-

Aircraft Review - AgustaWestland AW109SP by X-Trident
Scenery Review: KDCA Washington Airport & City XP12 by Drzewiecki Design
Behind the Screen... April 2024 Edition is available now!
Aircraft Review : Embraer E-190 by Flight Procedures Simulation
Scenery Review: LFKF - Figari, Corsica XP12 by FSX3D
Sound Addon Review : Rotate McDonnell Douglas MD80 Series sound package by Mango Studios
Scenery Upgrade Review : KTLH - Tallahassee International Airport XP12 by Skytitude
Aircraft Modification : Rotate McDonnell Douglas MD80 Series IAE V2500 Engine
Aircraft Review - Junkers A50 Junior S-LSA by vSkyLabs
Aircraft Plugin Review: Reality Expansion Pack for DHC-2 Beaver XP12 by Simcoders
Aircraft Update Review: Boeing 757 Professional Global package v2.6.12 by FlightFactor/VMax
Scenery Review: PAPG - Petersburg James A Johnson Airport by Northern Sky Studio
Military Aircraft Review : North American T-6G Texan by Khamsin Studios & Philip Ubben
Scenery Review : Society Islands - Leeward and Windward by Aerosoft
Scenery Review: X01 - Everglades Airpark, Florida by Skytitude
Classic Aircraft Review Updated : Aircruiser 66-75 v1.1 by Hangar 23
Scenery Review: RJBB-Kansai International Airport by Darkblue Scenery
Aircraft Review - Pilatus PC-6 Turbo Porter - DGS Series XP12 by Thranda Design


-
Latest Posts
-
 NEWS! - Scenery Released : LFMQ - Le Castellet, France by FSX3D Mention Le Castellet in France to most people and it probably wouldn't glean anything. Mention it to any motorsports fan, and their eyes will quickly light up, "That's the F1 Circuit Paul Ricard", a very famous test track for all things in motorsport. There has been a few races here as well by the Formula One circus, but the Paul Ricard glory days are long gone, it's all dayglow in perspective today, weird images that mask the runoff areas. LFMQ is right beside the track, but a very few of the Laurence Stroll's of the world can afford the outrageous landing fees, but you can have all this for only under $15. This is another FSX3D transfer scenery to X-Plane 12... a very nice to have. Le Castellet Airport, also known by the ICAO code LFMQ, is located in the Provence-Alpes-Côte d'Azur region, in the Var department, in the south of France. The LFMQ airport is positioned directly by the famous F1 Circuit Paul Ricard, making it a popular destination for motorsport enthusiasts and participants in events held at the circuit. Main Runway: The airport has a single asphalt runway (13/31) measuring 1,750 meters long and 30 meters wide, capable of accommodating a variety of aircraft from small passenger planes to private jets. Taxiways and Aprons: Taxiways and parking areas (aprons) are well equipped to facilitate the movement of aircraft and parking of private jets. Services include, International VIP airport with premier facilities,FBO services, high security, IFR procedure available 24h a day, Business centre, helicopter shuttle and hangars, Parking / hangar accommodation up to Gulfstream 650 and BBJ, Helicopter shuttle - 35 minutes from St. Tropez and 45 minutes from Monaco, Customs are also on request 24h. Features included in the scenery: Ultra detailed car parks, taxiways and track PBR on all objects Ambient occlusion (Objects and ground) Wet track effects Dynamic lighting Compatibility Ortho4XP Compatibility AutoOrtho HD photorealistic ground textures Noted as.... Business aviation’s gateway to "The French Riviera". Le Castellet very well value priced below $15 US dollars at only US$14.99. This scenery is only available in the X-Plane 12 option at 467Mb in size. Also Corsica, Gap-Tallard and Hautes-Alpes are all finally getting a lot of X-Plane 12 attention via these FSX3D excellent releases... check them all out now. Images are courtesy of FSX3D _______________________________ LFMQ - Le Castellet, France by FSX3D is now available from the X-Plane.Org Store here: LFMQ - Le Castellet, France Price is US$14.99 Requirements X-Plane 12 Windows, Mac or Linux 8 GB VRAM Minimum Download Size: 467 MB Current version : 1.0 (April 17th 2024) ___________________________ News! by Stephen Dutton 19th May 2024 Copyright©2024: X-Plane Reviews (Disclaimer. All images and text in this review are the work and property of X-PlaneReviews, no sharing or copy of the content is allowed without consent from the author as per copyright conditions) All Rights Reserved
 -
 Thanks for the review, just purchased it thanks to your review. I admit that X-Trident planes never disappoints. By the way, I think it is time that we should press the helicopters developers to start and expose their plane information, through Datarefs, for SAR mission to be created by 3rd parties. I already contacted X-Trident few months back, and I'm happy that he did not will consider that, but as MS2024 is looming, we need more options and I think that sites like this one is another platform to push this request since everyone will benefit from it. Cheers
 -
NEWS! - Aircraft Updated : Rotate McDonnell Douglas MD-11 v1.09 Rotate have released v1.09 for the McDonnell Douglas MD-11. Earlier in a noted "beta" release for testing, this now the formal release with a load of great improvements added to this fabulous authentic Simulation. First it tests support for Apple Silicon architecture, which has become a more restless problem for developers than first realised, developers are getting on top of the problems, but Silicon is certainly not of the same configuration of the older Intel based processors. Another big new feature is the "pop up" instrument displays are now available. Rotate aircraft (MD88/MD11) have always had fixed displays/screens. Now you can "popout" the instrument panels including the MCDU units. It was always hard to programme with their position relative to the MAP display (PLAN MODE)... You still have to use the MCDU for inputs, but it saves you from flicking back and forth between the MAP display and MCDU. Yes all the popouts are scalable in size and can be used in Home Cockpits in the usable Window configuration. And YES I really "loved" the new feature. Lighting has also had a bit of a revision, fine tuning you can all it. The lighting was always really good in the MD11, but it feels now more natural, Softer? but it looks excellent. Windows are now more cleaner, clearer... I personally found them a bit "Too" clean, clear... I would like the option for dirty windows as my preference, or the dirtier the better. There has been attention on the landing roll. The MD11 has one of the fastest landing speeds of any aircraft, so this aspect point is important. Here several areas on the approach phase have been tuned. Including AP1/AP2 annunciator in (the) FMA during dual land mode has been fixed, FMS SPD deceleration select/preselect now have safeguards during approach, FMC now does calculated IAS values for deceleration configurations. The MS speed target was rising above the approach speed below 100AGL in some cases... and finally the landing roll brakes have better deceleration. All are aimed to the approach and landing phase sequences. The v1.09 changelog is the usual lengthy output from Rotate, mostly nips and tucks to this of one of the very the highly specialised Simulations for the X-Plane 12 Simulator... - Added pop up windows for screen displays. - Implemented MIN PROF field in STAR page for RNAV procedures. - Implement FMS SPD deceleration select/preselect safeguards during approach. - Show FMC calculated IAS values for deceleration configurations. - Improved VNAV descent prediction during non-clean configuration. - Improved VOR interception accuracy. - Tuned landing roll brakes deceleration. - Added VERT ALERT annunciation in FMA when approacing T/D. - Filter airports displayed by runway length. - Reset CLB/ACCEL FMC fields. - HDG SEL (pull) must allow edition of the heading target until <3º difference. - Pushing FMS SPD (with no wheel change) resets to ECON. - Added warning and logging for route loading process. - Improved LED lighting of LCD displays. - Inhibit DEFINED WAYPOINTS deletion when used in the flight plan. - TCAS TA Only mode should be engaged automatically on ground and below 1000AGL. - Improved manipulation of ELF switch. - Reorder SID/STAR listing after applying filters. - Reset ADG with maintenance button. - Reduced dirt on windshield texture. - Fixed FMS SPD indication glitch during climb at cross-over altitude. - Fixed a problem with navaid selection with duplicate names. - Fixed AFS pitch limits during SOP. - Fixed a problem when transitioning from PROF to ALT HLD/SOP during descent. - Fixed navaid DESELECT for ILS navaids. - Fixed APPR/ILS guidance response when signal is not available. - Fixed HDG turn direction problem when crossing 0. - Fixed HDG bug reset after being hidden. - Fixed AP1/AP2 annunciator in FMA during dual land. - Fixed a bug in bank limit during non curved transition. - Fixed FMS SPD target rising above approach speed below 100AGL in some cases. - Fixed draw order of flight director bars in PFD. - Fixed Aircraft floating over the runway during autoland in XP11. - Fixed DME only stations not showing correct data in ND. - Fixed ATS too responsive during cruise. - Fixed compatibility problems with A Pilot's Life and other plugins. - Fixed N2 going over red arc during TO in high altitude airports. - Fixed bug in FPA discreet stepper when going down. - Fixed problem in "fix all failures" function. - Fixed a bug in landing gear disagree lights. - Fixed a typo in stby airspeed indication. - Fixed a bug in logic of CRZ and CLB thrust mode auto-selection. - Fixed A-ICE ALL ON shown along with all other A-ICE alerts. - Fixed reverser indication color during deployment on air. - Fixed engine fire handles annuciators. - Upgraded to newer Aerosoft database. The update v1.09 now also available to download from the Skunkcraft Updater, or use your X-Plane.OrgStore account and download the latest version in v1.09. Support Forum at X-Plane.org or http://support.rotatesim.com/ _____________________ Yes! the McDonnell Douglas MD-11 v1.09 by Rotate is currently available from the X-Plane.Org Store here : Rotate MD-11 Price is US$83.95 The feature list is HUGE, so if you want to read it, then open the text file. Feature List.txtUnavailable Requirements X-Plane 12 or X-Plane 11 Windows 8 or Mac OSX 10.12 or newer (M Processors supported) , Linux Ubuntu 64b 18.04 or newer 8 GB+ VRAM recommended Current version: 1.09 (May 16th 2024) You can download this updated v3.0 Updater free here; SkunkCrafts Updater Standalone client Full download v1.09 changelog is here; Changelog v1.09.rtf ________________ NEWS! by Stephen Dutton 17th May 2024 Copyright©2024: X-Plane Reviews Disclaimer. All images and text in this review are the work and property of X-PlaneReviews, no sharing or copy of the content is allowed without consent from the author as per copyright conditions) All Right Reserved.
-
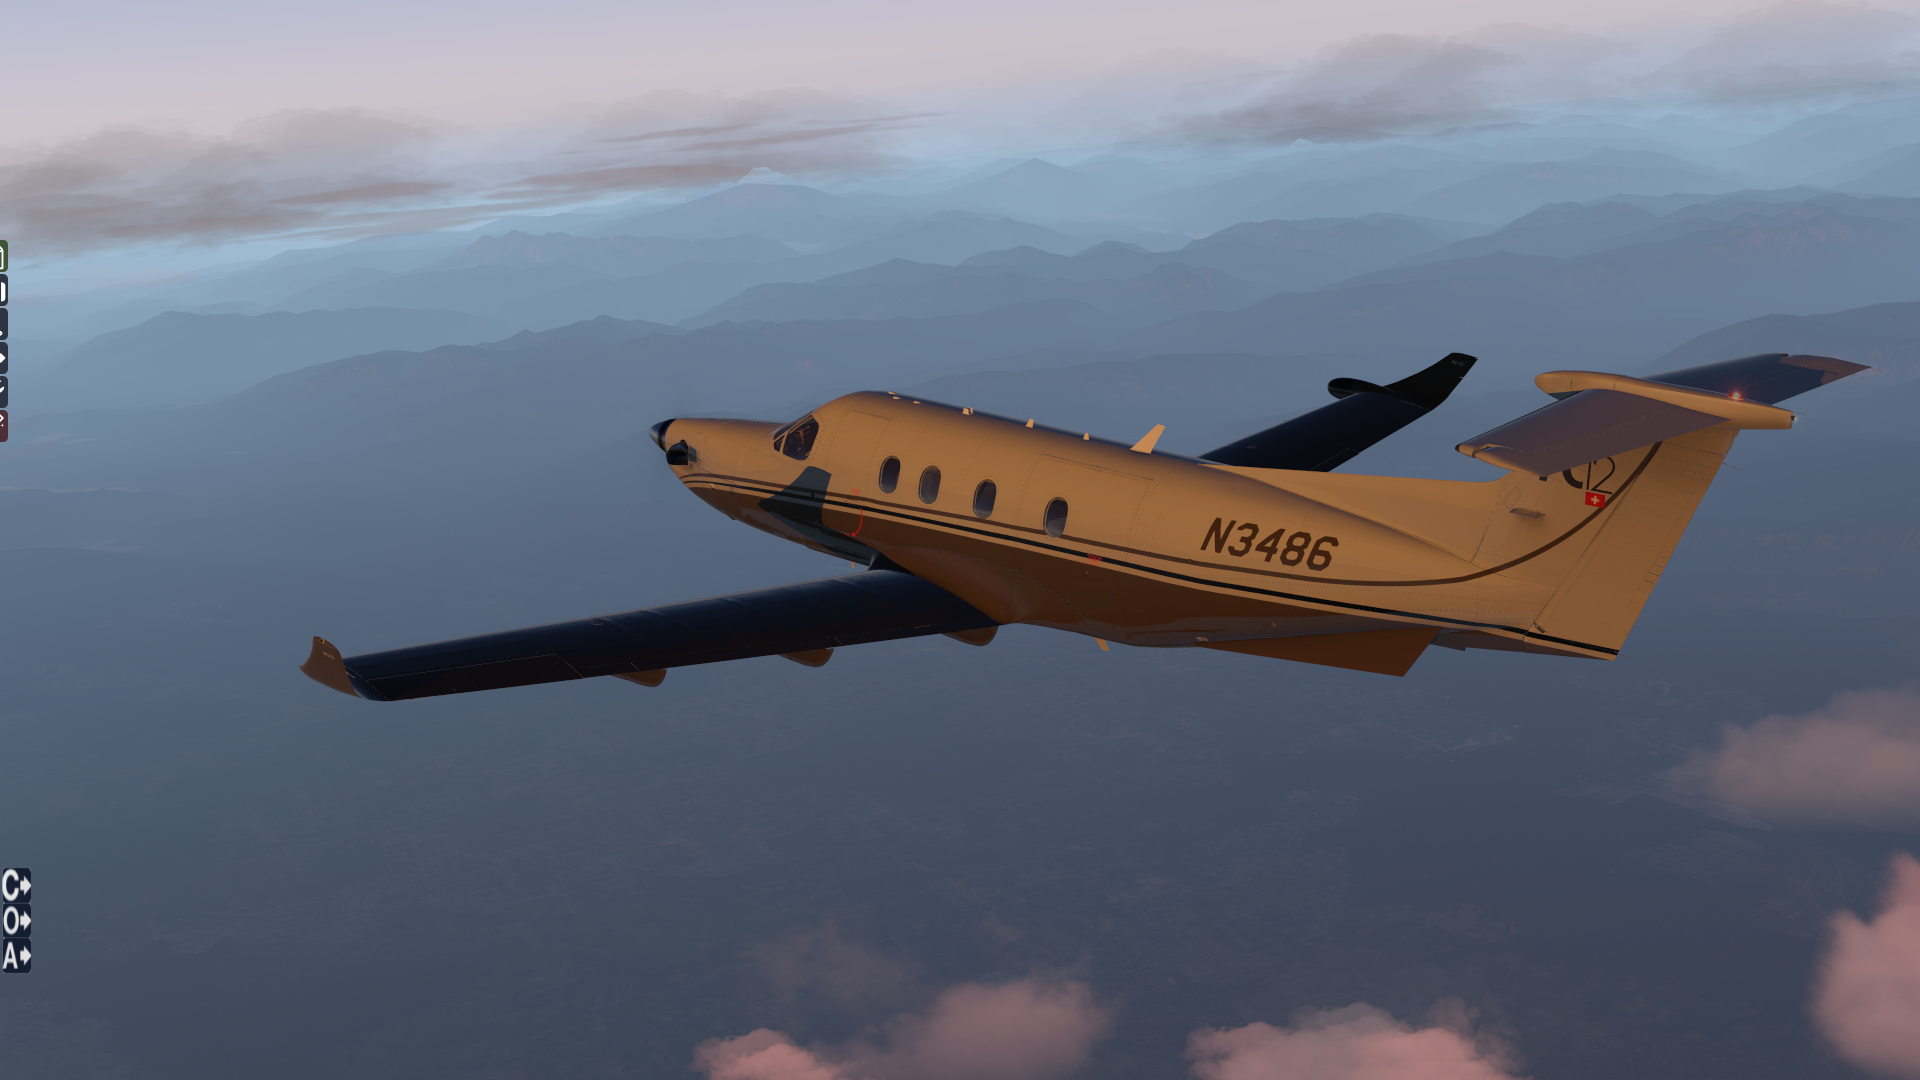
Aircraft Review - Pilatus PC-6 Turbo Porter - DGS Series XP12 by Thranda Design In June 2020. Thranda Design released the X-Plane 11 version of the utility Swiss aircraft, the Pilatus PC-6 Turbo Porter. The aircraft was a more modern replacement for the long-established DHC-2 Beaver in the highly competitive utility role. The first PC-6 version came with a 254 kW (340 shp) pistoned-engine, it first flew in 1959. But it was when an early turboprop powerplant version that became available for the PC-6 with the Garrett Air Research TPE 331, that the aircraft really came then into it's own class. But the TPE 331 installation didn't last long either, as in May 1996 with the Pratt & Whitney Canada PT6A engine performed its own maiden flight and the PT6A really then cemented the Porter's reputation and as a direct replacement for the DHC-2, the Beaver's production ended just two years later. A rugged utility design the PC-6 is... The aircraft and the excellent modeling was extremely good in X-Plane 11, even if the XP11 world was flat compared to the realism of XP12. The conversion to XP12 keeps the dynamics of the earlier aircraft, but now places it in the highly developed world of X-Plane 12 ULTRA hi-res PBR realism, it stands out, brilliantly in the world it richly deserved. Design wise there is not much difference, but the XP12 version comes with the newly created PBR textures, are all 8K now as well (four times the resolution), so the detail is far more highlighted, even extremely so. Admire the perfected riveting, the panel construction, ribs... all so very good. Rugged landing gear is intricately done, all the struts and built in dampers are beautifully realised, gotta love those tyres, also available are the bigger Tundra sizes as well. Daniel Klaue is one of the most prominent X-Plane developers so you are going to get nothing more that the very best, and certainly that is the case here. In the XP11 review I admired the wing profile, it's worth repeating again here... as it is an almost perfect sculpture. A lot of the glass areas are just flat, but the main windscreen is a complex, convexed shape and has a large helicopter feel... here again with all the glass it is highly realistic, and you can have the tint on or have clear glass. Cabin The cabin has a two-abreast layout in six seats, in the same check blue trim as XP11. Still very modern, and looks more towards the higher quality in XP12. Side doors can be left open in flight if required, but that would scare the bejesus out of anyone actually sitting in there, unless you were going for a parachute jump. Seat backs can be moved forward, and any, or all of the seats can be removed. The aluminium wall panels and riveting is still worth admiring, it looks and feels very realistic, note the parachute rail above. Cockpit The PC-6's cockpit is very basic in a utilitarian way, with just metal frames with all the controls or instruments added or bolted on... note the very rudimentary window air blower, it is basically a pipe with holes drilled in it? Still the quality of the instrument panel is absolutely first rate, it comes with lovely authentic instruments. The prominent forward metal frame bar also creates a shelf, and items like the quadrant and flap switch/rudder trim, clock (right) and Interrupt and the alternate trims are bolted directly on to the frame... note the loop wire park brake, it is really basic. ... three levers control "Prop", Throttle "Power" and Mixture "Idle" which has a safety gate. The lever to the panel push-pull rod is expertly crafted and has excellent realistic animation. T shaped throttle lever looks like a twin throttle handle but it isn't, but does carve out a working handle feel. Lower Flap selections are UP (0 degrees), TO (28 degrees) and LND (35 degrees). Rudder pedals are as basic as the ones you use with your simulator, it is just a simple moving bar and the extra pedals for brakes. The air and heat piping is visible and again something you would buy from your hardware store. Lovely simple control stick, with a PTT (Push to Talk) button front and has a trigger switch behind. Front seats are encased in a bucket style frame, and those hanging seat belts are still awfully well done. _________ Instrument Panel The instrument panel in this PC-6 is unique as it can be configured to your own personal preferences in the menu, a unique feature by Thranda, but first we will look at the default layout of the panel. The Porter is a strictly one pilot operation, rarely does it have two aviators flying, but the stick and rudder controls are provided in the second seat. So all the instrumentation is to the left and set around the pilot's eyes. Clear and concise, most instruments are quite large and really well done here. Standard Six covers Airspeed Indicator (knots), Artificial Horizon and the Attitude Indicator on the top row. Below is a ADF/VOR pointer, Heading Dial and Backup Attitude Indicator. Third row has a Vertical Speed Indicator, Turn Coordinator and Fuel Gauge (litres), far left lower is a Radar Altitude Dial. A note about the two Altitude Indicators in that the top row version only moves per hundred feet in a click, which I really like, unlike the backup standard clock dial version. Avionics package includes both the GNS 530 and the GNS 430 GPS units, a Garmin GTX327 transponder and bottom is a Garmin GNA 340 radio set. Centre panel left has four dials with two small top and two larger lower to cover the engine performance with (small) Prop RPM speed x 100 and gas generator RPM or Ng %, and below below (large) are the Torque psi and ITT or "Inter Turbine Temperature" gauge. Right side instrument panel has a few more engine readouts, these include the Indicators for the oil temperature, pressure, and fuel pressure which are combined into a single gauge... ... below is a ammeter and an voltmeter, the PC-6 utilises a 28V electrical system. A single 24V battery is installed to provide power for engine starting and as a secondary source for DC power. A 300-amp starter generator provides normal power at 28 volts. Far right is a suction gauge (Vacuum). Centre right panel is a Hobbs counter and a lovely Whisky Compass centre screen. There are two wing tanks of 170 US gallons each (643.5 liters, 1147.5 lbs, or 520.5 kg) of total of usable Jet-A fuel. These wing tanks gravity-feed into a small 2.9 gallon collector tank located behind the cabin rear bulkhead, which feeds the engine. The twin fuel tank gauges are lower right, in compliment with the total fuel gauge at the lower SS position. Dials are really well done and look really nice. All lower circuit breakers are active. The electrical switchgear are set out in two rows, top external lighting and lower Master (Power), Generator and various other generic electrical power switches. There is a panel each end of the instrument panel. To the right is a De-Ice system with ampere gauge. Left is the optional external fuel tank panel... ... each under-wing optional external tank holds an additional 49 gallons (185.5 liters, 330.7 lbs, or 150 kg) of usable fuel. The external tanks are really well done, but also makes the Pilatus look very military. Notable is the ADF panel sitting down between the two front seats, very hard to use in a simulator way, but again well done. At each of the end of the shelf, there are airvents which are fully animated for movement and flow. Menu - Tablet Biggest difference between the earlier PC-6 Porter in this updated XP12 version is a new menu... well sort of? The side Arrow window tab is still there, and it still does the same pop-up menu, but it is now in the shape of a iPad - Tablet. There is a reason for this change... the same iPad/Tablet can also be used as a Tablet in the aircraft. There is a brown circular patch on the window, if you press the hotspot, then the IPad/Tablet will appear, and the same tablet is also attached to the right hand side window. The iPad/Tablet can be adjusted, but not too far in movement as the window's glass gets in the way. The original seven menu selections have now been almost doubled to 13 selections, the side menu is also gone and they have all been replaced by square icons; Aircraft Options, Weight & Balance, INSTR Options, Panel Editor, Static Liveries, DYNAFEEL, Log Book, Checklist, Ground Handling, Dynamic Liveries, Flight Computer, Equipment and AviTab... at the bottom is a "Brightness" slider. Missing from the earlier menu is the "Camera" selection? Notable is that the screen tablet is set in a "Window" frame, and these window popups can be moved around the screen and also scaled in size... Aircraft Options This page menu is also changed from the earlier "General" selection, but the options and the layout stays the same, the layout is still as highly detailed and as very comprehensive as before in the General tab. Three selections cover group items, but any one item via "Click Spots" can be individually selected or hidden via the aircraft graphic. "ALL COVERS" will select engine inlet/outlet covers and pitot cover, "ALL TIE-DOWNS" for propeller and wing tie-downs and "ALL DOORS" for both cockpit doors, both cabin sliding doors and the twin engine cover doors, and open the forward panels and it exposes inside a lovely recreated PT6A-27 turboprop, flat-rated to 550 SHP (47.3 psi at 2000 RPM) as this is the Pilatus PC-6 B2/H4 version represented. The Engine can be set into two modes... SIMPLIFIED or REALISTIC In Simplified mode the engine will automatically limit the engine to remain below the maximum torque of 47.3 psi. In Realistic mode it will be up to the pilot to avoid exceeding the engine limitations. The propeller gearbox or propeller shaft can break if the torque limit is exceeded by a certain margin, resulting in engine failure and smoke in the cabin (the smoke can be cleared by pulling the firewall air shutoff control closed). There is also a very nice GPU (Ground Power Unit) and an Electric Tug on the rear tailwheel, that is controlled via your joystick. There is the selection of a SIMPLIFIED or REALISTIC tailwheel actions. in Simplified mode the tailwheel is standard X-Plane rudder connected yaw in a range of +- 30 degrees, In Realistic mode it functions as in the real aircraft. There is a section in the manual relating to steering in the freewheeling mode. Other Aircraft Options menu selections cover; Window and Instrument Panel Reflections on/off, Startup Running on/off, External Fuel Tanks show/hide, Chocks and brakes on/off. All EXT - External Lights can be switched on and off as can ALL INT - Internal lights. The lights can also be accessed on the aircraft graphic including the extending and retraction of the end of the wing landing/taxi lights, this action can be a bit fiddly and slow but clever. The lights on the PC-6 are now all LED. Weight & Balance The PC-6 has the same intricate great "Weight and Balance" menu as earlier. In both Lbs and Kgs, which can be selected via the toggle... ... Fuel can be added, and you can also use the twin-external tanks if they are then shown, and both are adjustable in the menu as well. Pilot, passengers and cargo can all be set for their individual weights (scroll), and the CofG (Centre of Gravity) parameters are all shown on a graph and with a marker on the aircraft of it's physical CofG, when done you can save the configuration and later reload it. As noted you can show/hide any of the rear seats, by pressing the X by the seat. Add in weights to the two front seats will also add in the Pilot (Dan) and his lovely female Co-Pilot. But adding in cargo (weight) will not put anything in there rear, unlike on some Thranda aircraft. INSTR Options A new menu item is your "Instrument Option" menu page. There are four options available; GPS #1 Popup (GNS 530), GPS #2 Popup (GNS 430), STEC 55 "Fifty Five X" Autopilot Popup, and there is also the option to change the Baro Units from mb to inhg. Panel Editor "Panel" is now "Panel Editor"... part of the Thranda "Dynamic Generation Series", also re-authored for XP12. More about the DGS Series The Thranda PC-6 Porter can be highly customised in two areas to suit your taste. First in Dynamic Panel, as there is no default instrument setup, as you can customise the panel to suit your own flying preferences. In the new iPad/Tablet configuration the screen space is now far larger than the old "Panel" Menu. This is good, because as some of the small access zones before tended to overlap each over, so you always found yourself adjusting (scrolling) the wrong item. Top row of options are 4 different panel backgrounds, Default Grey, White, Black and Blue. (Note all options can be mouse scrolled) There are also Five Panel "Presets". For most selections you have to save (overwrite) the preset you want, then reload the aircraft to get the panel configuration you want? Alpine Avionics Evolution Part of the options available is the EFD 1000 which is a self-contained multifunction digital display that is divided into a Primary Flight Display (PFD) in the top half, and an Electric Horizontal Situation Indicator (EHSI) in the lower half. As EDF 1000 systems go it is not highly featured system, with the GPSS, MAP, 360 and Menu functions all not simulated, but the display does pop-out... It works of course with the S-TEC Autopilot. Laminar Research G1000 Also part of the options is the duel screen Laminar Research G1000 GNS system, both the PFD and MFD/MAP pop-out for convenience. The RealityXP GNS 530W/430W or GTN 750/650 Touch 3D bezels are also available if you have these optional addons. The "Dynamic" in the panel is another featured DGS. Besides having different custom panel configurations, you can also customise the instrument panel by selecting "ENABLE 3D PANEL EDIT MODE". This will highlight the available instruments you can change in green. Selecting an instrument via the "INDIV INST" (Individual Instrument) and "ACTIVE INSTRUMENT" it will highlight the instrument you want to say, move to another place or adjust the position on the Instrument Panel... ... or hide the instrument completely to make space, say you don't want the Autopilot? then simply delete it. You can also add in tools and instrument features, like the "Switch Panel", or the Aspen EFD 1000, or the Reality XP bezels. You have access to all of the 44 individual instruments and avionic units... and basically you can also start with a completely blank panel and then create your own unique or personal instrument layout... and can have up to, or can save 14 different panel layouts (presets) ... so for absolute layout choice it is crazy! Static Liveries This was earlier called "Painted Liveries", now named just Static Liveries. There are only eight provided liveries, down from 16 earlier choices. But they are the best of the bunch. Thranda is the Default. The earlier twin white of the liveries that were noted as "DynamicLiveryResources" and "ZZTEMPLATELIVERY" liveries are now missing? as the DGS system has be refined, it is now more smoother and the long wait pause times have been reduced. There is a white "Blank_Livery" available (in the Documentation) as a template to add in more Static Liveries. DYNAFEEL "DynaFeel" is a system that dynamically adjusts the rate at which the controls deflect, in Pitch, Roll and Yaw. It is based on airspeed and how much the control's are deflected. This means the controls will feel light and responsive at low speeds and with some small deflections, but will get progressively heavier as the airspeed increases. Logbook This is one feature adopted from the JustFlight Menu. This Icon will just show the X-Plane Logbook window. Checklist New to the Thranda PC-6 is Checklist. A 36 page checklist is very comprehensive set in the iPad/Tablet. Navigation is via the lower left/right arrows, or you can scroll the pages via the centre box bottom. The Checklist will also pop-out into a scalable window, to make the list available anywhere in the cockpit.... You tick off the list one-by-one (green), but there is no default to clear the list in one click? Ground Handling This Ground Handling Icon is also new. This option just views the X-Plane default "Ground Handling" window. if you prefer that tool over the Thranda electric tug. Dynamic Liveries Earlier we saw the available "Static Liveries". Here you can actually design your own livery and save the livery. You have a menu to select on the right that can colour a certain part of the aircraft, like the Roof, Wing, Tail or Wing tips. Select which one you want and then adjust (scroll) the RGB colours for that area. Other options include changing the Registration of the aircraft and putting the "PC-6" logo on the tail. It looks hard but you can easily design a very nice livery in about twenty minutes... To help there is already 31 liveries already completed to choose from, or to adjust the finer details of any of the presets to your liking. ... when done you can "Save" (Add) the livery and then "APPLY" it to the aircraft. When you apply the livery the screen will then freeze for a few minutes, and go a bit weird? The results are however excellent. A note... if the created livery does not appear correctly? Then go to the Static Liveries and select "Apply", then go back to the created Dynamic Livery and do it again, this time it should create the livery you wanted. A feature is the (Quick) selection of Dirt via percentage selections you can adjust the amount of Dirt, Scratches and Dirt Int on the aircraft (0%-255%) and apply it instantly. So you can have either a pristine or a very grubby aircraft with just a twirl of the numbers. Also changes can can be made to the Metal or Rough surfaces, this can be applied to any of the liveries. Note you can apply the same Dirt and Scratches onto any of the Static Liveries directly via that menu. As noted before. the DGS system is far smoother in this new layout, it is also far easier to use as well with the larger scalable panel. Flight Computer Another new feature from the JustFlight menu. This shows you your current aircraft data including; OAT, GS (Ground Speed), Endurance, Range, NMPG/SMPG, Altitude, TAS (speed), Fuel Flow, Fuel Used, Headwind (knts) and Crosswind (Knts). Both units in Metric or Imperial are also available.... and you can reset the fuel burn. Equipment Under the "Equipment" Icon you have several items as external options, these items were originally under the MISC tab There are Five Equipment options. Top is the Regular or Tundra (large) Tyre option. A set of Skis. Mud Flaps can be used with either the Regular or Tundra tyred settings. Forward passenger window can be either sizes in Small or Large. And the optional twin wing tanks. AviTab AviTab is a PDF viewer, Airport info, METAR info and ILS frequencies information tool, it also has a moving map that supports online maps and offline maps, Navigraph integration in that you can link your Navigraph account and see the charts right in the cockpit. In the PC-6 the Avitab is available in both the 3D tablet and a scalable pop-out window. _____________ Lighting The lighting on the PC-6 is very utilitarian both externally and internally. Note the images here are from the X-Plane v12.1.0 beta, which is a huge improvement over the earlier X-Plane 12 lighting. There are two underwing Landing/Taxi lights, Red beacons top and lower fuselage (selectable) or you can have bright white Strobes, and the three standard Navigation lights. Instrument Panel is lit by a simple red light on the roof. And there are two sidewall mounted cabin lights for the rear. Amphibian Most Thranda X-Plane 12 releases now include both the wheeled version and also the Amphibian variant. There is no "Float" version here, only the Amphibian variant, but very good it is. The aircraft looks excellent in the air, but you have to be aware of the extra weight in takeoff and manoeuvring, the so called "pendulum" effect. Float design is the usual excellent Thranda thorough design and detailing, hull shape is excellent. Rudders are raised and lowered by a lever right forward side of the pilot's seat, or do as I do in using a keyboard command Excellent retractable gear is also very realistic, gear control is by the additional panel set on the beam in the centre panel. The performance on water is again absolutely first rate, water craft have come a long way in better realism since the introduction of X-Plane 12, here you are seeing the latest incarnation with the v12.1.0 water... it's now just perfectly brilliant. The "Equipment" Menu is also different in the Amphibian version. There is all new menu order, from top; Water Rudder (retracted/extended). Ladder Left, Ladder Right, Windows (Small/Big), Wing Tanks (Disabled/Enabled) and Docking Hold. We will look at "Docking Hold" first. This is the same tool as earlier noted as the "Slew" feature. Docking Hold mode allows you to manually move the aircraft around in a disconnected X-Plane space. It functions by temporarily overriding the various aerodynamic and physical forces on the X-Plane settings, it is to allow the user to reposition the plane as desired. This feature is however highly touchy and it is used mostly only really with the Amphibian/Floats option in docking the aircraft to say a pier or marina. But it works extremely well. The optional Left and Right ladders are connected to the wings. Both the Menu options of the same "Static LIveries, and "Dynamic Liveries" are also available for the Amphibian, with the floats being colour matched to the fuselage. Flying the XP12 PC-6 Porter First you have to understand the unique attraction to the PC-6 Porter. It is as they say a "Seat of the Pants" aircraft. True pilot's love the Porter because of the feel and reaction the aircraft has under their control. So if you need to get into an impossible remote landing strip then in most cases it will be with a Porter... short, rough even steep gradients are all challenges that the PC-6 can take on with it's incredible STOL - Short Takeoff and Landing capabilities. But also remember that in front of you is a massive PT6A-27 turboprop, flat- rated to 550 shp, turning a large Hartzell 4-bladed constant speed propeller. It is like having a powerful V8 engine attached to a Go-Kart, and in your case a monster of an engine attached to the light frame that you are sitting in... so the PC-6 is unique in the way you handle it, or fly it... overall you can see the immense attraction to pilots it has. So put on the power, and you get a serious "whoa!" in that PT6A-27 t will pull you left off the runway quick smart... even if you are ready for the pull, so slow power on to start, then build up the speed. Rudder action is however very good (considering the petit size), so you can easily straighten up the line, only 30 knts and the tail is off the ground... 70 knts and your flying. Use only one stage of the flaps (28º) and your flying even earlier, as the STOL effect is very good. The PC-6 has a rate of climb of 1,010 ft/min, or a 1,000fpm. But it can easily out-climb that rate at the limit, and still gain speed. Service ceiling is 8,197 m (26,893 ft). Thranda do note the engine limits for the PC-6, and to certainly the need not to exceed the parameters, as that would be easy with the power you have available, but now in the air and at your altitude it is time to trim the Porter. The electric trim is on the joystick and very easy to use (I have a keyboard trim setup), the trim display is left top on the instrument panel (arrowed). The PC-6 is super easy to trim via the vertical and a couple of flicks left of the rudder trim should have you easily flying hands off stick neutral, in fact you don't need an autopilot as the Porter will fly trimmed straight into the horizon very easily... one note though is there is no rudder trim, so the aircraft has a tendency to pull left under power, which you have to manually correct. I don't have any qualms at all in recommending the PC-6 as a "Pilot's" pilot aircraft, a bush plane that is easy to fly. For a novice flier, this is also a great starter aircraft, "Seat of the pants" sort of thing, you feel the Porter as much as fly it. Sounds have been re-authored in FMOD, capturing the subtleties of the PT6 engine and its very dynamic 4-bladed prop, with a lot more authentic wind noise and background sounds. Maximum speed is 232 km/h (144 mph, 125 kn) Vno, Vne: 151 knots or cruise at 213 km/h (132 mph, 115 kn). Range is 730 km (450 mi, 390 nmi) with maximum payload and Ferry range is around 1,612 km (1,002 mi, 870 nmi) with maximum internal and those twin-underwing fuel tanks. I checked out the banking again, and yes you still need that stick back-pressure to turn cleanly, but the stick feedback is very, very good, in fact the handling overall is quite superb. So the flight dynamics have also been extensively overhauled for both for the land and the amphibian version, and to closely match XP12's new dynamics. You can even adjust your altitude just by reducing the power, pull the throttle back and down you go, too steep then you can climb back just as quickly by pushing the throttle back up to counter the fall, and all without moving the stick... .. at the right height flare off the nose down attitude to rub off the speed... when the speed is around 80 knts and a good 15 knts into the white zone you can drop the flaps to 28º, this effect will then drag the speed down to the approach speed of 60 knts, lovely is fact there is no flap lift, or unbalance as the aircraft slows down, you feel the lift but not that secondary sinking feeling with less power... and it is all smooth as. I will note that with the no backlit instruments... in some lighting conditions the X-Plane 12 heavy shadows can make them hard to read, it is a very dark panel. Drop the flap to the full 36º and your speed will rub off to 55 knts, you are still flying well at this speed, but any less power and then you will lose height. Stall speed is only slightly below your approach speed at 96 km/h (60 mph, 52 knts), and you have a red light on the panel if you exceed this low speed. The trick is to go as low to the low speed warning without lighting the red light, it is the perfect landing speed as you will also wind down slowly to the runway. Only a slight flare is needed, it's a taildragger after all.... and your down! Yes flying the Porter was easy, but let us not get too cocky here as this aircraft is not for absolute total amateurs, skills were needed to do the right procedure, right speed at the right place to get that extremely exciting landing, but if you are good at flying like this, then the Porter will reward you back a thousand times over... as the PC-6 is brilliant to fly. _______________________________ Summary One of the most versatile and even a workhorse background utility aircraft, the Swiss built Pilatus PC-6 Porter is on of the most coveted pilot dream machines for its basic but powerful design, extremely flexible for its amazing STOL capabilities this is one of the most rugged and the best get in and then out of remote areas fixed-wing aircraft available. Daniel Klaue needs no introduction if you have been in X-Plane for a period of time, certainly one of the most innovative and one of the most talented developers out there that is highly regarded within the Simulator. This is a Dan Klaue aircraft and so you expect tons of ideas and clever features and certainly the PC-6 Porter does not disappoint in that department. Modeling and detail is absolutely first rate, this is an excellent Porter aircraft with a lovely design and high quality. For X-Plane 12 the PC-6 has had a very comprehensive overhaul, including all new authored textures in 8k (four times the higher resolution than before) it shows of course, but without the framerate hit. The EFB: Electronic Flight Bag, or the Thranda Tablet is all new, with now 13 options (up from seven before), and all the pop-out windows are scalable. Flying Dynamics are also completely revised for XP12, as is the better LED lighting. Advanced FMOD (2)-based sound system has also been extensively overhauled for XP12, and all of course recorded from a real PC-6 and it's PT6 engine, The innovative menu system "Dynamic Generation Series", in you can create your own instrument panel layout or layouts as up to 14 different layouts of 44 instruments and avionics can be saved with 6 default layouts including a Aspen EFD 1000 with S-Tec 55x autopilot, and the panel is also RealityXP GNS 530W/430W or GTN 750/650 Touch with 3D bezels ready. A huge selection of 32 liveries is still complimented with a feature to create your own colour scheme and livery, then you can save them as well. The feature list is huge, and the excellent Amphibian variant is now part of the package. This aircraft is X-Plane 12 only, but the X-Plane 11 version is still available. Simply a pilot's aircraft to fly and love, the Pilatus PC-6 Porter is extremely responsive to your inputs, but that is why you love this aircraft, skills are required to get the very best out of the machine as it is a powerful taildragger, but even the most early cadet pilots will still love it. That huge feature list and a great value price, all now in X-Plane 12, so this is the perfect PC-6 Porter you always dreamed of, and what more can you ask for! _______________________________ Yes! the Pilatus PC-6 Turbo Porter - DGS Series XP12 by Thranda Design is NOW available from the X-Plane.Org Store here : Pilatus PC-6 Turbo Porter - DGS Series XP12 Price is US$34.95 Retail Price:$44.95- you Save:$10.00(22%) Requirements X-Plane 12 (not for XP11) Windows, Mac or Linux 8 GB VRAM Recommended Download Size: 4.1 GB Current version 1.0 (May 4th 2024) _______________________________________________________________________ Installation and documents: Download is 4.05Gb and the aircraft is deposited in the "General Aviation" X-Plane folder. Installation key is required on start up and is supplied with the purchased download file. Full installation is 4.94Gb Documents supplied are: Blank_Livery_For_Painting ChangeLog.txt Thranda PC6 Documentation v1_2.pdf Thranda PC6 Expansion Pack Manual.pdf Thranda PC6 Manual XP12.pdf Thranda PC6 Performance Charts MASTER XP12.pdf Thranda Pilatus PC6 Graphics Settings XP11.pdf Thranda Pilatus PC6 Graphics Settings XP12.pdf Thranda Pilatus PC6 Joystick Settings.pdf X-Plane G430 Manual.pdf X-Plane G530 Manual.pdf A Blank Livery (PNG) of four files are provided for painting. Checklists, setting and loads of Performance graphs are provided in the various manuals _____________________ Review System Specifications: Windows - 12th Gen IS1700 Core i7 12700K 12 Core 3.60 GHz CPU - 64bit -32 Gb single 1067 Mhz DDR4 2133 - PNY GeForce RTX 3080 10GB XLR8 - Samsung 970 EVO+ 2TB SSD Software: - Windows 11 Pro - X-Plane Version 12.05r1 (note, during the review X-Plane v12.1.0 was released, and features in the update are noted and shown in this review) Plugins: JustFlight-Traffic (X-Plane.OrgStore) US$52.99 : Global SFD plugin US$30.00 : RK Apps XPRealistic v2 - US$34.99 Scenery or Aircraft - PAWG - Wrangell Airport, Alaska by NorthernSkyStudio-PAWG (X-Plane.OrgStore) - US$29.95 _____________________ Aircraft Review by Stephen Dutton 16th May 2024 Copyright©2024 : X-Plane Reviews (Disclaimer. All images and text in this preview are the work and property of X-PlaneReviews, no sharing or copy of the content is allowed without consent from the author as per copyright conditions)
-
NEWS! - Laminar Research releases v12.1.0 It felt like a long time coming, and I haven't used the X-Plane Updater since December 2023? But here is the next update for the X-Plane 12 Simulator, it has a new name code as well in v12.1.0, with an extra digit added for incremental updates (that should mean more updates? but I'm not hopeful, given Laminar's past track record). This is a "beta" release, and that comes with ongoing development. The update list is extremely long (there are 354 bug fixes alone!), but the main feature areas are; Anti-aliasing (AA): Improved quality with better scene handling and coverage for alpha-tested surfaces (those with transparency). Depth of Field: More control with a setting for Real Camera Shake (RCAS) and a notification when textures are reduced due to memory limitations. Lighting: Bloom Effects and overall a more focused sources of lighting. Shadows: Smoother shadows overall, cloud shadows on water, and faster rendering times. Lightning: v12.1.0 features more realistic visuals with subtle color adjustments, distance variations, and bolt thickness changes via distance. Sound effects have also been improved for a more immersive experience. Particle Effects: The new system allows for particles on ground contact, easier editing with copy/paste, and datarefs for better control. Pre-built effects include jet engine afterburners (JATO), water bombing, ground scrapes, and rotor wash from helicopters. Aircraft configuration files (ACFs) let you disable these effects if desired. G1000 navigation system: including an accurate startup splash screen, a NAV page, a stormscope, datalink weather support, Terrain, a WPT page, an AUX page, and new datarefs. Water: Fixed water clarity issues, with color and transparency depending on location. Cloud shadows are now visible on water surfaces. Compatibility note: existing X-Plane 11 water scenery packs may not work perfectly due to differences in water rendering and might require updates from the creators. Autogen: Enhanced visuals for high-rise buildings in European cities and improved parking aircraft placement at airports, prioritizing larger planes for bigger spots. Supported flap systems: allowing the accurate simulation of manual flap controls such as the one in the Piper PA-28, with precise and gradual adjustments, and the dial-a-flap system, which is present in some McDonnell-Douglas aircraft. Early v12.1.0 images are simply breathtaking... Notable is the adjustable sharpness of the instruments... a huge difference in quality! You can find the full ongoing v12.1.0 beta details here: X-Plane 12.1.0 Release Notes To update v12.1.0, then just run the X-Plane Updater, it is a 5.3 GB update. Note that this a beta (beta tickbox is required to download the update). So expect more development as the v12.1.0 is consistently updated to the full v12.1.0 release. _________________ X-Plane 12 is purchased directly from Laminar Research for US$79.95 and the download file size is 86 GB X-Plane 12 Price is US$79.95 Minimum Requirements Disk space: 25 GB CPU: Intel Core i3, i5, i7, or i9 CPU with 4 or more cores, or AMD Ryzen 3, 5, 7 or 9 Memory: 8 GB RAM Video Card: a Vulkan 1.3-capable video card from NVIDIA or AMD with at least 2 GB VRAM Note: Intel GPUs are not supported by X-Plane 12 _____________________ NEWS! by Stephen Dutton 15th May 2024 Copyright©2024: X-Plane Reviews (Disclaimer. All images and text in this review are the work and property of X-PlaneReviews, no sharing or copy of the content is allowed without consent from the author as per copyright conditions) All Rights Reserved
-
 Wow, an excellent review of an excellent helicopter. Now I see what a special bird this is, and I'll be adding it to my X-Trident collection.
 -
 Hey Stuart! Maybe you would consider flying the T-6A again? There is a new version 2.1 available now with a number of improvements and new features since your initial review was published.
 -
Aircraft Review - AgustaWestland AW109SP by X-Trident The helicopter category is one of the most competitive in features and innovation than any other area in the X-Plane 12 Simulator. To a point it is brutal, as developers are consistently upping the standards to higher and higher levels. Can you go even higher? even to the next level? We are all about to find out with the release of X-Trident's next project... in the AgustaWestland AW 109SP. The AgustaWestland AW109, originally the Agusta A109, is a lightweight, twin-engine, eight-seat multi-purpose helicopter designed and initially produced by the Italian rotorcraft manufacturer Agusta. It was the first all-Italian helicopter to be mass-produced. Its production has been continued by Agusta's successor companies, presently Leonardo S.p.A. (formerly AgustaWestland, when merged into the new Finmeccanica since 2016). The AW109 is a lightweight twin-engine helicopter, known for its speed, elegant appearance and ease of control. Since entering commercial service, several revisions and iterations have been made, frequently introducing new avionics and engine technologies. AgustaWestland have promoted the type for its multi-role capabilities and serviceability. The type has proven highly popular with VIP/corporate customers (Think Succession TV Show); according to AgustaWestland, 50% of all of the AW109 Power variant had been sold in such configurations. Other roles for the AW109 have included emergency medical services, law enforcement, homeland security missions, harbor pilot shuttle duty, search and rescue, maritime operations, and military uses. In 2008, AgustaWestland claimed the AW109 to be "One of the industry’s best-selling helicopters". X-Trident have a lot of experience and also have a great "Track Record" in the X-Plane Simulator, certainly with quality helicopters, with the formidable Bell AB 412 and the CH-47D Chinook being the class of the field. X-Trident have also dabbled with the Tornado and Harrier AV-8B in the fixed wing military arena... but it is their rotary-aircraft that they are mostly aligned to. Like noted, quality is extremely high in helicopters. So any new debutant release has their work cut out to deliver something special. A first look at the AW 109 is really a special moment to savour, as the aircraft is totally eye-catchingly brilliant in detail. We have found the quality of dedicated X-Plane 12 aircraft to be already very good, even standout by a totally different level from even of the very best of older X-Plane aircraft, of say like Rotate's MD-80 and MD-11... Good X-Plane 12 aircraft have that standout believability and crediblity of realism. Note this aircraft is the AW 109SP. The "SP" is different by being a single pilot IFR, TAWS and EVS, with new avionics in Genesys Aerospace systems and the front section of the fuselage made from carbon fiber to reduce weight. Also it has the "S" lengthened main rotor blades with a different tip design from the Power version. When you first look at a lot of Simulation detail, it usually looks very good. But go close up and REALLY up close then the detail usually falls away. But not here with the AW 109, as when you get in close, you are just blown away, by not only for the excellent detail but also for the sheer quality of the work, it is "Realism 101", right down to every small rivet and joint. Your paying for this quality of course, but it is nice to admire the realism of it all. It feels factory fresh, but still a working machine as well. The Pratt & Whitney Canada PW206C Turboshaft engine, 418 kW (560 hp) each, are both semi-visible, another X-Trident speciality (think CH-47D Chinook)... and all vents and lockers are perfectly done, as are the massive exhaust cones at the top rear. Glass is perfection, lovely tinted, deep and have great surrounds... you won't get better detail than this. Helicopter detail is highlighted by one area, rotor movements, or the rotor system. X-Trident was one of the first to do detailed links and hub mechanics... so I expected the same here, I was not disappointed. Rotor hub assembly detail is intricate and fully detailed right down to the last cotter nut and pin. The red centre rubber cone is also highly realistically animated (the same on the tail rotor assembly), so you can spend a lot of time in moving it, and personally working it all out to your heart's content. Roll (right-left) Pitch (forward-back) Collective (down-up) Tail rotor detail, shows a developer at the very top of their skills development, it is a piece of simulated art. YAW is animated (right-left rudder). Retractable landing gear is excellent. Not only the perfect tyre and rim detail, but the internal bay is fully detailed as well, rear gear is perfectly realised to near perfection... it is about as good as you could do, and I love the scruffed tyres for ultimate realism. Doors Both front pilot and co-pilot doors open, and both rear doors slide open, but you can't hide them. You manually internally have to open the doors, first by moving the latch, then physically moving them open or backwards. There is a menu option as well. Note the fold out step... There is only one cabin option... VIP or "Succession" layout, all in white luxurious leather. Tricky is moving from the cockpit to the rear cabin, as the boundaries are very tight, there is a (very small) gap between the seats, so the best way is out one door and back in via the rear door? There is only the pilot provided and his arms are animated to the controls... there are no provided Co-Pilot or Passengers in the package. Menu The "AW109SP" menu is set in the X-Plane banner.... It has three options; Options, Windows and Operations... there is the "Toggle FPS", but this is just the X-Plane framerate data for development. Options (Configurations); In the options tab there are six available choices; Controls, Options, Sounds, Anim, Maps and Obstacles. Controls; There are a lot of options to set the AW109 controls to your best feel and reaction, in fact a full page of adjustments. Main are the "Damper" adjustments for Pitch, Roll and Yaw rates, a Non-Centreing cyclic, Servo (Autopilot) motors (off-on-test), Rudder Ovrd (override), lower are sections for "Collective", Pedals, Power Levers, Auto Mute, Auto HDG (Heading) and VNAV. Right side adjustments cover the Collective, with; FT rel (release) mode, Threshold, Pedals FT rel mode and pedals threshold. Collective Input can be via the keyboard, throttle or auto-detect, you can also reverse the settings as well. Options; X-Trident give you a lot of setting options. Synt Vision Range (0-2400 meters), Instruments (Standard or Performance), Popup (Standard, Performance or Show in VR), Scale, (0.5 - 1.5), APMS ALT knob mode (Select or Pre-Select), Collective Cue (Off, Normal or Bright) Tickbox options include; Auto load windows, Hide Frames Labels, Duplicate Popup, Hide 3d model... the "Hover" can be set to; velocity, Position or Auto. You can Enable the PFD-HDG, have a Realistic "Direct To" and a Custom VRS-Vortex Ring State (X-Plane 12 only). You can enable the "Replay mode", Show VFR labels, Hide the main rotor, Force the collective for ALT, and Use the collective with ATT. Notable is that the above is for what you would call a professional grade setup, another layer of adjustment above the normal conditions. Sounds; Top is the "Master", then you have two separate selections for both the Interior and Exterior sounds... Engines, Starter, Transmission, Main Rotor, Avionics, Cockpit and AWS - Advanced Warning System Anim (Animation). Left are the door sliders; Pilot, Co-Pilot, Rear Right & Rear Left. There is a glareshield animation which we will see soon. Bottom is a "Rotor Demo" that turns the rotors. MISC. are optional objects; Top are a pair of headsets in the cockpit, you can also touch them to hide. You can have the choice of putting the duel UHF aerials under the front fuselage, or a single one on the roof left. The sliding Step on the lower right fuselage can be seen or hidden if required. Detail of the step is excellent, only a step, but so well done. Last two options is an external Camera, and Anchor Plates on the fuselage. Crew... is the Pilot setting, Off (hidden), On (visible), or Auto (pilot visible only from the external view). Remove Before Flight... This set of options will put a load of tags, covers and plugs on the AW 109, including; Engine cover and plug (left and right), Pitot (left & right), cowlings (left & right) and set some nice wheel chocks. You can also "Ignore RBF" or hide them all. Maps; On this menu page you can insert custom area maps on the central "Mission Display" (MFD Multi-Functional Display). Obstacles; Selections of "Obstacle Groups" can be selected from this menu page. Windows: You can load and save instrument windows, and there are ten pop-out options available, SBY (Standby), EDU (1&2), PFD (Pilot/Co-Pilot), ND (Navigation Display), RTU (Radio) and Mission Display. The popup Window panels will also be seen soon. Operations: under the "Operations" there is only one option... to hide or show the rear wheel chocks. Cockpit. First view of the AW 109SP Instrument panel is a moment... Your actually shocked on how really good in realism it all is, it just "Blows your mind". The trick is in the instrument displays, they are an unusual colour in a dark, dark purple. But they give the panel a feel and look of complete absolute realism.... "oh wow". As noted you can move the glareshield towards you, if you want more shade over the instruments. OHD (Overhead Panel) is excellent, and big for a small helicopter... Lower panel is also really well done. Like noted earlier, the boundries are very tight in here, so moving around for a different angle to the instrument panel is quite difficult, hence the odd FOV angles to see the lovely white leather front seats. The VIP fitout and cockpit/cabin materials are all top notch, beautifully done and all very real. It is a seriously nice workplace. Look hard at the majestic fitted carpet... incredible, and the door frame moldings, perfection! Another "blows you mind" moment is when the instruments are powered up, it is not just blown this time, but your head explodes by the sheer detail before you, it is a kaleidoscope of colour... "wow', simply, "wow, wow". I will first note the excellent power up on all the displays, as each can be activated/shutdown separately via the units power switches (arrowed below). The procedures are beautifully activated, the centre EDU has a brief colour on startup, then it will "Test" the system, finally the IDU will display the current system information. The lower radio panels also take time to focus and turn on... it is all so very authentic, also highly realistic. All four IDU's popout in windows by pressing the centre of the IDU screen, also in the "Windows" menu as noted earlier. All the popout windows are scalable and can also be moved anywhere on the screen. Other popouts include the top Mission Display, SBY (Standby Instrument), EDU (Engine Display Unit) and RTU (Radio) Genesys Aerosystems IDU-450 EFIS The highlight here is the Genesys Aerosystems IDU-450 EFIS (Electronic Flight Instrument System). It comprises of two IDUs (Integrated Display Unit)s. Top the PFD (Primary Flight Display) and lower the MFD (Multi-Functional Display) with MAP. This set up is per normal with most Aircraft Avionic suits, but here the IDU-450 takes on a different concept. Notable is that the AW-109 has it's own dedicated set of EFIS flight systems software 8.0E, created by Genesys just for this machine, and that software version is replicated here by X-Trident. Note the 8.0E Manual can be downloaded directly from Genesys Aerosystems, the link is set below. In the last two decades, cockpit resources have followed the commercial carriers’ trend toward “Automation Centered” systems. These sophisticated systems minimize pilot involvement and automate control of the aircraft and its systems to the greatest extent possible, “pilot-centered” system. While still highly automated, this type of system, common in other military tactical applications, presents the pilot with information necessary to make decisions about the flight and take the appropriate actions. A good example is the Highway-In-The-Sky (HITS), which allows for highly automated approaches, but its predictive nature provides the pilot unprecedented awareness of upcoming maneuvers. EFIS Flight Logic goal is IFR-VFR equivalence and the basic concept of the FlightLogic EFIS is proven HUD symbology overlaying a real-time 3-D virtual reality view of the outside world. The resulting “Synthetic Vision” provides the pilot in IMC with the same simple visual clues for navigation and aircraft control as those used in VFR conditions. UPPER IDU (PFD) has the standard flying instruments, which are set out before the "Synthetic Vision" background, including the Speed and ALT tapes, Pitch and Artificial Horizon, Rate of Turn, and top a compass, also V/S Vertical Speed indicator is visible when used. The IDU has a simplistic military feel to the layout and to use. Access and selection is via the eight buttons set around the instrument. Left; FPL (FlightPlan), ACTV (Active), INFO and OBS... Right; MENU, BARO, NRST (Nearest). The MENU brings up the selections. (ZOOM, DCLTR, HRZ SYNC, DESIG and TIMER). BARO shows Barometer selections. NEAREST and OBS are also available. One tool is the "HORIZON SYNC", that locks the Artificial Horizon to the SYNTH VISION. IDU Menu selections are deep, and they need time to learn and navigate, there is a manual provided, it is also 500 pages long! LOWER IDU (MFD) The access buttons around the MFD are the same as the upper IDU, so do so the same menu actions... The MENU however has also a few different options; PAGE, FORMAT, DESIG and TIMER. Under PAGE you have eight screen options; MAP (Main), HSI (Horizontal Situation Display), NAV LOG, STRIKES, TRAFFIC, DATALINK, HOVER and WEATHER RADAR. HSI is your standard degree navigation tool, NAV LOG will show you your Flights, STRIKES (not yet implemented) will eventually show your current data, TRAFFIC will show the aircraft around you, DATALINK, the actual datalink page is not implemented here, but shows your control position (Cyclic & Rudder) and WEATHER RADAR shows the current weather. HOVER gives you a radar look of your hover position, movement and speed... we will look at this more in the flight section. The IDUs are brilliantly brought to life here, highly realistic and have excellent working menus. There are also like mentioned, a "deep dive" of branches of detail to get the most out of the Genesys system, "Study"... oh yes, certainly a study depth learning curve. EDU Centre instrument panel is the EDU (Electronic Display Unit), there are two units in EDU 1 and EDU 2. The EDUs are installed on the instrument panel and are identified as Primary EDU (EDU1), on the pilot side, and Secondary EDU (EDU2), on the co-pilot side. During normal operation both displays are operative. Important is that if one EDU goes out of operation, then the basic requirements of that EDU unit are then transferred to the other EDU unit called REVERSIONARY Mode. That aspect is really well done here. EDU 1 details N1, - TOT - TRQ - NR - N2 & Caution, Warning and Advisory messages EDU 2 details - Engine 1 oil pressure - Engine 1 oil temperature - Transmission oil pressure - Transmission oil temperature - OAT - Engine 2 oil pressure - Engine 2 oil temperature - Main hydraulic pressure 1 & 2 - Fuel Quantity - Fuel Pressure - Utility hydraulic pressure - DC current - DC voltage - AC voltage - Fuel flow - Normal utility hydraulic pressure - Emergency utility hydraulic pressure and Advisory and status messages. ON-OFF is the EDU power switch, BRT-DIM the unit's brightness. You can CLR mesages, and ENT (Enter) details, and the non label right lower scroll switch is for editing the Caution, Warning and Advisory messages (CWA), or new options to be scrolled. Caution/Warning menu is – WARNING messages (red) – CAUTION messages (yellow) – ADVISORY messages (green) – STATUS messages (cyan). M - Menu. Lower on each EDU is a menu button "M". This gives you a lower menu that covers three main options... - START. This key selects the START mode on the EDU1. – CRUISE. This key selects the CRUISE mode on the EDU1. – MAIN. This key selects the MAIN mode on the EDU2. Secondary options include – AUX. This key selects the AUX (auxiliary) mode (i.e. hydraulic, electrical and fuel information) on the EDU2. – TEST. This key initiates the BIT of the IDS system. It can be operated only when the helicopter is on the ground (WOW active). – POWER CHECK. This key initiates the Power Assurance Check recording. The "TEST" mode is particualarly well done.. RMS & APMS Centre lower panel are both the Radio Management System (RMS) panels, each side of the Automatic Pilot Management System (APMS) RTU 1 is right (Pilot) and COMM 2/NAV 2, RTU 2 is left (Co-Pilot) and is COMM 1/NAV 1. The central APMS is part of the AFCS - Automatic Flight Control System, and is basically a SAS or Stability Augmentation System. It stabilises a helicopter against pitch and roll disturbances due to wind gusts and turbulence. Modern systems include yaw as well and are sometimes called “three-axis systems. But the APMS is a far more advanced SAS in being say just an Automatic system, rather than a Manual action, Airbusie to Boeing if you sort of know what I mean. We will look at the APMS in more detail when flying the aircraft. Mission Display Located top central of the Instrument panel is the large "Mission Display". It has four options, PiP - Picture-in-Picture with a compass, "North UP" is also available. There are two settings for the External "Video Camera", close (ENHC - Enhanced) and long. You can zoom the MAP all the way out and in, via the Pop-out panel, there will be the option to add in moving maps. OHP (Over Head Panel) covers ELEC, LIGHT (Internal and External), FIRE EXTINGUISHER, VENT, AVNX BAY and ECS - Environmental Control System. All Circuit Breakers (Fuses) work. Both Throttle handles control the power to each engine, in set positions, and there is a very nice Rotor Brake as well. Lower panel covers Landing Gear lever and indicator lights, Park Brake, Fuel Valves, Engine Modes, AHRS - Attitude and Heading Reference System, and AURAL WARNING options. Cyclic and Collective There is great detail and functionality on both the Cyclic and Collective controls, slightly less on the Co-Pilot's control set. Pilot's Collective has 2 engine GOV (governors), Engine Trim, Float, Main Trim, Search Light and Landing/Taxi lights, there is a Master rest on the handle. On the Cyclic is a ATT (Attitude Retention System), Wiper (right), NR, Main Trim and a AP DISC (Autopilot disconnect. Co-Pilot's Collective is slimmed down to Engine Trim, External Search Light and Main Trim, on the Cyclic is the ATT button, Wiper (left), Main Trim and AP DISC. AW109 Lighting In my version the lighting feels not finished? There are three adjustment knobs for the INST PNL (Instruments Panel), OVHD (OverHead Panel) and PED (Pedestal), mostly the highlighting. There is a Cabin light, but it doesn't work? and the two overhead spot lights are dead as well. There is a DAY and NIGHT lighting mode and the Passenger Warning Lights work in the rear. External Lighting has very nice Landing/Taxi lights in the stub wings, Navigation Lights (Stub and Tail), Two Beacons (top and bottom fuselage). Under nose left is also a retractable "Search" light. __________ Flying the AW109 The first question is... is the AW109 easy to fly? This is still a helicopter with helicopter controls and feel, so you still fly it like a helicopter. But the trick here is that like an Airbus, it also has control laws and protections. These so called "helpers" do however smooth out your inputs and give you more control in the hover, modes you could call them. But it does make it a far more easier machine to master and control, so it is a very nice helicopter via it's controls, a sort of Limousine for the air, also noted as "Ferrari of the skies" because of it's speed. Now a note. You don't get an external power unit with the X-Trident AW109? So when you want to fly from a "Cold" set up, you have to move quickly once the battery switch is thrown, as your then on a "Battery Drain" timer, so you will need some engine/generator power as soon as possible. If you do go dead... the AgustaWestland is "dead, dead". And only a complete restart will get you back to life (a fault fix doesn't recharge the battery). Flightplans In most cases I don't usually do flightplans in Helicopters, as most flights are usually only short distances, or a circuit back to the same airport. But the AW109 is a more of point-to-point aircraft, and the flightplan system is extremely good here, so we will take a look at it... Select FPL (Flightplan) and it will show two options... SELECT and CREATE-EDIT. SELECT is a selection of .fms flightplans from your X-Plane/Output/FMS plans folder. The navigation of the flightplan selections is very easy via the right knob, press the centre to activate! CREATE-EDIT allows you to create a flightplan from scratch, or edit a flightplan. In CREDIT-EDIT mode you now have a menu option, CREATE FLIGHT PLAN, ACTIVATE FLIGHT PLAN, EDIT FLIGHT PLAN, (Reverse Flight Plan), (Delete Flight Plan), CREATE USER WPT (Lat-Lon) also (Rad-Dst), EDIT USER WAYPOINT, DELETE USER WAYPOINT and (Raim Prediction). Selecting "CREATE FLIGHT PLAN" will bring up the Flightplan editor.... with two options "EXIT" or, and back when editing ICAO codes. Press ADD to construct a Flightplan. You are given options in NRST APT, NEAREST VOR, NRST NDB, NRST FIX and NRST USER (AIRWAYS is also available). Then your Airport ICAO code can be directly keyboard entered via the lower box, return works as well. If you press NRST APT (Airport), the IDU will bring up a scroll box of nearby ICAO airports to choose from, again navigation is by the right knob and press the centre to activate. ADD again and this time a FIX (Waypoint - OKTOV), then build up the flight plan with the required VOR - NDB - FIX - USR - AIRWAYS... then another APT at the end. The system is very simple and extremely easy to use. When done you can SAVE the Flightplan to the the .fms folder. You can (edit) via INSERT or DELETE. Select the FIX or Navigation ICAO via the scroll knob, then select, or DELETE the FIX, INSERT is very much the same, by selecting the fix you want to add next, then fill in the ICAO. Flightplan competed it shows in the MAP and on the NAV LOG page. Other MAP options include; CENTER, N (North UP), PAN ON, SYMB DCLUTR and FNCT DCLTR (hint here, the TERRAIN selection is hidden in the FNCT menu). MAP RANGE (zoom) is also available, and DIRECT-TO is also great for changing the flightplan in flight. Just add in the FIX ICAO code lower right, or select from the NRST scroll list The flightplan mode is a very solid piece of work from X-Trident, and it is very well replicated from the original Genesys system. LFML (Marseille Provence) to LFMN (Nice Côte d'Azur Airport) Fuel selected on the lower console, and the Throttles are both set to Idle.... the engine starters (1&2) are on the top of the throttles, then you watch the EDUs come alive as the aircraft goes into a start mode. It is all Full Authority Digital Electronic Control (FADEC), so the start procedure for each PW-206C is fully automatic... In come the start up procedure sounds, the start whine then the rotor clatter, but clatter is not the right word, an air-conditioned high whirr is closer in sounds to this modern machine. Both throttles go forward to "Flight" and the "NR" goes to maximum, wait a few moments to gain the extra thrust, then your ready to go... Feel is everything with helicopters, hands and feet. With the AW109 the feel is slightly different? The software helps in the controls, helping you manoeuvre the machine, mostly by giving you more of a wider parameter to work with. The effect is opposite... as the machine will take smaller inputs, as explained by the yaw in the tail-rotor... so usually in most cases you have to use a LOT of right rudder to control the tail rotor thrust, but here you don't as the thrust is more centralised, so you don't have to push so hard, as the system compensates for you. So getting up into a hover, and keeping the AW109 straight is very easy. I can even store the gear in the hover, just by holding the machine static with absolutely no effort. Slightly nose down and bit of collective and your moving forwards, more nose and more collective, and your now gaining speed. So manual flying with the AW190SP is excellent, a pussy cat really. As you can easily get the altitude and adjust forward speed that you want. Here now I am doing 131 forward knots and 1600ft. There is a reason for this? I need a steady forward speed and height to activate the APMS or Autopilot. To activate you select the AP1 & AP2 buttons, Then press the ALT pyramid to hold the altitude, then HDG for the heading selection. All your APMS selections are shown in the lower box on the upper IDU. The APMS does require a bit of study, it is a complicated system to a point, to navigate, but once you have worked it out, it is brilliant to use. Some adjustments work on the fly, like speed (IAS) and V/S, but a few are select, then press the button on/off, in this case the HDG, select the new heading then click the HDG buton off then back on, and only then will the AW109 go to the new heading. Now the Autopilot is flying the aircraft, and so I head back to the start point of my flightplan... I spent time doing the flightplan, because it is an excellent requirement for one of the best features of the Genesys system... I get past the first APT waypoint then line up the flightplan, then I press NAV to engage the AP to the flightplan. Once you activate the flightplan, you get a tunnel of wireframes on the upper IDU, that you will fly though, and they are your route guide right through the flightplan... first you align with the wireframe tunnel, then it becomes the central part of the PFD. It is exceptionally well done, beyond brilliant, so very authentic. The machine is quite automatic, the APMS system will adjust for you in Speed (collective) and Altitude. Select a new altitude and then set the V/S for the speed of the climb (or descent), press ALTA to hold that altitude and the aircraft does the rest. Both IDU's are also independent of each other, so you can have different range (zoom) levels on either display At each waypoint you will get a symbol in the PFD IDU, a circle that gets larger as you approach the FIX... as go though the circle you will then go to your new heading, again it is all fabulously well done. Selecting the NAV LOG will give you your full Flightplan with detailed Waypoints, Path, Distance, ETE, ETA and your Fuel useage. Other waypoints use other symbols, here an NDB waypoint shows the point of the position of the NDB on the forward IDU map. The AW108SP has a maximum speed of 311 km/h (193 mph, 168 kn), a cruise speed around 285 km/h (177 mph, 154 kn) and a never exceed speed of 311 km/h (193 mph, 168 kn). The ferry range is 932 km (579 mi, 503 nmi) and the the Rate of climb is 9.8 m/s (1,930 ft/min). Spectacular is the cockpit in flight, the rear cabin is not bad either for the Logan Family, as we cruise by the French Riviera heading towards Nice. Now at the final turn to Nice (LFMN), the final turn has a different fix symbol in a diamond on a point. I am now down to an 80 kts approach speed at 200 ft... time to activate another brilliant feature, "HOVER" mode. The button is however slightly hidden on the very right middle on the APMS panel. Once activated the HOVER display is automatically shown in the lower IDU. Activating and the AW109 with then slowly come to a stop at the designated height. On the display the Flight path marker is removed at low speed, <30 knots groundspeed, and is replaced with hover vector symbology. The hover vector indicates direction and groundspeed of drift at low groundspeeds (when lower than 30 IAS) consisting of Large Aircraft Symbol Reference Marks, an inner concentric ring indicating ten knots groundspeed, an outer concentric ring indicating 20 knotsgroundspeed, and a vertical and horizontal dashed line passing through the center extending to the outer ring. You manoeuvre in the HOVER by using your HAT (Joystick) set to Trim, Up, Down, Left, Right and a purple circle is your target point (arrowed) that moves at your commands, then the AW109 will follow in that direction... The pad's H will also show in the display to get the perfect alignment of the landing pad... You then use the RHT knob on the APMS panel to descend (or gain height) with the Vertical Reference system VRS-3000, which is also available to make an absolute perfect landing! It is totally brilliant, simply easy to use and a dream for those that struggle to land Helicopters... the old way to manually fly to a hover then land, still works, but this is way more fun and engaging. By the way I landed with my feet off the rudder pedals! I can't even get close the detail and symbology available here with this Genesys System in a review and provided here by X-Trident, as noted the manual is 500 pages long, highly detailed, but well worth studying... I will note it is certainly another major level in helicopter flight immersion, I was totally captivated by what you have here at your disposal... unbelievably brilliant by X-Trident. Liveries There are four liveries (with more expected). Default is the Brazilian Havan PP-UUU, plus MountainFlyers, Silver OM-TVR and a clever Thunderbird 1. Summary The AgustaWestland AW109, originally the Agusta A109, is a lightweight, twin-engine, eight-seat multi-purpose helicopter designed and initially produced by the Italian rotorcraft manufacturer Agusta. It is known for its speed, elegant appearance and ease of control. X-Trident have a lot of experience and also a great "Track Record" in the X-Plane Simulator, certainly with quality helicopters, with the formidable Bell AB 412 and the CH-47D Chinook being the class of the field. X-Trident have also dabbled with the Tornado and Harrier AV-8B in the fixed wing military arena. X-Plane 12 is delivering exceptional quality aircraft for the X-Plane Simulator, and the AgustaWestland AW109SP is certainly well within that "Excellent" category. Quality and detail is off the chart, as we approach perfection in realism, as there is nothing to fault here, just to admire. The rotor head/tail rotor is fully animated and detailed, right down to the last nut and screw, perfect glass is highlighted by the top rated undercarrriage with it's realistic hubs and tyres. The P&W Canada PW206C Turboshaft engine is only partly viewable, but well done. The focus is on the avionics, or the installation of the Genesys Aerosystems IDU-450 EFIS. This is a deeply conceived system with built in “Synthetic Vision”, there are two sets of IDUs for both PFD and MFD for both pilots. EDUs (Electronic Display Units) are also highly developed as is the Backup Instrument, and Radio RDU. Another highlight is the Automatic Pilot Management System (APMS) Or Autopilot with built in Auto hover. The APMS is a highlight of the machine, but in also adding in the flightplan capability and symbology, it is a major step forward in Helicopter flight immersion. Both X-Plane 12 and X-Plane 11 separate versions are part of the package. Sounds are not a highlighted feature here, but they are FMOD 2 and quality based from a real AW109, I really liked them and the 3d dynamic sound was very good internally and externally. Features are however not overly represented for a helicopter, with the focus on the Pro market for menu settings and features. Only one cabin version, and even missing a Co-Pilot and Passengers, the usual wire cutters, mirrors, doors off, belly hook and even an external Ground Power Unit are all missing. The AugustaWestland AW109SP represents another level of immersion in the competitive X-Plane arena of vertical flight, big words can be said here, Amazing, Incredible, Category Dominating, Totally Immersive.... The AW109SP is all of these things and more, another step forward, another height achieved, overall it is a damn nice helicopter to use and fly, and a totally worthwhile investment. __________________ Yes! - the AgustaWestland AW109SP by X-Trident is NOW available from the X-Plane.Org Store here : AgustaWestland AW109SP Price is US$45.00 Requirements Plane 12 or X-Plane 11 2 Separate files are provided at no additional cost Mac, Windows, Linux 8 GB+ VRAM Recommended Download Size: 593 MB Current version: 1.0 (May 11th 2024) Designed by X-Trident Support forum for the AgustaWestland AW109SP Download The AW109SP is a 432Mb download with an installation size of 934Mb, in your X-Plane Aircraft folder, this is an X-Plane 12 aircraft only. All updates are via the built-in Skunkcrafts Updater Documentation There is excellent full coverage documentation and installation details for the AW109SP, including; 10_AW109SP for X-Plane - quick guide v1.0.pdf 20_AW109SP for X-Plane - AP and FMS tutorial v1.0.pdf 30_AW109SP for X-Plane - CHECK LIST v1.0.pdf The Full "8_0E-IDU-450-Rotorcraft-Rev-A" Genesys System manual is available for download here; https://genesys-aerosystems.com/wp-content/uploads/2023/11/8_0E-IDU-450-Rotorcraft-Rev-A.pdf _____________________ Review System Specifications: Windows - 12th Gen IS1700 Core i7 12700K 12 Core 3.60 GHz CPU - 64bit -32 Gb single 1067 Mhz DDR4 2133 - PNY GeForce RTX 3080 10GB XLR8 - Samsung 970 EVO+ 2TB SSD Software: - Windows 11 Pro - X-Plane Version 12.05r1 Plugins: JustFlight-Traffic (X-Plane.OrgStore) US$52.99 : Global SFD plugin US$30.00 Scenery or Aircraft - LFML- Airport Marseille XP by At (X-Plane.OrgStore) - US$24.99 - LFMN - Nice Cote d'Azur v2 by JustSim (X-Plane.OrgStore) - US$18.50 Review by Stephen Dutton 12th May 2024 Copyright©2024: X-Plane Reviews (Disclaimer. All images and text in this review are the work and property of X-PlaneReviews, no sharing or copy of the content is allowed without consent from the author as per copyright conditions) All Rights Reserved
-

By Dominic Smith · Posted
Scenery Review: KDCA Washington Airport & City XP12 by Drzewiecki Design By DrishalMAC2 Introduction Situated in the bustling heart of the nation's capital, Ronald Reagan Washington National Airport (KDCA) serves as an essential hub for both business and leisure travellers. Located along the scenic banks of the Potomac River, this airport offers a gateway to the iconic landmarks and political intrigue of Washington, D.C. KDCA boasts three runways (01/19, 15/33, and 22/4), providing a seamless travel experience with its modern facilities and efficient operations. Its advanced amenities ensure smooth departures and arrivals for various aircraft, from regional jets to larger commercial airliners. Besides its operational capabilities, KDCA also holds historical significance, reflecting the rich heritage of American aviation. Named in honour of Ronald Reagan, the 40th President of the United States, the airport serves as a tribute to his legacy and ongoing impact on the country. Located in the heart of Washington, D.C., KDCA provides convenient access to the city’s diverse attractions, including the significant monuments of the National Mall and the legislative activity at Capitol Hill. Whether visitors are exploring political landmarks or engaging with local culture, KDCA serves as an efficient and welcoming gateway, reflecting the standards of excellence and innovation characteristic of American aviation. This is Drzewiecki Designs' first XP12 scenery, which enhances parts of the city and upgrades some nearby buildings with helipads, making them “landable”. This feature is especially appealing for X-Plane users who enjoy flying rotary-wing aircraft. Installation Process Once you've downloaded the ZIP file, it's 1.5 GB in size; when extracted, it expands to 3.4 GB. This size is quite reasonable given the extensive content included in this scenery package. The installation process itself is straightforward: upon opening the extracted folder, you'll find three additional folders. Simply drag and drop the "DD Washington City XP12" and "DD KDCA Washington XP12" folders directly into your X-Plane 12 custom scenery folder. Documentation The download includes four documents. Three of these are installation instructions available in Russian, Polish, and English, and are clearly written and simplify the installation process. The fourth document is a "manual" that provides an overview of the airport, condensed installation instructions, links to relevant charts, a list of scenery features, links to support pages, credits, and a license agreement. Satellite Imagery The satellite imagery directly surrounding the airport is of decent quality, though there are better examples available elsewhere. The package also includes ortho satellite imagery for the entire surrounding area; however, this is of noticeably lower quality. While it improves upon the default textures by X-Plane (what wouldn’t), it would be beneficial to have the option to remove this layer and use our own, self-generated Ortho4XP tiles instead. The lower zoom level of the satellite imagery particularly affects the depiction of the Potomac riverbanks, which appear quite harsh and do not look as impressive, especially when following the DCA river visual approach. In future updates, an option to replace this with self-generated ortho tiles would be highly welcomed. Ground Textures The runway textures in this scenery are reasonable, enhanced by additional tire marks to convey a sense of daily use. However, there is a notable issue with texture uniformity across all three runways. For instance, the real runway 15/33, features a mixture of different coloured surfaces, which has not been replicated here. Introducing more distinctive runway textures that reflect these real-life variations would significantly enhance the scenery's authenticity. Additionally, the edges of the runway textures appear quite harsh, so incorporating some kind of transitional texture could greatly improve the overall appearance and integration with the surrounding environment. Similarly, the taxiway textures, while visually appealing, suffer from repetitiveness, with the same texture used across approximately 90% of the airport. This does not accurately reflect the actual variety seen in aerial images, such as those on Google Maps. Despite this, the added tire marks and wear and tear effects on these textures do lend a highly authentic look. Signage and Navigation Aids The airport signage in this scenery has been handled quite well, with all the necessary runway and taxiway signs positioned accurately. The signs are sharp and easily legible, which enhances navigational clarity for simmers. Additionally, the Washington (Ident: DCA) VORDME has been included and correctly placed, which is particularly noteworthy and adds a realistic touch to the scenery. GA Terminal and Hangars The GA terminal is modelled to a high standard and seamlessly integrates with the main passenger terminal. The GA hangars are also well modelled, with a few having open doors, revealing aircraft inside, and include detailed interiors, including general clutter like ladders, cones, and boxes, adding to the realism. Additionally, banners inside the hangars indicate their specific functions, such as “American Airlines DCA Maintenance” and “Signature Flight Support.” Outside the hangars, there are two corporate jets parked, one of which has its main door open, showing people engaged in conversation. This area also includes the U.S. Coast Guard ramp, where two Coast Guard helicopters are stationed at their designated spots. Terminal 1 Terminal 1 has been modelled to a high standard, effectively replicating the real structure. However, the textures sometimes appear flat and could benefit from more variation to enhance realism. In contrast, the ground texturing around concourse A is notably well-executed, featuring oil spills and signs of wear and tear that add authenticity to the environment. The various concrete and asphalt textures around this area have been accurately reproduced, confirmed through comparisons with Google Maps images of the actual airport. Much like the exterior, the interior of Terminal 1 is also modelled to a high standard, including detailed elements such as airline signs at each gate, reflecting real-life arrangements. Additionally, numerous 3D figures are positioned throughout the terminal, creating a bustling atmosphere that enhances the view from the cockpit of aircraft at the gates. Terminal 2 Special attention has been given to Terminal 2, making it instantly recognisable. The exterior is modelled to a higher standard than Terminal 1, with improved texture quality that enhances its appearance. Inside, Terminal 2 excels at capturing the distinctive atmosphere of DCA with its beautifully recreated roof and glossy floors that contribute to a polished look (pun intended). Each airline is provided with a realistically designed check-in desk area, enhancing the authenticity of the terminal. Although the various shops are represented only as 2D images, this decision is practical, considering that simmers typically spend limited time inside scenery terminals. The concourses B, C, D, and E have also been replicated to a high standard, featuring beautiful ground textures that add to the overall aesthetic quality. Ground Clutter and 3D People The ground clutter around the airport is varied effectively across different stands, contributing to a dynamic and realistic environment that avoids a repetitive "copy and paste" appearance, which is sometimes visible in other payware sceneries. Some of this clutter is airline-specific, featuring items like U.S Airways coaches and Delta baggage carts, although the presence of U.S Airways equipment may not be entirely accurate given the fact that the airline has ceased operations. Whilst the terminal interiors are nicely populated with numerous 3D people, adding to the bustling atmosphere, the ramp areas show a noticeable lack of ground personnel. This absence detracts from the realism on the airside, where the presence of staff is critical for an authentic airport experience. Night Lighting Night lighting is executed exceptionally well, featuring bright white lights around the ramp areas that enhance visibility and ambiance. The taxiway and runway lighting also receive high marks for their clarity and precision, with special attention given to the approach lighting. This is especially notable for the RNAV approach into runway 19, which follows the Potomac River. The approach lights mounted on various bridges along the river are synchronized to flash together, providing a striking visual reference for pilots. Overall, the night lighting is impressive, incorporating several thoughtful details that greatly benefit the night-time flying experience. At night, due to the way the lighting has been applied, the building interiors really come alive. During the day, the lighting comes across as slightly dull, but at night, it is transformed, giving the buildings a vibrant, welcoming glow. The contrast between day and night is quite remarkable. The Capital In addition to the airport, the package extensively covers many of Washington D.C.'s landmarks and a significant portion of the inner city. To the west of the airport, areas known as "Crystal City" and "Pentagon City" are modelled to a high standard, featuring custom buildings that are accurately placed, surpassing the autogen quality provided by simHeaven’s X-World America. The downtown D.C. area, including iconic landmarks such as The White House, Capitol Building, Lincoln Memorial, and the Smithsonian National Museum of Natural History, is also included and modelled to the same standards. In total, the scenery features over a thousand landmark buildings in the vicinity of the airport, each contributing to the authenticity of the package. If you've visited Washington D.C., you’ll certainly enjoy exploring the area; just remember to bring a guide! Performance Impact I'm pleased to report that the scenery is very well optimised, with no noticeable loss in performance on my system (specs below). This is particularly surprising given the extensive detail included in the package and the generally high demands of the Washington D.C. area. Conclusion Having explored the enhancements to Ronald Reagan Washington National Airport by Drzewiecki Designs, it's clear that the improvements to both the airport and the surrounding Washington D.C. area is impressive. The package excels with its detailed rendering of terminals, hangars, and particularly the night lighting along the Potomac River. The accurate depiction of landmarks and key areas such as Crystal City and Downtown DC significantly enriches the overall experience. Although there is room for improvement in texture quality, particularly the supplied orthos, and a more 'populated' ground environment outside of the terminals, these issues do not significantly detract from the overall high quality of the scenery. In summary, with its thorough execution and extensive features, this scenery provides substantial value, enhancing the X-Plane 12 flying experience in the nation’s capital. ________________________ KDCA Washington Airport & City XP12 by Drzewiecki Design is now available from the X-Plane.Org Store here: KDCA Washington Airport & City XP12 Priced at $30.00 Features A high-quality model of KDCA Ronald Reagan Washington National Airport, featuring the up-to-date version with extensive details throughout the whole airport FPS-friendly design, with epic night textures, dynamic lighting and PBR materials Performance-friendly interior modeling at terminal buildings, control towers, and some hangars, static aircraft, advanced night lighting (incl. River Visual and dual PAPI), animated trains Animated jetways, VGDS, marshallers (SAM plugin) Washington D.C. city scenery included, with over a thousand landmark buildings surrounding the airport, ortho coverage and some lite airports Requirements X-Plane 12 Windows, Mac, Linux 8 GB+ VRAM highly Recommended Download size: 1.5 GB Current version: 1.1 (March 22 2024) Review System Specifications Windows 10, Intel i5-12400F, 32GB RAM, RTX 3070Ti ________________________ Scenery Review by DrishalMAC2 10th May 2024 Copyright©2024: X-Plane Reviews (Disclaimer. All images and text in this review are the work and property of X-PlaneReviews, no sharing or copying of the content is allowed without consent from the author as per copyright conditions). -
NEWS! - Aircraft Updated : PAC CT/4E Airtrainer v3.0 by vSkyLabs The little Pacific Aerospace Corporation CT/4 Airtrainer has already had two X-Plane 12 patches, the last one was v2.2a (15th February 2023), but here is the really official X-Plane 12 version in v3.0 of the aircraft, plus a few nice updates and touches to this extremely nice trainer aircraft. The Pacific Aerospace Corporation CT/4 Airtrainer series is an all-metal-construction, single-engine, two-place side-by-side seating, fully aerobatic, piston-engined, basic training aircraft that is manufactured in Hamilton, New Zealand. The X-Plane 11 PAC Airtrainer Review is here: Aircraft Review : PAC CT/4E Airtrainer Project by VSkyLabs There are some interesting details in this v3.0 update... the AEIO engine has been tuned, and the airfoils have been revised. PBR has been added to the External and Internal textures and there is better enhancement for VR (Virtual Reality). Finally the FMOD sound system has been updated to v2. V3.0 Changelog Flight Dynamics: Inverted flight fuel-tank is now simulated (allows maximum 10 seconds of inverted flight/negative g). AEIO-540-L1B5 Engine tune-ups: Power tuneups including power gradients calibration. Fuel consumption curve update including cruise performance. Airfoils update. Graphics: PRB setup for interior and exterior models to fall in line with the latest X-Plane 12 rendering aspects. Various 3-d modeling enhancement for the interiors. Paint-kit update. Systems: 3-d HUD was added (optional feature). Sounds: New FMOD 2 sound pack. POH: Manual update rev.004. Added Lycoming O-540/I540 performance charts. Added 'Essentials' pdf file with assignments summary. This project is part of the VSKYLABS 'Test-Pilot' series, designed specifically for use with X-Plane cutting edge Experimental Flight Model. Images are courtesy of vSkyLabs... the PAC Airtrainer is availble for both X-Plane 12 and X-Plane 11, however the XP11 version does not have the effects and features that is available in X-Plane 12. I really loved the quality of the PAC in X-Plane 11, so an update to X-Plane 12 quality would bring out even more of that exceptional realism! The PAC CT/4 Airtrainer by vSkyLabs is now available to update from the X-Plane.OrgStore! Just log into your account and download v3.0 ___________________________ Yes! PAC CT/4 Airtrainer v3.0 by vSkyLabs is NOW available from the X-Plane.Org Store here : PAC CT/4 Airtrainer Price is US$32.95 On sale: US$32.95 US$23.07 you Save:US$9.88(30%) Requirements X-Plane 12 or X-Plane 11 Windows, Mac or Linux GB+ VRAM Recommended Current version: 3.0 (May 6 2024) ___________________________ News by Stephen Dutton 7th May 2024 Copyright©2024: X-Plane Reviews (Disclaimer. All images and text in this review are the work and property of X-PlaneReviews, no sharing or copy of the content is allowed without consent from the author as per copyright conditions) All Rights Reserved
-
NEWS - Aircraft Relesed : Pilatus PC-6 Turbo Porter - DGS Series XP12 by Thranda Design Thranda Design have released their excellent Pilatus PC-6 Turbo Porter for X-Plane 12. The Pilatus PC-6 Porter is a single-engined STOL utility aircraft designed by Pilatus Aircraft of Switzerland. First flown in 1959, the PC-6 was produced at Pilatus Flugzeugwerke in Stans, Switzerland. It has been built in both piston engine- and turboprop-powered versions, and was produced under licence for a time by Fairchild Hiller in the United States. After 604 deliveries in 63 years, Pilatus ended production in 2022. Originally released in X-Plane 11. The "Porter" has had an extensive overhaul and upgrade for X-Plane 12, including... Re-authored textures in 8k (four times higher resolution than before. One 8k texture = FOUR 4k textures!) Completely re-done normal maps, and largely re-authored albedo textures. Fully re-authored sounds in FMOD, capturing the subtleties of the PT6 engine and its very dynamic 4-bladed prop with a lot more nuance and detail than before. Completely overhauled flight dynamics, both for the land and the amphibian version, to most closely match XP12's new dynamics Systems matched to new XP12 standards. Overhauled existing dynamic livery, added dirt and scratches effects (configurable in real-time). Now has "Modern" and "Classic" paint scheme layout. Re-authored lighting to take better advantage of XP12. EFB: Electronic Flight Bag, or the Thranda Tablet. All the extra functionality of this plane has moved from the fly-out menu (v11 PC6) to the EFB. Use it in 3D: you can move it from the pilot's side to the copilot's side, or disable it completely in 3D. Mounted on a swivel, for convenient viewing angle. Use it as a 2D pop-up window, or pop the window out onto a secondary screen. Use it in VR in either mode. Control the brightness of the EFB in 3D or 2D Intuitively set up like an iPad with different apps, all documented in the included manual. The PC-6 is part of Thranda's "Dynamic Generation Series", re-authored for XP12. More about the DGS Series Features Aircraft Options App: Option to run the engine in realistic mode or simplified mode. Control over chocks, tie-downs, and engine covers Control over the electric tug Window reflections on or off Instrument reflections on or off Startup running or cold and dark Control retractable landing lights via scroll wheel (independent left/right, Infinitely variable tilt, to use lights for both taxi and landing purposes.) Ground Power Unit (GPU) option External fuel tanks (under the wings) Steering options: realistic or simplified. Control over exterior and interior lights via a schematic of the plane. Control over doors and engine access Weight and Balance app Full control over aircraft's weight and balance. Control weights on a per-seat basis, or dial in the desired total, and the desired CoG directly. Hide seats, and replace weight with cargo. Control fuel quantities in the wing tanks by simply scrolling over the wing tank with the mouse. External fuel tanks can be enabled and disabled, and their weight independently controlled. Add weight to the copilot's seat, and the copilot shows up. Switch between Lbs and Kg. Preview weight and balance on a graph Load preset configurations, and save them to disc for later use. Instrument options app Call up pop-up windows for GNS430/530/Autopilot Switch between InHG and MB display in the Kollsmann window of the altimeter. Dynamic Panel app Move any instrument to any location on the panel, or even between pilot and copilot's seat. Supports 3rd party RealityXP GTN750 instruments, also fully configurable Save your own presets, and even share them with the community! 2 operating modes: Layout page and Individual Instrument page. Move instruments around a virtual panel layout or use numerical entry for precision placement. Also allows for control over instrument placement in 3D space, via special click spots that are made visible in edit mode. GNS430 and 530 can be swapped out, but a restart of the plane is required, as 430s and 530s are mutually exclusive in terms of compatibility. Supports G1000 configurations. Several preset panel configurations, showcasing different layouts and instrument equipment. Choose between different panel backgrounds. Static Livery app Preview available liveries and tailnumbers by scrolling over the plane. Apply dirt and scratches dynamically Also supports 8 traditionally painted liveries, in all their full 8k glory! Compatible with custom liveries. (Folder names should be named the same as the registration number, and the plugin picks that up as the livery's name.) DynaFeel app Dial in exactly how difficult you think the controls should be. This simulates different pilot's physique and strength. (Stronger pilots can put more pressure on controls, and hold full deflection at higher speeds). Log Book App Calls up Laminar's log book in a separate pop-up window. Log your flights and track your virtual adventures. Checklist App Very complete checklist, allowing for the ticking off of boxes of completed items. Navigate the many pages by using the scroll hotspot at the bottom of the checklist Pop up or pop out checklist app as a separate window Ground Handling App Call Laminar's default ground equipment, if you prefer that over the Thranda electric tug Opens up a separate pop-up window. Dynamic Livery app Create "virtual" liveries, based on one common design layout, and assign any color to any available paint segment. Now supports control over roughness and metalness Add dirt and scratches to your dynamic livery, and save these settings along with your livery preset. Quickly create preview of livery in real-time, using intuitive controls Apply selected livery in real-time (Granted, with these huge textures, it may be a bit of a wait... but no external graphics software required!) Option to include/hide manufacturer logo and "PC-6" sign Option to change the tail number in real-time, or disable it altogether Easily and quickly create dozens of paint schemes in-sim! Flight Computer App Easily visible data like OAT, Groundspeed, Endurance (HH, MM), Range, NMPG, altitude data, airspeed data, Fuel Flow, used fuel, headwind and crosswind component data. Pop up or pop out Flight Computer app as a separate window. Equipment App Tires: Choose between Tundra and regular-sized tires Skis: Enable or disable skis for snow ops Mud flaps: Enable or disable Windows: Choose between regular windows and massive windows in the sliding rear doors Wing tanks: control the loaded fuel weight in the "Weight and Balance" app. Option to enable/disable wing tanks, with realistically simulated weight, momentum, rotational inertia, and drag characteristics AviTab App (optional) If AviTab (freeware plugin) is installed, it can be viewed inside the tablet, or as a pop-up window. SkunkCrafts Updater Thranda recommends using the standalone SkunkCrafts Updater app, to stay up-to-date on the latest versions of the plane. Option to participate in Beta program, via check box in SkunkCrafts Updater Excellent ULTRA hi-res PBR realistic materials, featuring true-to-life plate deformation and to-the-rivet precision. Flight dynamics and systems: The PC6 has quite a few very unique flight characteristics, including the ability to enter Beta mode in flight, and these are faithfully reproduced. (This allows for very steep descents.) The real PC6 is considered to be a real STOL workhorse, whose flight characteristics and excellent STOL capabilities are calibrated to maximum precision in the sim Details, such as the condition lever latch mechanism and a functional throttle gate add to the realism Sliding passenger doors respond to G-forces, so when returning from a parachute drop, while on a steep descent, the doors will roll shut. Over-torquing the engine will cause shaft damage, when in "realistic" mode. This can result in prop loss, cabin smoke, terrifying turbine shaft friction sounds, etc Smoke in engine can be brought under control by killing the "Firewall Air" via cabin lever Tie-downs and chocks actually keep the plane from moving, even in high winds Advanced FMOD-based sound system: High fidelity, multi-track sounds with smooth transitions Individual volume control over different aspects of the sound experience Different sounds for front of plane than for back of plane Panning around the plane in exterior view yields awesome 3D audio effects, including "blade slapping" sound when view is perpendicular to prop Prop pitch produces characteristic aerodynamic aural effects, especially during Beta and Reverse mode. Individual buttons and switches in the cockpit each have their own unique sound. Realistic electrical sounds, based on bus load and other factors (Sounds actually give you clues as to what's happening under the hood) Combustion roar sound typical for turboprop engines -recorded from real PT6 engine Outside wind intensity is affected by slip and AoA. (The more the surface area of the fuselage is hit by oncoming wind, the louder the sounds) Support forum for the Pilatus PC-6 XP12 Images are courtesy of Thranda Design he Thranda Design DHC-2 Beaver is now available from the X-Plane.OrgStore for X-Plane 12 only. _________________ Yes! the Pilatus PC-6 Turbo Porter - DGS Series XP12 by Thranda Design is NOW! available from the X-Plane.Org Store here : Pilatus PC-6 Turbo Porter - DGS Series XP12 Price is US$44.95 Currently US$44.95 or $10.00(22%) Off Requirements X-Plane 12 (not for XP11) Windows, Mac or Linux 8 GB VRAM Recommended Download Size: 4.1 GB Current version 1.0 (May 4th 2024) ________________ News by Stephen Dutton 5th May 2024 Copyright©2024: X-Plane Reviews Disclaimer. All images and text in this review are the work and property of X-PlaneReviews, no sharing or copy of the content is allowed without consent from the author as per copyright conditions) All Right Reserved.
-
-
Latest Reviews
-
-
Featured Reviews
-
-
X-Plane News!
-
-
Most Popular Reviews
-
-
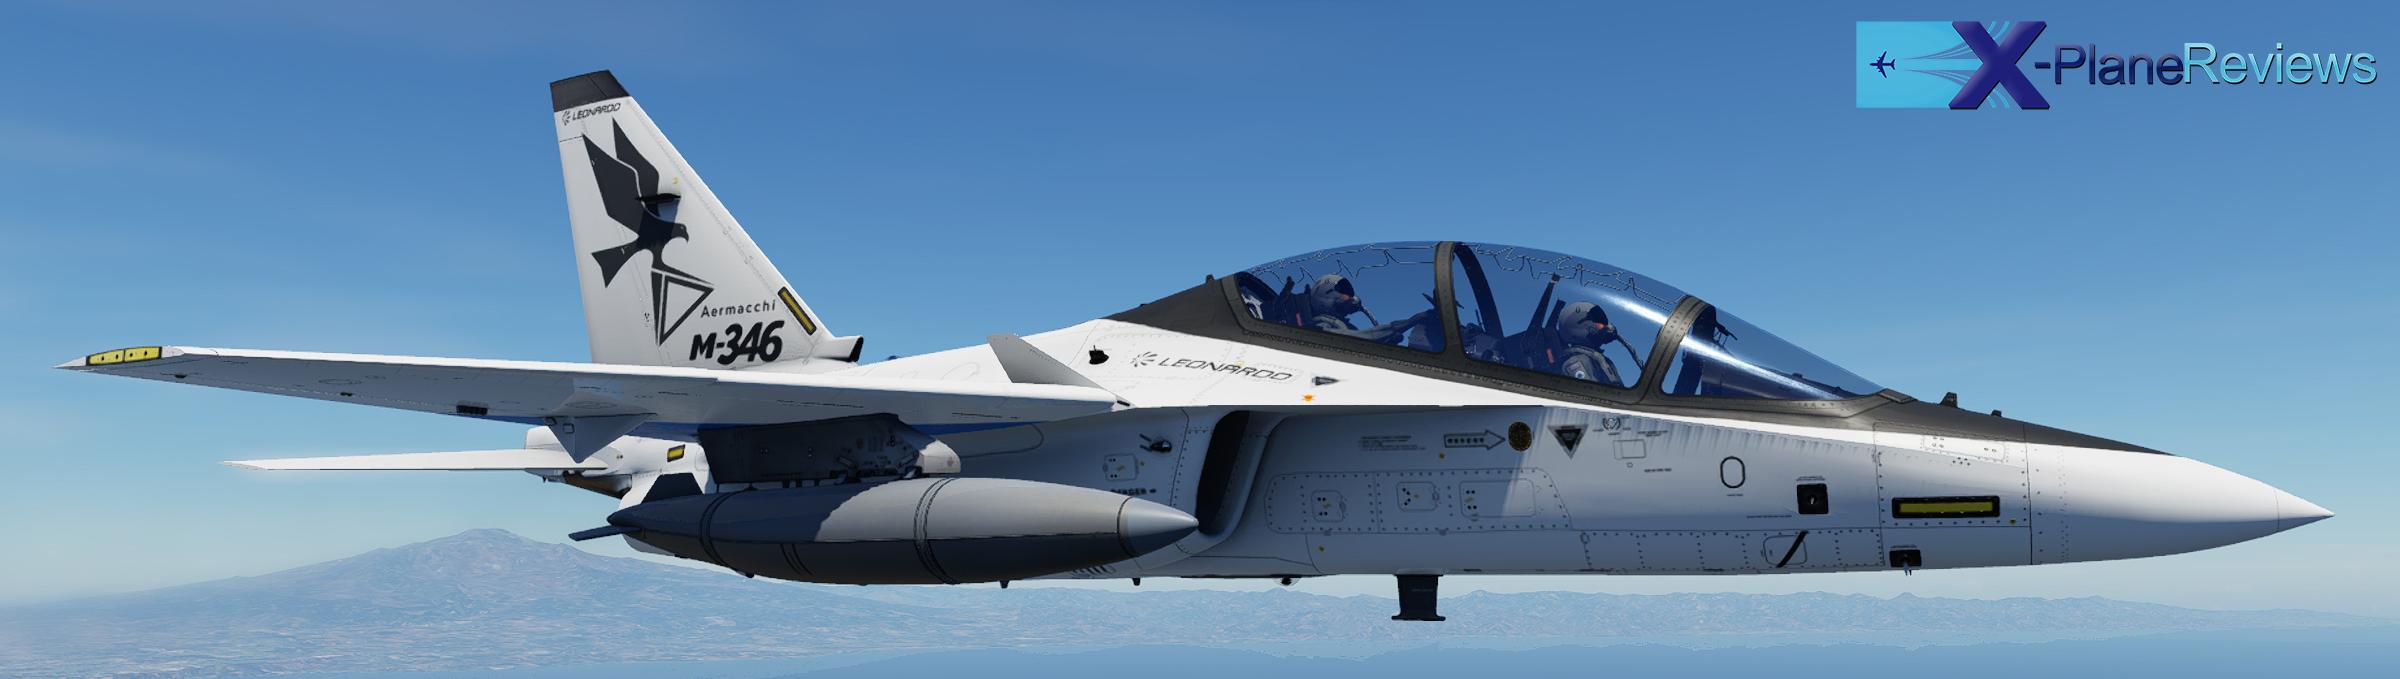
-
X-Plane Screenshots - Post Yours Here !
-

Guest jolo_lol
Is that X-Enviro?
-
Goodbye, we will miss you.
loved your amazing reviews
also some lovely photos- I see you finally bought the 767
-
As a goodbye from this incredible website, I am leaving my best X-Plane photos. They aren't that good but I believe they are cool.
Goodbye!

-
Who's Online 0 Members, 0 Anonymous, 42 Guests (See full list)
- There are no registered users currently online
-
Member Statistics
4025
Total Members1157
Most Online