BernardoCasa
-
Posts
33 -
Joined
-
Last visited
-
Days Won
7
1 Follower

Recent Profile Visitors
6555 profile views


BernardoCasa's Achievements
Advanced Member (3/3)
20
Reputation
-
 hi_nihaozaoan reacted to a post in a topic:
My best ones.
hi_nihaozaoan reacted to a post in a topic:
My best ones.
-
BernardoCasa reacted to a post in a topic:
Behind the Screen : Year in Review 2020
-
BernardoCasa reacted to a post in a topic:
My best ones.
-
CX_Fan reacted to a post in a topic:
My best ones.
-
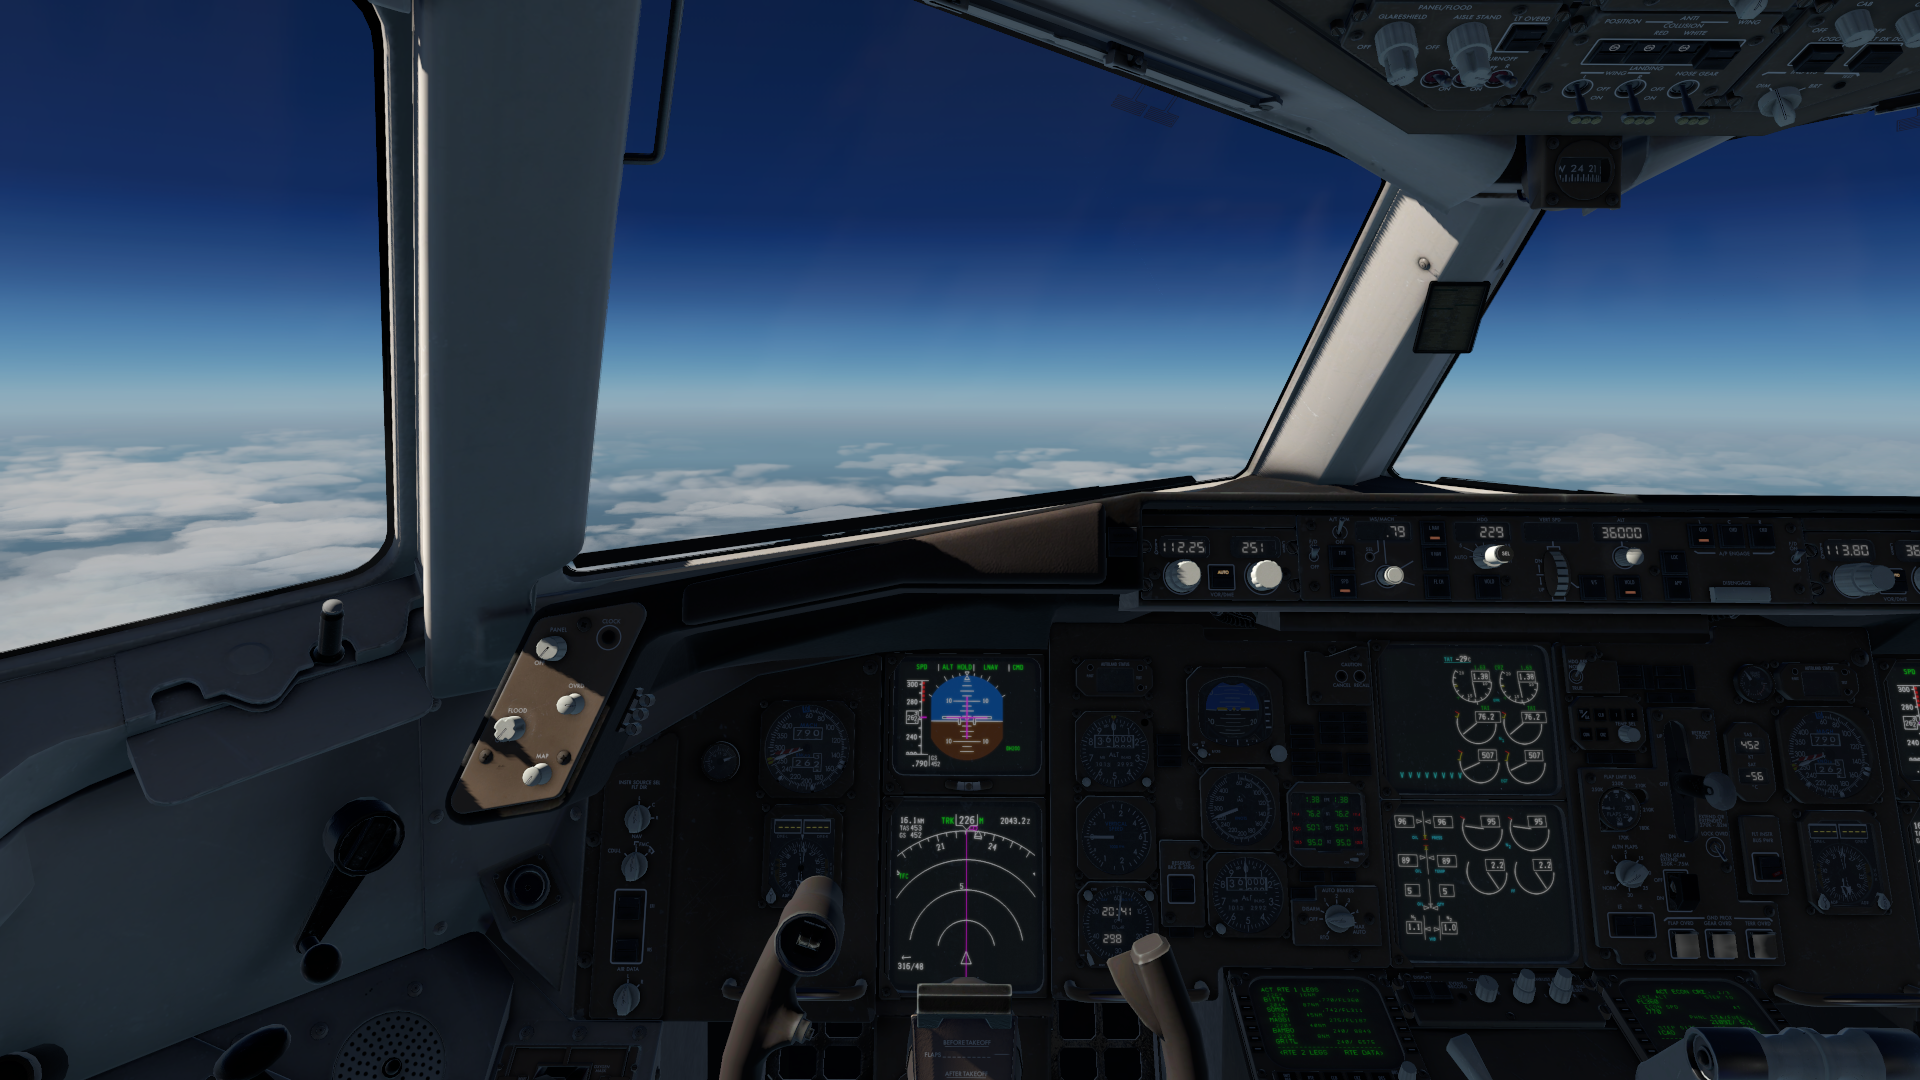
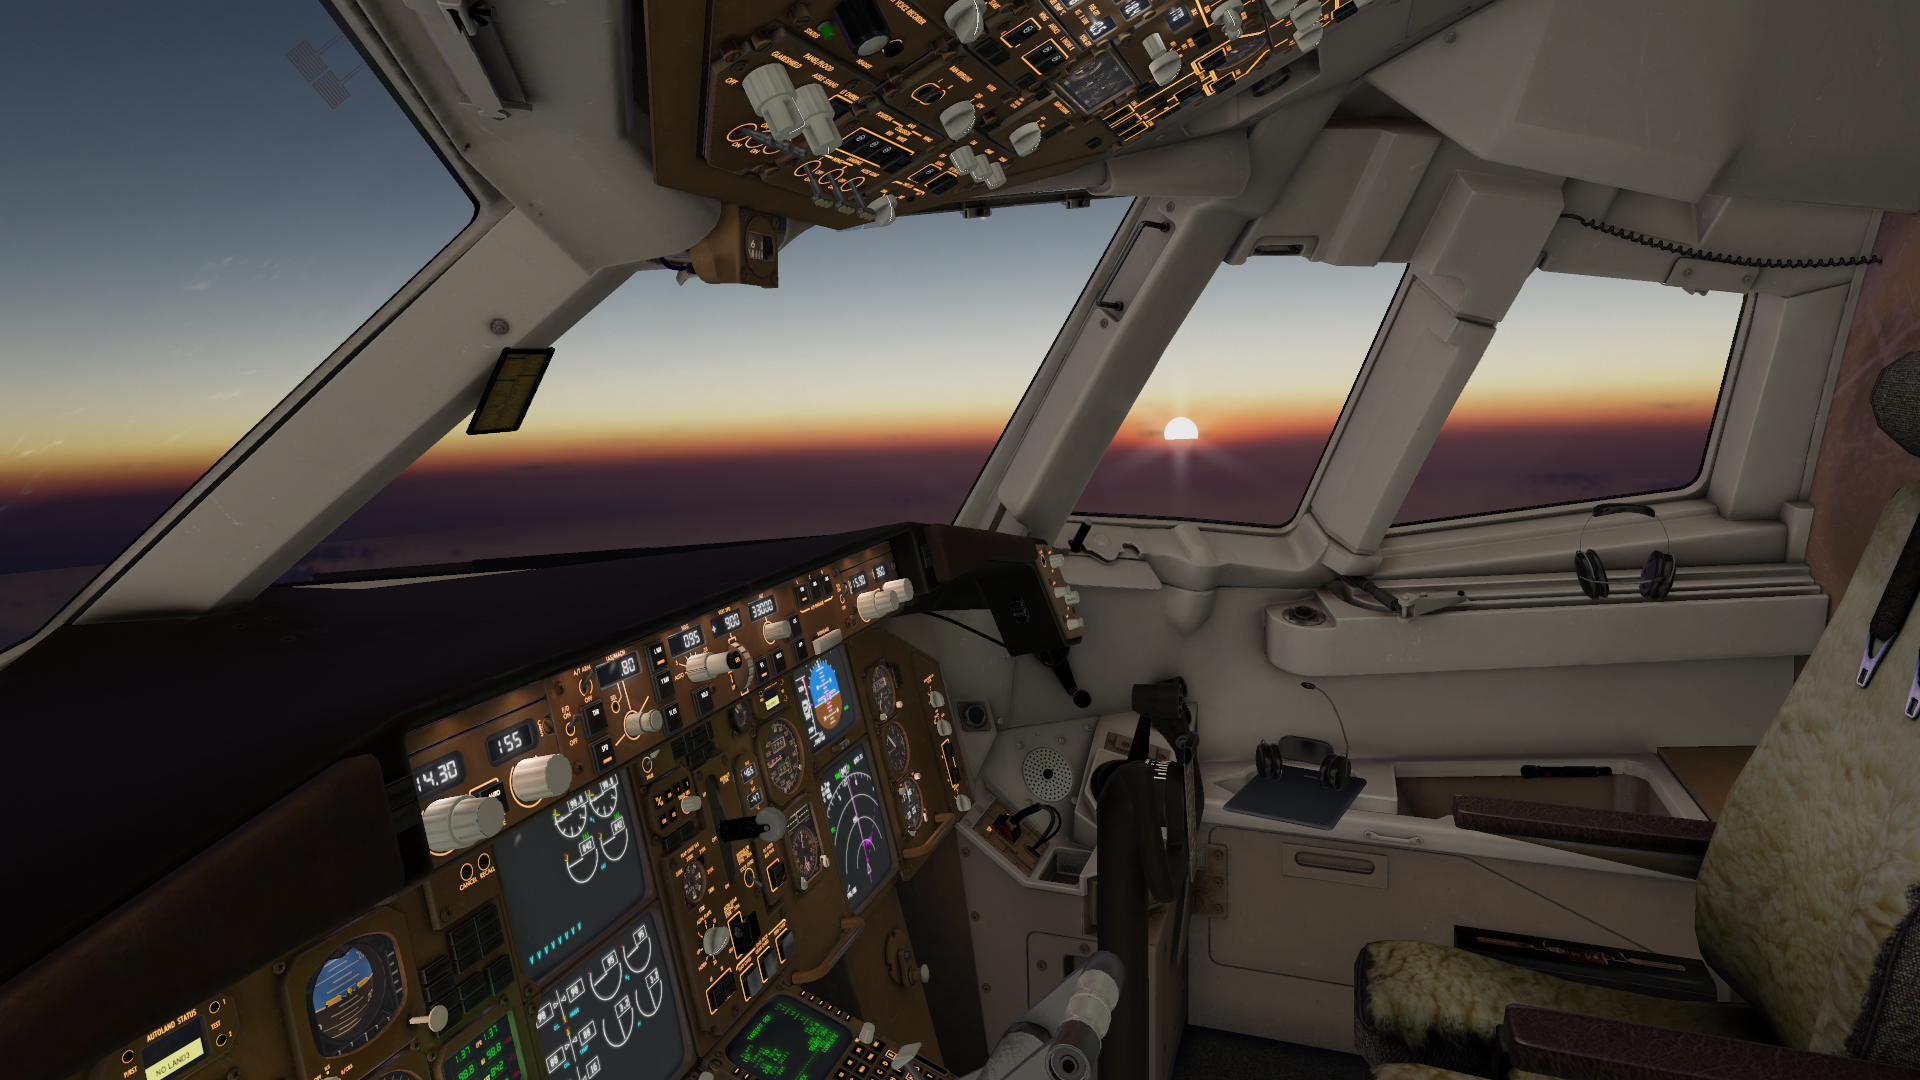
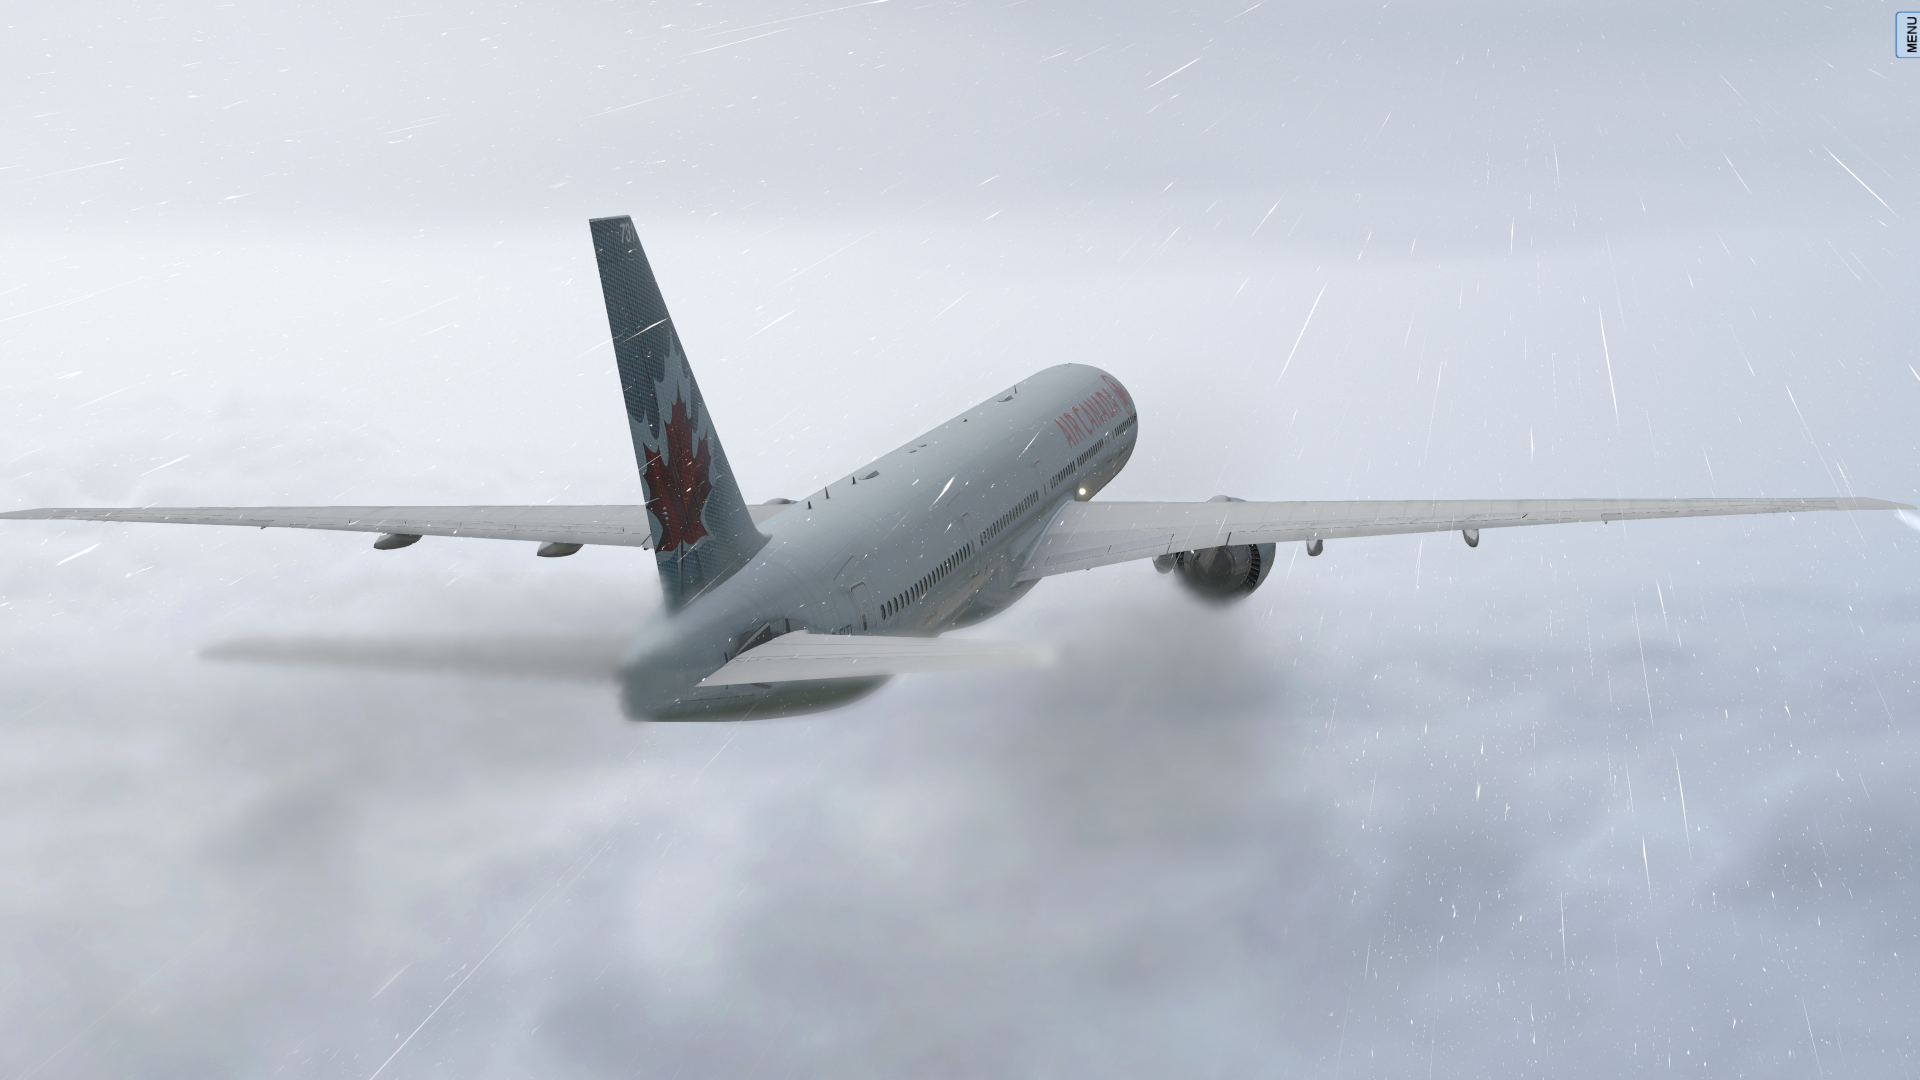
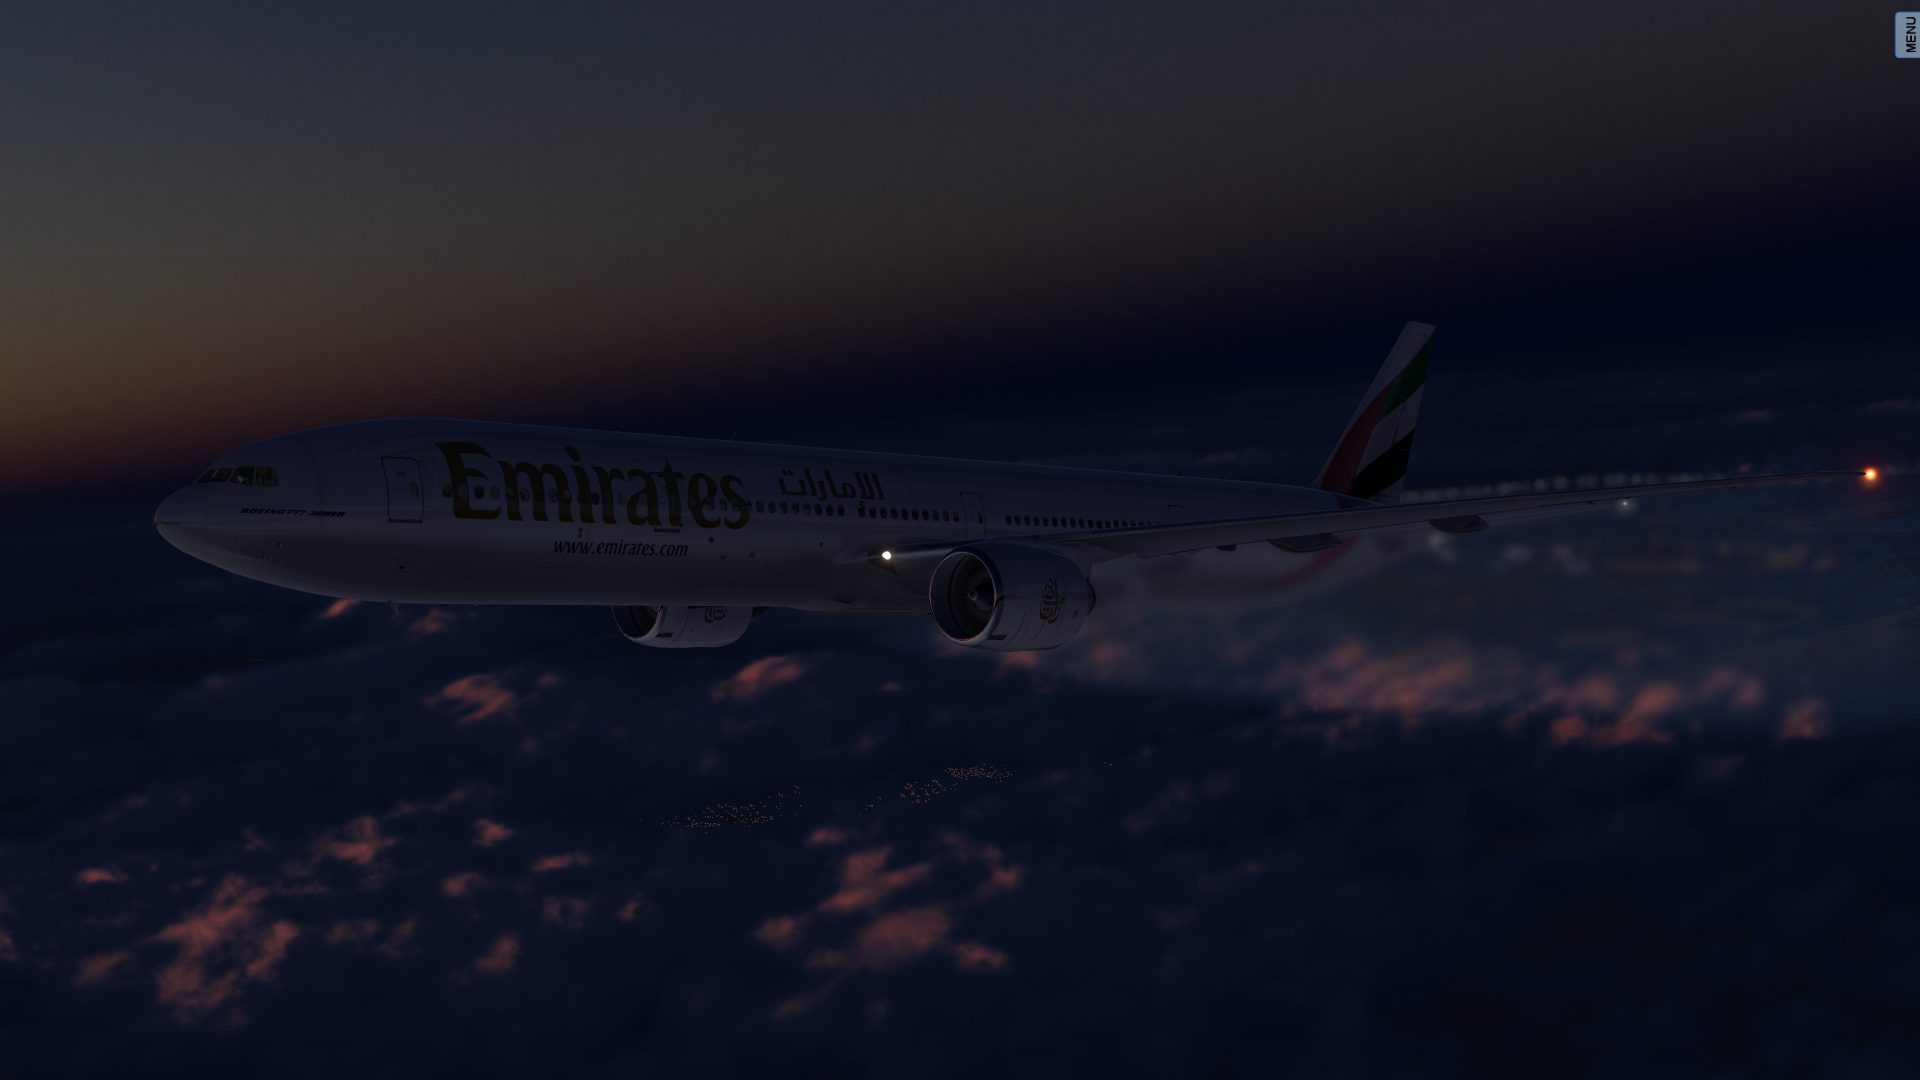
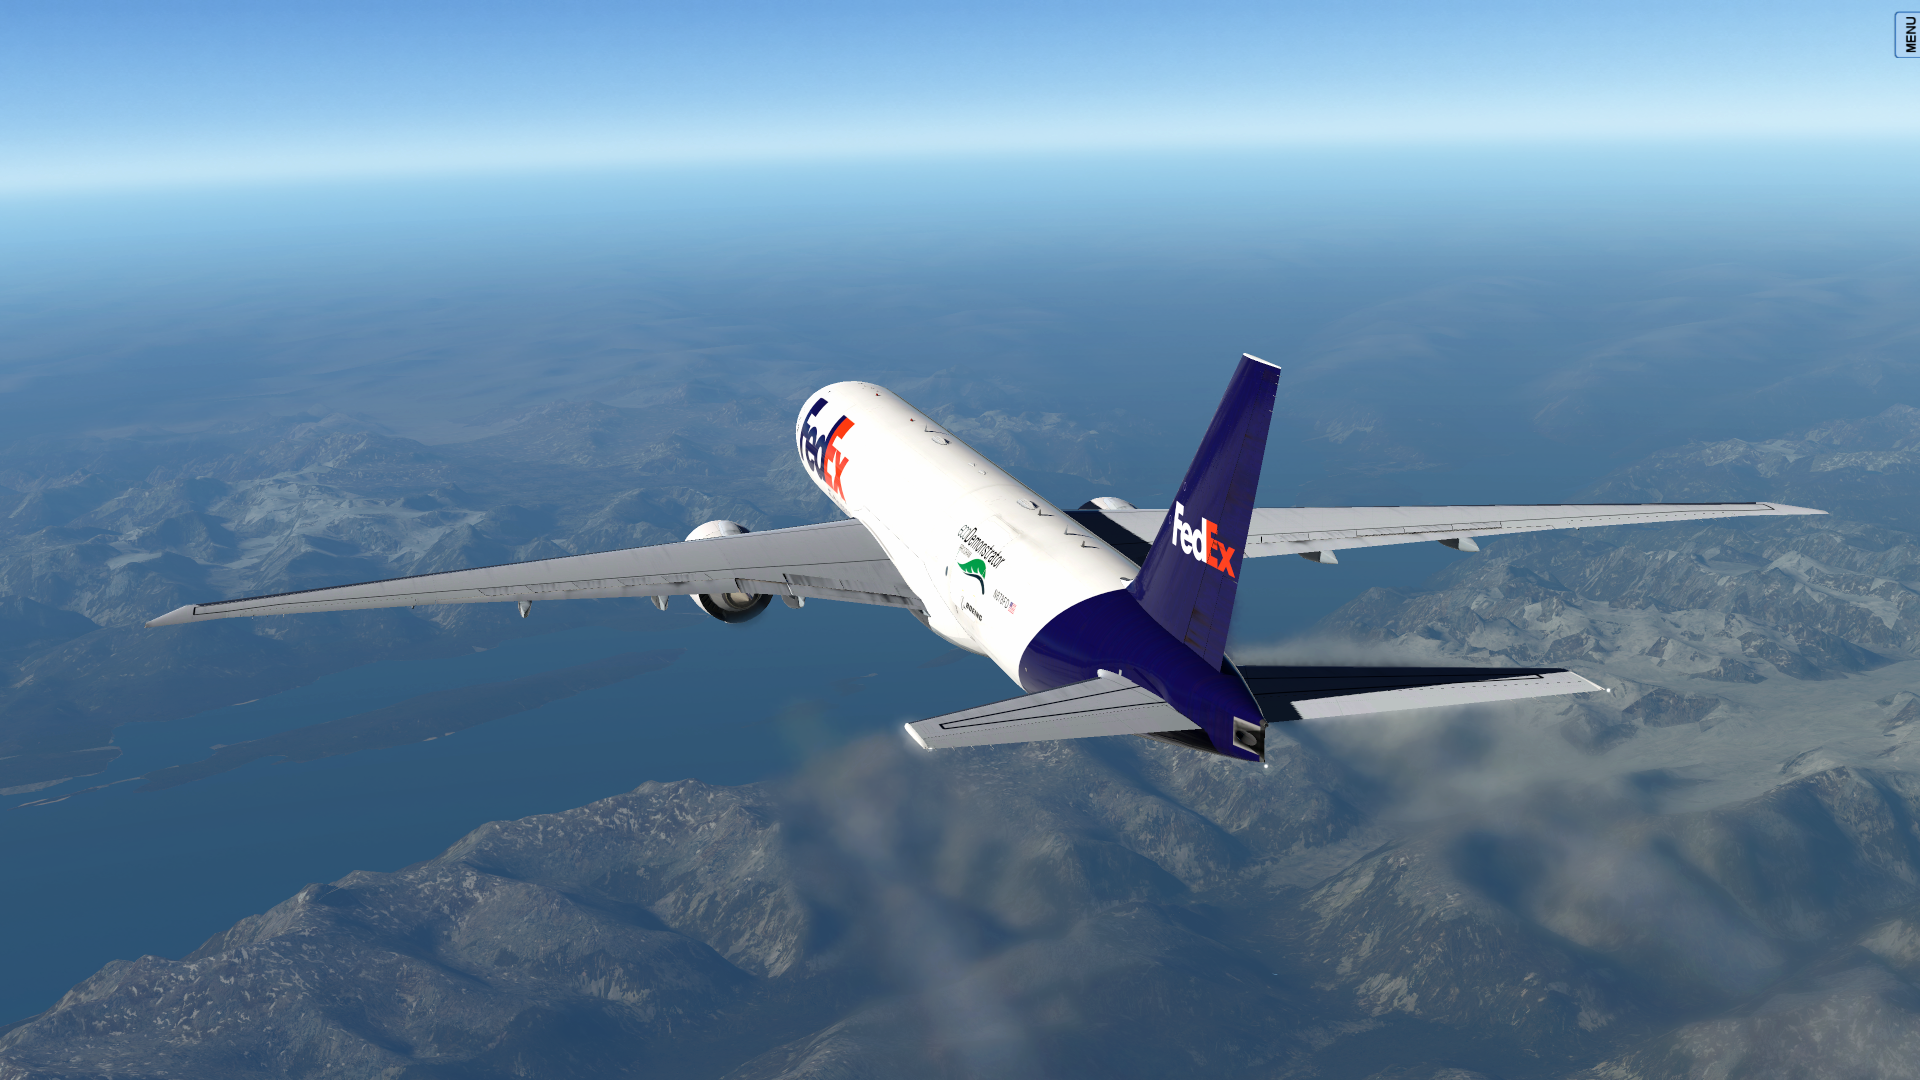
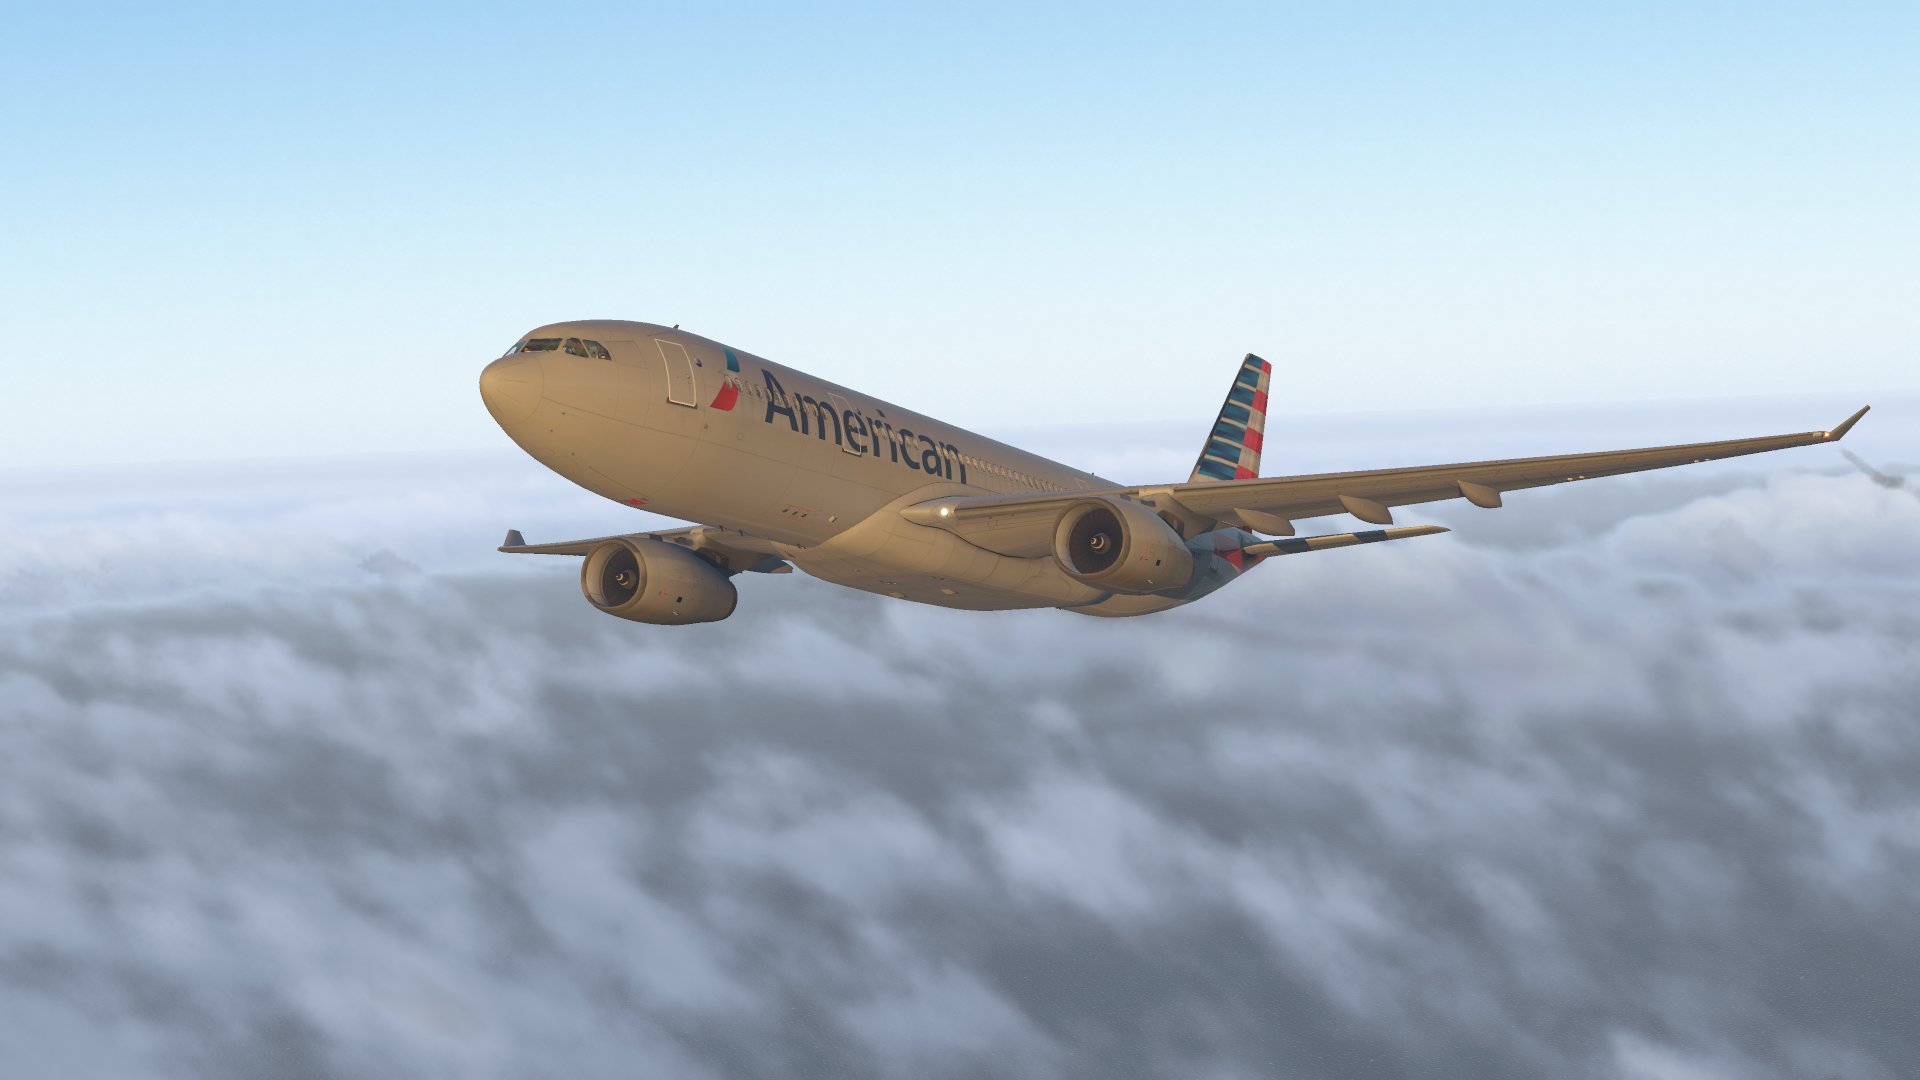
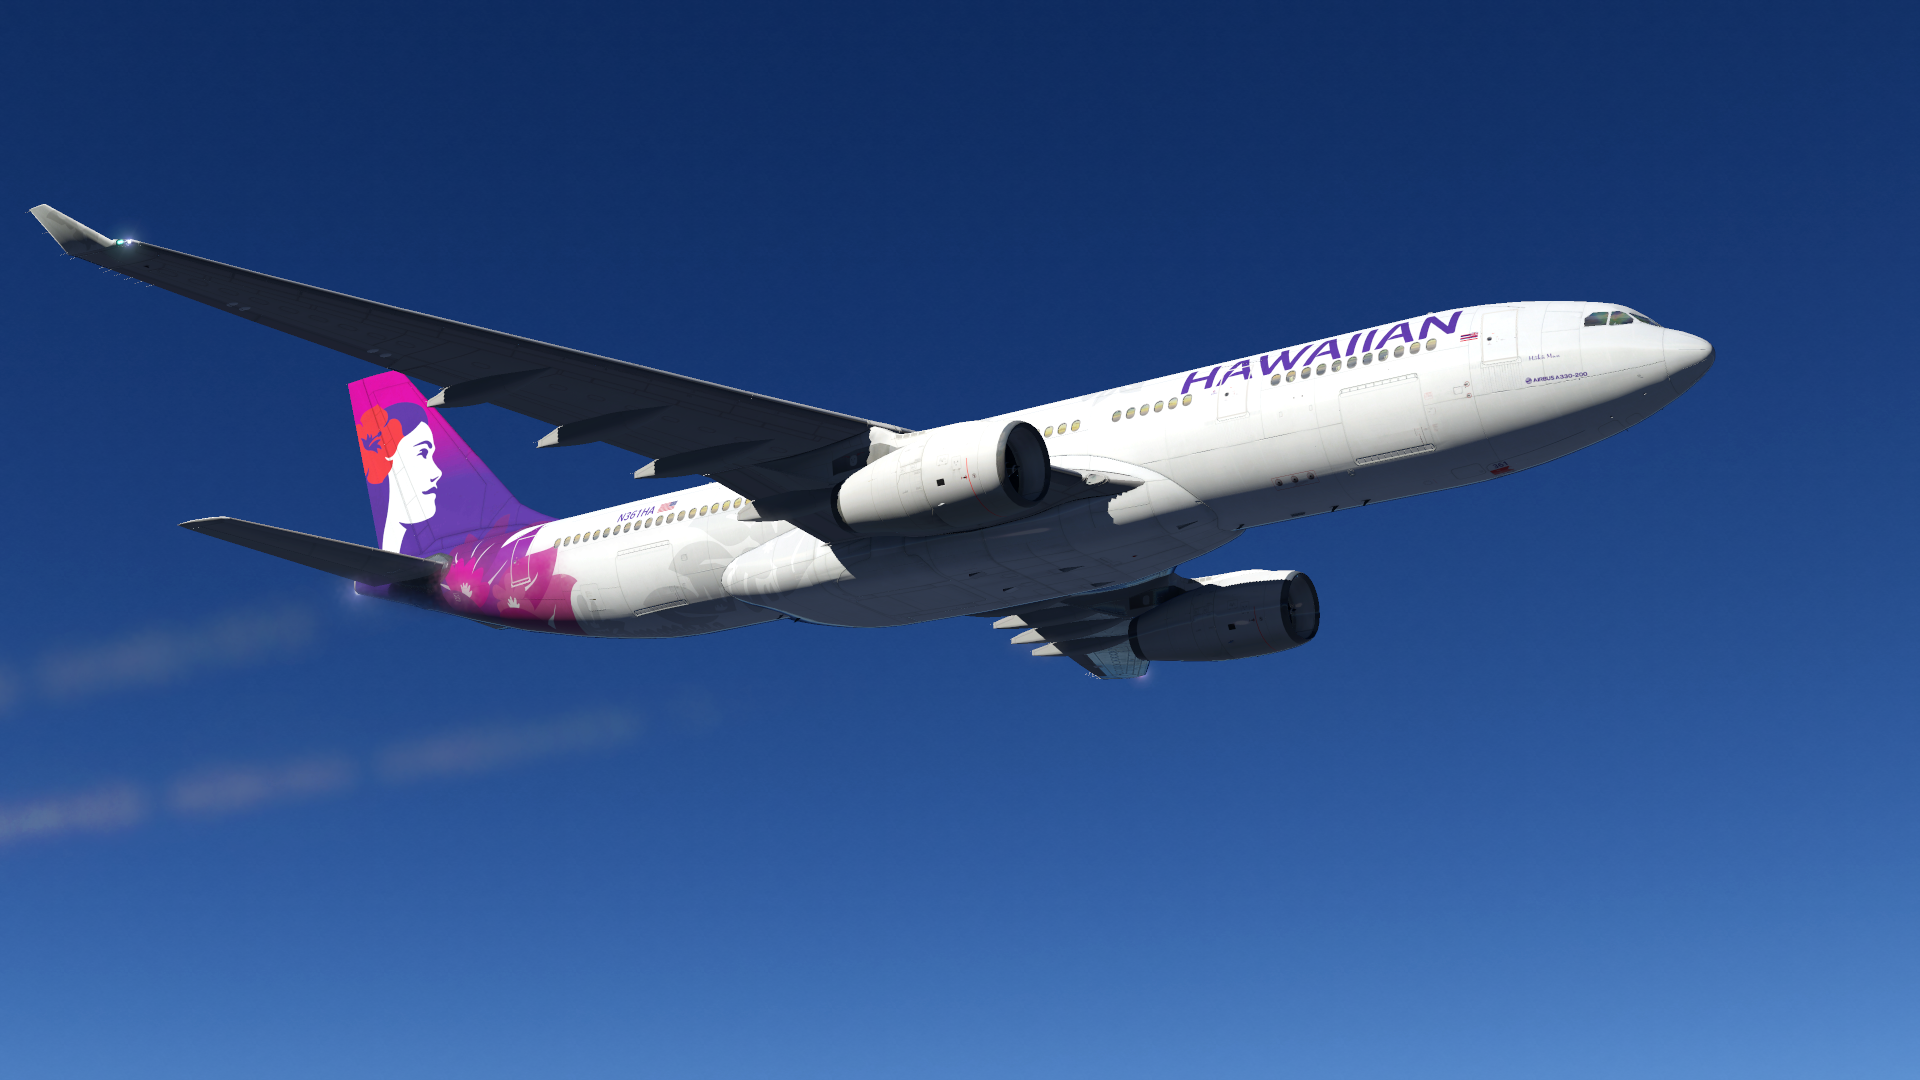
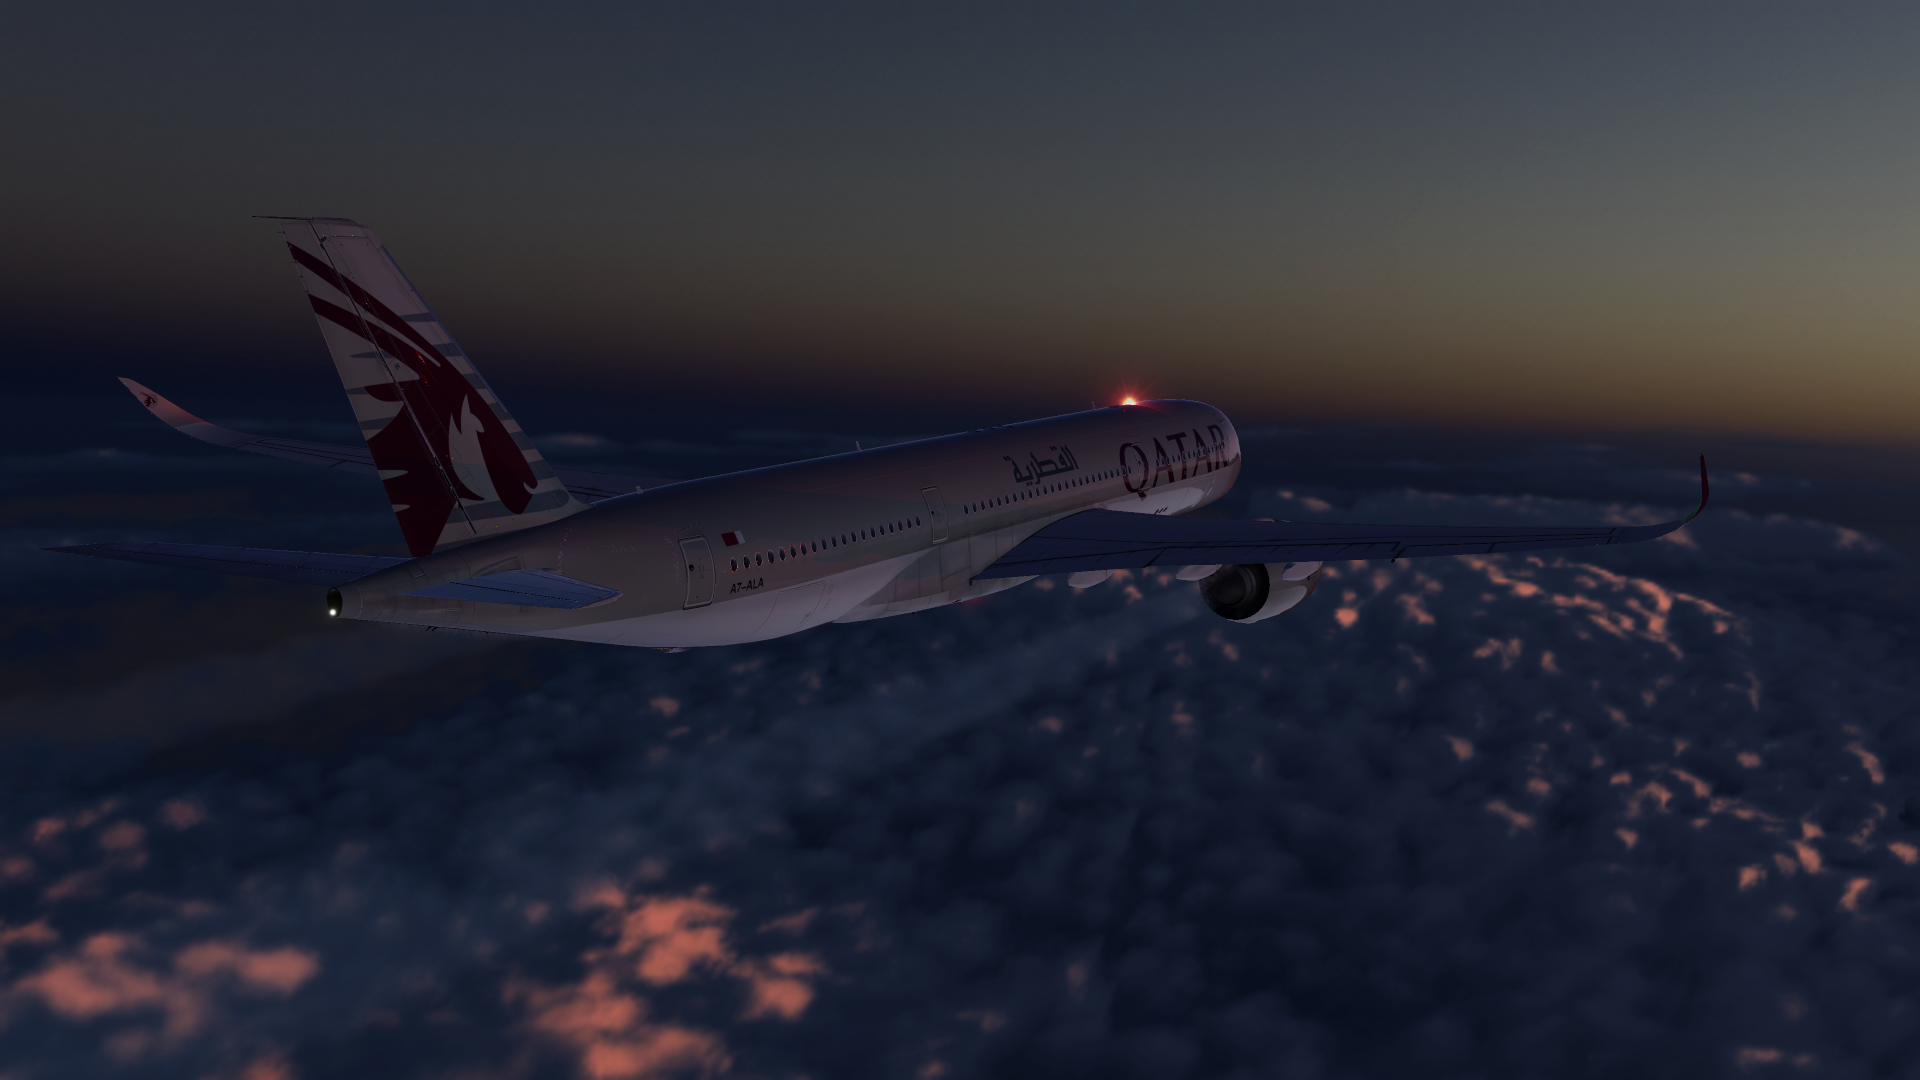
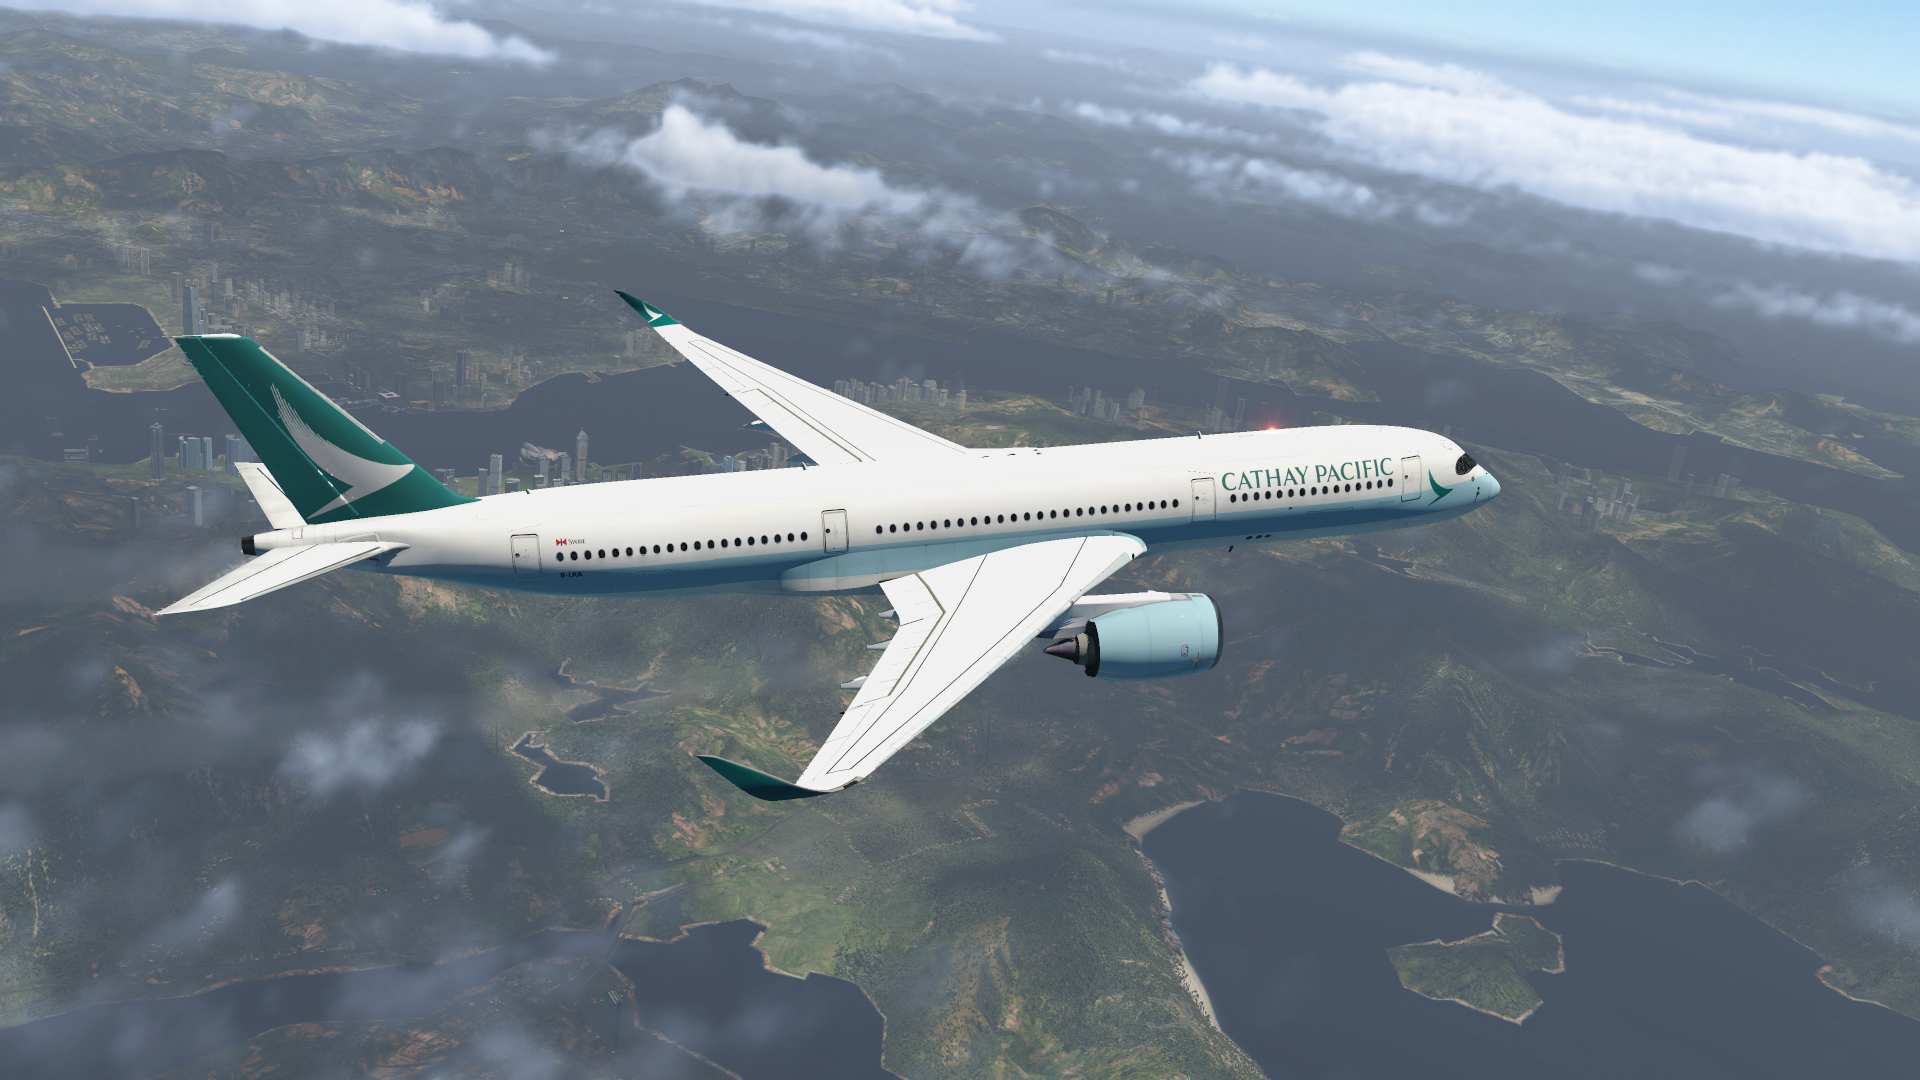
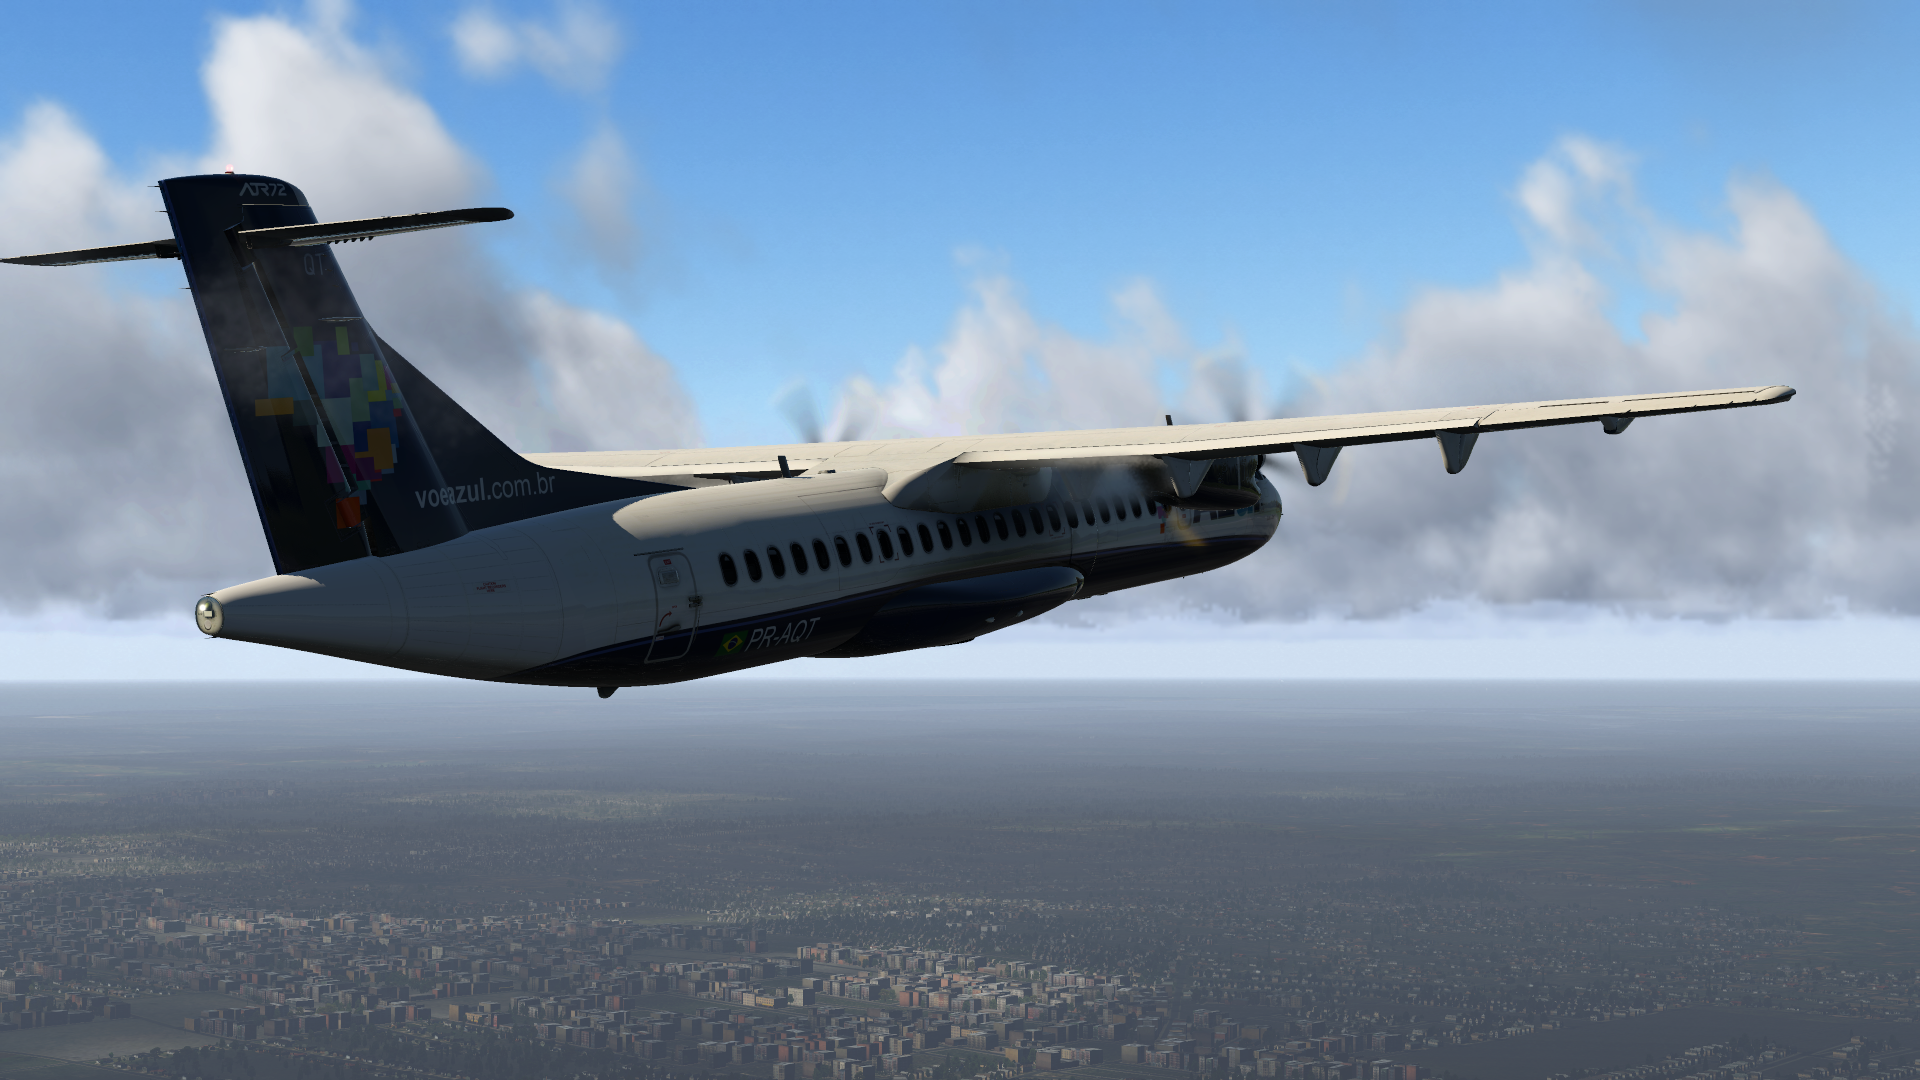
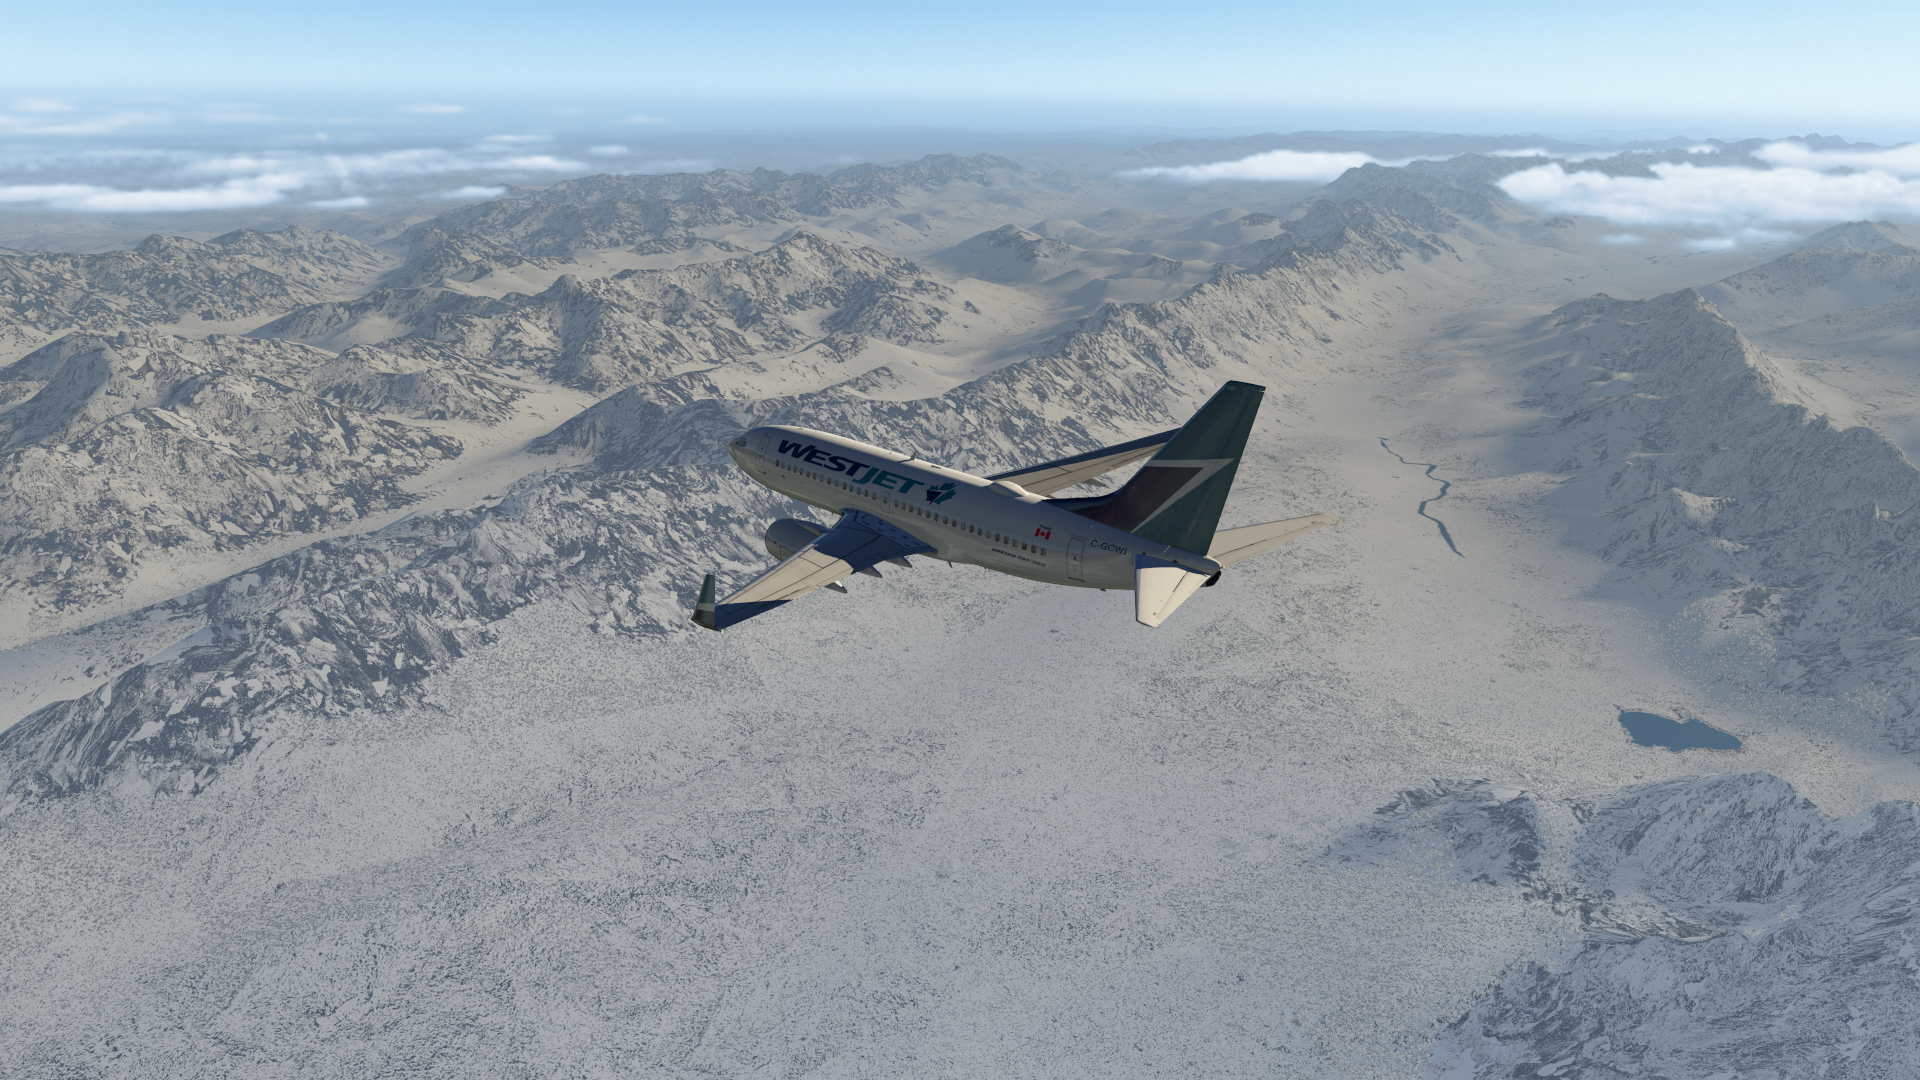
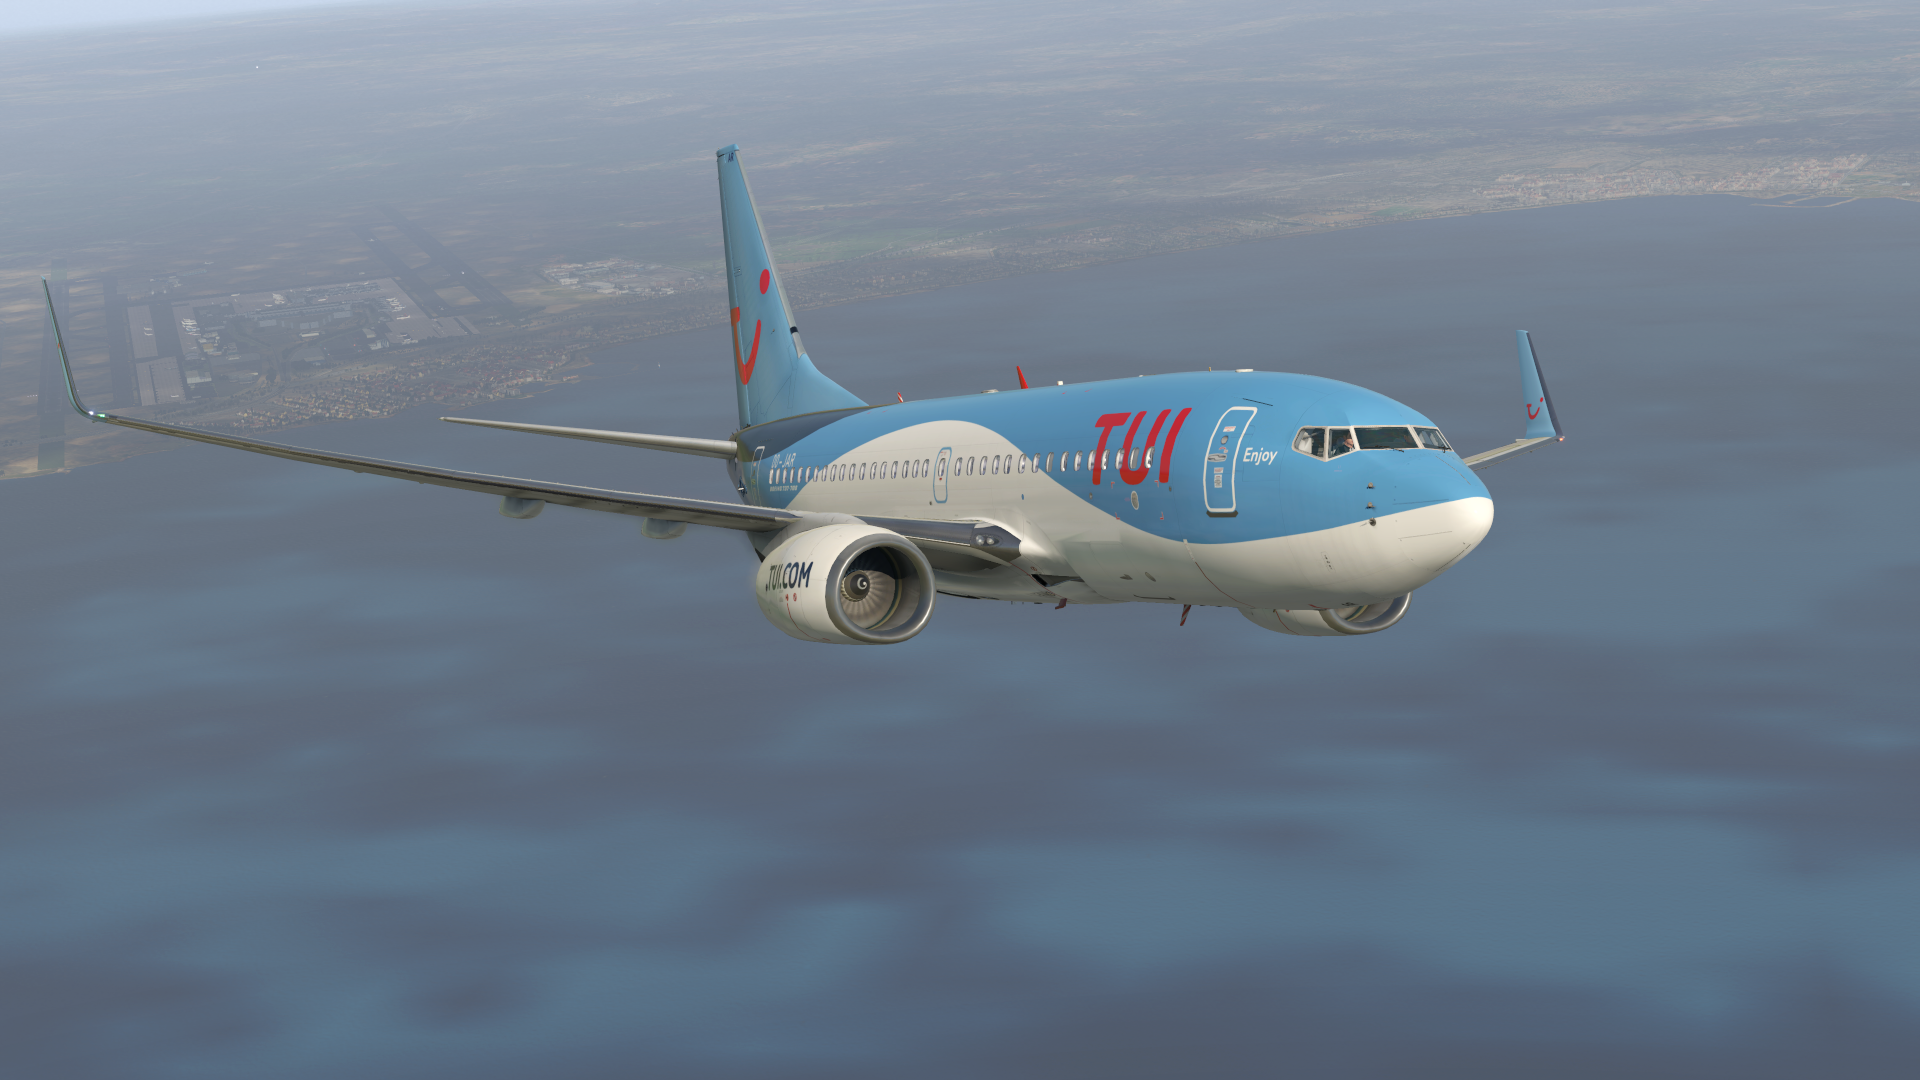
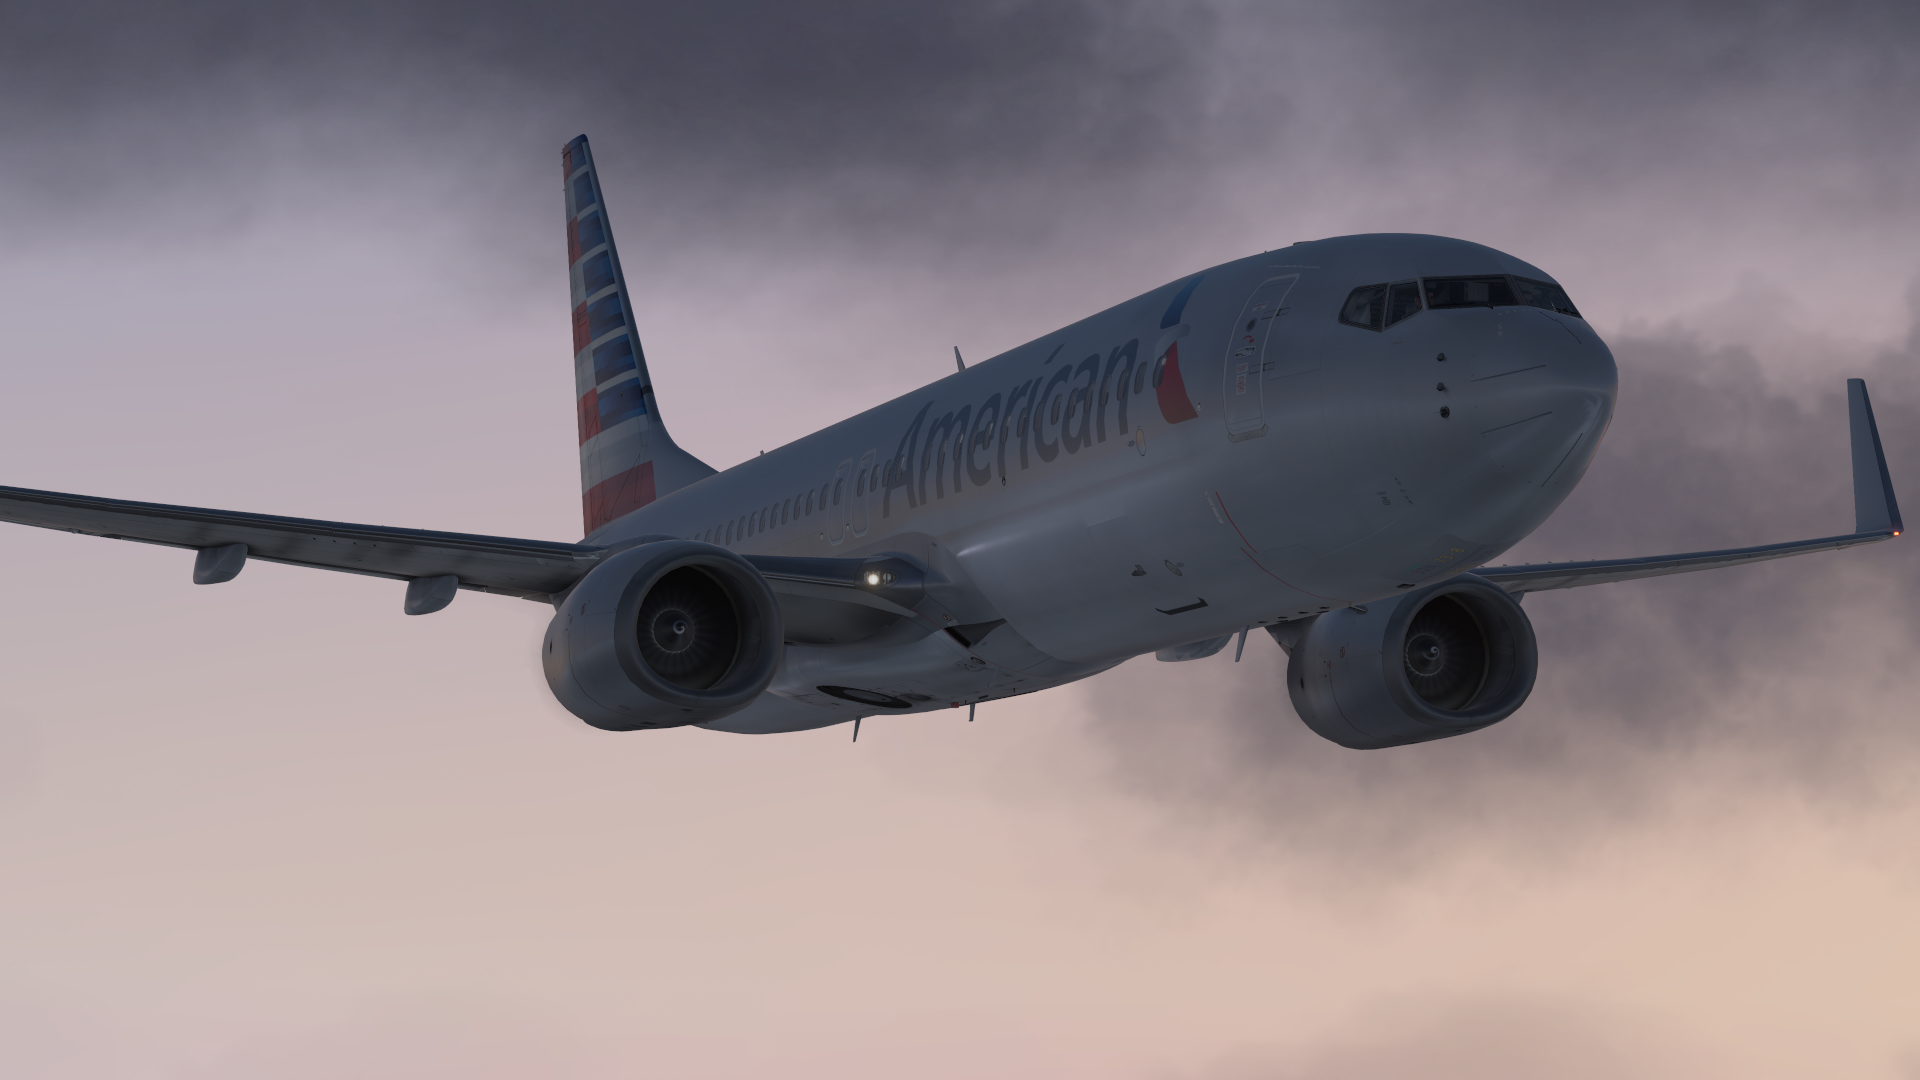
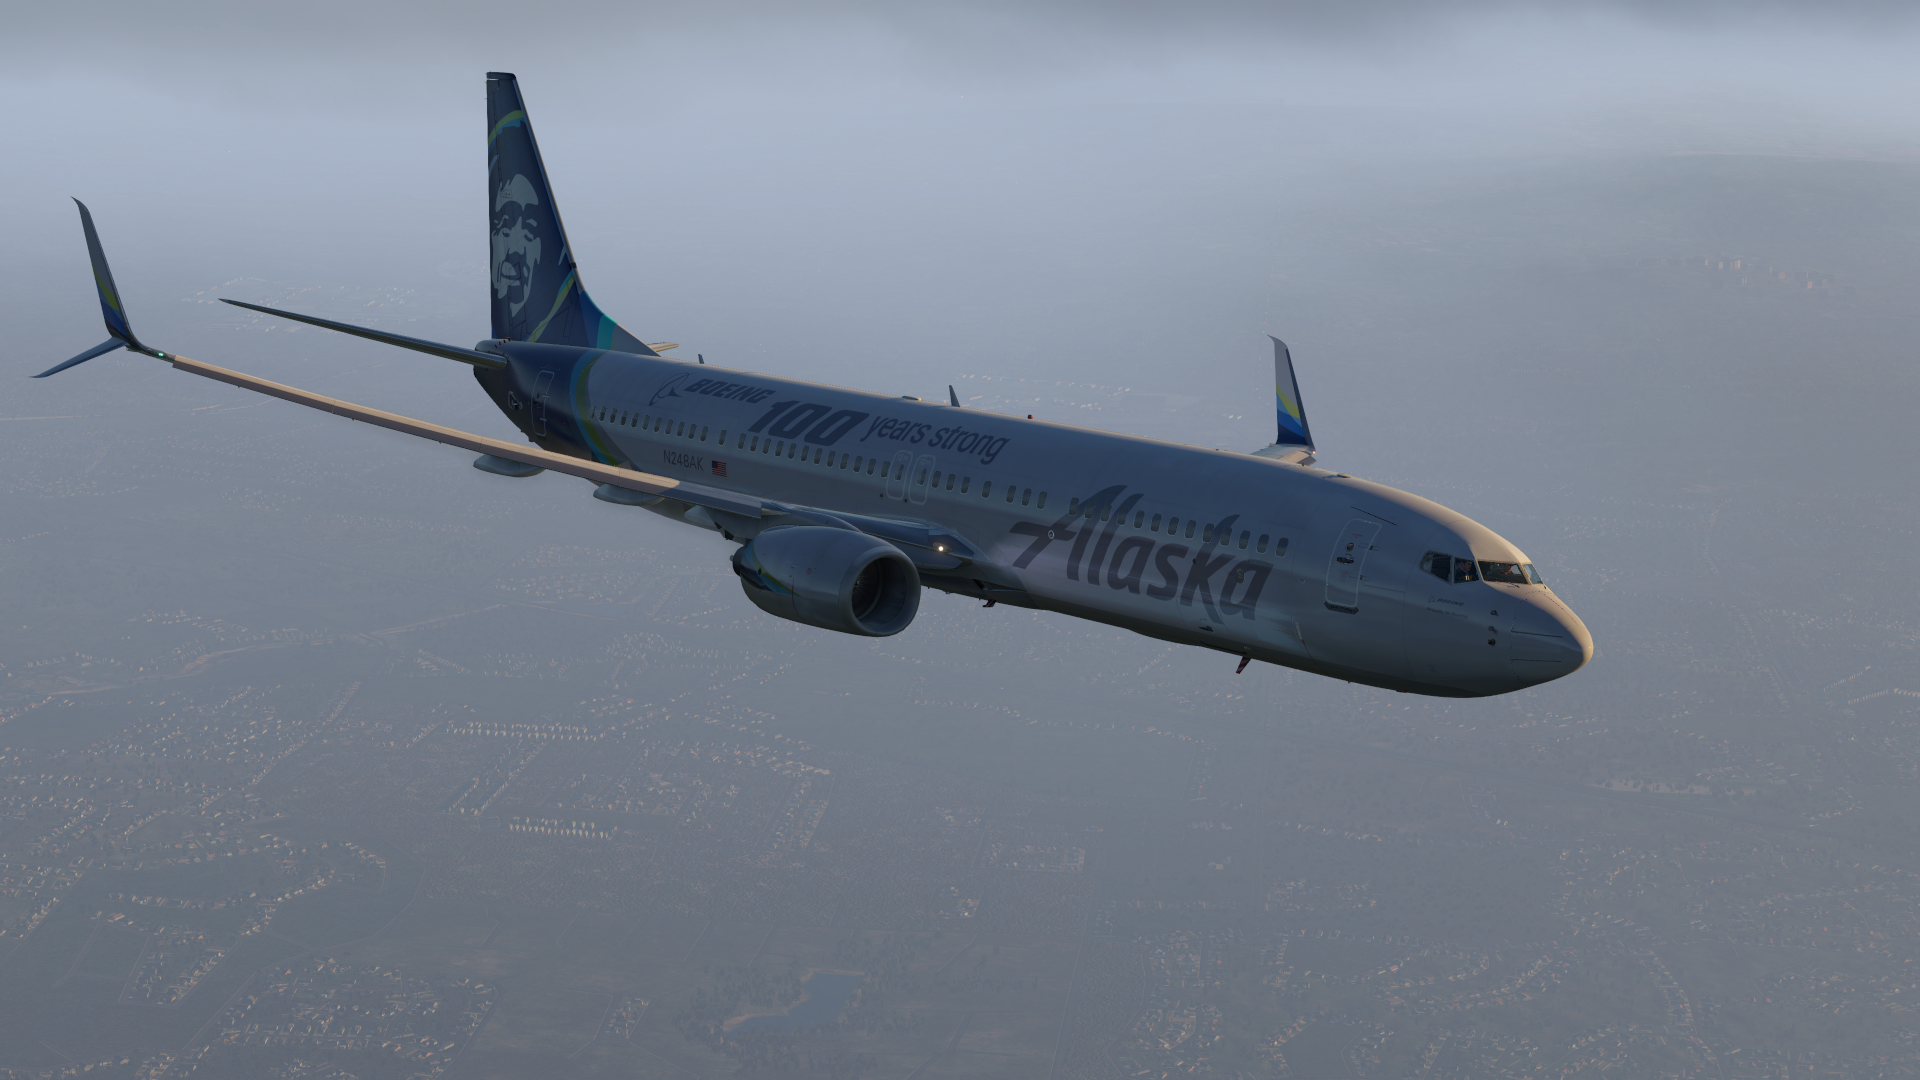
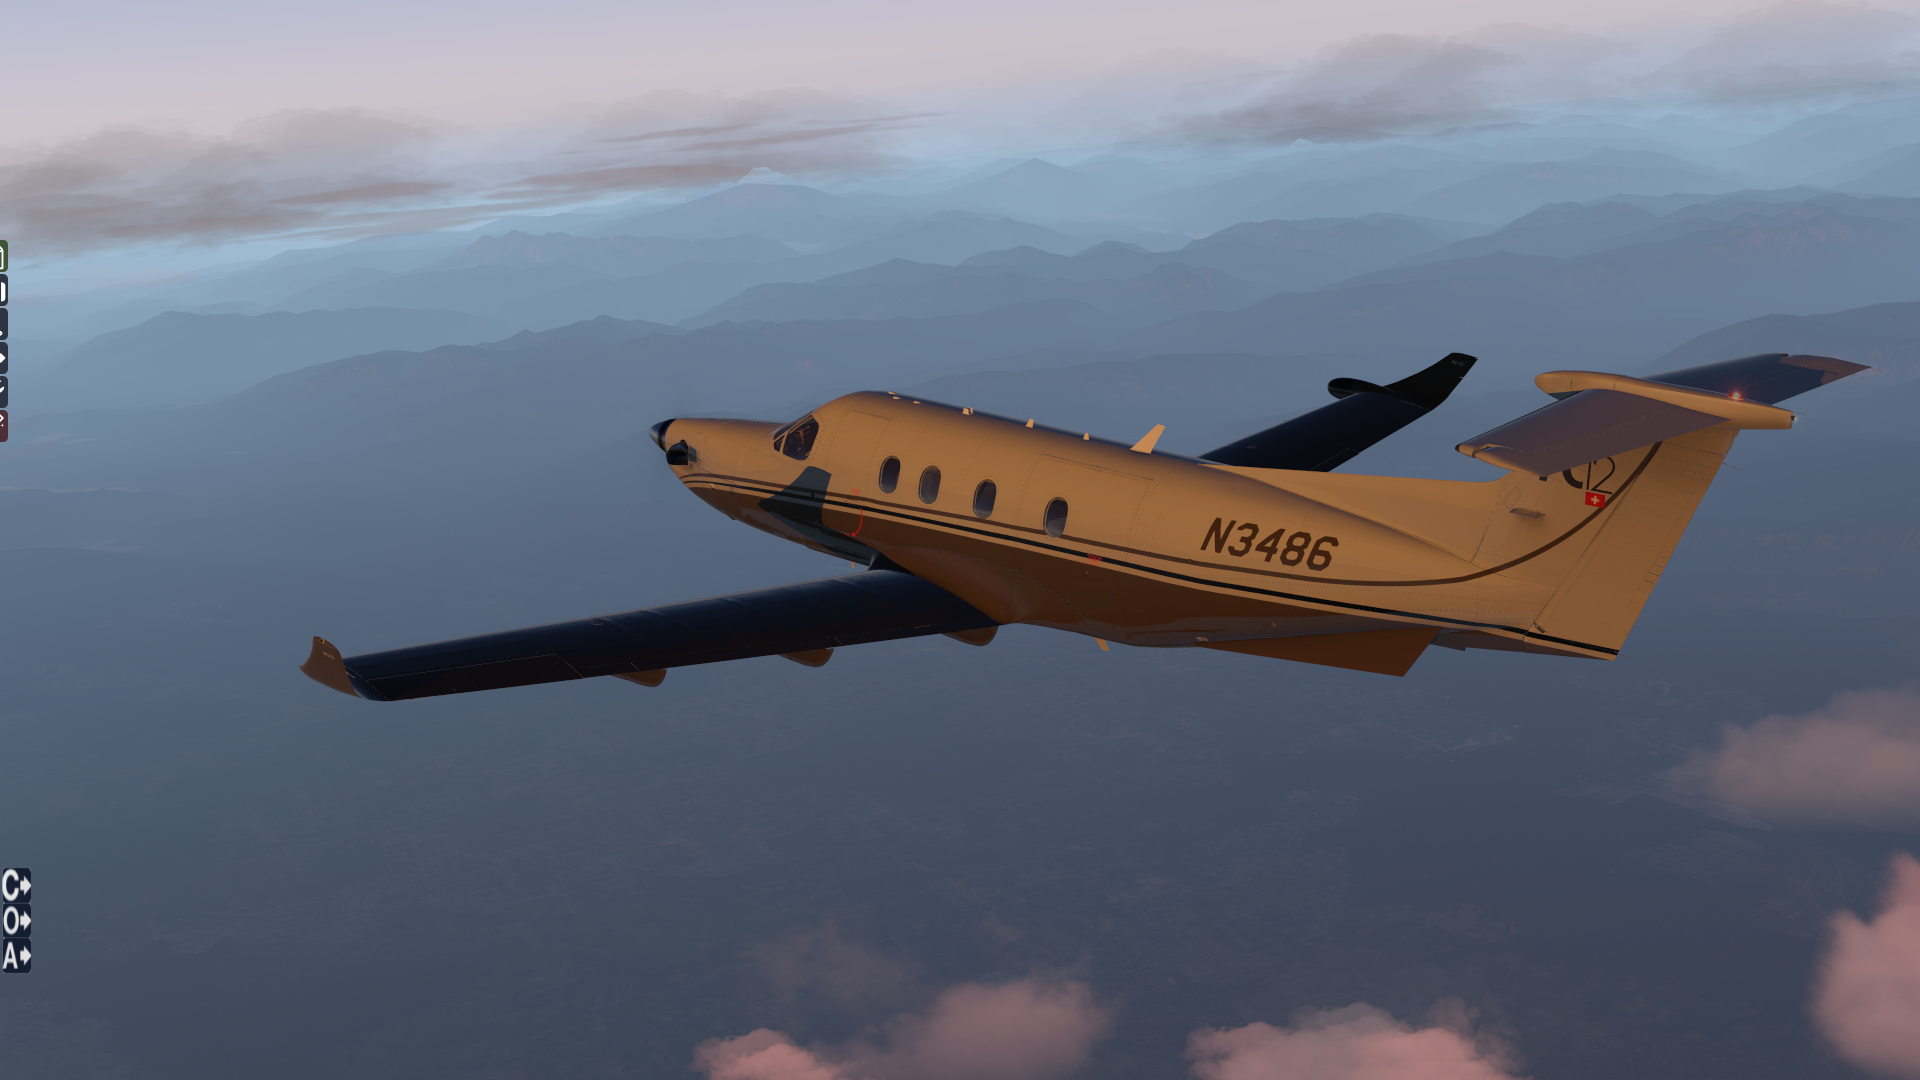
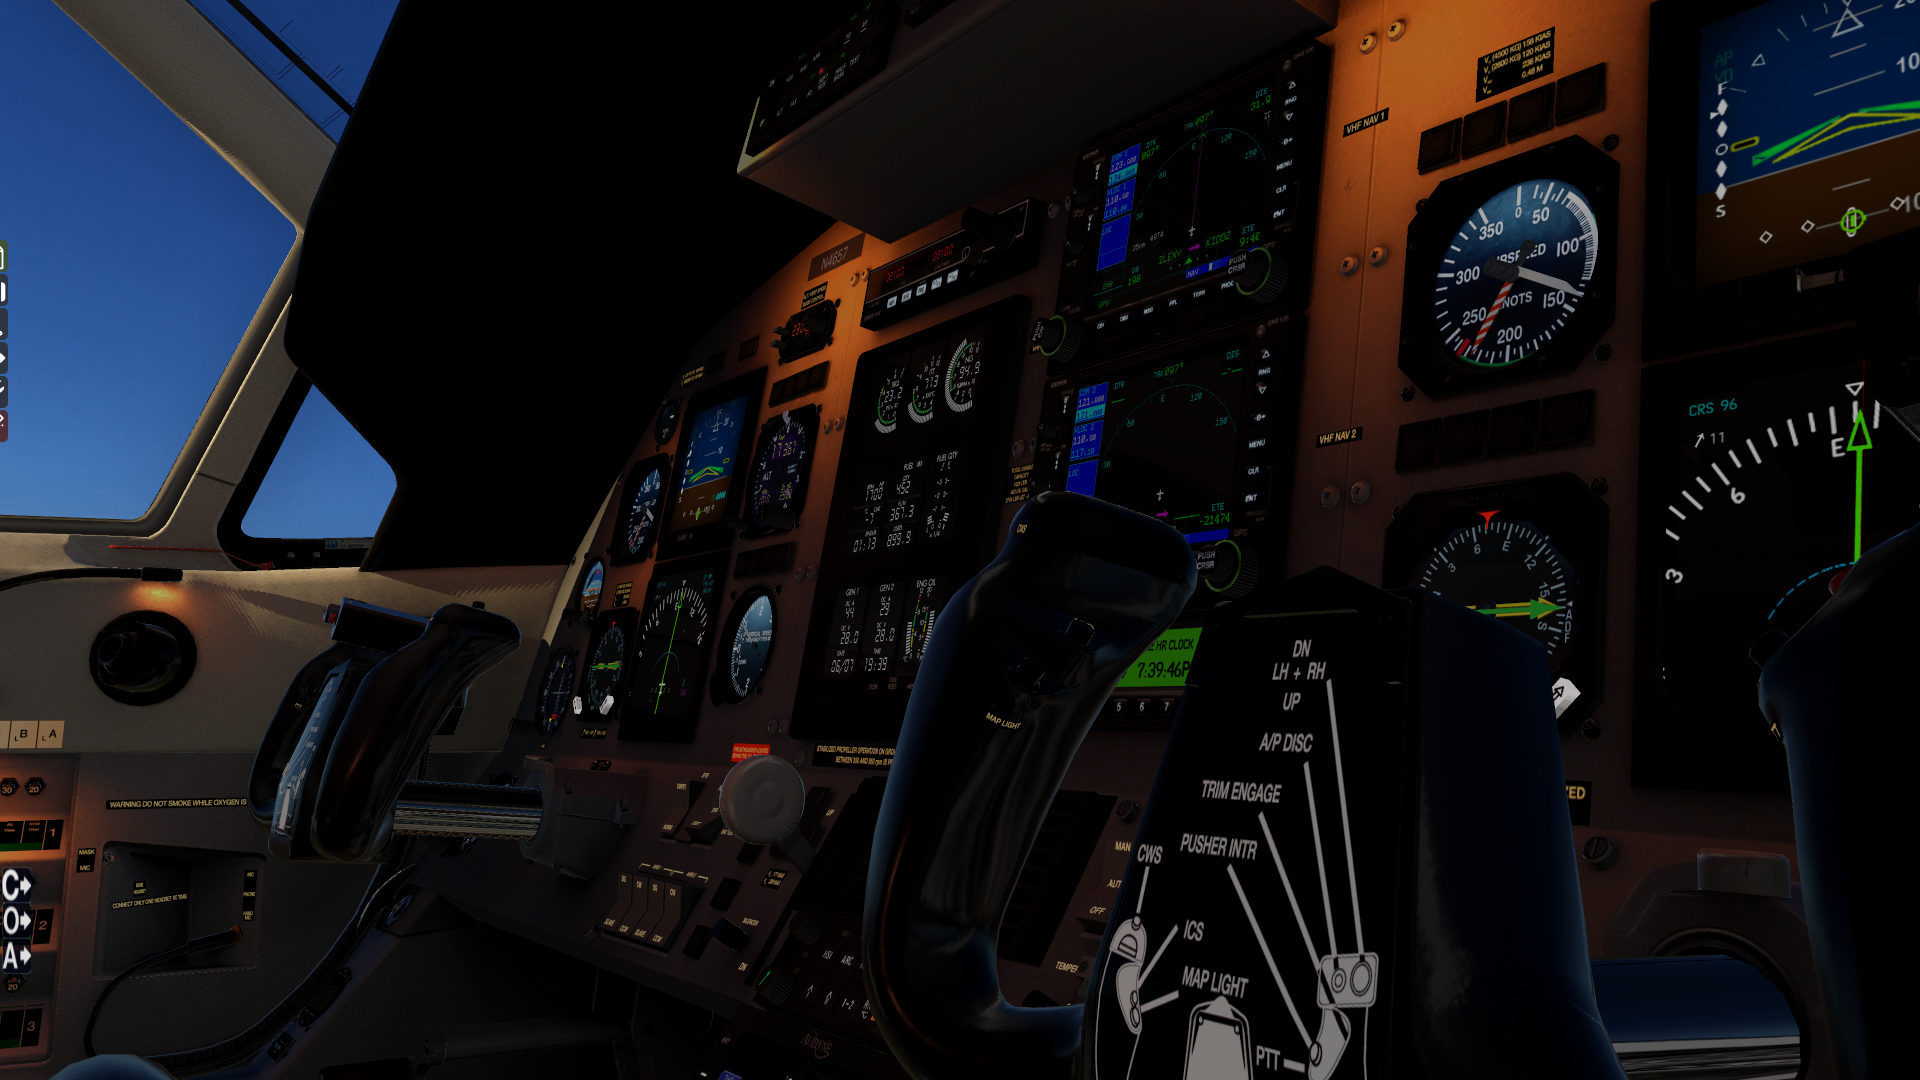
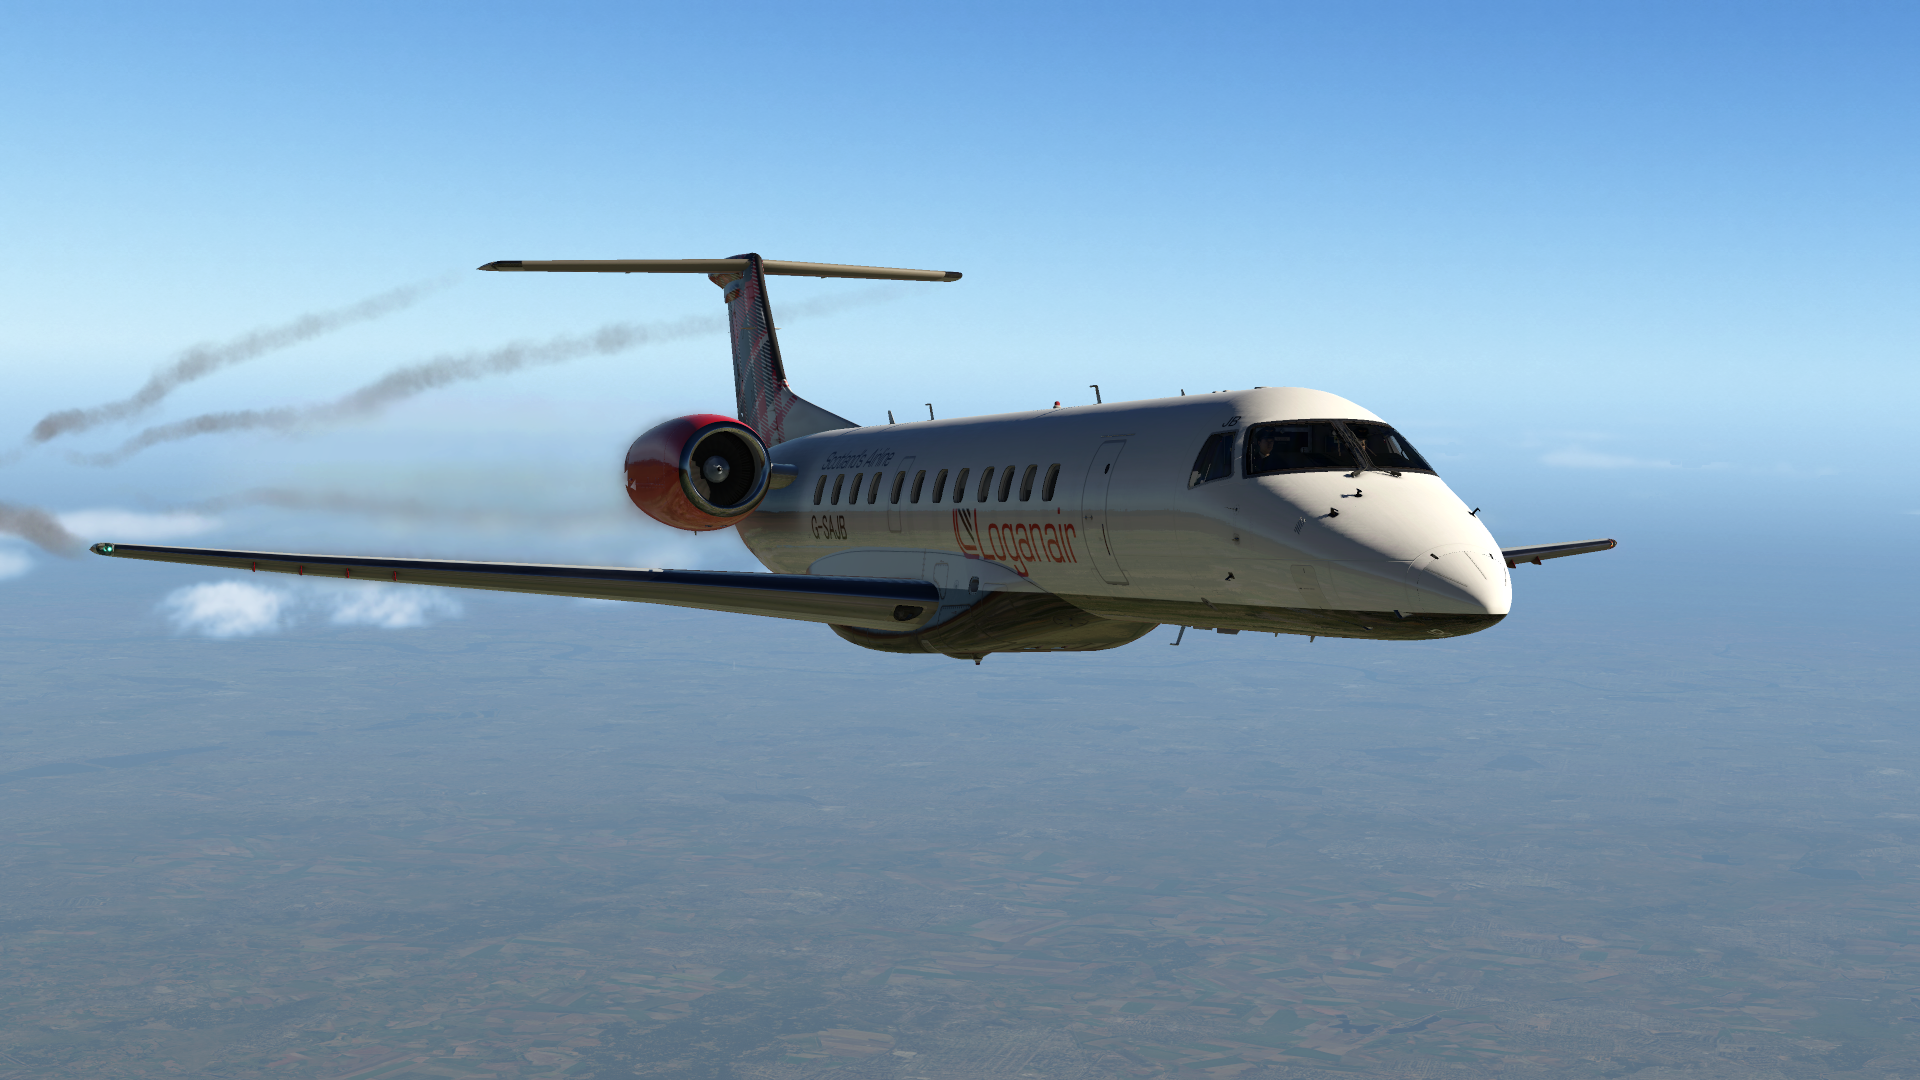
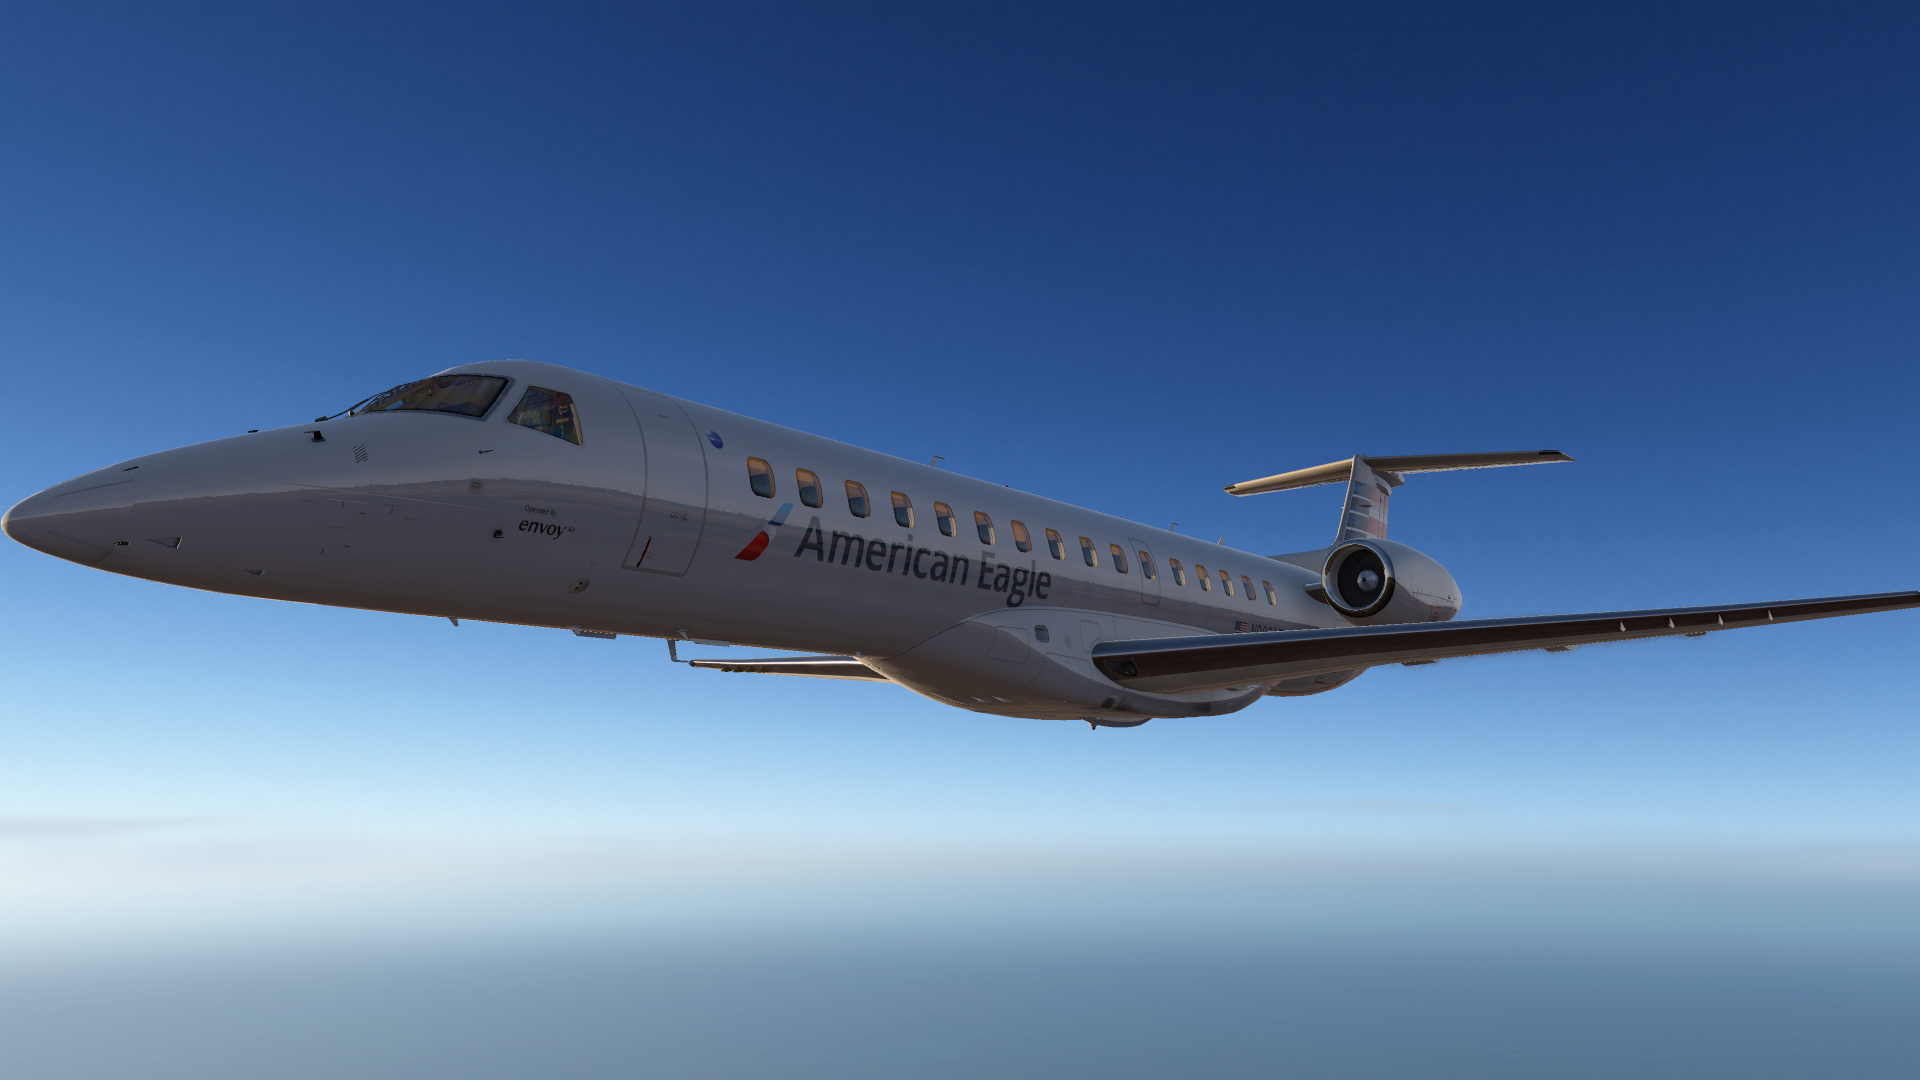
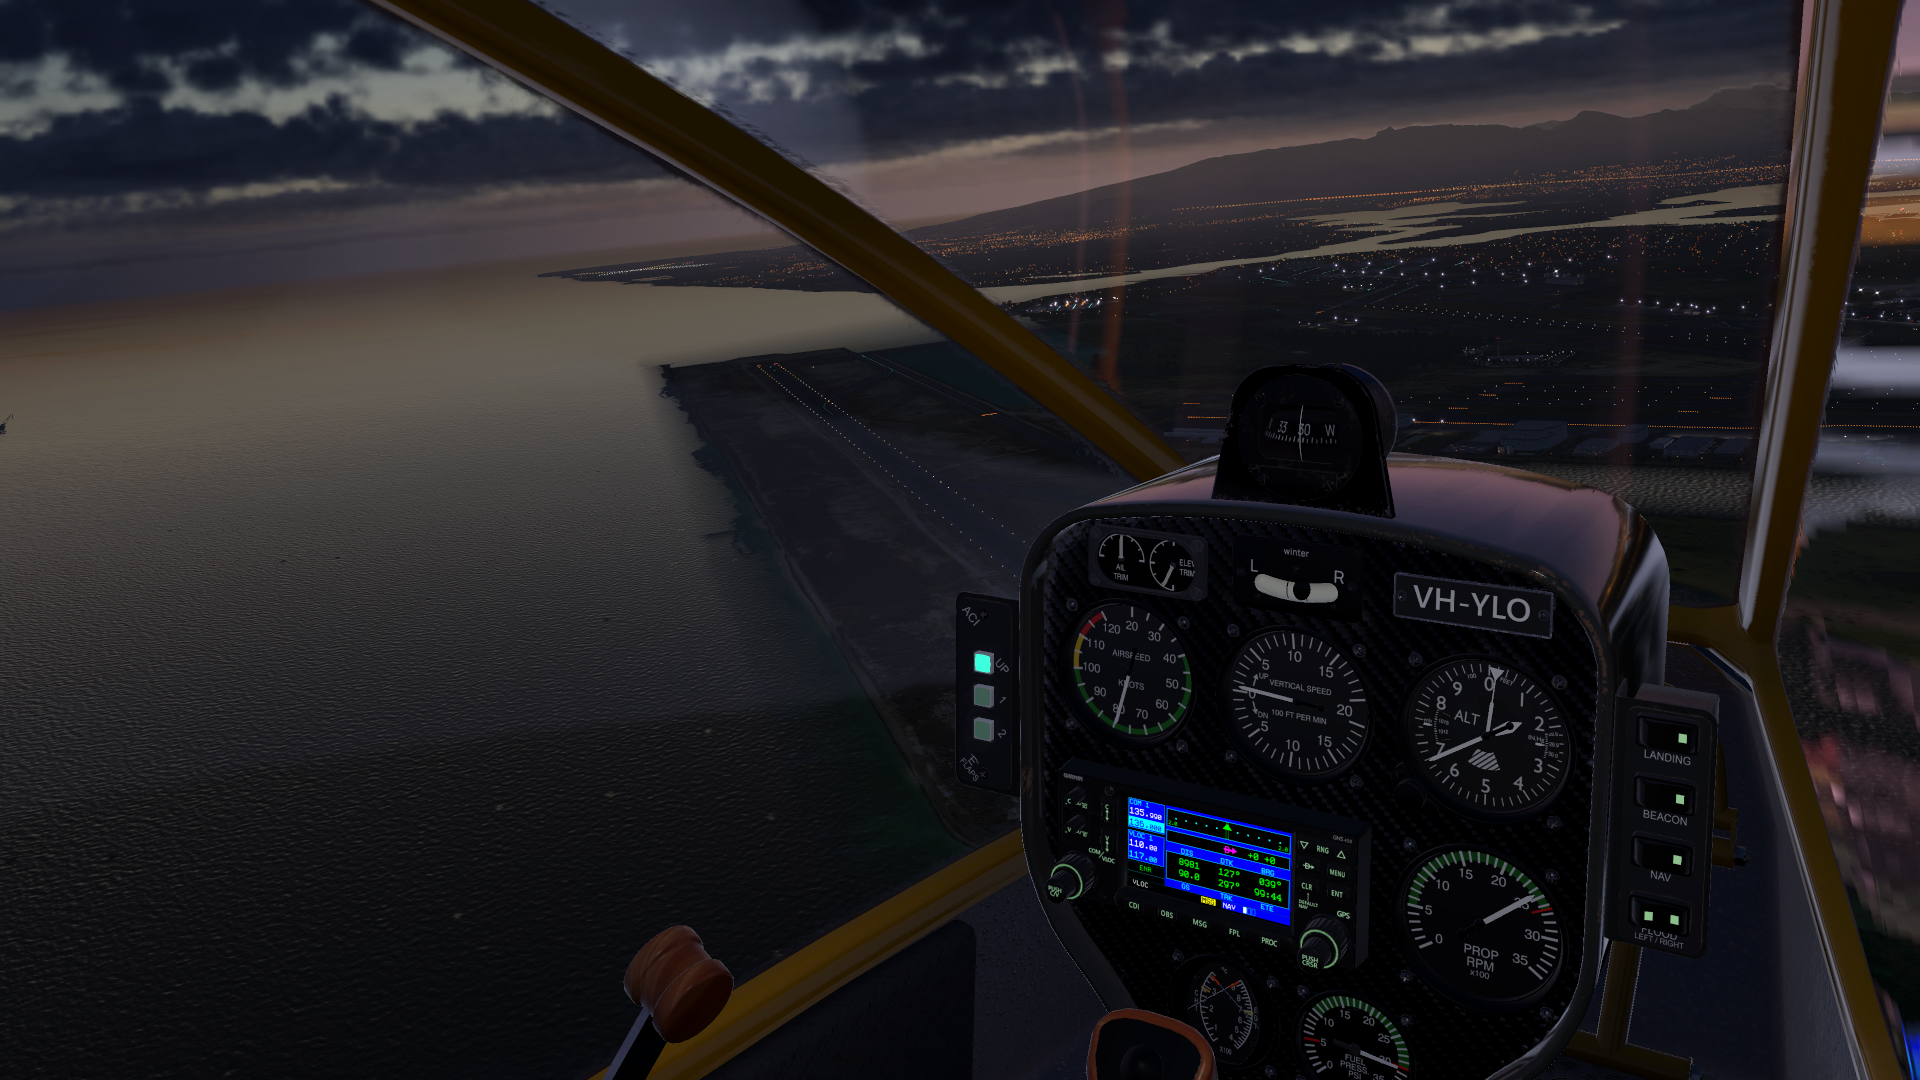
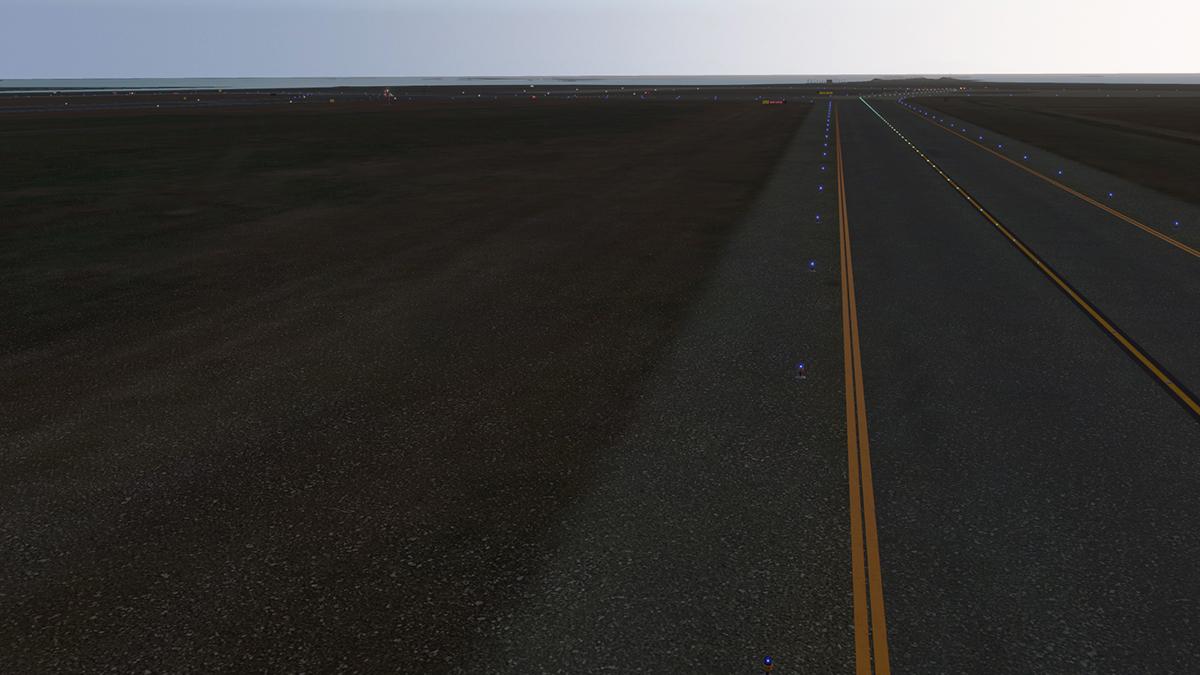
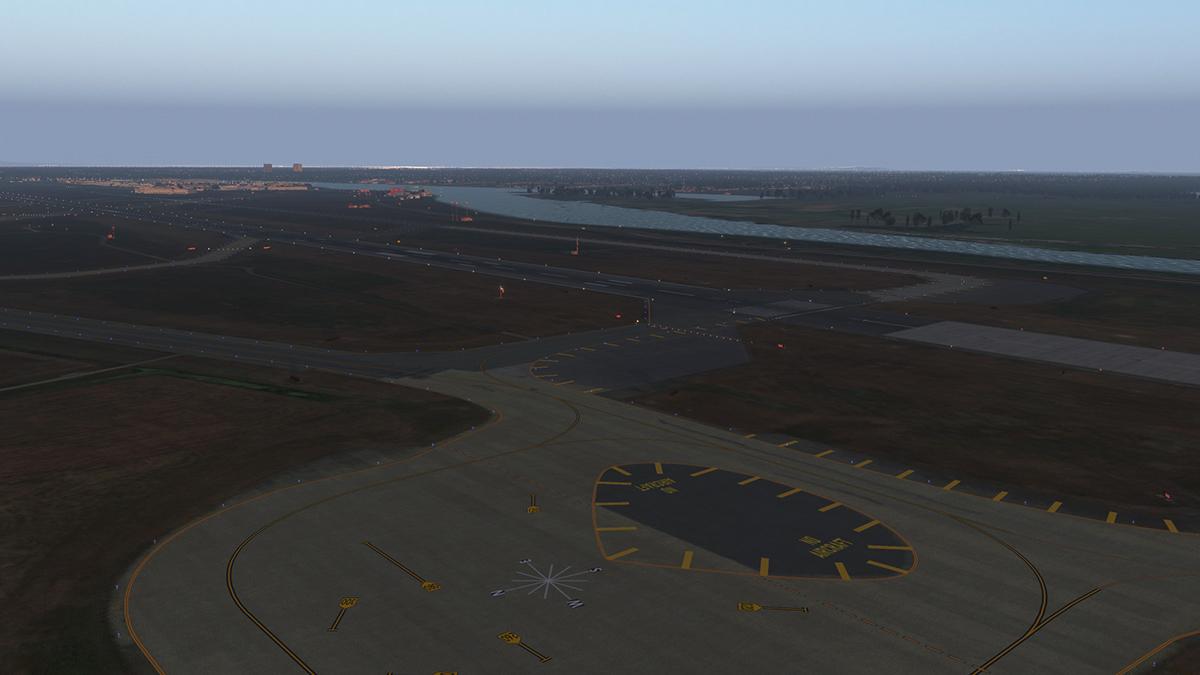
As a goodbye from this incredible website, I am leaving my best X-Plane photos. They aren't that good but I believe they are cool. Goodbye!

- 1 reply
-
- 2
-
-

Aircraft Update : Boeing 787-9 Aviator v1.5.0 by Magknight
BernardoCasa replied to BernardoCasa's topic in Airliners Reviews
I am having issues with my pc, but the moment I solve them I will resume my reviews. -
-
-
AirbusMan reacted to a post in a topic:
Aircraft Comparison : Boeing 777 vs Airbus A350
-
AirbusMan reacted to a post in a topic:
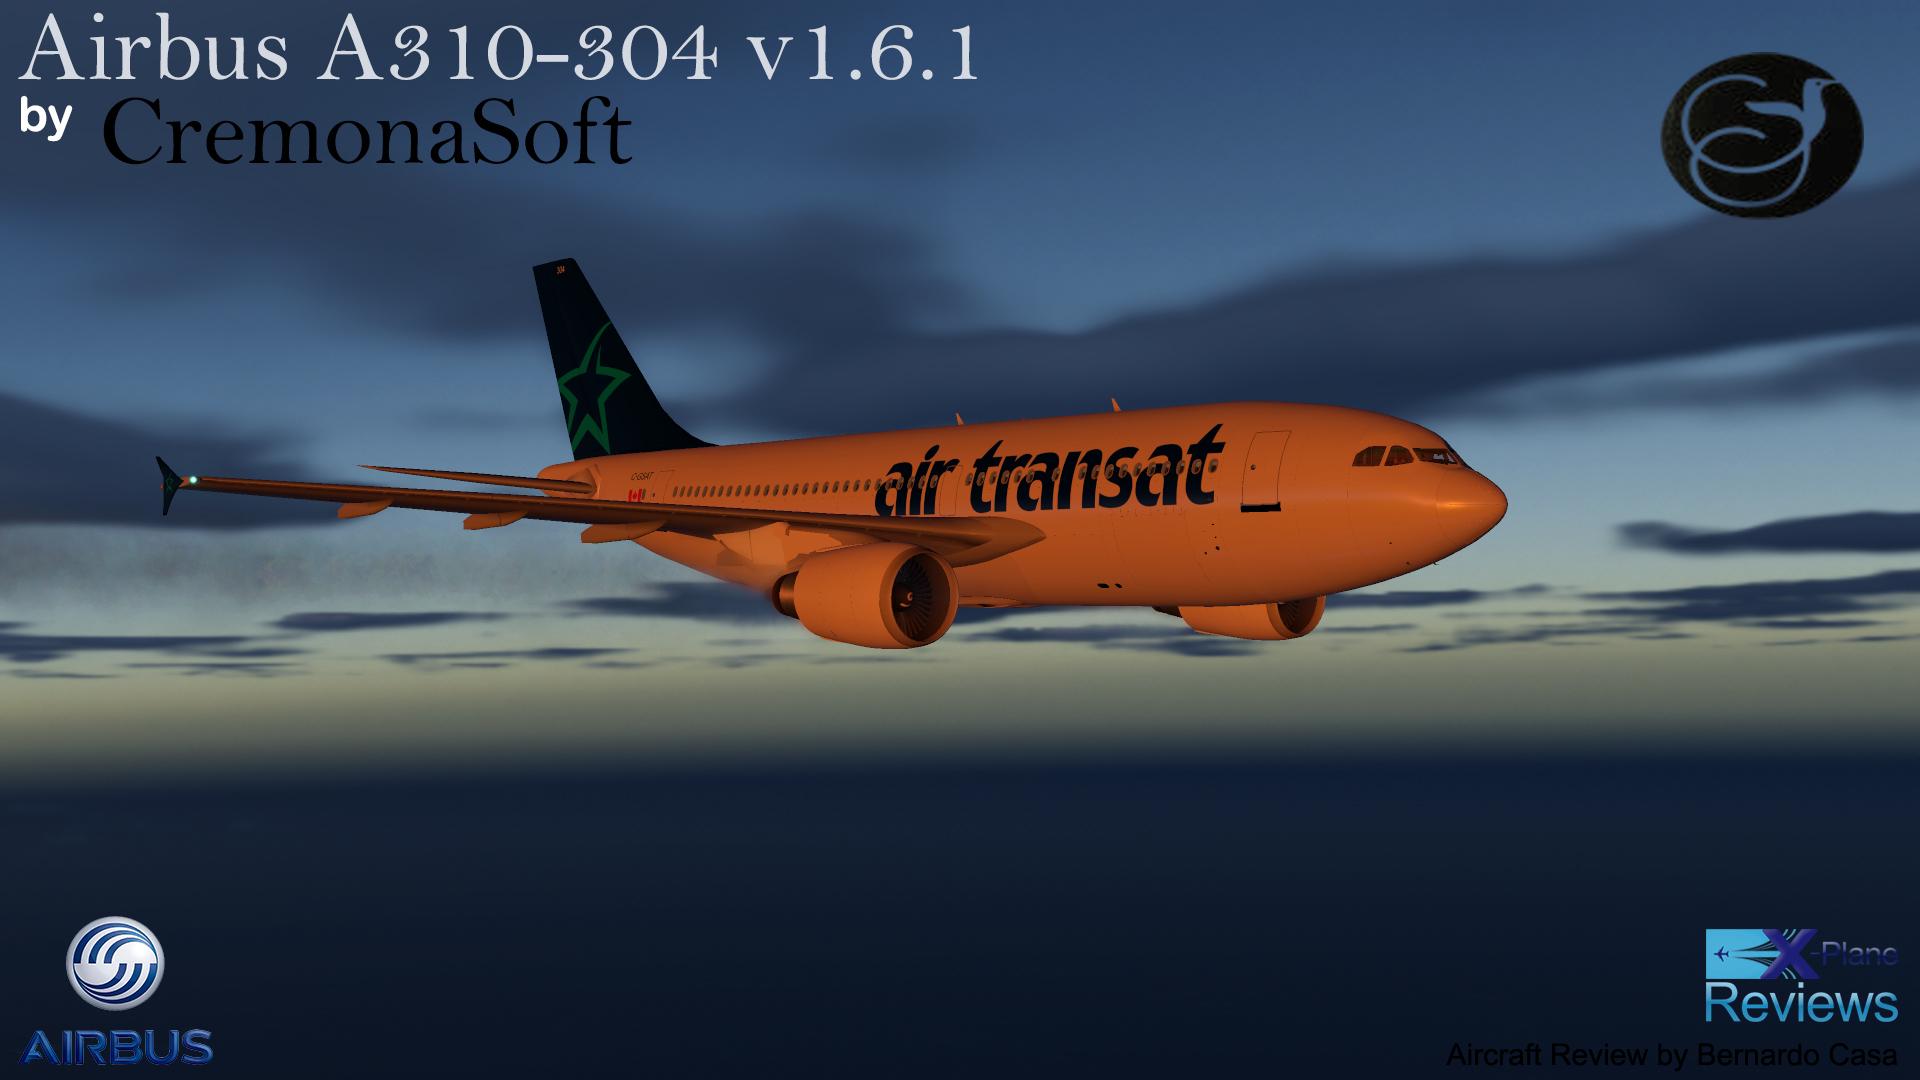
Aircraft Review : Airbus A310-304 by CremonaSoft
-
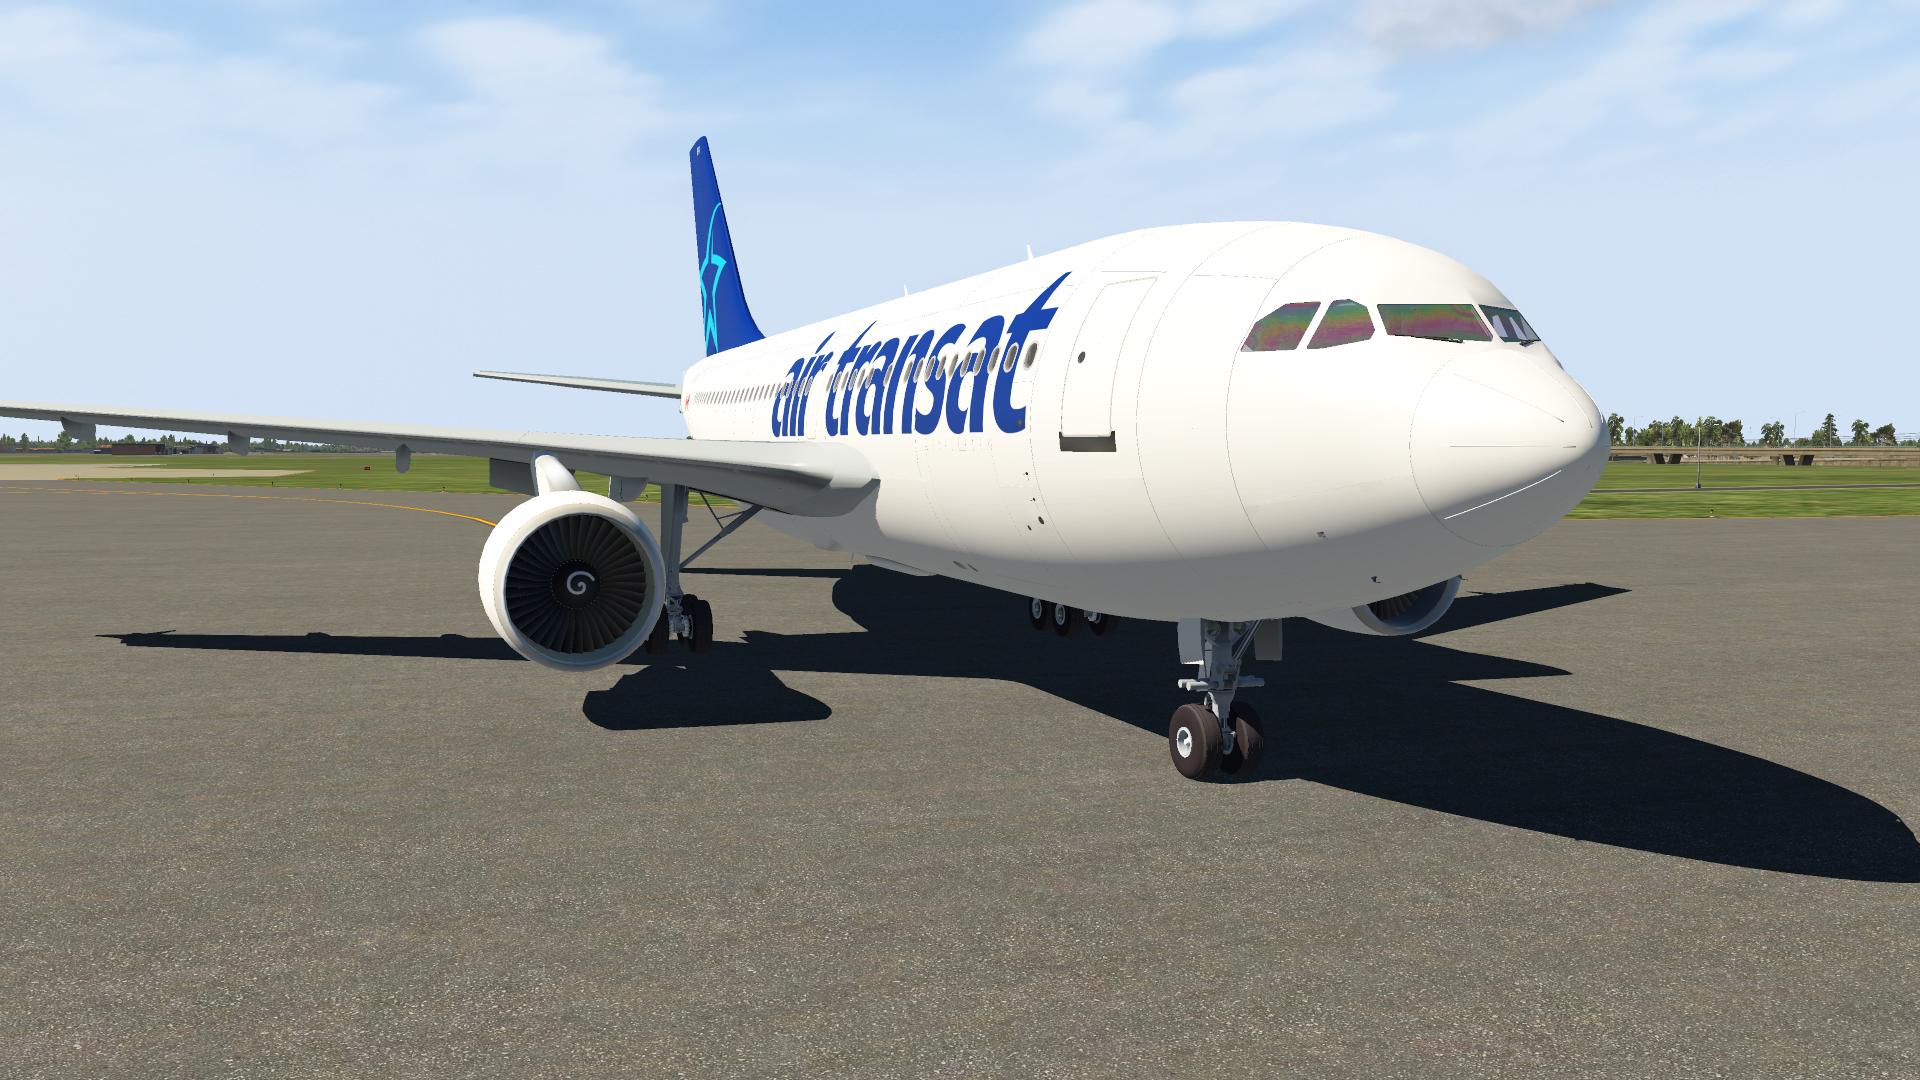
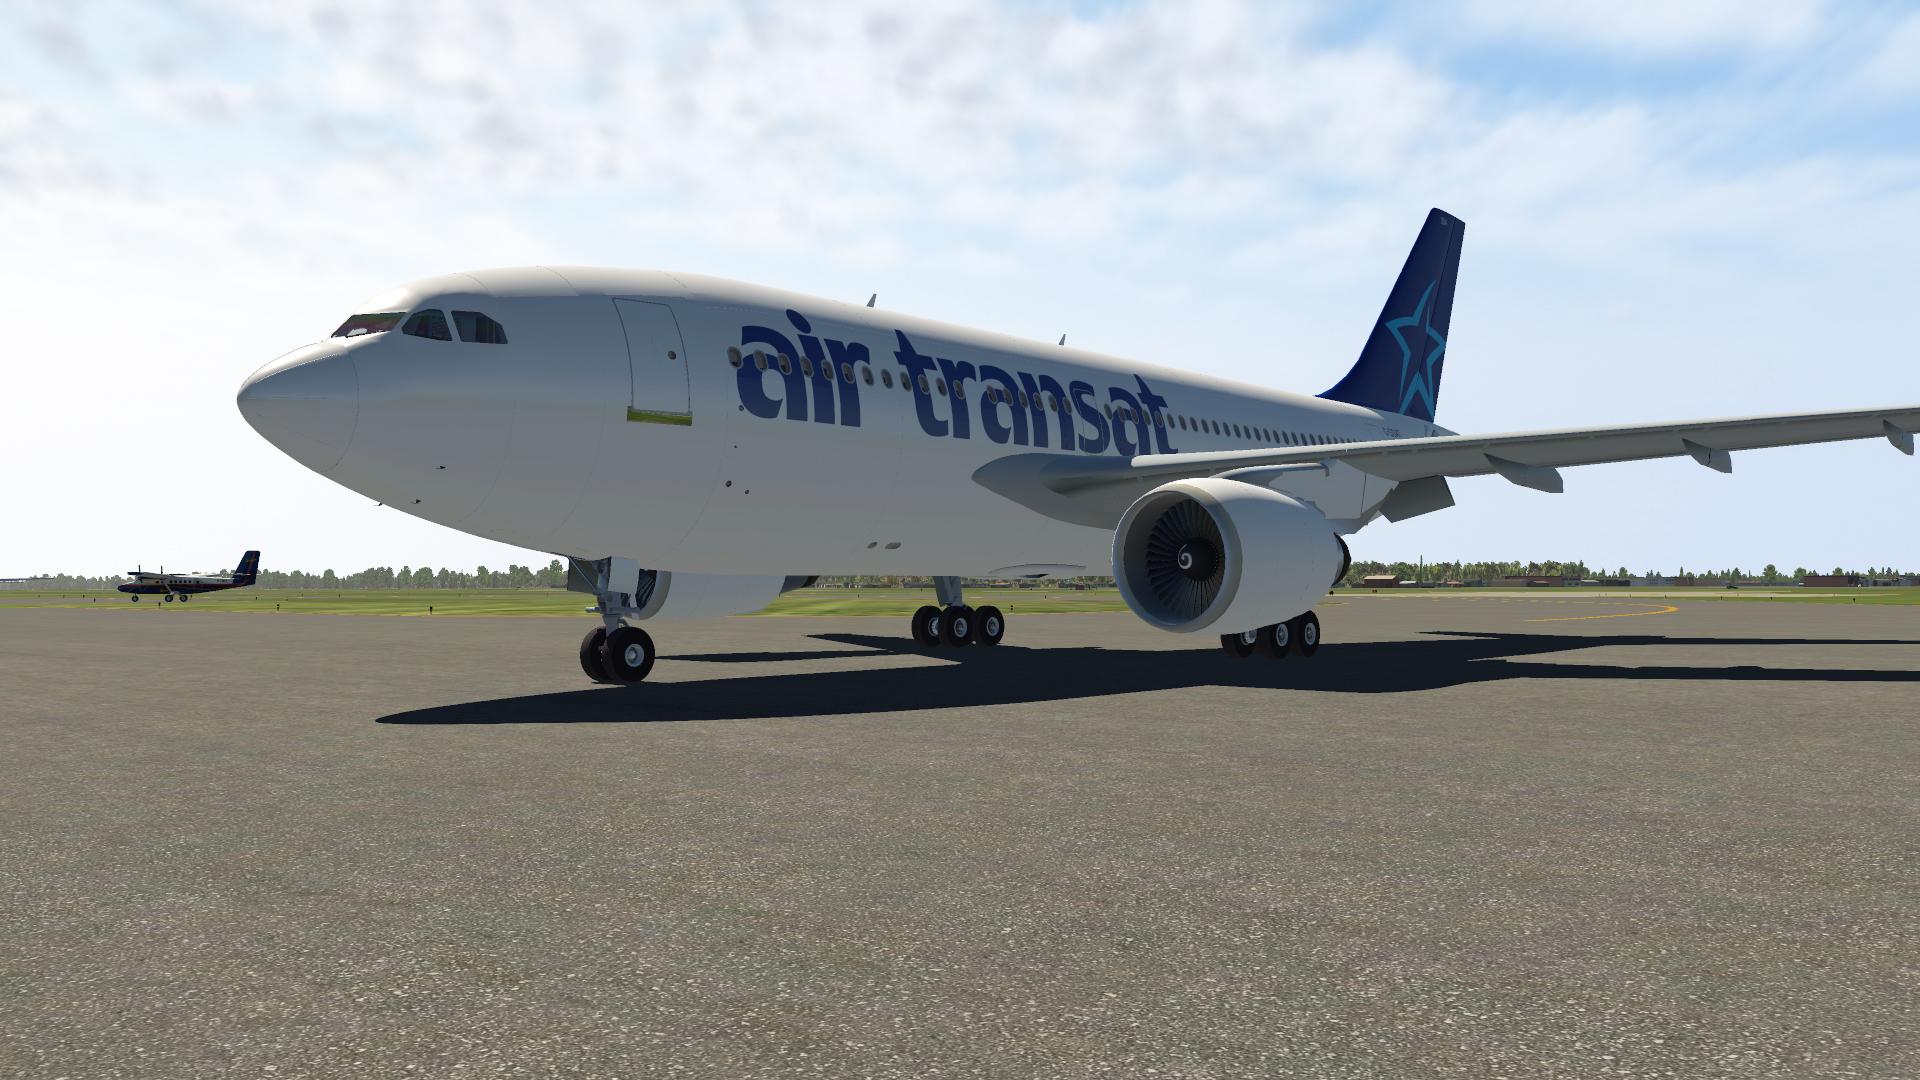
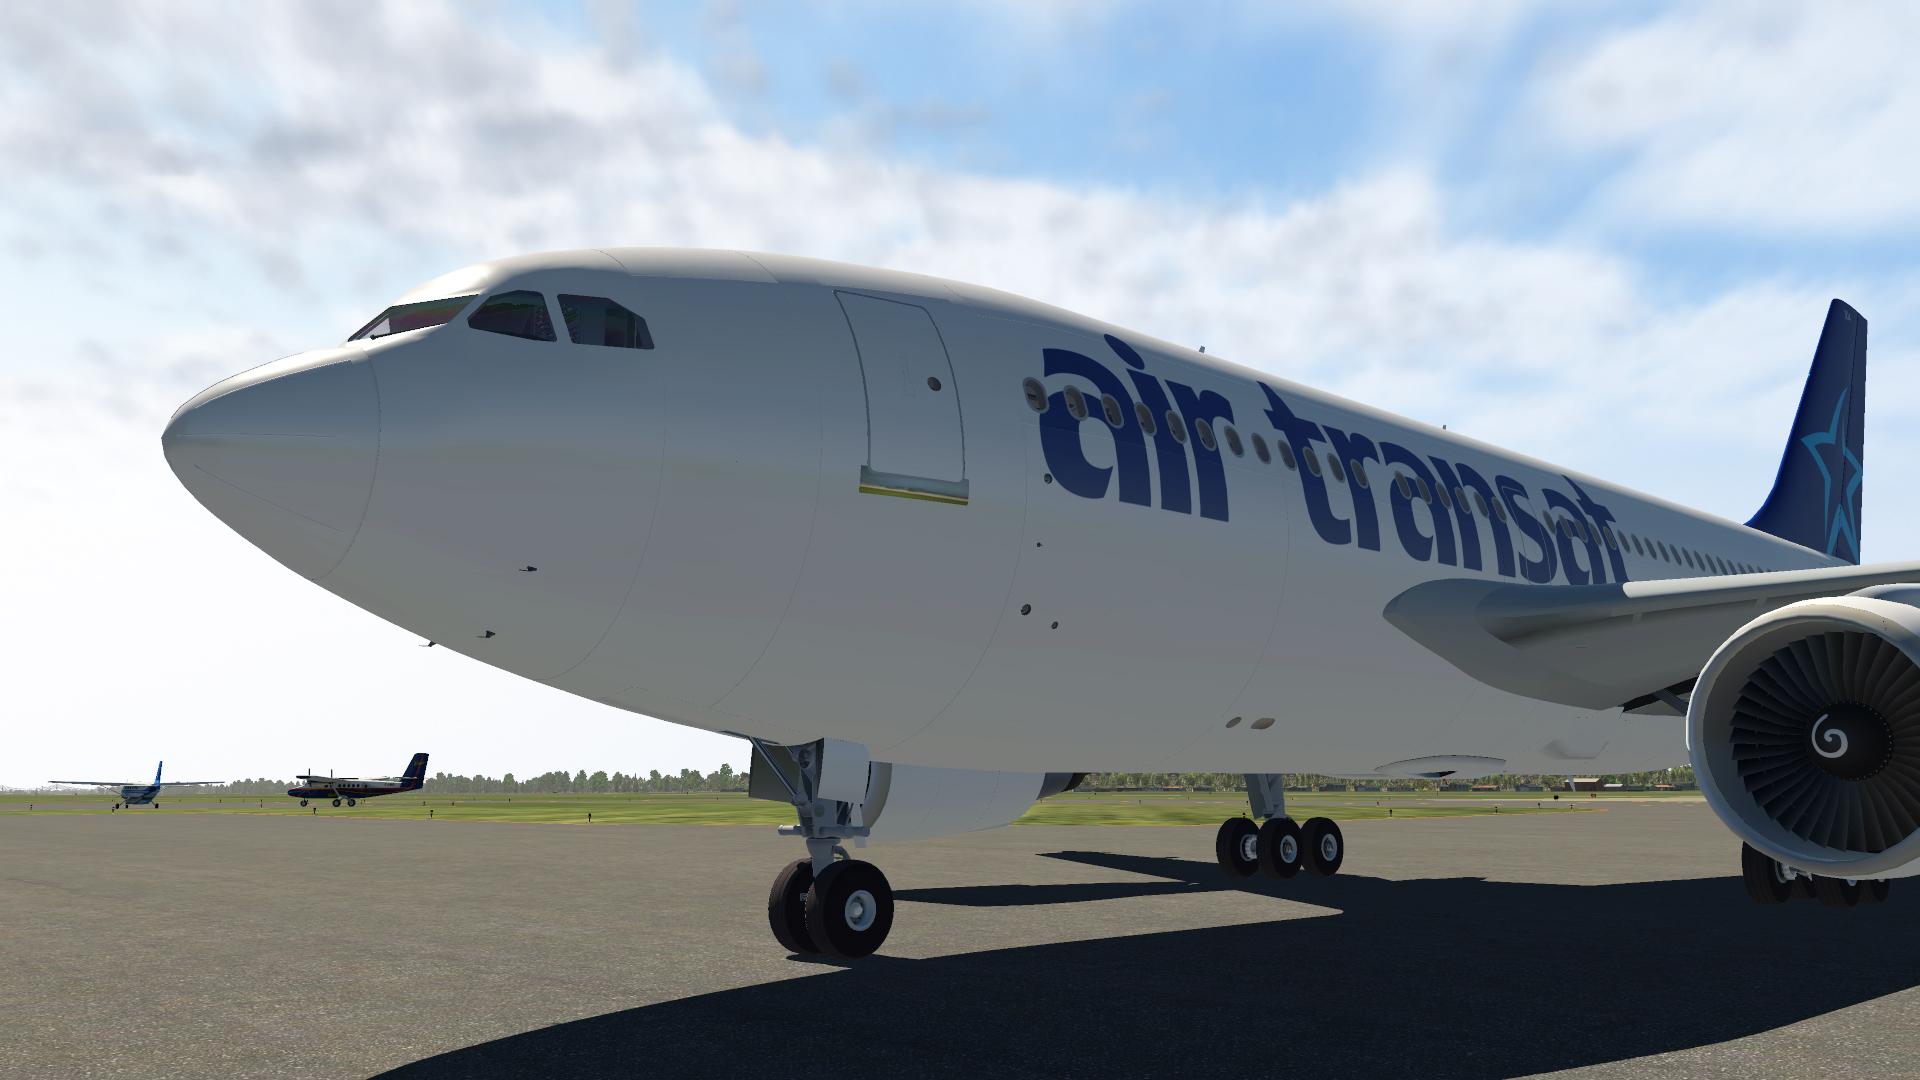
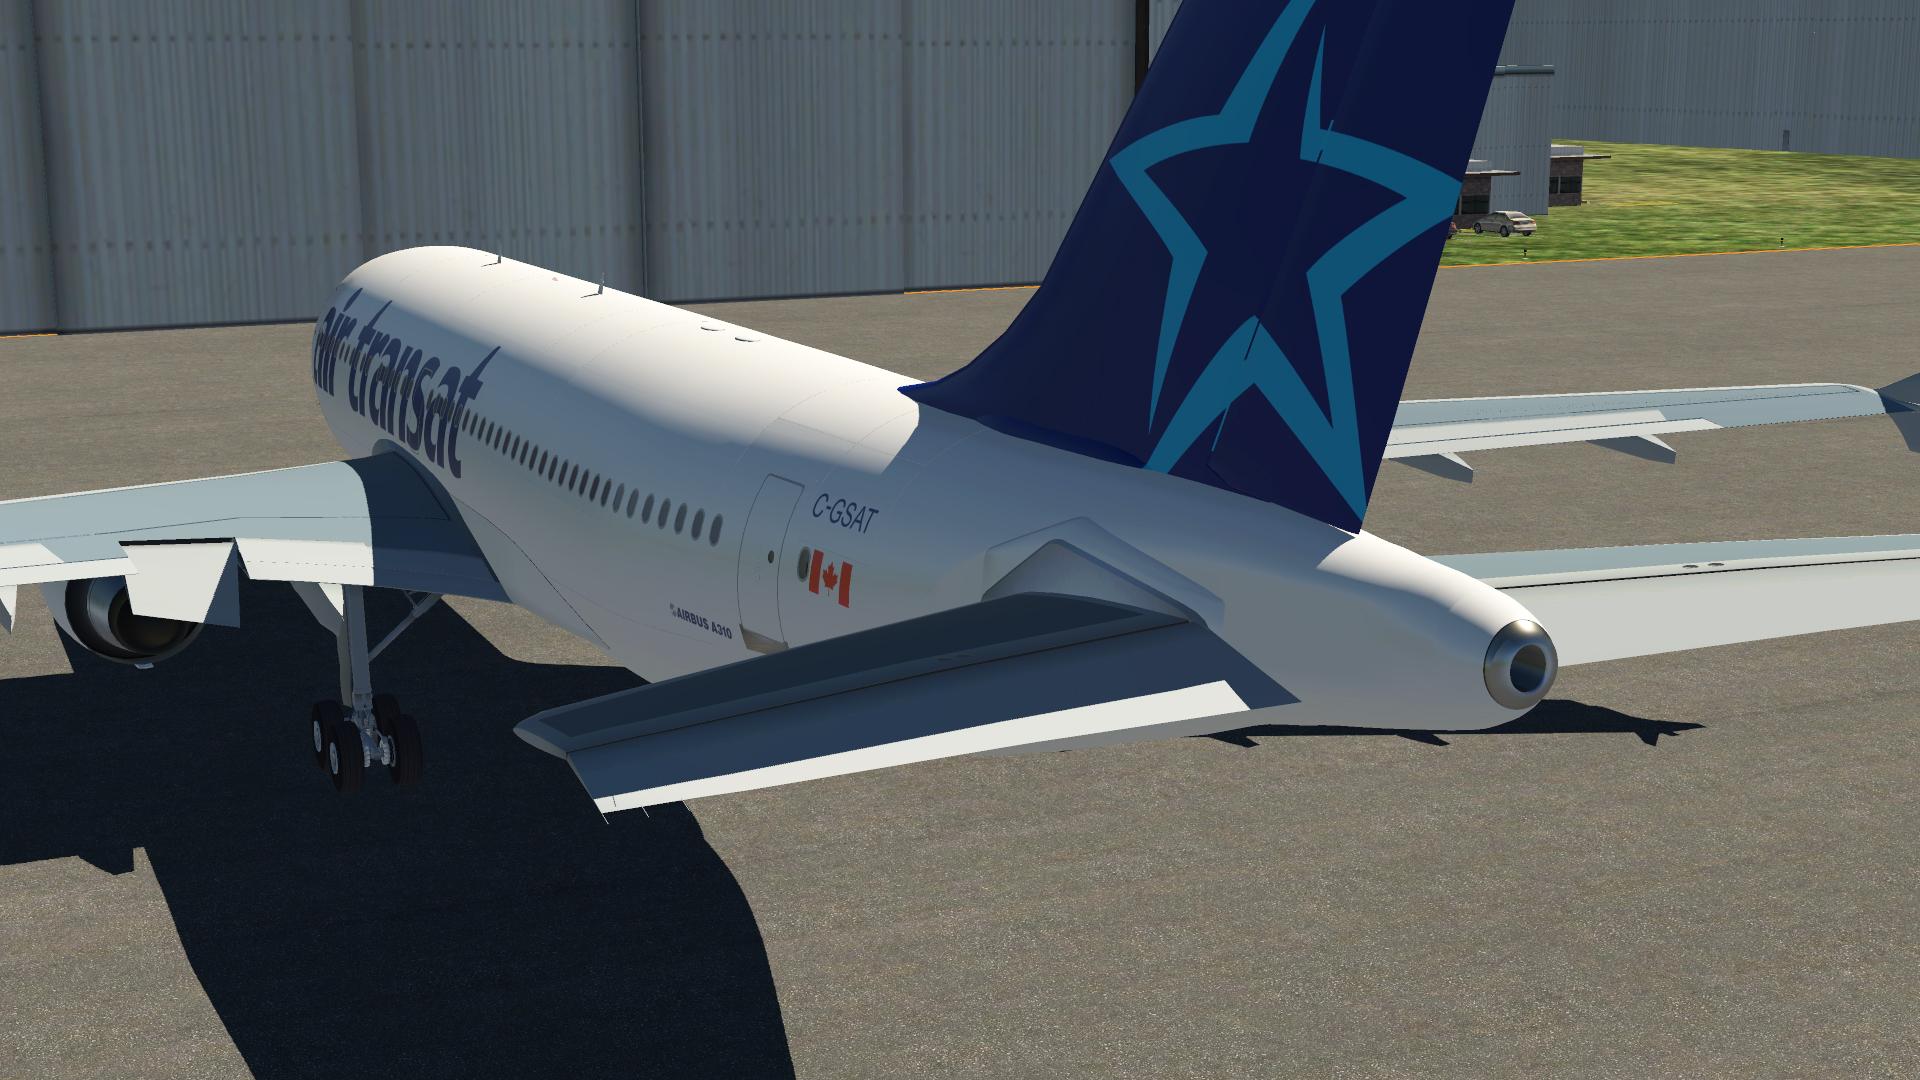
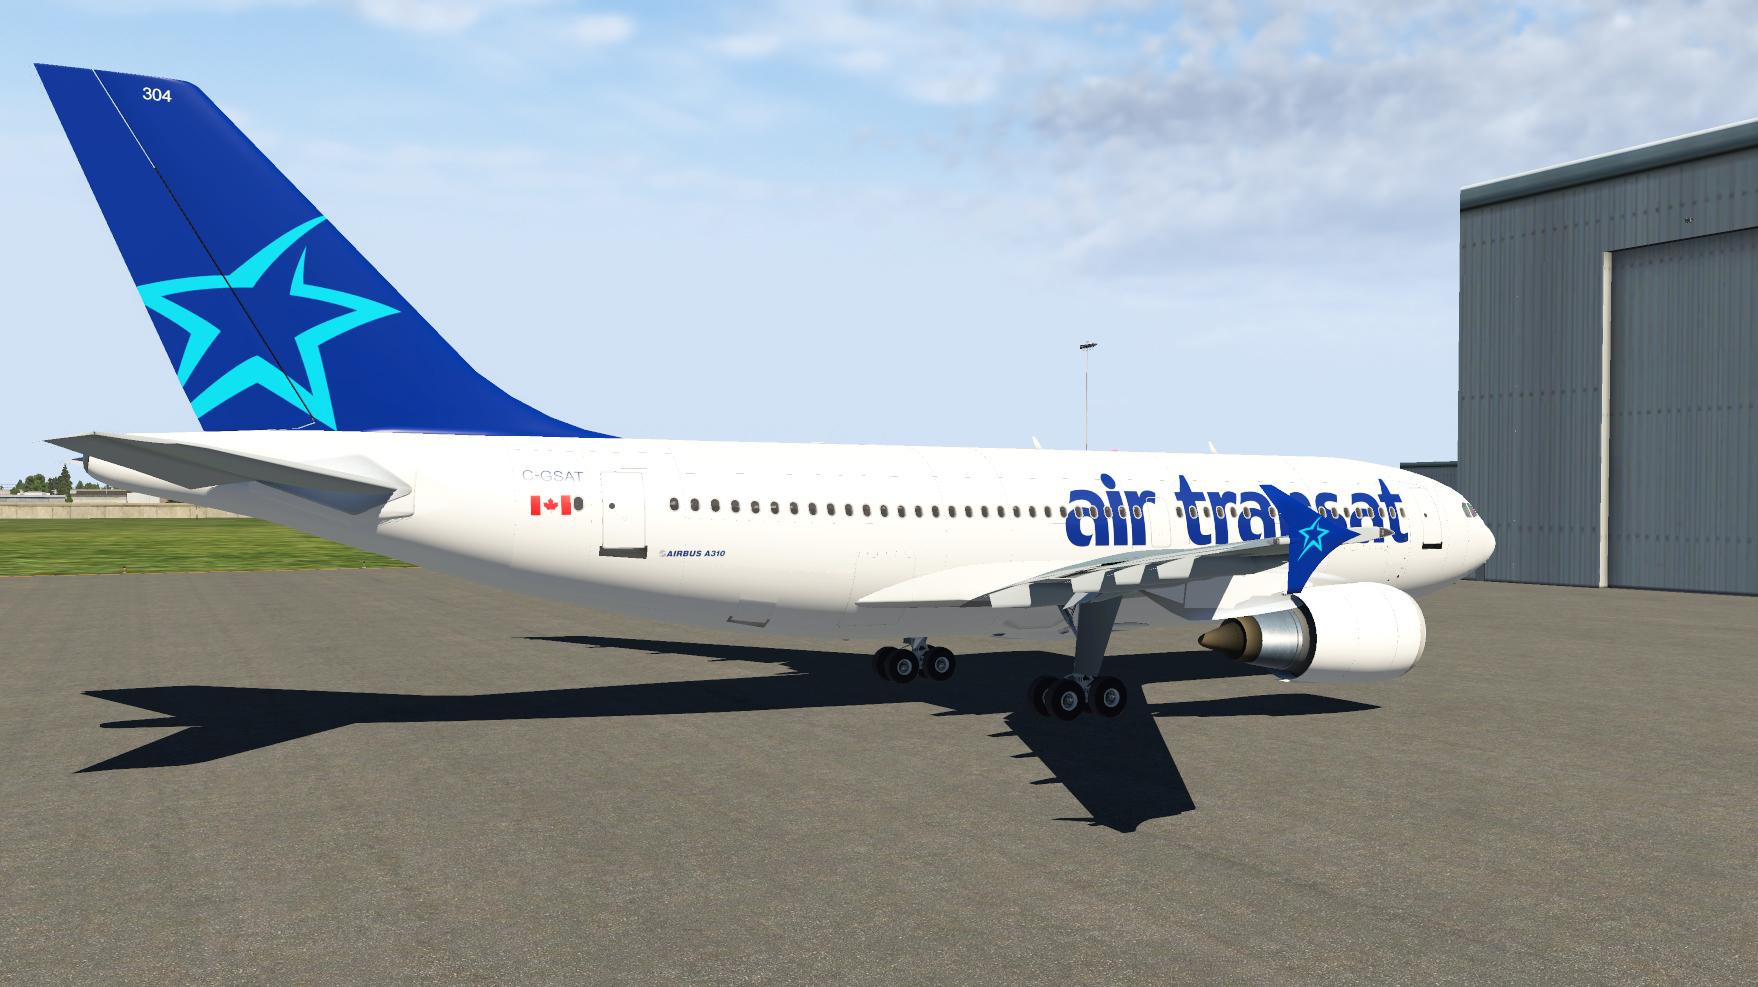
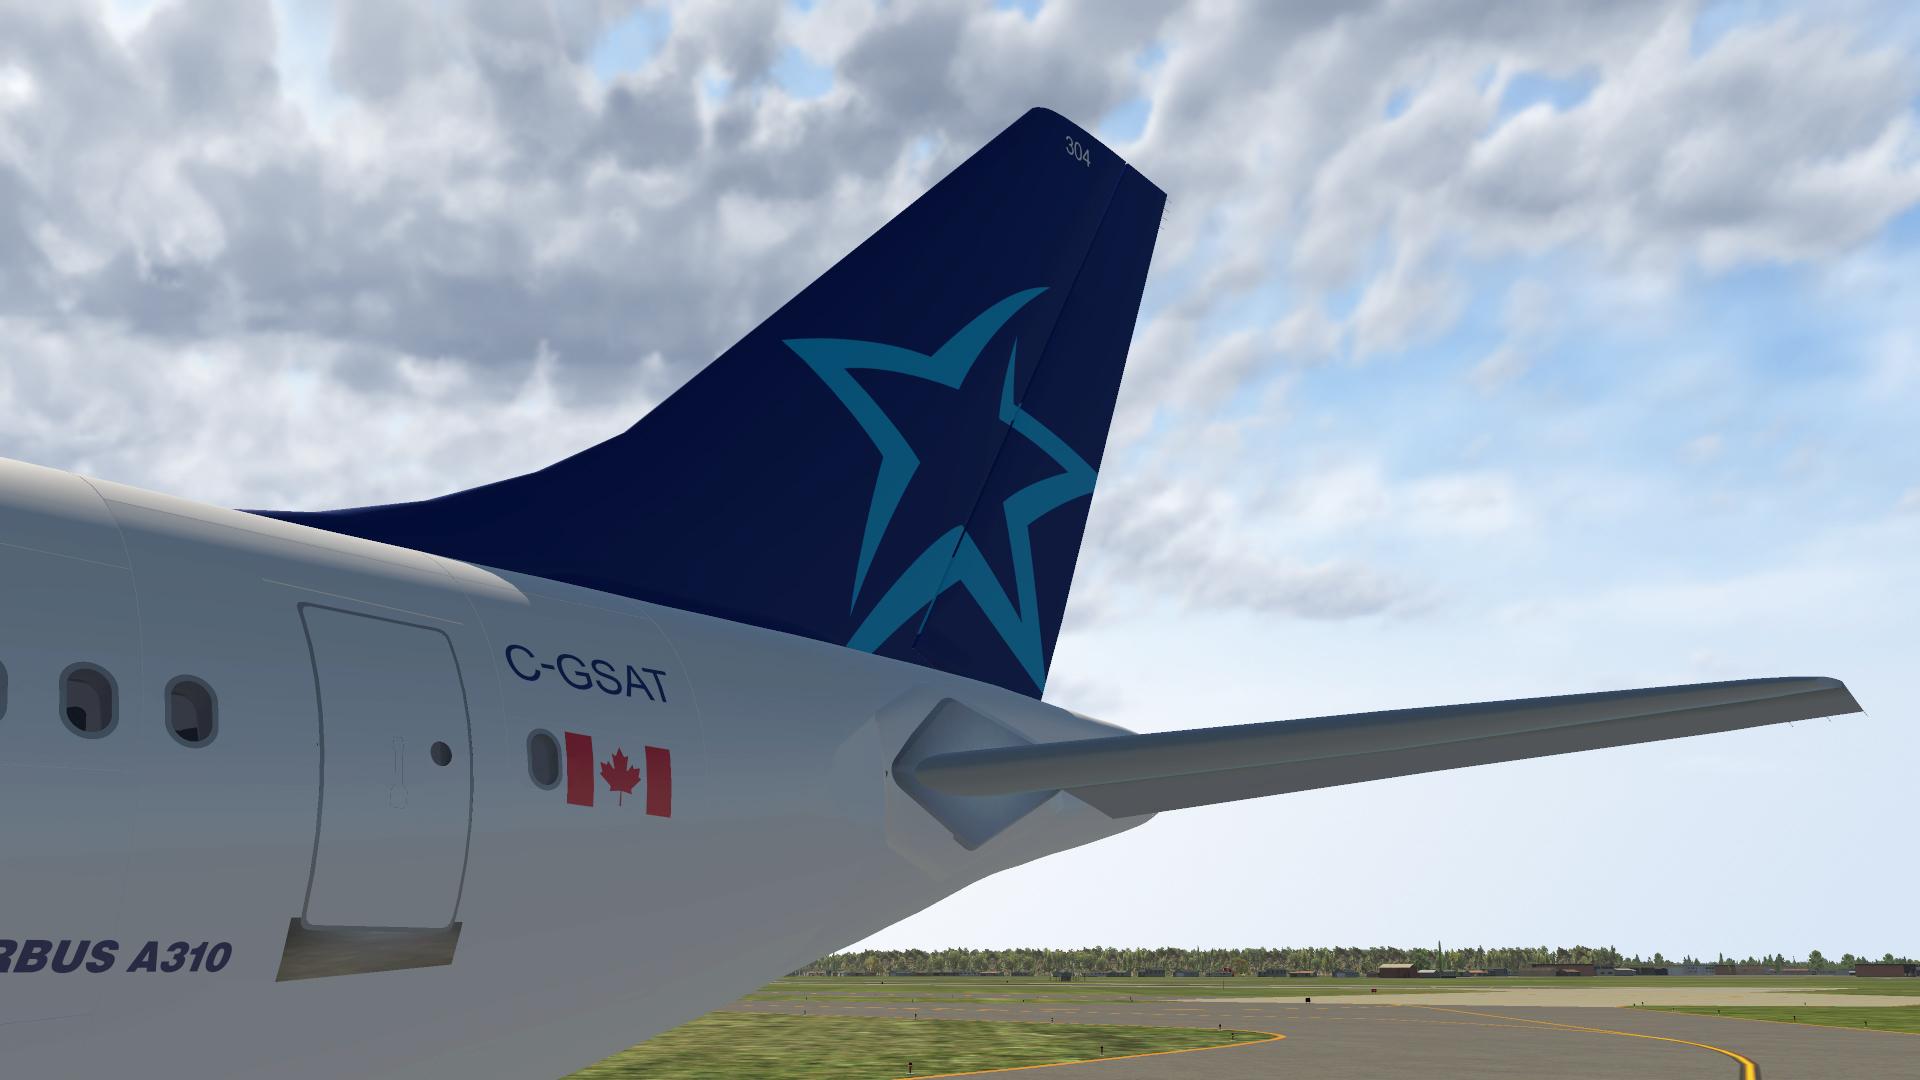
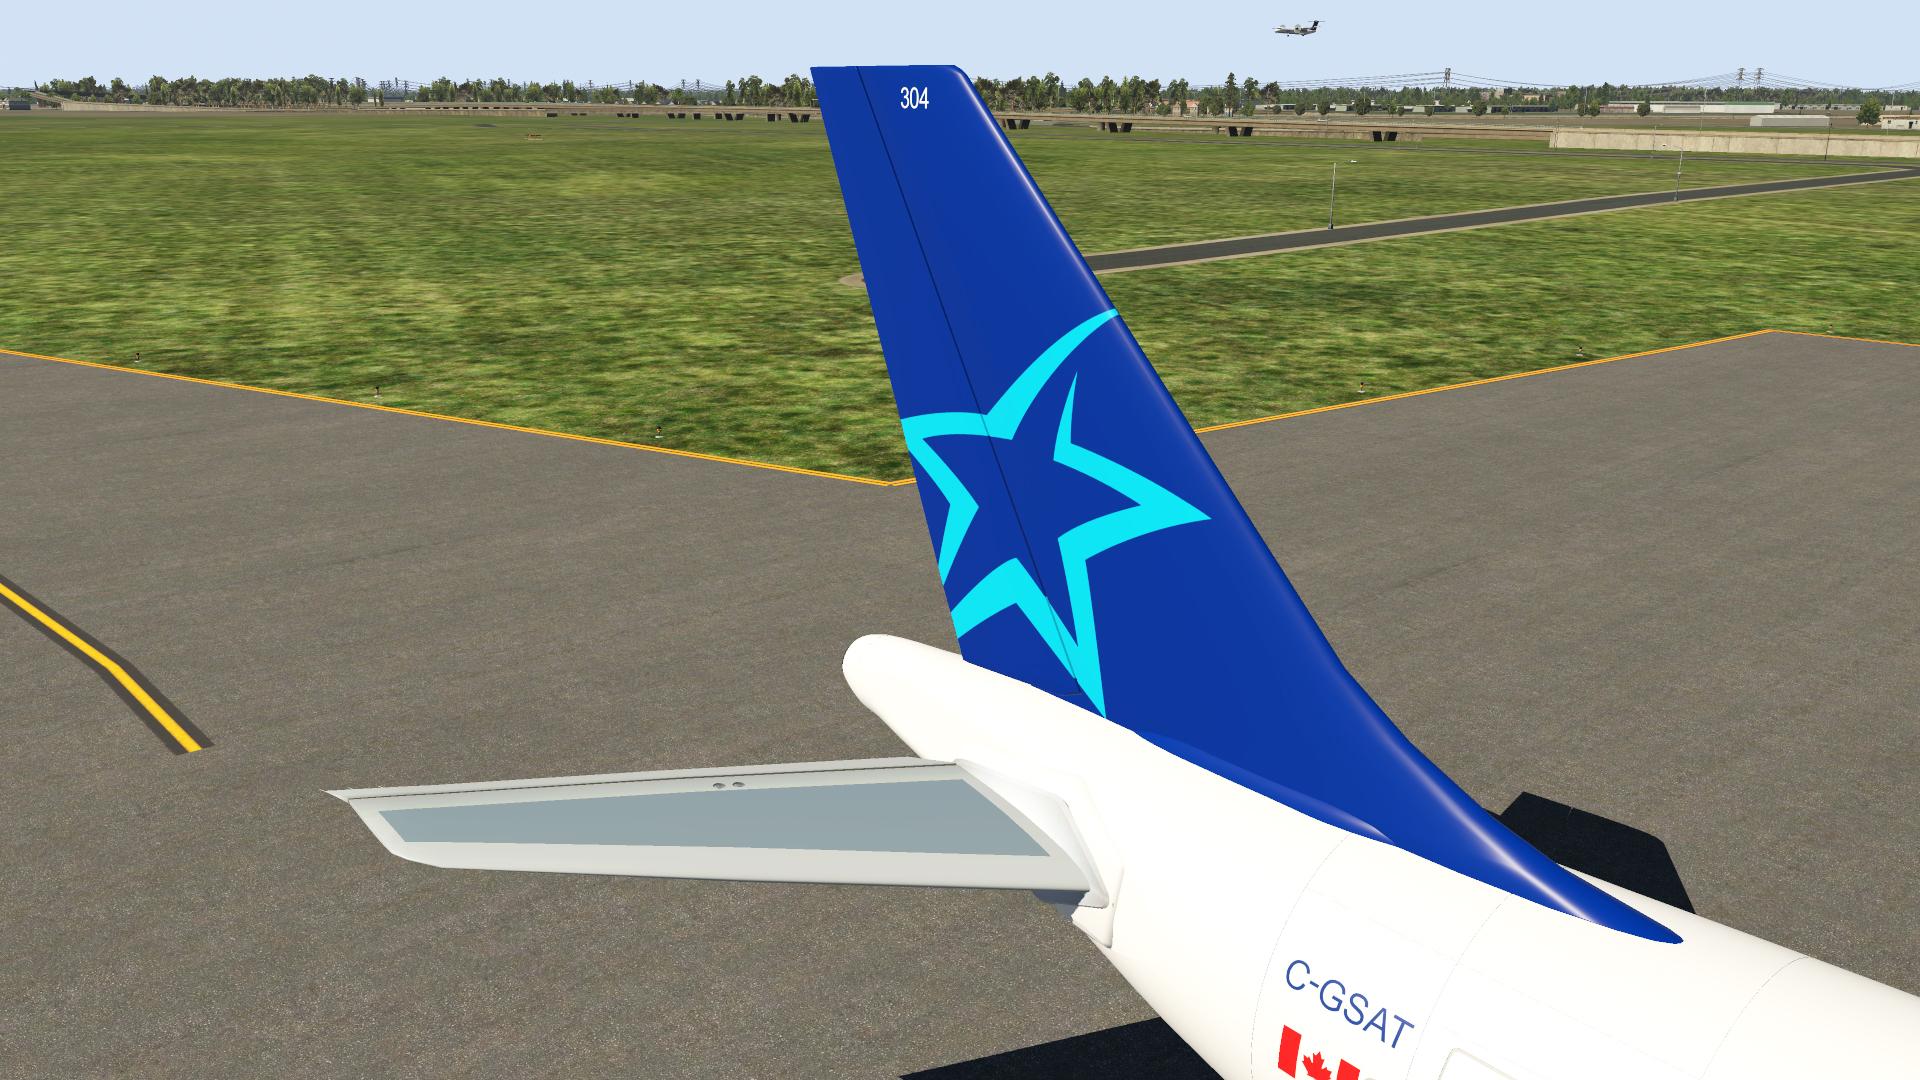
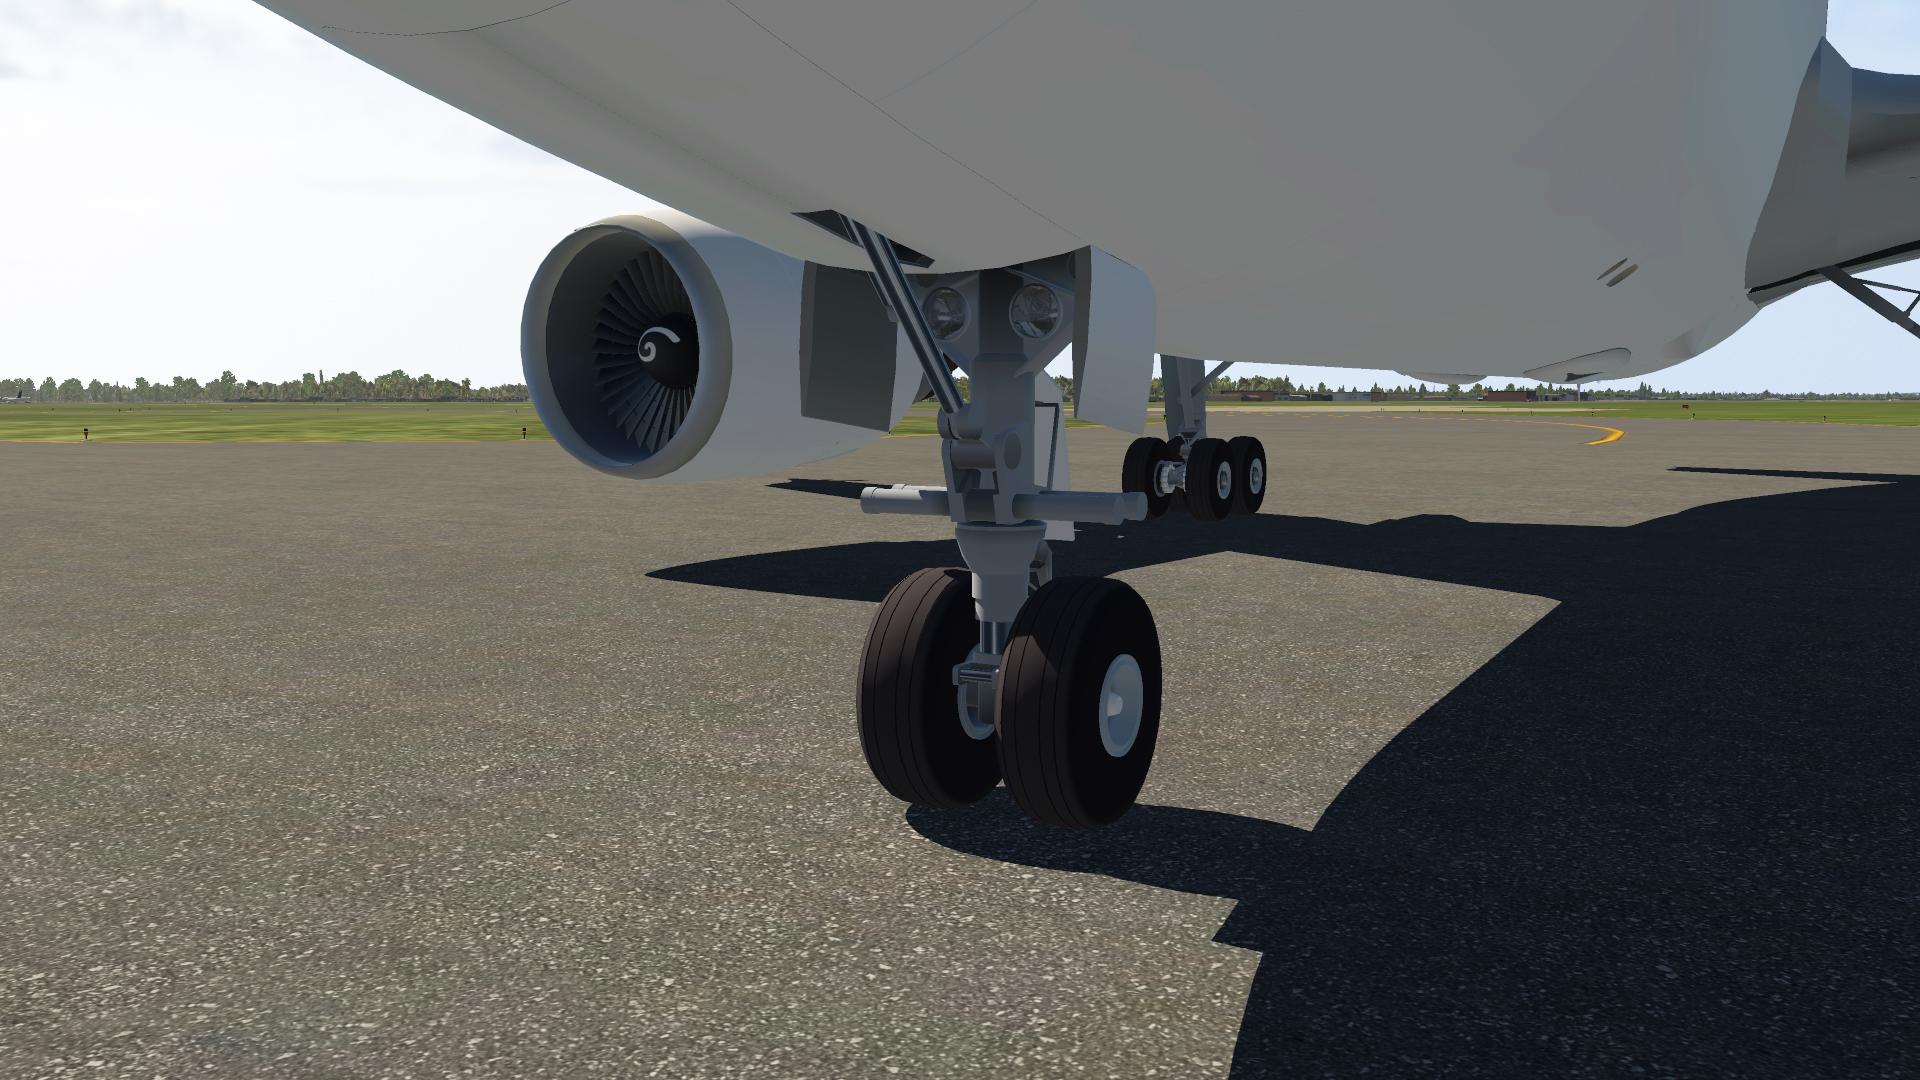
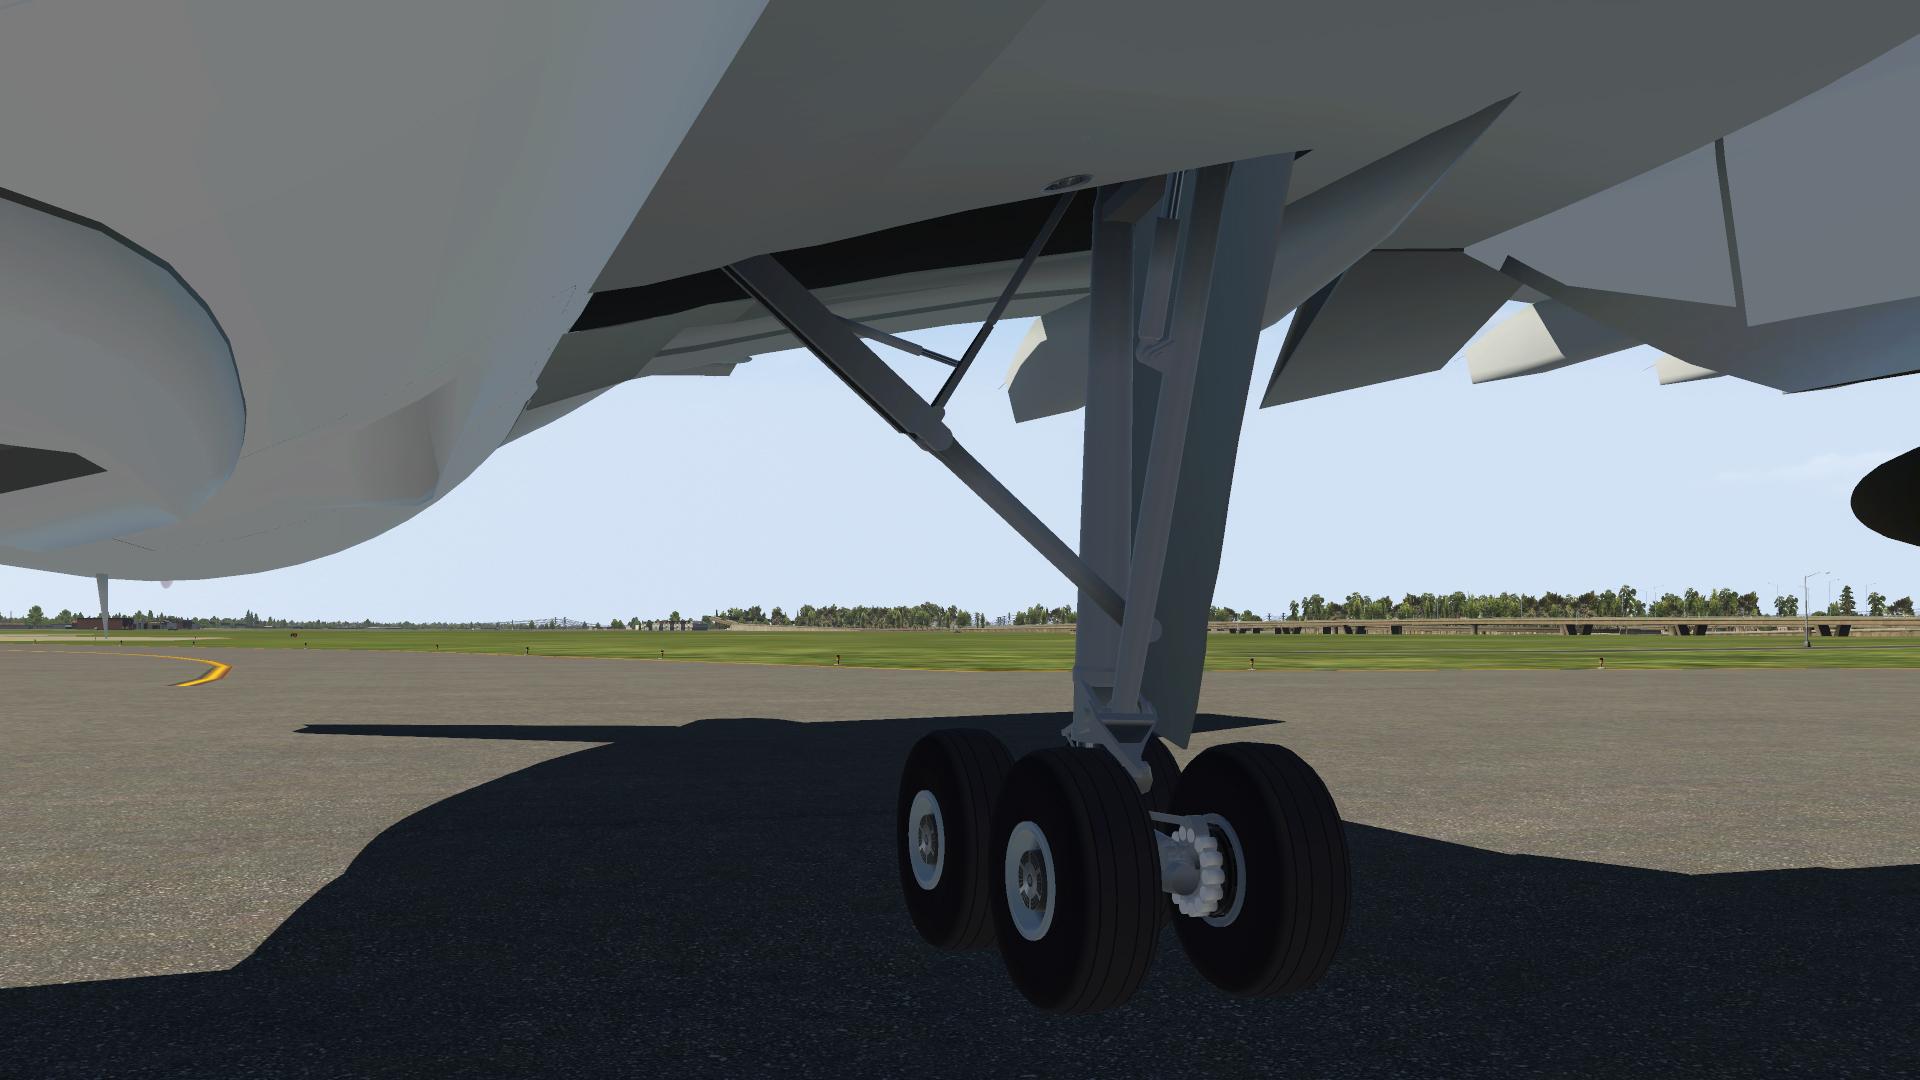
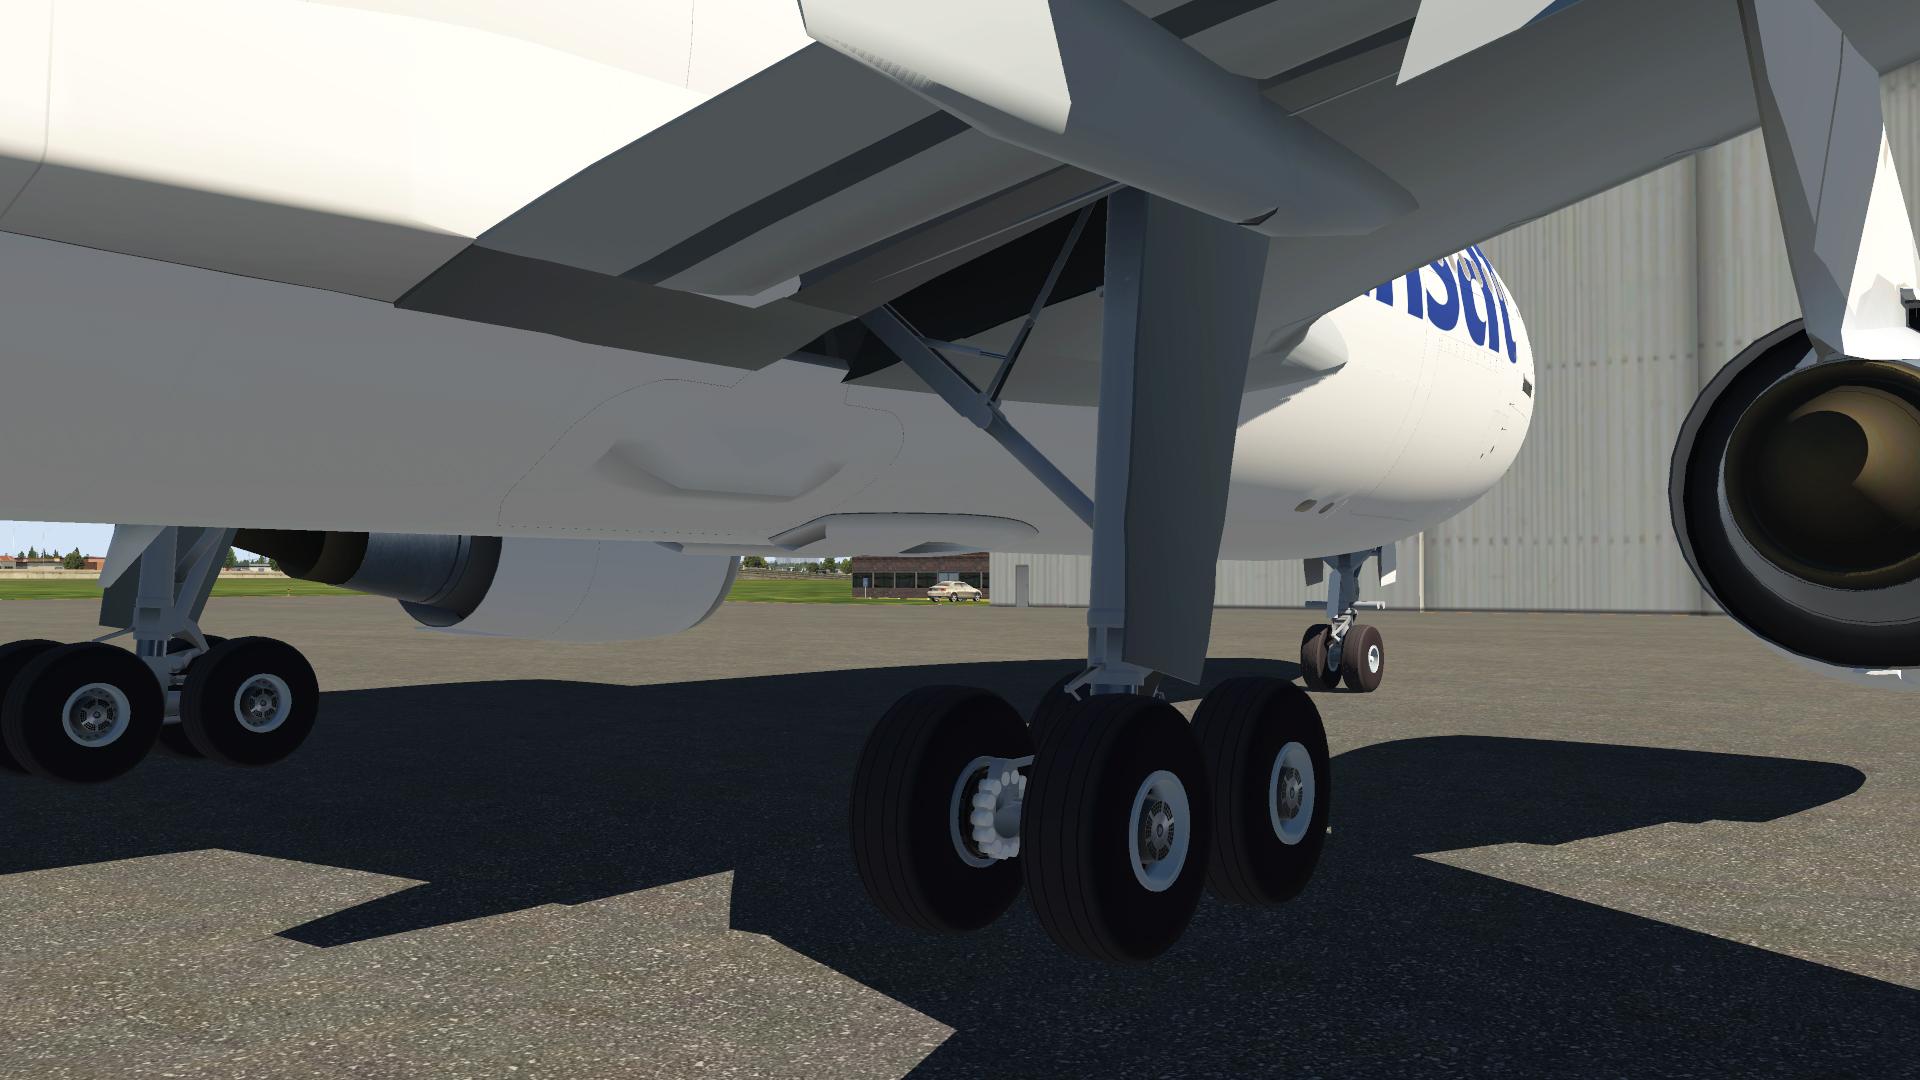
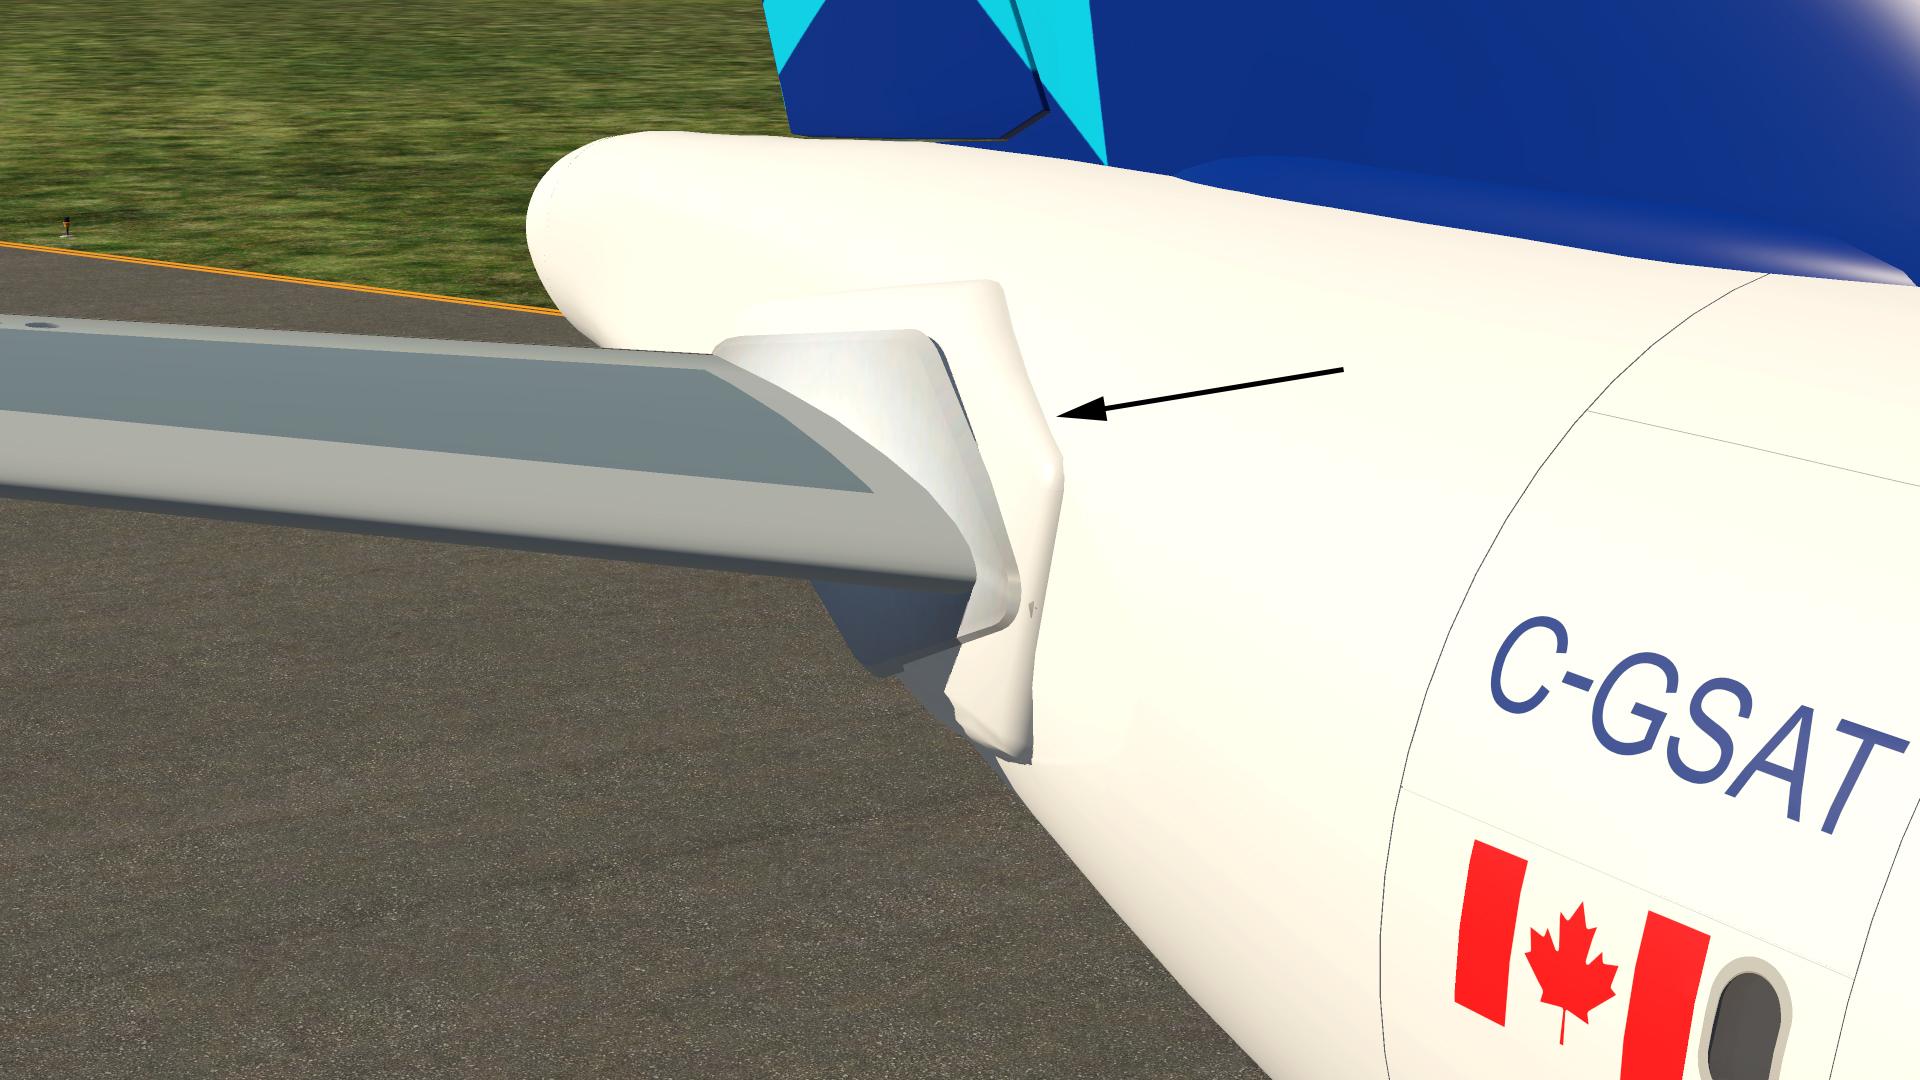
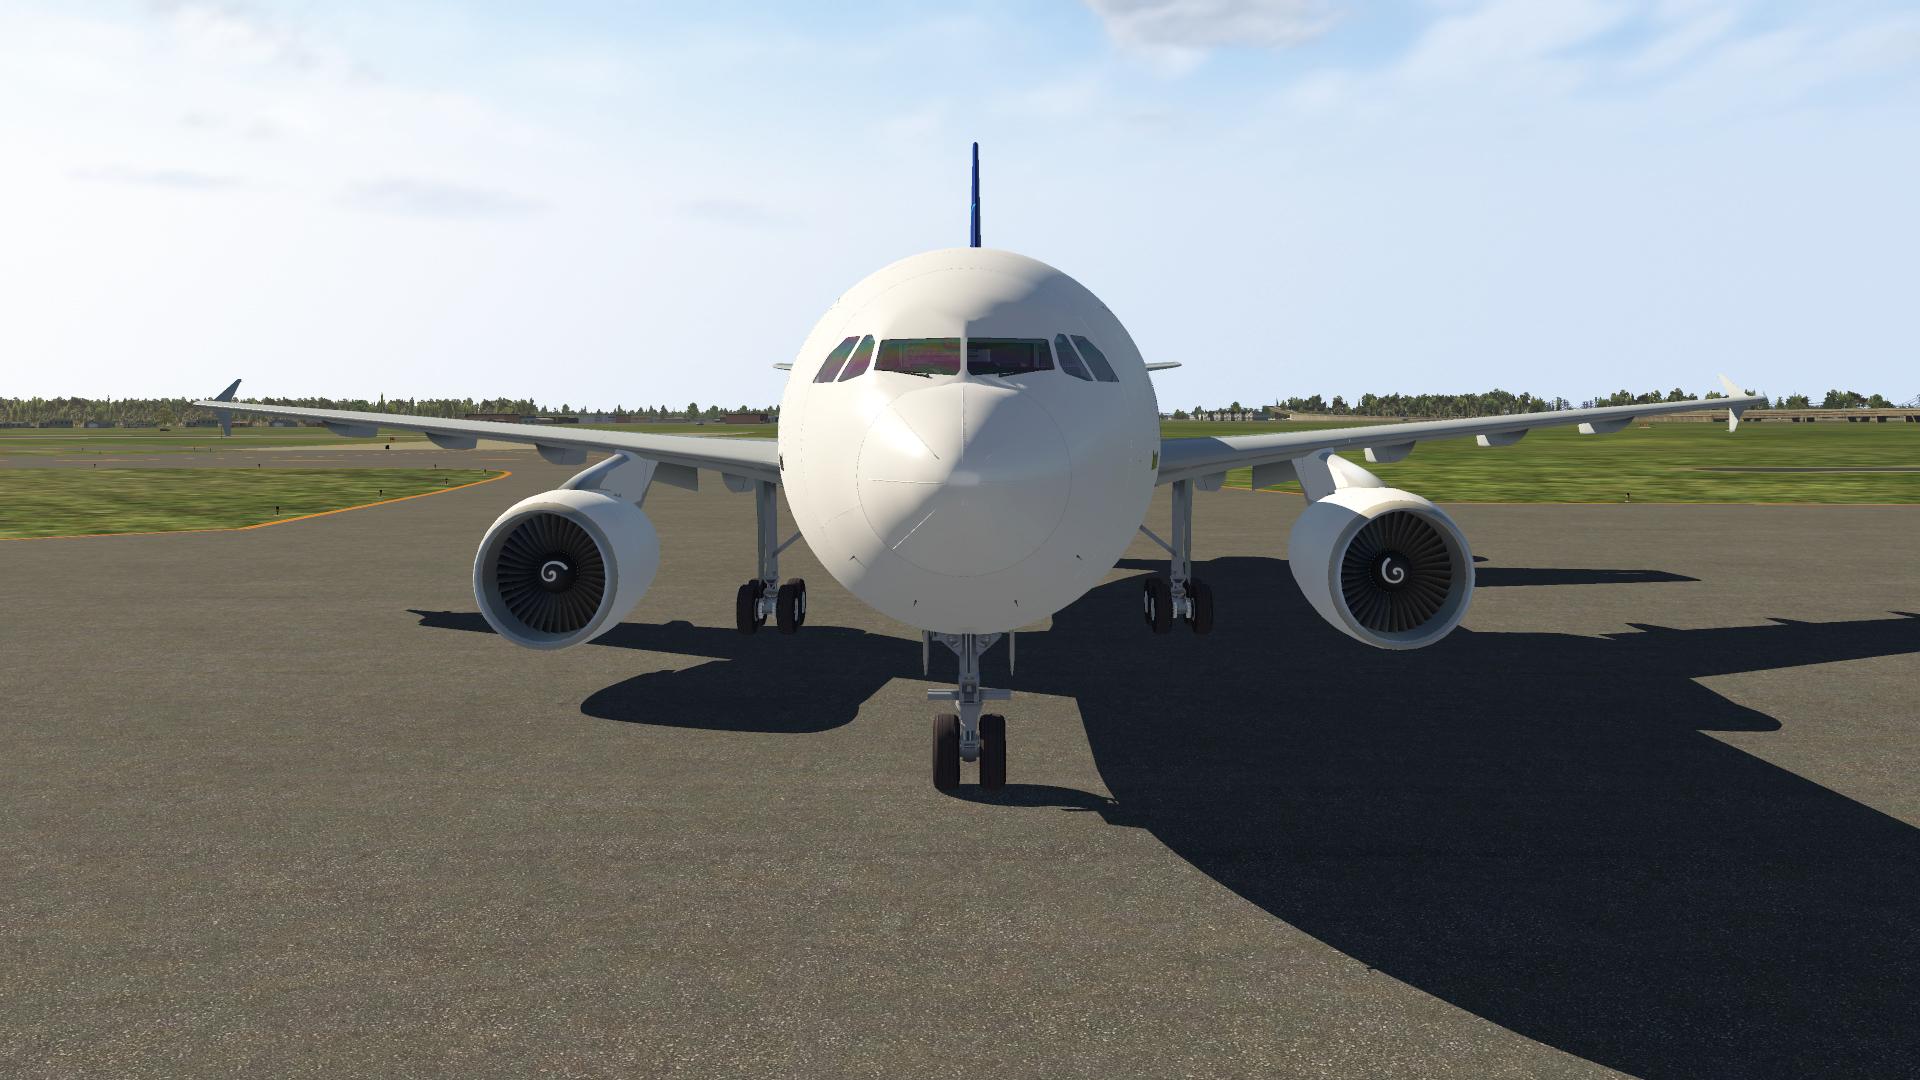
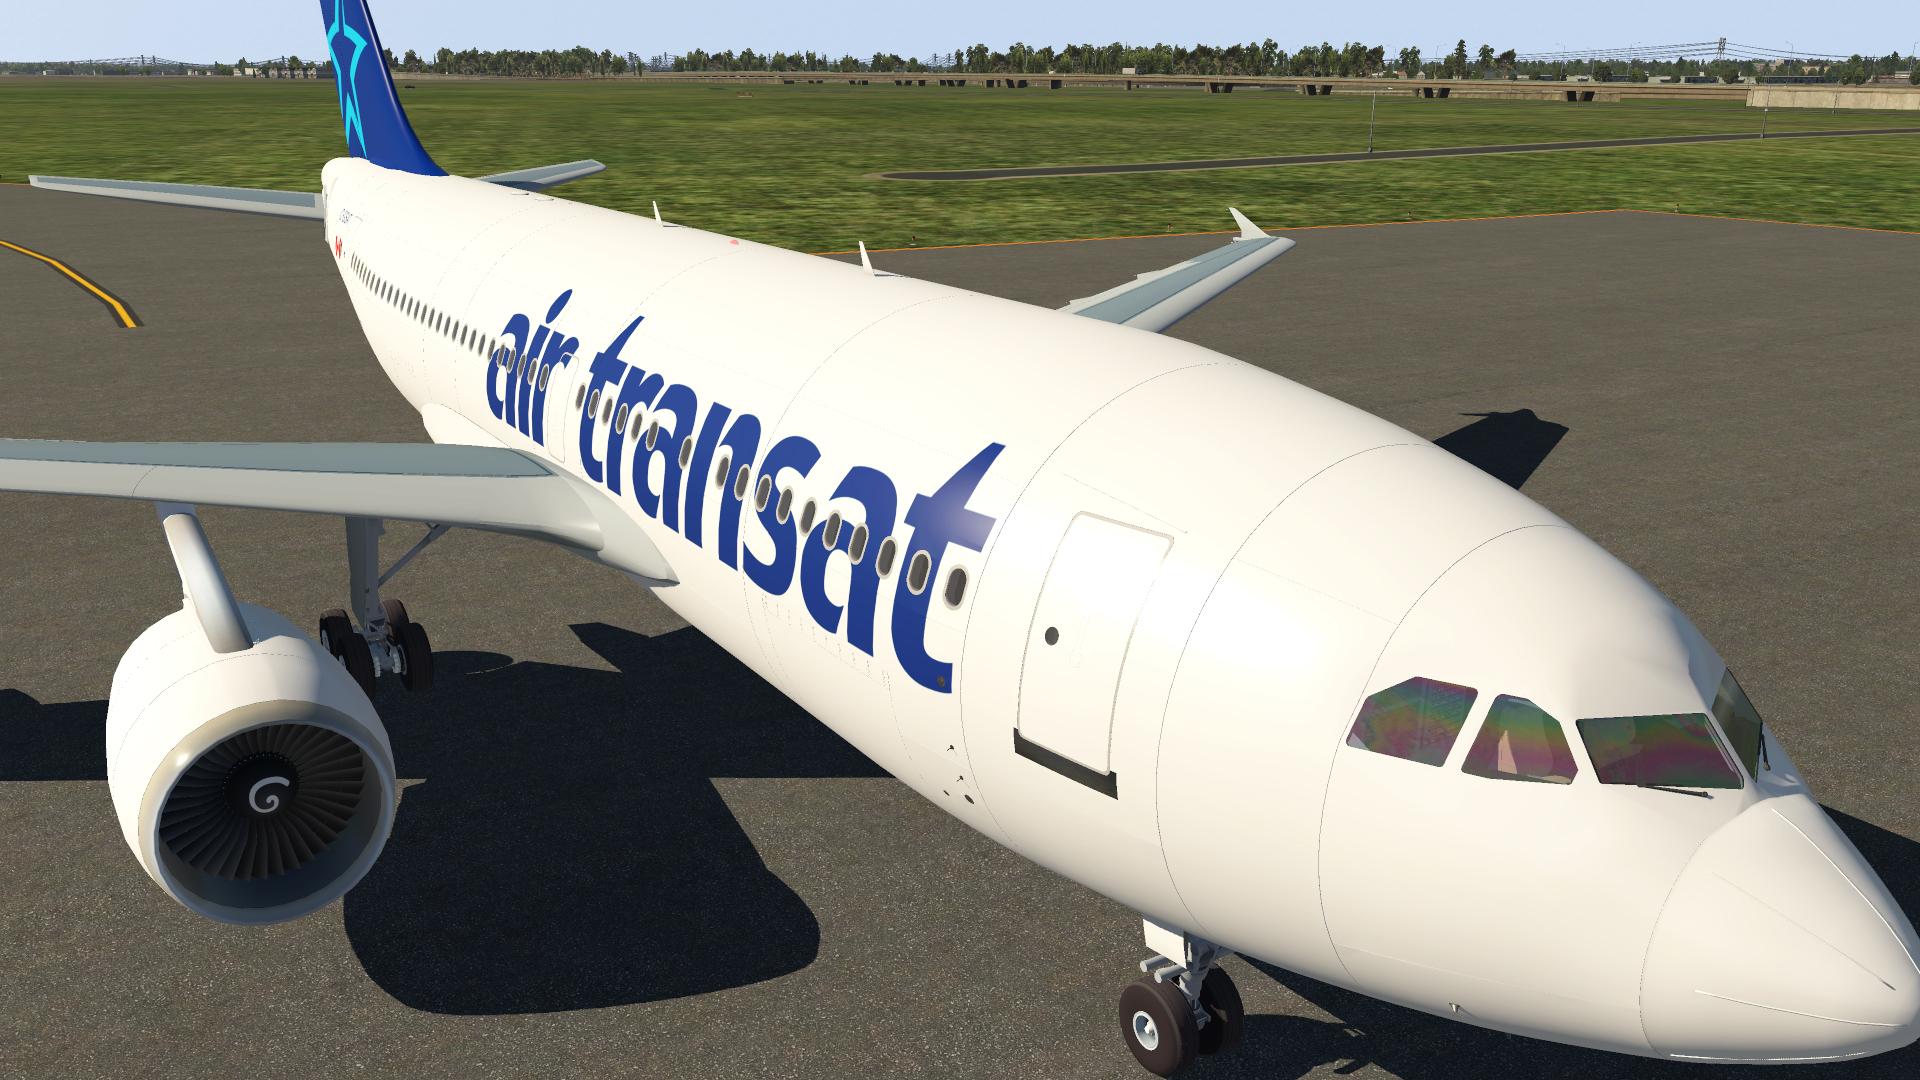
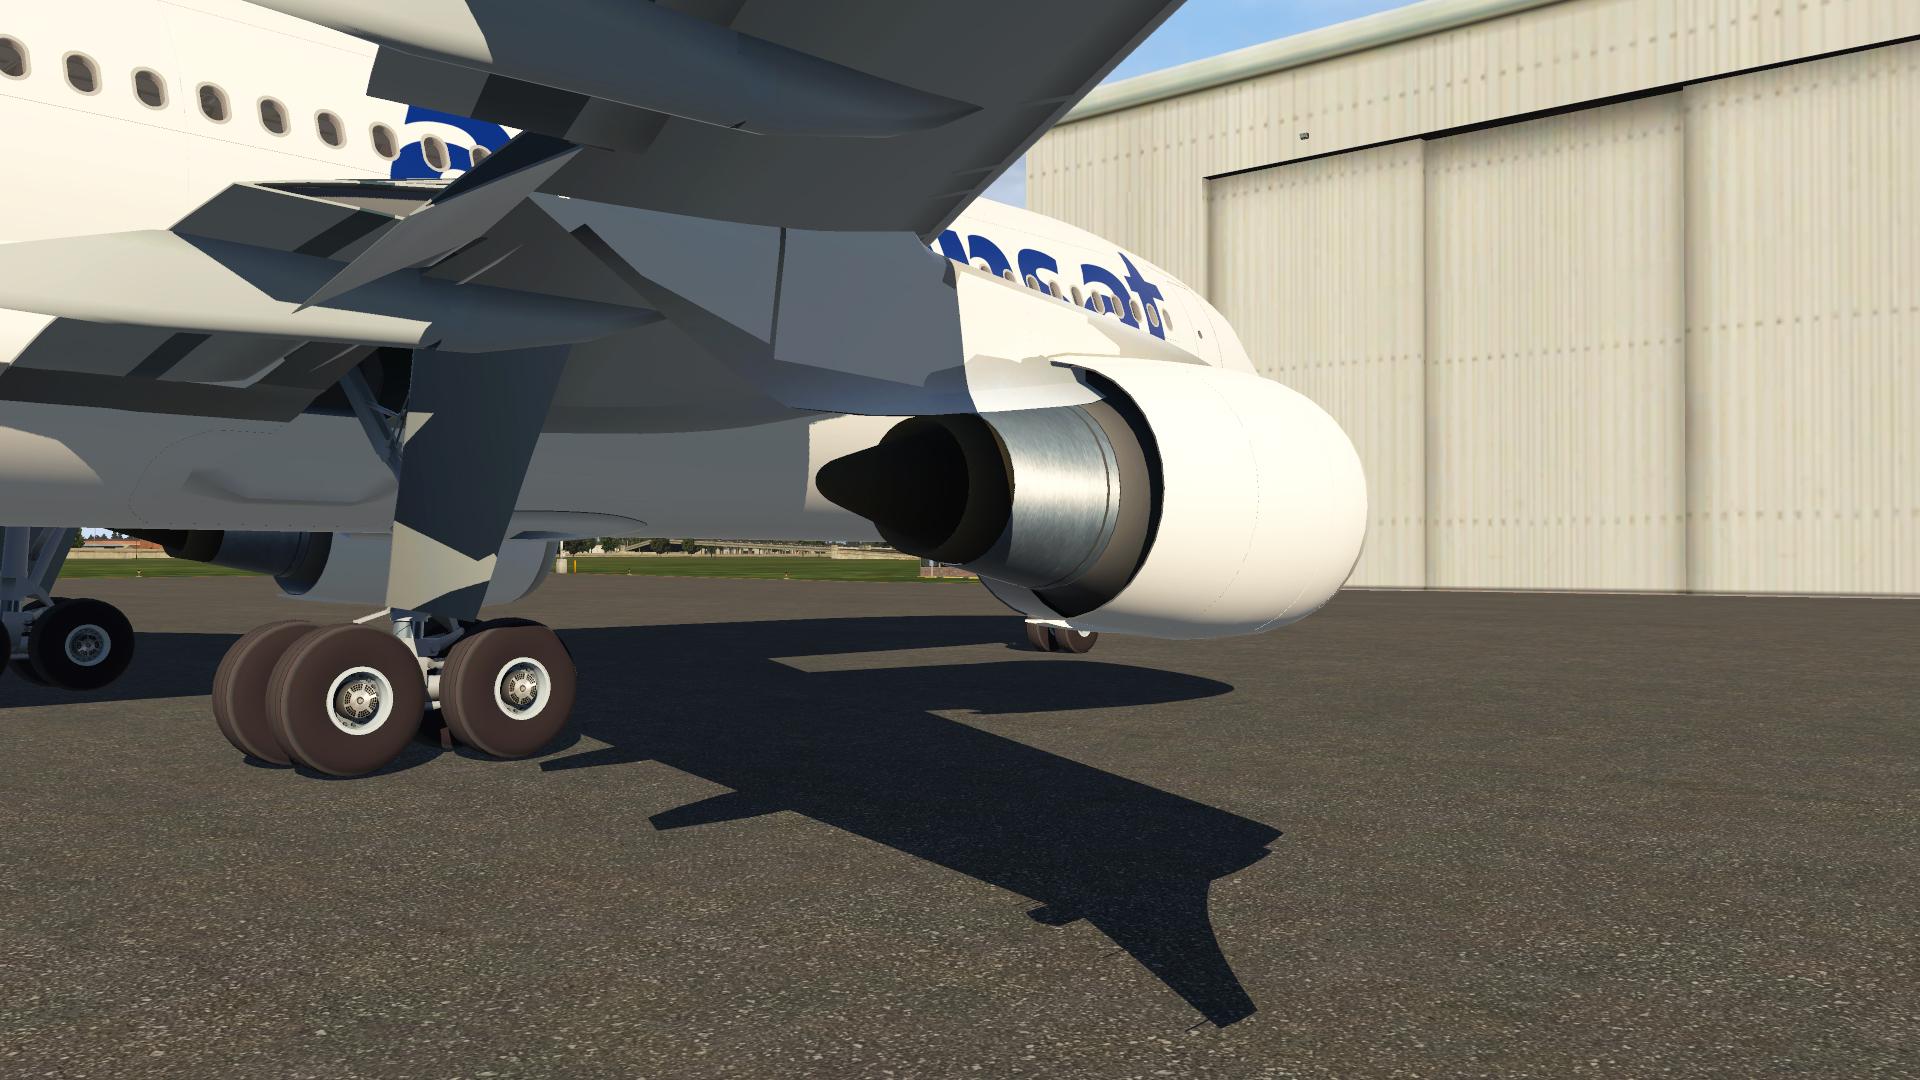
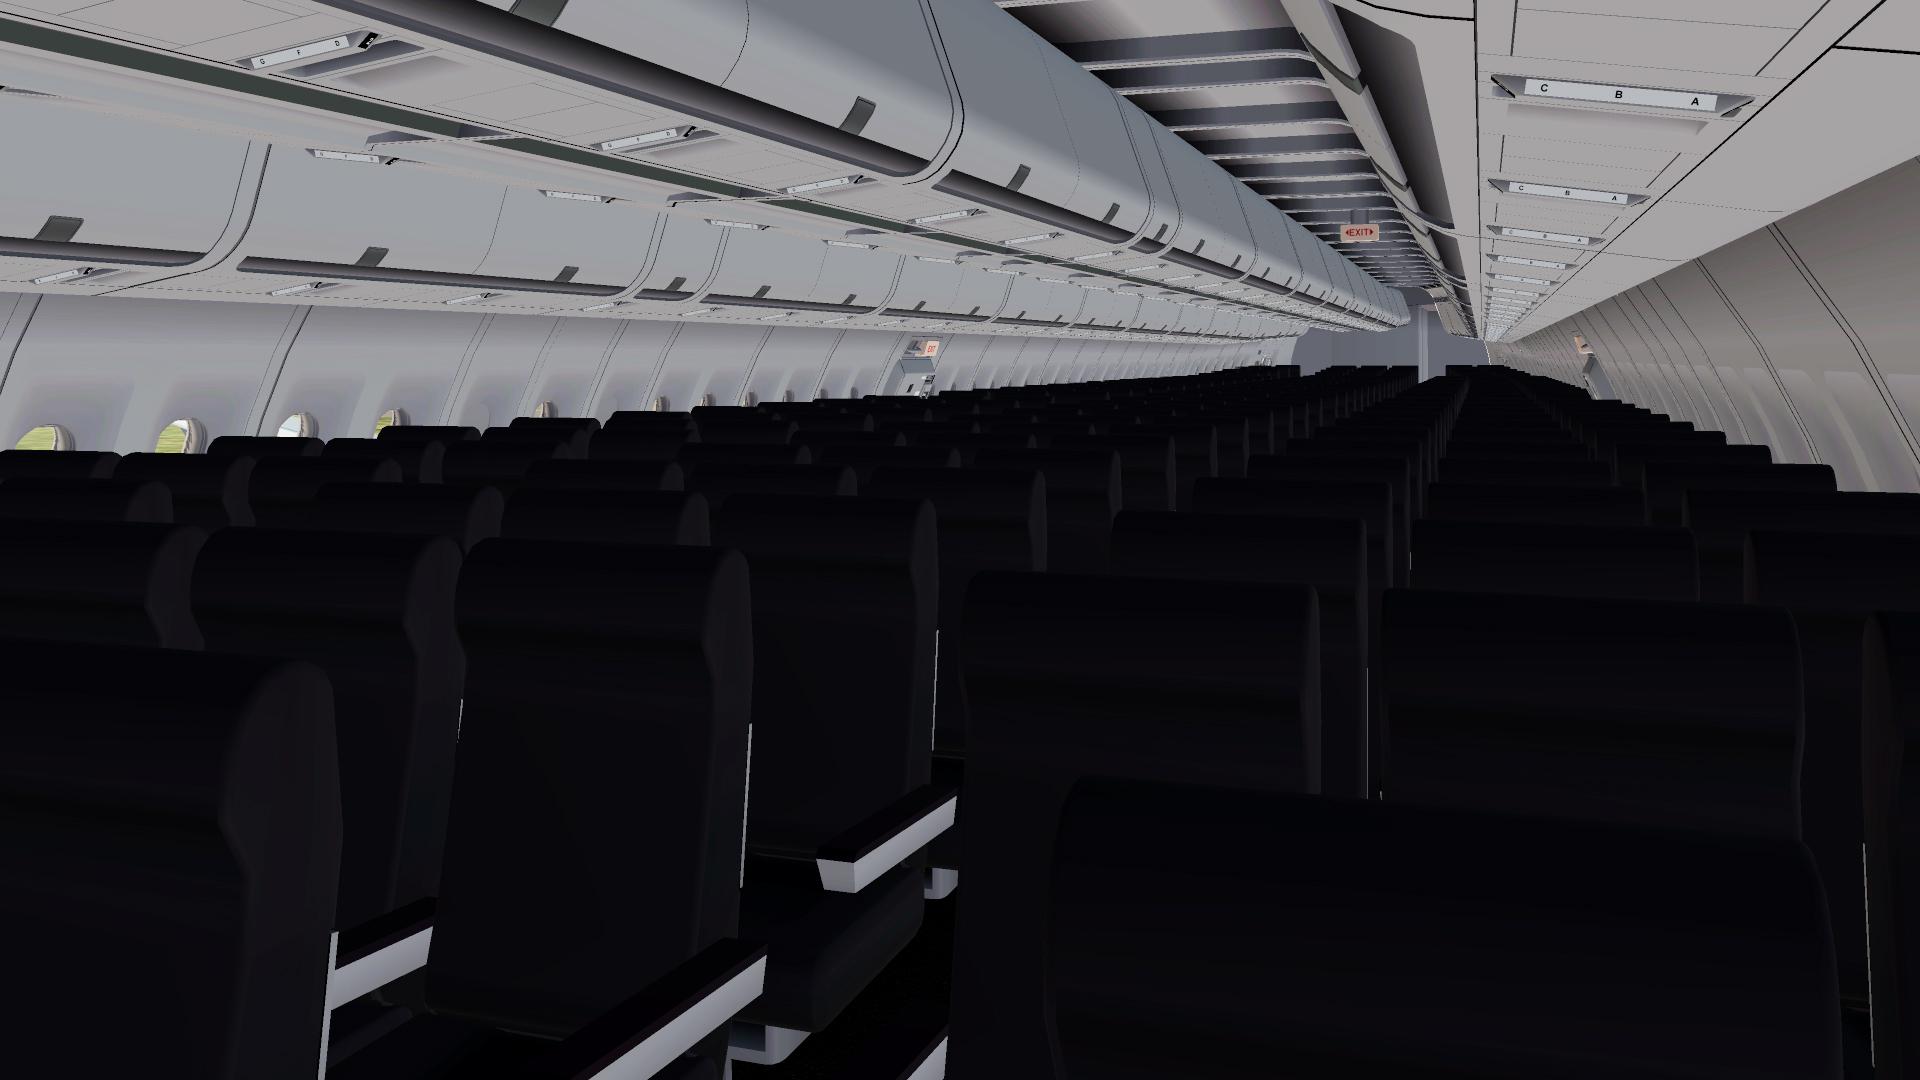
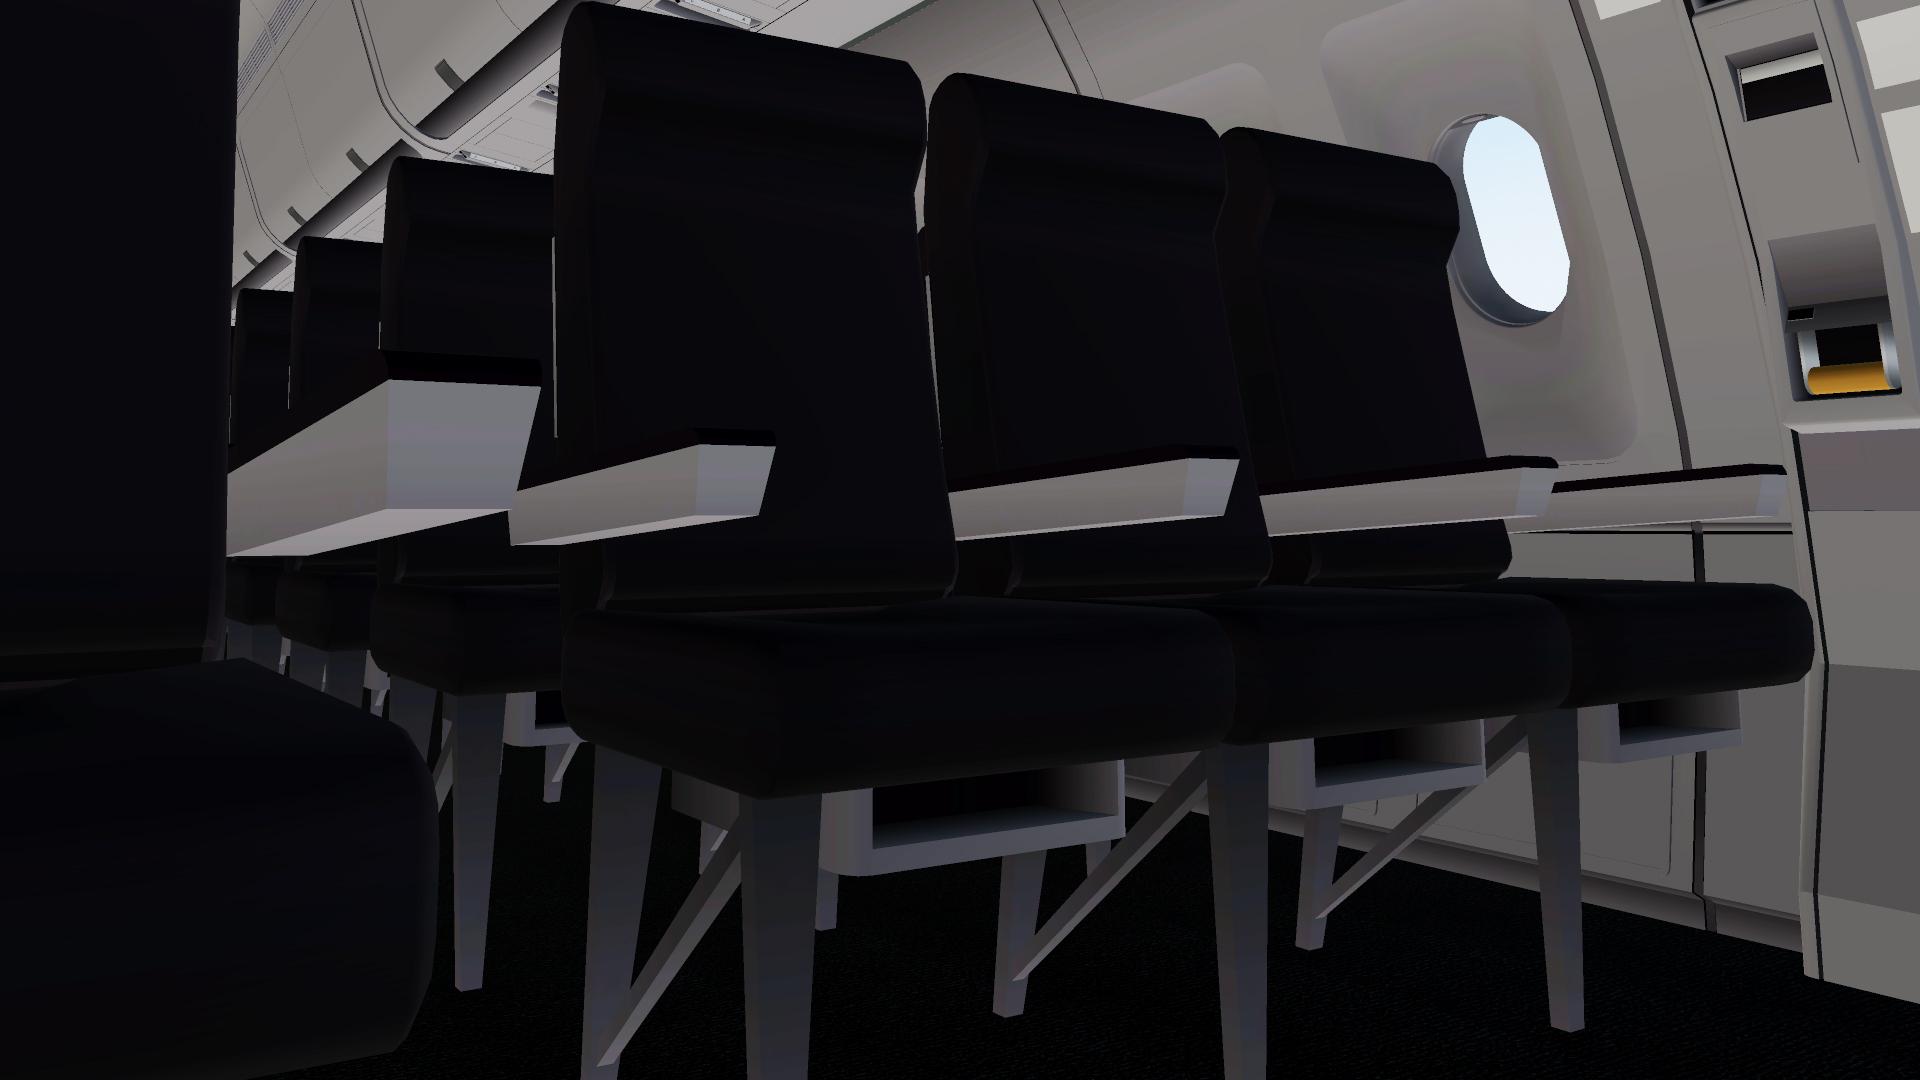
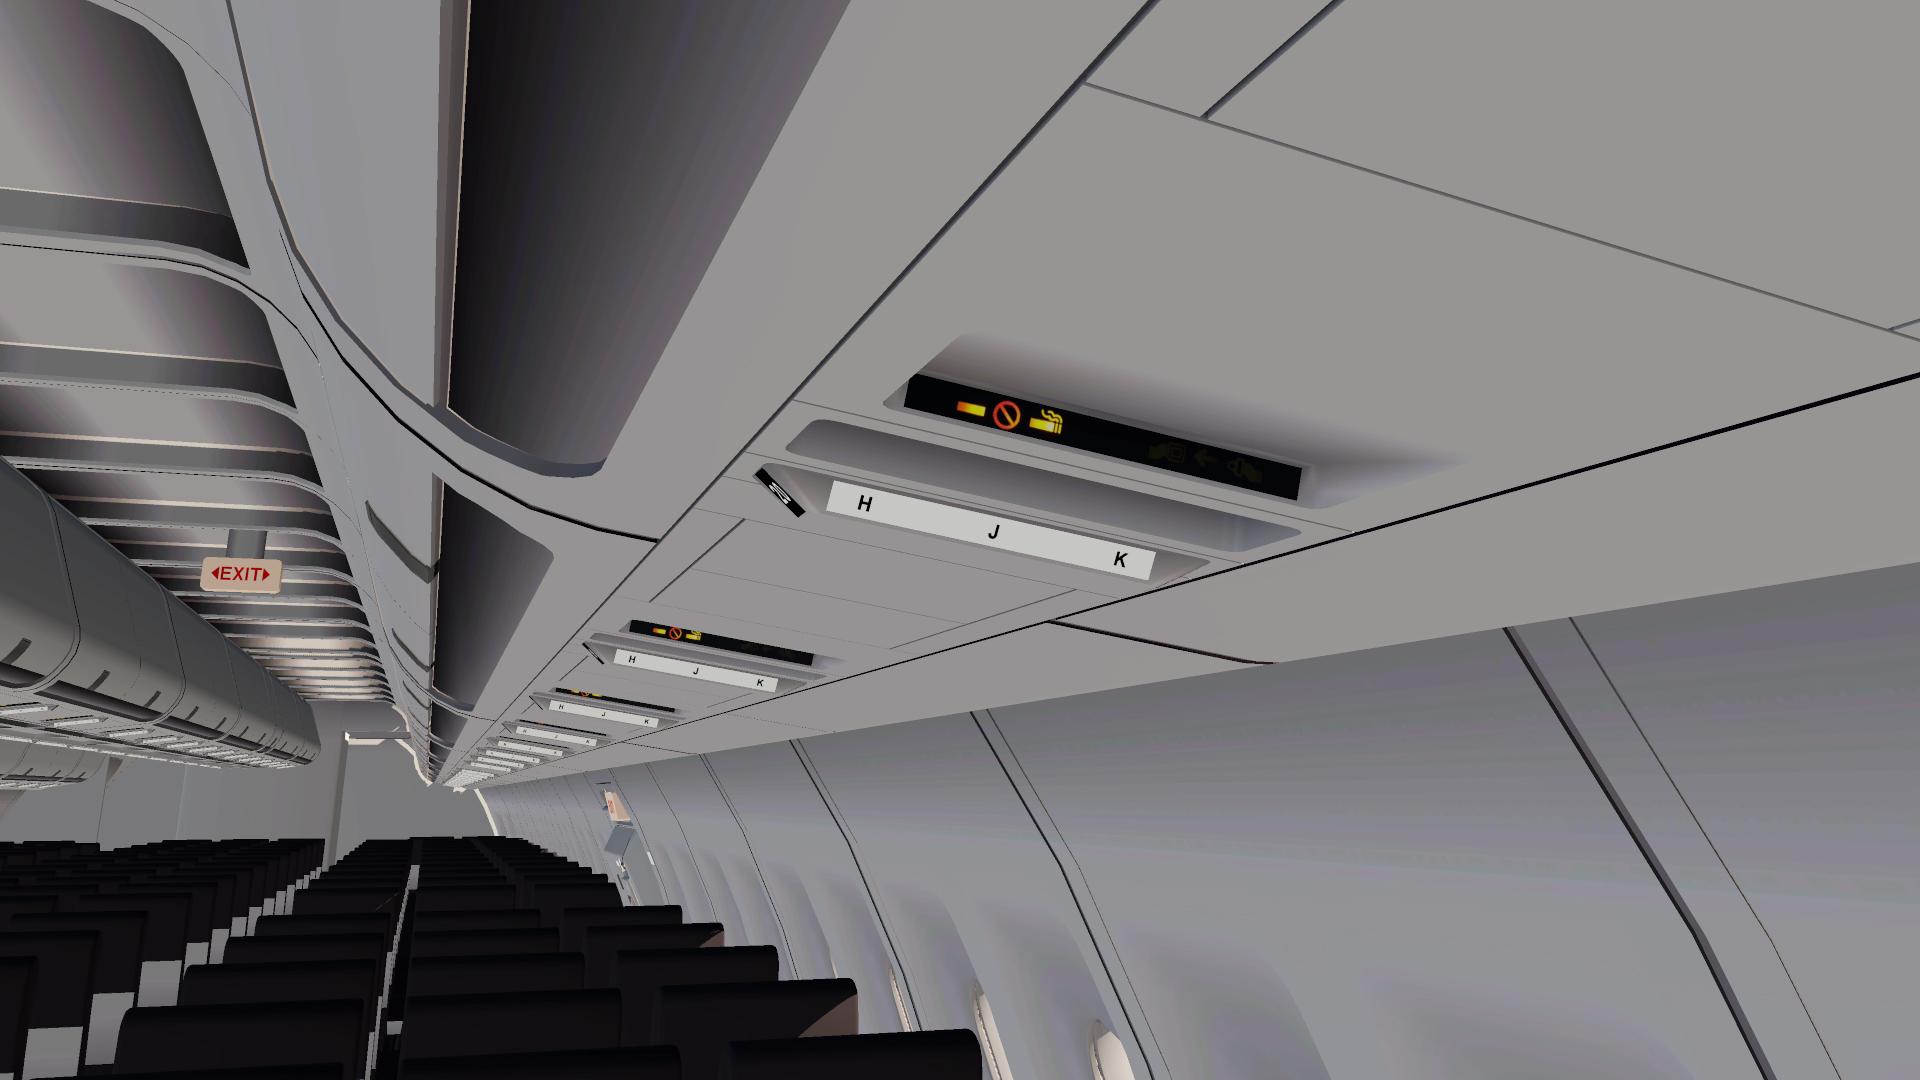
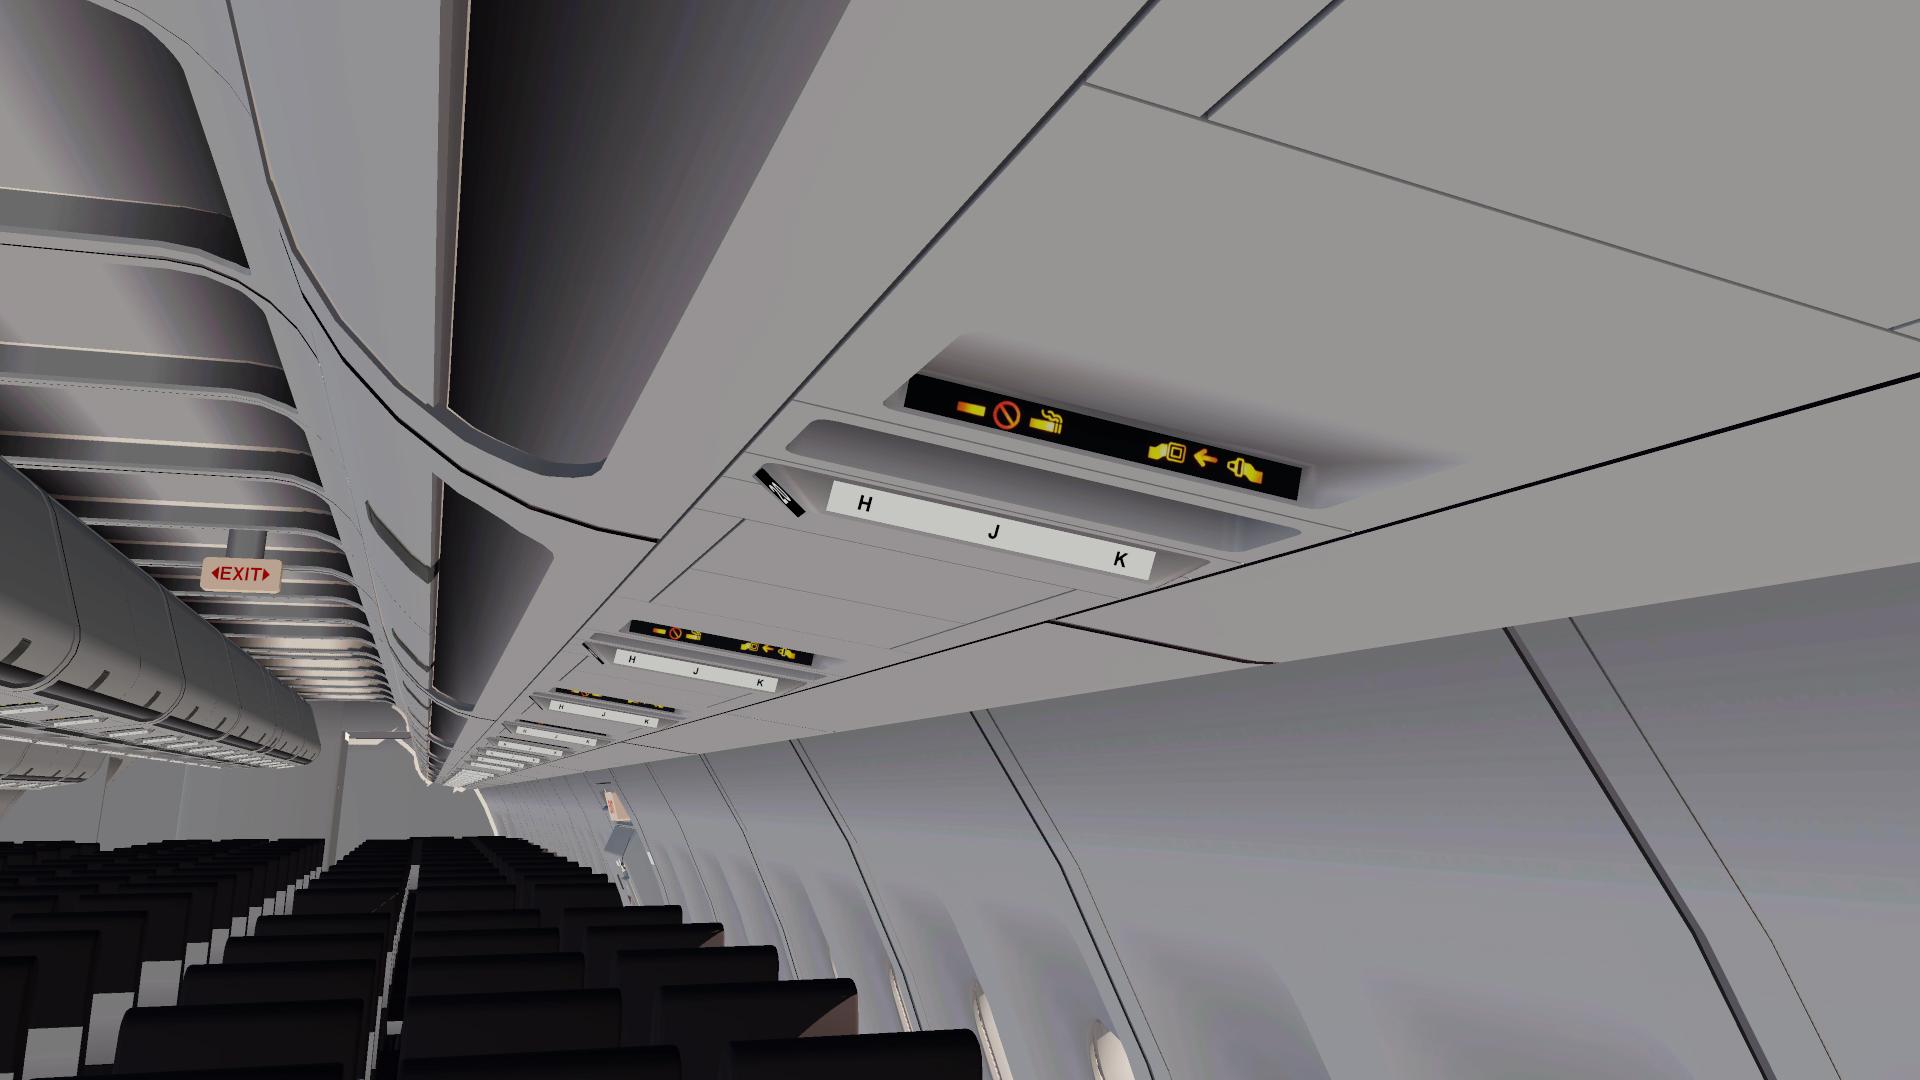
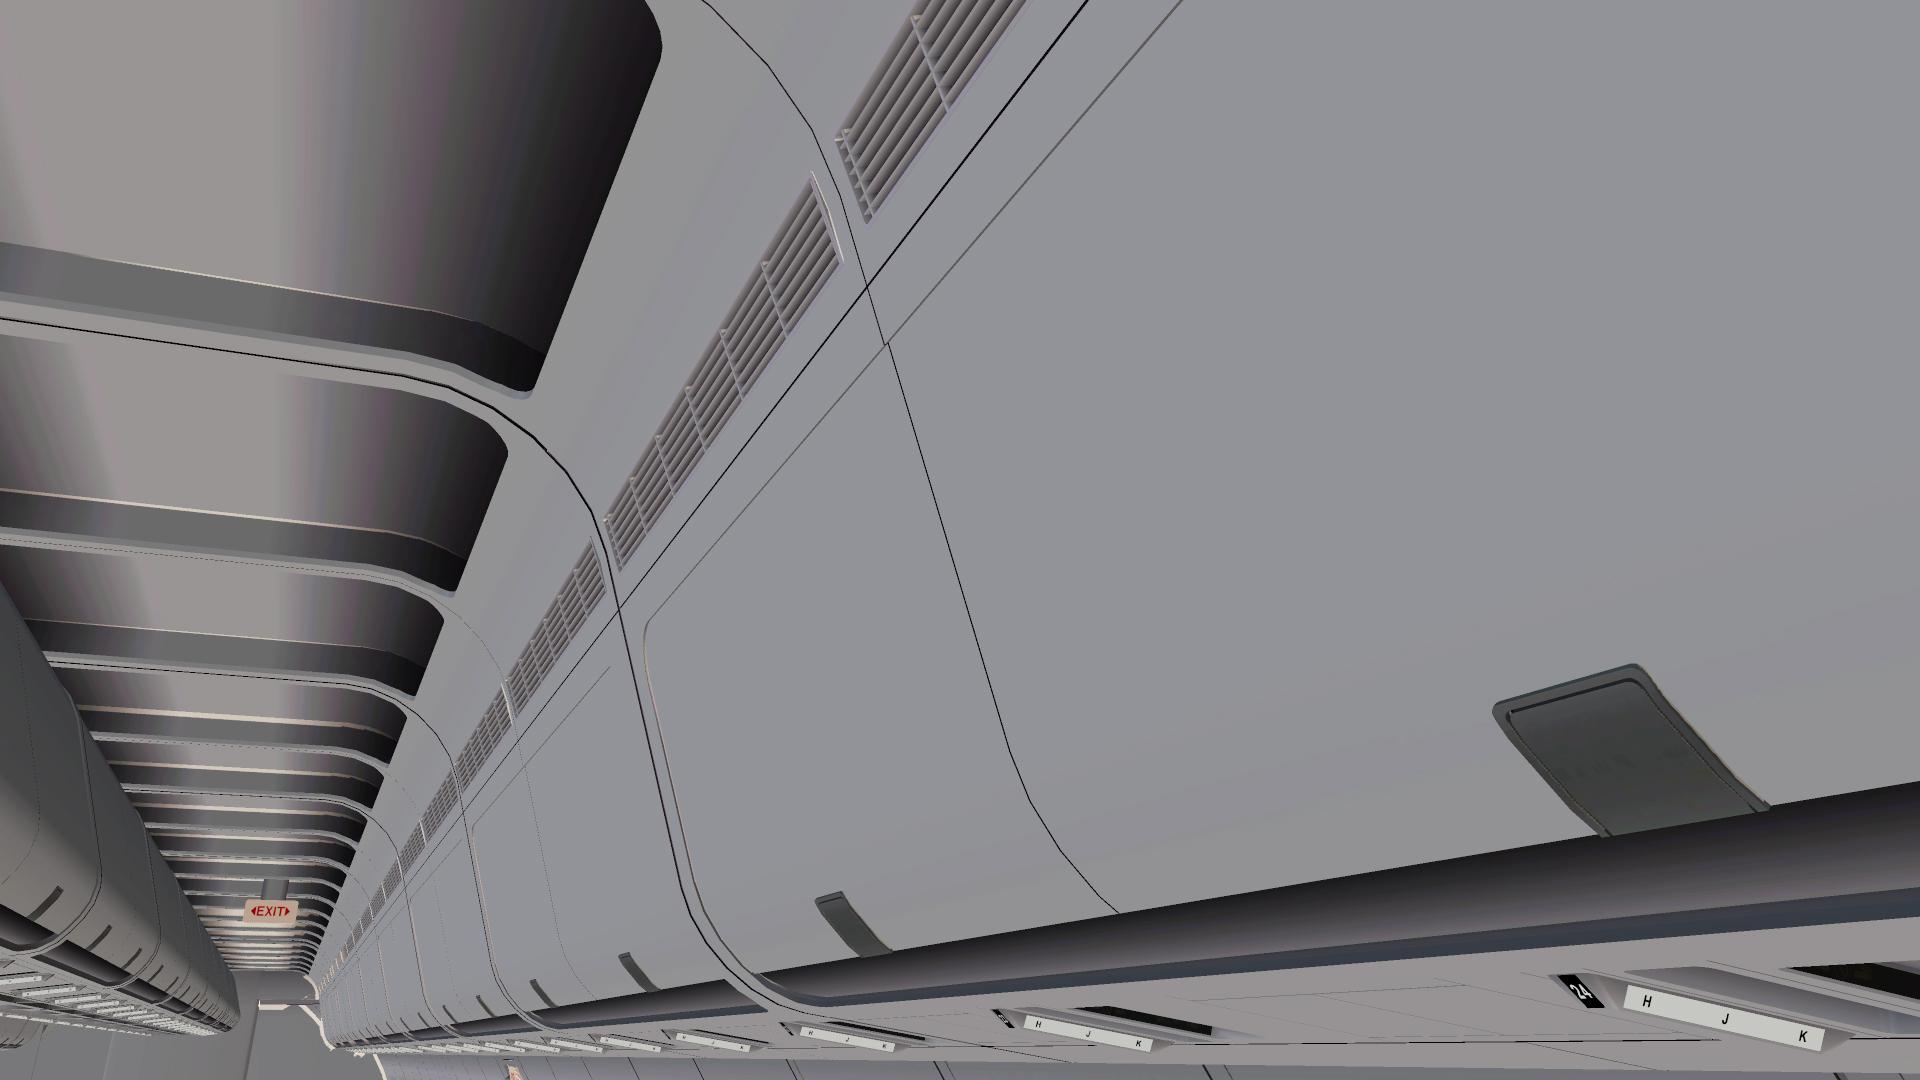
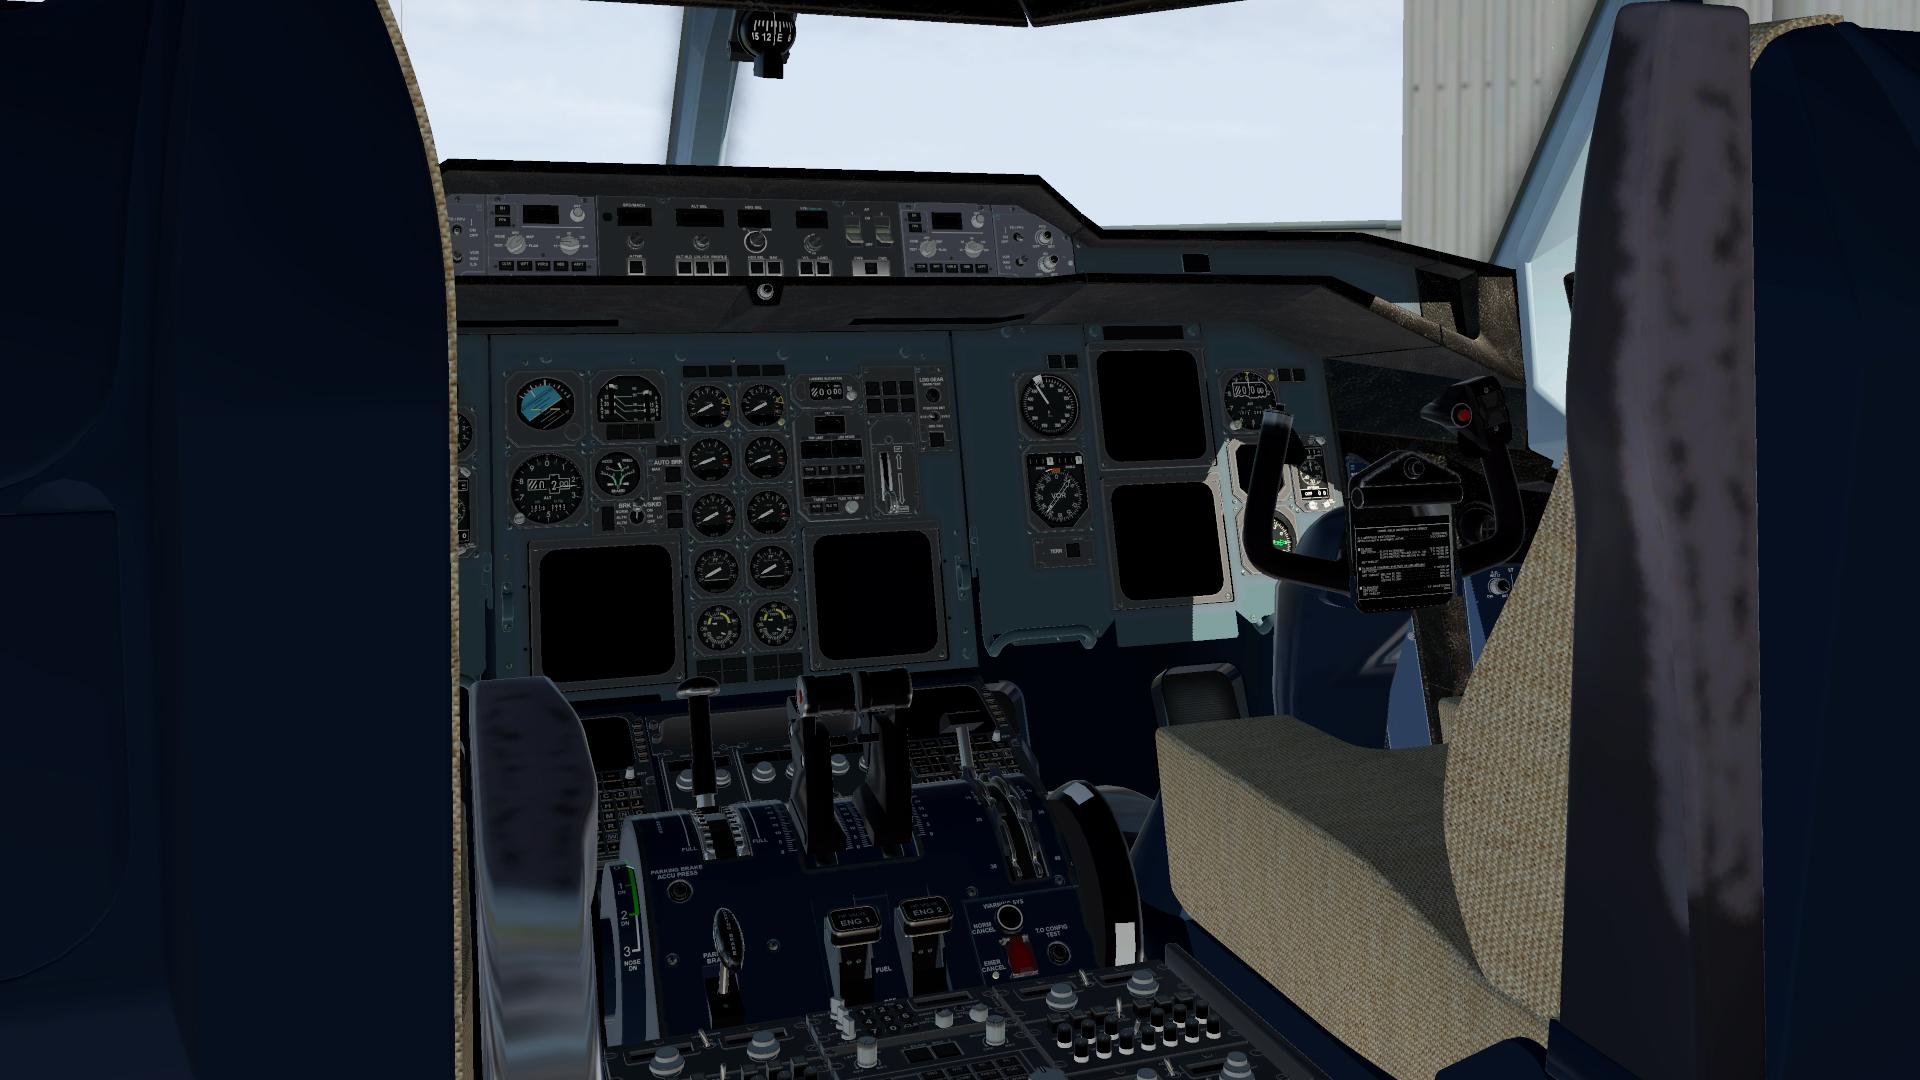
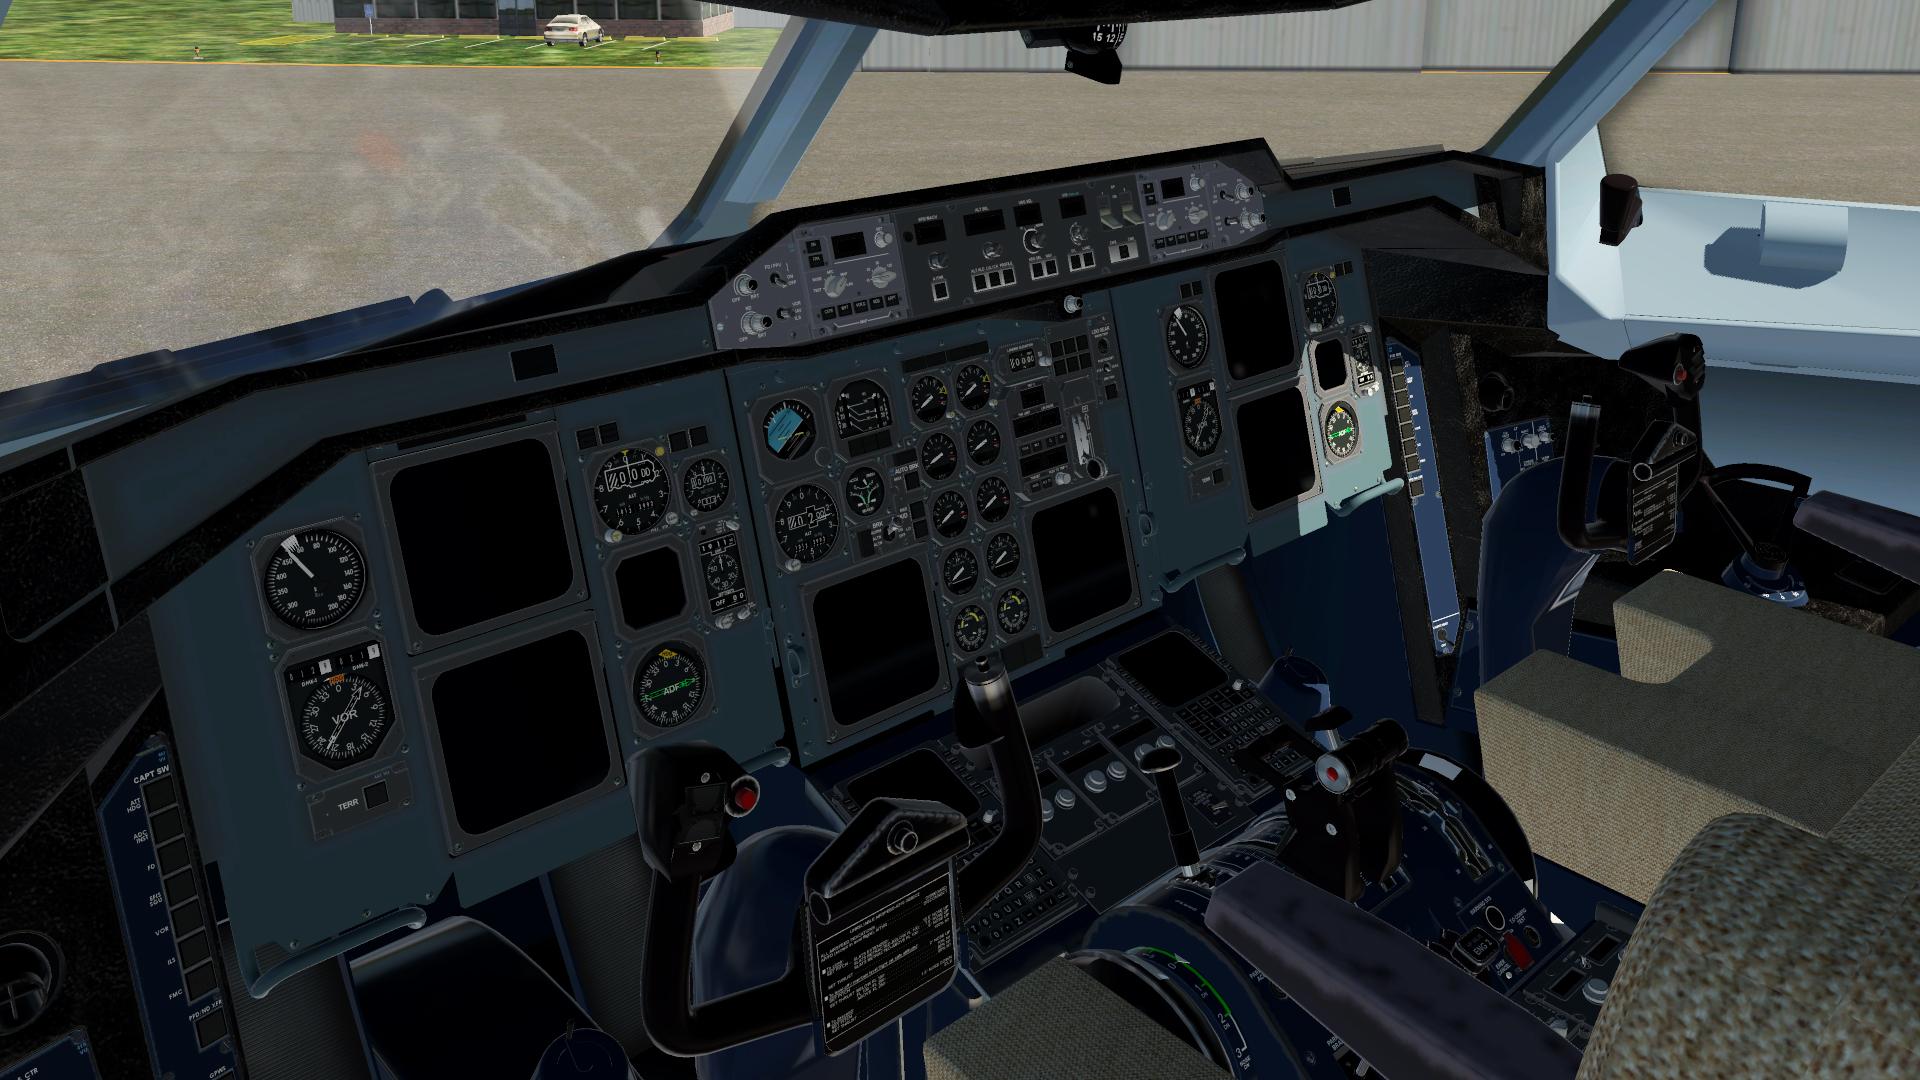
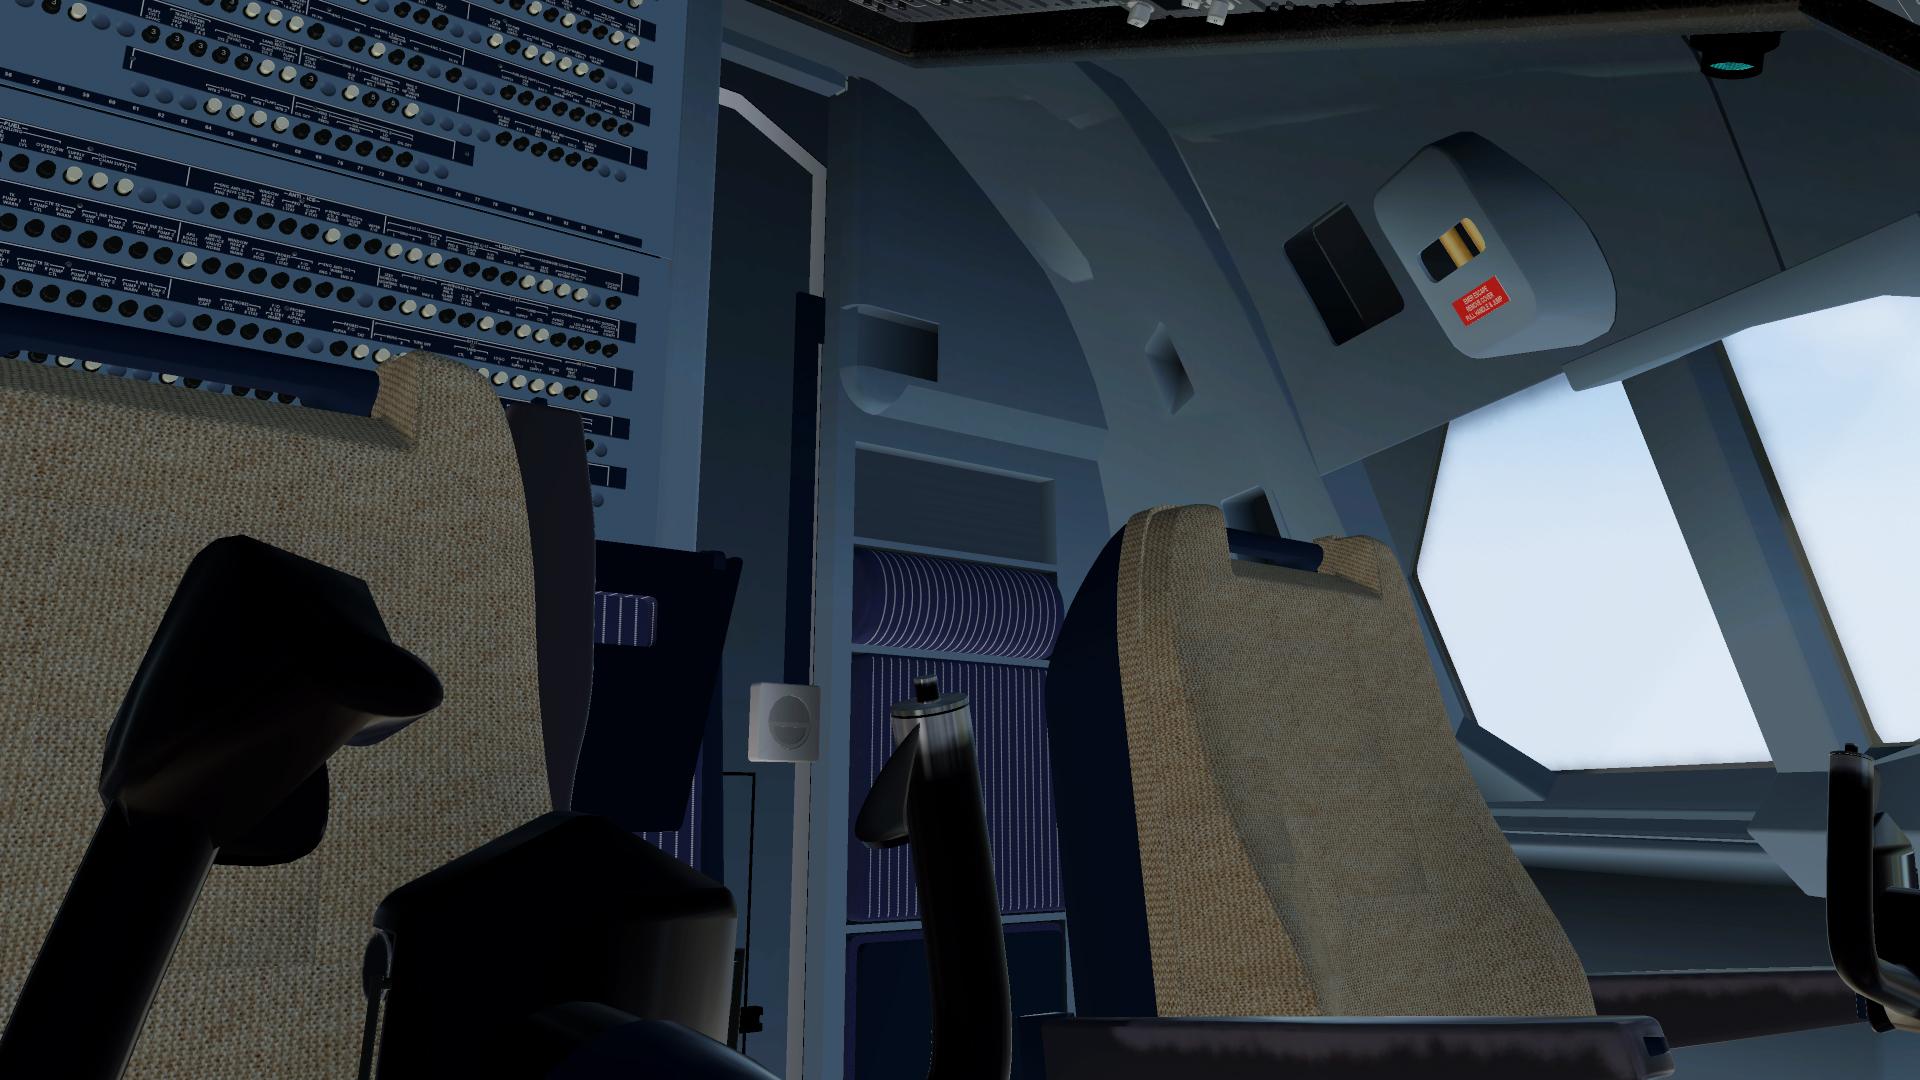
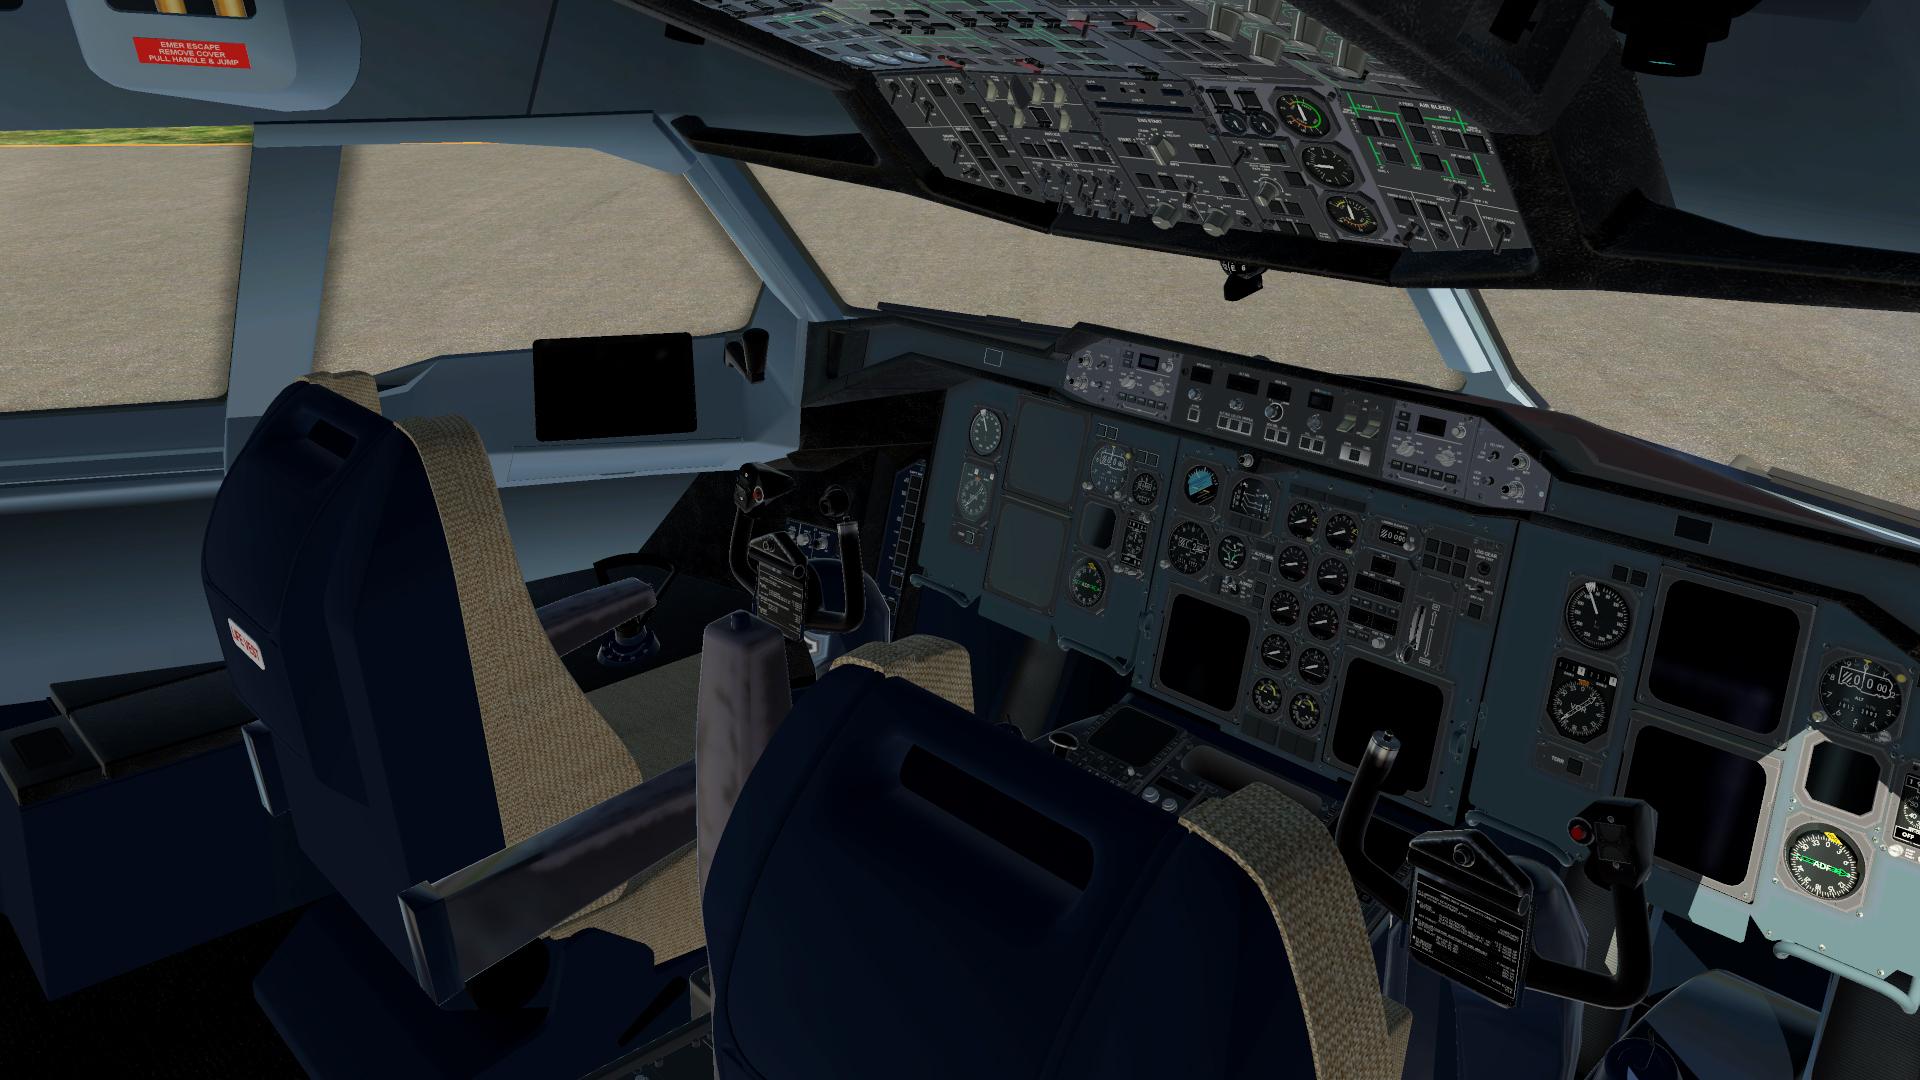
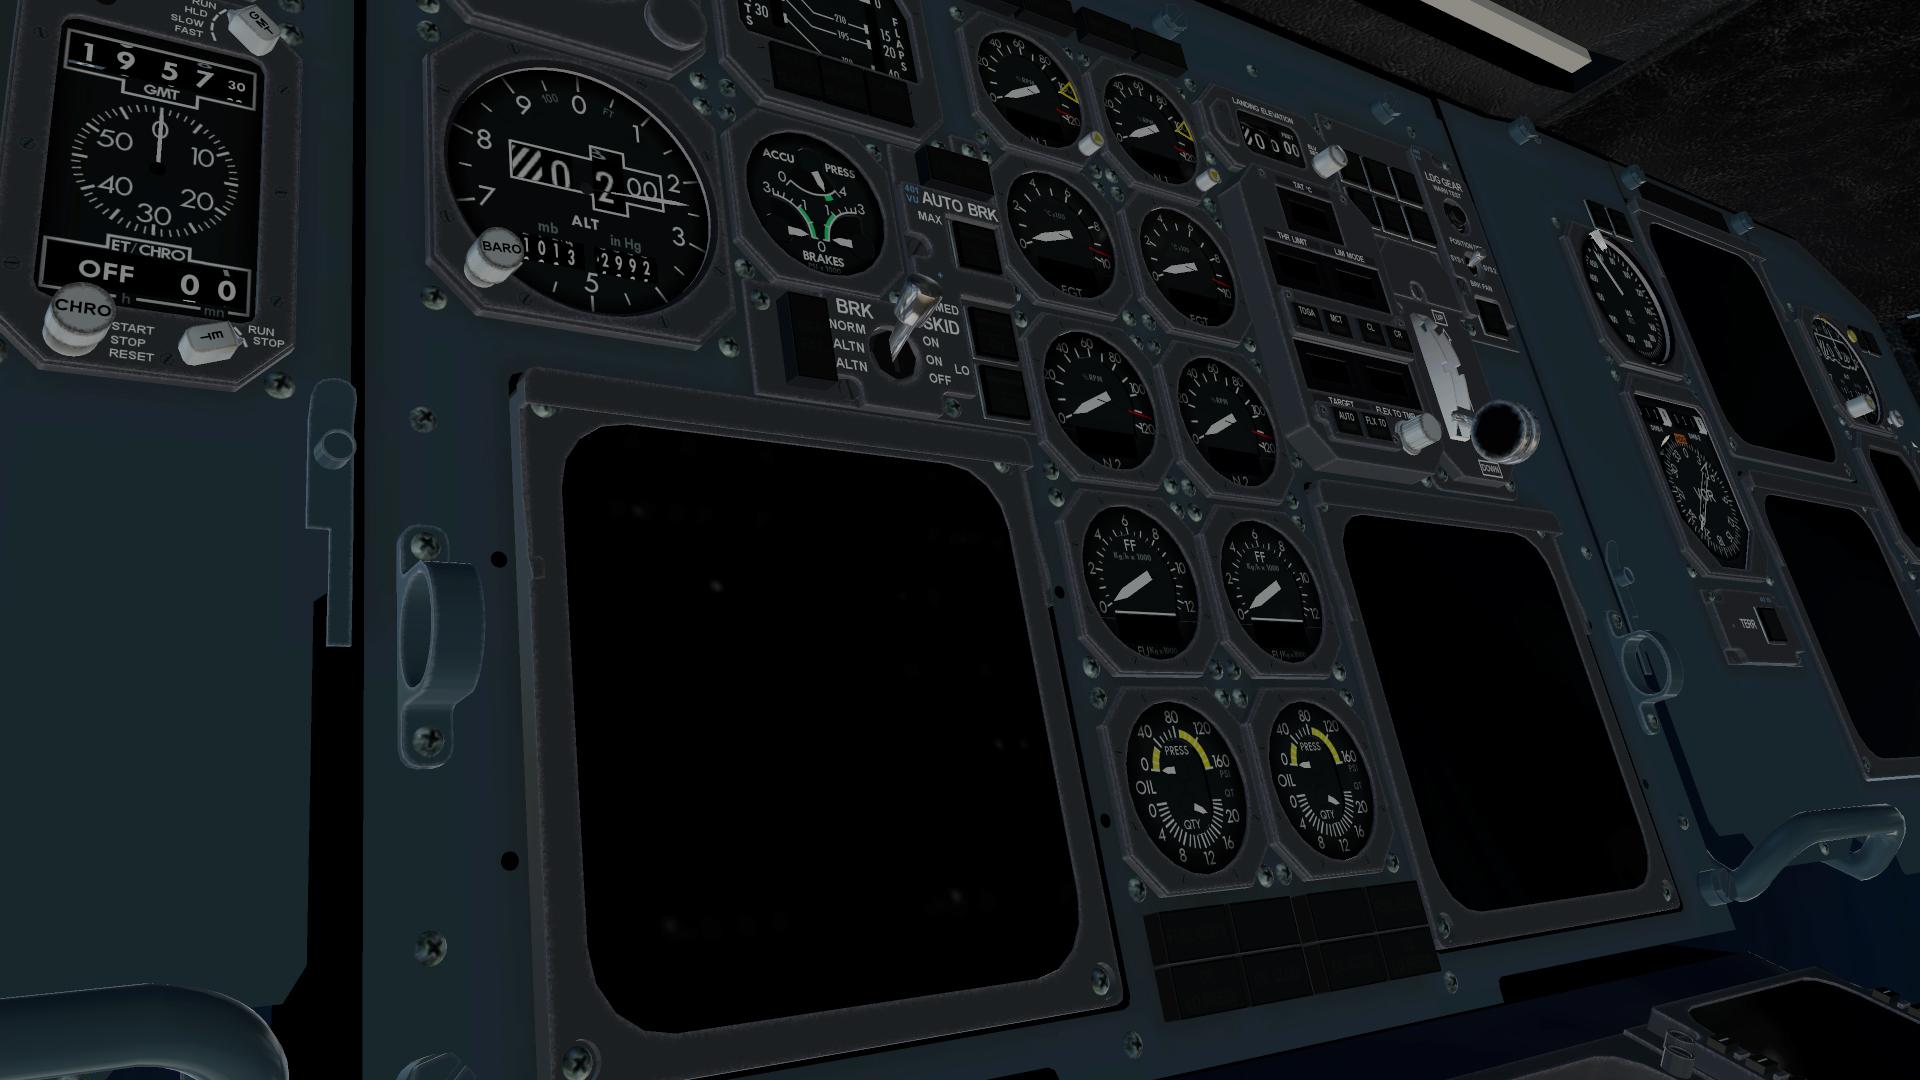
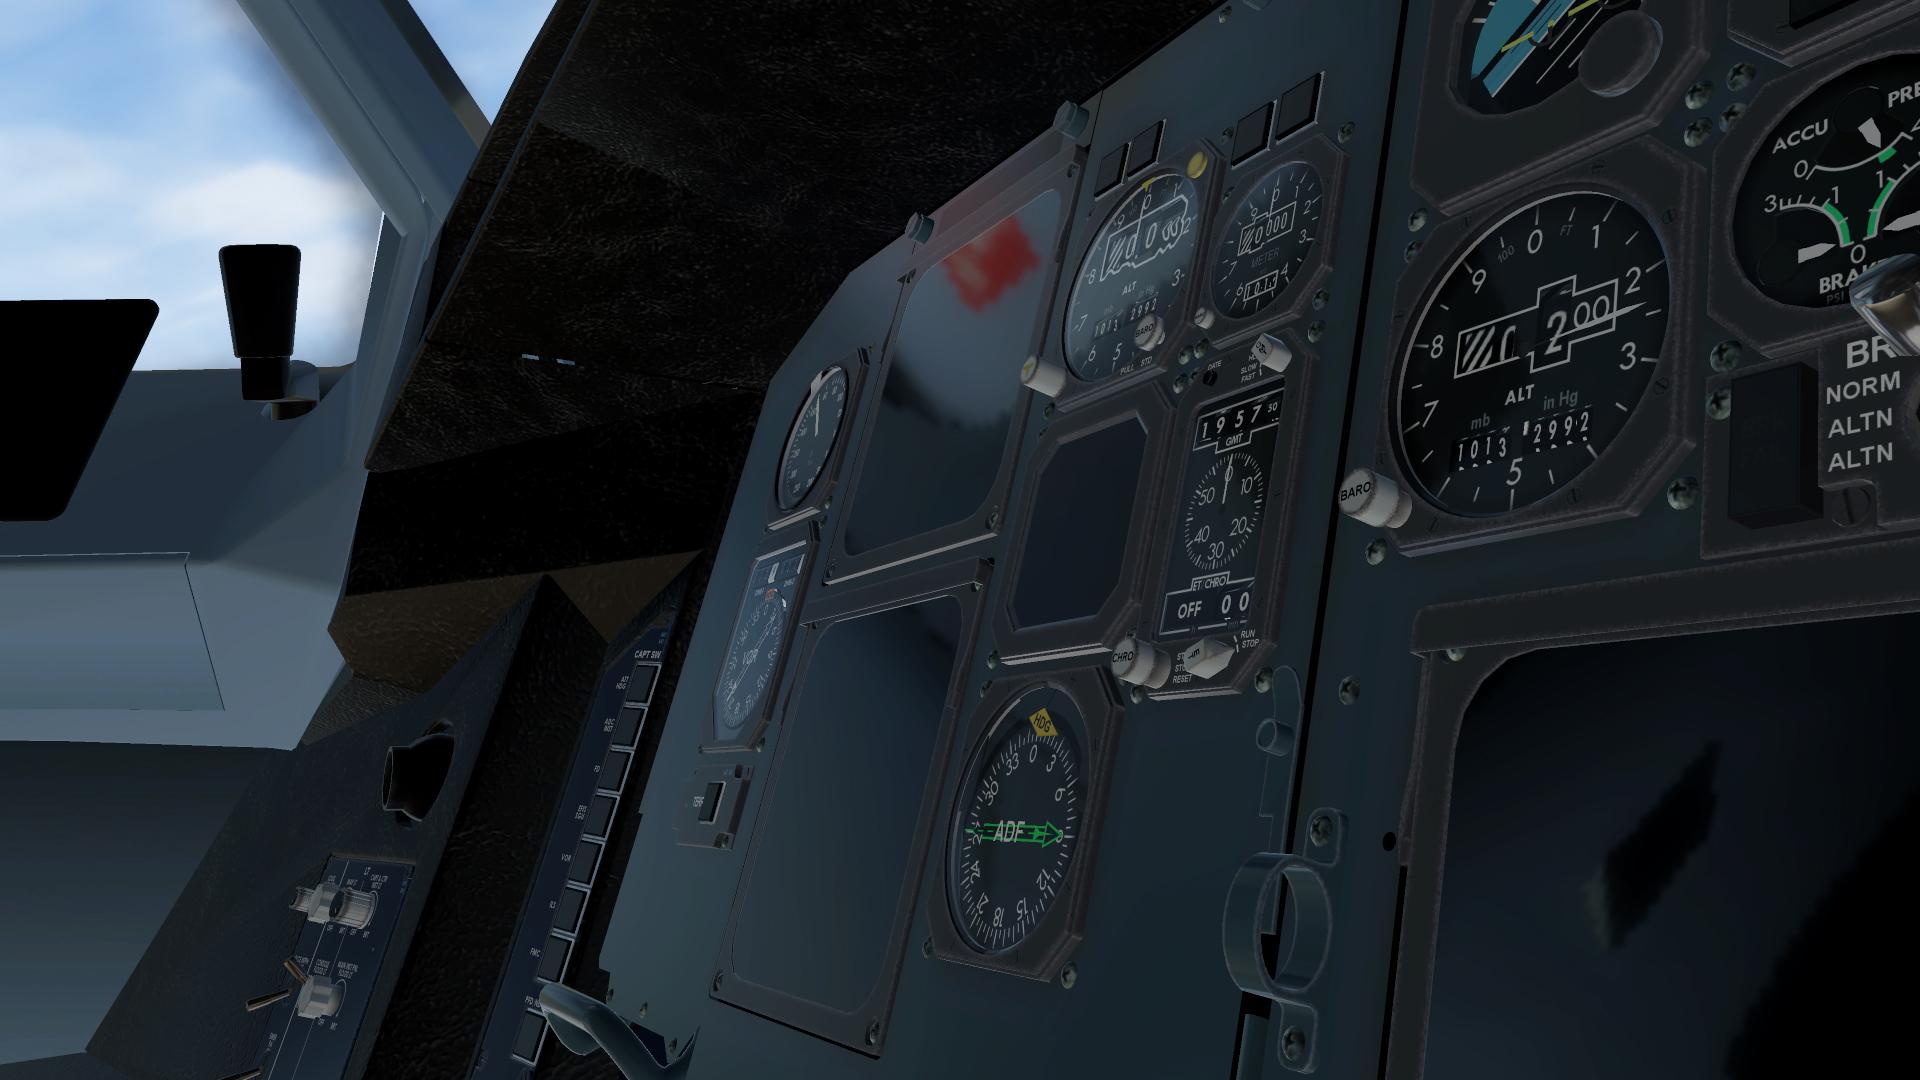
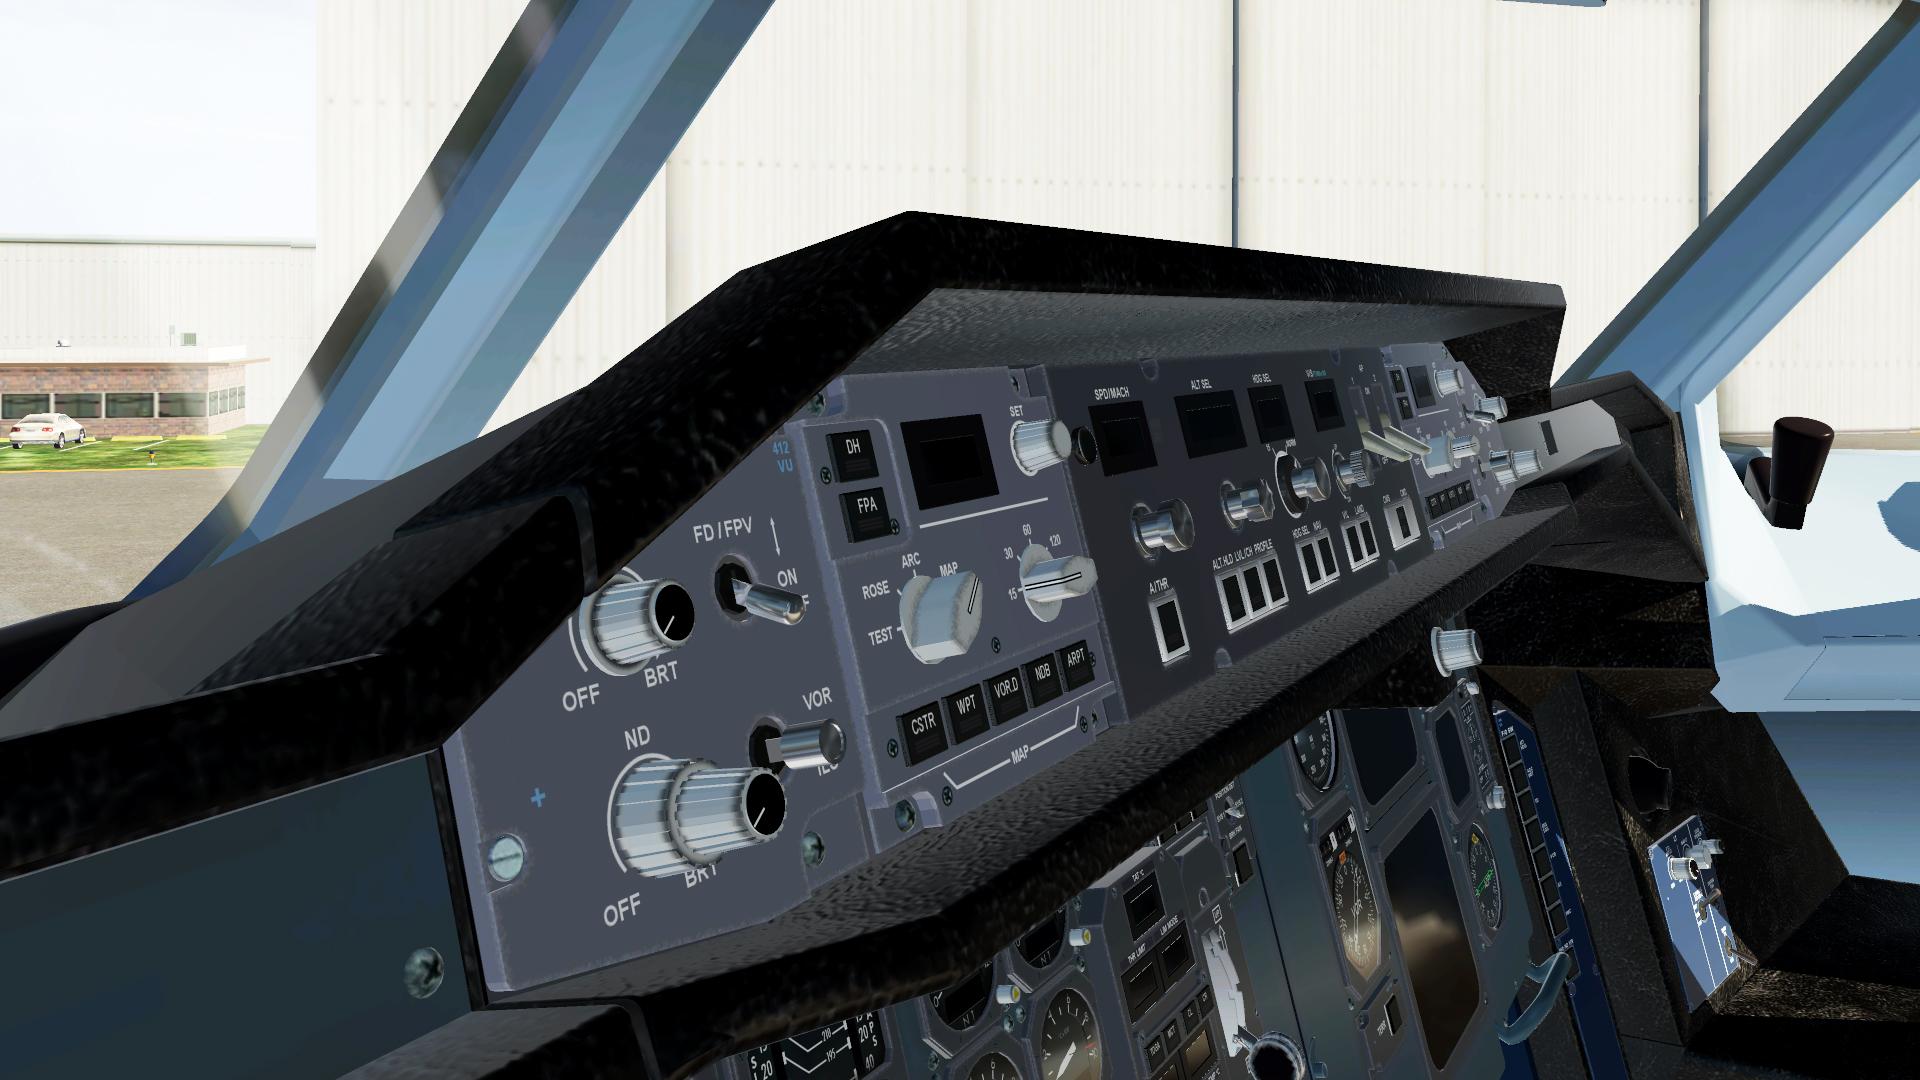
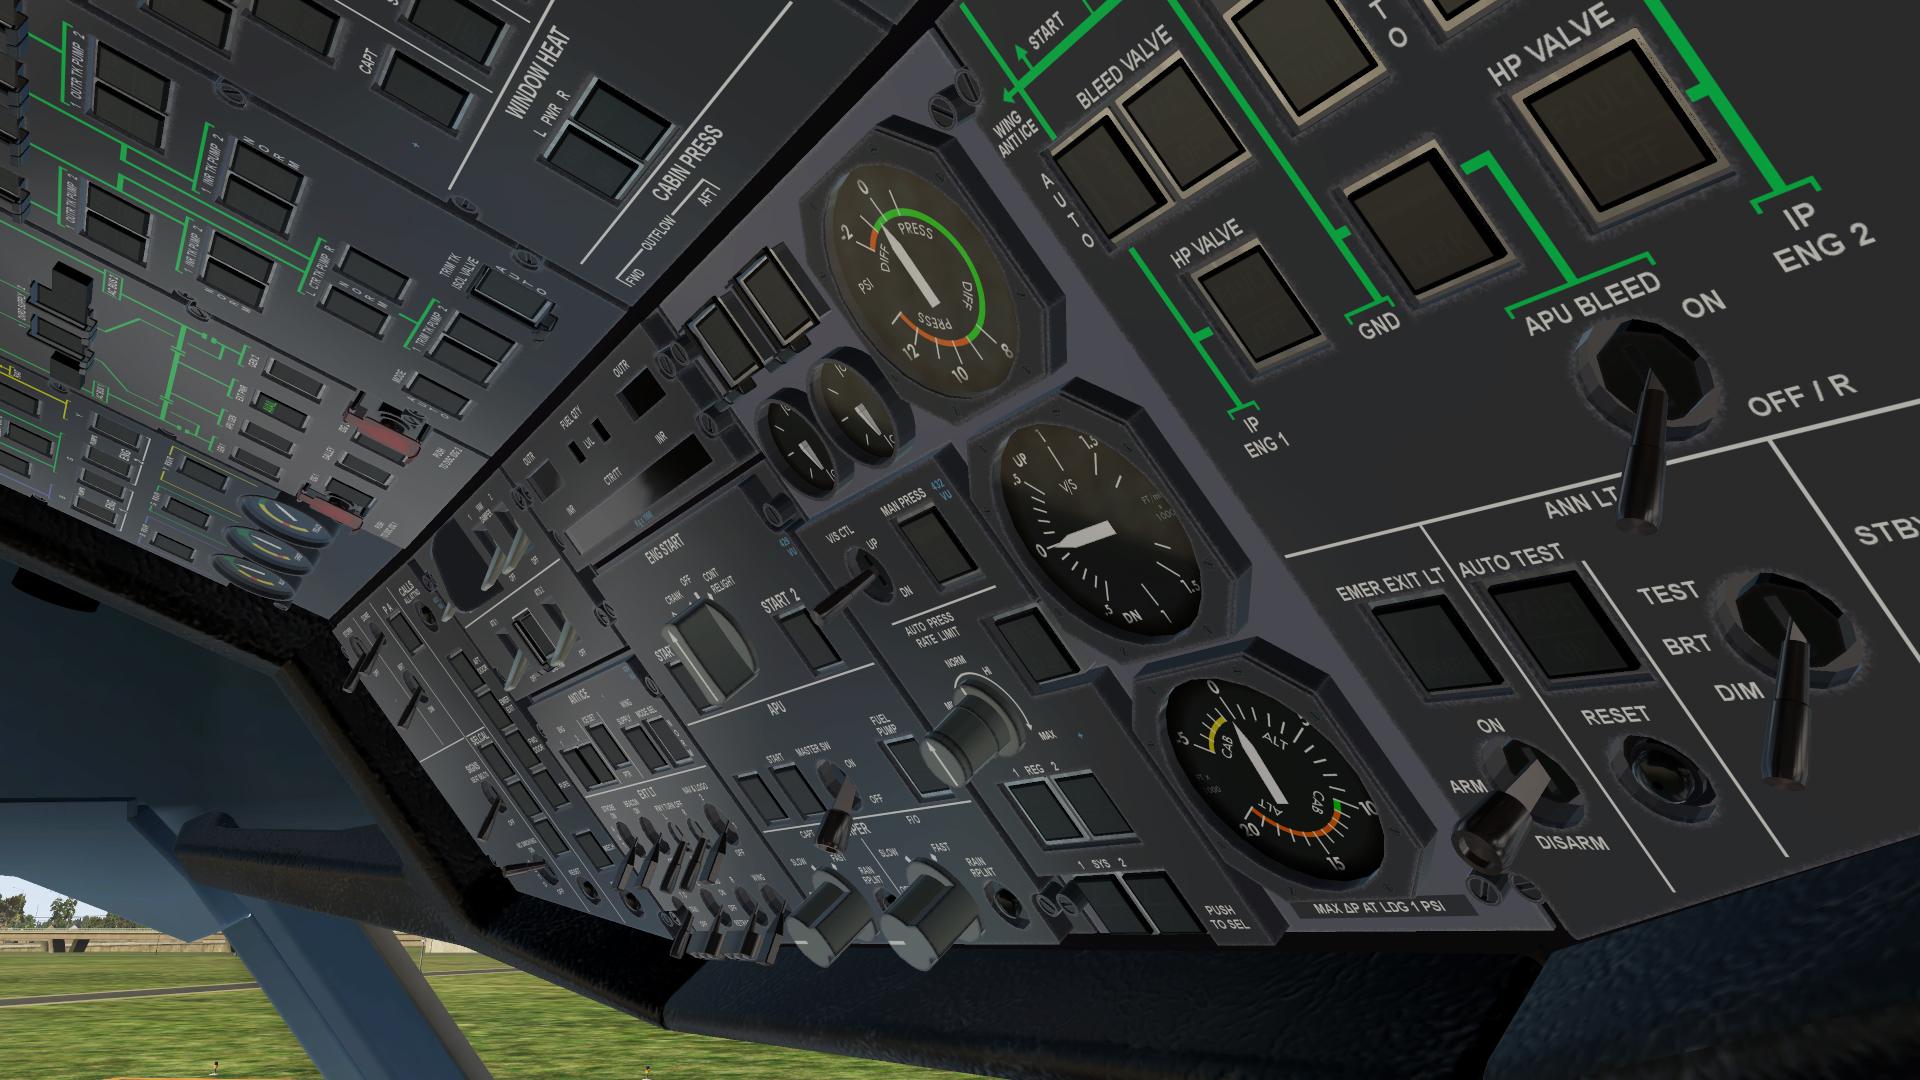
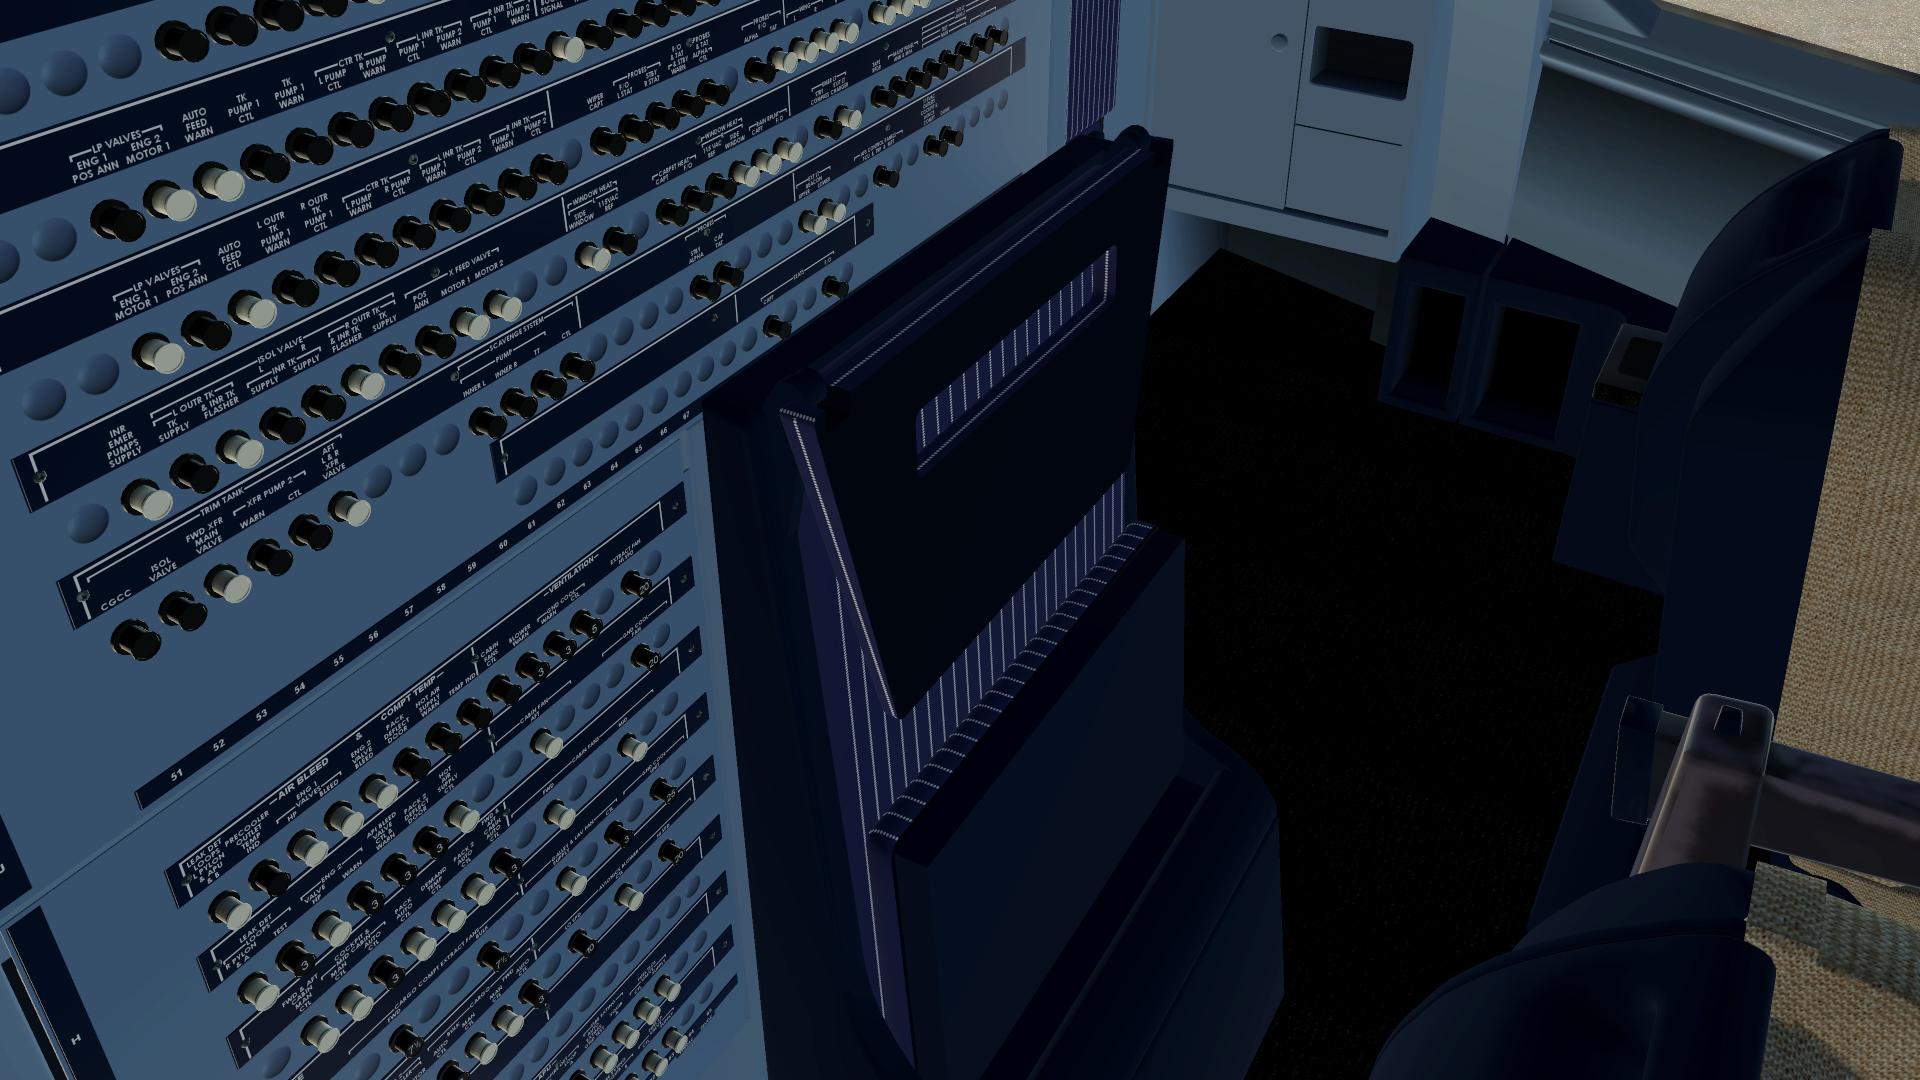
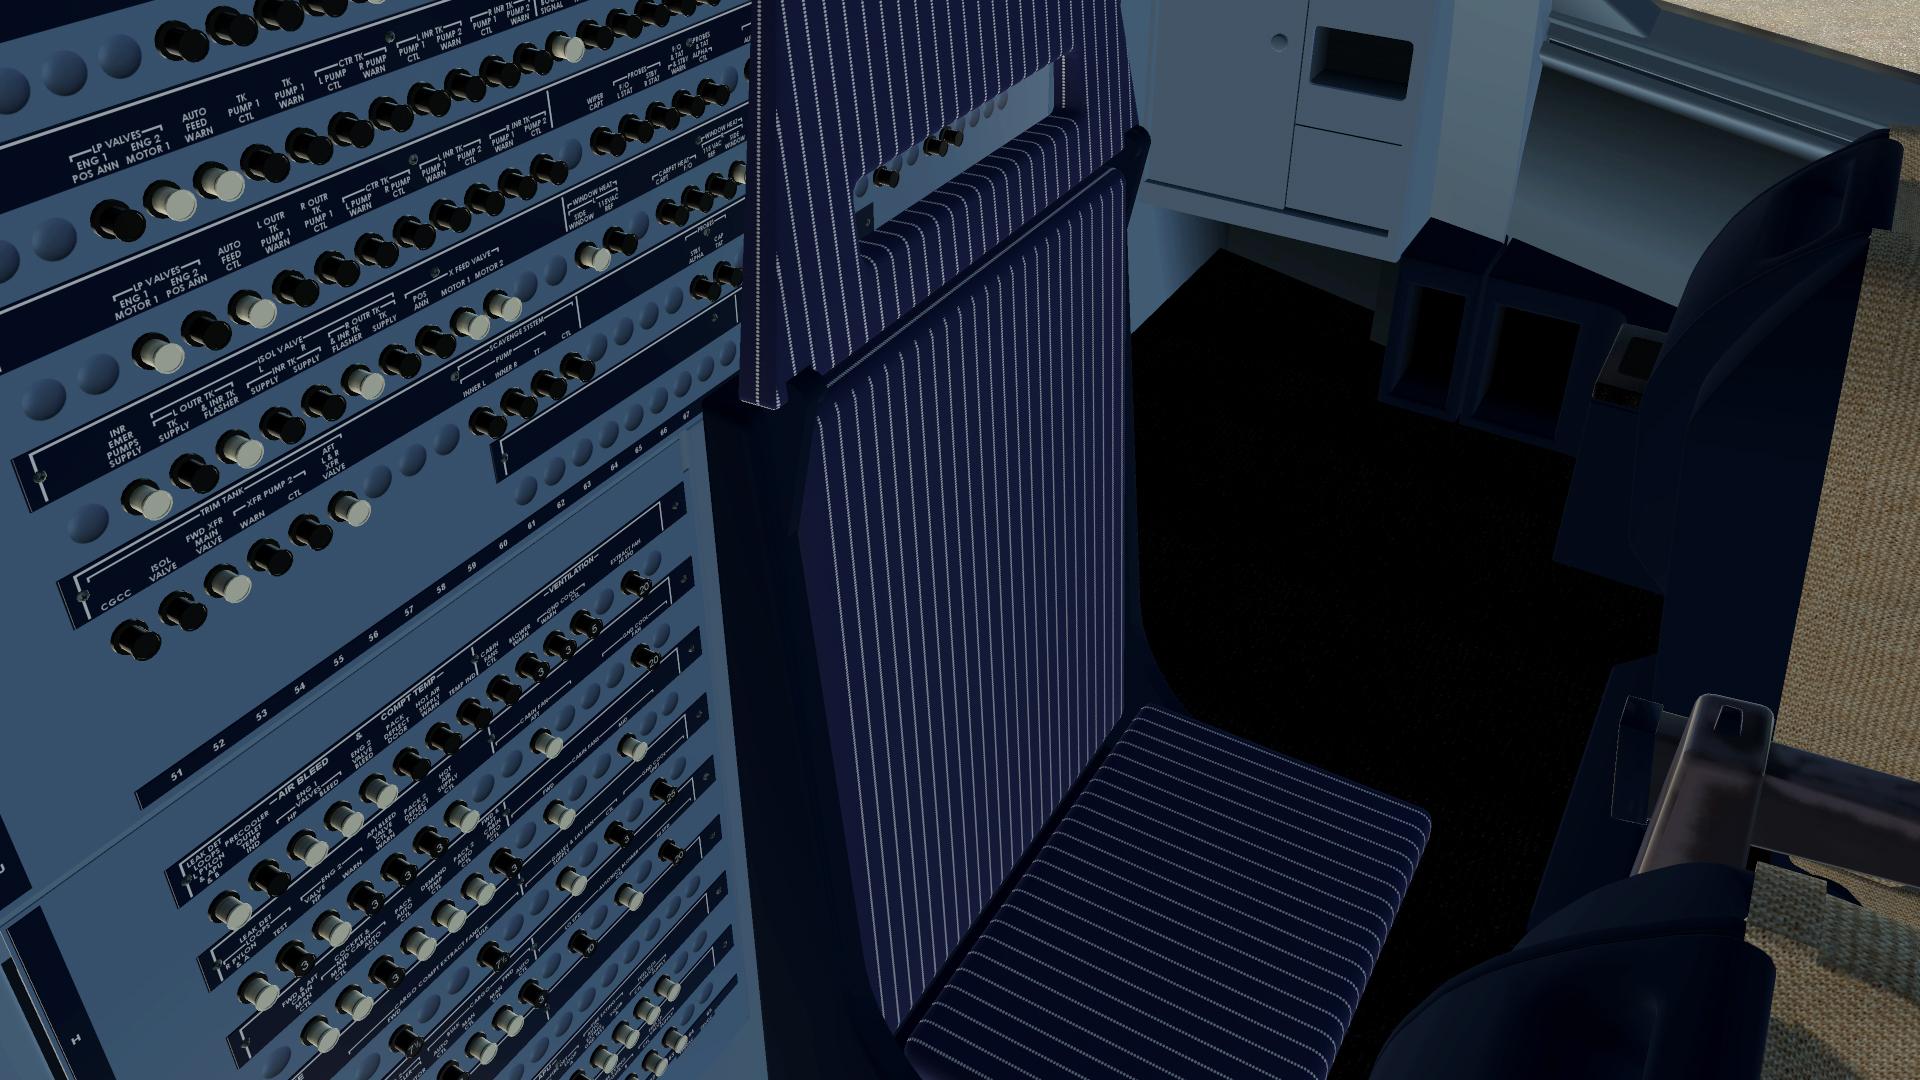
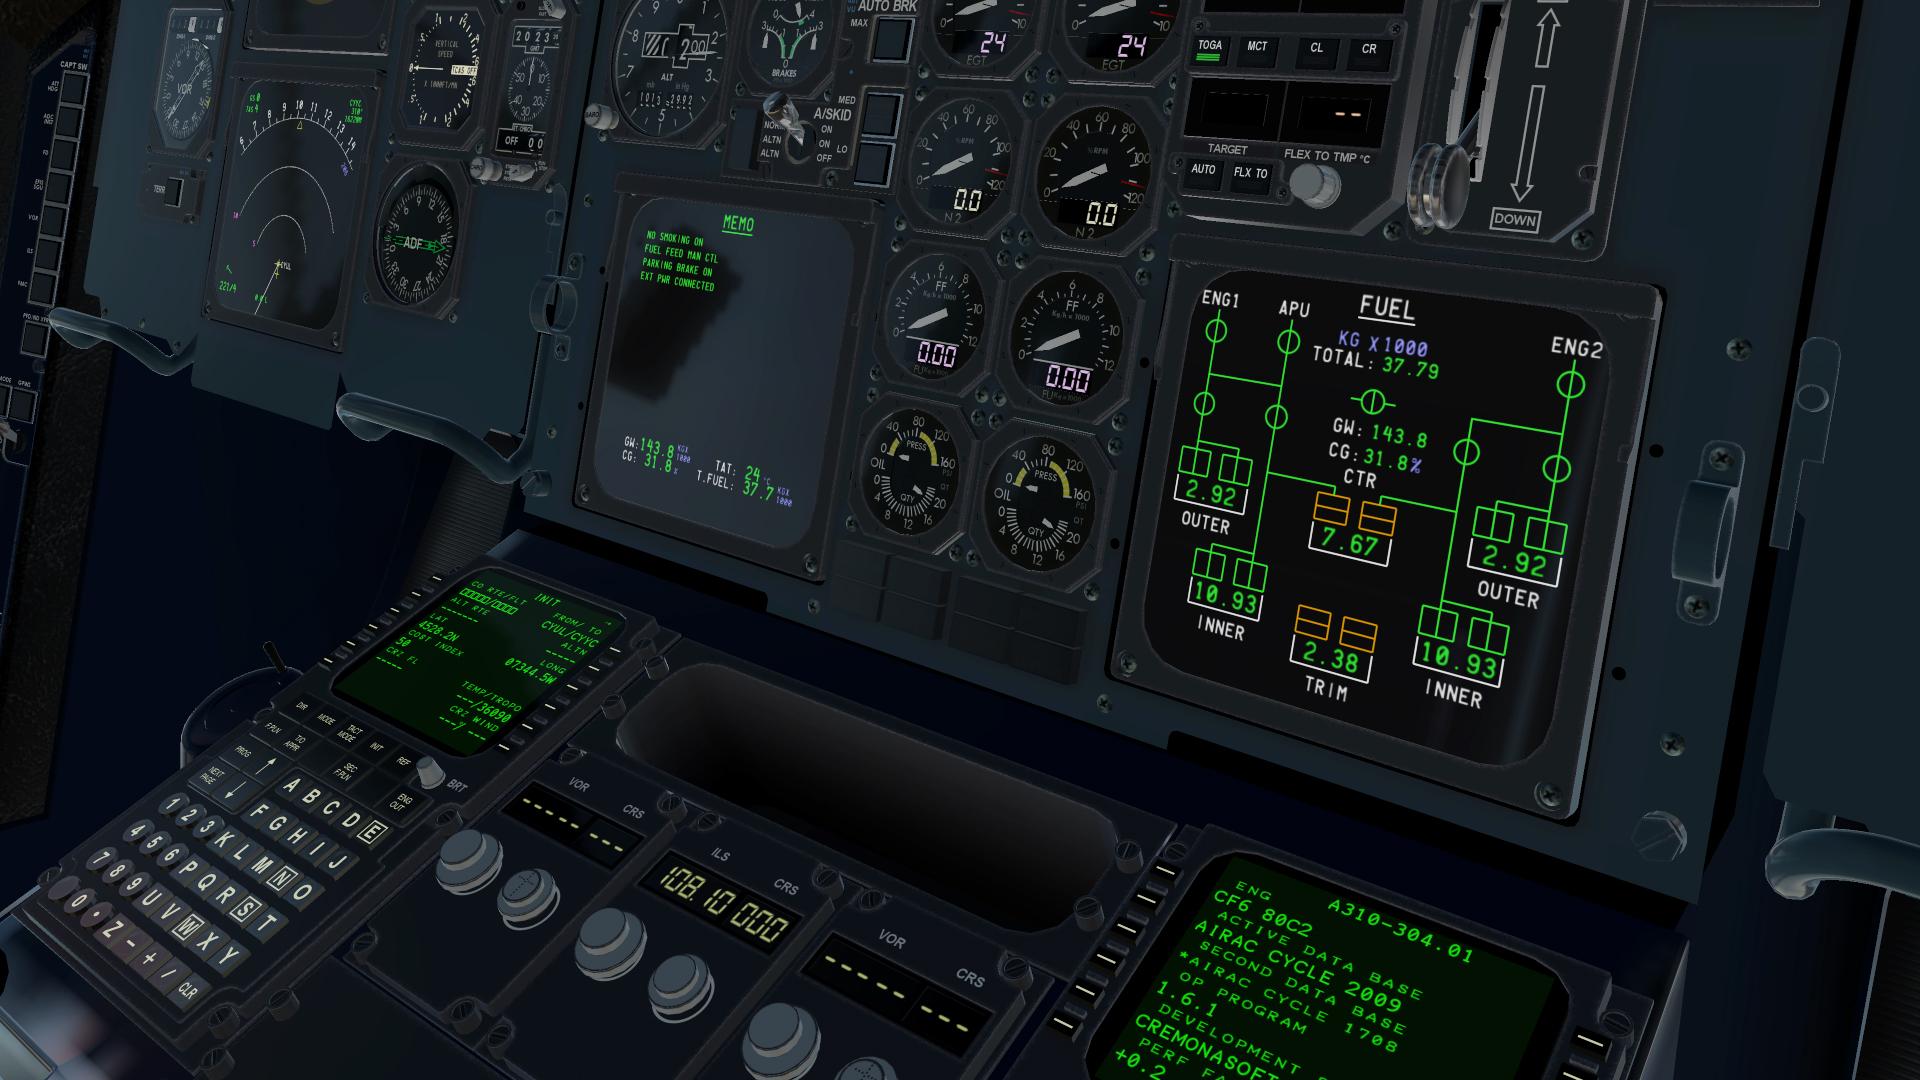
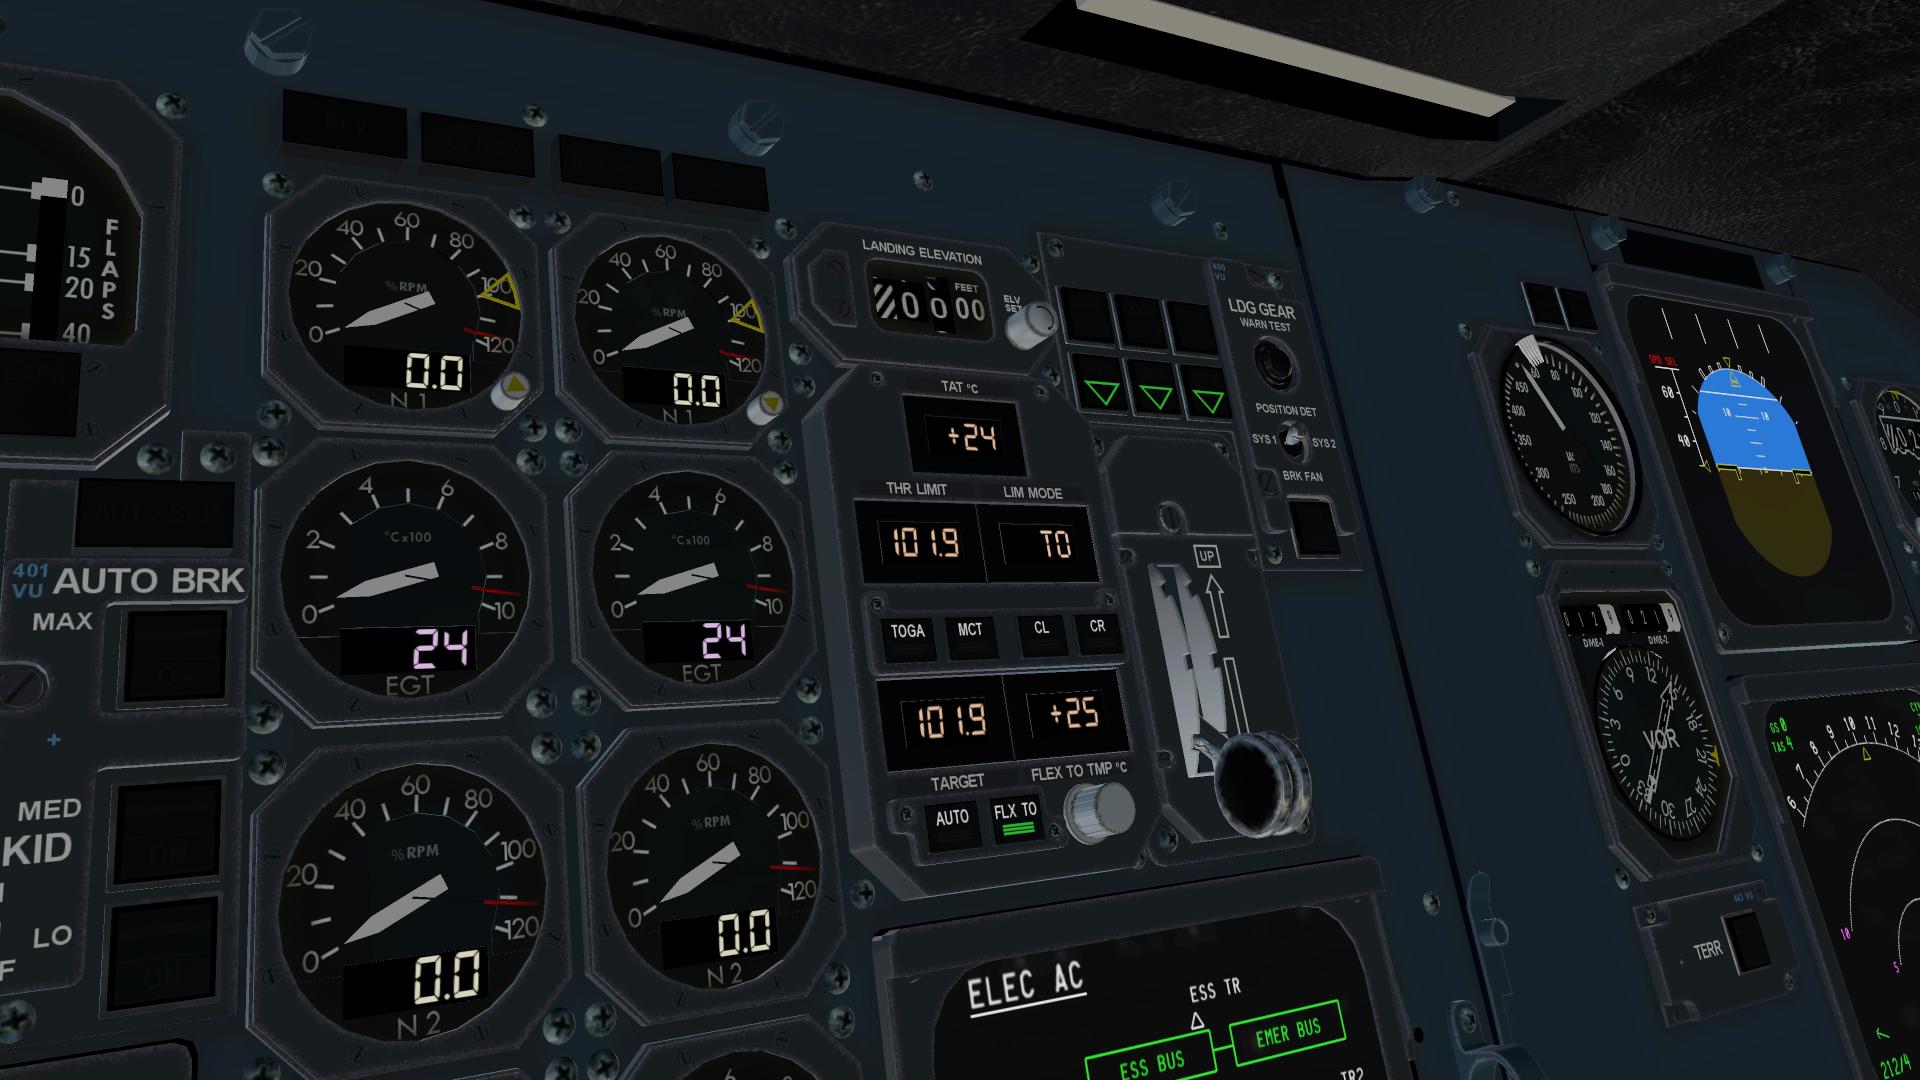
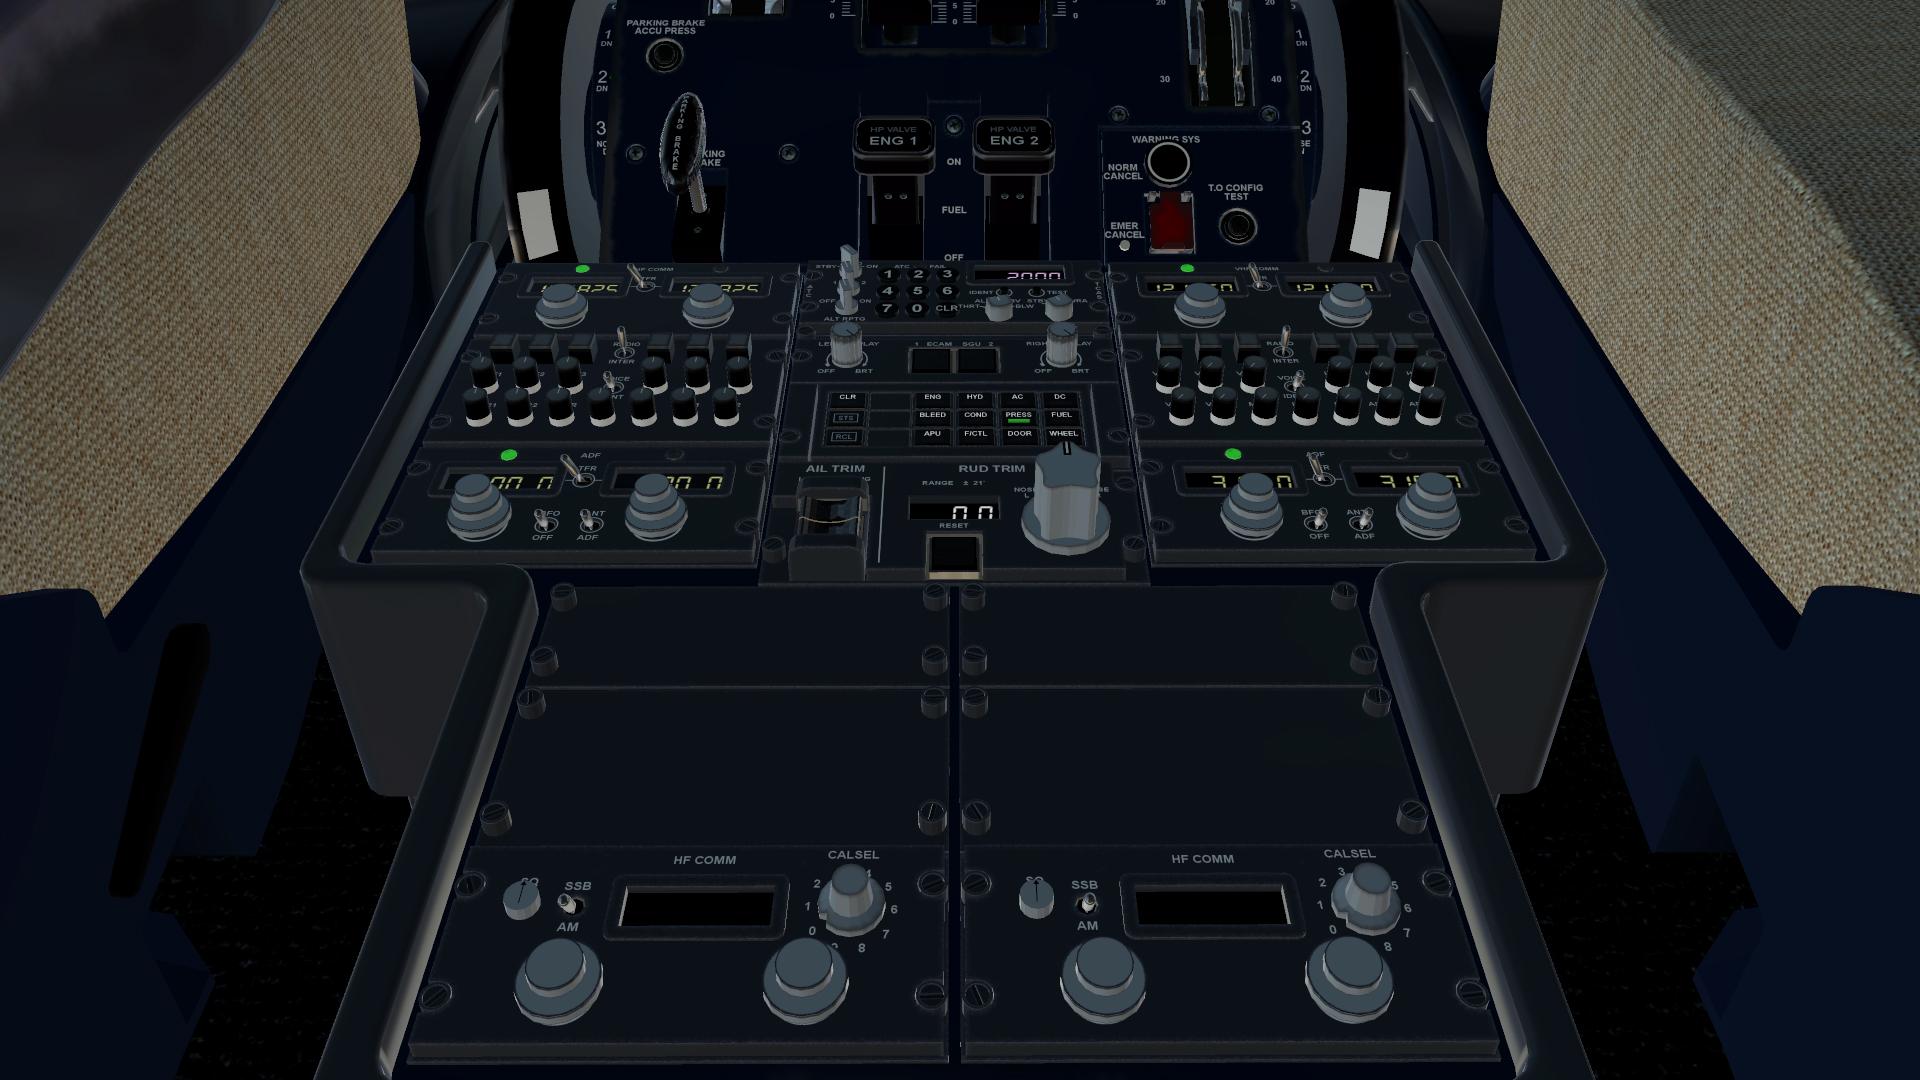
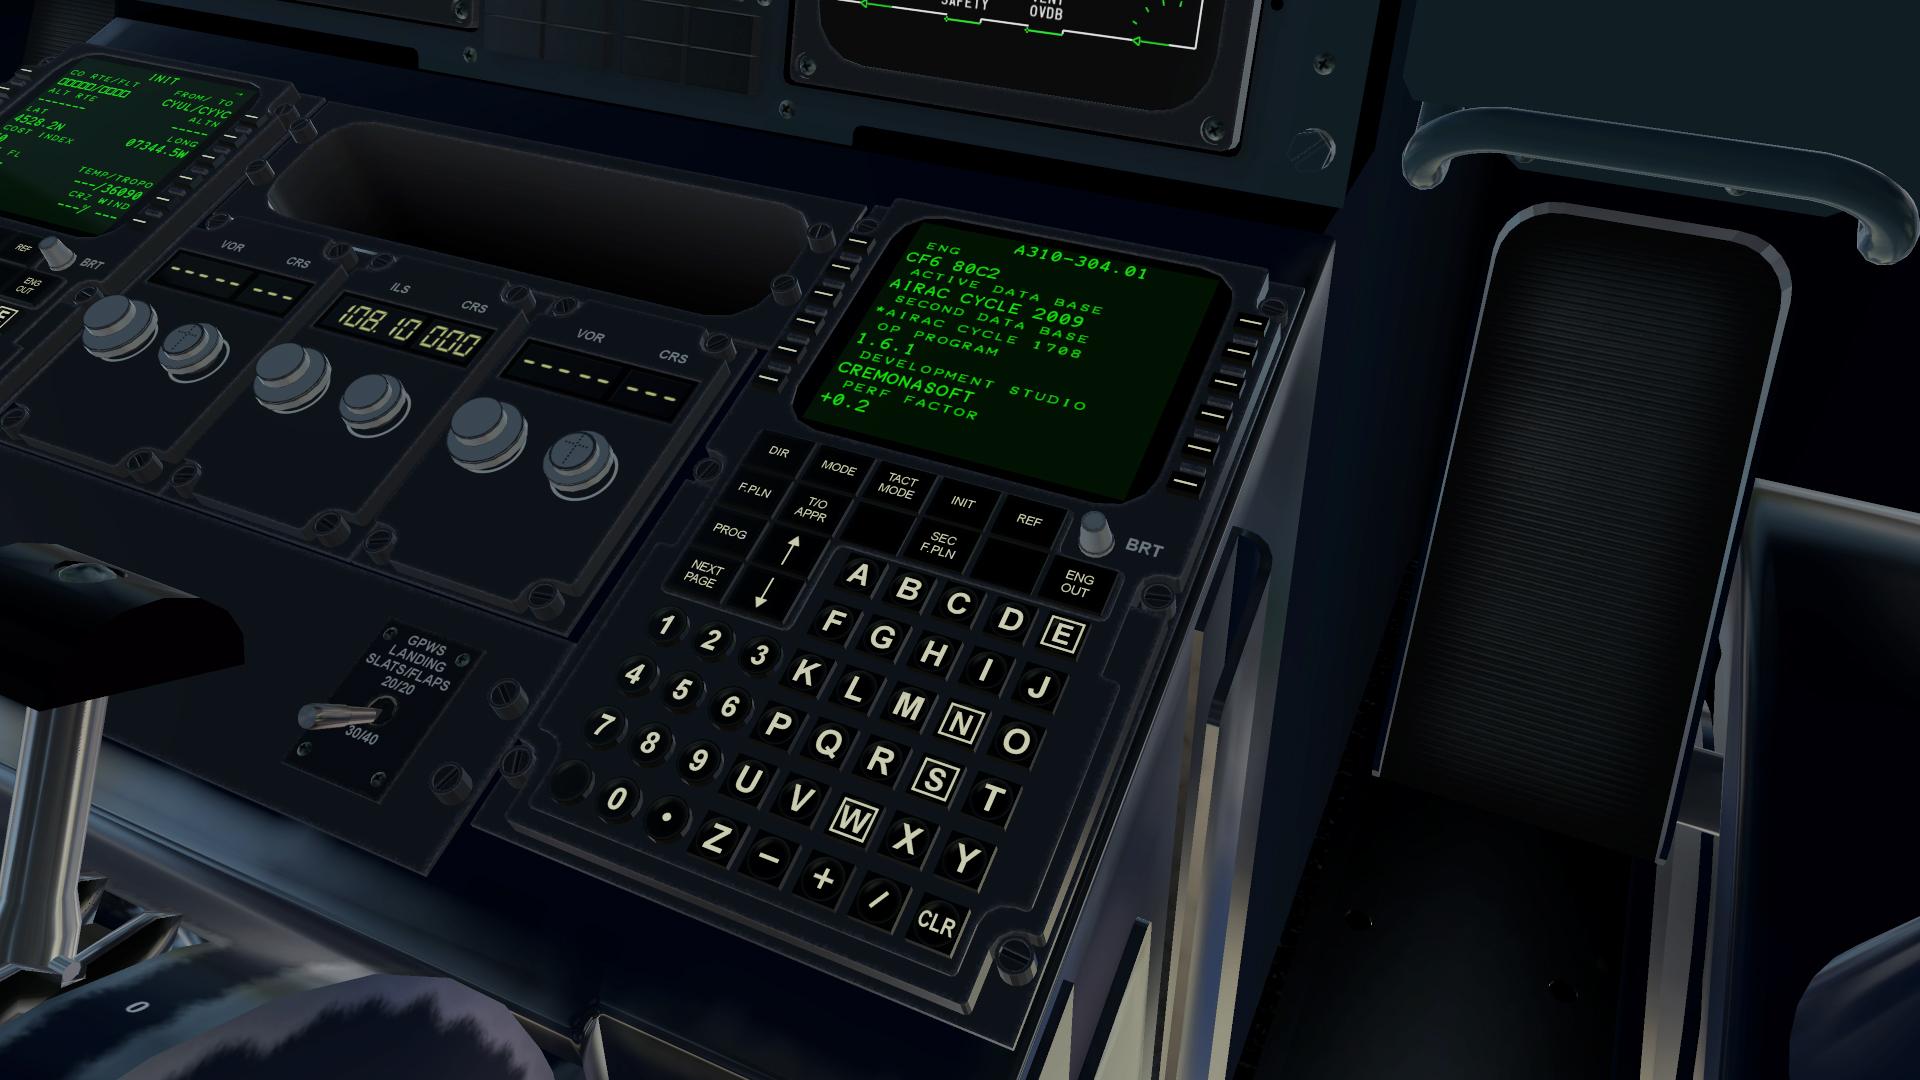
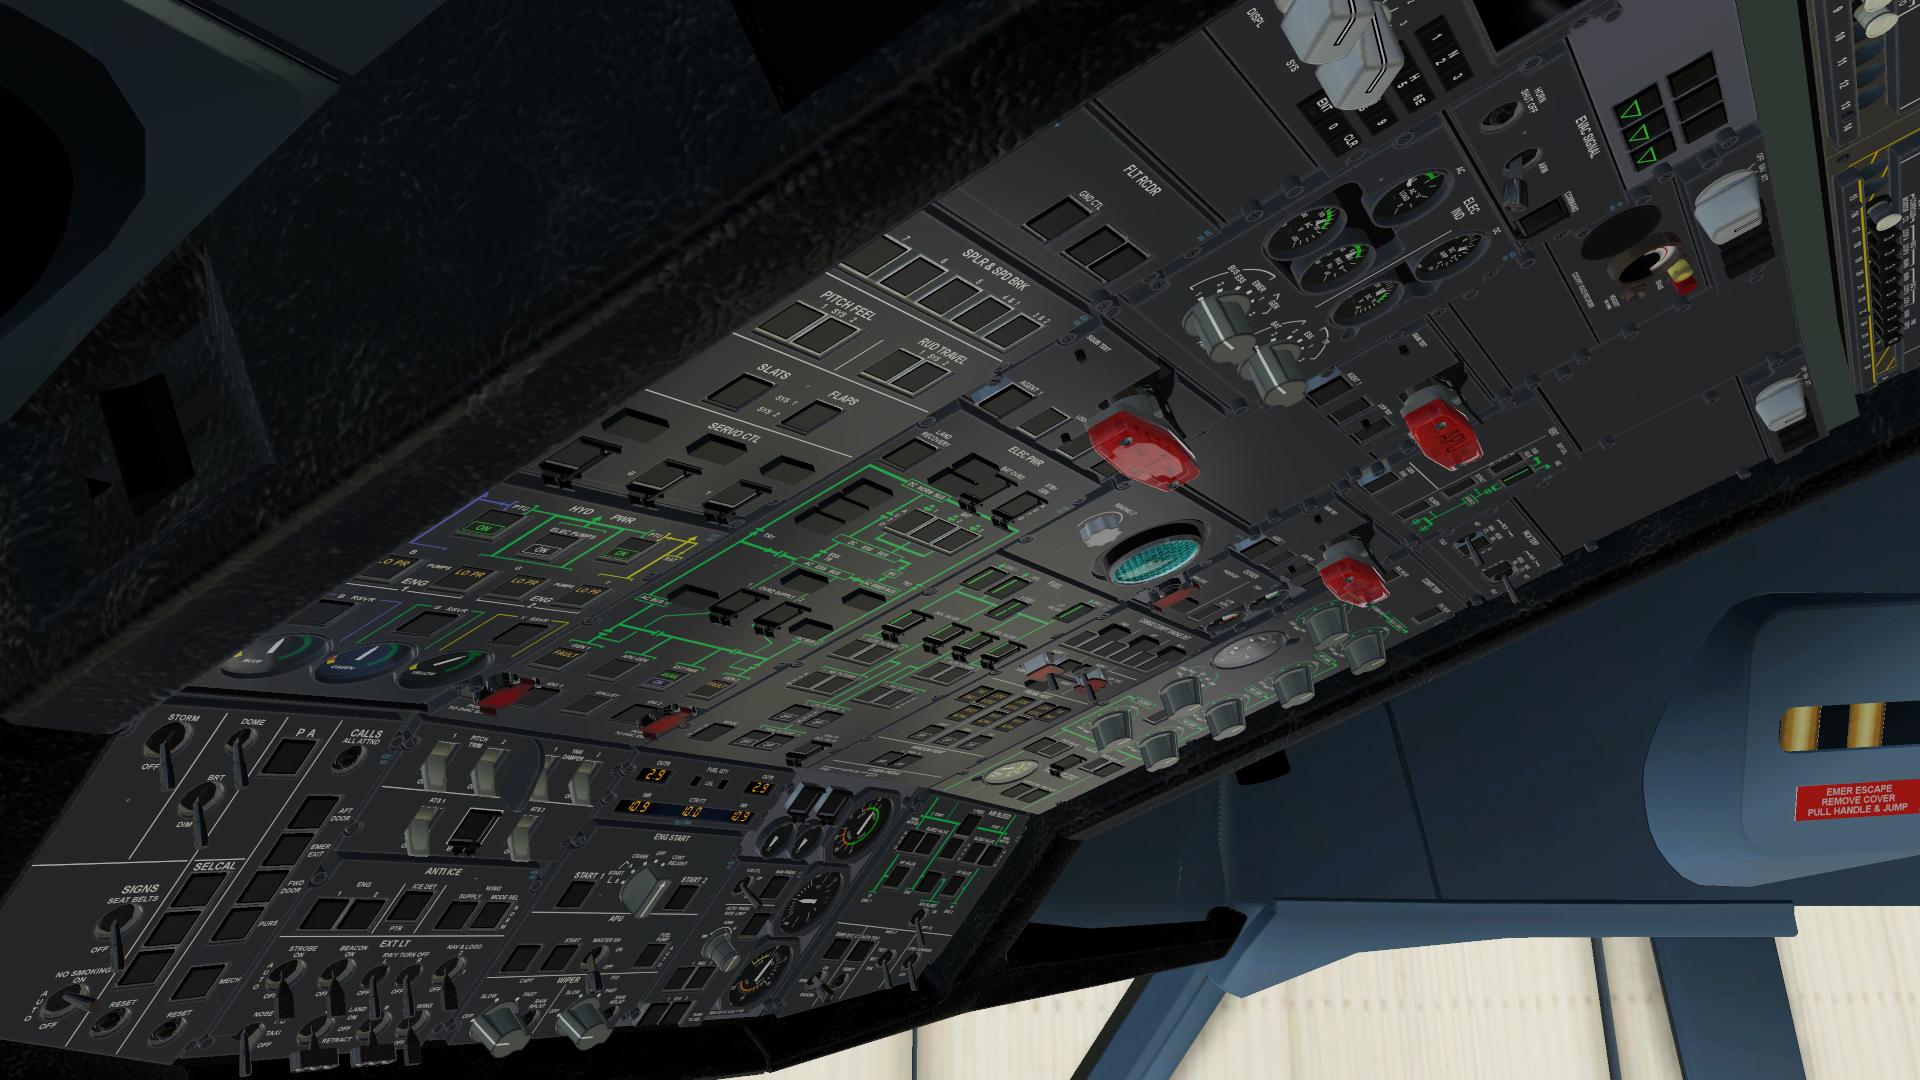
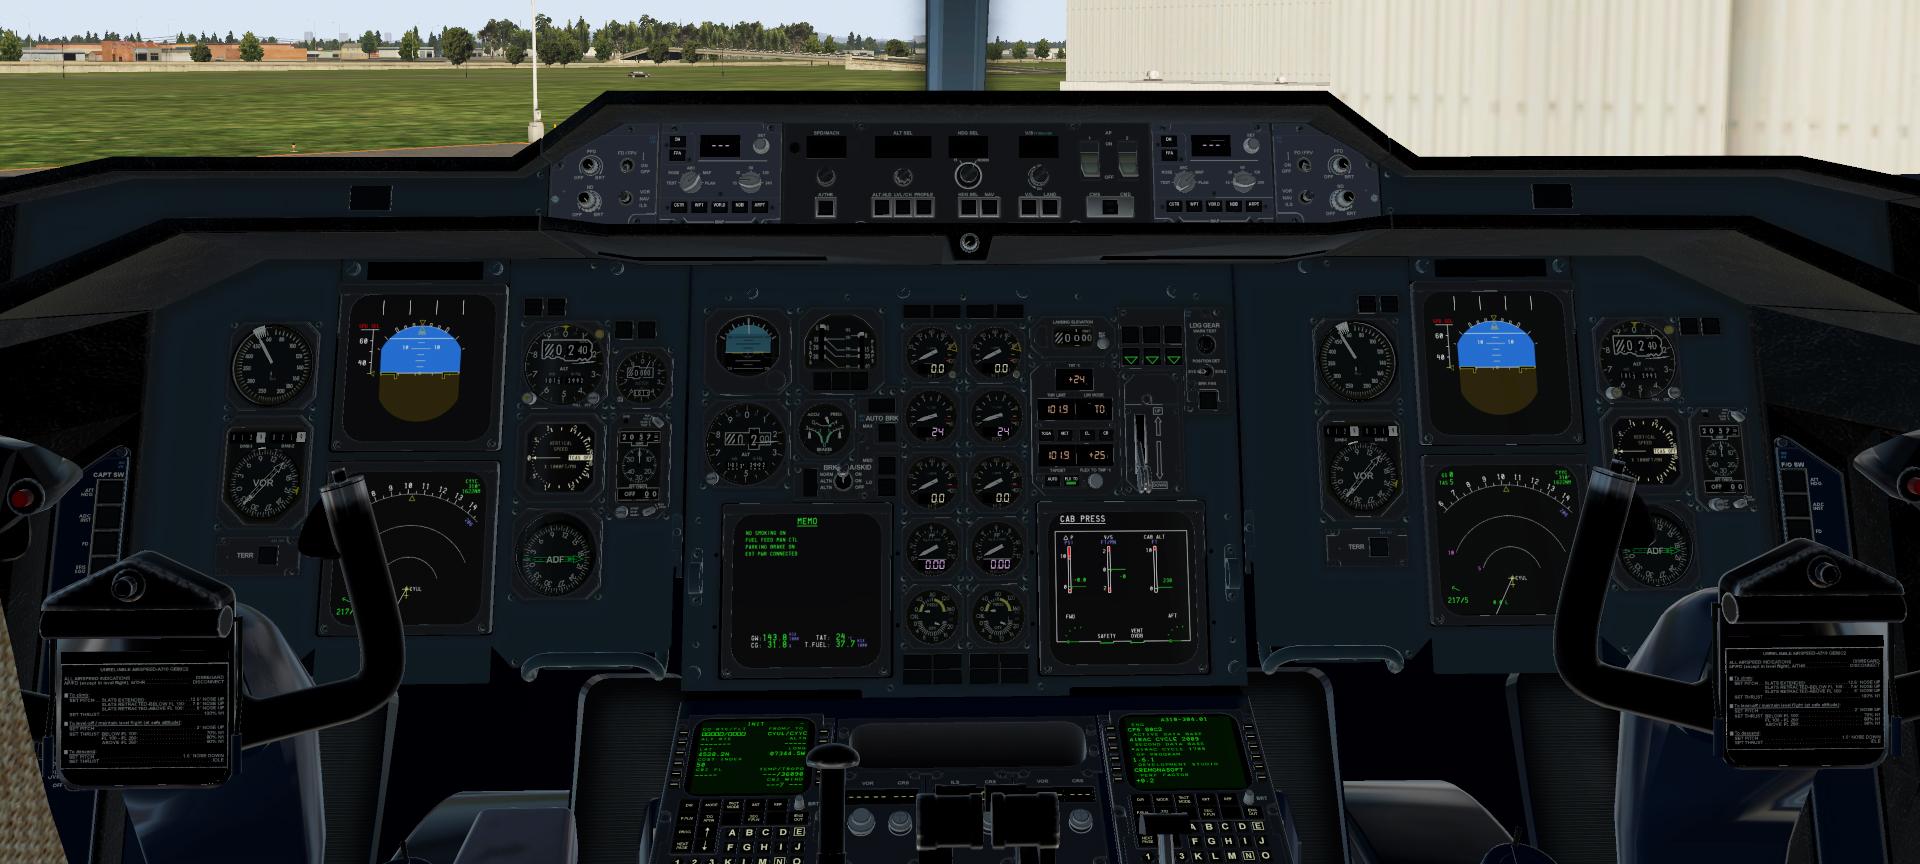
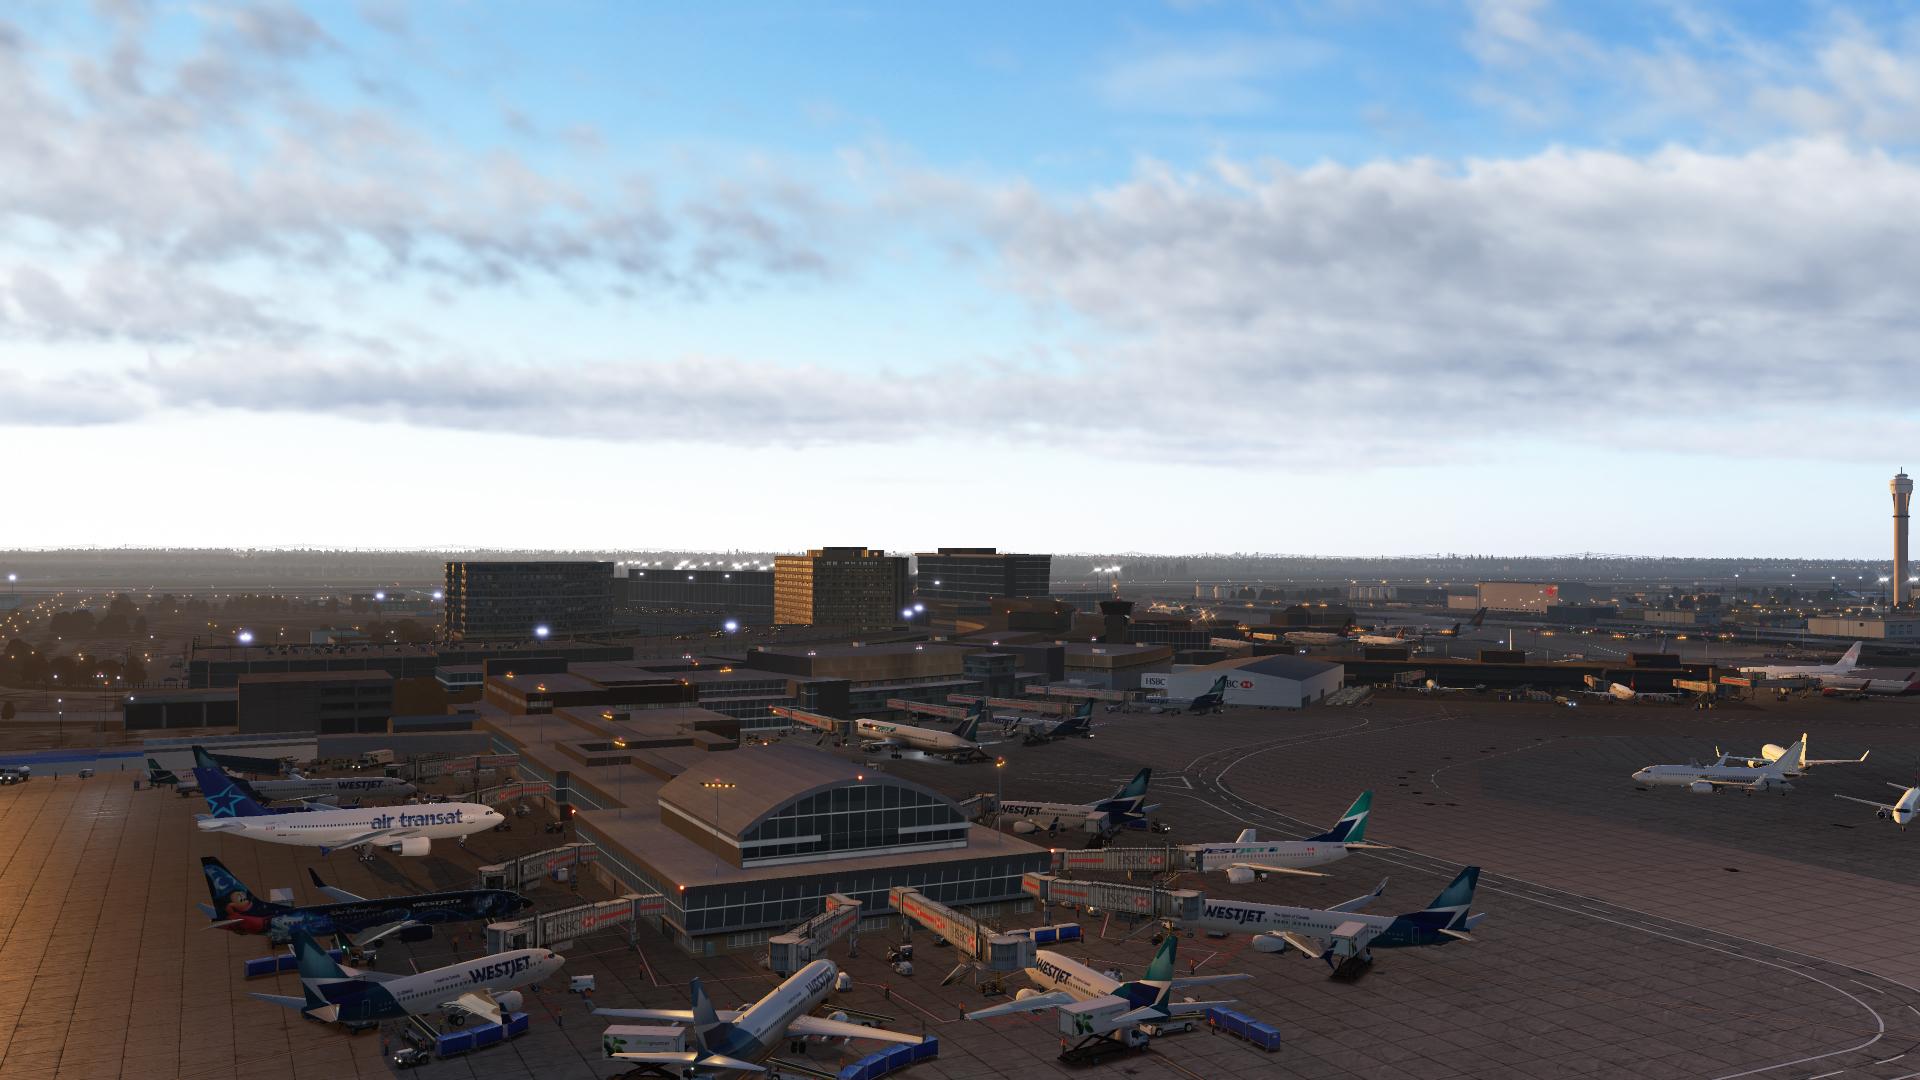
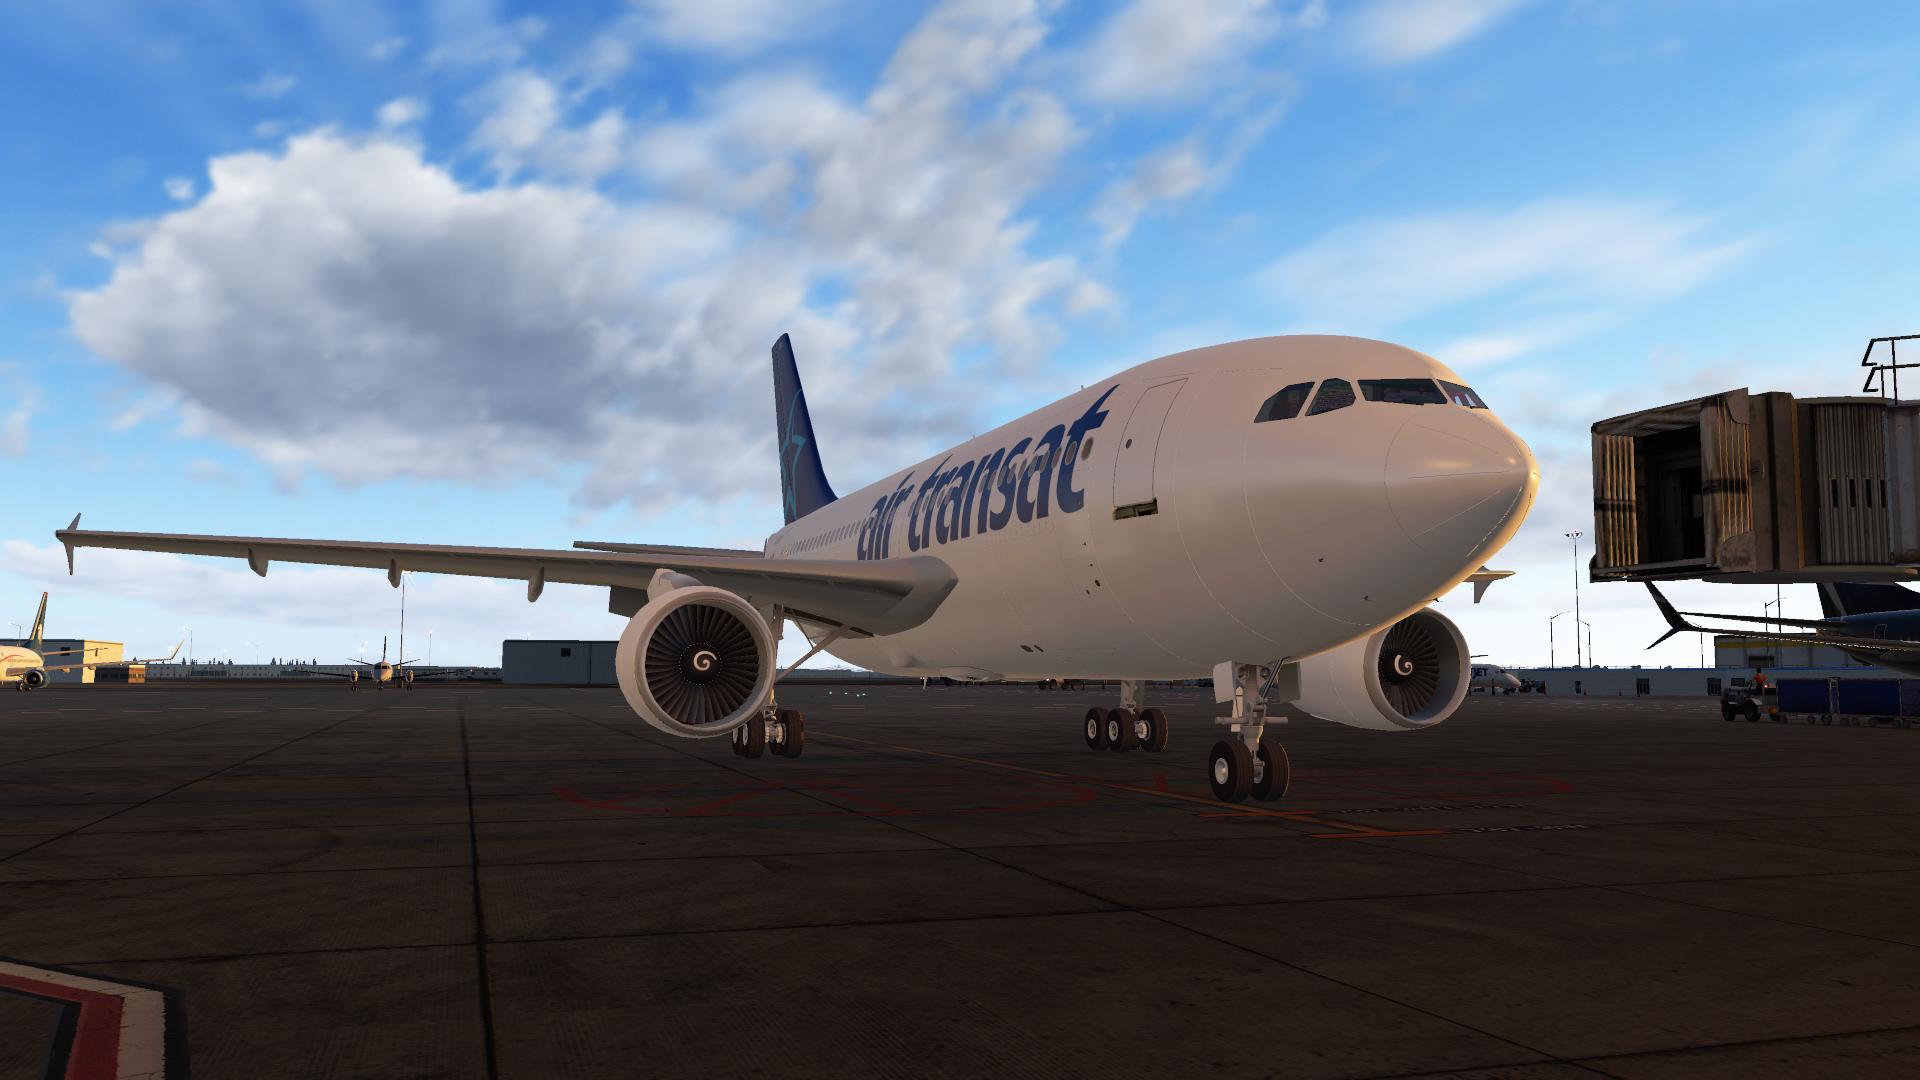
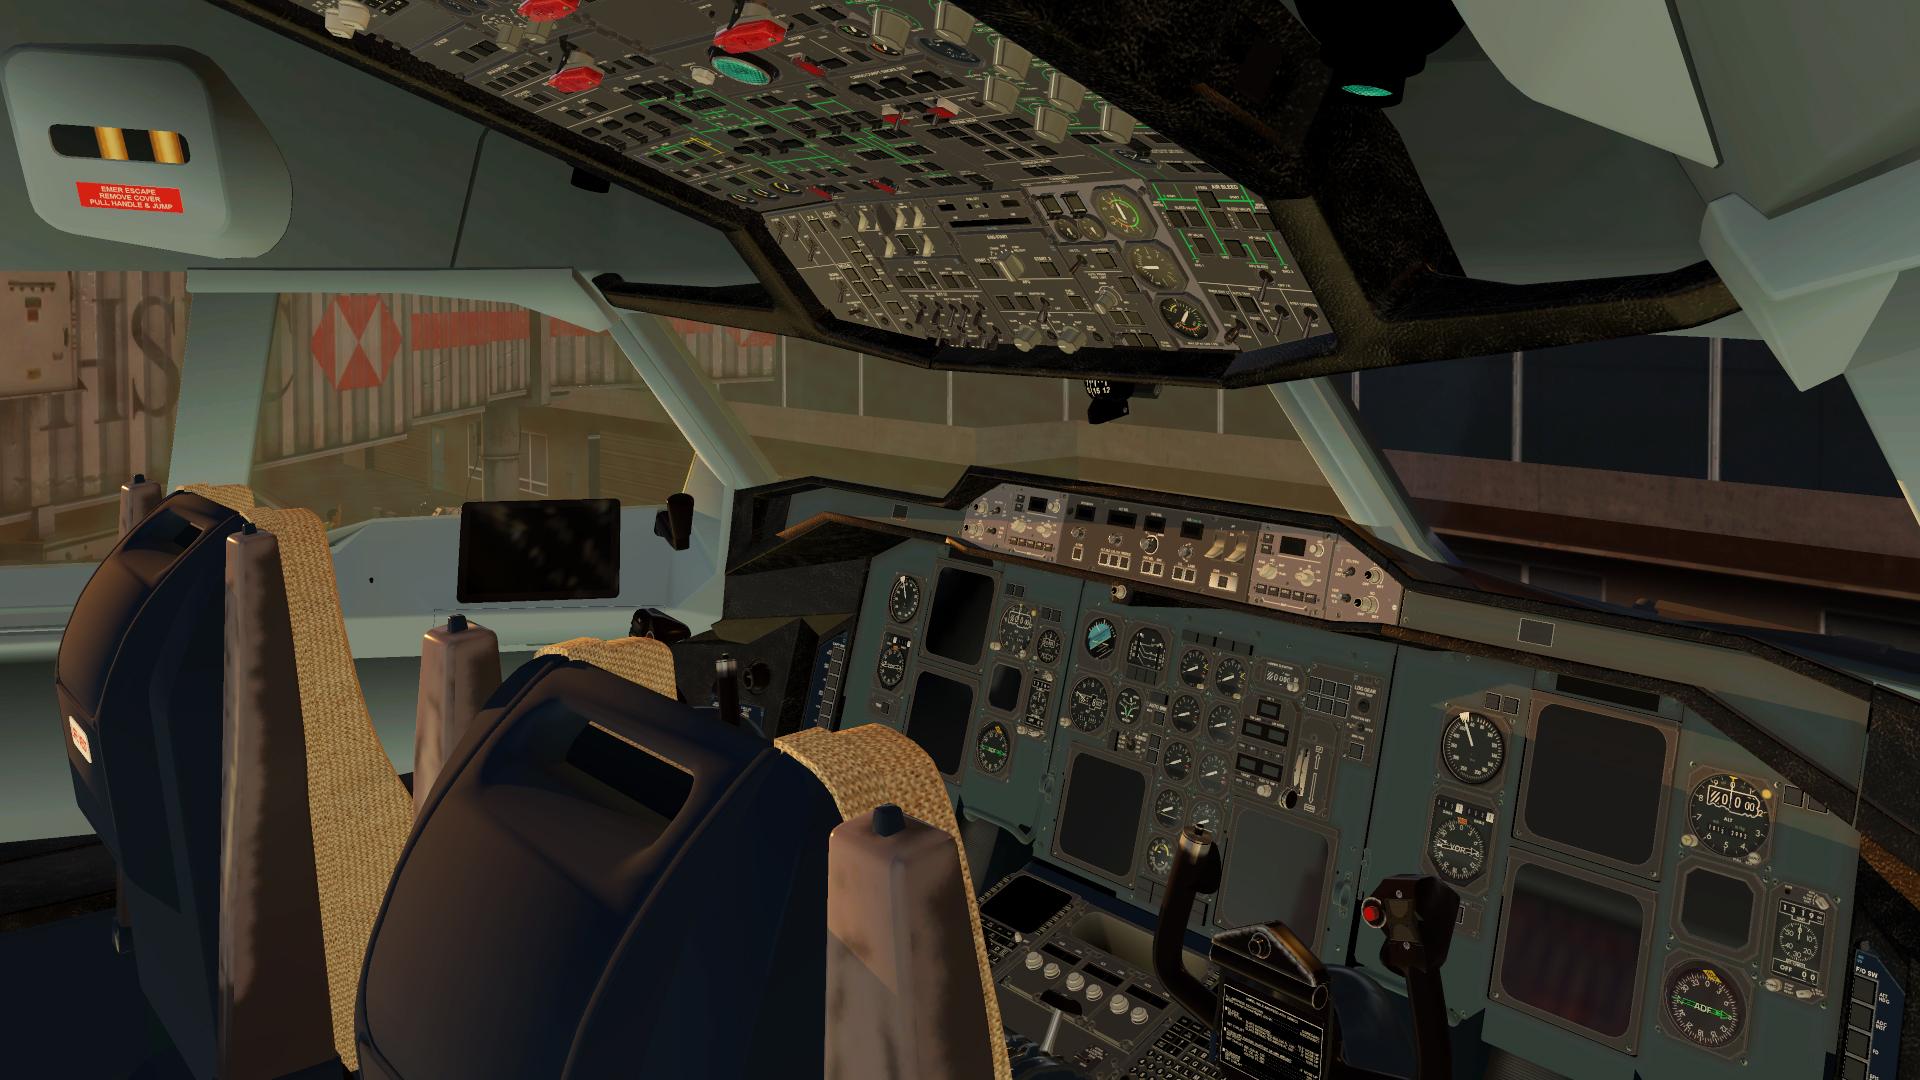
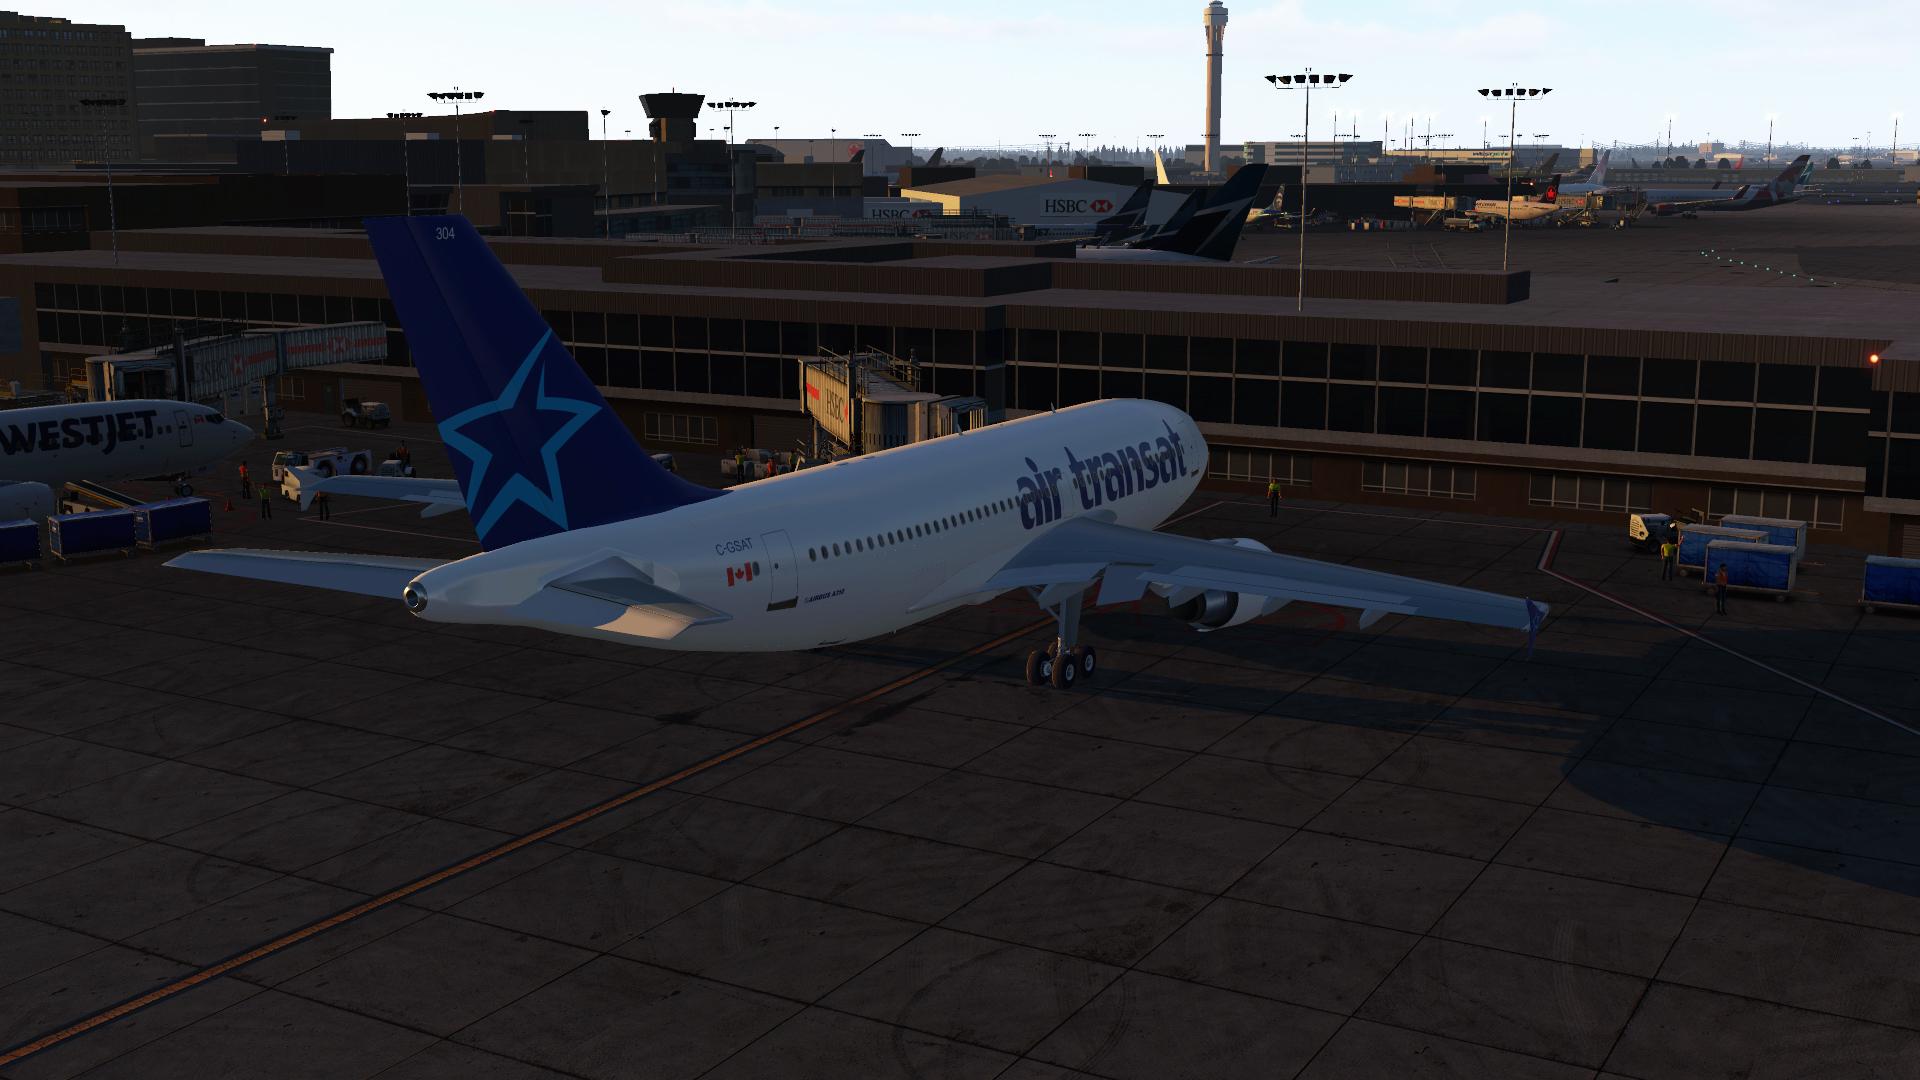
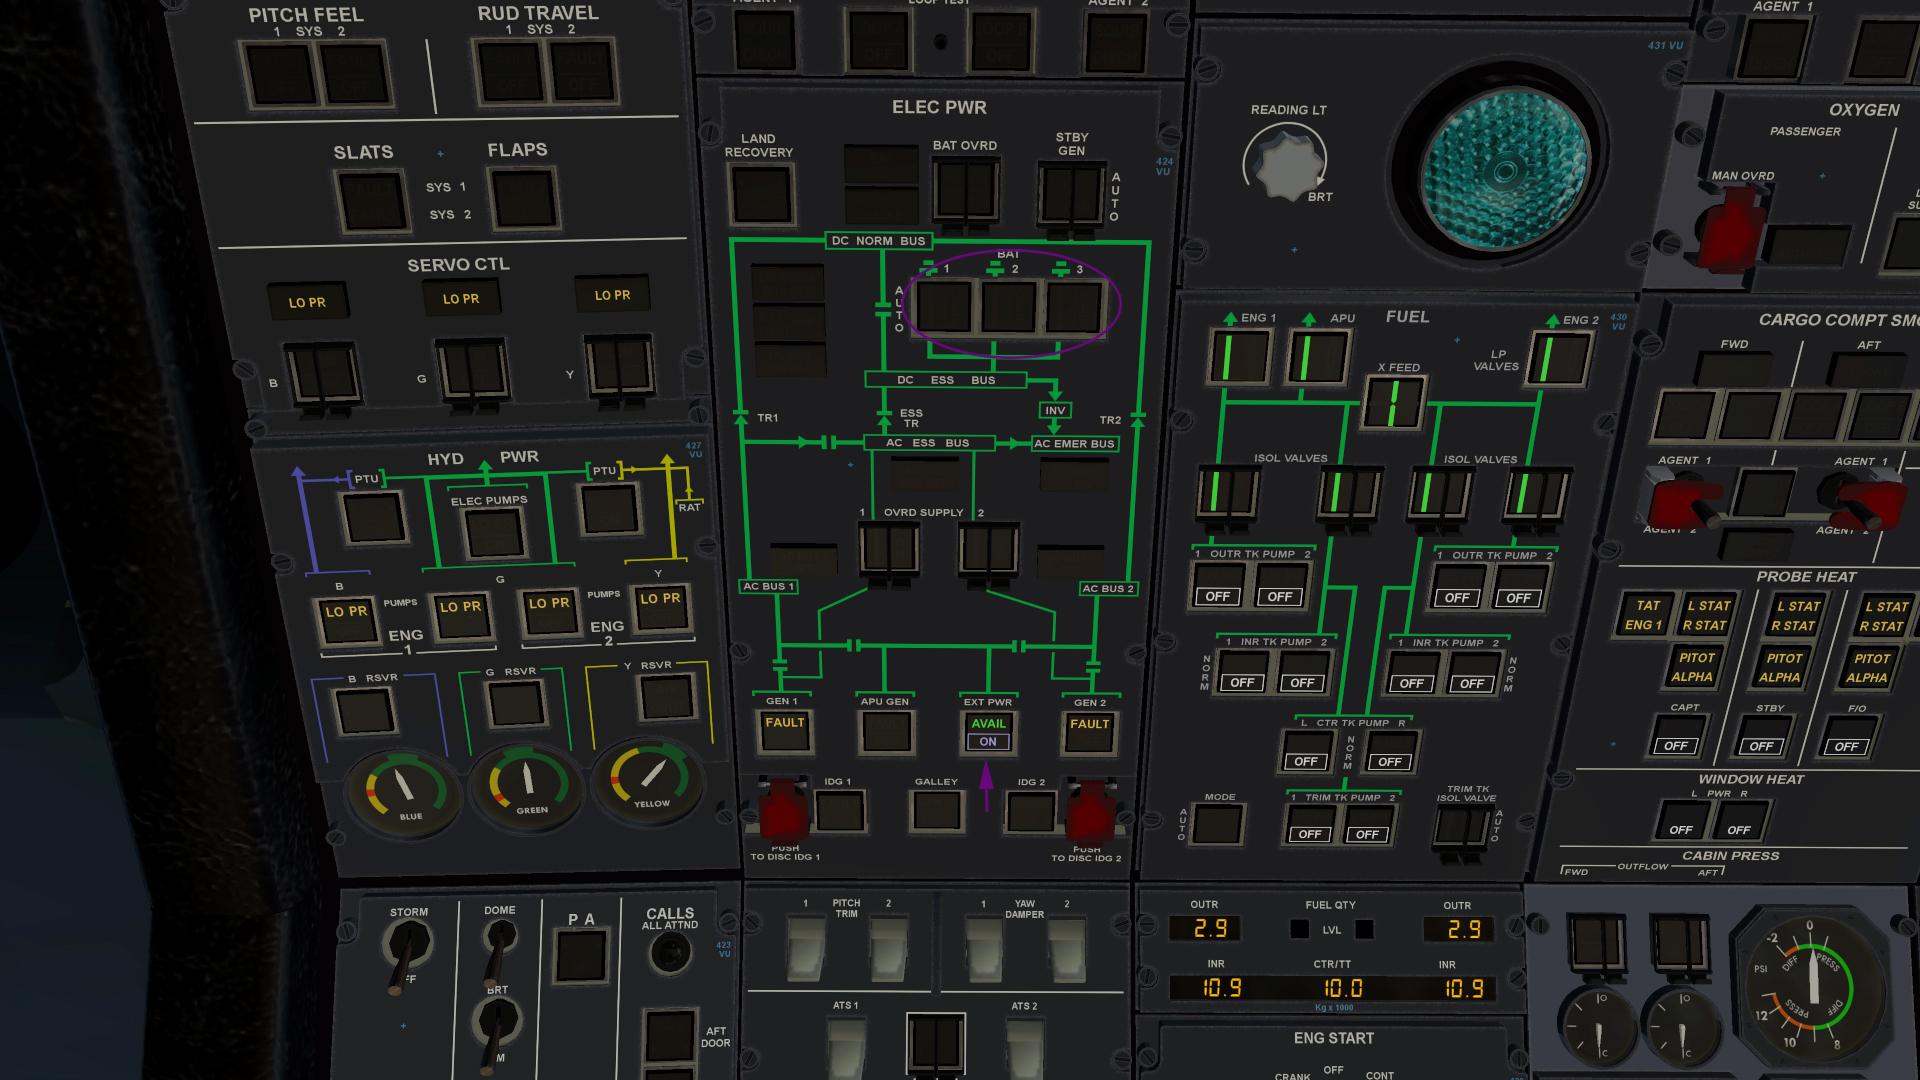
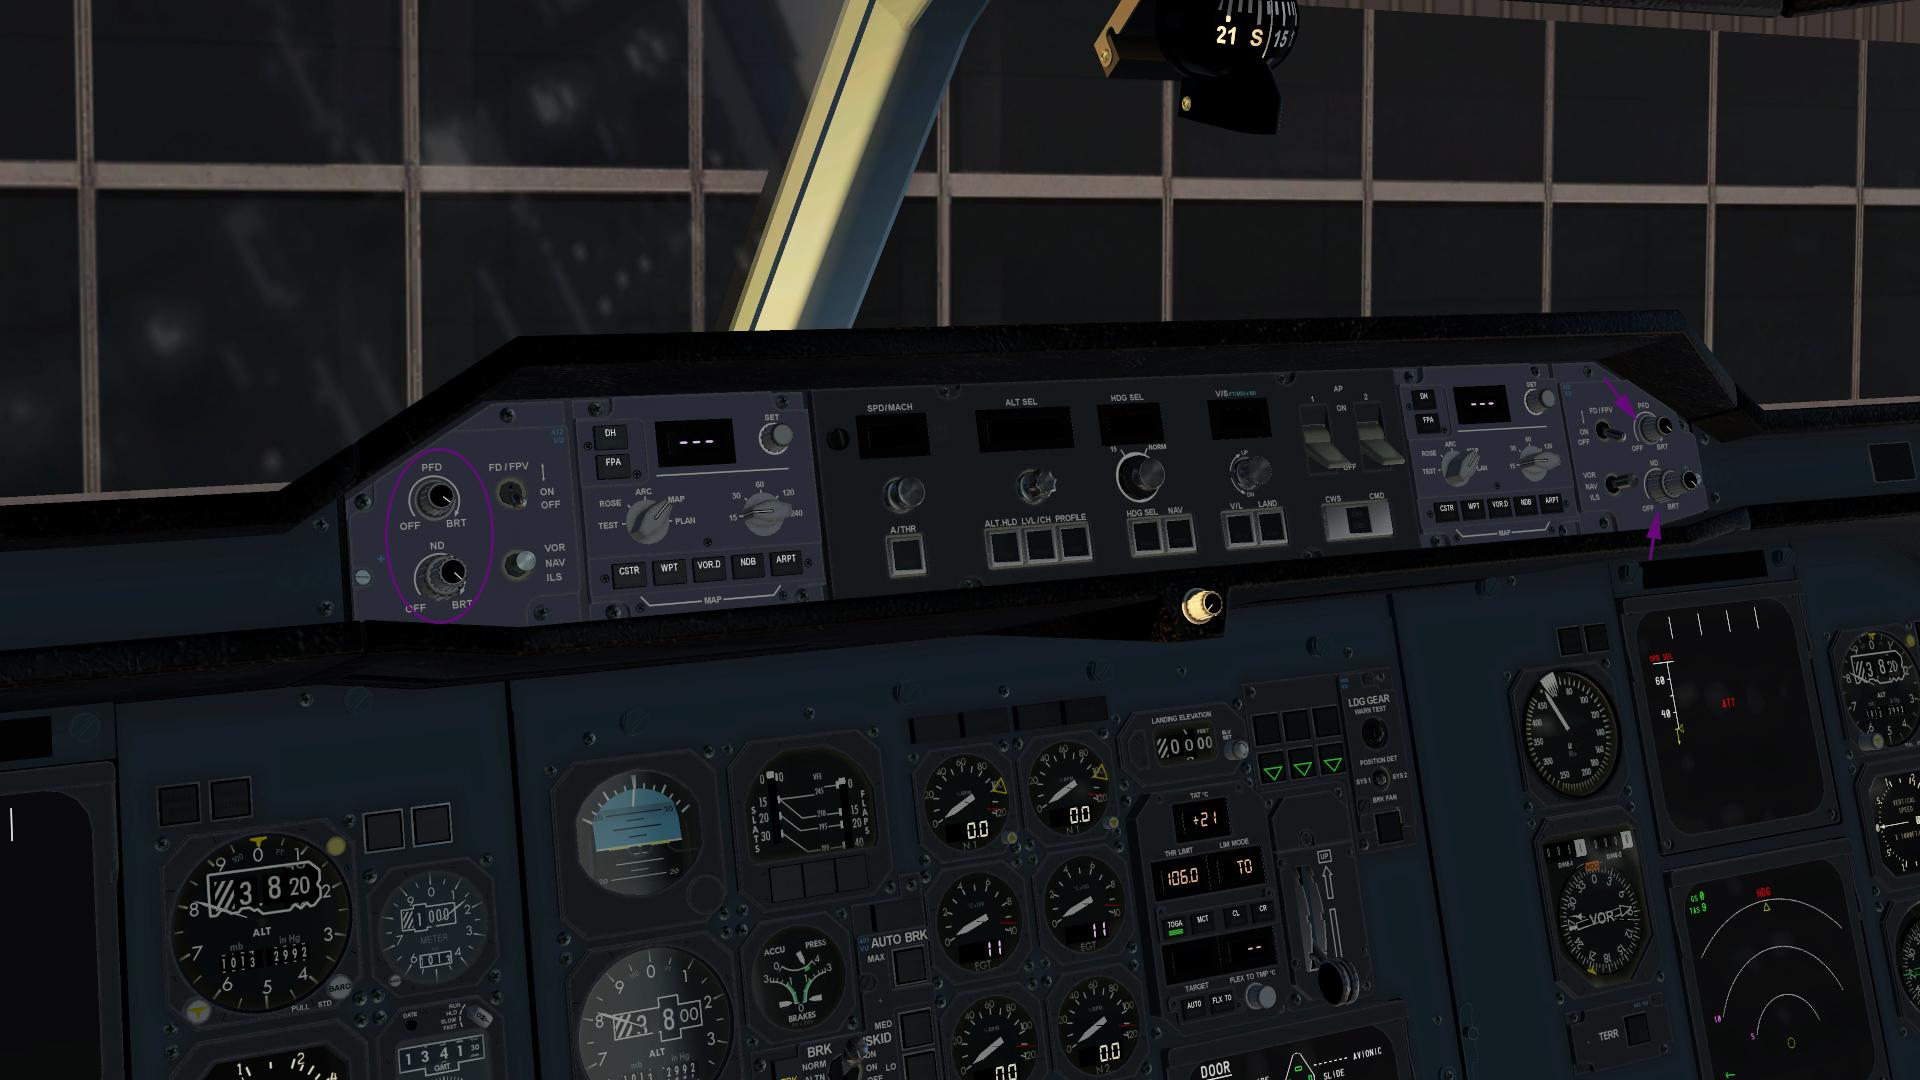
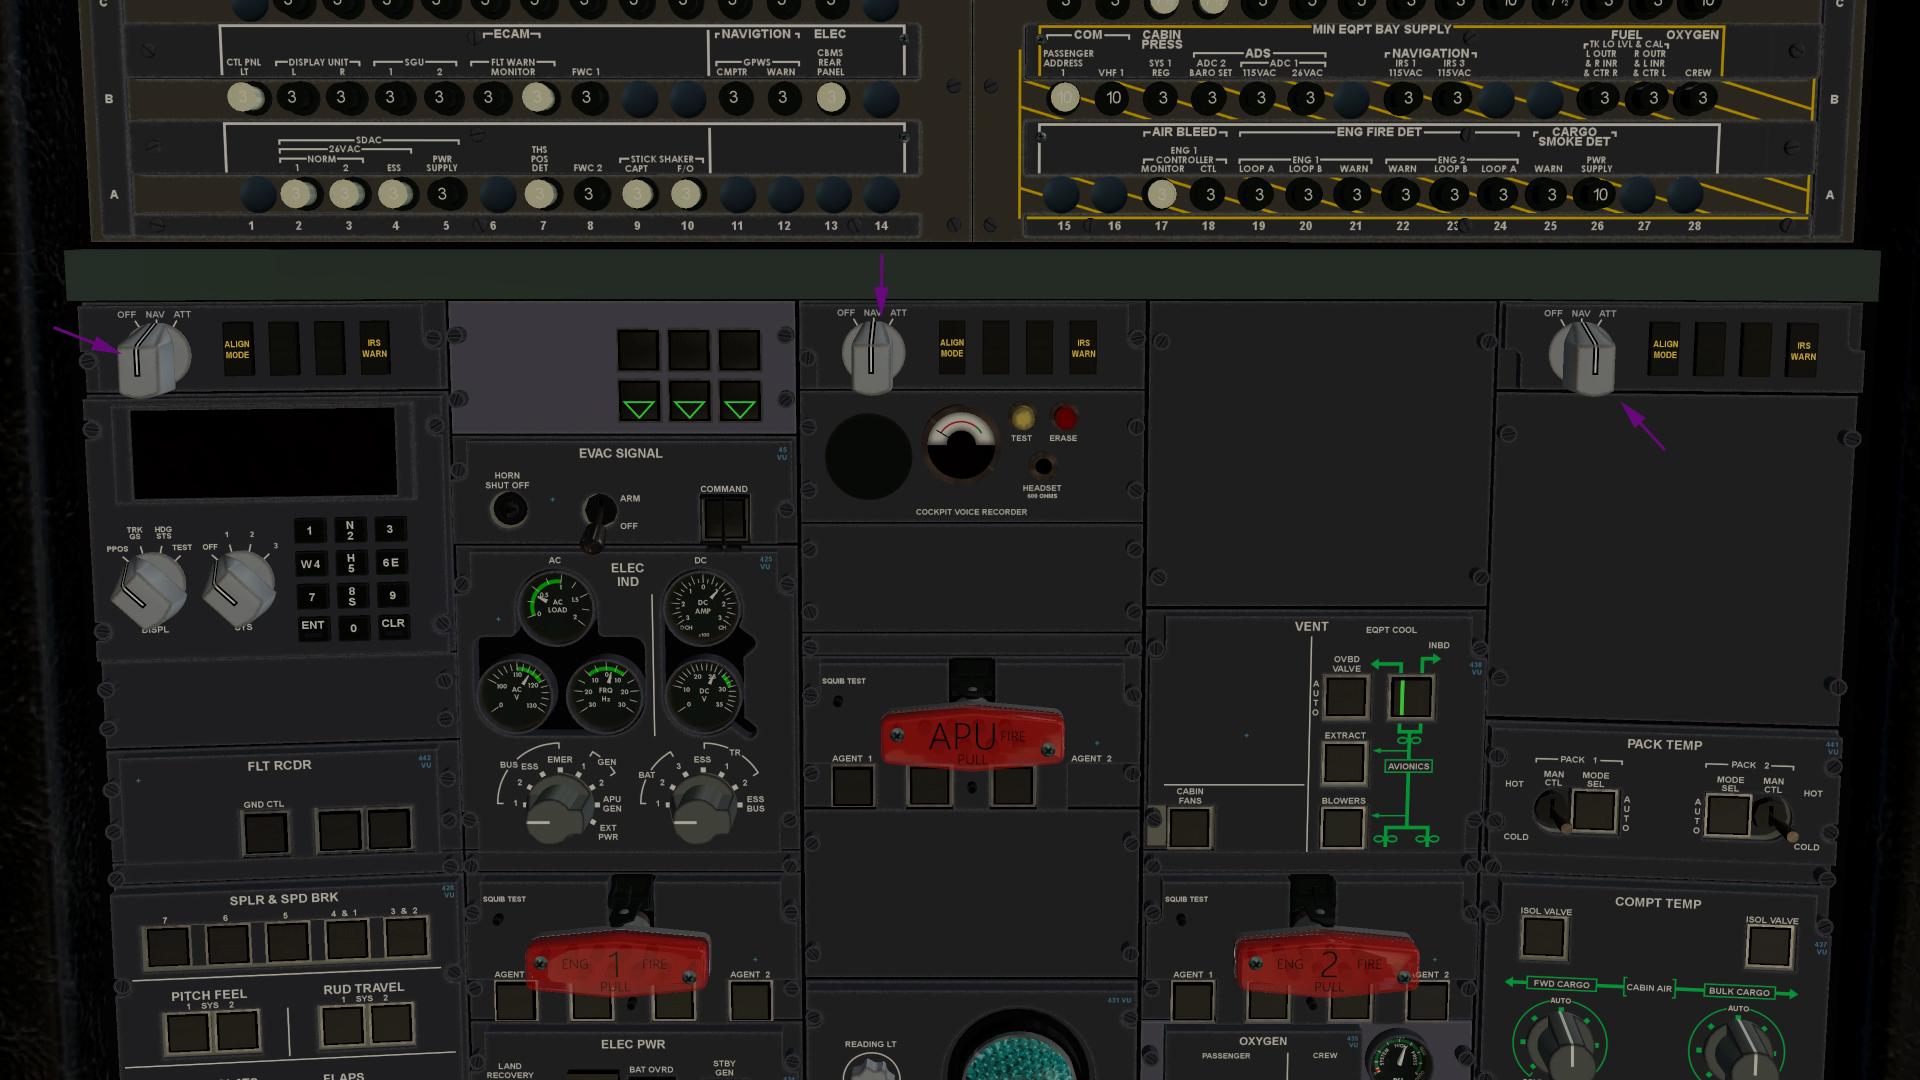
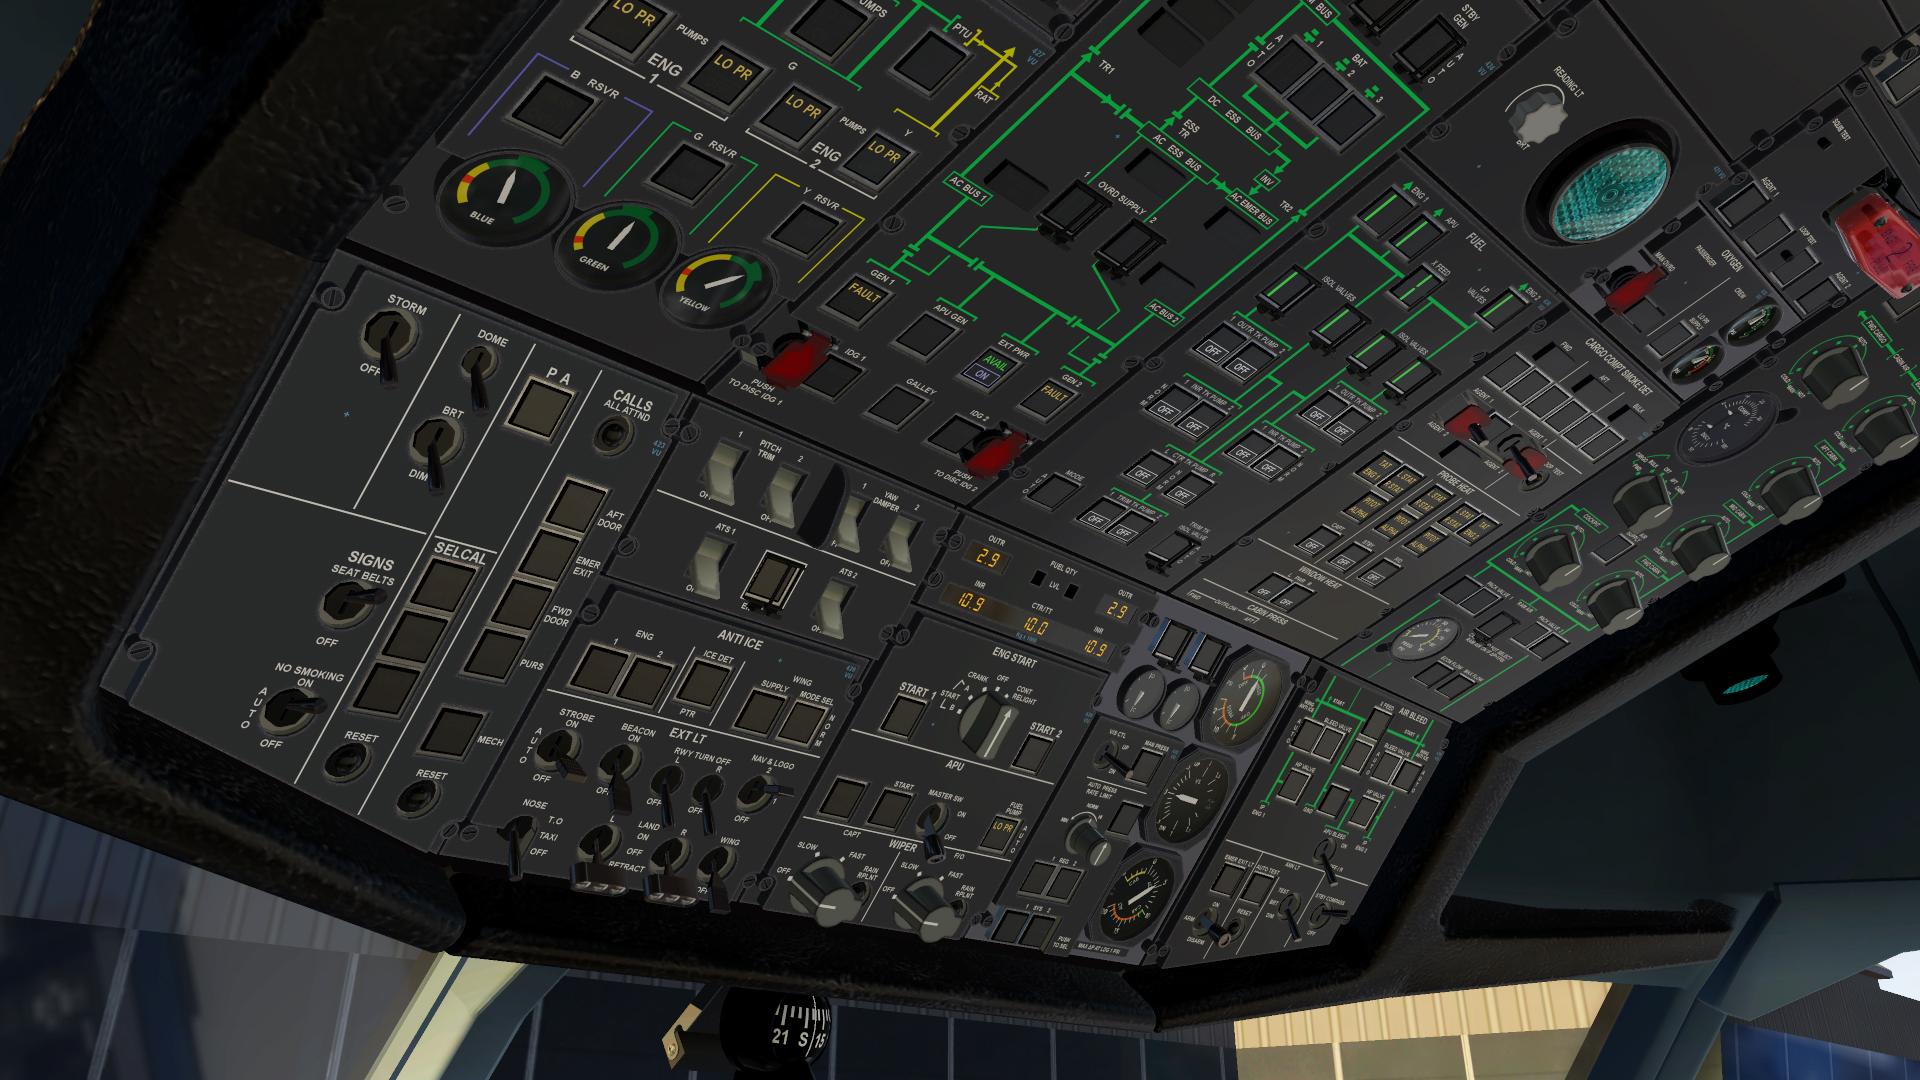
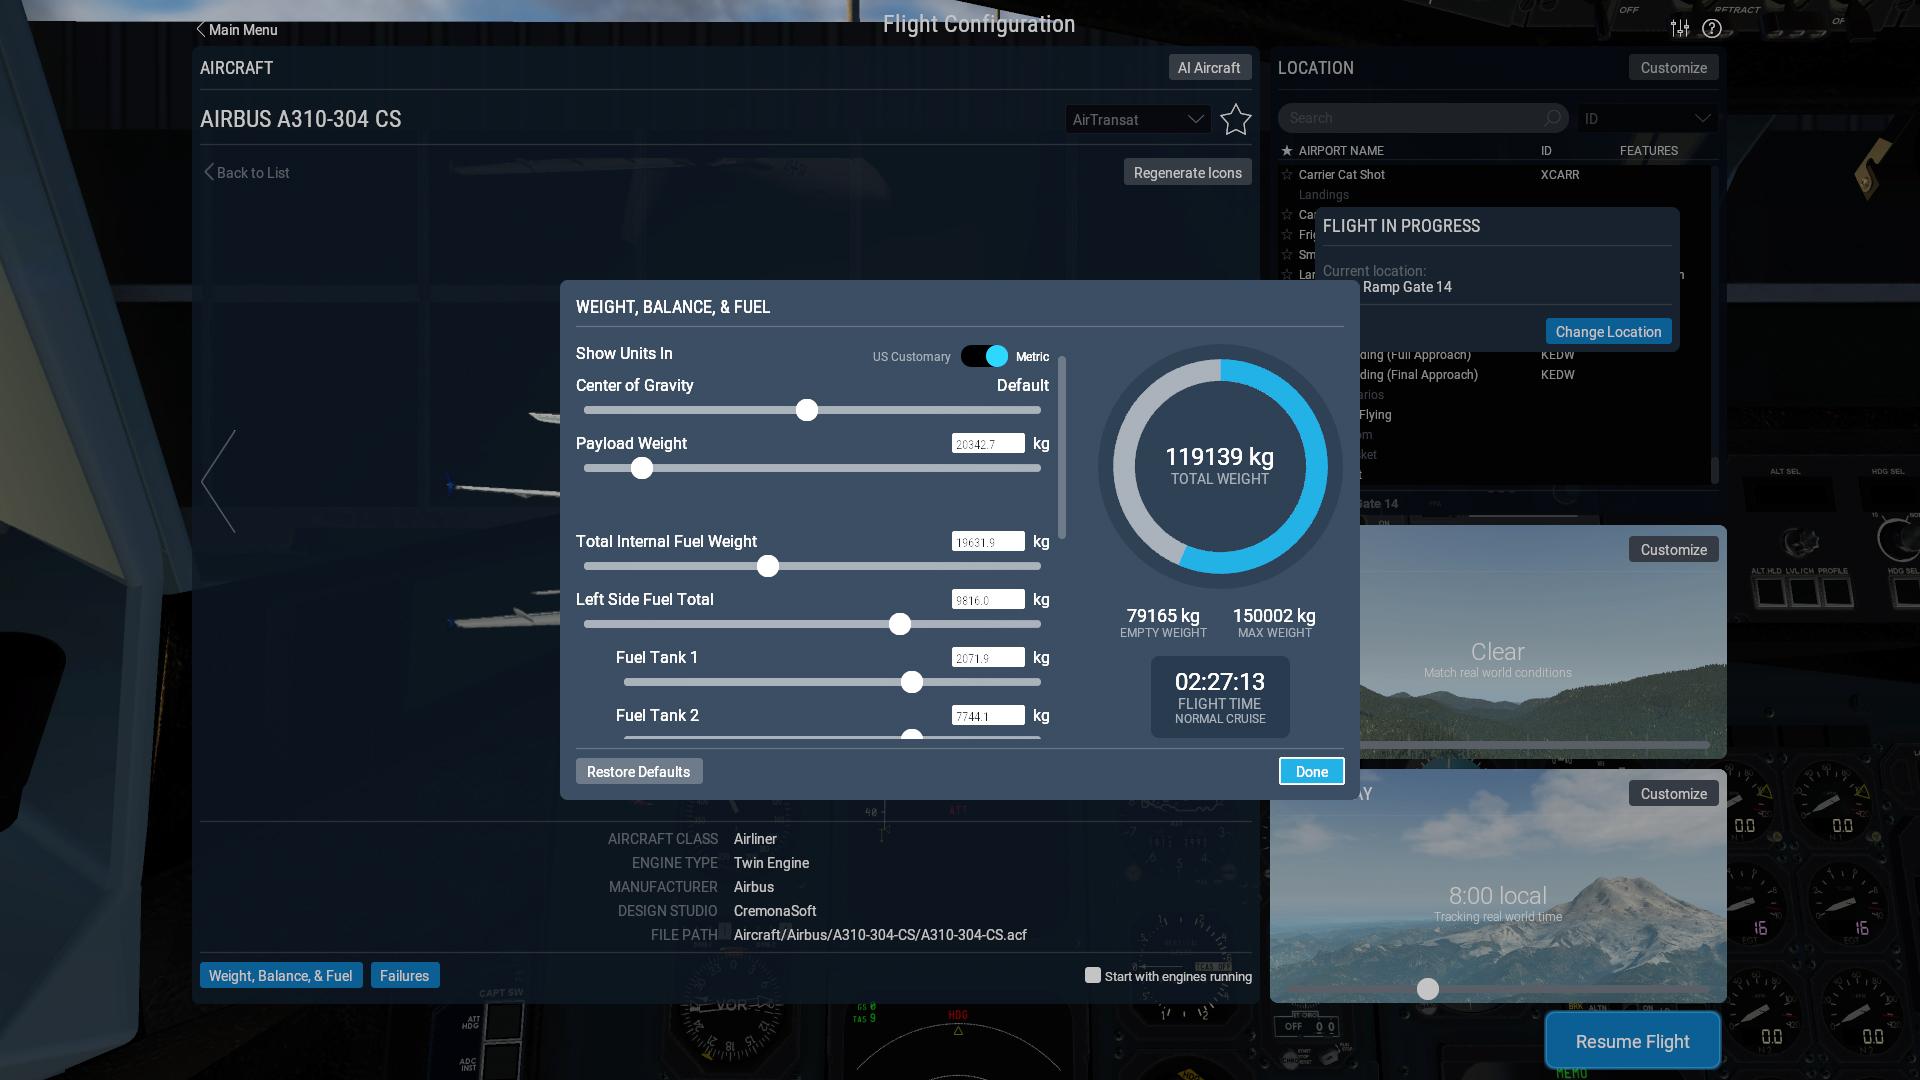
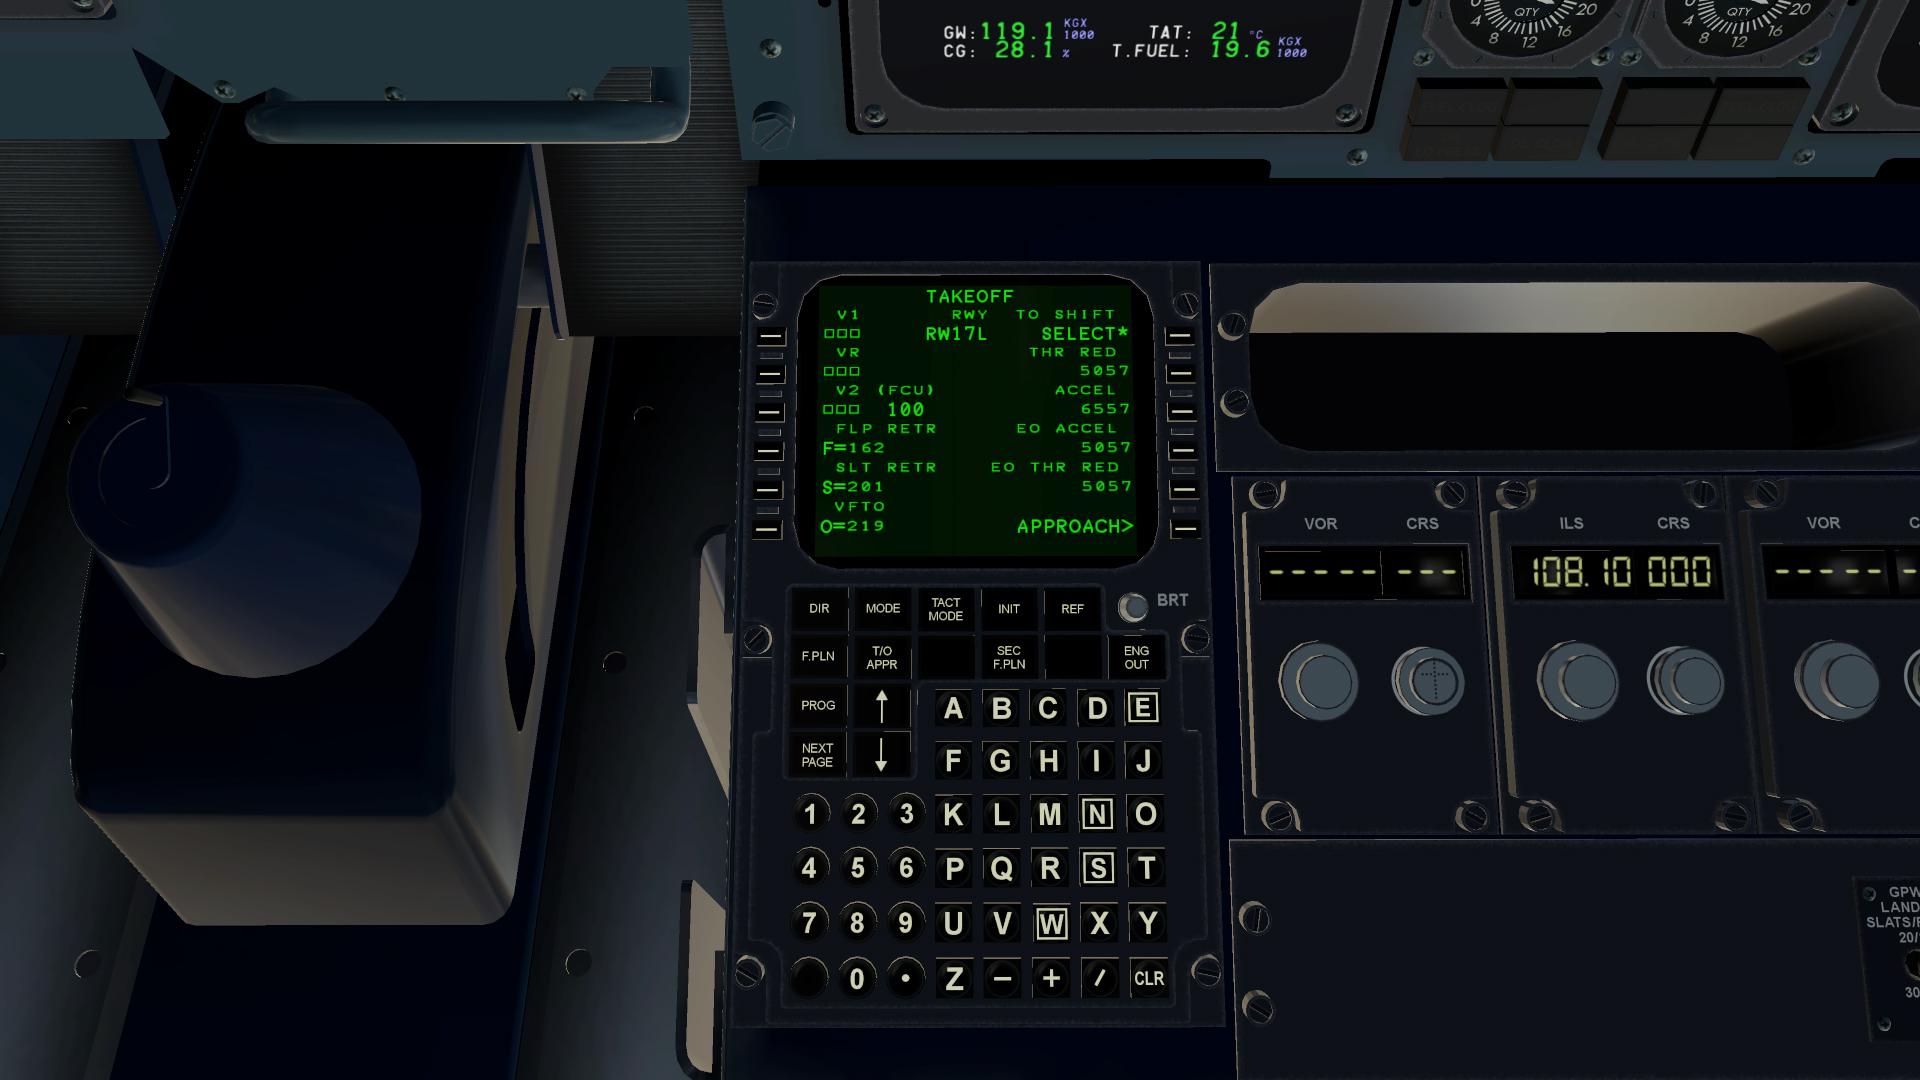
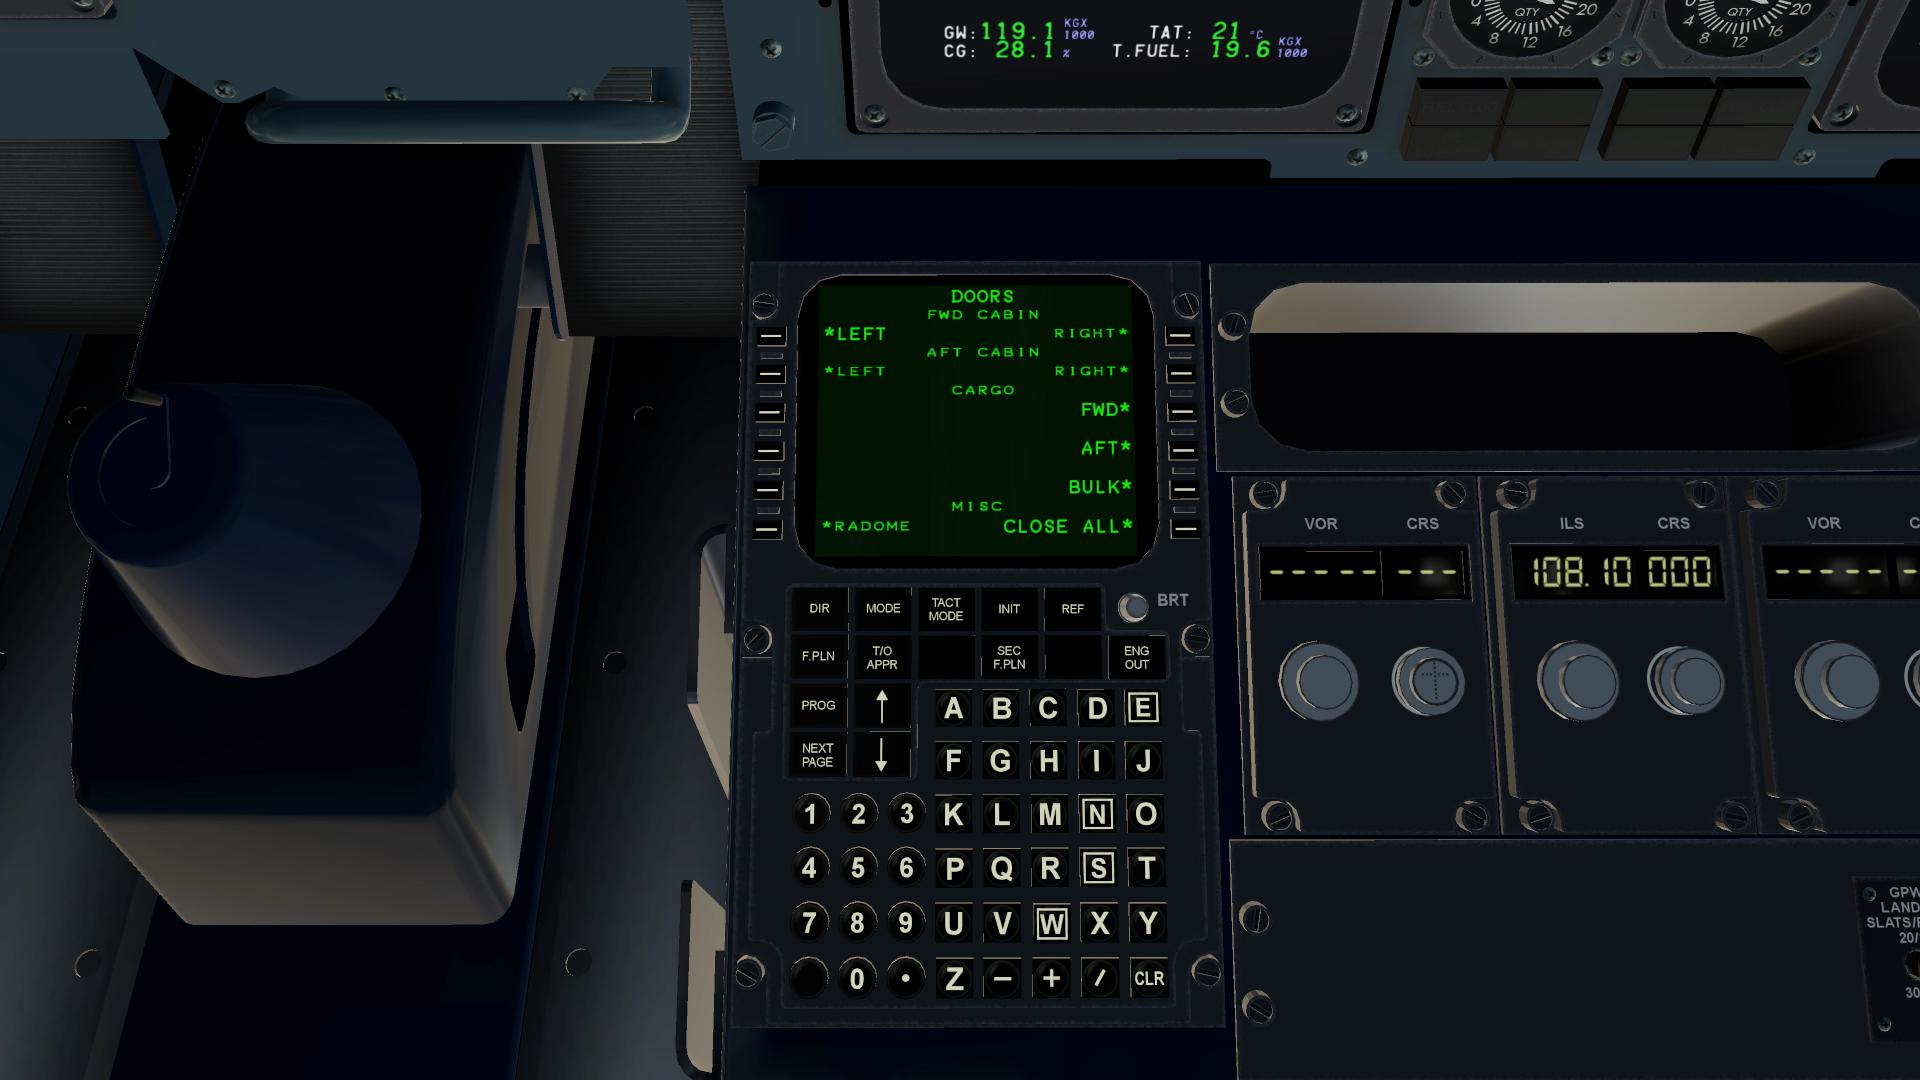
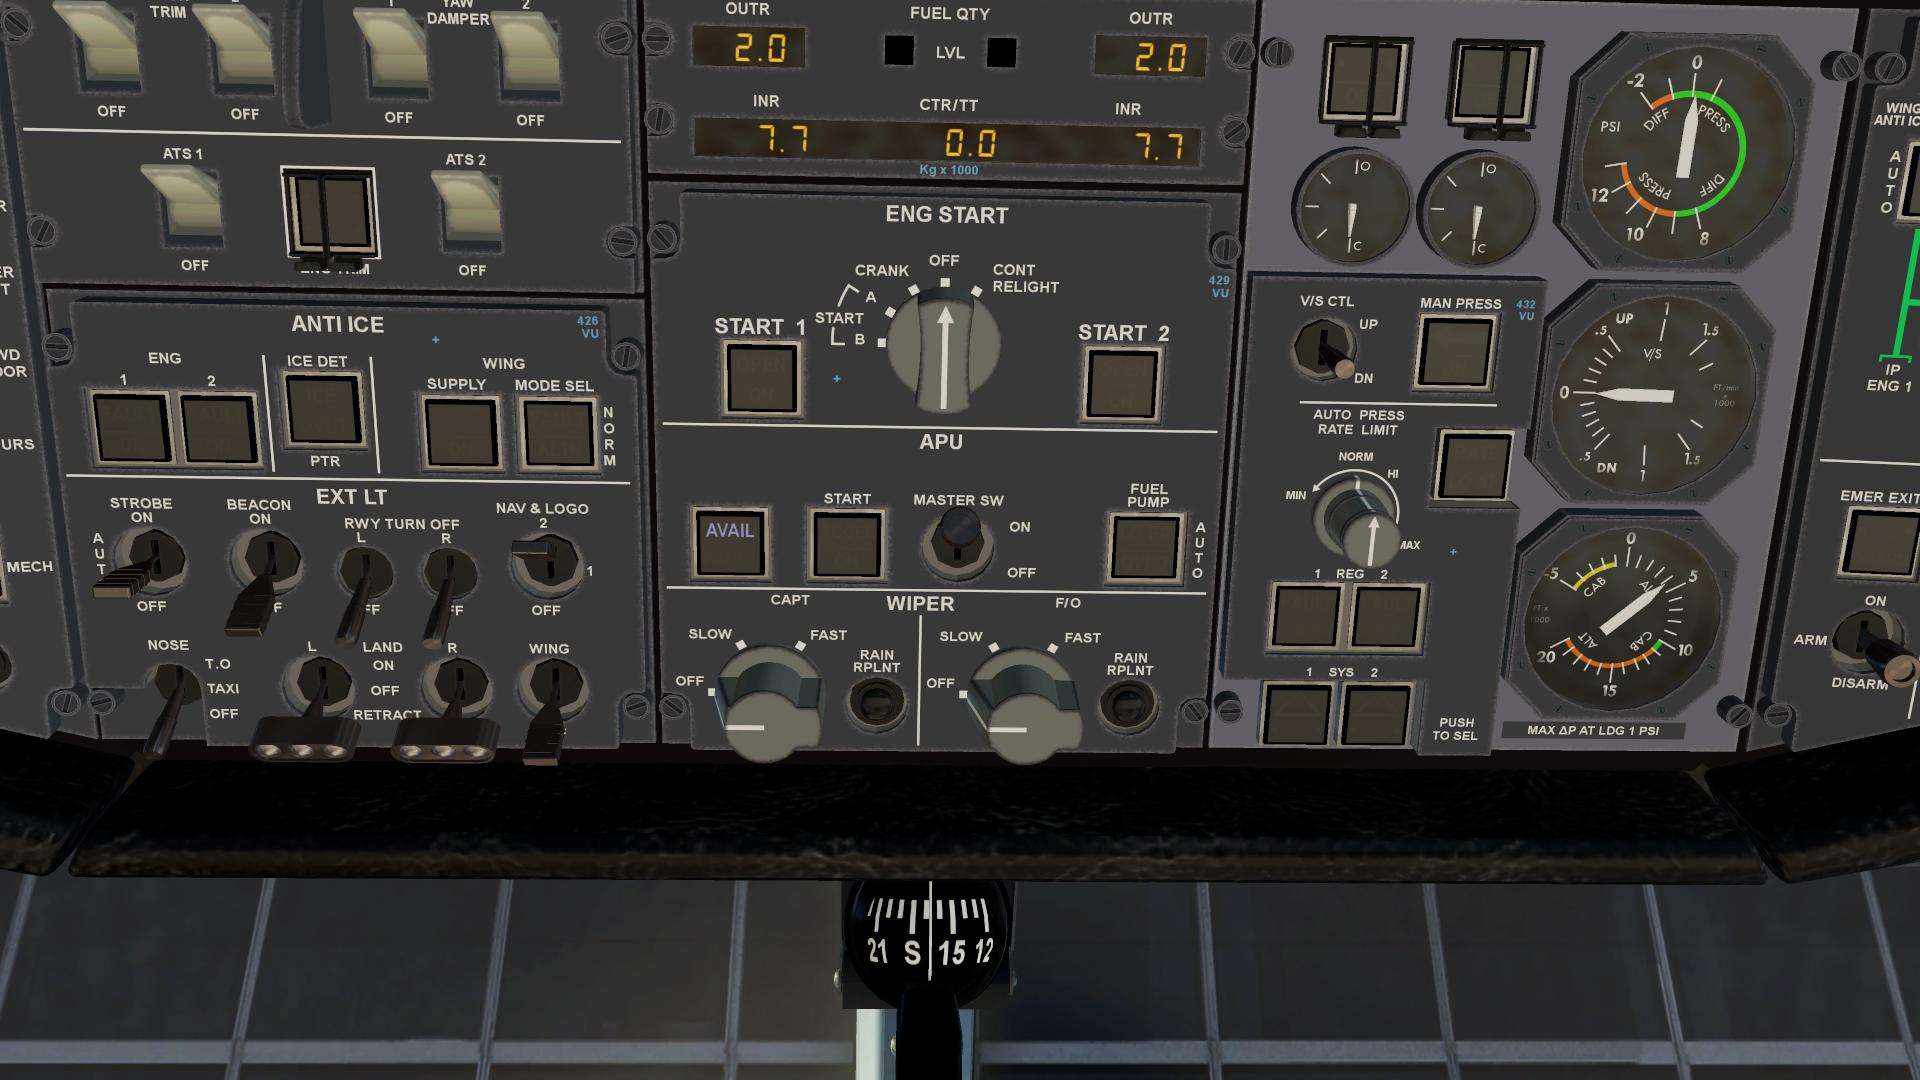
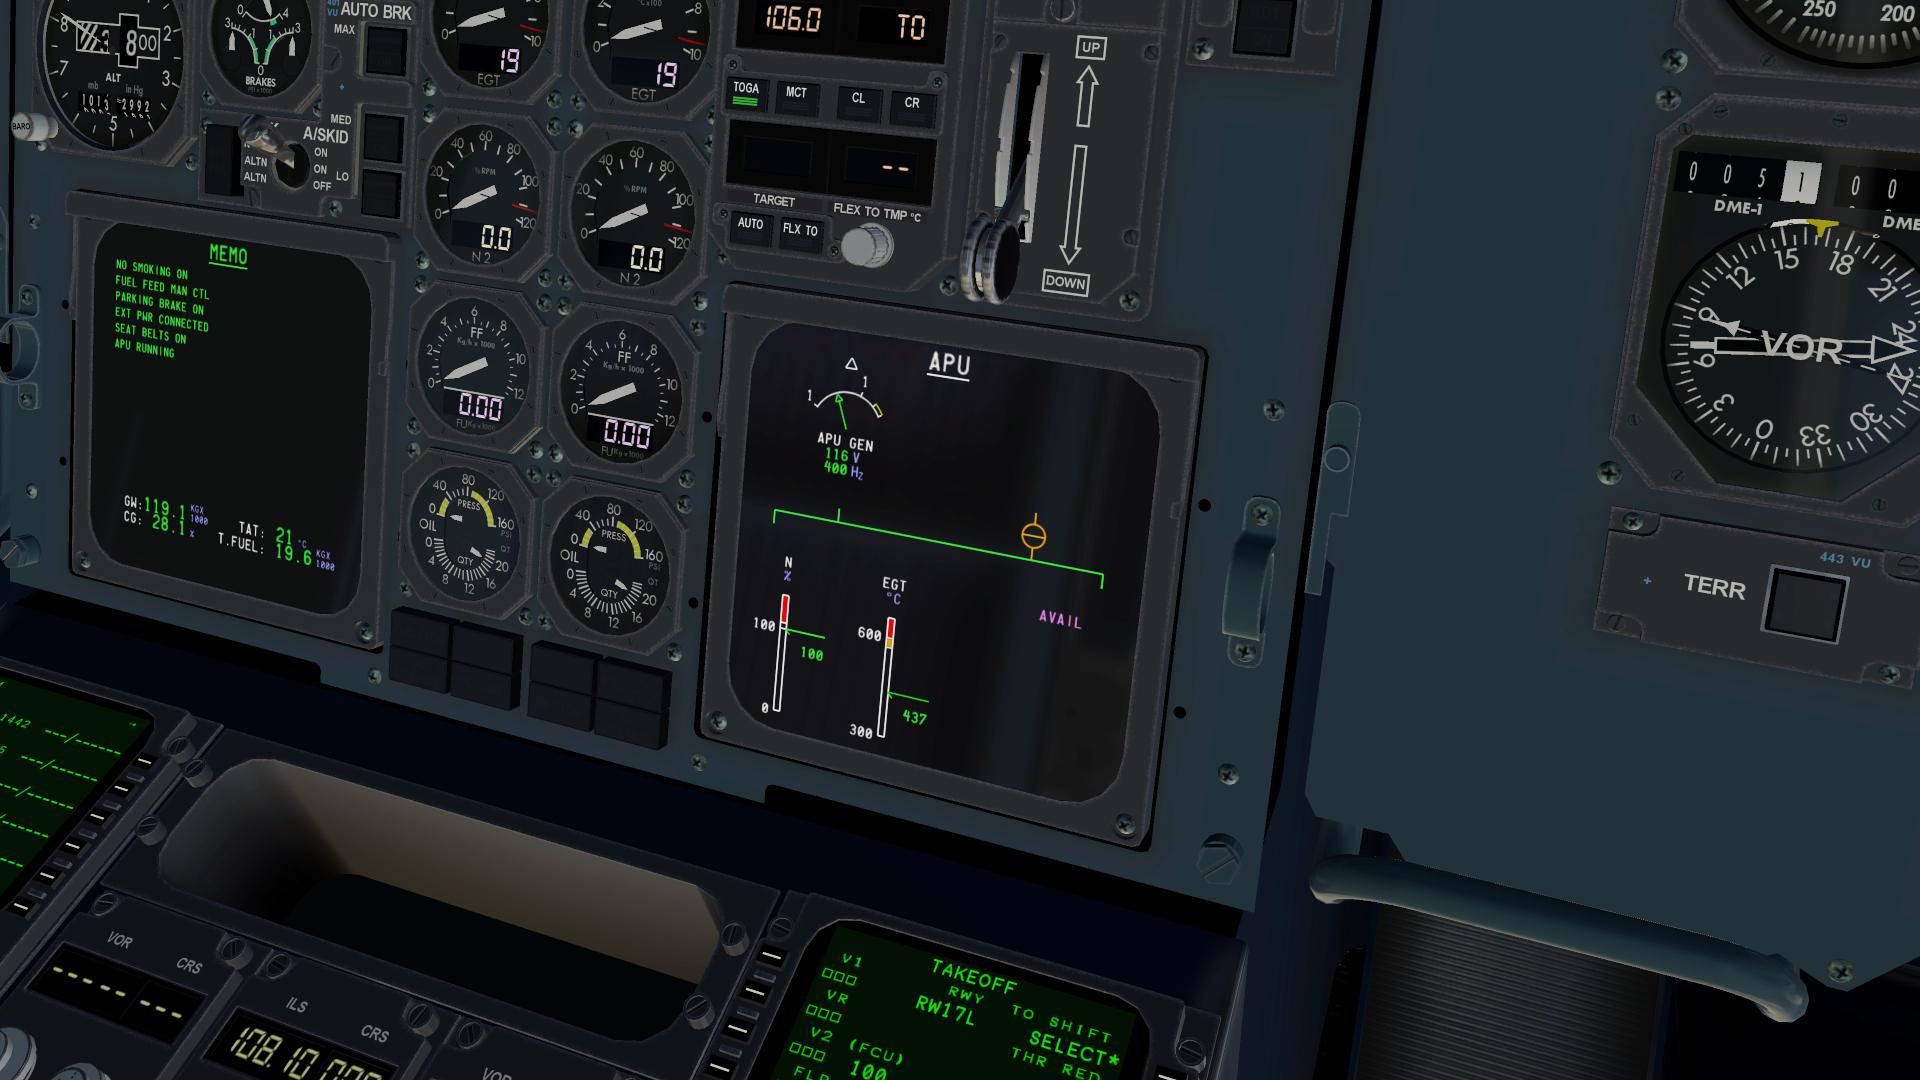
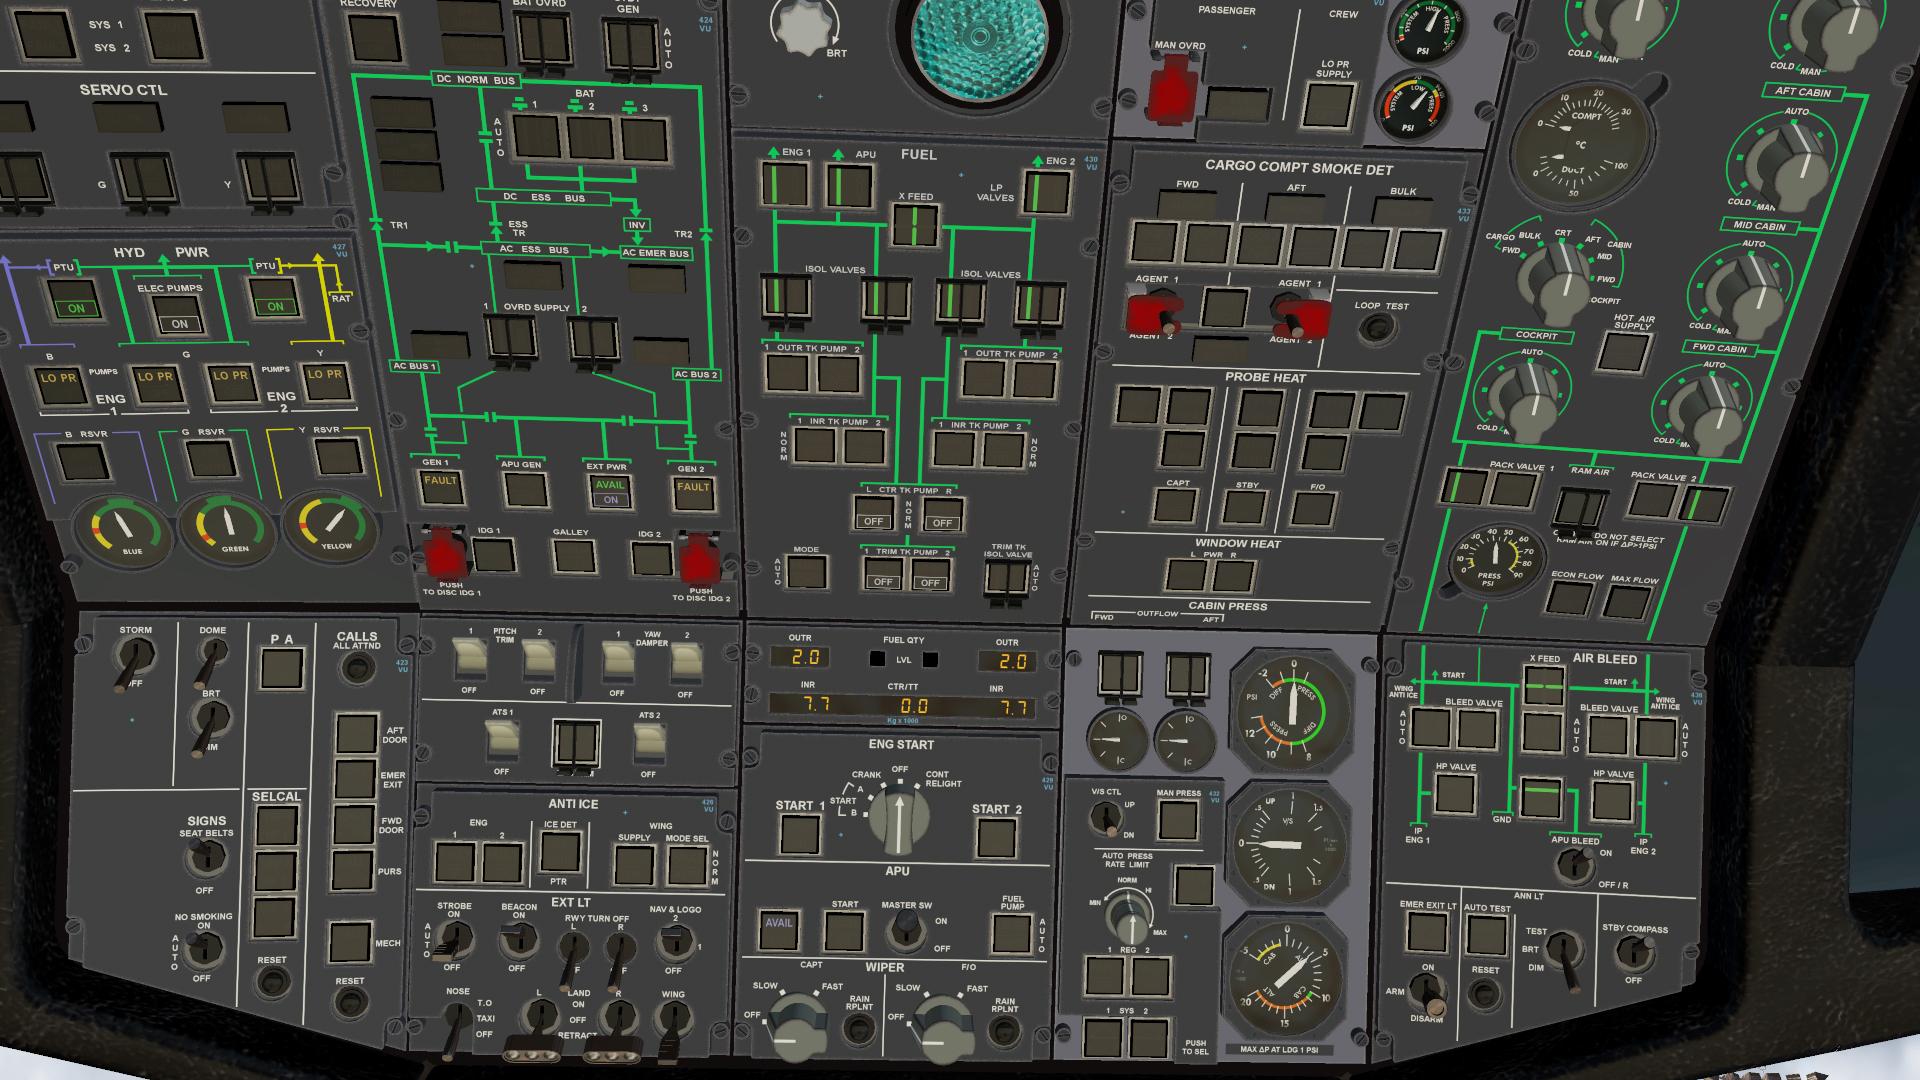
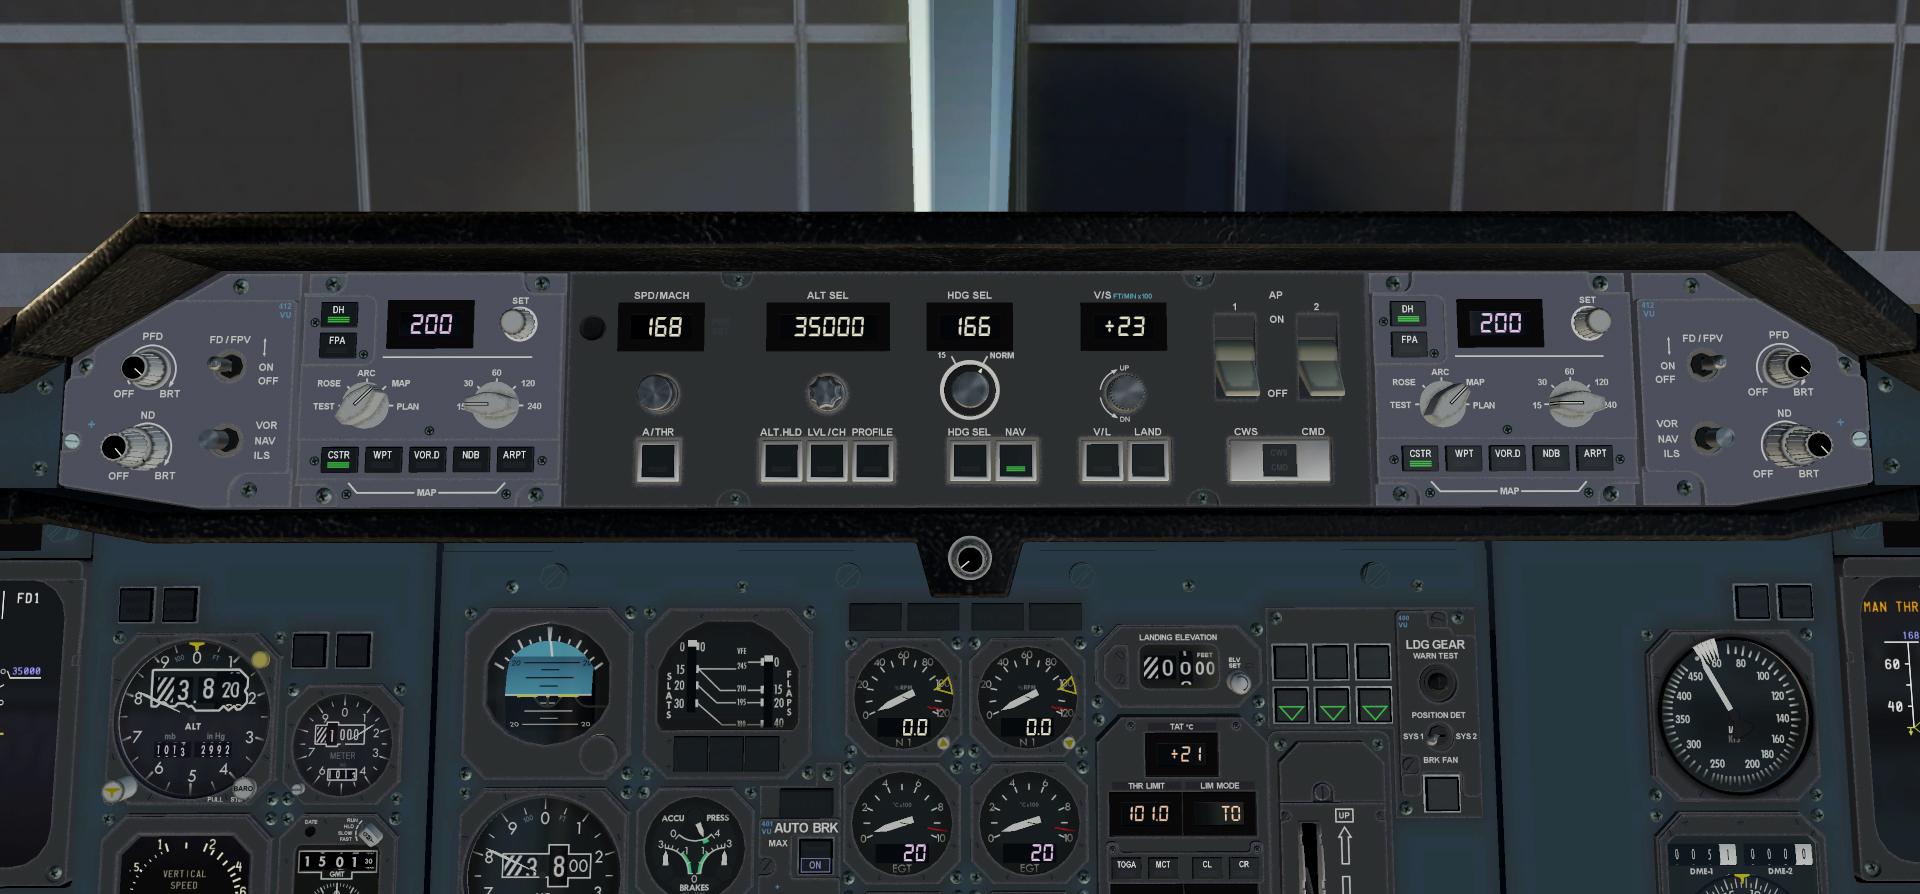
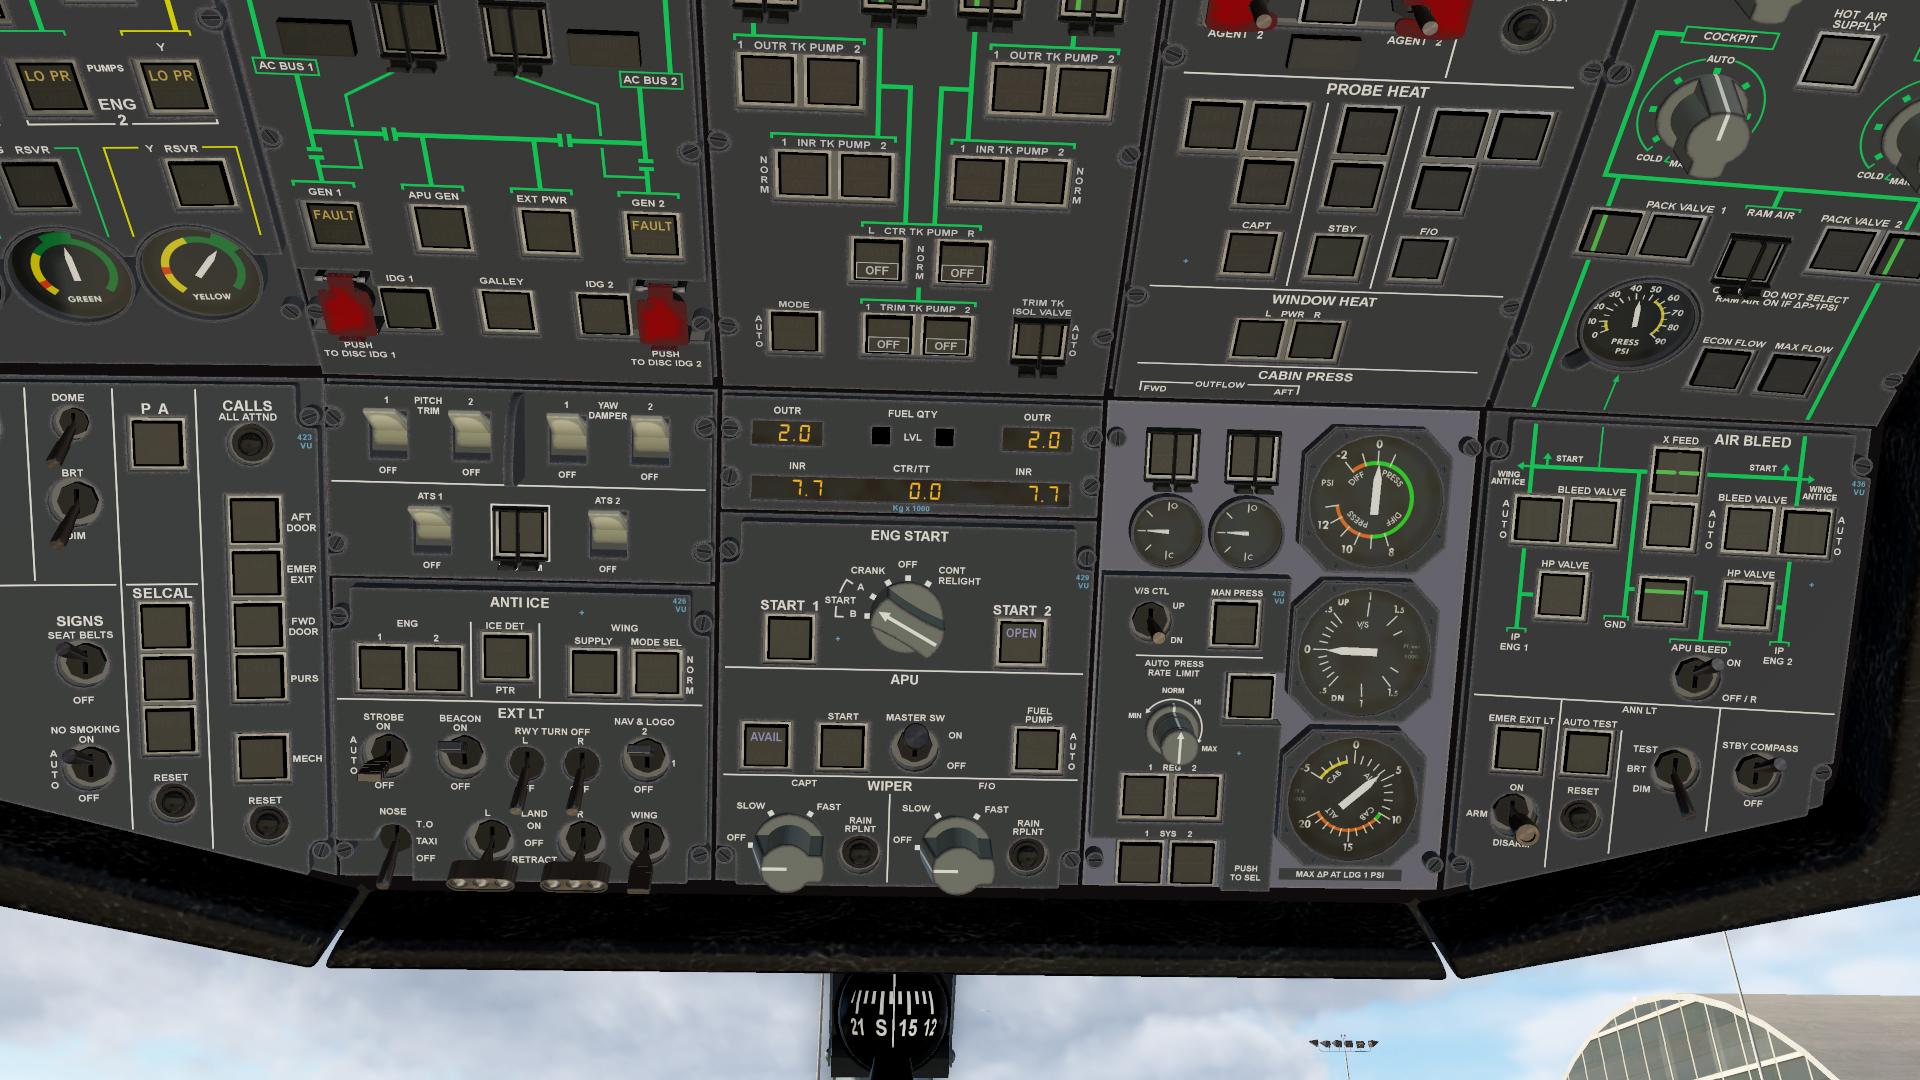
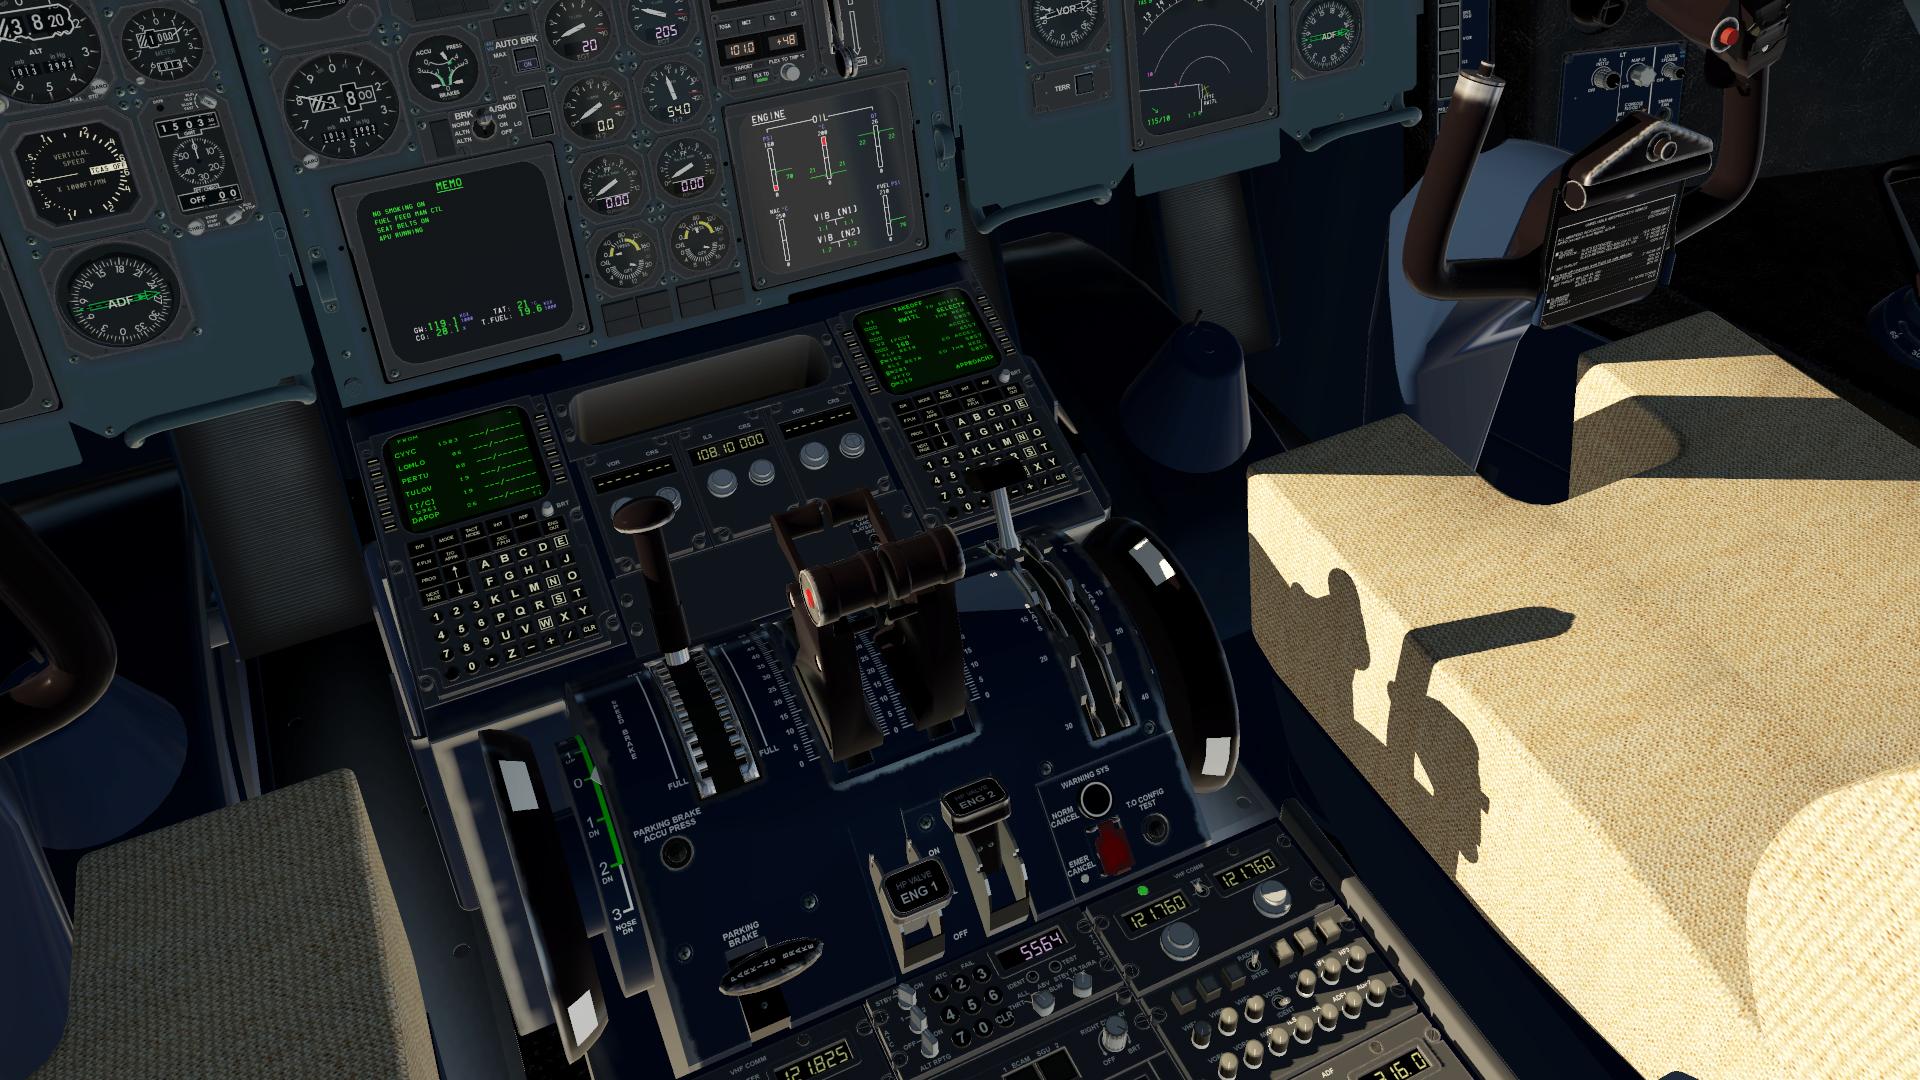
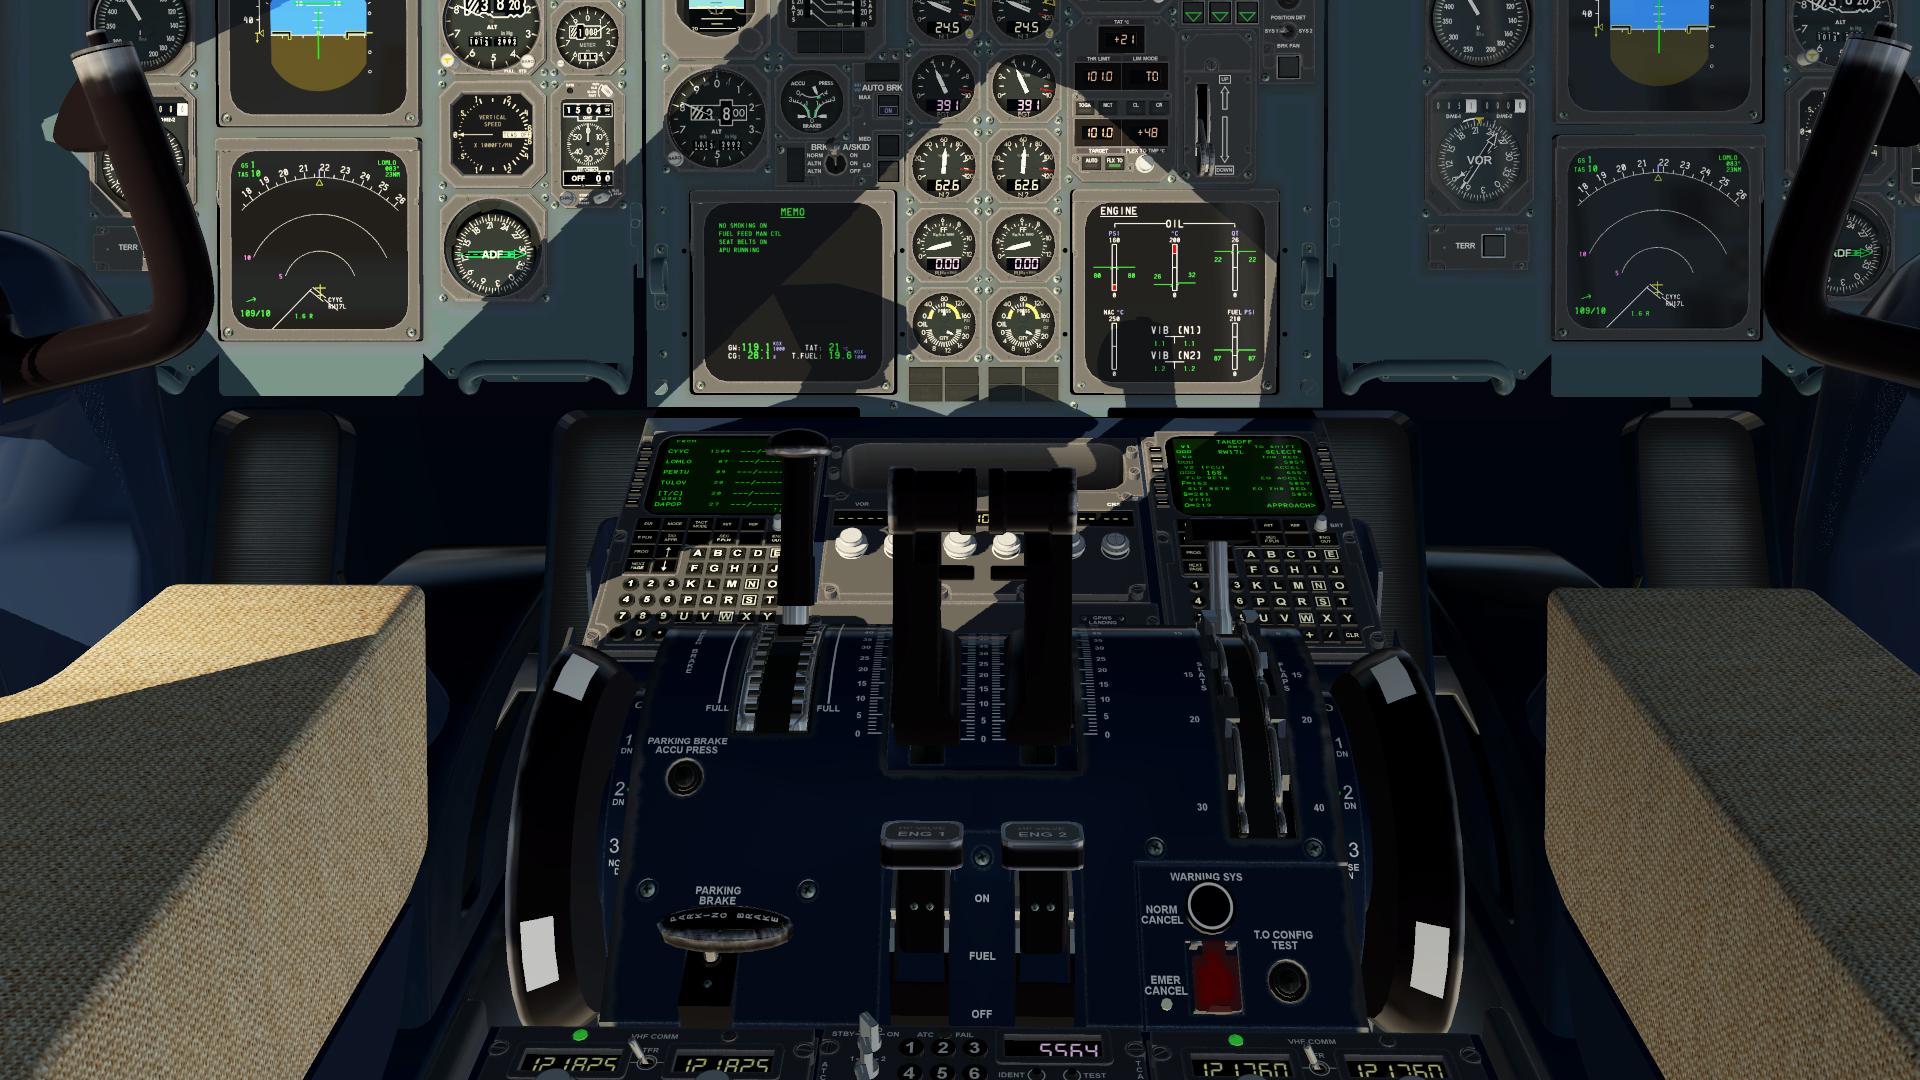
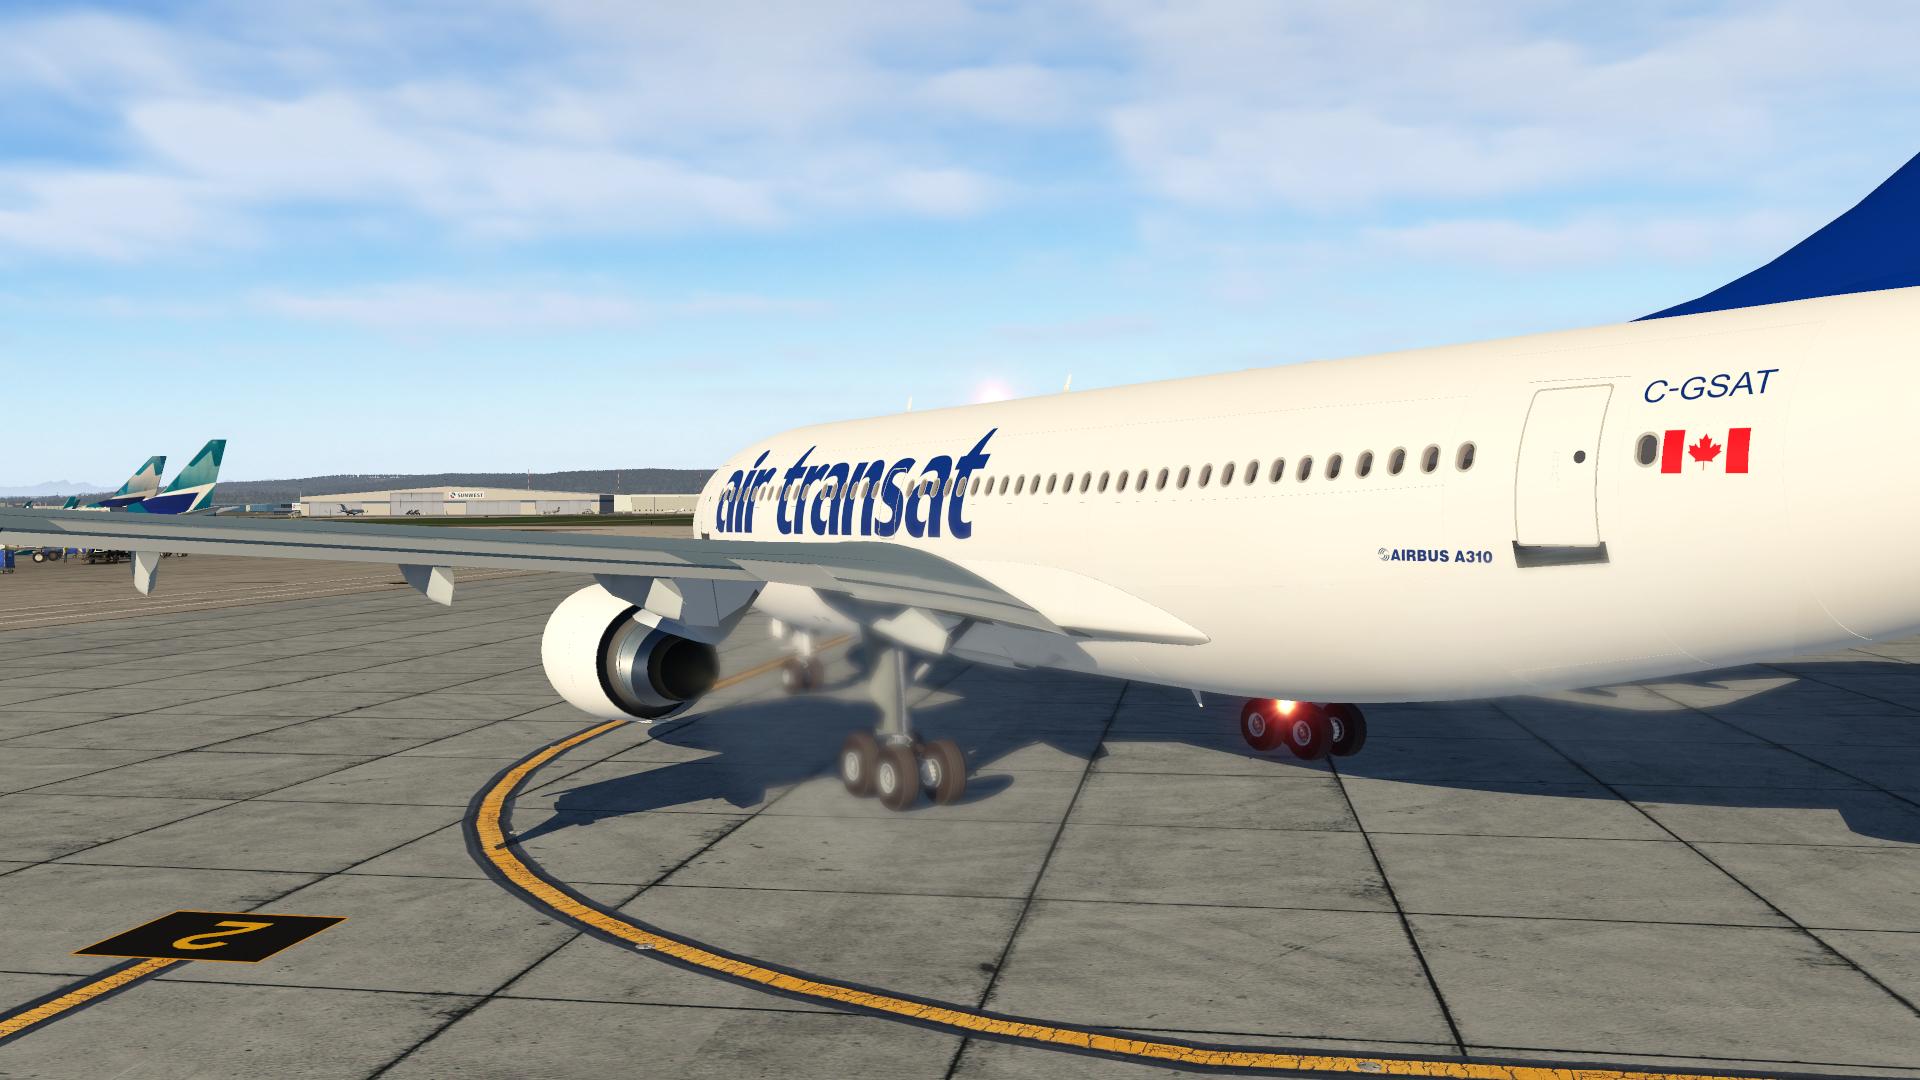
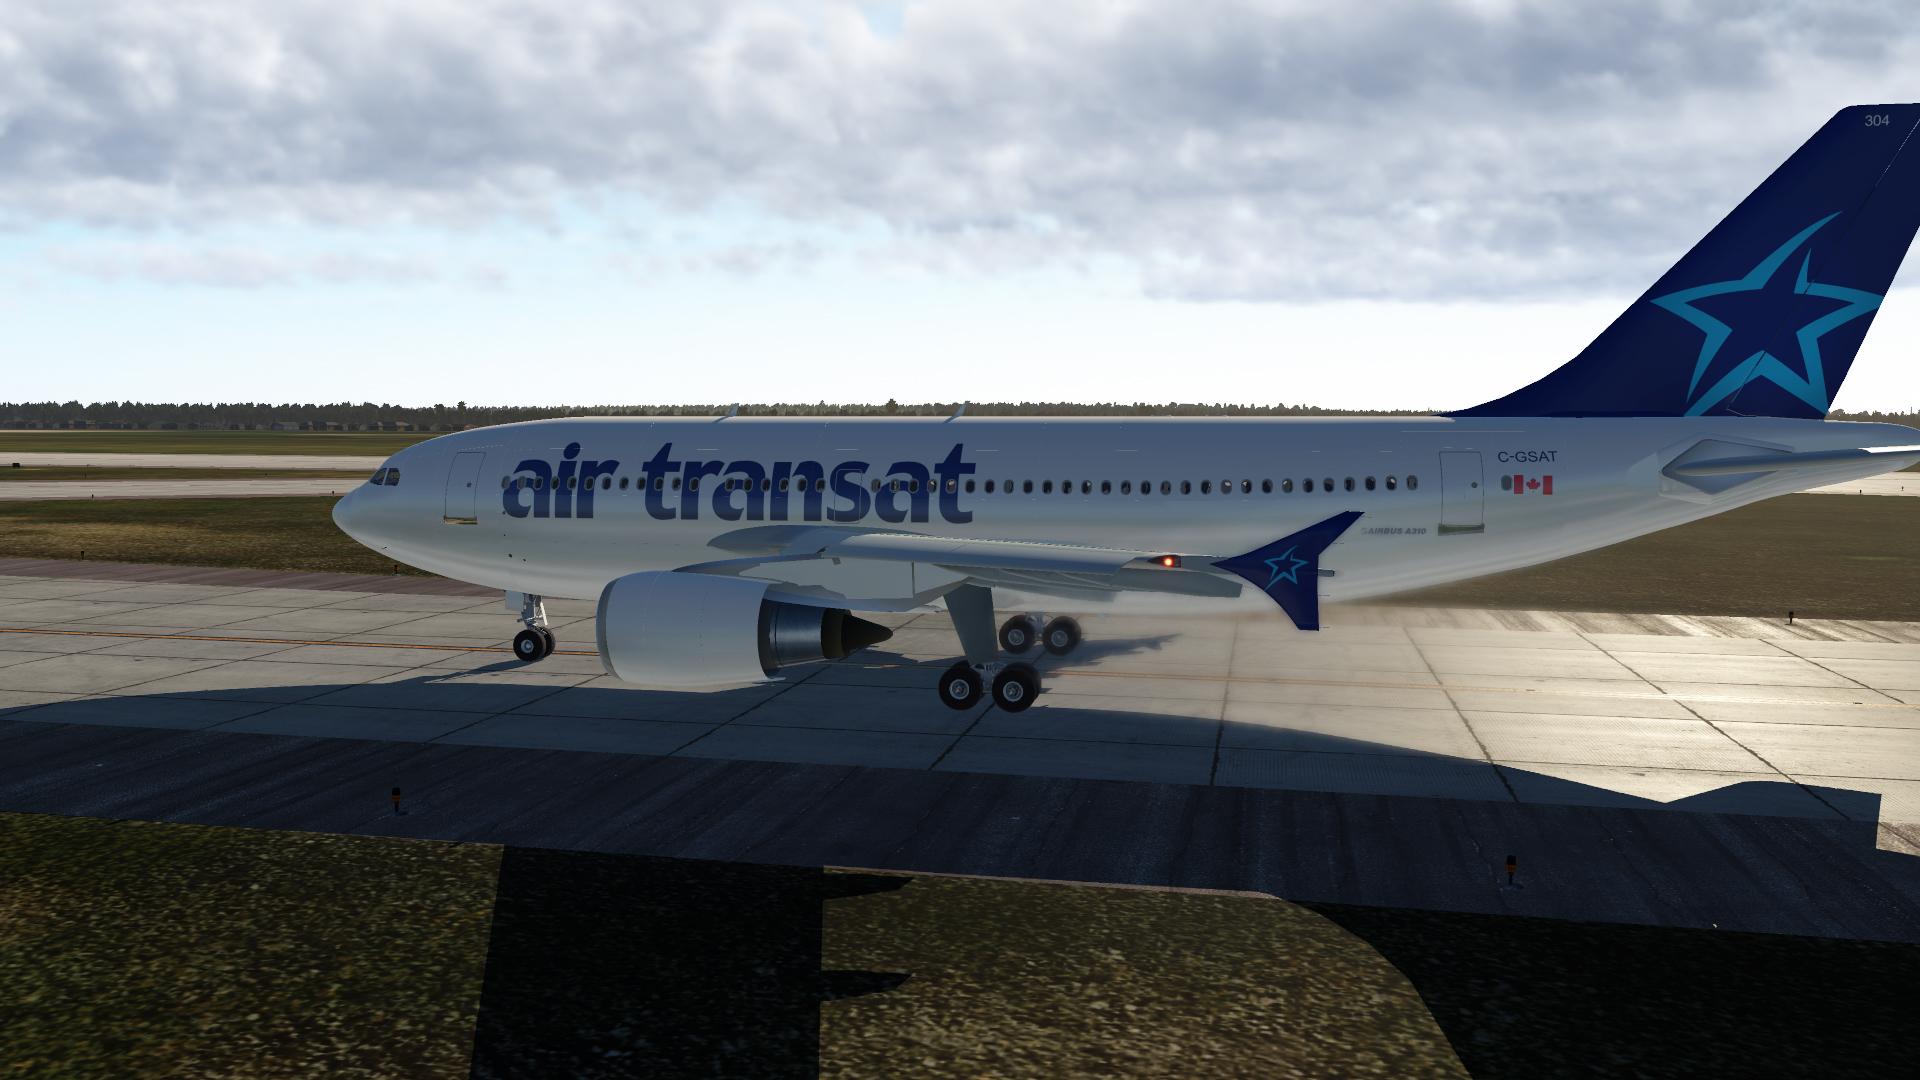
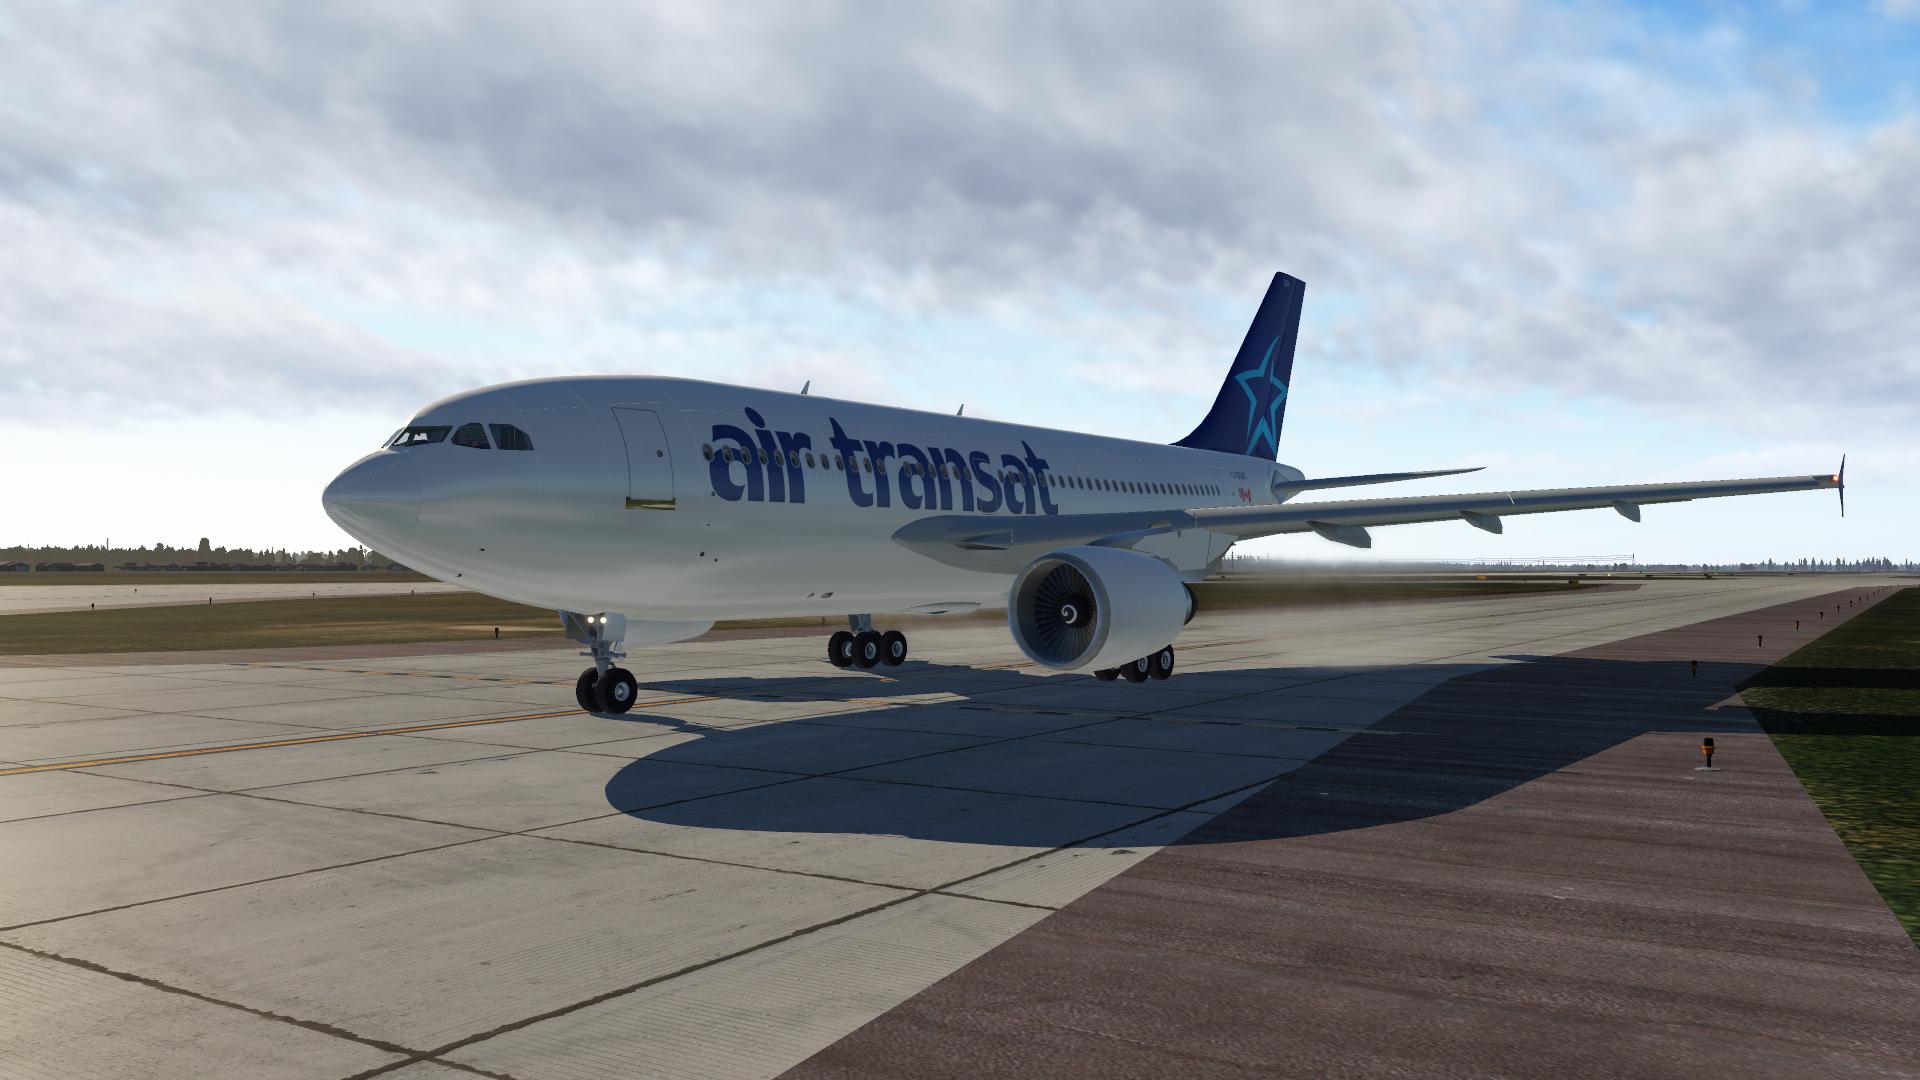
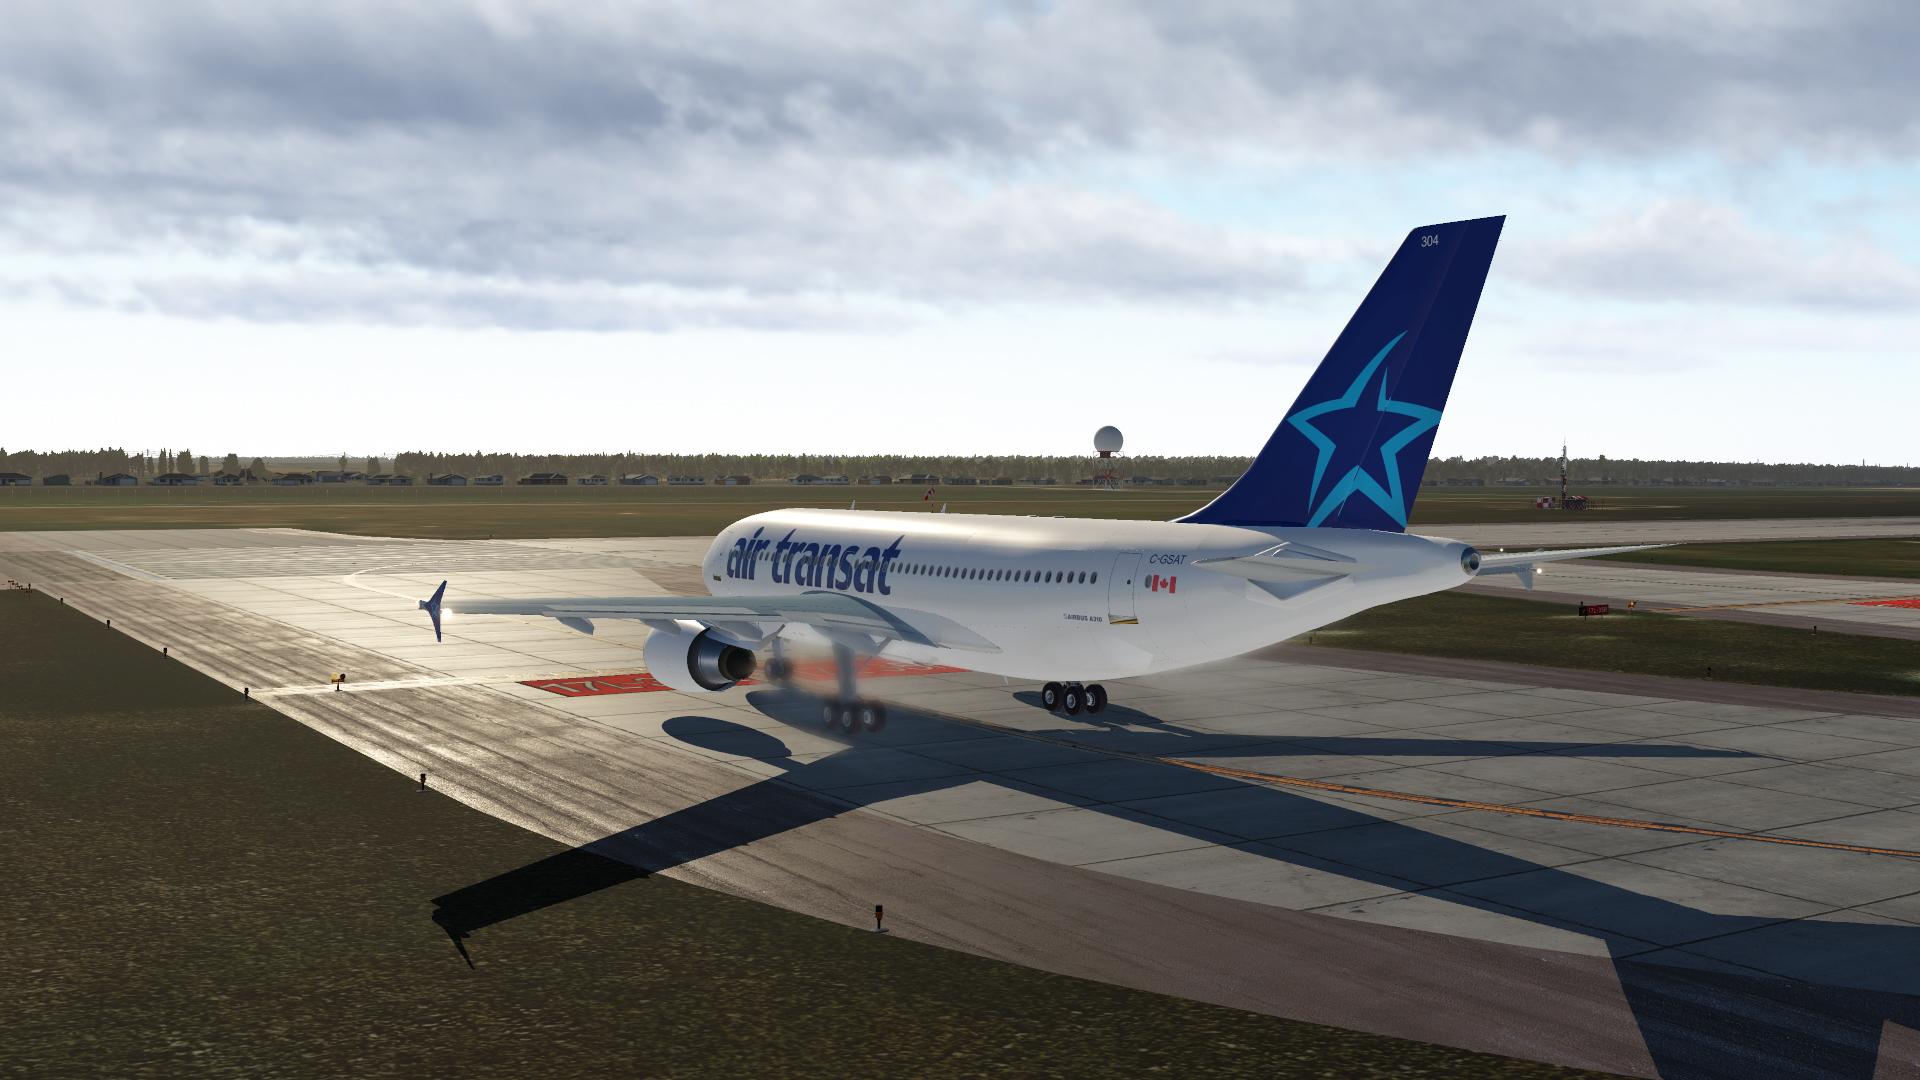
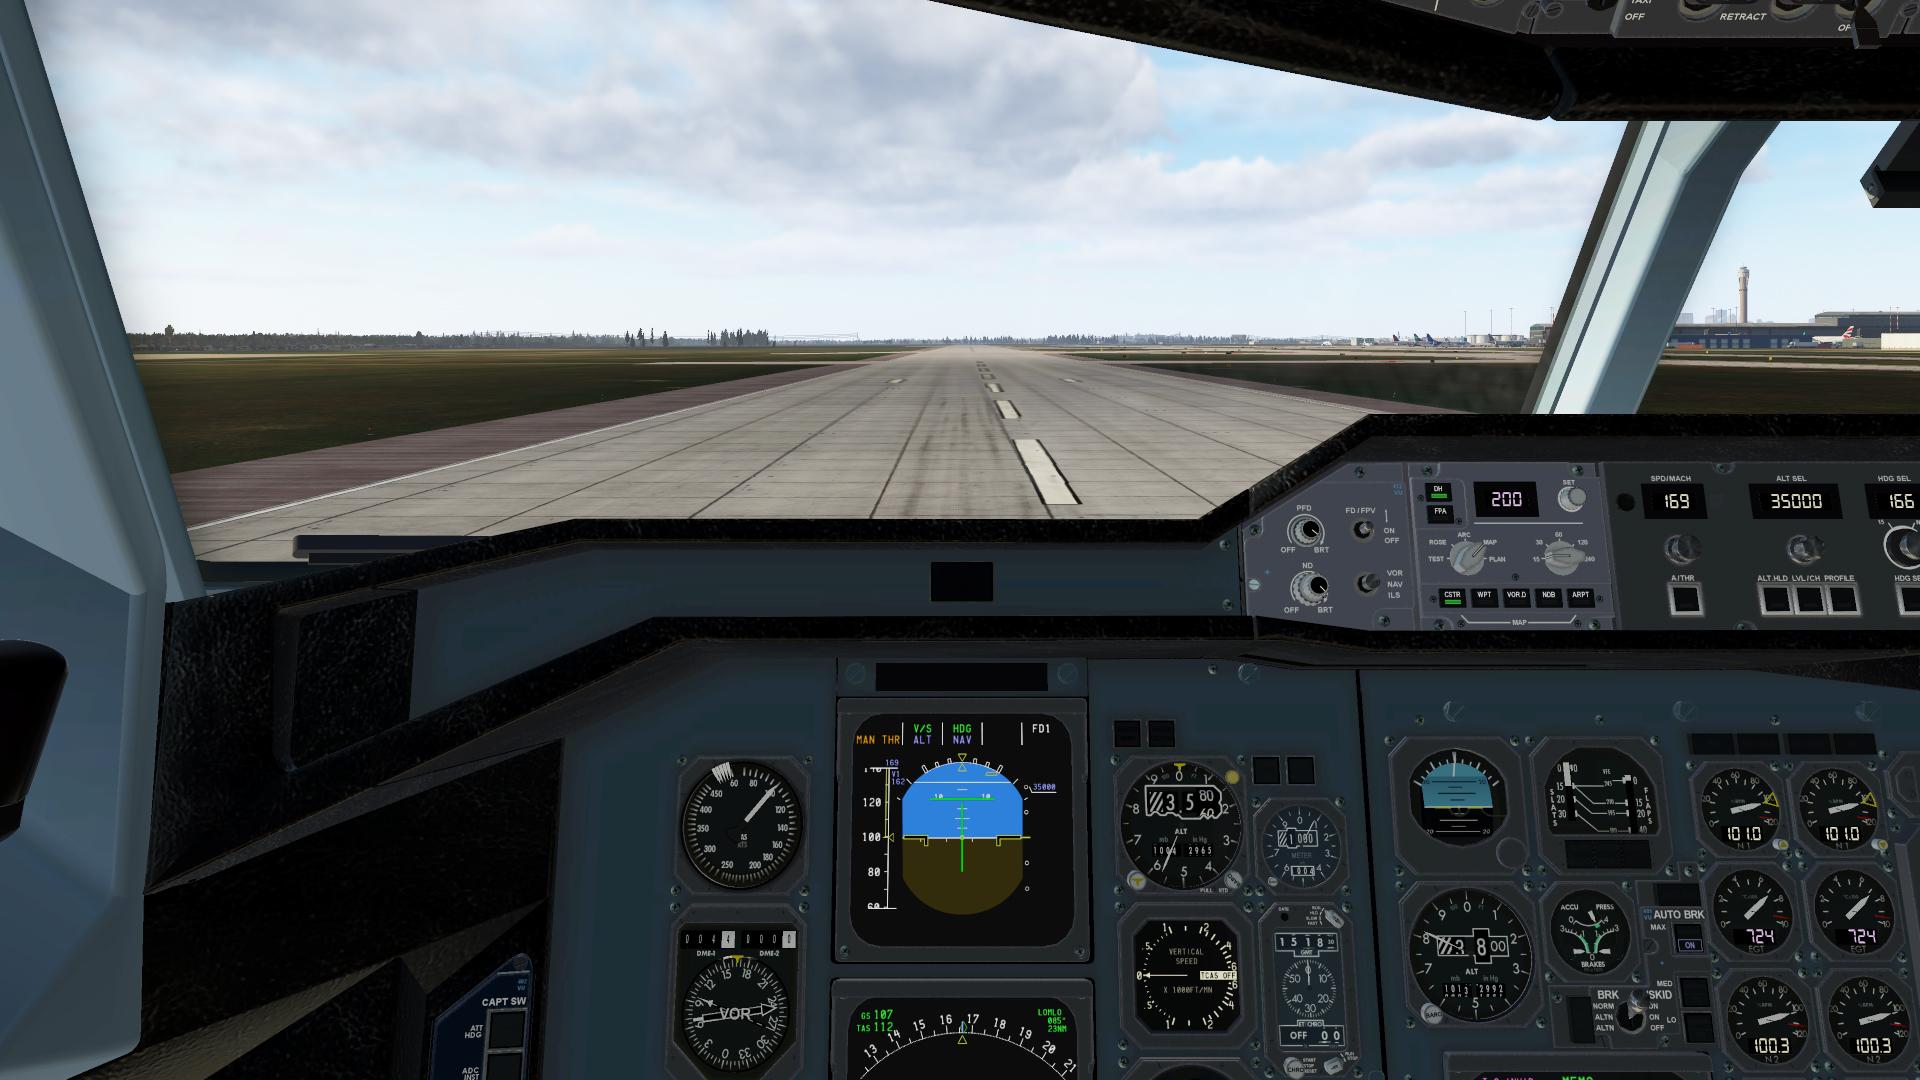
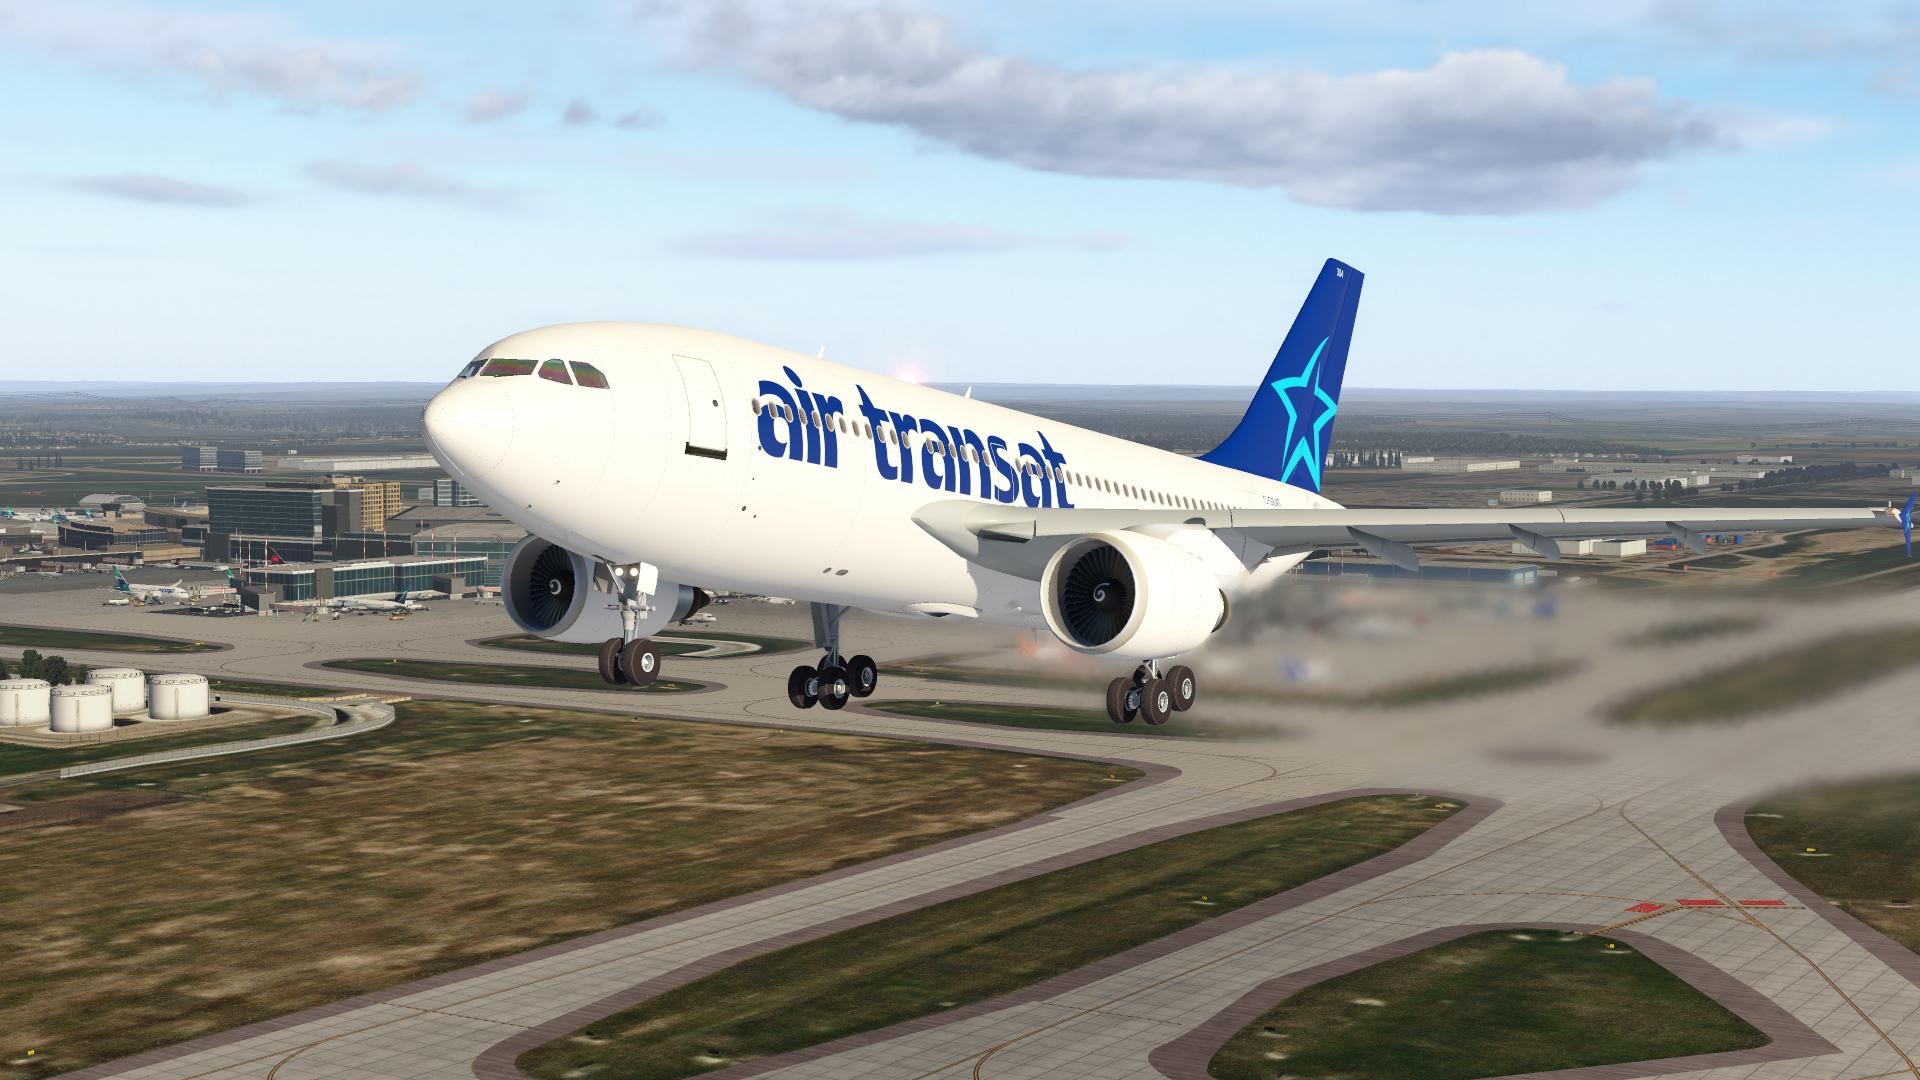
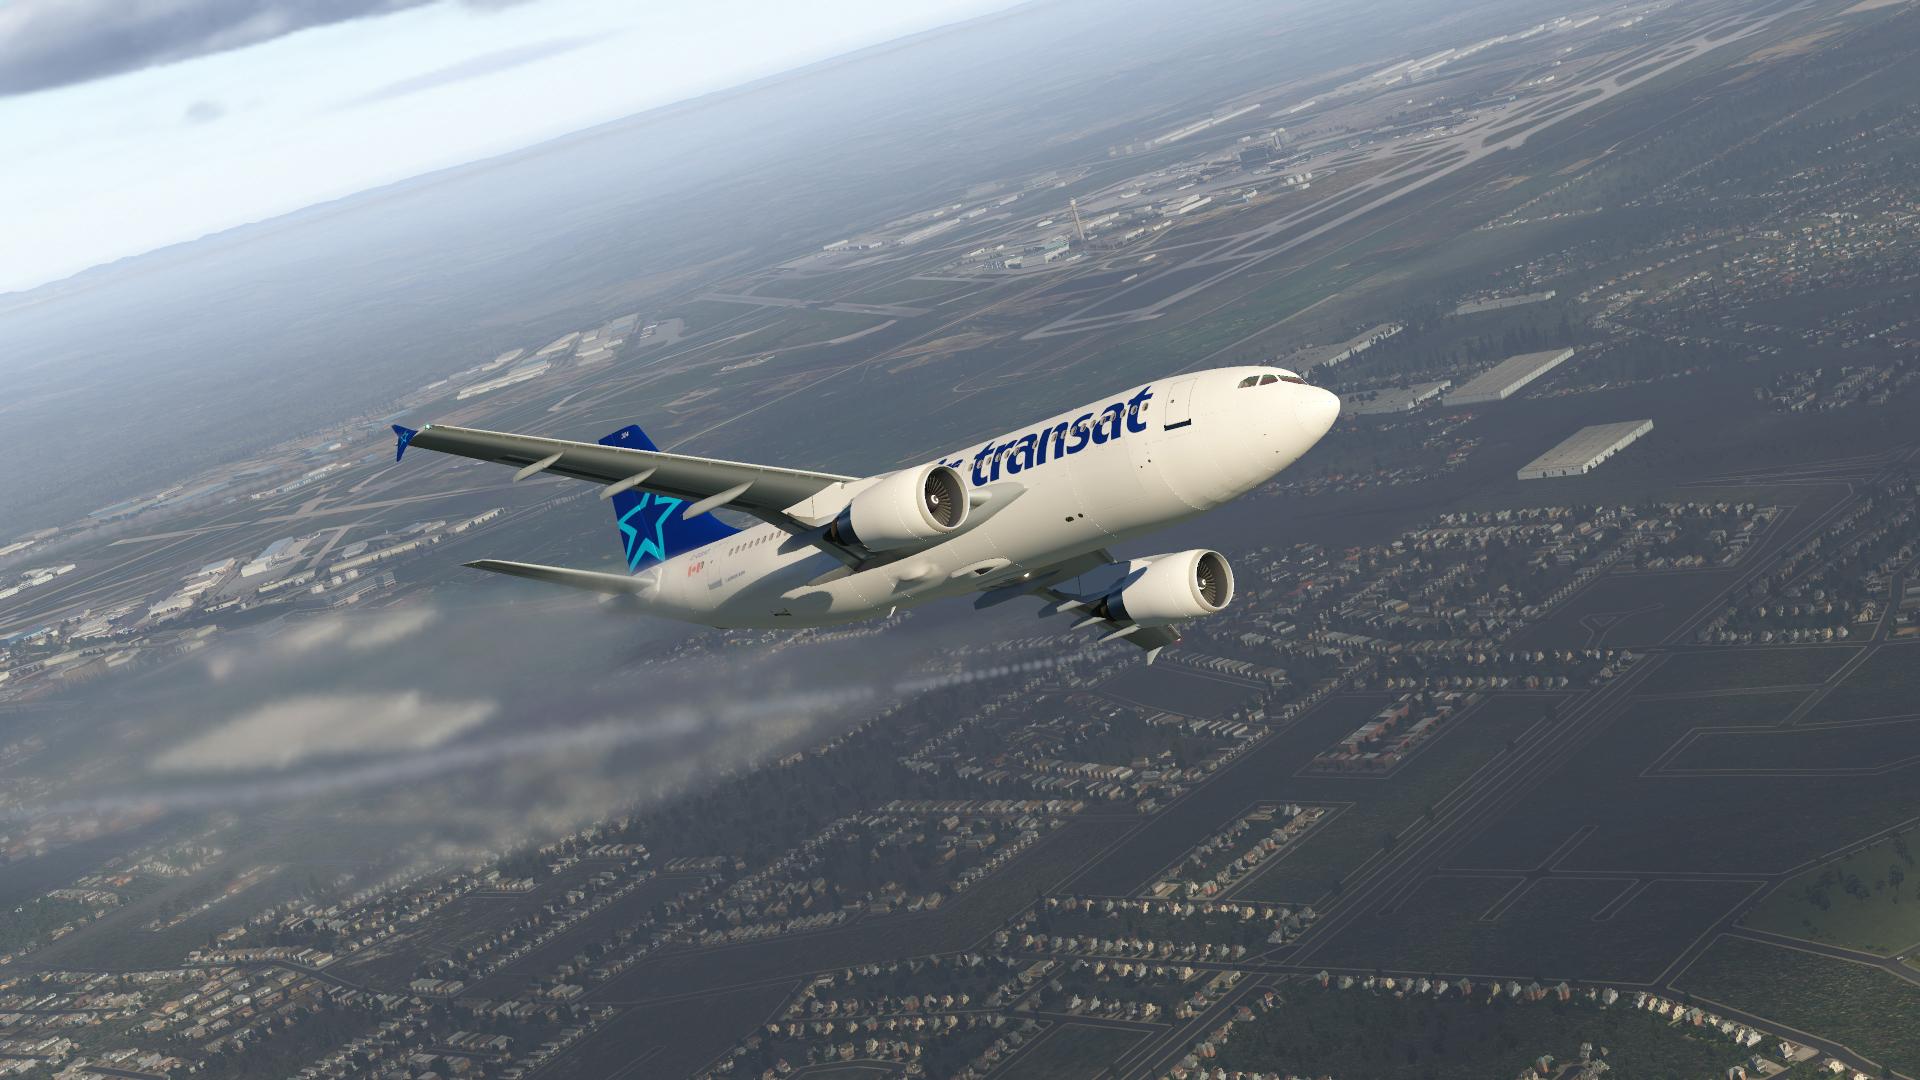
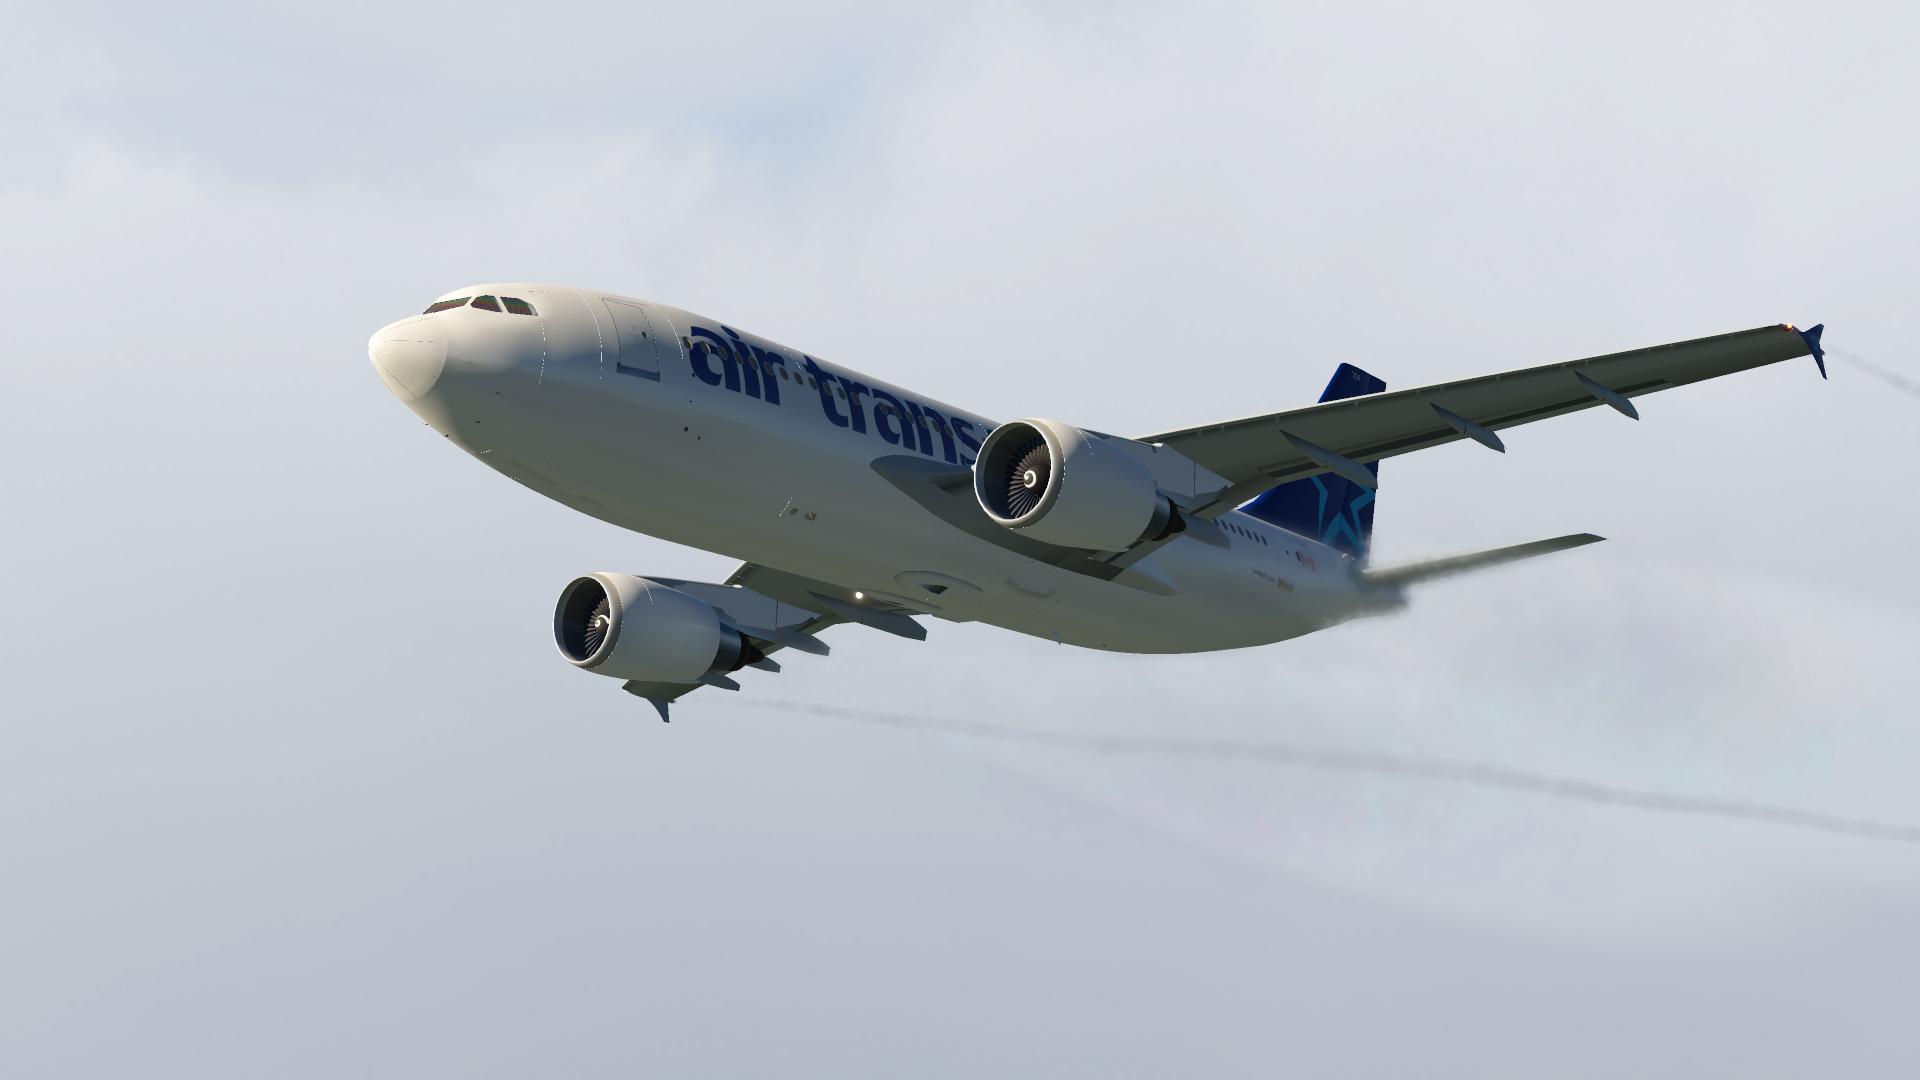
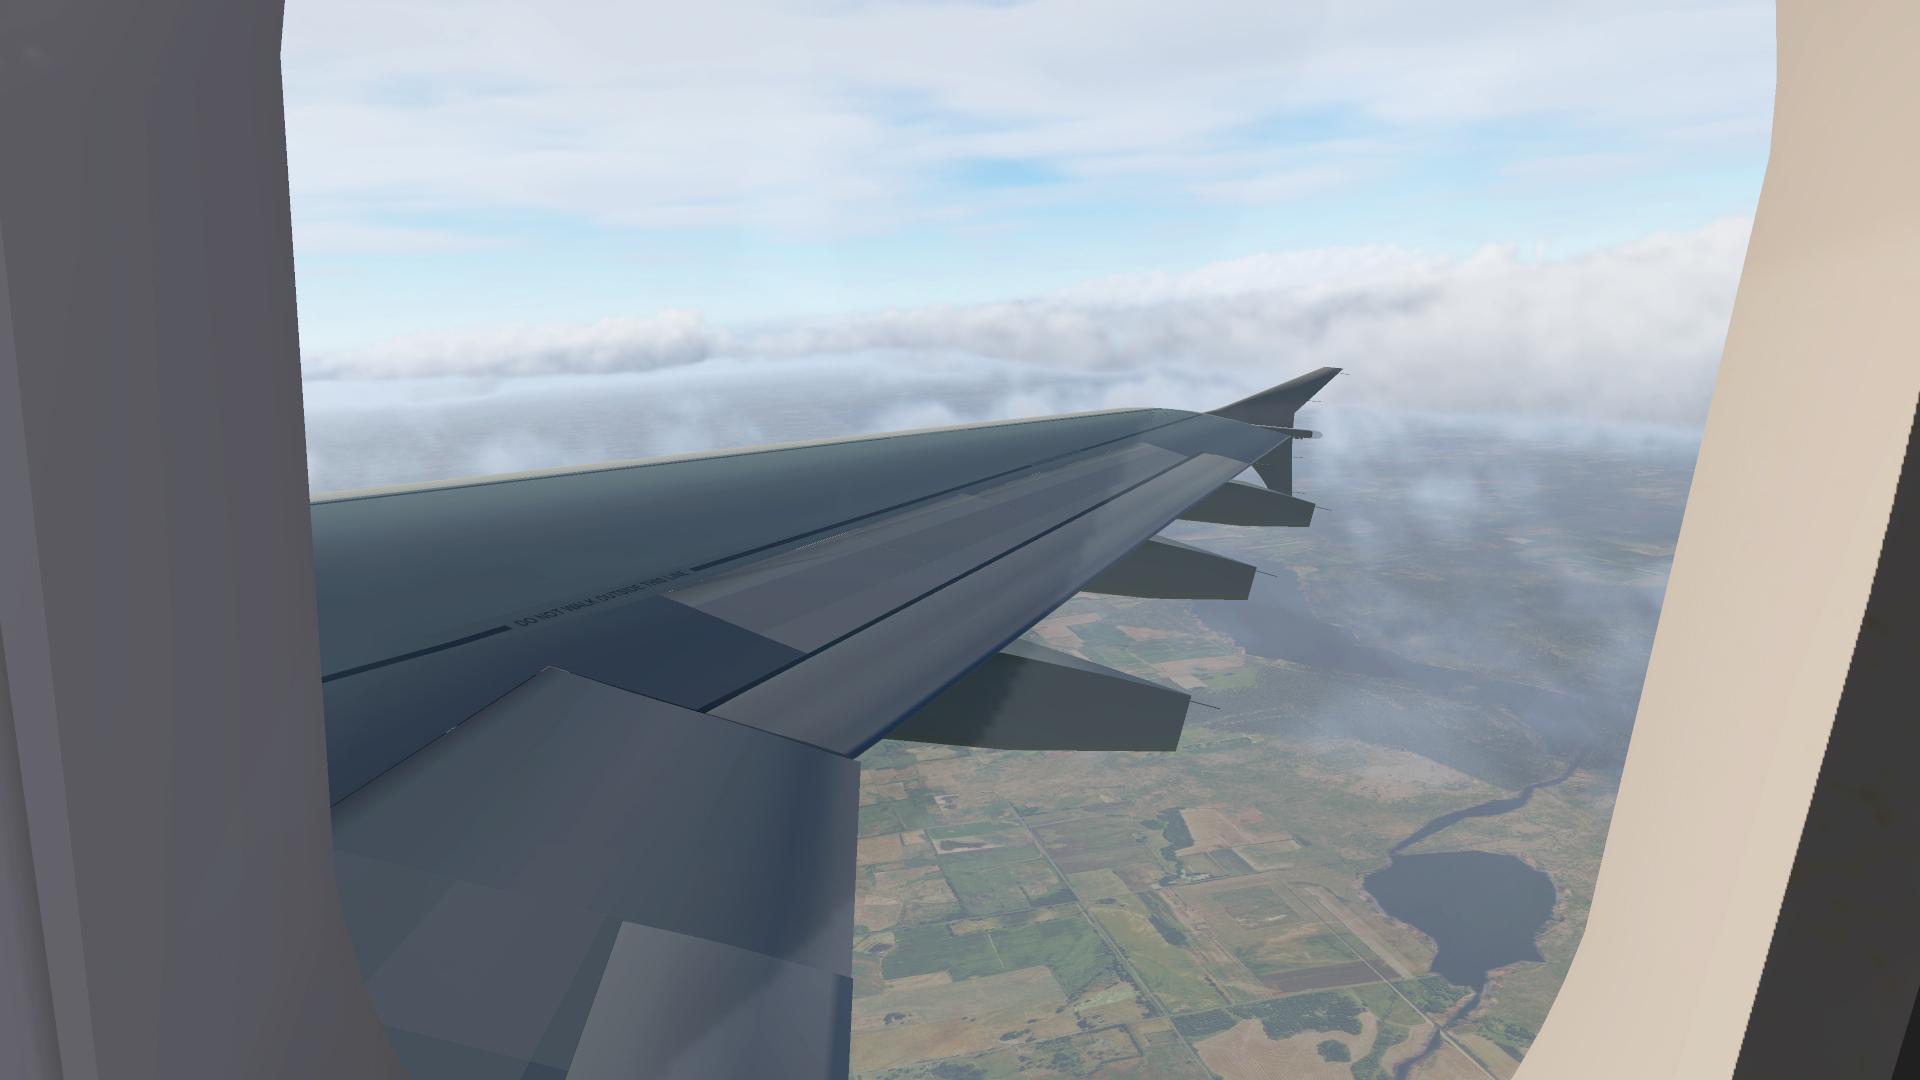
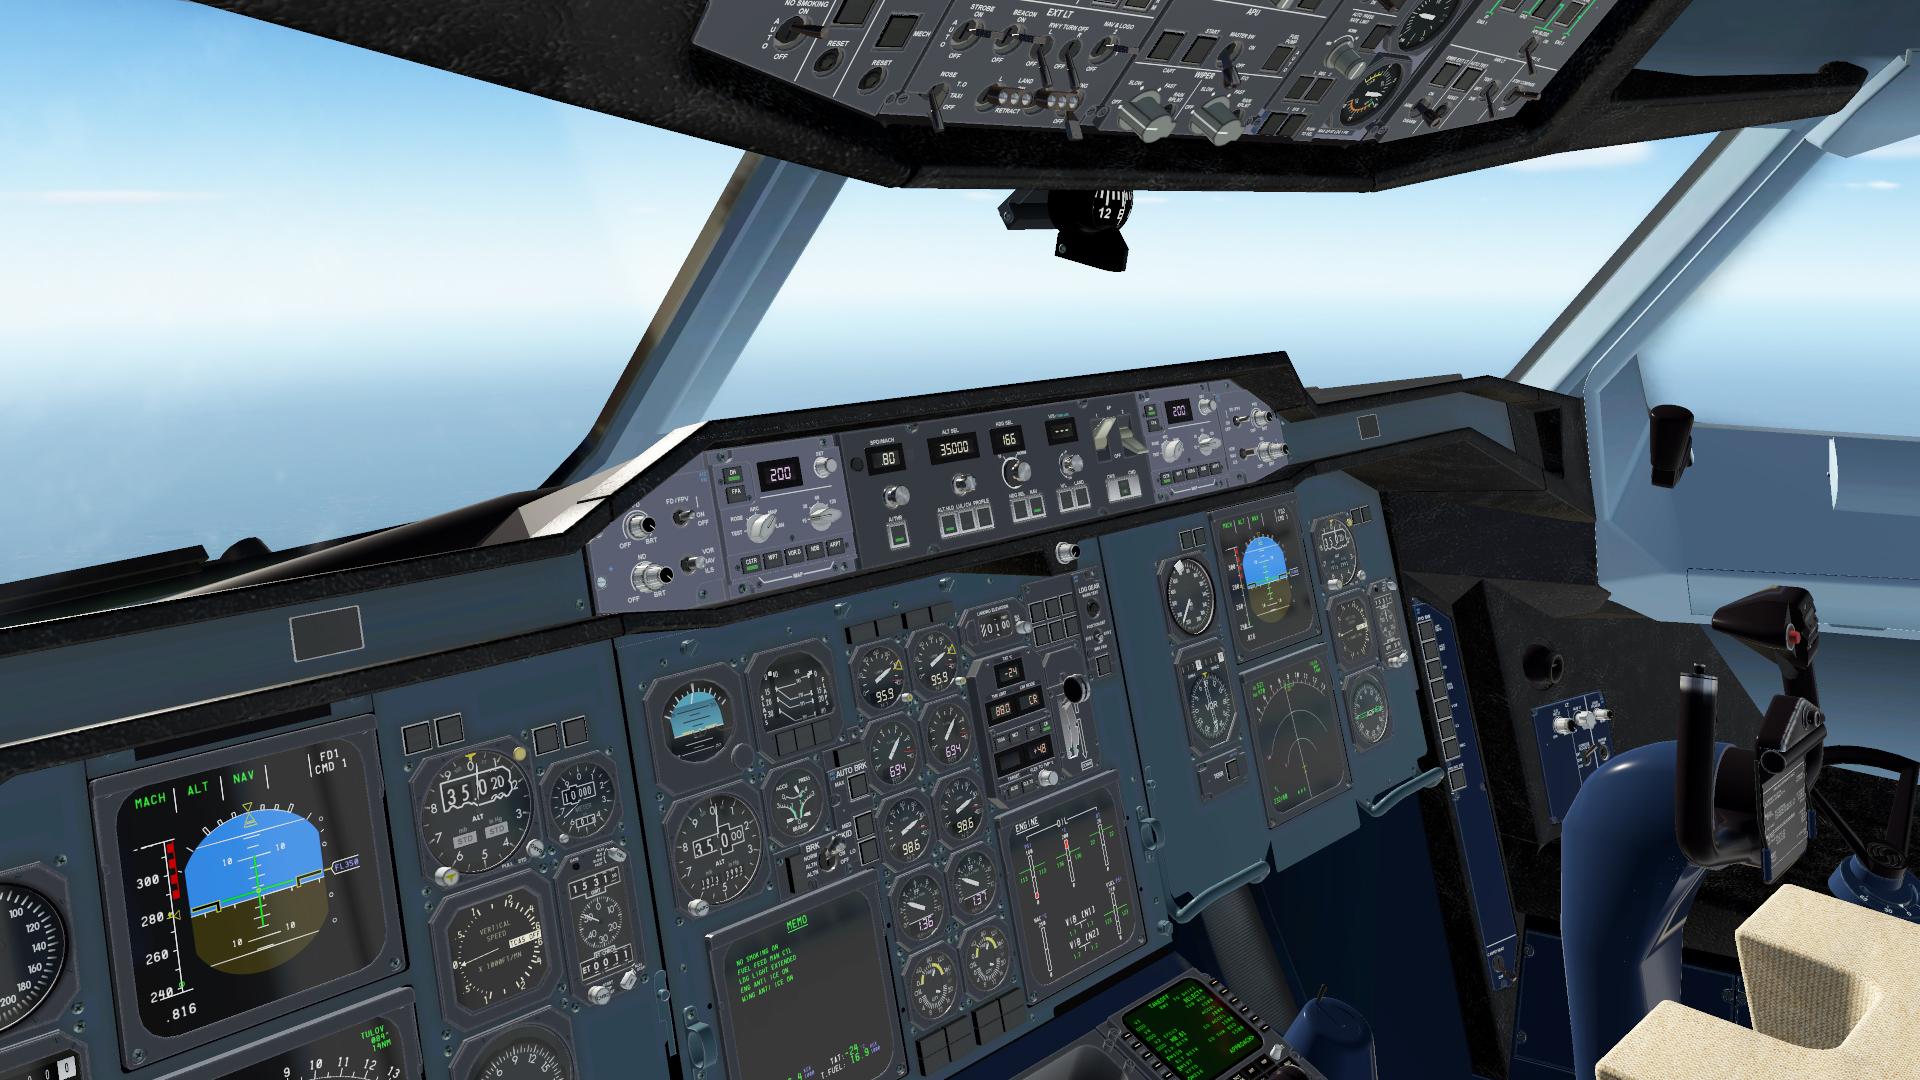
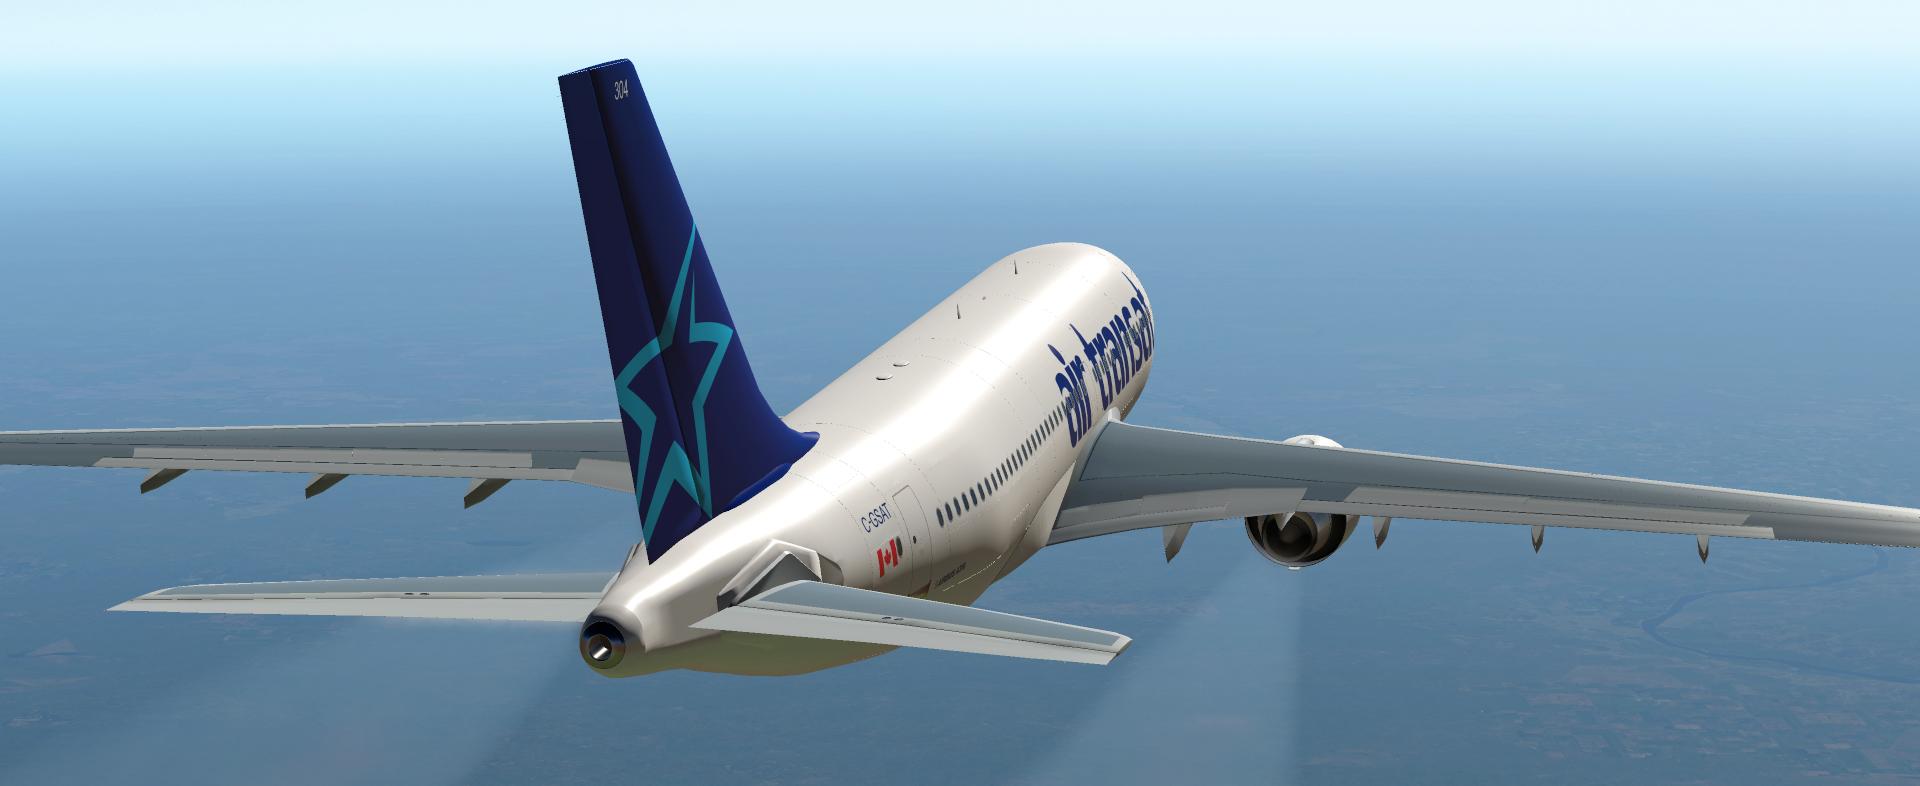
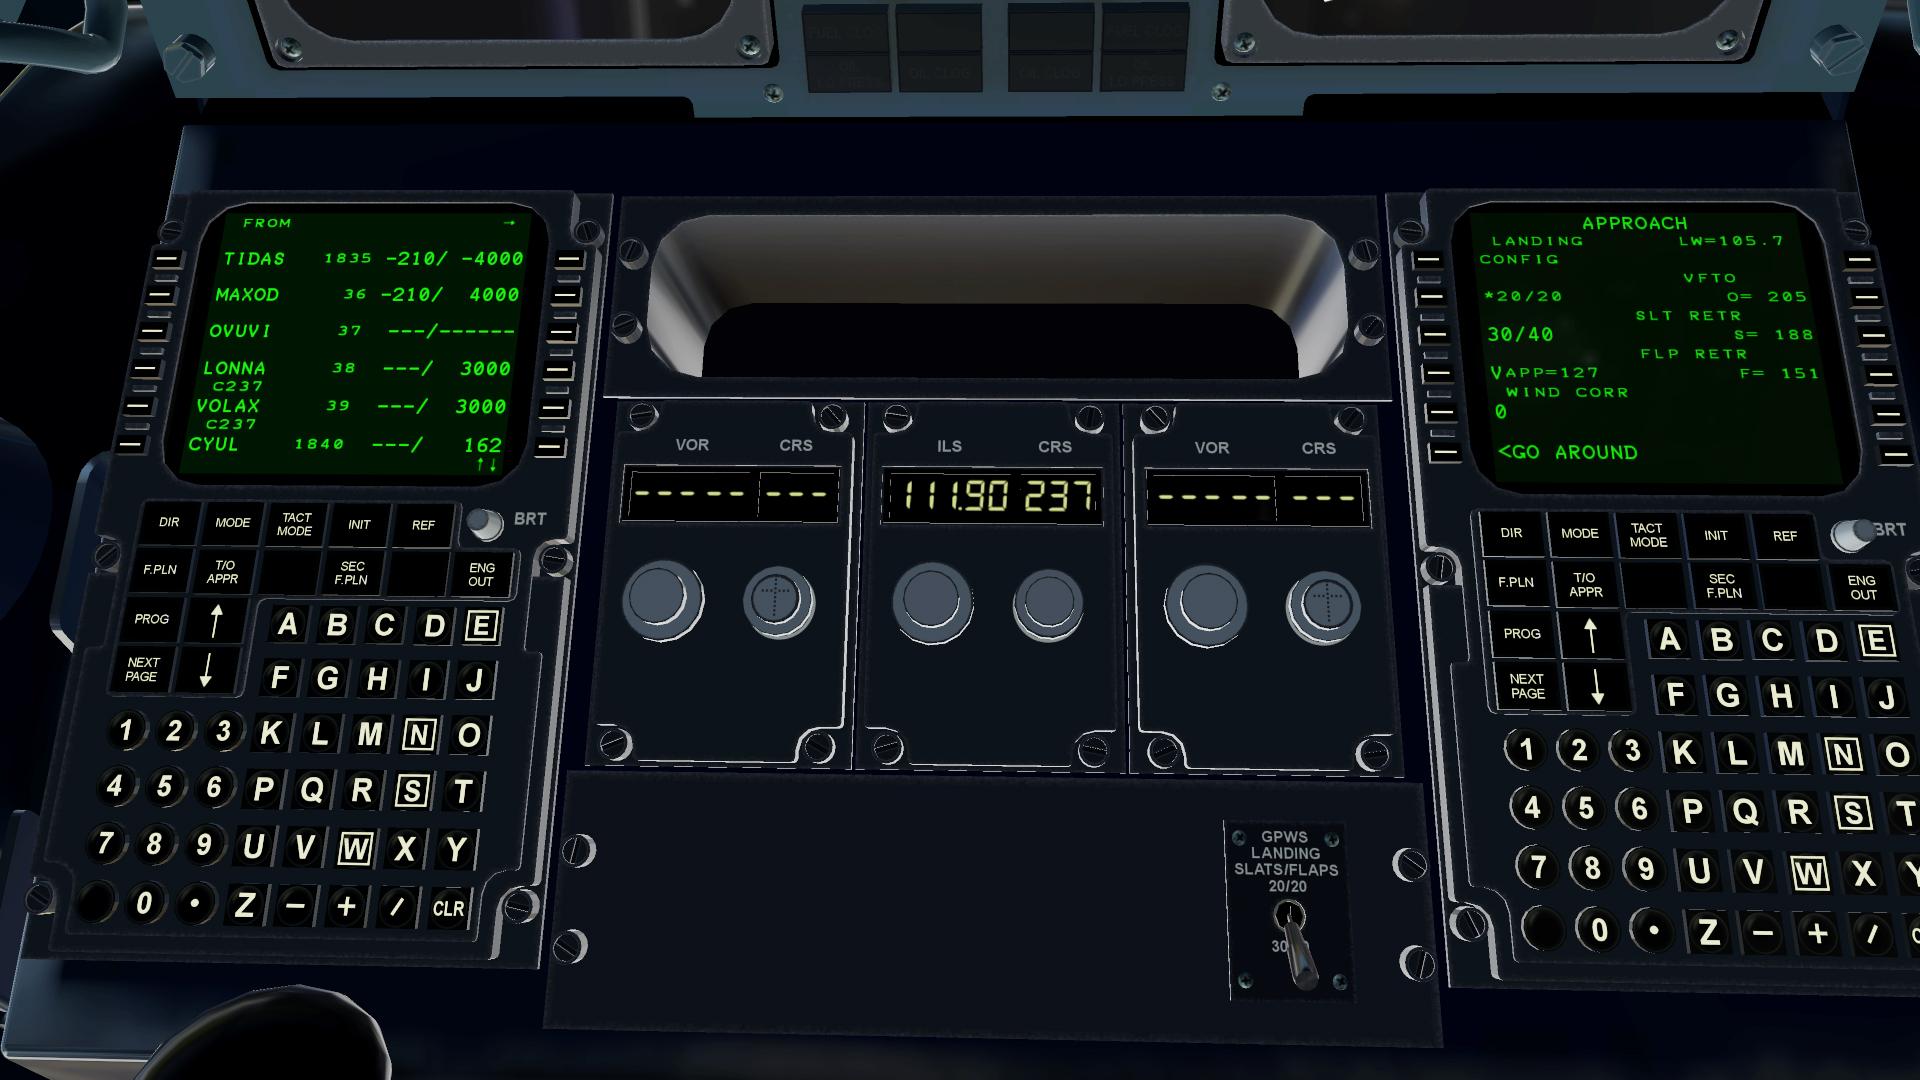
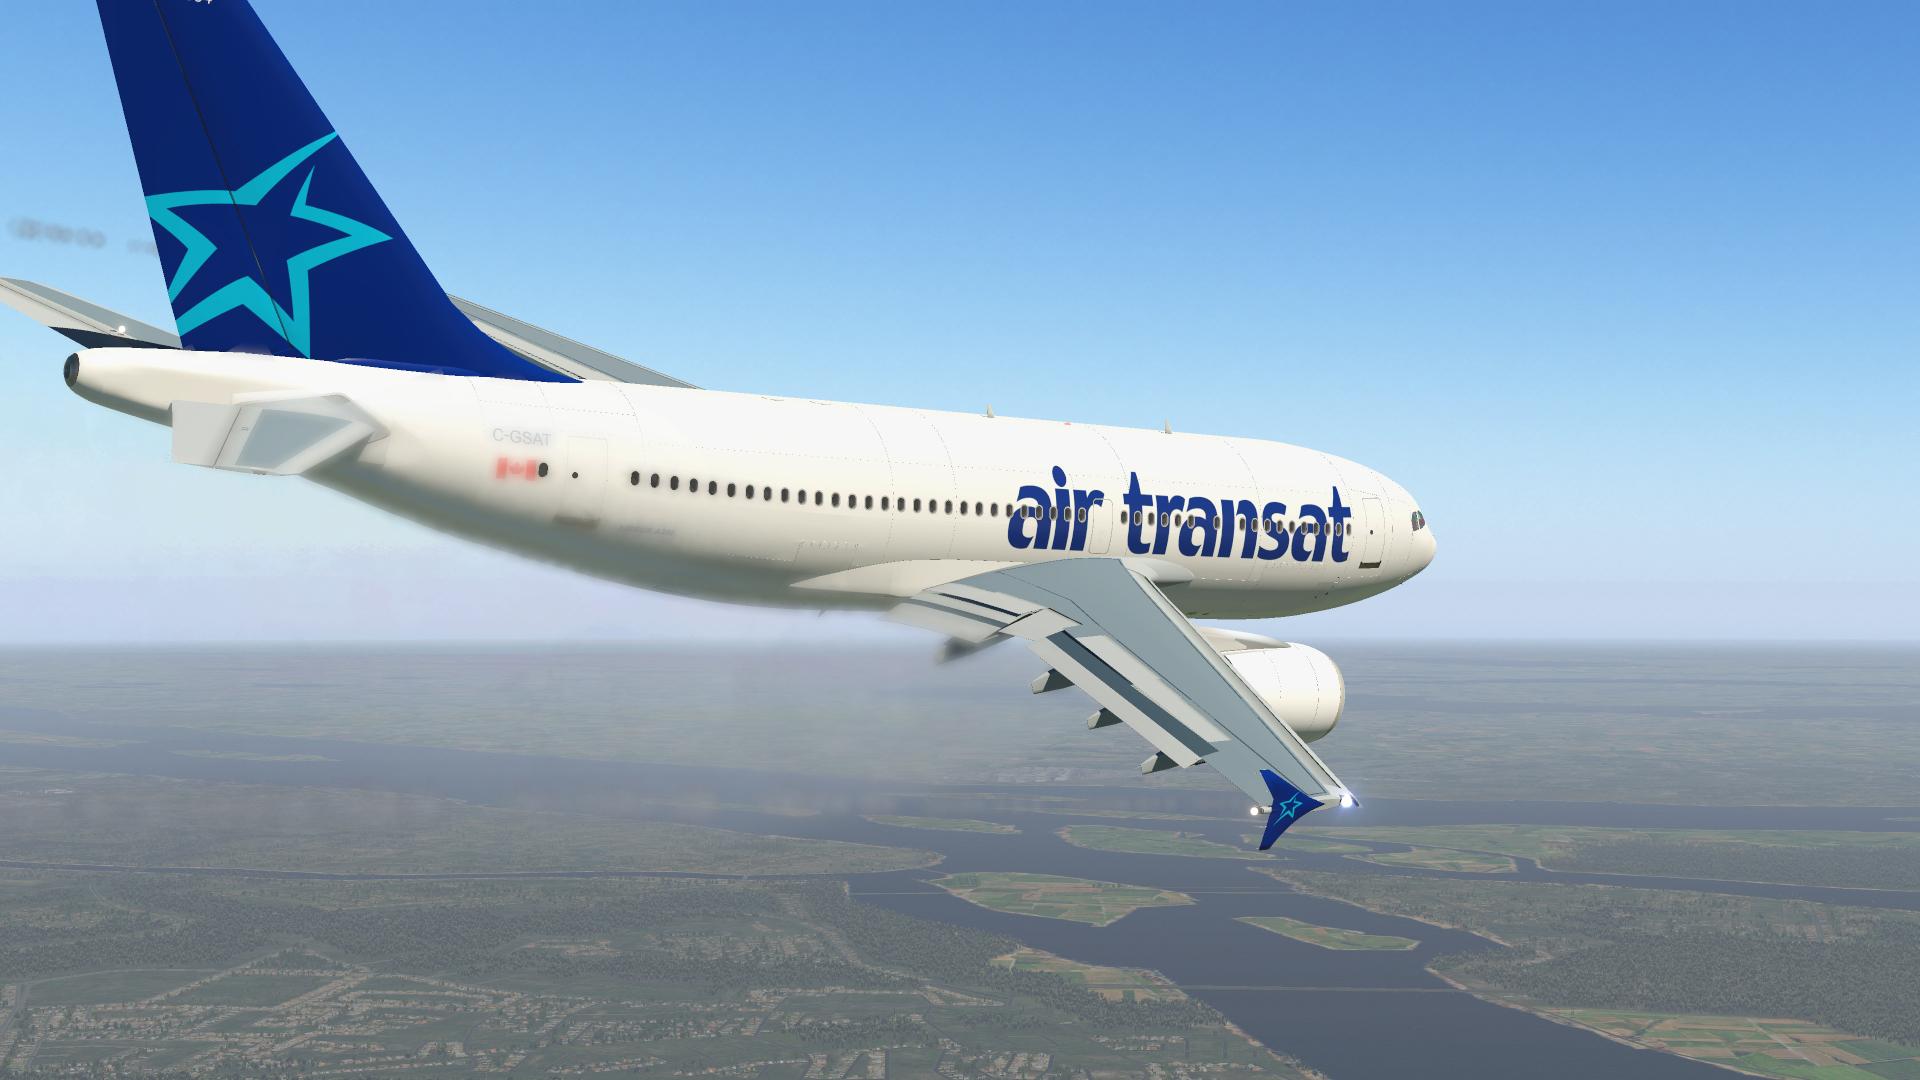
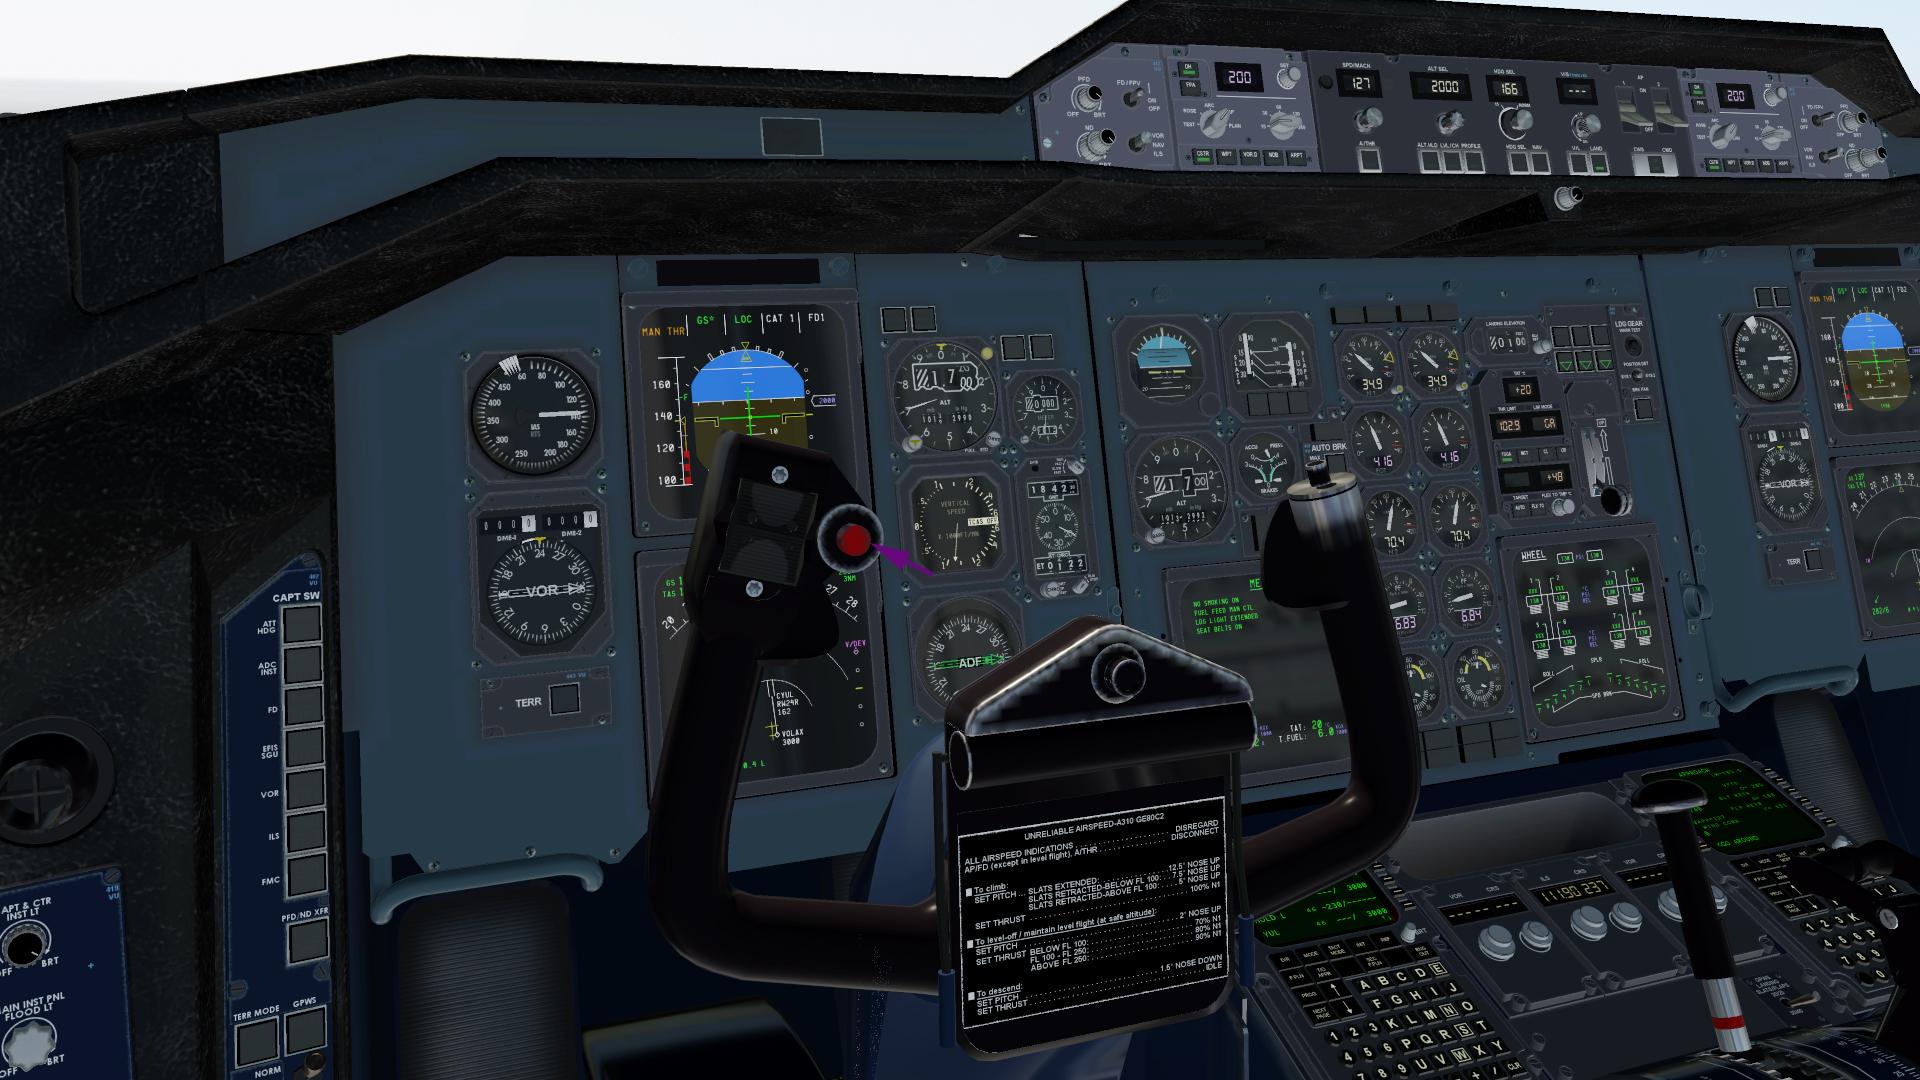
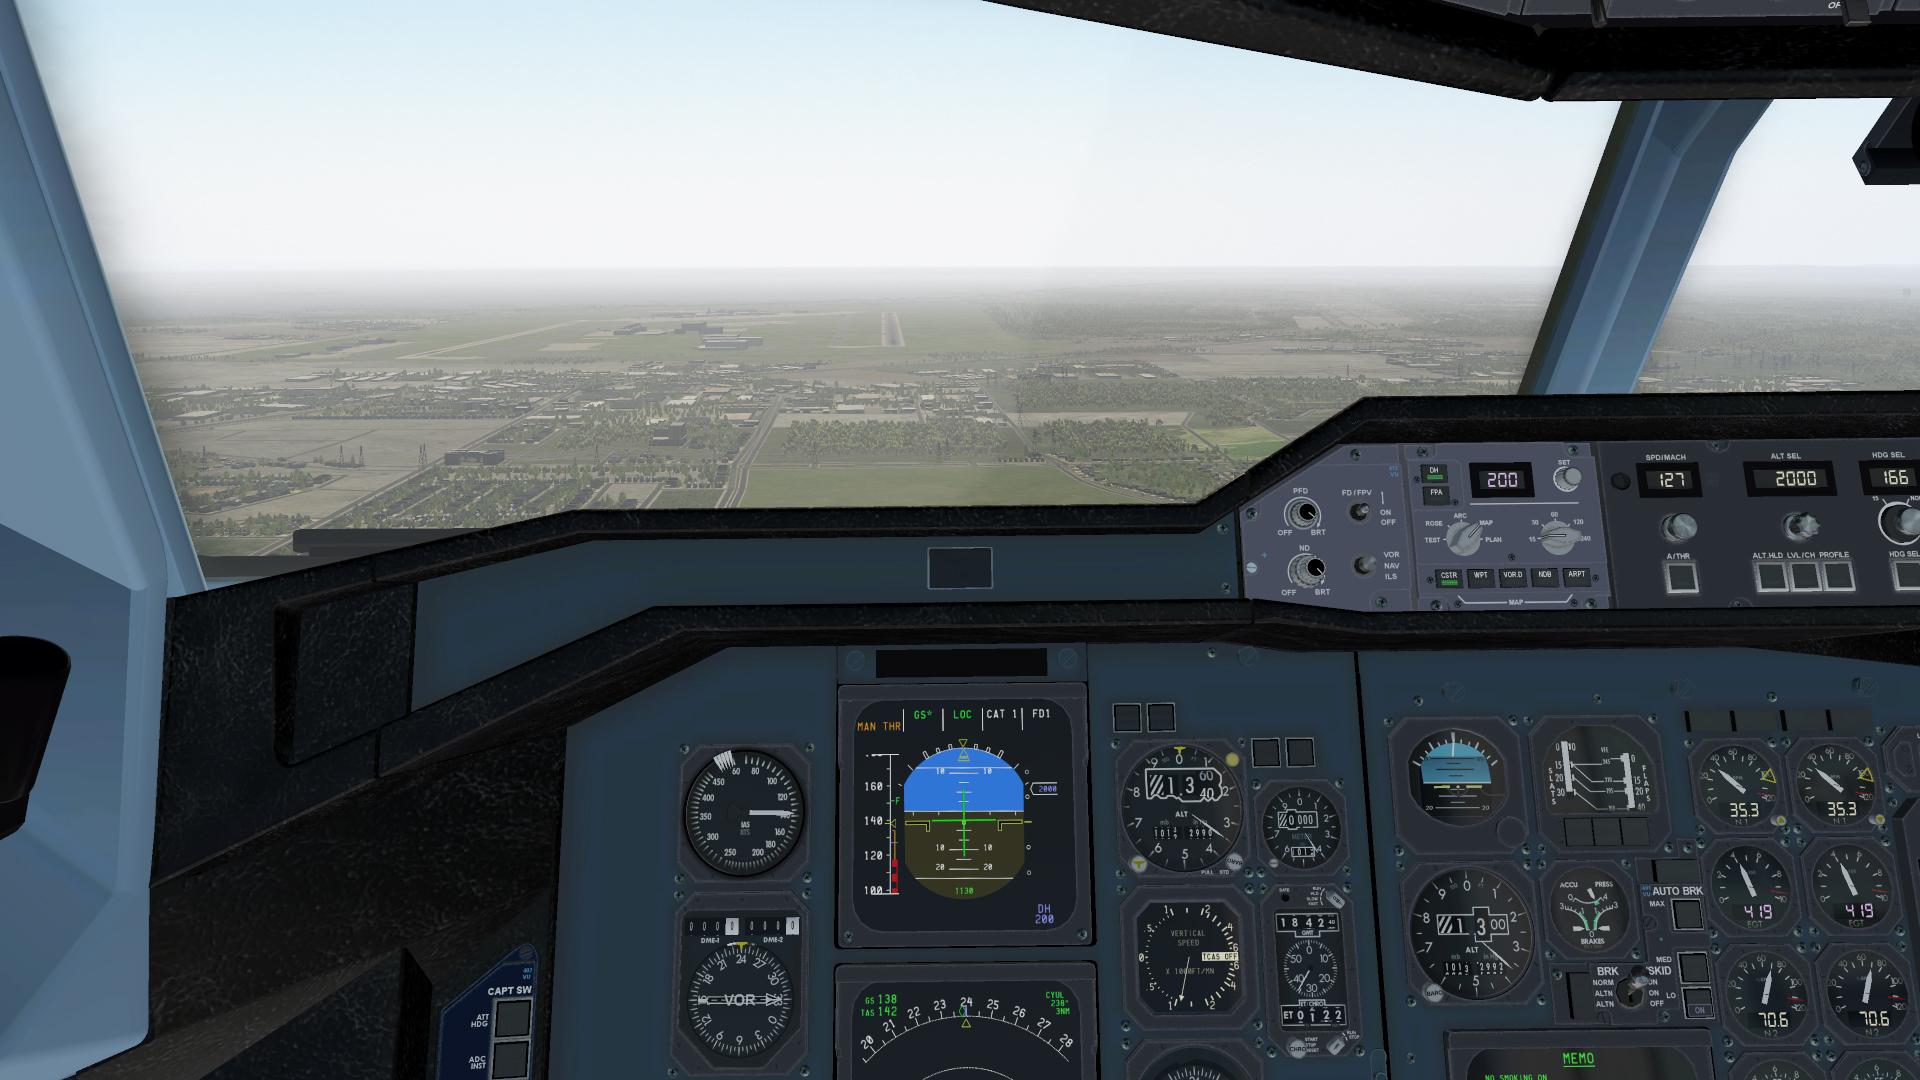
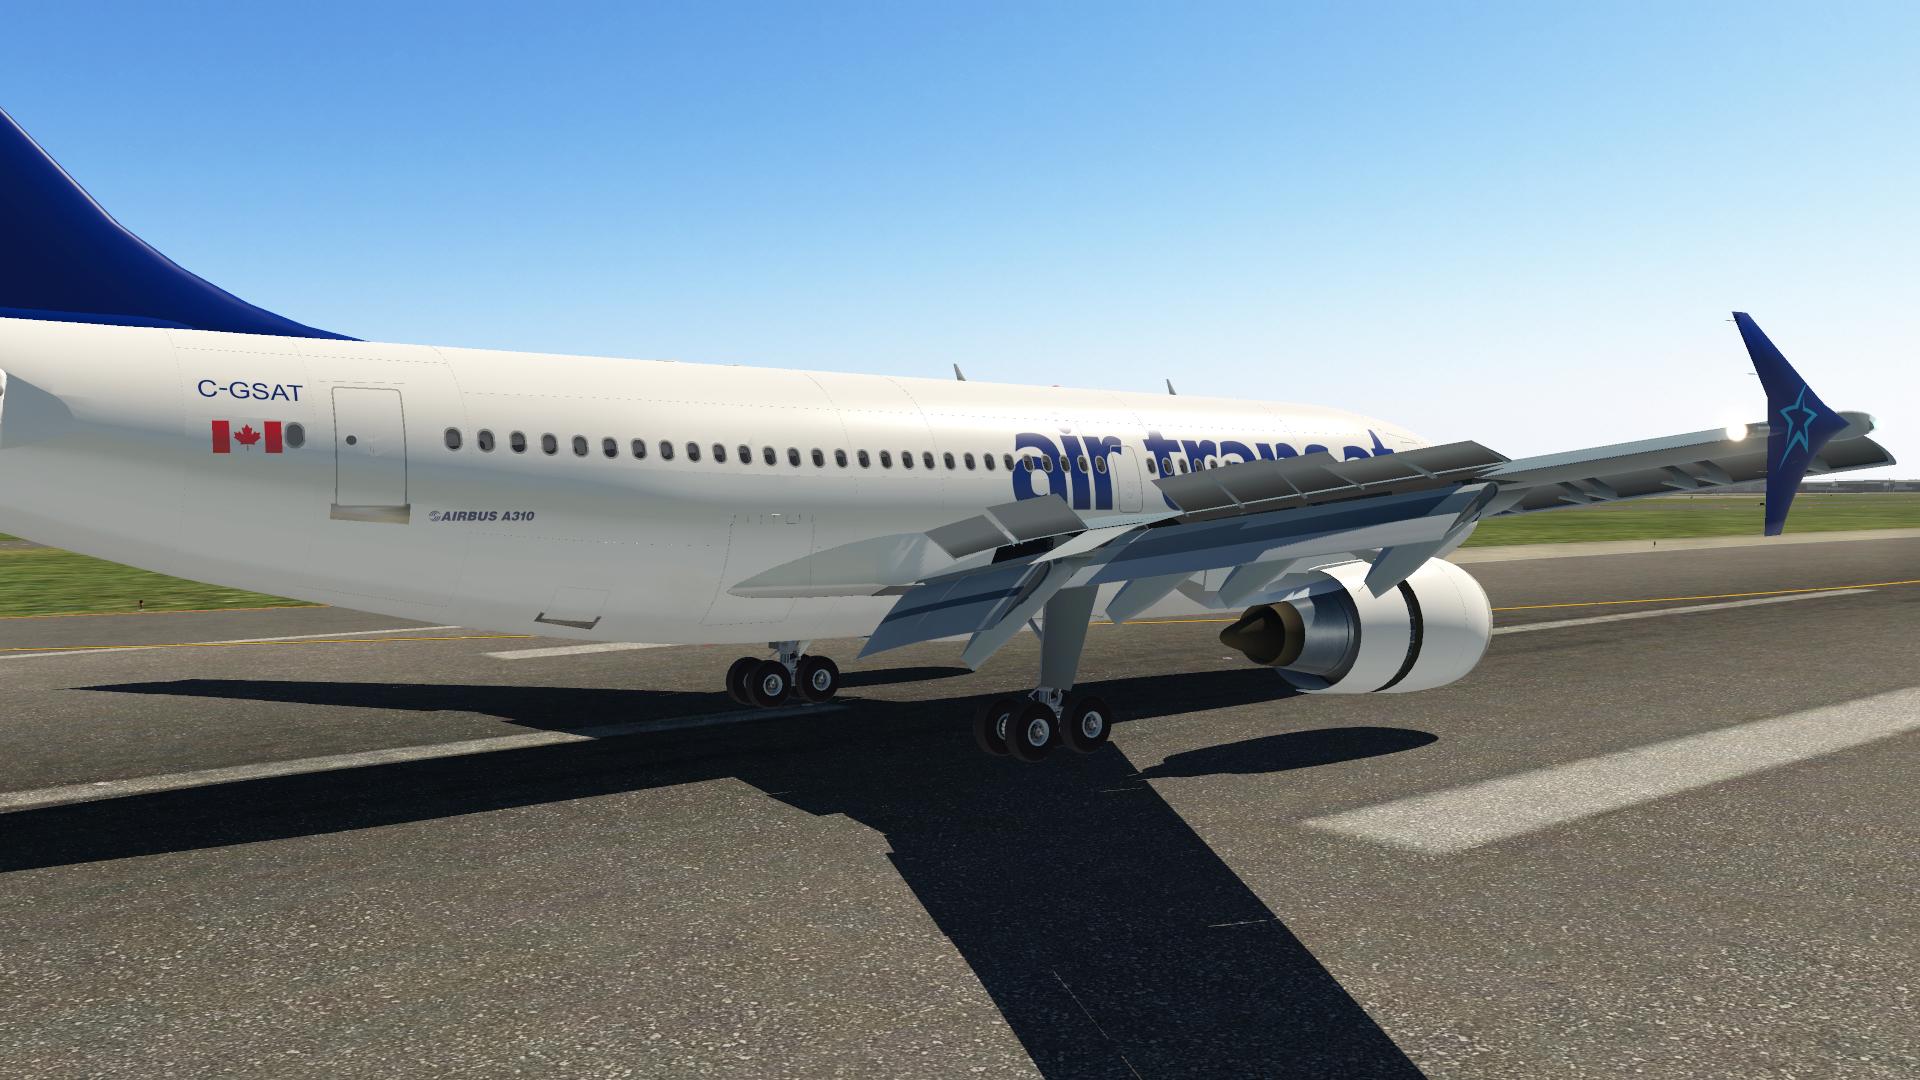
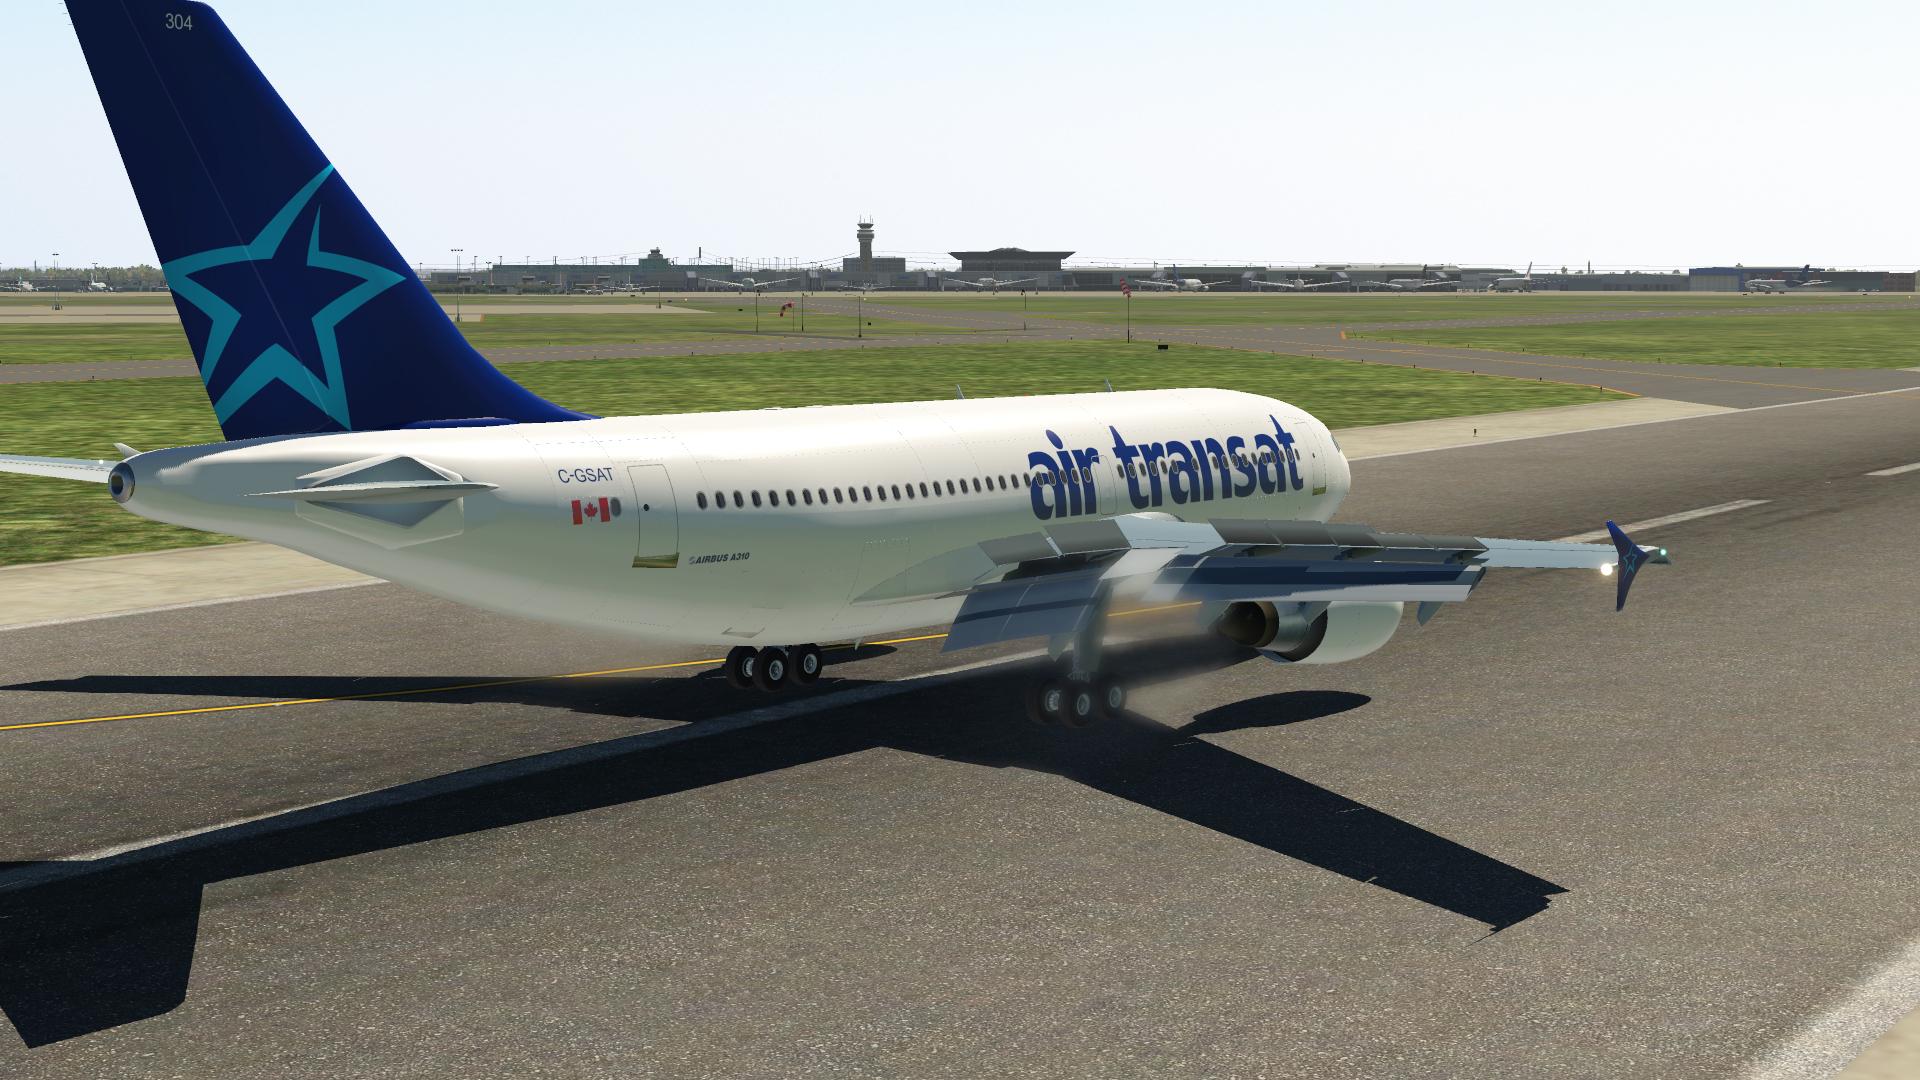
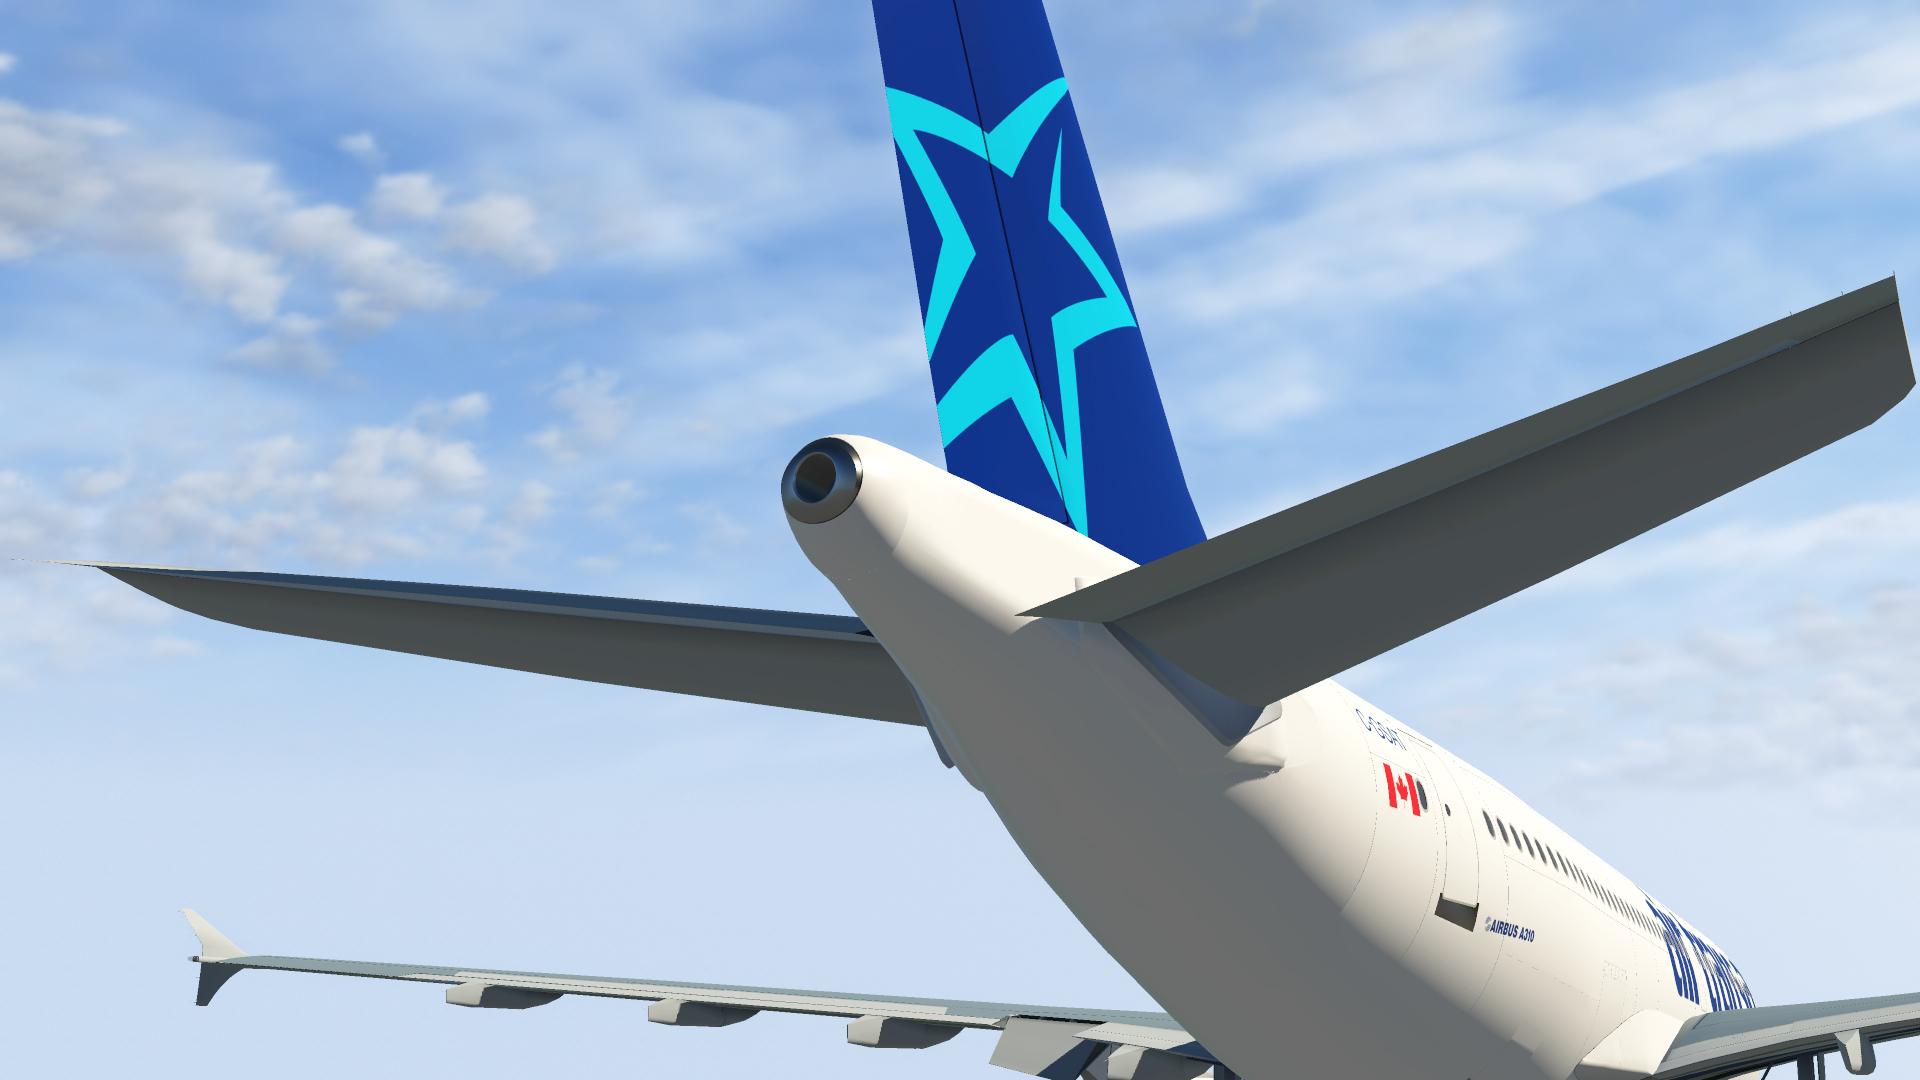
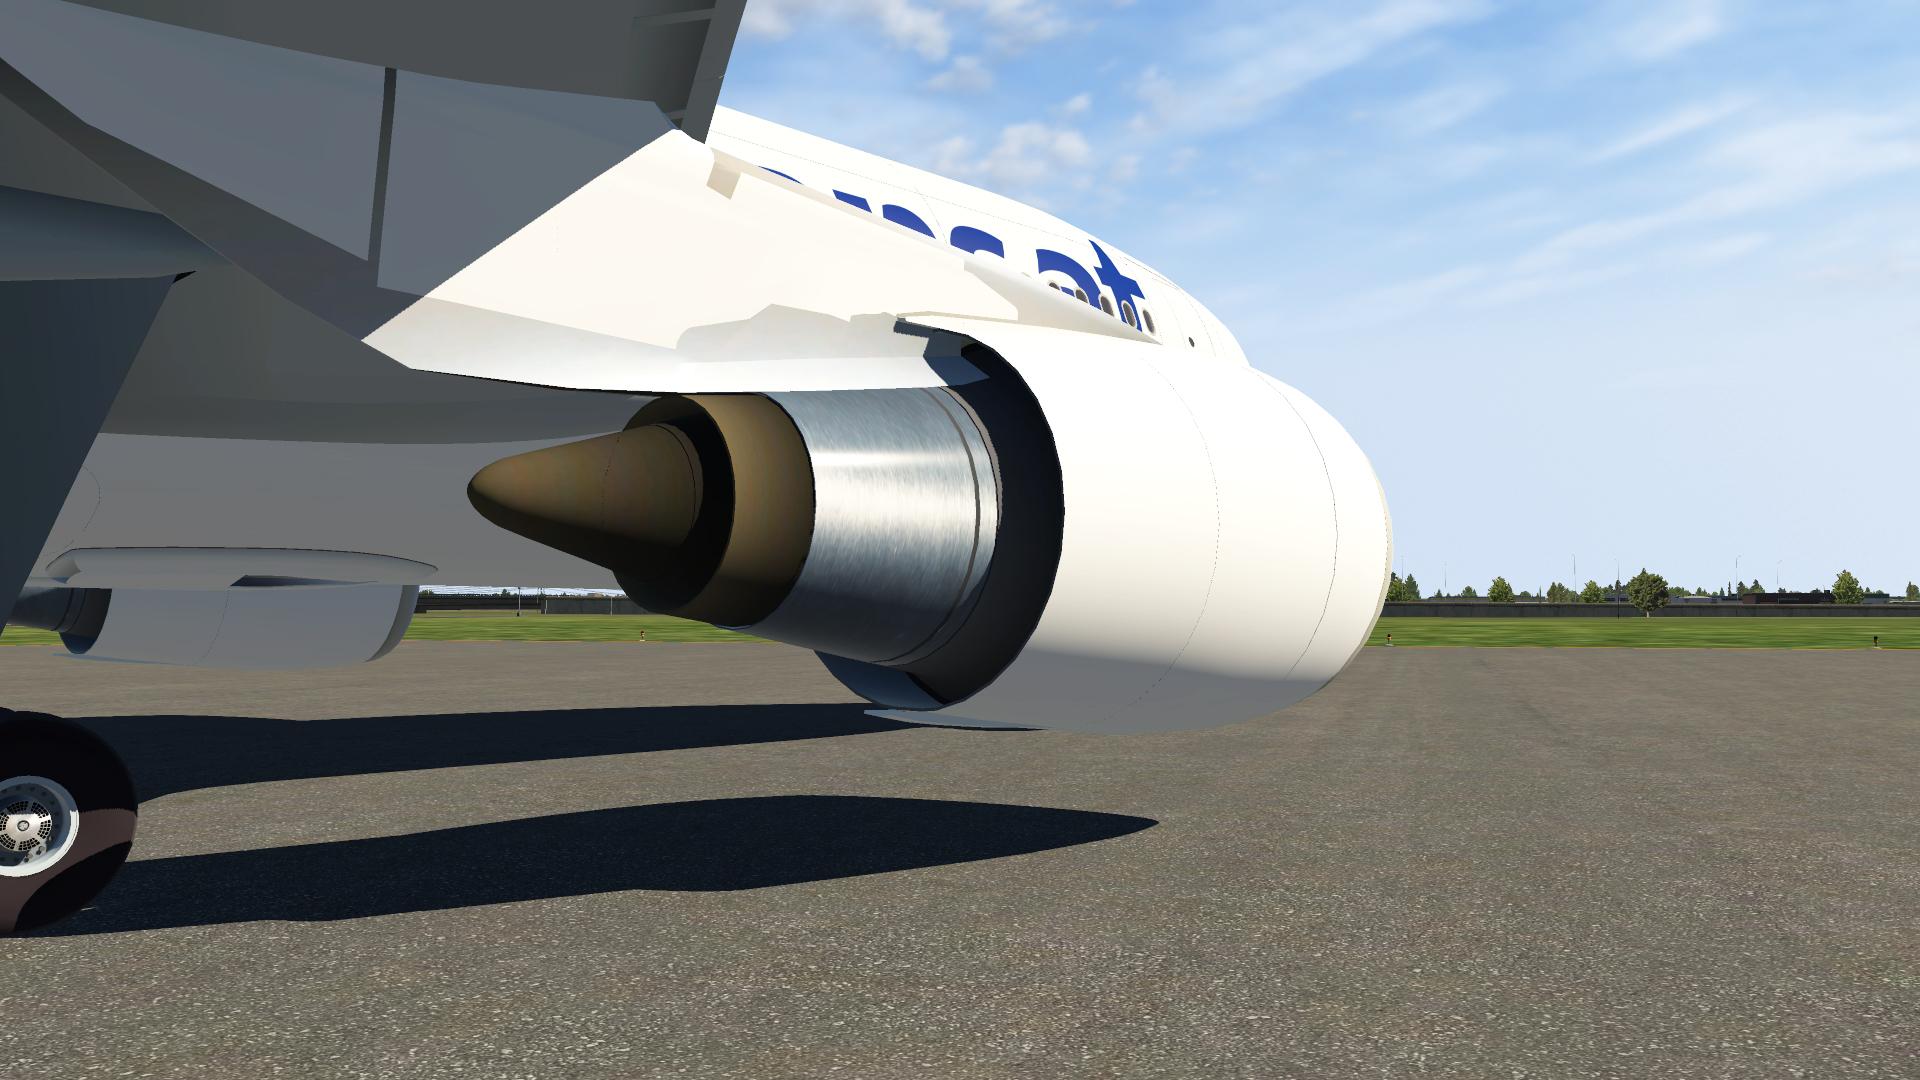
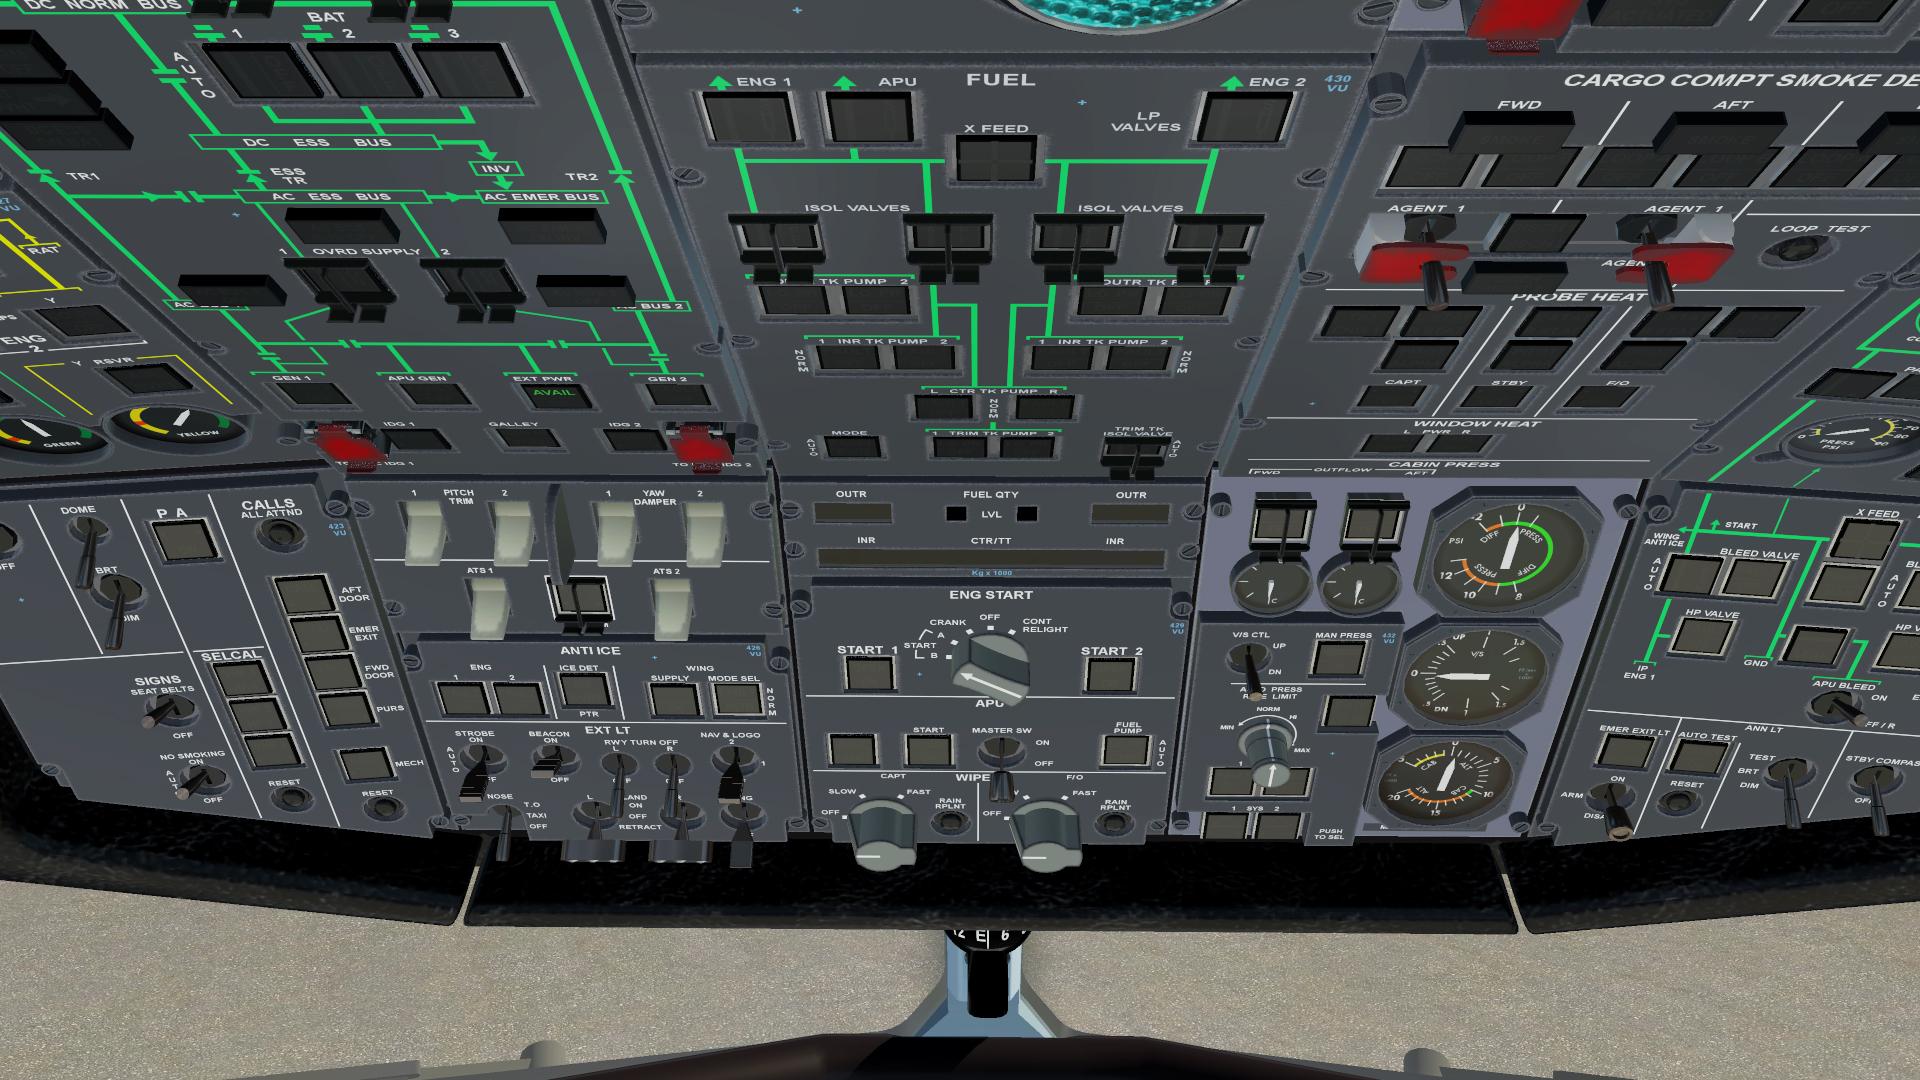
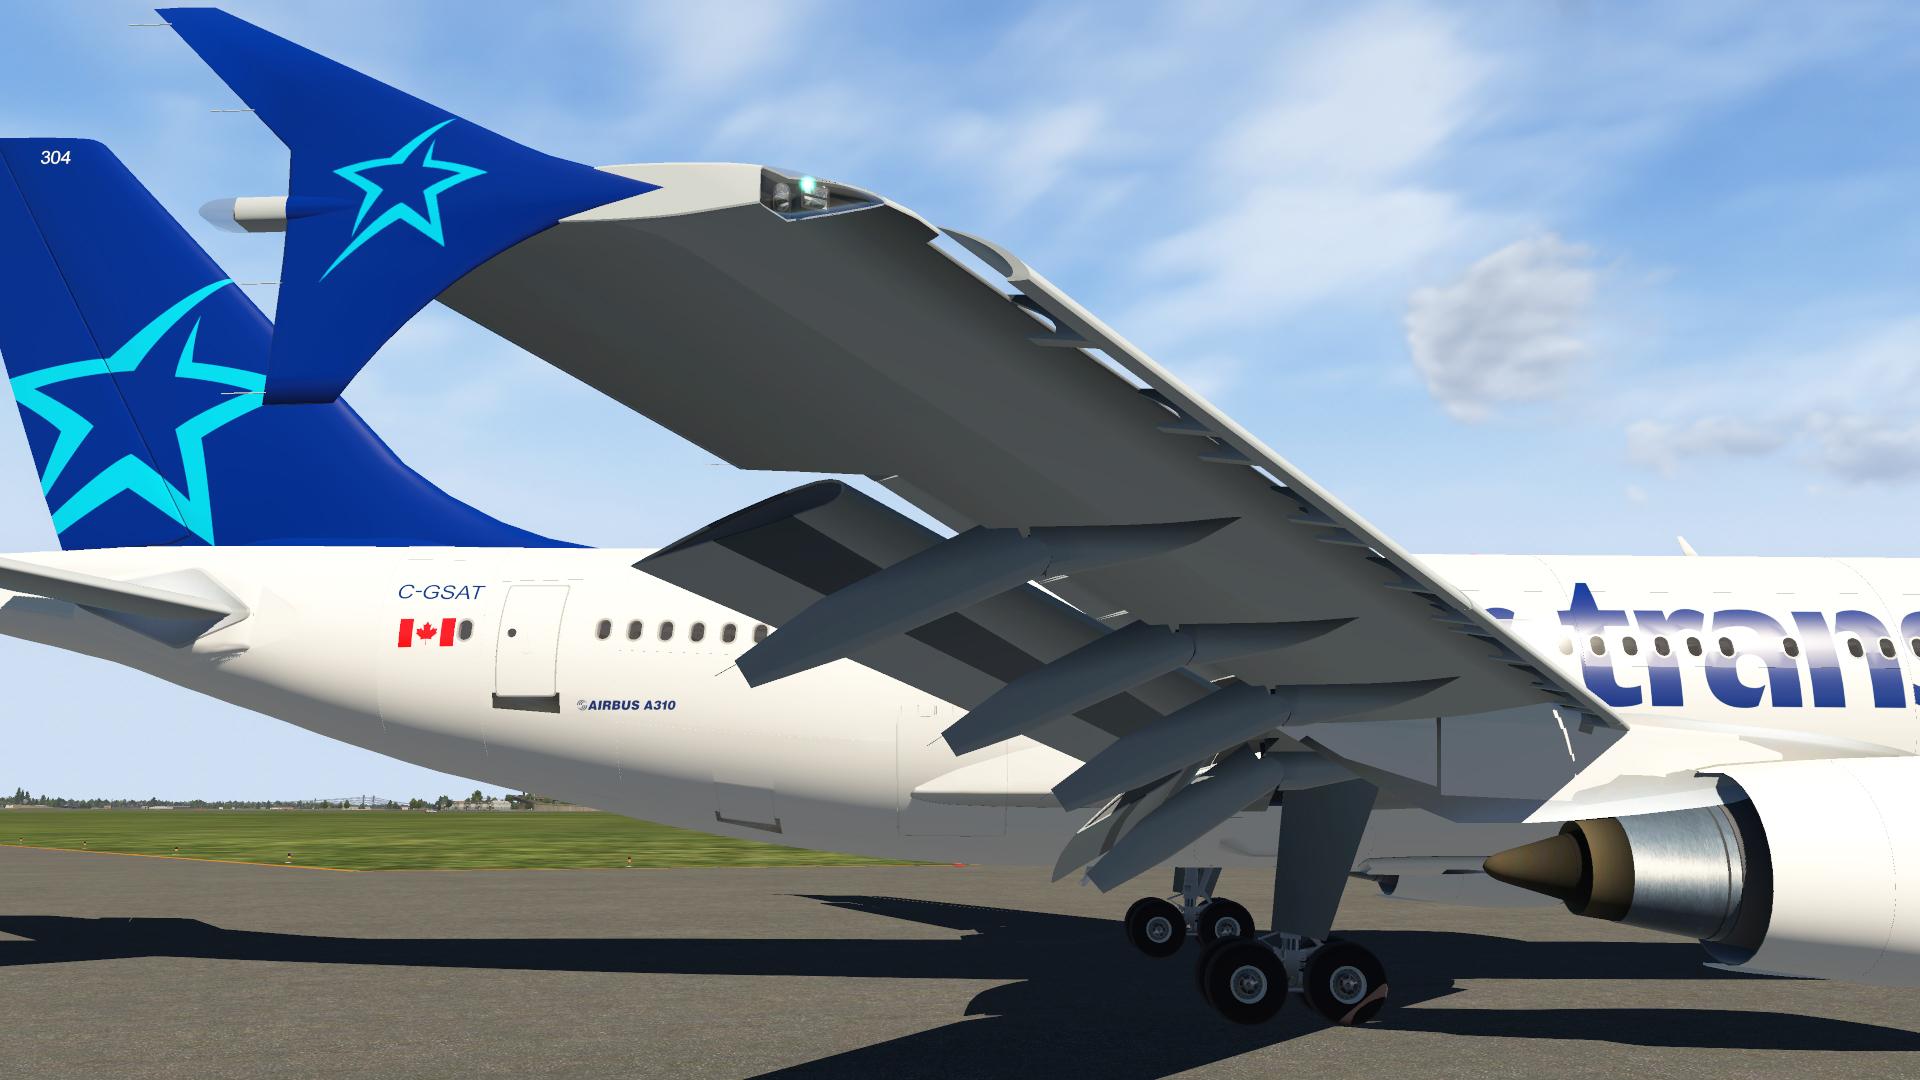
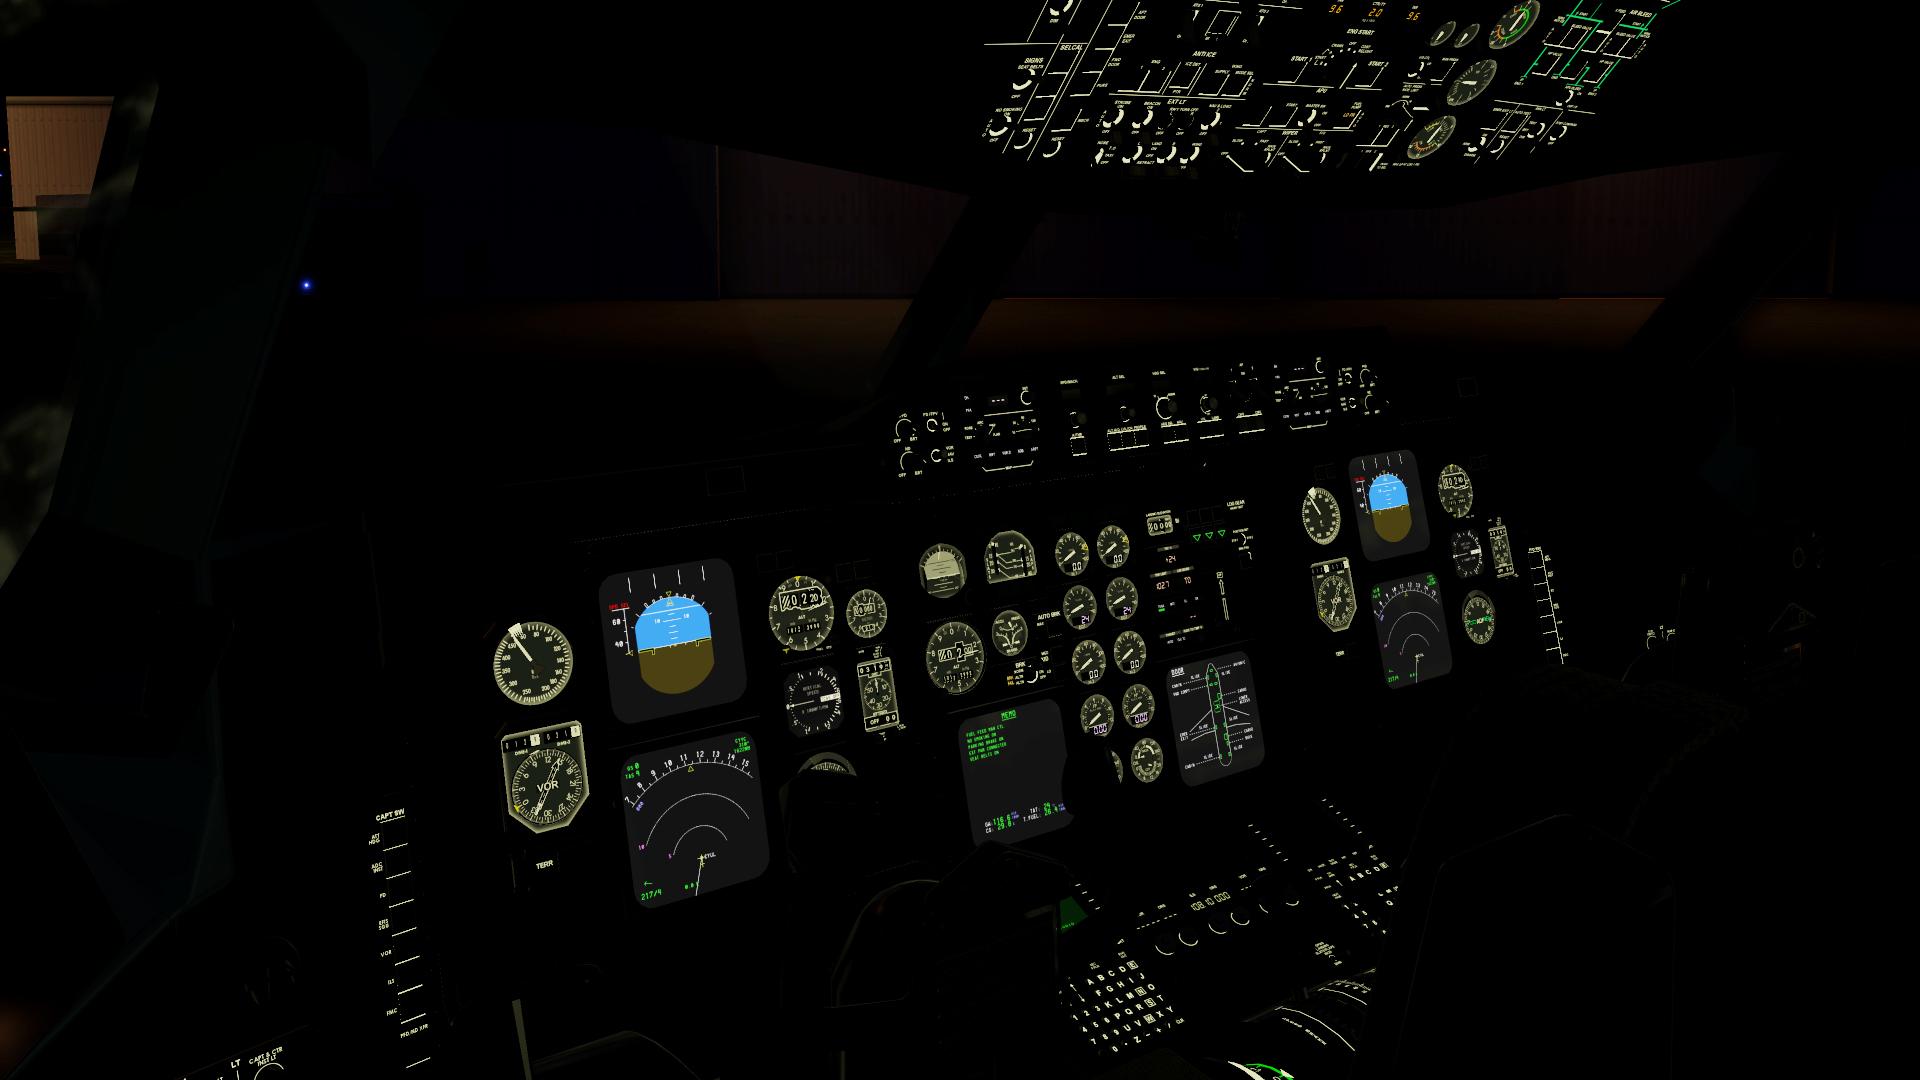
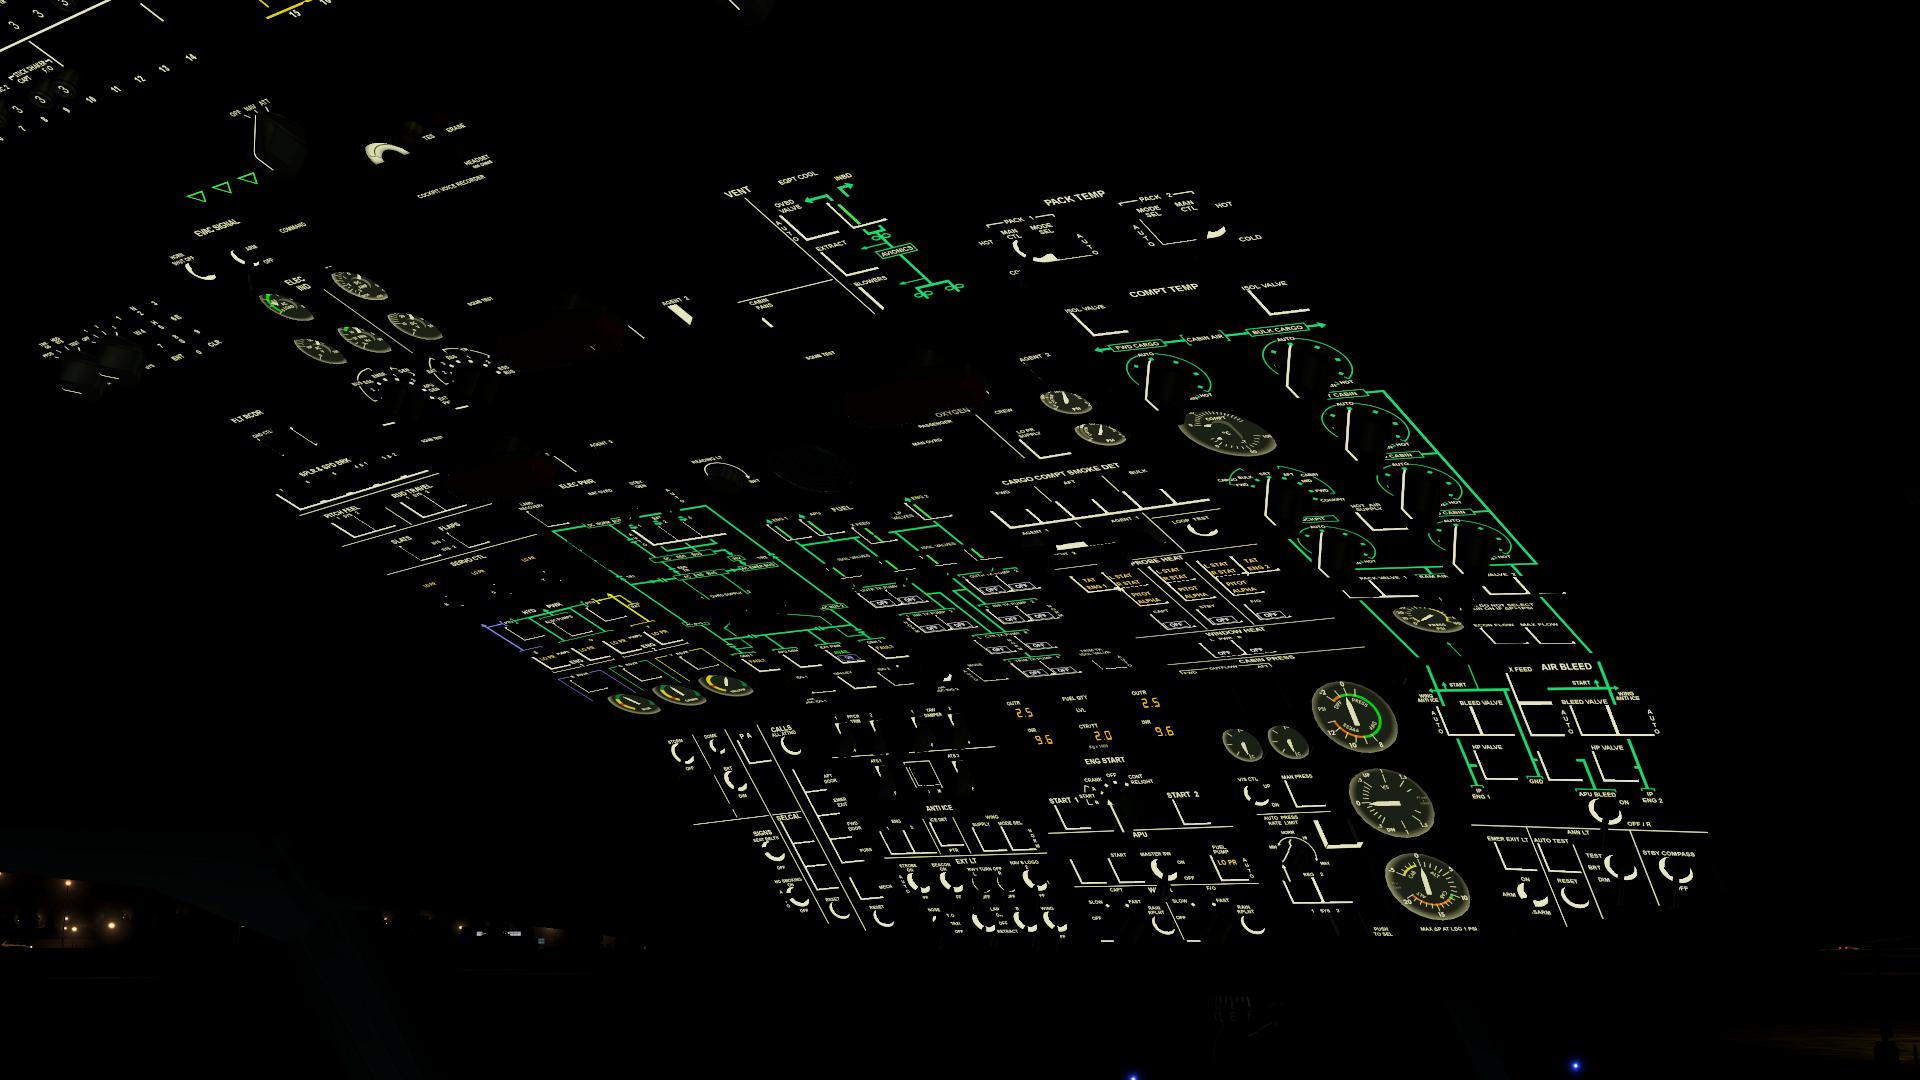
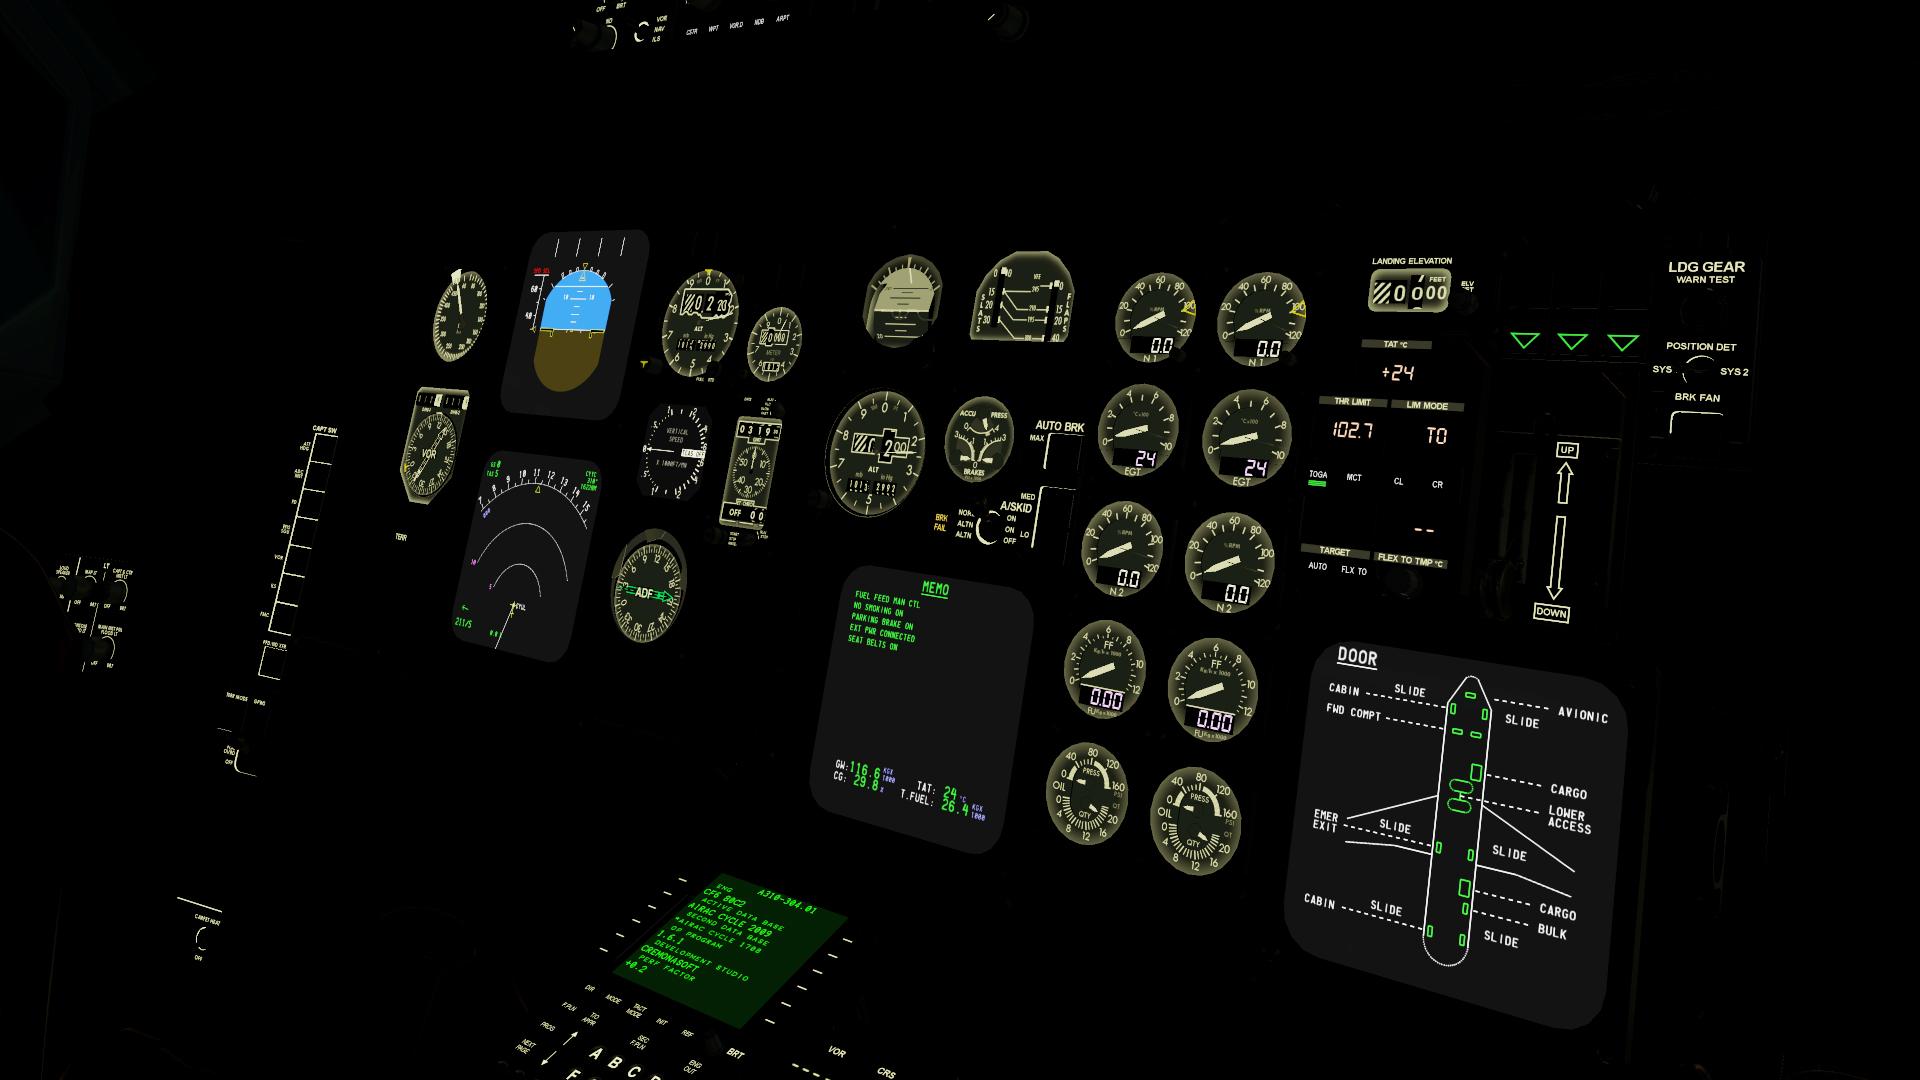
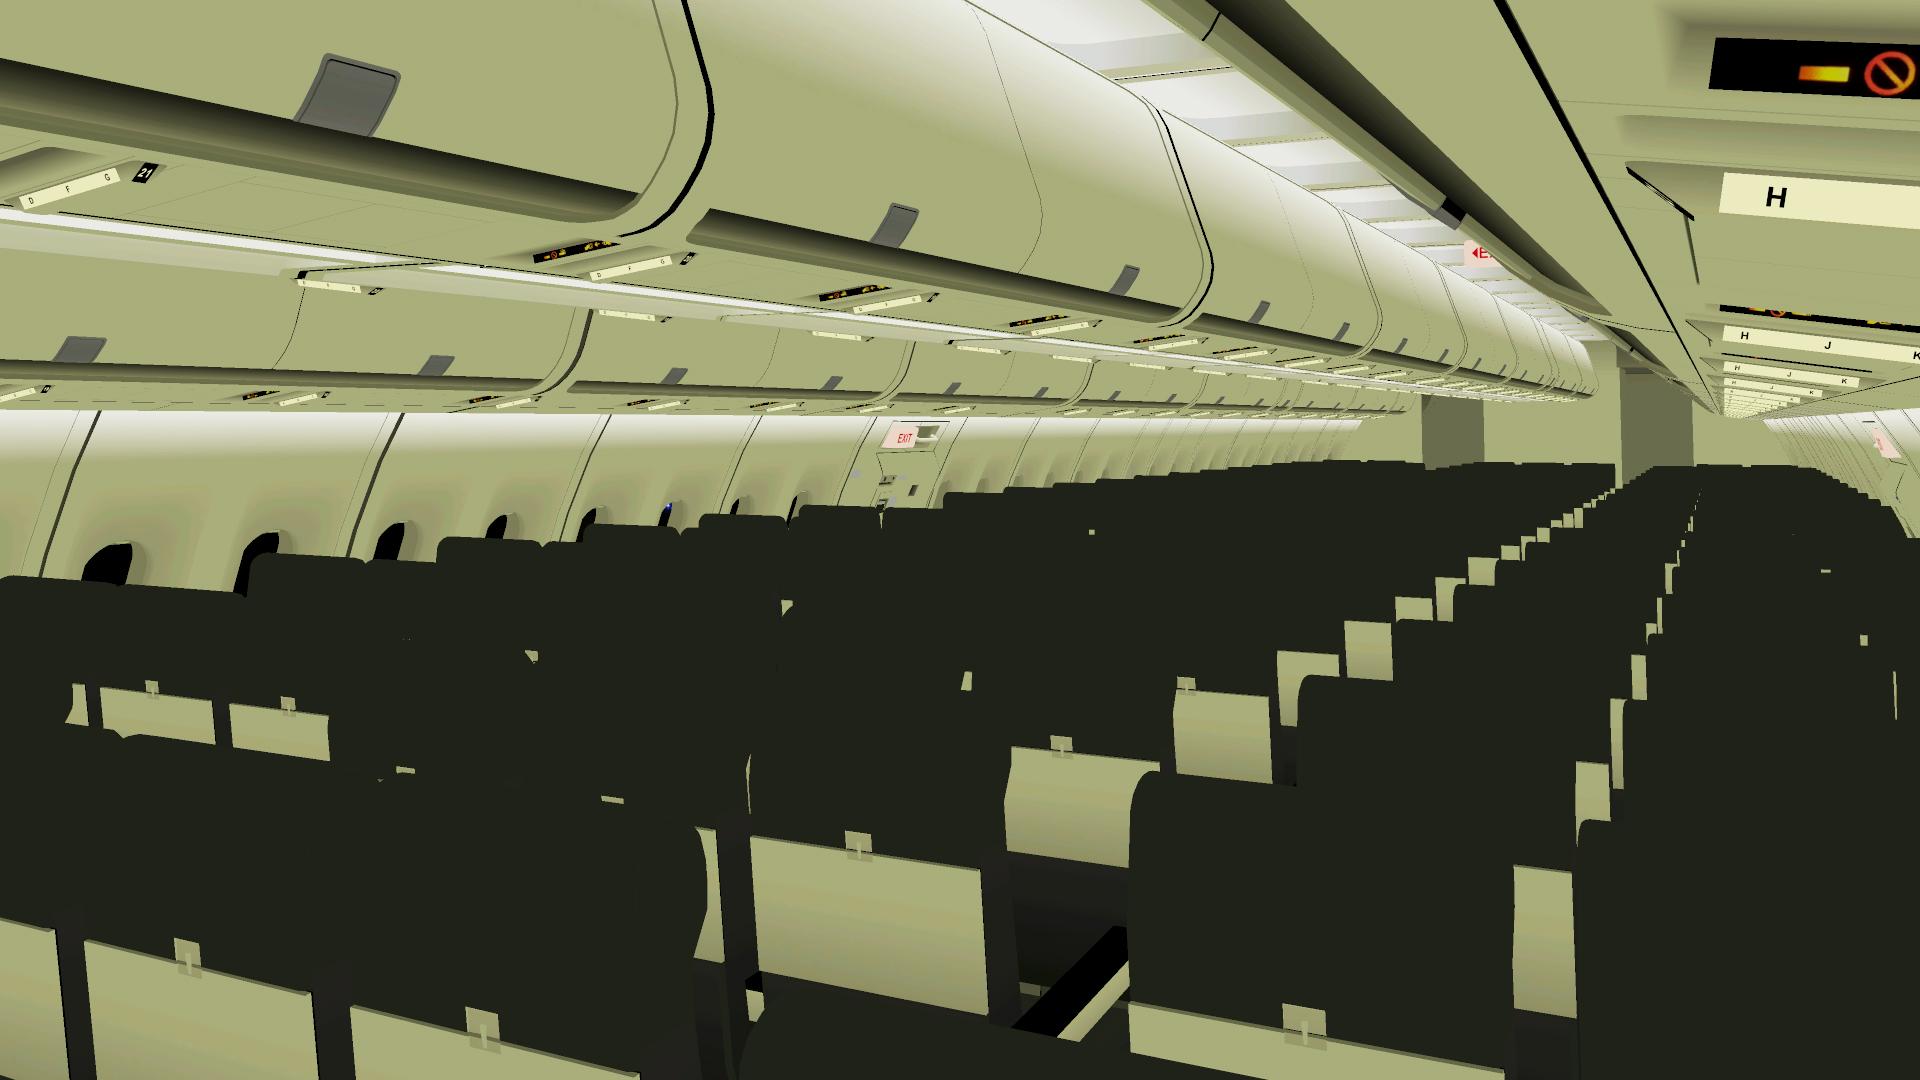
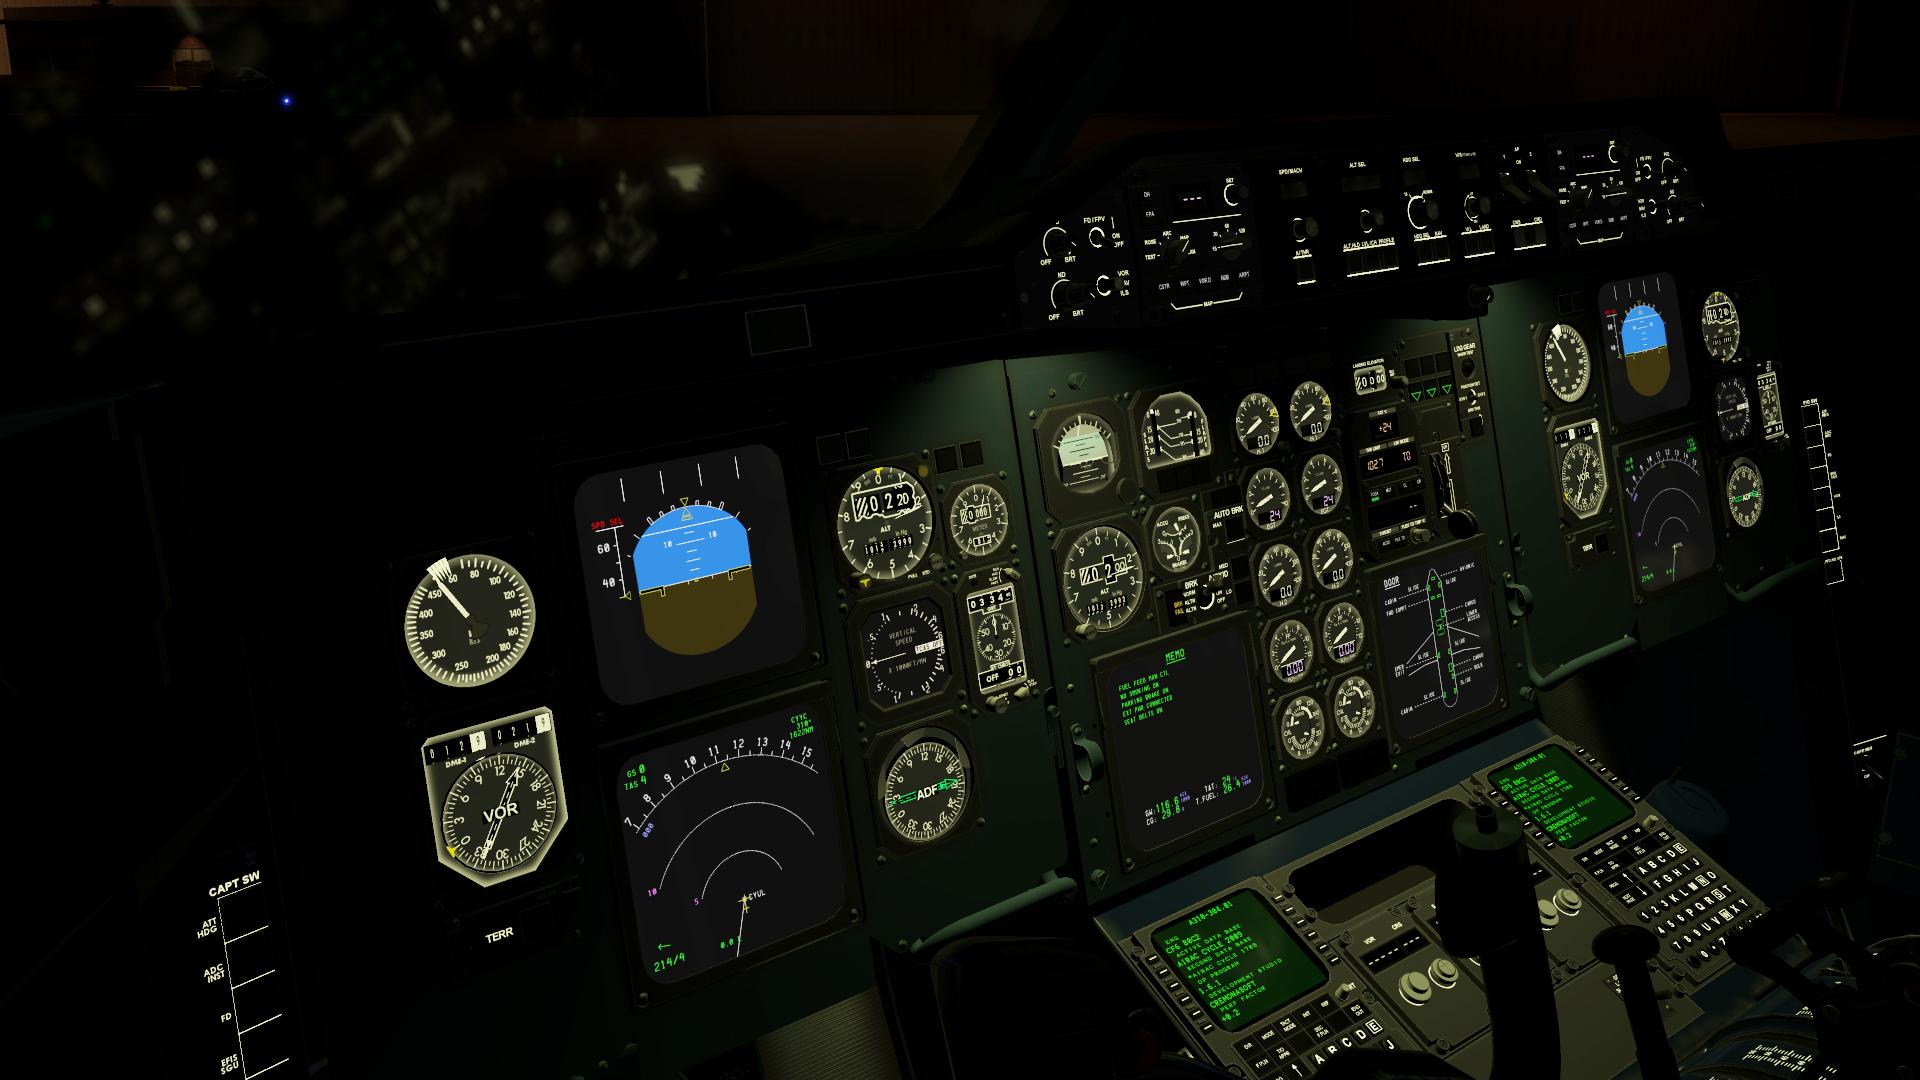
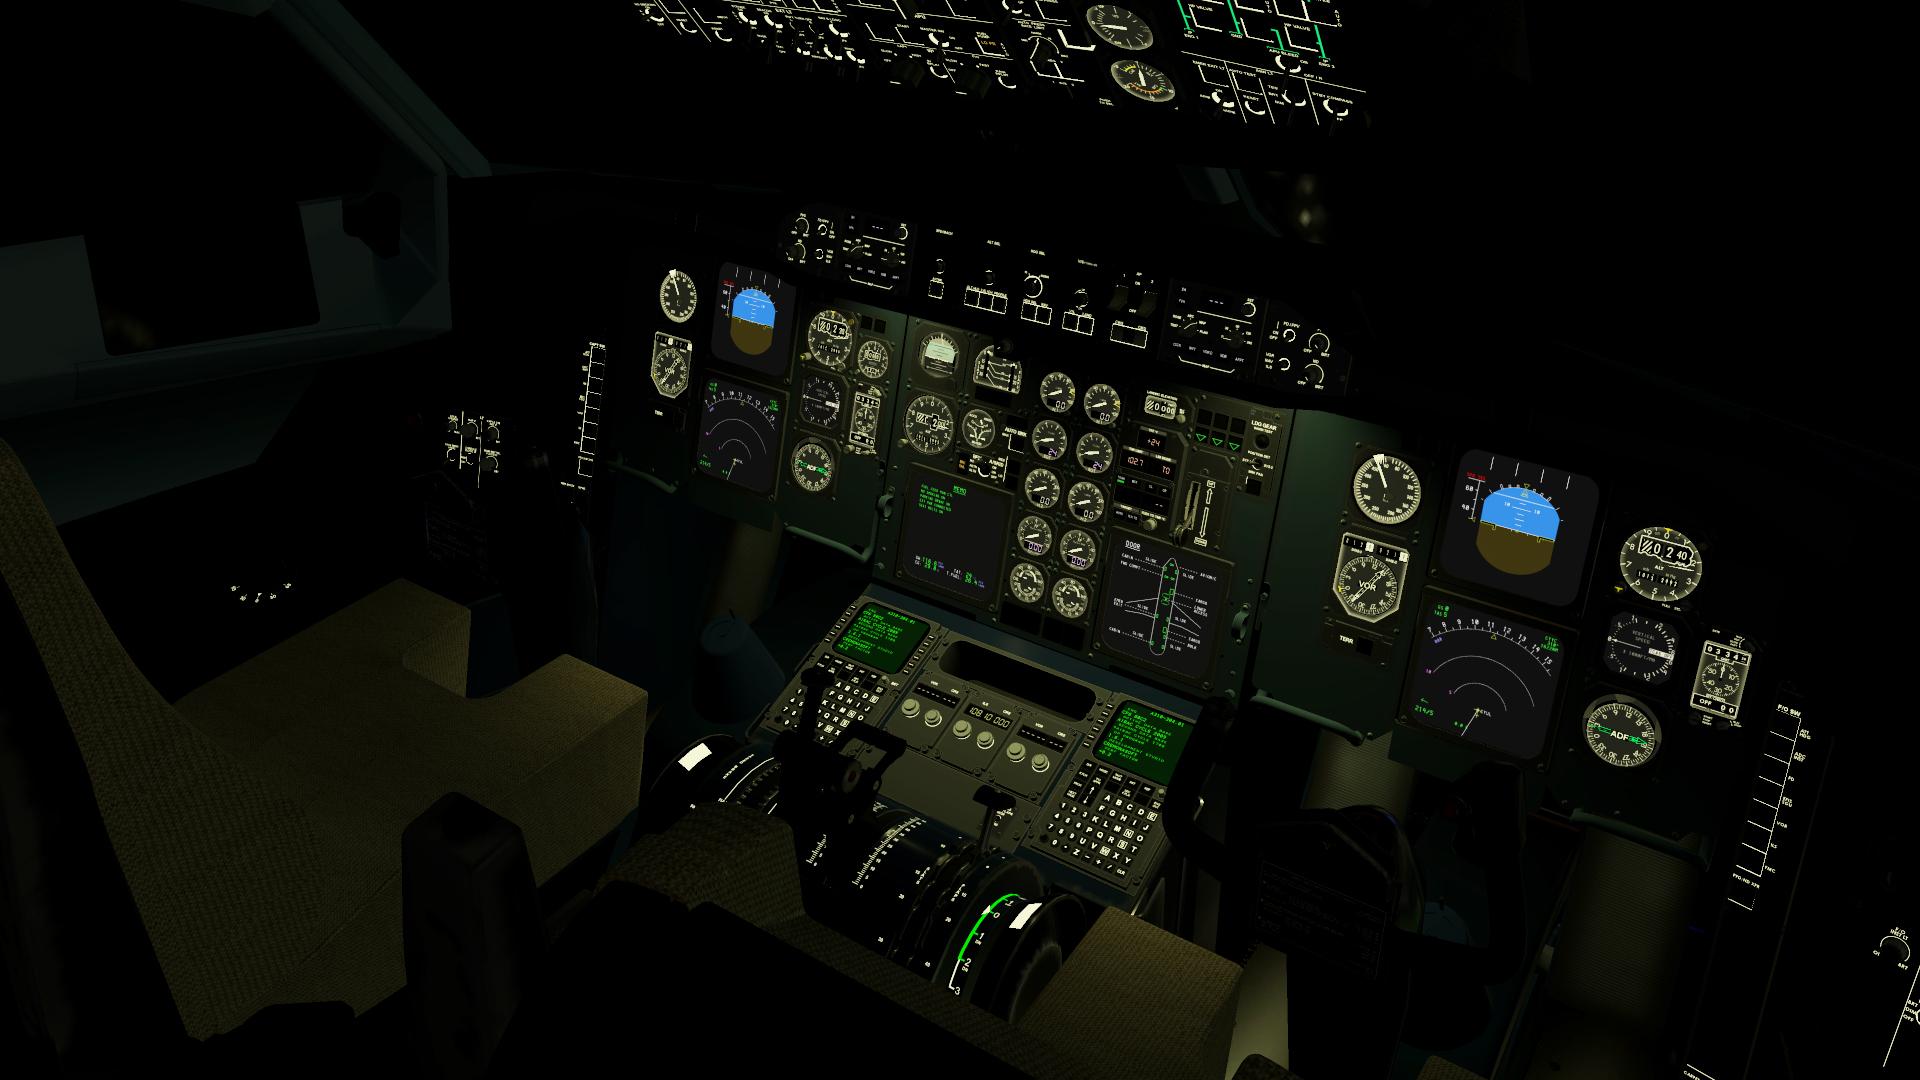
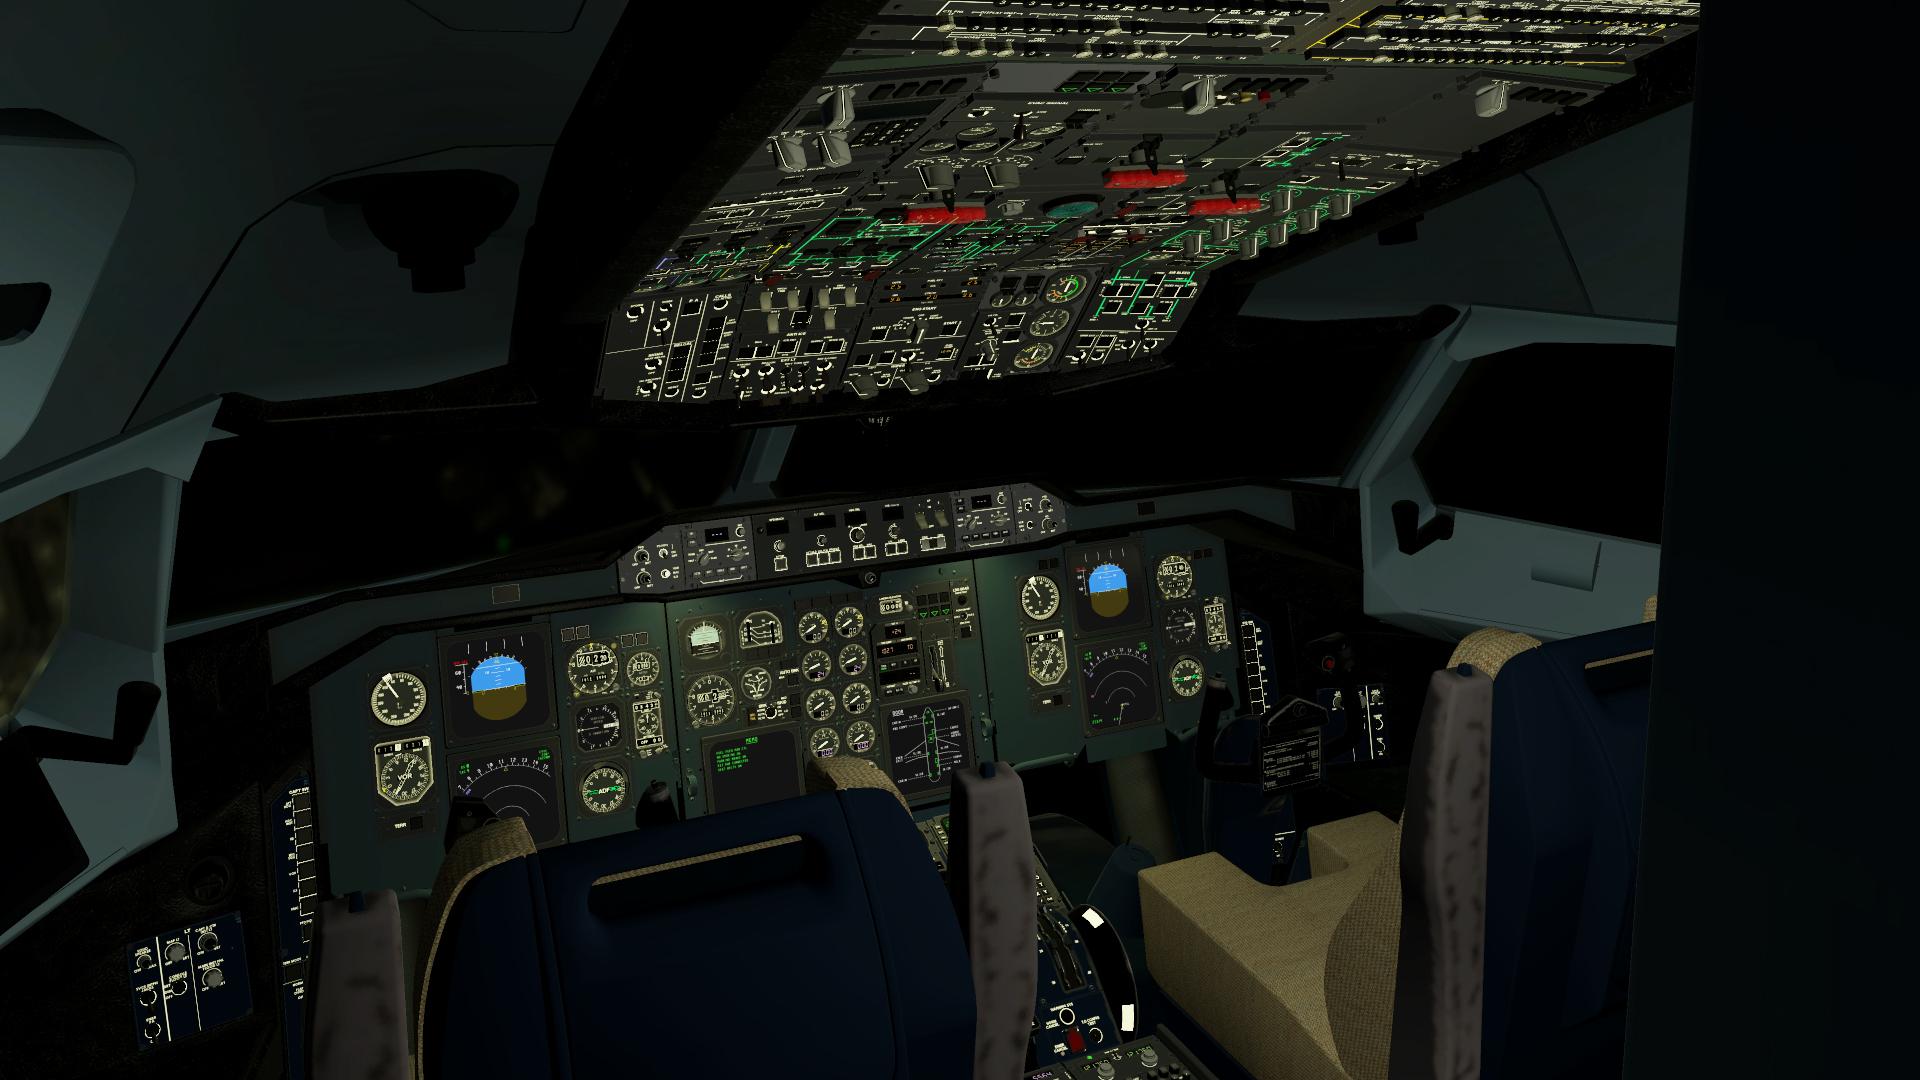
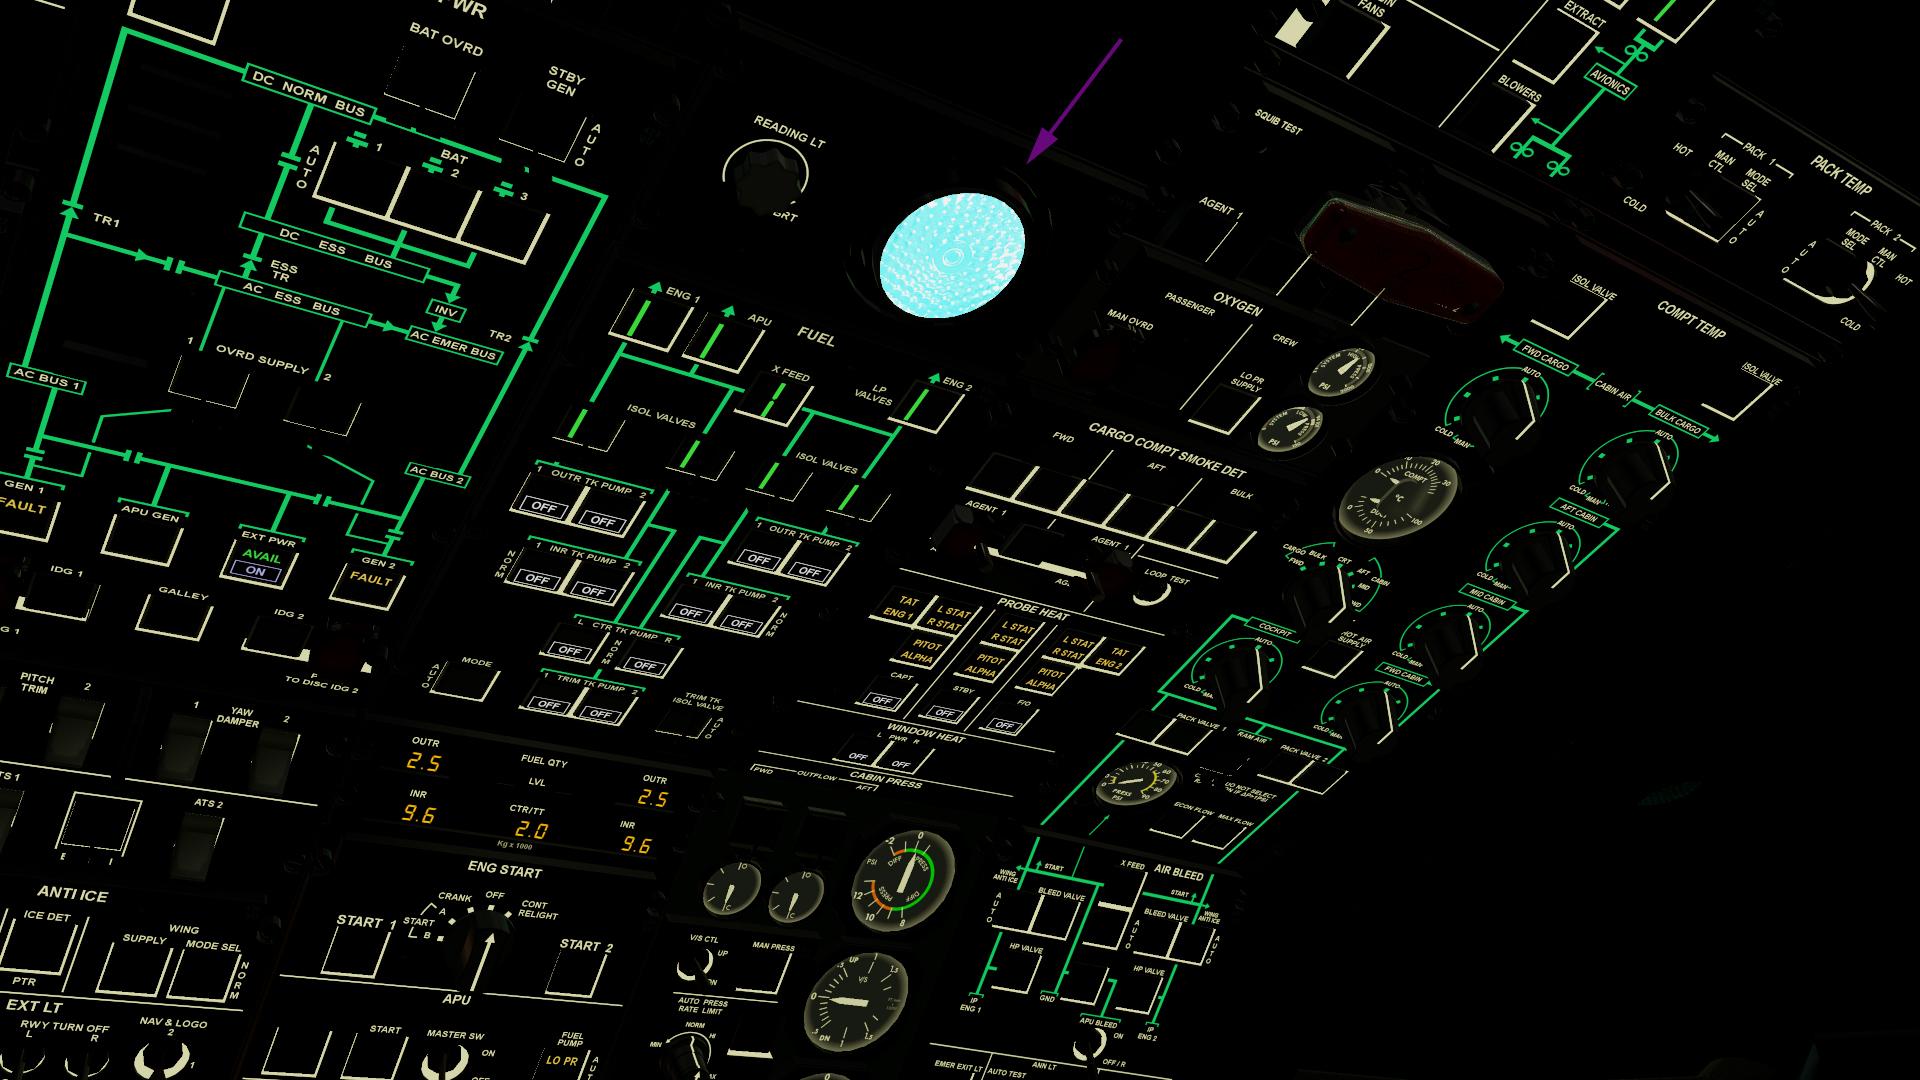
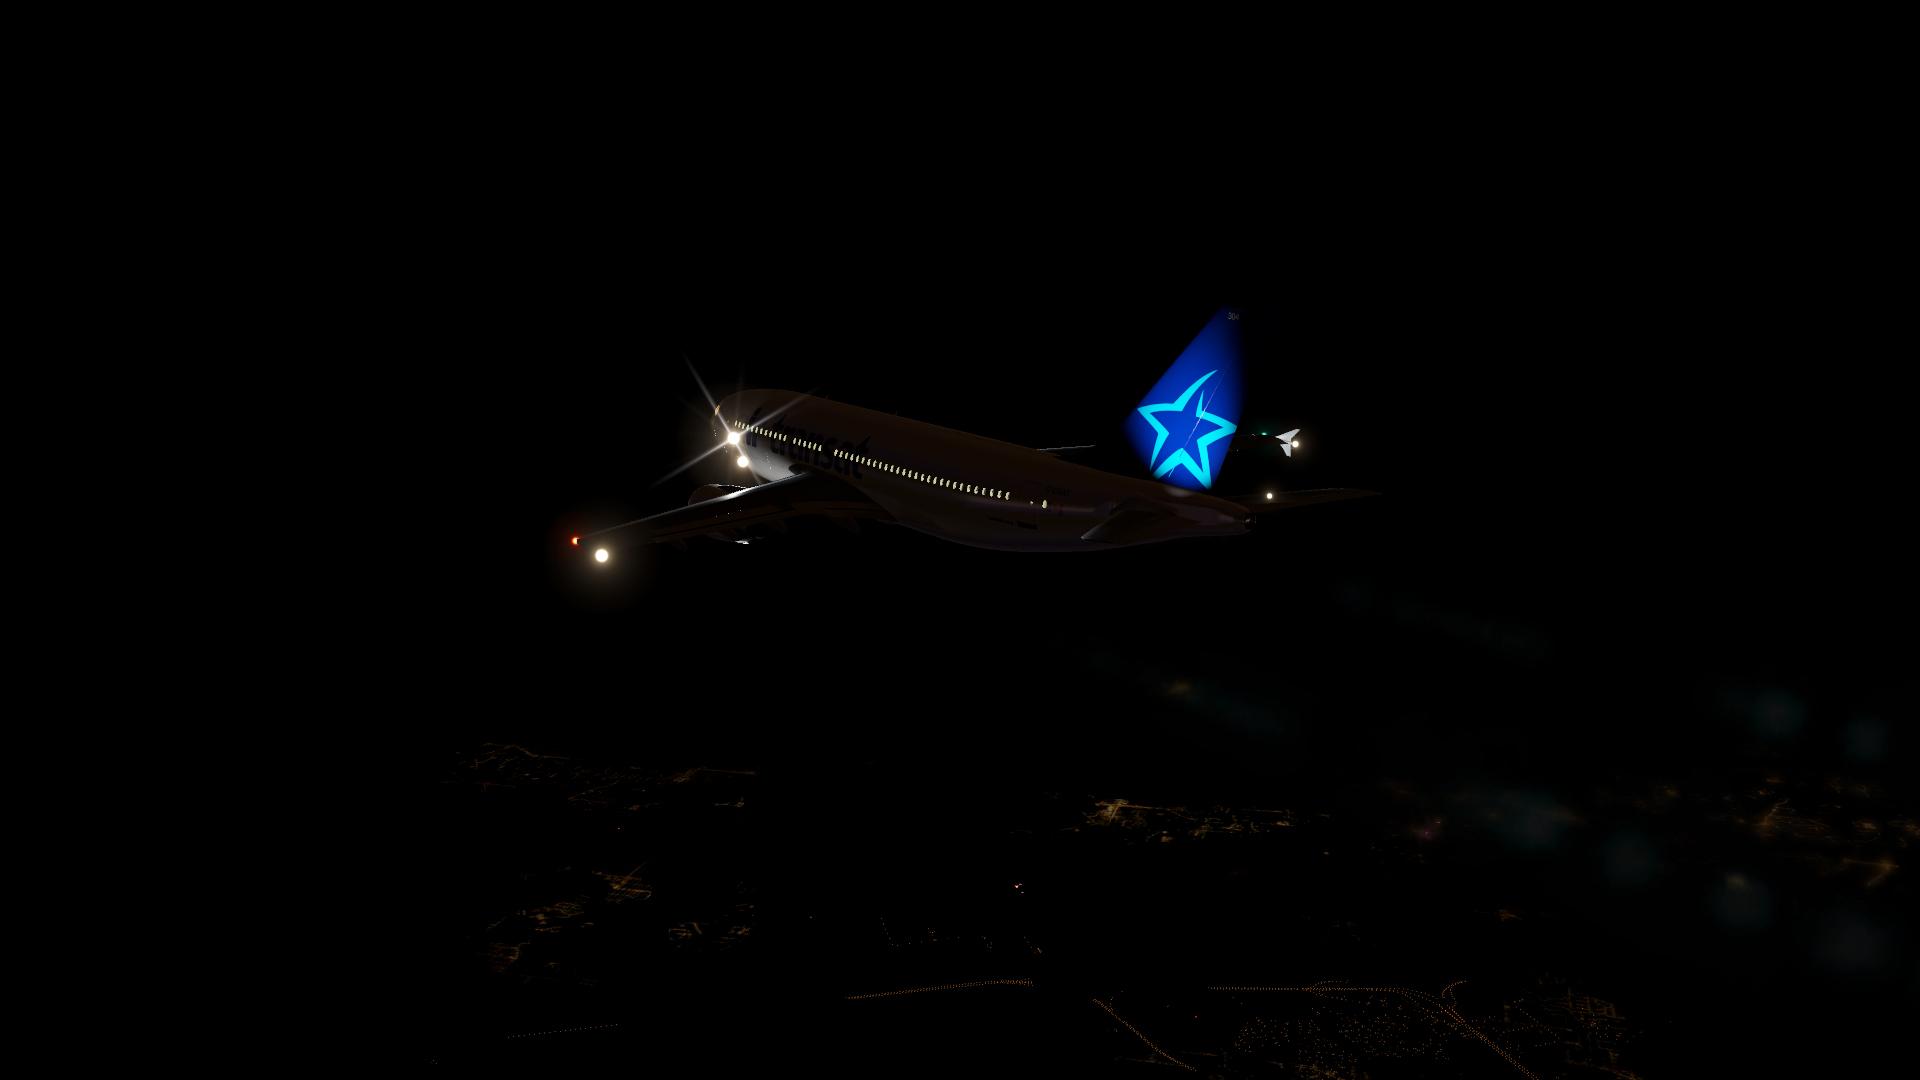
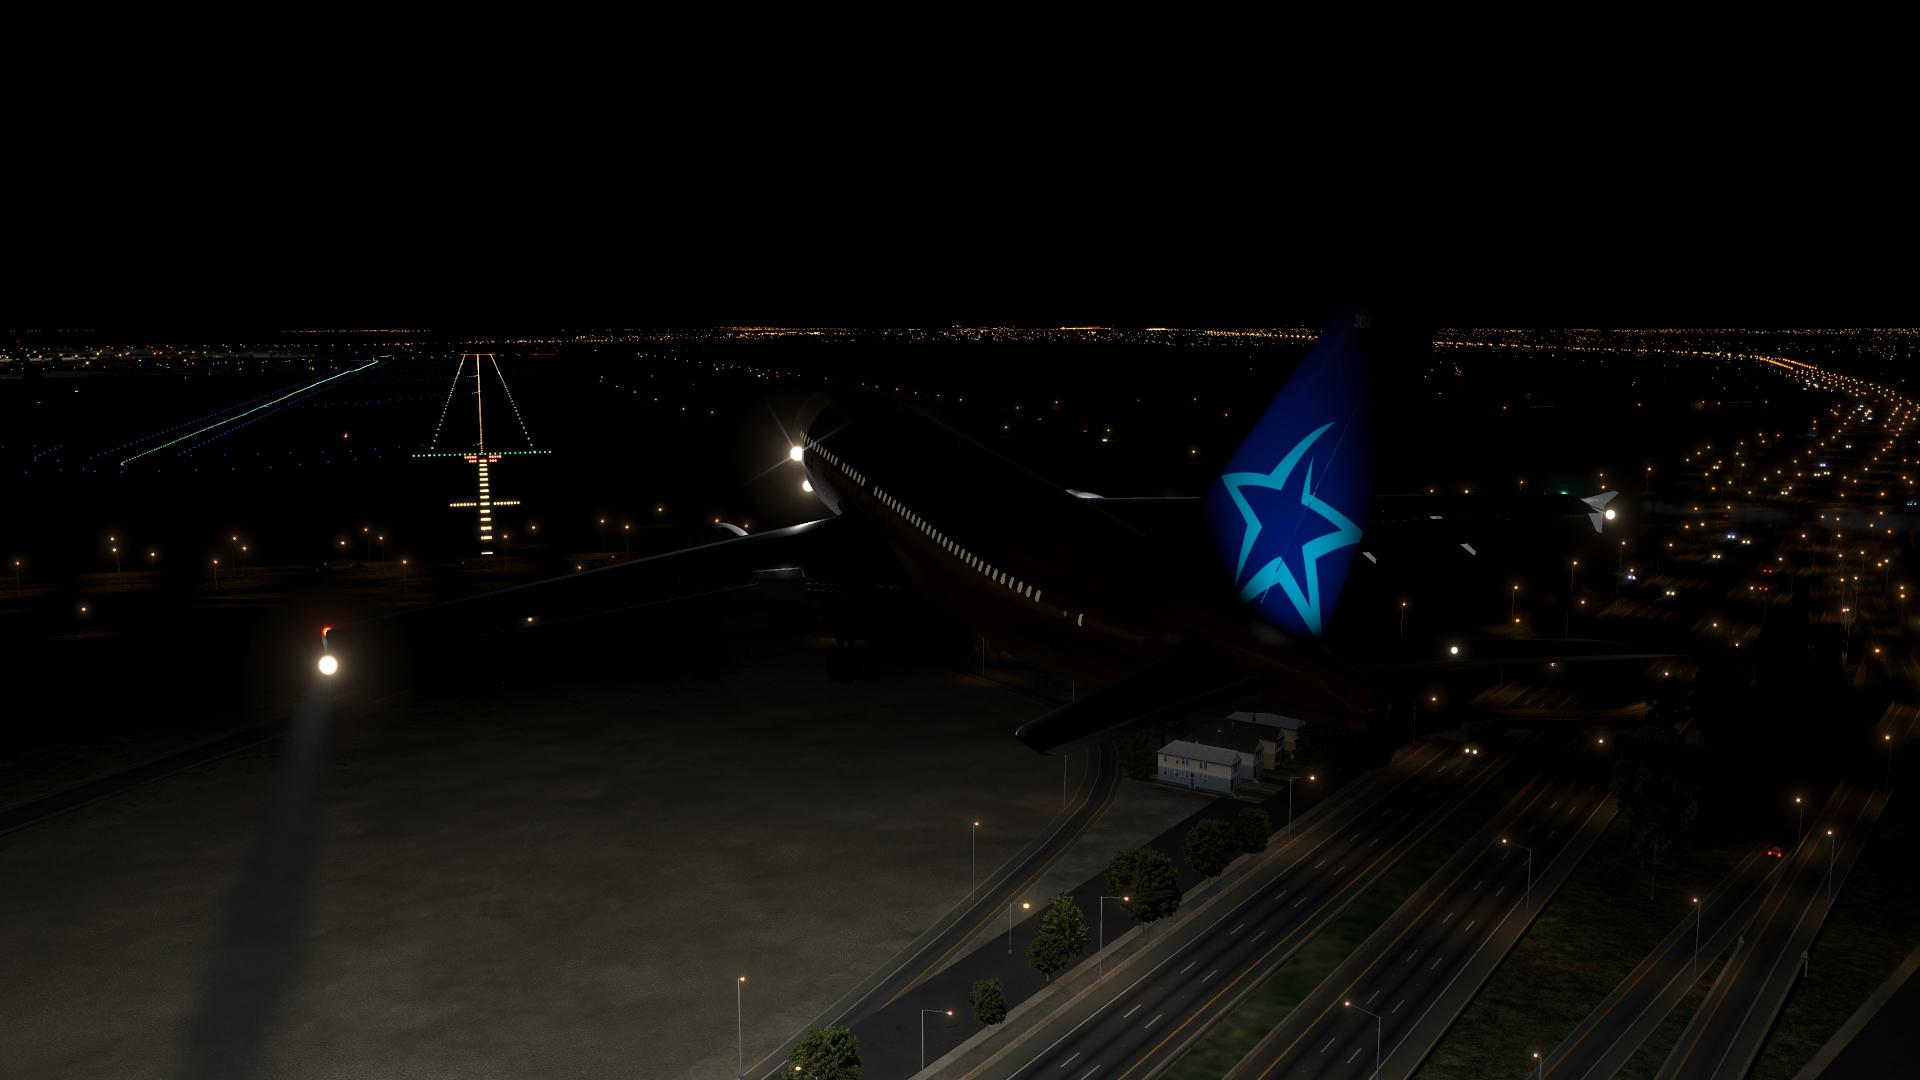
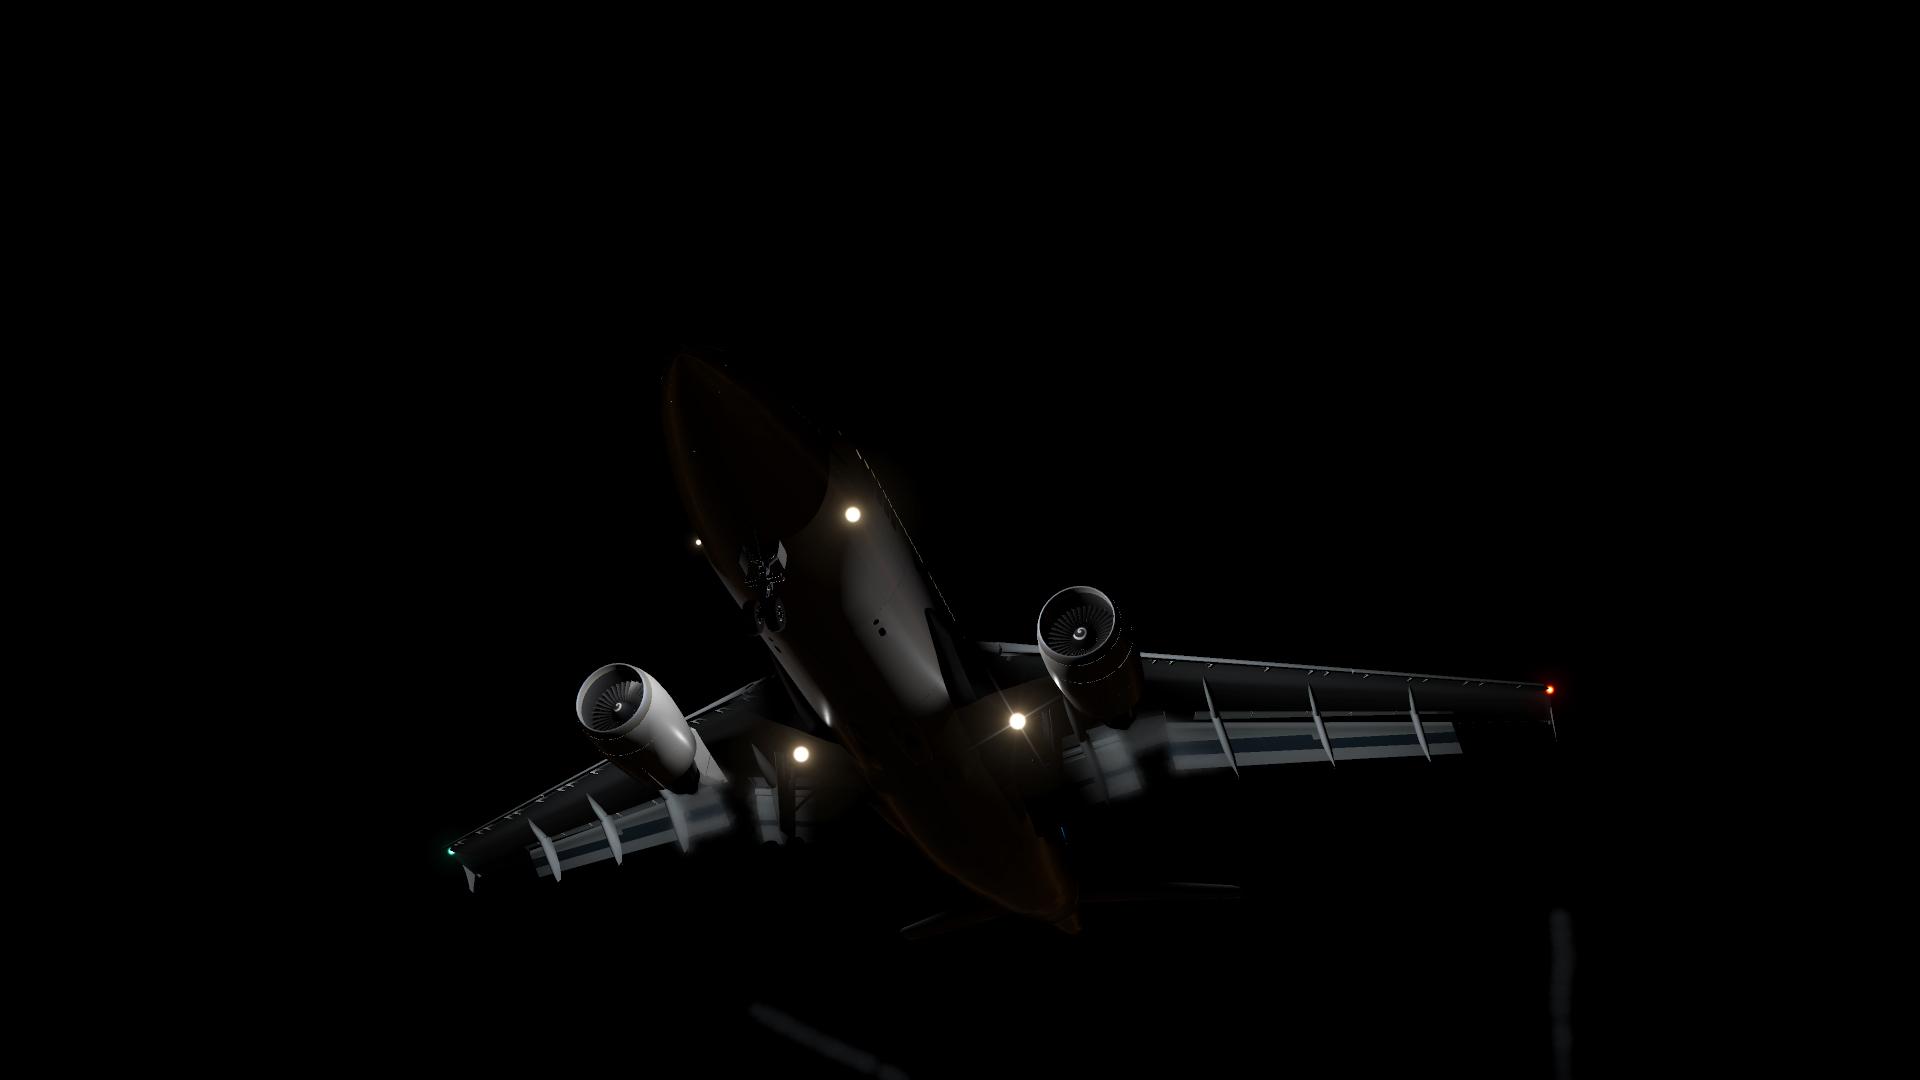
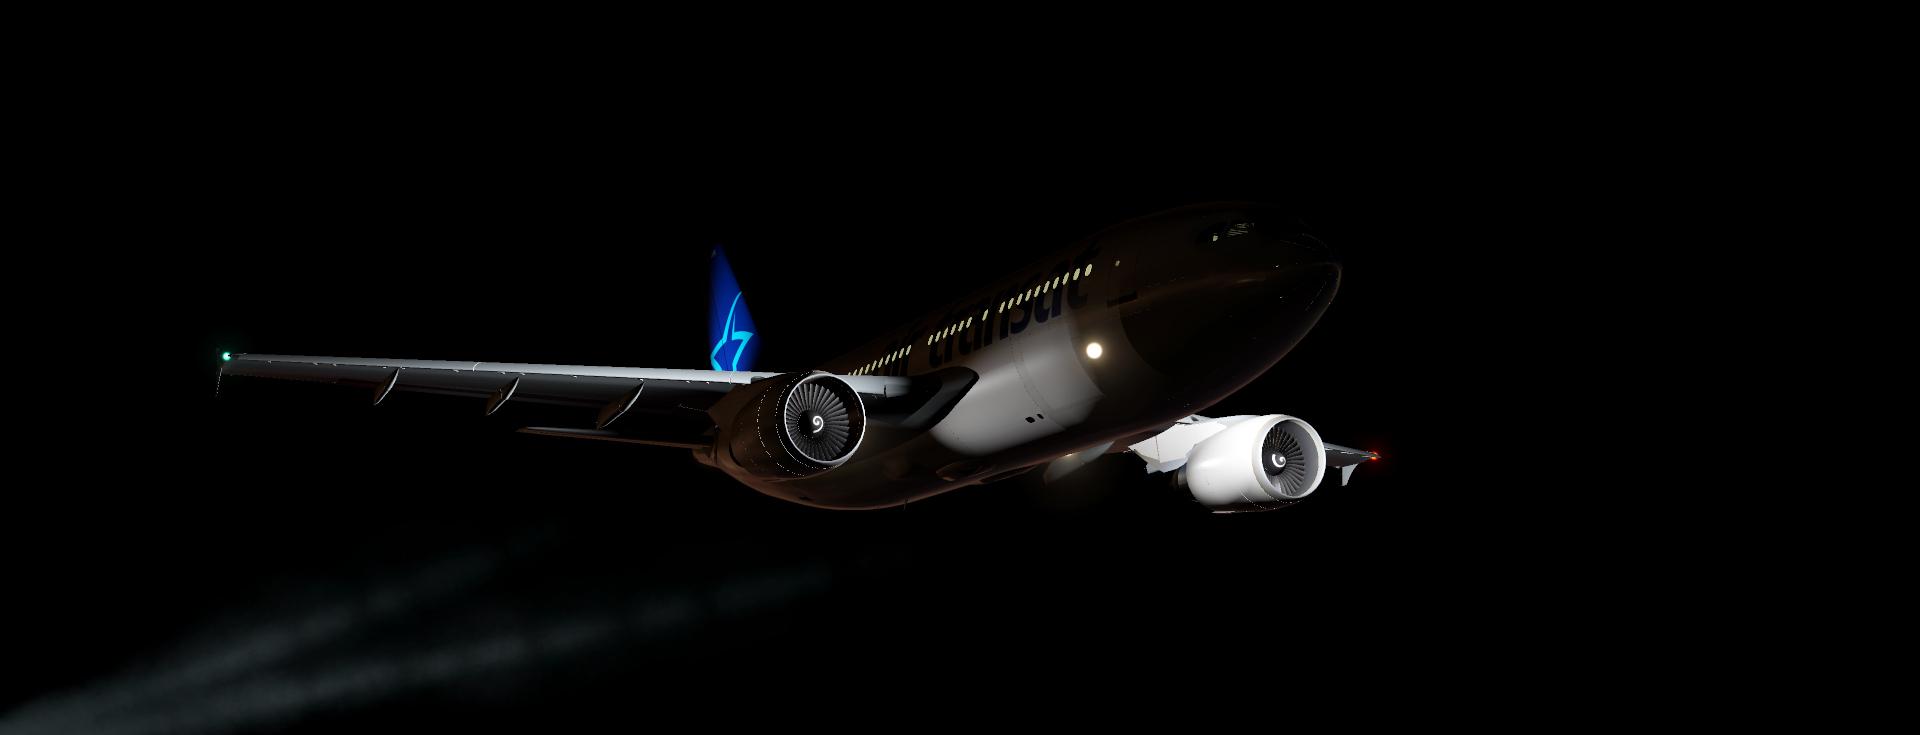
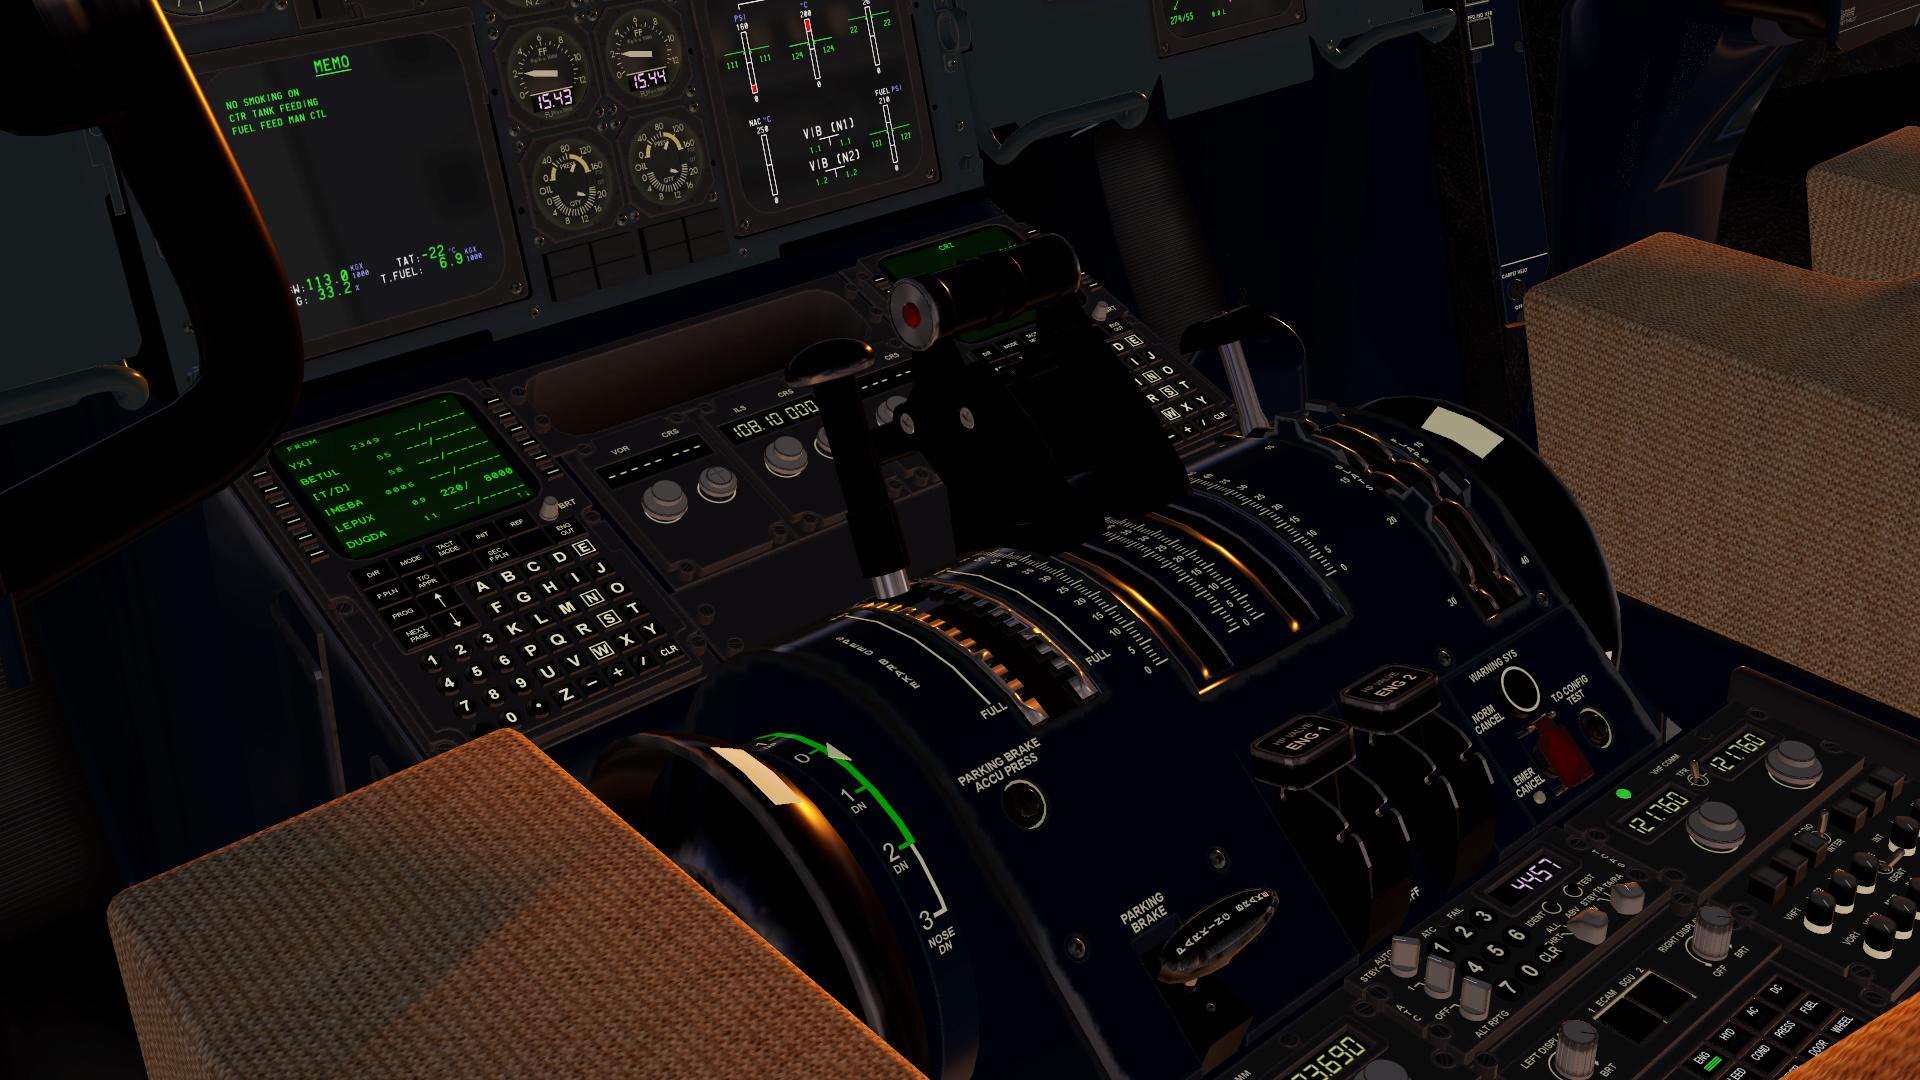
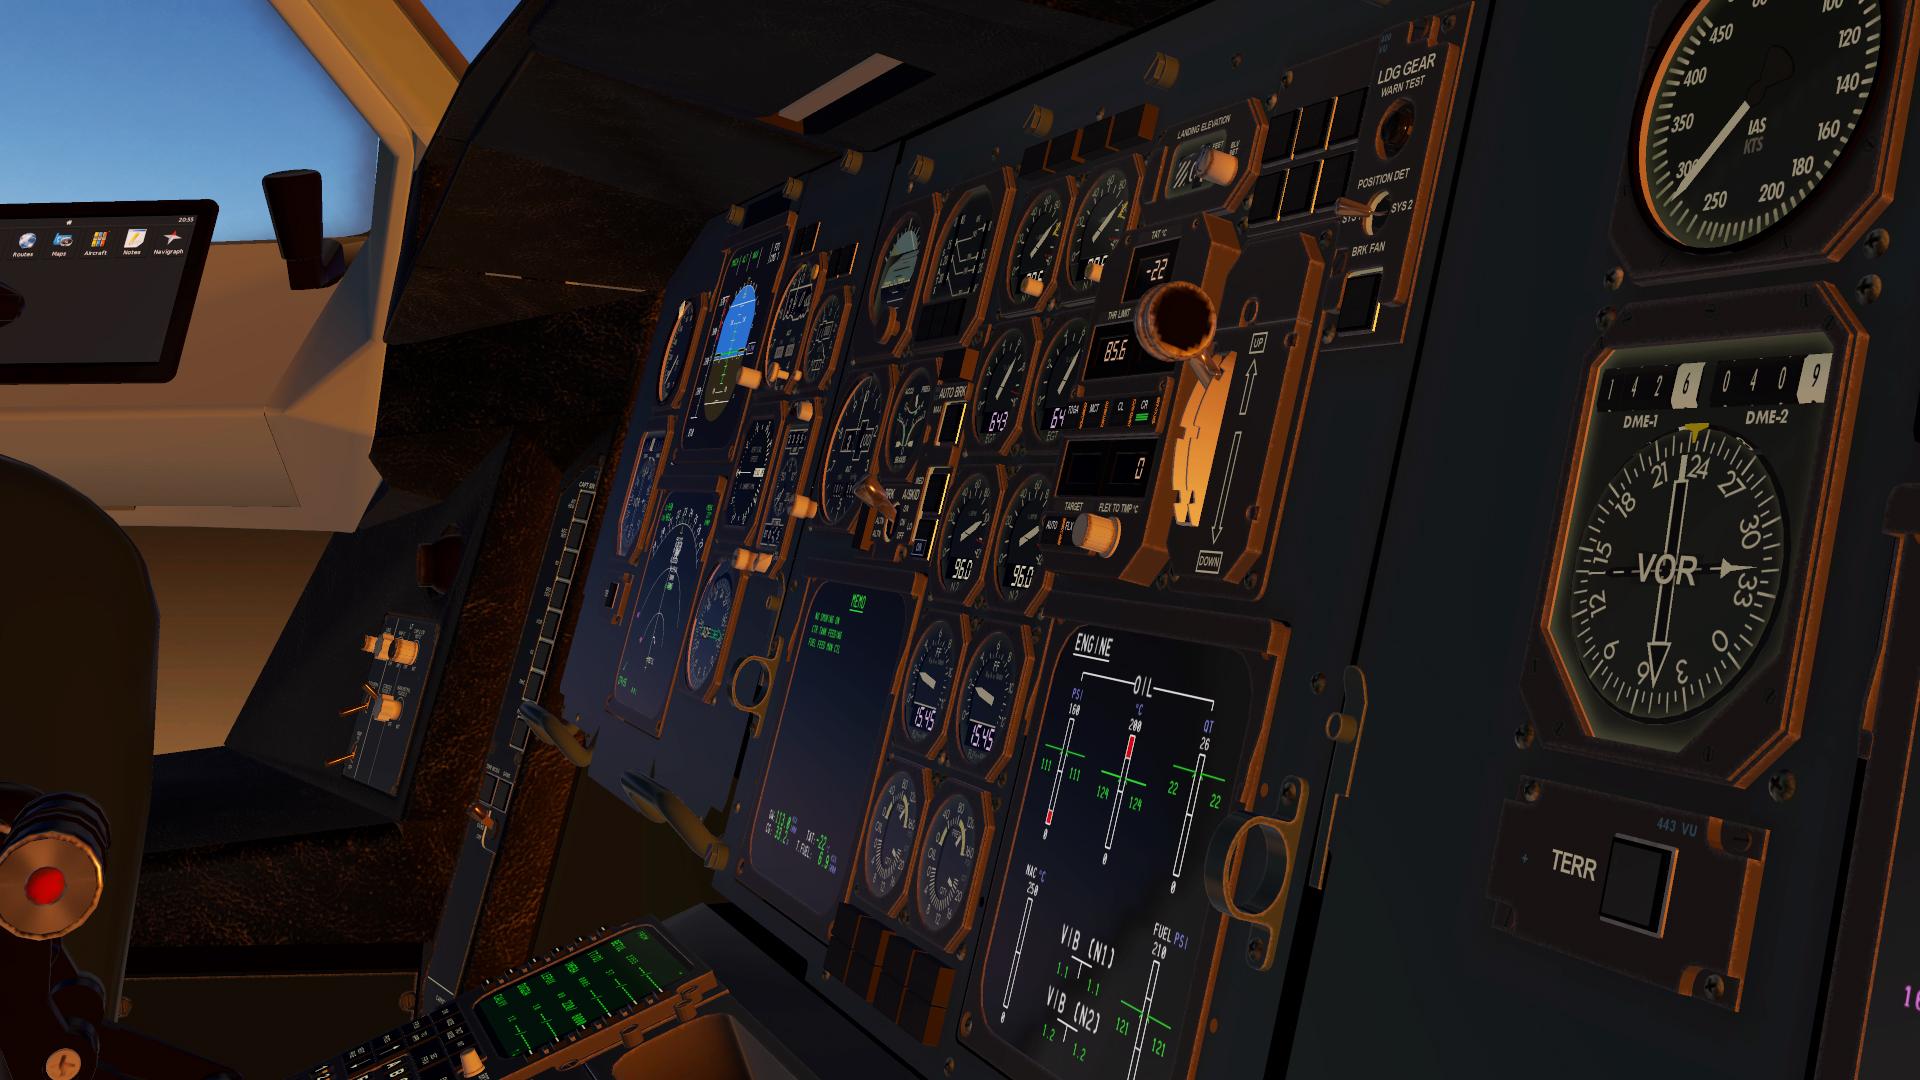
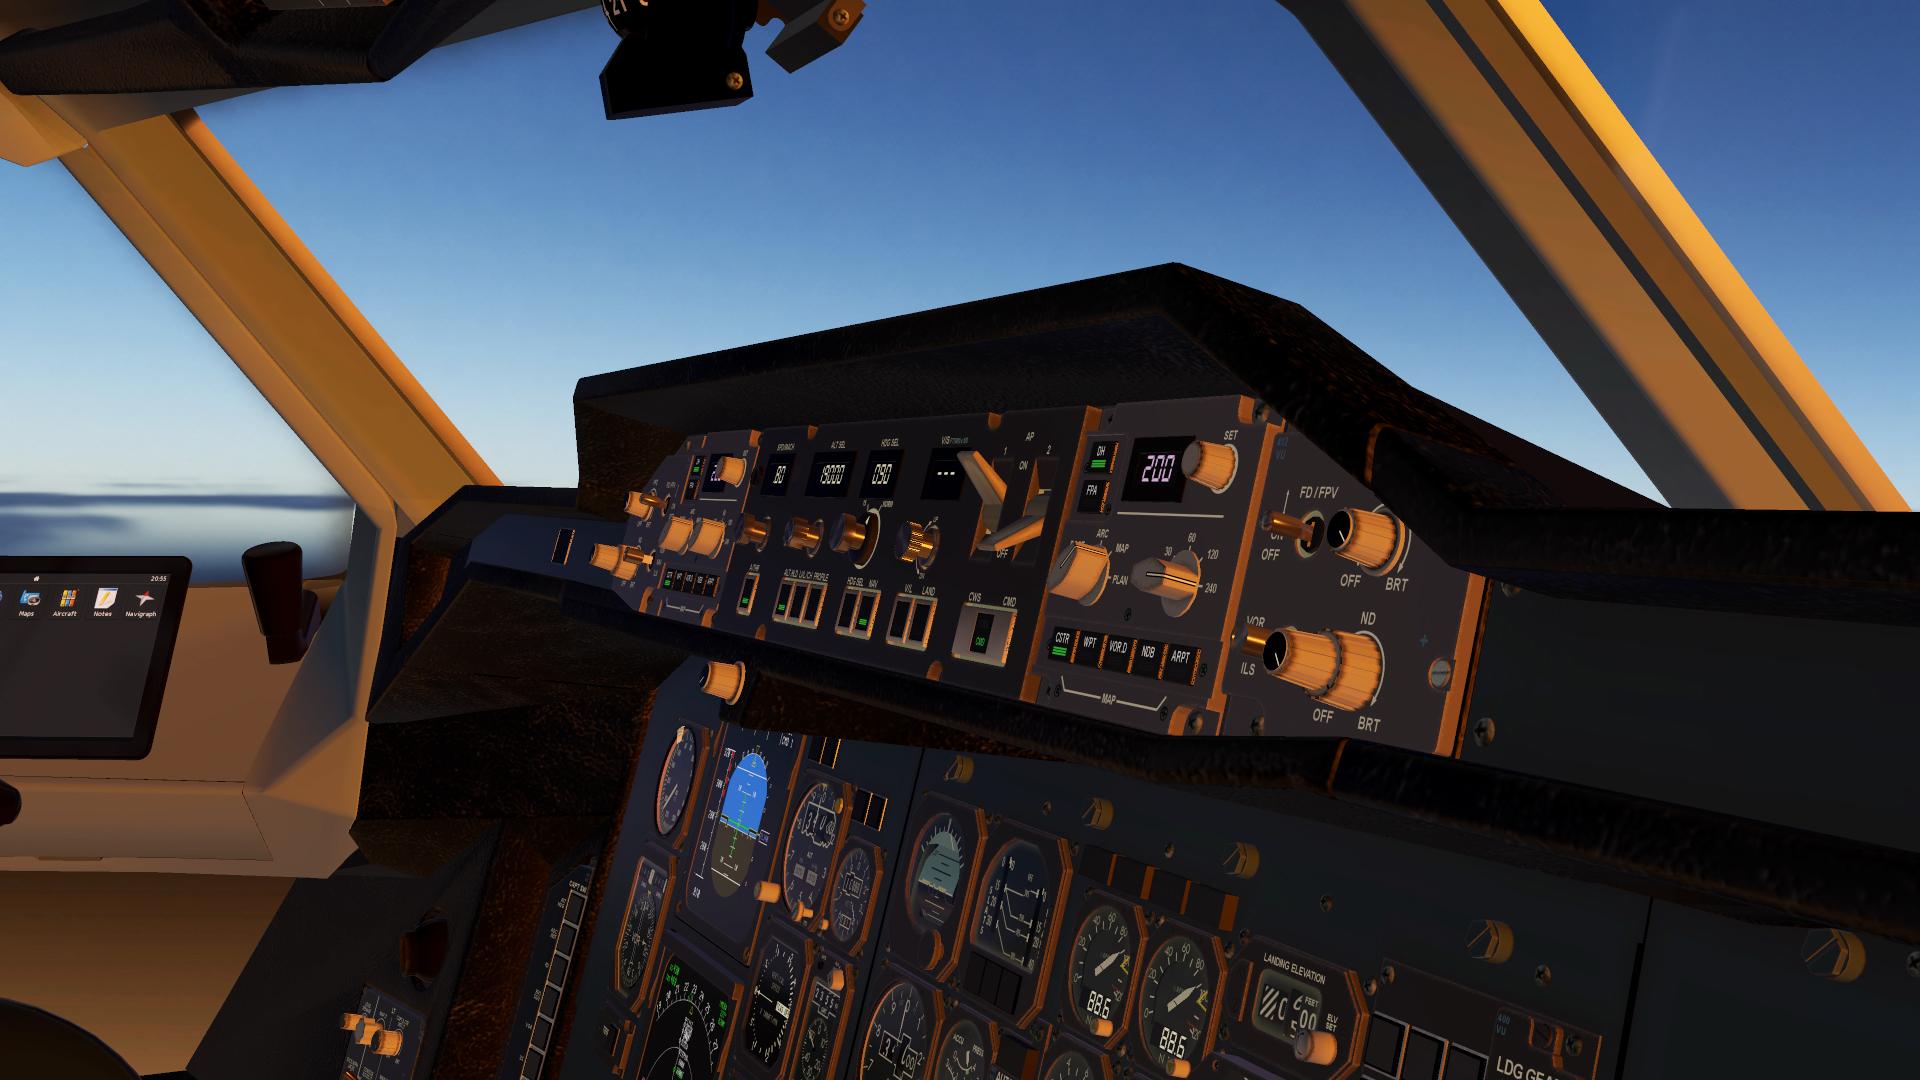
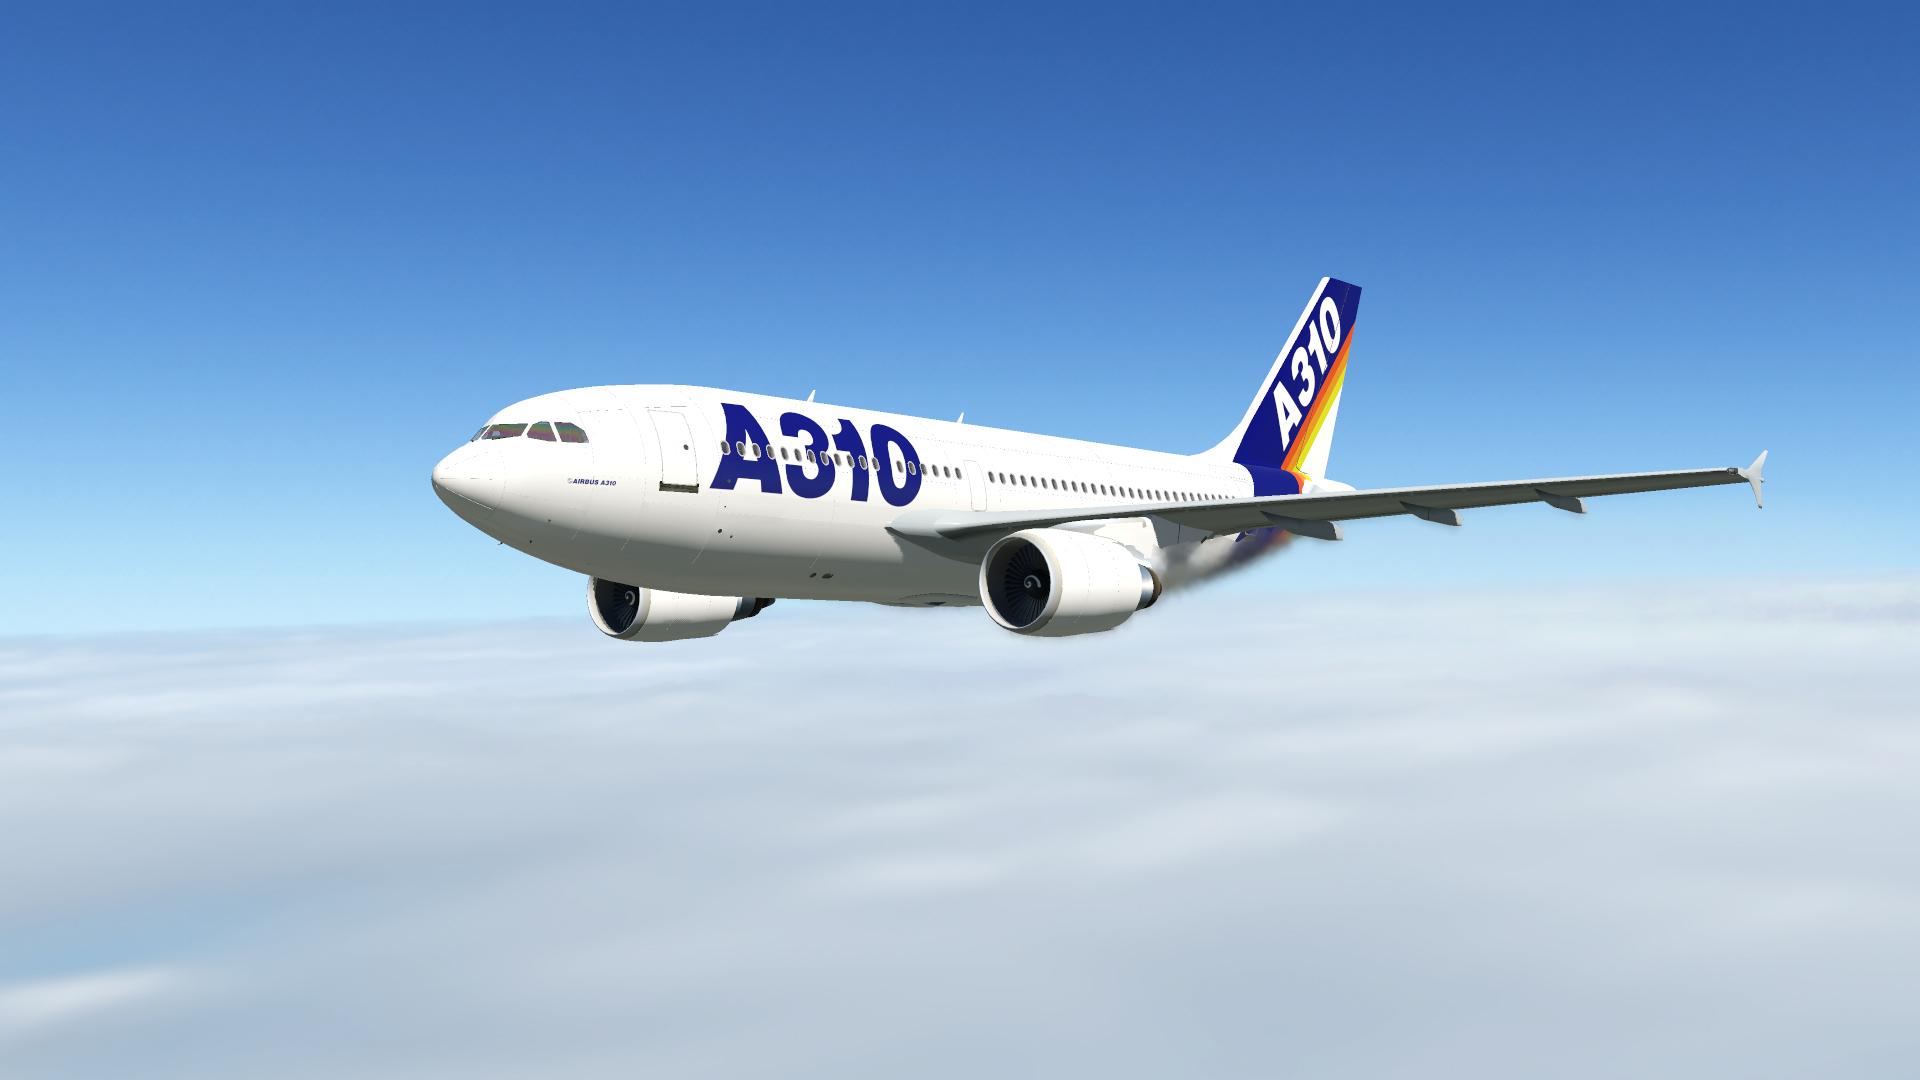
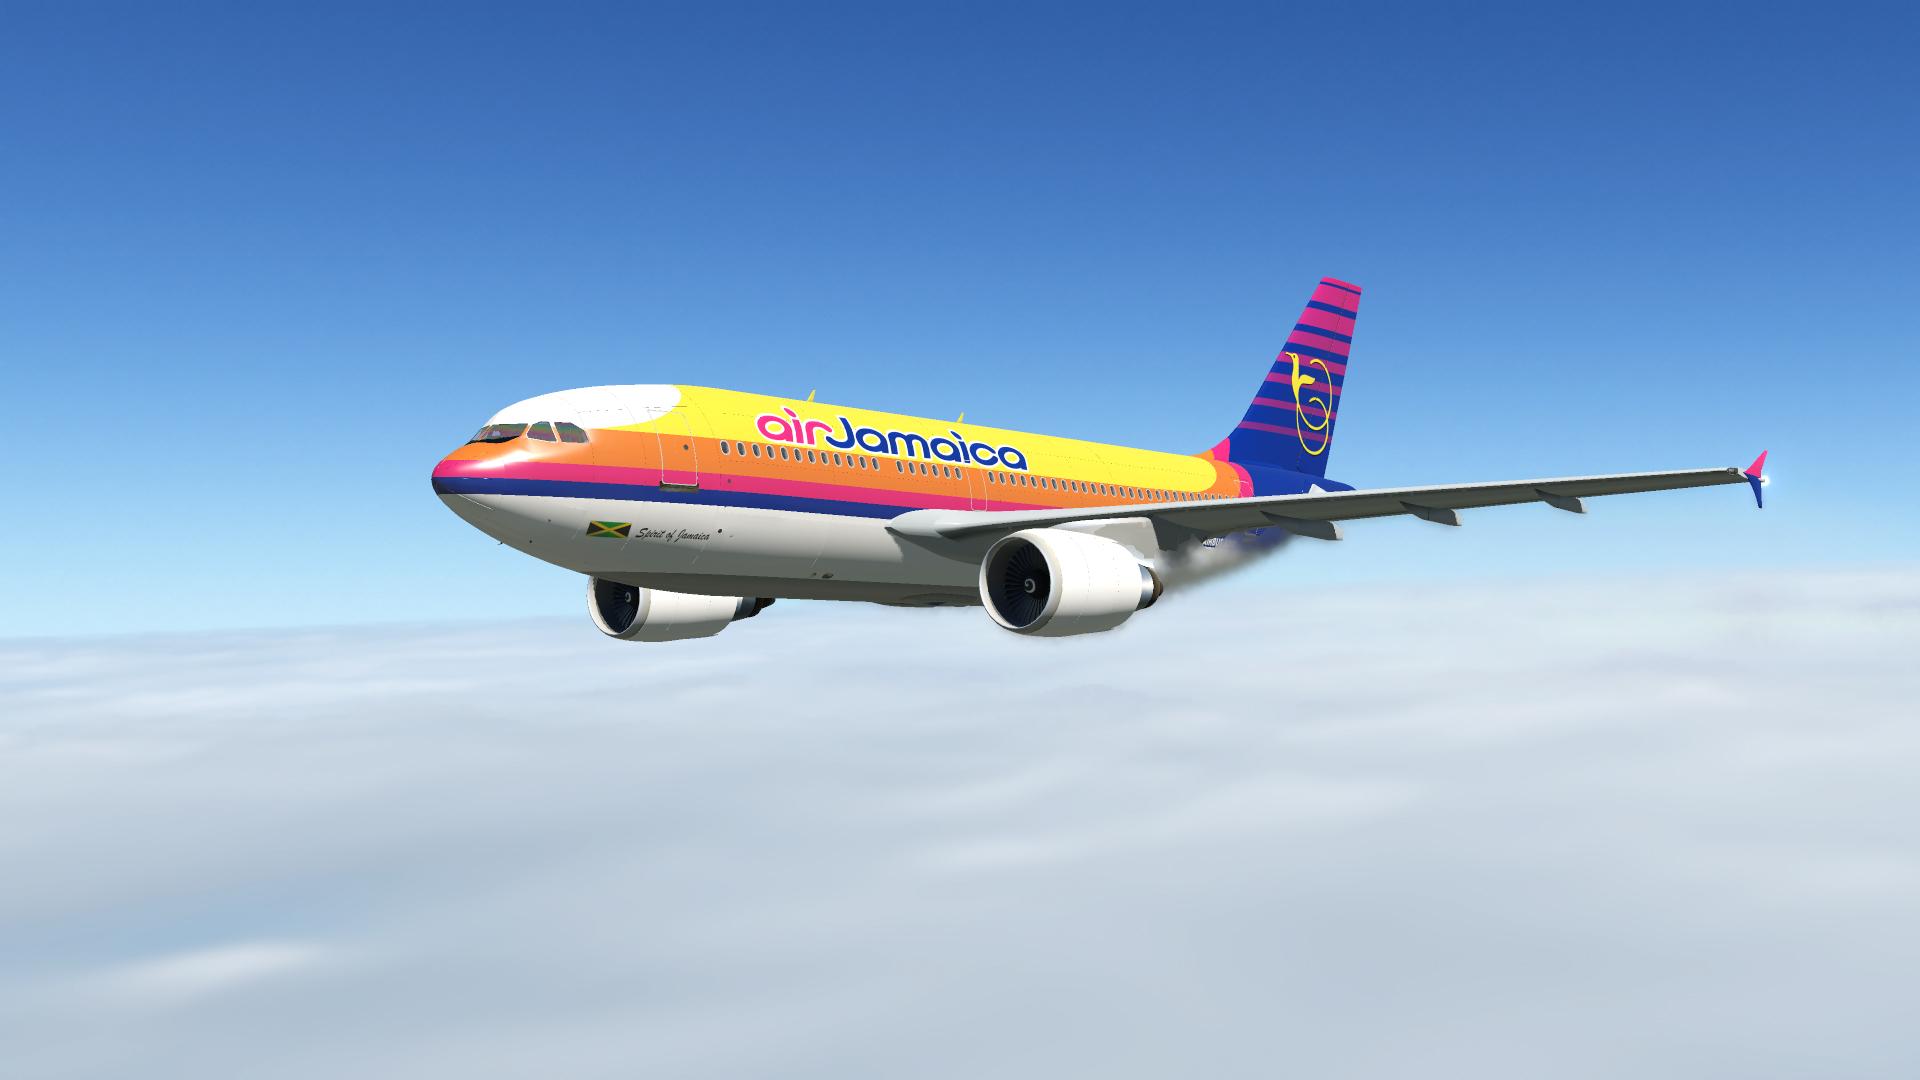
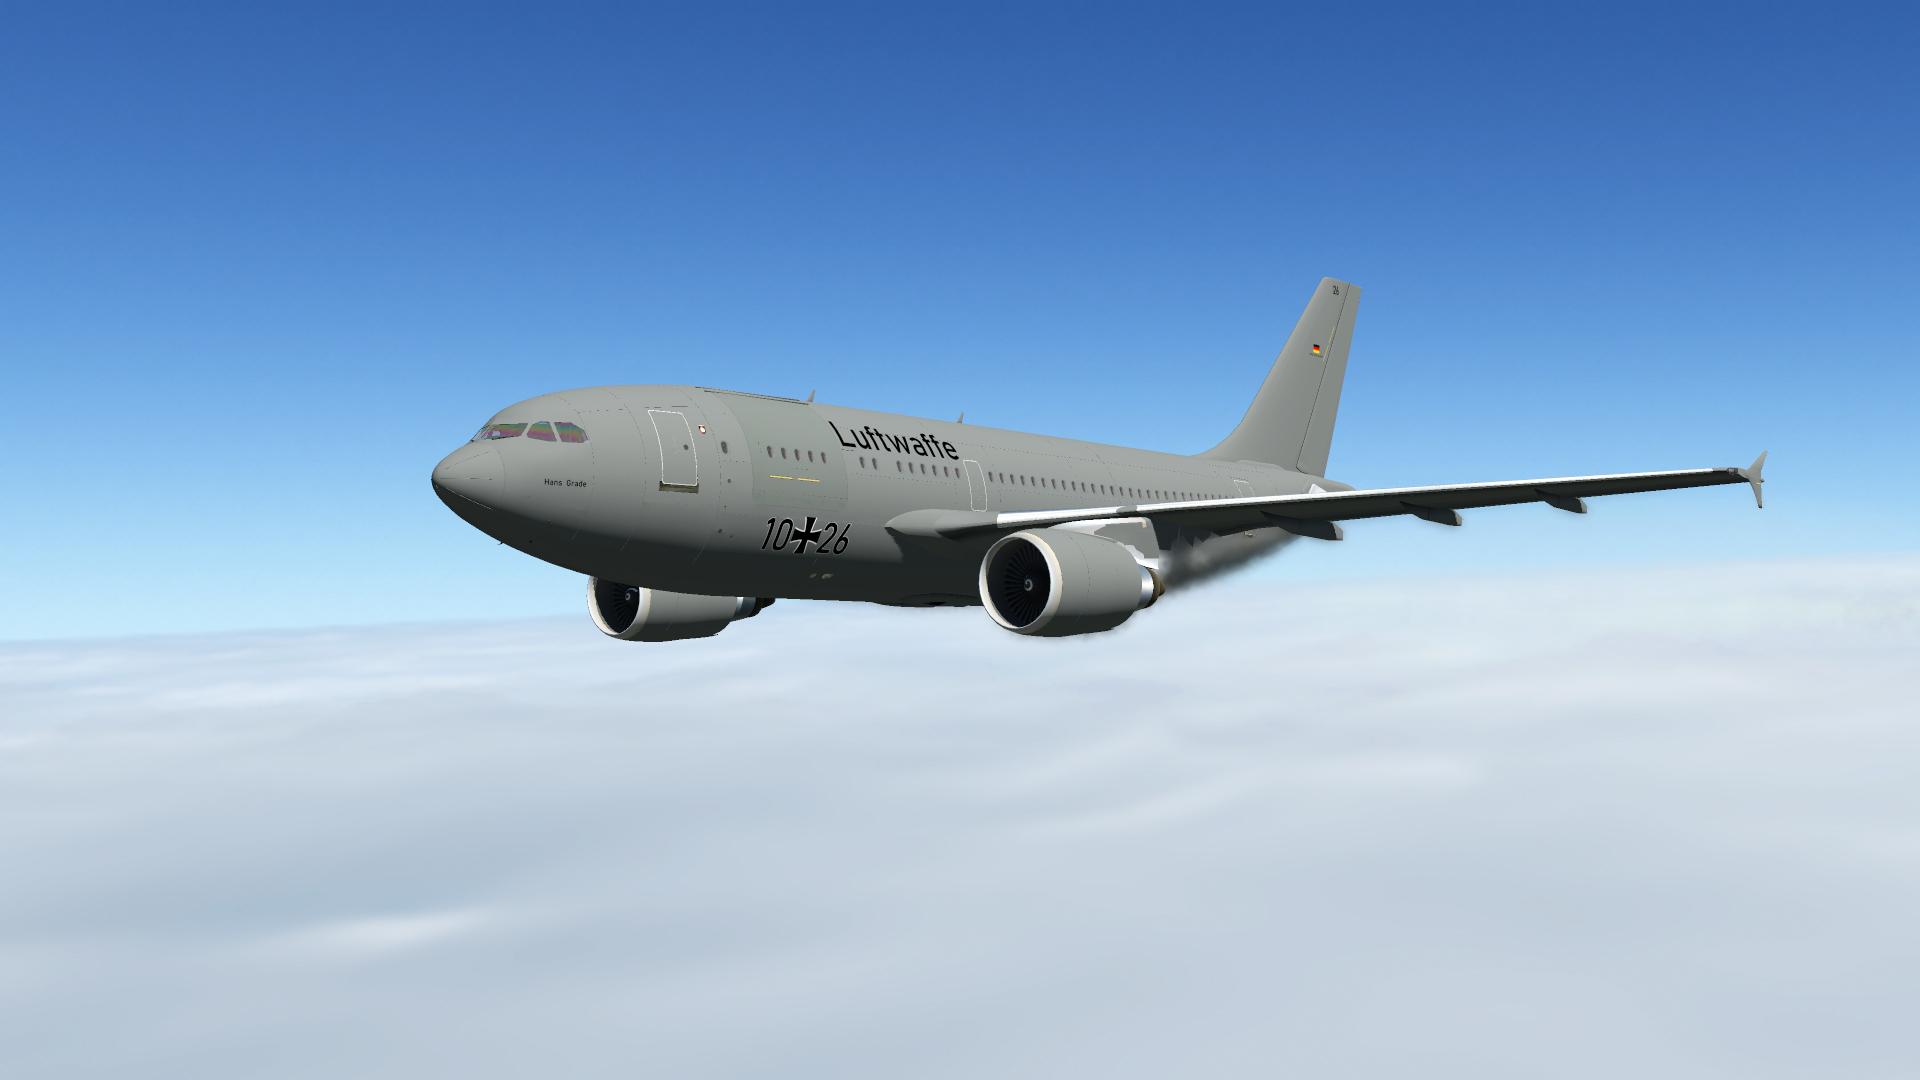
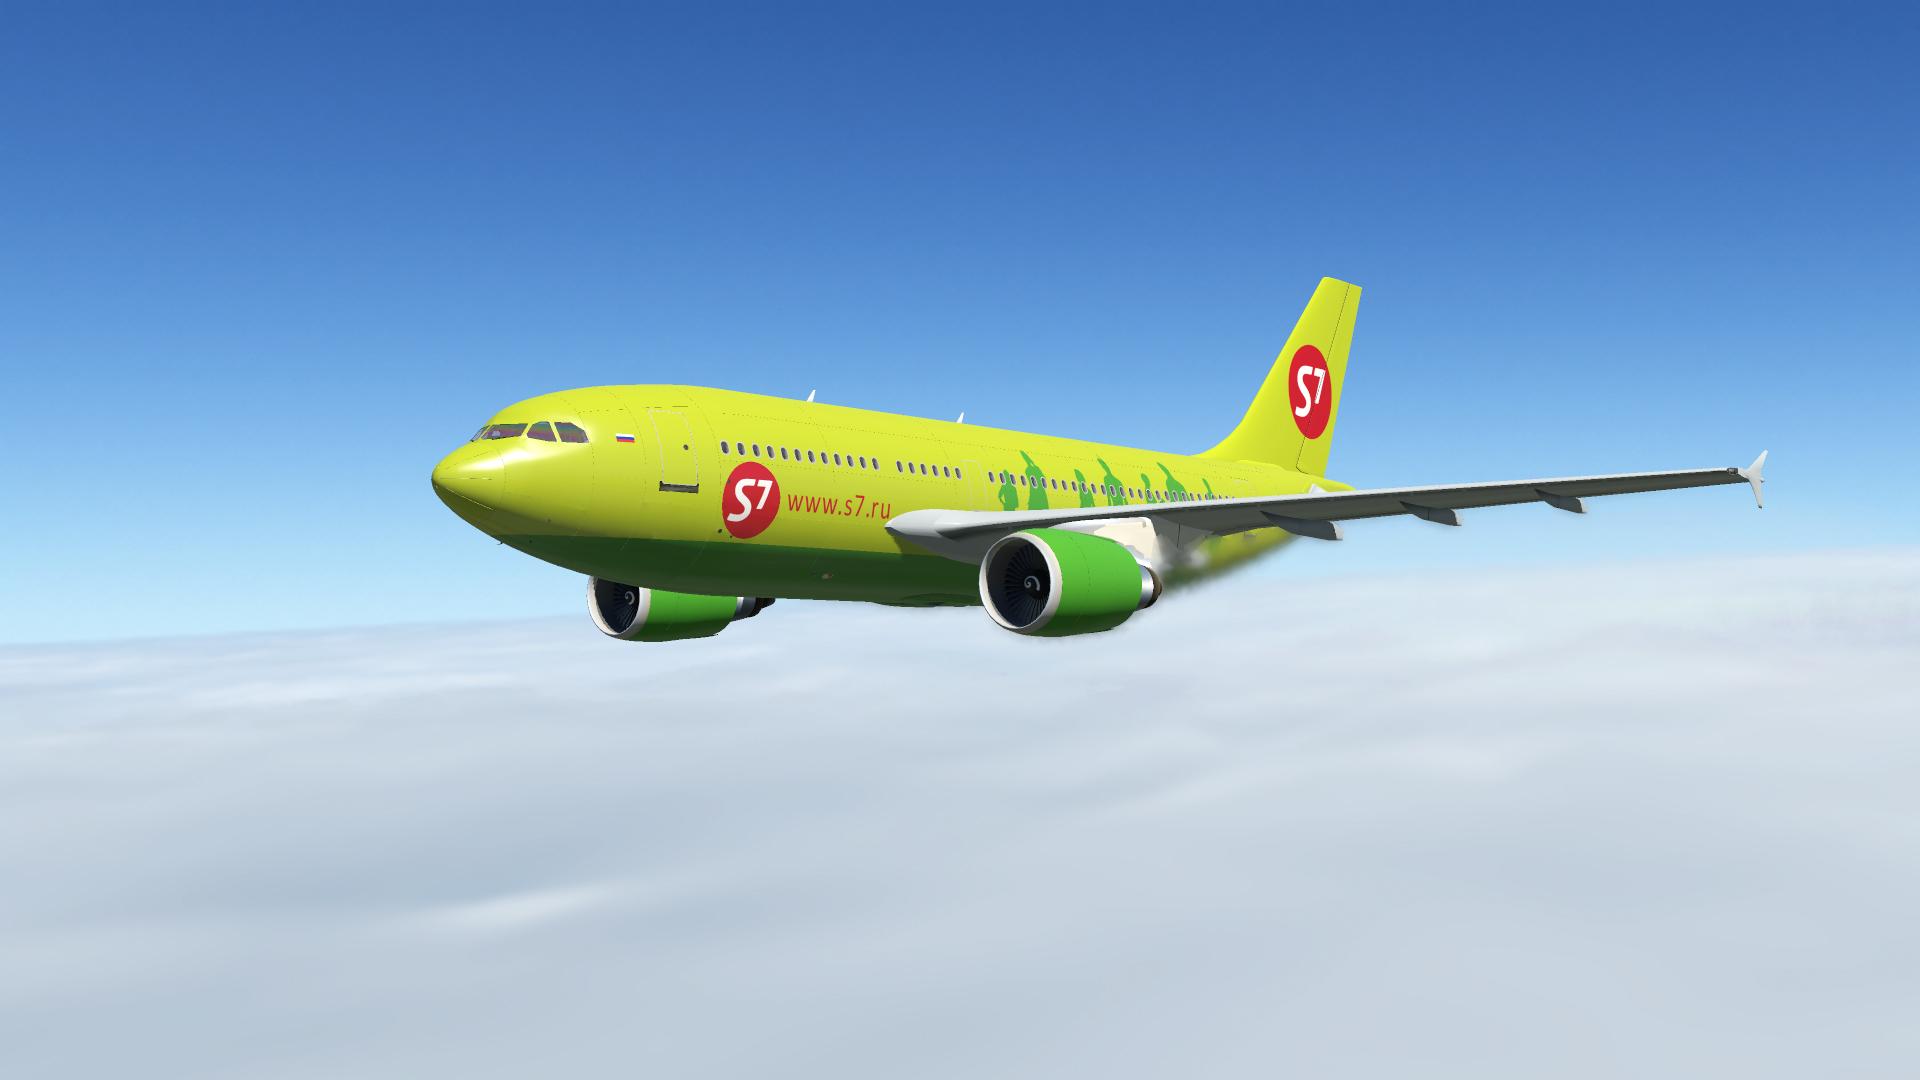
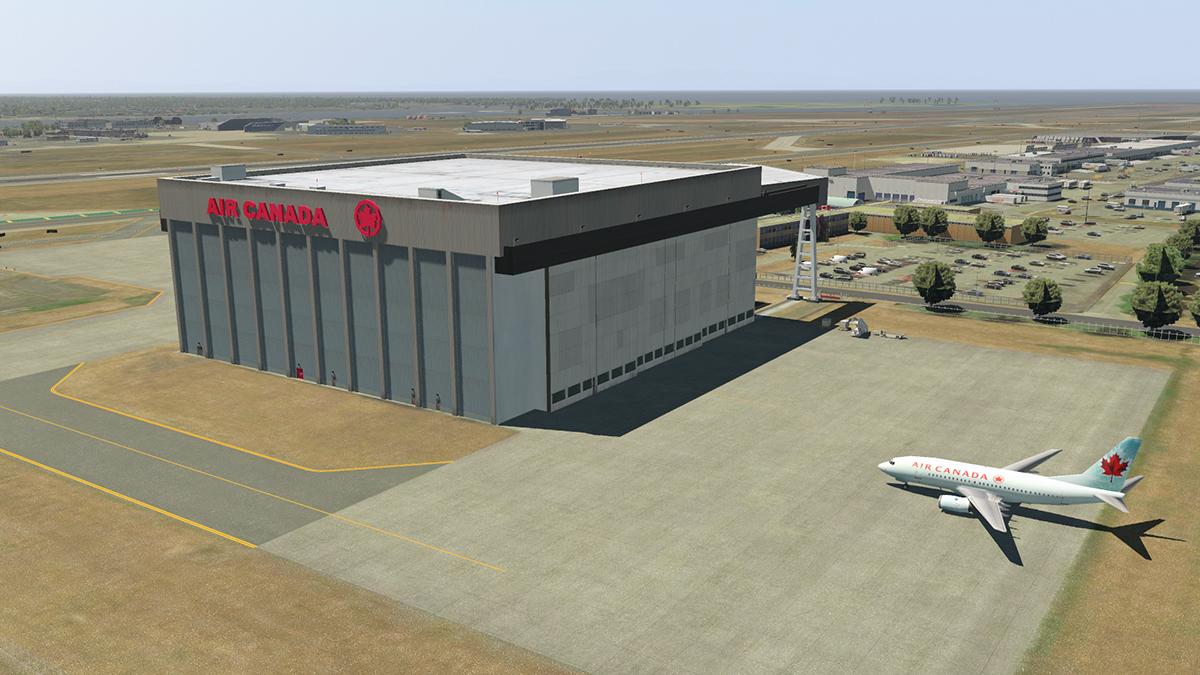
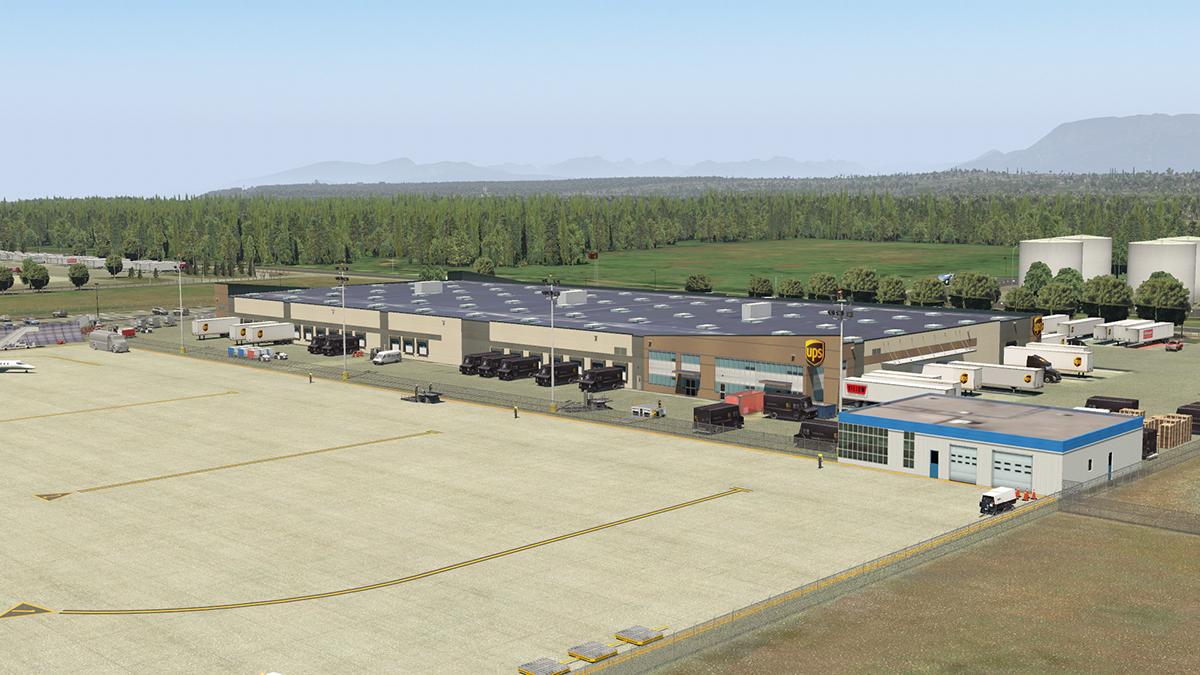
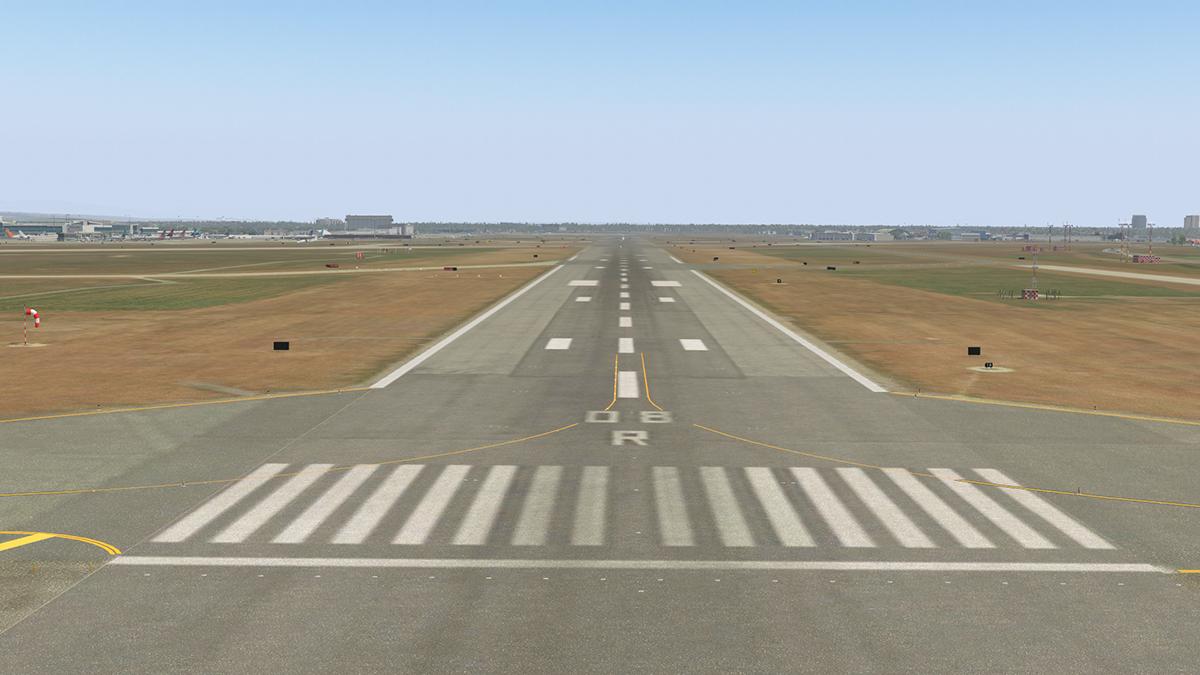
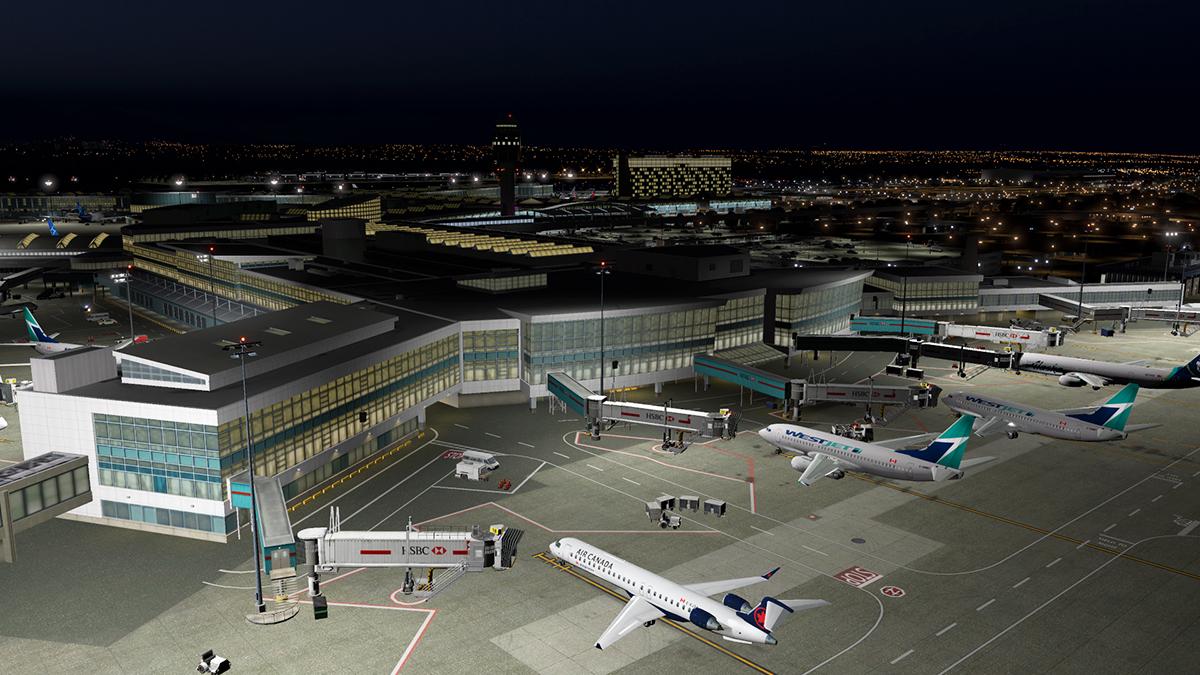
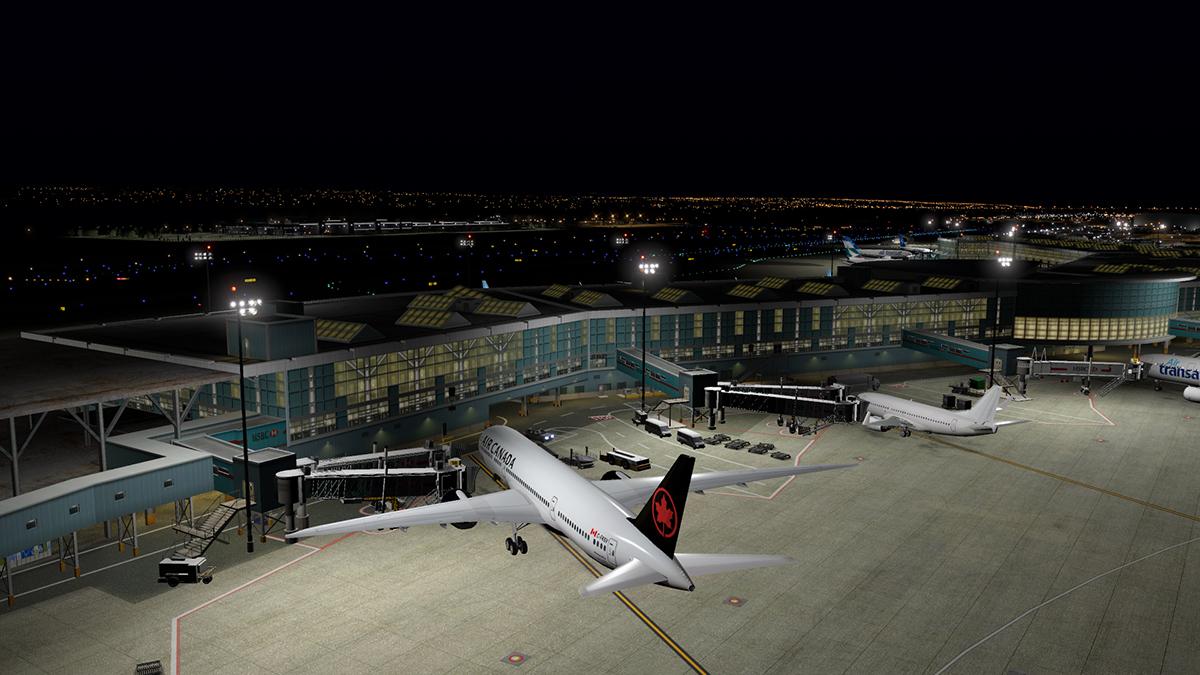
Aircraft Review : Airbus A310-304 by CremonaSoft Aviation in the 80s experienced many changes like the addition of new aircraft and rule modifications, such as ETOPS or Extended-range Twin-engine Operational Performance Standards. For those who don't know what ETOPS is, the shortest way to describe it is the maximum time in distance a twin-engine aircraft can be from an airport. Due to these regulations, most long-haul routes were dominated by quad and Trijet airlines, however, this started to change with the introduction of some fundamental aircraft. In the late 70s, Airbus presented their A300, the first wide-body twin-engine airliner. Equipped with the JT9D or the iconic CF-6, it became a huge success especially due to its low fuel consumption when compared to the tri and quad jet airliners. A few years later (1982) the Airbus A310 made its first flight, being introduced one year later with SwissAir. Airbus produced the A310 due to a high demand for an aircraft smaller than the A300, which resulted in a greater range when compared to its predecessor. One of the A310 main characteristics was the introduction of a two-crew glass cockpit, which was later adopted by the A300 newer versions and the Fly-by-wire technology. The A310 had two versions, 200 and 300, however, we will only talk about the 300, the version which was designed for X-Plane. Equipped with two JT9D or PW4000 or even the CF6, the engines could produce from 45,800 pounds of thrust up to 57,900lbf. With a wingspan of 43.9m and a fuselage length of 46.66m, the A310-300 can fly up to 5,150nm. Its capacity can reach 280 passengers in a 3-3-3 configuration, as well as 15 LD3 containers. The A310-300 has an MTOW of 164,000kg and a ceiling of 41,000ft. Older aircraft are starting to get more and more relevant in the X-Plane community, especially airliners. In the last years, we could see the improvement and releases of quite a few high-quality aircraft, like the FlyJSim 727 and 737v3, the new A300 by iniBuilds as well as the MD-80pro and the upcoming MD-11. CremonaSoft released their version of the A310 in October 2018, but sadly the product was way under the expectations. No review related to this add-on has been posted here and after some updates, we taught it was the right moment to post a review. Airbus A310-304 by CremonaSoft First of all, this aircraft, like many others, is still in development. You have to keep this in your mind, otherwise you may think this is a piece of crap. As always, let's start with the exterior modeling and textures, usually the first two things you notice when looking at an aircraft. As you can already tell, exterior modeling isn't the best part of this add-on, actually, it is quite under the average for an aircraft of its price. The modeling is good in some areas but pretty bad in others. You will spend, or at least should, more time inside the cockpit than outside cameras, so the exterior shouldn't bother you that much. The vertical and horizontal stabilizers are well modeled, just like wings, which aren't the best in X-Plane but doesn't look that bad. The landing gear is ok, even though it could be way better texturized and more detailed, the 3D modeling doesn't seem to have any problem. It does have some metallic details, but as said before, the textures could be better. The tires modeling is quite boring, quite unrealistic too, as well as the textures, which are extremely basic. The fuselage is quite complex, because in the same way I like it, I don't like it. I don't see any big problem with, excluding the very poor textures, it does have the shape of the A310 but there something that simply removes the realism. Maybe the connection between wings and fuselage, the weird shapes next to the stabilizers, or the weird lines all around the fuselage, which can be also found in the FF777. Sometimes, especially when looking from the front, the fuselage appears to be too large and rounded when compared to the real plane. I don't know why, but the fuselage seems to be missing something, there isn't any beauty in it, and that may be the problem. The real plane, like I said before, could be equipped with three engine variants, two Pratt & Whitney options, and one General Electric. CremonaSoft decided to only model the GE engine, but this isn't a big problem because according to Planespotters.net, from all 37 A310 that are still flying, only 4 are equipped with PW engines. The engines are fine. The modeling isn't perfect but manages to be a good replica from the real one. However, as you could imagine, the textures are far away from being good, especially in the pylon area. Generally, the engine is ok, but needs some improvements Cabin The A310 by CremonaSoft does have a 3D modeled cabin, and its quality is quite controversial. The A310 cabin length is one meter shorter than the A321, 33.25m, and the same cabin width when compared to the A330-200, 5.28m. The A310 maximum capacity is 280 seats, but the average seating is from 190 to 230 seats. The cabin in the CremonaSoft A310 is modeled in a 3-3-3 configuration, with the last rows being 2-3-2 due to fuselage limitations. The cabin has three major problems. First, the seats texturing is very basic, which makes the good 3D modeling irrelevant. Second and probably worst, there are no galleys, and this is a shame because cheaper planes like SSG E-170/195 and X-Crafts E145 have some pretty interesting galleys, while this aircraft has just empty spaces. The third is more sound-related when you get close to the walls the outside sounds replace the interior sound, making your life quite harder to set good cameras without hearing the outside sounds (at least for someone like me who likes to have passenger views cameras), but nothing you should stress about. As I said in the first paragraph of the cabin section, the cabin quality is quite controversial, but until now I mostly talked about bad things. However, I must say that this aircraft has one of the most, if not the most, beautiful ceiling and baggage bins in all X-Plane. The modeling is extremely sharp and the texturing is very good in some areas like the seatbelts signs, which turns on and off, as well as in the bins. I was extremely surprised by the quality of those baggage bins. Another good thing in the cabin is the 3D modeling, which is simple but well executed. As you could see, the cabin has some weak and strong points, however, due to the number and importance of the weak points, the good aspects are a little bit diminished . Probably the best and easier way to fix those problems is by adding high-quality textures in the seats, that combined with the relatively good modeling would result in a way more interesting cabin. Afterward, an addition of galleys would be pretty interesting. Cockpit Generally, the cockpit is quite good, especially when looking at the 3D modeling. It's a pretty faithful representation of the A310 cockpit, most switches, buttons and systems are in the correct locations. Just like the A300, the Airbus A310 is also equipped with a yoke, differently from the newer planes which are produced with sidesticks. Most of the airliners today are equipped with the so-called full glass cockpit, but the Airbus A310 still uses the well-known steam gauges to monitor the engine parameters. As I said earlier, the A310 introduced the EFIS technology for Airbus which would be later adopted in the A300-600 and evolved in the A320. It's pretty nice to see the LCD screens working together with the gauges, the transition between two eras in aviation. Like I said before, the cockpit 3D modeling is pretty nice, with sharp and accurate corners, however, the textures, like in all this add-on, are under the expectations. Even though we have a beautiful modeling and great reflections, the poor textures bring the whole cockpit to an inferior quality level. That's really sad because you can't find this sharp modeling in many add-ons, especially in this price range. CremonaSfot has added two nice details their plane, the ability to open the cockpit windows as well as the interactive jump seat. In one of the recent updates, the Avitab compatibility was also added to the aircraft. In order to use the tablet, you will need to click in the small button which is shown in the photo. One of the most important things in an aircraft is the systems, and sometimes designers who don't have an extremely beautiful aircraft, compensate that downside with high-end systems. Toliss is a good example, the modeling is far away from being perfect, but the top-notch systems give them the post of one of the best designers. The systems in this add-on are actually quite good, and despite the fact they can't be considered study level, there's quite a system depth. In its release the systems were awful, but after some updates, the systems got way better. Even though they need improvements, the AP is completely functional, at least I didn't see anything missing, the navigation apparells are working as well as all the ECAM showing systems. The way things happen here in the A310 is quite different from what we are used to seeing in an Airbus, especially in the overhead panel. However, I will cover a step-by-step tutorial later in this review. As you could see, there is a custom FMS, another great system feature of this aircraft. Generally, we can conclude that the modeling and systems are pretty strong points with this aircraft, but the terrible textures seem to take over the cockpit and make it look worse than what it really is. Setting up the Airbus A310-304 In this section of the review, I will show you how to basically start the plane. In order to learn all or at most of its functionalities you will need to read the several manuals that are included with the aircraft. There you will be able to learn most of the plane resources and features, as well as a startup process similar to what is done in real life. The flight that we are going to recreate is the Air Transat 125, departing from Calgary heading to Montreal. This route is now being operated by the new A321NEO, but today we are going to use the A310. Beautiful sunrise here in Calgary, it's currently 7:25 a.m, and approximately 12°C. Today we are going to transport 176 passengers and 2.7 tons of cargo, resulting in a total payload weight of 20.1 tons, quite light for the A310. The estimated flight time is a little less than 4 hours, a considerable time to cross most of Canada. Let's start the procedures by entering the cockpit. We won't follow the Standard Operating Procedures, SOP, manual step by step in this short tutorial, but you can easily access it by looking at the manuals folder. First of all, we need to power up the aircraft, so in order to do that, we need to turn all the three batteries on and use the external power. After that, you should turn your screens bright on and after set the three IRS switches to NAV position. Now that your aircraft has stable electric power, you can turn on the required lights as well as the seatbelts signs and test the anti-fire system. Before heading to the FMS I suggest you to load the aircraft. This action needs to be performed by the X-Plane load tab because there is no aircraft menu. This would be a nice addition to the add-on, CremonaSoft could do something similar to the Toliss aircraft menu, there you can set the loading details as well as performance calculations. Now that your plane is loaded, let's head to the FMS. If you are used to the Airbus FMS system in aircraft like the A320 and A330 families, you will notice that this FMS works exactly the same way. First, INIT page, there you should set your departing and arriving airports, as well as click in align IRS and set your cruise flight level. I didn't find any cost index information on SimBrief, so I will leave it as default 50. Click on Next Page and set your fuel/load information. Sorry for the low-res photos but there is no way to make them look better. Flight Plan page and now we must set our route. As this can take some time, I won't show you all the steps, but you can easily find many tutorials on YouTube, but don't worry, it's very easy and intuitive. Just be aware that, differently from an A320, you need set your STAR info by the last waypoint menu, not airport. With our route set, we need to go to the Takeoff/Approach page. The Takeoff/Approach page is equivalent to the PERF page in the A320, however, you don't need to set any information here, they will automatically appear when you set your flaps to T/O position. Another feature that you can use in the FMS is located in the REF page, there you can open both passanger and cargo doors. Well, route and performance ready, let's continue the startup process. Turn on your Yaw Damper, ATS and Pitch Trim switches, click in the electric pump green and start the APU. Make sure to have the fuel pumps on before starting the auxiliary power unit. After changing the APU switch to on position, the ECAM will automatically change to the APU page. Now you can click in the start switch, and after the APU is running, an Available light will appear. You can monitor all this information through the ECAM screen and turn on the APU bleed as well. Before calling our pushback truck we must make sure that we have all doors closed, beacon light on, MAX auto brake, hydraulic pumps, anti-ice system and AP panel set. You can also set a desired flex temp. Now that we are ready, let's call it and then start up the engines. Now that the pushback truck is connected, let's start the engines. Set your ENG Start knob to Start A or B, click in the START 2 button, wait for 25% N2 RPM and set the HP VALVE ENG 2 to on. Repeat the process with the other engine. In my opinion, the engines seem to start too fast, in less than 15 you already have them in idle, CremonaSoft should take a look at it and rework its performance. Flaps 15, now you can see the v-speeds in the FMS, so you should the V2 + 15 in the AP. Taxi lights and transponder on, let's start taxiing. We will be departing in the runway 17L today, going direct to LOMLO. Quite a long way to our runway, this means more time to get the best, or at least try, angles for the photos. Just some few more minutes and we will be departing. Clear to takeoff, N1 to 40% and TOGA. The engine fastly builds up power and in a few seconds, we are accelerating. The v-speeds in the A310 are quite higher than in other planes but the engines have a lot of power available. Actually, they have so much power that they seem to be a bit overpowered. I expect that CremonaSoft fix this little issue, which causes the plane accelerates too fast, even when it is loaded with the maximum weight. Climb thrust and bye-bye Calgary, next destination, Montreal. The plane can easily keep a climb rate of 2500ft/min, so we shouldn't take much longer to reach the cruising altitude. I've noticed two things in the wings during my test flights. First, there is no wing flex, even in stronger turbulences, I didn't notice any movement in the wings. Second, the wings doesn't go up. What I want to say is that usually, due to the applied forces, the wings flex up during flight, but in the CremonaSoft A310 they stay like in the ground. This gives the plane a strange look, especially during climb. Well, at least the sight from up here is pretty beautiful. A little bit more than 3 hours and we will be approaching Montreal. Now that we've started our descent, we must make sure that some things are ready. Right now we only have to check our ILS frequency/course, as well as our vertical deviation. The FMS should now show our approach speeds, and you should select your approach flaps in the indicated switch. As we get closer to the airport we need our altimeter and auto brake to be set, and spoilers armed. Runway at sight, we should already have our flaps and landing gear down. As we have good visibility I will also turn the autopilot off, just remember to hit the red button in the yoke in order to turn off the AP disc alarm. Final seconds before landing and the plane feels like a big aircraft, with slow and heavy movements, I like it. And touchdown, welcome to Montreal. The plane is very easy to control, with smooth and slow reactions, perfect for a top-notch landing. Spoilers up and reverse open, it's now time to stop. Montreal is the second-most populous city in Canada and Air Transat operations base, situated in the province of Quebec, this city is in my "To be visited" list of cities around the world. Clearly, the aircraft has its downsides, but I really enjoy flying it. Yes, it still needs some refinements, however, the path CremonaSoft is following has a good future. In my opinion, the engine performance could be reworked, they seem a bit overpowered, but the general physics are pretty good. If the next session I am going to talk about wasn't so bad, this plane wouldn't be as bad as people say it is. ------------------------------------------------ Sounds Well, I'll be honest, the sounds are way under the expectations. Starting with the engines, sincerely, I am very disappointed. In case you found the ignition and spool up sounds bad, they won't get much better at full thrust. The APU sounds are the exact same from the default Cirrus SF50 engine, but at least you have them. Maybe the best sounds are the switches, knobs and buttons sounds, as well as the flaps. Despite that, the sounds could be completely redone. Lighting The lighting in the CremonaSoft is very simple but effective, you won't be impressed in the same way that you won't have any with it. Despite the fact that you have very few options, the only downside I can see here is the cabin light, which isn't adjustable and makes the cabin textures look a bit weird. The Storm switch intensifies the current lighting and also add the panel flood lights. I really enjoy using it. Last but not least, we have the well-known dome light, which differs from the newer Airbus aircraft, the A310 has only one dome light position; and reading light, which can illuminate any desired location in the cockpit. Moving on to the exterior lights, as you would expect from a payware aircraft, they are all there, landing, logo, taxi, strobes... Nice to see the individual runway turnoff lights, as I can remember they operate together at the A320. The external lights are actually pretty strong, so it will be quite hard to not see the runway during your approach. Honestly, this aircraft looks pretty nice at golden hours, especially because you can still clearly see the 3D modeling but the textures aren't appearing that much. Here are some nice photos of these moments. Liveries CremonaSoft A310 has four more liveries, the classic Airbus house, AirJamaica, S7 Airlines and the Luftwaffe MRTT livery, which fits the A310 very well. The aircraft still doesn't have a paint kit, this means you can't create your own liveries, however, the designer said that this feature will be incorporated soon. I can't wait to see some nice custom liveries for the A310. Summary Well, everything must end somewhere, and here finishes our review. CremonaSoft A310 is a quite complicated product with bad reviews on its back, and sincerely, it's really hard to recommend this add-on for you. Yes, it has some good qualities like the engine and cockpit modeling, as well as the system, which in my opinion, are pretty solid for an aircraft at this price range. We could all see that the designer spent a lot of effort into fixing and improving the systems, but all that isn't enough to make me say this is a good aircraft. Yes, this aircraft is under development by the author, and yes, they have made quite big improvements on it, but there are still many downsides. The Magknight 787 another plane under development, and even though it has its problems, I could easily recommend it for you. Differently from the A310, the 787, and even with a worse cockpit modeling, is funnier and more pleasant to fly. In my opinion that is caused due to the sounds, because many times good sounds make a bad aircraft enjoyable, so they might be the salvation for the A310. I know, it isn't easy to develop an aircraft for a simulator, especially a plane that is almost no longer in use, this usually means a lower demand resulting in a smaller budget for the designer. However, producing a product with so many downsides won't help you too much with sales. My suggestion to CremonaSoft is very specific: First, add some enthusiastic sounds for things like batteries, ext power, A/C, flaps and especially engines. Just this will make the aircraft way better. After that you can use current the good 3D cockpit modeling and apply better textures, they don't need to be perfect, just acceptable, your plane isn't that expensive. Leave the systems how they are, the way they are working is completely fine, even better than planes like JarA330 and FF777. After all that is done, your aircraft will be way better, and will start selling more, at least that's what I wish. Last, you should completely redesign the exterior, except the engines which are fine. It will take some time, yes, but if manage to do all that I've said before, your aircraft will be pretty damn nice. Since its release, the A310 received many big updates, especially in the last 4 months. This is nice to see because sometimes designers release their products and simply abandon them by not releasing updates or significant changes. I can see a good future for this aircraft, however, it won't be easy, a lot of time is required to take this aircraft to a good quality level. Quite good interior modeling and pretty nice systems are the main highlights, however, the bad textures and sounds, combined with the poor general exterior modeling/textures attract more attention. The other main problem is the fact that it's very hard to spot an A310 flying today, this means that many people are no longer interested in acquiring the add-on. However, this isn't an excuse because FlyJSim 727 and 737 are even older in real life and very popular in X-Plane. My final answer is, just buy the CremonaSoft A310 right now in case you're a great fan of the Airbus in real life, otherwise, wait for a few more updates. I can see a good plane in the future, and it might not take too long. --------------------------------------------------------------------------------------------- The Airbus A310-304 v1.6.1 by CremonaSoft is available Changelog at the X-Plane.Org Store Airbus A310-304 by CramonaSoft Price is US$49.95 Features: Flight Characteristics: Accurate weight distribution. Nice flight model. 3D Model: Accurate, high quality external models for fuselage, wings, stabilizers and engines- derived from measurements for the real aircraft. All control surfaces (slats, flaps, ailerons, spoilers, rudder, elevators, THS) accurately animated. Engine reverser animations. Detailed landing gear with claw angle and full animation. Open/close animations for both cockpit windows and all exterior doors. Highly detailed 3D cockpit with super-sharp 4K+ textures and 3D lighting. Detailed 3D gauges, counters, switches and knobs with animations. Metallic surface and glass reflection effects in X-Plane 11 render engine. Detailed flight control and throttle animations. Crisp 3D cabin. Super-sharp external textures. Accurate 3D reproduction of all external aircraft lighting. Systems: Custom APU start-up and running parameters. Custom electrical system with AC/DC BUS simulation logic. Custom pneumatic system with bleed-air logic. Cabin temperature simulation. Hydraulic system logic simulation. Fuel system logic simulation. Engine start and crank (windmill). Complete exterior lighting control. Slats/flaps operation with accurate timings. Takeoff configuration test system. Landing gear operation with accurate timings and gear status test. Brake ‘Accu Press’ logic simulation. Pitch (with trim wheel animation), aileron and rudder trim. Weather RADAR. Engines: General Electric CF6-80C2, with realistic performance and custom engine sound. Custom Electronics: Airbus flight phase logic implementation. Flight warning computer implementation, with aural warnings and decision height + altitude callouts (integrated into the flight phase logic). Changelog ChangeLog.txt Requirements X-Plane 11 Windows only 4Gb VRAM Minimum - 8Gb+ VRAM Recommended Current version: 1.6.1 (July 30th 2020) -------------------------------------------- Aircraft Review by Bernardo Pierdoná Casa 25th August 2020 Copyright©2020: X-PlaneReviews Review System Specifications: Computer System: Intel Core I5-9600K 4,30GHz / 4x8 Corsair Vengeance RGB Pro 3200MHz - Gigabyte RTX 2070 - Z390 Aorus Master - Kingston A1000M.2 SSD 240GB Software: - Windows 10 - X-Plane 11.41 Addons: Logitech Pro Flight Yoke/Pedals/Throttle Quadrant - Logitech Extreme 3d Pro Joystick - Sound: Samsung Home Theater System J5500WK Plugins: Environment Engine v1.13 by xEnviro US$69,90 Traffic: Traffic Global by JustFlight US$52.99 Scenery and Aircraft -CYYC - Calgary International Airport by Canada4Xplane (X-Plane.Org) - Free (Disclaimer. All images and text in this review are the work and property of X-PlaneReviews, no sharing or copy of the content is allowed without consent from the author as per copyright conditions)
- 1 reply
-
- 1
-
-
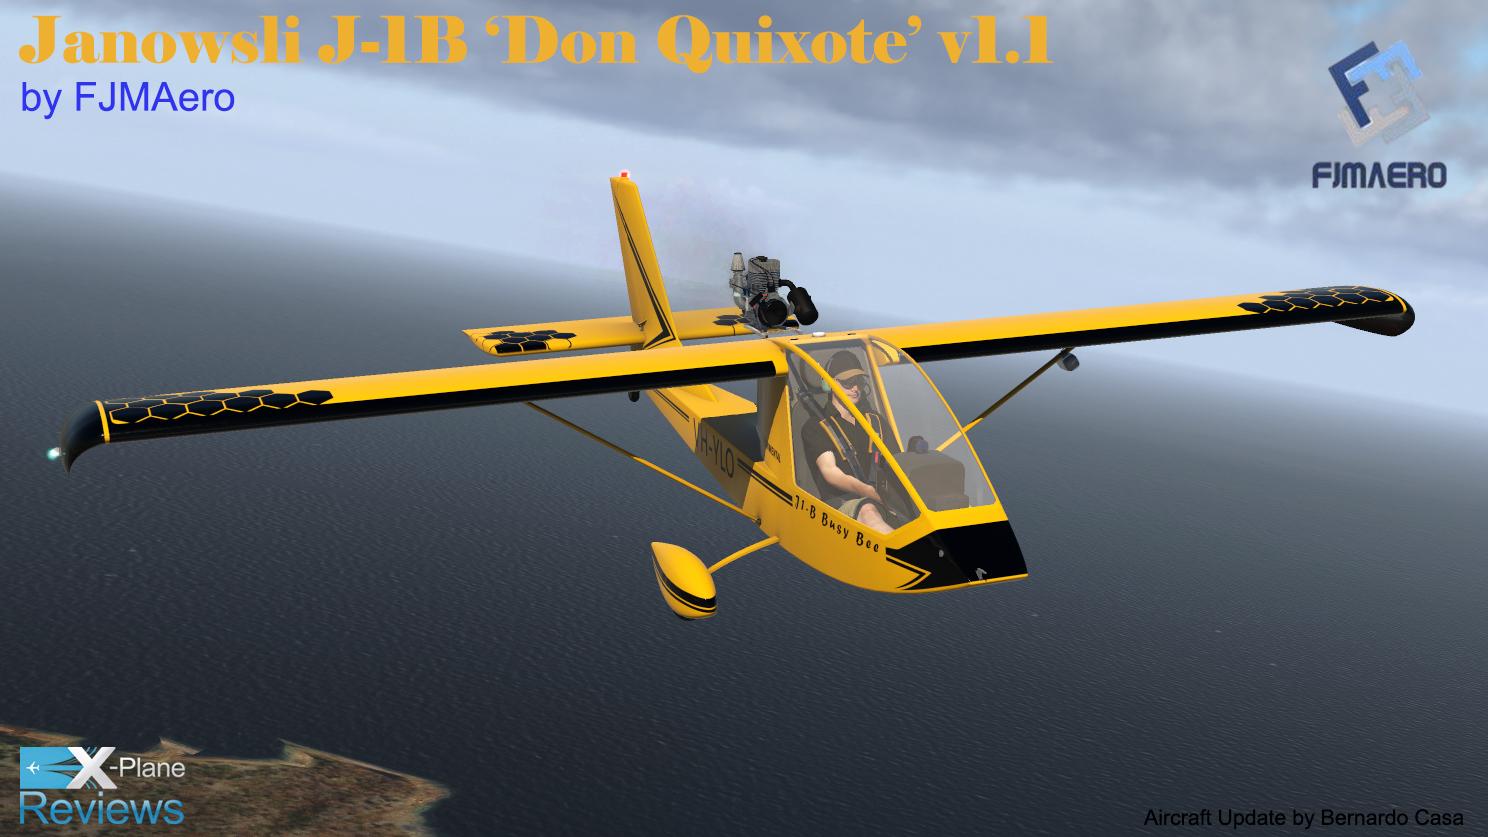
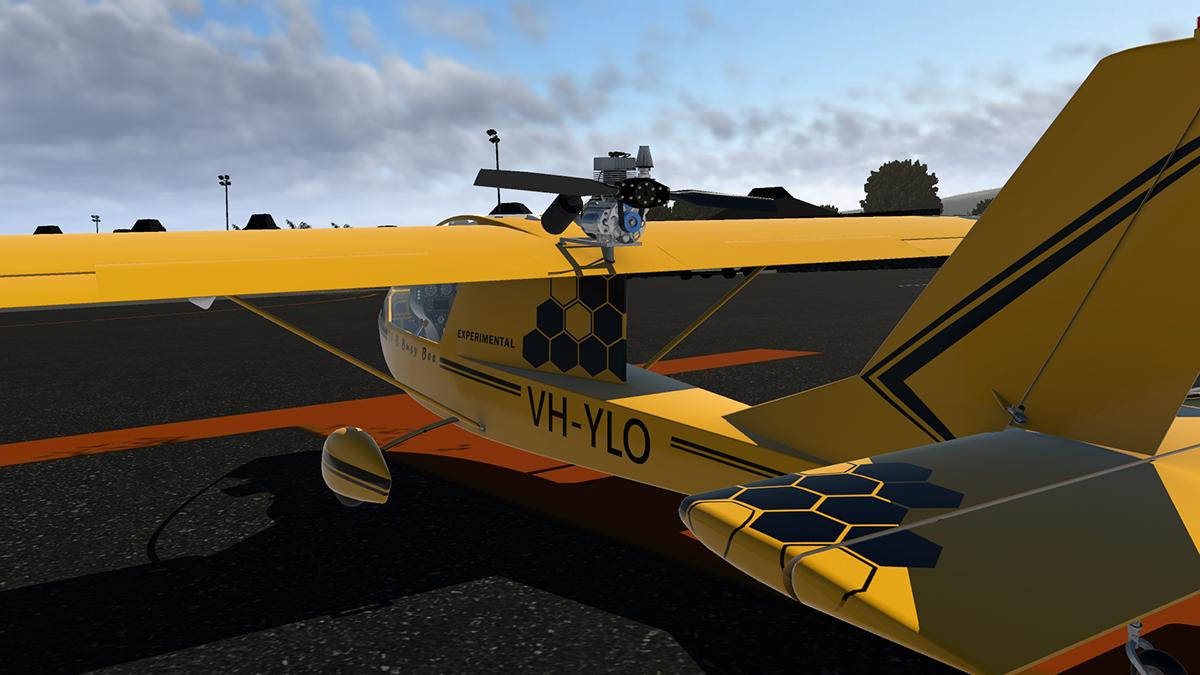
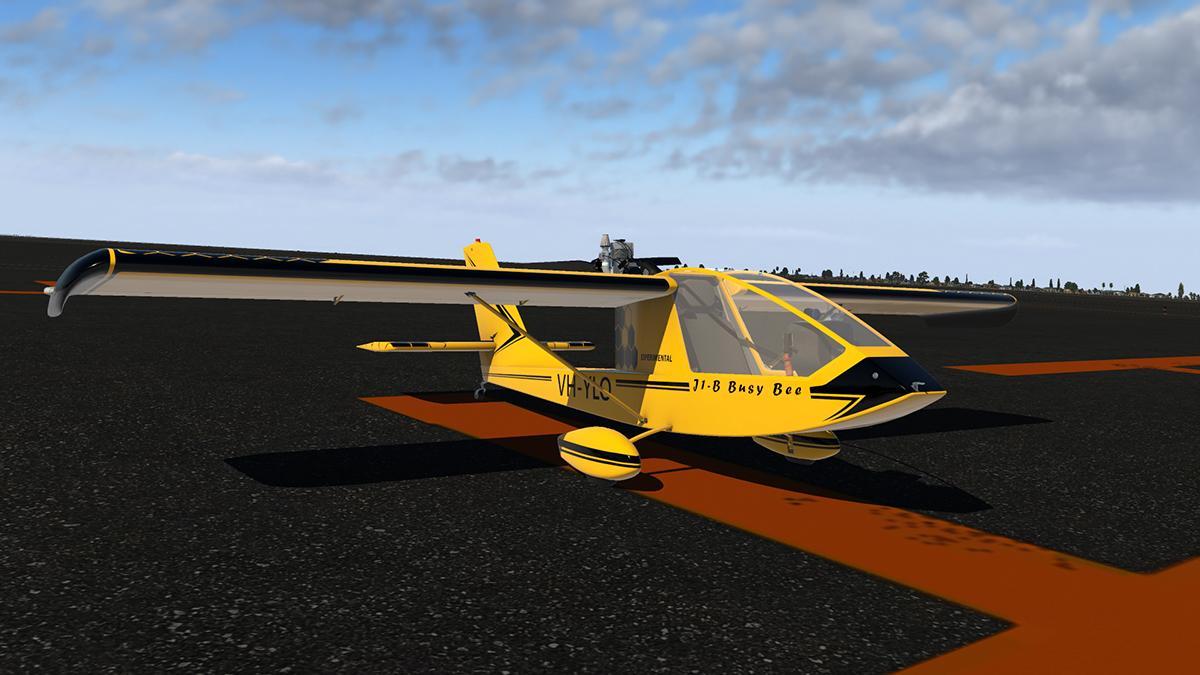
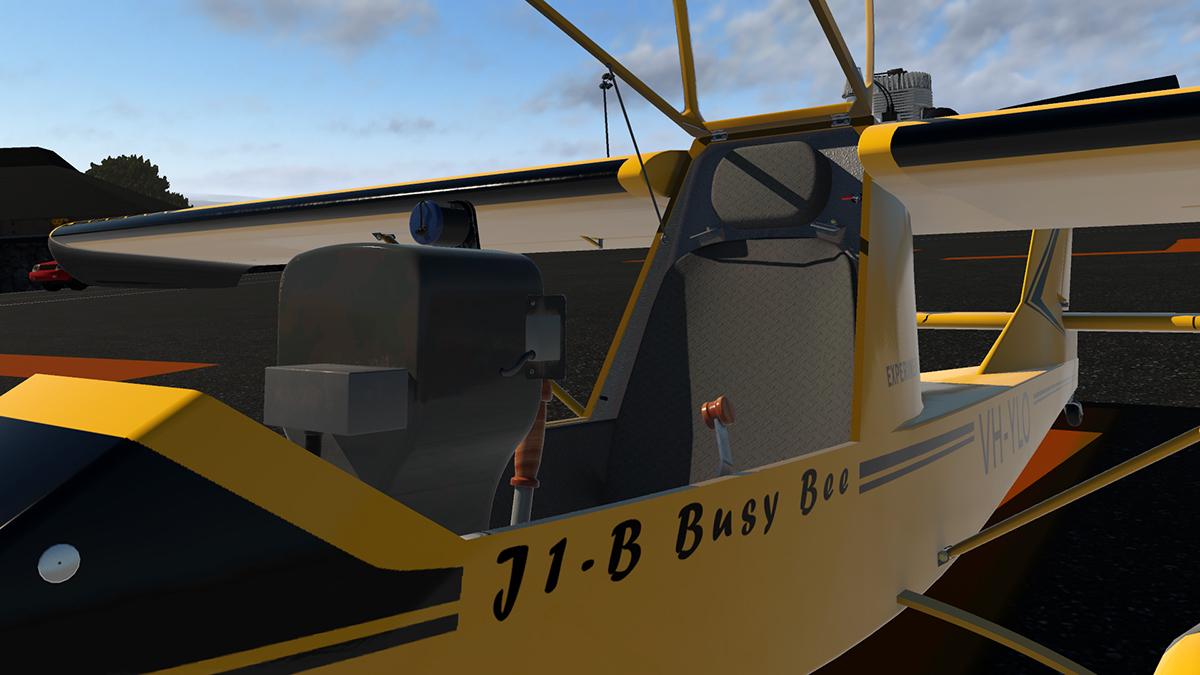
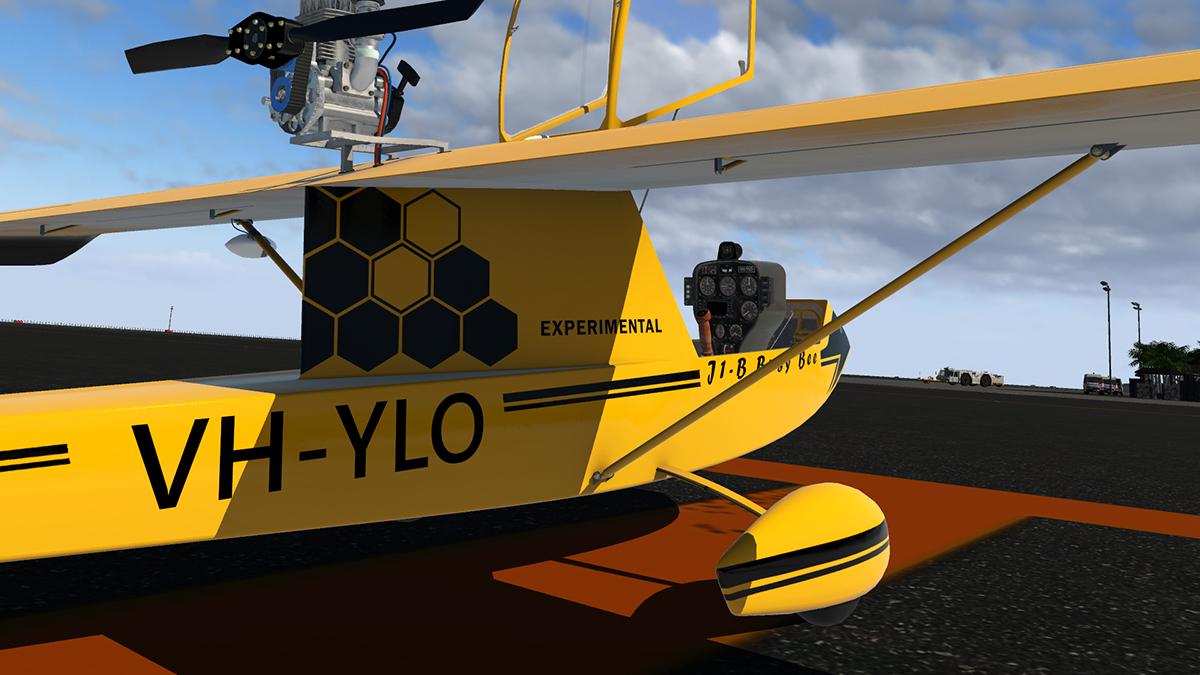
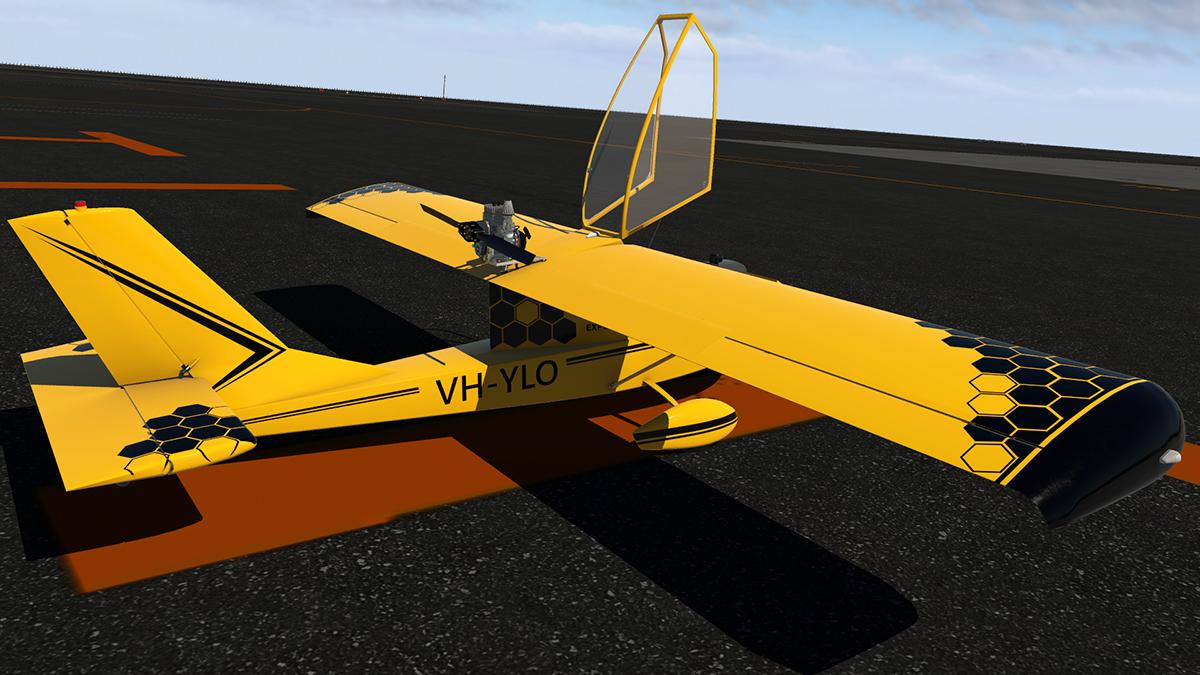
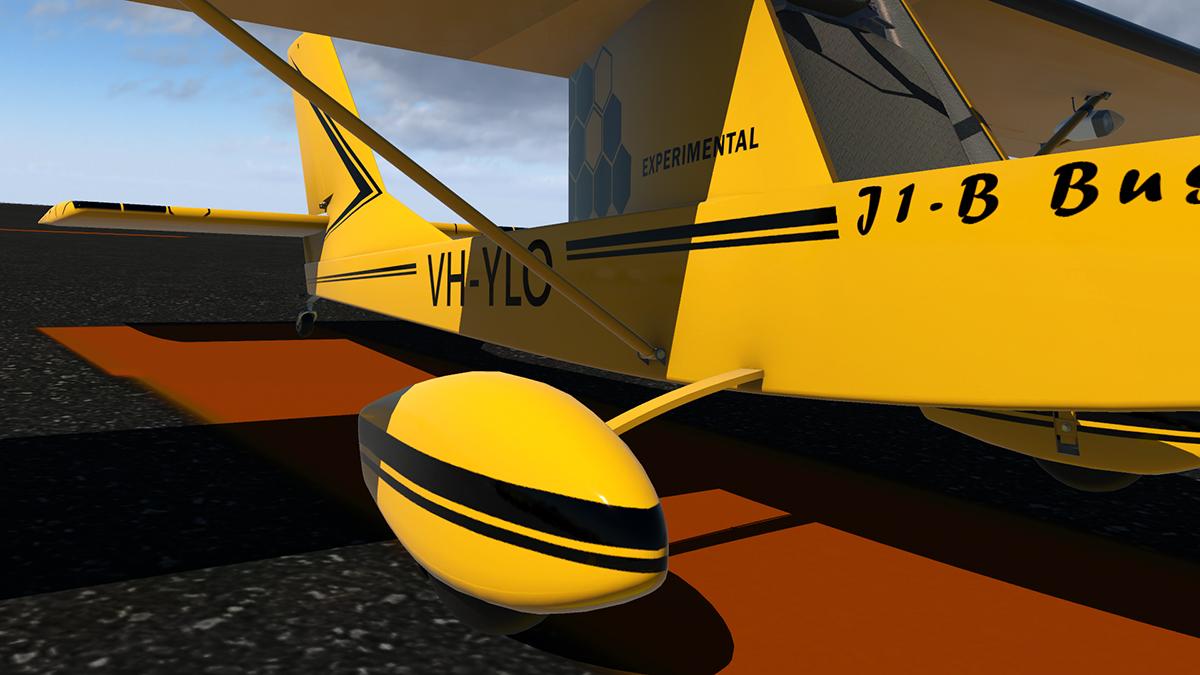
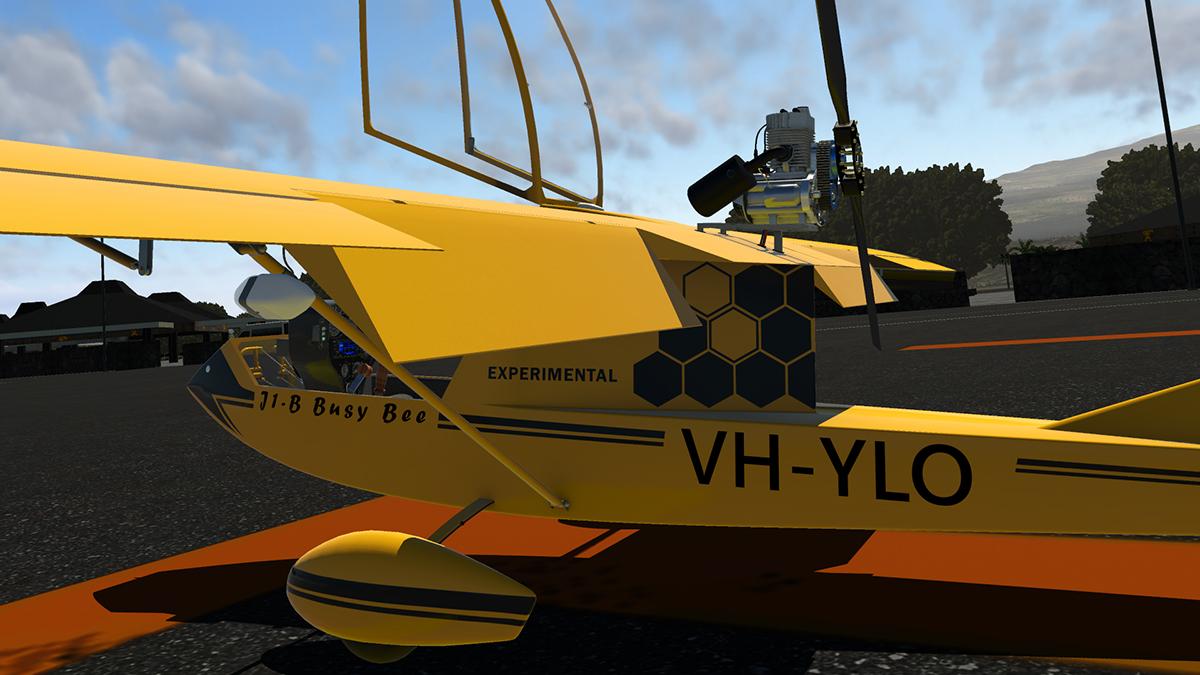
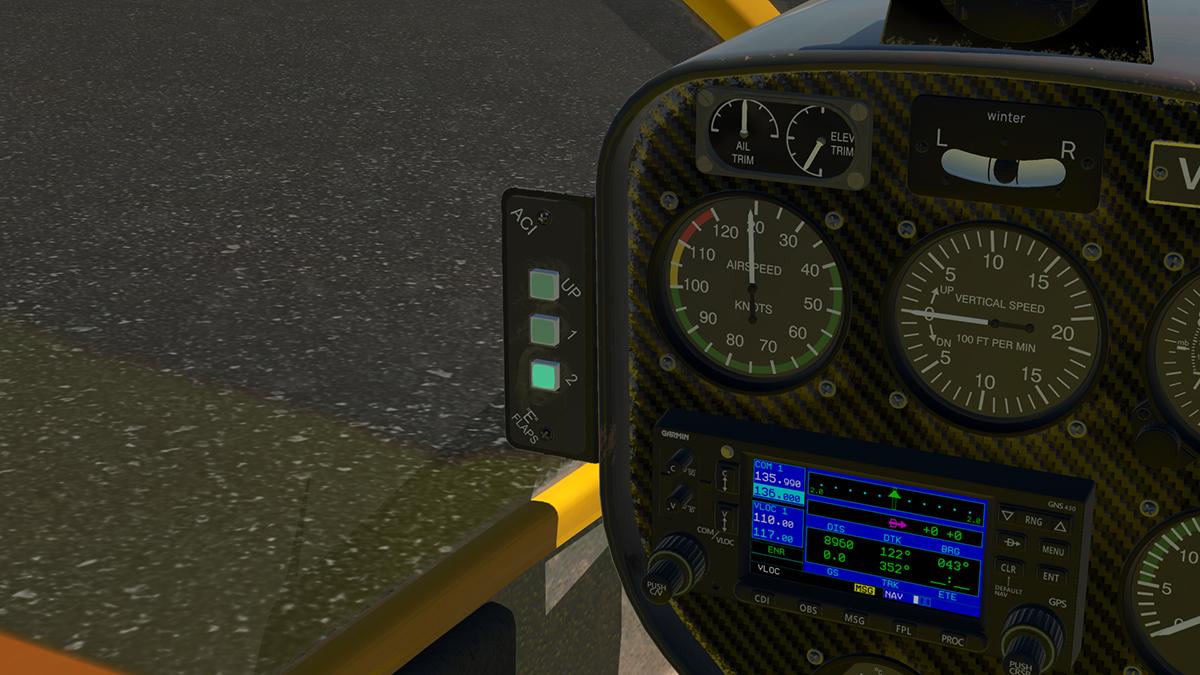
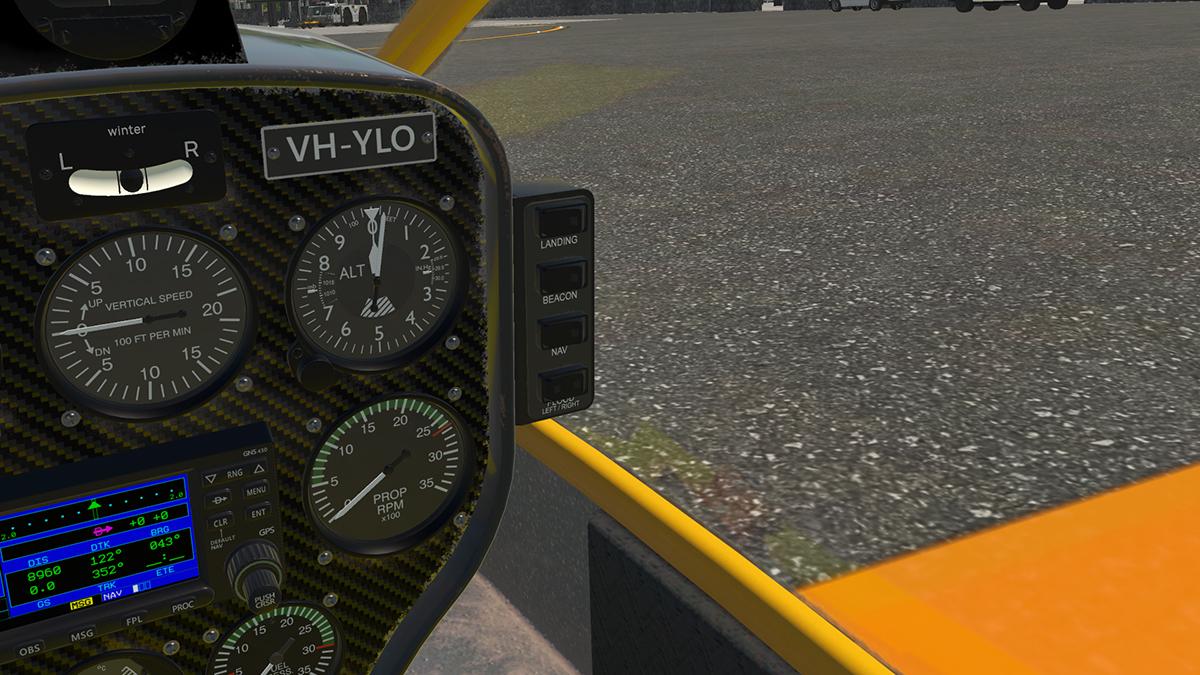
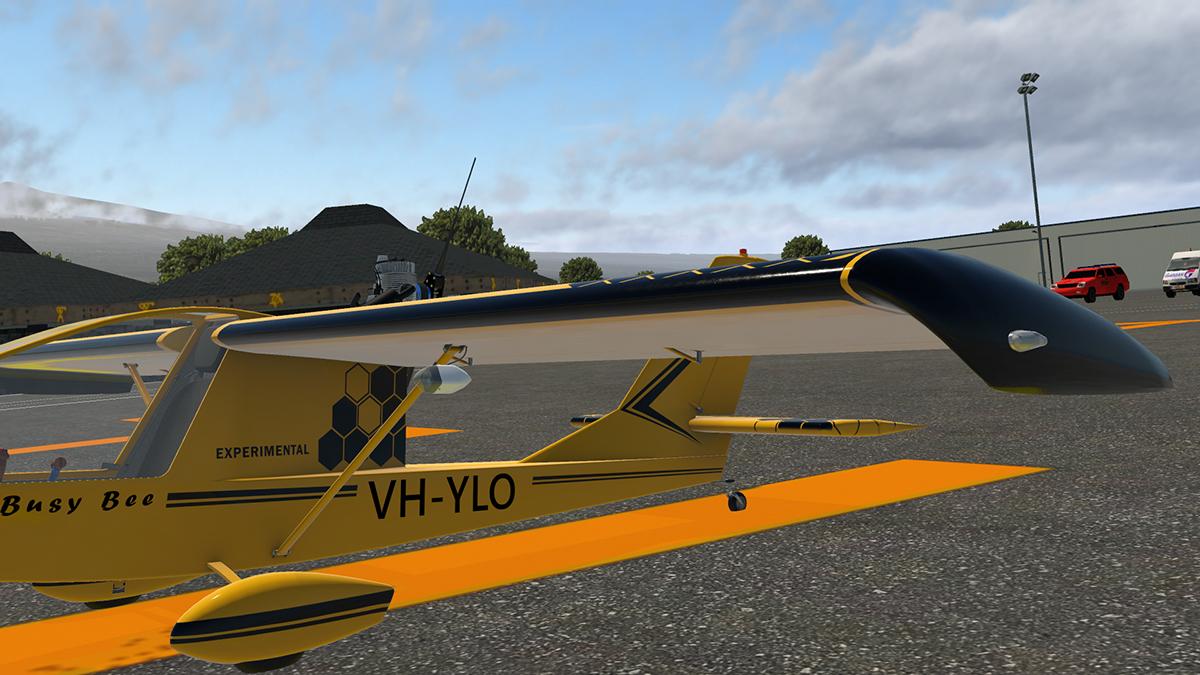
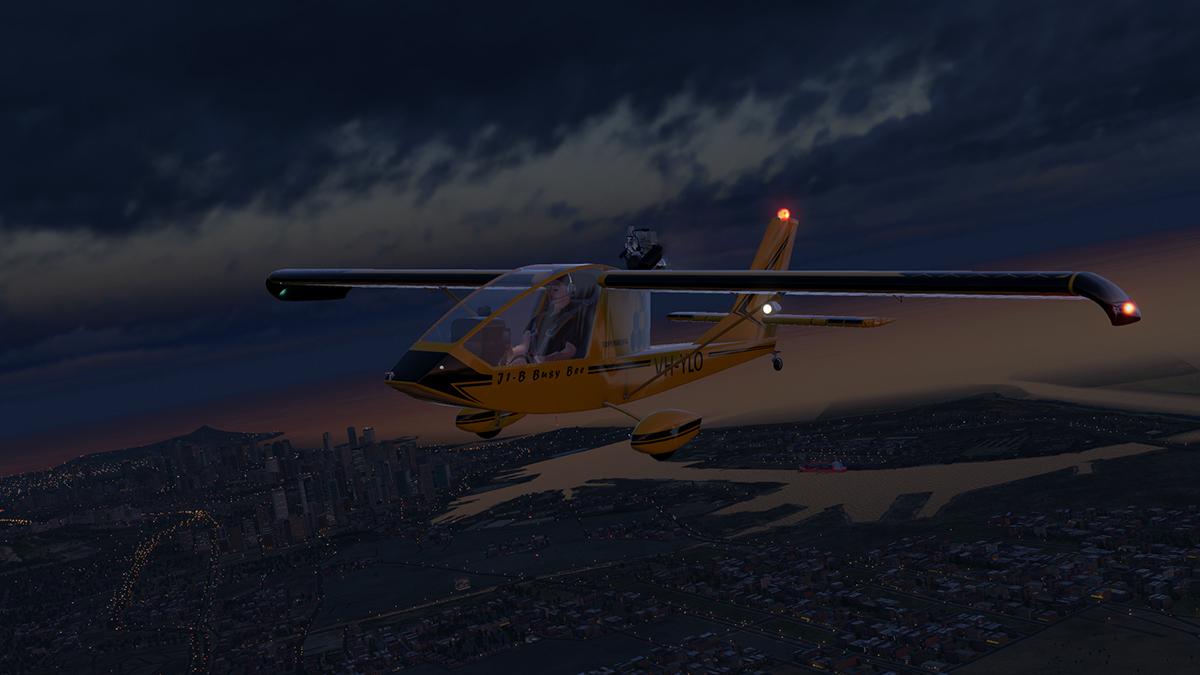
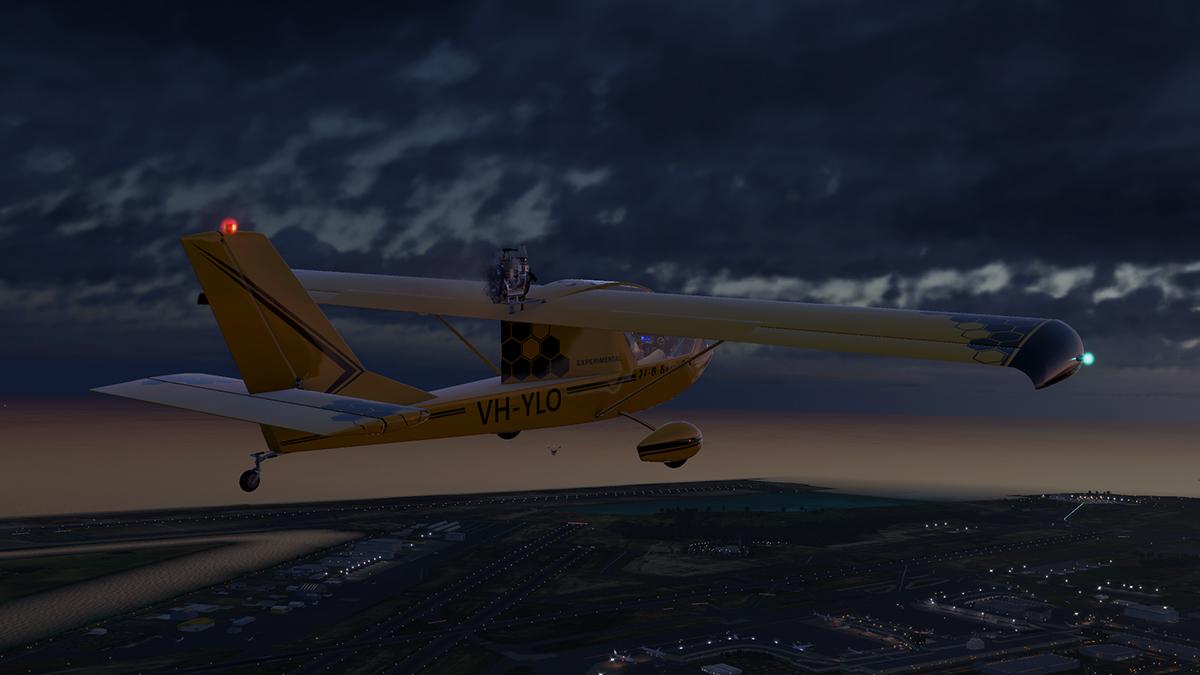
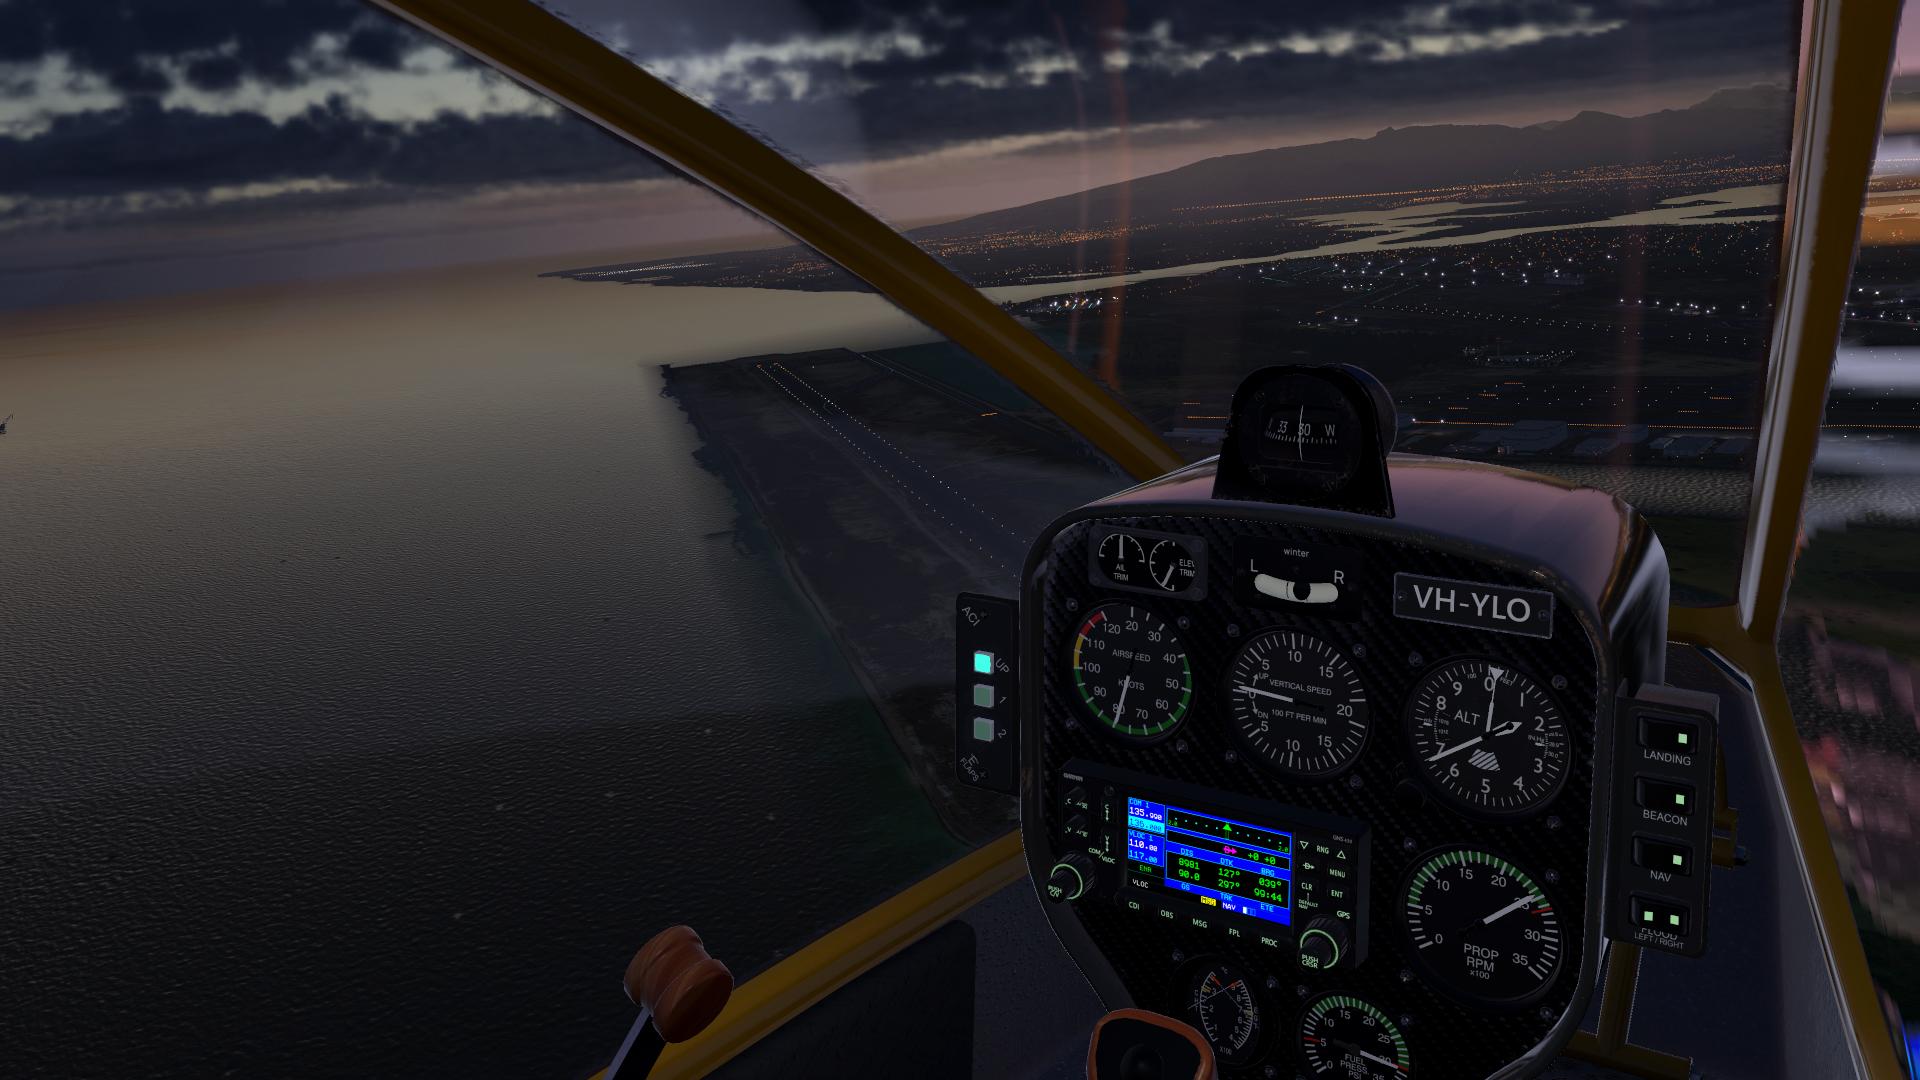
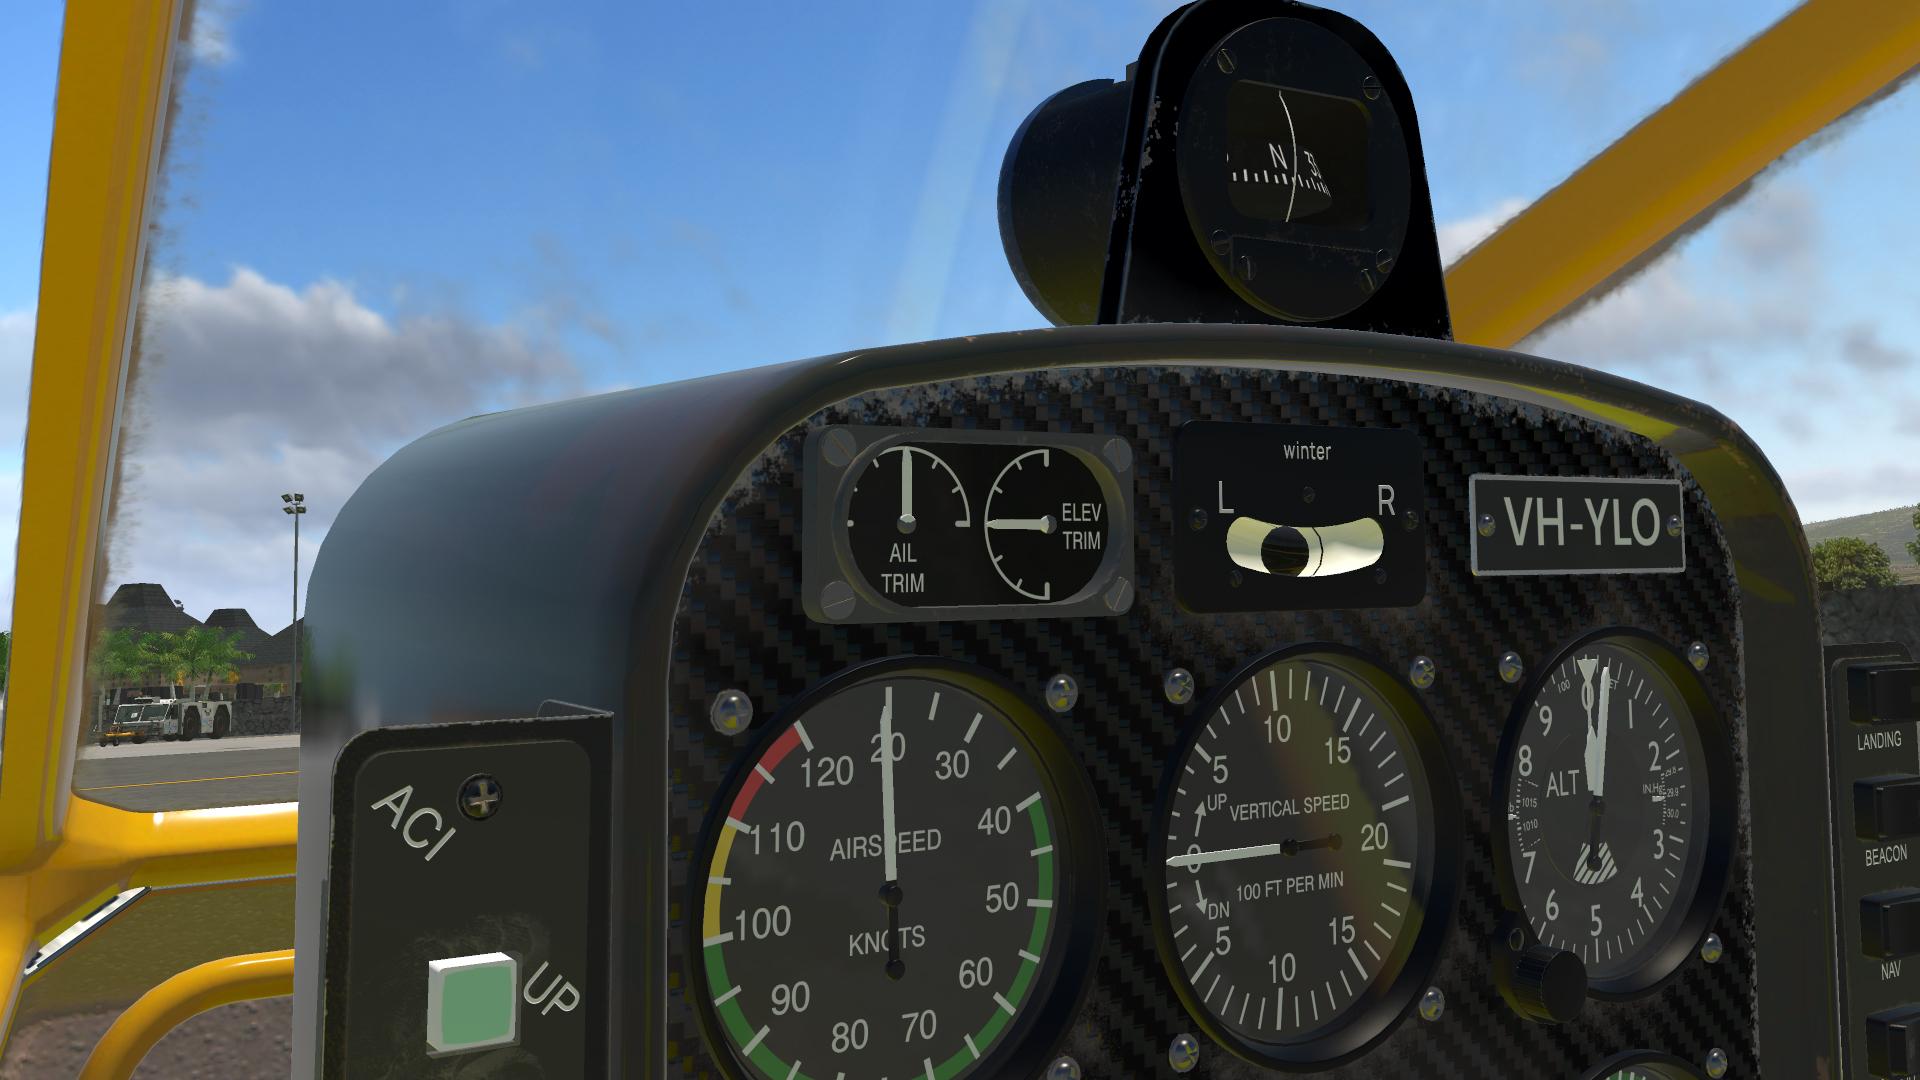
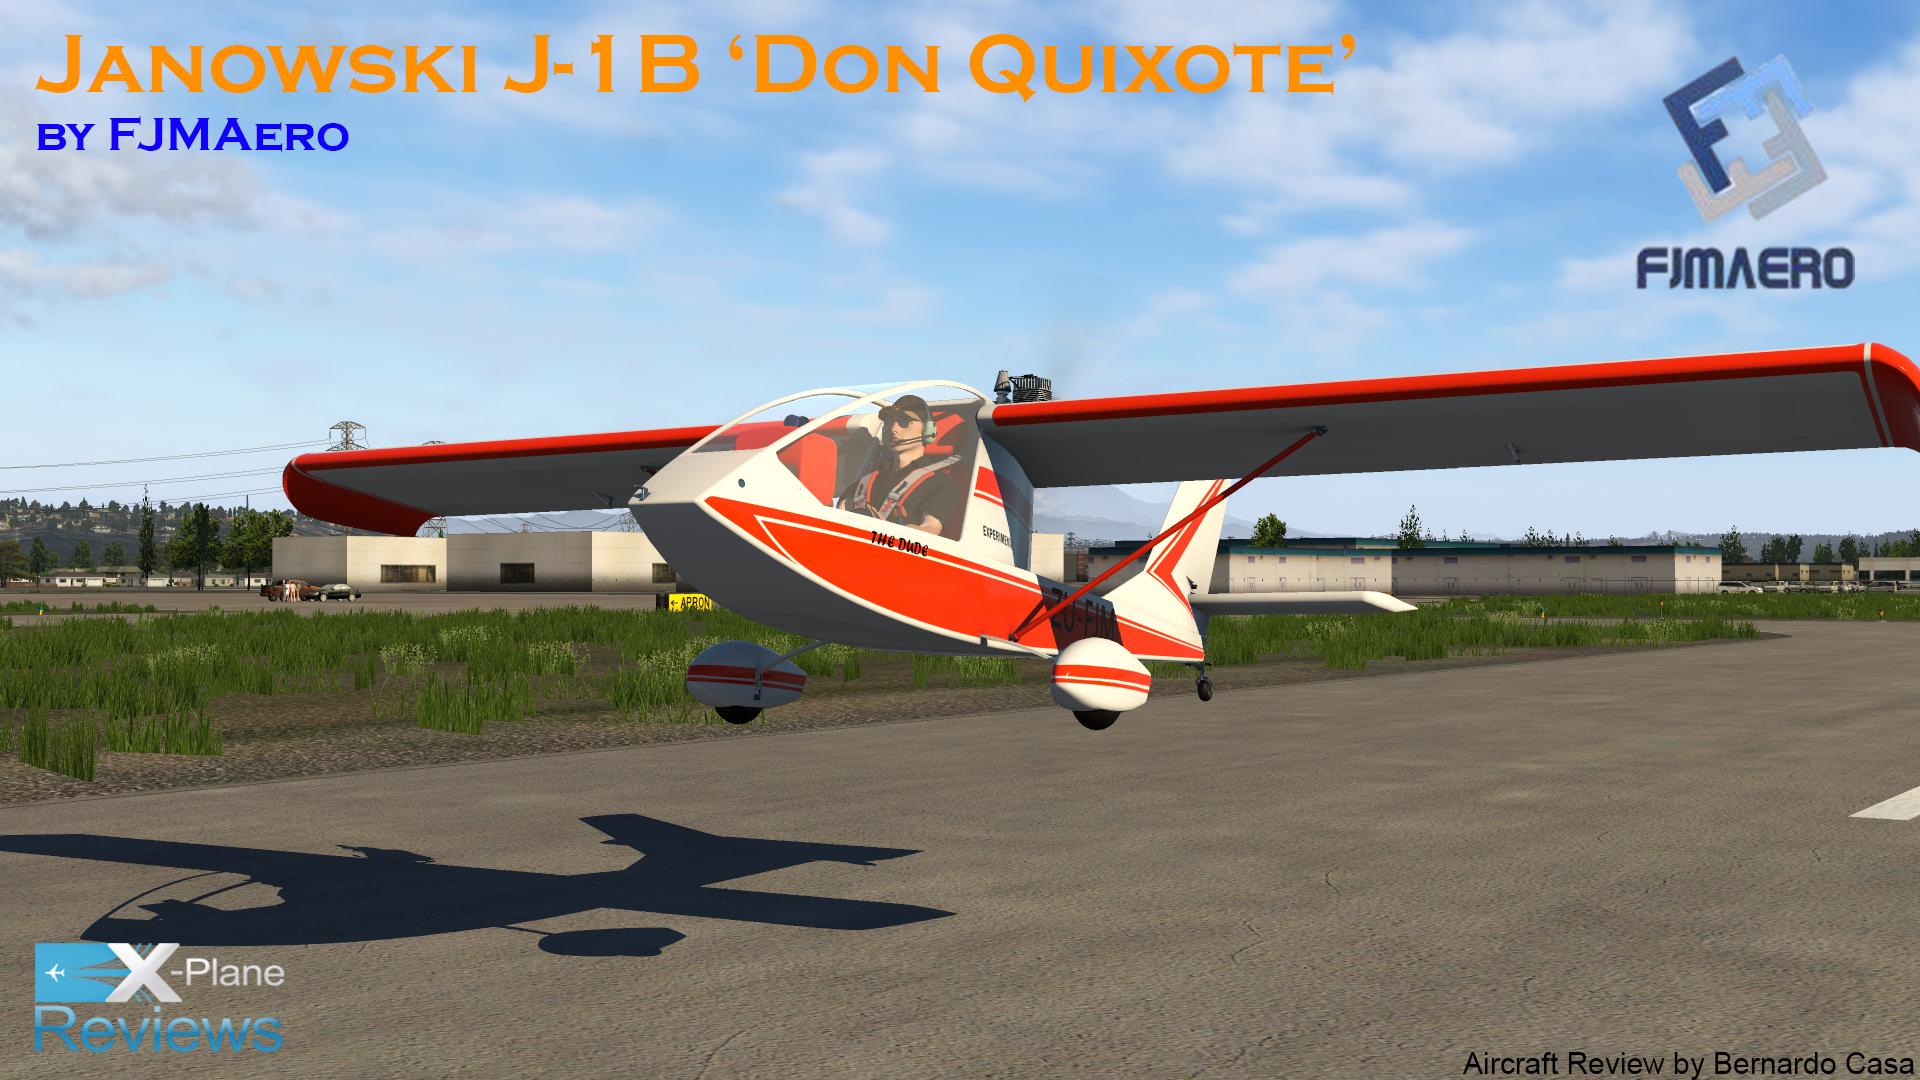
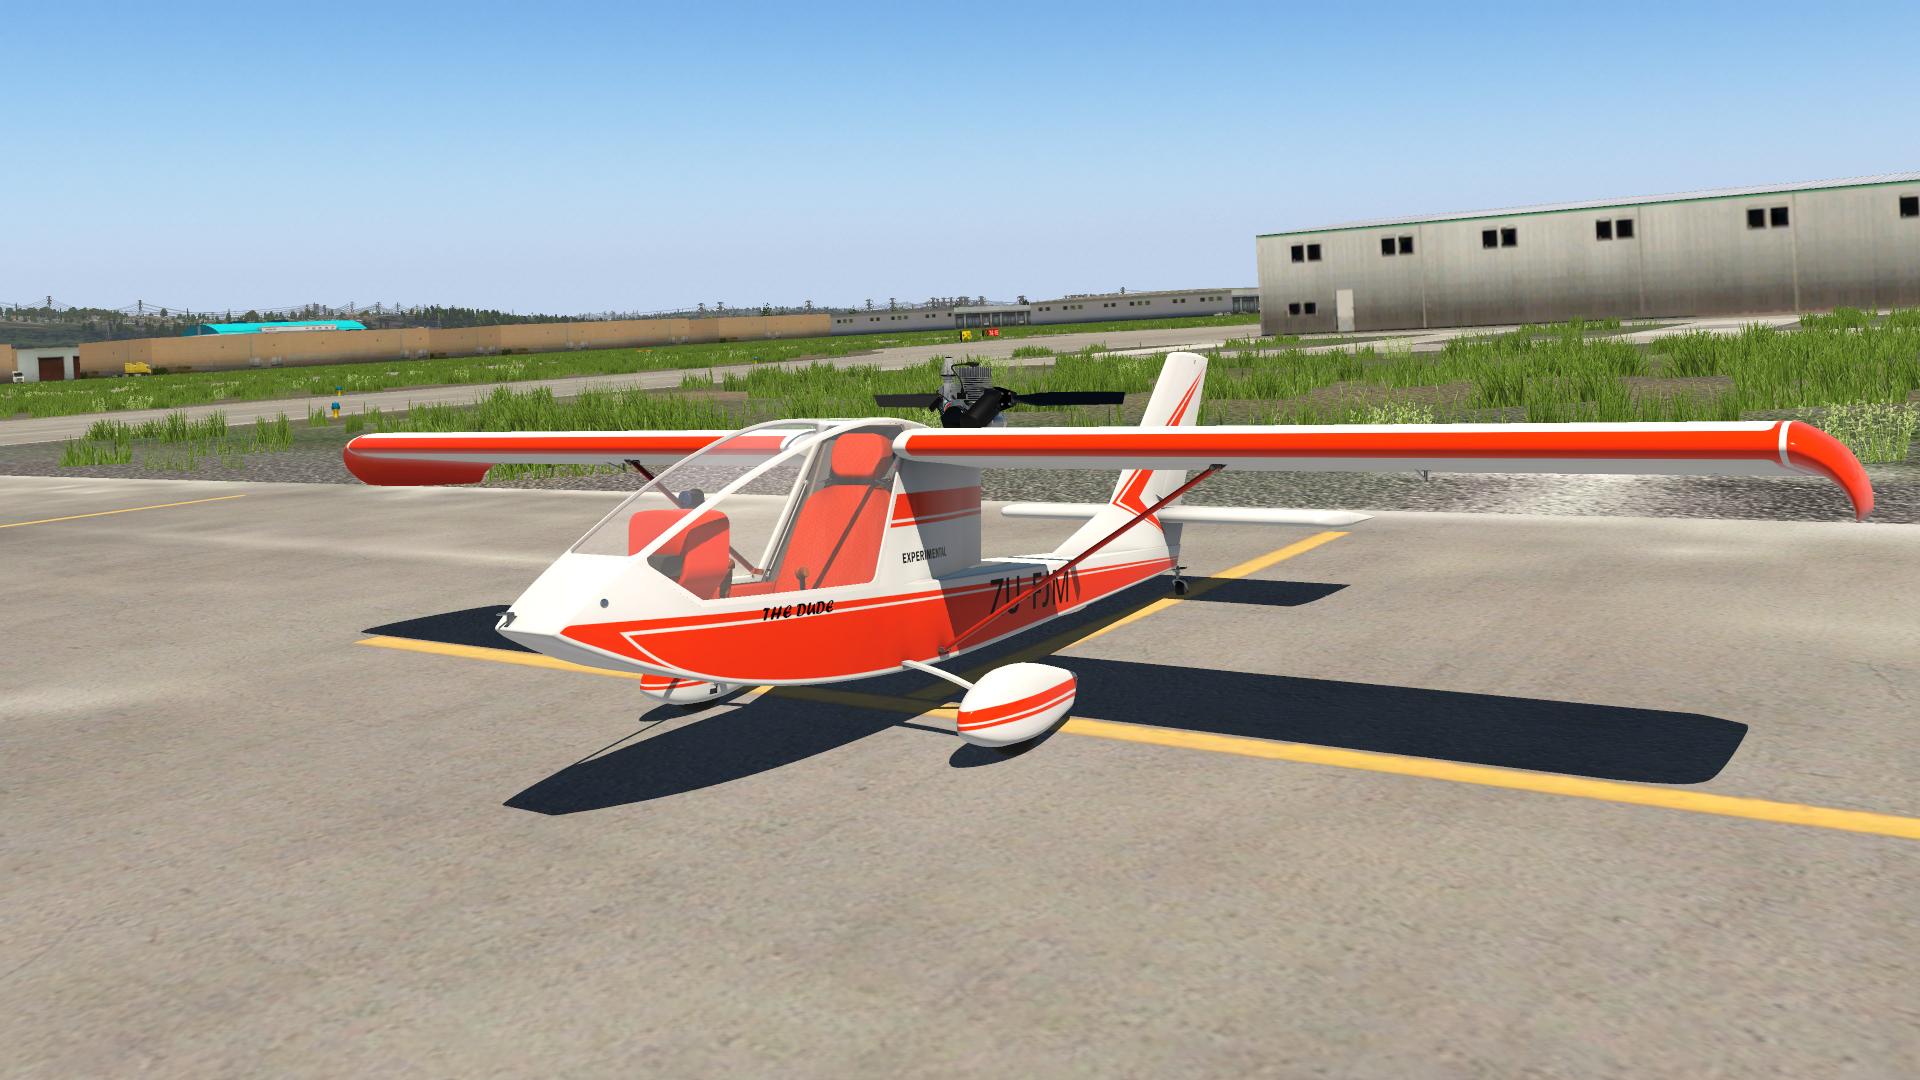
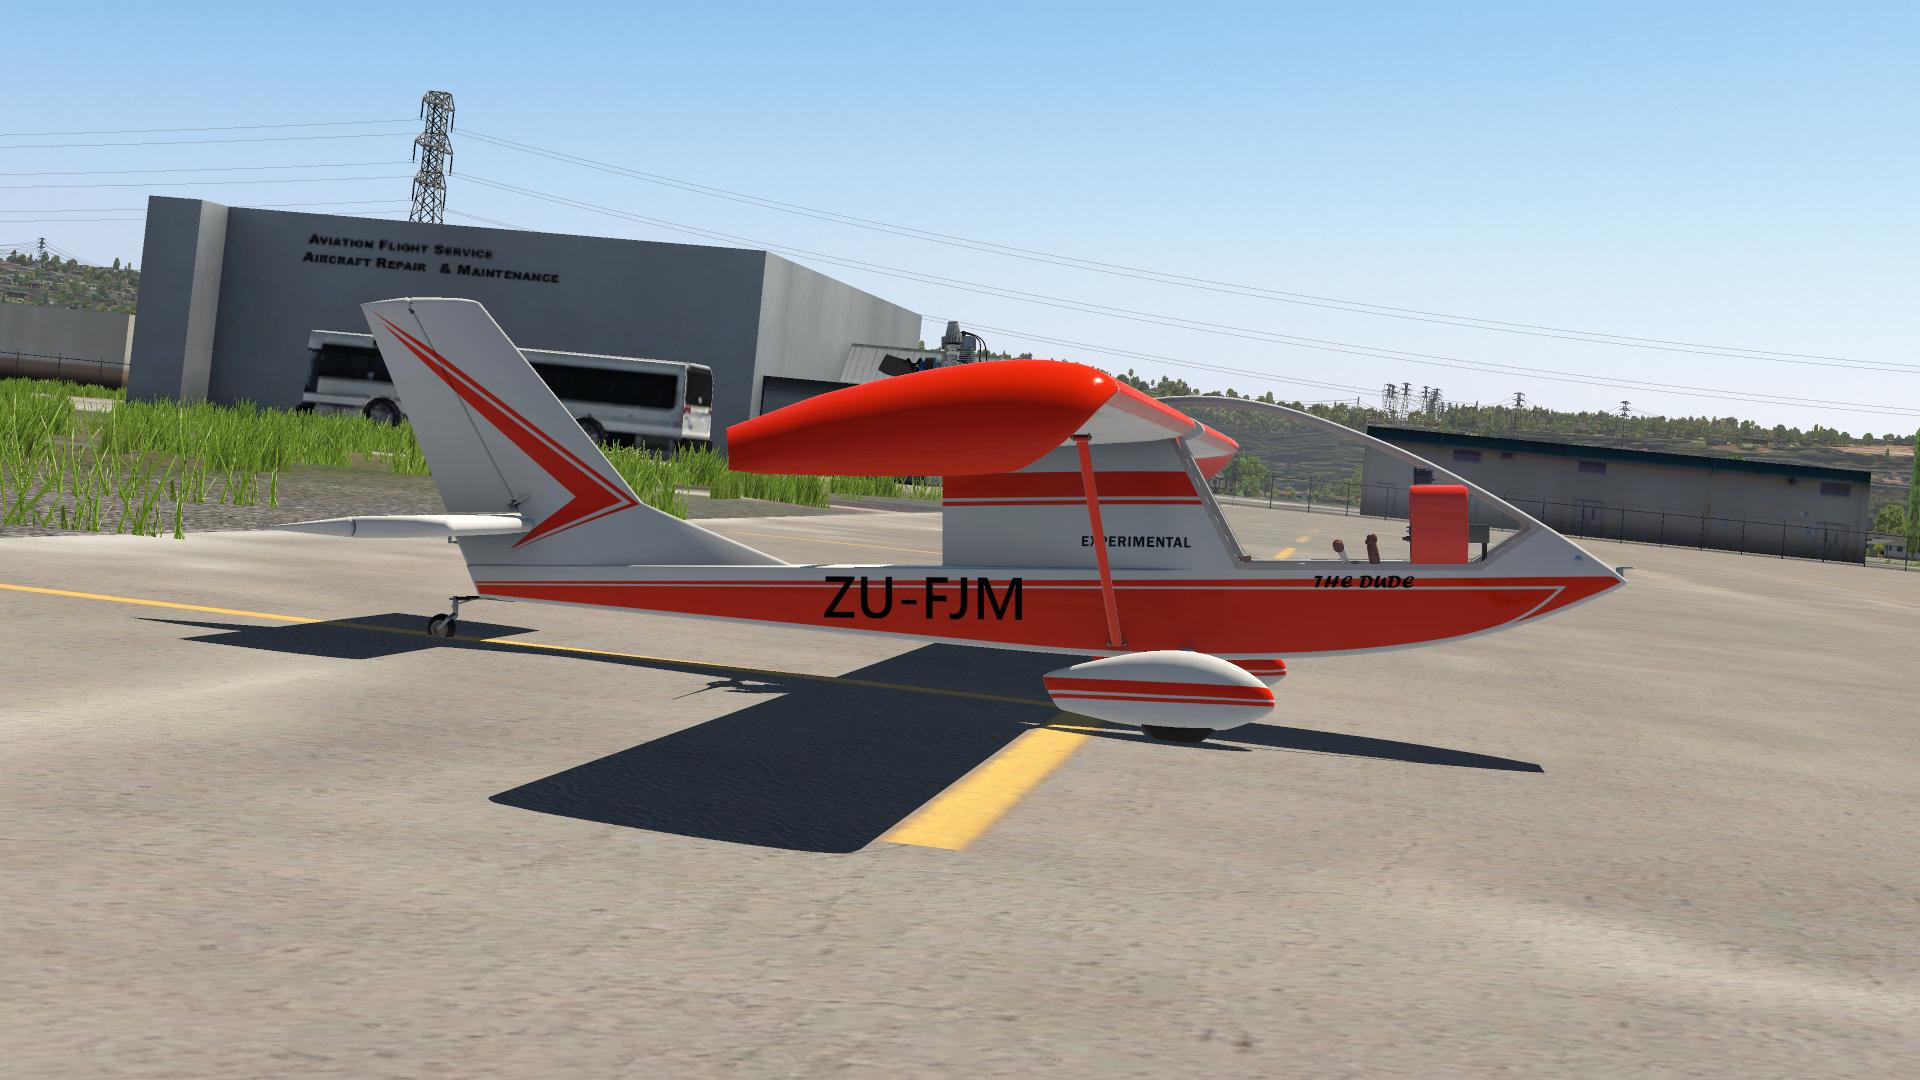
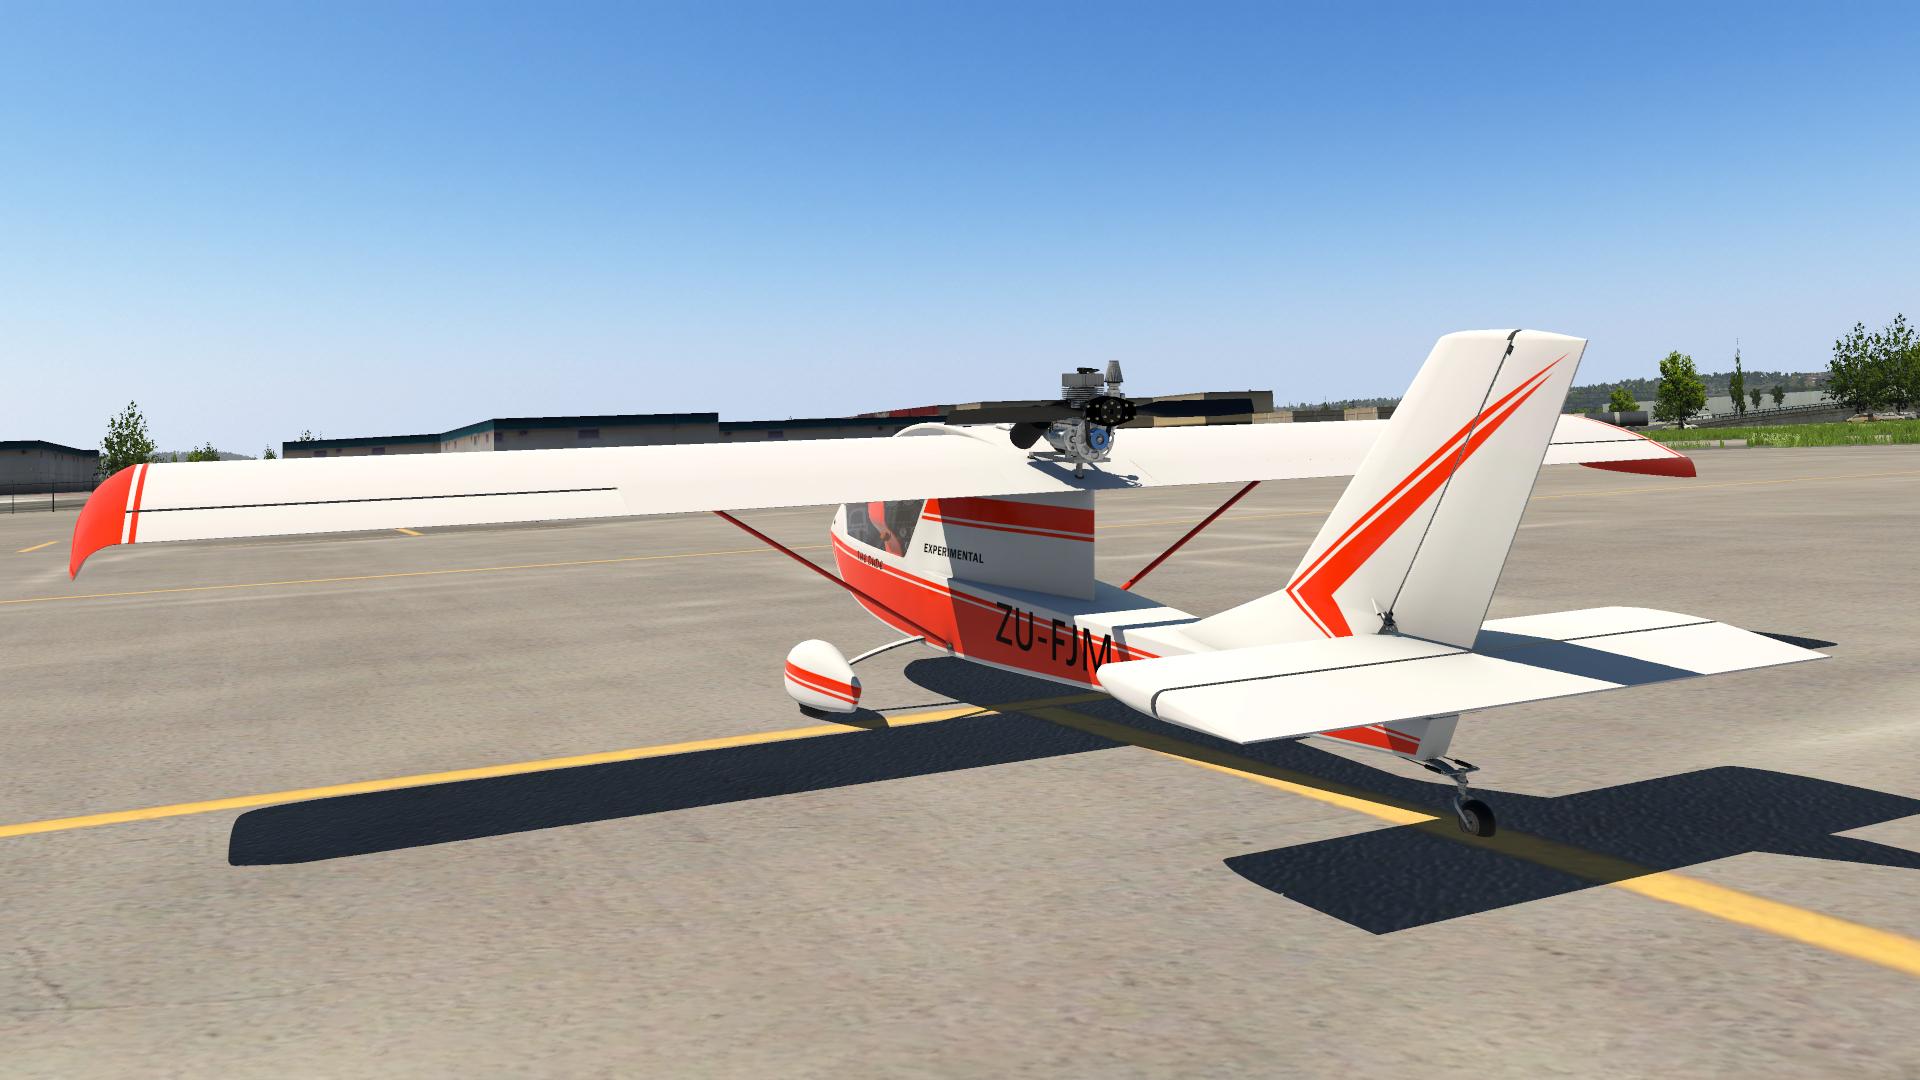
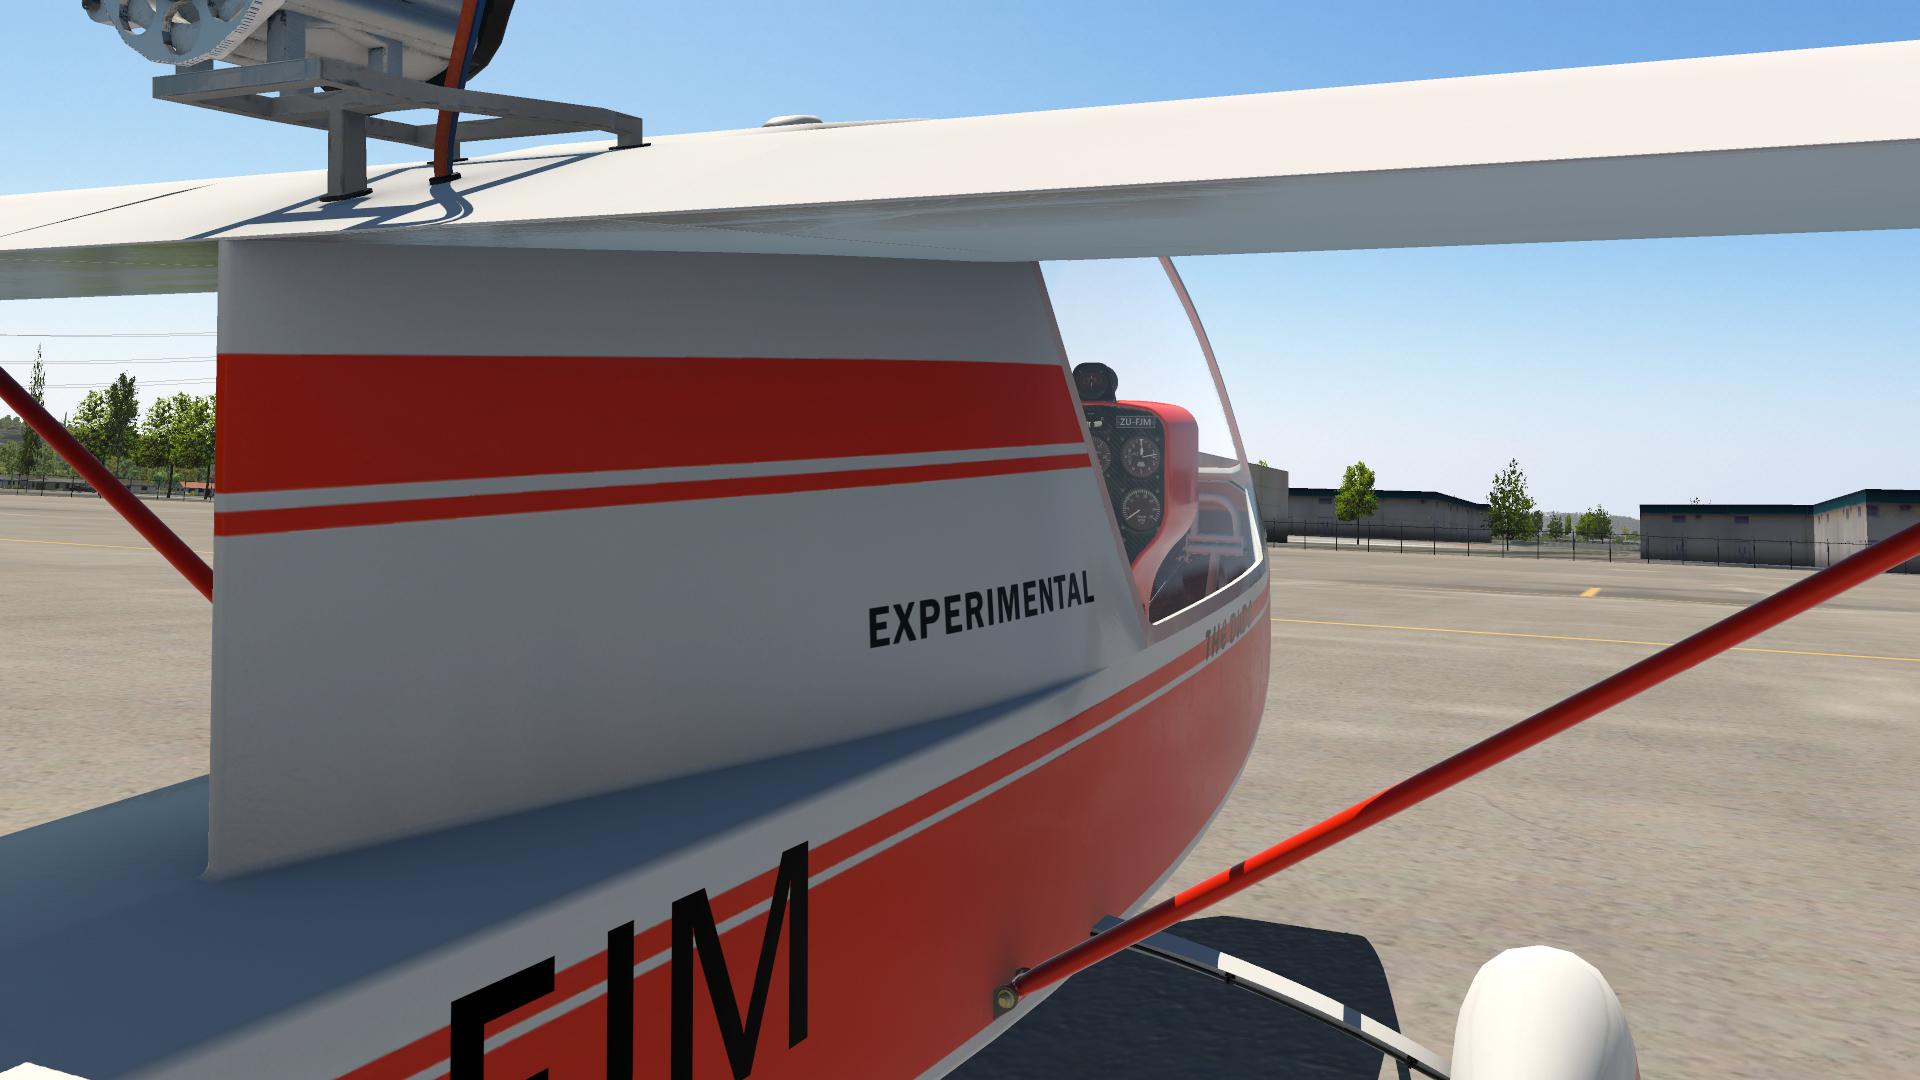
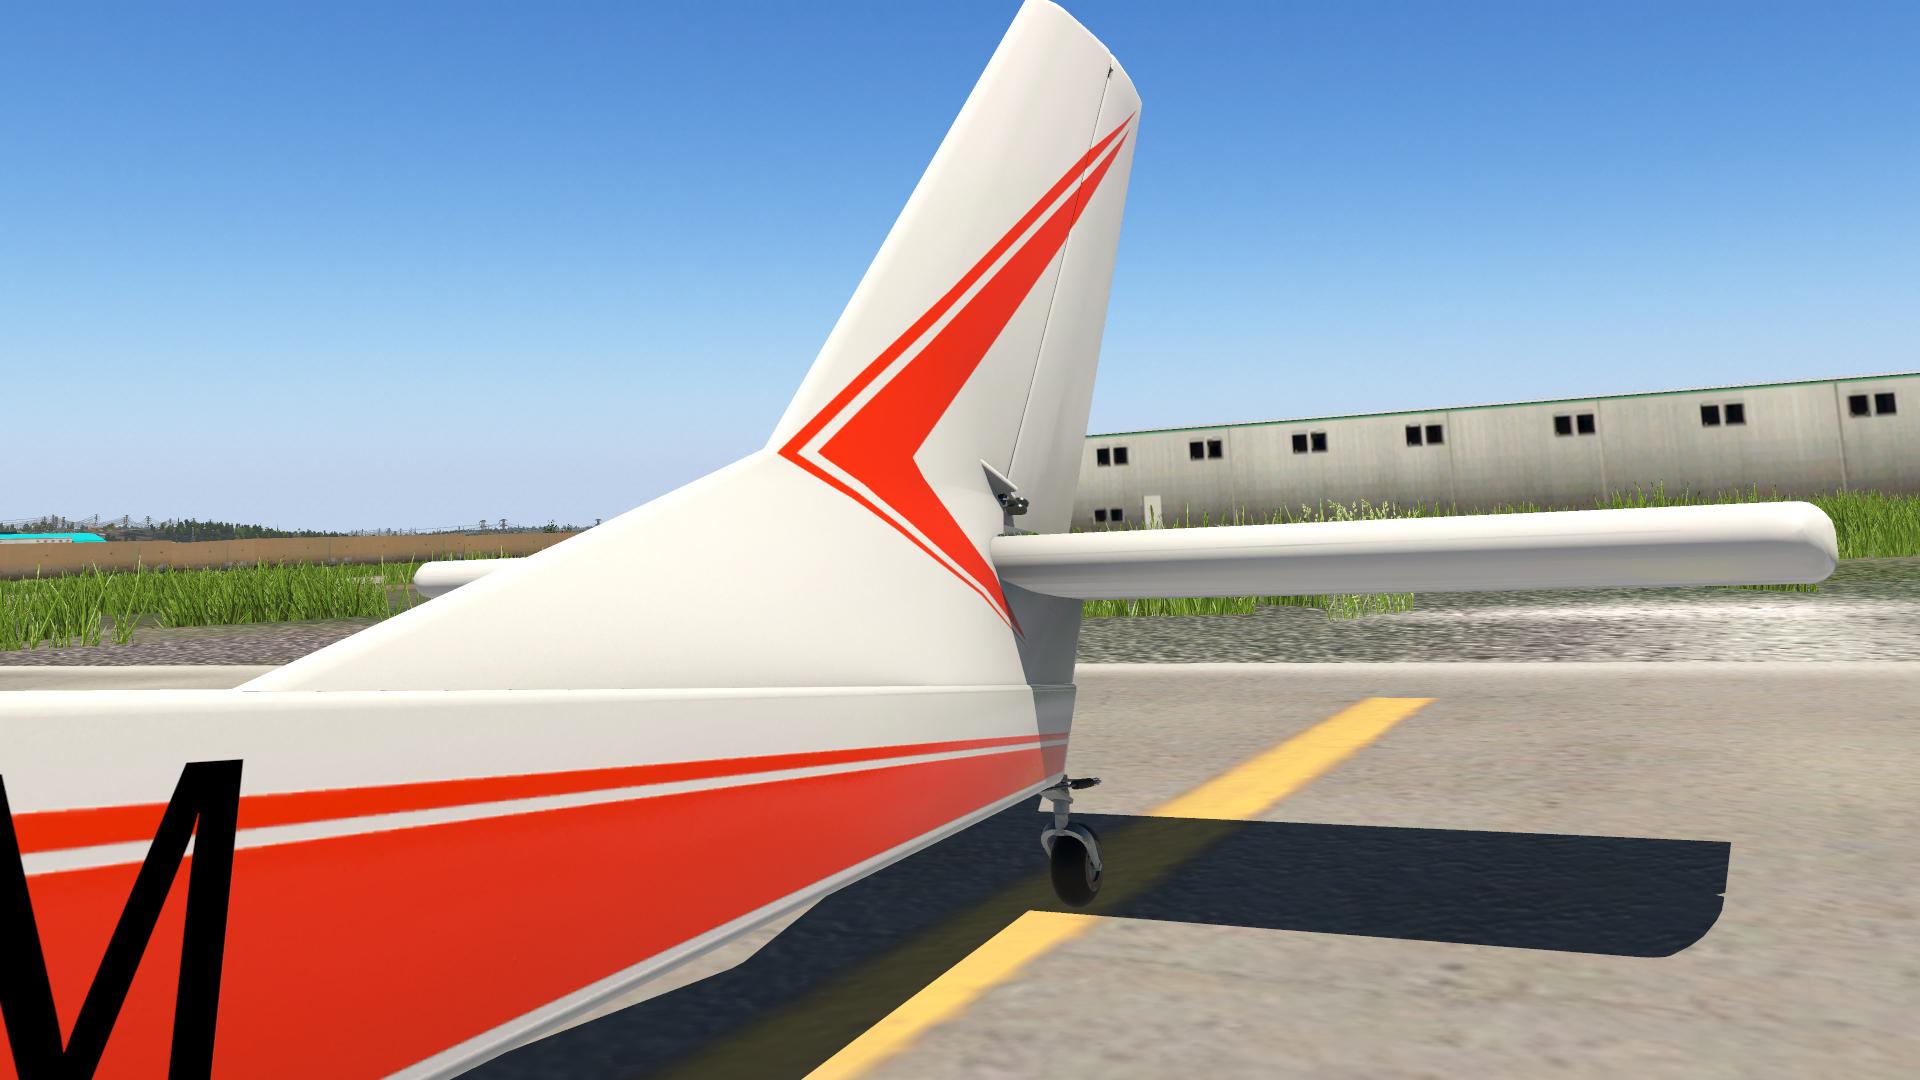
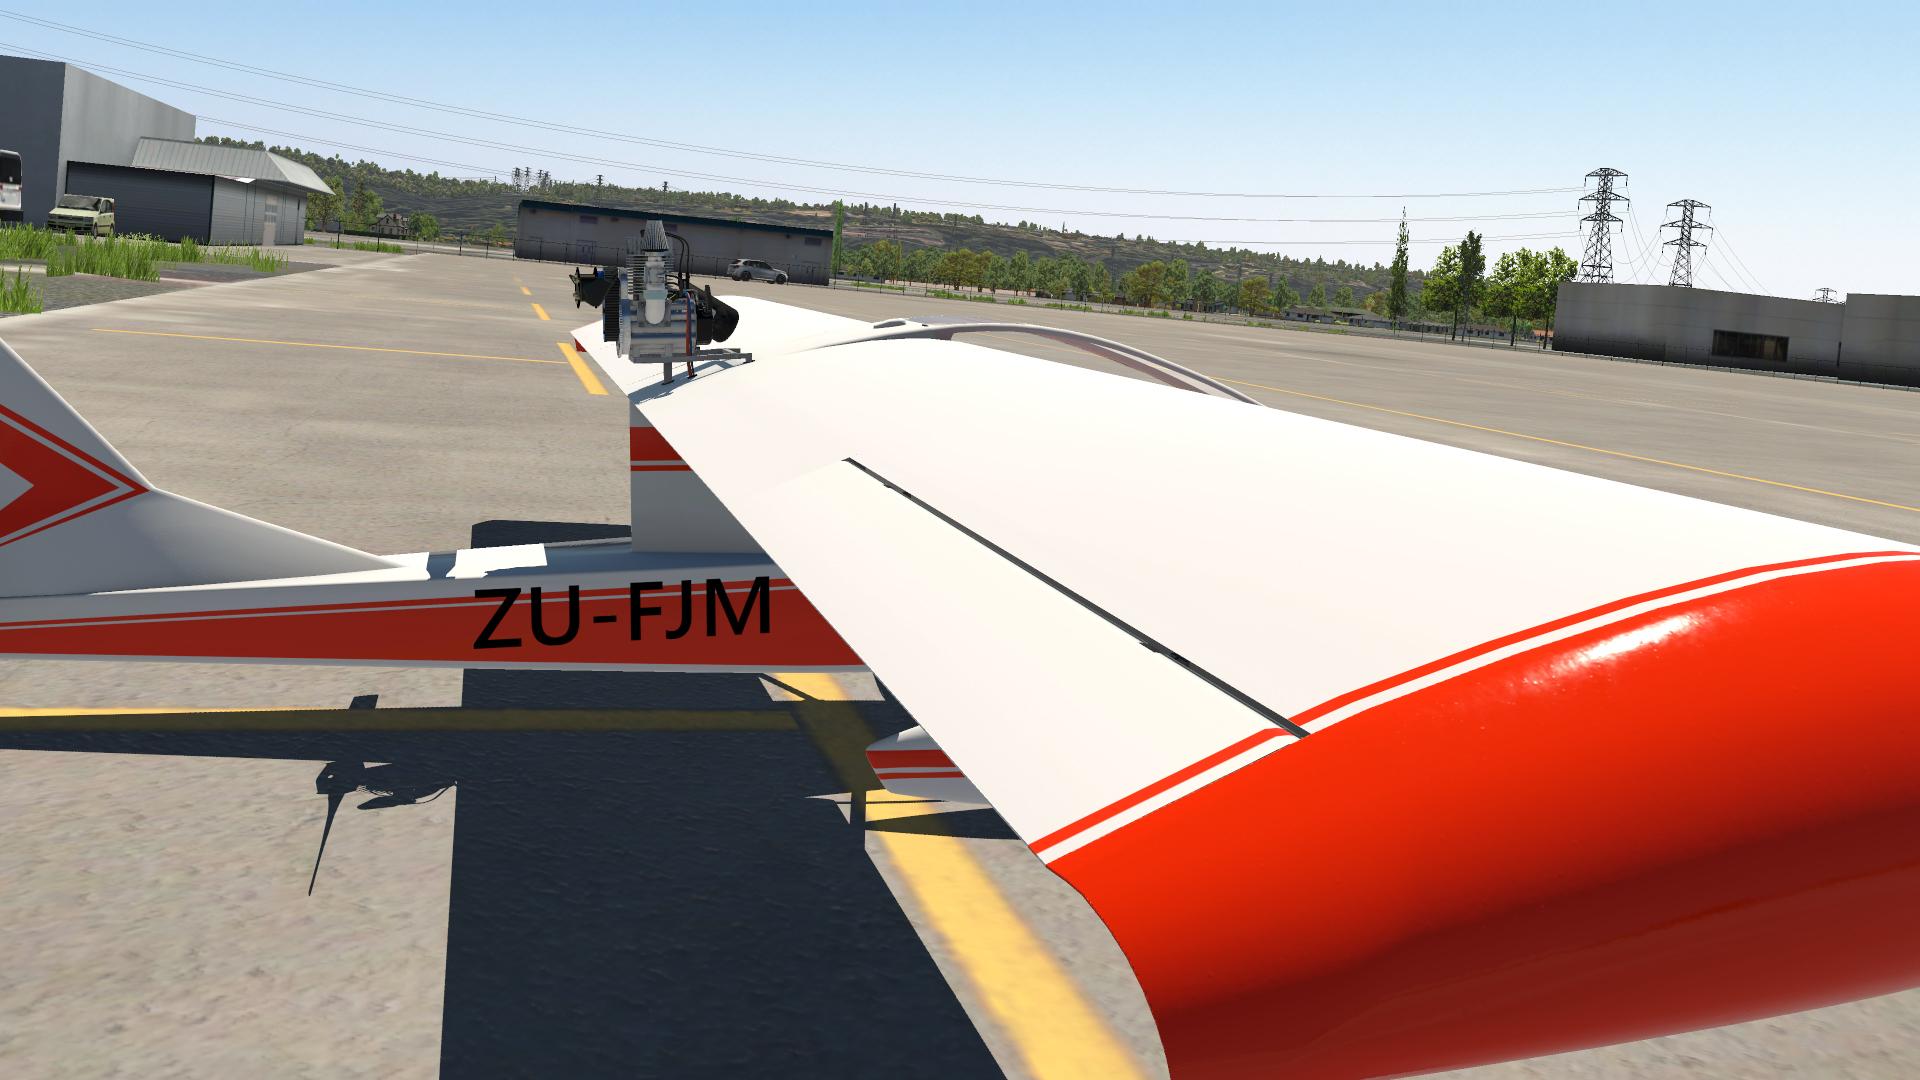
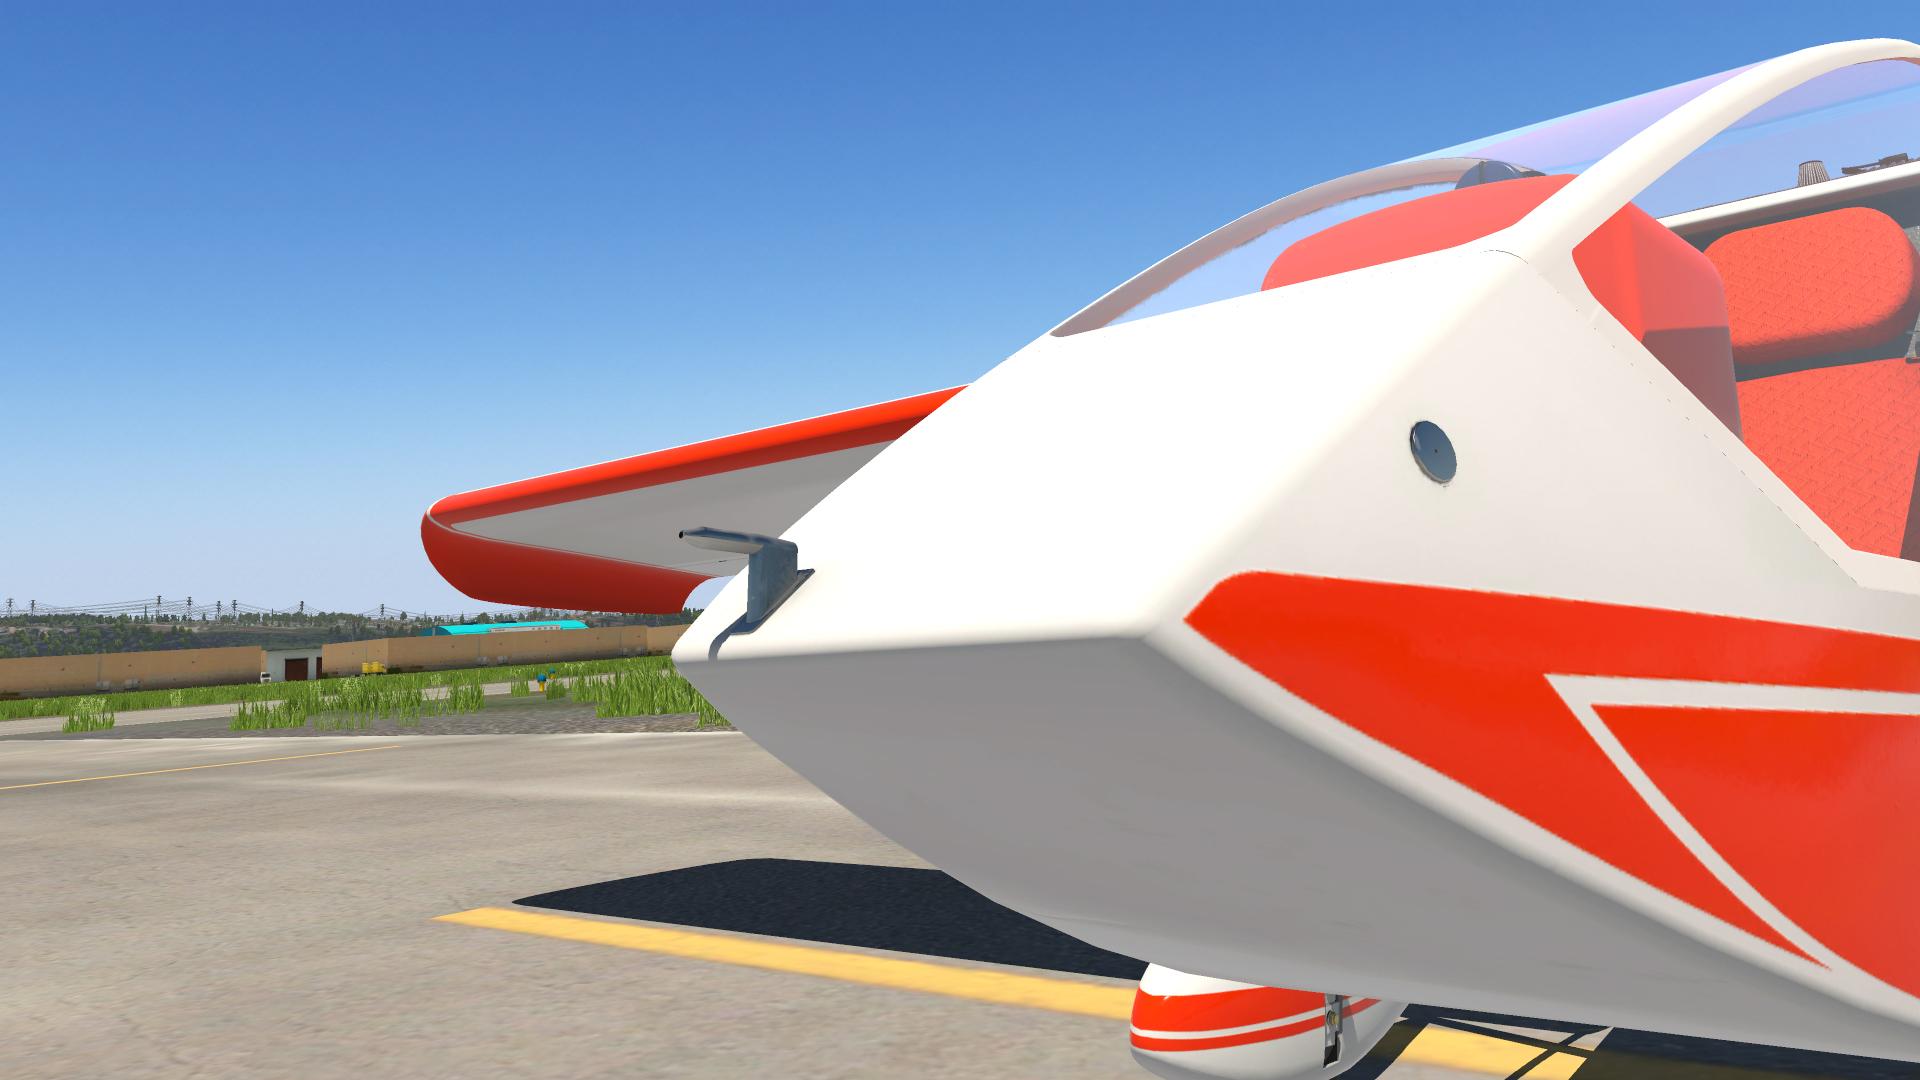
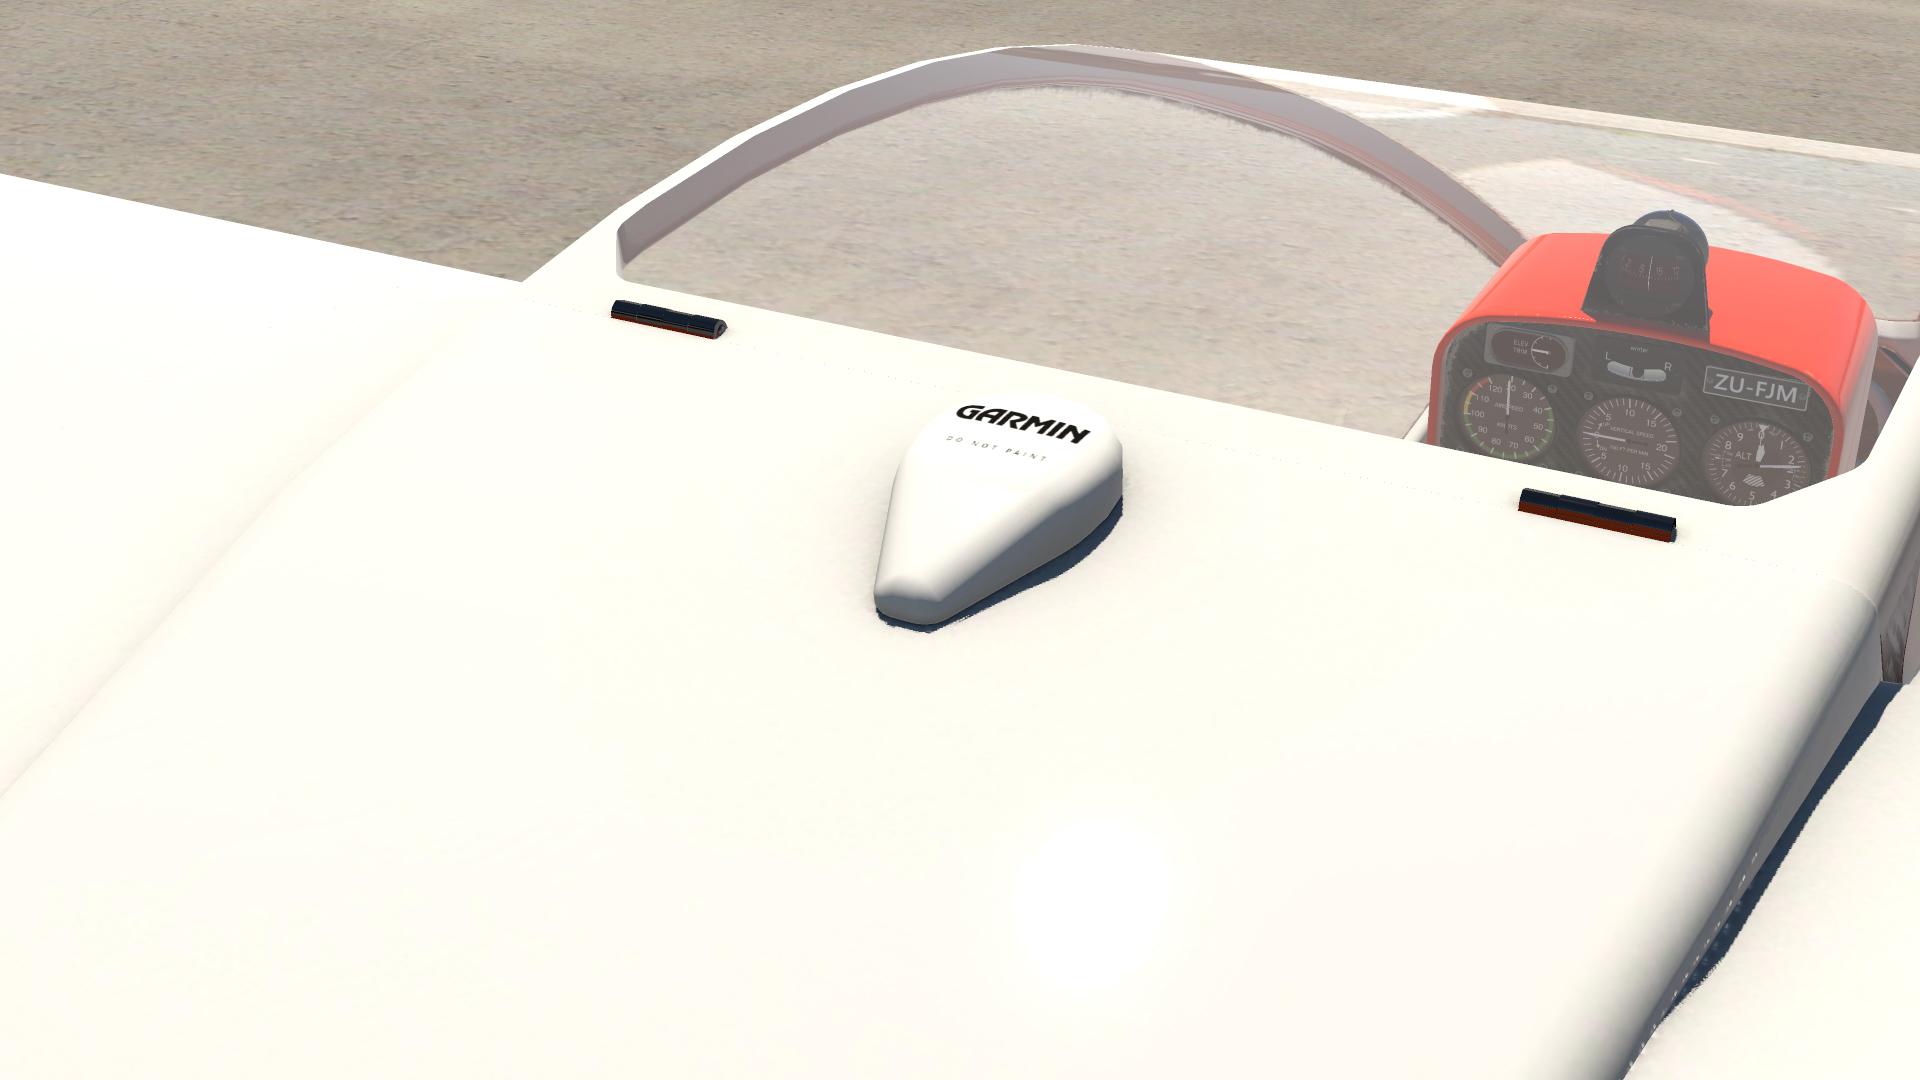
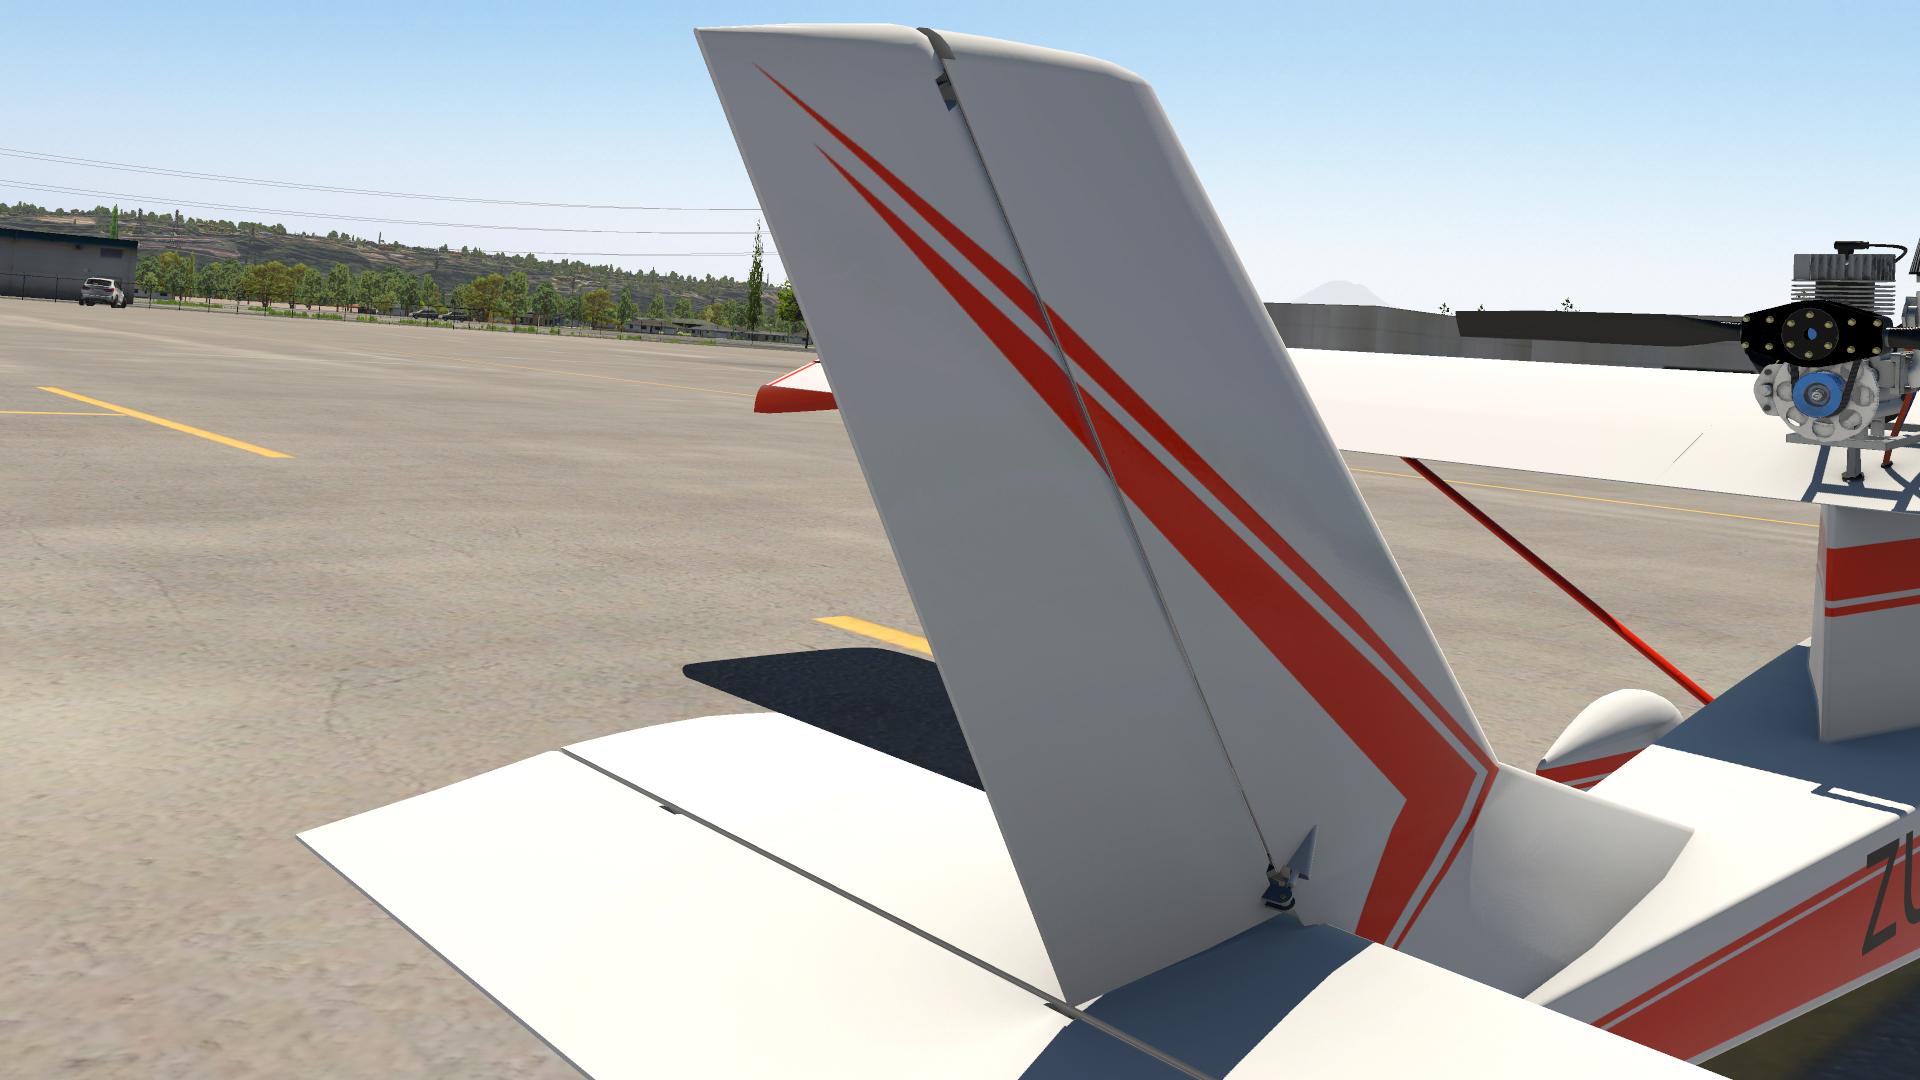
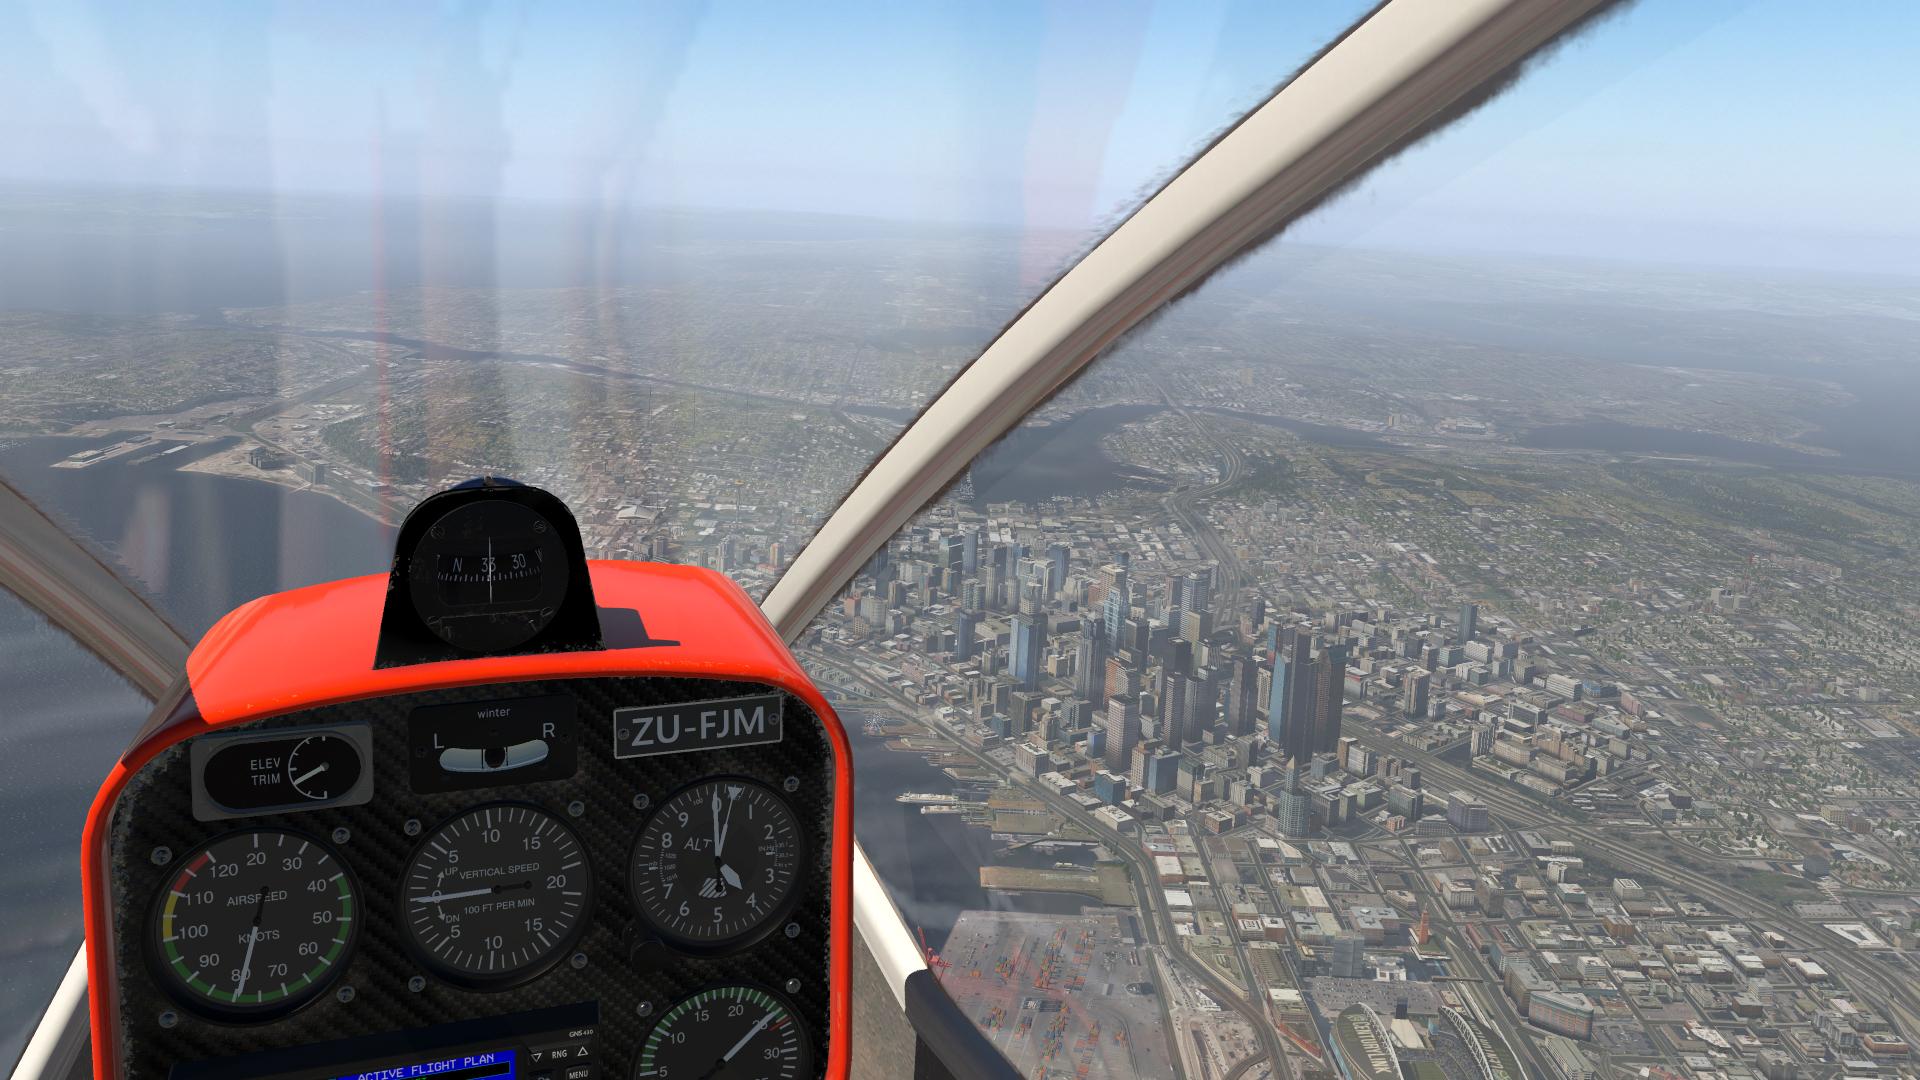
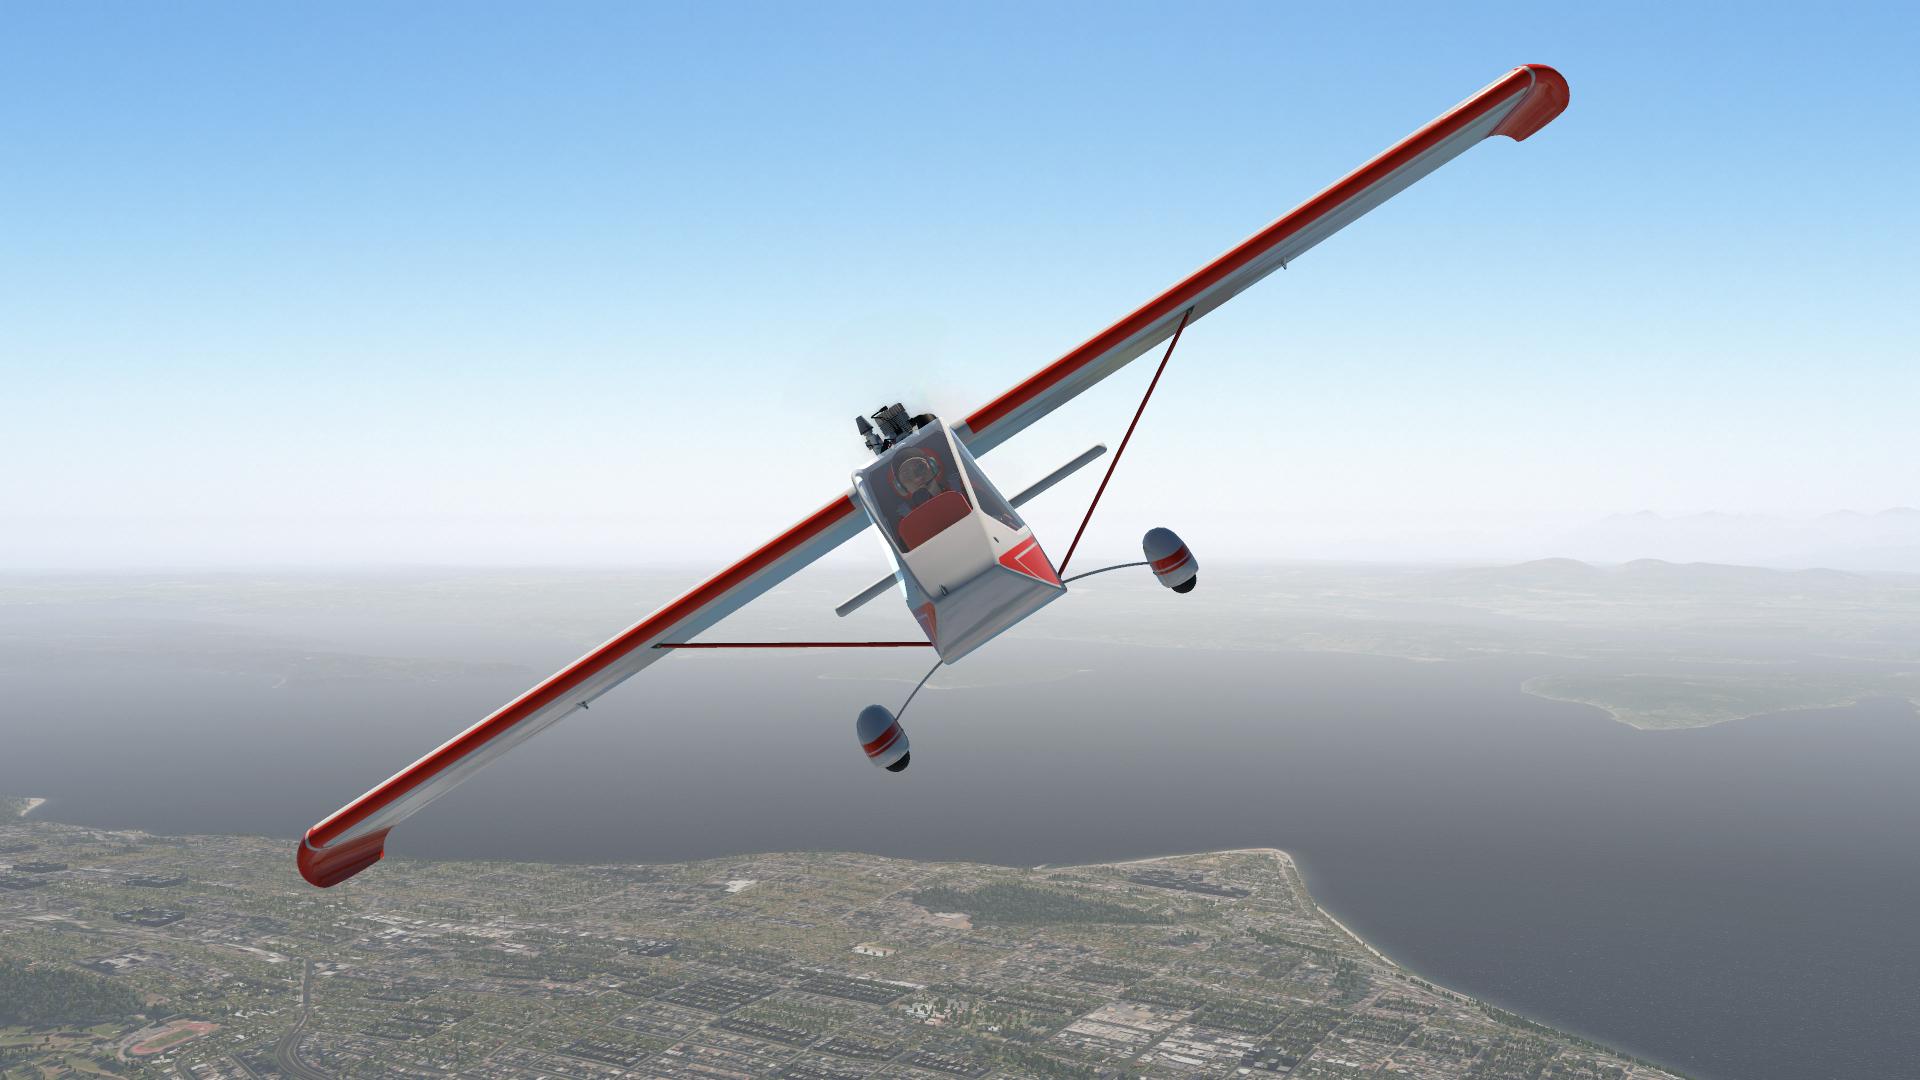
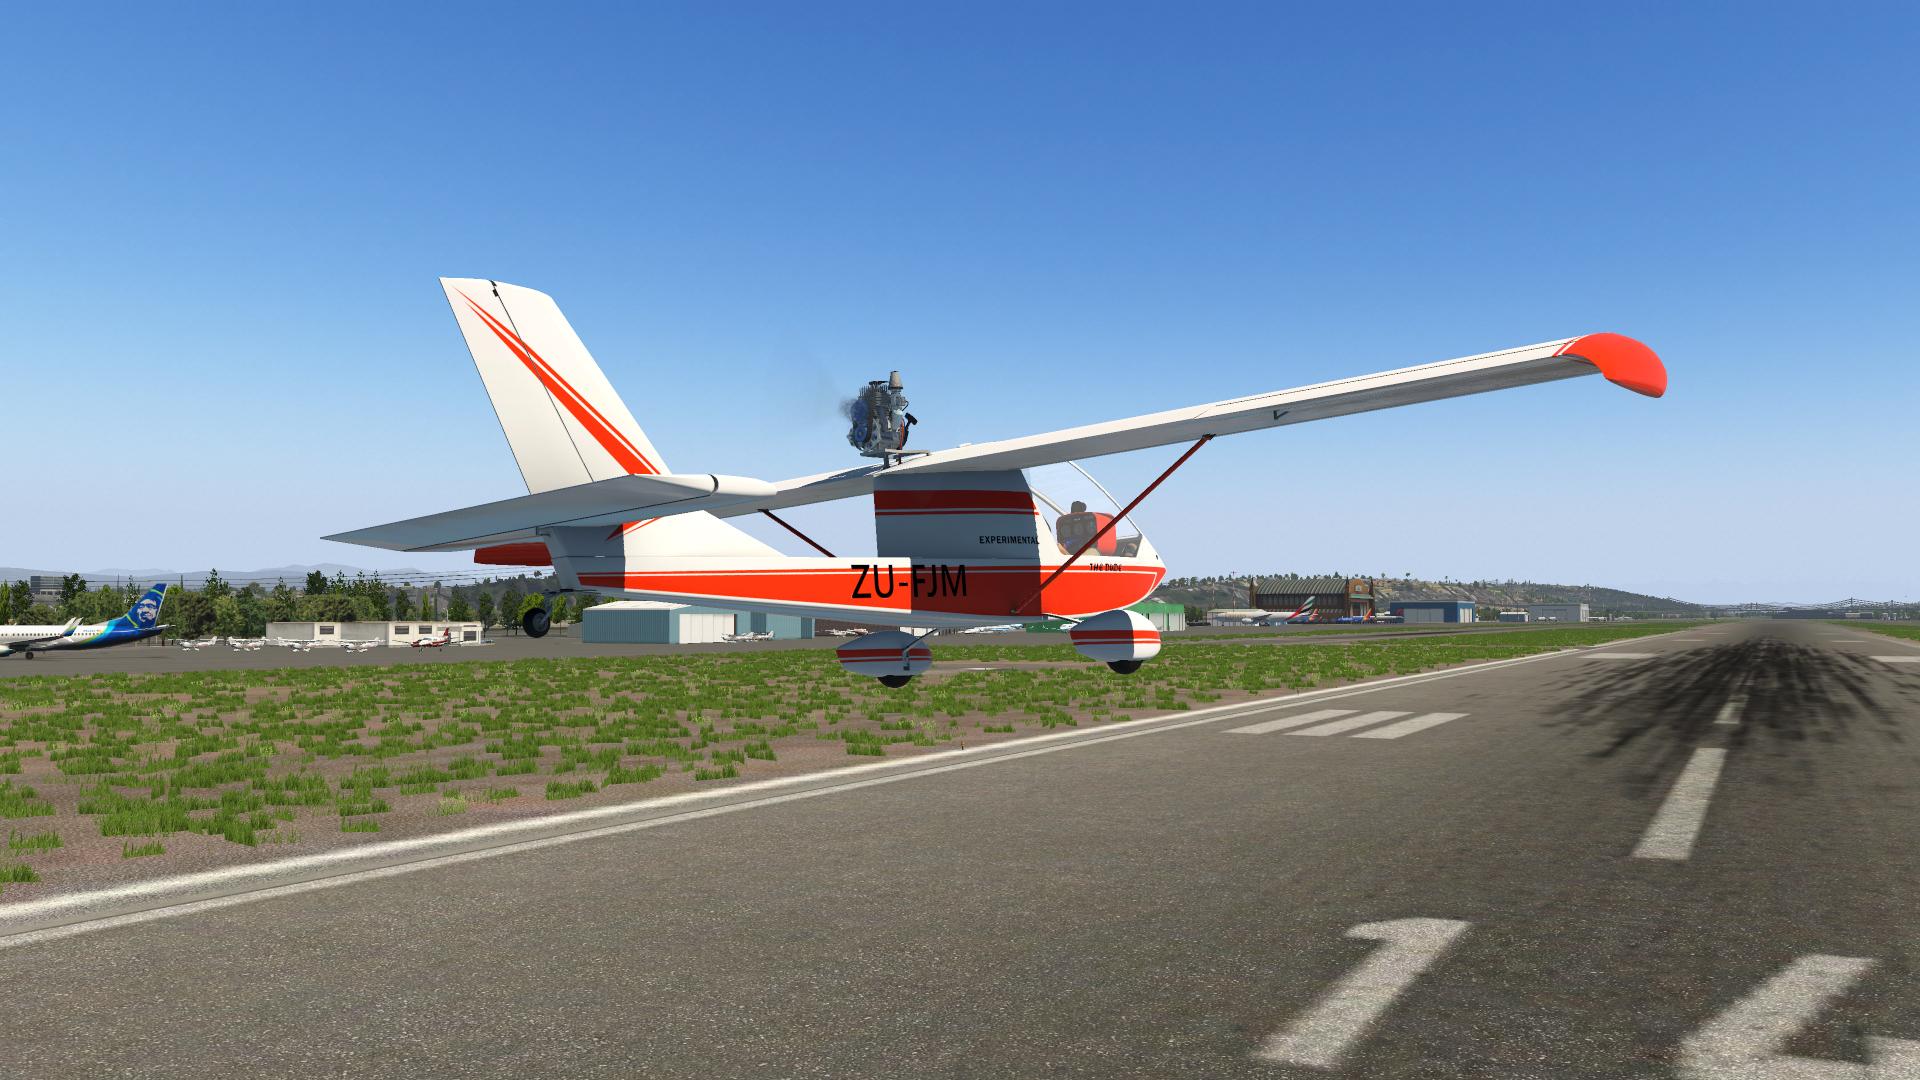
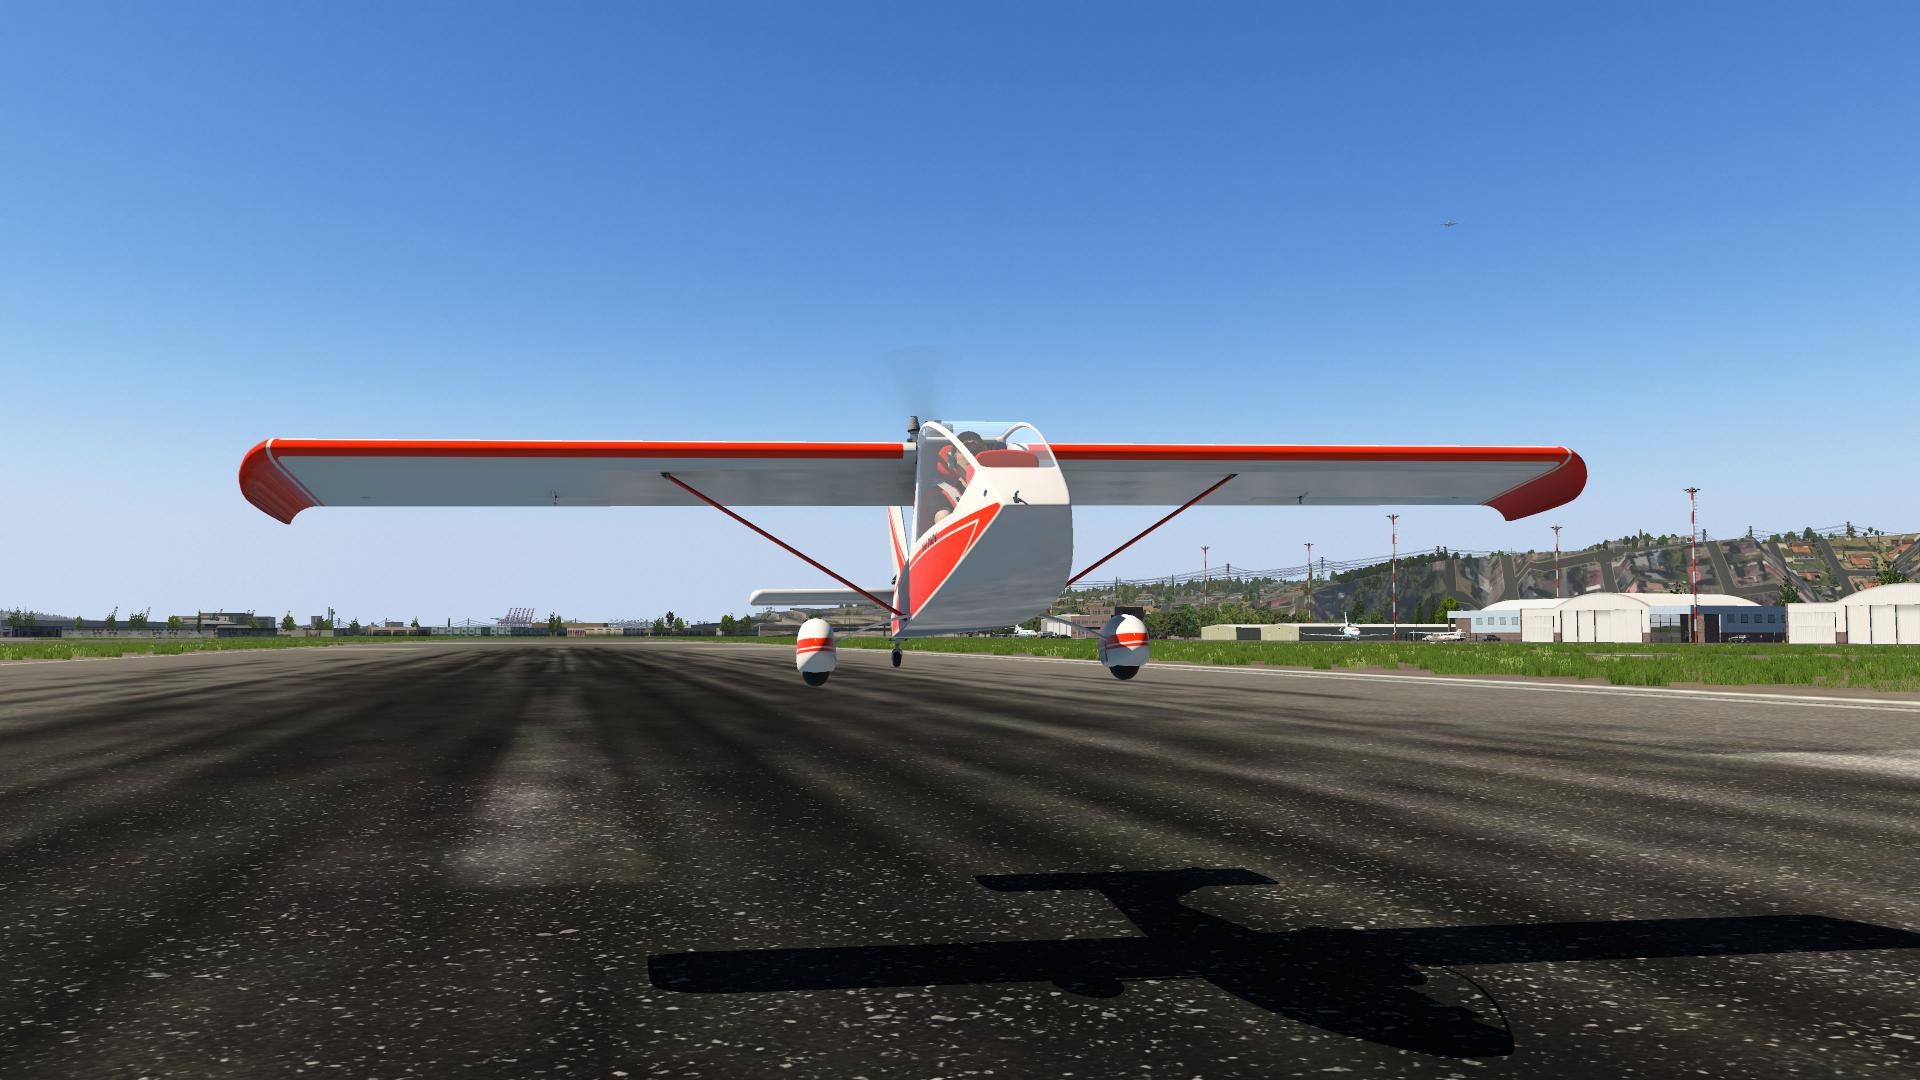
Aircraft Update : Janowski J-1B 'Don Quixote' by FJMAero A month ago I've posted the complete review of this small and high-quality aircraft, showing you all its details. This week FJMAero released the v1.1 of the J-1B, contemplating a lot of improvements and new features, which in my view, should get an update review. Let's start the review and see what really changed and in case you weren't completely sure of buying it when it was released, this may be the time to add the aircraft to your fleet. Just like its predecessor, the J-1B still has those high-quality textures and beautiful 3D modeling, and by now you can already see some changes in both interior and exterior. Let's start with the exterior changes. As you can see, the J-1B received a brand new livery named Busy Bee, which had its design inspired by a honeycomb, at least that's what I think, resulting in the Busy Bee name. The Hirth F-33, Warp Drive propeller and landing received some animation fixes which can sometimes be noticed during your flight. The J-1B received many other major changes, starting with the flaps. In this update, FJMAero included a 3 position, UP, 1 and 2, electric flap system which can be controlled by the flap selector unit on the panel. The FMOD actuator sounds for the flap motors were also added to the aircraft. The flap modeling is ok but the controller is pretty nice, good modeling and lighting. Another major change was the addition of lights, this way you will be able to do some local night flights. The designer added landing, beacon, nav and flood lights, which can all be controlled by the lighting panel installed in the cockpit. All of them were very well modeled and implemented in the aircraft. Pretty nice to see them in darker hours of the day. The interior didn't receive many changes, most of them are related to other systems like flaps and lights. Probably the most noticeable change is the addition of the Aileron trim and its instrument gauge right next to the pitch trim gauge. Now you also can enable and disable the canopy panel transparency by clicking at the compass. Last but not least, the J-1B received a fix that turns the fuel pump on when you click at the "RUN" switch, previously it started together with the battery, this way the engine won't overflow while you set up the GNS430. The last change is related to the paintkit, the wing template was adjusted due to the addition of the flaps. Summary The Janowski J-1B by FJMAero was one of the best ultralights for X-Plane when released, reflecting the hard work of the designer. Now that it has received its first update, new features were added to the J-1B as well as some little improvements. Just like in its previous version, this little aircraft has no problems at all and it will be quite hard to note some possible improvements, maybe increase the details in the aileron and flaps area, but it isn't required. As I said in the first part of the review, if you weren't sure of buying the J-1B, this would maybe change your mind. Well, I've already recommended the aircraft in its release review, and wouldn't make any sense if I didn't do that after upgrades, so yes, I completely recommend this plane. FJMAero isn't very known as a designer for X-Plane, but I am sure that if the designer keeps this high-quality level, I am sure that they will get bigger and develop even better add-ons. The Janowski J-1B is for sure one of those little planes that will bring a smile to your face while flying it. ------------------------------------------------------------------------------ The Janowski J-1B by FJMAero is available in the X-Plane.Org Store here: Janowski J-1B Price is US$19.95 The J1-B is a home-built aircraft design originally conceived by Jaroslaw Janowski and Witold Kalita in the late 60’s. The design featured a high-wing single-seat configuration with rearward mounted engine on top of the wing. The FJMAero J-1B is representative of a fiber glass airframe powered by a Hirth F-33 air-cooled two-stroke engine producing up to 28 HP, with design loads of +6/-3G. The J-1B is flapless and comes with a fully movable elevator trim to compensate the effects of the high-thrust line above the center of gravity. Our J-1B is a designed to provide the virtual pilot with an aircraft that is easy to handle, offers excellent visibility and exhibits interesting flight characteristics for those that enjoy stick and rudder, seat-of-pants flying. Ideal for short scenic flights, cross-country VFR and is light aerobatics capable. Features: Highly detailed 3D interior and exterior model with many fine details to discover High-resolution (4K) physical based rendering (PBR) texture sets to showcase surfaces ranging from painted resin, spray paint, metal, seat fabric, dust effects, all the way to leather for the dust cover at the base of the control stick Animated controls, control rods and surfaces, canopy, fully articulated rudder pedals with differential braking and cockpit switches Custom XLua driven ignition panel to provide a robust engine and avionics start-up, including custom commands that can be assigned to joysticks or other hardware peripherals. Open the fuel valve, turn on the battery bus, switch the ‘Run’ button to on and press the starter to bring life to the Hirth F-33 and the ‘Warp Drive’ propeller. High-resolution flight instruments designed from the ground up to maintain clarity at all viewing distances. Includes a highly detailed 3D face for the GNS 430 (X-Plane 11 native) Full-bodied FMOD sound set that includes (but are not limited to): Hirth F33 engine sounds Buttons and switches, including the GNS430 Engine starter and fuel pump systems Wheel sounds for impact, rolling and sliding Cockpit shake/vibration noise based on ground roll Wind noise on the canopy based on airspeed Sideslip air noise on the airframe and canopy Custom stall horn providing incremental feedback based on angle of attack Realistic sound attenuation when closing/opening the canopy Custom Clark Y airfoil. Flight model tested with standard and experimental flight model (11.41+), with the latter being preferable for those that enjoy stick and rudder flying. Four liveries including ‘Fire Red’, ‘Blu’, ‘Moon’ and ‘Blank’. While the first three come with custom PBR textures for each paint scheme, the Blank scheme has a neutral PBR set to assist with repaints. Each livery features its own unique internal textures A unique tail number repaint texture that allows customisation of the fuselage tail numbers, the pilot name under the canopy, as well as the number plaque on the instrument panel without having to repaint the entire aircraft. An easy to use registration Photoshop file is provided. Customise your J-1B and make it your own. Paint kit designed from the ground up to be easy to repaint (external and internal), including colour coded layers in Photoshop with instructions to preserve PBR materials, as well as UV island guides to assist livery painters (see manual for more details). The following diffuse paint sets are provided: Fuselage Wings Cockpit Instrument pod (excluding instruments) Fully detailed pilot in external views with custom headset and aerobatics-ready harness. Requirement X-Plane 11 Windows, Mac or Linux 4 GB VRAM Minimum - 8GB+ VRAM Recommended Download Size: 410 MB (paint kit is 675 MB) Current version : 1.0 (June 12th 2020) THE AIRCRAFT DIDN'T COME WITH A CHANGELOG ---------------------------------------------------------------------------------------------------- Aircraft Update by Bernardo Pierdoná Casa 25th July 2020 Copyright©2020: X-PlaneReviews Review System Specifications: Computer System: Intel Core I5-9600K 4,30GHz / 2x8 Corsair Vengeance RGB Pro 3200MHz - Gigabyte RTX 2070 - Gigabyte Z390 Aorus Master - Kingston A1000M.2 SSD 240GB Software: - Windows 10 - X-Plane 11.41 Addons: Logitech Pro Flight Yoke/Pedals/Throttle Quadrant - Logitech Extreme 3d Pro Joystick - Sound: Samsung Home Theater System J5500WK Plugins: Environment Engine v1.13 by xEnviro US$69,90 Traffic: Traffic Global by JustFlight US$52.99 Ground textures: ALES US$15.99 Scenery and Aircraft -PHNL by Haui (X-Plane.Org) - Free -PHKO, I didn't find the link but I will look for it. It's freeware and can be found in the X-Plane.Org. (Disclaimer. All images and text in this review are the work and property of X-PlaneReviews, no sharing or copy of the content is allowed without consent from the author as per copyright conditions)
-
BernardoCasa reacted to a post in a topic:
Aircraft Update : Airbus A350-900 XWB Advanced v1.6 by FlightFactor/SteptoSky
-
Aircraft Update : Boeing 787-9 Aviator v1.5.0 by Magknight
BernardoCasa replied to BernardoCasa's topic in Airliners Reviews
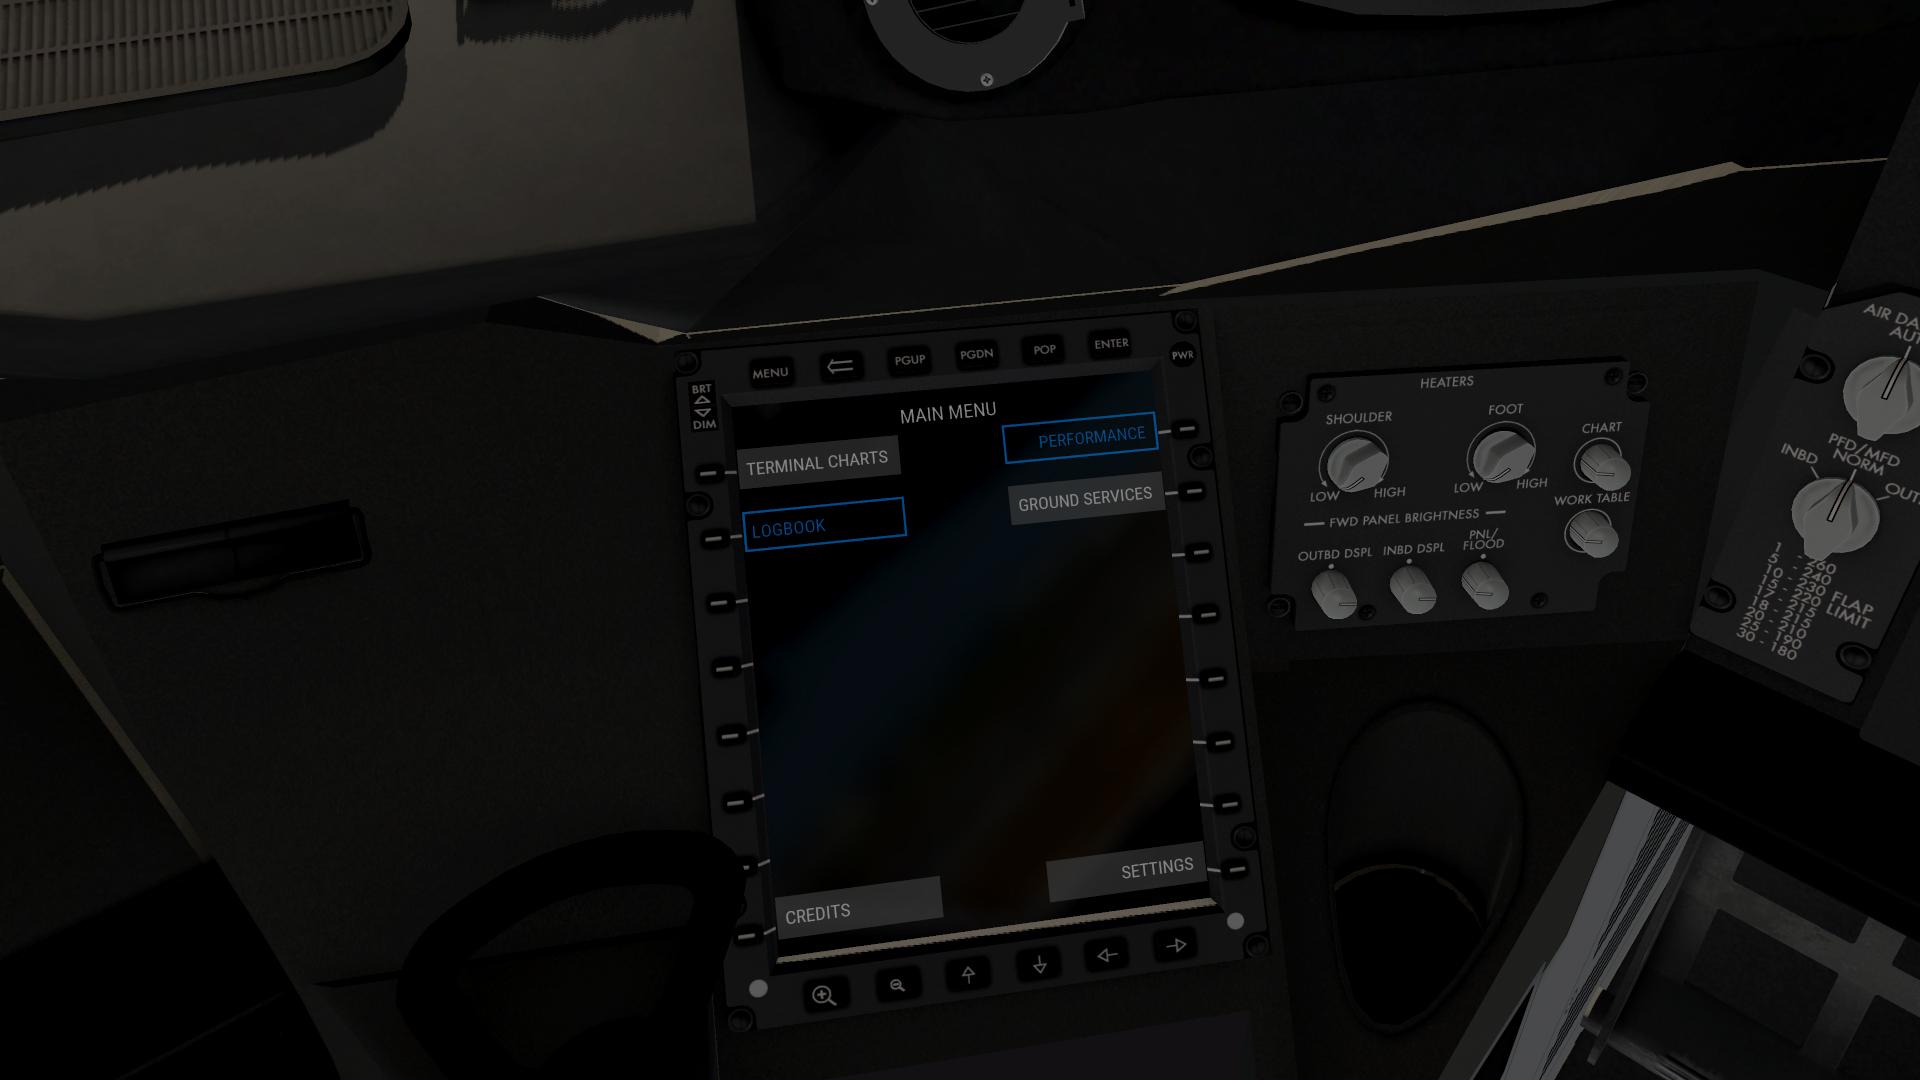
The plane comes with the default X-Plane FMC, which works with no problems. You need Navigraph to update the AIRAC and/or use the charts. -
Aircraft Update : Boeing 787-9 Aviator v1.5.0 by Magknight
BernardoCasa replied to BernardoCasa's topic in Airliners Reviews
Yeah, I have all those little problems too, quite annoying but not sufficient to prevent you from having some fun with the 787. It is still under development, but I can see a lot of potential on it, can't wait for the next update and new features. -
Aircraft Update : Boeing 787-9 Aviator v1.5.0 by Magknight
BernardoCasa replied to BernardoCasa's topic in Airliners Reviews
Ok, so I took the aircraft for a departure and I believe that I know your problem. I've set myself at 9,000ft with ALT hold and no A/T, should work fine with A/T, then selected the desired heading. After that I clicked at the HDG hold button and nothing, just like you described, however, if you unclick the hold button, leaving no light on, and click the SEL button in the HDG selector the plane should follow the selected heading. So, just click SEL and don't click hold. I expect that this post helped you. Casa -
Aircraft Update : Boeing 787-9 Aviator v1.5.0 by Magknight
BernardoCasa replied to BernardoCasa's topic in Airliners Reviews
I believe that you mean AP. Well, when my AP is on I always select LNAV, so I never used HDG mode. The next time I get the opportunity to fly the 787 again, I'll take a look at the HDG mode. The LNAV works pretty well, so I don't see any reason for using HDG. If you want to use it during approach, try flying the plane by yourself, it is very enjoyable. -
AirbusMan reacted to a post in a topic:
Aircraft Updates : Airbus A319 and 321 by Toliss
-
AirbusMan reacted to a post in a topic:
Aircraft Updates : Airbus A319 and 321 by Toliss
-
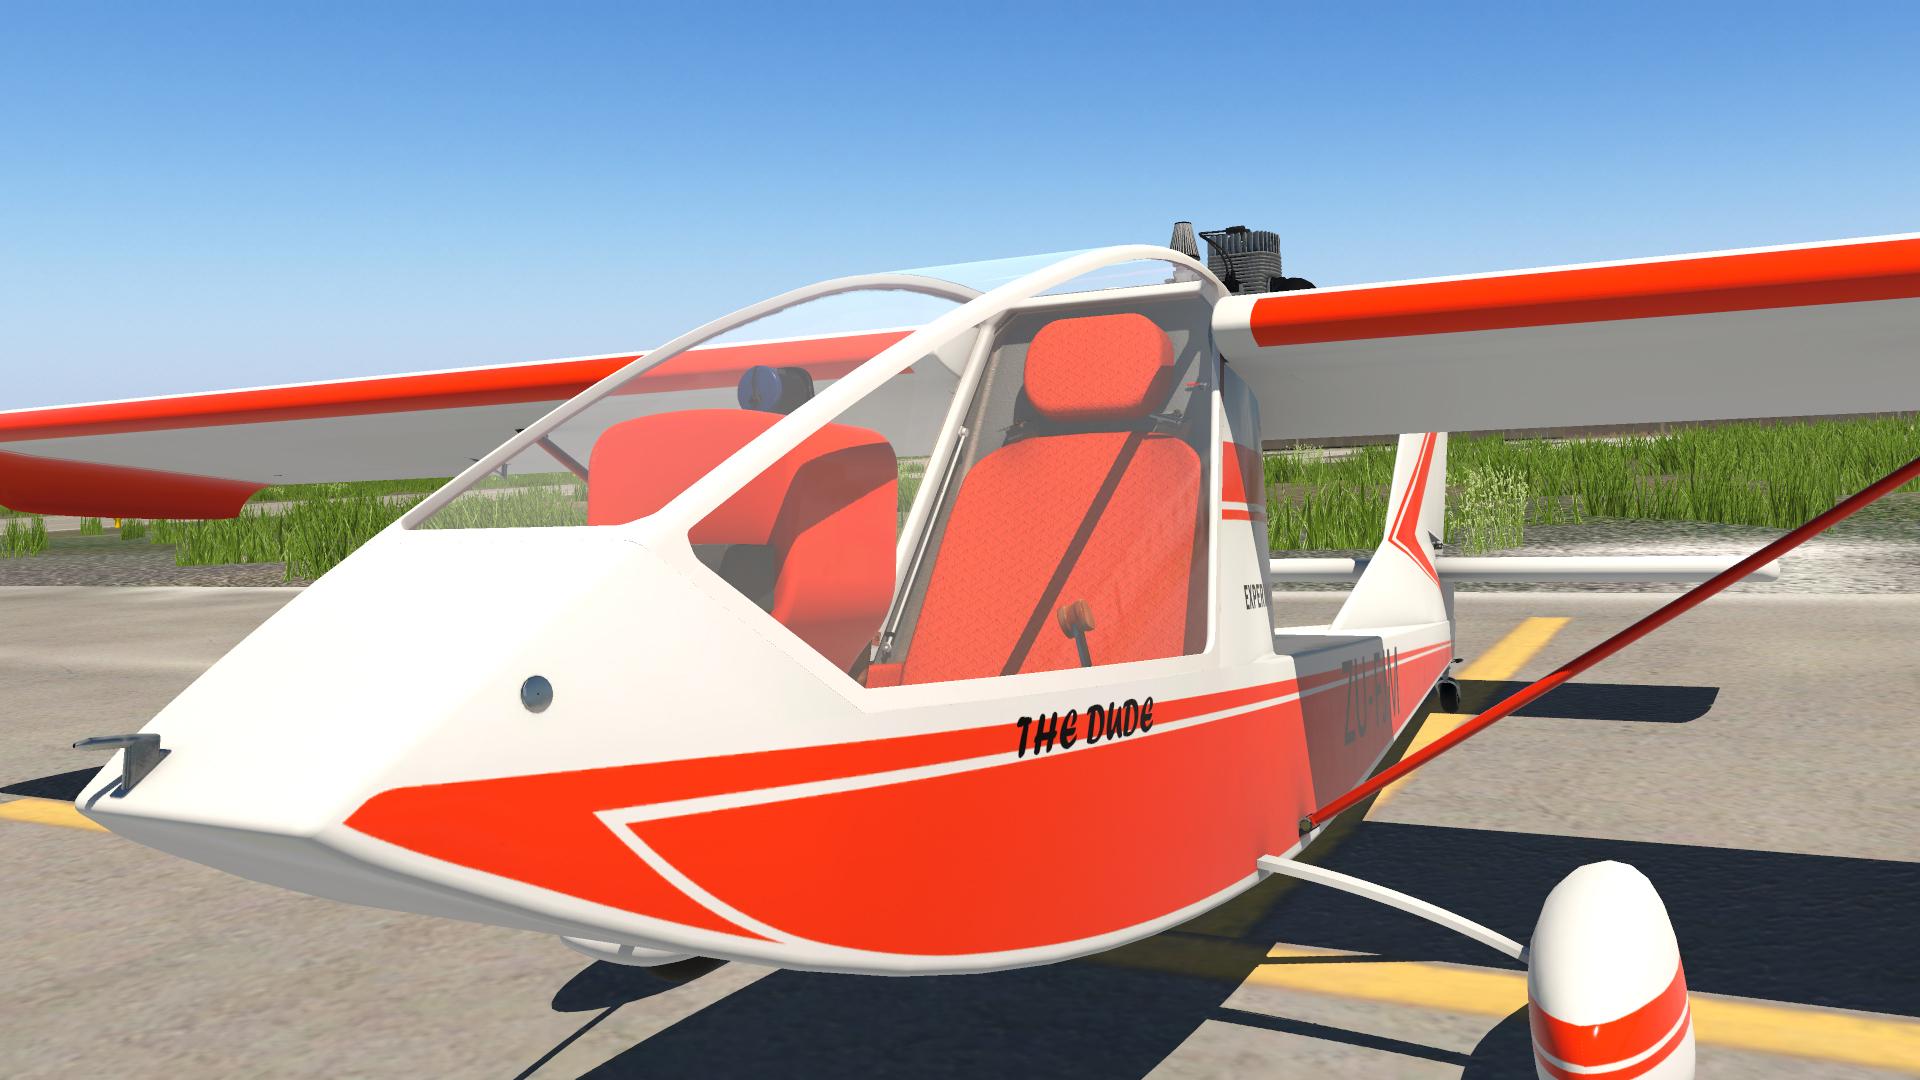
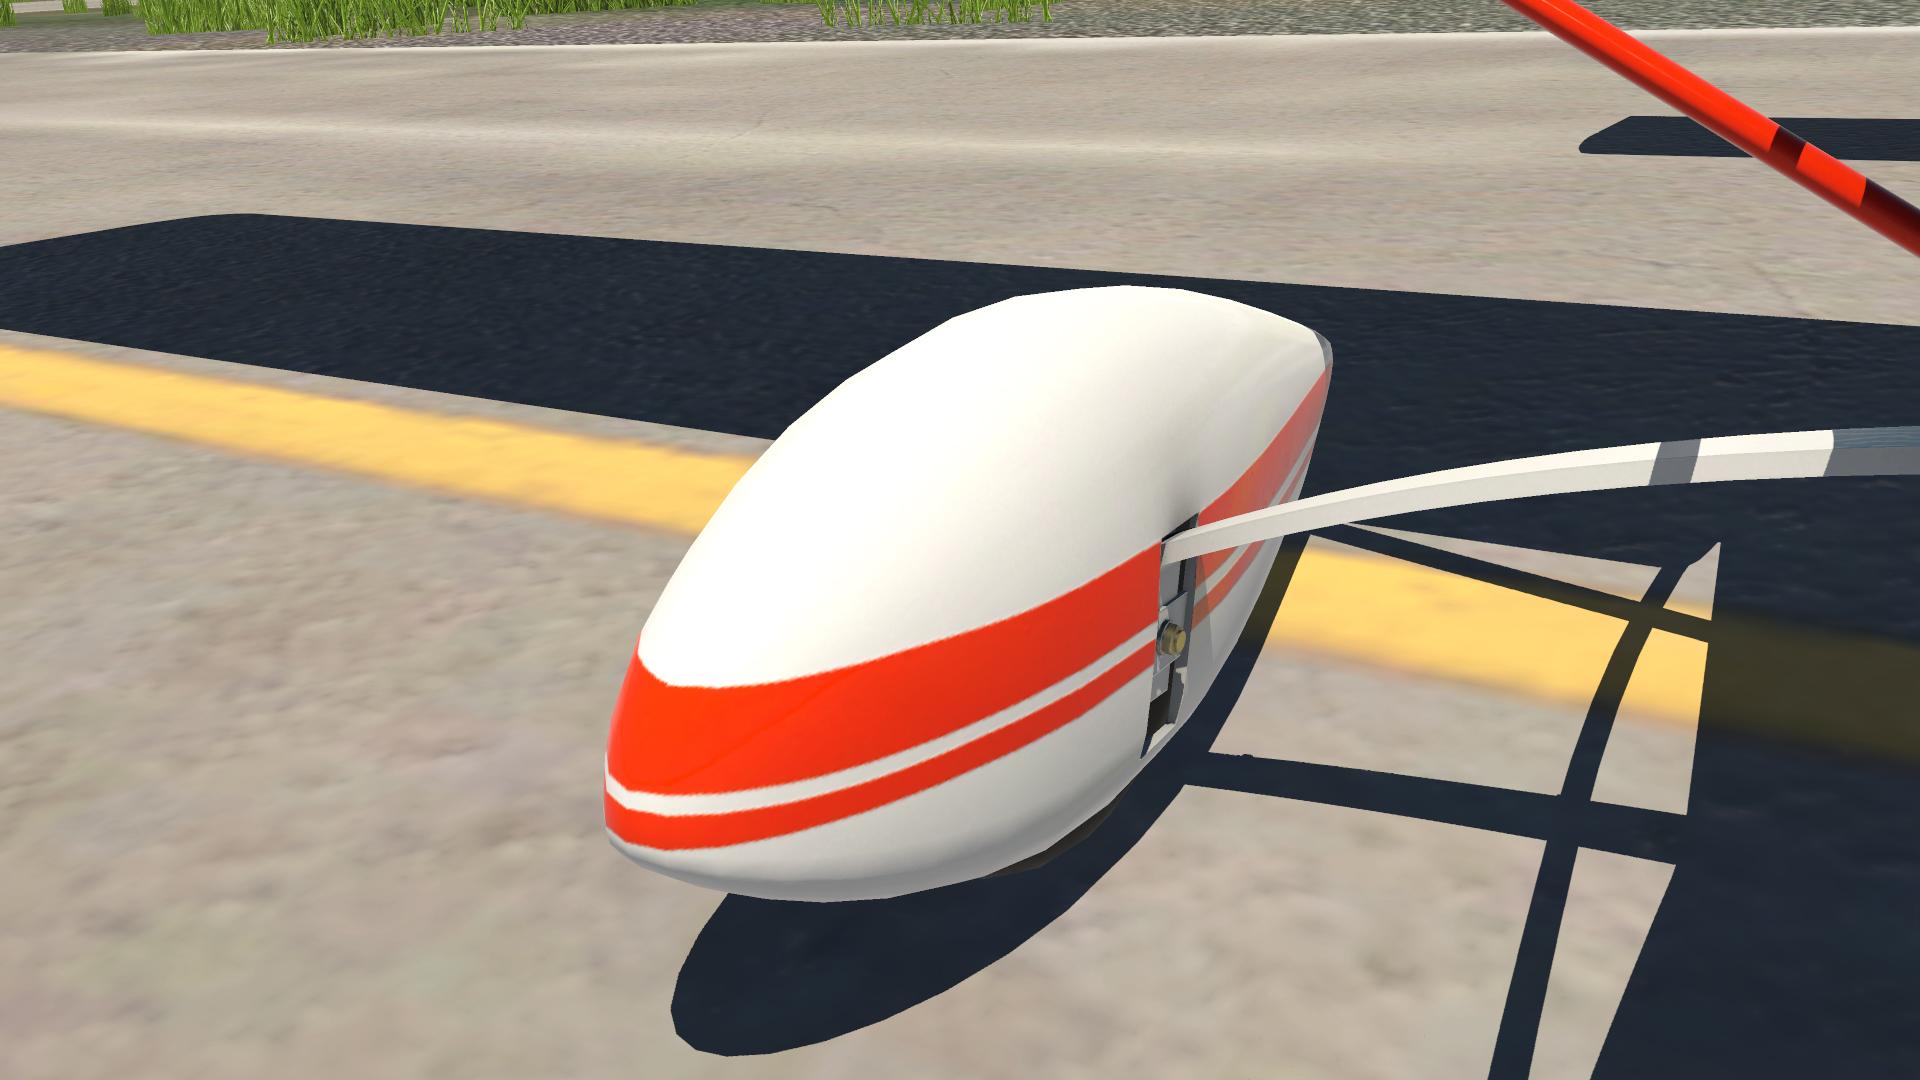
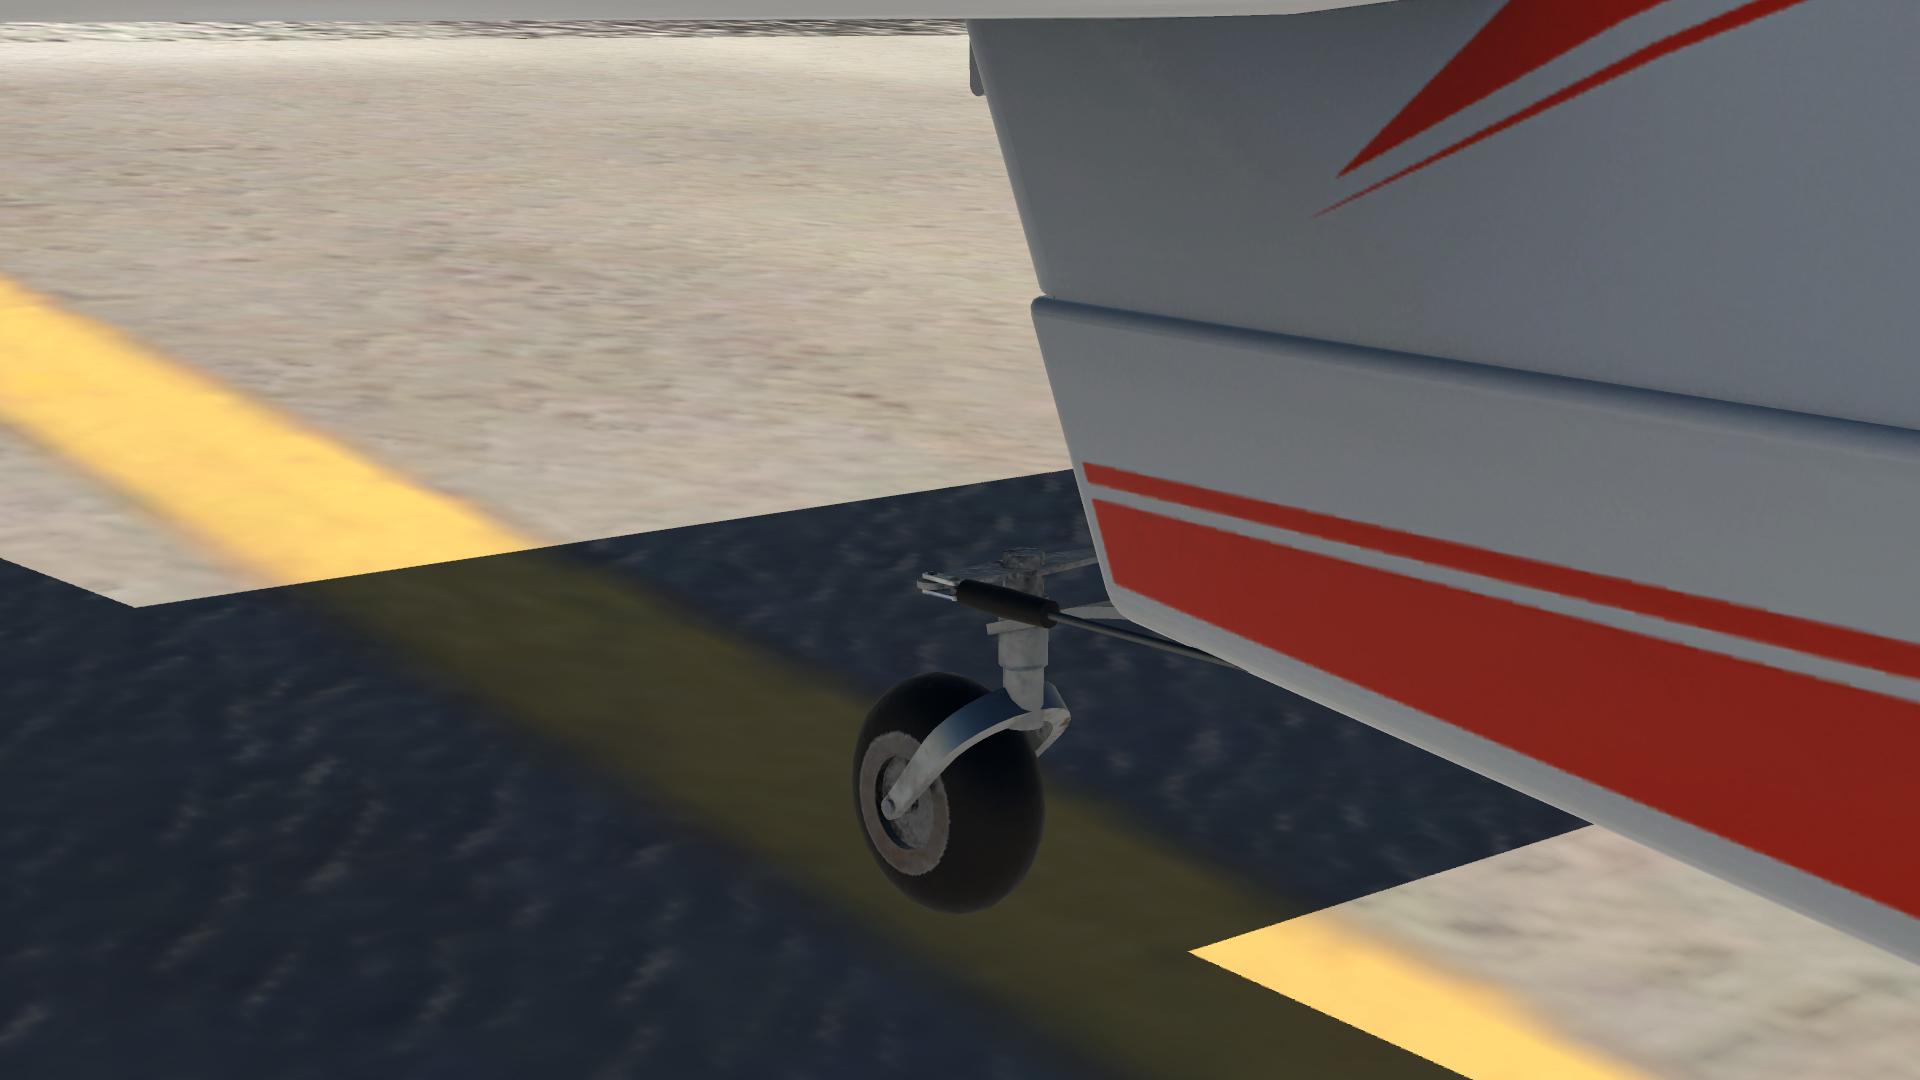
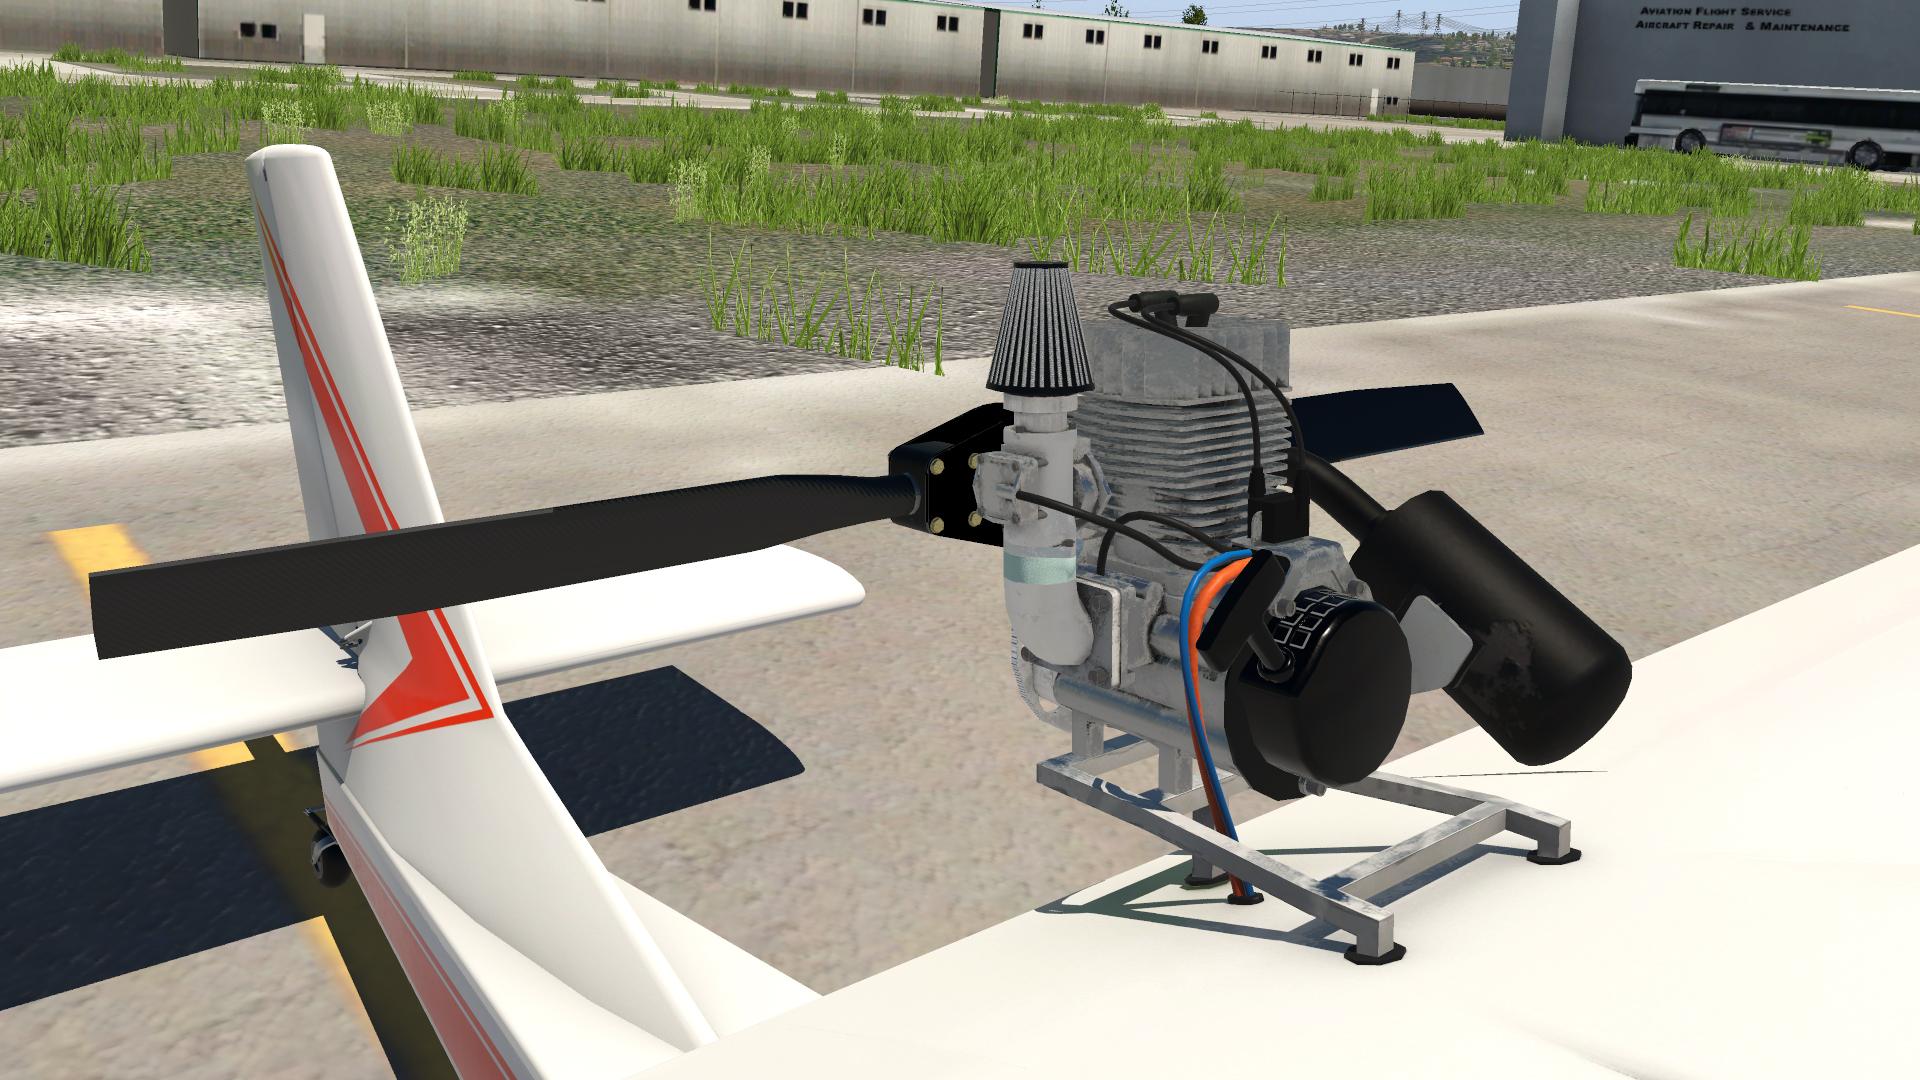
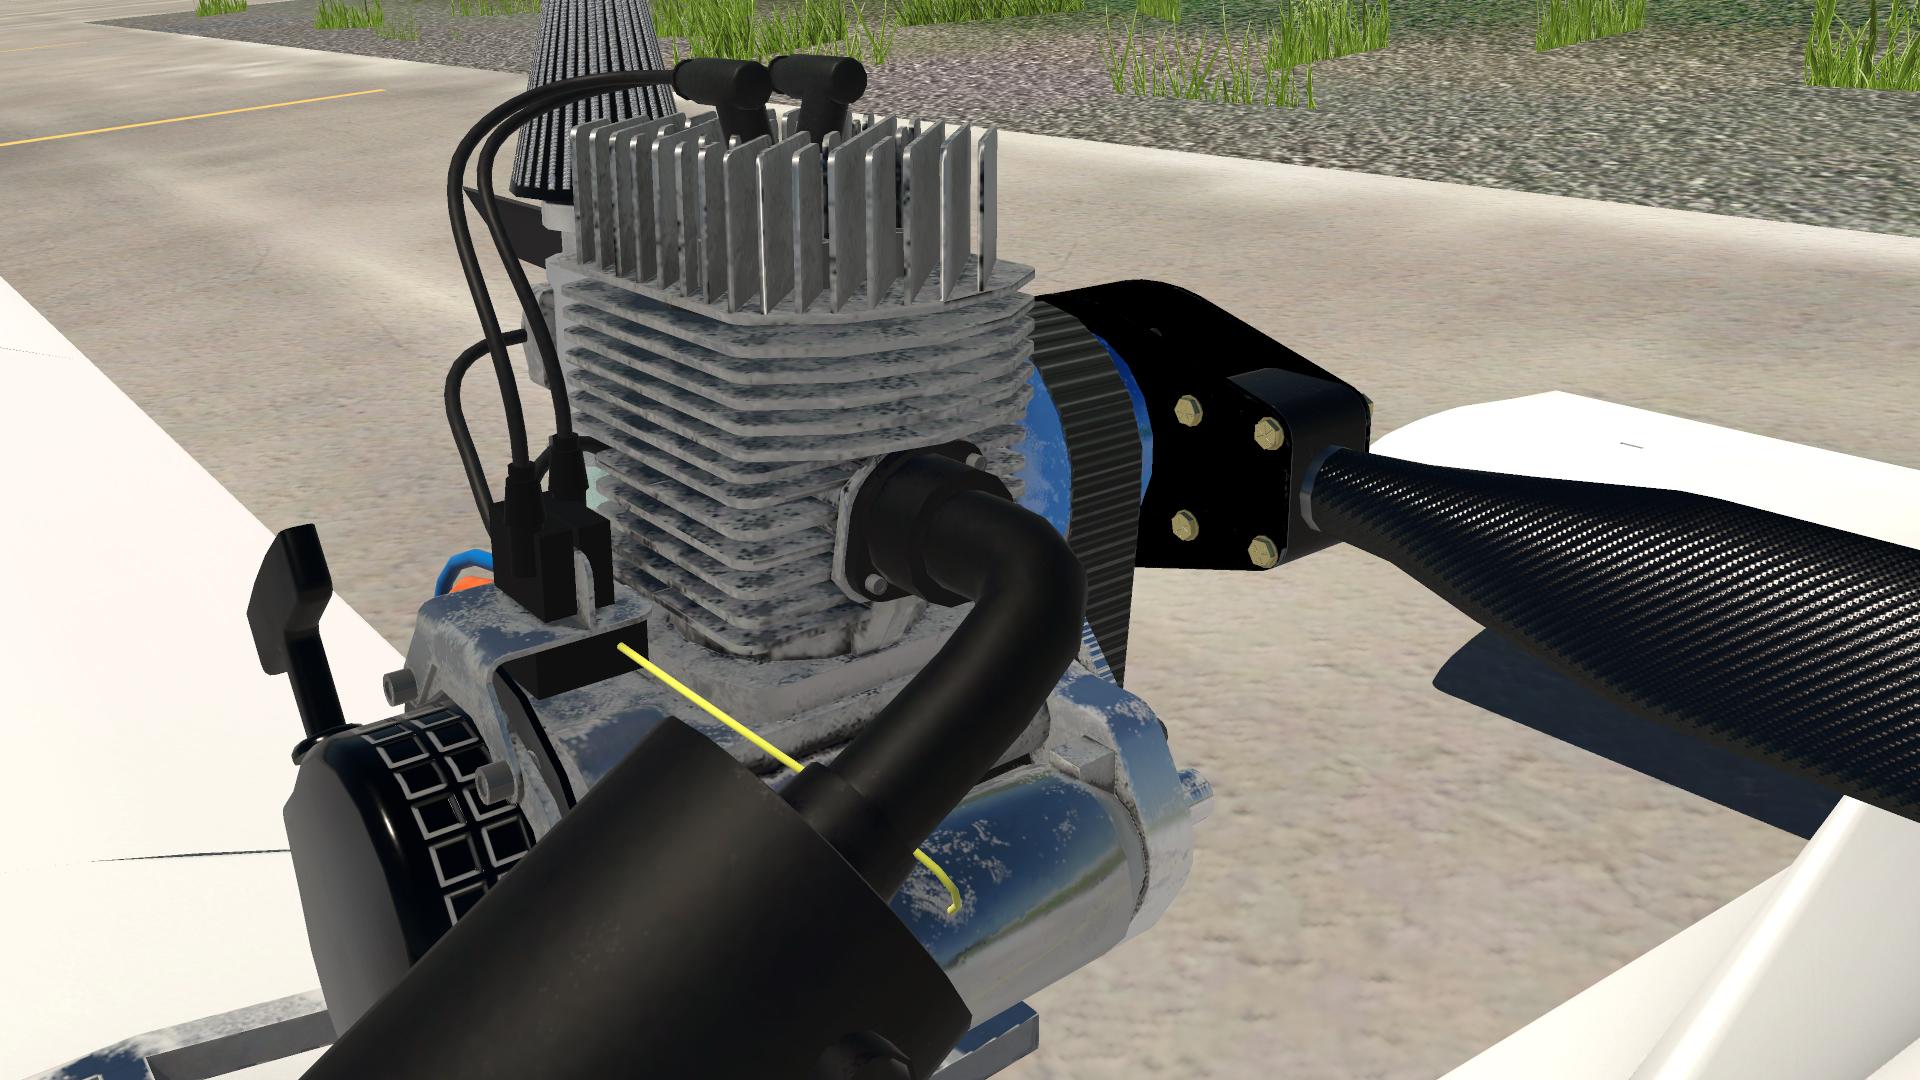
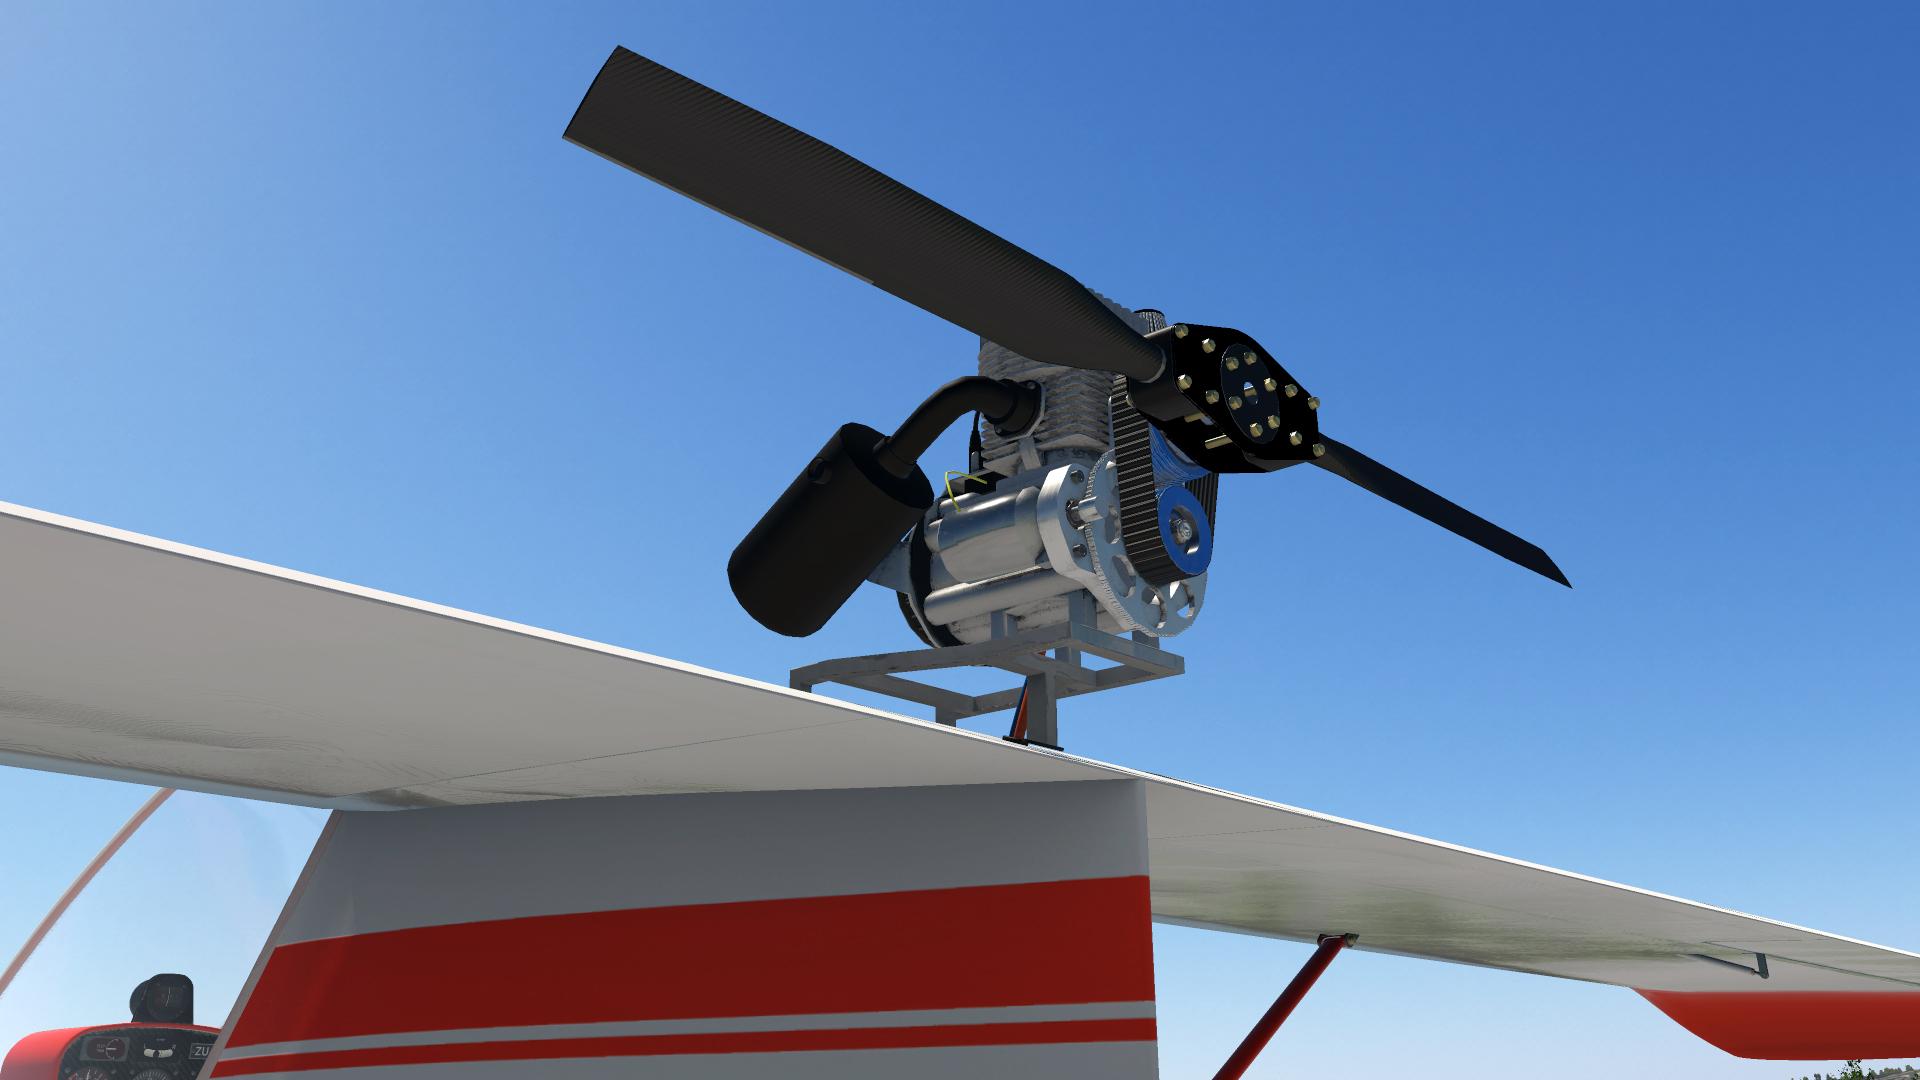
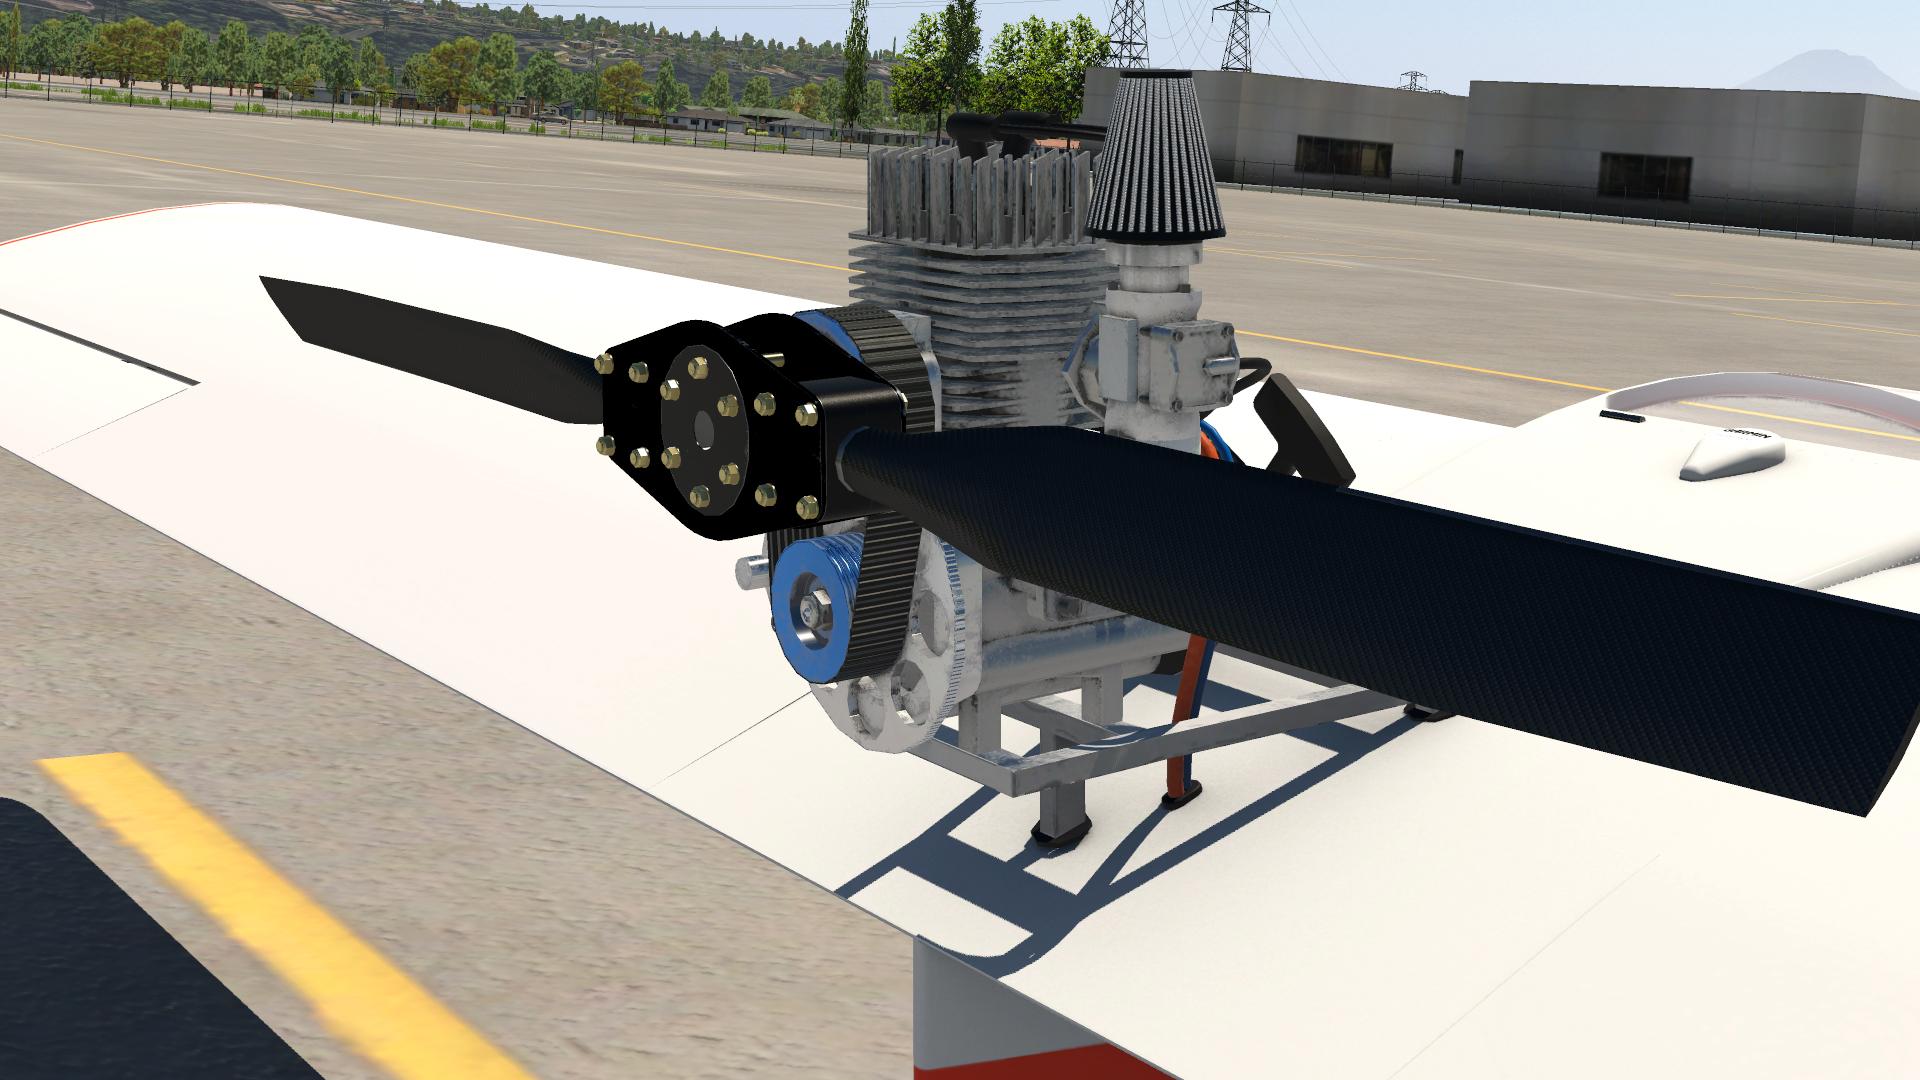
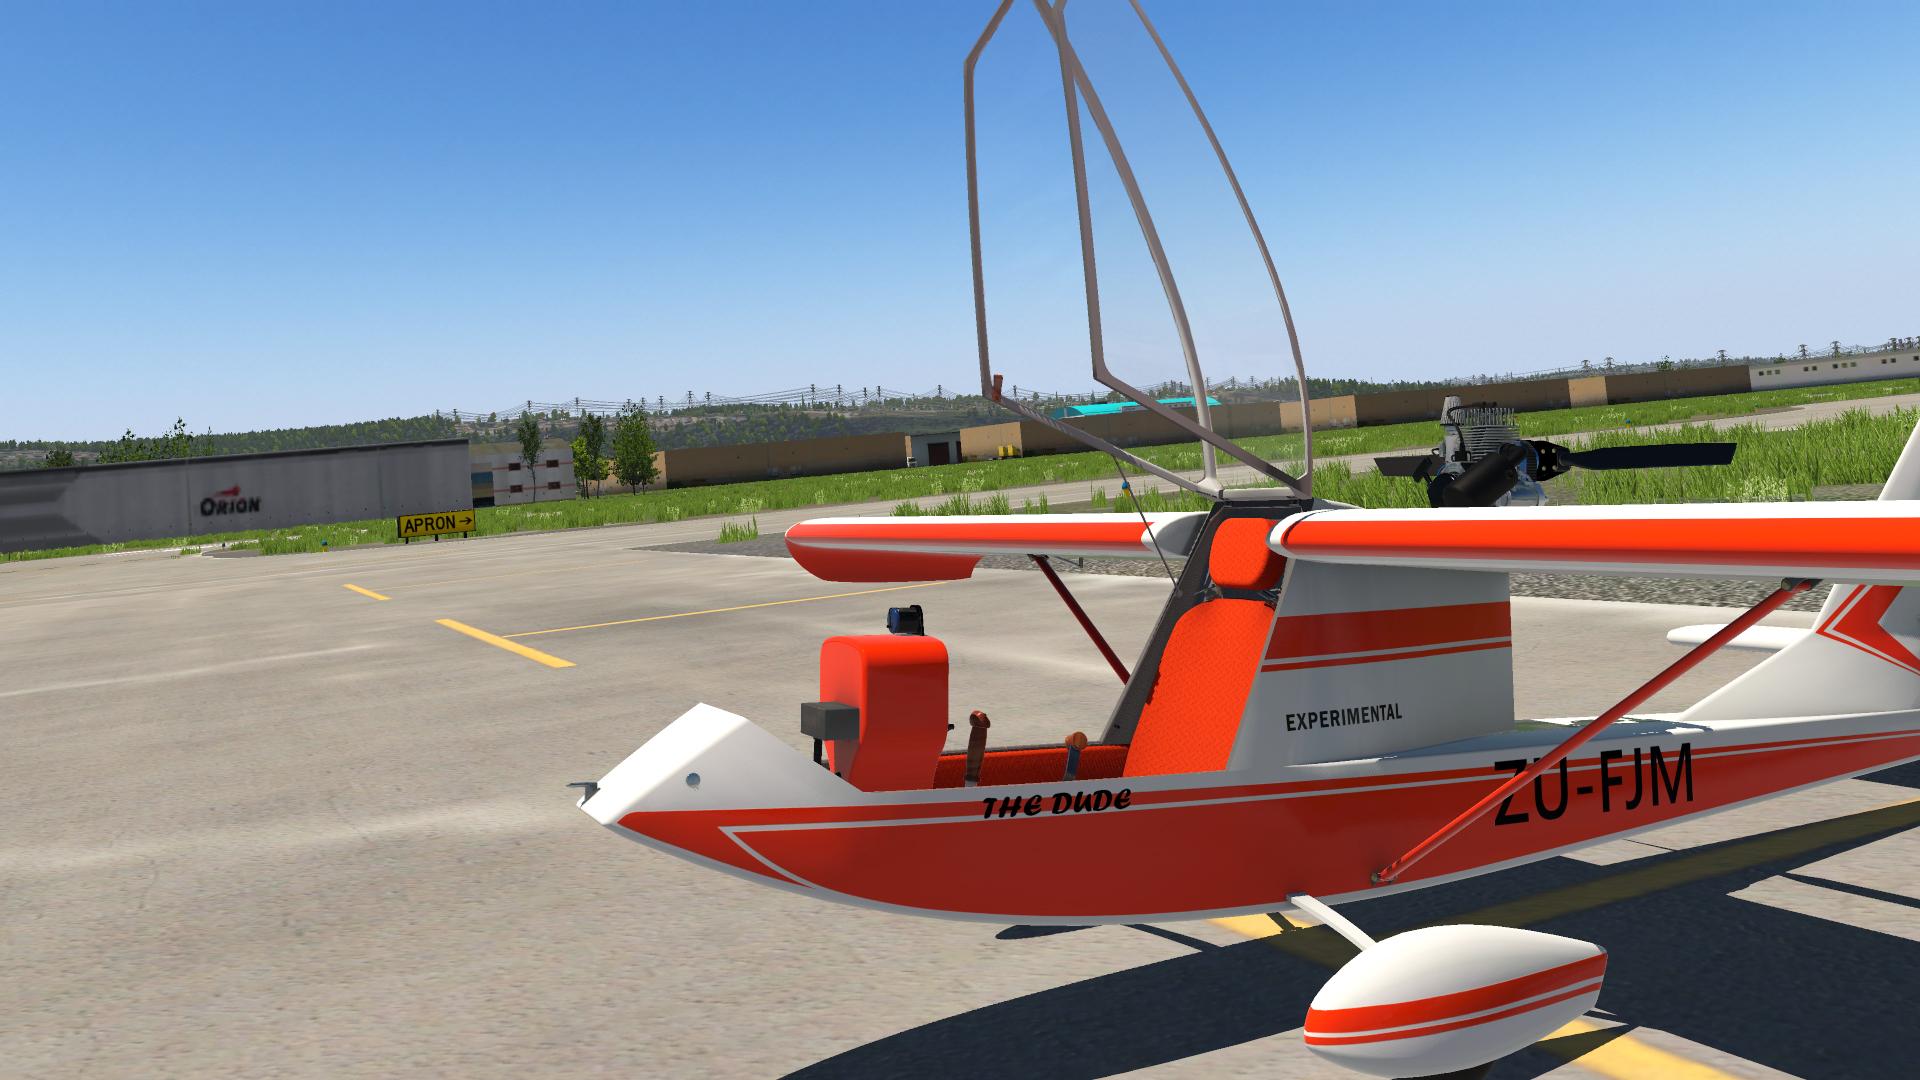
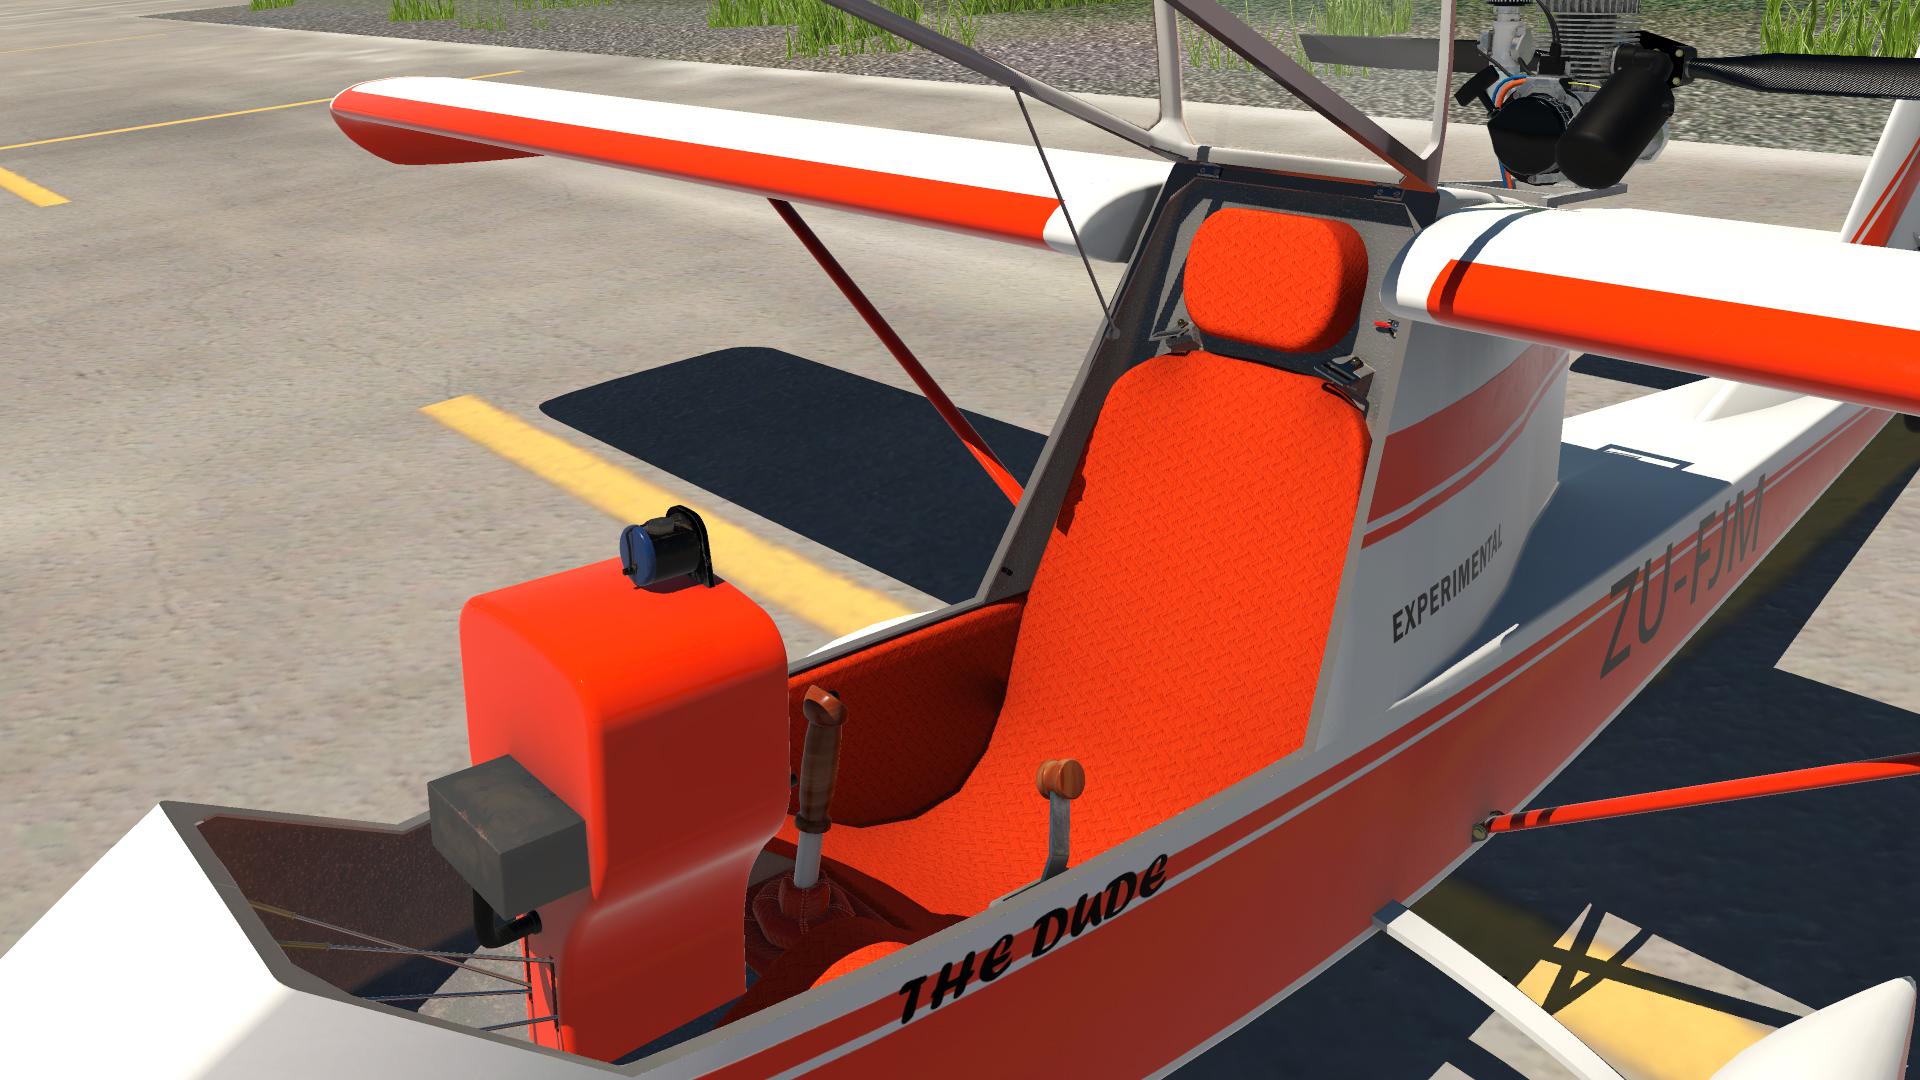
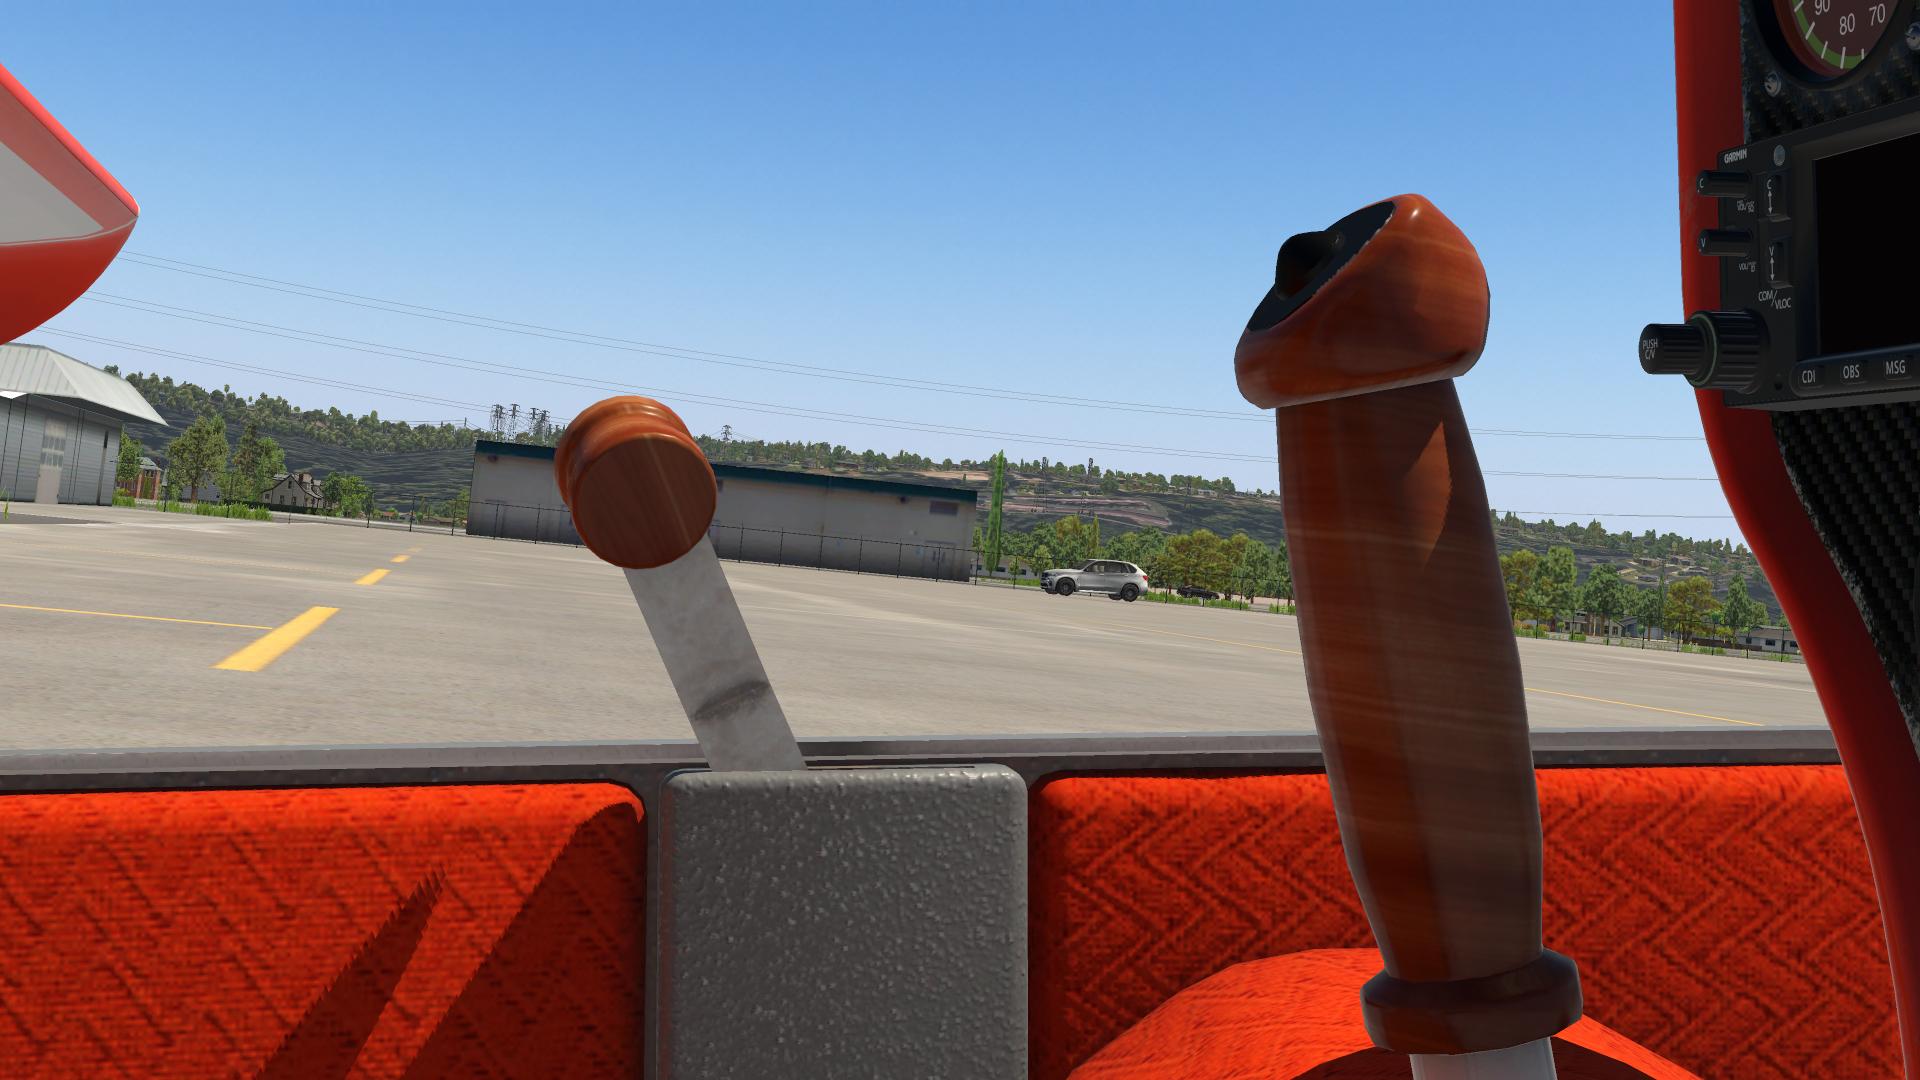
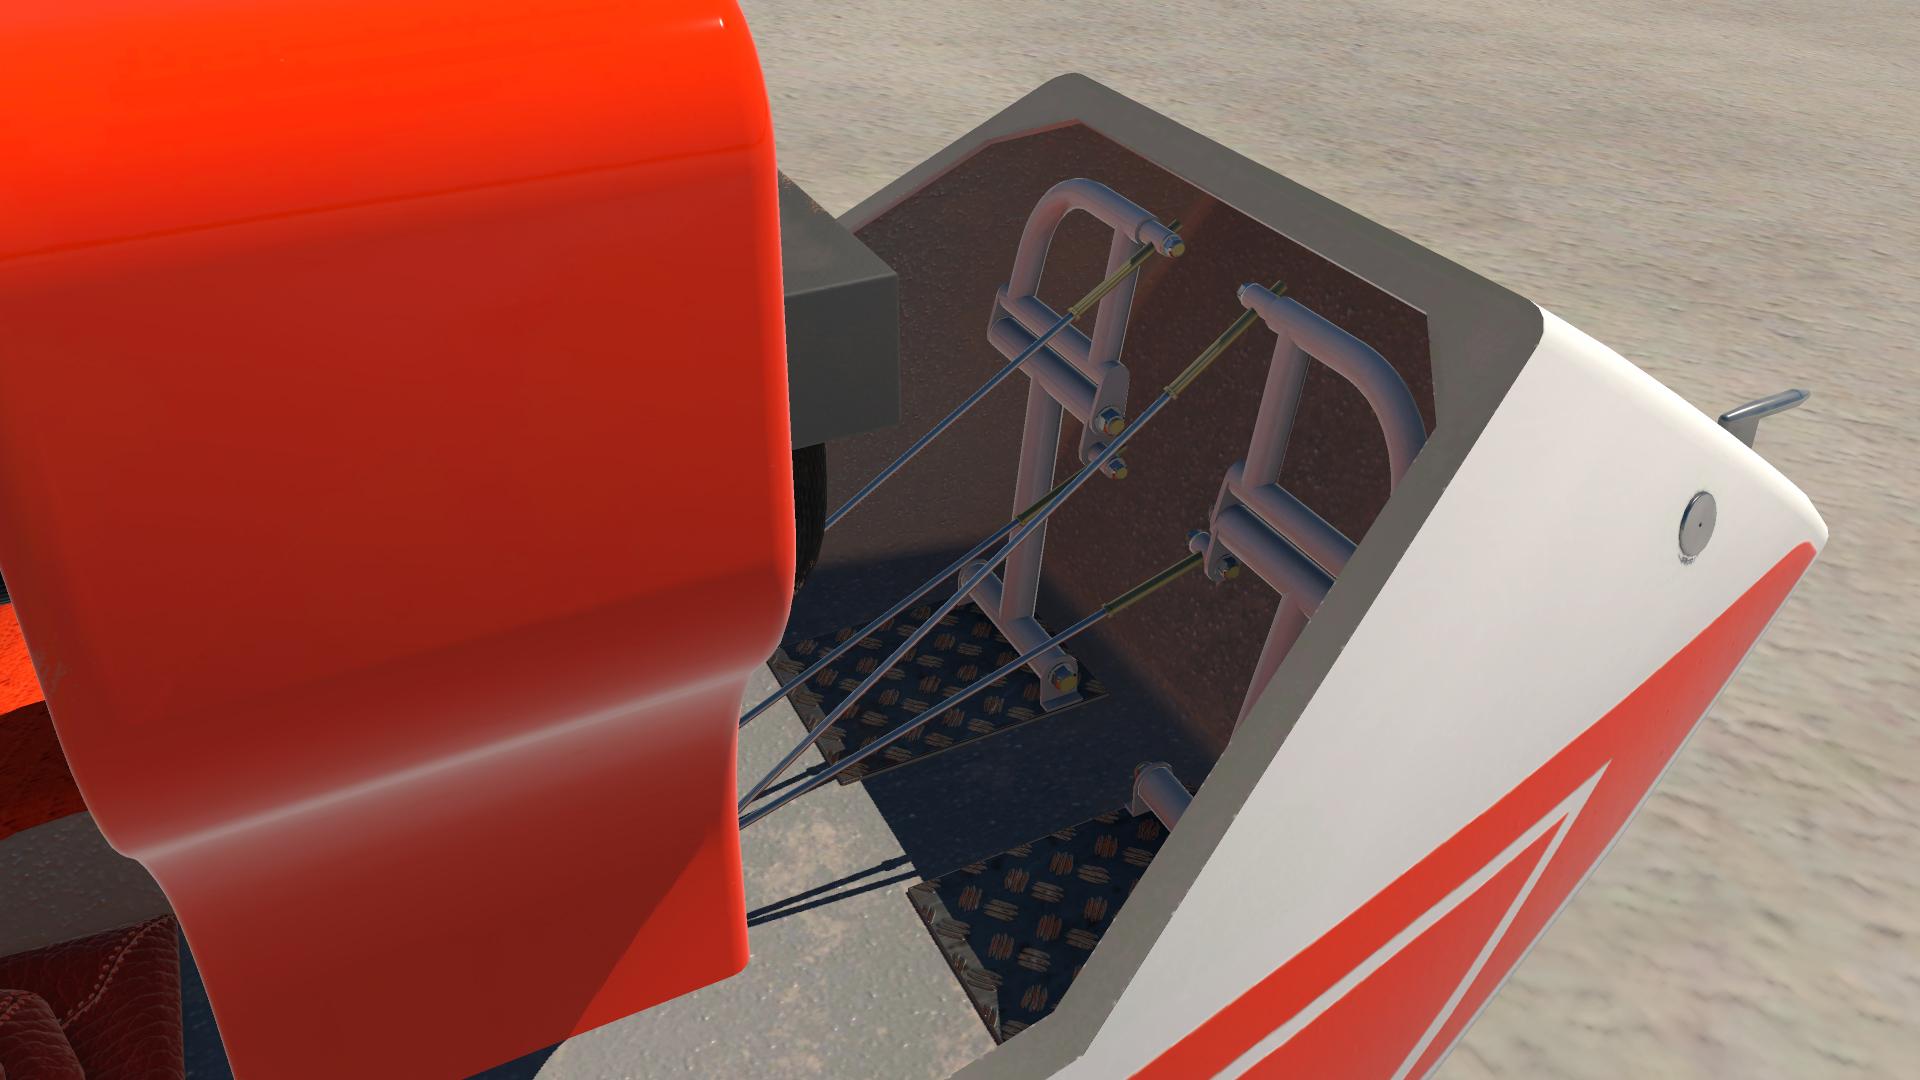
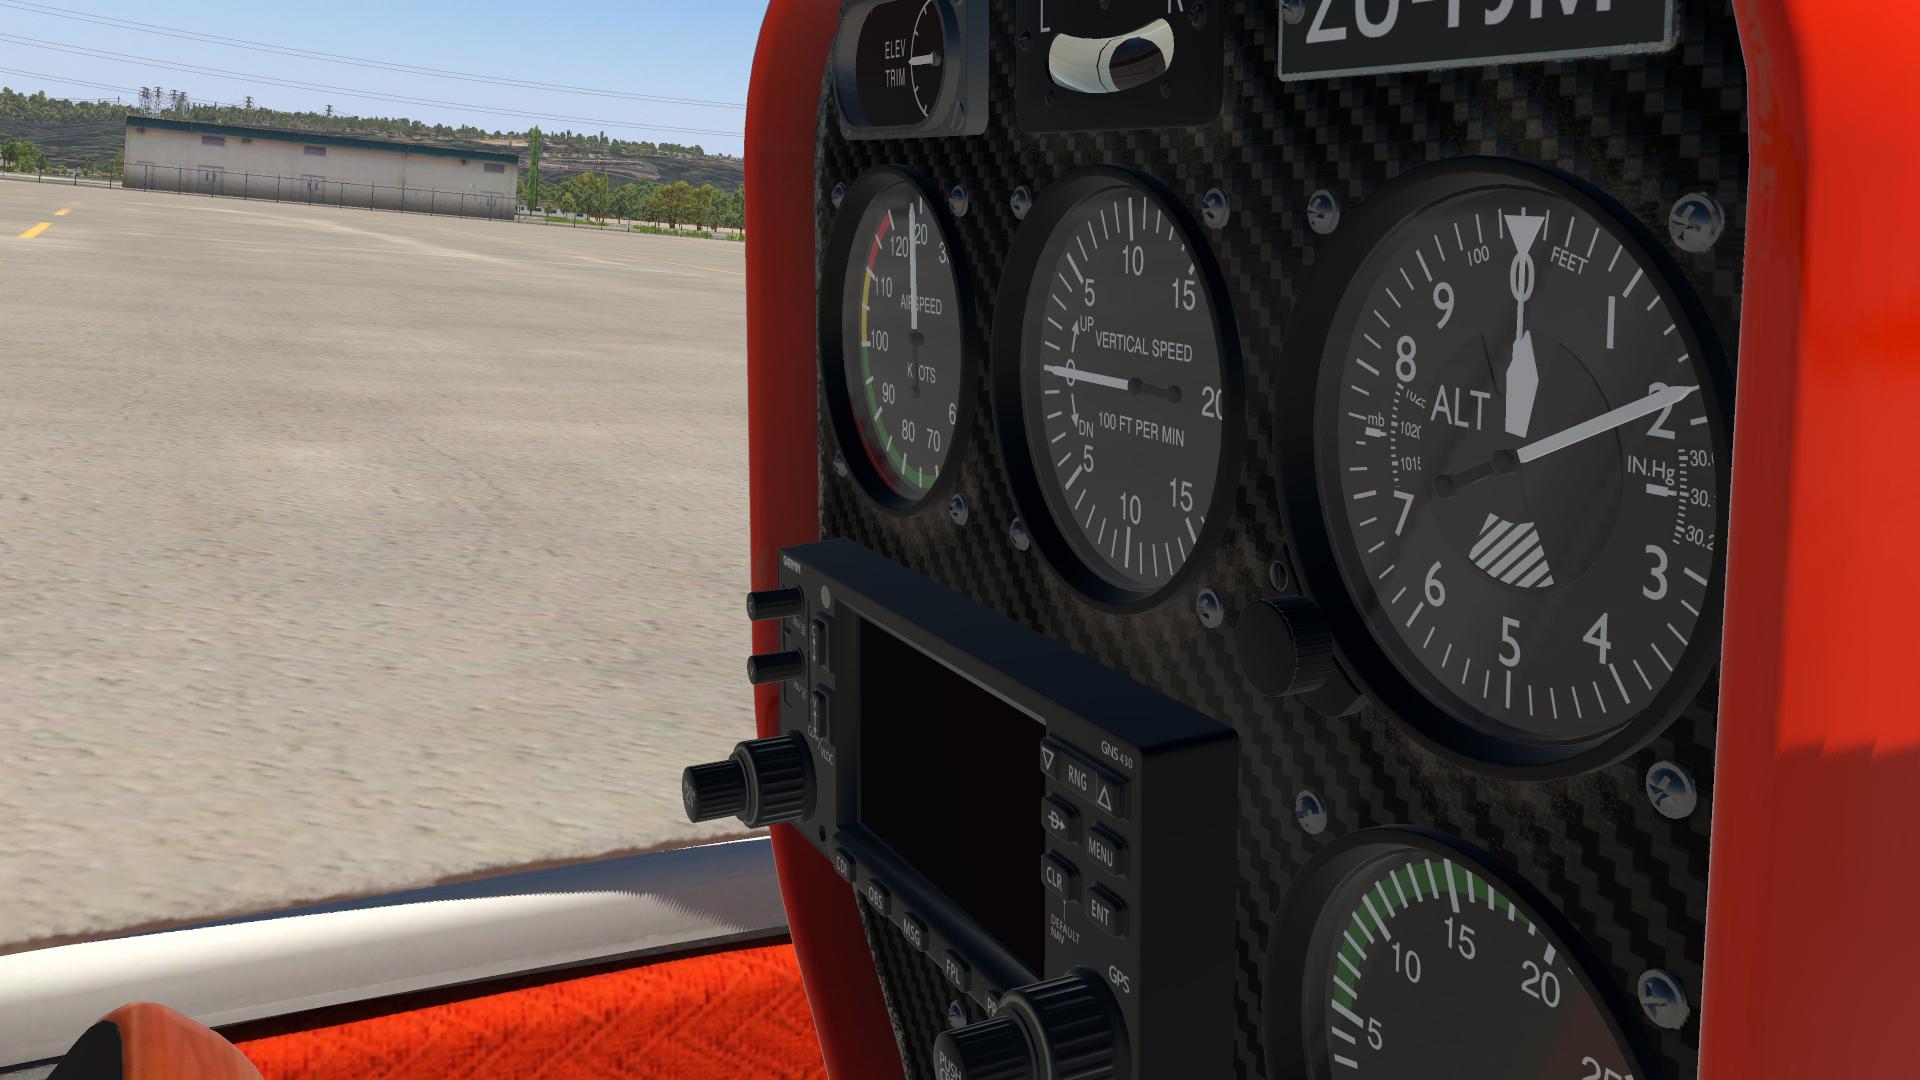
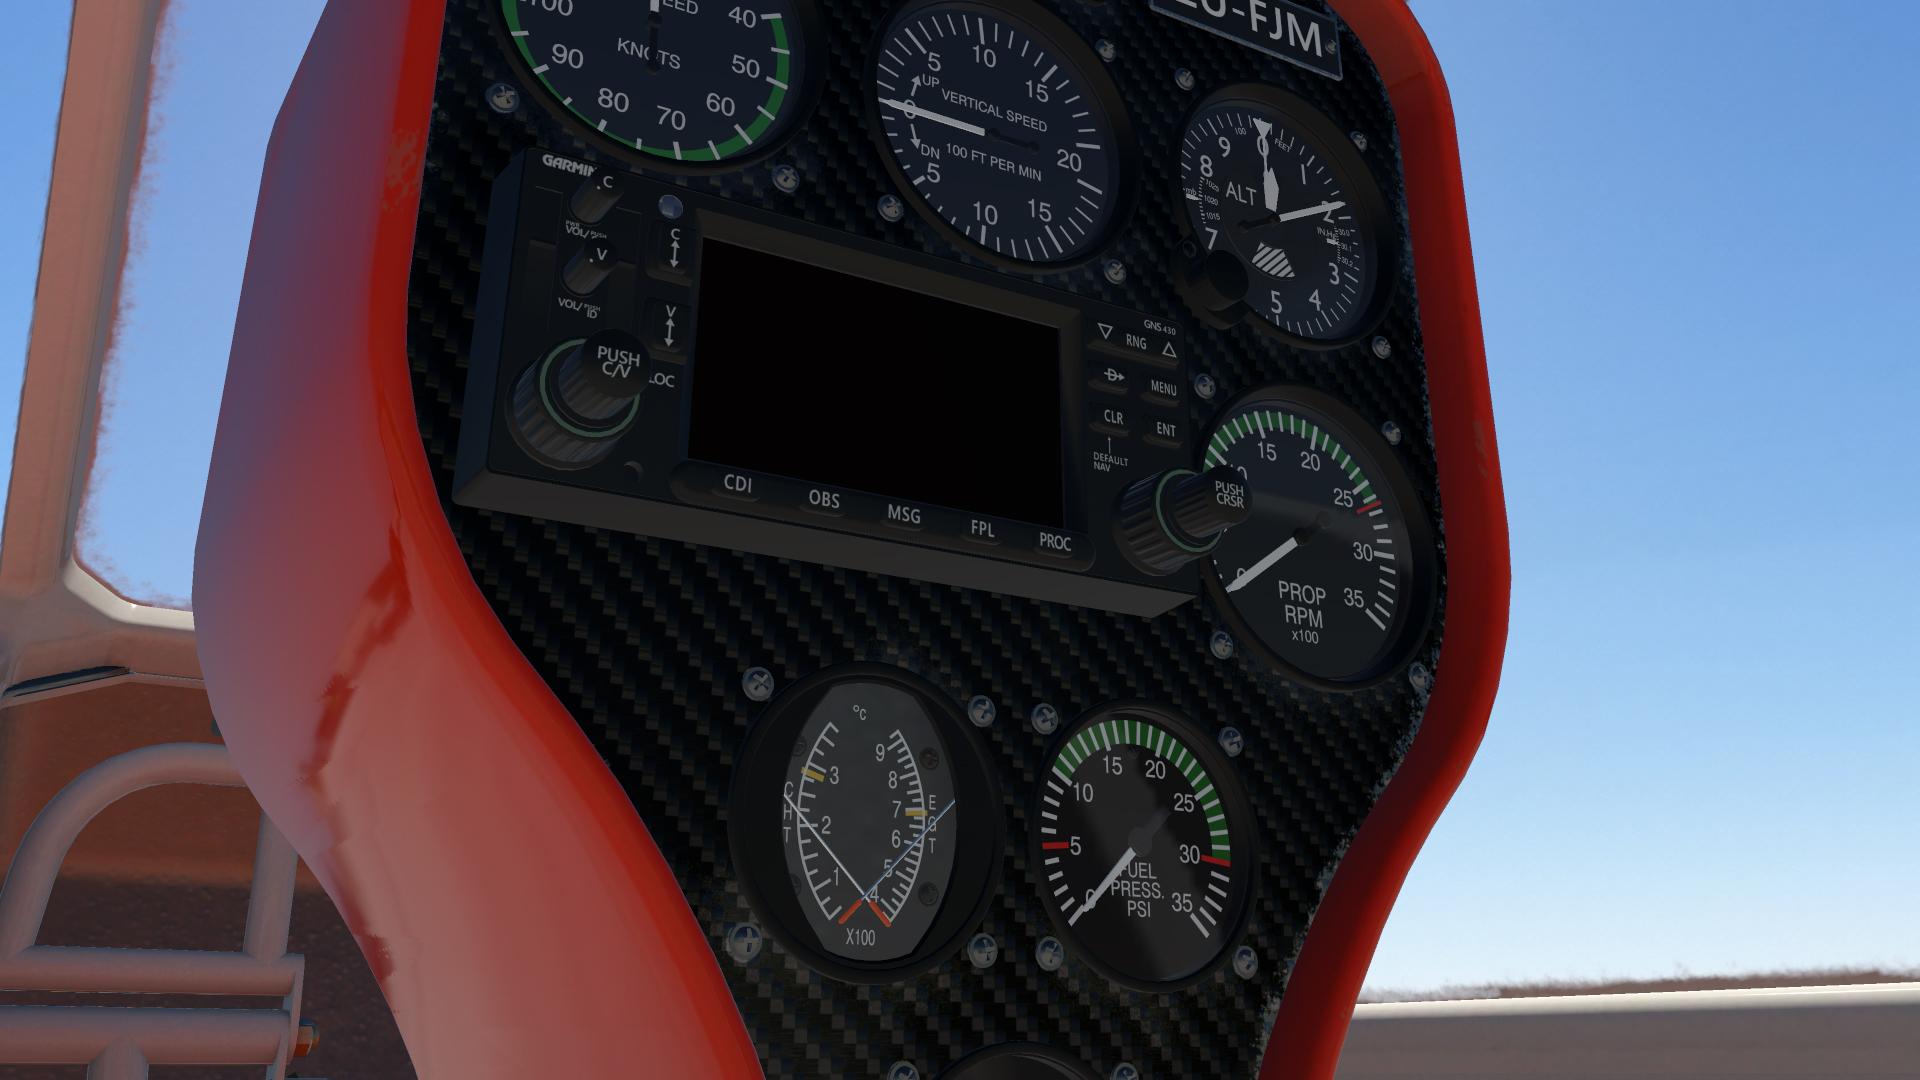
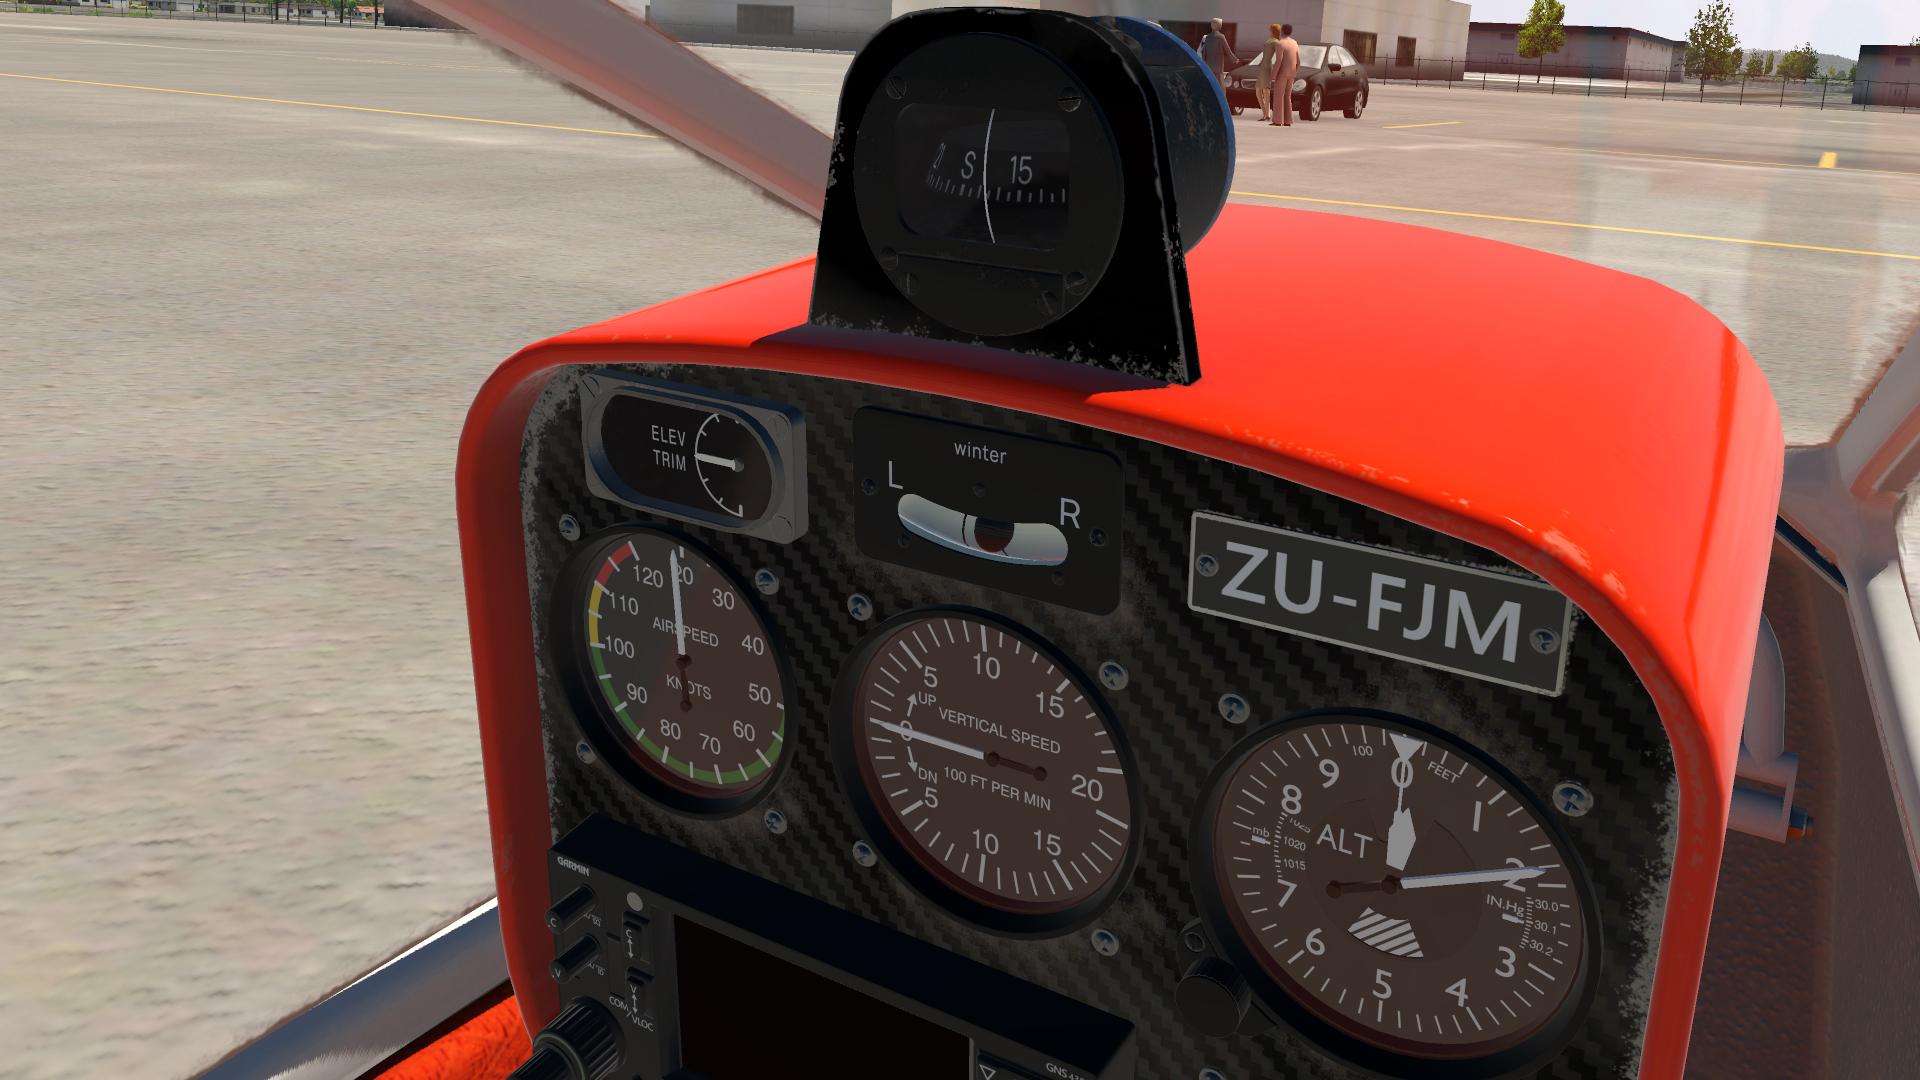
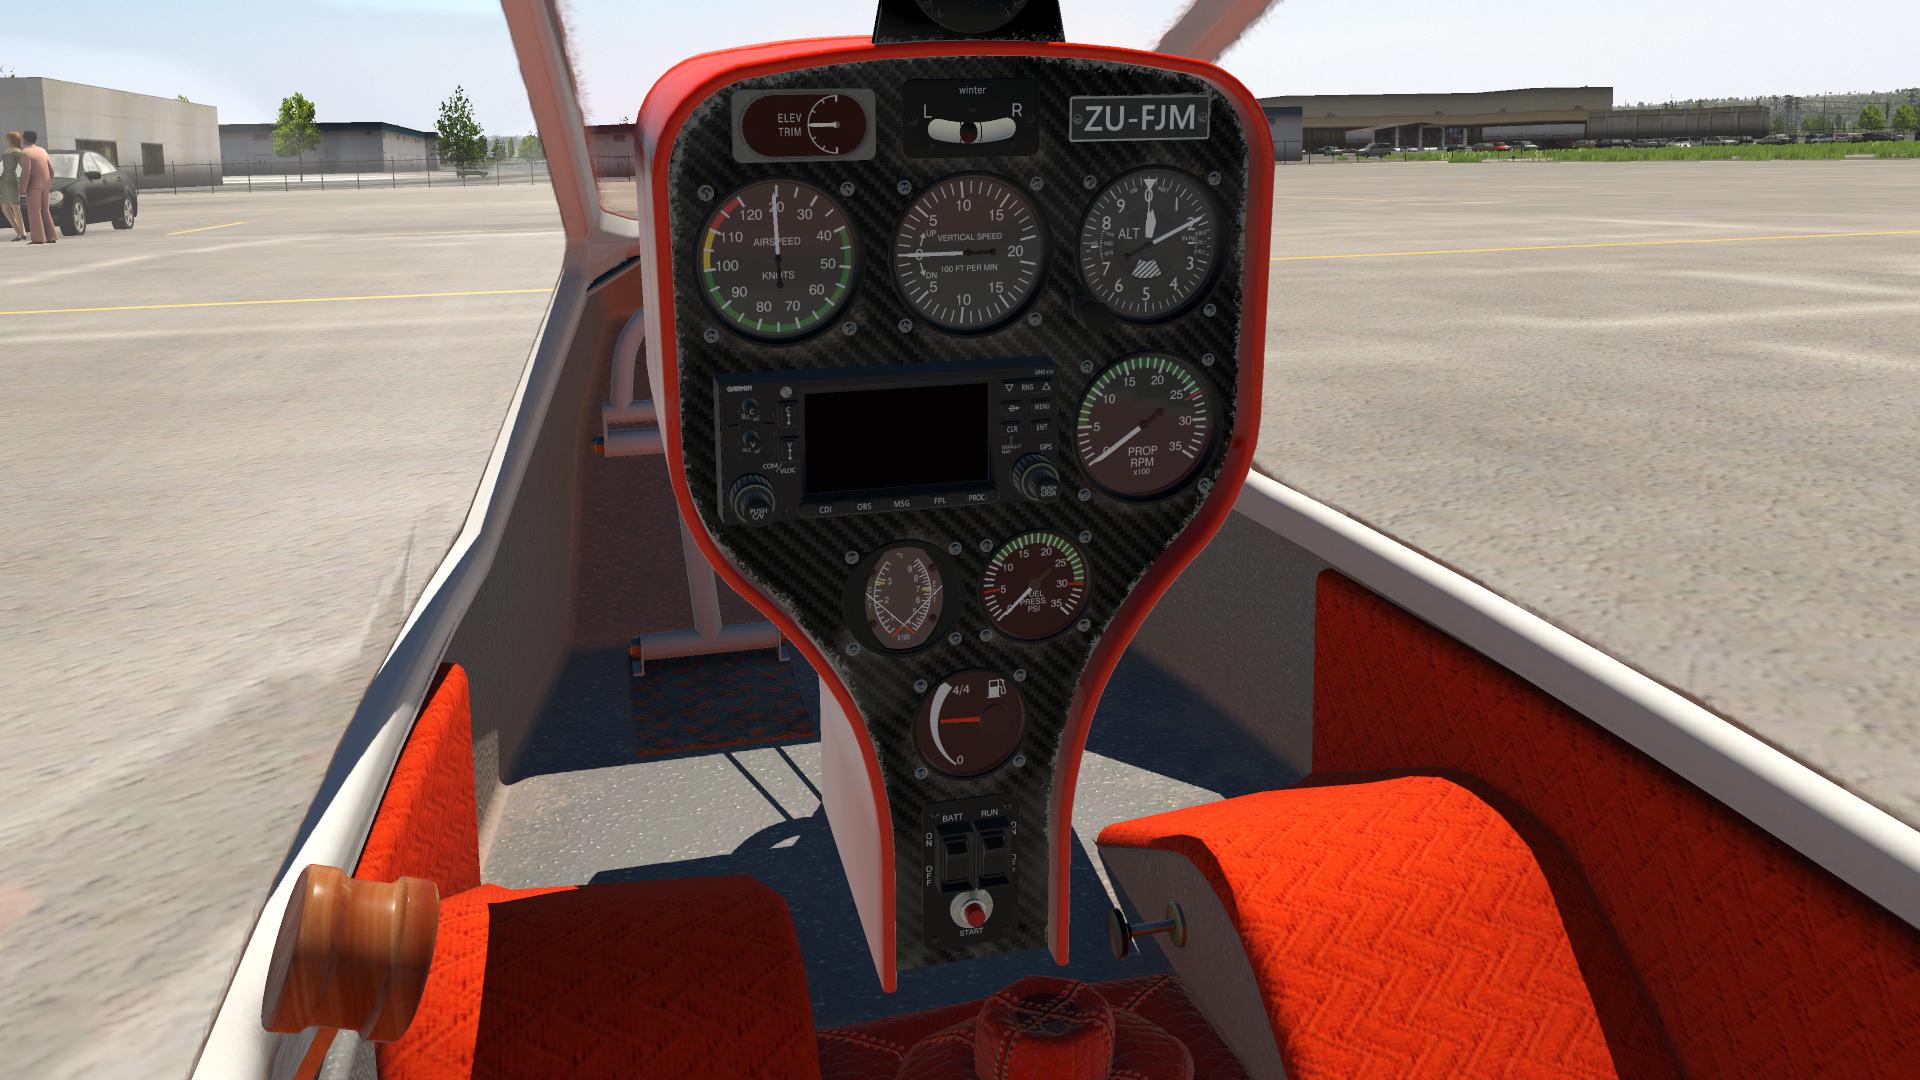
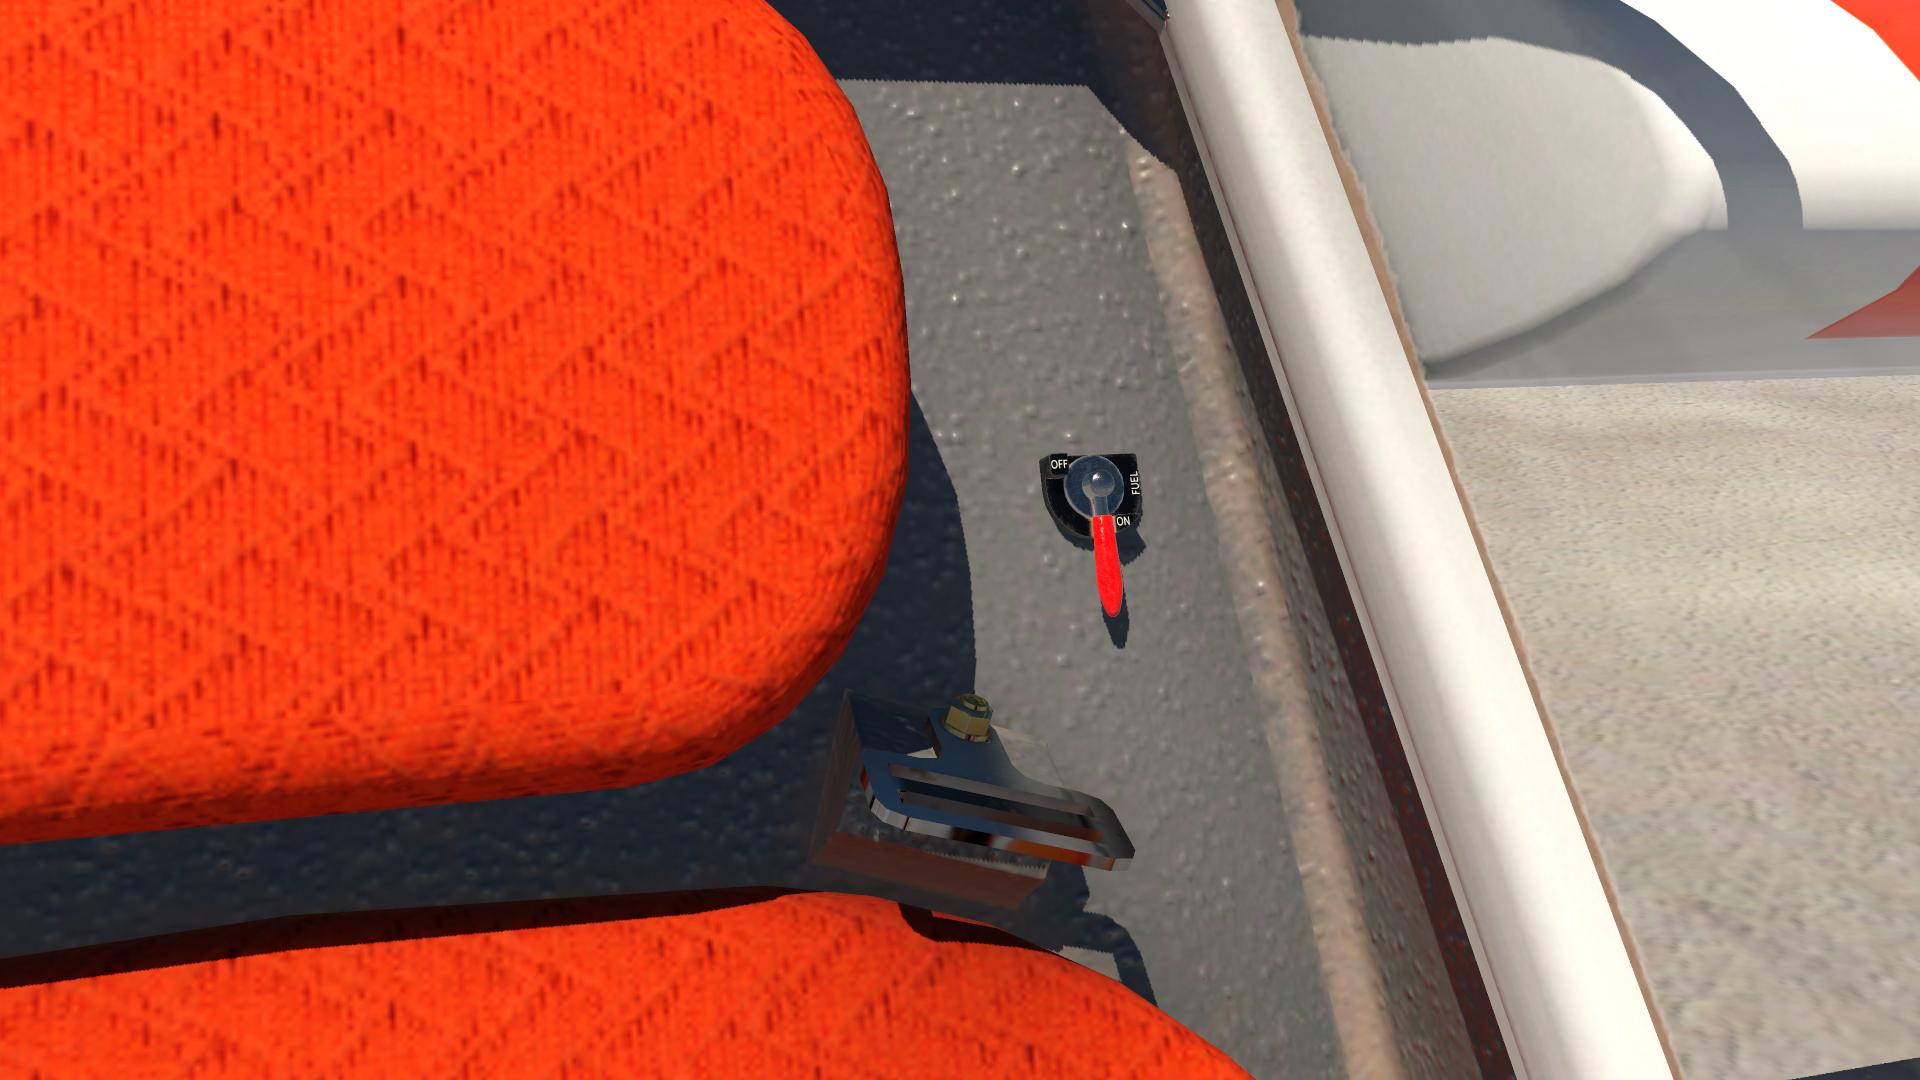
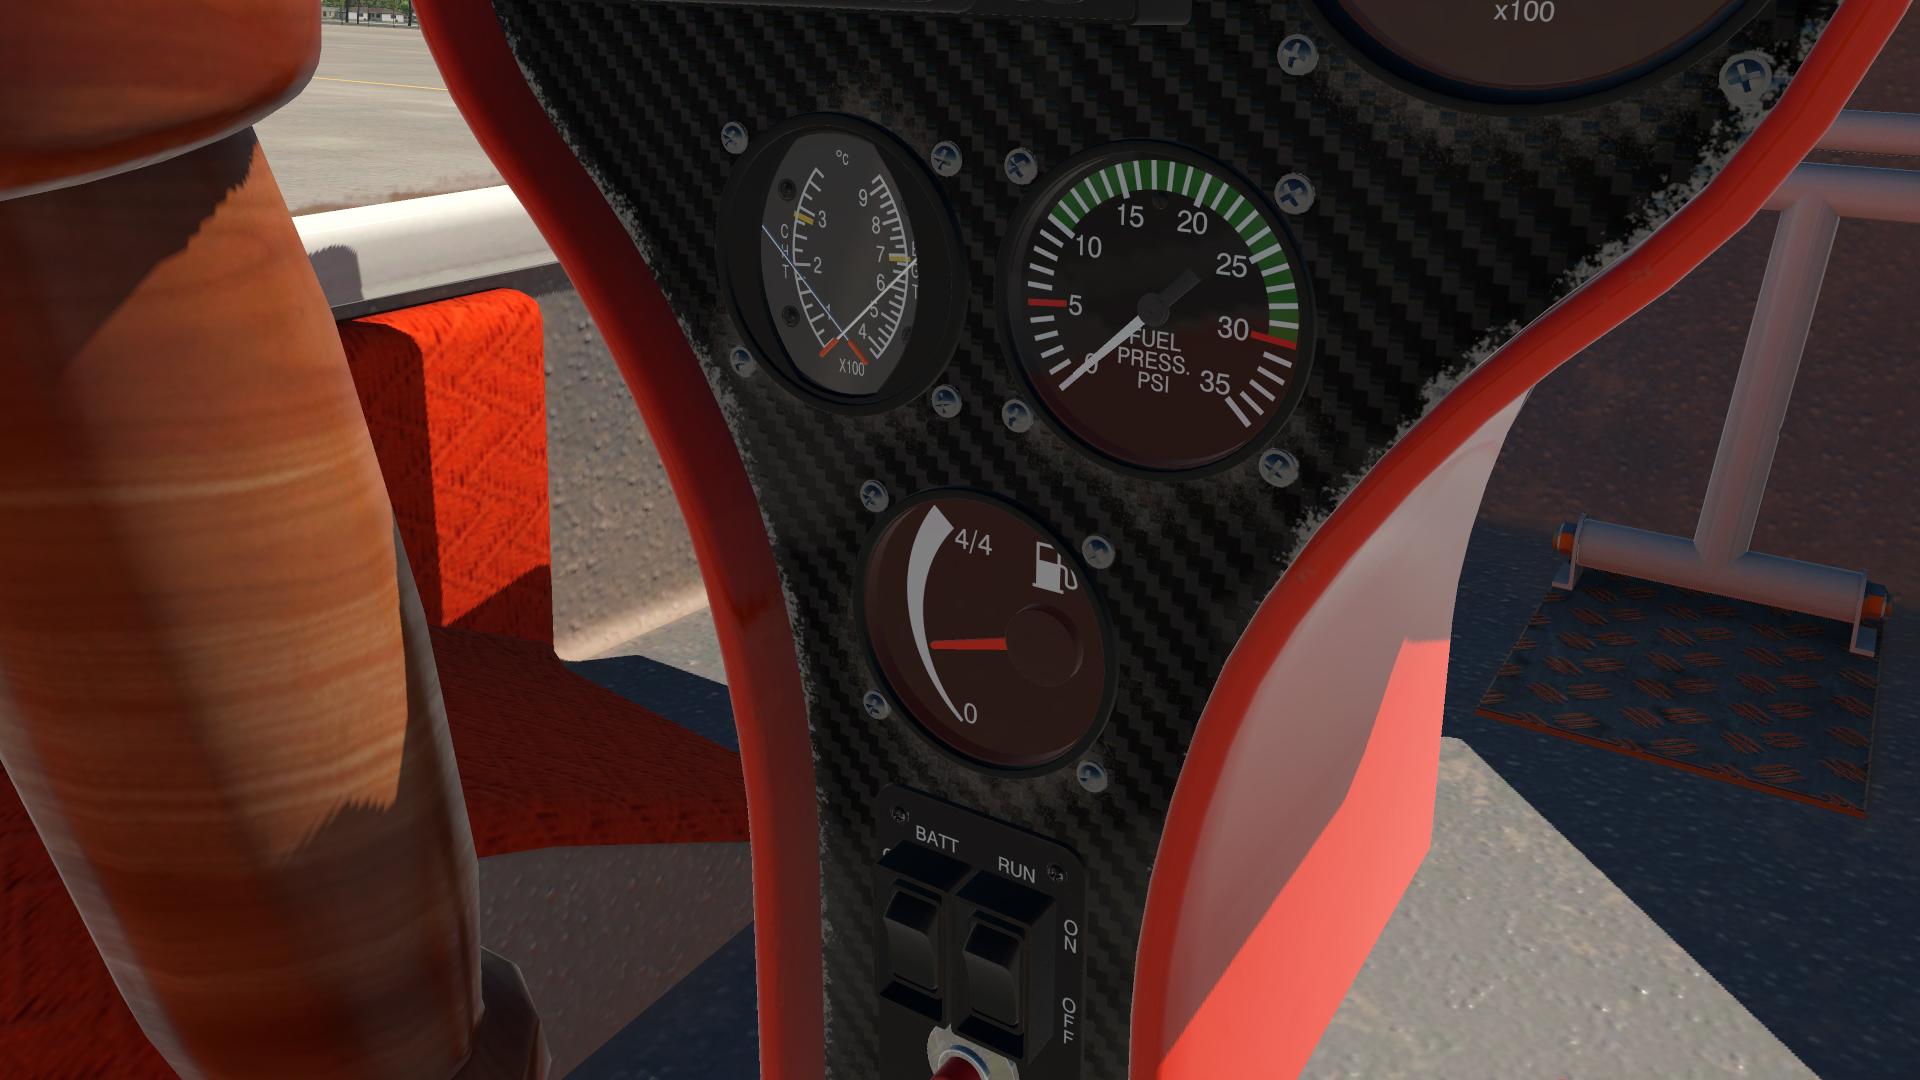
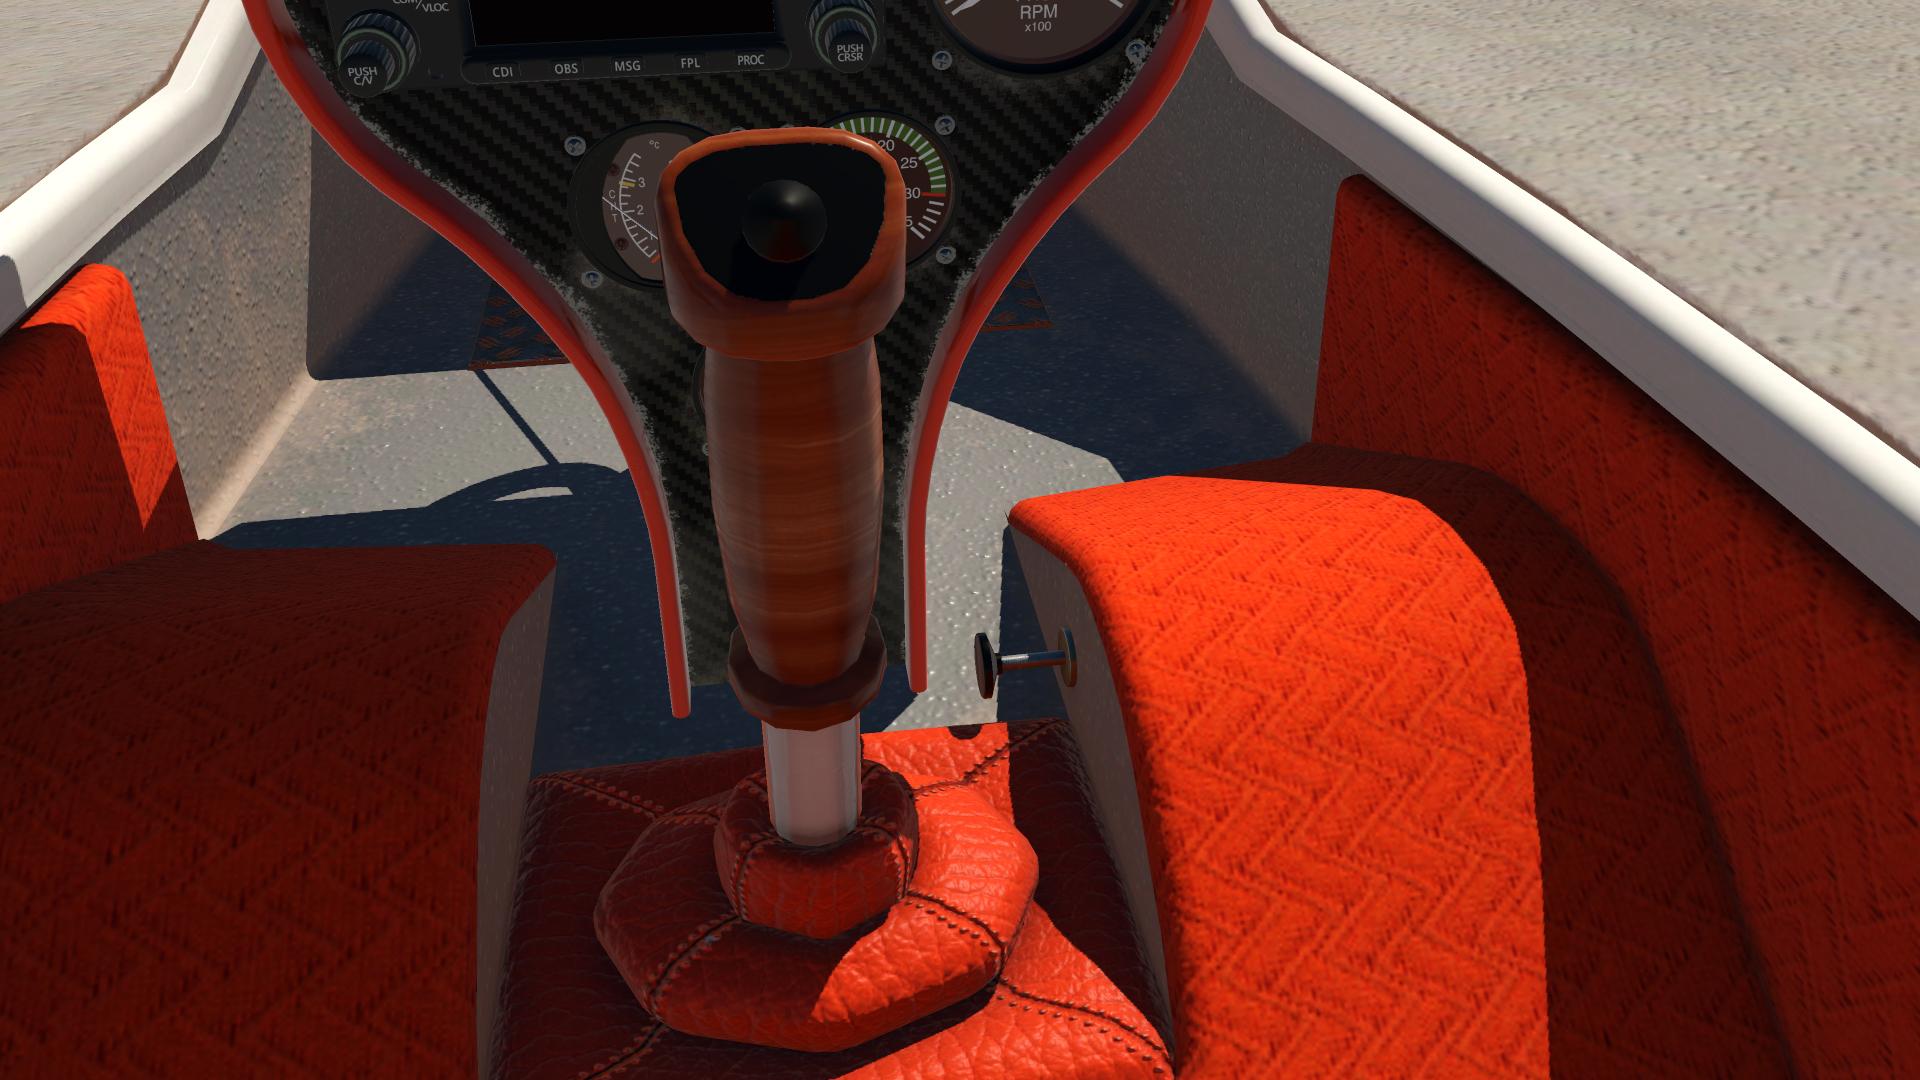
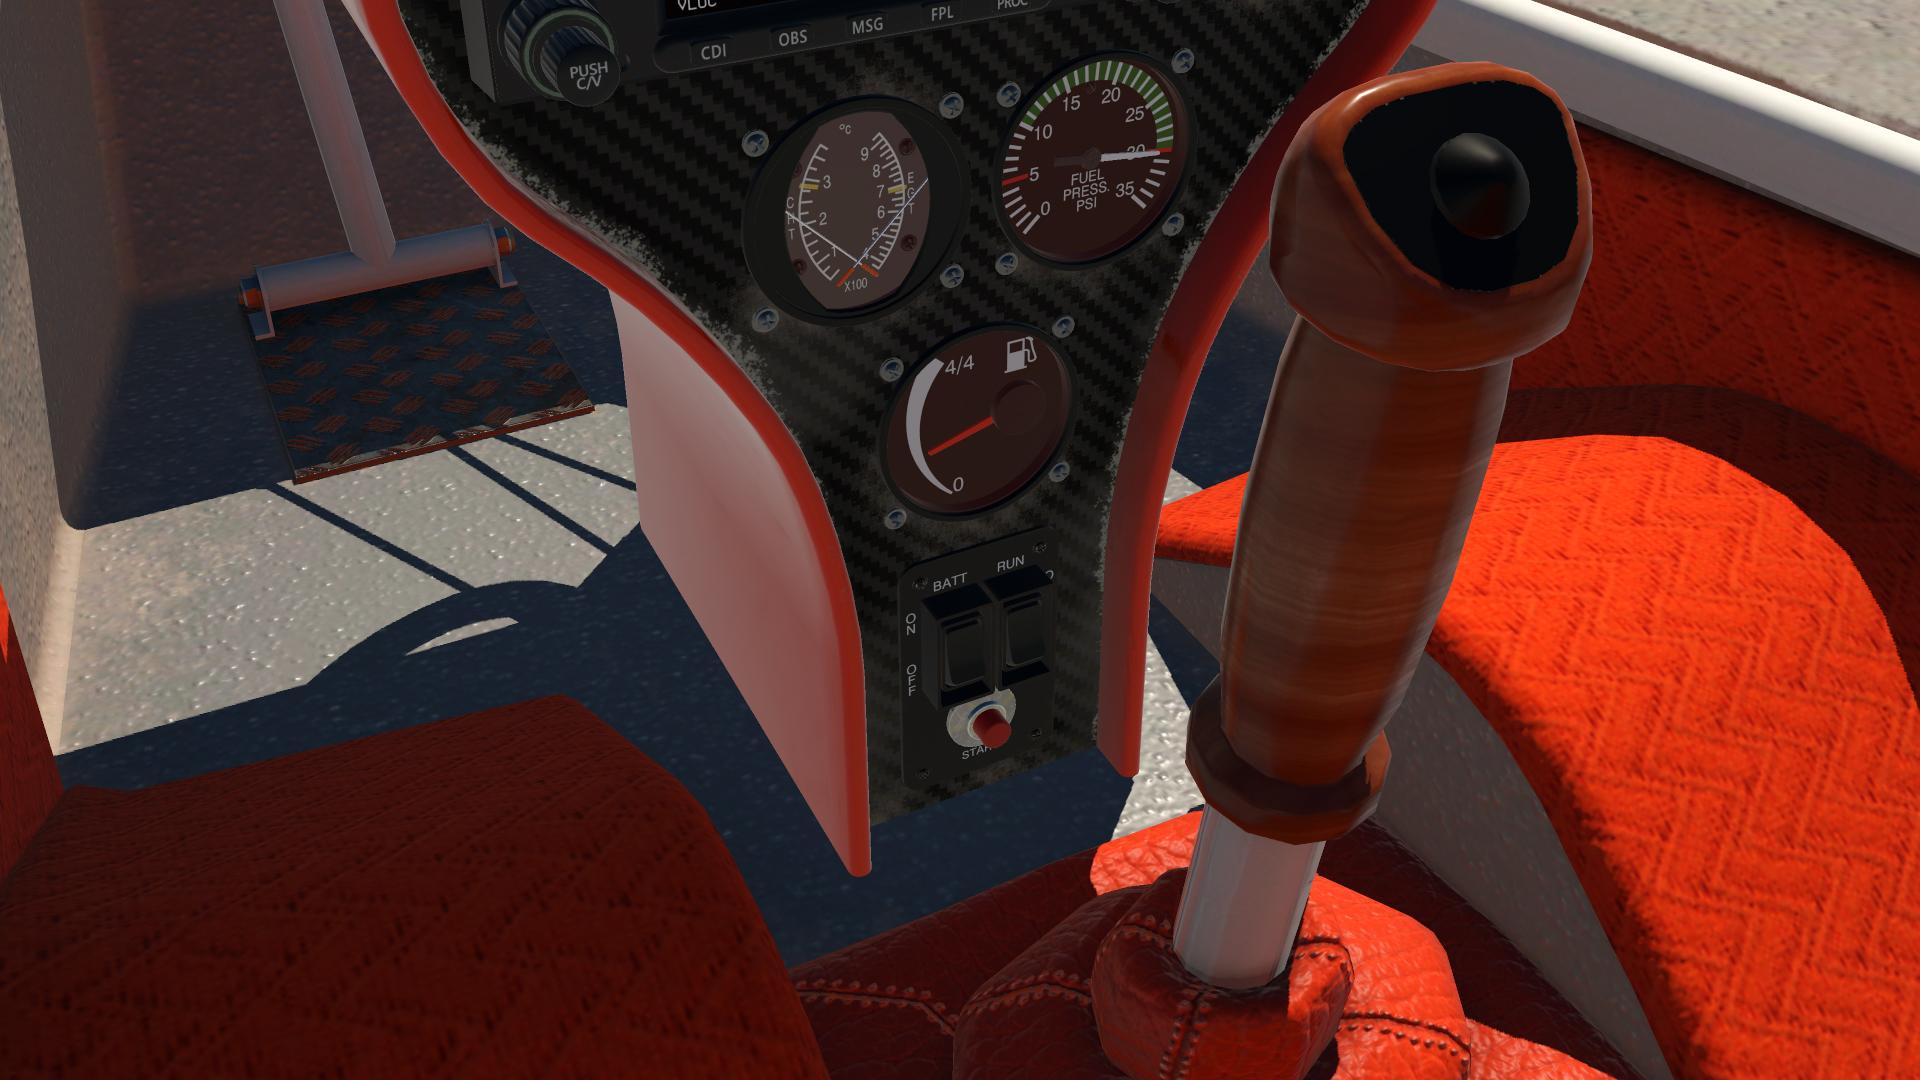
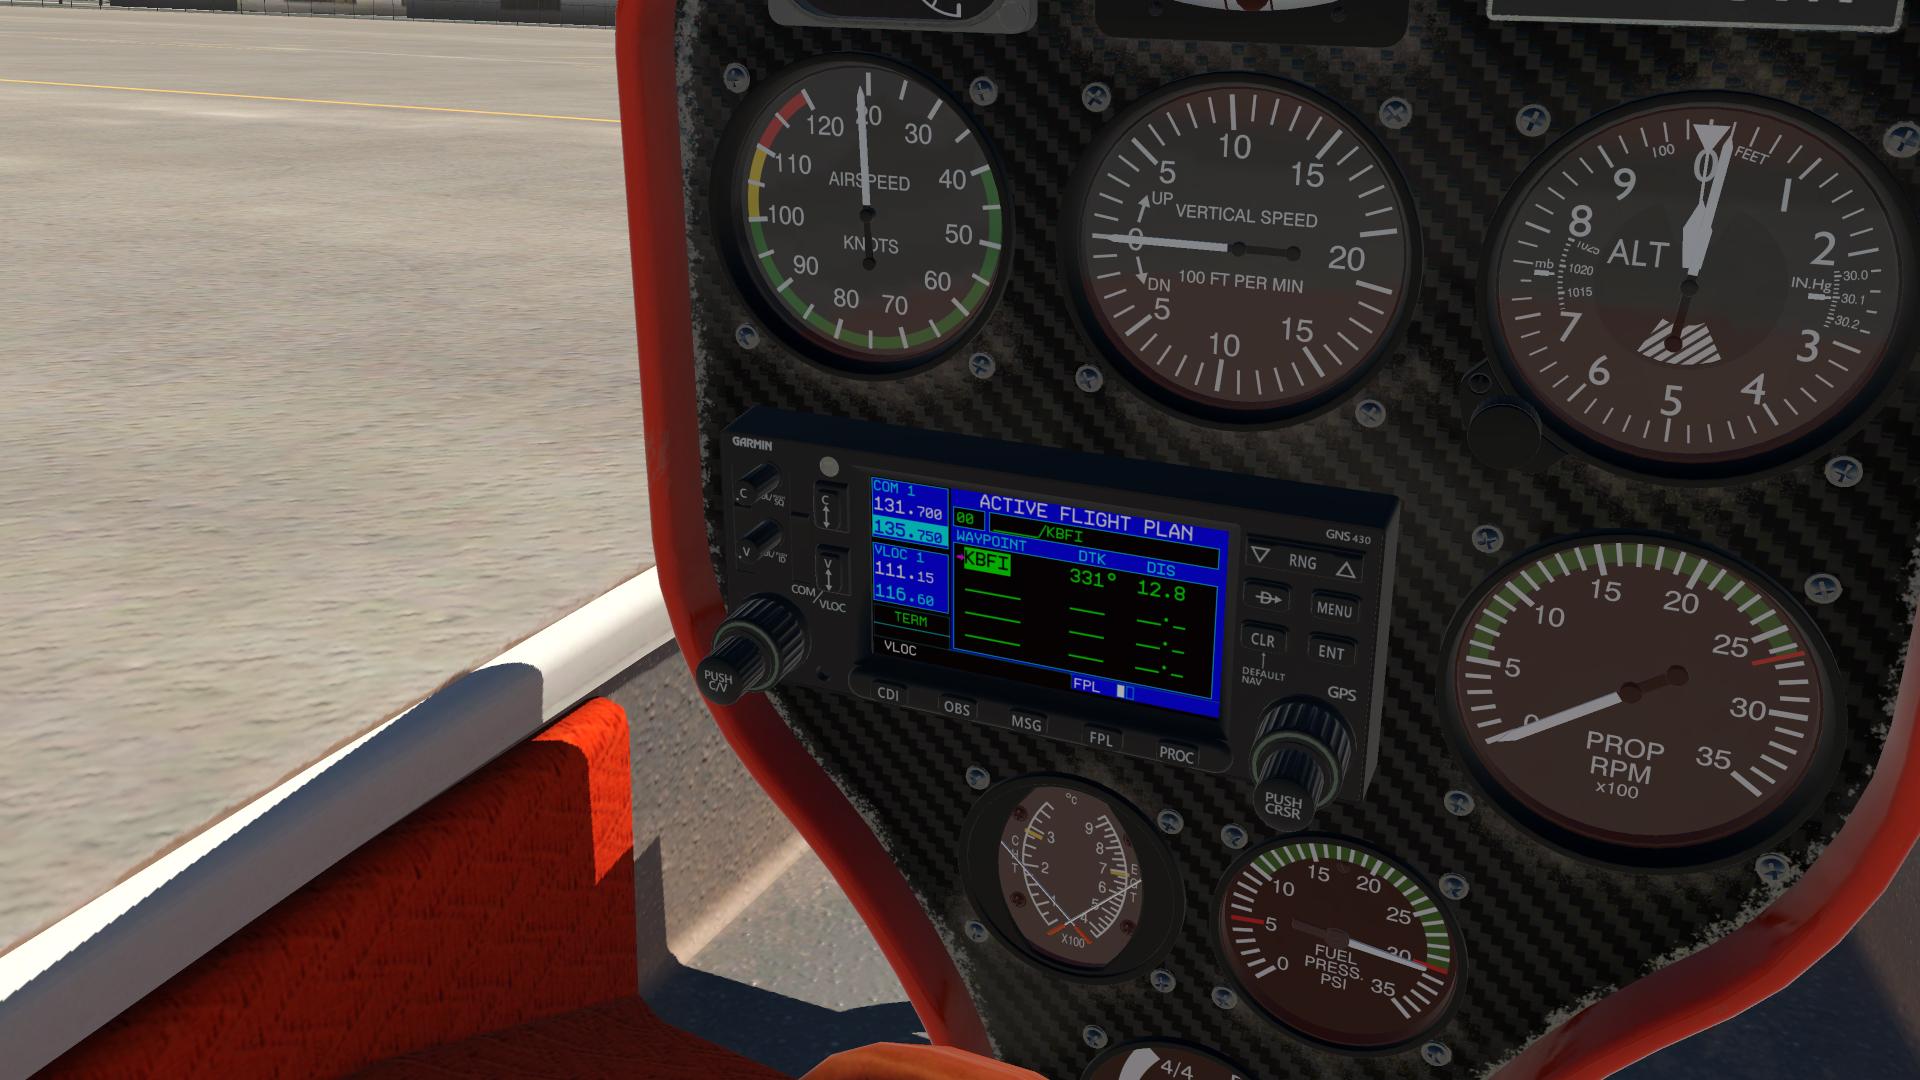
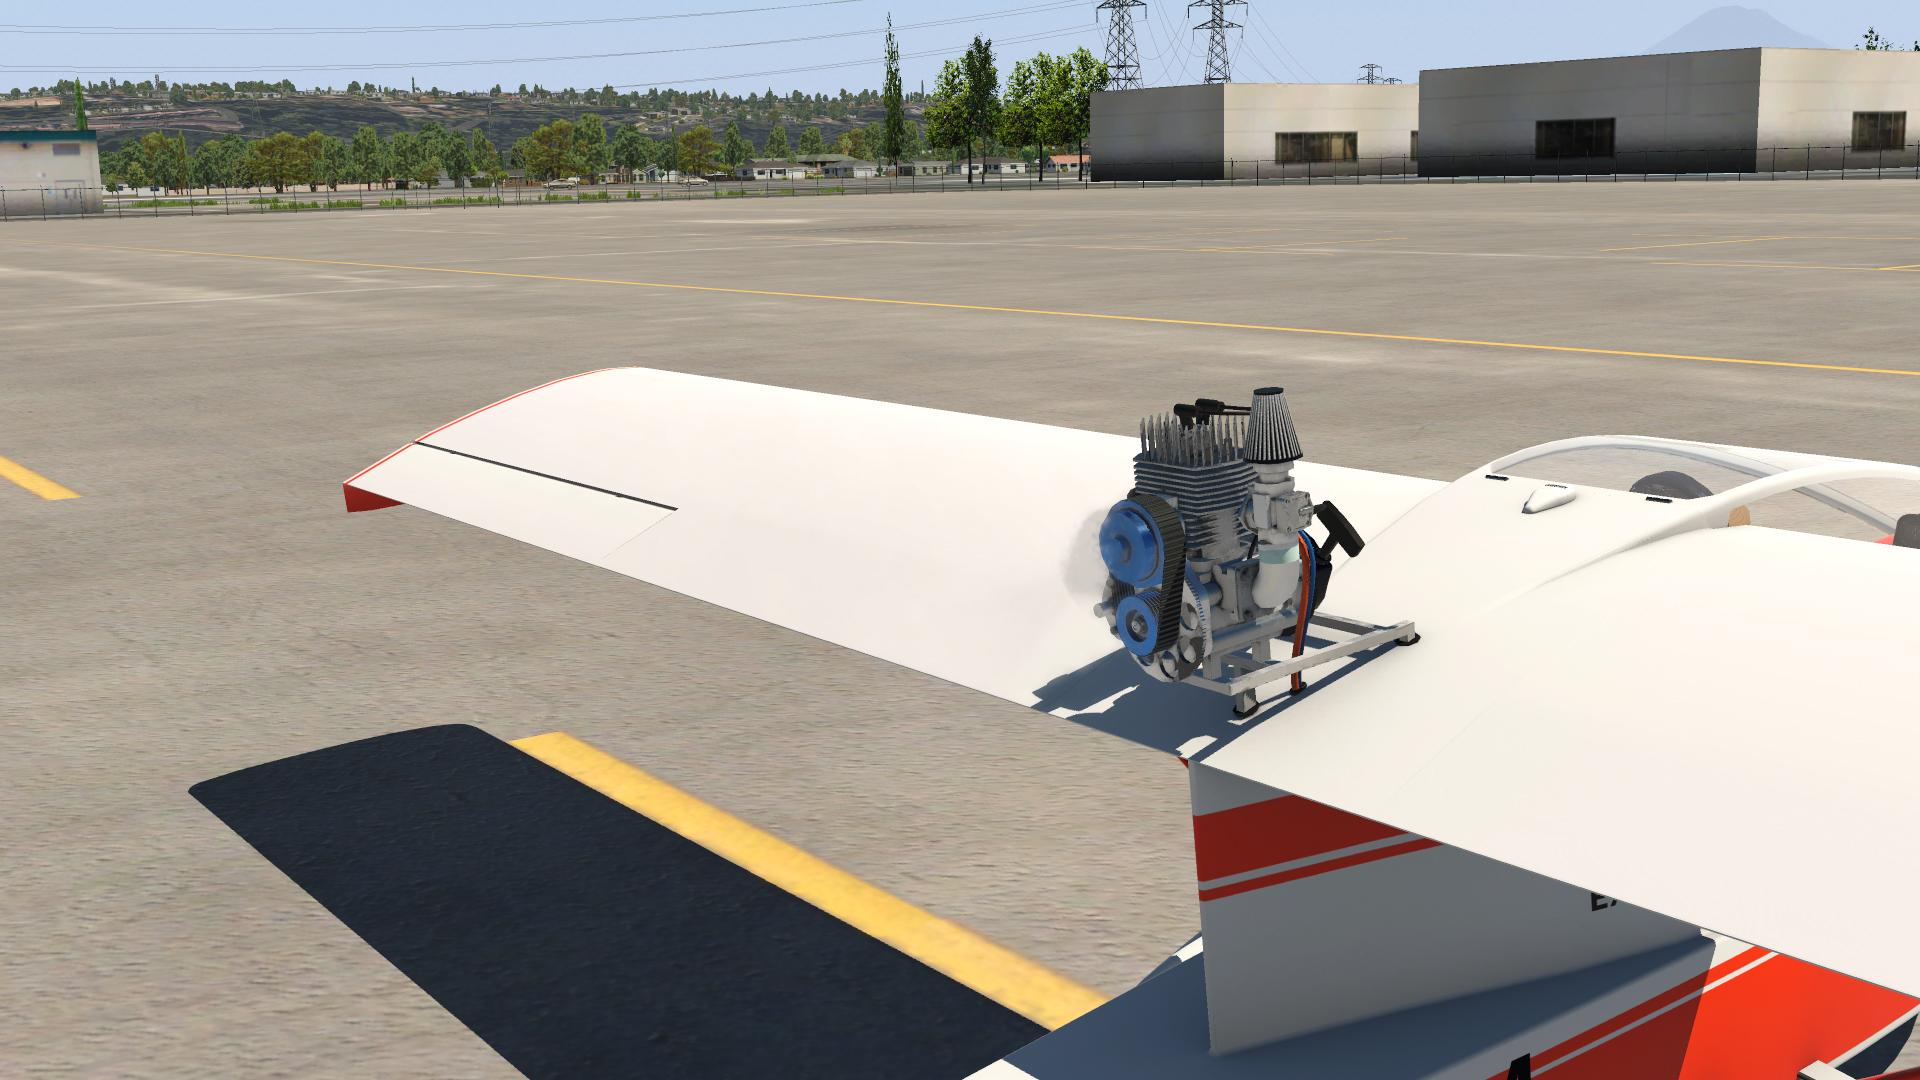
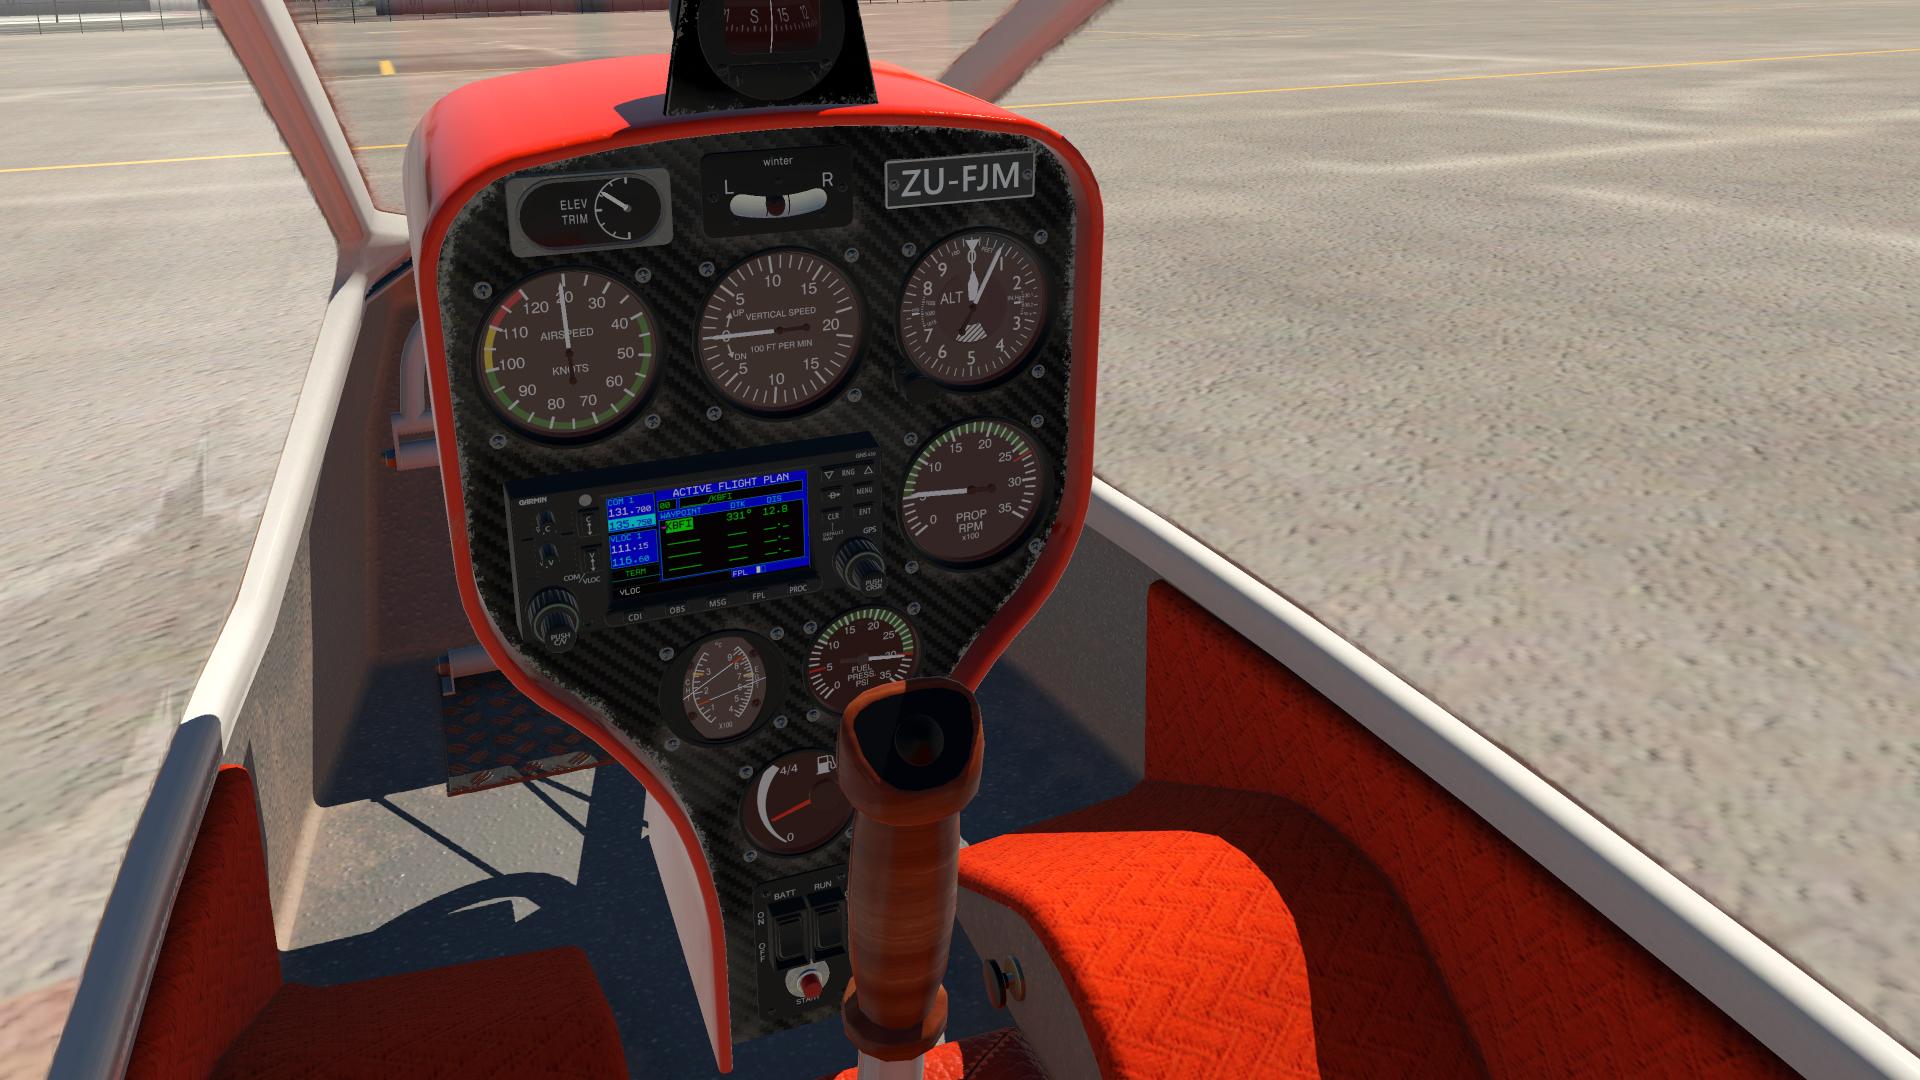
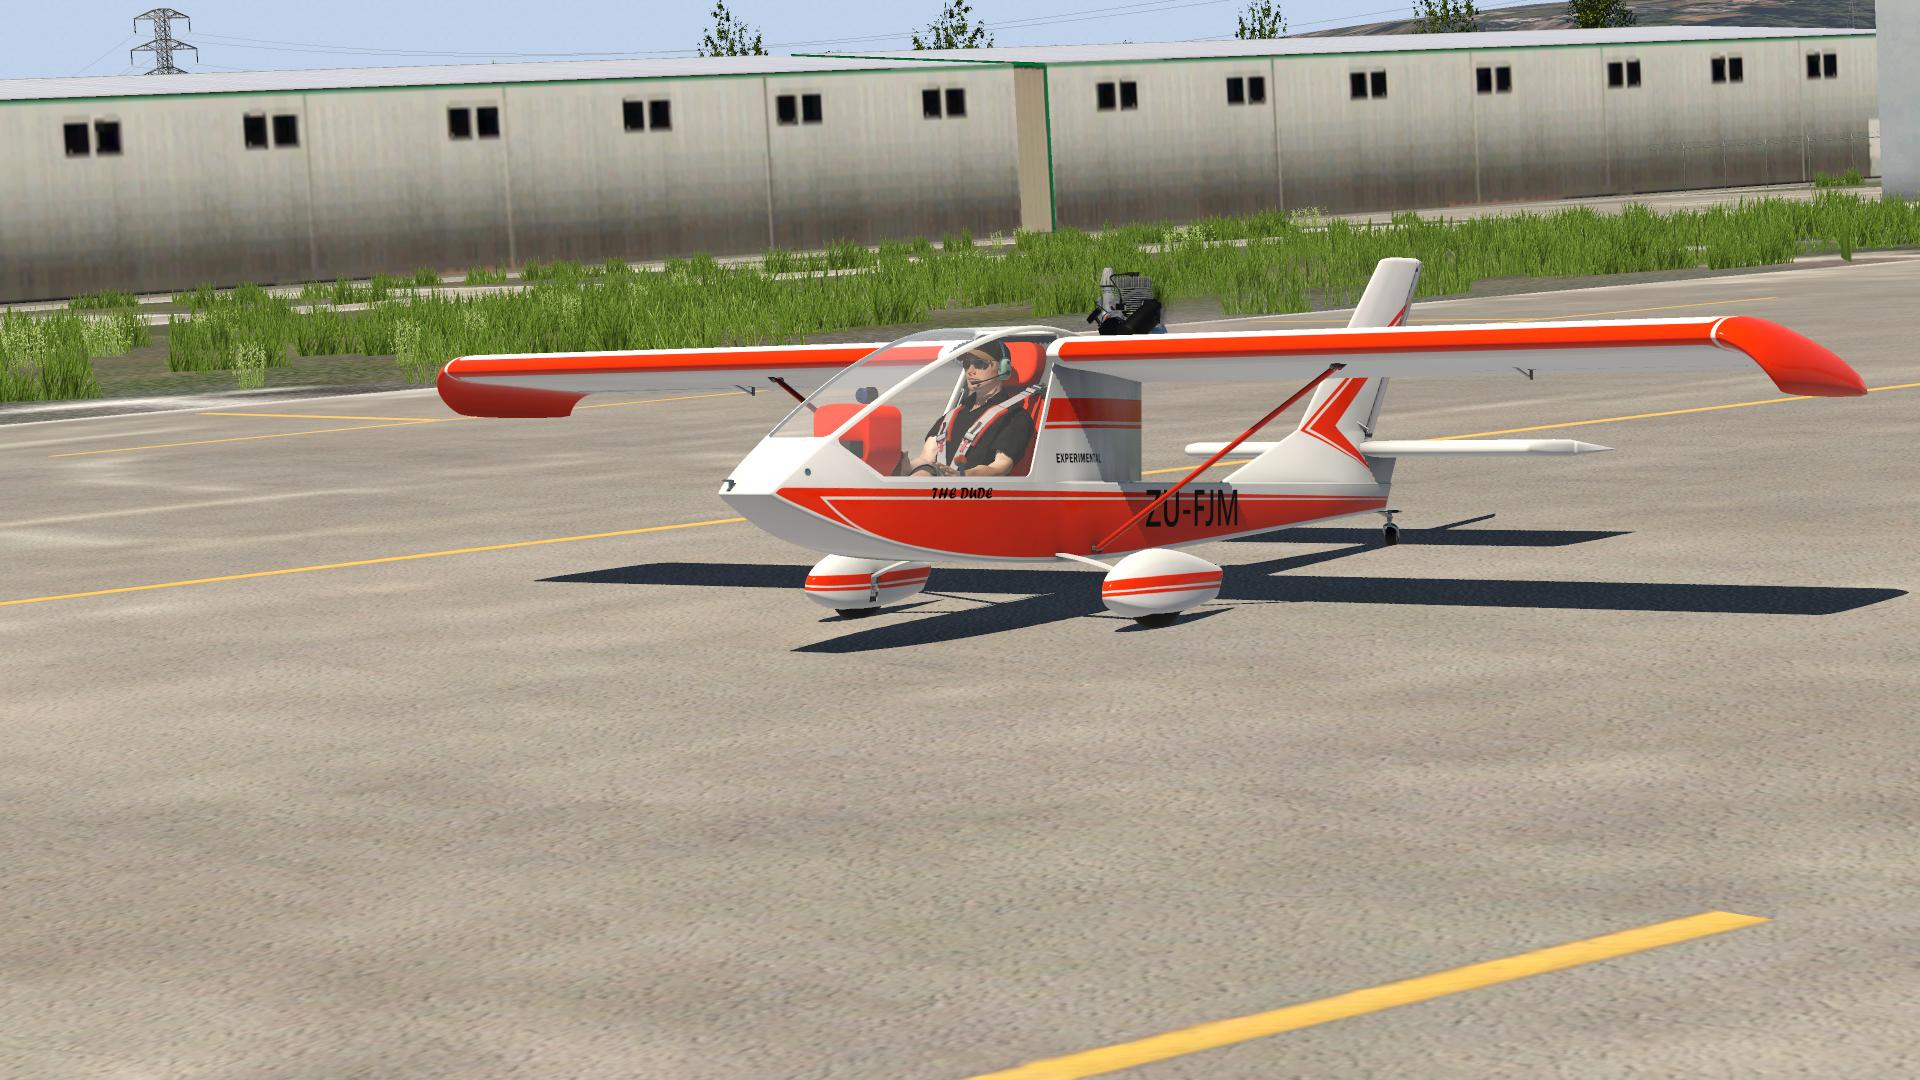
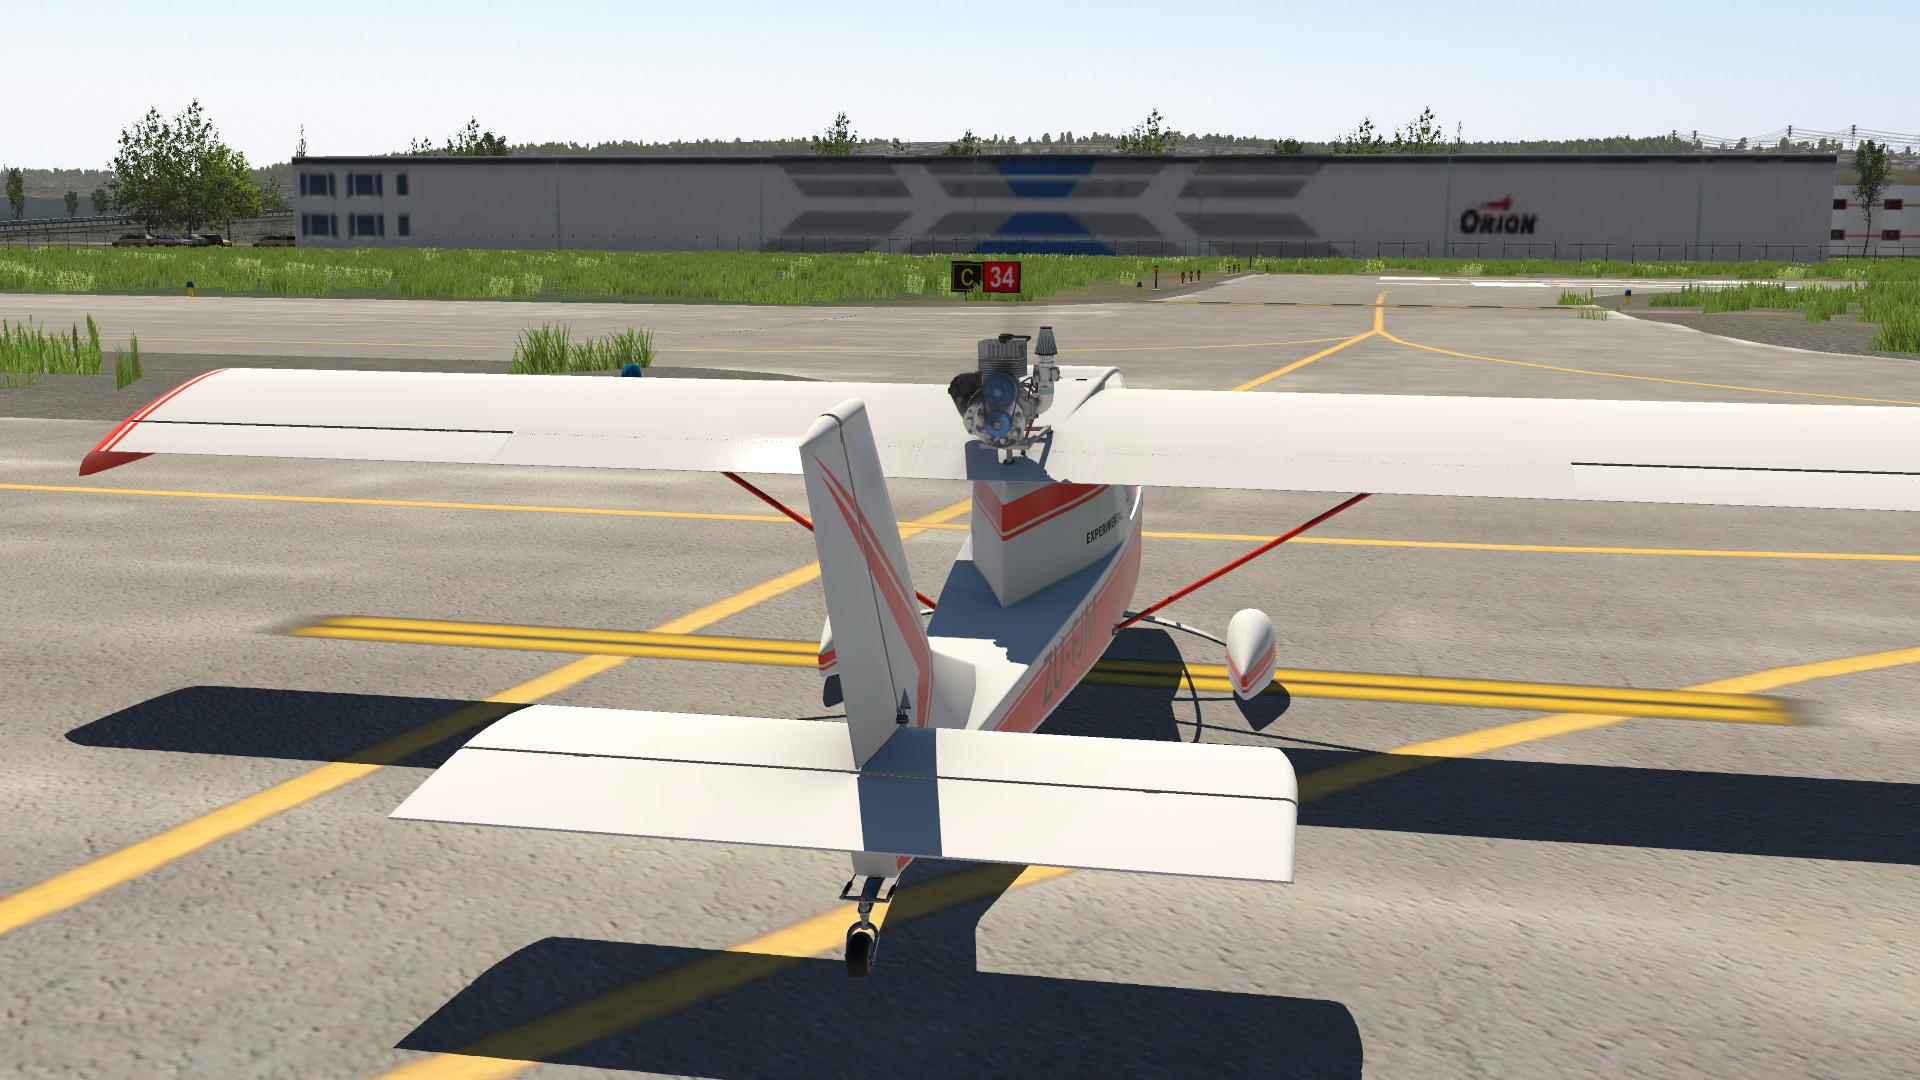
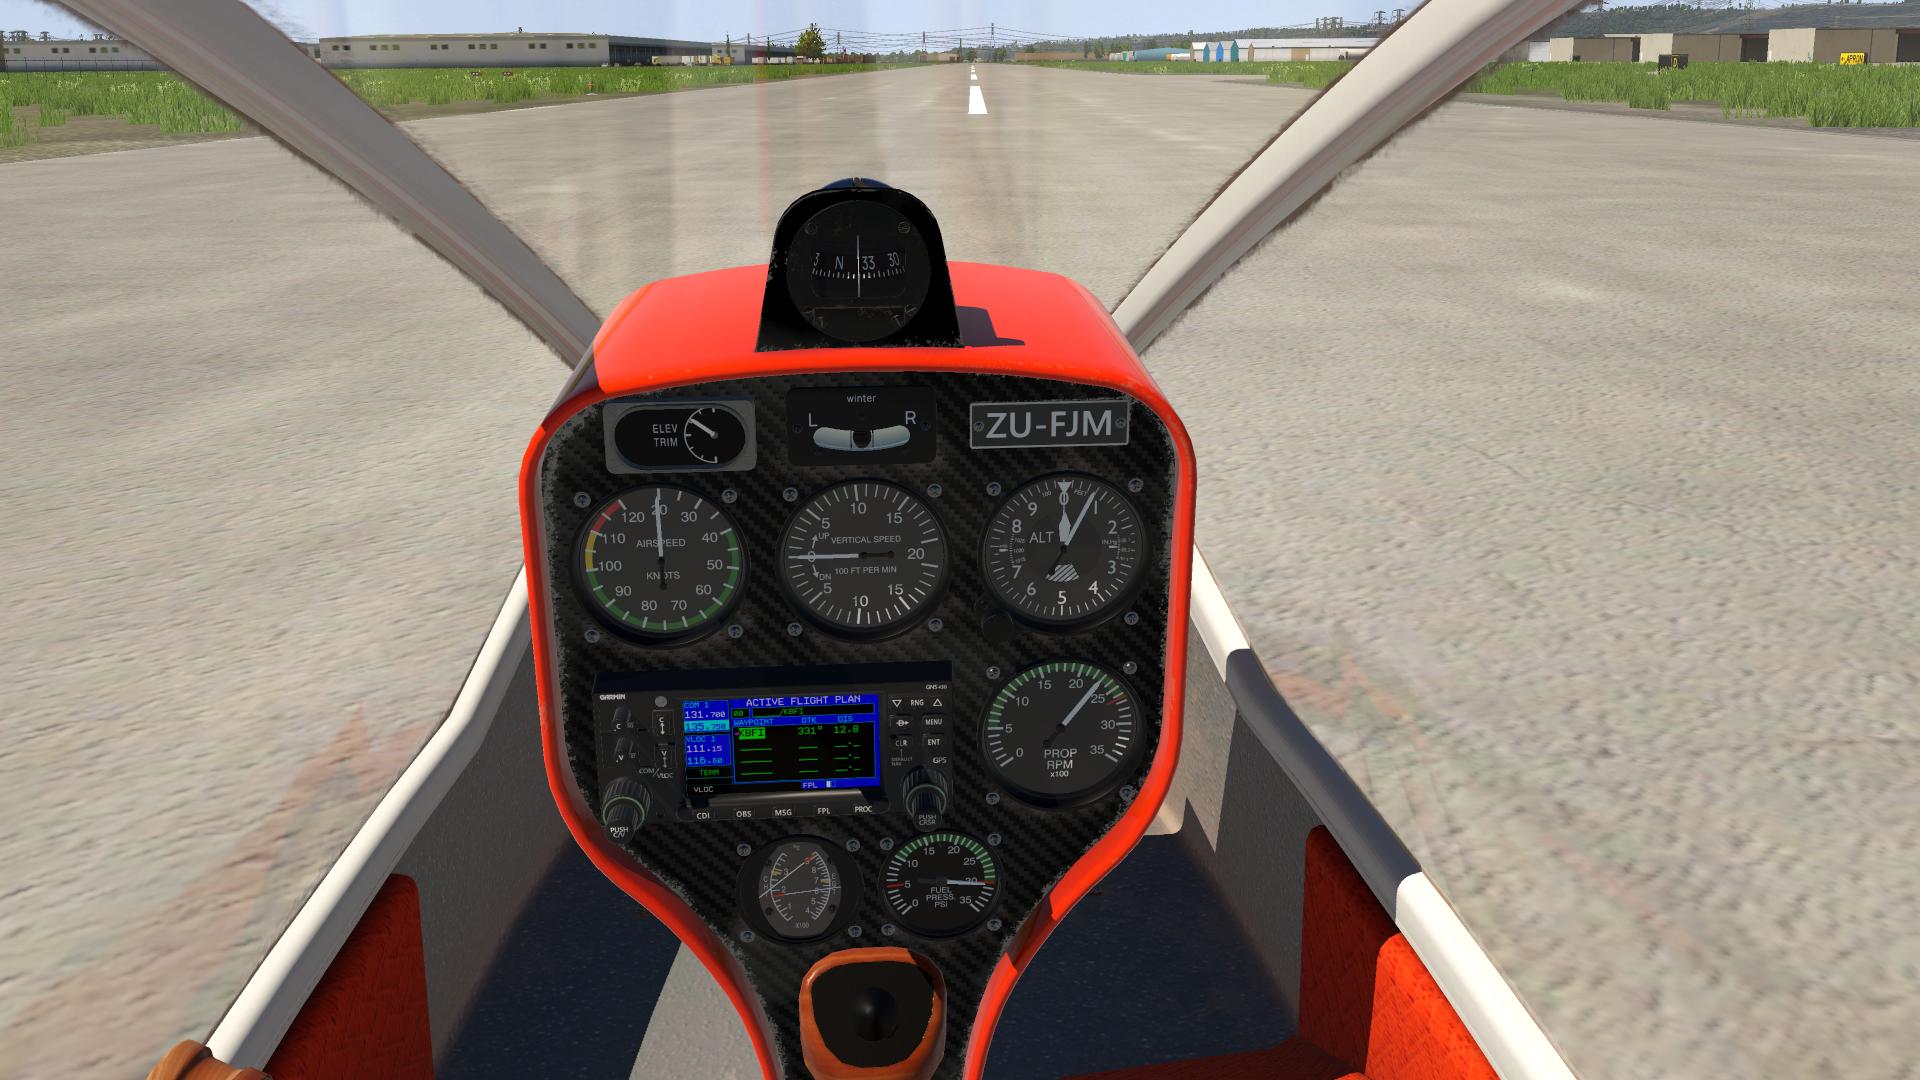
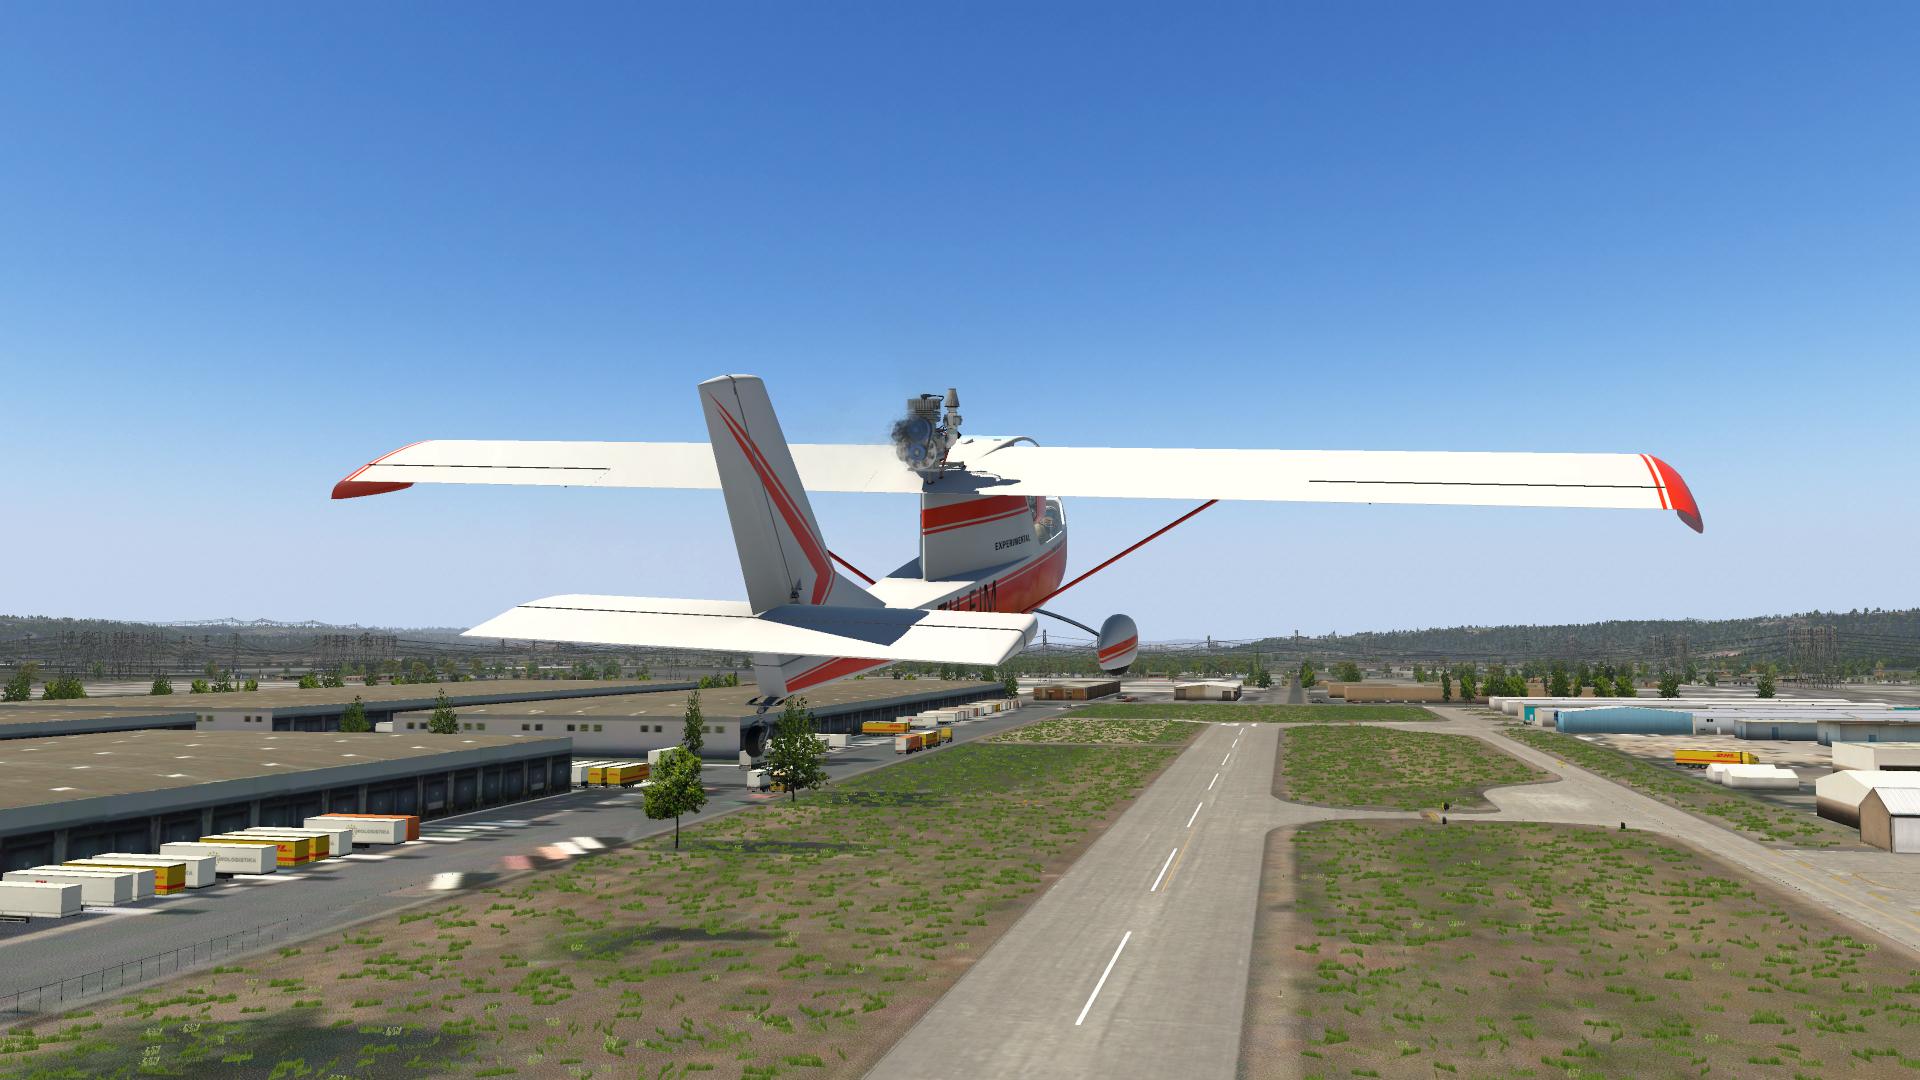
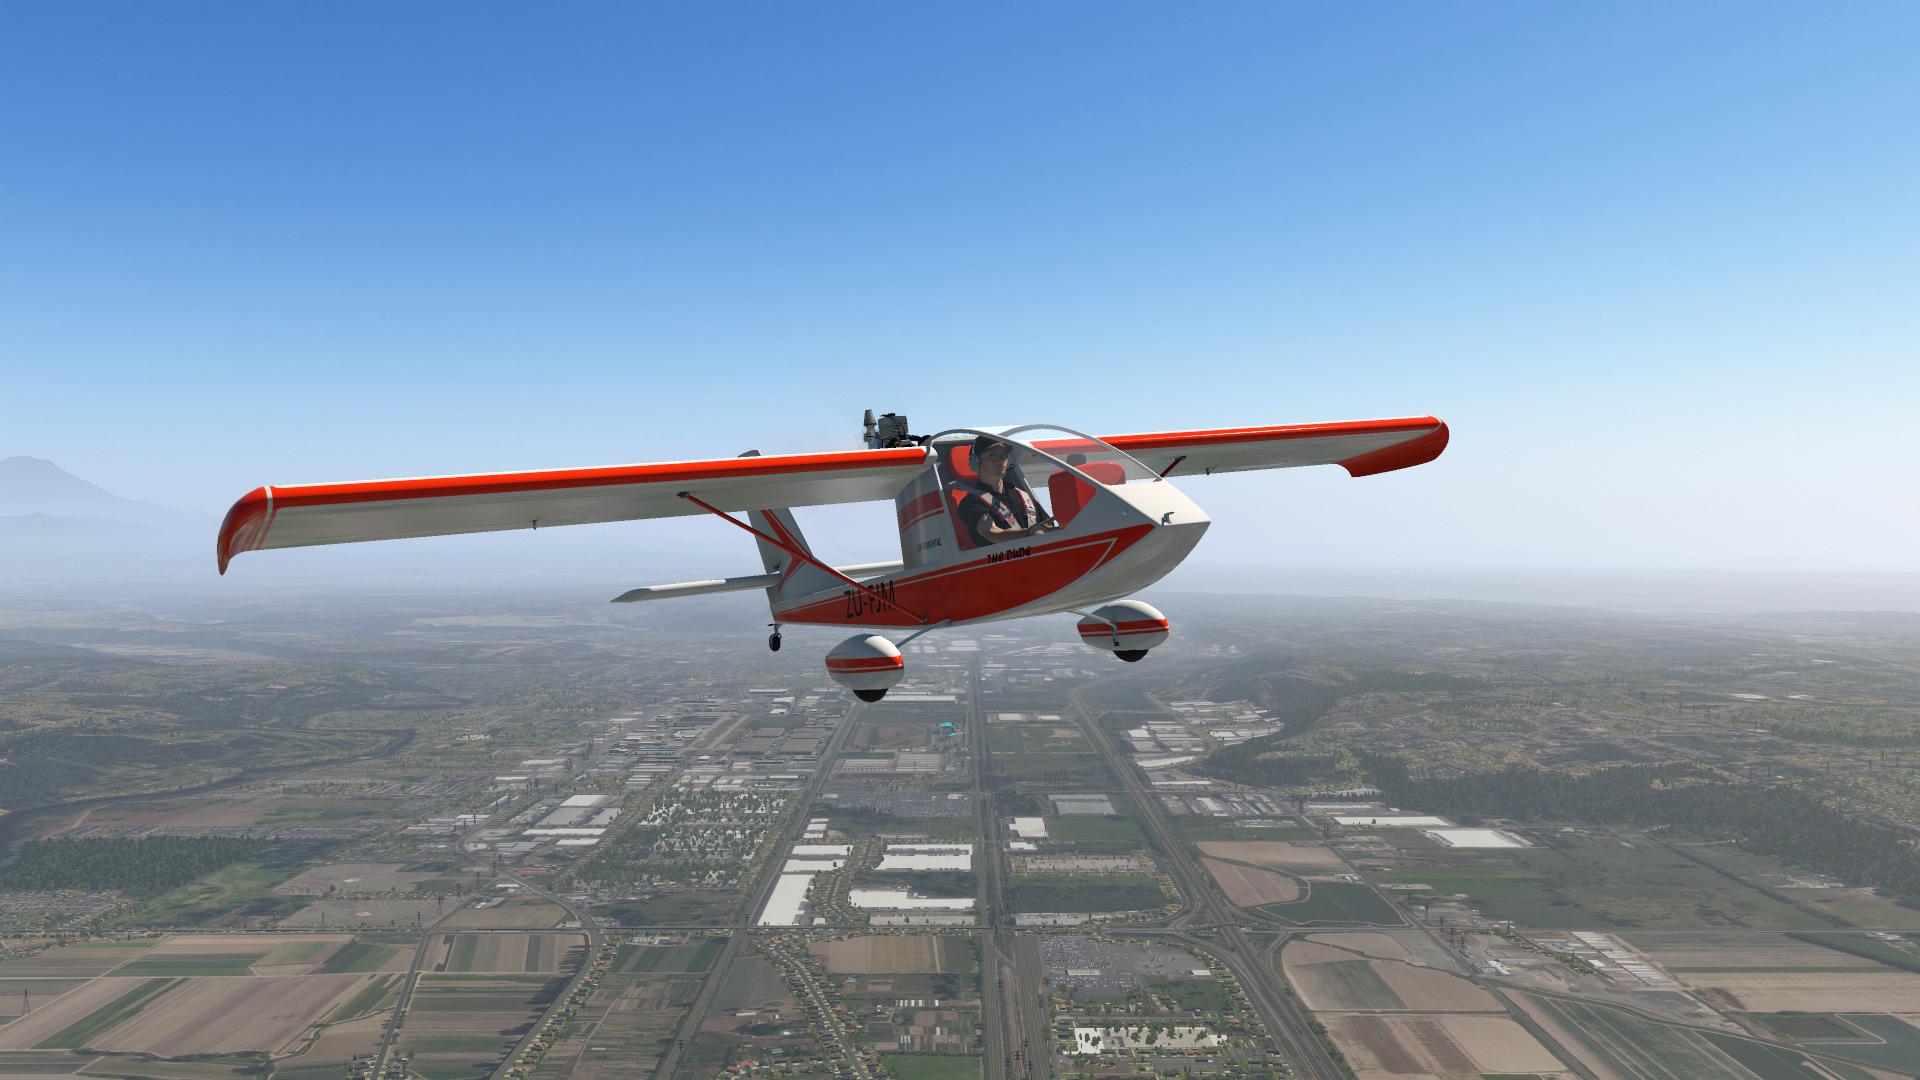
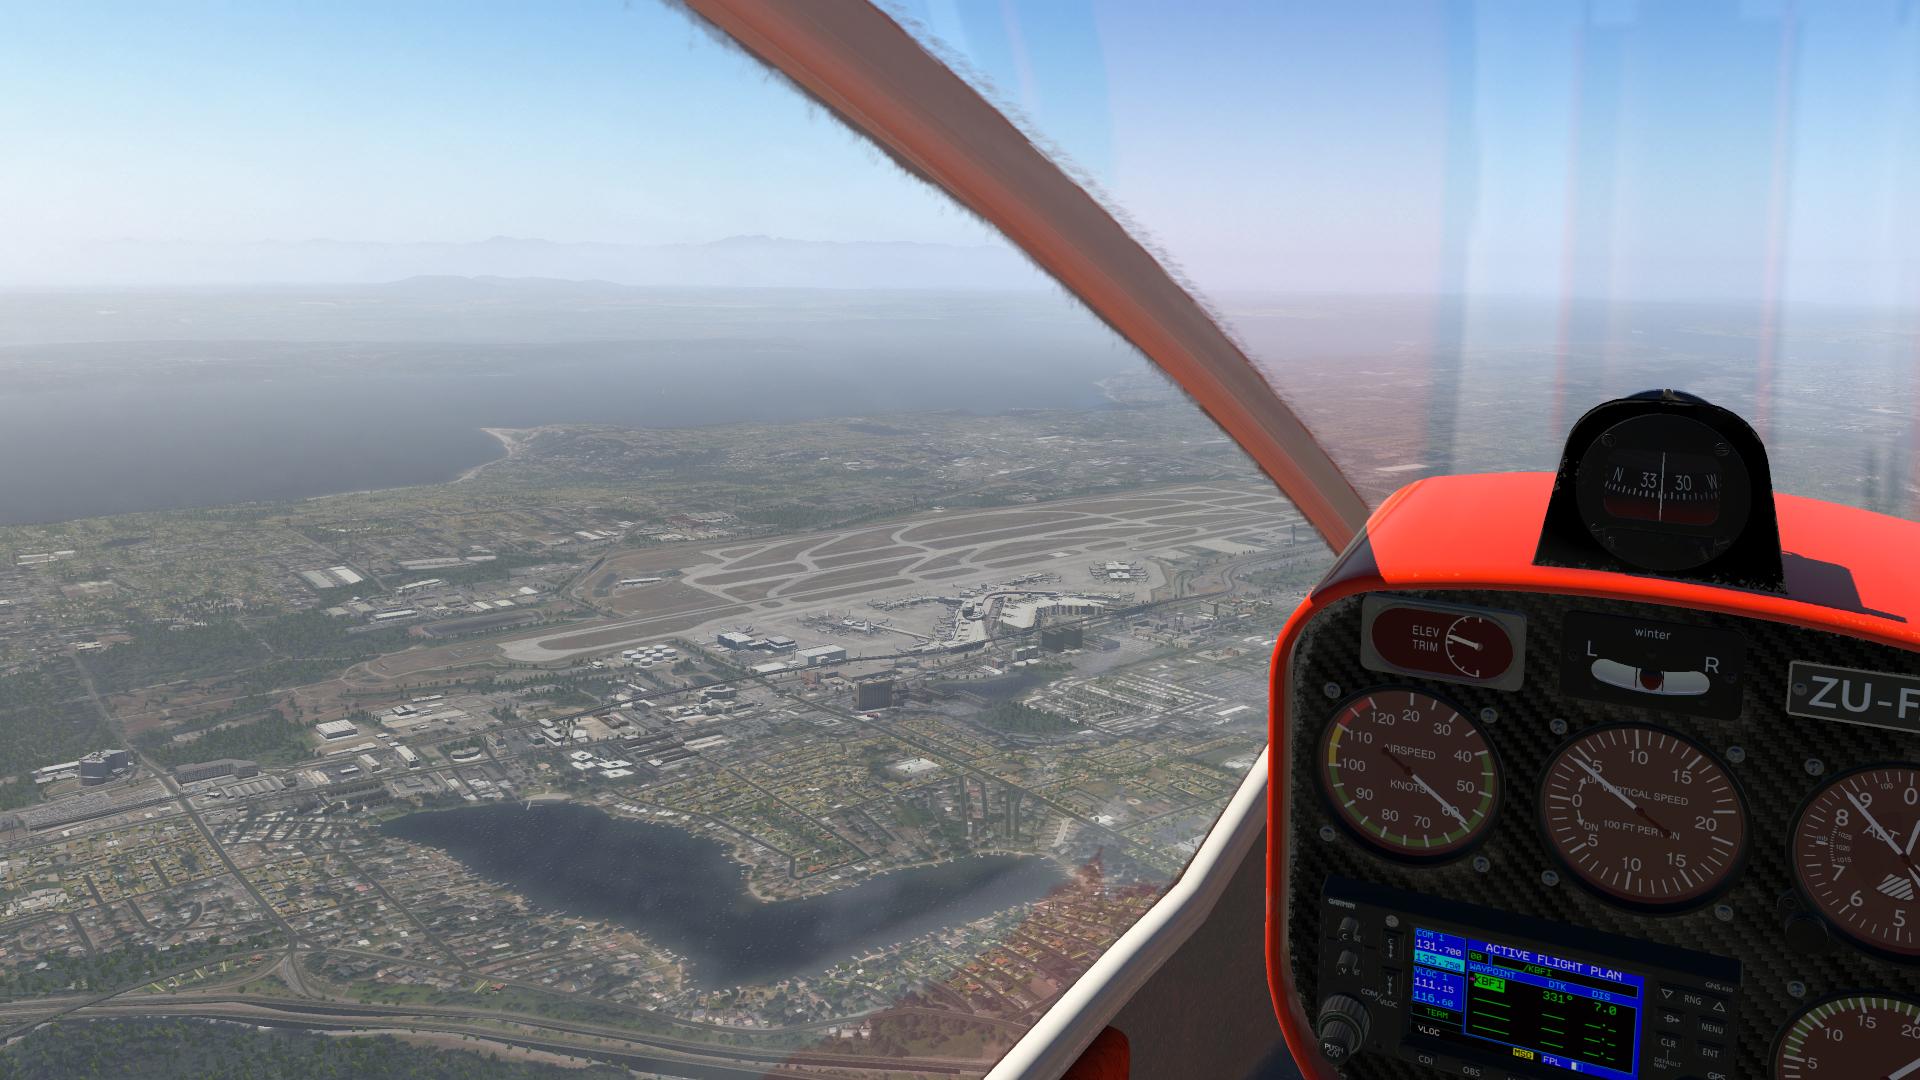
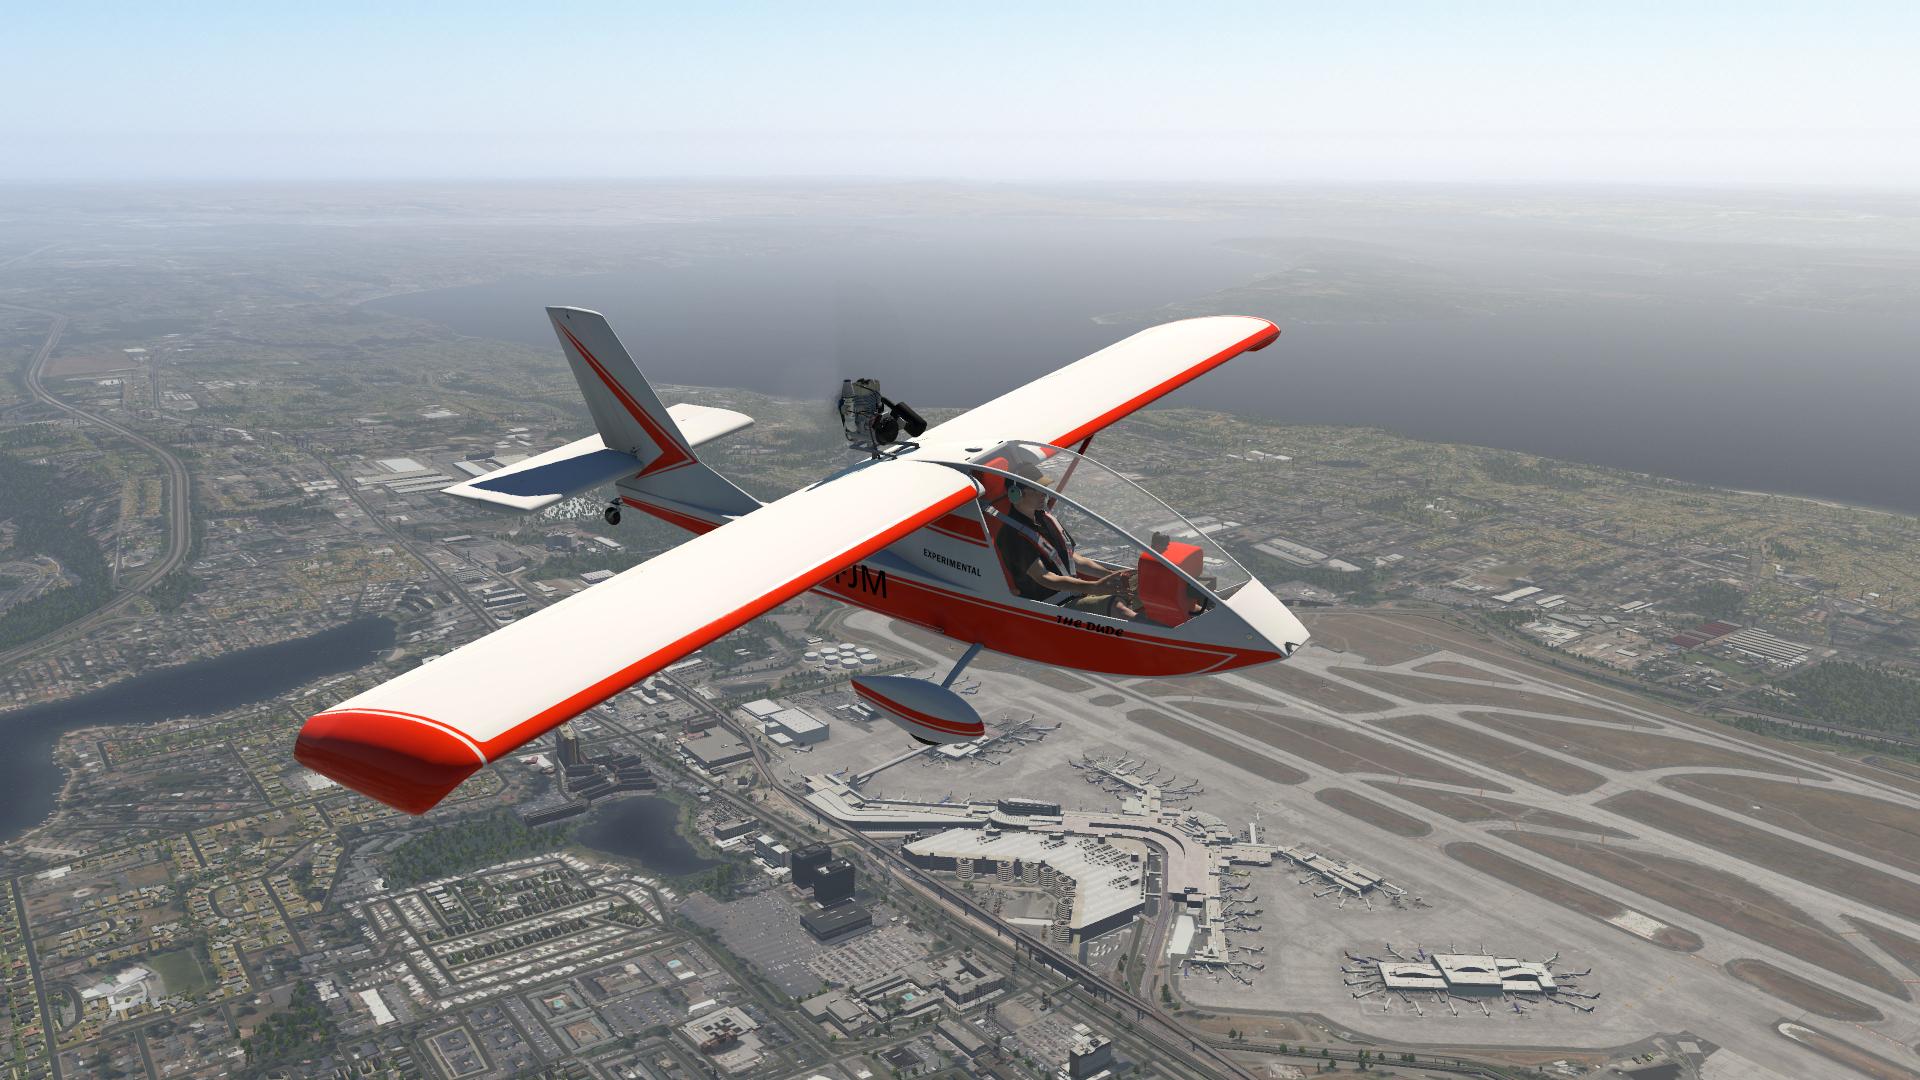
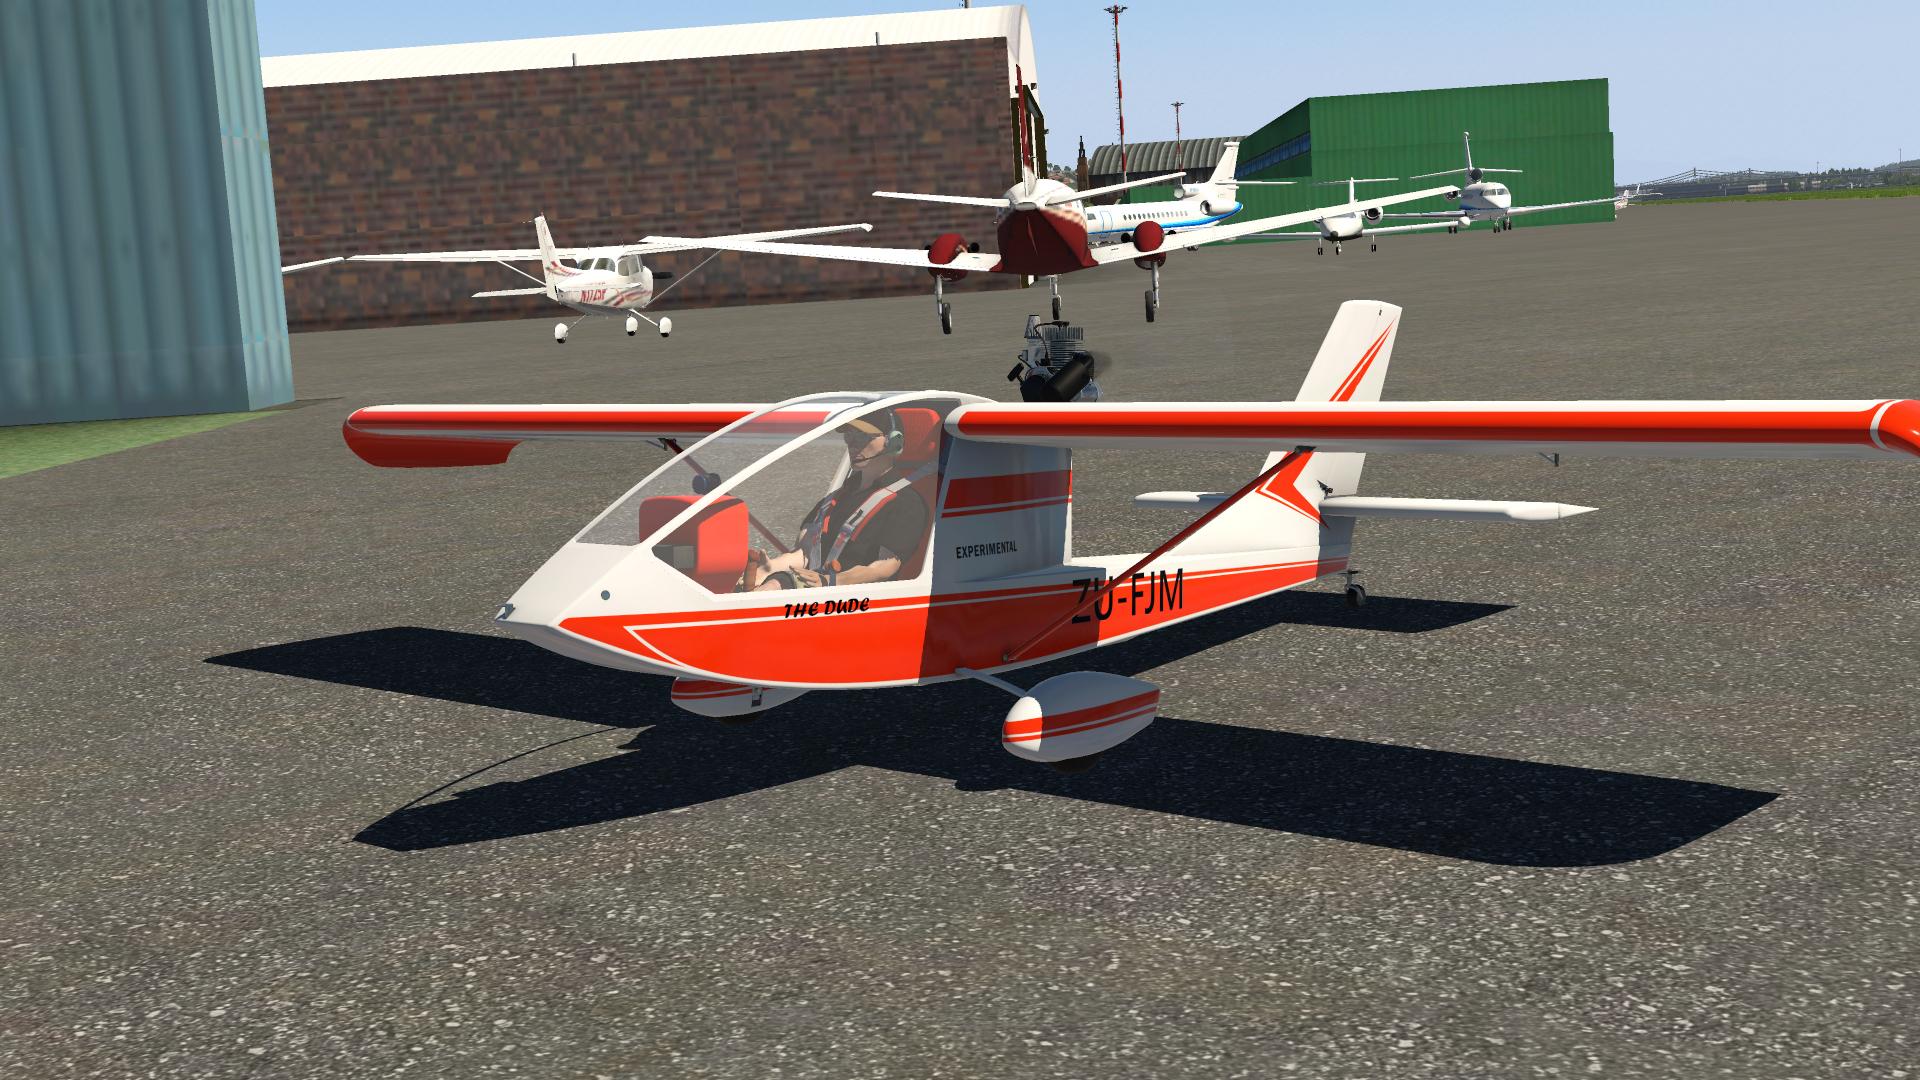
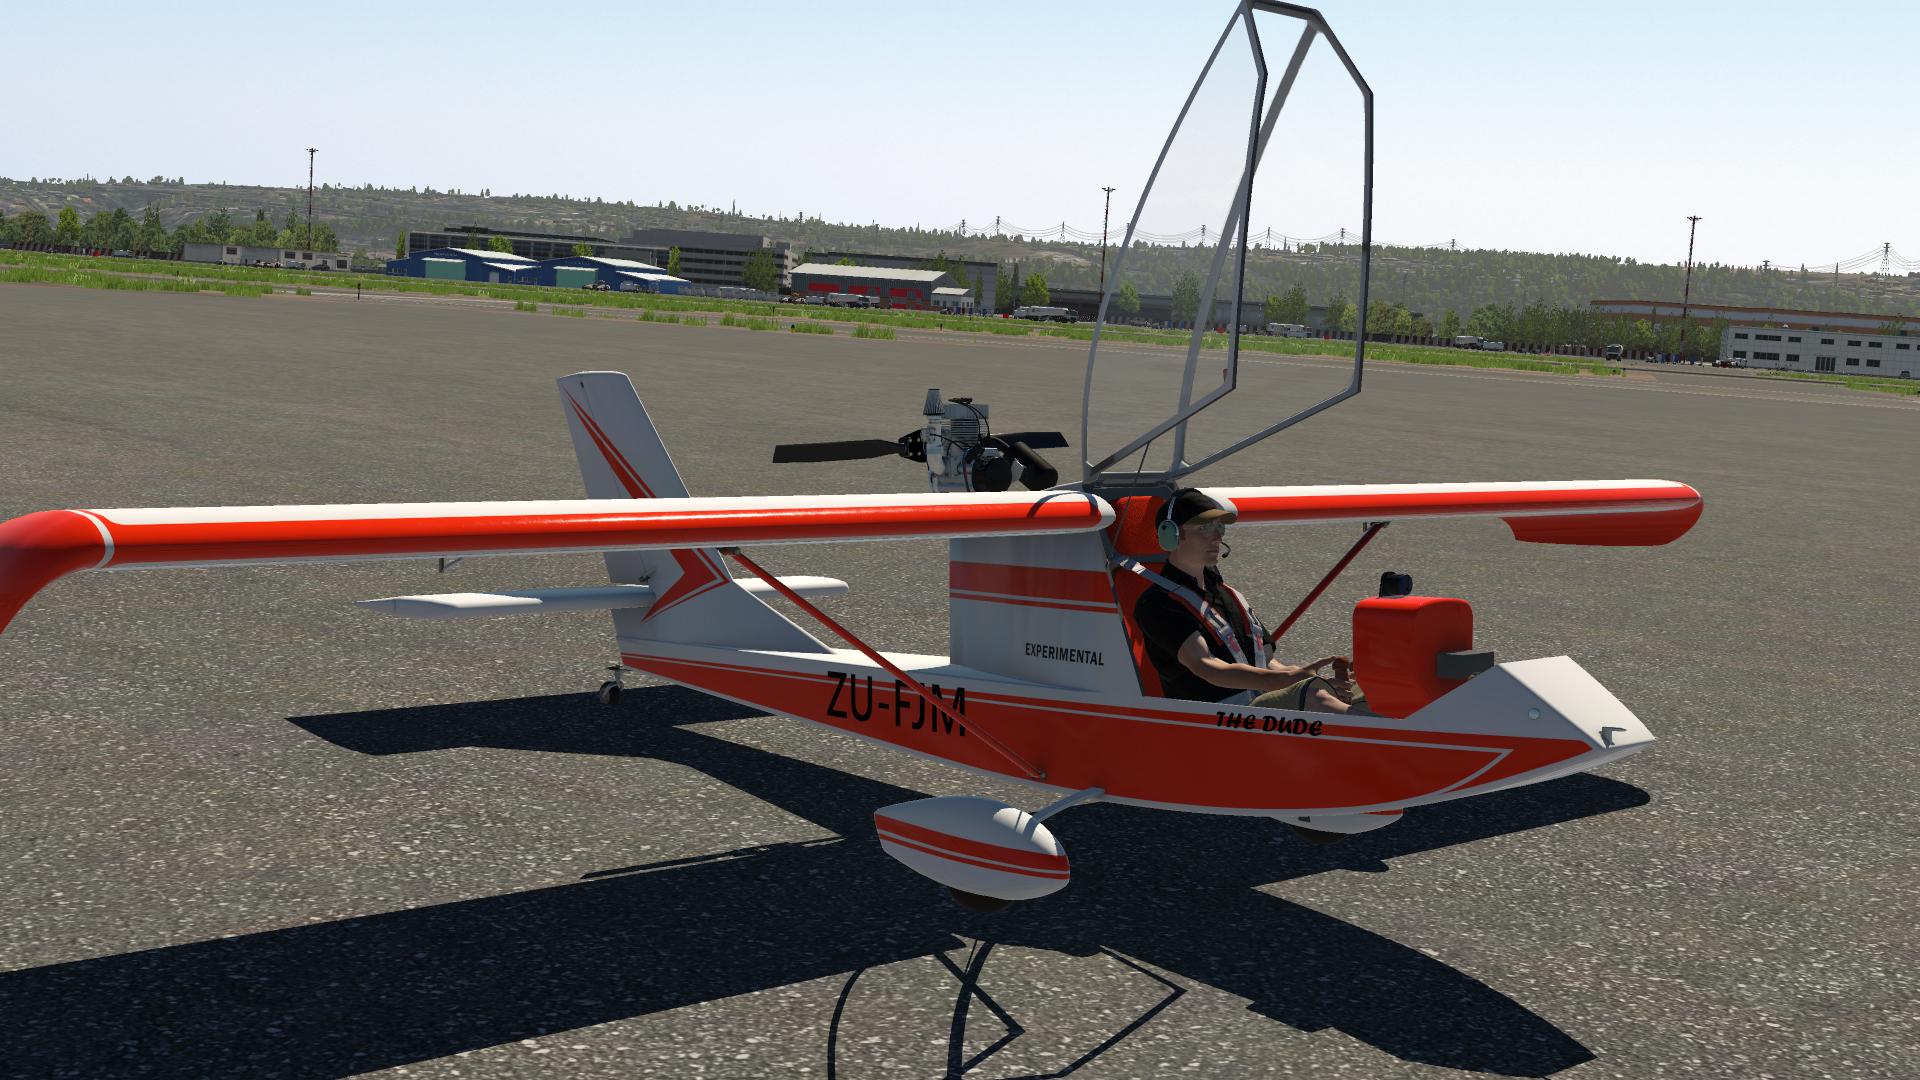
Janowski J-1B 'Don Quixote' by FJMAero In the last week, FJMAero released their Janowski J-1B in the Org.Store, offering the X-Plane community another good quality ultralight aircraft. The Janowski J-1 Don Quixote, initially named as Prząśniczka ("Distaff"), is a Polish home build ultralight designed in 1967 focusing on the home build segment. The original prototype was equipped with a Saturn engine, which was composed of two motorcycle engines, producing 23HP. The J-1 could be also equipped with a Trabant engine (29HP), or a VW conversion which produced 48HP. The plane I am going to show you in this review is the J-1B variant, with a fiberglass airframe and a Hirth F-33, air-cooled two-stroke engine that produces up to 28HP. The plane evolved for more modern variants like the J-2 Polonez, J-3 Eagle, J-5 Marco, and the J-6 Fregata. We don't have many good quality ultralights for X-Plane, so if you want a new ultralight aircraft for your collection, this may be the plane you were looking for. Let's check the review first. As you can see, the J-1B is an experimental single-pilot aircraft mounted in a conventional landing gear configuration. Even though the plane is mostly used for short scenic flights, it can easily handle light acrobatic maneuvers. With a very simple design, the J-1B has more equipment than you would imagine, including a battery, electric starter and even a Garmin GNS 430 unit. Differently from most aircraft, the J-1B doesn't have flaps, which aren't necessary since it doesn't weigh more than 200kg. FJMAero made a very good job in all parts of the exterior modeling. Even though the real aircraft is very simple, the designer managed to make a very nice exterior, adding many details and high-resolution (4k) textures. Pretty nice to see many details like the pitot tubes, the Garmin antenna and many other things. Personally, I prefer an aircraft equipped with a tricycle landing gear, however, the conventional landing gear suits this aircraft very well. As the rest of the exterior, the modeling and textures are pretty nice here. As you can imagine, the engine modeling is very good too. The Hirth F-33 is a mono cylinder two-stroke engine, producing up to 28HP. FJMAero made a incredible job with the engine, adding a lot of details like the pipes, cables, the cylinder cooling fins, serpentine belt, and many other things. The textures are really good too, giving the engine a used look. The J-1B is equipped with a two-way composite propeller, which also has a pretty nice modeling and textures application. Just like the exterior, the interior is very well modeled and presents very high-quality textures. In order to open canopy, you will need to click on the strap located on the right side of the seat. The cockpit is mostly made of plastic, but thankfully the seat that you will spend some time seated is upholstered and apparently comfortable. As usual in this aircraft, the seat has a nice modeling and good textures. As I said in the previous paragraph, the cockpit is mostly made of plastic, however, the joystick and throttle don't follow this rule, been made of beautiful wooden material. The rudder pedals are very nice, basic but very well modeled in this replica by FJMAero. Glass is sometimes a problem for designers, however, FJMAero nailed it, making it very realistic and even reflective depending on the light angle. You will better notice it after in the review when I fly the J-1B. The Janowski J-1B comes with a very simple but beautiful and complete panel, even offering a GNS 430 unit. The textures on it are extremely good, giving a very natural used look to it. You won't be disappointed by the modeling either, very smooth and realistic. Pretty nice to see the reflections all over the cockpit, especially in the instrument gauges. If you want to hide the beautiful joystick, just click on the registration plate and it will disappear. As you could see, the cockpit is very basic, but well done, presenting high-quality textures, smooth 3D modeling and good reflections. However, the most important thing in an aircraft is the flying capability, so now let's take a look at how does it behave flying and how to make it happen. Flying the J-1B As you can imagine, starting the J-1B is very easy. The first thing you will need to do is make sure to have your canopy closed and parking brake set, which is located under your right leg, then look at the left side of the seat, right next to your head, and you will see the fuel valve, turn it to ON position. After that the aircraft will be able to send fuel to the engine, allowing you to start it. Make sure you have enough fuel for your flight, otherwise you may have some problems. Today I will make a panoramic flight in Seattle, departing from Auburn Municipal (S50) and arrive in the Boeing Field (KBFI), so 5.5KG of fuel should be more than enough. Now that you are ready to start the aircraft look behind the joystick, there you will find both battery and engine switches, turn the BATT switch first and check if the fuel pressure is at 30PSI, then turn the RUN switch on. Your electric system should be working and your engine ready for the start. If you want, insert your route in the GNS430 unit, this way it will help you reach your arrival airport and/or use SID/STAR procedures easily. Starting the engine is very easy, just hold the start button for a short time and the engine should be running perfectly. You will notice the pretty good FMOD engine start sounds while doing this. The Janowski J-1B is so basic that it doesn't have any kind of lights, this means that you only need to release your parking brake and taxi to your runway. Make sure to apply some trim because the engine height forces the aircraft nose down. While taxing you will notice that FMOD sounds aren't incredible, missing some things like switches sounds, but more than enough for this little plane. The combination of the Hirth F-33 engine and the aircraft lightweight results in a very short takeoff run. Just set your engine at full power, something near 2250RPM, and watch the fast acceleration of the J-1B which reaches the rotate speed very fast. In a few seconds, you will see yourself a few feet above the ground. The pilot inside the cockpit is pretty nice, extremely well modeled and texturised. While climbing you will feel the aircraft very well, which answers to your commands very quickly. A few minutes after taking off and we are flying over Seattle-Tacoma International Airport, such a big airport. Our cruise altitude will be 4,000ft today, more than enough for this flight. I am pretty sure you will enjoy flying the J-1B, it is that kind of aircraft that always require your attention for keeping a leveled flight. We can already see the huge Seattle city, which I expect to visit one day. Beautiful representation by Drzewiecki. In order to go back to our destination airport, we will need to make a turn, and this is a good moment to test the J-1B light acrobatic capabilities, and I may say that the aircraft handle this kind of flight very well. Now let's head to KBFI. Even though the Janowski J-1B doesn't have flaps, it can easily fly at very low speeds such as 40Kts. Stall speed is around 58 km/h (36 mph, 31 Kts), so you have a little space to work from here.You may need to practice some approaches and landings because it is very hard to lose some speed and land in the correct spot using this aircraft. However no plane is too hard for a good pilot, so you will be able to easily land it after a few flights. Once parked at your ramp, just shut off the fuel valve, then turn off the RUN and BATT switches, after that just make sure to set the parking brake. The Janowski may require a little bit of practice for landings and approaches, however, after you learn how to control it you will see how fun to fly this little aircraft really is. Summary Well, it seems that everything ends here. During the review, I tried to show all the aircraft details for you, and we can conclude that the Janowski J-1B by FJMAero is a pretty nice plane. Honestly, I didn't find any problem related to it, just qualities like superb 3D modeling, both external and internal, and high-quality textures. The sounds are pretty nice as well, and even though they can be a little improved, they are more than enough for the J-1B. This is the first FJMAero product released in the X-Plane.Org Store, a pretty good first release. I know that the Janowski J-1B is a very basic plane, however, I may say that FJMAero did an extremely good job with it. It would be nice if the designer released an update for the J-1B or even a new aircraft with the same high-quality level. Ultralights aren't very common in X-Plane, even for me, however now I see how fun and enjoyable they are, so if you are looking for an ultralight and a different plane for your collection, which is under US$20, this may be one of the best options. --------------------------------------------------------------- The Janowski J-1B by FJMAero is available in the X-Plane.Org Store here: Janowski J-1B Price is US$19.95 The J1-B is a home-built aircraft design originally conceived by Jaroslaw Janowski and Witold Kalita in the late 60’s. The design featured a high-wing single-seat configuration with rearward mounted engine on top of the wing. The FJMAero J-1B is representative of a fiber glass airframe powered by a Hirth F-33 air-cooled two-stroke engine producing up to 28 HP, with design loads of +6/-3G. The J-1B is flapless and comes with a fully movable elevator trim to compensate the effects of the high-thrust line above the center of gravity. Our J-1B is a designed to provide the virtual pilot with an aircraft that is easy to handle, offers excellent visibility and exhibits interesting flight characteristics for those that enjoy stick and rudder, seat-of-pants flying. Ideal for short scenic flights, cross-country VFR and is light aerobatics capable. Features: Highly detailed 3D interior and exterior model with many fine details to discover High-resolution (4K) physical based rendering (PBR) texture sets to showcase surfaces ranging from painted resin, spray paint, metal, seat fabric, dust effects, all the way to leather for the dust cover at the base of the control stick Animated controls, control rods and surfaces, canopy, fully articulated rudder pedals with differential braking and cockpit switches Custom XLua driven ignition panel to provide a robust engine and avionics start-up, including custom commands that can be assigned to joysticks or other hardware peripherals. Open the fuel valve, turn on the battery bus, switch the ‘Run’ button to on and press the starter to bring life to the Hirth F-33 and the ‘Warp Drive’ propeller. High-resolution flight instruments designed from the ground up to maintain clarity at all viewing distances. Includes a highly detailed 3D face for the GNS 430 (X-Plane 11 native) Full-bodied FMOD sound set that includes (but are not limited to): Hirth F33 engine sounds Buttons and switches, including the GNS430 Engine starter and fuel pump systems Wheel sounds for impact, rolling and sliding Cockpit shake/vibration noise based on ground roll Wind noise on the canopy based on airspeed Sideslip air noise on the airframe and canopy Custom stall horn providing incremental feedback based on angle of attack Realistic sound attenuation when closing/opening the canopy Custom Clark Y airfoil. Flight model tested with standard and experimental flight model (11.41+), with the latter being preferable for those that enjoy stick and rudder flying. Four liveries including ‘Fire Red’, ‘Blu’, ‘Moon’ and ‘Blank’. While the first three come with custom PBR textures for each paint scheme, the Blank scheme has a neutral PBR set to assist with repaints. Each livery features its own unique internal textures A unique tail number repaint texture that allows customisation of the fuselage tail numbers, the pilot name under the canopy, as well as the number plaque on the instrument panel without having to repaint the entire aircraft. An easy to use registration Photoshop file is provided. Customise your J-1B and make it your own. Paint kit designed from the ground up to be easy to repaint (external and internal), including colour coded layers in Photoshop with instructions to preserve PBR materials, as well as UV island guides to assist livery painters (see manual for more details). The following diffuse paint sets are provided: Fuselage Wings Cockpit Instrument pod (excluding instruments) Fully detailed pilot in external views with custom headset and aerobatics-ready harness. Requirement X-Plane 11 Windows, Mac or Linux 4 GB VRAM Minimum - 8GB+ VRAM Recommended Download Size: 410 MB (paint kit is 675 MB) Current version : 1.0 (June 12th 2020) ______________________________________________________________________ Aircraft Review by Bernardo Pierdoná Casa 21st June 2020 Copyright©2020: X-PlaneReviews Review System Specifications: Computer System: Intel Core I5-9600K 4,30GHz / 2x8 Corsair Vengeance RGB Pro 3200MHz - Gigabyte RTX 2070 - Gigabyte Z390 Aorus Master - Kingston A1000M.2 SSD 240GB Software: - Windows 10 - X-Plane 11.41 Addons: Logitech Pro Flight Yoke/Pedals/Throttle Quadrant - Logitech Extreme 3d Pro Joystick - Sound: Samsung Home Theater System J5500WK Plugins: Environment Engine v1.13 by xEnviro US$69,90 Traffic: Traffic Global by JustFlight US$52.99 Ground textures: ALES US$15.99 Scenery and Aircraft -Seattle City by Drzewiecki -Seattle Airports by Drzewiecki (Disclaimer. All images and text in this review are the work and property of X-PlaneReviews, no sharing or copy of the content is allowed without consent from the author as per copyright conditions)
-
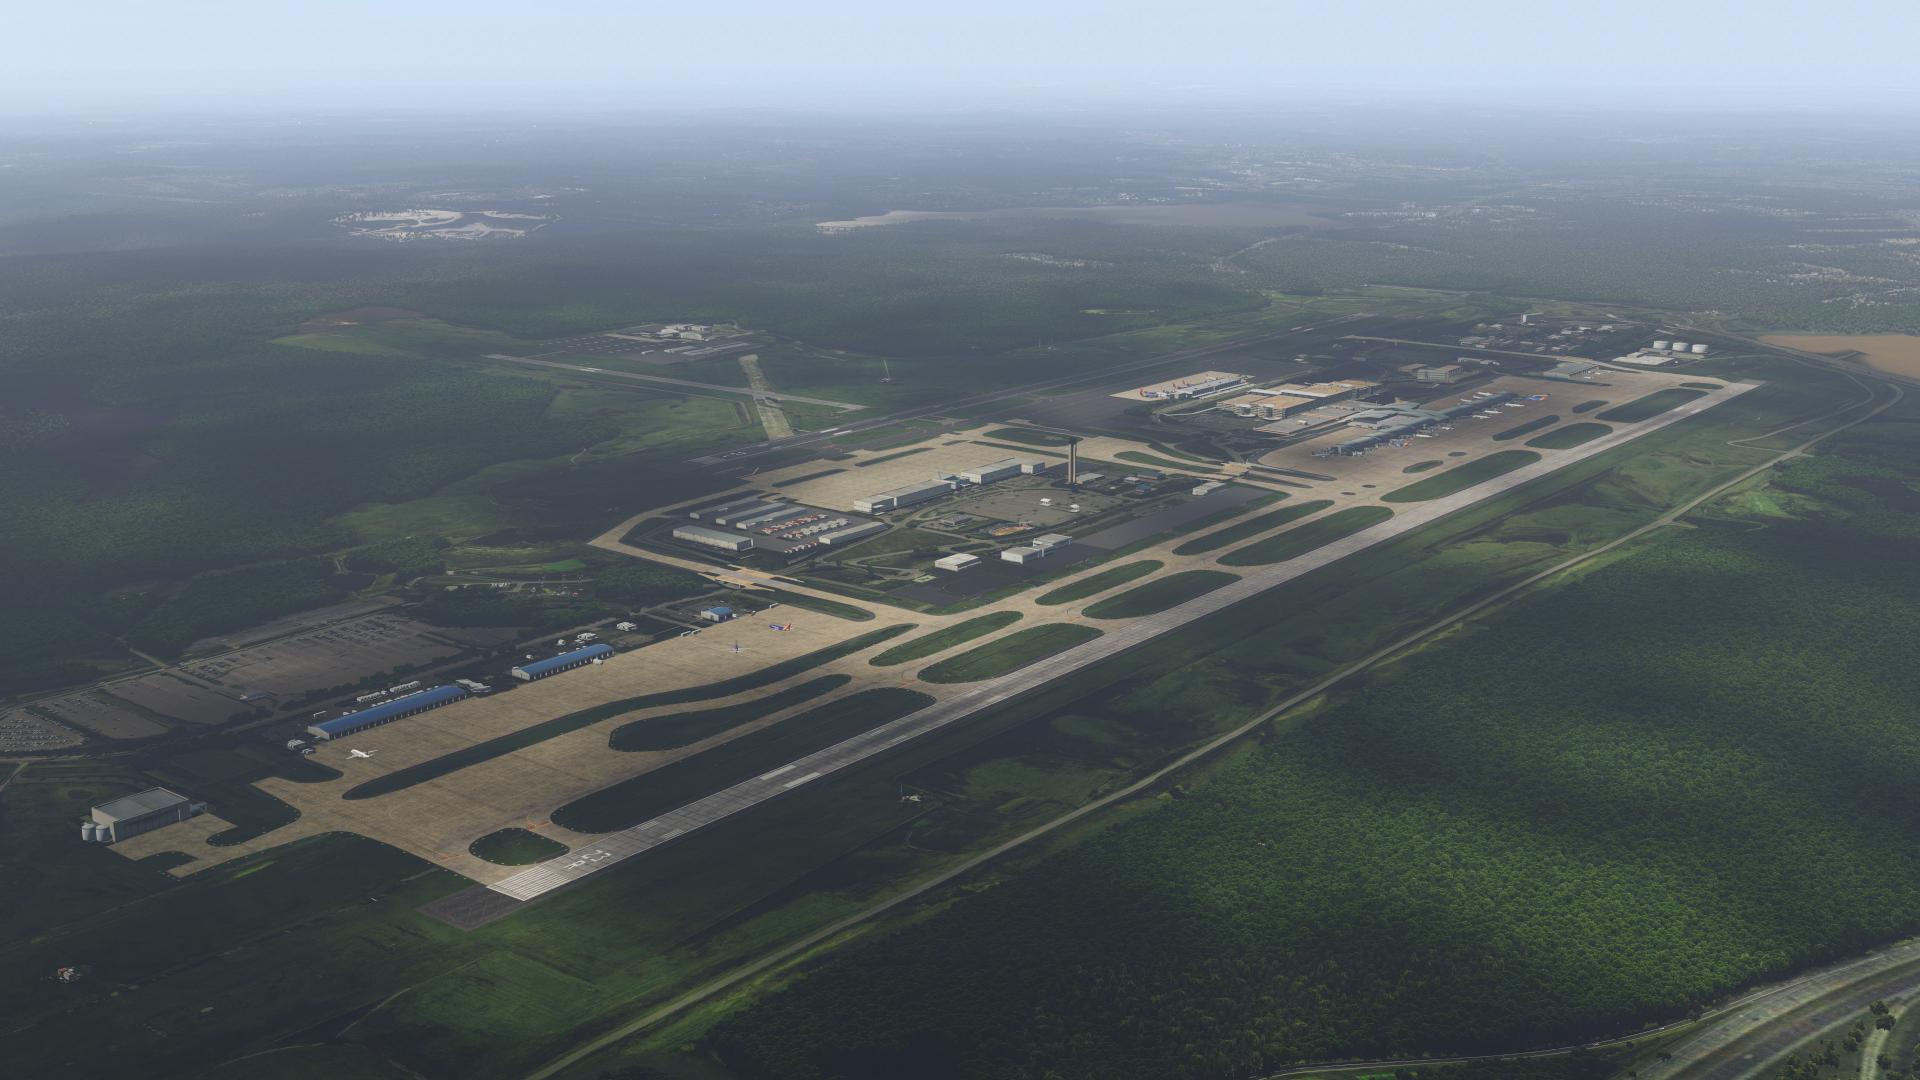
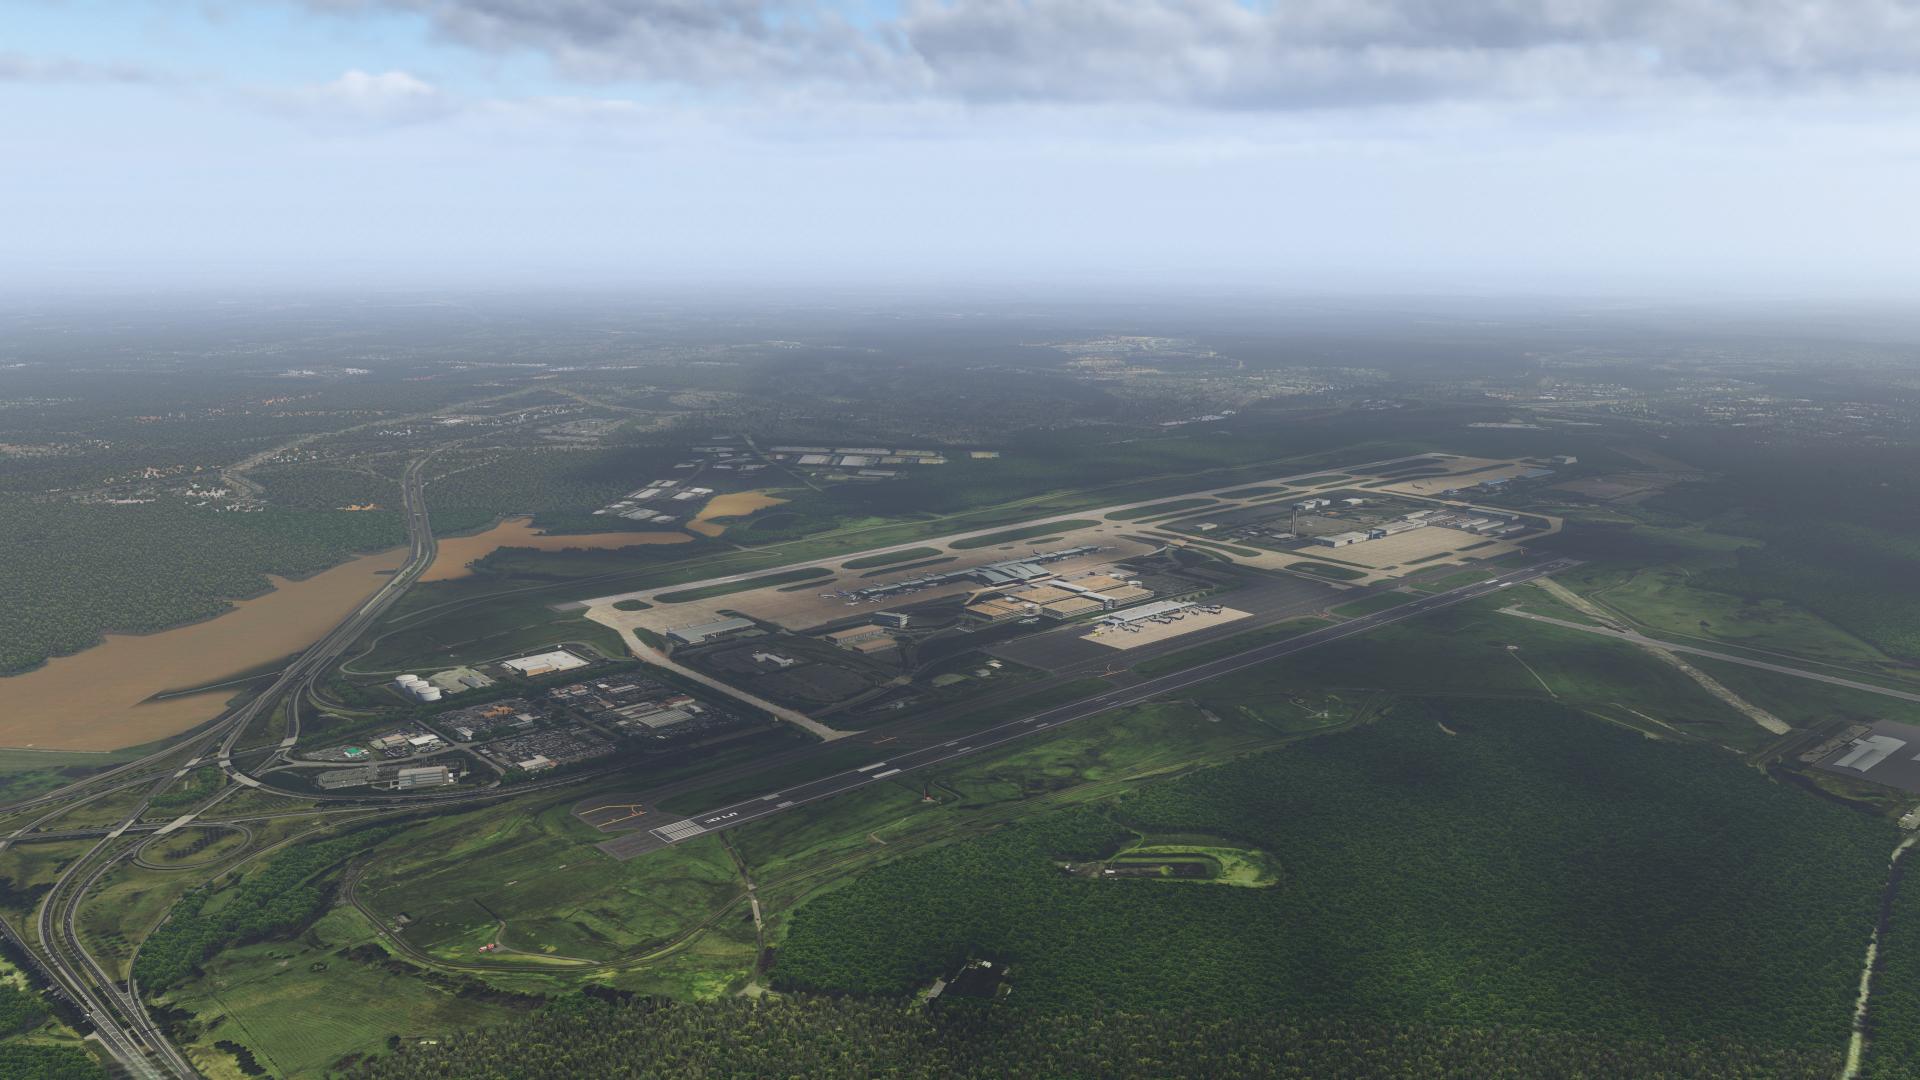
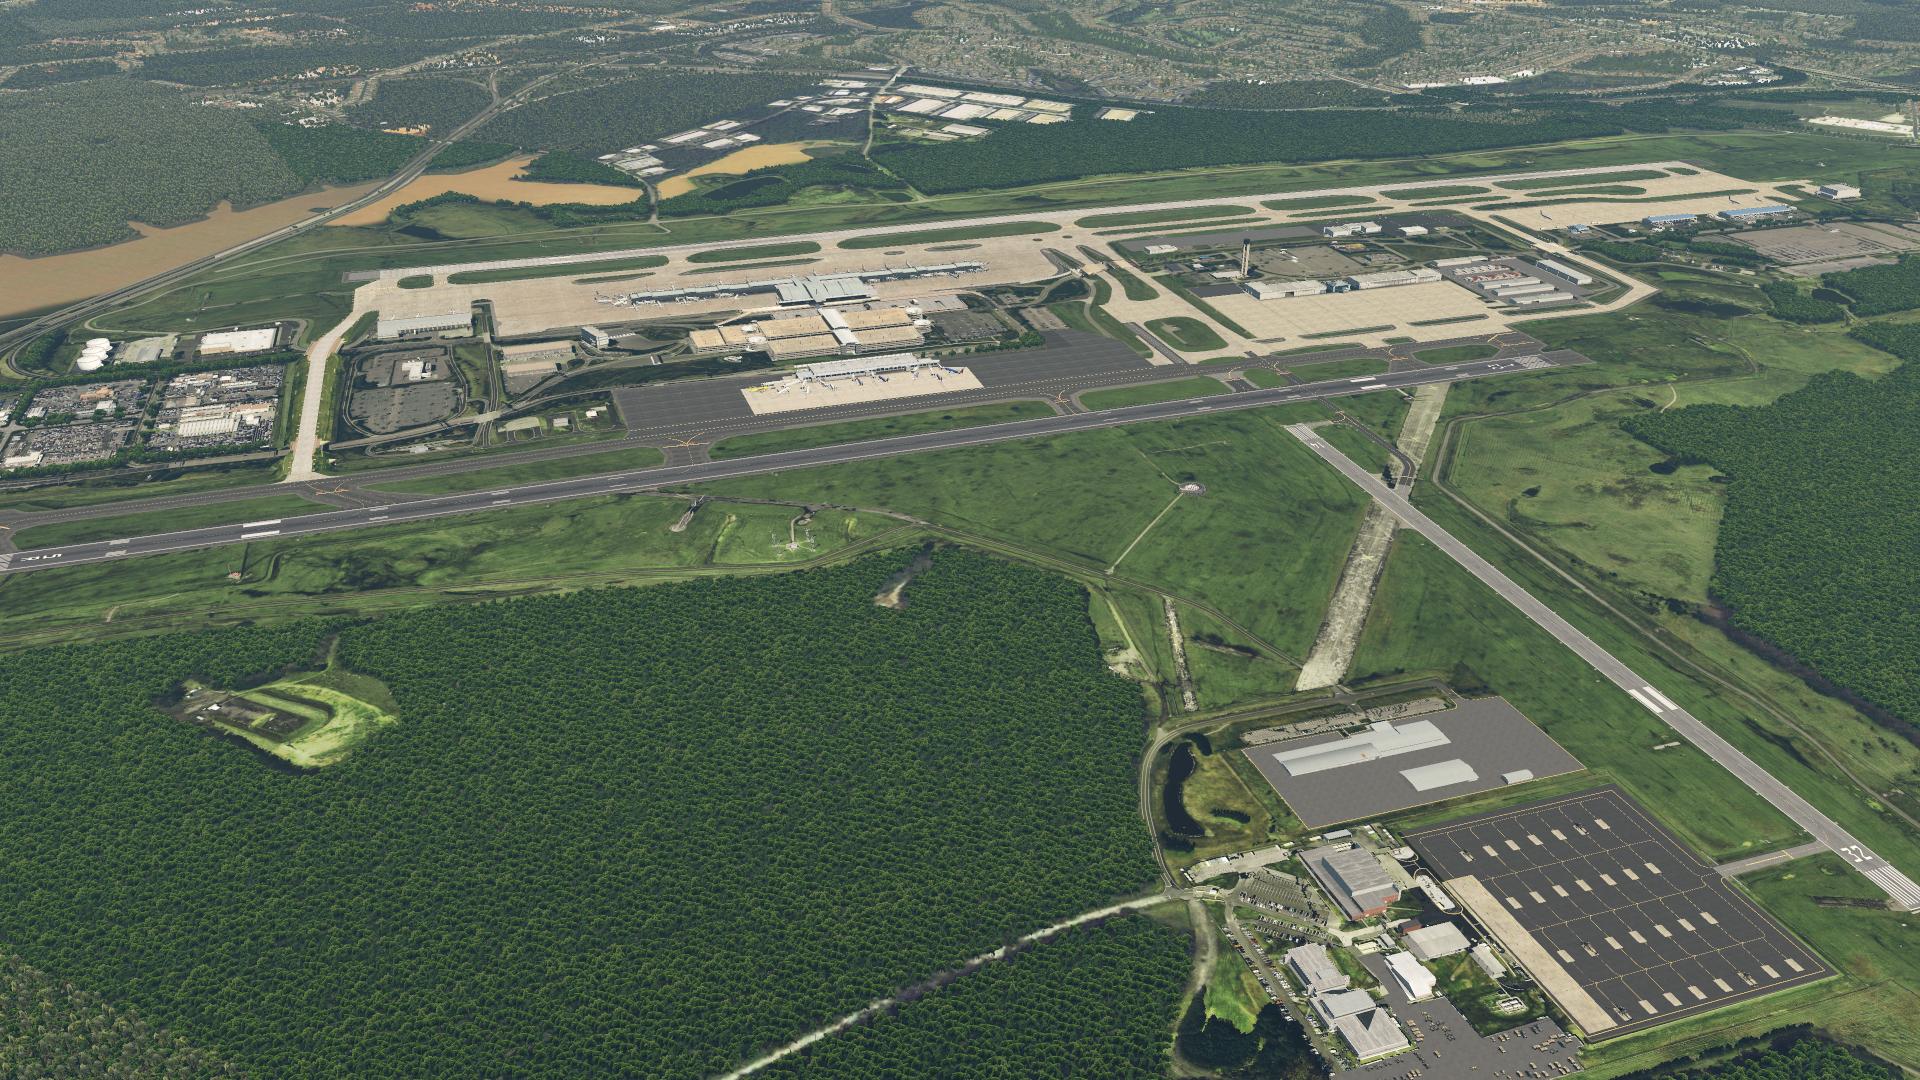
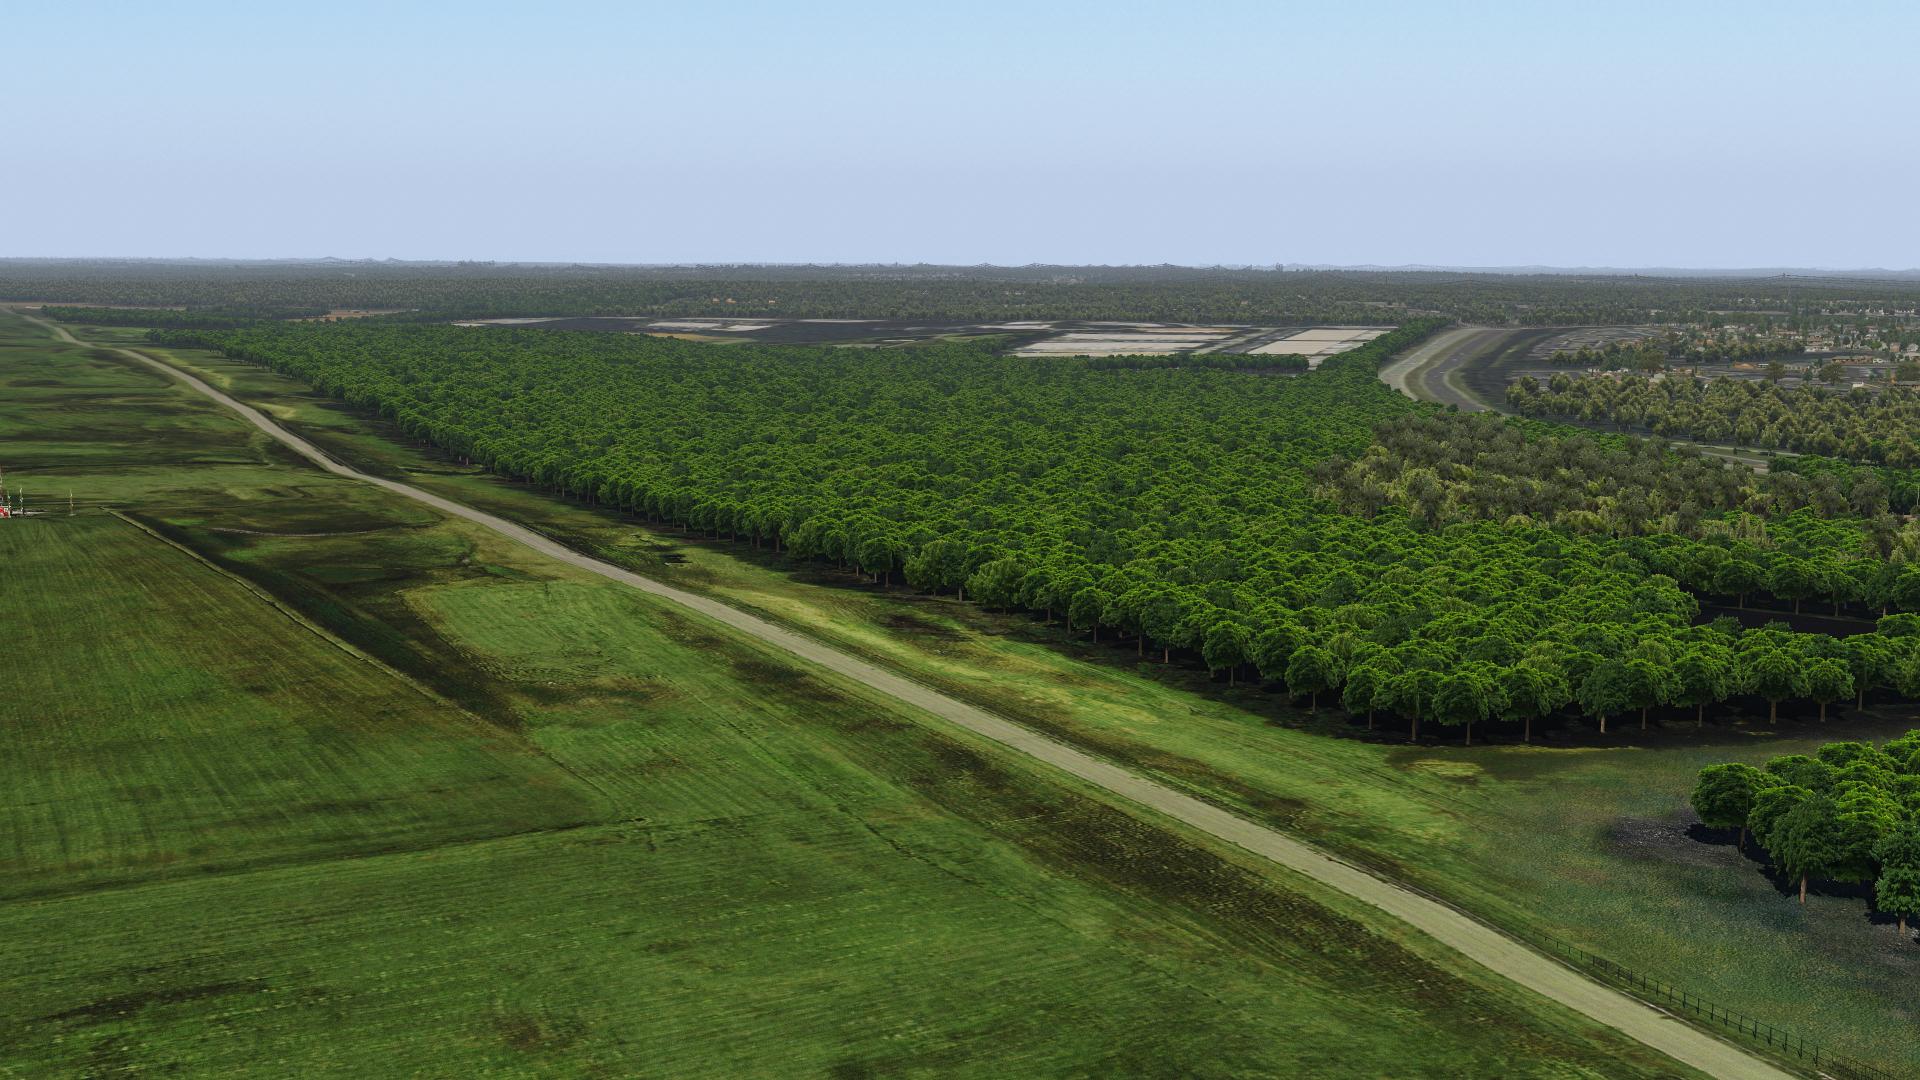
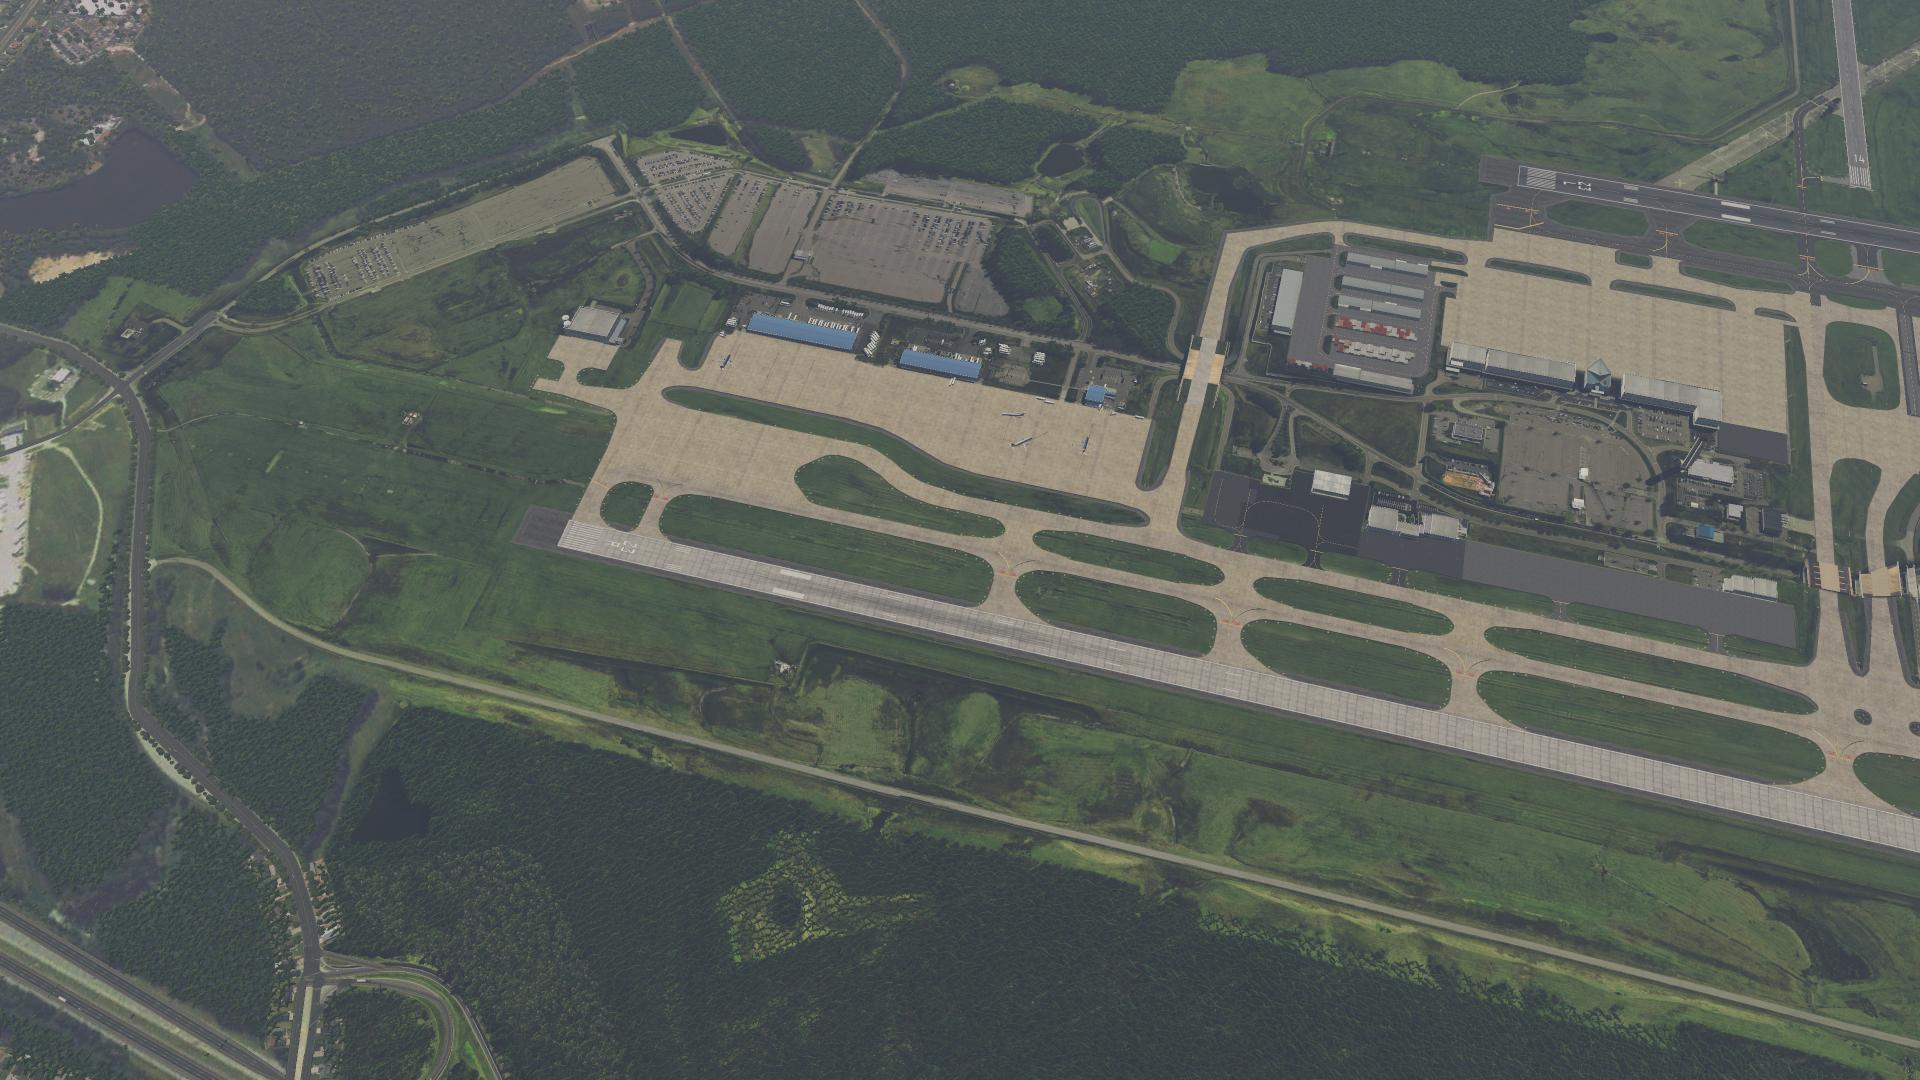
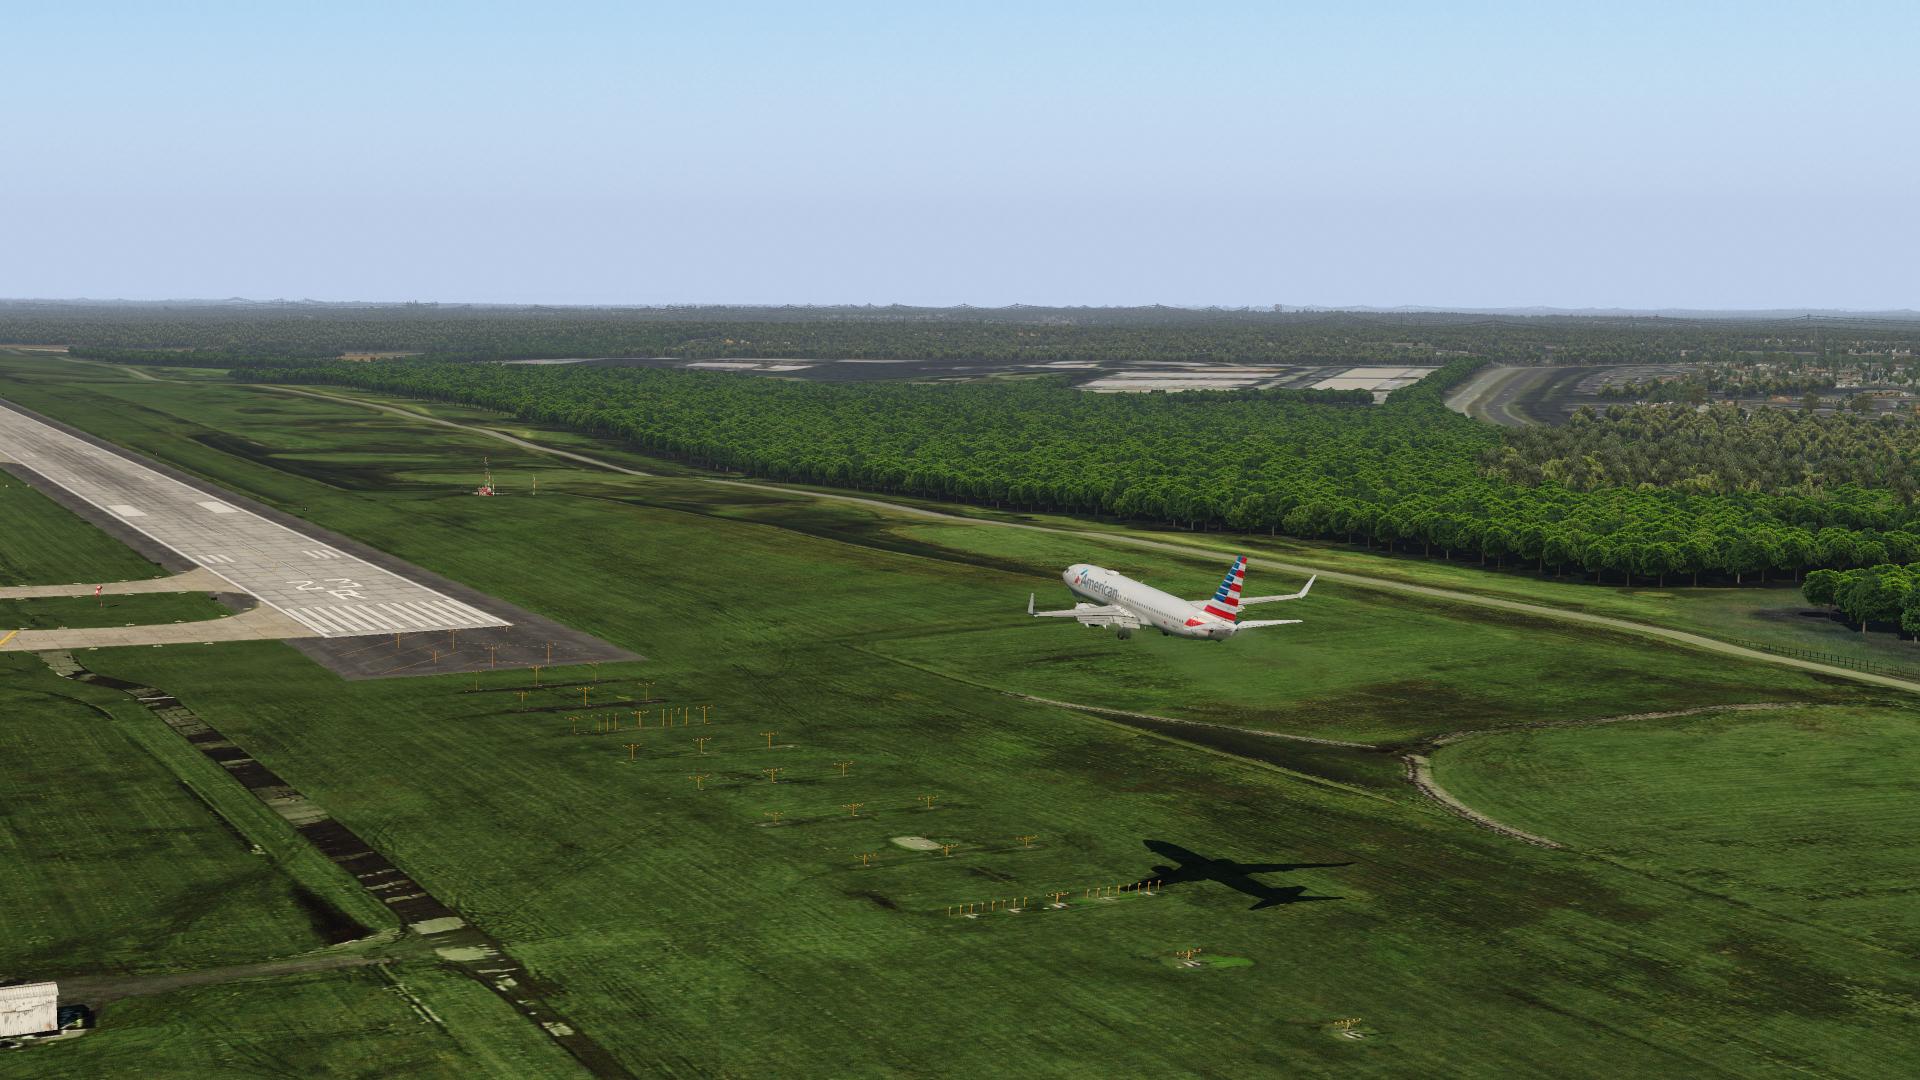
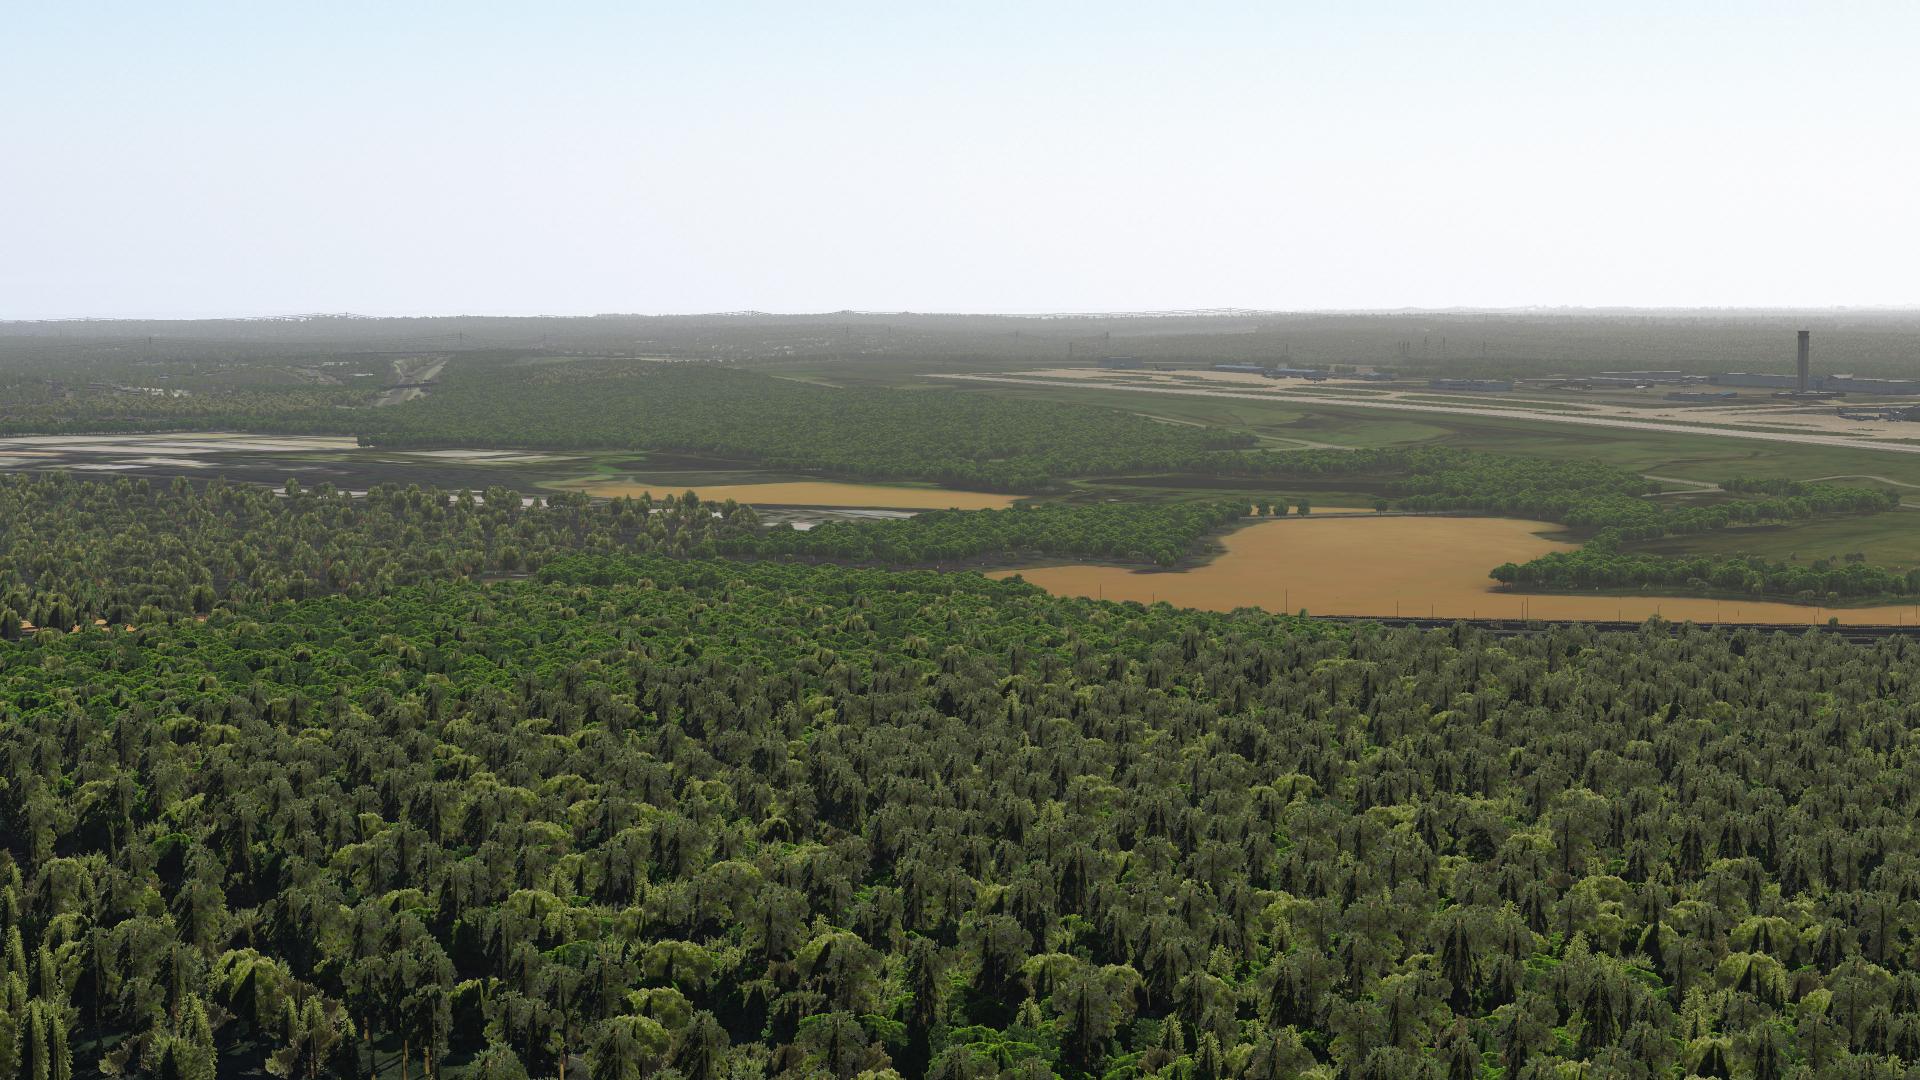
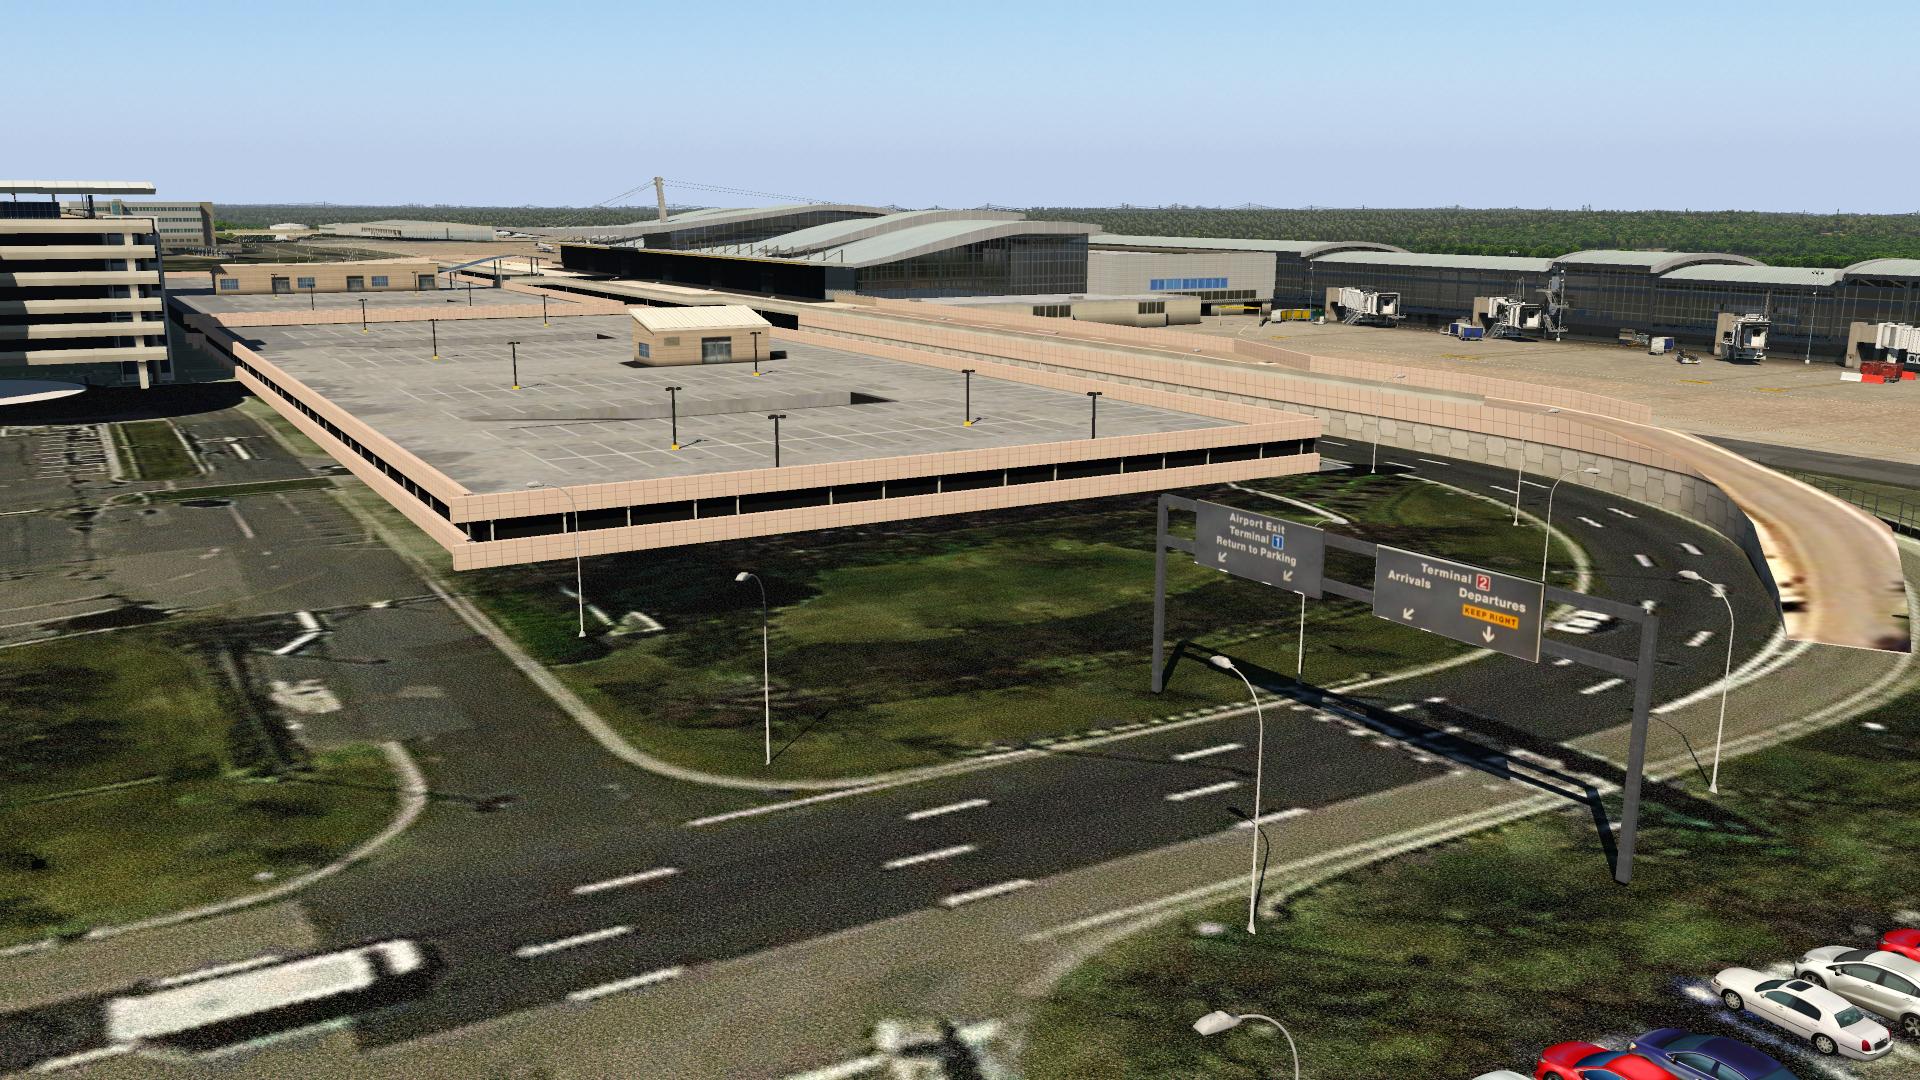
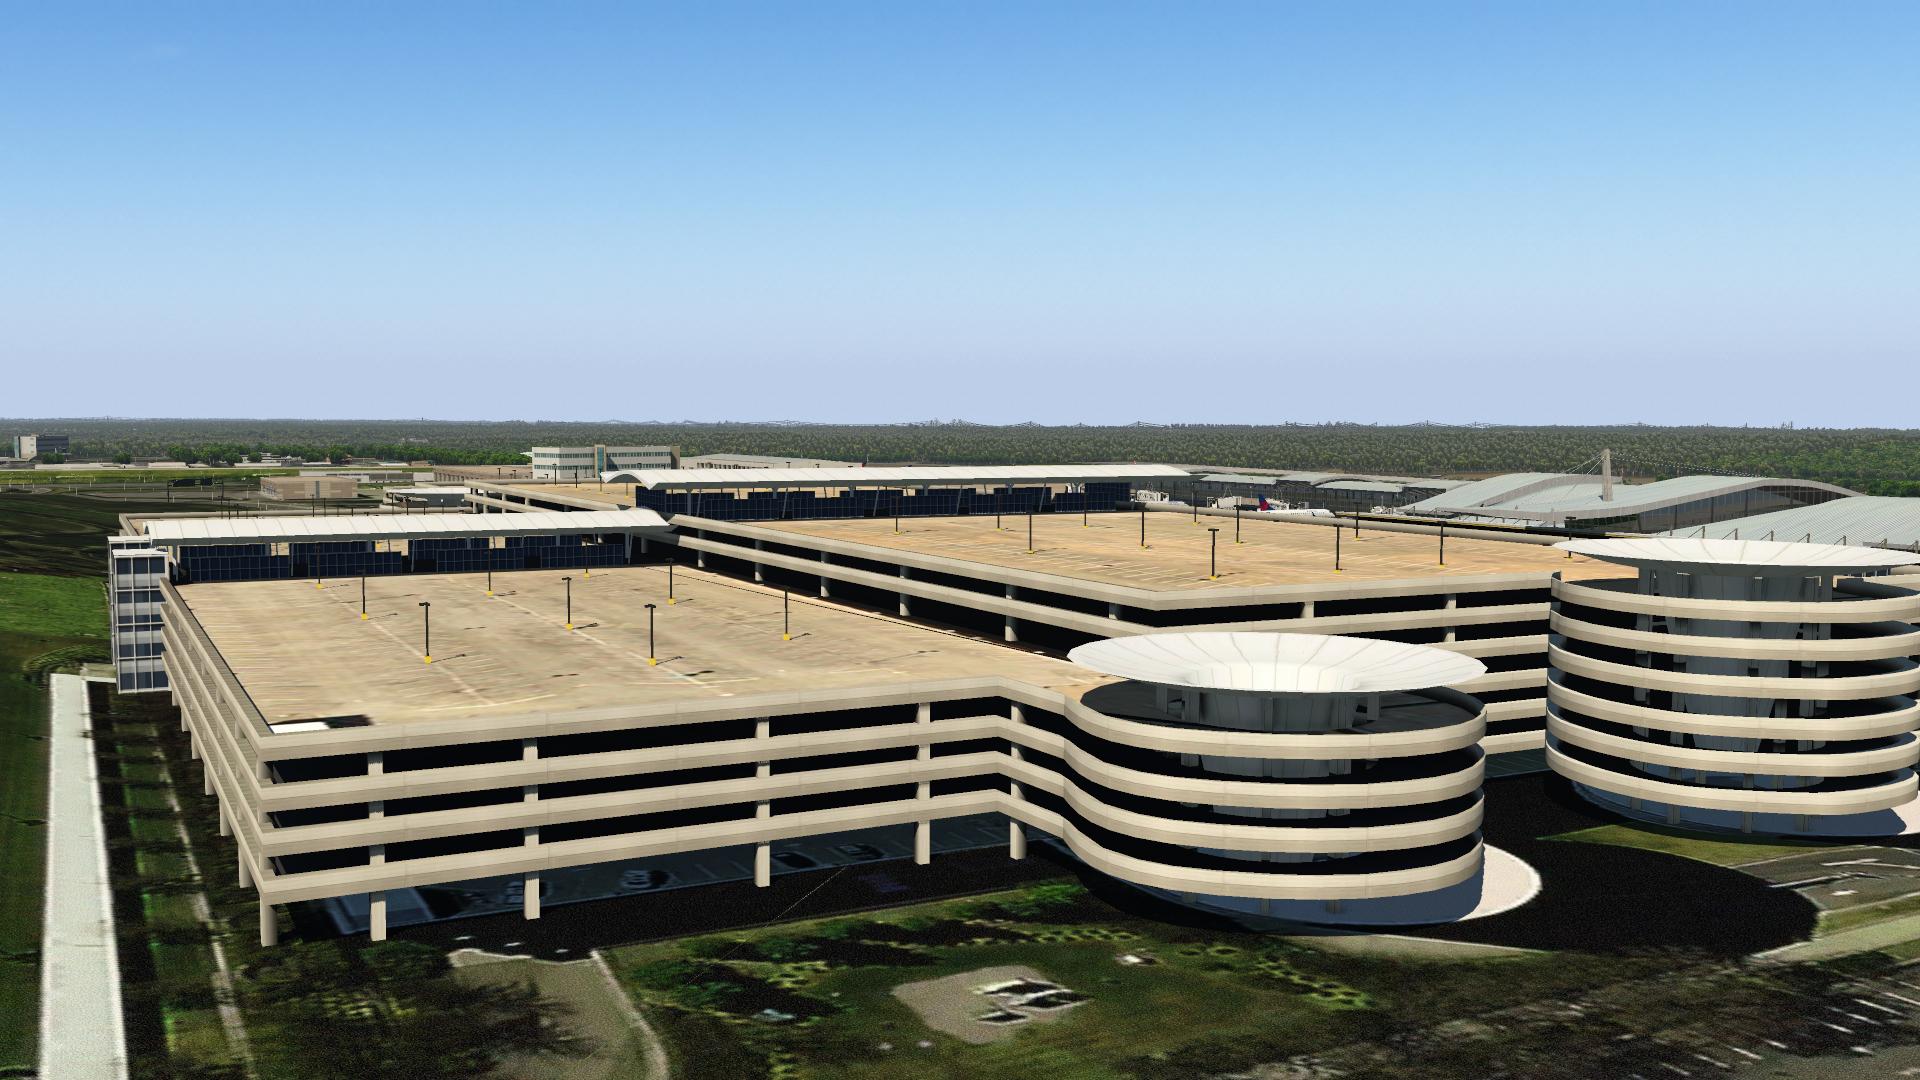
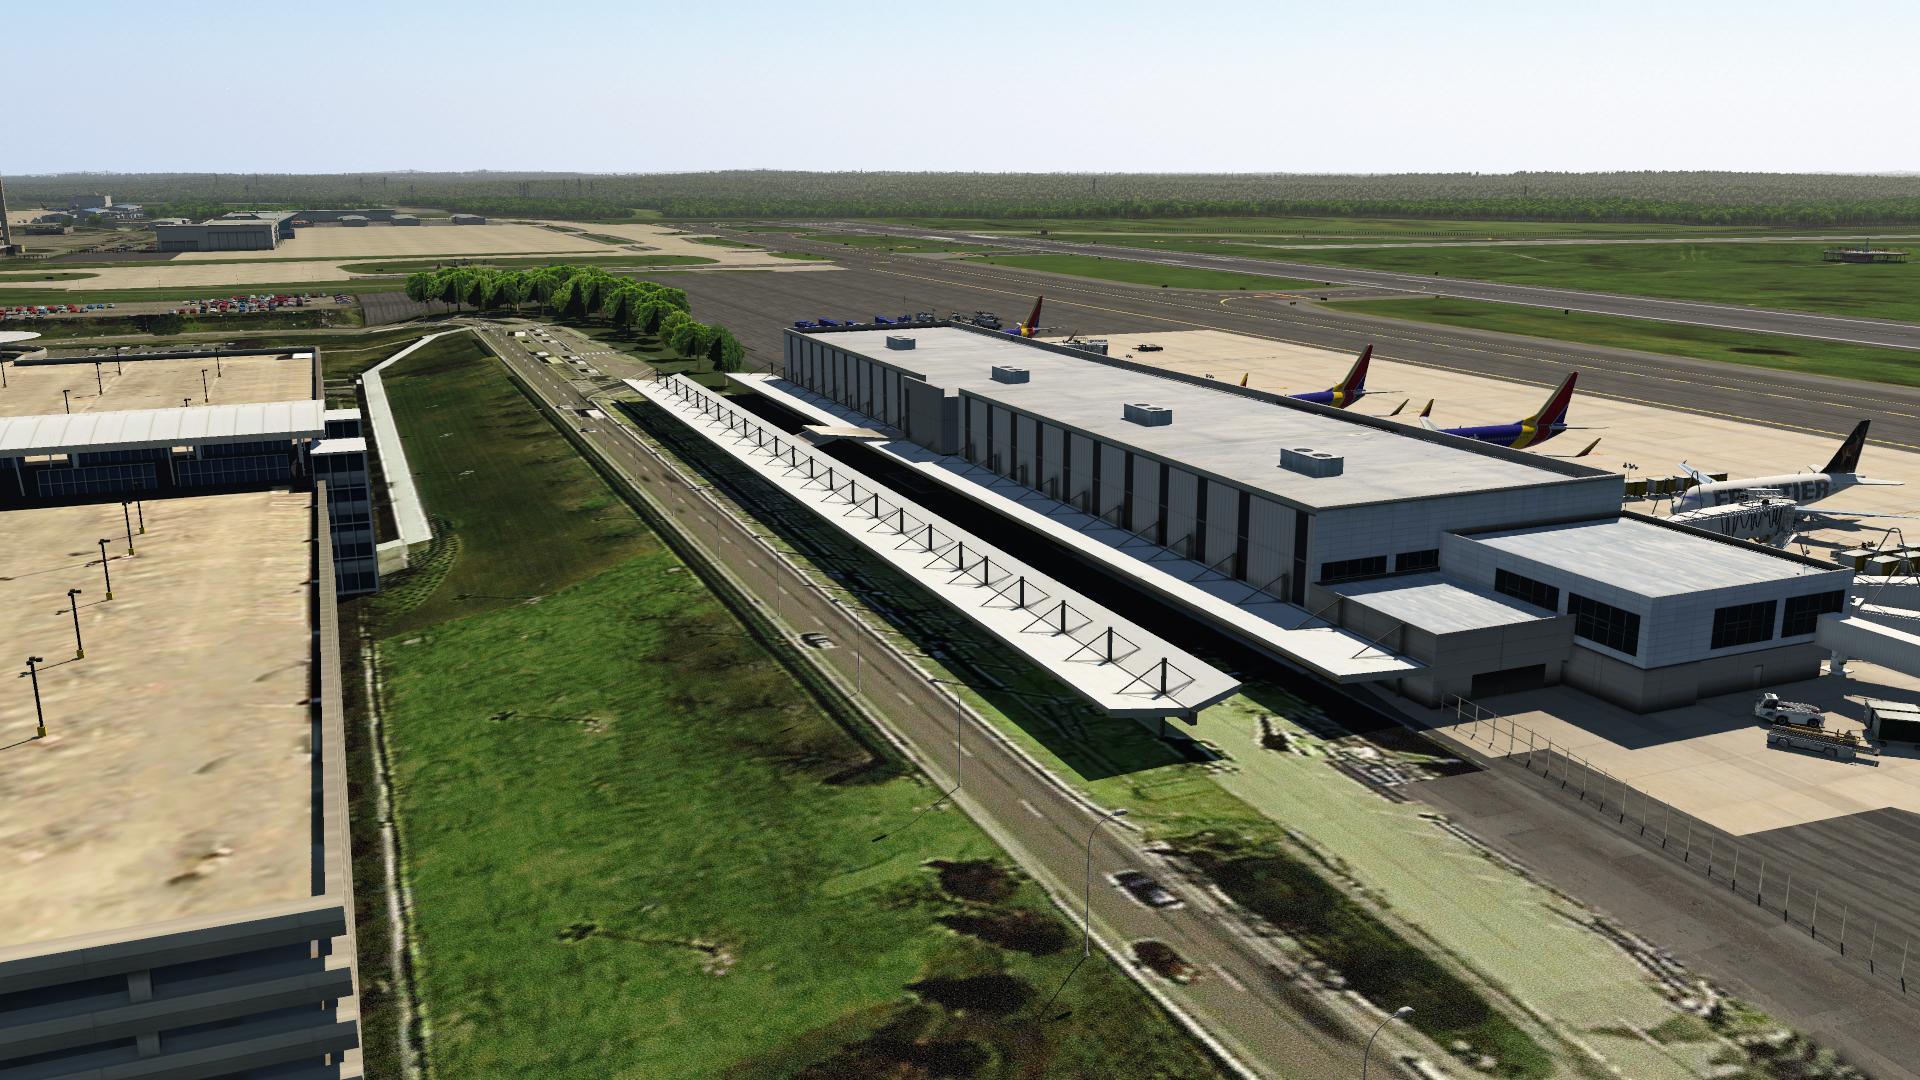
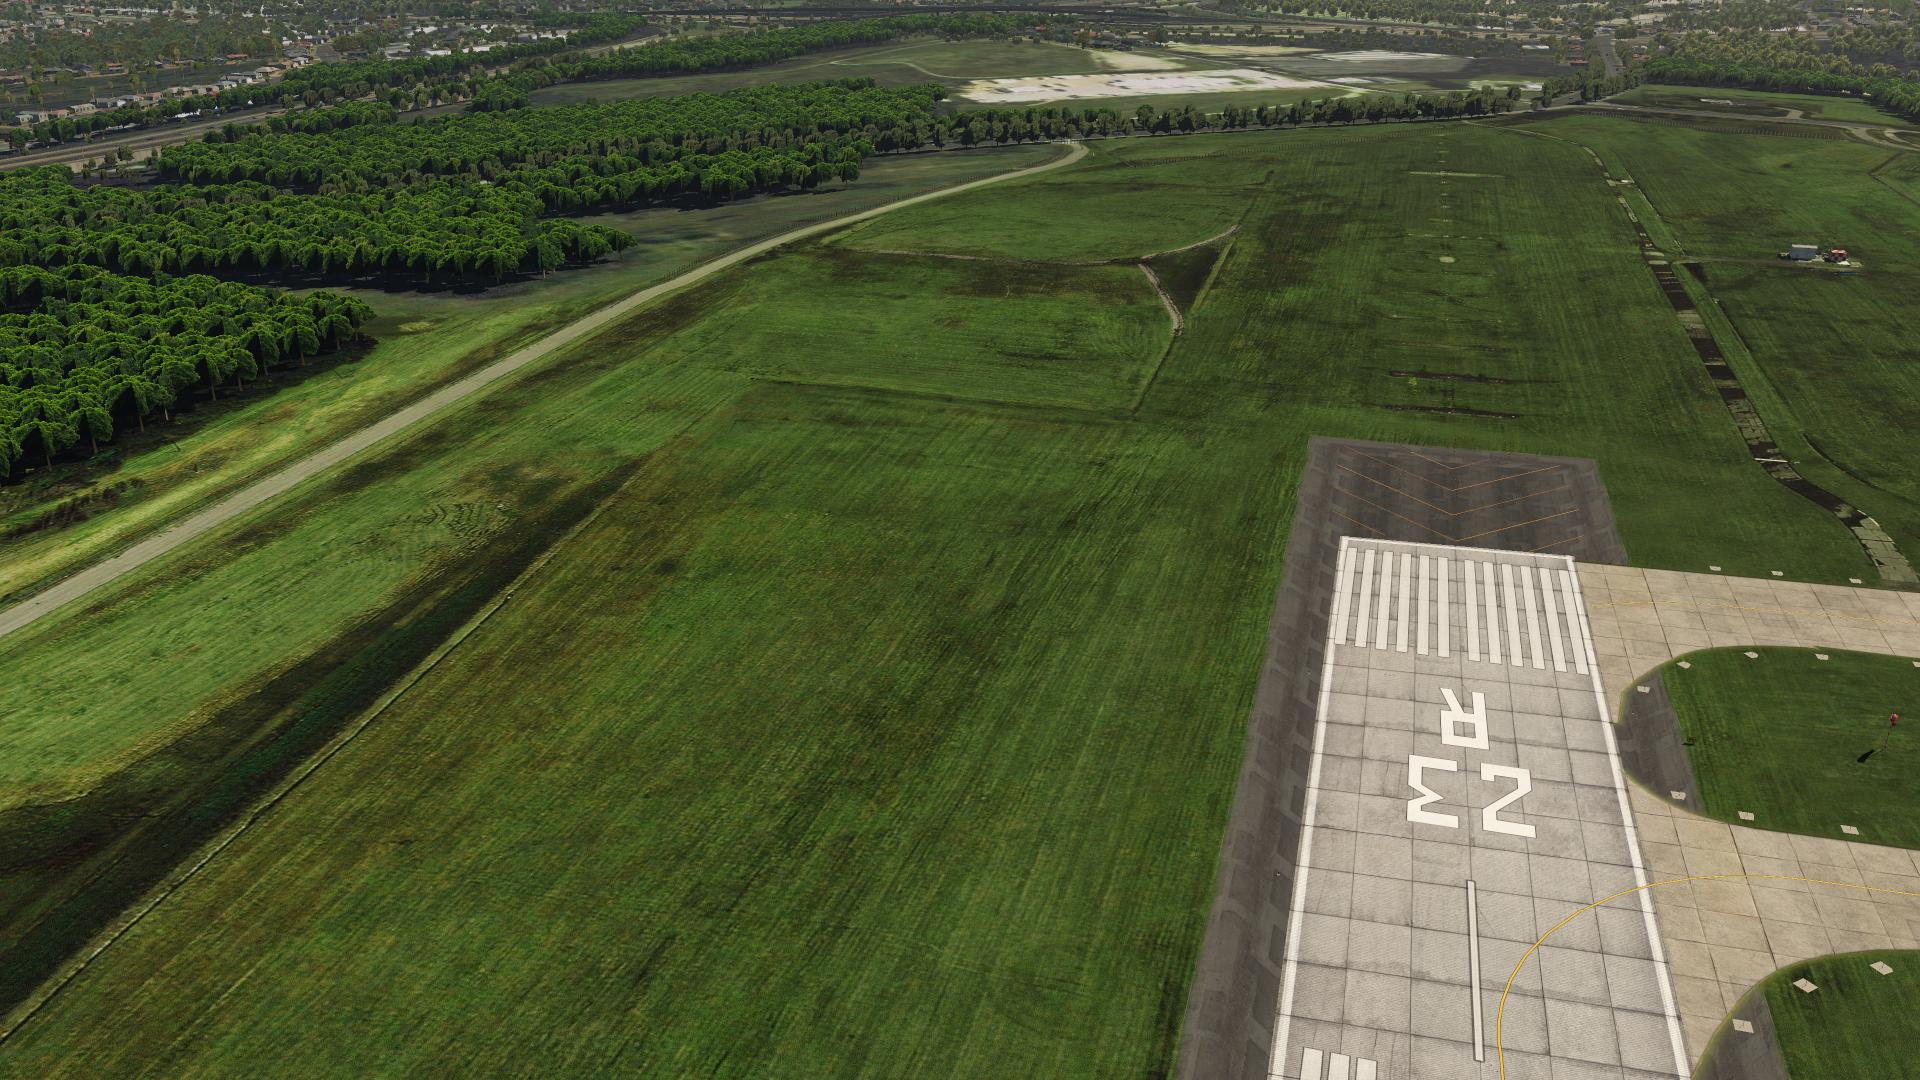
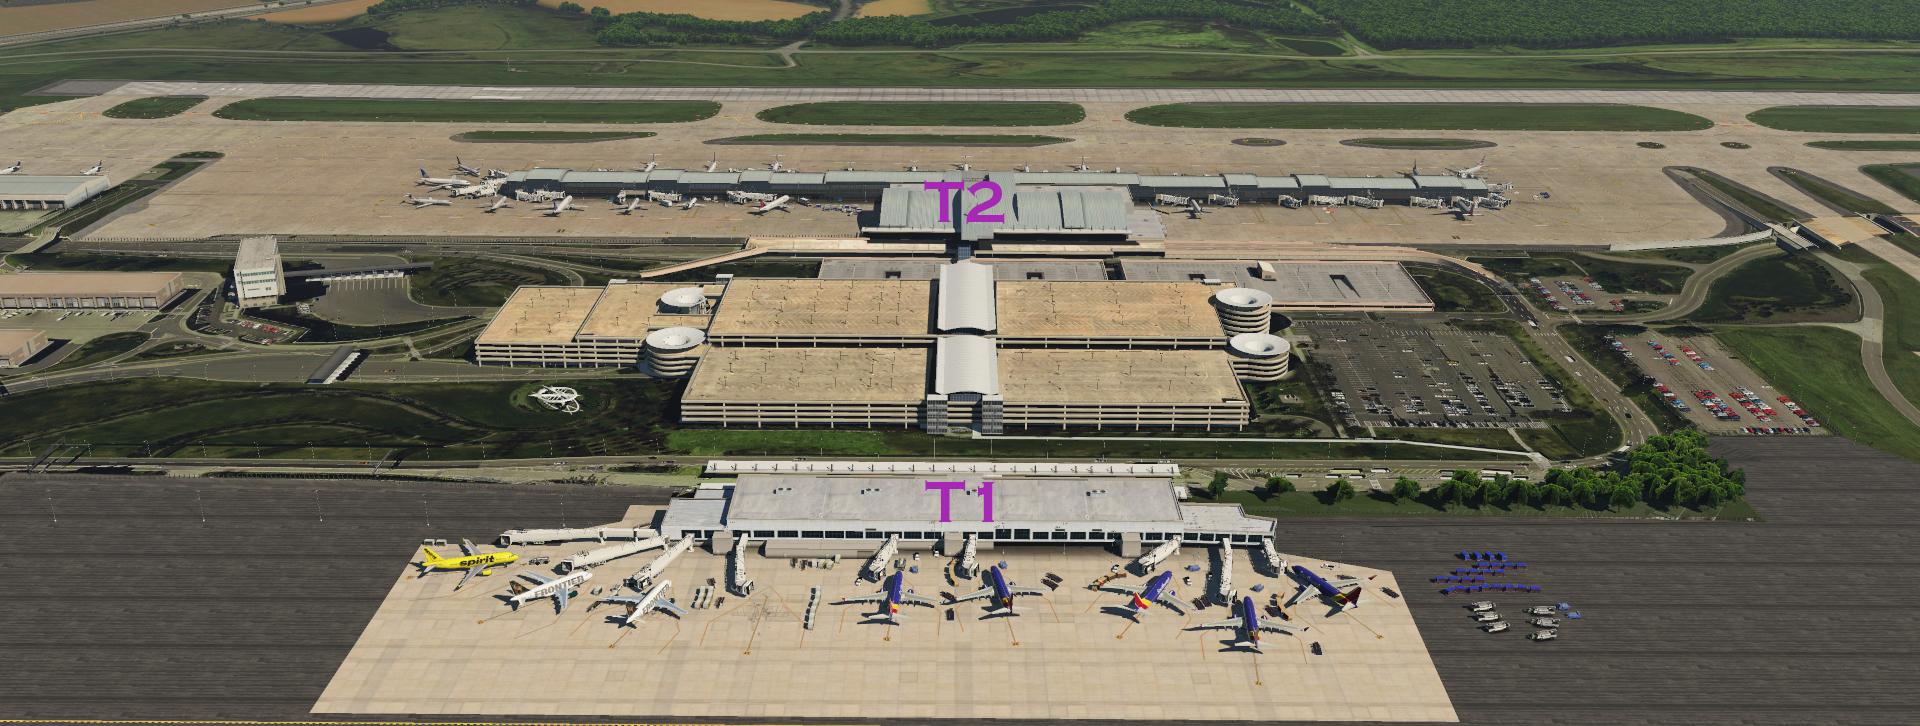
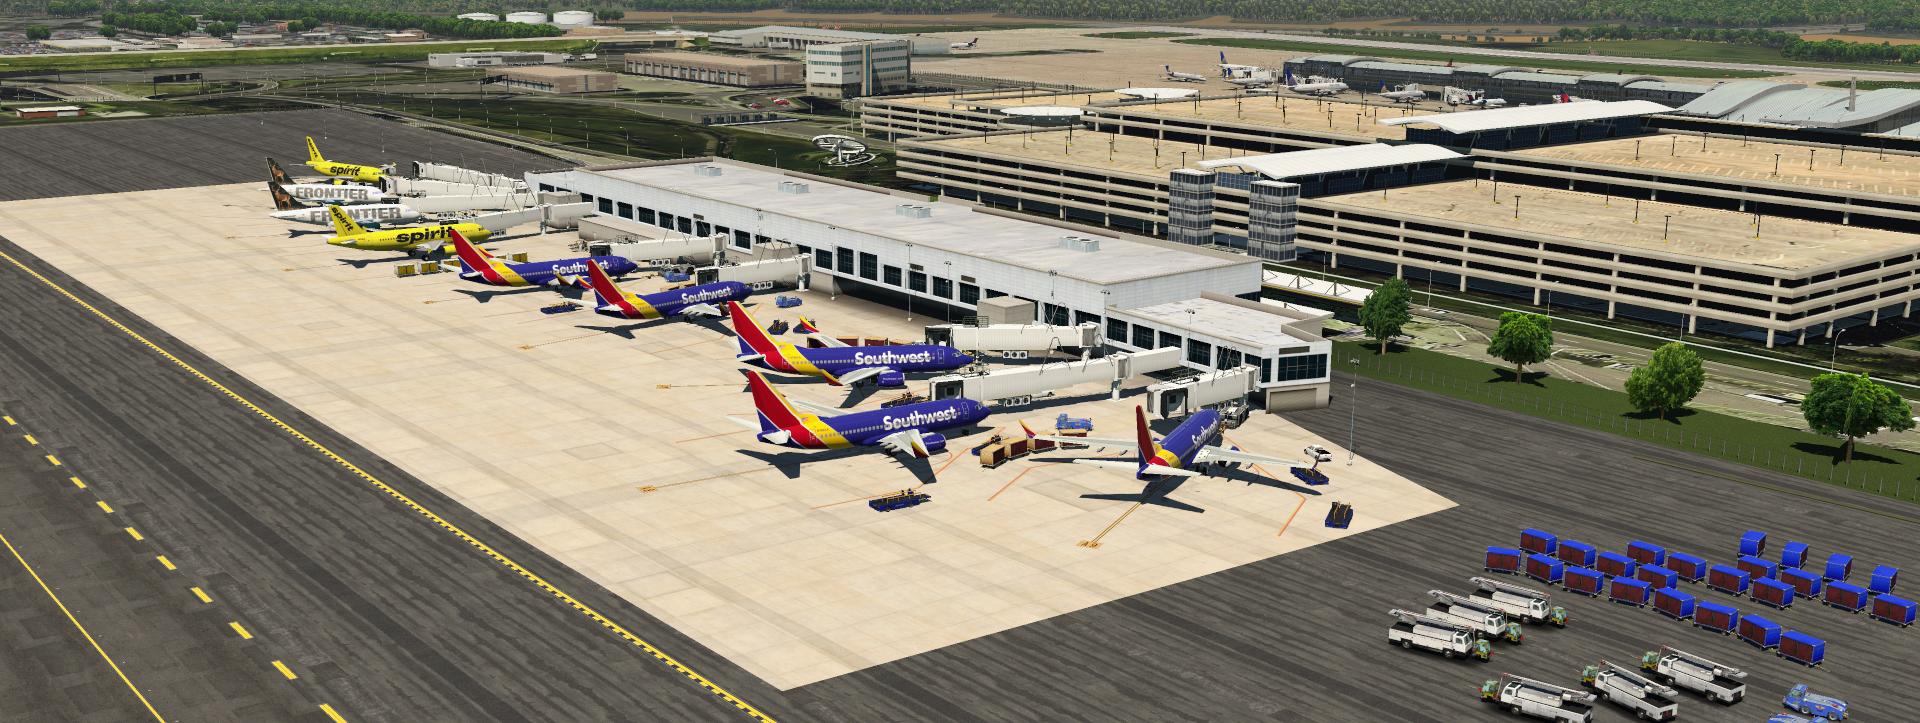
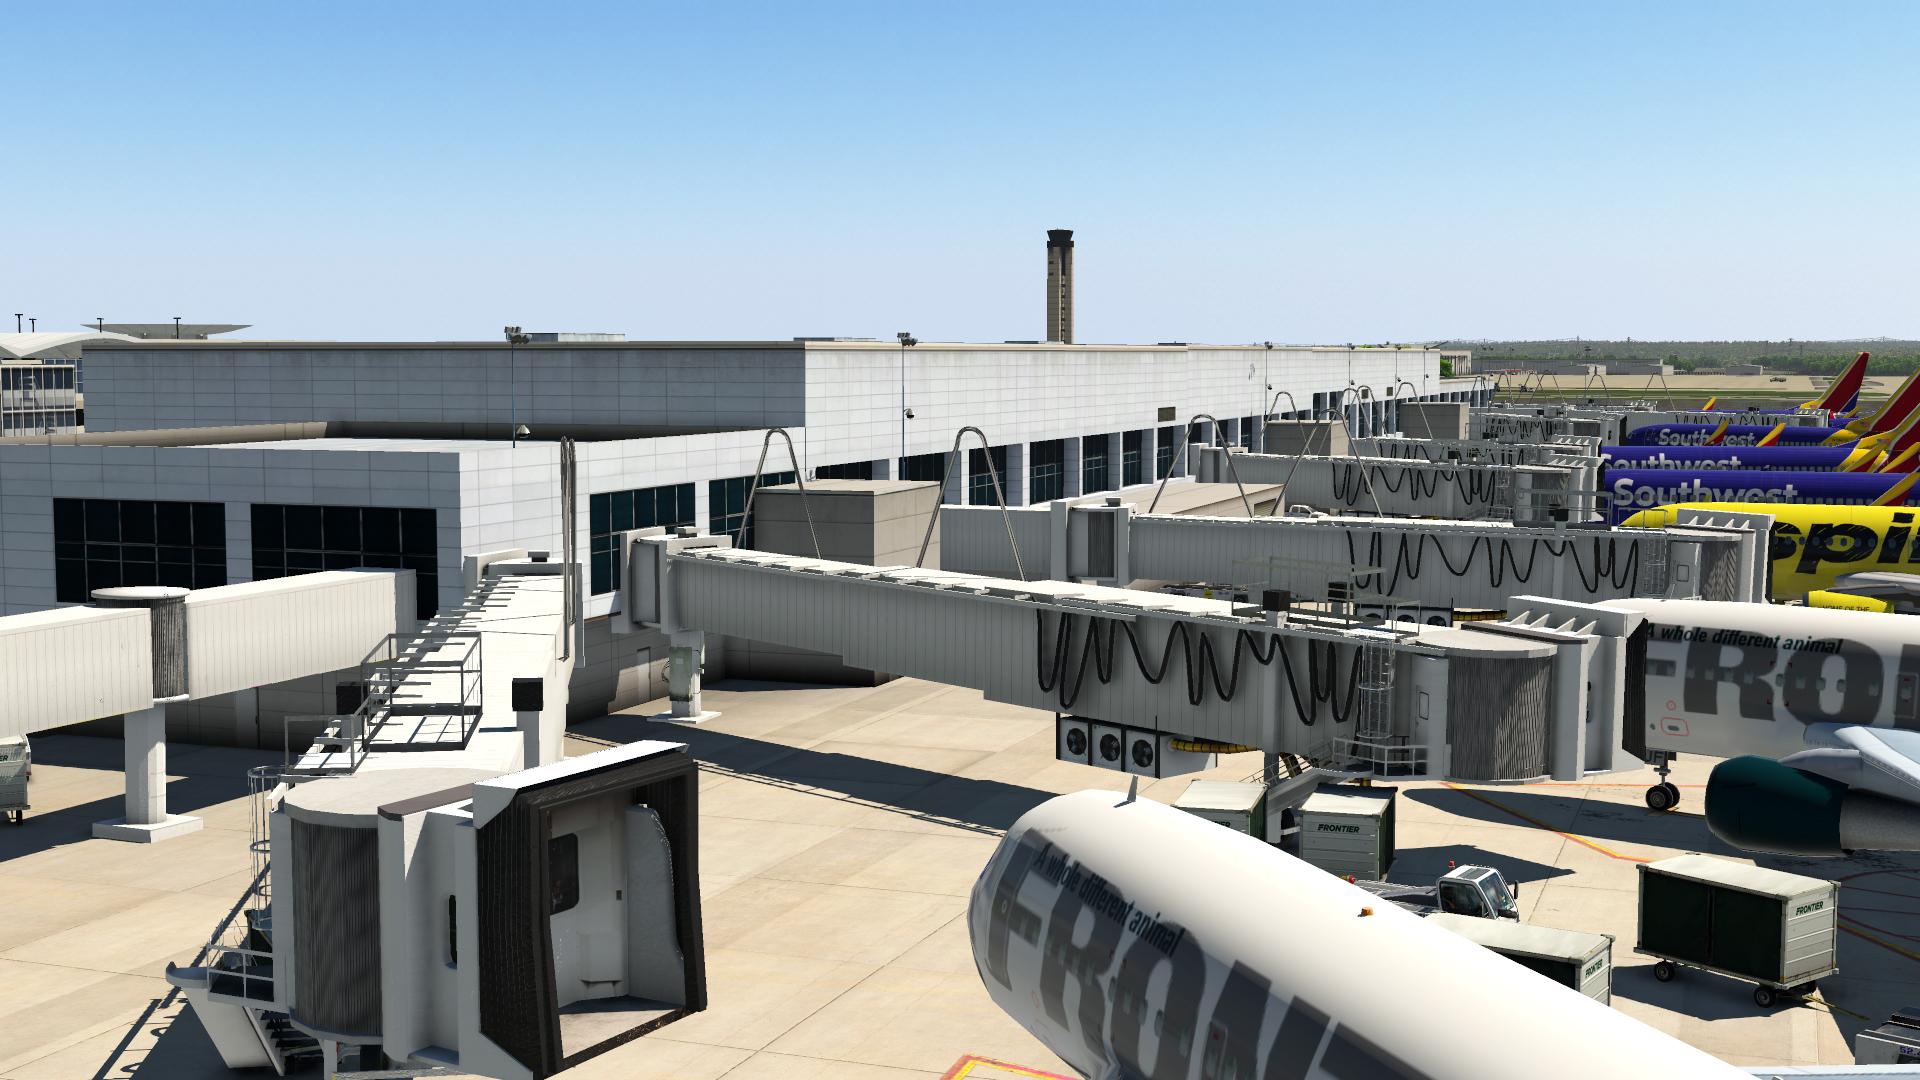
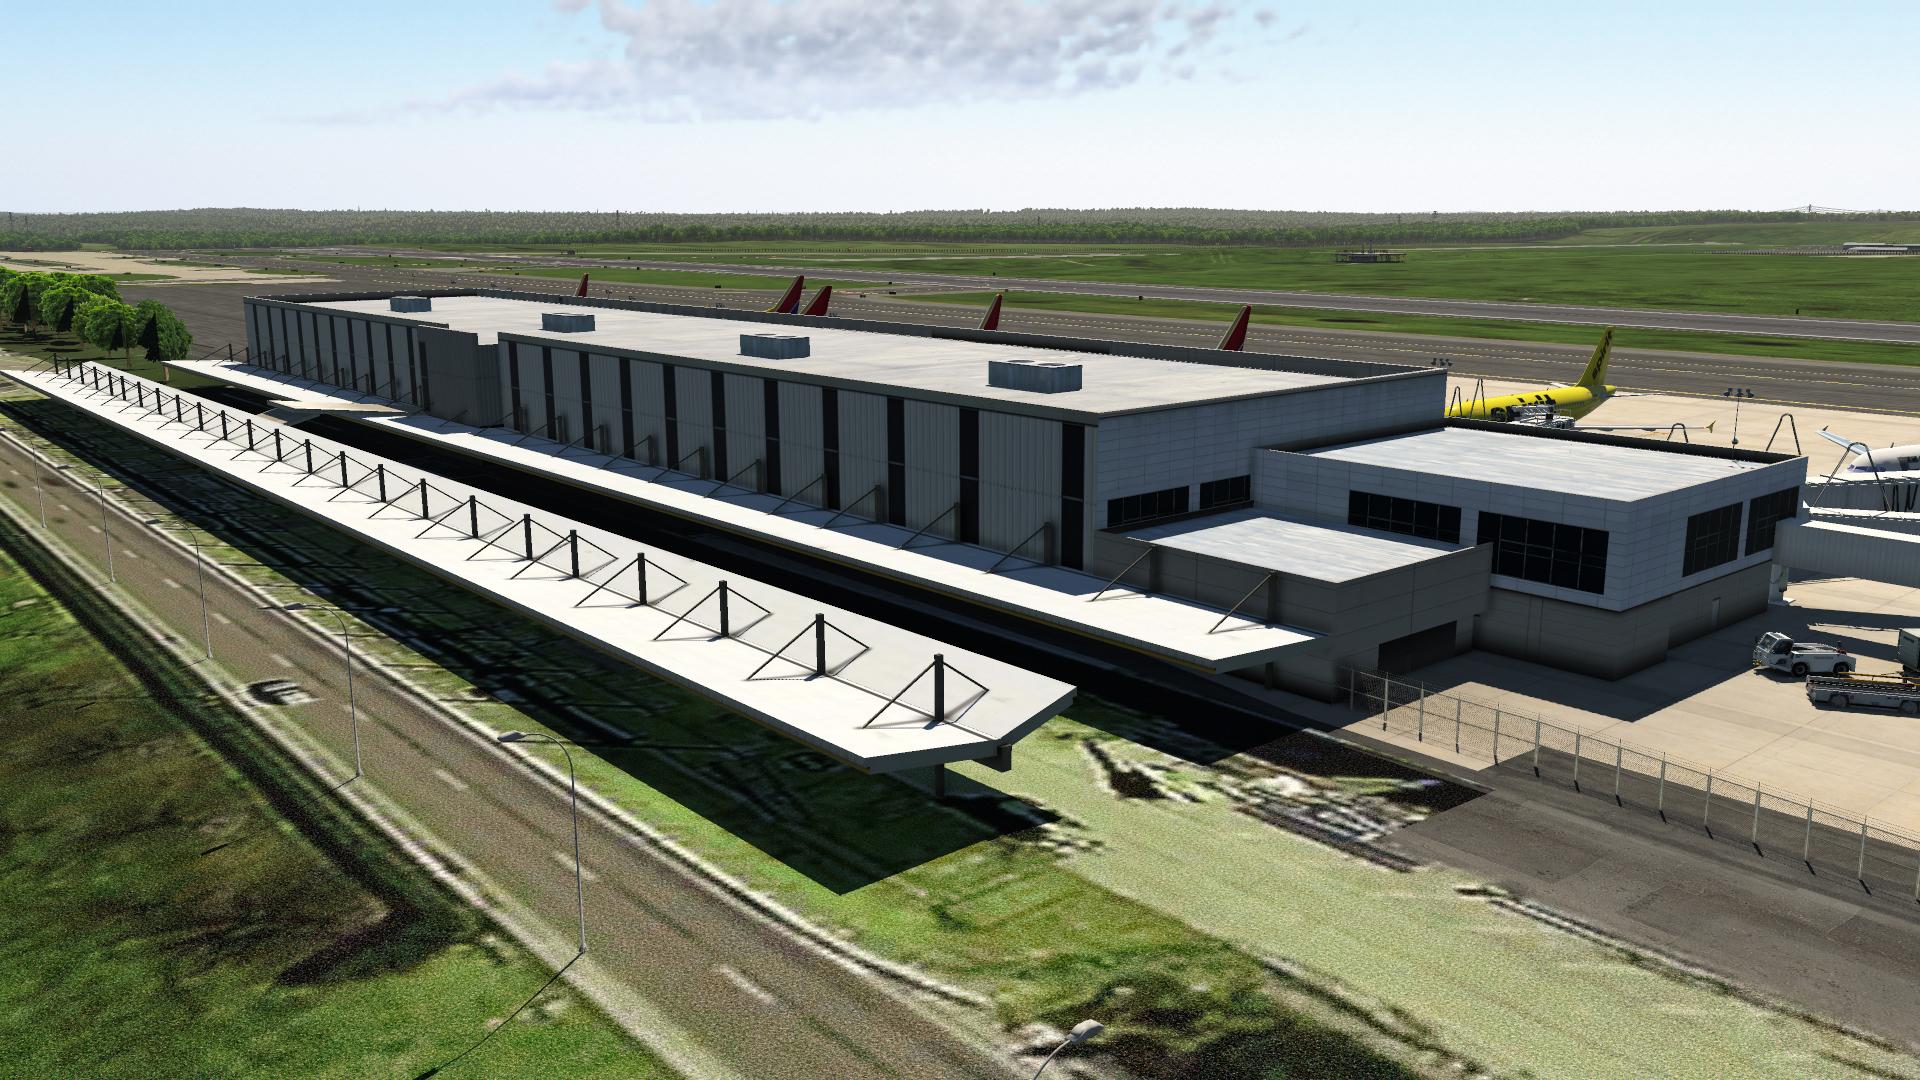
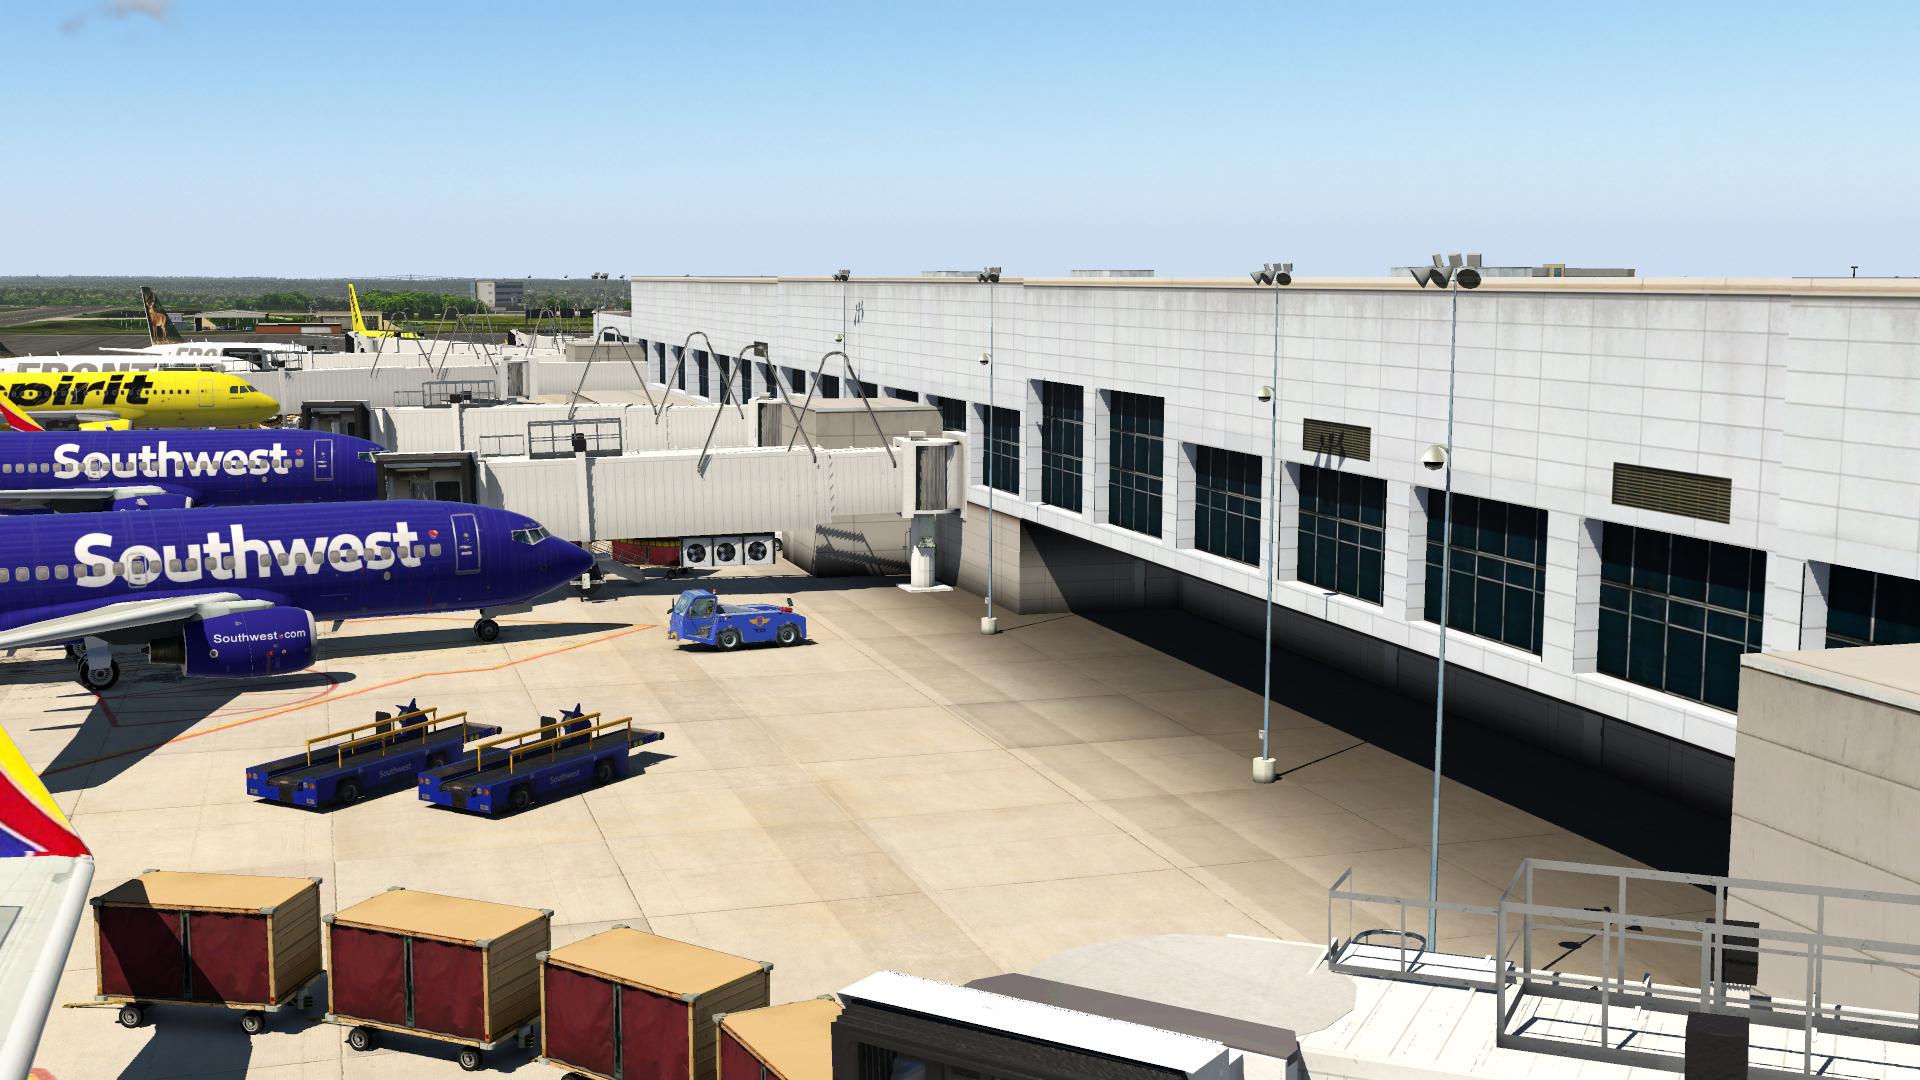
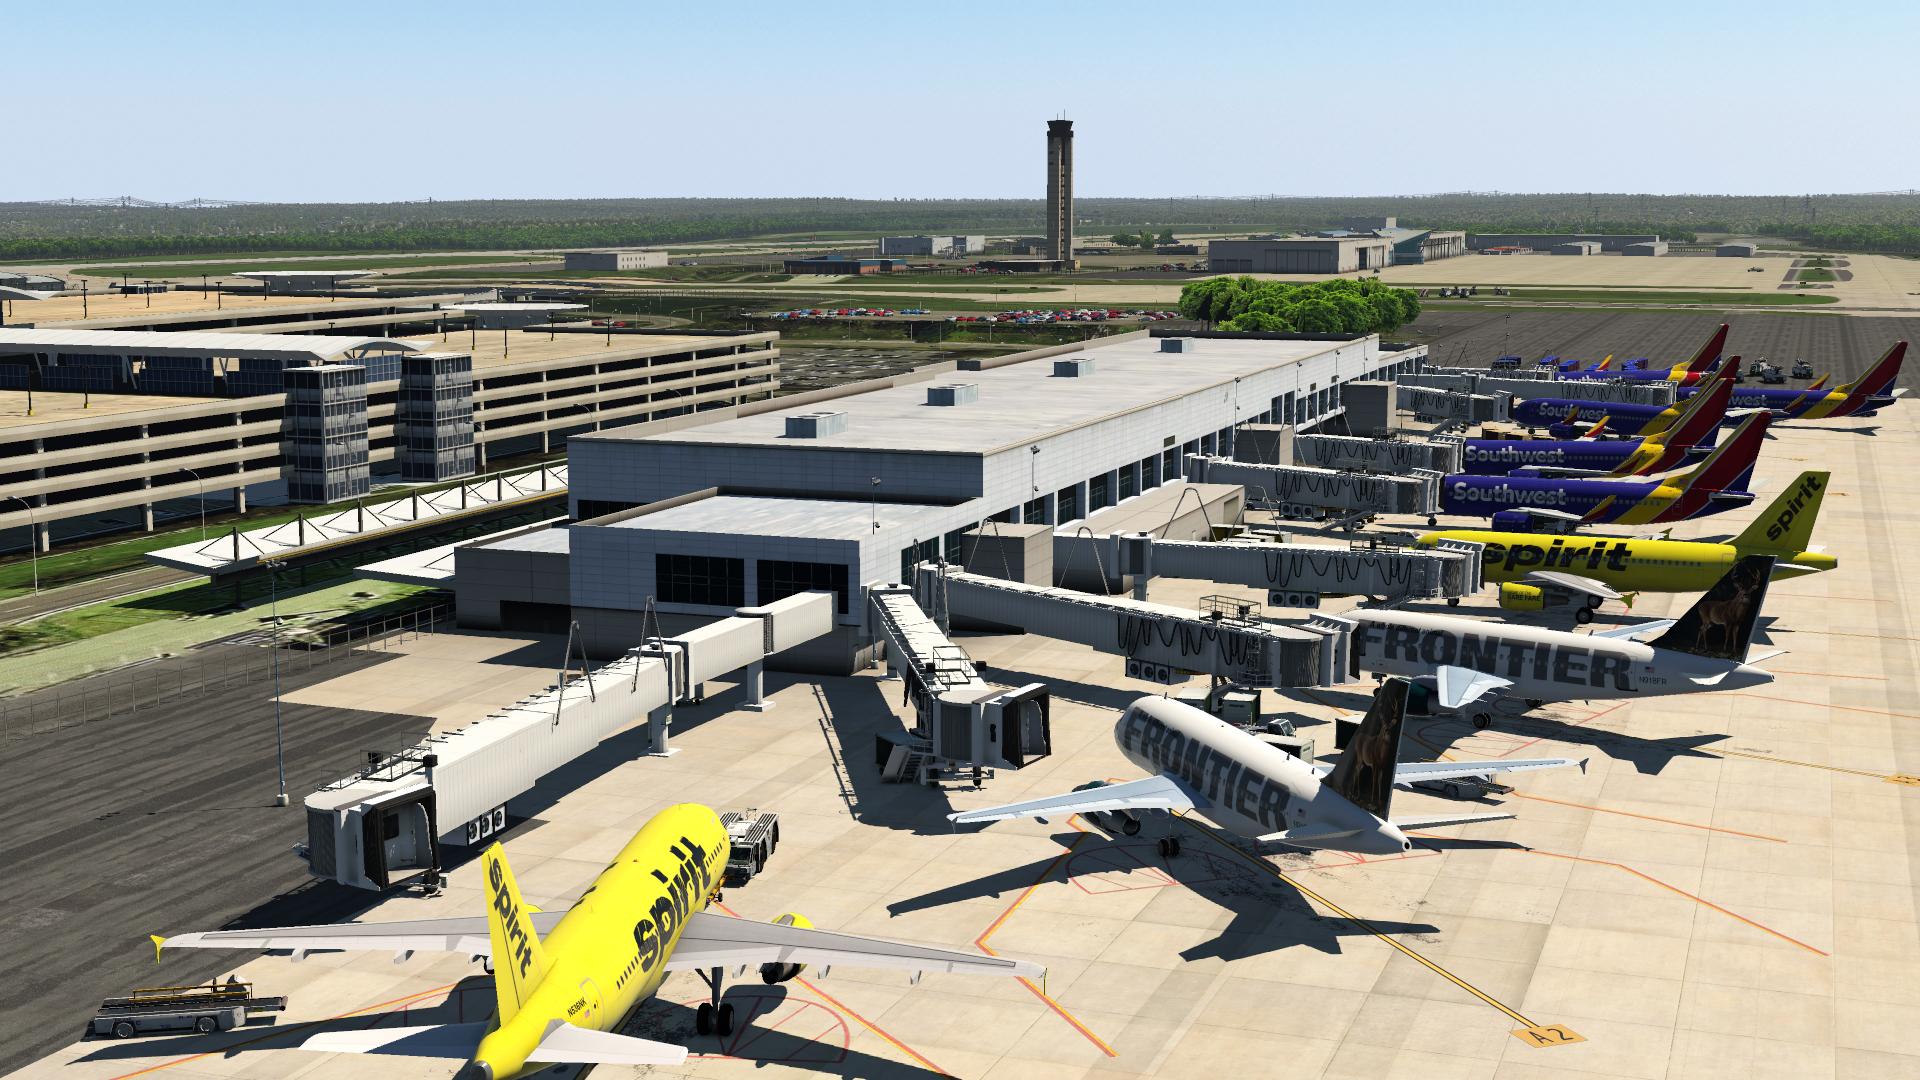
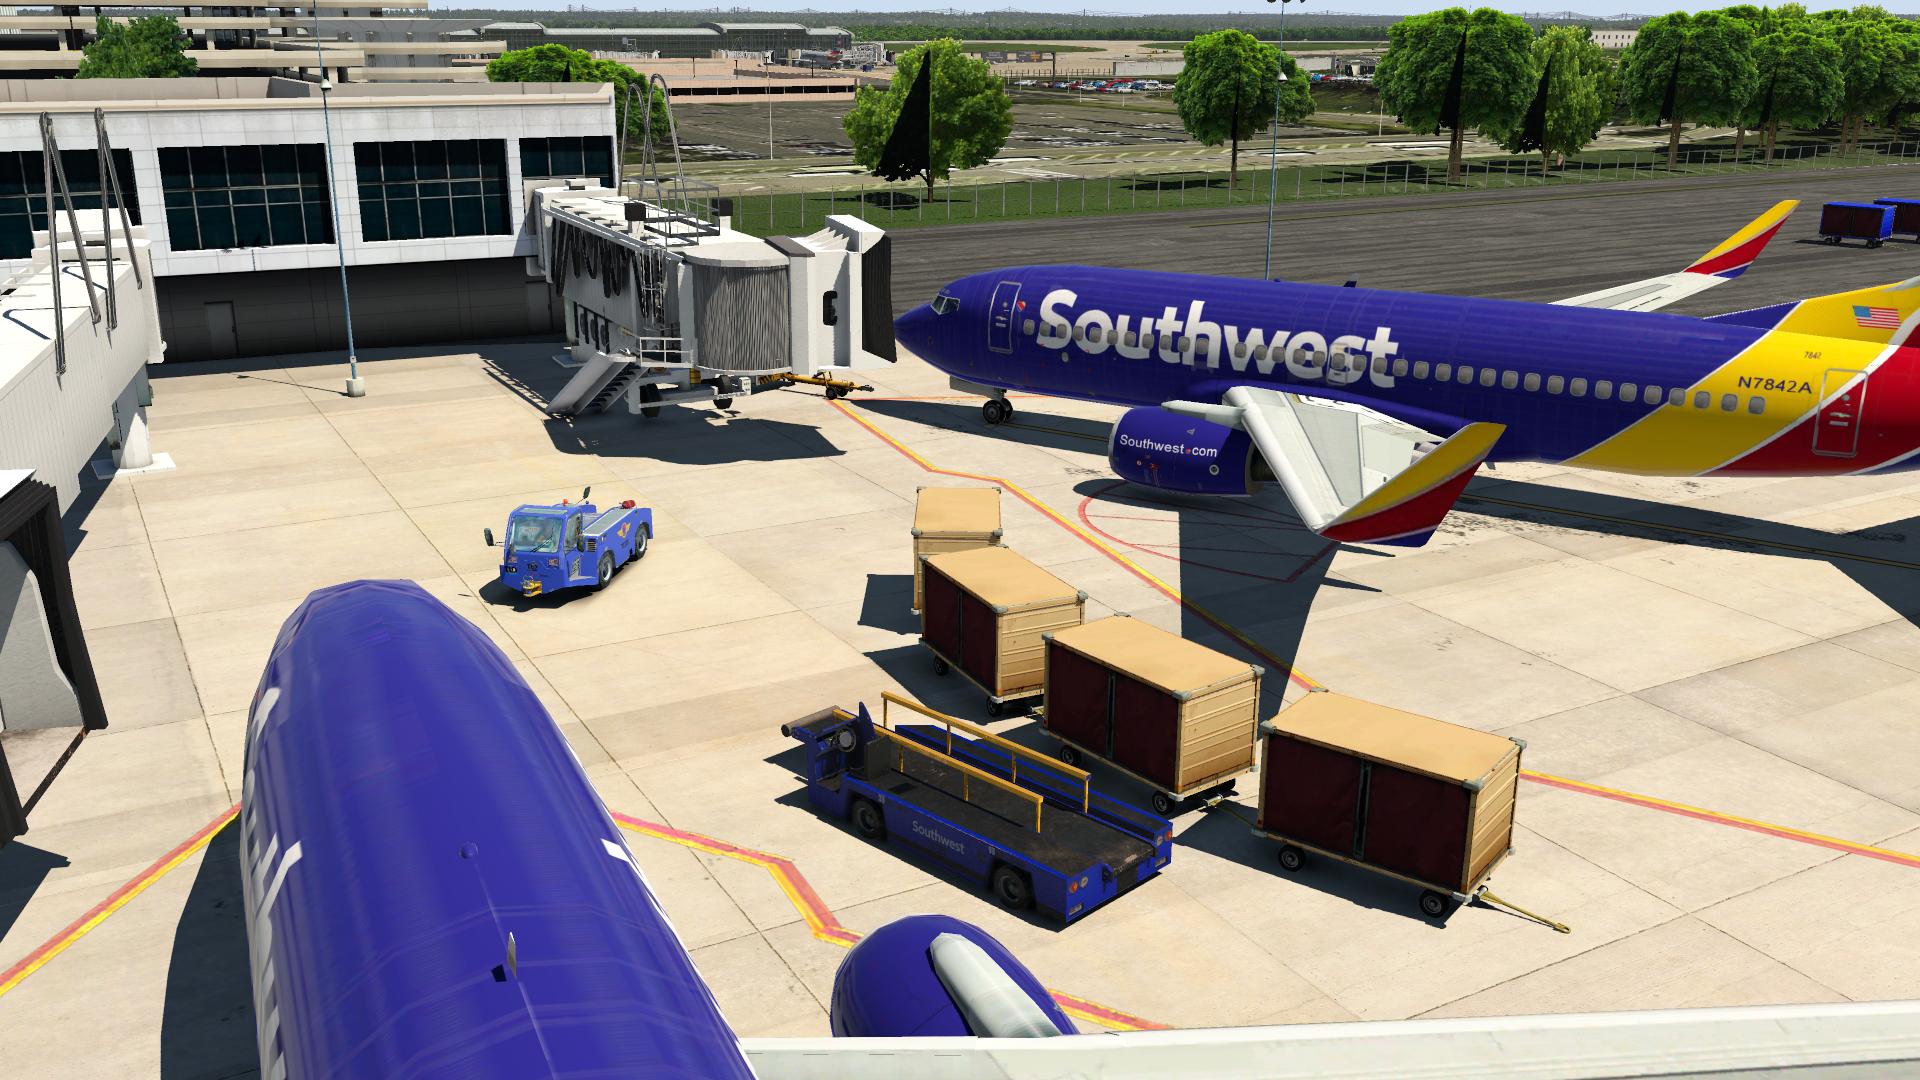
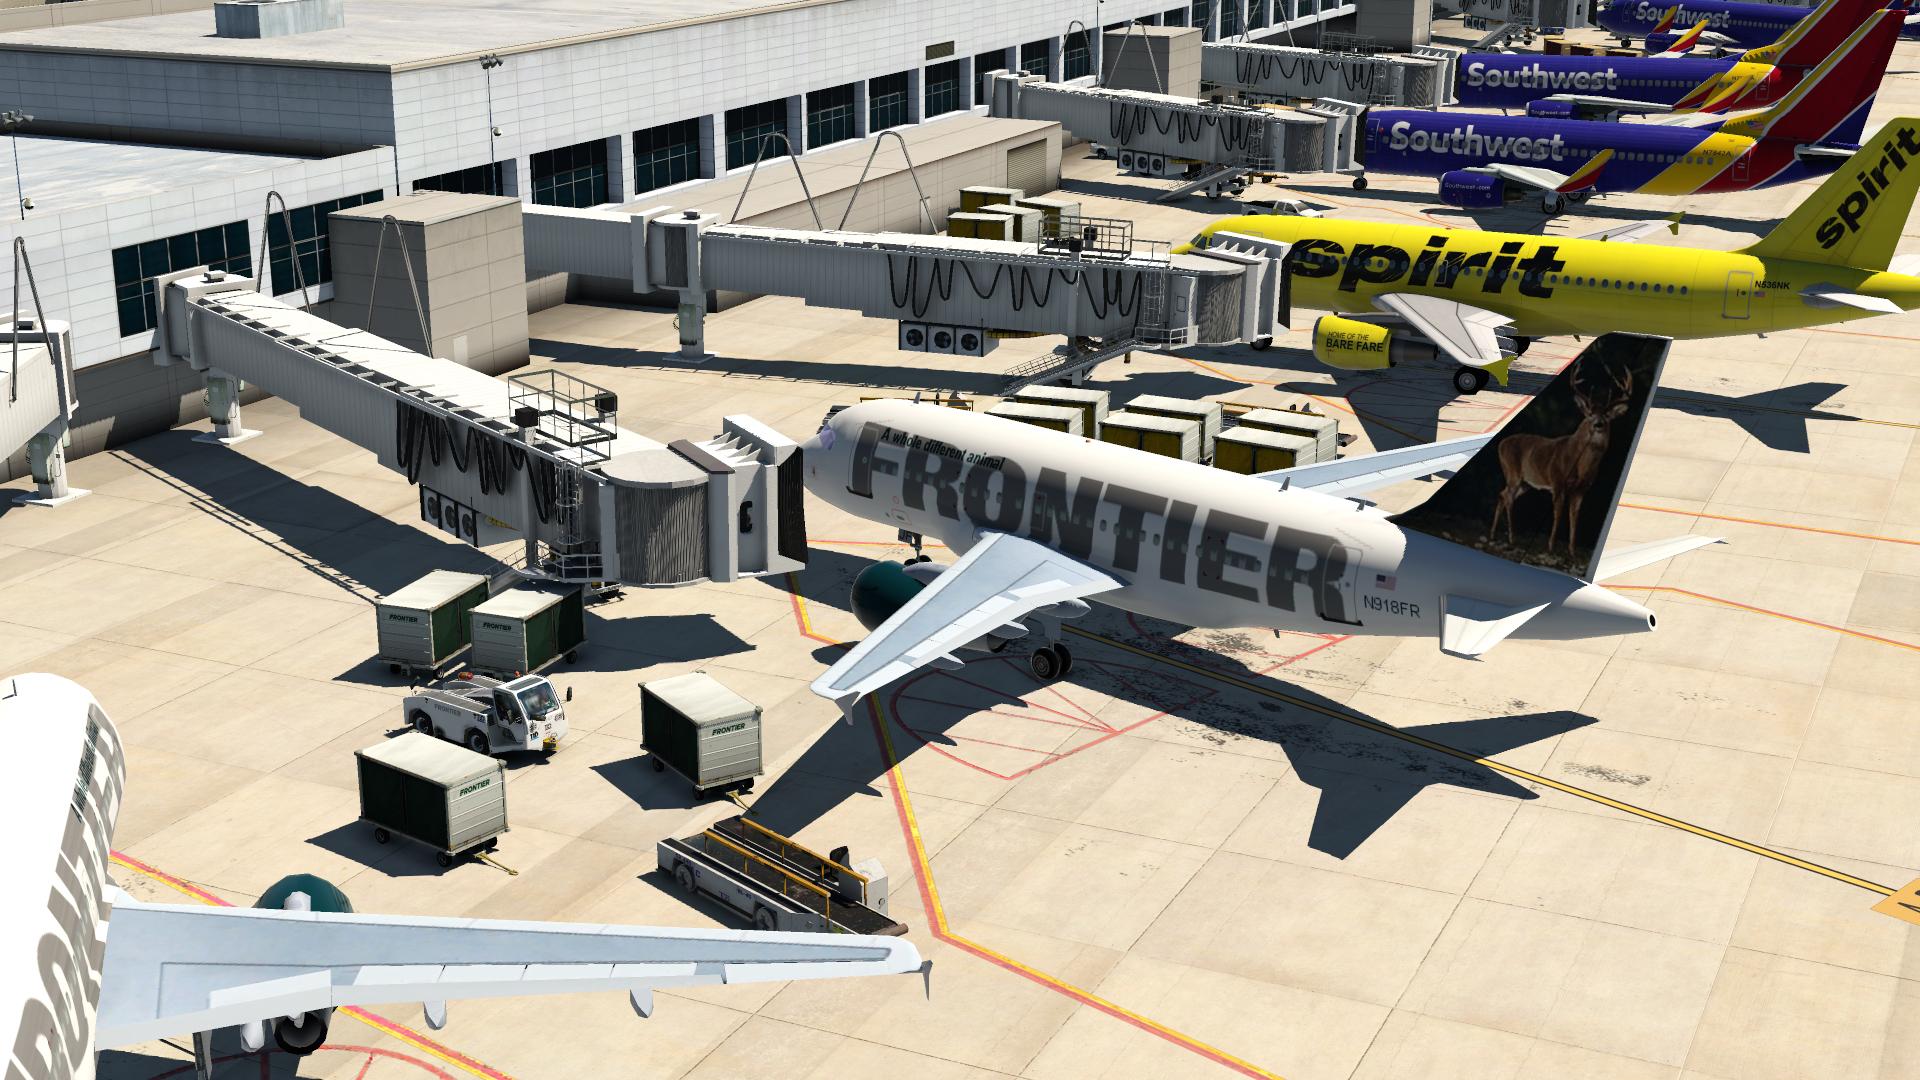
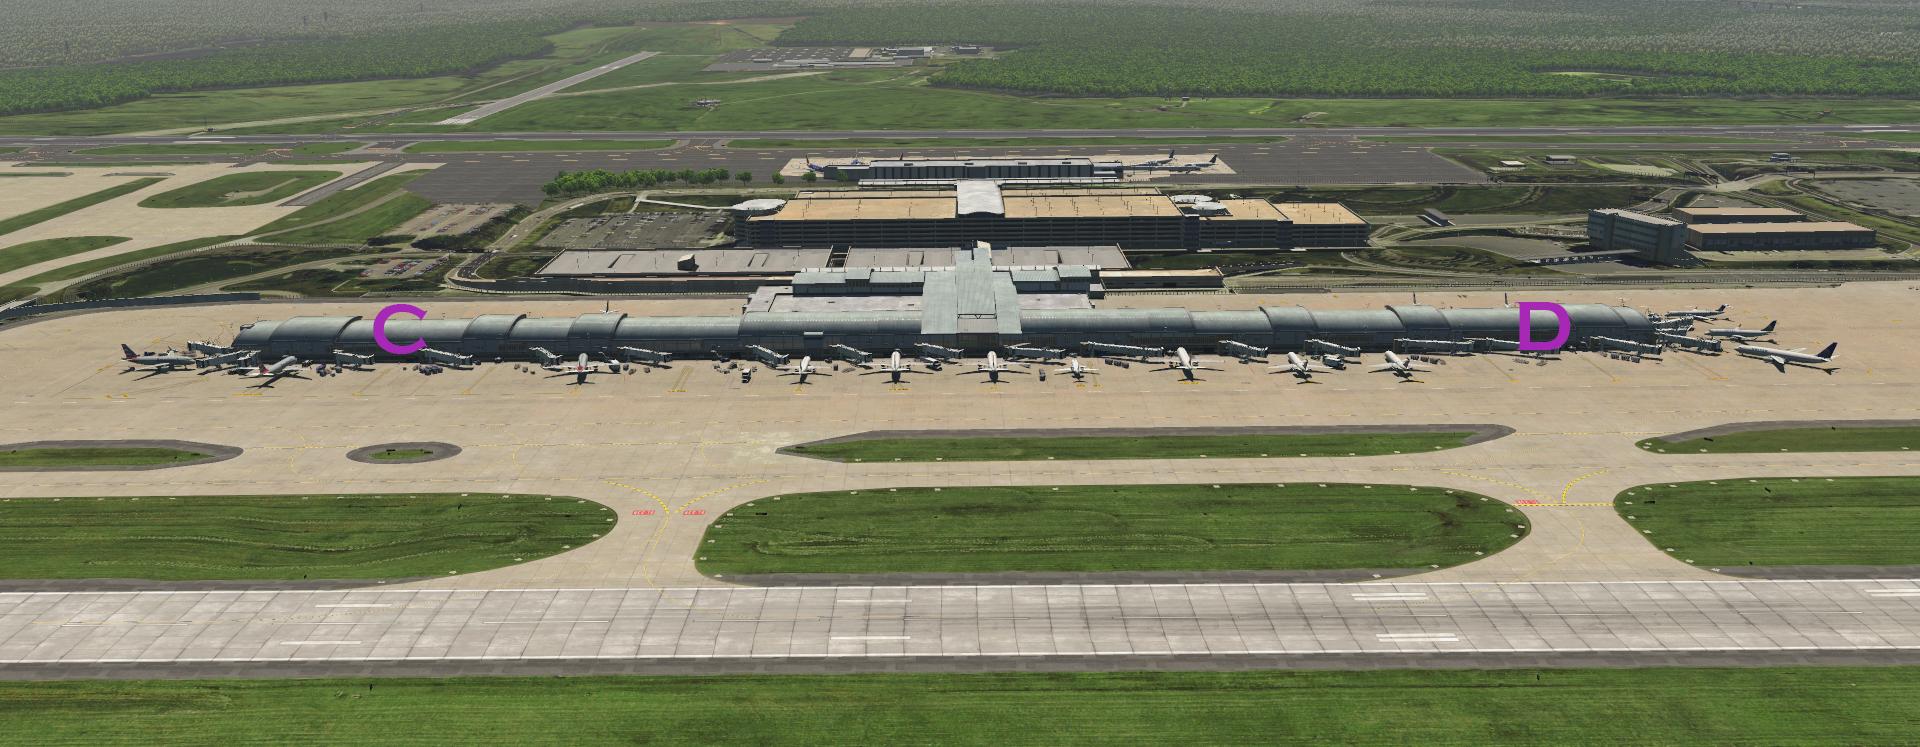
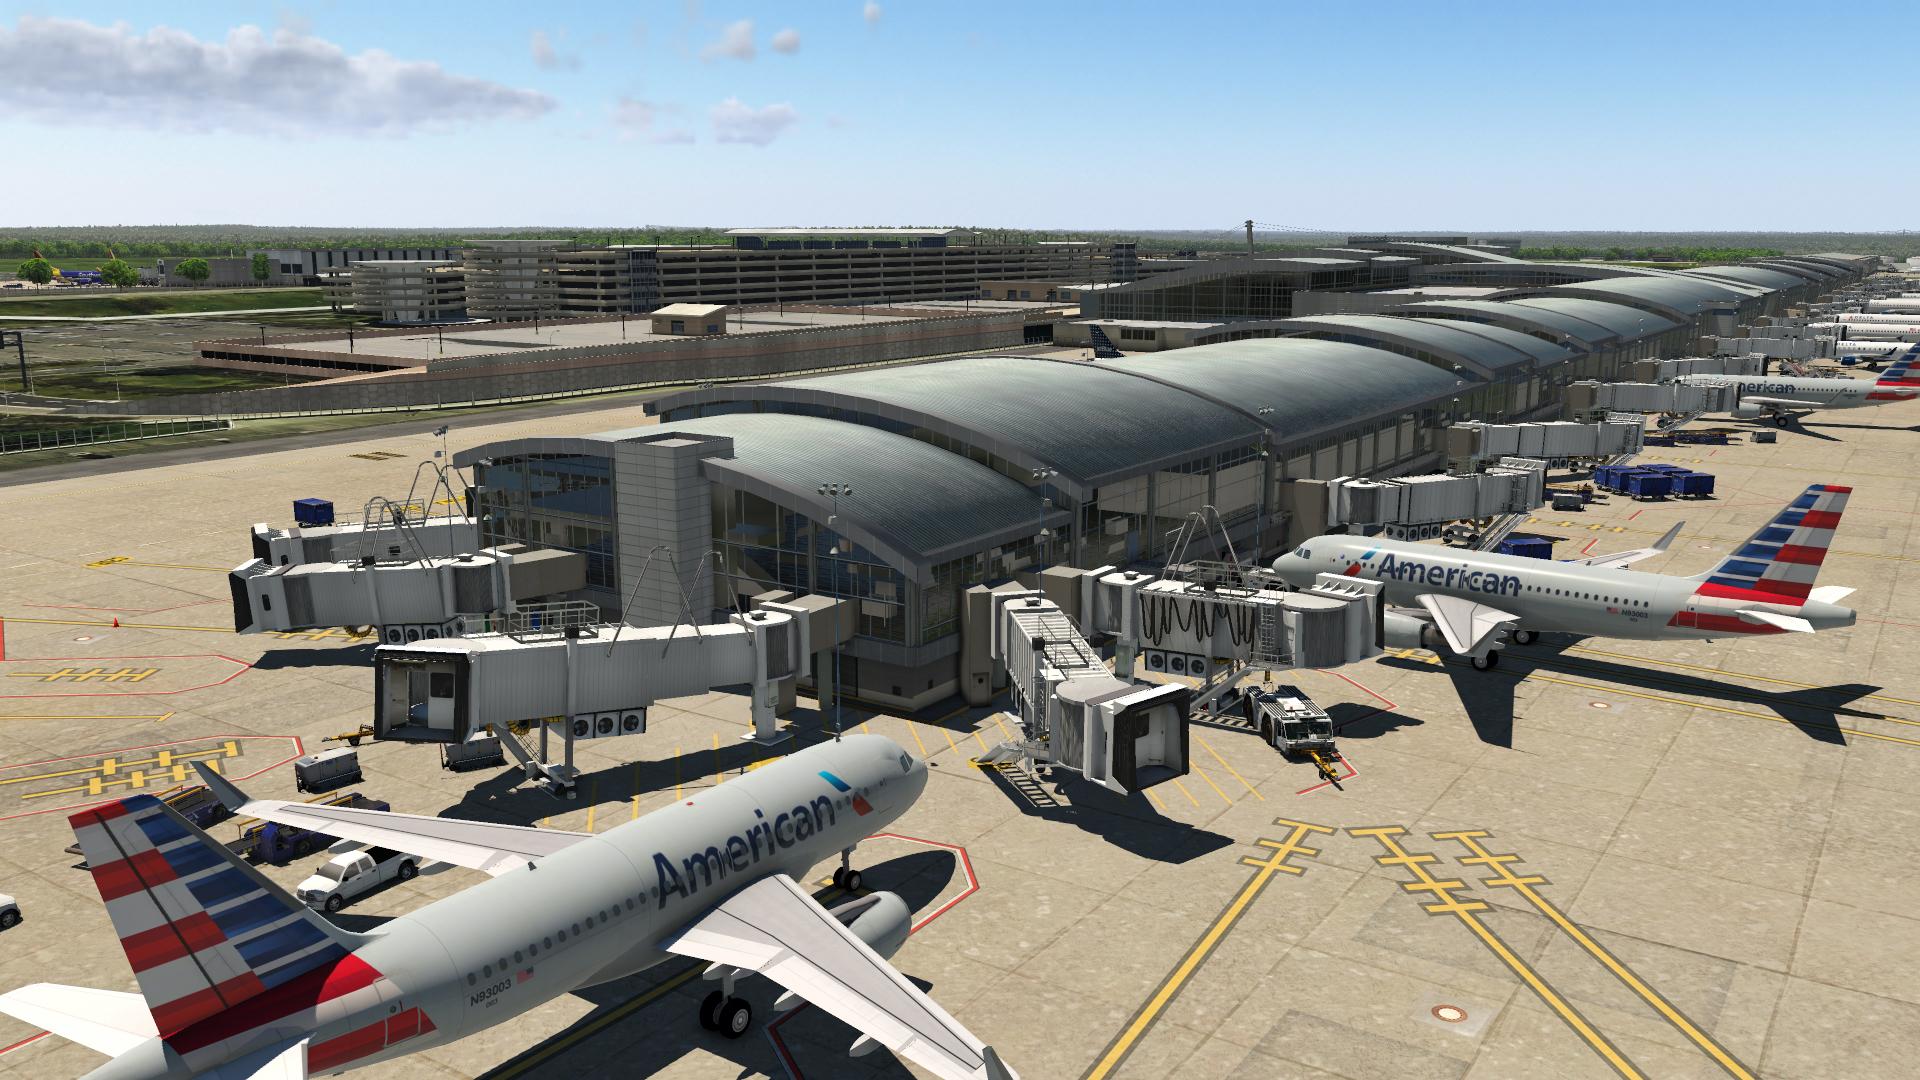
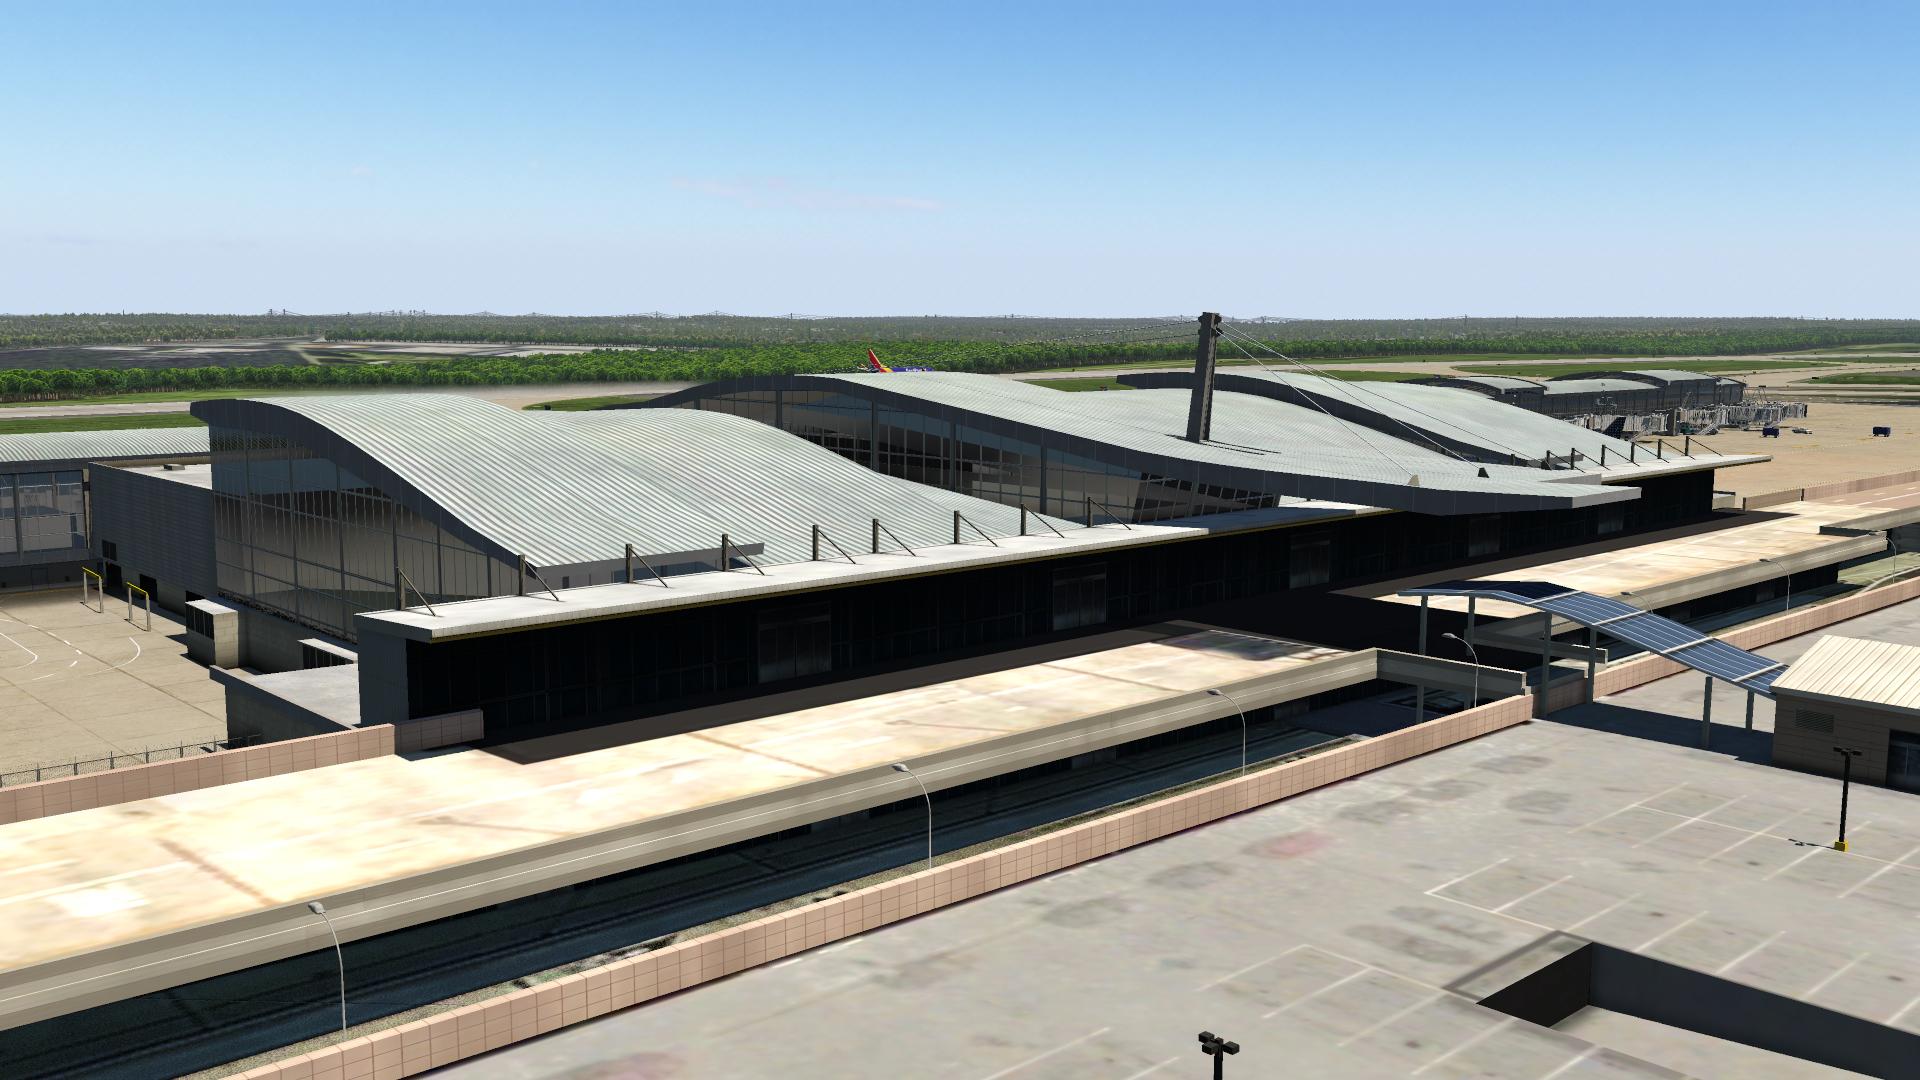
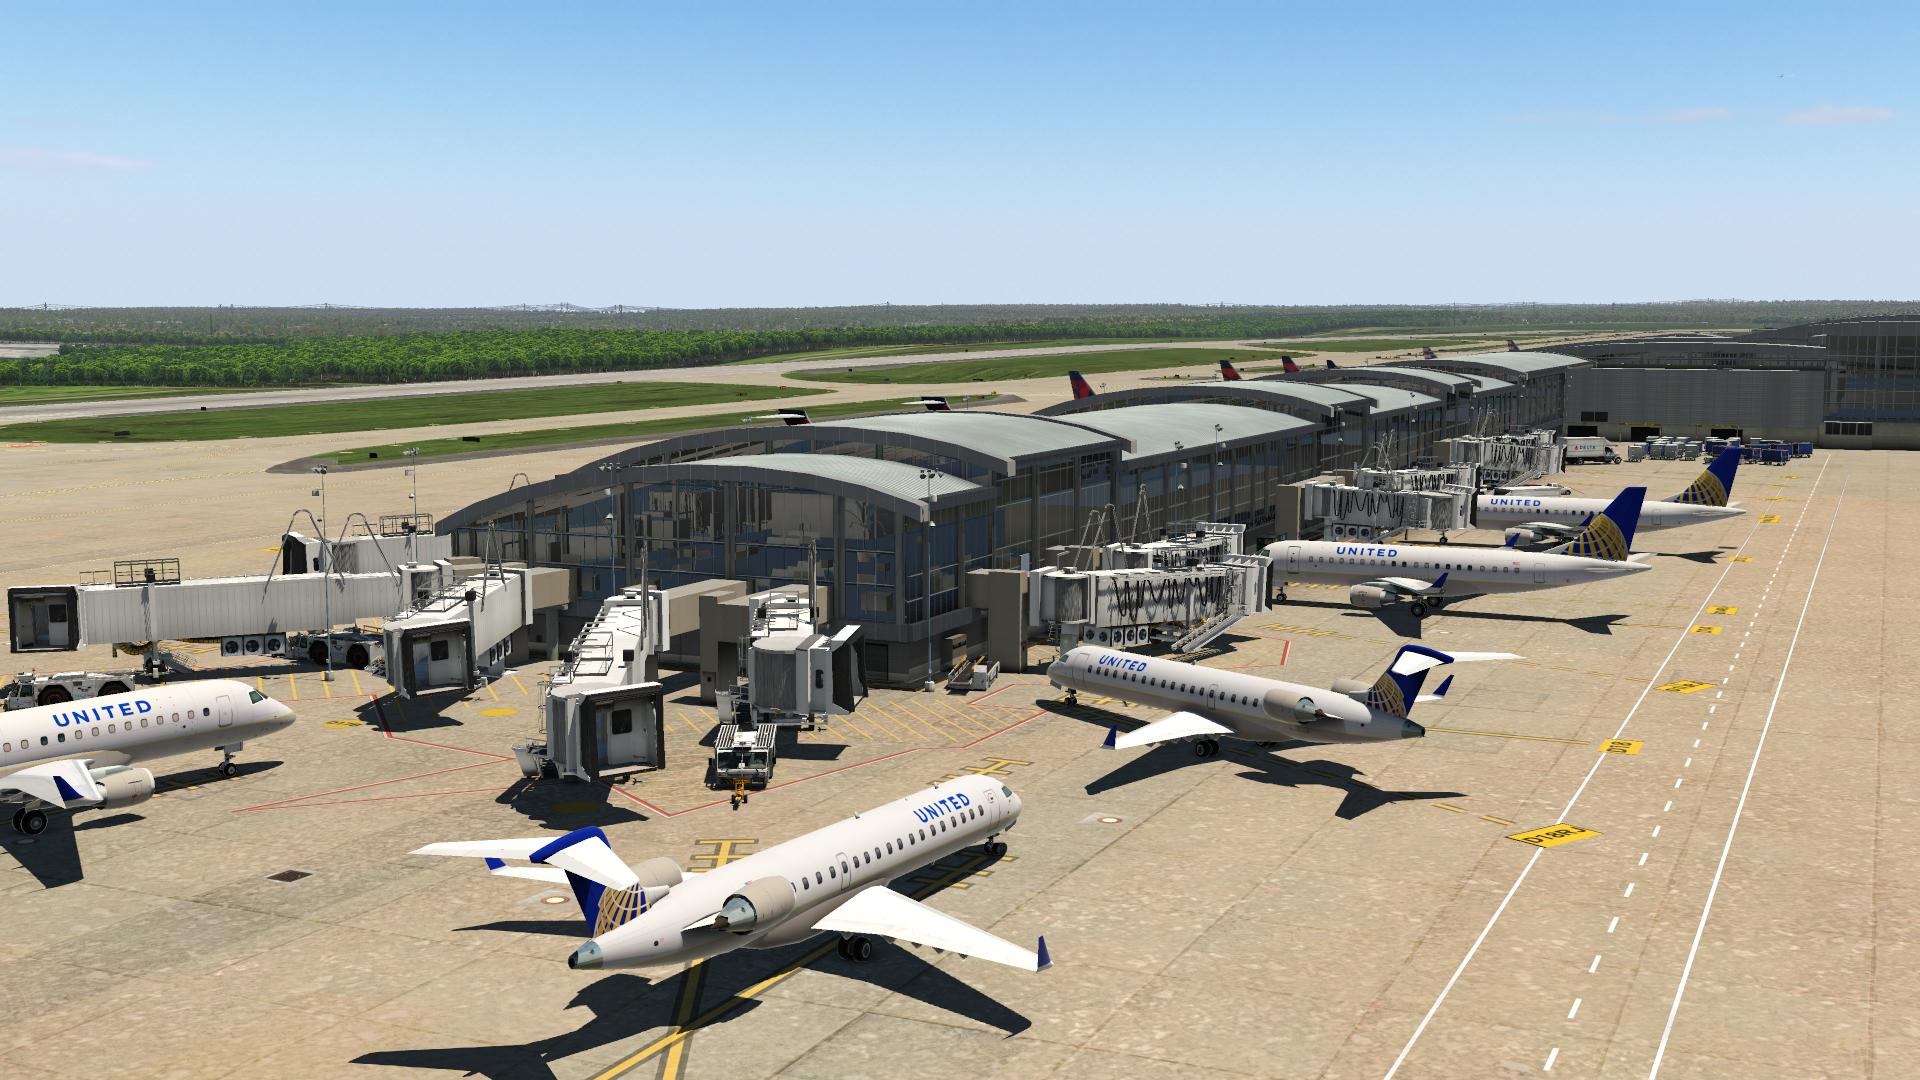
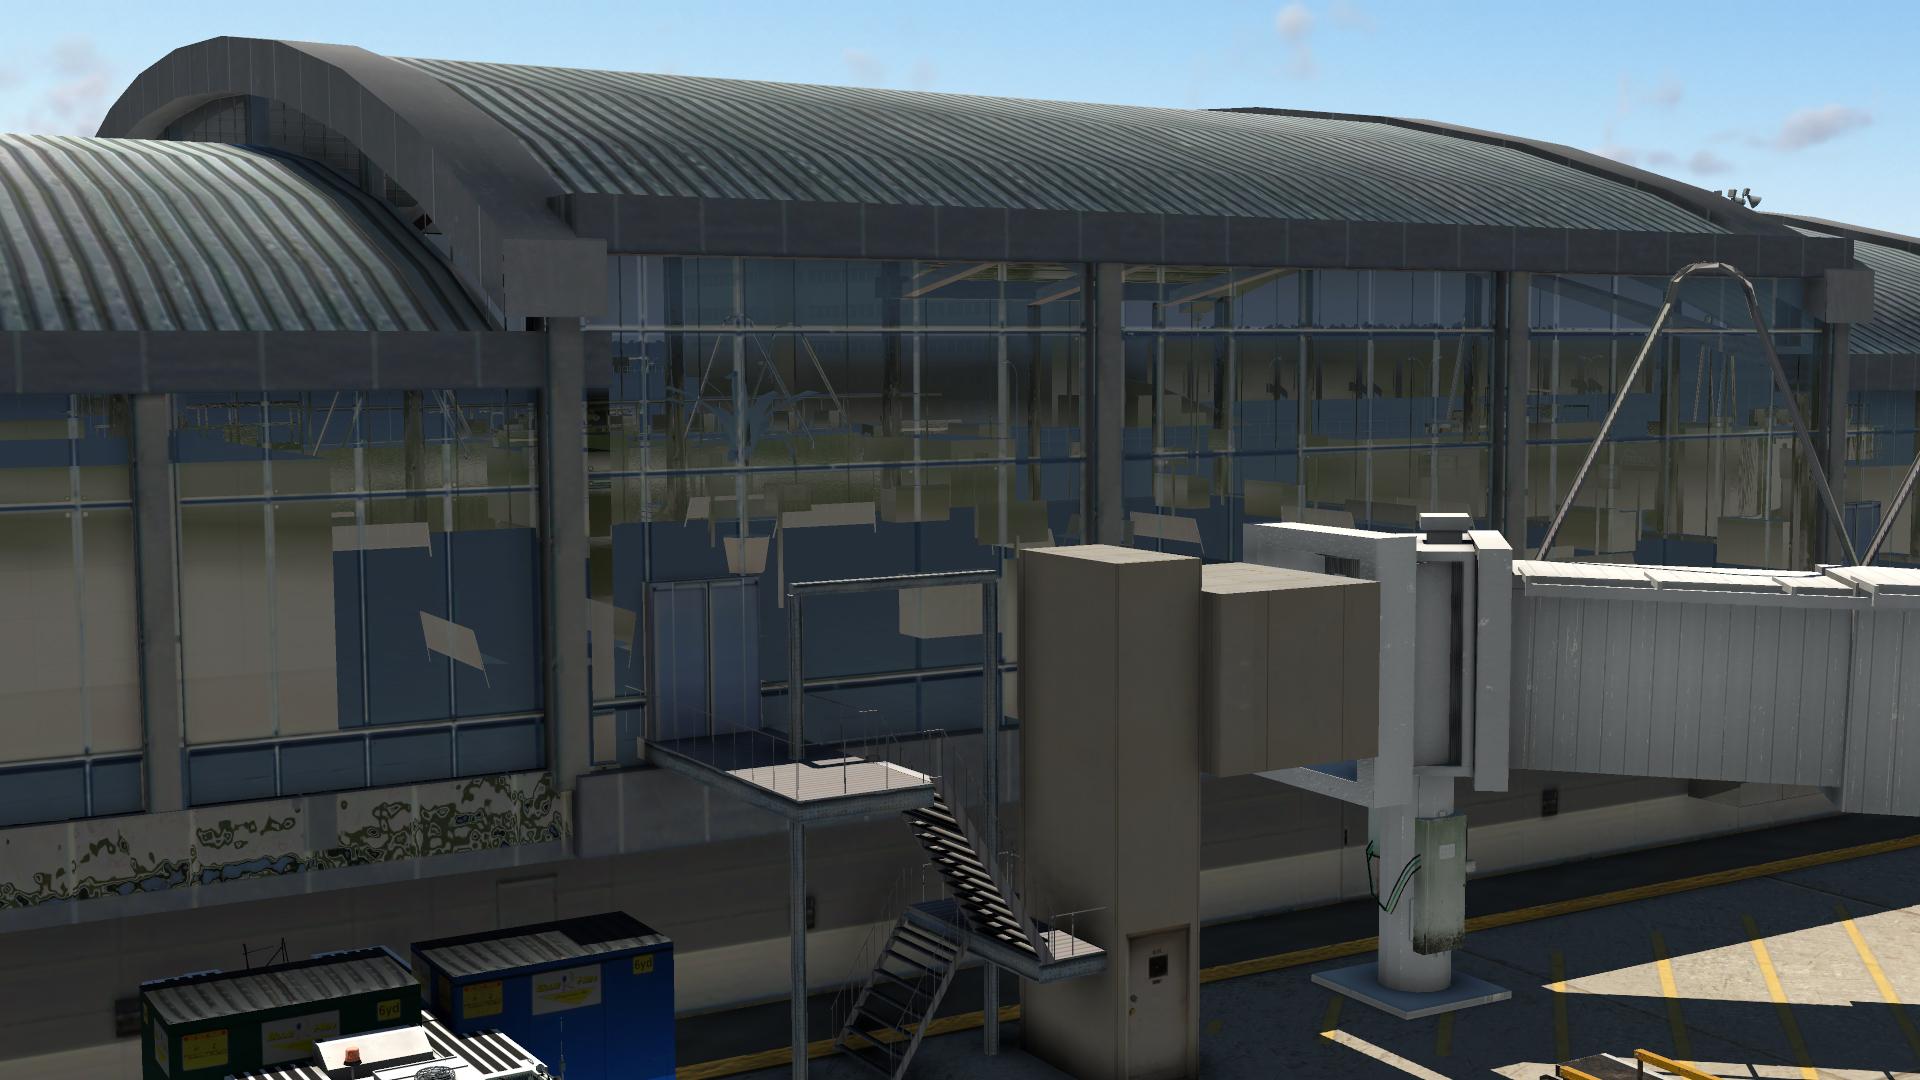
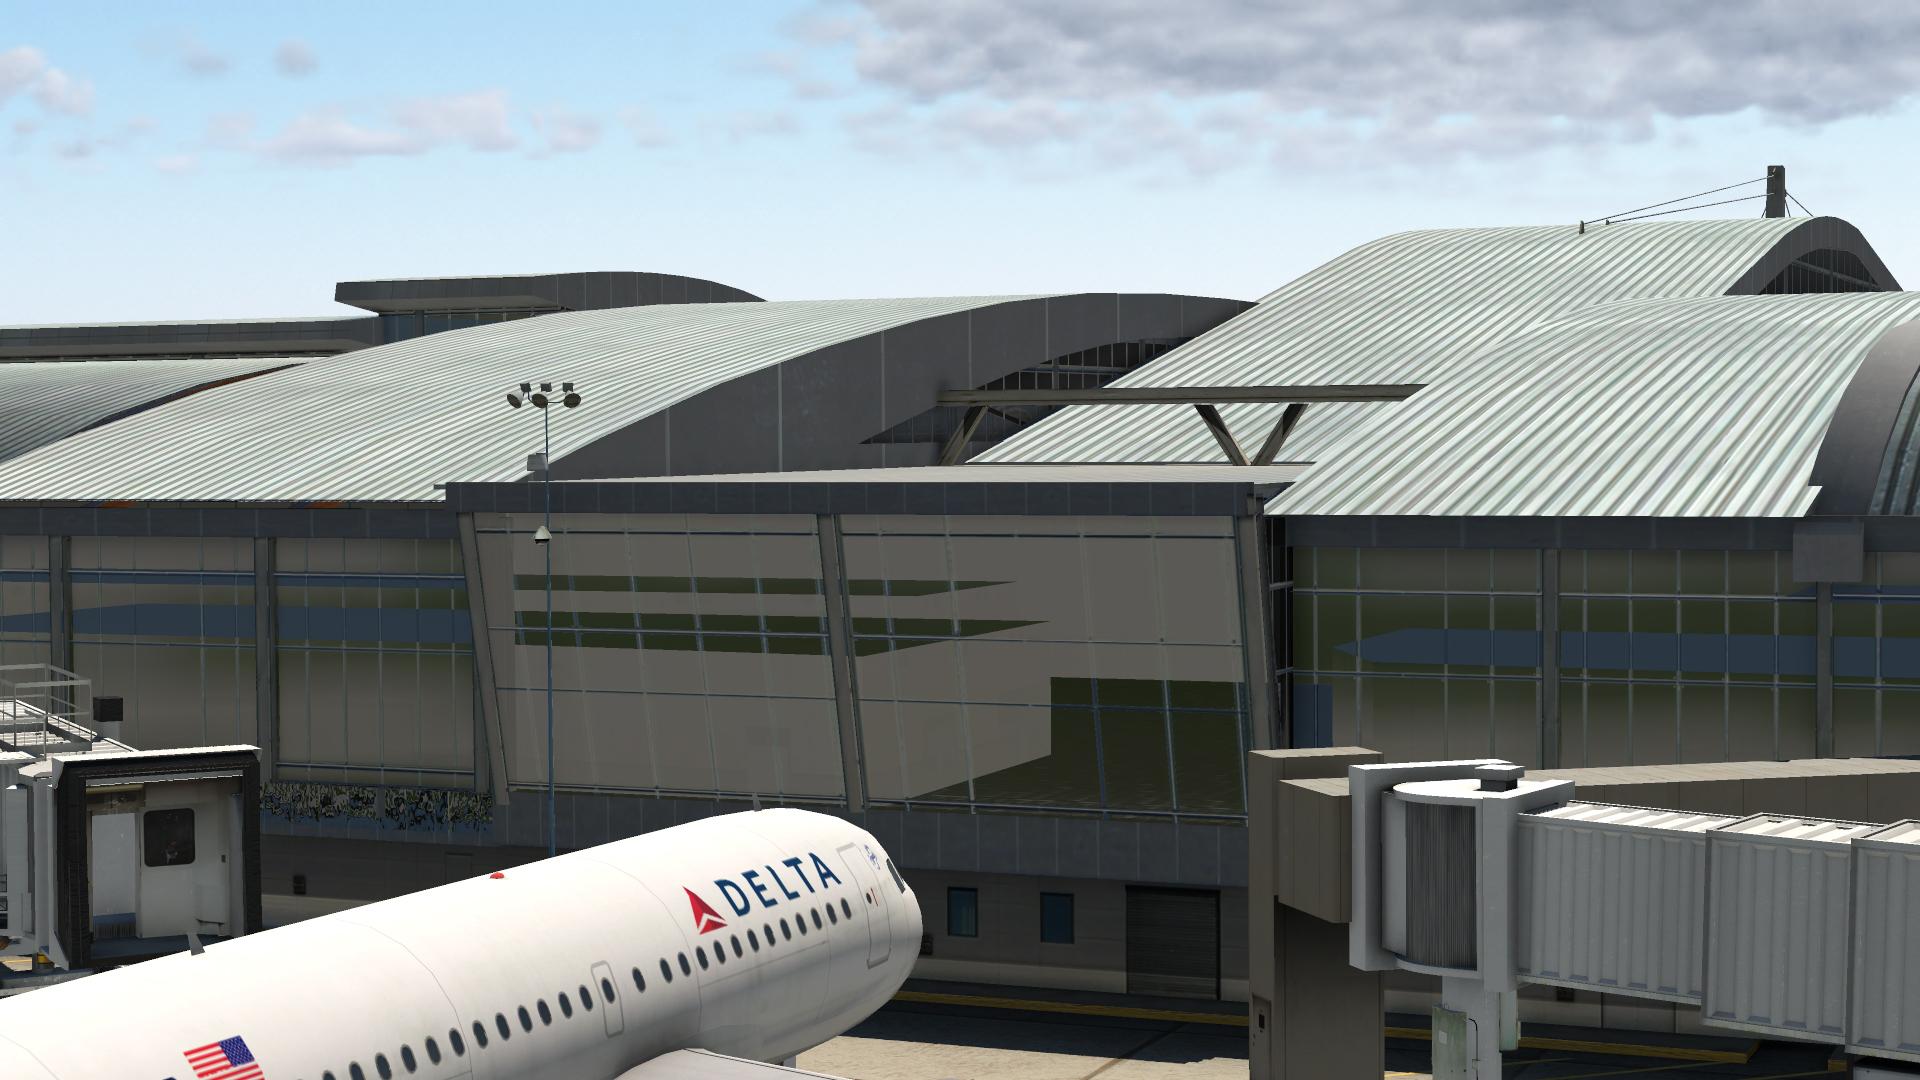
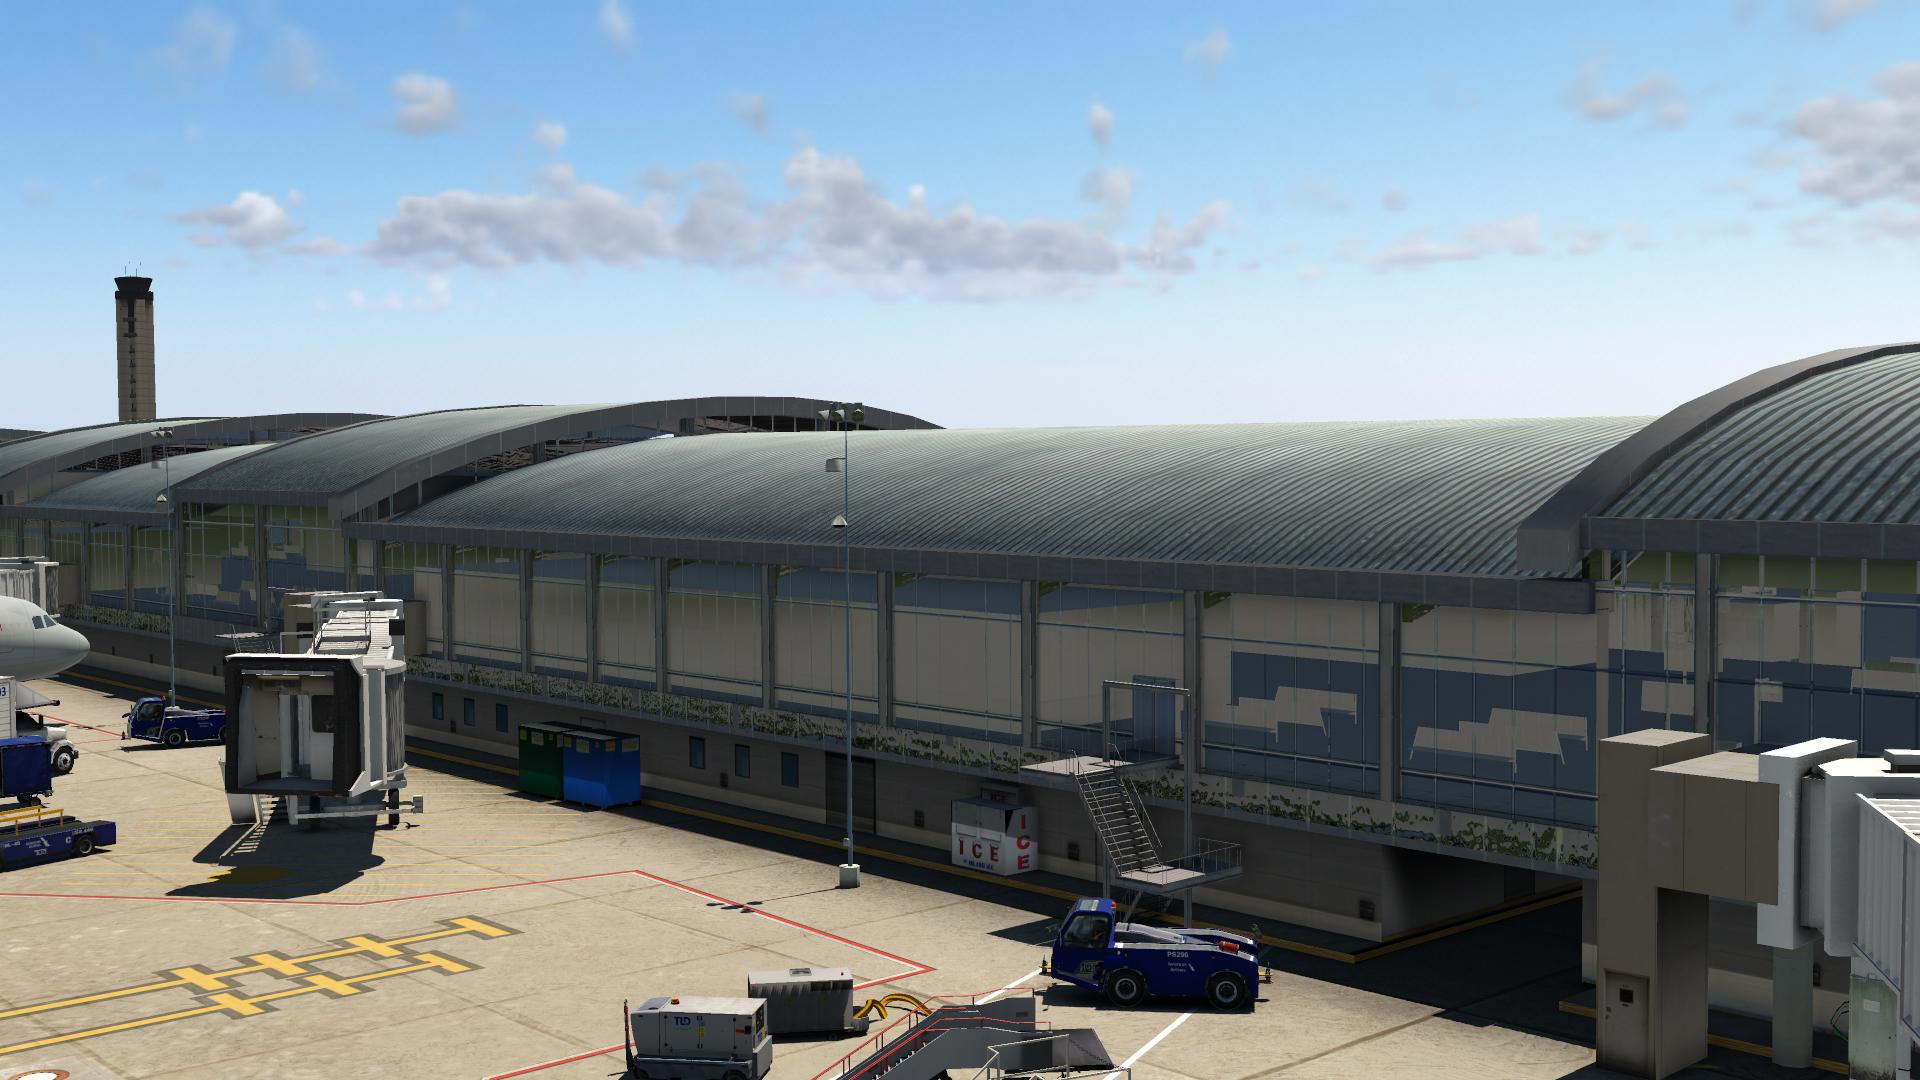
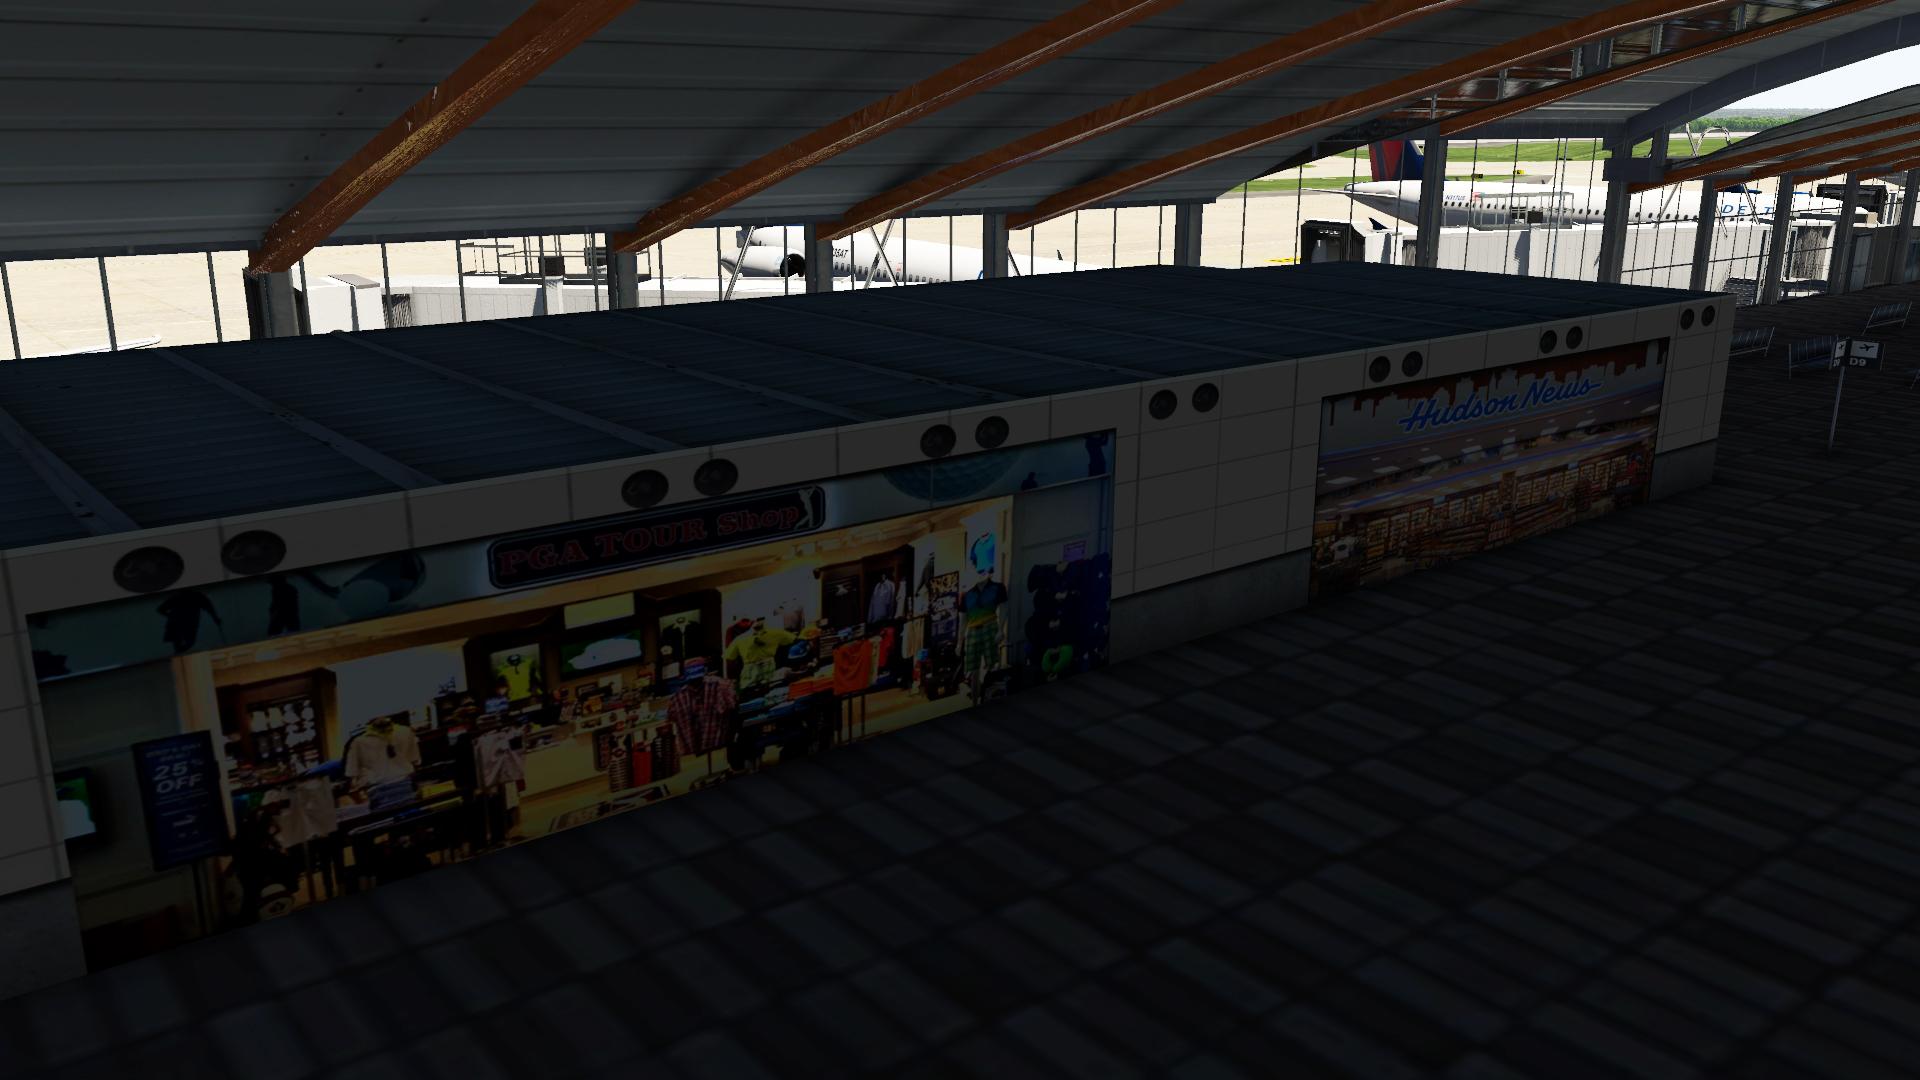
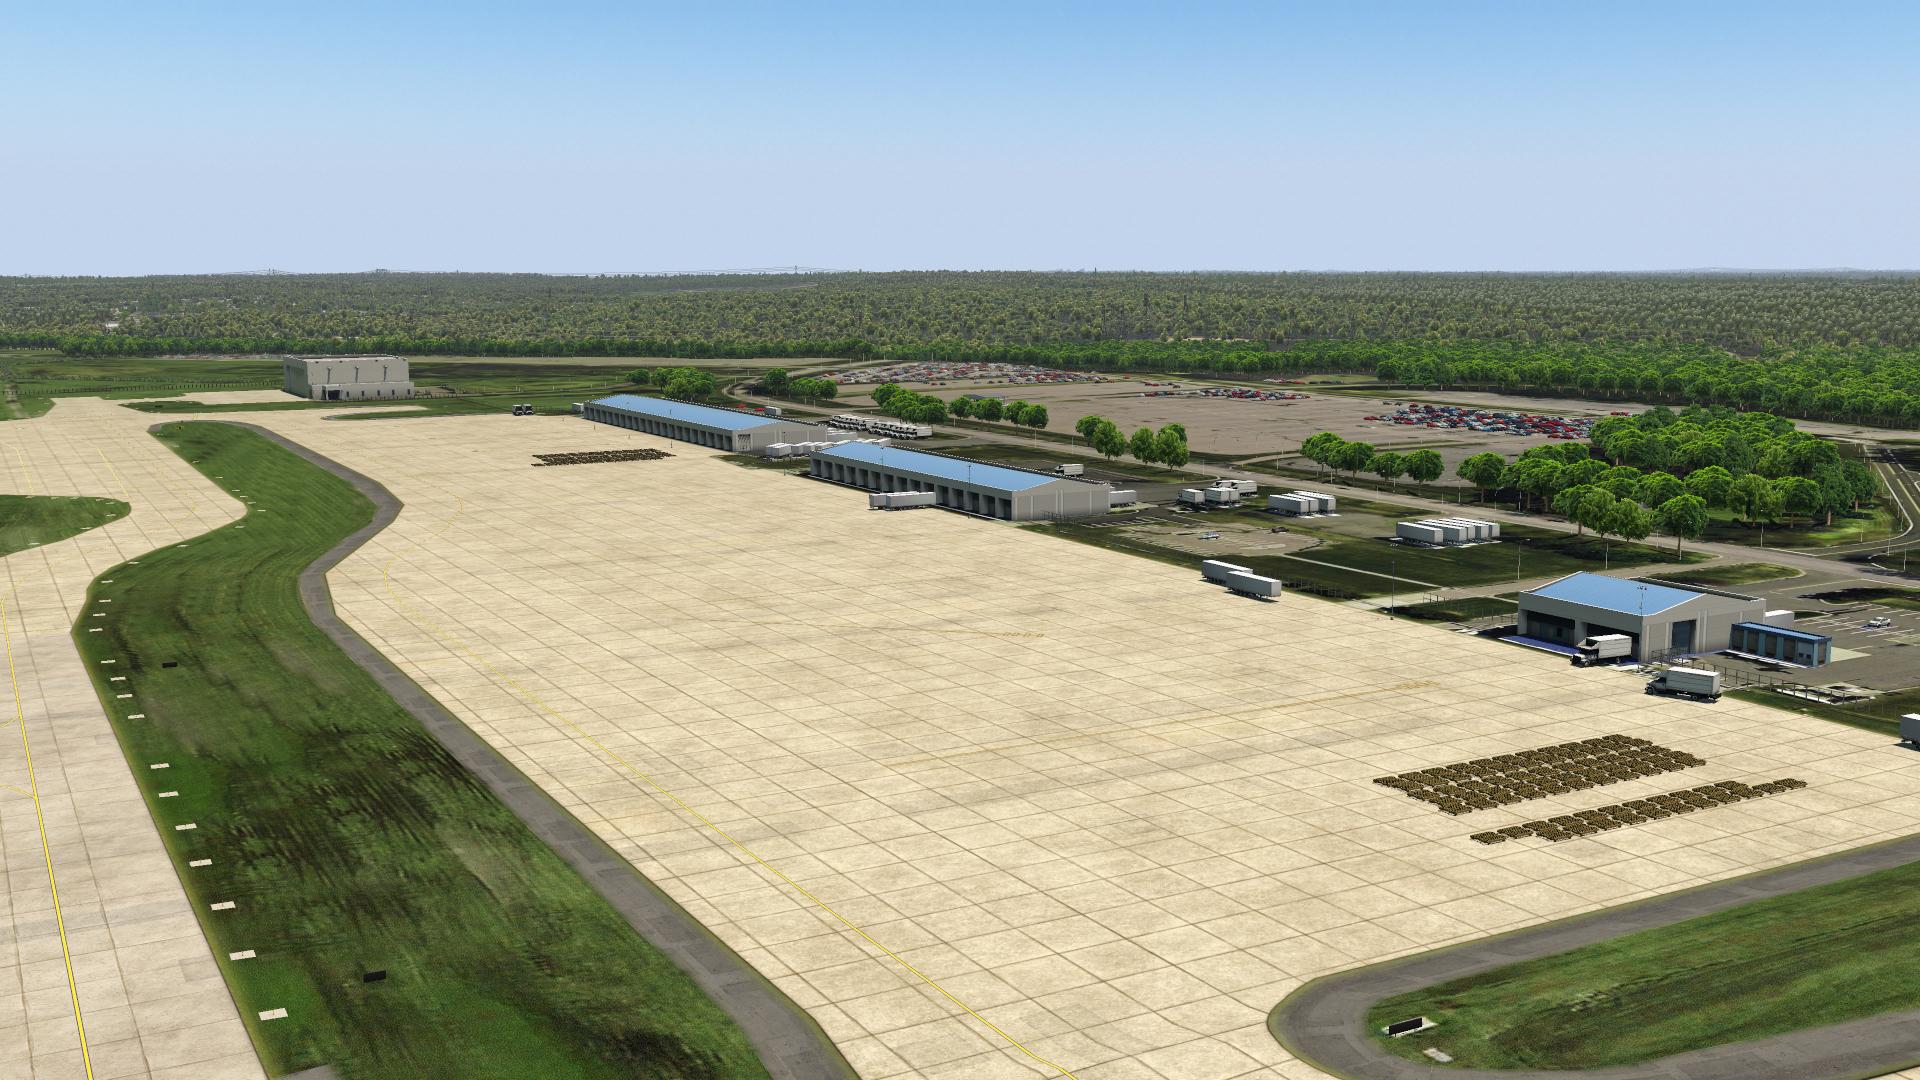
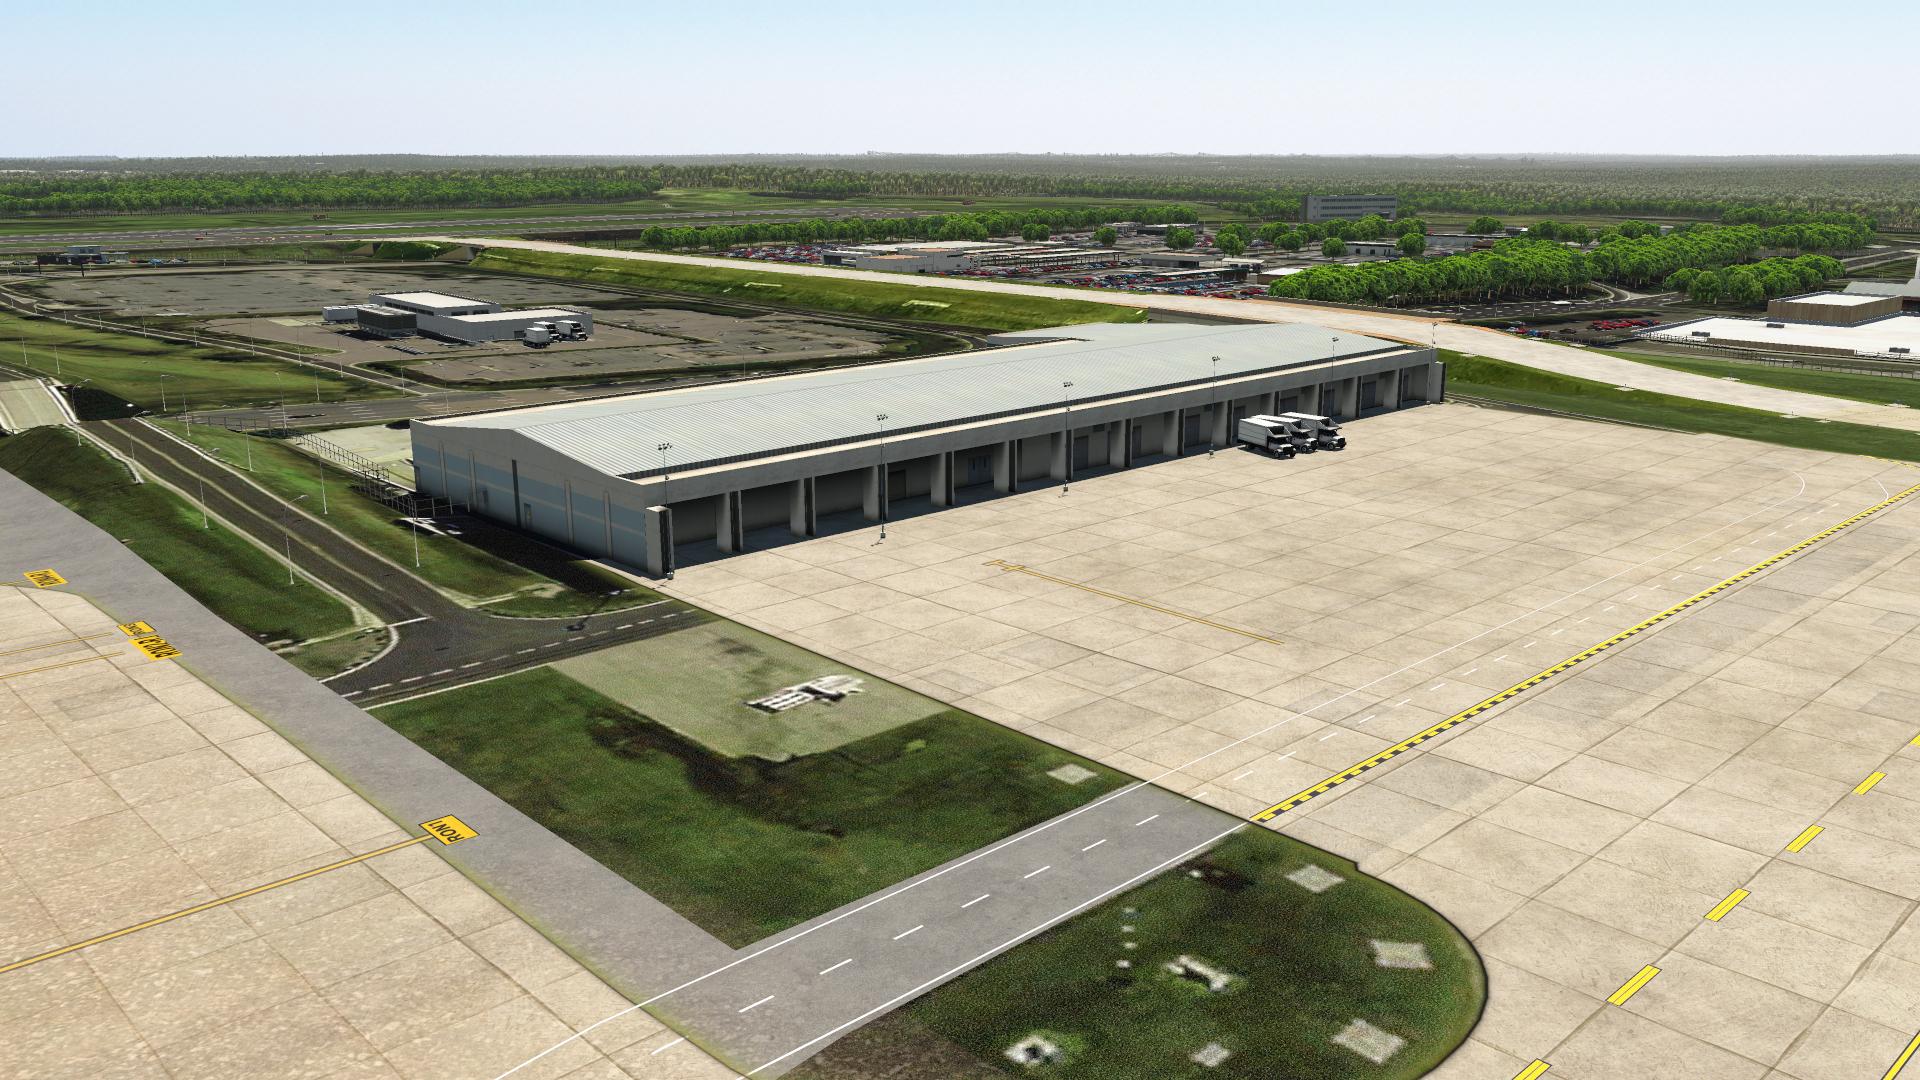
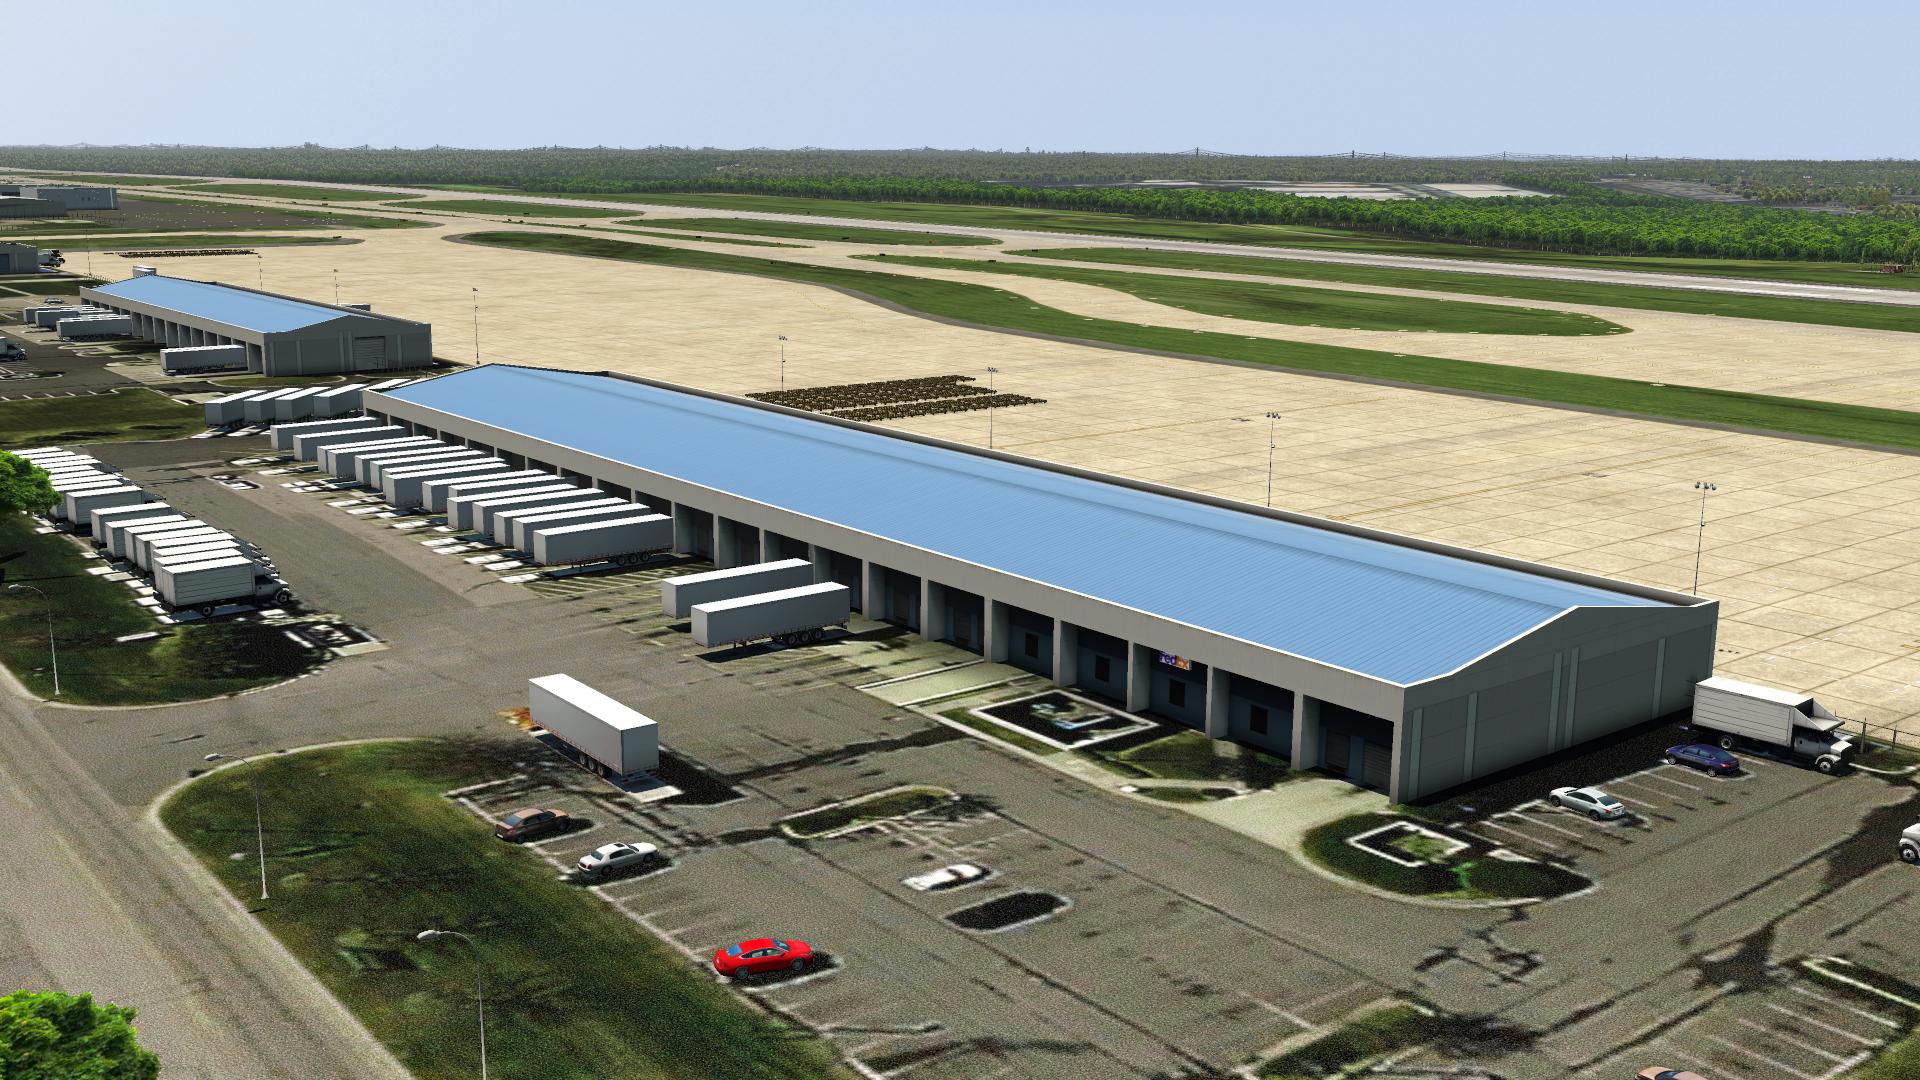
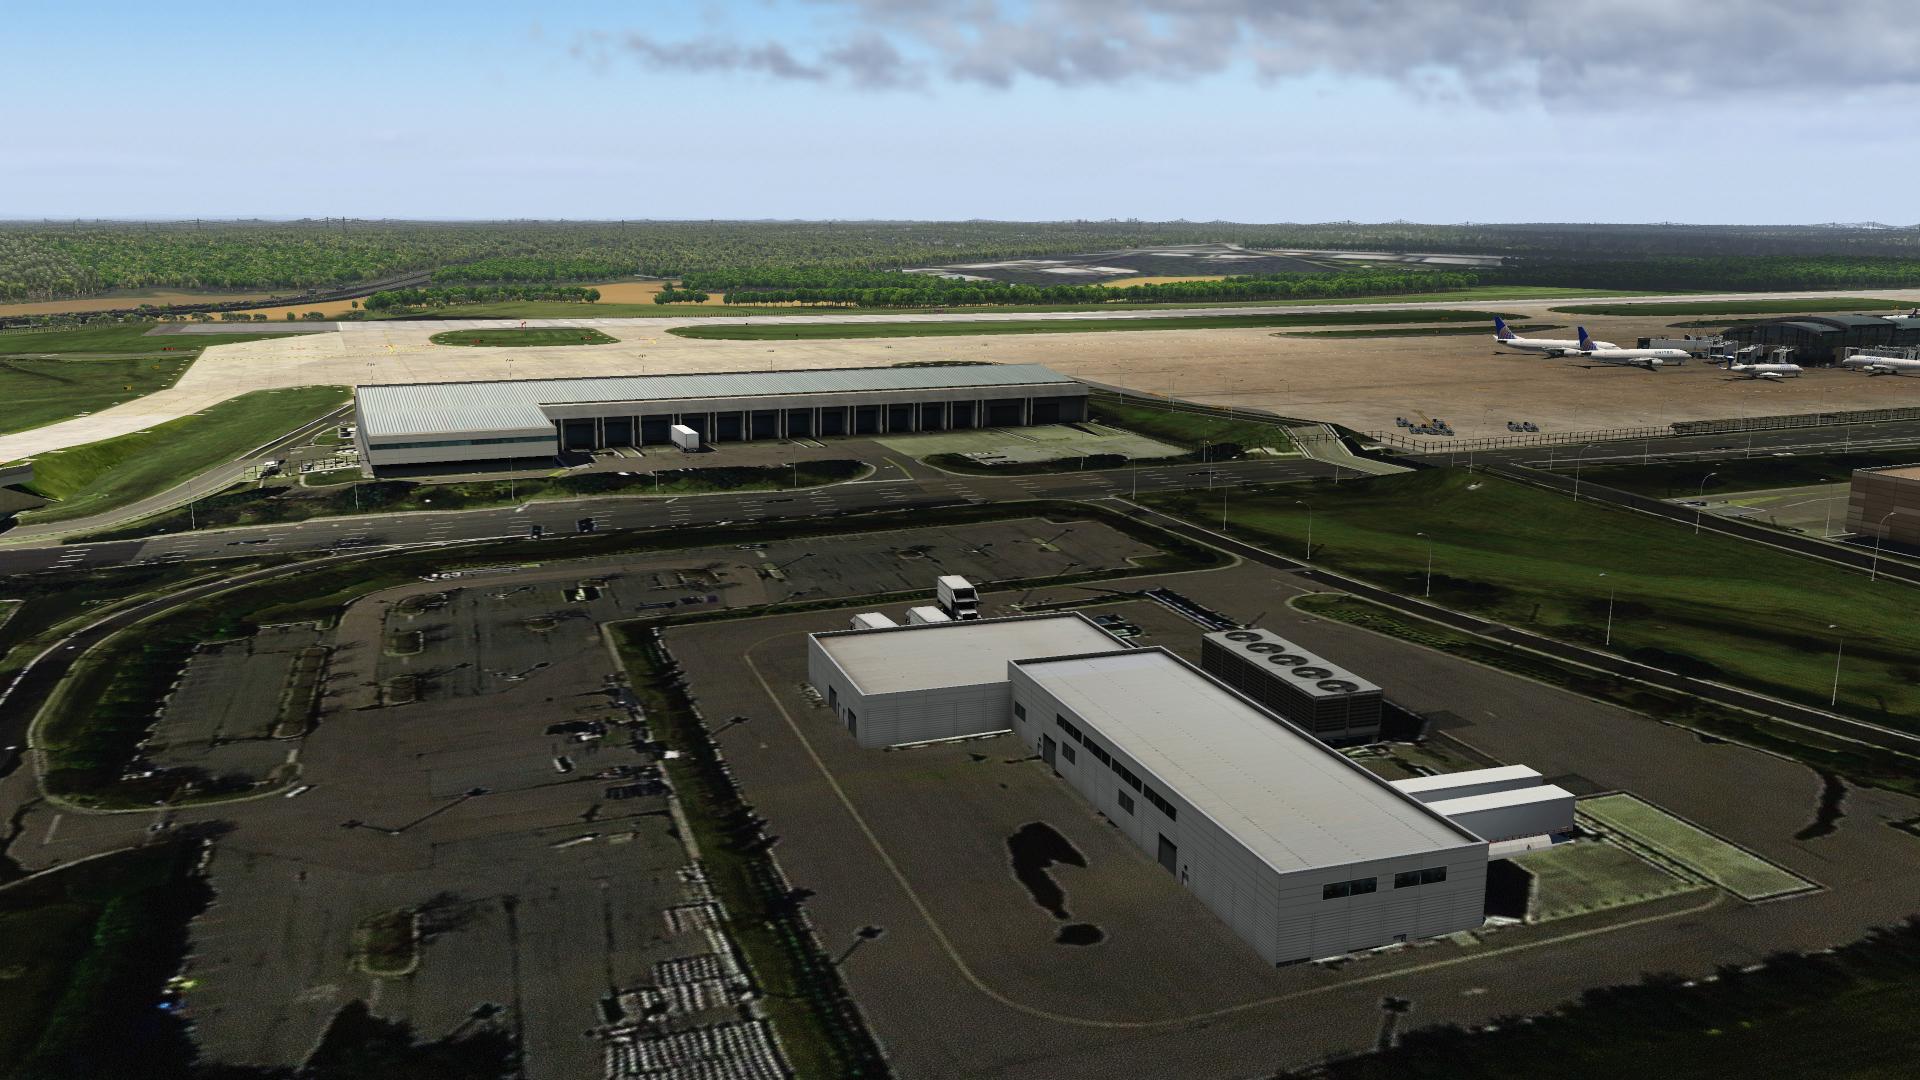
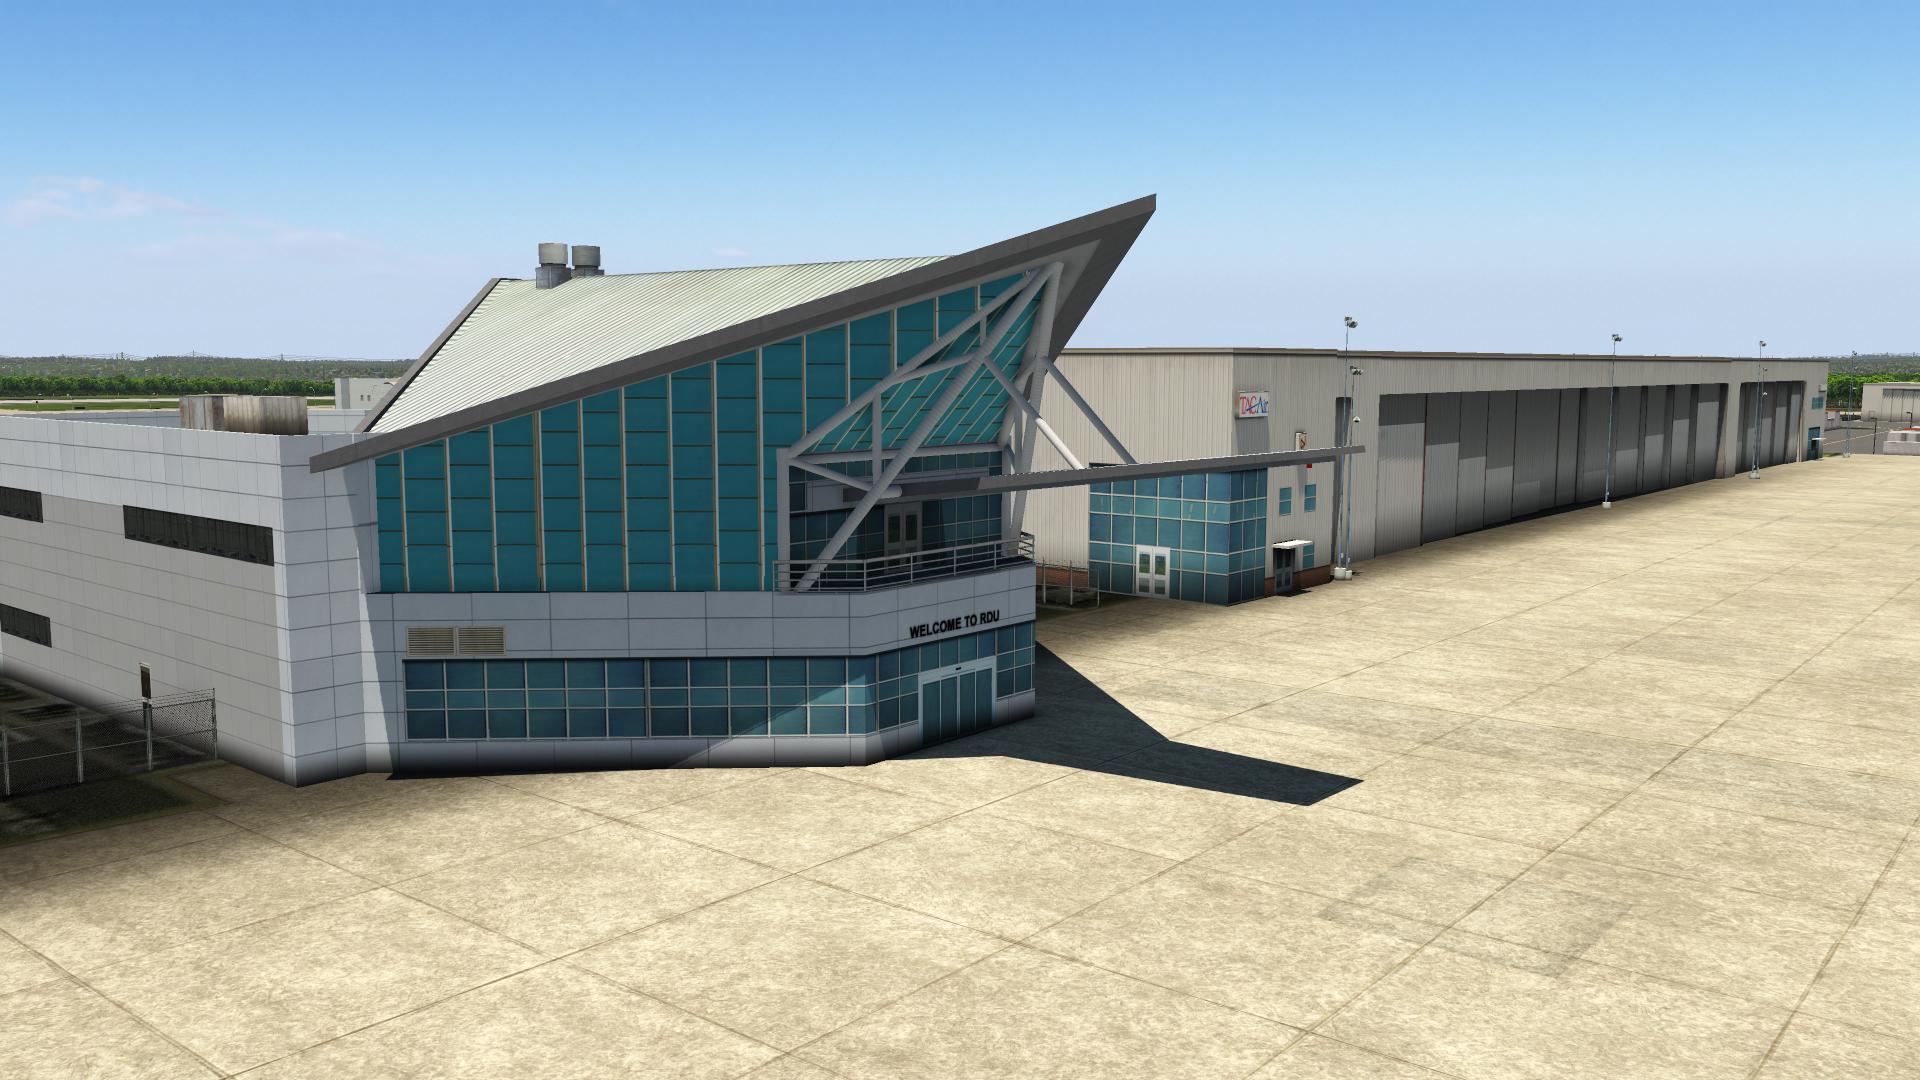
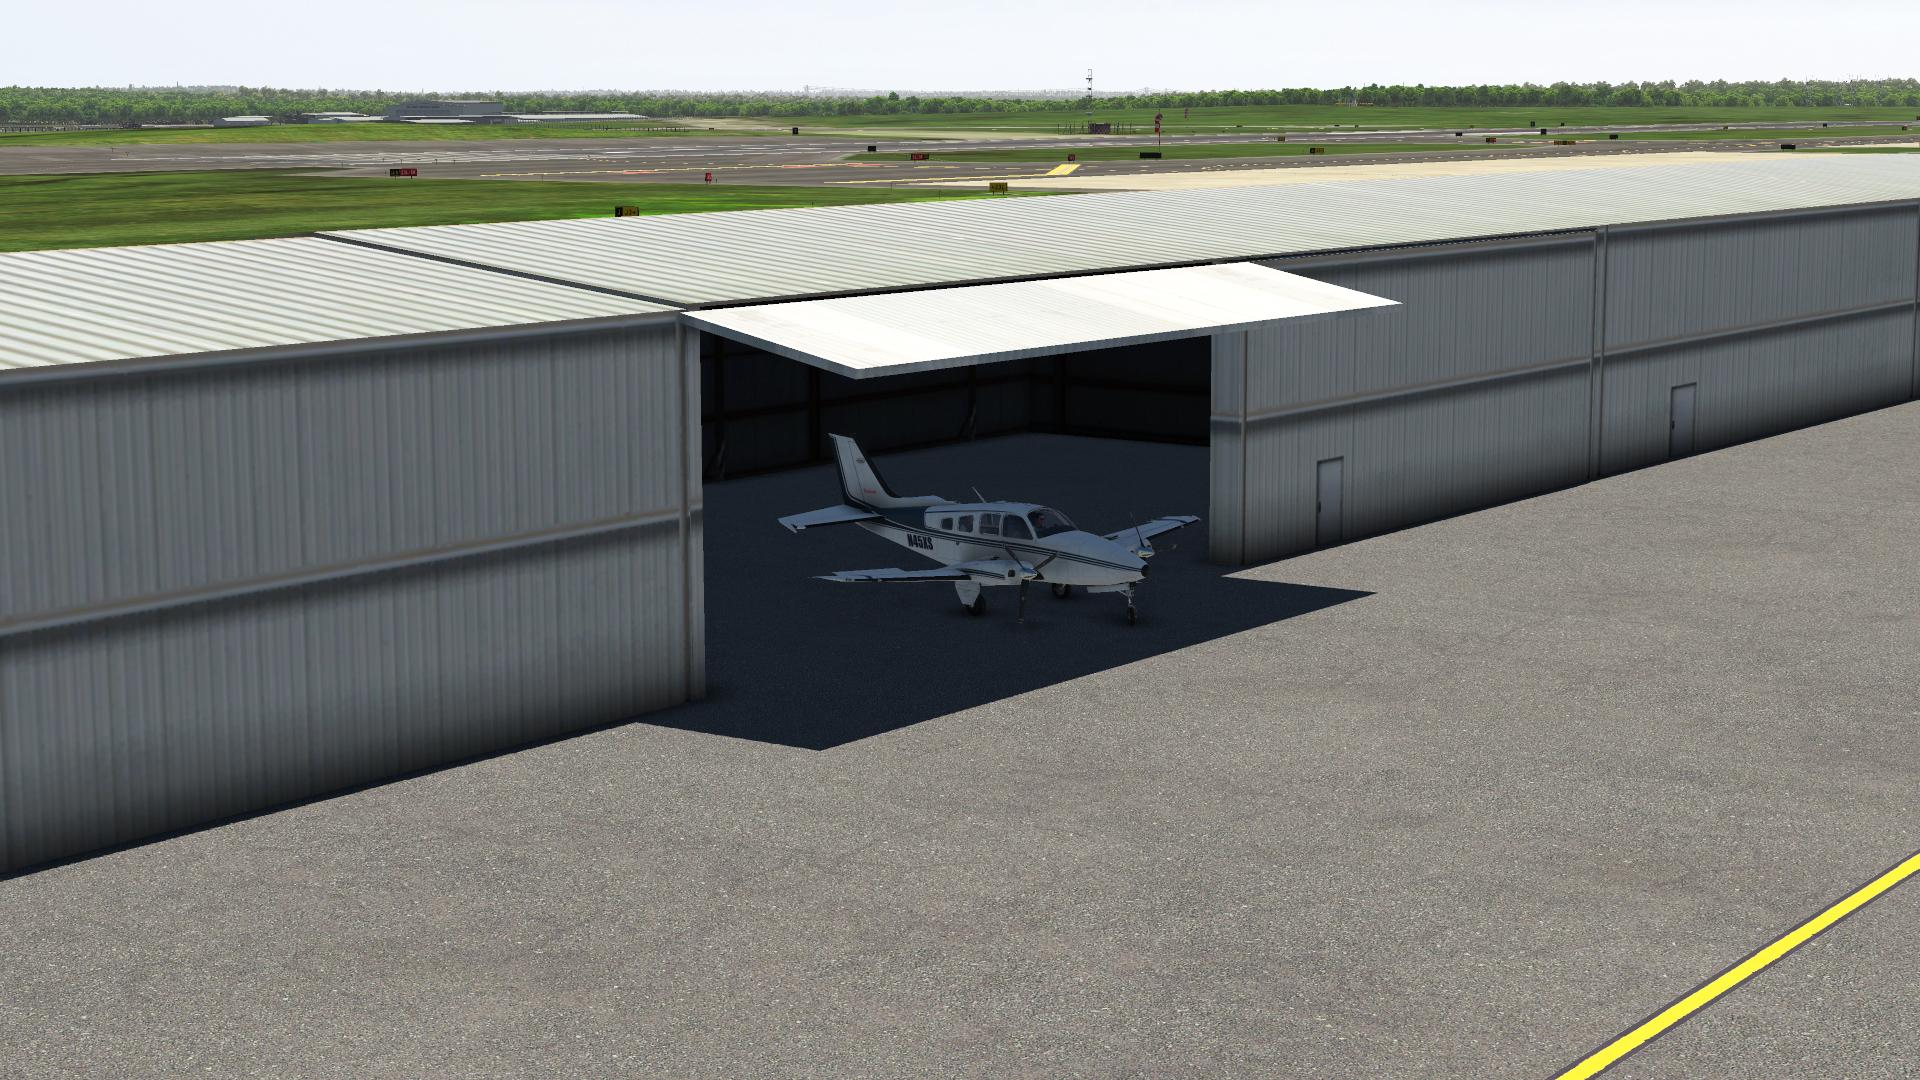
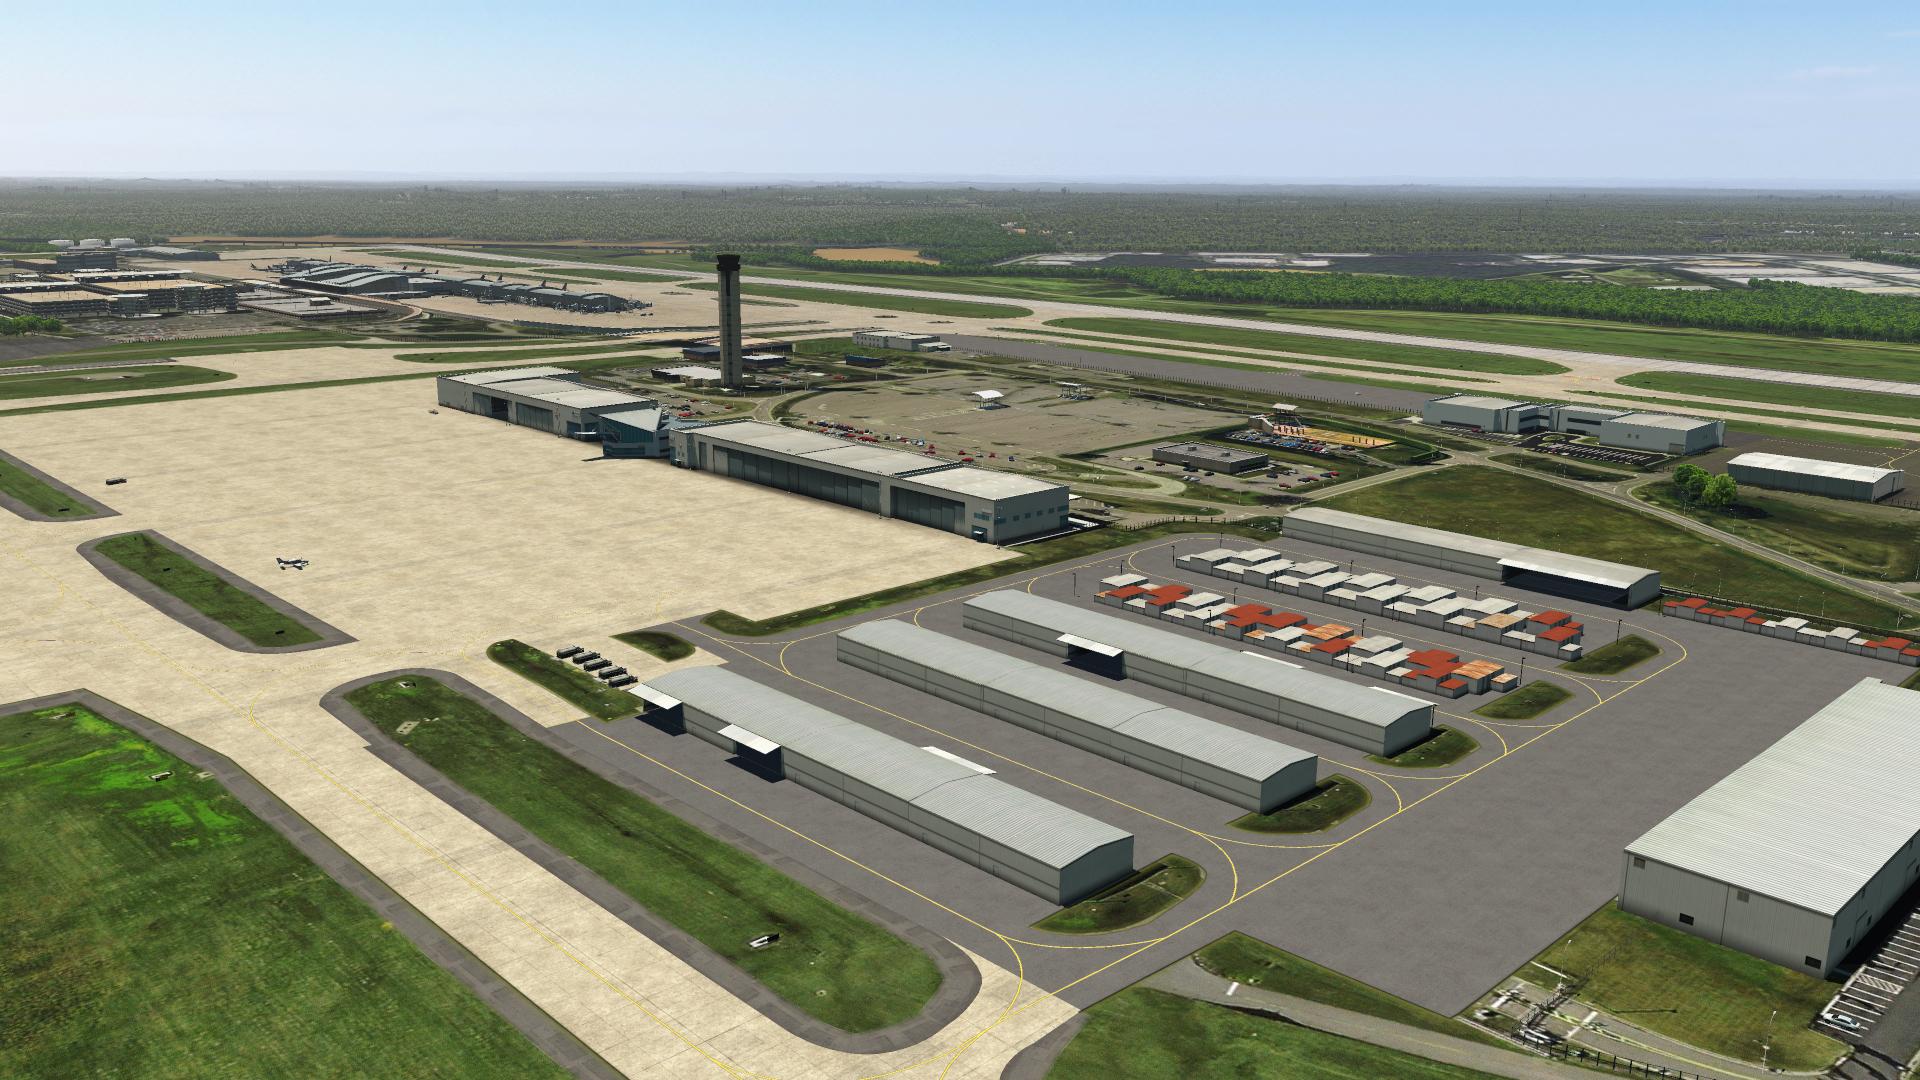
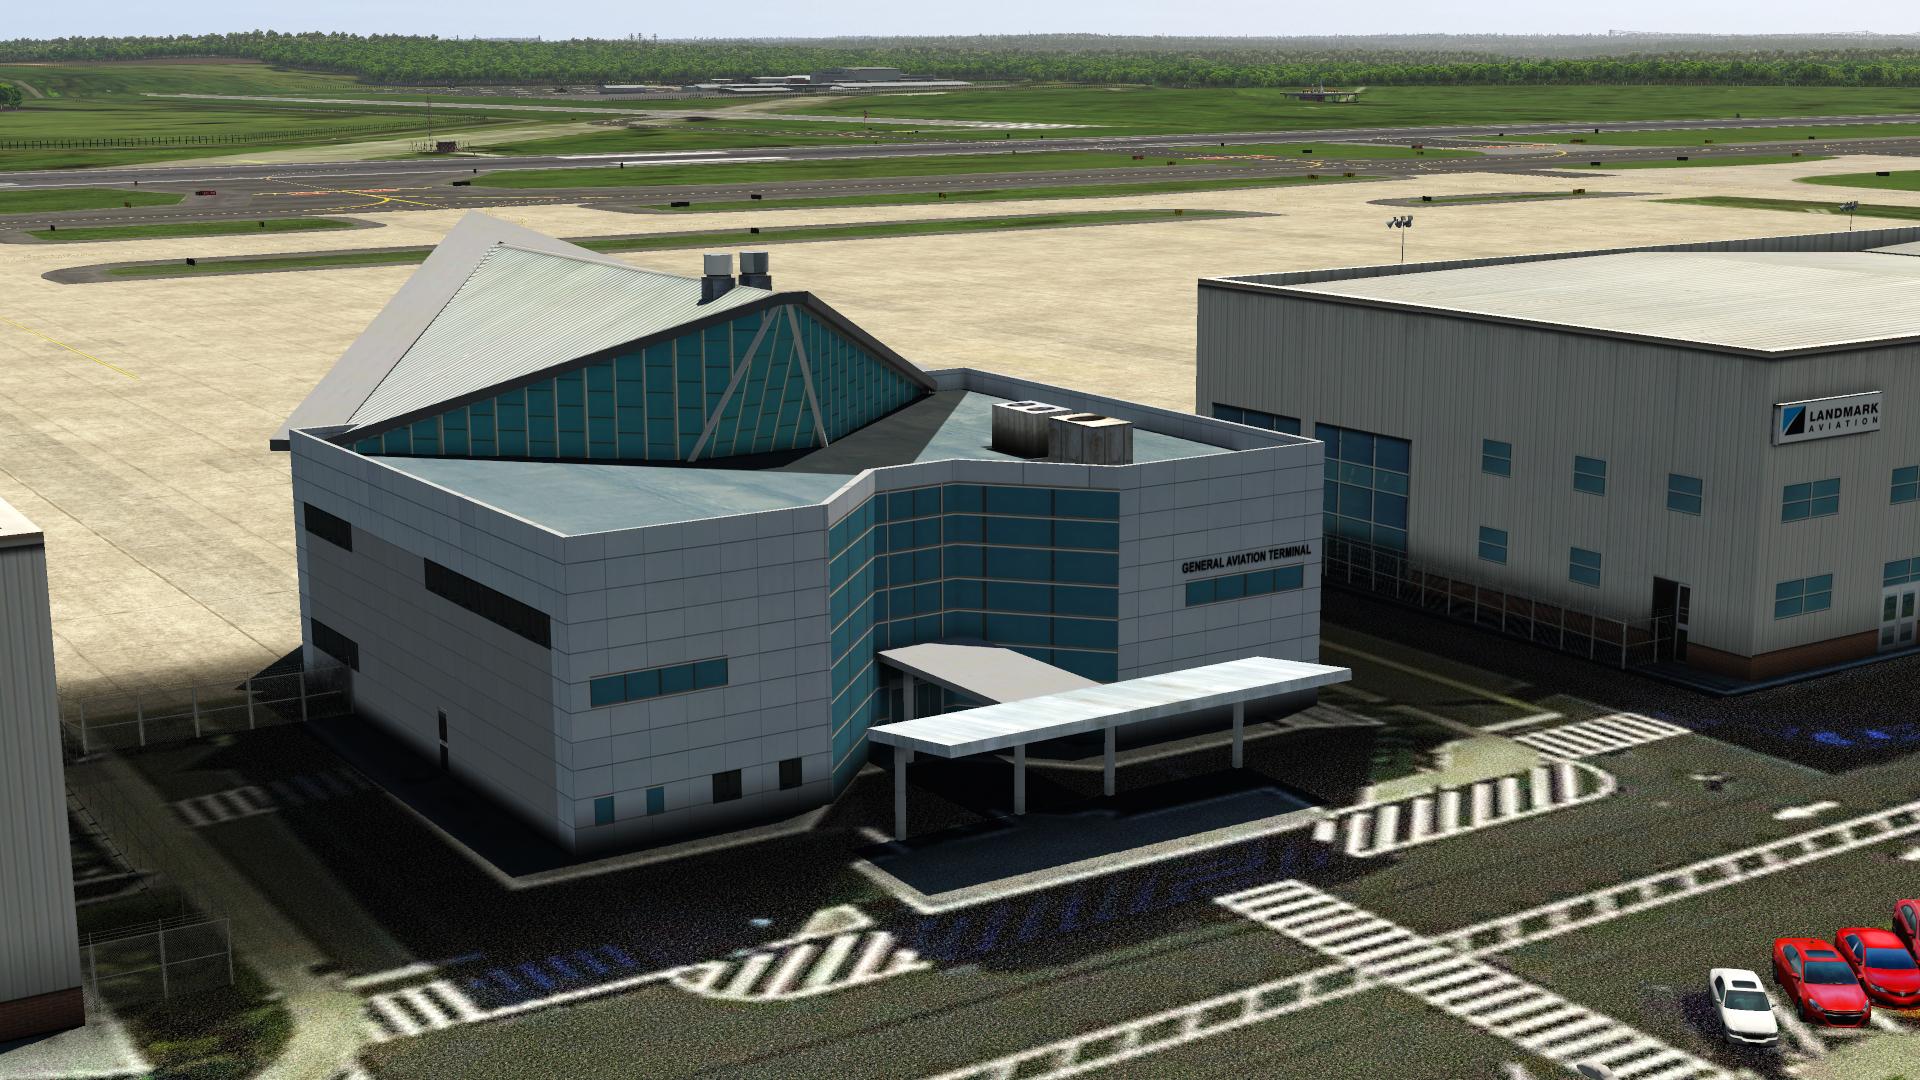
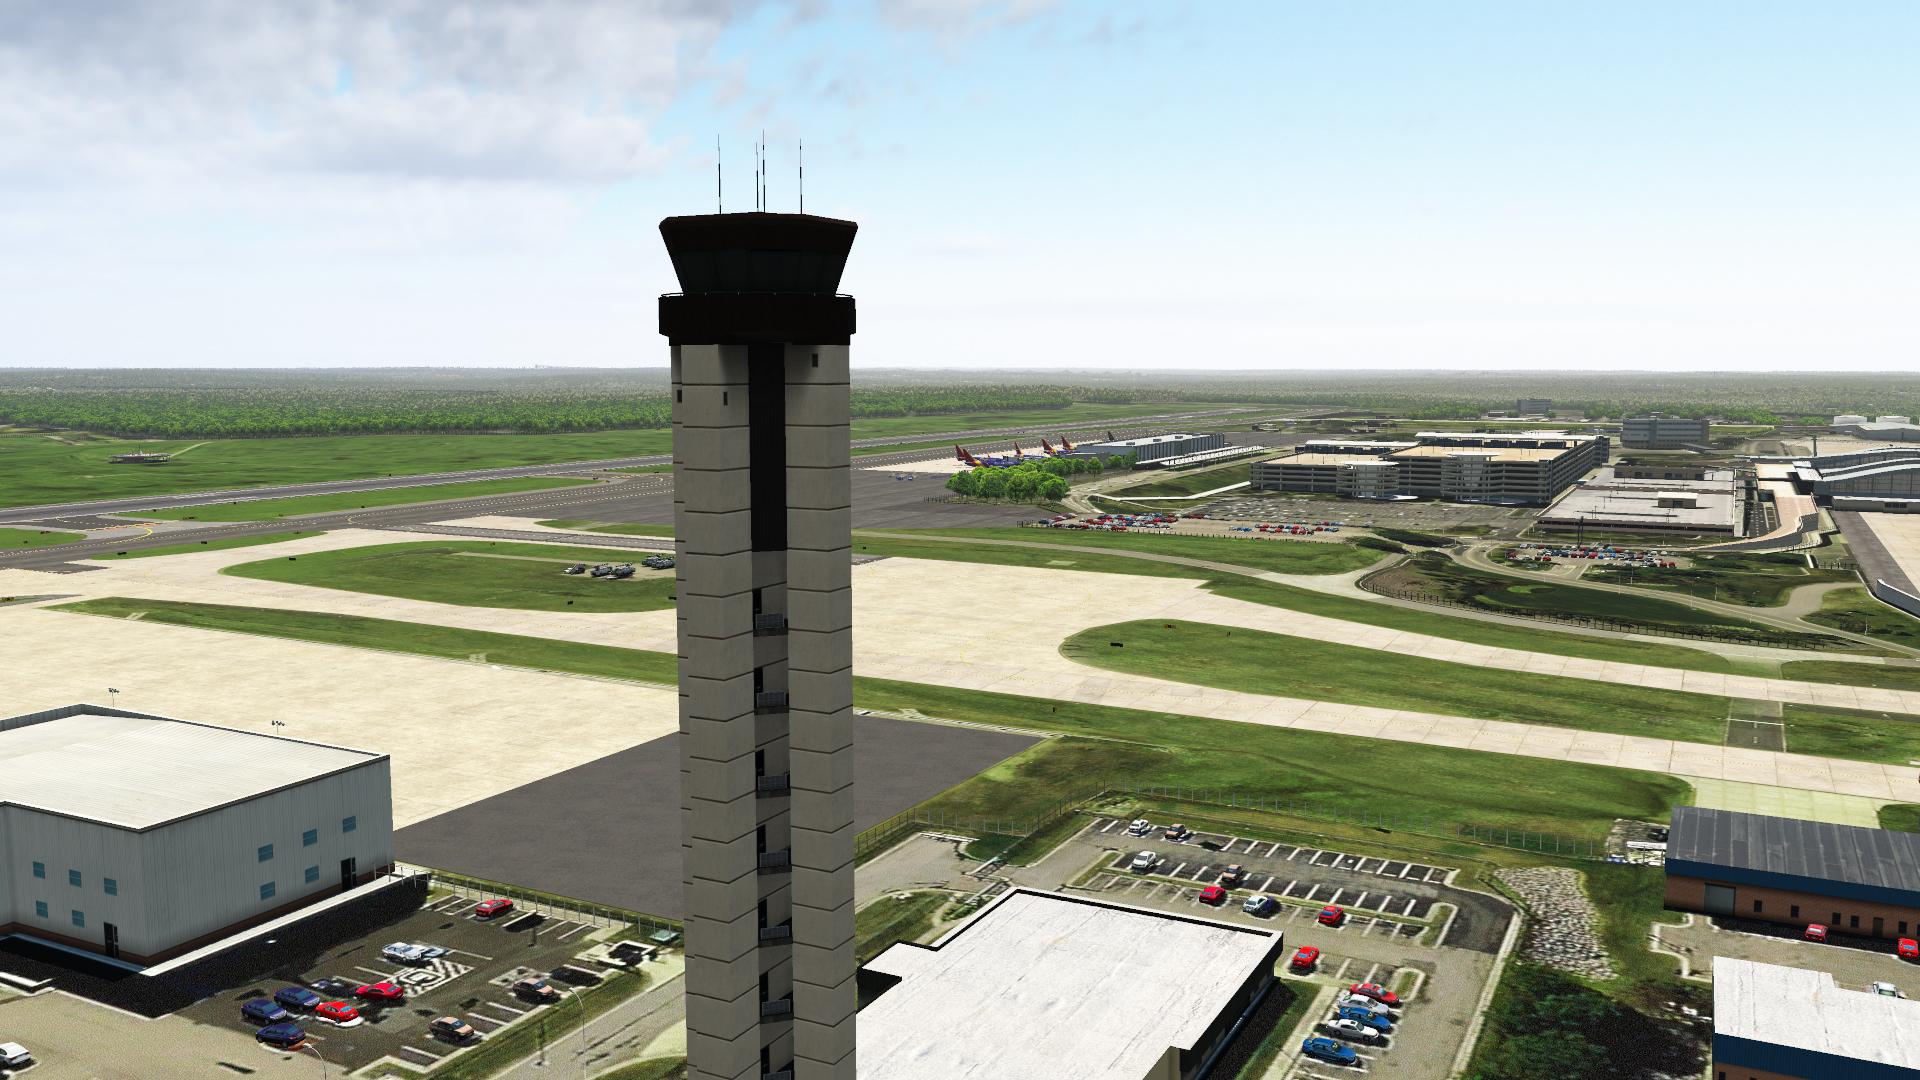
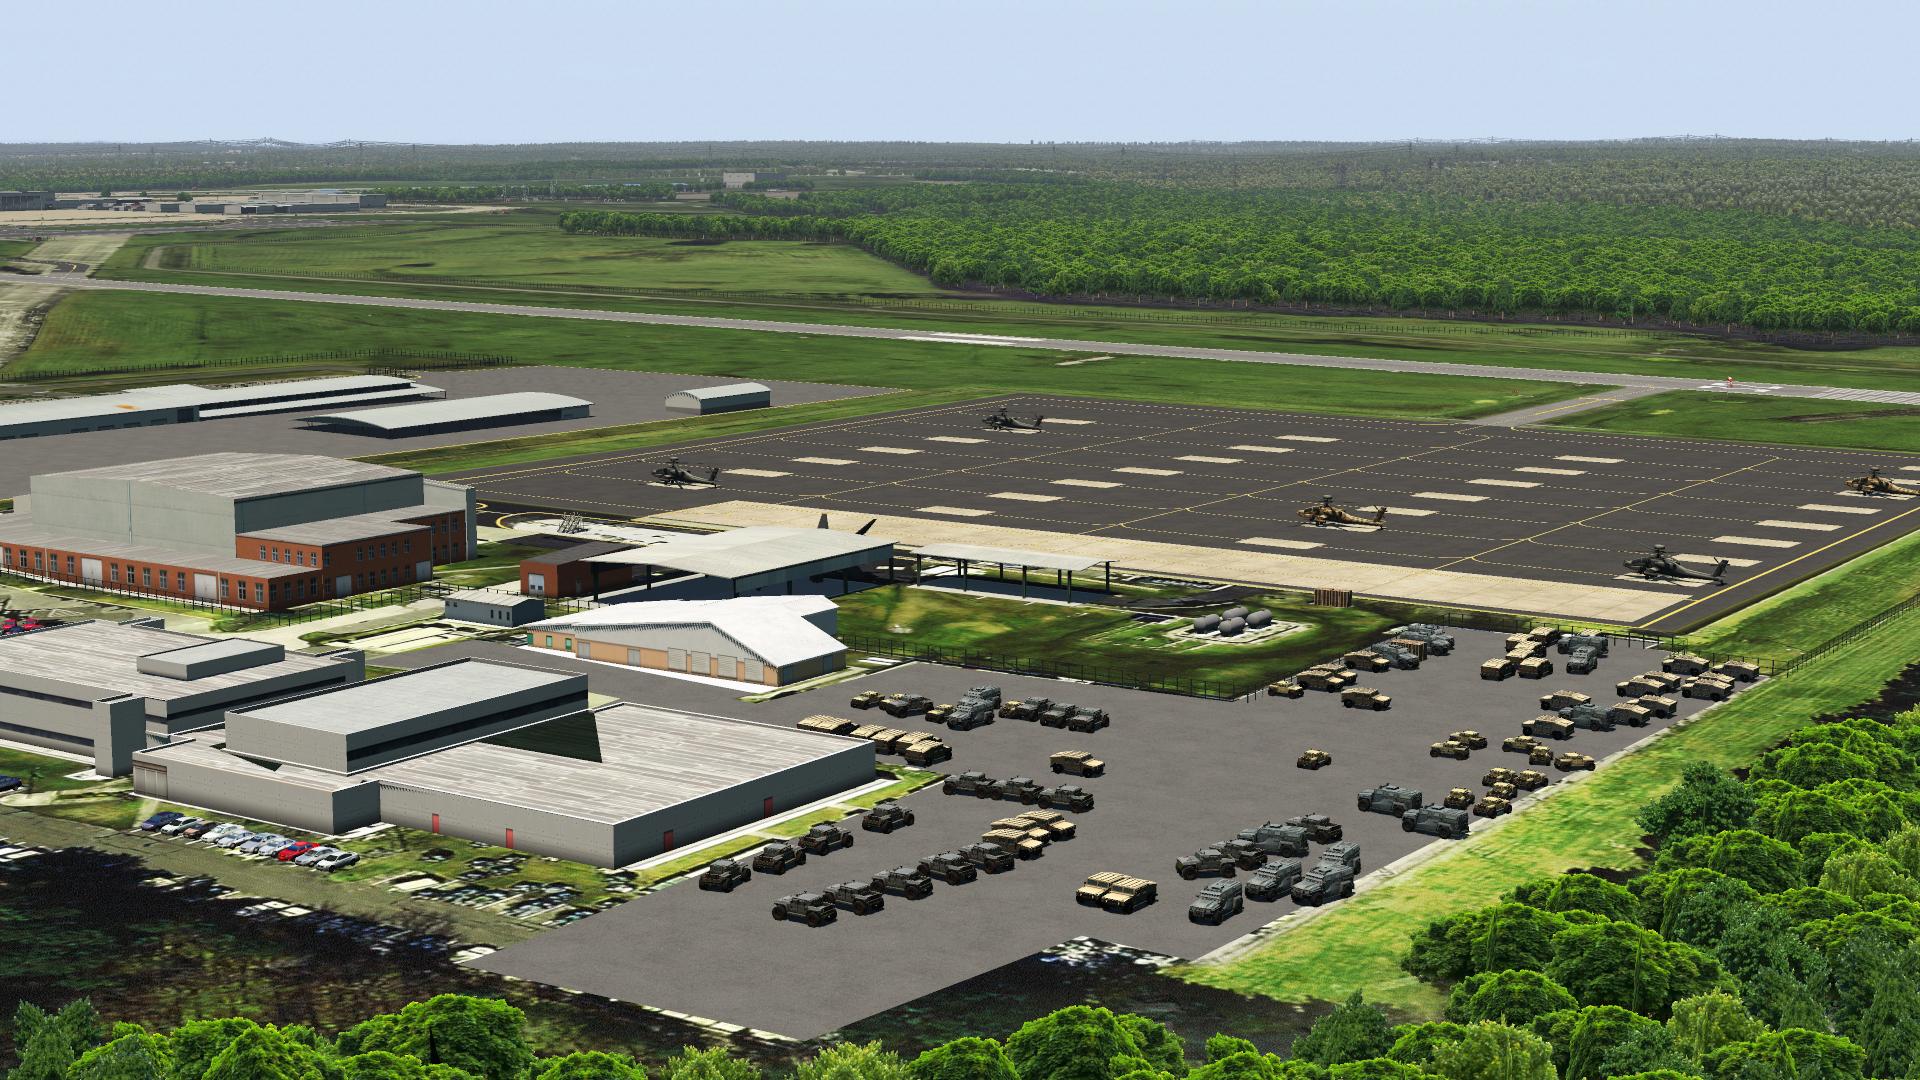
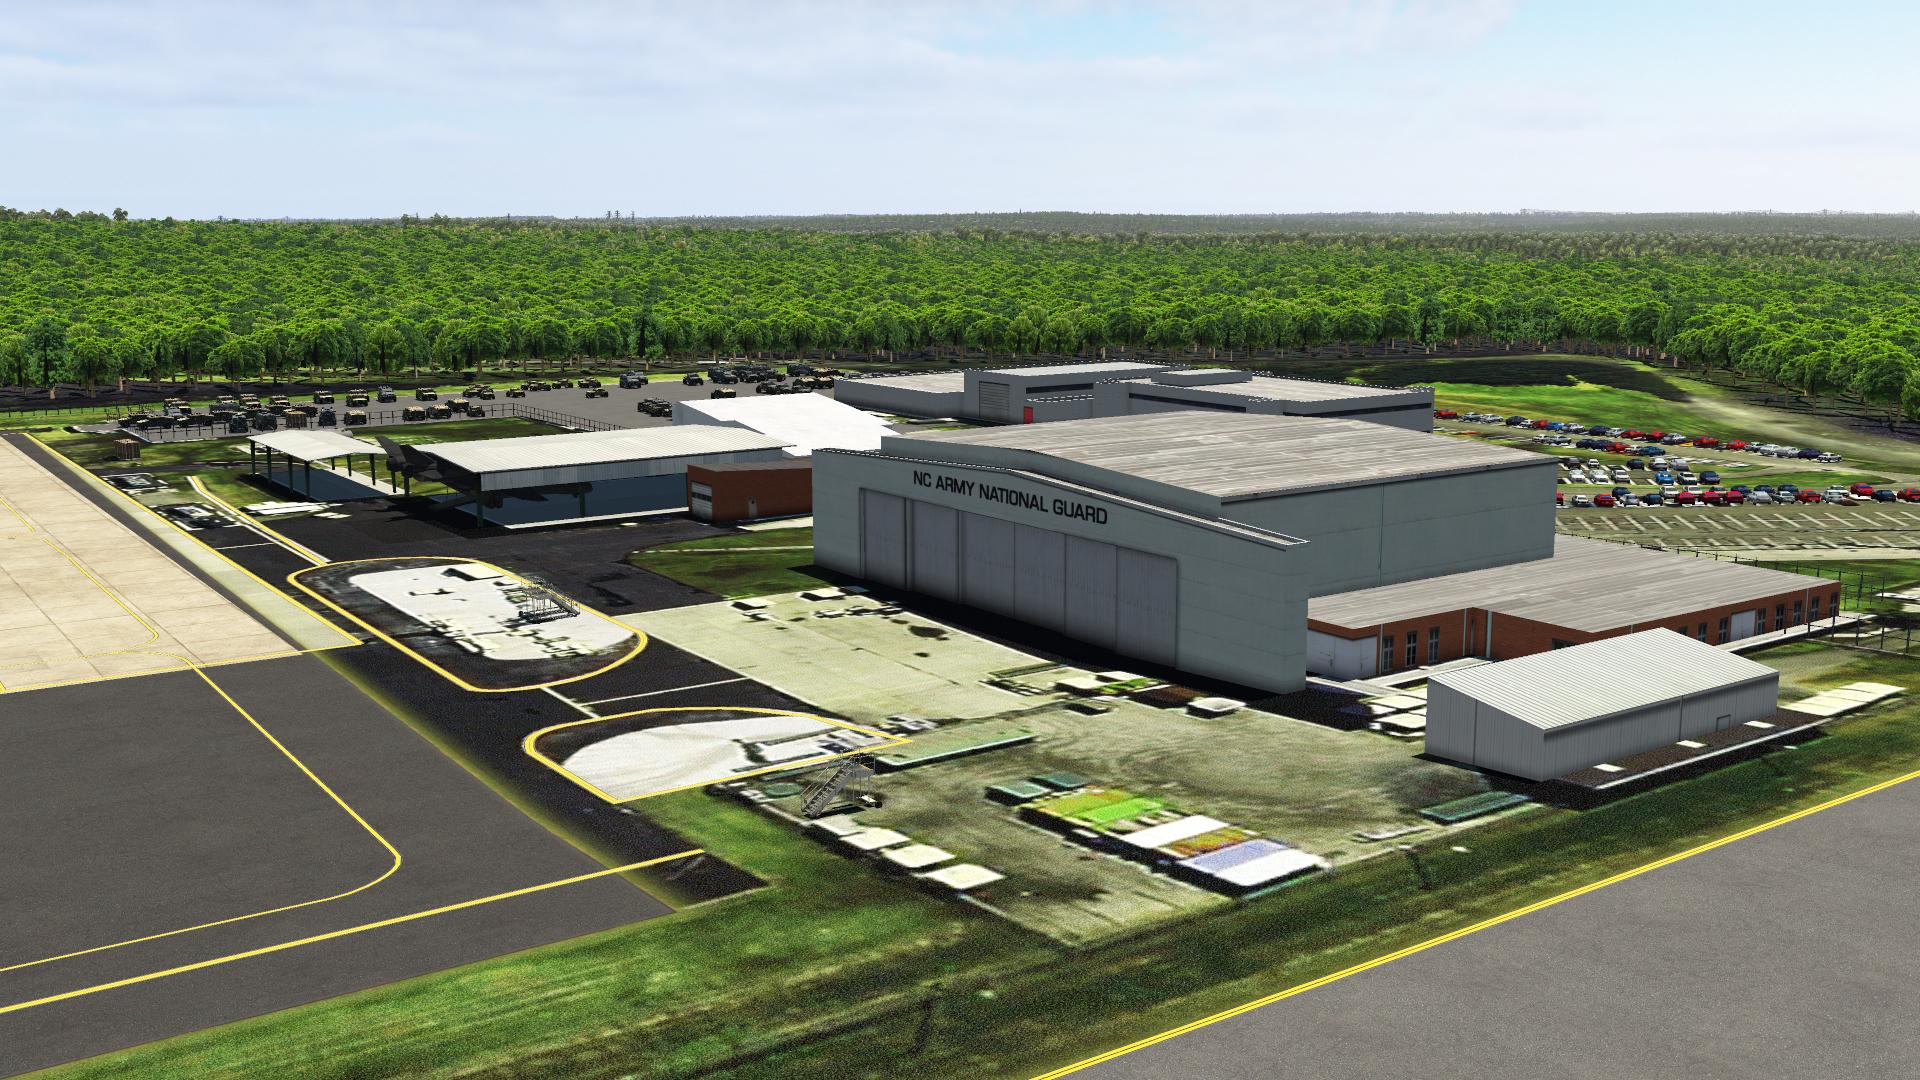
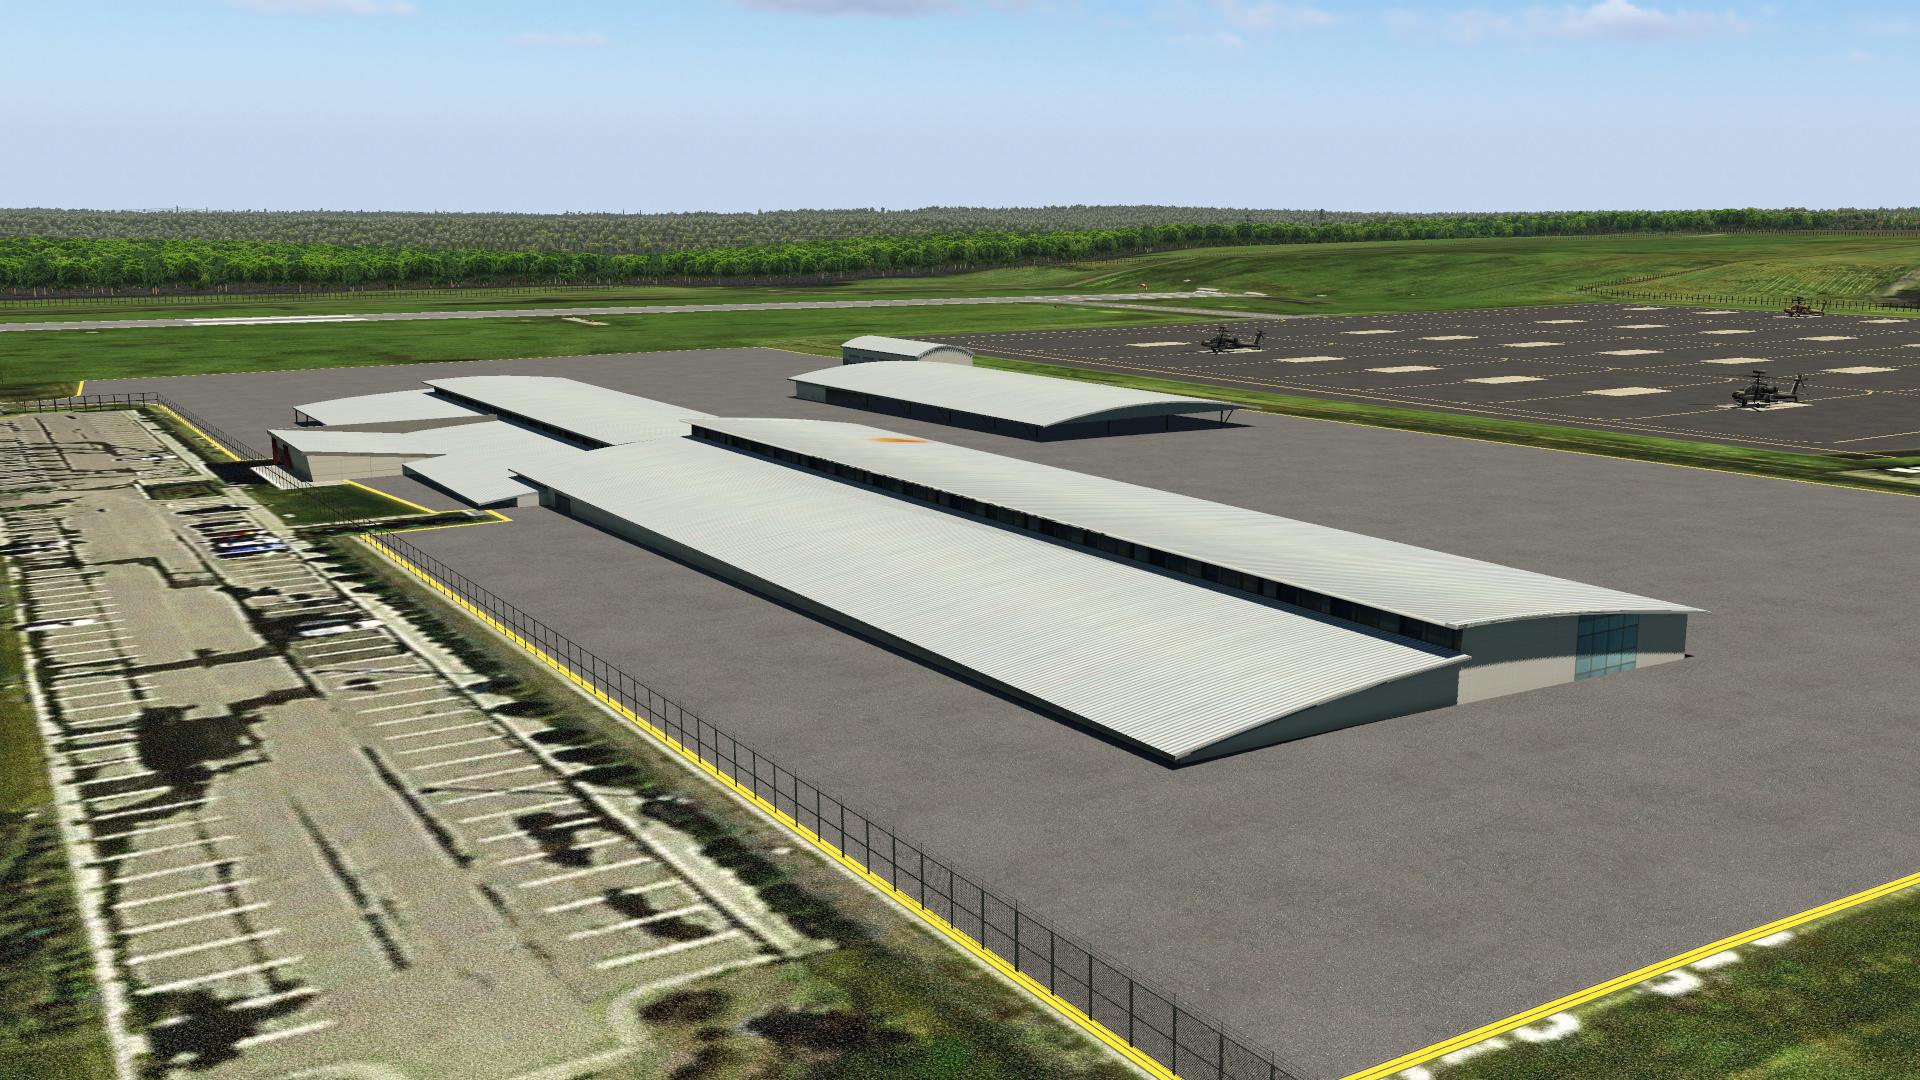
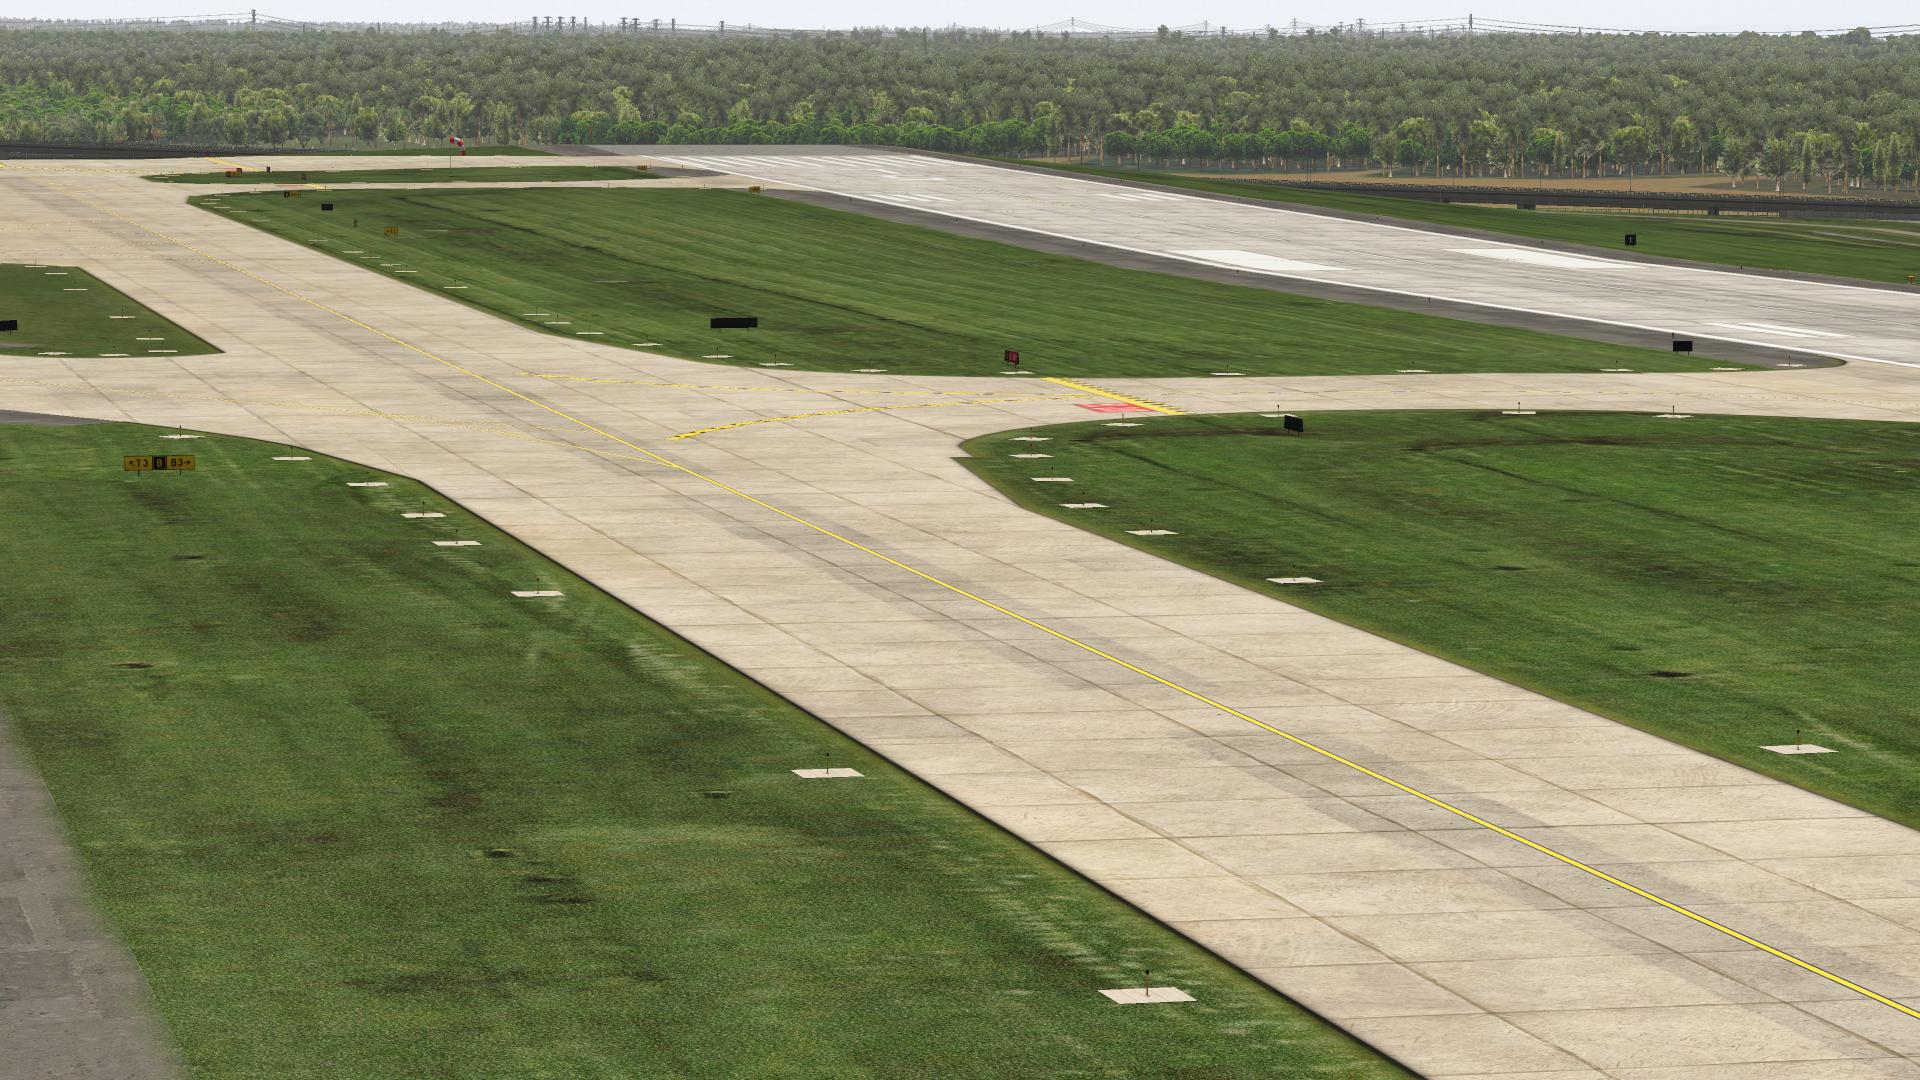
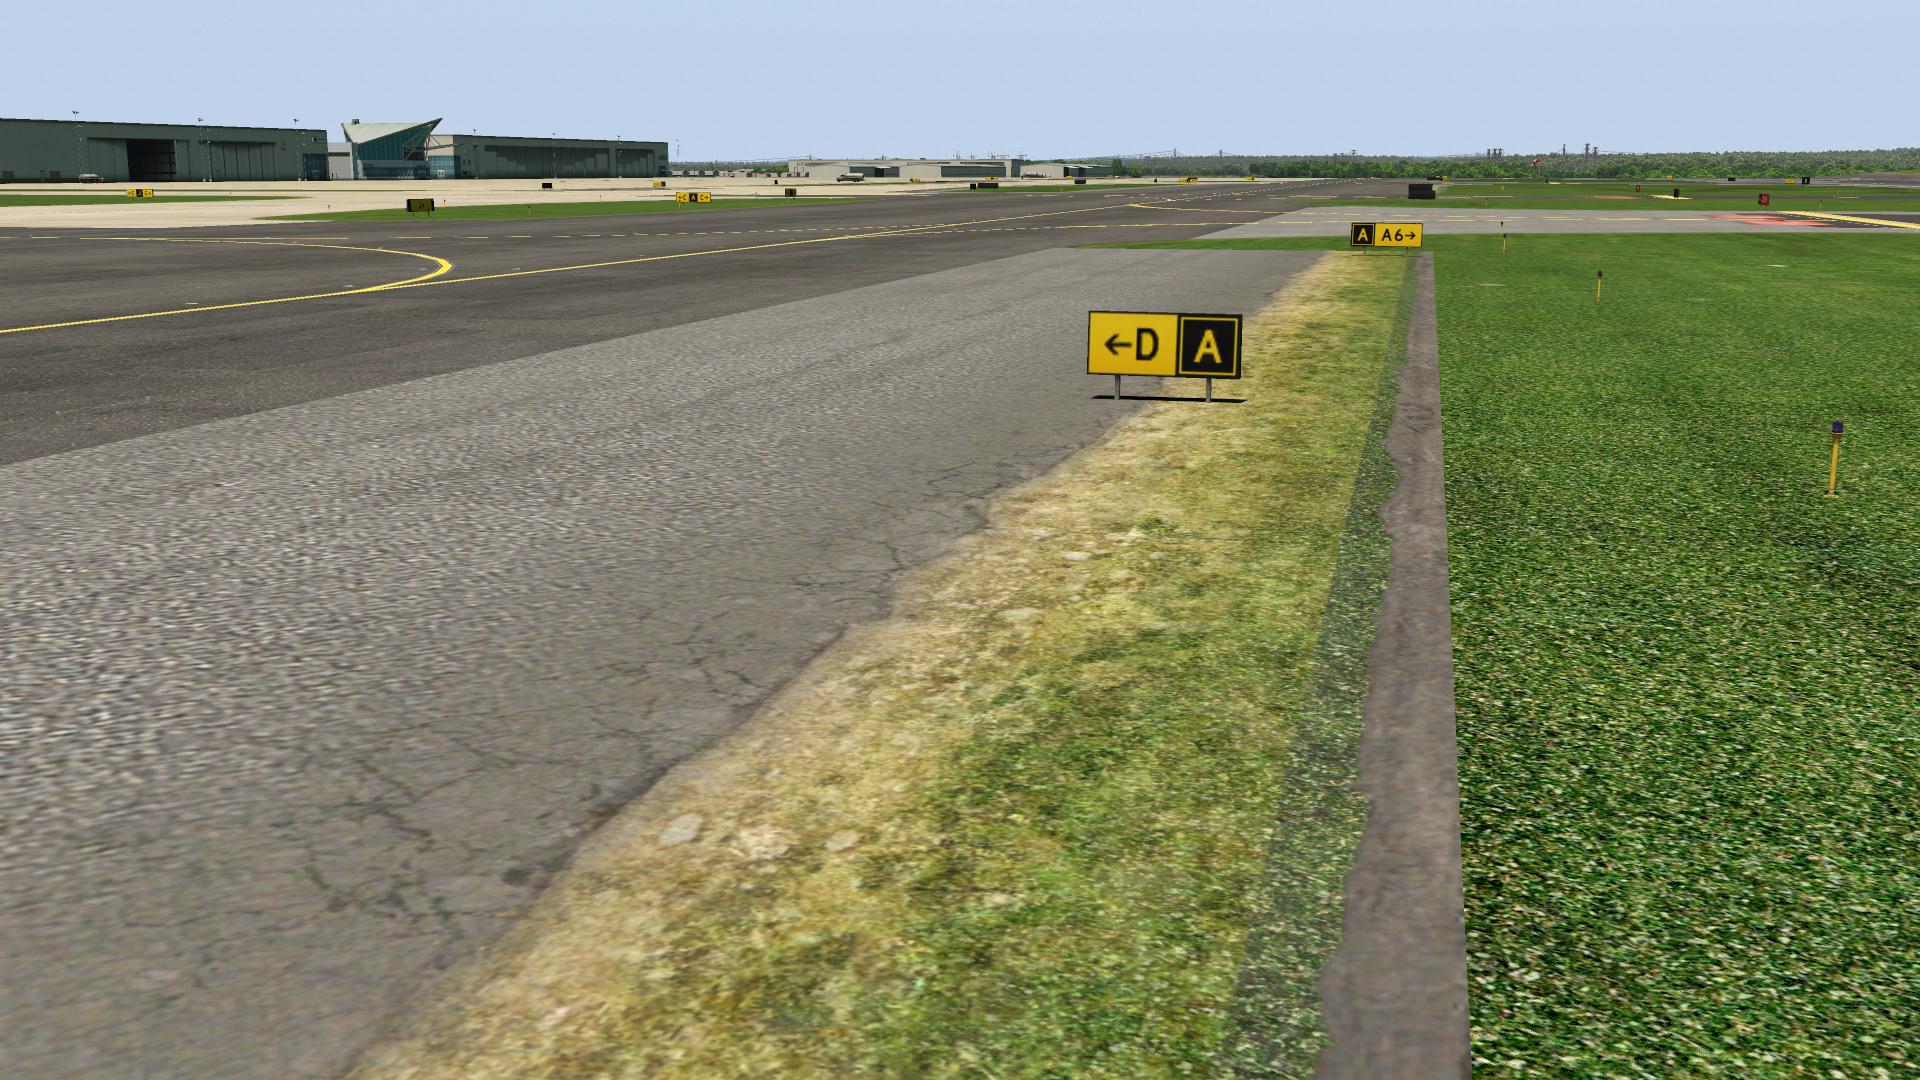
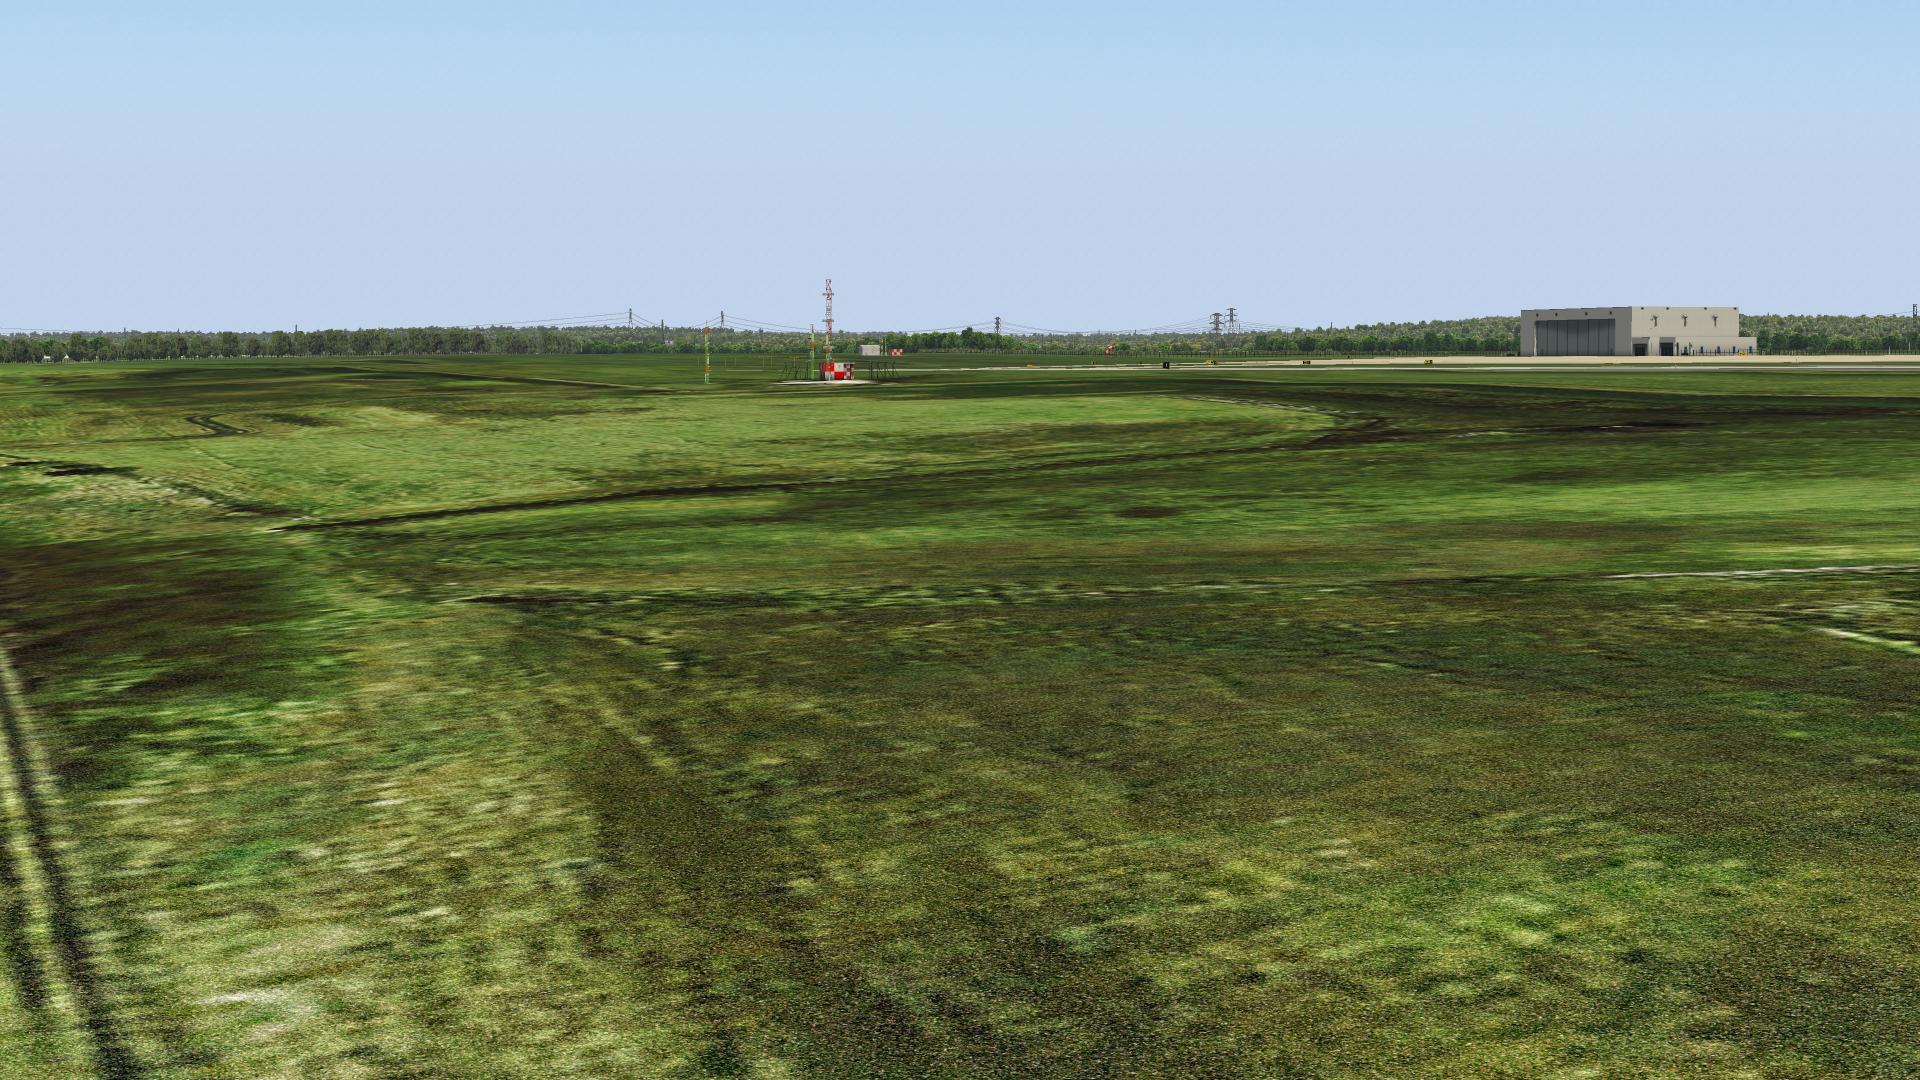
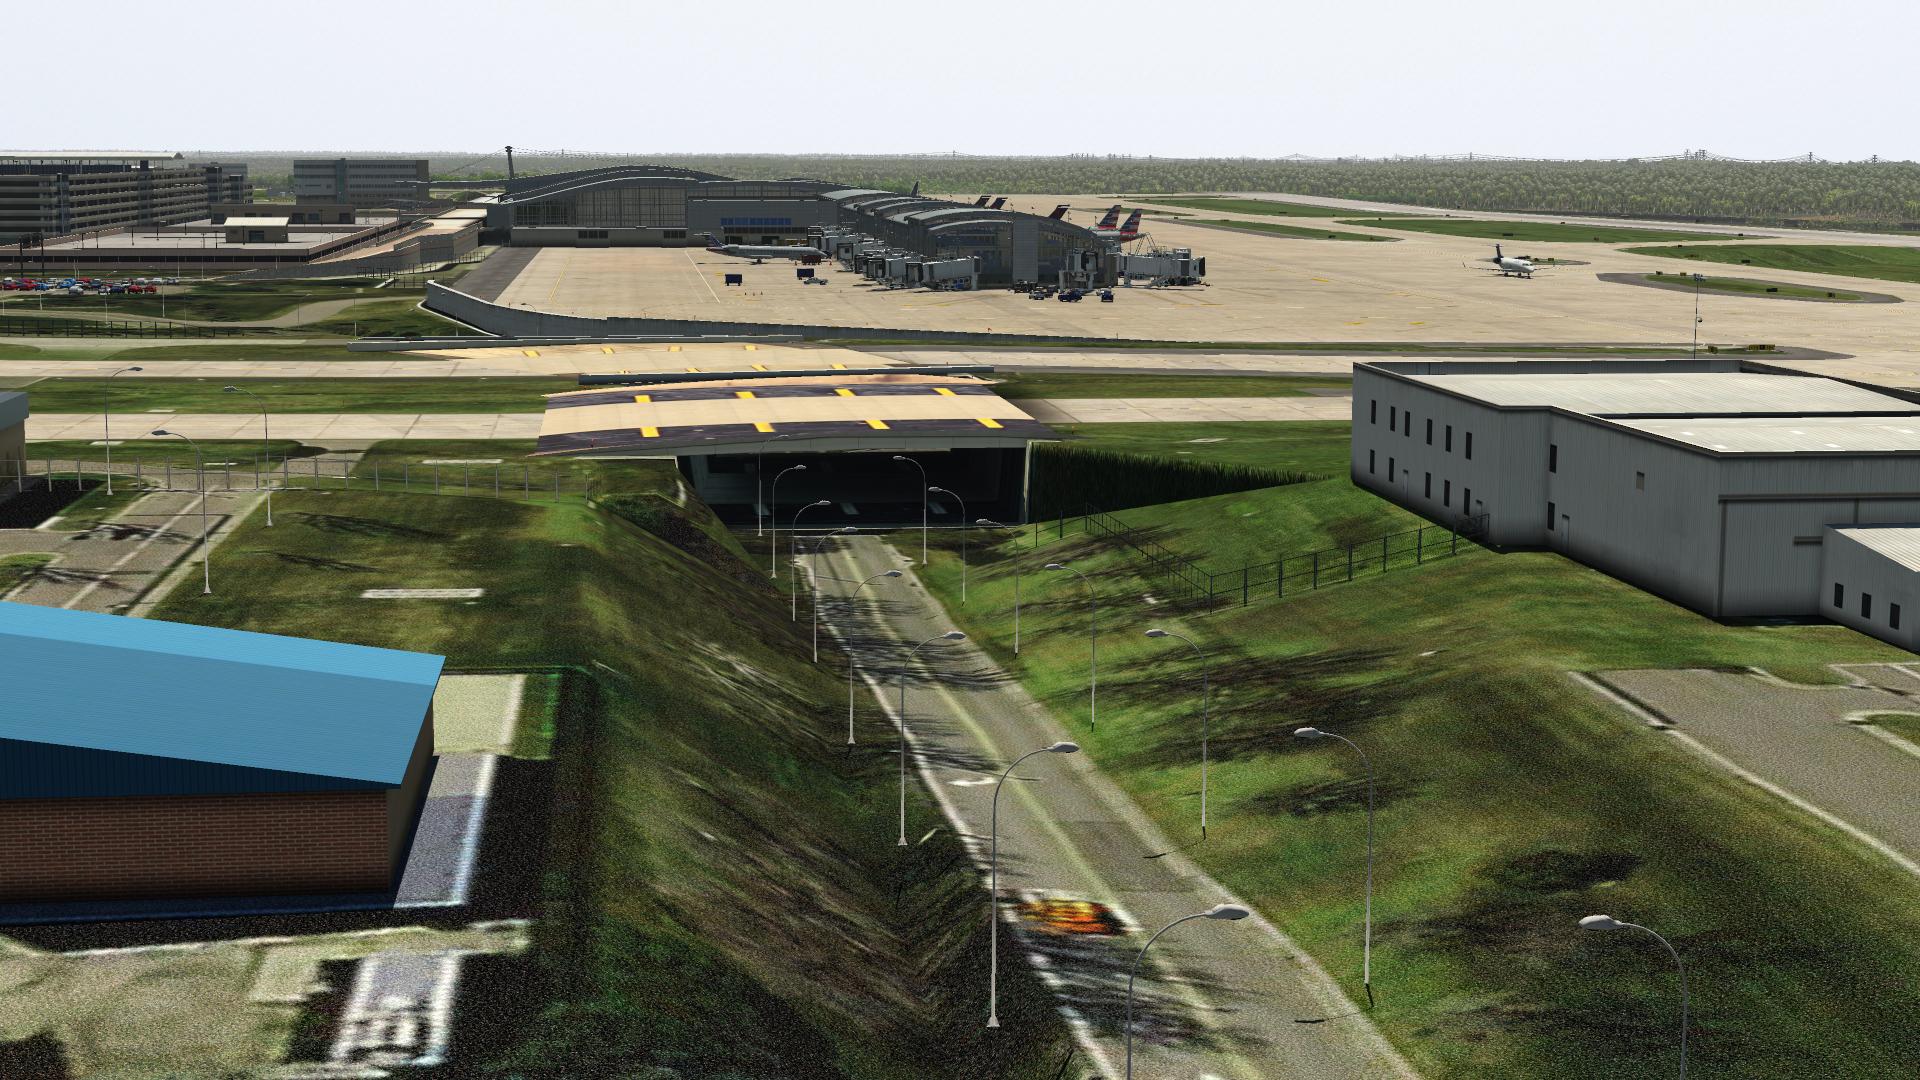
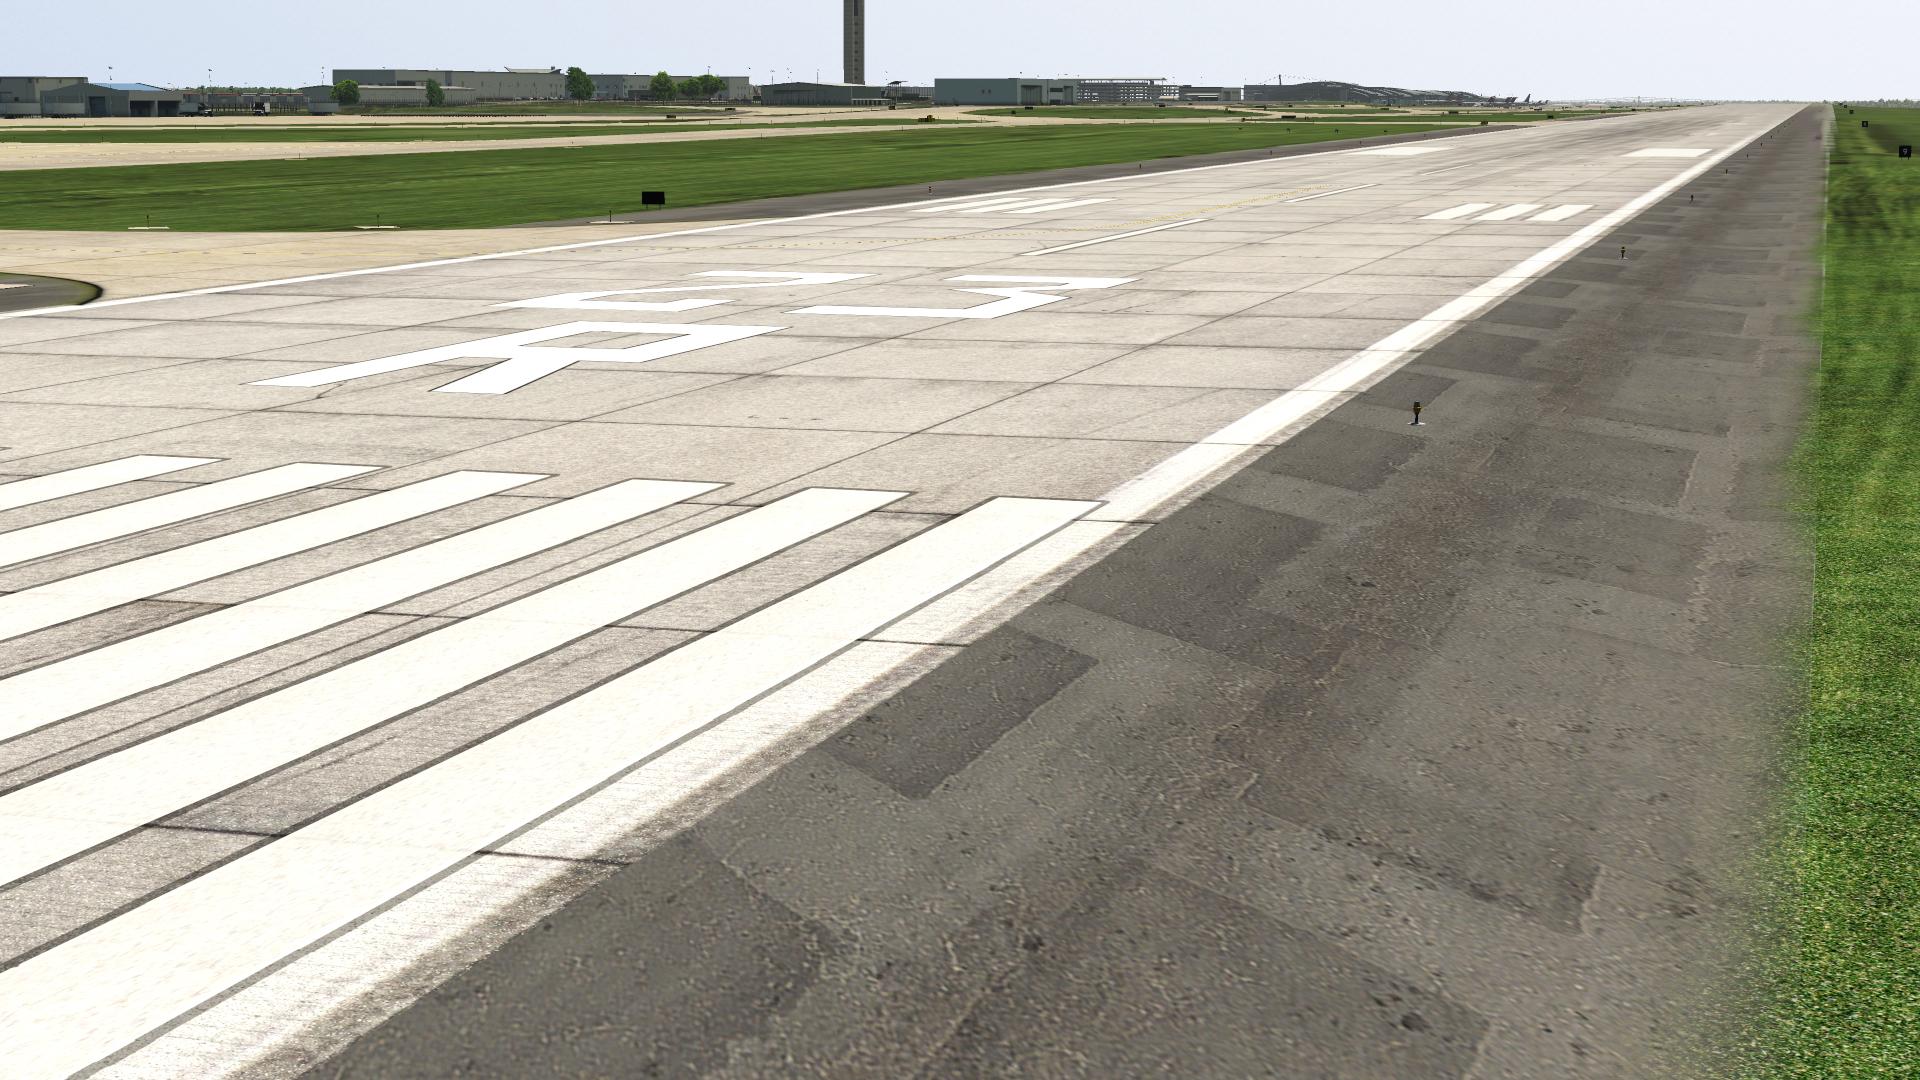
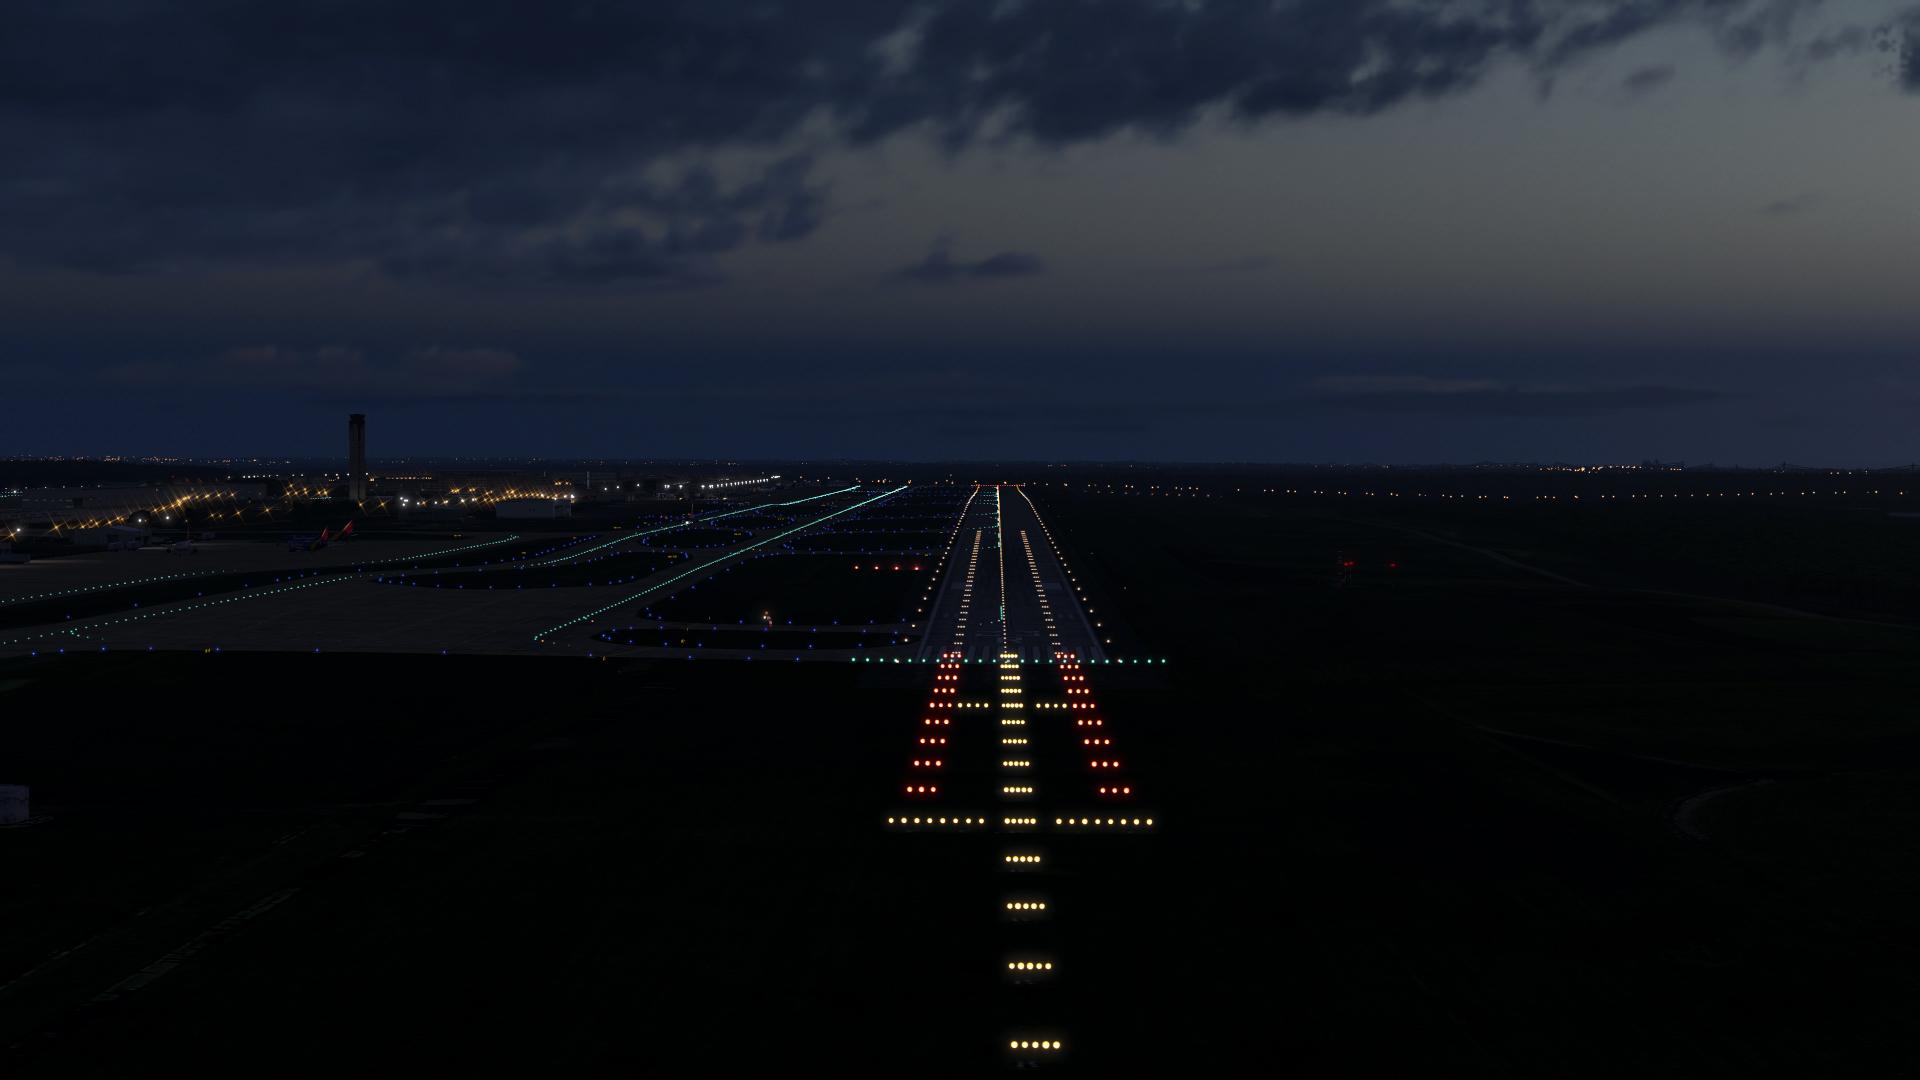
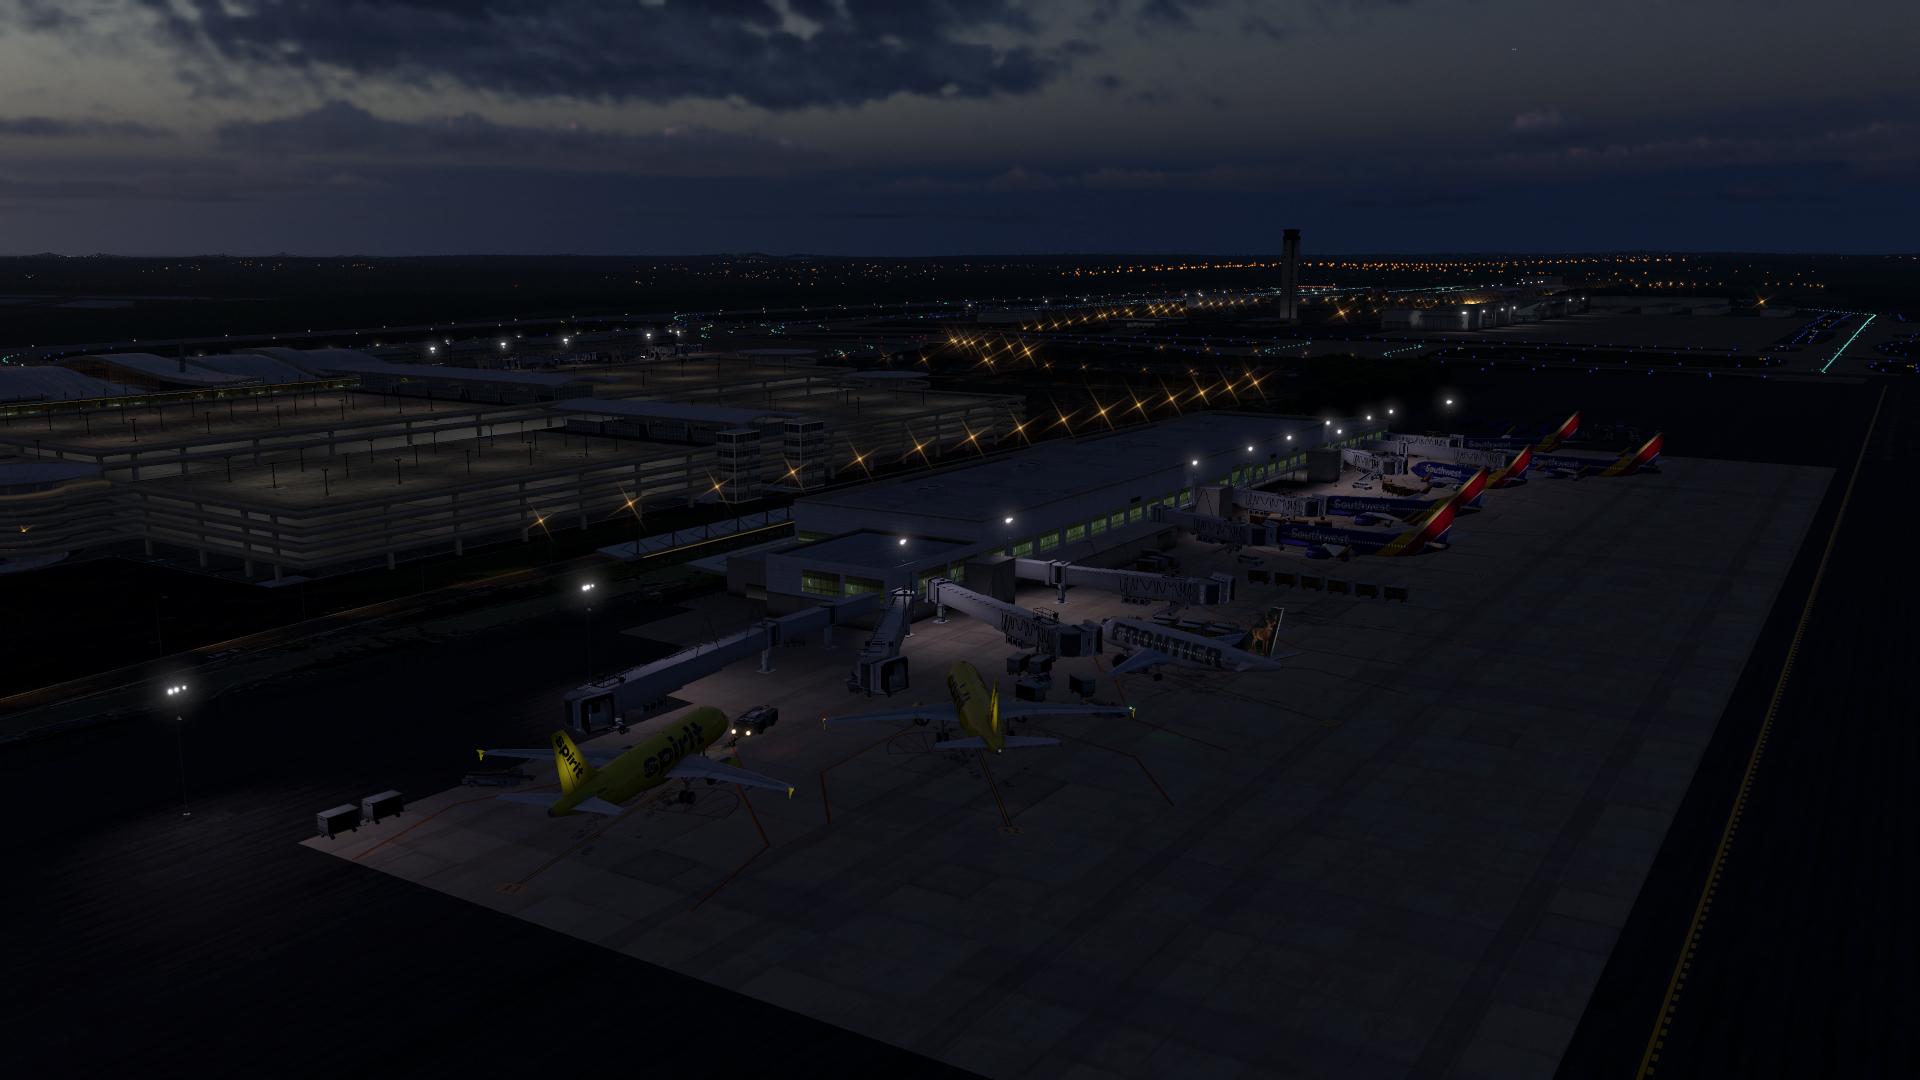
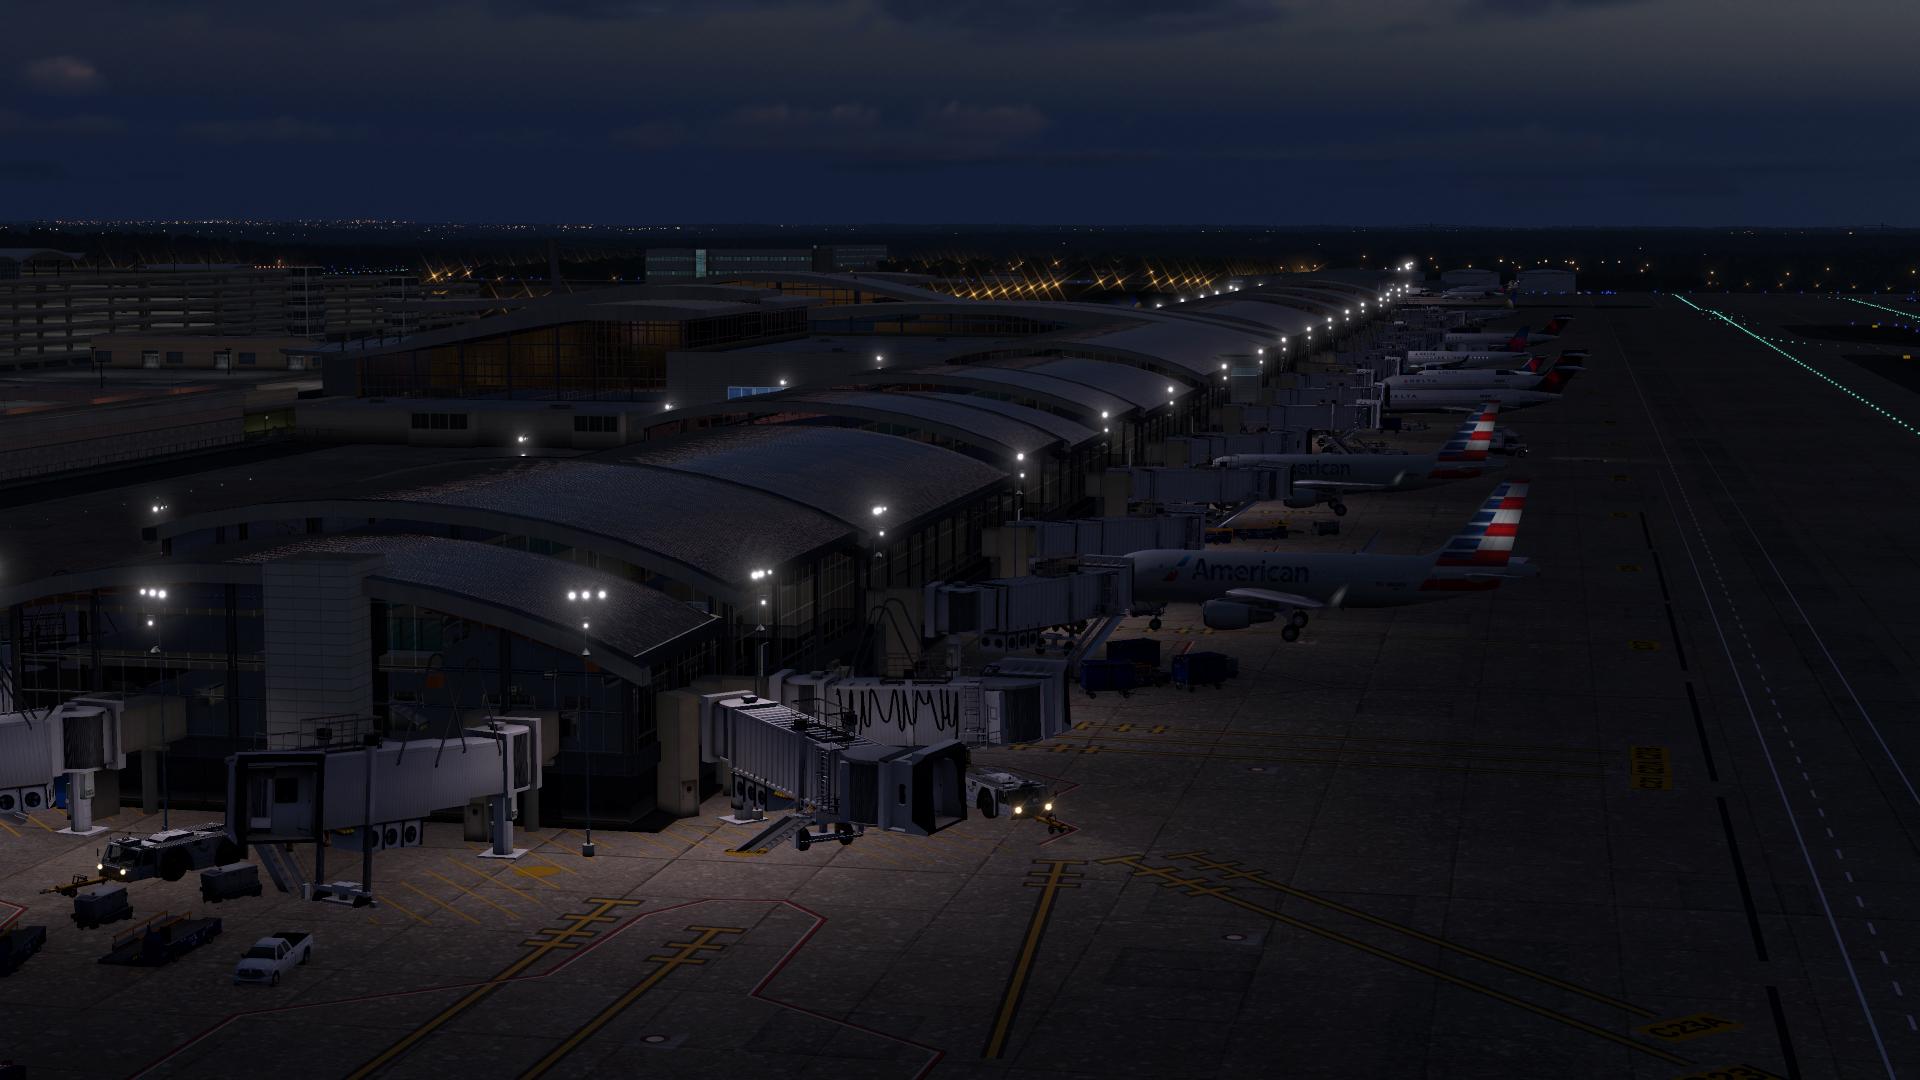
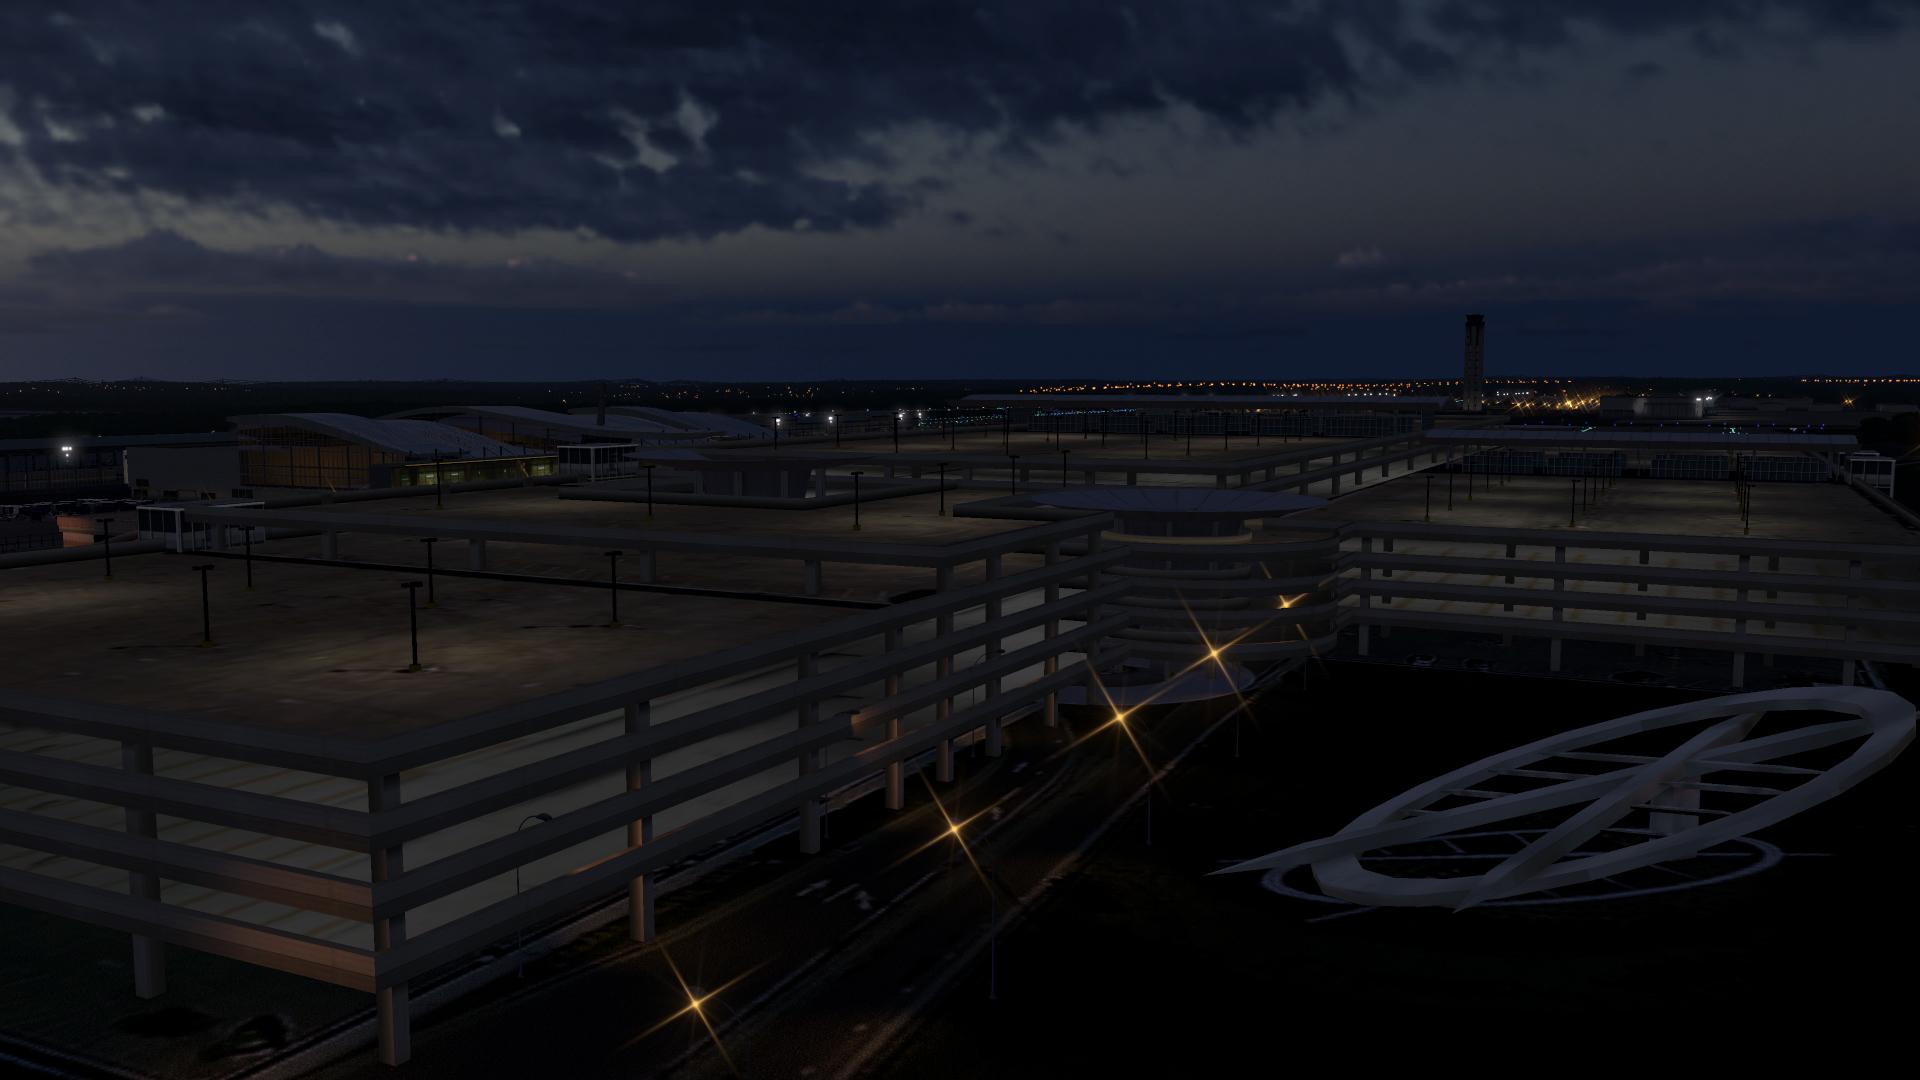
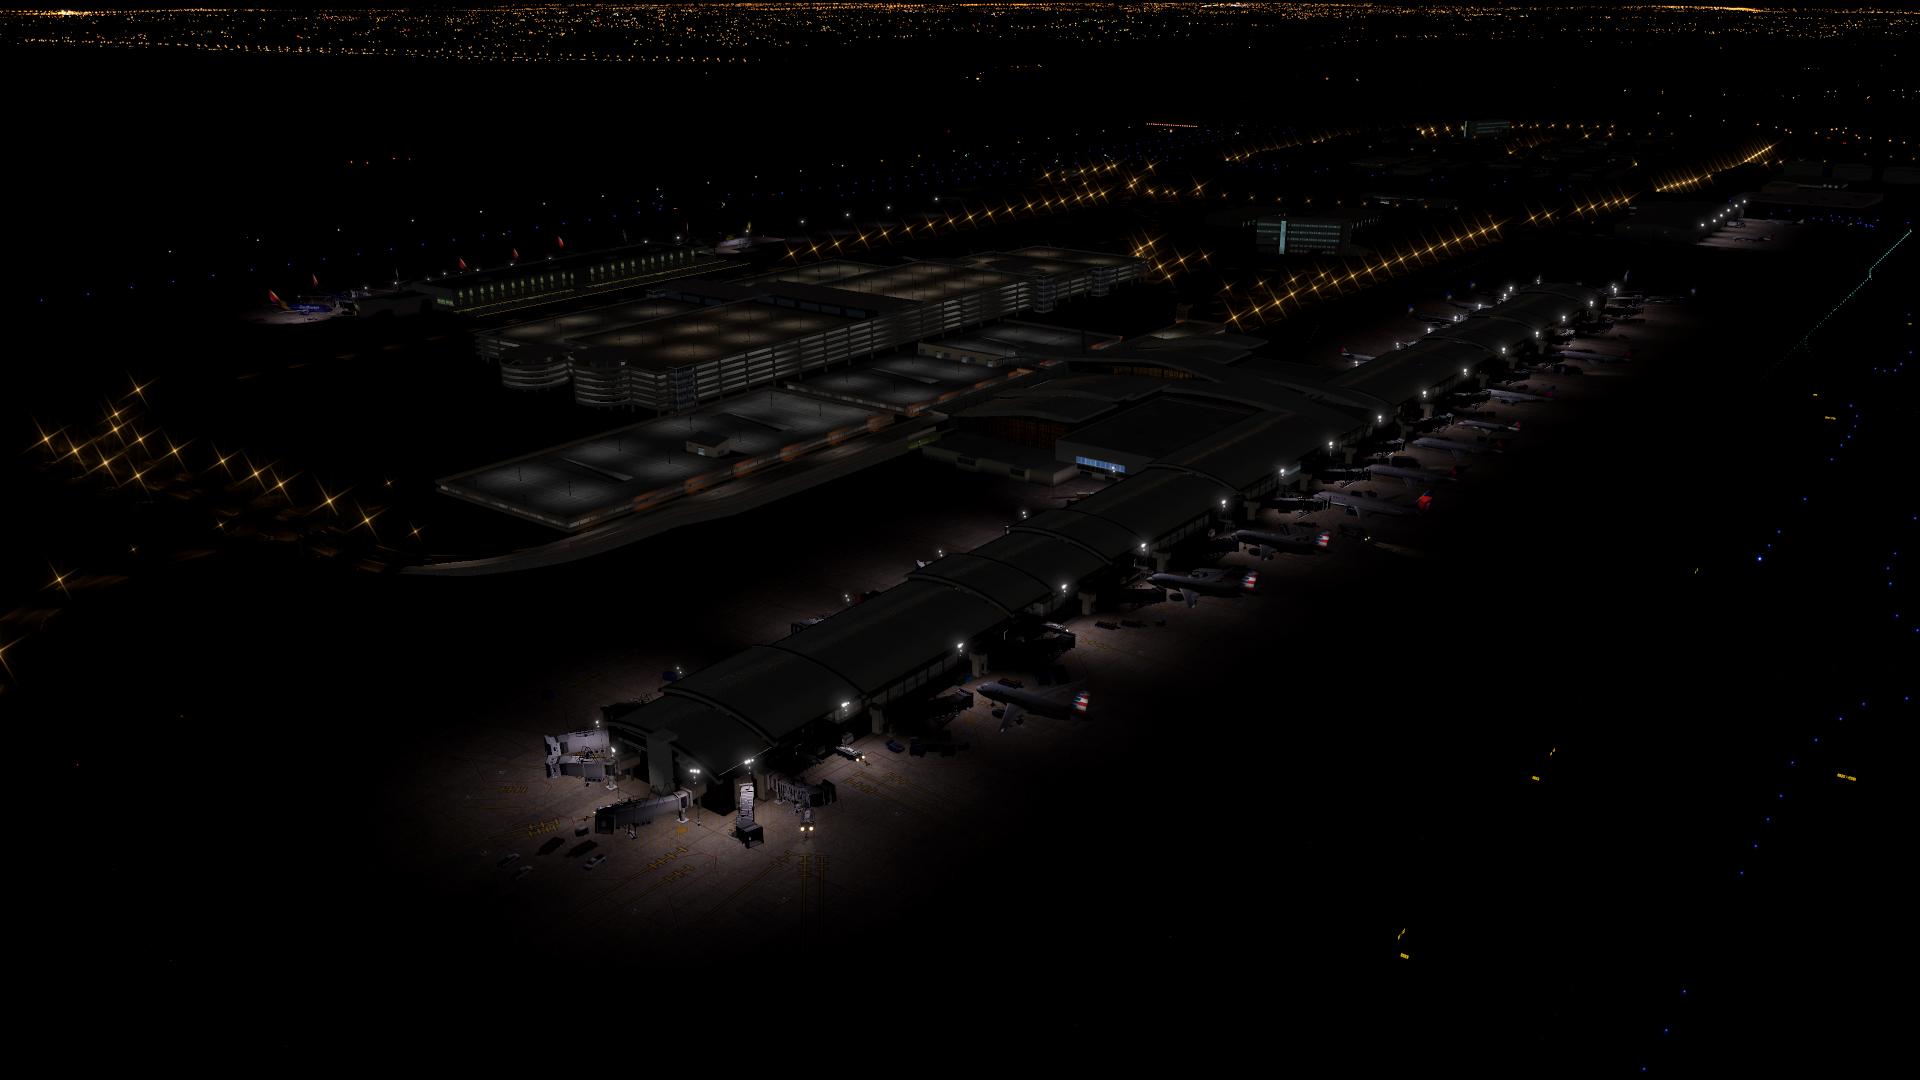
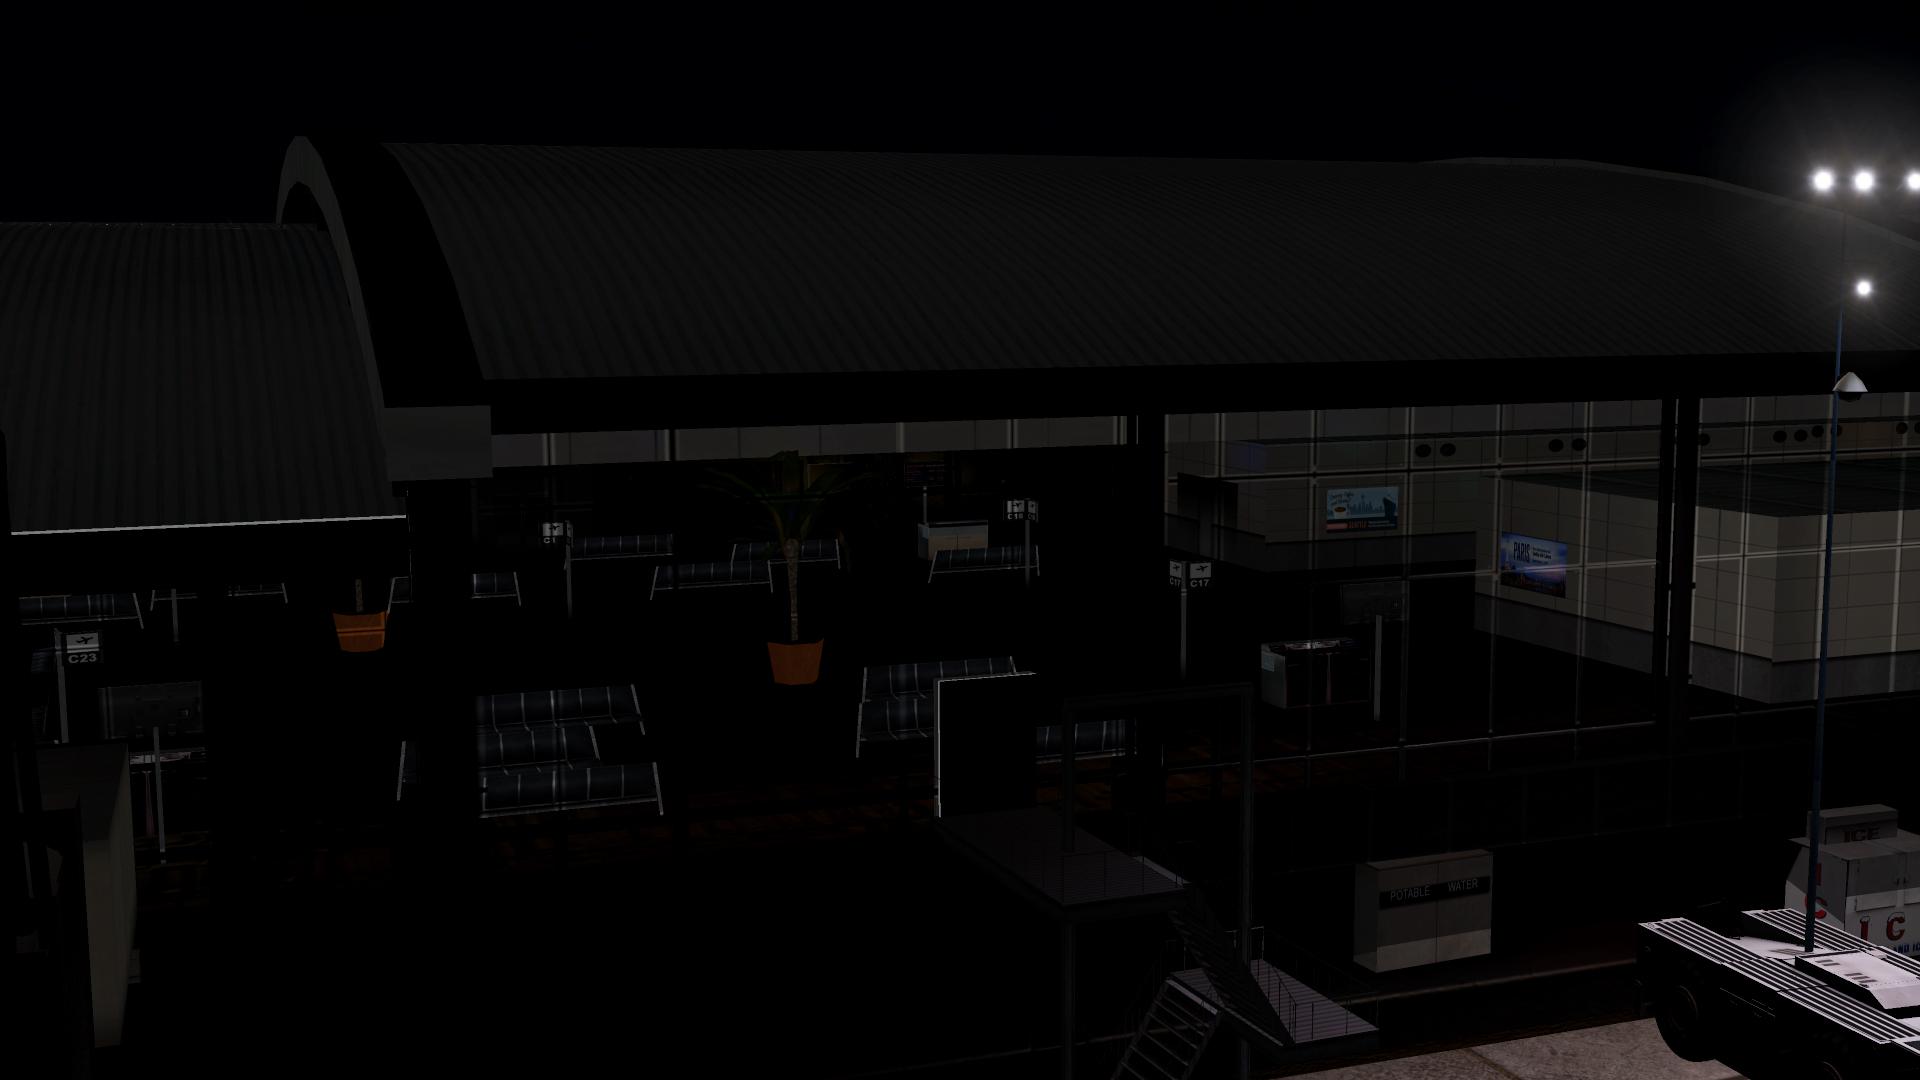
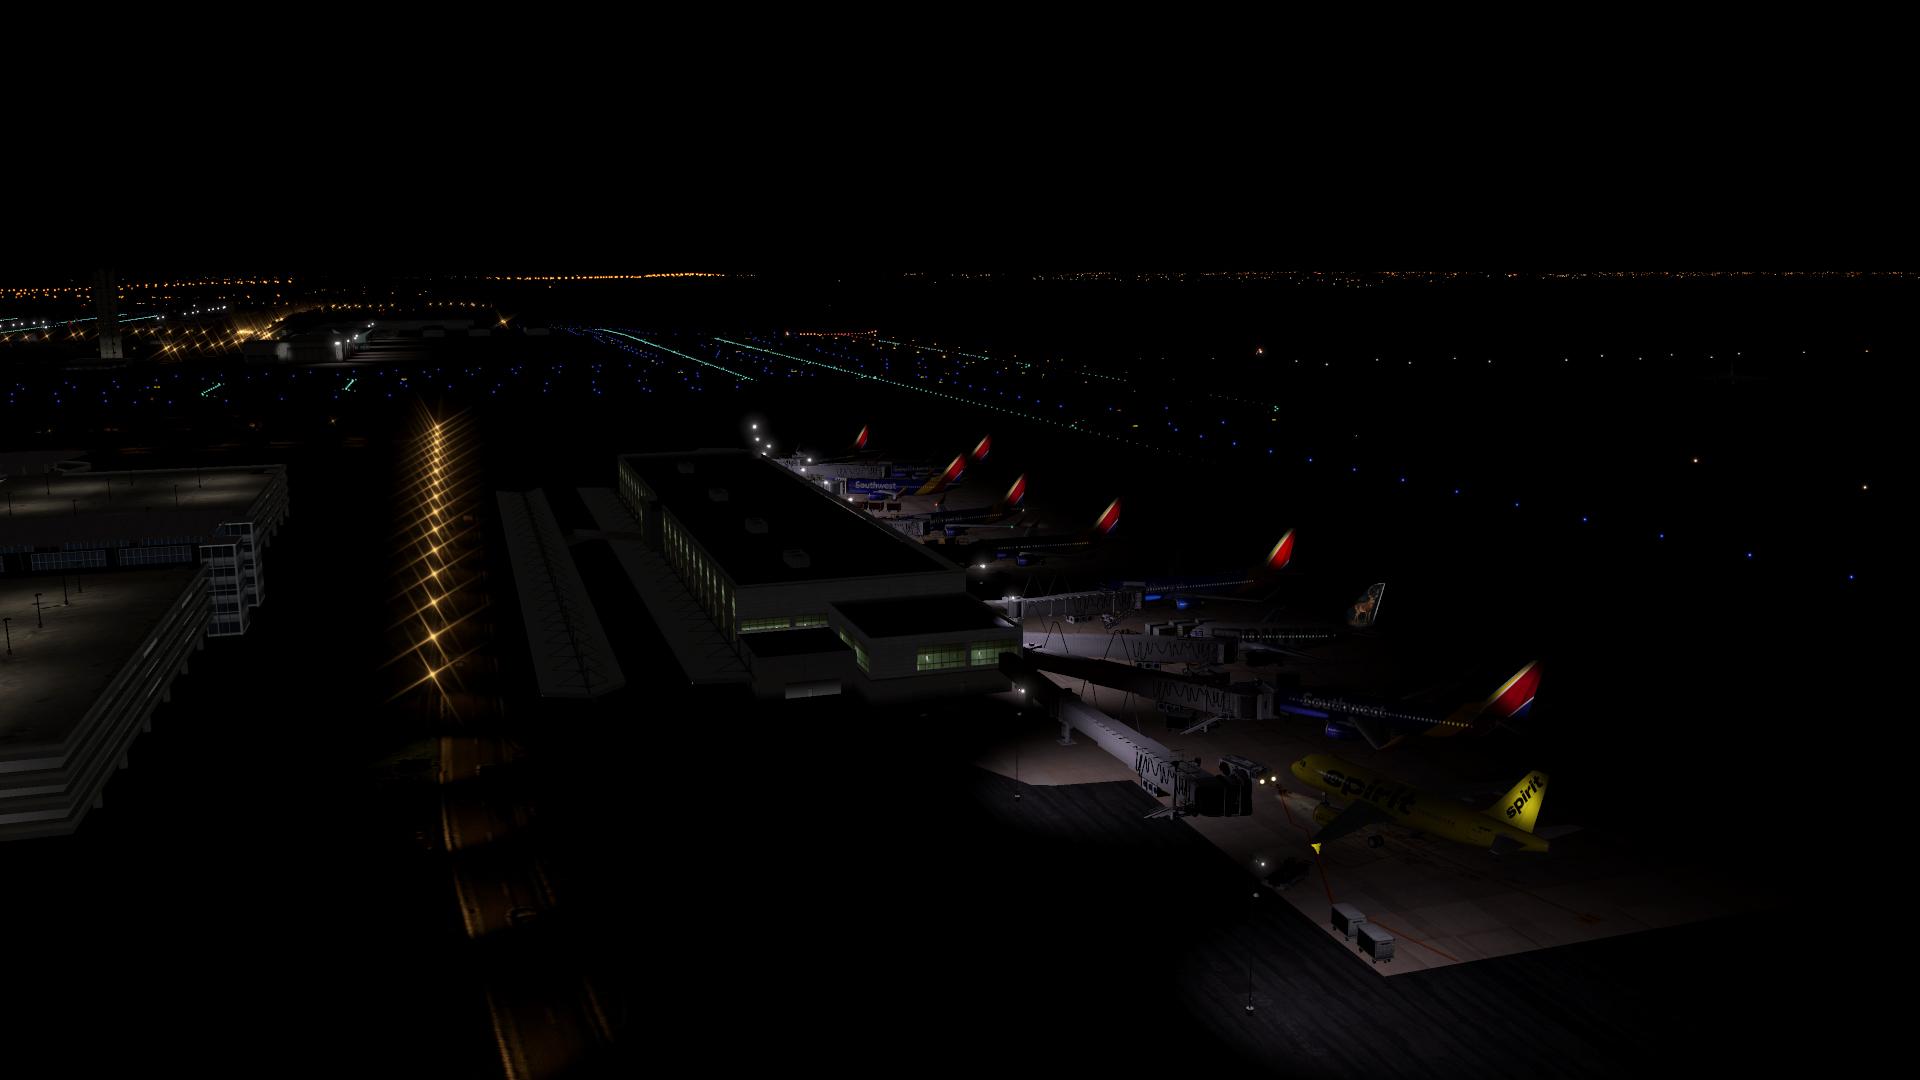
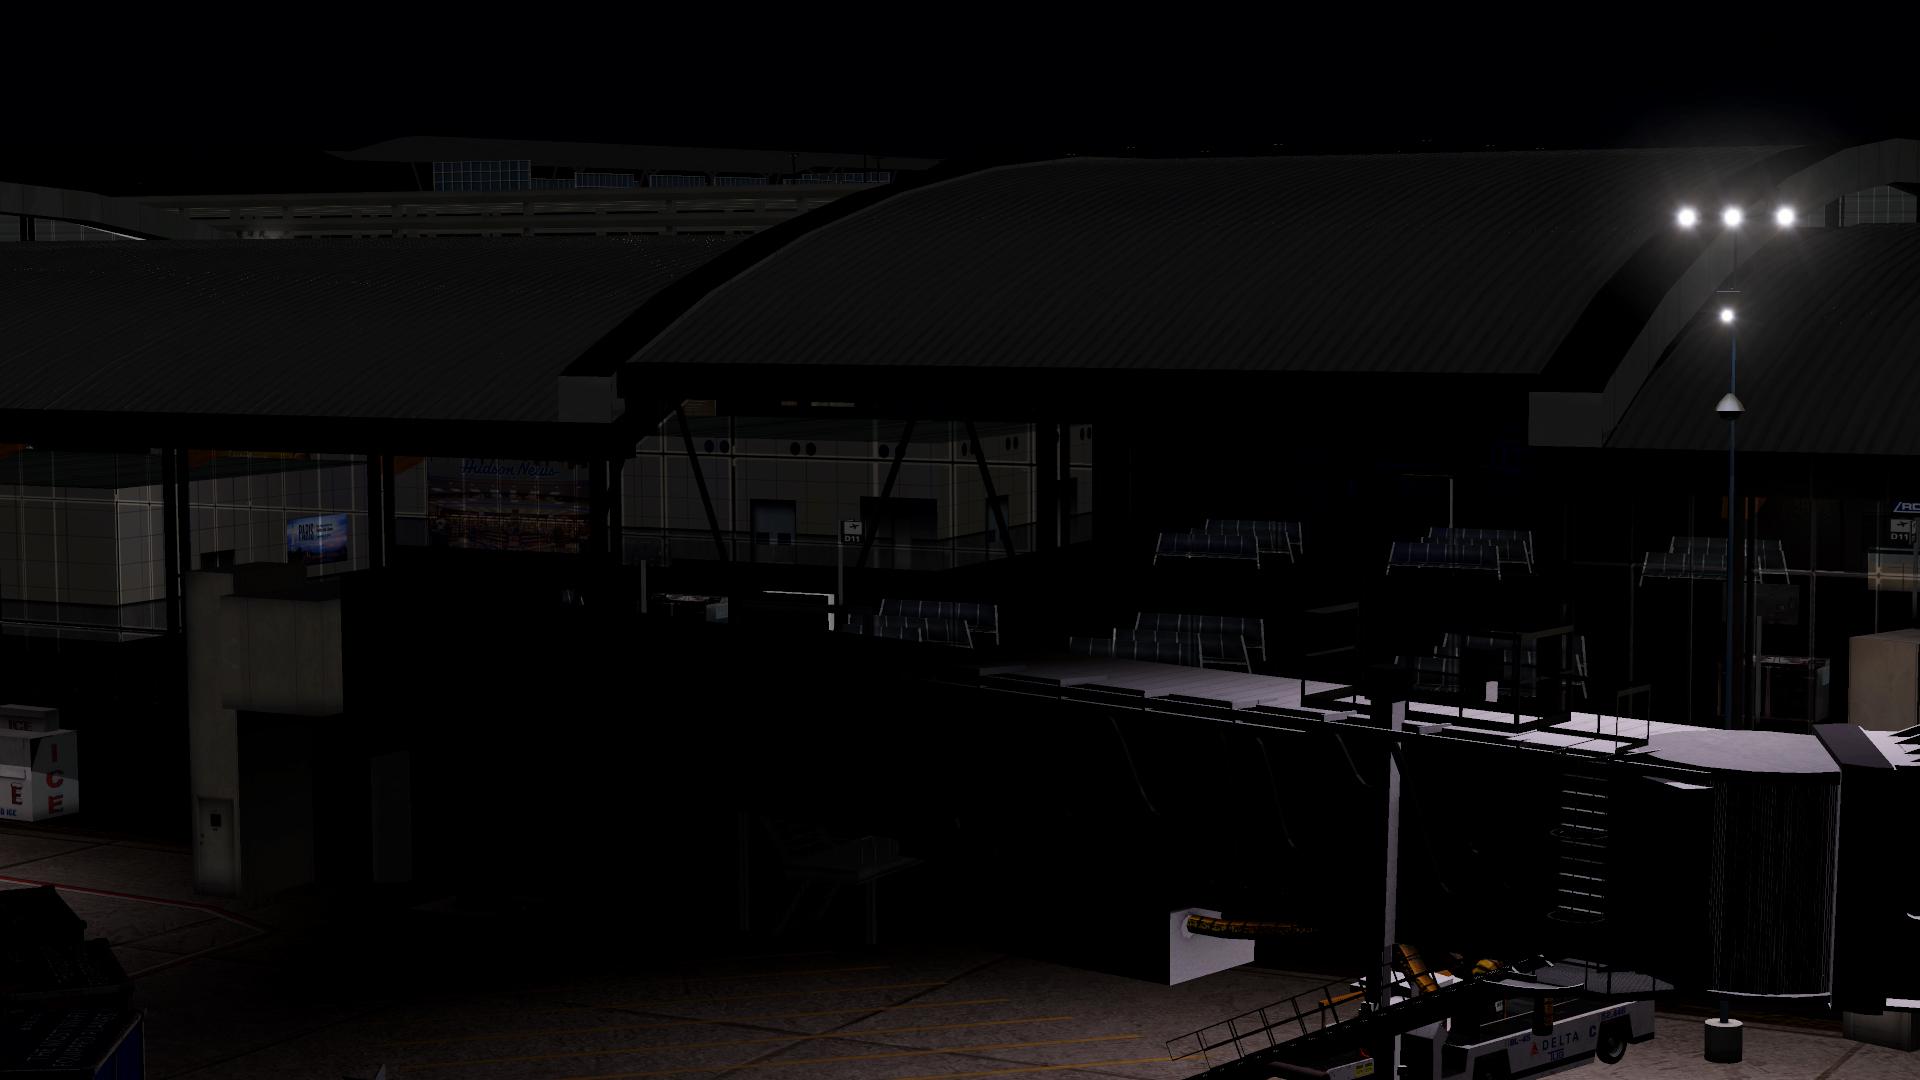
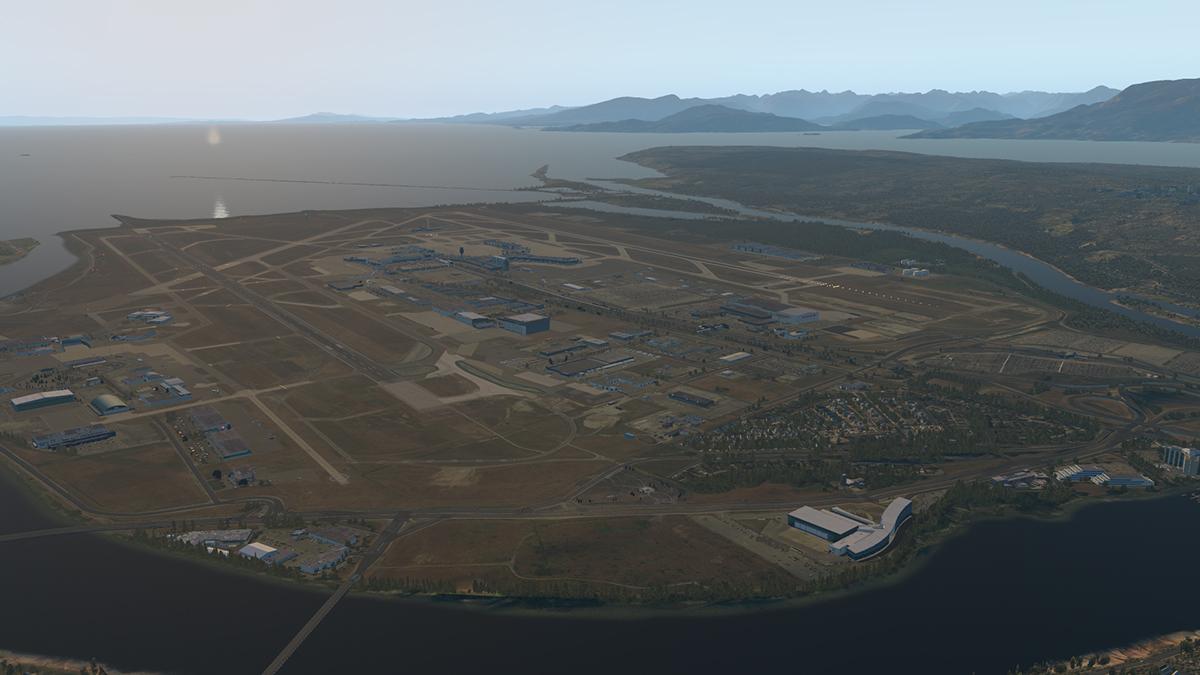
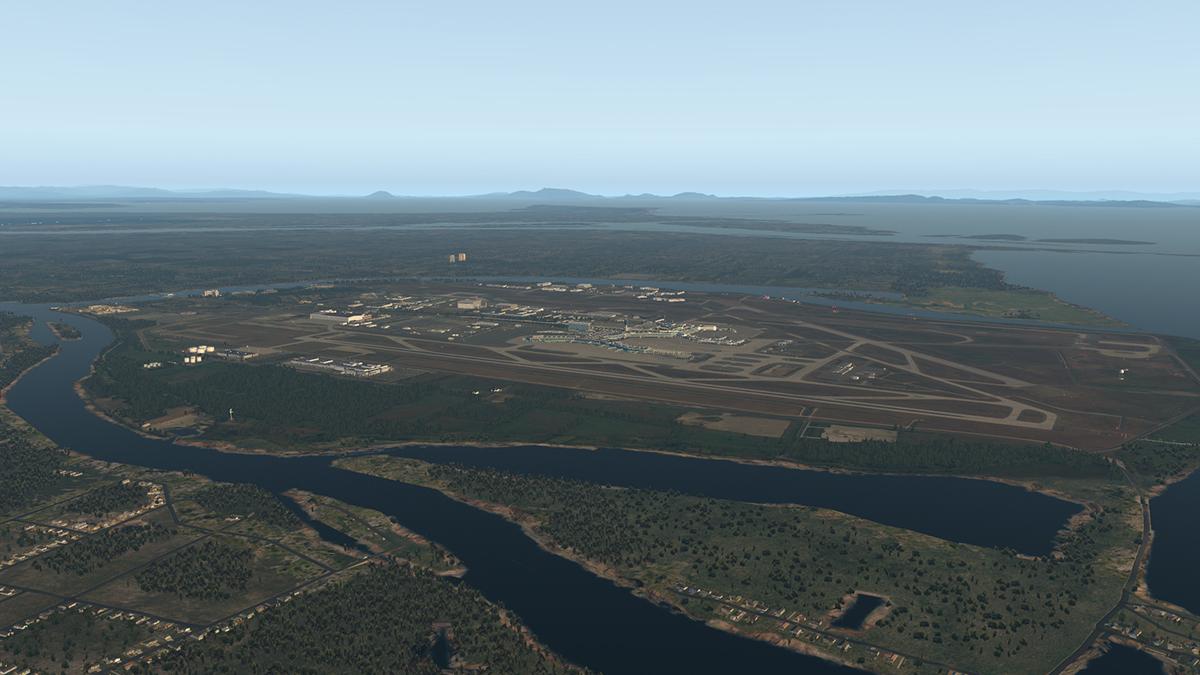
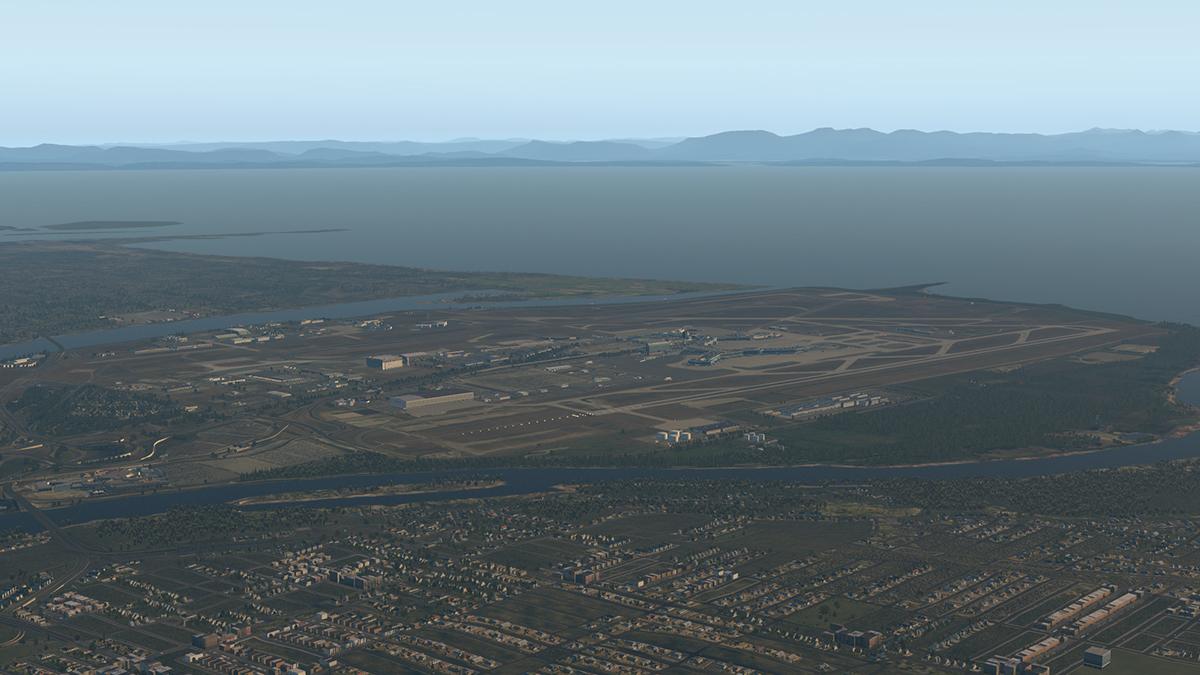
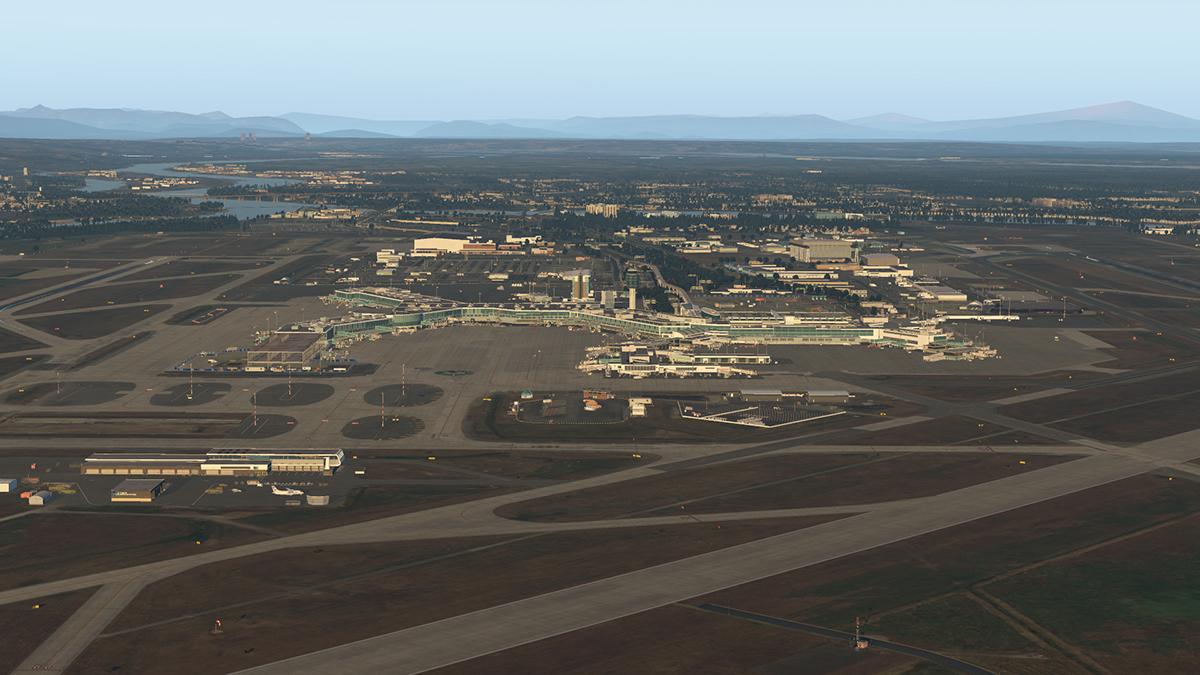
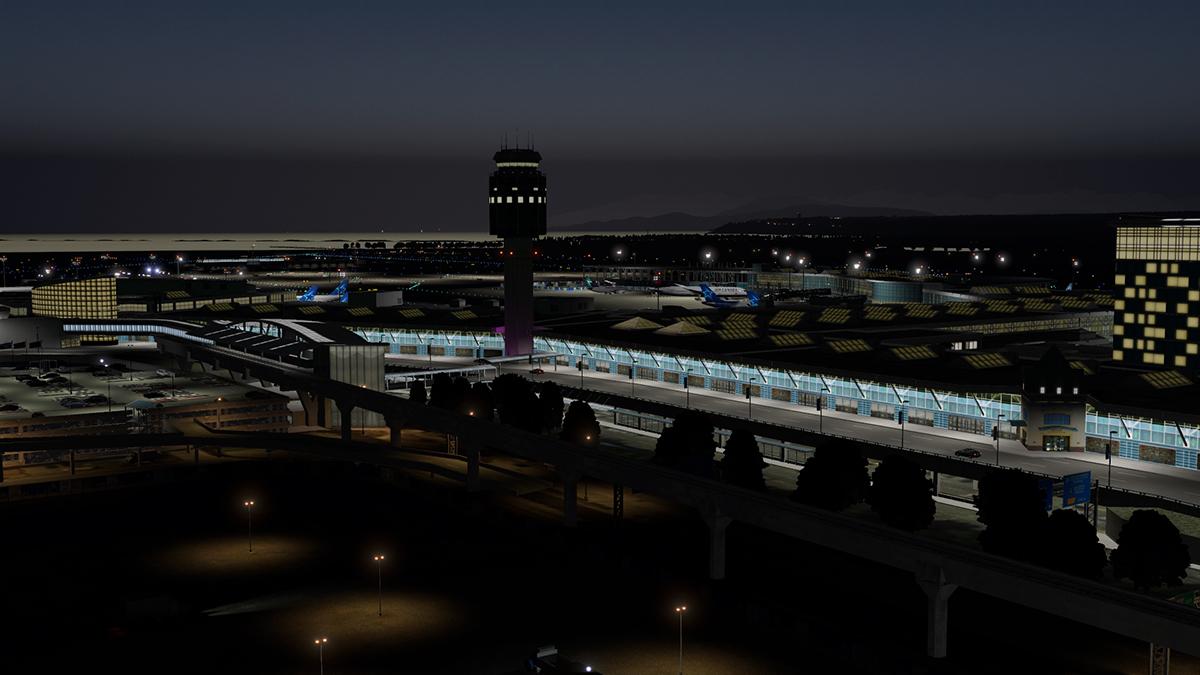
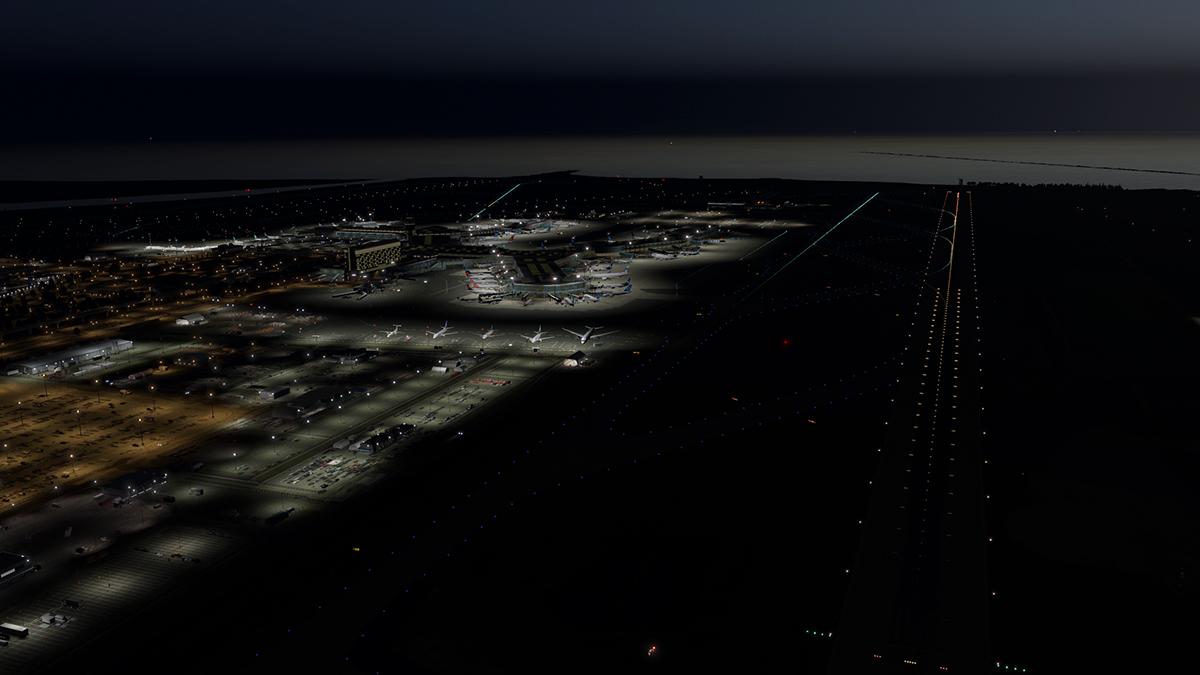
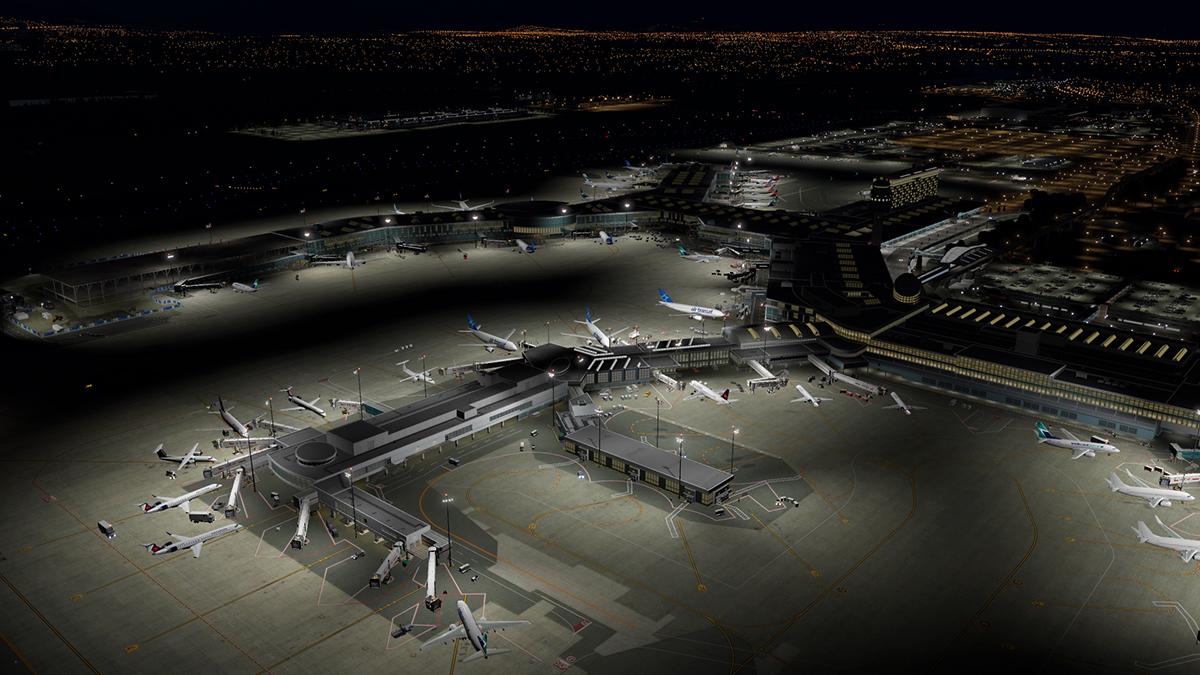
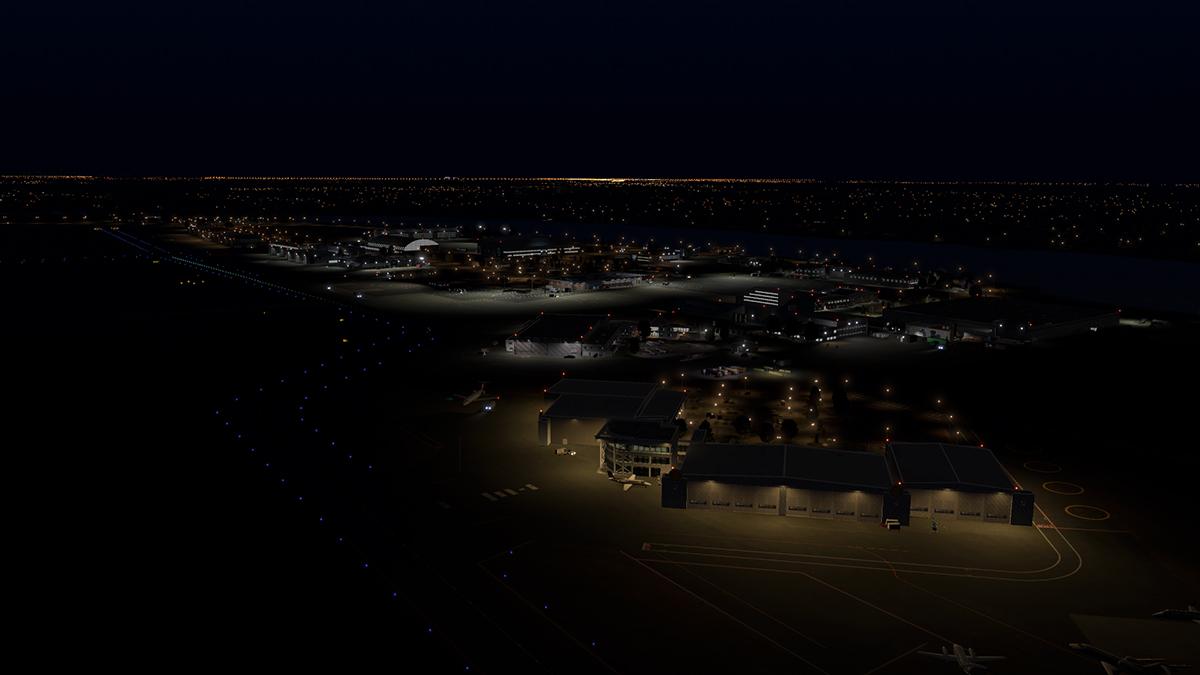
Scenery Review : KRDU - Raleigh-Durham International Airport by Departure Designs Located in the state of North Carolina, Raleigh-Durham International Airport is the 39th busiest airport in the U.S and the second in its state, just behind Charlotte Douglas International Airport. The airport started its operations with Eastern Airlines in May 1943, making flights to Miami and New York. Last year the airport had a passenger traffic superior to 14,200,000 (enplaned + deplaned) passengers. The airport has passenger city to 68 cities and an average of more than 450 flights daily. As you see by the title, the airport has international flights too, being London, Paris and Toronto the most popular international routes. X-Plane didn't have a payware version of the airport until mid-April, when Departure Designs released their KRDU scenery. In the last month, our friend Stephen wrote two reviews of Departure Designs airports, Fort-Lauderdale and Oakland. Both airports had their pros and cons, however, Departure Designs released a lot of products in a short time and this may have reduced the quality of them. Let's take a look at this replica of Raleigh-Durham Airport. Raleigh-Durham International Airport IATA: RDU - ICAO: KRDU 05L/23R 10,000ft (3,048m) Concrete 05R/23L 7,500ft (2,286m) Asphalt 14/32 3,570ft (1,088m) Asphalt Elevation AMSL: 435ft / 132m The first thing I've noticed after installing the scenery were the trees and orthophoto. Departure Designs made an incredible job adding more trees, which gives you the feeling of a real forest. They also nailed the orthophoto, high-quality color graded satellite imagery, that when combined with the nice trees results in an awesome airport surrounding area. Pretty nice to see these during an approach. The orthophoto quality is one of the best I've ever seen in X-Plane, showing almost every detail in the ground. The transitions between the runways/taxiways and the grass is pretty smooth and detailed. The most popular way to get in the airport is by car, and that makes sense because the airport between two Highways that connect the cities of Durham and Raleigh. The orthophoto is so good that Departure Designs didn't even have to use modeled roads. The pickups and dropoffs zones in both terminals, as well as the parking lots, are very nice. The designer seemed to have worked pretty hard in the parking lots, adding 3D cars, being careful with details and producing a nice 3D modeling. In my opinion, the only downside related to the roads is the lack of animated traffic, however you wouldn't notice it in most of your departures and landings. Even though Raleigh-Durham isn't a big airport, it consists of two terminals and three concourses, A, C, and D. You can navigate through the terminals using a shuttle bus or the moving walkway. Let's take a look at both terminals right now. Terminal 1 This terminal occupies the site of the airport's original terminal, which opened in 1955 and went trough many expansions. In 1982 the building received an expansion that would create a new terminal, which is known as the current terminal 1. The old part was demolished in 2016 due to expenses and lack of practical use. Nowadays, the Terminal 1 has 9 gates, named A1-A9. Until the end of March 2020, Southwest was the only airline operating in the terminal, using gates A5-A9, however, in April the gates A1-A4 were reactivated and are now operated by Frontier, Allegiant and Spirit Airlines. When compared to other payware airports, or even terminal 2, the modeling is very basic. But this isn't Departure Designs fault, the terminal is actually a pretty good replica of the real one. Instead of having glass and a modeled interior like Terminal 2, this terminal has solid windows. At least the textures are quite nice and those columns between the windows give a nice perspective depending on the angle you look at them. Even though the building is quite basic, Departure Designs inserted some nice details in things like the ground handling vehicles. Pretty nice to see them with the Southwest painting or Spirit and Frontier colors, and the fact that the vehicles are parked around the correct gates is nice too. Terminal 2 The terminal occupies the site of the old Terminal C, which was built between 1985 and 1987 and served as an American Airlines hub. In 2003 announced plans to expand and renovate the terminal, however in 2006 it was completely rebuilt. Designed under the philosophy of contextual regionalism, related to Critical regionalism, the terminal is divided into two concourses, C and D, and has 36 gates, which 4 can accommodate the huge 747. I may say that Departure Designs made a overall good job in T2, even though it has some quite strange problems. The 3D modeling is pretty nice, it isn't incredible but doesn't seem to have any problem. The glass is a problem in T2. The addition of a 3D modeled interior requires glass, which can give an airport insane visuals or ruin it. We saw that glass was quite a problem in KFLL by Departure Designs, and sadly this KRDU also has problems with it. Note that I tested many graphic settings and none of them solved the problem. It is quite hard to exactly describe the problem, which appears to be related to reflections and textures. While looking from outside you will notice that the interior textures seem to disappear, resulting in all silver objects and some strange blue and light green colors. Sometimes, depending on the angle you look at the interior, the colors change, resulting in a very weird effect. The reflections are quite strange sometimes. Just like KFLL, when you are looking from inside the terminal it appears to have no glass. The interior is very basic, but at least the textures are nice. All jet bridges, in both T1 and T2, are equipped with SAM - Scenery Animation Manager. They are really nice, however, due to the fact that many jetways are to close from each other, it's recommended to connect the jet bridges manually. If it wasn't by the problems related to the glass, this would be a very nice terminal. It has some good features like 3D modeling, textures and attention to detail. It would be nice if Departure Designs fixed that problem, but I believe that it won't be easy to solve it. Cargo Raleigh-Durham airport has two cargo areas, South and North. The North cargo area is used by cargo airlines, being the largest cargo operator FedEx and UPS. The South cargo area is used by commercial airlines with cargo operations. General Aviation The airport has a quite big general aviation area, with some hangars and other facilities. Some of the hangars have their doors open, this means that you can park your aircraft inside them. Right next to the general aviation terminal is located the control tower. It's pretty simple, but at least it doesn't have any kind of problem. Military Raleigh-Durham Airport has a military facility located right next to the runway 32. There you will see some hangars and some other facilities. Sadly some of the buildings are under the ground, so I expect Departure Designs to fix that. Pretty interesting to see an easter egg in this scenery, which is the S.H.I.E.L.D jet, from the Avengers movie. I know that some people may not like things like that in a simulator, however, you won't even notice it unless you start searching for it. Ground Textures Just like most part of the orthos, the ground textures in KRDU are very good. If you closer to the ground, you will notice that the textures have a really high-resolution. It's pretty nice to see so many details in the ground. Even though the airport doesn't have 3D grass, the combination of the extremely good ground texture, high-density trees and awesome orthophotos results in a fabulous landscape around the airport. It's important to note that the airport comes with a custom mesh that will show you all the nice elevation changes. Another pretty nice quality related to the ground is the reflections, which make the airport way more beautiful, especially during the sunset and sunrise. The reflections impressed me in a very good way. Lighting The lighting in KRDU is pretty average, and needs to be improved in some ways. When it isn't really dark yet, the lights are nice, however, when it gets darker the lights seem insufficient. The main parking lot seems very nice when illuminated. As I said earlier, the lights seem to be insufficient when it's pretty dark, especially when you are away from T1 or T2. Apparently, the only good thing related to the night time in this airport is the interior modeling from the Terminal 2. I don't what is happening there, but at night the glass is fine and the interior doesn't have those textures problems I've shown you earlier. Even though, the internal lighting is pretty bad. --------------------------------------------------------------- Summary Raleigh-Durham International Airport by Departure Designs is an interesting scenery for X-Plane 11, offering many good features as well as having some problems. Generally, we can assume that this is a good airport that needed more love from the designer. Both T1 and T2 overall modeling are nice and even though they aren't outstanding, you won't be disappointed with them. Probably the only problem related to the terminals is that strange glass in Terminal 1, which appears to have issues with reflections, causing problems in the indoor textures and modeling. As I said earlier the ground textures are pretty good, with reflection, many details and high-resolution textures. The only downside related to the ground textures is the absence of wet textures for the taxiways and runways, which would give the airport a very nice visual while raining. The orthophoto is another good feature of the airport, with very high-resolution and colors that match the airport region really well. Those are probably one of the best features offered by this replica of KRDU by Departure Designs. The designer seems to have some difficulties with lighting, sometimes it seems insufficient. During the KFLL review, Stephen showed us that lighting wasn't very good there either. These little problems are the reason for KRDU not being a top tier airport for X-Plane, and they could be solved by paying a little more attention to details. As I said in the very first beginning of the review, Departure Designs released three airports in a short period, and that could have affected the quality of the products. After writing the review and analyzing the airport I could conclude that my affirmation was true, all the problems in the 3 airports could have been fixed with a little more time. KRDU is a beautiful airport and even though it has some problems, I liked it. I know that it isn't easy to make an airport, but if this scenery received a little bit more of love, it would be perfect. --------------------------------------------------------------------------------------------------- The KRDU Raleigh Durham by Departure Designs is available at the X-Plane.Org Store KRDU Raleigh Durham Price is US$23.99 Features: Heavily optimized Airport PBR Textures throughout Airport SAM Seasons Highly detailed Custom Animated SAM Jetways Custom WT3 support Custom Night Lighting color graded Satellite Imagery High Resolution 4K Textures Terminal layout circa Q2 2020 Custom Mesh seamless with VStates North Carolina Ortho4XP Patch included Requirements: X-Plane 11 Windows, Mac or Linux 4GB VRAM Minimim - 8GB+ VRAM Recommended Current version: 1.0 (April 16th 2020) Download size: 3.5 GB Installation: Download scenery file size is 3.18GB Three folders are included+One manual Dep_KRDU - Raleigh Durham Dep_yRDU_Overlay Dep_zRDU_Mesh Final scenery size is 6,76GB, quite big. SAM plugin - Scenery Animation Manager - suite 1.2 is required for this scenery Documents One manual is included with the scenery package ->RDU Manual ---------------------------------------------------------------------------------------------------- Scenery Review by Benardo Pierdoná Casa 06th June 2020 Copyright©2020 : X-Plane Reviews Review System Specifications: Computer System: Intel Core I5-9600K 4,30GHz / 2x8 Corsair Vengeance RGB Pro 3200MHz - Gigabyte RTX 2070 - Z390 Aorus Master - Kingston A1000M.2 SSD 240GB Software: - Windows 10 - X-Plane 11.41 Addons: Logitech Pro Flight Yoke/Pedals/Throttle Quadrant - Logitech Extreme 3d Pro Joystick - Sound: Samsung Home Theater System J5500WK Plugins: Environment Engine v1.13 by xEnviro US$69,90 Traffic: Traffic Global by JustFlight US$52.99 Ground textures: ALES US$15.99 Scenery or Aircraft Boeing 737-800 by Zibo (X-Plane.Org)free Default Baron B58 by Laminar Research (Disclaimer. All images and text in this review are the work and property of X-PlaneReviews, no sharing or copy of the content is allowed without consent from the author as per copyright conditions)
-
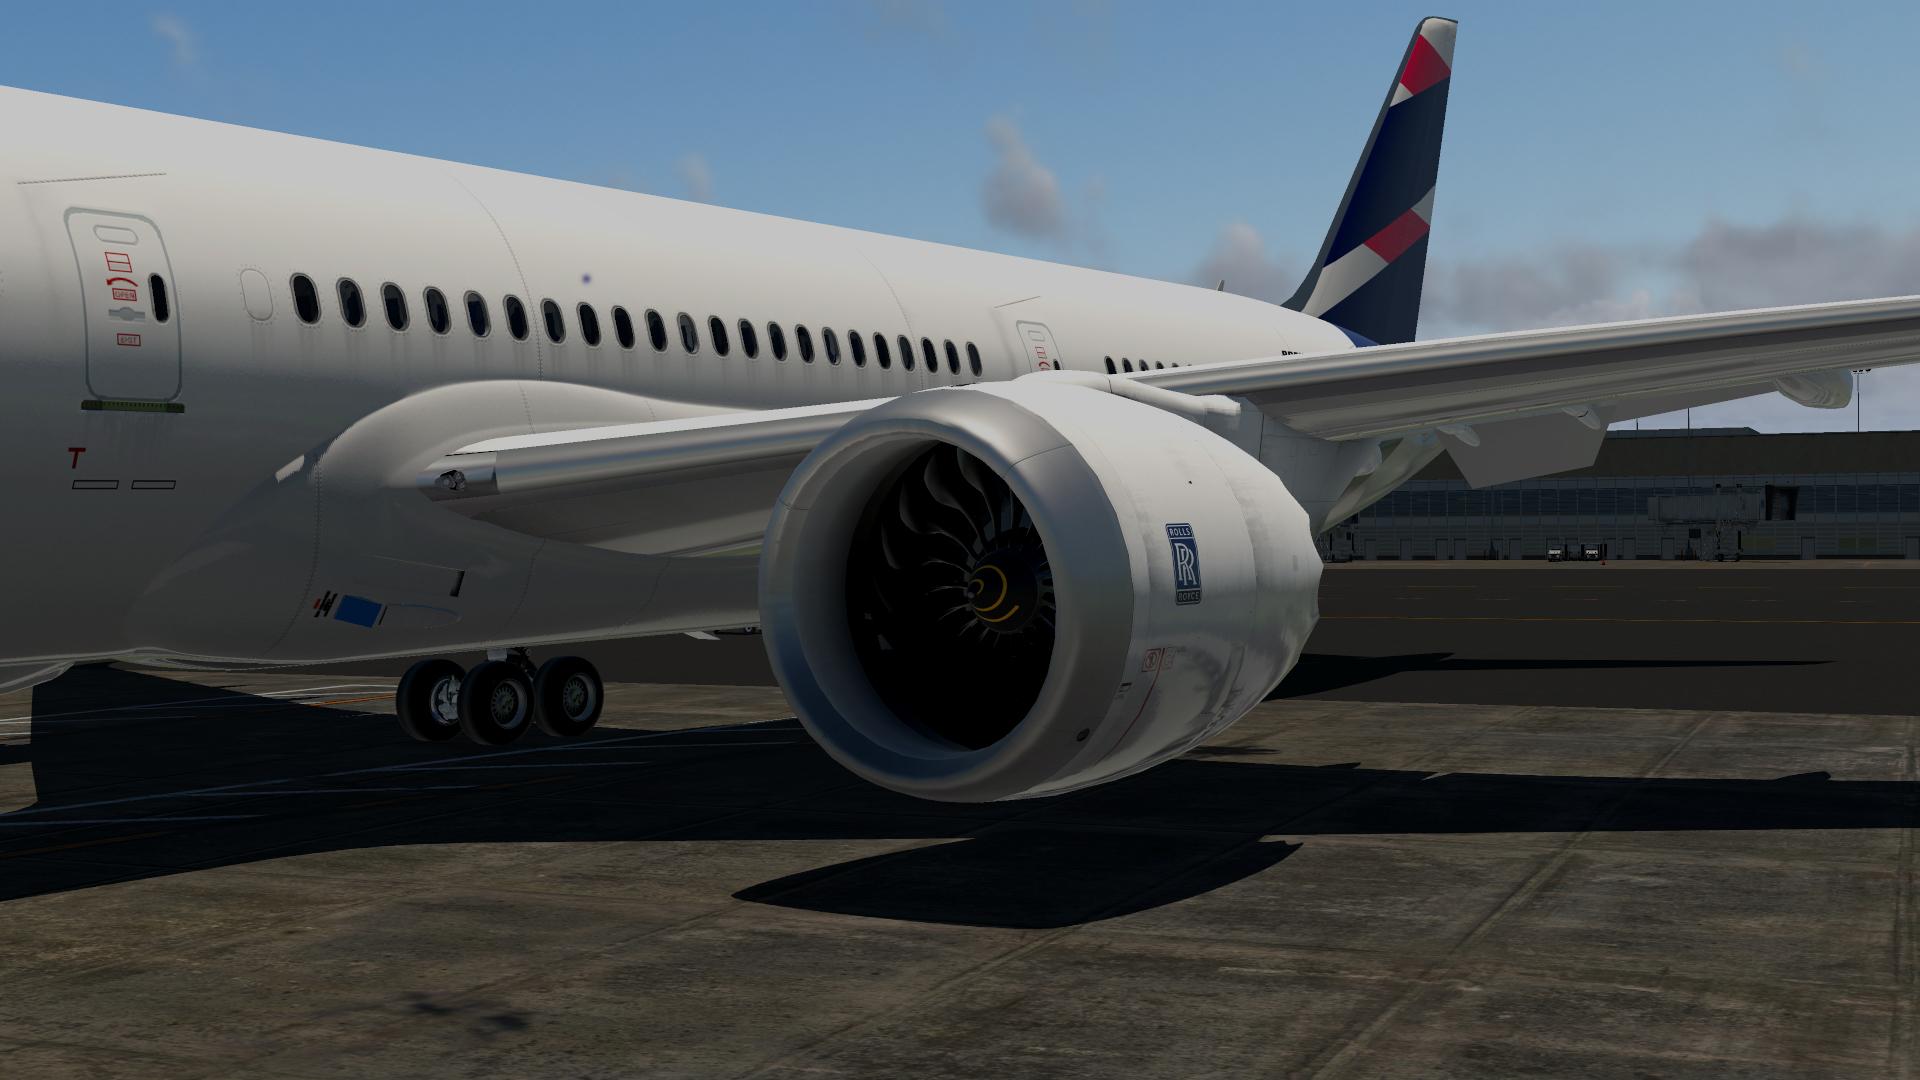
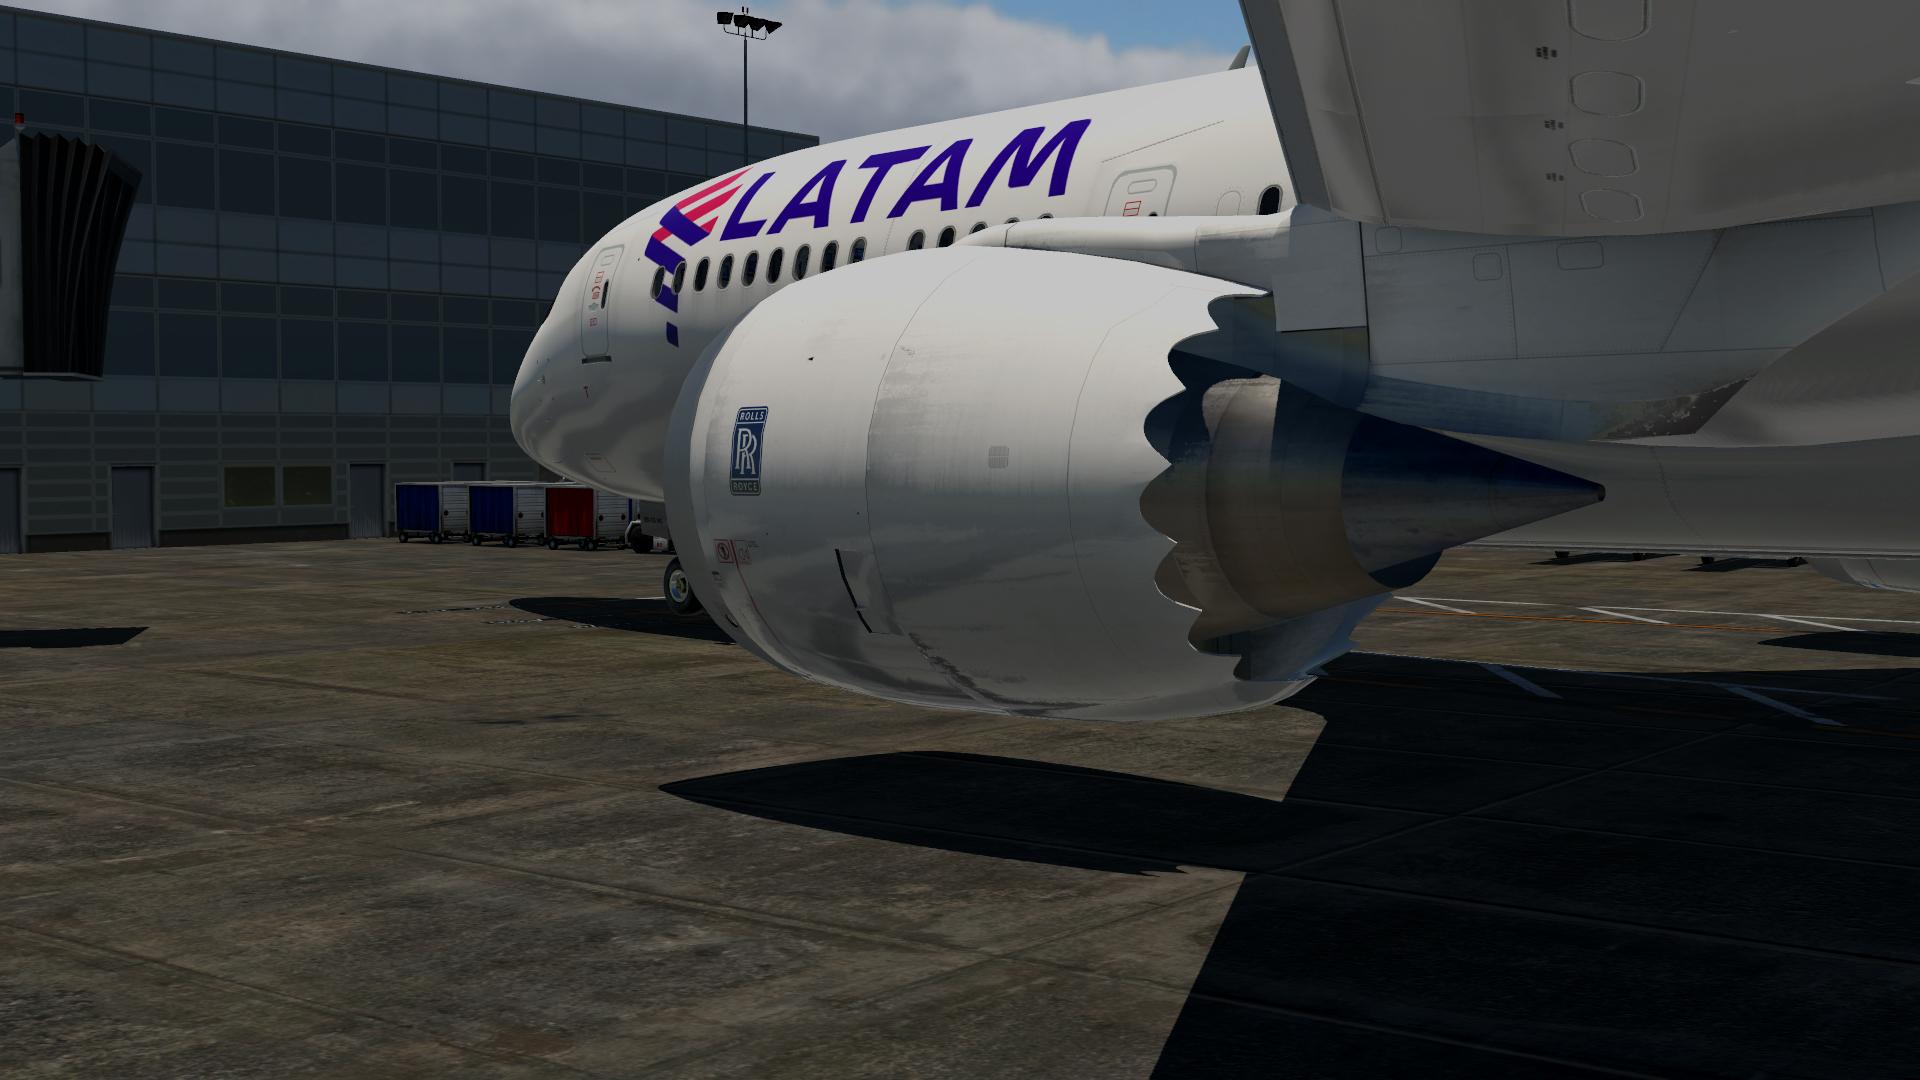
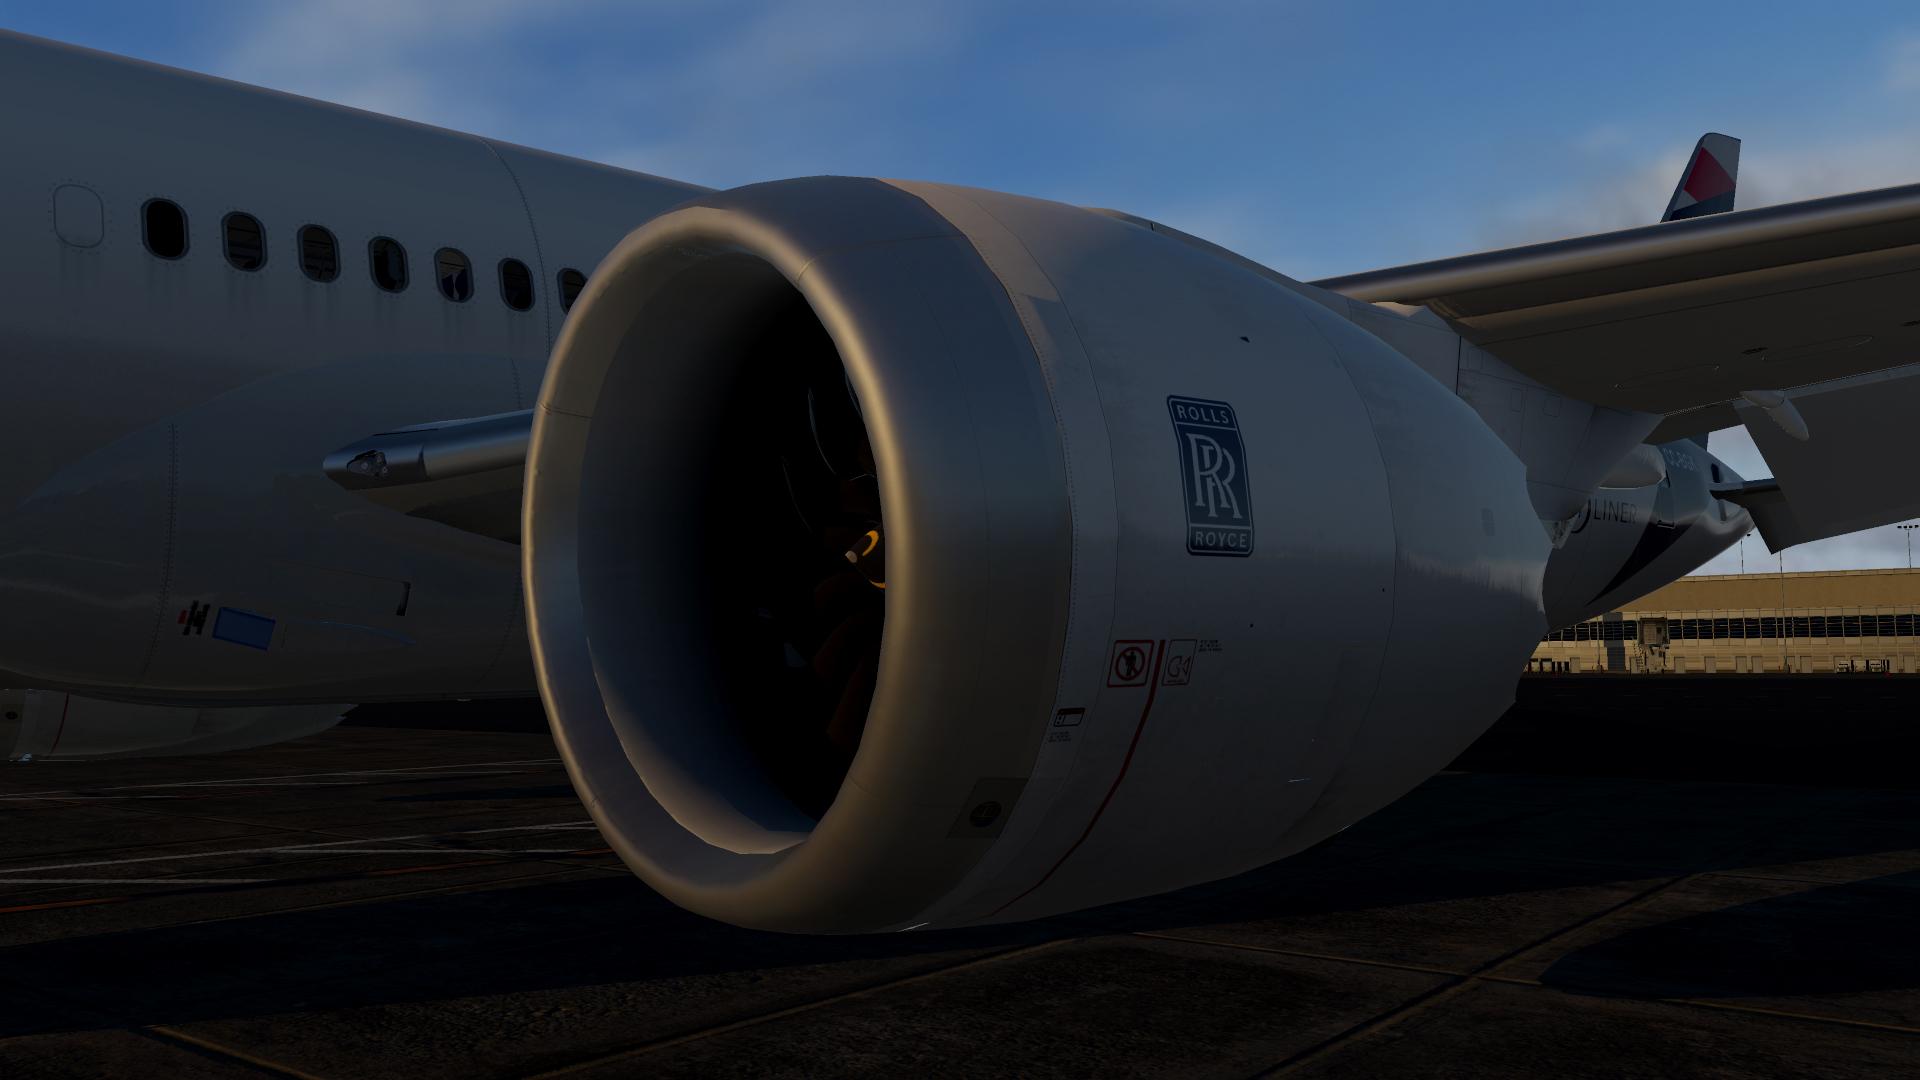
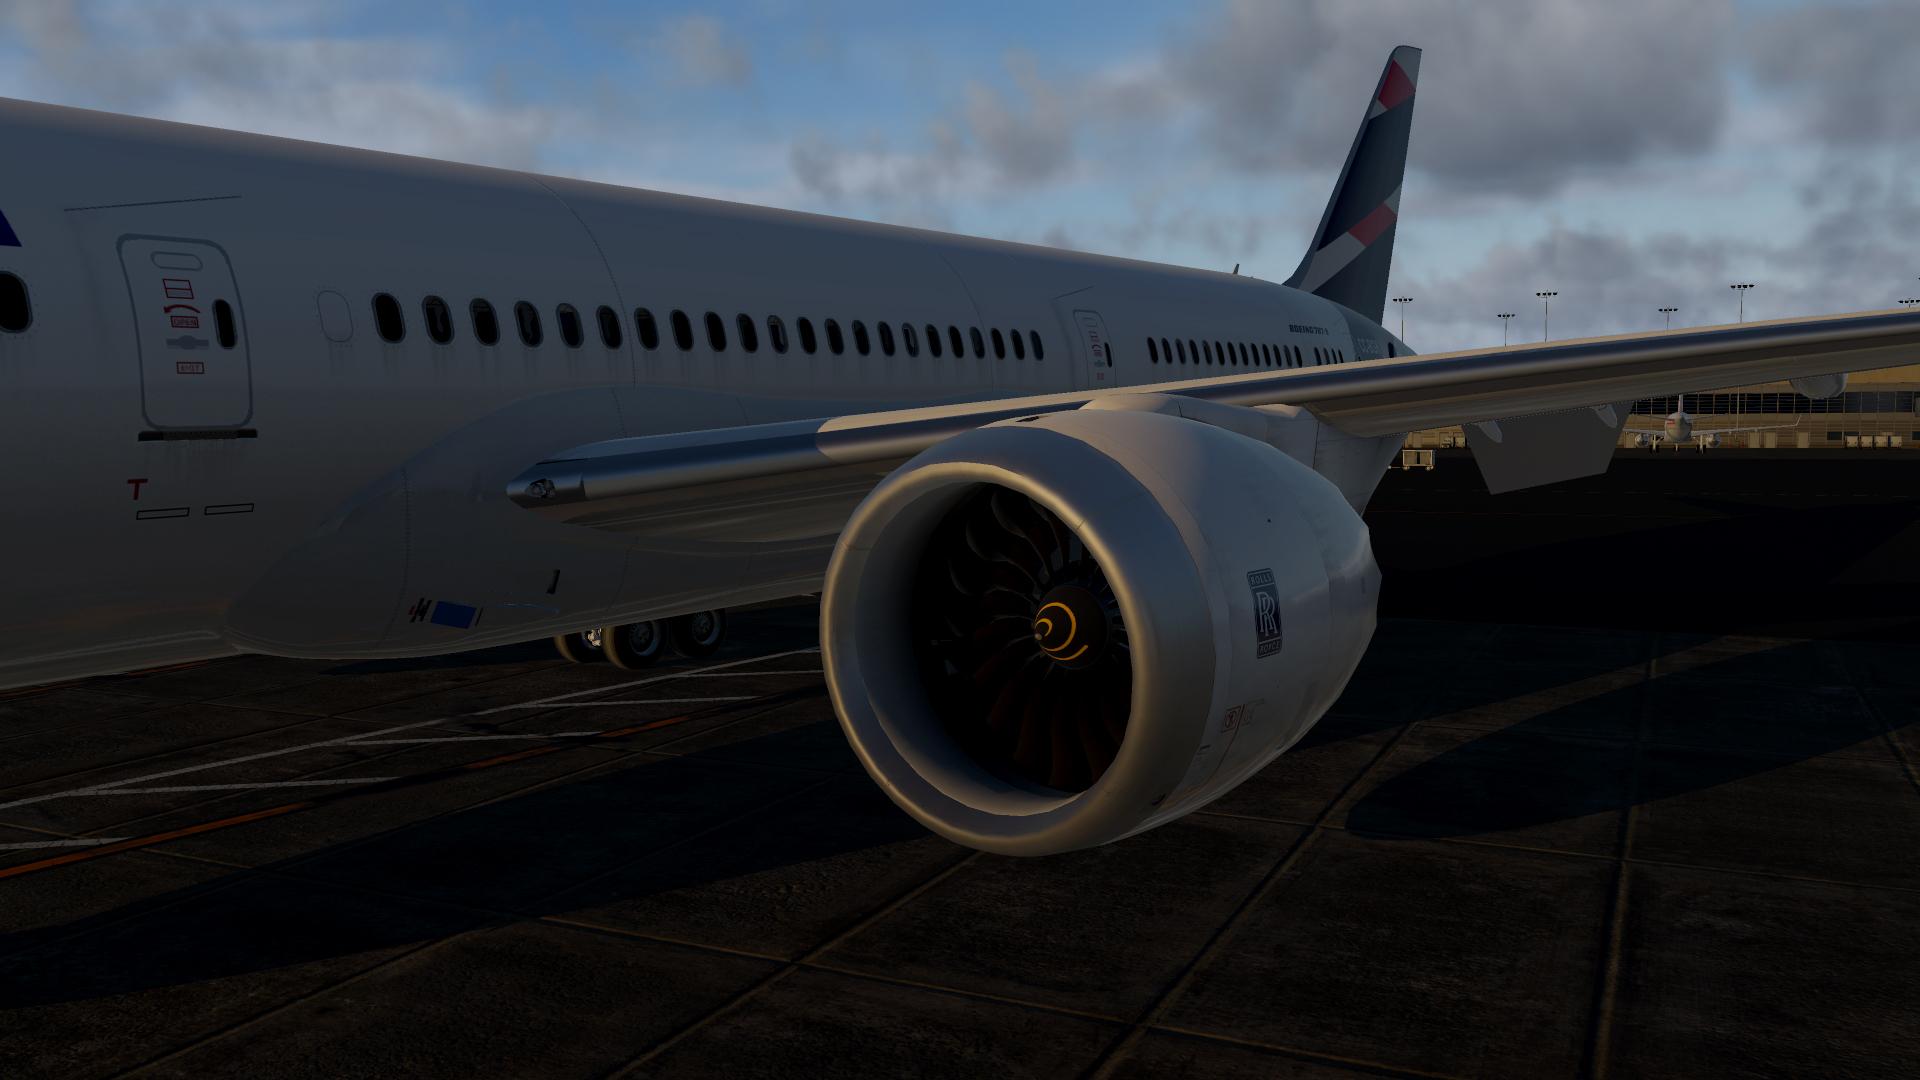
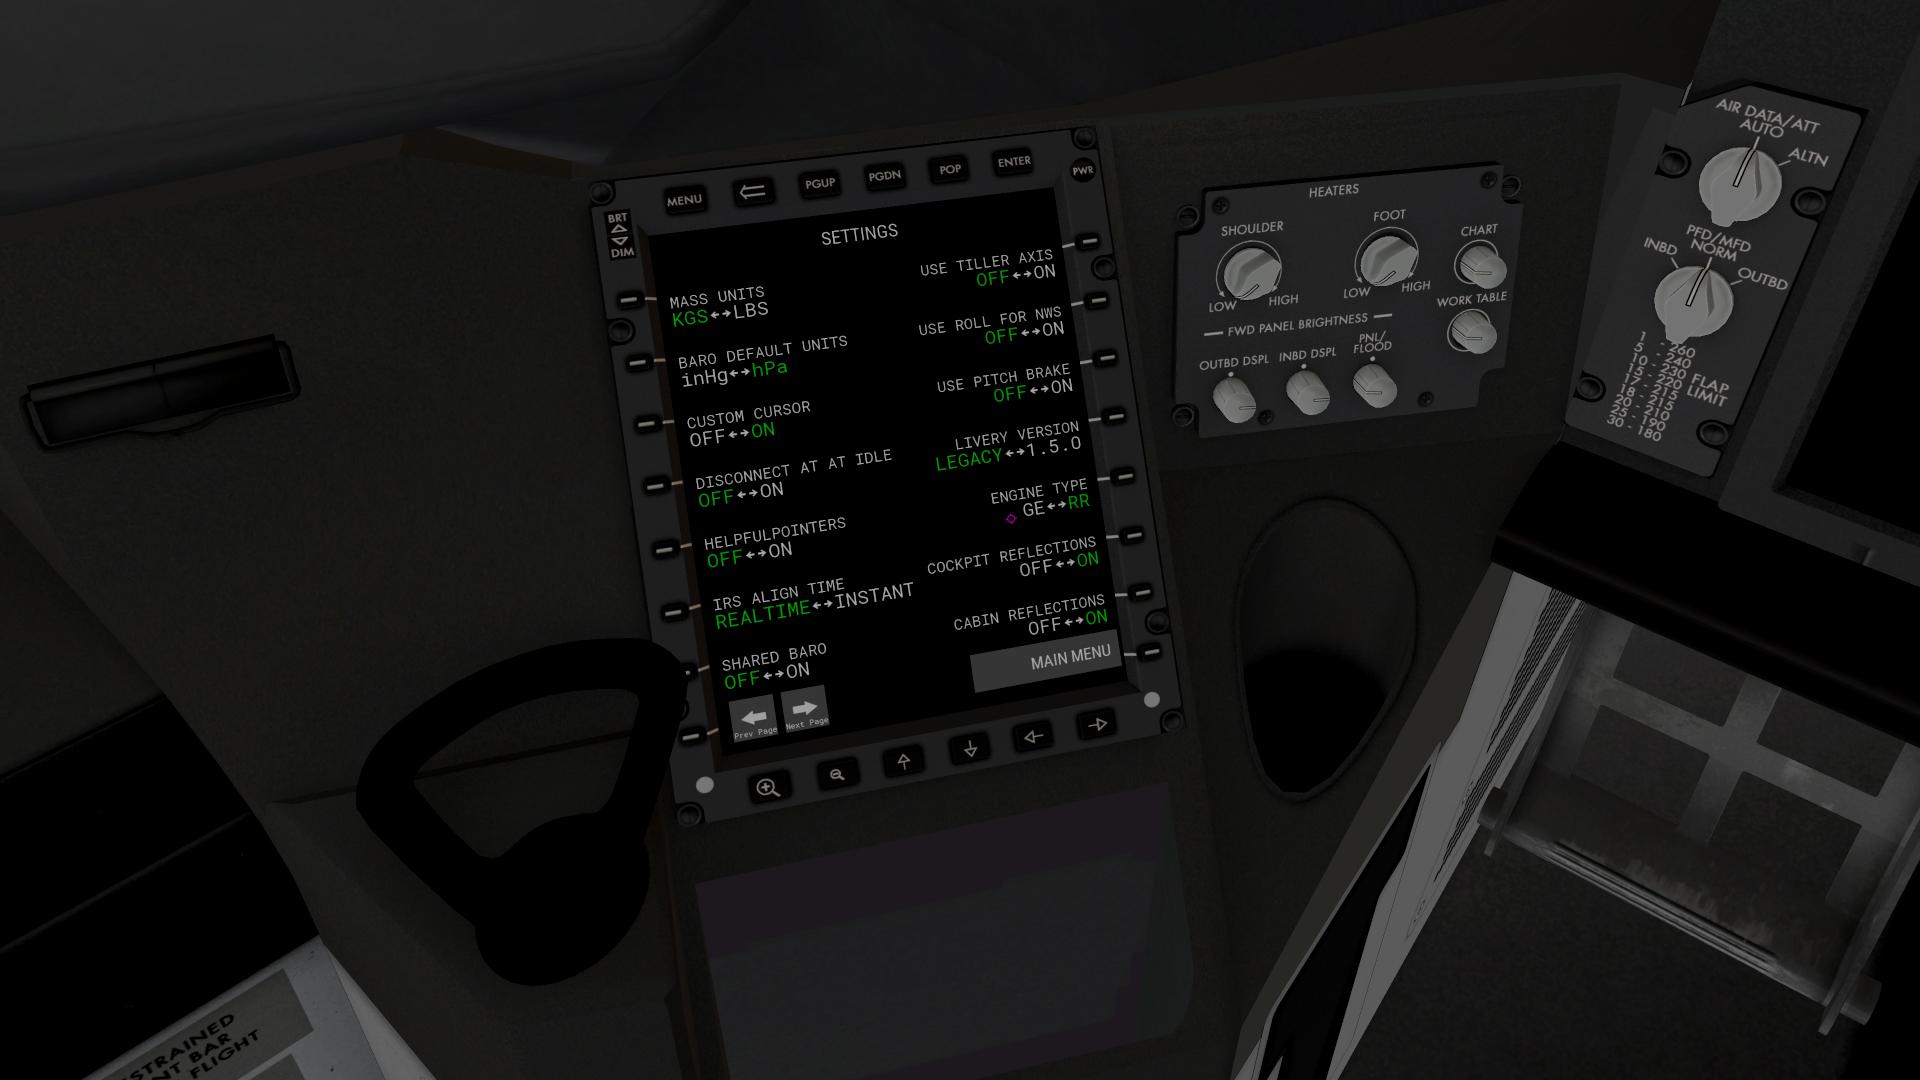
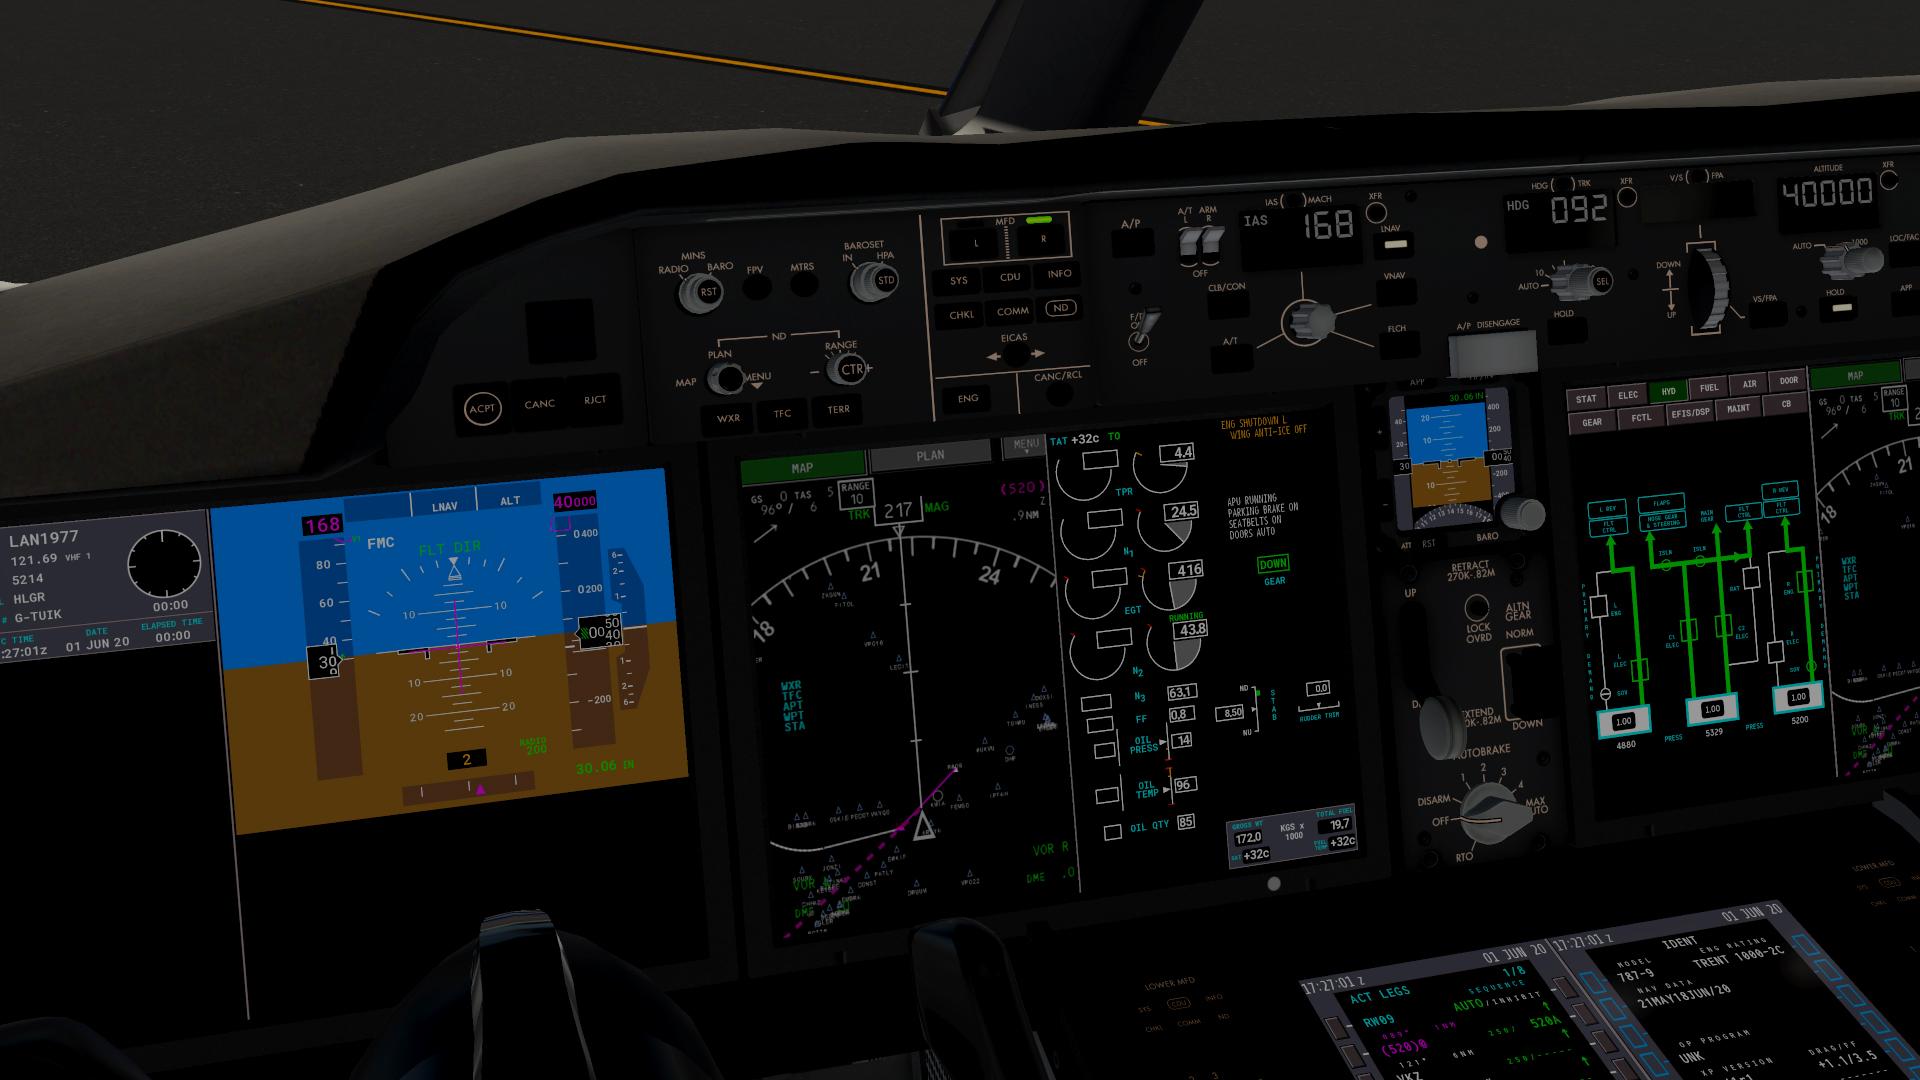
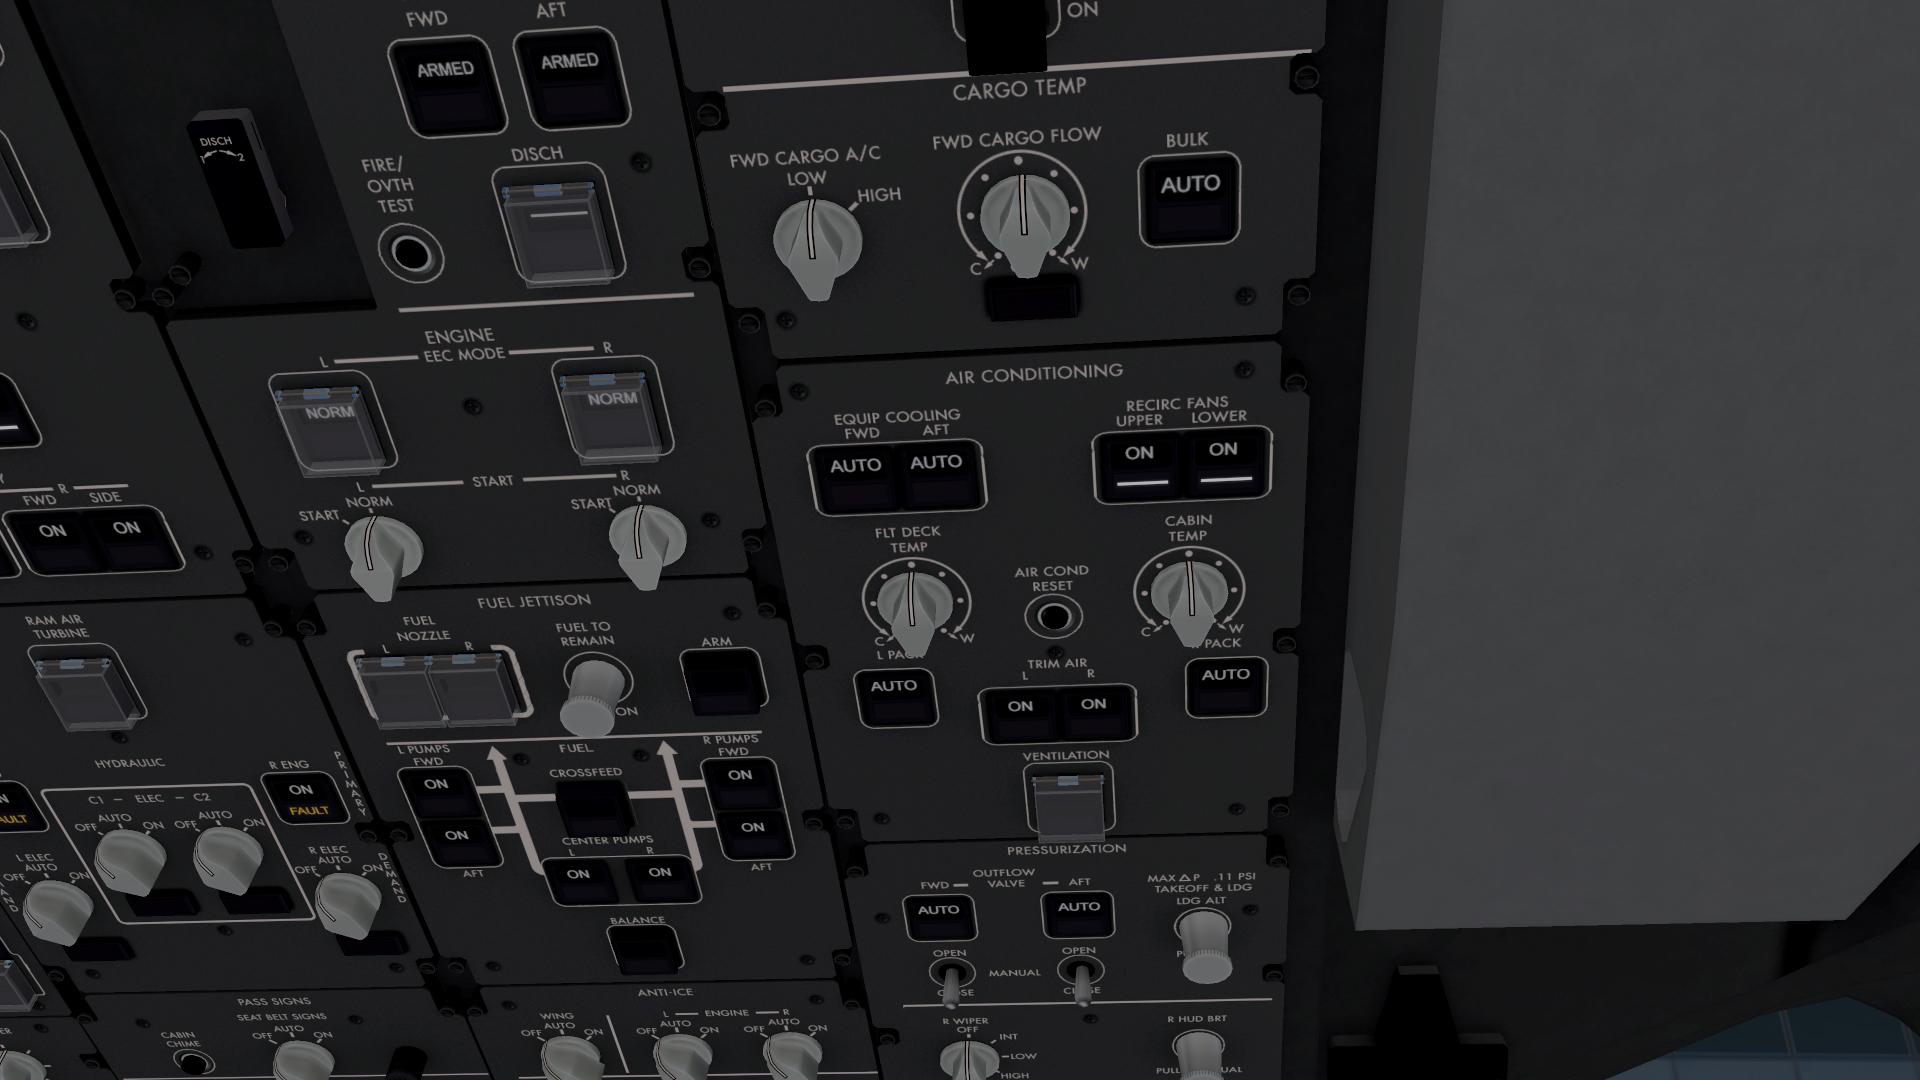
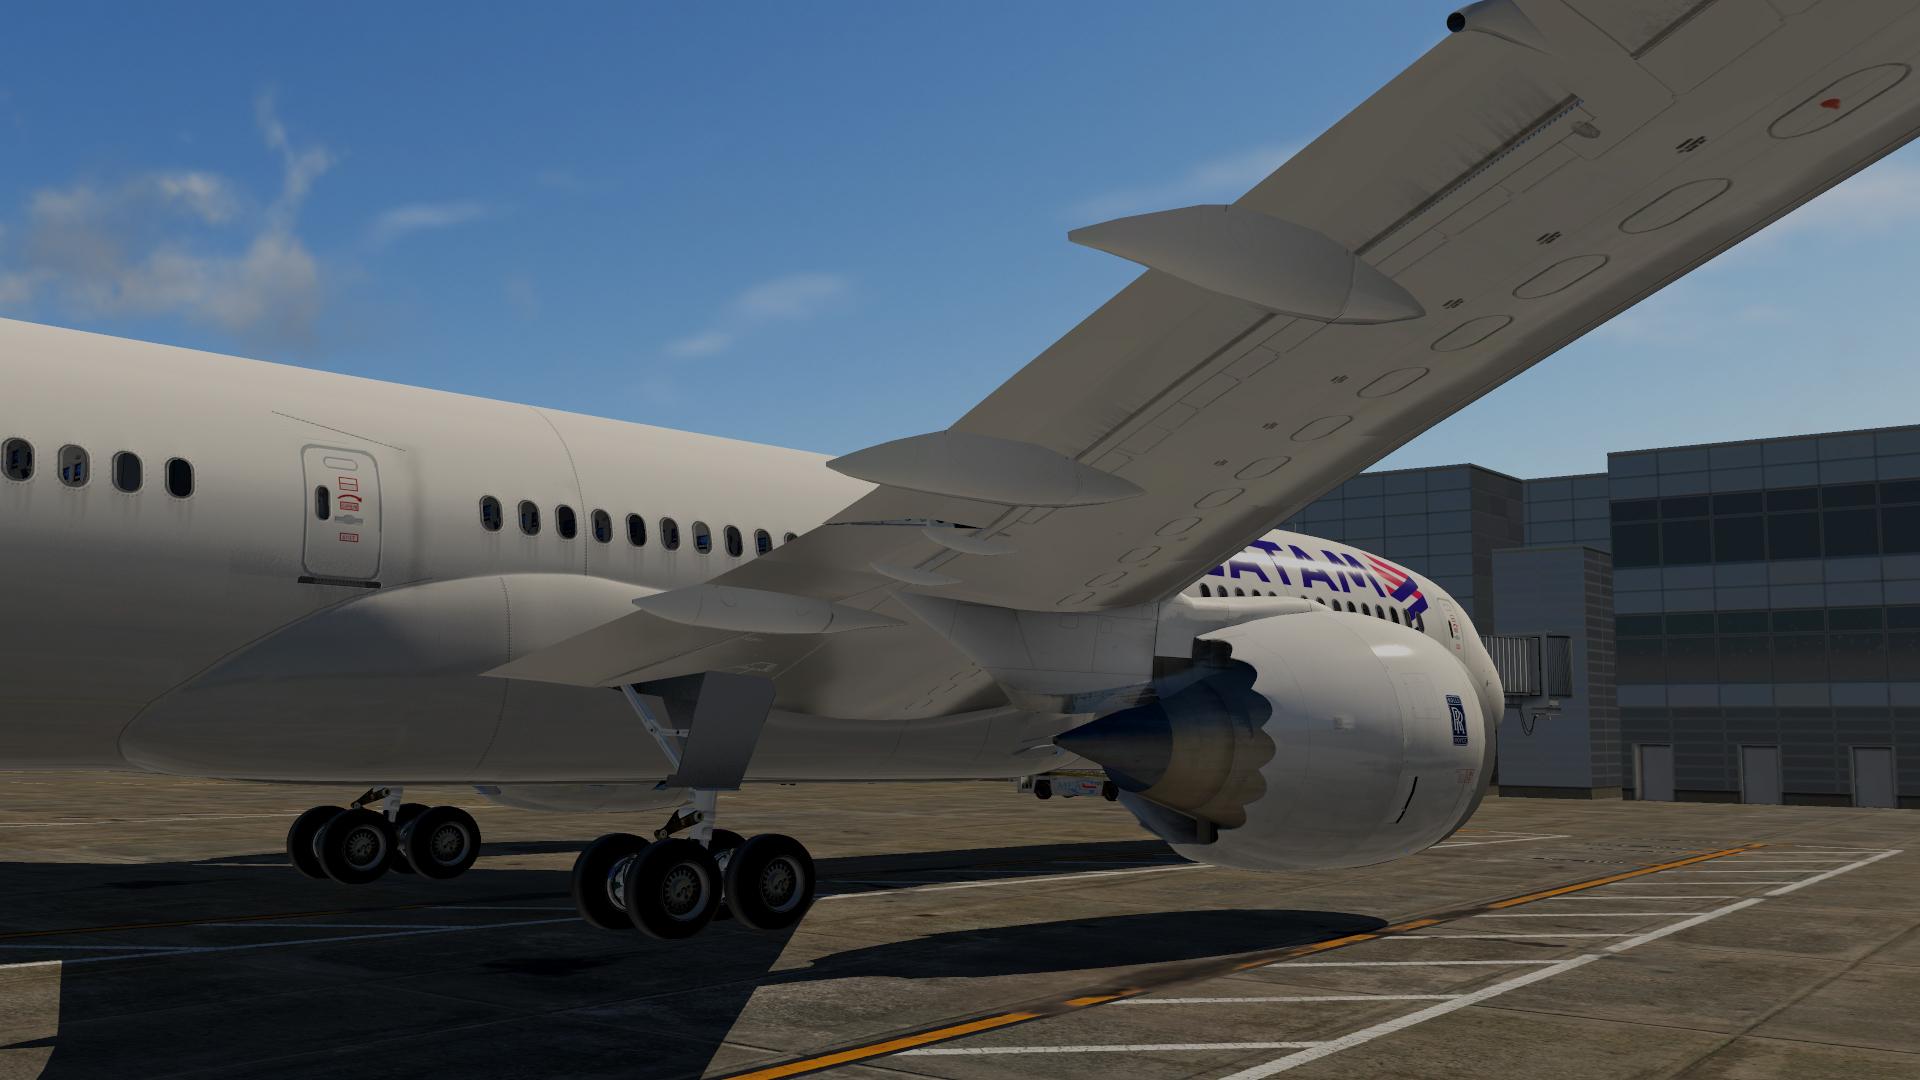
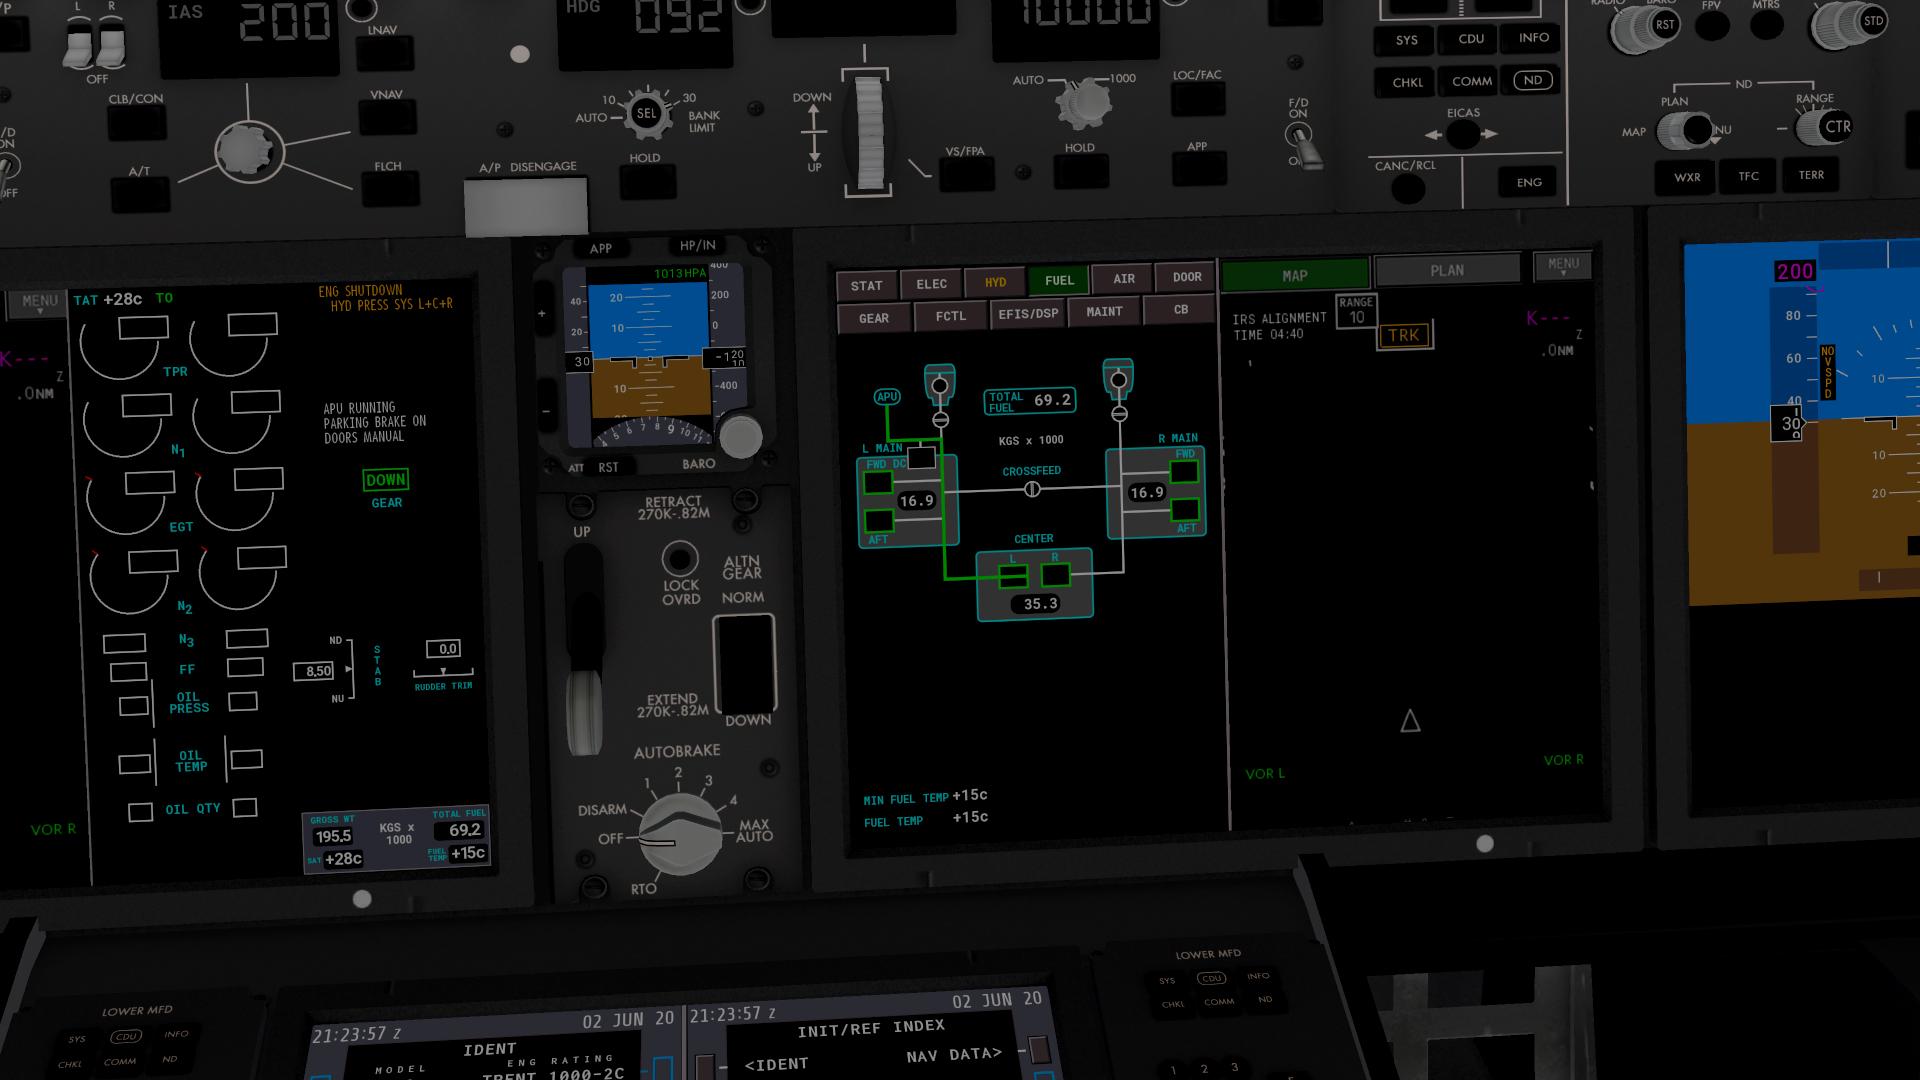
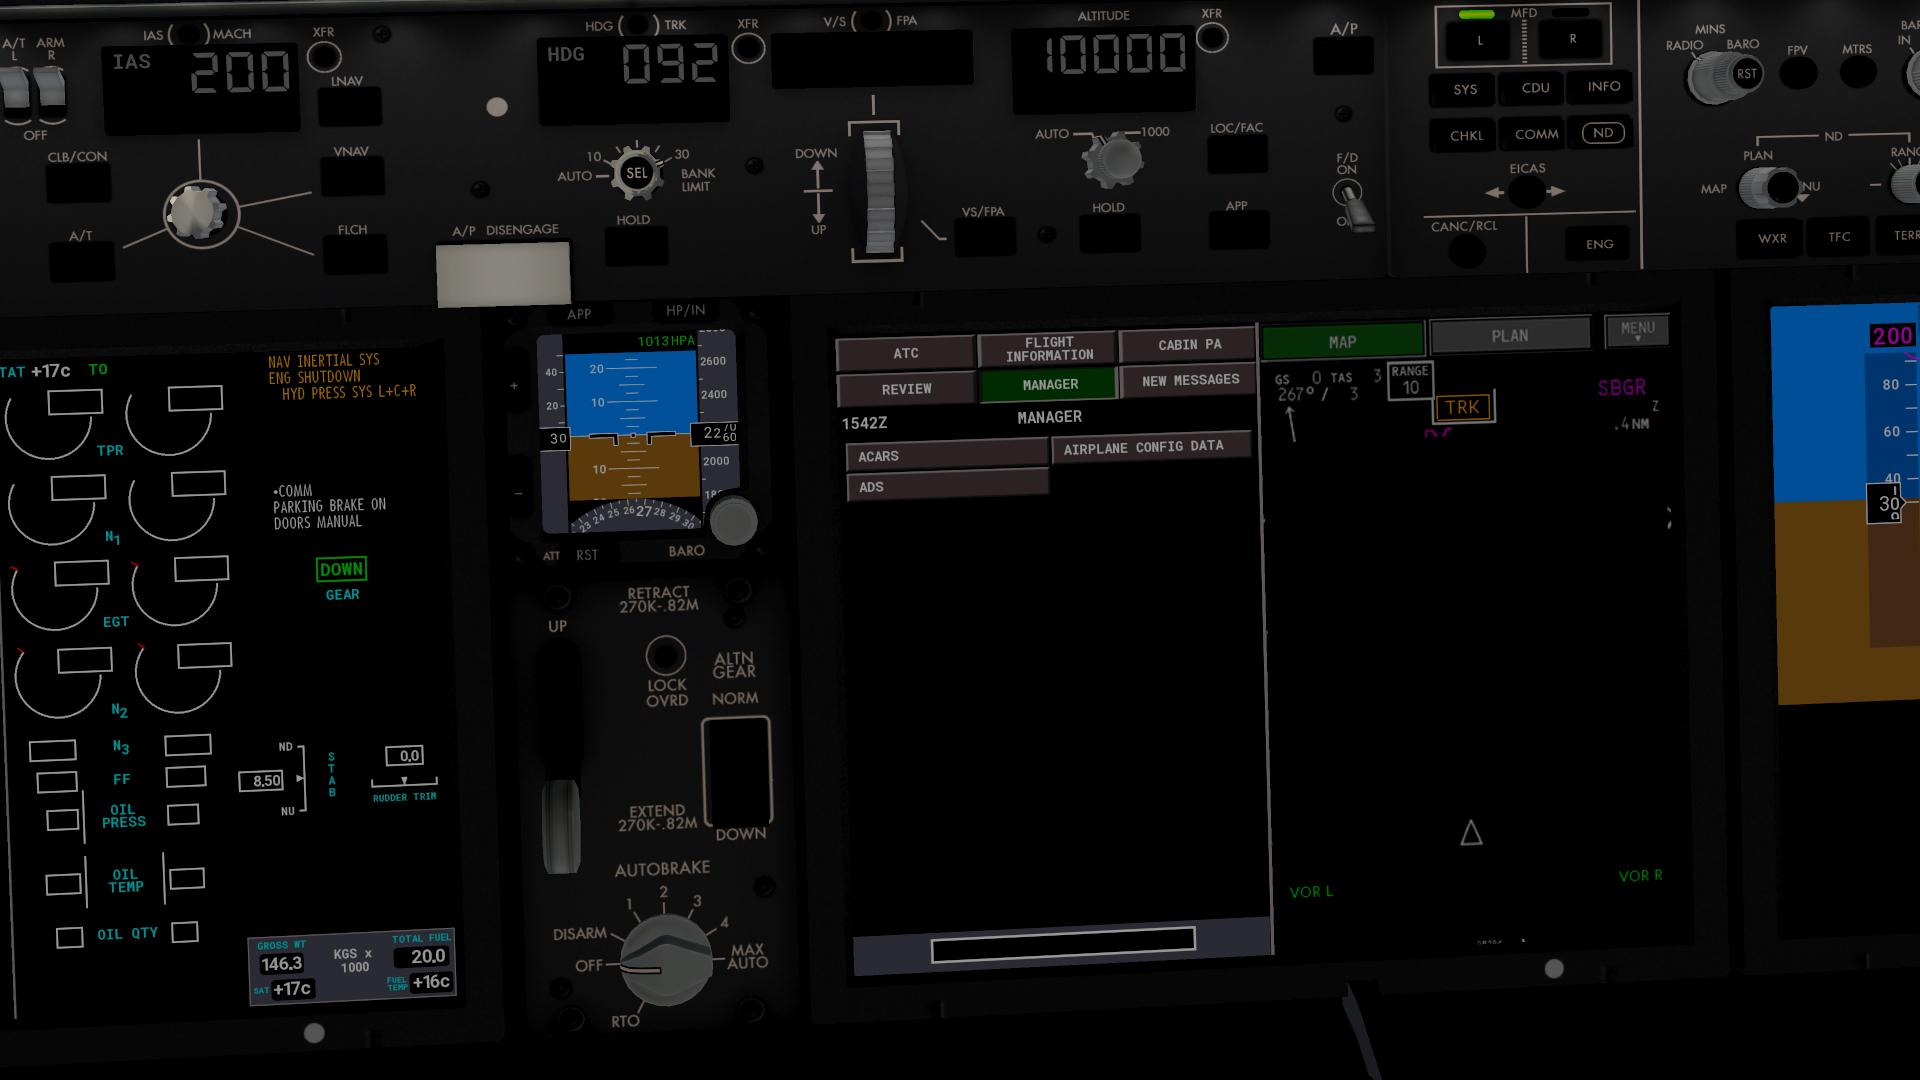
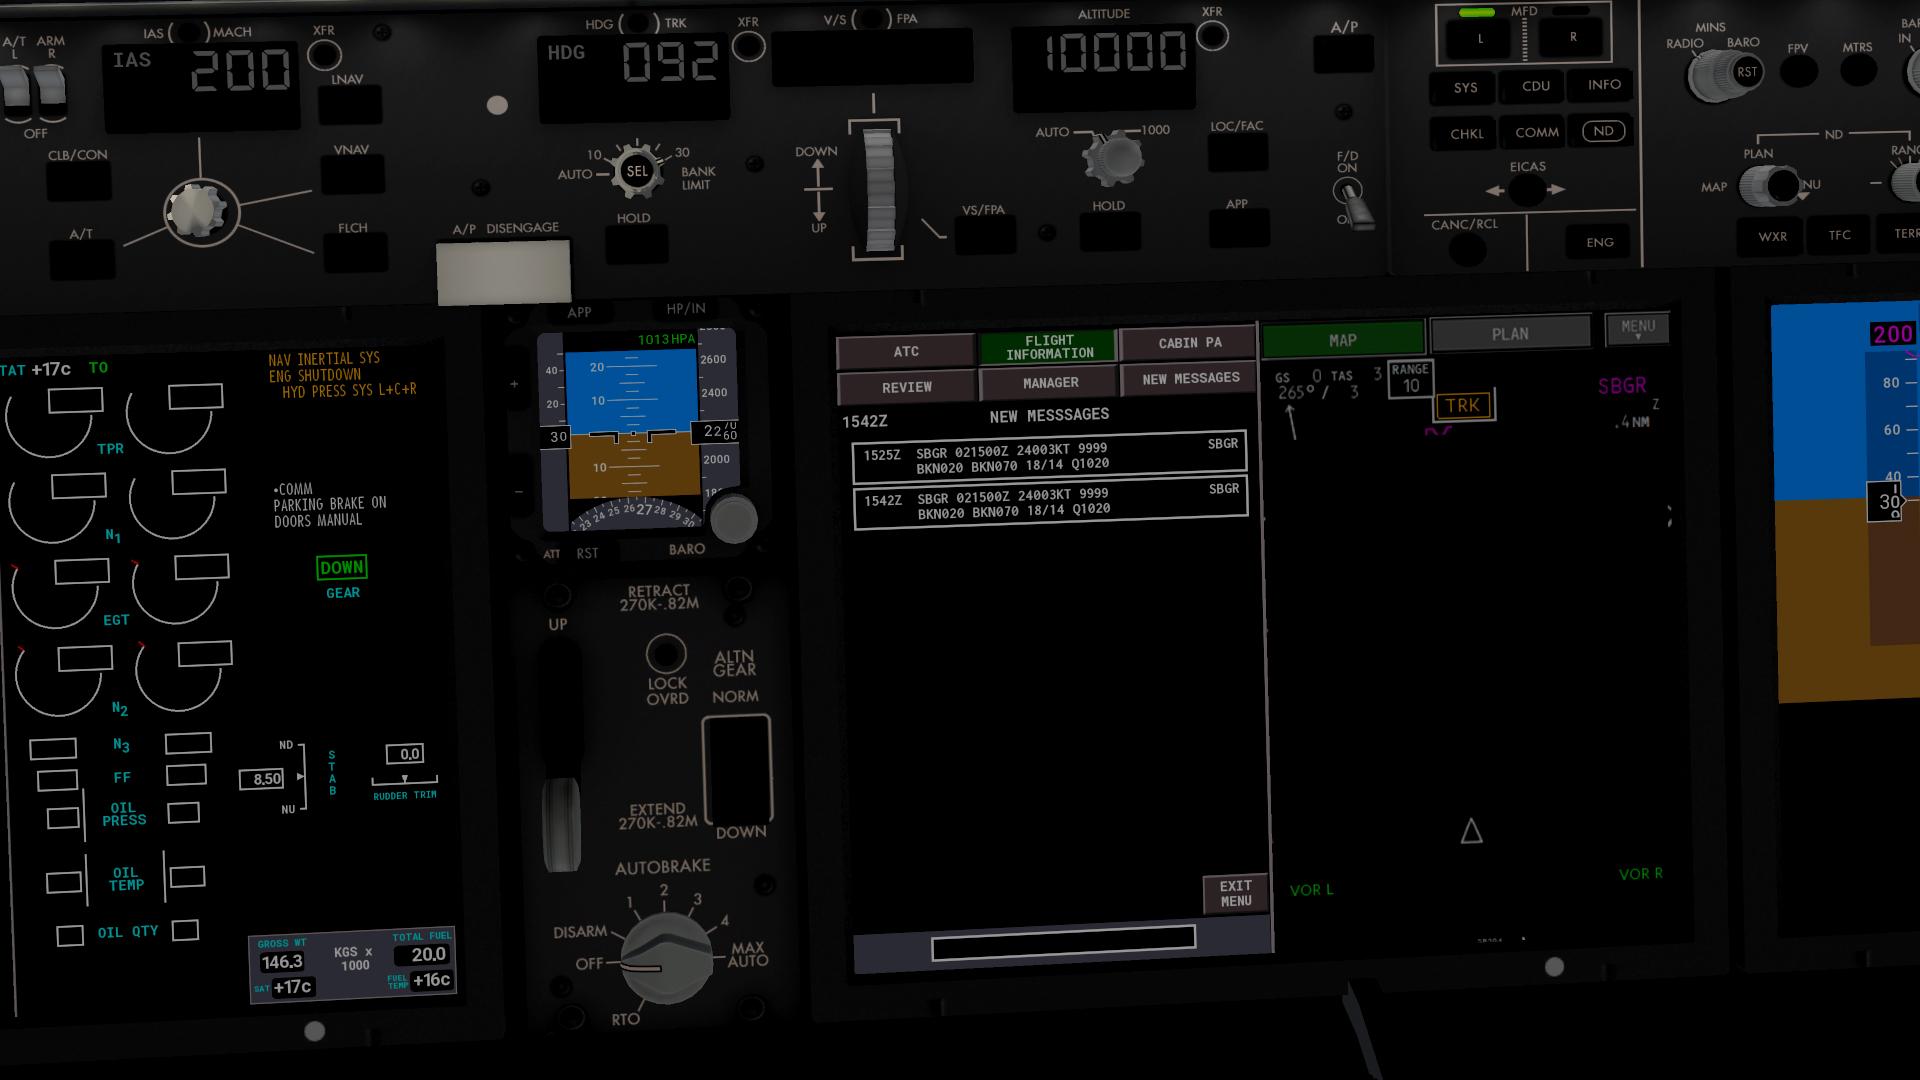
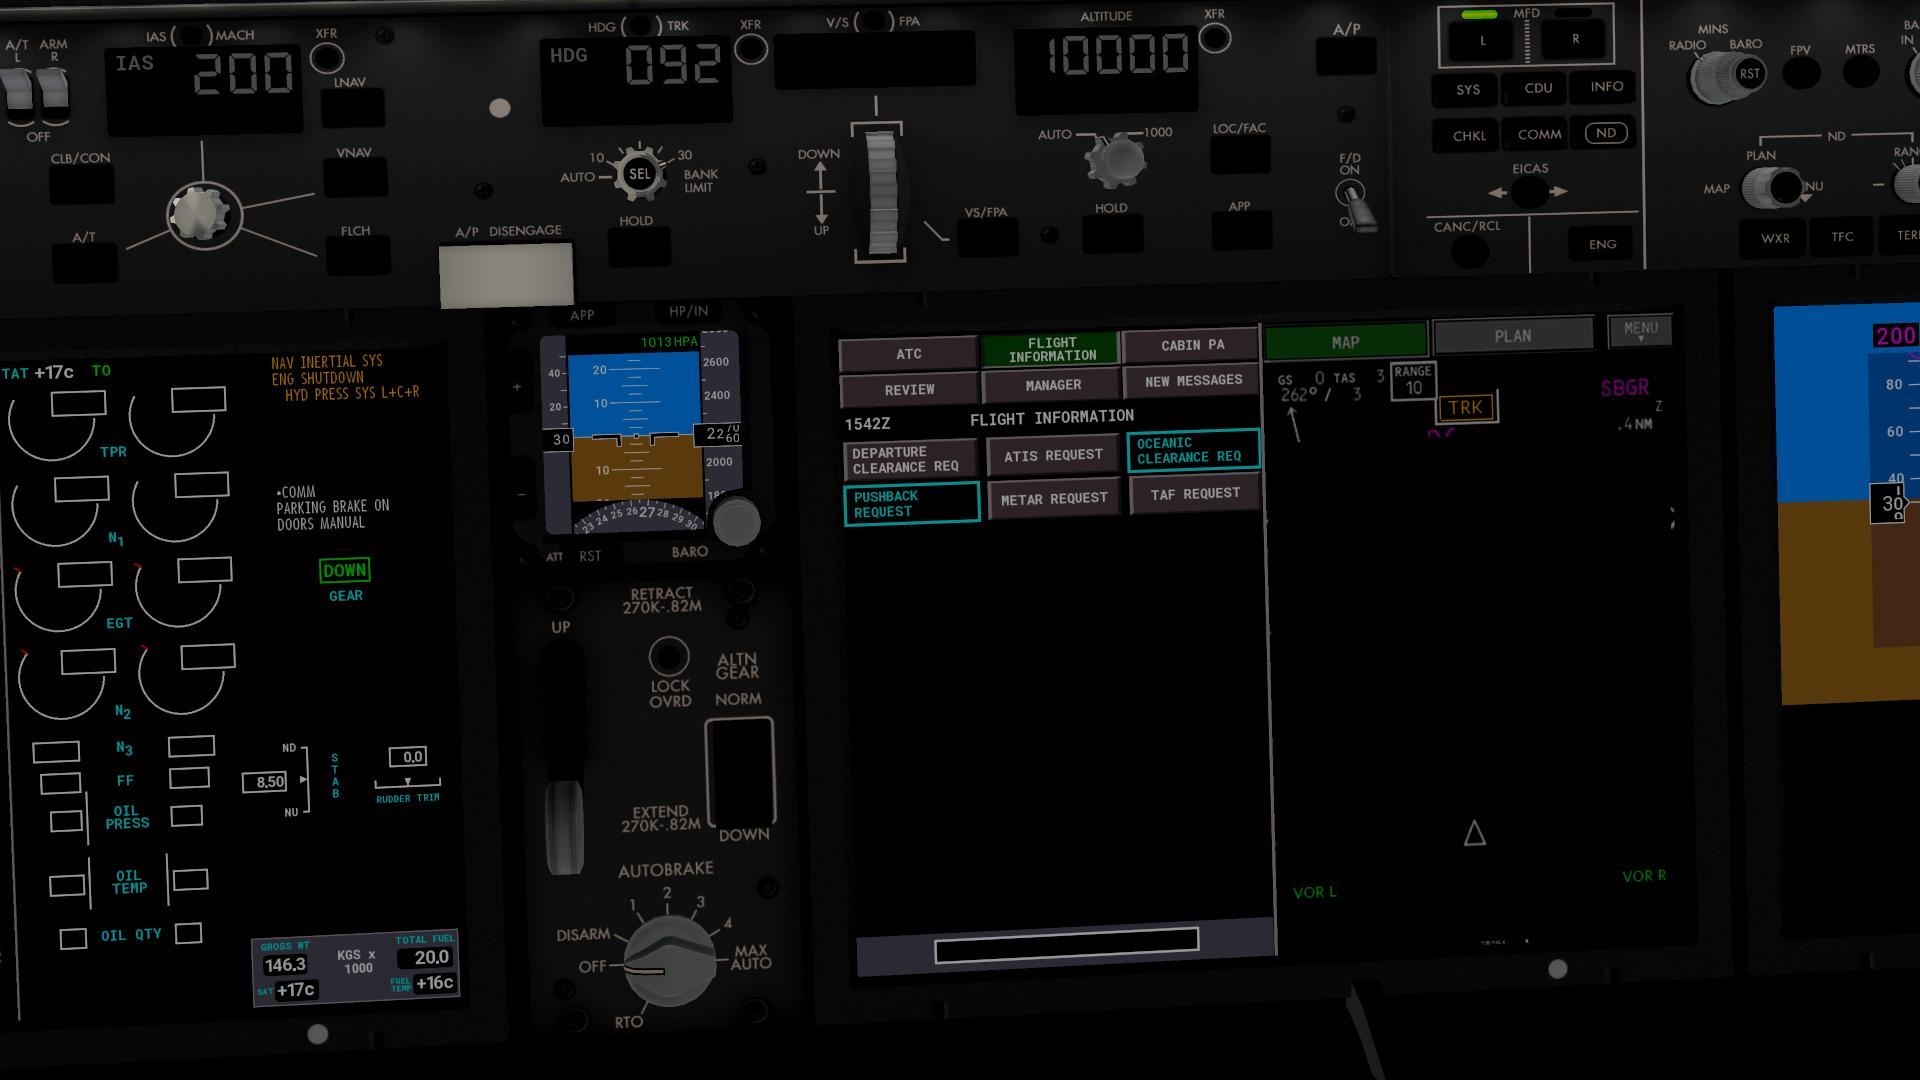
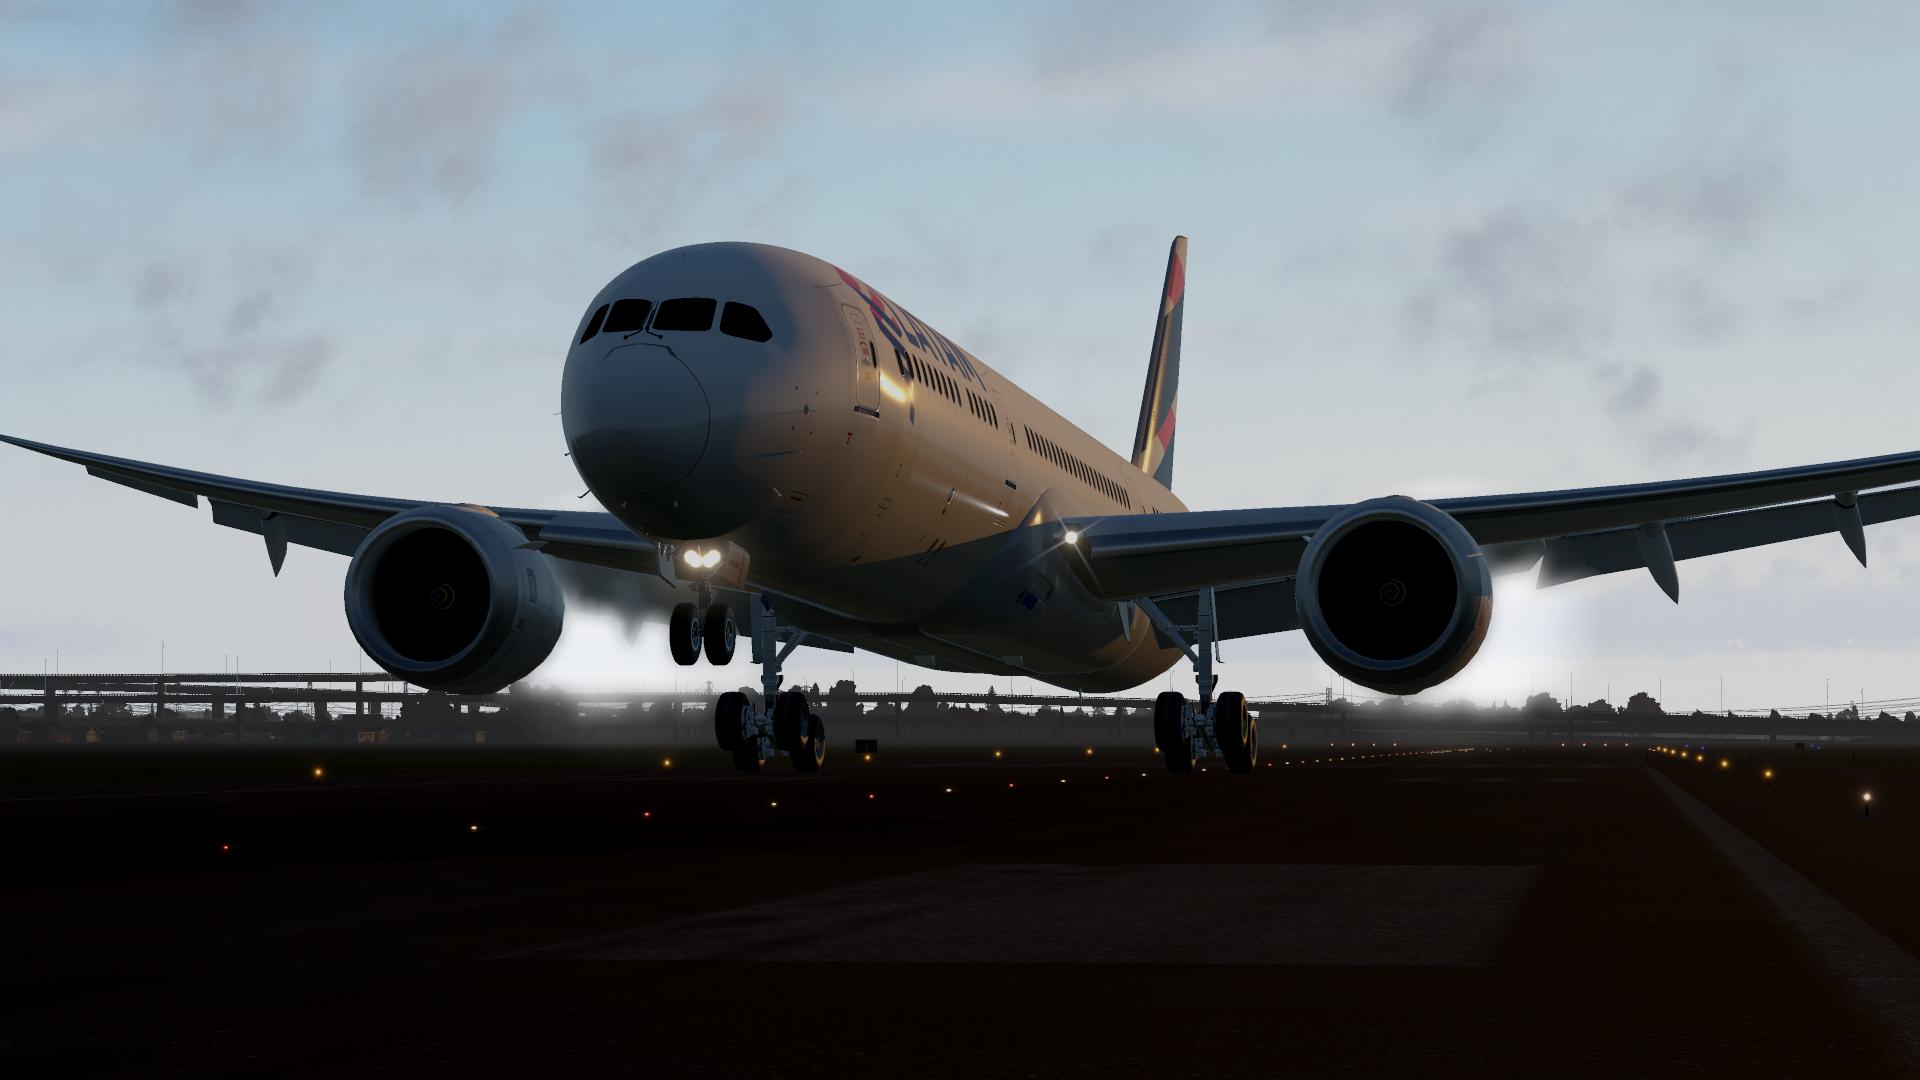
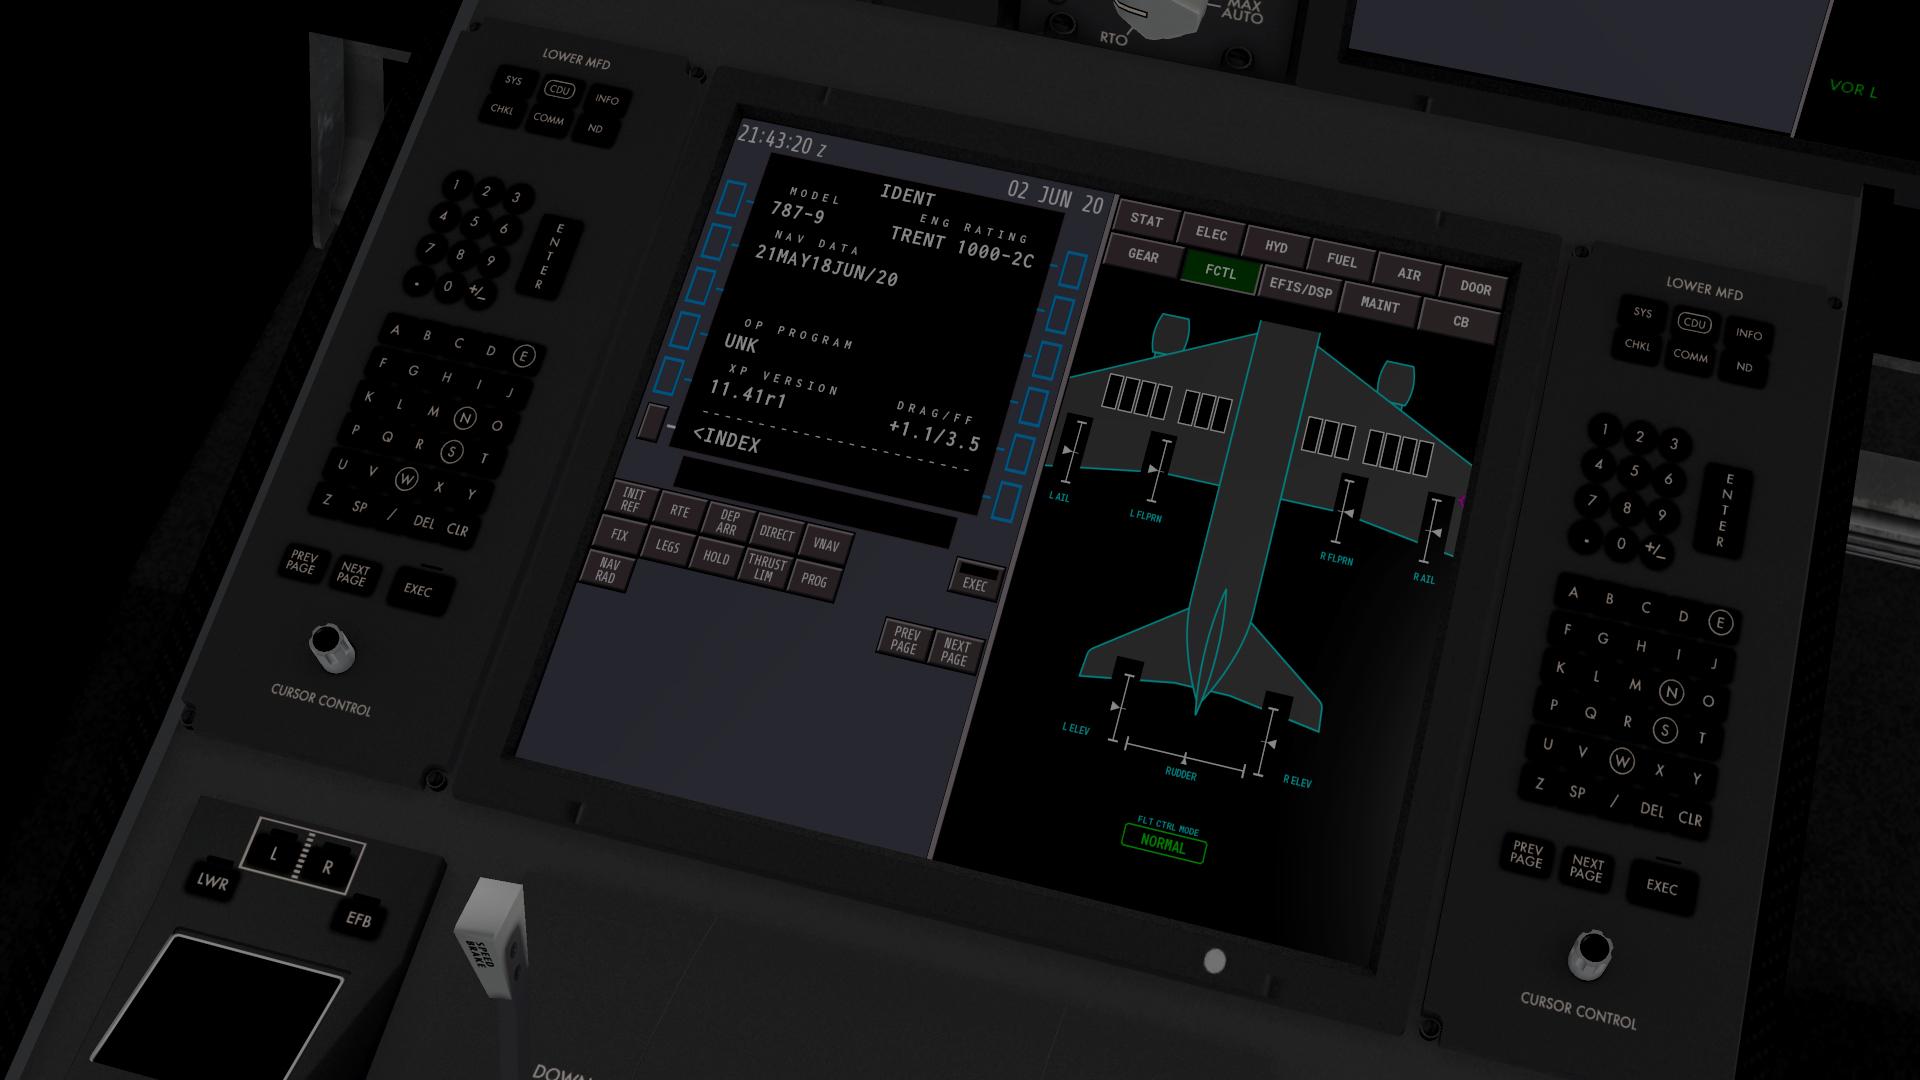
Aircraft Update : Boeing 787-9 Aviator v1.5.0 by Magknight A few days ago was released a new major update for the Magknight 787. This great update brought many new features and usabilities, as well as a lot of corrections from the previous version. The most awaited features that are included in the update are probably the ACARS support, the new Rolls Royce engines and flight controls changes. As in the older versions, you must have Java installed, if not, the plane comes with the installer. Just follow the installation instructions and you have any problem. If you don't have installed the Java correctly, a message will appear in the cockpit screen located on your left. The Magknight had issues with the Skunk Crafts updater in the past, and sadly this is happening again. You will need to download the update through the X-Plane.Org Store. ACARS The Aircraft Communications Addressing and Reporting System or ACARS is a digital data link system for transmission of short messages between aircraft and ground stations via airband radio or satellite. It can be used for many operations, such as weather reports, air traffic control, and others. In this update the 787 now supports a few tasks in the ACARS system, being METAR and TAF request one of them. The system is very easy to use. Make sure to have your Hoppie logon code and insert it in the ACARS section in the COMM page. It's important to note that you need to insert the departure and arrival airports in the MCDU, as well as the flight number. After that, you can head to the flight information page and there you will find some options. If you want to request the METAR, just insert your airport code, click in "send" and wait a few seconds. This way you can receive the METAR for the desired airport. Note that most functions work this way. if you don't know what is the Hoppie code, just type "Hoppie ACARS" in google. This website should appear https://www.hoppie.nl/acars/, click in "get logon code" and just follow the given instructions. New Engines (Experimental) In the last version, v1.4.1, the beautiful GEnx engines were added to the aircraft, and now it's time for the Rolls-Royce Trent 1000 engines. Completely remodeled, they are a great addition to the aircraft. This new feature isn't a visual change only, it changes the sounds and performance as well. I don't know your opinion, but this was the greatest feature included in the update. The engine chevrons were a great improvement brought by the 787, which was later adopted by the 737 Max series and the Boeing 748. Alongside the many benefits related to performance and similar things, the chevrons give the 787 a very beautiful and distinctive visual. Pretty nice at the sunset. Be aware that new liveries are required to use the RR engines. As I said earlier, the addition of RR engines also changes the performance of the aircraft. Accordingly to the information provided by Magknight in the Store, the Rolls-Royce engines have approximately 8% more power than the GE. It's important to note that TPR and throttle limiter are experimental features. If you want to change the selected engine, you will need to head into the settings menu and change the option from GE to RR. The airplane will inform you that an aircraft reload is required, so you should reload it as said by the given instructions. The Magknight team made such a great job modeling the new engines, just like the GE engines in the last update. Now you can fully simulate 787 flights that use both GE and RR, just remember to download the new liveries. Custom Systems This update brought many changes related to systems, especially air conditioning and Fuel. Starting with the air conditioning system. Many changes occurred here, such as the addition of Air EFIS graphics, which gives you the ability to monitor the air conditioning system. Sound and packs airflow changes are also listed in the changelog. The fuel system received some upgrades in many areas like fuel balance system, fuel feed on ground, central tank scavenge system and many other modifications which aim to make a better add-on. Custom Flight Controls The Magknight 787 received many improvements and changes related to flight controls. Some people were having issues with the autobrake in the previous version, but now this shouldn't happen, the autobrake received corrections and should be working perfectly. Spoilers and flaps were also improved, being the spoiler retraction and deployment as well as flap timing order good examples. There were many other improvements in this update, like the addition of FCTL and hydraulic system messages in the EICAS. The disabling of the roll tiller when the plane is above 45kts is another little improvement that makes the aircraft more realistic. The aircraft performance and flight model also received changes in this update, aiming for a more realistic simulation of the Boeing 787-9. Summary This new update for the Magknight 787 brought many new features, as well as bug fixes and different improvements. Tailstrike protection, APU haze and texture corrections are some of the many changes included in this new version. As always, the changelog will be attached at the end, so you will be able to check and know exactly what changed in version 1.5.0. As you all know, the Magknight 787 is a plane under development, so don't expect it to be perfect by the moment, however you can affirm that it had a huge improvement since its release. Due to the fact that the 787 is becoming one of the most important and versatile planes in the real world, it has been chosen for both short and long-haul more and more over the time. This great representation of the incredible Boeing 787-9 Dreamliner shouldn't be missing in your hangar, especially after this nice update which includes those beautiful Rolls-Royce Trent 1000 engines. ______________________________________________________________________ The Boeing 787-9 Aviator Edition v1.5.0 by Magknight is available in the X-Plane.Org Store here: B787-9 Aviator Edition Price is US$44.95 Upgrade cost to the "Aviator Edition" from the original payware release version is US$10, see your X-Plane.OrgStore account for the upgrade. Features General Brand new flight model built for X-Plane 11.40+ Improved wingflex Custom IRS simulation, with quick align Auto-update for the lifetime of X-Plane 11 LED exterior lights Revised font for cockpit textures New yoke model Revised cockpit textures Pause at top of descent and jump to waypoint 3D cabin New: Multiple engine choices Choose from the mainstay GE engines, or the new experimental RR engines Each engine has different flight characteristics New: Custom flight controls 5-setting autobrakes with RTO capability Dynamic flap timing and order Roll spoilers based on speed and wingforce Surface droop on hydraulics loss Surface fadeout by speed New: Hoppie ACARS integration Intergration with the Hoppie ACARS network Allows uplink of pre-departure clearances and weather information FMOD soundpack by audiobirdXP Fully custom FMOD soundpack for the GENx engines Extensive integration with systems Cockpit switch and button sounds 3D cabin and fuselage Ground-up exterior fuselage model including optional tinted windows 3D cabin with optional seating Cabin is optional, configurable in EFB for performance Custom electrical system Designed from the ground up for the 787 Ground power unit Custom anti-ice, simulating the resistance in each mat Liveries Blank livery included by default Other liveries available at https://magknight.org/liveries Liveries from before 1.4.0 will not be compatible due to change of engine and fuselage models Auto-Updater Uses the Skunkcraft Updater for Automatic updates Requirements: X-Plane 11 Fully updated Windows, Mac or Linux 4GB VRAM Minimum - 8GB+ VRAM recommended Download Size: 1 GB Current and Review version : 1.5.0 (May 24th 2020) changelog.md ______________________________________________________________________ Aircraft Update by Bernardo Pierdoná Casa 2nd June 2020 Copyright©2020: X-PlaneReviews Review System Specifications: Computer System: Intel Core I5-9600K 4,30GHz / 2x8 Corsair Vengeance RGB Pro 3200MHz - Gigabyte RTX 2070 - Gigabyte Z390 Aorus Master - Kingston A1000M.2 SSD 240GB Software: - Windows 10 - X-Plane 11.41 Addons: Logitech Pro Flight Yoke/Pedals/Throttle Quadrant - Logitech Extreme 3d Pro Joystick - Sound: Samsung Home Theater System J5500WK Plugins: Environment Engine v1.13 by xEnviro US$69,90 Traffic: Traffic Global by JustFlight US$52.99 Ground textures: ALES US$15.99 (Disclaimer. All images and text in this review are the work and property of X-PlaneReviews, no sharing or copy of the content is allowed without consent from the author as per copyright conditions)
-
Scenery Review : CYVR - Vancouver International Airport by GloballArt Vancouver is Canada's third biggest city, with the second busiest airport in the country. Often described as a trans-Pacific hub, it has more direct flights to China than any other North American airport. YVR is in being an important hub for Air Canada and WestJet, as well as a relevant operations base for Air Transat. This huge airport enplaned and deplaned more than 1.1 million passengers in March, with more than 17,650 aircraft runway movements in the same month. Vancouver airport also had more than 1,860 non-runway movements, which includes floatplanes, charters and helicopters. This incredible airport didn't have a payware version for X-Plane, until GloballArt released their version of Vancouver International Airport. GloballArt is a well-known scenery designer for X-Plane, being Toronto Pearson International one of its most famous products. A few days ago they released their replica of Vancouver International Airport, a great addition for the X-Plane community. Vancouver International Airport IATA: YVR - ICAO: KFLL 08L/26R - 9,940ft (3,030m) Concrete 08R/26L - 11,500ft (3,505m) Asphalt/Concrete 13/31 - 7,300ft (2,225m) Asphalt/Concrete Elevation AMSL 13 ft / 4m The airport by itself almost occupies all the small island called "Sea Island". It is divided into three terminals, which are the Domestic, International and South terminals. Domestic Terminal This is the first terminal we are going to talk about. Divided into three concourses, A B C, the terminal has 49 parking positions, most being equipped with jet bridges. All concourses will receive expansions, which will increase the terminal capacity. Concourse A Concourse A is the smallest of the three. It has few jet bridges, so most of the aircraft parked there need to planed and deplaned outside the building. Concourse B Many airlines operate in concourse B, Westjet, Sunwing and Air North are some examples. Differently from concourse A, this one has jet bridges in almost all gates. All airport jet bridges are very nice, very similar to the real ones, which also have "HSBC" wrote on them. GloballArt uses AutoGate plugin to animate the jetways, this means you have to install it if you want them to work properly. Concourse C Concourse C is the biggest concourse in the domestic terminal, with Air Canada being its main operator. It has more gates, with and without jet bridges, than the other concourses in the Domestic Terminal. As well as the others, Concourse C will receive a major expansion planned in the Master Plan 2037. Even though the airport doesn't have interior modeling, the external details of the building are quite nice. International Terminal Compared to the Domestic one, this terminal is quite bigger, and unlikely the other terminal, there are 2 concourses instead of three. Concourse D Used by all international flights from Vancouver, this concourse has 15 gates, all being able to handle wide-body aircraft. Seven of the gates are fitted with 2 jet bridges, two which can handle the enormous Airbus A380, operated seasonally by British Airways. As well as all the other concourses, Master Plan 2037 includes an expansion for concourse D, named Pier D, which will be the first expansion to be concluded. As you can see, the main structure of the new building is almost ready. GloballArt has modeled it, and a very nice construction site too. Concourse E The last one is Concourse E, which is the US preclearance area and has 21 gates, 17 being equipped with jetways. The majority of US-bound flights operate from Concourse E; the only exceptions are flights from an international origin (Cathay Pacific's Hong Kong—Vancouver—New York and Philippine Airlines' Manila—Vancouver—New York flights), or flights that depart after 8:30 p.m. (e.g. Delta Air Lines' Vancouver—New York flight). The gates E75 to E78 can accommodate smaller wide-body aircraft, and are swing gates which can be used for international departures, as gates D75 to D78. It is good to note that gate E95 accesses both the E95A and E95B stands. Differently from all other four concourses, the E one will receive two building expansions. The first one, Pier E, will give Concourse E more space for operations, while the Pier F/East Concourse will create a whole new wing for the airport. The of the Vancouver Airport Authority said that this expansion will start shortly after the conclusion of the Pier D. South Terminal The South Terminal is a portion of the original pre-1968 terminal which is still in use. This includes the floatplane terminal. It also houses the corporate headquarters and main base of Pacific Coastal Airlines and Harbour Air. The South Terminal serves regional airlines that fly mostly within British Columbia, in addition to helicopters and chartered flights. Surrounding Areas Here I will show all the buildings and features near the South Terminal, which mostly consist of General Aviation aprons and private hangars. As I said earlier, this area has the General Aviation aprons as one of its main characteristics, and GloballArt make sure to add them. There are many places to park your plane, helicopter and even sea-plane. There are many hangars here too, and most of them are the same as the real ones. Million Air, Signature Air Support, London Aviation and Shell are some good examples. All hangars are custom built and very realistic. The surrounding areas of the South Terminal have a very unique thing, which isn't found in most airports. Noise management is one of the main focus of the YVR airport, and post-maintenance engine test produces a lot of noise. With that in mind, YVR airport constructed an Engine Testing Facility, which was modeled by GloballArt. East and Northeast Areas These two areas of the airport majorly consist of cargo hangars and ramps. The airport most noticeable features in the East region are the Purolator and FedEx cargo facilities, as well as Air Canada and Jazz Hangars. In the NorthEast area of the airport, next to the runway 26R is the UPS building, very nice and detailed. A few meters from the UPS facility is located the huge Canada Post building. Main Terminal There are many interesting things in the Main Terminal or very close to it. Starting with the control tower, which isn't incredible but has some details like the lights and antennas. Vancouver Airport has two, of many, characteristics features, the Skytrain and the Fairmont Hotel. The Skytrain station is pretty nice, very good modeling, and connects Vancouver to its Airport. The fact that GloballArt included a moveable train is very nice. The Fairmont Hotel is a very beautiful and iconic construction at the airport. Located on the East side of the building, in front of Concourse E, the hotel has 386 rooms, and if you be lucky, you may get a room facing the beautiful airport. De-icing zone Vancouver airport has 10 communal de-icing bays and more than 20 de-icing trucks, which are extremely necessary during the cold weather. GloballArt has already implemented this feature in the Montreal Airport, and it worked with most aircraft. However, in this airport only the VDGS works, no de-icing trucks, this way you can only simulate the de-icing procedure with de-ice included aircraft, like the Zibo 738. Note that the VDGS shows the indications for all supported aircraft, so if you want, you can stay there for a few minutes and imagine that your plane is being de-iced. Mesh and Custom Buildings The package also includes a mesh, even though the areas around the airport are mostly plain, and a few custom buildings. These buildings a nice, however they don't have winter textures, differently from the airport. Ground Textures The ground textures are very good, during both day and night. There is a wide variety of surfaces, especially in the taxiways and runways, and they are all very detailed. The taxi lines textures are pretty nice too, with some showing usage cracks and others seem to be new. The runway textures are beautiful, which gives you the feeling of a used runway. A very nice detail that GloballArt inserted in their product is the smooth and high-quality textures transition between taxiways and land, making the airport way more immersive. If I am not wrong, you can apply this by using the well-known decals in your Orthophotos. GloballArt also included a very nice feature related to ground textures in the airport, wet ground textures. These files add the wet appearance to the ground, which gives the airport extra realism. Even after the rain stopped, the ground remains wet and shows many puddles. The airport includes 3D grass, but just like the real one, it isn't present in most parts of the airport. This occurs, most of the time, because the snow covers the land for a considerable time during the year, killing it. Lighting Probably one of the most important things in an X-Plane airport, the lighting in Vancouver airport is pretty nice. No lights are missing, runways, taxiways, roads, terminals, etc... Are all illuminated. The lights around the gates are pretty good, making it very easy to see and maneuver your aircraft. The lighting at the South Terminal region is pretty good too, as well as in the main terminal and its surrounding areas. The only downside related to the airport lighting is the textures, especially the ones from the Main Terminal. They don't look as good as during the day. _________________________________ Summary CYVR Vancouver International Airport by GloballArt is a solid airport, delivering what you would expect from it. This airport is the type you like and doesn't get disappointed at all, even though some things could be improved. The modeling is pretty good, especially in certain areas like Pier D. Ground textures are very nice as well, with a great variety of surfaces and beautiful textures, including wet ground textures. GloballArt included winter textures and custom mesh in the airport files, as two different folders. The fact that the airport doesn't have a modeled interior is one of the downsides. The addition of this feature would make the terminal way more beautiful for two reasons, being the first and most obvious, a modeled interior, and the second transparent windows. Having transparent windows would remove the current textures, which could be better, not just in the Main Terminal building, but in all objects around the airport, like jet bridges. It is very important to note that the airport has Stop Bars, a light system located in the runway holding position. I couldn't show you this because it only works when you are connected to a server like IVAO and VATSIM. This system consists of red and green lights, controlled by the control tower, that show the pilots when they should enter or not the runway. As I said earlier, one of the main features of the airport, when compared to others, is the de-icing system. Right now it only shows information in the VDGS, but we all expect it to be like CYUL, with the operational de-icing trucks Maybe in the next version. Probably many people didn't notice that the airport is already at version 1.1, which became available one week after the initial release. This update brought many improvements, such as lighting fixes and FPS gains. If you always wanted to fly into Canada's second busiest airport, but never found an X-Plane version that was good enough for you, then this airport is the one you were looking for. I am sure that GloballArt gave their best at this airport and even though it is far away from perfection and has some downsides, it has many good qualities. If you are not sure if you should get this airport or not, trust me, you won't be disappointed with the solid airport. _________________________________ The CYVR - Vancouver International Airport by GloballArt is available at the X-Plane.Org Store. CYVR - Vancouver International Airport Price is US$24.95 Features ✓ Accurate replica os CTVR – Vancouver International Airport, updated 2020. ✓ Precise modeling based on original references, photos and others researchs. ✓ Customized runways, lines and taxiways, with ambiente occlusion included in the textures. ✓ Sun reflections effects on pavements. ✓ Fingers Auto Gate with VGDS o By Marginal ✓ Static objects, vehicles and aircraft are present in this scenery. ✓ Avenues and streets with personalized and standard vehicle traffic. ✓ HDR lighting with custom night textures. ✓ Custom textures with ambient occlusion. ✓ Animated ground traffic and default aircraft traffic. o Plugin Ground Traffic by Marginal ✓ Custom Approach Lights (ALS) systems. ✓ Included taxi routes for aircraft, "taxi route" ✓ Taxi routes configured to WT3 plugin. ✓ Airliners configured Ramp Start. ✓ De-Ice Signboard best configured to ZIBO 738 (complete) an other aircrafts (Signboard). o Use Auto Gate plugin datarefs - by Marginal ✓ Winter texture - only the Airport area. ✓ Stop Bars lights. o Online flights only. Included in scenery package ▪ CA-CYVR-A-Vancouver Intern Airport G1 ▪ CA-CYVR-B-Vancouver Mesh G1 ▪ CYVR Winter Textures ▪ Instruction Manual (English and portuguese BR) Requirements X-Plane 11 Windows. Mac or Linux 4 GB VRAM Minimum. 8 GB+ VRAM Recommended Download Size: 1 GB Current version: 1.1 (May 22nd 2020) Installation Download scenery file size is 1GB Three folders are included+2 manuals CA-CYVR-A-Vancouver Intern Airport CA-CYVR-B-Mesh YVR_Winter-Textures Final scenery size is 3.5GB AutoGate plugin - AutoGate is required for this scenery Documents One manual in two languages English and Portuguese(BR) ->Manual-CYVR-English ->Manual-CYVR-Portugues _____________________________________________________________________ Scenery Review by Benardo Pierdoná Casa 27th May 2020 Copyright©2020 : X-Plane Reviews Review System Specifications: Computer System: Intel Core I5-9600K 4,30GHz / 2x8 Corsair Vengeance RGB Pro 3200MHz - Gigabyte RTX 2070 - Z390 Aorus Master - Kingston A1000M.2 SSD 240GB Software: - Windows 10 - X-Plane 11.41 Addons: Logitech Pro Flight Yoke/Pedals/Throttle Quadrant - Logitech Extreme 3d Pro Joystick - Sound: Samsung Home Theater System J5500WK Plugins: Environment Engine v1.13 by xEnviro US$69,90 Traffic: Traffic Global by JustFlight US$52.99 Scenery or Aircraft Boeing 737-800 by Zibo (X-Plane.Org)free 737-700U by Captain Kitten (Threshold)free (Disclaimer. All images and text in this review are the work and property of X-PlaneReviews, no sharing or copy of the content is allowed without consent from the author as per copyright conditions)
-
CX_Fan reacted to a post in a topic:
Aircraft Review : Embraer ERJ Family by X-Crafts
-
Aircraft Updates : Airbus A319 and 321 by Toliss
BernardoCasa replied to BernardoCasa's topic in Airliners Reviews
Very nice aircraft collection! I really want to buy the 767 and A320, they seem fabulous.