-

Behind the Screen... September 2024 edition now Available!
Scenery Review : KRSW - Southwest Florida International Airport by Skytitude
Aircraft Review: Beechcraft Bonanza G36 by PAE
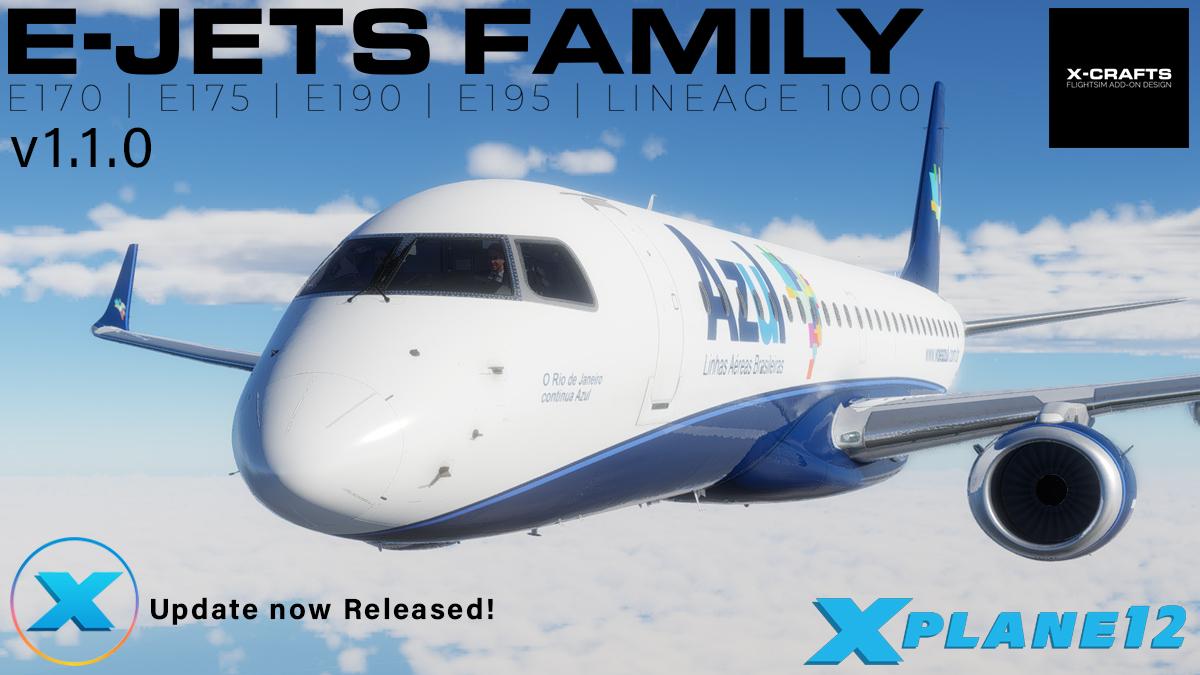
Update Review : E-Jet Family v1.1.0 by X-Crafts
Scenery Review: KBOI - Boise Air Terminal XP12 by Verticalsim
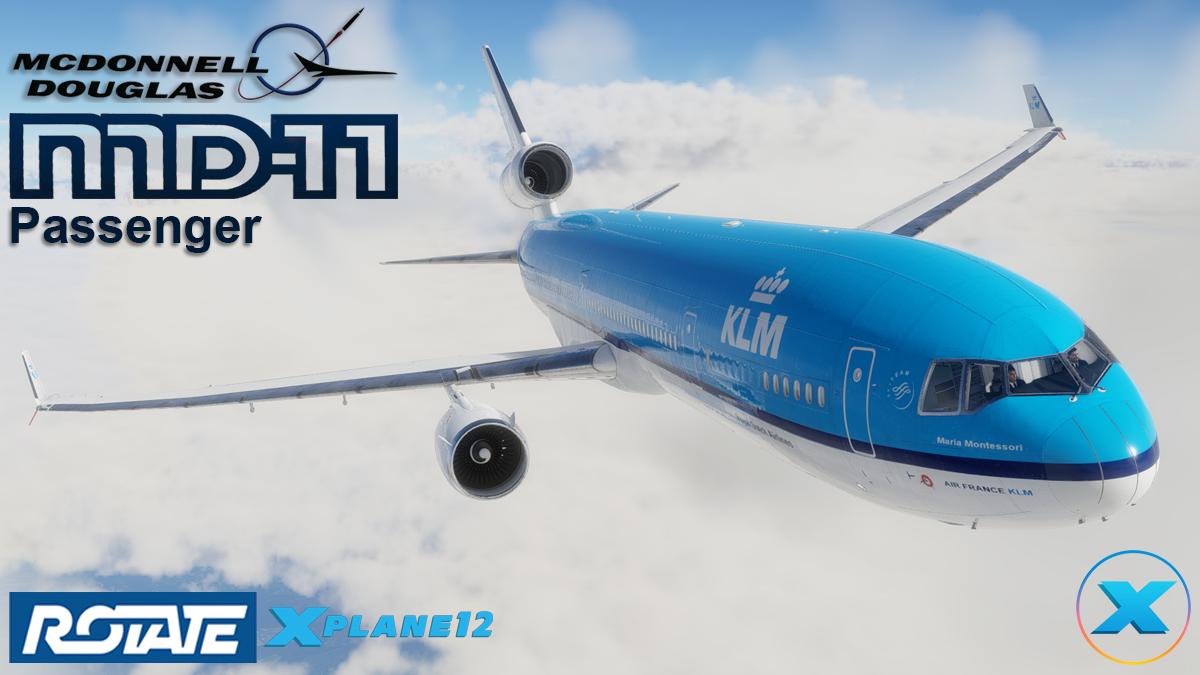
Aircraft Review : McDonnell Douglas MD-11 Passenger by Rotate
Scenery Review : EDDN - Nuremberg XP by Aerosoft
Scenery Review: PASI - Sitka Rocky Gutierrez Airport XP12 By Northern Sky Studio
X-Plane 12 : State of the Union 2024
Aircraft Release Review - Boeing 777-200ER v2 Ultimate by FlightFactor Aero now available in beta!
Utility Review: xOrganizer v3 XP12
Scenery Review: EDVK - Kassel Airport XP12 by Aerosoft
Aircraft Update Review : Tecnam P2006T v9.1 by vSkyLabs
Scenery Review - HECA Cairo International, Egypt XP12 by TaiModels
Updated! PHNY - Lanai Airport, Hawaii XP12 by Northern Sky Studio
Update Review: PAC CT/4E Airtrainer XP12 by vSkyLabs
Aircraft Review : Robinson R66 Turbine XP12 v3.0 by vSkyLabs
Released!.. read the Mega Review... ToLiss A330-941neo


-
Latest Posts
-
 NEWS! - Aircraft Updated : Aeroprakt A22-LS Project v3.1 by vSkyLabs The Aeroprakt A22-LS Project has been updated to v3.1 by vSkyLabs. Two areas in this update are the focus. Notable is the feature of 'Cockpit-Builders-Heaven' to assign switches, levers and interactions to a designated section of the X-Plane 12 assignment screen, secondly is the redesign of the "Brake Lever" which is now coupled with the throttle lever as in the real world aircraft. This aircraft is available for both X-Plane 12 or X-Plane 11, but the XP11 version does not have the unique features in regards to the more upgraded X-Plane 12 version. Version 3.1 (October 20th 2024) Interaction: VSKYLABS 'Cockpit-Builders-Heaven' was implemented, allowing to assign all aircraft switches, knobs, levers and interactions in a designated, cluttered section in the X-Plane 12 assignment screen. Windows get automatically closed when the aircraft is airborne. Systems: Brakes lever is now coupled with the throttle lever, as in the real-world aircraft. The brakes lever moves along with the throttle lever, back and forth, while the pilot can grab the brakes lever and squeeze it in for braking. Brakes lever is programmed to allow button activation with 5 'steps' for push and release. This 'saves' an axis in favor of buttons for hardware-using pilots. Using the 'wing sweep' axis is still an option (when using the buttons method - do not assign the wing-sweep axis as it may cause operation conflict). Graphics: Minor tough for fuselage PBR (reducing over-reflective surface). The vSkylab philosophy is that you are purchasing an ongoing project, and all the development is free and ongoing throughout the X-Plane 12 version. These projects are under constant development: the development road-map is including flight model refinements, enhanced systems depth, additional liveries and other improvements. The Aeroprakt A22 v3.1 by vSkyLabs is now available from the X-Plane.OrgStore, if a current owner, then just go to your X-Plane.Org Account and download the latest version. _____________________________________ Yes! - the Aeroprakt A22-LS Project by vSkyLabs is NOW available from the X-Plane.Org Store here : Aeroprakt A22-LS Project Retail Price is US$29.00 On sale: $29.00 US$23.20 you Save:$5.80(20%) Requirements X-Plane 12 or X-Plane 11 Windows, Mac or Linux 4 GB VRAM Minimum - 8 GB+ VRAM Recommended Current version: 3.1 (October 20th 2024) ___________________________ NEWS! by Stephen Dutton 22nd October 2024 Copyright©2024: X-Plane Reviews (Disclaimer. All images and text in this review are the work and property of X-PlaneReviews, no sharing or copy of the content is allowed without consent from the author as per copyright conditions) All Rights Reserved
 -
NEWS! - WebFMC Pro v2.3.3 now supports Airbus A330-900 neo by ToLiss A very quick note that WebFMC Pro v2.3.3, now supports the newly released Airbus A330neo from ToLiss, it also supports Haptic feedback on Android devices. Changelog v2.3.3 Added support for ToLiss A330-900 Neo Support for Haptic Feedback: adds vibration to button clicks (available on Android devices only, defaults to off) v2.3.3 is for X-Plane 12 and the X-Plane 11 v1.11.2 version is coming soon (should be in the X-Plane.OrgStore by the time you read this). The WebFMC is a plugin that allows you to use a FMC (Flight Management Computer) on an external screen via a web browser. That is an another computer or tablet. So it is a remote tool, but a very beneficial tool and even a powerful one in programming in route and performance data and following the set aircraft route in flight and in mirroring the aircraft's built in FMS (Flight Management System). Added into the functionality is a load of features in the use of the FMC on another screen. WebFMC Pro is available as noted for X-Plane 12, and also previously for X-Plane 11, if you already have WebFMC Pro for X-Plane 11, then there is still (but now for only a limited time ) an upgrade for previous users, there is also a US$10 off offer to upgrade to the X-Plane 12 version. This upgrade covers your plugin and service updates for the full run of the X-Plane 12 version. Currently there is also a US$5 off offer for new purchasers of this excellent tool. Support for all aircraft that use X-Plane FMC All airliners that come installed with X-Plane, as well as some 3rd party aircraft (e.g. FlyJSim 727v3, 737v3 and a few others) use the default FMC implemented by X-Plane. Since WebFMC Pro supports the default FMC, these aircraft are automatically supported as well, even though they are not listed explicitly on the above list! Update download to v2.3.2 is now available at the X-Plane.Org Store, just remember to swap over your registration txt to the new version folder. ____________________________________ Yes! WebFMC Pro v2.3.3 XP12 by Green Arc Studios is NOW AVAILABLE from the X-Plane.Org Store here : WebFMC Pro XP12 Price is US$29.99 Current WebFMC XP11 users can get this new XP12 version at $10 off. Please find the coupon code in the original WebFMC Invoice X-Plane 12 Operating system requirements: - Windows 10 64-bit - Mac OS 10.15 (Catalina) or newer - Ubuntu 22.04 LTS 64-bit Web Client requirements The CDU can be displayed on any modern and up-to-date web browser with JavaScript support. We recommend the latest versions of Google Chrome on PC or Android and Safari on iOS. No internet connection required, remote device needs to be on the same local network as X-Plane PC. We do not guarantee support for vintage and obsolete iOS devices (according to official Apple classification, here: https://support.apple.com/en-us/HT201624). If you have an old device try WebFMC Free before buying or upgrading. Access CDU / FMC of select X-Plane 12 airplanes via any modern web browser running on your PC or mobile device over local network. Quick and easy access to the FMC Get easy access to the FMC: quickly edit the flightplan, monitor flight progress, set up your approach and do all the typical work of the pilot without having to move around in the cockpit, even if the plane doesn’t support FMC as a popup natively - on the same PC, or different monitor, tablet or phone - in fact you can use multiple displays at the same time! Make pilot tasks easy and comfortable Enjoy external views during cruise while monitoring flight progress on separate screen or take a quick look at your phone to verify calculated landing speed with just a glimpse of an eye during busy time on approach. Make flying complex SIDs / STARs easy as you can focus on the important flight parameters while having overview of the constraints all the time. Take your mobile to the kitchen as you cook a dinner during a long haul and never miss T/D again! Convenient to use Use physical keyboards on PC with extra keys such as Prev/Next page mapped to keyboard keys for easy access. WebFMC scales dynamically to fit any display or window size and can look as native app on mobiles by using browser's "Add to home screen" feature. Web Client The CDU can be displayed on any modern and up-to-date web browser with JavaScript support. We recommend the latest versions of Google Chrome on PC or Android and Safari on iOS. No internet connection required, remote device needs to be on the same local network as X-Plane PC. Support for WebSockets RFC 6455 standard is required which implies at least iOS version 6. _________________________________ NEWS! by Stephen Dutton 21st October 2024 Copyright©2024 : X-Plane Reviews (Disclaimer. All images and text in this review are the work and property of X-PlaneReviews, no sharing or copy of the content is allowed without consent from the author as per copyright conditions)
-
NEWS! - Aircraft Announcement : Pilatus PC12 by Thranda Design Thranda Design have announced their next aircraft to be released, now currently in Alpha Release. It is the Swiss Pilatus PC12. A single-engine turboprop aircraft renowned for its versatility, reliability, and efficiency. There have been a few PC12's in X-Plane, a STMA Shade Tree PC12/47G and Michael Sgier did a PC12 and PC24 for X-Plane 10/11, but the most familiar X-Plane PC12 was from Carenado. The Thranda Design comes with their exceptional DGS (Dynamic Generation Series). This means, all the instruments and many buttons, switches, knobs, etc. are all fully configurable. Dynamic liveries, both with a classic and a modern scheme will also come standard. Extremely high-definition and detailed 4K textures provide the visual quality you'd expect from a Thranda product. The PC12 was one of the most popular aircraft in X-Plane, it's that engine, a Pratt & Whitney PT6A-67P turboprop, the same monster that powers the Cessna Caravan at 1,200 shaft horsepower (shp), its smooth and very powerful. The free-turbine configuration also allows the propeller to operate independently of the engine speed, which provides smoother power delivery and better performance in a range of conditions. This Thranda PC12 is still in development... Announcement thread is here... Thranda's next plane in the DGS series: The Pilatus PC12 X-PlaneReviews will keep you posted on any more news on this exciting release from Thranda Design __________________________ NEWS! by Stephen Dutton 18th September 2024 Copyright©2024: X-Plane Reviews (Disclaimer. All images and text in this review are the work and property of X-PlaneReviews, no sharing or copy of the content is allowed without consent from the author as per copyright conditions) All Rights Reserved
-
NEWS! - Scenery Release : KCHS - Charleston International Airport by DominicDesignTeam DominicDesignTeam (DDT) have released their second airport scenery after KAUS-Austin Bergstrom Intl Airport last year in November. This release is KCHS - Charleston International Airport for X-Plane 12 (Only). Charleston International Airport is a joint civil-military airport located in North Charleston, South Carolina, United States. The airport is operated by the Charleston County Aviation Authority under a joint-use agreement with Joint Base Charleston. It is South Carolina's busiest airport; in 2022 the airport served over 5.3 million passengers in its busiest year on record. The airport is located in North Charleston and is approximately 12 miles (19 km) northwest of downtown Charleston. The airport serves as a focus city for Breeze Airways. It is also home to the Boeing facility that assembles the 787 Dreamliner. The airport consists of four general areas: the military area to the west, the airline terminal to the south, the general aviation area to the east, and the Boeing assembly area further to the south. The airport has had brief periods of international service. In 2001, Air Canada briefly served the airport from Toronto but ended service immediately after the September 11th attacks in 2001. Porter Airlines briefly served Charleston with flights to Toronto in 2015. In April 2019, British Airways launched a seasonal route to London's Heathrow Airport. This was Charleston's first transatlantic flight. The first season ended in October. Due to the COVID-19 pandemic, the service was suspended in 2020. In 2023, Air Canada announced a return to Charleston with daily nonstop flights to Toronto starting in March 2024. Scenery Features Include: PBR Textures Dynamic Lighting Real Ground Markings Custom, painstakingly hand-crafted pavement, showcasing all imperfections including dirt In October 2009, Boeing announced that it would build a major plant on 265 acres (107 ha) at the airport as a second final assembly site for its 787 Dreamliner commercial aircraft. The facility began limited operations in July 2011 and rolled out its first completed aircraft in April 2012. Additional facilities to complement aircraft assembly have since been announced by the company. As a joint civil-military airport, Charleston Air Force Base today shares its runways with Charleston International Airport for commercial airline aircraft operations, and a commercial aircraft factory making Boeing aircraft, on the south side of the airfield and general aviation aircraft operations on the east side. The 437th Airlift Wing (437 AW) of the Air Mobility Command (AMC) and the 315th Airlift Wing (315 AW) of the Air Force Reserve Command (AFRC) operate the C-17A Globemaster III from the base. The installation has also in the past maintained an alert site for rotational Air Combat Command (ACC) and ACC-gained Air National Guard fighter-interceptor aircraft. Images are courtesy of DominicDesignTeam __________________ Yes!... Charleston International Airport by DominicDesignTeam is now Available from the X-Plane.Org Store here : Charleston International Airport Price is US$21.00 Requirements X-Plane 12 (not for XP11) Windows, Mac or Linux 8 GB VRAM Minimum Download Size: 1 GB Current version: 1.0 (October 16th 2024) ___________________________ News by Stephen Dutton 18th September 2024 Copyright©2024: X-Plane Reviews (Disclaimer. All images and text in this review are the work and property of X-PlaneReviews, no sharing or copy of the content is allowed without consent from the author as per copyright conditions) All Rights Reserved
-
Aircraft Review : Airbus A330-941neo by ToLiss The story of the Airbus A330 Series is an odd airline history of being not what the Airlines actually wanted, but always came back to the aircraft to be used as a mainstay of their fleets. Created in tandem with the Airbus A340, it shares the same fuselage and flight deck layout, with the A340 being four engines, were as the A330 has only two . The standard A340-500 had a range of 9,000nm, the A330-300 a range of 6,350nm. But the A340 went into service on the cusp of ETOPs (Extended-range Twin-engine Operational Performance Standards) that favoured the Twin-Engine aircraft like the Boeing 777, later A350 and Boeing 787. So the four-engines became too expensive to run, so didn't sell well of only the 377 aircraft delivered. The A330 Series however has delivered 1,600 aircraft delivered. A330 family found success with full-service airlines, low-cost carriers and even cargo operators, thanks to its versatility... but it was still a bumpy road in getting there. Then suddenly the A330 series found fame. With the long entry into service of the Boeing Dreamliner 787, then you couldn't buy a A330 for the love or money, as bigger Full Service Airlines were now paying above cost to acquire them to fill in with their fleet requirements. It is that sort of aircraft. The Airbus A330neo or "New Engine Option" was a reaction to the Boeing 787 Dreamliner, which offered airlines superior fuel efficiency and range, making it a strong competitor in the long-haul twin-engine market. The A330neo program was launched in July 2014. The A330neo achieves a 14% reduction in fuel consumption per seat on a typical long-haul flight compared to the A330ceo (current engine option) models, with the 25% improvement achieved when considering fuel per seat in specific configurations and high-density seating. This helps airlines also reduce operating costs and emissions. Besides the new highly efficient Rolls-Royce Trent 7000 engines the A330neo incorporates sharklet wing extensions which reduce drag and enhance the overall aerodynamic efficiency, like with the A350 XWB to achieve it's efficiency goals. Again it has been the odd operators rather than the Full Service Airlines that are currently buying the A330neo, only Delta and TAP and Virgin Atlantic that have been the major Full Service players. Again with the unreliability of the Dreamliner 787, it again has customers now looking at this not only in the long range aspect, but also very versatile in the domestic operations services. Toliss has no peers with Airbus Aircraft in the X-Plane Simulator. The Journey started as the QPAC A320, then under the Toliss brand, came the A319, A321, the large A340-600 then lately the A320neo. To release the A330-941 in a "neo" guise was no really no surprise after the A340 and A320neo products. First impressions of the A339 are extremely good. Airbus aircraft are pretty modern and therefore doesn't have a lot of the external character like a 60's or 70's design, it is all very clean and polished in design. And that can be hard without slipping into bland for a modeller, but here it is the right balance, as ToLiss has come a long way in this area, and their products are now more refined and better put together. You can certainly see the maturity and experience coming in, the rear window upline is really well done, as is the aluminum alloys in the fuselage construction, held together with a very substantial littering of rivets... so the detail is excellent. The A330neo uses the same construction techniques as the A350, with aluminum alloys which provides the strength and rigidity while keeping the aircraft lightweight in the main fuselage. And also uses composites in certain sections, such as the fairings, wingtips and some parts of the empennage (tail section), it's a balanced approach rather than the Boeing B787 fully composite design. Antennas shown here cover both Gogo’s 2Ku technology, which is a dual-antenna system that enhances the signal strength, ensuring better speed and consistency for passengers. Internally Gogo is connected to Panasonic Avionics for the best inflight Wi-Fi connectivity Cockpit windows come with the raccoon mask style are very good, and have nice tinted glass. Wipers are good as well, far better than the clunky earlier ToLiSS ideas. There are two fully dressed pilots shown in the external view, and quality looking pilots they both are. Door detail is also very good and the text detail is all readable, the side widows are also nicely done, and the glass is in there, but looks holey from a few angles. The Cargo doors are all animated (lock levers as well) and internally the cargo holds are all well detailed. You can see the far better aerodynamic design than the A330ceo, smoother in the inboard and a thinner wing. The wingspan of the A330neo is 64 meters (210 feet), which is an increase over the older model’s 60.3 meters. This larger wingspan helps generate more lift and contributes to the improved efficiency of the aircraft. Wing detail here in replicating the newer design is very good and highly realistic, with the nice wing lighting assembly which are also well done. The Airbus A330neo uses the fowler flap design, and extended it is well done in the detail, more so is the inner detailing of the hydraulic and pneumatic systems, again showing the extra detailing now associated with ToLiss designs. The refined sharklets on the A330neo contributes to up to 14% better fuel efficiency per seat compared to the previous generation A330ceo, and nicely intergated the sharklets are skillfully done here. Highlight here is the ginormous Rolls-Royce Trent 7000 engine, which is 112-inch (2.85 meters) in fan diameter. Making it significantly larger than the fan on the previous-generation Trent 700 engine. It has a bypass ratio of 10:1, meaning that for every unit of air passing through the engine core (where combustion happens), 10 units of air pass around the engine core. So the 7000 is significantly quieter in operations, and has lower CO2 and NOx emissions, so you get a 4% reduction in fuel burn per seat with an Increased thrust and power for the A330neo’s larger size and higher takeoff weight. The ToLiss RR Trent 7000 is excellent, nicely modeled and love the rear copper exhaust cone and the burnt nacelle. Note the RR Logo is branded as "Gliding Kiwi", to offset any legal affairs and patent licensing. Thrust reverser action and internal detail is excellent, and a big shout-out to Emma Bentley for the excellent A339 Virgin Atlantic livery seen here. The A339 has a tricycle-Type Landing Gear with a one nose landing gear (NLG) twin-wheel bogie, and the two main landing gears (MLG) in a dual-bogie configuration. They are constructed using high-strength materials like steel and titanium, with carbon brakes, which offer excellent heat dissipation and wear resistance. The design here is very very good, as the Oleo cylinder and Oleo piston which are really well designed, as is the downlock and drag brace. The Axle-beam assembly is also excellent... but there is something overall missing? the strut hydraulic piping is not on either the nose-gear or the mains? the piping can be seen in the wheel wells, but it doesn't come any further down the assembly. Tyres are good, but come with a few shapely lines, but the wheel hubs are authentic to the A330 Series. The A339 uniquely uses a sophisticated shock absorption system, which has oleo-pneumatic struts (a combination of gas and hydraulic fluid) to absorb the impact of landings and to absorb the extra weight of the A330neo. All doors are animated in the three ToLiss modes, AUTO, OPEN and CLOSED, with still the AUTO as default. Not my favorite ToLiss feature as they open when you want closed, or closed when you want open, so you have to go around the menu to reset every door to manual (that is ELEVEN doors folks), but there is now a door option... you can assign a command to OPEN all doors, set doors to AUTO, or to CLOSE all doors, all by your key commands, hallelujah to all that. Stairs are available on passenger doors 1L, 2L and 4L... on passenger doors 1R, 2R and 4R are the catering service vehicles, and there are baggage loaders on the Fwd and Aft Cargo doors, Chocks are available on all bogies. The De-Icing trucks introduced on the ToLiss A320neo are here as well. They come and de-ice the wings and engine, then move to de-ice the rear elevators and rudder, it's still all very clever in operation, but the operations has been reduced a little, now it only takes around ten minutes, rather than the long slog of 23 minutes on the A320neo... there is an instant de-ice option available as well. Cabin ToLiss cabins have usually been very functional, but modeling wise a bit standard. But there has also been a growing confidence in the detailing. This A330neo is the best ToLiss cabin to date. It is the mooted "Airspace by Airbus” which is designed to offer a modern and comfortable experience for passengers while also providing airlines with flexibility in cabin configurations. It is a very nice cabin layout, if slightly "Greyish" in tone, but the detailing is nice and the signage readable. There are two cabin configurations. Forward is a First/Business cabin layout. Certainly the best ToLiss cabin in quality, it is all very nicely designed. Screens show two A330neo images or the nose camera, switchable from the cockpit. There are 6 rows of 4 abreast cabins. Mid-deck and rear cabin is all economy seating, they are BIG cabins... with some nice detail were the rear cabin tapers into the tail. Seat frames and certainly the seat materials are again a step up for ToLiSS, more quality and detail, head rests are now inprinted with "ToLiSS" and it looks very nice. Centre sections are well detailed, so overall a nice modern cabin. Notable is there is a lot of "ToLiSS" branding in here, signs on the wall, images and even more branding on the seat back screens... showing confidence! There are three galleys. Forward for the A Listers, then Mid-Deck and a large Economy galley layout at the rear. Cockpit-Cold There is no shock when entering the A330neo flightdeck. It looks just like a normal A330, so not much change in here from the ceo to the neo versions. If you expecting dramatic changes then they are not visible in here. That is good, really good as there is nothing new here to translate to, so you will feel very familiar very quickly with everything. But there are however a few things that are different, or presented as clever new features as we shall see. Rear has a third seat and a jumpseat to the right rear. Detail is very good, with a wardrobe (and hangars) portable oxygen and avionics bay. Overhead panel (OHP) and Console wouldn't feel out of place on an A320, Airbus layouts are all so familiar. Cockpit - Powered (Hot) Switch on the power, and you get the full Airbus system start up procedure, all the systems will "self-test" for 40sec, and even the MCDUs (Multi-function Control and Display Unit) and CPDLC displays will also flash on and off as they also self-test, it is all very good... The system will settle down to the active mode, but with no navigation alignment. The quality of ToLiss aircraft are their deep systems and procedures, this is what you pay for, and they really deliver that Airbus system study intergration. ADIRU (Air Data Inertial Reference Unit) alignment is 7min, again a very exact procedure of the navigation setup of the system (you can do an instant Nav alignment if you want to). X-Plane 12 does make the display text look a little blobby, so you need to lower the display lighting to minimise the effect, but there a lot of panel lighting adjustments to do, plus you can also adjust the screen background glow effect, this also includes the MCDUs. All the displays pop-out, including the Integrated Standby Instrument System (ISIS) and both MCDUs. Early ToLiss aircraft were not really known for their animations (toys!). But there are quite a few now included to enjoy. There is the slide-out table for both pilots, and the forward window blinds can be dropped down. The side windows can be opened... ... and the seats are power animated to move forwards and backwards for entry, all the seat armrests can also be folded. Seat design, materials are also far better than in the early days, it is a nice quality detailed cockpit now. Any new ToLiss release comes with some really nice new features, and almost everything noted here will usually flow over on to the other ToLiss aircraft over the next period of updates, but you get them here first. HUD (Head Up Display) The biggest new feature (X-Plane 12 only) is the Head Up Display. I'm not overall a big user of HUDs, but this one is based on the new Laminar feature, and very, very good it is. We won't see the full potential at this point, but will see that later in use. One note is that you can't adjust the HUD, meaning you have to adjust your visual distance to the HUD, and not the other way around. Visual Primary Flight Display detail is excellent, and you can adjust the brightness and DECLUTTER the data via the panel on the glareshield. Only tricky issue is finding the HUD lever to lower or raise it, as it is black on black, not so much when activating it, but in say after landing, and your hunting around for the lever to hide it? Don't want the HUD option, then you can remove it with a blank panel in front of you. D-RAIMS -Digital Radio and Audio Integrating management system Another new feature is D-RAIMS. This is a console panel that is a new introduction feature on Airbus Aircraft. It replaces the twin Radio Panel on the centre console. The object of the new D-RAIMS panel is to intergrate three other separate panels into the one unit. That is the Radio, TCAS (Traffic Collision Avoidance System) and the Transponder. The D-RAIMS is really well replicated here as all the buttons are functional, but you will have to learn the new layout operations. ROPS (Runway overrun protection System) ROPS is an Airbus system designed to continuously calculate whether the aircraft can safely stop in the runway length remaining ahead of the aircraft. If at any point the system detects there is a risk of a runway overrun, flight deck alerts are generated to help the crew in their decision making. It has four active elements... "Landing Approach" as the aircraft approaches the runway, ROPS assesses the current speed, descent rate, and runway conditions. "Runway Monitoring" after touchdown (also Rejected Takeoff), the system continues to evaluate the aircraft’s deceleration and whether the remaining runway distance is sufficient to stop safely. "Pilot Alerts" if the system detects any risk of an overrun, it provides escalating alerts, prompting the pilots to take action, and "Feedback Loop" were the system updates continuously in real time, providing feedback based on the aircraft’s progress down the runway. The ROPS is shown on the PFD. ATSAW (Air Traffic Situational Awareness) Basically ATSAW is an expanded TCAS - Traffic Collision Avoidance System. ATSAW data is typically displayed on the Cockpit Display of Traffic Information (CDTI) or in the Airbus on the MAP/Navigation display, which shows the position of surrounding aircraft, their speed, and relative distance. Current In-Trail Procedures now also allow aircraft to safely follow each other at closer distances in cruise conditions. Portable Devices New (never seen before) is the signage change from "No Smoking" to "No Portable Devices". Yes it is an "about time" change. The signs here are on the cabin signs, the panel change of the old "No Smoking" Switch, and an alert display on the upper ECAM. It all looks very modern in asking you (politely) to "Please Turn Off Electronic Devices". Avitab- EFB (Electronic Flight Bag) Introduced on the A320neo are the two Avitabs situated on the sills of both sides of the cockpit... if you have a Navigraph account, you can access the Navigraph Charts, tools and other features on the A339neo. Besides the AviTab EFB there are now five tab options... WGT-BALANCE, TO PERF, LDG (Landing), PERF, CHECKLIST and ISCS W + B is your Weight and Balance sheet, it shows you your Weights, Centre of Gravity, Payload and Fuel with a load graph. TO PERF (TakeOff Performance) covers your takeoff configuration of which you can "COMPUTE" to create the TO data. LDG PERF (Landing Performance). Very similar to the TO PERF, but here you can "COMPUTE" your landing configuration and shown margins. (Ignore "OVERWEIGHT" as the LDG Prefs were computed at TO, not closer to the landing phase, so you are still full of fuel) PRELIM CKPT PREP (Preliminary Cockpit Preparation) or a big set of words for Checklist. The Checklist is very good, green ticks are easy to use over 22 categories, easy to clear or reset as well via the lower "RESET" button. ToLiss ISCS - Interactive Simulation Control System A new TAB on the Tablet is the ISCS or "Interactive Simulation Control System", or putting the Menu also on the tablet. The ToLiss Menu system is a bit more in depth than for just selecting SETTINGS, it is the heart of the ToLiss way of flying and using the aircraft. You can still access the ISCS via the banner "Plugins", menu, the other setting option is "Resume from last flight", we will look at that soon. I usually also set the ISCS menu on a key command (key S), this makes the ISCS far more accessible and quick, plus the same set command works on any ToLiss aircraft. If you fly ToLiss aircraft, you will be very familiar with the ISCS Menu system, however there are a few different changes in here, so again it could be noted as "the same, but different". There are the eight ISCS tabs available covering: Startup Situations, A/C + Sim Config, Loading Perfo, Ground Services, Faults Scenerios, Addons, Sound/Actions, Joystick and the General Settings Actions. The TAB layout is now however slightly different, as the former first TAB has been split into two separate TABs of STARTUP SITUATIONS and A/C + SIM CONFIG. STARTUP SITUATIONS LOAD/SAVE SITUATIONS is an absolute gem of a tool, basically it is "Save" tool, but it saves EVERYTHING including the important FMS settings and your route, and better still it gives you a backup "Auto-Saving" feature in case X-PLANE does a nasty CTD (Crash to Desktop) or a freeze on you, all the saves are held in the X-Plane Plugin's Folder and not in the A339neo Aircraft folder... Simply years better than any other save tool in X-Plane, it is simply golden to set up or to have your aircraft ready at a certain state of "ready for Flight" mode, and so very helpful if you just want to come back and just fly, then you can save the aircraft situation ready that way... it is just simply brilliant. The saved situations can be "Filtered" to find certain saved situations if the list is long (delete older saved situations as well). AUTO-SAVING time can be set from 1 Min to 30 Min, but every 5 Min is the best compromise, or reset your CURRENT_SITUATION if you again have a system or computer crash... Certainly ONE of the biggest features on the aircraft, if not the main feature overall. STARTUP this TAB section is all new, and is split between "Quick" and "States". Quick is instant actions on Engine 1 Start, Engine 2 Start, APU Start and ADIRU Alignment. States are Engines Running, ADIRU + APU ON, External Power on, Cold + Dark and F/CTL Law Overide, you can set as a DEFAULT three items in ADIRU+APU, Ext Power and Cold+Dark, F/CTL can also be set as "Direct". A/C + SIM CONFIG Another new TAB selection, but you will find other actions from other previous TABS on this page, but mostly the settings here are all new. SIMULATOR CONFIGURATION These settings are general settings, including the choice of seeing the ISCS in the Tablet, Sync Baro Sttings and Use FCU Mouse Gestures. VISUAL SETTINGS include; Wing Flex Strength (Slider), Wing Flex from gear bumps (Slider), and (Instrument) Background Glow (Slider). Other options include; Remove Glass Reflections, Use LIT Tex (Textures) for Cabin Lighting, Show XP (X-Plane) Partical Effects, Inhibit Cabin Object (Hides cabin), and Inhibit Inseat Screens (Hides seat video screens). You can also set to refresh the PFD (Primary Flight Display) so many (X) cycles. AIRCRAFT CONFIGURATION Here you can set up the aircraft configuration to your needs, options include; Use "Brake Fan", Has "D-RAIMS" system on the PFD, Imperial or Metric Units, Use the "HUD" (Head Up Display), HUD uses perfect data, and the ROW/ROPS (Runway overrun protection System) ON/OFF or AUTO PERFORMANCE ADJUSTMENTS Three items (Sliders) cover Aircraft Age, Engine Age, and if the Aircraft is NEW or OLD, you can save all the configurations and options on the page at the bottom. LOADING PERFO This tab covers the "Aircraft Loading" and "CG-CW", Payload, Passenger, Cargo and Fuel (Block Fuel) which all can be set, then added to the MCDU INIT B page values. Fuel loading can be "Quick" or "Slow" (Real Time). CG-GW Diagram gives you your Centre of Gravity and Gross Weight limits on a graph. TO PERFORMANCE settings can also be set here with vSpeeds, Centre of Gravity and Trim, Flex Temp and (Airconditioning) PACKS on. GROUND SERVICES This tab covers the external factors on the aircraft. Ground Supplies provides options for "External Power" (GPU) Power A - Power B and "High and Low pressure air" to start the engines and provide ventilation/air-conditioning while on the ground. But as noted there are no external physical GPU units, Chocks however are shown. But there is a built in PUSHBACK feature... The pushback is quite basic in look and to use in auto or manual modes. However I always use the excellent BetterPushBack Truck as an alternative. The Toliss A339neo has been configured correctly for the BetterPushBack use, so it works extremely well here. Note in watching the pushback operation on the ECAM! DEICING... You can do a "Quick" De-Ice, or use the "Animated" De-Ice Trucks for the full around the aircraft service AIRCRAFT DOORS have three selections with AUTO (default) CLOSE and OPEN. The auto will open the doors when the park brake is set and the engines are off. But they do have a tendency to be a bit uncontrollable in opening/closing at the wrong times or not opening when you need them to be open. So the manual "Close" is my preference to control them. There is no save selection either and so every time you open (or move) the aircraft you have to then (constantly and annoyingly) reset all the doors back to your AUTO preference state, as the default auto setting will always switch on command, that said you can now assign a command to OPEN all doors, set doors to AUTO, or to CLOSE all doors, all by your key commands, and yes I'm very happy! Their are PAX STAIRS on 1L, 2L and 4L Doors, CATERING TRUCKS on 1R, 2R and 4R, and animated "Baggage Loaders" on both FWD and AFT Cargo hatches. FAULT SCENARIOS The A339neo has a great failure system, or Fault Scenarios. These failures can be set up on the ISCS Panel. This feature is listed under the "FAULT SCENERIOS" tab. You can have a total random setting that covers a wide range of 90 faults over eighteen systems in "less" or "more" than "100 Flights", or you can set your own failure with the options including: NOW, AT Time, AT IAS (Speed), AT ALT (set altitude) or RANDOM, Also is the point of failure in Take-Off, Climb, Cruise, Descent, Landing and Flight... and you can set as many failures as you like. SOUNDS ADDONS Turbine Sound Studios (TSS) provides the sounds for ToLiss aircraft, but you can default back to the X-Plane default sound volumes if you wish in controlling a MASTER, INTERNAL and EXTERNAL volume. You can also set the COMPONENT VOLUME in; Engine Vol, System Vol, Cockpit Sounds, Environment, Ground Contact (CNTCT) and Aural Alerts, 3D Sound Fading will silence the PTU and Flap sounds in the cockpit. If you ADD ON any third party ADDONs then they will be shown here. This Sound TAB used to be part of the "General Settings" TAB, but now a dedicated page for these options. JOYSTICK ACTIONS Joystick Configuration selections options cover the "Primary Joystick" with Deadband adjustment, Joystick Roll For NWS (No/Auto/Yes), that replaces the earlier NWS (NoseWheel Steering) on/off, "Rudder To Tiller IN VR", Enable "Second Joystick" with Deadband Adjustment for custom setups like home built panels or training as it supports the use of two sidesticks (pilot and co-pilot side), A dual input and priority logic are also available as on the real aircraft), "Tiller Assigned" (with Tiller centre setting). "Pedal Brakes Assignment" with brake strength (slider), Smart Park Brake, Allow Brake on One Pedal. Throttle Configuration can use keys "F1/F2 Toggle reversers" (I use the joystick trigger!), "Smart THR Idle Lock" and "Rev on Same Axis". You can set (via sliders) both the "CL Detent Location" (Climb) and "MCT Detent Location" (Maximum Continuous Thrust). Under ACTIONS there are two options of "Jump To Next WP" (Waypoint, and an "Auto-Pause" with four choices; OFF, ON WARNINGS, ON WARN + CAUT, and ON WARN/CAUT/TOD. The "Auto-Pause feature allows automatic pausing of the simulation, if: A master warning is triggered (e.g. due to AP disconnect) A master warning or a master caution are triggered. (Any system fault) A master warning or caution is triggered, or the aircraft has passed the T/D, i.e. has entered the DESCENT phase. You can SAVE all the TAB page choices at the bottom. ACCOUNT SETTING As noted this was the earlier "General Settings" TAB, but the Sounds section has been moved to TAB 5, and the "Account Ids" has been added from the old "Sound/Addon/Accounts" TAB. The (New) "Account Settings" TAB has five sections in: "Product Info", "Account Ids", "Startup Behaviour", "User Interface" and "Miscellaneous". Product Info (Information) covers the current build number and version (very Airbus), and License ID Accounts Ids; if you want to use the ACARS function for flight plan download, you can put your SimBrief pilot ID into the field “SimBrief ID”. Important note: This is a pure number, not your SimBrief Email address. You can find this number on the Simbrief Website, under “Dispatch / Account settings” and then in the Simbrief data tab under “Pilot ID”. Simbrief options incude; Ignore AIRAC/AC Type mismatch: If this option is OFF, the flight plan download will fail if the active AIRAC cycle in the FMGS does not match the AIRAC cycle used by Simbrief for planning. Set Payload + Fuel to Simbrief: If you select this option, the cargo, payload and fuel on board in the ISCS will be set immediately to the Simbrief values. Always use SimBrief winds: If this option is selected, any wind request in the FMGS will take the wind data from the Simbrief plan HOPPIE CPDLC LOGON option The option “Auto Execute handovers” allows to switch to the next ATC station automatically upon receiving the “handover” command from your current ATC station without having to notify the new ATC station. ATIS Source; VATSIM of PILOTEDGE Startup Behaviour sets the aircraft to a certain startup situation; "Default Baro" in either HPA or InHG (note you can also have the choice to SYNC or adjust manually the separate PFD Baros). Set your own default "Transition Altitude" (Slider). You can "Start with Bright Displays" (ON/OFF). User Interface is options on how you interact with the aircraft. Options include: "Pop-out windows for Pop-ups" and you can save your setup "Pop-Up configuration on Quit" (Cockpit builders). Miscellaneous The "ILS auto align" is a feature that if the custom scenery that rotates the runway; for these cases the ILS and the runway are not aligned anymore. The ToLiSs A339 plugin thereby contains a feature that detects if there is such custom scenery installed and then realigns the ILS in the internal database with the new runway heading. "XPDR Compatiblility Mode", is the use of different transponder modes. "Cache Routes only on Startup" prevents the plugin from checking for changes to your fms flight plan files during the flight. The "Enable AviTab Tablet" option has been removed, making the tablets now part of the cockpit furniture. You can again save all "Preferences and Default Values" Interactive Audio Control Panel (IACP) There is another menu access system situated on the Radio Panel, called the "Interactive Audio Control Panel" (IACP). This feature gives you finger access to an item in a more pop-up accessible form... two options available are INT and CAB or INT which has five ground communication tabs; SERVICES, PUSHBACK, FUEL/DEFUEL, CARGO HANDLING and DEICING... ... second IACP option is CAB selection that covers Cabin interaction; DOORS, PASSENGERS and CABIN LIGHTING... ACARS - Aircraft Communication Addressing and Reporting System ToLiss aircraft comes with the ACARS function, used as noted earlier with the CPDLC. But it has another function here in the ability to download the FlightPlan from Navigraph's Simbrief. The tool was introduced on the ToLiss Airbus A340-600 v1.1, since then also updated to the rest of the ToLiss fleet (A319/A321/A32N) and so it is a big feature in the A323neo as well. A full tutorial in how to use it was covered in Airbus A340-600 v1.1 by ToLiss... SimBrief Remember that you have to complete your SimBrief Pilot ID in the ISCS (SOUND/ADDON/ACCOUNTS). Then the "Data" link has to be opened by pressing the COMMS VHF 3 button the Radio panel. Also important is to set the "Set Payload + Fuel to Simbrief", option ON, if not you will have to set up the aircraft fuel and weight options separately. Then complete and generate your SimBrief flight profile, note you use the Aircraft Type A339, for NEO, not the A330. Our route today is VS - Virgin Atlantic VS338 from EGLL (Heathrow Lon) to KCTL (Charlotte US). Lighting-Interior Again ToLiss has come a long way in designing the interior lighting since the early days. The lighting setup is now all comprehensive to the standard Airbus system. Panel downlights are far better, brighter, but still non-visible in the daylight. But the individual instrument displays and INTEG lighting is now very good and on class for this price range. There are three overhead spotlights for centre console, and two reading lights, but the reading lights (although adjustable) are not that strong in lighting the pilots seats. You can darken down the instrument panel nicely for dark takeoffs and landings, to which I am grateful. There is even a separate lighting switch for the compass, very nice touch. There are three DOME states (DIM-BRT-STORM), but they won't work unless to switch on the CTL switch to the left. Lighting-Interior Cabin lighting is bright, but thankfully adjustable on the IACP panel, but there is no separated lighting for the galleys. The cabin lighting is set in a percentage % shown here is OFF, 8%, 16% and 30%.... above 40% is too bright. But there is also a cabin lighting option on the A/C + SIM CONFIG page with the selection of "USE LIT TEX FOR CABIN LIGHTING", this option creates the current "Airspace by Airbus” mood lighting with blur textures on the ceiling and just down-lighting, very nice it is, the rear Galley thankfully stays full bright in this "TEX" mode, so it all works very well. Exterior - Lighting External lighting is excellent. Navigation, Beacon and Strobes are perfect, twin wing(Ice) lights are also well done. Tail light works, but only when the flaps are not set to zero as per Airbus rules. Internal view on the Ice/wing lights are excellent, and keep the cabin lights down to avoid the liner effect. There are Taxi, RWY Turnoff lights and the Main Landing lights ___________________ Flying the A330neo Typical moody muggy London day... I set up the A339 the night before, so when ready to go (or if I wanted to do the same LON - CTL route again it is already saved and ready) with the excellent "SAVE SITUATION" feature. So all I have to do is call pushback. There is a choice, the built in Pushback tool, or BetterPushBack which I prefer. Now in the pushbacked position it is time to start the "Trents". Engine 2 is first. Bleed ON (APU running), and select ING/START, both packs (air conditioning) need also to be OFF. Then it is the simple operation to flick up the No.2 Engine switch under the throttle quadrant. The full start procedure is shown on the (ECAM) which will display the engine start indications. You get the full timed parameters, N2 (core speed) increases to around 20%–25% N2. Then the engine fuel flow will begin, and the Ignition will engage automatically, N1 (fan speed) will start to increase as the engine spools up, and you will wait for stable idle... this typically happens around 58% N2 and 20% N1. When Engine No.2 is done then the same startup procedure for Engine No.1. Turn off thev IGN/START and shutdown the APU Set Flaps (1+F), timer, and SPLRS (Spoilers) ARMED, you can check if the TO CONFIGURATION is correct by pressing the TO CONFIG button lower console menu, any errors are then shown. Sounds... very good, if you get really close? the Trent 7000 is super quiet, and nothing, not a sound of it in the cockpit. But they are good quality sounds, right from the engine startup procedure to the running of the engines and APU, you can adjust the aural balances in the ISCS. Power up, brakes off and your moving... The ToLiss Tiller Steering is very authentic to the aircraft, but tricky to master. It is far slower to turn than your inputs, so there is delay between moving the tiller and the turning action, it can make you over reach thinking it is not turning below, it is "really slow" so you have to adapt to it. The trick is to not taxi too fast, the slower you go, the easier it is to turn, go too fast and you will lose control and slide with the front wheels at the wrong angle burning friction... But I love the heavy 220,706 kg TO weight of the A339, you feel it and respond to the mass around you, a good sign of a great simulation. A standard departure, but this one is with a difference... I now have a HUD feature to help with the takeoff! There is now no need to half your screen, bottom the instruments, upper the window. Instead you have everything you need right in the middle of the window without looking down. At first you will think it would be just the basic PFD instruments, Speed and Altitude Tapes, Artificial Horizon, V/S (Vertical Speed), Rate of Turn, Baro, Wind, and Compass. They are all there obviously. But as you initiate items, like Throttle modes (Including FLEX), SRS (Speed Reference System), NAV, FD (Flight Director) and A/THR, then they all show up, obviously the speed bugs are on there as well... 162 + 10 Knots and rotate, "Positive Climb" The Flight Director indicators of inputs for pitch and roll are shown, with your FD target position to aim for, it is all very comprehensive. Gear up. You don't have to look at the Gear indicators either as there is a definite "thump, thump, thump" of the gear locking into place. Gear retraction (and extraction) is first rate. Typically the A339 climbs at a rate of around 2,000 to 3,000 feet per minute (fpm), depending on the weight of the aircraft, weather conditions, and engine thrust settings. It is a bit of a bumpy ride through the low cloud base, but then you are free. Without doubt the HUD is very dramatic, obviously not the first HUD arrangement in X-Plane, but unique for the ToLiss, the trick here is the amount of quality data detail provided on the screen, it looks and feels very professional in operation on a Airliner. The maximum altitude for the A330-941 is around 41,000 feet (FL410), but the typical cruise altitude for long-haul flights is between 33,000 and 39,000 feet. With a maximum range of the A330-941 of approximately 7,200 nautical miles (13,334 kilometers). The Airbus A330-800 has a slighter longer range of approximately 8,150 nautical miles (15,094 kilometers). But the loss of range is made up by the extra capacity of seats 406 passengers for the A338 to the 440 passengers for the A339 depending on the cabin configuration. We are coming up on the "North Atlantic Track" (NAT) a network of predefined routes that change daily based on weather patterns, jet streams, and traffic demand. The tracks are updated daily by the Shanwick (UK) and Gander (Canada) Oceanic Control Areas (OCAs). Pilots file flight plans based on these routes. There is an entry point (RESNO) and an exit point (JANJO) on this track, in-between are a sets of co-ordinates defined by latitude and longitude, but they have there own special input code or setting to program the Co-Ords into the MCDU system. The Co-Ordinates 56°0'0.0"N 020°0'0.0"W is converted to 56N040W for input (Simbrief does it automatically). There is also the "Organized Track System" (OTS) another series of tracks connecting different oceanic waypoints across the North Atlantic. It helps manage the flow of aircraft flying between Europe and North America. These tracks are designated as “Track A,” “Track B,” etc., depending on the day’s configuration. There is also "Random Route Navigation, outside the NAT system, for some aircraft who may use “random routes” based on their specific flight plans and preferred wind patterns. These random routes also follow oceanic waypoints and require frequent reports to the Oceanic Centres. As noted you can insert your SimBrief route and data directly into the MCDU, you just have to fill in your TO Prefs (TakeOff Preferences) on the TO PERF page to complete the setup from the ISCS. FUEL PRED (Prediction) is excellent and found under FUEL PRED button. I rarely use the Airbus Style PROG (Progress) as it is not at all as good as the Boeing tool, so I mostly rely on the PERF selections for each phase of the flight. EQUI - TIME POINT is also available, found under DATA lower RK6. ETP (Equal Time Point), which is basically the point at which it'll take a shorter time to continue to the next suitable diversion airfield than to turn back to the last one. Mostly used on ETOPS routes and over oceans for diversion actions. The A330-941 being a Twin-Engined aircraft is governed by ETOPS or "Extended-range Twin-engine Operational Performance Standards", so we are using a very Northern NAT Track. ETOPS is a certification and regulatory term used in aviation that allows twin-engine aircraft to fly on routes that are farther from a diversion airport than what would be allowed under standard regulations. ETOPS regulations allow twin-engine aircraft to operate over remote areas, such as oceans or polar regions, where a suitable alternate airport might be more than 60 minutes away under normal twin-engine rules. The A339 is certified for ETOPS-180 as a standard, which allows it to fly up to 180 minutes (3 hours) from the nearest suitable diversion airport in the event of a single-engine failure. The A330neo can also be certified for ETOPS 285, which extends the range to 285 minutes (4 hours and 45 minutes). And there is (Potential Certification) for ETOPS 330 by some airlines, which would allow the aircraft to operate up to 330 minutes (5 hours and 30 minutes) away from a diversion airport. This is beneficial for ultra-long-haul routes where alternative airports may be sparse, such as over polar regions or the southern Pacific Ocean. Atlantic route crossings are always a great scrutiny of the X-Plane weather (besides looking out of the window). For years the view up here at altitude was not great even noted as dismal, but with X-Plane 12 we have had a focus on this important role in Simulation... X-Plane 12.1.0 delivered the final piece of the jigsaw in delivering those higher Cirrus cloud formations, storms as well. But I have done a few tracks over the Atlantic over the year, it was good before, but there seems to be a little more backroom tinkering over the last few XP12 updates, the view out now is quite spectacular, Cumulonimbus is all in their glory. Sitting in the rear is very nice, the sounds are very good, with a differential difference between sitting behind the engine or in front of it, sounds are of course 360º dynamic, but the cockpit is a far quieter place. The Camera backseat screens are not really useful, maybe on takeoff or landing, but other wise blank(ish), the live front video also uses up framerate? so be glad you can turn the feature off. But it's nice and serene on the flightdeck, with only the "Trim Tank" flashing away now and again in telling you it is doing it's job You may be thinking? why London to Charlotte, North Carolina. It's an odd route? But you have to understand the routes that the A330neo is built for, not the mainline point to point like London to New York, Boston or Washington in this context. But for those long thin routes, making connections outside of the major hubs, it varies your flying as well, gives you a more interesting palette of destinations to chose from, and so you are also thinking outside the usual box. The remnants of Hurricane Milton are still hanging around North Carolina, dirty, black and low. Approach into Charlotte-Douglas KCTL is via STAR MAJIC4 into Rwy 18L. It is an easy approach from the north, but the weather is a bit tricky. The Tablet LDG PREFs are now reset (Compute) as we have burnt off the fuel, and shown are the new calculated landing differences, The Rwy ILS (IVKQ 110.35mHz) is now also active, you can't insert the frequency until you are within the 100nm area, the ILS ICAO code will show when you select the PFD "LS" ILS ribbons to say that approach is now active. Approach Phase is also now activated in the MCDU. At GIZMO you track right to CAVVI on the chart for the turn into 183º directly into CTL (Charlotte). HUD is back in operation, so no look downs are now required, you can just focus ahead... ... CAVVI and it is a hard bank left. The ToLiss A339 looks and feels great, the approach flying can be as automated or as manual as you want, both aspects work extremely well here, but mostly the auto modes are excellent. Once you select APP then the data shows up on the HUD, both AP1 and AP2 can be selected here for a DUAL CAT 3 Approach. Gear down, and an increase of wind noise as it lowers, and the same satisfying "thunk, thunk,thunk" of the Tri-Gear locking into place. Glideslope data (G/S and LOC) are now displayed in the HUD, note the target runway outlined centre. The runway target increases as you approach... ... then disappears when you go into the LAND phase, giving you a clear view of the threshold. After LAND mode you go into FLARE mode... "Retard, Retard" Nice "touch", then the full reverser and airbrakes to slow you down, reverser power sounds are excellently loud, so was the gear touch feel (you can adjust this aspect)... ... you have to skillful on the rudder pedals and tip-toe brakes to get a clean centre line roll-out, certainly on a damp runway... but that is were the piloting skills come in. A tight runway exit around taxiway C2, I have sort of mastered the slow tiller... sort of? With the A330-941neo now cleaned up (even the HUD put away), it is a long taxi to Concourse D (International) along taxiway C. Bay D10 is waiting, and I am ready to shutdown, 8h55m is a long flight, but the ToLiss A339 is a dream to fly for these long -haul thin routes, brilliant Simulation, great investment. Liveries You get four liveries with the package; ToLiss House, and three Airbus branded in; First Flight, "Airspace" and "Foundation (10 Years)" Again to note the RR Logo is branded as "Gliding Kiwi", to offset any legal affairs and patent licensing. There is a Paintkit available, and already the painters are churning out quality liveries, I'll note a few early ones here including the Condor Package, Cebu Pacific, Garunda, and Virgin Atlantic. ____________________ Summary ToLiss was the part of the 2009 original collaboration with QPAC to create the first X-Plane A320 simulation with realistic Airbus Flight Control Laws, and automated cockpits. Since then the developer has gone on to creating the very best Airbus aircraft for the X-Plane Simulator, with the A319-112, the A321-231, A340-600 and the Airbus A320neo. The choice here of the Airbus A330neo (New Engine Option) is not really a big surprise, but on how good this A339 is the surprise. Modeling and design is very good, but early ToLiss didn't have the extensive extreme quality you can now expect in this category, but with a change of a modeller a few years back, now in every area the detail and quality is highly improved, better again here and now showing a maturity that wasn't there earlier, that said, the missing hydraulic lines on the undercarriage are a bit of an oversight, but the excellent Rolls-Royce Trent 7000 engines makes up for that aspect... add in then matching the high quality Airbus Official systems and for the excellent flying feedback of the aircraft. This ToLiss is absolutely the best, or better of it's category and class. System wise the ToLiss A339 is the best in X-Plane (all ToLiss Airbus aircraft are), with all the Airbus Flight Laws and Protections highly intergrated, with the authentic engine control laws. If you want to fly the automated Airbus you can, but if you want to dig deeper into the "Study" aspect of Airbus Philosophy. Then that aspect is also very highly available here, so both Pro's and Newcomers to the Airbus way of aviation can be easily satisfied here. Both cockpit and cabin are excellent, new textures are in the cockpit and the cabin look and feel is a step up from the earlier releases. The A33-941 comes with a few new features. Head of the feature list is the HUD (Head Up Display), fully intergrated with full data graphics, it is a bonus to landing and takeoff procedures. D-RAIMS -Digital Radio and Audio Integrating management system, ROPS (Runway overrun protection System) and ATSAW (Air Traffic Situational Awareness) are all new to ToLiss, with the No Smoking sign changed to Portable Devices. Sounds are by Turbine Sound Studios, very good but not that extreme BSS quality. The ACARS function is fully intergrated with the CPDLC system , but really only available to on-line fliers with the HOPPIE network, but very good it is. The ToLiss ISCS - "Interactive Simulation Control System" is far more than a menu, it provides tools and options that are truly remarkable. The LOAD/SAVE Situation tool is a godsend for any Simmer... saving perfect situations to return ready for flight or even an unexpected simulator crash, I was back up and flying perfectly in minutes after a bad scenery crash, this shows the tool's peerless power. SimBrief intergration can load in the "Full" data brief into the aircraft's systems, another huge time saver. Fault Scenerios are also excellent as are aircraft configurations. AUTO-PAUSE, this feature allows the user to leave the computer during a flight to do a pause in three alert scenerios. The ISCS is also now available on the side Tablets with AviTab. Notable is that all the above new features will gradually transfer to other ToLiss aircraft, but you can now use them here first. New to ToLiss on the A320neo were the ground equipment, here also on the A330neo are the Baggage Loaders and Catering Trucks, and the sensational animated De-Icing Trucks and here we have stairs on all left doors. Opening Side Windows and the Electronic Flight Bag EFB tools for WGT-BAL, TO PERF, LDG PERF, and extensive built in CHECKLIST and as noted now the ISCS are all on the tablet. The "Interactive Audio Control Panel" (IACP) has also been extended to include both Ground and Cabin tabs with excellent cabin lighting adjustment. Commands for the AUTO doors has made me happy, the difficult tiller steering is however a learning curve, and there is still no physical ground GPUs? but the niggles are very few. The list can obviously go on, and on... but notable is the X-Plane 12 version in using the X-Plane features, an X-Plane 11 version is included in the package, but that would takeaway a lot of the dynamics and the immense fun this aircraft has to offer by using the X-Plane 12 environment. "Peerless" is the word I would use here, "Transcendent" is another. If you want Airbus Aircraft in the X-Plane Simulator, then there is only one place to go to... ToLiss, and again they deliver another excellent aircraft with tons of real useful features in the Airbus A330neo. Certainly a great if brilliant investment, the features alone are worth the money, but with everything else... ... It's unparalleled simulation, and Highly Recommended! ________________ Yes! - the Airbus A330-941 neo by Toliss is NOW available from the X-Plane.Org : Airbus A330-900neo Price is US$89.99 Requirements X-Plane 12 or X-Plane 11 Windows , Mac or Linux 4 GB VRAM Minimum - 8 GB+ VRAM Recommended for XP12 Not for commercial use. For any commercial use enquiries, please contact [email protected] Download Size: 1.2 GB Version 1.0. (October 19th 2024) Fully Featured Detailed FMGS: 3 independent MCDUs providing real life FMGS programming capability 2 independent autopilots SID/STAR and airways support in a fully custom FMGS backbone supporting all A424 leg types (Arc, course or heading to intercept, Radius to Fix, Holdings, etc.) Support for all approach types present in real life A340-600s, including GLS, ILS, LOC backcourse, etc. Full VNAV guidance with TOC, TOD, Deceleration point, speed limits, fuel prediction, etc. Altitude and speed constraints as the real aircraft deals with them Support for Go-Arounds and diversions Nav Aid autotuning Pilot item database, such as pilot fixes, pilot navaids etc. Flight plan saving via the Pilot routes page Equitime point computation and nearest airports page Accurate systems: Fly-by-wire system with reversion between normal law and alternate law 1, alternate law 2 and direct law as per real life logics. Hydraulic model for flight control actuators computing hydraulic flow through the actuators, the control surface hinge moment, maximum feasible deflection etc. This gives realistic surface floating angles if a control surface is lost due to combinations of hydraulic and computer faults. Quantitative hydraulic model considering the maximum hydraulic flows of the different pumps as a function of engine speed. This is most noticeable when flying on RAT or with wind milling engines Quantitative bleed model considering the bleed mass flow for engine start, wing anti-ice air conditioning packs etc. High fidelity fuel system including inflight CG control by pumping fuel to and from the tail tank, fuel jettison, manual and automatic transfers between the different tanks Detailled model of each ADIRU including alignment, small pressure sensor differences between the units, switching of sources for PFDs Fault injection system allowing to trigger over 140 system faults either at a specific point in flight or randomly during a flight phase Cockpit display system simulating the dependency of the displays on the Display management computers resulting in real life display limitations ECAM system with over 30 warning and over 200 caution messages including associated ECAM actions. 3d modelling Detailed 3d cockpit with animated switches Mouse gesture system for interaction with push-pull knobs emulating the motion on the knob with the mouse Detailed cockpit lighting with reading lights, console light, tray table lights etc. 4 class passenger cabin with underfloor lavatories and crew rest Custom particle effects for engine heat trail, Fuel jettison etc. Custom landing gear model for bogey touch down. Usability features Situation loading and saving. It is possible to save the flight at any point in time and resume it another day. This can also be used, e.g., to save the position just before approach and practice just the approach many times Autosaving allows recovering where you left off, should the X-Plane session end unexpectedly Jumping waypoint-to-waypoint through the cruise phase: Shorten your flight to focus on the more interesting parts as you like 4 different startup configuration from Cold and Dark to engines running and ready to go In-screen popup displays or use of x-plane windows for popups Adjustable Wingflex via a slider in the ISCS Possibility to turn the screen reflections on and off Auto-updater by Skunkcraft Included Installation Download of the Airbus A339 is 1.08Gb and it is installed in your Airliner Folder as a 1.85Gb folder. On start up you will have an activation screen presented to enter your Serial Number (Key), and then press the "Activate" bar to authorise the aircraft. I recommend to totally restart the aircraft from your desktop to realign all your plugins and load the aircraft cleanly. AviTab Plugin is required for this aircraft The Skunkcraft Updater is provided for updates Documents There are Three Manuals Included with the package. All are extensive and well laid out with great details Aircraft manual, which is primarily intended as a reference after the tutorial has been completed. It provides a reference for standard operating procedures, as well as a more in- depth look into the different systems of the aircraft. Simulation manual : Describes installation, and setup of the model as well as usage of the “Interactive Simulation Control System”. Tutorial flight, which provides a step-by-step description of a complete flight from cold & dark to aircraft shut-down after landing. This is the best manual to learn flying the aircraft. ToLiss_AirbusA330-900_AircraftManual.pdf ToLiss_AirbusA330-900_SimulationManual.pdf ToLiss_AirbusA330-900_Tutorial ____________________________ Review System Specifications Windows - 12th Gen IS1700 Core i7 12700K 12 Core 3.60 GHz CPU - 64bit -32 Gb single 1067 Mhz DDR4 2133 - PNY GeForce RTX 3080 10GB XLR8 - Samsung 970 EVO+ 2TB SSD. Sound-Bose Quietcomfort Headphones Software: - Windows 11 Pro - X-Plane 12.1.2rc4 Plugins: Traffic Global - JustFlight-Traffic (X-Plane.OrgStore) US$52.99 : Global SFD plugin US$30.00 Scenery or Aircraft - EGLL - London Heathrow International Airport by Taimodels (X-Plane.OrgStore) - US$28.00 - KCLT- Charlotte Douglas International Airport UHD by Nimbus Studios (X-Plane.OrgStore) - US$26.95 ____________________________ Review by Stephen Dutton 18th October 2024 Copyright©2024: X-Plane Reviews (Disclaimer. All images and text in this review are the work and property of X-PlaneReviews, no sharing or copy of the content is allowed without consent from the author as per copyright conditions) All Rights Reserved
-
NEWS! - Aircraft Update : ICON-A5 v4.0 by vSkyLabs This virtually all new version v4.0 is practically a 90% remake of the original aircraft, and the change log is also quite comprehensive. The biggest new unique feature is for bilge water build-up and bilge pump drainage systems which are being simulated here, plus better dynamics, systems and a new sound package FMOD 2.02, it all adds up into a big change on this little amphibian. The Icon A5 is a sleek, light sport aircraft (LSA) designed for adventure flying. It is an amphibious two-seater, meaning it can take off and land on both water and land. The aircraft powered by a Rotax 912 iS engine, offering about 100 horsepower and a cruising speed of approximately 95 knots (109 mph). The Icon A5 is often praised for its intuitive controls and is marketed as an aircraft that makes flying more accessible to those who may not be professional pilots. It’s perfect for those seeking adventure in the skies and on the water. Version 4.0 - October 14th 2024 Major Update Flight Dynamics: Re-validation of all performance and flying handling qualities following real-world ICON-A5 published data. Redesigned fuselage hull to allow more accurate 'step-taxi' and water takeoff performance. Wing design tune-ups to allow higher performance figures accuracy throughout the flight envelope regimes. Airfoils update. Propeller re-design to allow higher accuracy of power gradients and prop-disc drag throughout the engine's power curve and airspeed regimes. AOA indicator calibration. All-around complementary aerodynamic design tuneups. Systems: Re-make of the entire annunciation system (warning lights, gears lights, trim lights, bilge pump and water rudder light) using the latest X-Plane 12 conventions. Re-make of the entire cockpit lighting systems for the console, instruments, and panels. Re-wiring of the warning lights to reflect systems status more accurately, including 'engine' warning light conditions, which will light when exceeding engine's operational limitations. Enhanced Altimeter - showing both systems for pressure tune-up, including total altitude (digital display). Electric artificial horizon now shows slip-indication, VSI trend and 'BRAKES' warning light. AOA indicator graphics re-work to provide the updated instrument appearance. Starting switch manipulator enhancement to allow 'holding' the key in 2-d mode for more realistic behavior. Heating knob is now functional (no actual heating will be sensed...). Wing-folding mechanism is now possible for interaction only when the aircraft electrical system is in the OFF position. This allows folding and unfolding the wings without the need to set the power switch to ON. Graphics: Interiors/exterior models PBR enhancements (including various 3-d modeling enhancements). G1000 panel and knobs - remodeled with improved appearance. Pilot and passenger PBR enhancements. Cockpit placards improved existing ones, added new ones. Default paint enhancements. Better animation for fuel-tank selector. Sounds: New FMOD 2.02 sound package. Added bilge-pump sound. Added windshield wind effects (noticeable when flying without the windows installed). The Icon A5 features also a highly accurate aircraft performance and flight handling qualities which follows the official 'numbers' with high precision, including the A5 unique AOA indicator which is calibrated to allow authentic use during all phases of flight. Removable windows - but fly without the windows installed you get. the increased drag affecting aircraft performance. And avionics wise - it is equipped with a single-screen/dual display LR G1000 bundle, or a 'VSL LSA Companion' avionics alongside a ready-to-use Avitab display. Autopilot included in both 'modes'. The vSkylab philosophy is that you are purchasing an ongoing project, and all the development is free and ongoing throughout the X-Plane 12 version. These projects are under constant development: the development road-map is including flight model refinements, enhanced systems depth, additional liveries and other improvements. The ICON-A5 v4.0 by vSkyLabs is now available from the X-Plane.OrgStore, if a current owner, then just go to your X-Plane.Org Account and download the latest version v4. _____________________________________ Yes! - the ICON-A5 v4.0 by vSkyLabs is NOW available from the X-Plane.Org Store here : ICON-A5 v4.0 Retail Price is US$29.00 On sale: $29.00 US$23.20 you Save:$5.80(20%) Requirements X-Plane 12 or X-Plane 11 Windows, Mac or Linux 4 GB VRAM Minimum - 8 GB VRAM Recommended Download Size: 215 MB Current Version: 4.0 (October 14th 2024) ___________________________ NEWS! by Stephen Dutton 15th October 2024 Copyright©2024: X-Plane Reviews (Disclaimer. All images and text in this review are the work and property of X-PlaneReviews, no sharing or copy of the content is allowed without consent from the author as per copyright conditions) All Rights Reserved
-
 You mention " Including four lovely heavy ships, and five leisure watercraft, including Austin Meyer being chased by sharks..." in the new Caribbean Update. My question to you is: are you folks planning on placing any boats on the Great Lakes shipping routes & if so, are you modelling the look of the Great Lakes Freighters that are being used there. Back sometime ago, a fellow simmer "Daveb86" had posted a rendition of a Great Lakes Freighter he was working on, but then he disappeared. While I'm on the subject of the "Caribbean Update", my hat is off to you guy's for what you have done here in making XP12 more real like. Thanks
 -
NEWS! - Engine Mod : Mango Studios releases A340 Trent 556 Engine Mod I like these clever little engine mods (Modifications) from Mango Studios. I don't usually do this sort of thing (Mods), but this series of engine mods are very good, mostly for the very high quality of the modeling and their detail. You also get associated liveries as part of the package as well, in this case Etihad, Etihad F1 Grand Prix 2015, Lufthansa Old Colors, Qatar, South African, Virgin Atlantic. But note, this is not a sound pack, just the modeling. The Trent 556 refers to a variant of the Rolls-Royce Trent 500 engine, specifically designed for the Airbus A340-500 and A340-600 models. The “556” in Trent 556 denotes the engine’s thrust rating of 56,000 lbf (pounds of force). And these engines were a key part of improving the performance, range, and efficiency of the A340-500/600 variants, allowing them to fly on long-haul routes. Mango Stuidos provides both a manual and a video on the RR556 installation. __________________ Yes!... A340 Trent 556 Engine Mod by Mango Studios is now Available from the X-Plane.Org Store here : Mango Studios A340 Trent 556 Engine Mod Price is: US$6.99 Requirements The Toliss A340 is required for this add-on. Download Size: 60 MB Current version 1.0 (October 11th 2024) ___________________________ NEWS! by Stephen Dutton 12th October 2024 Copyright©2024: X-Plane Reviews (Disclaimer. All images and text in this review are the work and property of X-PlaneReviews, no sharing or copy of the content is allowed without consent from the author as per copyright conditions) All Rights Reserved
-
NEWS! - Laminar Research releases 12.1.2 as Final The latest X-Plane 12 version has gone out of beta testing, and that v12.1.2 is now noted as "Final". This v12.1.2 was listed as the "Caribbean Update", and it was a very substantial update. Including four lovely heavy ships, and five leisure watercraft, including Austin Meyer being chased by sharks... to highlight the Caribbean release theme, three airports and destinations were also included; Princess Juliana International Airport at Sint Maarten, Juancho E. Yrausquin Airport on the island of Saba and the famous short sloping runway at Gustaf II Airport on the island of Saint Barthélemy, or St. Barth’s. Important was the water fix between the tropical waters and standard deeper water, so there are now no visible hulls in the water, but the colourful coral reefs can still shine through. X-Plane is now noted with 20,000 3D Gateway Airports with Dual Airbridge support and you got more camera views. The general airport library also got some additions with some passenger stairs, airport buses and a ground power unit, and the X-Plane replay tool had a lot of attention. Notable were the ships, I absolutely loved them, a lot of users hated them? you work it out... anyway there was later added in on the Graphic Menu in a selection to turn them off... Overall it was a very successful update in the X-Plane 12 series Next up is X-Plane 12.1.3, which will bring upgrades to the ATC system (SIDs/STARs) and then later on improvements are coming to our weather engine, plus the introduction of the new cockpit weather radars. Most of these items will round out the changes to the New Year. ______________ NEWS! by Stephen Dutton 11th October 2024 Copyright©2024: X-Plane Reviews Disclaimer. All images and text in this review are the work and property of X-PlaneReviews, no sharing or copy of the content is allowed without consent from the author as per copyright conditions) All Right Reserved.
-
NEWS! - Scenery Update : LFRE- La Baule Escoublac v1.1 by VFRScenery Released in November 2022, this is the first major revision of LFRE- La Baule Escoublac to v1.1. by VFRScenery, available for both X-Plane 12 and X-Plane 11. La Baule-Escoublac Airport, a small regional airport located 3 km east of the town La Baule-Escoublac, France. With the airport situated near the town of La Baule, providing easy access to the popular seaside resort and surrounding areas in the Loire-Atlantique region. La Baule primarily serves general aviation, including private planes and small aircraft. It’s not a major commercial hub, so it’s typically used for private flights, flight training, and occasionally by chartered services. X-PlaneReviews did a release review by Felicity Smith of La Baule here: Scenery Review: Pack Bretagne: LFRE La Baule + LFEQ Quiberon As noted this is a comprehensive update, the changelog details are here; Version 1.1 - October 10th 2024 Changed the window textures of the building to the left of the museum. Complete overhaul of the garage adjacent to the La Baule museum. Retextured the walls and roof of the La Baule museum. Overhaul of the hangar to the right of the museum with new textures. Created the "Aviation Museum" directional sign. The flag area is now properly fenced, and the flags have been replaced. Optimized the fences. Created specific streetlights for the airfield. Added steps to the restaurant terrace and the missing joinery on the right. Revamped the terrace with added shrubs and updated ground-floor textures of the control tower. Completely redesigned the parking lot area with new objects (garbage shed, bins, electric bike rack, bollards, mailbox...). Added a surveillance camera. Created the Vall Jet building and its area. Added gates to the airport access points. Created parking lot barriers. Various modifications and improvements. For current owners of the VFRScenery La Baule, this is a free update, for purchasers the scenery is currently on sale at US$14.99, with a saving of $5.00(25%) Features Accurately modeled airfield from photos taken on site in 2022. Custom 3D objects (no external library required) Hangar interiors modelled and lit at night 10 hangar doors open and close (more animations to come) 4k PBR texture Accurately modelled fresco of the aeronautics museum Customized control tower lights scanning the tarmac\ Custom 3D objects\ Precision modeled Avgas 100LL and JetA1 stations OrthoPhoto compatible Optimized for good FPS VAC card included User manual in English and French Images are courtesy of VFRScenery __________________ Yes!... LFRE La Baule Escoublac v1.1 by VFRScenery is now Available from the X-Plane.Org Store here : LFRE- La Baule Escoublac Price is US$19.99 On Sale for US$14.99, a saving of $5.00(25%) Requirements X-Plane 12 or X-Plane 11 Windows, Mac or Linux 4 GB VRAM Minimum - 8 GB+ VRAM Recommended Download Size: 3.4 GB Current Version : 1.1 (October 10th 2024) ___________________________ News! by Stephen Dutton 11th October 2024 Copyright©2022: X-Plane Reviews (Disclaimer. All images and text in this review are the work and property of X-PlaneReviews, no sharing or copy of the content is allowed without consent from the author as per copyright conditions) All Rights Reserved
-
NEWS! - Citation C-560XL by AirSim3D XP12 updated to v2.1 By the usual past updates for AirSim3D, this v2.1 release is not as lengthy or as comprehensive for their Citation C-560XL. But that is a good thing, as it means it is a maturing simulation, good before, the C-560XL is now even more a very nice all rounder Private jet, it also won X-PlaneReviews "Best Private Jet of the Year 2023" award last year. The Cessna Citation Excel (C-560XL) is a midsize business jet that belongs to the Citation family of aircraft, developed by Cessna Aircraft Company (now part of Textron Aviation). Introduced in the late 1990s, the Citation Excel (and its variants like the XLS and XLS+) has become one of the most popular business jets in the world, known for its excellent performance, comfort, and efficiency. It also combines the range and comfort of larger jets with the ability to operate from smaller airports typically served by light jets. Here are the 2.1 update details... Version 2.1 APU fuel now correctly (again) uses fuel from the correct fuel tank (after breaking due to XP12 update) Emergency ATC channel auto tuned when clicking the EMER and SQ buttons on the Standby Radio (more realistic emergency situation declaration) -- view this working in our to be released soon PAN PAN PAN!! Engine fire Tutorial! Fixed ELT switch typo AOA gauge fixed to now work correctly after C&D start Improved Reverser bucket timing and STOW functions. POH updated with a couple of added details to be aware of. Search for "Reverser STOW" APU bleed air switch correction (2 positions) Added G1000 map Pan function. POH updated with a couple of added details to be aware of. Search for "G1000 pan" Outside Battery or Baggage doors will now not open when in the air The full X-Plane 12 C-560XL review is here: Aircraft Update : Citation C-560XL X-Plane 12 by AirSim3D “My main interest is flying bizjets, and this one is an excellent addition to my ''hanger".... Also, Support responds very quickly on this forum too. Thanks for that." “Just doing a night flight, the night lighting is excellent. I do like this airplane a lot” “Engine sounds are really good inside and out. I live near an airport, and it sounds like the real Citations as they take off” “The best aircraft of my hangar .. and I have all the other more popular biz jets and Airliners!! From the XPlaneReview: “Having flown the XL a lot over the past month, I now really love it, even miss it a lot when flying other aircraft. Recommended.” “Are ya'll thinking about making other AWESOME models like this one? 5 Star (support) service!” Designed by AirSim3D Support forum for the C-560 XL ____________________ Yes! the Cessna Citation 560XL X-Plane 12 v2.1 by AirSim3d is NOW available from the X-Plane.Org Store here: Cessna Citation 560XL XP12 Price is US$69.95 Cessna Citation 560XL XP11 Price is US$49.95 You Save:$10.00(17%) Cessna Citation 560XL XP12 + XP11 Price is US$79.95 You Save:$10.00(17%) Features: AirSim3D C-560 XL: Real-Jet authenticity Real jet visits at Boeing airfield were extensively used to inform build and design decisions 100’s of pages of real POH manuals, specs, drawings, pics used Real pilot tested and extensively beta tested Result: real-world systems, lighting, functions, modeling and procedures authenticity Requirements X-Plane 12 Only Windows, Mac or Linux 4 GB VRAM Minimum - 8 GB+ VRAM Recommended Current version : 2.1 (October 8th 2024) There are 3 purchase options for the 560 XL XP11 only Version . Get it here XP12 only Version. Get it here XP12 and XP11 Bundle . Get it here (this one) ___________________________ News by Stephen Dutton 10th October 2024 Copyright©2024: X-Plane Reviews (Disclaimer. All images and text in this review are the work and property of X-PlaneReviews, no sharing or copy of the content is allowed without consent from the author as per copyright conditions) All Rights Reserved
-
-
Latest Reviews
-
-
Featured Reviews
-

-
X-Plane News!
-
-
Most Popular Reviews
-
-
-
X-Plane Screenshots - Post Yours Here !
-

Guest jolo_lol
Is that X-Enviro?
-
Goodbye, we will miss you.
loved your amazing reviews
also some lovely photos- I see you finally bought the 767
-
As a goodbye from this incredible website, I am leaving my best X-Plane photos. They aren't that good but I believe they are cool.
Goodbye!

- hi_nihaozaoan and CX_Fan
-
 2
2
-
Who's Online 0 Members, 0 Anonymous, 43 Guests (See full list)
- There are no registered users currently online
-
Member Statistics
4184
Total Members1157
Most Online