-

Scenery Review: Stockholm Archipelago AIRTaxi by LagoFlightLabs
NEWS! - Laminar Research releases X-Plane 12.1.4 beta
Scenery Review : KSFB - Orlando Sanford Intl Airport, USA by Taimodels
Aircraft Review : Diamond DA20 SV by Aerobask
Aircraft Review: PA-28R TURBO ARROW III / IV XP12 by Just Flight
Aircraft Review : Pilatus PC-12 DGS by Thranda Design
Behind the Screen : Year in Review 2024
Aircraft Review - V-22 Osprey Tiltrotor XP12
Aircraft Review: Stinson 108 Package XP12 by Ted Cook
Behind the Screen... November 2024 edition now Available!
Aircraft Review: Gulfstream G550 Business Jet by X-Hangar
Scenery Review: VSKYLABS Airbases: Base-8
Aircraft Review : Gulfstream 650/650ER by AKD Studios
Interview: Developer Spotlight: Antoni Rybka, AKD Studio
Update Review: Cessna 152 by Just Flight - Thranda Design
Plugin Review : X-ATC Chatter v1.7.2 by Stick and Rudder Studios
Released!.. read the Mega Review... ToLiss A330-941neo
Scenery Review : KRSW - Southwest Florida International Airport by Skytitude
Scenery Review : LZTT – Poprad-Tatry Airport, Slovakia by Chudoba Designs and Flying Partners


-
Latest Posts
-
 Scenery Review : LZTT – Poprad-Tatry Airport, Slovakia by Chudoba Designs and Flying Partners In the hub and spoke system, were as a "Hub" is a major airport, usually associated with a city, to the "Spoke" or a small regional Airport that is an interesting destination. Most Simulation users usually stay on the "Hub to Hub" main line of the connections of the airline system, but I like the differences that a large Hub to a small Spoke destination, mainly to explore places you would never usually go to, or to "go off the beaten path" so to speak. Chudoba do a lot of these excellent Hub & Spoke sceneries. This is such a spoke regional airport, or destination in LZTT - Poprad-Tatry Airport that is in Slovakia. Poprad is a city in northern Slovakia at the foot of the High Tatra Mountains, famous for its picturesque historic centre and as a holiday resort. The largest town of the Spiš region and the largest of all towns in the vicinity of the High Tatra Mountains in both Slovakia and Poland, Poprad is the tenth largest city in Slovakia, with a population of approximately 50,000. The Poprad-Tatry Airport is interesting because of it is one of the highest elevations in Central Europe, at 718 m, which is 150 m higher than Innsbruck Airport in Austria, but 989 m lower than Samedan Airport in Switzerland. So you will have to calculate carefully your landing altitude and not to create a large hole in the ground. This is a destination more popular than you would think, as even Wizz Air and Ryanair connect out here to bring in the holiday makers to these excellent resorts, it is cheap skiing compared to the heavily used French and Swiss resorts. As noted Chudoba Designs does a lot of these interesting sort of niche sceneries like; Göteborg Landvetter Sweden, Brno-Tuřany in the Czech Republic, Bratislava Airport and even Marsa Alam, which is one of the most visited tourist airports in Egypt. Here with Poprad there is local connection with another another developer in Flying Partners Slovakia, an established MSFS 2020 developer. It is only a short hop from Vienna to Poprad, so there is no need to climb any higher that 26,000ft, before descending down to the resort town, as it is only 170 nautical miles between the two Airports (You could drive there really). Equipment? the A319 from ToLiss, the baby bus, perfect for the short route. Arrival is via EPEDA3D, into runway 27 (ILS- 110.1 TT), there is no ILS on the other end of the 8,530 ft (2,600m) runway (09)... Poprad–Tatry Airport Letisko Poprad-Tatry 09/27 - 8,530ft (2,600m) - Concrete 07R/25L- 2,493ft (760m) - Grass 07L/25R - 2,493ft (760m) - Grass Elevation AMSL2,356 ft / 718 m First view is just of a single runway, and with no airport infrastructure to be seen, "did I load in the scenery folder right?" yes I did, but all the way down there, the landscape looks oddly empty from your height. On final approach it is still the same dilemma, just a runway, nothing else? In the 27 approach your in a valley, the High Tatra Mountains to the East, and the Low Tatras to the West. Poprad township is to your left as you approach the 27 threshold... ... 09/27 is a long, looong runway, you feel the length, but I still missed the first turn cutout to the left. There are four turnaround cuts on the left side of the runway, I snag the second from the top, but it is still a long taxi back. Once rotated into the southern direction, finally you can see the terminal area, set deep into the trees to your right. The single long taxiway A is a tight turn into, you have to get it right, even with this small Baby Bus. Once on the apron, there are four parking slots, all twist the aircraft around to be mostly parallel with the terminal. The Poprad-Tatry Airport was originally built in 1938, and it's age is still reflected in the buildings, certainly Poprad-Tatry has been modernised, well several times with terminal additions, but the original airport layout feel is still here. That long 8,500 ft 09/27 runway dominates any view, and the intergration of the scenery to the surrounding X-Plane default is very good, using the fence line as the boundary. The two grass runways 07R/27L and 07L/27R are well intergrated as well, if hard to see when in use. As noted the original terminal still stands as built for the World Championships in classic skiing at Štrbské Pleso in February 1970, the administration and built in control tower, built at the same time as the terminal is still also represented at the airport. The central terminal is well done, but there is a sort of FlightSim feel about the building. In the modeling and graphics, but it works really well in context despite it's origins. There are no internal details. There has been two terminal upgrades, in 2008, Poprad–Tatry Airport extended its arrival terminal and (also, upgraded the lighting approach system for runway 27), Then later, on January 31, 2014, a new departure hall was inaugurated, meeting all Schengen requirements, with construction costs totaling nearly €2.62 million. Both are well defined in the scenery. Both sections are separated, and fully detailed internally... first Arrivals. There are two arrival zones, Red and Black. Separated for International and Schengen. Departures is twice the size and more detailed. So the newer extension terminal is highly detailed and with great quality detail at that. The 70's Control Tower and Administration building is very authentic, there is also a built in Fire Station and an original hangar as part of the complex. You also have excellent quality X-Plane 12 active trees as part of the fauna. Tower detail is excellent, with a basic internal control layout. Air Transport Europe (ATE), established in 1991, is a Slovakian aviation company that has a big presence at Poprad. The company specializes in helicopter emergency medical services (HEMS), particularly in the High Tatras region, and offers various aerial work services, including logging, liming, construction, and agricultural operations. ATE use the biggest hangar here and have an administration building set behind. Modeling and textures also have that FlightSim look and feel, but it is well done and feels nicely authentic. ATE operates a flight school offering specialized helicopter training programs. Their courses include type rating for Agusta A109 K2 and Bell 429 helicopters, as well as a Type Rating Instructor (TRI(H)) course. There is a secondary Flight School on the north apron called JetAge, and a secondary hangar opposite. Note the BMW X5, it is the only animated vehicle in the scenery, but it is well done, in doing rounds of the facilities. If you look very carefully, a few of the buildings are not quite properly connected to the ground (Floating), it is not a distraction, but it is visible, like with the ATE Admin building. Landside is small, and basically just one carparking area, but it well designed and filled with nice detail, highlight is the great signage. Ground textures are good, very good. Great variations in textures, from the stoney asphalt (correct scale), rubber touch marks, to concrete and other hard surfaces. Cracks, oil repair or asphalt cement mixed with petroleum solvents to fix cracks and wear and tear damage is really well done... as is the wear and tear surfaces, only slight is the very straight lines on the surfaces edges, a shame as everything else here is so very good. Lineage wear and tear is top notch as well, very realistic. The grass runways are well done, but the wild tuffs of grass, don't quite work in context. X-Plane 12 dynamics are of course developed into the textures. PBR reflections and normal maps are dynamic with burnt-in ambient occlusion which are all active... snow conditions are very good being this high in altitude. Lighting is very good, but again a mixture of the old and new, or with antiquated FlightSim or X-Plane 12 effects. Runway approach lighting is top rate with RAIL on the 27 approach, but be aware there is no centreline lighting, neither on the Runway or the Taxiway A. Outwardly Poprad-Tatry looks great... ... but the older modeling has the dreaded FS greyed out windows, the newer modeling is modern and fine, unfortunately the old overwhelms the new. The ramps are however excellent for night operations, great beam throw and nicely well lit. Notable is that in downloading Chudoba scenery, they use a third party system to Authorise and Download the scenery. When you purchase the scenery you are given a Authorisation key and then are directed to the Chudorba Design (Antileak) website. You paste in the authorisation code, then select the "LZTT – Poprad-Tatry Airport" scenery, then the site will check your credentials and verify your purchase... then to install you then press "Download" to do the installation of the product. Summary This is another (hub &) spoke airport by Chudoba Designs in association with Flying Partners Slovakia. Set deep in the Slovakian Tatra Mountains is LZTT – Poprad-Tatry Airport, positioned by Poprad, a city in northern Slovakia. A single runway airport that services the ski fields of this exclusive area. Modeling is a mixture of old FlightSim and new X-Plane 12, and the combination works very well to create an original authentic scenery. There is both old (70's) terminals and administration/control tower and new terminal (2008). Excellent lighting though is offset by older buildings ex FlightSim windows, that look very dated and now misplaced. Great textures and X-Plane 12 trees and fauna create dynamic seasons and weather, signage is very good, but only a single animated BMW X5, that rides around the airport. Overall Poprad-Tatry is great experience, a great high altitude destination that is authentic, Ryanair and Wizz Airlines service the airport, and at a value price of only a below US$20 price, even currently discounted to US$12.95, so a winner for your Eastern European collection, verdict, far better than I thought it would be! 👍 Great eastern European authentic scenery, great combination of old and new styles, excellent lighting and textures/signage 👎 Old fashioned FlightSim night windows ________________ Yes! - the LZTT – Poprad-Tatry Airport, Slovakia by Chudoba Designs and is NOW available from the X-Plane.Org Store here : LZTT – Poprad-Tatry Airport Price is US$12.49 You Save:$7.50(38%) Retail Price:$19.99 Requirements X-Plane 12 Only (not for XP11) Windows, Mac or Linux 8 GB VRAM Recommended Current Version : 1.0 (January 9th 2025) Download for LZTT – Poprad-Tatry Airport is 3.24Gb. The download and Authorisation is done via Chudoba Designs own application, called Antileak, you get an automatic referral to the site. Install is different for X-Plane 11 (STEP 2) as you have to install a different "Earth nav data" (Provided) file... You install only one folder; LZTT_ChudobaDesign-FlyingPartners Provided is both X-Plane 12 and X-Plane 11 versions of the scenery, plus the Chudoba "Library", not required if you already own a Chudoba Scenery. Full Installation is 1.05Gb in your Custom Scenery Folder. (only X-Plane 12 was installed) Documentation: no documentation ___________________________ Scenery Review by Stephen Dutton 27th January 2025 Copyright©2025: X-Plane Reviews Review System Specifications: Windows - 12th Gen IS1700 Core i7 12700K 12 Core 3.60 GHz CPU - 64bit -32 Gb single 1067 Mhz DDR4 2133 - PNY GeForce RTX 3080 10GB XLR8 - Samsung 970 EVO+ 2TB SSD Software: - Windows 11 Pro - X-Plane 12.1.3 Plugins: JustFlight-Traffic (X-Plane.OrgStore) US$52.99 : Global SFD plugin US$30.00 Scenery or Aircraft - Airbus A319 XP12 by Toliss (X-Plane.OrgStore) - US$89.99 (Disclaimer. All images and text in this review are the work and property of X-PlaneReviews, no sharing or copy of the content is allowed without consent from the author as per copyright conditions) All Rights Reserved
 -
NEWS! - Scenery Released : LFNJ - Aspres-sur-Buech, France by FSX3D FSX3D are back with another of their small but highly detailed French sceneries, their first for 2025. This time we get to visit Buëch region in the South of France with LFNJ - Aspres-sur-Buech. Aspres-sur-Buëch Airport (ICAO code: LFNJ) is a small airfield located in Aspres-sur-Buëch, within the Hautes-Alpes department of the Provence-Alpes-Côte d’Azur region in southeastern France. The airport is situated at an elevation of approximately 2,726 feet (831 meters) above sea level. It has two runways, with North-South Runway 18/36, the runway is 900 meters (2,953 ft) in length, and the East-West Runway 10/28, 650 meters (2,133 ft), there are no charts available for LFNJ... This is an unique airfield located on a small plateau with a view of the Buëch region. Some pilots call it "the aircraft carrier" because landing there feels a bit like landing on a ship's deck! LFNJ is also called Chevalet aerodrome, this airfield has a rugged, natural charm. Tucked away in a sunny valley surrounded by mountains, it's perfect for pilots who enjoy flying in quiet, remote areas. However, its specific wind and weather conditions mean that only authorized pilots can fly there. Features: Ultra detailed 3D PBR Textures Ambient occlusion (Objects and ground) Wet track effects Dynamic lighting Compatibility Ortho4XP Compatibility AutoOrtho HD photorealistic ground South-Est Z17 (Ortho4XP 1.40) with personalized elevations at one centimeter of arc Autogen (Houses,Lights,Cars) Again here is another cheap nifty French scenery, which all are of great value, and now there are quite a few sceneries from FSX3D to collect if you are flying around France. Images are courtesy of FSX3D _______________________________ LFNJ - Aspres-sur-Buech, France by FSX3D is now available from the X-Plane.Org Store here: LFNJ - Aspres-sur-Buech, France Price is US$12.99 Requirements X-Plane 12 (not for XP11) Windows, Mac or Linux 8 GB VRAM Minimum Download Size: 485 MB Current version : 1.0 (Jan 24 2025) ___________________________ News! by Stephen Dutton 27th January 2025 Copyright©2025: X-Plane Reviews (Disclaimer. All images and text in this review are the work and property of X-PlaneReviews, no sharing or copy of the content is allowed without consent from the author as per copyright conditions) All Rights Reserved
-

By Dominic Smith · Posted
Scenery Review: Stockholm Archipelago AIRTaxi by LagoFlightLabs By Colin Parker Introduction The Stockholm Archipelago is the largest archipelago in Sweden, and the second-largest archipelago in the Baltic Sea (the largest being the Archipelago Sea across the Baltic in Finland). Inhabited by farmers and fisherman since the 1400s, it has become a popular tourist destination since the 1950s. It’s possible to visit the larger islands in the archipelago all year round, but during the winter months the routes depend on the ice conditions. LagoFlight-SA’s latest 'AIRTaxi' scenery pack includes five fictional airfields, each scattered across the largest islands of the Stockholm Archipelago: Möja, Namdö, Ornö, Runmarö, and Utö. This pack follows the footsteps of LagoFlight-AG’s Balearic Islands AIRTaxi scenery, imagining routes that could be operated by an air taxi company using small GA aircraft, if the airfields existed. Each airfield features a short, hard-surface runway, along with a range of terminal styles and air traffic control towers. Active ATC frequencies and services are integrated with X-Plane 12’s ATC model. One quirk to the scenery is that there’s a slight Victorian railway station feel to these airfields, in that they’re a bit over-engineered for the modest traffic the tourist trade might bring. But let’s be honest, realism isn’t the goal here, it’s enjoyment. This scenery gives you a chance to sharpen your flight planning, short-field flying, and weight-and-balance skills in some truly stunning locations, and in that, it certainly excels. Stockholm & Surrounding Area Installation & Documentation After purchasing, the scenery pack downloads as a small 191KB zip file (yes, you heard that right) and unzips to a mighty 1.6MB! To install the scenery, simply unzip the folders into your X-Plane 12 Custom Scenery folder, then launch X-Plane 12. The documentation is limited to a single page Readme .pdf, which provides basic installation instructions and guidance on locating the airfields in X-Plane. It’s short, but it gets the job done! Exploration & Graphical Quality The airports all feature high-quality textures and objects, along with native X-Plane 12 vegetation. I tested the scenery under various weather conditions, and it performs well with rain, snow, and wind. Each airfield includes a passenger terminal, cargo area, and refuelling points, offering plenty of opportunities to practice taxiing and other missions. All facades and objects come from the standard Laminar libraries for X-Plane 12, hence the download size. The developer suggests using Orthophotos or Auto Ortho for the best visual experience, so I installed tiles +59+017, +59+018, and +58+017 using Ortho4XP, and I can confirm that the scenery looks much better with Orthophotos in place. I also added X-World Europe by simHeaven and Global Trees as these really help bring out the best in the package. Möja Möja (ICAO: ATXM) is the northernmost airfield in the scenery pack, with an elevation of 0 feet. Located on Möja Island, just a short distance from the town of Möjastrom, it’s surrounded by lush forests and features a small brick terminal, an outdoor cargo area, and a control tower with internal detail. The hard-surface runway runs 01/19 and stretches six hundred and fifty meters. It’s not entirely flat, with a slight upward slope from the nineteen threshold, levelling off just past the aiming point markers. Fuel is available from a bowser, and there’s limited baggage handling. Although the airfield has surveillance RADAR, operations are strictly VFR, with no instrument landing capabilities. The runway is lit at night, making it suitable for night flying. There are three ramp starts, though they’re positioned too close to the terminal for an aircraft to taxi away easily. Pushback is not available, so you’ll either need to pull the aircraft back using the map or rely on a turbo prop with reverse thrust. Runmarö Runmarö (ICAO: ATXR) is the next airfield south, sitting at an elevation of eighty-eight feet. Located on Runmarö Island, the closest of the archipelago’s islands to mainland Sweden, it features a striking glass-and-concrete terminal, an integrated control tower, freight handling, and a workshop building. Fuel is available on-site. There are three ramp starts in front of the terminal, all positioned well enough for a small plane to turn before taxiing. Pushback isn’t available, though. The animated vehicles on the airfield occasionally follow odd paths, driving across the grass or even through fences. A few of the vehicles also seem a bit too large for the aircraft typically operating here, but then again, it wouldn’t be X-Plane if you didn’t have at least one oddity! Like Möja, the airfield boasts a well-lit hard-surface runway, oriented 01/19. At seven hundred meters, it’s fifty meters longer than Möja, and operations are strictly VFR, with no instrument landing capabilities. The runway is twenty-five meters wide. Namdö Namdö Island lies five nautical miles south of Möja. The airfield (ICAO: ATXN, elevation thirty-nine feet) features a large terminal, a small car park, and a separate control tower with an outdoor freight handling area. There are three ramp starts outside the terminal, but no pushback facilities are available. The taxiway operates on a one-way system. Fuel is provided via pumps rather than a bowser. The well-lit, hard-surface runway is five hundred meters long, thirty meters wide, and oriented 06/24. Operations are strictly VFR, with no instrument landing capabilities. Ornö Ornö is a larger island, located eleven nautical miles southeast of Namdö. The airfield (ICAO: ATXO, elevation forty-nine feet) features a single-storey brick terminal, a military control tower, and a larger fuel facility than the other airfields in the pack. Of all the airfields, this feels most in tune with its surroundings. As with the other airfields, there are three ramp starts, all of which are easy to taxi away from without issue. The well-lit, hard-surface runway is oriented 17/35, five hundred meters long, and twenty-five meters wide. It crosses a public highway near the seventeen threshold. Utö Utö (ICAO: ATXU, elevation twenty-six feet) sits at the southernmost edge of the archipelago, nine nautical miles southwest of Ornö. It’s the largest airfield in the scenery pack, with six ramp starts spread around the terminal. The hard-surface runway runs 14/32, measuring nine hundred and fifty meters long and thirty meters wide. The airfield features a multi-storey car park, a large concrete terminal, and a multi-tier control tower. Nothing like planning for the distant future! There’s also a helipad, though it’s not available as a start position. Surveillance RADAR is available at the airfield, but, like the others, operations are strictly VFR with no instrument landing capabilities. The runway is lit at night, making it suitable for night flying. Night Lighting X-Plane has always excelled when it comes to night lighting, and this scenery is further proof of this. With the right weather conditions, the lighting effects can be pretty impressive. Performance Being such a small scenery in terms of SSD/HD space, the package consumes minimal processing resources and has no noticeable impact on frame rate. If you can run default X-Plane 12, you can run this package with similar performance. Conclusion To be honest, I wasn’t sure what to expect from this scenery at first: fictional airfields serving a demand that doesn’t really exist, with somewhat oversized terminals and aircraft handling facilities. But there’s something to be said for a collection of airfields so close together, offering plenty of opportunities to practice and refine core flying skills. If you pair the scenery with the three ortho tiles mentioned in the documentation, along with X-World Europe by simHeaven and Global Trees, the experience really comes to life. That’s not to say it isn’t enjoyable on a standalone X-Plane install, it’s just that these extras make it far more worthwhile. There are a couple of small issues that LagoFlight-SA could address, such as the positioning of the ramp-starts at Möja and the odd routes taken by animated vehicles on some of the airfields. But aside from that, this scenery is a lot of fun to fly in. ___________________ Stockholm Archipelago AIRTaxi by LagoFlightLabs is available from the Org store here: Stockholm Archipelago AIRTaxi Priced at US$15.00 Features: Medium sized Terminals ATC Frequencies 4k Textures High attention to Detail 3D Native XPlane 12 Vegetation Very Performance light Parking lots with lots of Parked Cars Detailed Tarmac Textures with custom Patterns and Cracks Taxi Line Native X-Pane 12 Ground Truck Traffic Airport service High quality ground Vehicles Ground Markings Cargo area Fueling station ATC Towers Advanced Night Lightning Water and Snow effects Custom ICAO Codes Optimized for X-Plane 12 Requirements: X-Plane 12 (not for XP11) Windows, Mac, or Linux 8 GB+ VRAM Recommended Current version: 1.0.0 (December 10th, 2024) Reviewers System: Processor: AMD Ryzen 7 5800X 8-Core Processor 3.80 GHz Memory: 32.0 GB Graphics card: NVIDIA GeForce RTX 3060 Aircraft Review by Colin Parker 25th January 2025 Copyright©2024: X-Plane Reviews (Disclaimer. All images and text in this review are the work and property of X-PlaneReviews, no sharing or copying of the content is allowed without consent from the author as per copyright conditions) -
NEWS! - Laminar Research releases X-Plane 12.1.4 beta Laminar Research have released a new version of X-Plane in v12.1.4 in Beta form. It quite a visual based update, with a load of new ideas, new objects and features. The headline feature is "FlightLessons", with Austin Meyer. Personally I don't know if Austin Meyer is the best person to be shouting at you while learning to fly, but there you go. There are four beginner flight lessons in the Cirrus SR22... The four lessons consist of; Lesson 01 - Cirrus Intro, Lesson 02 - Basic Handling, Lesson 03 - Advanced Handling and Lesson 04 - Cirrus Landing. Survive that, and you can uprate to the bigger Lancair Evolution, with another three lessons, including; Lesson 5 - Evolution Intro, Lesson 06 - Emergencies and finally Lesson 07 - Cross Country Give it a try! Second feature is a really interesting one... a Physics-Based Camera It has two modes; Physics-based camera for internal views (optional) Hand-held camera for external views (optional) The internal called "G-Loaded Camera" is basically a "shake" camera to add in movement in the cockpit, there are of course a few of those reality plugins, but this one looks and feels very much smoother in operation, creating Turbulence, Shaking, and Ground Movements in G effects. The External "Hand Held Camera" is not a walkaround mode, but rather a shaking of the aircraft externally (Shift -C). There was another addition not mentioned in the notes of a "Lock geographically" this freezes the view to the location. All three new modes are in the X-Plane/Banner/View Menu. There has also been a "Safe Mode" added. For situations where X-Plane crashes due of a plugin. This can also be activated manually by holding the CTRL key during startup, or by using a new startup scripts located in (X-Plane/Support) folder. Now you won’t have to go through the tedious process of removing addons one at a time to isolate crashes. X-Plane has returned to the parts of Southern Germany, Northern Italy, and Austria, which is now (again) the demo area from Portland, with Salzburg being the location for the new flight lessons. With the returned demo area, then Salzburg LOWS Airport scenery is also in having a significant update, with the Red Bull hangars and Salzburg Castle now available. Second Scenery update is for Barra Airport (Port-adhair Bharraigh). Barra Airport is a short-runway airport (or STOLport) situated in the wide shallow bay of Traigh Mhòr at the northern tip of the island of Barra in the Outer Hebrides, Scotland. The airport is unique, believed to be the only one in the world where scheduled flights use a tidal beach as the runway. The correct runway choice is critical, with delicate wind and tidal conditions... Laminar have made the Tide indicator and Windsock fully active to help with your takeoff or landing choices. The Garmin G1000 has had more attention, with a Search and Rescue (SAR function to allow specialised flight paths when being involved in search and rescue operation). There has been added a huge amount of New Library Objects, there are a fair few additions, including Snow and De-Icing Equipment... Firefighting Scenarios and Ambulances Trucks All vehicle styles are however very biased to American vehicles, not much in worldly variations? Airside and Airport Operations But overall it is all very good visual quality stock for the Simulator. Gateway Airports and since the last update in v12.1.3, with this update 1,481 Gateway airports have been refreshed. Fixes and Enhancements General New Joystick profiles for the VKB S-TECS Throttle Mini Adjusted magnetic pole in X-Plane to match real world data Fixed an error when resizing the windows using a Wayland session on Linux AI aircraft will obey STAR altitude restrictions when on final (XPD-16285) Fixed an error when changing audio devices in the sound settings page (XPD-16365) Glider Tow crashes when activating TCAS Override (XPD-16422) Aircraft Cessna 172 SP - Improved the climb and idle performance to better match those of the real airplane Grumman F-14 Tomcat New manual on how to operate the F-14 Tomcat ATC Entering an airport in the flight-plan as waypoint will no longer override the destination airport We’ve updated the voice pack to include additional aircraft manufacturers and models Don’t allow read-back before the message has been fully heard (XPD-163479) Pilot voice says “Ukraine International” instead of “international” at ENGM (XPD-16405) Many additional fixes and smaller enhancements Scenery Added some “Warning Jet Blast Signs” at Princess Juliana International Airport (IATA: SXM, ICAO: TNCM) Systems General Fixed KDAB ILS7L.HANAV when flying a slow aircraft, such as the Cessna 172 Boeing 737 autopilot turns to north upon capturing LOC instead of inbound course when flying the ILS32R at EDDK (XPD-16462) Garmin G1000 Pressing the small FMS knob on the MFD will no longer have an effect while being on the map display (XPD-16433) FMS Fixed stutters when calculation the mach change-over altitude Weather Improved the display of wind directions in the weather map Many improvements around the METAR reader, especially the handling of GRIB data: Sea-state group is recognised and ignored in METAR ‘M’ for ‘Missing’ is recognised and ignored in automated METAR More robust parsing of QFE No-data groups are handled fully. This should fix many cases of incorrect temperatures/wind/vis/QNH etc. where the METAR contains slashes. Previously these would leave the default – ISA – settings in place. Many more METARs should be read fully, instead of partially or not at all Zulu time is read and used to affect how much influence each METAR has on the current weather. This means you can no longer simply read the current/prior METARs and assume they will be equally weighted. Tops on CU/CB should no longer have a chance of being several thousand feet higher than reported in the GRIB METAR reporting CB no longer sets all cloud layers to CB CB chance is read from GRIB files and used to affect CU/CB classification Cloud layer blending over time for the same station changed to use the same method as elsewhere Cell blending changed to have smoother transitions Web API Added support for calling commands using the Web API As noted the Weather has had more attention, Those GRIB files are still not perfected. I had a bad stutter or framerate cycling on the "real" weather download, I am hoping this aspect has been fixed in this v12.1.4b update. Overall it is a another significant update from Laminar Research, the first for 2025. Enjoy! You can update to X-Plane v12.1.4 beta now via the built in X-Plane Installer application, just select "Update X-Plane" and make sure the "beta" selection box is ticked. It is a 5.2 Gb Installation. ___________________________ NEWS! by Stephen Dutton 25th January 2025 Copyright©2025: X-Plane Reviews (Disclaimer. All images and text in this review are the work and property of X-PlaneReviews, no sharing or copy of the content is allowed without consent from the author as per copyright conditions) All Rights Reserved
-
NEWS! - Update Release : Maule M-7-235B Project XP12 v1.5 by vSkyLabs vSkyLabs have released an update to the Maule M-7-235B Project in v.1.5, this is an extensive revamp of this very popular and versatile aircraft. The Maule M-7 is an easy to fly, 4 or 5 seat Taildragger STOL American aircraft built and based in Moultrie, Georgia . Most models can be fitted with floats, skis or bush tires, and there is also a nose-wheel version. The aircraft is agile and very versatile, and has a large and easy to access cargo area. The Maule M-7 is a favorite bush-plane, and also favorite among commercial operators and private pilots. V1.5 is a comprehensive major update, details included are; Flight model: Engine idle RPM tuneups. Empty aircraft CG refinements to all variants. Aircraft handling refinement in pitch/roll/yaw axes to better replicate the Maule M-7 responsiveness in all phases of flight. Landing gears - Differential-braking feature when using only rudder equipment (no to brakes hardware) was refined to allow more docile 'automated' brakes with rudder input. Systems: All CB's are now wired up into the electrical system and fully functional (two panels - front and RH). S-TEC 55x autopilot was implemented in the analog variant. Dual GNS-430 bundle was implemented in the analog variant. Night lighting - instrument panel - improved. Heading bug was re-positioned to the correct instrument in the panel. Graphics: G1000 module was replaced with enhanced 3-d model. Various PBR touches for external textures and liveries. Interaction: VSKYLABS 'Cockpit-Builders-Heaven' was implemented, allowing to assign all aircraft switches, knobs, levers and interactions in a designated, cluttered section in the X-Plane 12 assignment screen. Fuel selector manipulator was replaced with improved 'rotatable' knob functionality. This improves interaction in 2-d and especially in VR, where you simply 'rotate' the fuel tank selector to the desired position. Bug fixes: Gears indicator display (float-plane) fix (lights illuminates at night). The development of the VSKYLABS Maule M-7-235B project for X-Plane flight simulator was approved by Maule Air, Inc. However, it is an independent VSKYLABS project which is not related, affiliated and/or endorsed by/with Maule Air, Inc. PROJECT HIGHLIGHTS Three aircraft included (land and amphibian, Analog/G1000, Classic gears/35" Bushwheels). Designed for X-Plane 12 cutting edge flight model environment. Superb flight dynamics with authentic performance and flight handling characteristics. Built for VR: development was tailored specifically for VR, and optimized for 2D usage. Engineered and designed as a genuine, default X-Plane 12 aircraft. The VSKYLABS projects are practically show-casing X-Plane, as they are stretching X-Plane default features, systems and flight model to its limits without any dependencies on complementary plugins or software...delivering a very robust simulation model, having maximum compatibility with the ever evolving X-Plane flight simulator. Perfect fit for beginner and expert pilots. Equipped with Alpha Systems AOA 'Eagle' indicator replica. Built-in Avitab Plugin Compatibility (AviTab plugin is not included). Autoupdater based on the SkunkCrafts autoupdater - all updates are being pushed smoothly without the need to re-download the entire base package (base package will be updated every once in a while to minimize the gap). Highly responsive VSKYLABS support forums: VSKYLABS offers continuous professional support, from all aircraft related aspects (operating and flying) to X-Plane technical support. The project is under constant maintenance and development. The project includes the VSKYLABS 'Cockpit-Builders Heaven' assignment layer. It allows assigning all aircraft switches, knobs, levers, and interactions in a designated, uncluttered section in the X-Plane 12 assignment screen. This project is part of the VSKYLABS 'Test-Pilot' series, designed specifically for use with X-Plane 12 cutting edge Flight Model. Images are courtesy of vSkyLabs Design by VSKYLABS Support forum for the Maule M7-235 ___________________________ The Maule M-7-235B Project XP12 by VSkyLabs Flying Lab Project is NOW available! from the X-Plane.Org Store here : Maule M-7-235B Project XP12 Your Price: US$32.95 On Sale US$16.48 You Save:$16.47(50% off) Requirements X-Plane 12 - Not compatible with X-Plane 11 Windows, Mac or Linux 4 GB VRAM Minimum - 8 GB+ VRAM Recommended Current version: 1.5 (Jan 23rd 2025) ___________________________ NEWS! by Stephen Dutton' 24th January 2025 Copyright©2025: X-Plane Reviews (Disclaimer. All images and text in this review are the work and property of X-PlaneReviews, no sharing or copy of the content is allowed without consent from the author as per copyright conditions) All Rights Reserved
-
NEWS! - Scenery Released : Melilla Airport, Spain by Aerosoft It is a long time since we have had a brand new airport scenery release from Aerosoft, this is a Spanish airport located in the Spanish enclave of Melilla on the Mediterranean coast of Morocco. Melilla Airport is an airport located in Melilla, an exclave of Spain in Africa. The airport is located about 4 km (2.5 mi) southwest of the city, near the border with Morocco. Between 1931 and 1967 Melilla was served by the Tauima Aerodrome (now the Nador International Airport), even when Morocco had gained its independence in 1956. This Spanish controlled airport did not open until 1969. It has the capacity to move up to 500,000 passengers and the annual average number of passengers is around 400,000. Features include: • Detailed recreation of the real Melilla Airport (IATA: MLN, ICAO: GEML) • Military heliport (GEHM) and Islas Chafarinas Isabel (XGEI2) • 4K PBR textures for objects and ground • High-resolution custom colored orthophoto • Weather effects for wet, snow and ice • 3D trees & grass • New custom Mesh for the airport area • Optimized for great performance and visual results Melilla Airport presents an interesting challenge for pilots. With its unique geographic location and shorter runway, it provides exciting approach conditions, particularly for seasoned pilots looking for something different. This add-on makes the small but exciting airport a must-have for any X-Plane 12 pilot who appreciates authentic regional airports. Images are courtesy of Aerosoft Installation of the Melilla Airport for XP12 is done through the Aerosoft One installer: Aerosoft One Universal After you have installed Aerosoft One, click on ENTER PRODUCT KEY (under the Library Tab) Then enter the Serial Number provided in this order. This will give you the option to download the airport. This is an only X-Plane 12 installation. __________________ Yes! Melilla Airport, Spain by Aerosoft is now Available from the X-Plane.Org Store here : Melilla Airport, Spain Price Is US$17.99 Requirements: X-Plane 12 • Operating System: Microsoft Windows 10 / 11 (64bit), Linux (64bit) or macOS10.15+ • Processor: Intel Core or AMD Ryzen CPU with at least 4 cores • Memory: 8 GB RAM (16 GB or more recommended) • Graphics card: Vulkan 1.3-capable graphics card (AMD/ Nvidia) with at least 6 GB VRAM (8+ GB recommended) • Free hard disk space: 3.2 GB, SSD highly recommended • Installation runs via Aerosoft One, this requires an internet connection and an Aerosoft user account! ___________________________ News by Stephen Dutton 23rd January 2025 Copyright©2025: X-Plane Reviews (Disclaimer. All images and text in this review are the work and property of X-PlaneReviews, no sharing or copy of the content is allowed without consent from the author as per copyright conditions) All Rights Reserved
-
NEWS! - Scenery Updated : Svalbard XP to v1.2 by Aerosoft/MAPS2xplane One of the great if the very best scenery areas you can get for the X-Plane Simulator is Aerosoft's Svalbard XP. Created by MAPS2xplane, this is a sensational area scenery of the remote (very) Northern European set of Islands within the Arctic Circle. Svalbard was previously known as Spitsbergen or Spitzbergen, is a Norwegian archipelago in the Arctic Ocean. North of mainland Europe, it lies about midway between the northern coast of Norway and the North Pole. The islands of the group range from 74° to 81° north latitude, and from 10° to 35° east longitude. The largest island is Spitsbergen (37,673 km2), followed in size by Nordaustlandet (14,443 km2), Edgeøya (5,073 km2) and Barentsøya (1,288 km2). Bjørnøya or Bear Island (178 km2) is the most southerly island in the territory, situated some 147 km south of Spitsbergen. X-PlaneReviews did a full review of the MAPS2xplane release of Svalbard XP This v1.2 release of Svalbard XP is the X-Plane 12 conversion. Basically the actual scenery aspects in the review stay the same, what is different here is the X-Plane 12 weather effects, in this case seasonal winter to summer ice and snow. Update to Svalbard XP 1.2 is via the Aerosoft "Aerosoft One" application and is free. If you purchase the current Svalbard XP, you will still update to the XP12 version when installing. Installation of the Svalbard XP for XP12 is done through the Aerosoft one installer: Aerosoft One Universal After you have installed Aerosoft One, click on ENTER PRODUCT KEY (under the Library Tab) Then enter the Serial Number provided in this order. This will give you the option to download the airport. Note the different X-Plane 11 and X-Plane 12 installations. The earlier X-Plane 11 version is also included the package, but only v1.0.1, and the XP11 scenery comes without the XP12 effects. __________________ Yes! Svalbard XP v1.2 by Aerosoft - Maps2XPlane is now Available from the X-Plane.Org Store here : Svalbard XP Price Is US$37.99 Requirements: X-P-Plane 12 or X-Plane 11 Windows, Mac or Linux 8 GB VRAM Recommended Download Size: 2.6 Gb (Using Aerosoft One) Current Version: XP12 1.2 (Jan 16th 2025) Installation of Svalbard XP is done through Aerosoft one installer: Aerosoft One Universal ___________________________ News by Stephen Dutton 22nd January 2025 Copyright©2025: X-Plane Reviews (Disclaimer. All images and text in this review are the work and property of X-PlaneReviews, no sharing or copy of the content is allowed without consent from the author as per copyright conditions) All Rights Reserved
-
NEWS! - Aircraft Released : Tecnam P2002 JF XP12 / XP11 by DMAX DMAX has released a completely revised Tecnam P2002 JF to X-Plane 12. This is a new totally redesign, but XP11 users can get 20% off the purchase price if you already own the XP11 P2002 version. The older X-Plane 11 version is included in the package as a bonus. The P2002 Sierra is a two-seater side by side, low wing aircraft. The P2002 features superlative performance and flying qualities, now confirmed by hundreds of P2002 sold throughout the world and validated in 15 countries other than Europe. The ease of piloting and maintenance make this aircraft an excellent solution for training in flight schools. It is also an ideal platform for surveillance and as well as, of course, for pure recreational and private use. The new X-Plane 12 version includes; Accurate flightmodel of a P2002 JF Fixed prop - 100hp Graphics & Visuals Ported from AC3D to Blender, improved exterior compared to XP11 version and totally rebuilt panel instruments to keep up with new specs. Detailed 3D cockpit and exterior with animations, manipulators and PBR textures. Cockpit & Panel Garmin GNS 530, S-TEC basic autopilot, customizable KNOTS or KMH anemometer, as well as propeller or engine RPM. A complete preflight/walkaround is possible "remove before flight" covers, chocks and ropes openable fuel caps for visual inspection of the fuel level openable engine bay oil check procedure with the characteristic Rotax "burp" fuel check from bleed valves openable battery bay working stall switch on the leading edge Liveries 5 liveries plus a white one for custom painting (same layout and UV map of the XP11 version to maintain retro compatibility). Visual payload and fairings Passenger model and baggage (vary depending on stations payload) as well as removable wheel fairings. Dynamic load sheet A reproduction of a common load sheet is in the right cockpit pocket for educational purpose. It change depending from Weight & Balance settings. Engine stuff Openable engine doors as well as battery compartment for inspection. Oil level inspection with Rotax characteristic "burp" procedure. Checklist, extras and POH XP12 native windshield effects (rain and ice), featuring custom fmod sounds. Checklist.txt and original POH included. Ready for VR (Virtual Reality). A major market for the P2002 is in the flight training sector as noted; accordingly, its design and several of its major features, such as the use of a low-mounted wing and a bubble canopy, result in the aircraft being particularly well-suited to use as a trainer. Its construction principally comprises conventional aluminium, and enables the aircraft to withstand the maximum load limits of +4/-2g. The JF model is with the fixed tricycle landing gear, and a variable-pitch propeller version, which was certified by the European Aviation Safety Agency in 2012. Images are courtesy of DMAX, and the Tecnam P2020 is now currently available at the X-Plane.OrgStore ___________________ Yes! the Tecnam P2002 JF XP12 / XP11 by DMAX is Available from the X-Plane.Org Store here : Tecnam P2002 JF XP12 / XP11 Price is US$27.95 Requirements X-Plane 12 X-Plane 11 - The older XP11 version is still included as a bonus Windows, Mac or Linux 8GB VRAM recommended Current version: XP12 12.01 - Jan 21st 2025 ______________________ NEWS! by Stephen Dutton 22nd January 2025 Copyright©2025: X-Plane Reviews (Disclaimer. All images and text in this review are the work and property of X-PlaneReviews, no sharing or copy of the content is allowed without consent from the author as per copyright conditions)
-
Should do as it notes 11.50+, but XP11 is now getting very dated? 12 is much nicer!
-

By Valentin_1986 · Posted
hello, work in xp11 ? -
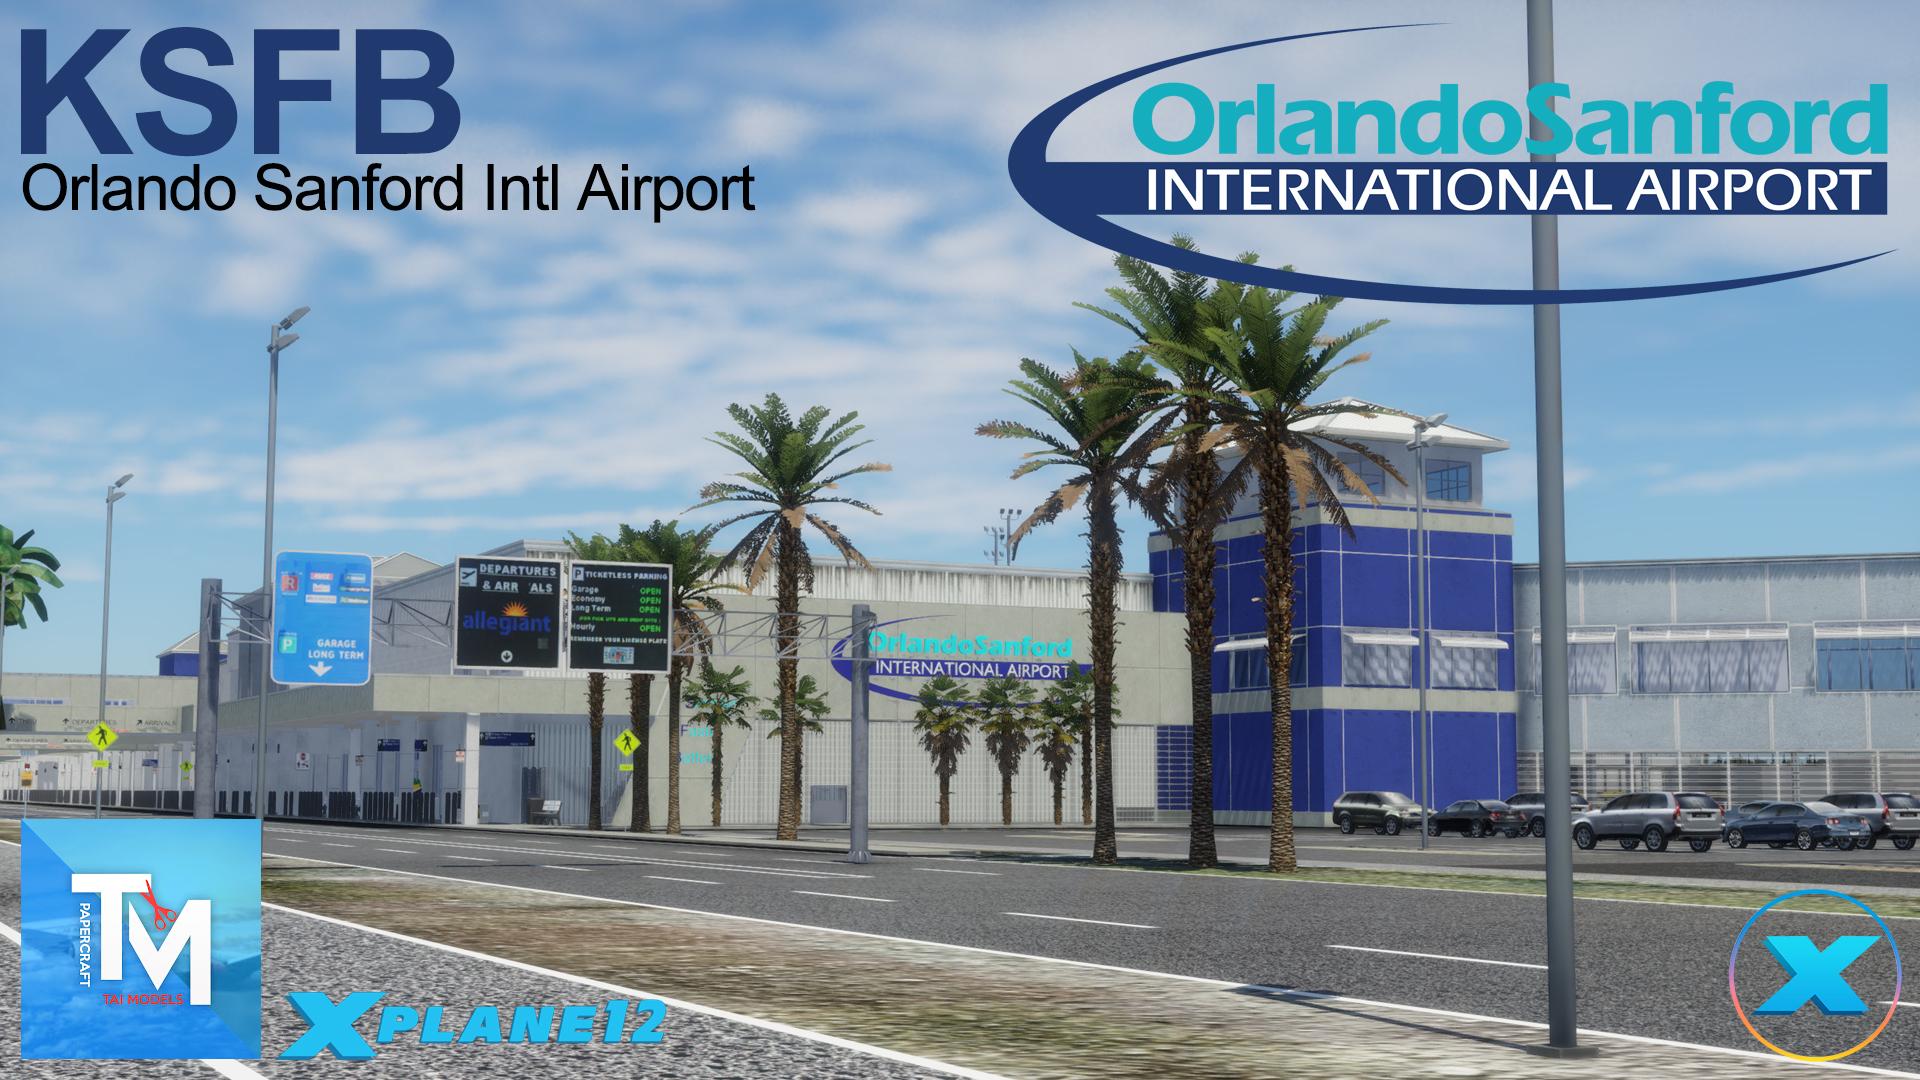
Scenery Review : KSFB - Orlando Sanford Intl Airport, USA by Taimodels In central Florida USA, Orlando is a tourist mecca. The focus is of course the mega complexes of Disney World, but also situated here are Universal's Studios, Seaworld and Legoland, if you want more, there is also Fun Spot America, Icon Park and my favorite Gatorland. The central hub for Orlando is MCO or Orlando International Airport set south of the city, central is ORL or Orlando Executive, a great base for General Aviation and Biz Jets... but there is one more airport, basically little known and positioned 27 miles north of Orlando City in SFB Orlando Sanford International Airport. Orlando Sanford was originally built as Naval Air Station Sanford and was opened November 3, 1942, now 82 years ago . It was a Master Jet Base for carrier-based attack and reconnaissance aircraft, and was used by the U.S. Navy until 1969. The airport is currently owned and operated by the Sanford Airport Authority. The majority of SFB's passenger traffic has been domestic; this is mostly attributable to the entrance of Las Vegas–based Allegiant Air, for which Sanford is a focus city. But it was also popular with Thomson Airways (now TUI Airways), that began operating routes from UK airports. This was the largest international airline at the airport having served eight destinations around the UK. However, in November 2019, TUI Airways announced that from 2022, it would switch their Orlando operations from Sanford to Melbourne Orlando International Airport including the daily flights to/from those 8 British airports. This will bring their operations nearer to Port Canaveral where TUI Cruises will operate from in coming years. As a package holiday company this brings passengers closer to their cruises, although it has angered many TUI passengers who fly with the company to visit Orlando for Walt Disney World and Universal Orlando Resort. This is another scenery release by Taimodels, an odd choice, but Taimodels have done these small regional based sceneries in the past, mainly YBCS Cairns and EGCC Manchester, so Sanford fits right in there between the usual mega airports from this prolific developer. Orlando Sanford International Airport IATA: SFB - ICAO: KSFB - FAA LID: SFB 9C/27C - 3,578ft (1,091m) - Asphalt 9L/27R - 11,002ft (3,353m) - Asphalt 9R/27L - 5,839ft (1,780m) - Asphalt 18/36 - 6,002ft (1,829m) - Asphalt/concrete Elevation AMSL55 ft / 17 m Taimodels Sanford intergration with the X-Plane scenery is relatively very good, the custom textures are slightly noticeable, but not glaringly so, they could have however been better matched (more darker/greener) but overall you wouldn't notice the differences. Because of the multiple runway setup, the taxiway system is a bit complicated, yes 9L/27R is relatively straight forward, but otherwise charts are required for the complex navigation. Sanford's runway layout is relative to it's Military origins. Four runways that allow independent operations on each. The 9L/27R Main 11,000 ft runway north, the 9R/27L 5,800 ft medium strip south... ... 18/36 6,000ft Cross, and the tiny in the front of the terminal area 5,800 ft 9C/27C strip. So you have a great choice of runway here depending on the equipment you are flying, from very light aircraft, standard GA, twins, commuter, regional and of course main line services. Terminals There are two Terminals at SFB, the older Terminal A and the newer Terminal B, the terminals are defined by the three concourses. Terminal A Terminal A was built as part of the airport’s efforts to support growing passenger traffic in the late 1980s and early 1990s. It primarily served domestic charter and leisure travelers. In the 1990 with the rise of charter and budget airlines, Sanford Airport grew in popularity as an alternative to Orlando International Airport (MCO). Terminal A was expanded to accommodate this increased demand especially with the arrival of Allegiant Air with an additional concourse and gates, and improved passenger facilities, later the second concourse was absorbed by Terminal B. The original terminal became a hub for international charter flights, particularly from the UK and Europe, operated by airlines like TUI Airways and Icelandair. Gates 10 to 16 are set on the single west concourse. Externally all the terminal buildings here are a bit nondescript, or even plain, but the excellent panel detail is there if you get in close enough, and nicely done it is, the ground clutter is also well done, but only generic, and not airline or airport branded. I couldn't activate the Airbridges, neither by X-Plane's Ground Handling, or OpenSAM, and no animated traffic is highly noticeable. Terminal A Landside however is highly detailed, the arrival drop-off zones are really well done. But like Taimodels HEAC Cairo, the bolder colours don't work (SFB in reality is more of a softer blue). The heavy blue and white brings out the model side, more than a realism feel. But you can't say it not well done because it is... the detail continues inside, as all the internal areas are well detailed and modeled. Highlight here is the NAS Sanford Memorial, that is located in the terminal, it comes with restored PV-1 Ventura Bomber sitting on the roof of the museum. Basically you can walk in all the interior areas and move out to all the three concourses. All check-in and waiting areas are extensively detailed, and shows the high standard required today in detail for Simulation Airport Scenery. Again missing are animations and people, so as it is really well done by Taimodels, it also feels a bit empty of life. Terminal B Terminal B was constructed in the early 90's for more expansion of the International charter capacity. And over time Terminal B underwent several more expansions and renovations to keep up with demand. This included adding the additional gates, improving baggage handling systems, and upgrading passenger facilities. In 2010, SFB Terminal B underwent several more modernization efforts to update and expand, with more new gates (four) with a newly constructed concourse that was added to the east. This improved passenger waiting areas, better baggage handling systems, and enhanced retail and more food options were also added. Gates 1 to 4 are on the new (east) concourse, and gates 5 to 9 are on the central concourse. As with Terminal A, Terminal B has the same excellent Landside Arrivals and internal terminal detail... The new eastern Terminal B extension is also well and nicely detailed, although oddly the airbridges are all set very low on the building, and don't actually connect correctly to the concourse floor? this low airbridge aspect is relevant to all the concourses? ________________ Landside There are loads of carparks, rental zones, and one large multi-story carpark at SFB. loads of 3d cars are set on asphalt that is in areas a little to large in scale, but overall the vista works very well. Also the terminal and road signage is excellent. The ex-Military base creates a problem for developers in the vast areas you have to cover. Away from the terminals, it is a huge swathes of open aprons to be filled only by General Aviation and Business Jet facilities. This can also create a emptiness to the scenery. Part solution is that if you are running Traffic Global is to put all the sliders to full, and even the GA sections. And it does help in creating a more working environment. Annoying missing though are GA refueling points, I can't find one if I wanted to drop in to SFB to refuel the aircraft, so a big omission there. Overall Taimodels have made a good fist of filling in this huge area, in there are hundreds of small buildings and hangars, and a fuel depot mid-western section. Another help is the business signage from Million Air, CE Avionics, L3Harris Flight School which all does a great job. There are no specalised cargo facilities here at KSFB, but a few of the larger hangars are used for freight operations. Around the field are pockets of infrastructure. North of 9L/27R are Allegiant Air maintenance facilities, and Constant Aviation. To the far west is the IAA Orlando North auto auction facility. South of 9L/27R eastern section is an excellent aircraft breakers yard, the Fire Station and a Helicopter facility with 5 pads. South on 9R/27L is a large GA storage area, with the various aircraft lockups. Control Tower The Sanford Control Tower is a basic field tower, it operates daily from 6:30 AM to 11:00 PM local time. During these hours, air traffic controllers manage airport operations including takeoffs and landings. When the tower is closed, the airspace reverts to Class G, and pilots should use the Common Traffic Advisory Frequency (CTAF) on 120.3 MHz for communications. Modeling and detail of the tower is excellent, including the internal detail. There is the NAS Sanford Memorial Park, which is located at the entrance of Orlando Sanford International Airport on Red Cleveland Boulevard, which commemorates the history of Naval Air Station (NAS) Sanford. Established in 1942, the restored RA-5C Vigilante aircraft, the last type of aircraft to operate from NAS Sanford is on display, and the memorial is represented here in the scenery. ________________ Ground Textures There is a very wide variety of textures to represent the 82 year airbase, and all the variations are well covered here by Taimodels. The lineage is a bit too new and bold, but the complex signage layouts are all represented. Ramp areas are really well done as well, with the various concrete variations, but in the GA areas (old base aprons) from a distance however, the repeat patterns come out strongly. X-Plane 12 dynamics are of course developed into the textures. PBR reflections and normal maps are dynamic with burnt-in ambient occlusion which are all active... I don't really expect Chicago whiteout conditions this far down in Florida, but I do expect tropical thunder storms effects to be really good. Field textures are the custom photo scaled but again work well in context, bushes on these stoney textures can come off worse in this instance, not really a fan of this idea. There is fencing, but they are oddly missing around 9L/27R, the burnt in lines are there, but no actual fences? ________________ Lighting All runway lighting is standard X-Plane 12 ICAO definition, so you can't fault that, and all runways are well lit on any approach. Apron terminal area parking has an yellowish glow, very different? but it works in the darkness down on the ramps. Landside arrivals is well lit in contrast to the airside, it's quite bright and oddly it all works. Internally it is a bit hit or miss, some areas are well lit, other areas are half bright... In the GA areas, the overhead lighting is again yellowish, but there is a lot of down-lighting and fill lights with lit signage, some open hangars are lit inside, and are useful for night parking. To sum up, the lighting like the Sanford Airport scenery is far better than it all seems at a first impression... as the slogan says; We Are SFB Simple Faster Better Summary Orlando in Florida, southern USA has three supporting airports in, MCO or Orlando International Airport set south of the city, central is ORL or Orlando Executive, a great base for General Aviation and Biz Jets... but there is one more airport, basically little known and positioned 27 miles north of Orlando City in SFB Orlando Sanford International Airport. Formally Naval Air Station Sanford and was opened November 3, 1942, now 82 years ago . It was a Master Jet Base for carrier-based attack and reconnaissance aircraft, and was used by the U.S. Navy until 1969. Again this is another regional airport from Taimodels, also known for their mega sceneries like OMDB Dubai and HECS Cairo. Note this is an X-Plane 12 scenery only. Taimodels have become a force in creating X-Plane Simulator sceneries, and KSFB Sanford is no exception. outwardly SFB looks spread out and empty, but this is a scenery to explore, and at the more intimate level the terminal detail and fixtures are very good, certainly the fully recreated internal areas with the NAS Museum, although the colouring is a bit brash. In landside and very wide areas of the airport's spread out infrastructure, it is all very well reproduced, the highlight however is the selection of various independent runways, that cover all types of aircraft, from commercial, regional, commuter, Biz Jets, General Aviation and even very light aircraft. Sanford was a former NAS Station, with all the relative elements here that are still intact. But there are no animated vehicles and traffic or people to bring the scenery alive, so it can come across as a little empty and cold, the airbridges are also placed wrong and don't work either, and the missing GA Fuel refueling points are a waste of in the way you could use the scenery in VOR cross-country flying... and that is a shame because there is a huge amount to like here, even the lighting surprises you on how effective it is at night... at this sub US$20 price, is SFB Orlando Sanford International Airport a hidden gem? 👍 Great selection of various runways, well modeled with excellent interiors, versatile uses for all different equipment, great signage and runway/taxiway textures. 👎 No ground or traffic animations makes the airport a bit lifeless, non-working and badly placed airbridges, missing fence work and GA refueling points. __________________________ The KSFB - Orlando Sanford Intl Airport, USA by Taimodels is NOW available! from the X-Plane.Org Store KSFB - Orlando Sanford Intl Airport, USA Priced at US$19.50 Requirements X-Plane 12 (not for XP11) Windows, Mac or Linux 8 GB+ VRAM Recommended Download Size: 875 MB Current version : 1.0 (December 31st 2024) Installation Installation of KSFB - Orlando Sanford Intl Airport, USA is done via download of 871 Mb... There is just one folder to install Taimodels-KSFB-Orlando-Sanford With a total installation size of 1.78 Gb. There are no Documents provided by Taimodels ____________________________ Review System Specifications Windows - 12th Gen IS1700 Core i7 12700K 12 Core 3.60 GHz CPU - 64bit -32 Gb single 1067 Mhz DDR4 2133 - PNY GeForce RTX 3080 10GB XLR8 - Samsung 970 EVO+ 2TB SSD Software: - Windows 11 Pro - X-Plane 12.1.3 Plugins: Traffic Global - JustFlight-Traffic (X-Plane.OrgStore) US$52.99 : Global SFD plugin US$30.00 Scenery or Aircraft - None - ____________________________ Scenery Review by Stephen Dutton 17th January 2025 Copyright©2025: X-Plane Reviews (Disclaimer. All images and text in this review are the work and property of X-PlaneReviews, no sharing or copy of the content is allowed without consent from the author as per copyright conditions) All Rights Reserved
-
-
Latest Reviews
-
-
Featured Reviews
-
-
X-Plane News!
-
-
Most Popular Reviews
-
-
-
X-Plane Screenshots - Post Yours Here !
-

Guest jolo_lol
Is that X-Enviro?
-
Goodbye, we will miss you.
loved your amazing reviews
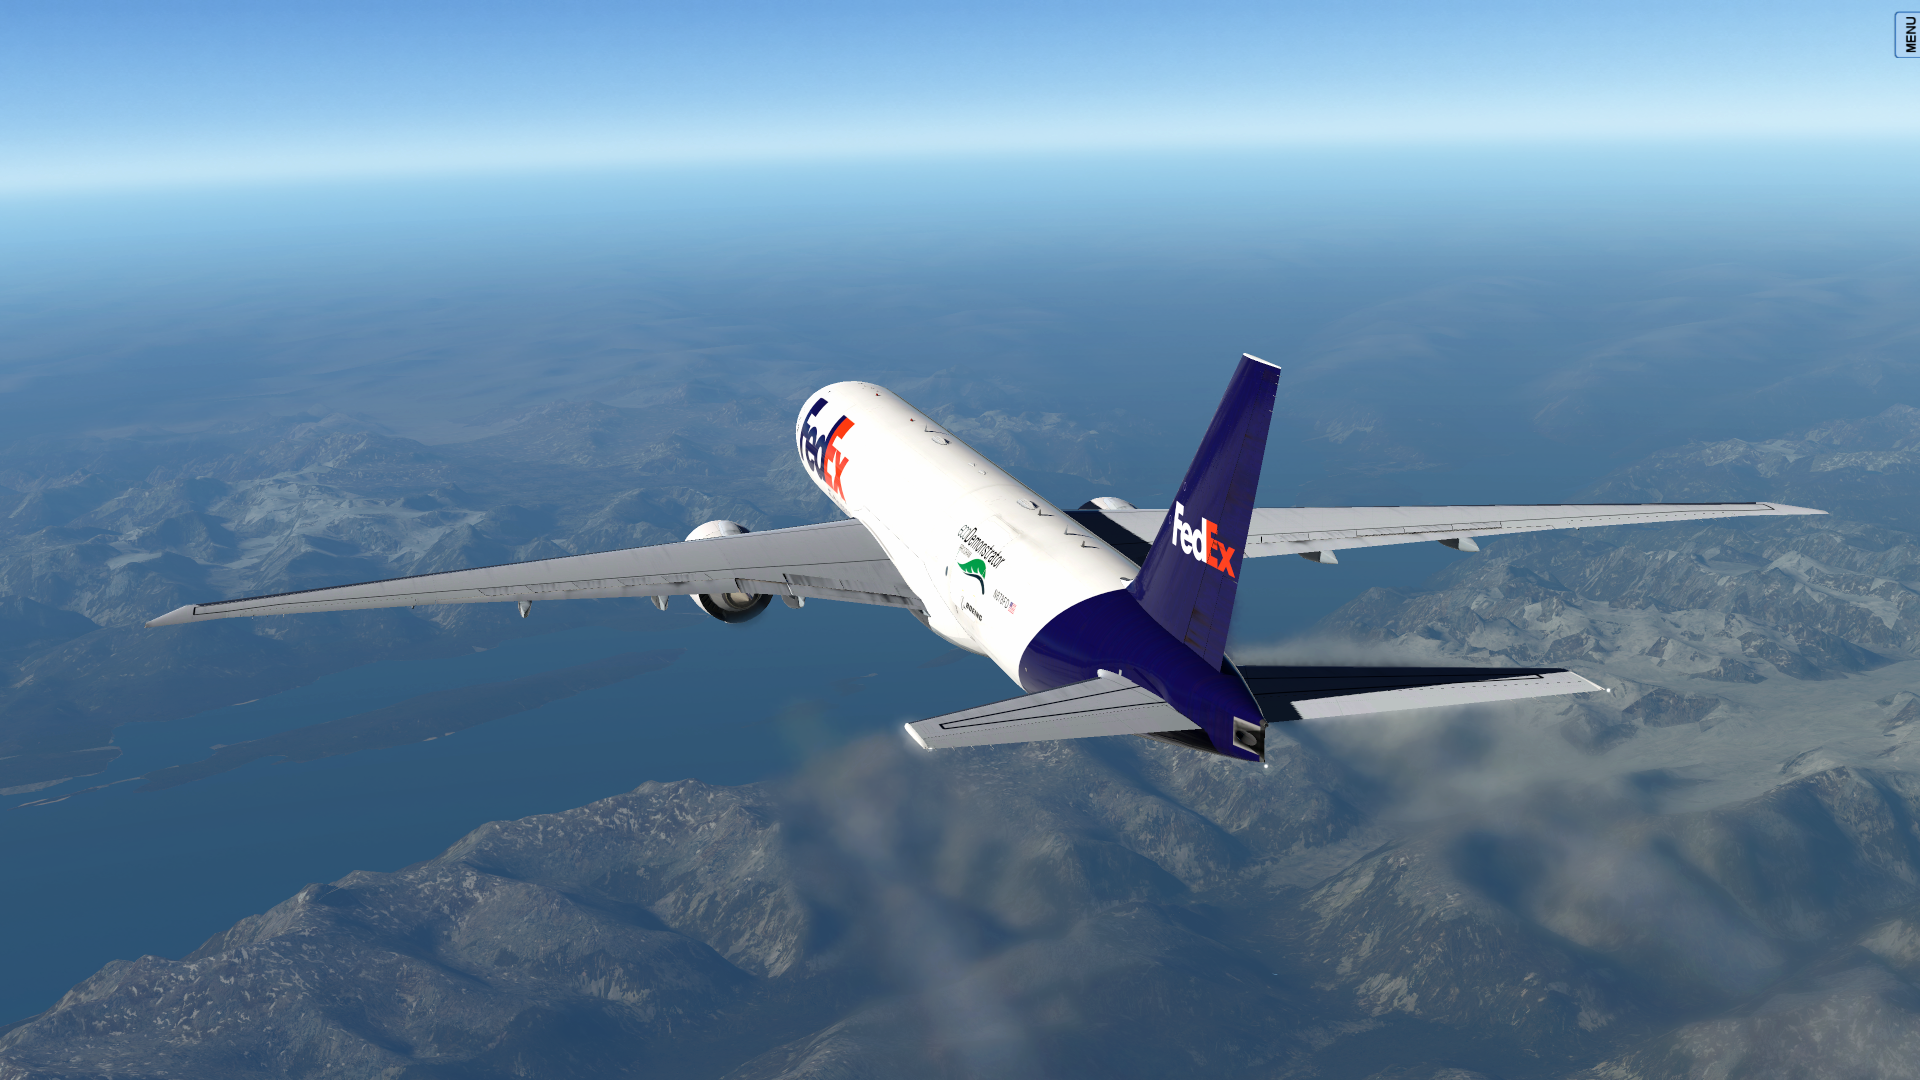
also some lovely photos- I see you finally bought the 767
-
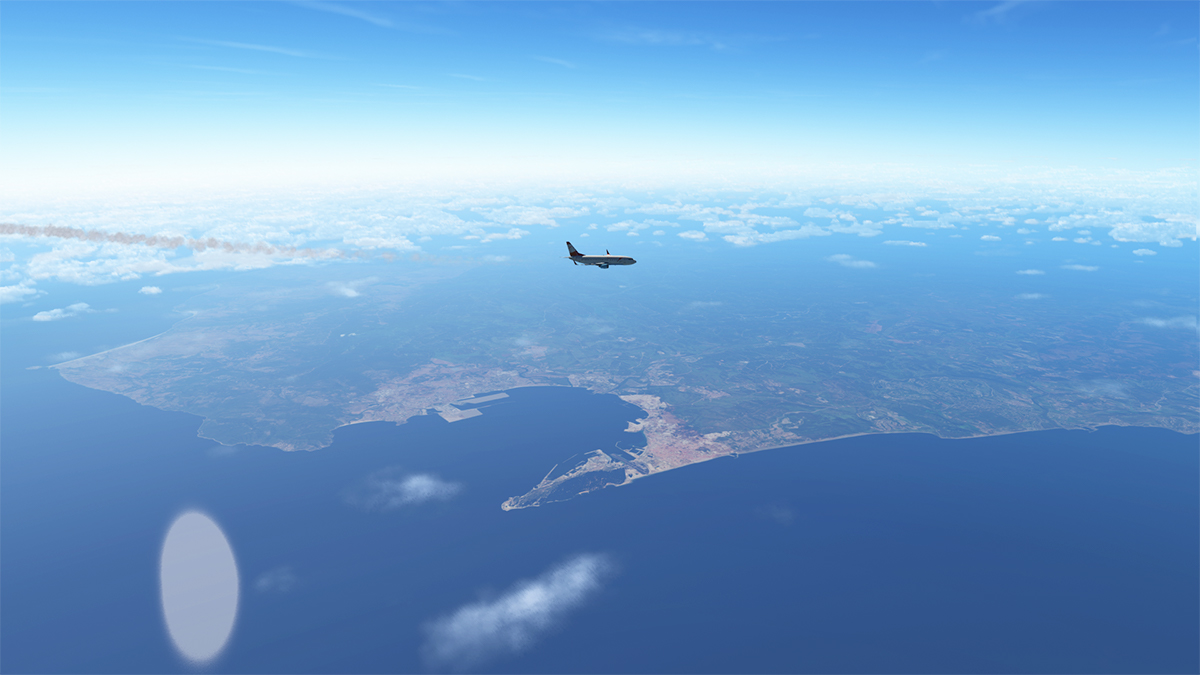
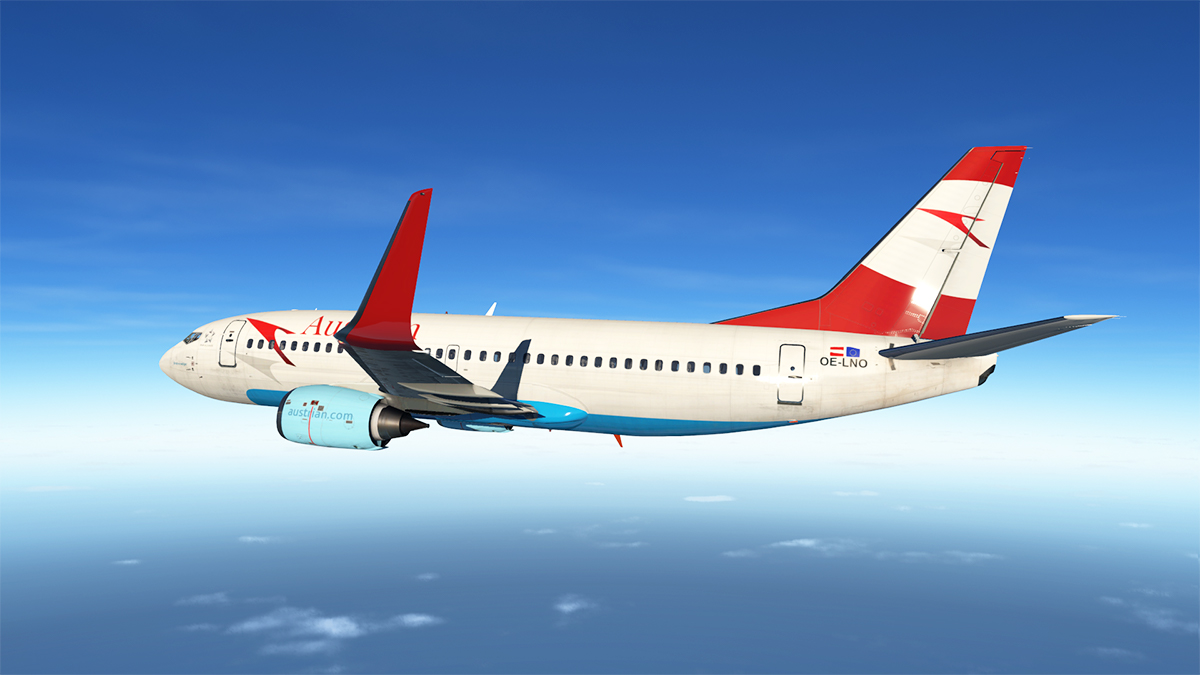
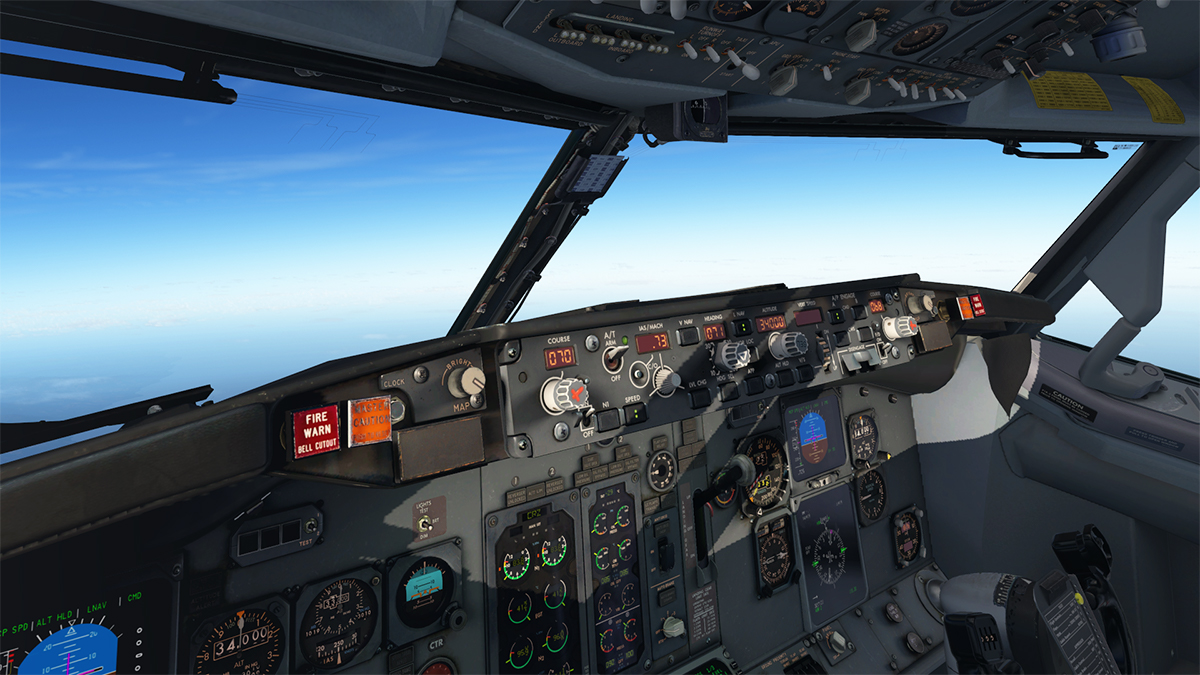
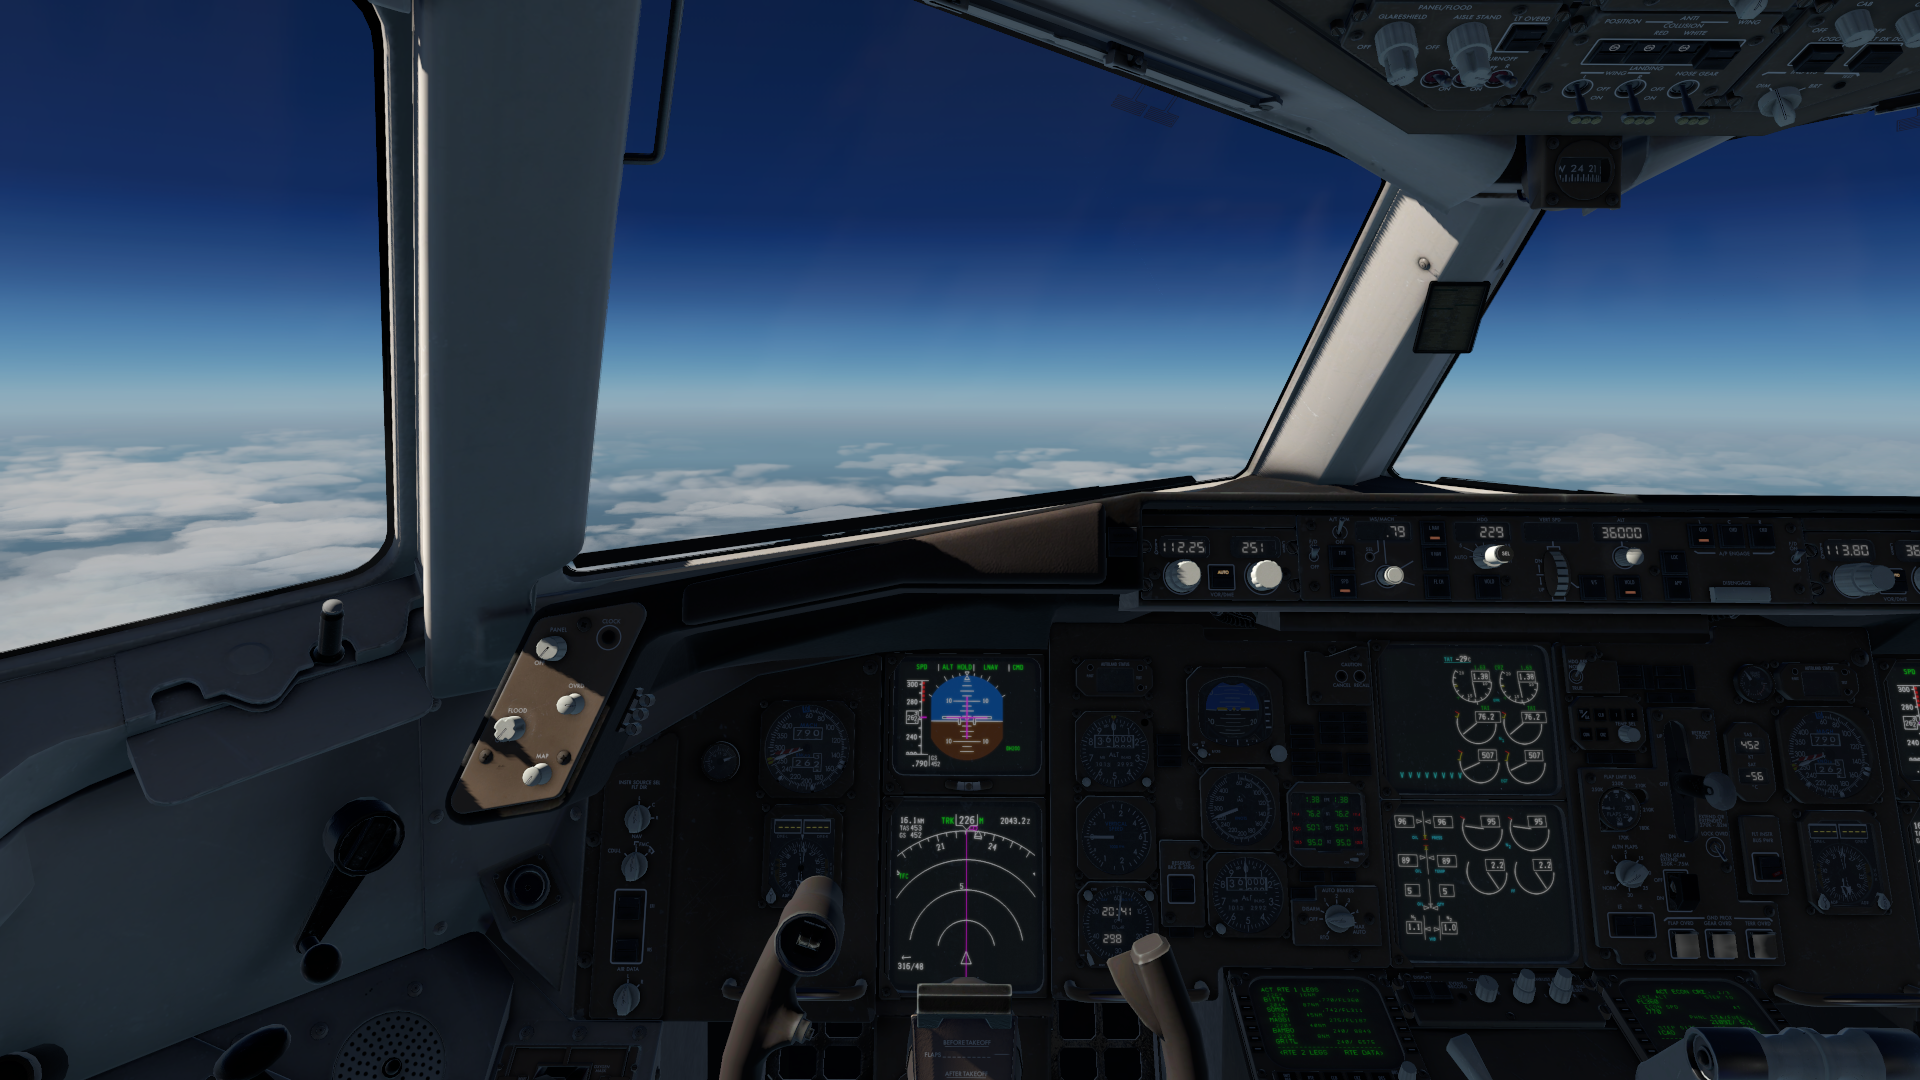
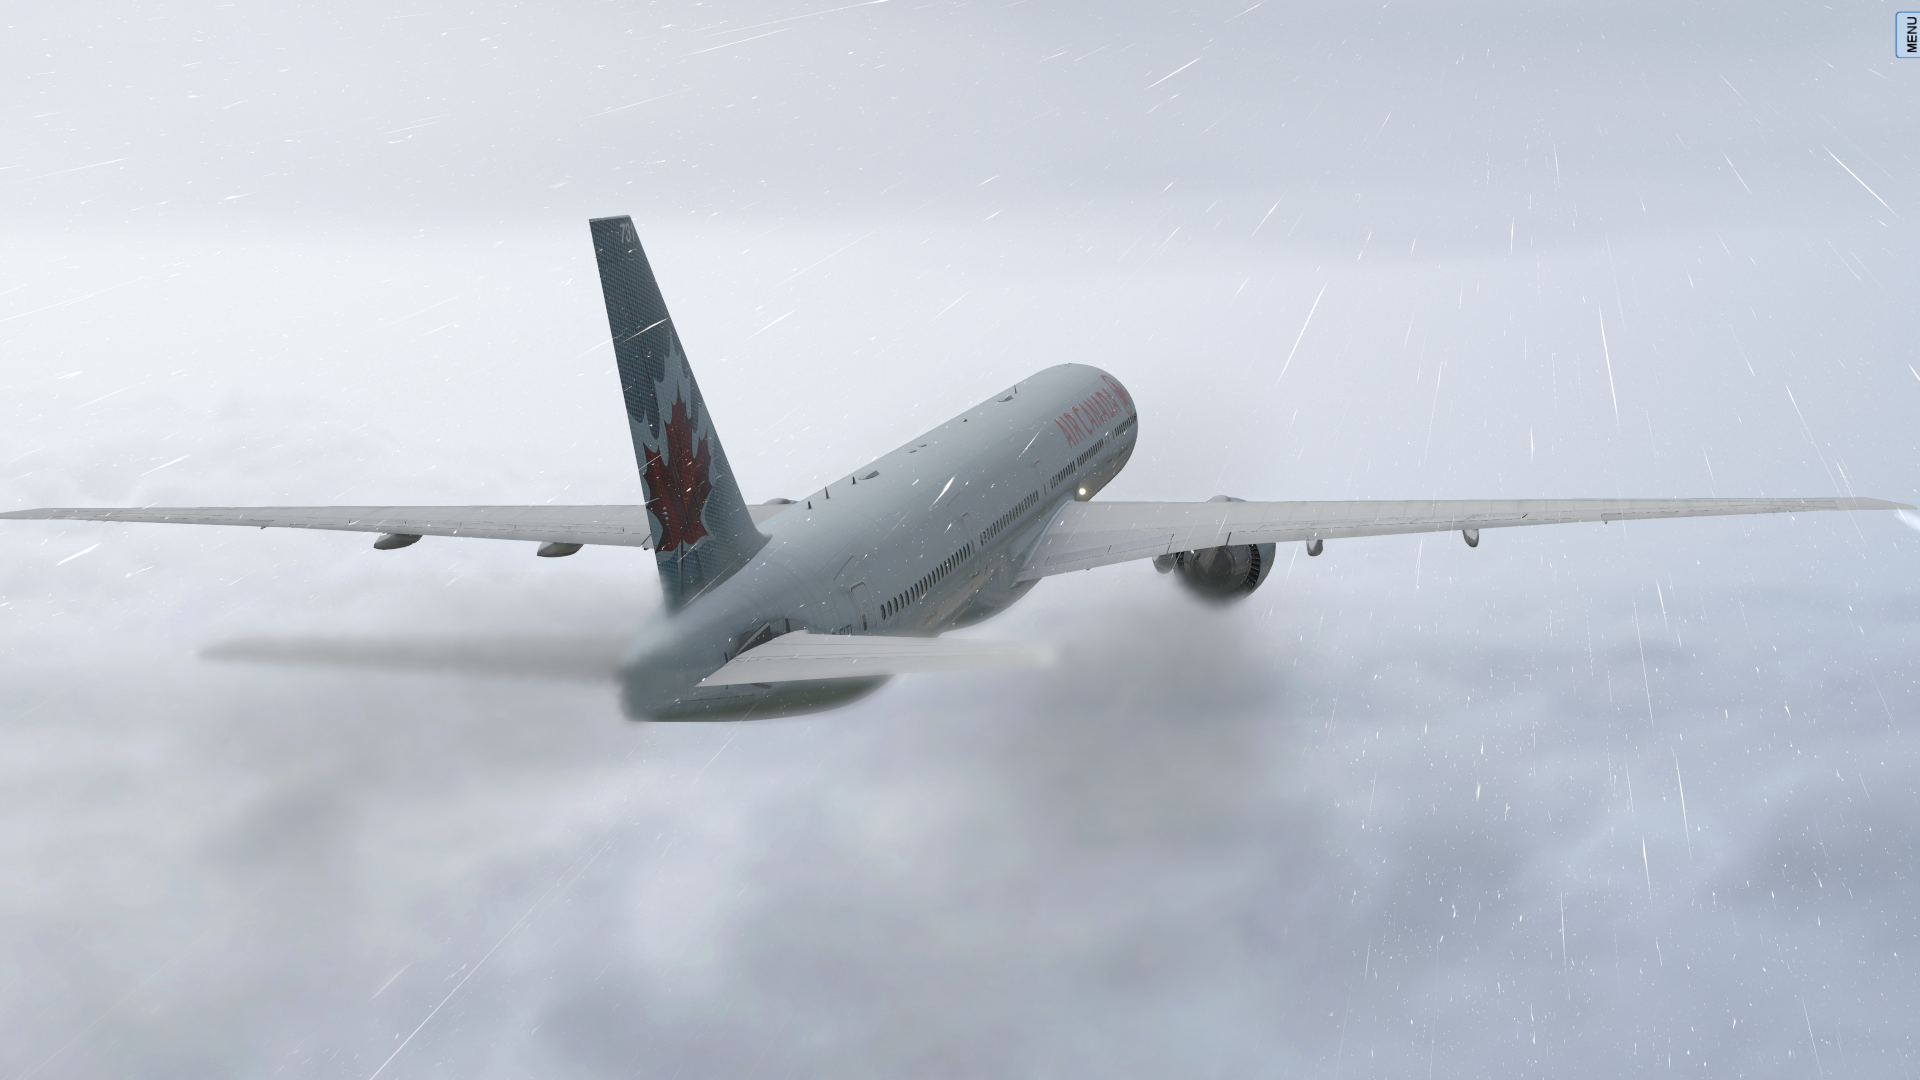
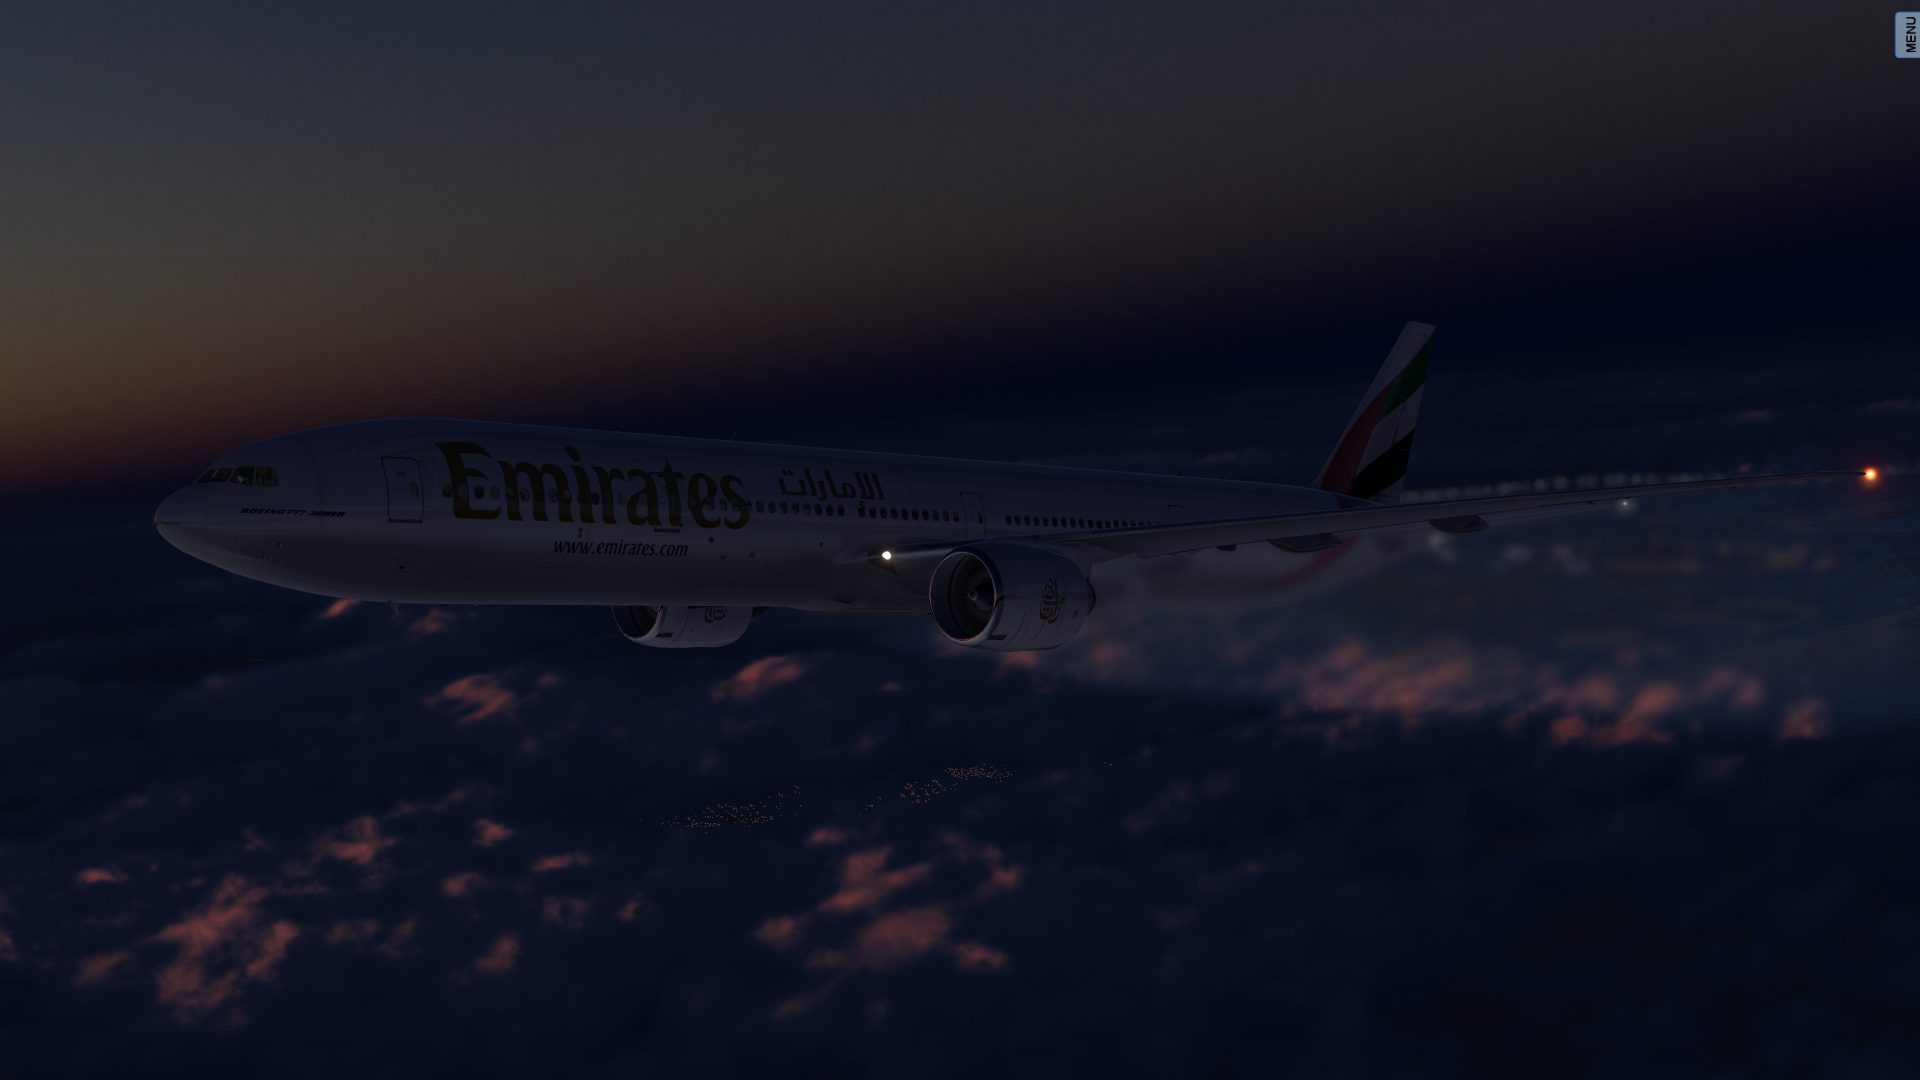
As a goodbye from this incredible website, I am leaving my best X-Plane photos. They aren't that good but I believe they are cool.
Goodbye!

- hi_nihaozaoan and CX_Fan
-
 2
2
-
Who's Online 1 Member, 0 Anonymous, 45 Guests (See full list)
-
Member Statistics
4262
Total Members1157
Most Online