

Stephen
-
Posts
2731 -
Joined
-
Last visited
-
Days Won
354
Content Type
Profiles
Forums
Articles
Posts posted by Stephen
-
-

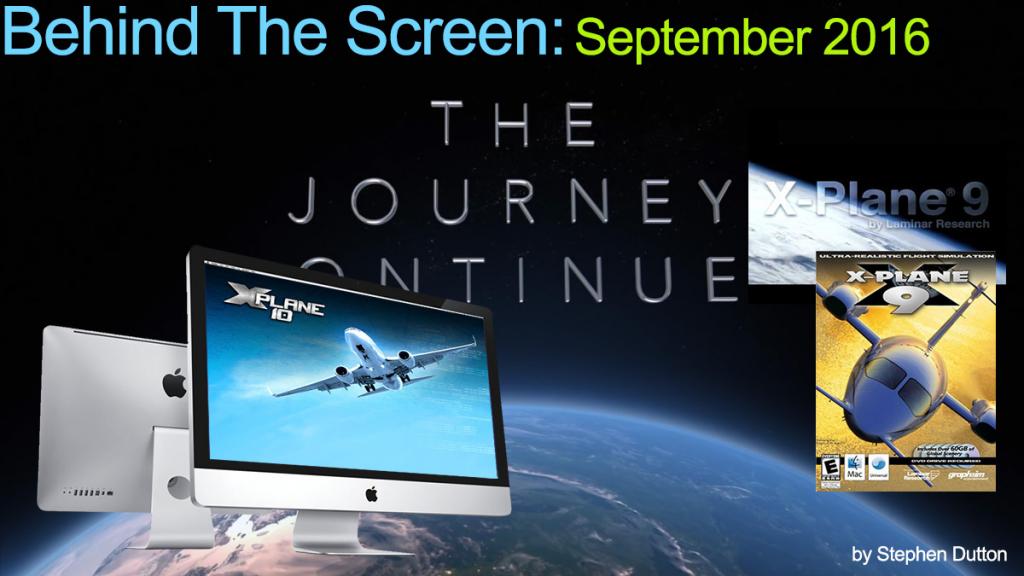
Laminar Research : X-Plane 11 Release notes
For Laminar Research to announce that a "Big Announcement" that was coming in October at the RAF Cosford Simulation Show (8th October) and that Austin Meyer and Ben Supnic where going to be there at the show, and even the Stanley Kubrick inspired promos are now coming off YouTube at a rate of click.
So it wasn't really a hard to guess that this was for the announcement for the release of X-Plane11, as the timeline easily pointed towards "Thanksgiving" as this was always the usual standard Laminar Research major release point period anyway. The 13th June FlightSimCon previews were correct as well along with my forecast that yes indeed X-Plane 11 will be released this year, for as noted at the time the shown exhibits at FlightSim 2016 were just too well defined to be still in early development.
But with the release at Cosford you did get more information, and a little more detail in that you can now define on what X-Plane 11 is going to be.
First to note is that X-Plane 11 is available now if you wish to purchase the online key, you DON"T actually get X-Plane11 of course but you do get the download as soon as it is available (Thanksgiving in the US) and the key works for X-Plane10 and 11 as so you don't have to have different keys for the different versions.
There will be for the first time two different packages to buy and are aimed at different audiences, the current price is US$59.99
Download
1. The first download is the electronic version, but to use this download does mean you must already have X-Plane10 installed with the "Global Scenery" that comes on those eight DVD disks. This version is intended for current X-Plane users and the upgrade to X-Plane11 will be just like a standard X-Plane installer update. Which is very good news as you will have X-Plane11 installed very quickly and not wait around for the eight disk DVD package to arrive, and as I am in Australia in that last time it took six weeks for the package to arrive.
-There is the option to download the "Global Scenery" or as it is noted as "Regional Scenery" but it is a very hefty download (see below) -
Steam: Steam will be probably be downloaded the same way. But in most cases the first X-Plane release is usually a beta version (or prerelease) so the new version may not be available to Steam straight away as per the beta program rules.
Boxed Package
2. The second version is the standard Boxed version with the nine DVD disks. This version is aimed at new users to X-Plane and the set requires the user to download and insert the full or selected areas that makes up the "Global Scenery" folder.
Obviously with the "Download" that means there is no update to the basic X-Plane scenery tiles or an inclusion of the HD version. But it is my guessing is that these will continue and you will still have the option (depending on your computer power) to use the HD scenery or not. This area is still a bit of an Laminar dilemma in that on how to download these huge Gb files over the web (overall nearly 100 gb of scenery is now available). But faster broadband speeds may help there, but for X-Plane11 that global scenery area really stays the same as X-Plane10.
Coming X-Plane 11 Features
- New User Interface
- Multi-Monitor & MultiPlayer
- New Aircraft
- GPS and FMS (Flight Management System) enhancements
- New Flight Model
- New Autogen (model)
- Dynamic Airports
- Lighting & Fog
- FMOD Sound
- Particle Effects
- New Weapons System
Set within those headline features are other great new ideas and enhancements that will greatly enhance the simulator, we will highlight them as we cover the main items in depth.
It must be noted that the above is just the current listed features, not the complete list of what X-Plane 11 will become. A new version of the simulator is not what you only see but what is also buried in the code or hidden structure to support new features not yet perfected or ready for use. One area that highlights this will be covered in Lighting and Fog below. So don't despair if you think some important items have not been addressed in this first release period.
Note: Laminar Research is keeping the release very much in house for this early beta, so the images here are a collection of poor You Tube grabs and the few released images. When X-PlaneReviews gets better sharper images I will replace them or add in more information as it comes to hand, so check back in again regularly as they become available.
New User Interface
Everything you are currently used to when starting up X-Plane will be gone in X-Plane11. One of the biggest complaints of X-Plane is its very complicated and to be honest very dated drop down menu interface. It works of course and no doubt about that, but still very old-fashioned.
Now on startup you will the new designed startup screen...
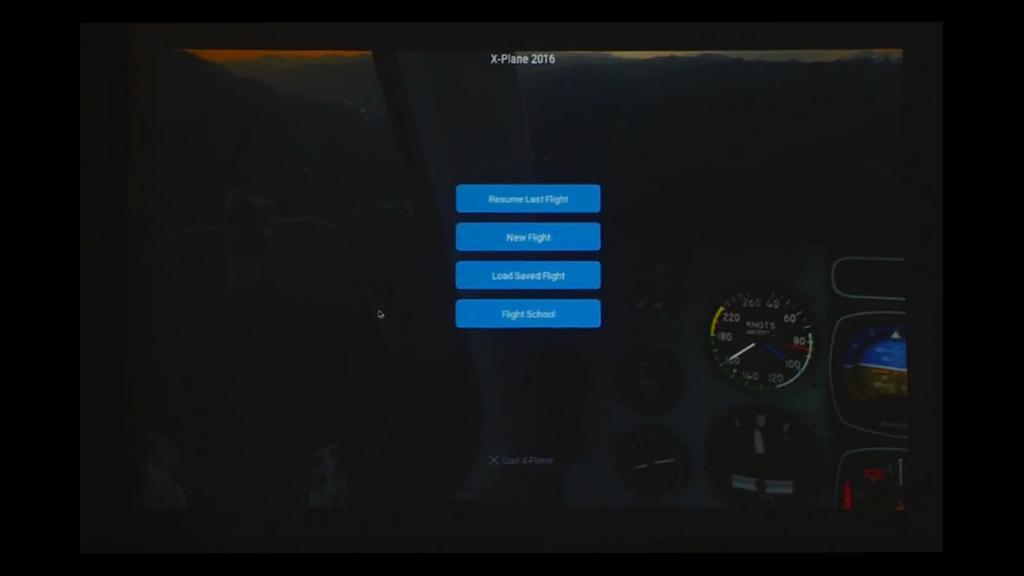
.... you will soon get four options on restarting X-Plane.
- Resume Last Flight
- Start New Flight
- Load Saved Flight
- Flightschool
I personally love the "Resume Last Flight" selection in that the one thing that really annoys me is resetting up my last point in the simulator, another great help here is in the menu selection of airport start points as we will see. But to get back to the point where you left off in the last flight is a total pain in either positioning in the local map or taxiing to the required position from the runway. I was never really happy with the "save situation" as it always left the aircraft missing something or not loaded correctly and it was worse with plugin 3rd party aircraft.
"Load Saved Flight" could be the replay mode? or a replacement for the "save situation" in a new updated form.
Flightschool will be now built in for novices and for the rest of use to hone our skills, but a nice addition.
Another but excellent item is the "Exit X-Plane" button on the bottom of the panel. How many times have you started X-Plane by mistake or wanted out early, and then you would have to wait while it took ages to all load up everything, just so you could go and "quit!" well no more.
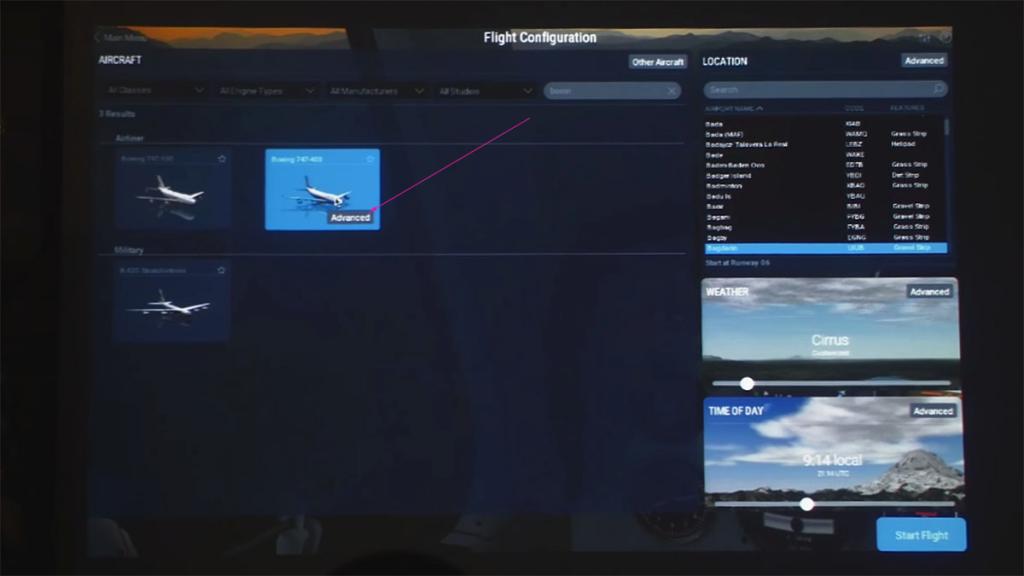
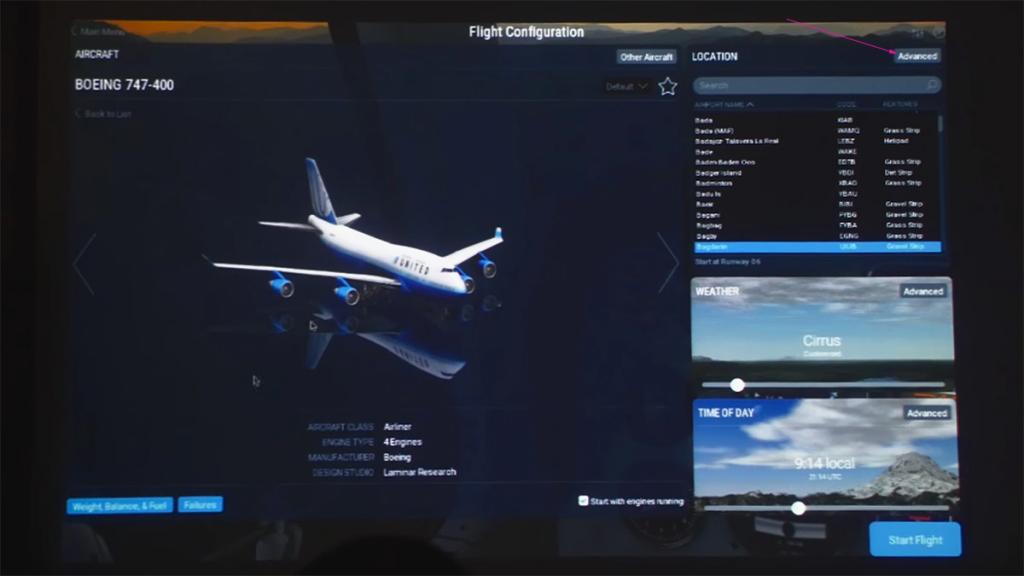
Flight Configuration Screen
The old "Quickflight" Screen is gone, and has been replaced by the "Flight Configuration Screen". This new screen is more than just a start up panel to set up the aircraft, airport and weather details... It is now your complete new startup menu system.

This a very clever panel to use. On the surface it still has only the basic components of the selection of the aircraft, airport and weather with the added panel for the time of day settings. Simple to use and to look at... and still fast to set up.
But the setup panel goes on far more than just picking out the basics. Unlike before you can now also fine tune each selection to your complete specifications... we will start with Aircraft.
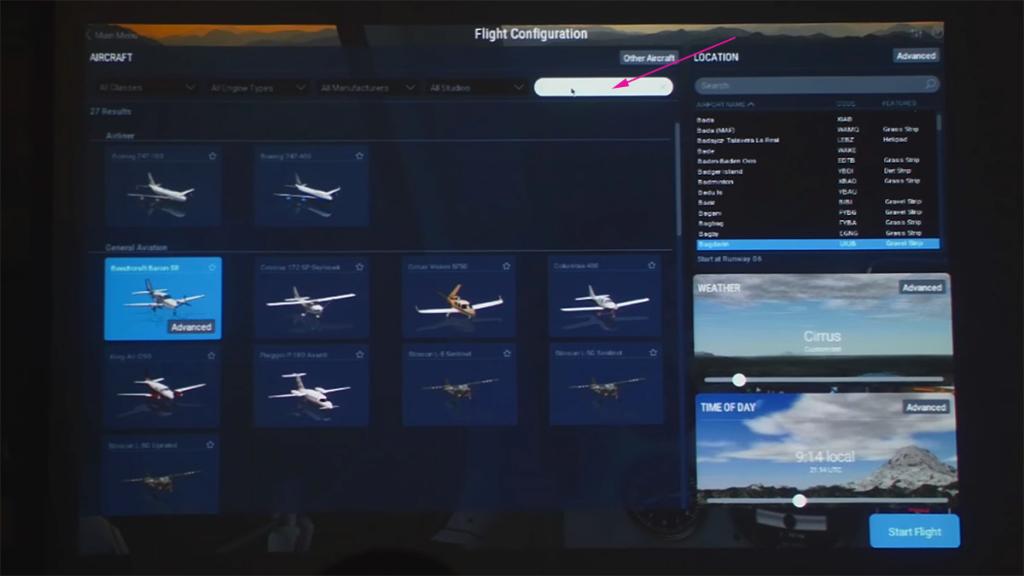
Aircraft
Selection of aircraft is not just selecting the aircraft from your aircraft folder anymore. You now have in X-Plane11 a wide variety of search options in a set banner menu that consists of:
All Classes - All Engine Types - All Manufacturers - All Studios
This breaks down the selections into easier groups under the set folders in the X-Plane Aircraft folder, but more than that you can also select the engine number (1, 2,3 or 4), aircraft manufacturer or X-Plane developer (3rd party). Still lost to find what you want, then use the new search box.
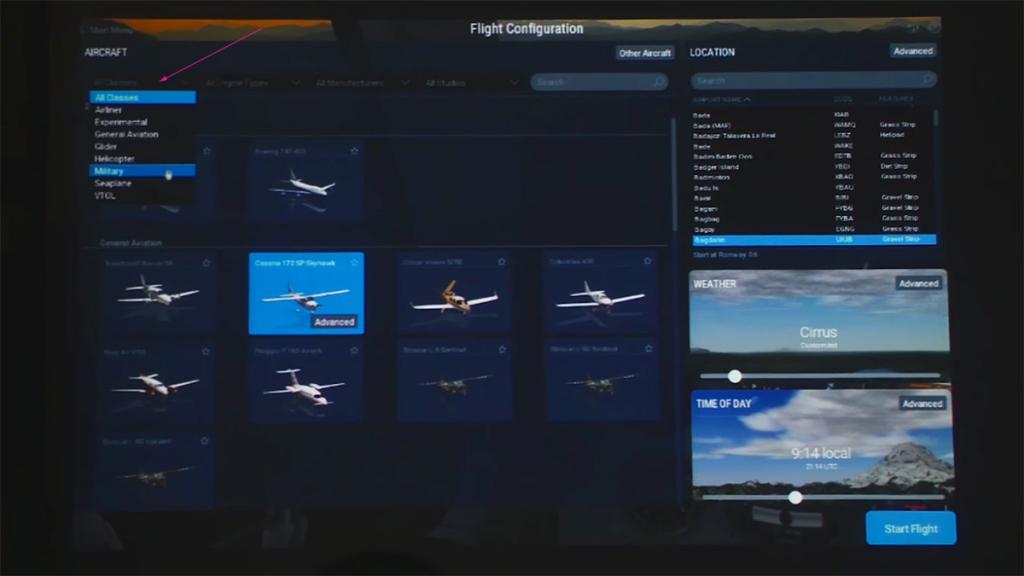

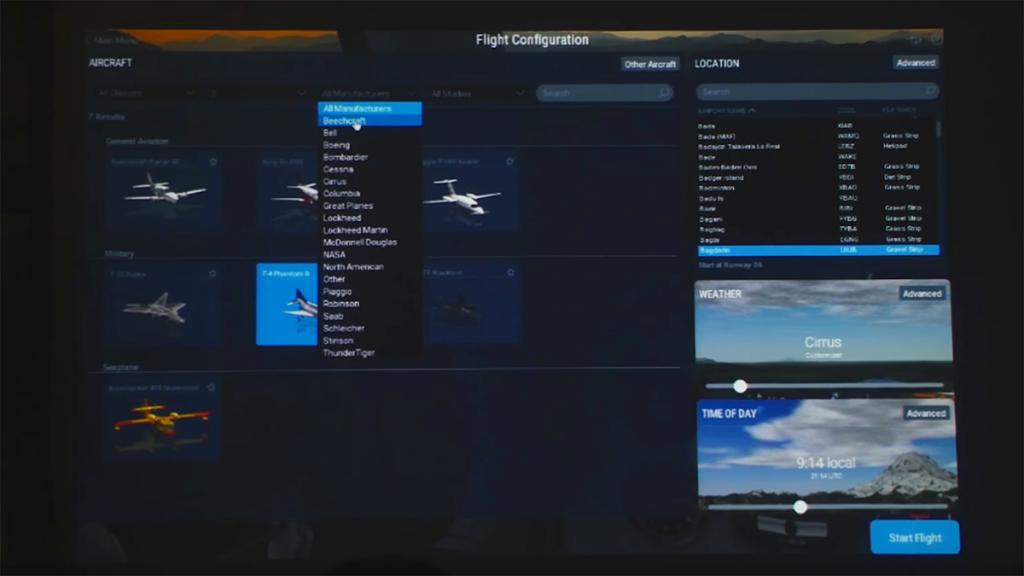
The trick buttons here in X-Plane11 are the "Advanced" buttons on each selection. These buttons now allow you to drill down and do more fine tuning on how or which way you wish to set that item up, in either the areas of Aircraft, Airport, Weather or Time of Day.
In selecting "Advanced" on your selected aircraft you get more details on the aircraft, including the star (green arrow) for making the aircraft a "Favorite" selection and then that selection listed in the your "Favorites" list.
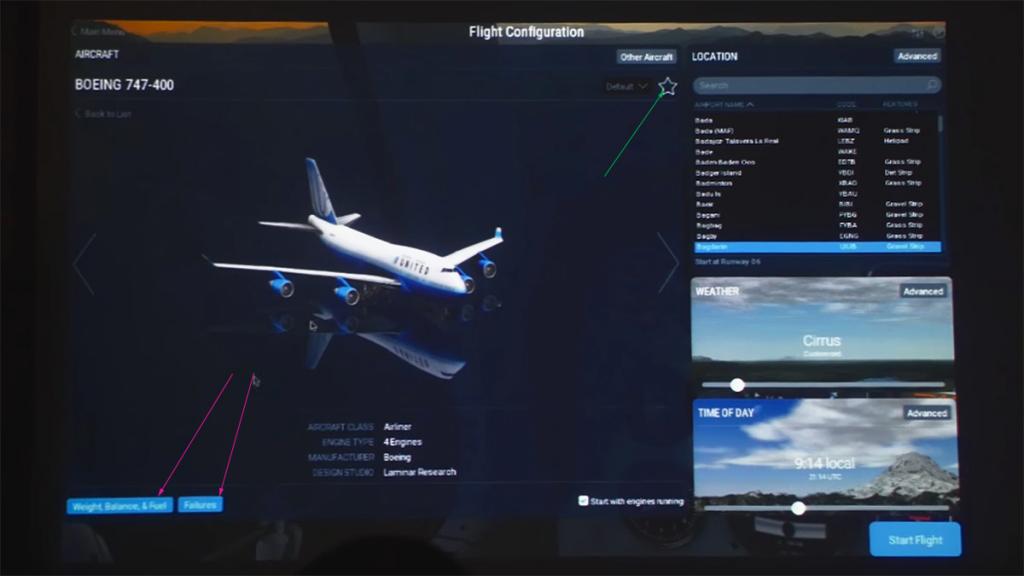
Lower left of the panel are two buttons that relate to setting up the aircraft in "Weight, Balance & Fuel" and "Failures". Notice also the checkbox for Hot or cold engine start (or engines running).
There is also a tab here to allow you to scroll (quickly) visually through all your liveries that are included with this aircraft and then select the version you want.
Selecting either the "Weight, Balance & Fuel" and "Failures" buttons brings up setting panels for both areas.
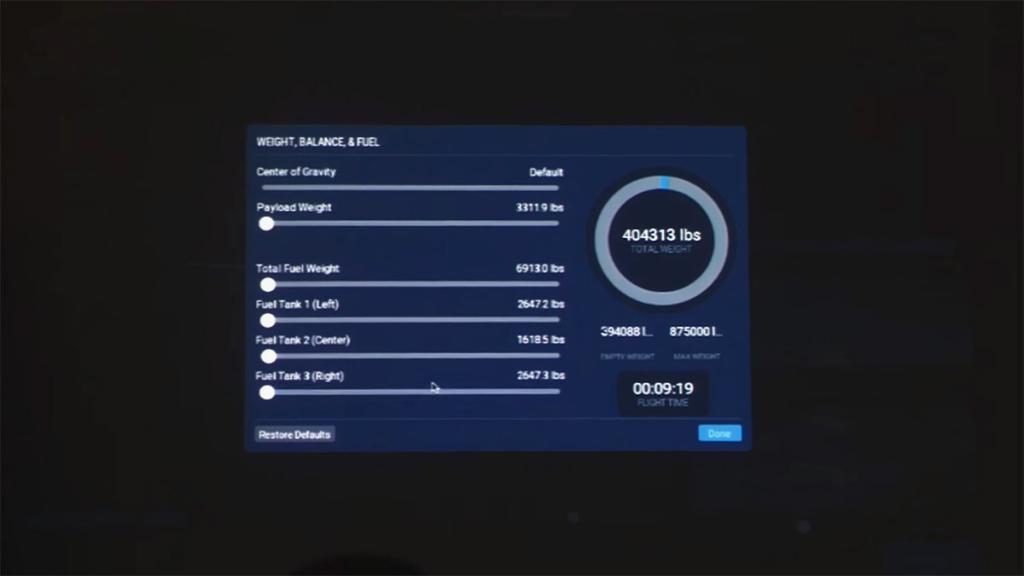
The "Weight, Balance & Fuel" panel is brilliant to use and the aircraft adjustable weight dial is easy and very clever to use and at any time you can reset to the default values.
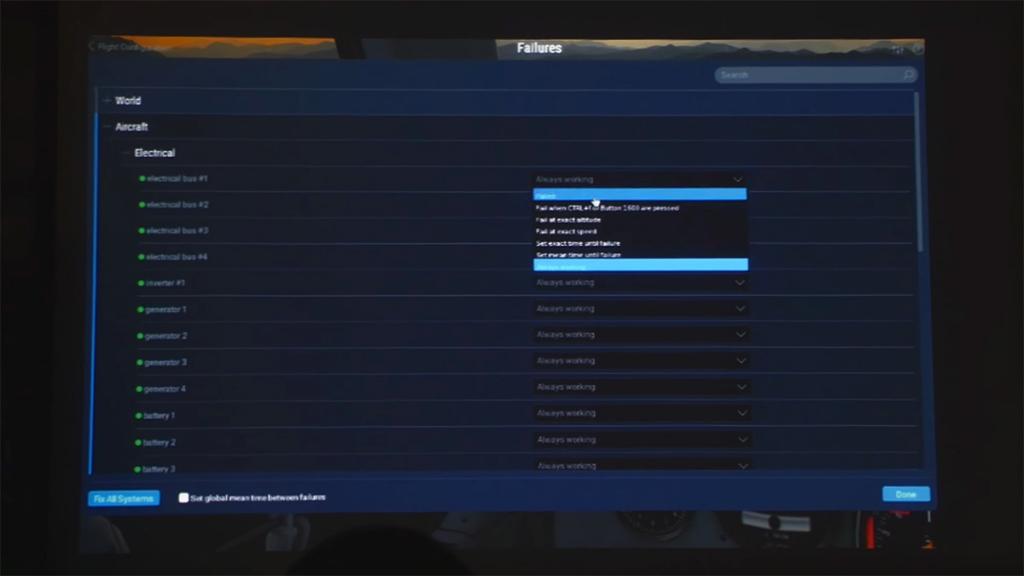
In "Failures" you can drill down from system (and aircraft) area failures to specific items and the times or frequency of those failures. The usual "set global mean time between failures" and to be able turn off the failures altogether is still in there.
Location
There is an excellent feature in that you don't have to go and backtrack to a main menu to select another different area in the setup menu that you need to access.
If you just want to do the basics like select an airport then just do that, or if you select the "Advanced" button of that area then you go straight to that area... this is quick and highly efficient navigation, and it allows you to what you want and do it very simply, but also the very indepth setups are just as easy to access across all the different areas you need to change...
Airports are easier to search with more information on their type and use. There are two selections in start points in "Ramp" or "Runway".
But the biggest feature is the easier finding that correct runway or gate start position.
Before it was a time consuming guessing game to get that runway or gate start that you wanted, certainly if you were looking for a say a cargo stand. But now all the gates and runway positions are all marked and the airport location map will scale to help you find the correct position.

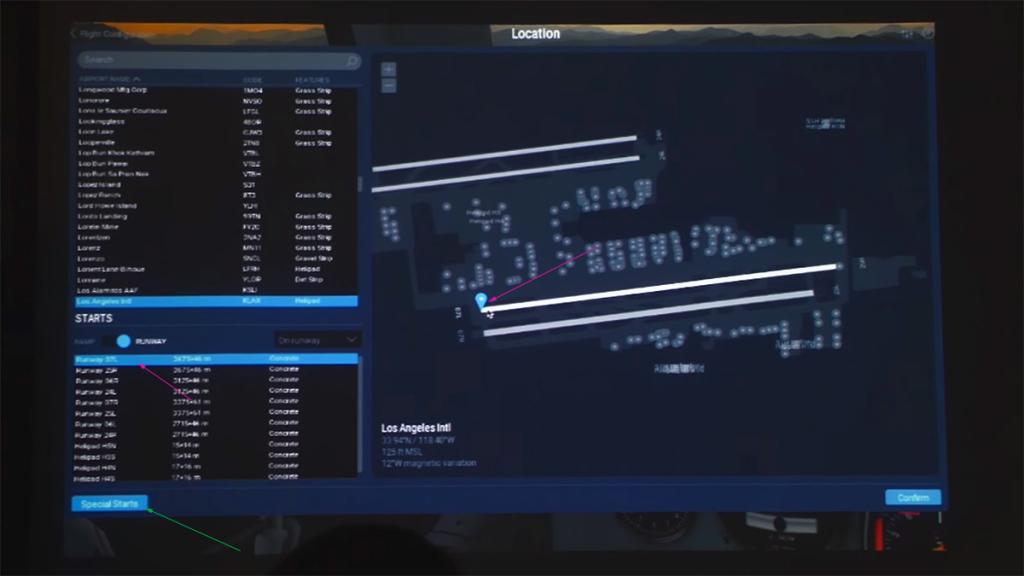
How easy can this be...
A lower left button (green arrow) notes "Special Starts", a favorites list or my guess it is the "Aircraft & Situations" situations starts.
Weather and Time of Day
Instead of the eight weather selection panels (Clear, few, scattered, broken, overcast, low-Vis, foggy and stormy) you now have a sliding scale of all the weather options available and what the weather looks like.
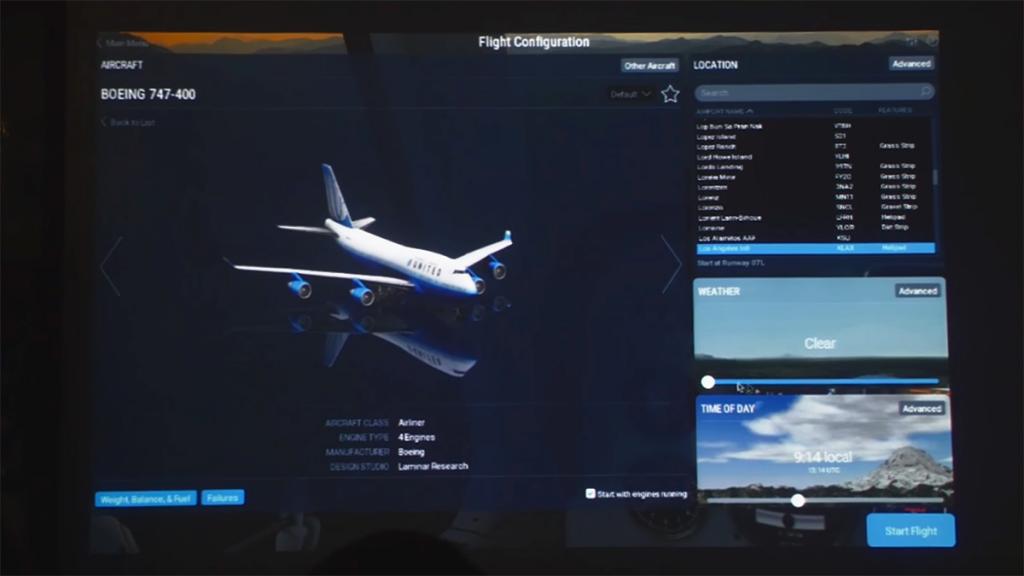
Same goes for the "Time of Day" panel with the same time scale and graphic options. No views of the "Time of Day" Advanced button has yet been revealed, but the "track real date and time is in there".
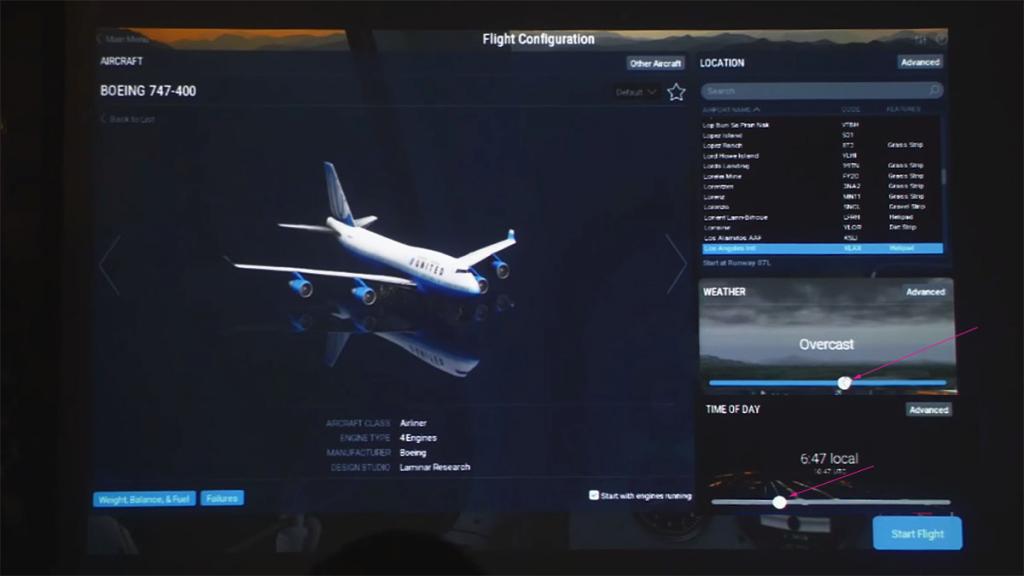
Under the Weather "Advanced" button the old complex weather panel is gone...
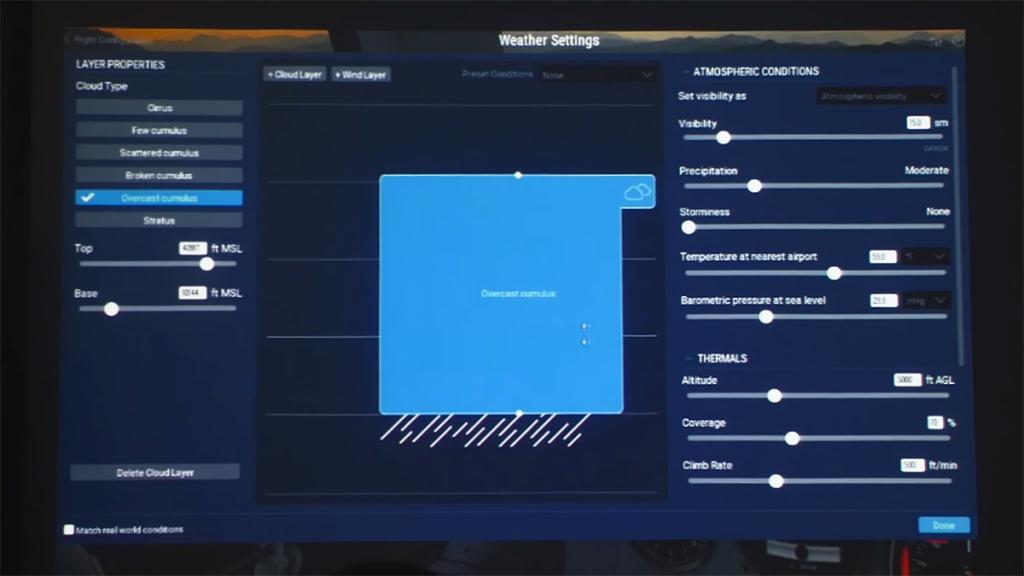

The Weather setup is now more visual (that means easier) than the guess work layout of before. Both "Cloud" and "Wind" layers are added in and set separately but shown together in an altitude format, very easy but they can also be setup in a very comprehensive way. Dragging of the different altitudes that you want with the selected "Cloud" and "Wind" settings that you want to cover is again visual and you can just drag to set which is easy and clever.
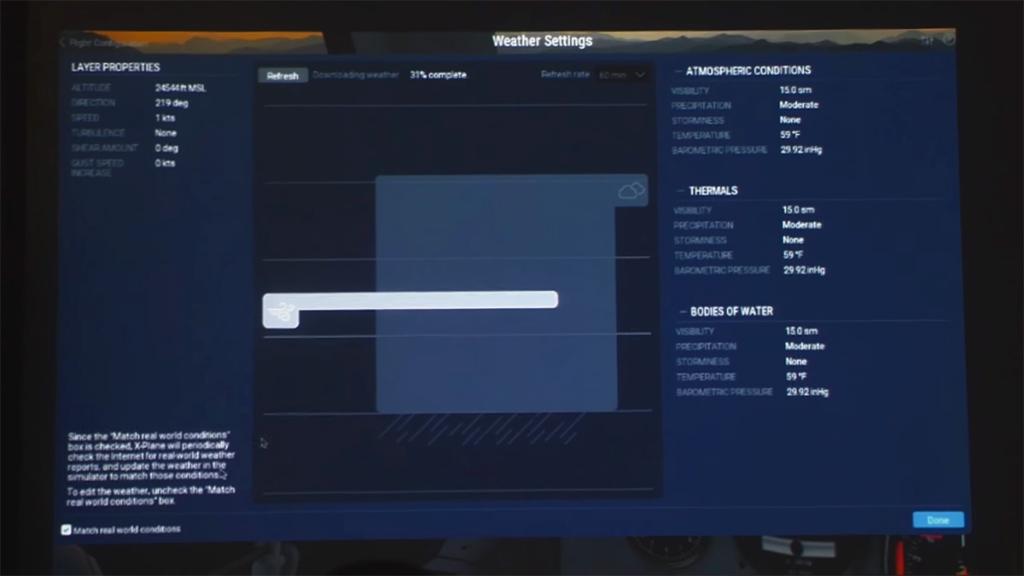
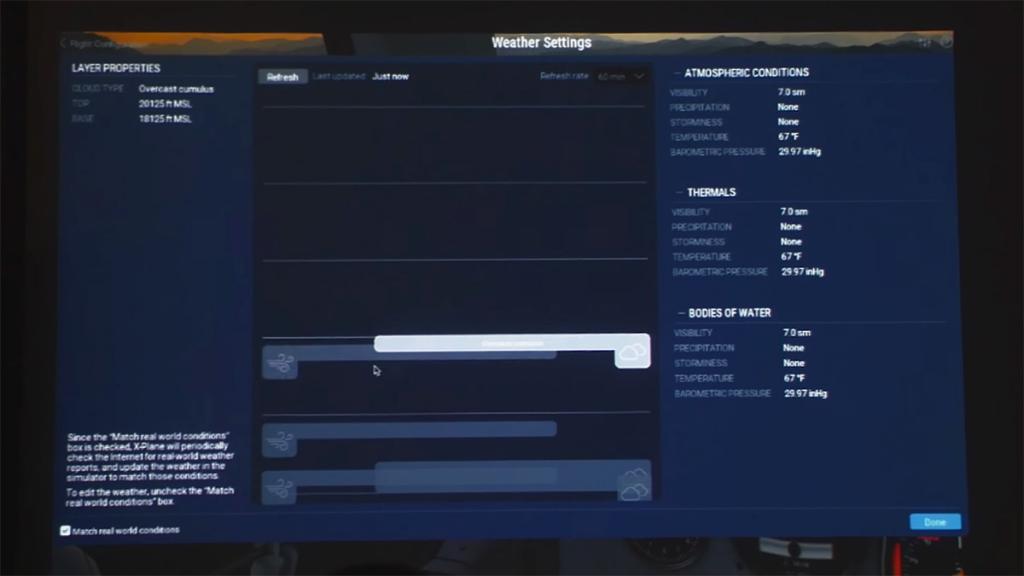
The weather "properties" are also now displayed of each layer and the information is certainly very handy if you have auto imported the real world METAR's or high winds (Winds-Aloft) data.
Checkbox for real time data downloads is bottom left.
X-Plane load Screen
This is the new X-Plane load screen. The standard moving load bar (now in blue) is still along the bottom, but at least now we have something more interesting to look at while we wait.
Menu panel
Where as really before in X-Plane10 there was one banner menu for all X-Plane setup and computer settings. In X-Plane11 the settings have now been split into more different areas.
- The first was the above "Flight Configuration Screen" that covered all the areas of setting up the Aircraft, Airport, Weather or Time of Day.
- The second is the computer screen settings panel, and these panels access is by a new popup banner.
Instead of the earlier single row of dropdown menus aligned to the left the menu has been split with the few remaining text menus still on the left, but a new set of six icons now sitting on the right.
The noted left text banner Menu items here are:
File - Flight - View - Developers - Plugins
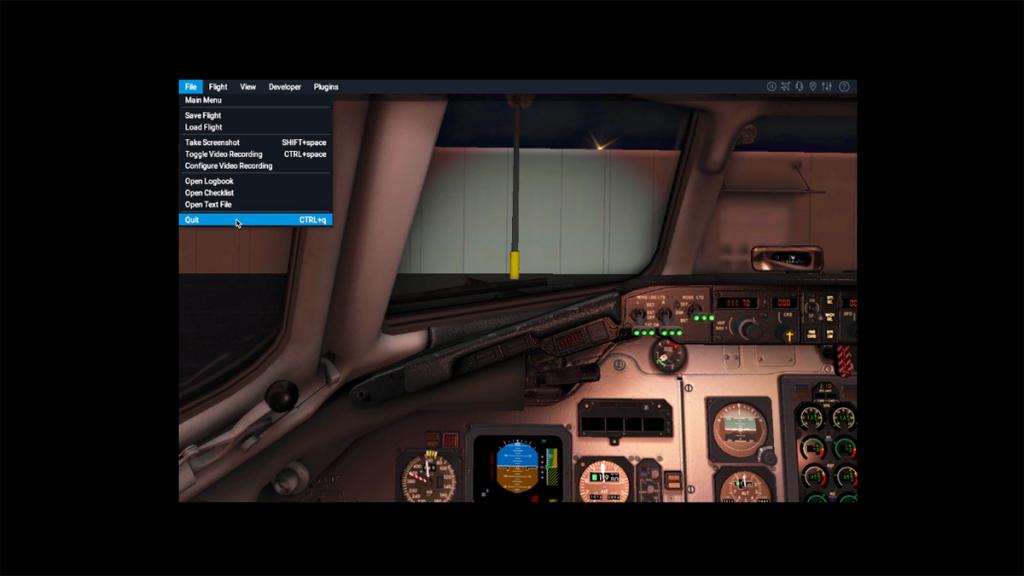

The right set of icons have to this point not been totally defined, but the "Flight Configuration Screen" set out above is the first icon and the "settings" menu below is the fifth icon.

The settings menu consists of:
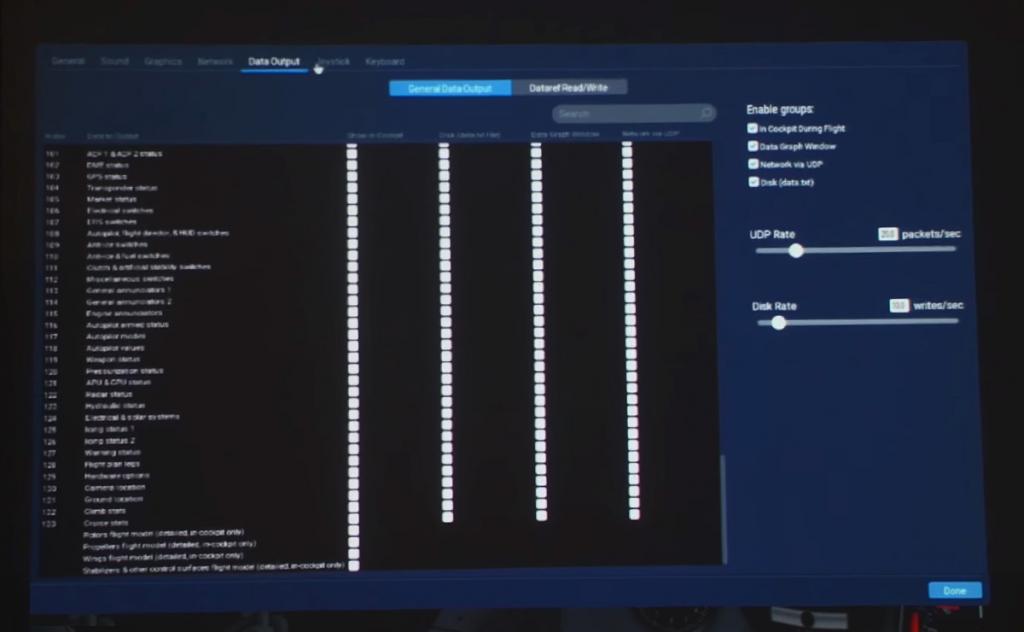
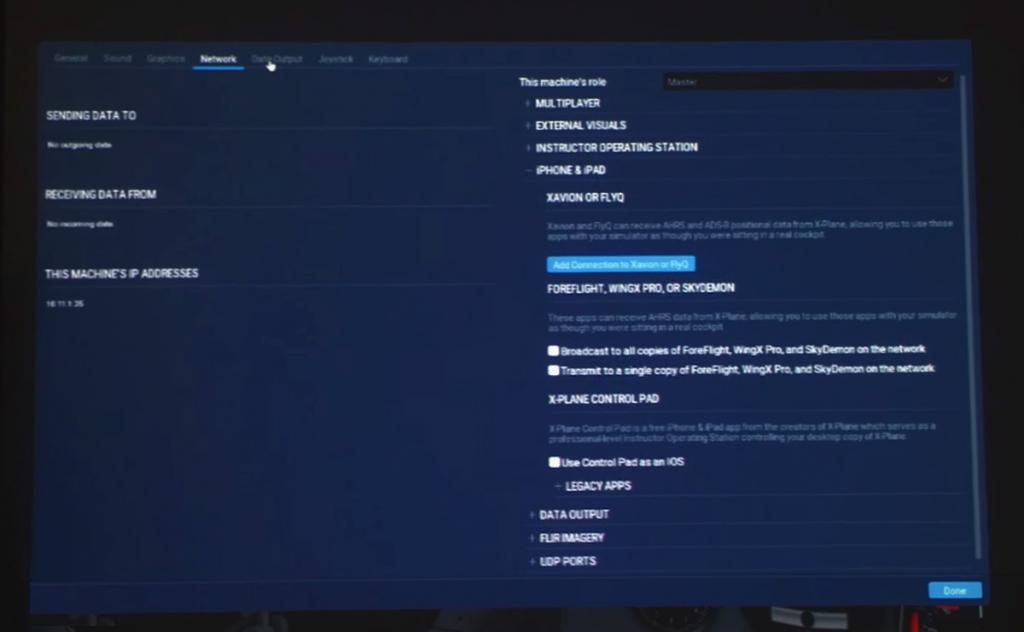
General - Sound - Graphics - Network - Data Output - Joystick - Keyboard
In effect you should easily recognise all these menu items as the same as in the current X-Plane10 layout... only one title is changed and that is the "Graphics" in that the current panel is called "Rendering Settings". No images of the new "Graphics" panel are yet available, but my guess it has been totally redesigned for a more ease of use and less confusion on how to set out your render settings and what each item does. It will be interesting to see the final layout as this panel is usually the most used of all the X-Plane menu items.
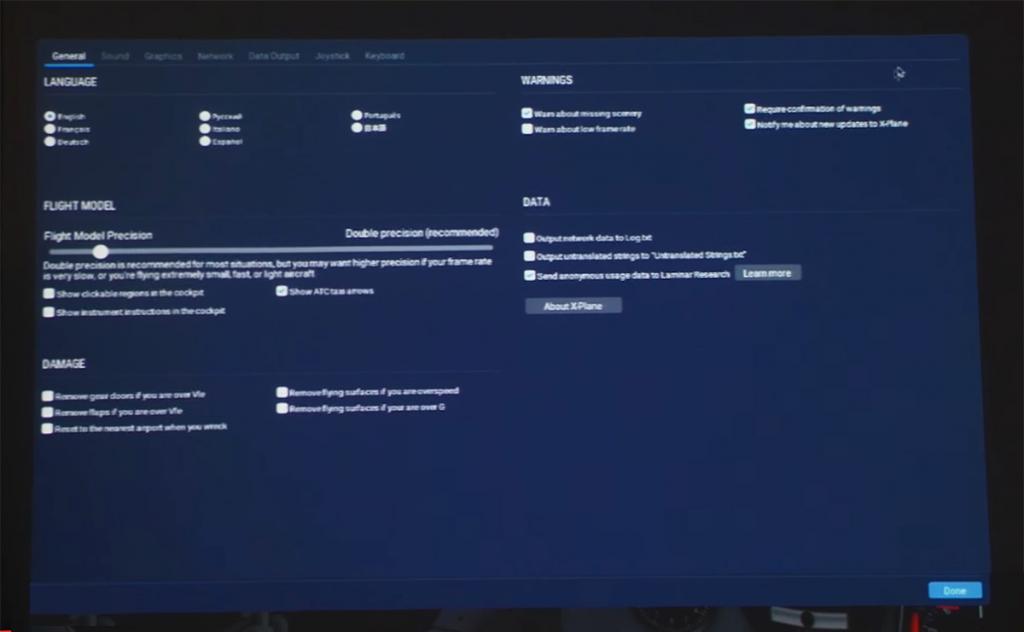
The above "General" settings is a guide of what to expect with a more clearer layout and sliders replacing numbers in many areas.
The "General" panel covers five areas in:
Language - Warnings - Flight Model - Data - Damage
These two panels show the changes for "Data Output" and "Network" settings. There are all completely redesigned but the as with everything here the actual items and the selections are the same as with X-Plane10, so you should very easily change over to the new format.
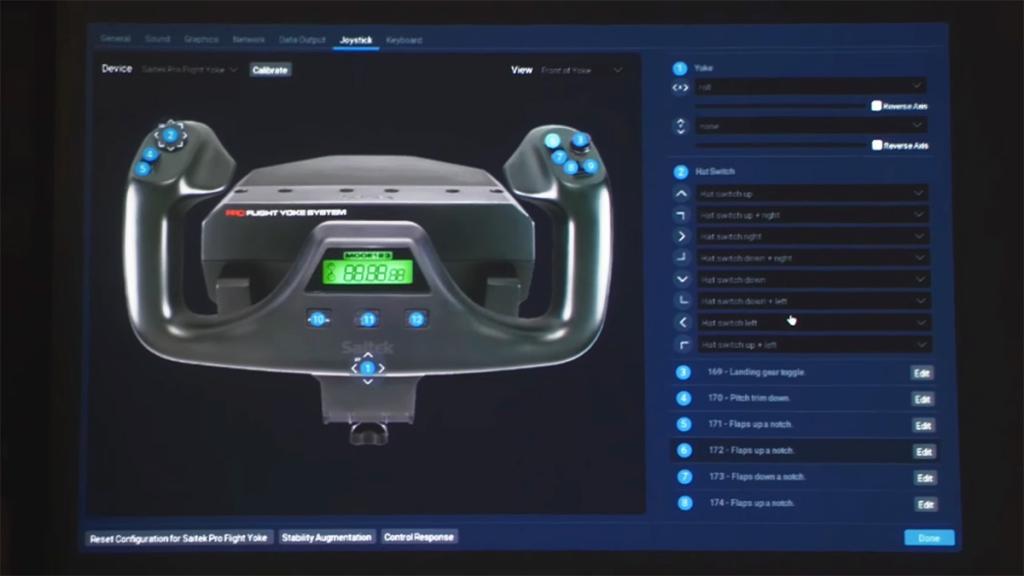
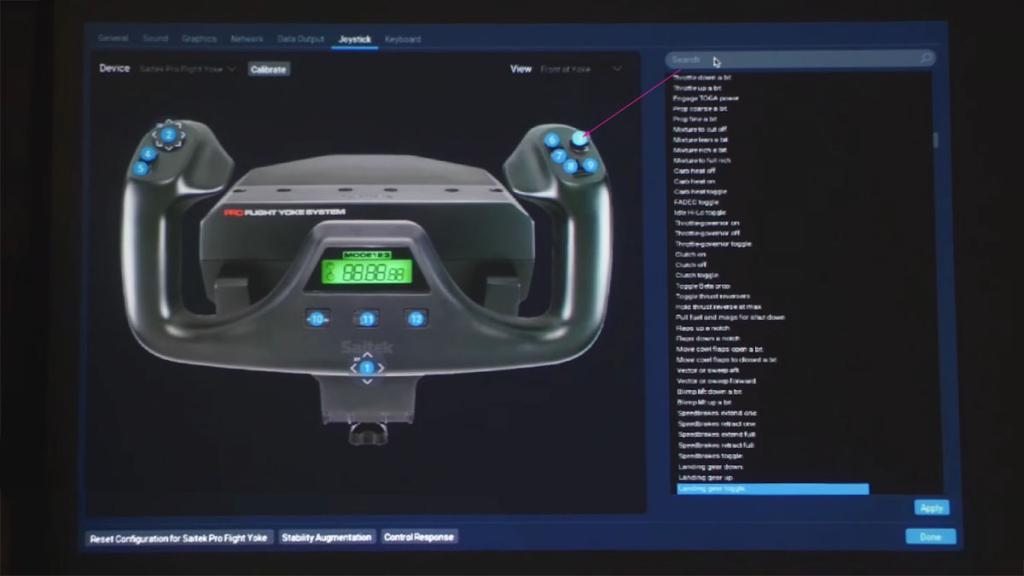
The "Joystick" panel looks excellent with the connected controllers shown in the display and all the buttons and sliders are noted for X-Plane connection. Again the process to connect up the buttons to the X-Plane command is the same but with just a different format.
Multi-Monitor and MultiPlayer
Laminar Research have noted they have made or are going to make significant changes for "Multi-Monitor" and external device support for home-based systems and more importantly for the Instructor/Trainee markets.
In X-Plane11 there is now more window support for Multi-Monitor users.
If you use any pop-out windows (or panels) then they can also be moved to a new window or to a second monitor. All windows also can be resized and scaled to fit your monitor size, and so they can be as small or large as you need them and you can compress or expand their panels as you like.
A new tool is that you can also put world visuals on any monitor which I guess would be like a moving map. It will be interesting how 3rd party developers will use this idea and the tool... so watch that space.
And for more versatility the Instructors operators station will in X-Plane11 be able to be put on any secondary monitor.
For online "MultiPlayers" which is a now important area for simulators, Laminar Research have changed the panel design to reflect the set up X-Plane for on line gaming. There has always been a lot of noise and complaints about this area of X-Plane from online users, but Laminar Research as said that they are going to make this area one of the best, but don't expect miracles straight away, but for Laminar's perspective they do need to get it right, because this area is one of the big growth areas (meaning sales) for the simulator.
New Aircraft
One of the biggest surprises that came out of the 8th October announcement was the exciting new aircraft that will be included with X-Plane11.
Four are expected and they are:
- Boeing 737NG
- Cessna Citation X
- Sikorsky S-76 (helicopter)
- Mcdonnell Douglas MD-82


Boeing737NG: The inclusion of a Boeing 737NG as a default aircraft in X-Plane11 is a surprise, but should it be? It has been floating around for awhile and if you take a look at the promo logo for X-Plane10... that is a Boeing 737NG. So is it late or did it just take far longer to create than expected. But with a default version now available that can't be a bad thing.
A night shot of the B737NG cockpit says a thousand words, but "Wow" has to be at the very top of the list. I wouldn't expect a lot of system depth, the basics should be all in there though and note that excellent FMS is installed (more on that below).

Cessna Citation X: Another aircraft that disappeared completely early in its conception stage has reappeared as an excellent looking Biz jet.
Sikorsky S-76: Good helicopters have been thin on the ground for a few years, but this excellent looking S-76 could really shake you out of your fixed-wings and back into the world of vertical flight.
Mcdonnell Douglas MD-82: Laminar Research noted that this MD-82 has been around for a few years. My guess it is the completed X-Plane Freeware Project version that never made it out of beta in X-Plane9, gone then but not forgotten, the T-Jet is back!
Another huge X-Plane favorite has also (finally) had a big makeover and that aircraft is the default Boeing 747-400
So well long in tooth is the default B744 is that I actually dropped it from my flying roster (see Behind the Screen : August 2016). But the gods have heard my pleas and the Queen is back. The images briefly show a complete redesign in the cockpit, that is a great start.... and all those heavy textures seem to have been banished!
GPS and FMS (Flight Management System) enhancements
The really exciting prospect of those two new and updated heavies (B737NG/MD-82/B744) is that X-Plane10 will deliver not only the aircraft, but they will be (hopefully all of them) for the first time have a default X-Plane FMS (Flight Management System)
The new FMS is definitely installed in the MD-82, as the aircraft is shown in the above images and so it is in the B737NG, but what of the others? Why would or should you get excited about this FMS?
Well this is a Philipp Münzel designed FMS and think... FlightFactor... Boeing 777,757, 767... getting the vibe? Philipp Münzel FMS's are the best in X-Plane, elegant, with a lot of system depth, and hopefully now available in all three of these great new aircraft in X-Plane11.
An added bonus with this default FMS is that like the default Garmin GNS430/530 GPS, you might not know where it may end up in other 3rd party aircraft.
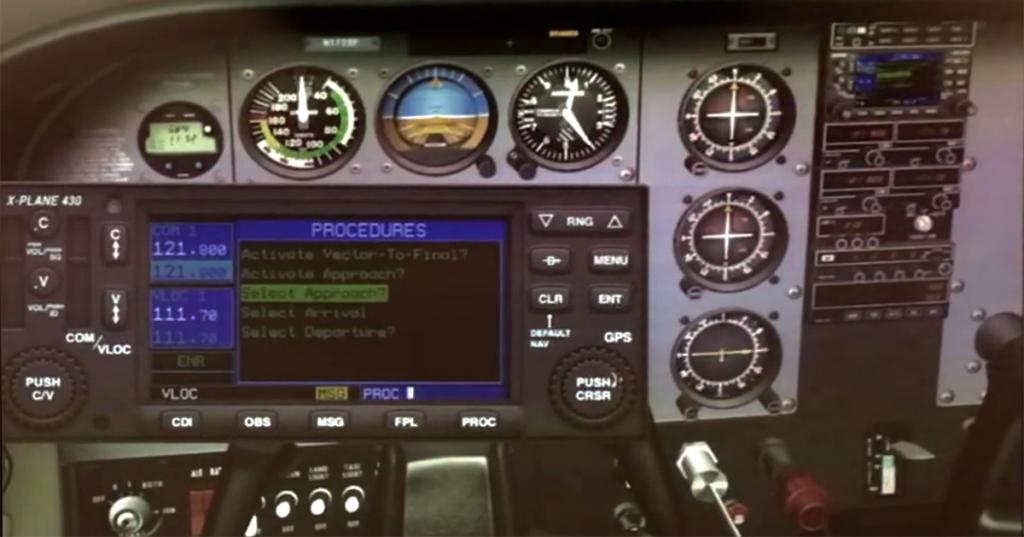


As the new FMS shares the same data as the Garmin GNS430/530 GPS. So the flow and depth of data that is required for the FMS has gone the other way into the current GPS pair as well..
Now the Garmin's have runway selections, SID and STAR departure and arrival procedures, vector to final, air-routes and better flightplan visual layouts. In other words it is now a powerful bit of kit. And if Philipp has been through the code it should be smoother and more efficient as well in operation.
So in one swipe all the FMS/GPS systems in the X-Plane aircraft have been brought right up to date and are all quality units.
Laminar Research have also noted that ALL the default aircraft will be of the same quality and detailing, and you had a taste of that quality with the release of both the updated Beechcraft Baron 58 and King Air C90B in 10.50.
New Flight Model
Austin Meyer said that X-Plane11 will have new and better flight model. Mostly concentrating on his own Lancair Evolution he explained the forces and running of his PT-6a-42 engine in that what you get in pure performance doesn't happen so much in real life aviation and he wants to simulate that... Interesting stuff, we will see where that goes and more in depth when it moves on more from the theory to the X-Plane desktop... but it is an interesting future and could bring X-Plane higher to an even more realism benchmark.
New Autogen (model)
X-Plane10 was mostly specific in getting the visual aspect of the simulator more realistic. To a point it was pretty successful in the idea of a plausible world and not so much of a complete replica of the real world. Efficiency of objects is the key and the other direction in to creating perfect replica buildings is just going to grind your computer down to a crawl as you see with OSM 3d scenery. In reality once you are up in the air, most of the scenery around you does look the same, only the different shapes and sizes make the differences. This is the idea behind the plausible world look.
Throughout the X-Plane10 run the plausible world idea was more refined than expanded. Then as now you still only have one set of autogen for the suburbs known as SoCal or South Californian or USA. The code for other different regions to expand out the autogen was put in place a few X-Plane10 versions back, but still not utilised. Up to this point Laminar Research has only used one Swiss artist to keep the quality and the tight restrictions required for efficient autogen.
But really after the full run of X-Plane10 and only SoCal and a more of a focus on the urban infrastructure in tall buildings, factories and warehouses X-Plane is still covered with actually almost the same SoCal autogen in the suburbs from Dubai in the Middle-East to Stockholm in Sweden.
That will all change in X-Plane11. The art assets are being opened up to 3rd party artists to contribute to the regional autogen... and thank god on high for that.
The autogen restrictions are still very severe as they need to be for the efficiency that is required, but otherwise there is no doubt that with the many hands already shooting up this area that the look and feel of the autogen will change quite significantly and quickly.
Laminar Research has shown the first area to be included and it is Germany, and in X-Plane11 you will have besides SoCal also Germanic housing. Another addition to the autogen model is the inclusion of terraced or long buildings. These are created by putting together many of the current singular buildings and then joining them up together as a row (below right).
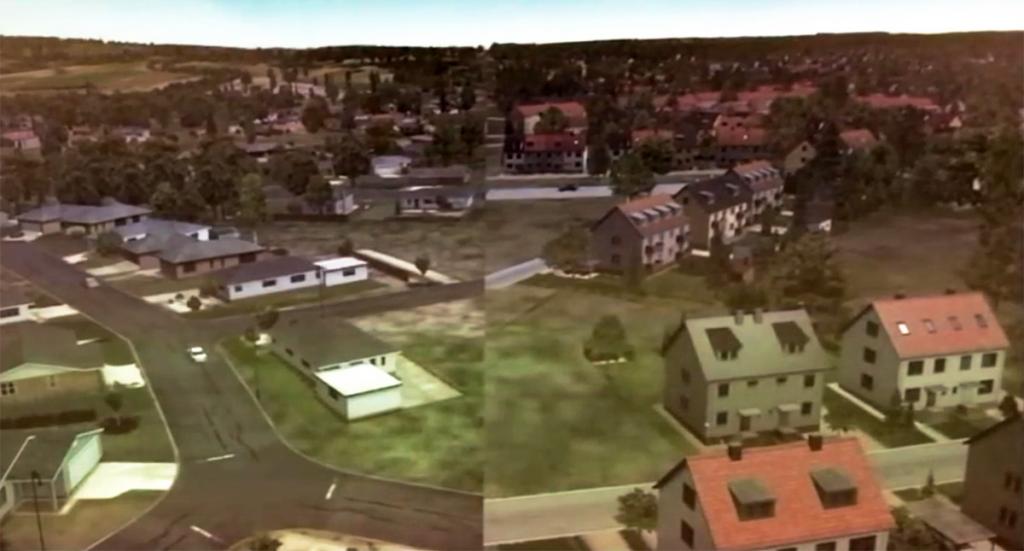
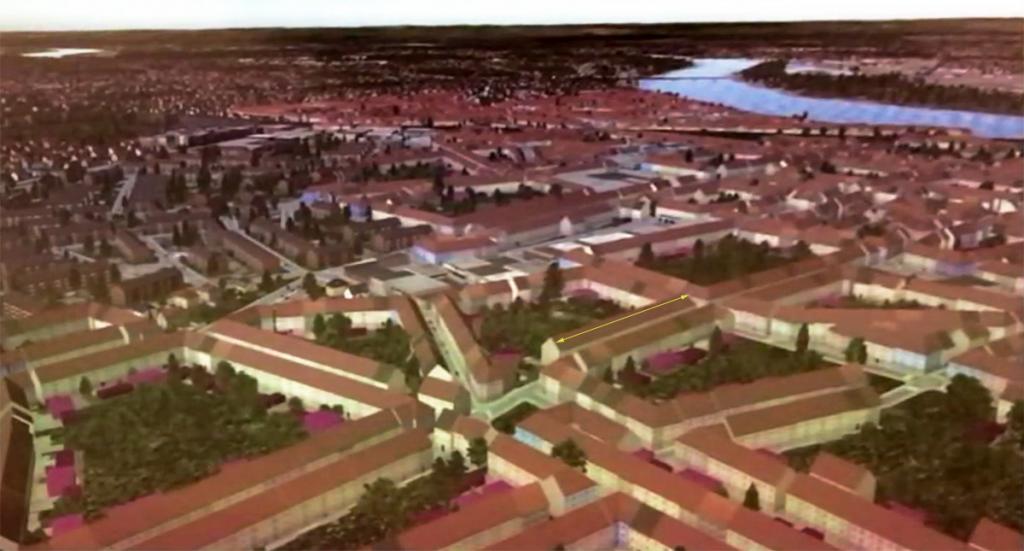

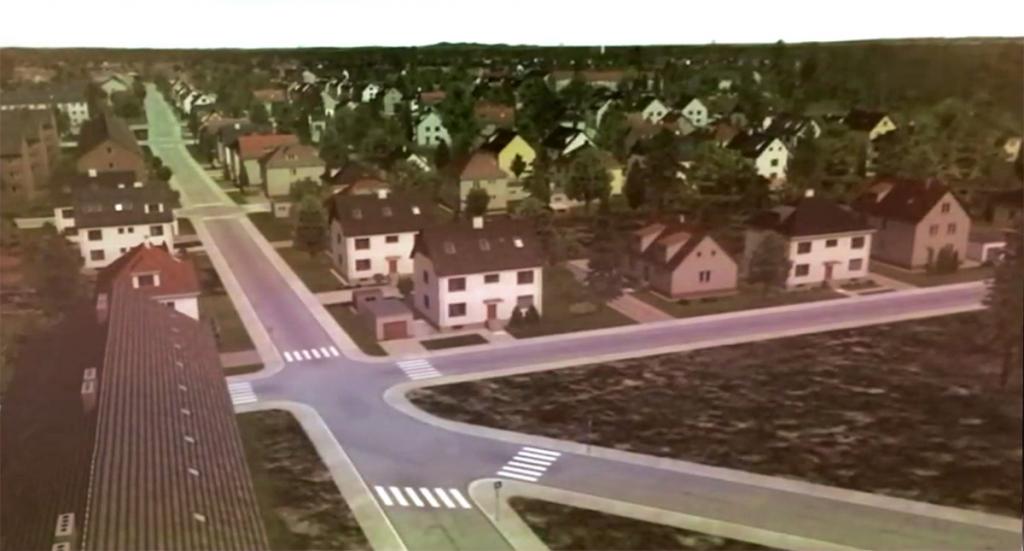
The autogen transformation will be quick, and more plausible in the fact that soon your arrival into Dubai finally won't have American housing on your approach path!
Dynamic Airports
Another of the big original complaints about X-Plane was that it did not have the huge database of airports to fly into. It did have the airports per se, but only the airport data in the location of the runways and a windsock! But no actual 3d buildings.
That changed in X-Plane10 as Laminar Research created a database to collect 3rd party airports built using the WED tool to fill in that credibility gap and if you load X-Plane now then these "Global Airports" are automatically sited there for your use. To a point more time and hours in creating the tools and infrastructure to support this specific area of X-Plane (called Lego) during the X-Plane10 run in reality overrode most other areas of development, but the results have been very good. The numbers are impressive in 7,092 global sceneries have been created and 5,191 of them have been created with 3d objects by 1,862 scenery artists. But this only puts the scenery into the simulator, now Laminar want to go to the next step in creating... Dynamic Airports!
Dynamic Airports as a feature has already started with the 10.50 update with the inclusion of better static (A.I.) aircraft positioning at airport gates to work with the better ATC (Air Traffic Control). Now Laminar Research is adding in another step in filling out the areas around the aircraft with service vehicles or "Live Ground Traffic".

I use the JARDesign "Ground Handling Deluxe" plugin for service vehicles a lot, It works and looks great. But around you there is nothing happening to all the other aircraft and when you taxi in or out of the terminal areas and unless it has vehicle "Traffic" running, there is nothing going on.
This new feature will provide more movement but also fill in all those blank areas with service vehicle traffic. This sounds great in theory and with one aircraft but then multiply that with say Atlanta (KATL) or another mega-hub and it will be interesting to see it all works, but it is very exciting as well if it does...
The feature is also available for 3rd party (i.e. payware) developers and that is where you are going to see the biggest changes, as the feature will be perfectly intergrated in with the airport scenery.
There will be a new WED (WorldEDitor) version released the same time as X-Plane11 with the new tools built in for creating these "Dynamic" features.
Lighting & Fog
One of the fanfare features of X-Plane10 was HDR or High-dynamic-Range rendering which created great lighting effects and lighting shades. Laminar Research were justifiably proud of their HDR feature and it was a big bonus for the simulator.
As good as HDR is it doesn't cover all the aspects of reflection and lighting. Mostly in reflection. As we see the world our eyes are very good at picking up the variations in light reflected objects in say dull flat items to bright shiny reflective surfaces.
So a new lighting feature come in X-Plane11 is "Physically Based Rendering" or "PBR" The idea is that any surface can have different reflection properties, like a brick's surface (or texture) is not shiny or even that reflective. It can however in certain lighting conditions look shiny and reflect light, so a runway that can close up look rough and have a flat matt surface reflection, at a distance though the runway can also then look actually like a reflective surface and like water. And this is the idea behind Physically Based Rendering and the way that light follows the rules of Physics.
From a computing position anything can be done, but it is at the cost in the processing or computing power. So in most cases visual tricks are used to compensate for the different surfaces. It works like this...
Instead of using current lighting techniques like using multiple diffuse textures and specular maps for each part of every object in the simulator to represent the various different conditions, you can just create one texture for each part then artificially define properties like the refractive index to help parameterize a physics model that controls how light and shadow work when rendering frames of the simulator's view that contains that object.
Bonuses of PBR in X-Plane11 will include that everything (surfaces) will now be reflective and the reflections can vary with the viewing angle with a very efficient process without using huge amounts of processing power.... it is called a "Win Win"


So our current dull objects or aircraft will become more dynamic and shiny. Glass will look more natural and surfaces from any angle will be reflective. In the early days the PBR effects won't cover the scenery modeling as it is far more complex, but Laminar say's that it will come in some form in the future and not interfere with current scenery textures.
Also coming to X-Plane11 is Screen Space Ambient Occlusion (SSAO). An algorithm is implemented as a pixel shader, which analyzes the scene depth buffer which is stored in a texture. For every pixel on the screen, the pixel shader samples the depth values around the current pixel and tries to compute the amount of occlusion from each of the sampled points. In its simplest implementation, the occlusion factor depends only on the depth difference between sampled point and current point. Ambient occlusion is a shading and rendering technique used to calculate how exposed each point in a scene is to ambient lighting. The interior of a tube is typically more occluded (and hence darker) than the exposed outer surfaces.
The trick of SSAO is to make the complex calculations only on the computers GPU in realtime (and not using computers CPU) which makes it very efficient to create ambient lighting and to make the simulator scenes more lifelike.
Fog
X-Plane11 comes with a new particle effects engine and it has been completely rewritten for efficiency and better effects. One of the early side effects from that new engine is the new fog shader.
Fog in X-Plane now is quite a strange animal in that what you get really is all or nothing. The worse effect is as you come into land and the fog just lifts and you get the full airport in a new light, very dramatic but not very realistic.
The new fog now has exponential decay or it becomes more and more thicker at a more rapid rate. Better radial distance and linear calculations create a smooth flow from one fog distance and thickness to another... in other words perfect fog.


This effect will also create a much more effective horizon or that haze that takes out the detail of buildings at a distance, the effect all round is more realism.
It is also important to note that in the process of installing new features and code. Is that with a major simulator version change not everything is laid out for use on the initial release. The fog feature is one coming, but many has expressed the views that more or better weather effects should have taken priority. As they say you can't build a house without a foundation, and that is what Laminar are doing here in laying down a foundation for better weather effects that are coming in the X-Plane11 run. When is anyone's guess, but Ben Supnic noted that only when the effects are good enough will they be included as they are still in the early stages of development, but they are coming.
FMOD Sound
FMOD is a sound effects engine developed by Firelight Technologies and the FMOD format is coming to X-Plane11 to create far better and more 3d like surround sounds for all Win/Mac/linux platforms.
The new sounds will intergrate directly with the X-Plane Flight model, physics and command system. To a point X-Plane's current sound engine is very basic, just a collection of wav sound files were as most developers are now currently using plugins to create separate sound engines to compensate for the current lack of flexibility. This sound engine will bring the sound back into the simulator.
Since the FlightSim 2016 notes then no new information about sounds were revealed at the 8th October announcement. But back then Laminar Research did note that they were creating a new tools to create better sounds for their inclusion in the simulator and it will be open to all developers.
New Weapons System
Laminar Research did release a load of new features for weapons use in X-Plane 10.50, these included:
- Weapon selection is now better with flashing selected armaments. You can now also steer or aim in a direction a gun, even with a second joystick can be added in to do the delivery job.
- Unguided bombs and rocket numbers have been added with up to 24 bombs and 99.999 rockets! that is if you can carry that heavy load.
- Air to ground bombs and missiles can now be laser or GPS guided to their targets. Either by a gun/bomb steering with a joystick axis or by locking in on a target and then firing letting the bombs or missiles go to their assigned target, and all can be set via your on-board aircraft situation display monitor.
- In the upgraded weapons package is another feature that could be used also by other aircraft developers. This is a new on board aircraft "Camera" feature that can be steered (again by a second joystick) and zoomed with my guess a joystick top-hat, key or similar adjustment.
If that is the package or more is coming to X-Plane11 then Laminar didn't expand anymore on that area at the 8th October announcement, so we will have to see what is actually in there when X-Plane11 is released.
Summary
the new X-Plane in version 11 is more a very technical upgrade than X-Plane10 which was more focused on the visual. So at first glance the simulator will not have as much in your face features except for the complete overhaul of the interface and menu system.
But dig deep and there is a lot going to be inserted in there and a lot in the way of efficiencies in not only in the way the simulator runs, but also in the way it looks and sounds.
But don't expect all the gongs and features on release. It will take a year or so before everything is fully settled down and all the features are well intergrated. And also keep in mind on that count that the basic building blocks are actually going in now, but they won't show their features for a while into the future. In reality it is a good approach by Laminar Research in to put in first a lot of basic components or code and get that working perfectly until then later adding in more features and ideas on top. This is the opposite of the approach to X-Plane10 were as Laminar put everything in at the start and then spent a lot of time just fixing it all up.
Looking closely at the new interface, you can see a radically different way you will interact with X-Plane. It is in the smooth transition for all areas in selecting Aircraft, Scenery, Weather and Time of Day and still have a simple or the deep depth of settings very easily at hand. The interface is powerful and clever and a lot of time and thought has gone into its conception, it looks very smooth in operation as well and will be a big drawcard for new users into flight simulation. For current users you will easily recognise all your current menu items and settings for use, the only difference is the way they are now accessed and used.
Value... Many will question value and the cost of upgrading to X-Plane11. Just first note that with X-Plane10 you got far much more than Laminar Research advertised when it was released so yes in the end you did end up with great value for your investment.
So if Laminar Research do deliver the new features promised here then it is already good value, more so if the promised new efficiencies are part of the deal then that is a better deal as well. The biggest bonus than like X-Plane10 is that many of you shouldn't need to currently upgrade to run X-Plane11 as in reality there is nothing in there that could be a processor buster. If you have an already weak machine with X-Plane10 then don't expect the new one help you out either, you will still need power to run it. but that generational leap in power is not required here.
For sheer value on top of the new simulator is the collection of new aircraft. The B737NG, MD-82, Cessna Citation X, S-72 and a totally revamped Boeing 747-400 are all worth the admission price alone, yes they won't have the depth of systems or features of say a flightfactor aircraft, but they will have its FMS! and that is going to be a brilliant deal for everyone.
The above notes are in context of yet not actually running X-Plane11 or even sighting it as it is not yet actually running as a beta, so areas and maybe even items will change on the release of the new version. To that effect we will update this review to compensate for those changes.
Also remember that it is good chance the first release will be a beta version (as Laminar did with X-Plane10) so if you want a solid version then I would wait until the release goes final (it only took a few weeks last time).
The one thing about X-Plane is the constant change, another new era is coming for our simulator and it is another exciting step towards what Austin Meyer's vocally proclaims "The best simulator ever!" Funny thing is with X-Plane11 he may be finally getting there.
____________________________________________________________
Stephen DuttonUpdated 17th October 2016Copyright©2016: X-PlaneReviews
-
56 minutes ago, Guest sohearn said:
T/O configuration is Wings Forward, Flaps Mid.
Yes tried that configuration, and it does work... I thought any flap would create too much drag, but apparently not. SD
-
News! - First X-Plane 11 feature and Release Videos
Laminar Research have released there first X-Plane11 video, covering the new features.... Lighting, Reflection and Fog
They also note... X-Plane 11 includes:
A new, intuitive user interface
An overhauled aircraft fleet, plus 4 brand new aircraft
High-resolution exteriors and detailed 3-D cockpits on all included aircraft
European buildings and roads
and more!I have now added in the two X-Plane 11 release presentation video's and I will add more as they become available...
X-Plane 11 presentation. *Part 1*
X-Plane 11 presentation. *Part 2* -
Behind the Screen : September 2016
Like August, September seemed to go on forever and ever. The releases after the Northern Summer trickled to down to a few as well. Like Hollywood movies the pair of E-Jet's from SSG and X-Crafts had been released within weeks of each other so it was from one E-Jet directly to another (I also did some beta testing before the X-Crafts release), both are very good, but both don't quite hit the very marks high they should have done and each was for basically for only one or a few reasons.
In the SSG it was that average FMC and poor menus (location) but otherwise it was a brilliant update, but the these two items were enough to keep them out of that extremely level we expect now with quality (and expensive) payware. I have always been a big fan of X-Crafts E-Jets, but the panel (displays) and mostly that really old red line in the nav/map was another small detail that made the design look and feel older than it really is, and took away the advancement of the brilliant FMS by Steve Wilson. That same Textron FMS is also installed in the now announced coming Hawker 4000 so it will be interesting how the same FMS system is incorporated into a different design. The benefit of another great Biz jet will only help to keep us happy in the last quarter of 2016.
As of writing this BtS it is only a few days to the RAF Museum Cosford 8th October 2016 "FlightSim 2016" event. Laminar Research have announced a big announcement for X-Plane at the show and there will be two presentations at 11:00 until 12.30 & 14:30 until 16:00 and noted is that Austin Meyers is first and Ben Supnic in doing the second presentation, and they will be in the and guess where the.... Cold War Room!
Ultimately the overall feeling about September was about finishing up and tying up loose ends. X-Plane 10.50 was now final and then at the end of the month WED 1.5 went final as well. Although the X-Plane WED (WorldEDitor) app on the surface looks very much the same, it is now really a full blown editor and airport scenery building program in one, it is powerful but it is still 2d layout does make it hard to create 3d objects and placing them is awkward, but the 2d interface does make it very quick as well, and you will always have the Overlay Editor for that job which I still prefer to use anyway.
But WED 1.5 does have a huge amount of new tools to use like the excellent new airport sign builder, and after my comments for X-Plane 10.50 Laminar have tightened up the taxiway requirements to get that area of confusion in to a more working model, you now can not release an airport unless the taxiway routes are correct, and so it should have been earlier.
But it is the feeling of closing the door on X-Plane 10.xx. There will be no doubt in the history of the X-Plane simulator that this version was the subliminal version that changed the simulator from being a niche product to one of the best simulators you can buy. There is the question that if Flight Simulator itself had continued its progress and updates of which would have been the better overall sim, most would have still noted FS, but it is X-Plane's underlying creativity and versatility that makes it as good as it really is today.
As to value I have already reflected that there are not many products you buy that can deliver not only what was promised on the package (even if it did take four years to get there) but give you outstanding extra value and twice or more as many features that you had originally paid for, with that are the highlights are 64bit processing and the excellent Garmin GNS 430/530 gps system, which means that Laminar Research are willing to change in the moment to insert great ideas and not just tick items off a bucket list, and that deep down is what makes this simulator really great.
Yes I have been reflecting the journey from my start in X-Plane from around X-Plane 9.50 to the current 10.50, that is just 7 steps of releases to get to where we are now (final X-Plane9 was 9.70), but there was a lot of smaller updates in between. I was excited about my entrance into X-Plane, but to compared to my current experiences to what I flew then is just overwhelming in the fact that thank god I have a great imagination, because you really needed it to create a believable world around you, and to a point you don't need that now, with Heathrow looking like Heathrow and hopefully the future is full of more great city scenery like Drzewiecki Design's excellent "Moscow City" to fill in the only realistic scenery gaps that the simulator requires. We are finally getting there and closer than ever to that realistic simulation nirvana that seemed so impossible back in X-Plane9, yes there are still many areas to be addressed, but overall the progress throughout X-Plane10 has been outstanding.
Aircraft as well have come a very long way since X-Plane9.50. Then there was just one really good virtual cockpit Boeing 757, now we rarely look at any new aircraft unless it has a 3d virtual cockpit and more as standard. In systems and functionality you only have to use the Boeing 767 from FlightFactor to see how close we are to real world simulation, and as I just flew a local B737 simulator (iFly Flying Experience!) it was simply very outdated in it's graphics and only a real world set of physical controls made it better than the the simulator I use every day. In most cases I missed the functionality of X-Plane and the versatility of the simulator and it costs far, far less to purchase and gives more satisfaction on a dollar to dollar basis.
As one door closes then another will open. Very soon at RAF Museum Cosford we will see the next step in our simulator evolutionary future. One thing will be evident is that X-Plane11 will nothing like X-Plane10 in it's goals and features, as that job is now completed. X-Plane11 will go in another direction from X-Plane10 and what you will get also is another very different feel as X-Plane 10 was from X-Plane9 and X-Plane8 before that, but that is an exciting future as well...
_____________________________________________________________________________________ Stephen Dutton8th October 2016Copyright©2016: X-PlaneReviews
-
Free Aircraft Release! : Concorde by Dr Gary Hunter

Growing up in the sixties was a time of huge speed advances. The predictions were of New York in 3 hours and Singapore in 7 hours via Bahrain, and then we went far faster again... to the moon.
Looking back now it all feels like we lost have something, yes we can afford to travel the world on a few thousand dollars... but the excitement and the sheer feeling of the momentum of advances in technology has now been reduced to smart phones.
The real tragedy was that the machines that gave us our biggest breakthroughs were then never advanced forward, there was no Concorde Mk2 or Space Shuttle Mk2. And so there came no advancements on their ideas and weaknesses, like the noise and sound barrier on Concorde and the better insulation tiles for the Shuttle. Instead they were all consigned to museums and with that a negative backward feeling now exists. You know it can be better, as we lived through that now past era of huge ideas and advancement that actually came true and real.
But you can still relive a little of what one machine of that era was, in the Concorde. Dr Gary Hunter created a Concorde for X-Plane9®, so yes this aircraft is old now even by X-Plane standards. It didn't fly very well either lately because of the advances of the simulator, so an update to v10.50 was carried out and the aircraft has been gratefully passed over to the X-Plane.Org to be released... yes that is right this Concorde is for free!
And no matter which way you look at it this aircraft is still one of the very best looking machines ever built, The modeling is slightly old, but not enough not to make it feel totally outdated.
The panel is from an era of X-Plane seasons past, and the instruments are quite blurry. But it is totally functional and does have a 3d Virtual Cockpit.
There is also a great engineers station, and you need to watch those fuel gauges, they gulp down fuel like no tomorrow, but hey you are also covering the ground at a one mile every two and three quarter seconds!
Full cabin as well with the all important speed Mach numbers and altitude.
You are seriously moving at m2.2, you can feel the speed even over the smooth Atlantic Ocean, watching my moving map on my iPad, the aircraft is moving as you are watching it even at a high distance, the Nm counter is clicking over click, click, click fast as well... this is no sub-sonic slow ride to China or as in this ride... to New York.
Distances of descent to any airport will need a bigger or longer distance with this machine as it is a long way down from 50,000ft or even 60,000ft if you are game.
Liveries included: Blank or Eurowhite, BA Union, BA Landor, BA Flag, AF, AF Retro, Prototype and Singapore.
New York and "Look Mum, no Flaps!" drop the nose and the speed to 195knts and you get that over familiar hawk look...
The aircraft is surprisingly easy to fly on approach, but watch for a high nose in the air after landing.
Concorde is back in New York!
______________________________________________________________________
There is a big thanks to the work of Dr Gary Hunter in creating this X-Plane Concorde, and now passing it over to Nicolas of the X-Plane.Org for you to download... for FREE!, yes just go to the link below (sign in first) and download this Concorde and go.... Supersonic!
Yes! the My Planes (Dr Gary Hunter) Concorde is available for download here:
Price is Free!
Features:
- Accurate dimensions
- 2D and basic 3D Cockpit
- Object-based model, Very detailed model
- 8 liveries
- Cockpits have been totally redesigned.
- Go to the virtual cockpit and move to the center laterally (right arrow key) then translate backward through the aircraft (shift-pagedown key) to see the virtual cabin interior.
- All cabin windows are in 3D, and the cabin interior is modeled (seats etc). These differences are most obvious when using LIT textures as you can see inside the cabin more easily. Try circling the plane when flying in low level lighting conditions (sunset for example). Updated and tidied up the 3D virtual cockpit a little. The horizon is 3D now but its hard to notice so I may drop it in future versions.
- All fuselage doors are operable using keys
- 8 fuel tanks
- Full 3D Model
Regular Concorde and Concorde 'B' included
- The model B was to have been the definitive airline version of Concorde, produced from airframe number 17 onwards. As production stopped at airframe number 16, the model B never actually took to the air, though much of the design work and improvements were retrofitted to existing Concordes. The most noticeable difference would have been the big wing of the model B, non-afterburning (more powerful) engines and a much greater range. This version also features an airbus style “glass” cockpit.
______________________________________________________________________
Overview by Stephen Dutton
6th October 2016
Copyright©2016: X-Plane Reviews
-
3 hours ago, Guest Hawkman225 said:
How can you get the plane to go faster than 330mph without the auto pilot disengaging.
My guess here is that you haven't flown the heavies for very long? I made the same mistake "duh", but when you pass through 25,000ft you switch from knts to Mach, the cruise of the A330 is m82...
I actually have a funny story about this as when I set a Boeing 747 out of Singapore heading to London I set it up and went out for a few hours to return to find the aircraft circling over India with the AP disconnected... The culprit was not switching over to the mach. SD
-
Aircraft Review : Hawker 4000 by RW Designs
The Hawker name is synonymous to British Aircraft design and production and connected to Harry Hawker and the classic WW2 design the Hawker Hurricane. But Hawker aircraft today are built not in Kingston upon Thames in England but in Wichita, Kansas in the United States by Hawker-Beechcraft. Although the road of the many different and possibly odd joint connections of this aircraft company this Hawker 4000 is still connected to its illustrious pioneer of the affordable first-generation executive jets the Hawker 125.
The same sweptback shape, twin-engined high tail-plane silhouette is still there, and to a point even today most executive jets still conform to this classic configuration for private personal transport across the world.
The Hawker 4000 started out as a larger aircraft than the existing Hawker 1000 that formed the top of Raytheon's jet range at the time. The design, then known as the Hawker Horizon, was intended to fly in 1999, with certification and initial customer deliveries planned for 2001.
The first prototype made its maiden flight on August 11, 2001,with the second prototype and third prototypes making their maiden flights on May 10 and July 31, 2002.The aircraft made its public debut in November 2002 when a development aircraft was displayed at the National Business Aviation Association NBAA) convention. As of March 2007 Hawker's orders totaled more than 130 aircraft, with deliveries scheduled to begin in June 2008.
The Hawker 4000 can be outfitted to seat ten people. The aircraft's carbon composite construction gives it more interior space than many jets in its class and Interior standing room is an average of six feet. This composite construction also makes the aircraft lighter than a standard aluminum structure, allowing a maximum range of 3,445 nautical miles, and a service ceiling of 45,000 feet (14,000 m). The flight deck features a Honeywell Primus Epic avionics suite with EICAS, FADEC and autothrottle, and altogether 73 aircraft between 2001 - 2013 were built.
RW Designs Hawker 4000
It is hard to believe that RW Designs have only been around for a few years or so (before as Jetsim) but in that time they have released an Airbus A330-300 in two versions, Beechcraft Duke B60 and a Supermarine Spitfire. All quite different and with no common ground between all of the aircraft. Now their latest release is a private jet in this lovely Hawker 4000.
Quality private jets have been a rarity in X-Plane over the last few years, mostly the main one that stands out is the excellent DDen Challenger 300 and otherwise most of the others are older or updated v9 aircraft. There is a few nice ones out there, but it is in this high quality payware segments and there are only a handfull that can live up to that standard.
First view of the Hawker 4000 is still the distinctive Hawker aircraft shape that was significant with the original Hawker 125 from the 60's. The point is "if it looks right, then why change it" mantra is still relevant even today, but the aircraft may look like its predecessor, but overall it is very different if more highly designed and avionic fitted out aircraft than the Hawker 125.
There is a tutorial with the aircraft and the route is between EGLL - Heathrow to EDDH - Hamburg. So with this review we will follow that route and have a look at this aircraft.
First Impressions
First look is impressive of the Hawker 4000, not as finely designed as DDen's Challenger but then again other no private jet is either. But the Hawker does look really nice and the light shows off the great lines of the aircraft and the great craftmanship of the design.
Getting closer and the detailing is very good, all the antenna's and body fittings are perfect. Note the excellent body taxi and landing lights.
Paneling and riveting detail is good with great low-drag air inlet NACA ducts are spread around the aircraft. Wing chrome is very good as well. It is amazing how few many developers can do authentic chrome, but it is perfect here. Engine detail is well done with full animated thrust reversers which are closed here. note the very good engine outlet design. Undercarriage is a trailing link and also fully dynamic in ground operation and in animated opening/closure functions.
Menu
The aircraft menu is an iPhone (positioned by both pilot's) that covers a Pre-Flight Walkaround, external GPU (Ground Power Unit), Wingflex (on/off), Passenger map (cabin) A lovely Mercedes Benz limo is thrown in with the deal, engine covers and wheel chocks with cones are all provided as the external elements.
Pre-Flight walkaround gives you 17 steps around the jet to observe the aircraft.
Cabin
Private Jets are defined by their cabins. And the Hawker has a very nice one indeed.
A set of four leather club lounge chairs with two more chairs on the left to the rear and a great sofa on the right fills out the cabin's seating arrangements. Detail on the chairs are good, but that extra softness leather feel is just missed close up. Great wood paneling dominates and especially on the excellent galley, but none of the doors open. Note the excellent moving map, that works really well.
In the rear behind the doors, is a refresh compartment with a sink and aerial throne (er toilet), far rear is the luggage compartment, which would look nice with a few bags to fill up the big space.
Door opening point is above the door. All the blinds are animated and can be open or closed.
The cabin lighting is adjustable by the slider on the panel on the armrests, a great feature that allows you to set the correct mood for the cabin...
Cockpit
The aircraft is powered down. selecting the external GPU and switching on the batteries brings the jet to life.
Hawker aircraft were always known for their deep glareshield cowls, the the Hawker 4000 has a really great one with excellent instrument lighting set up in the upper part of the cowl.
Another British design control has also been kept from the past heritage in the ram horn style control columns (same as Concorde). Five displays dominate the panel with the standard PFD (Primary Flight Displays) at each outer side, Map and Navigation displays inner and the engine/aircraft situation display center. Standby artificial horizon/speed/altitude sits center panel.
Overhead panel is very modern and again the British Aerospace big button feel is evident. Pedestal is clean with airbrakes left, thottle (reverse) center and flaps right, trim toggles are to the rear.
Displays are well done but the text and numbers are very small? from the pilot's chair position they can be quite hard to read and certainly with the map items (waypoints). There are no display reflections either, which makes them slightly dull, as you are very used now to these reality feel features and when they are not there you notice it.
But there is a lot of detail on the displays and far more so when you are flying as we shall see, but the layout is very clean and makes it easy to absorb the information. I am not crazy about the yellow alert panel (it does disappear when you are running), but again the reflections would have dulled that item down to be less over bright and give it a more natural feel.
Map/Navigation display is very similar to the E-Jet system which uses the same Honeywell Primus Epic Avionics suite.
Three main drop down menus cover: Map - Plan - Systems
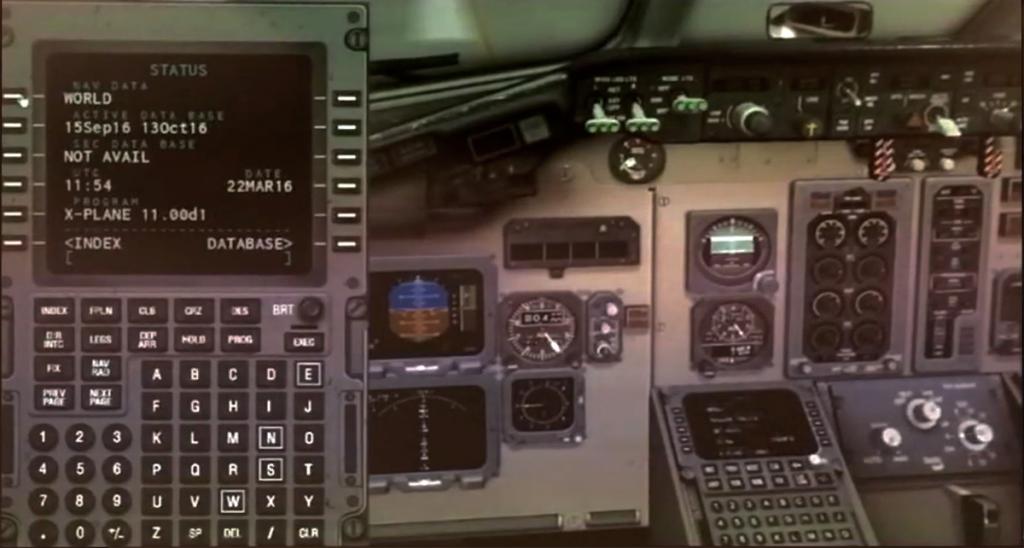
Map menu has the map waypoint on/off selection, Progress and the "Vert Prof" (Vertical Profile) screen bottom. Plan is the route plan, but it is very small and not scaleable (zoom) which makes it very hard to use and read. The "Systems" drop down menu covers all the aircraft systems and each of the areas covered are: Status - Elec (Electrical) - Fuel - Hydr (hydraulics) - Bleed - Flt Ctrl (Flight Controls).
Lower menu is two menus for switching on/off the WRX radar and TCAS.
All the displays do pop-out which makes the reading or setting up easier. The panel lighting (and overhead/pedestal) and PFD display buttons are on each left and right leading edge of the glareshield.
Tekton FMS System
This private jet comes with something special... a working FMS. If it looks familiar then you are not wrong, in that this is the same FMS that is in X-Crafts E-175.
If you have used this FMS in the E-175 then there are only small differences using it in the Hawker and your cross-training will be relatively simple. .
It is still a three set route layout in Departure - Route - Arrival with SID (Depart) and STAR (Arr) set from the FMS and the route is inserted in between, when done the whole route is then joined or assembled together by executing (Exec) into the system. You can save the route, but only the center element as a .fms file. On loading up the route you have to still then add in again the Departure and Arrival elements separately to build up the completed route.
The "Radio" page is now the default and the excellent active keyboard input mode as designated by the green circle O in the top left of the display and white scratchpad rectangle is used by pressing the center of the FMS screen. Anything you now type into the scratchpad will now be live from your keyboard. But note that to switch back out of "active" mode when your inputs are completed and that screenshots don't work.
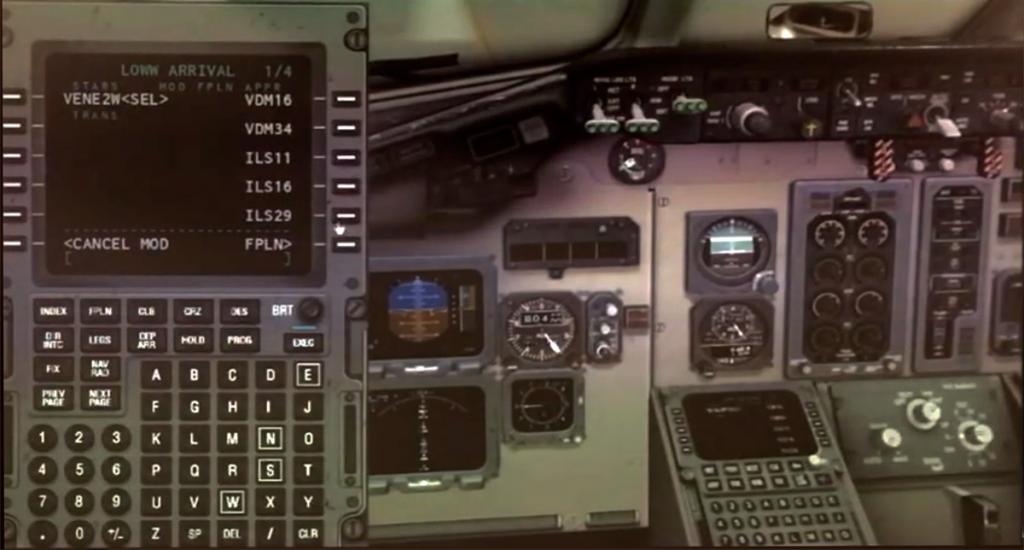
This is the route in the tutorial from EGLL (Heathrow) to EDDH (Hamburg).
First you need to set the departure Airport (EGLL) and runway (27R) and the SID (Standard Instrument Departure) to BPK (Brookmans Park).
When the SID is inserted you need to go to the SID Edit to adjust the blank altitudes to match them up with the inserted altitude settings, or adjust the SID to match your own altitude departure points.
In this tutorial route RW Designs is using "Airways" between the waypoints and you can access these fixes via the "Airways" key RK6 (Right Key 6).
Airways have a route (and number) and a you can go in either direction, so a secondary airway selection is your destination waypoint (here TOTRI) . note the "Airways" automatically insert and you don't have to save them like in adding in the standard fixes, the FMS just moves on to the next waypoint if you select "Airways" again. As this route doesn't use any of the other fixes in AIRP, VOR, NDB or FIX then if you want more information on how to insert them, I covered that area in the X-Crafts E-175 Review.
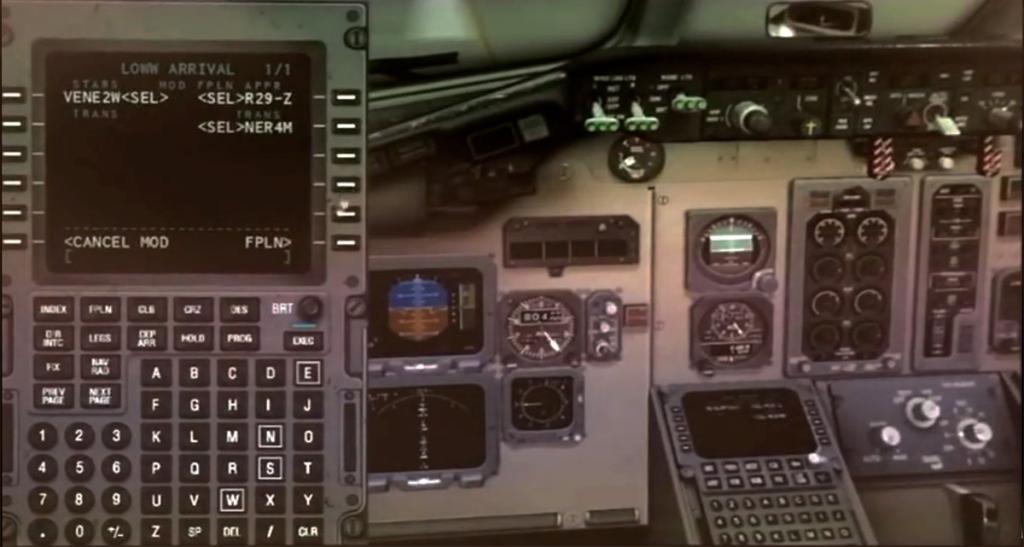
Finally you add in the third element of the flight plan with the arrival airport, which here is EDDH (Hamburg) and the arrival runway you want to use in RWY23. then set your STAR (Standard Terminal Arrival Route) and the route elements in SID - Route (Airways) - STAR are all completed.
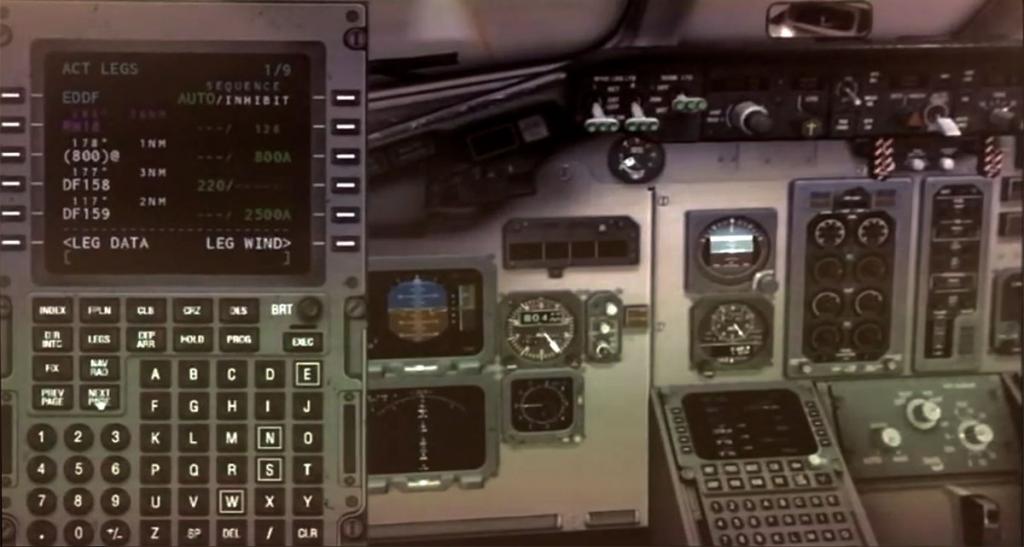
All details of this route are provided in the tutorial with the aircraft and a description on how to construct the route. Once the route is assembled then you go to the "Progress" page and press the INIT assemble together the elements which is noted by "FMS DATA INITIALIZED" and then you can execute (EXEC) the completed flightplan into the system.
And the flightplan is then completed and displayed on the FLT PLAN page within the "Progress Pages". A note on the CLR button next to the DEL (Delete) button. The CLR will clear or completely wipe the route section of the flightplan to start again, so it is too easy in that to think it is just a back one step to change an input, the DEL does that and that can be confusing and a loss of a lot of hard work.
The PERF (Performance) pages (three in Takeoff - Cruise - Approach) are excellent and you get a lot of detail in the displays.
The Tekton FMS System is good and actually easy to use once you master it, but it does require a period of practise and use before understanding it in detail and the way it assembles the three elements that make up the flightplan. Adding in preferences and other items have to be done before you initialize the flightplan.
Flying the Hawker 4000
Start up is very easy! Just startup the on board APU and select Bleed next to the APU startup button, then put the "Bleed Isolate" to "Open".
The APU takes a about a minute to start up and is shown best on the Elec menu.
The fuel valve (start/cutoff) button is on the pedestal and when ready just press "Start". The whine starts and the sounds are good, not brilliant, but quite good. I found the sound was a bit low in the cockpit (barely heard in flight) but RW Designs said they would up the volume a little more.
Brakes off and your rolling... speed at idle is a bit to high so you have to correct it with the brakes, ditto with turning in that the nose wheel squeals unless you dial down the taxi speed low to turn, but you soon get used to the movements.
These jets are like Ferrari's of the skies, and the Hawker 4000 is no exception. You have two Pratt & Whitney Canada PW308A turbofans, pumping out 6,900 lbs each, so you are very quickly up to your takeoff speed of ___ and the climb rate will let you climb to 37,000 feet in 14 minutes.
The "vertical profile" is great if you have programmed the FMS with the correct altitudes, but personally I like to adjust my altitudes manually as I need to, and that counts here as the climb is quite steep. Note the great progress information on both the MAP/NAV display and on the FMS.
Center glareshield autopilot is simple and easy to use except the altitude knob. that is extremely slow at the start and then finally gets faster afer a while, it makes it hard for quick adjustments. There is no "Auto Thrust" but the system will hold the cruise speed if set in the FMS.
There is no doubt this is nice looking aircraft and I really like the way the light shows off the fuselage shape just forward of the engines. allowing a maximum range of 3,445 nautical miles, and a service ceiling of 45,000 feet (14,000 m) with a max speed of 0.84 (482 knts) and a cruise speed: Mach 0.82 (470 knts). There is no Mach switch over so you deal in KIAS and manually unless the speed is set in the FMS.
As the light fades the Hawker looks good in the dark shades...
The cabin looks inviting from the external and the tail logo lights up the rear nicely and the you have wing strobes, beacon, Recog (recognition) and pulse Recog lights.
Cockpit lighting is nice and adjustable, those three huge lights light up the the displays and you need nothing more, but you will tone the light down for landing.
The lights are toned down in the cabin as well as we approach Hamburg.
Inboard taxi and landing lights look great on approach... Three stage flaps at 12º - 20º and 35º don't mess with the altitude much and they give you a very low 140knts landing speed.
The landing lights need a little more distance, not much but they only become active a bit last minute.
And you need both landing and taxi lights to get the spread you need...
Once on the taxiway they are quite good, and the wing/ice lights are good as well. The taxi and wing lights help the passengers to disembark, but the view inside the cabin is inviting at night.
There was no way to see the thrust reversers at night, but the operation and animation is very good, but there is no "REV" note on the panel?
Liveries
There are one blank (white) livery and the default N119AK is very nice, but the other three are a bit uninspiring, 3rd party painters love these aircraft so maybe we will get a few nice designs on the downloads.
Summary
Comparisons with DDen's excellent Challenger 300 is always going to be the deal with any new private jet. The Hawker is not in that exceptional class, but it is certainly the best second private jet now available for X-Plane... overall this is a very nice aircraft.
There are some great features with the Hawker and even the Challenger does not have a working FMS in which we do have here.
A few areas need a little more fine tuning and the missing reflections on the windows and certainly on the displays are noticeable in this high end quality period of X-Plane, but the aircraft is so nice to look at and the cabin is a really nice place to spend some time in with the replays that you want to spend time and enjoy the aircraft from both aspects.
But this is certainly another level of quality and design from RW Designs as well, there has been a lot more development on this Hawker than all the rest of their releases put together and that does show here and that brings them up to another level in the eyes that enjoy these great aircraft.
So yes I really like this Hawker 4000, and even the few British bits left over from the past, in other words it is a real Hawker aircraft that Harry Hawker would have been really proud of.
______________________________________________________________________
Yes! the Hawker 4000 by RW Designs is NOW available from the new X-Plane.Org Store here :
Price is US$39.50
Features Include:
Tekton Flight Managment System by Steve Wilson
· SIDs, STARs, Transitions, Approaches, Airways
· Aircraft progress data supplied to MAP display
· Compatible with Aerosoft and Navigraph custom data
· Performance page with fuel, weight and balance entries
· V speed calculation and audible call outs
· Highly versatile and powerful navigation unit
Visual
-Professionally developed 3D interior and exterior.
-Wingflex
-Hundreds of animations mimicking real aircraft function
-Night lighting
-UHD 4K textures
-Normal mapping
-6 Liveries
-Paintkit includedCustom Systems
-All displays are powered via SASL
-Main displays pop-up for a more enjoyable flying experience
-Custom navigation display with plan mode
-Vertical Profile display
-Menu Based Systems
-Electrical, hydraulic, pneumatic systems modelled.
-Custom Autopilot LogicRequirements :
X-Plane 10.50+ (any edition) - running in 64bit modeWindows, MAC or Linux - 64 bit Operating System required
4Gb RAM - 1Gb VRAM Minimum. 2Gb VRAM Recommended______________________________________________________________________
Installation : Download is 193.00 mb which is unzipped to your X-Plane Private Jet folder (there isn't one in X-Plane so I created my own!) at 270.00mb.
Documents : Documents included are an Aircraft Operating Manual and a Flight Tutorial.
RW Designs - Support forum
______________________________________________________________________Review by Stephen Dutton
25th October 2016
Copyright©2016: X-Plane Reviews
Review System Specifications:
Computer System: Windows - Intel Core i7 6700K CPU 4.00GHz / 64bit - 16 Gb single 1067 Mhz DDR4 2133 - GeForce GTX 980/SSE2 - Samsung Evo 512gb SSD
Software: - Windows 10 - X-Plane 10 Global v10.50
Addons: Saitek x52 Pro system Joystick and Throttle : Sound - Bose Soundlink Mini
Plugins: Headshake by SimCoders (free)
Scenery or Aircraft
- EGLL - Airport London Heathrow by Aerosoft (X-Plane.OrgStore) US$27.56
- EDDH - Airport Hamburg by Aerosoft (X-Plane.OrgStore) US$21.34
-
Aircraft Review : Panavia Tornado GR4 by X-Trident
After the cancellation of the United Kingdom's BAC TSR-2 project in 1965 the country was put in limbo in finding a multi-role aircraft to replace the many different types of aircraft already in service in many different roles, but to also cover their advancing tactical strike/reconnaissance capability but with the added capability to fill another role as a light bomber to replace the current V Bombers.
The trend in the mid-sixties was towards variable-geometry wing designs to gain the manoeuvrability and efficient cruise of straight wings to be combined with the high mach speeds of swept wing designs, and the leading design of the period was the American F-111K. So an order for the F-111 was granted, but swing wing design was a seriously complex and a hard engineering design to overcome and the F-111 fell behind in with it's multiple problems.To cover the F-111's waiting period the American provided F4 Phantoms as they did in Australia as to also the RAF, but eventually as the F-111 was still years from service and the British government decided that their own swing-wing aircraft to suit their own and European needs was now the better quicker route to follow than more costly waiting and so the F-111 order was cancelled. So Australia soldered on as the only F111 foreign purchaser and it was almost a decade before they mastered all the problems and in the long run the F-111 was not overall a very effective or efficient military machine, the many that survived here in Australia cost millions per year to keep in the air.
For the German's and Italian's they were in the same frame of mind in their requirements to replace their ageing Lockheed F-104 Starfighters. So a memorandum of agreement was drafted between Britain, West Germany, and Italy (and Holland, but they later dropped out) in May 1969 to create a multi-role aircraft called the MRCA (Multi Role Combat Aircraft) under the German banner of Panavia Aircraft GmbH.
The first of more than a dozen Tornado prototypes took flight on 14 August 1974 at Manching, Germany, but both the first two prototypes crashed as did a third, but mostly the crashes were through pilot error and not major design flaws but for a few minor modifications to cover airflow disturbances
The contract for the Batch 1 aircraft was signed on 29 July 1976. The first aircraft were delivered to the RAF and German Air Force on 5 and 6 June 1979 respectively. The first Italian Tornado was delivered on 25 September 1981 and at the finish of production in 1998 there was 992 of this excellent aircraft built.
There has been no doubt about the overwhelming success of the Panavia Tornado as it has seen service and has had major success in most conflicts since it's inception into service, and is still even now and decades later still giving sterling service until the new but again the very late into service F-35 which is in the shades of the F-111 debacle all over again.
X-Trident Panavia Tornado
The Panavia Tornado Project for X-Trident is actually their second aircraft after the excellent AMX Fighter. But the complex Tornado project was put aside to complete their other project of the Bell 412 helicopter that has gone on in X-Plane to great acclaim and has brilliant features.
Now the Panavia Tornado is back... big time!
Beta 9.0
It is important to make clear at the start of this review is that X-Trident have a slightly different approach than other developers when releasing their aircraft. What you buy and what this review is based on is a Beta version or beta 9.0. This aircraft is not the final completed aircraft, if you want that then you will have to wait for the 1.0 release version, and all the comments in this review are in that context. It is not really that much different from most other releases really, because every primary release is never ever complete anyway, they always need some tidying up and bugs weeded out. But you will find something's here don't work and a few patches of odd design, in other words you are in buying this aircraft just another Apple tester for the aircraft, because that is what Apple also do with all their release now.
Panavia Tornado GR4
Their is no doubt the GR4 Tornado is a very dramatic aircraft in all it's different postures and roles. It is a twin-seater that has three primary Tornado Variants: the Tornado IDS (Interdictor (operates far behind enemy lines)/strike) fighter-bomber, the suppression of enemy air defences in the Tornado ECR (electronic combat/reconnaissance) roles and the Tornado ADV (Air Defence Variant) Interceptor.
First view and feel of the Tornado is dynamic. X-Trident have done a really great modelling design on this iconic euro fighter, there are some gaps in the paneling in that you can see some daylight and they are mostly right up the engine intakes, but otherwise it is all very well done with great detail and perfect realism touches that convey the aircraft correctly.
Excellent detail is highlighted and very evident around the the two engine exhausts as with the layers of the outlets the outer and the inner sections, the variable inner nozzle is amazing in perfect operation as you increase the power to full afterburner....
.... you not only get the nozzle animation but the correct thrust colour changes as well, and it looks really thrust full on powerful...
The aircraft's main feature is of course those swing wings... They can be set any degree rake but you will use mostly three positions from the angles of 68º Wide, 40º mid and 25º full sweep back.
Wing animation is smooth with the weapon attachment mounts also moving correctly to compensate for the new angles.
On the ground you can see the aircraft with it's ground elements in place. You get engine and inlet covers, remove before flight tags on the aircraft and on the armaments and even a cockpit canopy support, note the excellent rear and realistic engine covers. A cockpit ladder is also provided, that gives you a lot of authenticity on the ground, but there are no wheel chocks or a Ground Power Unit (the aircraft has a built in APU)
Close up the undercarriage detailing is excellent with the twin front and single side wheels, suspension animation is also excellent as is the complex folding and unfolding of the gear out of the fuselage which we will see later.
Cockpit
Externally the cockpit has a huge amount of detail, very realistic. Highlights are the amazing canopy design and the stacked instruments for the rear navigator/pilot.
If internally it looks complex it is because it is, certainly the areas can be broken down into their different areas of systems, but many are in military speak and not plain English, so a bit of study is required to understand what does what. The current manual is still quite basic, but a full one is the works... it is required.
The cockpit design is extremely good, very authentic, but most minor switchgear doesn't work at this point, more system integration is promised.
The main front panel is dominated by the large central map display with the flight instruments to the left and the engine instruments to the right. Two scopes top are for (left) TFR (Terrain-Following Radar) and (right) RWR (Radar Warning Receiver). The small twist handle top left is for arming the weapons, but it starts up in the Armed and not Safe setting!... so you have to manually set it correctly.
Gear and aircraft situation is noted left main panel and on the right is a panel of annunciators and brake pressure, canopy latch is above.
Right arm side panel covers TACAN radio, Navigation radio, In flight refuelling, IFF (Identification Friend or Foe) and external, panel and cockpit lighting.
Left arm panel has (top) APU start, and engine start, then throttle, limiter, flaps and wing sweep. (bottom) Autopilot, PFCS (primary flight control system), SPILS (ejector seats) and Comm radio.
The wing sweep control lever is easy to use with every degree set out for use, and the twin (engine) throttle levers have two actions... back and forward for thrust, and also they click to the left to auto set the reverse thrusters and if the "Stop latches" are set to up you can then shut down the engines. You have to work out which small arrow does which job on the throttle as there is a few of them and it is easy to pick the wrong one.
The front and centre HUD is excellent, with two selections and weapon arm details. I keep it off while taking off or landing for better runway visibility but that is my choice. Behind the stick (which can be hidden) is the MSI mode panel, then the weapons control panel and lower is a set of switches arranged for a "Rapid Takeoff". Note the "G" meter on the right, it records your highest "G" until you reset it.
Centre joystick is excellent, but check out the bank movement as the grip moves only from the centre axis to the left or right...
Rear seat position is currently still mostly under development, but there is a working Chaff and Flare panel (right lower panel) and a better weapons panel than for the pilot (left lower panel). But you have to love the minute joystick.
Menus
The Tornado uses a Plugin Menu system that drops down from the X-Plane menu bar (plugins) and the X-Plane Aircraft/Weight & Balance & Fuel menu on the "Ordnance" tab is to also be considered as a secondary menu page.
The drop down menu covers...
Smart views (on/off)... note: if you use the standard X-Plane key save view system, you need to keep this item switched off as it badly interferes with that the way of changing your cockpit views.
Jump to Navigator seat; Puts you in the rear seat!
Load map; You can create and load in your own moving map with a rendering (or scan) of the map saved in a“.tga” format without compression. there are no finer details as yet on how to create this and it is noted a full tutorial is coming.
Controls; a full set of the same commands that are set out around the aircraft's cockpit, but here they are all in one place for ease of use.
AAR; The AAR or Air to Air Refueling is a feature with the X-Trident Tornado, we will cover it later, but there is a menu panel to control both aircraft.
Weapons; Using the cockpit weapons panel is a bit hard and a few functions are missing. So this menu panel makes it easier to set up and use.
Joystick debug; A guess this is used for development as it shows the joystick axis coordinates.
TACAN; This is a full list of TACAN frequencies close to the aircraft.
Special; shows selections for the side aircraft ladder and static elements as noted above.
_____________________________________________________________________________________
Flying the GR4 Tornado!
You would think that the 68º wide sweep of the wings would be the best for lift on takeoff, but that isn't the case. Full out the wings create too much drag, so you don't create the required speed to takeoff by the end of even RAF Valley's (EGOV) long RWY14 2,290 metres (7,513 ft).
So the sweep setting required is the mid 40º, and with the full throttle setting and afterburners glowing, you move... really move.
So fast in fact that in only a short time you are way above 250knts and heading for 300kts... on the ground!
Slight pull of the stick back and your free of the ground and powering away, you feel the aircraft and it is really nice to control... gear up.
It is well worth saving a replay and then going back and watching the gear stow away. The rear gear sorts of twists and folds forwards inwards like a big killer bird does, Tornado... Bird of Prey sorta sounds great.
Front and rear positions are visually great, but a highlight is the excellent reflections on the canopy, they create that sort of fishbowl feel of the bubble canopy, and from the rear the effect is more realistic than in the front...
Weapons
you have both A-A (Air to Air) and A-G (Air to Ground) weapons including Sidewinder, Mk83 (low-drag general-purpose bombs), Storm Shadow (SCALP - air-launched long range, conventionally armed, deep strike weapon), Mauser BK27 Cannon, plus counter-measure BOZ 101 (Electronic Counter Measure Pod (ECMP)) and TSPJ - Tornado Self Protection Jammer and the Joint Direct Attack Munition (JDAM) system.
I not sure if the Tornado is set up to use the new X-Plane 10.50 weapon system functions, but if not I would expect the system to be included in the future.
You can use the centre armament panel, to fire the weapons, but using the menu panel is far easier.
You here can "arm" the weapons, SET or LOAD them, Select from either the Cannon A-A or A-G and set your target in: Alpha, Bravo or Charlie.
Make sure you have set the safety knob to "Live" and lift the "Late Arm" red cover to set them ready... Then just fire away, I use a trigger button on my joystick.
I would like a key- pop-up on the menu items as you hide the menu panel away and then want it back, so a quick key press would save a lot of time.
The "Storm Shadow" deep strike weapon is very impressive. A sort of small cruise missile, you arm, then fire it and it drops and ignites below the aircraft then goes away to hunt it's target or victim. Me.. I just got out of there...
Bombs and Cannon are also highly effective, and all the weapons can be managed through the X-Plane Aircraft/Weight & Balance & Fuel menu on the "Ordnance" tab
AAR or Air to Air Refueling
One of the big features with the Tornado is the AAR or Air to Air Refueling. You can download a "Buddy" Tornado set up for AAR that is not noted at this point? And that aircraft is loaded into your X-Plane A.I. (Aircraft & Situations - Other Aircraft).
At this point in time in creating this review I have not actually hooked up (yes I hold my head in shame, but if not you would be not reading this review for a month's time).
The built in refueling boom on the Tornado is extended by the In-Flight refueling panel on the top right arm panel. The animation is excellent as it extends and you are ready for your "Buddy" to catch up. Best way to see where the "buddy" is, is on the "local map". but it does take (a lot of time to get into position or catch you up).
The AAP panel allows you to set (more than one) tankers from the A.I. list, then you can activate it or switch it off for normal A.I. use. You then can set the - Altitude, Heading and speed of the tanker and then "Sync" it to your Tornado. There are three different "Difficulty" challenges in "Easy", "Medium" and "Hard"
The panel is however confusing? and there is to date no instructions except for the basics of the panel's layout? Is the AP your Tornado or the Buddy? and is the sync to do what, just sync the same alt, head and speed? to your Tornado or the buddy?
I think a good feature would that the "buddy" when activated comes up and past and then holds the correct station for you to hook up, and even does a hook up for you, certainly a manual mode is required, but it gets really (really) hard to do, as when you get into the slipstream of the "buddy" your Tornado shakes quite violently, that makes it hard to do those fine adjustments required to hook up. The AAR control panel needs to be more accessible than just via the drop down menu, because you need to switch it on and off a lot...
The idea of controlling the "buddy" aircraft is a great one, and to a point it works. But what doesn't work is the finer control you need. I needed the tanker to go up about 50ft, but the control panel just jumps to a higher altitude, and the buddy disappeared. Speed adjustment works to a point, but not in the small numbers but jumps of 15-30knts, so the buddy is too fast or too slow. So "sync" should be sync! and the two aircraft should be locked together at the correct point to come together if you are in the correct position.... its all just too hard.
Time to do a Scott Tracy and pull those wings back like Thunderbird One and head back to RAF Valley...
The speed and power of this thing in is very heady at mach 1.6! hammer time!
The Tornado is tricky on landing.
I haven't yet mastered the approach, but if you drop the speed, you get a very quick stall. So the approach speed margin is very small between the lowest speed at around 200knts-180knts (which is still too fast) or finding yourself falling into that nasty ground swallowing stall... so you tend to make your approaches too fast and then slightly stall the last part of your way to lower the aircraft to the runway.
I thought low speeds would be better, as you have not only the swing-wing at its most extended of 68º and with those really great main rear and leading flaps.
You arm the thrust-reversers before landing by pushing the throttles left, but X-Trident have now added a keyboard key (for the joystick) in an update at my request (They are also really hard to use manually). This allows you more control of when you need the reverse thrust as on auto setting the excellent two position spoilers come up first and then finally the clams come together, you needed more control too wind off the speed as soon as you are settled on the runway, the reversers are effective and you need that instant stopping power.
Put the throttle right up and thankfully the reverse-thrust is powerful and you finally start to run off that excess speed and the aircraft will quickly slow to a taxi speed.
_____________________________________________________________________________________
Lighting
There is a lot of adjustable lighting in the cockpit with the instruments and with the both side panels which all have separate knobs.
The overhead cockpit lighting gives a (very) slight dark red glow, I feel it should be more redder. Toned down the panel is very black and white, but works very well.
Rear position needed the mapping screens working correctly, but it will look really good once more attention of this area is completed.
HUD is excellent for use at night.
Navigation lights are sets of two. One set on the wing tips and another on the engine inlets, the secondary nav lights can be dimmed or made to flash for identification (refueling). External cockpit illumination is great visually.
There is a single taxi light on the front gear strut, and two landing lights are built into the the undercarriage door panels, but you can only have either the taxi or the landing lights on, but not all on together.
Liveries
There are six liveries and all are very well done. They consist of: AM 6th Stormo Camo (Italian) as default, 50th Stormo (Italian), P-01 D9591 (German), MarineFlieger 43-87 (German), ZA412 617 Squadron (Dambusters) RAF (British) and RSAF (Saudi).
I found no basic RAF Squadron for this review and many others are already asking why only one RAF?, More to come I hope.
_____________________________________________________________________________________
This release from X-Trident is noted as a beta, and to a large point it is. There is still a lot of development of the aircraft still to do, it is certainly not finished and in parts it feels that way. The basics however are great and the aircraft is more than usable, and no doubt the final release aircraft will be excellent going on X-Trident's past reputation. but the small niggles are certainly there and if you are fine with that then you will love the aircraft.
As an aircraft the Tornado GR4 is well... awesome! I really hate using that word, but here it fits. It is a great machine to look at and fly, and there is a really great set of features in this package, and overall the aircraft is expertly created with simply great detailing.
If you really like great fighters then certainly invest in the Tornado, you won't be disappointed and I predict that in time it will be an X-Plane classic of it's category.
______________________________________________________________________
Yes! the Panavia Tornado by X-Trident is NOW available from the new X-Plane.Org Store here :
Price is US$38.95
If you have already purchased X-Trident's excellent AMX then X-Trident are preparing a coupon code that will give you a 4$ discount on the full price of the Tornado.
Features Include:
- Pilot and navigator 3d cockpits
- Realistic performances
- Detailed startup sequence
- Moving map
- Terrain following radar
- Radar warning
- Long and short range guided bombs
- Custom HUD with CCIP for gravity bombs; air and ground targets tracking
- Weapon control panel with multi-configuration capability
- Realistic / animated in flight refueling with the provided buddy tanker
- Animated ejection sequence
- Custom throttle control
______________________________________________________________________
Installation : Download is 355.60 mb which is unzipped to your X-Plane Fighter folder at 648.90mb.
The "Buddy" Tornado needs to be downloaded, and loaded as an A.I. aircraft into the X-Plane Aircraft & Situations - Other Aircraft Menu
The "Buddy" must also be set as the Air Force and Navy Refuel options on the same Aircraft & Situations Menu.
Documentation : Tornado for X-Plane 10 - quick start v04 (not completed) and Startup and take off checklist.
Requirements :
X-Plane 10.50+ (any edition) - running in 64bit modeWindows, MAC or Linux - 64 bit Operating System required
4Gb RAM - 1Gb VRAM Minimum. 2Gb VRAM Recommended
Current version: 2.0 (last updated September 22 2016)______________________________________________________________________
X-Trident - Support forum for the Panavia Tornado
______________________________________________________________________Review by Stephen Dutton
5th October 2016
Copyright©2016: X-Plane Reviews
Review System Specifications:
Computer System: Windows - Intel Core i7 6700K CPU 4.00GHz / 64bit - 16 Gb single 1067 Mhz DDR4 2133 - GeForce GTX 980/SSE2 - Samsung Evo 512gb SSD
Software: - Windows 10 - X-Plane 10 Global v10.50
Addons: Saitek x52 Pro system Joystick and Throttle : Sound - Bose Soundlink Mini
Plugins: Headshake by SimCoders (free)
Scenery or Aircraft
- EGOV - RAF Valley for X-Plane v10 by rcmarple (X-Plane.Org) - Free
-
8 hours ago, Tim/Rodeo314 said:
Hi, just a quick note to let you know it's a Hawker 4000, not 400 (an older and smaller jet based on a Mitsubishi design).
Done... thanks
-
News! - Sale! : Alabeo Sale now on!

Thanksgiving already!, Christmas is here! You would think that but you can rest easily as it is still only 1st October and the holiday periods are thankfully still months away, even though at your local shopping town/village/centre you are already face to face with a certain Mr Claus... it gets worse every year, why bother and just make it a Christmas shopping period all year round.
But that doesn't mean that you can't get a great bargain now as till the 9th October 2016 you can get 40% off most Alabeo aircraft. And that is a great deal for some of the very best aircraft in X-Plane, and some are available to buy for as low as US$11.97.
The 40% off deals are now available from the X-Plane.OrgStore below...

______________________________________________________________________
Stephen Dutton
2nd October 2016
Copyright©X-Plane Reviews: X-PlaneReviews 2016

-
News! - Coming Soon! : Hawker 4000 by RW Designs
Payware Biz jets are very thin on the ground in X-Plane, in fact there is only one really top notch aircraft in DDen's excellent Challenger 300 but that is all about to change with another aircraft from DDen in the form of the Bombardier Global 6000, and before that JW Designs have announced coming very soon is their Hawker 4000, which was formally known as the Hawker Horizon.
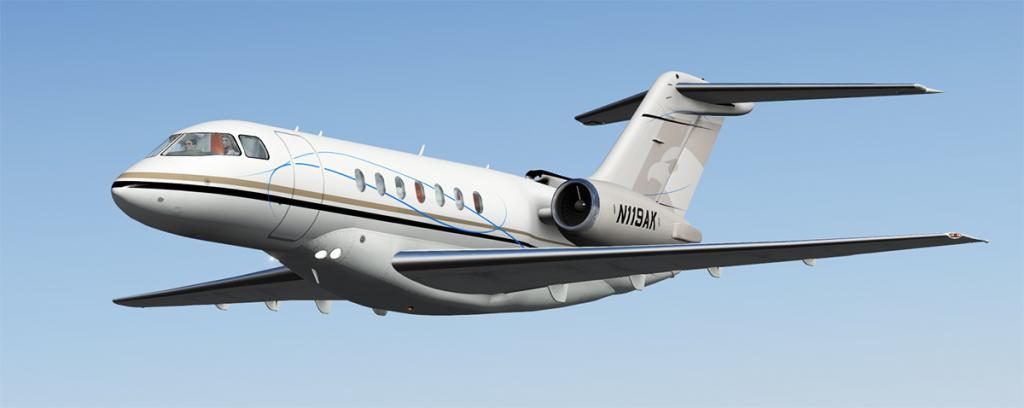

Rumors are that it is very good, very detailed and the aircraft comes with an adapted version of the Tekton FMS, the same type of FMS that is in the X-Crafts E175 v2.0, this will be the first Biz jet with a built in FMS in X-Plane.
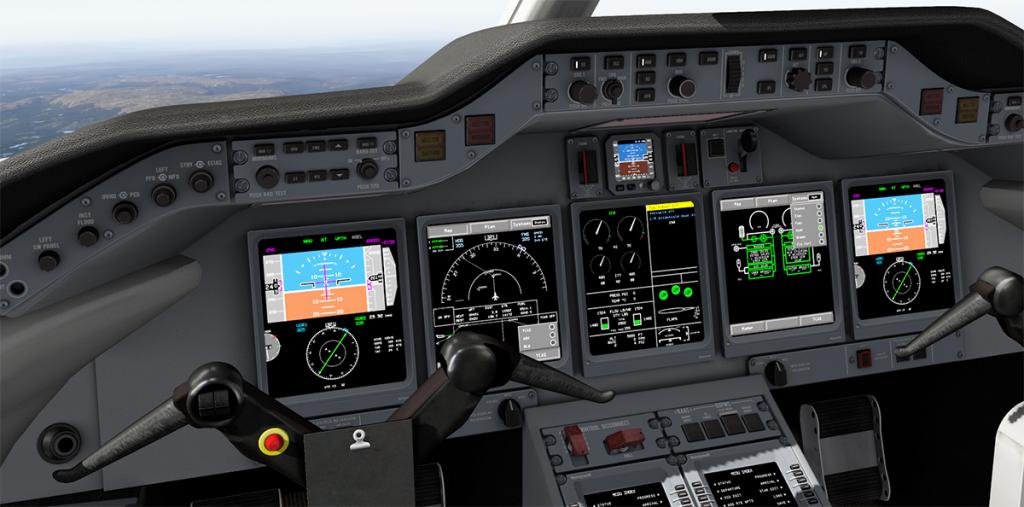
Cockpit looks very functional and well designed, but system details are still thin on the ground. If more images or information is forthcoming we will post it here.
Release is due soon, maybe around Mid-October, and no price has been announced but expect around the US$30-$35 dollar mark.
______________________________________________________________________
Stephen Dutton
28th September 2016
Copyright©X-Plane Reviews: X-PlaneReviews 2016
-
News! - SoundPack Released : CRJ200 by BlueSkyStar
As noted in the news earlier this month BlueSkyStar Simulations is updating their excellent soundpack for the J Rollon CRJ-200, that package has now been released. So go to either the X-Plane.OrgStore or Simmarket and update your plugin package.
The full changelog includes:
- All sound levels have been preset to maximum realism, advise not to change them.
- APTCAB containing now not only passengers sounds, which could be activated by assigned button in x-plane (watch extra features video inside) but could be also activated by switching seat belts signs to off.
- FA announcement are added to APTCAB, activated by:
beacon on - welcome announcement
strobes on - seats for departure
strobes off - arrival announcement
- apu logic remade, adjusted volume, works with outside/inside depending on if door is open/closed.
- pack turbine sound with outside/inside logic if door is open/closed
- avionics with outside/inside logic if door is open/closed
- Aft bay equipment sound added
- avionics sound remastered
- bleed sound remastered
- duct sound remastered
- hydraulics sound remastered
- standby instrument sound remastered, added stby off realistic sound
- few engine sound samples remastered
- added brake vibration on high speed, low speed
- rain outside/inside logic if door is open/closed
- rain sound remastered
- touchdown sounds remastered
- spoiler sound remastered/ gearwind sound remastered
- added pilot induced rattle/turbulence sounds
- added weather affected turbulence sounds from 1 to 4 depending on severity
- changed wind soundX-PlaneReviews did a comprehensive review of the CRJ200 sound package here:
Aircraft Addons : CRJ-200 JRollon - Sound Packs by Blue Sky Star SimulationsThe JRollon CRJ200 is required separately to use this package.
This amazing sound plugin totally changed the feel and use of this the most original of all X-Plane aircraft and is a must buy for anyone who has purchased the aircraft. If you want to purchase the CRJ-200 then go here.
BSS CRJ-200 Sound Expansion Pack
 BSS CRJ-200 Sound Expansion Pack
Well worth the investment.
______________________________________________________________________
Stephen Dutton
27th September 2016
Copyright©X-Plane Reviews: X-PlaneReviews 2016
-
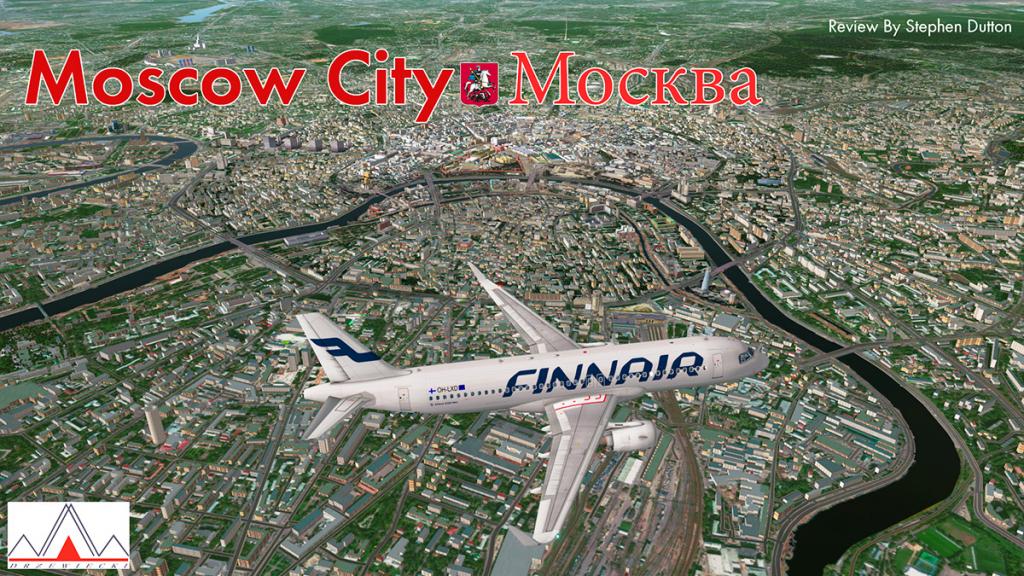
Scenery Review : Moscow City XP by Drzewiecki Design
You fly for hours, anticipating your arrival, wanting to take in the area and the views of another country far away from your departure airport. The airport and the area you leave from is detailed and visually full, and you know you have a great airport scenery waiting for you at the other end of the flight, then when you arrive...
... Nothing, but flat plain emptiness and the same boring standard X-Plane basic scenery, worse there is no OSM (Open Street Map) data in the tile either, so there is no road or autogen detailing in there as well, just well nothing.
When Drzewiecki Design released their UUEE Sheremetyevo Airport XP, I loved it because it was like a visitor from the Cold War past, the Soviet era, and it was also great scenery and great choice of a destination to fly to from any of the capitals of Europe... but that was it, just this great airport in the middle of nothingness, bland.... zero ville.

Now Drzewiecki Design has released "Moscow City" a scenery package to compliment their UUEE Sheremetyevo, and boy how much a difference this release has done to this totally boring area.
To get the full first impression effect I flew JARDesign's A320neo from EFHK Vatnaa, Helsinki to UUEE Sheremetyevo which is flight Finnair AY153 which is a daily 9.25am service.
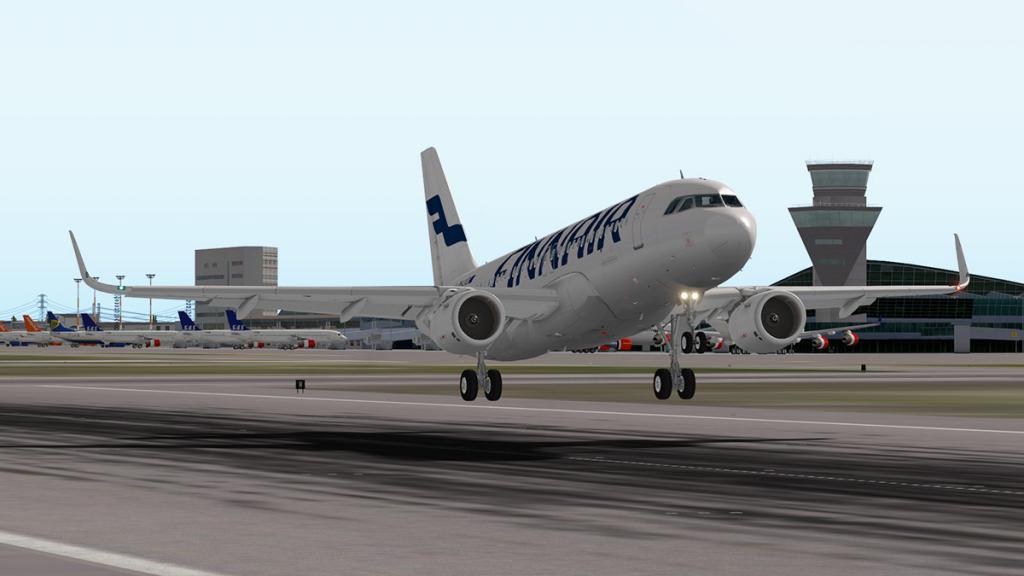
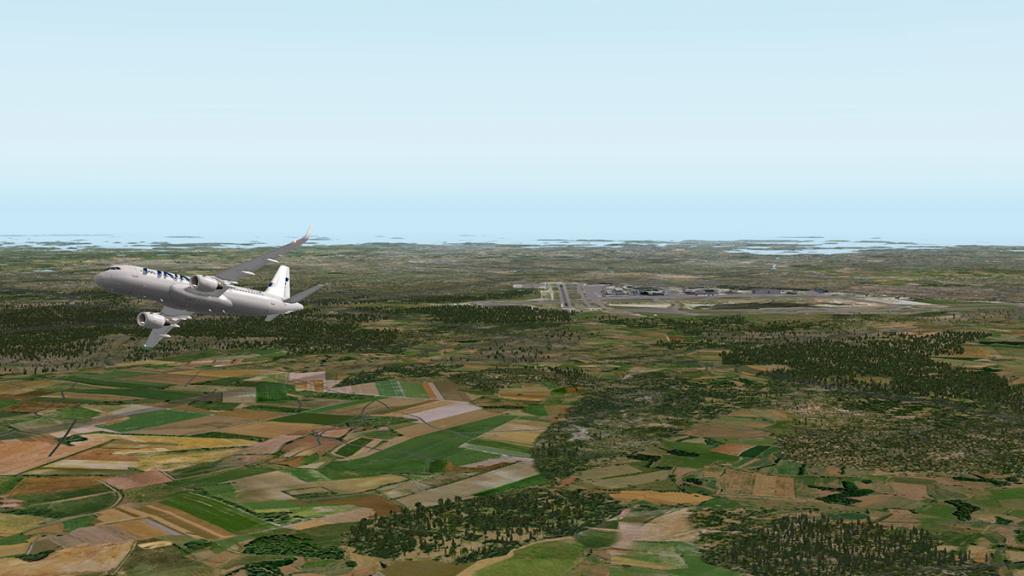
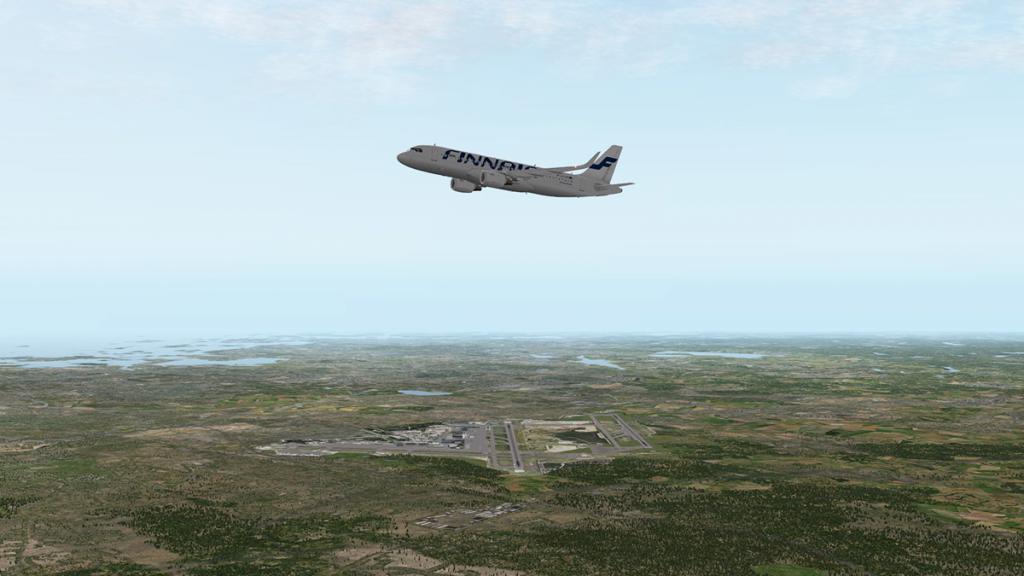
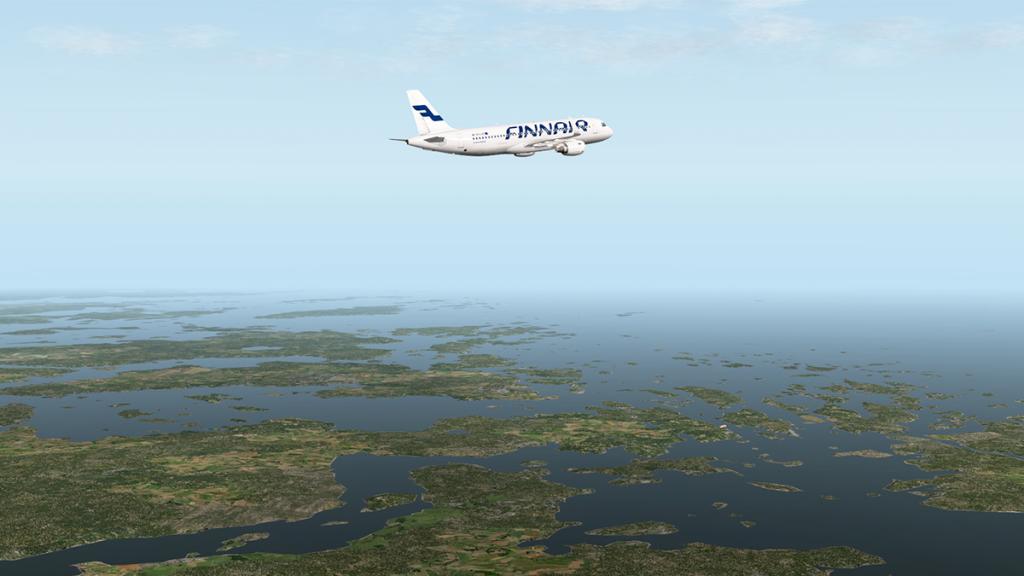
First Impressions
I was surprised to start picking up scenery still quite away out from central Moscow, as I approached my 6000ft transition altitude. Here there was buildings and houses and the physical visual notes you were arriving somewhere.
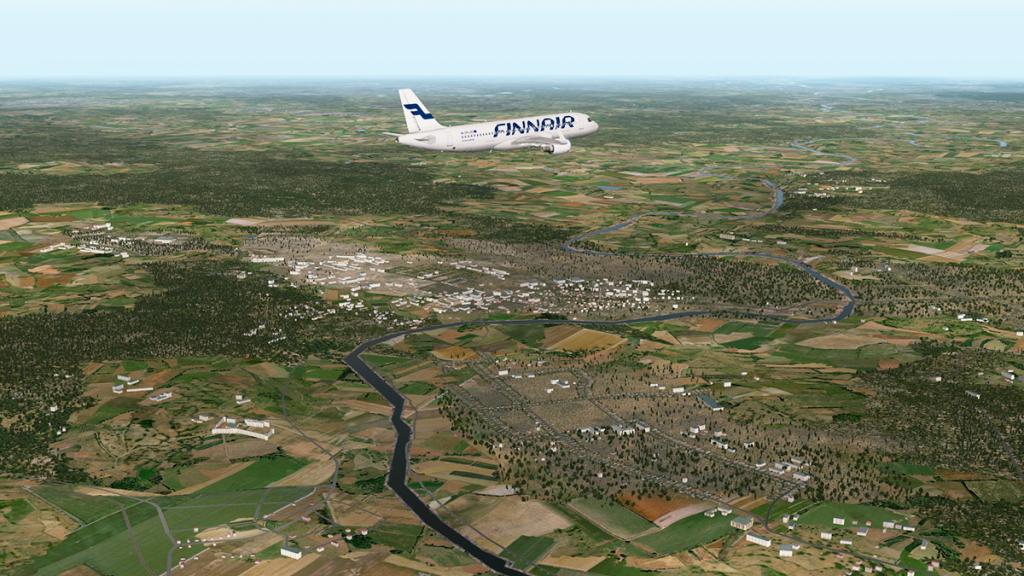
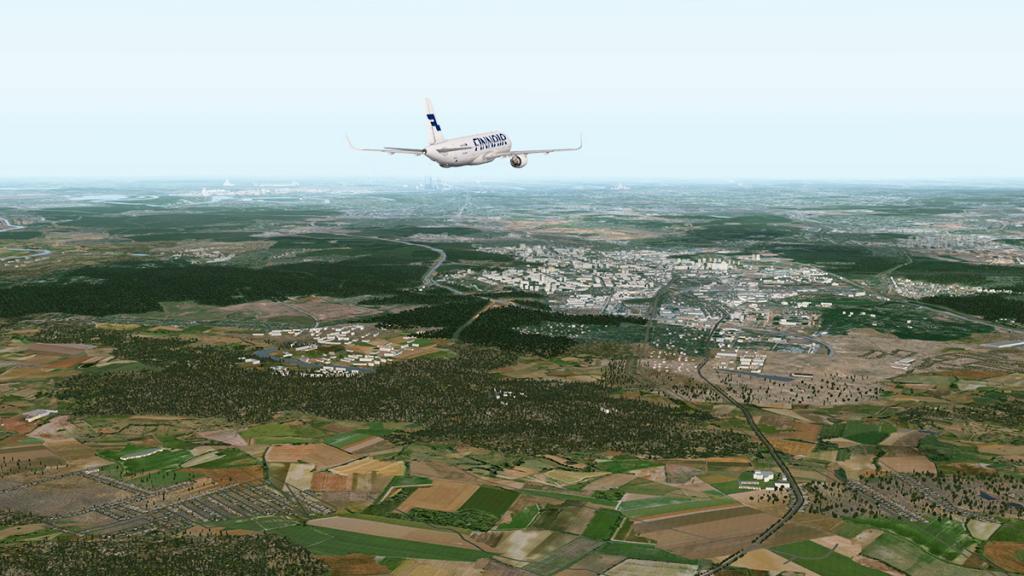
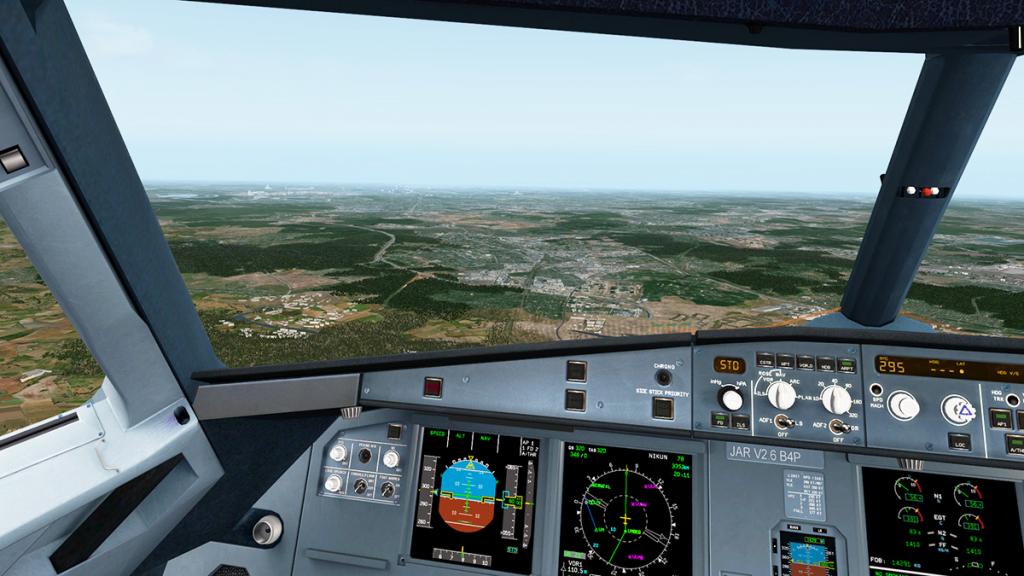
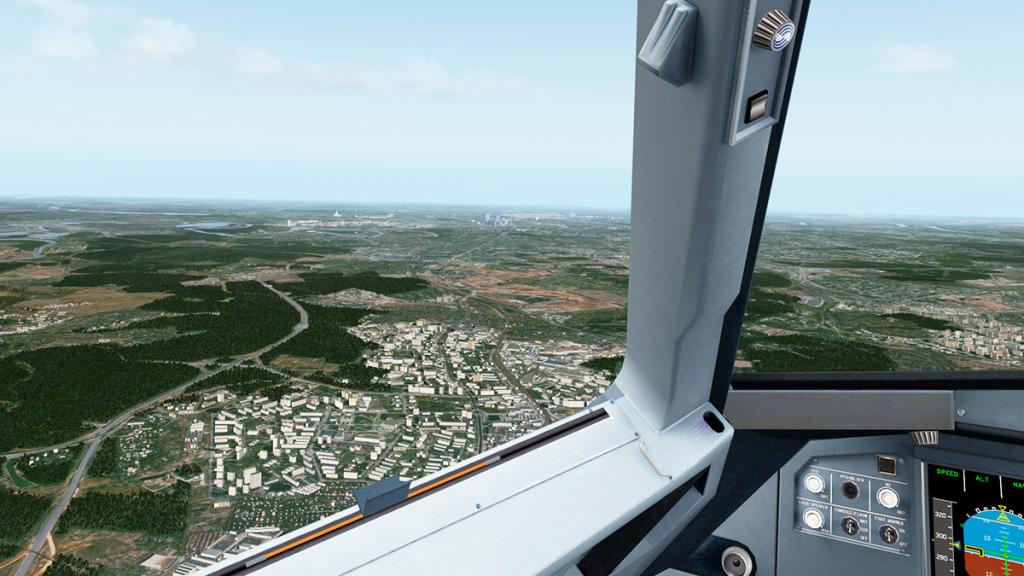
Looking hard at the horizon through the A320's windows and you could see the iconic silhouette of Moscow city.
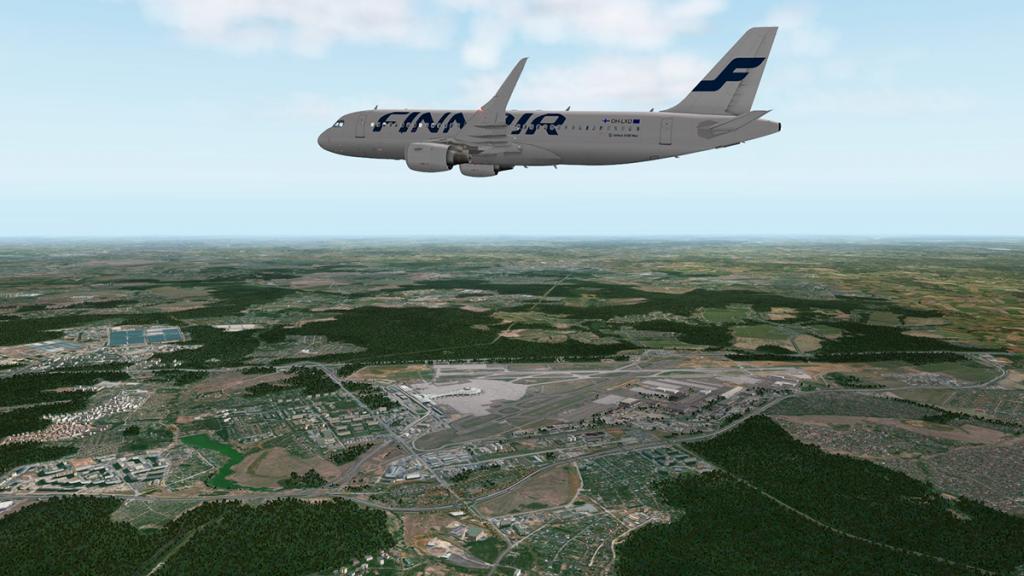

The scenery provides lite versions of all Moscow's Airports, this is UUWW Vnukovo, which was easily recognisable as you flew over. As you fly closer to the centre of the city the density of the objects below becomes quite heavy as the landscape fills in. You have all kinds of infrastructure including, blocks of flats, tower blocks, factories, housing, skyscrapers and almost everything that makes up an urban landscape, in all there is 2000 custom-made buildings that makes up this impressive scenery.
A note here in that you don't get that rolling as you move feeling effect where as it just suddenly appears in front of you and then quickly disappears behind as soon as you have flown out over the area. There is a slight effect of that as there has to be, but only in the far distance and as you can see from the images the views in every direction are widespread and visually it is very good to excellent.
The "Seven Sisters" or "Stalinist skyscrapers" built from 1947 to 1953 are all in the scenery with their "Wedding Cake" architecture or officially Russian Baroque- Gothic style. Most famous is the Moscow State University, front and centre of the image below.


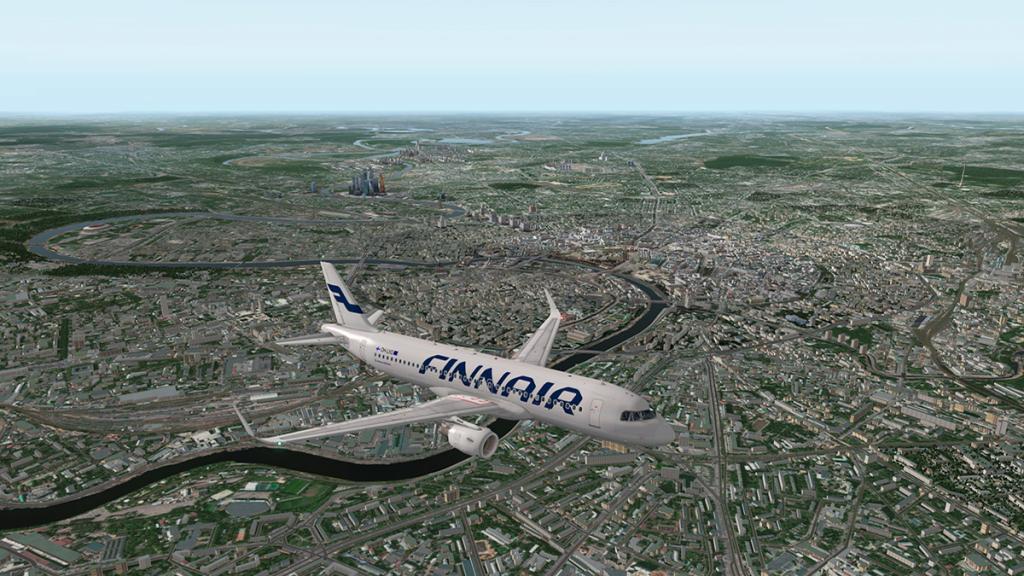
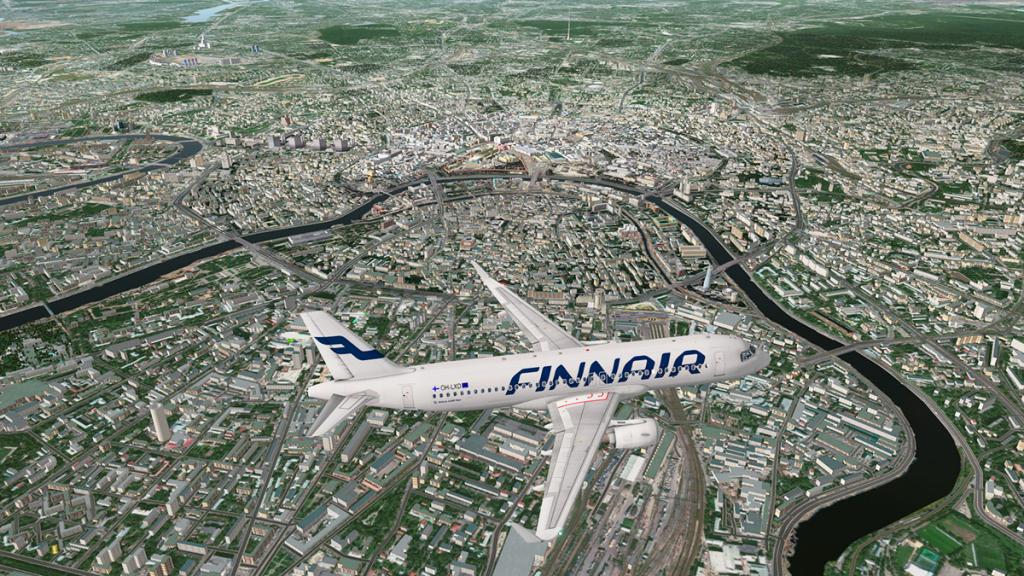
Central Moscow is excellent and extremely realistic, and you really need a travel guide to pick out the landmarks and detail, but it is hard to miss the Red Kremlin complex and St Peter's square from the air. Both sides of the aircraft is visually full until you have crossed right over the city.
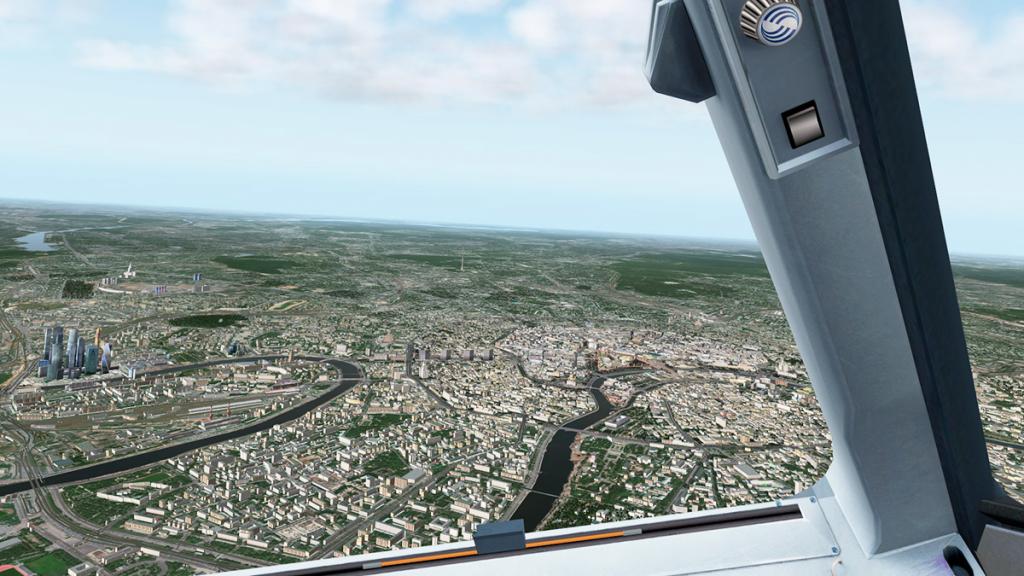


I am not a fan of the generated 3d OSM scenery, but this is very good in blending in perfectly with the X-Plane default scenery and giving you a smooth transition from country to urban and back again with great realism.

Over the city and turning north towards Sheremetyevo, another Moscow airport UUMU Chkalovsky is represented on the turn.
The city skyline is now easily visible on landing at Sheremetyevo, and that really helps in the arrival factor, more so in that the cities building infrastructure spread now comes up and around the airport to fill the gaps to the city itself, and making the original Sheremetyevo scenery that was so open and lonely in the old X-Plane view is now a big part of the whole in this combination. No doubt it really brings this always good scenery now alive and very usable.

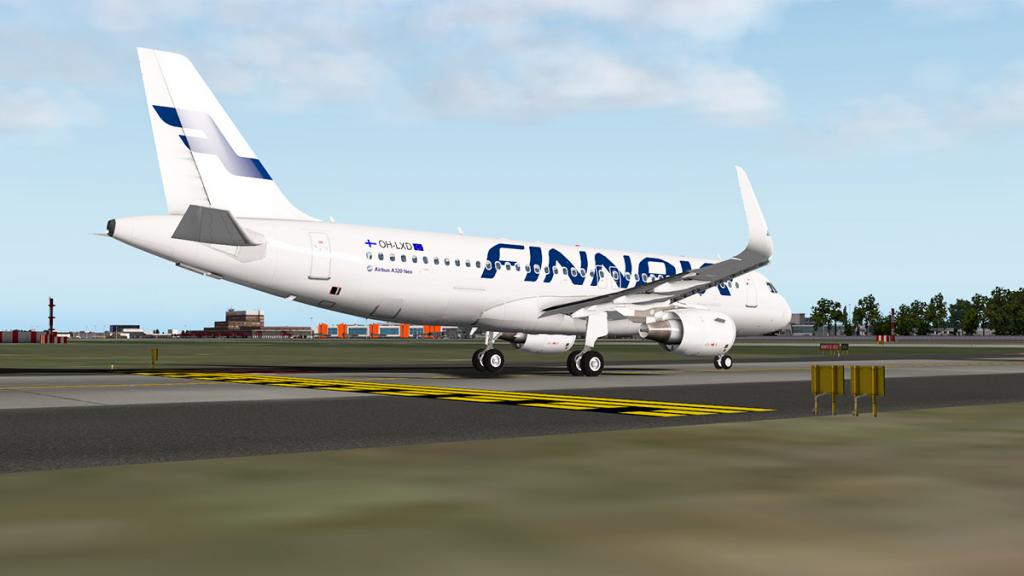
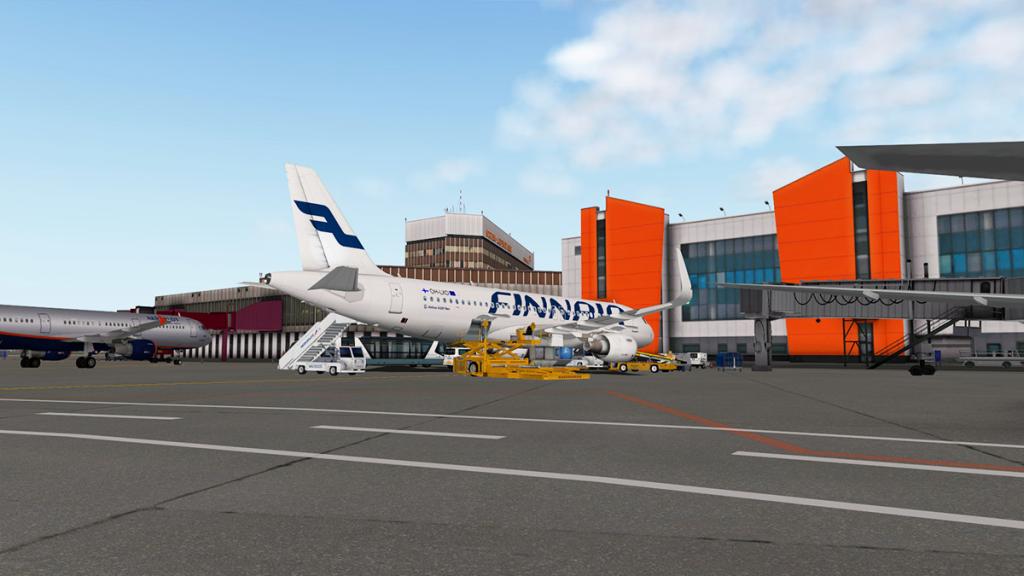
Sheremetyevo Airport
Before we move on to the city itself. It is important to note the area around UUEE Sheremetyevo itself.

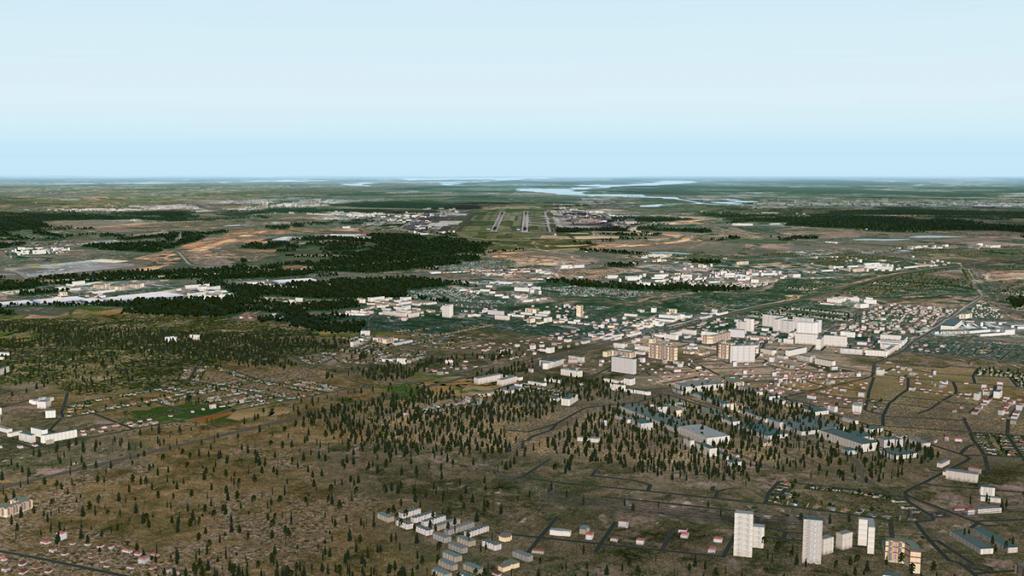

Compare the large image above to the earlier image at the start of this review to see the amount of change there is around UUEE Sheremetyevo with the addition of this Moscow City package. The two sceneries are of course meant to be used together, and in reality it would look odd if you had Moscow City scenery installed without the Sheremetyevo scenery included to fill out the northern areas. A highlight is that both sceneries together form a single whole, as the areas between the airport and the central city area are well filled in and that gives you a huge area of coverage and the full visual aspect.
To get a closer lower look at the Moscow Center I commandeered Dreamfoil's lovely Bell 407.
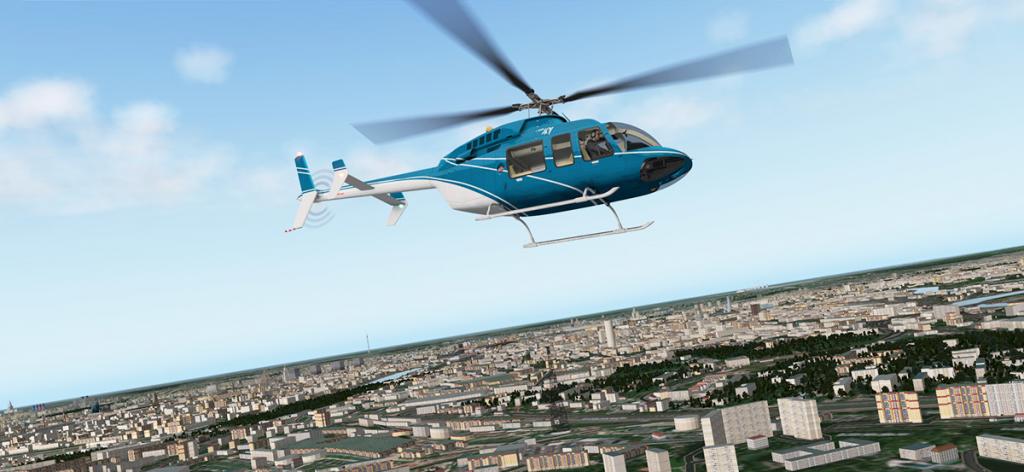
There is a 4.000km² total area covered with this scenery here, and you have expect some sort of building replication to cover all that ground. There is of course but as well in the fact there is also enough variations as to not keep it all interesting and not obviously visually obvious.
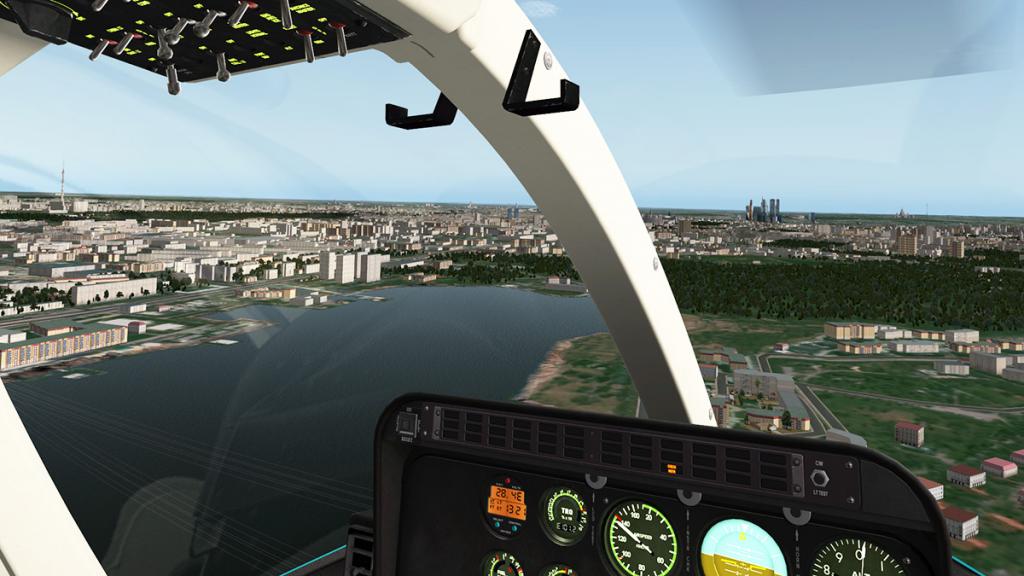
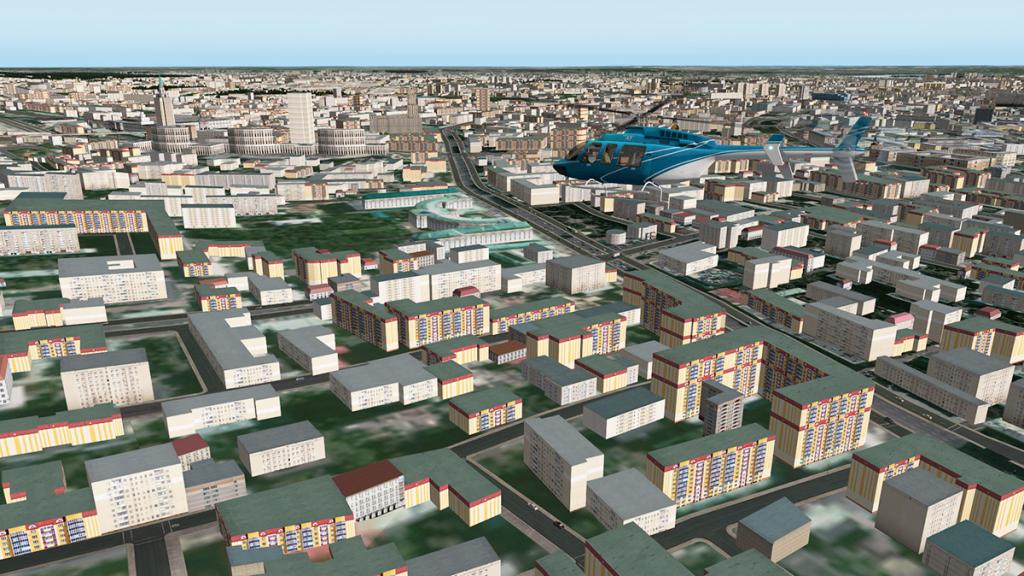

The closer you go to the central area, the variations in the buildings change there in style and density as well. And then more of the iconic buildings start to appear as you get closer in again to the middle. The business district is excellent, with a lot of business towers and the more modern futuristic skyscraper architecture that stands out in every view point in eye scans across the city.
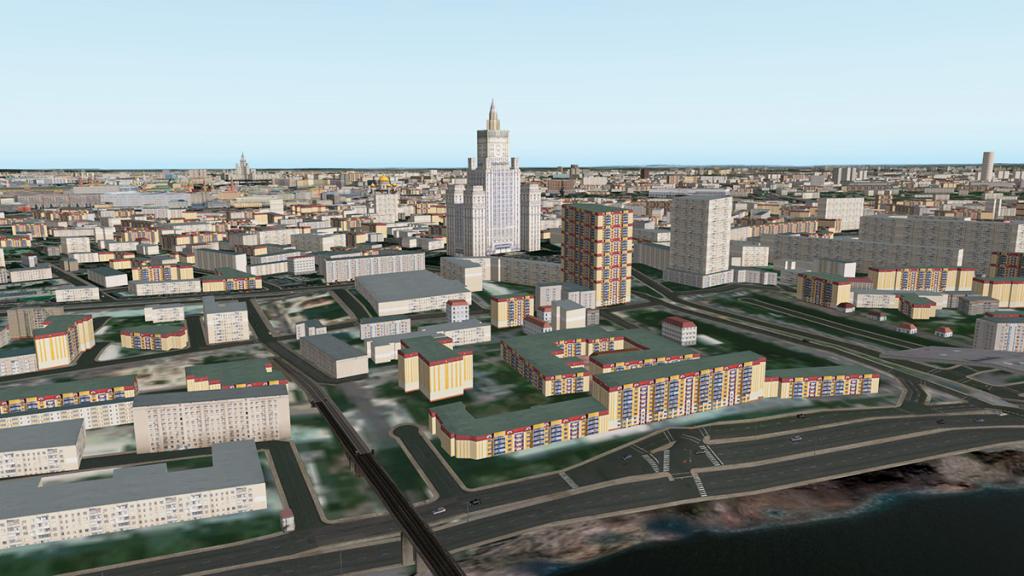
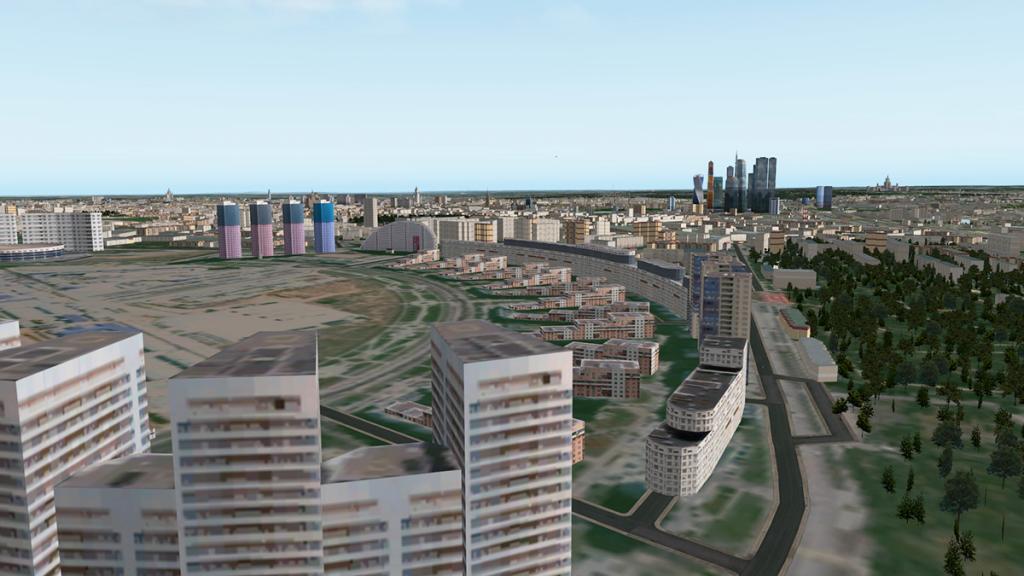
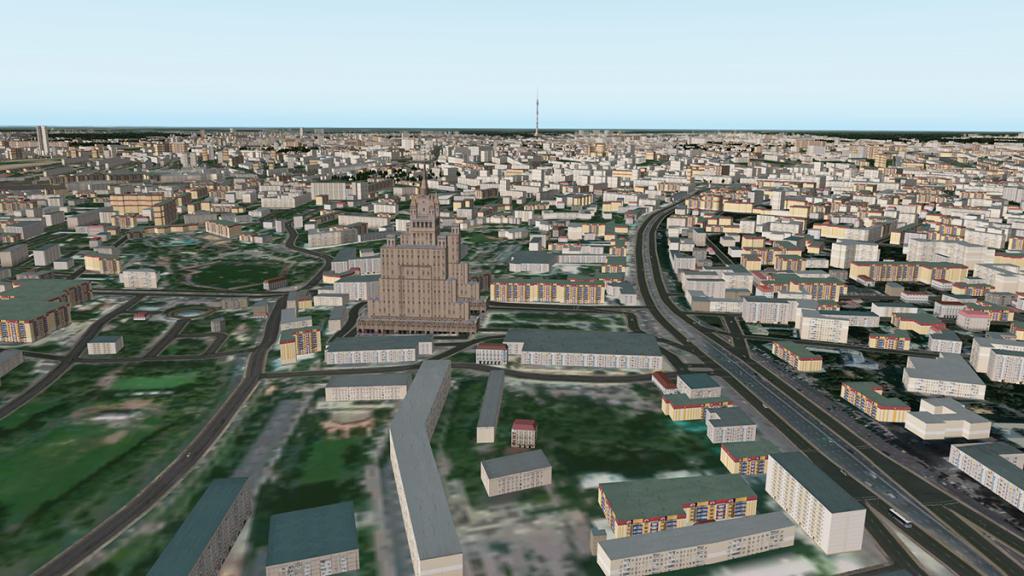
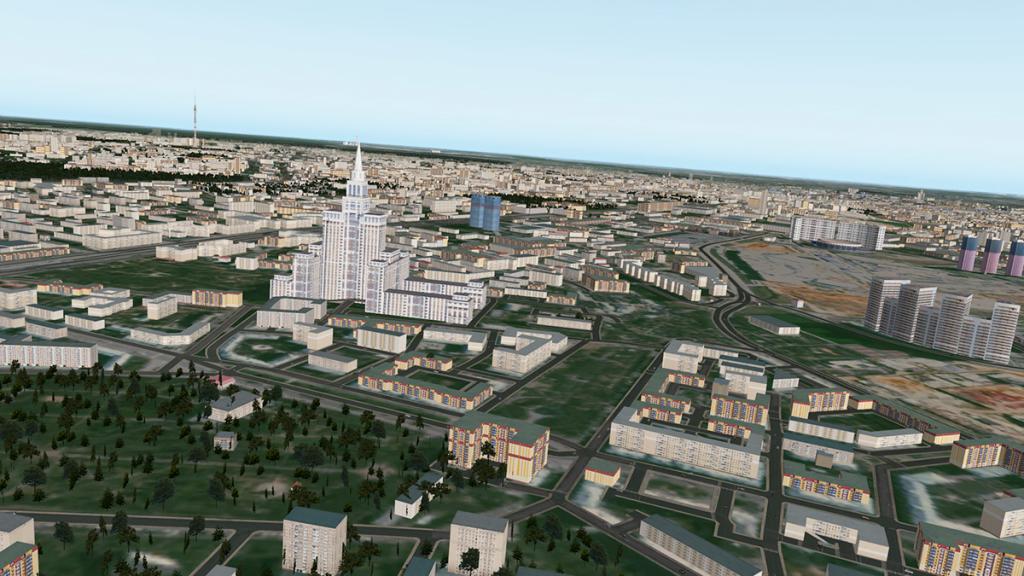
The more recent is in tune with the more older Stalinist era that makes up the Moscow skyline.
The Kremlin Complex and the Cathedral of Vasily the Blessed (St Basil's) is excellently represented and so is "Red Square"
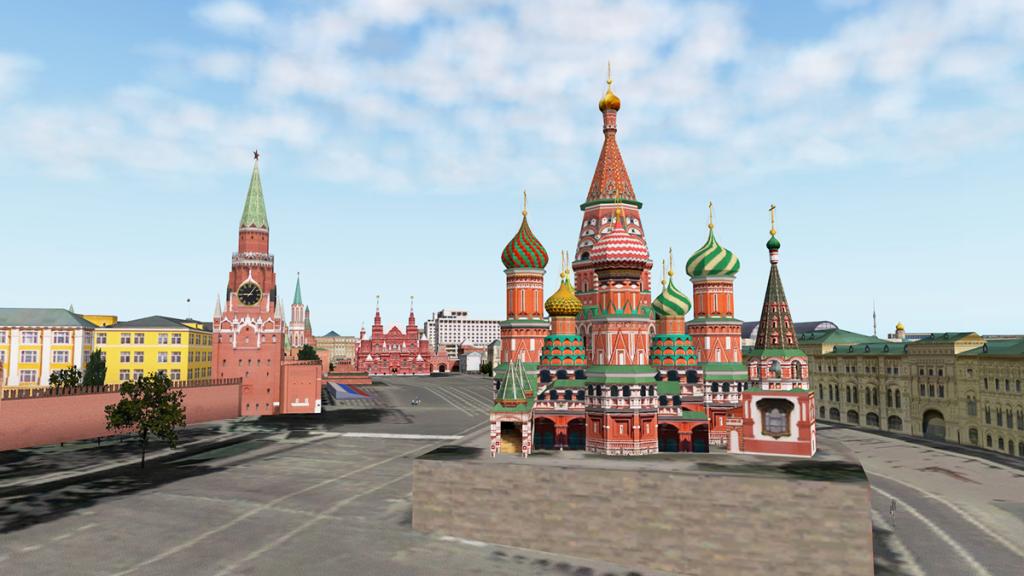
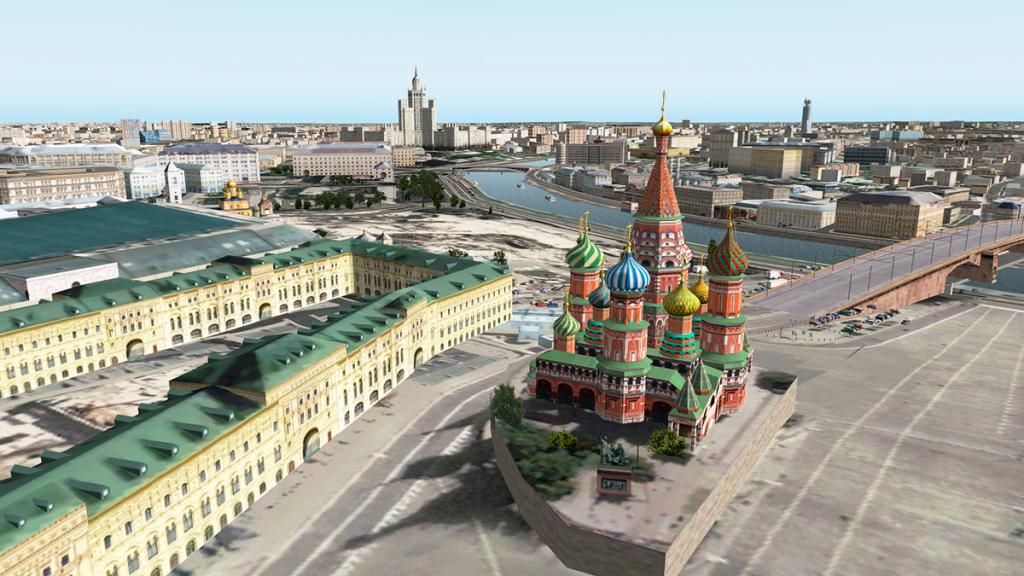
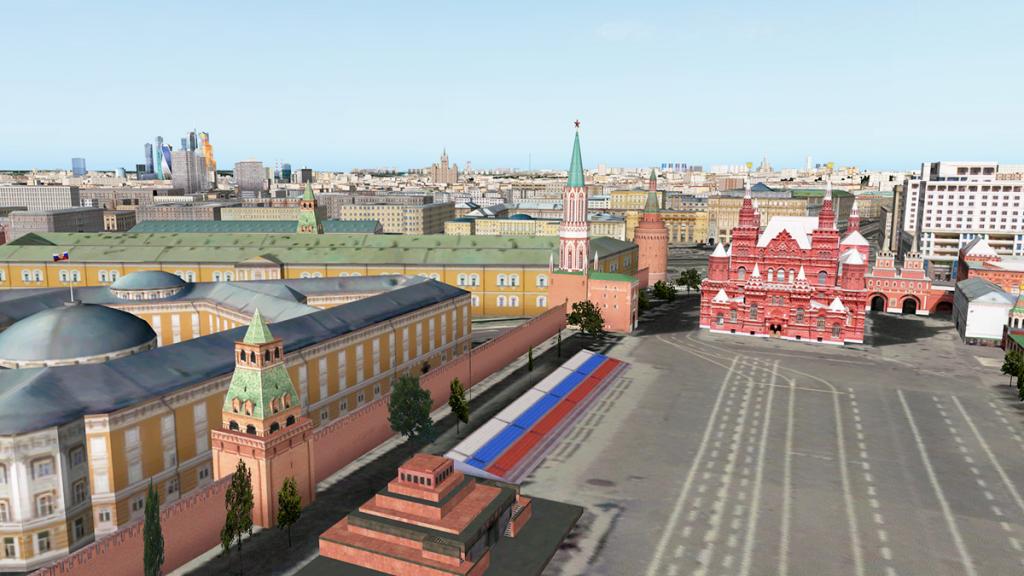
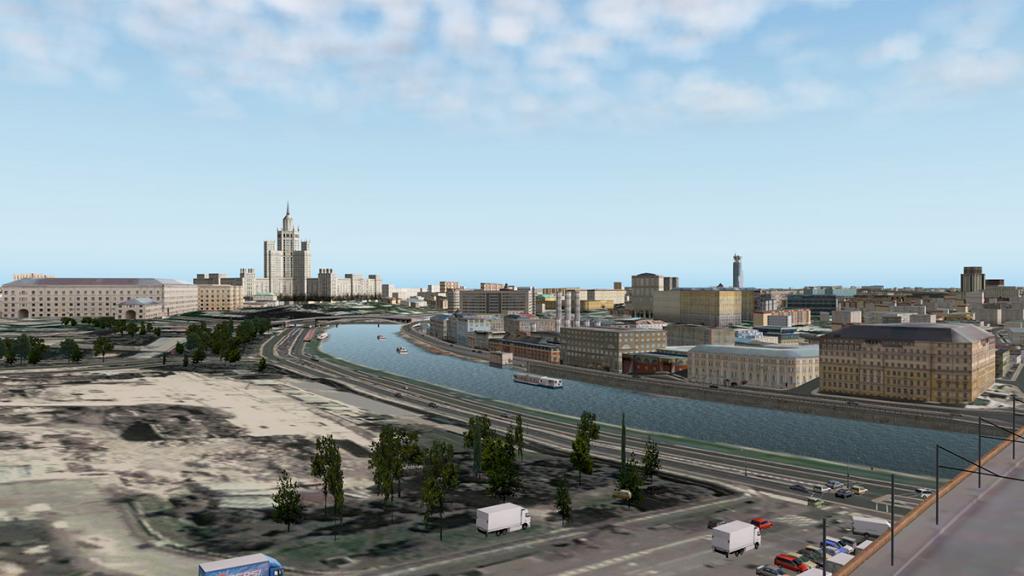
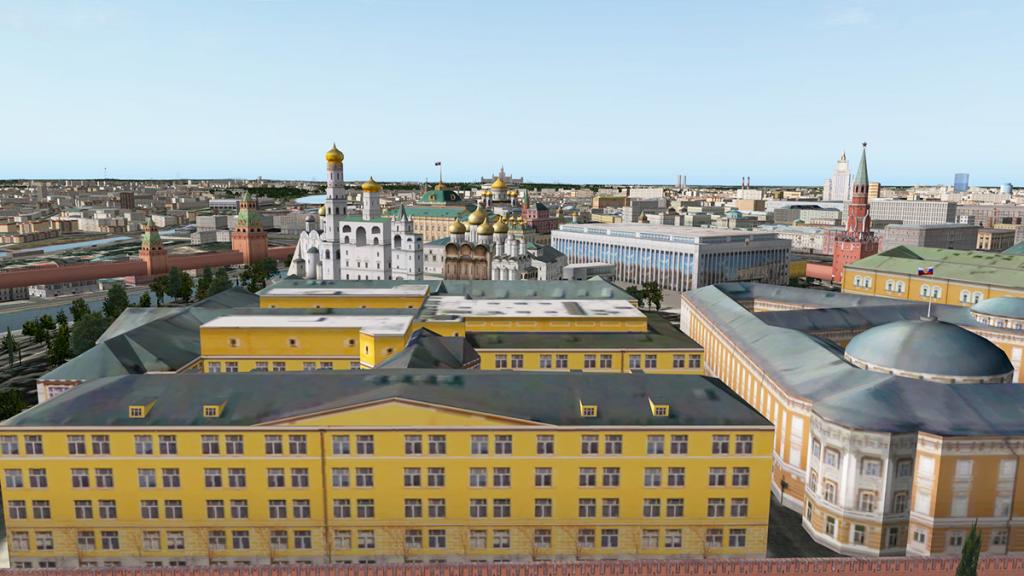
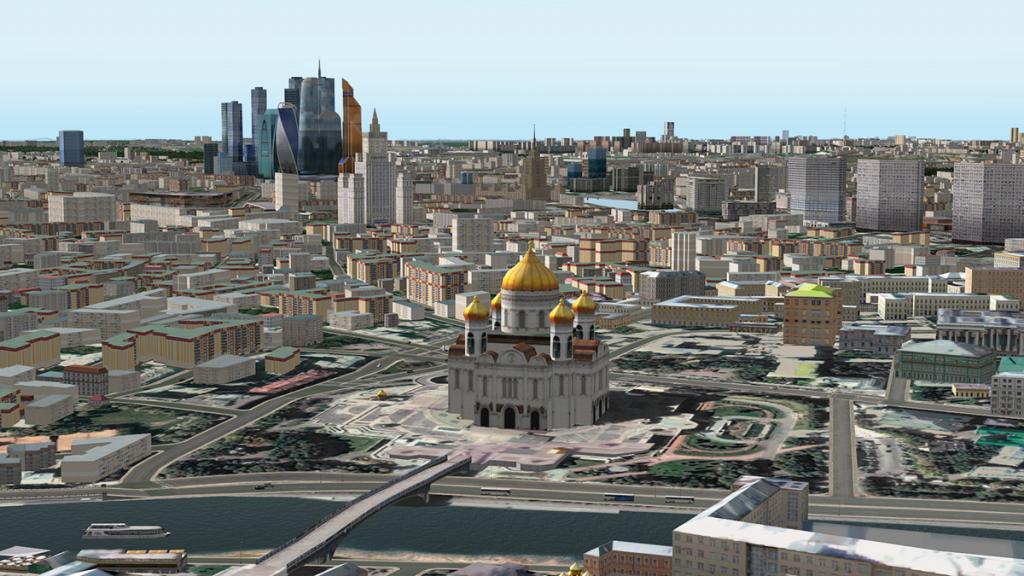
There are Orthodox churches everywhere and all the big icons in the Moscow Cathedral Mosque, Cathedral of Christ the Savior, Grand Arena of the Central Lenin Stadium, Otkrytive Arena and department stores, museums and power stations and more....
I did have issues with many buildings floating, including the Kremlin. I tried both "Runways follow terrain contours" on and off with no flattening of the objects and there is no information in the manual either on how to fix the problem.
Night lighting is very good, yes there is again a repeatable pattern to the majority of the hundreds of the apartment blocks that does stand out, but the more individual buildings do all have that personal touch and some buildings look really very good.
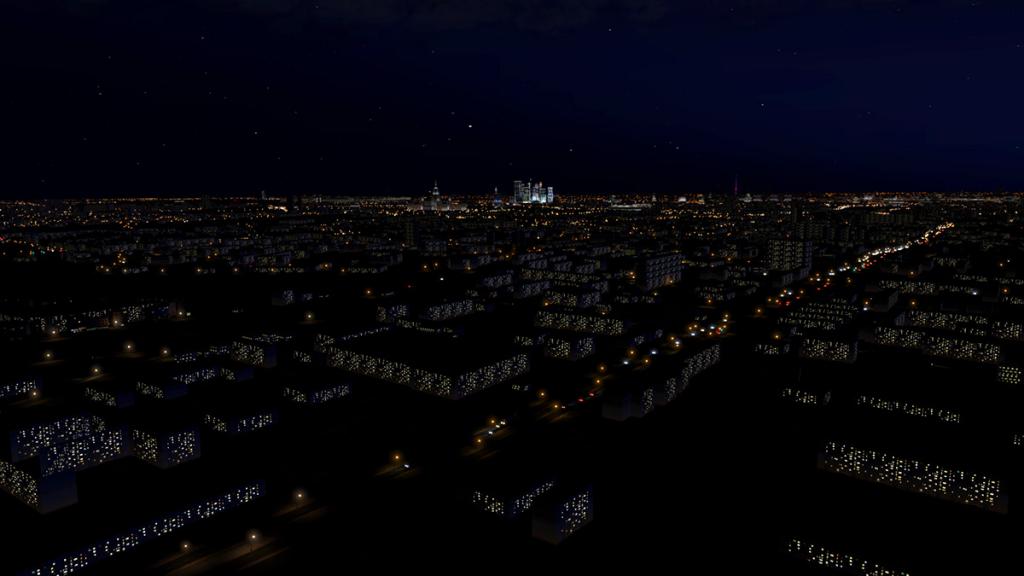
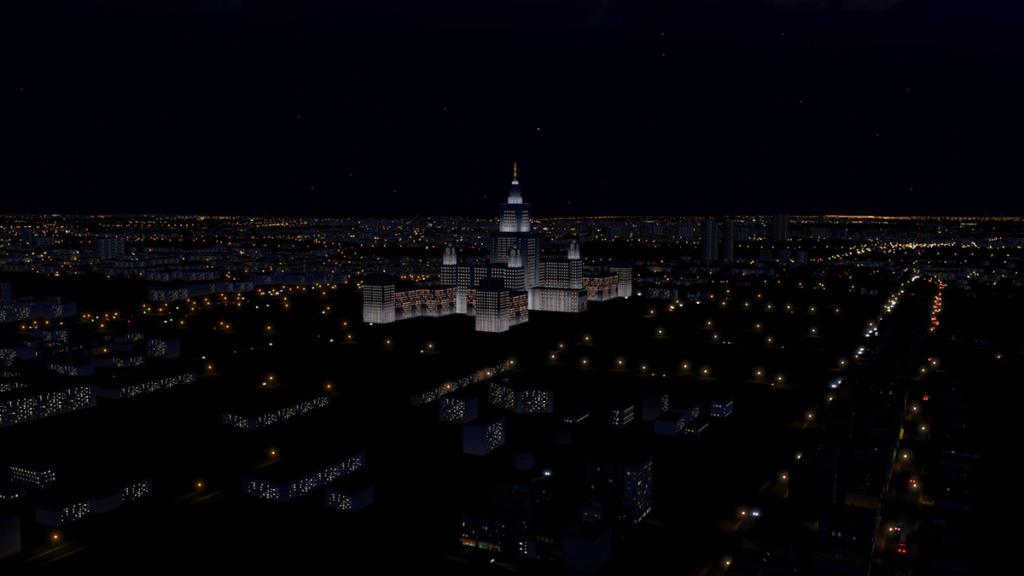


The highlight here is the business district which looks magnificent and is very realistic from any direction at night as is the lit Stadium.


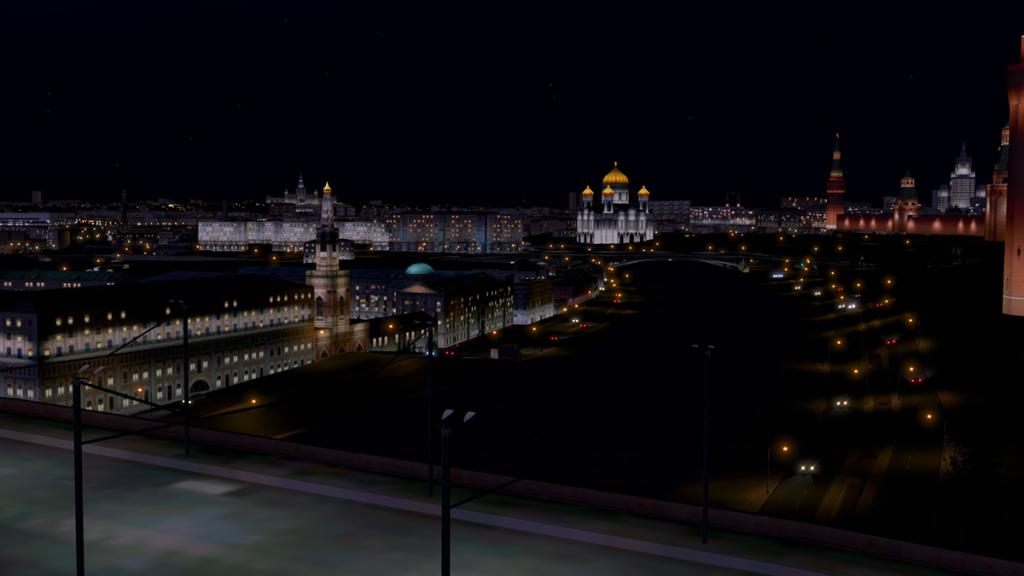
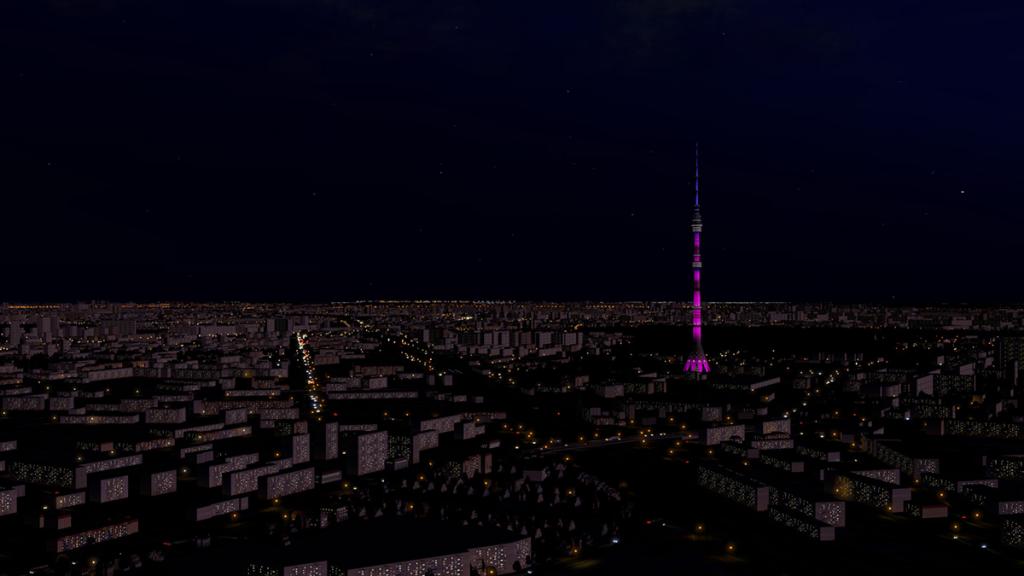
Although away from the central area the Ostankino Tower that stands 540.1 metres (1,772 ft) tall, and is the tallest freestanding structure in Europe and it looks great at night and is a very good position indicator from the air from any direction.
Included Moscow Airports
As noted also included in the scenery are seven airports and several helipads.
UUWW Vnukovo

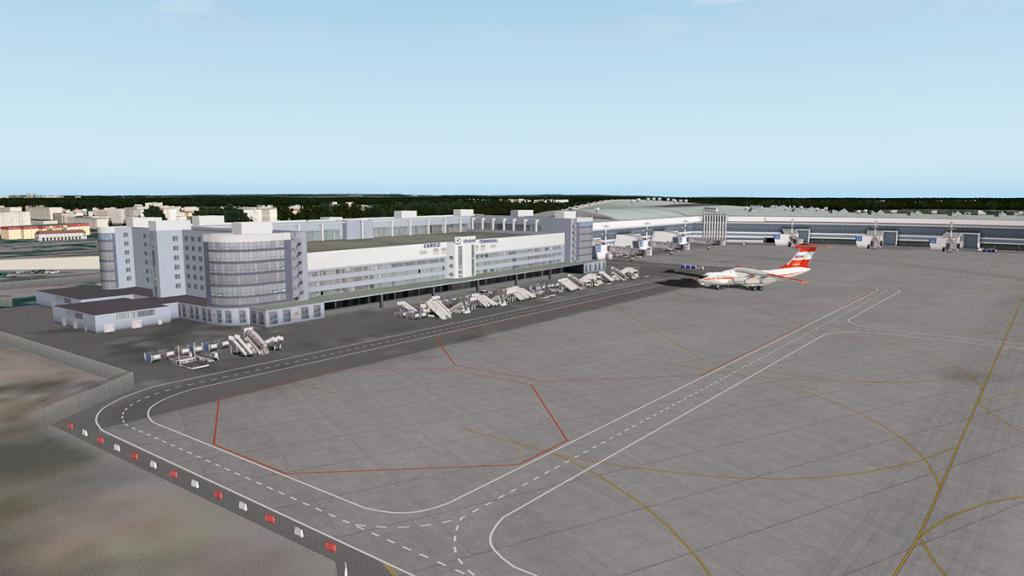

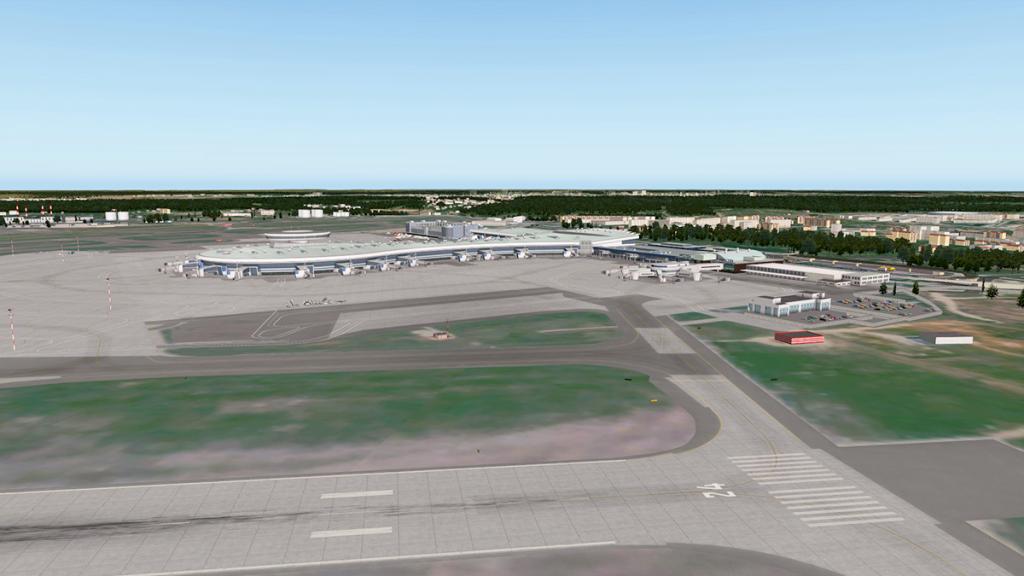
The futuristic Vnukovo International is very good for a lite version, with great terminals and lots of small detailing. Only thing missing is the static aircraft and a bit more ramp equipment, but otherwise it is highly usable.
UUDD Domodedovo


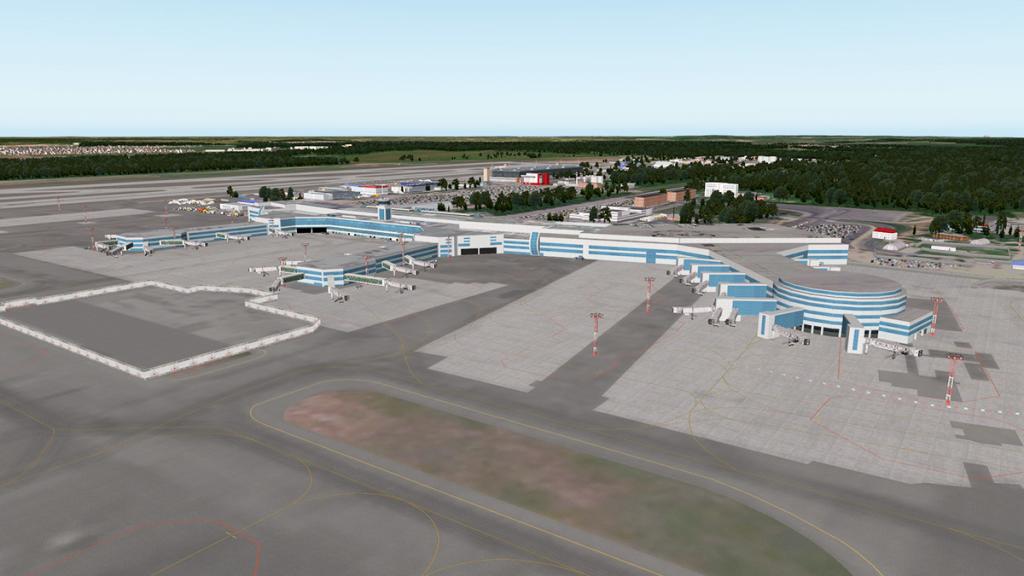
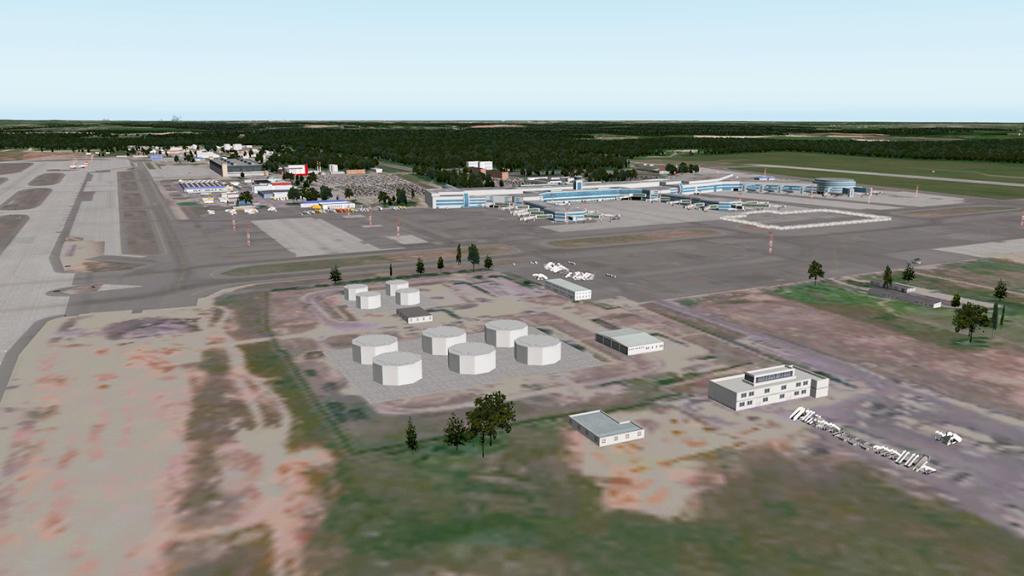
The oldest of Moscow's International airports is Domodedovo. Again it is quite devoid of static aircraft and I am not crazy about the blue terminal glass work, but it is still a very workable scenery to use and has a lot of well made objects.
UUBW Zhukovsky

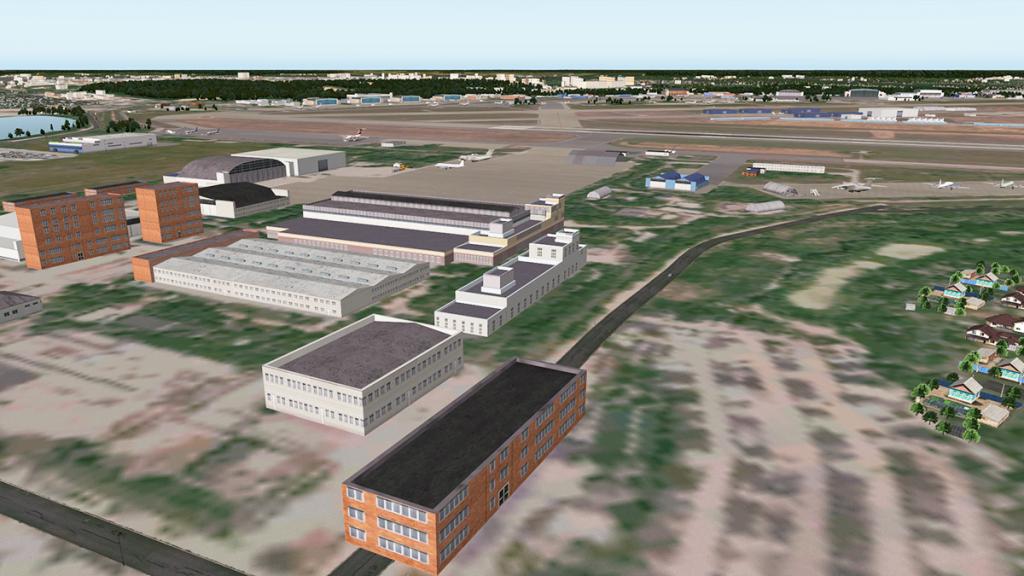
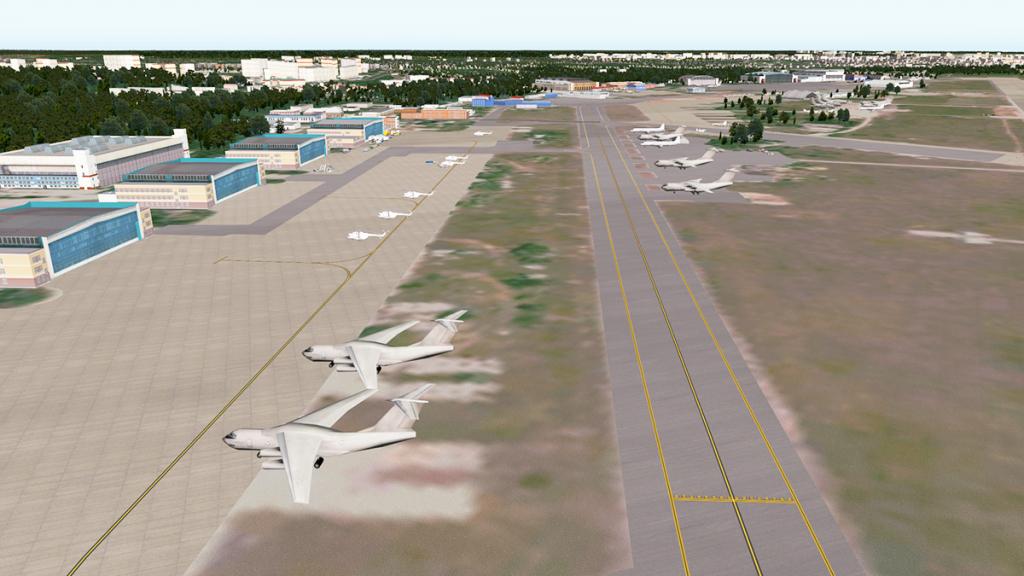
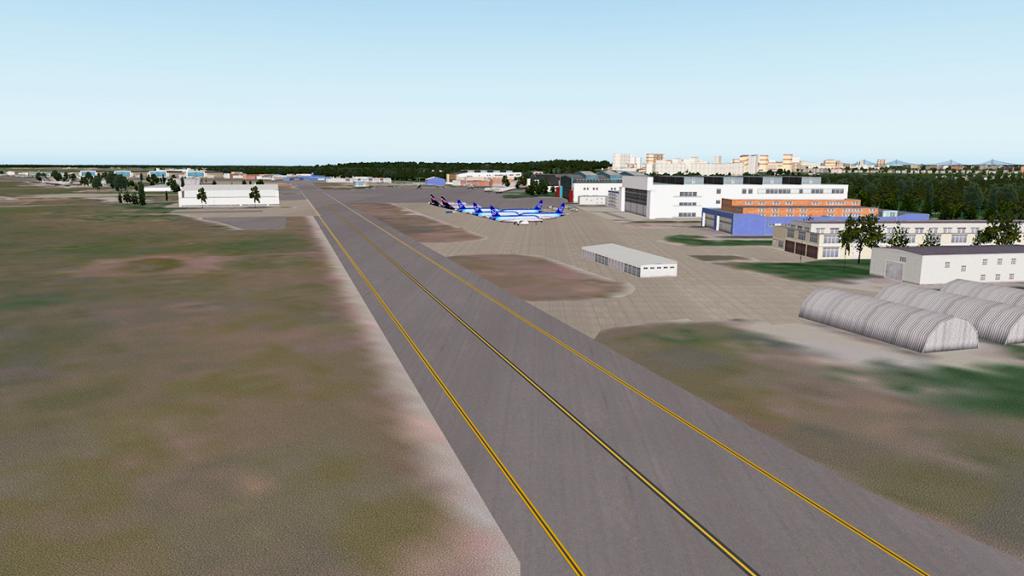
Zhukovsky was a major aircraft testing facility since the cold war years, with most of the major Russian Experimental Design Bureau's having facilities here. It is also now used by the Ministry of Emergency Situations! and cargo carriers. It was also used as a test site for the Soviet Buran reusable Spacecraft because it has the world's second longest pubic runway at at 5,402 m (17,723 ft). Mostly it is a collection of very large hangars but has a lot of static aircraft in storage.
UUMO Ostafyevo International Business Airport
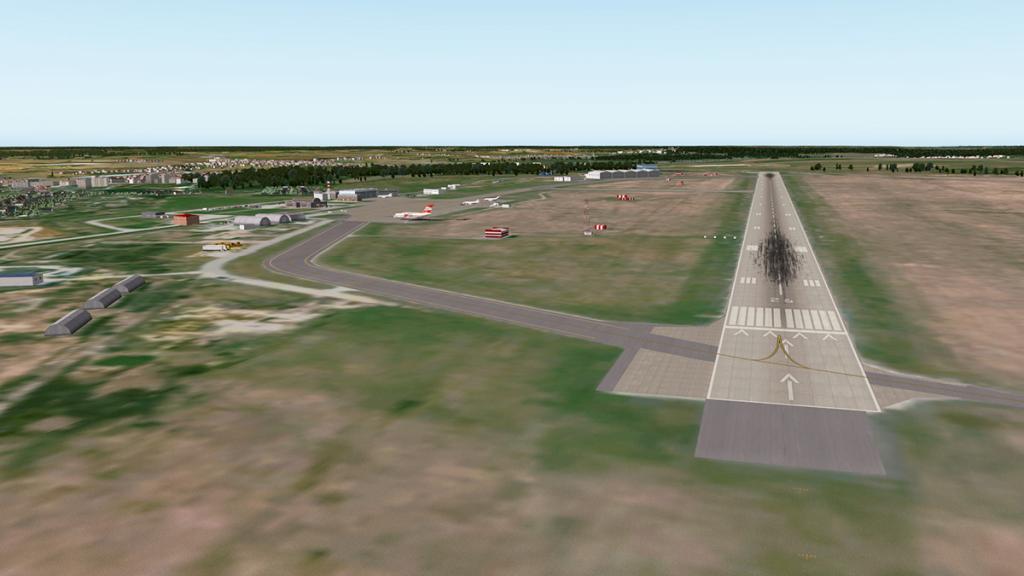
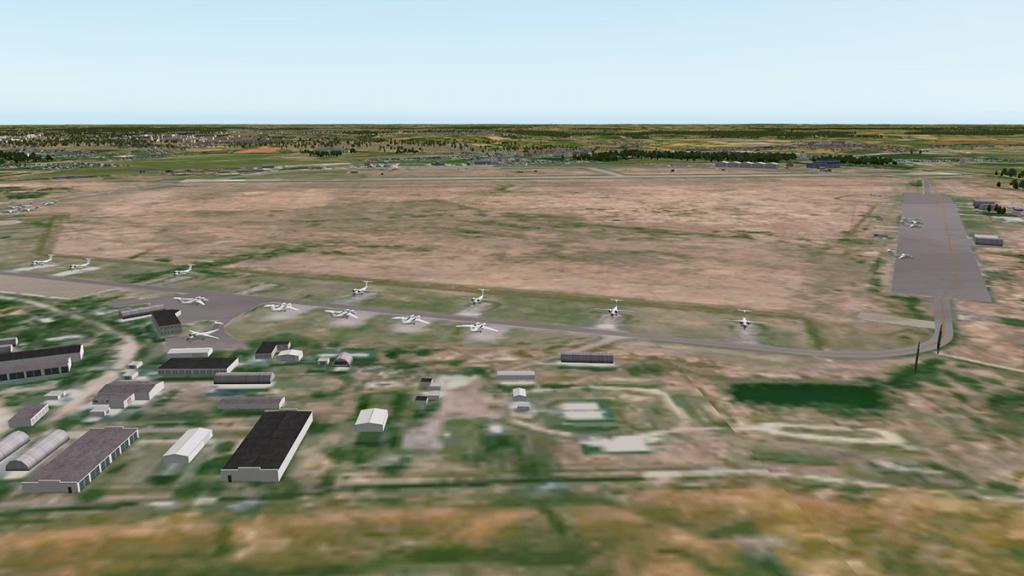
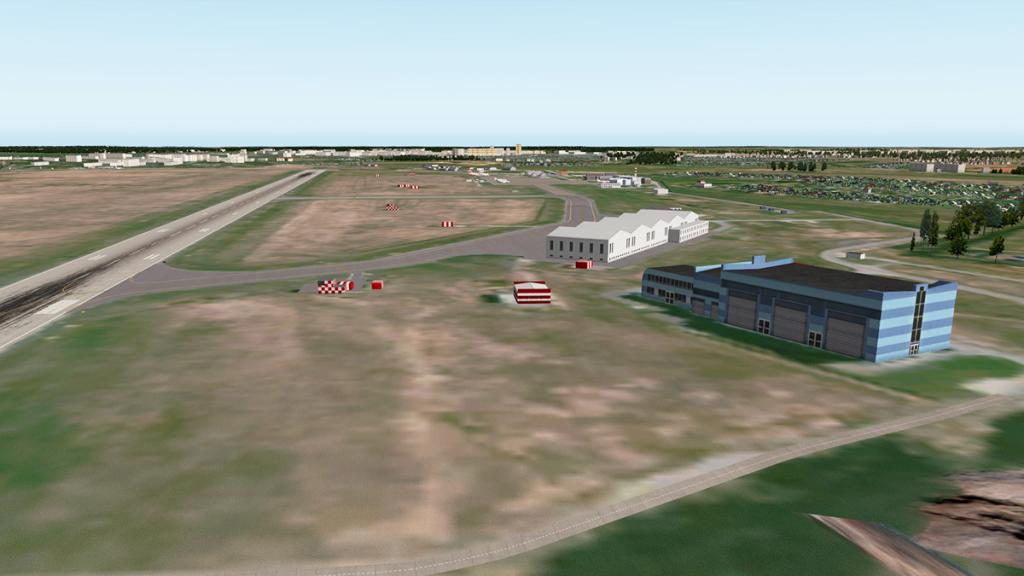
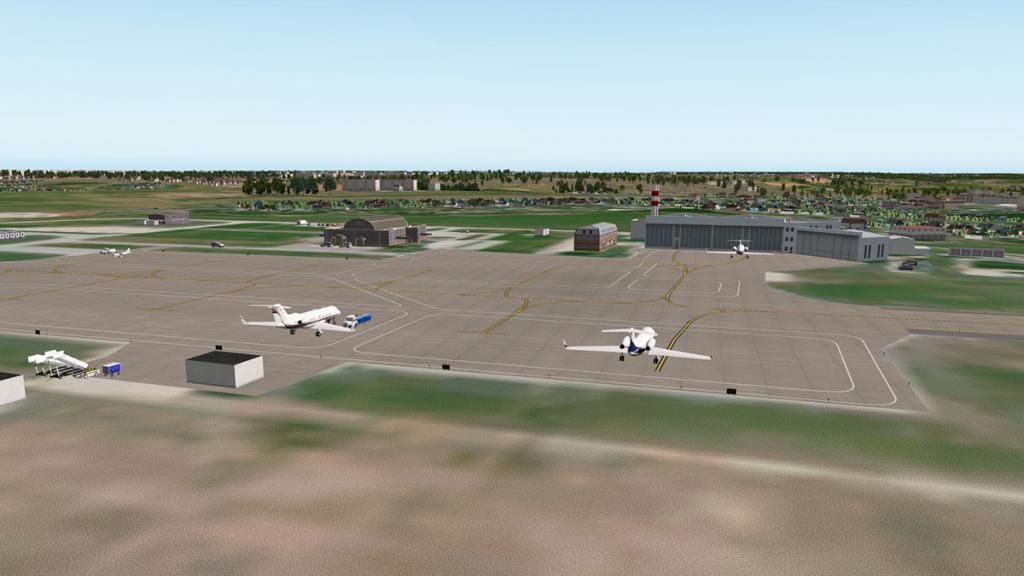
A former military airbase. Ostafyevo features a new modern glass terminal, and caters primarily to business aviation.
UUMU Chkalovsky

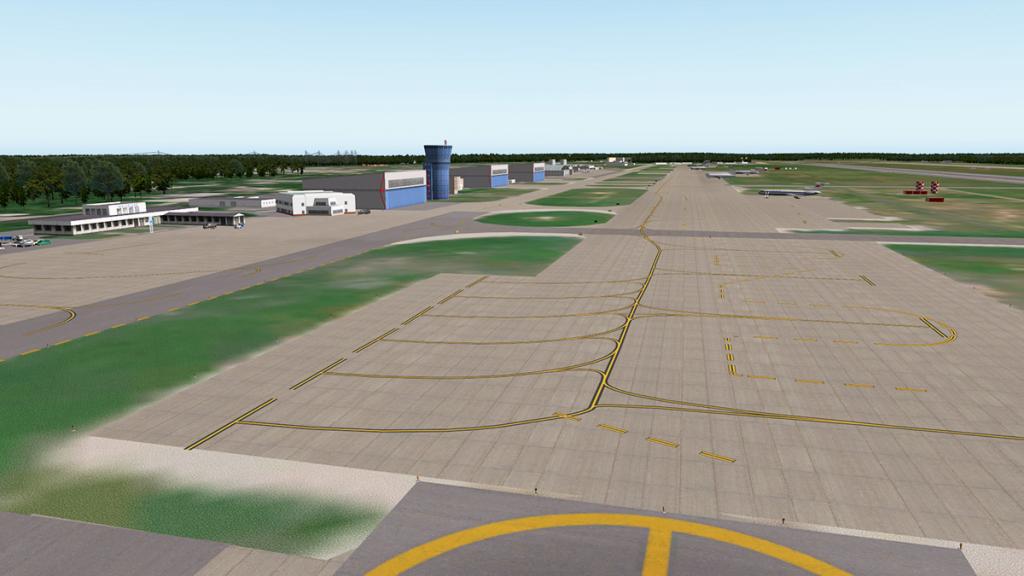
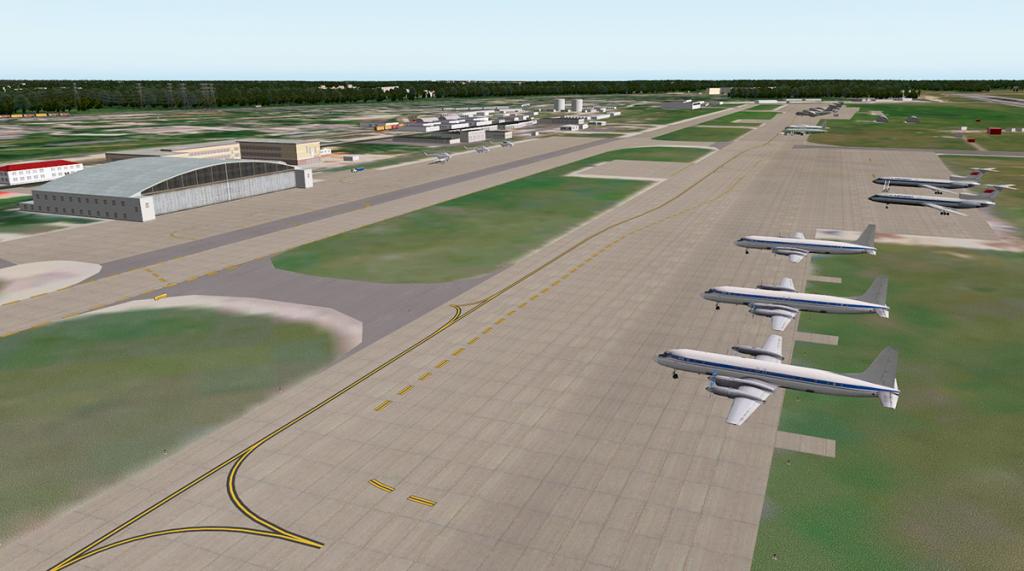
Chkalovsky is a military logistics airport that is famous for it's support for the Russian Space program and transport to Star City and the Yuri A. Gagarin State Scientific Research-and-Testing Cosmonaut Training Center. Yuri Gagarin left here on his final flight before crashing by the town of Kirzhach.
UUBM Myachkovo Airport
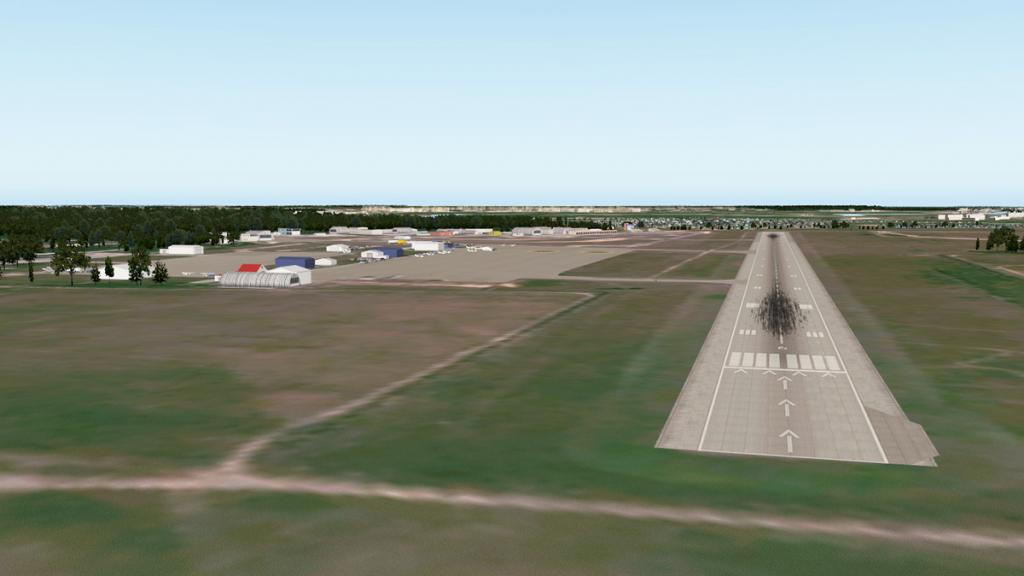
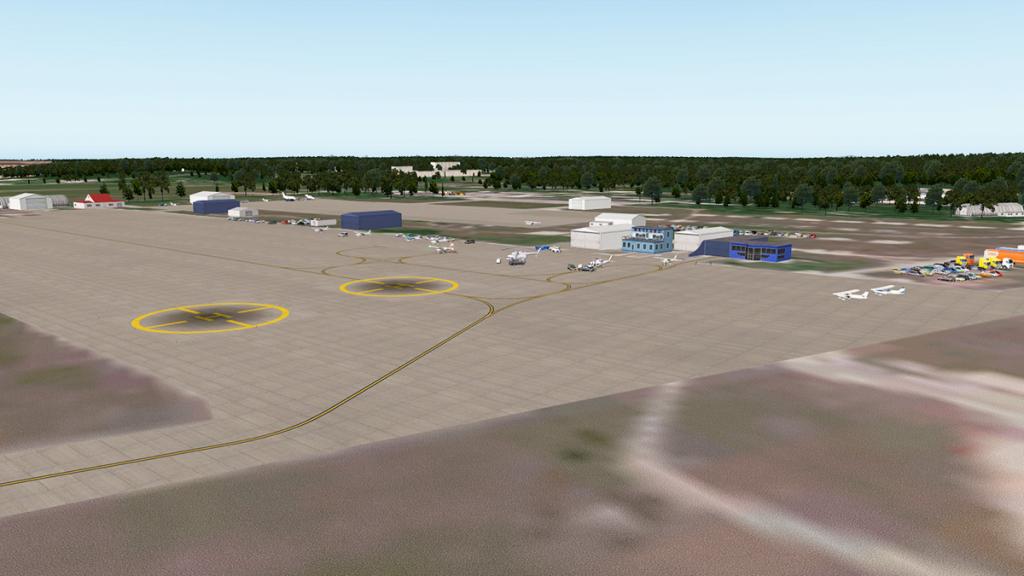
Myachkovo is a small General Aviation Airport that is owned by the Finpromko company. Cargo aircraft up to the size of the Ilyushin ll-76 freighter can also use the airport.
UUMB Kubinka
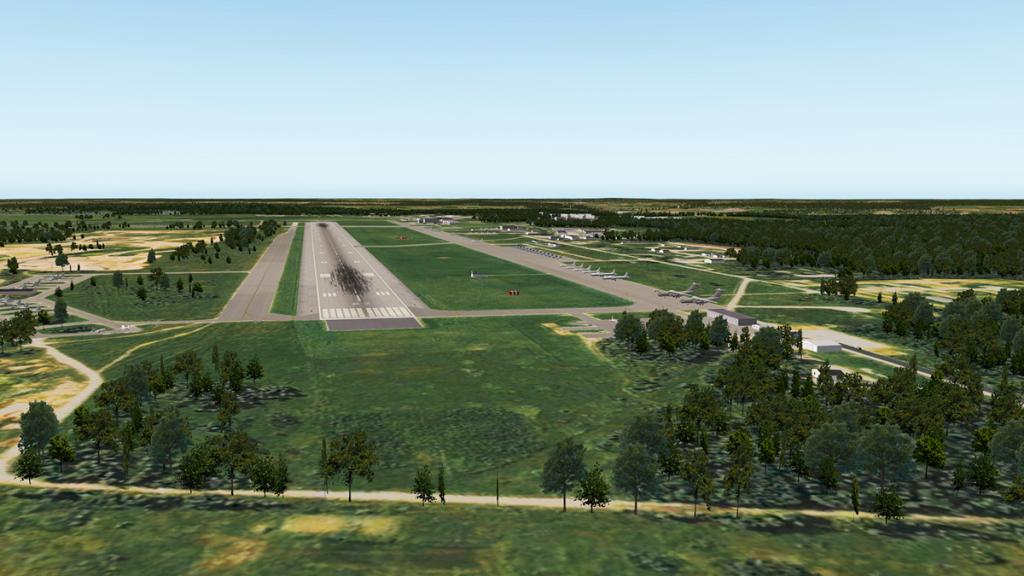
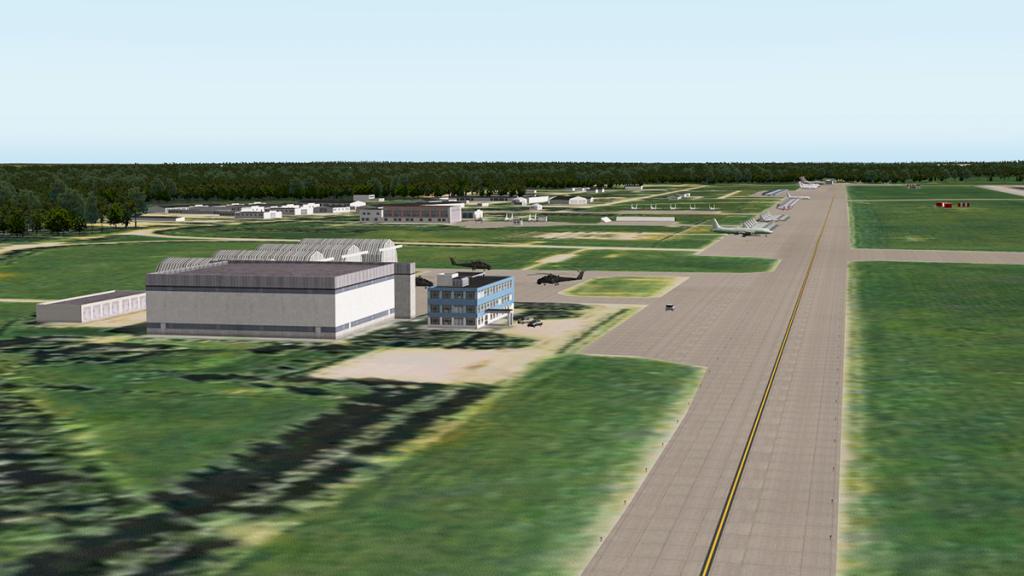
Kubinka has been a significant Russian military airbase and large airshows are held here to show off the Russian military might.
There is also provided UUU1 Kremlin Airport, within the Kremlin walls, but I couldn't get it to work? There are two pads in H1 and H2.
Summary
Your first thoughts after reviewing this excellent Moscow scenery is not with this actual package. You then wish that you could have this extensive scenery at London, Rome, Madrid, Berlin and the list could go on with any of your favorite European Cities, and don't count a load in the Middle East and Asia. But a London scenery like this would certainly be a godsend in our X-Plane world. Drzewiecki Design has already done Warsaw and Manhattan, so there is always hope.
It is not cheap either and you need to add in their UUEE Sheremetyevo scenery package on top of that as well. But you get an awful lot of ground covered here for your money, with the area covered here that is extensive... huge and flying into Moscow will never be the same again.
A few areas to note in one that in my case a few of the buildings floated, the download is huge load at 1.4gb and this Russian area is not the best for navigation aids and programming FMS units as most waypoints are not recognised. Most of the airports ILS coordinates also have to checked and recalibrated (Drzewiecki Design do provide all the correct coordinates) so there is a little work to do to set up repeat services but the work is worth the results.
Not only is the actual Moscow city and all it's buildings supported, you also get seven (if lite versions) of Moscow's other airports included as well, but the framerate processing of all this huge amount of objects and scale is pretty good to excellent. Framerate does hurt more on a lower (helicopter) level and certainly you need a computer with a little extra power is in no doubt required, but overall for the size of the area the scenery is extremely efficient.
Yes I was impressed by this Moscow City Scenery, as this once very barren area of X-Plane is now a very attractive repeat destination as nothing can give you a greater fulfilment than seeing your destination appear in the distance and then give you a huge visual experience as you fly over and approach your destination.
Moscow City certainly delivers that and more... Just more sceneries like this please!
_____________________________________________________________________________________ 
Moscow City XP by Drzewiecki Design is NOW available! from the X-Plane.Org Store here :
Price: $36.00Scenery features:- Extremely detailed model of Moscow metropolitan area in Russia
- Almost 2000 custom-made buildings and other objects, all high quality, FPS-friendly and with night textures
- Whole Moscow center done in 3D as well as all other important landmarks - museums, palaces, skyscrapers, towers, bridges, railway stations, Zara stores...
- Trains, ships, 3D people, cars, airport vehicles, static aircraft - anything you can imagine
- About 4000 sq.km of photoreal 0,5-1m/pix terrain with autogen
- Sceneries of all surrounding airports including UUWW Vnukovo, UUDD Domodedovo, UUBW Zhukovski, UUMO Ostafyevo, UUBM Myachkovo and UUMB Kubinka, with all airport buildings, detailed layouts, people, airport vehicles and more
- Very detailed Kremlin model with newly constructed heliport
Fully Compatible with UUEE Moscow Sheremetyevo XP by Drzewiecki DesignRequirements
X-Plane 10.50+ (any edition)Windows, Mac, Linux1Gb VRAM Video Card - 2Gb+ VRAM highly RecommendedDownload size: 1.8Gb!_____________________________________________________________________________________
Installation and documents:
Download for the Moscow City XP is 1.47gb and the unzipped file is deposited in the "Custom Scenery" as four files:
DDZ Moscow City XP (3.99gb) - Yes GIGABYTES!
DDZ Moscow City XP Layer 2 (30.20mb)
DDZ Moscow City XP Documents (1.0 mb)
ZZZ_DDZ Moscow City XP Terrain (20.10mb)
Installation for Windows comes with an .exe installer that deposits the files in the correct order required (however I still moved the ZZZ- folder to the bottom via the INI text install list.
Installation Instructions are provided for Mac and Linux
You need to check all airports ILS coordinates are correct, instructions are provided.
Documents: Two documents include
Moscow City XP MacLinuxinstall
Moscow City XP Manual (seven pages)
_____________________________________________________________________________________ Review by Stephen Dutton26th September 2016Copyright©2016: X-PlaneReviewsReview System Specifications:
Computer System: Windows - Intel Core i7 6700K CPU 4.00GHz / 64bit - 16 Gb single 1067 Mhz DDR4 2133 - GeForce GTX 980/SSE2 - Samsung Evo 512gb SSD
Software: - Windows 10 - X-Plane 10 Global ver 10.50
Addons: Saitek x52 Pro system Joystick and Throttle : Sound - Bose Soundlink Mini
Plugins: JARDesign Ground Handling Deluxe US$14.95 : WorldTraffic US$29.95
Scenery or Aircraft
- Airbus A320neo by JARDesign (X-Plane.OrgStore) - US$59.95 : A320neo Sound Packs by Blue Sky Star Simulations (X-Plane.OrgStore) - US$19.95
- Bell 407 by Dreamfoil Creations (X-Plane.OrgStore) - US$34.95

-
News! - Aircraft Update : Boeing 787-8 to10.50
Voidhawk9 has done an update to Heinz Dzuirowitz's Boeing 787-9. Heinz the original developer is sadly not with us any more, so it is great news that Voidhawk9 with VMAX has continued on his wonderful legacy.
10.50 changes:
- Pushback Truck now functions with both VIP and Passenger versions. (64bit required for Windows users. Works in 32bit and 64bit on Linux and probably Mac)
- Pushback Truck documentation re-written to be easier to understand. The original was confusing to many users.
-
Flight model entirely re-built. Much more is known relative to when this 787 was first released! Points of note:
- All-new supercritical airfoils.
- Wing (and tail) layout rebuilt to higher accuracy.
- Control geometry, including all flaps, ailerons, spoilers, etc., revised to accurate positions and area (and deflections, where known).
- All body shapes more accurate, including fuselage, engines, and pylons. This greatly improves body lift/drag dynamics.
- Partial 'fly-by-wire' implementation using X-plane's own artificial stability. Provides much more realistic response to the pilot.
- Fuel-flows now accurate for for correct cruise range.
- Exterior lighting re-worked to match reality, and eliminates 'ball of light' under the nose.
- VIP version has the custom sounds of the passenger version.
- Wing textures revised, so that slats and spoilers now blend cleanly into the wing when retracted, as in reality.
- Cockpit windows now have golden tint, like the real aircraft, instead of purple.
- Small FPS improvement in cockpit views.
This update will keep the Dreamliner flying a bit longer and keep it current, so a big thanks to Voidhawk9
You can download the updated 10.50 version by going to your X-PlaneStore account and downloading and the update is available now...
_____________________________________________________________________________________
The Boeing 787-9 Dreamliner by VMAX is available from the X-Plane.Org Store here :
And is priced at only US$19.95
Features
- Officially licensed By the Boeing © Corporation
- Accurate dimensions based on 2D and 3D drawings supplied by Boeing ©
- Great Flight model
- Accurate and smooth flight model
- Realistic Wingflex
- Compatible with Advanced FMC systems
- UFMC and X-FMC Compatible (but not required)
- Awesome 3D details
- New pilots and co-pilots
- Decorated cabin. 2 versions: Passenger and executive
- Detailed wing textures
- Virtual cockpit based on the real 787 Dreamliner
- Drop-down overhead panel with use of 40+ datarefs
- Pop up panels for easier navigation: Radio, FMS,Throttle
- Tons of liveries
- All paints are high-resolution - Use of normal maps for superior texturing
- See additional liveries here
- Pushbask Truck
- Fully controlled truck - Truck video here
- Flight Model by X-Aerodynamics
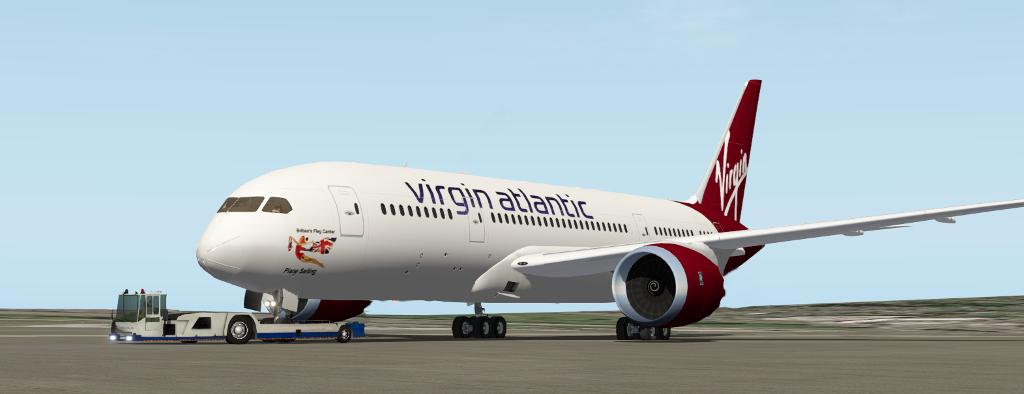 Requirements:X-Plane 10.50+ (any edition) running in 64 bit modeWindows, Mac or Linux (64bit OS required)512Mb VRAM MinimumCurrent version: 10.50 (last updated Sep 20th 2016)Images courtesy of Voidhawk9
______________________________________________________________________
Stephen Dutton
23rd September 2016
Copyright©X-Plane Reviews: X-PlaneReviews 2016
-
News! - Aircraft Released! - Beechcraft AT11 Kansan by STMA
Shade Tree Micro Aviation (STMA) have released a military version of the Beech 18 called the Beechcraft AT11 Kansan. This aircraft is based on the Khamsin version and is not to be confused with the STMA version of Heinz Dzuirowitz's Beech 18 that was acquired after his passing and was reviewed here. Beechcraft Model 18.

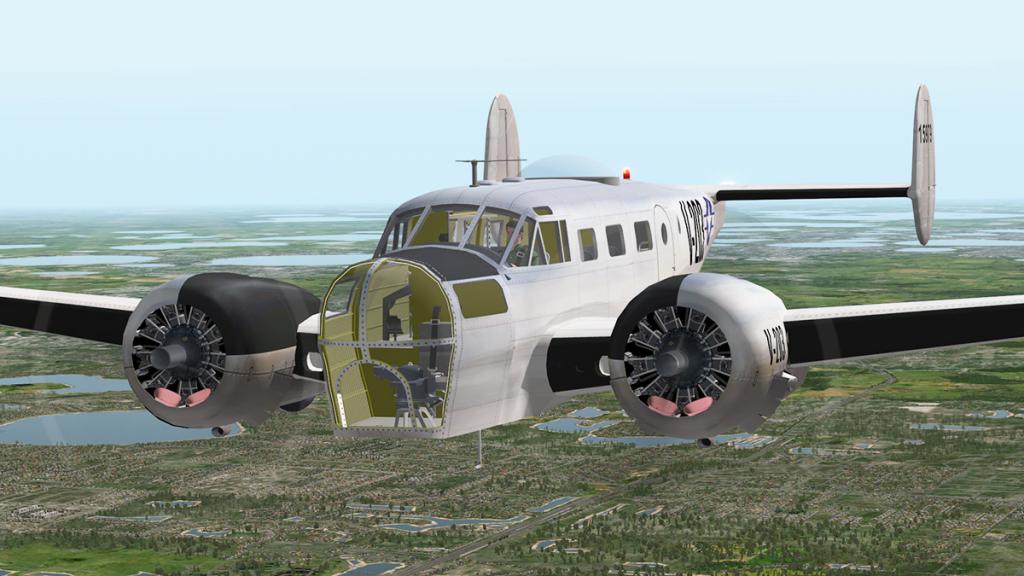

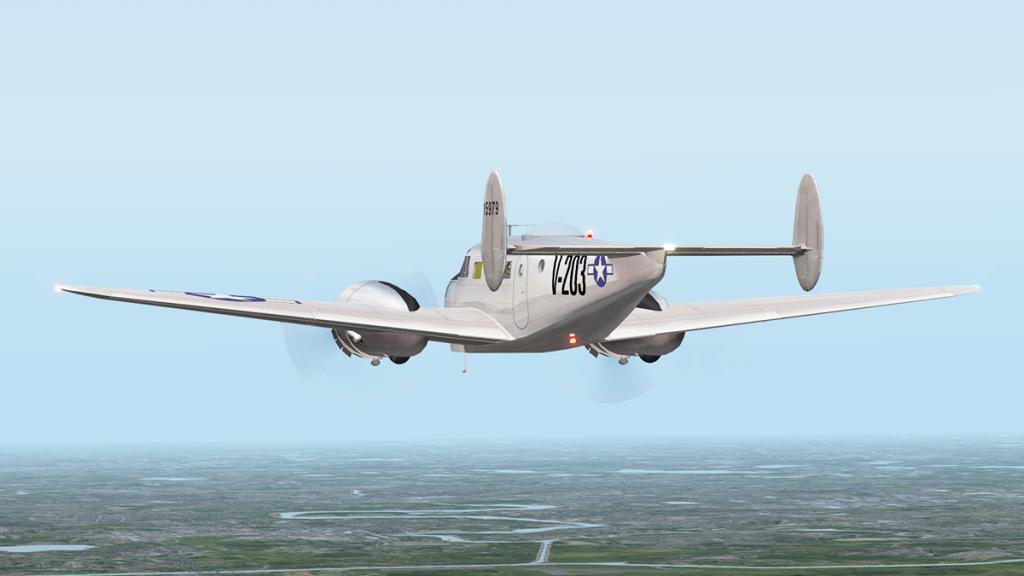
Features:
1. Two completely new models, Bomber & Navigator, created using the Type Certificate Data Sheet, aircraft manuals, Internet files and photos, and our extensive knowledge of similar aircraft.
2. Includes all of the upgraded features of our Beech D18S Twin Beech models.
3. New military-style aircraft interiors.
4. The Bomber has a fully functioning, controllable, fuselage-mounted turret gun and a bombardier’s station is in the nose. The Navigator has a navigator’s station in the nose, work tables in the cabin and a celestial navigation astrodome in place of the gun turret. Our custom STMA_Guns plugin rotates through the available stations letting you be the pilot, the gunner/navigator, or the bombardier/navigator. Simply press the Gunner Station button or program a key or joystick button to STMA/Guns/RotateGunStation. Perfect for engaging in a little aerial combat with your online opponents!
5. Copilot rudder pedals and yokes are manipulators which, when clicked, move aside to permit the bombardier/navigator to enter the nose compartment.
6. AutoUpdater (AU) equipped. Under customer control automatically updates the models when they are loaded into X-Plane
7. Package includes STMA’s latest AutoUpdater (AU) equipped HangarOps plugin.KANSAN Version notes (wikipedia)
Bombing and gunnery trainer for USAAF derived from AT-7, fuselage had small, circular cabin windows, bombardier position in nose, and bomb bay; gunnery trainers were also fitted with two or three .30-caliber machine guns, early models (the first 150 built) had a single .30-cal AN-M2 in a Beechcraft-manufactured top turret, later models used a Crocker Wheeler twin .30-cal top turret, a bottom tunnel gun was used for tail gunner training, 1,582 built for USAAF orders
There are two versions in the package:
Navigator Version
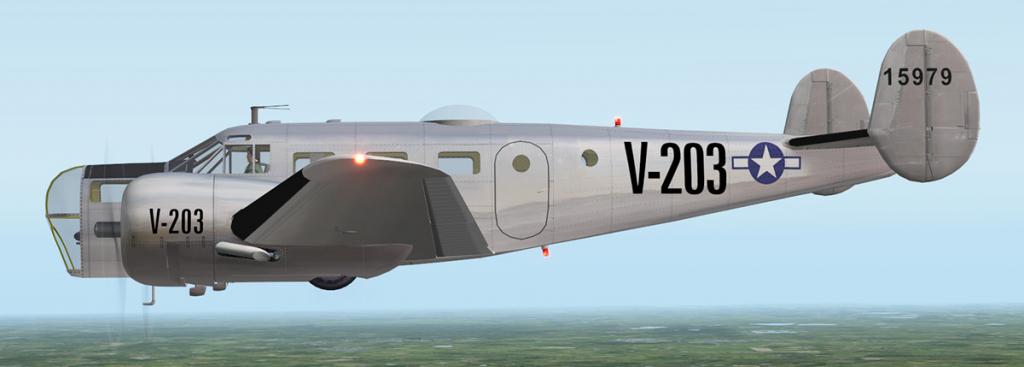
Bomber Version
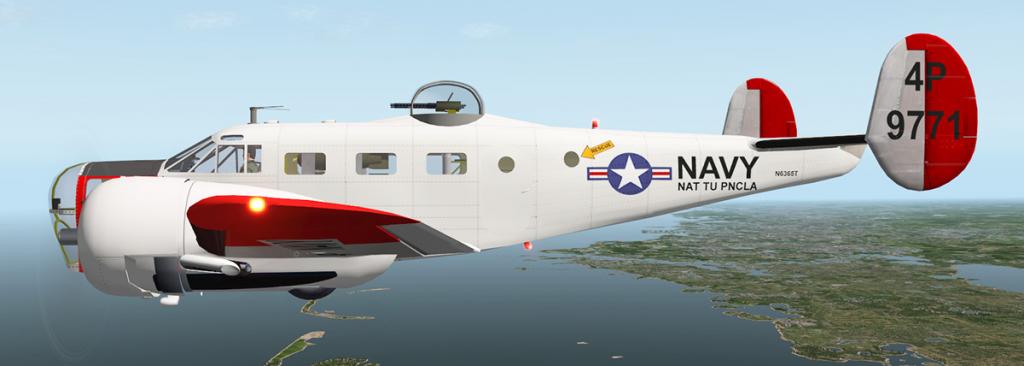
Half panel cockpit is unusual and interesting and both the yokes for the pilot and co-pilot can be hidden. Panel is comprehensive and can be seen from both flying positions.
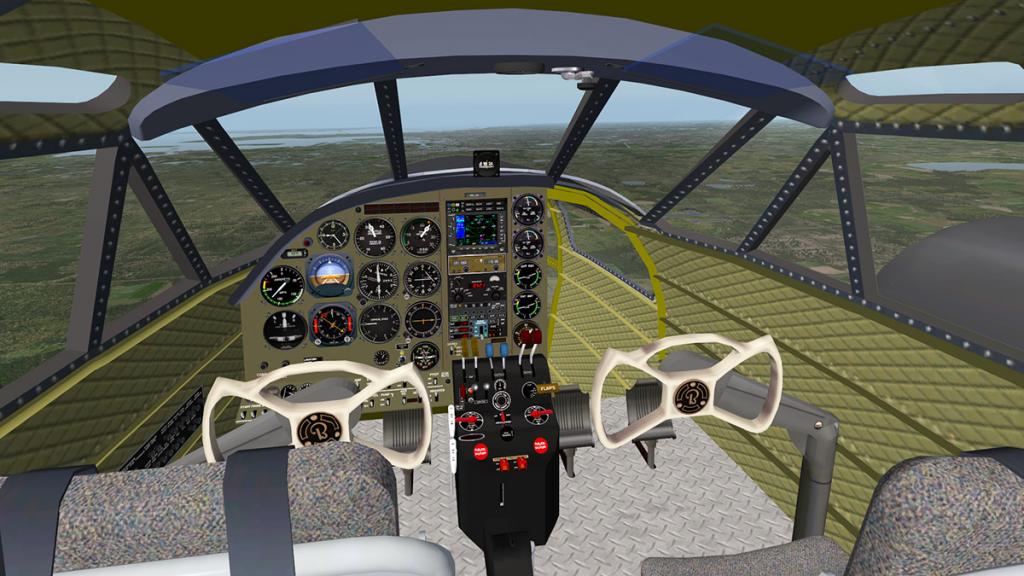
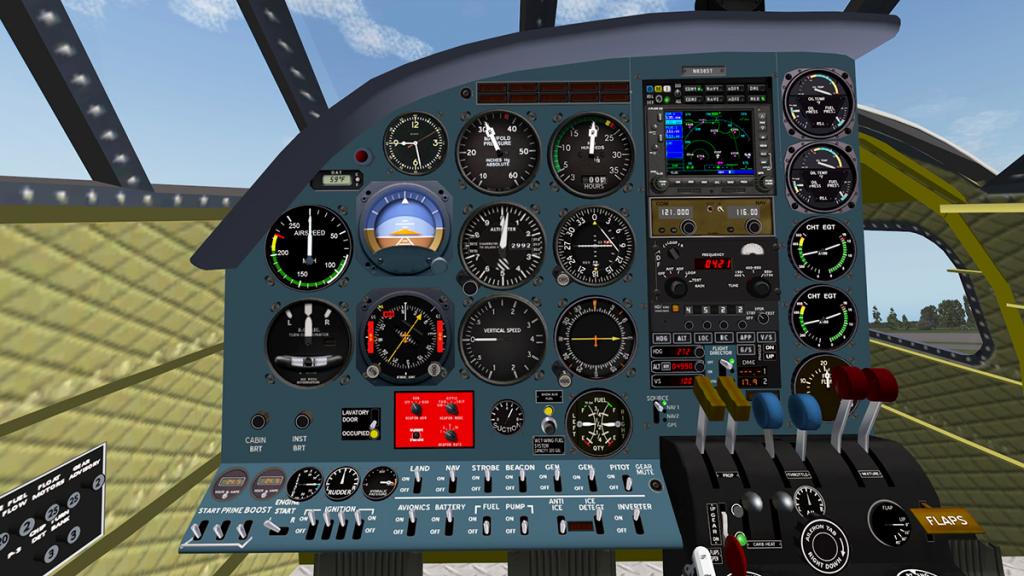

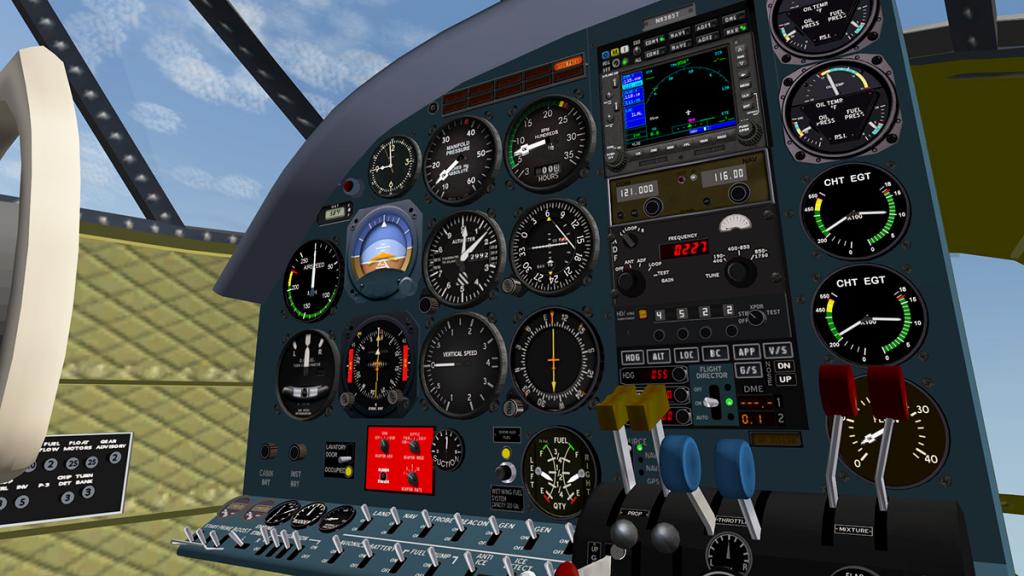
In the rear there is seating (Navigation) or Bomb Racks (Bomber), and the bombs shake around quite turbulently and it feels quite unnerving with all that explosive power bouncing around just behind you.
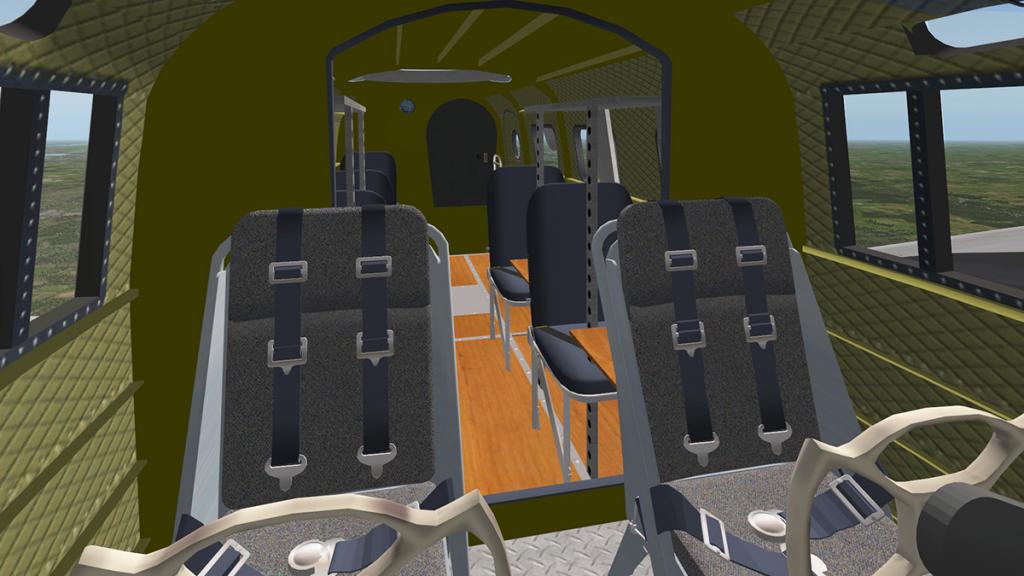

There is both Navigation and Bomber positions forward, the bomber panel has a full set of controls and built in moving map to drop the armaments.
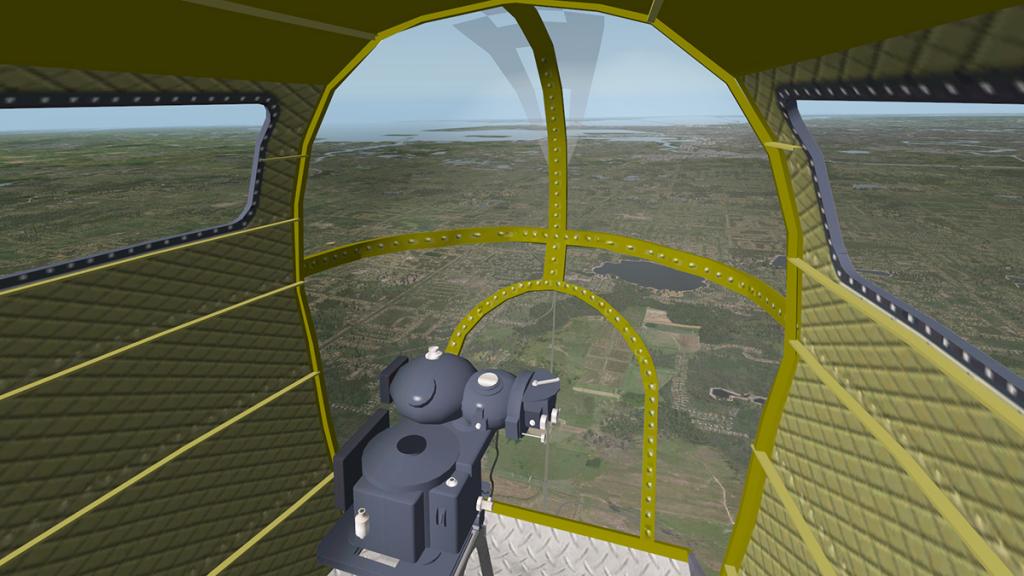
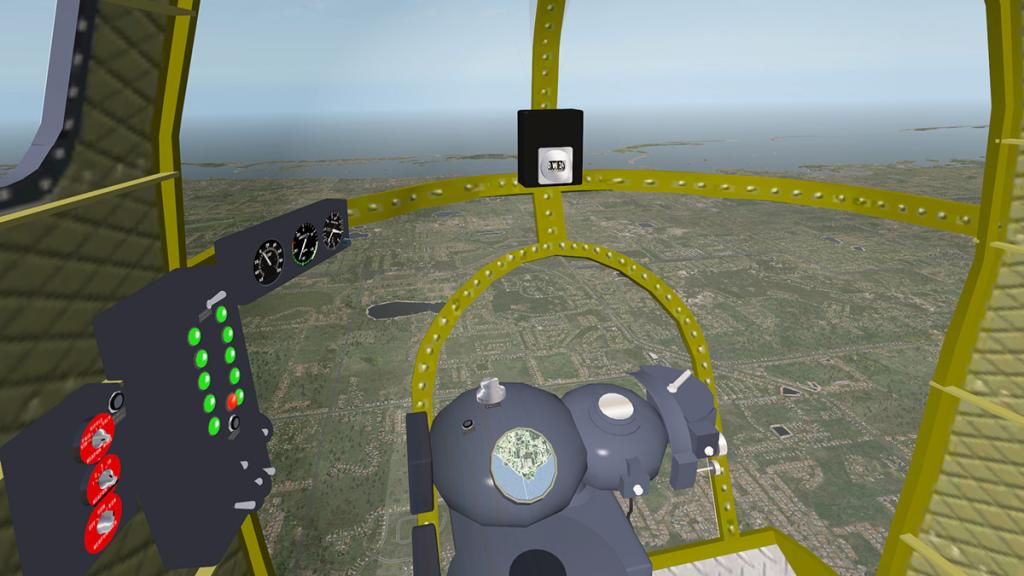
You can switch between the pilot's position and the top gunners position by pressing a button on the panel.
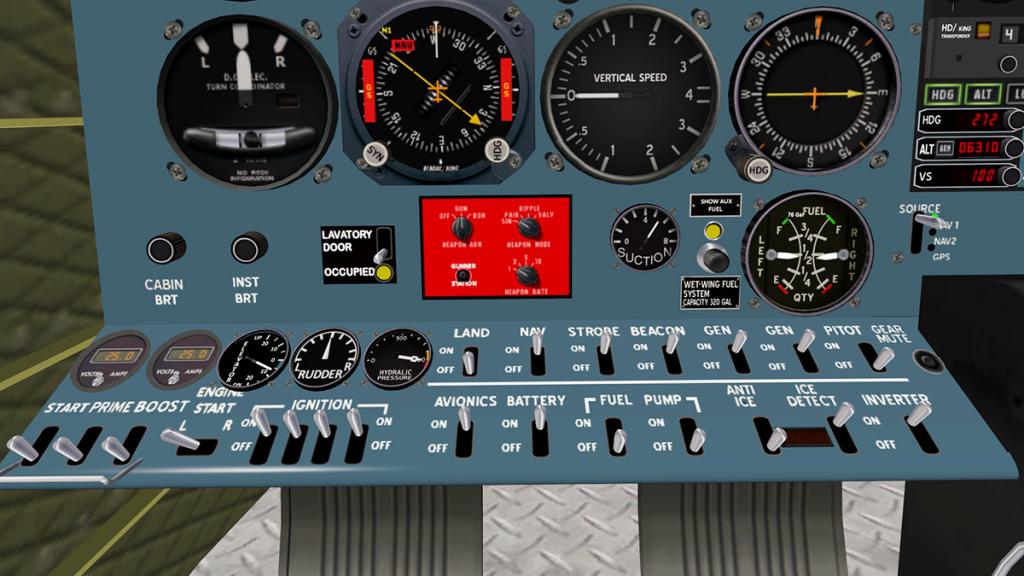
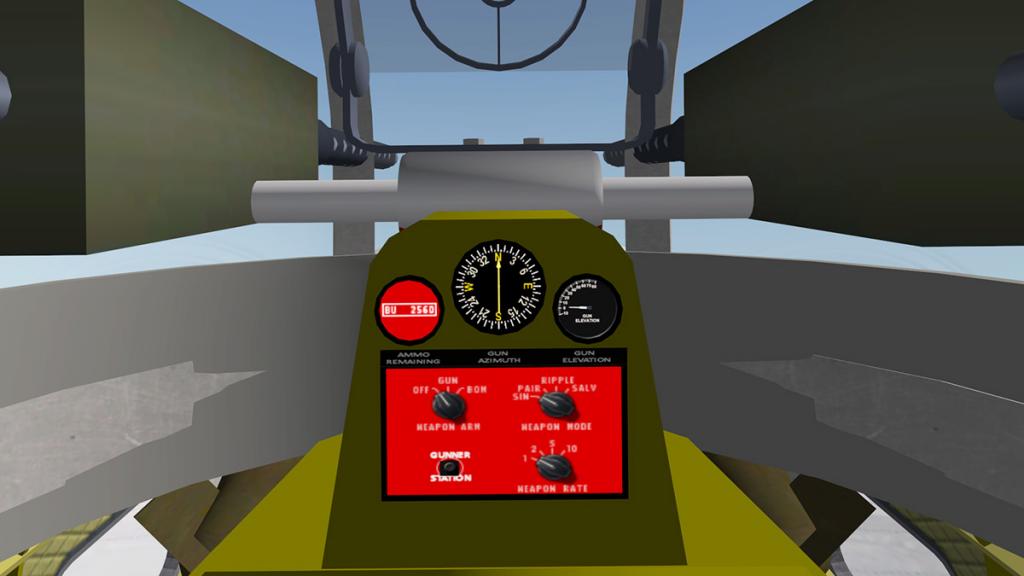
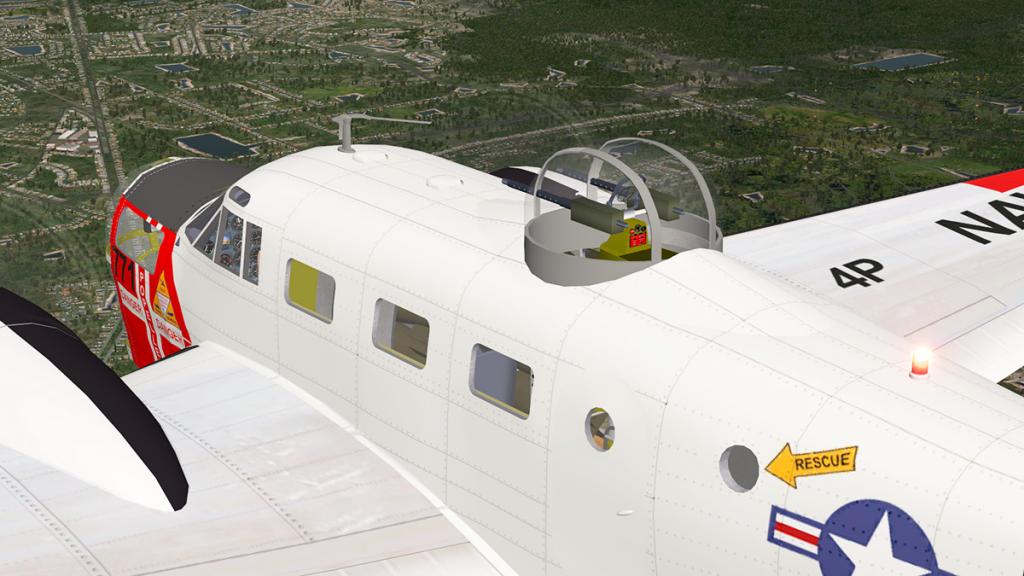

Good pop-out Menu has all doors (open/close), Yokes (hide), Ground Elements and tow tug represented.
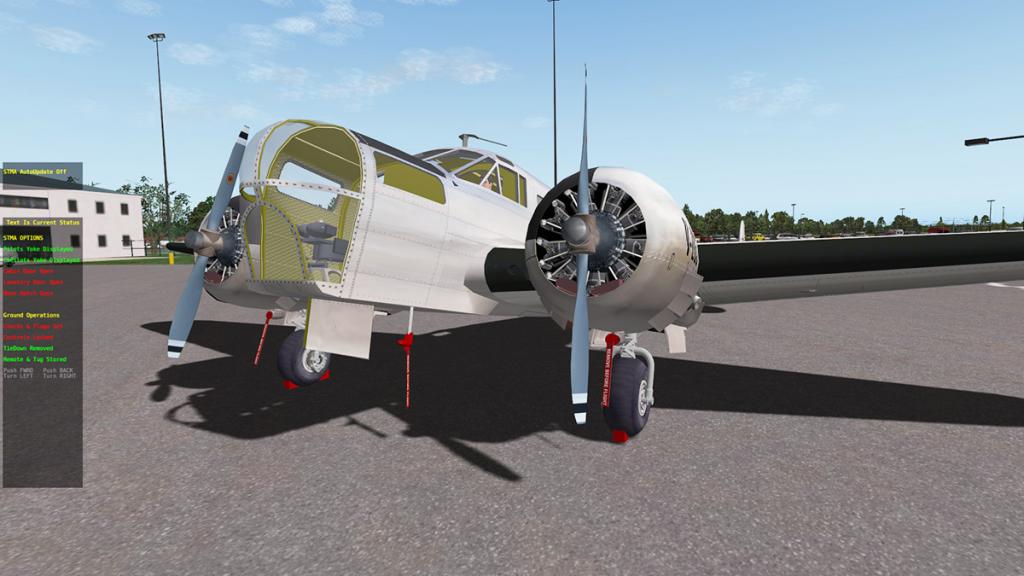
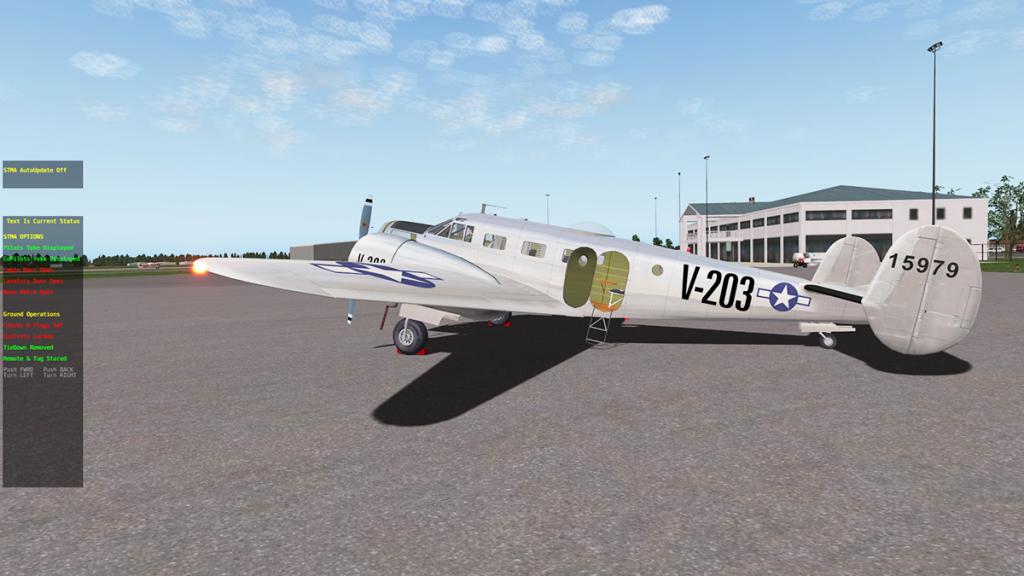
Both variants come with four liveries: M78, MS JO, US Navy and V-203
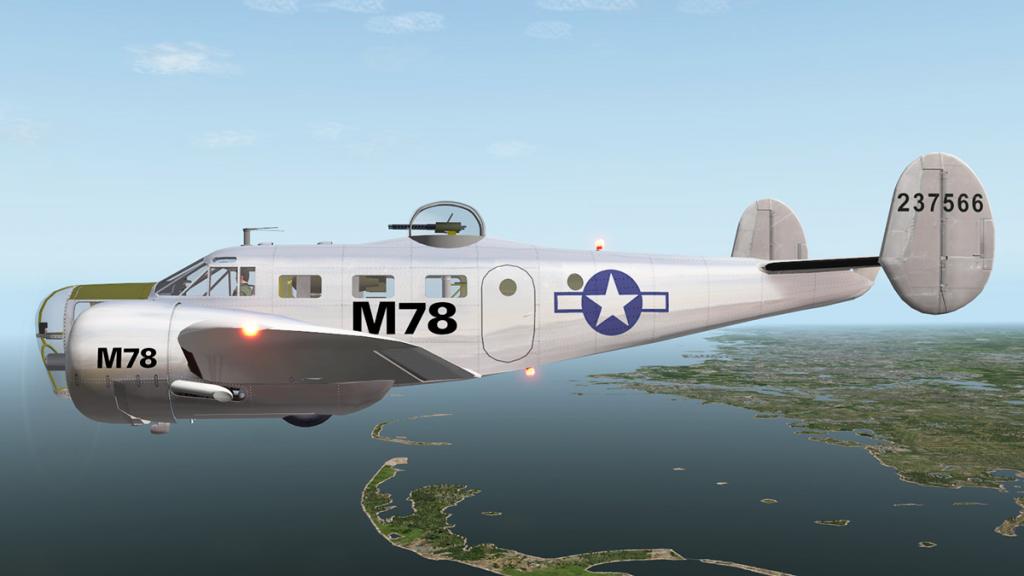


The US Navy is the best of the bunch.
The aircraft comes with STMA's new automatic update system (you can turn it off if you wish to) that will check everytime you fly the Beech AT11 and do any updates automatically, it works and is very clever and you will know you will always have the latest version.
The Beechcraft AT11 Kansan is now available.
_____________________________________________________________________________________
The Beechcraft AT11 Kansan by Shade Tree Micro Aviation is NOW available from the X-Plane.Org Store here :
And is priced at only US$29.95
Requirements:
X-Plane 10.50+ (any edition)
Windows or Mac ( sorry no Linux version at this time)
1Gb+ VRAM recommended______________________________________________________________________
Stephen Dutton
22nd September 2016
Copyright©X-Plane Reviews: X-PlaneReviews 2016
-
News! - Aircraft Released! : Aero Commander 500S by Nimbus Simulation Studios
Nimbus has released an aircraft called the Aero Commander 500S. If you think that Nimbus is a new developer to X-Plane then your wrong, they are actually an old X-Plane developer, but of sceneries and not aircraft. So this excellent popular Aero Commander is their first foray into fixed-wing flight.


A quick circuit flight notes that this is a great aircraft, with lots of great features including:
Beautiful 3D model- HD textures
- Custom sounds
- Pilots and passengers
- Original AF-520 autopilot.
- Optional GPS
- Beautiful night lightning
- Normal maps
- Custom systems (autopilot, hydraulic failure, fuel)
- 4 liveries and more coming
- Lots of animations and details
Nice Reflections- Dynamic fuselage reflections
- Instruments reflections
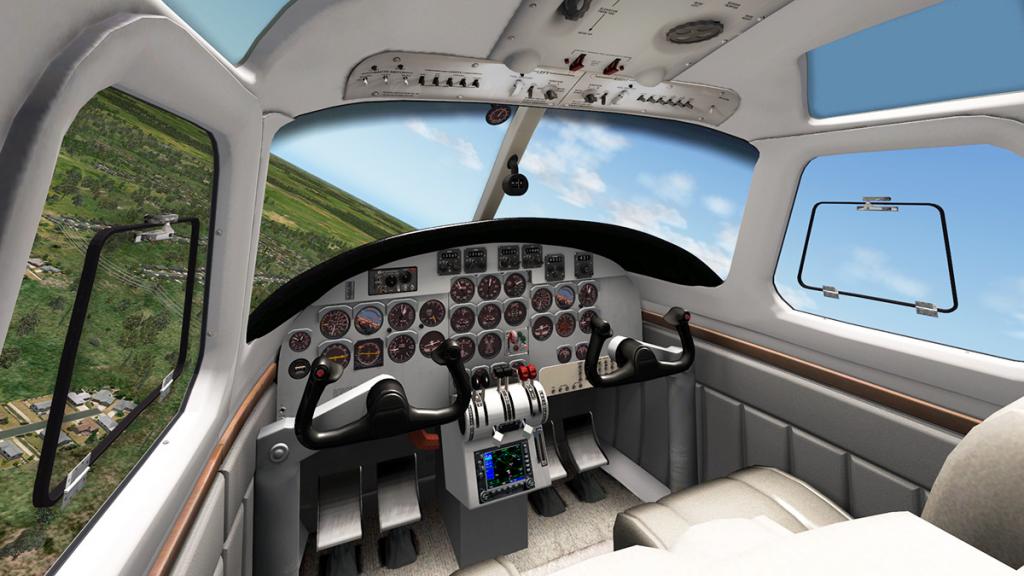
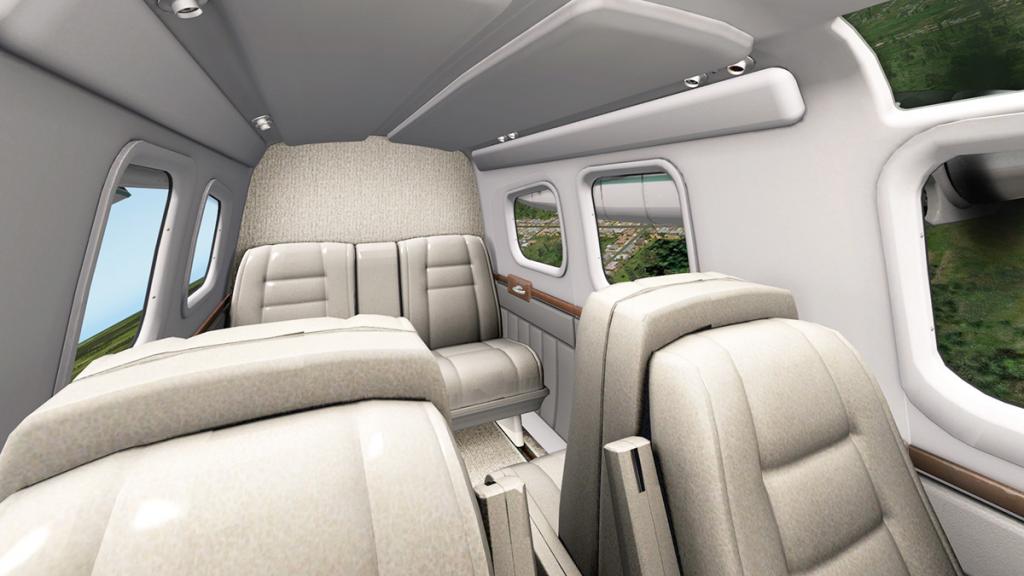
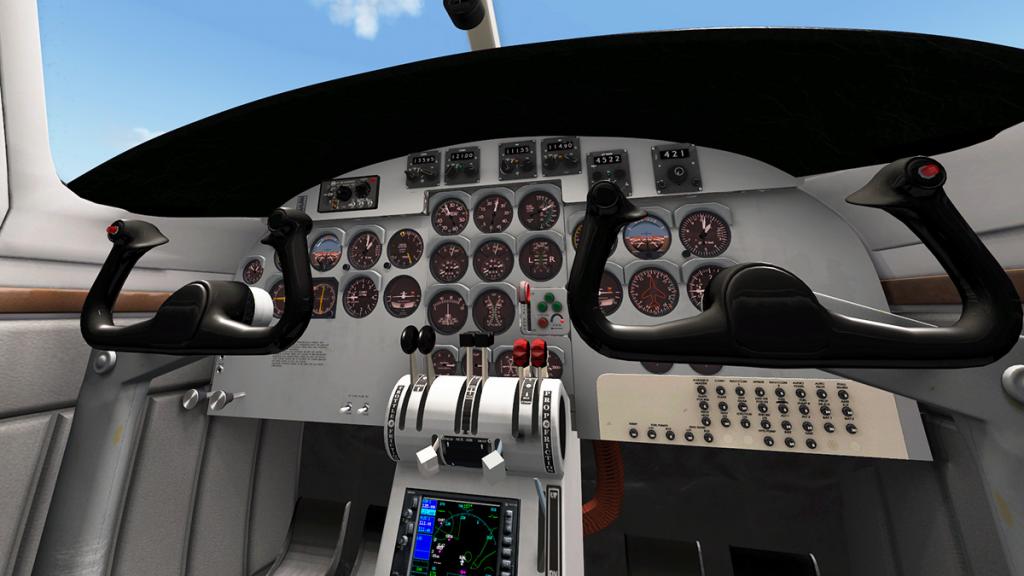
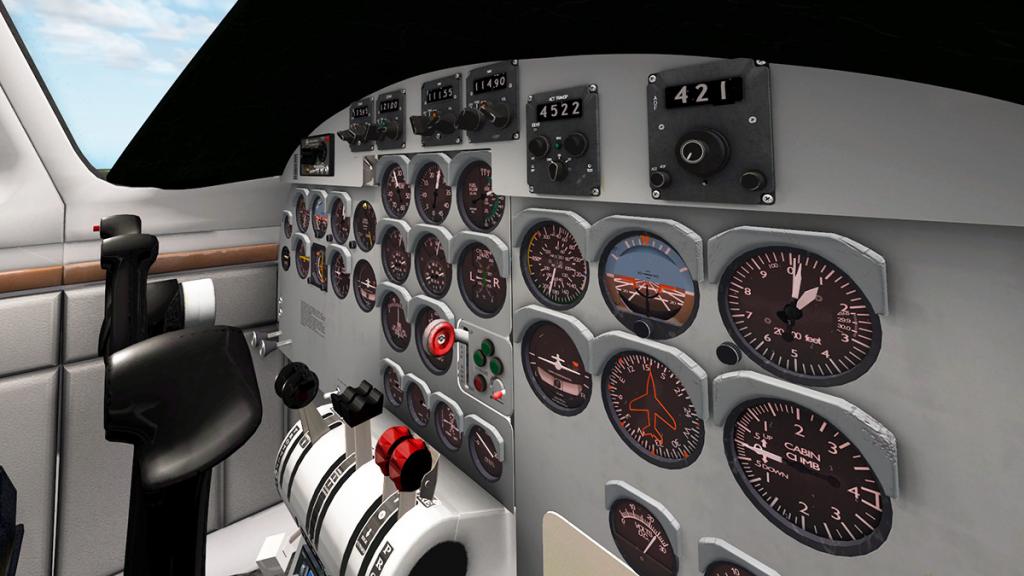
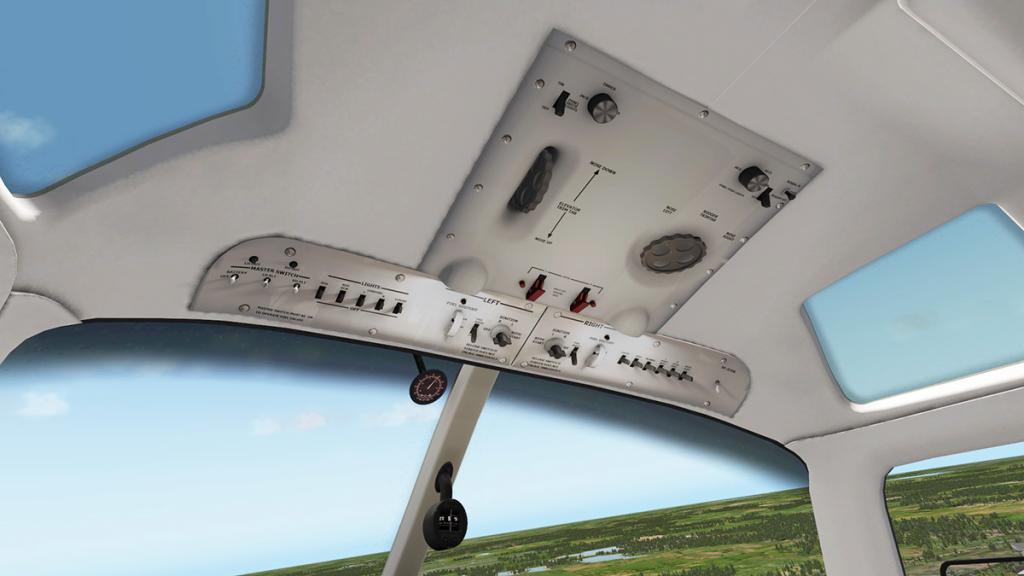
 There are three liveries, White and Blue, Green/Black and Red/Grey with more noted as coming.
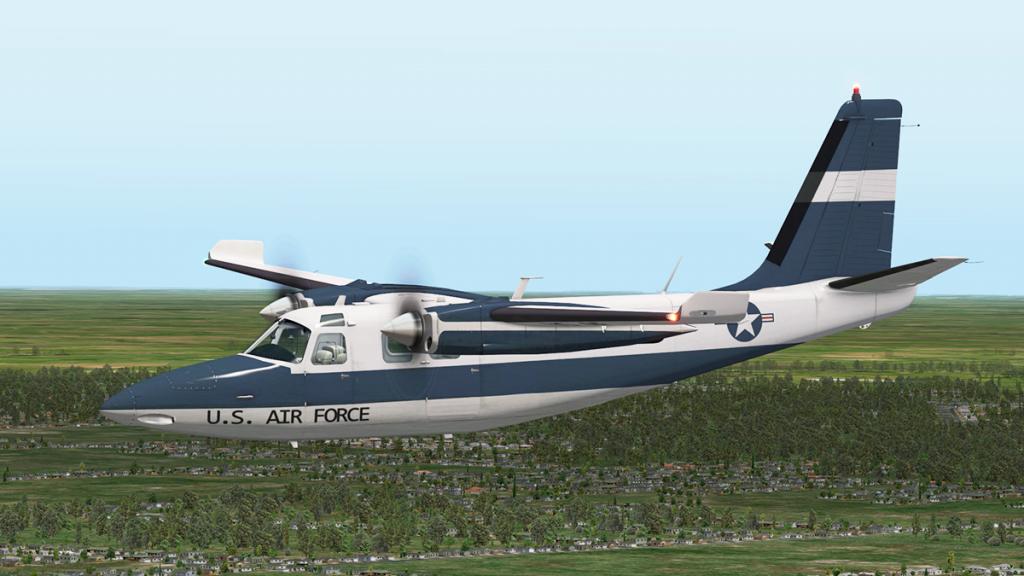

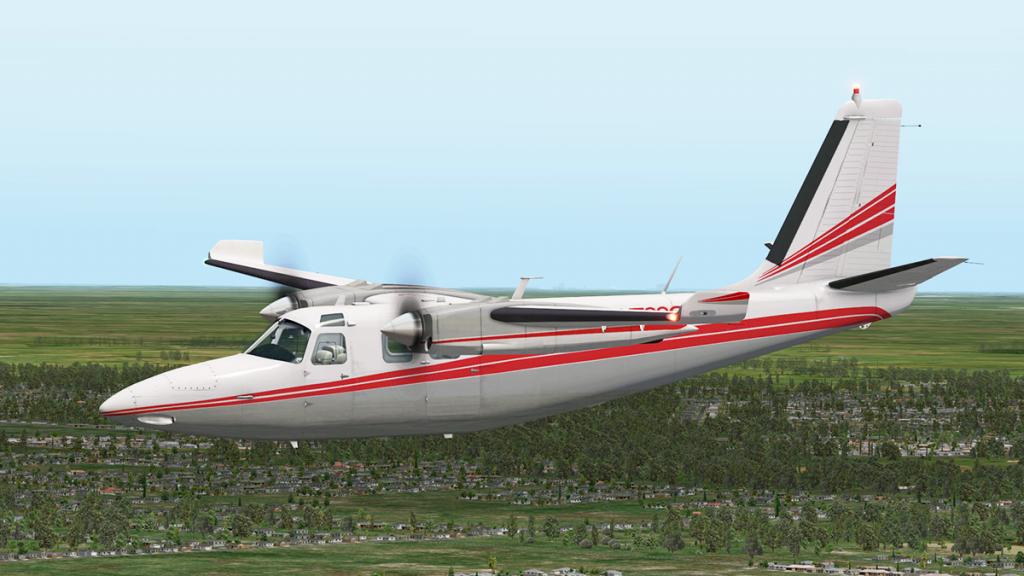 The two menus are good with easy refueling and weights.
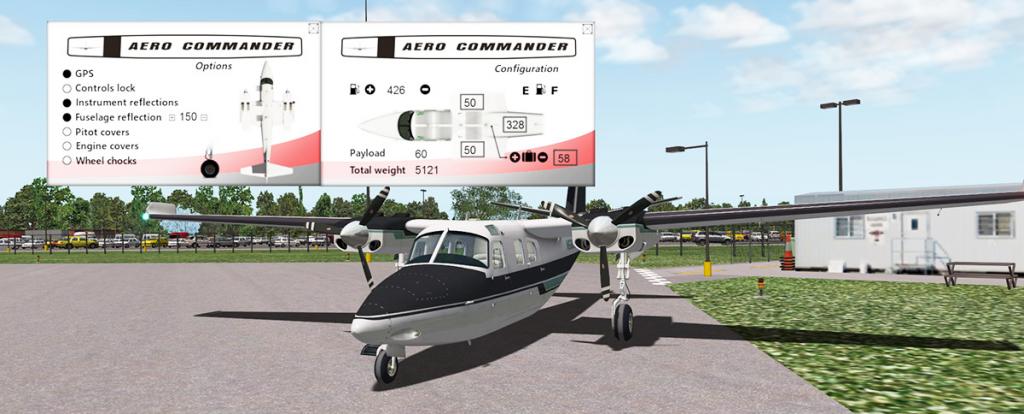 Night lighting is different, but good... nice red dials.
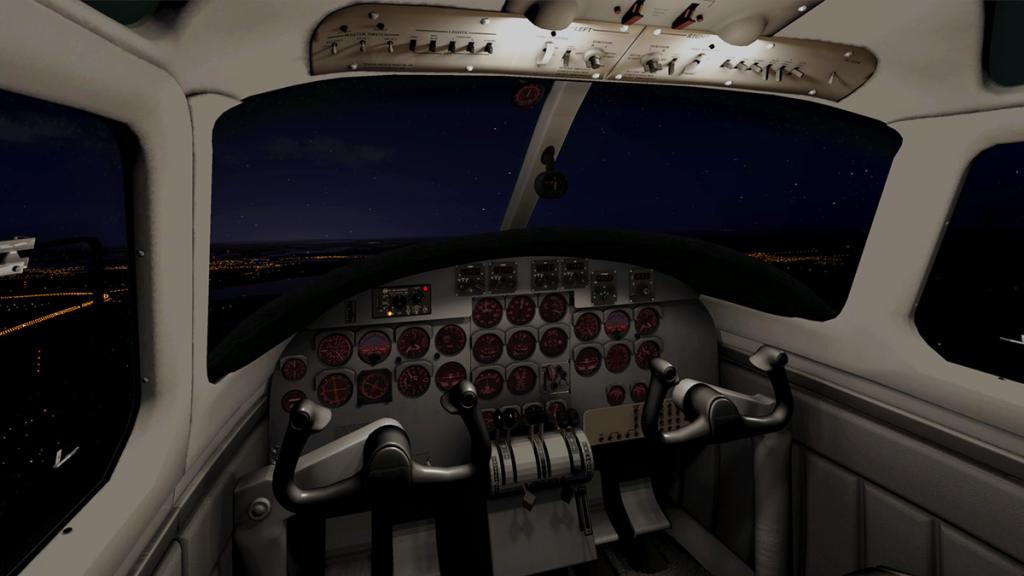
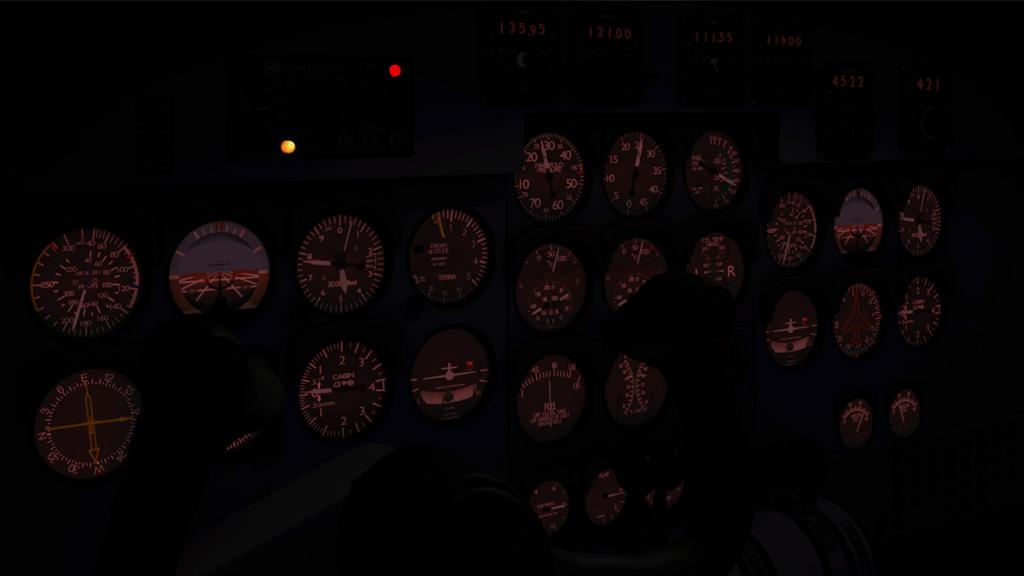 This aircraft is a replica of the Aero Commander 500S/Shrike variant with the pointed nose and squared off tail and comes with two 290 hp Lycoming IO-540 engines. The 500S is the most popular variant of the Aero Commander with over 300 built.
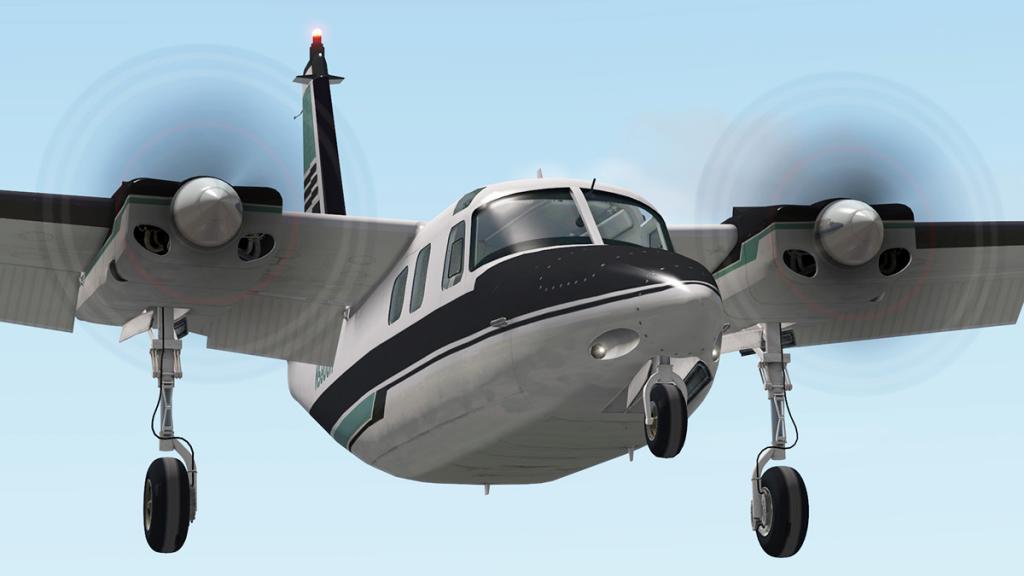

_____________________________________________________________________________________
The Aero Commander 500S by Nimbus Simulation Studios is NOW available from the X-Plane.Org Store here :
And is priced at only US$27.95
Requirements:
X-Plane 10.50+ (Any edition) 64bit mode
Windows, Mac, Linux (64bit OS required)1Gb VRAM Minimum - 2Gb+ VRAM Recommended______________________________________________________________________
Stephen Dutton
21st September 2016
Copyright©X-Plane Reviews: X-PlaneReviews 2016
-
15 hours ago, Guest guest said:
i have an issue all the dials read 9999 or 999 and i always have an overspeed warning plz help
Not enough info? Is this a new installation, upgraded up to 10.50, have you got ALL the Microsoft Visual C++ Redistributable Packages installed?... the last one would be my first check... SD
-
News! - Plugin update : Simcoders update REP to v2.5.1


Simcoders has done a very small but important update to their Reality Expansion Packs (REP) for the Carenado Cessna CT210 and the Bonanza F33 and V35.
Item covered in this update is related to the braking system which had a bug related to the hardware rudder pedals algorithm. Because of this bug, the joystick axis were not managed correctly, resulting in the toe brakes to work only partially.
Version 2.5.1 is meant to target this issue and to make your rudder pedals to work correctly.
The update also covers and fixes some minor things in the C210, such the altimeters knob manipulator and the aileron trim tab.
Just go to your account at the X-Plane.Org Store to update to the new v2,5.1 version as it is available now.
X-PlaneReviews has covered the SimCoders REP packages, so if you want more information then checkout both articles here:
Aircraft Update - CT210 Centurion II v3.1 by Carenado + Reality Expansion Pack by SimCoders
News! - Released - SimCoders Reality Expansion Pack Bonanza F33A
______________________________________________________________________
Stephen Dutton
18th September 2016
Copyright©X-Plane Reviews: X-PlaneReviews 2016

-
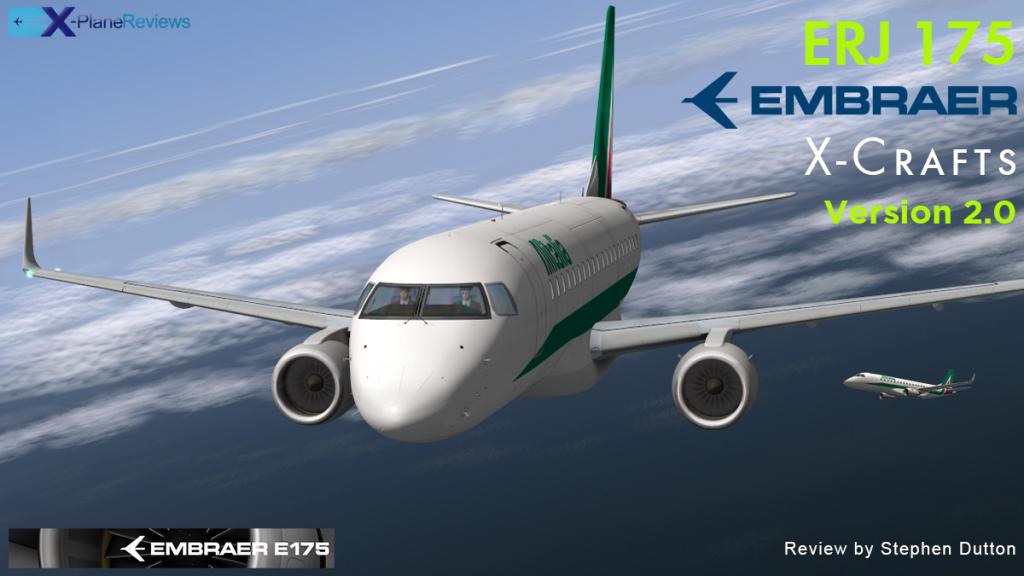
Aircraft Review : Embraer E-175 v2.0 by X-Crafts
The Brazilian Embraer family of regional aircraft has been successful in one of the most successful niche markets in aviation in the last few decades. While the big boys and girls at Boeing and Airbus slugged it out for the single-aisle 150-180 seater market. Embraer and Canada's Bombardier’s CRJ Series quietly created a whole new category in the 60 -100 seater regional markets and those markets are now one of the most contested markets for future sales with Bombardier’s entry into service (EIS) C-Series and Embraer with their updated E2 Series.
In X-Plane there is a similar reflection of Embraer E-175 and E190/5's from both Supercritical Simulation Group (SSG) and X-Crafts versions of the same series. SSG only last month released their latest version of their E-175 called the "Evolution" and here is the v2.0 release of X-Crafts E-175. With both coming at almost the same time it does look like a coincidence or even as a "tit for tat" release, but that is far from the truth as they just fell in around each other or were in the same places in the development cycle, as the early X-Crafts beta v2.0 versions were available well before the SSG version was released.
This is also not going to be a direct comparison review between the two versions either, that will be done at another time, and I admit it would be a great comparison that is worth recording. But here the focus is just on the v2.0 release of the X-Crafts aircraft.


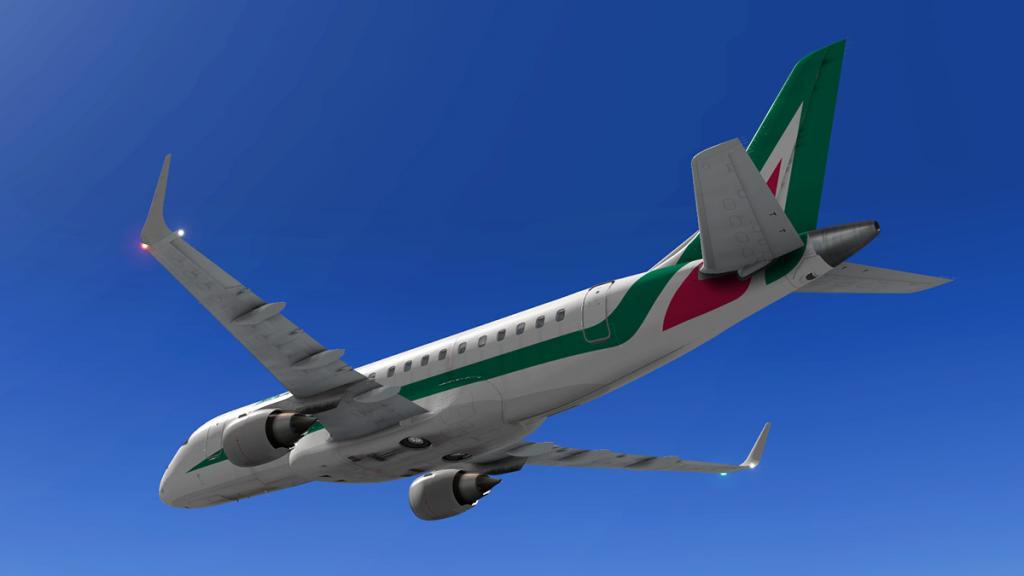

The original release (v1.0) of the X-Crafts E-175 was just before Christmas 2015. And even at this early stage this E-Jet was significantly the best of all the E-Jet family series for X-Plane and building upon the high standard for the time of the first E-Jet from X-Crafts with their E-195LR.
X-Crafts E-175 v2.0
Externally v2.0 is almost exactly the same as the last version. Which is a good thing and not a bad one as the biggest feature of X-Crafts E-Jets was the quality of its external airframe which came with a very nice shine to the fuselage, and the aircraft always looked very good in great lighting conditions. Only changes externally are the engine fans now rotate the same way and there is now more added screws around the wings and fuselage (it is of course very worrying that you flew with not enough screws to hold it all together in the earlier versions). The front nose gear was not animated before (did you notice?) it is now and the aircraft looks better for that.
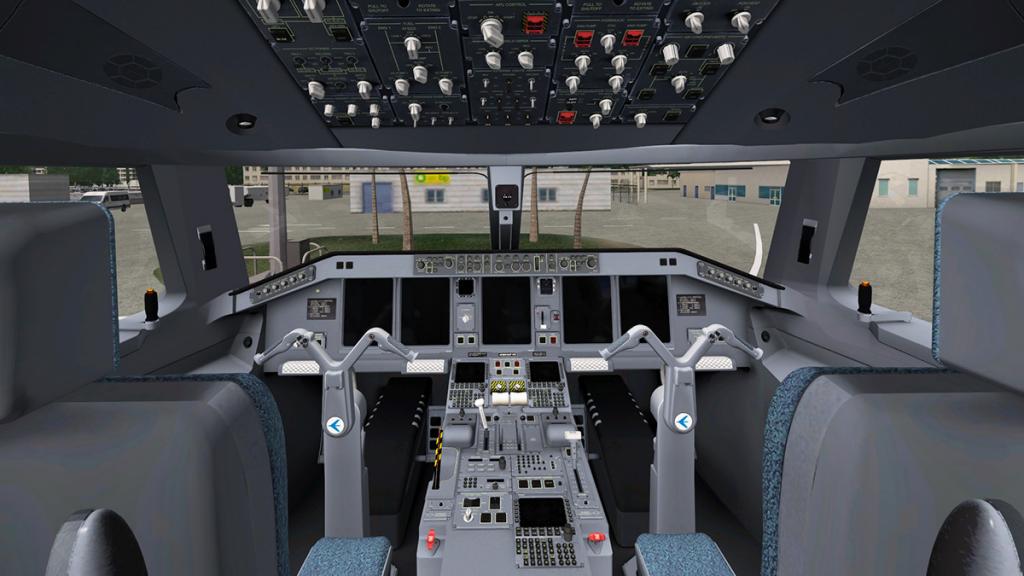
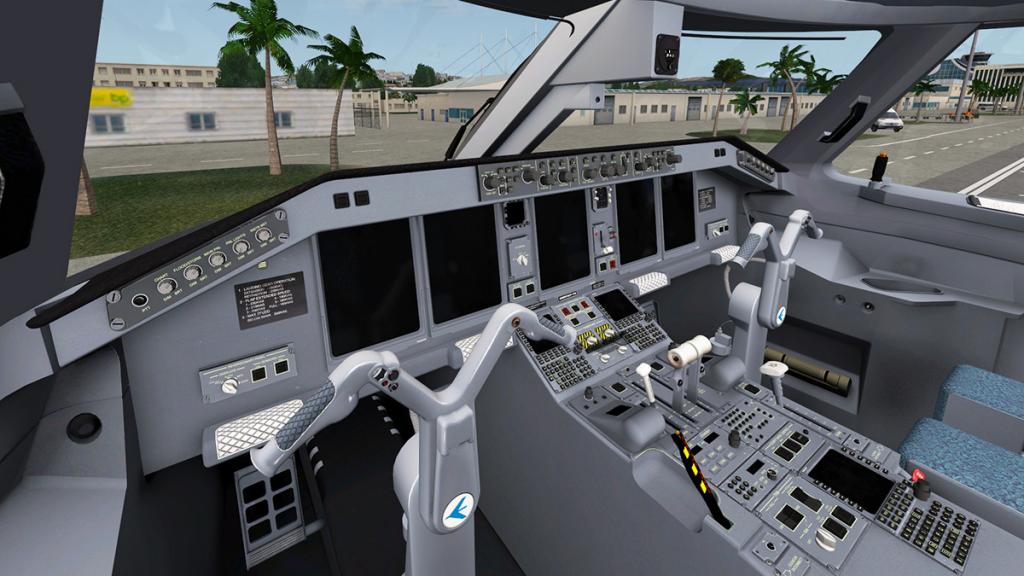
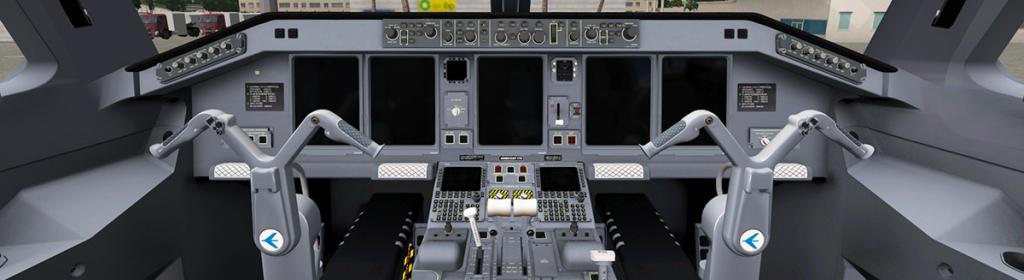
With the aircraft powered down the cockpit looks great, again at first glance it does not look that different to the earlier version. But to note in this power off view the panel reflections are very good and authentic.


Power on and the panels look good, but again not much different on the face of it all. The changes for v2.0 are small and subtle in fixing up the correct switchgear and knobs and small items that you thought were working before but actually were not.
The only really big visual change is the overhead panel which has been completely redone...
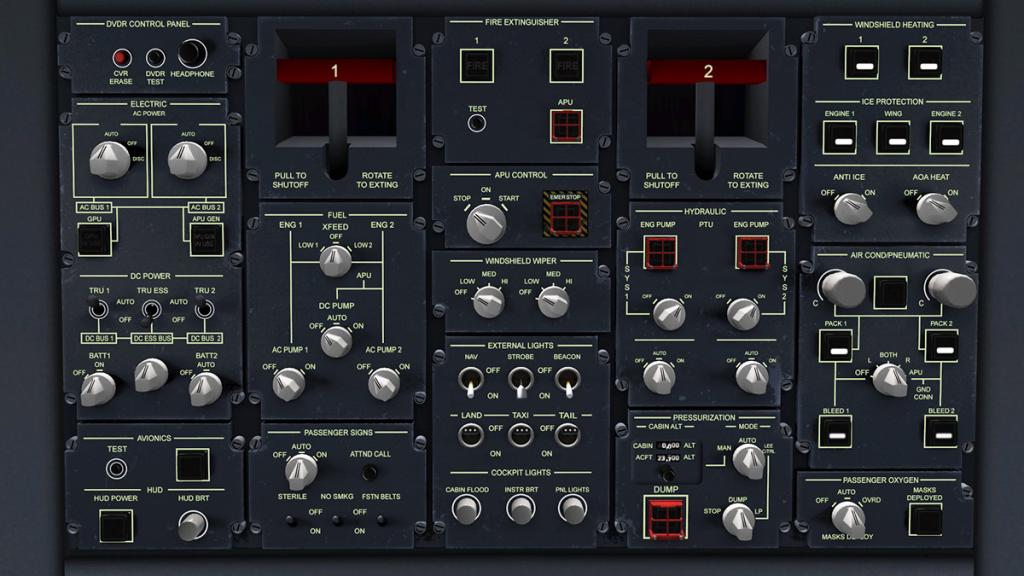
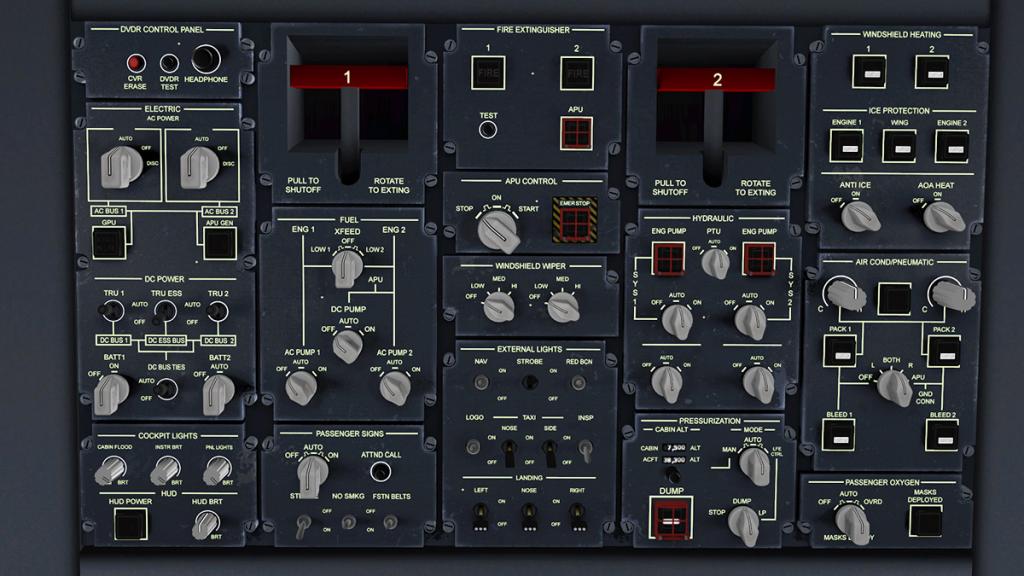
v1.1 Panel v2.0 Panel
Spot the differences? Most of the knobs have been redesigned to reflect the correct switchgear now on a real E-175. The lighting panels are completely different with the switches of different types, and the use is slightly different as well.
There is also added left and right landing light switches and there has been a removed avionics switch as it does not exist in the real aircraft. The Avionics now come on automatically with the battery 1 selection., the hydraulic knobs now also longer turn in unison, and each starts the hydraulics pump separately. If you remember on the earlier versions many of the switches were tied in together, were as you turned one switch the other activated the same way. I really didn't like this effect and most of those items have now been separated and work independently.
Tekton FMS System
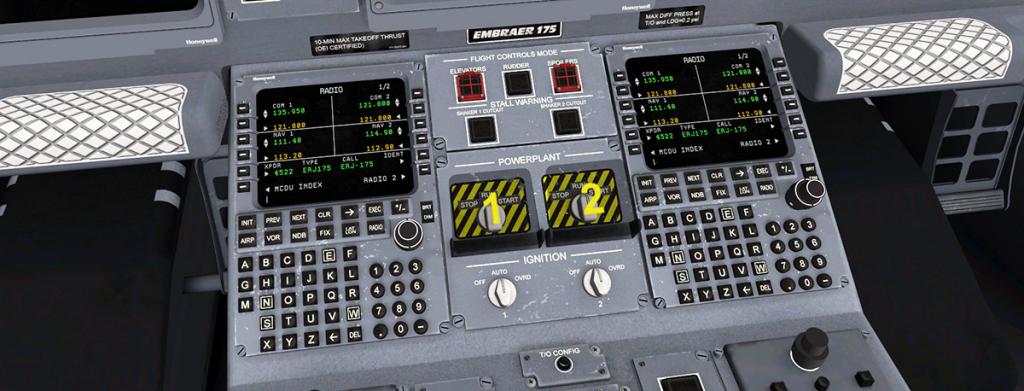
The main feature on v2.0 is the updated Tekton FMS. The built in Flight Mangement Computer (FMC) was released on the original version and had a slight update on v1.1, but here in the v2.0 version it has had a big overhaul. It still does the same flightplan layout with the three separate elements, and those are:
SID (Standard Instrument Departure) - Route - STAR (Standard Terminal Arrival Route)
You can save a route but only the center "Route" portion to a standard .fms file. When you reload it you have then rebuild the departure SID and approach STAR waypoints from scratch, so you don't reload the entire route and just fly.
My flight today is from LFMN - Nice to LIRF - Rome (Fiumicino) and we will programme the FMS to fly that route.
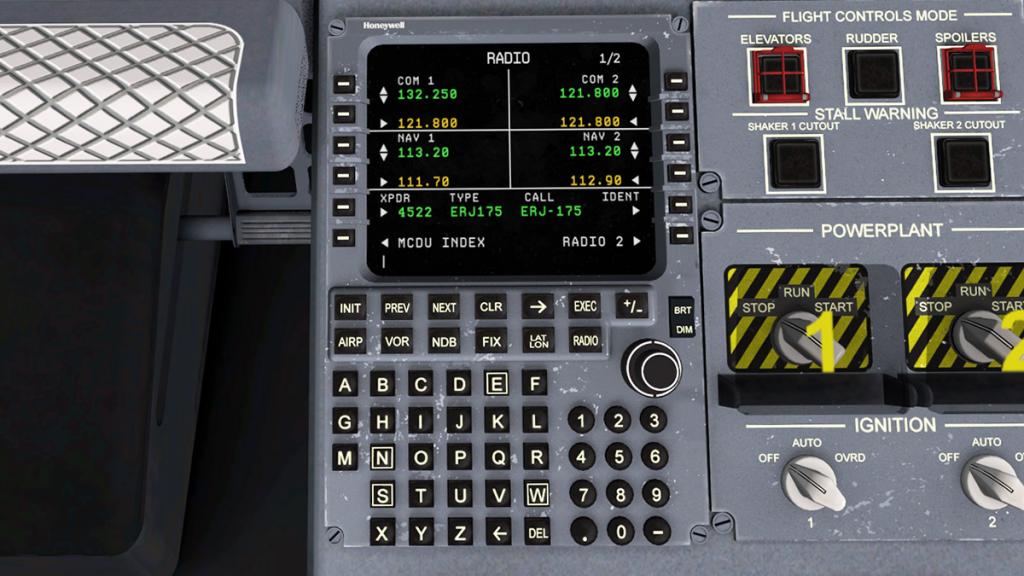
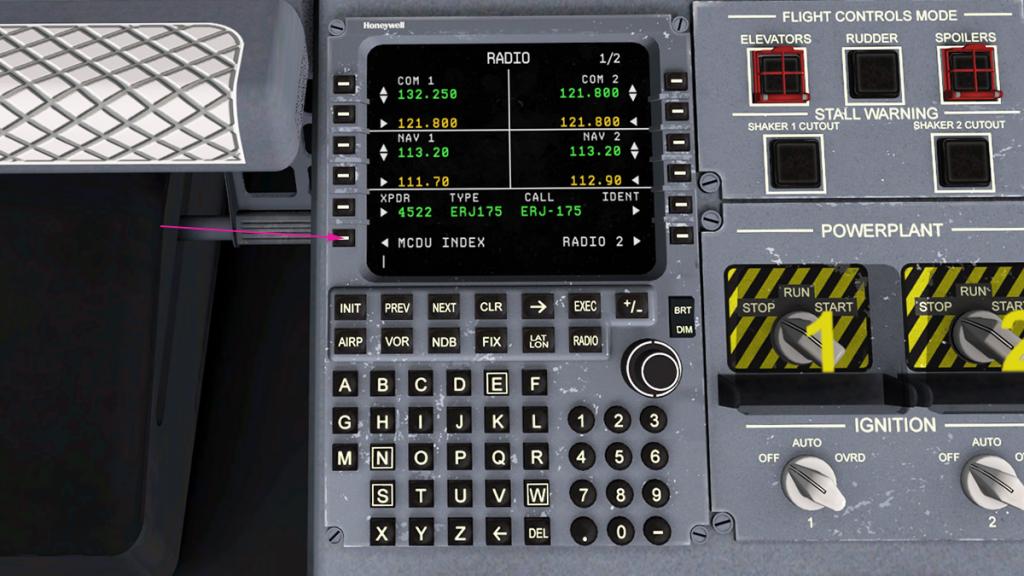
The RADIO page is now the default start up page as it is on the real FMS system (it was the MCDU INDEX page before) and to go to the MCDU INDEX you just press the L6 key.
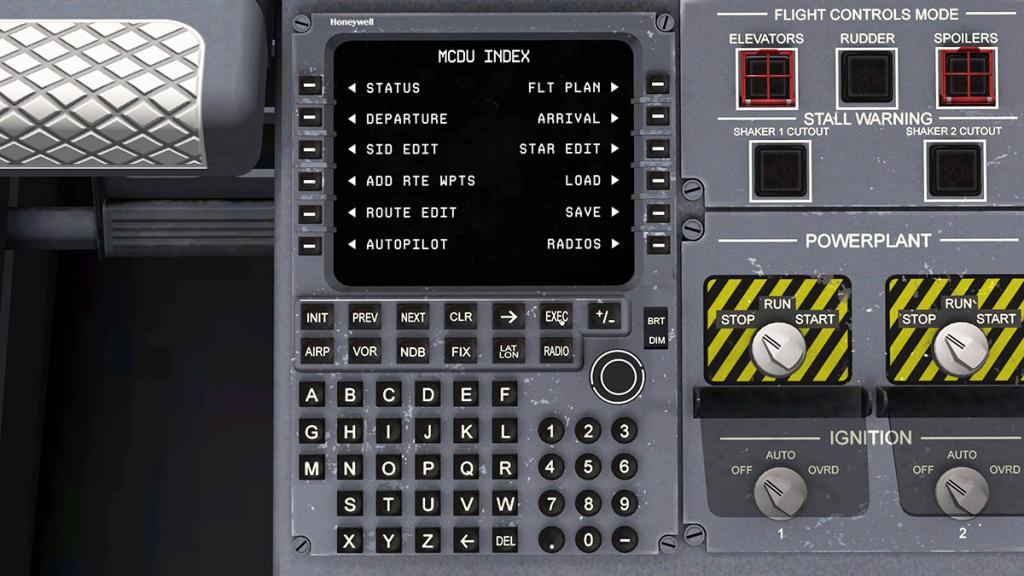

v1.1 MCDU INDEX v2.0 MCDU INDEX
There are some changes on the MCDU INDEX page from the earlier versions. Left keys are still the same, but the right key list is different with the (RK6) RADIO key gone (now selection is directly on the keyboard menu) and that is replaced by the PERF (Performance) page.
Top of the list (RK1) "FLT PLAN" is also gone and that entry has been replaced by the new "PROGRESS" page.
The rest of the input keys to insert the DEPARTURE and ARRIVAL entries, and the corresponding SID and STARS are still the same as is the ROUTE input and LOAD and SAVE (as noted the load and save only loads or saves the route center segment to .fms).
Direct keyboard input
On of the new Tekton FMS features is the excellent direct keyboard input into the MCDU FMS.
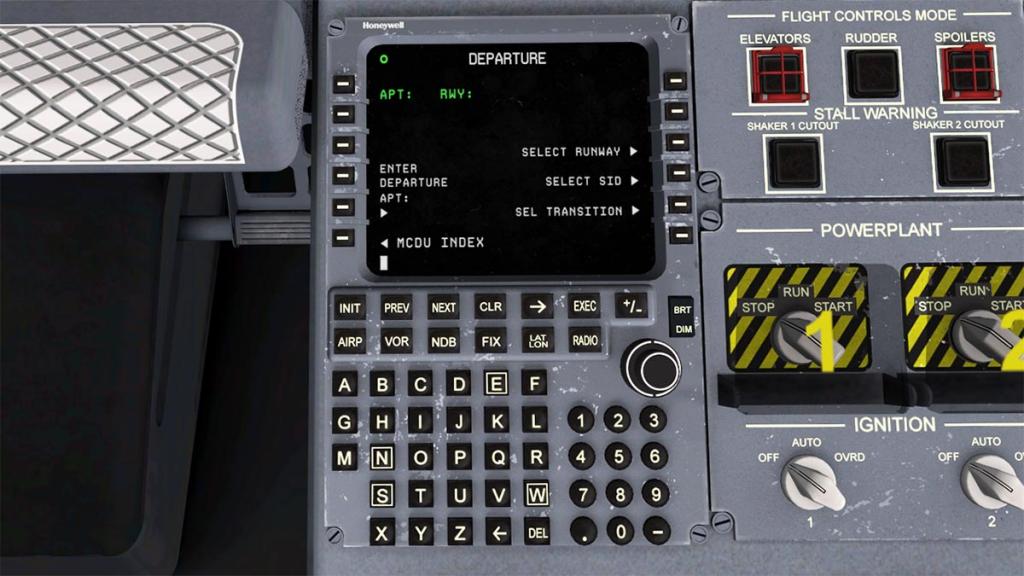
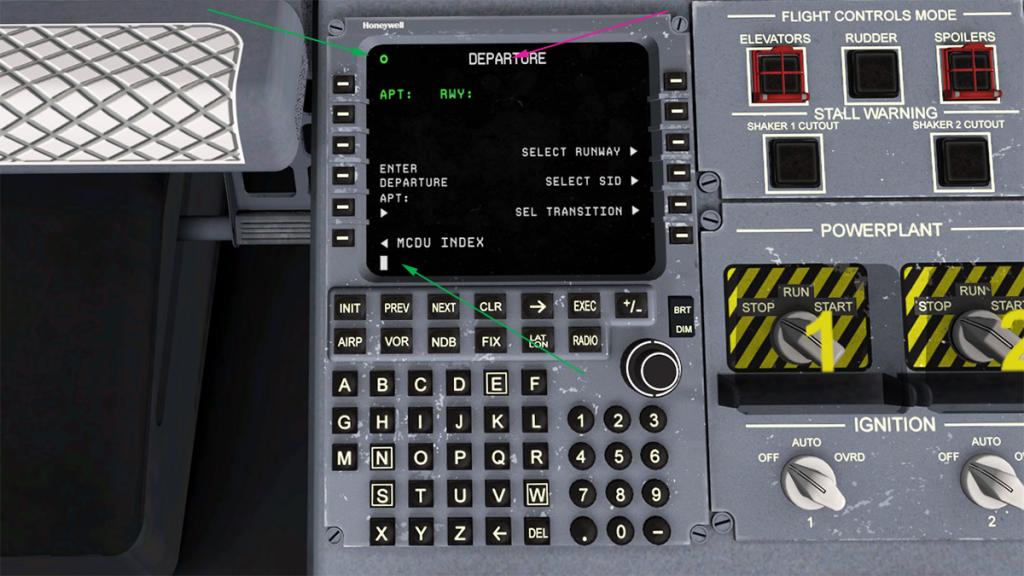
Selecting (LK2) DEPARTURE brings up the "Departure" page to input your departure airport, runway, SID and Transition. To use the direct input you just press the title on the top of the page which in this case is DEPARTURE. You are now in the active keyboard input mode as designated by the green circle O in the top left of the display. Anything you now type into the scratchpad will now be live from your keyboard, to go out of the direct input mode just press the DEPARTURE title again... simple and brilliant!
Just note that when in the active mode the usual X-Plane input is cancelled and that means any screenshots or other areas don't work, until you click out to normal again.
But you very quickly and easily use the system and navigating in and out of the active modes, it is so very easy to use and you are very quickly using it as per normal in programming the system.
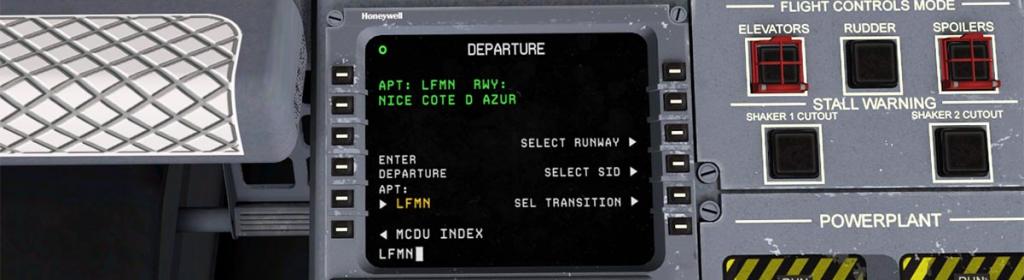
You now input all the rest of the DEPARTURE items with airport runway, SID and Transition details as you did on the earlier v1.0 version.
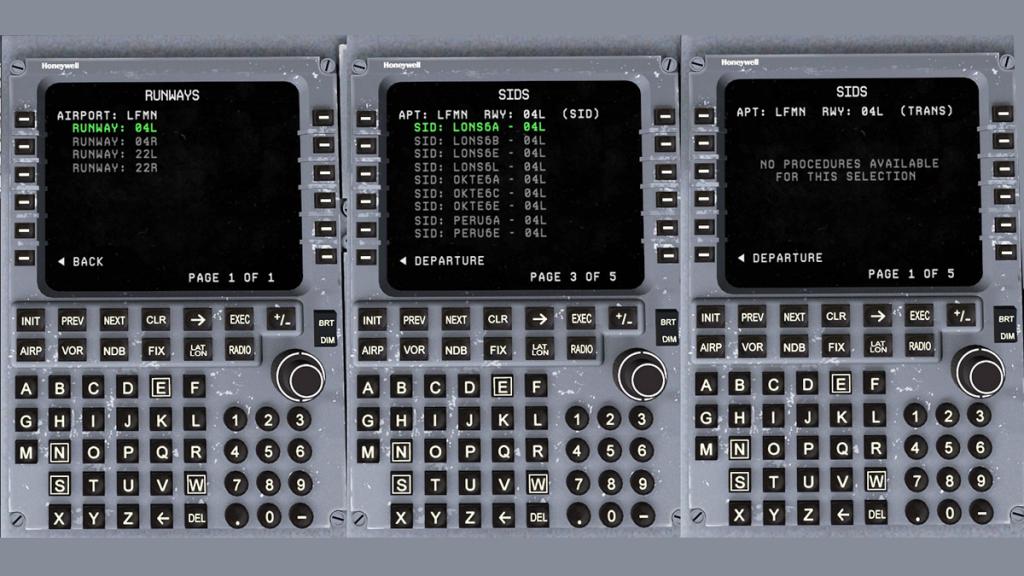
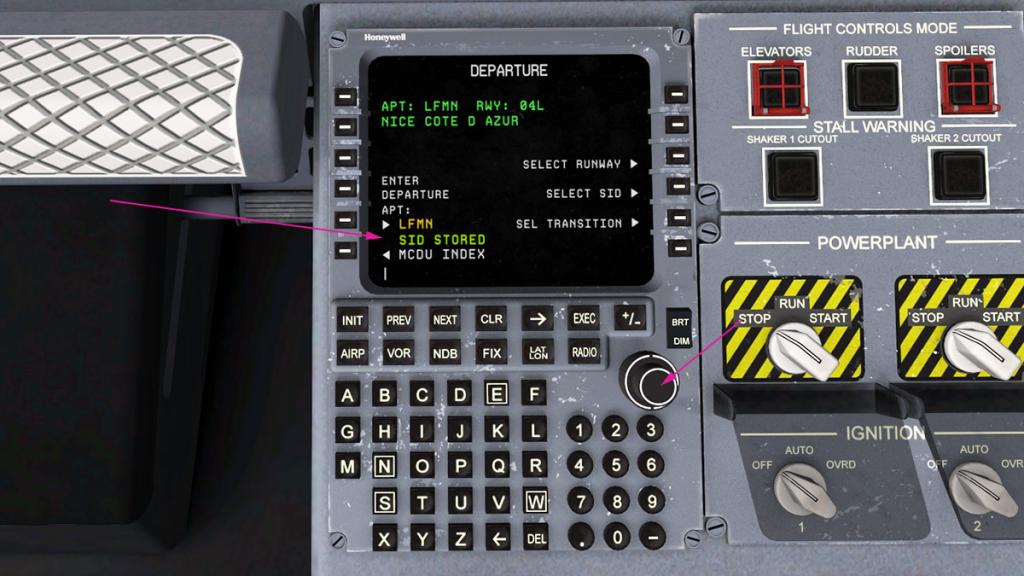
You use the knob to select and go up and down the selections, PREV or NEXT is used to go to the next page, then press the centre of the knob to activate that selection and you get a "SID STORED" note on the display.
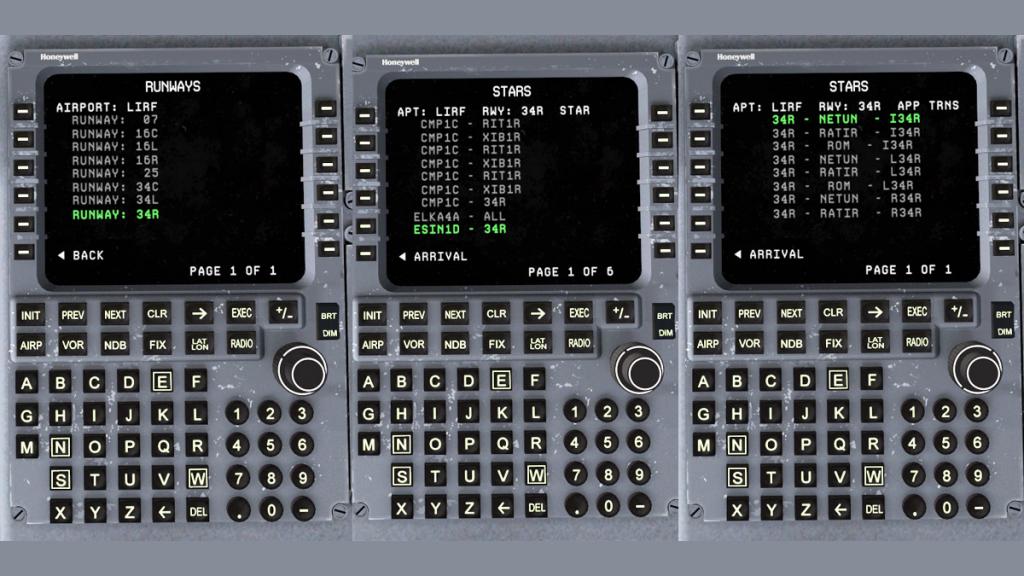
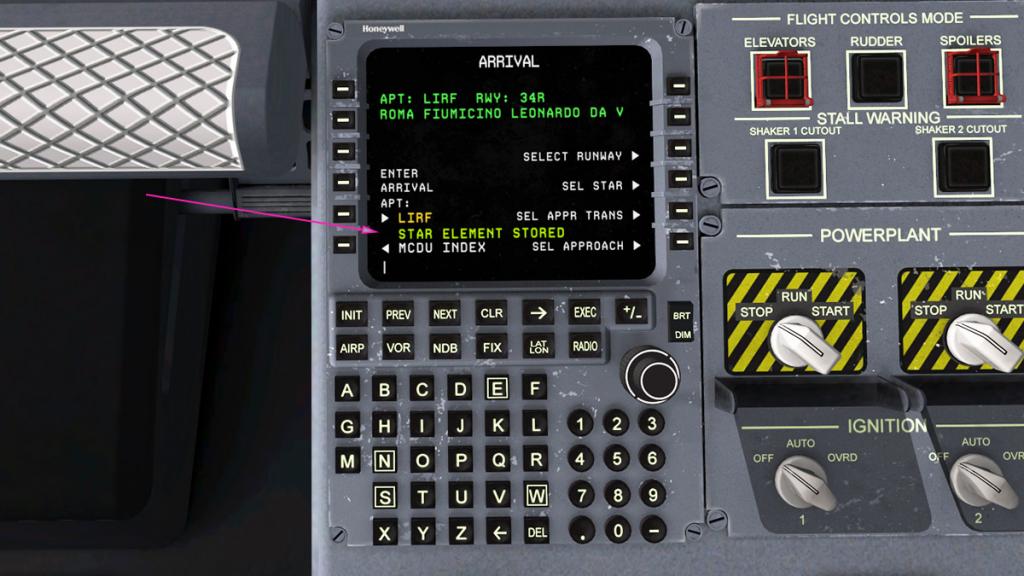
You do your STAR ARRIVAL the same way with the airport LIRF- Roma Fiumicino, then the Runway, STAR and Transition details, when done you again press the centre of the knob to activate that selection and you get a "STAR ELEMENT STORED" note on the display.
The DEP (SID) and ARR (STAR) elements are now done, so now we will fill in the center ROUTE section. This is done by pressing on the MENU INDEX page the L4 key. Select either an - Airport, VOR, NDB or FIX waypoint and add in the name of the navigation aid, you can add in the altitude here also. SAVE to insert the waypoint into the route list.


The new v2.0 version also allows you to now add in AIRWAYS. These sections are inserted by noting the last ROUTE waypoint entered or the last waypoint of your SID to enter an airway. Then choose an airway direction and finally choose the exit waypoint. Then you can add in more standard waypoints or enter a different airway as you build up your route list. When the route is completed you can see the full list by going to ROUTE EDIT, and there you can edit the list or change the route selections. I only have three waypoints as the flight is quite short from LFMN to LIFR.
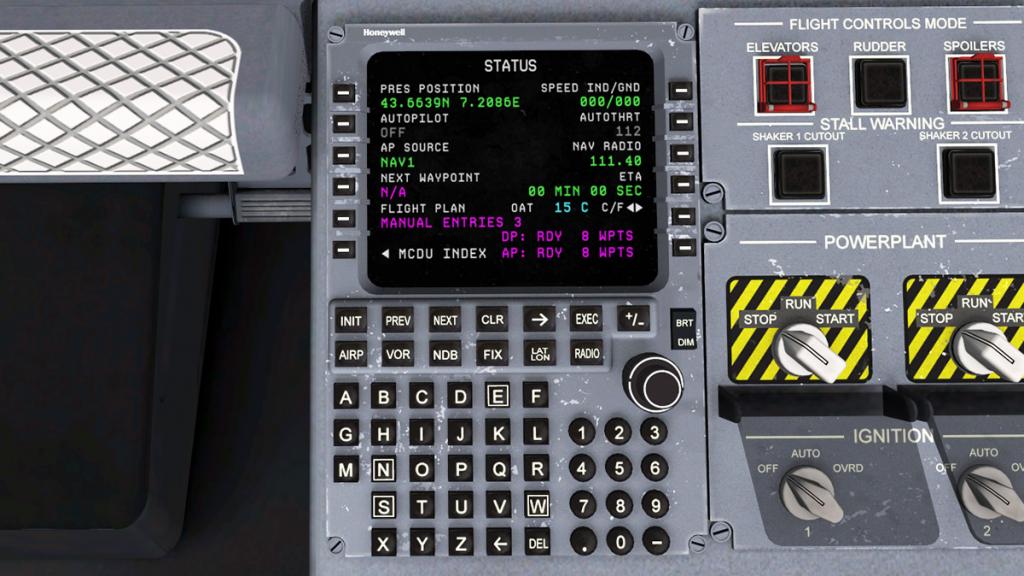

You can check the sections and the amount of waypoints inserted on the STATUS page.
You have to take a little diversion from your flightplan execution to do your PERF - Performance settings BEFORE you load in (or initialize) the flightplan...
... GoTo PERF on the MCDU INDEX page.


There are three pages to set up for the aircraft flight performance. First page is "Takeoff" With aircraft settings on the left and flap settings on the right, you can switch between either LBS or KG via RK5.
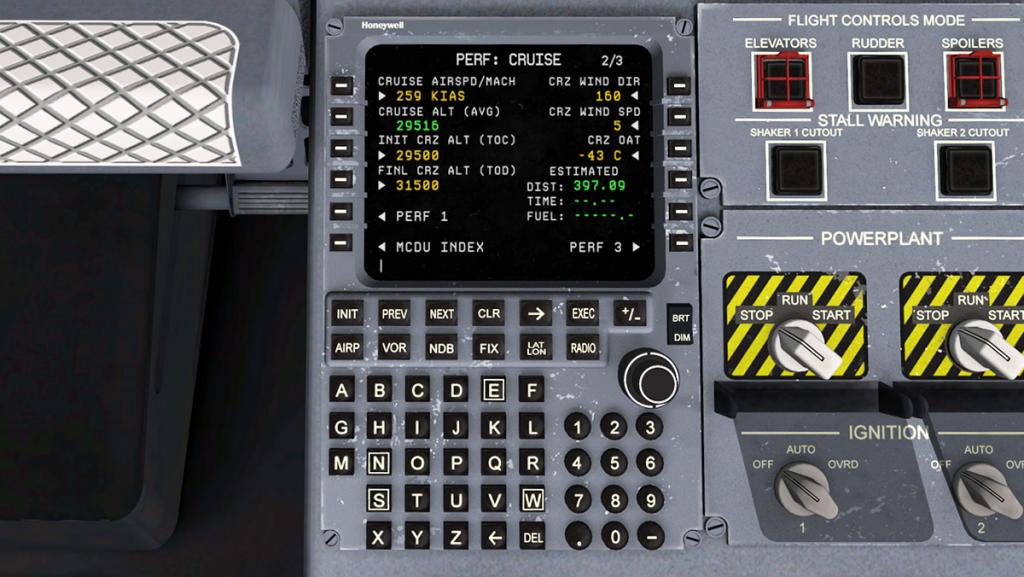
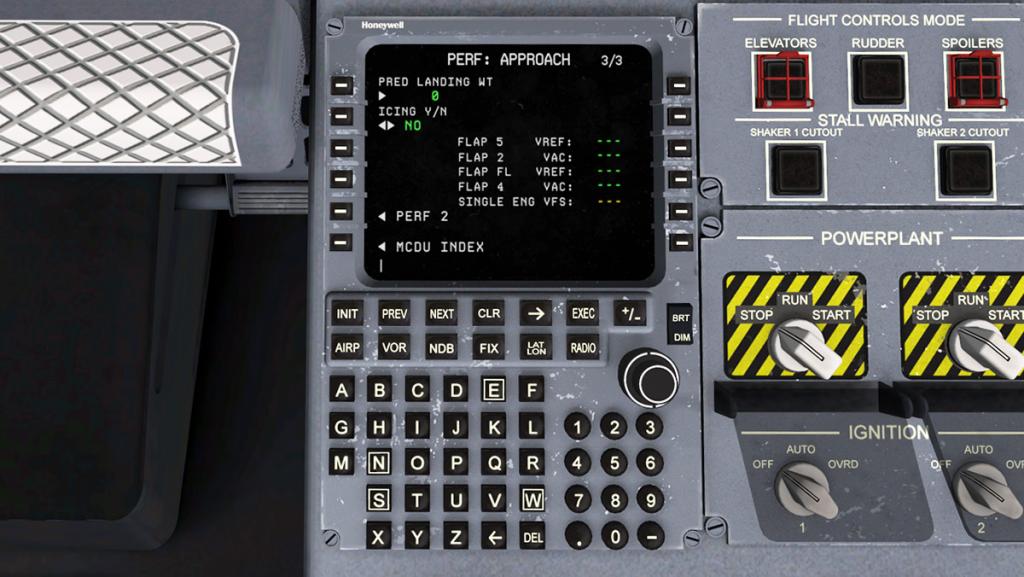
Second page covers your "Cruise" settings and third page covers the "Approach" settings. You can adjust the App settings with the Iceing situation on or off in that the bleed will affect the engine performance.
The slightly messy area is now finding the way of loading the flightplan into the FMS. You go to the PROGRESS page and then...
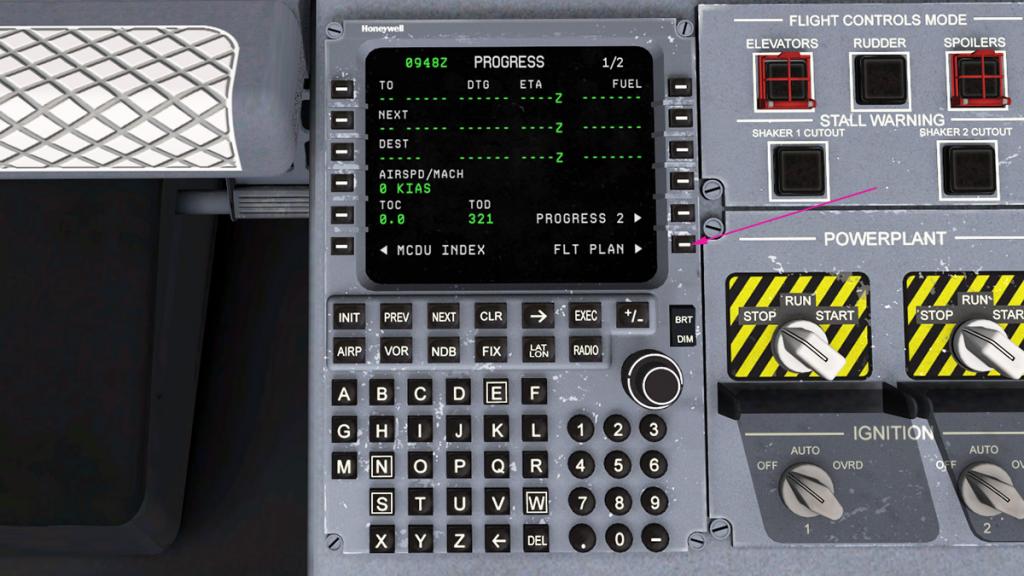

... Goto to FLT PLAN (moved from the main INDEX menu) and then first INT (initialize) the data or in plain Engilsh assemble the flightplan together, then press EXEC to Execute or load into the FMS the full flightplan.

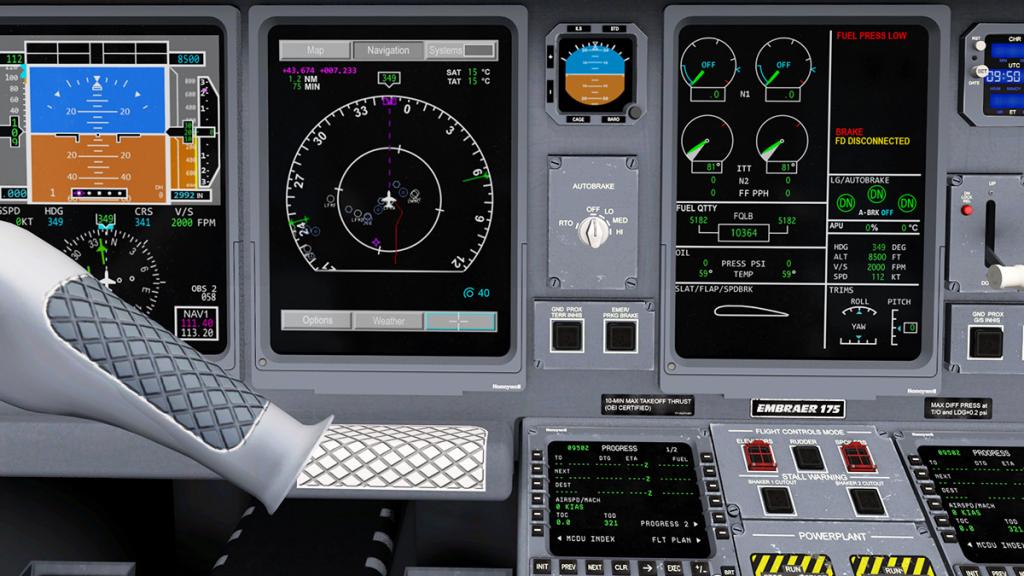
The Flightplan is now always listed on the FLT PLAN page and is shown on the Navigation display.
You can always edit each of the three segments and then reinitialize the flightplan and Execute the new version.
So overall the flow in lots of ways of creating the flightplan is the same, but now differently set out to insert the flightplan into the system and it is far better than the original way of setting up the FMS, as it is more smoother and has a far better building flow. The only negatives are that you can't see the waypoints as you build up the flightplan or edit it, until you reinitialize the three changed segments. Then you have to reedit it again and reinitialize it until you have the flightplan you want, which can be slow work if you have to adjust the SID and STARs that don't quite fit the route you want or dovetail correctly into your central route waypoints, it also makes it harder to see on the display which SID or STAR is best for the DEP or ARR segements, so any "well I'll try this one" doesn't work here as you will have to be very clear which SID and STAR from the chart you require is correct before selecting it.
The completed route red navigation line shown in the navigation display is the standard X-Plane version, which looks very out of date now and it would have been better if it had reflected the huge amount of changes of this now far better FMS unit with a more modern navigation route layout.
Other notes with the new v2.0 Tekton FMS are:
- Added all altitude constraint types.
- Added several new leg types to provide more accurate depiction of fix to fix legs.
- Removed transition requirement leading to final approaches, making all possible approaches to an airport available for selection.
- Added default visual departure and approach waypoints automatically when an airport is selected (overwritten when appropriate procedure elements are selected).
- Added ability to edit your STAR while enroute and re-execute without needing to use a complex autopilot procedure to maintain course.
FMS flightplan and fuel loaded, we just wait while the aircraft is being finalised on the ground. You can get a very good SET for this E-175 to use the JARDesign Ground Handling Deluxe Plugin. The earlier set had the stairs going through the aircraft, but it is all fixed and very good now...
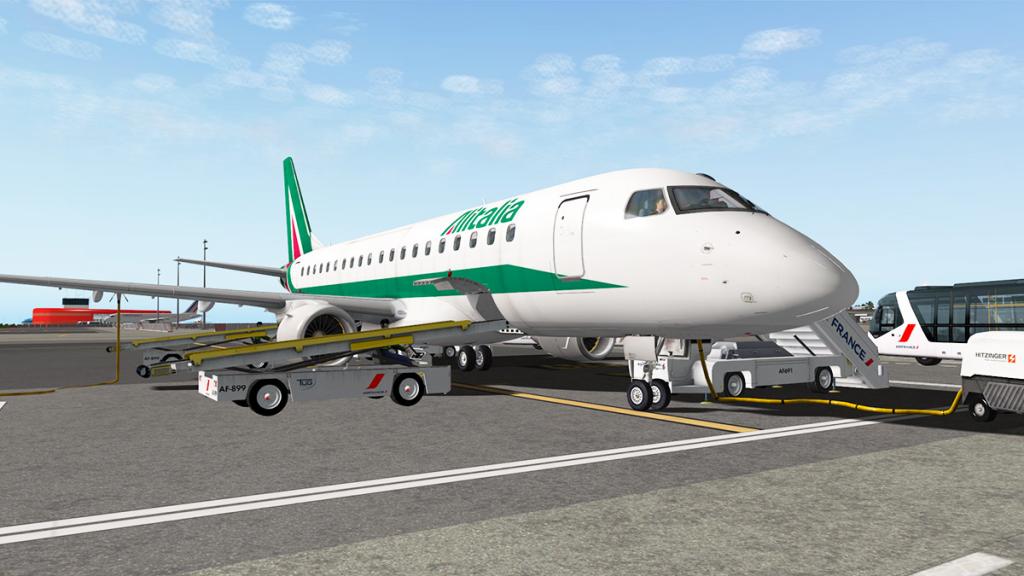
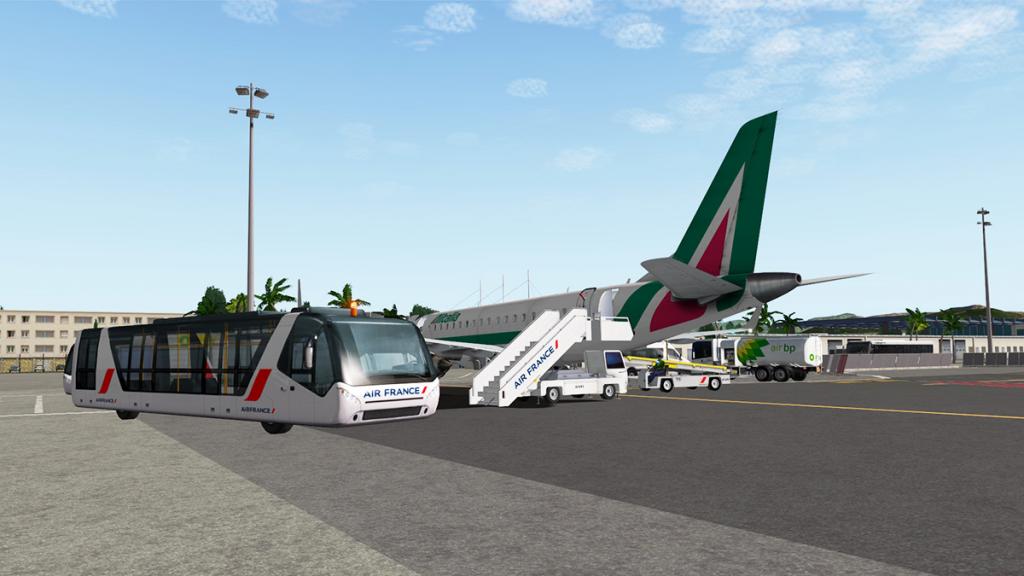
Menus are still the same and located on your left lower point of the screen, move your mouse to make them appear.
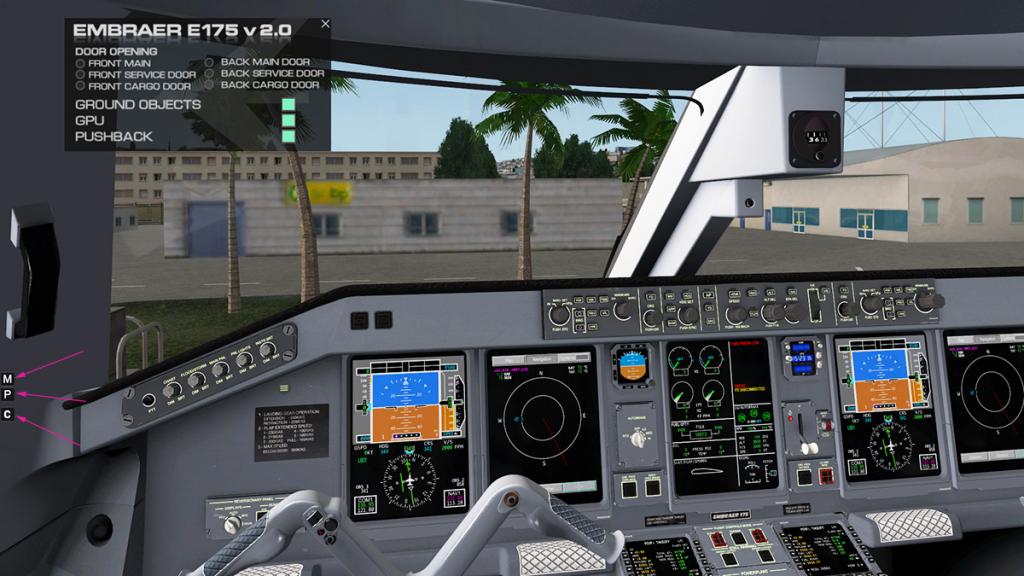

The three menus cover (M) Doors, Ground Objects, GPU and Pushback. Then (P) covers the pushback settings in distance and turn direction.
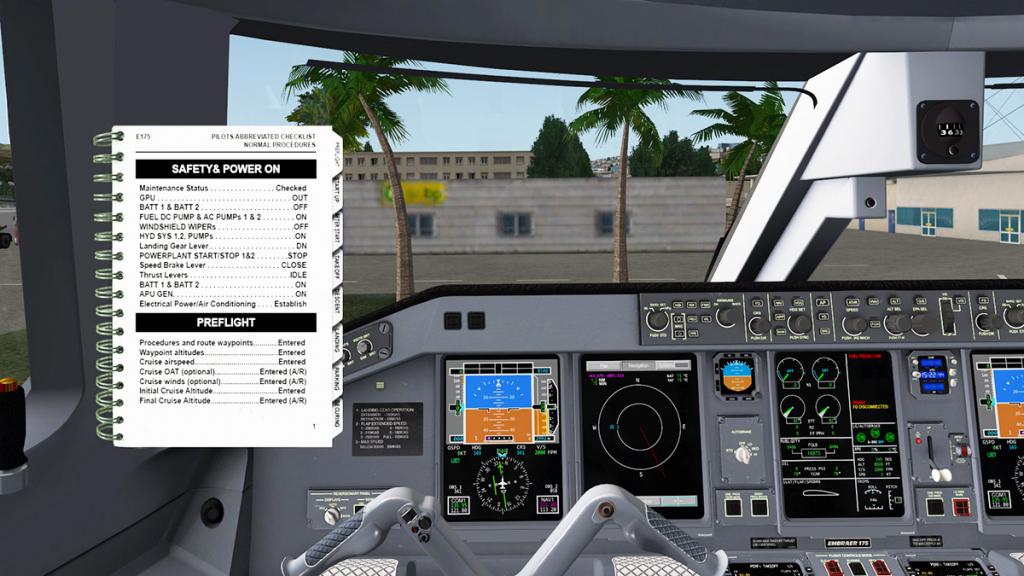
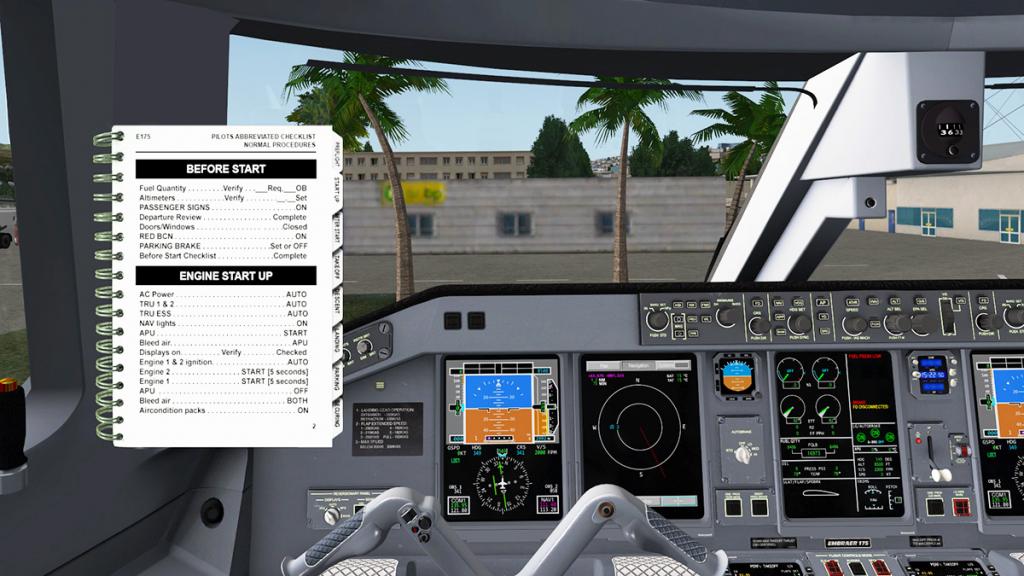
(C) cover the Checklist and very good and handy it is. (note in flight only the Checklist menu is available).
v2.0 has had a revision of the sounds, and items like the GPU and APU now create better sounds. Also if you open the doors or windows then the external sounds are now louder in the cockpit, they do feel far better and more realistic.
New callouts are also now available if you have correctly set up the PREFs on the FMS with V speed callouts as you reach the set speeds. "V1," "ROTATE", "V2" and "TAKEOFF OKAY." are all now working correctly, and alerts "NO TAKEOFF SPOILER," "NO TAKEOFF FLAPS," "NO TAKEOFF TRIM" and/or "NO TAKEOFF BRAKES" will inform you if you don't do the correct settings. One thing that has become an annoyance is that every time you do a mouse click on anything you get a click in sound, click here, click there and after a time it gets annoying...
A full total review of the exterior and all the panel and instrument details of X-Crafts E-175 is available here: Aircraft Review : Embraer E-175 by X-Crafts
Flying the v2.0 E-175 by X-Crafts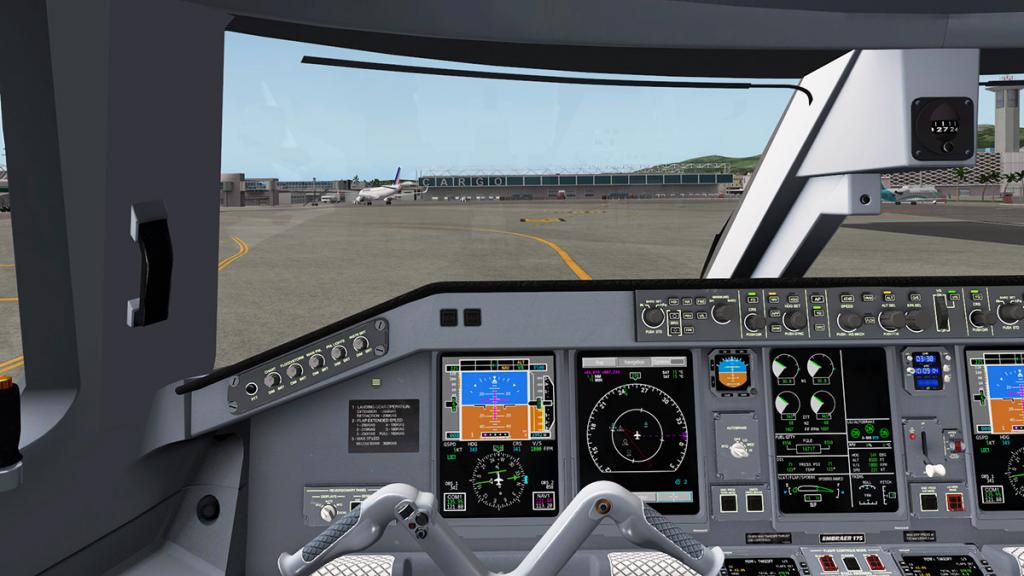
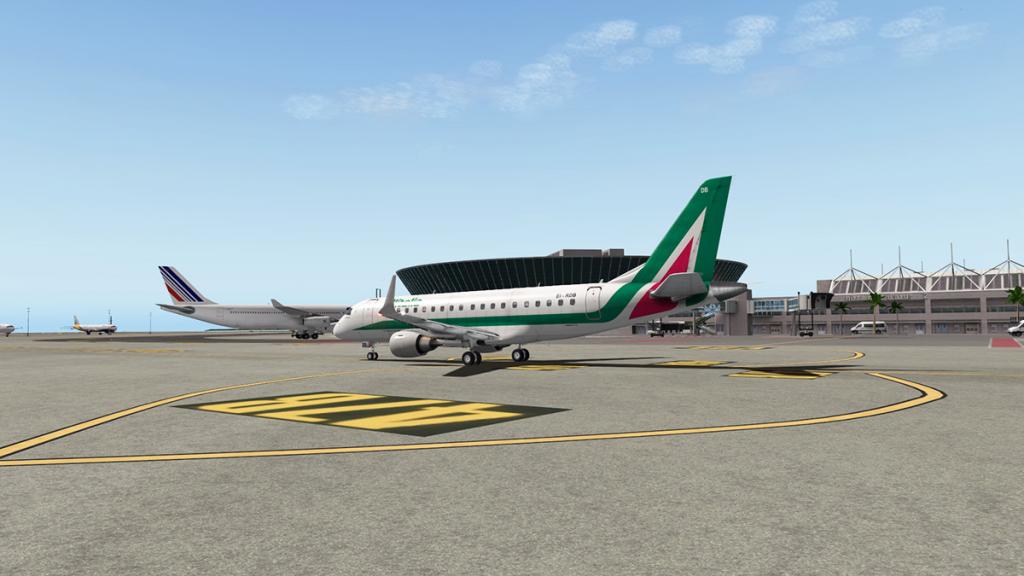

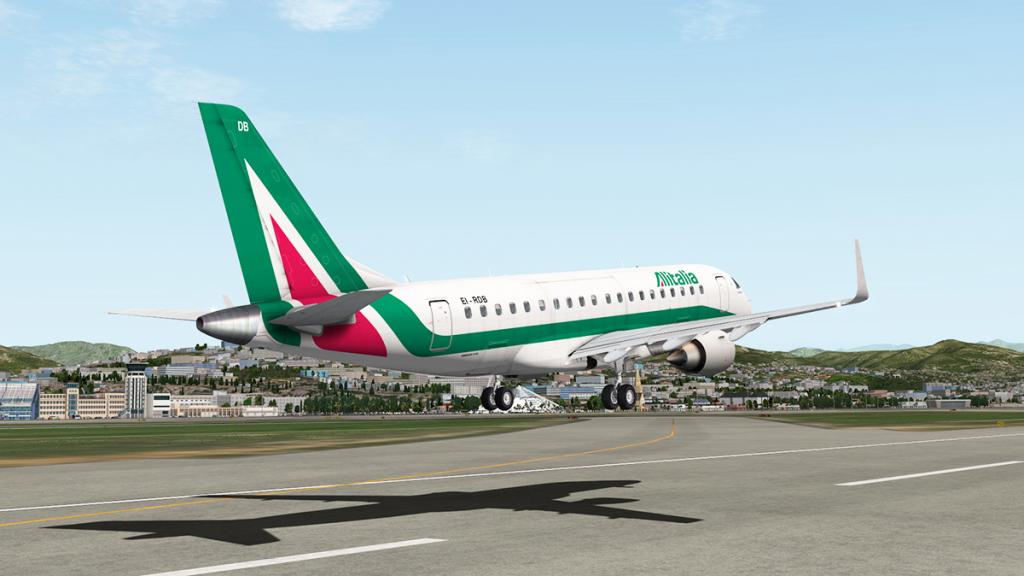
Pushback completed, I taxied towards my departure runway, but a change of runway from RWY 04L to 04R required the RWY setting in the FMS to be changed, it was simple to do by going to the Departure airport, changing the runway, then initializing the new flightplan and then EXEC the flightplan. The process was clean and worked perfectly.
There are a few small tricks on taking off this X-Crafts E-Jet. You need to set the V/S (Vertical Speed) (2000fpm) and arm it, also the NAV/FMS needs to be also armed. Once you rotate and have a "positive climb" then retracted the flaps straight away and hit the A/P (autopilot) button, get the process right and the takeoff is clean or perfect, but leave the flaps out and your V/S will suffer or the aircraft will fight against the climb. Rotation is around 162knts +10 depending on your weight.
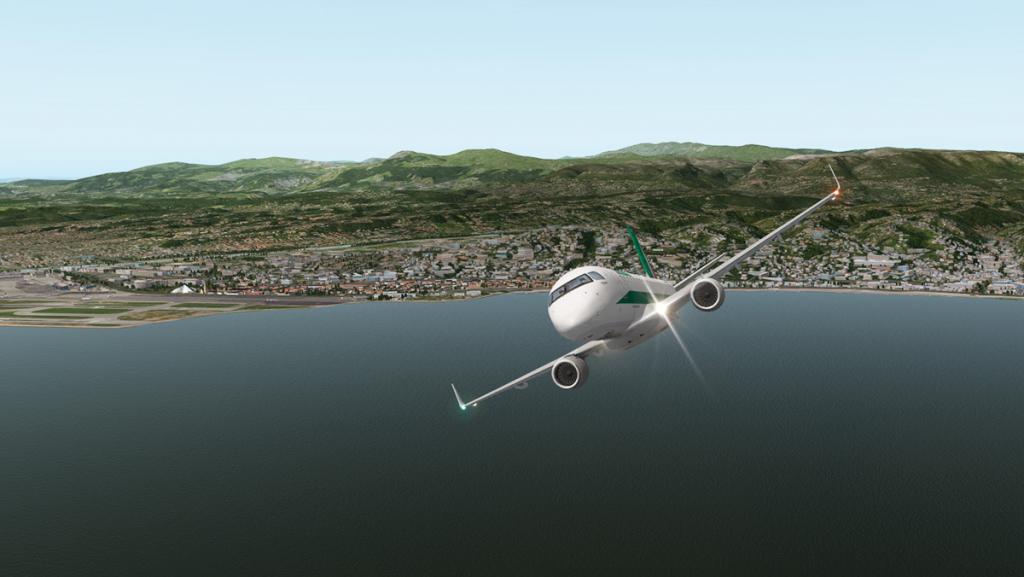
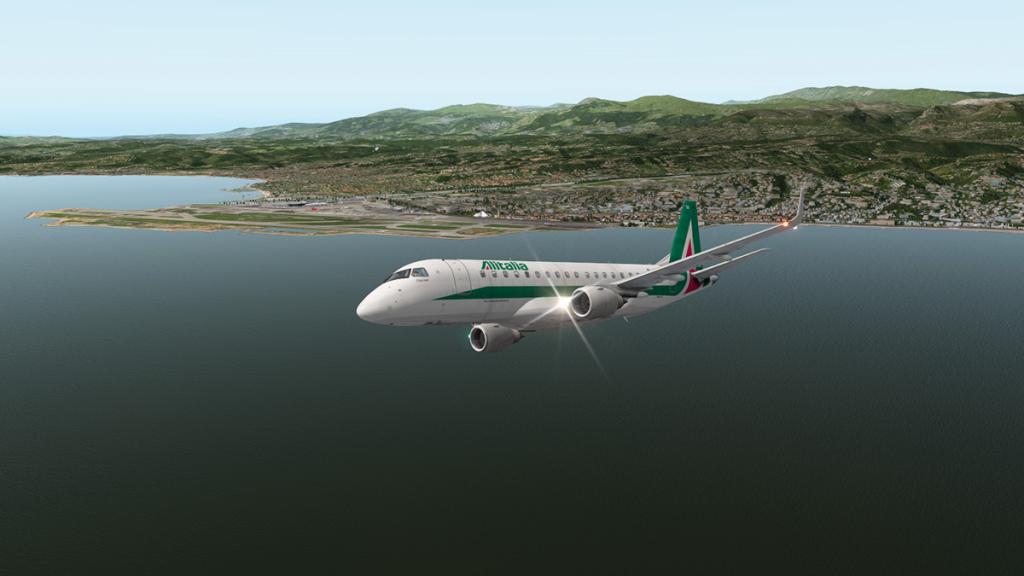
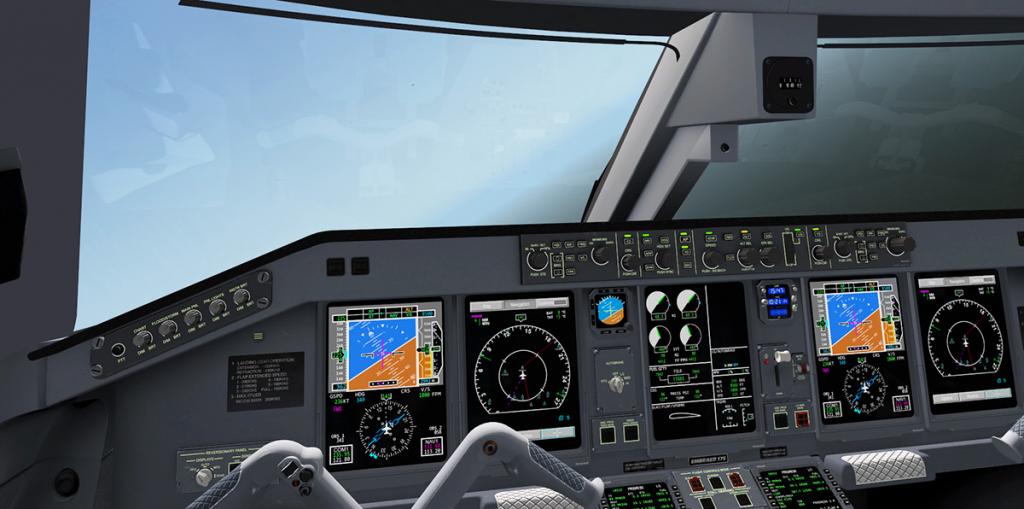
Once the flightplan is activated the new v2.0 PROGRESS page comes alive...
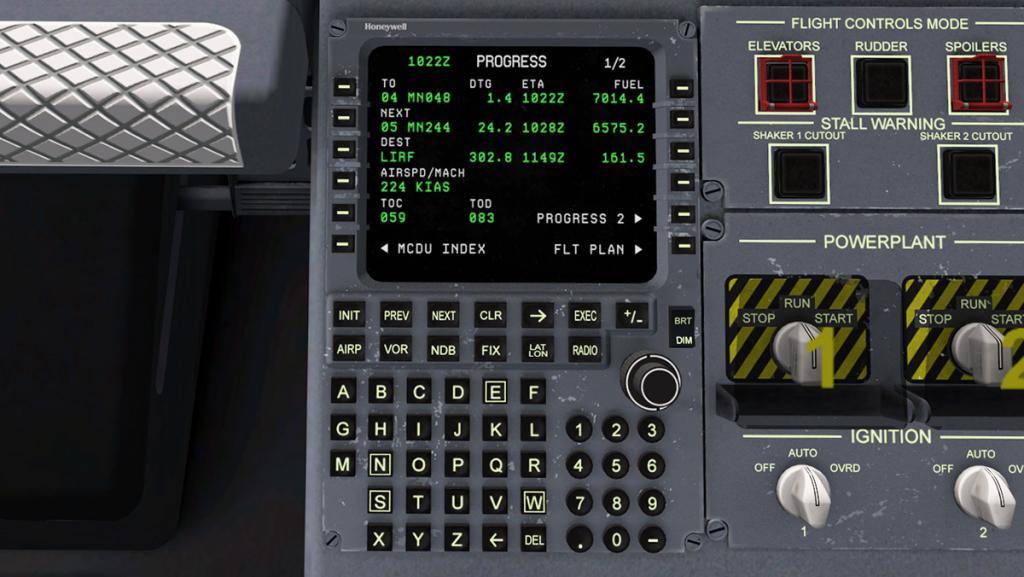
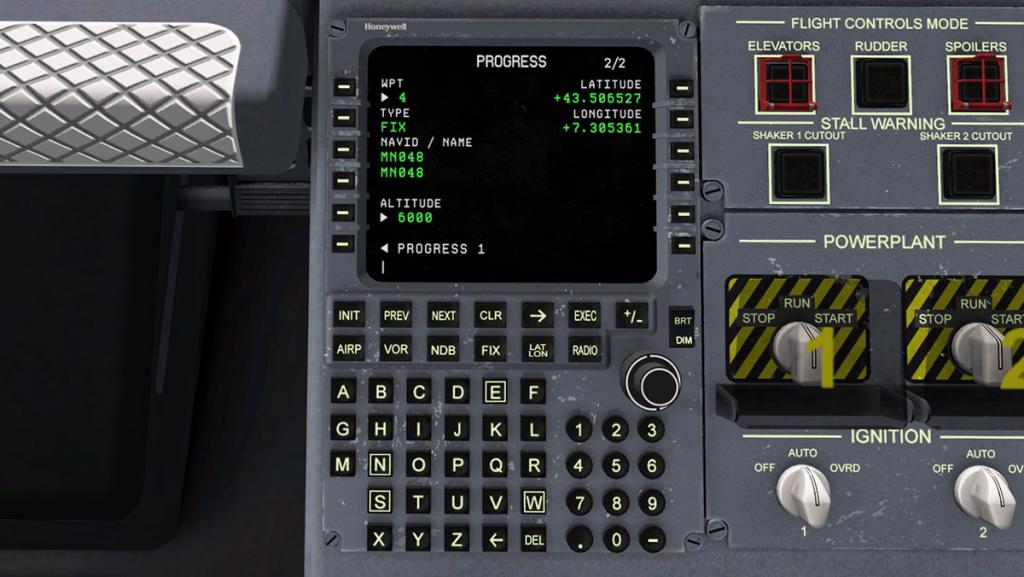
I have a big love of PROGRESS pages (yes I am a bit weird that way) but to have one now in the E-175 is a big step forward for me with this aircraft, and this is a very good and detailed version.

The X-Crafts E-Jet always looks sensational in the air. During the climb phase the distance values have been adjusted for realism between 10K and 30K (270KIAS) to be slightly slower, and you feel that slight falloff during the climb. Lower than 10,000ft there are not any power restrictions.

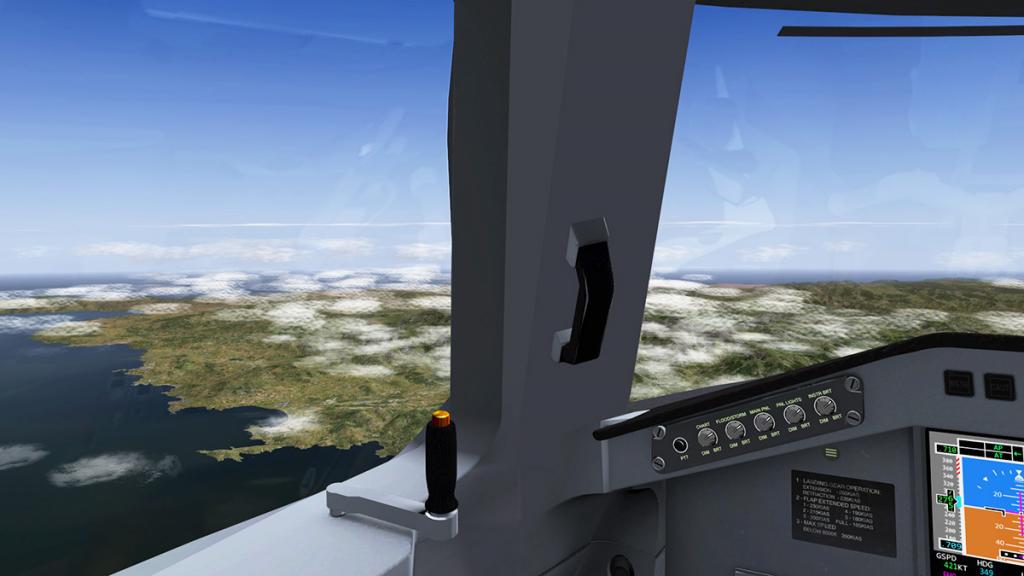
X-Plane puts on a great view of the coast of Corsica as I approach my cruise altitude (285) and the island is already a full view to the left.
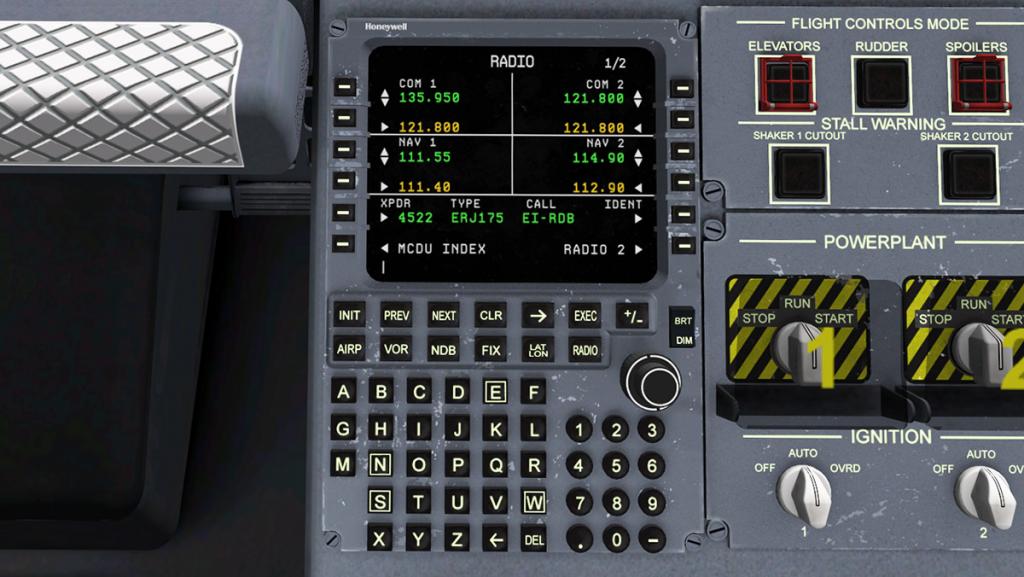

I like the ease of setting up the RADIO page ready for the LIRF RWY 34R Approach, the new direct keyboard input is a big step forward in adding in the frequencies.
Note the cruise speed of M.80, the v2.0 has had the speeds revised and to the correct speed of M.82 based on the weight of the aircraft. A note in that the KIAS and Mach transition speed is quite high in the E-175 is FL300, not my usual FL250... nice to know.
Like the (above) PROGRESS page the STATUS page (below) is also updated in real time.
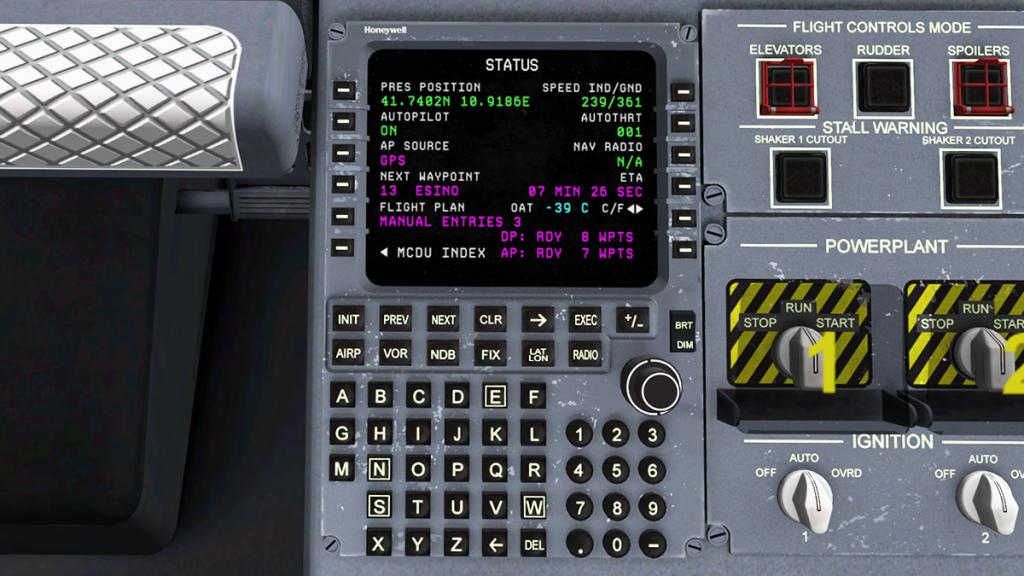
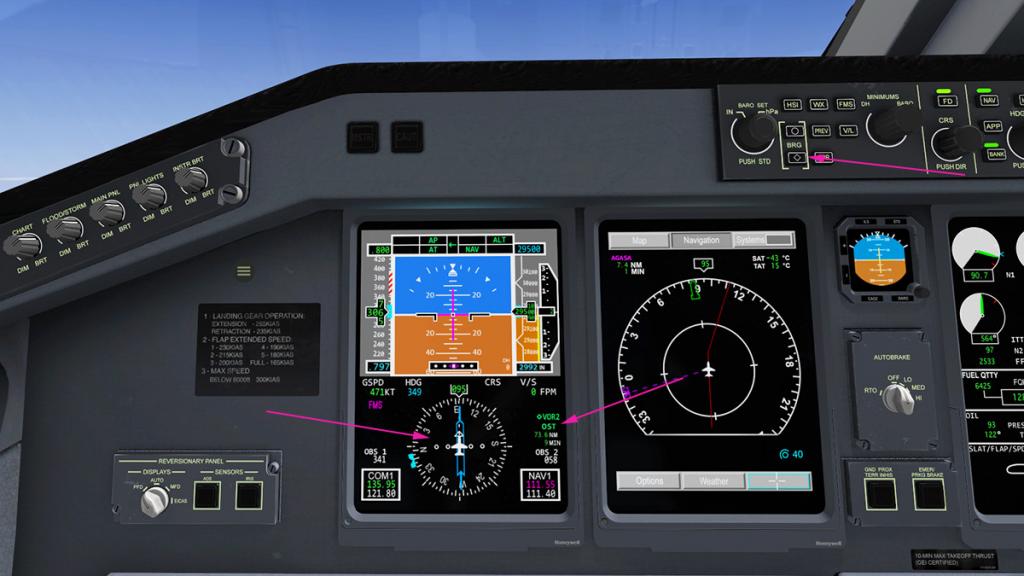
The navigation section in the Primary Flight Display is a compass rose (with built in course/CDI). It should also have the NDB and VOR pointers that should appear when the VOR2 signal is picked up, which I have done here with (OST) Rome. They are however on the outer part of the MAP display, but the two buttons to activate these pointers are given another job instead to select the VOR1 and VOR 2 direct heading selection? And you miss those VOR/NDB pointers to align up a runway manually out of your direct eyeline.


As the Corsica east coast slips by it will be soon time to start our descent into LIRF as the Italian west coast comes into view.


I used the airbrakes briefly a few times to keep the speed in check on the descent, and it worked very well.
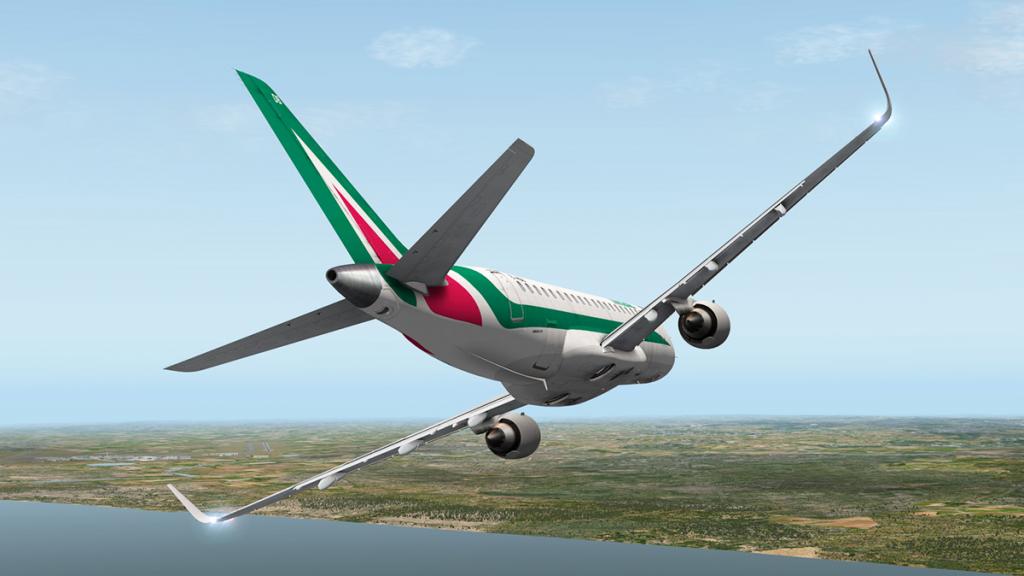
Final hard left turn to final and approach shows off the excellent underside of the E-175, detail is very good and there has been a few touchups in v2.0, but most small.


The aircraft is great on finals with good throttle control and handling, you can easily control the aircraft at it's slow speed, and toch down is around 132knts.
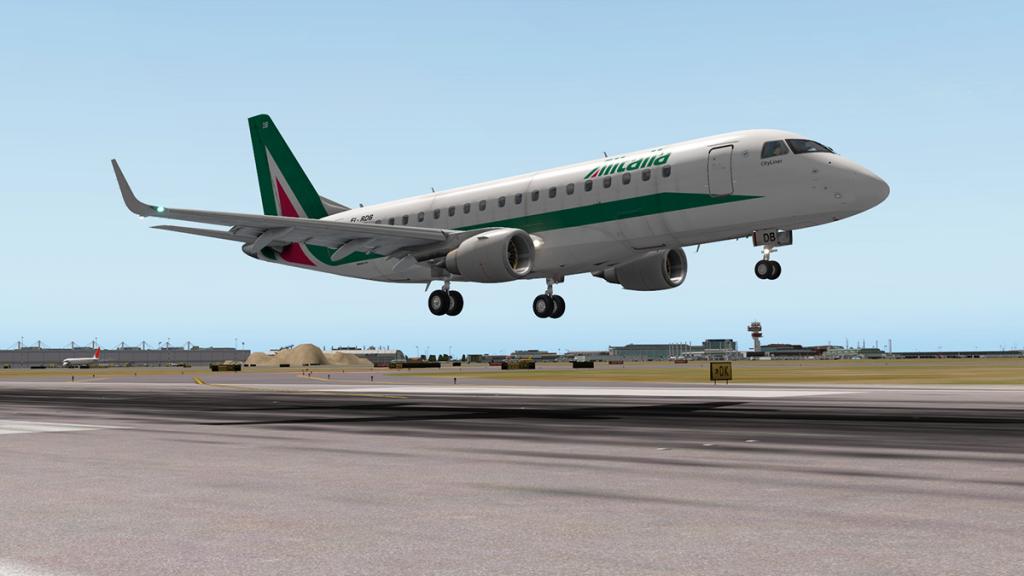
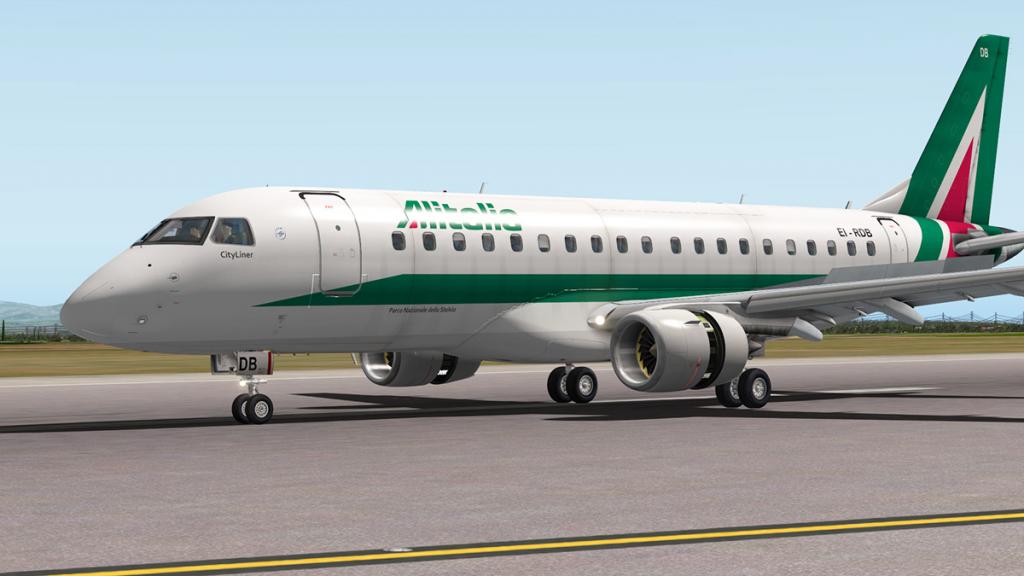
Excellent spoiler and engine reverse animation and action is swift in slowing down the aircraft.

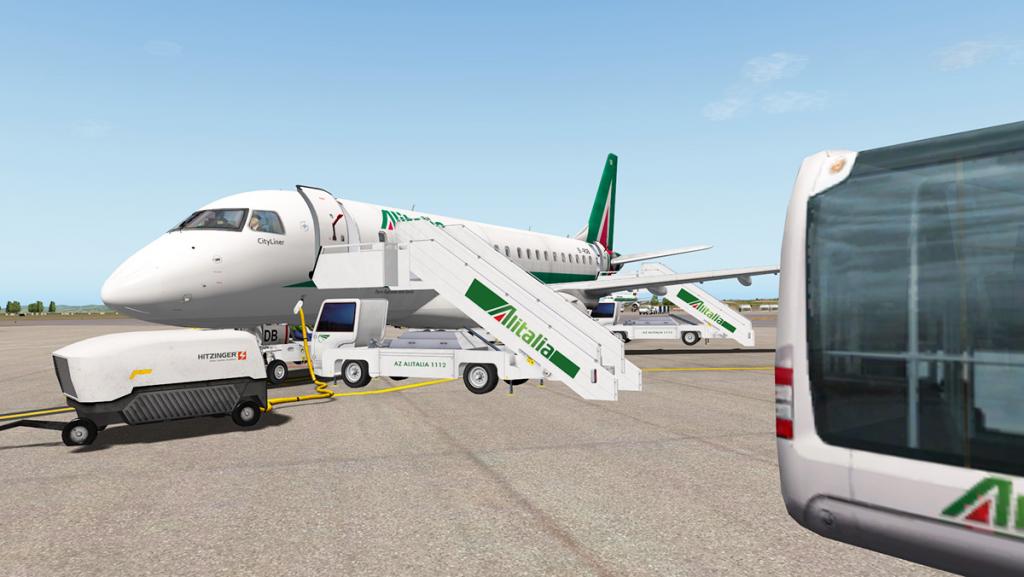
LIRF's remote assigned stand is 202, and with the spooling down of the General Electric CF34-8E engines, the services come around the aircraft, job done.
Liveries
There are no new liveries with v2.0 but included in the package is: Air Canada, Alitalia, American Eagle, Delta, Delta Connection (Compass), Emrbaer House colors, Flybe, UE Tulip, United Express (SkyWest), US Airways (Black), US Airways (White), Plain White and White dirty.
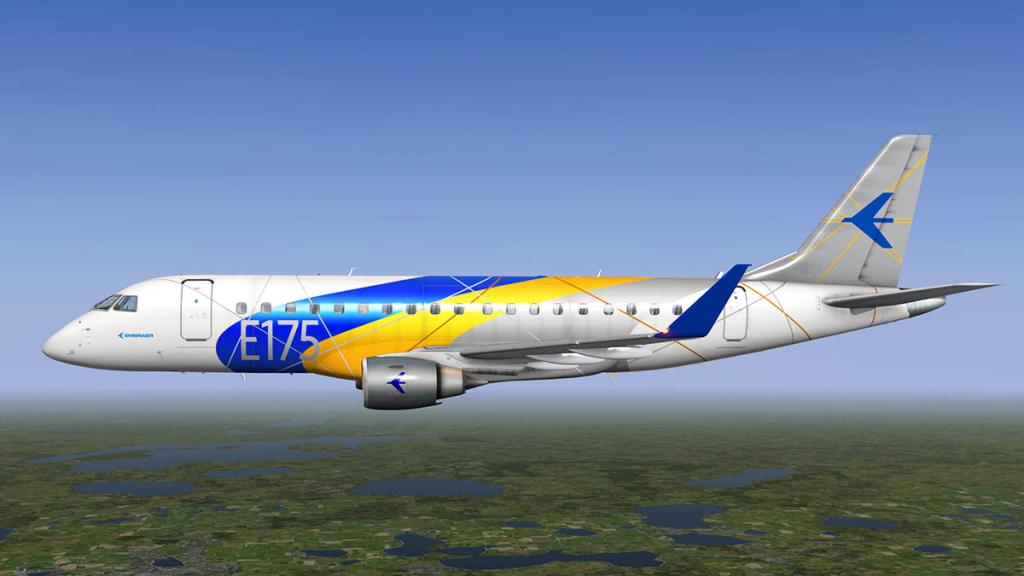


And there is a wide free selection from 3rd parties on the .Org like these below and all are excellent and 4K HD quality.
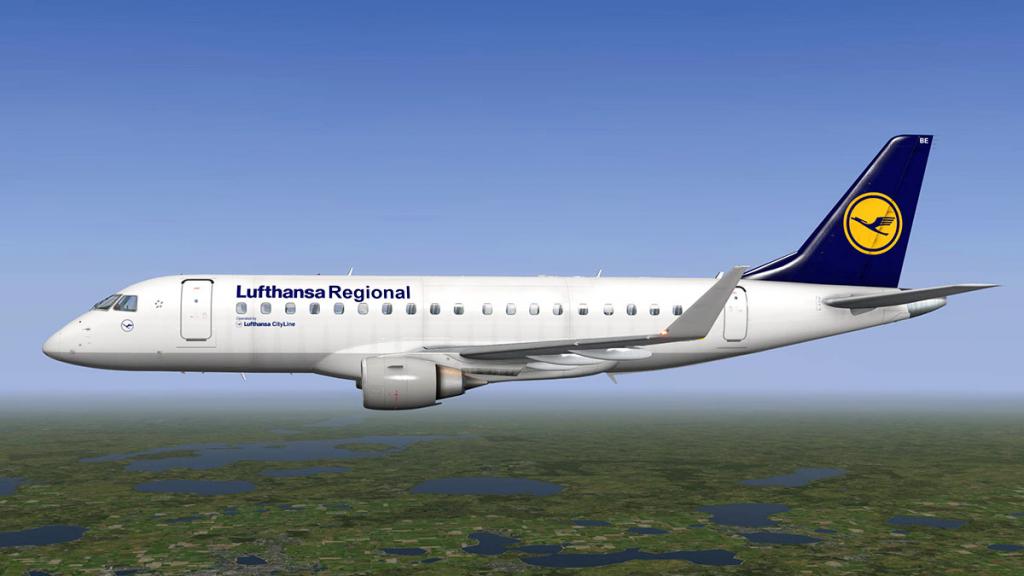


Summary
As noted in this review the biggest feature in v2.0 is that Tekton FMS. It is not just the excellent new features in the FMS like the PROGRESS page but the new reorganizing of the whole unit is also very good, but it does flow and work far better as well. It is not totally perfect from my angle because you can't build the routes as you can see them and save in the sections when done as you go along, but almost everything else is laid out there. And keep an eye on this style of FMS as it will start popup in other aircraft in X-Plane as well.
In other areas like the new overhead panel and many other areas the E-175 has had a fair bit of attention, but X-Crafts has thankfully left the original external design alone and the aircraft is all the better for that.
A few quirks do however do drop this E-Jet just under that excellent position, like the red line Nav display, the missing heading rose pointers and the pitch numbers look wrong on the Primary Flight Display.
All sounds are well improved and in cruise mode the aircraft is a nice place to be, it flies really well as well, but watch those little tricks on takeoff to transition cleanly to your climb position.
X-Crafts is also noting this v2.0 is a paid upgrade (US$5) to this version but that is still excellent value for a really nice aircraft with a lot of great features and certainly closes the gap between these two excellent E-Jets available in X-Plane, overall none of them come out as the better of each other, but the line is now getting very close... and the winner will be in the upgrades and future versions, but for now the X-Crafts version is slightly the cheaper of the two... so the choice is yours.
______________________________________________________________________

Yes! the Embraer E175 v2.0 by X-Crafts is NOW available from the new X-Plane.Org Store here :
Price is US$39.95
If you have already purchased the Embraer E-175 from X-Craft's at the X-Plane.OrgStore then go to your account and upgrade to v2.0 for only US$5.00, Please email [email protected] to get your discount code and include you original order number.
Features
- Accurate dimensions based on drawings and documentation provided by Embraer ©
- Windows, Mac and Linux compatible
- Custom FMS
- Custom pushback plugin with animated tug
- On-screen checklist plugin - Plugin menu for door control, ground objects or GPU
- Tested by a real Embraer E175 pilot
CUSTOM FMS
- both the custom and stock FMS are available on the pedestal or as popup panels
- More details about the FMS below
INTERIOR:
- Amazing 3D modeling of cockpit and cabin
- High resolution textures
- High resolution Embraer style PFD, MFD, EICAS displays
- Pop-up screens, pop-up radios panel
- MFD with 8 synoptic pages and a new improved Navigation displa
- High resolution textures on panels - Text is crisp and clear to real
- Intuitive cockpit manipulation - I have always taken great care to make the cockpit as easy to use as possible. This means all clickable areas in the cockpit are very big so that you can easily click on any button, knob or lever in the cockpit
- Each switch, lever, knob, and handle is animated
- Detailed cockpit lighting - All cockpit lights are controllable
- Cargo area modeled
- HUD equipped
EXTERIOR
- 4K High resolution textures (fuselage 10000px/meter squared)
- Highly detailed landing gears
- Flap and speedbrakes mechanisms modeled
- Realistic Wingflex animation
- 2 versions of winglets available
- 9 Liveries included so far and more are on the way!
- Accurate dimensions based on drawings and documentation provided by Embraer ©
- Windows, Mac and Linux compatible
- Custom TEKTON FMS© by Steve Wilson
- Custom pushback plugin with animated tug
- On-screen checklist plugin
- Plugin menu for door control, ground objects or GPU
- Tested by a real Embraer E175 pilot
- Suitable for beginners - Just load and fly within seconds!
- Great for advanced users -Enjoy the complexity of the Custom FMS!
TEKTON FMS© Features:- Direct Keyboard Entry (DKE)
- Custom MCDU Interface:
- SID, ROUTE and STAR waypoint lists are treated as separate editable items
- Color keyed data presentation
- Scratchpad data entry
- Interactive feedback
- Both the custom and stock FMS are available on the pedestal or as popup panels
-
Procedures Enhanced for V2.0:
- SIDS and STARS from X-Plane stock or third party custom data
- New: Altitude constraints for procedures
- New: Refined procedures leg routing
- New: More flexible STAR element selection
- New: Default visual departure and approach
- New : Edit and reload STAR while enroute while in autopilot
- Ability to easily edit SIDs, Routes, STARS and the loaded FLT PLAN
New AIRWAYS options- New Progress Monitoring on two new pages
New Performance Flight Planning:- New PERF 1 page providing preflight and takeoff data
- New PERF 2 page allowing route fuel planning
- New PERF 3 page for approach data
INTERIOR:- Amazing 3D modeling of cockpit and cabin
- High resolution textures
- High resolution Embraer style PFD, MFD, EICAS displays
- Pop-up screens, pop-up radios and FMS panels
- MFD with 8 synoptic pages
- High resolution textures on panels - Text is crisp and clear with any rendering options
- Intuitive cockpit manipulation - I have always taken great care to make the cockpit as easy to use as possible. This means all clickable areas in the cockpit are very big so that you can easily click on any button, knob or lever in the cockpit
- Each switch, lever, knob, and handle is animated
- Detailed cockpit lighting - All cockpit lights are controllable
- Cargo area modeled
- HUD equipped
EXTERIOR- 4K High resolution textures (fuselage 10000px/meter squared)
- Highly detailed landing gears, Flap and speedbrake mechanisms
- Realistic Wingflex animation
- 2 versions of winglets available
- Pilots in external view
- All doors are animated and controllable from the plugin menu
OTHER FEATURES- Compatible with UFMC, X-FMC
- Compatible with JAR's Ground Handling Deluxe
- New exterior night lighting. You can now operate any of the following lights: NAV, Strobe, Beacon, Left/Nose/Right landing lights, Side/Nose taxi lights, Inspection lights, Logo lights. All lights including Nav and Strobe lights cast light on the surroundings.
- Audible Alert System
- Custom sounds
Video is only available via YouTube
______________________________________________________________________
Installation : Download is 720.30 mb which is unzipped to your X-Plane in your regional Jet folder (if you have one or "Heavy Aircraft") at 822.40mb with the extra liveries loaded.
Documentation : Demo Flight & Instructions, v2.0 Feature List, FMS Tekton Manual, 2.0 Manual (including a full set of speed charts) - (52 pages)
Requirements :
X-Plane 10.50+ (any edition) - running in 64bit modeWindows, MAC or Linux - 64 bit Operating System required
4Gb RAM - 1Gb VRAM Minimum. 2Gb VRAM Recommended
Current version: 2.0 (last updated September 22 2016)______________________________________________________________________
X-Crafts Developer Support : ERJ - 175 by X-Crafts - X-Plane.Org______________________________________________________________________Review by Stephen Dutton
23rd September 2016
Copyright©2016: X-Plane Reviews
Review System Specifications:
Computer System: Windows - Intel Core i7 6700K CPU 4.00GHz / 64bit - 16 Gb single 1067 Mhz DDR4 2133 - GeForce GTX 980/SSE2 - Samsung Evo 512gb SSD
Software: - Windows 10 - X-Plane 10 Global v10.50
Addons: Saitek x52 Pro system Joystick and Throttle : Sound - Bose Soundlink Mini
Plugins: WorldTraffic 2.2 X-Plane.OrgStore US$29.95 : JARDesign Ground Handling Deluxe US$14.95 : Headshake by SimCoders (free)
Scenery or Aircraft
- LFMN Nice Côte d'Azur Airport by JustSim (X-Plane.OrgStore) - US$19.95
- LIRF - Roma Fiumicino Leonardo Da Vinci v4.0 by DtRs90 (Wehrlipub - Seaman2020) - (X-Plane.Org) - Free

-
43 minutes ago, Guest Wings999 said:
Hi Stephen. Thanks for your reviews and blogs. I am really enjoying them. A question on your early statement.. "Okay first pull your preferences in the "Output" folder." Do you mean to delete the Preferences folder entirely or just its contents and leave the folder empty? Secondly do you recommend to do this prior to upgrading to 10.50 or after you have done the download?
Yes you pull out the full preferences folder and X-Plane will rebuild them from the ground up, but that means you have to reset everything to your usual preferences like with the render settings menu. load 10.50 and run, even if it crashes then pull the preferences and then rebuild X-Plane. A trick I use is to save in the old preferences files is the "X-Plane Keys.prf" and the "X-Plane Screen Res.prf" and when you have run X-Plane and set it up with the new preferences you can over write the new ones with those two older files and you will get back your keyboard settings and monitor settings as they were. As I have a lot of set keyboard settings it saves having to redo them all again... SD
-
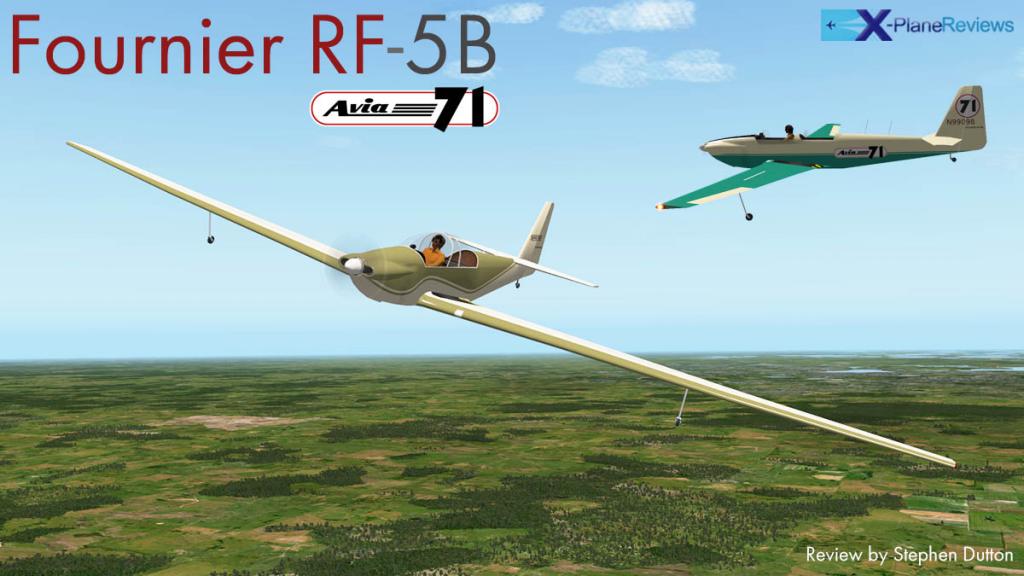
Aircraft Review : Fournier RF-5B by Avia71
Motorised gliders make the hard part the easy part... that is just getting up into the air. And once up there it is nice to be able to position yourself quickly at the right point to collect the full potential of those lifting updrafts. So you don't then have to rely on a puller plane to get you up in the air, and if you get bored you can easily power up and head on home. The disadvantages are of course the weight you have to carry around with you, it is not a pure gliding experience par excellence, but in reality the disadvantages outweigh the purity of the sport as this versatility makes the aircraft easier to run, use and fly without any outside assistance and it is those set of conditions that have made the Fournier RF Motorglider a very popular aircraft.
These aircraft are known as "Touring Motor Gliders" for the obvious reasons, but there are different ideas to do the same thing. Most of these lightweight powered gliders have only a small puller or pusher engine, either mechanical or electric. Where as the Fournier is different is that the engine is quite large and very powerful for the size and weight of the airframe. The B version here uses the 50.7 kW (68 hp) Limbach SL 1700 E Comet engine, and that makes it a true touring aircraft that just happens to good at gliding and be semi-aerobatic as well.
Built by René Fournier in the central French area of Nitray , near Tours. The famous RF aircraft was the first of what we now call Touring Motor Gliders. The Frenchman already had an outstanding pedigree as René Fournier as he was already a recognized artist in the early 1950s, an amateur pilot, aircraft mechanic at the patented School of Rochefort, he was also poet, a violinist and especially a ceramist. He also was already highly involved in creating sailplanes and the early prototypes of the RF-5B carried small motors.
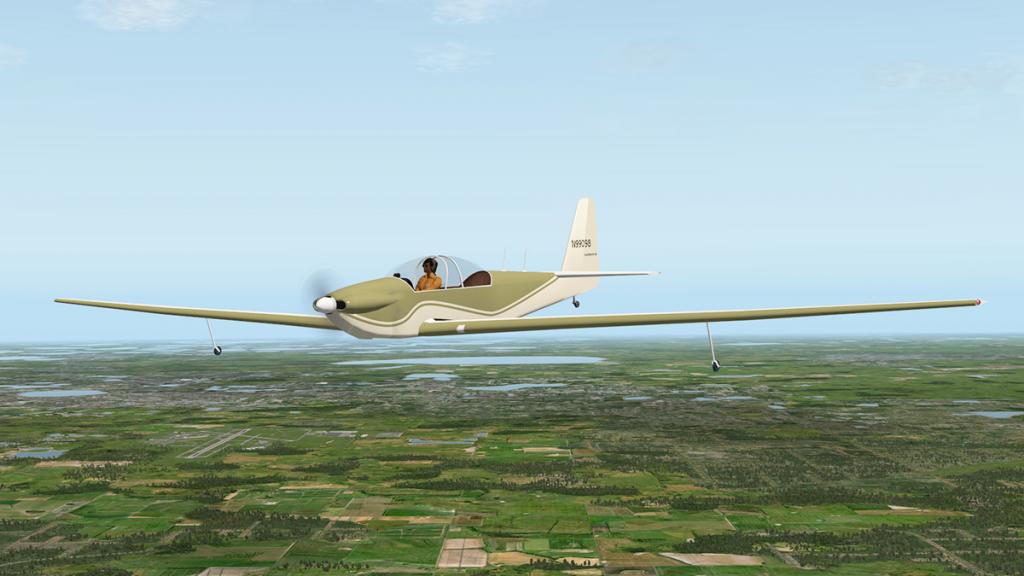
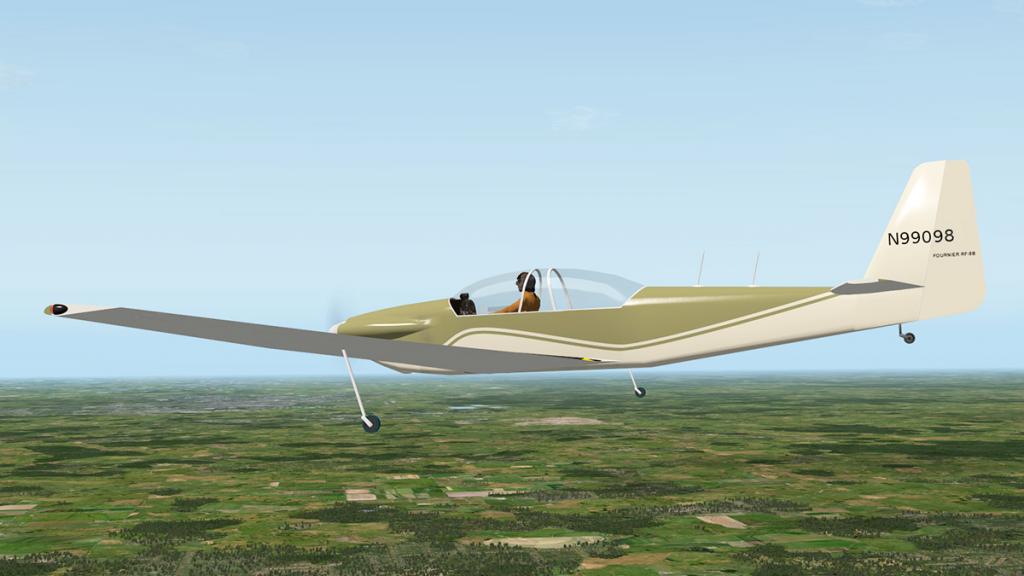
Fournier RF-5B by Avia71
Gliders are rare in X-Plane, maybe one a year. And so when a new one comes along if you are albatross minded it is usually worth a look.
This aircraft is a replica of the developer's personal aircraft, which was uncovered in an old hangar and restored back to flight. This is the "Lady Wander" (N99098) and the aircraft first flew in in 1971.
Design wise it is basic, but well done. Remember the aircraft is not from a fully developed design studio, but one person's personal project to bring the aircraft to life in X-Plane. So detailing is minimal, but the aircraft is plugin based and not a Plane Maker design and that means it does have some quality above the standard issue basic X-Plane structures with good features.


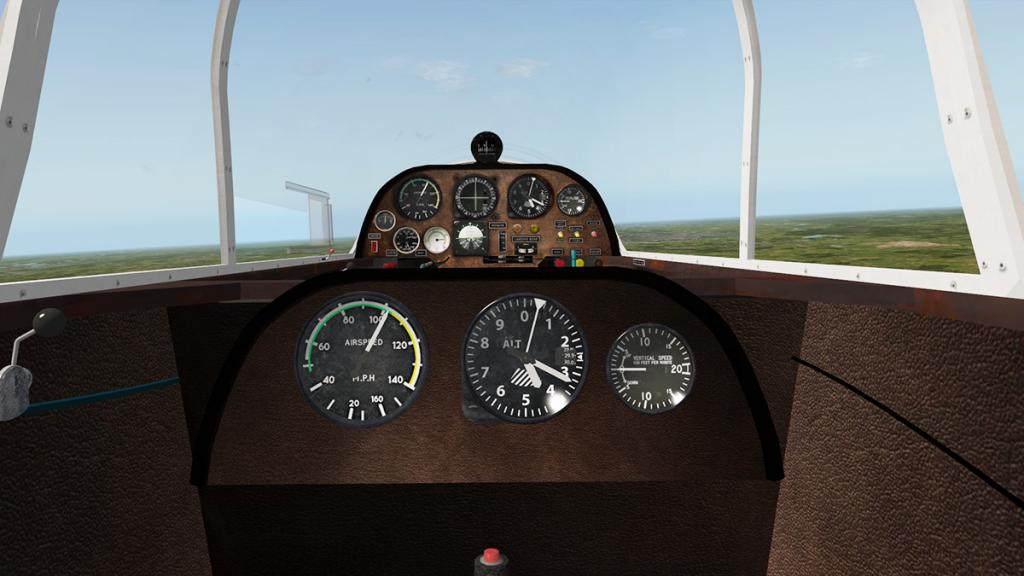
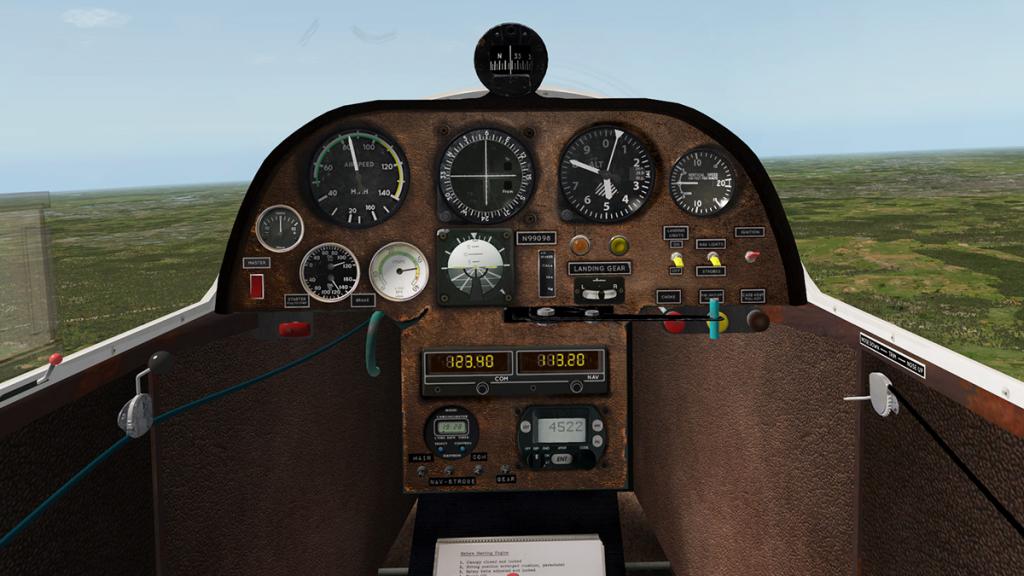
The forward panel is basic but well laid out on a cork or rough hardboard base. Four large major instruments dominate with the airspeed, VOR fix, altitude and the smaller rate of climb instruments. An amp meter is left with oil pressure and temperature gauges next. An engine RPM counter is next to the well calibrated artificial horizon, which is different but effective in its grey/black background. Airbrake indicator (0 - 1/2 - Full) and slip bubble indicator. Right panel are lighting and ignition switches with push pull choke, Fuel cutoff and Carb heat knobs below. A large compass is on the top of the panel.
Below the panel is the Starter (engine) Brake and the huge handle to control the variable pitch on the propeller. This lever is important to convert from the powered flight to flattening the pitch for glider flight.
On the central lower panel there is a Radio set which is an unusual unit because it is COMM (1) and NAV (VOR2) setting (usually it is Comm 1 and NAV - VOR 1) and set below is both a Davtron Chronometer and TRIG Transponder.
Left side is the (small) throttle, and on the right a pitch trim lever, right down under seat is the airbrake lever.
Being a two-seater the Fournier does have instruments in the rear as well, but only the basic airspeed, altitude and rate of climb instruments... oh and the second set of a stick and rudder controls to fly the aircraft.
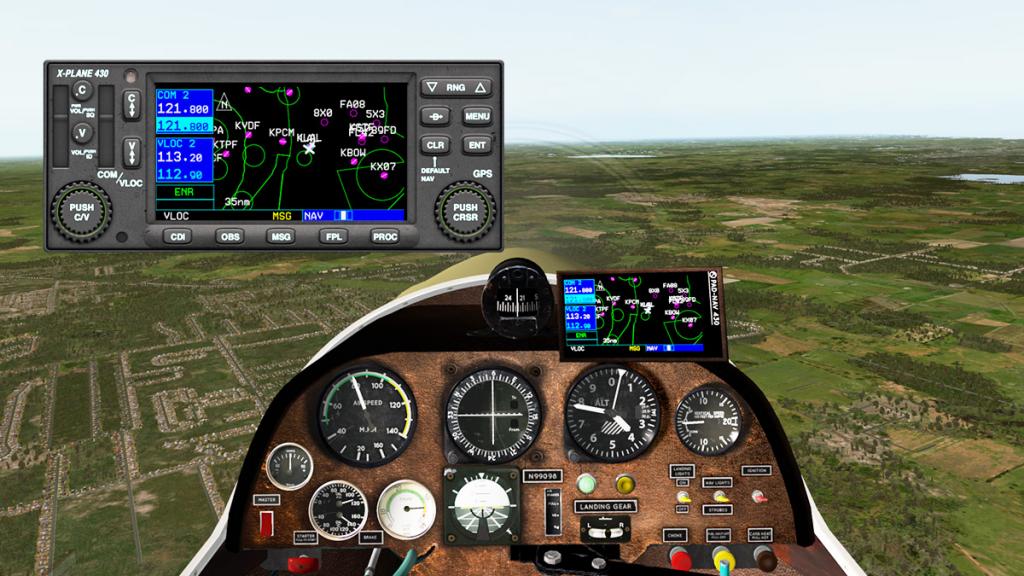
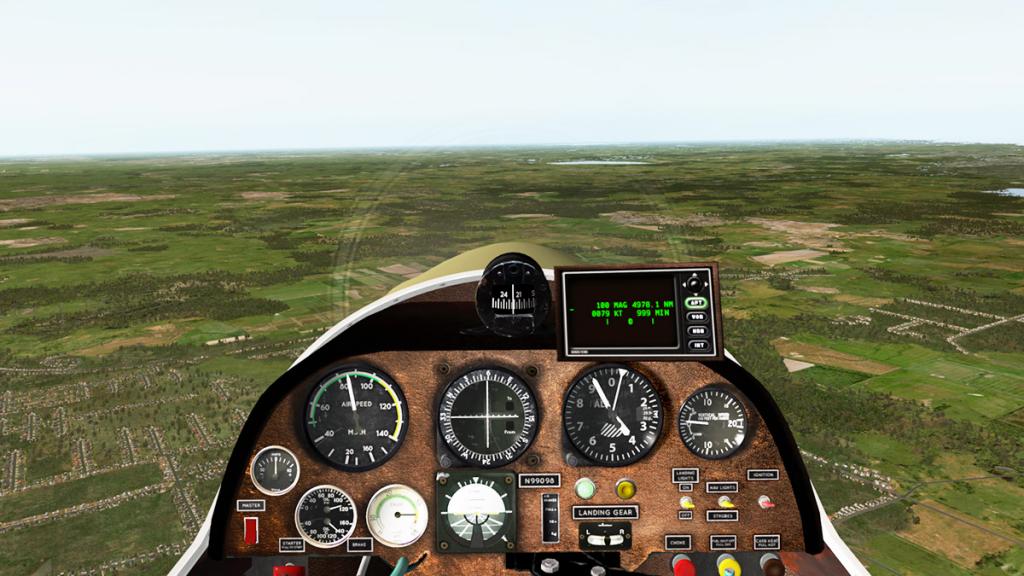
By pressing either side of the compass you can pop-up either the X-Plane GNS430 or an earlier basic Bendix/King unit.
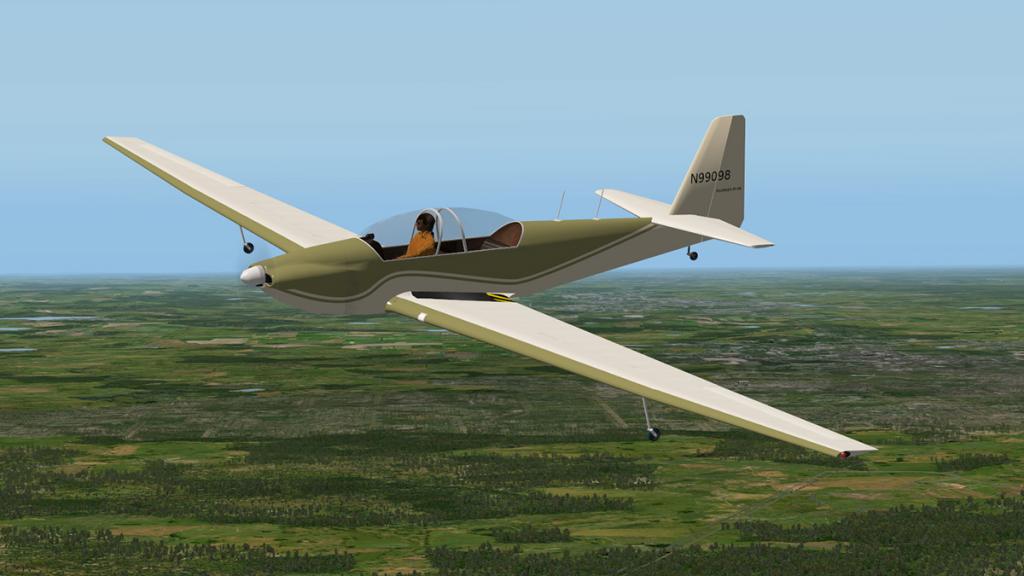

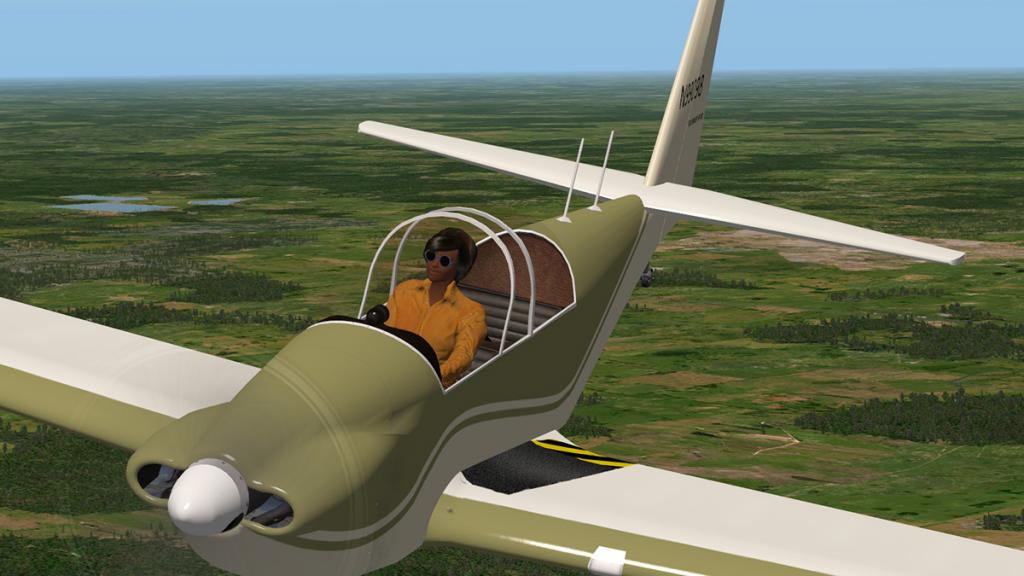
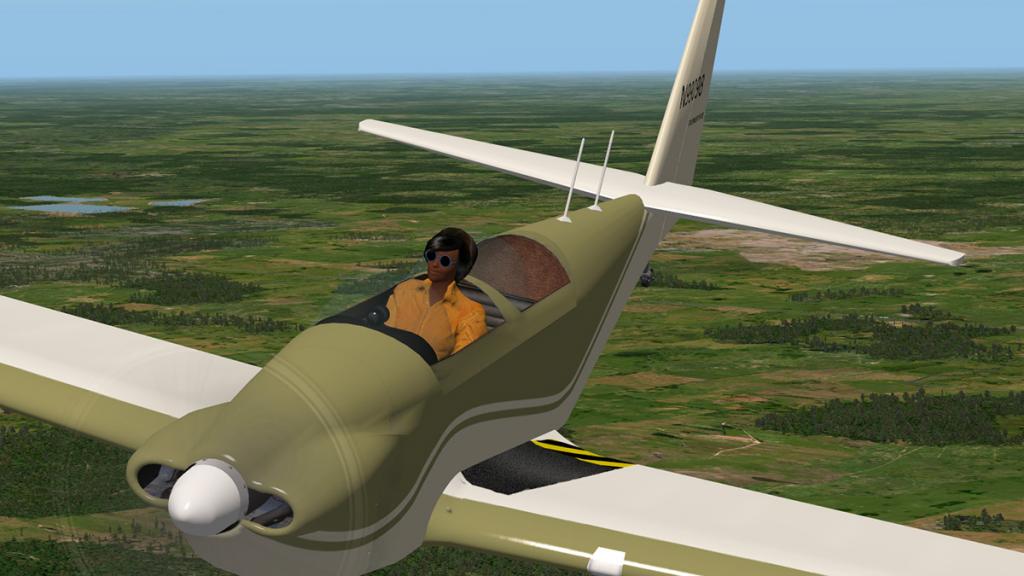
There are two options in a fully opening (animated) canopy or a twin open seat arrangement with small screens. An optional animated pilot who seems to be on a Sunday afternoon fashion posing outing can be switched in or out.
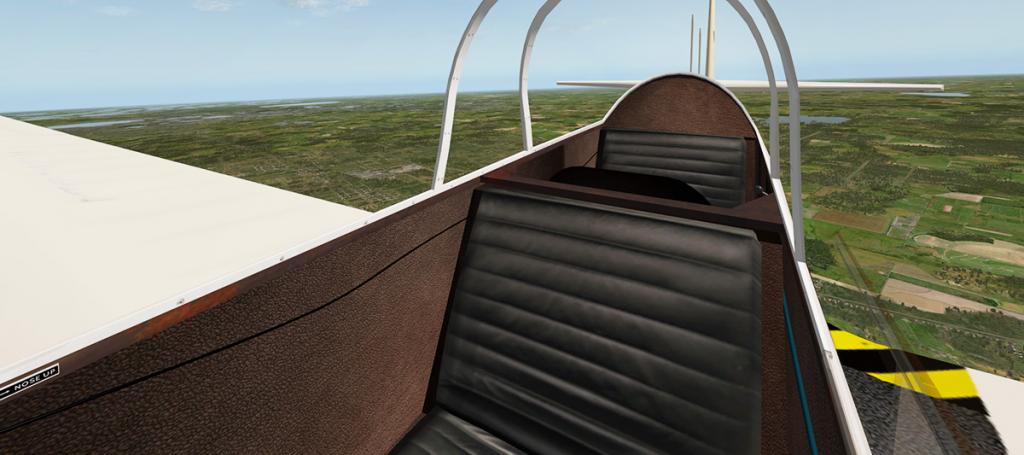
Seats are basic but in a well done leather covering.
Flying the Fournier RF-5B
The aircraft looks very fragile sitting on the glass or hard runway surfaces. A single wheel (glider style) supports the aircraft and the wings are supported by single stick like none retractable support wheels.
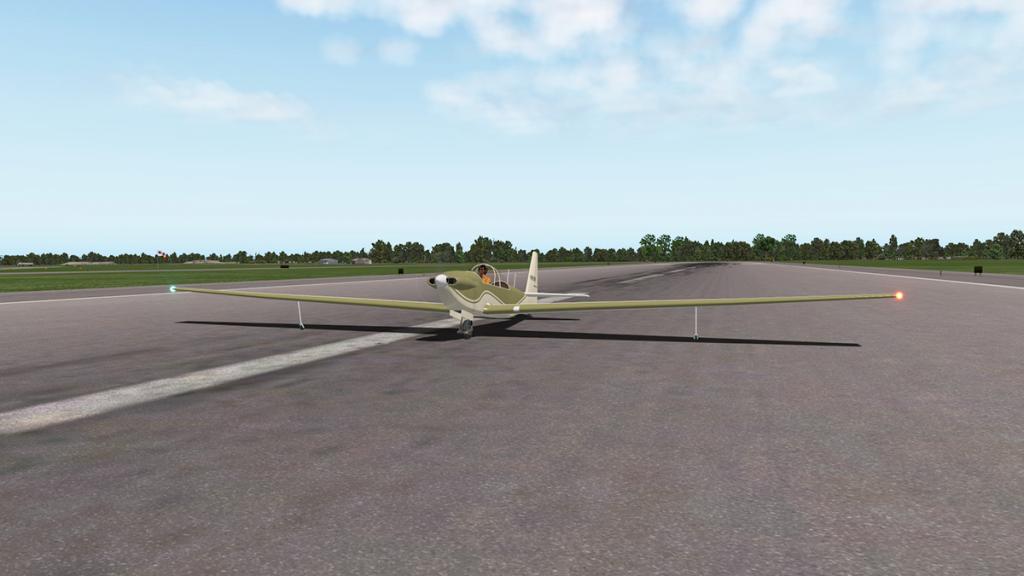
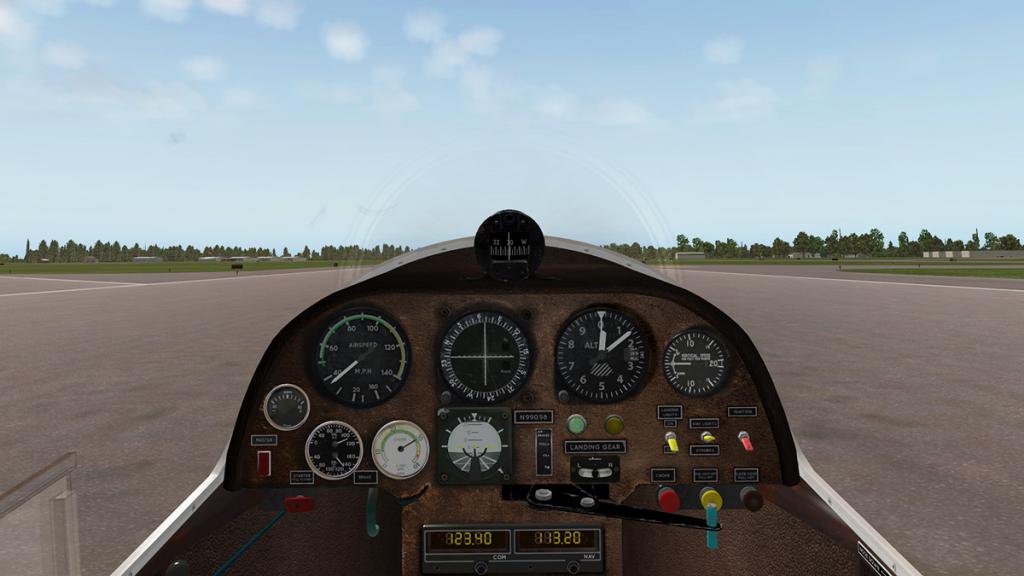
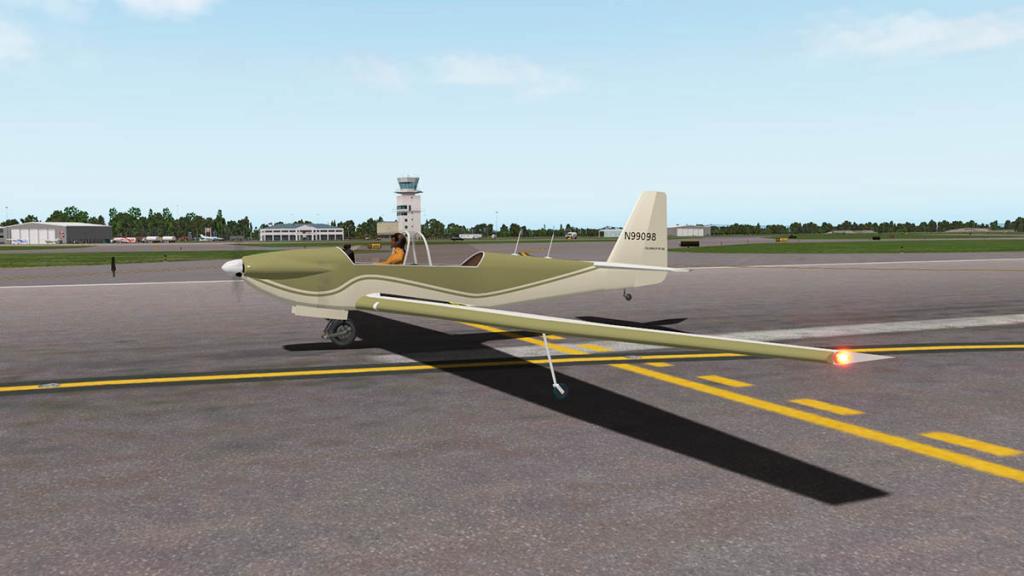
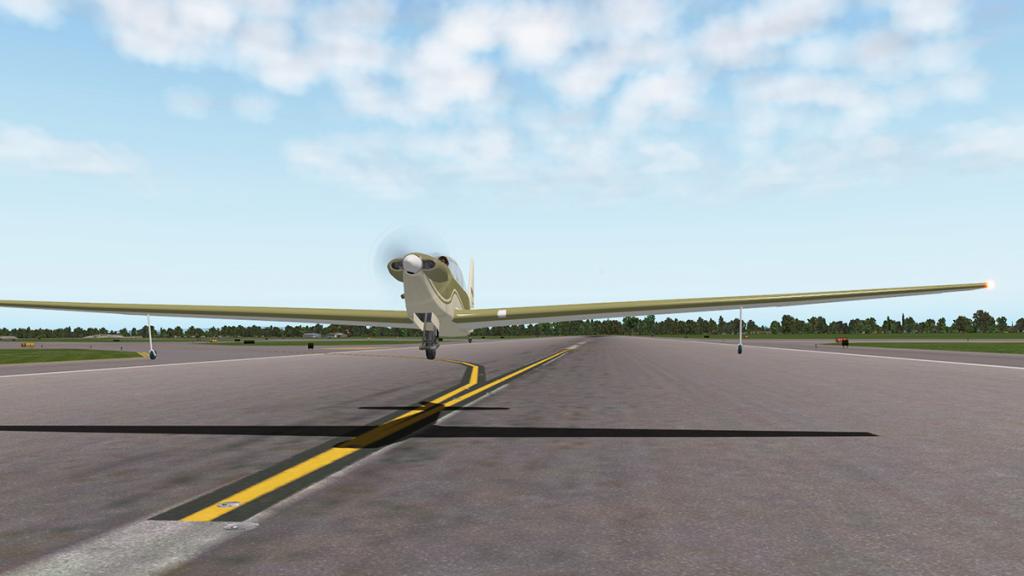
The Limbach engine is quite throaty and powerful as you increase the throttle and surprisingly in a low wind the Fournier is very stable on the takeoff roll. Around 40mph (35 knts) the tail will lift as you gather more speed and rotation is around 55mph (48knts) with a slight back pull of the stick.
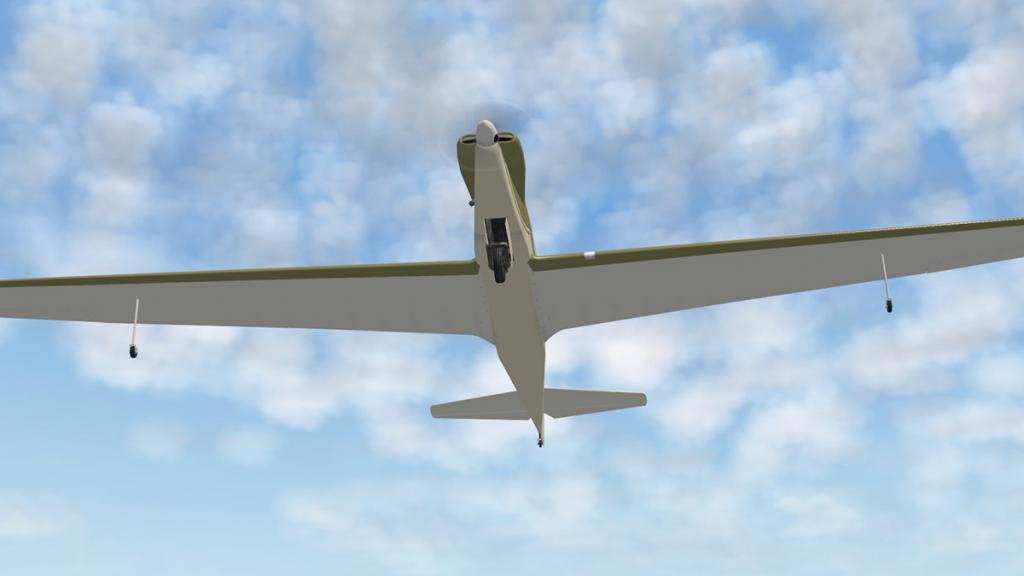
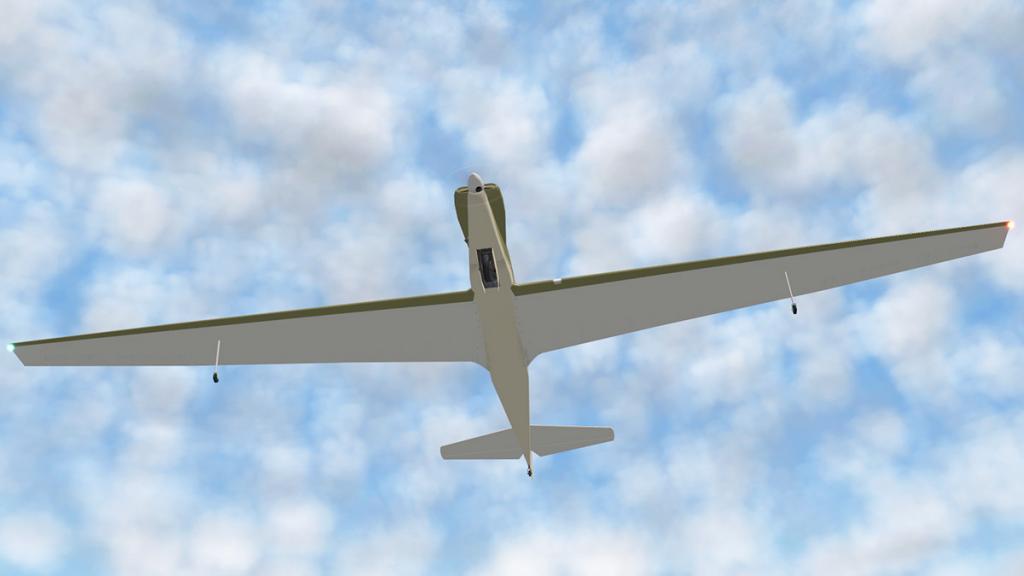
It helps to internalise that large support wheel straight away to quickly clean up the airflow around the aircraft, but you do have a fair bit of power at your disposal. The Fournier will climb quite easily but you will need to find the right balance between the power (speed) staying static and your best rate of climb, i found it was around 700fpm which is very good, but 500fpm does give you more space to go faster as you climb.


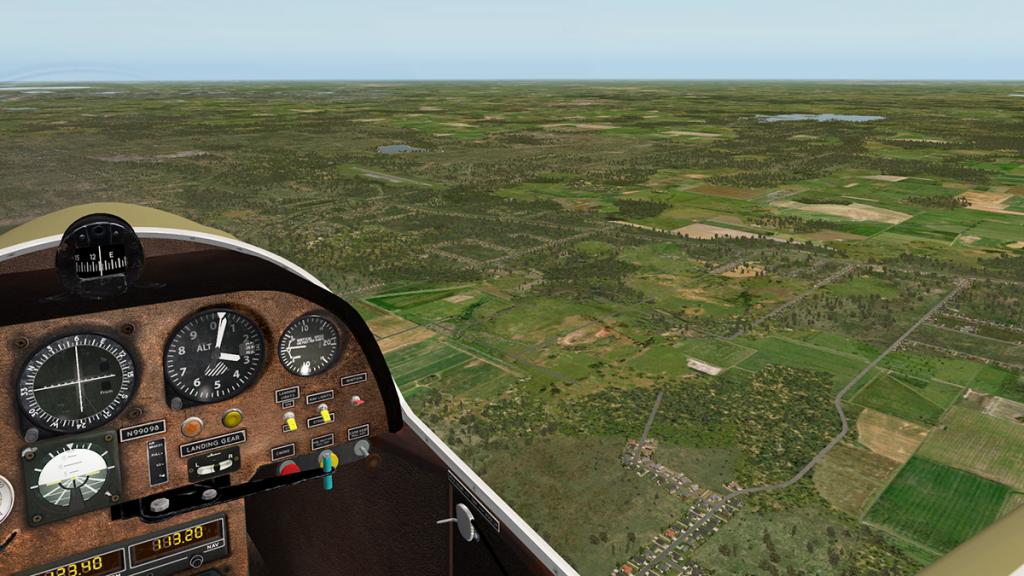
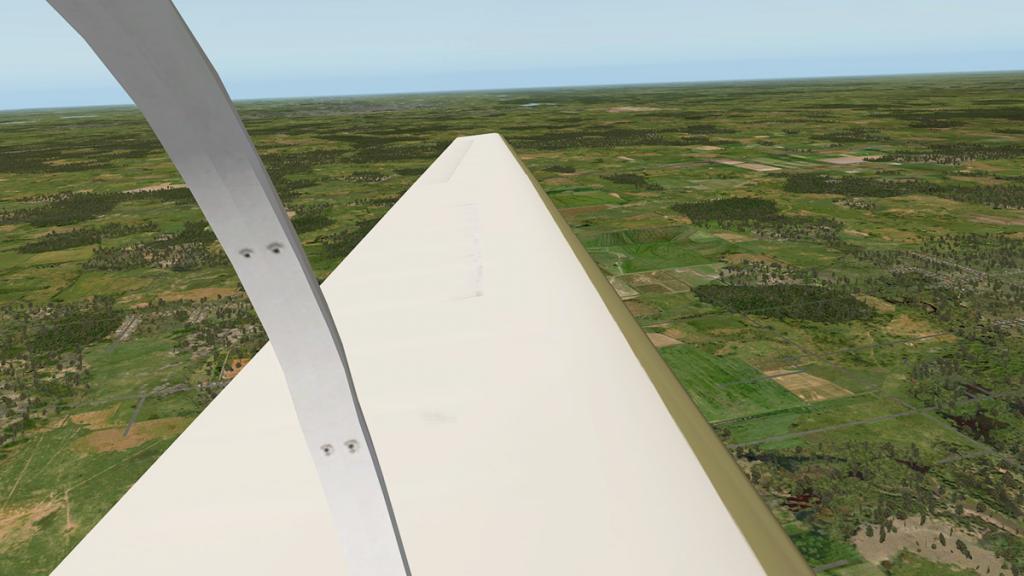
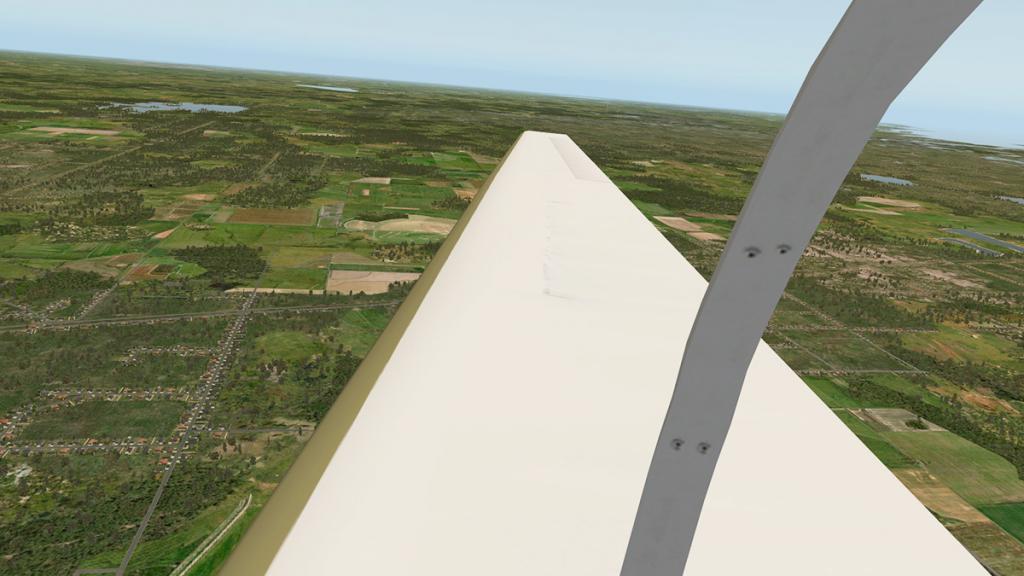

Once at your desired altitude the 360º view is very good, but you will need to adjust something before you get too relaxed.
Twiddling with the small trim lever will balance out your rate of climb and steady the aircraft, it is a little fiddly to get it right, but the aircraft is much more stable when you get the right setting and easier to fly over a distance. The only other force is the power from the propeller that gives you a slight yaw that you have to correct with the rudder pedals.
Powered to Glider flight
Once you have reached your altitude and position, you will want to go to glider mode. You stop the engine by pulling out the "Fuel Switch off" knob and then you wait until the propeller has spun down.

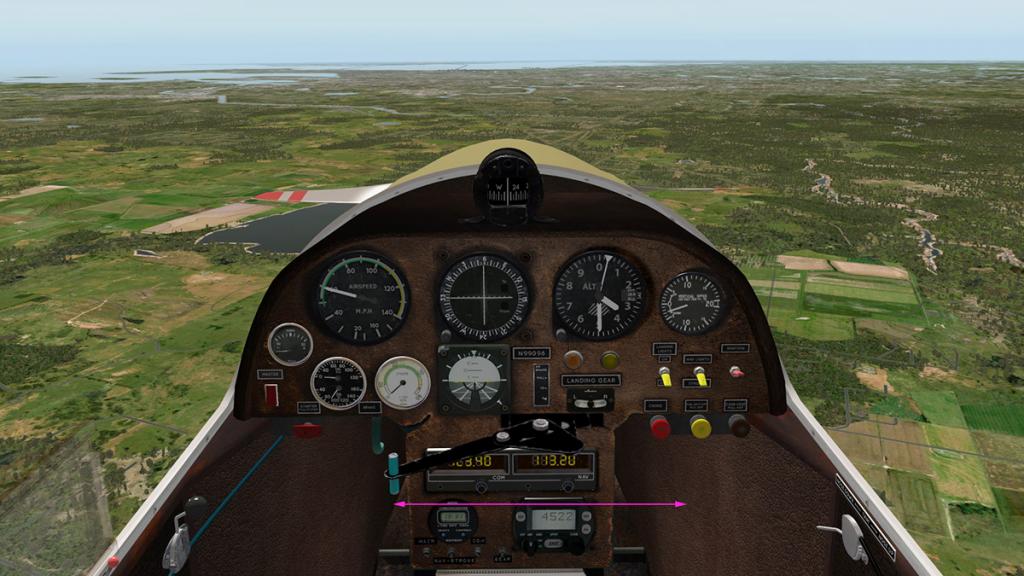
Then you feather the prop via that propeller pitch handle to lock it into a horizontal position, and you can now go soaring...
... don't however just pull the handle across without shutting the engine first and letting it spin down, as the consequences of that action will mean you will blow up the engine and have a smoke filled cockpit.


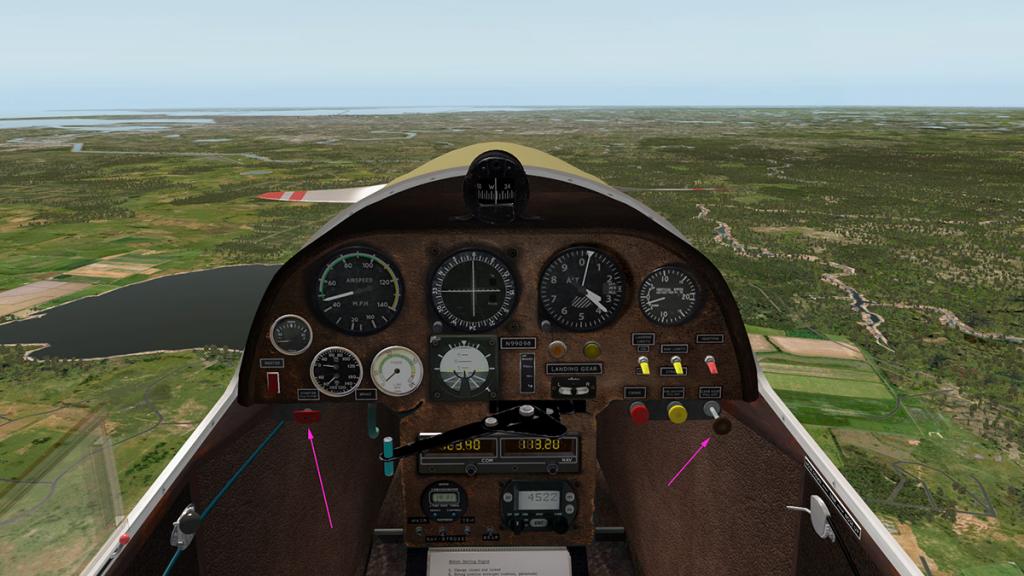
Restarting powered flight requires a bit more effort. Because the engine is not running and has become cold and so you will usually get the "Carb Ice" notice and the engine is now too cold or frozen to restart. So you first have to pull out the "Carb Heat" knob and when the notice disappears can you then push in the fuel shutoff, then release the propeller from the horizontal position and finally hit the left lower side starter button. The engine won't start straight off, but you will need a little throttle (not too much to flood it) and then it will fire back into life.
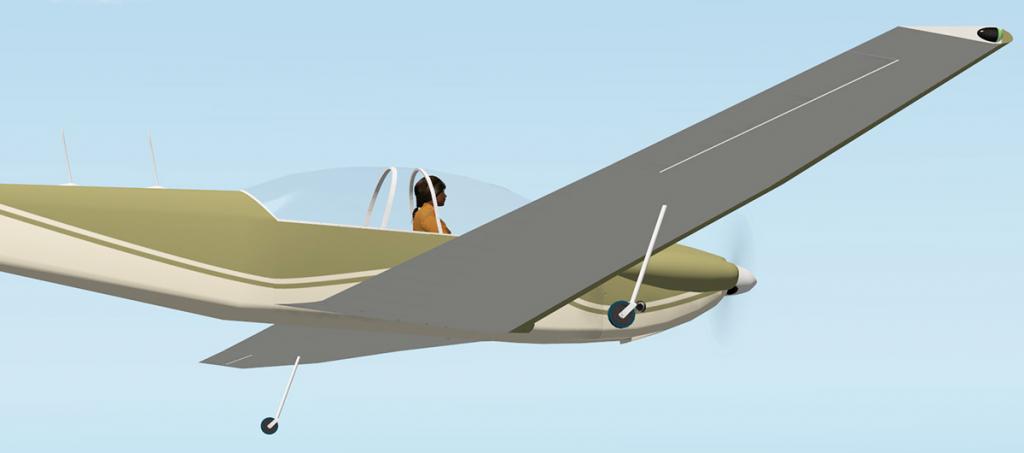
With the Fournier being a well balanced Glider (correct trim important) then the aircraft is very light and easy to fly. It can turn on a dime as they say, but it is very easy to position and slips down easy for approach.

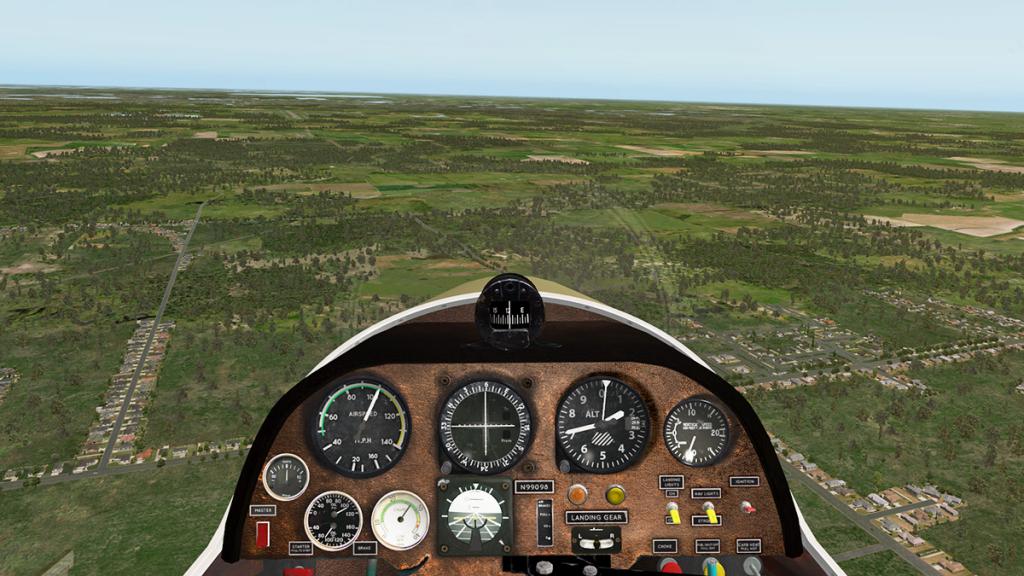
The airbrake lever is positioned on the floor and you pull it up (two settings available) as noted on the panel. Note the built in checklist.
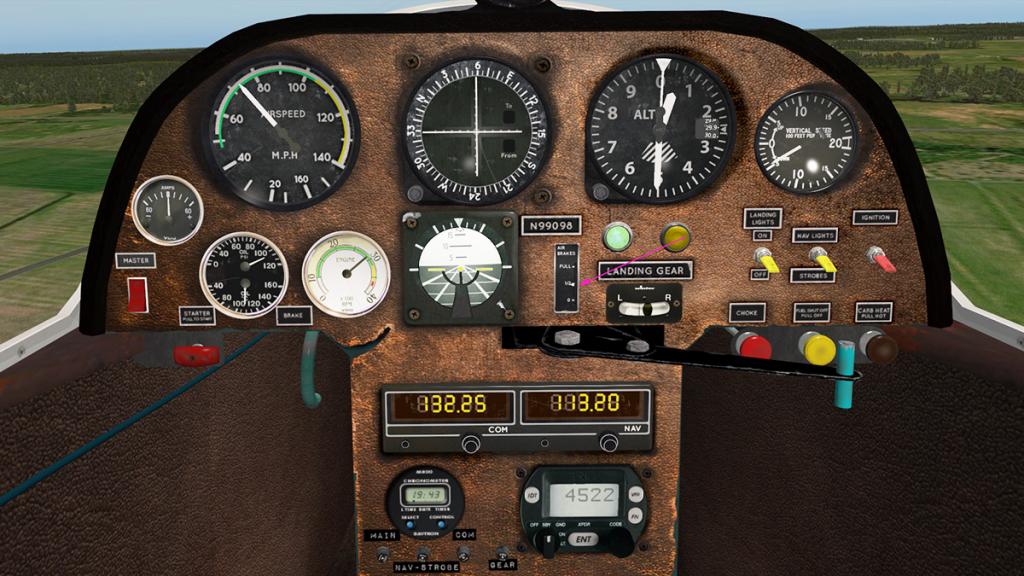
Those two stage airbrakes come in like throwing an anchor out of the cockpit. So you have to be aware of the sudden speed drop and to not create a bad stall.
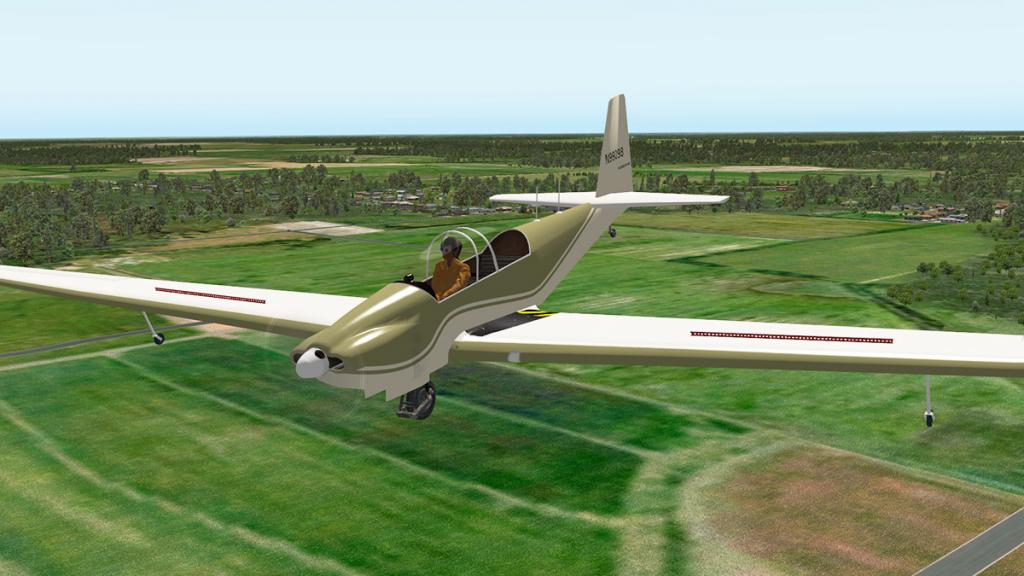
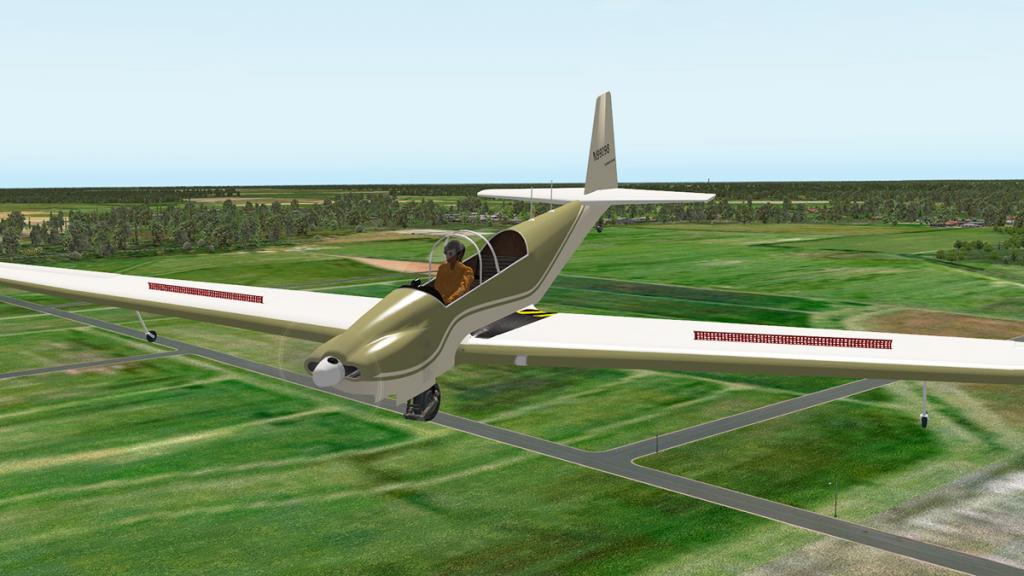
In the air we can get a better look at that big single landing wheel.

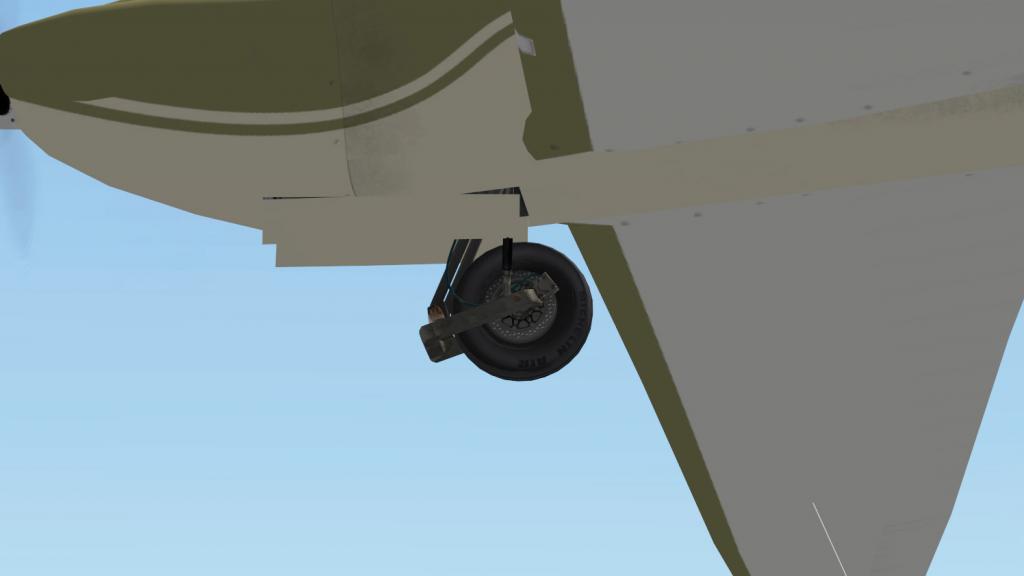
The single wheel with a safety guard is very well modeled and animated.
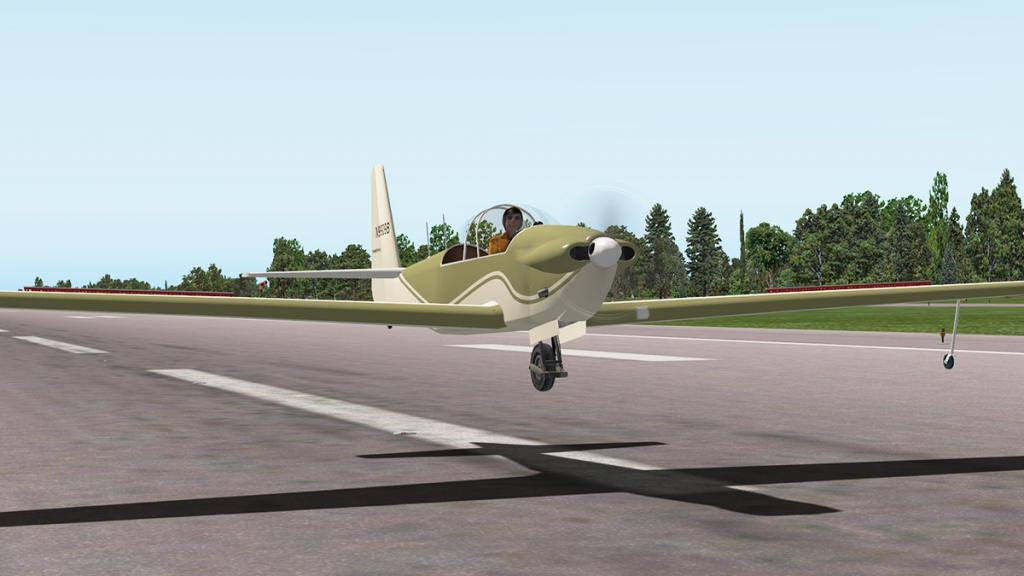

Excuse the pun but you sort of glide in to a stable landing at around 40mph (35knts) landing speed, use the airbrakes wisely unless they will catch you out if you are going to use them close to the ground, I found a quick up and down of the lever adjusted the speed for touch down.
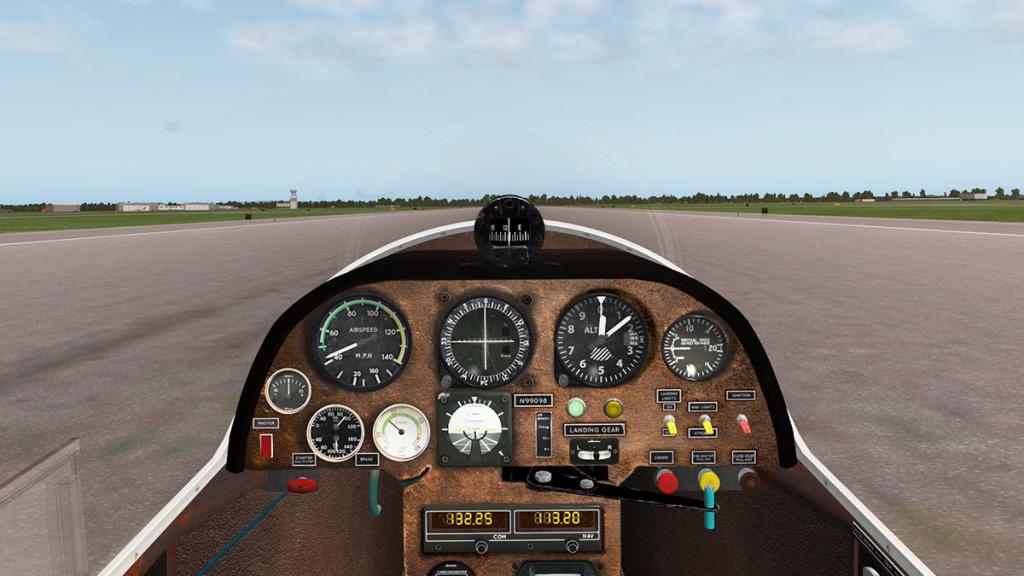
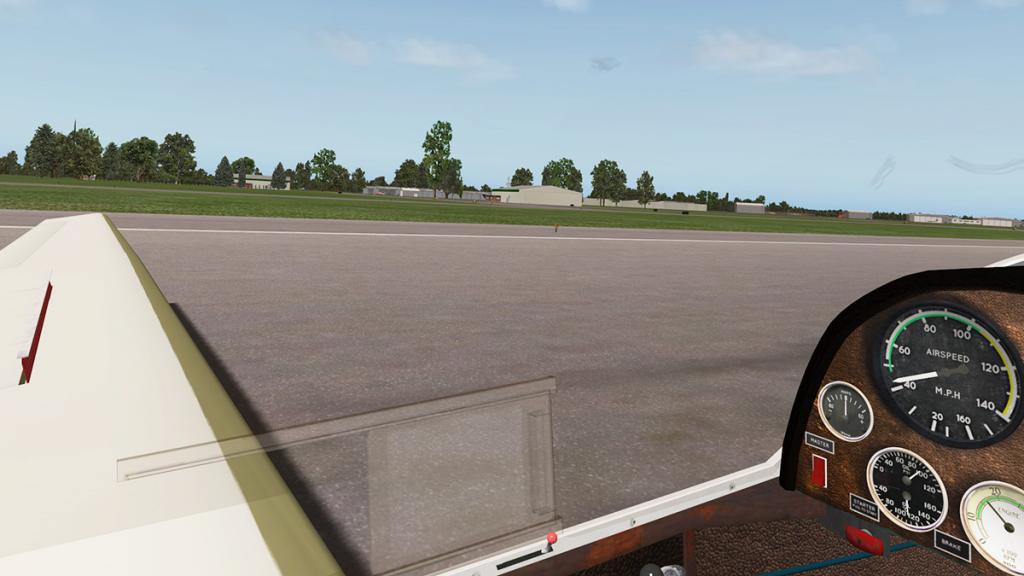
The Fournier is quite stable back on the ground with those out set training wheels, there is none of this sudden twist when you have to put a wing down on the grass to stop, like you do in a normal glider.
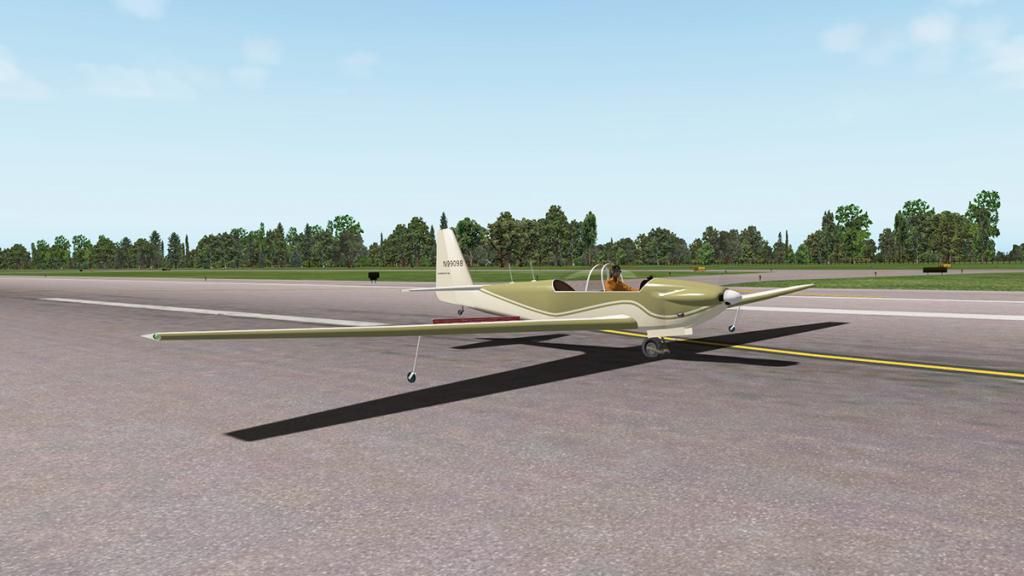
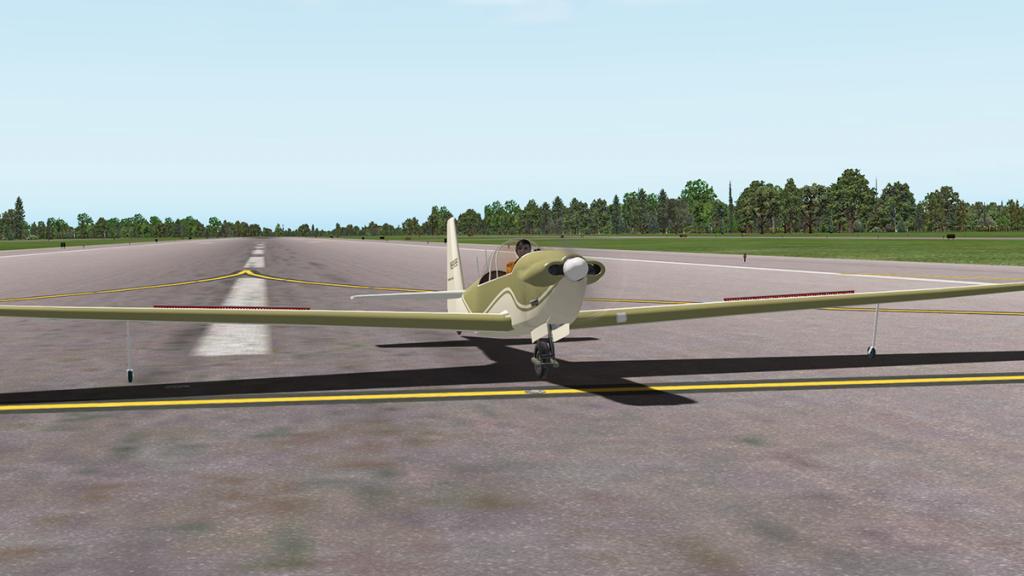
A gentle touch of the brakes when you have run off a little of the speed will bring the Fournier to a stop and it is of course a little faster stopping on grass. Taxiing is no problem with easy manoeuvrability just like any other taildragger.
Menu


You can access a pop-up menu by pressing the (71) tag in the lower left screen.
The simple menu covers "Field of View". There are eight spot points of view that are good except for the two outer views which note the view towards the aircraft, but actually face forward?
Covered or open cockpit, Show pilot or an empty aircraft and the radio set view behind the control stick. And if you select the clickboard image it shows a forward view above the compass?
Liveries
There are eight liveries including a blank white. All are quite bland, and more livery detail and depth would have helped in bringing the aircraft to life more as the 3d modeling is quite good, and there is quite a wasted good selection of great real life liveries available for this aircraft on the web

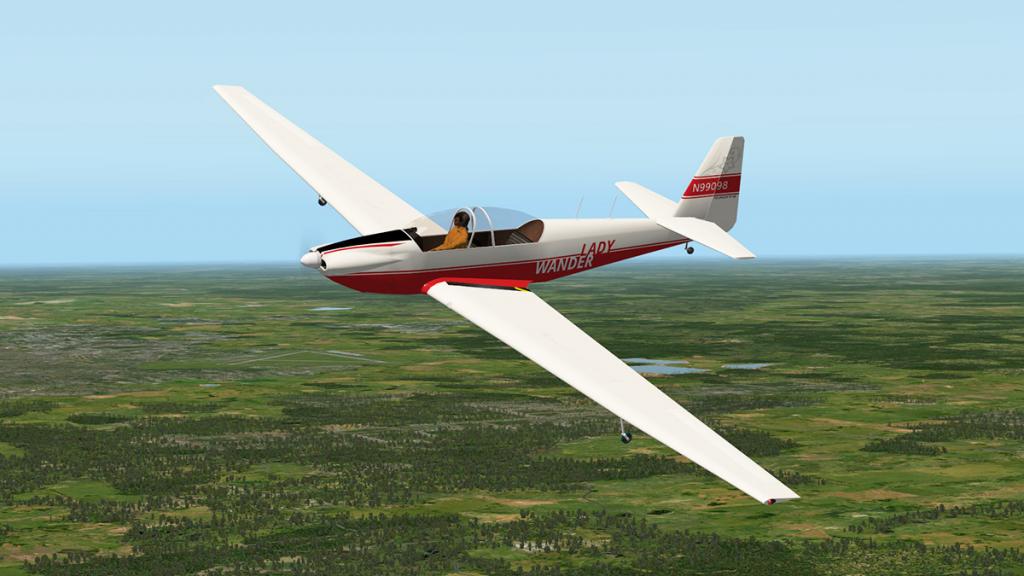

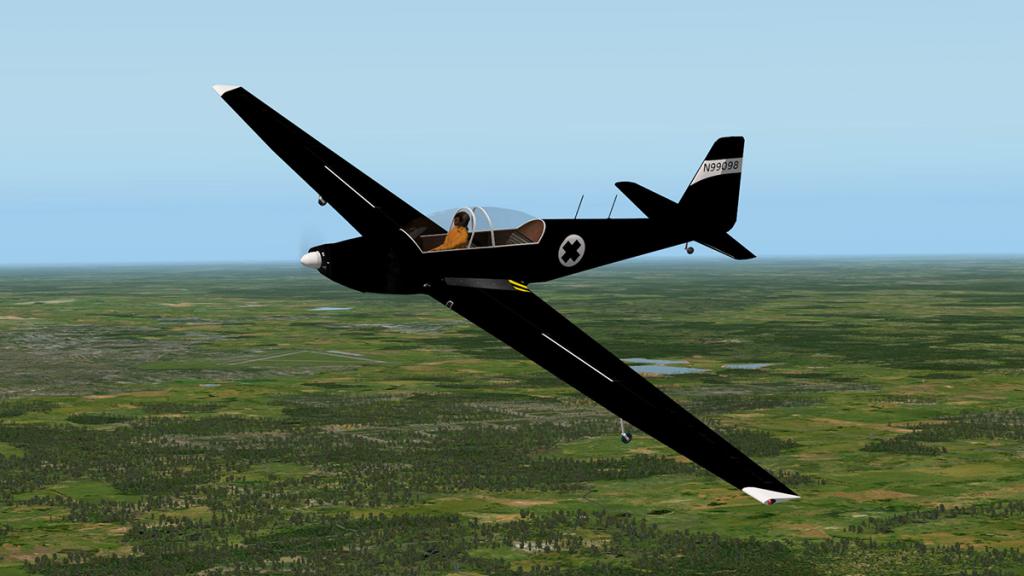
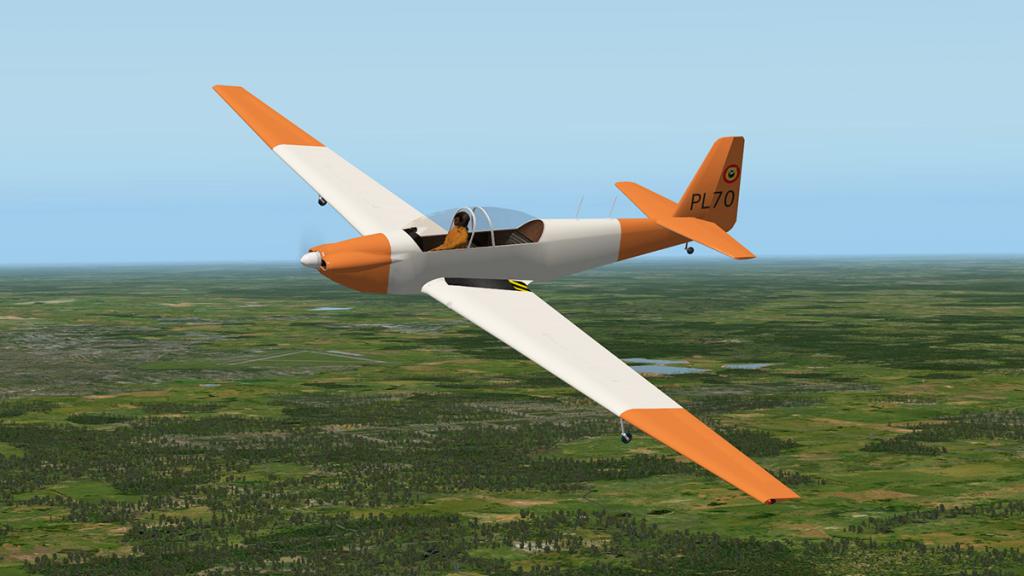


Lighting
I don't think the Fournier can be flown at night as the panel is completely dark and the instruments are not very visible or even recognisable, externally it is also standard navigation lights, wing strobes and a single large landing light.
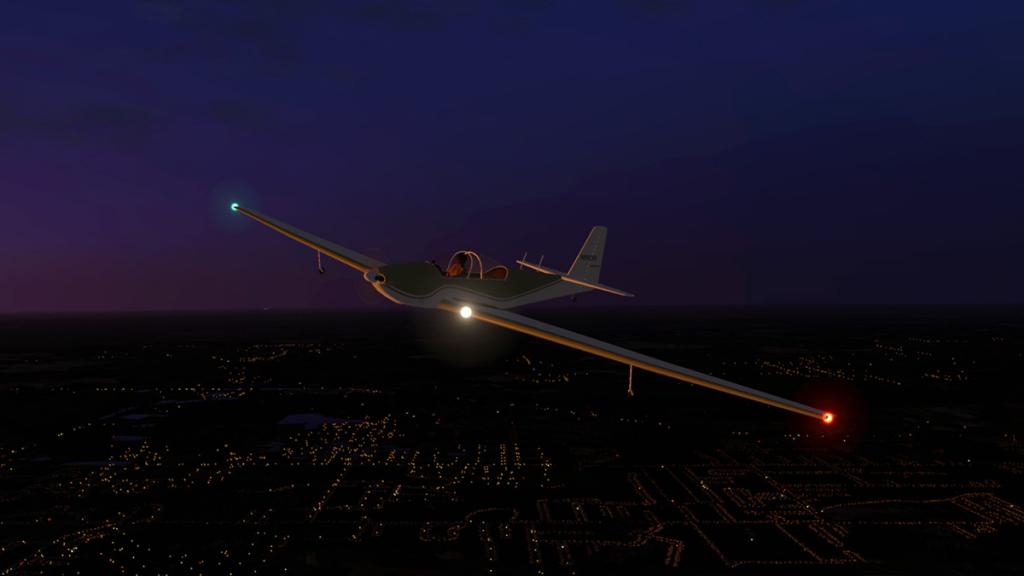
Performance
Wing Span : 55ft 10in (17.02m)Empty Weight : 1,014lb (460kg)Gross Weight : 1,499lb (680kg)Max Cruise Speed : 118mph (190km/h)Economy Cruise : (75mph) (120km/h)Stall Speed : 42.5mph (68km/h)Service Ceiling : 18,050ft (5,500m)Engine : 68hp Limbach SL 1700 ESummary
Internally and in flying performance the Fournier RF-5B is very good, but the average skin of the aircraft and liveries lets down a far better aircraft sitting underneath. Real RF-5B's have more detail as you can see the wooden slats and wing frames under the canvas, were as here the wings are mostly plain on both sides. There is slight evidence of this canvas on frame but not enough to give the aircraft life or a realistic look. X-Plane is now in the world of hyper-realistic quality modeling and textures, and you notice that here.
The effects and design are good inside the cockpit, and it is really great and easy to fly and convert from powered flight to soaring flight and back again.
If you want a a great motor glider and there is certainly a lot of versatility and even a lot of fun built into this great classic French aircraft, then you will love this clever machine from a very clever Frenchman.
______________________________________________________________________
Yes! the Fournier RF-5B by Avia71 is NOW available from the new X-Plane.Org Store here :
Price is US$19.95
Features:- Complete 3D cockpit
- Two versions : canopy and opencockpit (switch even in flight)
- Two GPS included : simple receiver and X-Plane 430 (switch even in flight)
- Instrument switches (even in flight)
- HD textures
- Custom sounds
- Custom animations
- 8 livreries
- In flight special procedure for feathered propeller, as the actual aircraft
- Checklists and procedures inside the cockpit
- Pop Menu
- Easy access around cockpit and outside
- Field of view adjustment
- Switch between 2 models : opencockpit or canopy
Installation and documents:
Download for the Fournier RF-5B is 55.90mb and the unzipped file is deposited in the "General Aviation" X-Plane folder at 66.10mb.
An 18 page manual with checklists and original Appendix is supplied
Requirements:
X-Plane 10.45+ (Any edition)Windows, Linux and Mac in 64bit mode1Gb VRAM Video Card Minimum - 2GB VRAM Recommended_______________________________________________________________ Review by Stephen Dutton14th September 2016Copyright©2016: X-PlaneReviewsReview System Specifications:
Computer System: Windows - Intel Core i7 6700K CPU 4.00GHz / 64bit - 16 Gb single 1067 Mhz DDR4 2133 - GeForce GTX 980/SSE2 - Samsung Evo 512gb SSD
Software: - Windows 10 - X-Plane 10 Global v10.50
Addons: Saitek x52 Pro system Joystick and Throttle : Sound - Bose Soundlink Mini
Scenery or Aircraft
- KLAL - Lakeland Linder Regional Airport 2.01 by Drankum - (X-Plane.Org) - Free
-
9 hours ago, Rivegauche610 said:
I was able to rebuild my 10.45 successfully following your instructions in "post beta heaven"! I copied the successful install to an external drive so when I upgrade I have a backup. Thank you again.
Well that is good news, I still think if you still upgrade to 10.50, then the preferences are the only problem to restart, so pulling them and restarting will create a new set of 10.50 prefs and a clean start to the app. SD
-
8 hours ago, Rivegauche610 said:
Well, I was premature in upgrading, as were others, it seems. The program now stops on the Quick Start page and when I go to click on an airplane the line above is selected. And then nothing else works - clicking on "Get Flying" or whatever it is called does nothing. Not happy. I have asked in several forums for a reversion to 10.45.
Okay first pull your preferences in the "Output" folder. It means that you will have to rebuild your settings from scratch but it will clean out the 10.45 settings, or you can rebuild the X-Plane app as I noted here: Post beta heaven
Older poor running computers do this, they need very, very fine tuning to perform correctly and the only way to that is to rebuild the preferences to the new settings.
A good tip is that if you get a smooth running computer then make a save/copy of those current preferences and keep them safe, then if it goes bad you can then just copy the best working preferences back in to get back to the same correct working level.
10.50 is more efficient than 10.45, so it should run better... so no don't go backwards. SD
-
54 minutes ago, Rivegauche610 said:
Stephen, will this new release work as well on modestly powered systems as 10.45 did? Asked a different way, does it require more CPU oomph and a more robust video processor than its predecessor? I will upgrade to a capable PC, but for now I run X-Plane well enough on my MacBook Pro with all the extras turned way down.
Thanks,
Kevin
Yeah I don't see why not as v10.50 doesn't have anything in there that could hurt framerate, if anything the simulator should be slightly better as there is a fair bit of refinement, clouds are certainly improved but don't expect miracles... SD


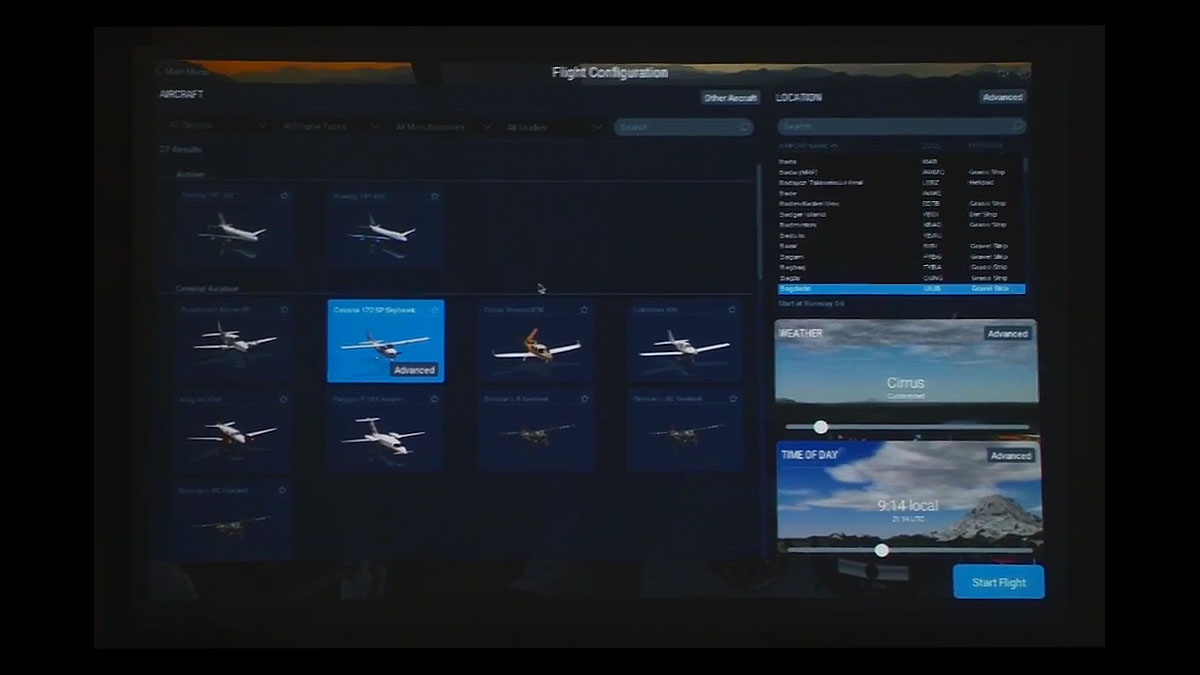
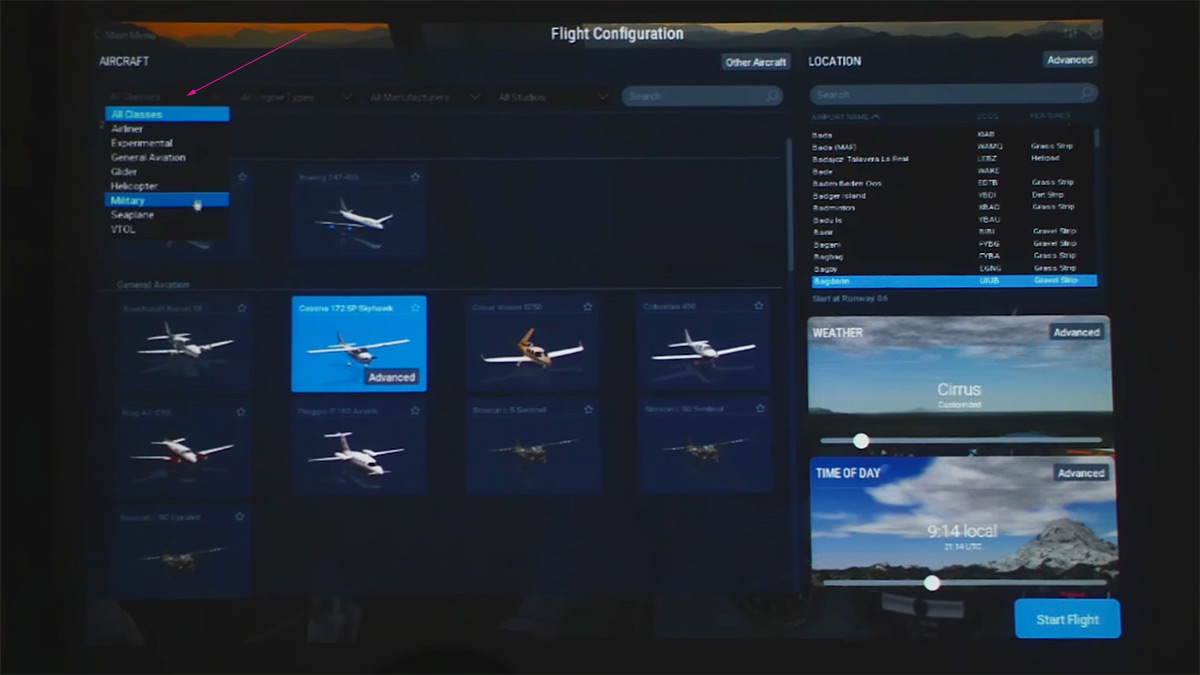
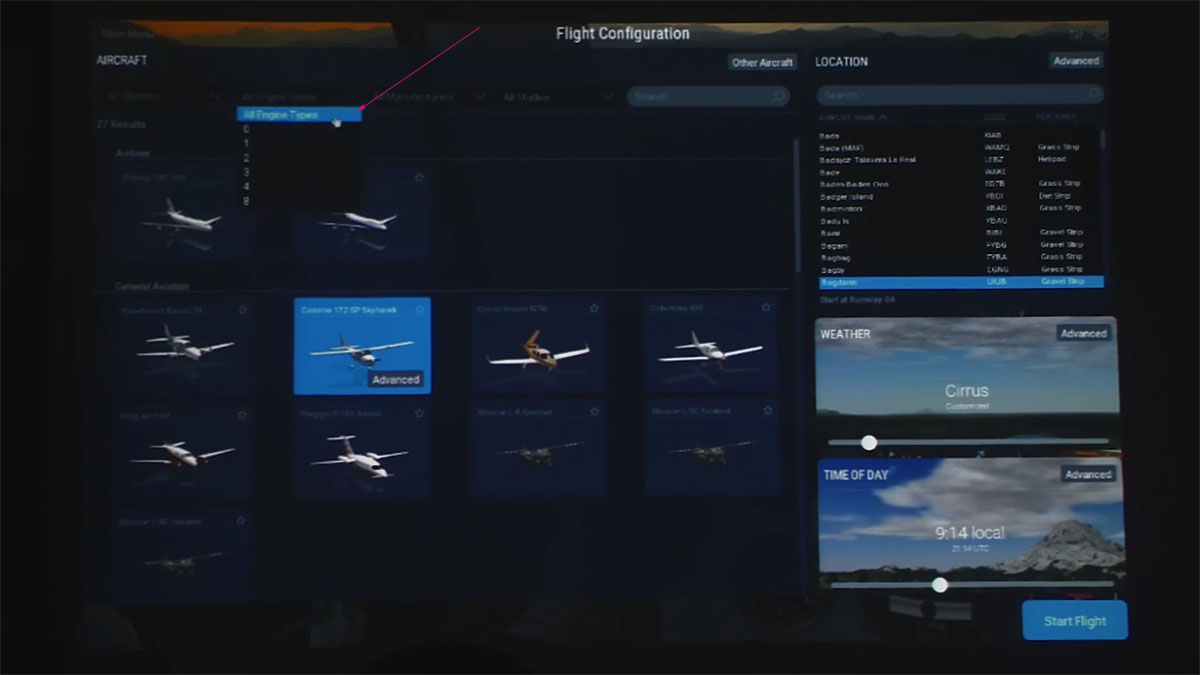
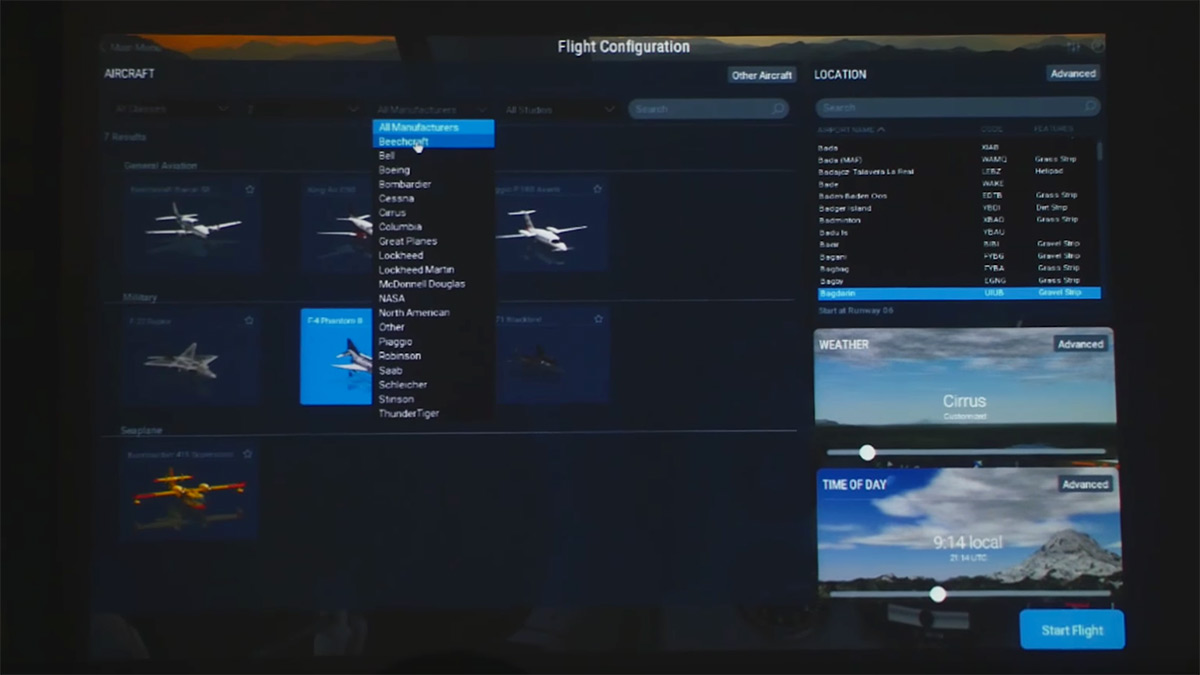

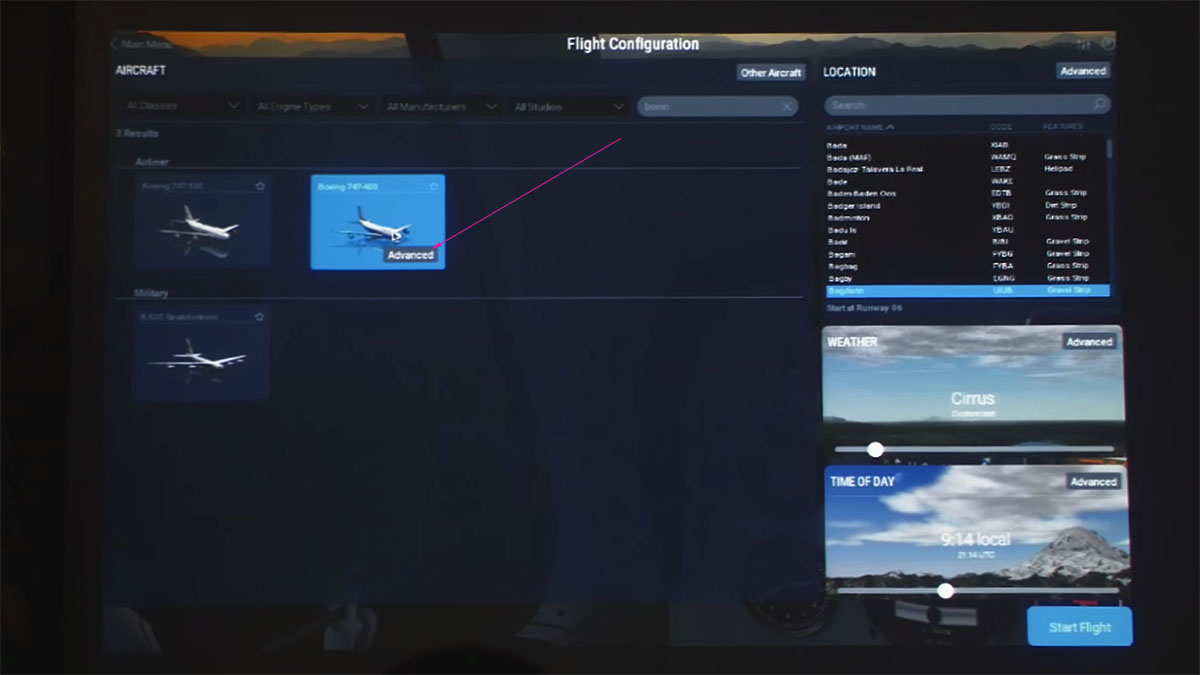
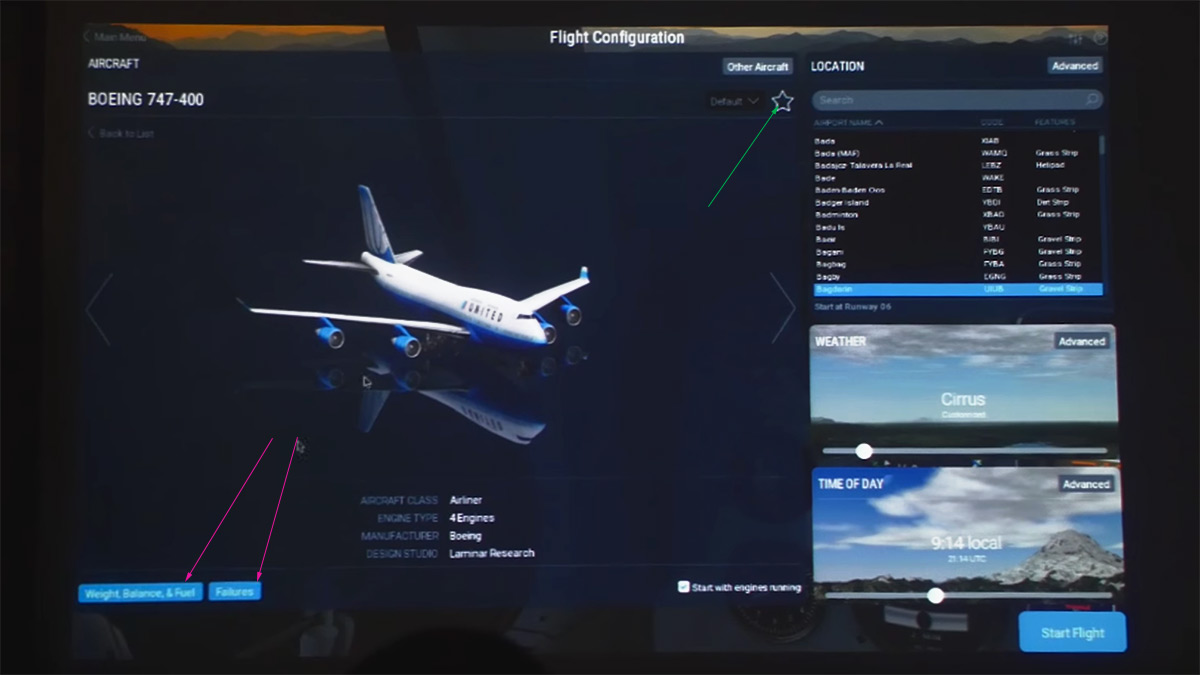
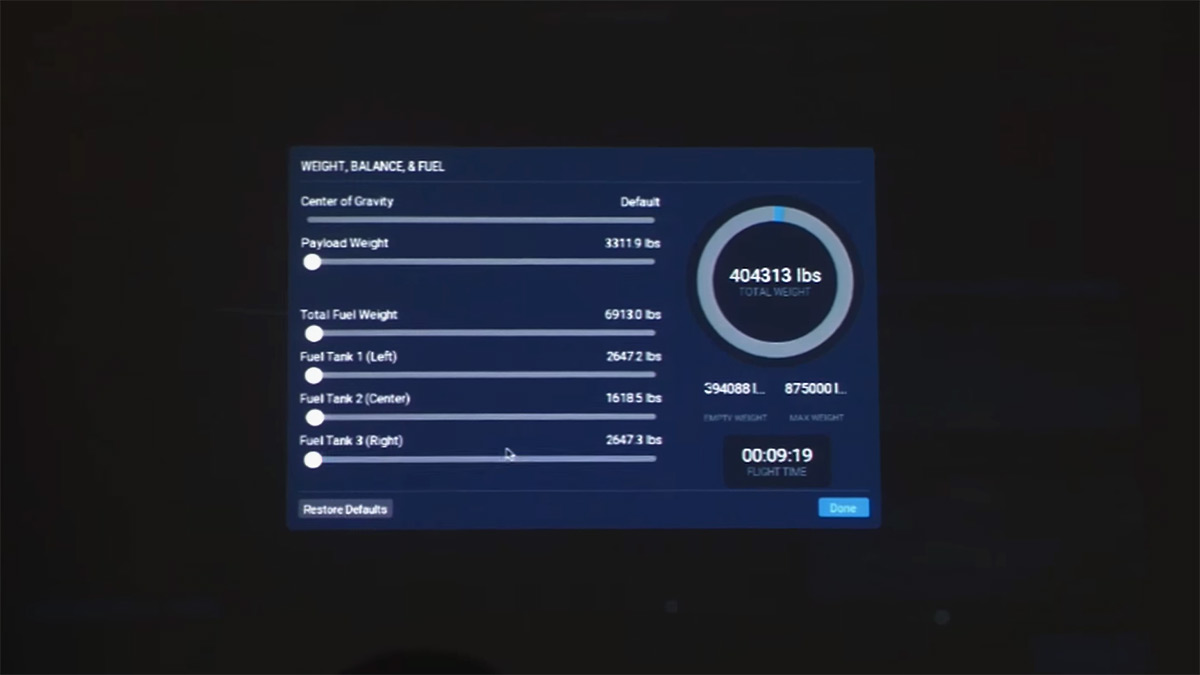


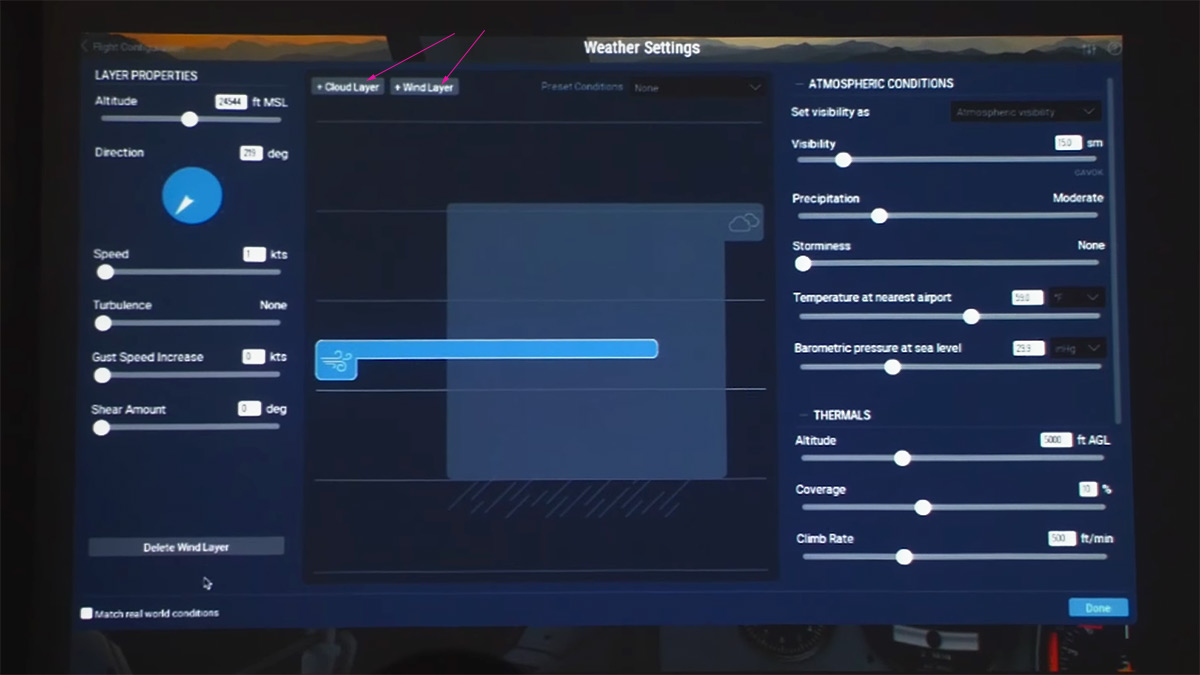


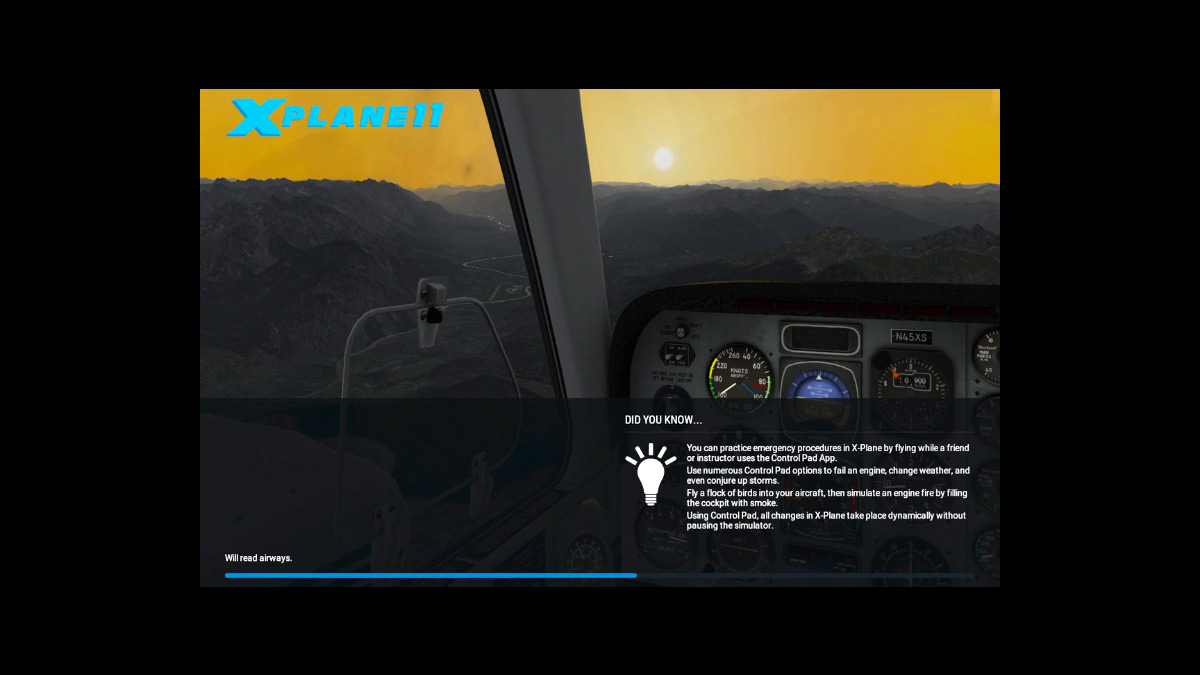


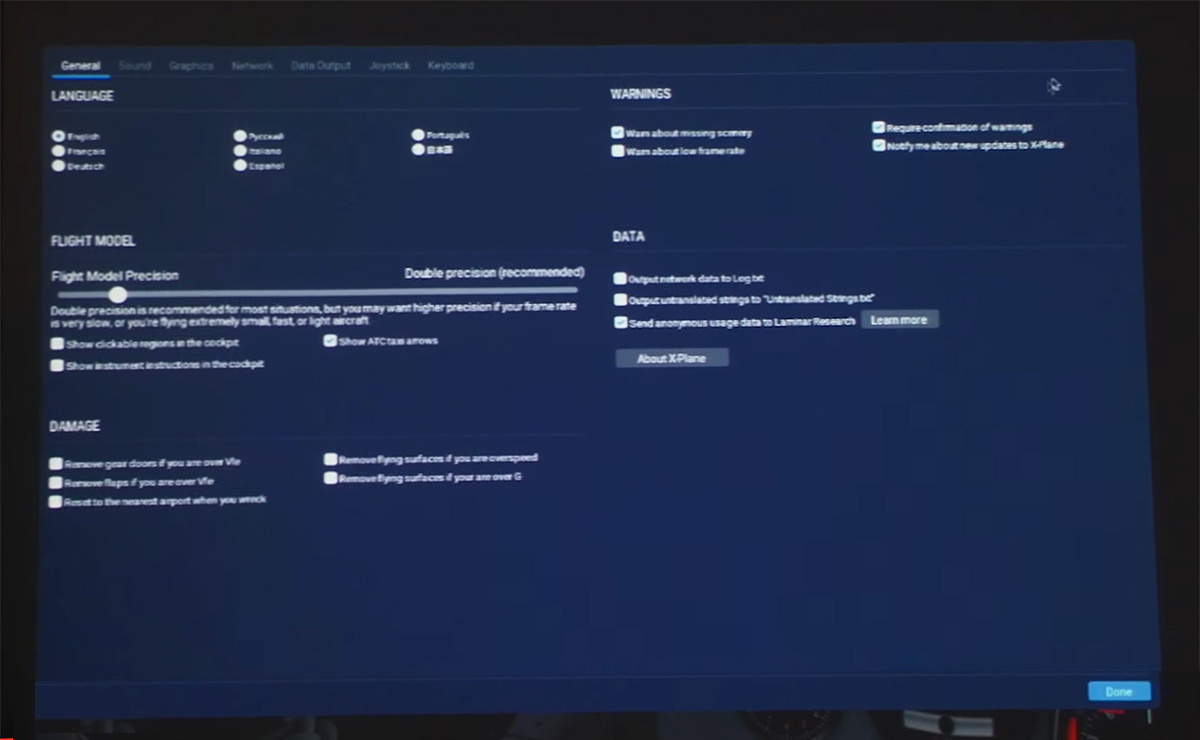


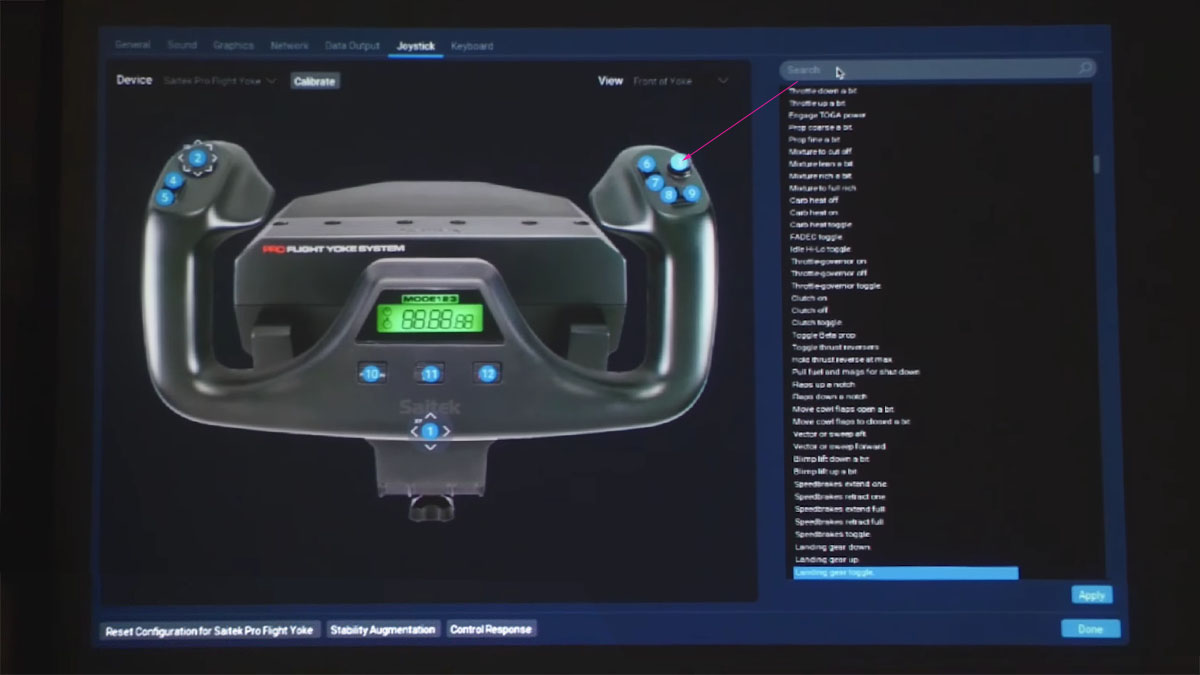


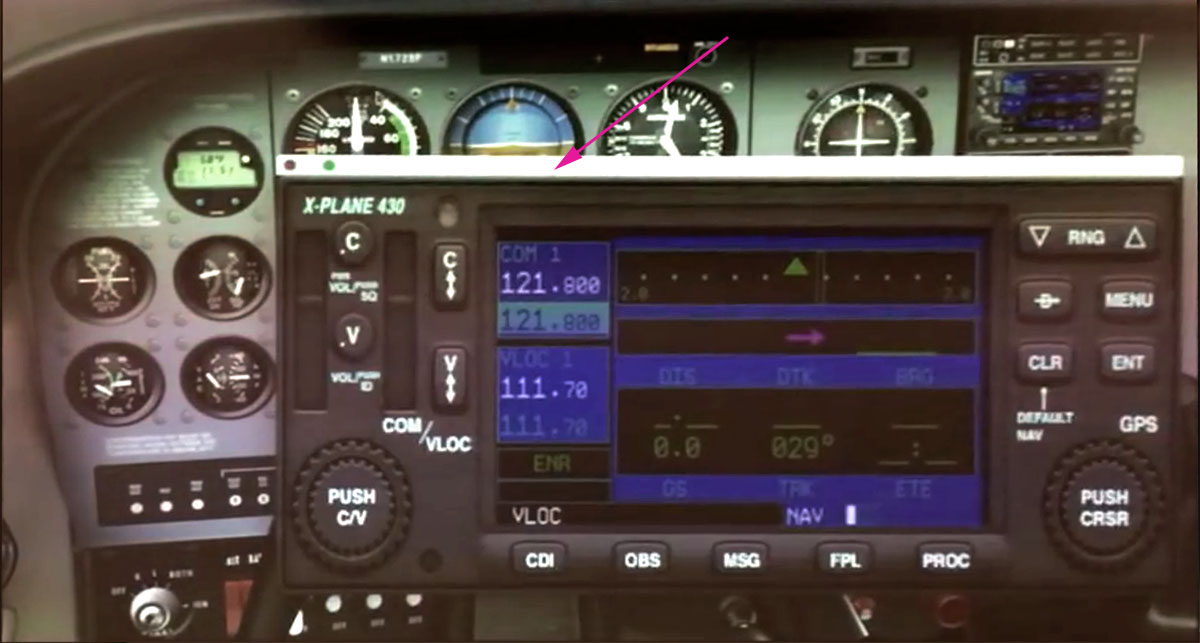


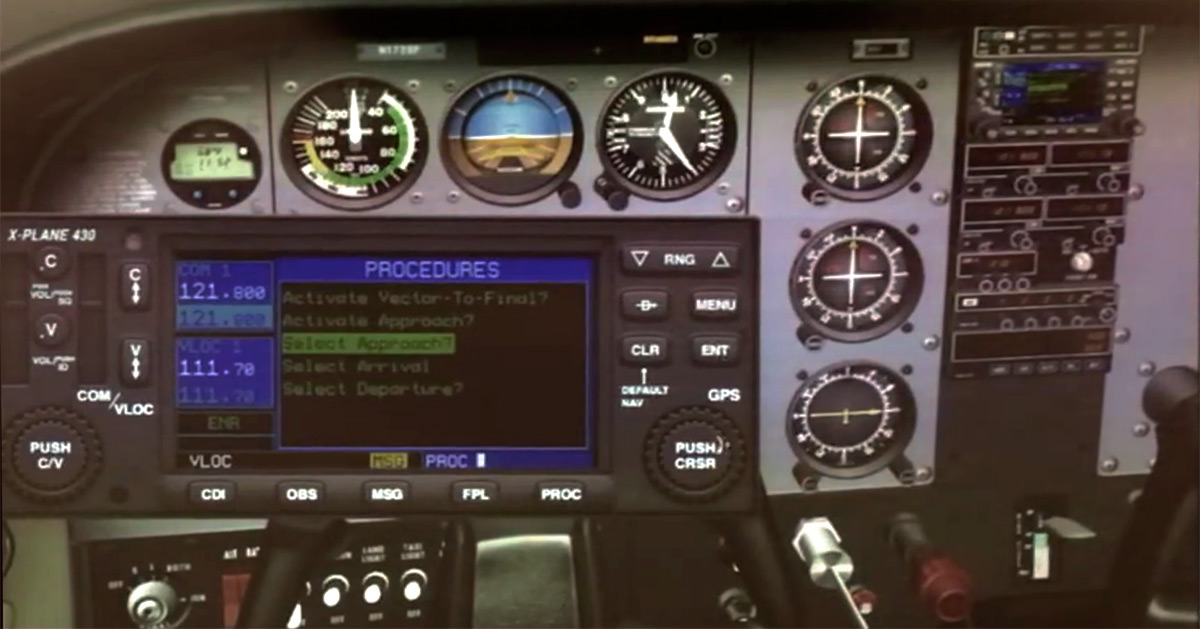
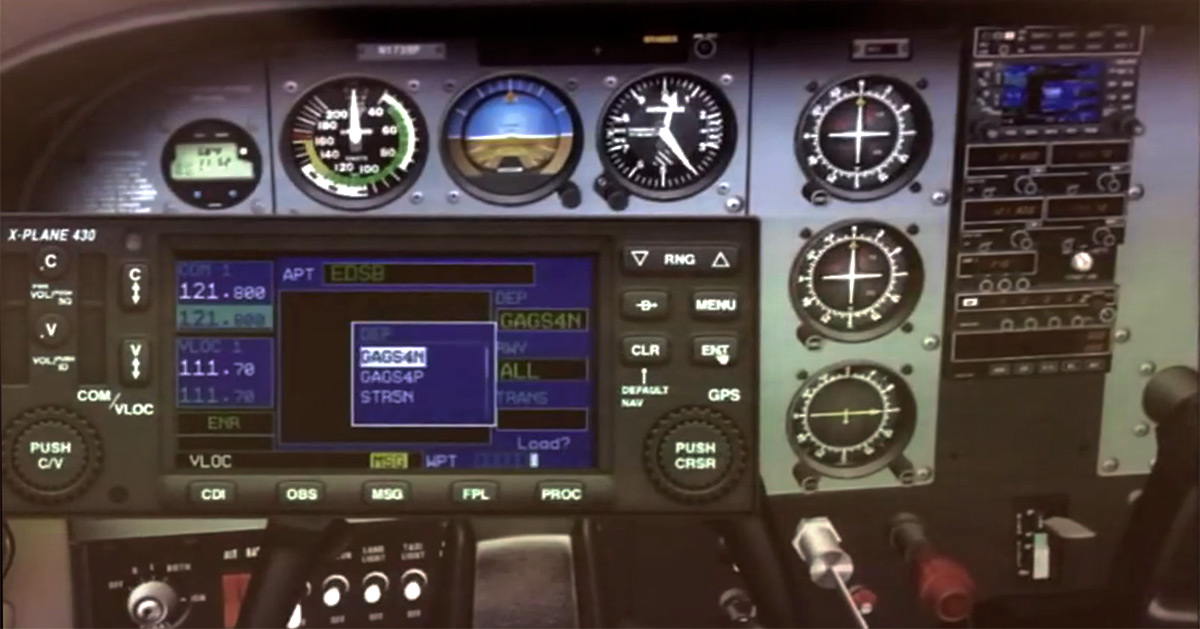
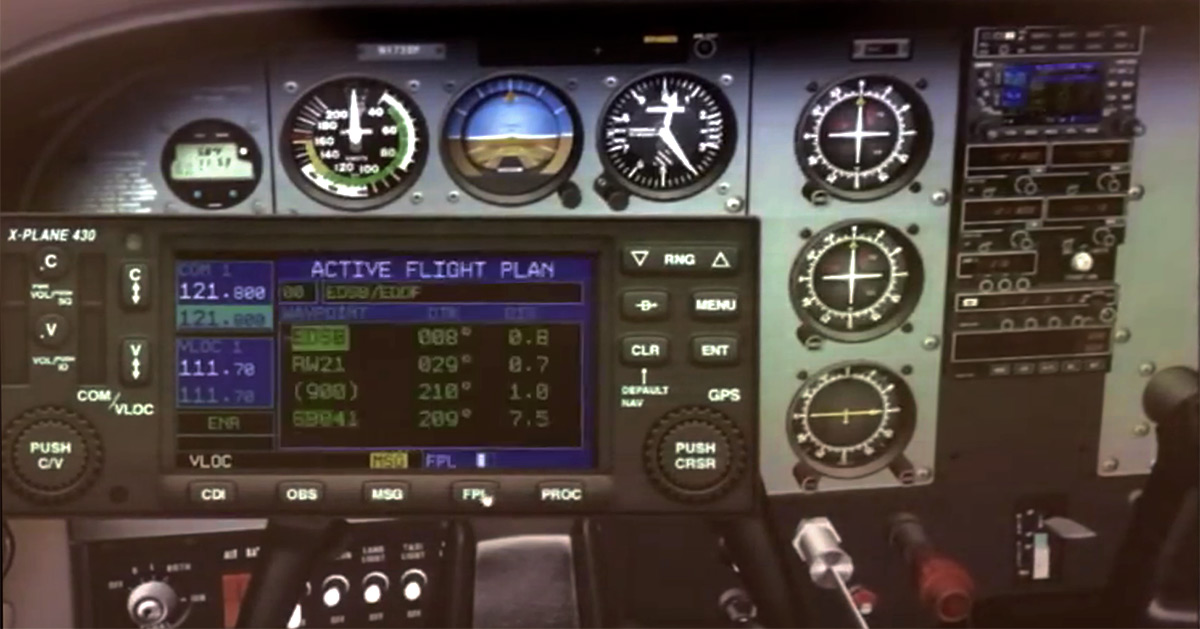
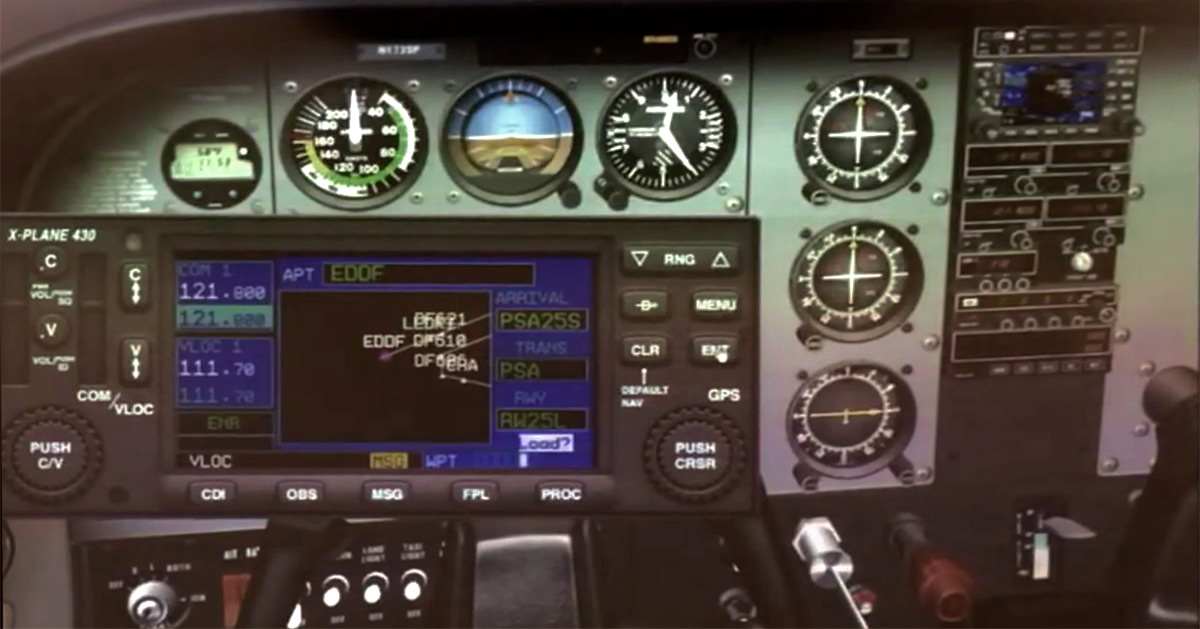


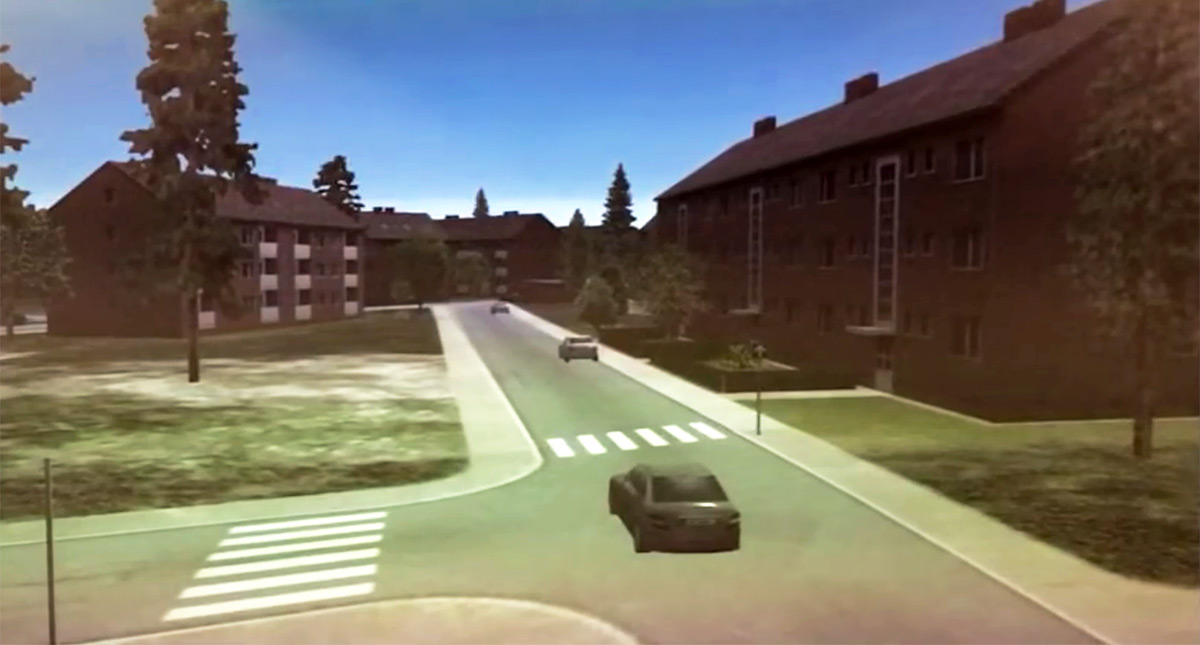


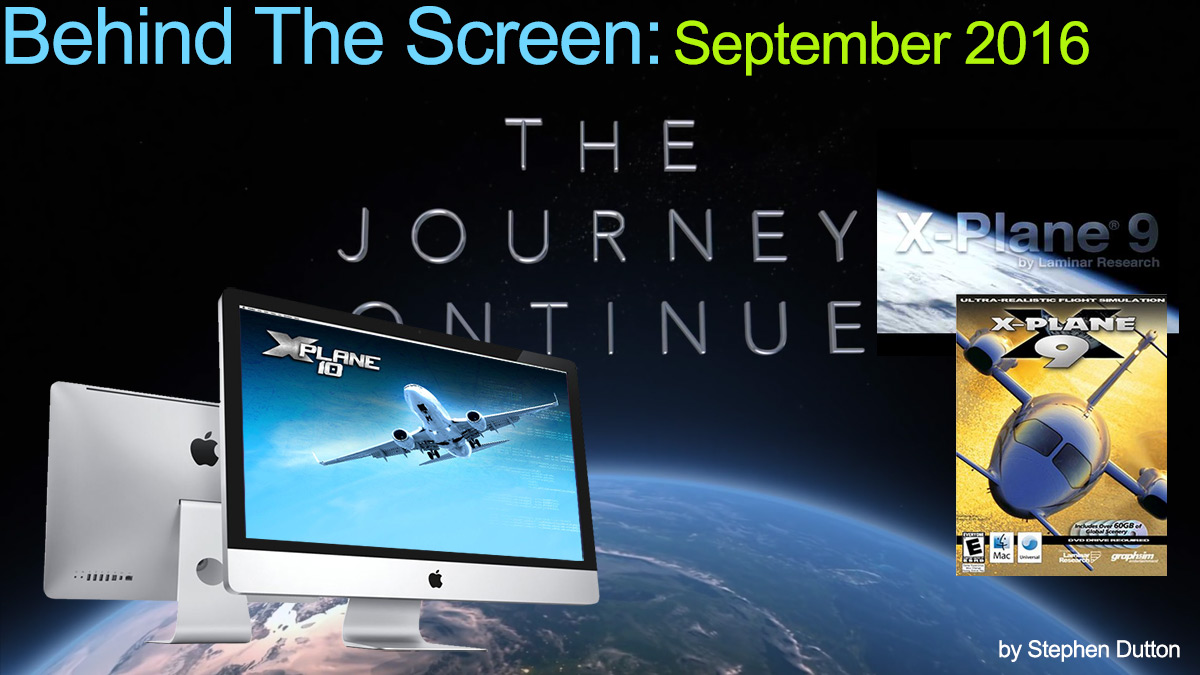
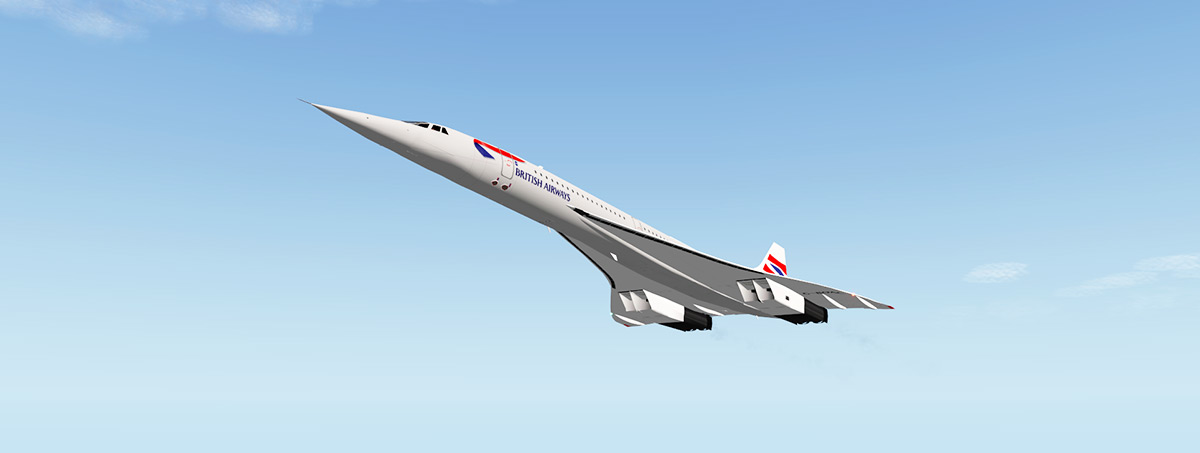
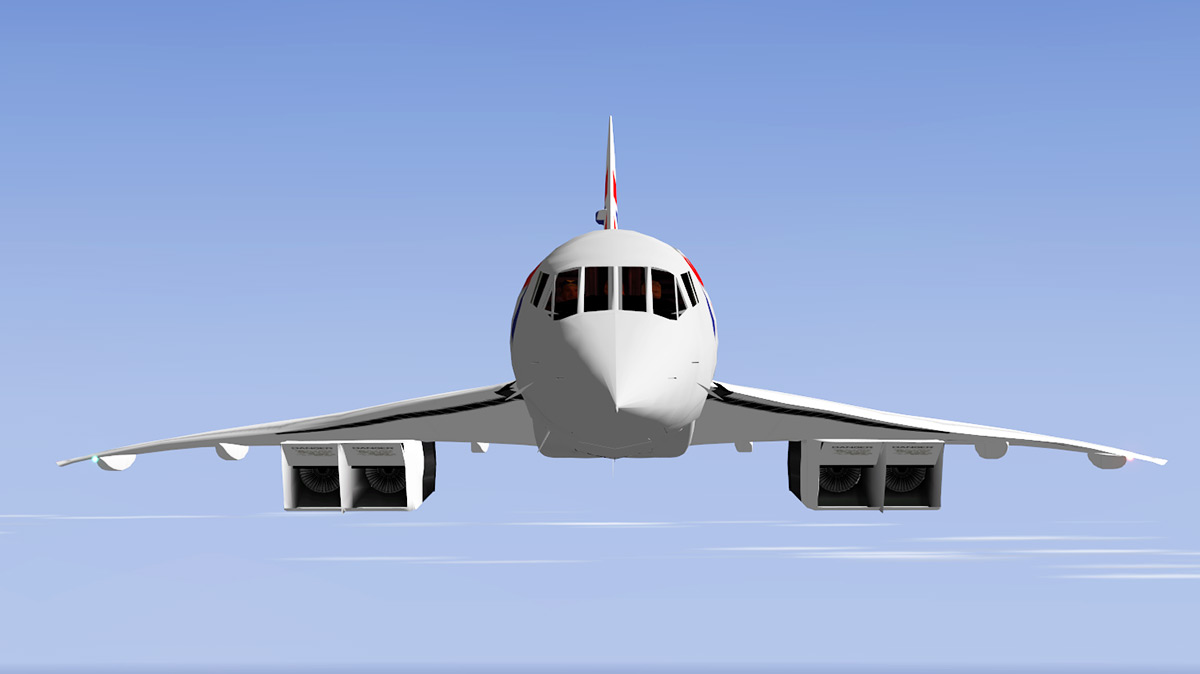
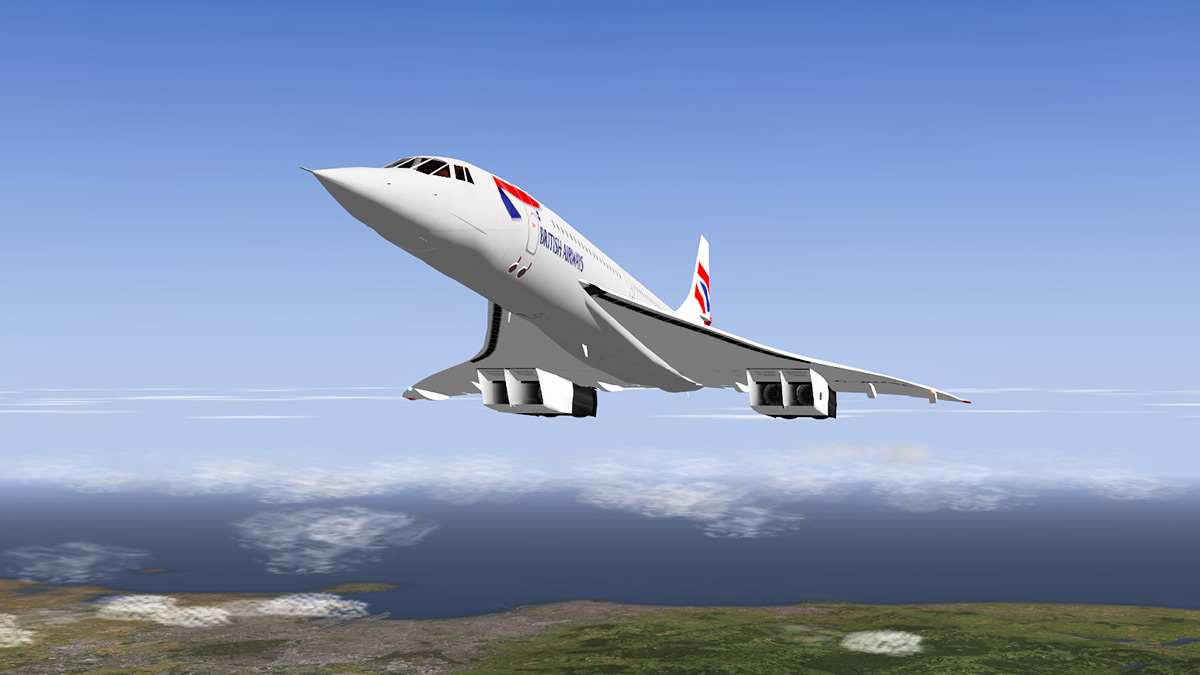
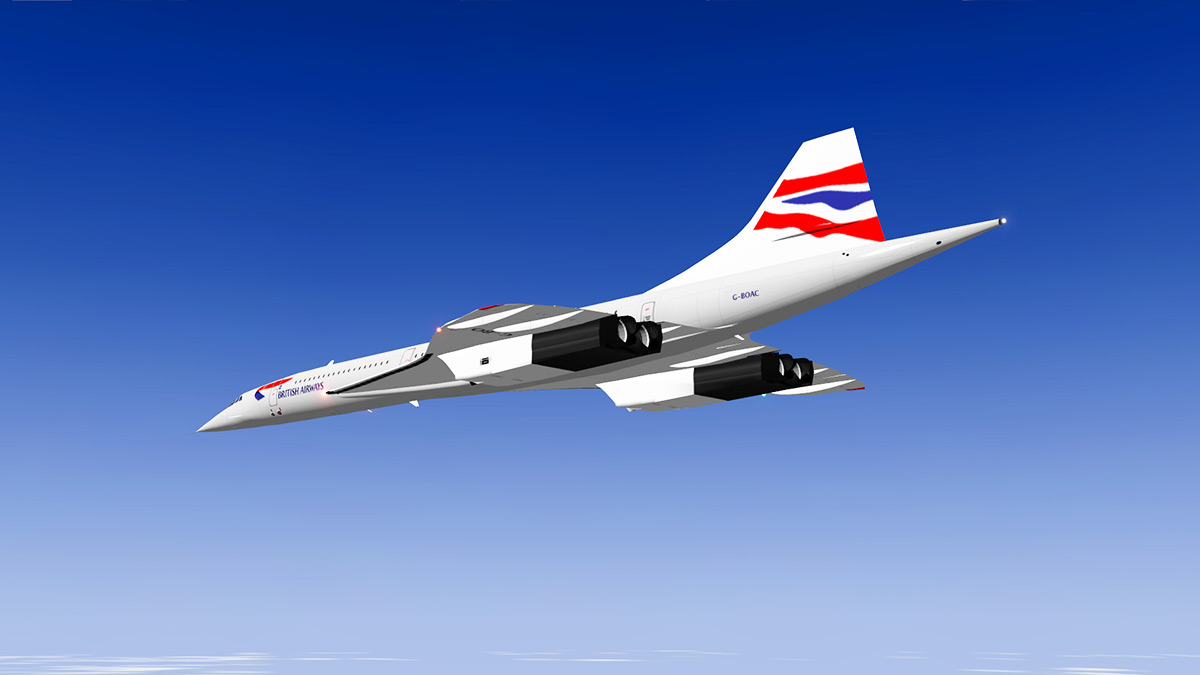
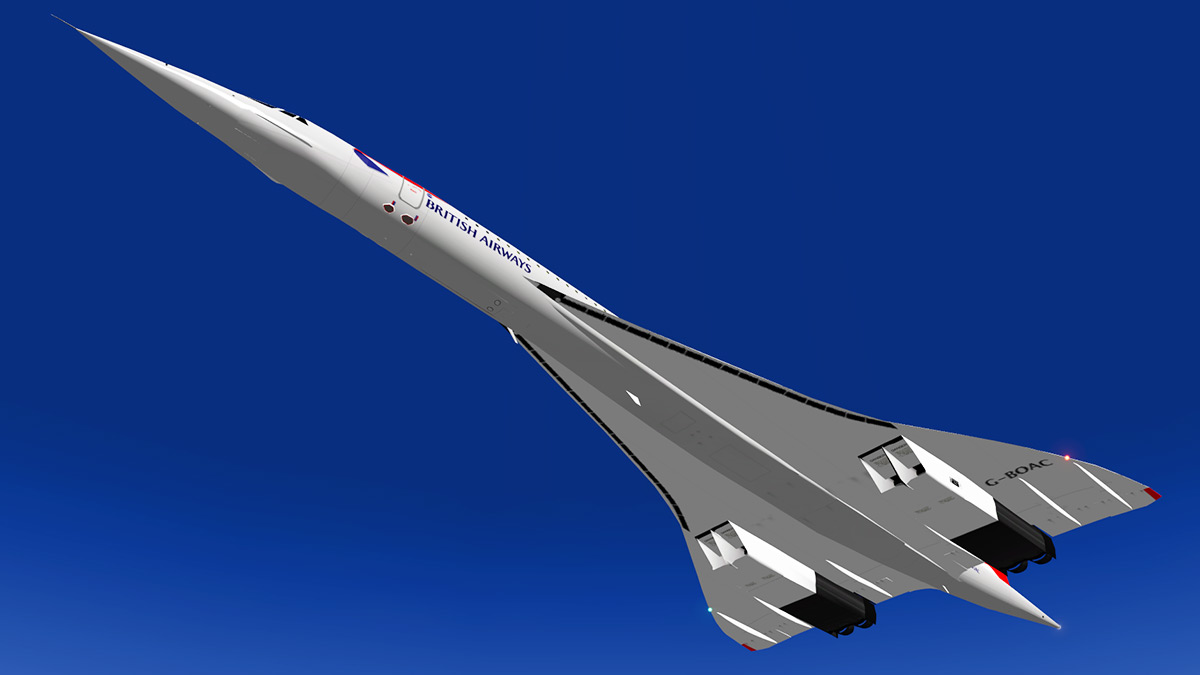


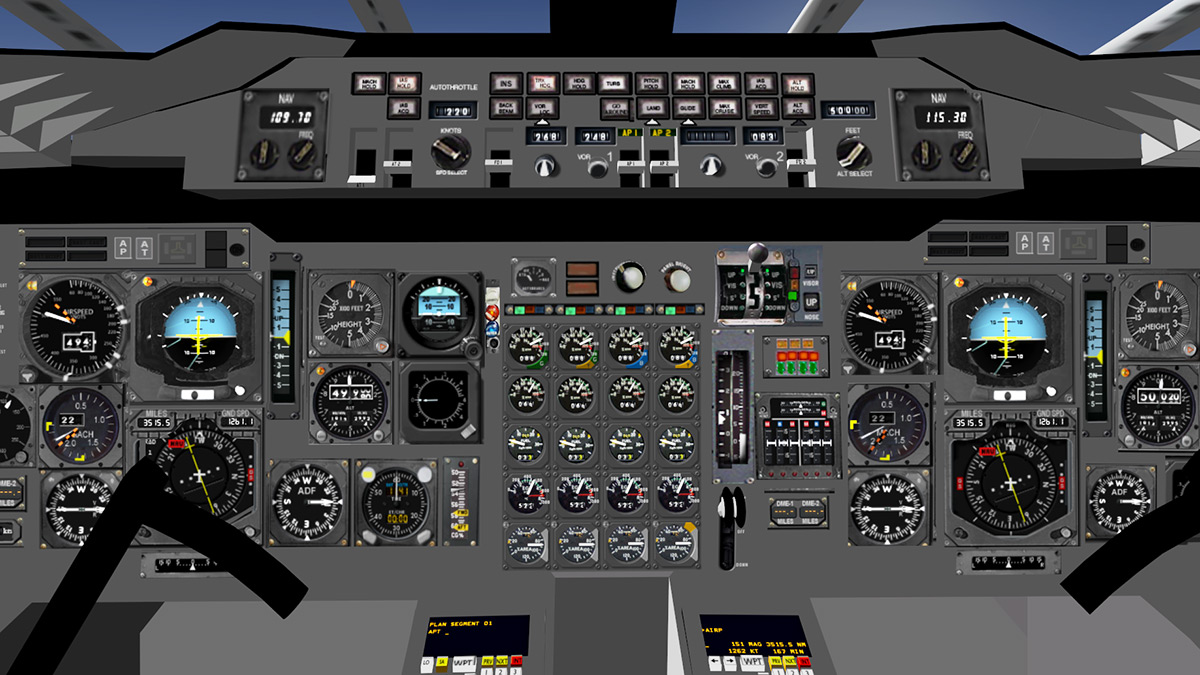


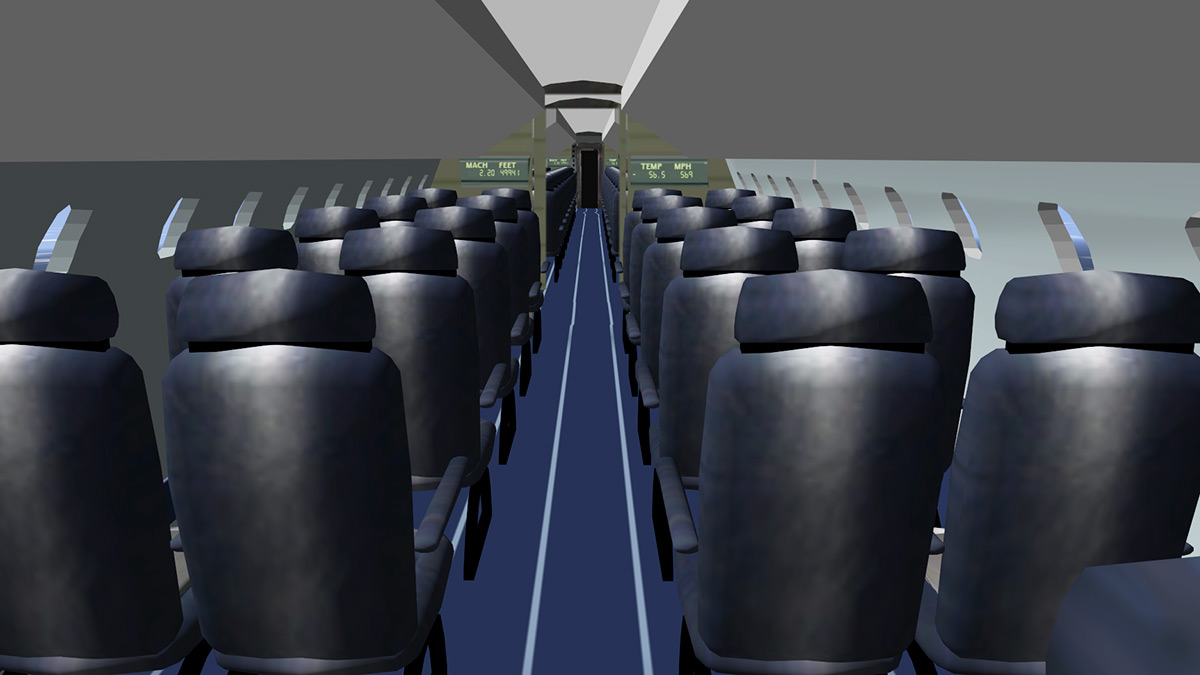
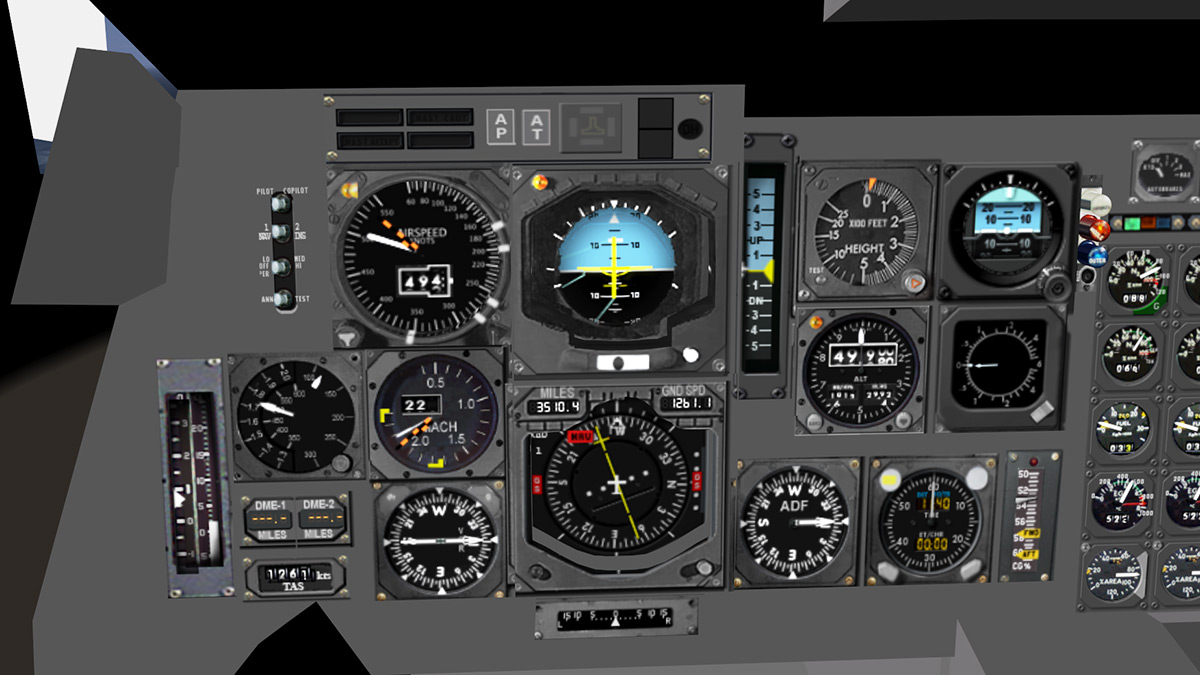
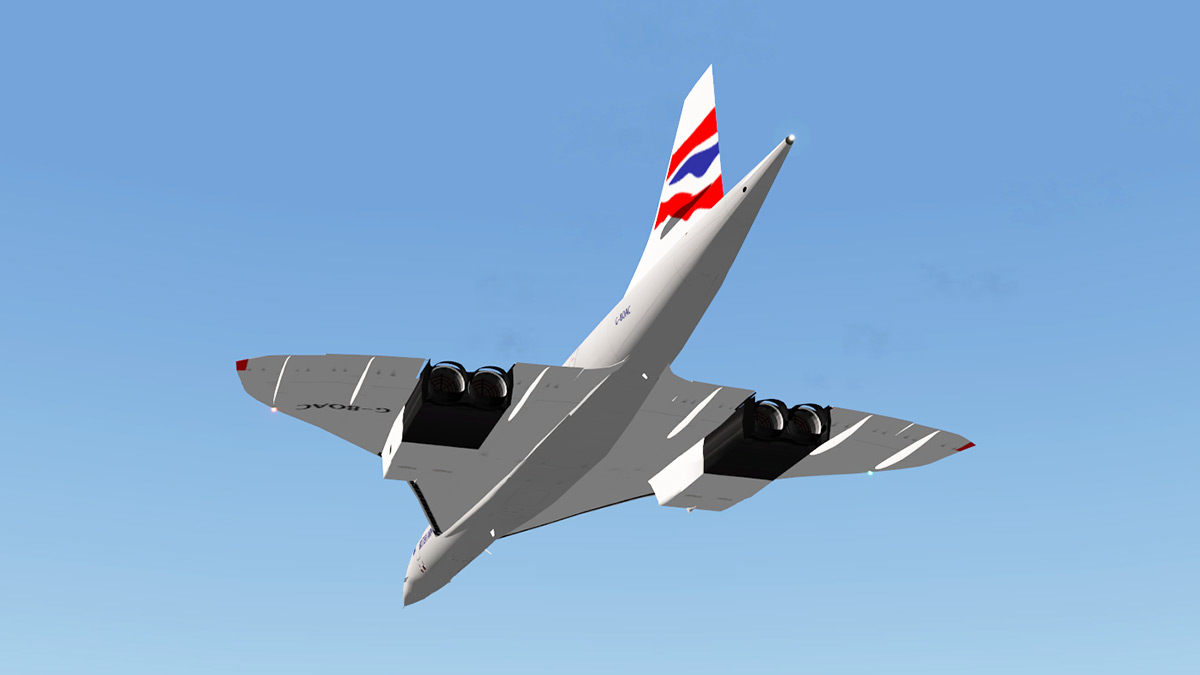
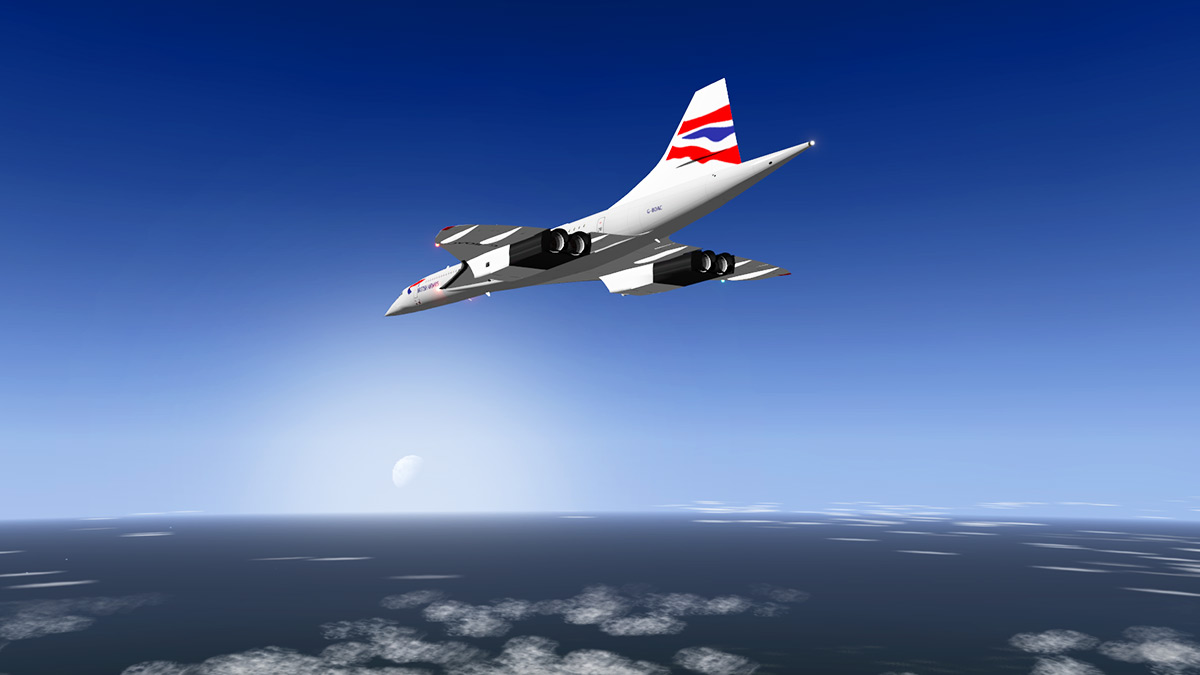

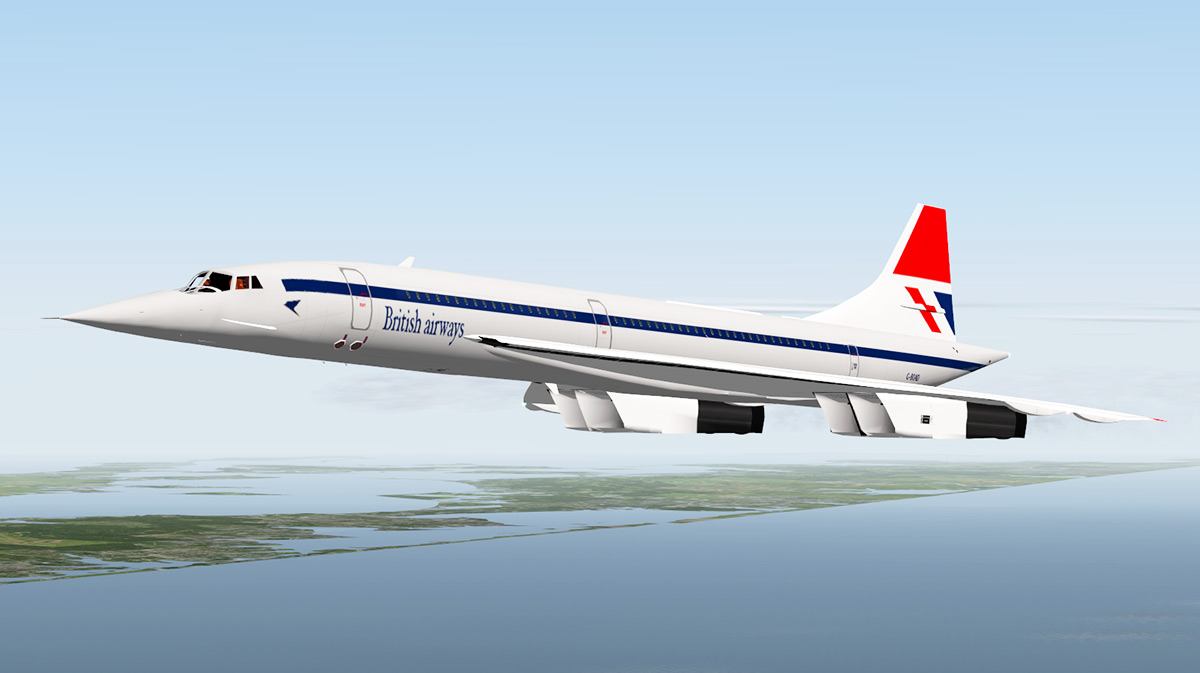
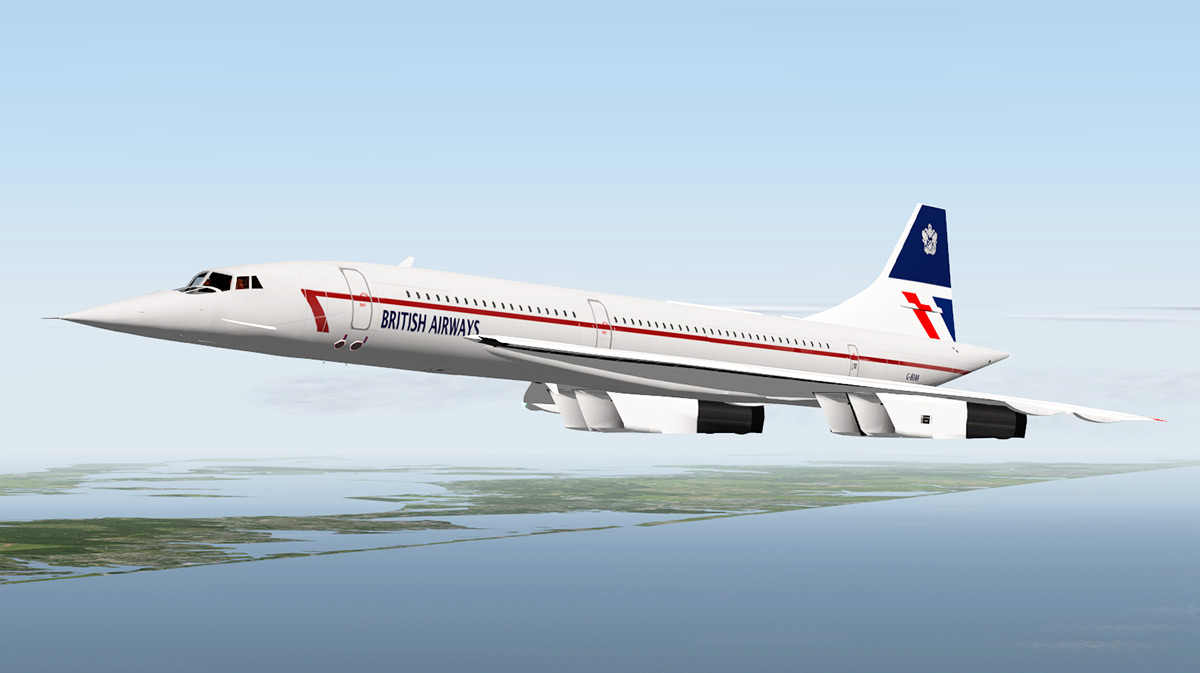
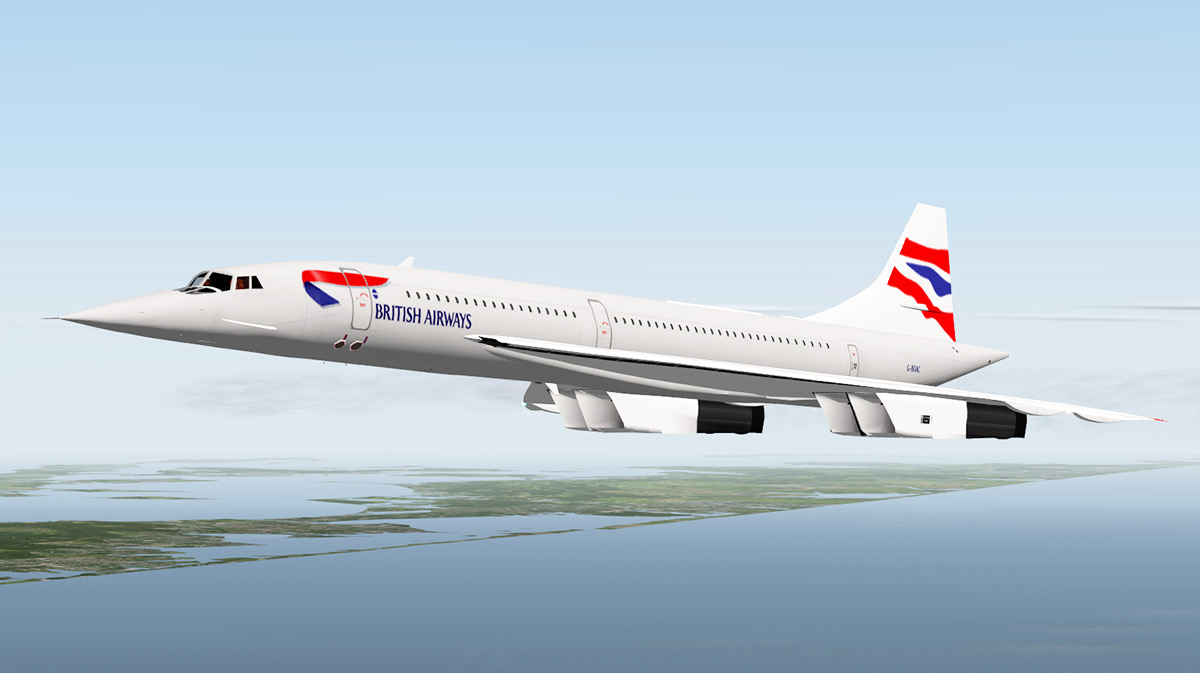
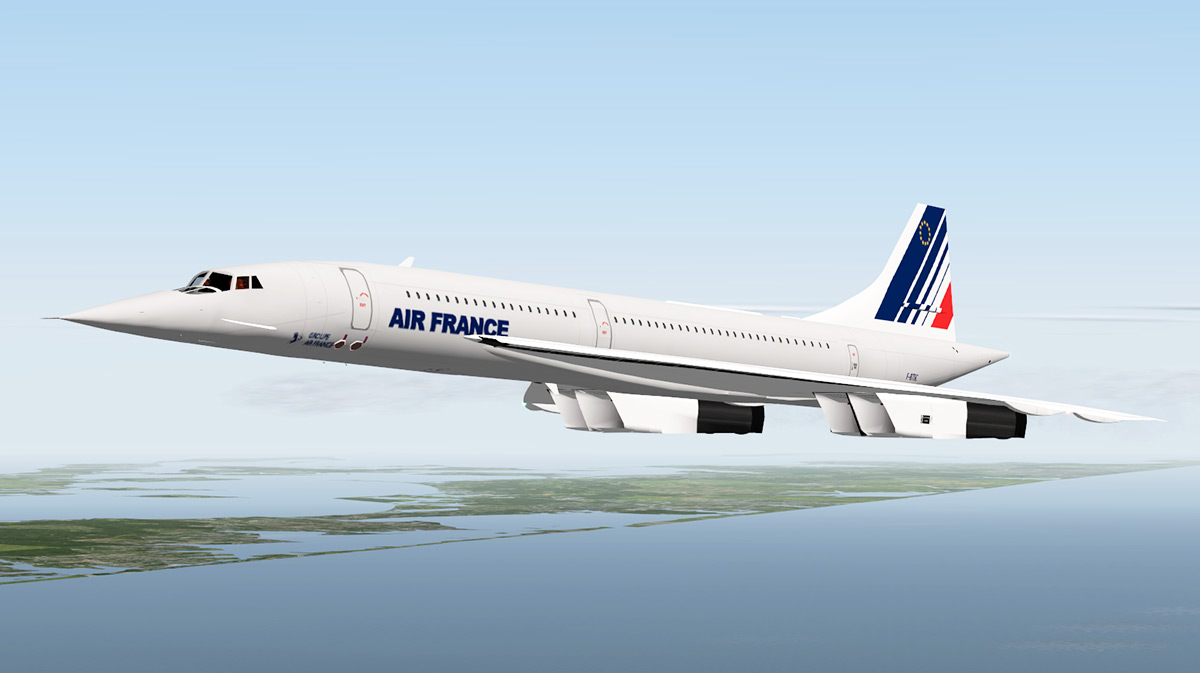
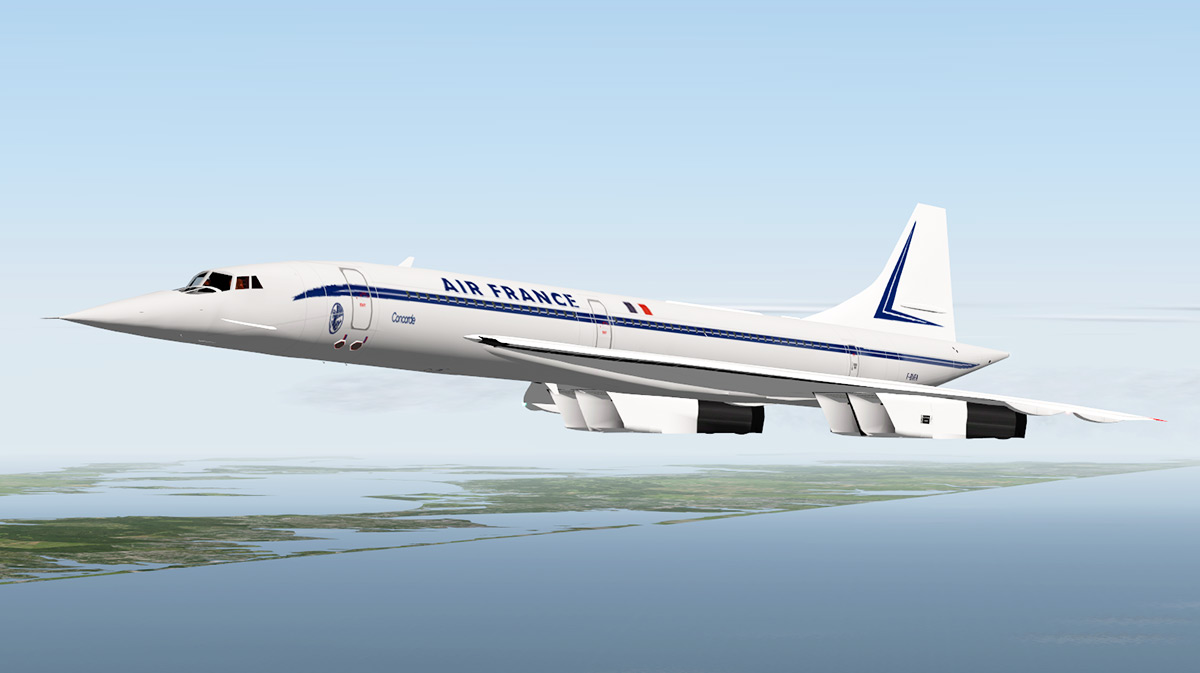

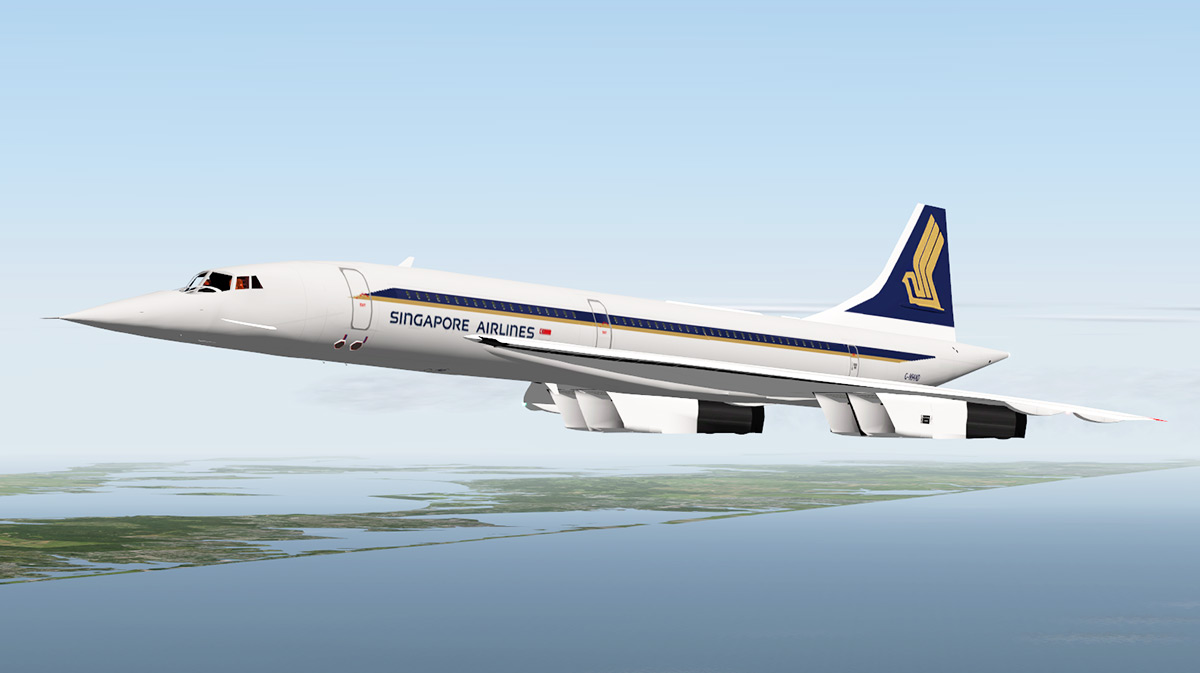
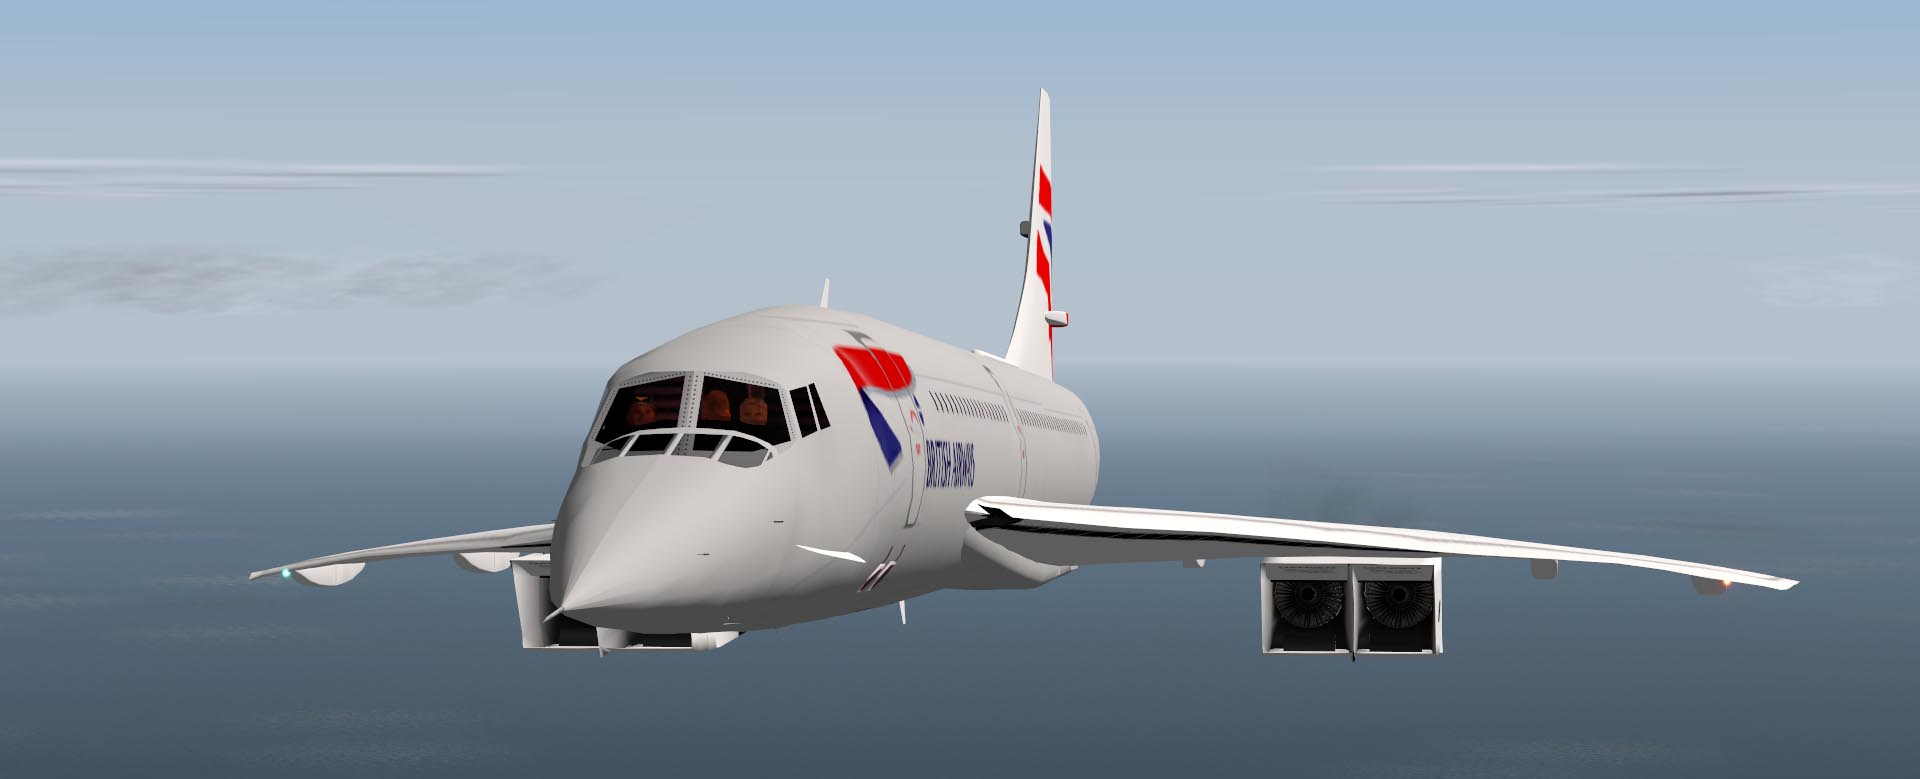
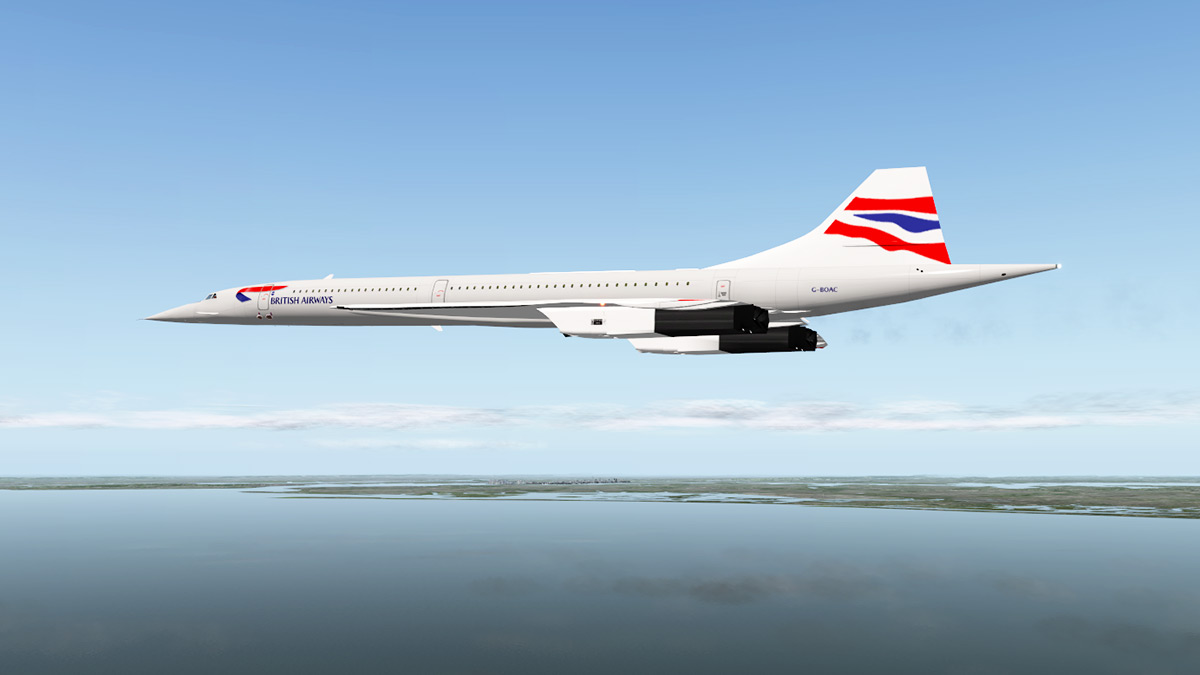
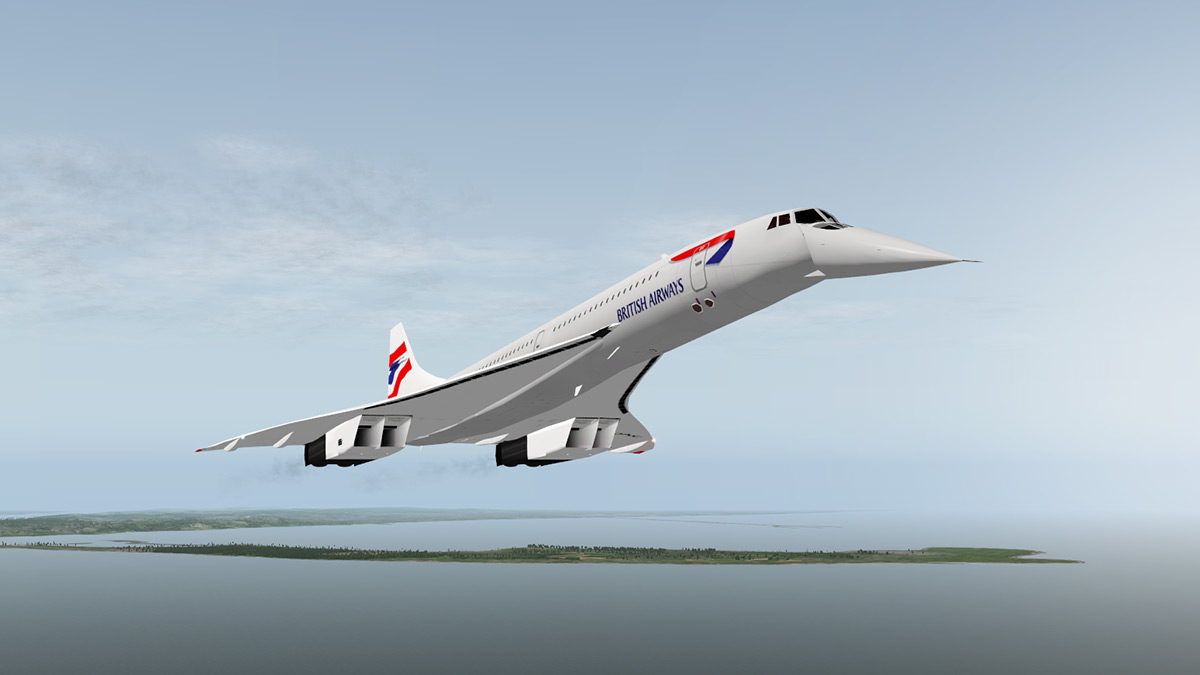
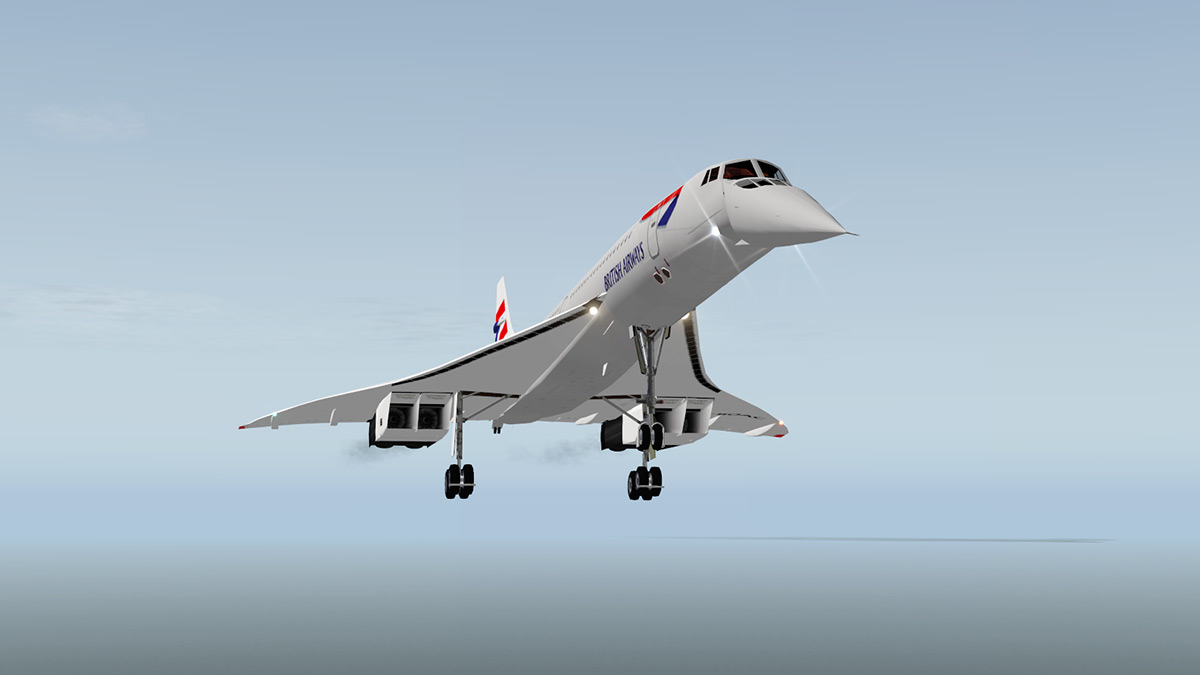

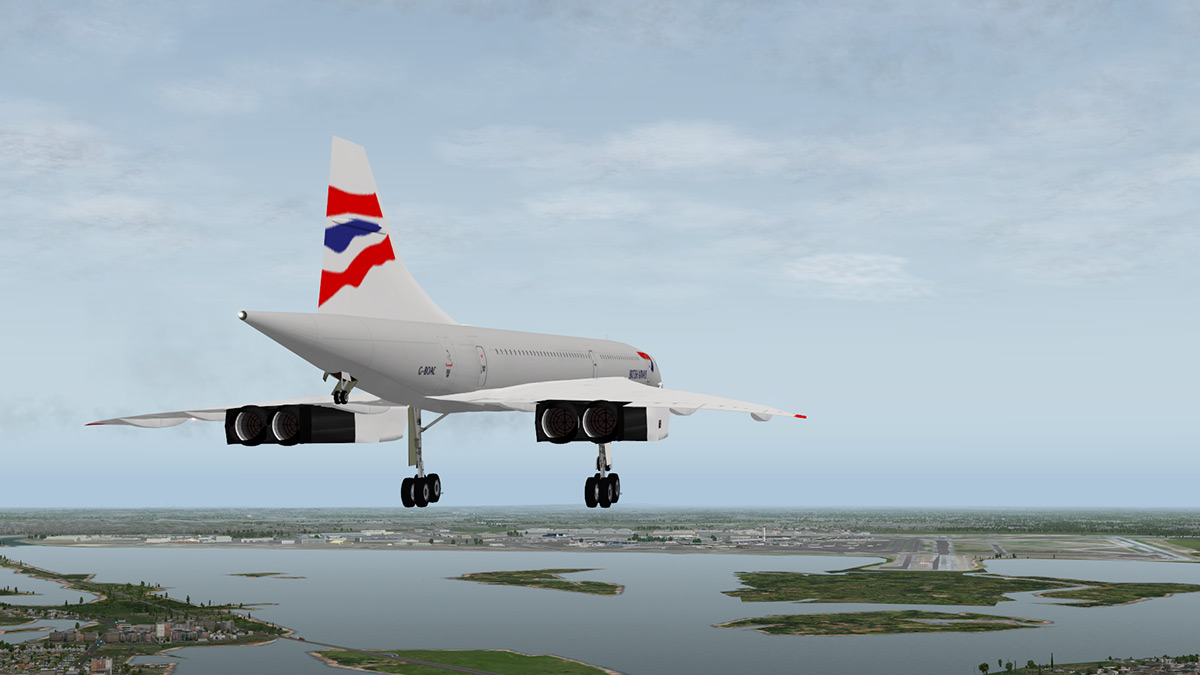
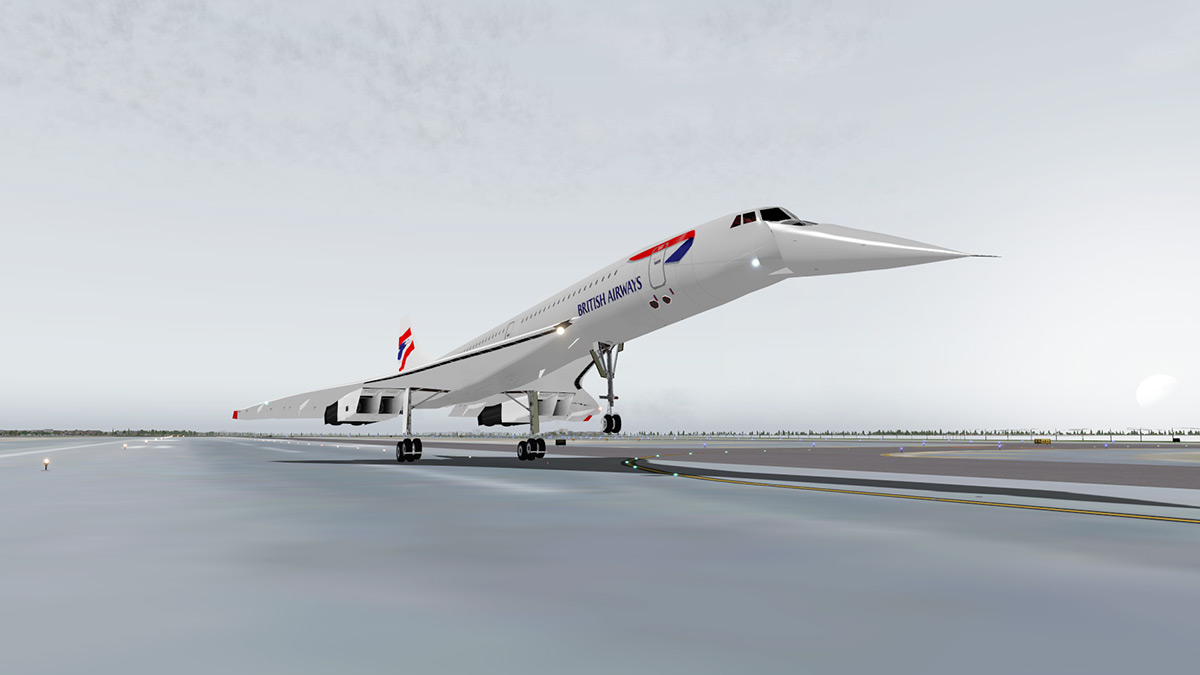
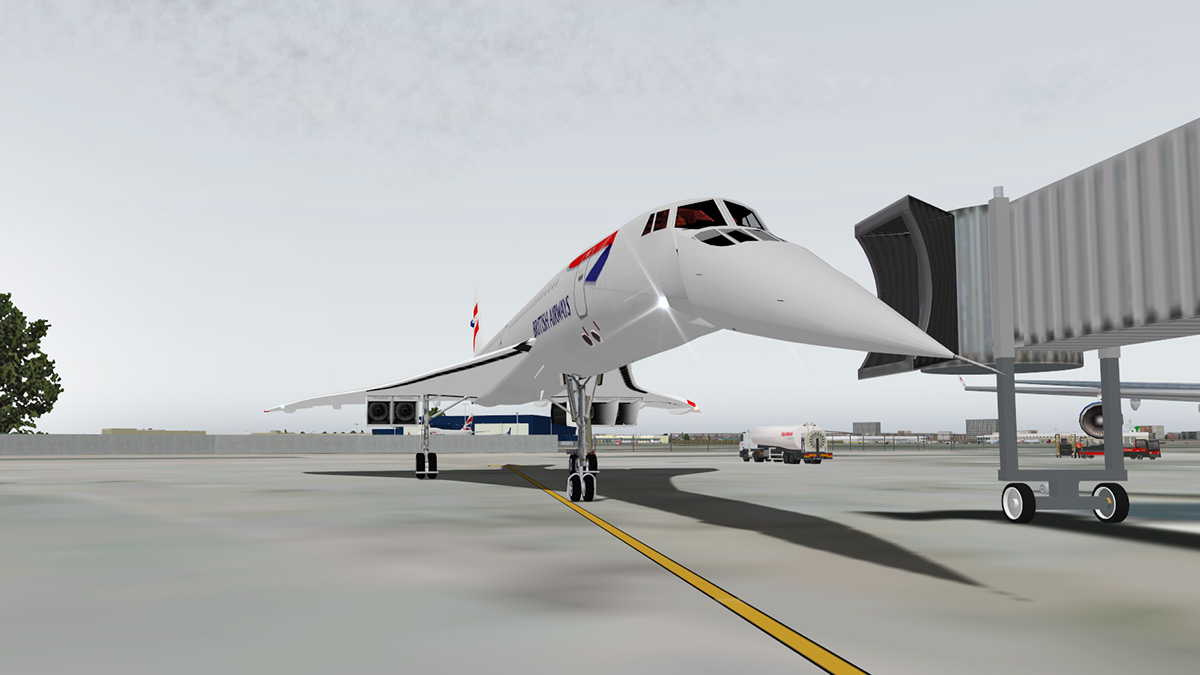


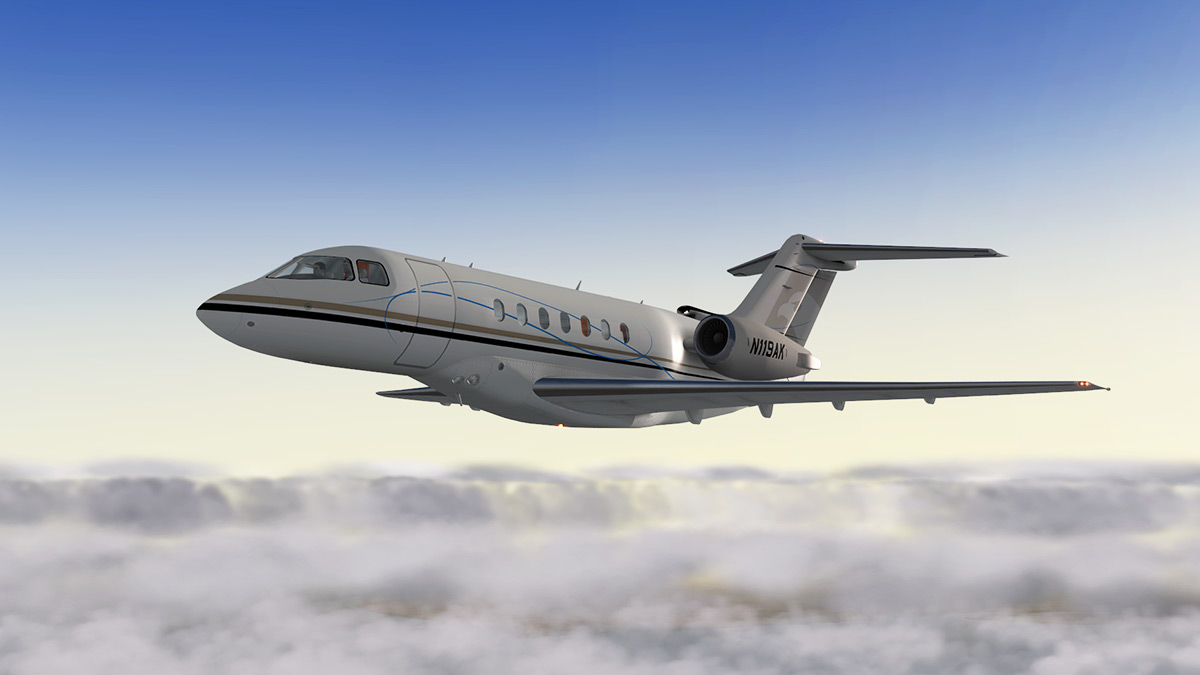

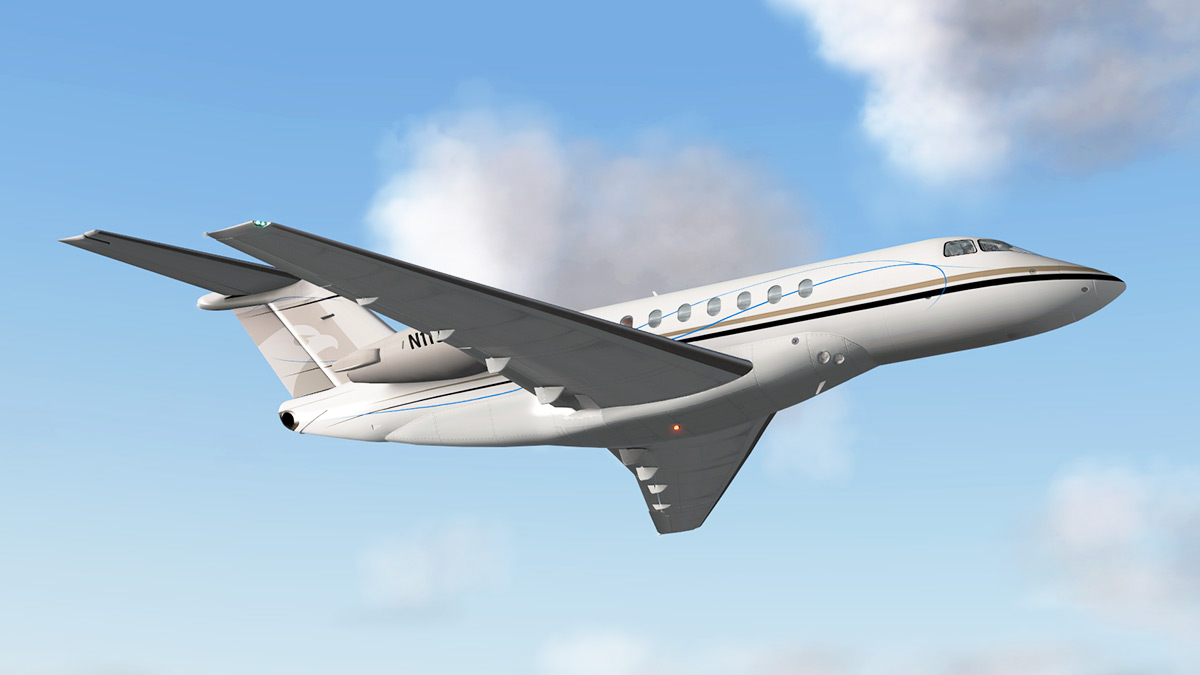
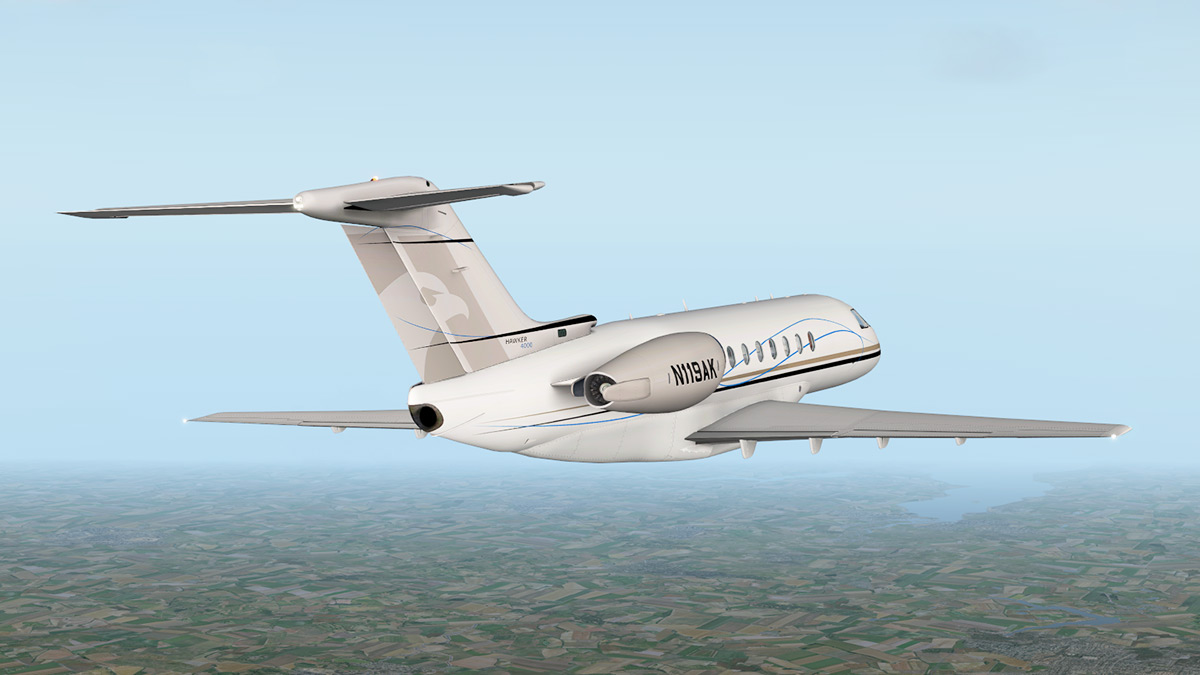
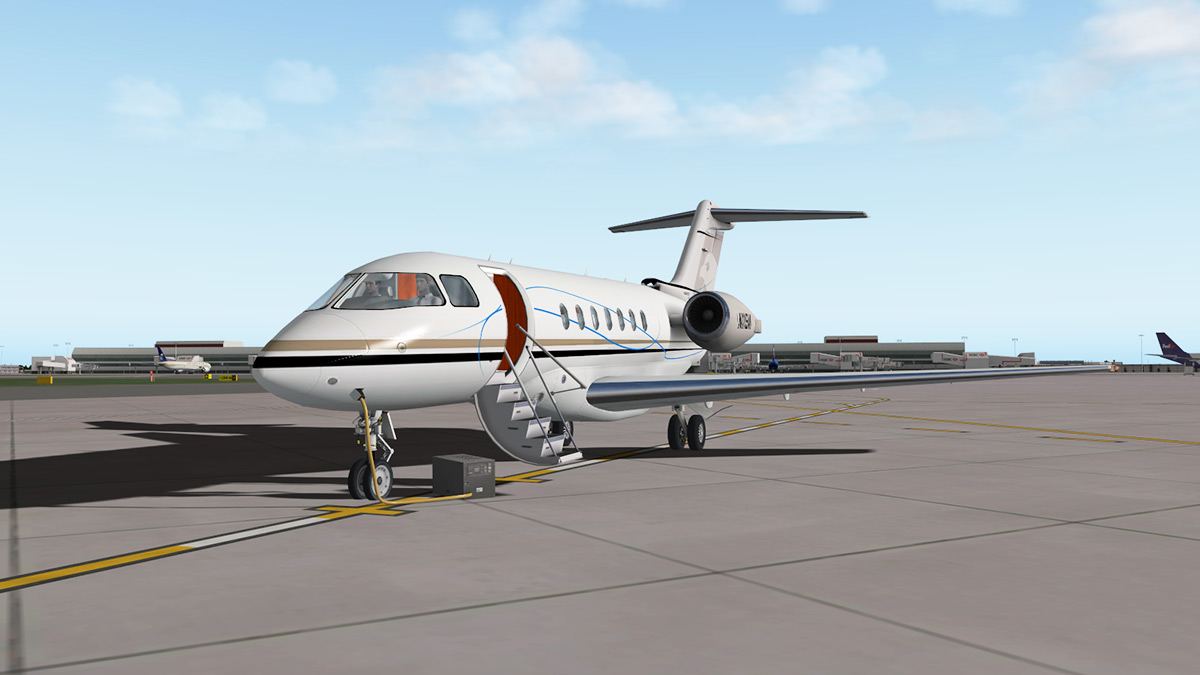


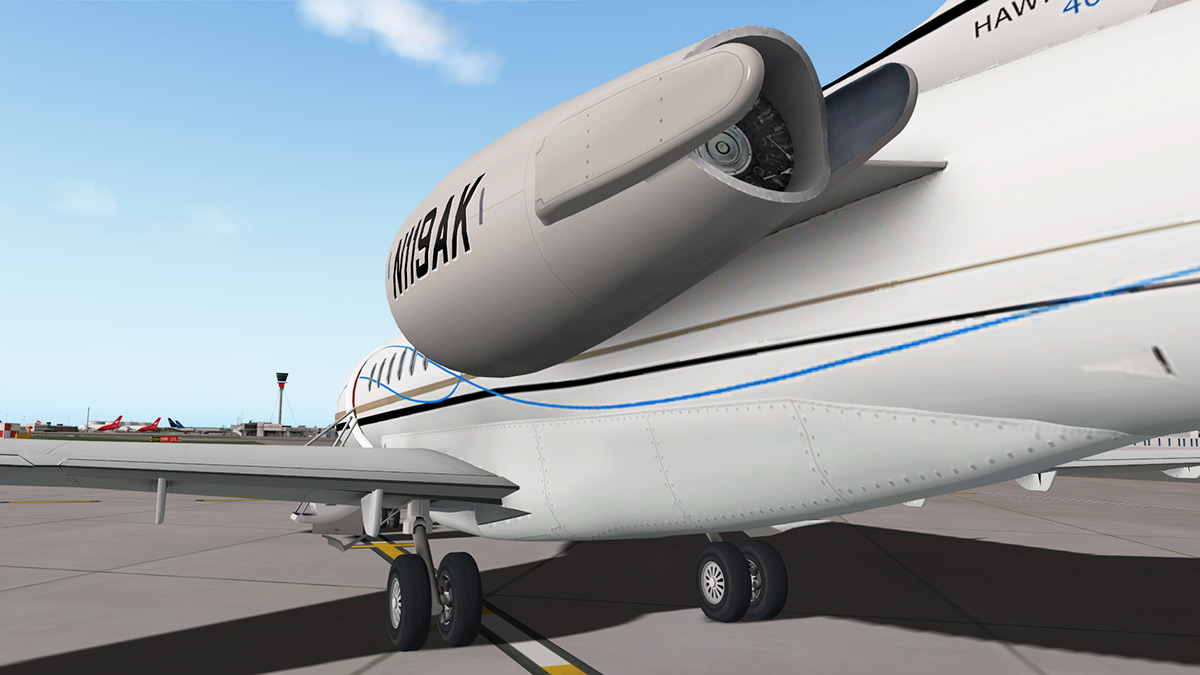
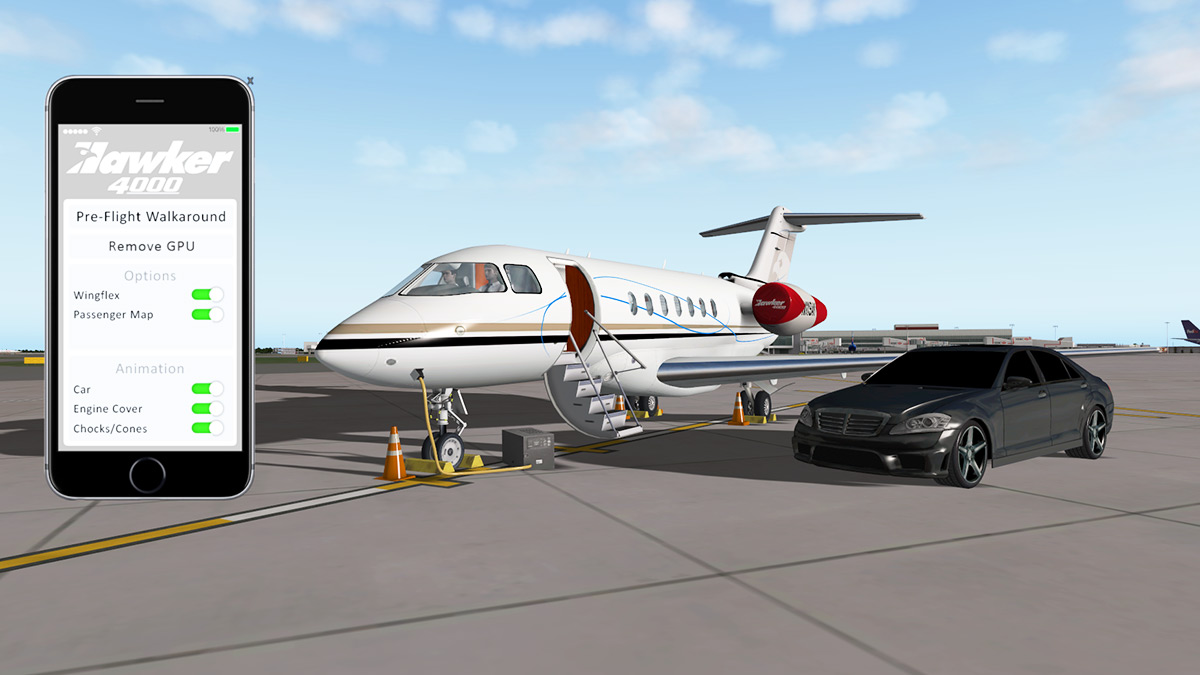
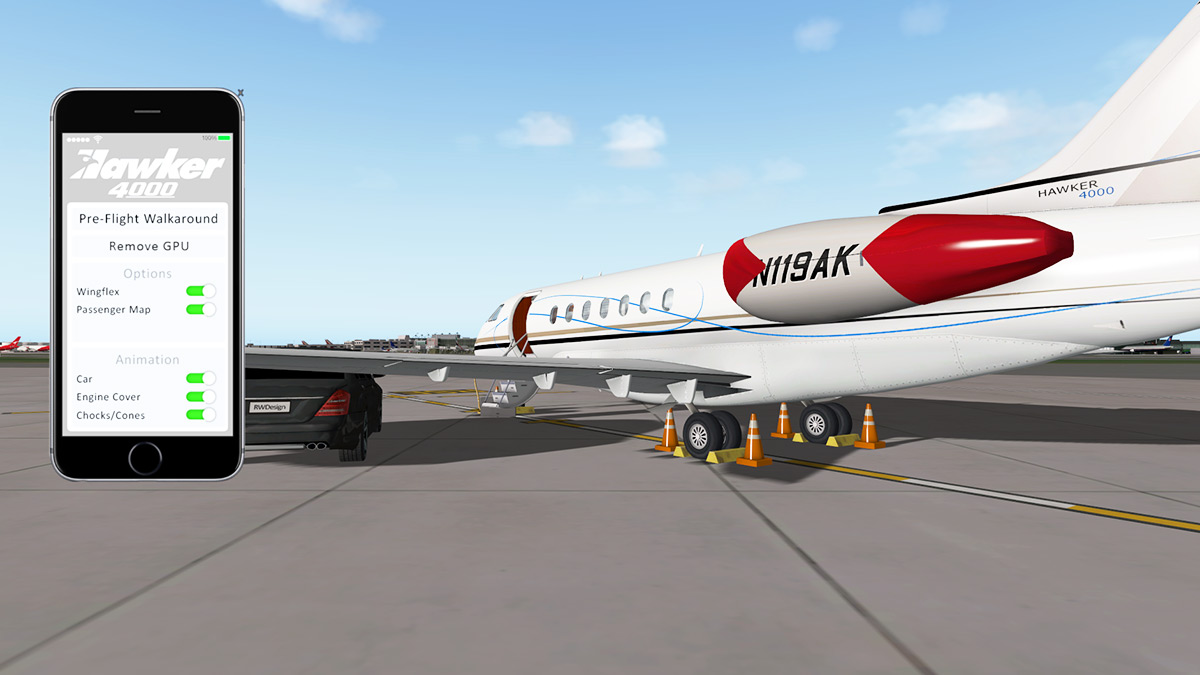

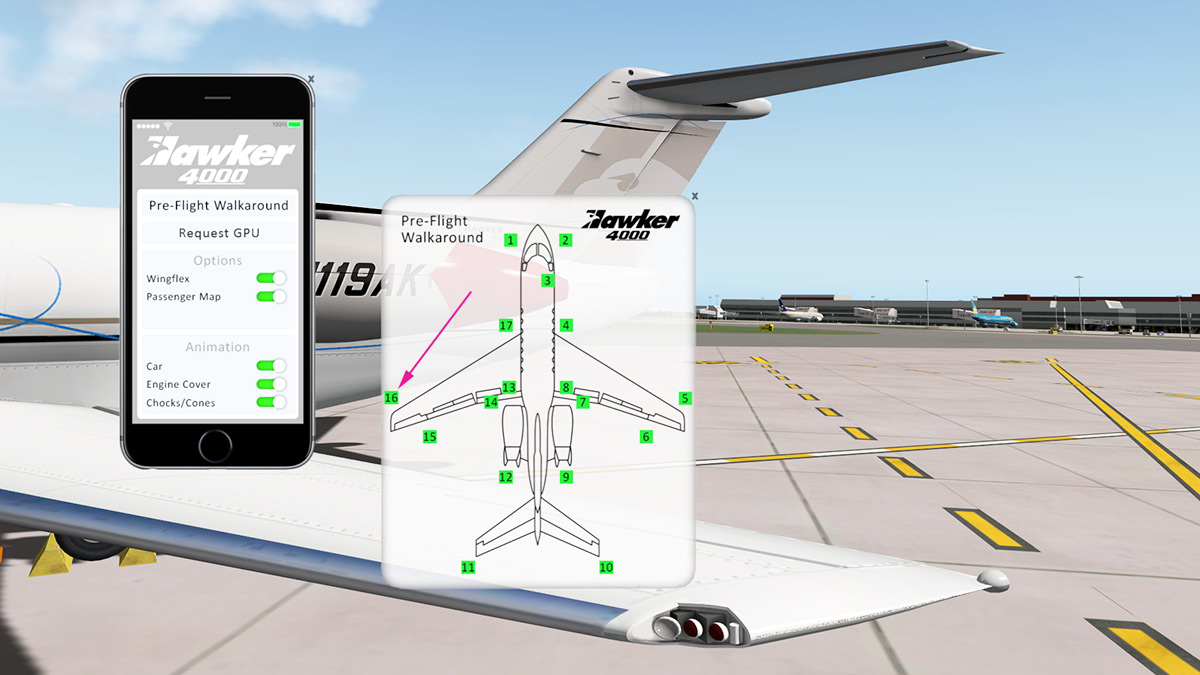
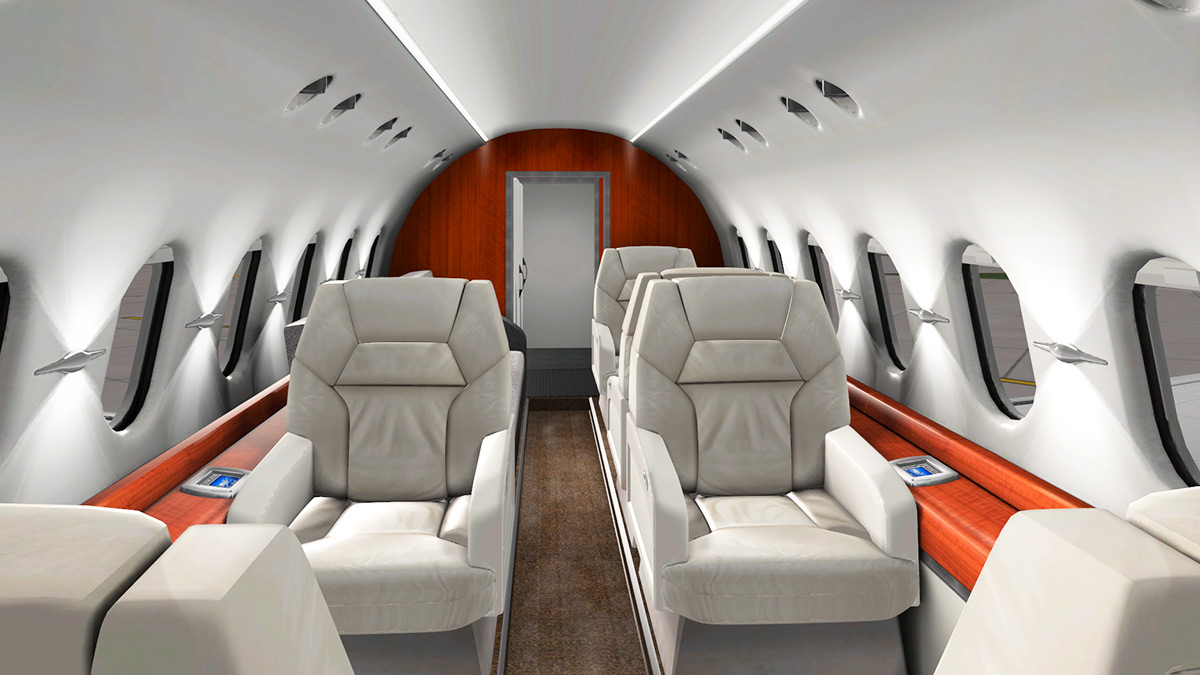

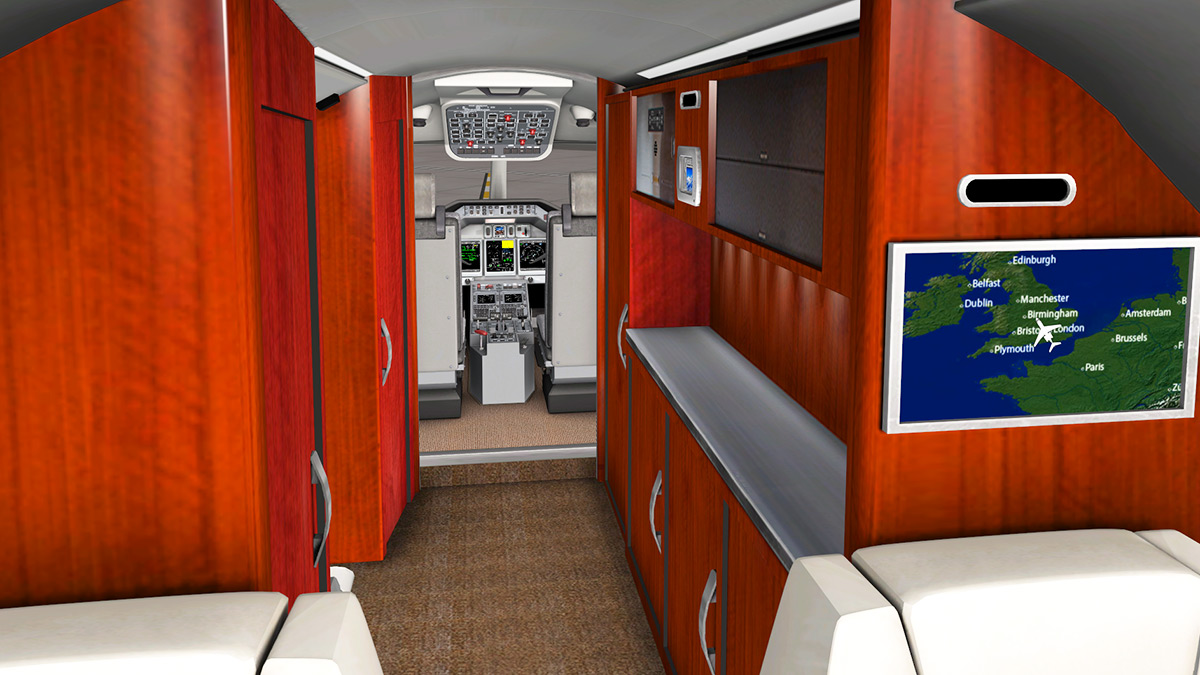
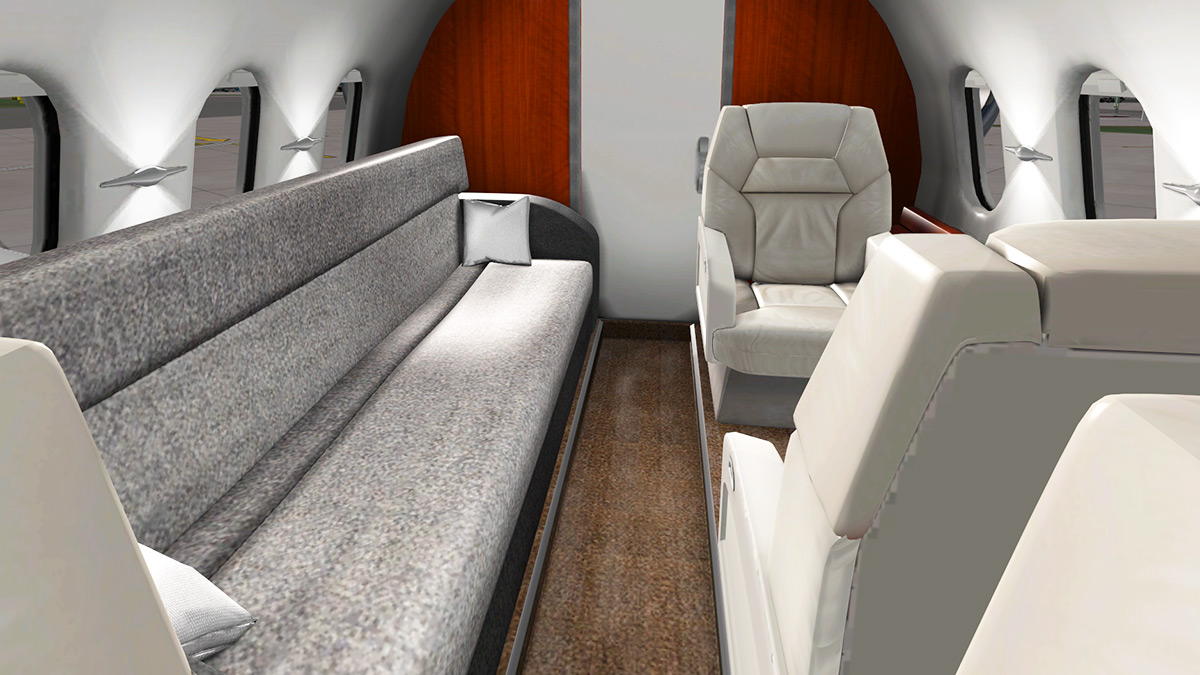

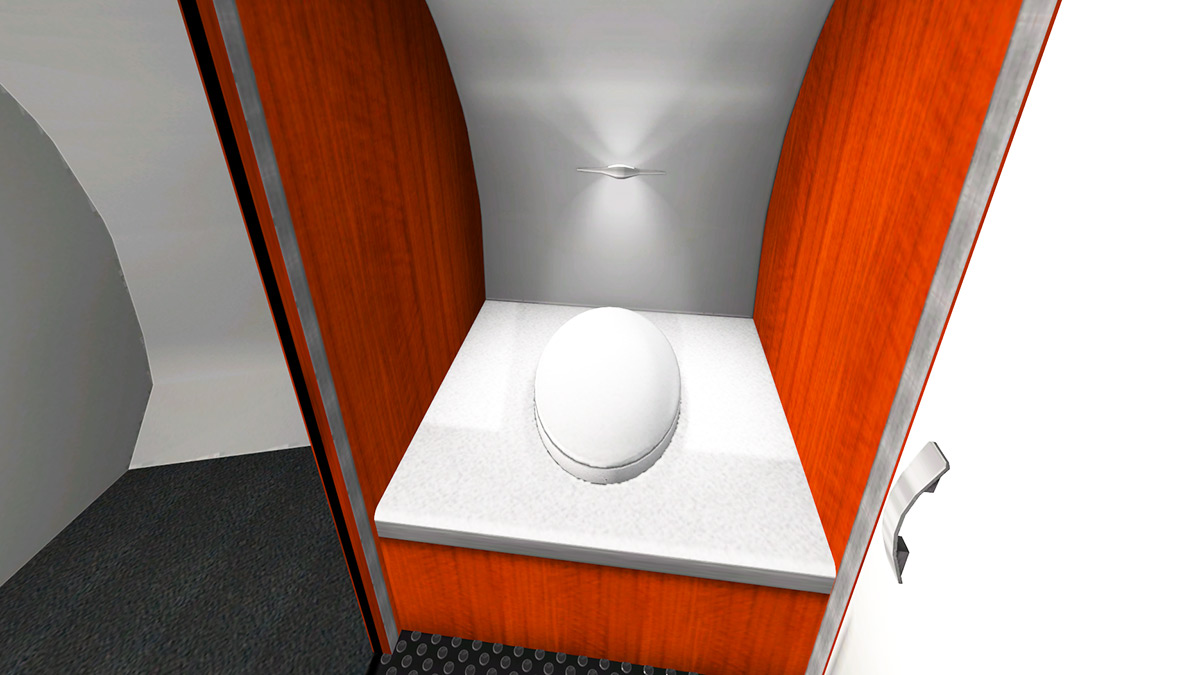
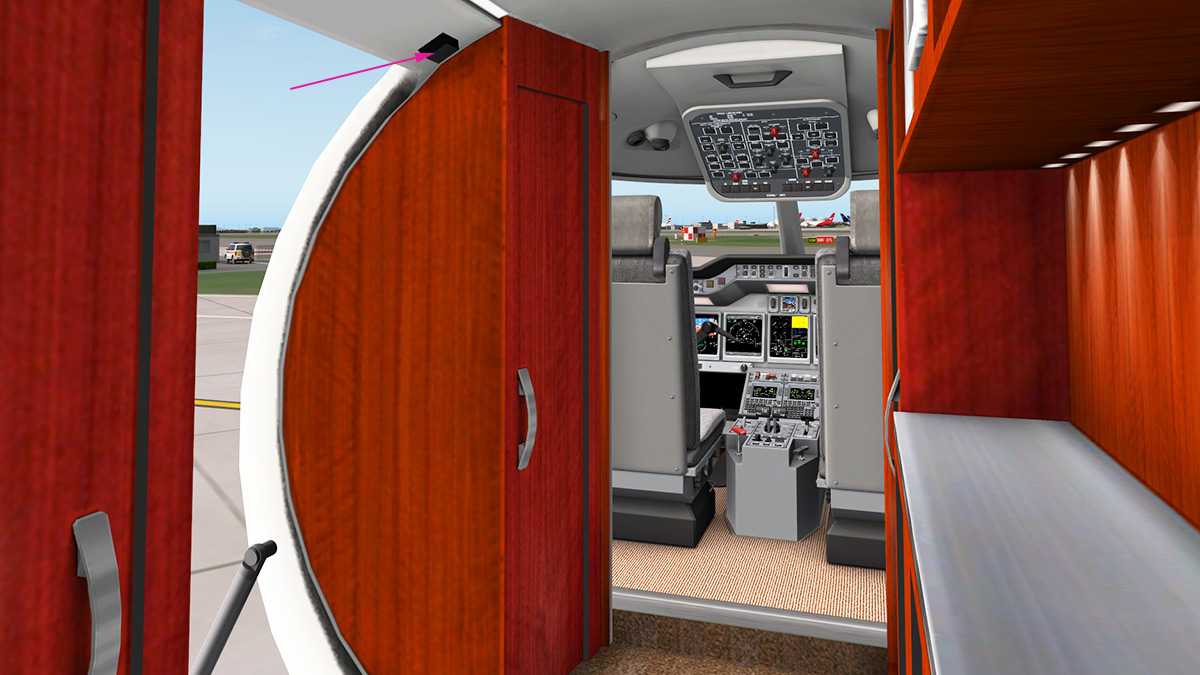
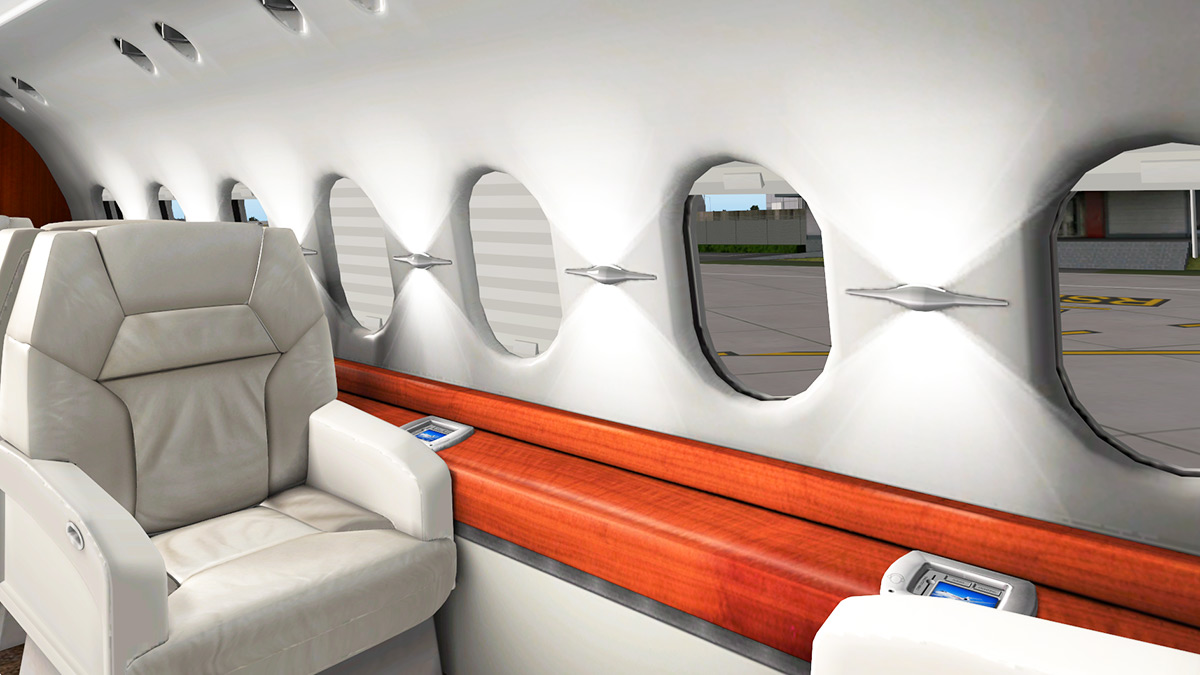
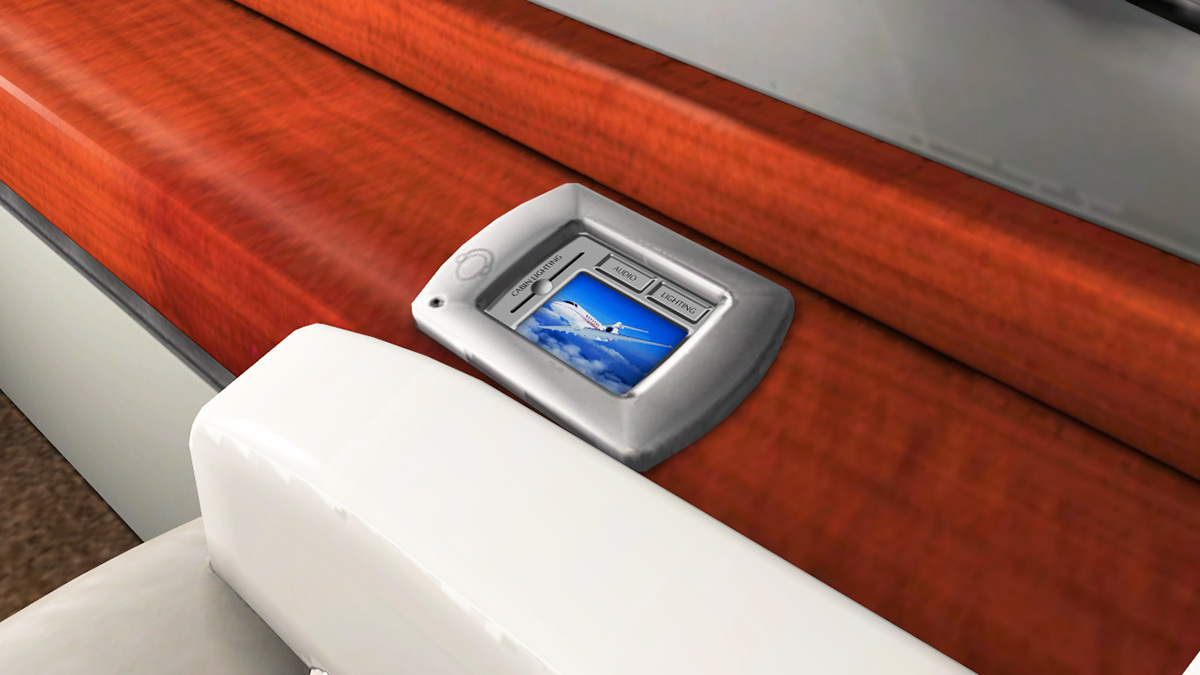
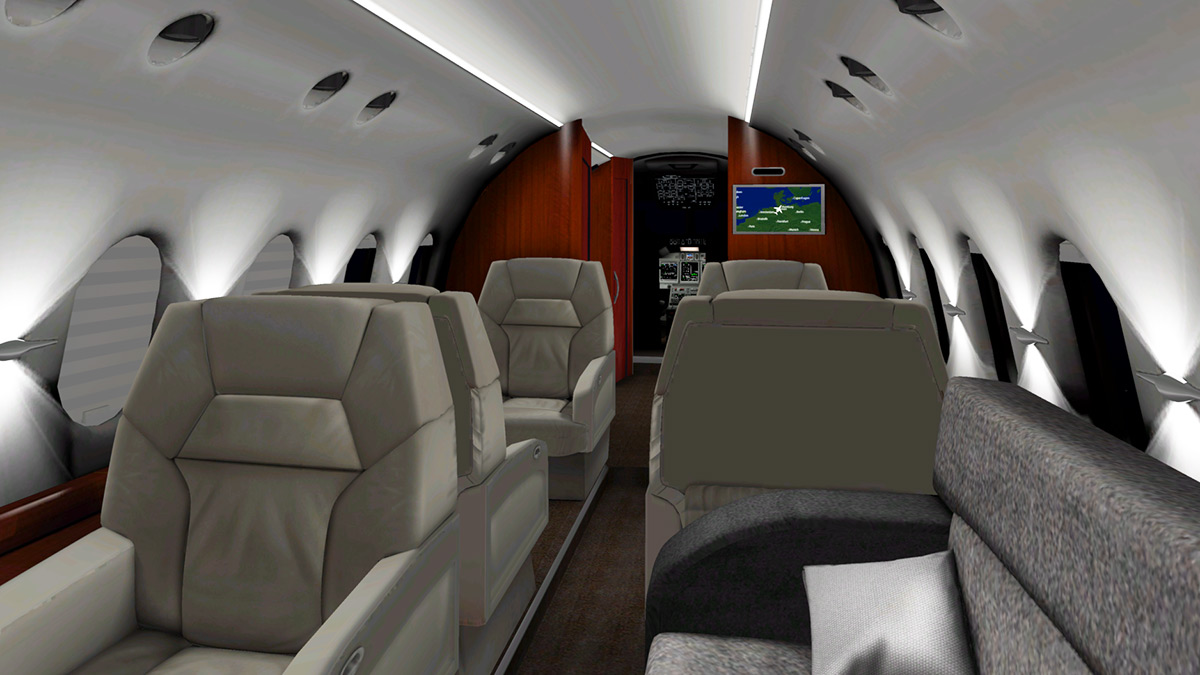
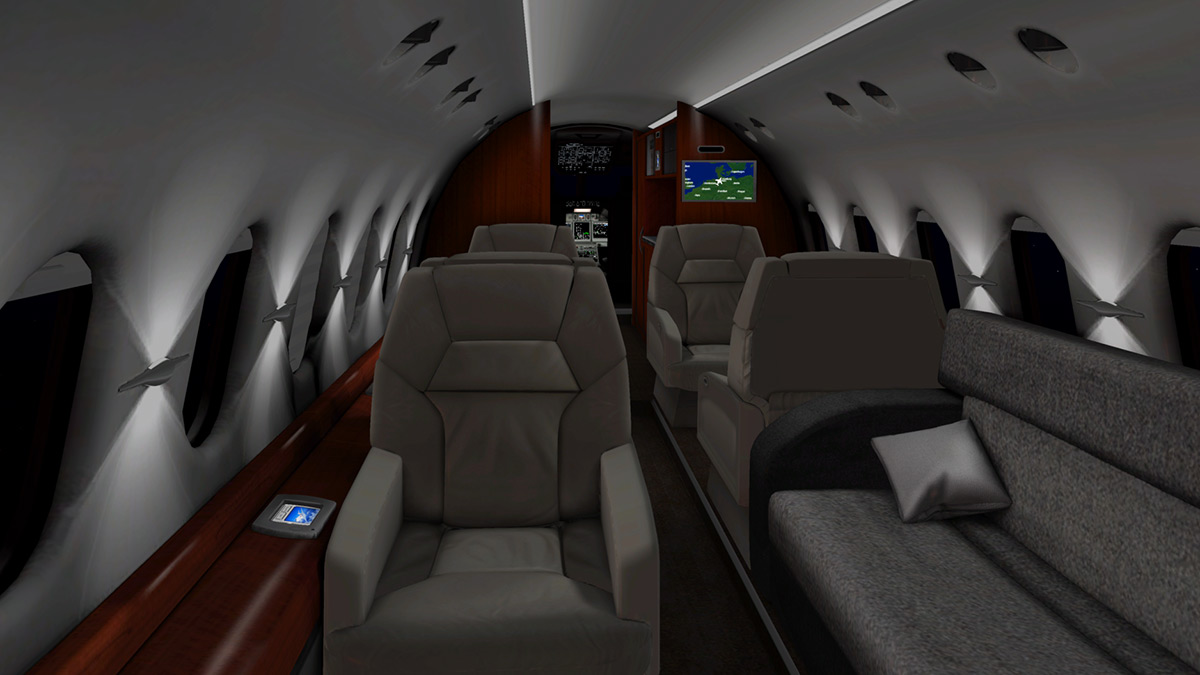
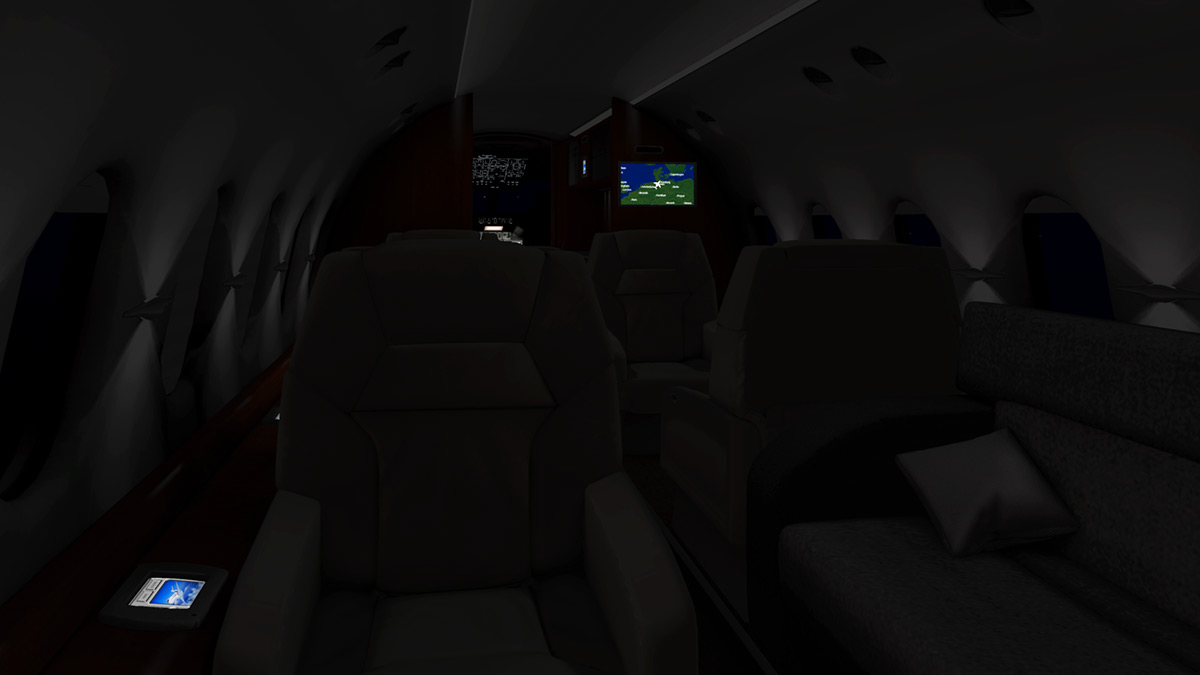
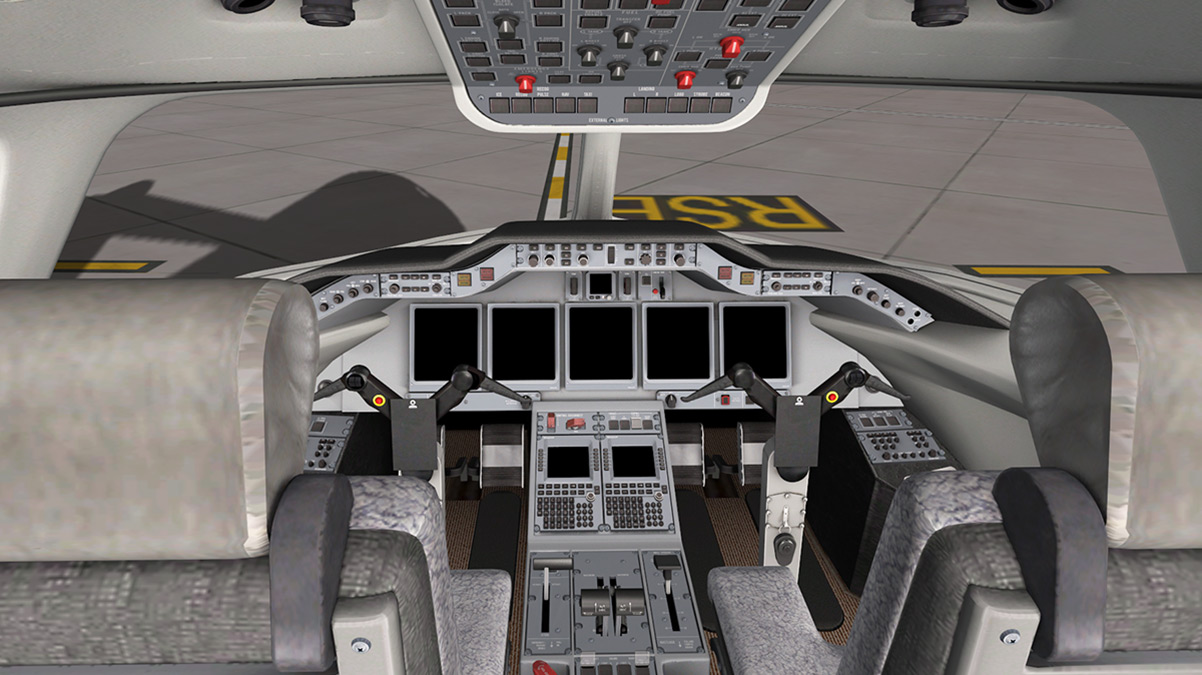
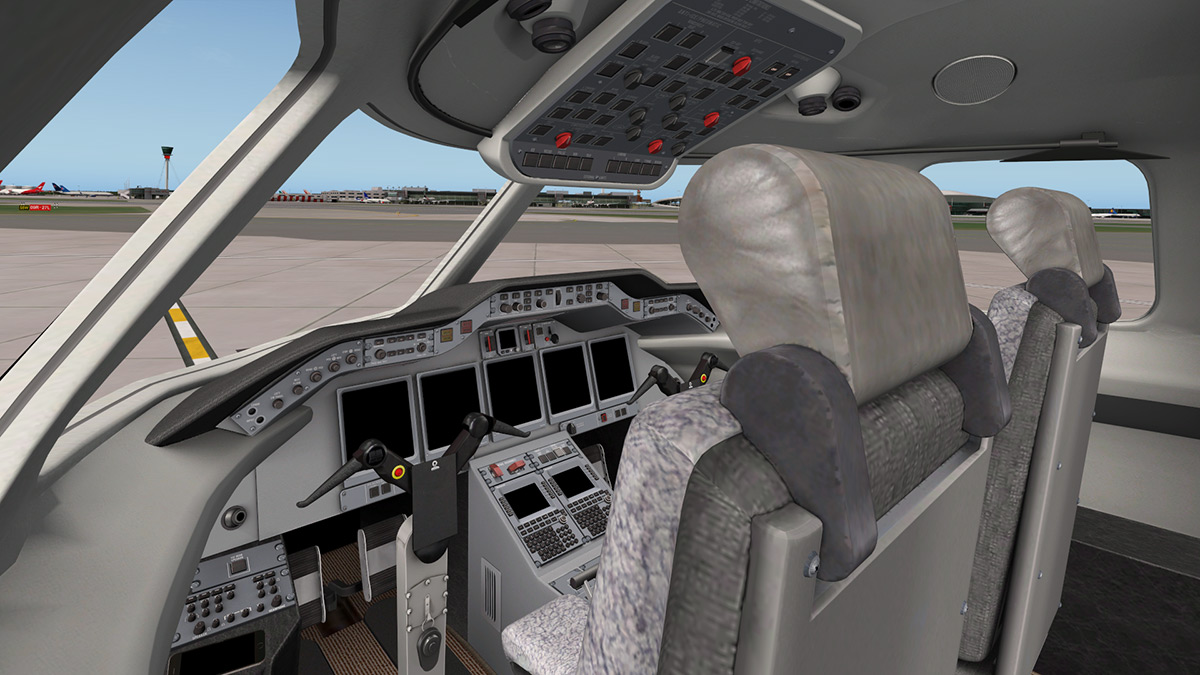
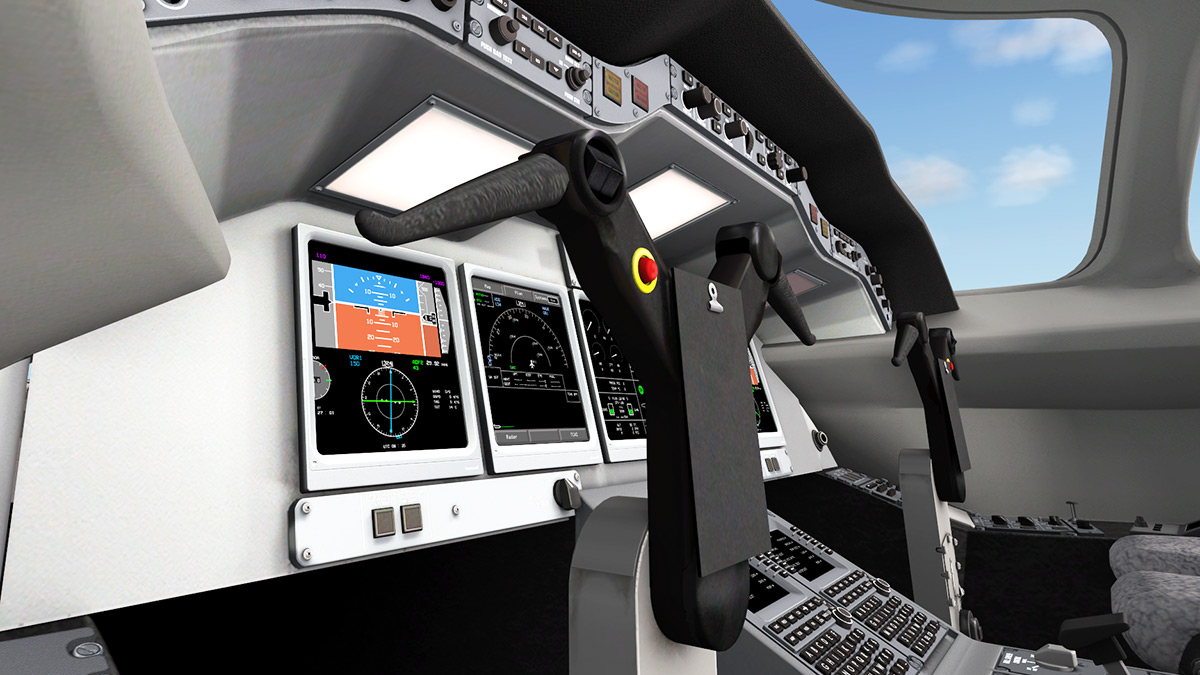
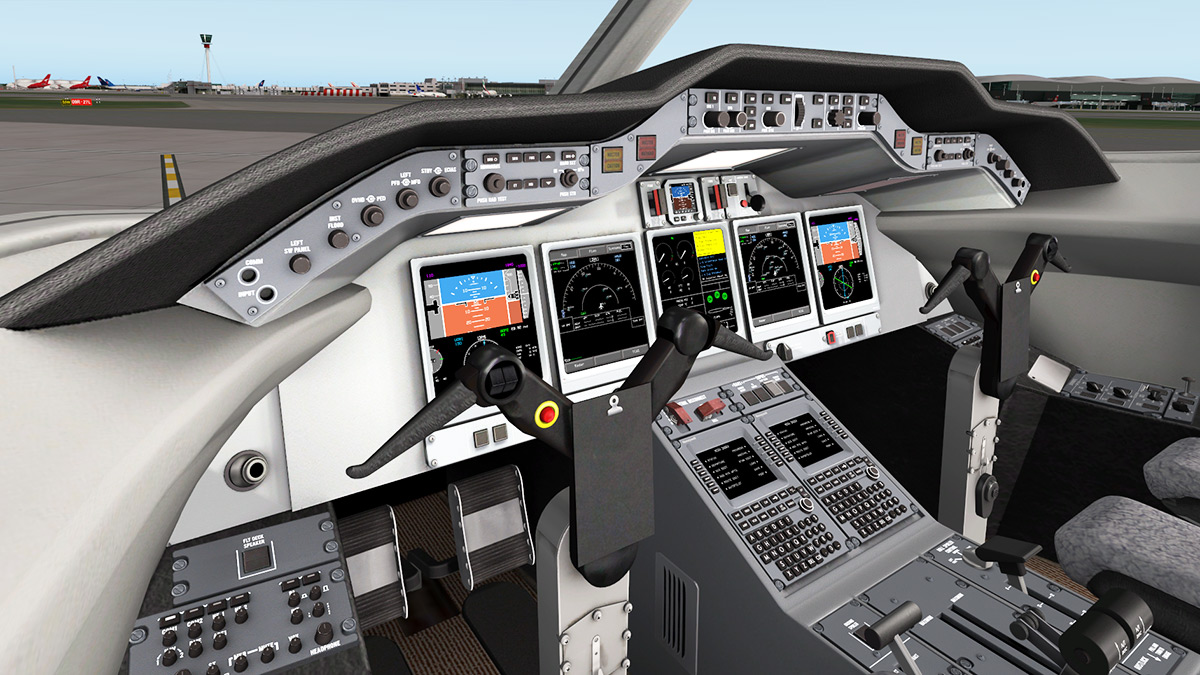
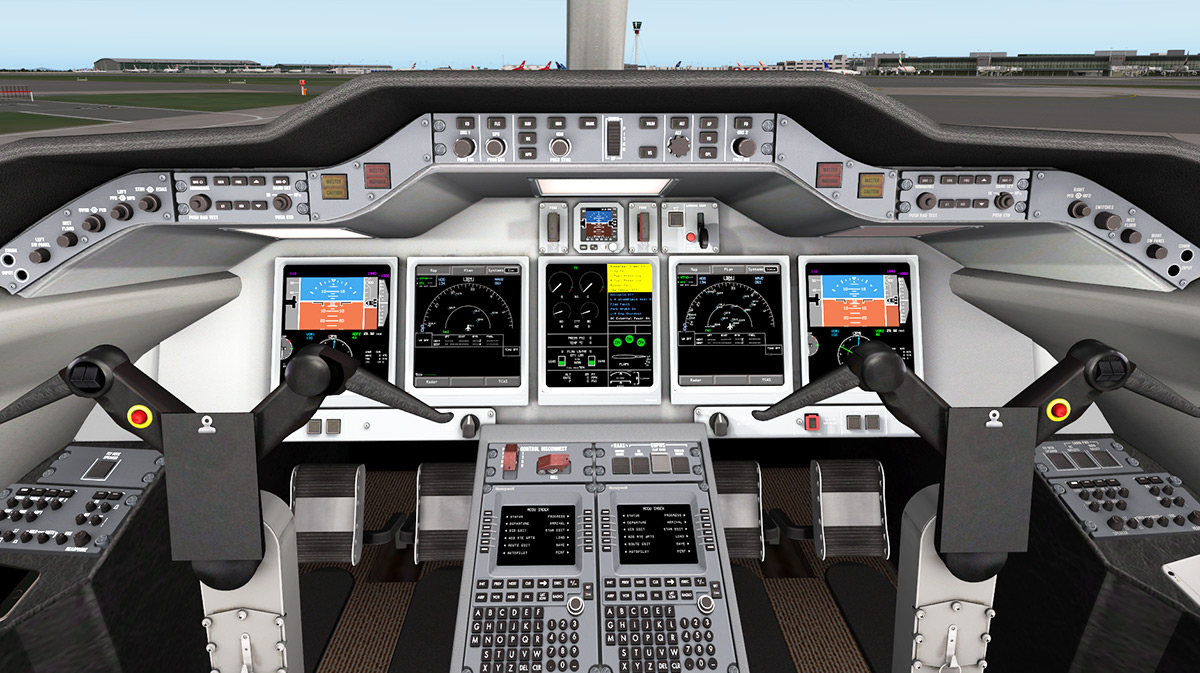
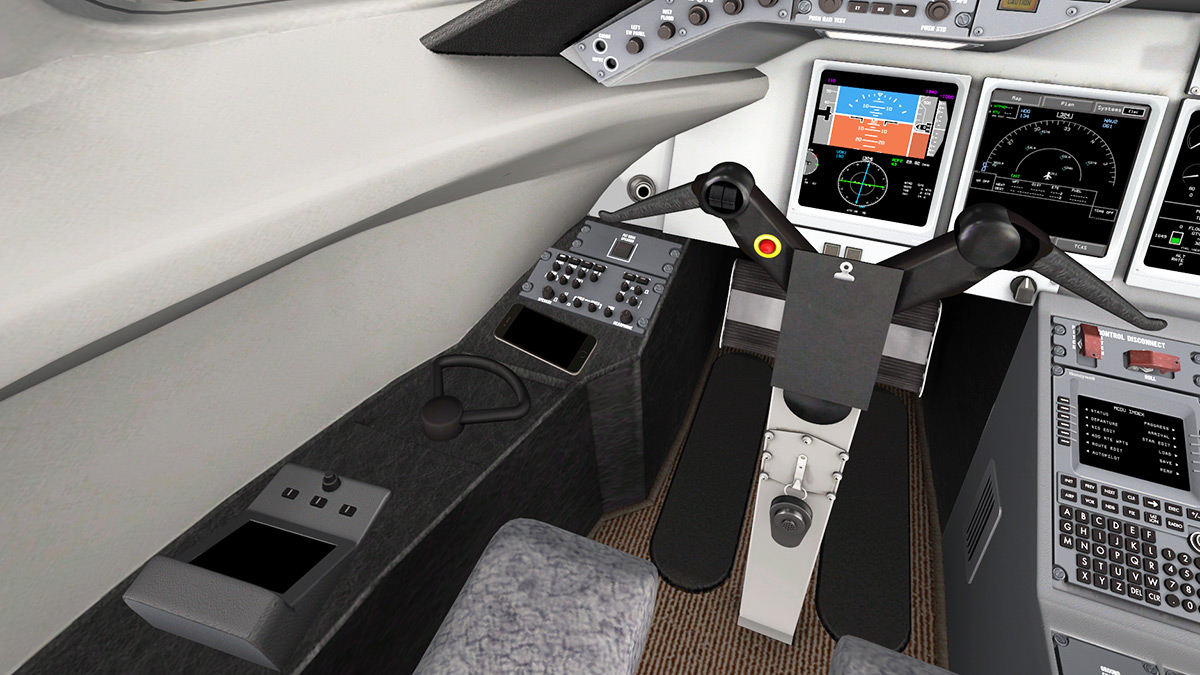

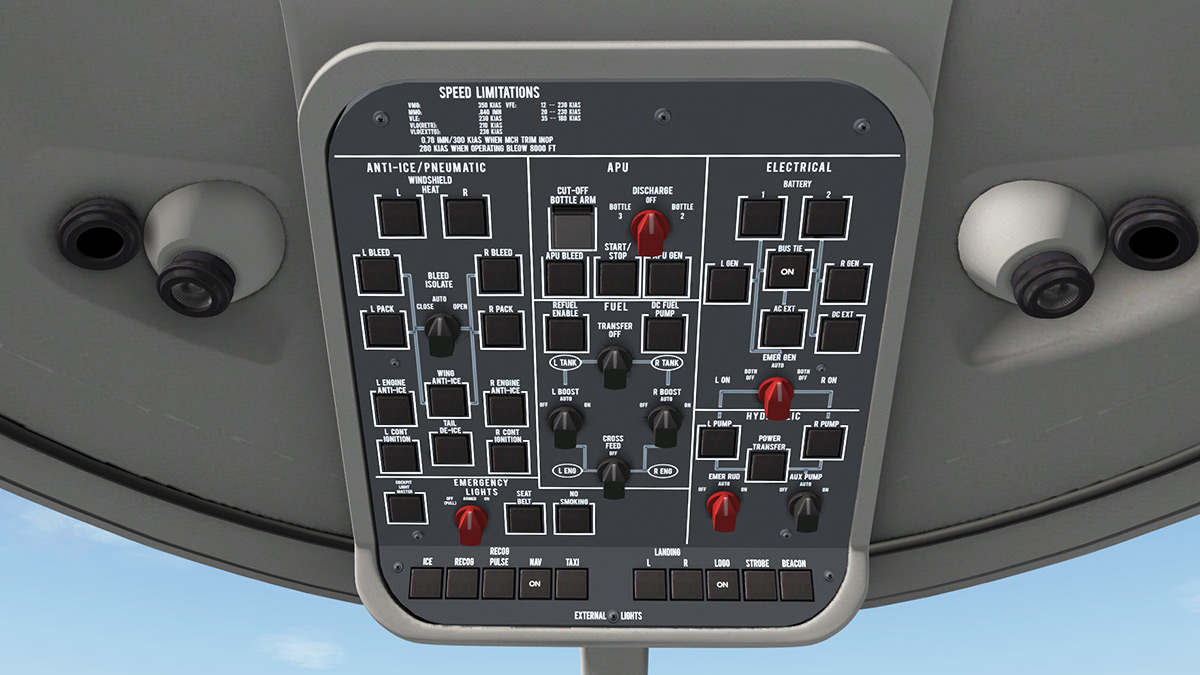


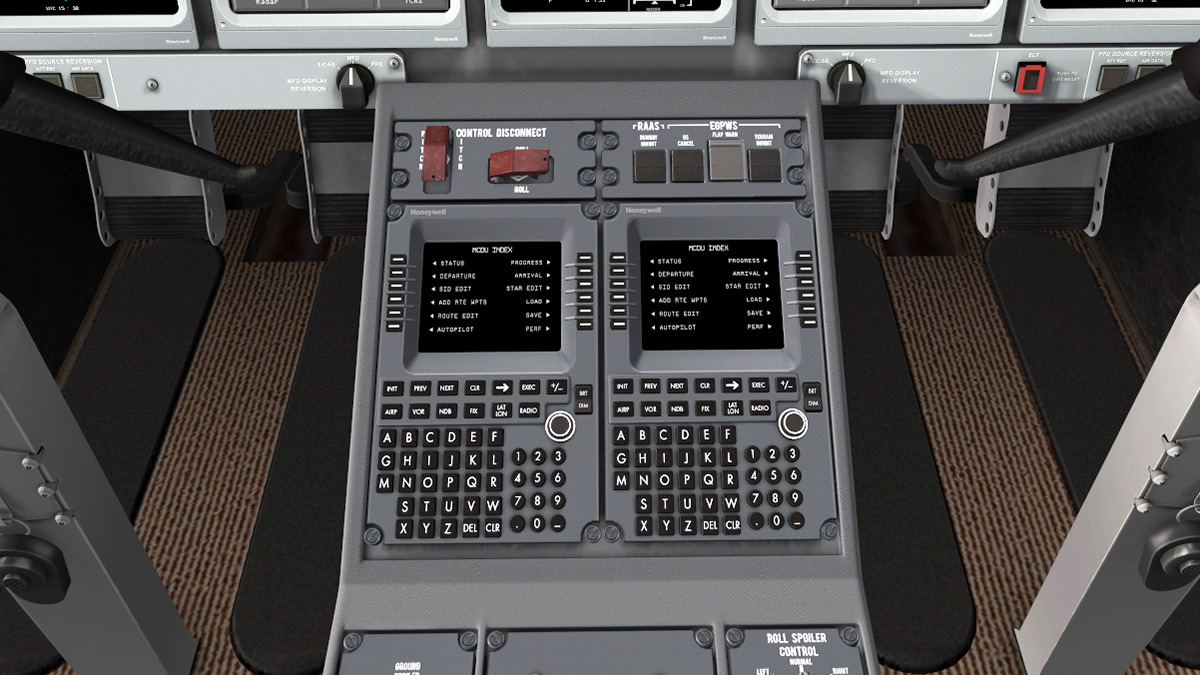
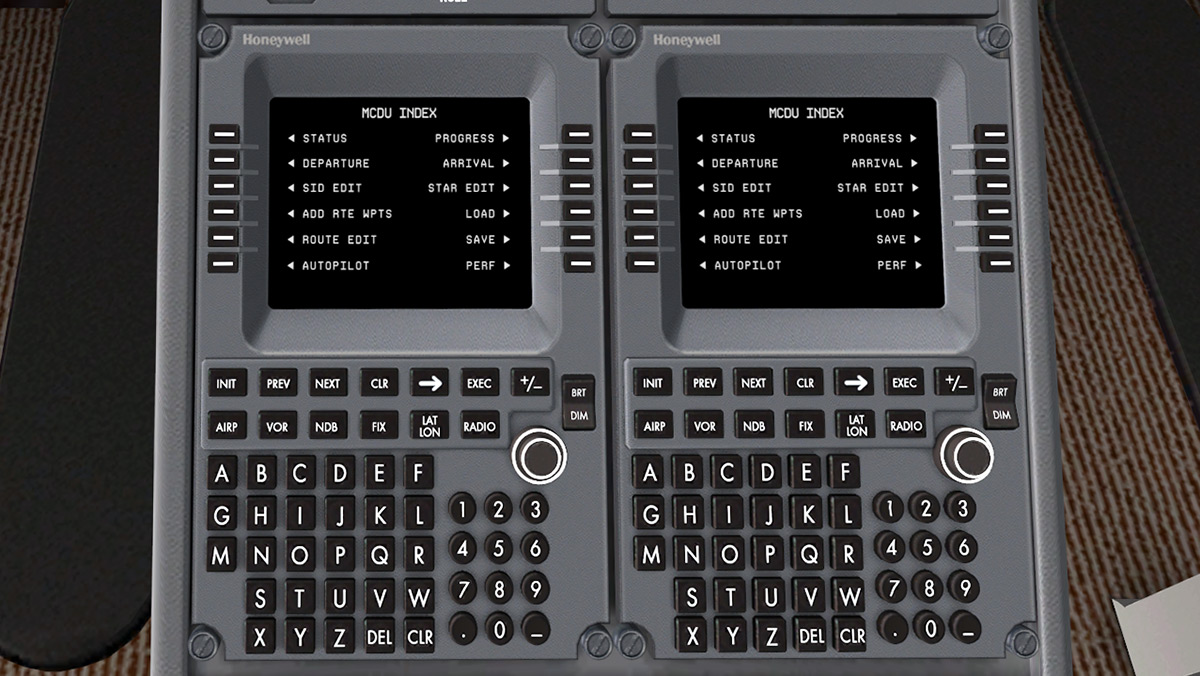

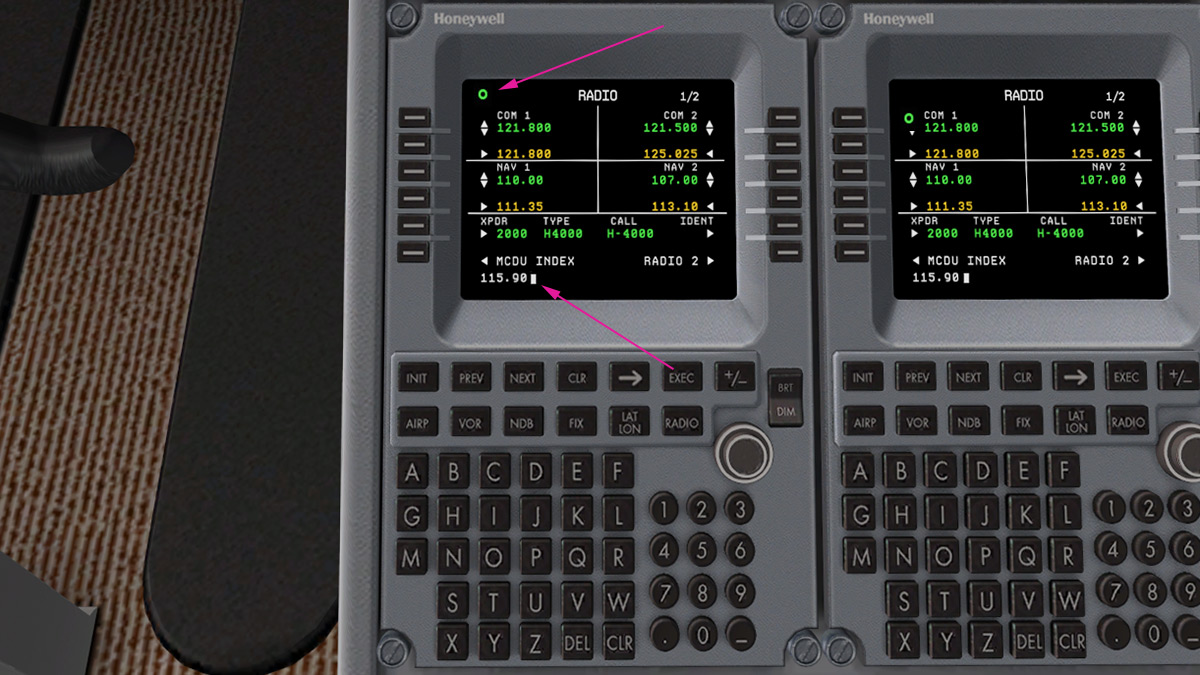
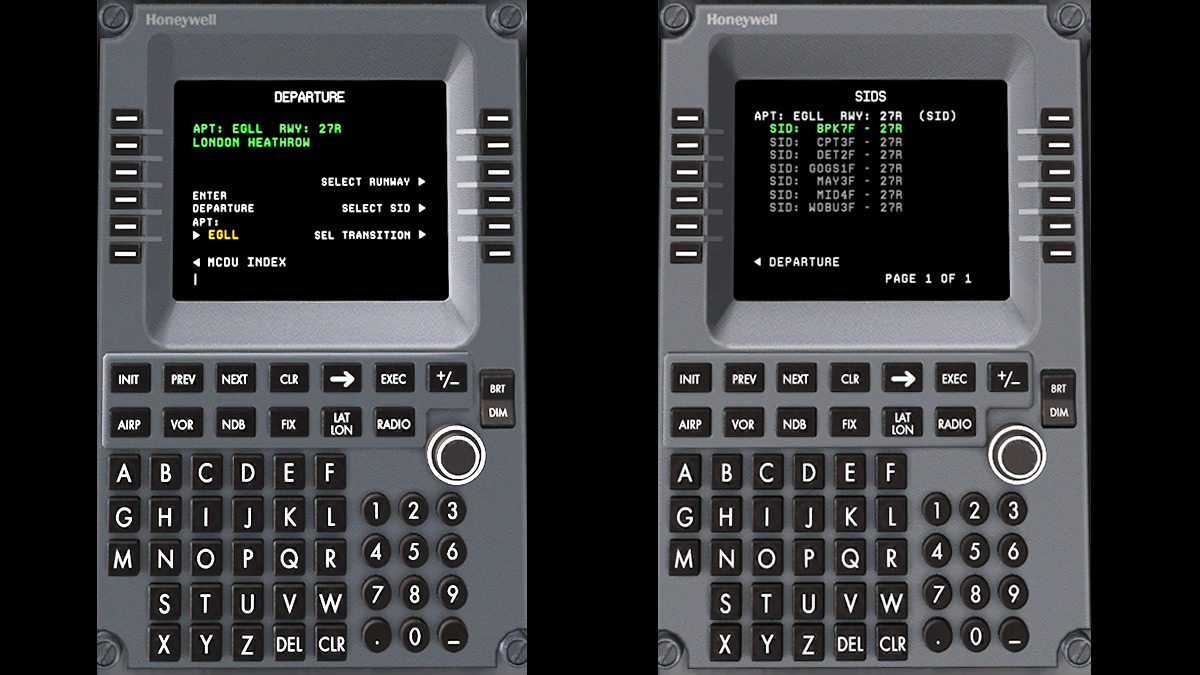

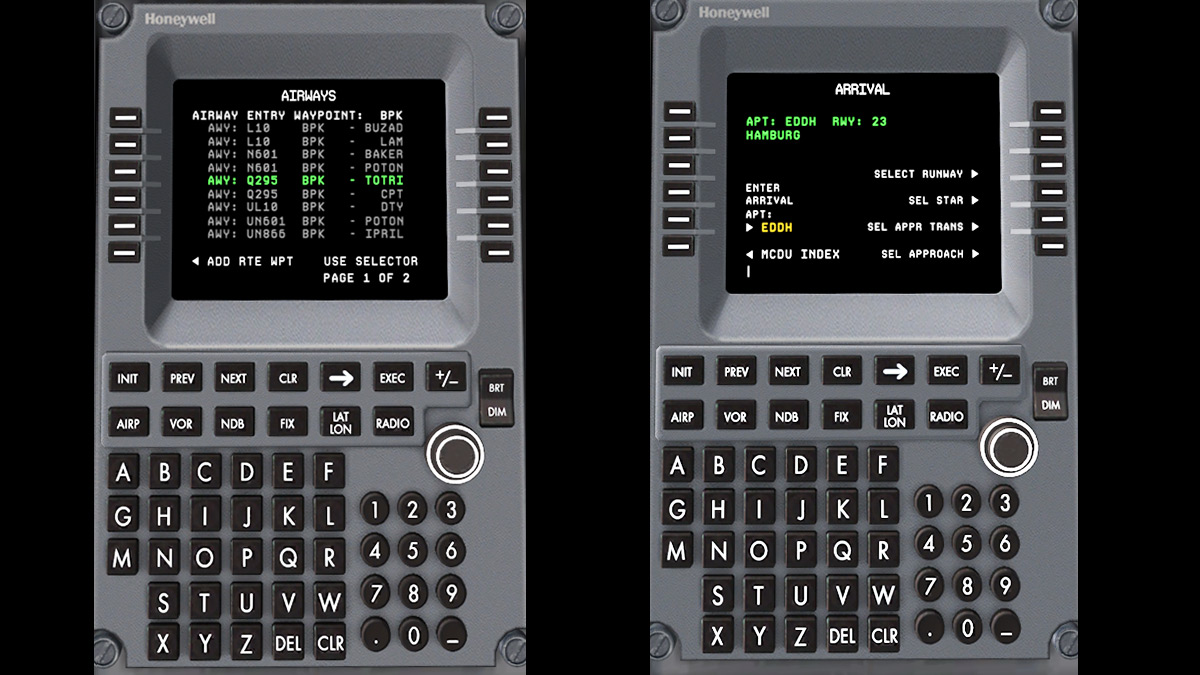

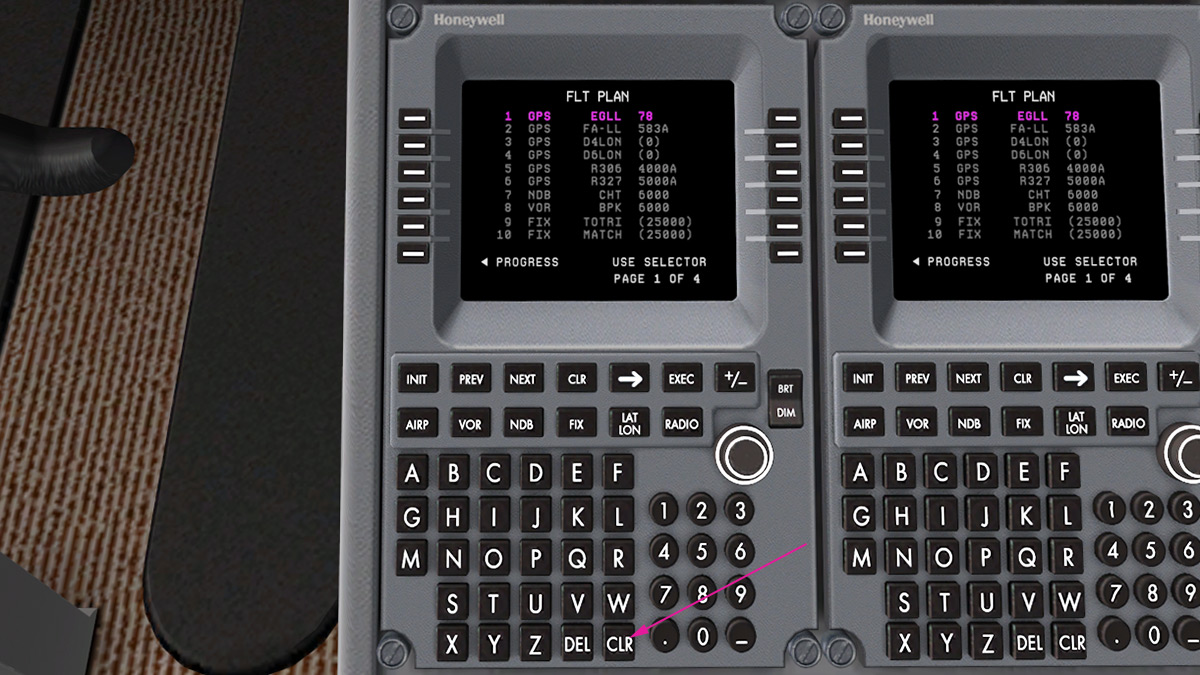
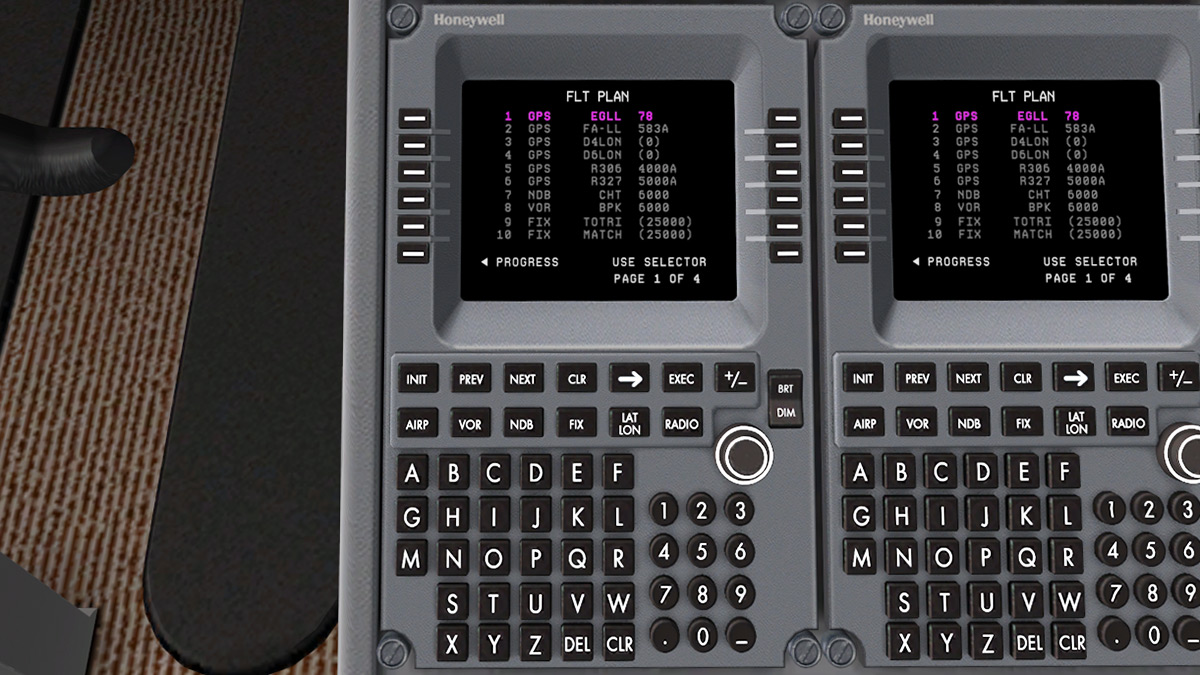
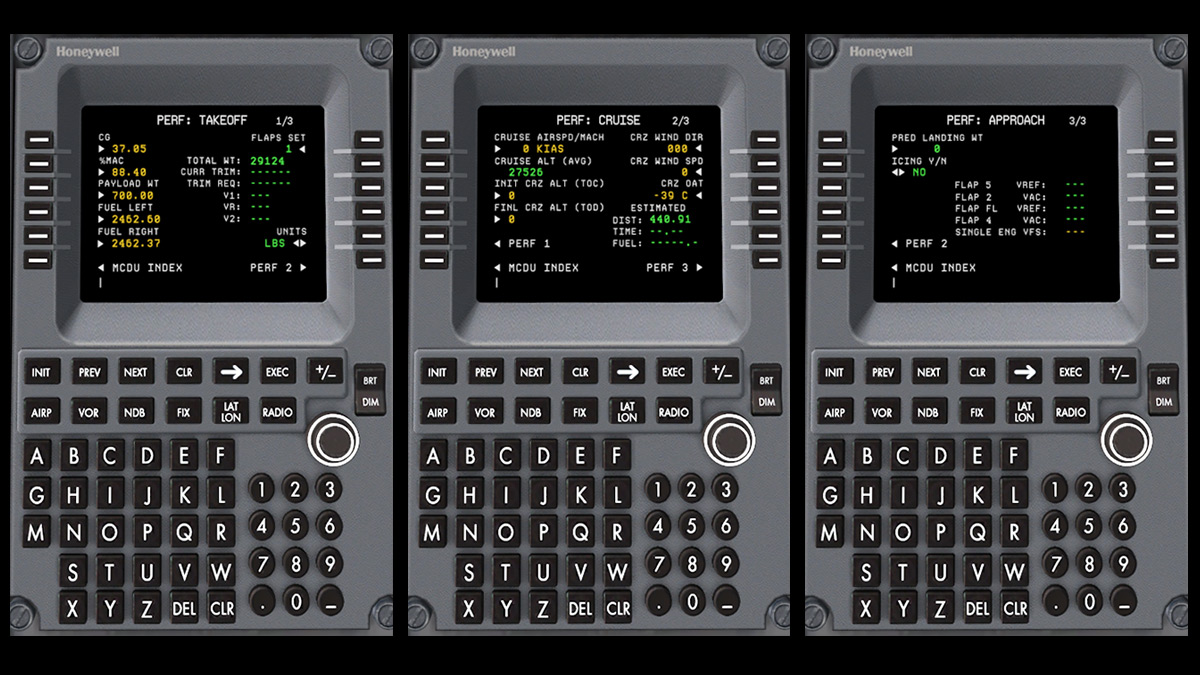

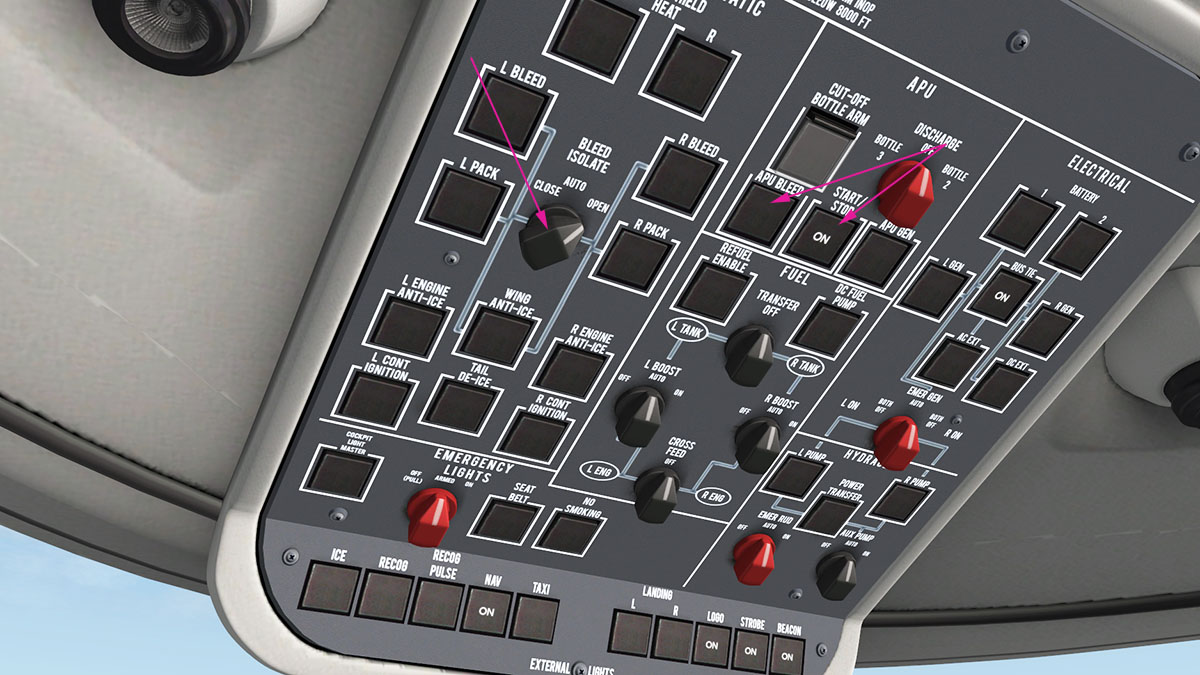
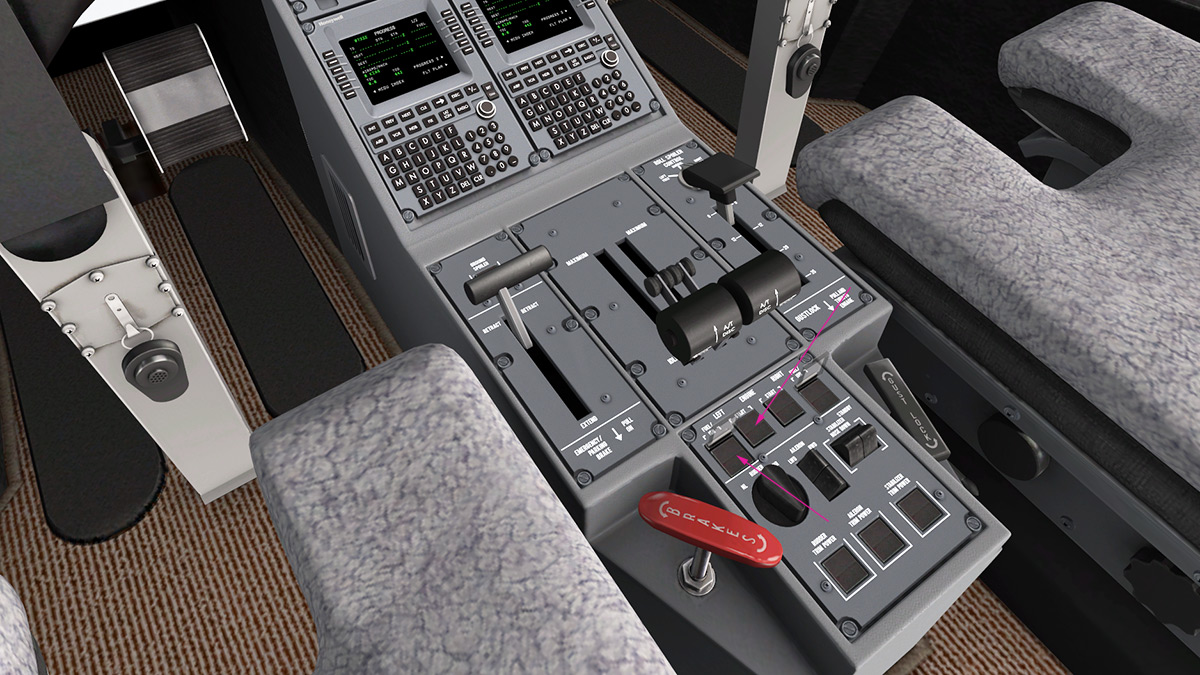
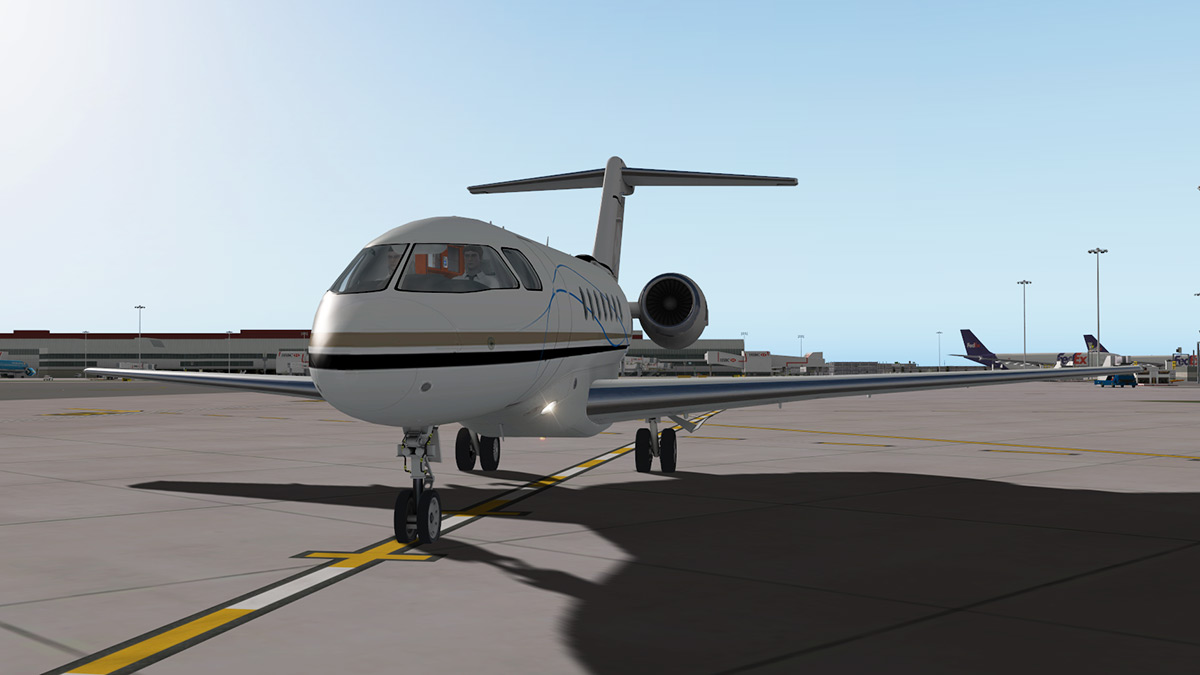
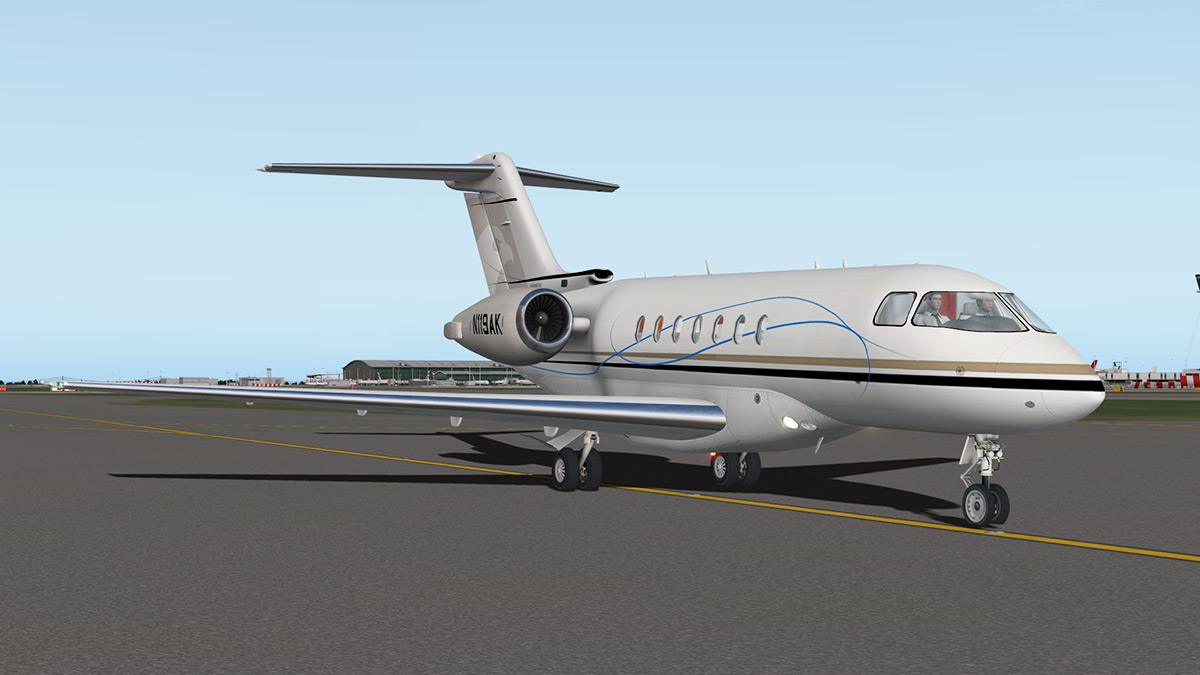

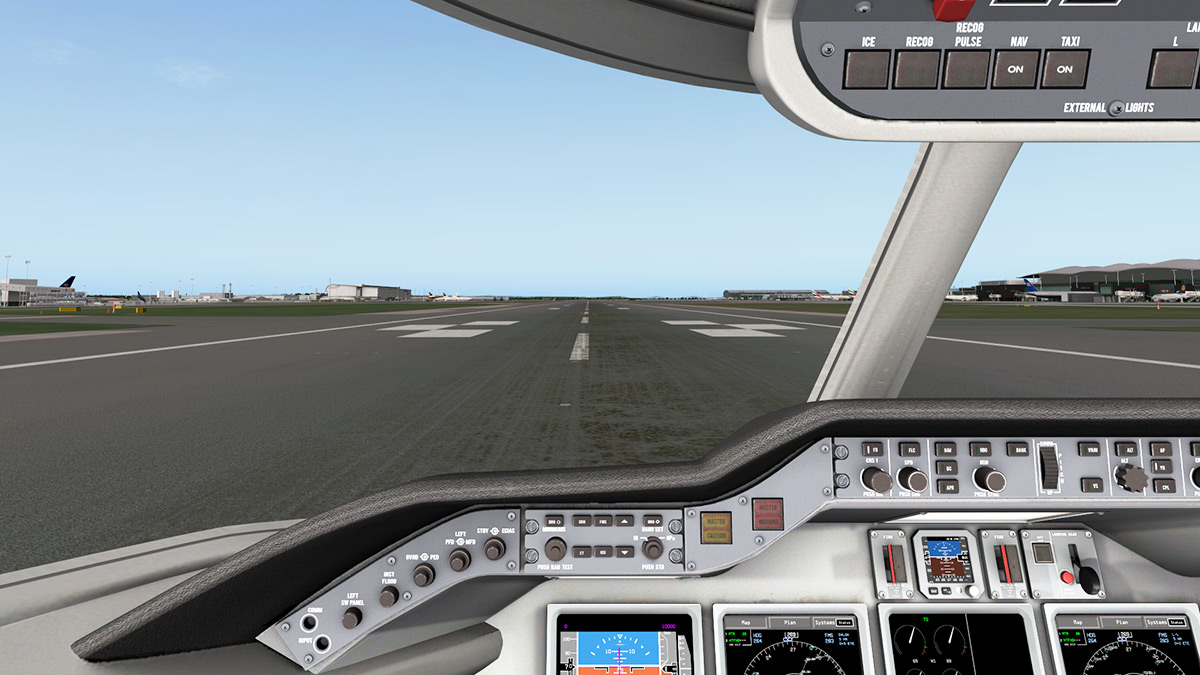
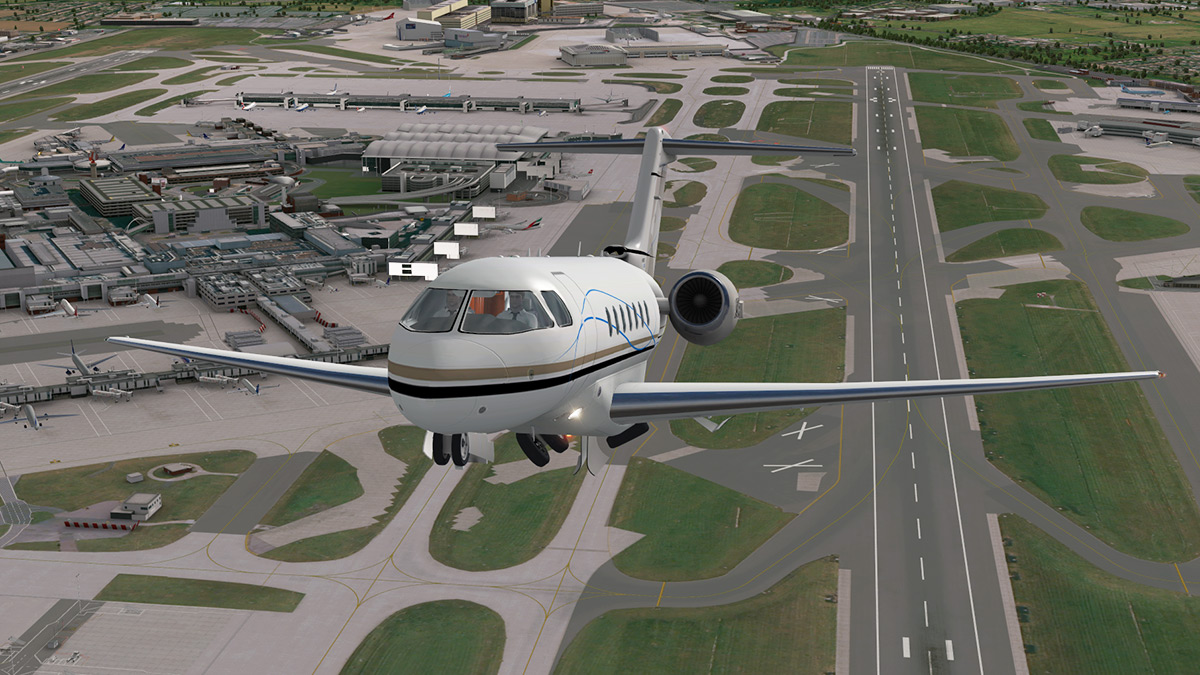
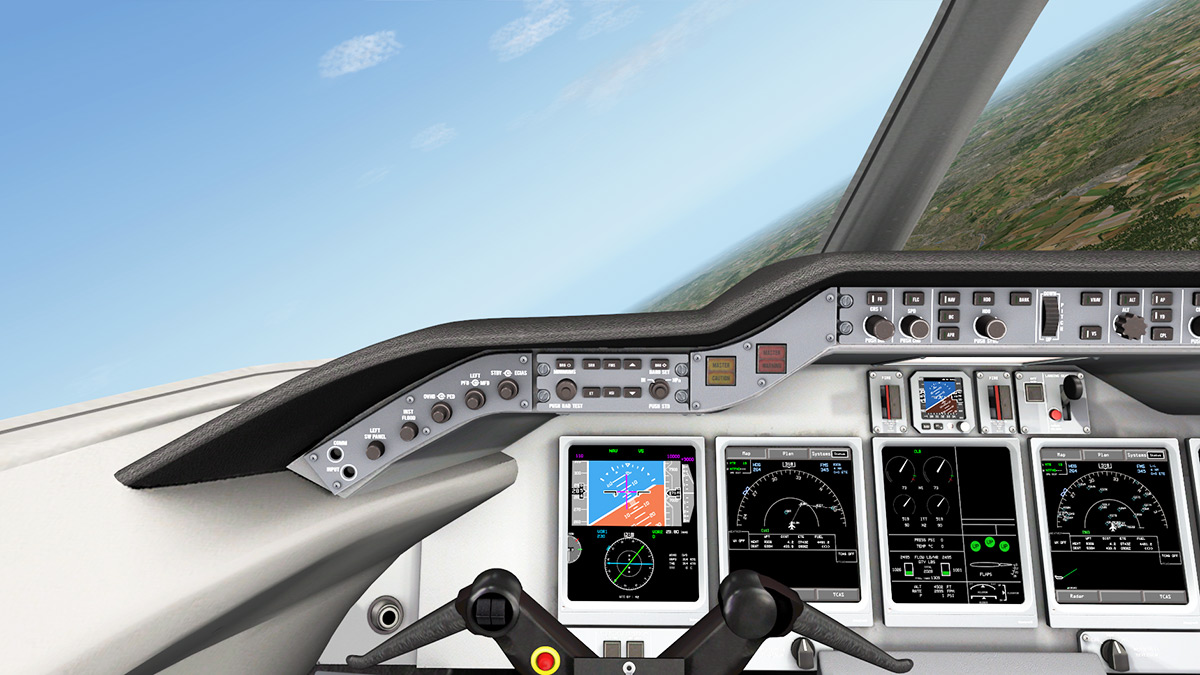

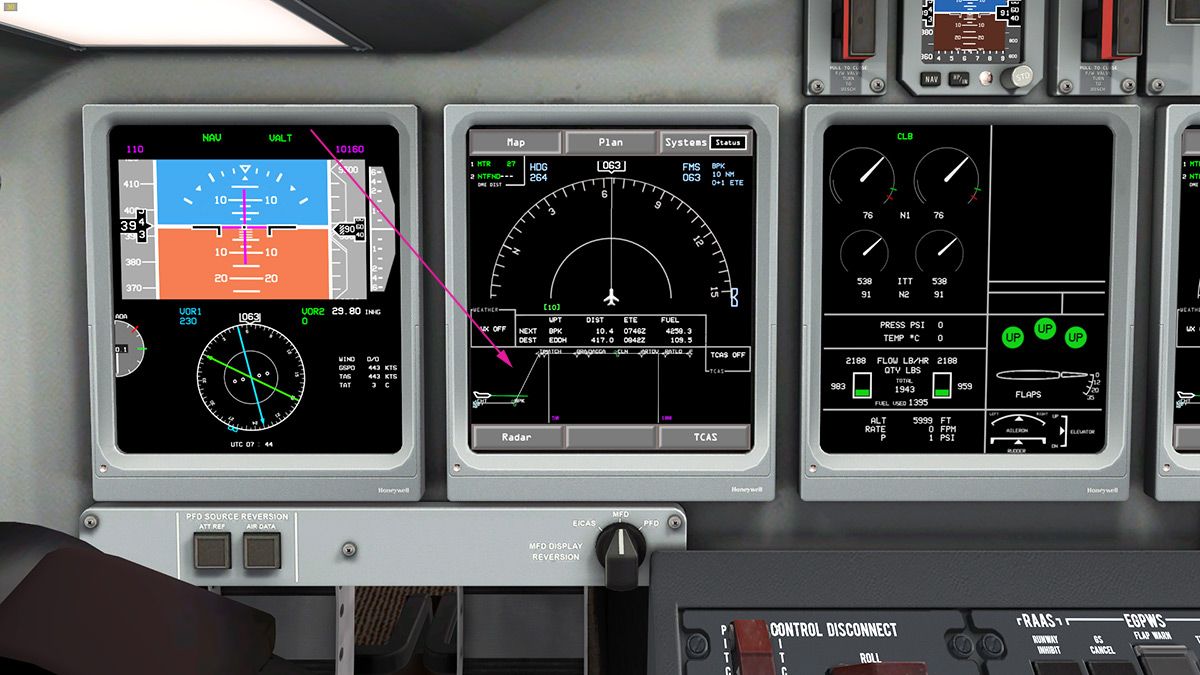
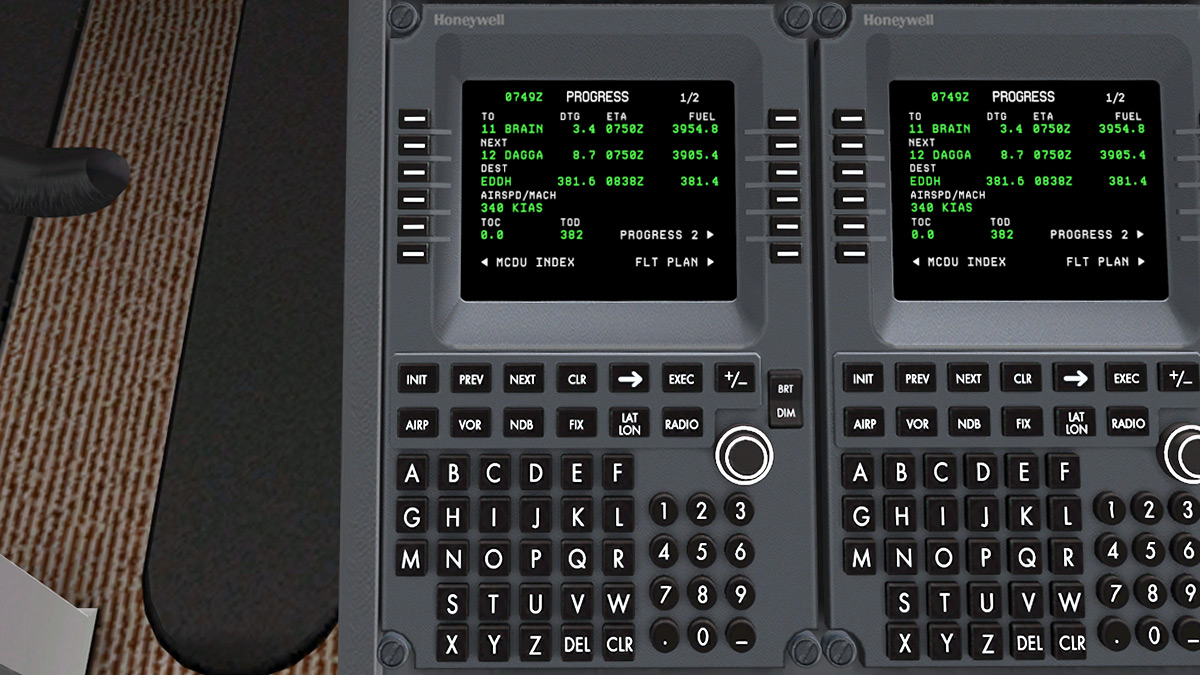


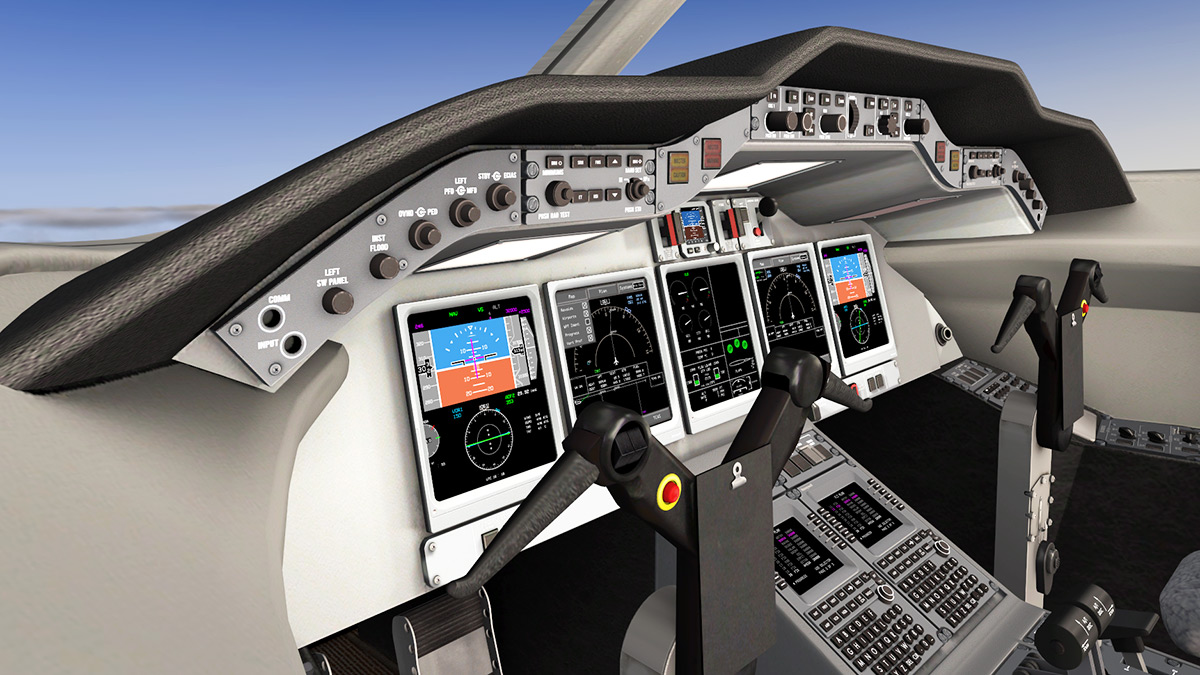


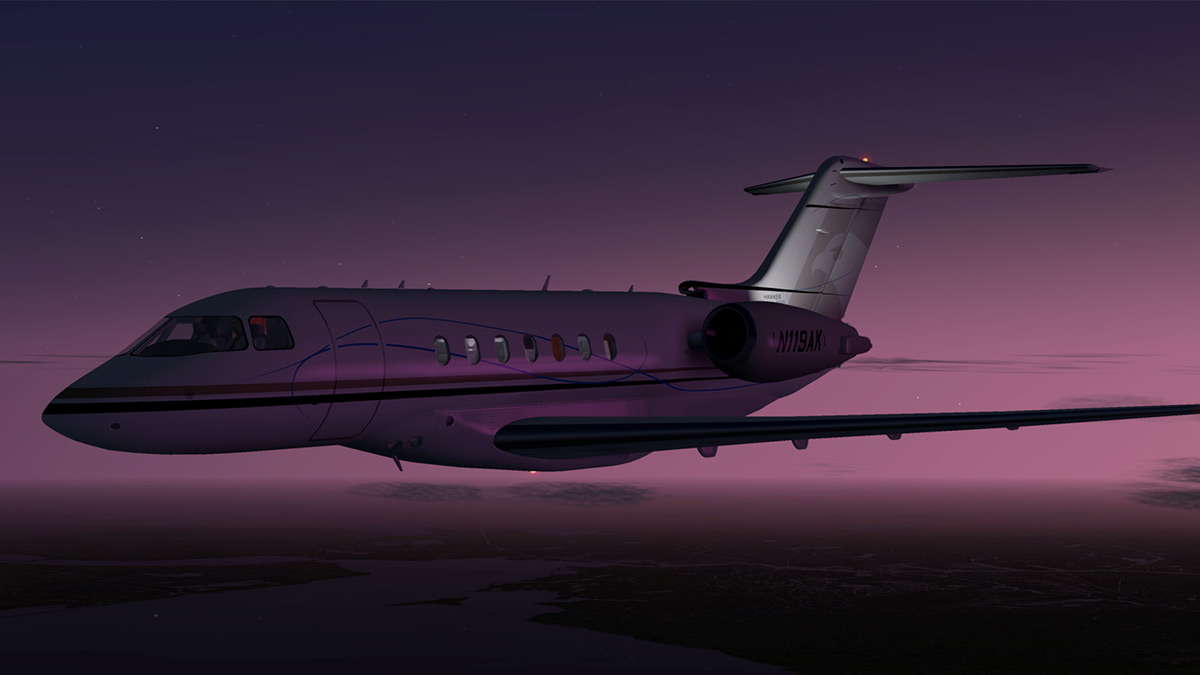
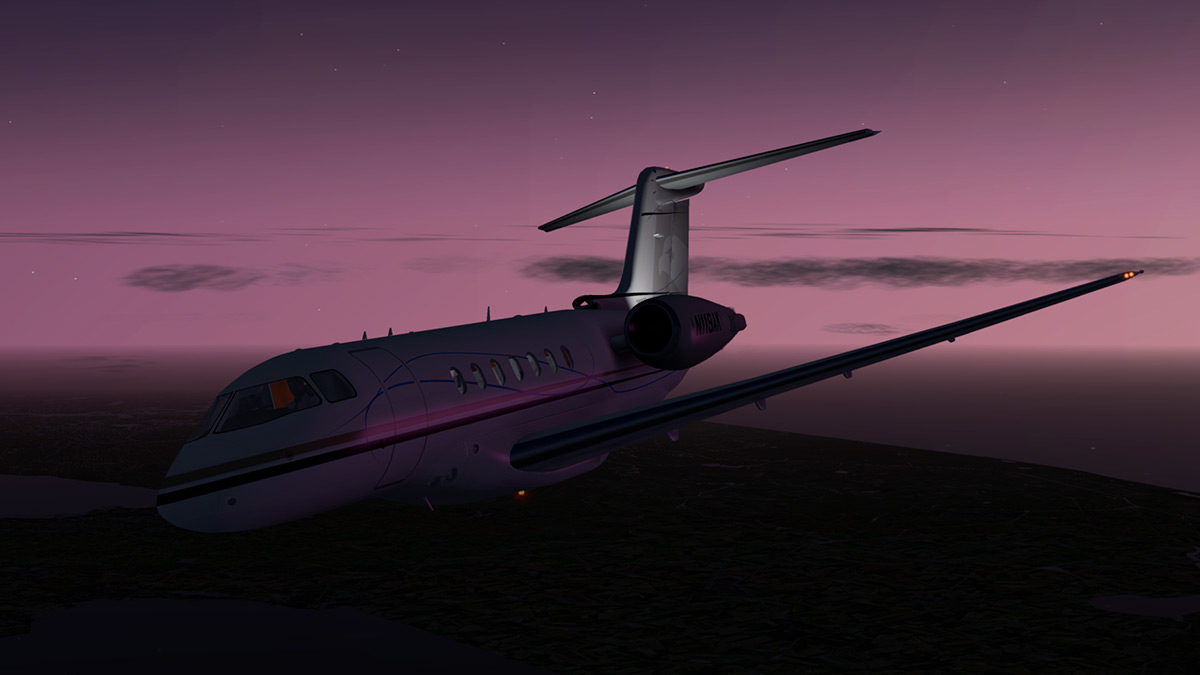
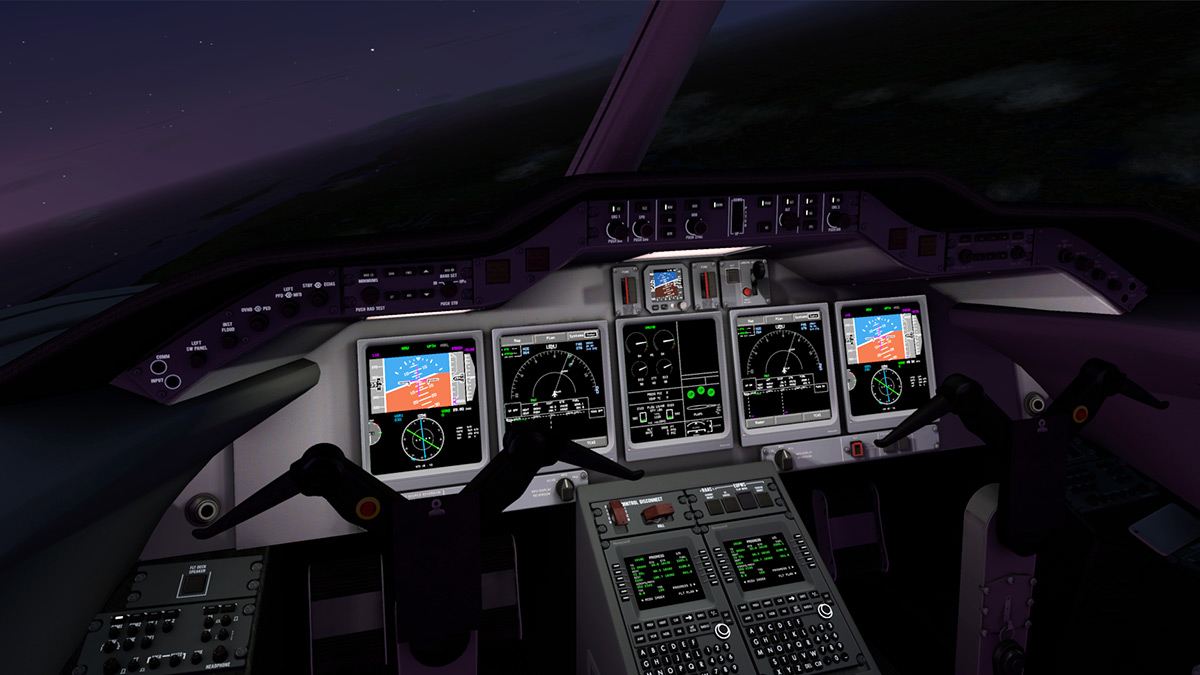
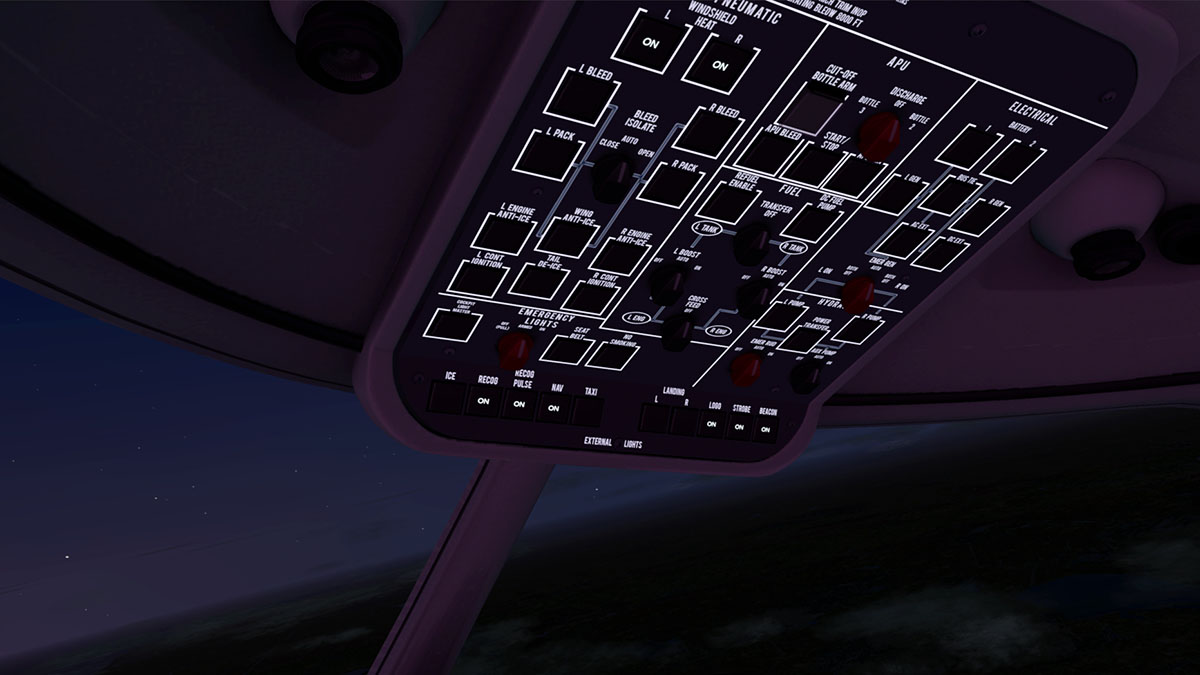
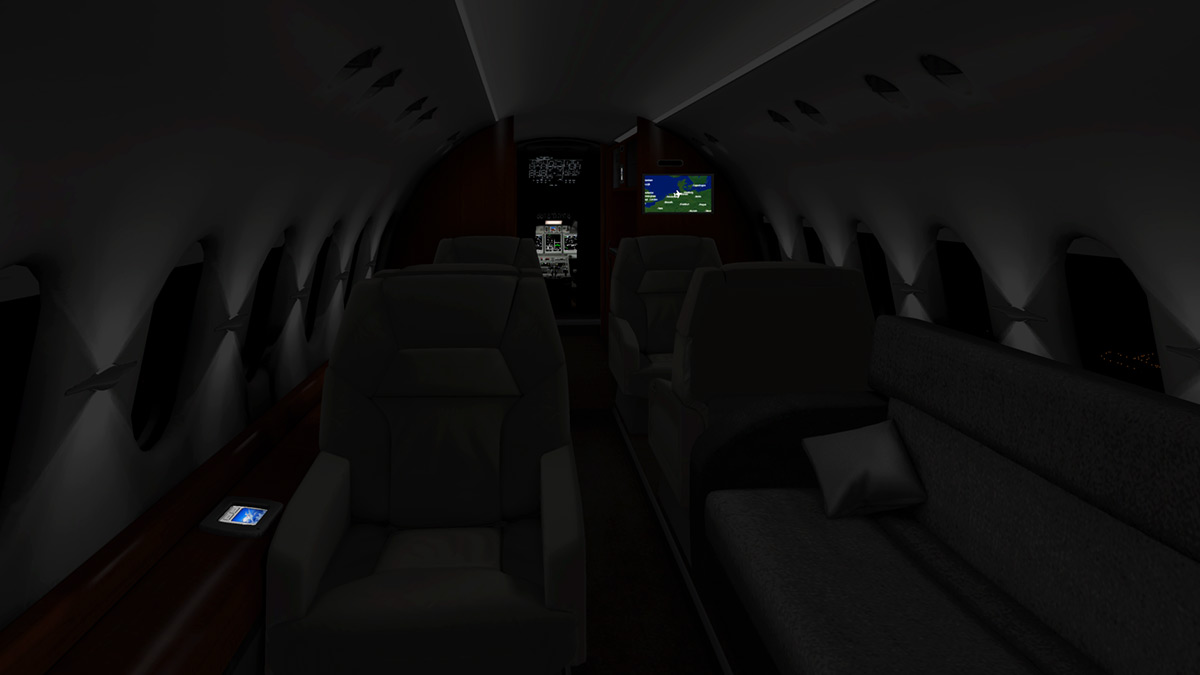
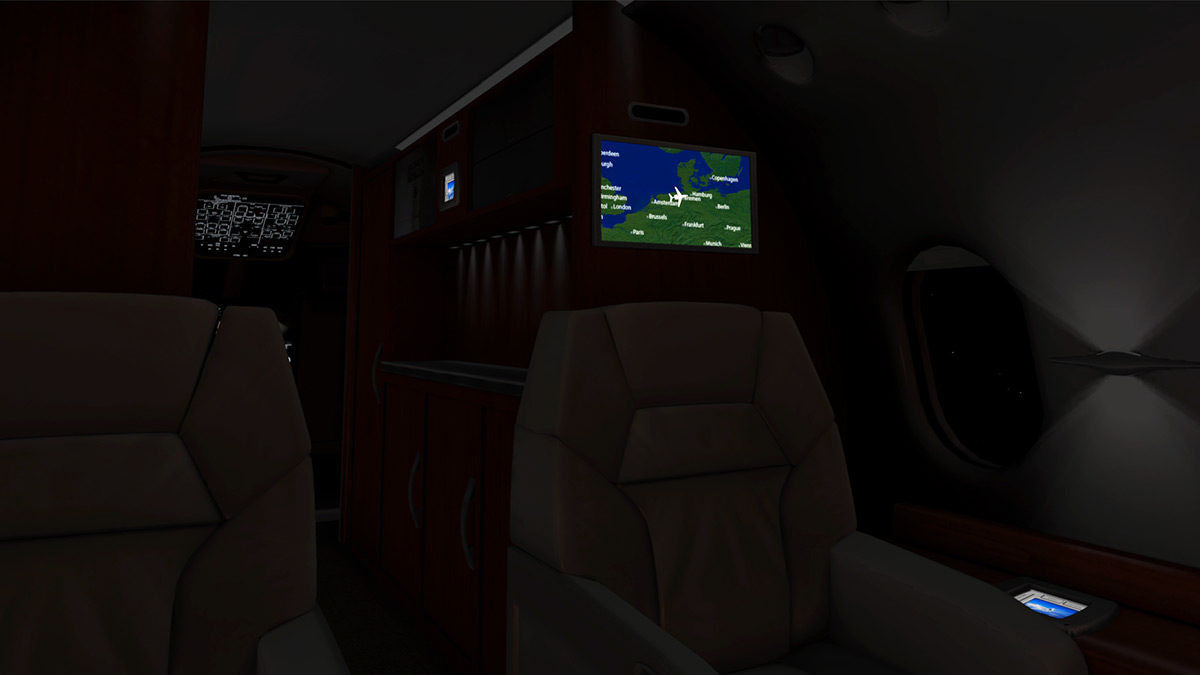
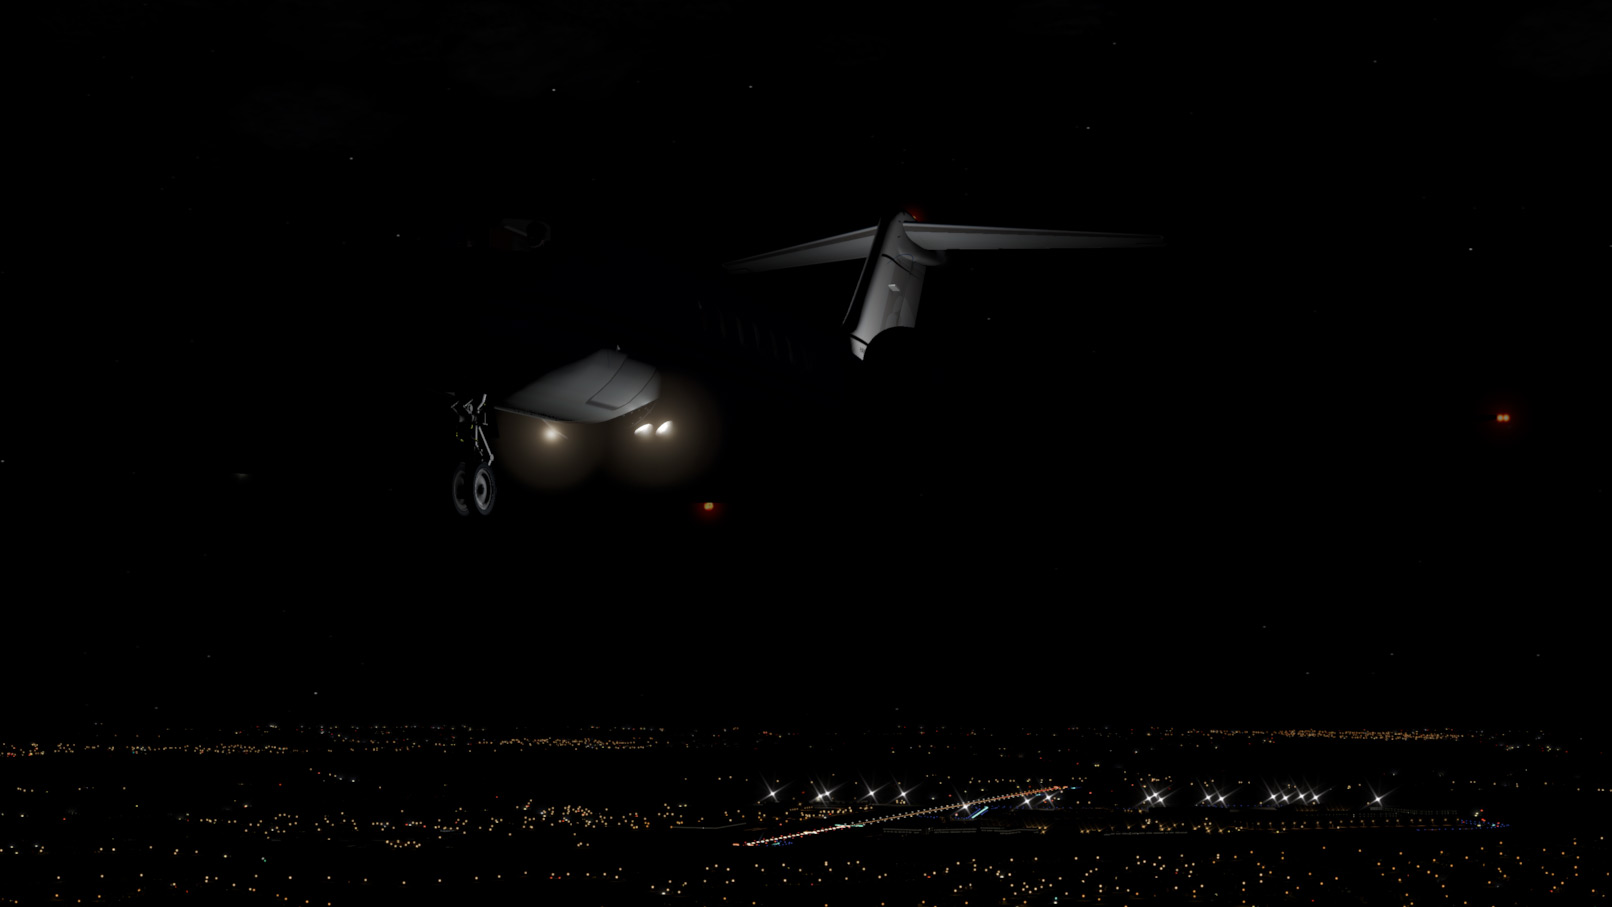
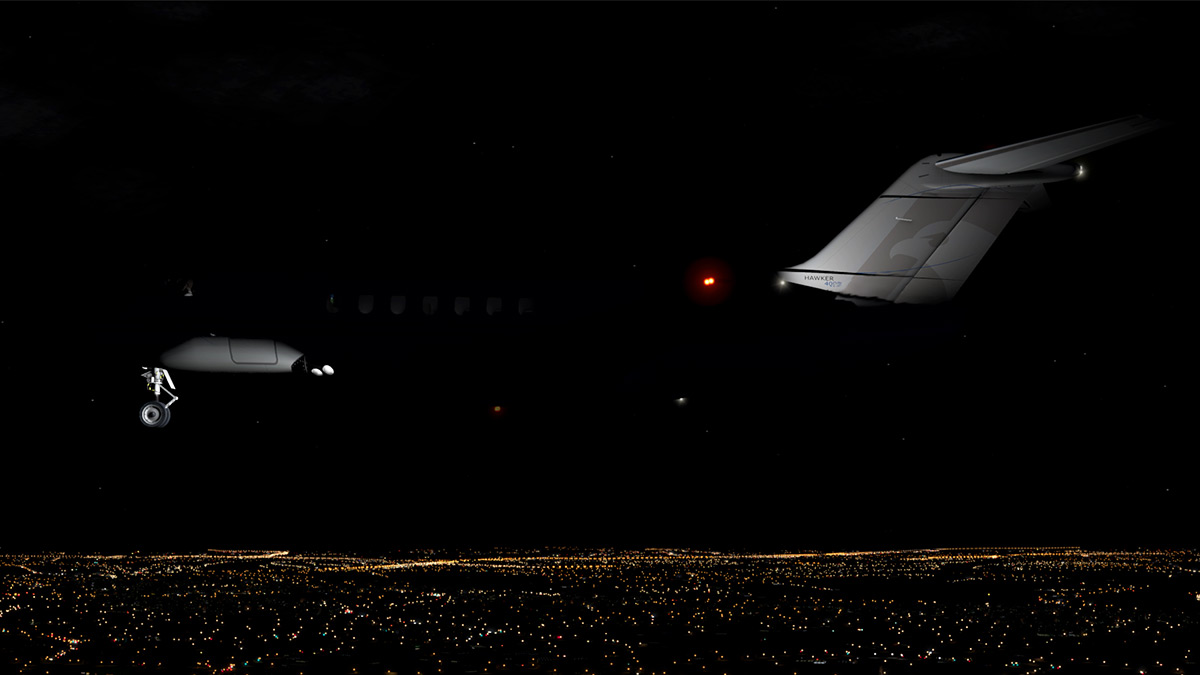


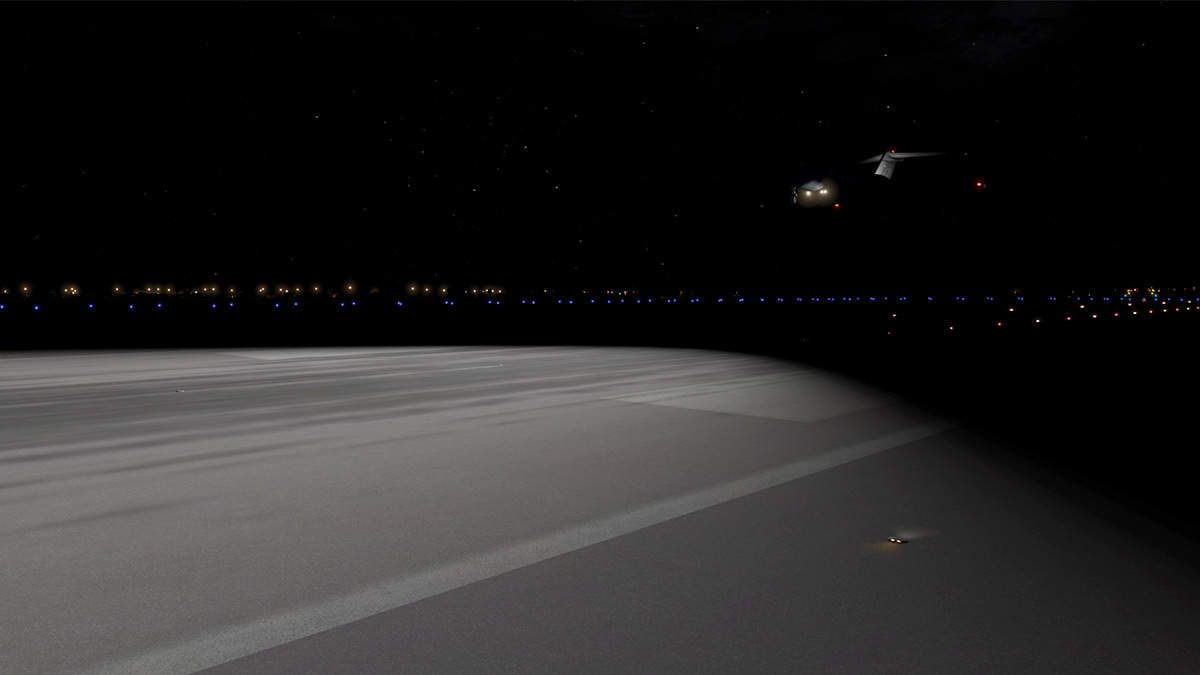
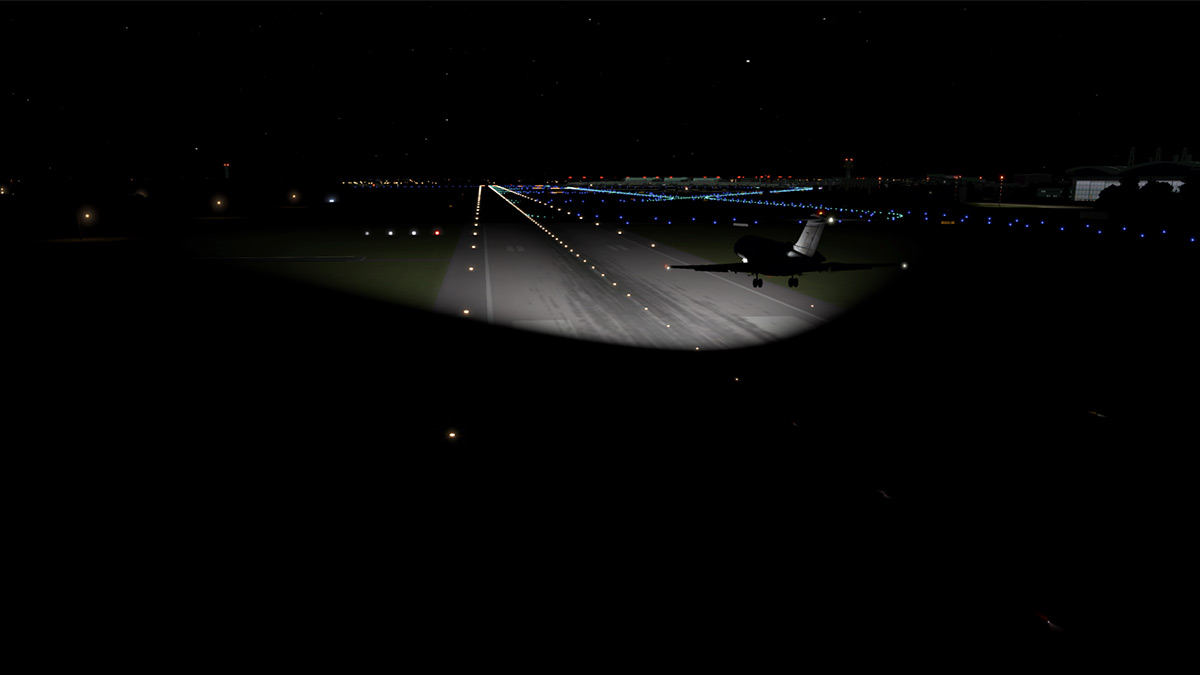
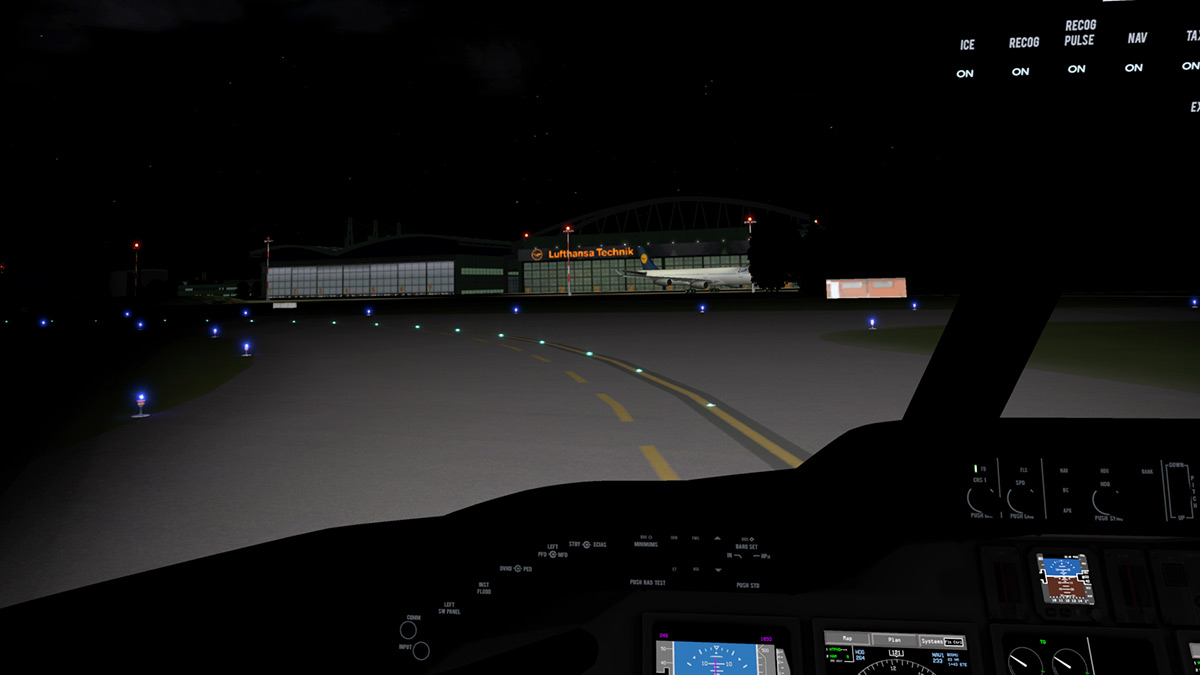


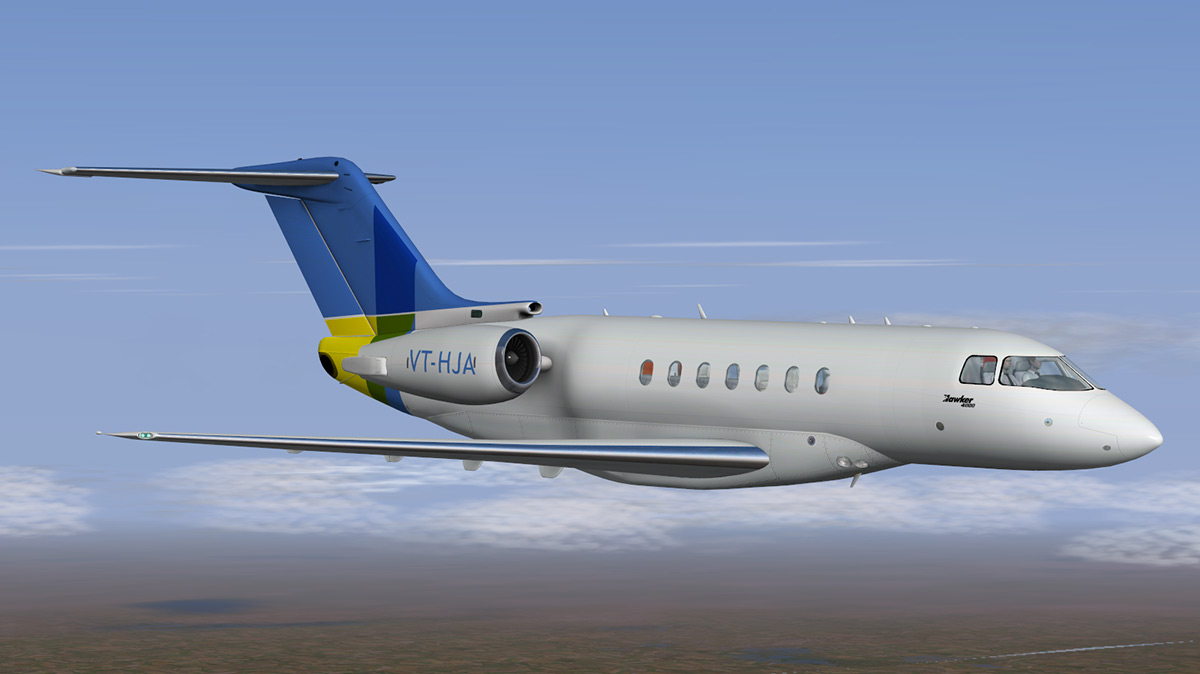
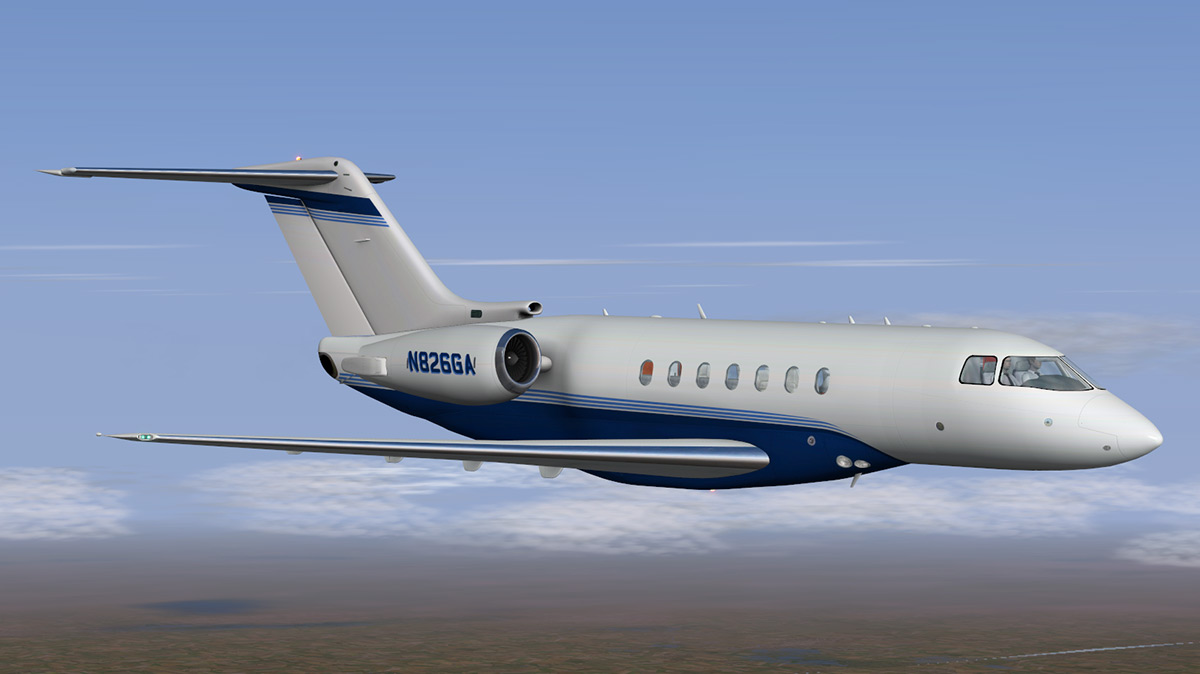


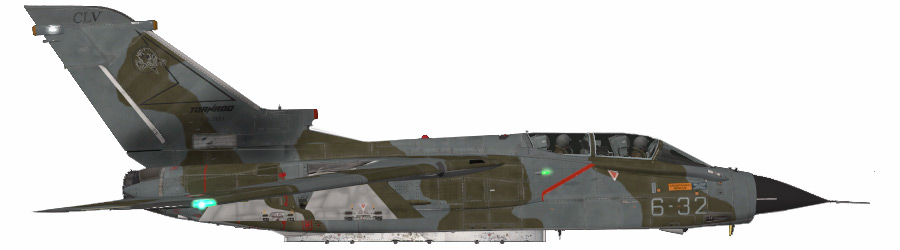

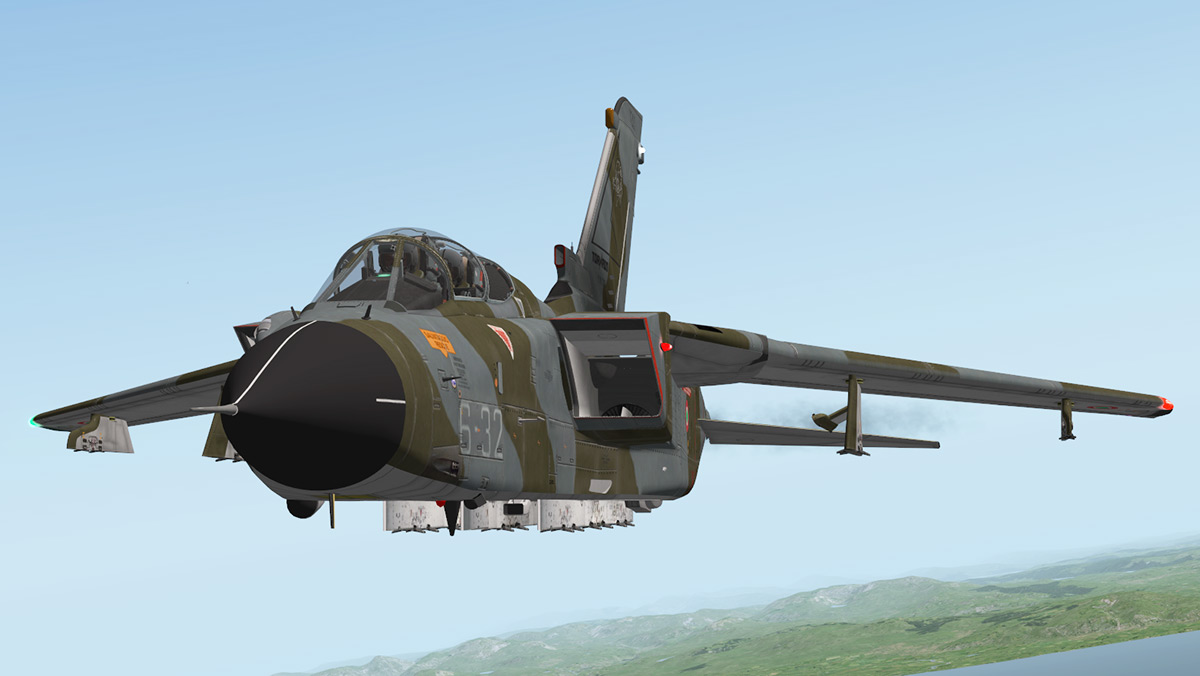

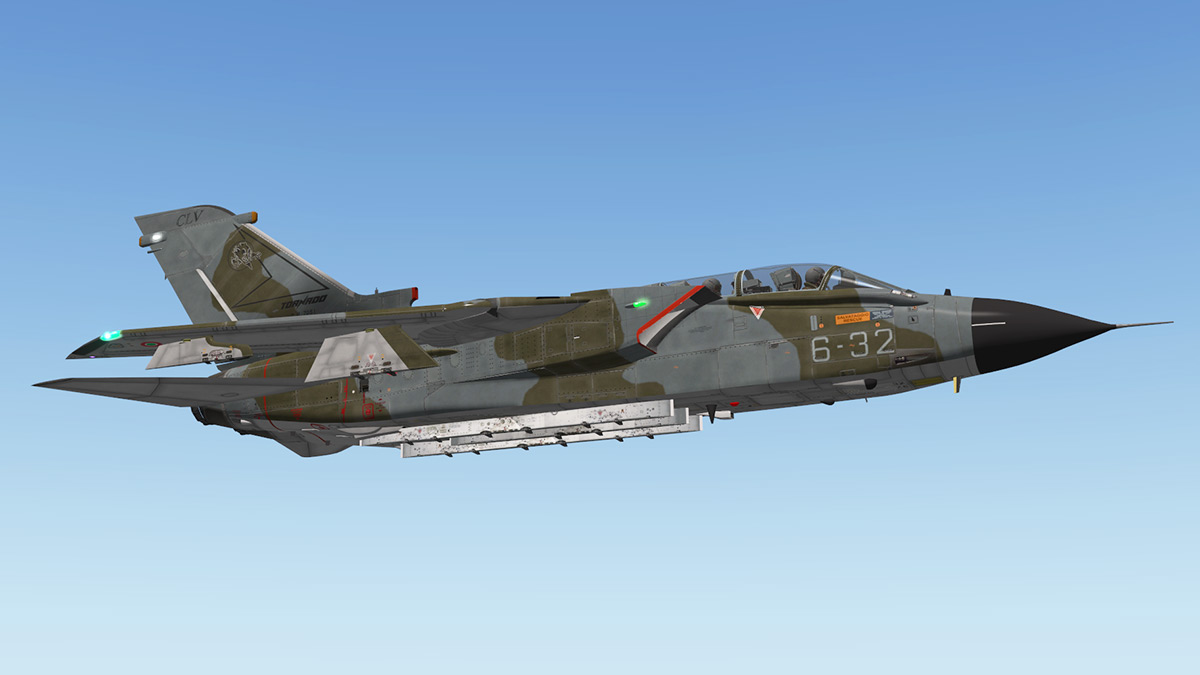
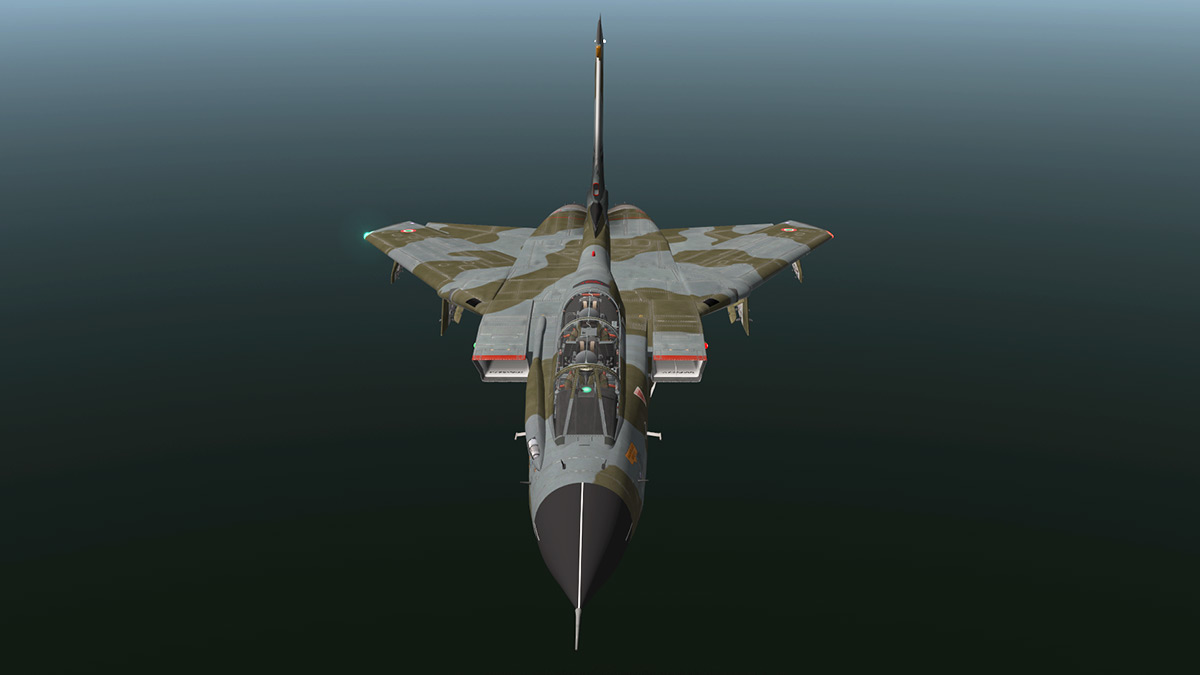
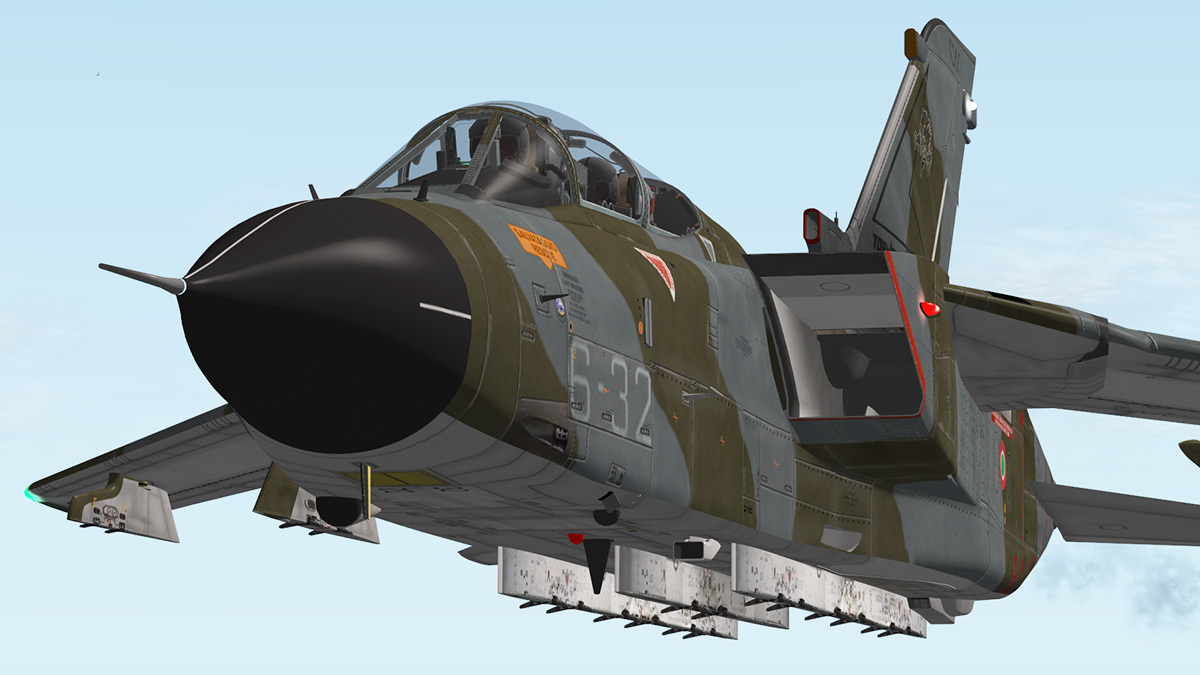

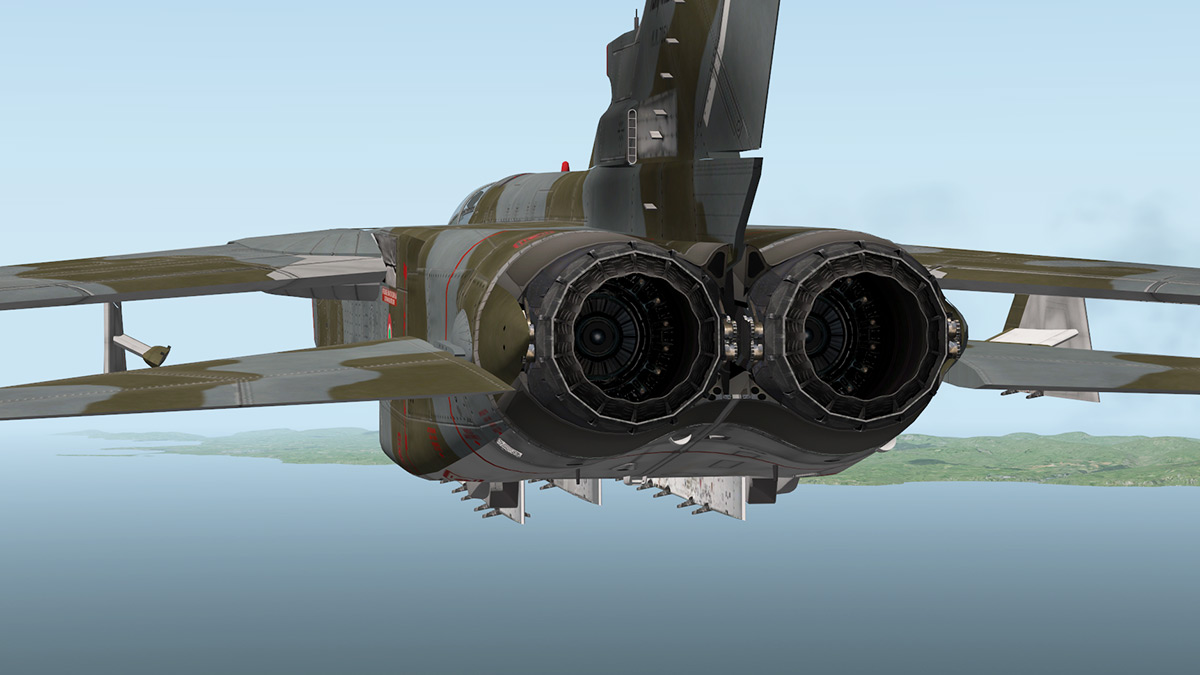
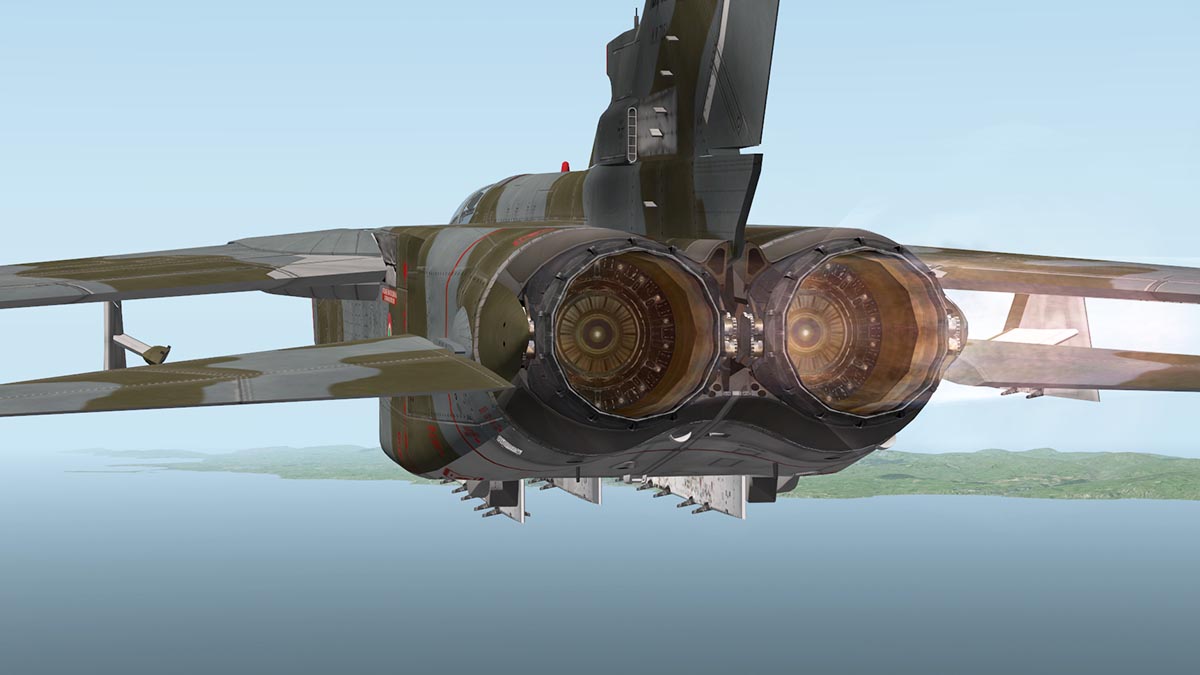
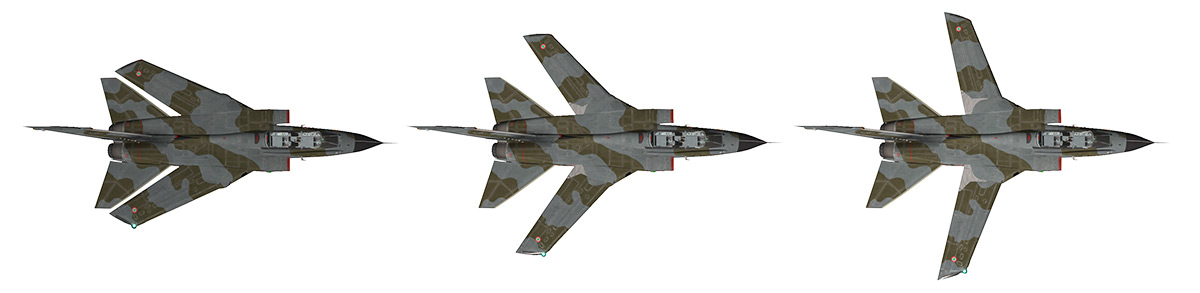
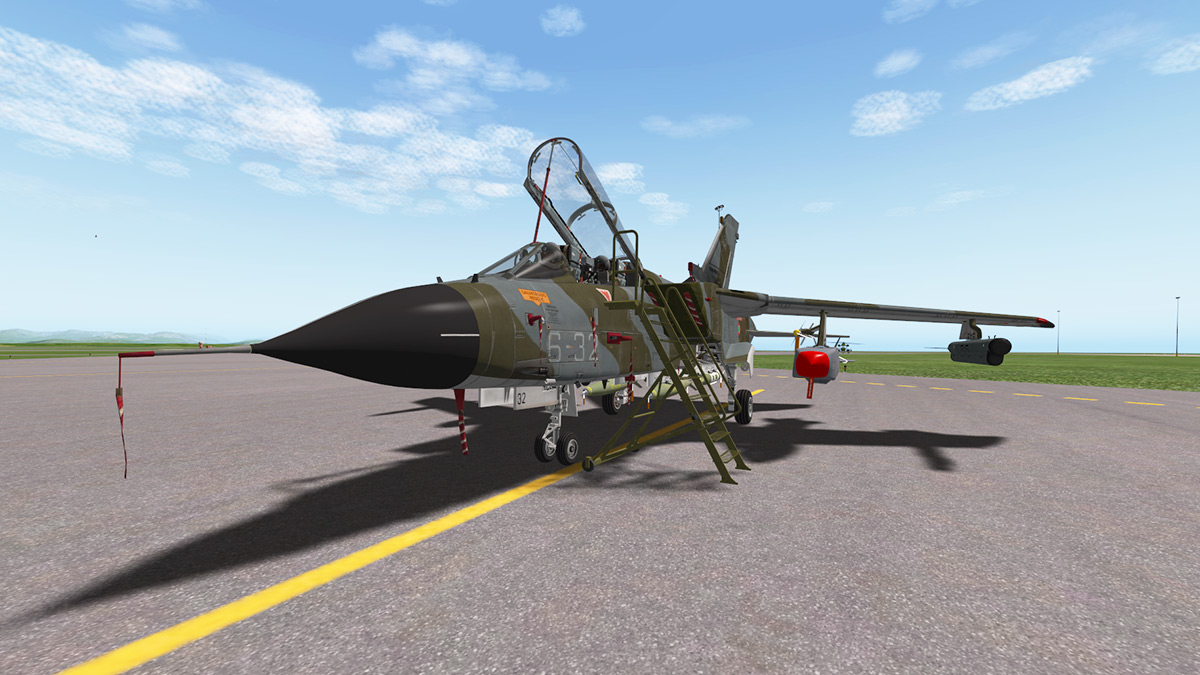
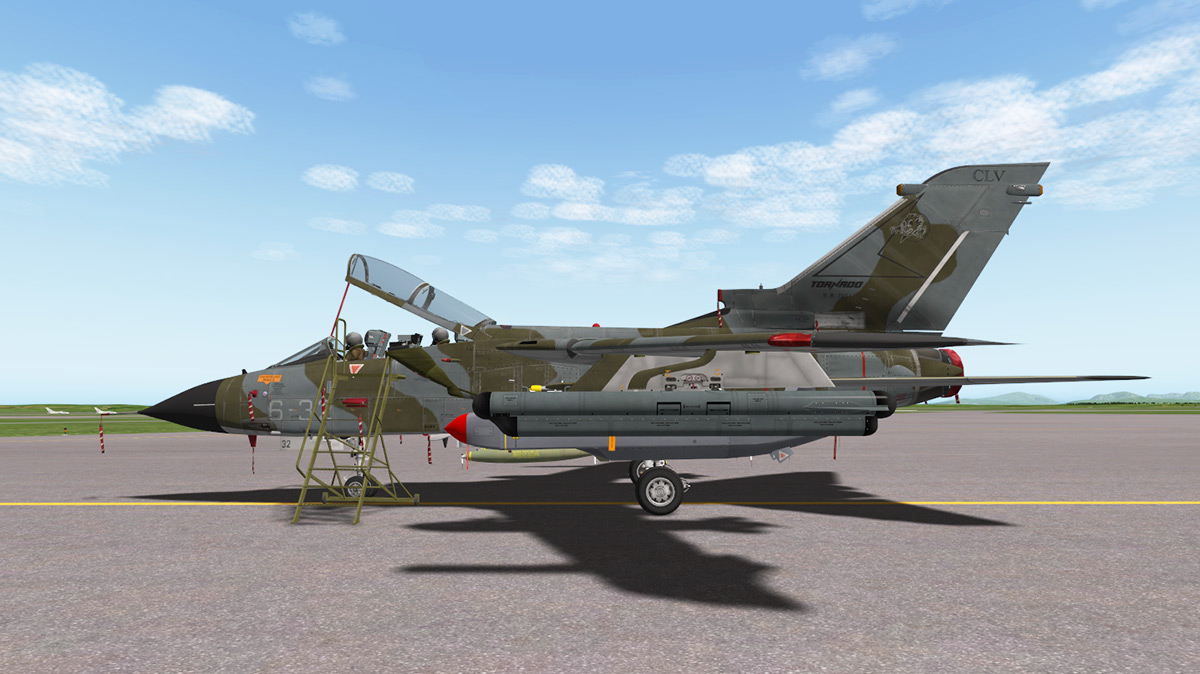
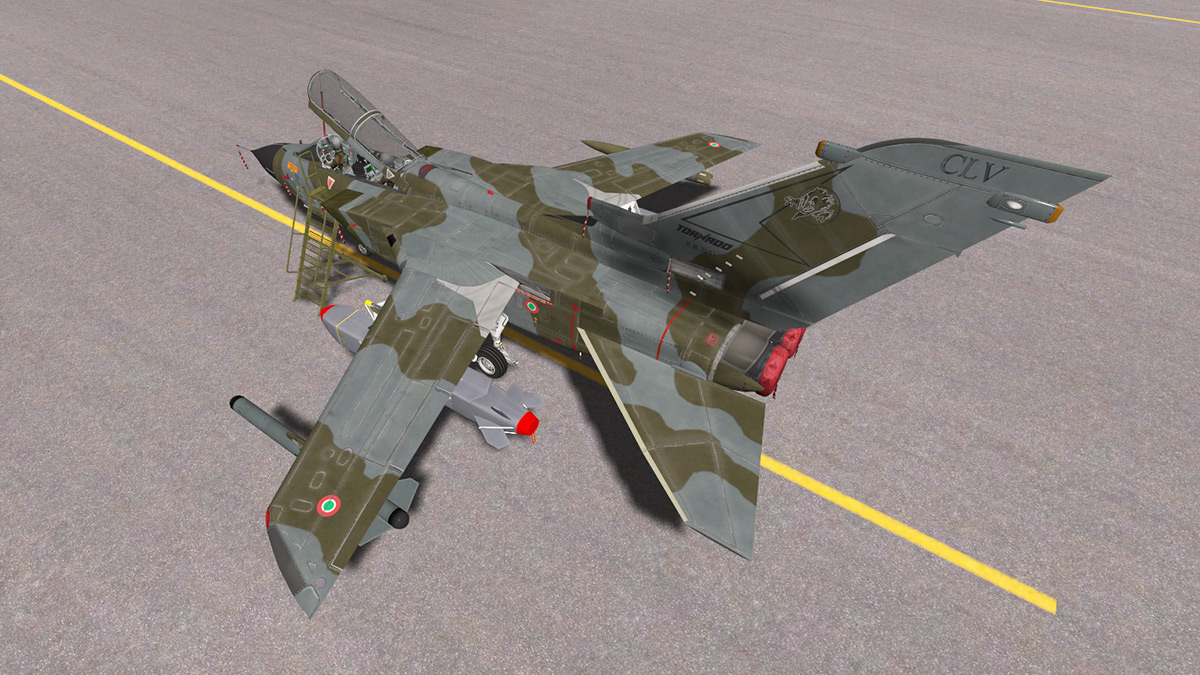
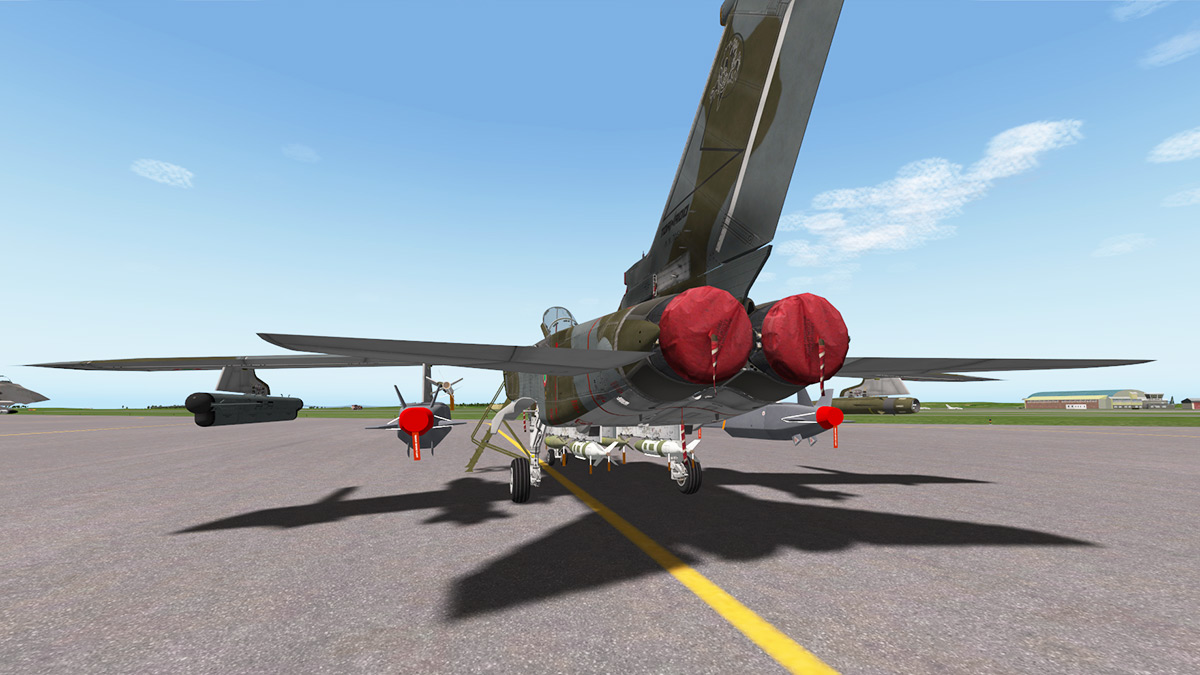

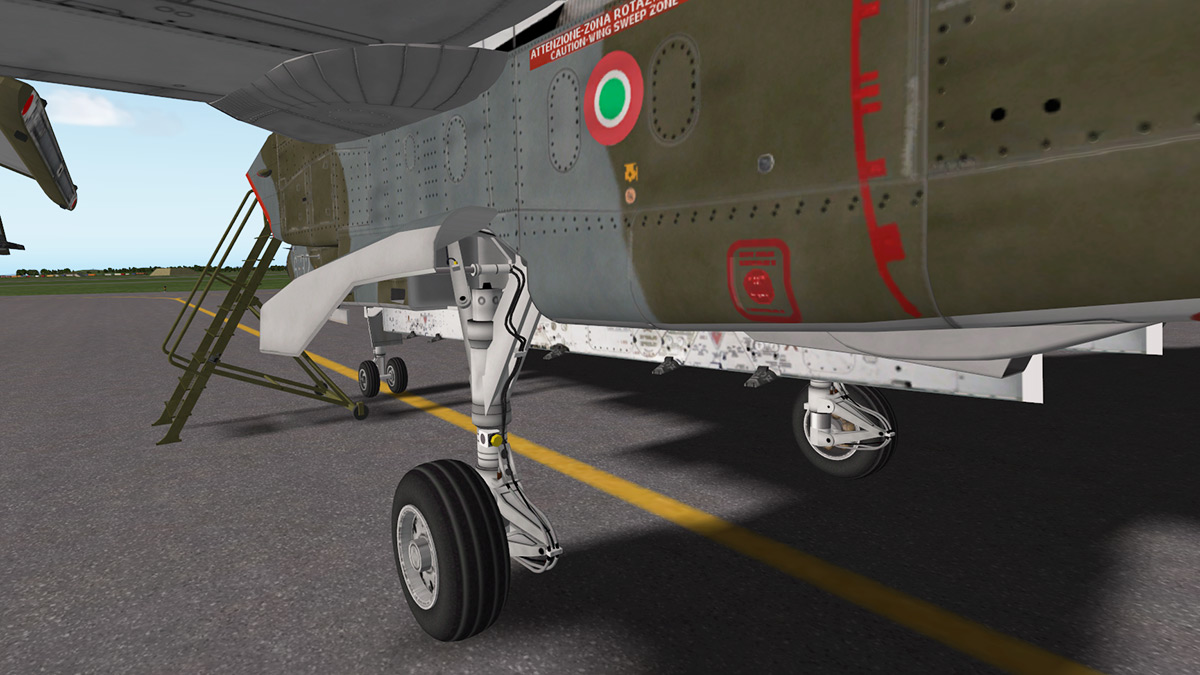
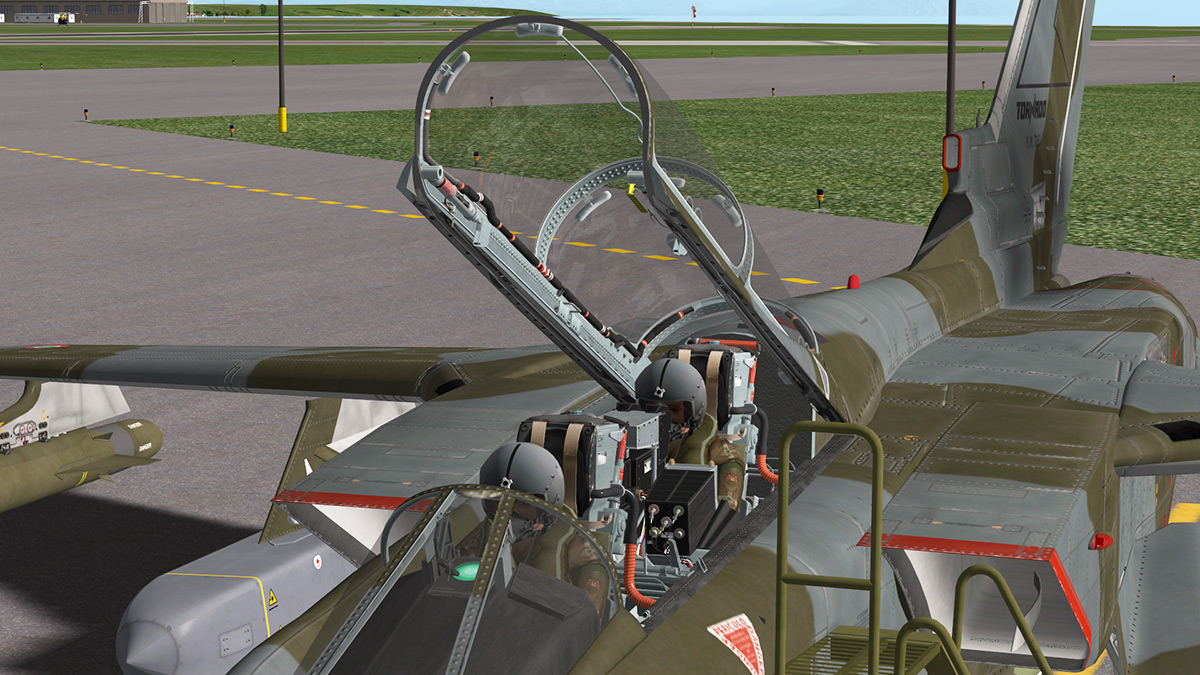


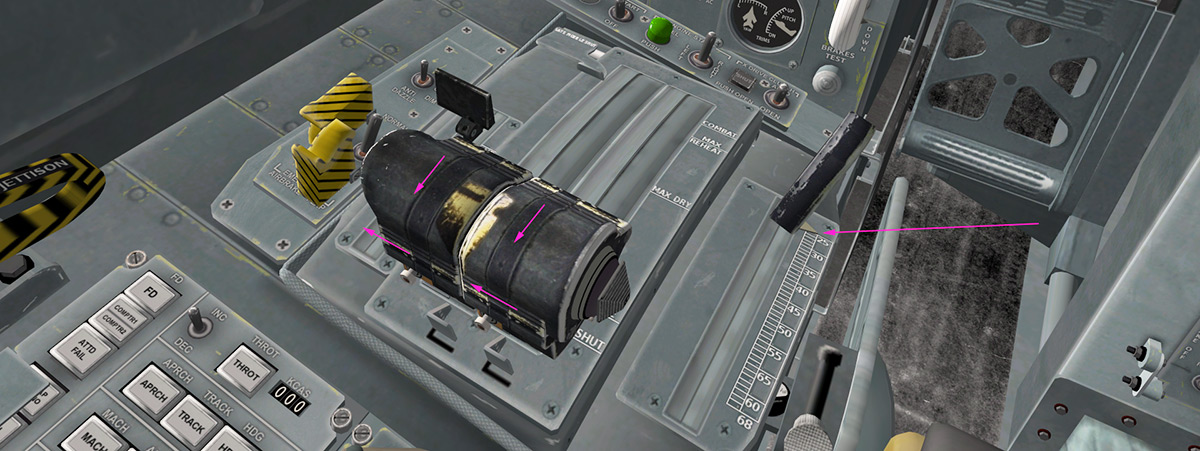
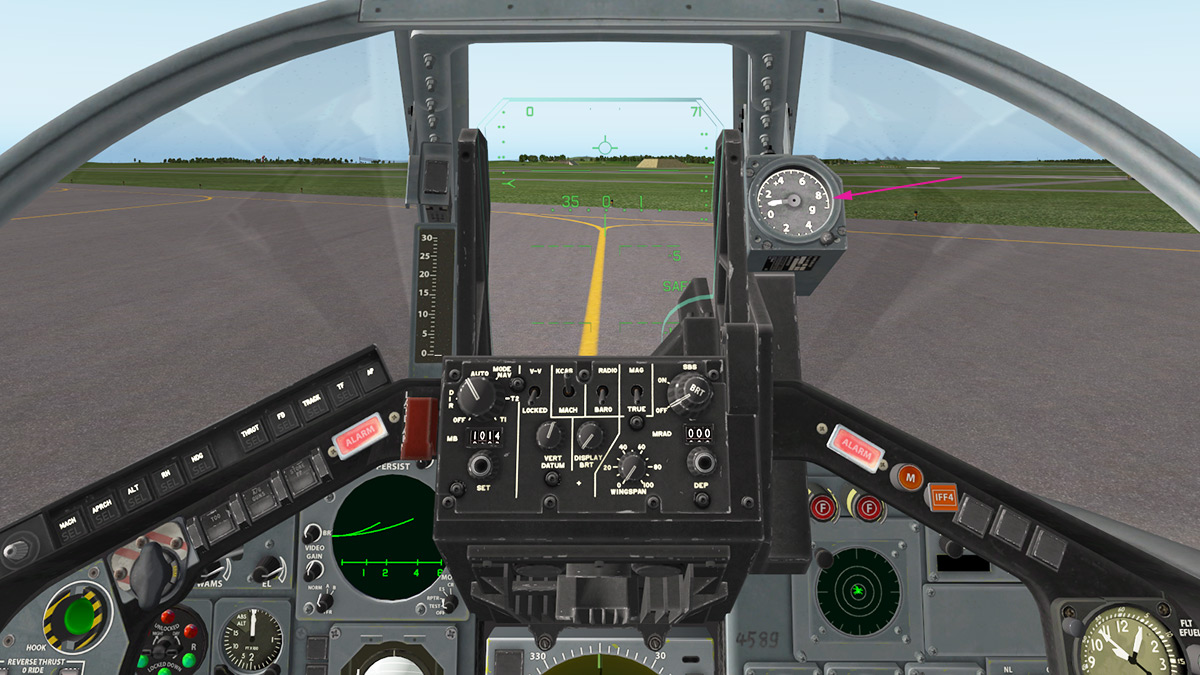


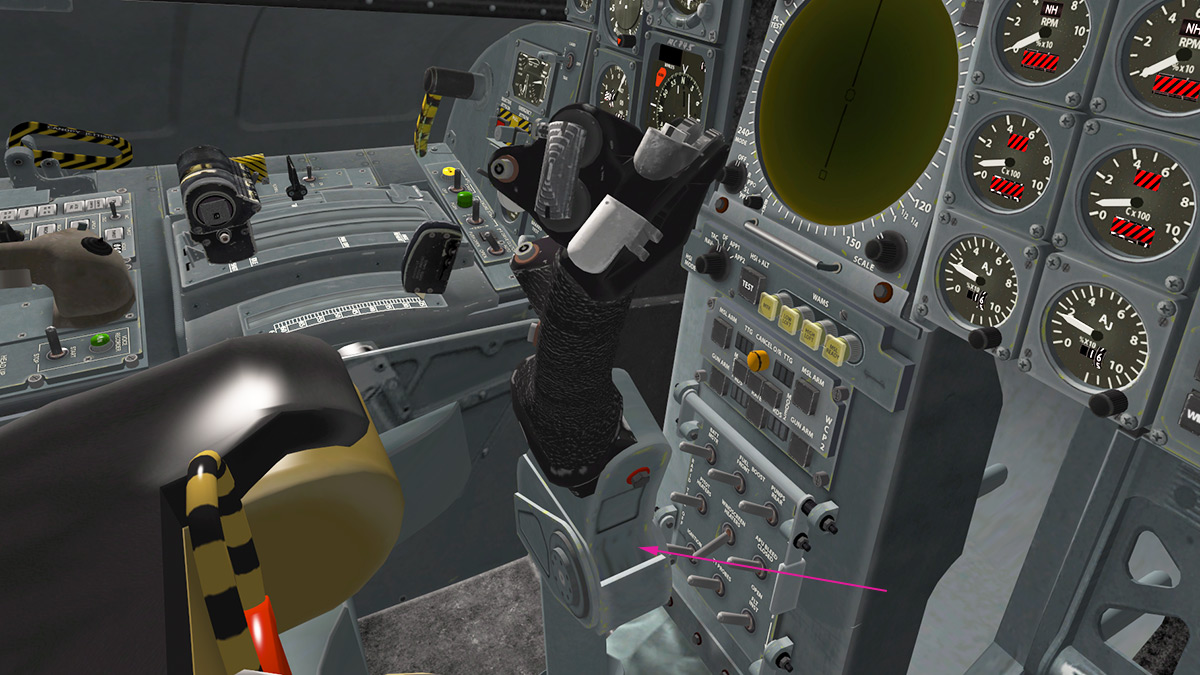
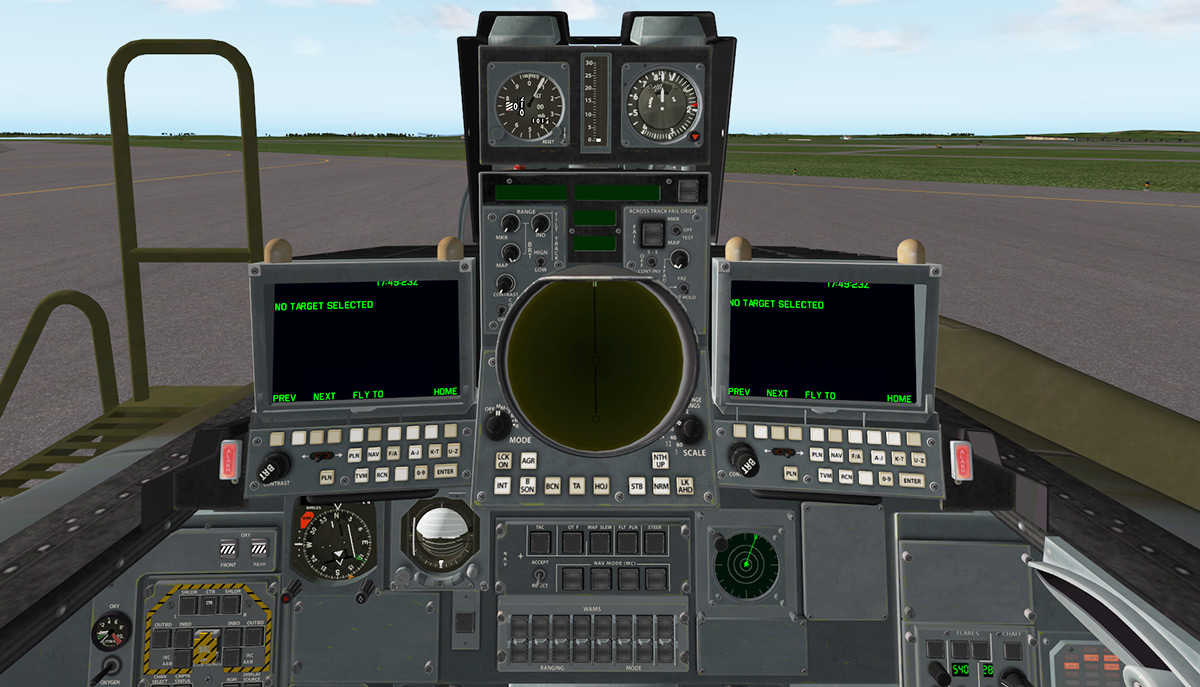

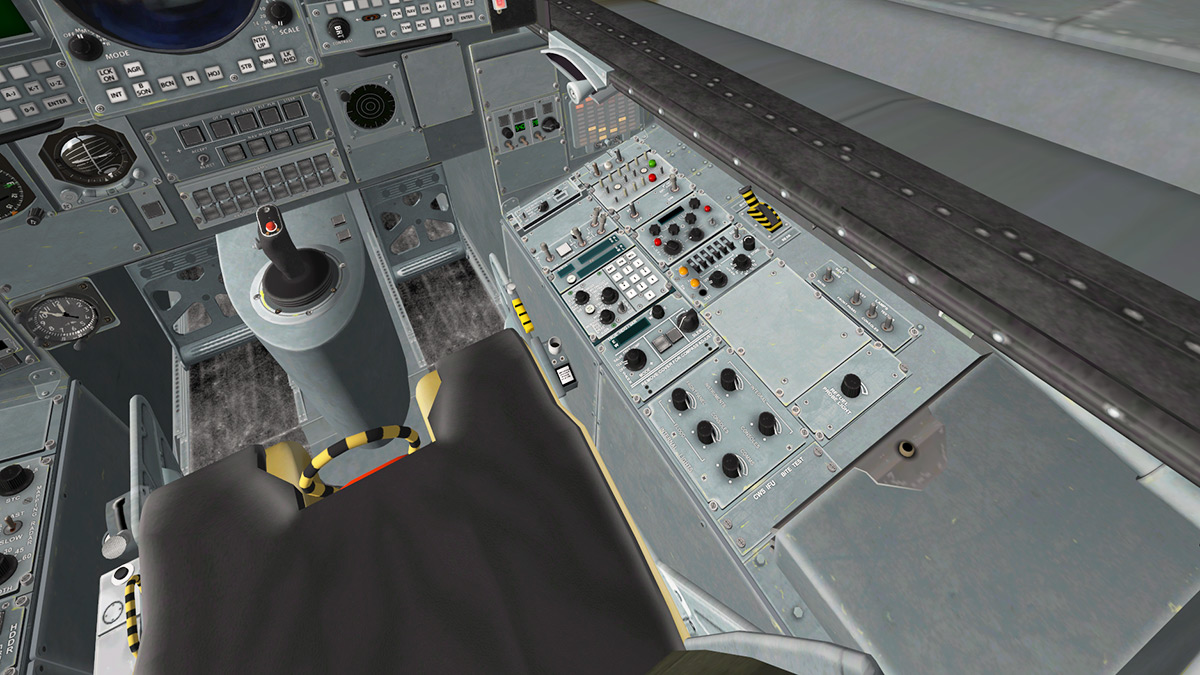
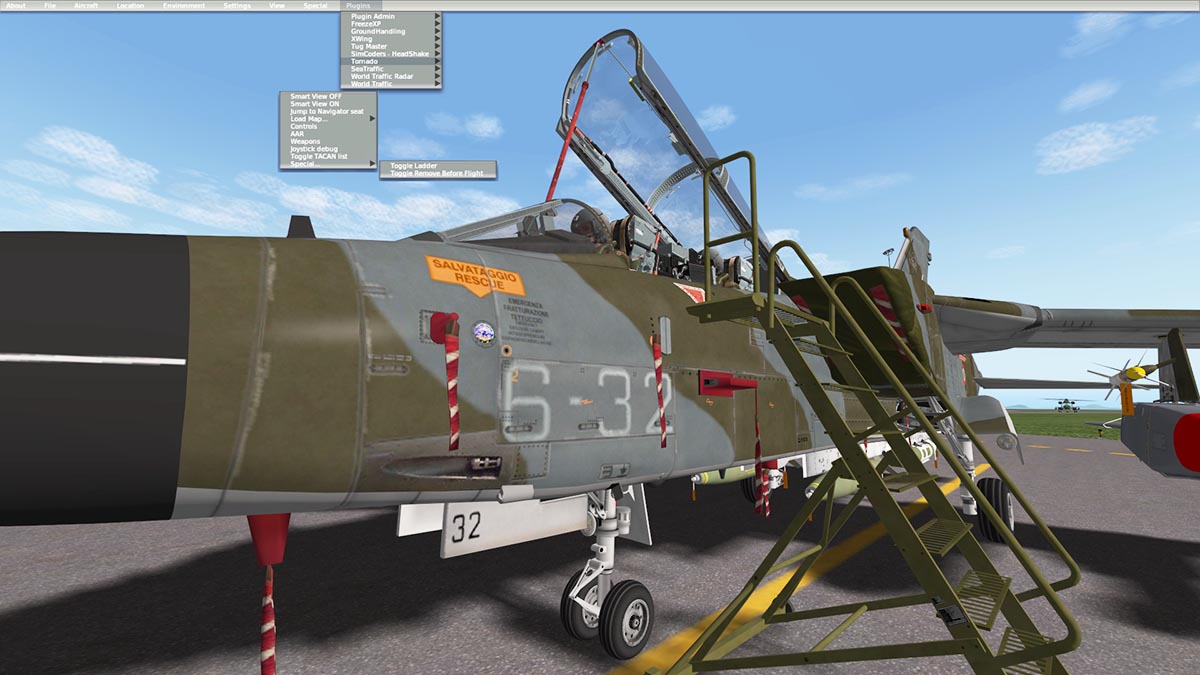
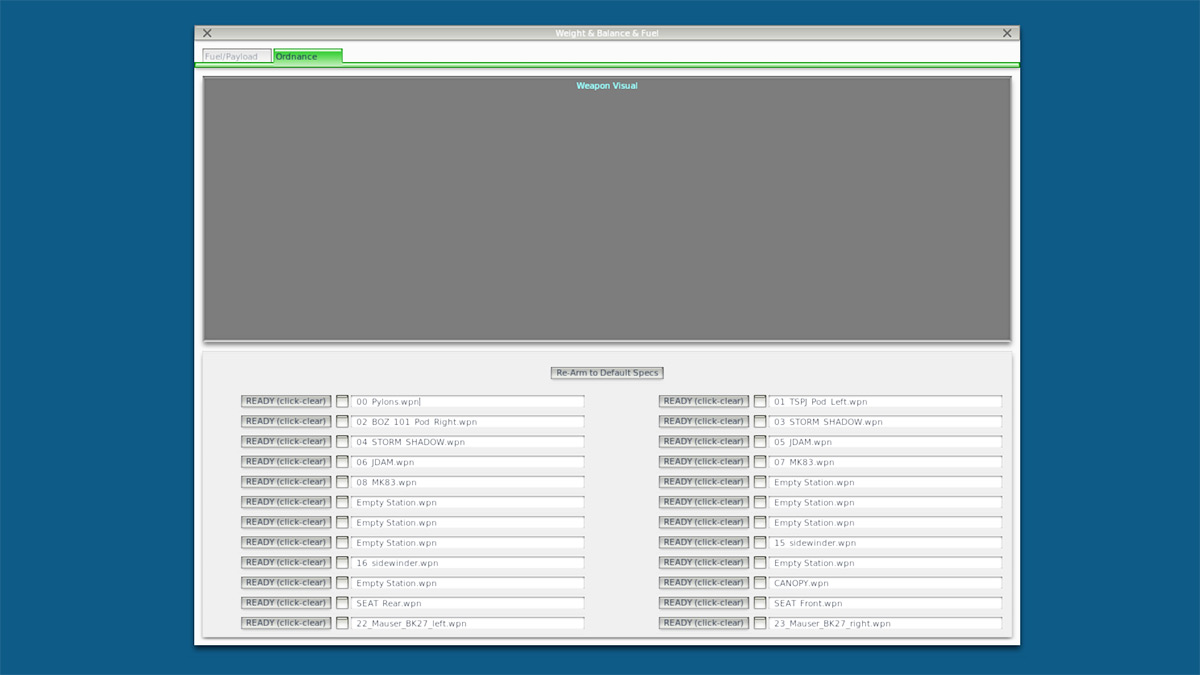

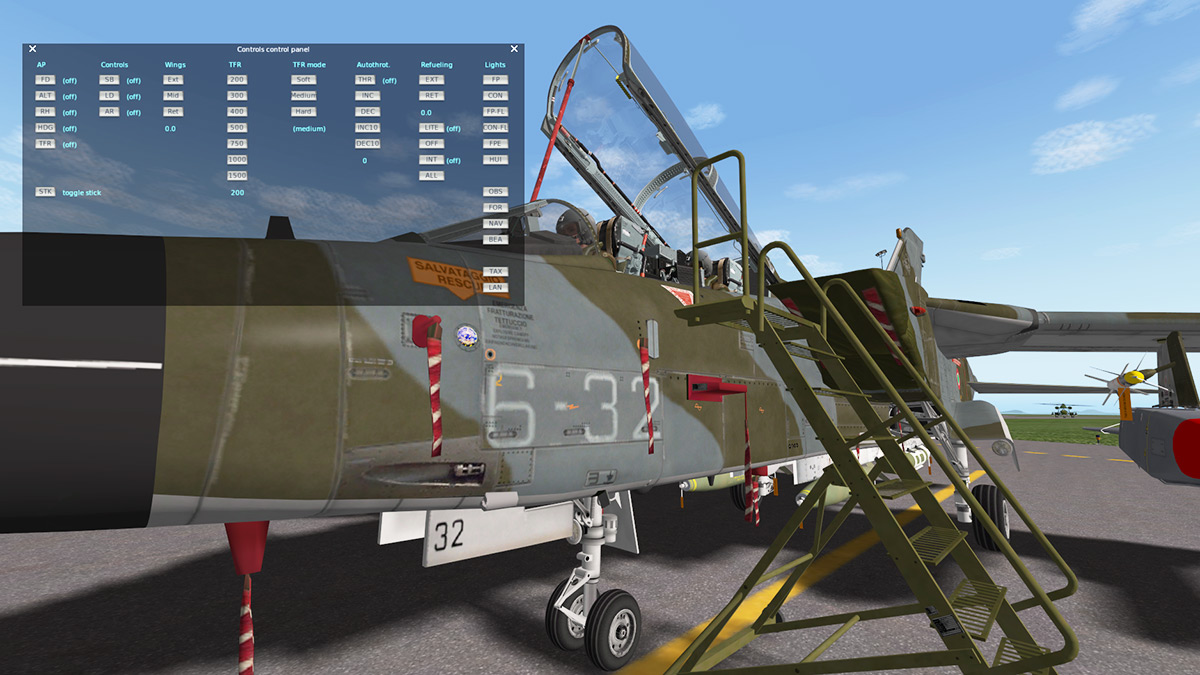

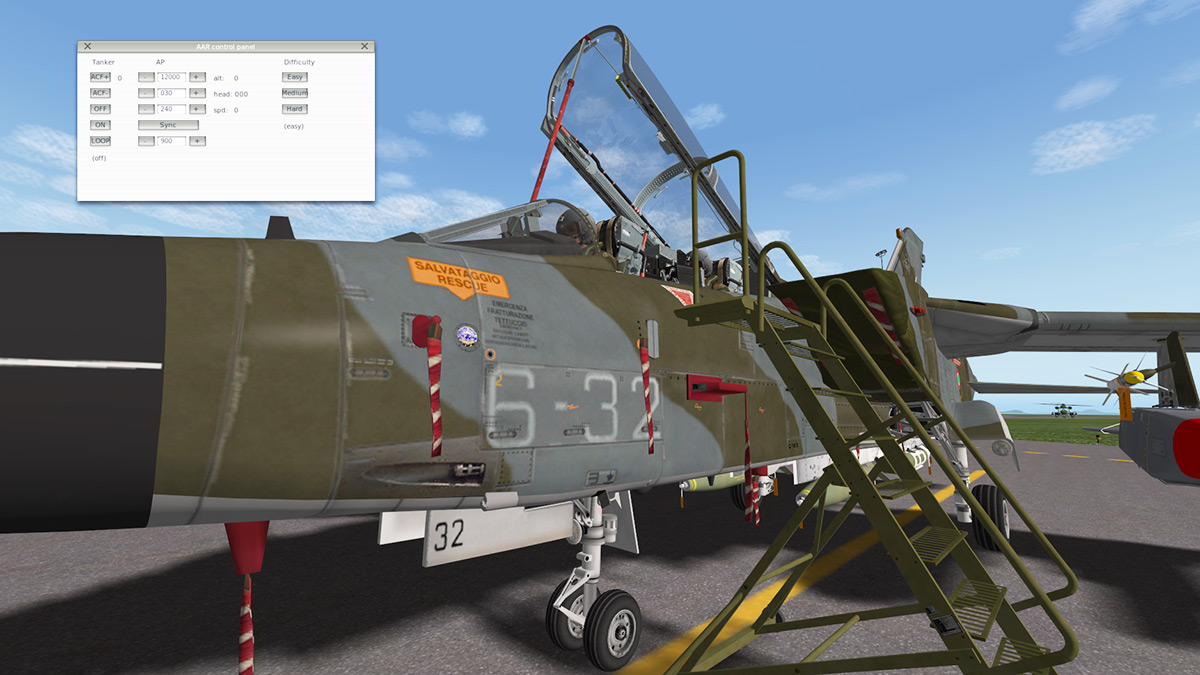
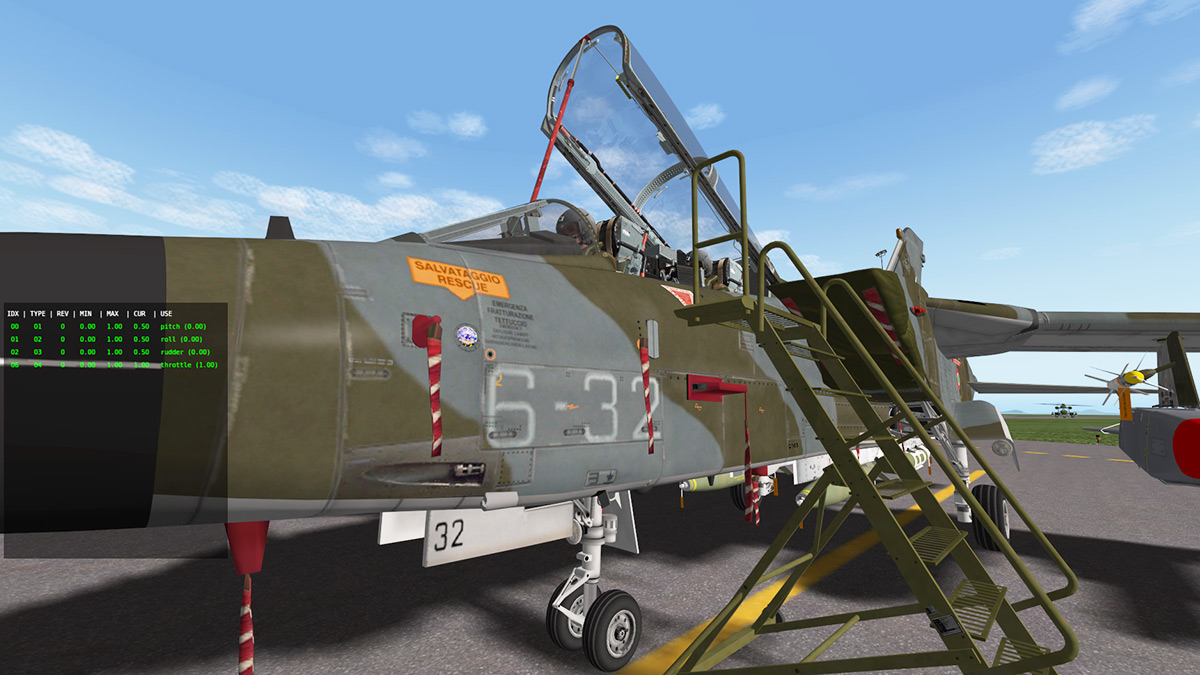
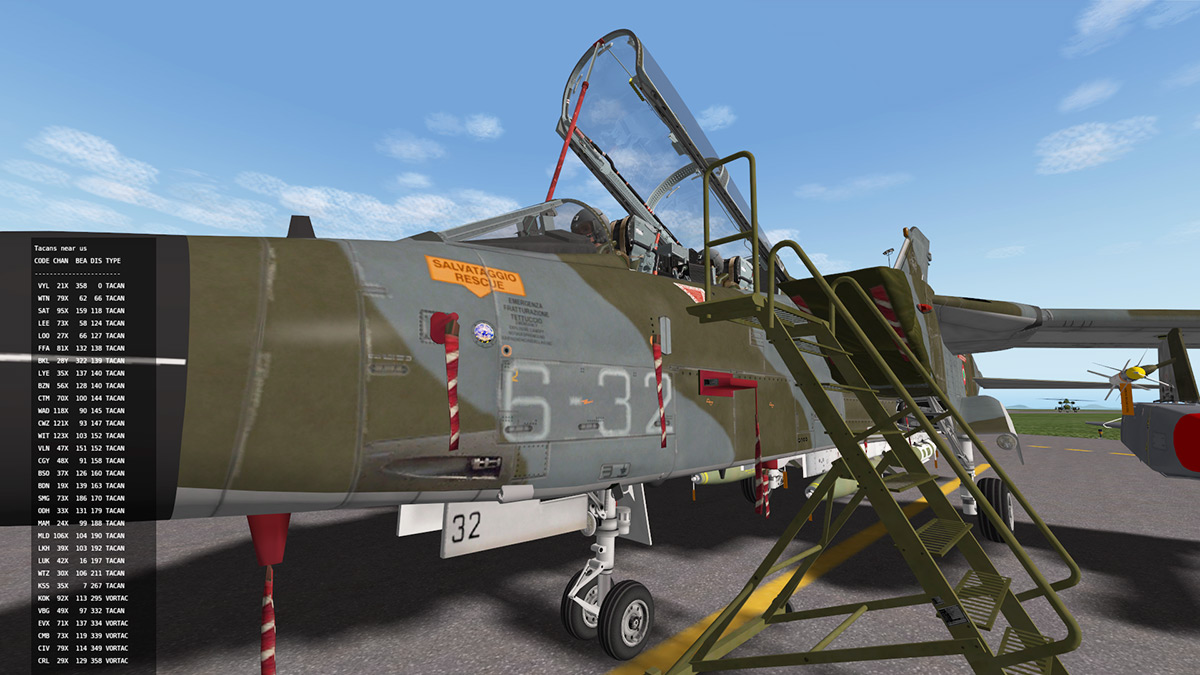


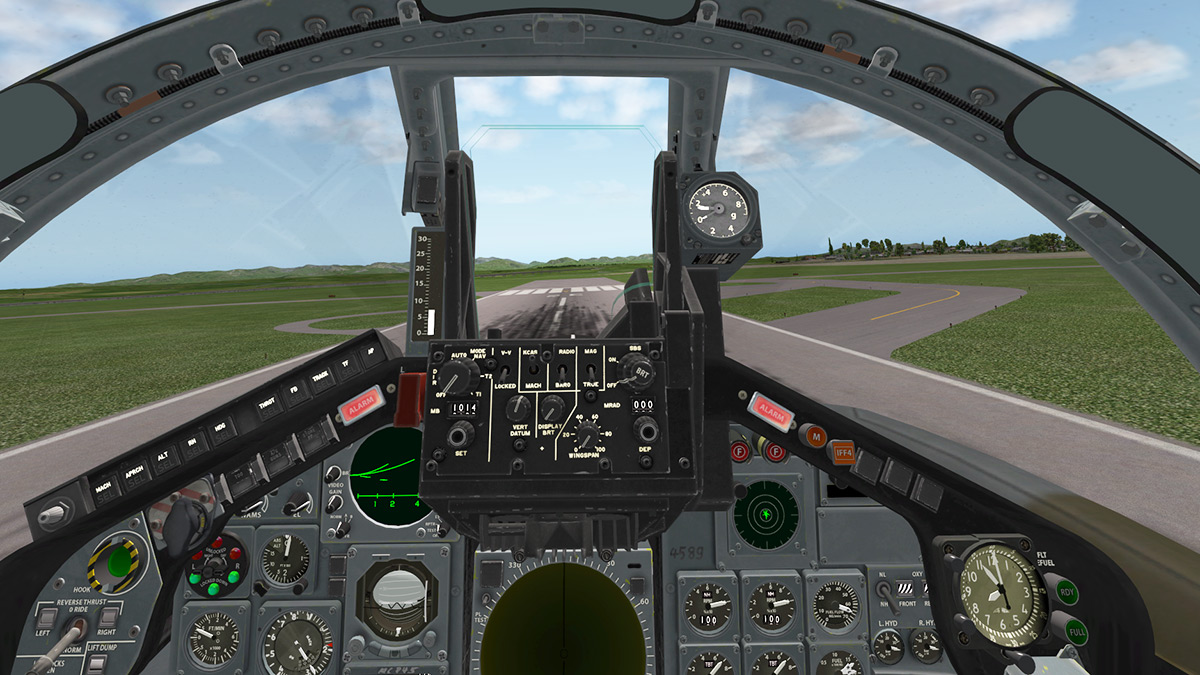
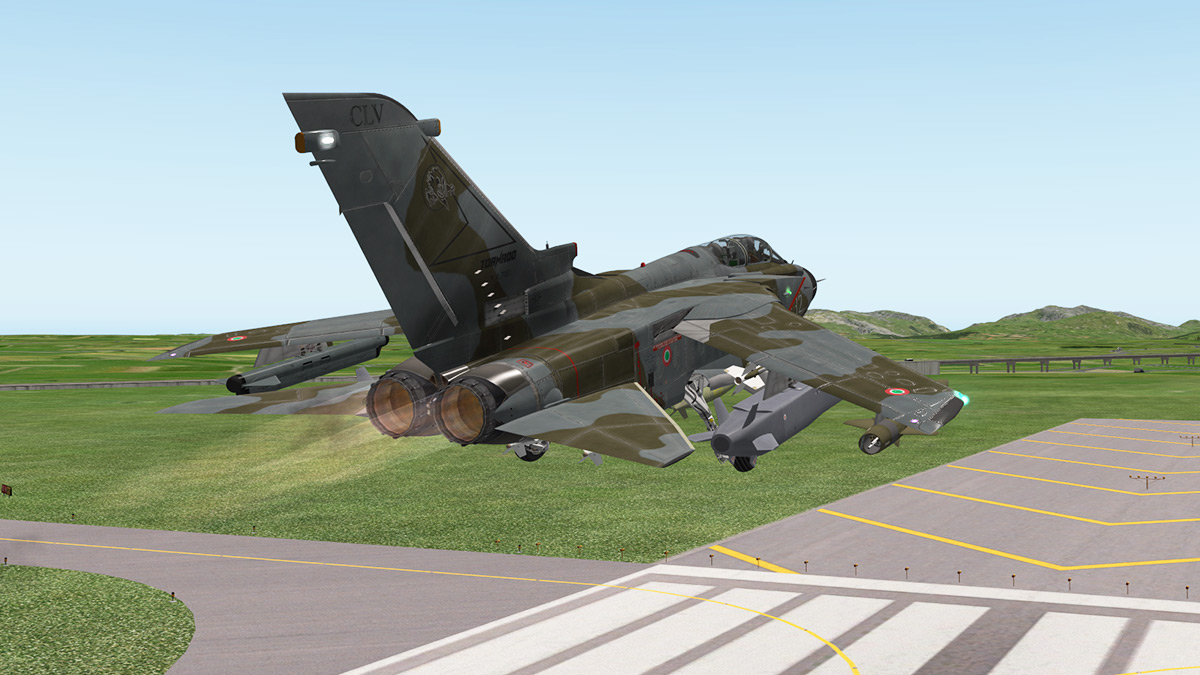
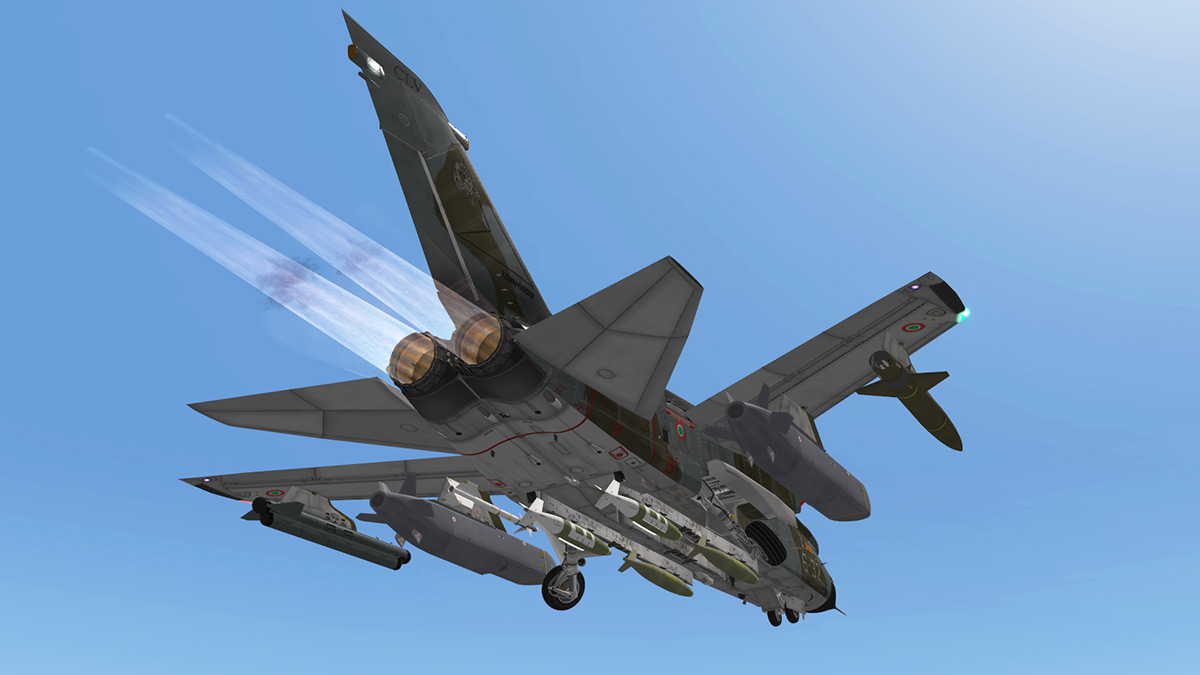
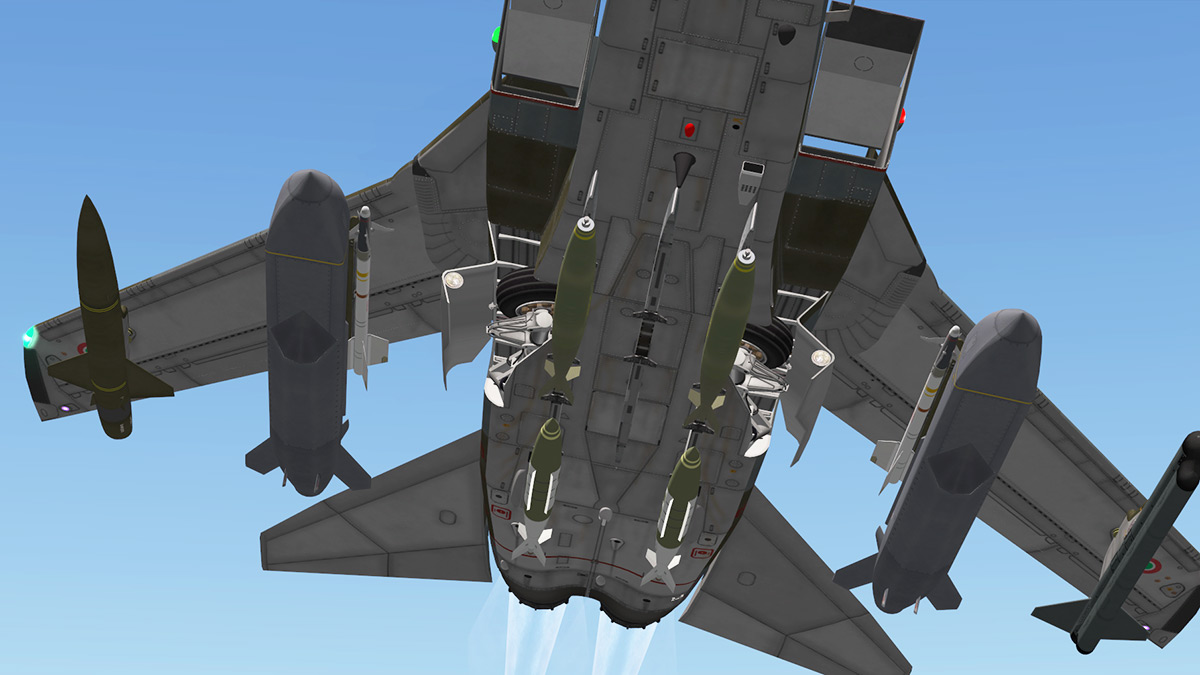
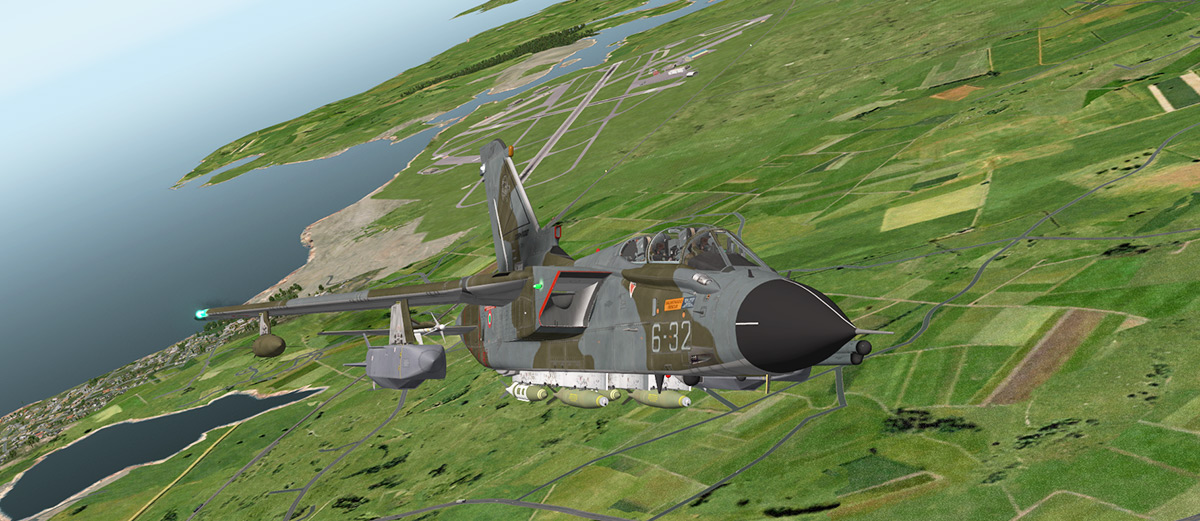

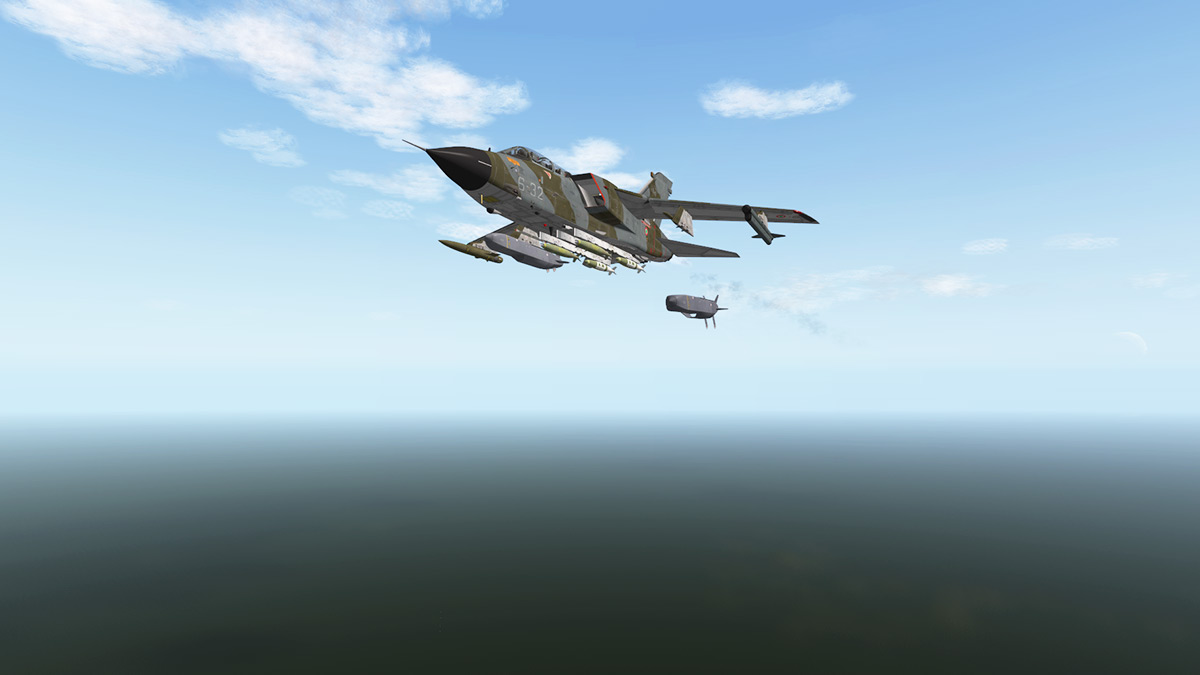
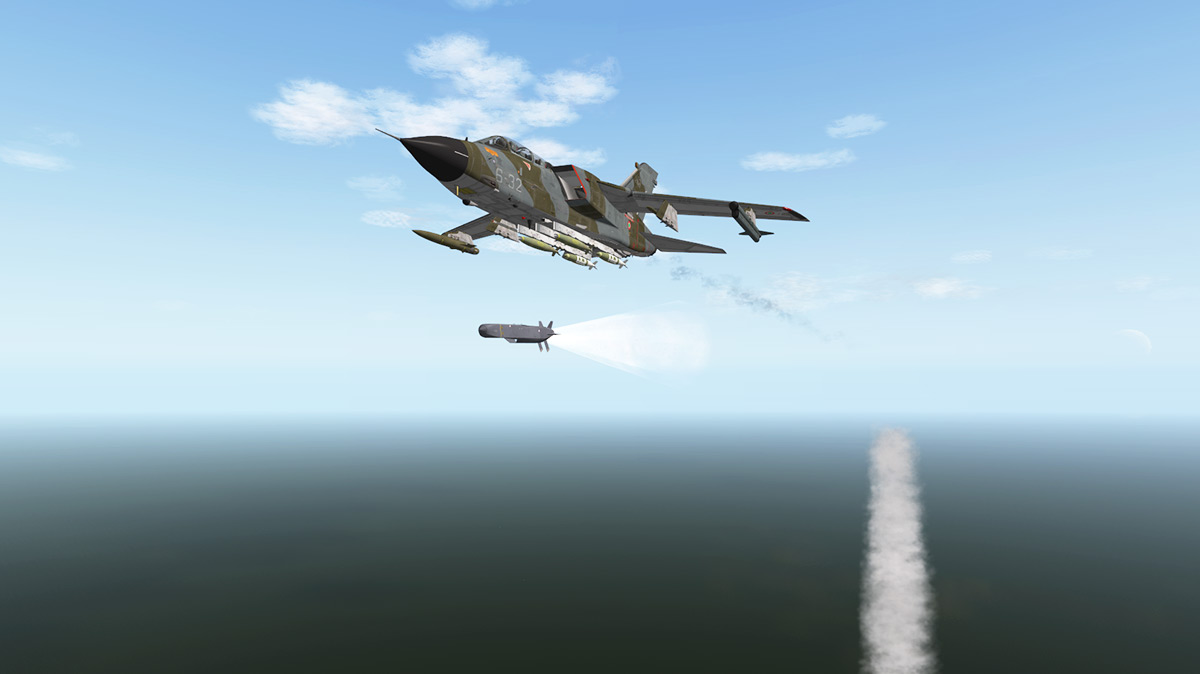
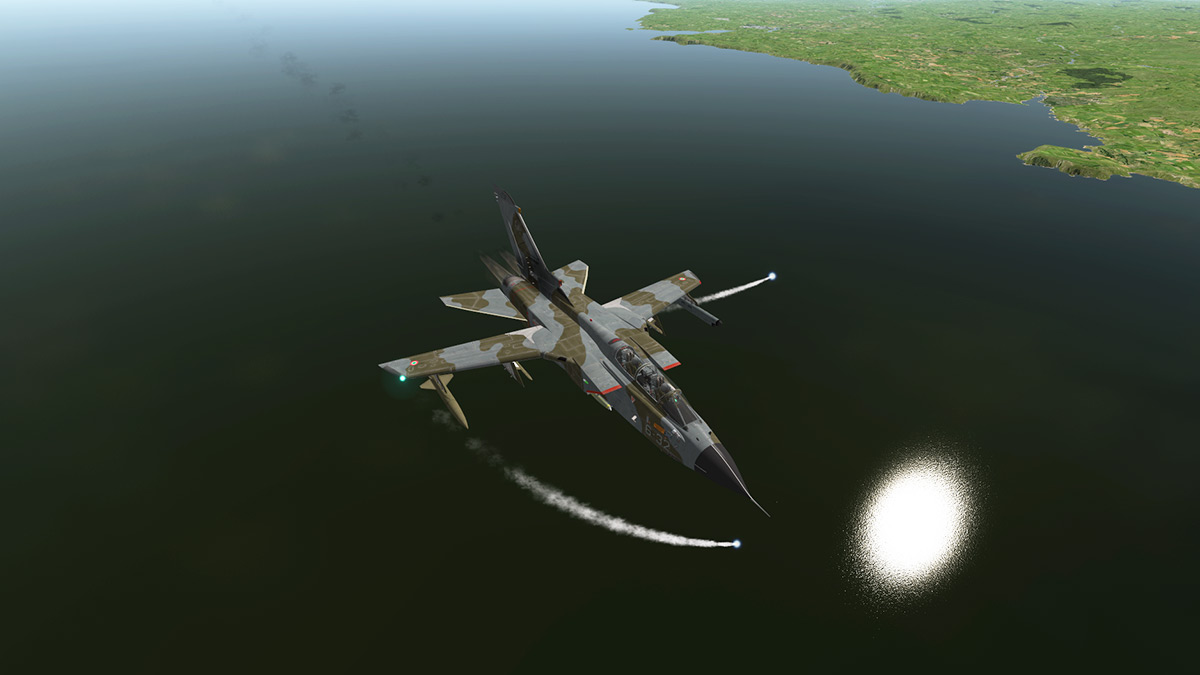
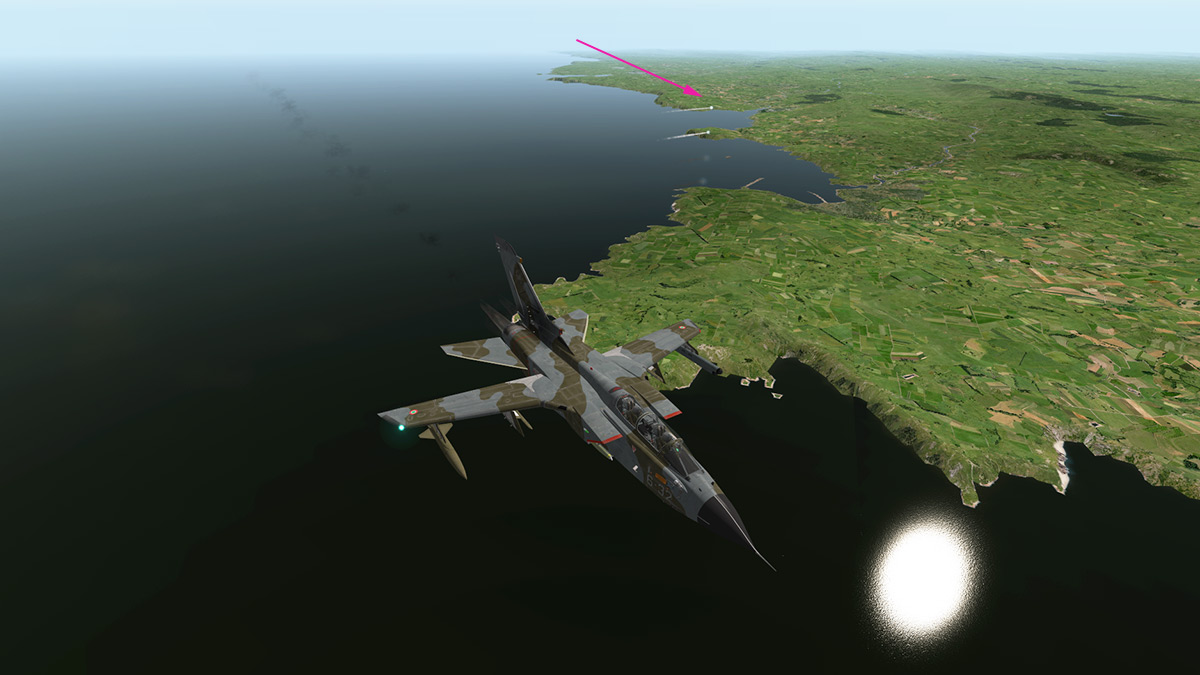
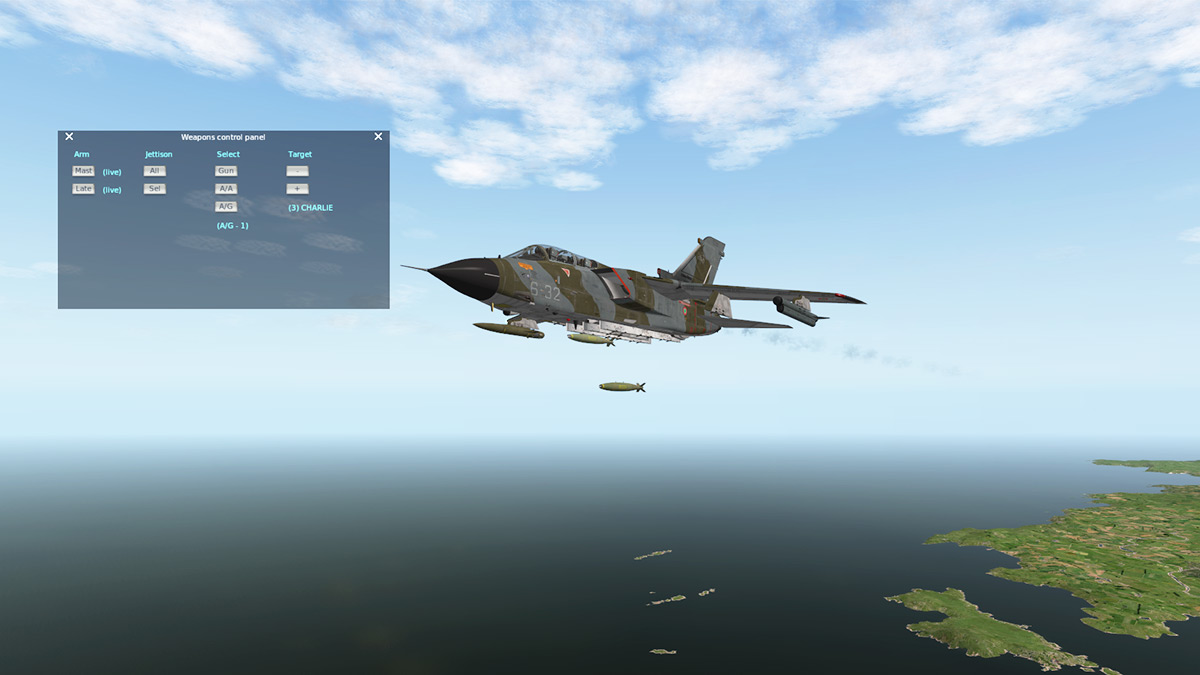
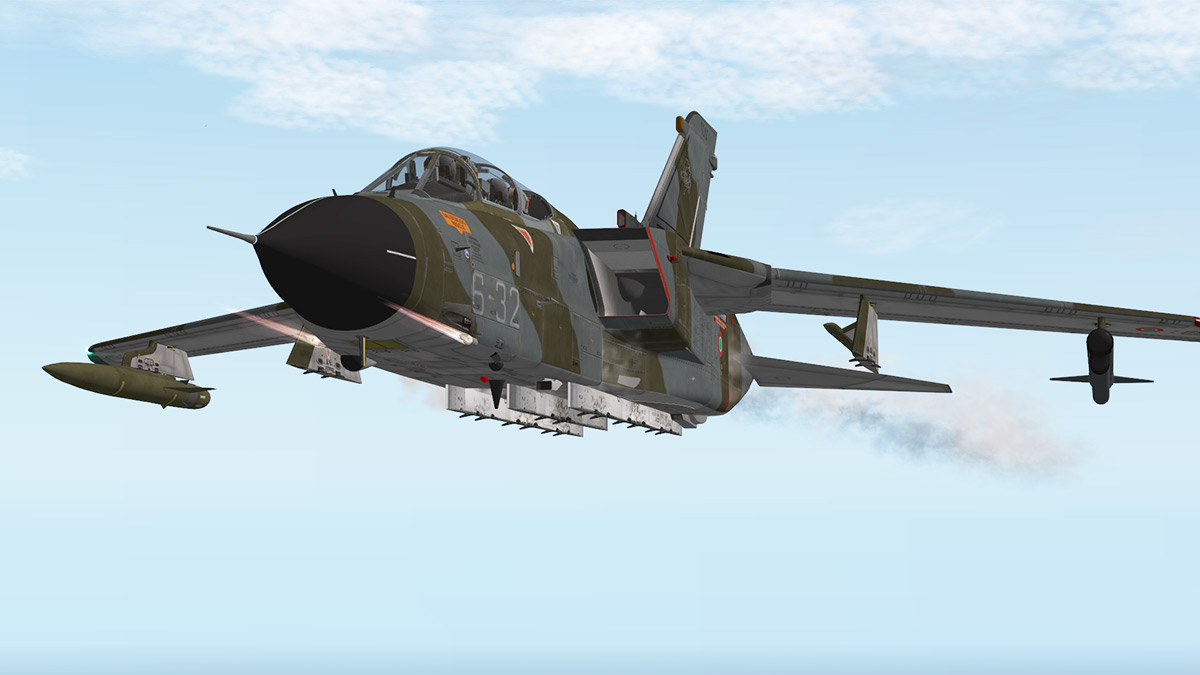
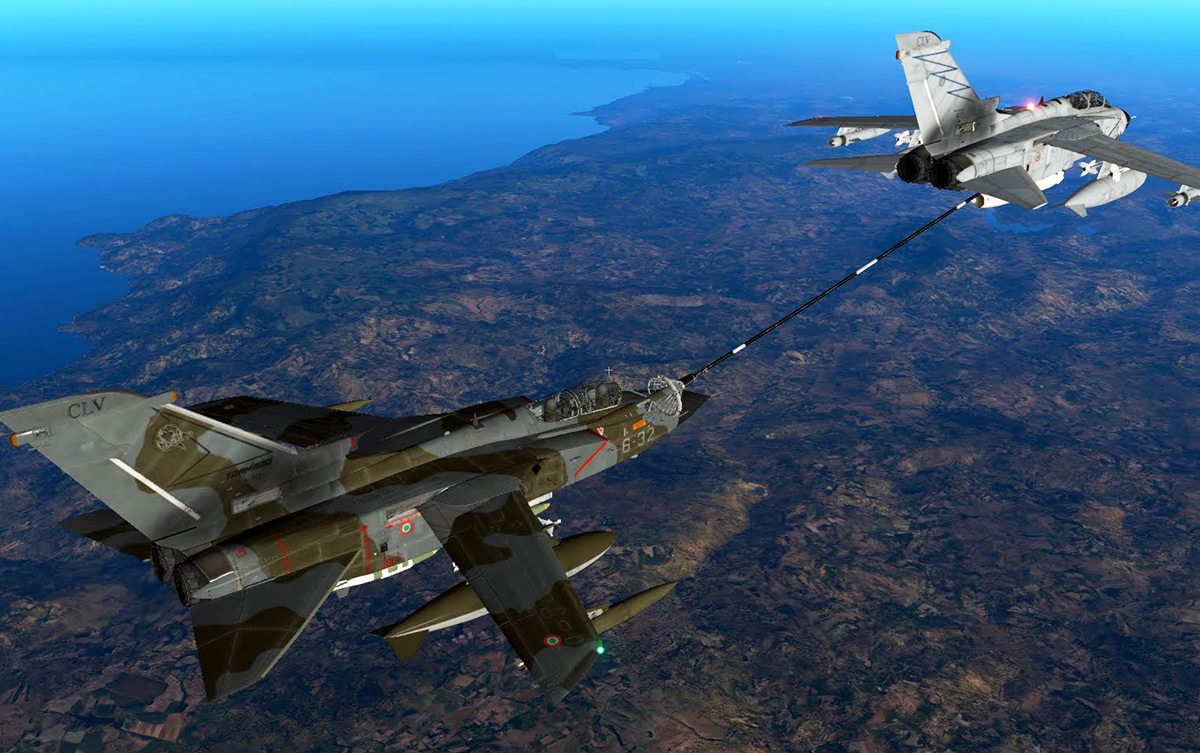
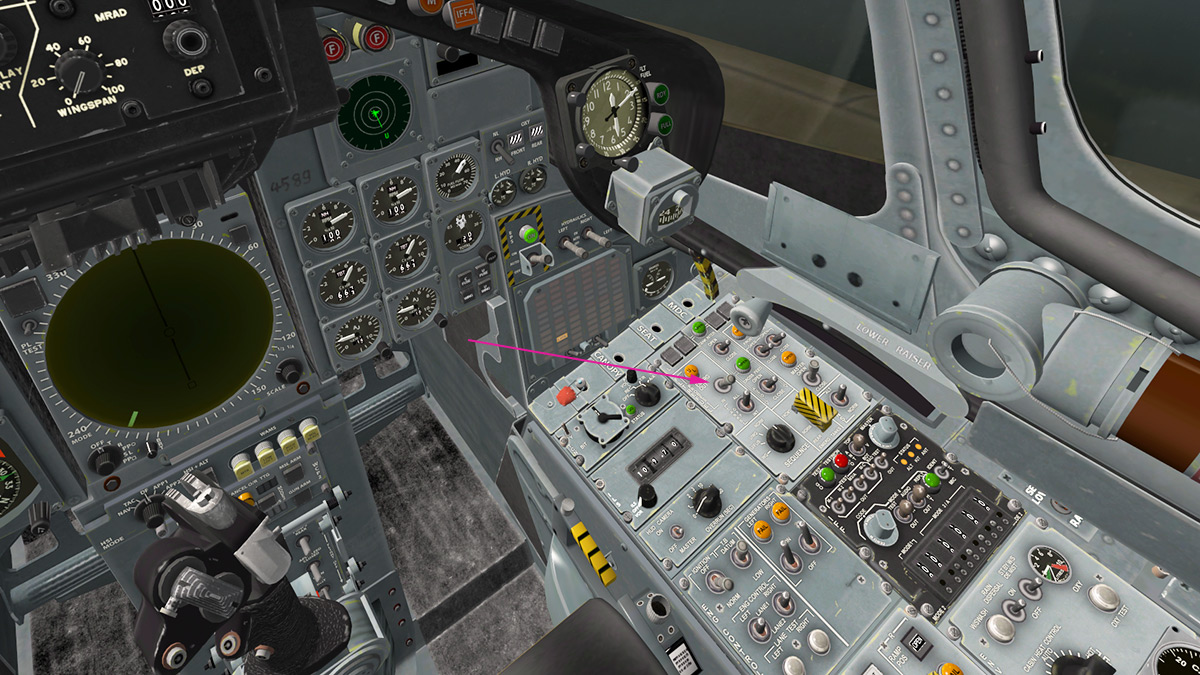
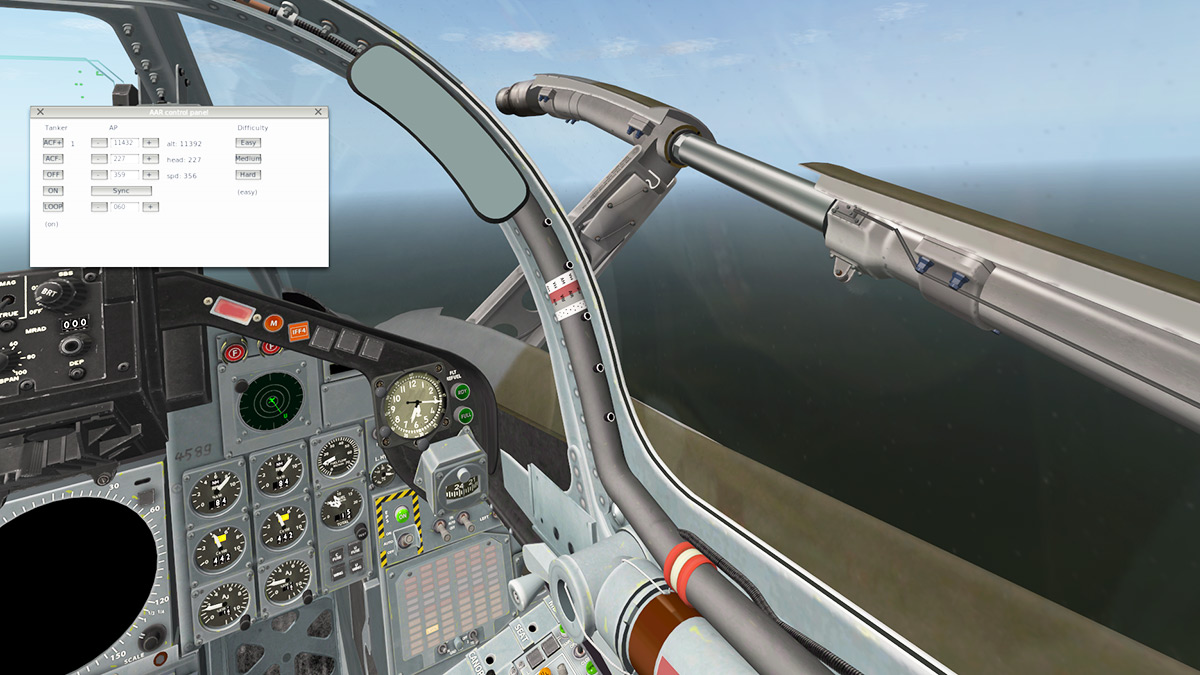
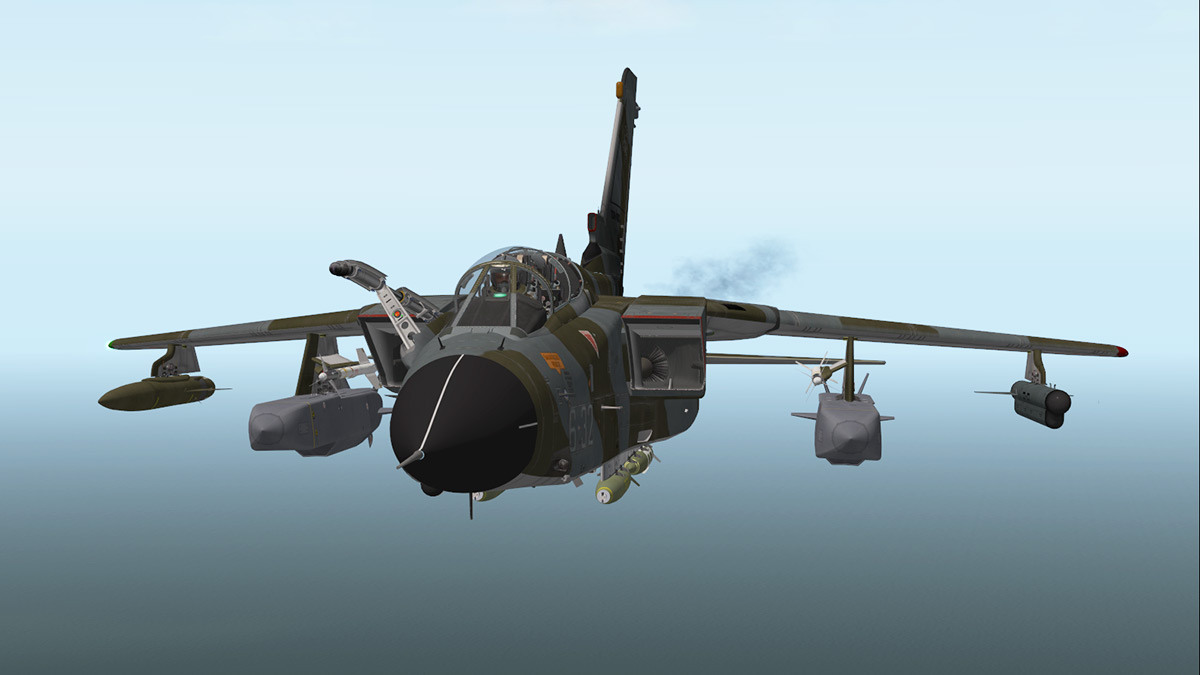
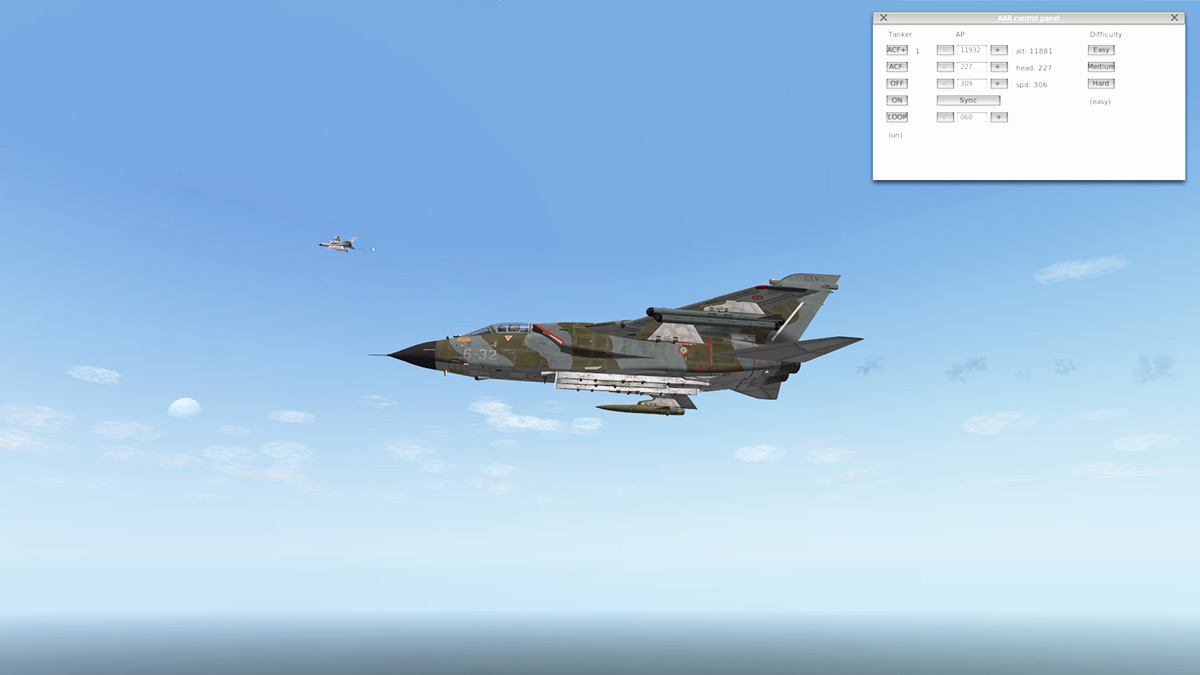
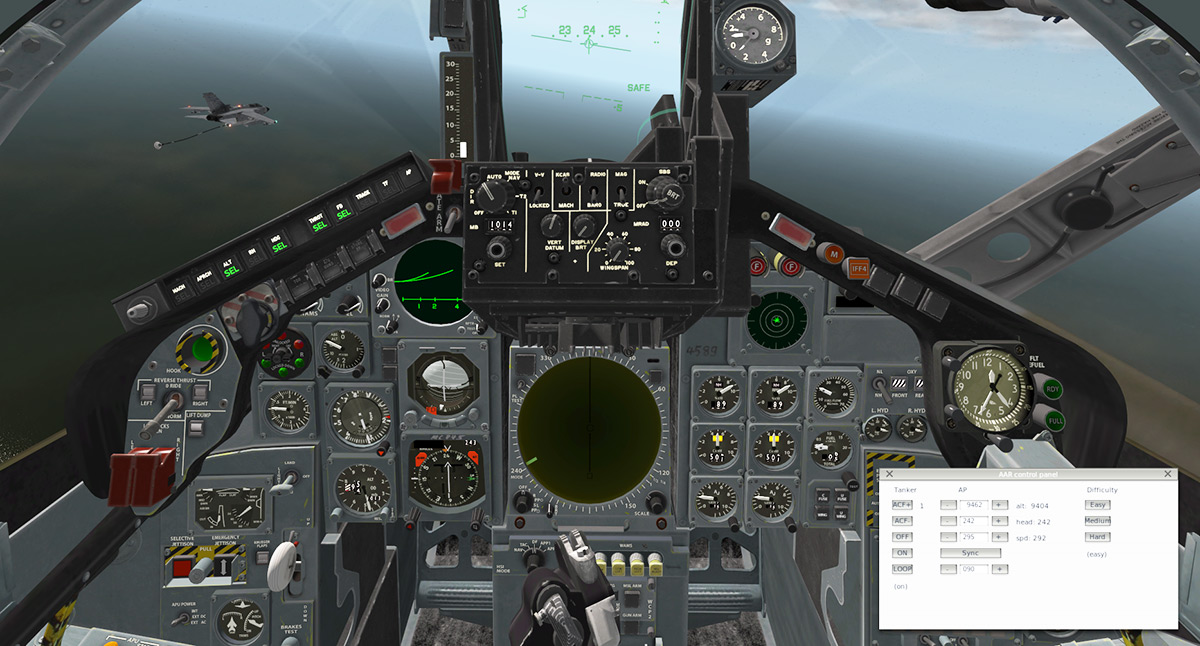

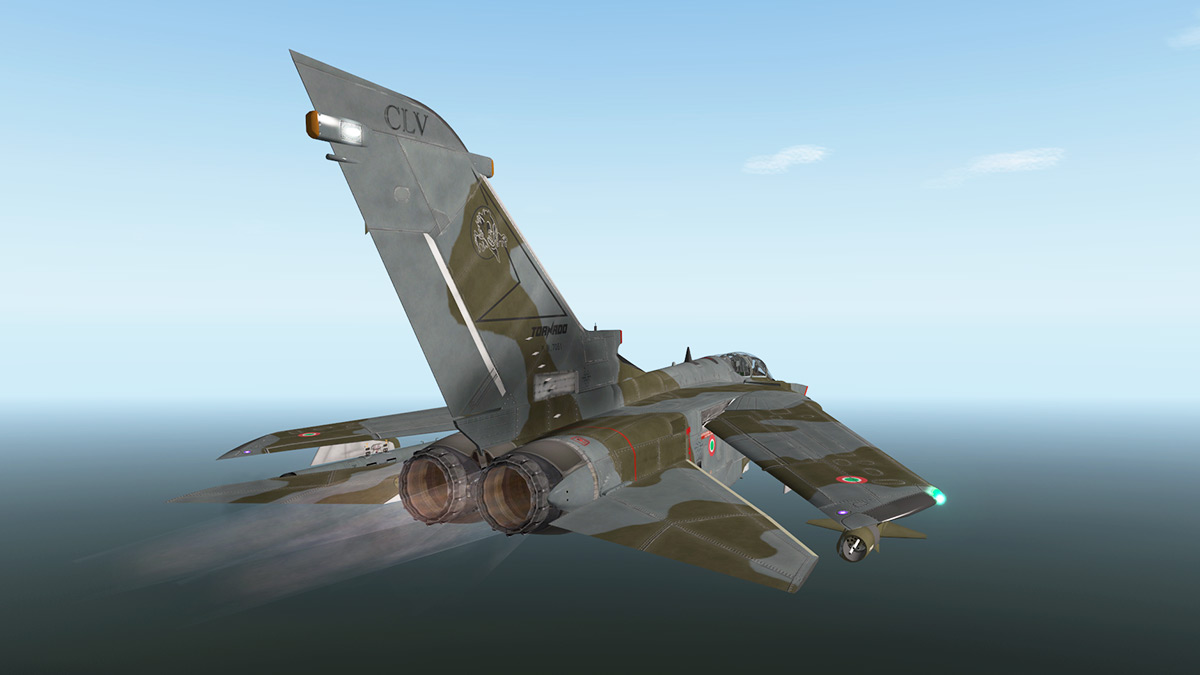
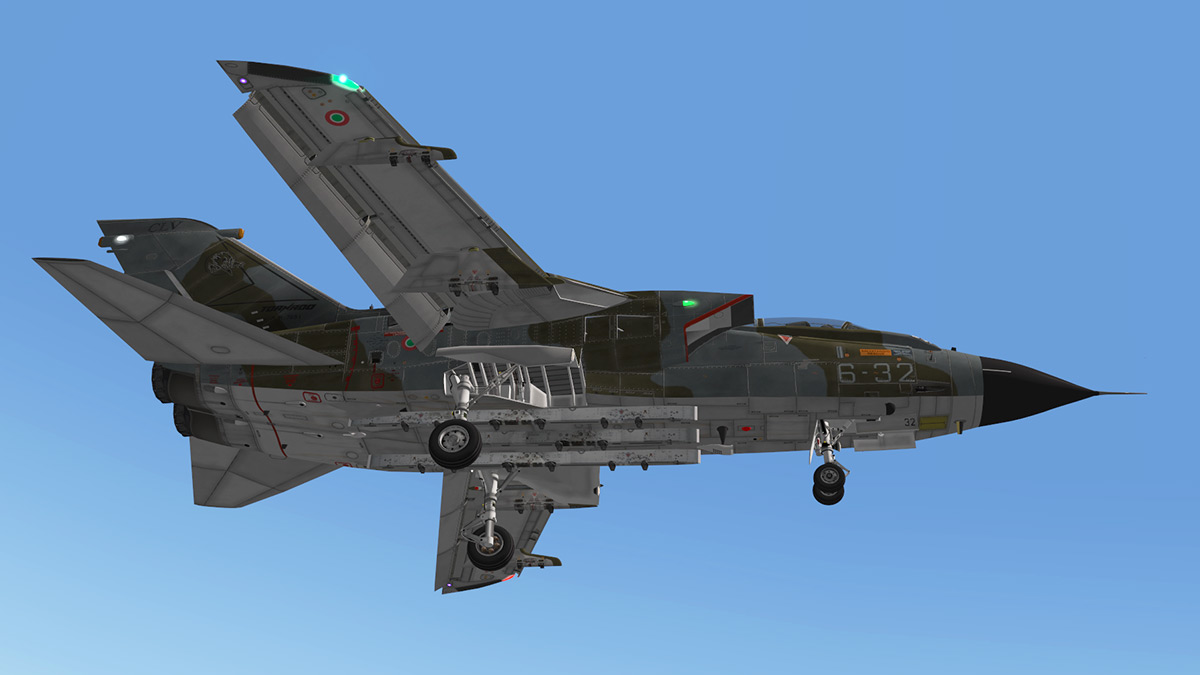
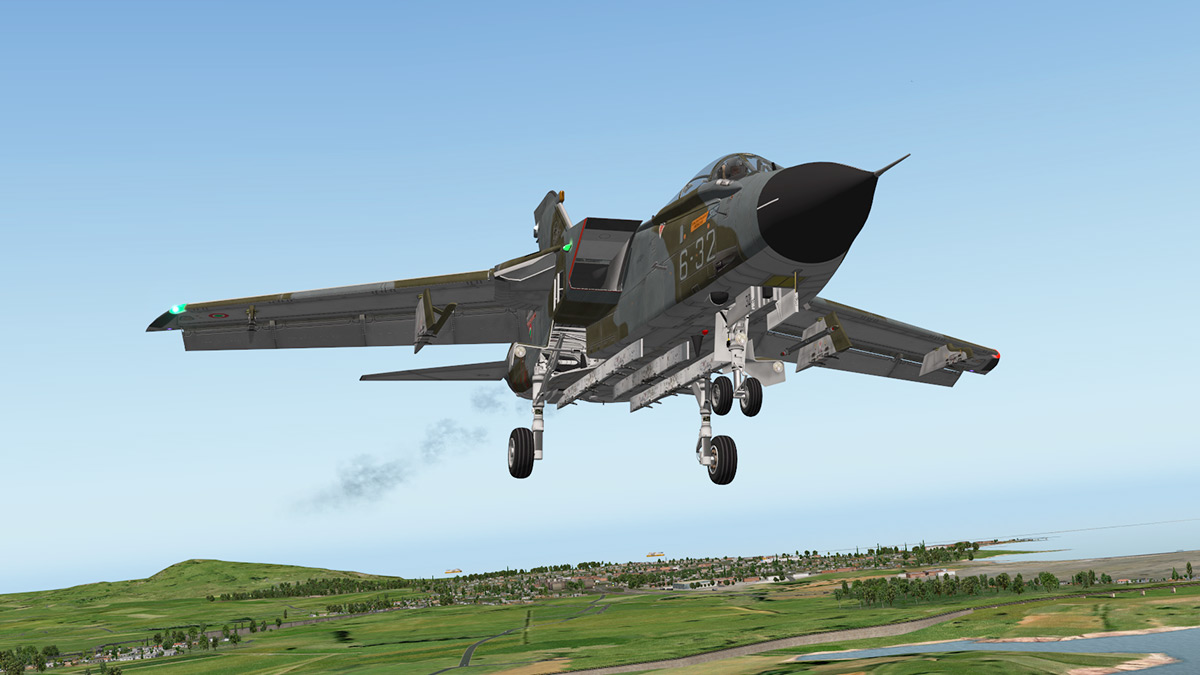
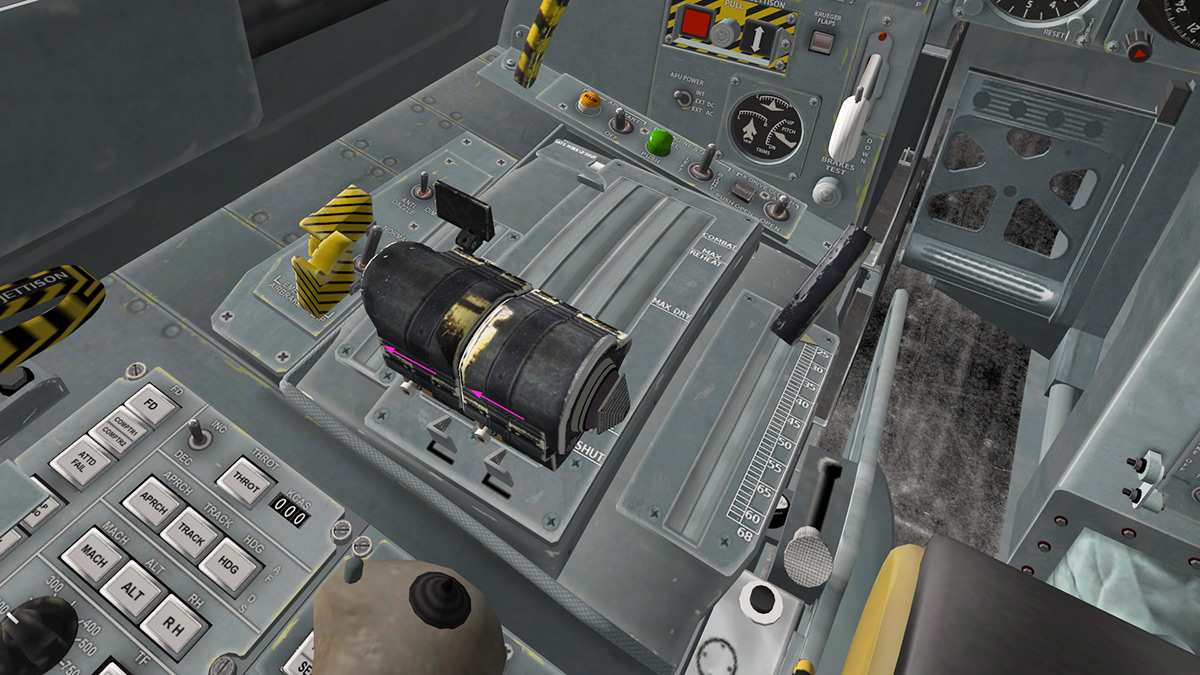
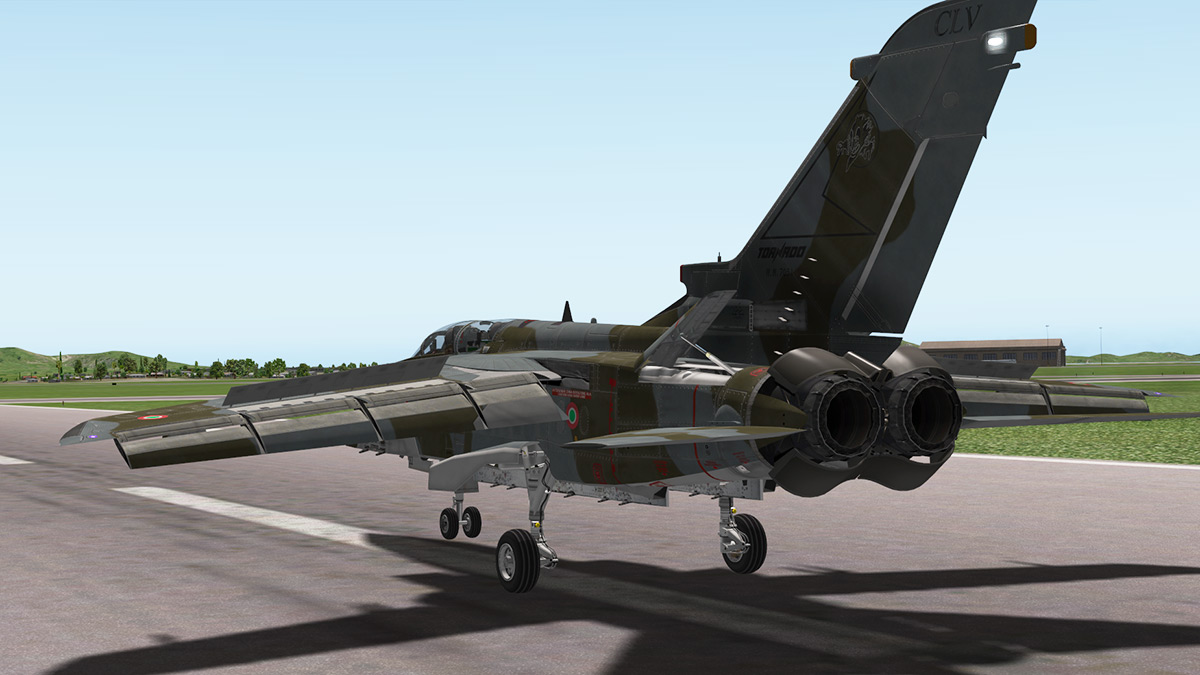
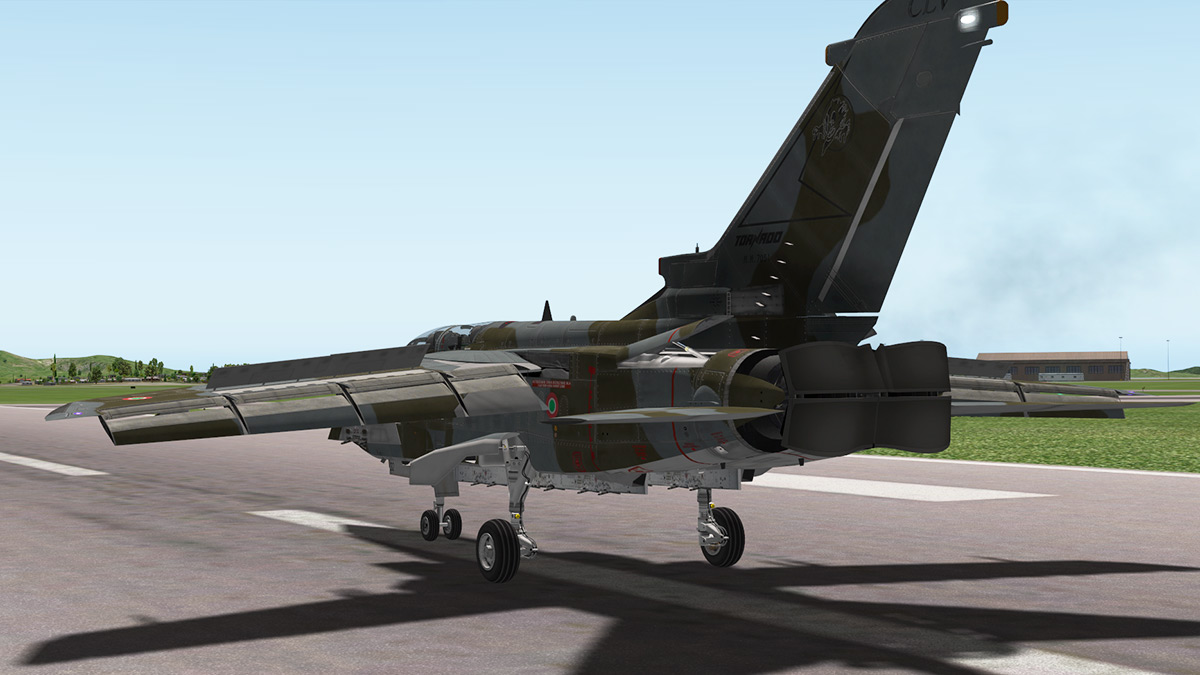


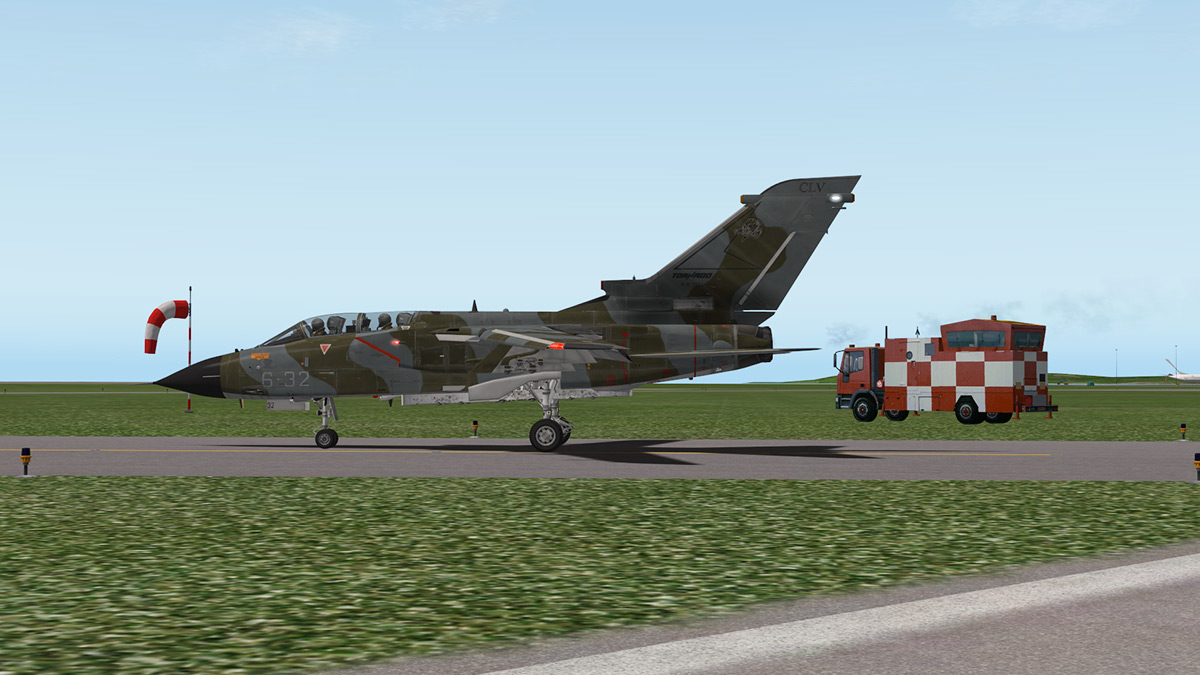
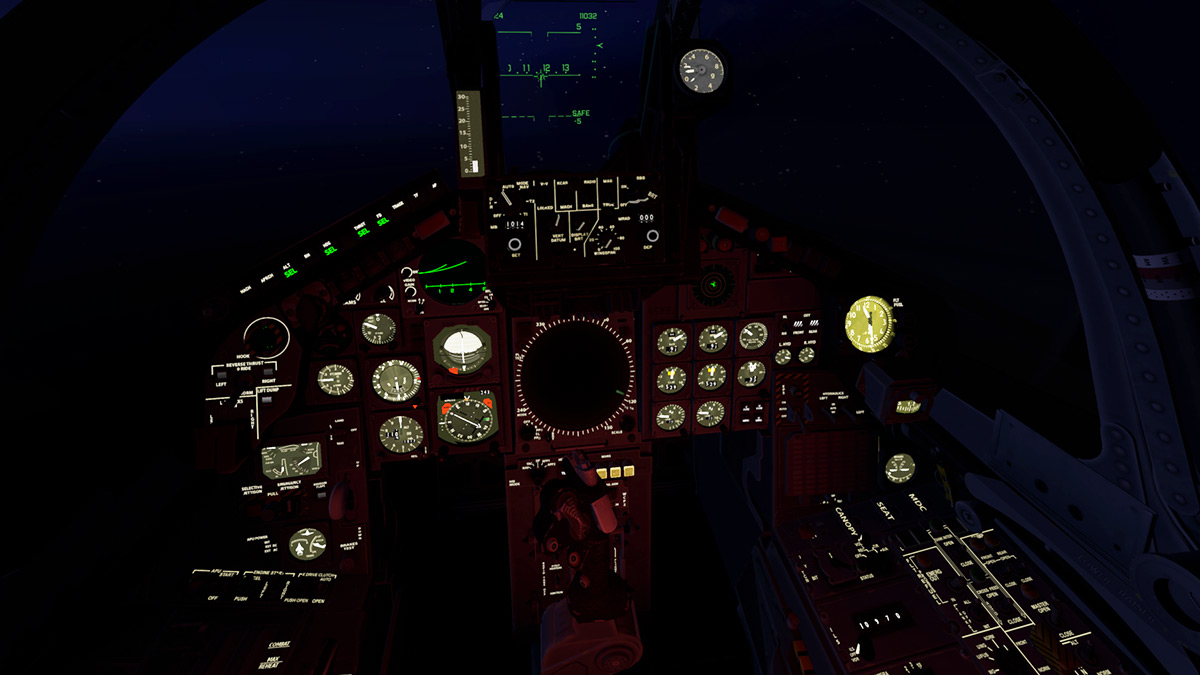
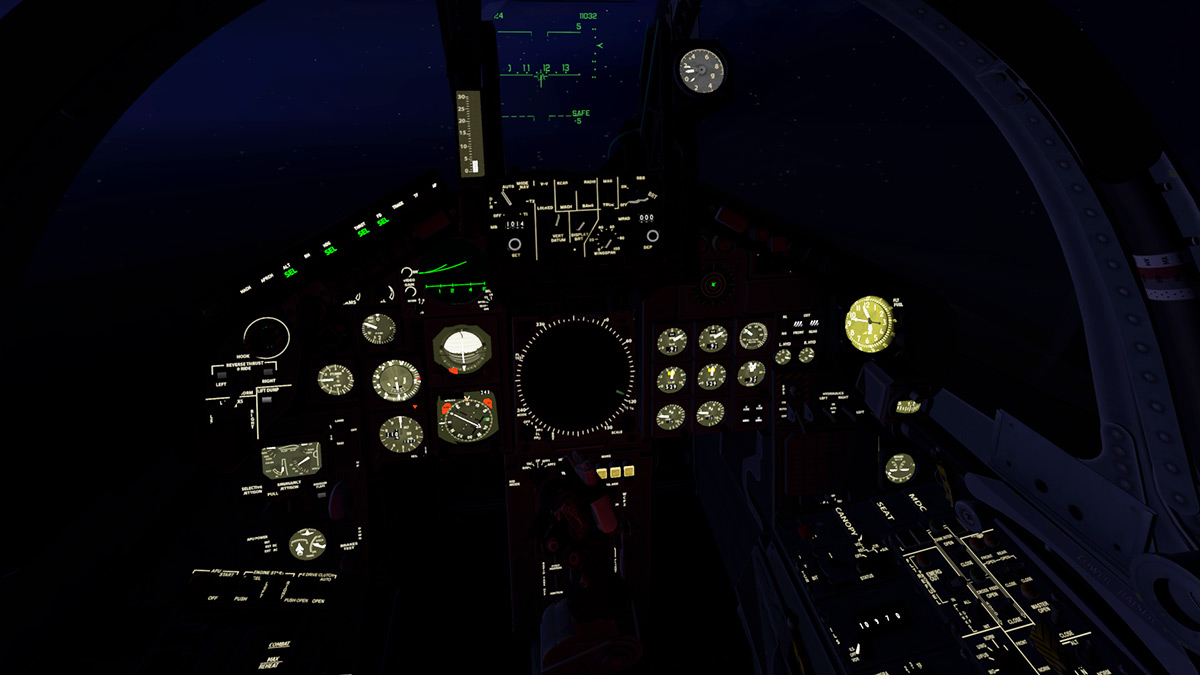
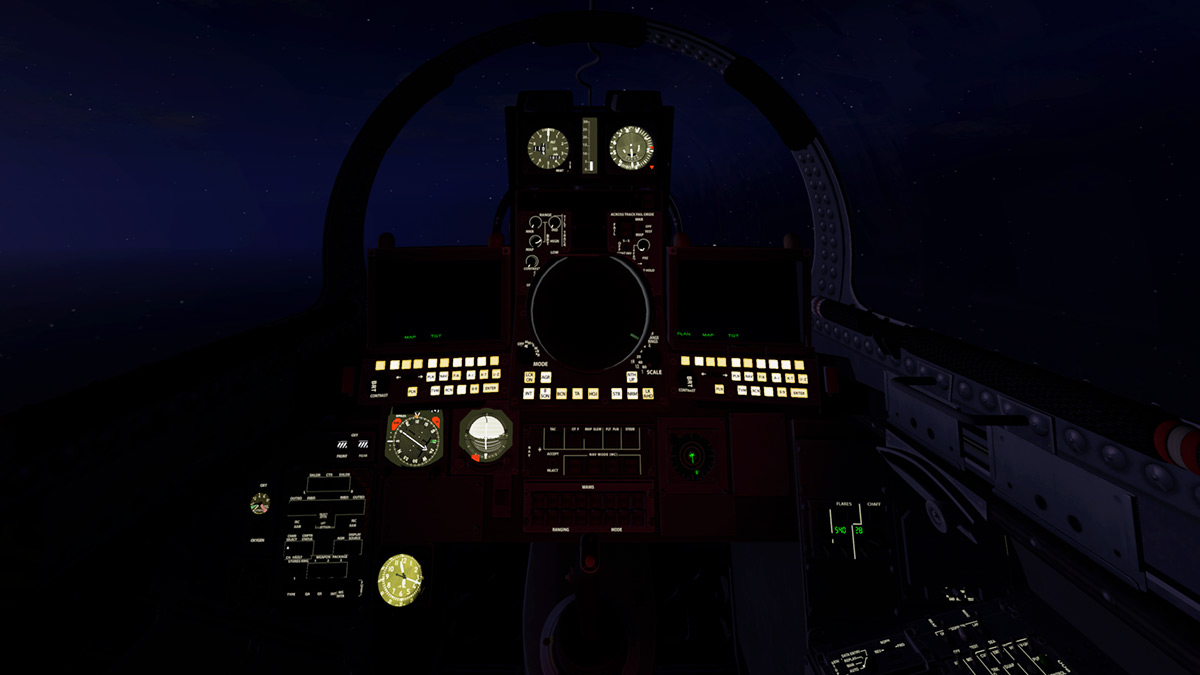
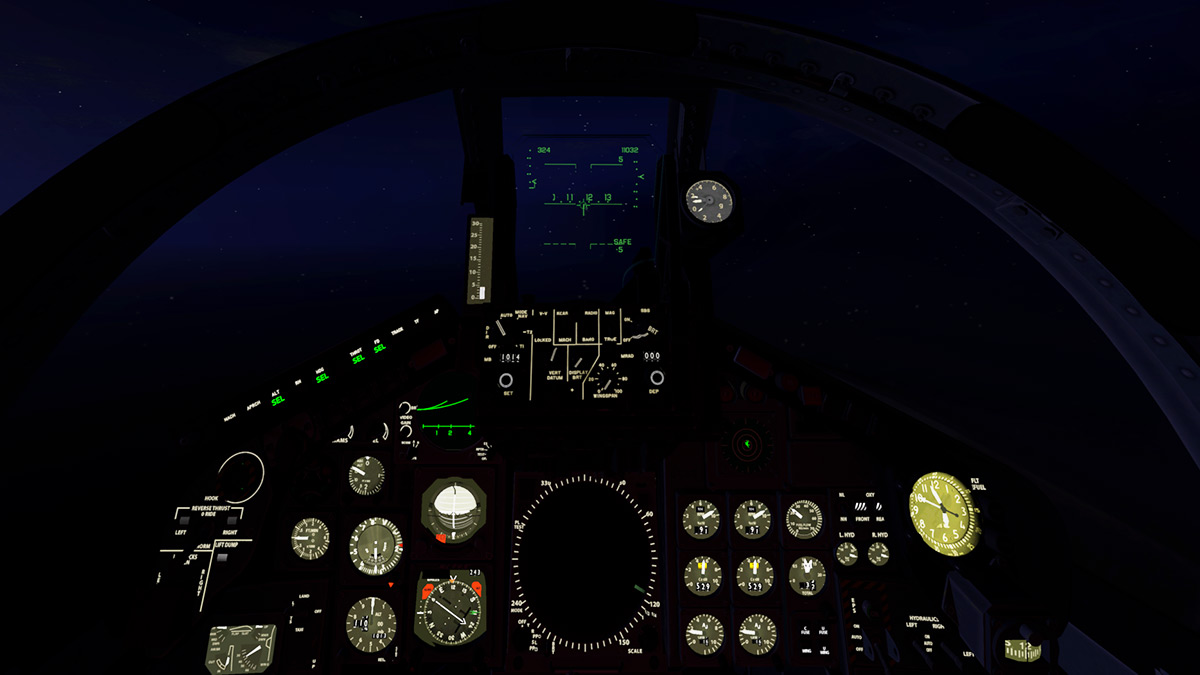


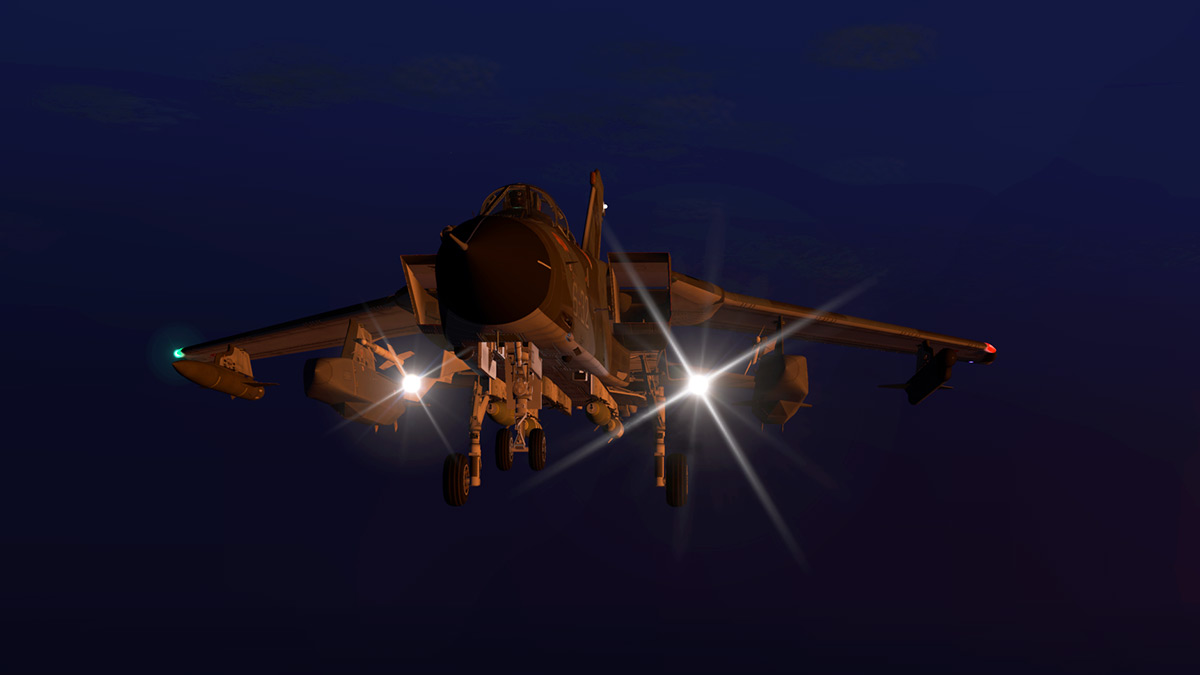
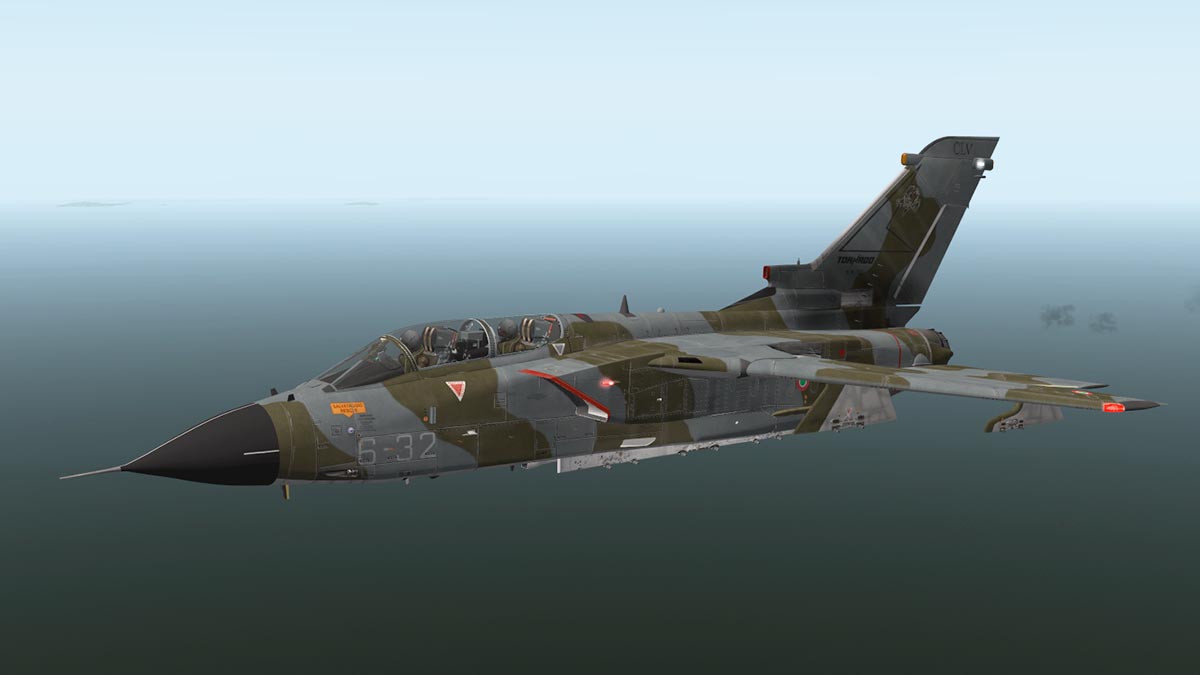

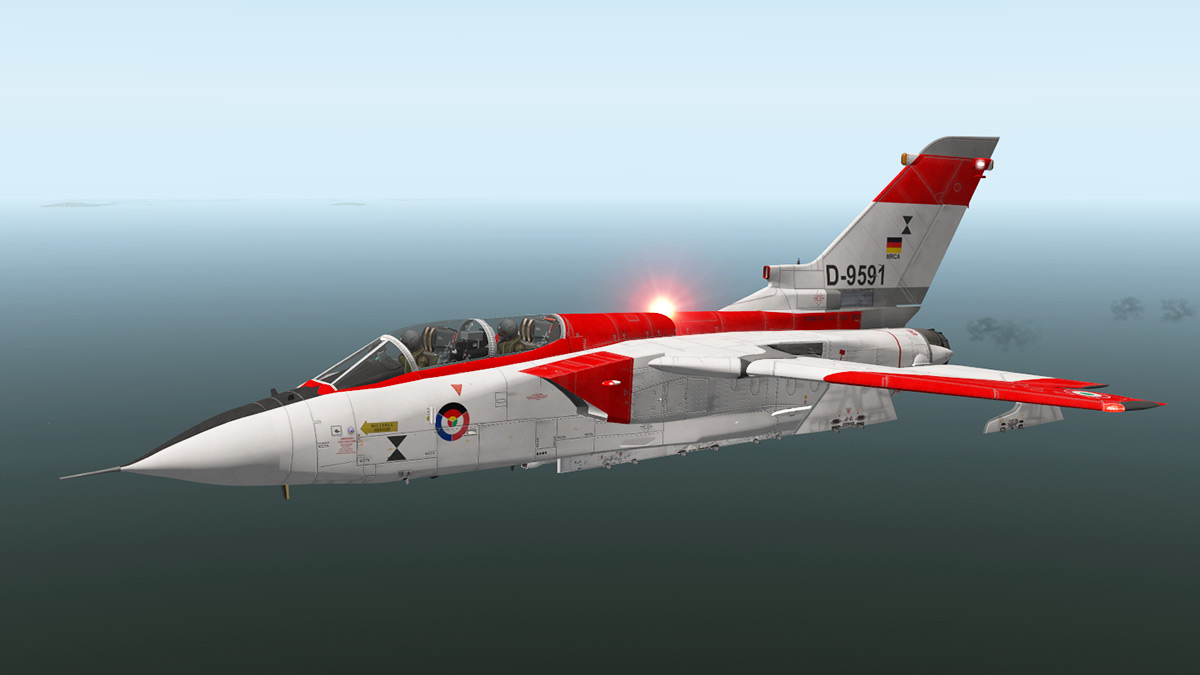
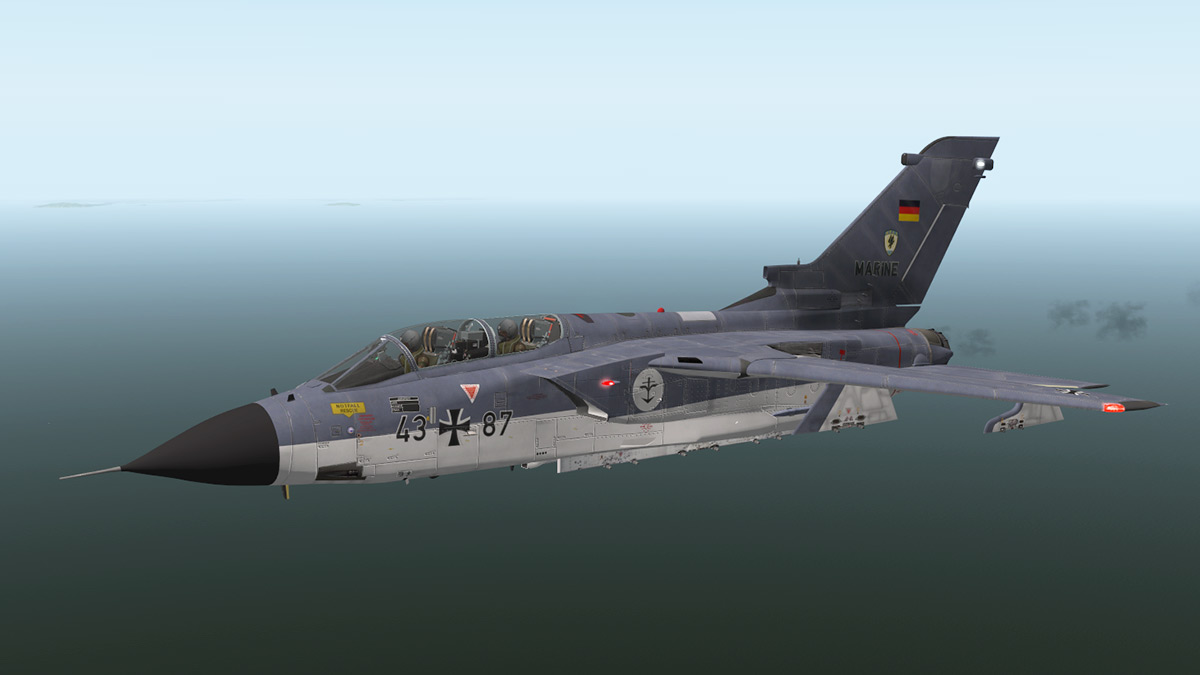
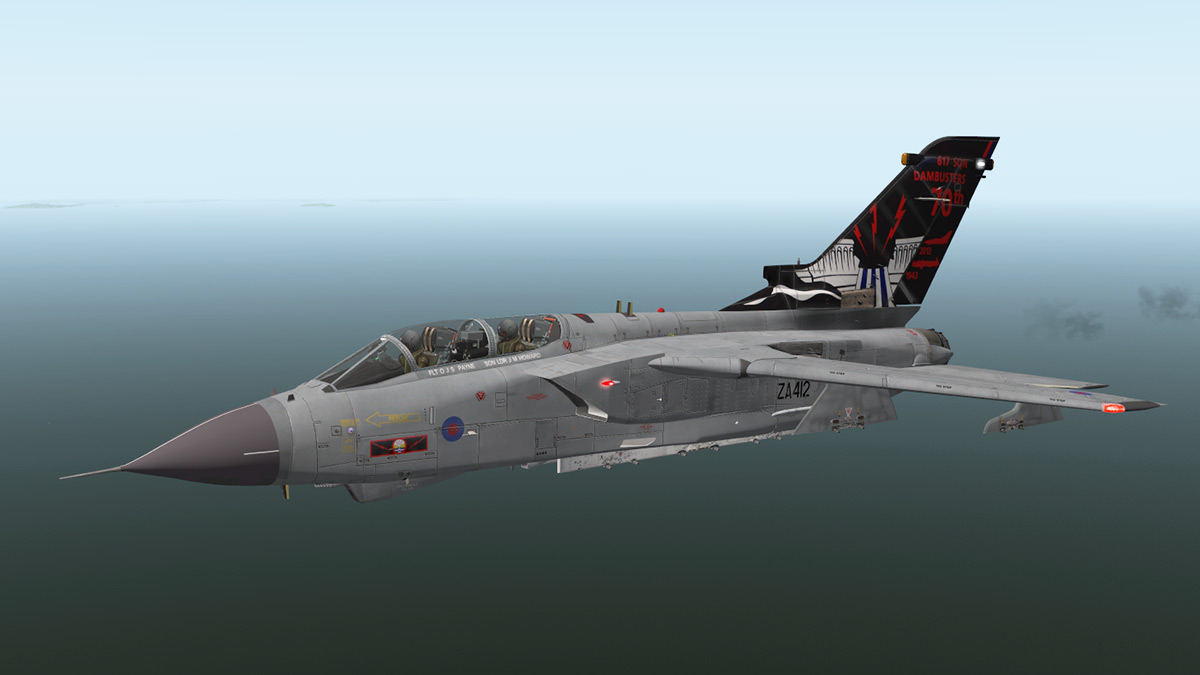
.jpg.0626d7fcfaf044a583b2fd0a3e00b905.jpg)


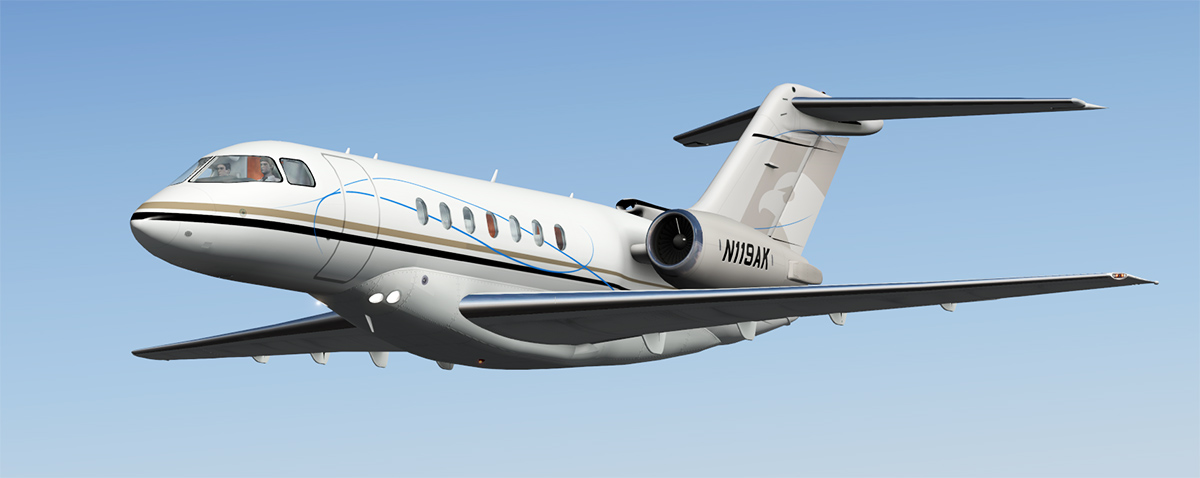


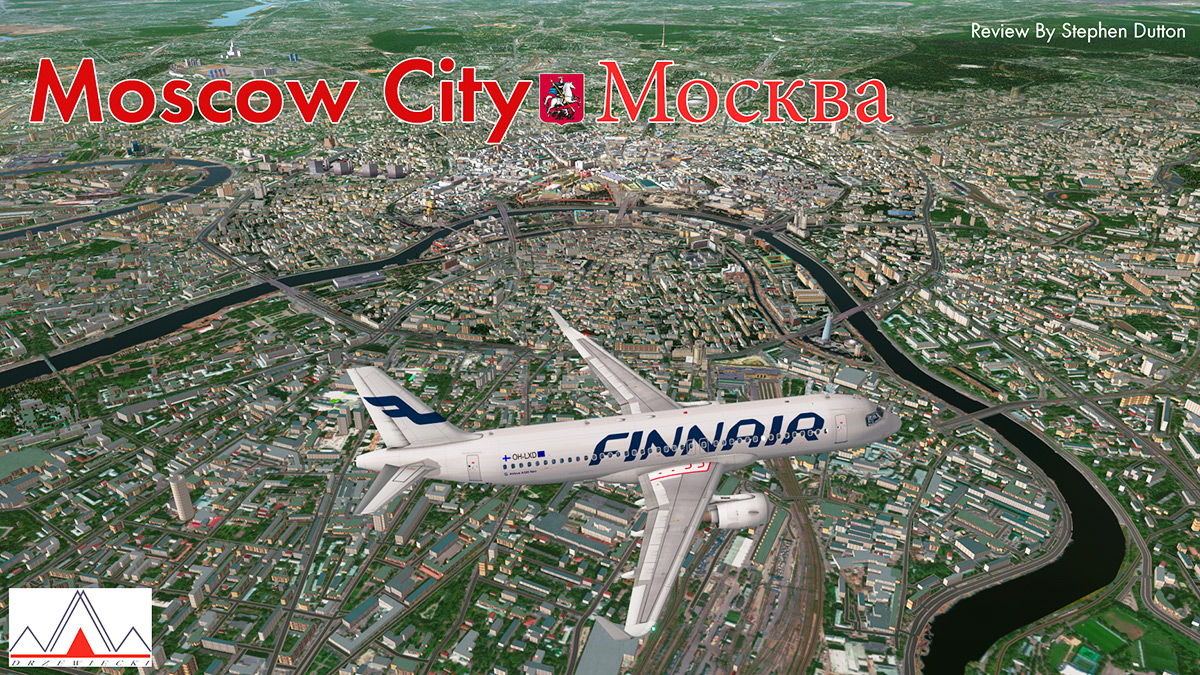

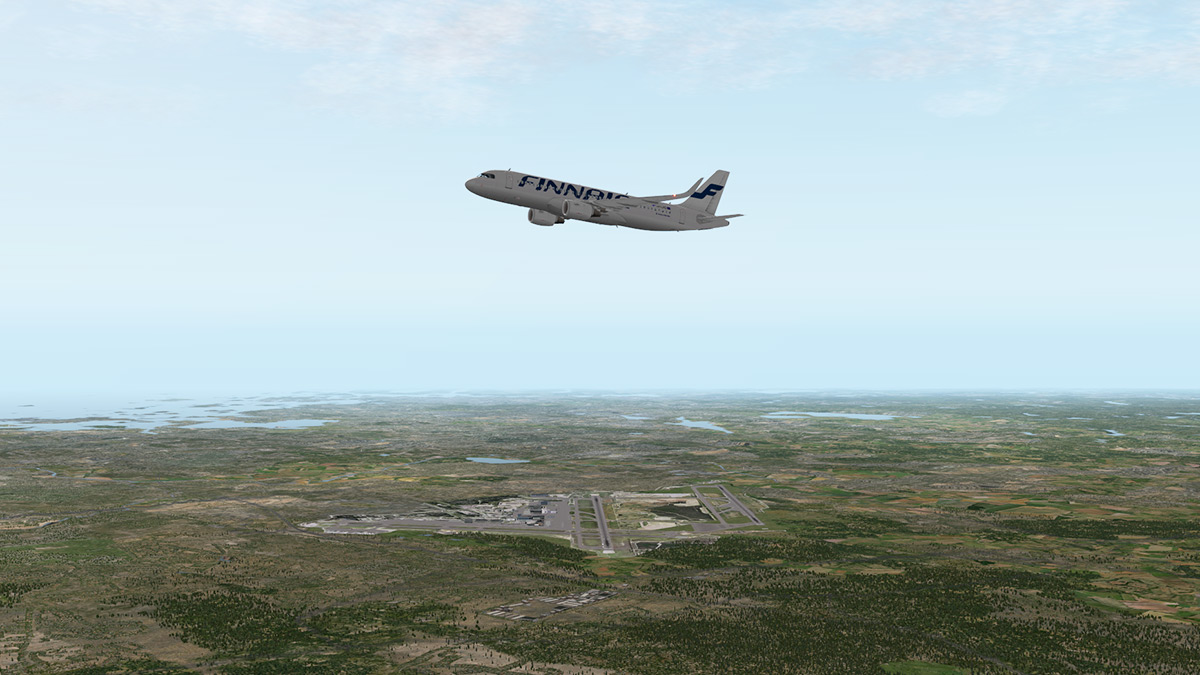

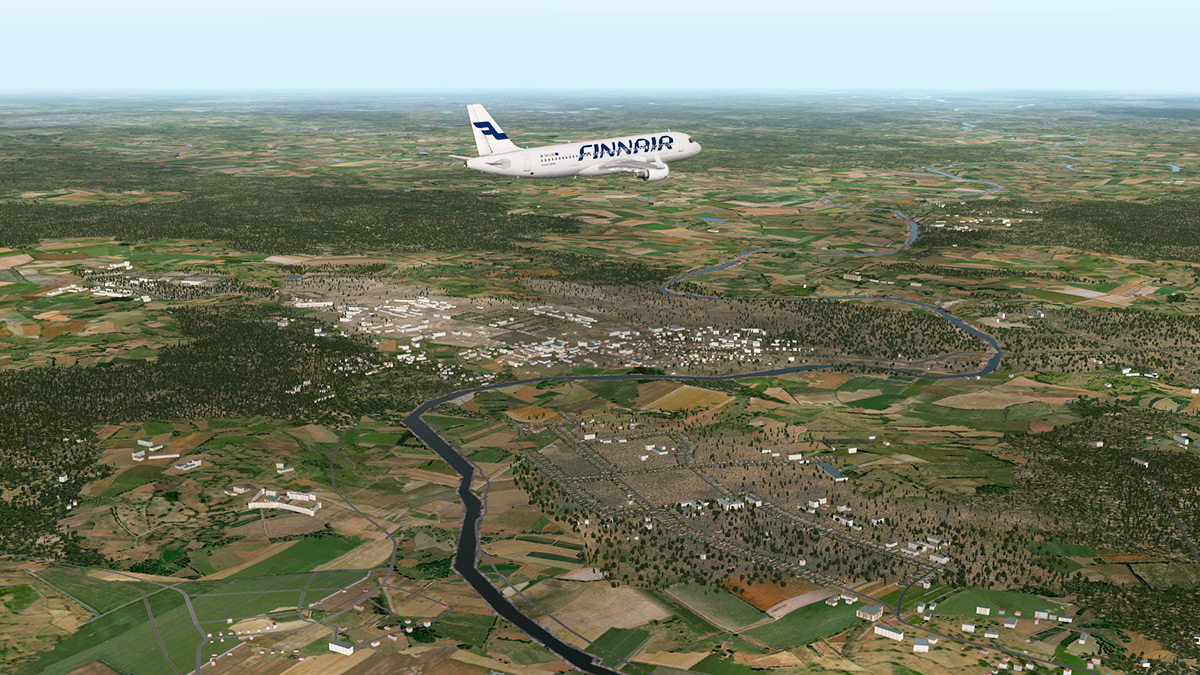


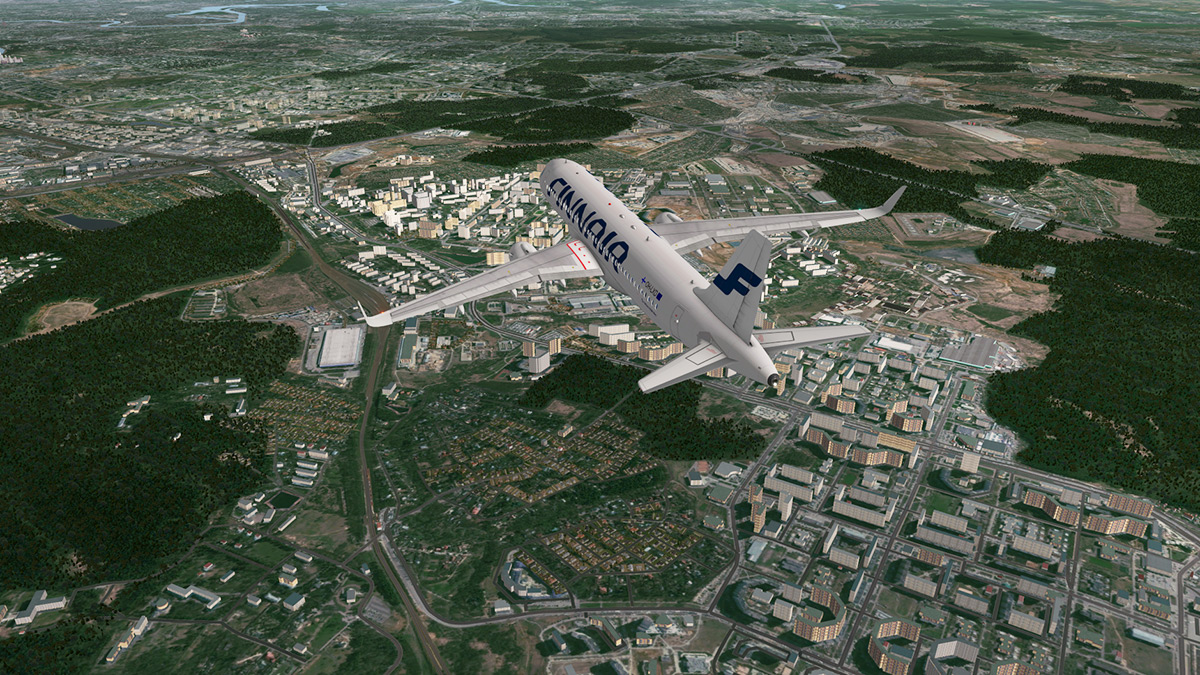
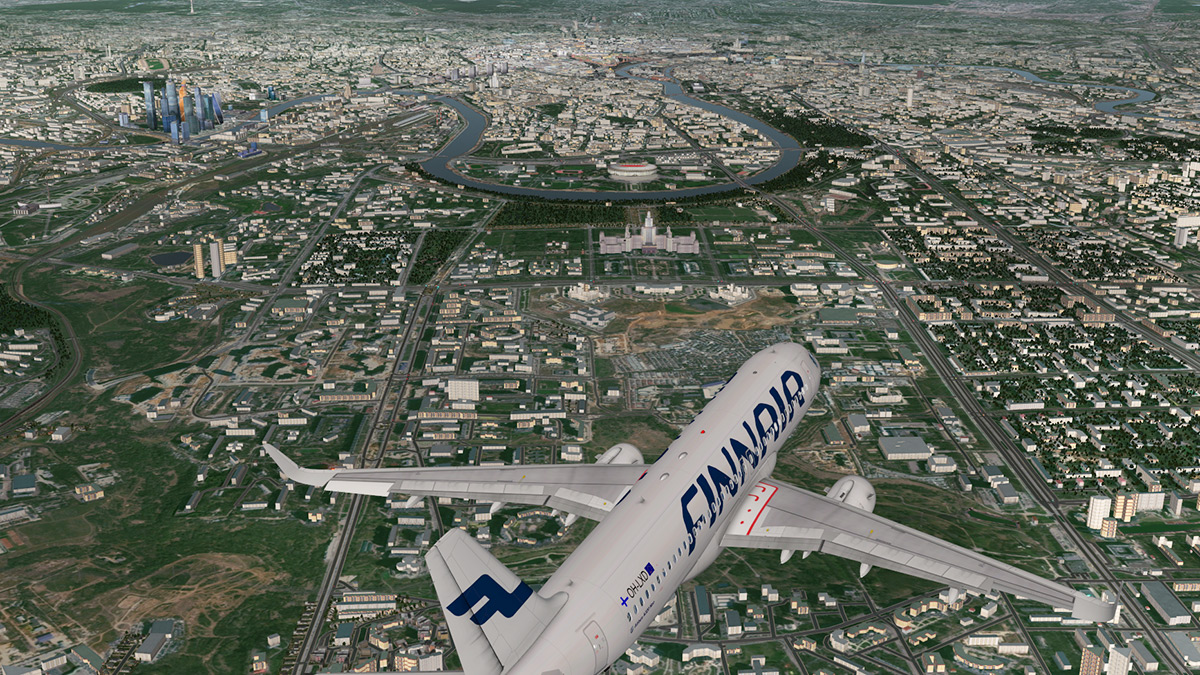
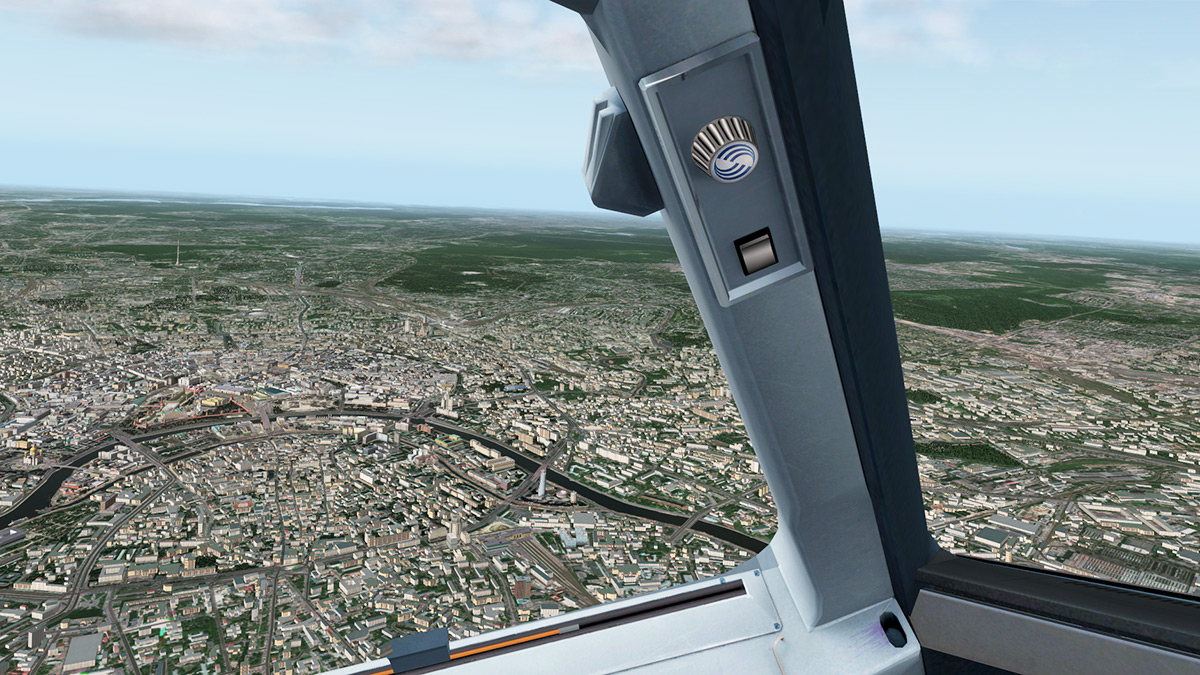
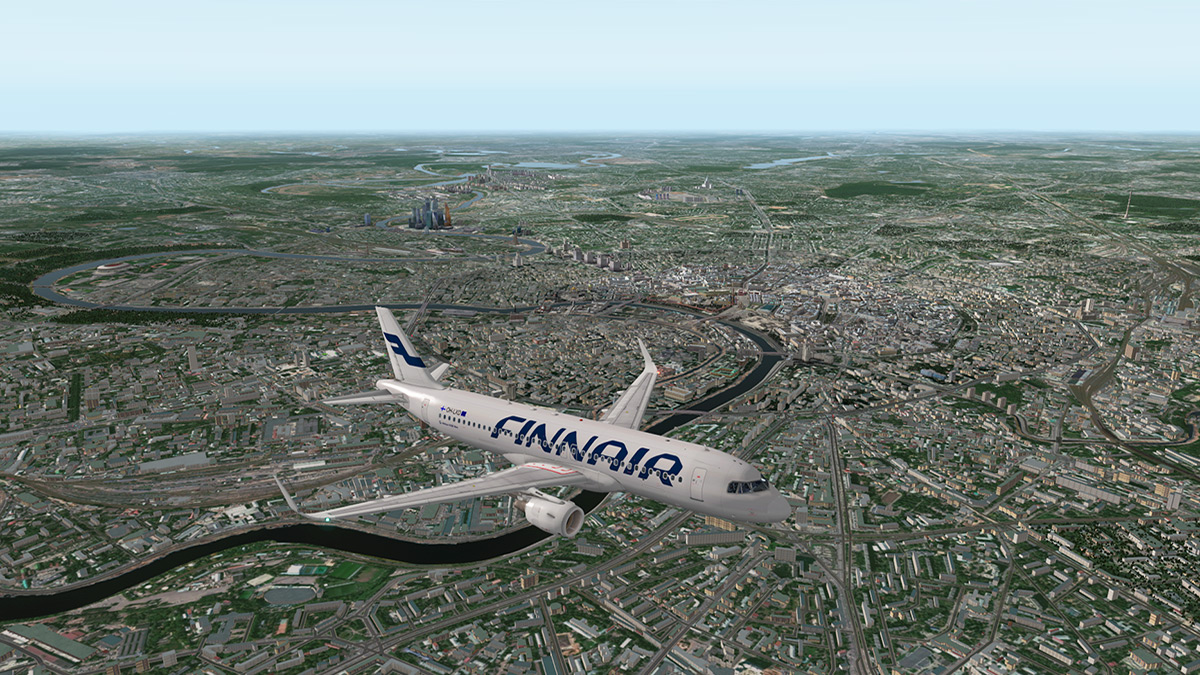


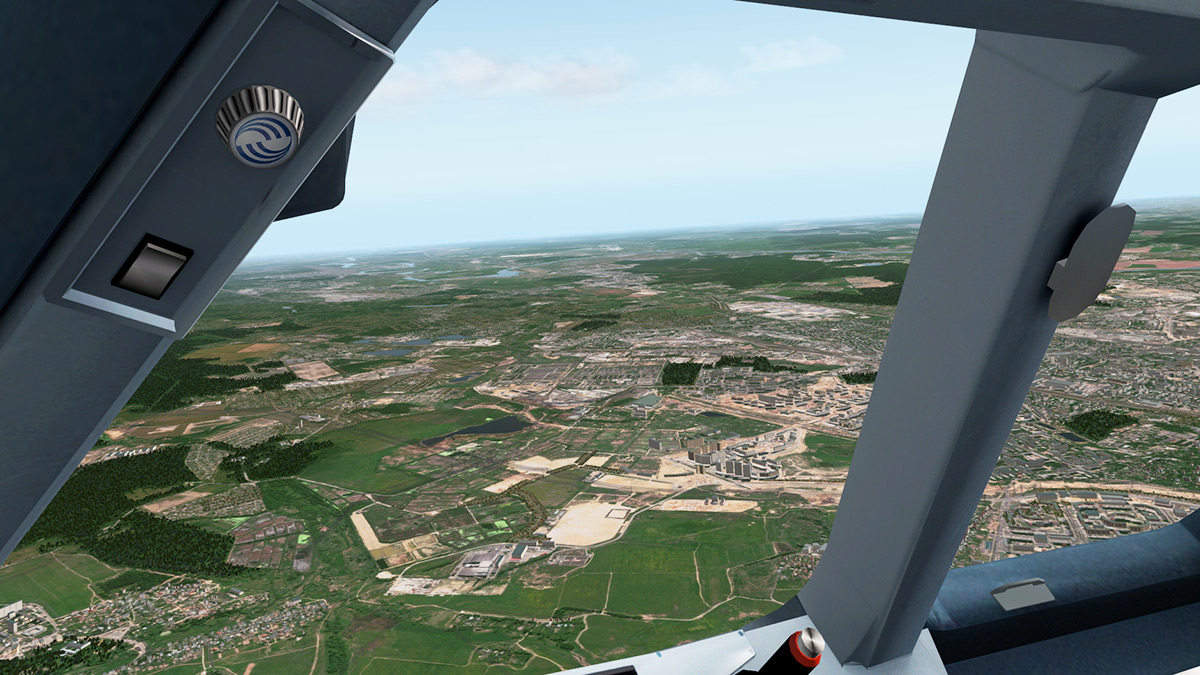
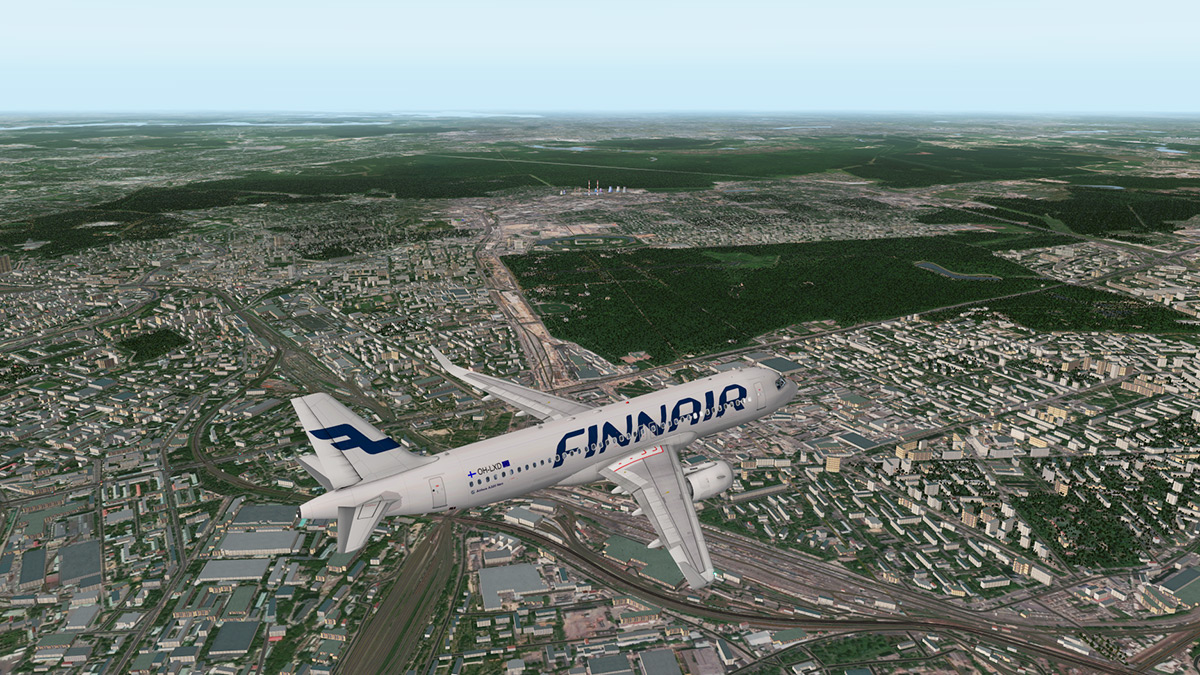
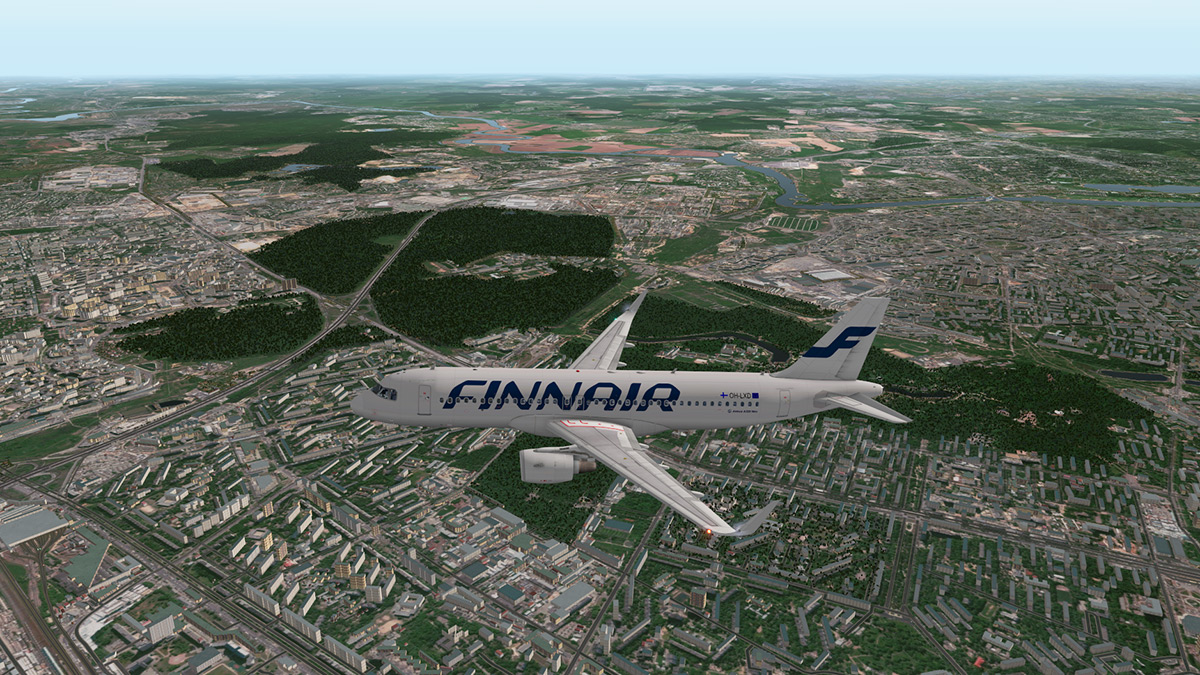

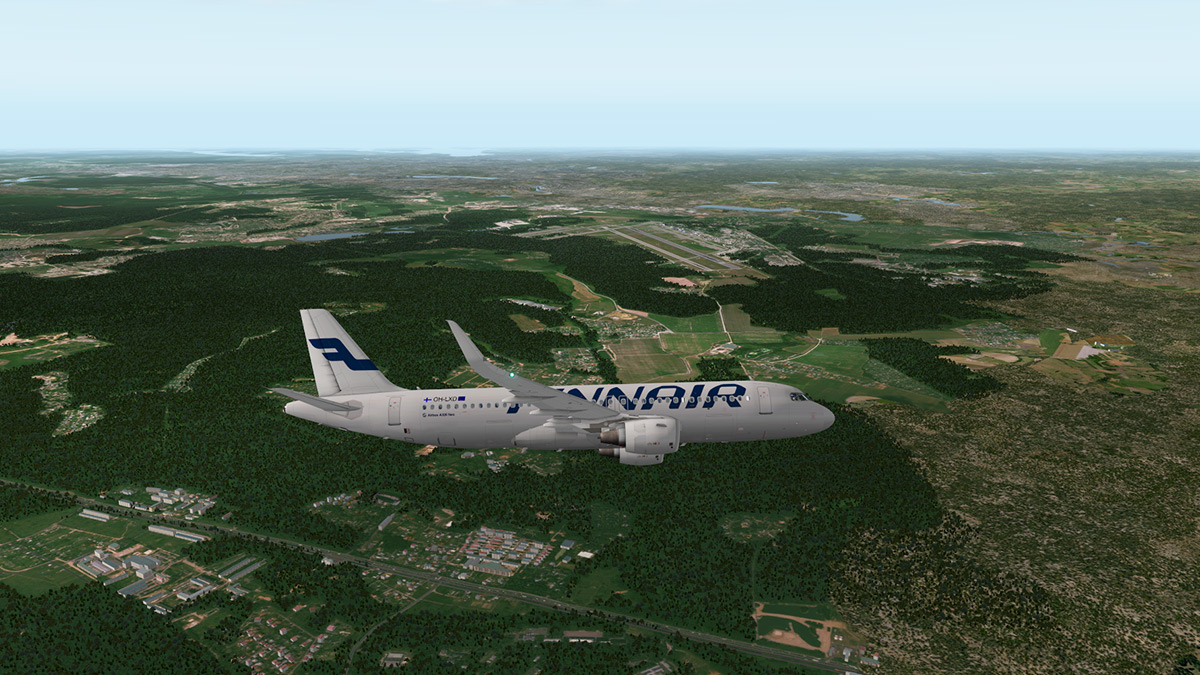

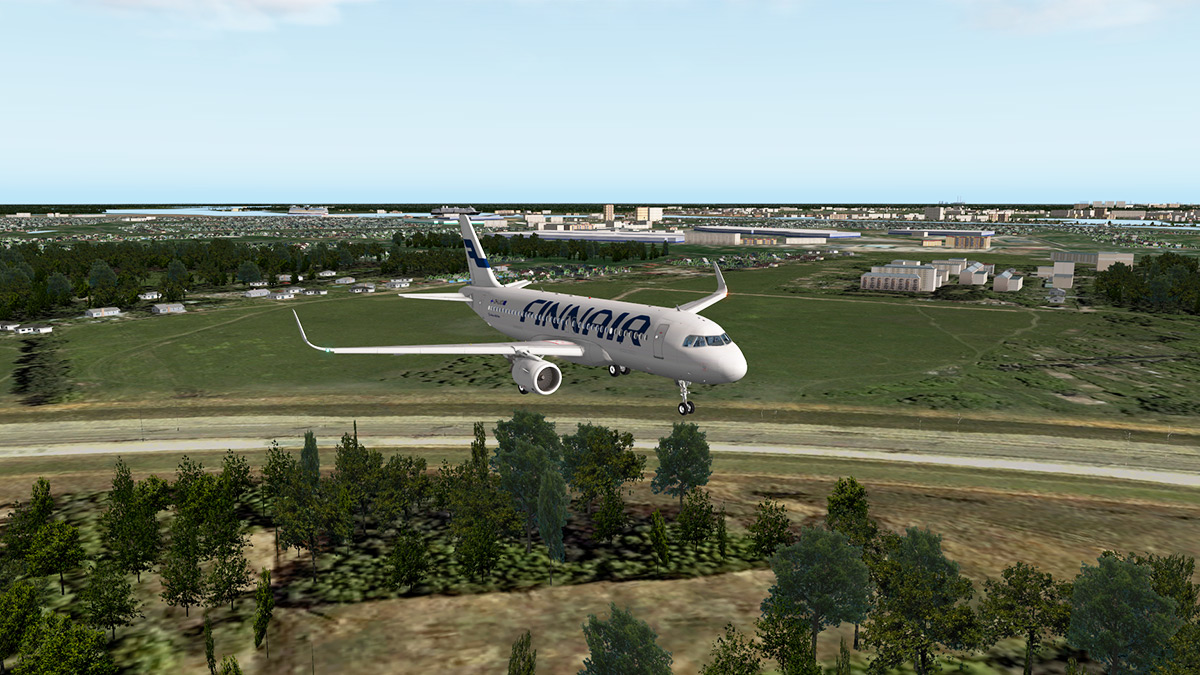
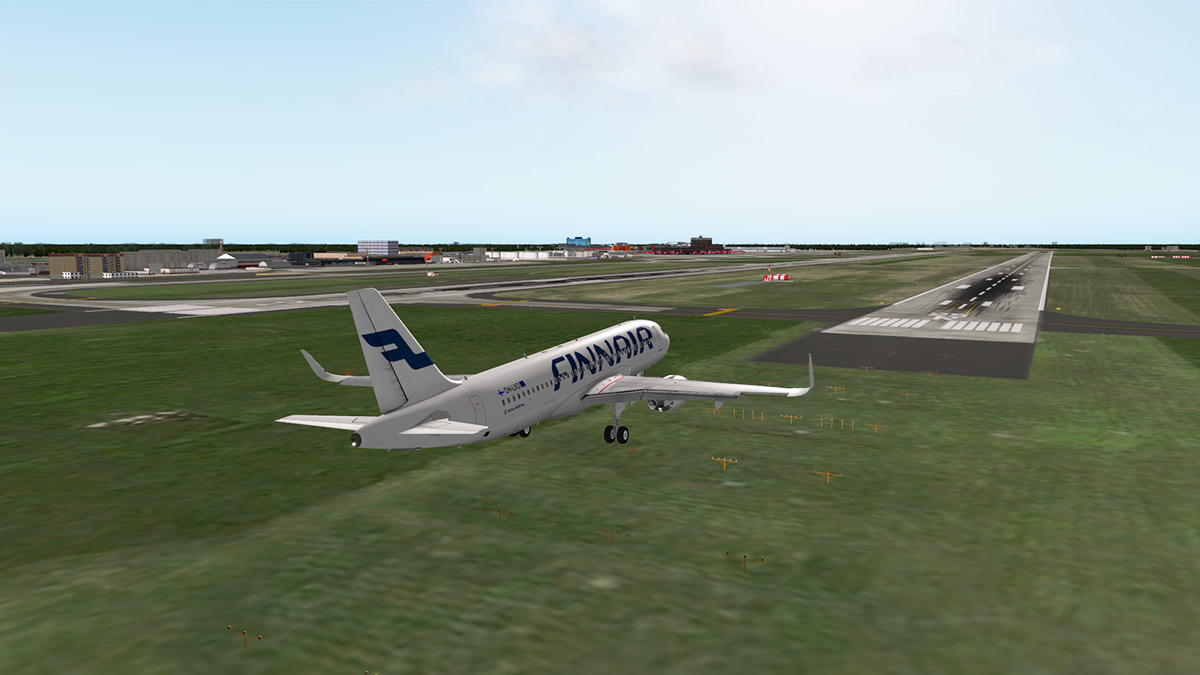
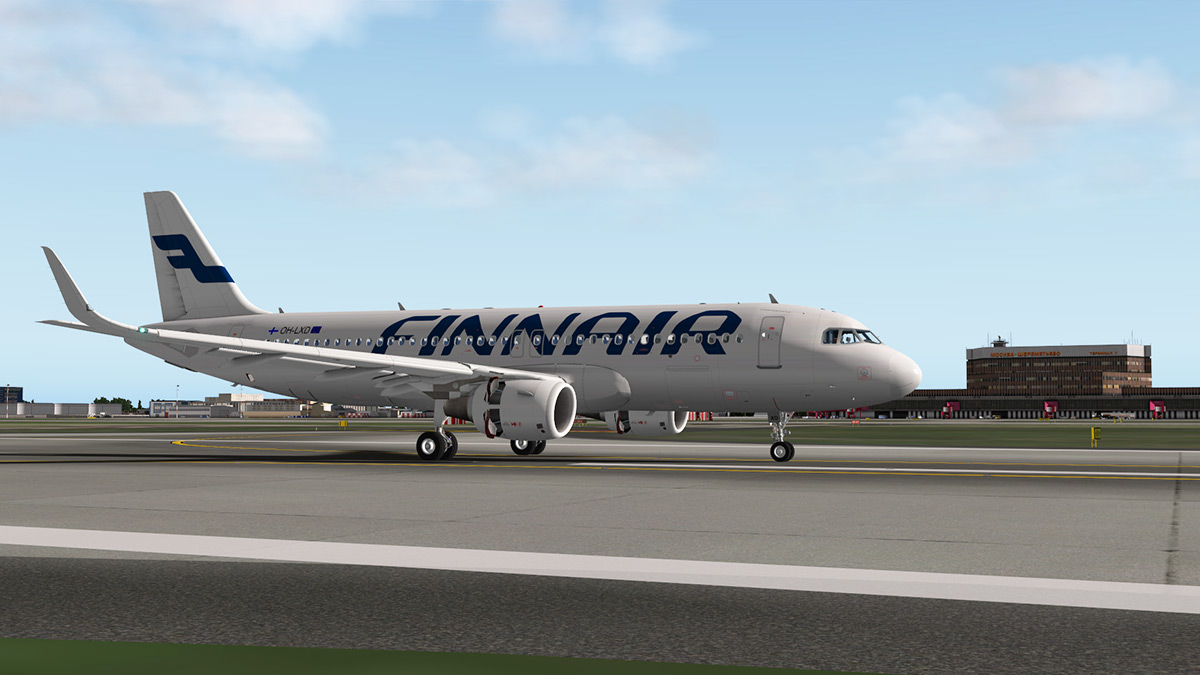

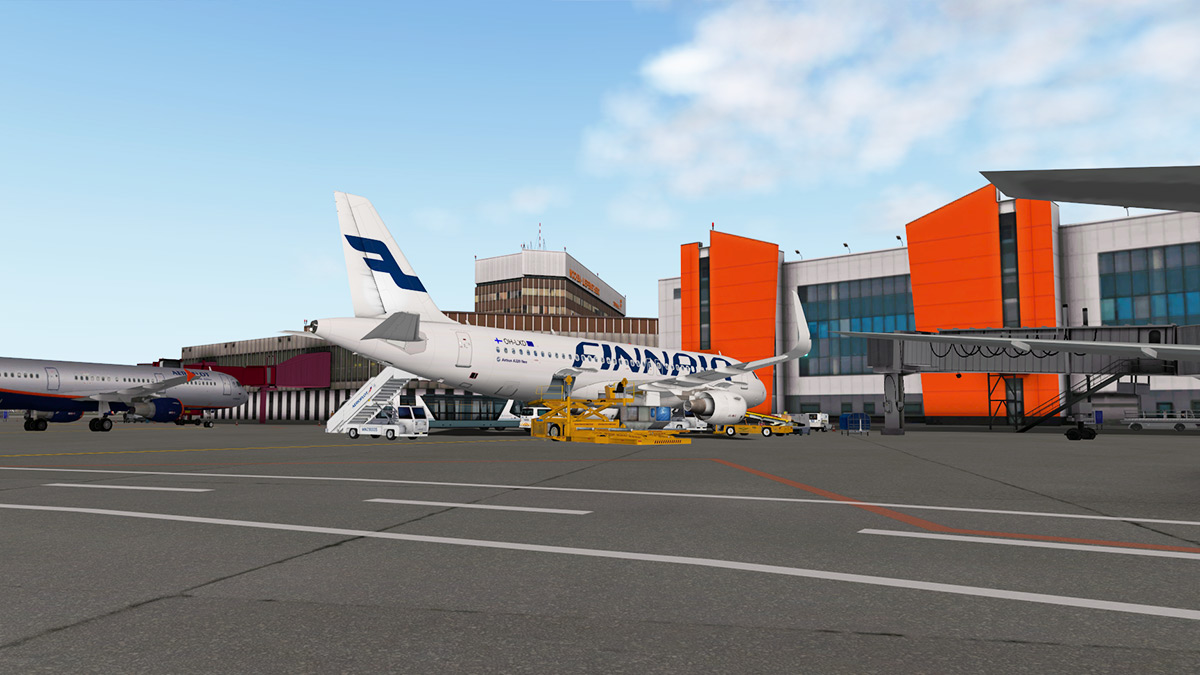
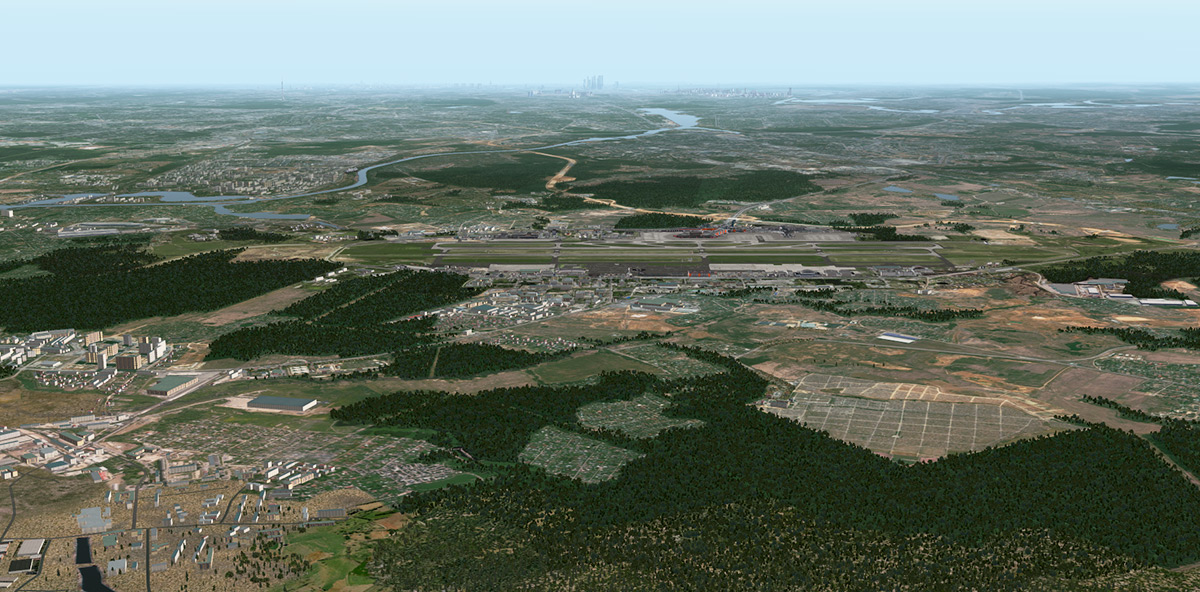


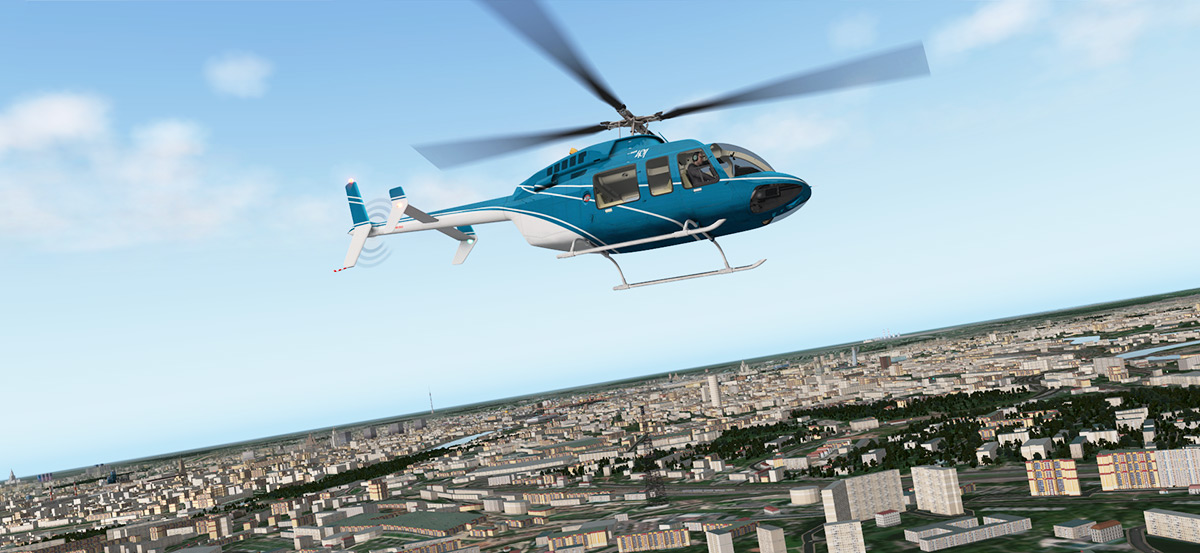
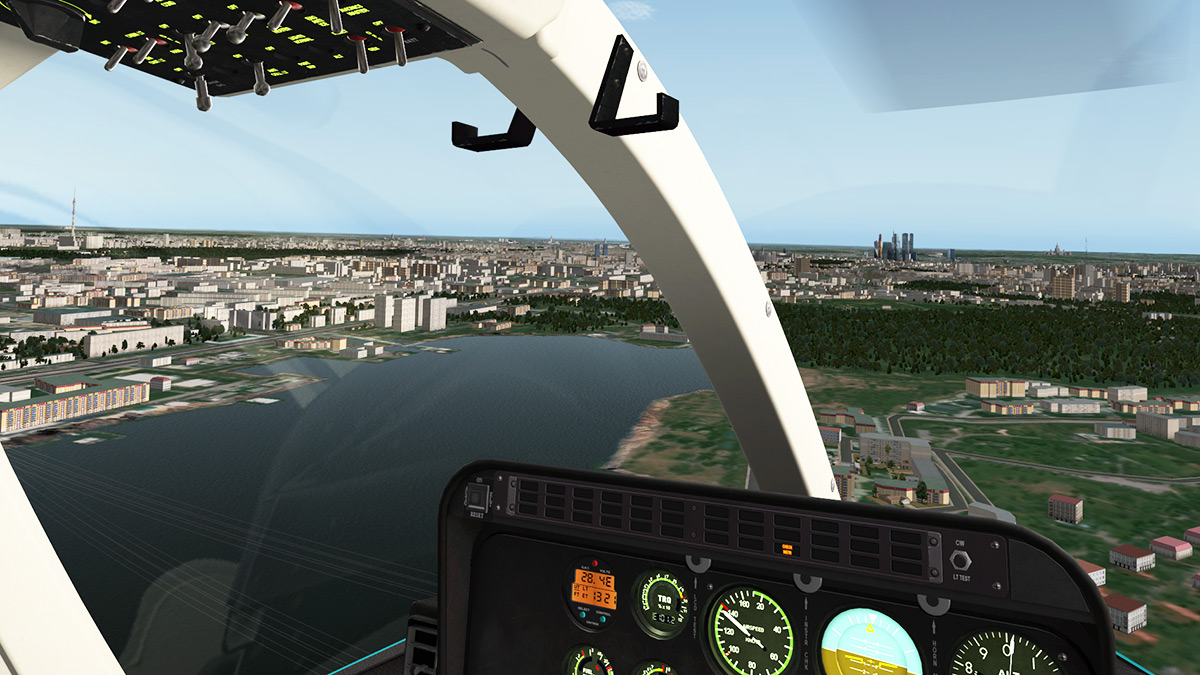
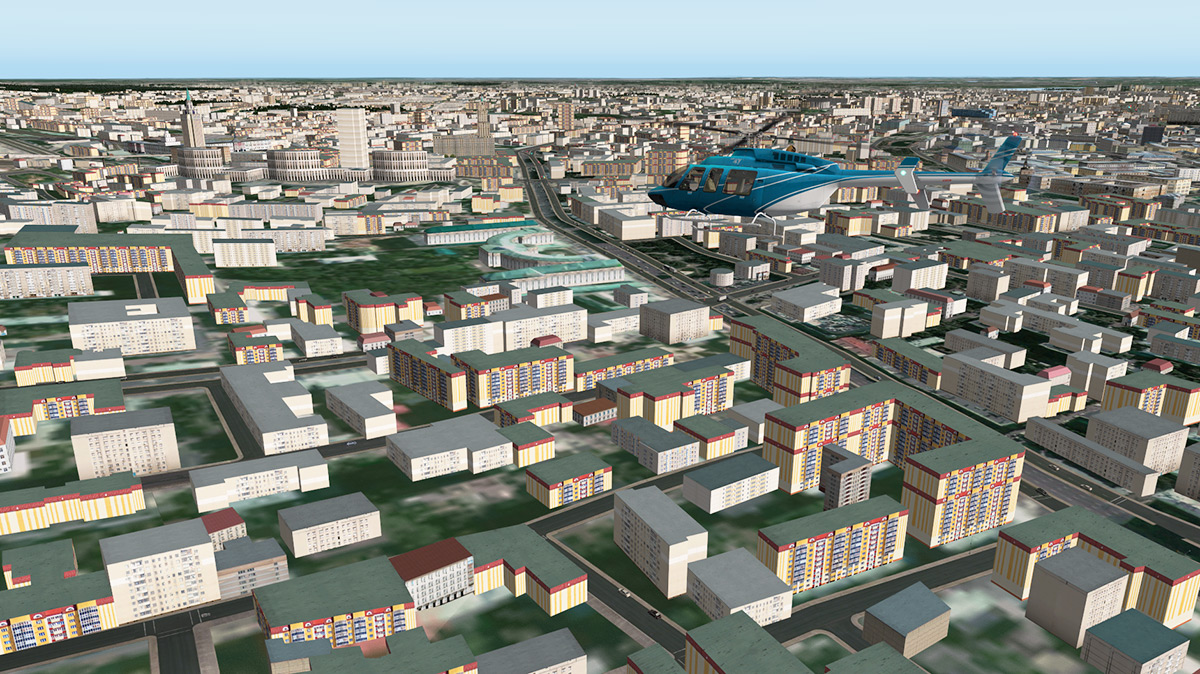
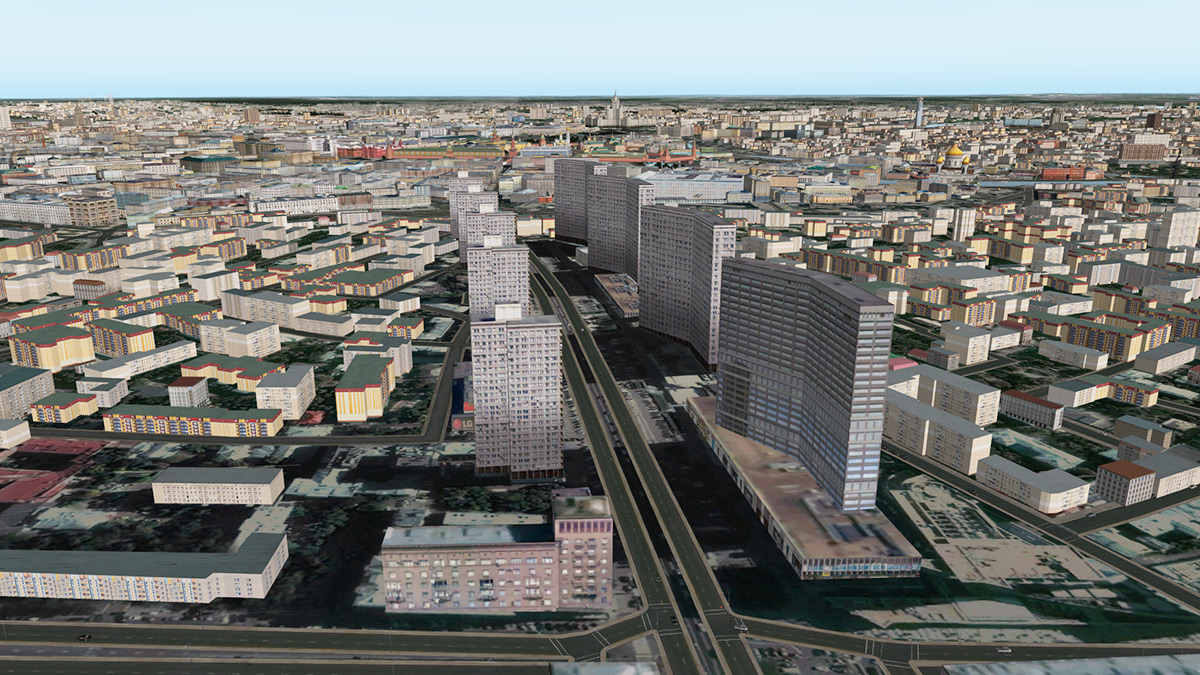

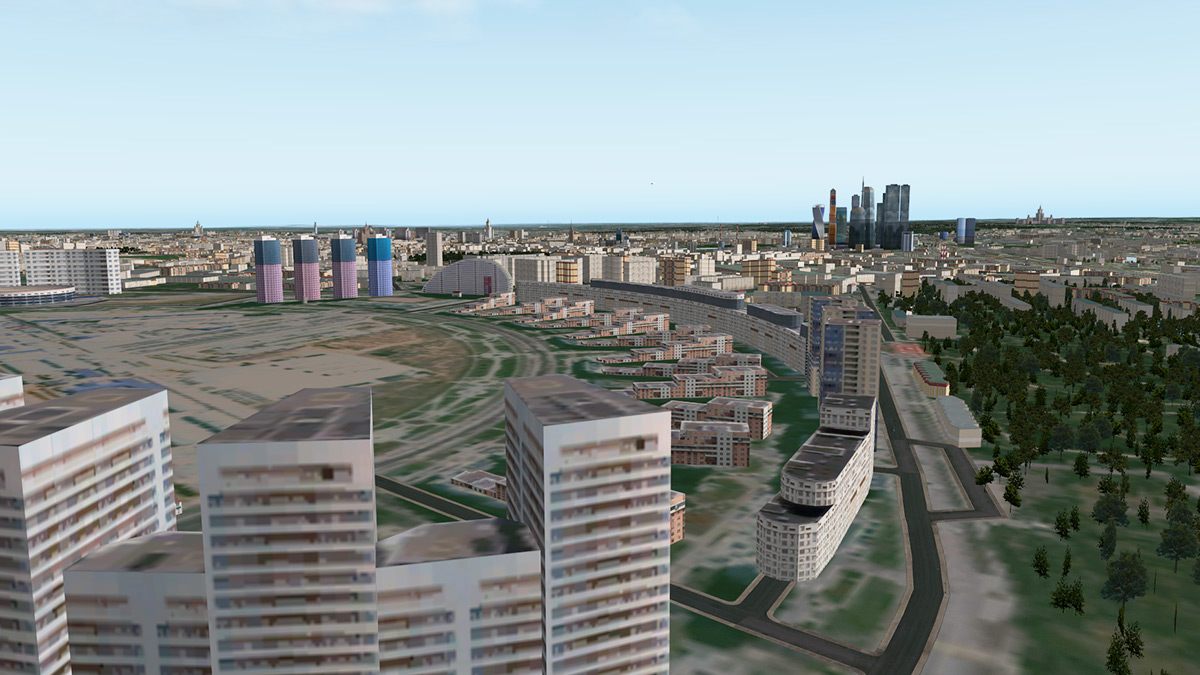


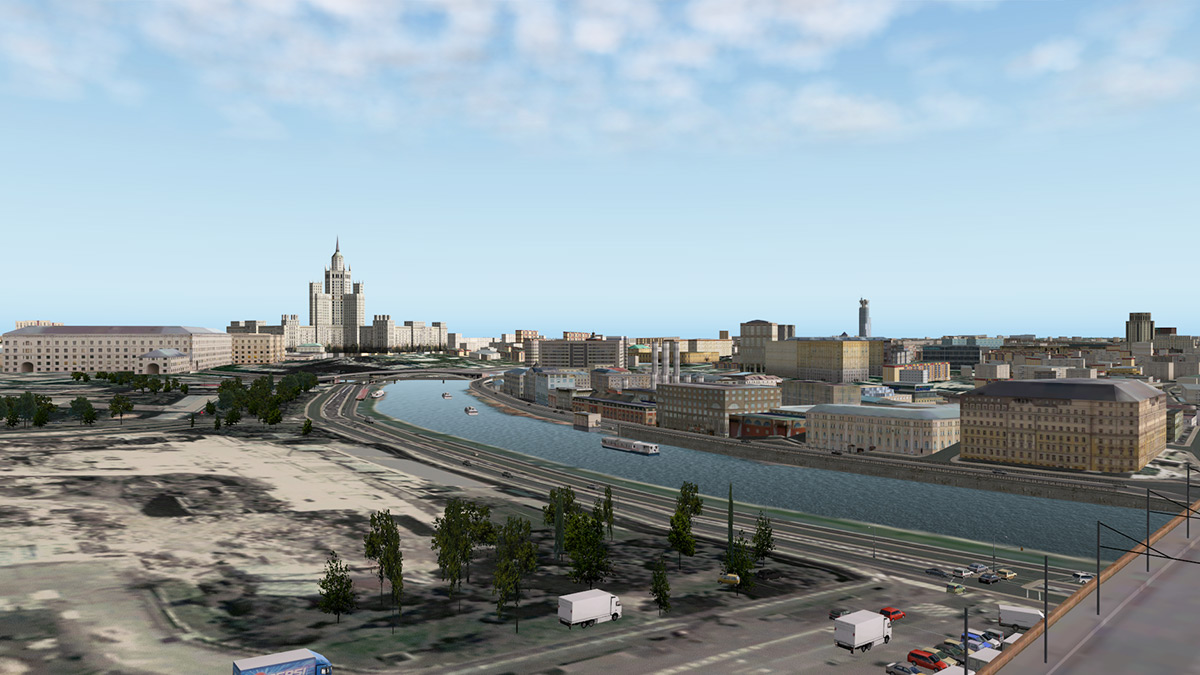
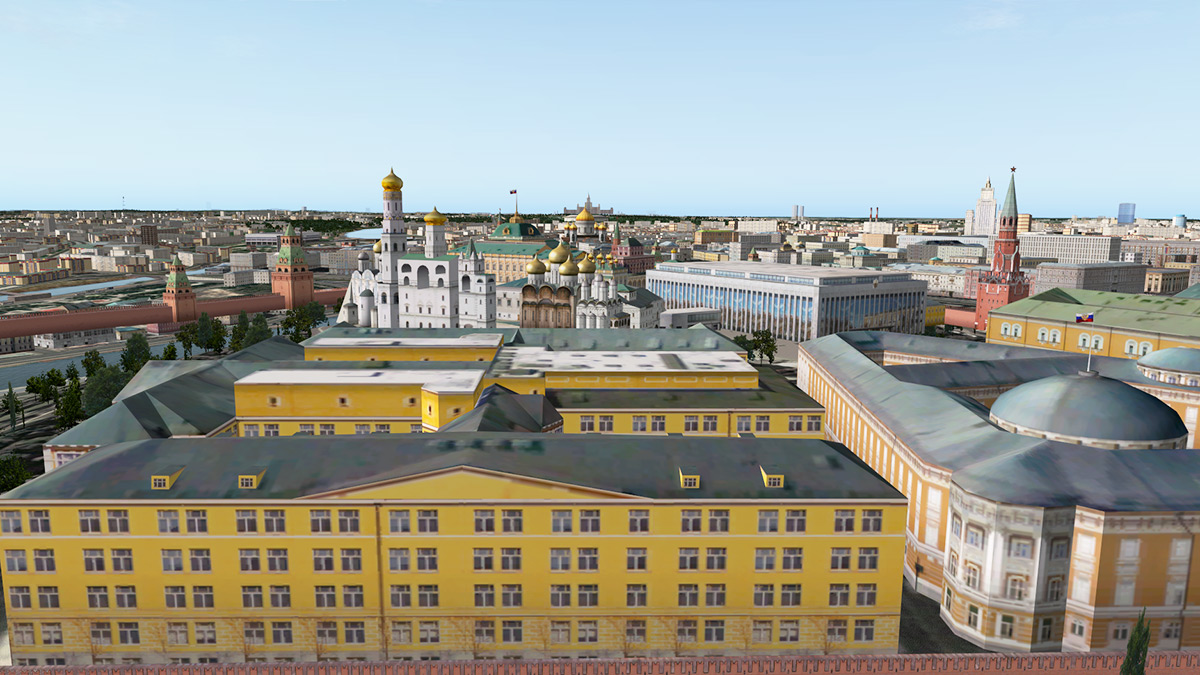

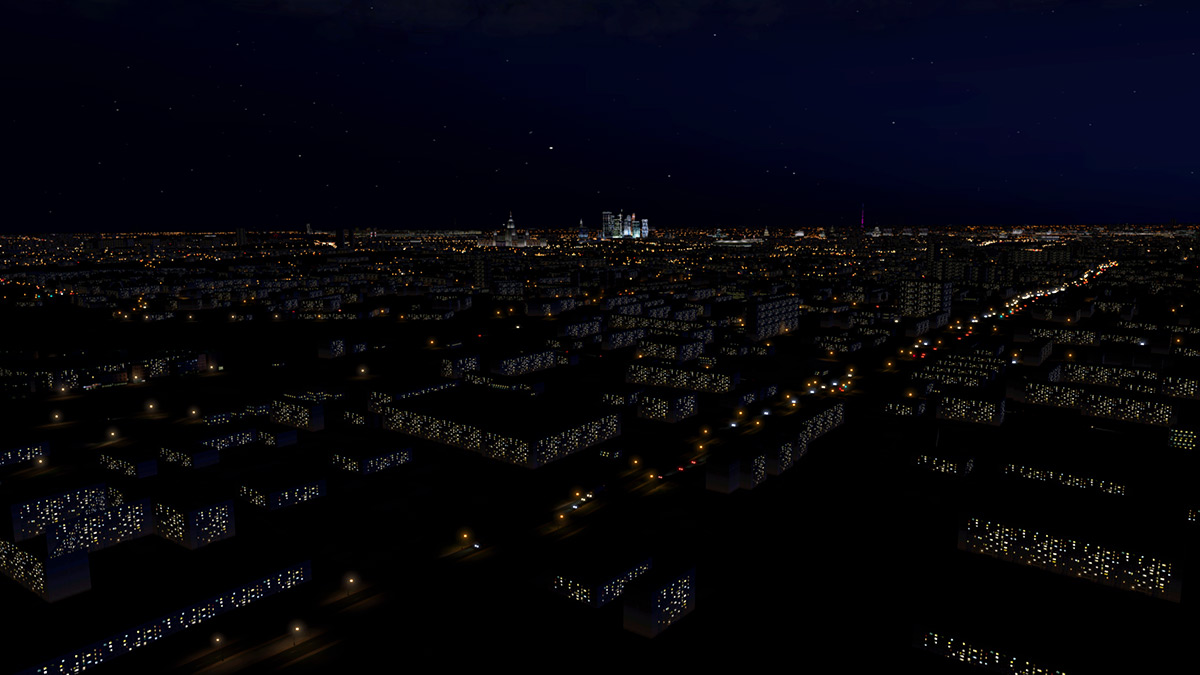
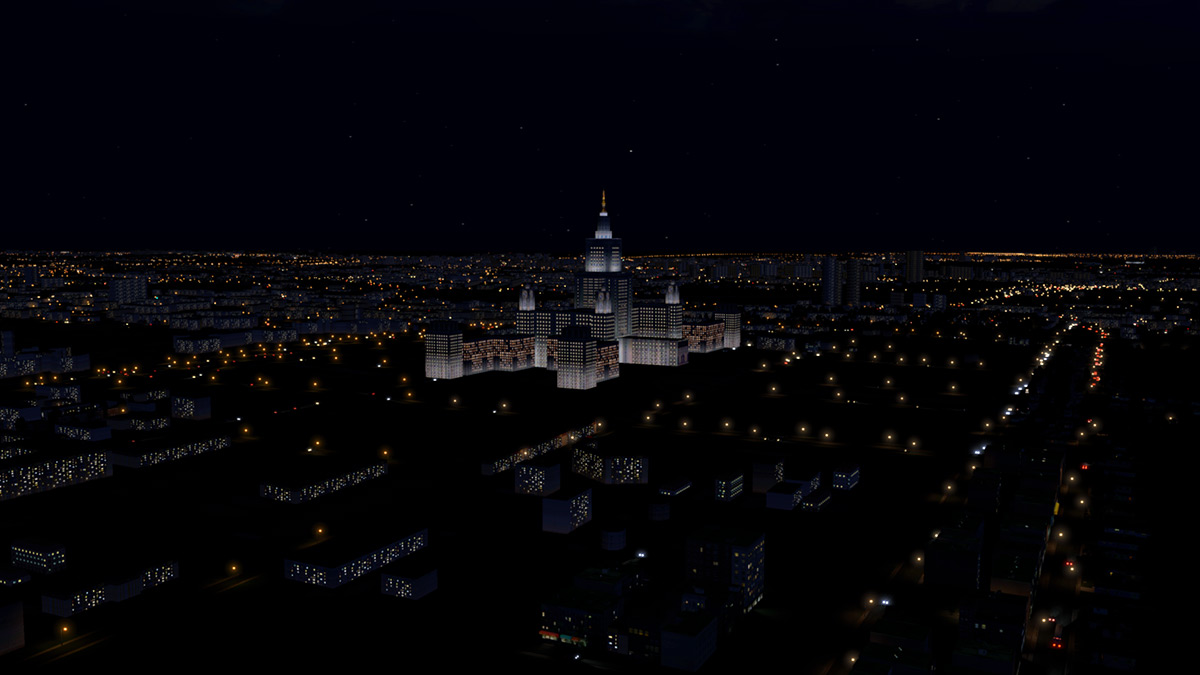
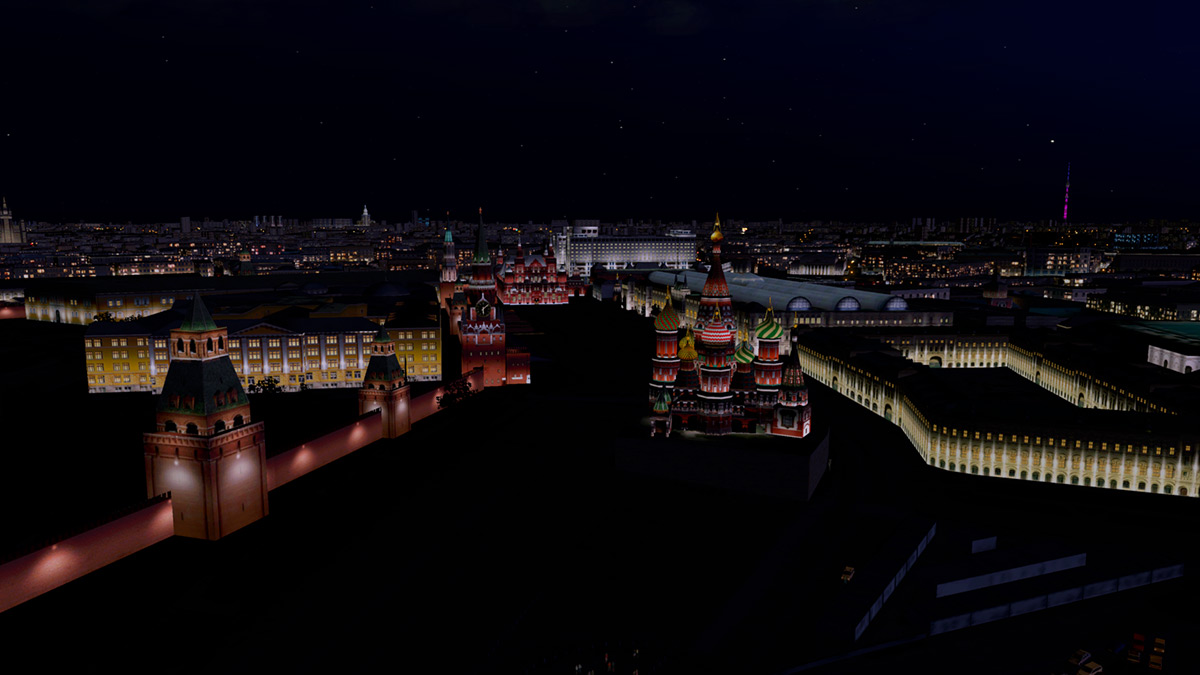
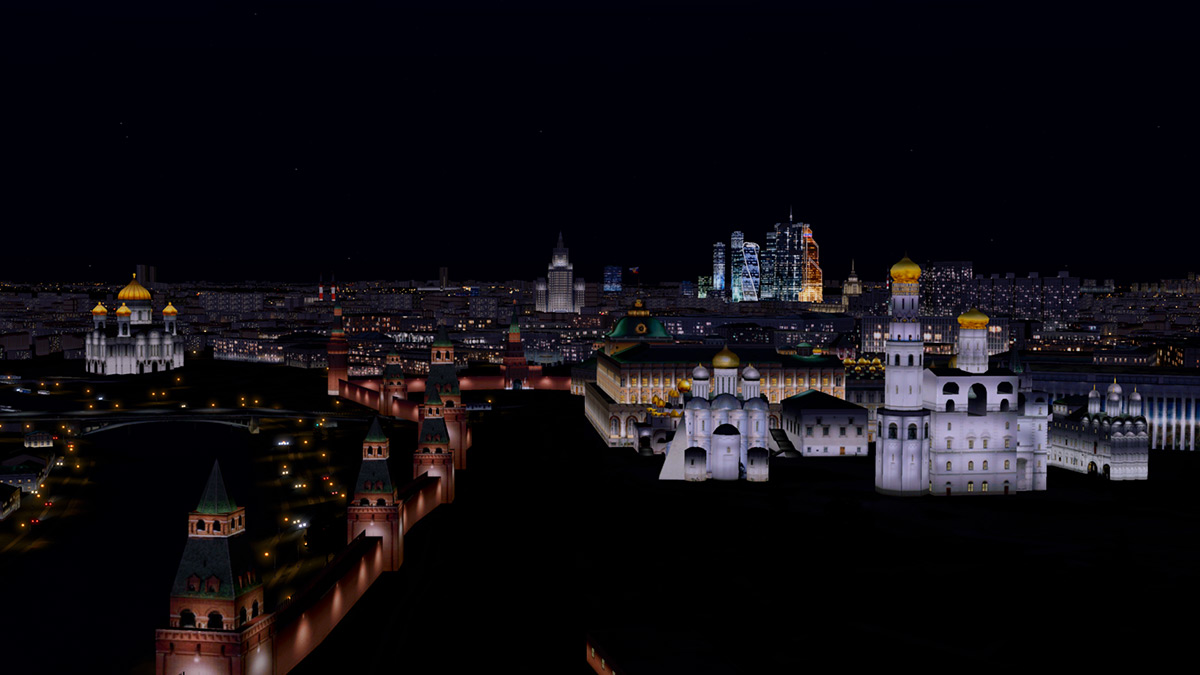

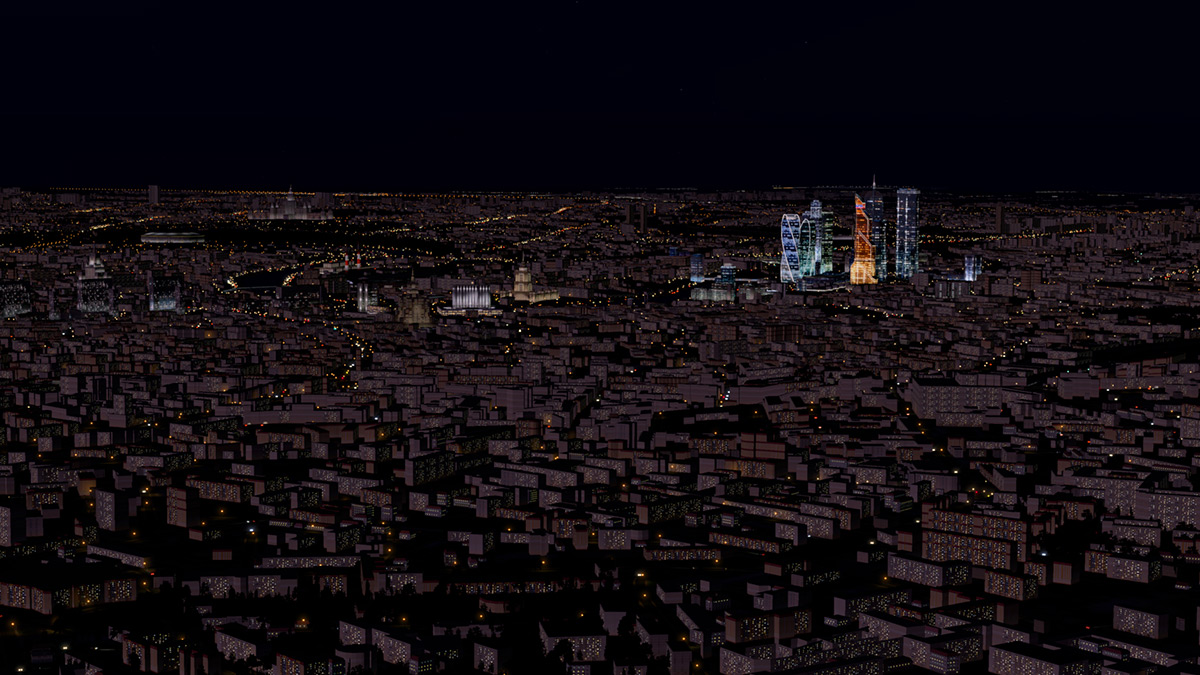


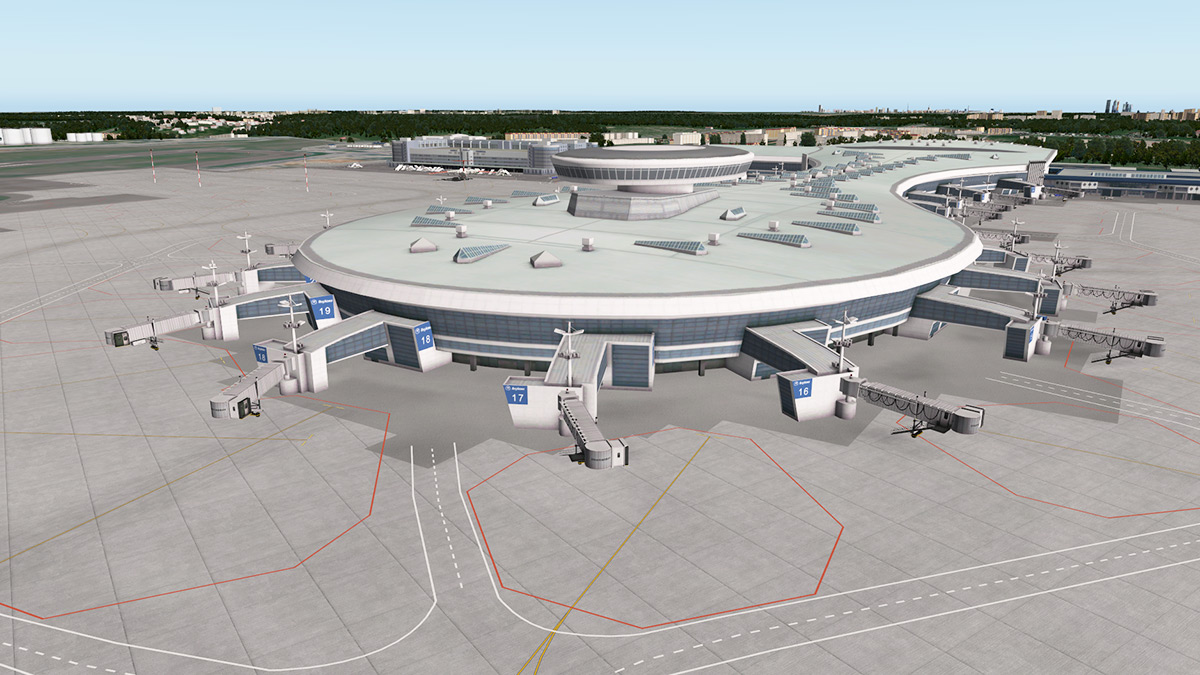
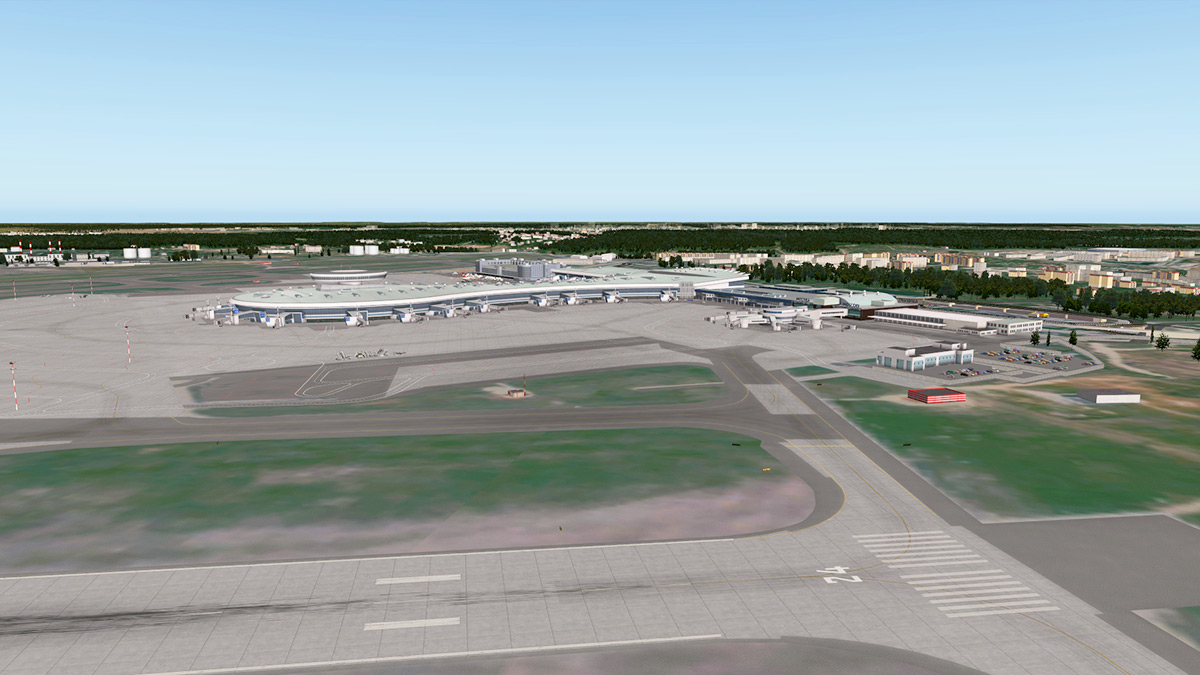
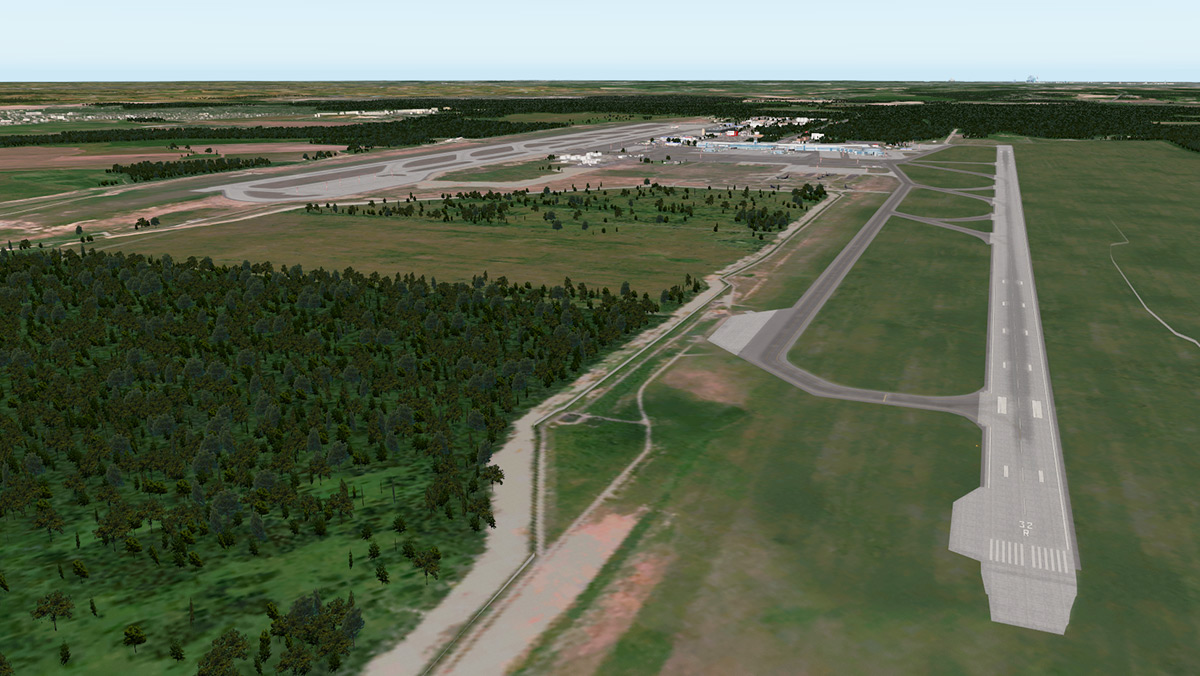
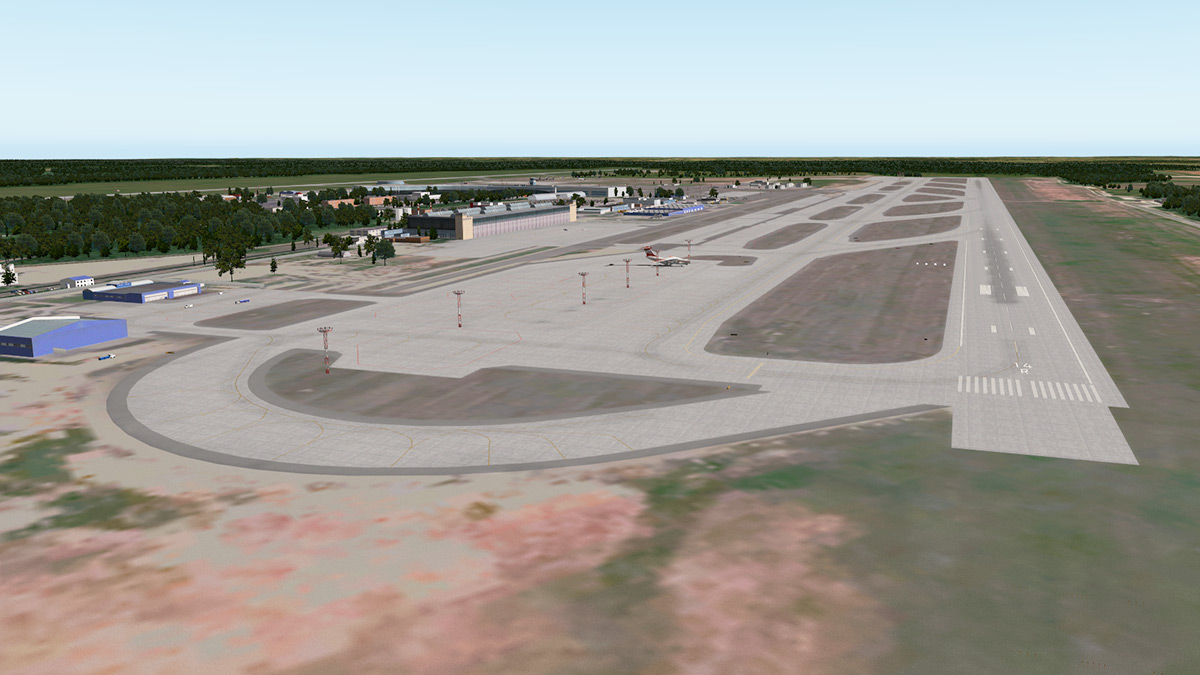


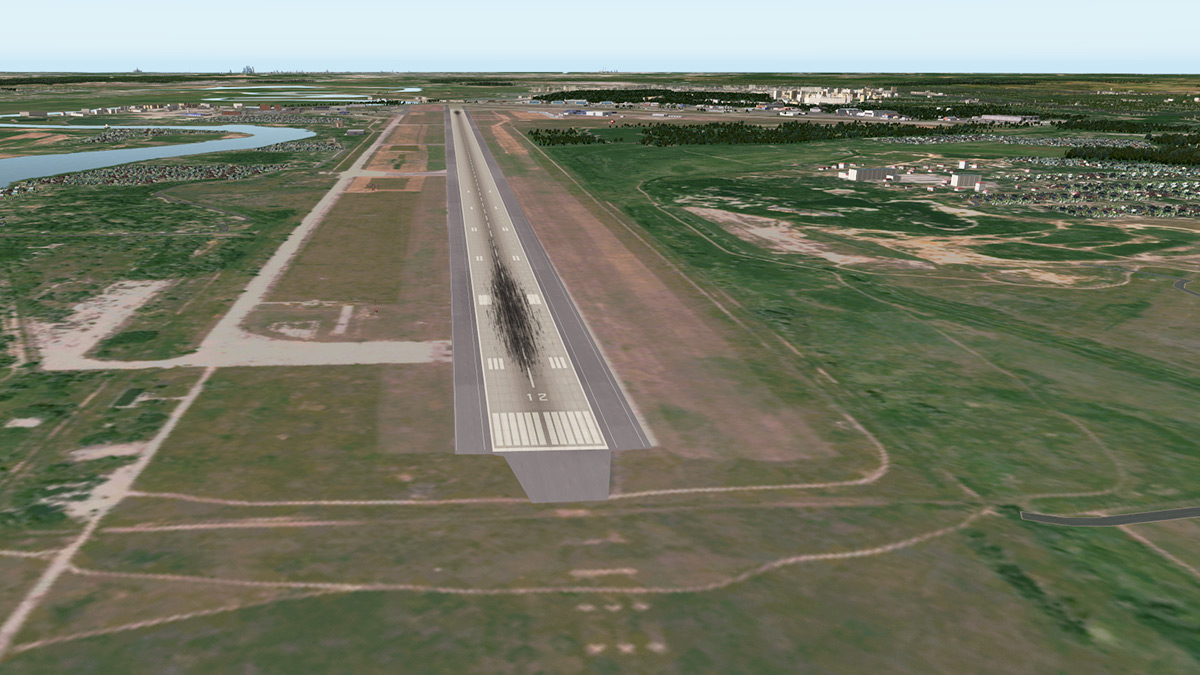
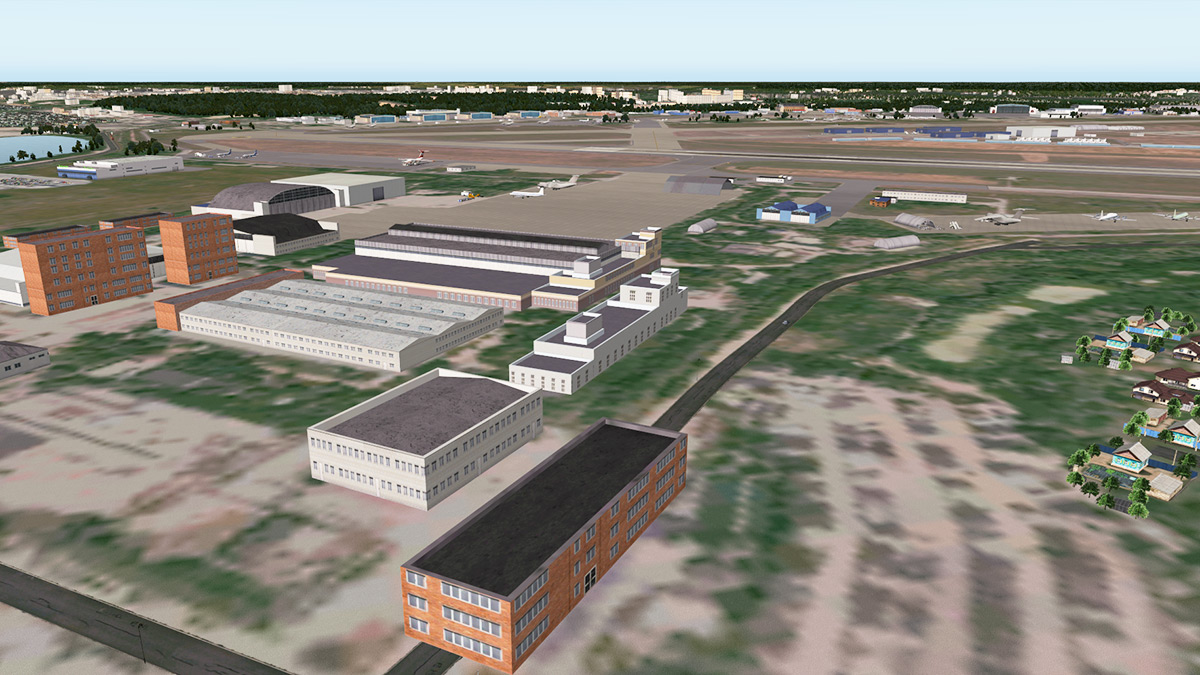
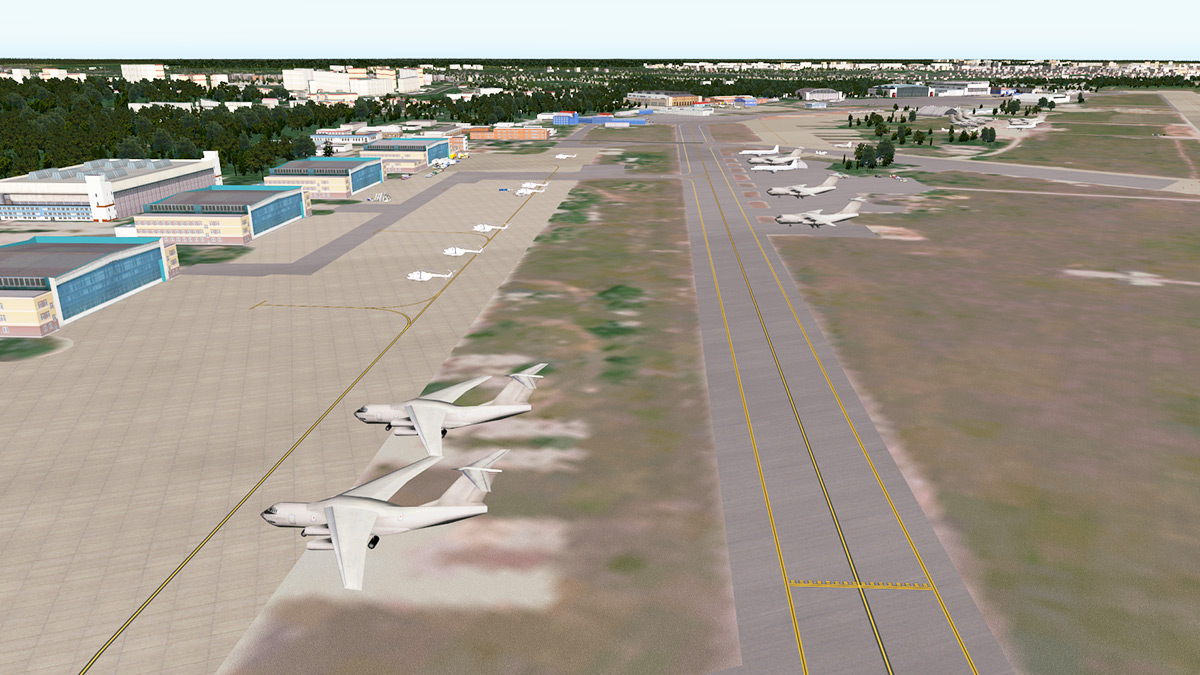

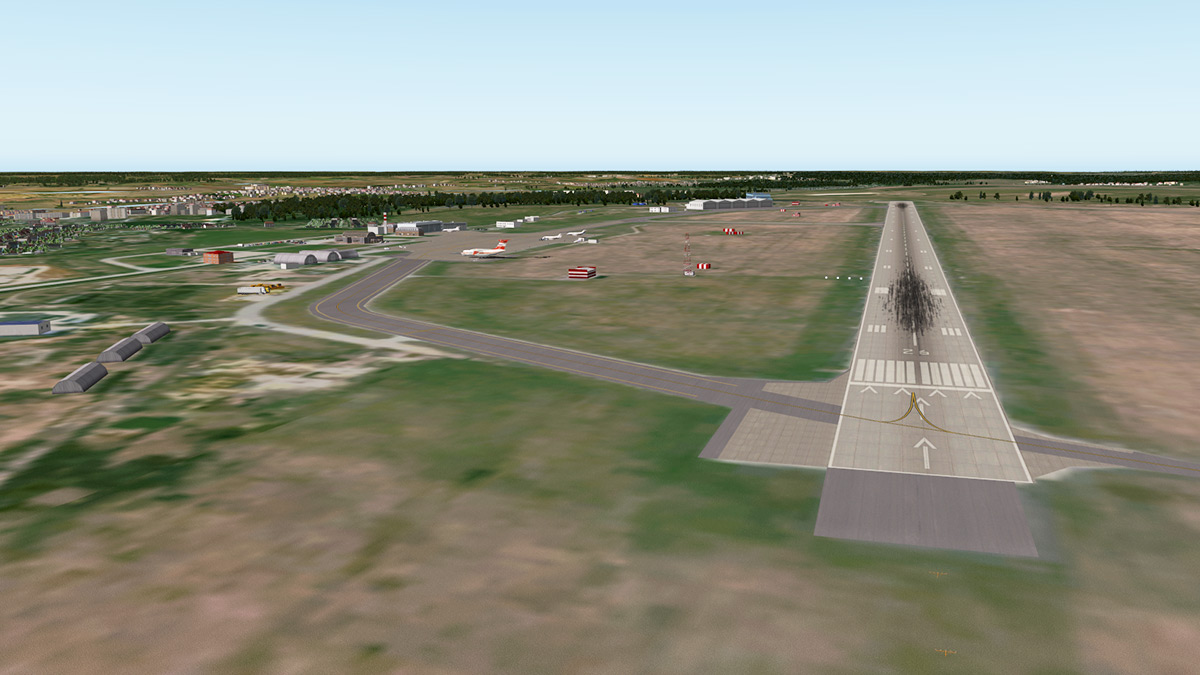

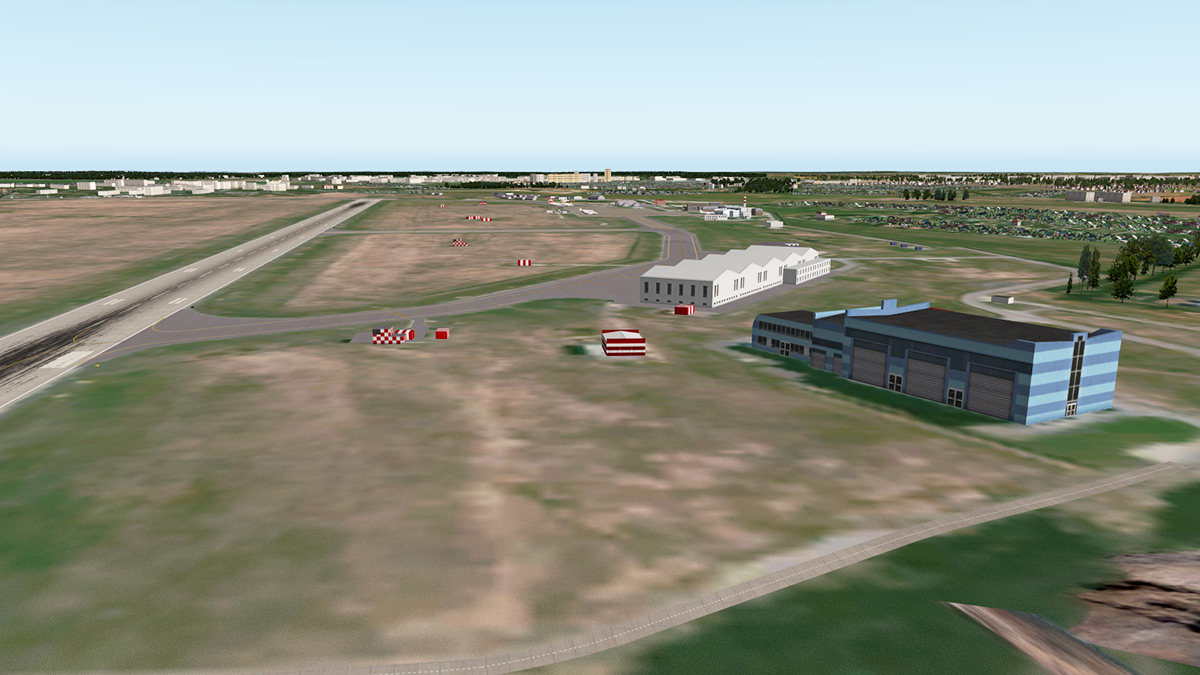


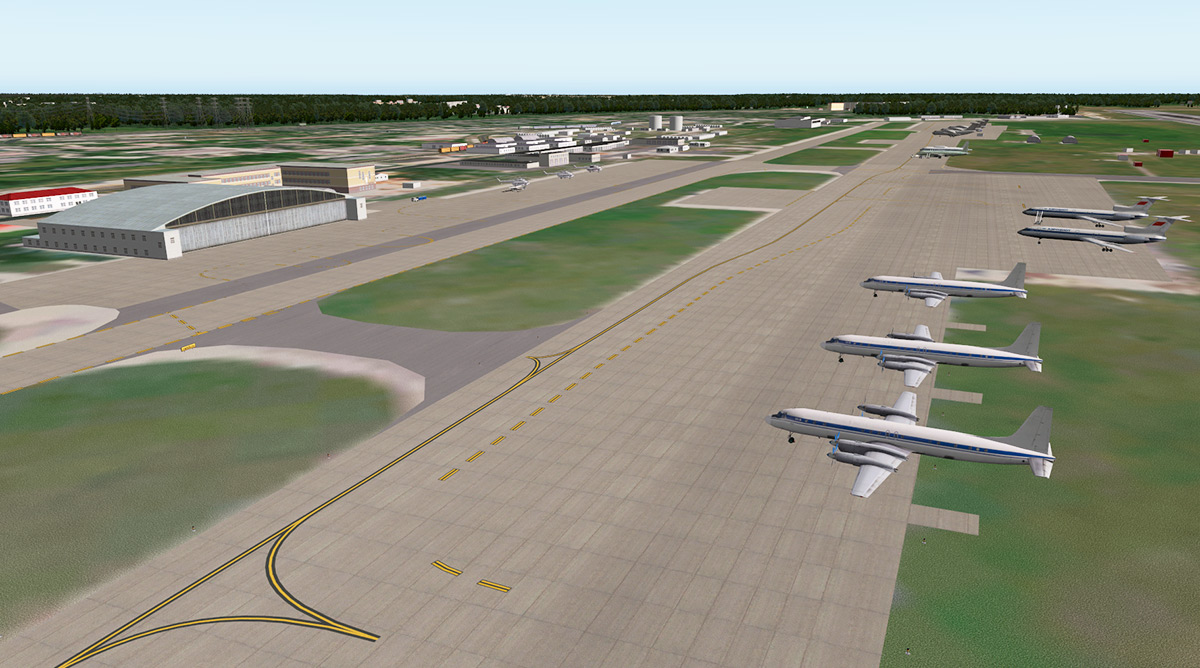


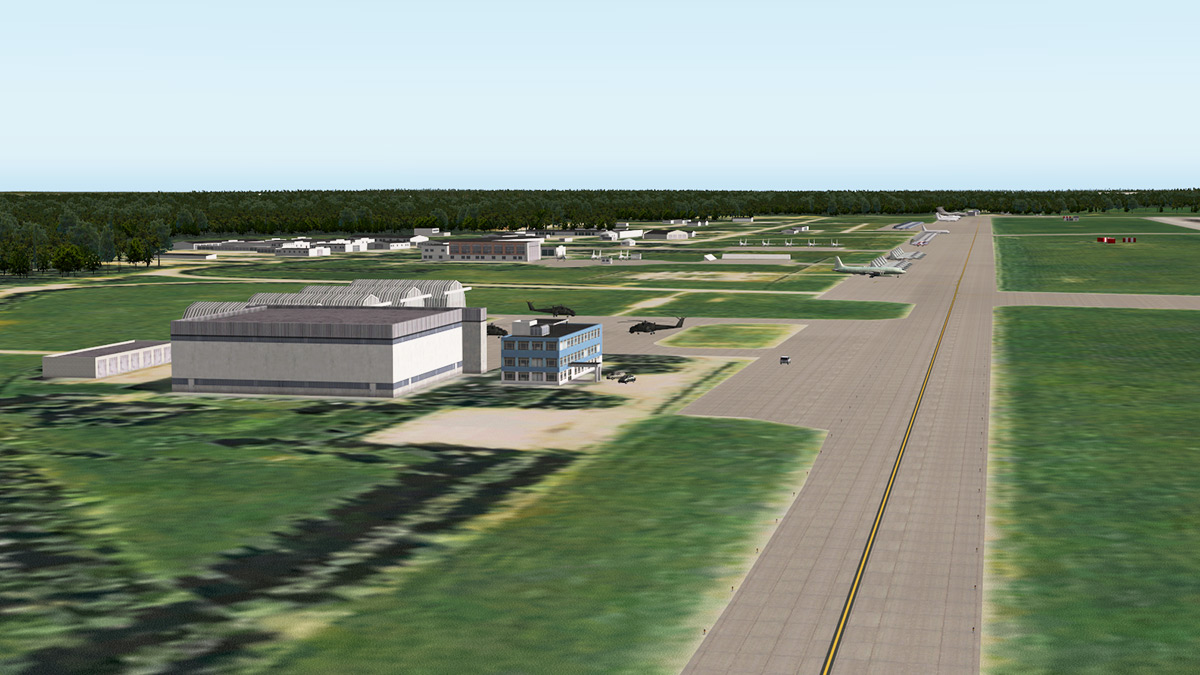
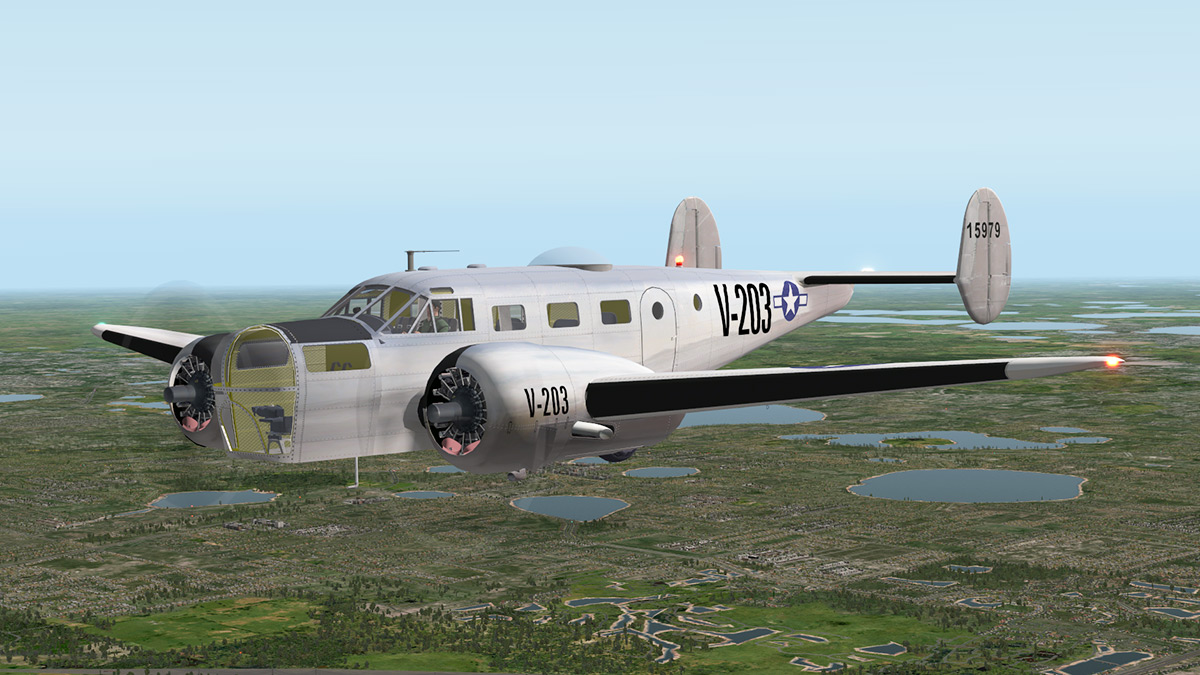

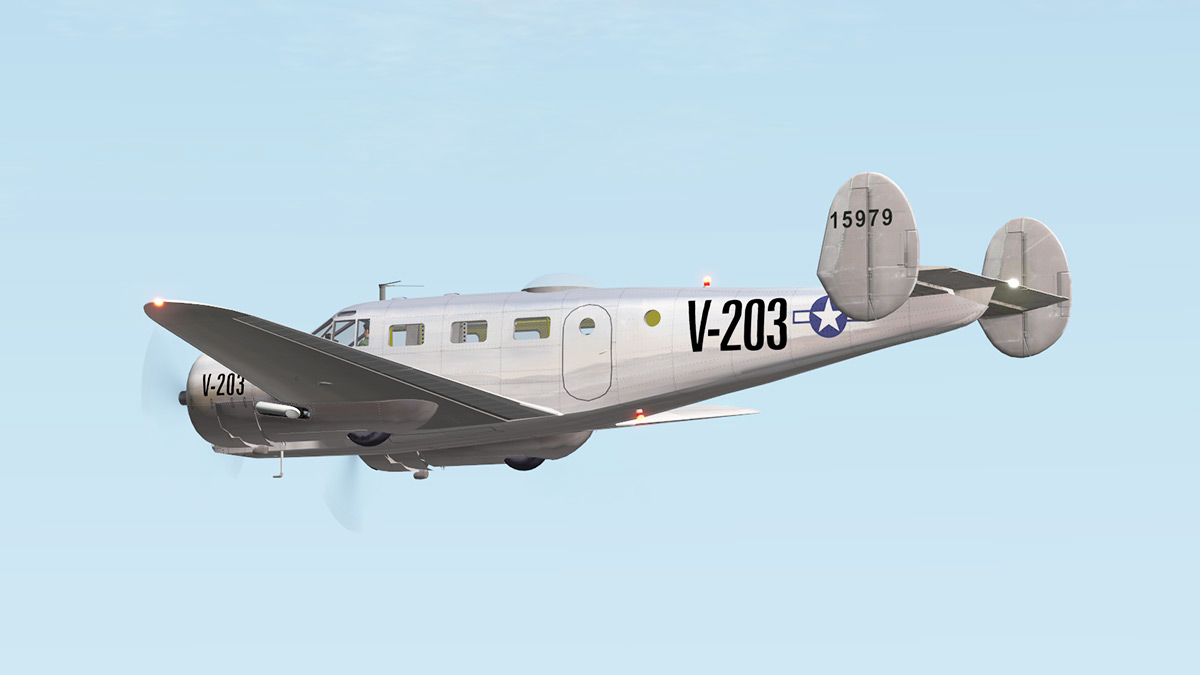
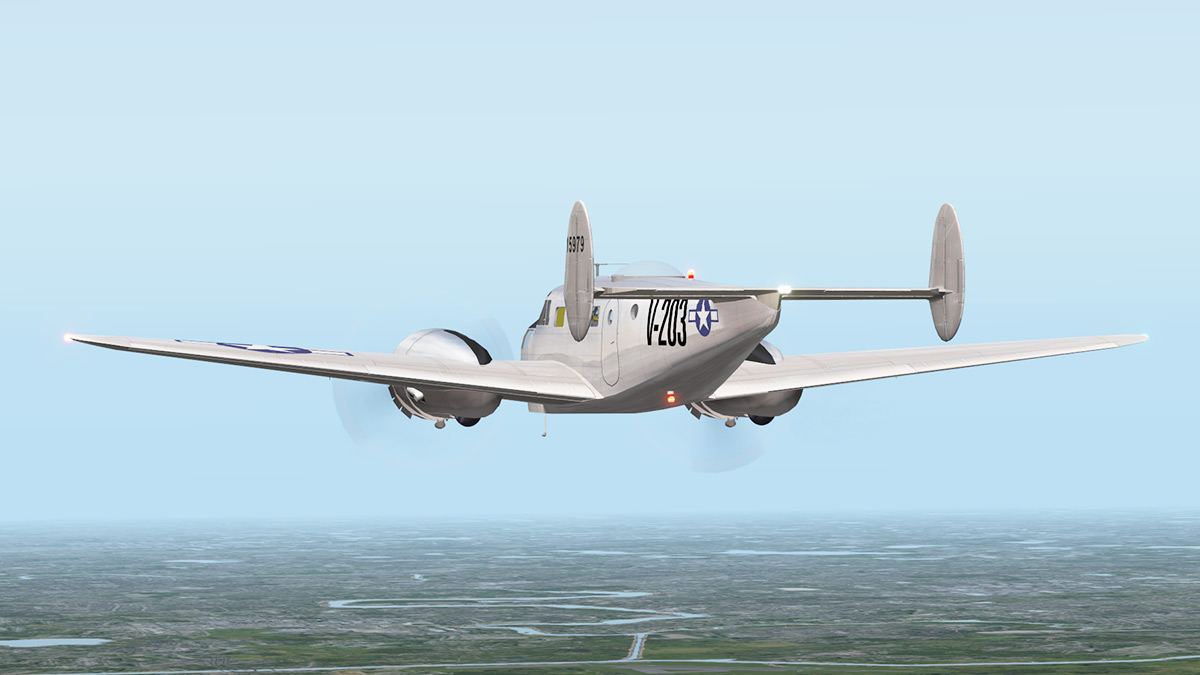


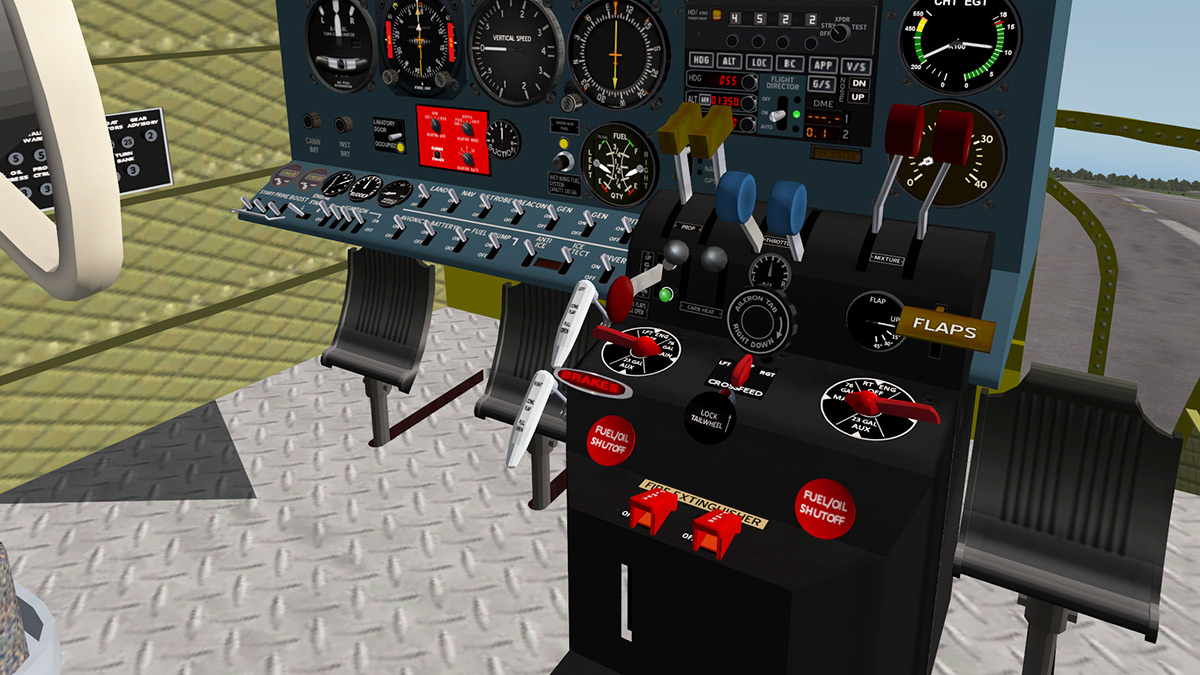
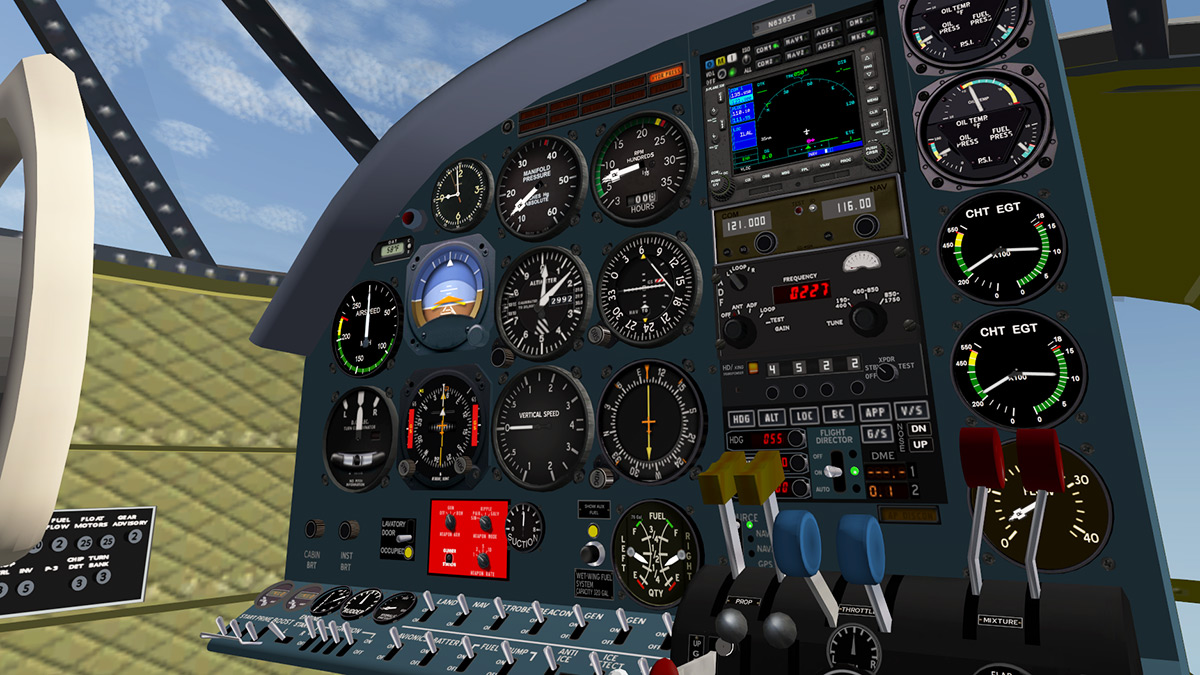

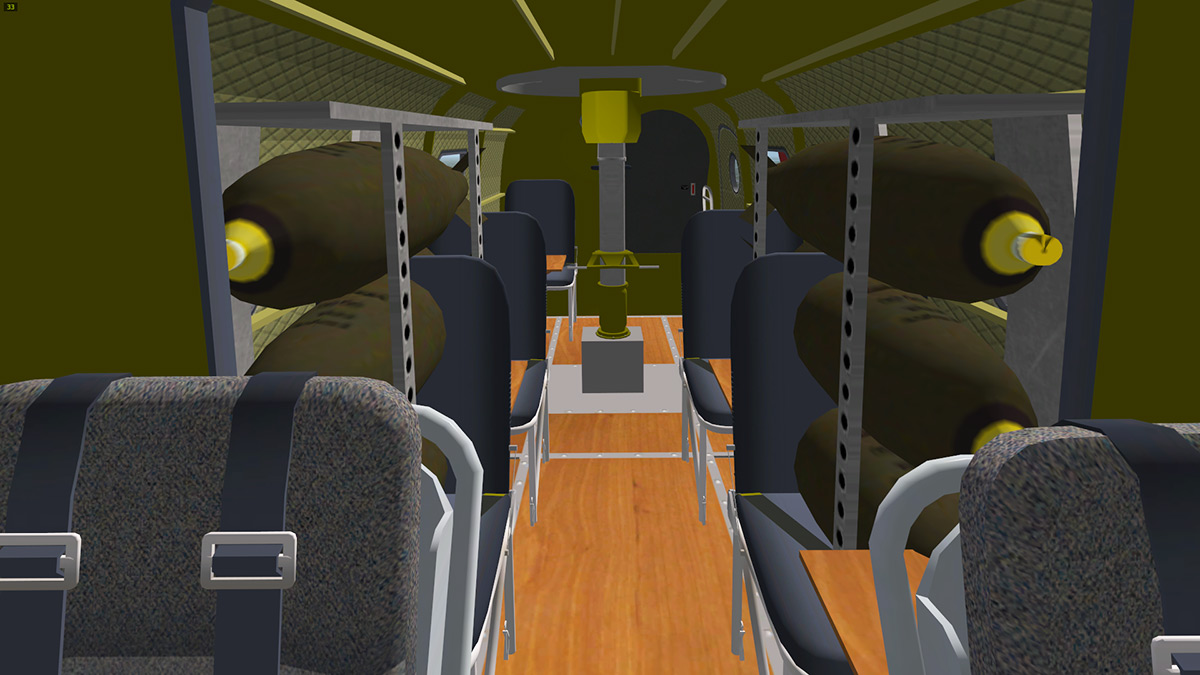


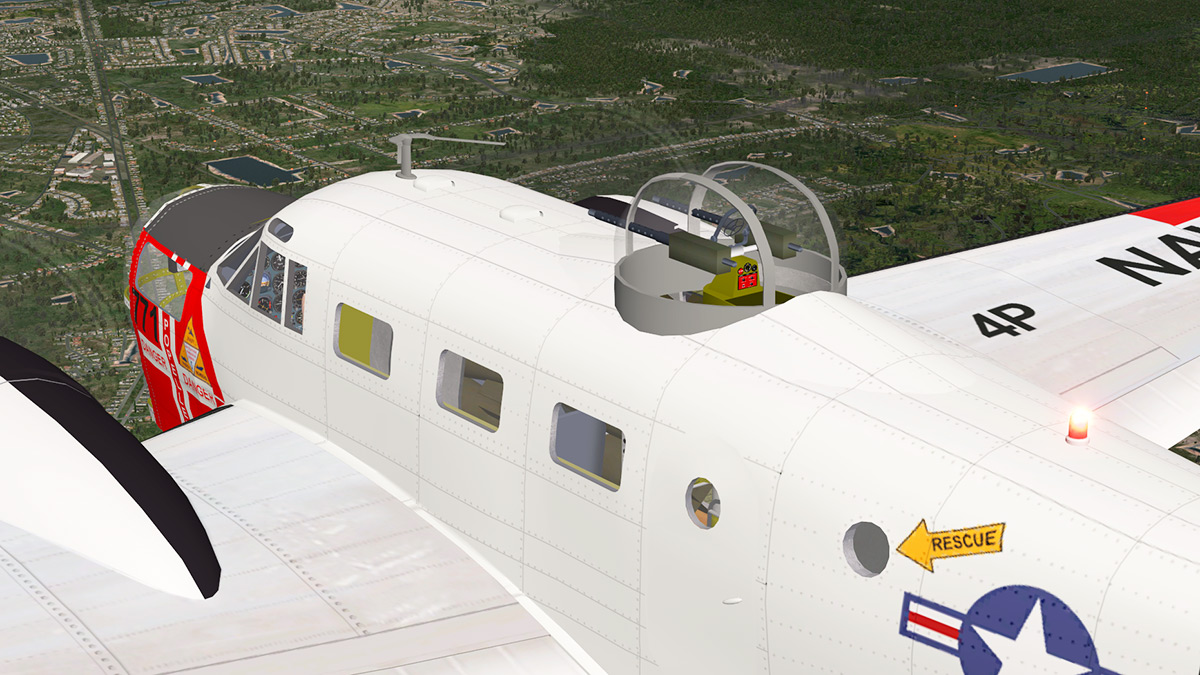
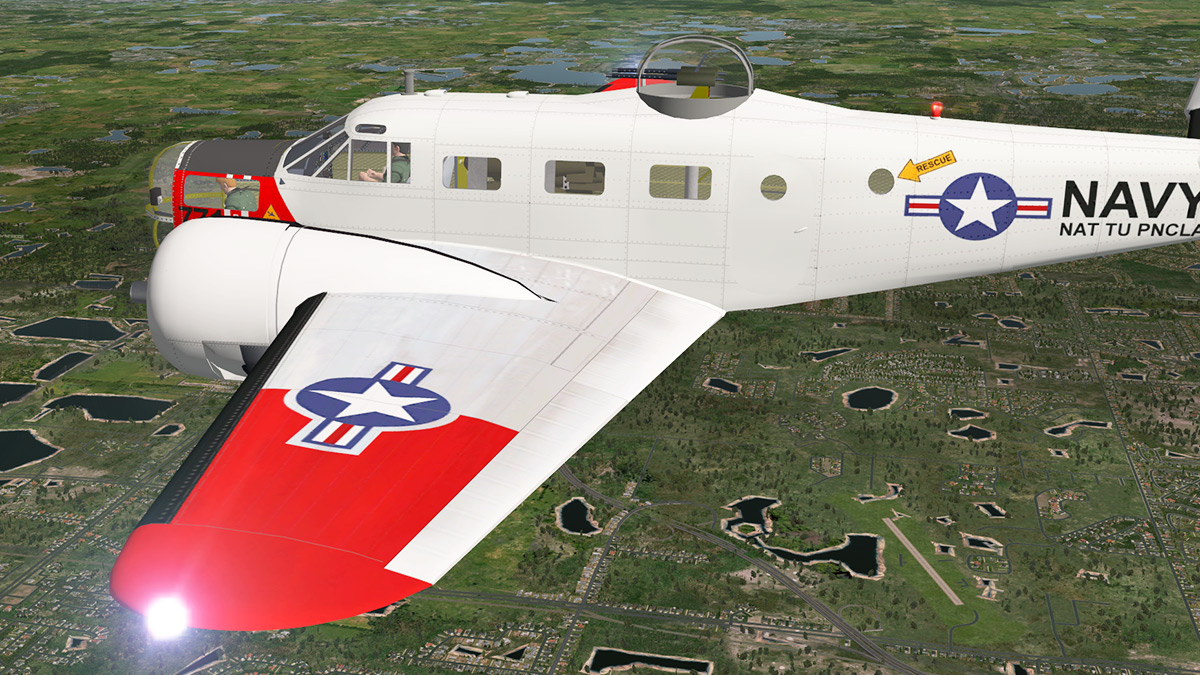

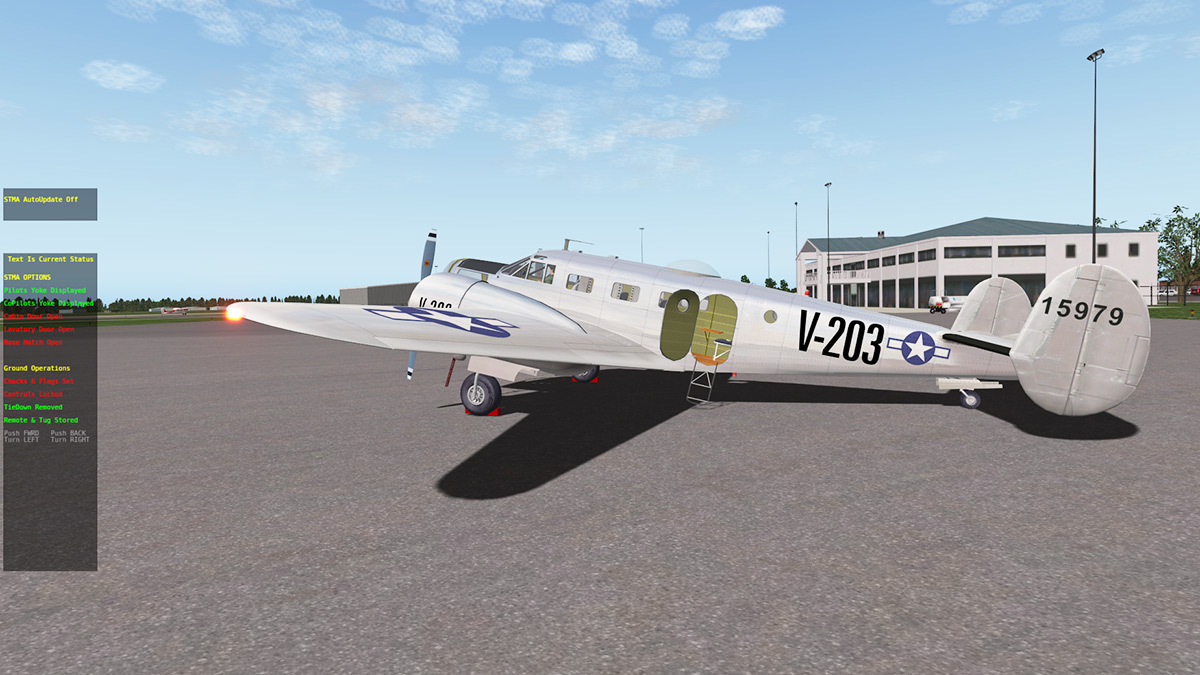

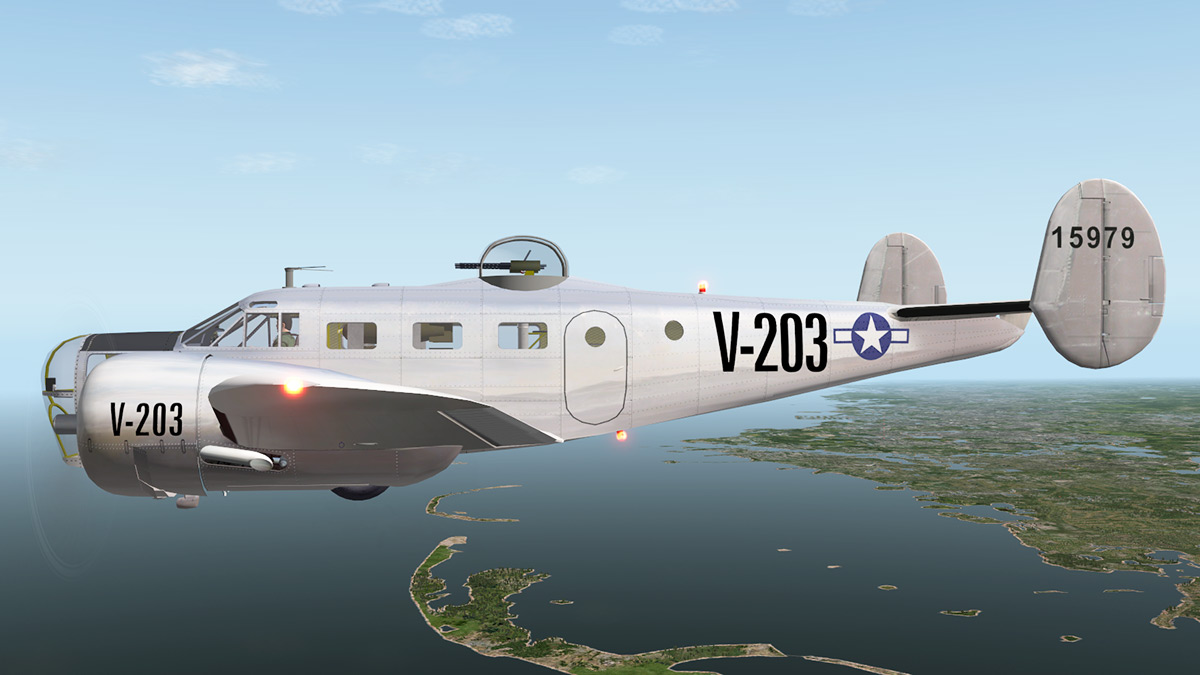
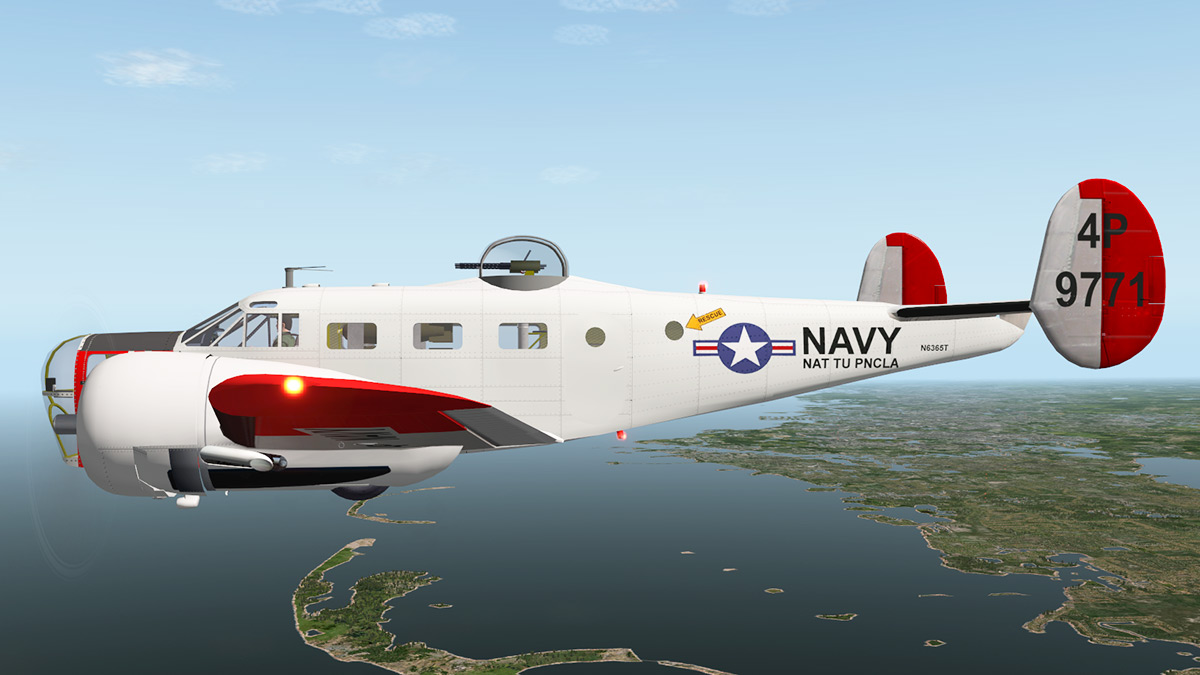


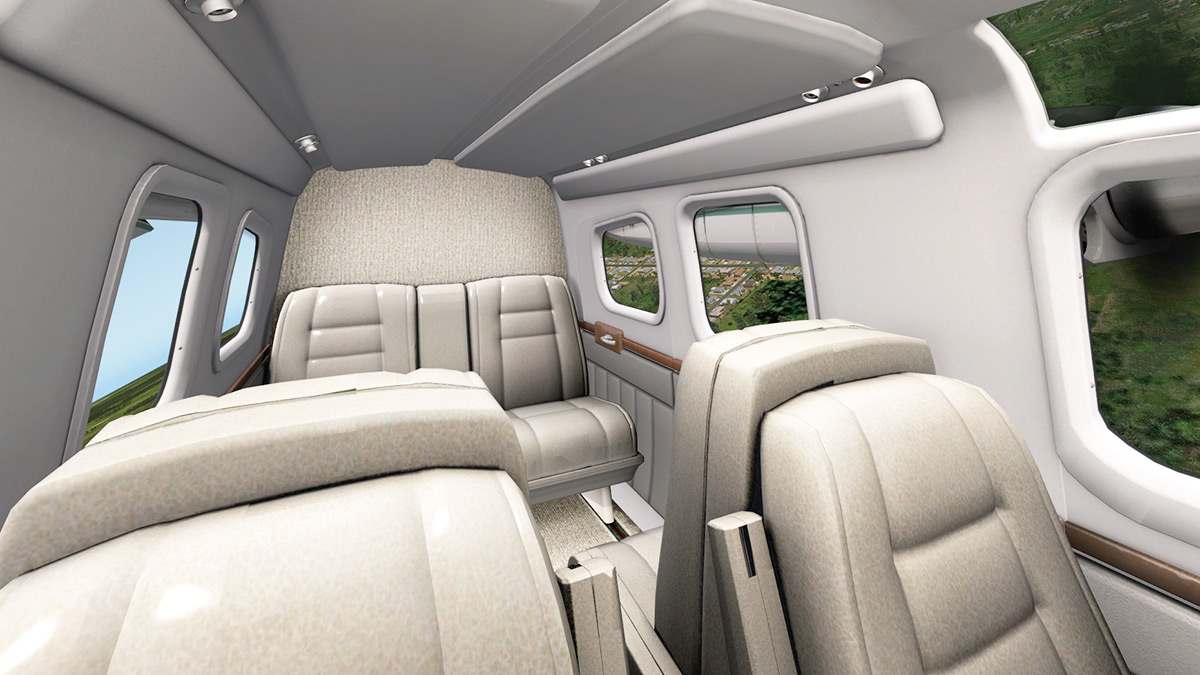
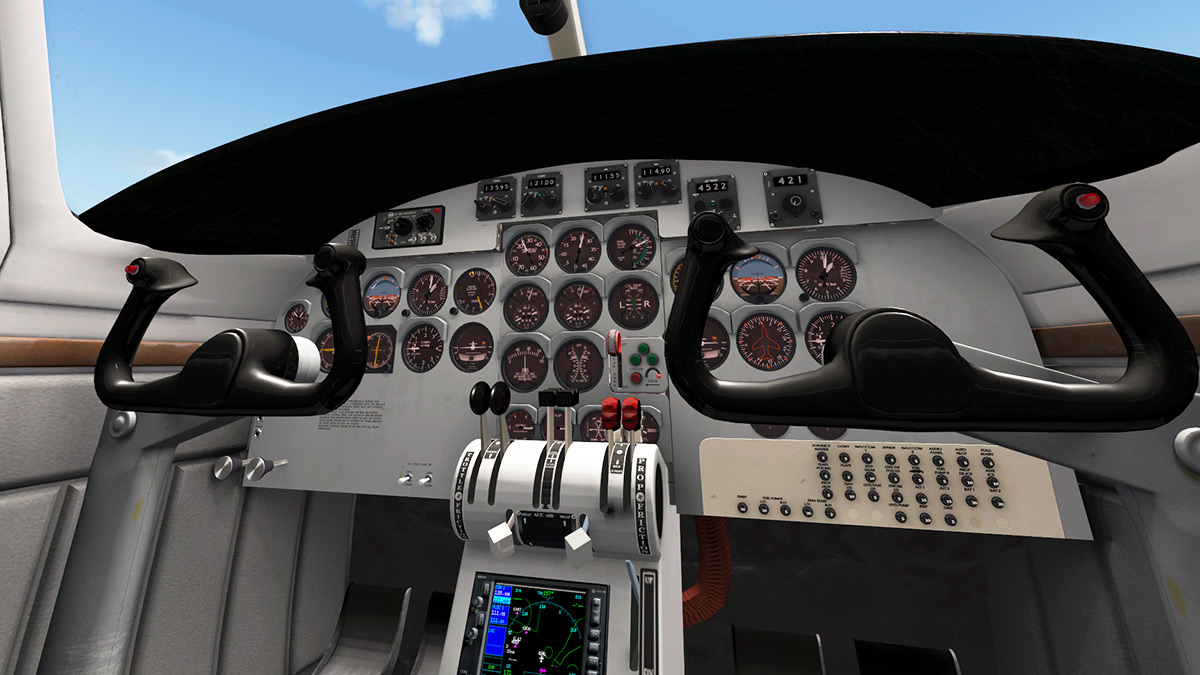


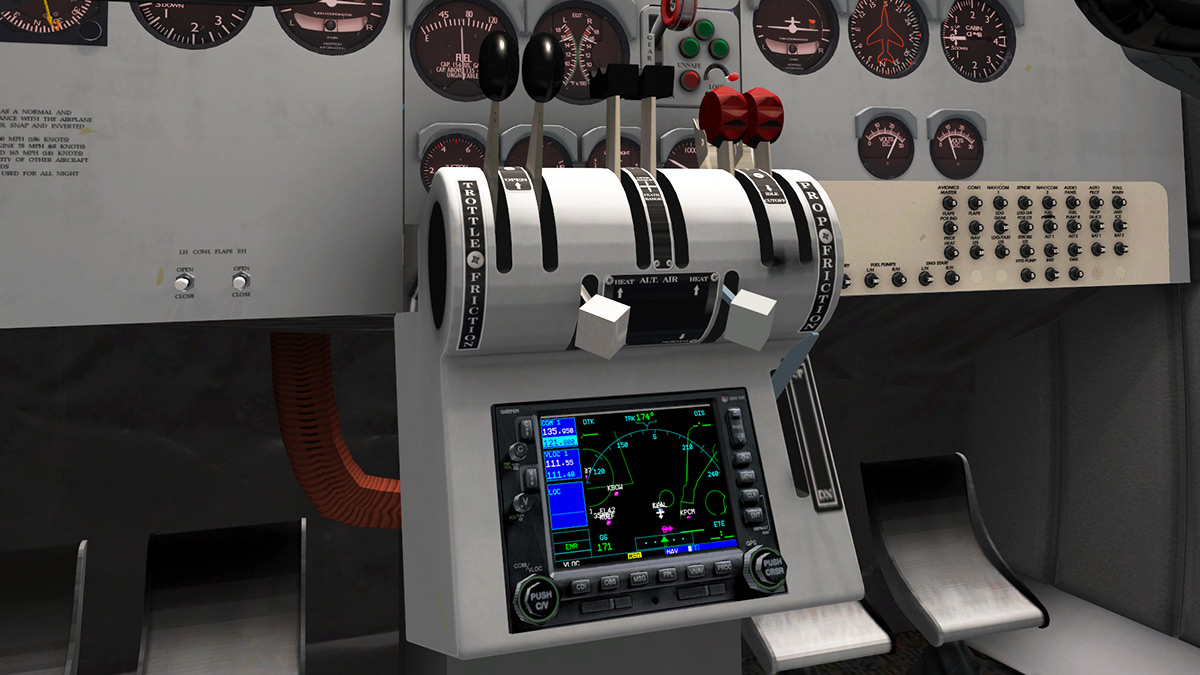

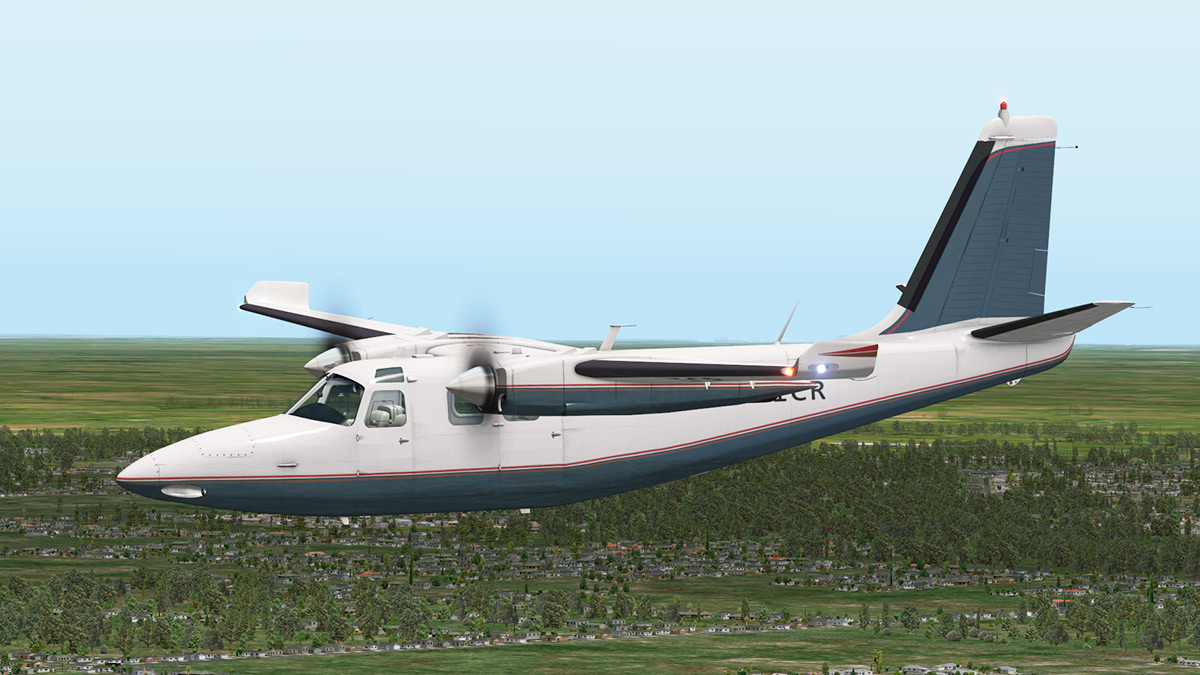
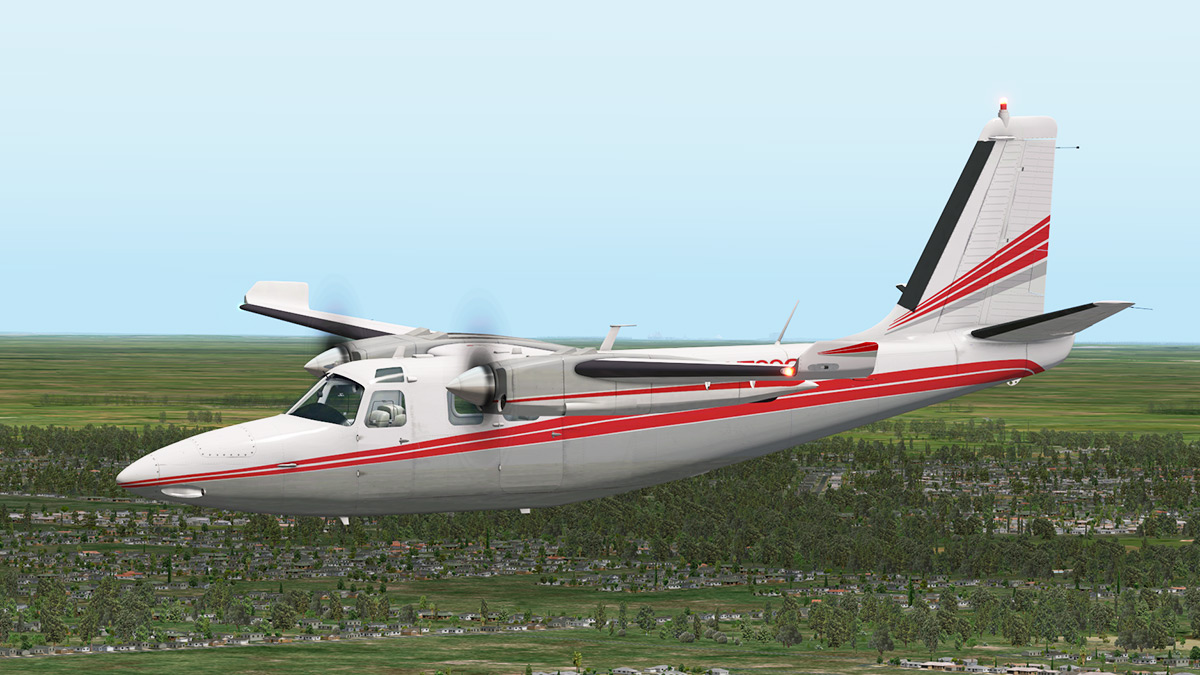


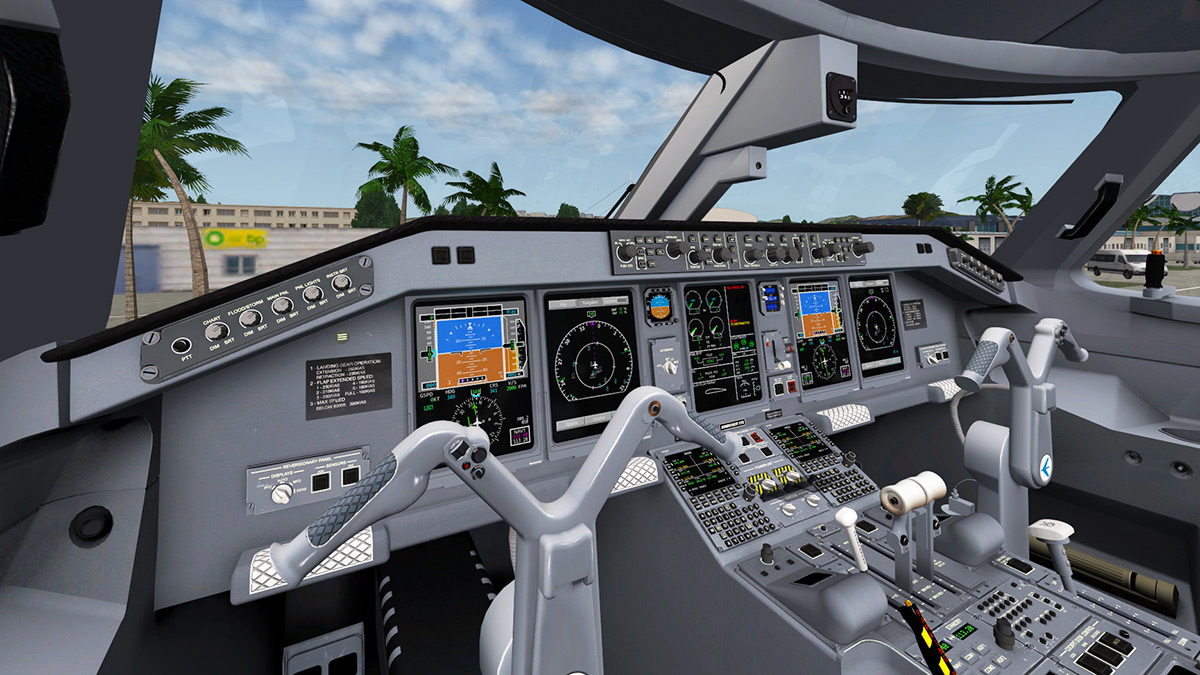
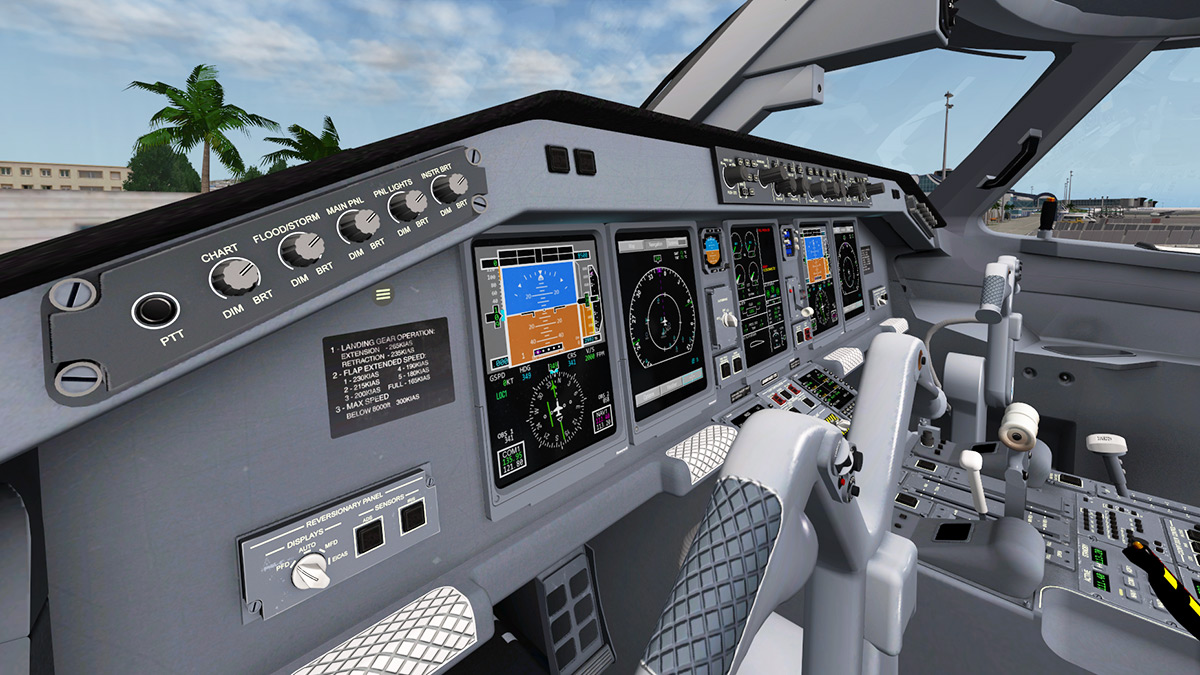
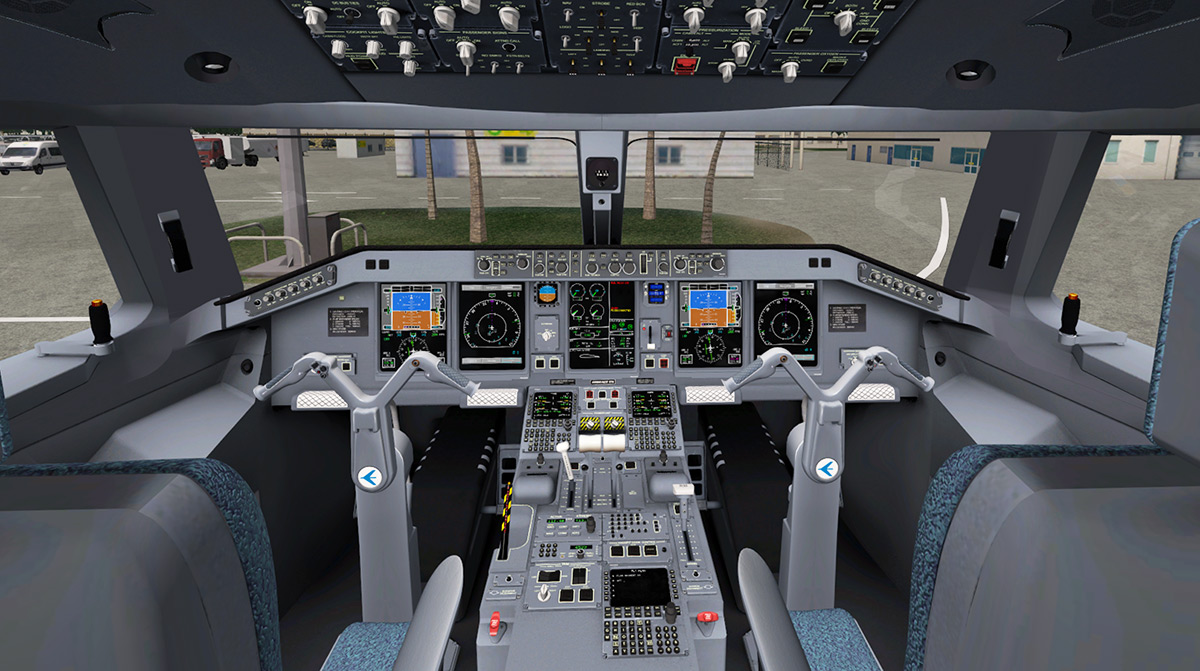
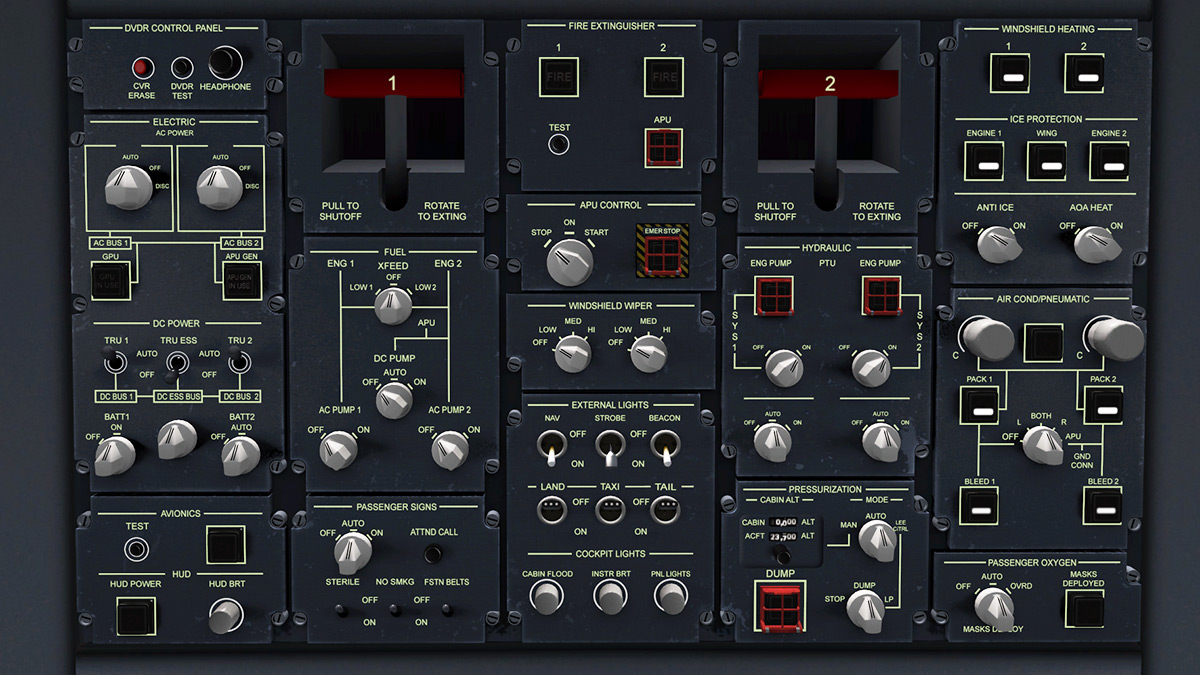
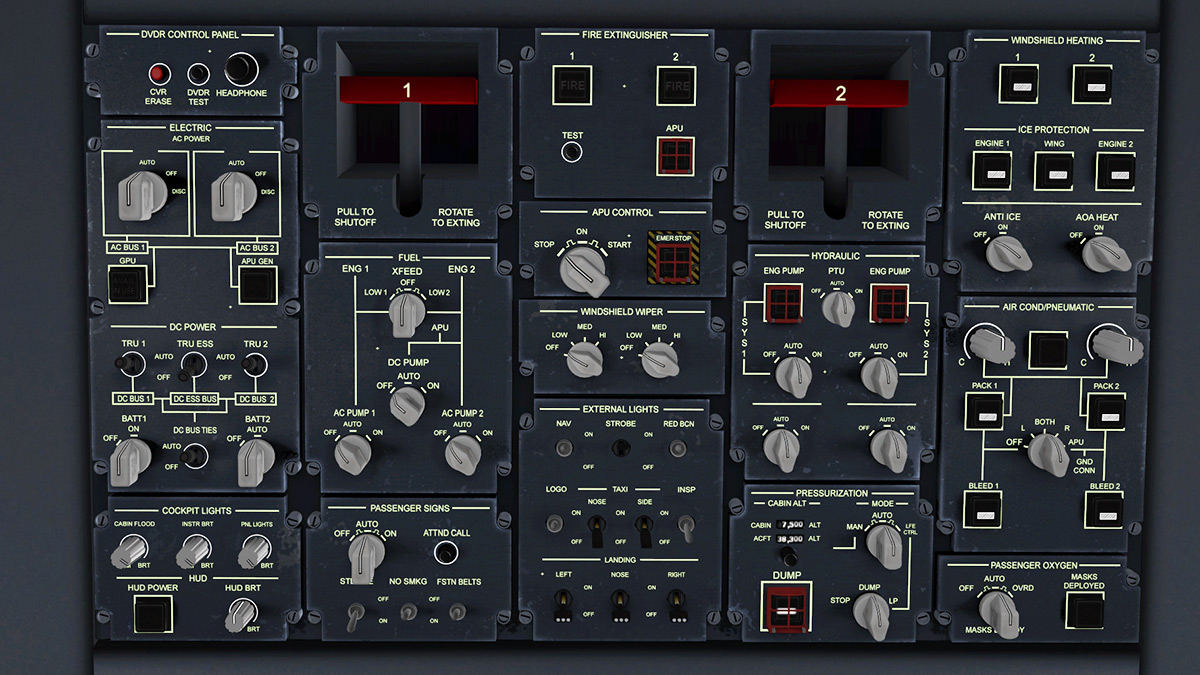
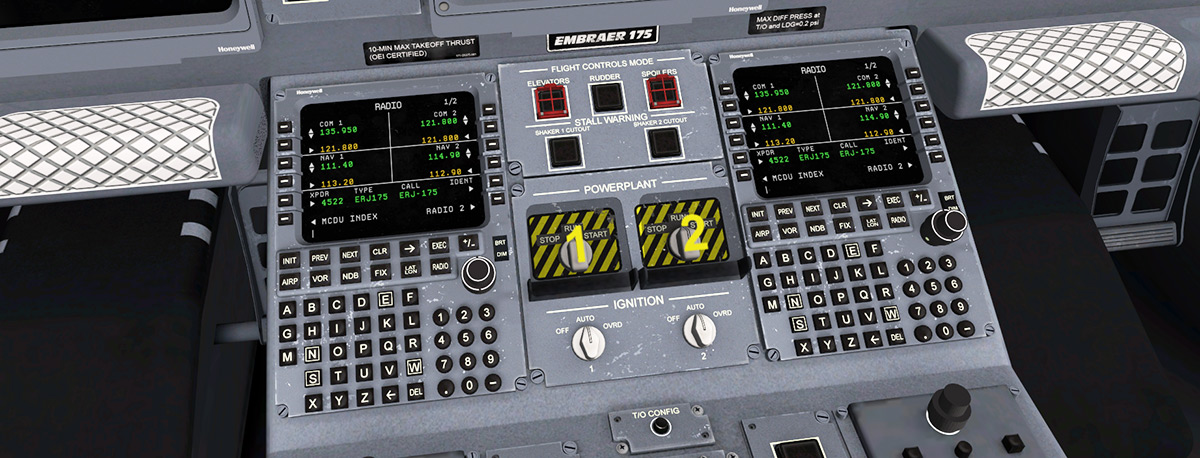
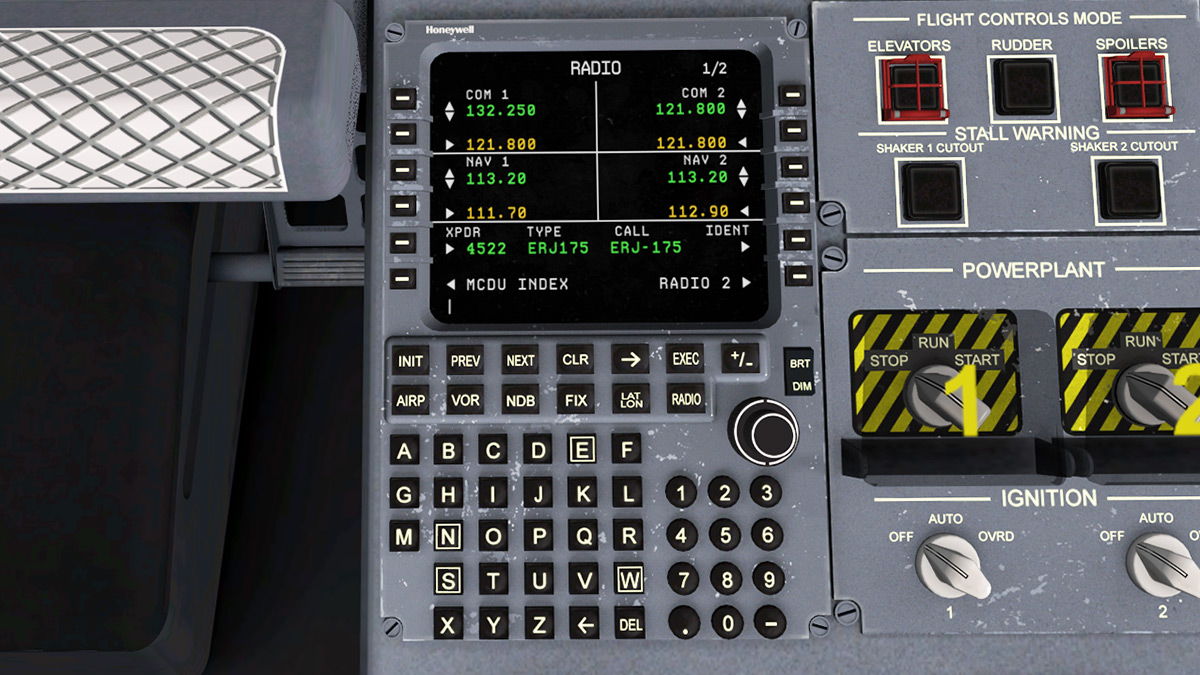

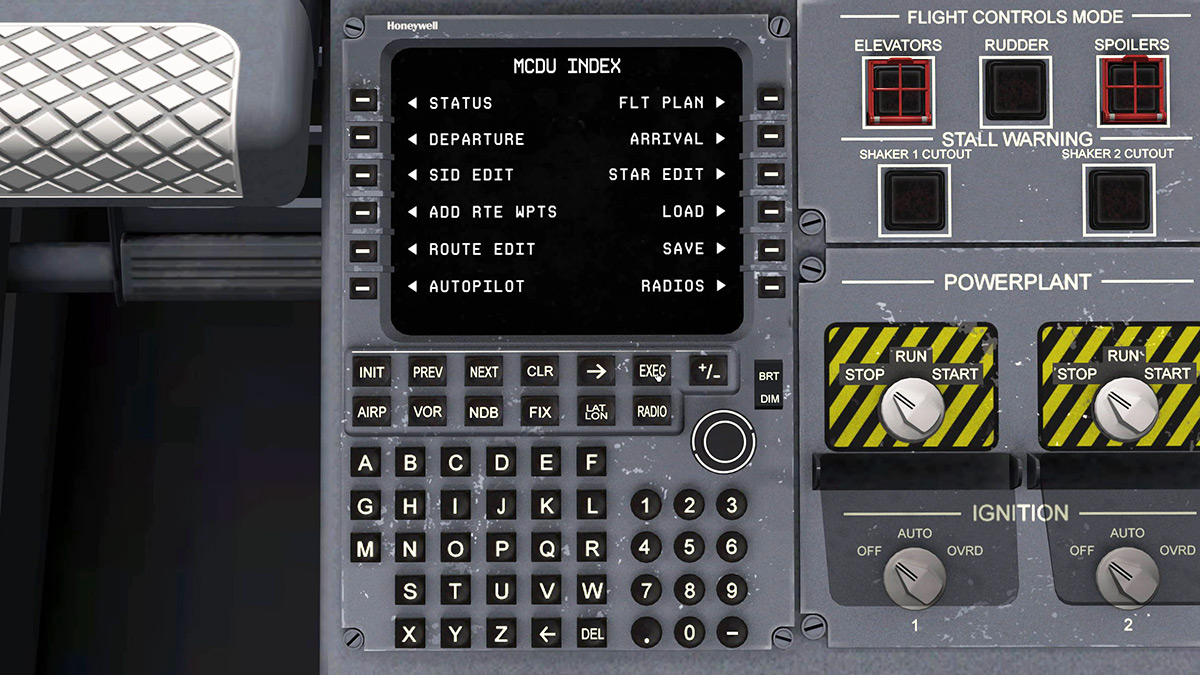
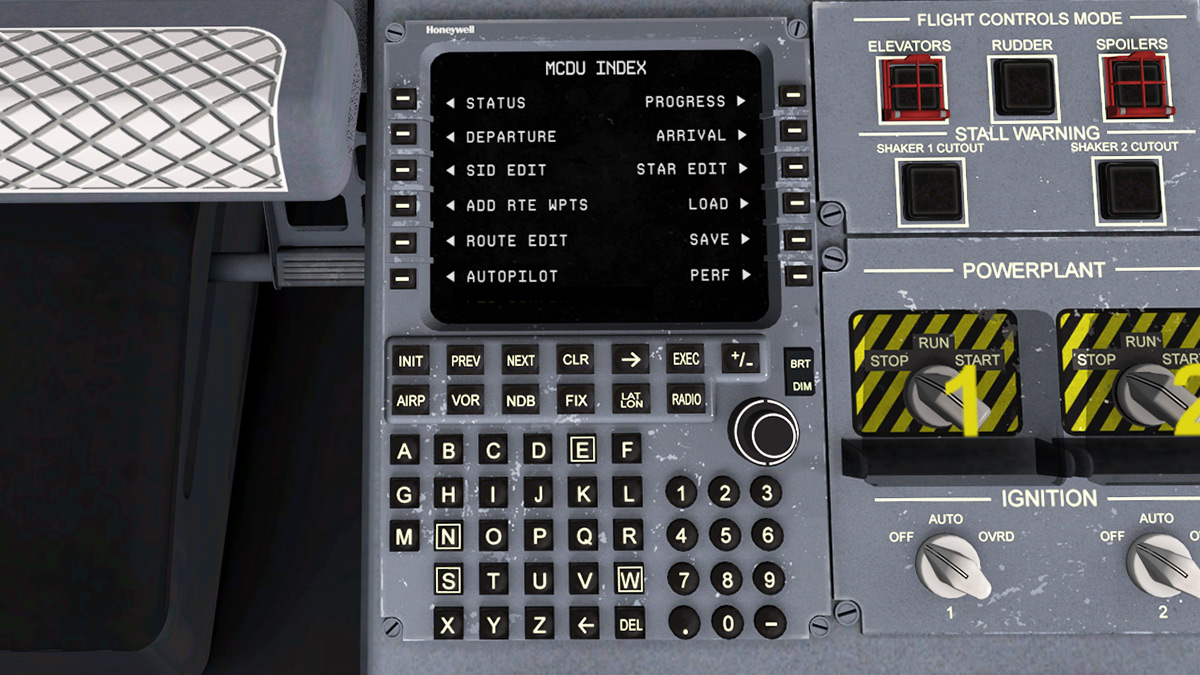

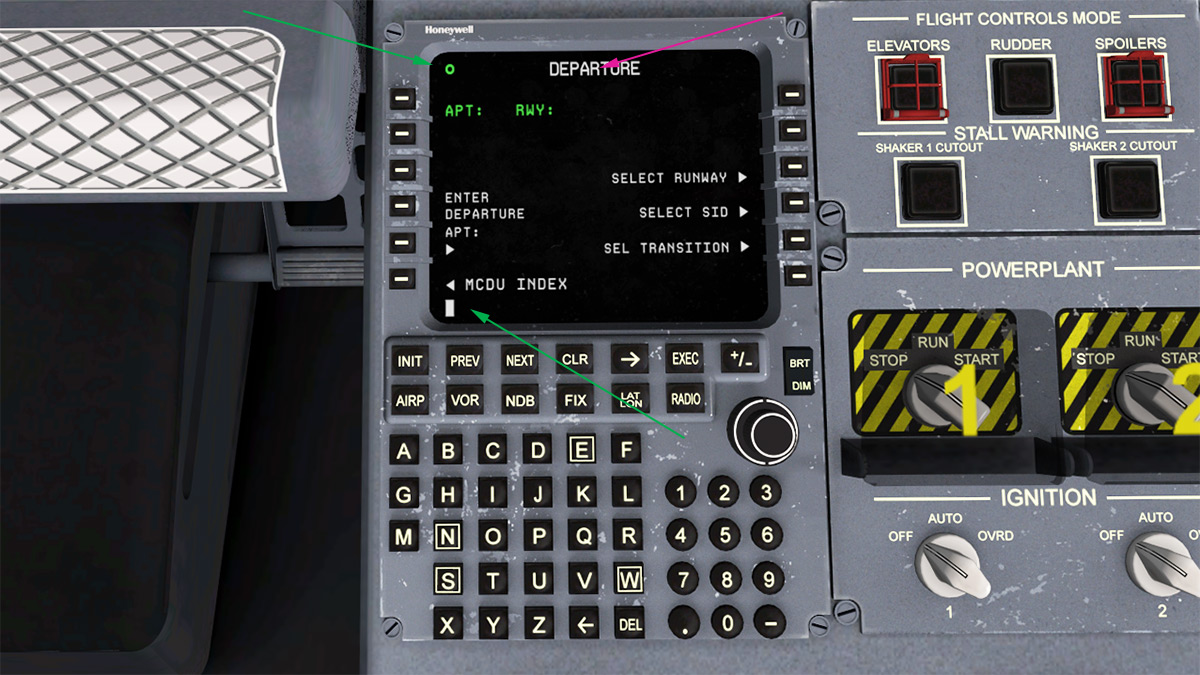
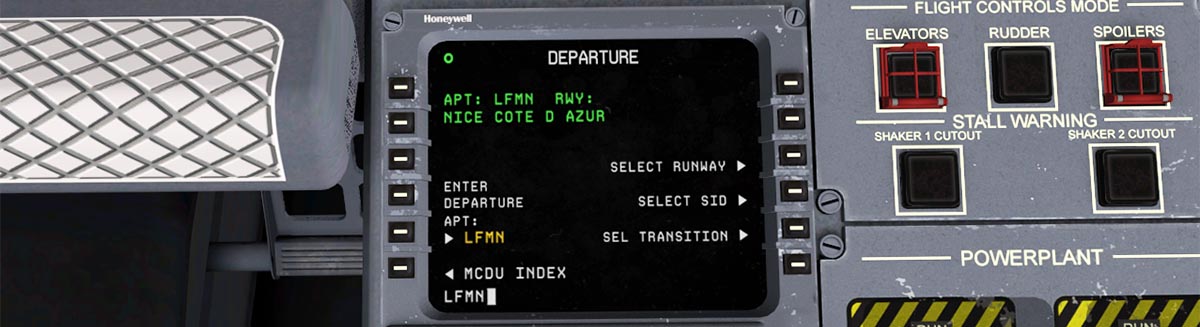
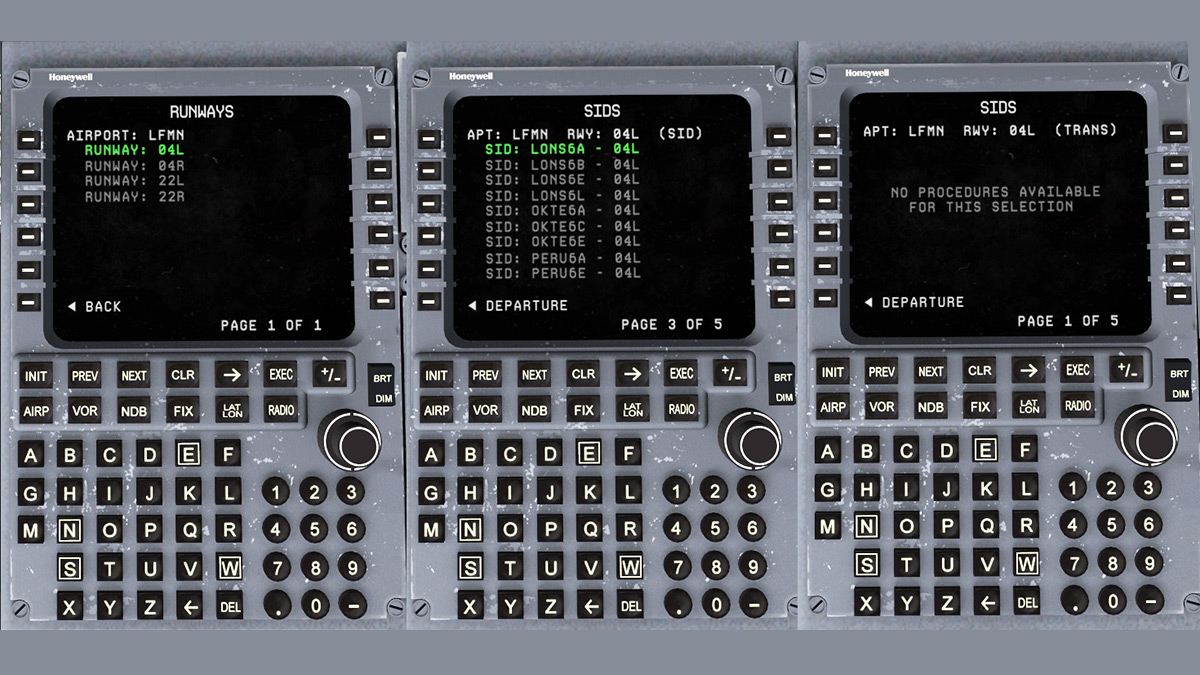

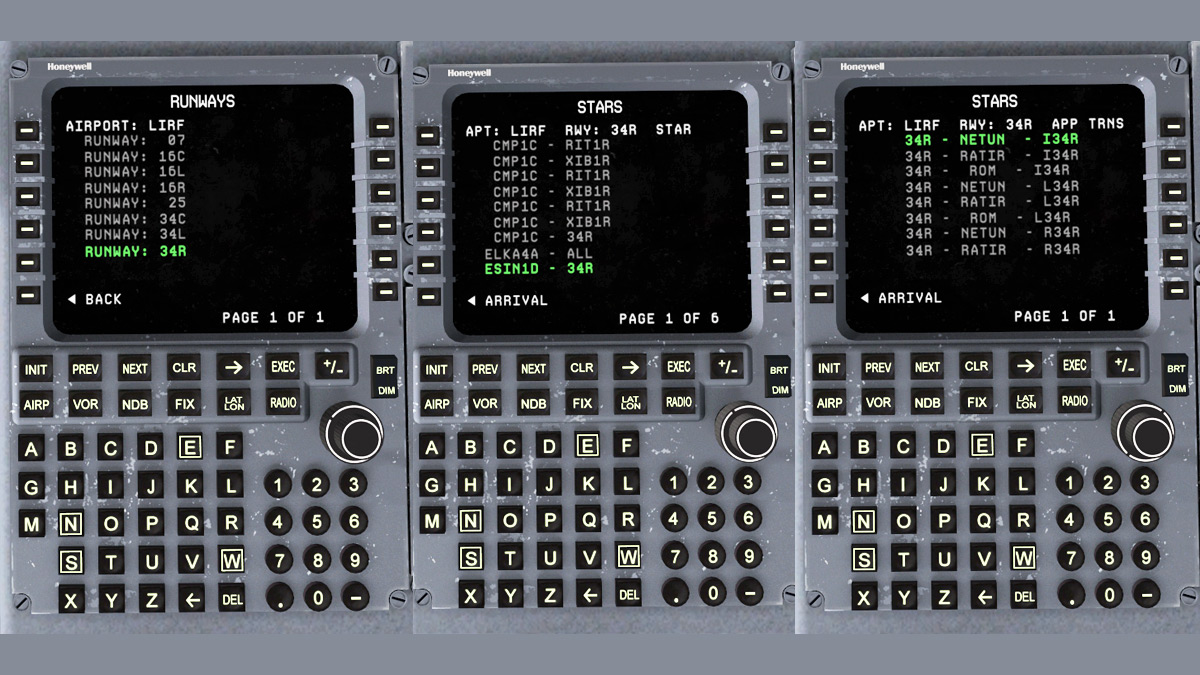


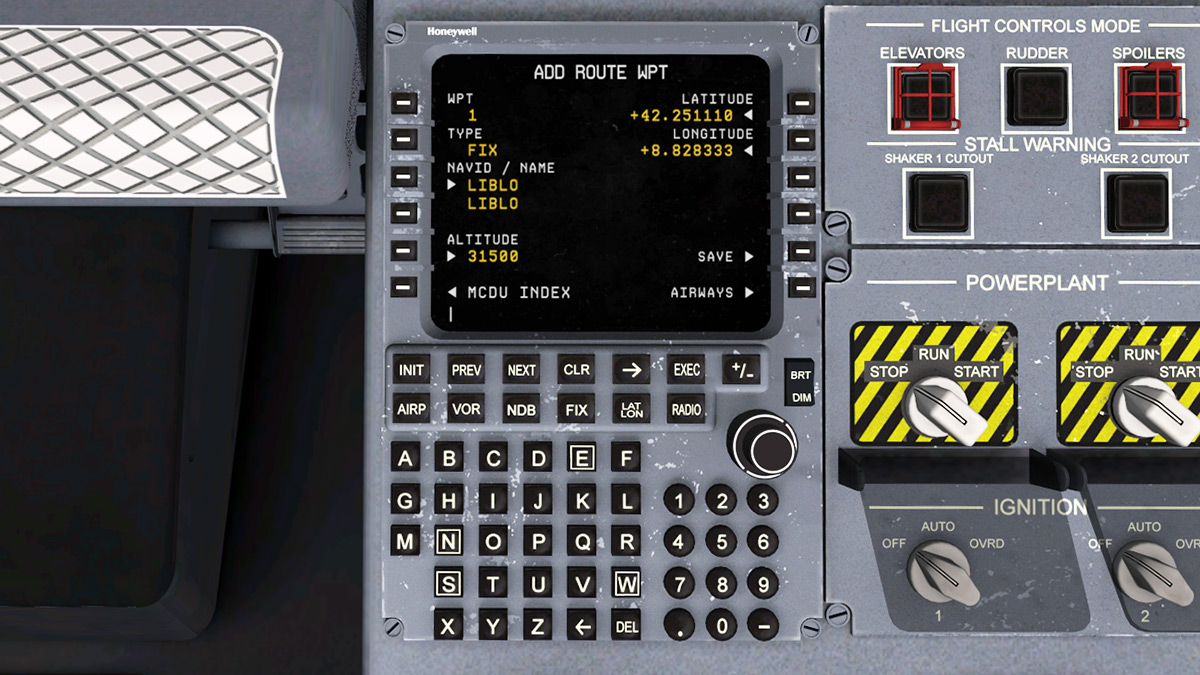
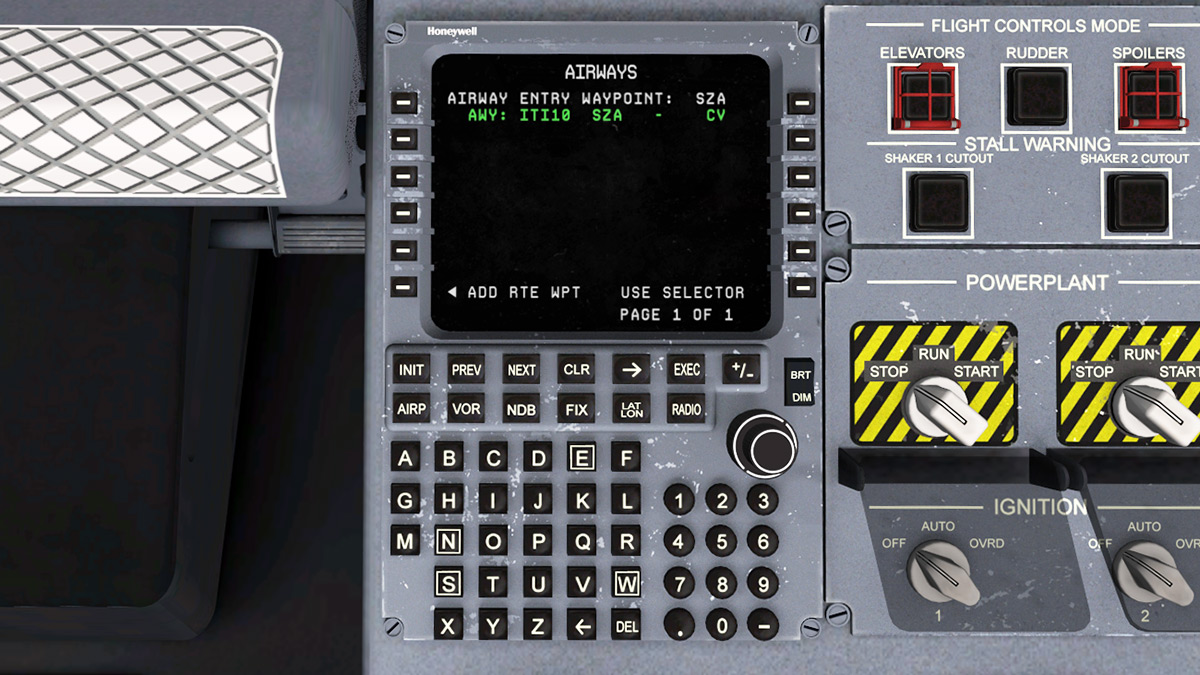


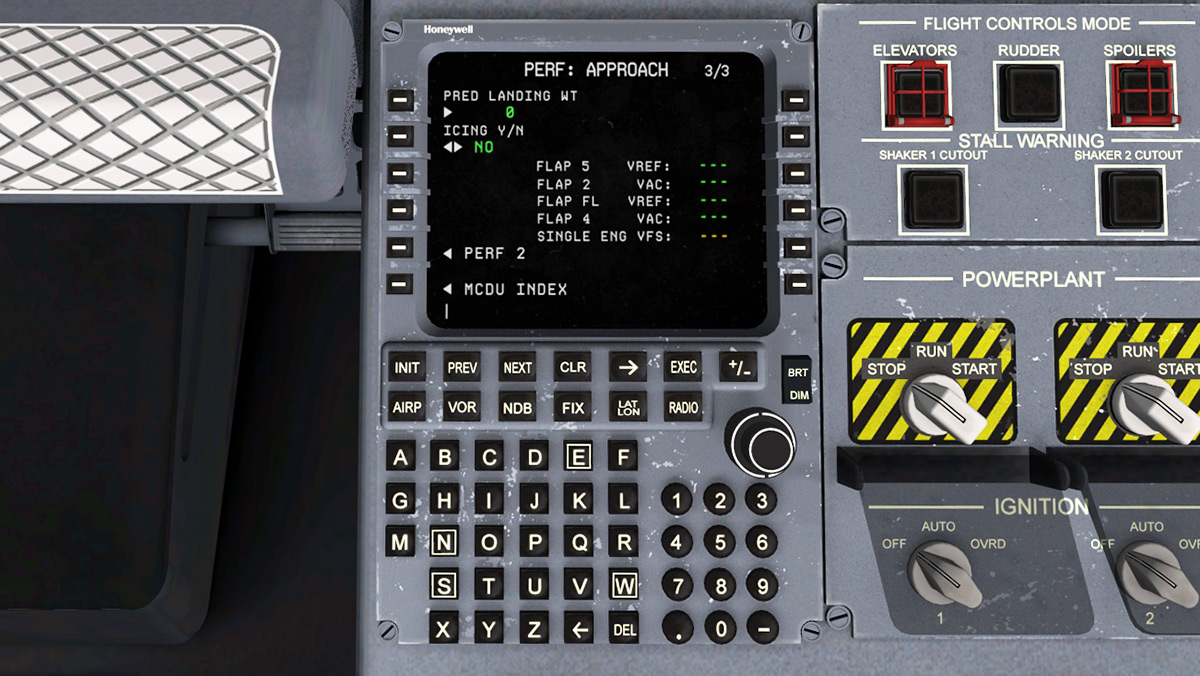

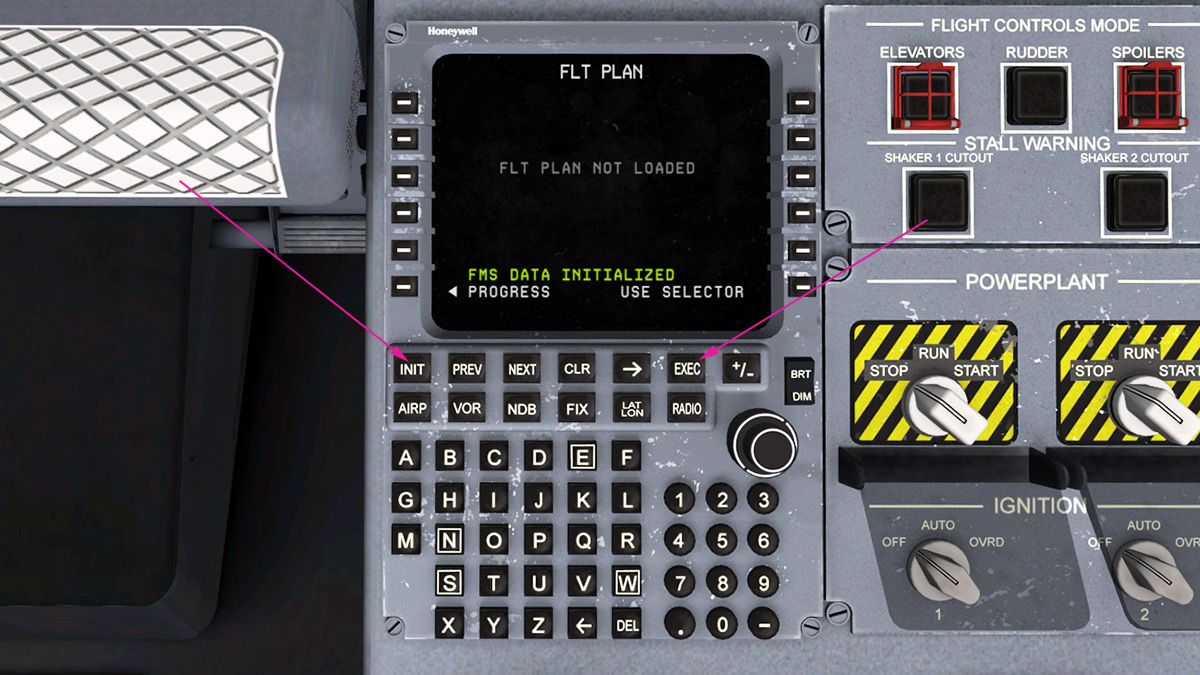

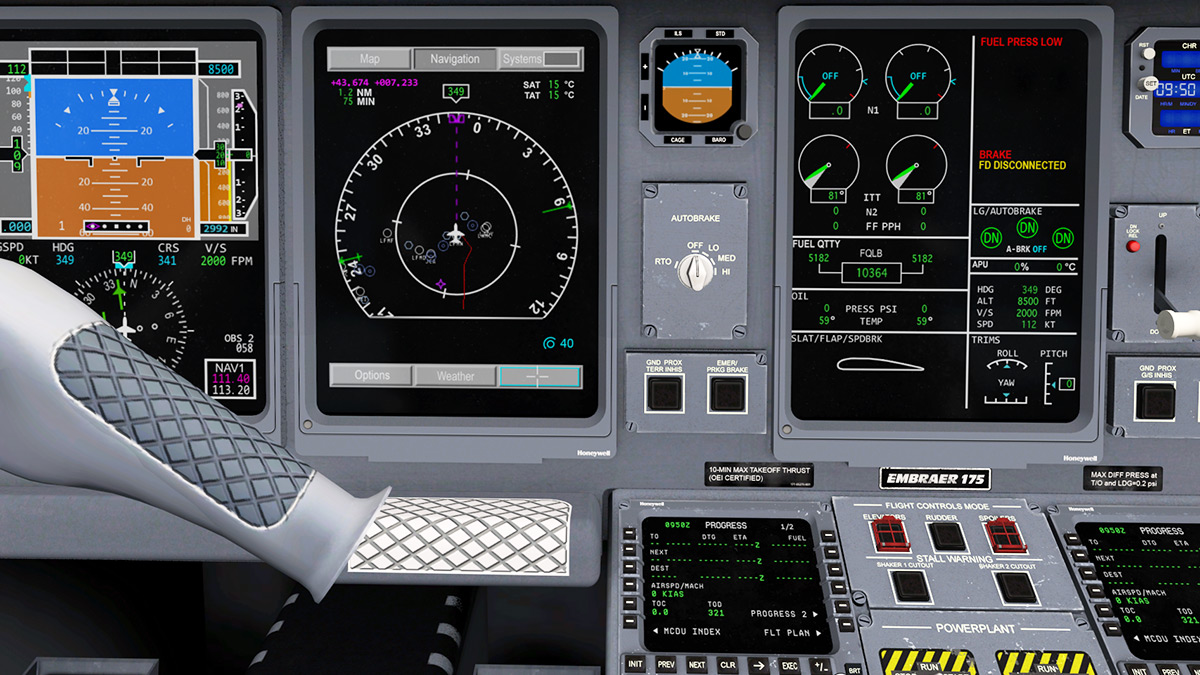


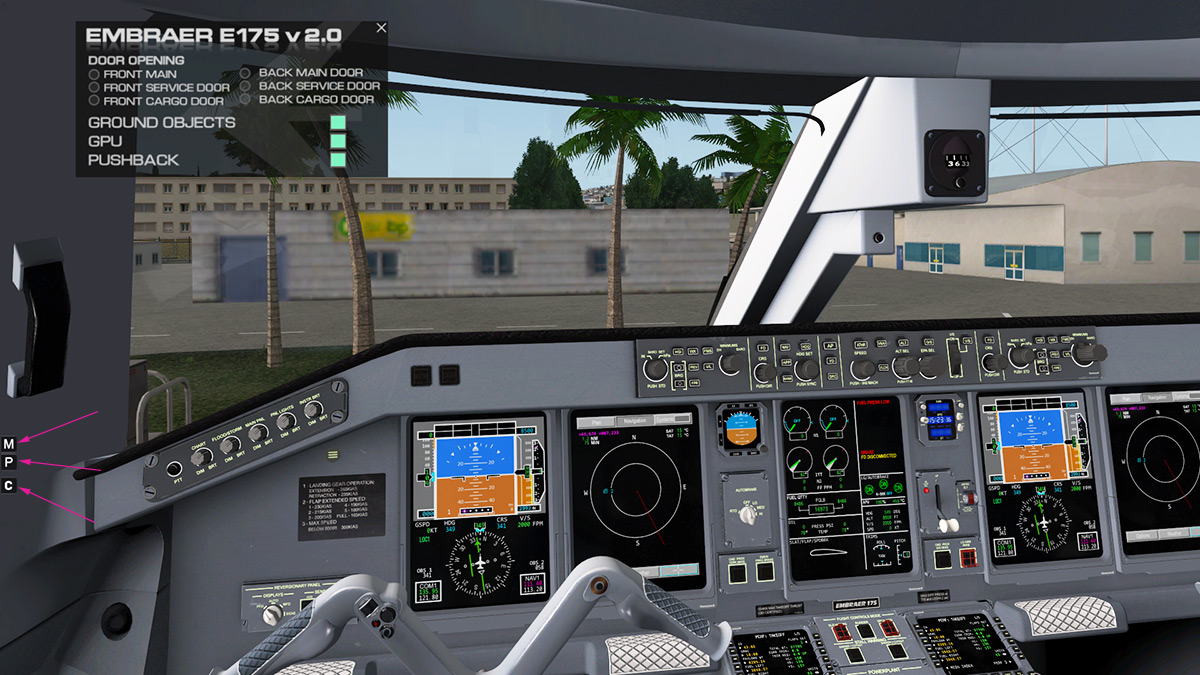


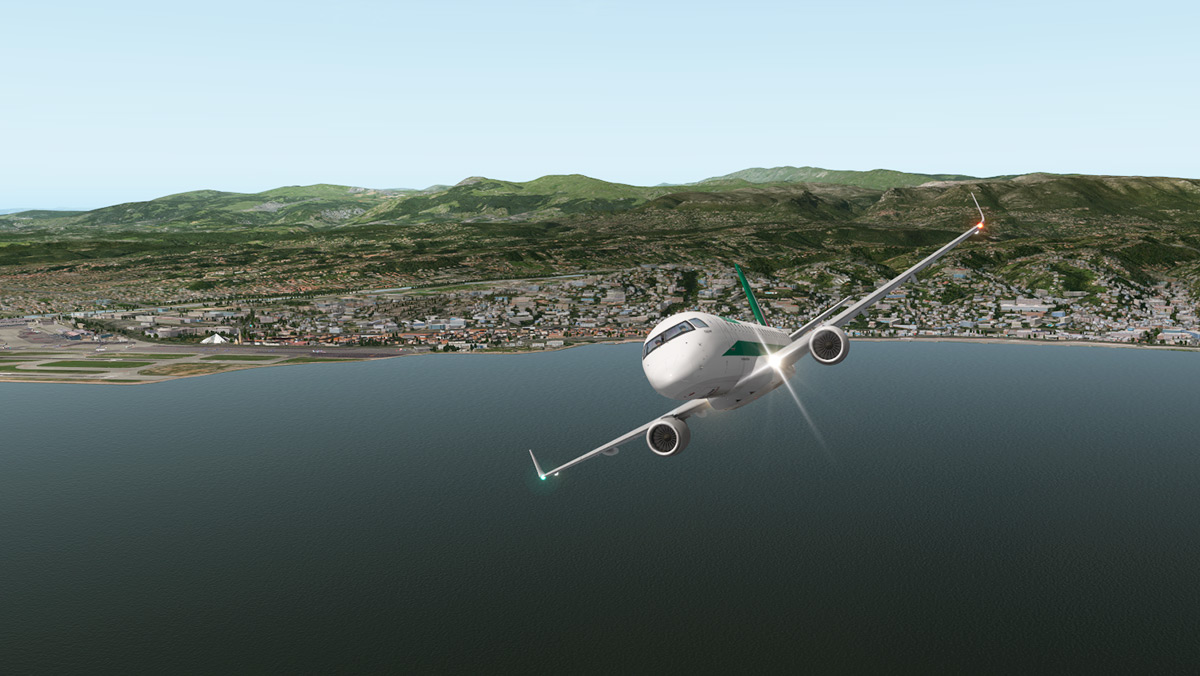


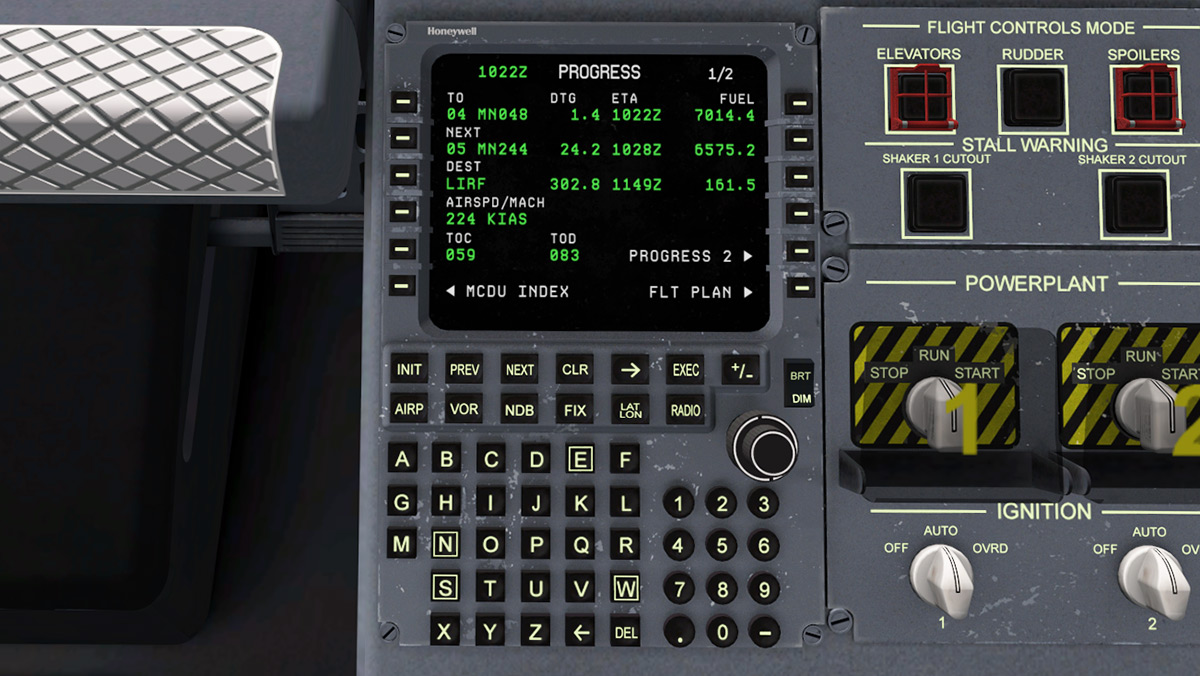
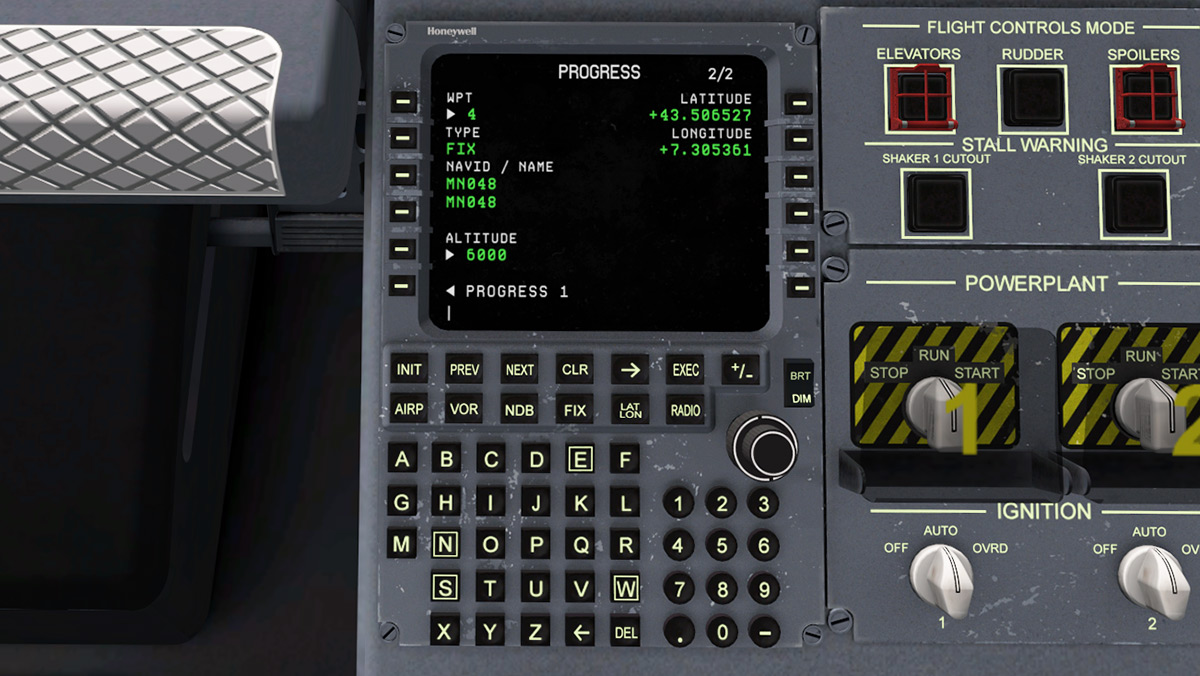

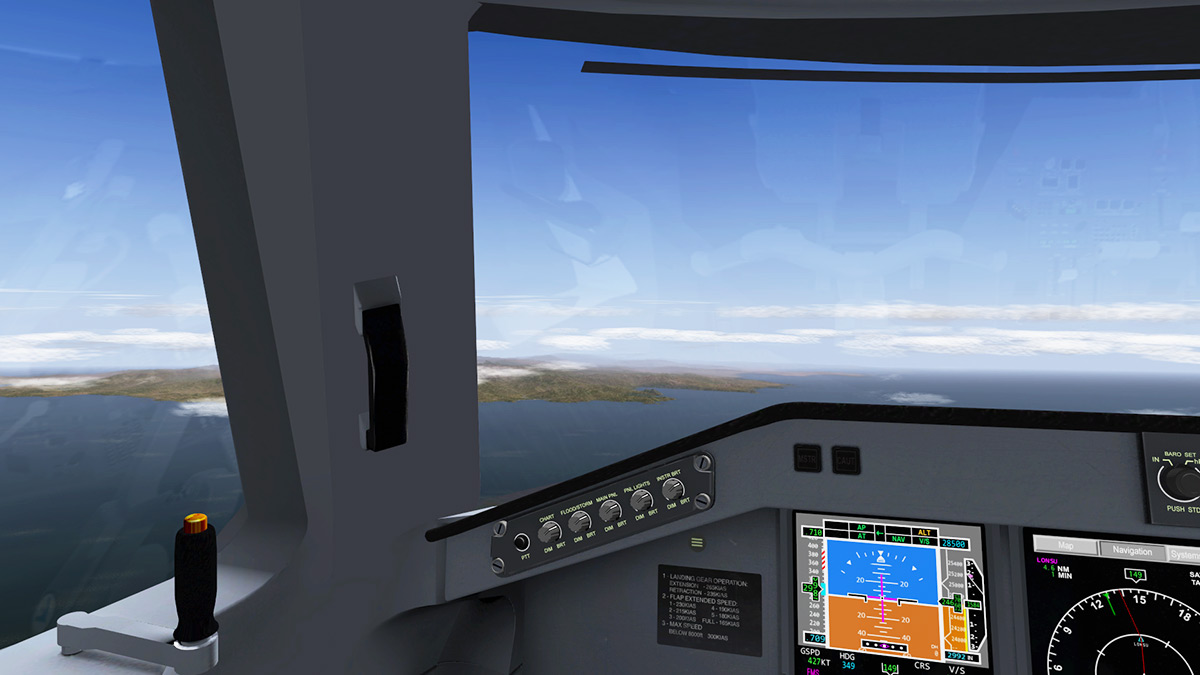

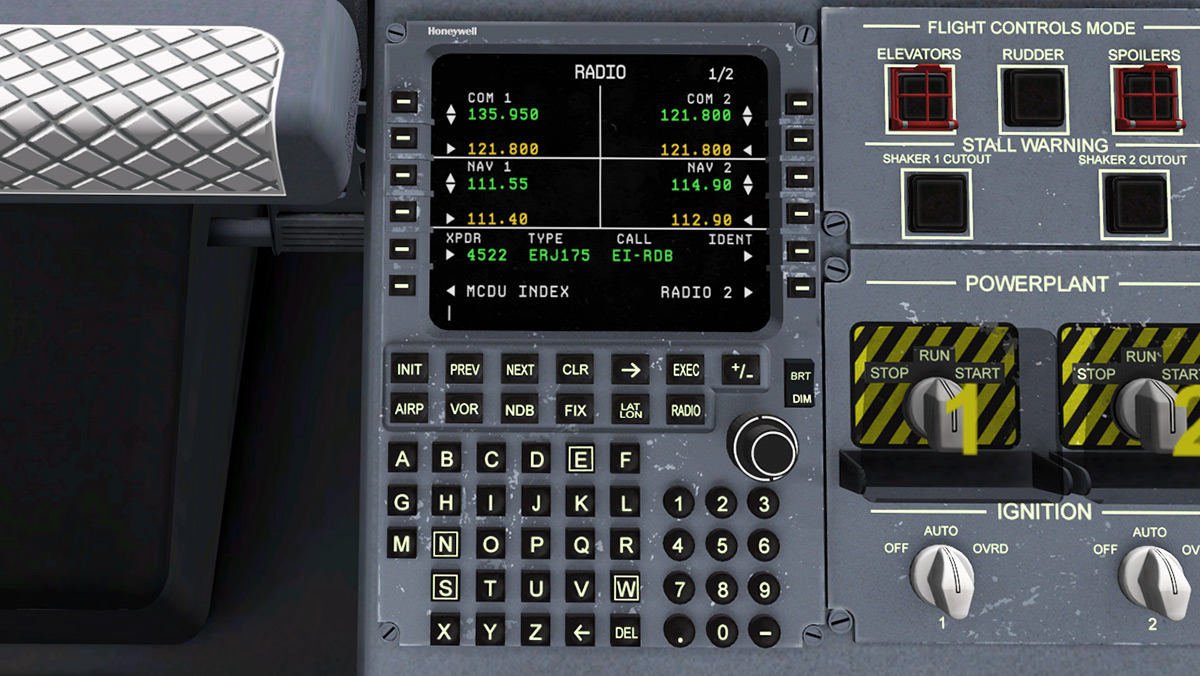
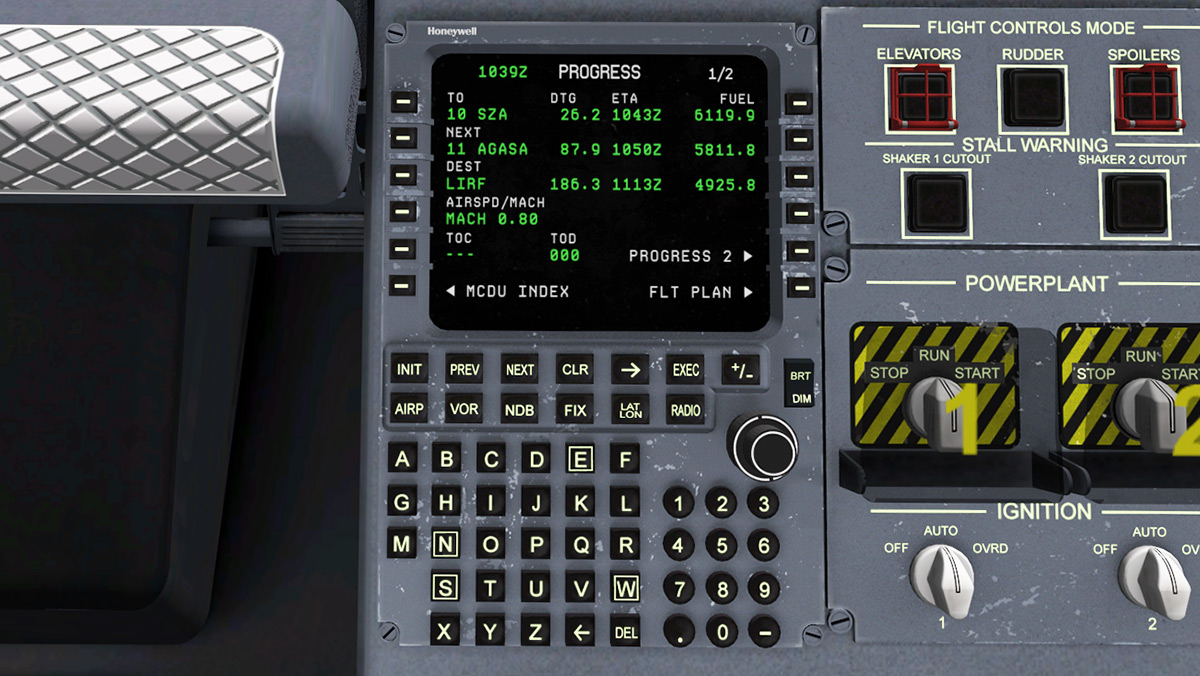


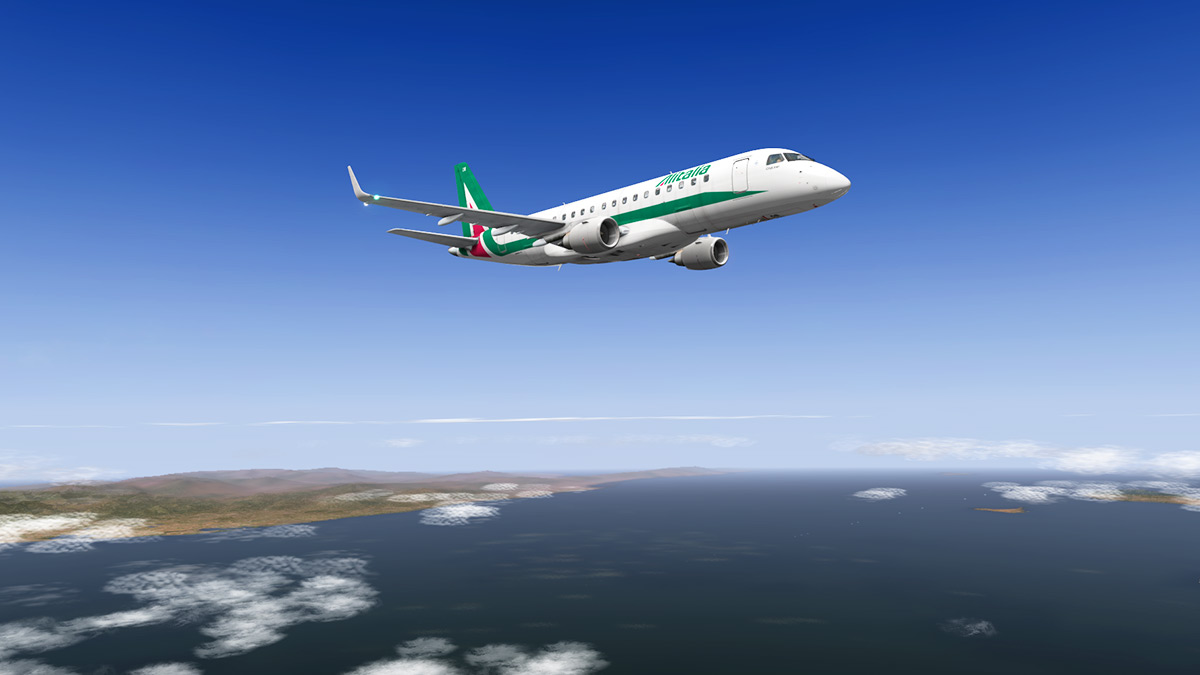
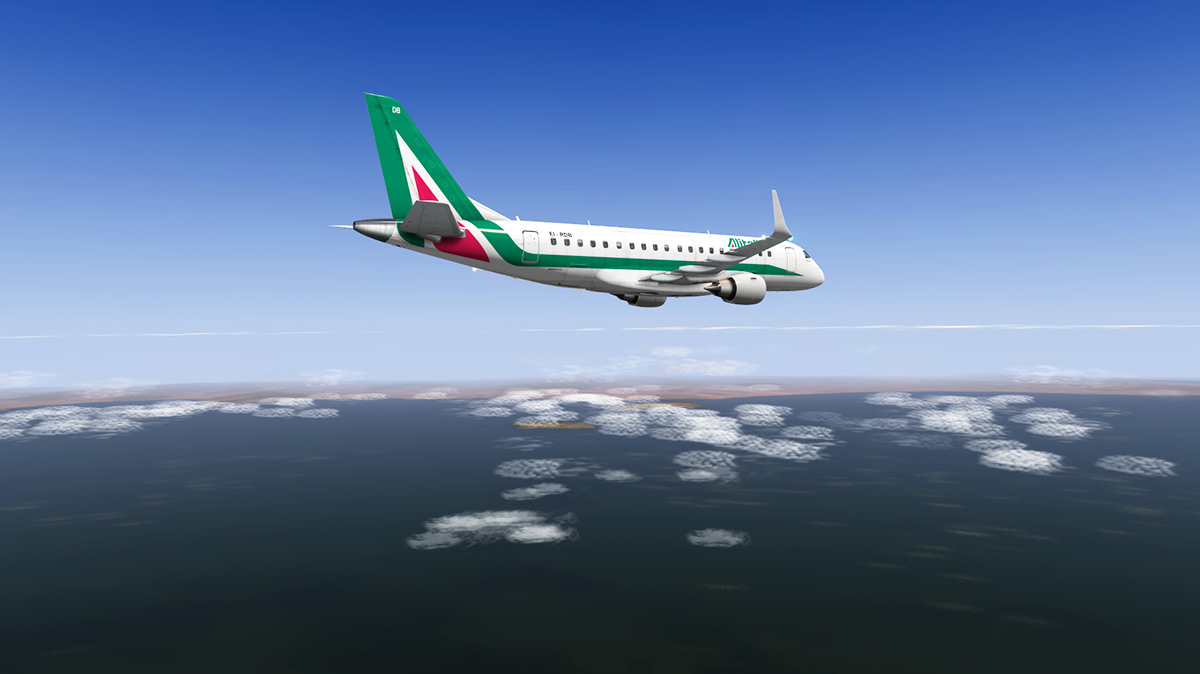
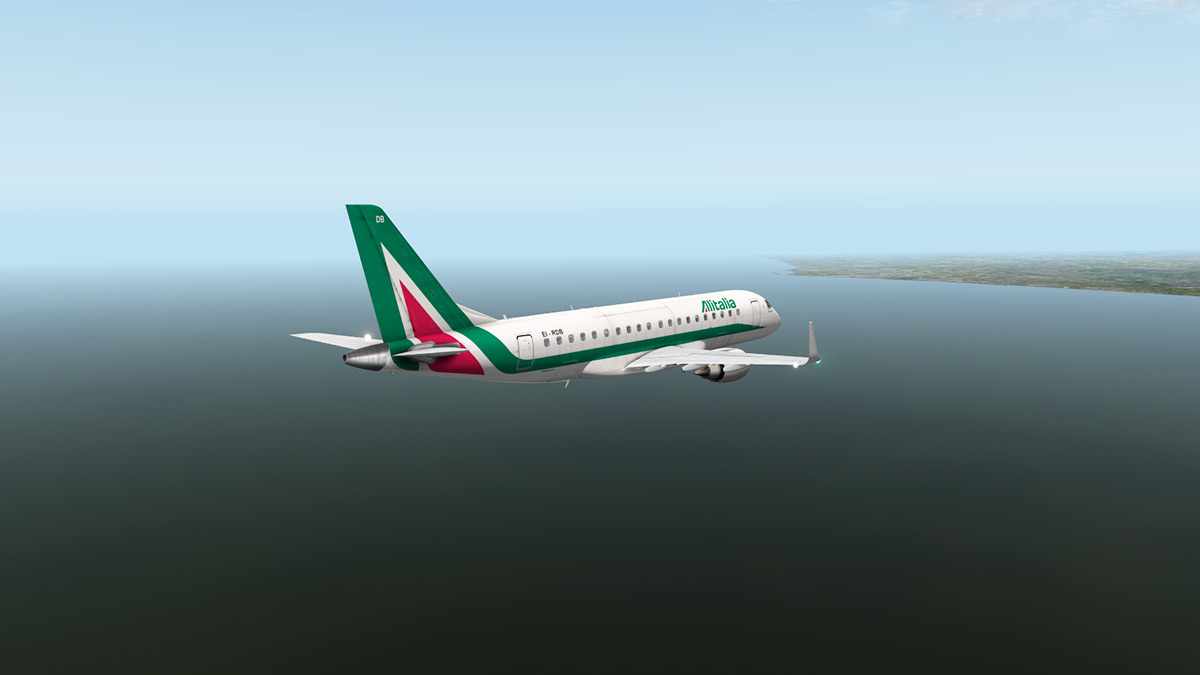


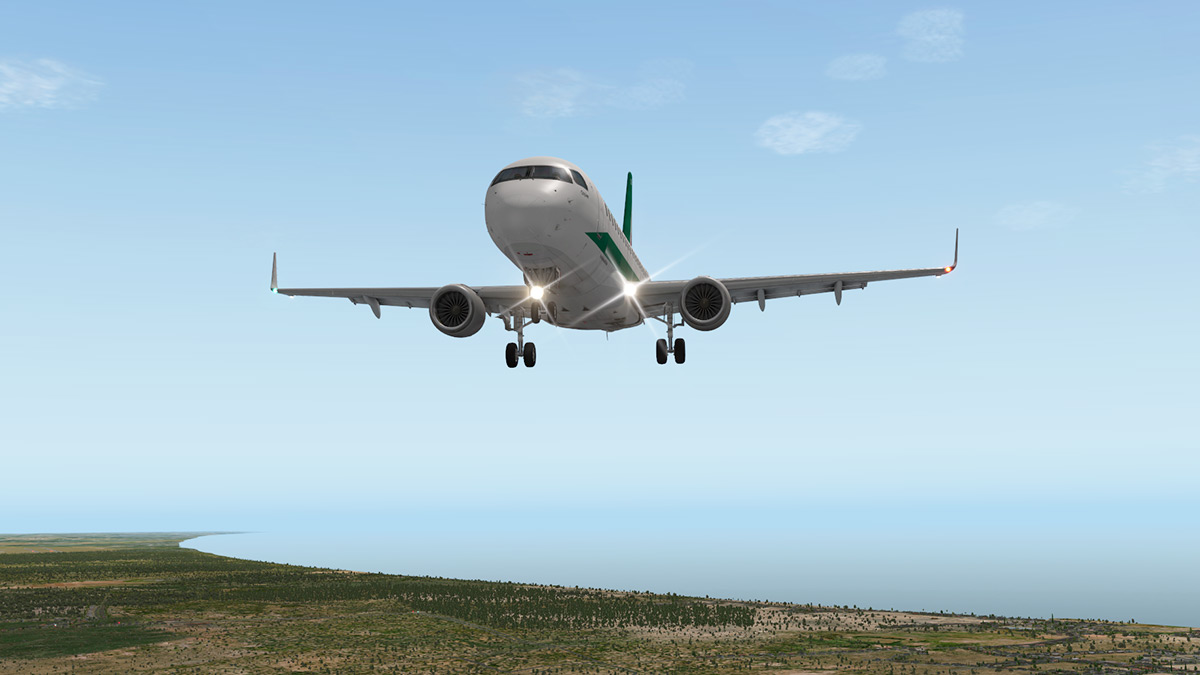

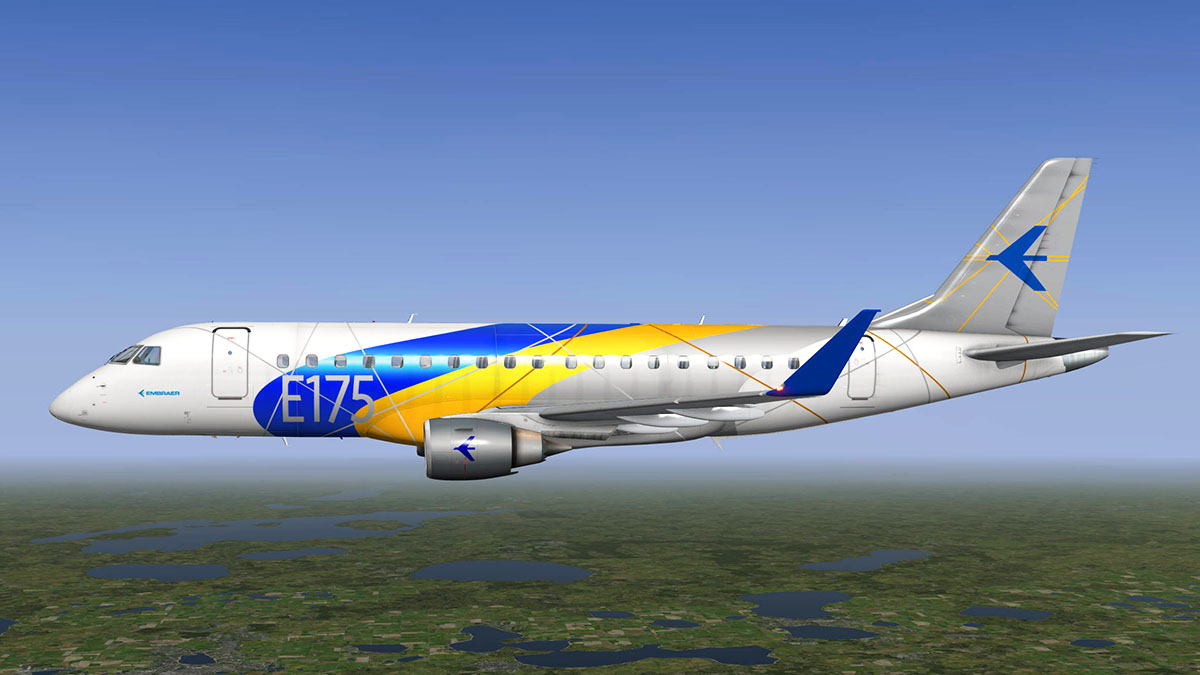


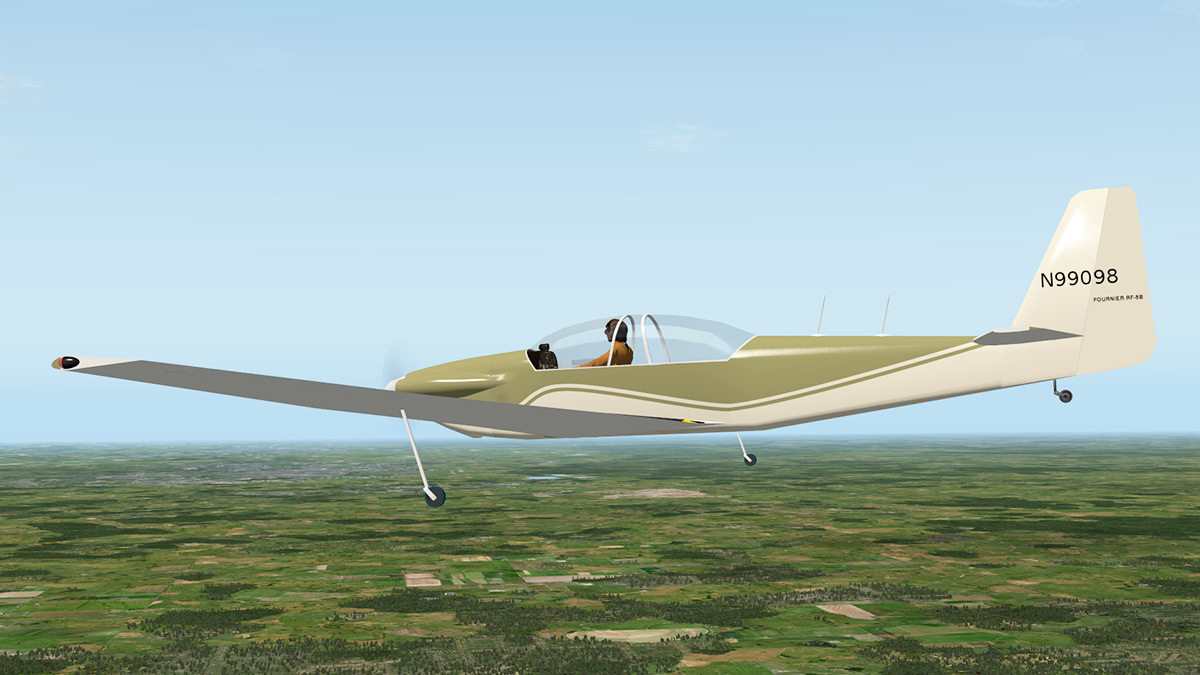


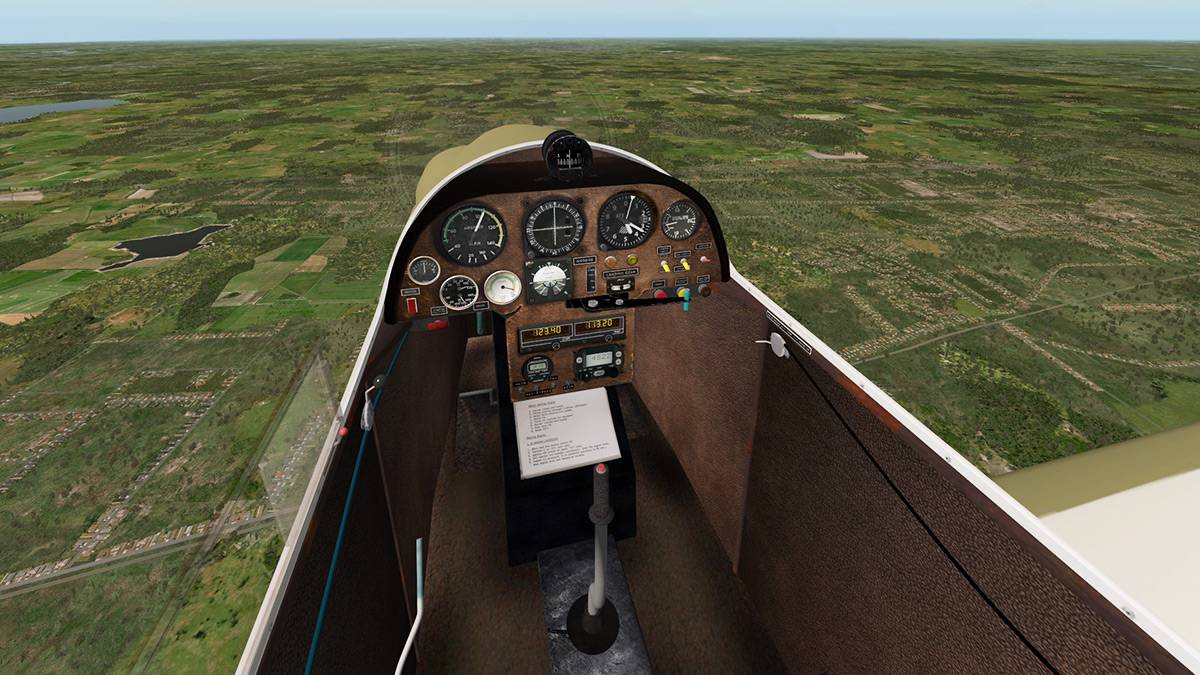
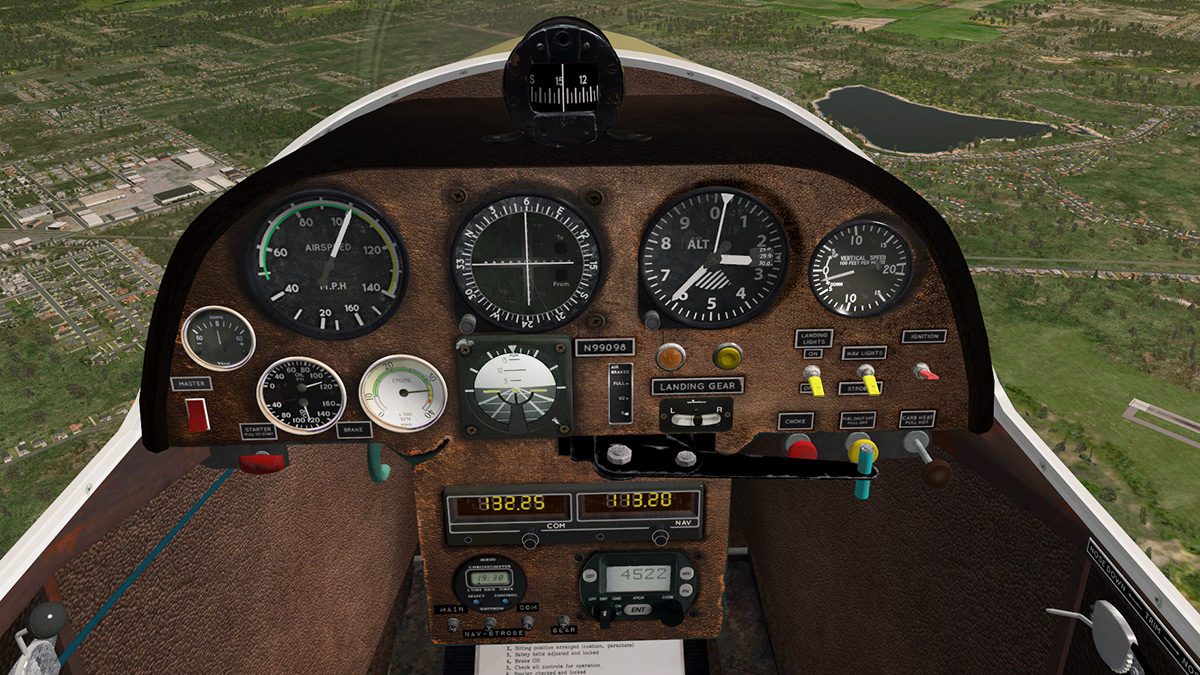
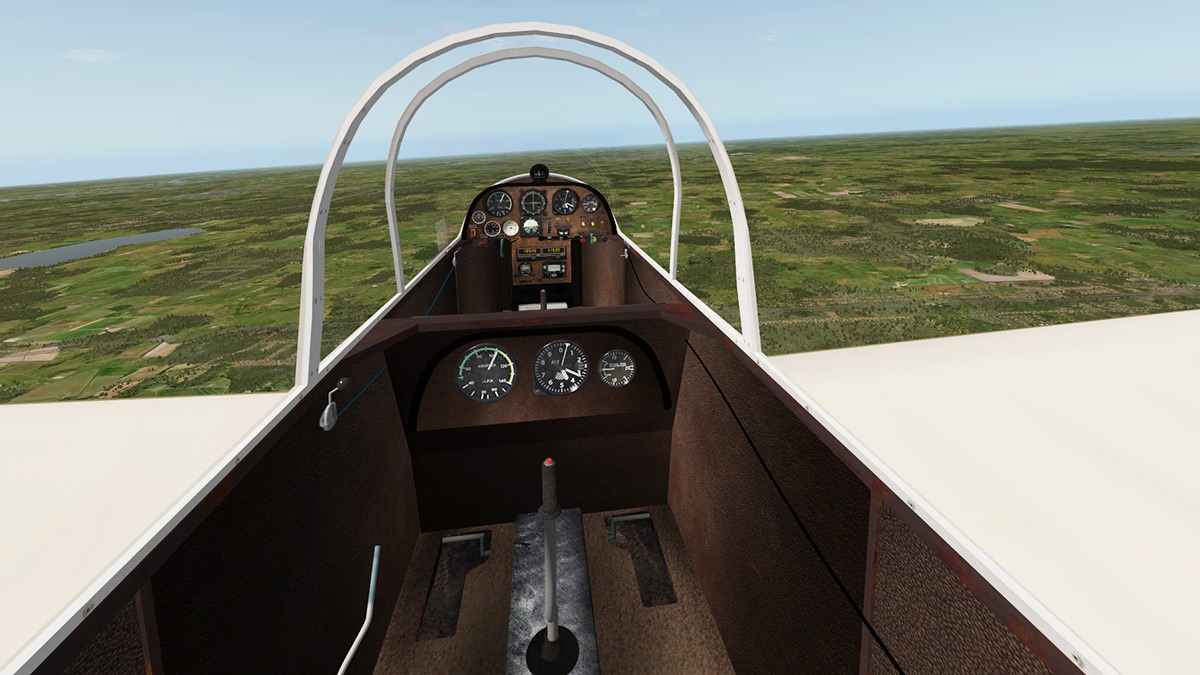


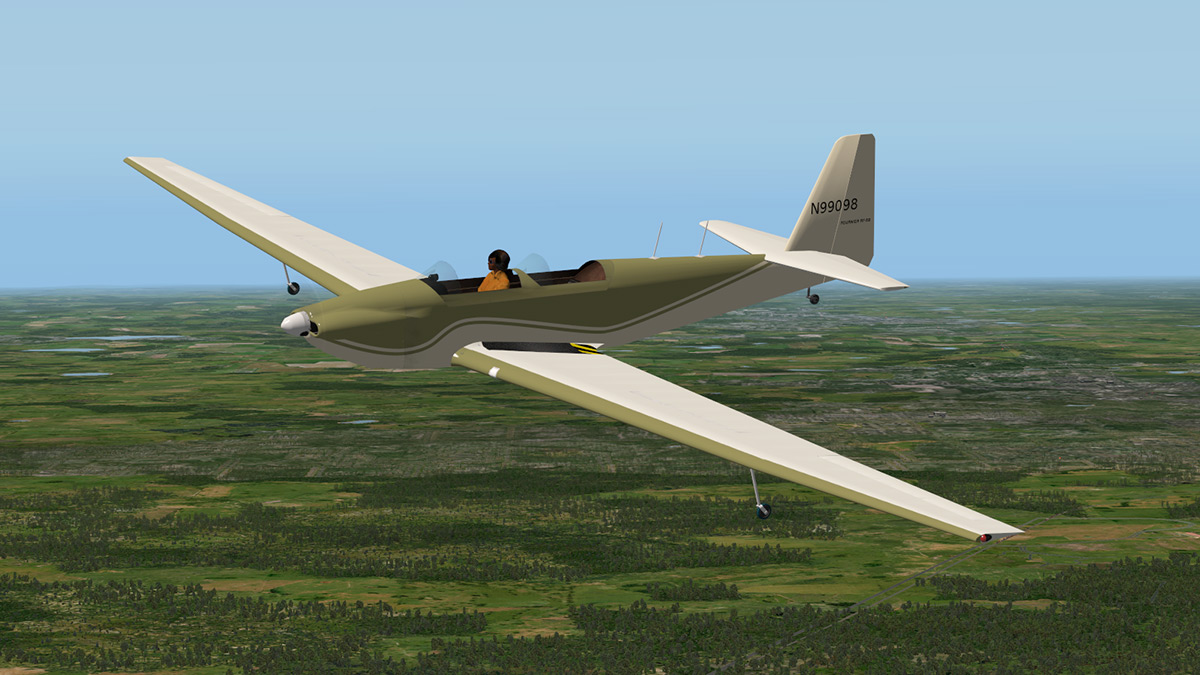

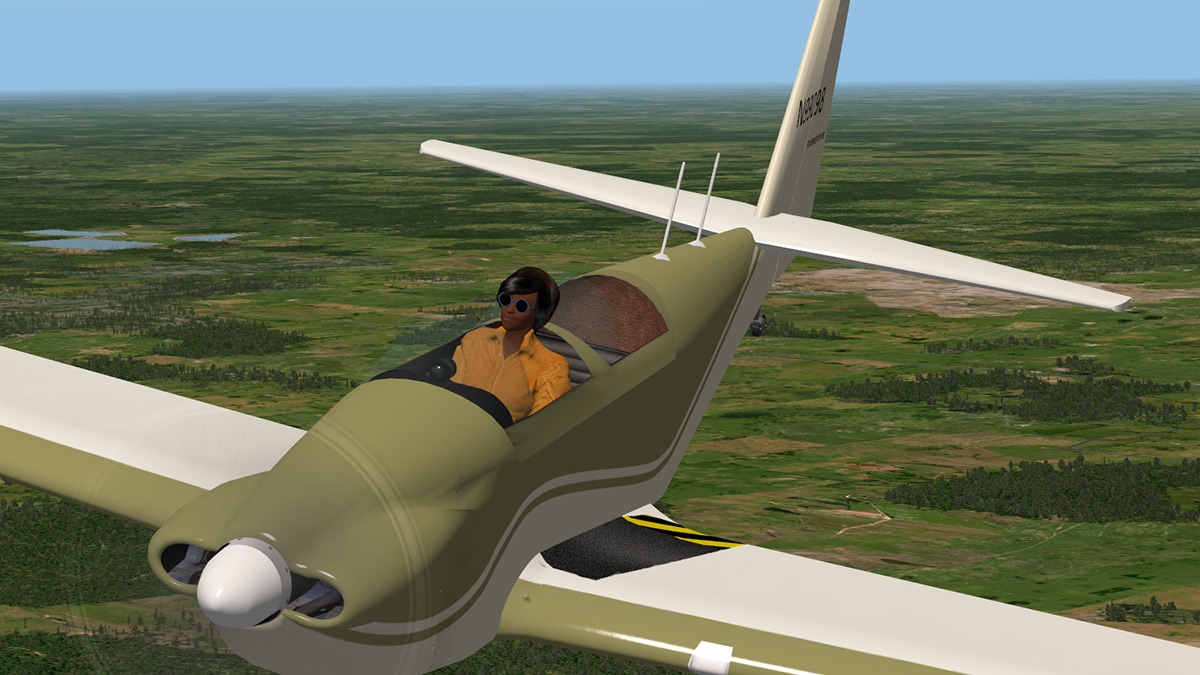


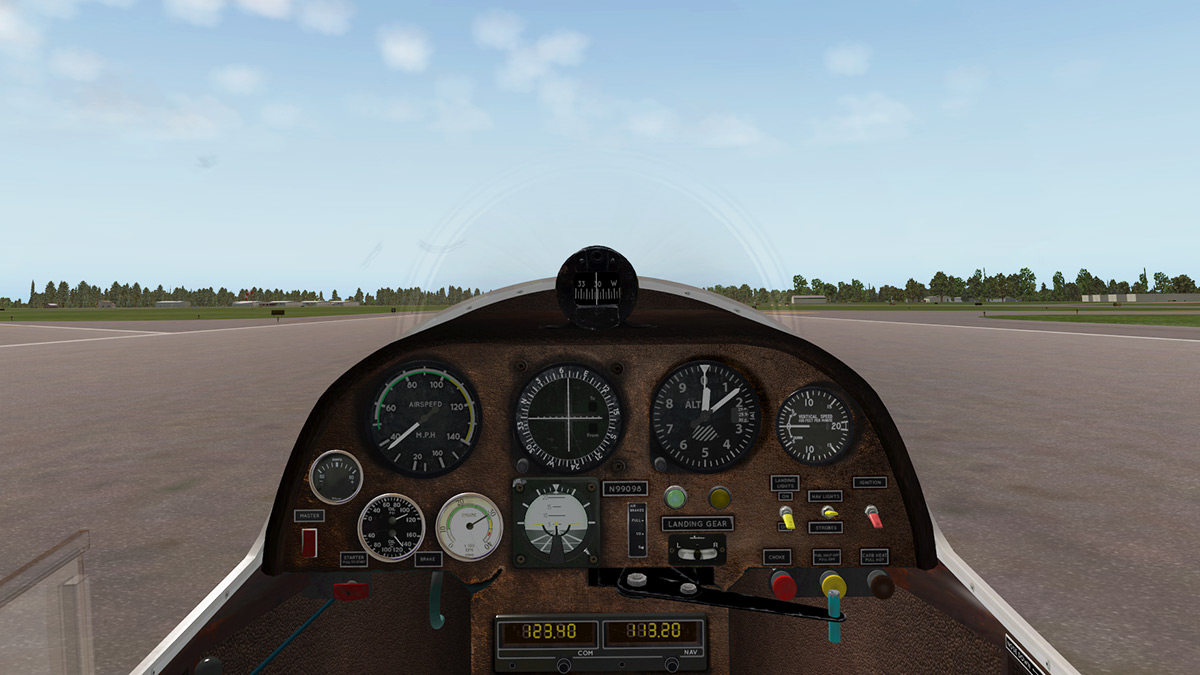
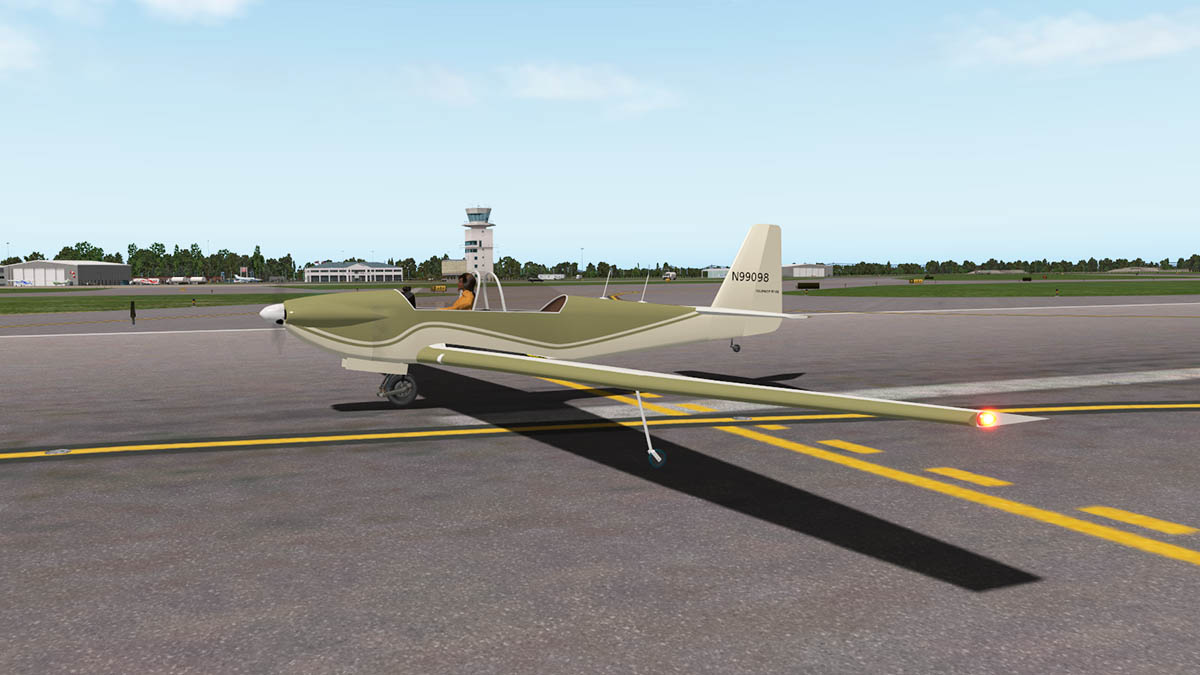
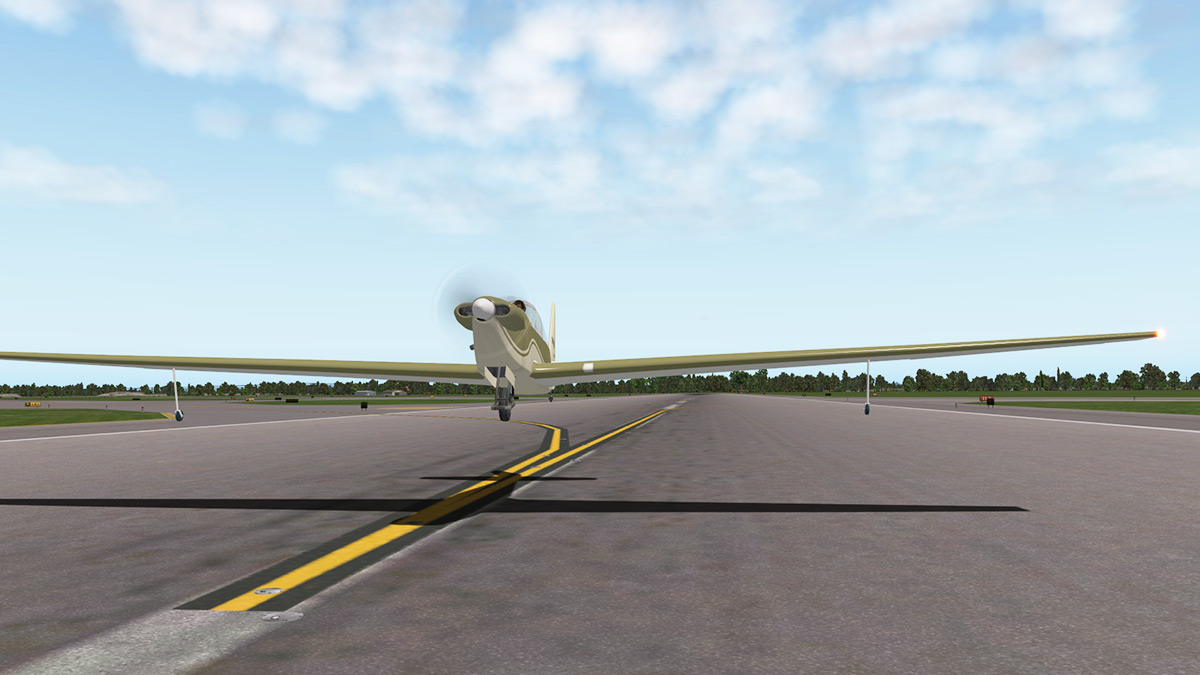


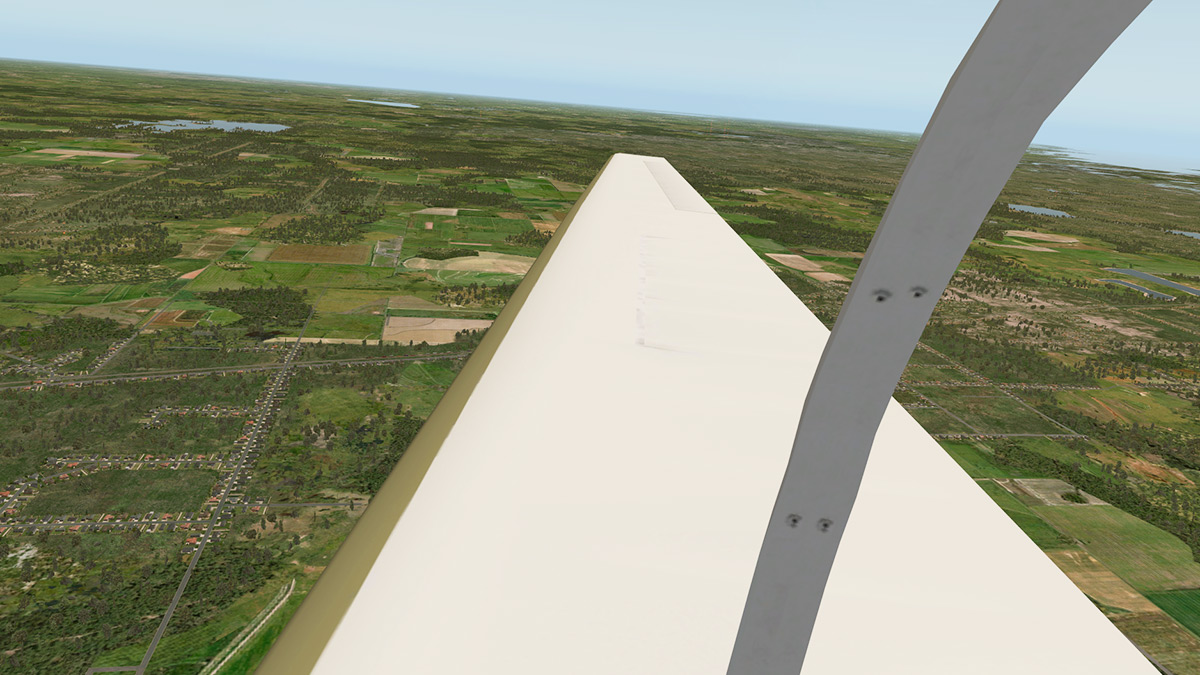

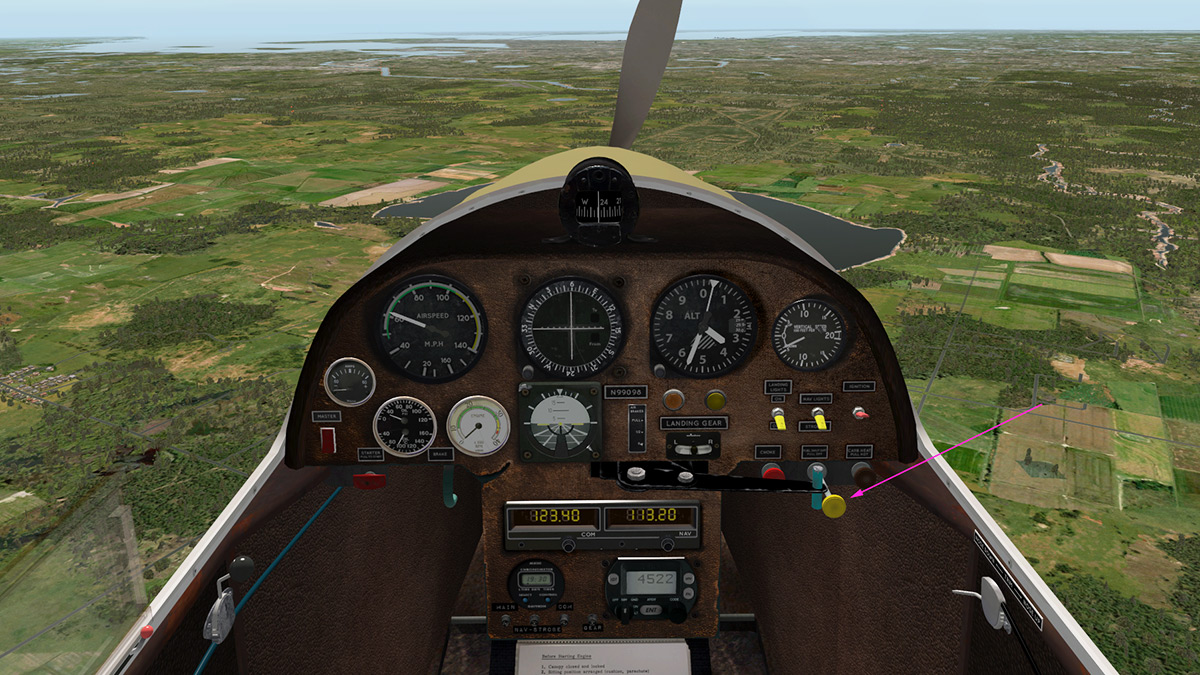


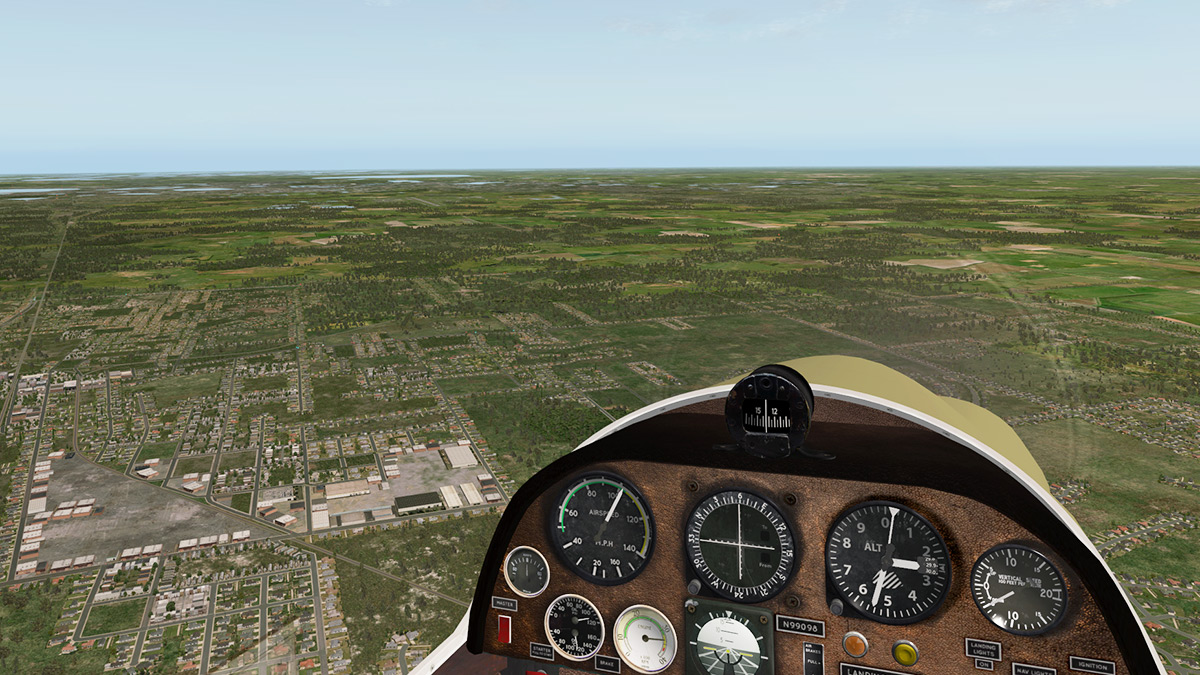

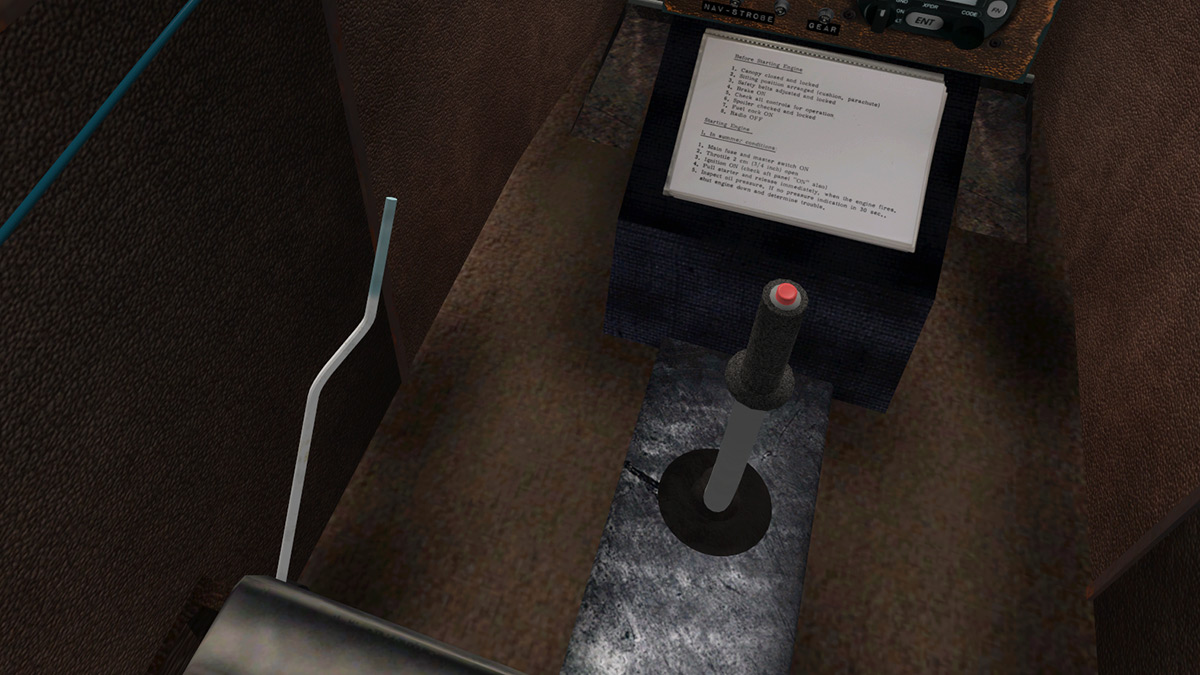
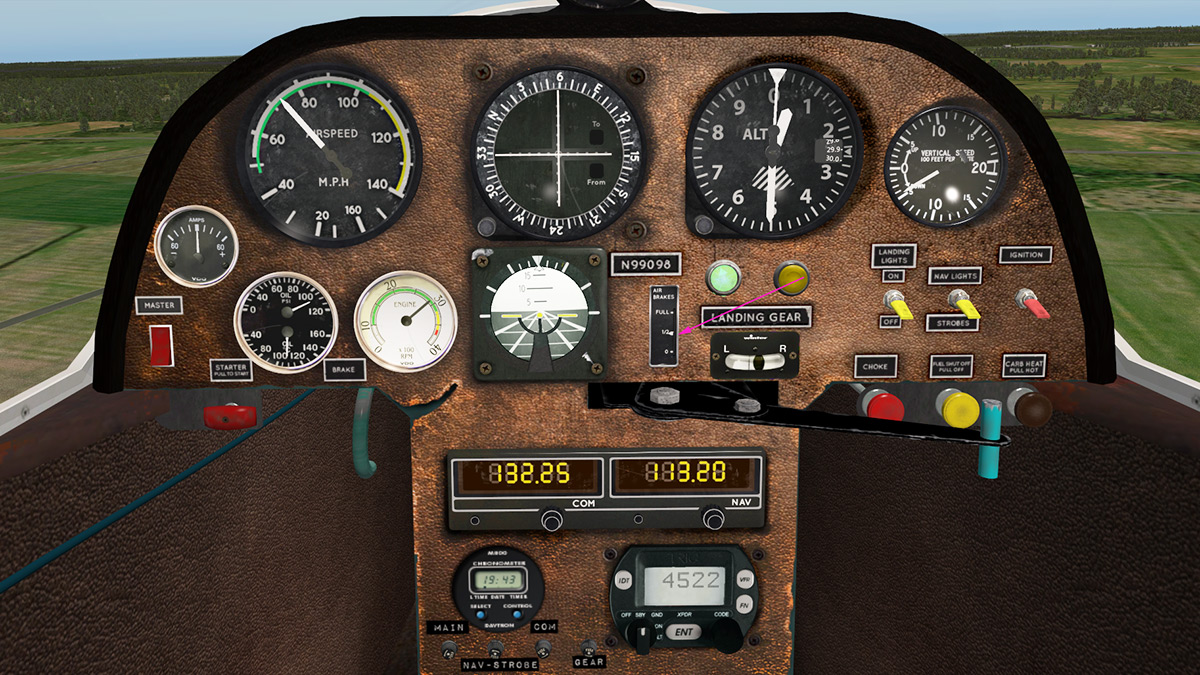


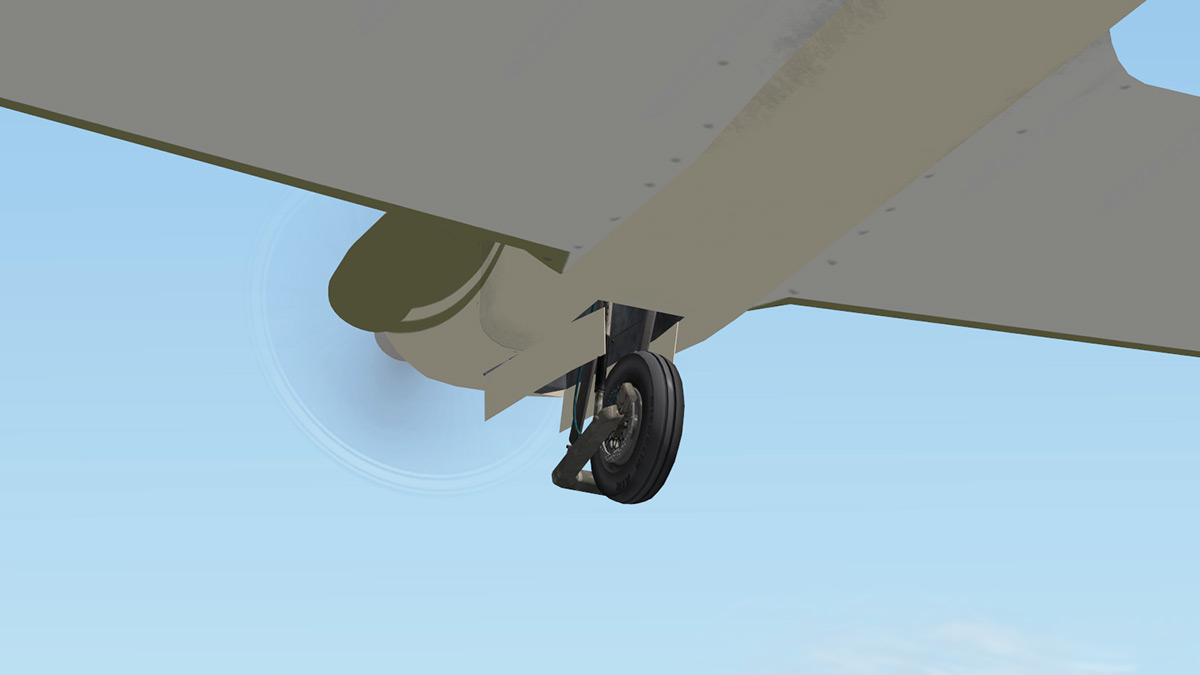

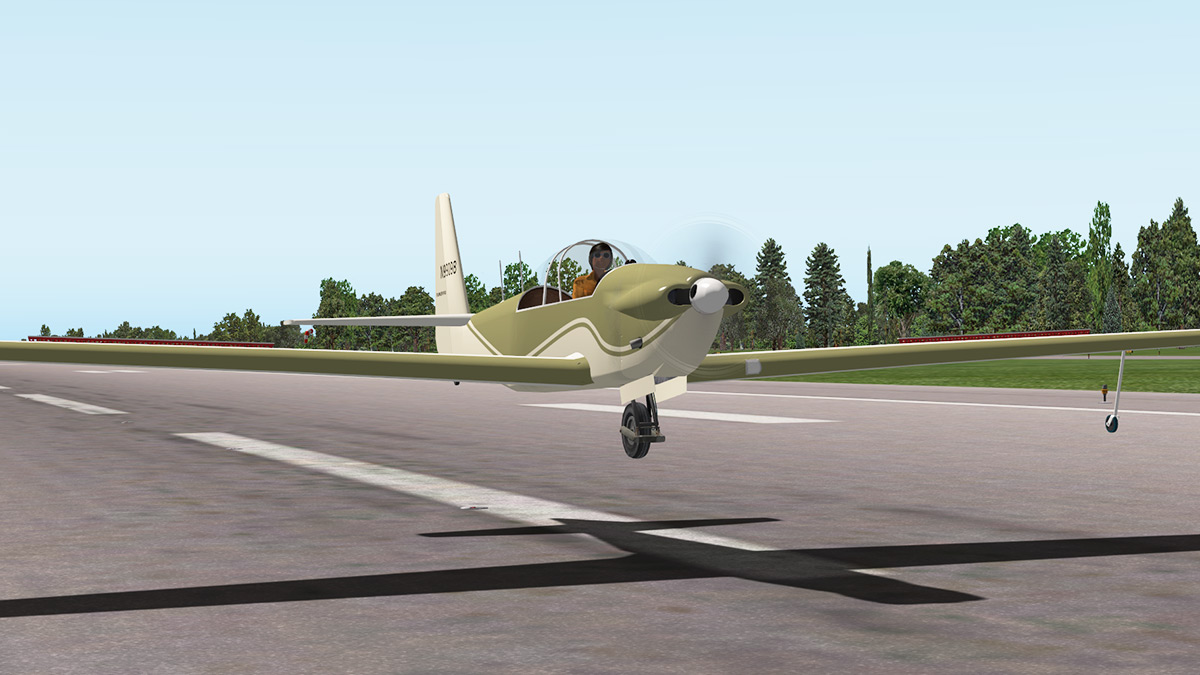

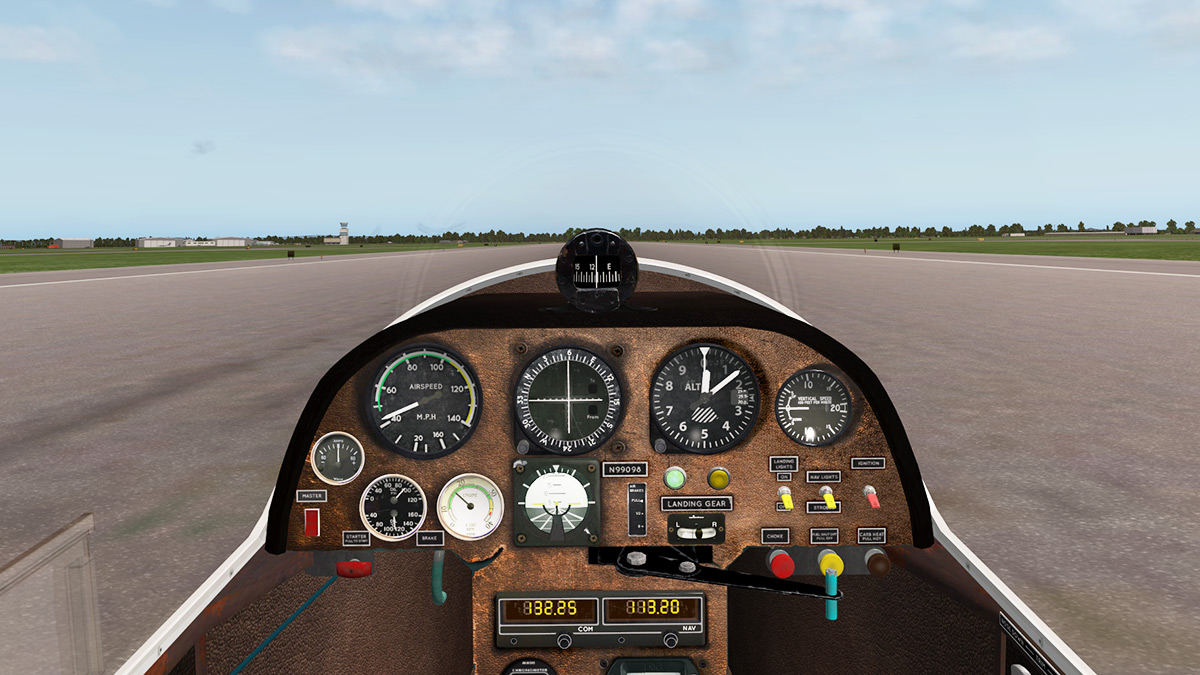


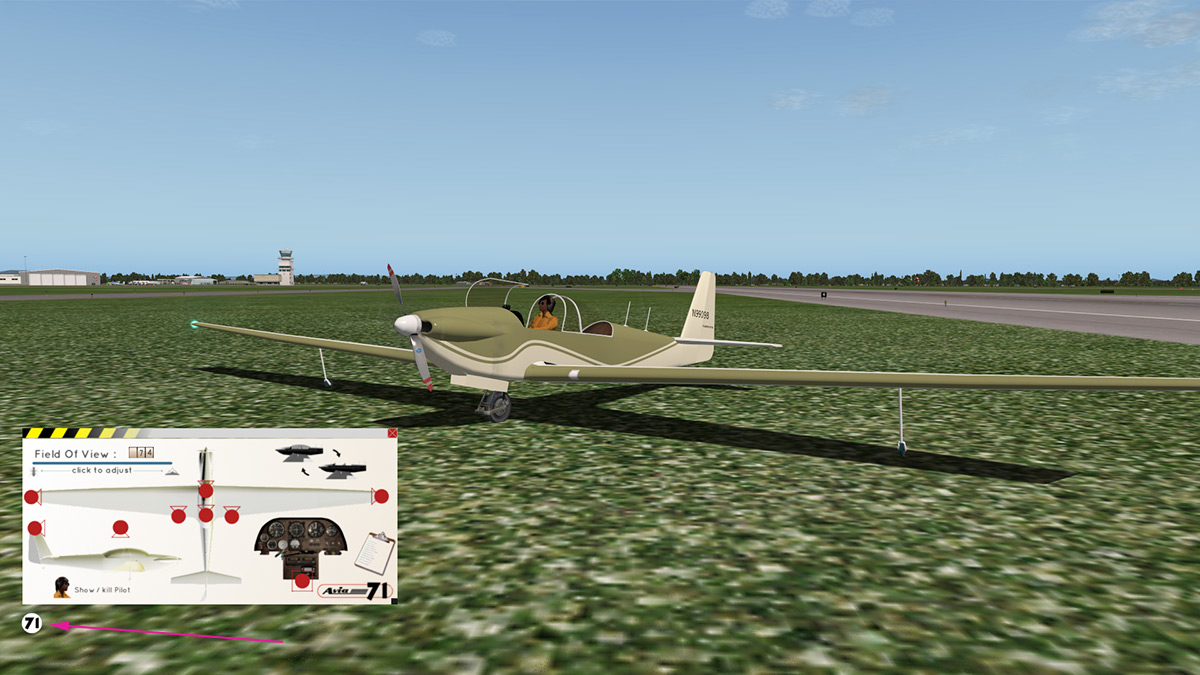
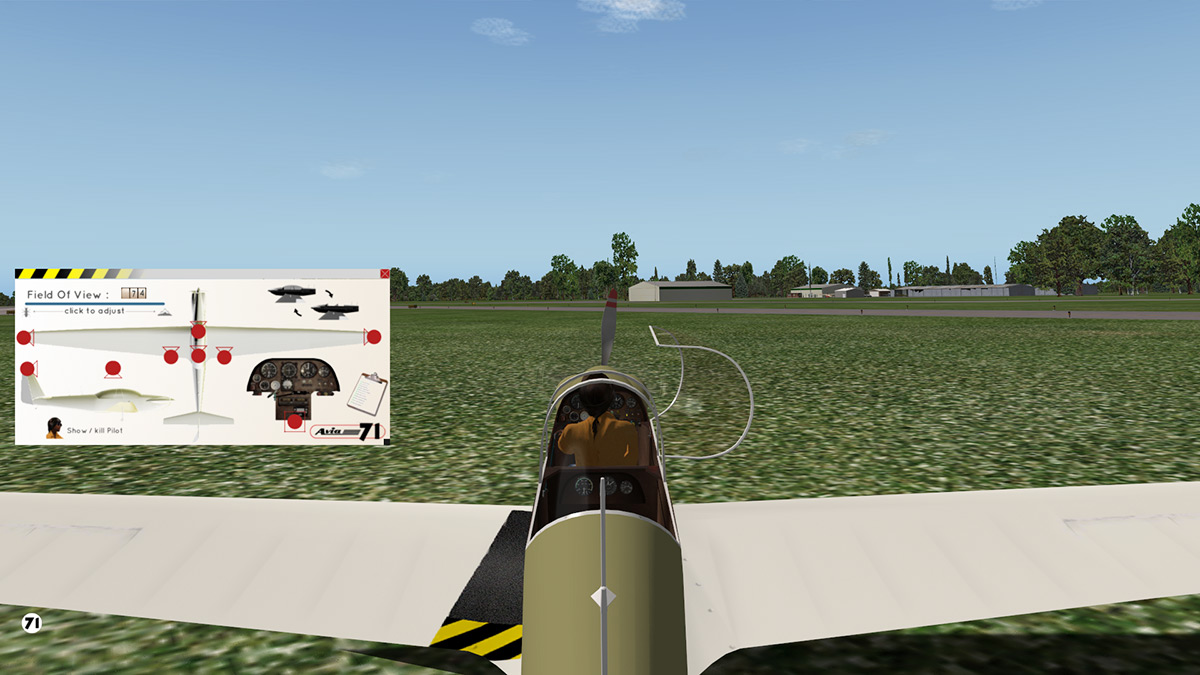
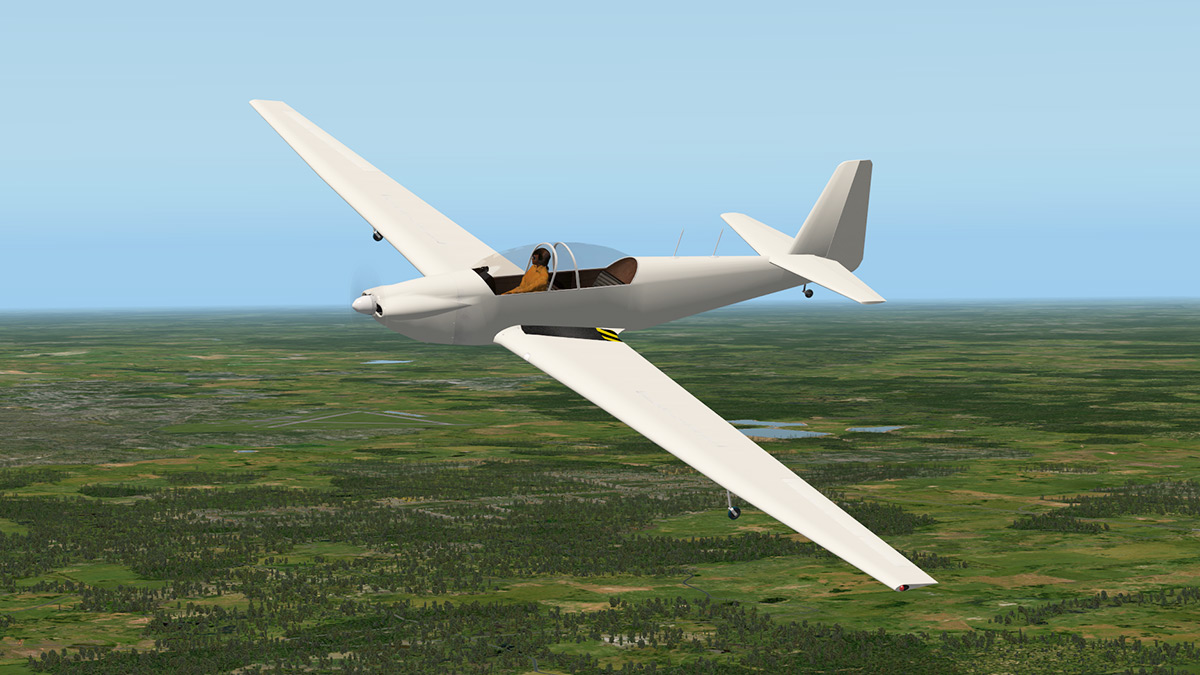

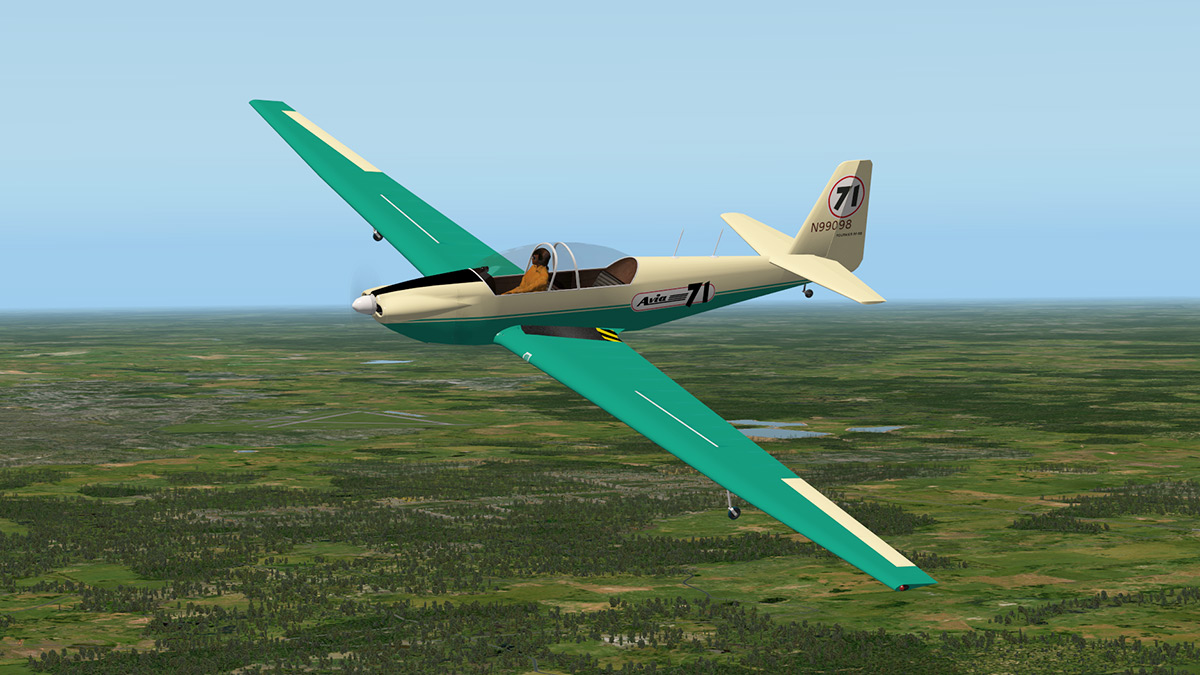
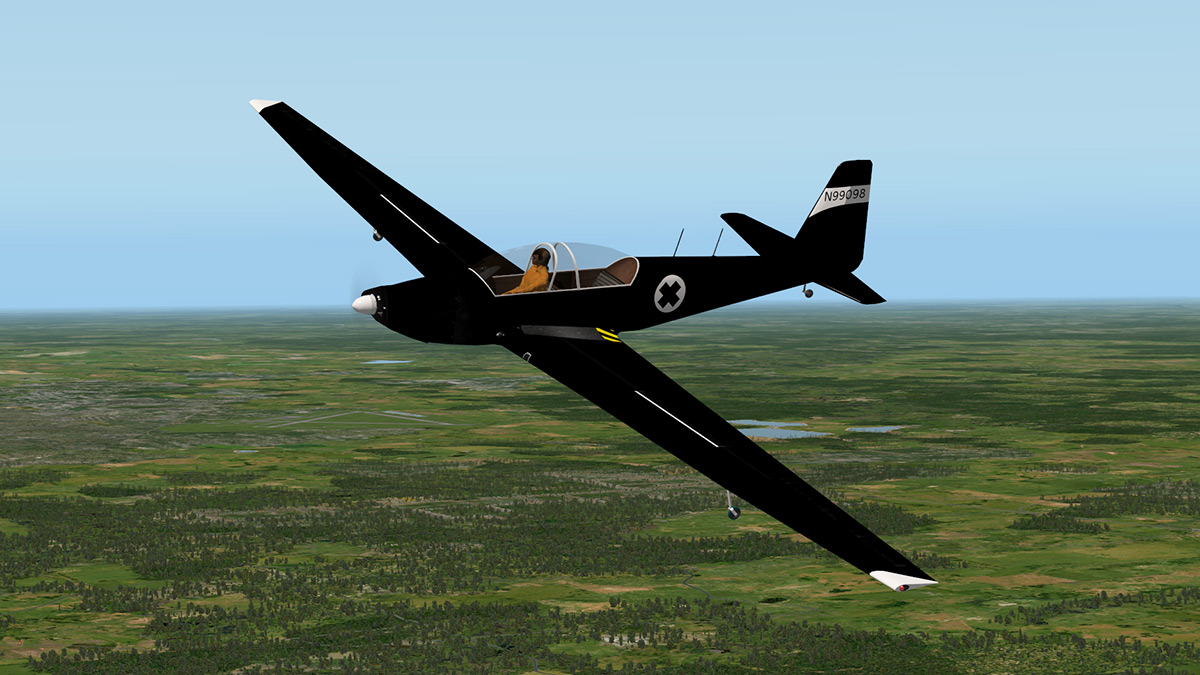

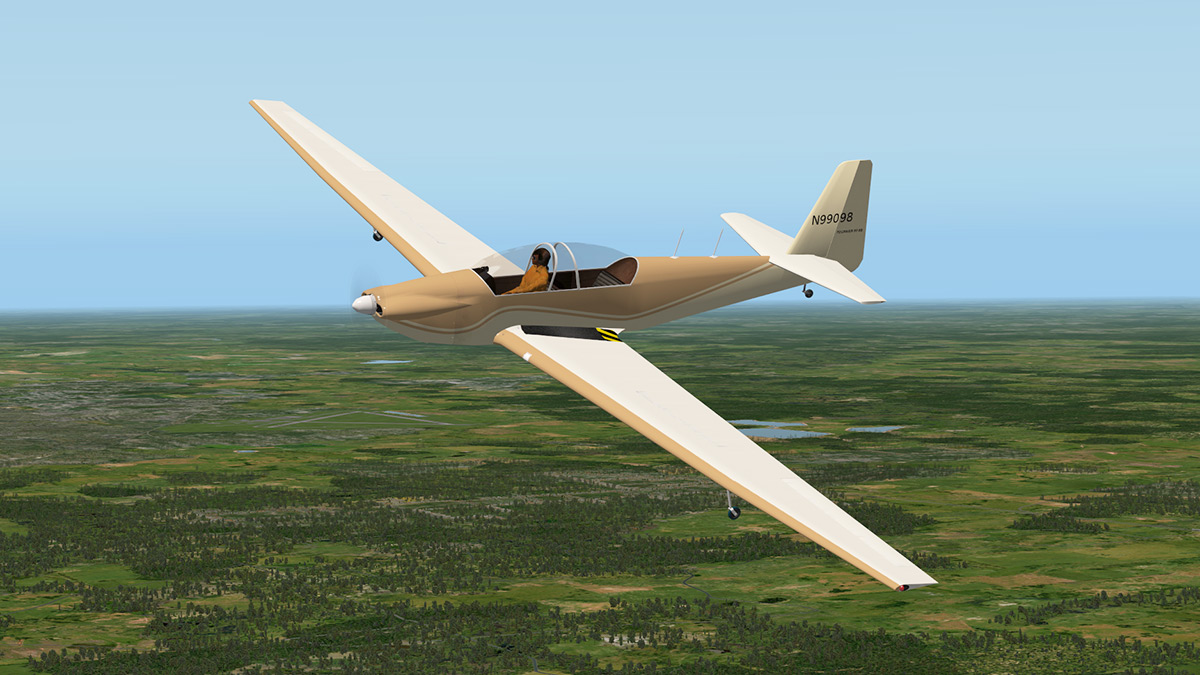
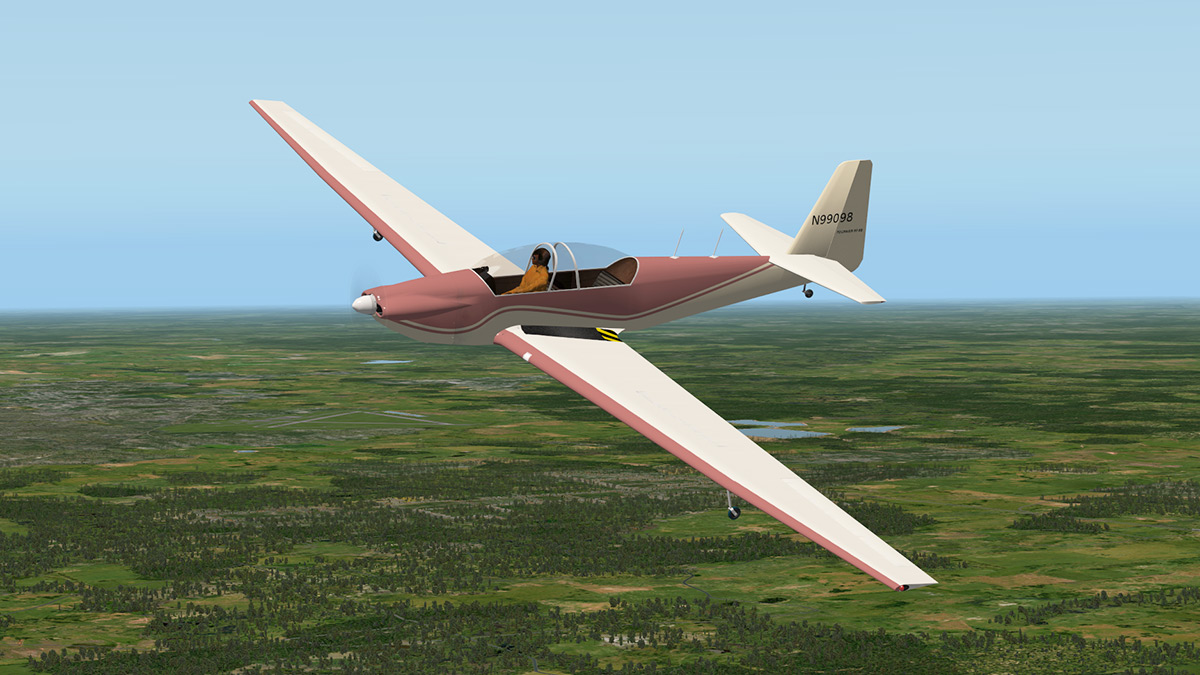


Aircraft Review : Airbus A350 XWB Advanced by FlightFactor
in Airliners Reviews
Posted
You have to make sure you are in the reverse (REV) (green) mode before putting up the throttles? If you go too early your going get the standard throttle thrust... It takes practise to get it right and you have to wait till the system is ready. But it does work correctly as I have used them. SD