Leaderboard

Popular Content
Showing content with the highest reputation since 06/27/24 in all areas
-
NEWS! - Sceneries Upgraded : Northern Sky upgrades all Hawaiian sceneries to X-Plane 12 Northern Sky Studios specialises in two significant areas, Alaska and Hawaii. A fair few of the Northern Sky Alaskan sceneries are already X-Plane 12 compatible, but until now none of the Hawaiian locations have had the same dynamic treatment. There are four... PHOG - Kahului Airport, PHHN - Hana Airport, PHNY - Lanai Airport and PHJH - Kapalua Airport. NorthernSky is notable for their already extremely high quality, both external and internal detail, but also for their very value low prices (for what you get), even then, purchasers of the X-Plane 11 version get a 50% off the price or most around only US$6 to upgrade. These sceneries are X-Plane 12 only, the older X-Plane 11 versions are also still available. All updated features are basically the same with X-Plane 12... - weather effects - PBR materials - new lights - 3D vegetation Ortho4XP tile for the whole island (link in the manual): - X-Plane 12 bathymetry - X-Plane 12 DSF sound - high resolution elevation - edited orthophotos - edited coastline and water bodies - real runway profiles for all airports - All materials created for full PBR - Shading and occlusion effects on all airport buildings - Custom orthophoto for the airport and surrounding areas - World Traffic 3 compatible - Compatible with Ortho4XP and default mesh Kahului Airport (ICAO: PHOG) is an airport in the state of Hawaii, United States, located east of Kahului in Maui County on the island of Maui. It has offered full airport operations since 1952. Most flights into Kahului Airport originate from Daniel K. Inouye International Airport in Honolulu; the Honolulu–Kahului corridor is one of the heaviest-trafficked air routes in the US, ranking 13th in 2004 with 1,632,000 passengers. Hana Airport (ICAO: PHHN) is a regional public use airport of the State of Hawaiʻi on the east shore of the island of Maui, 3 nautical miles (5.6 km) northwest of the unincorporated town of Hana. The airport was officially opened on November 11, 1950. It is primarily a commuter facility used by unscheduled air taxis and general aviation. Lanai Airport (ICAO: PHNY), is a state-owned public-use airport located about 3.4 miles (6 km) southwest of the central business district of Lanai City, in Maui County, Hawaii. It is the only airport serving the island of Lanai. Construction on the new terminal began in January 1993. The spacious new 15,000 square foot terminal, built to accommodate the growth in tourism to Lanai, was dedicated on April 19, 1994. It was five times larger than the structure it replaced. A new parking area, roadway and landscaping were included. Kapalua Airport (IATA: JHM, ICAO: PHJH, FAA LID: JHM), also known as Kapalua–West Maui Airport, is a regional private use airport on the west side of the island of Maui in Hawaii. It is located five nautical miles (6 mi, 9 km) north of Lahaina, in Maui County. Most flights to Kapalua Airport originate from commuter airports on the other Hawaiian islands by commercial commuter services, unscheduled air taxis, and general aviation. Named for the Kapalua Resort a few miles to the north, the airport replaced the Kaanapali Airport, which had an even shorter runway. All four of these excellent X-Plane 12 Hawaiian sceneries are now available at the X-Plane.OrgStore. All Images are courtesy NorthernSkyStudios _____________________________________ Yes! PHOG - Kahului Airport, Hawaii XP12 by NorthernSkyStudios is available from the X-Plane.Org Store here : PHOG - Kahului Airport, Hawaii Price is US$21.00 Customers who own PHOG XP11 can get this new XP12 version at 50% OFF. Discount code can be found in the original PHOG XP11 Invoice. Requirements X-Plane 12 (not for XP11) Windows, Mac or Linux -8 GB+ VRAM Recommended Download Size: 1.9 GB Current version : 1.0 (July 20 2024) ___________________ Yes! PHHN- Hana Airport, Hawaii XP12 by NorthernSkyStudios is available from the X-Plane.Org Store here : PHHN- Hana Airport, Hawaii Price is US$9.95 Customers who own PHHN XP11 can get this new XP12 version at 50% OFF. Discount code can be found in the original PHNN XP11 Invoice. Requirements X-Plane 12 (not for XP11) Windows, Mac or Linux 8 GB+ VRAM Recommended Download Size: 1,2 GB Current version : 1.0 (July 20th 2024) ___________________ Yes! PHNY - Lanai Airport, Hawaii XP12 by NorthernSkyStudios is available from the X-Plane.Org Store here : PHNY - Lanai Airport, Hawaii Price is US$12.00 Customers who own PHNY XP11 can get this new XP12 version at 50% OFF. Discount code can be found in the original PHNY XP11 Invoice. Requirements X-Plane 12 (not for XP11) 8 GB+ VRAM Recommended Download Size: 1.6 GB Current version : 1.0 (July 21st 2024) ___________________ Yes! PHJH - Kapalua Airport, Hawaii XP12 by NorthernSkyStudios is available from the X-Plane.Org Store here : PHJH - Kapalua Airport, Hawaii Price is US$12.00 Customers who own PHJH XP11 can get this new XP12 version at 50% OFF. Discount code can be found in the original PHJH XP11 Invoice. Requirements X-Plane 12 (Not for XP11) Windows, Mac or Linux 8 GB+ VRAM Recommended Download Size: 1.4 GB Current version : 1.0 (July 21st 2024) ___________________________ NEWS! by Stephen Dutton 22nd July 2024 Copyright©2024: X-Plane Reviews (Disclaimer. All images and text in this review are the work and property of X-PlaneReviews, no sharing or copy of the content is allowed without consent from the author as per copyright conditions) All Rights Reserved
 2 points
 -
Scenery Review : KCLT- Charlotte Douglas International Airport UHD by Nimbus Studios The latest Nimbus Studios scenery, was released in the Las Vegas FS Expo 2024 by it's creator Santiago Butnaru. This new scenery was the major American Airline hub of Charlotte Douglas International Airport (CLT), North Carolina, USA. The airport is situated approximately 6 miles west of downtown Charlotte. X-Plane users are well familiar with Nimbus Studios scenery, they can be usually large complex sceneries which are Nimbus's forte, including KORD Chicago O'Hare, KMCO Orlando International and most recently the excellent (and massive) KJFK - John F. Kennedy International XP12 in New York. Established in 1935 as Charlotte Municipal Airport, the airport was later renamed as Douglas Municipal Airport for Ben Elbert Douglas Sr., who was mayor of Charlotte when the airport was first built. In 1982 the airport was renamed again, this time to its current Charlotte Douglas International Airport moniker. After airline deregulation, passenger numbers at Chartlotte nearly doubled between 1978 and 1980, and a new 10,000-foot (3,000 m) parallel runway and control tower was opened in 1979. The airport's master plan called for a new terminal across the runway from the existing site, with ground broken in 1979. At the time, the airport only had two concourses: one used exclusively by Eastern, and one used by all the other carriers, including United, Delta, Piedmont, and several commuter airlines. There was a major expansion in 1990, as a new 80,000-square-foot (7,400 m2) international and commuter concourse (Concourse D) opened, and in 1991 further expansion of the central terminal building continued, reflective of USAir's dominating presence at the airport. Following the 2005 acquisition of US Airways by America West Airlines in a reverse takeover (a private company buys a IPO), Charlotte then became the primary domestic hub for the airline. The majority of US Airways' international routes however remained at the airline's second-largest hub, Philadelphia. Again there was another merger, this time the dominant US Airways and American Airlines in 2013, Charlotte then became the second-largest hub for the merged airline, after American's Dallas/Fort Worth. If you look at the Charlotte overview (above), some custom areas are darker than the X-Plane default surrounding landscape. It is however a bit of a illusion. The effect is caused by the X-Plane 12 3d tree angle, as looking at the scene at only an height of around 800 feet, then the trees would fill in with the correct colour match. No it shouldn't be like this, as it is only an X-Plane effect, it all looks quite normal lower. So the surrounding areas and the field are very nicely intergrated... it all looks very real. Charlotte Douglas International Airport IATA: CLT - ICAO: KCLT - FAA LID: CLT 18L/36R - 8,677ft (2,645m) Asphalt/concrete 18C/36C - 10,000ft (3,048m) Concrete 18R/36L - 9,000ft (2,743m) Concrete 05/23 - 7,502ft (2,287m) Asphalt/concrete Elevation AMSL 748 ft / 228 m KCLT has three parallel and one small cross runway in 05/23, presumably for GA and Cargo traffic. The taxiing distance to 18R/26L is a very long one, so extra fuel is required if assigned this runway, either for arrival and certainly for departure. The main terminal area is set central north between 18C/36C and 18L/36R. Charlotte Douglas has a single main terminal building, that is divided into five concourses: A, B, C, D, and E in an anti-clockwise direction. Concourse A Primarily serves domestic flights, Terminal A is divided into two parts: • Concourse A North: Newer section with additional gates (phase 1). • Concourse A: Older section. It is quite easy to differentiate between the older and newer concourses, as the newer A North zone is in blue that opened in 2018, comes also with larger windows, were as the "Older" finger section is more the standard American concrete and line of windows design. Gates are numbered A1-A13, and it serves various domestic airlines that are not part of American Airlines. The additional A gates, numbered A21-A29 hosts a variety of airlines, such as Delta Air Lines, JetBlue, Southwest Airlines, and Frontier Airlines. You are immediately very impressed by the detail, it is very well done on the ramps with a huge amount of custom clutter, including ladders, bins, chocks, cones, vehicles and all the other required service equipment... items are branded, but in a more generic way, than being individually airline focused. There is some animated ground service vehicles, but it is far from being comprehensive, with just the odd vehicle shuttling around. Concrete is very hard to define, but the aged texture feel and look of the concourses here are excellent. Glass is perfect as well... Nimbus struggled with glass earlier, most notably with their Miami scenery, but have refined the idea now to perfection... you can see the detailed internal areas through the glass from the external perspective. Yes you can explore the internal detail, but it's not the focus of the idea, as the figures are very basic close up, and most look non-human. All the gates here at CLT are X-Plane default "Ground Handling", not SAM enabled. Before this aspect was to be seen as a negative. But with the Laminar refinement for X-Plane 12 and the demise of the SAM plugin (yes there is OpenSam), this original idea is now a more attractive gate tool option. Concourse A North, is really well done in detail and design... it has a dark brown brick base, with three story windows, and a blue curved roof as designed by Perkins+Will, an international architecture and design firm. A North has a bigger internal size, so it works better in detail, it is really realistic, and even internally walkable (sit-able?) Concourse B This B concourse primarily serves domestic flights for American Airlines. There is also an American Airlines Admirals Club is located within Concourse B, providing a comfortable space for eligible passengers, restaurants include Starbucks, Jamba Juice, Bojangles’ and Panera Bread. Originally opened in the early 1980s (1982). It has since undergone various renovations and updates to enhance the passenger experience... There is a small ramp tower centre concourse, and there are the numbered gates from B1 through B16 which are available here. Internally the layout is the same as Concourse A, but connected directly to the main terminal, this atrium section is well done. Terminal The main terminal building connects all the five concourses together via a large central atrium, but originally it was only Concourses B and C that were part of the initial development, as the terminal was opened at the same time as both concourses in 1982, but more expansions were done to the terminal in the 90's to handle International flights. The design is highlighted by those huge massive glass windows, with that curve at the top for maximum internal natural lighting, the concept was done by Odell Associates, a prominent architectural firm based in Charlotte, North Carolina. The modeling by Nimbus is simply exceptional here, a step forward in terminal airport design and quality, these atrium curved structures and glass must have taken ages to get right, and shows off the skills of the developer. There is a massive carpark attached directly north of the terminal and an enclosing roof structure joins the two areas together in forming the arrivals zone. There are a load of static vehicles here, as there is also a lot of static cars for detail in or on the top of the carpark and the surrounding landside areas. Internally the terminal section is detailed, but not as overly so as the concourses. Concourse C Concourse C is almost a twin of Concourse B and as it was opened at the same time. The idea is for American Airlines connecting flights to be an easy domestic connection between the two areas. There is the same Starbucks in here, but also the different other restaurant options of Smashburger, Salsarita’s Fresh Cantina and PZA (Pizza and Italian cuisine). Gates available are C2 through C19. There are two square fences on the roof, but otherwise it is the same design.... notable is the complex but extremely well done junction between the Atrium and Concourse D, is very highly realistic visually. Same concrete facade and glass blends in well. Internally it is also the same layout. Concourse D Concourse D at Charlotte Douglas International Airport serves as the primary concourse for international flights, but it also handles some domestic flights. Concourse D has gates D1 through D13, and it is connected to the main terminal and other concourses via walkways and the airport’s shuttle service. Concourse D was completed and opened in the early 1990s. Since then the concourse has undergone several renovations and expansions to accommodate the increasing number of international flights and to enhance passenger amenities. American Airlines has an Admirals Club, and The Club CLT (accessible with various lounge membership programs or day passes) is also available. American Airlines (International flights), Lufthansa and British Airways are the main users of the area. As Odell Associates again did the design, there is more better intergration with the Odell central terminal, same high curved windows and pyramid connection atriums... The eastern end is a full glass wall that creates a big open air space internally, the concourse is topped off by a complex roof structure and a nice blue roof. Fast food (Hungry Jacks) and other restaurants are also well represented. Concourse E Concourse E has 46 gates numbered E1 to E50, making it the biggest of all concourses, it is designed to efficiently handle only regional flight operations, with a layout that allows for quick turnarounds and easy access for passengers. American Eagle is the main user here. Concourse E features a mix of airbridges and ground-level boarding (walk on/off). The concourse has a 32 gates equipped with airbridges, but the majority of the gates are designed for passengers to walk directly from the terminal to their aircraft parked on the tarmac. The various gate sections are connected via round glass buildings, the central one is called "The Rotunda.” It is located in the middle of Concourse E and serves as a distinctive architectural feature of the airport. Again the concourse is an Odell Associates design and was built and opened in 2002. At the end of the arms, is the main square ground-level walkon/walkoff boarding area The complex Concourse D is extremely well done, there is a huge amount of detail to feast your eyes on, or with certainly getting your money's worth. Internally it is all well done, but really set out for only the external views. Landside is dominated by three well modeled carparks, and set dead centre is the old Control tower, the new one is set to the south and visible top. Infrastructure north is excellent, first with the multitude of large carparking spaces, most filled with static 3d vehicles, then to the northwest is the the Duke Energy Little Rock Ops Center powerplant, centre is FedEx Freight and the Charlotte (long term) Park "n" Go and Old Dominion Freight facilities. Any southern approaches into CLT are well catered for visually. NC Air National Guard CLT is main base for the NC (North Carolina) Air National Guard which is located at Charlotte Douglas International Airport, where the 145th Airlift Wing is stationed. This unit operates C-17 Globemaster III aircraft and provides airlift capabilities in support of military and humanitarian missions. The ANG Station is well represented here by Nimbus, it is set east on taxiway D. Shown are the ANG maintenance hangars and five well modeled C-17 lifters. General Aviation Next south of the ANG Station, is a very large General Aviation area. Wilson Air dominate here with two GA/BizJet facilities. Certainly worth a refuel drop in... there are also two excellent H pads set here for helicopter services. Top and tail are two more charter business aviation areas, mostly large BizJet hangars, both areas in detail are very well covered in the scenery. Sullenberger Aviation Museum Set between the thresholds of Runways 18L and 23 northeast boundary is the Sullenberger Aviation Museum, previously known as the "Carolinas Aviation Museum". The museum showcases the history of aviation, including significant events like the “Miracle on the Hudson.” In 2022, the museum was renamed to honor Captain Chesley “Sully” Sullenberger, the pilot who performed the emergency landing of US Airways Flight 1549 on the Hudson River in 2009. The actual Airbus A320, registered as N106US is housed here. A bit of trivia... When US Airways swallowed America West, it then also used the America West's "CACTUS" callsign and ICAO code "AWE", as used by Flight 1549. Centre south between runways 18C/36C and 18L/36R is a joint area that covers the Cargo area, LSG Sky Chefs catering, American Airlines Maintenance and the main FAA Control Tower. The LSG Sky Chefs catering facility is well done (even if the catering trucks say "GateGourmet"?), next door is the United States Postal Service ramp and facility. Southwest Air Cargo is set here as well. To the west is the old USAir maintenance facility and it's massive hangar, now used for American Airlines maintenance. The ground detail and clutter is excellent, and there is a lot of fill detail that covers a wide area give value to the scenery. There is also a static AA A320 set in the hangar. East centre is the large Cargo area, that is split into North Cargo and South Cargo complexes. Charlotte’s central location on the East Coast of the United States makes it an ideal hub for domestic and international cargo operations. Based here presented are FedEx, Amazon Prime, UPS and DHL Aviation. The ramp includes approximately 8-10 dedicated cargo stands. CLT Control Tower As we have seen there are two towers visible at CLT, but the new FAA facility set in the south area was opened in 2007. The current control tower stands at approximately 370 feet tall, in making it one of the taller control towers in the United States. It covers Ground Control, Local Tower Control and Approach and Departure Control... unfortunately the X-Plane tower view (T) is set on the wrong tower? Nimbus modeling of the tower is good, but not detailed here as exceptional, certainly with the average roof aerials. Set in the ground image (arrowed above right), is the US Airways Flight 5481 Memorial. Shortly after takeoff from CLT in January 2003, the aircraft (a Bombardier Dash 8 Q300) experienced a loss of control and crashed, resulting in the deaths of all 21 people on board. The memorial is to highlight the importance of continual aviation safety, and the accident has led to changes in regulations and procedures to enhance flight safety. On the W 1 taxiway by the 36L threshold, the taxiway bridge is flat in the landscape, so it doesn't look very realistic, the well done rail sidings also highlight the issue. For all the excellence of this scenery, we leave a slightly low-note. Centre field is the field radar installation... it is a bit low-res for a scenery of this high quality, and worse the average red radar is not animated, but the radar and tower still highly visible when moving around Charlotte Douglas. Ground Textures Like at the Nimbus JFK, the ground textures here at CLT are excellent. Notable are the well done worn runway signage, not crisp and new, but tired and worn after years of service. Dirt and grunge on the touchdown points is also highly realistic as is the actual runway texture(s). Inner ramp areas are all mostly concrete as per most American Airports. Again the wear is excellent, and done is that the darker worn areas are set around the older terminals and service vehicle road courses, but around the new Terminal A North the wear is far less, a small but important aspect. PBR reflective (wet) active textures and burnt-in ambient occlusion are excellent here, you pretty well expect that now with any X-Plane 12 active scenery... but it is nice to see it in action. 3d Grass and spring flowers are also well done, the effect isn't over all of the field, but still does a great job in breaking up the flat surfaces. Foliage is also 3d XP12 excellent, but there are a few of the old style + cross trees mixed in there as well, but overall it is expertly done. Lighting The lighting at Charlotte Douglas is excellent... the scenery is not overly lit, but still really well detailed with a lot of different tones to make it realistic. The clear glass effect can work against you at night, making the terminals look unrealistic. It's not too bad here at Charlotte, and even what you could say is passable by the skill of Nimbus, where it works it stands out well, but the main terminal though looks a little bit too over bright and clear. All ramp and gate areas are nicely lit, and you can work nicely down there, so yes CLT is a highly workable night/darkness airport Like at JFK the maintenance hangar at CLT looks excellent at night, as does the well lit Cargo aprons. KCLT navigation signage is very clear and comprehensive, but the signs are just that in being clean, with no tired weather wear or ground reflections. Summary Charlotte Douglas International is a big airport by traffic and size, and has been a major airline hub for generations. First for Eastern, America West, then USAir and now American Airlines. It's a very popular airport as well with high ratings with the passengers. Besides the American Airlines domination, a few well connected international airlines use CLT as well, including Lufthansa, British Airways and American Airlines International. X-Plane users are well familiar with Nimbus Studios scenery, they can be usually large complex sceneries which are Nimbus's forte, including KORD Chicago O'Hare, KMCO Orlando International and most recently the excellent (and massive) KJFK - John F. Kennedy International XP12 in New York. That KJFK New York was a an major tour de force scenery for X-Plane 12, and well deserved, then this massive sprawling Charlotte Douglas is the same excellent work continued, even if in areas it is a little better again. It is certainly one of Nimbus Studios best sceneries yet, with top notch quality ground and building textures, glass and excellent modeling that captures the architectural detail and form that is distinctly CTL. All five terminal/concourses are extensive and all are set with high quality in detail, as is the excellent ground clutter and itemised aspects. Infrastructure in airport surrounds are again extensive and includes the Sullenberger Aviation Museum, NC Air National Guard and the Duke Energy Little Rock Ops. Surrounding 3d Grass and Fauna is also expertly done. It uses the older (but upgraded) "Ground Handling" tool for the animated gates, and there are some animated vehicles, but they are not overly represented here. There are a couple of oversights. The centre field Radar Tower is not in keeping of the high quality of the scenery, not animated either? the odd wrong Tower view setting? South W1 taxiway bridge is flat, not 3d? and all internal detailing like JFK is for external viewing only, but it is still very comprehensive, and it has some very weird people modeling. This CLT scenery is X-Plane 12 only. Nimbus Studios sceneries were always top notch quality and have excellent detail, but Charlotte Douglas shows a scenery developer at the very top of their game, and quality sceneries like CLT are highly usable and versatile in their use. So the KCLT scenery presented here hits every highlight with aplomb, and you can see that X-Plane 12 can deliver product as with the best of them.... Highly recommended. __________________ Yes!... KCLT- Charlotte Douglas International Airport UHD by Nimbus Design is now Available from the X-Plane.Org Store here : KCLT- Charlotte Douglas International Airport UHD Price is US$26.95 Requirements X-Plane 12 (not for XP11) Windows, Mac or Linux 8 GB+ VRAM Recommended Download Size: 2.5 GB Current version: 1.0 (June 21st 2024) Installation Installation of KCLT Charlotte Douglas XP12 is done via download of 2.52 Gb... There is only one file to insert into your X-Plane Custom Scenery Folder Nimbus Simulation - KCLT - V1.0 XP12 With a total installation size of 2.93Gb. There are no documents, but installation is very straight forward ___________________________ Review System Specifications Windows - 12th Gen IS1700 Core i7 12700K 12 Core 3.60 GHz CPU - 64bit -32 Gb single 1067 Mhz DDR4 2133 - PNY GeForce RTX 3080 10GB XLR8 - Samsung 970 EVO+ 2TB SSD Software: - Windows 11 Pro - X-Plane 12.1.0 Plugins: Traffic Global - JustFlight-Traffic (X-Plane.OrgStore) US$52.99 : Global SFD plugin US$30.00 Scenery or Aircraft - Aircraft None - ____________________________ Scenery Review by Stephen Dutton 15th July 2024 Copyright©2024: X-Plane Reviews (Disclaimer. All images and text in this review are the work and property of X-PlaneReviews, no sharing or copy of the content is allowed without consent from the author as per copyright conditions) All Rights Reserved
2 points
-
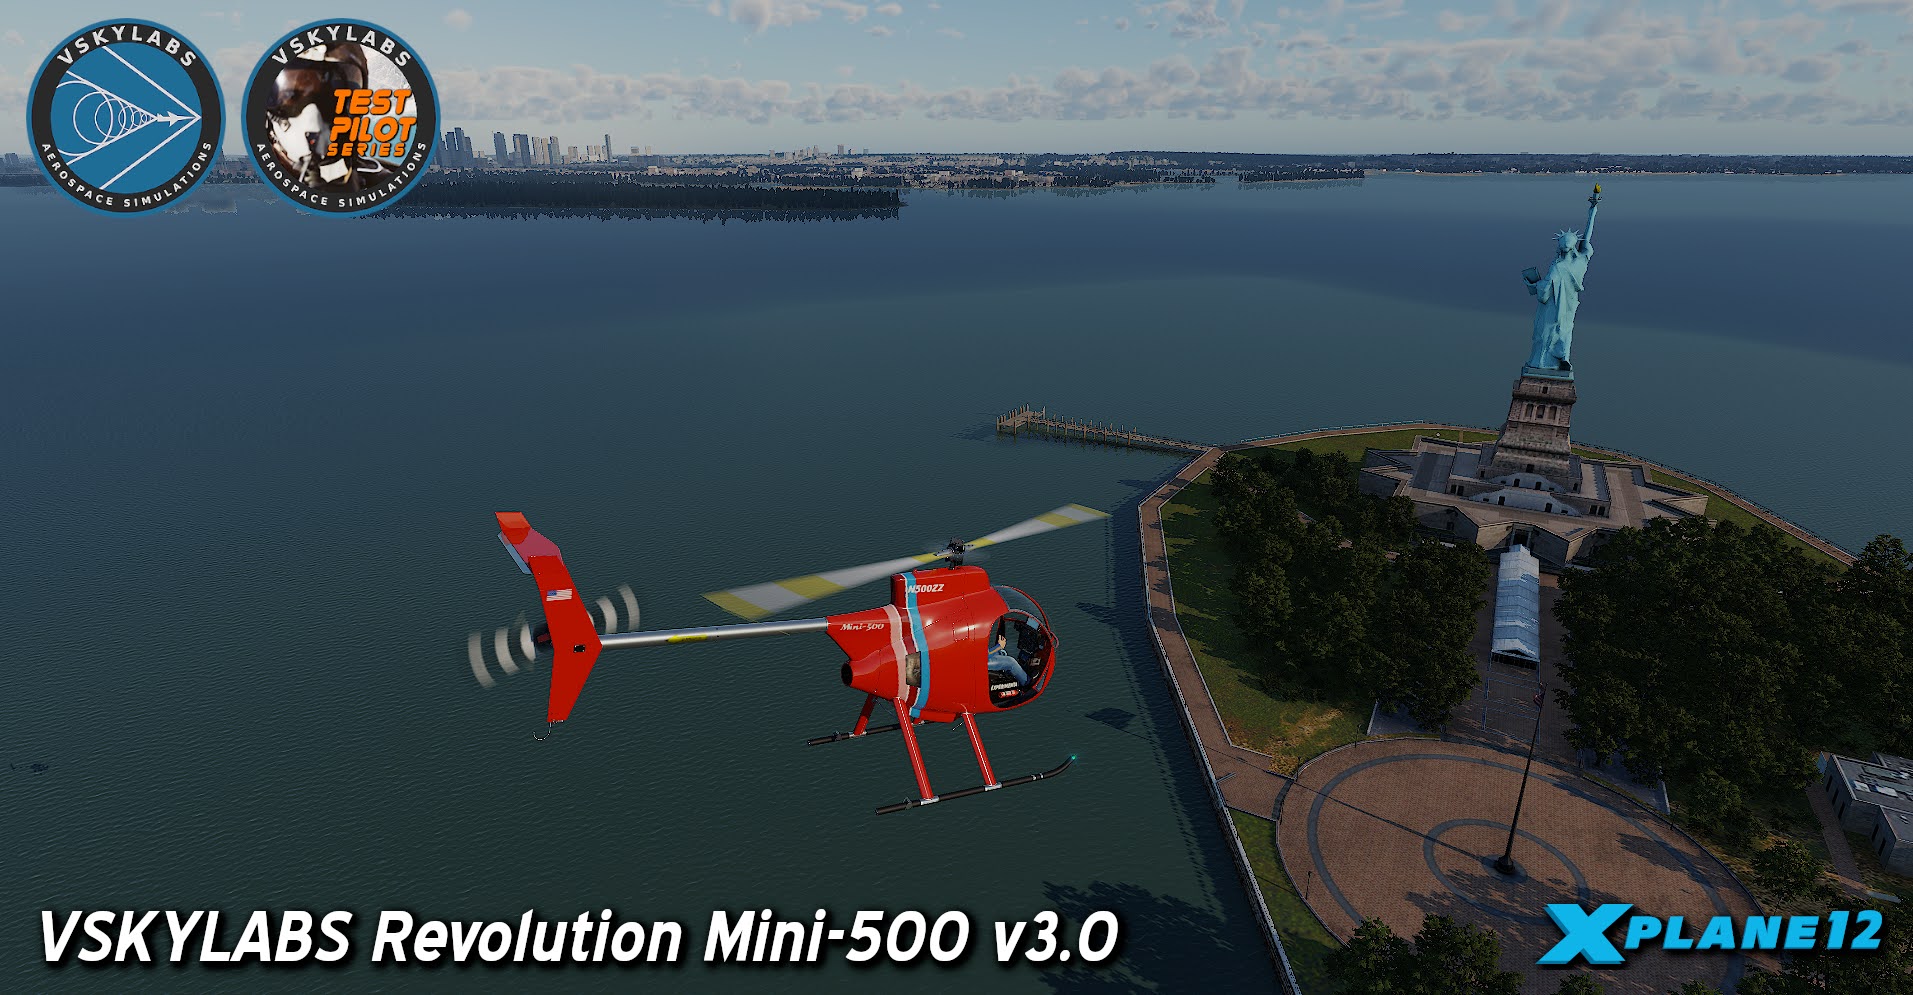
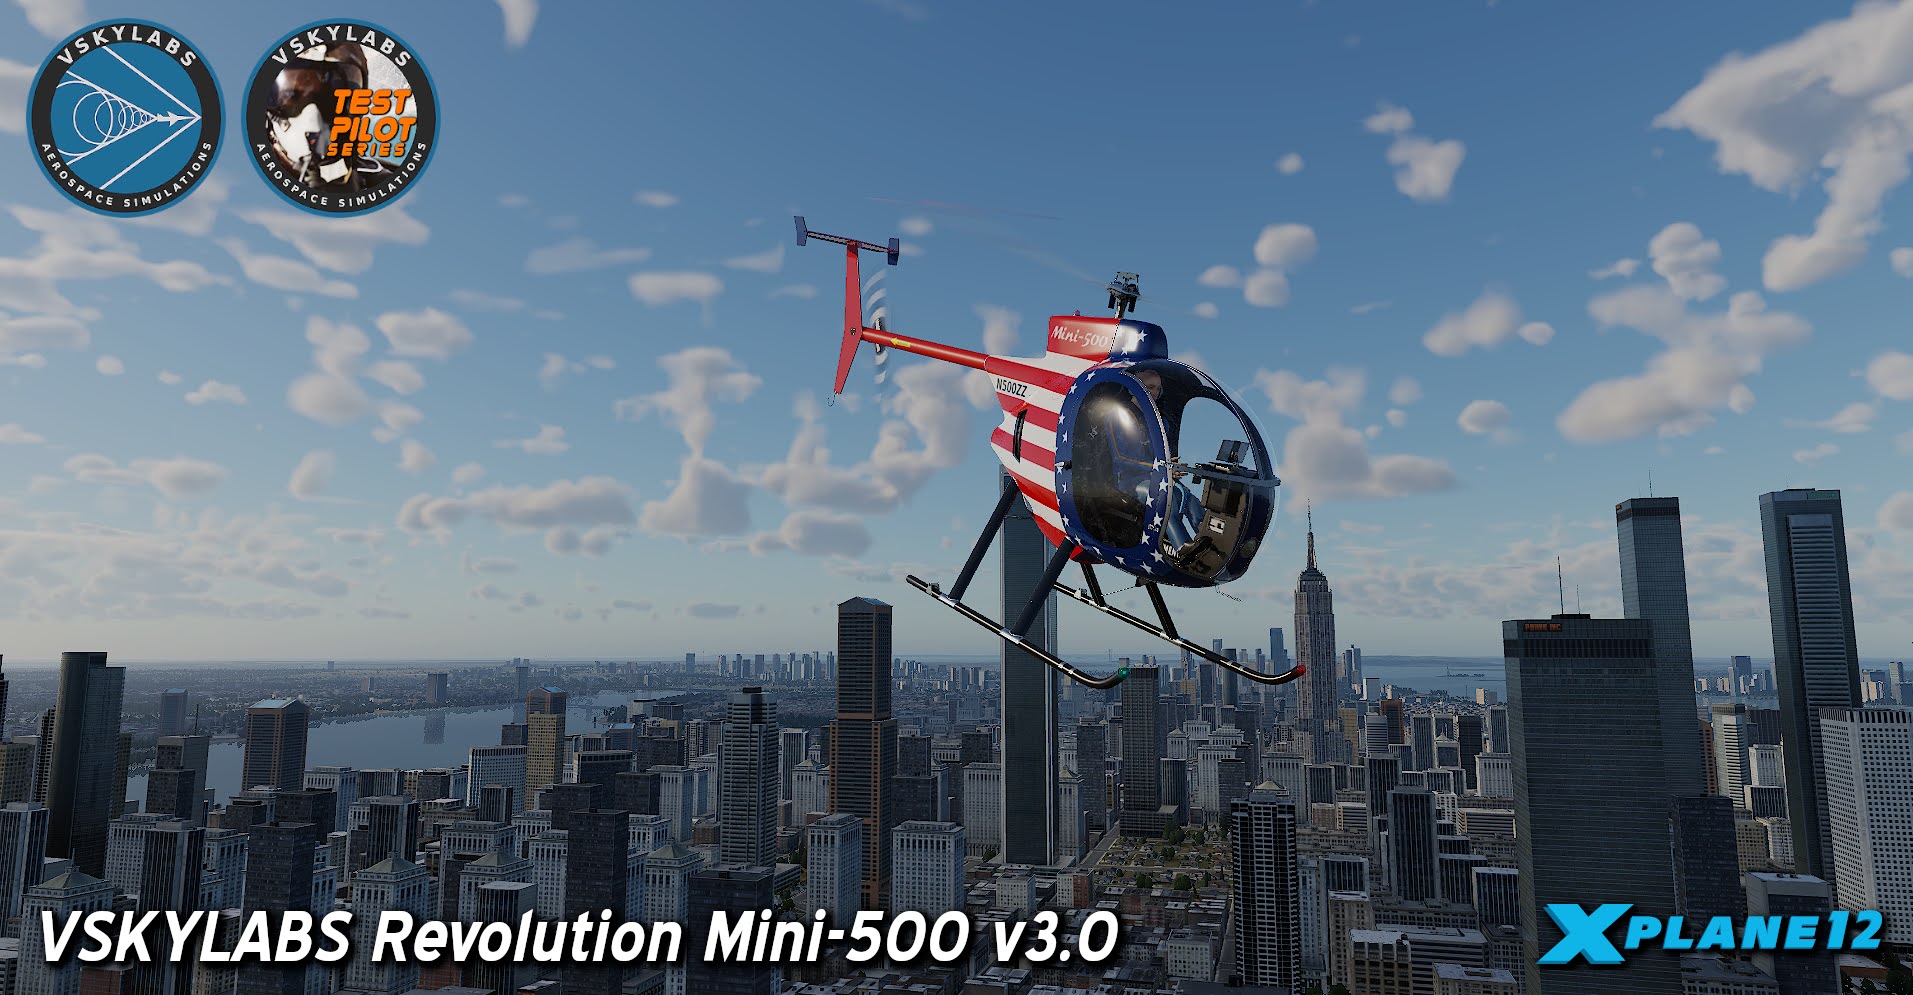
This A380 has been built up from the scratch in PlaneMaker. It just uses 3D objets from the old model. Systems, displays, graphics, plugins… all is new. Certainly we are using our codes for FBW, FlightDirector and autopilots, which already had been excellent in 2010. Now they are even better. Peter2 points
-

Aircraft Review : PA28R Piper Arrow III XP12 by Just Flight-Thranda
flightwusel and one other reacted to Stephen for a topic
Aircraft Review : PA28R Piper Arrow III XP12 by Just Flight-Thranda JustFlight arrived with the original Piper PA28R Arrow lll for X-Plane 11 nearly seven years ago. back then the Piper added in another quality General Aviation developer into the mix, with vFlyteAir, Carenado and Airfoillabs. But you could never want for more in the GA category aircraft. Jump forward those six plus years and the X-Plane world has changed from those days of when General Aviation totally dominated X-Plane for aircraft sales and choice. With Carenado now gone, it is only vFlyeAir that is carrying the GA banner, Airfoillabs do of course still present their C172, but other wise it is down Aerosphere to fill in the gaps, but they are not set in that higher category of ultra quality and features. JustFlight in co-operation with Thranda Design however have delivered some very nice General Aviation aircraft for the X-Plane Simulator in those six years, but although there was some conversions to the release of X-Plane 12, they were not what you would call to the XP12 standards, just a revamp to align the aircraft with the new Simulator version. But here now is the release of the X-Plane 12 JustFlight Arrow lll conversion, this is the full comprehensive revision and complete realignment with X-Plane 12. The Arrow is a part of the PA28 Cherokee family, but in this latest more modern reincarnation as it is a four-seater that includes a five inch fuselage extension, span increase with a semi-tapered wing, a larger horizontal tail, gross weight increase and other minor changes over the earlier Cherokee. The Series III here also introduced the retractable landing gear arrangement. It also had enhanced performance and better handling characteristics compared to earlier Arrow models. Thranda use a system to enhance the PBR (Physically Based Rendering) materials with their real-time environment reflections for superb quality and realism, 8K textures are now also used, twice the density, but highlights the detail and quality to a far better compounding degree. It shows off easily the highlights of the superb quality of the surfaces and the exquisite detailing on the PA28. But the process also creates unwanted shadows, and dull areas, if you look at the model in certain lighting conditions. It is a Thranda phenomenon, it can also create darker areas were their isn't any, so in the X-Plane 12 lighting, it can be shaded in cases were there shouldn't be any effects. But the detailing is excellent, best in class. Glass is simply exceptional, perfect in thickness, tint and reflections. The three point landing gear has had a "Hard, Hard" life, with in being worn, oxidised and painted rusted springs... this is an aircraft that has had a lot of flights in hard conditions over decades of use. Gear detail is also really well conceived and done here by JustFlight, as the landing gear system comes with an intricate retraction animation, slow/fast tyre rotation animation (blurry when rotating fast), and the precise shock absorber animation with multiple linkages are animated accurately. The "R" in the name designation means "Retractable". The performance of the Arrow lll is not what you call spell binding, not average either... Maximum Speed is 148 knots (170 mph, 274 km/h), with a Cruise Speed of around 137 knots (158 mph, 254 km/h). The range is 880 nautical miles (1,630 km) with a service ceiling of 16,200 ft (4,938 m). Rate of Climb is 1,000 ft/min (5.08 m/s), but you would usually only do around 800 ft/min. The Arrow here is powered by a Lycoming IO-360-C1C6 engine of 200 hp (149 kW), all up gross weight is 2,750 lb (1,247 kg). The realism extends to the flight dynamics, which are based on real-world performance and handling data, and input from Arrow pilots. Lets us be frank, the PA28 Cherokee series is the saloon car of the aviation world. It is a steady handling, doing the chores sort of aircraft. It is not a sporty machine (unless you go for the Turbo), or dynamic in it's flight envelope. But it is very solid, reliable and even handed machine. It's not boring to fly, as you have those X-Plane 12 dynamics, which are now very well fine tuned. So if a word summed up this aircraft, it is "Classic". The Arrow trims quite nicely, but requires re-trimming with any power changes, which you can use also to climb or descend as well. Bank and you will need a bit of back pressure to keep the nose up, also flying straight and narrow requires a fair bit of right yoke to keep it in line, to counter the asymmetric thrust (there is a rudder trim, but hard to access)... so you work in here to keep the Piper on an even keel, you trim and then keep on trimming to get it perfect. That is not to say I don't like it, as the PA28 gives you a lot of feedback... the best sort of Simulation. In a landing configuration you get a lot of drag, not only from flaps at 10º, but set 25º the Intermediate setting (used during approach and landing), and the 40º which is the Full flap setting (used for landing). The gear creates havoc with your nice clean approach, so be aware of when you drop it down. Otherwise when fully configured for landing it is all about the throttle control, in adjusting your height, a bad cross wind (12 knts) didn't help either, but otherwise it was a nice clean if easy landing. Note, the PA34 is a bit shimmy on takeoff, so fine rudder control is needed so it doesn't become a problem, overall you need careful control and slow up throttle movement to get the best clean track. I love it when things are done properly... I love the door on the Arrow, yes I love a door, you may think that is just plain weird or whatever, but I do... It takes more actions to open or close it than what they use on the Apollo capsule. There are two catches to open, one set on the roof and a big catch set forward in the door, then you can use the outside latch to open it. Other doors (and windows) include a very large baggage hatch set right rear, and the opening paper window on the pilot's side. Note the nice metal window surrounding plates. Two other ground options include, Chocks on all three wheels, and wing tie-downs... but there are no flags or inlet covers. Notable also on the exterior is the opening oil hatch top, and the excellent detailed exhaust system. The Hartzell Scimitar 74 inch Three-Blade Propeller is a variable-pitch, but not demonstrated here. Cabin materials can be divisive here... they are first and foremost excellent, but bright red. You will either love this cabin or totally hate it, myself I adore it, even if it sorts of dates the interior. It feels like that brushed velvet, and red Faux Leather trim, there is even the chrome fittings as well... the beige curtains, or window shades are really well done. The rest of the cabin and roof is beige and cream, again very 70's. The roof has a massive air ducting module, that makes the cabin tight and even claustrophobic, but again quite authentic, if even fancy... The internal textures have had the same treatment as the exterior, better PBR effects and Ambient Occlusion, so it has that X-Plane 12 highlight sheen, that gives the aircraft a big "wow" factor. Yes it is the same cabin as the X-Plane 11 version, but it now feels so very different in it's better feel and look. Instrument Panel In the X-Plane 11 Arrow version you had two panel options, as I noted "loved and cared for" and "worn" or unloved and scruffy". Here JustFlight have reverted to just one design, the older 70's padded look. Panel design is absolutely first rate, beautiful detail and with all the sheer realism you can get in simulation today, a highlight is the lovely glareshield with it's realistic stitching... you can just feel and touch it, or is that a caress for the sheer ownership of it all. The aircraft's registration still also changes with the different liveries on the panel which is a nice touch. The yokes are still really outstanding, the left different to the right with the Piper logo. The left yoke is fitted with a digital chronometer. The mode button allows you to toggle between either the clock mode or the timer mode. On top of the yoke but very hard to see is a black electric trim button with down (forward) and up (rearwards) adjustments. You can have both yokes visible, or one each side, or hide both together... very flexible. The instrument panel layout is exactly the same as the earlier X-Plane 11 in features... Instrument panel is set out with the Standard Six instruments that are centred in line of sight of the flying pilot with the Airspeed Indicator, Artificial Horizon and the Attitude Indicator on the top row and the Turn Coordinator, Heading Dial and Vertical Speed Indicators set out directly below. Left of the six pack top is the Gyro Suction dial with the Bendix/King ADF indicator set below. On the right top is a Garmin OBS VOR indicator (VOR1) and the same OBS VOR indicator (VOR2) below. I prefer the pointer VOR needle than this version as it is better for circuits and runway lineup (that is if the VOR is placed close to the runway). All the main dials are older black/white in design and not with the coloured Artificial Horizon that you could also have in this aircraft. Mid-left panel gauges are standard Cherokee with Oil Press, Oil Temp and Alt Amp on the left side and Left Fuel tank, Cyl Head Temp and Right Fuel tank on the right of the yoke. Lower-left panel has a basic Piper "AutoControl IIIB" Autopilot, which we will cover in more in detail later, the start key and a Manifold Pressure (inHG) and Fuel Flow gauge (Gallons per hour). Another gauge here is a Tachometer/RPM dial with built in Hobb's meter. Avionics in the Arrow are very old, the only modern gadget is the centre stack mounted X-Plane default Garmin GNS530, and yes of course it pops out. There is also the provision to install Reality XP's GTN 750 unit, but this is an addon extra and it costs you another $49.95. Lower right panel is an Exhaust gas temperature (EGT) indicator and you can rotate the screw to control the position of the red (maximum value) needle and left of the EGT is a comprehensive set of active circuit breakers. There is a fan switch and heating controls as well. The only instrument on the right side is a standby Altimeter and spare hobbs meter. Custom-coded electrical system comes with functional circuit breakers. Circuit breaker logic is linked to X-Plane's internal failure logic, so if the plane is set to fail a certain electrical component after a certain number of hours, the circuit breaker for that element will pop out. The audio panel is a very early model Bendix/King KMA T20 TSO which is above the GNS530, below bottom is the Benedix/King 76A transponder. The right side stack has a Bendix/King KX 175B radio for VOR in COM2 and VOR2 (COM1 and VOR1 is set via the GNS530). Then below is a Bendix/King KN 62A DME (Distance Measuring Equipment) set, the Benedix/King KR 85 ADF radio is set out below the KN 62A. There are a set of rocker switches mid lower panel for (L to R) Power (Battery & Alternator), Fuel pump, Landing Light, Anti-Collision Lights in rotating and navigation and Pitot Heat. Either end of the switch panel are two scroll wheels for Avionic brightness and Instrument brightness. The centre mini-pedestal has the familiar Throttle, Propeller and Mixture levers, but also a mixture lever lock on the side that restricts the mixture lever from moving below a 40% setting. The levers are a bit odd in that you have to move your movement upwards to move the levers down and vise-versa and in busy traffic conditions it can be annoying in the actions being the wrong way around. Also you have to use your switch gear before moving the Propeller and Mixture levers to the full forward position as they cover the avionics lighting scroll wheel, main power switches and fuel pump switch. I love the chunky T throttle handle. Below the mini-pedestal is your aileron trim wheel and park brake lever. Between the front seats is your beautiful elevator trim and flap handle, there is an emergency gravity assist gear drop lever here as well that works. Left lower wall panel is the Fuel Selector, with a Fire Extinguisher set beneath your thighs. Gotta love those filthy, worn, dirt strewn red carpets, detailing 101... metal foot plates are gorgeous. Authentic "Piper" branded rudder pedals are worth your gaze as well. Lighting The Arrow III's lighting here is quite basic, but it is very good in what it does. The panel is really very sepia and black/white in its design, but it does make for a very readable panel in the dark or in low lighting conditions. The instruments are backlit, but show the aircraft's age. Cockpit lighting is done via an overhead red lamp, it is quite bright, but the rear cabin is dark. The external lighting is the same in just being the basic lighting, with a strobe on the tail and navigation lights (or noted here as "anti-collision") There is a very strong nose landing light and the bright flashes of strobe lighting that don't strobe together which is interesting, in that you get the left wing and then the right wing in multiple flashes on each side. All external lights are very different in colour and in the more modern LED halogen bright than X-Plane dull, you get the brilliant star feel (new X-Plane 12 halo) effect as well. Sounds At this level you expect really good sounds. And the JustFlight Arrow does really deliver here with custom sounds for; switches, doors, gear warnings and far more, it features accurate location placement of sounds in the stereo spectrum, 3D audio effects, atmospheric effects, adaptive Doppler, and the exterior sounds spill in when window or door(s) are opened, there are the different sound characteristics depending on your viewing angle and distance from the sound source. It is all FMOD 2 in quality as well. Menu The JustFlight Menu system is all changed for X-Plane 12 as noted in the Duchess Model 76, that was released early March. Gone is the generally average looking dated tab menu. Here it is replaced by an iPad style tablet, stuck to the left window, or bring the tablet up in the screen by clicking the arrow tab top left (you can also popup the main tablet menu by pressing the left side of the window tablet)... But you do have other options, as the tablet can also be placed on either yoke and right side windscreen by clicking the bottom of the tablet... The pop-up tablet can also be scaled, or moved anywhere on your screen. The tablet is also adjustable (movable) via the hot-spot, top frame. But because of it's size and shape, the view-point is not ever really square or set head on, the yoke position is usually better, but now also situated far lower in your eyesight. The earlier X-Plane 11 version had eighteen tiles for selection, here it has been reduced down to twelve... Top row : Aircraft Options, Weight & Balance, Instr Options, Engine Config, and Static Liveries Middle Row : Configuration, Log Book, Checklist, Ground Handling and Dynamic Liveries Bottom row : Flight Computer and Avitab (Plugin required) Aircraft Options: Covers the two doors; CoPilot, Baggage Door and Pilot Window (Open /Close), Window and Instrument Reflections, Cockpit Lights, Swap Pilots, Altimeter (IN.HG/MB) and Ground Equipment (Left/Right Tie Downs, Nose, Right and Left Chocks). We have seen the opening doors and pilot window, also the Tie Downs and chocks. Dan Klaue and his wife turn up as your pilots, and basically they are same two fully animated pilots as in Thranda Aircraft, by this menu option, you can swap the seating position of the pilots. Weight & Balance: The weight and balance window is very good, if basic to look at (it is the original W&B window). It comes with adjustable weights for all four passengers, and baggage, fuel can be set here also as can the change from kg - lbs. There is the option to load the Aircraft "Half" or "Full" tanks. A full list of weights, CG and a large graph of your settings are all very helpful into balancing the aircraft. Press "Save Configuration" to save your preferred load setup, and "Load Configuration" to set up the aircraft. Lowering the Co-Pilot weight usually will make Him/Her disappear, but not in this aircraft.... there are there no passengers either if the weight added in the rear, or any bags if added to the baggage area, such is shrinkflation today. You can open most pages into a "Window" via the arrow logo right top. Instr Options (Instrument Options) includes two pop-ups for the GNS 430 and the Century IV (autopilot). The "AutoControl IIIB" has only two functions in holding the heading and roll L&R. You can adjust the heading (thankfully) via the Heading instrument knob, or switch off the heading on the AP and roll the aircraft to your new heading. There is a hidden function to hold your altitude (not on the real system) by pressing the "Piper" text above the coupler knob on the left part of the panel, It is hard to find and almost half-hidden but you do get a manipulator hand or finger to say it is actually there and but not when activated? It does work very well but the aircraft has to be perfectly trimmed before pressing it on... it deactivates with a kick as well when or if you adjust the trim wheel, so be ready for that. Another point is that because if you don't use the altitude hold function, you can adjust the trim without disconnecting the AP, so it is quite easy to hold an altitude by setting the trim finely. The old "Refill Menu" has been changed here to the Engine Options; this allows you to view the fuel and oil status as well as the status of spark plug fouling and Vapour Lock, and you can also recharge the battery if it goes flat, of which it does with regularity. There is also an "Imbalance" indicator for the Fuel Weight, you can do a "Refill" here of the fuel here as well. Static Liveries; You can rotate through all the six liveries with the Arrow lll via the "Static Liveries" menu. An option here (new) is that you can adjust the Dirt (dirtiness) between 0-100%. Very Thranda. Configuration: Here you can change the aircraft configuration, and there are three options; Engines Running (power up to flying mode), DynaFeel and the tablet (screen) Brightness. DynaFeel" is a system that dynamically adjusts the rate at which the controls deflect. It is based on airspeed and how much the control is deflected. This means the controls will feel light and responsive at low speeds and with small deflections, but will get progressively heavier as the airspeed increases. If you fly Thranda Aircraft, then you will be familiar with the system. Logbook: This icon brings up the X-Plane standard Logbook. Checklist: There is a 31 page checklist that you can tick off... very good, but even though there is a "End of the Checklist" tickable box, it doesn't oddly reset all the boxes to a reset... that is a return through of 31 pages, and an average of twelve boxes per page to untick, so you do the maths... Ground Handling: All JustFlight menus have odd useless tools, here is one... the X-Plane "Ground Handling" tool, for "Pushback" and "Request Ground Service"? It's a GA, not a Boeing 737. Dynamic Liveries: Here is another Thranda feature now available on the JustFlight Series. Thranda introduced a clever feature of a way to design your own livery called DYNAMIC LIVERIES. You have a menu to select on the right that can colour a certain part of the aircraft, like the Roof, Wing, Tail or Wing tips. Select which one you want and then adjust the three RGB colours for that certain area, and the selected colour (here seagrass) is shown in the square. You can also separately change the aircraft's registration number, the Piper logo can be added as well. Another option is that changes can also be made to the Metal or Rough surfaces, this can be applied to any of the liveries. When done you can "SAVE" or ADD the livery to the index and then "APPLY" it to the aircraft. The conversion takes a few minutes with some weird screen changes, but the results are excellent and now the Piper Arrow is in your own nice livery design... the results are found under the "DynamicLiveryResources" in the liveries. Flight Computer: The flight computer panel provides a wealth of information that is very handy in flight, with highlights including OAT (Outside Air Temperature), GS (Ground Speed), Endurance (time), Range (available), NMPG (Nautical Miles Per Gallon)/ SMPG (Standard Miles Per Gallon), Altitude (Density and Pressure), TAS (True Airspeed) and FF and used fuel flow, Winds (Headwind and Crosswind).... fuel burn can be reset. Units can also be changed from Metric to Imperial.. AviTab: The AviTab tool can also be used, and with Navigraph charts if you have an account. There is no tablet rotation from landscape to portrait, and to get back to the main menu, you press the right centre section of the frame. I found that for using charts, it is best setting them up in the side window, before opening up the main Pop-up, otherwise it just goes to a window setting. _____________ Liveries There are six (Painted Liveries) liveries plus the two of the system liveries are noted as "DynamicLiveryResources" and "ZZTEMPLATELIVERY", these are the currently selected "DYNAMIC LIVERIES". Summary The Arrow is a part of the PA28 Cherokee family, but in this latest more modern reincarnation it is a four-seater that includes a five inch fuselage extension, span increase with a semi-tapered wing, a larger horizontal tail, gross weight increase and other minor changes over the earlier Cherokee. The Series III here also introduced the retractable landing gear arrangement. It also had enhanced performance and better handling characteristics compared to earlier Arrow models. Here the Arrow lll has been extensively upgraded to X-Plane 12 by JustFlight/Thranda, note this is an upgrade, and earlier purchasers of the Arrow lll XP11 can get 10% discount off the new Piper X-Plane 12 aircraft. The X-Plane 11 version was an excellent aircraft. But this rejuvenated version for X-Plane 12 is far, far better again, Highlights of the changes are the new 8K textures, and the far better PBR effects, and this creates a far more quality exterior and interior. First glances say, old and tired, but on a closer inspection, it will cry out with "Classic" authenticity and it all comes to a very high quality. The Arrow comes alive in X-Plane 12, highly realistic and it gives you a very high quality PA28 for X-Plane 12. There is also a new menu system, as replacing an old tab system, and it is a quality iPad/tablet, that can be positioned in four different places. Besides a few of the original tabs and pages, there are also three new added features directly from the Thranda Design stable, with now the "PAINTED LIVERIES" function, the build your own livery feature of "DYNAMIC LIVERIES" and the "Dynafeel" tool. Performance, physics and handling have also been highly improved to X-Plane 12 standards, based on real-world performance and handling data, Sounds are totally upgraded, with a full stereo spectrum, 3D audio effects, atmospheric effects and adaptive Doppler, and the feature list is very long. But the odd quirks oddly remain? The Static Objects in being separated here are better, but there are very few of them. Lighting is basic, and you still get the very odd tab and useless elements like the X-Plane Ground Handling? and Logbook?... fillers only. The checklist is another oddity, with 31 pages of checks, that you can't uncheck in one operation. Priced in that high price range of US$40+, you expect a lot for your money. Thankfully you get that aspect here, but now even more so in the X-Plane 12 environment. It is an aircraft to spend time with to understand it's depth, the more you use it, then the more you find what you really like about it... depth in design is the words here. JustFlight/Thranda create excellent, lovely aircraft, that even the most novice pilot can fly and enjoy... overwhelmingly the main thing about the Arrow lll is that it brings back that deepness required, that seems to be lost in the more modern environment. So it's like going back ten years but still having all the mod-cons, the effects and dynamics that X-Plane 12 provides as well are part of the deal, the JustFlight Duchess had this same feeling, as does the Arrow lll here, it is a brilliant combination of the very best of both worlds.... Highly Recommended. ___________________ Yes! the PA28R Piper Arrow III XP12 by JustFlight Thranda is now available from the X-Plane.Org Store here : PA28R Piper Arrow III XP12 On sale: US$42.99 Requirements: X-Plane 12 (not for xp11) Windows, Mac or Linux 8 GB+ VRAM Recommended Current version: 1.0 (July 1st 2024) * Customers who own the PA-28R ARROW III XP11 by JustFlight can get 10% off this new XP12 model. Coupon code can be found in the original PA-28R ARROW III XP11 Invoice Installed in your X-Plane Aircraft folder 2.47 Gb. Installation 2.65 GB, Authorization on startup is required. AviTab Plugin is required for this aircraft Documents ChangeLog.rtf EULAstandardcommercialandacademic2024.pdf GA Fleet X-Plane 12 EFB.pdf PA-28R Arrow III ODM X-Plane 12 manual.pdf PA-28R Arrow III X-Plane 12 manual.pdf Design by JustFlight/Thranda Design Support forum: JustFlight Arrow lll _____________________ Review System Specifications: Windows - 12th Gen IS1700 Core i7 12700K 12 Core 3.60 GHz CPU - 64bit -32 Gb single 1067 Mhz DDR4 2133 - PNY GeForce RTX 3080 10GB XLR8 - Samsung 970 EVO+ 2TB SSD Software: - Windows 11 Pro - X-Plane 12.1.0rc2 (This is a Release Candidate review). Plugins: Traffic Global - JustFlight-Traffic (X-Plane.OrgStore) US$52.99 : Global SFD plugin US$30.00 Scenery or Aircraft - EGHI Southampton Airport by PilotPlus+ (X-Plane.OrgStore) - US$19.95 ___________________________ Review by Stephen Dutton 4th July 2024 Copyright©2024: X-Plane Reviews (Disclaimer. All images and text in this review are the work and property of X-PlaneReviews, no sharing or copy of the content is allowed without consent from the author as per copyright conditions) All Rights Reserved
2 points -
Behind the Screen : June 2024 Can you believe it is already half way through another year? Yes the months do seem to be passing quicker, and the years too. It was only two years ago we were waiting for the X-Plane 12 (beta) release, TWO YEARS, man it's gone quickly, and here we are nearly half way through the XP12 run, yes halfway already to X-Plane 13, Laminar Research will be soon dragging out the white board again to list the next set of exciting features! But that is for another day. Those two years were also very disquieting in the process as well... don't worry I'm not going down THAT road this month. So this created a bit of nervousness as the Fight Simulator Expo in Las Vegas approached this year. Laminar Research only sent two people last year to Texas, one the PR (Public Relations) guy and Phillipp Ringlar, so basically there was really no visibility from X-Plane, except for a stand and a few demonstrations... were as Microsoft basically took over the Expo with the Flight Simulator 2024 announcement. Your always looking for a base line, and the situation of knowing where you stand. To be honest that has been hard with X-Plane 12. It had all the excellent ingredients, and in the many times the power of X-Plane 12 sort of shone through, but somehow it didn't all come together for one reason or another. Last month in BtheS I noted the level of excellence now being shown via X-Plane 12 aircraft, most notably the X-Crafts E-Jet Series, X-Trident AW-109SP, and now we can add in the FlightFactor Boeing 777v2. Levels above in about what we expect with quality Simulation. But what of the X-Plane Simulator itself? But the 2024 Expo sort of gave us a better understanding of the current Simulation situation. For one there is a lot of competition out there, but overall it still comes down to FlightSim and X-Plane. After last year and the announcement of FS 2024 (coming in Nov 2024), I was expecting this year's 24 Expo to be "nail in the coffin" sort of scenario coming from Seattle. Oddly it didn't happen, but it did sort of showed were and where the situation is going. I will be honest, and I think I mentioned this at the time last year. I thought the new features for FS 2024 were quite disappointing, no seriously. Except for the continuing focus on the 3d landscaping, it didn't really deliver anything new except for presenting "Experiences", scoff you might... but even this year's 24 Expo was really a rerun of the same as last year, adding in only the Boeing MAX as an aircraft release. The only highlights were the "Vertical Obstacles", in creating thousands of infrastructure in pylons, weather towers, power stations and the clever world shipping. I do admit that over the course of the FS 2020, Microsoft did a brilliant job in filling in the world with their consistent "World Updates", 16 in all and the last World Update XVI, focused on the Caribbean region. The huge mass of 3rd party developers did the rest, releasing tons of aircraft, and far too many sceneries that were so nondescript, that I had google a lot to find out where they actually were. New developers were coming out of the woodwork by the hour, and if you could even think of buying even fraction of all these releases, then certainly my bank balance says absolutely not? Which comes to my favorite word "Momentum", that word gets things done and builds huge audiences, 15 Million users in this case, but to be honest I don't totally subscribe to that number. X-Plane has just over a million, but the core number of users is probably only around 200,000... So what is the true number for FlightSim, say 4, maybe 5 million, still a big, big number compared to X-Plane. X-Plane 12 has a huge amount of new features, including; Photometric Rendering, Enhanced Weather System, Seasonal Effects, Dynamic Water, Improved Flight Models, ATC Improvements and a new User Interface. You could say that most are in relation to the release of FS 2020, there is some truth in that but not all of it. These features were groundbreaking, but issues in getting them refined took far too long, and some took development of nearly two years on from release, you could call it behind the "8 Ball". But the release of the Newly numbered version 12.1.0, you finally had all the components working together in harmony, and the results are really quite amazing. But in the same time as noted FS 2020 had gained a lot of users and a far bigger audience. But putting them side by side as Simulators the differences are more even handed. Again you may scoff... but I was very surprised that FlightSim, didn't even have a replay function? but are added it into 2024 via a 3rd party, and a cheap fix at that? So two major things came out of Expo 2024. The first is the obvious neglect of the scenery. First I will note that scenery requires a huge amount of processing power, and something we didn't have a decade ago. Also Microsoft processes their scenery off your processor and delivers it to you in packages, a clever way of doing it, but that aspect also puts you at the mercy of your internet connection and speeds. And the hoards over there are always complaining of the problem. For X-Plane and for processing the scenery on your own machine, means that the size or detail of the scenery is restricted to what you can personally process, that aspect also restricts on what Laminar Research can also deliver in detail. But to be honest, even with all the issues around the scenery, Laminar still missed the ball completely in leaving the changes for so long at over a decade. The release in November 2011 of X-Plane 10, is now nearly 13 years (12 years and 222 days), although great at the time, that length of time in lying dormant in a simulator is simply backward thinking. I know I go on about this aspect, year after year, but the fact remains it has caused the biggest divide between the FlightSim and X-Plane, and the way that the users have preferred one Simulator over the other, great aircraft withstanding. Laminar in not being more vigilant on this aspect in every scenery area, has put the Simulator into a precarious position, that even lesser known, mostly battlefield Simulators, leave X-Plane and Laminar in the dust in quality background scenery. It is the "glaringly obvious" of the differences between the FS and X-Plane Simulators, and also why developers are trending and are attracted to the boards in FlightSim and not X-Plane. Give Microsoft their due, they looked at X-Plane's biggest weakness and totally exploited it. Then FS pushed the knives in deeper with their excellent World Updates, on how could you still keep on missing the vital messages coming at you, but Laminar did. Somehow the mantra of, we only do aircraft, not a whole simulator was even obvious when the old school FlightSim was around, users were wanting to pay huge sums to collect scenery and city vistas, they were already world building, aircraft were diabolical and unrealistic to fly, but it still made FlightSim a huge money earner in add-ons, plus it added numbers back then that X-Plane could only dream of. The problem of processing these huge sceneries is still the biggest barrier to creating a real world X-Plane. Notably at the 2024 Expo, Laminar finally revealed that they were now looking at the scenery in question, they even said they would fix the green spaces around custom scenery... But just thickening up some tiles with more density is not the option either. X-Plane needs to become a "World" Simulator in detail, it is obvious the 3rd parties are not going to come to the party unless you are going to give them something unique or clever to want to develop for X-Plane... If you are of a certain age when X-Plane 9 rolled into X-Plane 10, you would remember the incredible transformation of the release, sadly Laminar didn't follow that aspect up. The point here is that the visual and effects in X-Plane are very, very good, but the main character of the Simulator is critically missing. If Laminar Research can and do fix this scenery aspect, then X-Plane will have better or even chance of being a premier Simulator, even then also attract back developers and scenery creators to get some momentum back into the Simulator. Going for once where the user wants them to go, and throw away the clubby atmosphere that has restrained the Simulator, what was once X-Plane's biggest strength has become it's biggest liability, in wanting a cheap Simulator (meaning free) is disintegrating it from the inside out... 15 Million users if you believe that number or not is proof of what Simulation wants out of Simulators, game quality visuals are now required to create "Experiences", not just very, very complicated aircraft. The second point that where X-Plane has also done badly is in selling itself. Again that small clubby little world didn't want anything to upset their view or take on Simulation. Microsoft sold Simulation big time, to anyone who wanted to try it... X-Plane over the last decade did absolutely nothing, not even an advert in PC Pilot. I tell everyone within earshot how great it is, and have created fellow users in the process, many having seen my set up and wanted one for themselves, but I was a small voice in the wilderness... If they don't know what you are using or selling, then how are you going to grow? X-Plane did have momentum, but at only a snails pace, Microsoft showed what Simulation was all about with the huge expansion of FlightSim 2020 and took the users with them... the money as well. Till next month, see you then Stephen Dutton 1st July 2024 Copyright©2024 X-Plane Reviews
2 points
-

eBook Review: Introduction to X-Plane 12 by Dave Britzius
Kiwiflyer reacted to Dominic Smith for a topic
eBook Review: Introduction to X-Plane 12 by Dave Britzius By Dominic Smith Introduction Navigating the complexities of X-Plane 12 can quite often be a daunting experience, especially if you're a beginner just starting out. This is where "Introduction to X-Plane 12" by Dave Britzius comes in, as it’s tailored to make one of the most advanced flight simulators for the PC/Mac more accessible and manageable. This beginner’s eBook extends beyond the basics of typical manuals by breaking down sophisticated controls and challenging scenarios into manageable parts. Through practical tutorials and realistic flight scenarios, Dave provides not only the tools to navigate X-Plane but also the guidance to excel, ensuring a learning experience that is as effective as it is enjoyable for pilots at all levels. Comprehensive Coverage Attempting to master a flight simulator like X-Plane 12 can be rather intimidating (I’m still trying after many years) but Dave Britzius begins "Introduction to X-Plane 12" at the very start, by addressing the common challenges and questions that often overwhelm newcomers. His approach helps smooth out the steep learning curve, making initial steps far more approachable. In the "Your First Flight" section, for example, Dave goes beyond simply listing steps as he explains why each action is necessary, such as setting the flaps to 10 degrees during alignment on the runway to optimize lift and reduce drag, which is, as we all know, crucial for a smooth takeoff. This practical advice not only clarifies the complexities of the sim but also enhances the learning experience, thus making it feel like you're being guided by a knowledgeable friend. As such, the eBook is free from overwhelming jargon often seen in many manuals. Instead, it breaks down aviation concepts into digestible, manageable pieces. Dave’s progressive teaching style gradually helps build your confidence and prepares you to tackle increasingly complex tasks. Each chapter slightly raises the bar in terms of difficulty, yet the pacing is carefully managed to ensure it remains within your grasp. In many ways, it’s like teaching someone chess. Hands-On Approach As mentioned above, technical manuals can quite often feel impersonal and robotic, but "Introduction to X-Plane 12" adopts a distinctly human approach. Recognizing that the most effective learning is hands-on, Dave's guide immerses you directly into the pilot's seat from the very beginning. The eBook systematically introduces you to your virtual cockpit with clear, accessible language, making each step from engine start to taxi and takeoff feel like a personal tutorial. In many ways, it’s like having a seasoned instructor right beside you, guiding each manoeuvre with practical insights. For example, the section on your first flight is presented more as a conversation than a lecture. Dave walks you through engine startup, explaining each control. This approach not only makes the learning process engaging but also deeply practical. By breaking complex procedures into simple, actionable steps, this hands-on method ensures you’re not just following instructions but actually getting the hang of things. It’s about experiencing, doing, and really learning how to fly, rather than just reading about it. Ease of Use As newcomers of X-Plane will know, navigating through the complexities of the sim can be quite often overwhelming, akin to needing a co-pilot guide you through each step, and in way, this is what the guide helps hopes to achieve, as it acts as your virtual friend, ensuring you master the controls and scenarios you'll encounter. Imagine you're getting ready for a challenging cross-country flight in different weather conditions. The eBook provides checklists similar to what real pilots use, with clear explanations on why each step matters and how it affects your flight. There's also a handy checklist included in the download package (pages 94/95) that’s tailor-made for the book, making everything safer and more efficient. The scenarios provided in the eBook are all derived from real-life challenges, such as preparing to manage situations like navigating through a thunderstorm or handling unexpected engine failures without screaming “we’re all going to die” at your passengers! Dave’s clear explanations help demystify complex concepts. For instance, he describes aerodynamics with accessible analogies, such as comparing the function of airplane wings to a swimmer's arms moving through water. This method helps you grasp the principles behind the procedures, which in turn deepens your understanding and enhances your flying skills within X-Plane. Layout Key to the learning experience, "Introduction to X-Plane 12" integrates visual and interactive teaching tools. Unlike traditional textual descriptions, the eBook employs high-quality screenshots that directly illustrate each step of complex procedures, whether it’s adjusting the throttle, engaging the autopilot, or adapting to shifts in different weather conditions. These visuals simplify the technical details, making them more accessible and easier to replicate during your own sessions. Interactive elements in the eBook also play a vital role. For instance, diagrams that show the effect of wind shear on an aircraft's trajectory are not just visual aids, they're interactive tools that invite you to explore and manipulate variables to see real-time effects. Another example are the clickable checklists which transform routine pre-flight checks into active learning exercises, allowing you to engage with each step rather than passively reading through them. As a visual learner myself, I greatly value this approach (as I’m sure many others will) as it ensures that the knowledge gained is not only retained but also applied in an effective way. Advanced Topics Once you're comfortable with the basics, the guide elevates your training by delving into advanced topics that deepen your understanding and broaden your skills. Here, Dave covers essential techniques such as adjusting aircraft settings for challenging wind conditions to using navigational aids in poor visibility. The guide also includes sections on how to tweak your settings for optimal performance, such as adjusting the altimeter for varying atmospheric pressures, critical for maintaining accurate altitude readings during storms. With step-by-step guidance, the eBook ensures you make these changes both safely and efficiently in the sim. Conclusion "Introduction to X-Plane 12" by Dave Britzius is a highly valuable resource for navigating the many intricacies of X-Plane 12. It offers practical support to both novice and experienced pilots, helping them enhance their skills and deepen their understanding of the sim. This guide focuses on practical flying, in contrast to Dave's other book, "X-Plane 12 Handbook – Book 1 - Setup," which deals with hardware and software aspects. The eBook's hands-on approach to learning ensures that users are able to gain confidence through active learning, not just theoretical knowledge. By explaining the reasons behind each action, it helps you truly grasp the principles of flight simulation, thus making learning both effective and long-lasting. In summing up, I must say I really enjoyed using "Introduction to X-Plane 12." It truly helps you get the most out of X-Plane 12. Whether you’re a newcomer to the sim or a veteran user, Dave’s guide comes highly recommended as there's something valuable for everyone. ________________________ Flying Low: Introduction to X-Plane 12 by Dave Britzius is now available from the X-Plane.Org Store here: Flying Low: Introduction to X-Plane 12 Priced at $15.00 Features There are three sections: The pages dedicated to the Laminar Tutorials just add a few questions and answers and some guidance to the existing tutorials bundled with X-Plane 12. The Take-off and Landing tutorials go into matters much more deeply than the superficial Flight-school tutorials.. The bulk of the e-book is the detailed IFR and VFR flight from PAJN to PAKT and will cover step-by-step: Preflight procedures Starting the engine Filing a flight plan and creating one for the G530 moving map. Talking to ATC and following ATC’s instructions Taxiing and Takeoff Using some of the navigational instruments Navigating with VORs and extensive use of the CDI Saving and restoring a flight and the “gotchas” involved Sightseeing and Screenshots The autopilot Weather Landing without ATC in a traffic pattern in bad weather Checklists Replays At the end of some sections, there is a genuine report by a novice X-Plane user on where he had problems and lessons that he learnt. Length – 263 pages – 131 double-spreads. Checklist file included as well. Requirements Adobe PDF reader Download size 85MB This is a large interactive PDF and requires the free Adobe PDF reader to experience full interactivity. The PDF has an extensive index in the form of dynamic bookmarks available on the left-hand side of the viewing window. In addition, the main Table of Contents is one clickable chart to enable easy and quick navigation. Review System Specifications Intel i5 12400 – 32GB RAM - Nvidia Asus RTX 4070 – Windows 10 Home 64 Bit __________________________________ eBook Review by Dominic Smith 24th July 2024 Copyright©2024: X-Plane Reviews (Disclaimer. All images and text in this review are the work and property of X-PlaneReviews, no sharing or copying of the content is allowed without consent from the author as per copyright conditions).
1 point -
Aircraft Review : Airbus A380-842 XP12 by Peters Aircraft The Airbus A380 is a very large wide-body airliner that was developed and produced by Airbus. It is the world's largest passenger airliner and the only full-length double-deck jet airliner in service. Airbus studies started in 1988, and the project was announced in 1990 to challenge the dominance of the Boeing 747 in the long-haul market. I am first going to acknowledge that the Airbus A380 is an absolutely monumental aircraft. I personally have a lot of adulation for the machine. I think it has had a lot of unwarranted negative statements about it, but getting close to one, and flying on a A380 (four times to date), it is a brilliant addition to aviation. What the A380 achieves is not being recognised, and only then will its impact on aviation be it's lasting legacy when it is gone. So I am a little biased here in this review towards the aircraft, any A380 to fly in X-Plane 12 is going to fill my reasoning, it is the biggest and hardest long-haul machine to fly, or to fly correctly. There has been three A380's in X-Plane, Riviere's A380 is the most known, but I never really liked it, as the performance was shocking. There was another freeware, but that design was even worse in it's cardboard quality. There was an announcement back in April 2024 by X-Works that they were indeed developing a payware A380, but that project is still very much in it's infancy... the last payware A380 was from Peter Hager, or Peters Aircraft. Originally an X-Plane 10 era release, but the aircraft has then fell into a long decline, and since X-Plane 12's introduction it was grounded by the dysfunctional FMC and the lighting in being totally outdated and also non-functional. Well that A380 aircraft is back, in an upgraded X-Plane 12 wrapper. This A380 XP12 is not a completely new development, it is basically the same one, and it is still Planemaker based, in that it makes the origins in the year 2013. Can a 11 year old design compete with the same today? Outwardly it is different. The external model has been totally remodeled and now has 8K textures, it shows with the XP12 shine and the better detail, you can now read the textures as well, instead of the earlier ziggy buzzy lo-res images. The Airbus A380 wing is a work of art. I have a 1-300 model of the A380 to marvel at the shape and design, it was built only 5 miles away from where I was born, my family relatives built that wing... this area again has been remodeled, and it looks excellent in the bulky midsection and the hanging shape and design. Flaps are well done, and the leading edge foils are also well modeled. The engines here are the Trent 900 Rolls Royce engines of 70,000 to 80,000 pounds-force (lbf), only Qantas flies the A380-842 variant, pods are well done as is the rear exhaust cones and internal fans, the 900 has a fan diameter is approximately 116 inches (294.6 cm).... Only the inner engines (2 and 3) have reverser doors and all four engines have internal integrated drive generators (IDG). Noticeable however is the Planemaker gap between the fan and the cowling, once seen it is very hard to unsee it. Other variants on the A388 are the A380-841 Engine Alliance GP7200 - Trent RR 970 engines and the A380-861 Rolls-Royce Trent 970 engines, which serves other airlines including the biggest 125 aircraft fleet operator Emirates (uses both 861 & 842 variants). These other variants will becoming soon to the same package, as will those engine option operators. Four bogie gear is also remodeled, they now has more and quite intricate detail and better textures, the tyres are good, but are too shiny for me. And the rear set of bogies will now turn with the nosewheel, as on the real A380. There is no cabin, no opening doors or even any external elements? and is completely created in Planemaker... you could call it a pure X-Plane aircraft design. Externally though it does not look out of place in X-Plane 12, the mass of the Airbus just dominates the space around it. My flight today is YSSY (Sydney) to WSSS (Singapore) or QF01, the oldest sectional route on the "Kangaroo Route" to London, QF02 does the return route LON-SIN-SYD. The actual cockpit is the originally the same, looked brilliant a decade ago, still has that same punch today, but let us be clear, the functionality needs a fair bit of work to bring it up to current standards, as a lot of the switches don't work, and some are even doing the wrong action, some doing two actions in one (lighting). There is no First Officer interaction either, or any menus in here. The cockpit does feel great, but there are still far too many light gaps? even some shining through the OHP and mostly the lower floor and rear bulkhead, even through the OHP... it shows of an age back then... Seats are blocky/minecraft in design, worse is the very lo-res purple carpet, that needs replacing ASAP. Airbus joystick controller is well done, but not animated, this was all first rate detail back then, sort of holds up. All that power at your disposal via such petit throttles, note only the twin inboard thrust reverser levers. One area that has (thankfully) had attention are the instrument graphics, they used to be terribly crappy lo-res to use, even hard to read... now they are all bright and crystal clear... The main item that grounded the XP10/11 Peters Aircraft A380 was the outdated FMC (Flight Management Computer), it just didn't work anymore? The fix in here is quite surprising, just insert in the X-Plane generic FMC. It shouldn't work, but it does as it gives you access to routes, AIRWAYS, SID and STARS and DEP/ARR Approaches, and it pops out as well for ease of use. So it is not an Airbus FMGS installation, certainly not the later A350/A380 style FMGS. So route setup via the standard FMC is very easy, I admit not very Airbusy, but it is functional to use with STEP to plan awkward waypoints. Maybe Peters Aircraft should switch to the default A330 FMC, it might fit in better here? What is Airbusy is the PERF setup. Again not highly detailed, but you can at least add in the numbers you want for six PERF options; T.O (TakeOff), CLB (Climb), CRZ (Cruise), DES (Descend), APPR (Approach) and GA (Go Around). T.O... You can set the FL (Flight Level), Speed Bugs (V1, VR, V2) and either TOGA or FLEX... FLEX is recommended and is set at +45c, Flaps 1 or 2 and that gives you the THS FOR trim setting, Thrust Reduction and Acceleration altitudes can also be set. Finally you can set the Transitional Altitude, and that sets the EQ Acceleration altitude. Other options include Cost Index (CI) and .M speed, Descent .M/knts speed, Trans, Managed Speed... I haven't filled out the APPR tab, because I usually do that at around 100 nm before the approach to get the correct weather numbers. But OAT and QNH, either BARO or RADIO Minimums, and Trans Altitude are available You can choose between (landing ) CONF 3 or FULL flap, VAPP speed (VREF + Wind Correction), the landing speeds are then shown. GA (Go Around) speeds are also available as is the Thrust Reduction height. Weight and Fuel load is done via the X-Plane "Weight & Balance" menu, basic... Only set the "Total" fuel and don't use the individual tank sliders, then the system will set up the correct tankage for you, same with the trim as we shall see. The only other parameter to be set is the payload. The SYD-SIN route is quite short for the A380 as this sector is a 3484 nm and 8.0 hours flying time. The Airbus A380 can do a 8,000 nm (14,800 km) range, so the tankage here is only 110,721 kg, of a gross weight TOW 437,914 kg. The A380 can therefore be far, far heavier on T.O if flying a Pacific or Europe/Asia run and that is were your "Heavy" skills comes in and the challenge of flying the Super Jumbo. Pushback... and then we can start the engines. APU (Auxiliary Power Unit) has to be running, and you select on the OHP, the APUBLEED (it is locked to Auto), then select IGN START (Engine Mode Selector) on the ENG START switch. You start an inner engine first (2 or 3) for the pneumatics, environmental and IDG power, then the other inner engine (say 3), then engines 1 then 4. Basically when N2 reaches around 20-25%, you can move to the next engine in the sequence, the full startup procedure is very well done as the engine goes through it's start cycle to a configured N2 55%, the lower SD (System Display) gives you more information on the vitals. Engine start up sounds are actually excellent, yes the Hager A380 doesn't have every dynamic range, but the sounds were, and are still very good, and you can (slightly) hear them from the cockpit, as your sited a long way from the noise, and it is quite muffled as well, externally they are actually very good. Your powered up and ready to go... It is VERY important to set the T.O TRIM THS correctly. The position (usually around 39.5%) is set out on the lower right PFD, you will need to align the white line within the purple rectangle, certainly don't be out of the green rectangle range. The A380 is HEAVY so if the trim is out, then your not going to fly... anywhere! This brings us to a slightly controversial feature... When you let off the park brake, your view will shift? to seat down. You can adjust the view up and down to see through the cockpit window but otherwise it feels frozen. You are now connected to the nosewheel steering, so if you turn the nosewheel, then your view moves left or right as well? If you want out of this viewing tool, then press on the "Taxi" camera on the instrument panel, and your views go back to normal... In "Taxi" mode you get a double view (tail and nosewheel) to navigate the taxiways, it is very good actually... the same camera view can be put on the SD, but it doesn't cancel out the dynamic steering views... The dynamic view has several parameters to having it (auto) switched ON... if the aircraft is on the ground, taxi camera is OFF, parking brake is OFF, and the aircraft is NOT in T.O mode and if in ROLL OUT mode, with when the ground speed is below 30kn. Note that make sure you have the "Taxi" mode switched on when using push back... one you can see the pushback truck doing it's job, cool, but also that with the pushback tool turning and rattling the nosewheel, it affects the view by shaking it and turning your angle weirdly. But on the taxiway the "Taxi" image is great for following (holding) the centre line, and it shows your current taxi speed as well. The A380 doesn't taxi... it just rumbles along very nicely. 34L north track... this is were I have an issue with the feature view tool, if you turn the "Taxi" off you get shakes through the steering as you move it? so you can't read the instruments.... "Taxi" on then you still can't read the instruments to take off? It needs a full kill switch! The T.O distance depends of course on weight, airport altitude, runway conditions, but the average TO run is around 9,800 feet (3,000 meters) of runway for takeoff. So you can only use certain runways, same with using only certain taxiways with it's A380 size.... Up those four petite throttles and your moving. There is no CHRONO button (PFD)? to start? that aspect is needed, but the CHR panel does work. Your moving, but the Airbus won't leap off the line, or move fast... it is a strange aircraft in this respect, as everything goes into a slow motion aspect, that wing is very efficient, best in the business as it produces huge lift, so you sort of glide into the air with no dramas. 300,000 lbs of combined thrust, gives you the power you need, certainly at this lighter weight... again the climb rate is between 2,000 fpm and 3,000 fpm depending on the load factors, but 2,000 fpm is always a good yardstick. Gear up and Flaps to position 1 Watch that complex undercarriage store itself up in the aircraft, a feat of engineering. You can check the gear condition via the lower SD display. All Airbus developers have found a different way to imitate the Airbus button logic... The Peters Aircraft way is for in pressing the knob, is to pull it out, or Manual operation, there is a hotspot rear above the knob (green) to push in for the Auto operation. If there is a dot on the display it is noted as being in the auto setting... The original FBW or Fly-By-Wire is used in here. FBW takes pilot inputs, which are converted into electronic signals that are sent to flight control computers. These computers then process the inputs and send commands to the aircraft’s control surfaces. Also is it's flight envelope protection (LAWS) of Normal Law and Alternate Law. The system prevents the aircraft from exceeding operational limits, such as stall, over-speed, and over-G, enhancing overall safety. The FBW in Hager's A380 is a very good one, mainly because it was created by Mr X-Plane Airbus himself or Torsten Liesk of ToLiSS. So you have the quality feel and handing of Airbus Aircraft. So the A380 here handles and flies really well, and the system has been here refined for X-Plane 12 dynamics. So the Airbus systems and logic is very high, good a decade ago, still very good today. As noted I am under halve the range weight, so I have a lot options to climb up to my cruise altitude, in fact almost straight up to the assigned altitude. But if you are at MTOW (Maximum Takeoff Weight) then the A380 will handle very differently, not only in the initial climb, but climbing to altitude. If at MTOW, I usually climb first to about 30,000 ft, then step up the altitude to the final Cruise altitude in 2,000ft segments over 500 nm, burning off fuel and weight. It is all about efficiency Being a long-haul, you will settle in for the "Long Haul"... You can monitor the A380 via the excellent SD information, and overall you have 12 different options to observe; Engines, Bleed, Cabin Pressure, APU, Cond (Environment), Doors, Elec AC, Elec DC, Fuel, Hydraulics, Wheel, F/CTL (Flight Controls) and Video or Camera. The FMC two Progress pages are now accessible as well, unlike the original... Long-Haulers love their toys... here you can drop the front window blinds by pressing the "HotSpot" centre window, also you can pop out the worktable with a built in (non-working) keyboard. Performance is surprisingly very good, within and counting the same numbers as you follow the route in SimBrief, you have to make allowances for winds, which are quite heavy at the cruise altitude, but I found it was impressive and being within a 100 kg of fuel. Being a four engined aircraft... it is the lamentable situation that the aircraft is not super efficient like the A350 or B787, it costs money to run, but it's substantial running costs are out weighed by it's immense load factors, and that the passengers adore the machine. On the right routes (a bit like Concorde) it is highly regarded, even profitable. Worse is the fact that there is nothing to replace the A380 with, as the Boeing 777X is years away, even then how are you going to replace a 100+ fleet. You can get the most out of the A380, because the documentation from Peter Hager is excellent. Not only a deep manual (78 Pages), but there are also two detailed route tutorials. They are all the original manuals, but updated where needed for this XP12 release. In the late afternoon sunshine, Bali, Indonesia shines below. Yes the A380 is now flying in a more realistic 3d world, X-Plane 12 can create a very different atmosphere from the one I first flew this aircraft in X-Plane 10, that cardboard look and feel is now well gone, replaced by the dynamics of the latest version of the Simulator... it's impressive, because it is. Now approaching the STAR of UGEB1B for the approach into Changi, Singapore at dusk... it is a pretty time to arrive. Even using the older style of liveries, the Airbus looks very nice in the low light. Cockpit lighting is basic... all instrument displays are adjustable, as is the integral lighting for OHP and Pedestal. There are three STORM settings, Bright-Med-Off, that gives you the three moods in the cockpit... The Med STORM lighting setting is fine for most night operations, including the approach and landing, it's dull enough to see everything, but not too bright to distract you. There are no spot lights or any other siding lighting in here, but it's not too bad actually in feel. The external lighting has been upgraded to X-Plane 12, it looks good with the bloom effects, but misses the earlier better lighting that shone in the daylight, which I loved. The NAV WING, RWY Turnoff and LOGO are all under one (both) switches (NAV-LOGO), so you can't have the separated detailed lighting. STROBE, BEACON and LAND are thankfully separated, a shame as it could have been good if all the assigned switches had worked. The A380 has a brilliant lighting set up, six landing and twin wing lights will bring the aircraft alive at night. Turning into the 20R approach, you have to set up the ILS Landing Frequency... It's complicated here by the various ways you can insert the ILS Frequency... There are options on the three RMP (Radio Management Panel), but also on the Co-Pilot MFD, it is also on the FMC Radio setting... so actually which one do you use? You have to switch the NAV setting from VHF to NAV to insert the ILS Frequency as noted in the manual... only it does not work? the only option I could get the Frequency to work with, was on the First Officer MFD lower insert 108.90 MHz It's tricky to get right as you have to be almost on top of the glideslope before the ILS Freq will be accepted (it bounces back to the other Freq), if accepted it is then shown in the PFD when you press the LS button right EFIS Control Panel, and it shows you the ILS name "ICH" Freq and distance to the runway... Only now can you select the APPR button to lOC in the localiser It's all still very old school, and even frustrating to use effectively, as there is no set the frequency and be ready for landing deal here. Approach speed (Vref) is around 145 knts (FULL Flap), the A380 can be really slow on a landing approach, again you get that slow-motion effect, that gives you time to adjust before landing. In finals you can adjust down to below the 140 knt threshold... You get all the "LOUD" callouts 2,000, 1000, 500... but there is nothing like the thrill of landing a "Heavy" after a long flight, your nerves and muscles are tight, your focused on controlling this massive machine down onto that runway. "Retard, Retard"... Once the AP1 clicks off, you flare the A380 slightly, so the rear bogies touch cleanly at around 130 knts. Once the nosewheel is down, you can then activate the thrust reversers, only engines 2 and 3, but it is enough to slow the bulk of the A380 down... lighting on the ground is very good, even with the landing lights on or off. On the roll out you have to be aware of the steering view coming activating again, and it can come in with the thud! So you quickly turn on the "Taxi" camera again to get your views back... not a big fan to be honest. There are two liveries provided with this RR Trent engine choice, the earlier 2016, and the current 2024 livery. Summary The Airbus A380 is a very large wide-body airliner that was developed and produced by Airbus. It is the world's largest passenger airliner and the only full-length double-deck jet airliner in service. The origins of this Airbus A380 are over a decade old, back in the X-Plane 10 era, and the core design here is Planemaker based. The externals have however been fully redone for XP12 including quality 8K textures. So it looks very nice. The cockpit is basically the same as the earlier aircraft (XP11), but there has been added in new functionality and systems. The same original Torsten Liesk (ToLISS) plugin is still used but upgraded to X-Plane 12 dynamics, as has the overall aircraft performance (spot on). The solution to the broken FMC, was to replace it with the X-Plane default FMC, the intergration is clever and it works in giving functionality to the systems, but the A330 FMS would have have been a better more airbus style optional choice. Lighting is hampered by the switchgear, but the sounds if not dynamic are still excellent. The nosewheel guided camera is a good idea, but doesn't work that well in practice, as it changes you view at critical times of the takeoff and landing roll out, it buggers up the pushback tool as well. There are no static objects, or menus here, not even a cabin. light holes in the engines, OHP and cockpit can't be unseen, but they are all related to the Planemaker foundations. Flying a A380 is always a great sensation, it is a mega sized aircraft with a mega sized reputation. I am very familiar with the Peter's Aircraft A380, so fell back into the aircraft very easily, yes it is a bit of a nostalgia journey and it is great to have the aircraft flying again. Coming soon are all the different engine options and the airlines that fly them, unlike the old separated different variant purchases, and that aspect alone will put a lot of value into the package. It's an Airbus A380 in X-Plane 12, long haul and X-Plane 12 dynamics together... a great combination! _________________________ The Airbus A380 XP12 by Peter Hager scenery is Available now from the X-Plane.Org Store here : Airbus A380 XP12 Price Is US$59.90, You Save:$10.00(14%) Retail Price:$69.90 Requirements X-Plane 12 (not for XP11) Windows, MAC or Linux 8 GB+ VRAM Recommended Download Size: 172 MB Current version: 1.0 July 11th 2024) Installed in your X-Plane Aircraft folder 168Mb. Installation 305Mb, Authorization is required by inserting a licence txt in the aircraft folder. Documents __TUTORIAL FLIGHT PLANS 1 LFBO ILS.fms 2 LFBO RNV.fms 3 LFBOEDHI.fm _A388 ReadMe.rtf A380_manual.pdf Design by Peter Hagar Support forum: Peter Hagar A380 XP12 _____________________ Review System Specifications: Windows - 12th Gen IS1700 Core i7 12700K 12 Core 3.60 GHz CPU - 64bit -32 Gb single 1067 Mhz DDR4 2133 - PNY GeForce RTX 3080 10GB XLR8 - Samsung 970 EVO+ 2TB SSD Software: - Windows 11 Pro - X-Plane 12.1.1. Plugins: Traffic Global - JustFlight-Traffic (X-Plane.OrgStore) US$52.99 : Global SFD plugin US$30.00 Scenery or Aircraft - YSSY - FlyTampa Sydney (X-Plane.OrgStore) - US$28.00 ___________________________ Review by Stephen Dutton 22nd July 2024 Copyright©2024: X-Plane Reviews (Disclaimer. All images and text in this review are the work and property of X-PlaneReviews, no sharing or copy of the content is allowed without consent from the author as per copyright conditions) All Rights Reserved
1 point
-
NEWS! - Aircraft Released : Airbus A380 -842 XP12 by Peter Hager Peter Hager has upgraded his Airbus A380 to X-Plane 12. The biggest change is that you will now not have to buy a specific aircraft type, there are three; 380-842 variant was only sold to Qantas with Trent 900 Rolls Royce engines, and that is the type available with this release. Other variants are the A380-841 Engine Alliance GP7200 - Trent RR 970 engines and the A380-861 Rolls-Royce Trent 970 engines, which served other airlines including the biggest operator Emirates (861 & 842 variants). These other engine and type A380's will be when released soon, now be included together in the same package, In total you will get three A380 aircraft with different engines and a variety of airline liveries. The Airbus A380 is a very large wide-body airliner that was developed and produced by Airbus. It is the world's largest passenger airliner and the only full-length double-deck jet airliner. By December 2021, the global A380 fleet had carried over 300 million passengers to more than 70 destinations and completed more than 800,000 flights over 7.3 million block hours with 99 percent operational reliability and no hull-loss accidents. Over 50% of A380 capacity is from/to/within the Asia-Pacific region, of which around 15% is on regional flights within Asia. New Features New flight model, engine physics and performance set extremely close to real values. 3D-Cockpit with hi-resolution displays. Far more system depths than previous A380 for older XP versions: All System pages All Performance page tabs with optional pre-selection of SPD / MACH for CLB, CRZ and also pre-setting of MANAGED SPD / MACH for DES. Improved TAXI camera displays. Improved flight plan display and flight guidance, based on the default FMS. Exterior model with 8k textures! Dynamic view angle change for taxi. The rear pairs of the body landing gear steer at low speed. The Airbus A380 is available for only X-Plane 12, and is not available for X-Plane 11. Images are provided by Peter Hager _________________________ The Airbus A380 XP12 by Peter Hager scenery is Available now from the X-Plane.Org Store here : Airbus A380 XP12 Price Is US$59.90, You Save:$10.00(14%) Retail Price:$69.90 Requirements X-Plane 12 (not for XP11) Windows, MAC or Linux 8 GB+ VRAM Recommended Download Size: 172 MB Current version: 1.0 July 11th 2024) ___________________________ NEWS! by Stephen Dutton 12th July 2024 Copyright©2024: X-Plane Reviews (Disclaimer. All images and text in this review are the work and property of X-PlaneReviews, no sharing or copy of the content is allowed without consent from the author as per copyright conditions) All Rights Reserved
1 point
-

NEWS! - Aircraft Released : Airbus A380-842 XP12 by Peter Hager
Bernard Marc reacted to LoganG for a topic
Will there be any upgrade options for users having the XP11 version package?1 point -

NEWS! - Aircraft Released : Airbus A380-842 XP12 by Peter Hager
hi_nihaozaoan reacted to Jelo189 for a topic
What a shame to propose the same airplane frome as far as I remember XP V10 !! That Peter Hager A380 is truely an insult for all the third party developpers that put time into their creations and systems... 69 bucks for that cockpit is one of the greatest jokes this year.1 point -
NEWS! - X-Plane 12.1.0 goes final! Laminar Research has noted that the latest version release of v12.1.0 has now gone "Final", this was after 2 Release Candidates rc1&rc2. It is a big milestone in the Simulator's history as this new numbering system version was the biggest update since the release of X-Plane 12, nearly two years ago, in Sept 2022. Considering the short development period since May 15th, 2024, it has been one of the most shortest and efficient updates yet from Laminar Research. Features of X-Plane 12.1.0 include... Anti-aliasing (AA): Improved quality with better scene handling and coverage for alpha-tested surfaces (those with transparency). Depth of Field: More control with a setting for Real Camera Shake (RCAS) and a notification when textures are reduced due to memory limitations. Lighting: Bloom Effects and overall a more focused sources of lighting. Shadows: Smoother shadows overall, cloud shadows on water, and faster rendering times. Lightning: v12.1.0 features more realistic visuals with subtle color adjustments, distance variations, and bolt thickness changes via distance. Sound effects have also been improved for a more immersive experience. Particle Effects: The new system allows for particles on ground contact, easier editing with copy/paste, and datarefs for better control. Pre-built effects include jet engine afterburners (JATO), water bombing, ground scrapes, and rotor wash from helicopters. Aircraft configuration files (ACFs) let you disable these effects if desired. G1000 navigation system: including an accurate startup splash screen, a NAV page, a stormscope, datalink weather support, Terrain, a WPT page, an AUX page, and new datarefs. Water: Fixed water clarity issues, with color and transparency depending on location. Cloud shadows are now visible on water surfaces. Compatibility note: existing X-Plane 11 water scenery packs may not work perfectly due to differences in water rendering and might require updates from the creators. Autogen: Enhanced visuals for high-rise buildings in European cities and improved parking aircraft placement at airports, prioritizing larger planes for bigger spots. Supported flap systems: allowing the accurate simulation of manual flap controls such as the one in the Piper PA-28, with precise and gradual adjustments, and the dial-a-flap system, which is present in some McDonnell-Douglas aircraft. Updated landmarks for Las Vegas. Updated airport library with new objects (antennas, radars and water towers) Bug fixes You can find the full ongoing v12.1.0 details here: X-Plane 12.1.0 Release Notes To update v12.1.0, then just run the X-Plane Updater. _________________ X-Plane 12 is purchased directly from Laminar Research for US$79.95 and the download file size is 86 GB X-Plane 12 Price is US$79.95 Minimum Requirements Disk space: 25 GB CPU: Intel Core i3, i5, i7, or i9 CPU with 4 or more cores, or AMD Ryzen 3, 5, 7 or 9 Memory: 8 GB RAM Video Card: a Vulkan 1.3-capable video card from NVIDIA or AMD with at least 2 GB VRAM Note: Intel GPUs are not supported by X-Plane 12 _____________________ NEWS! by Stephen Dutton 10th July 2024 Copyright©2024: X-Plane Reviews (Disclaimer. All images and text in this review are the work and property of X-PlaneReviews, no sharing or copy of the content is allowed without consent from the author as per copyright conditions) All Rights Reserved
1 point
-
NEWS! - Stick and Rudder Studios updates both X-Key Pad 1.6.0 & X-ATC Chatter v1.7.3 beta Mark Cellis of Stick and Rudder Studios has been very busy of late. Two of his excellent utilities have had updates, first X-ATC Chatter, and now with the X-Key Pad. Both these excellent utilities can fly under your radar, but both are worth exploring, certainly as both are currently 25% off on sale. X-Key Pad 1.6.0 X-KeyPad gives you the ability to create Virtual Keyboards with highly dynamic key behavior and labels that can interact with and display data in X-Plane 12/11. These virtual keyboards can be placed on a secondary monitor, touch monitor, or a tablet by using Duet Display or SpaceDesk. X-KeyPad also supports a rich integration with all the Elgato Stream Deck Devices, the X-Touch Mini Midi Controller and P.I. Engineering X-Keys keyboards as well as a graphical user interface to create and edit all your configurations. The latest v1.6.0 version has had a massive up date, the changelog is massive. Version 1.6.0 (June 3rd 2024) Changed the communication protocol between X-Plane and the Stream Deck X-KeyPad plugin to use TCP rather than a shared memory approach. This provides a much more stable connection method, particularly on OSX. Added the ability to set the virtual device background color on the virtual device layout, issue 84 Added support for single/continuous command mode in Stream Deck dial rotations, Issue #86 Added Copy and Paste buttons to X-Keys key editor, Issue #66 Added try command to the list of last used commands, Issue #81 Added a Save as Default menu item in the Stream Deck editor Added the ability to have a history of commands that were last used in the command finder Added the ability to pop out the command and dataref finder to a separate window Added the ability to edit a dataref from the finder Enhanced the dataref finder so that it can filter on changes in a more robust way than the current dataref tool Added green text in the X-Touch editor dataref list to indicate a writable dataref Added the ability to detect if changes had not been saved when you close the editor window or load a new aircraft, issue #74 Added an ability to generate a cross reference file to easily see what commands and datarefs were used and on which keys/encoders. Added feature #67, the ability to test keys and encoders without having to map them in the Stream Deck device. Add the ability to specify a min and max on a numeric dataref when the increment mode is none Added datarefs for the numeric buffer character count and numeric buffer float value Added the ability to use expressive commands on the Stream Deck Plus encoder dial rotations Added a Teleport feature and two sample Stream Deck Plus teleporter encoders in the generic Stream Deck sample JSON. Added an optional continuous mode the to the X-Touch Mini encoders when using command mode. Added dual trigger support to expressive commands Added number buffer support to expressive commands Changed the baro key on the Stream Deck sample and the X-Keys C172 steam gauge and G1000 samples to use the new expressive command capabilities To use you will need the FlyWithLua plugin, which is needed for a number of the sample configurations, there is also a willingness to learn about X-Plane datarefs and commands, and the dataref tool plugin for X-Plane is highly recommended. _____________________________ X-ATC Chatter One of the quiet achievers, this clever plugin has built a huge amount of momentum since it its very modest introduction in late 2018. X-ATC Chatter started with only 5000 sound files, now it has 45,000 high quality ATC audio clips to it's name via using LiveATC.net. The concept has been widened as well. The result is a collection of audio files organized by geographic region and ATC controller / facility type that can be played during your flight with an intelligent player plugin for X-Plane to give background chatter to your flightdeck. Not an official release yet, but Stick and Rudder Studios have released the latest beta v1.7.3... details include; Release Notes for Beta 1 Changed the Out of Range detection to take into account your aircraft’s altitude. This also affects the range in the Nearest Facility window. Added shut down message to the log file Improved some Simple ATC Hints Fixed a bug where SimpleATC would set the radio to clearance after arrival taxi clearance confirmation when copilot handles radios was on Started using X-Plane 12 airspace center frequencies Prior to 1.7.3 center frequencies and their transmitter location accuracy were a bit mixed. Data was generally good for U.S. and to a lesser extend Canada but the rest of the world the frequencies and locations were estimated. Many ARTCC services are assigned to specific altitudes. As an example, Boston ARTCC is divided into two altitudes. Services when you are between 0 and 17,999 MSL and another when you are between 18,000 and 60,000 MSL. X-Plane 12 has better airspace information. Although we still don’t know exactly where the RCAG transmitters are located we do know the frequencies, the altitude range they service, and the location on the globe defined by a polygon that the frequencies service. Simple ATC version 1.7.3 will use this data when you are running X-Plane 12 to hand you off to different center frequencies when you cross an FIR airspace boundary or cross an altitude assignment boundary. We still don’t know the exact locations of each transmitter so X-ATC-Chatter will scatter them around the airspace polygon roughly 70 NM apart from each other. This is a very new approach to handling center frequencies so I have given you the ability to shut it off it you don’t like the way it works. That can be done on the settings dialog on the radios tab. The X-ATC Chatter latest beta is available here; Beta 5 - 1.7.3 beta release Yes highly recommended! _____________________________ Yes! X-KeyPad by Stick and Rudder Studios is now available from the X-Plane.Org Store here : X-KeyPad Price is US$18.00 Now on Sale, US$13.50... You Save:$4.50(25%) Requirements X-Plane 12 or X-Plane 11 Windows, OSX, Linux Current version: 1.6.0 (July 3rd 2024) Support forum for X-KeyPad _____________________________ Yes! by Stick and Rudder Studios is now available from the X-Plane.Org Store here : X-ATC Chatter Price is US$18.00 Now on Sale, US$13.50... You Save:$4.50(25%) Requirements X-Plane 12 or X-Plane 11 Windows, Mac or Linux Version 1.7.2 (April 27th 2023) Support forum for X-ATC Chatter ___________________________ News by Stephen Dutton 5th July 2024 Copyright©2024: X-Plane Reviews (Disclaimer. All images and text in this review are the work and property of X-PlaneReviews, no sharing or copy of the content is allowed without consent from the author as per copyright conditions) All Rights Reserved
1 point
-
Aircraft Review: Polaris AM-FIB by VSKYLABS
Kiwiflyer reacted to Dominic Smith for a topic
Aircraft Review: Polaris AM-FIB by VSKYLABS By Stuart McGregor Introduction When is a boat not a boat? Well, one answer is when it is the Polaris AM-FIB, or to give it its full name, the Amphibious Flying Inflatable Boat. It has been quite some time since I have written a review for the org, and in that time, I have been pretty much immersed in flying the much larger passenger cousins of the Polaris. So, to have the opportunity to try it out was a welcome break from the high-tech and frantic world of tube liners. To be honest, I had forgotten just how much fun you can get out of the simpler things in life, and please don’t get me wrong, simple doesn’t mean dull and boring, as I found out. The aircraft being reviewed here is based on the Italian 'Polaris FIB' ("Flying Inflatable Boat"), which is an ultralight trike, designed and produced by 'Polaris Motor' in the mid-1980s. It was then further developed in the 2000s and went on to become the Polaris AM-FIB, an Amphibious ultralight trike. I found it interesting to read about the collaboration between the real-life aircraft manufacturer (Polaris Motor) and the simulator developer (VSKYLABS). To see sim developers going to such lengths to bring us the best simulation products possible is pretty commendable, in my opinion. X-Plane Model The Polaris was initially released for X-Plane 12 in 2022, and since then, it has undergone several updates. The most recent, version 4, was released in June this year. The developers have described this as a major update, introducing new features such as upgraded flight dynamics to fully leverage what X-Plane has to offer, improved graphics with PBR adjustments, and enhanced FMOD 2.0 sounds, including better engine, prop, and wind sounds. It's great to see the Polaris continually refined and improved over the years. I believe this is a sign of developers who truly care about their users. It would be easy to develop a product, release it, and then move on; however, witnessing new features and refinements added over time is very much appreciated and helps keep each model vibrant and engaging. Installation Procedure Installing the Polaris couldn't be easier. Once you've purchased your copy, there's no need for installers or digital security codes. Simply download, unzip, and you’re ready to go, dead simple! As the file is not particularly large, only about 150 MB, it only takes a few minutes to download with a fast internet connection. It’s worth mentioning that there is also an option to download a version for X-Plane 11 if you’re still using that version of the platform. When you download from the org, you'll also receive a copy of the manual and the VSKYLABS brochure, which you can peruse at your leisure. I'll discuss the manual a bit later. Another feature worth highlighting is the use of the SkunkCrafts updater. While not new for those who already have the Polaris (it was introduced back in 2022), it’s a nice touch if you’re considering purchasing for the first time. Documentation The download includes several documents, some of which I've mentioned earlier. Within the download, you'll find a couple of folders containing everything you'll need. The contents of the "HOW TO INSTALL" folder are self-explanatory, and similarly, no surprises await in the "INSTRUCTIONS-MANUAL-POH" folder where the main manual is located. It's highly recommended to read through the manual cover to cover. Although it's only ten pages, it's packed with useful reference information, tips, and tricks to help you get the most out of your purchase. The manual is well-organized and easy to read. I particularly enjoyed the mix of text and photographs, with annotated images that are especially helpful for understanding the main features and aircraft controls. The manual does an excellent job of covering all the important features, and it's a credit to the developers for making it simple, informative, and well-laid-out. Exterior Although not a large aircraft, the Polaris is beautifully modelled. The textures are exquisite, from the wood grain details on the prop and the well-worn surfaces of the wings to the intricate details on the engine, fuel tank, and battery. The inflatable hull sponsons and the two passengers are also meticulously rendered. One particularly charming feature is the ability to add or remove the pilot and passenger via click spots on the seats, allowing for configurations with both, one, or neither. It’s amusing to note that the female passenger goes flying in her high heels, a curious choice for getting in and out of the Polaris! The aircraft includes a set of wheels that can be raised and lowered by clicking on the right sponson. Similarly, the brakes and sea anchor are operated from the left sponson. While the wheels look fantastic, I found it challenging to get real control whilst on land, perhaps missing something in the process. However, when on water, the boat rudder ensures easy manoeuvring, especially when using a set of rudder pedals. Interior When you sit in the pilot's seat of the Polaris, the view is exceptional, especially if you're flying in VR. The animations of the pilot’s arms and feet are impressively synchronized with the control movements. In VR, the alignment of the pilot’s virtual legs with your own can be quite uncanny. Looking down and seeing your virtual feet moving is a superb, albeit a little unnerving, experience. The throttle control is located just above your head, and a small mobile phone is positioned right in front of you. This setup allows you to manipulate the brakes and monitor your airspeed, altitude, as well as wind speed and direction, a crucial feature for aligning yourself with the wind during landings. The artificial horizon is also useful for flying, although, as noted in the manual, real pilots often rely more on their senses than on instrumentation. The increased sound of the wind as you turn into it is a fantastic example of how you can "feel" your way around the skies with the Polaris. Getting used to the control bar in your view might take some time, but the instrument panel is still quite visible. Here, you’ll find gauges for engine temperature, RPM, EGT, HOBSS, and fuel, along with a few switches for the battery, igniters, and a prominent starter button. Starting the Polaris takes only a couple of seconds, but when the engine kicks in, the aircraft truly comes to life. The FMOD sounds enrich the experience, bringing a real depth to the auditory environment. Flight Dynamics Due to the lightweight nature of the Polaris, the developers recommend setting the flight models per frame to at least five to counteract any odd ‘jumping’ behaviour during takeoff. Following this advice, I encountered no noticeable issues. While I struggled with land-based takeoffs, taking off from water proved to be incredibly enjoyable. The wind direction indicator is essential for aligning the nose into the wind, which significantly smooths the takeoff process. The water textures and lighting effects in X-Plane 12 enhance the overall immersion, making skimming along the water surface a novel experience for me. You could almost feel the water spray on your face. It’s worth noting that the sea anchor performs admirably when stationary, keeping everything steady as you prepare for takeoff. Once airborne, the Polaris is exhilarating to fly, quite a departure from the complex airliners I've been piloting recently. Its simplicity greatly contributes to the enjoyment, truly embodying the concept of "flying by feel". Although it climbs slowly due to its modest airspeed, this offers a perfect chance to relax and take in the scenery. However, the Polaris requires gentle handling in the air; abrupt or sharp inputs can make it feel like you’re on a roller coaster. Flying in VR adds an extra layer of magic, especially the sensation of rising from the water with the wind whistling past your ears. Skimming low across the water or ducking under bridges is simply magical. Once I mastered a few basic manoeuvres, the Polaris was delightful to fly. Given that it's essentially a boat with wings, exploring the myriad waterways that X-Plane offers adds a whole new dimension to the sim. The perspective is very different when you’re looking up rather than down. Perhaps VSKYLABS might consider adding a variant without wings, just the boat section. How much fun would that be! Landing posed its own challenges and required several attempts to perfect. It’s crucial not to reduce power too abruptly to avoid a bumpy landing, or worse. Mastering power management is key to handling the Polaris effectively. Performance The no-frills simplicity of the Polaris's design ensures that frame rates are consistently high. Even when flying over densely populated cities at low altitudes, the frames per second (fps) typically remain in the 50-plus range, rising to around 70 or 80 over waterways. Throughout my flights, I experienced no complaints in this department and observed no noticeable impact on the sim’s performance. Conclusion Overall, my time in the Polaris was thoroughly enjoyable, and it's certainly worth considering if you're in search of something a bit different. The enhancements in X-Plane 12, particularly in terms of aircraft performance on water, coupled with the new lighting and texturing techniques, make spending a few hours in the Polaris a truly unique experience. If you're looking for a lot of bells and whistles or high-tech features, the Polaris might not meet your expectations. However, if you're in the mood for some straightforward, seat-of-the-pants fun on and over water, this flying boat is definitely worth considering. Priced at $24.00, it's a bargain. You might even find it on sale, which would be an added bonus. ________________________ Polaris AM-FIB by VSKYLABS is now available from the X-Plane.Org Store here: Polaris AM-FIB by VSKYLABS Priced at $24.00 Features Project Main Features: VSKYLABS 'Test-Pilot' Project: designed for use with X-Plane cutting edge flight model environment, features superb flight dynamics with authentic performance and flight handling characteristics. VSKYLABS development for X-Plane approved by 'New Polaris FIB' company (however, it is an independent VSKYLABS project, not affiliated with 'New Polaris FIB'). Real-Physics, incorporating weight shifting and wing simulation of a hang-glider trike. Unique trike flying aspects are being simulated: stalls, slips, spins and tumbling. Designed with the focus on control and handling characteristics, excellent for basic and advanced hang glider trike training / conversion from fixed wing aircraft. Additional passenger which can be removed, to simulate light vs heavy trike operations. Amphibian aircraft - operation in water/land and snow/ice. Built for VR: development was tailored specifically for VR, and optimized for 2D usage. Autoupdater based on the SkunkCrafts autoupdater (XP12 only) - all updates are being pushed smoothly without the need to re-download the entire base package (base package will be updated every once in a while to minimize the gap). Highly responsive VSKYLABS support forums: VSKYLABS is offering continuous professional support from aircraft related aspects (operating and flying) to X-Plane technical support. Requirements X-Plane 12 or X-Plane 11 Windows, Mac, or Linux 8 GB+ VRAM Recommended Current Version: 4.0 (June 7th 2024) Review System Specifications Windows 10 64 Bit, CPU Intel i9-9900k, 64GB RAM, Nvidia RTX 2080 Ti, Oculus Rift S ________________________ Aircraft Review Stuart McGregor 5th July 2024 Copyright©2024: X-Plane Reviews (Disclaimer. All images and text in this review are the work and property of X-PlaneReviews, no sharing or copying of the content is allowed without consent from the author as per copyright conditions).
1 point -
NEWS! - AirSim3D updates Citation C-560XL XP12 to version 2.0 It is always debatable on what is the "best in category". But certainly the AirSim3D Citation C-560XL is certainly at the top of the list for the X-Plane 12 Simulator. The aircraft was released in the dying months of X-Plane 11. So the release for X-Plane 12 was a complete revision of the aircraft, and that leaped this Mid-Sized Business Jet into a new higher and premier position. The Cessna Citation Excel (XL) is an American midsize business jet in the Cessna Citation family. Announced in October 1994, the Model 560XL first flew on February 29, 1996, certification was granted in April 1998, and over 1,000 have been delivered. The 2,100 nmi-range (3,900 km), 20,200 lb (9,200 kg) MTOW jet is powered by two 3,650–4,080 lbf (16.2–18.1 kN) PW545 turbofans, has the cruciform tail and unswept supercritical wing of the Citation V (560), and a slightly shortened Citation X stand-up cabin. The Excel has the roomiest cabin in its class of light corporate jets and can seat up to 10 passengers (in high-density configuration; typically the number is six to eight in a corporate configuration), while being flown by a crew of two. To power the aircraft, Cessna chose the Pratt & Whitney Canada PW500 turbofan. It is hard to believe, but the 560 Excel is still the first aircraft by AirSim3d, but the latest update is very far removed from it's initial predecessor. Comments have suggested the cockpit textures were not a reflection of the quality of the aircraft. To a point I disagree with this aspect on two counts, one, this is a first design, but also the design is created to reflect a period. However in response to the comments, v2.0 has had a very big revision of the internal aspects, in Cockpit 3D-occlusion, shading and a coloring Texture update, it also has had glass updates, in that the glass is not now brightly coloured, but clear and more realistic, the annoying rear mirror reflection has also been removed. There are also new Startup and Anti-Icing annunciations, and the Autoland has been fine-tuned and the update comes with also better FMOD2 volume tuning. The results are of an even more well-rounded and quality aircraft, so the title of "The best" goes up another notch higher. Version 2.0 (July 1st 2024) Major Cockpit 3D-occlusion, shading, coloring Texture updates Major Glass updates New Startup annunciations New AntiIcing annunciations Minor updates to RMU test, Popouts freezing, Checklists content Removed mirrors (since XP can not do that) Autoland fine-tuning FMOD volume tuning The full X-Plane 12 C-560XL review is here: Aircraft Update : Citation C-560XL X-Plane 12 by AirSim3D “My main interest is flying bizjets, and this one is an excellent addition to my ''hanger".... Also, Support responds very quickly on this forum too. Thanks for that." “Just doing a night flight, the night lighting is excellent. I do like this airplane a lot” “Engine sounds are really good inside and out. I live near an airport, and it sounds like the real Citations as they take off” “The best aircraft of my hangar .. and I have all the other more popular biz jets and Airliners!! From the XPlaneReview: “Having flown the XL a lot over the past month, I now really love it, even miss it a lot when flying other aircraft. Recommended.” “Are ya'll thinking about making other AWESOME models like this one? 5 Star (support) service!” Designed by AirSim3D Support forum for the C-560 XL ____________________ Yes! the Cessna Citation 560XL X-Plane 12 v2.0 by AirSim3d is NOW available from the X-Plane.Org Store here: Cessna Citation 560XL XP12 Price is US$59.95 Cessna Citation 560XL XP11 Price is US$49.95 Cessna Citation 560XL XP12 + XP11 Price is US$79.95 Features: AirSim3D C-560 XL: Real-Jet authenticity Real jet visits at Boeing airfield were extensively used to inform build and design decisions 100’s of pages of real POH manuals, specs, drawings, pics used Real pilot tested and extensively beta tested Result: real-world systems, lighting, functions, modeling and procedures authenticity Requirements X-Plane 12 Only Windows, Mac or Linux 4 GB VRAM Minimum - 8 GB+ VRAM Recommended Current version : 2.0 (July 1st 2024) There are 3 purchase options for the 560 XL XP11 only Version . Get it here XP12 only Version. Get it here XP12 and XP11 Bundle . Get it here (this one) ___________________________ News by Stephen Dutton 1st July 2024 Copyright©2024: X-Plane Reviews (Disclaimer. All images and text in this review are the work and property of X-PlaneReviews, no sharing or copy of the content is allowed without consent from the author as per copyright conditions) All Rights Reserved
1 point
-
NEWS! - Aircraft Updated : Robinson R66 Turbine X-Plane 12 v3.0 by vSkyLabs In 2018, BC Helicopters team (Mischa Gelb, Ruben Dias and Diogo Dias), flew around the world in the R66 helicopter, it was an effort called 'EPIC Global Heli World Tour'. The mission lasted 97 days, in which the team covered 30,000 miles, stopping in 45 countries and flying over 5 continents. Im the process it established 2 new world records (fastest Antipode RTW on a helicopter, and longest RTW on a helicopter). That amazing feat is the basis of this vSkyLabs X-Plane 12 Simulation. The Robinson R66 Turbine is a five-seat helicopter designed and built by Robinson Helicopter Company. It features a two-bladed main rotor, a two-bladed tail rotor, and is powered by a Rolls-Royce RR300 turboshaft engine. The R66 Turbine is popular for various uses, including private transportation, law enforcement, flight training, and light utility roles. It offers a balance of performance, comfort, and cost-effectiveness, making it a versatile choice in the light helicopter market. This new v3.0 version is focused on a few areas; a new Flight Model (XP12), Graphics, Systems and a completely new sound system (FMOD 2) with an updated PaintKit.... Version 3.0 (June 29th 2024) Flight model: Deep tuning of engine power gradients, torque, throttle governor, handling characteristics in hover. Updated airfoils. Graphics: Remodeled front panel plate with high resolution instrument holes. enhanced 3-d modeling of RPM, Engine Torque, MGT and N1 gauges. Re-modeled GNS530 element with higher accuracy/resolution. Re-modeled G1000 element with higher accuracy/resolution. Added scratched windshield. Cockpit panel PBR tune-up for the latest X-Plane 12.1.0 rendering standards. Cyclic stick is now extended by default (can be shortened with the use of hide-yoke feature as before). Removed the avionics extension screen from the front/RH side of the cockpit. External liveries PBR tuneups. Systems: Integrated G1000 PFD/MFD into a single screen. Both PFD and MFD are separate pop-out windows, and it can be toggled easily using on-screen/VR interaction, or key/button assignment. New dual-system altimeter. Sounds: Sound package is now of the latest FMOD 2.02.22. Added physical/aerodynamic based blade-slap effect. Paint-Kit: Minor changes to paint-kit to comply with the latest X-Plane 12.1.0 rendering engine. Project Main Features: VSKYLABS 'Test-Pilot' Project. Highly defined flight dynamics model of the Robinson R66 Turbine helicopter Highly detailed model of the Robinson R66 helicopter. Robust simulation of the R66 drive train and RR300 Turbo-shaft engine: Utilizes X-Plane's new and advanced free turbine simulation. Autorotation capable. Comprehensive systems: Drive system, Hydraulics flight controls, Engine Anti-ice, Starter-generator and ignition system, Fuel system, Auxiliary fuel system, Electrical system with functional CB panel, Lighting, Annunciator panel, Cabin heater, Rotor brake and more. Fully functional VR (Virtual Reality) Ready: highly interactive cockpit environment including levers, switches, fuel cut-off / shut-off guards, 3D checklist viewer, modular cyclic and more. Equipped with Robinson's 'later' advanced panel: a perfect mix of the traditional analog gauges and glass cockpit display. R66 Auxiliary fuel system. Fully featured G1000 (modified). Autopilot Built-in Avitab Compatibility (Avitab plugin not included). Multi-Layer FMOD sound pack. The project is under constant development: development road-map is including flight model refinements, enhanced systems depth, additional liveries and other improvements. Skunkcraft Autoupdater is included: project updates are fast and efficient! This project is part of the VSKYLABS 'Test-Pilot' series, designed specifically for use with X-Plane cutting edge Experimental Flight Model. This aircraft is also available for X-Plane 11 (obviously with out the dynamics and effects of X-Plane 12) Images are courtesy of vSkyLabs... The Robinson R66 Turbine v3.0 by vSkyLabs is now available from the X-Plane.OrgStore _____________________________________ Yes! - the Robinson R66 Turbine v3.0 by vSkyLabs is NOW available from the X-Plane.Org Store here : Robinson R66 Turbine Price is US$34.95 (Currently on sale for only US26.36!) You Save:$8.59(25%) Requirements X-Plane 12 or X-Plane 11 Fully Optimized for XP12 Windows, Mac or Linux 8 GB+ VRAM Recommended Current version: 3.0 (June 29th 2024) ___________________________ News by Stephen Dutton 30th June 2024 Copyright©2024: X-Plane Reviews (Disclaimer. All images and text in this review are the work and property of X-PlaneReviews, no sharing or copy of the content is allowed without consent from the author as per copyright conditions) All Rights Reserved
1 point
-
NEWS! - Scenery Released : LFKT - Corte , Corsica by FSX3D FSX3D has released another Corsican Airport in the series, this time it is LFKT Corte. These are converted scenery from FlightSim, but tuned very highly to the X-Plane 12 platform. LFKT, is also known as Corte Airfield, is a small airport located near the town of Corte on the island of Corsica, France. It primarily serves general aviation and does not handle commercial airline traffic. The airfield has an elevation of around 1,299 feet (396 meters) above sea level with a single runway, designated 16/34, which is approximately 1,150 meters (3,773 feet) in length and has an asphalt surface. The runway is also has a slope of 1.88% (uphill on side numbered 30 (SW-NE) and downhill on side 12 (NE-SW). The airfield is used for various general aviation activities, including private flights, flight training, and aerial work. It is not equipped for regular commercial airline operations. Corte Airfield is popular among pilots for its scenic location in the mountainous region of Corsica, offering stunning views and a challenging flying environment. There are no ATC facilities at the airfield. Features Include: Ultra detailed car parks, taxiways and track PBR on all objects Ambient occlusion (Objects and ground) Wet track effects Dynamic lighting Compatibility Ortho4XP Compatibility AutoOrtho HD photorealistic ground Corsica Z17 (Ortho4XP 1.40) Also Corsica, Gap-Tallard and Hautes-Alpes are all finally getting a lot of X-Plane 12 attention via these FSX3D excellent releases... check them all out now. Images are courtesy of FSX3D _______________________________ LFKT - Corte , Corsica by FSX3D is now available from the X-Plane.Org Store here: LFKT - Corte , Corsica Price is US$12.99 Requirements X-Plane 12 Windows, Mac or Linux 8 GB VRAM Minimum Download Size: 392 MB Current version : 1.0 (June 28th 2024) ___________________________ News! by Stephen Dutton 29th JUne 2024 Copyright©2024: X-Plane Reviews (Disclaimer. All images and text in this review are the work and property of X-PlaneReviews, no sharing or copy of the content is allowed without consent from the author as per copyright conditions) All Rights Reserved
1 point
-
NEWS! - Aerosoft Scenery Upgrades : Airport Stuttgart XP and Airport Istanbul XP to X-Plane 12 Aerosoft have released two upgrades to their Airport Stuttgart XP and Airport Istanbul XP sceneries to X-Plane 12. Both have had essentially the same upgrade listing, with focuses on Ground textures, Custom Mesh including PBR reflections and normal maps, Revised Lighting, 3d Grass & vegetation placement , Updated SAM, Weather effects for wet, snow and ice, and full support for native XP12 seasons. Airport Stuttgart XP Airport Stuttgart XP brings the international airport of the state capital of Baden-Wuerttemberg as a native add-on to the flight simulator X-Plane. This add-on represents the airport in the latest status of development of the real airport. All airport buildings, the layout of the runway and taxiways, as well as the lighting systems and all navaids have been implemented in detail and with PBR textures (Physically Based Rendering). In addition, numerous buildings were created for the area to ensure a real-life feeling of the airport. NEW - XP12 Version Features: • Standalone, fully customized XP12 version • Revised lighting • Ground textures now including PBR reflections and normal maps • Revised orthophoto, color optimized for XP12, including autumn/winter version and normal map • Reworked vegetation placement (new volumetric grass) • XP12 3D vegetation for forests, trees and bushes for seamless integration into the environment • Weather effects for wet, snow and ice • Full support for native XP12 seasons, with no other add-ons or plugins • Reworked autogen and street placement • Revised static aircrafts • New XP12 Custom Mesh from Maps2Xplane (incl. Ortho4XP-Patch) ___________________ Airport Istanbul XP Istanbul Airport is the new main international airport of the city of Istanbul. It has been in operation since 2018 and ranks 1st among airports in Turkey. Istanbul Airport is located on an area of 76.5 million square meters and is intended to be a global hub between the continents of Asia, Africa and Europe. The airport is located northwest of Istanbul on the Black Sea, approx. 40 km from the city center. NEW - XP12 Version Features: • Standalone, fully customized XP12 version • Revised lighting • Ground textures now including PBR reflections and normal maps • Revised orthophoto, color optimized for XP12, including autumn/winter version and normal map • Reworked vegetation placement (new volumetric grass) • XP12 3D vegetation for forests, trees and bushes for seamless integration into the environment • Weather effects for wet, snow and ice • Full support for native XP12 seasons, with no other add-ons or plugins • Reworked autogen and street placement • Revised parking lots with many additional static cars • New XP12 Custom Mesh from Maps2Xplane (incl. Ortho4XP-Patch) • Animated wind turbines without SAM plugin X-PlaneReviews reviewed the X-Plane 11 version on the release of the scenery from Aerosoft: Scenery Review : LTFM - Airport Istanbul XP by Aerosoft. I had a lot of comments on the ground textures, lighting and the layout of this earlier version. But a lot of the listed update revisions do cover those comments, it will be interesting to see this X-Plane 12 version in it's revised state. Notable is that you have to use the "Aerosoft One" application to install (update) on both Stuttgart and Istanbul XP12 sceneries... Installation of either airport for XP12 is done through Aerosoft one installer: Aerosoft One Universal After you have installed Aerosoft One, click on ENTER PRODUCT KEY (under the Library Tab) Then enter the Serial Number provided in this order. This will give you the option to download the airport. Note the different X-Plane 11 and X-Plane 12 installations. The earlier X-Plane 11 versions are also included in either package, but without the XP12 effects __________________________ Yes! Airport Stuttgart XP by Aerosoft is now Available from the X-Plane.Org Store here : Airport Stuttgart XP Price Is US$21.99 Requirements: X-Plane 12 or X-Plane 11 Windows, Mac or Linux 8 GB+ VRAM Recommended Installation via Aerosoft One necessary Current Version : 1.0 XP12 (June 26th 2024) Airport Istanbul XP Price Is US$29.99 Requirements: X-Plane 12 or X-Plane 11 Windows, Mac and Linux 8 GB+ VRAM Recommended Download Size: 1.2 GB via Aerosoft One Current version: 1.0. for XP12 (June26th 2024) ___________________________ News by Stephen Dutton 27th June 2024 Copyright©2024: X-Plane Reviews (Disclaimer. All images and text in this review are the work and property of X-PlaneReviews, no sharing or copy of the content is allowed without consent from the author as per copyright conditions) All Rights Reserved
1 point
-
NEWS! - Updated : Revolution Mini-500 Project v3.1 by vSkyLabs The Revolution Mini-500 is a 1990s American single-seat light helicopter, designed and built by Revolution Helicopter Corporation as a kit for homebuilding. Revolution Helicopter however went out of business in November 1999, and the kits are no longer available. The Mini-500 was designed as a light helicopter that resembles a scaled-down Hughes 500, powered by a Rotax 582 64 hp (48 kW) two-stroke engine. The Mini-500 has a tubular steel fuselage with a foam and glass-fibre structure cabin. It has a two-bladed semi-rigid rotor and a conventional two-blade tail rotor. The first Mini-500 flew in 1992 and the company delivered the first production factory-assembled helicopter in July 1994. Production of kits ceased in 1999 and the company claimed that more than 500 had been sold. The aircraft has had a parlous history... as Rotax warns owners of the 582 engine in the Owners Manual about its limitations: "This engine, by its design, is subject to sudden stoppage. Engine stoppage can result in crash landings, forced landings or no power landings. Such crash landings can lead to serious bodily injury or death"... the statement is supported by the 16 fatalities when operating the Mini 500. Initial intentions were that it would be powered by a Mazda Wankel engine, but this was abandoned and plans shifted to the Solar T62 turbine engine. There is no indication that new production by Stitt, has delivered any aircraft kits. The X-Plane version of the Mini-500 was released back in January 2019. There was a fully upgraded X-Plane 12 version released 12 months ago, but this update refines the aircraft to the latest X-Plane 12 dynamics and features with version 3.1. Flight dynamics: Airfoils update. Refinements for the rotor system, increasing (a very bit) of the margin for autorotation envelope. Skids physics refinements to fix the tendency for self-yawing to the left on paved runways, at 100% RPM, collective down. Sounds: fixed issue caused when removing the doors inflight (sound remained as if the doors are still connected and closed). Interaction: Stick (cyclic) manipulator sensitivity increased to follow stick actual motion. Starter keys switch interaction improved. Graphics: Minor touches for canopy and pilot appearance. VSKYLABS 'Test-Pilot' Project - Professional-grade physics, handling and performance characteristics. Highly defined and engineered flight dynamics model of the Revolution Mini-500, built around the powerful X-Plane flight model. The Mini-500 performance was analyzed by experts. Fully functional VR (Virtual Reality). Multi-Layer FMOD sound pack, composed with actual recordings of the Mini-500 helicopter engine and rotor sounds. Unique aspects of the Mini-500 helicopter are simulated and are part of the flying experience by definition: Manual engine/rotor RPM management, low rotor-inertia aspects, in-flight nose tuck during engine-stop, rotor RPM management, retreating blade stall condition (Vne), typical Mast bumping, typical autorotation capability and more. The VSKYLABS 'Test-Pilot': Revolution Mini-500 is designed as if it was a real kit-built helicopter, awaiting for it's first test-flight. Was it built exactly as instructed? Will it fly as expected? wow there is only one way to find out! You will have to get familiar with it step by step...or you might get yourself into serious trouble when mistreating it. Mastering the Mini-500 will sure make you a better helicopter pilot! The original pilot's manual and other 1st hand references contributed by the Mini-500 real-world designer were one of the core-materials during development of this project, and the VSKYLABS Mini- 500 pilot's manual includes the actual data and information of the actual Mini-500 manual. Autoupdater based on the SkunkCrafts autoupdater (XP12 only) - all updates are being pushed smoothly without the need to re-download the entire base package (base package will be updated every once in a while to minimize the gap). The project is under constant development. Highly responsive VSKYLABS support forums. This project is part of the VSKYLABS 'Test-Pilot' series, designed specifically for use with X-Plane cutting edge Experimental Flight Model. This aircraft is also available for X-Plane 11 (obviously with out the dynamics and effects of X-Plane 12) Images are courtesy of vSkyLabs... The Revolution Mini-500 v3.1 by vSkyLabs is now available from the X-Plane.OrgStore _____________________________________ Yes! - the Revolution Mini-500 Project v3.1 by vSkyLabs is NOW available from the X-Plane.Org Store here : Revolution Mini-500 Price is US$26.50 (Currently on sale for only US13.20!) Requirements X-Plane 12 or X-Plane 11 Windows, Mac or Linux 8 GB+ VRAM Recommended Current version: 3.1 (June 17th 2024) ___________________________ News by Stephen Dutton 18th June 2024 Copyright©2024: X-Plane Reviews (Disclaimer. All images and text in this review are the work and property of X-PlaneReviews, no sharing or copy of the content is allowed without consent from the author as per copyright conditions) All Rights Reserved
1 point
-
NEWS! - Aircraft Upgraded : K-1200 K-MAX XP12 by STMA The Kaman K-MAX (company designation K-1200) is a helicopter with intermeshing rotors (synchropter) designed and produced by the American manufacturer Kaman Aircraft. Developed during the 1980s and 1990s, the K-MAX builds on the work of the German aeronautical engineer Anton Flettner. Performing its maiden flight on December 23, 1991, it was specially designed to optimally perform external cargo load operations and is capable of lifting payloads in excess of 6,000 pounds (2,700 kg), which is greater than the helicopter's empty weight and almost twice as much as the competing Bell 205 despite sharing a similar engine. Being a synchropter, it has greater efficiency in comparison to conventional rotor technology. In addition to airlifting external loads, specialised configurations for aerial firefighting and casualty evacuation have been developed. It was produced for both military and civilian operators. Shade Tree Micro Aviation (STMA) released back in 2012 their version of the interesting synchropter, the K-12000 K-Max. This is the upgraded X-Plane 12 version, but the older X-Plane 11 version is still available. Details Made for precise heavy lifting, the Kaman KMAX helicopter works around the world in precision lift operations involving logging in mountainous terrain, firefighting in remote areas, construction in mountainous and urban settings and resupply in remote regions. The intermeshing synchrotor design maximizes lift capability while keeping the noise level much less than other helicopters. The STMA KMAX for XP12 goes to a new standard with Garmin G530 navigation capability, full IFR cockpit, new lighting features, rain and reflective windscreens, an improved external load console, and a set of new slung load objects specifically designed for the KMAX and XP12 slung load modeling. In our previous models we included a specific Bambi bucket version and a tanker version. XP12’s new slung load modeling obviates the need for a special Bambi version and the Isolair company has ceased production of KMAX tanker add-ons so we now offer a configurable single model with long line you can adjust in PlaneMaker to fit your skill levels. In development we review the most appealing liveries and include them with the model. The cockpit is now fully animated with 3D instruments and improved lighting for all conditions. Also included is the KMAX operations manual and full cockpit documentation in active touch region labels to be able to quickly master startup and shutdown. VR operations are also included if you have that capability. If you are new to XP helicopters or thinking about learning helicopter flight, the KMAX with its counter-rotating rotors makes it the simplest helicopter to learn vertical flight. There is no yaw to counteract as you increase or decrease collective and the KMAX has plenty of power to get you wherever you want to go. If you are an “old head” XP helicopter type then the KMAX and its load assortment will be a great addition to your fleet. The initial production run of the K-MAX ran between 1991 and 2003, at which point the line was shuttered after the completion of 38 helicopters due to low customer demand. During June 2015, Kaman announced that it was restarting production following the receipt of ten commercial orders for the K-MAX.[1] During May 2017, the first flight of a K-MAX built on the restarted production line took place; two months later, the first new-build aircraft since 2003 was delivered to a customer based in China. However, in January 2023, amid a downturn in demand, Kaman announced its intention to shutter production of the K-MAX once again. Images are courtesy of Shade Tree Micro Aviation ___________________________ Yes! The K-1200 K-MAX XP12 by Shade Tree Micro Aviation is NOW available from the X-Plane.Org Store here : K-1200 K-MAX XP12 Price is US$29.95 Requirements X-Plane 12 Windows , Mac or Linux 8 GB+ VRAM Recommended Current version : 12.1 (May 22 2024) ___________________________ News by Stephen Dutton 25th May 2024 Copyright©2024: X-Plane Reviews (Disclaimer. All images and text in this review are the work and property of X-PlaneReviews, no sharing or copy of the content is allowed without consent from the author as per copyright conditions) All Rights Reserved
1 point


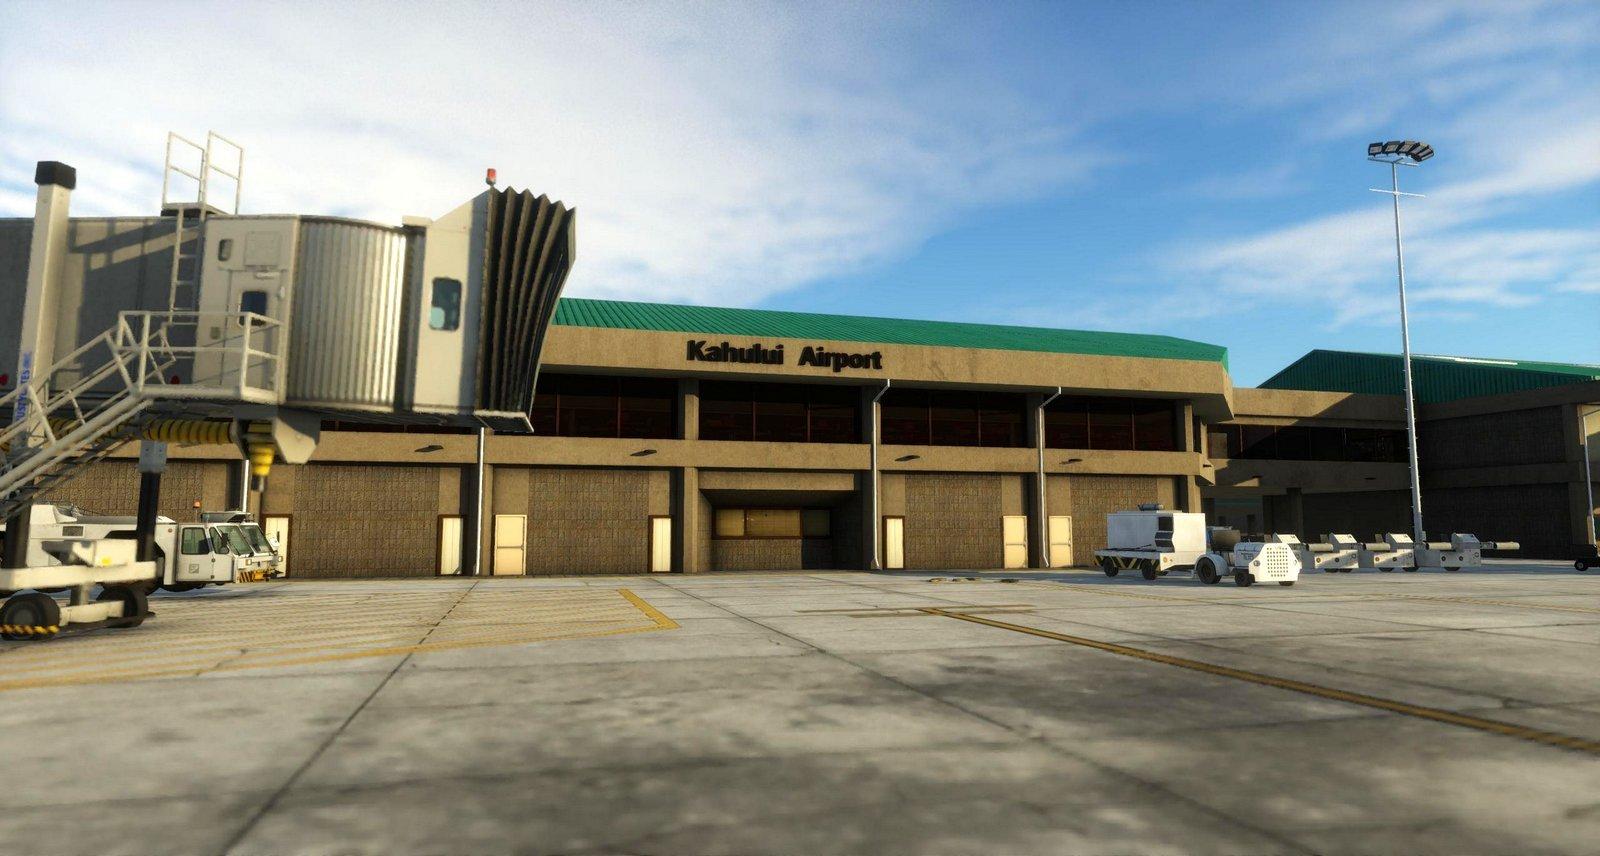
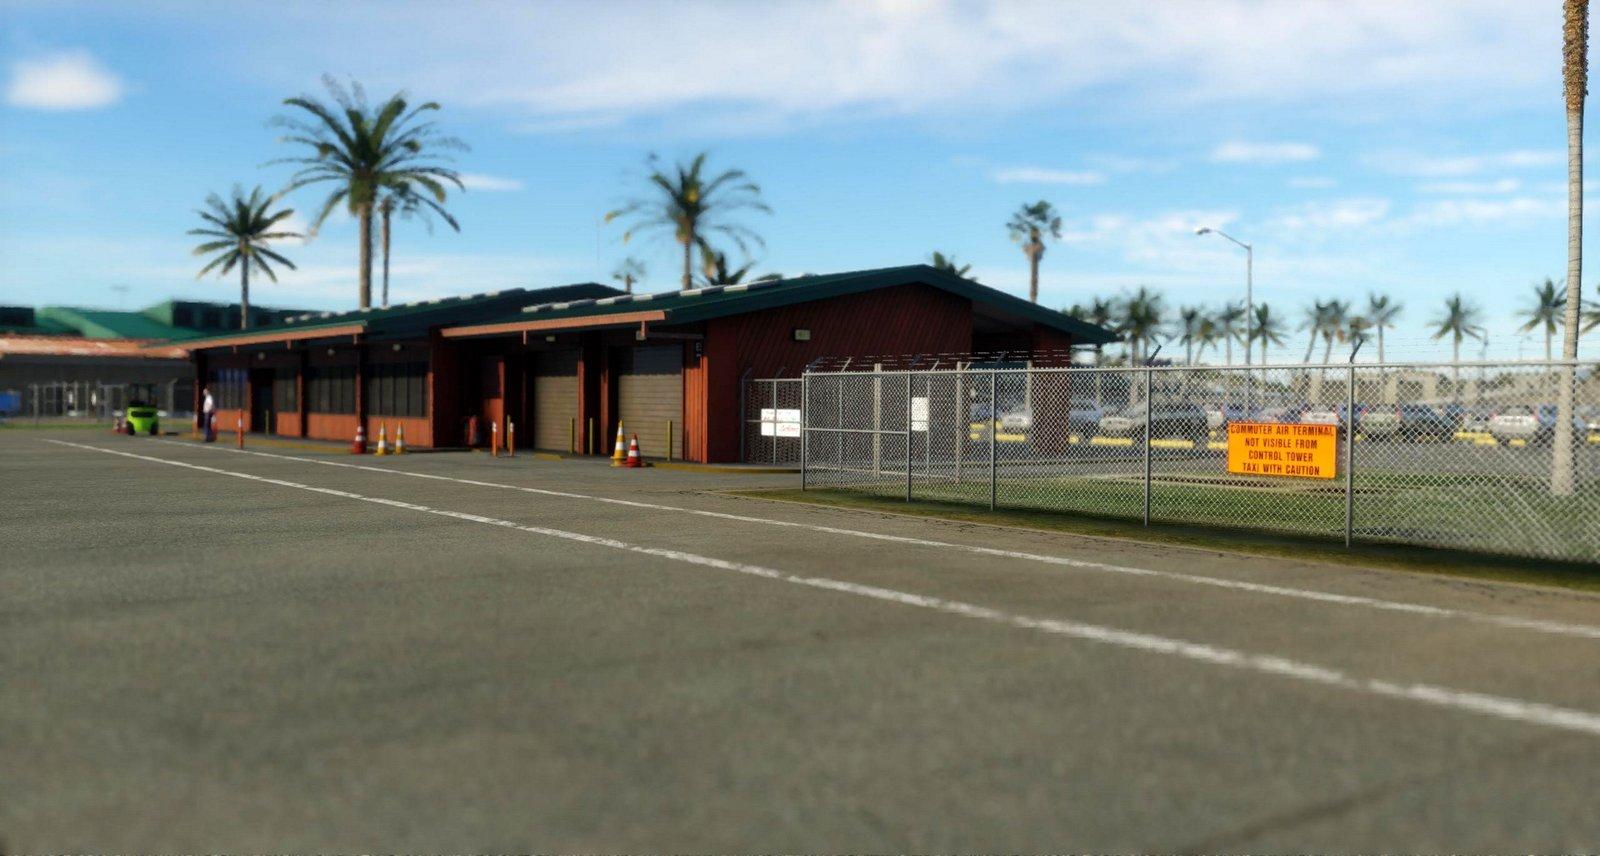
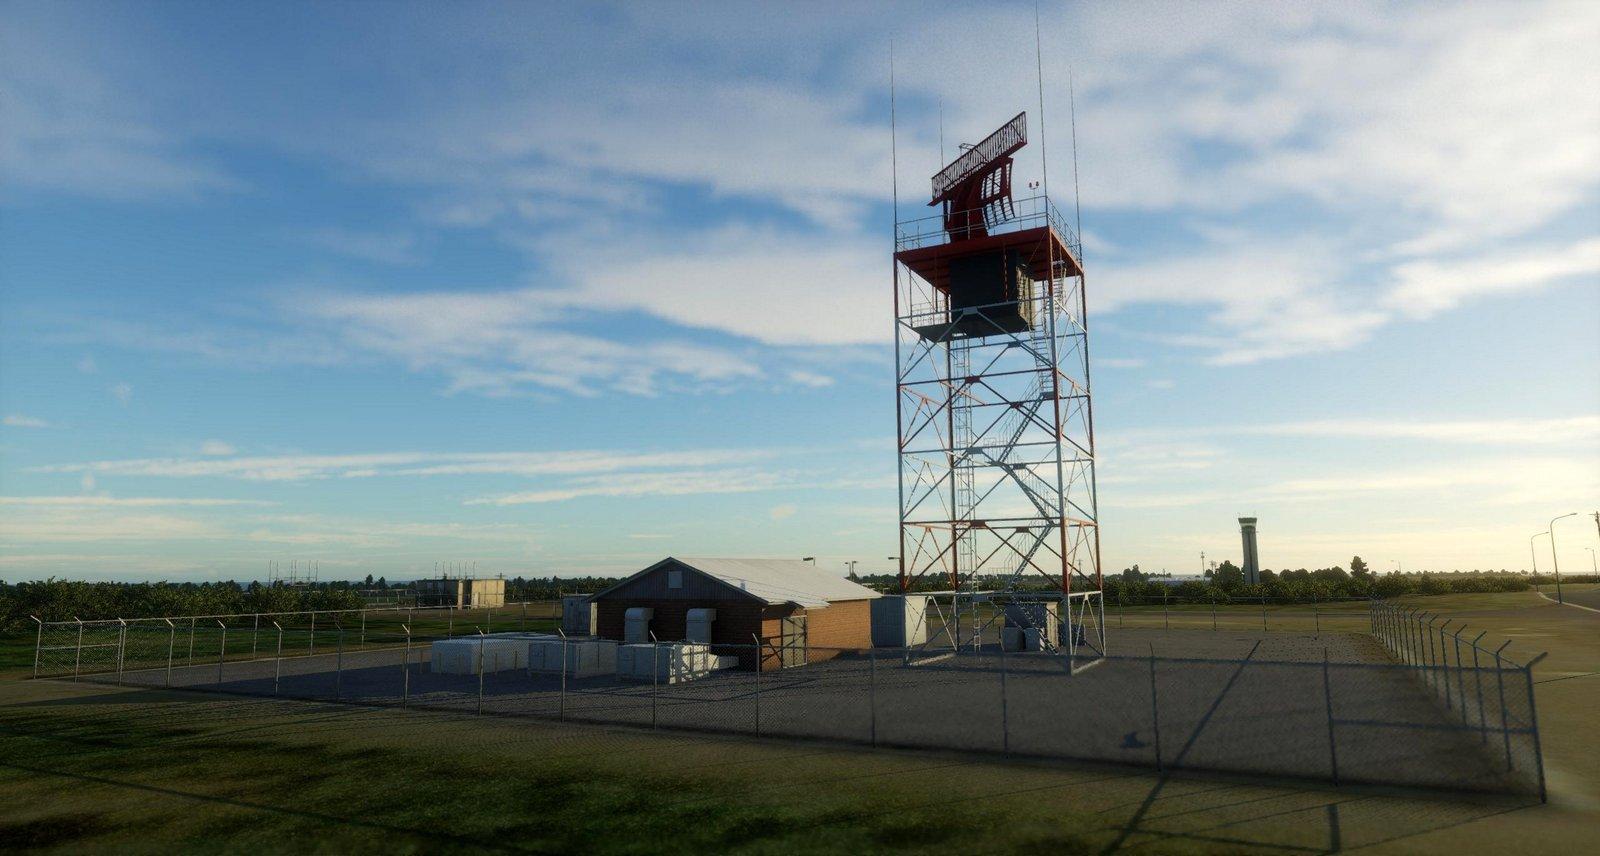
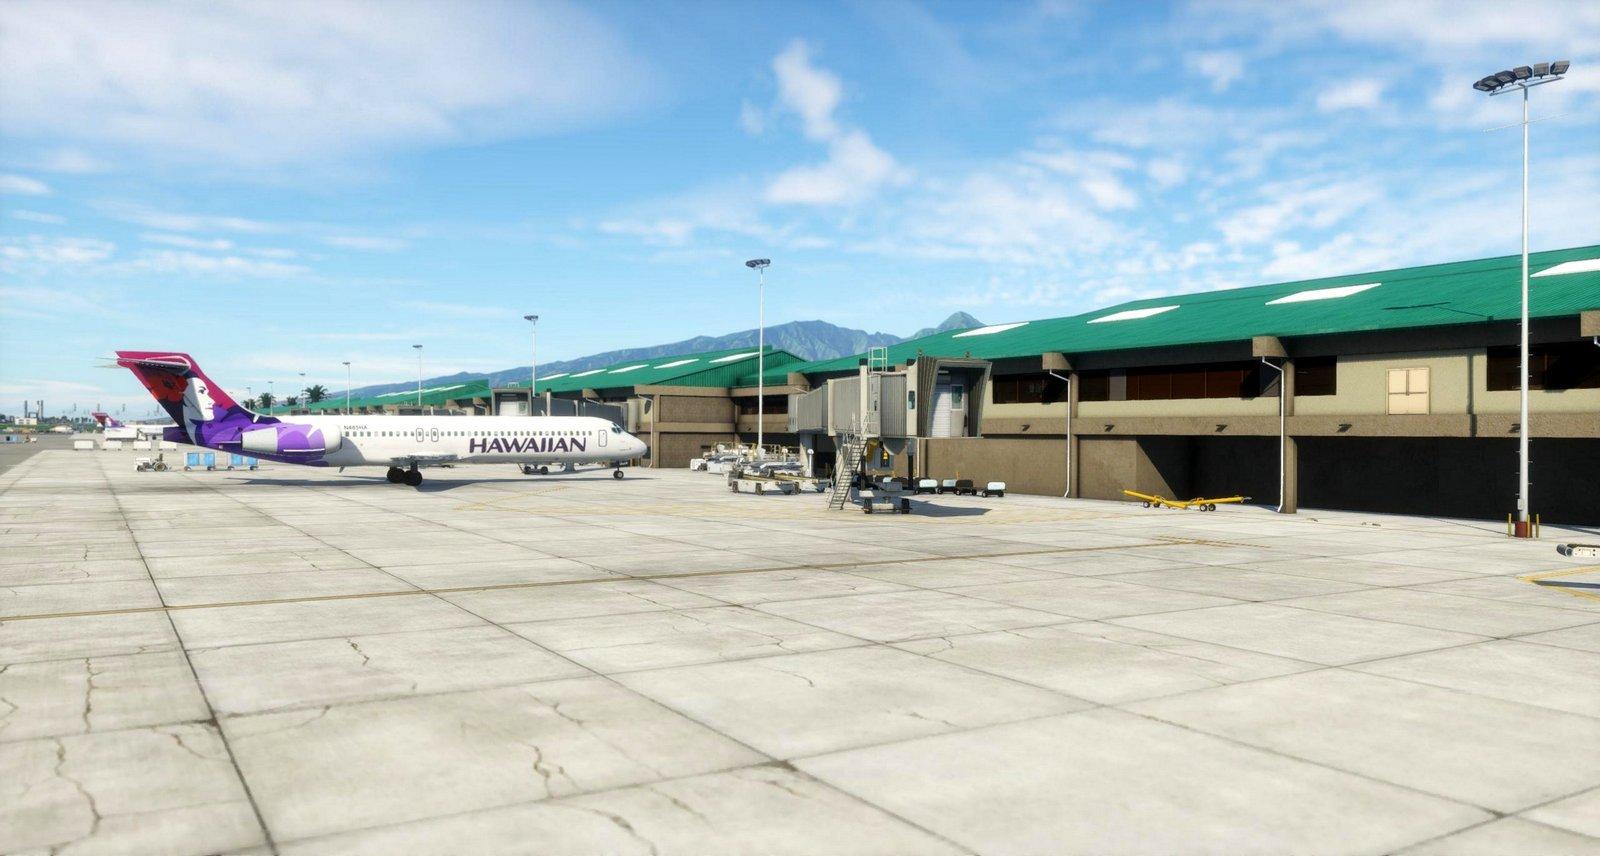
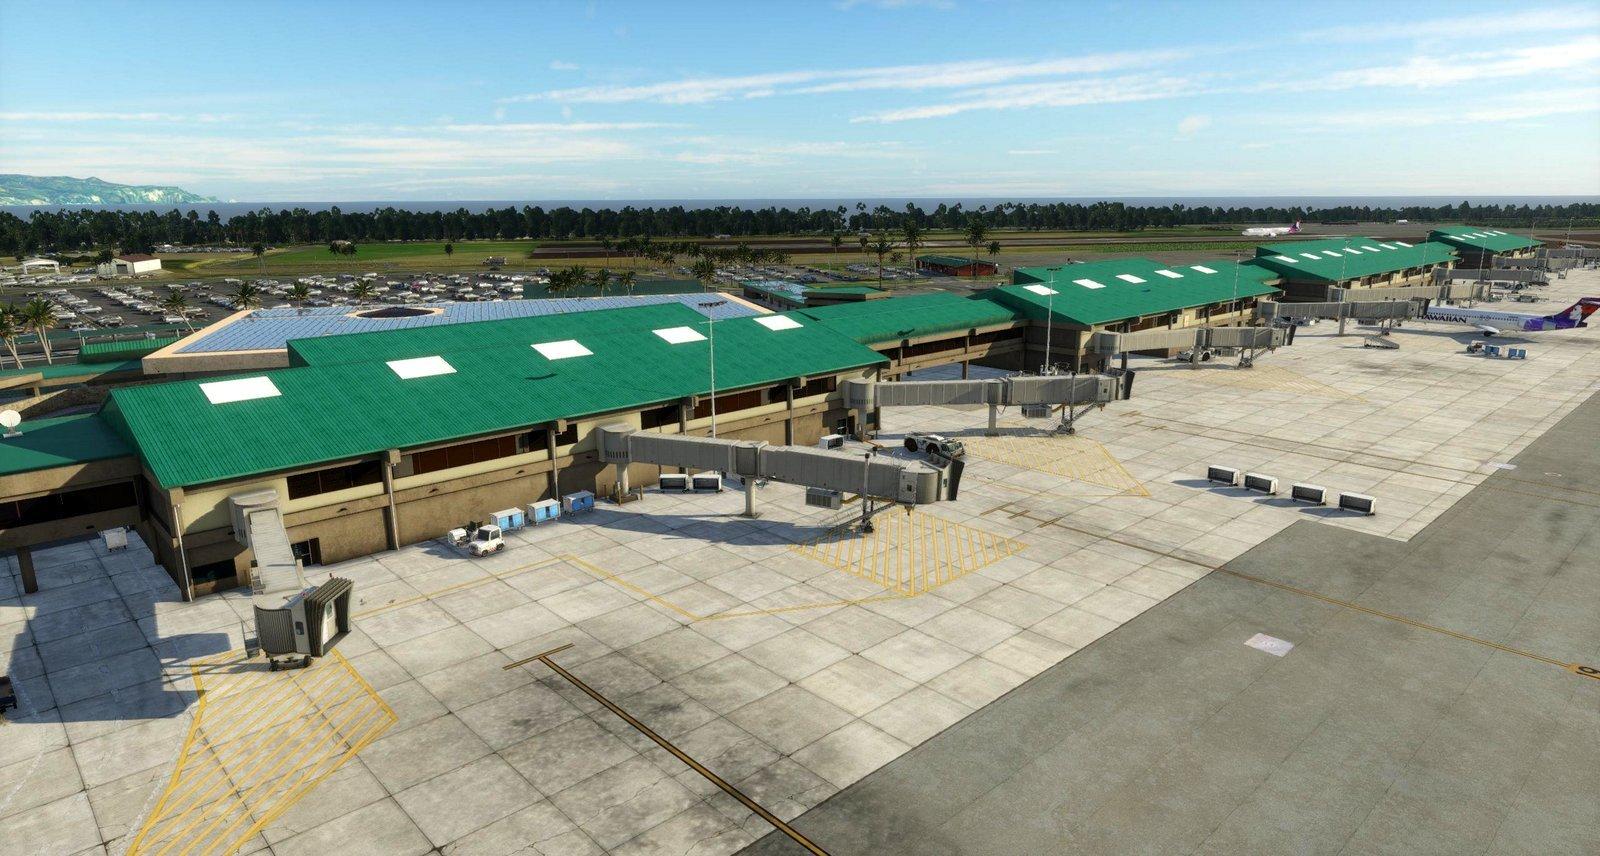
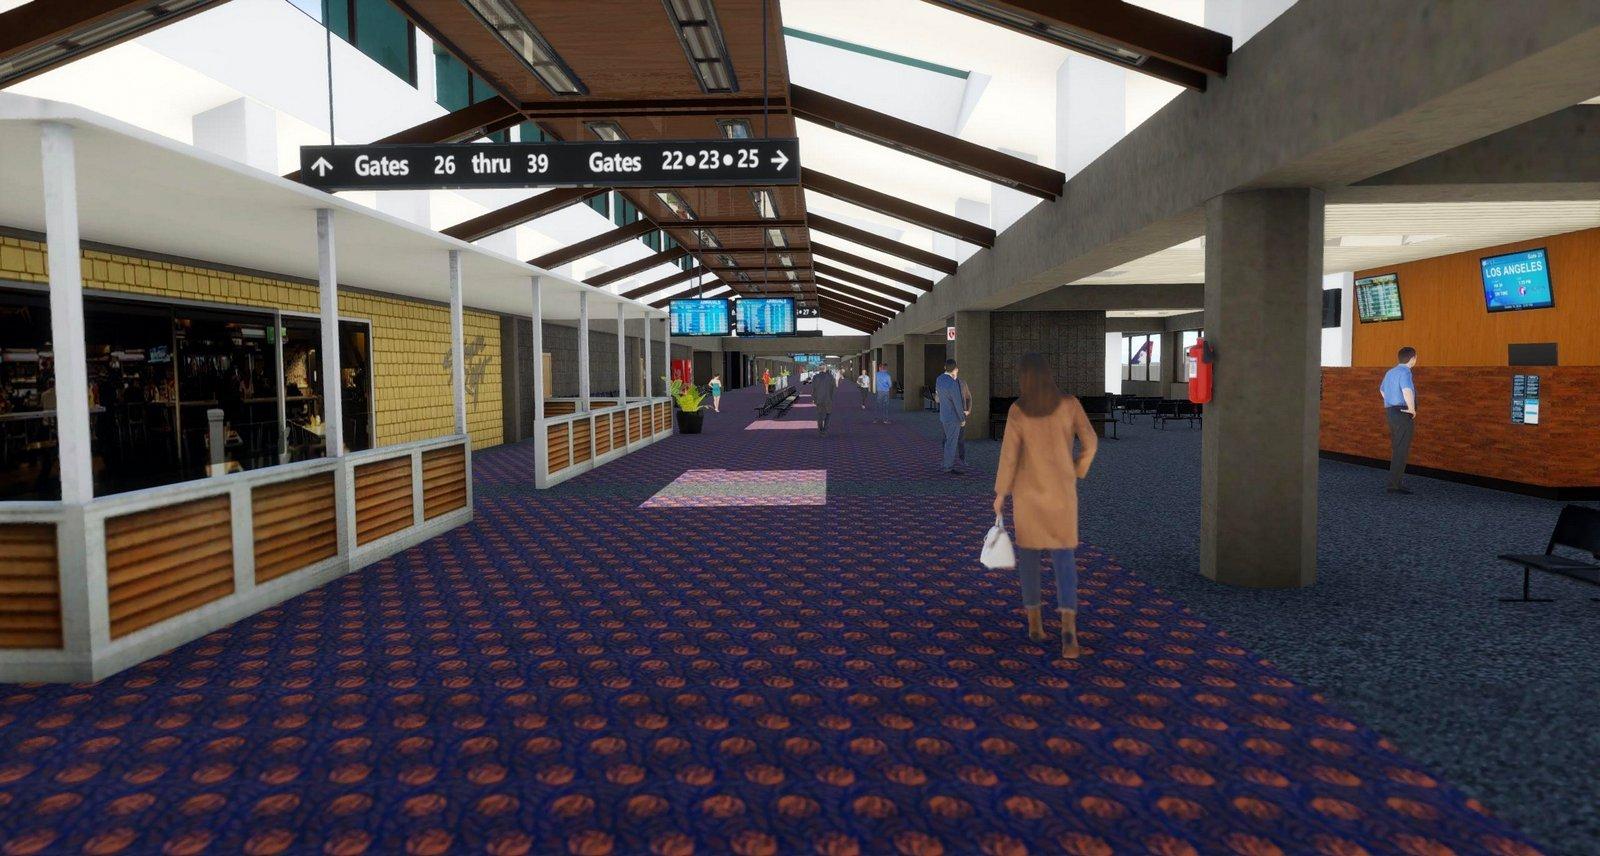

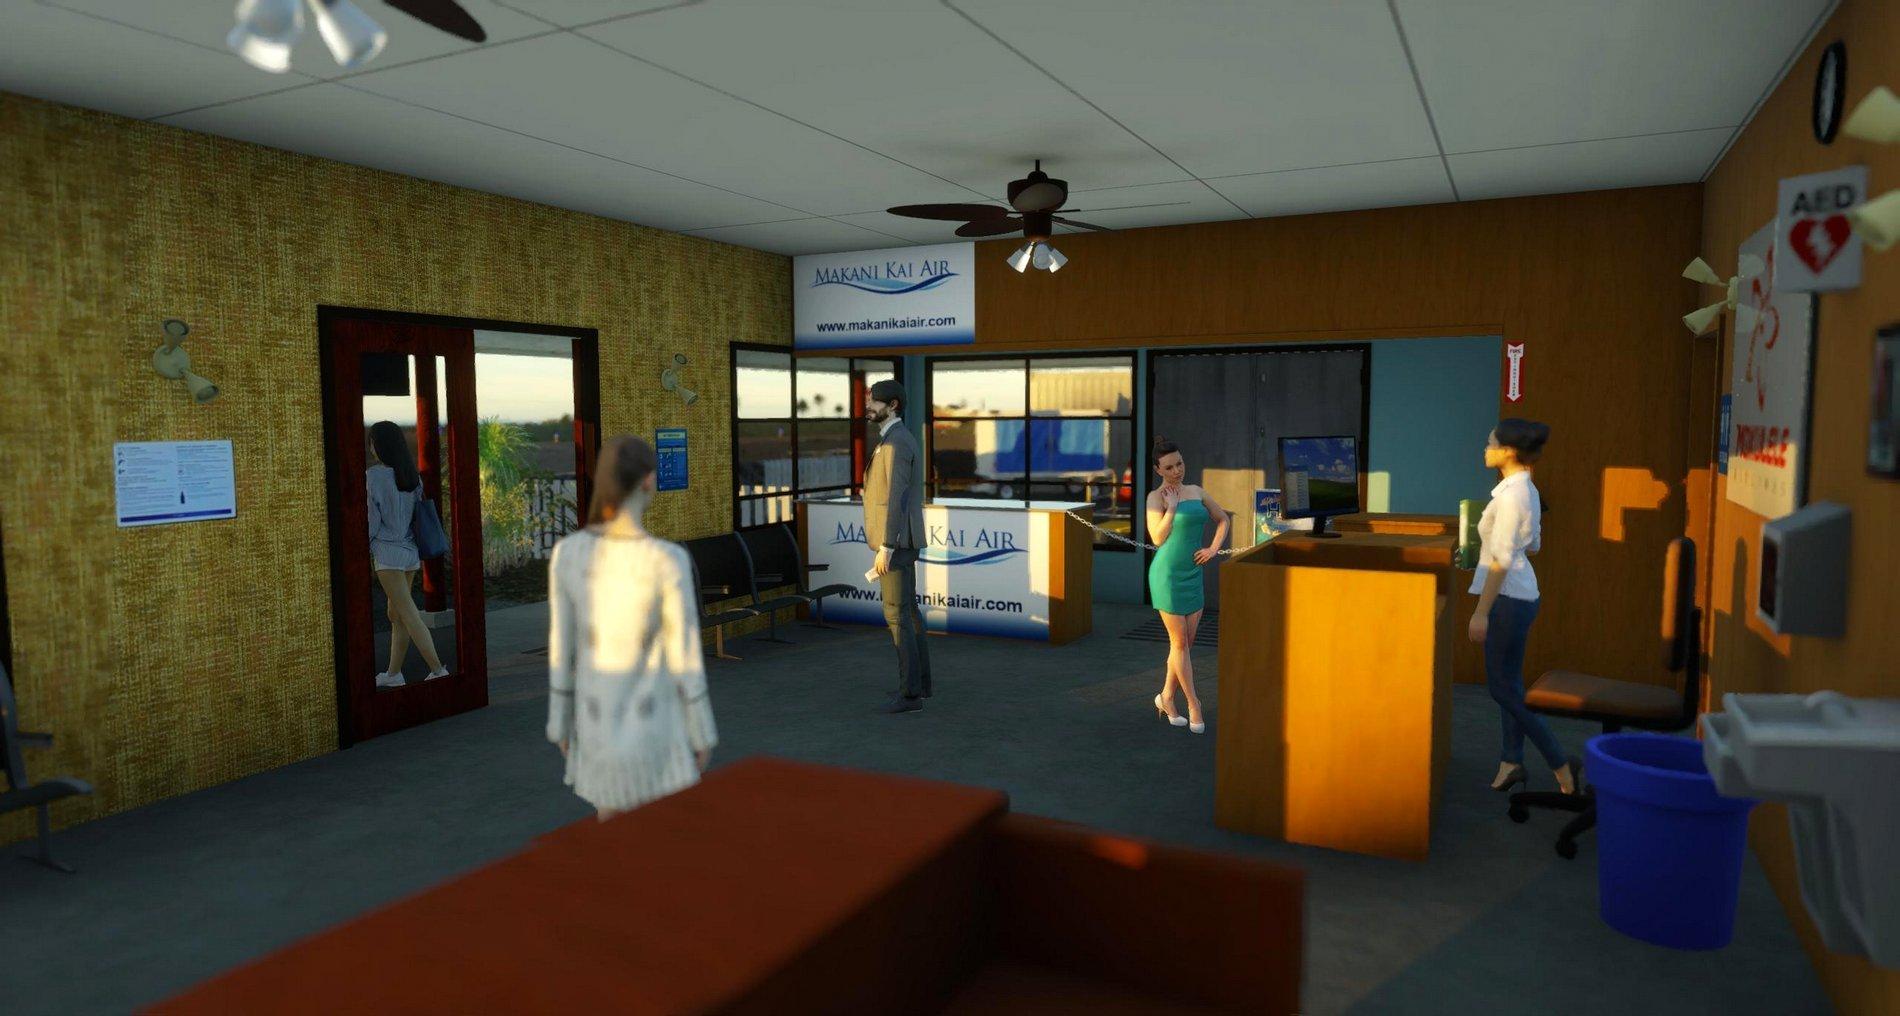
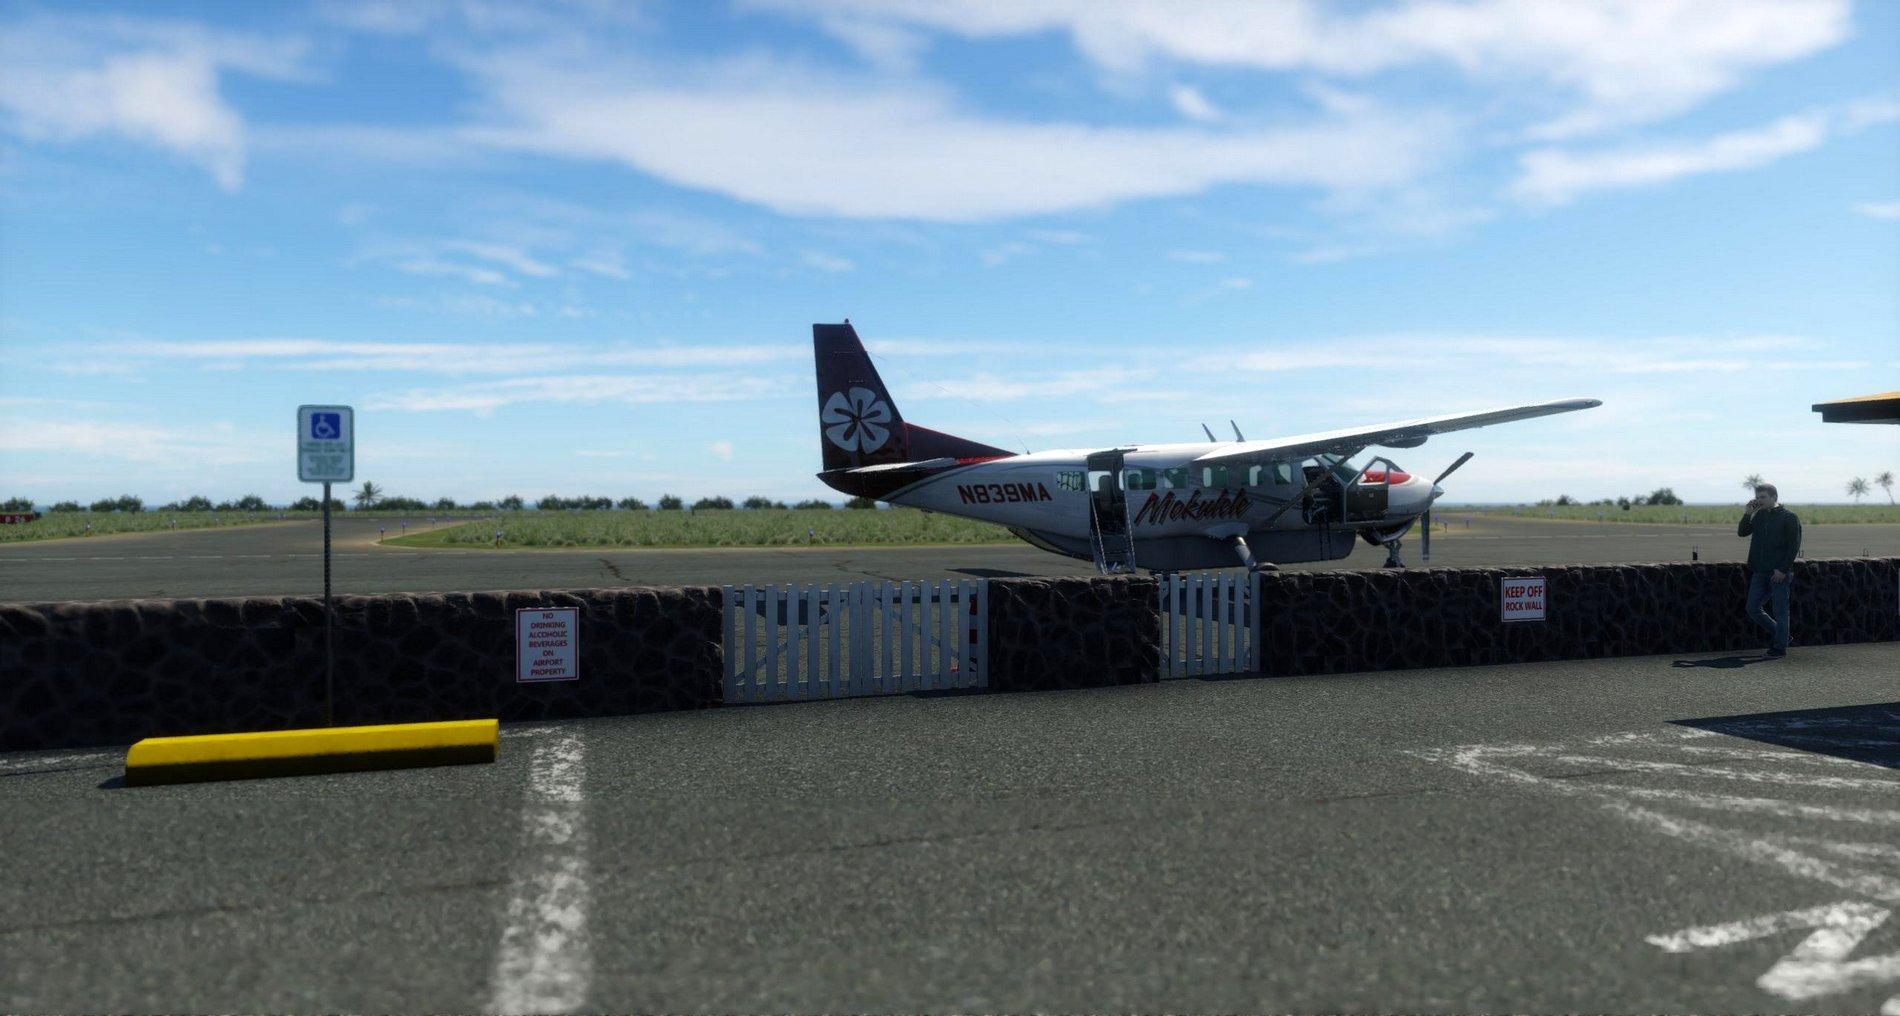
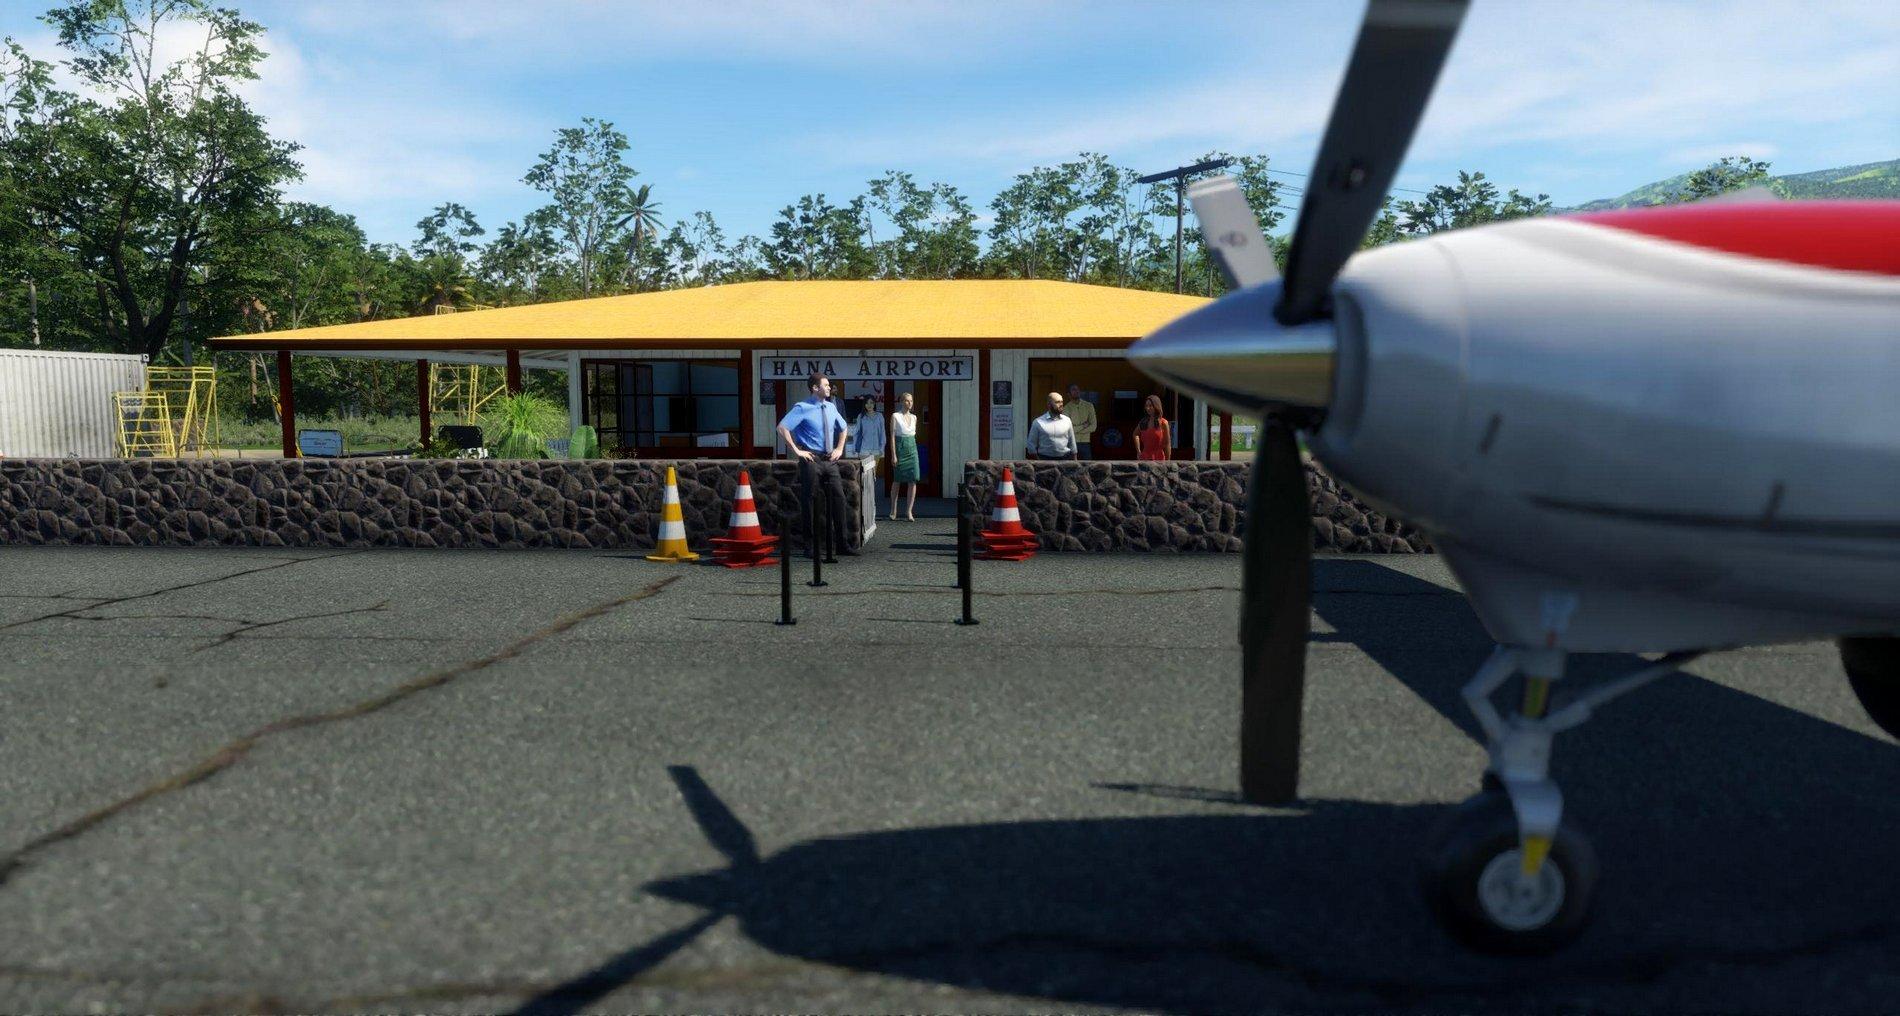
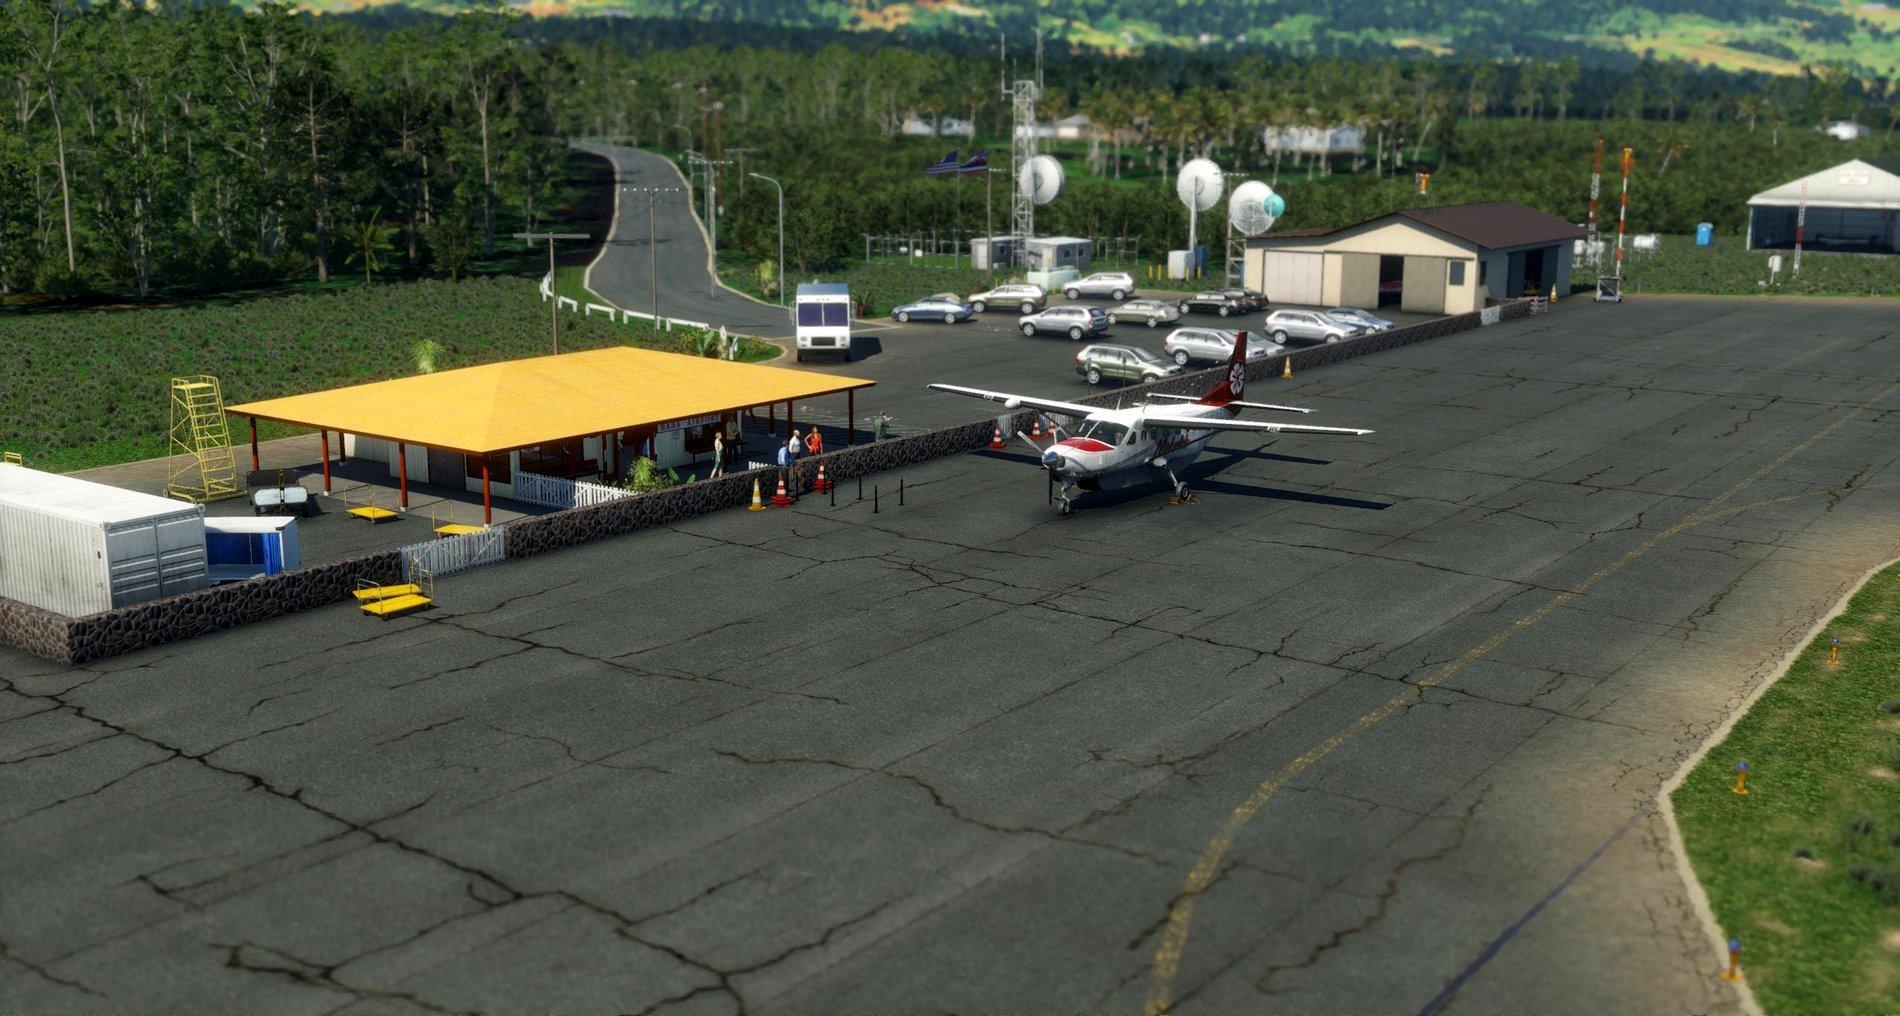
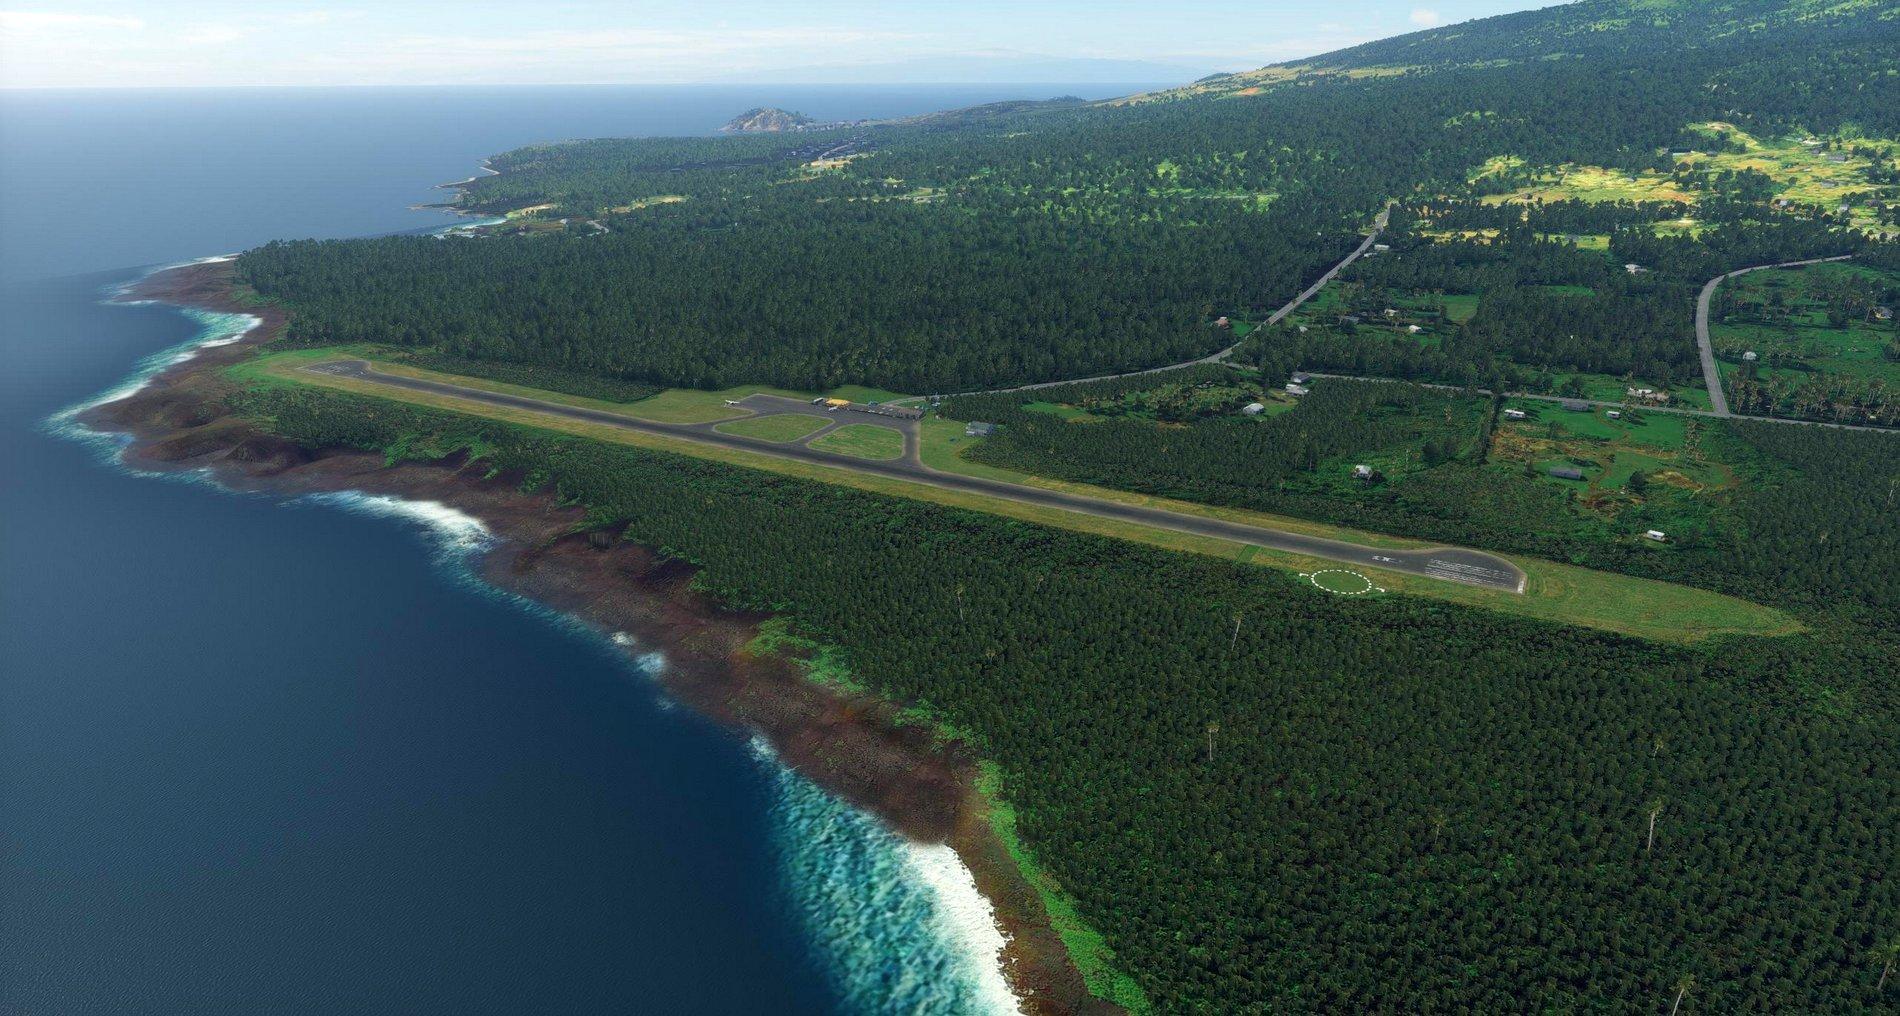
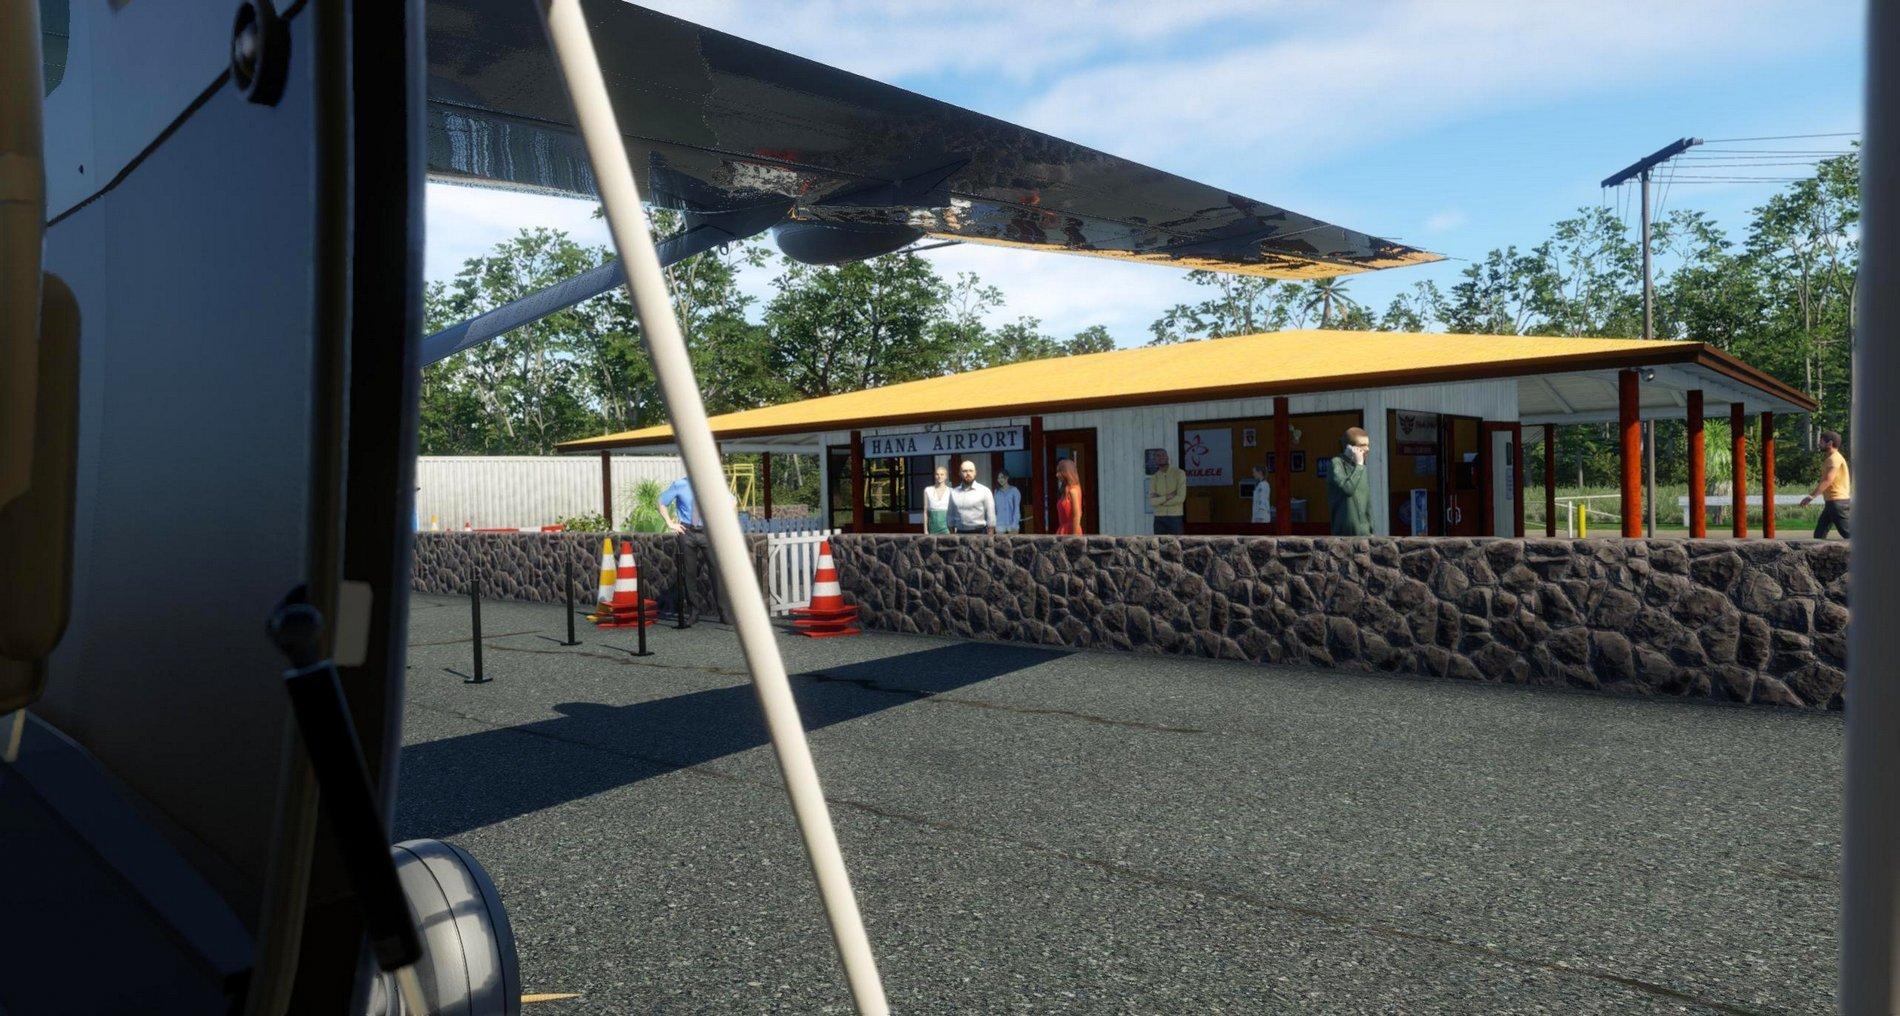
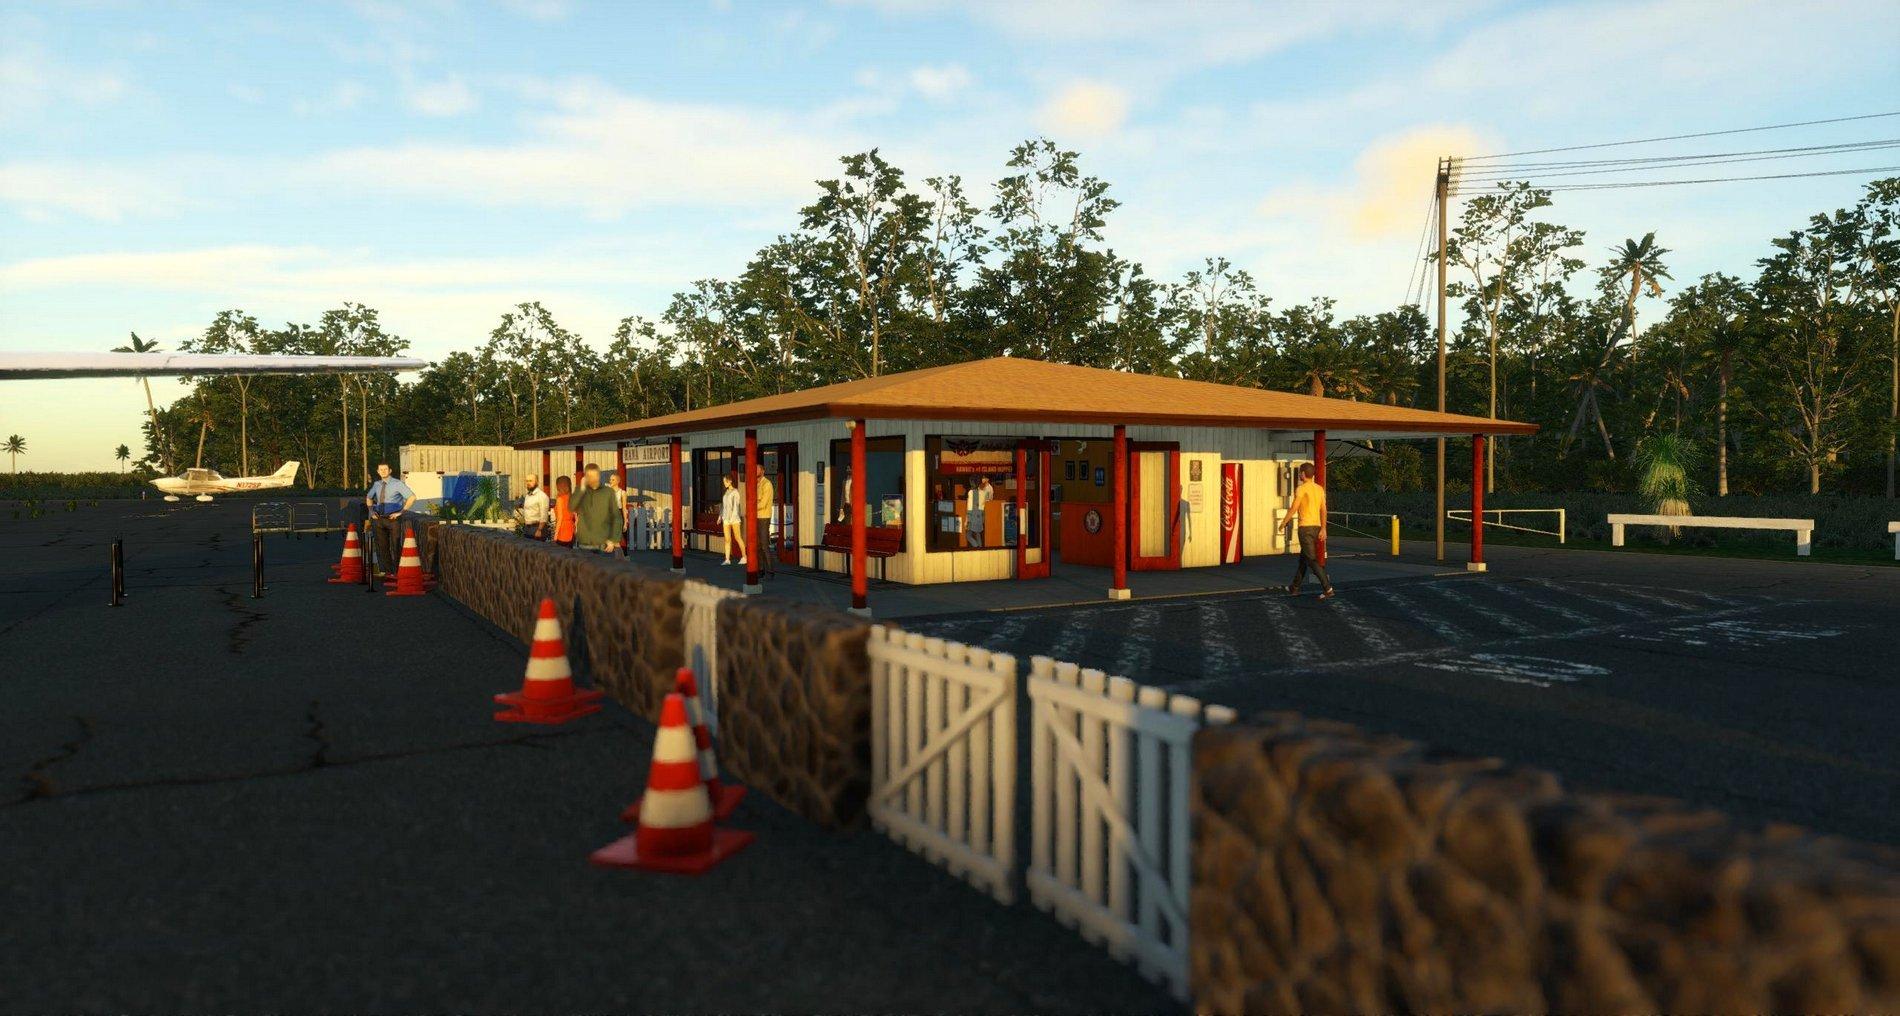
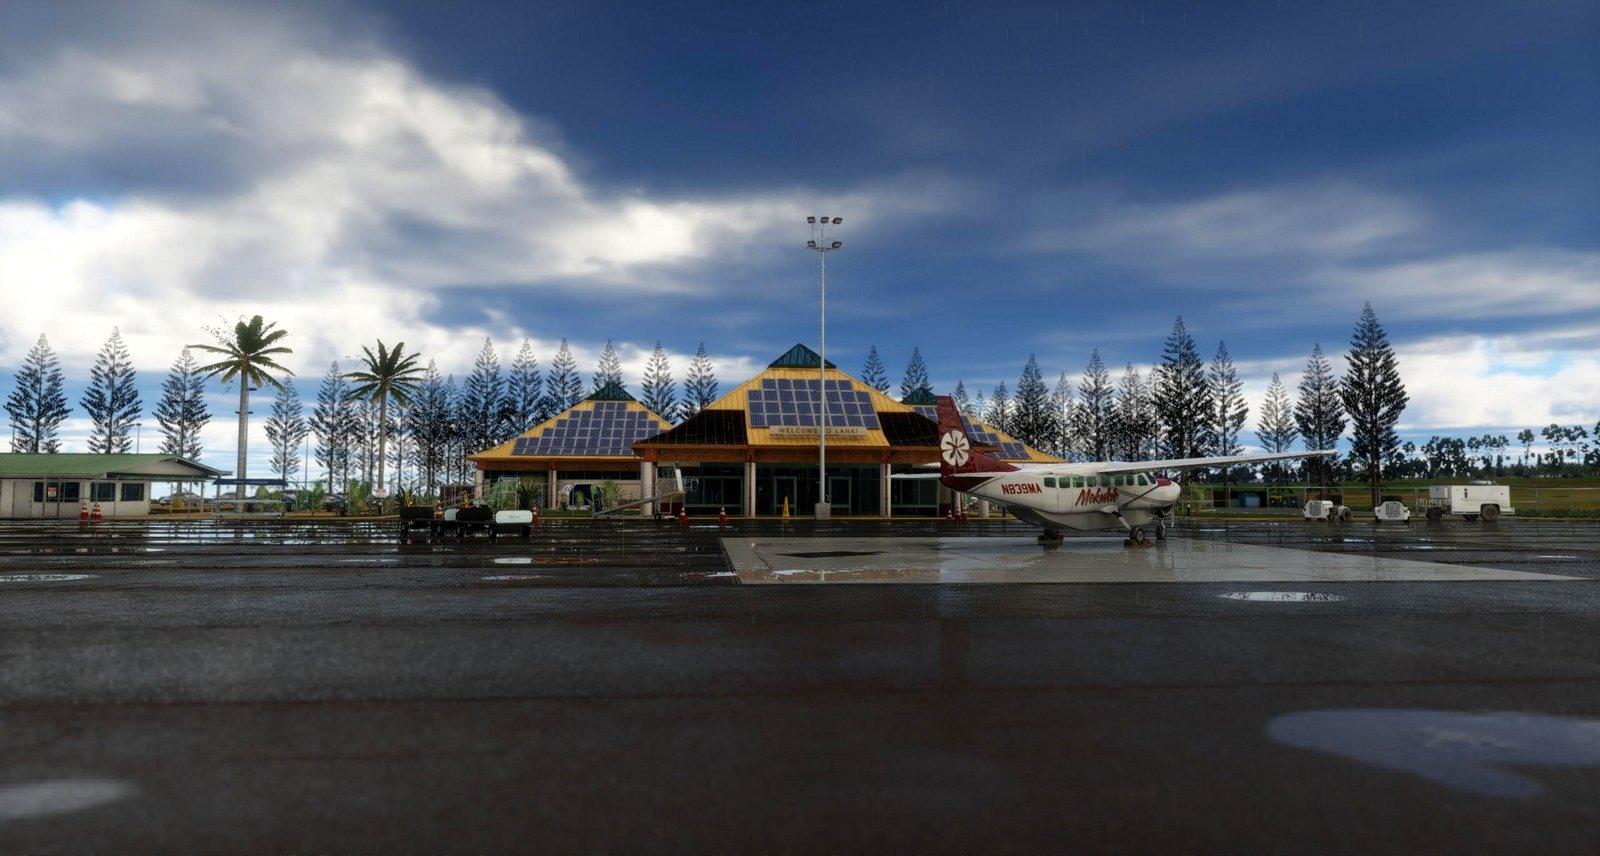
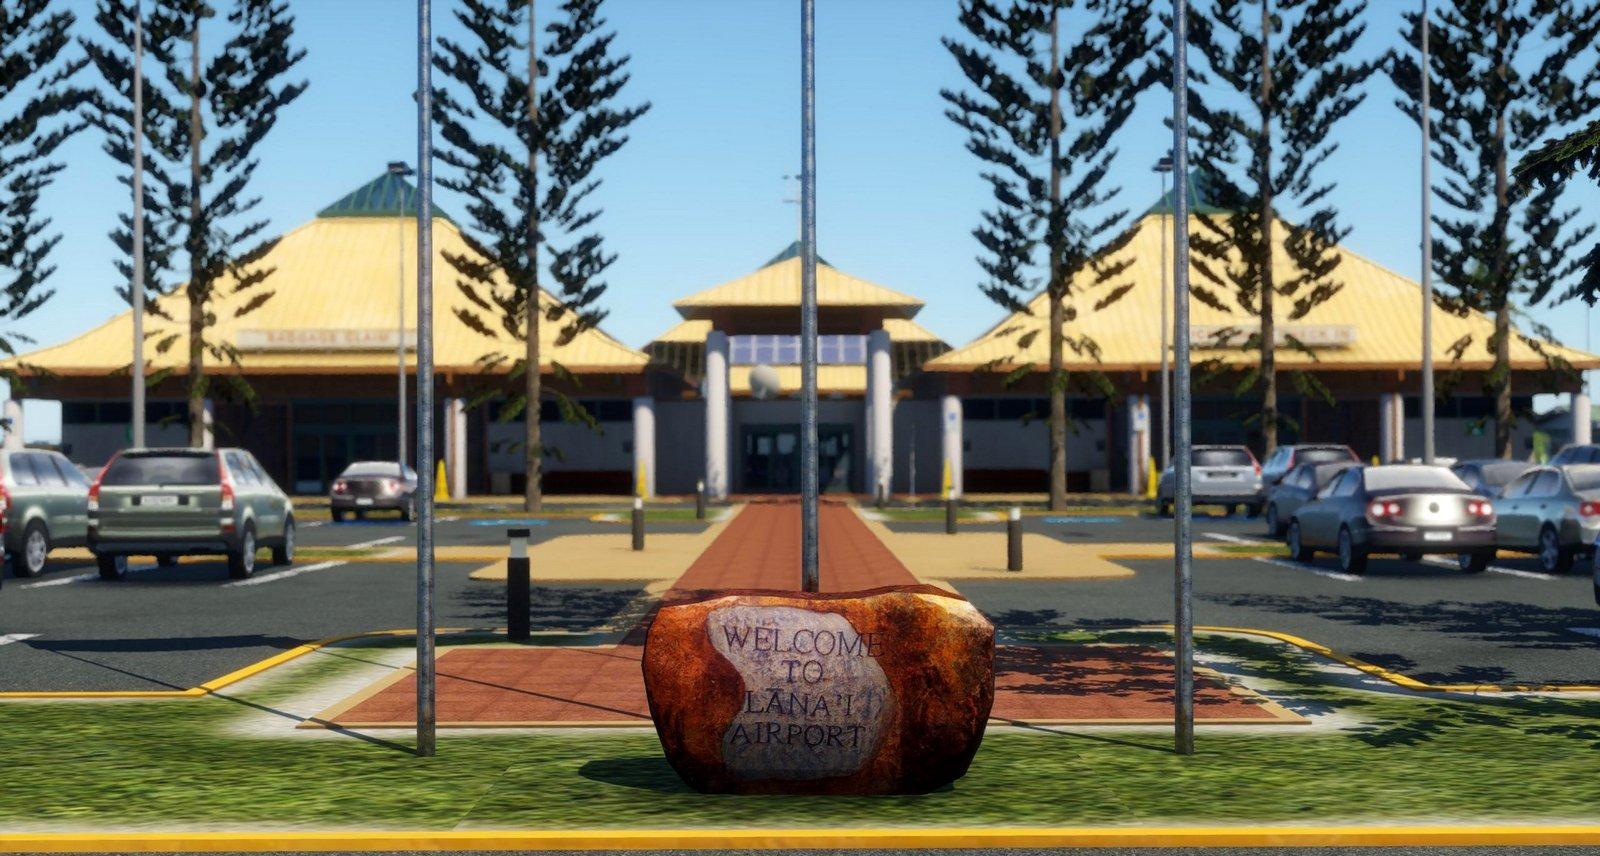
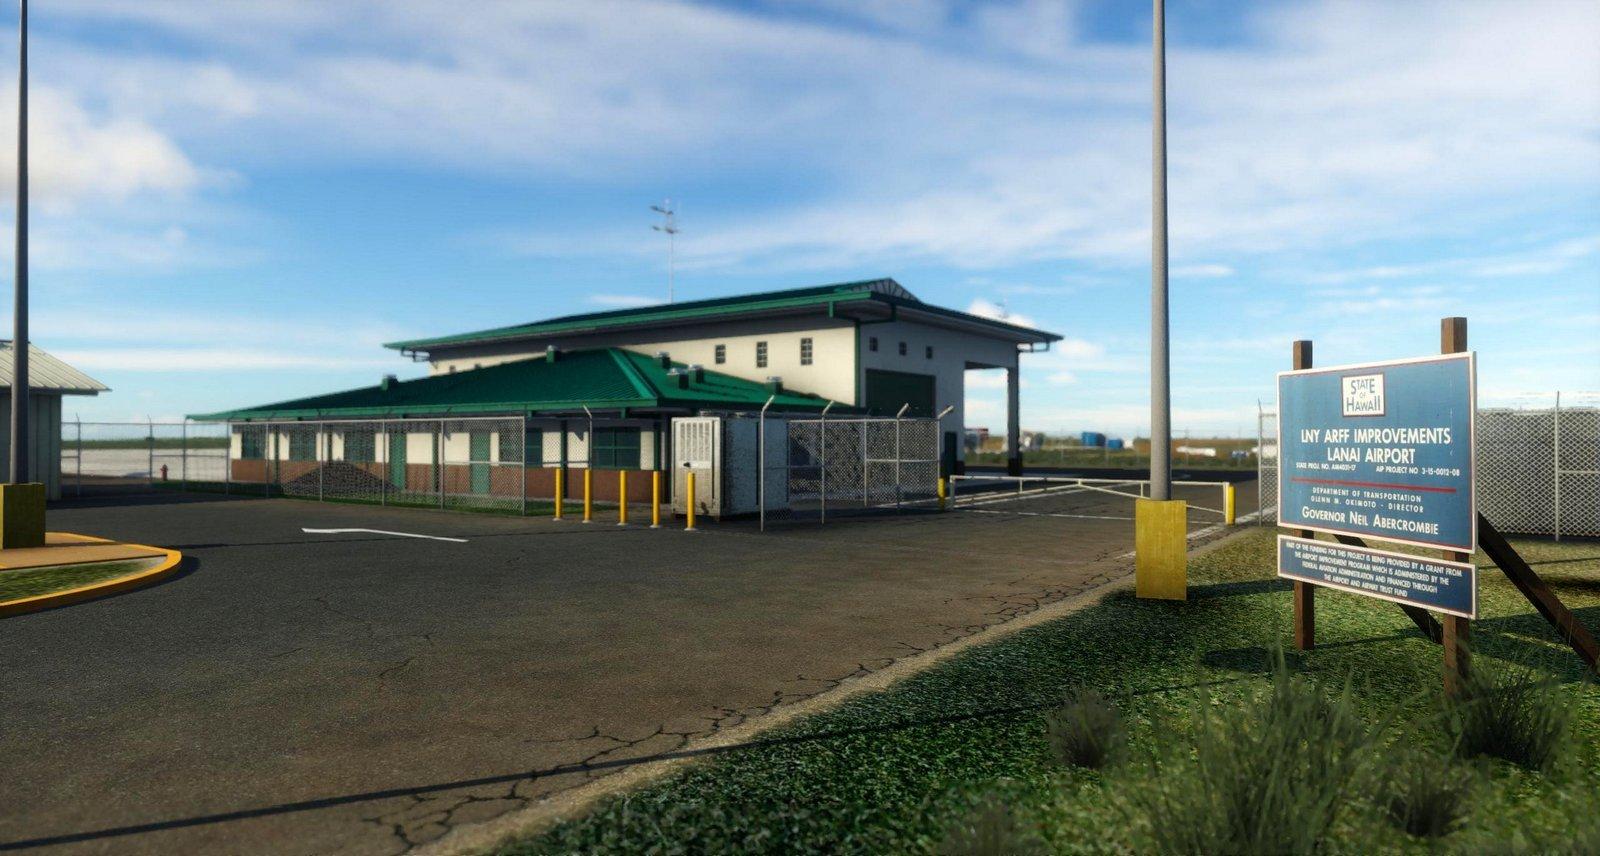
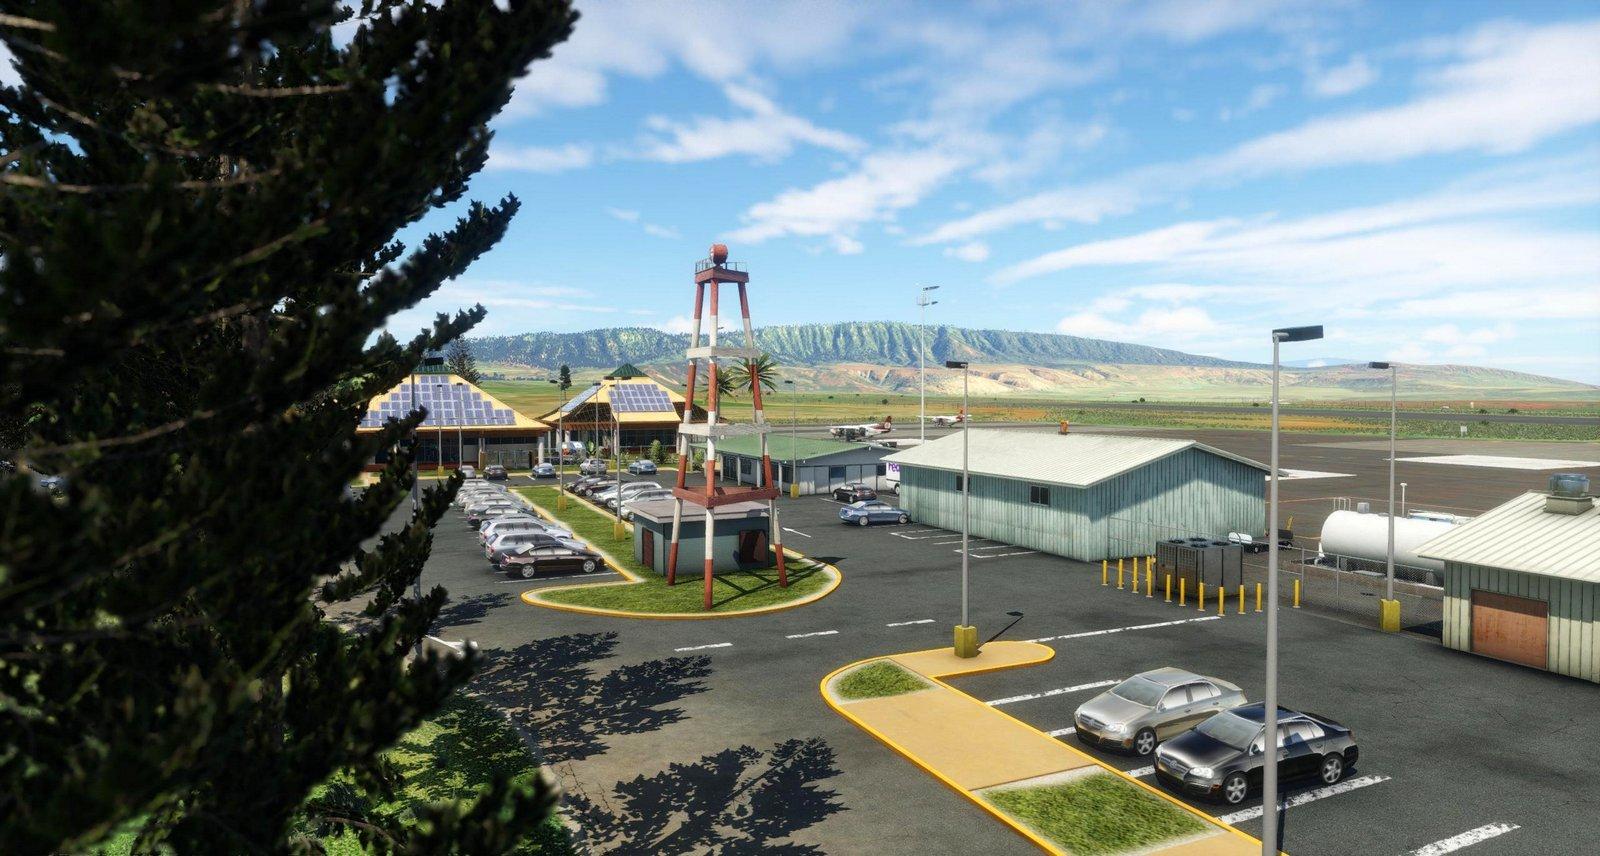


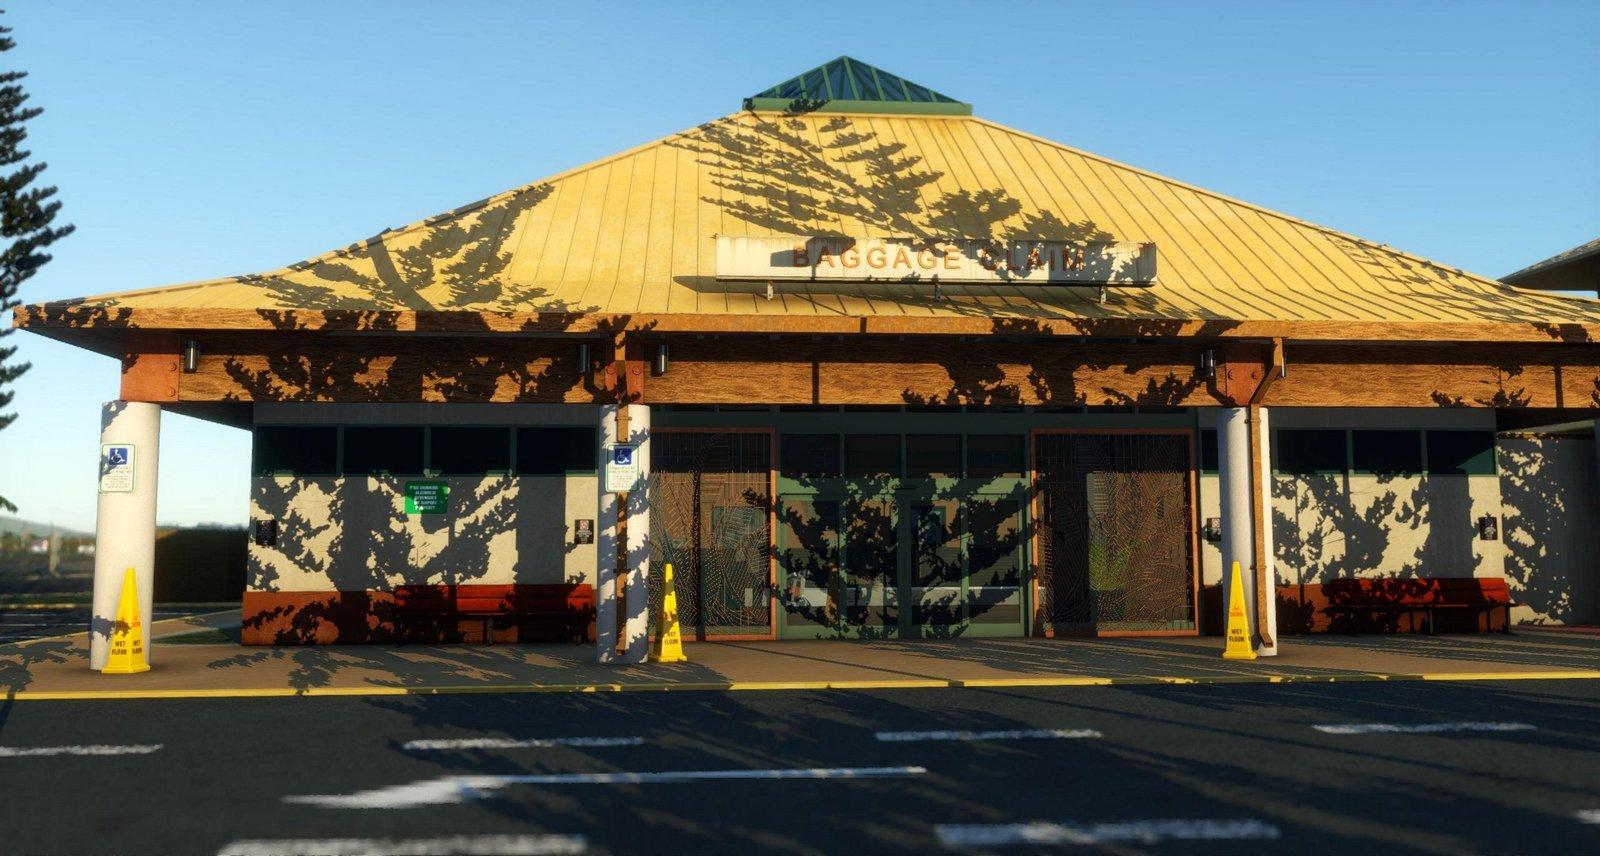
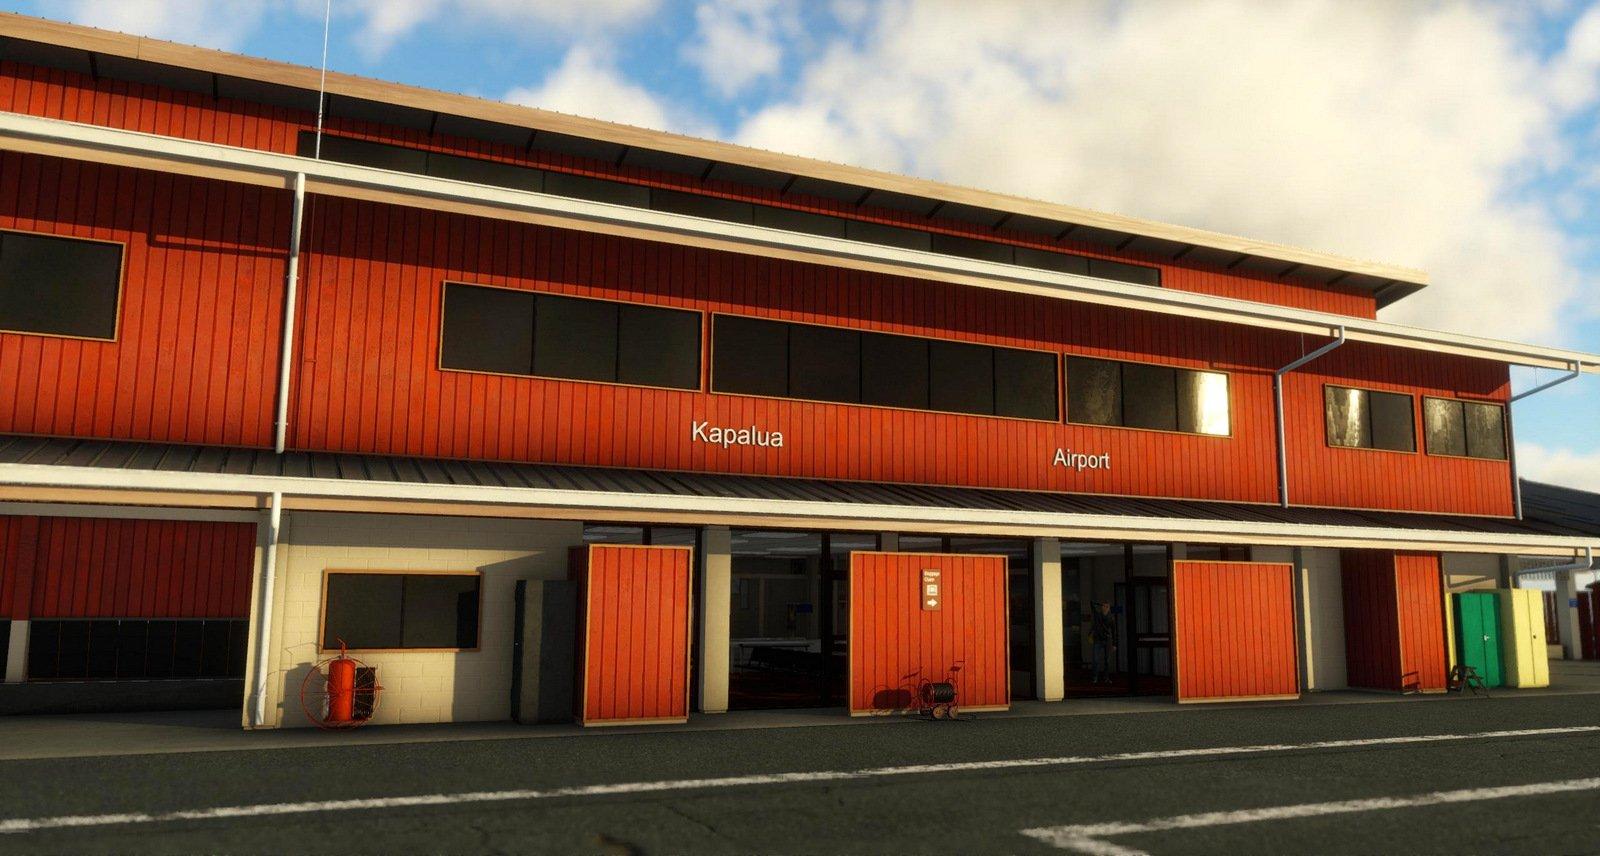
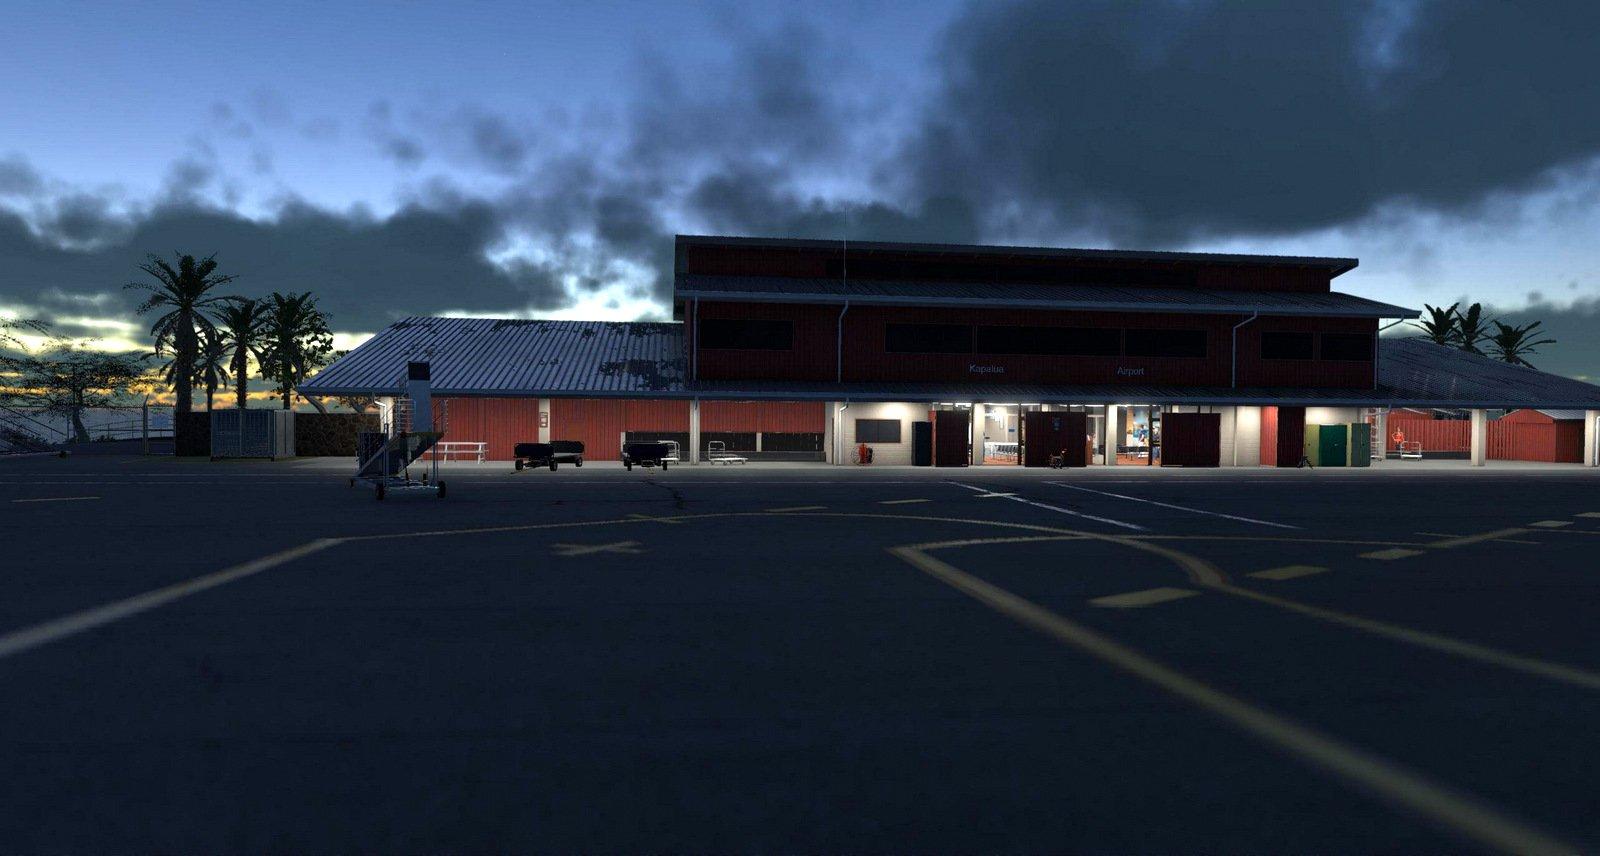
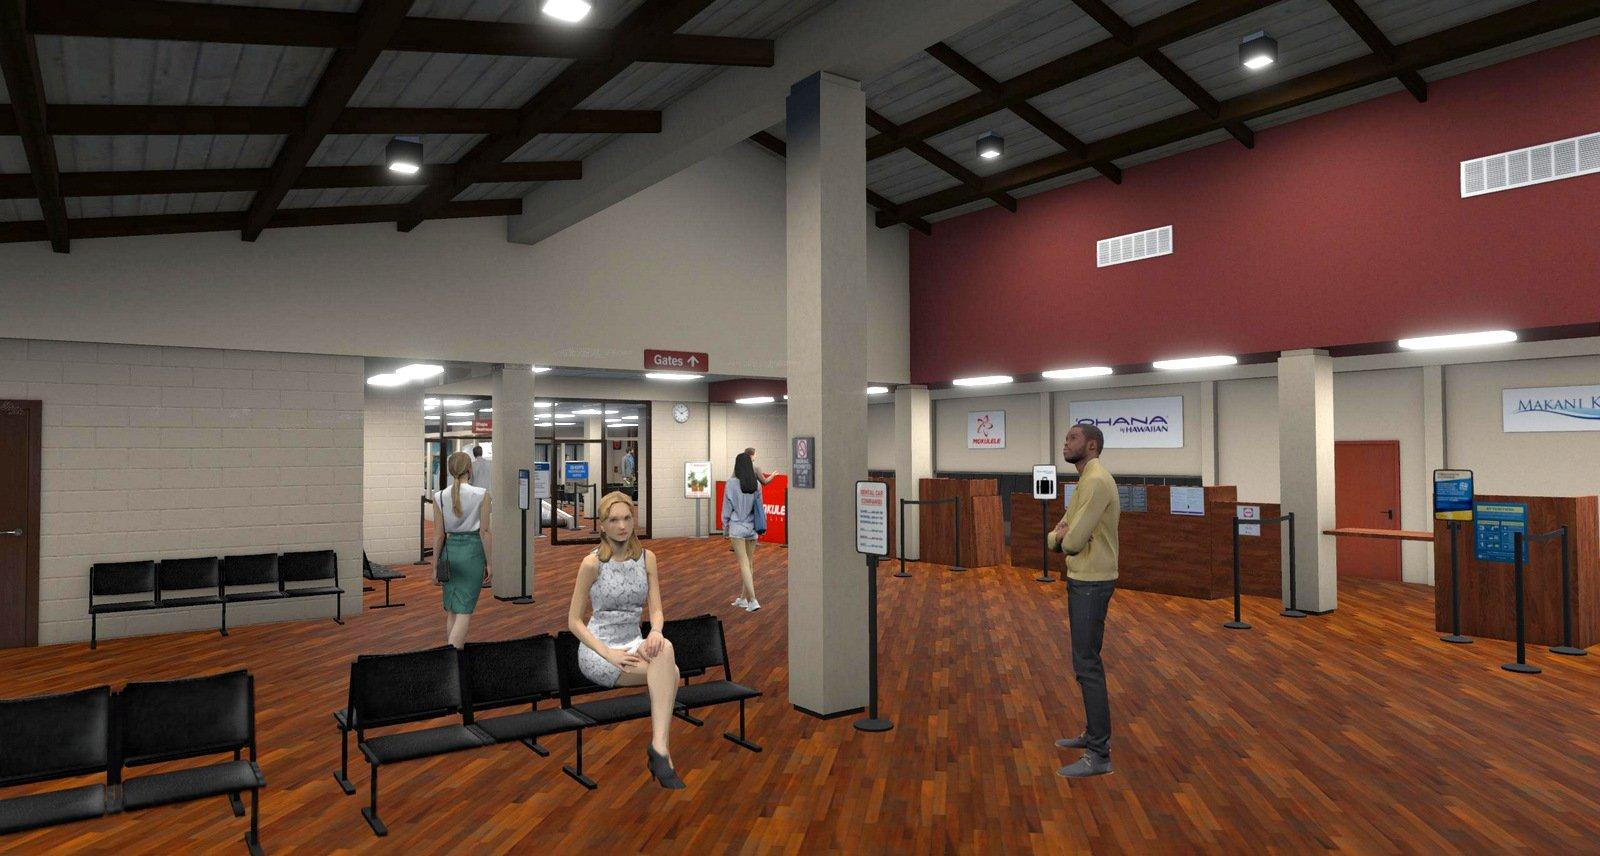
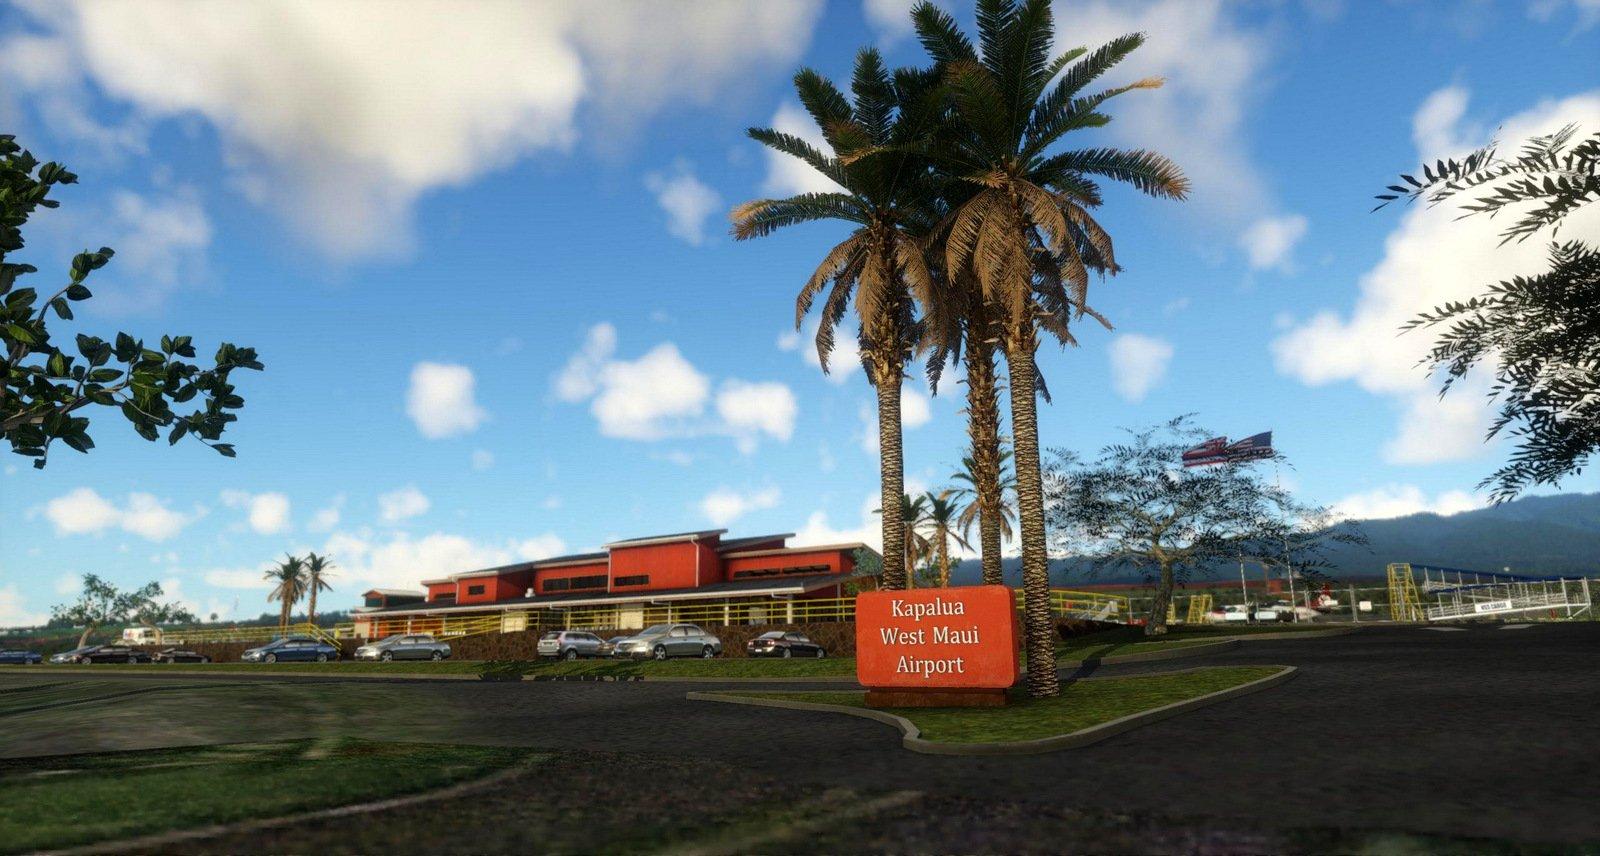
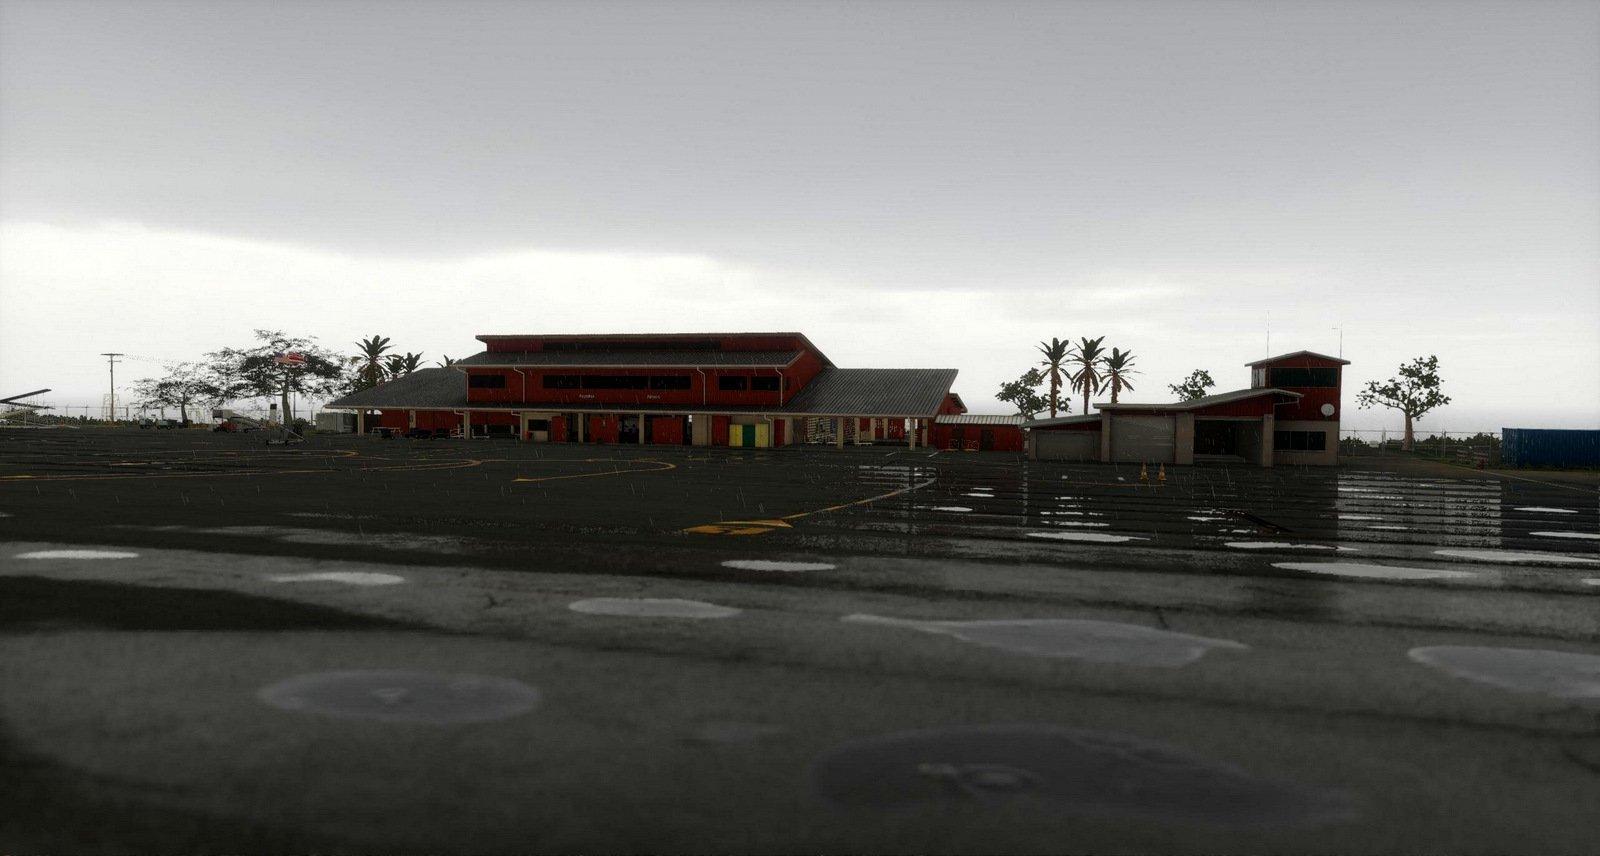
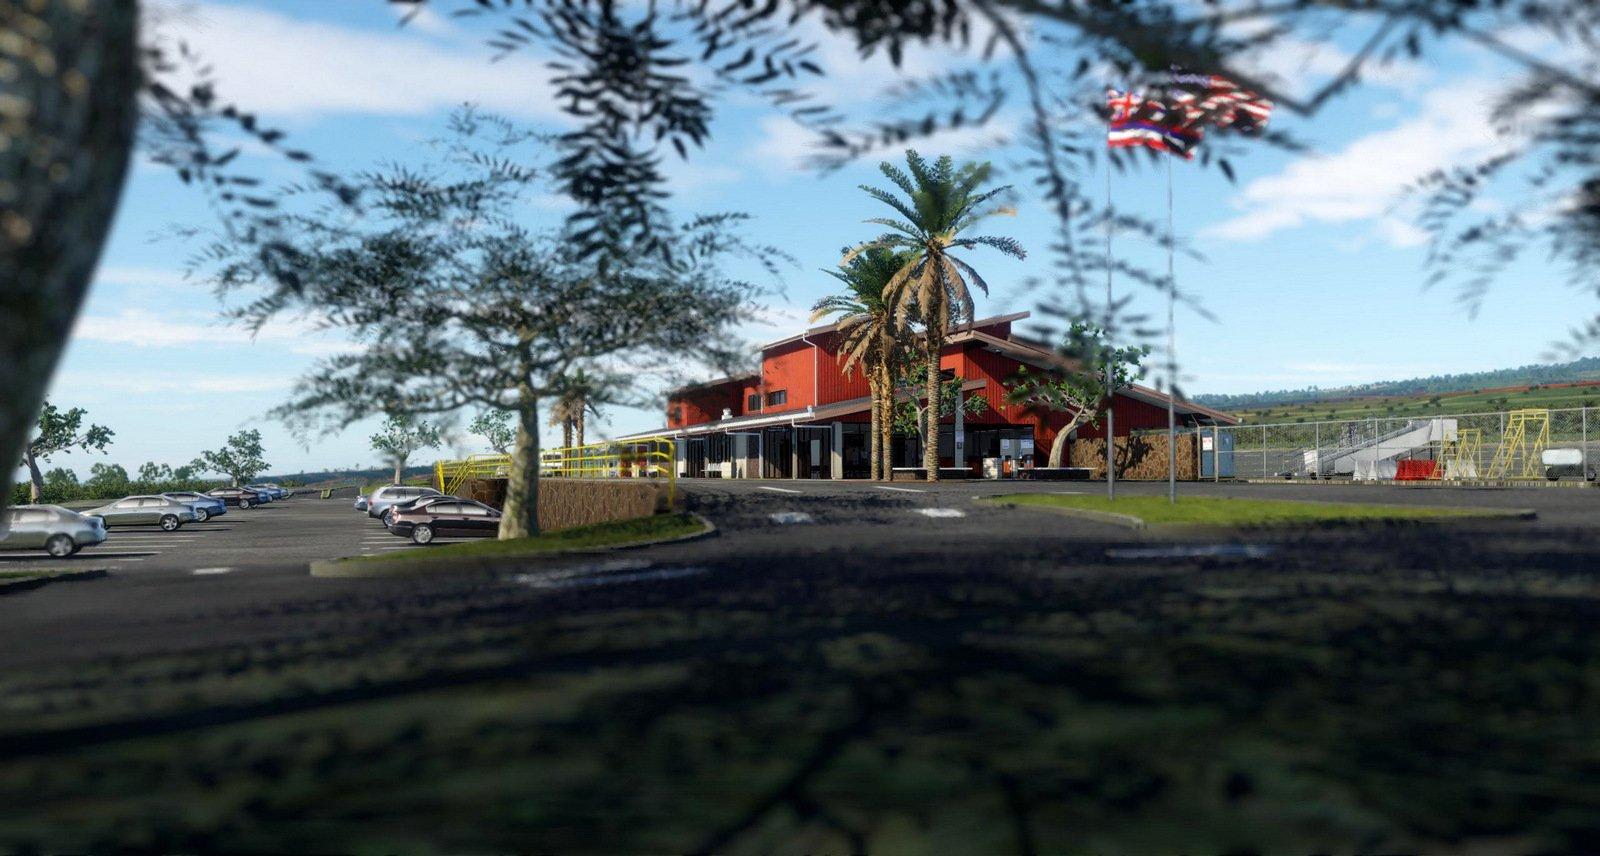
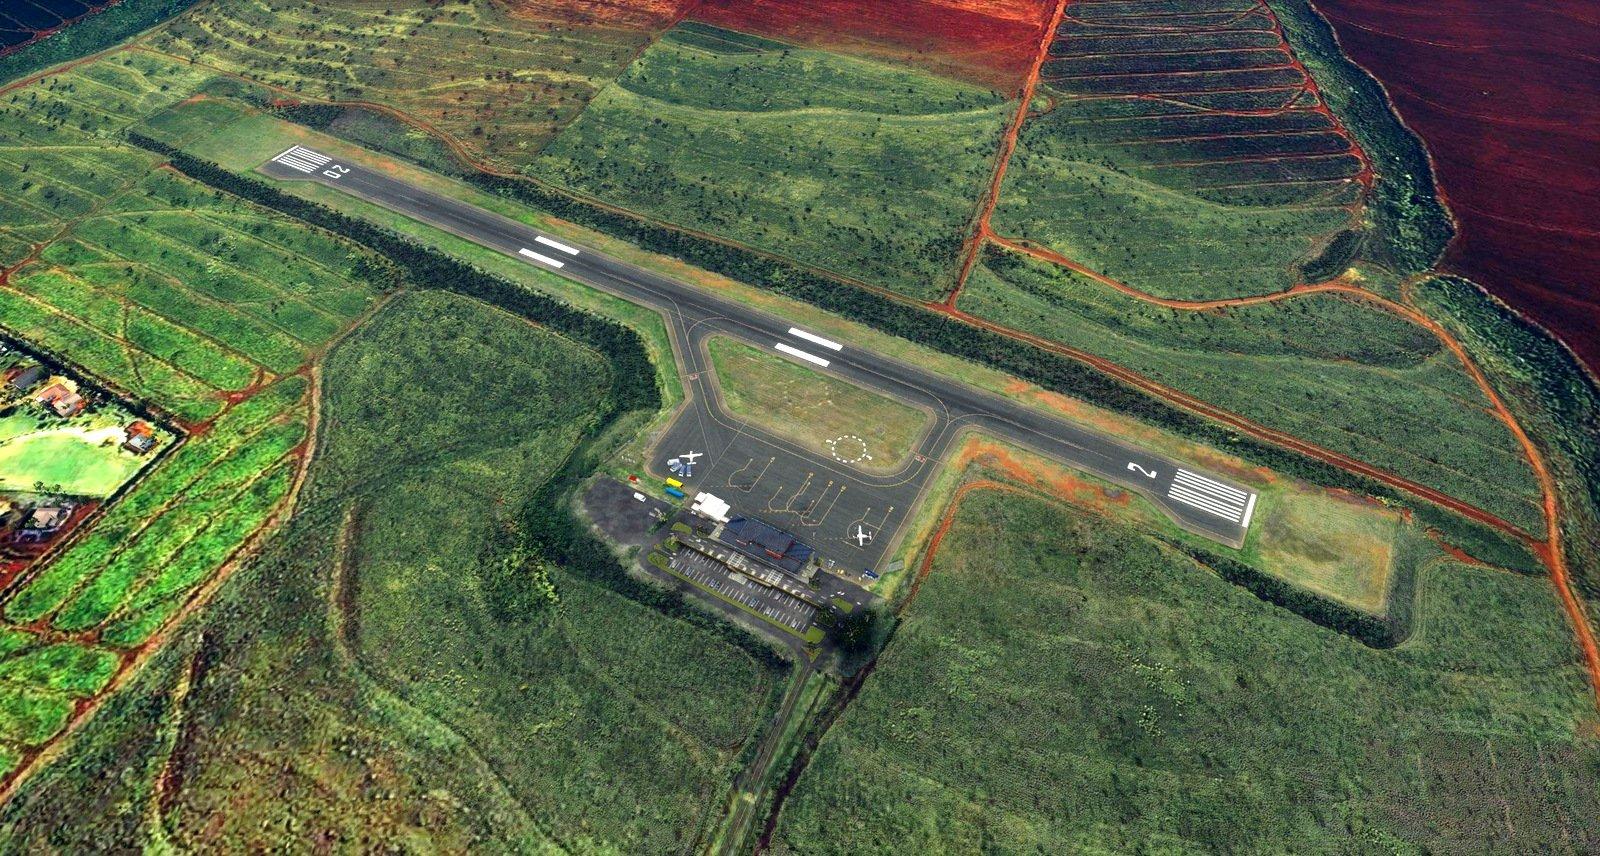
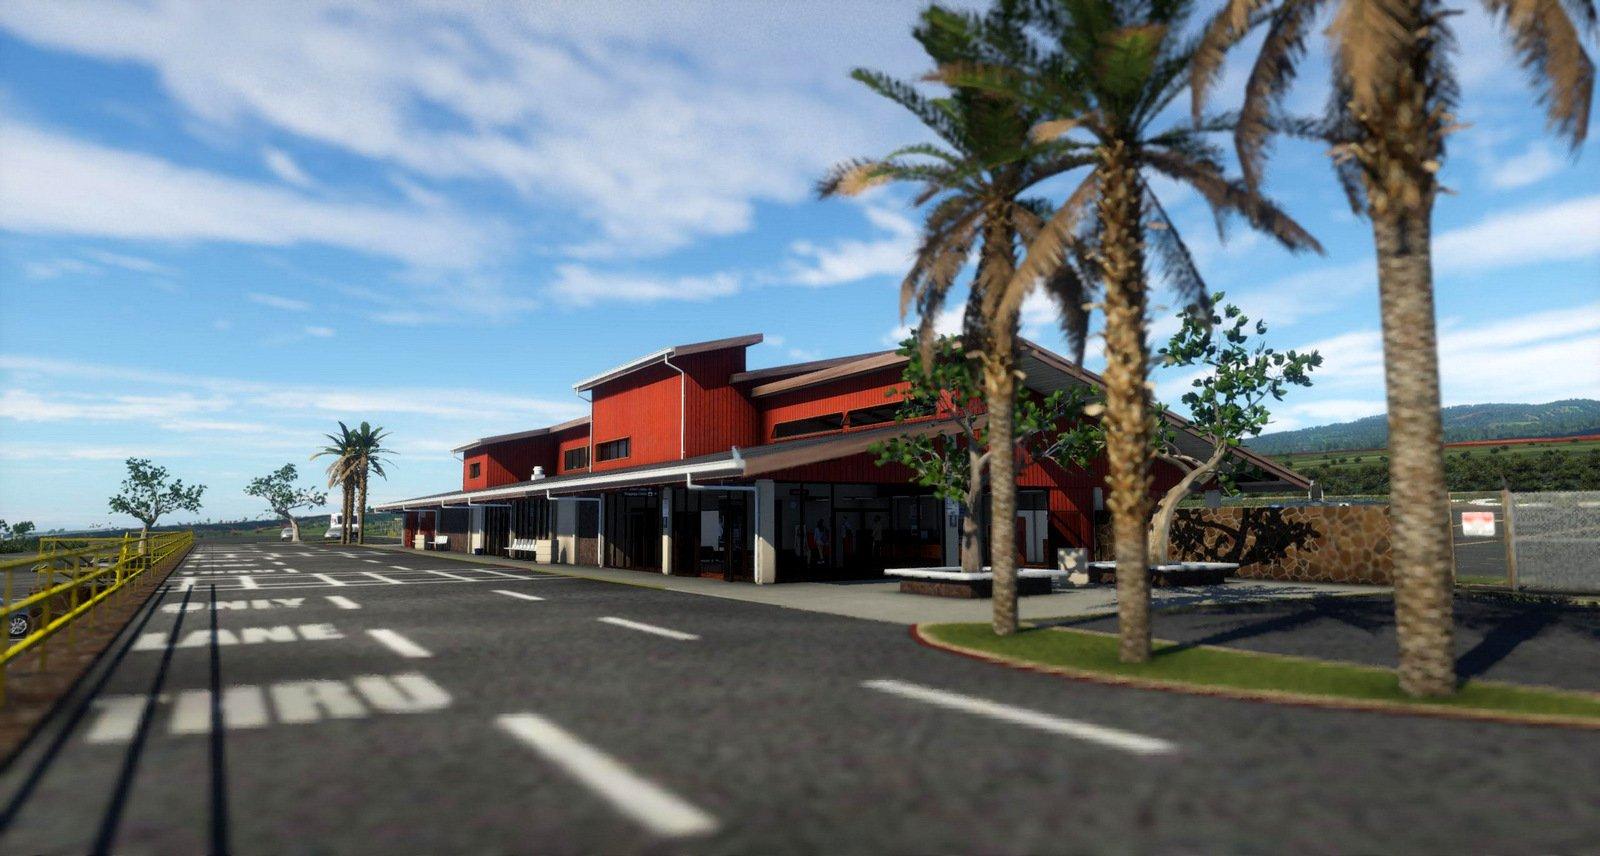
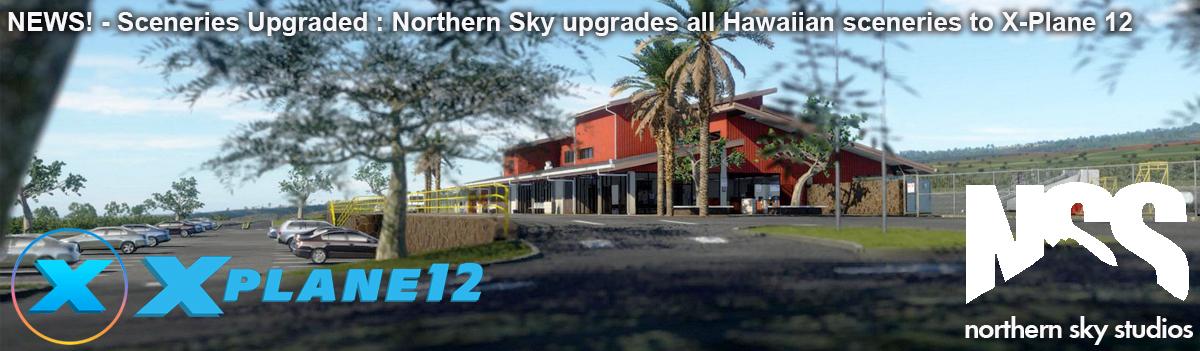

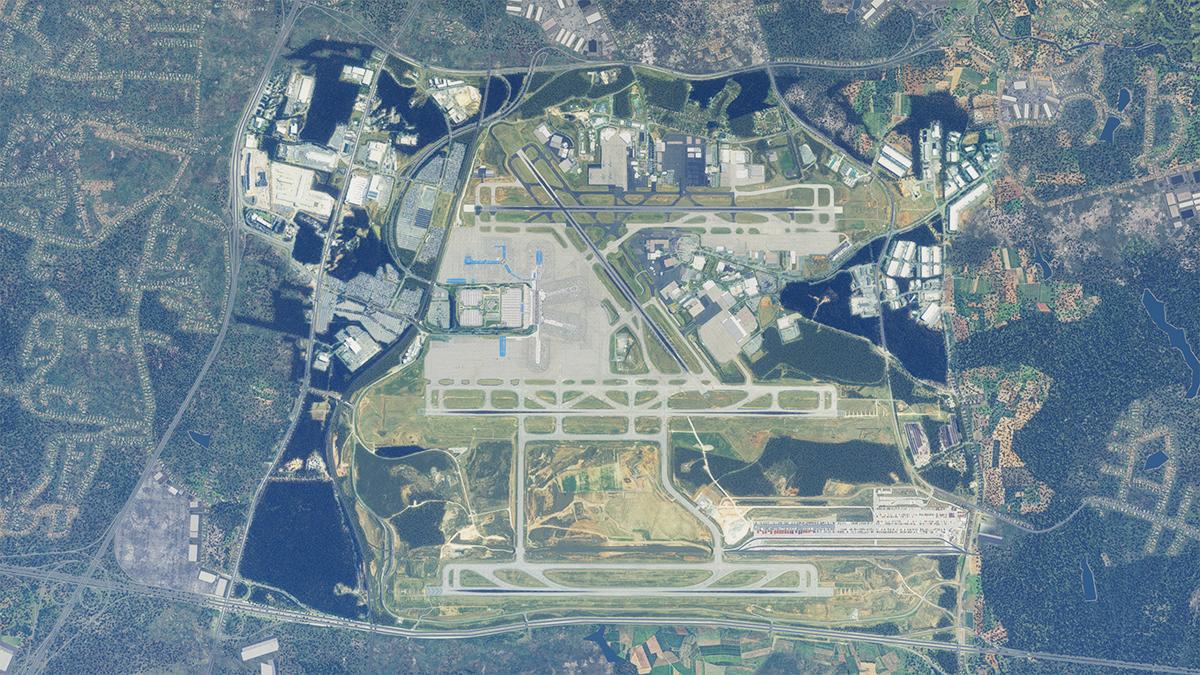
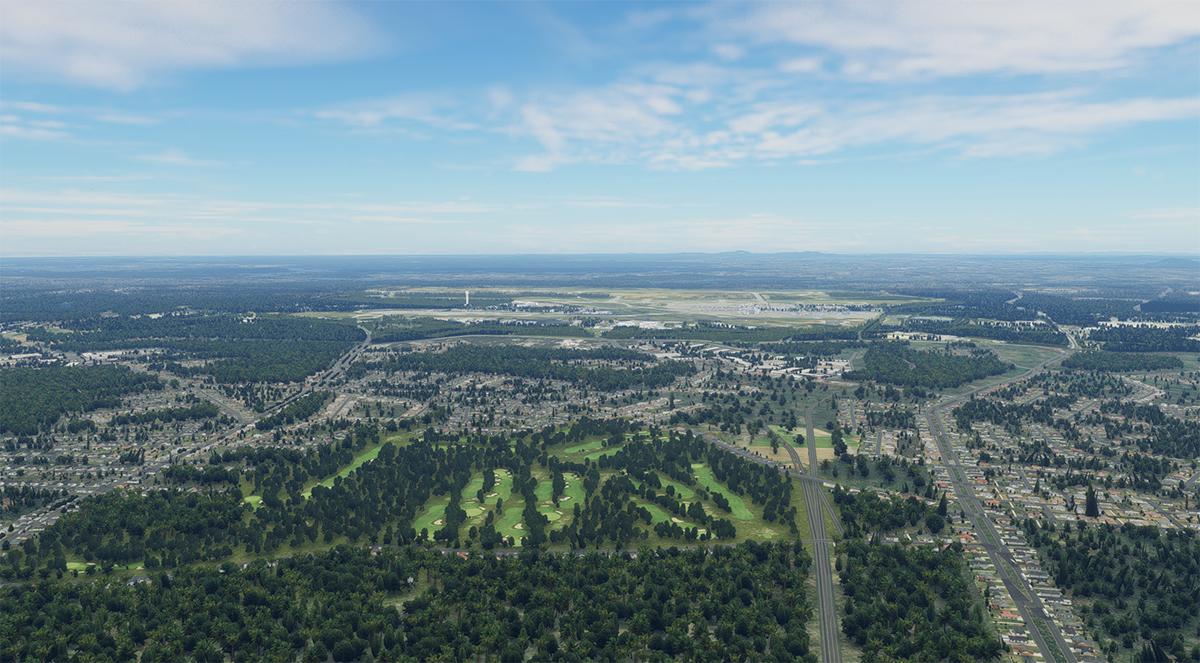

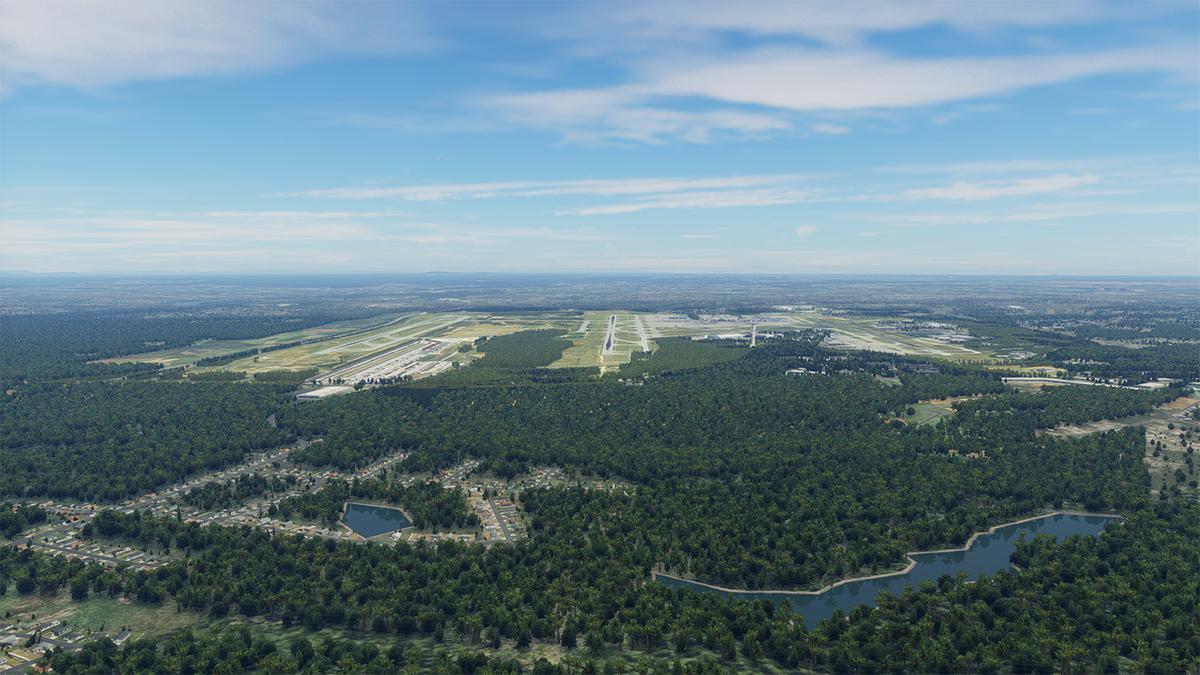
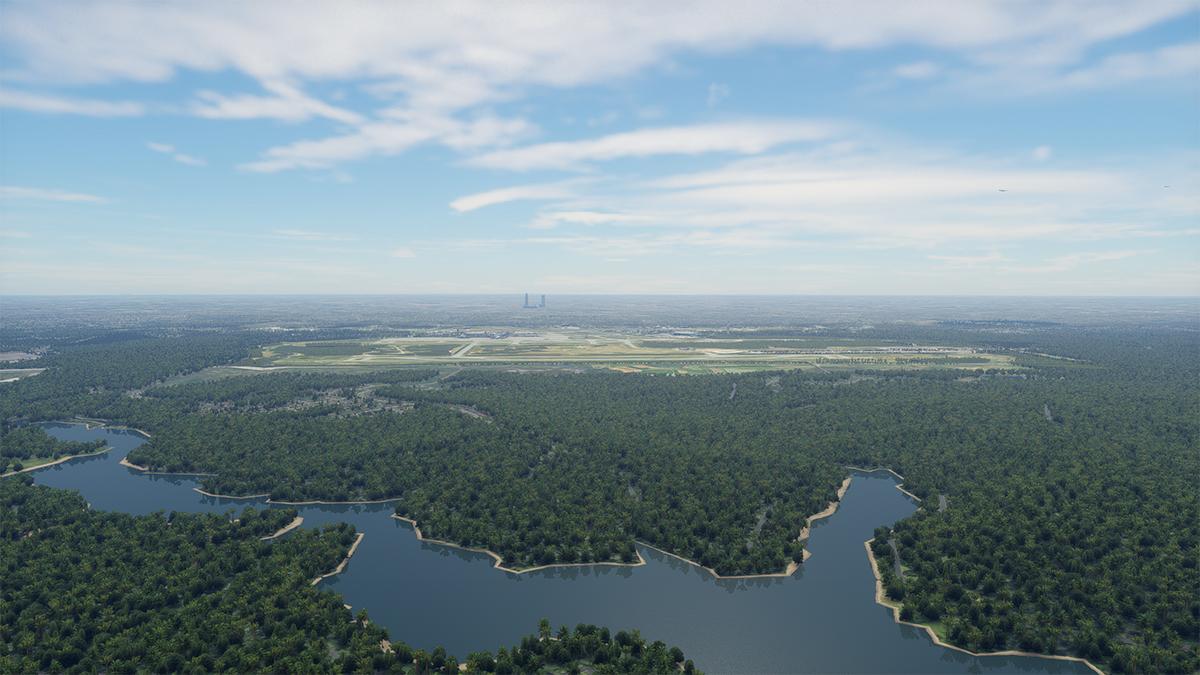
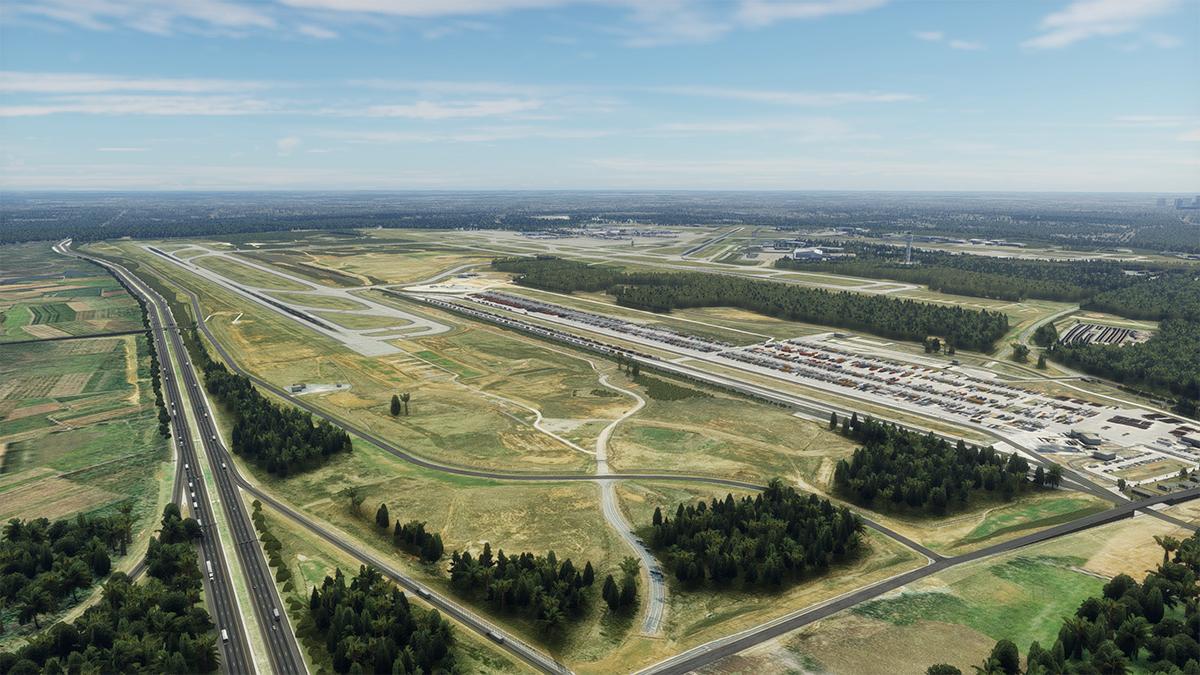
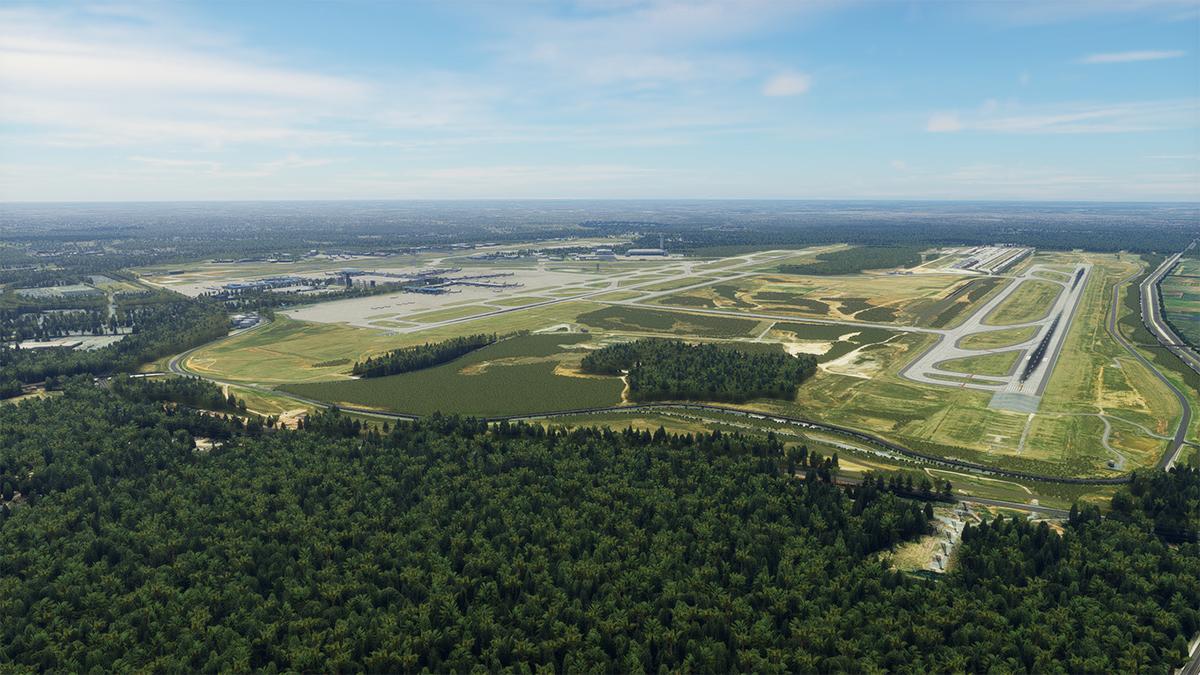
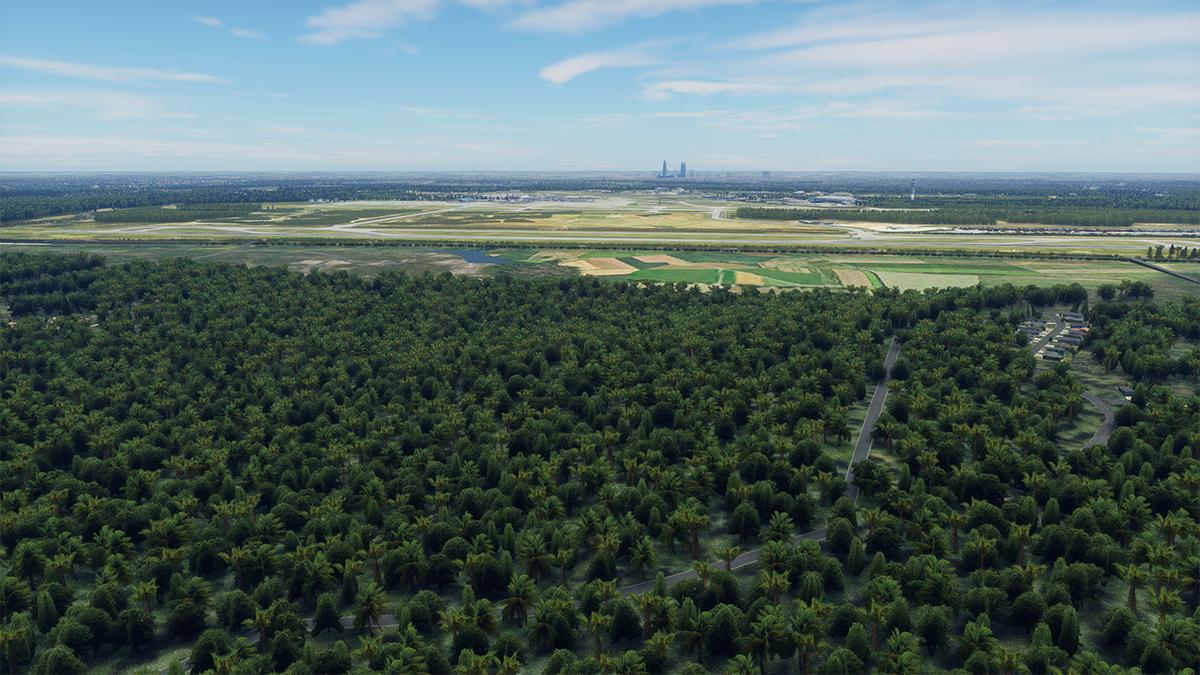


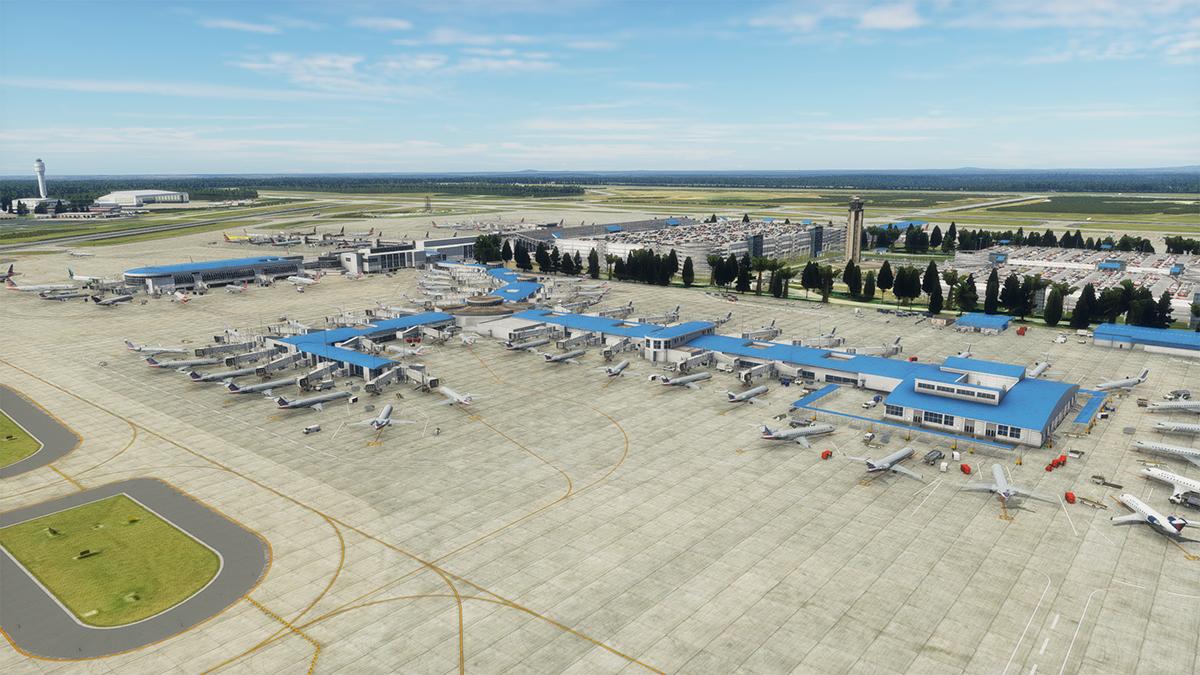

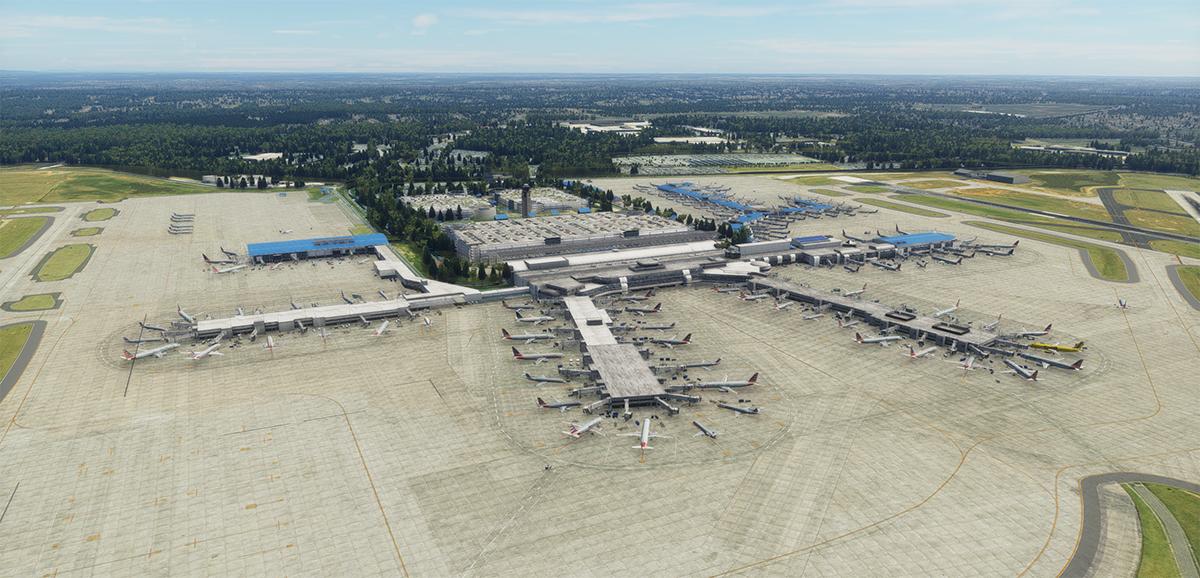
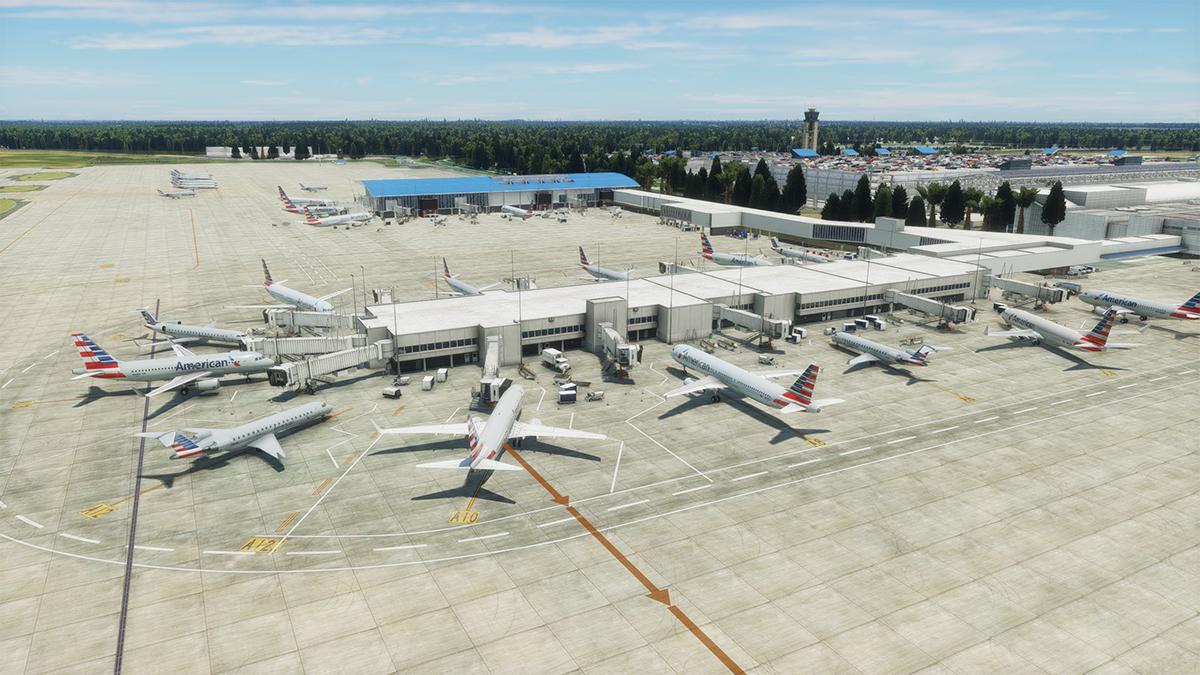
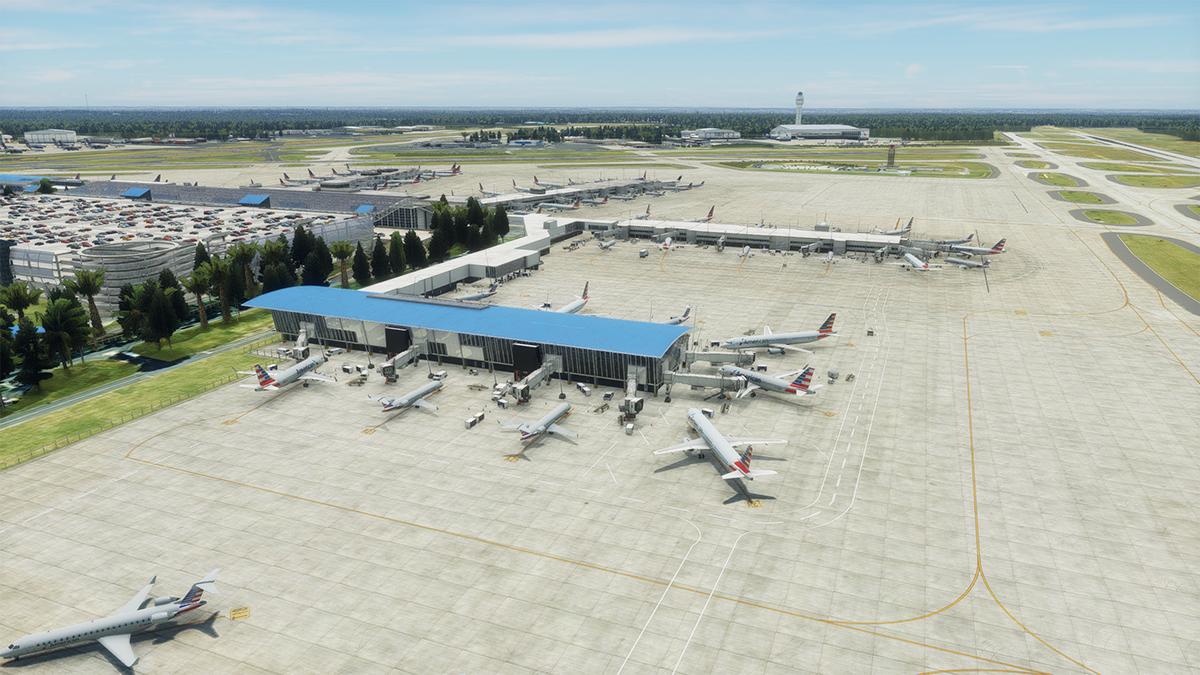
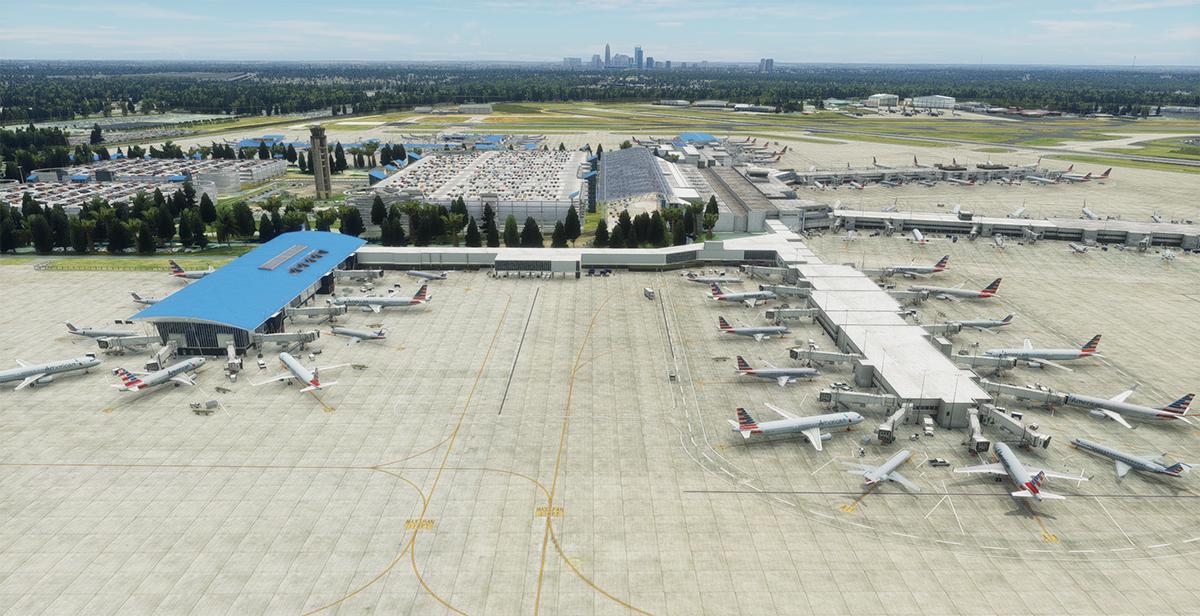
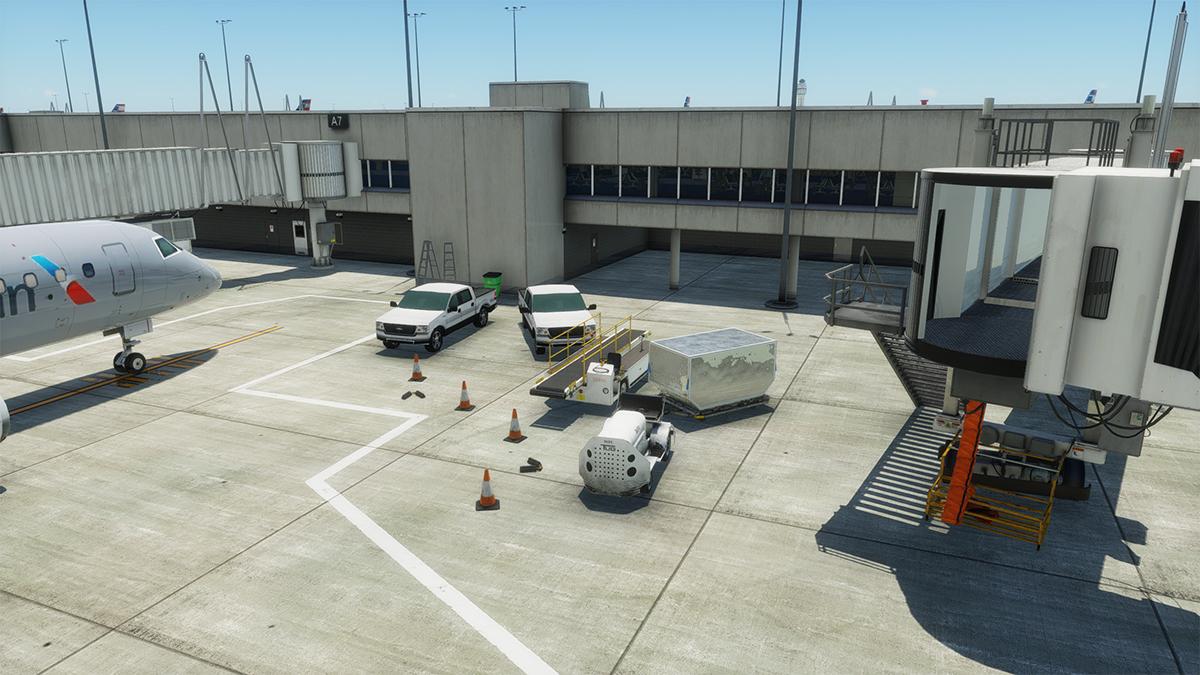
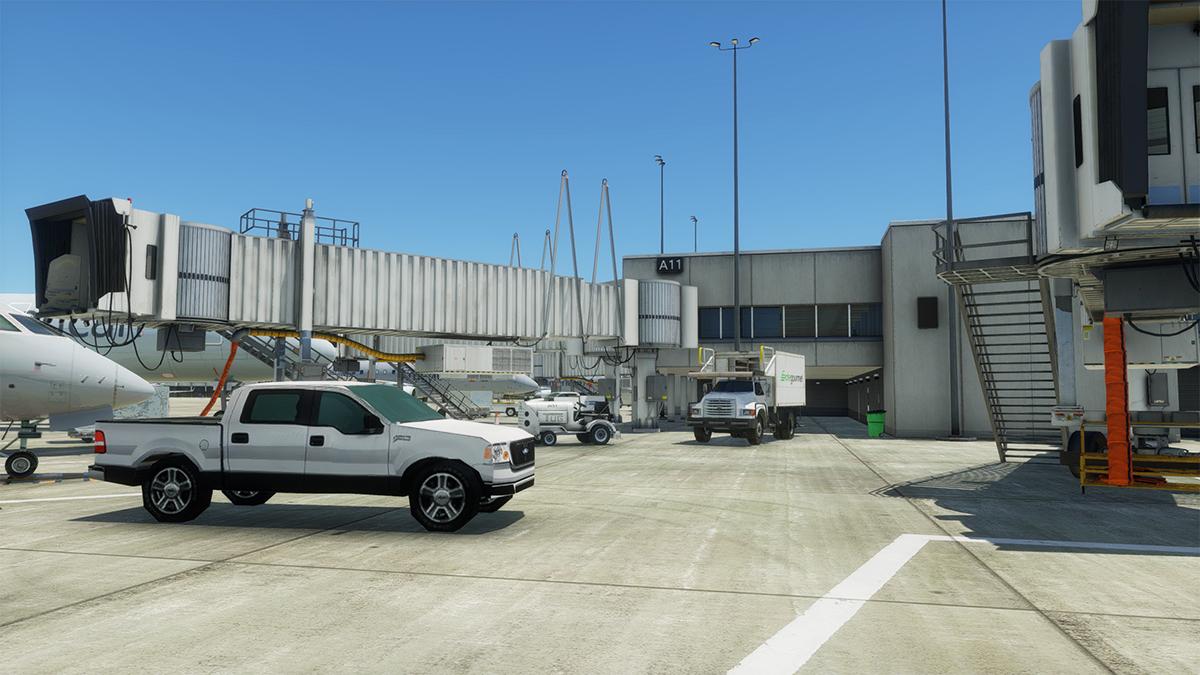
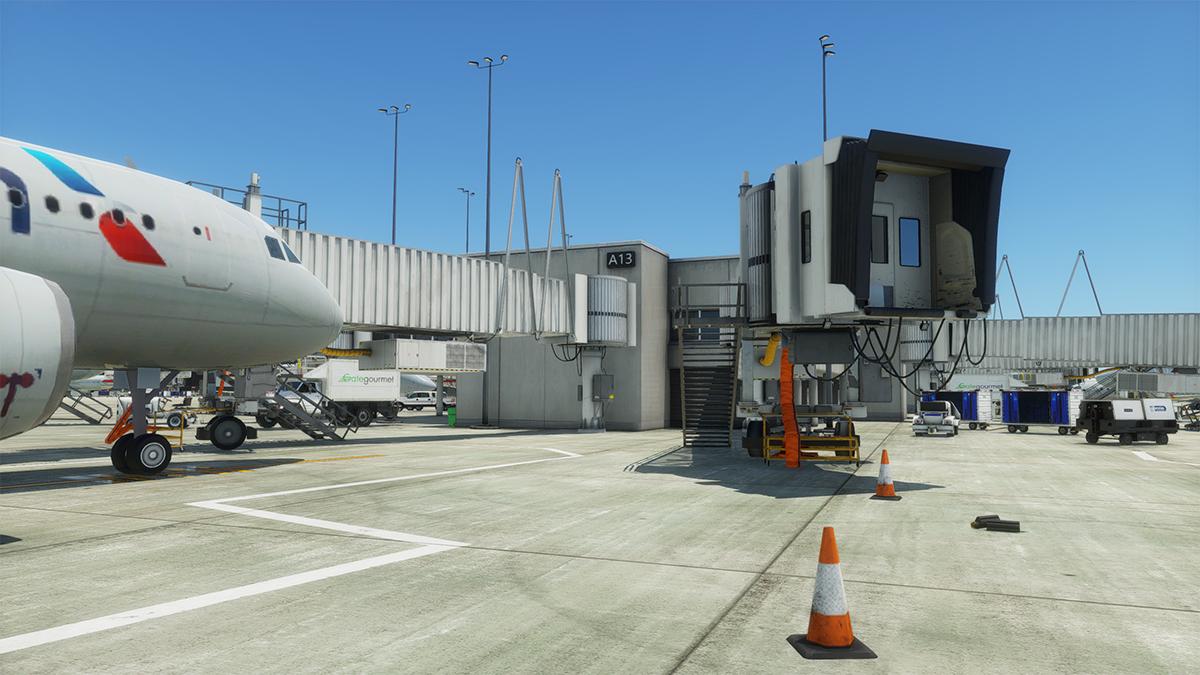
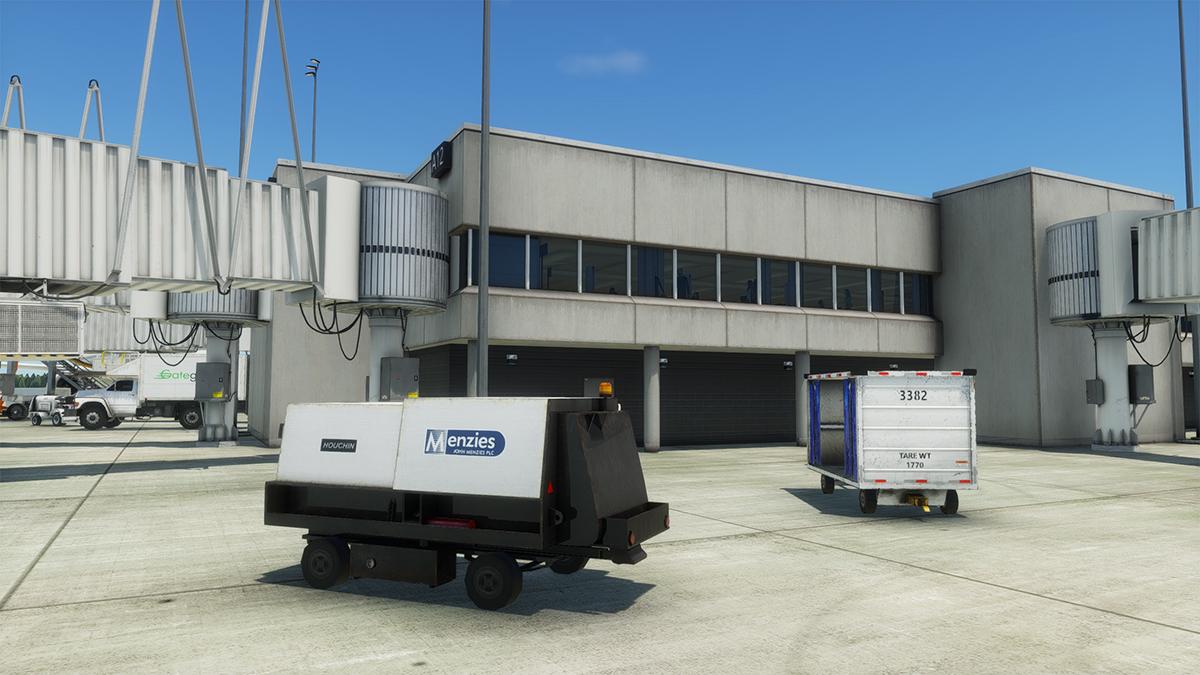
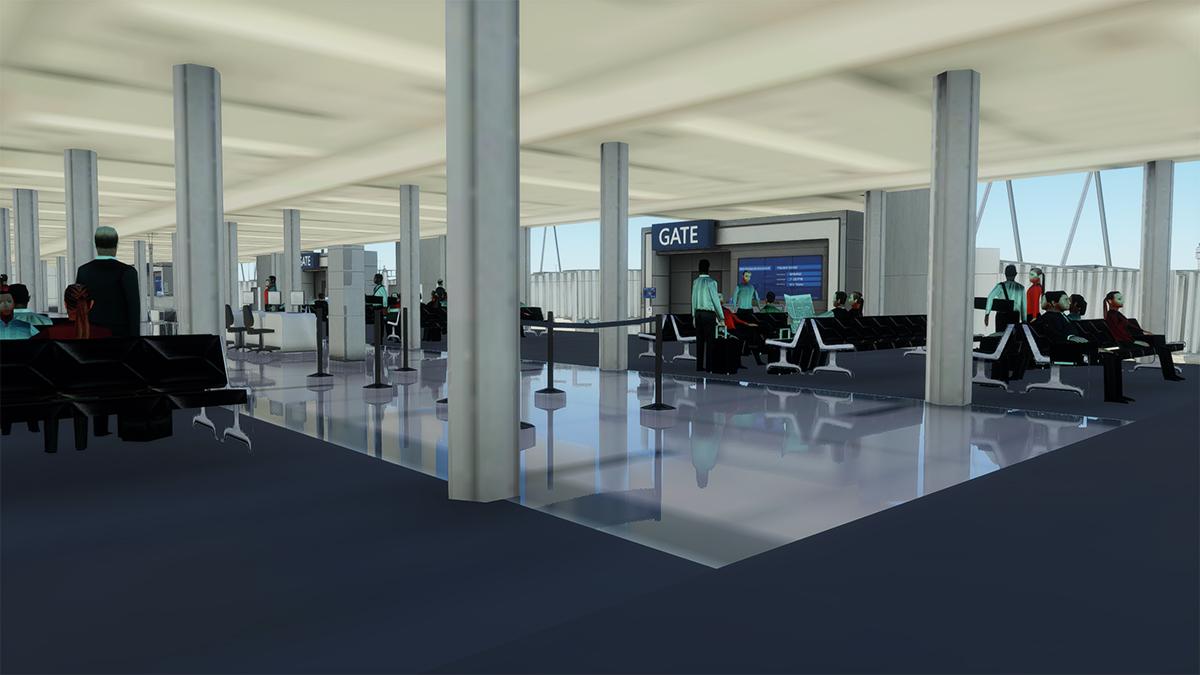
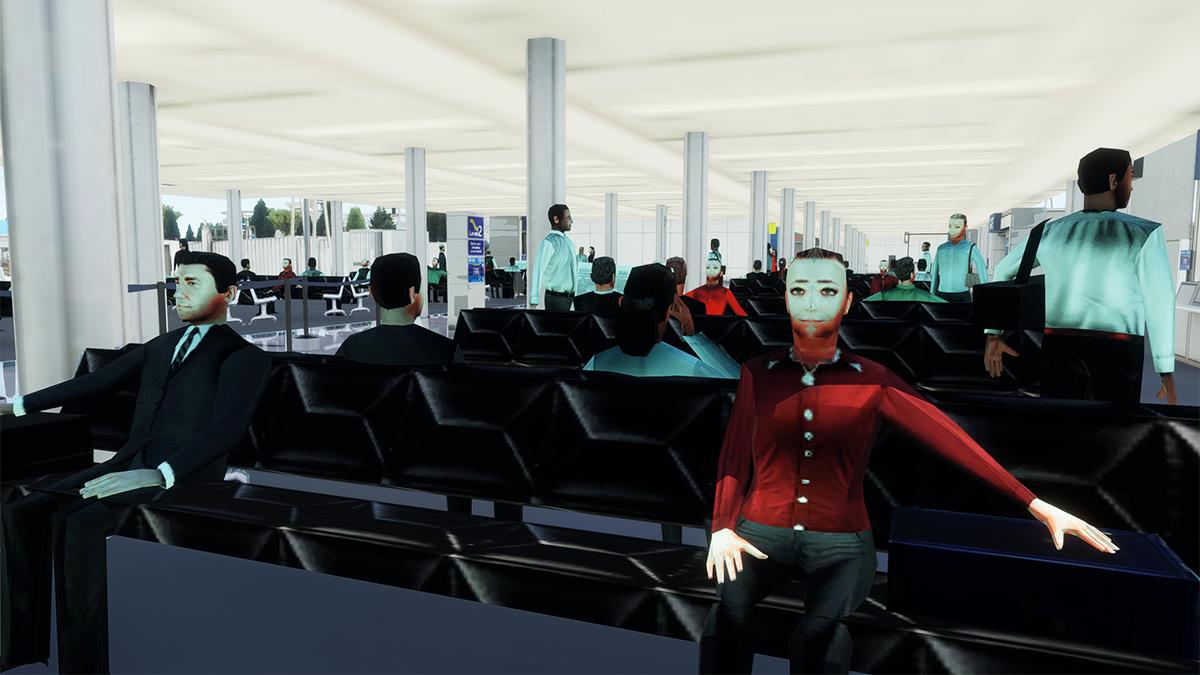
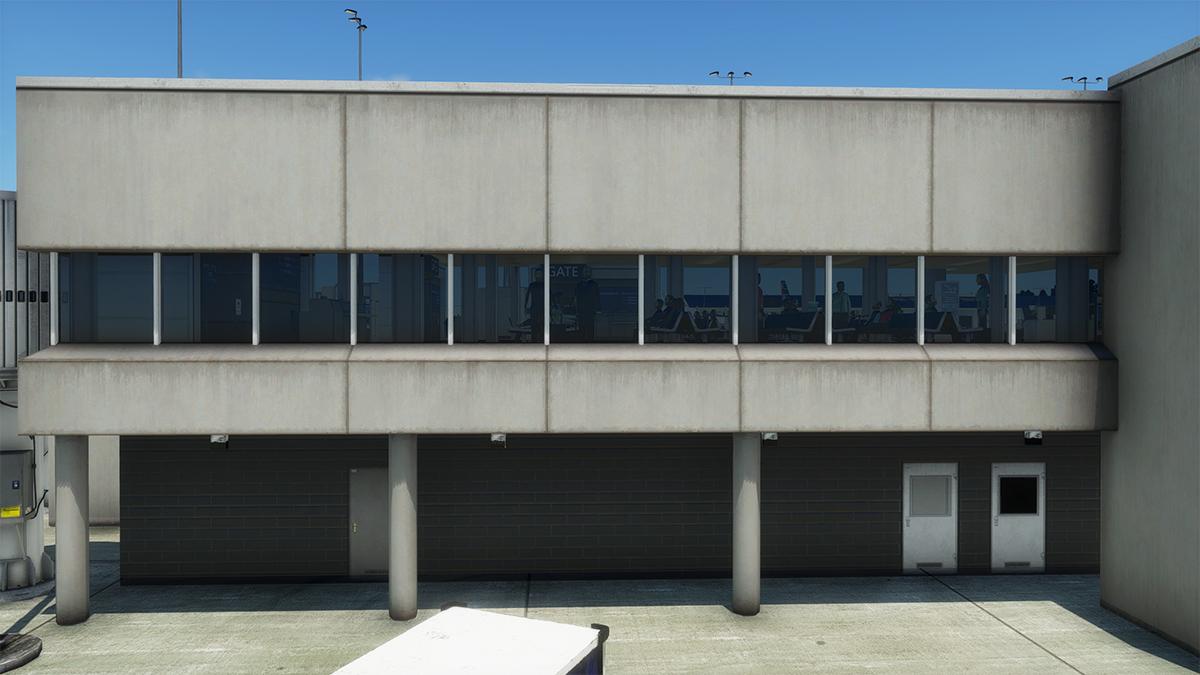
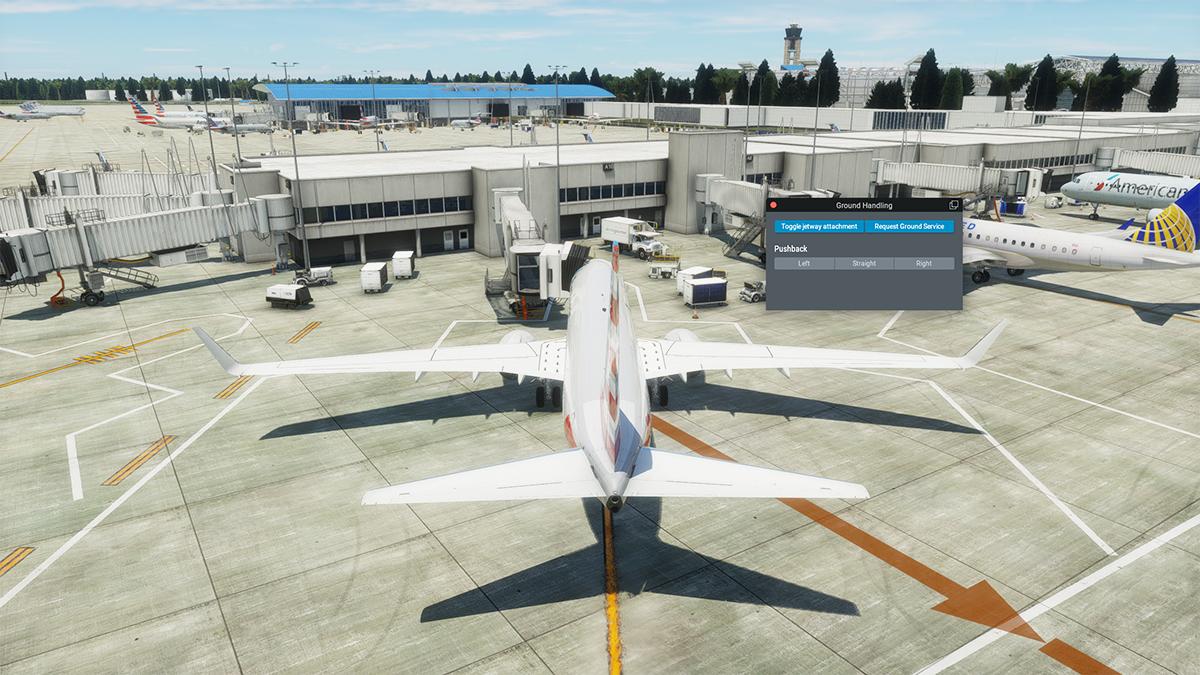
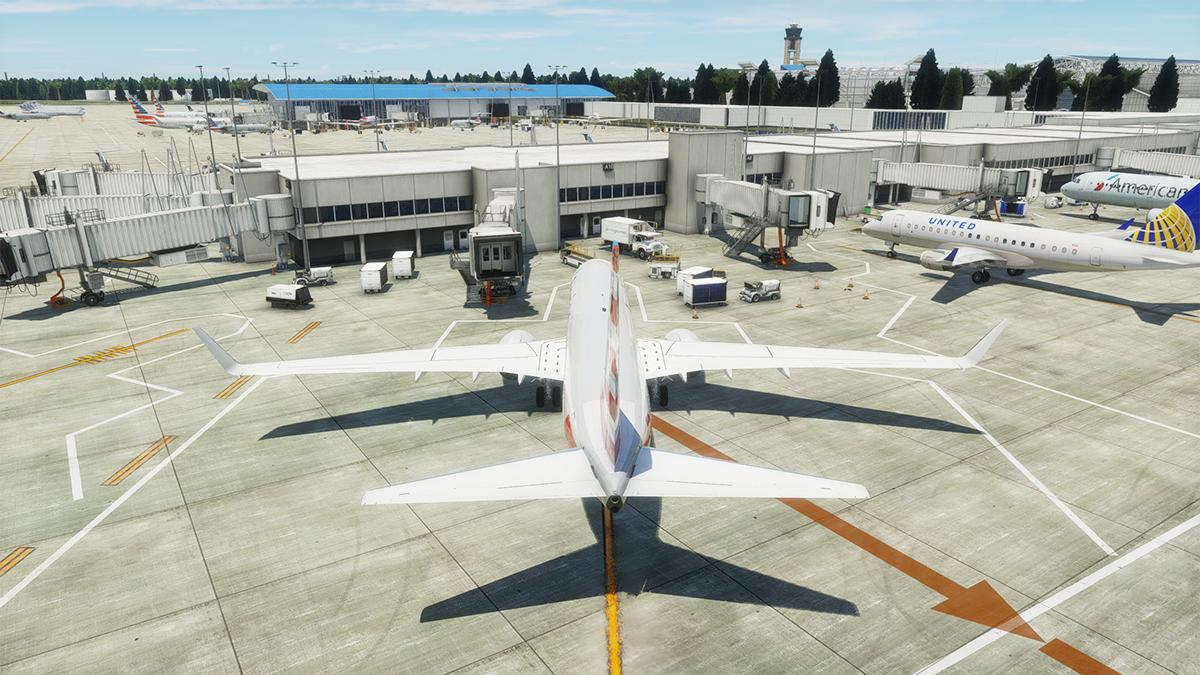
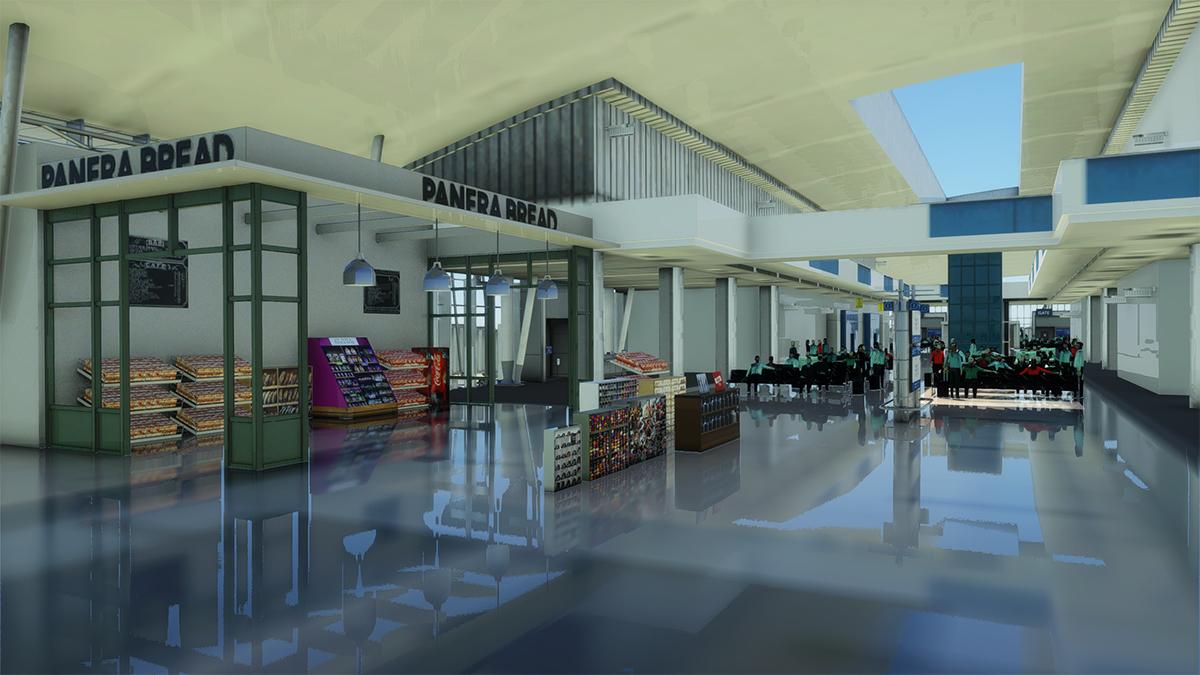
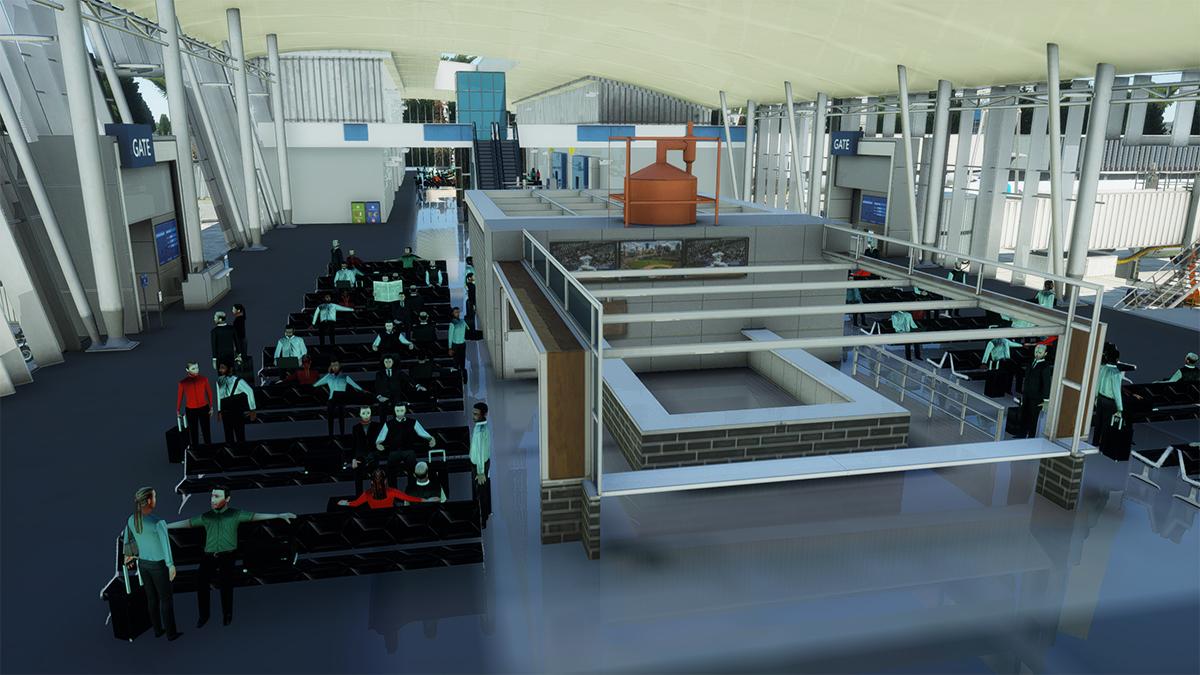
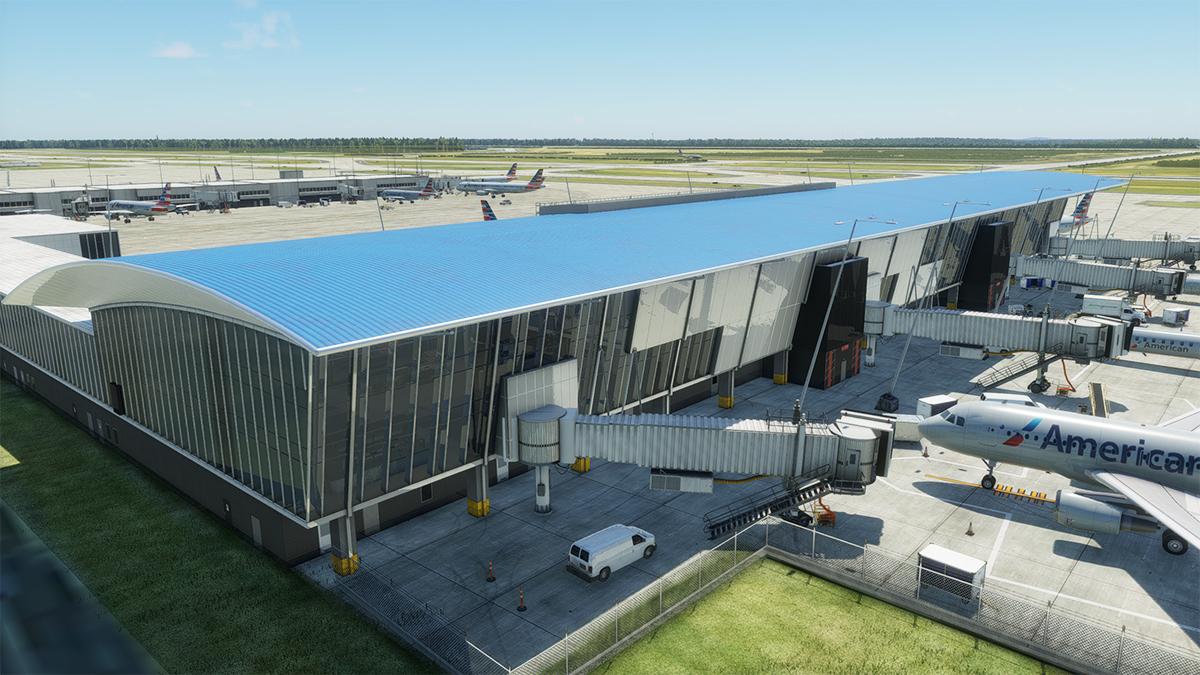
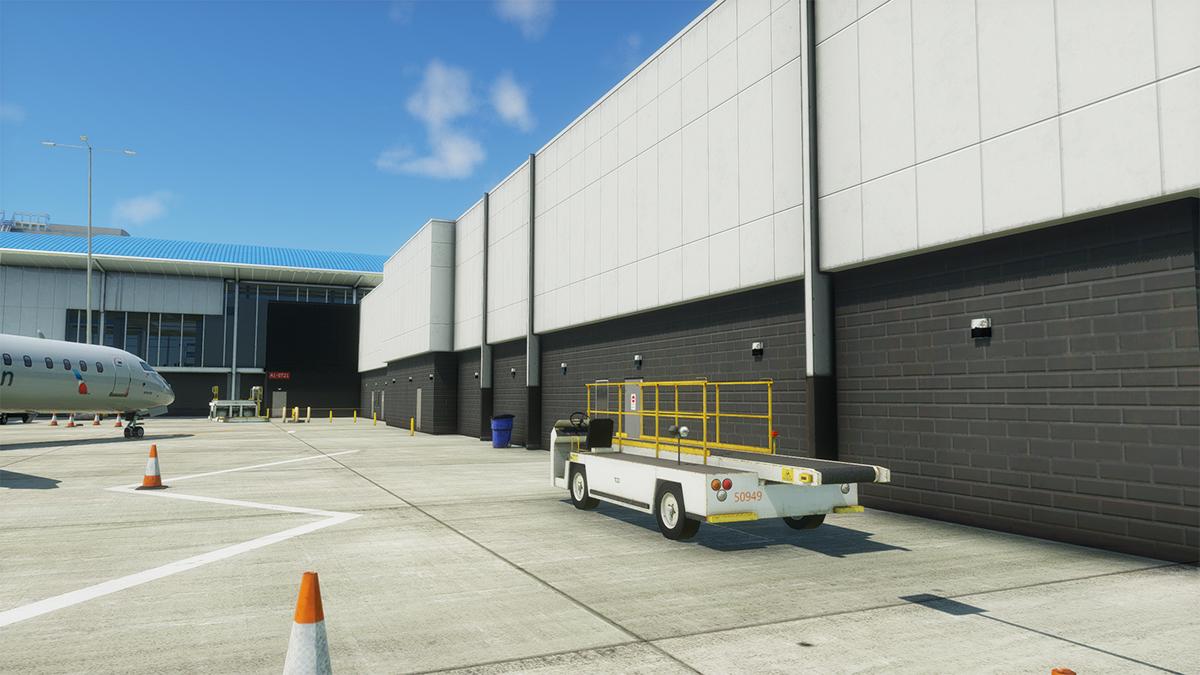
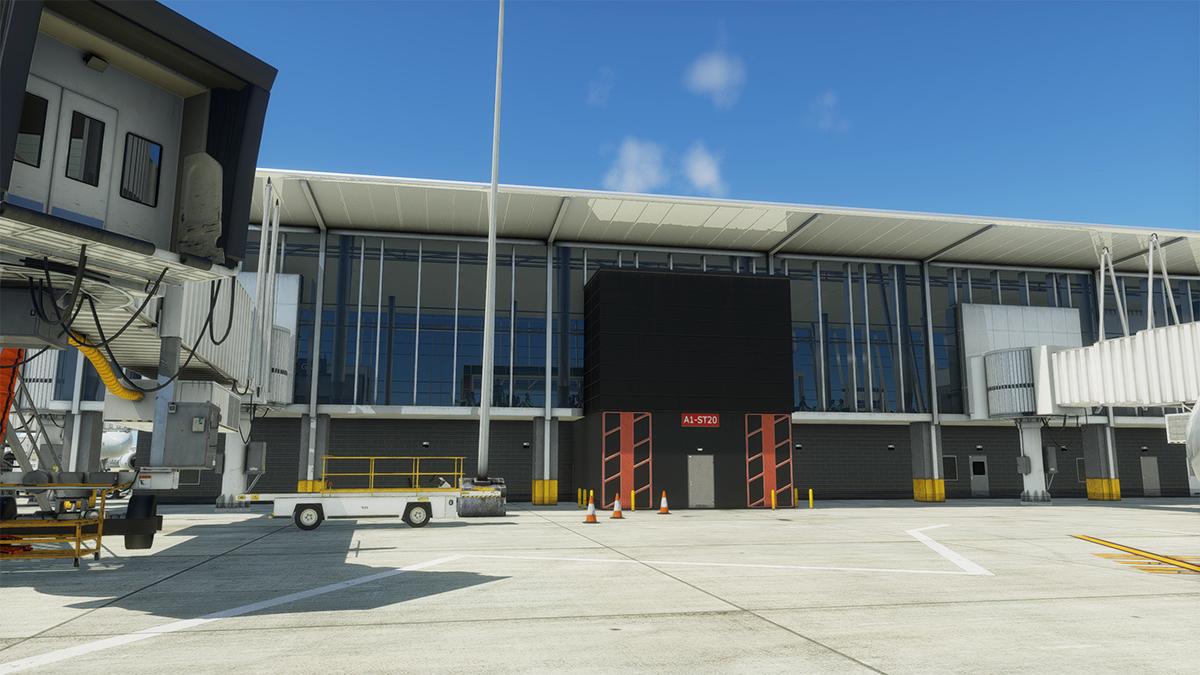
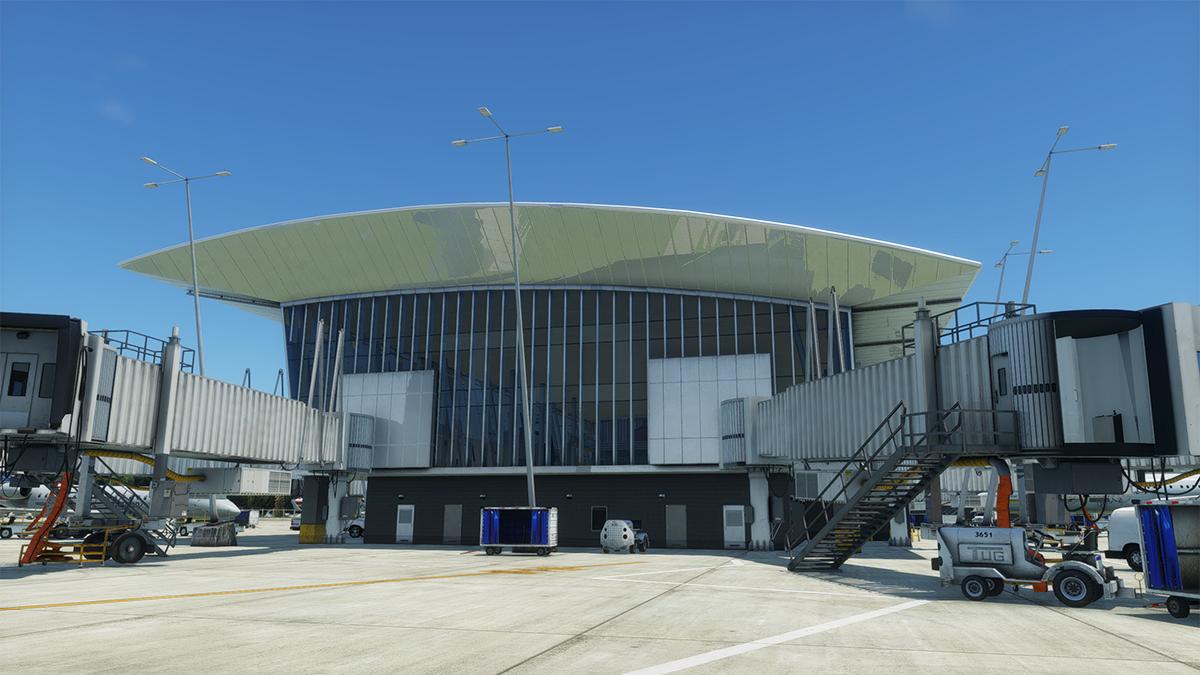
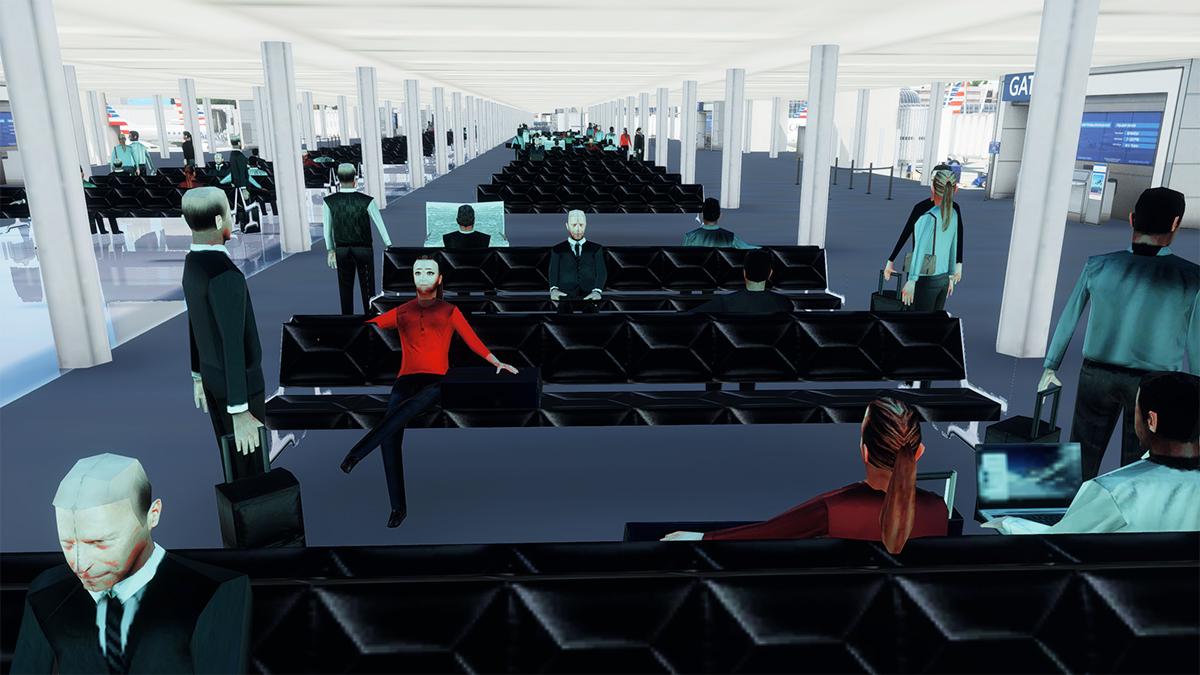
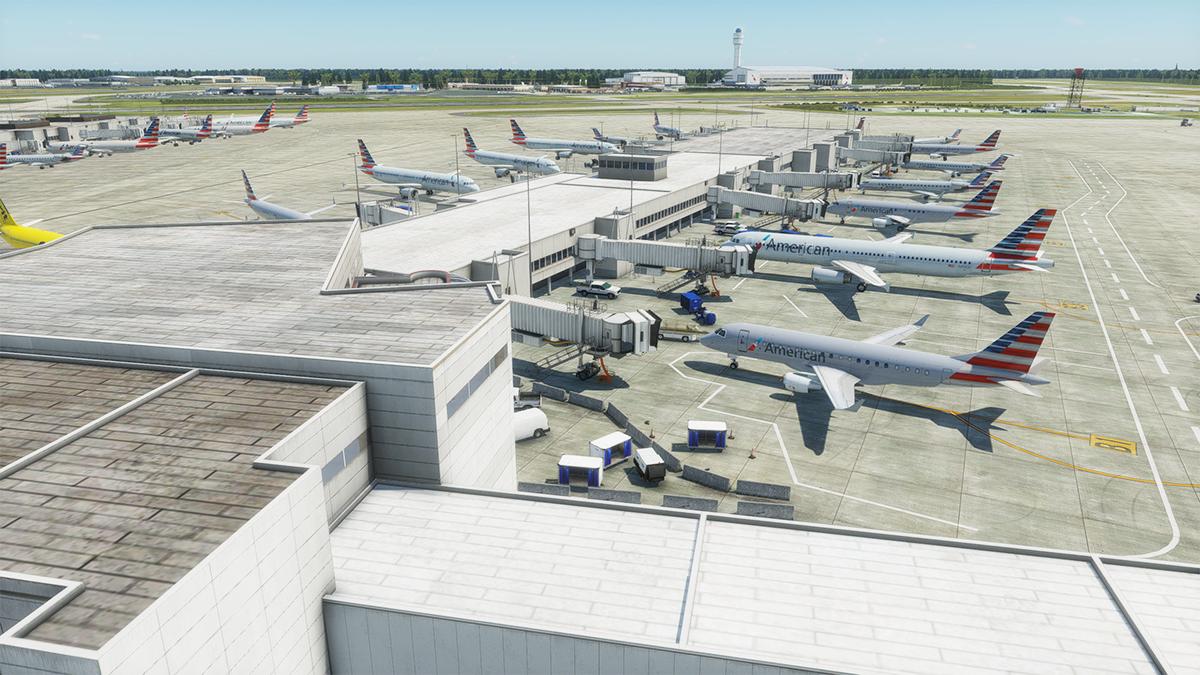
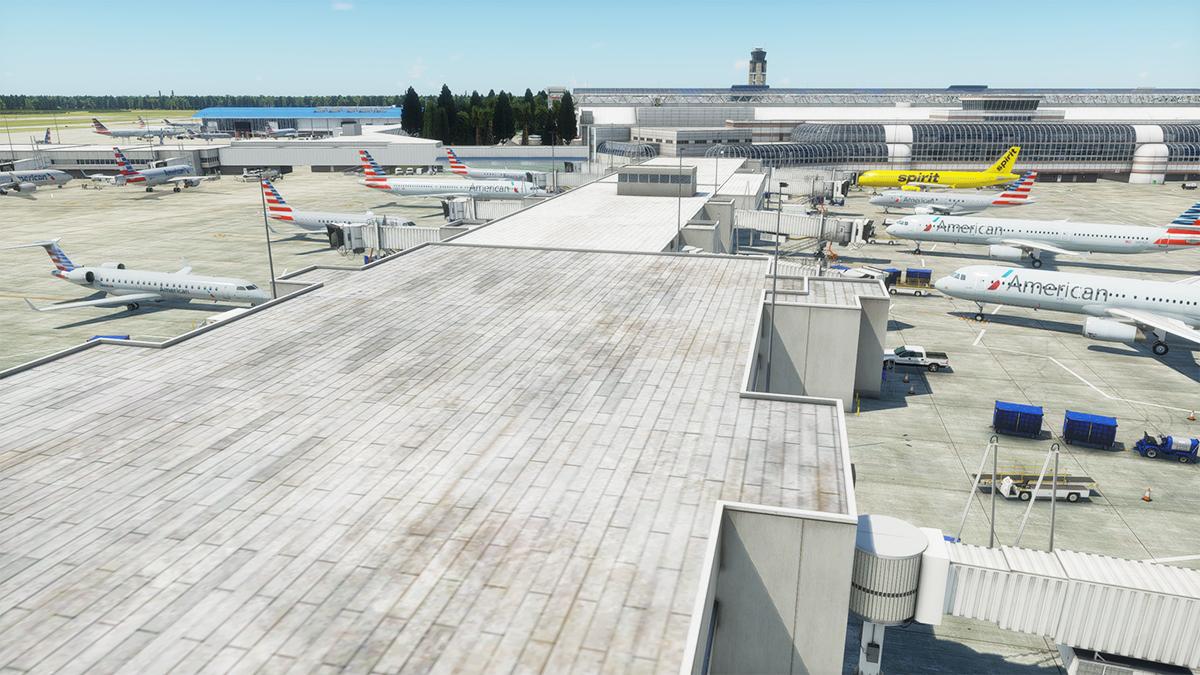
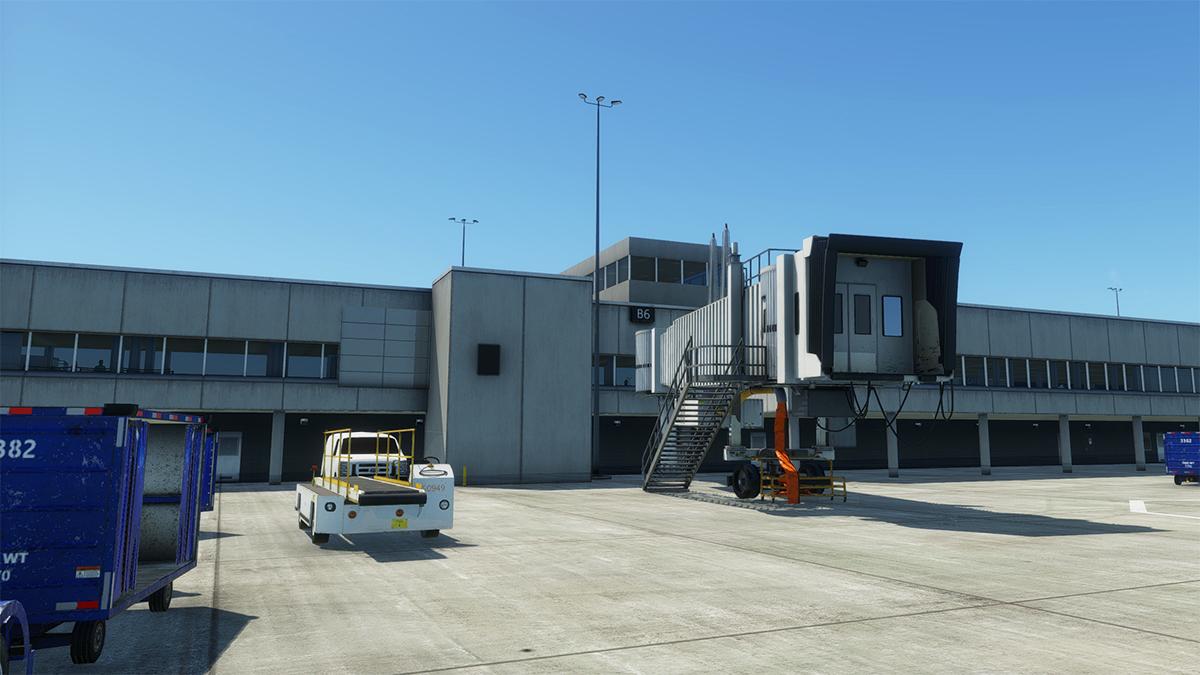
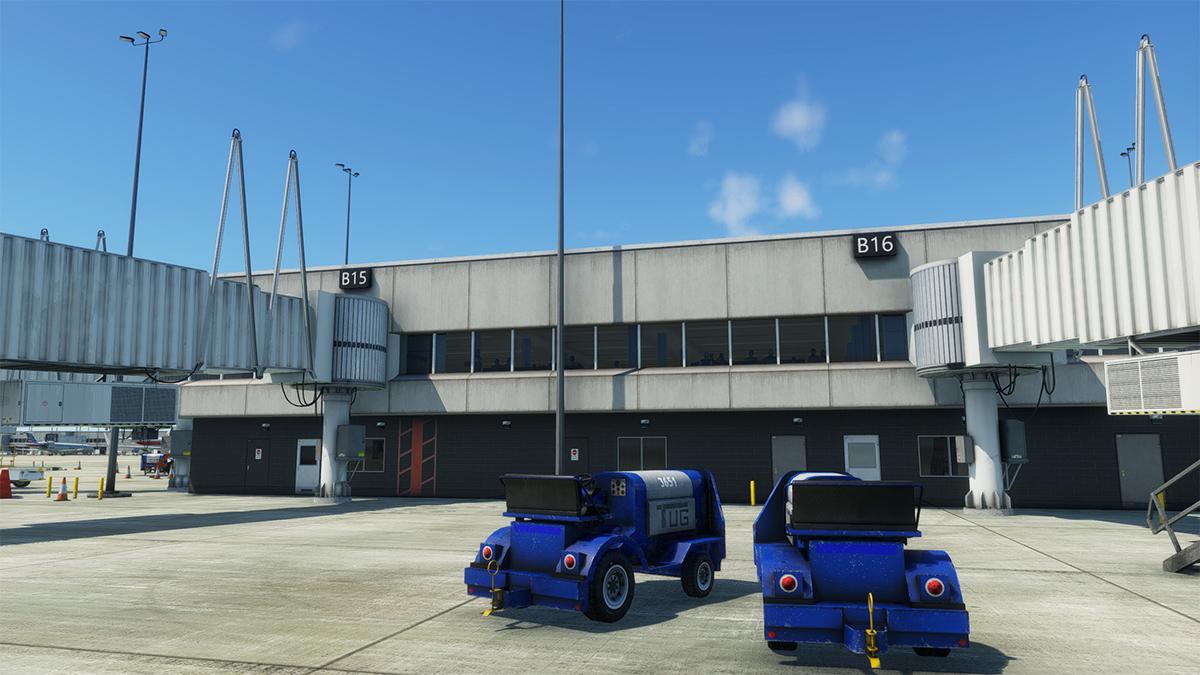
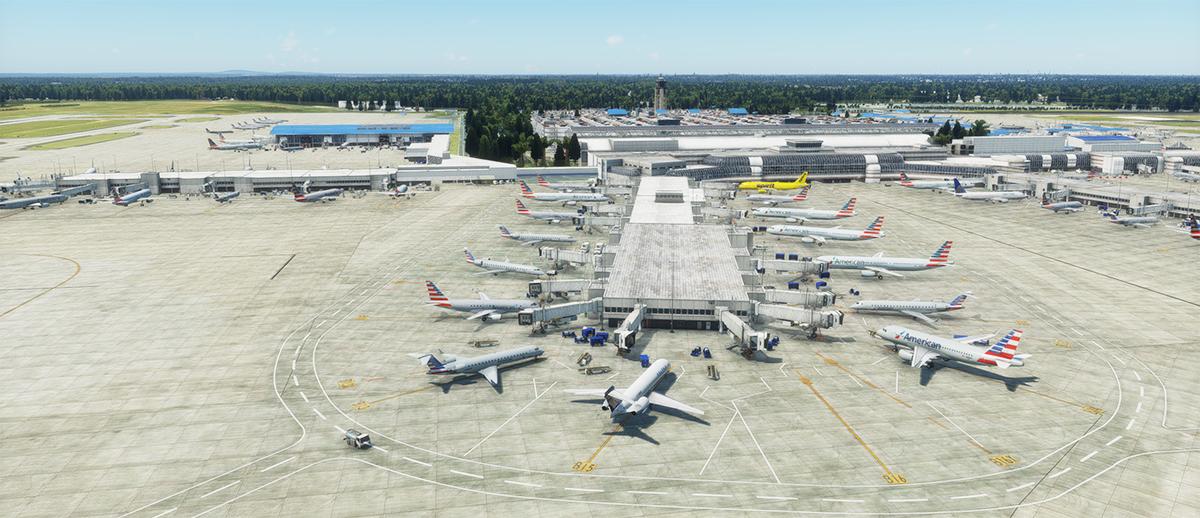
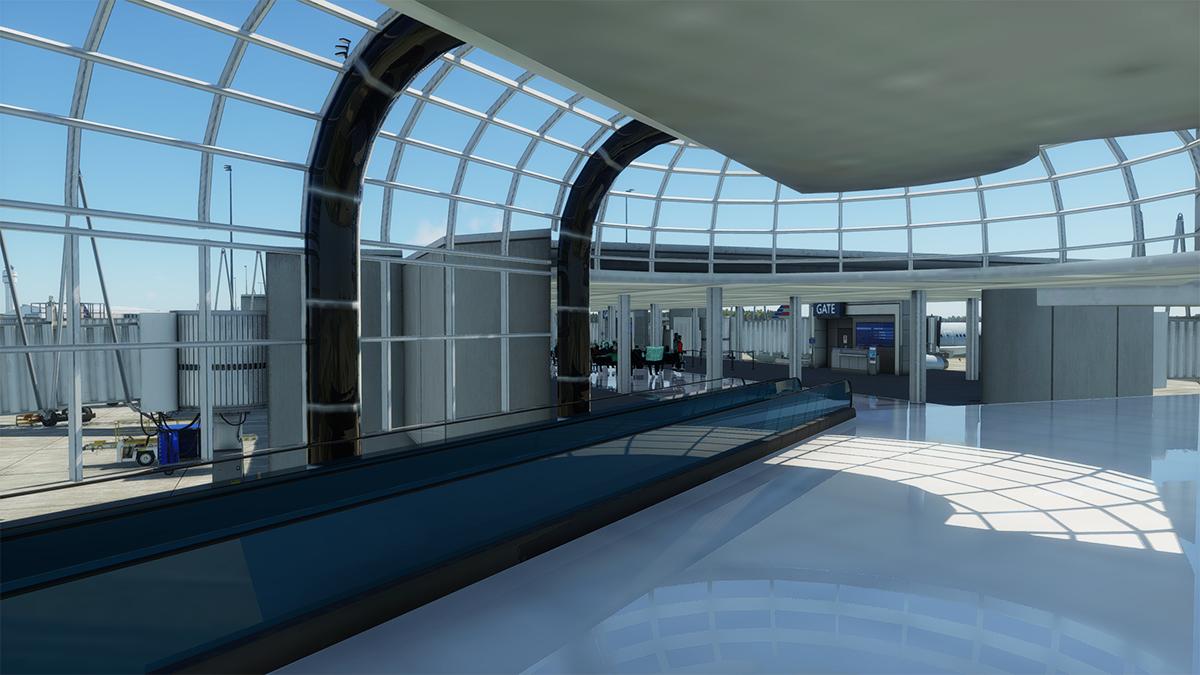
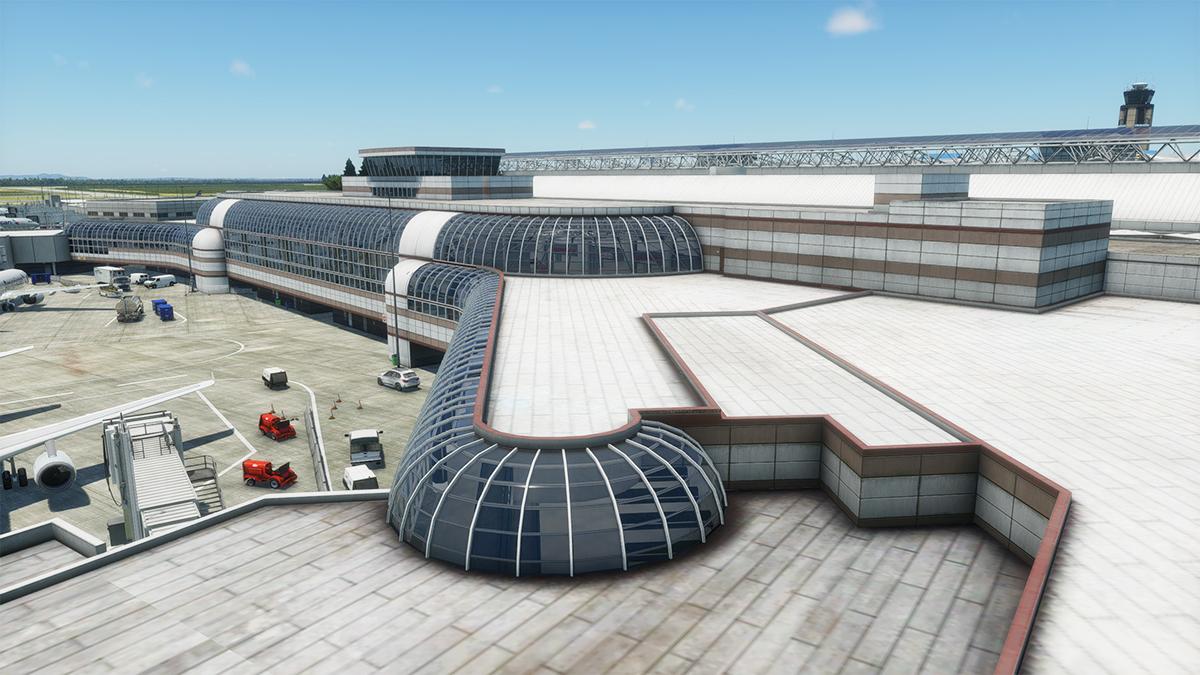
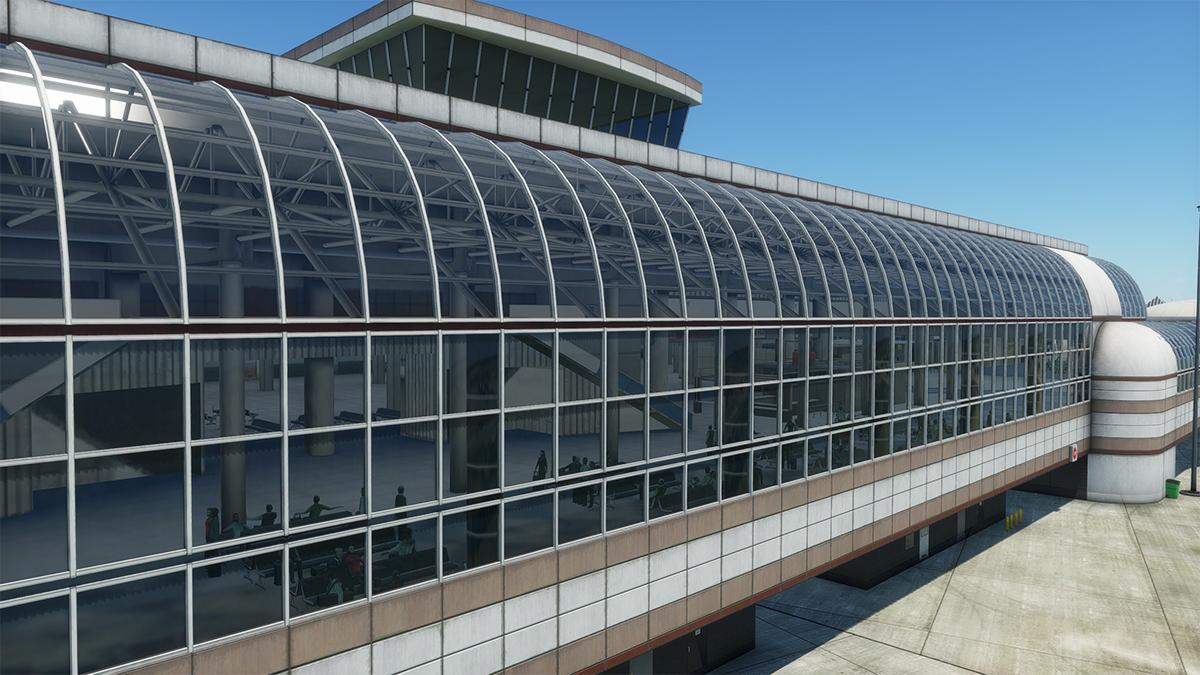
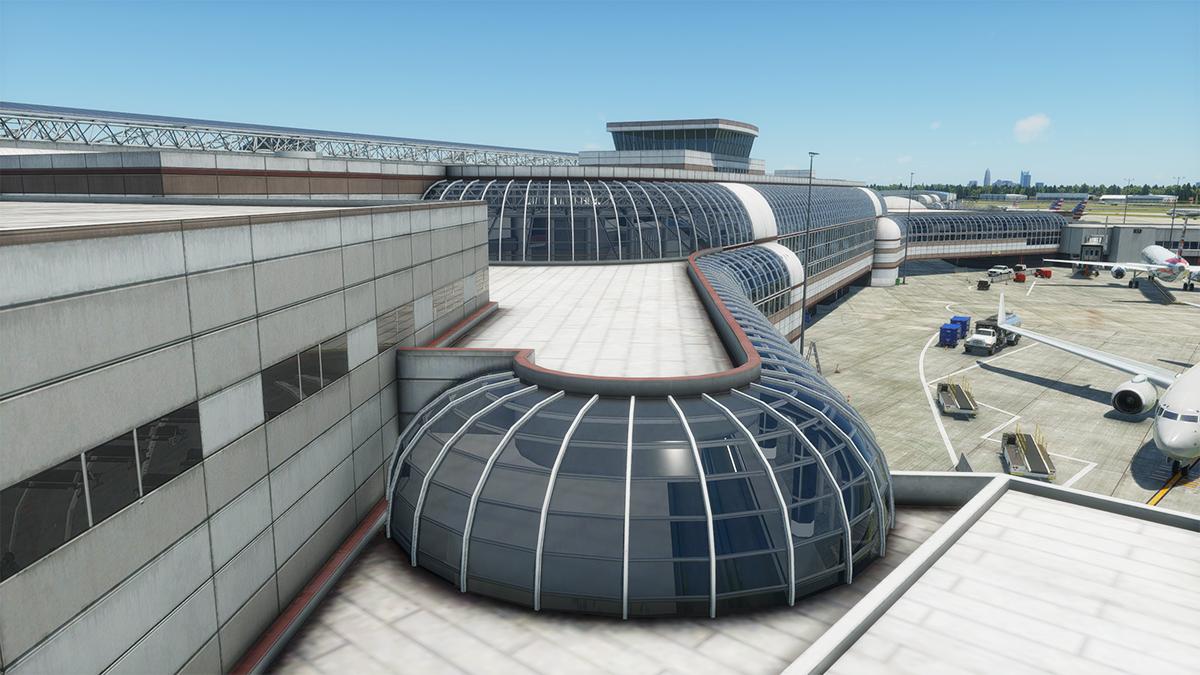
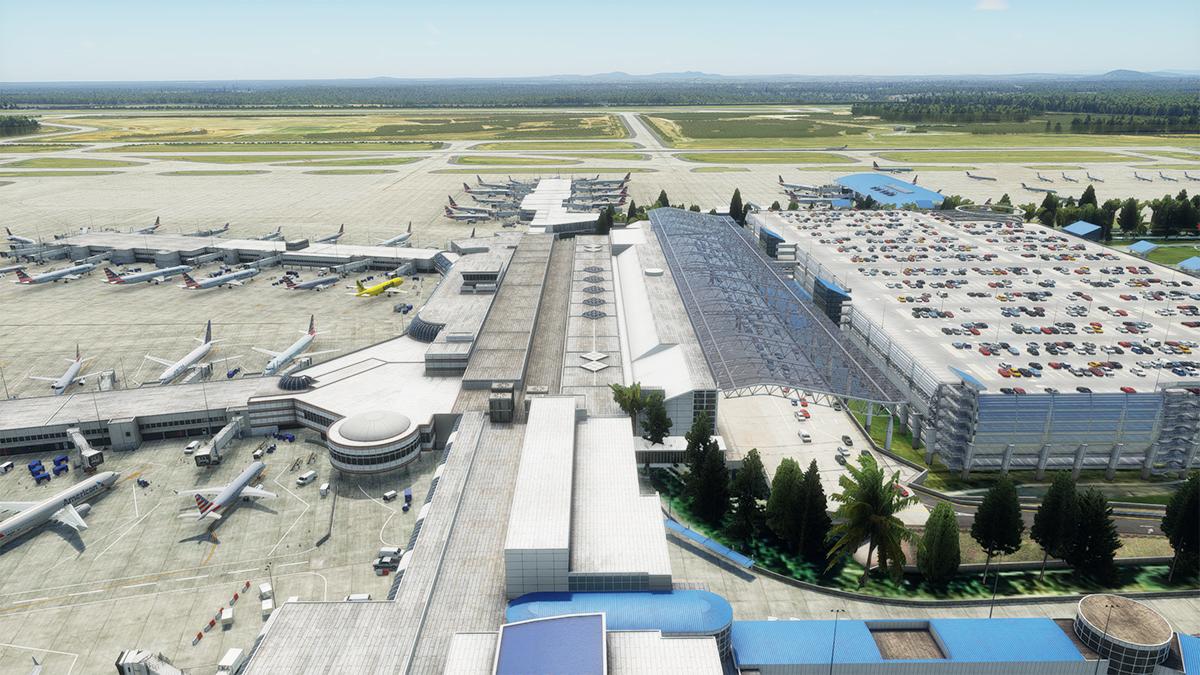
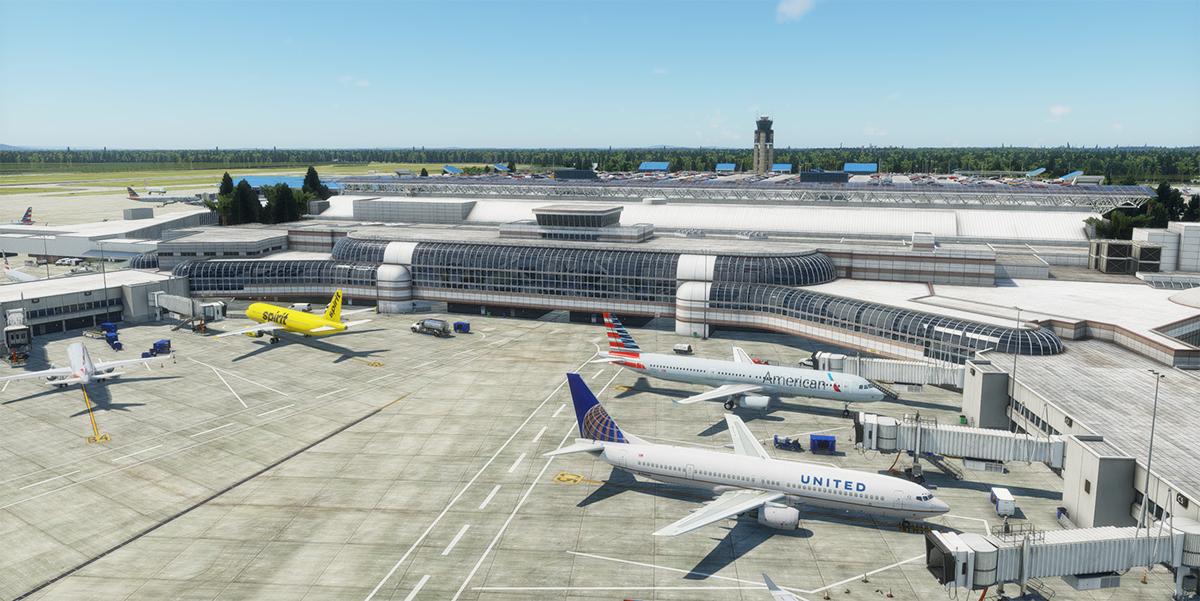
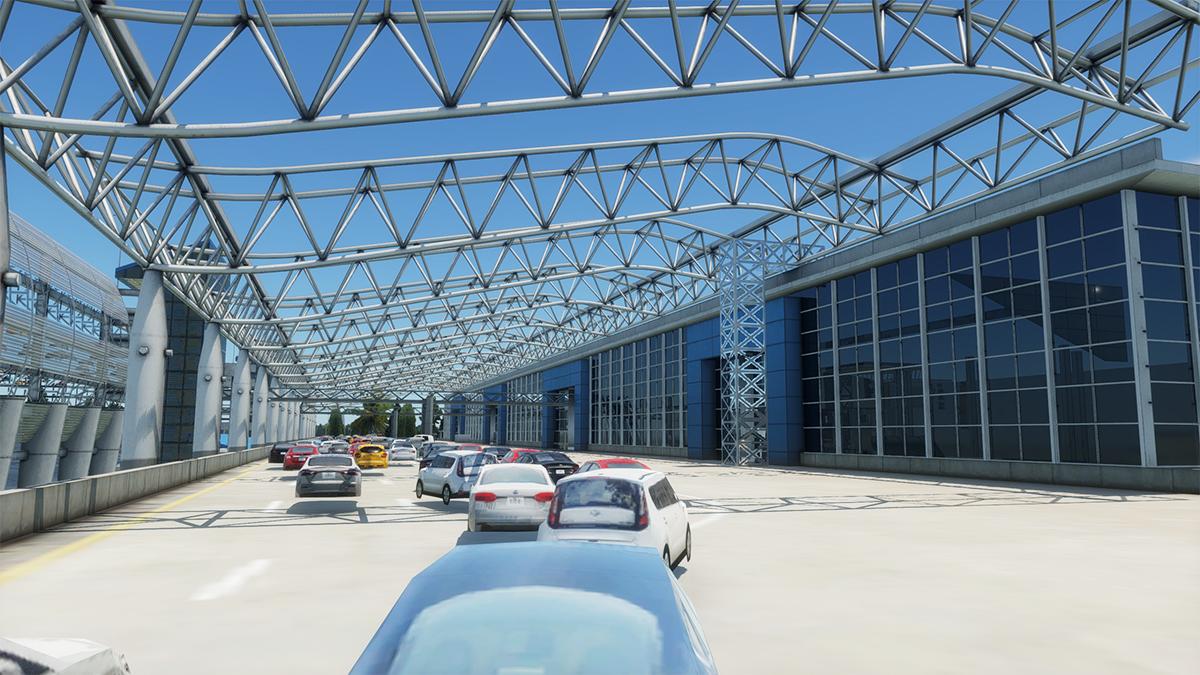
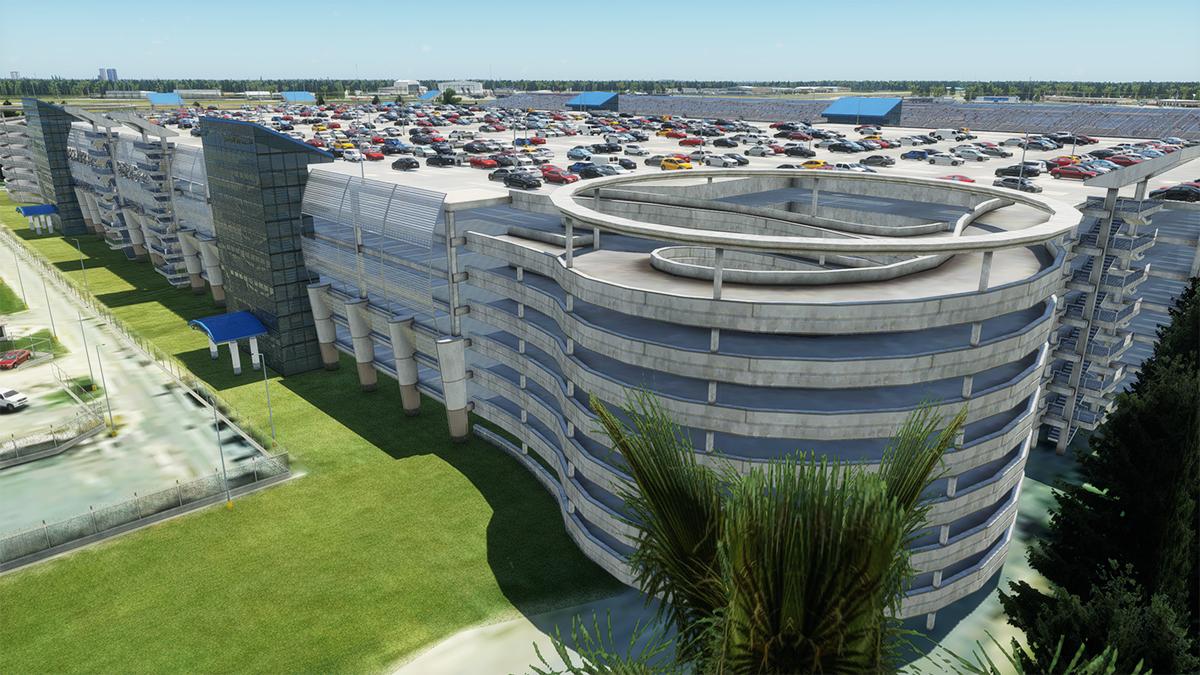
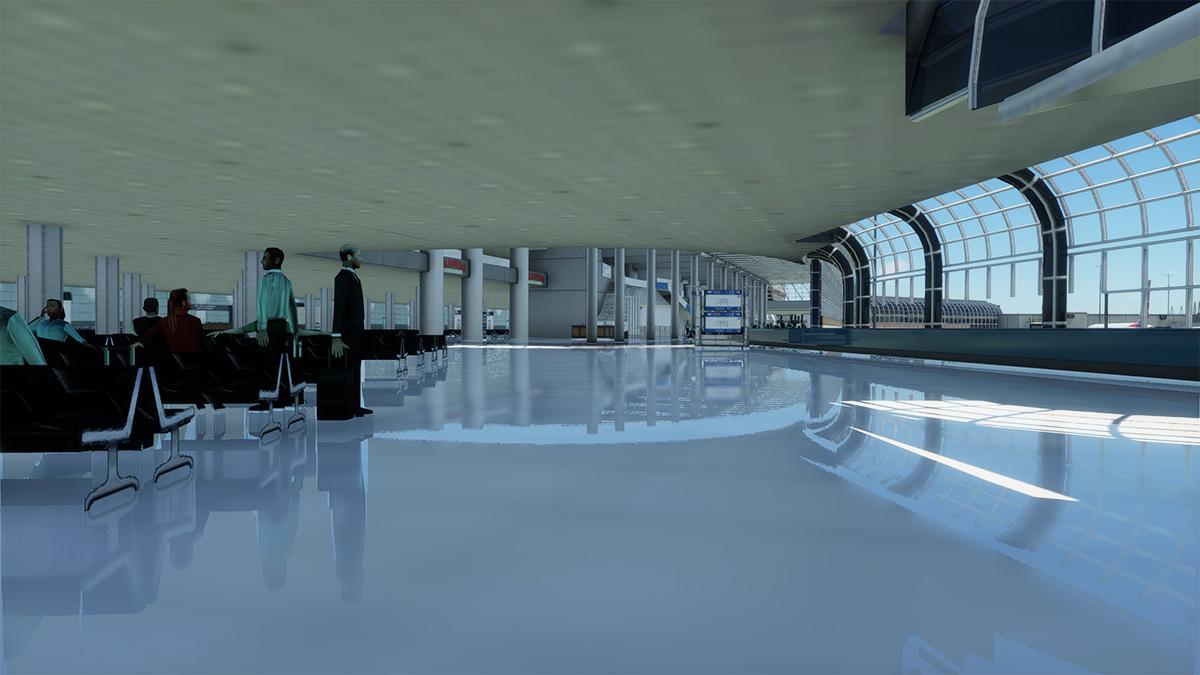
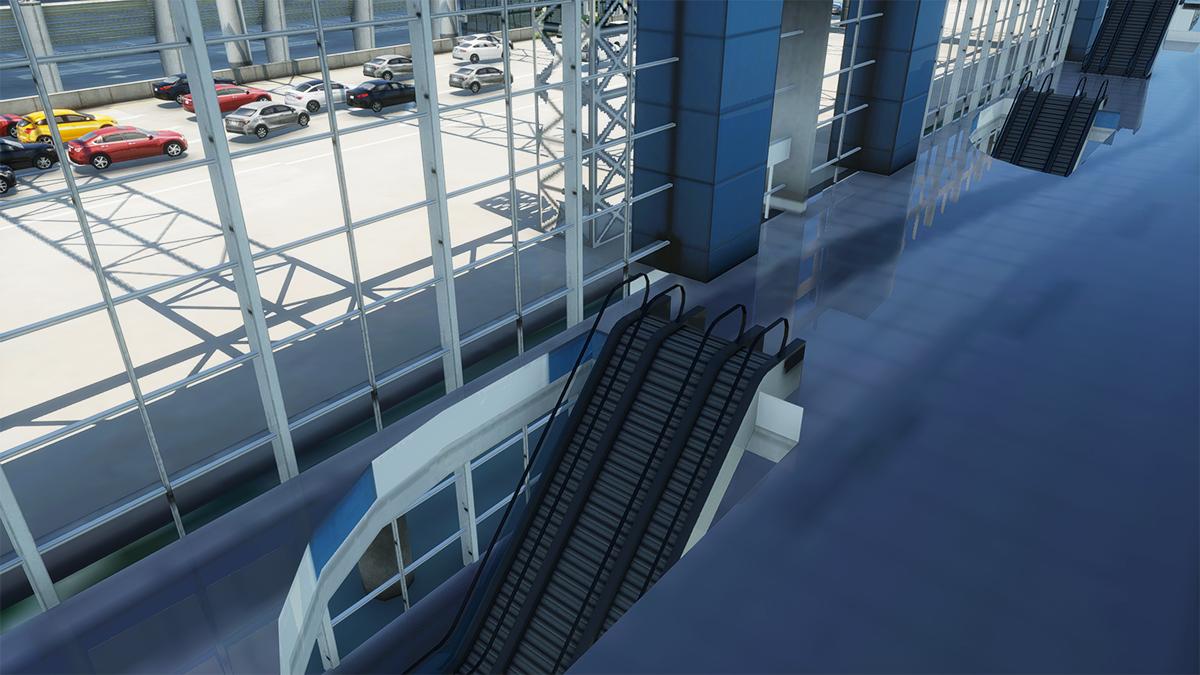
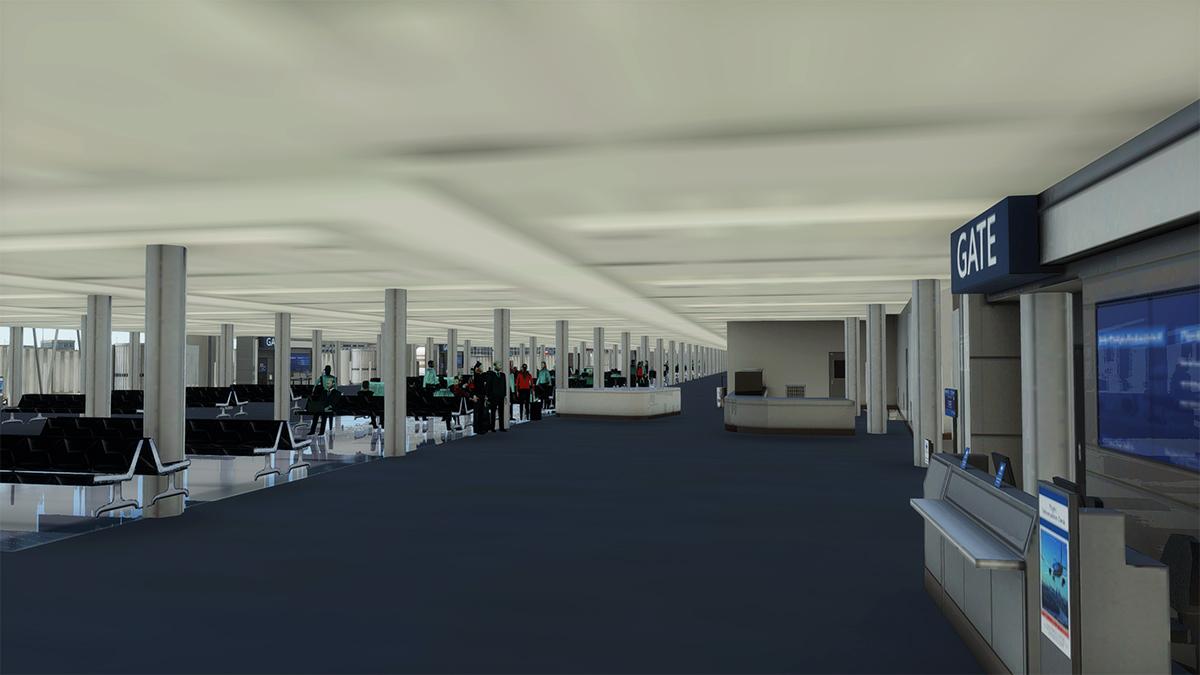
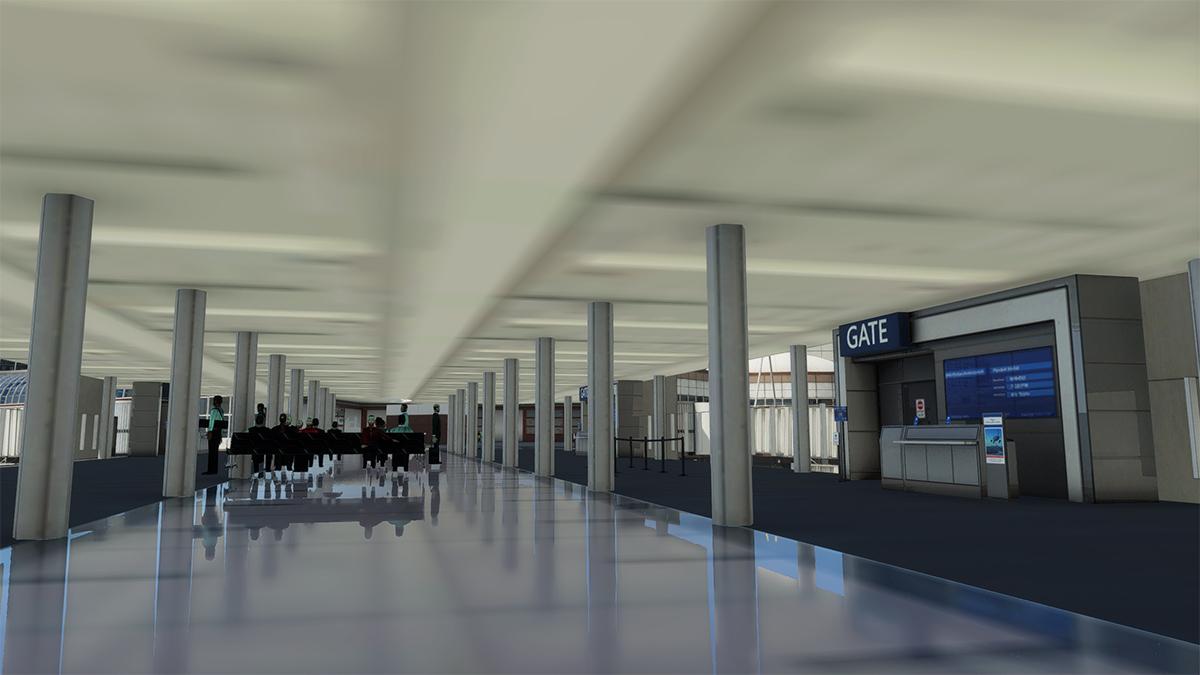
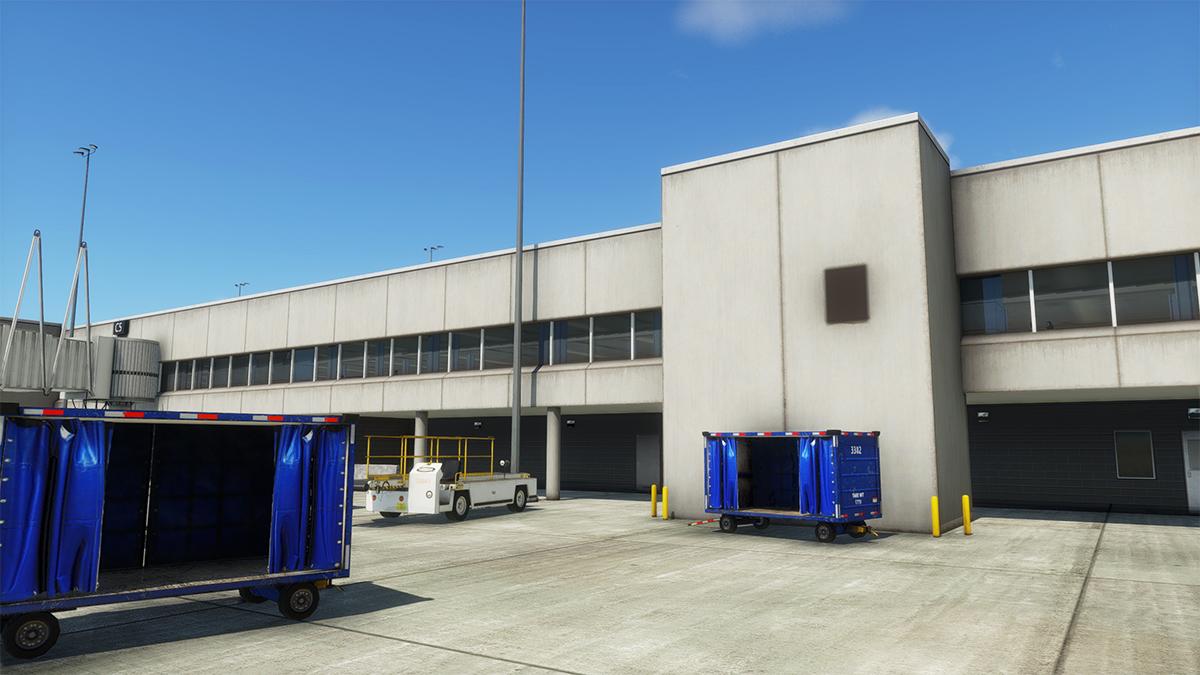
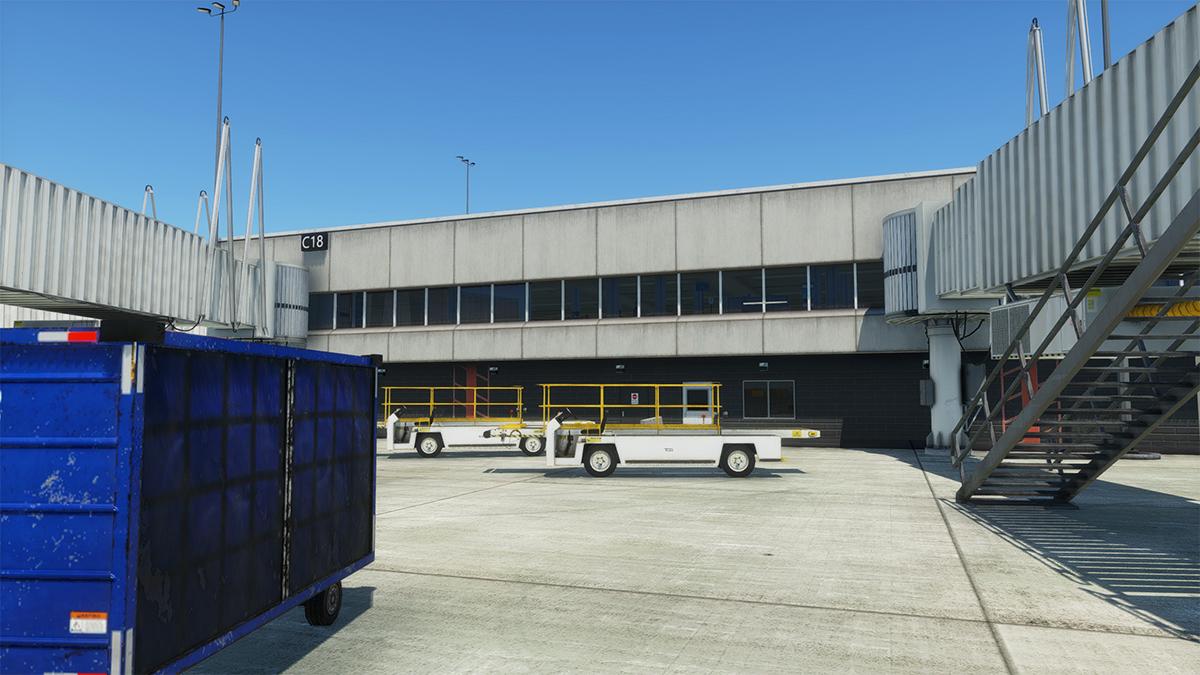
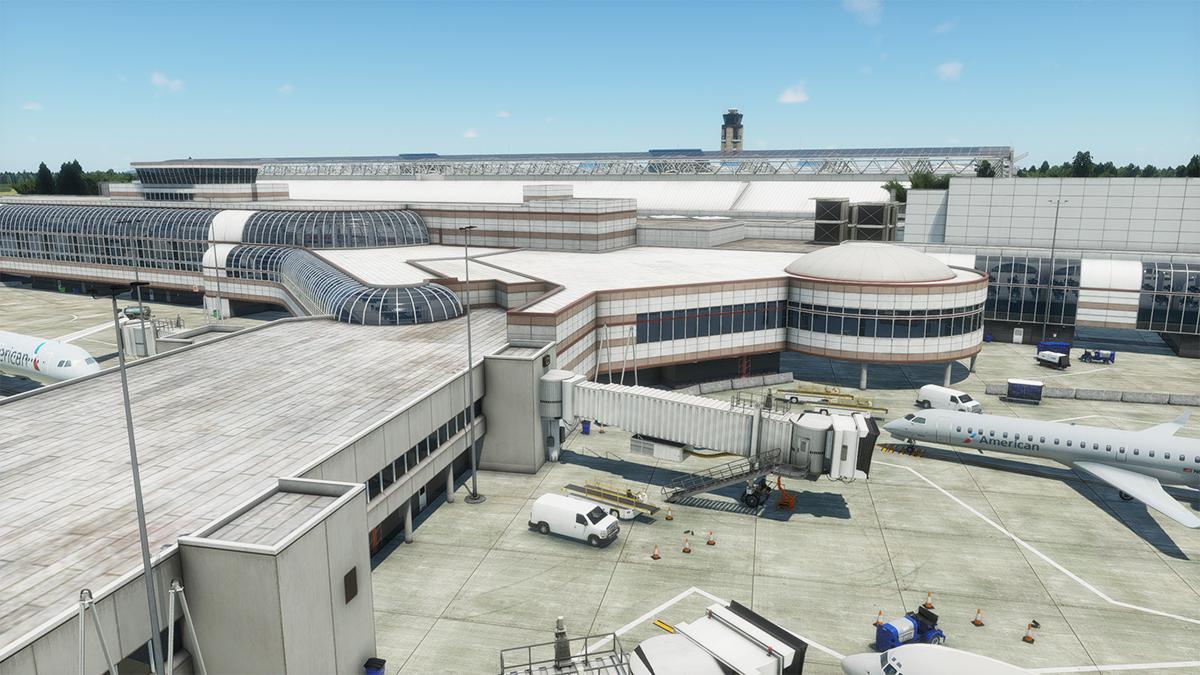
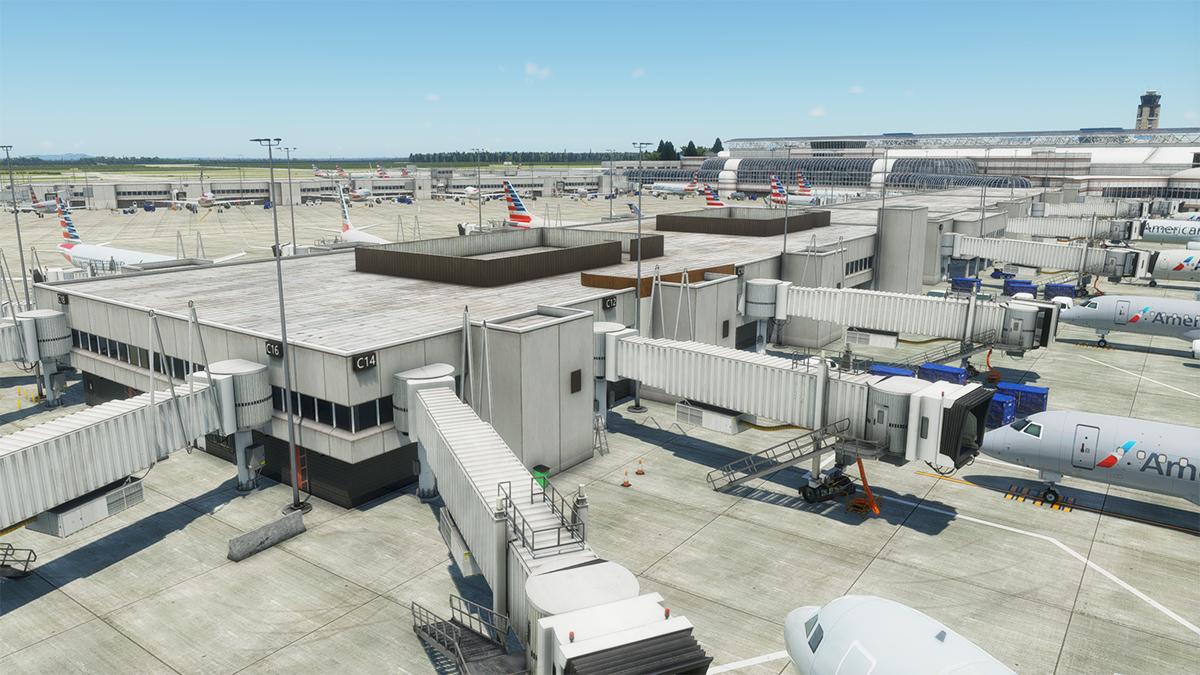
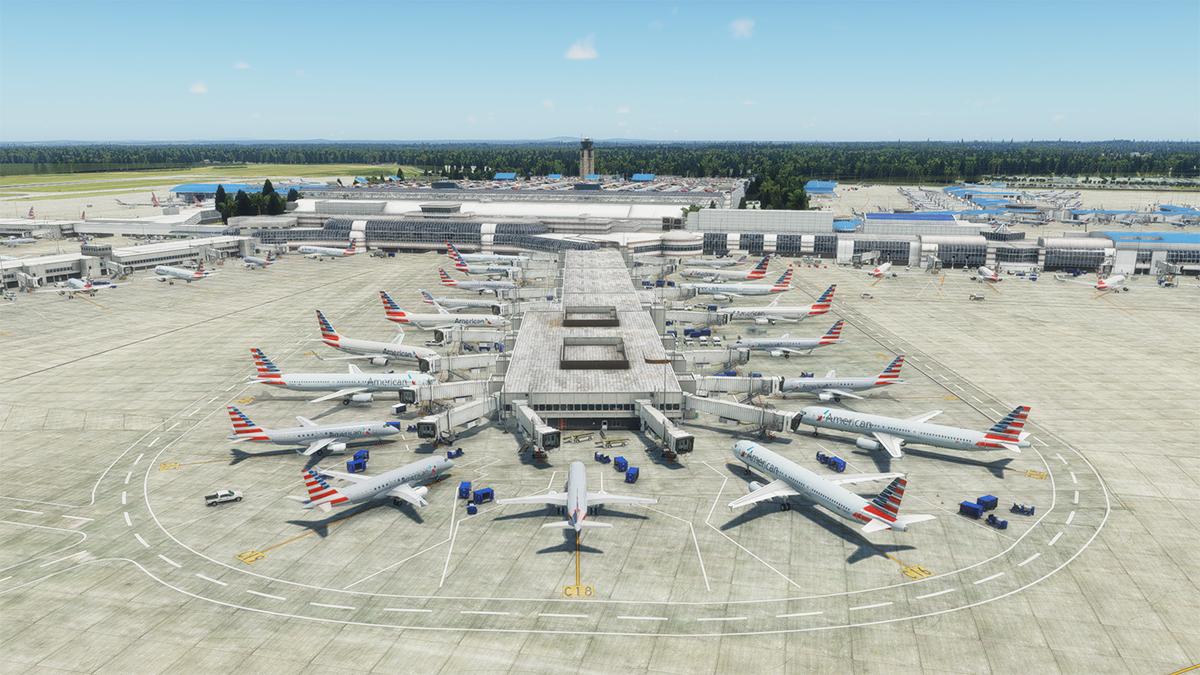
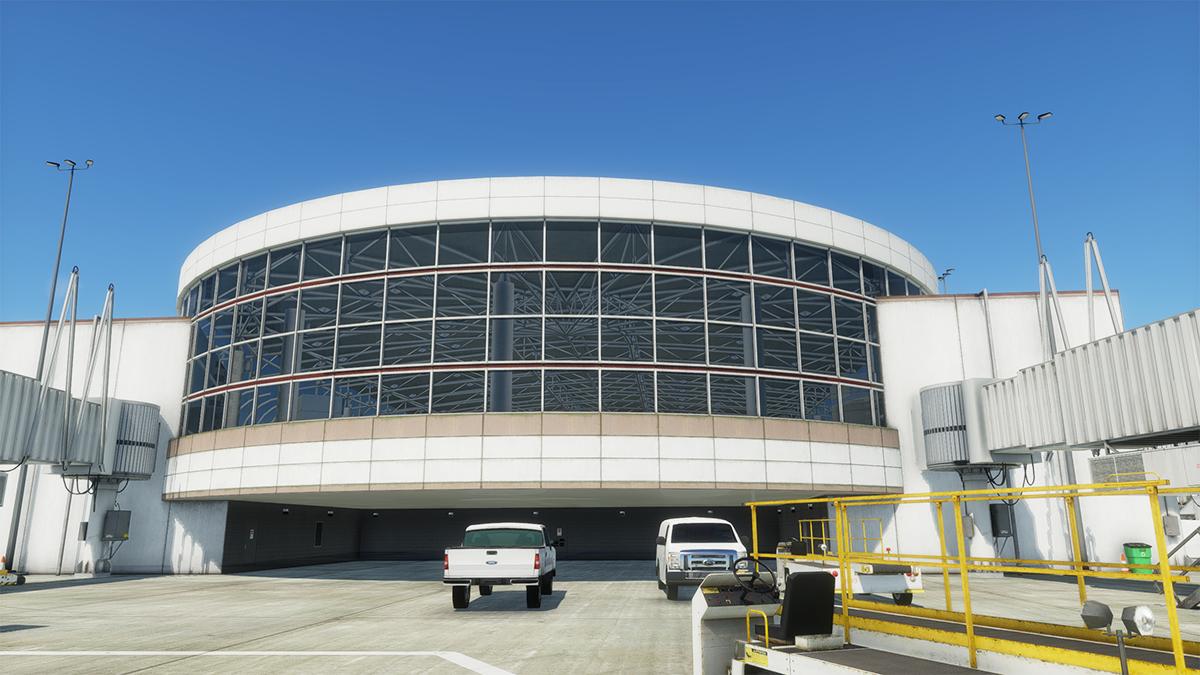
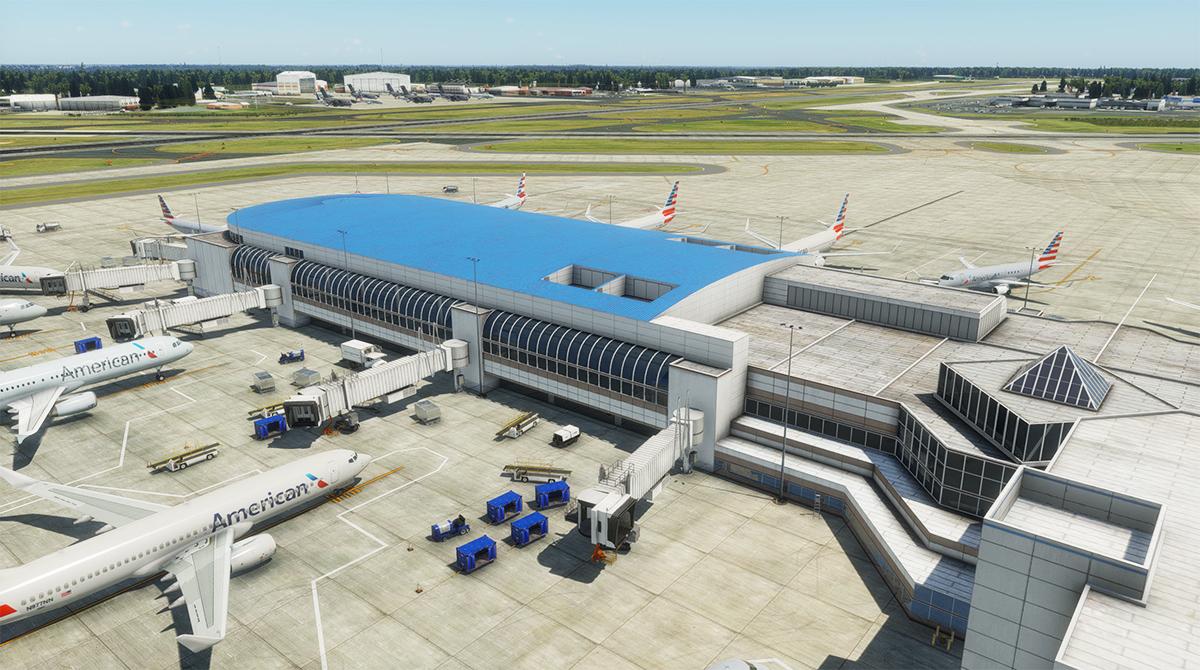
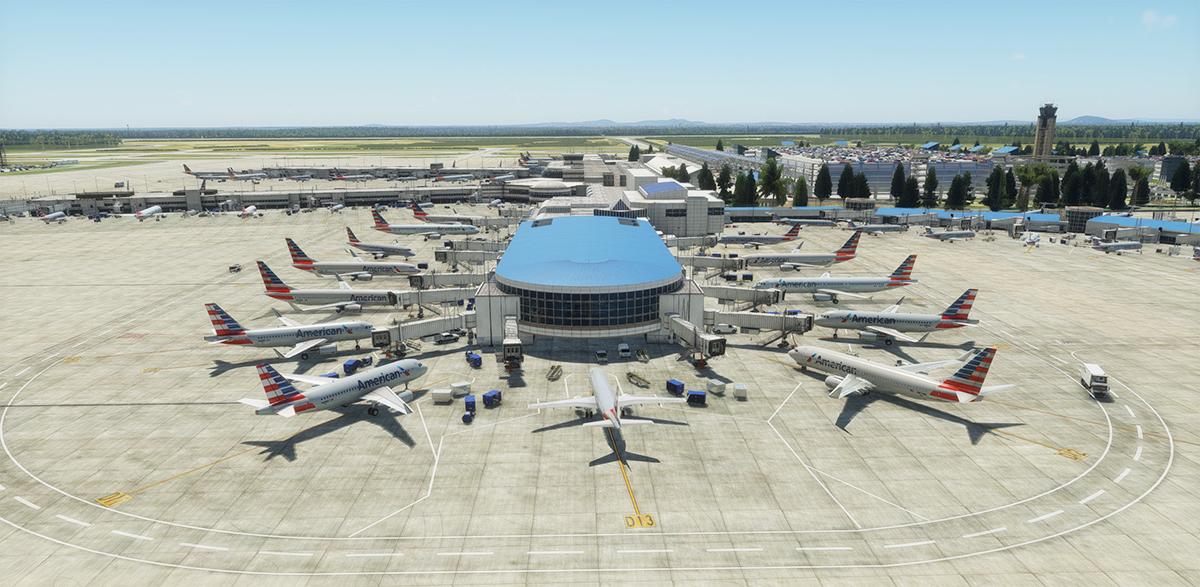
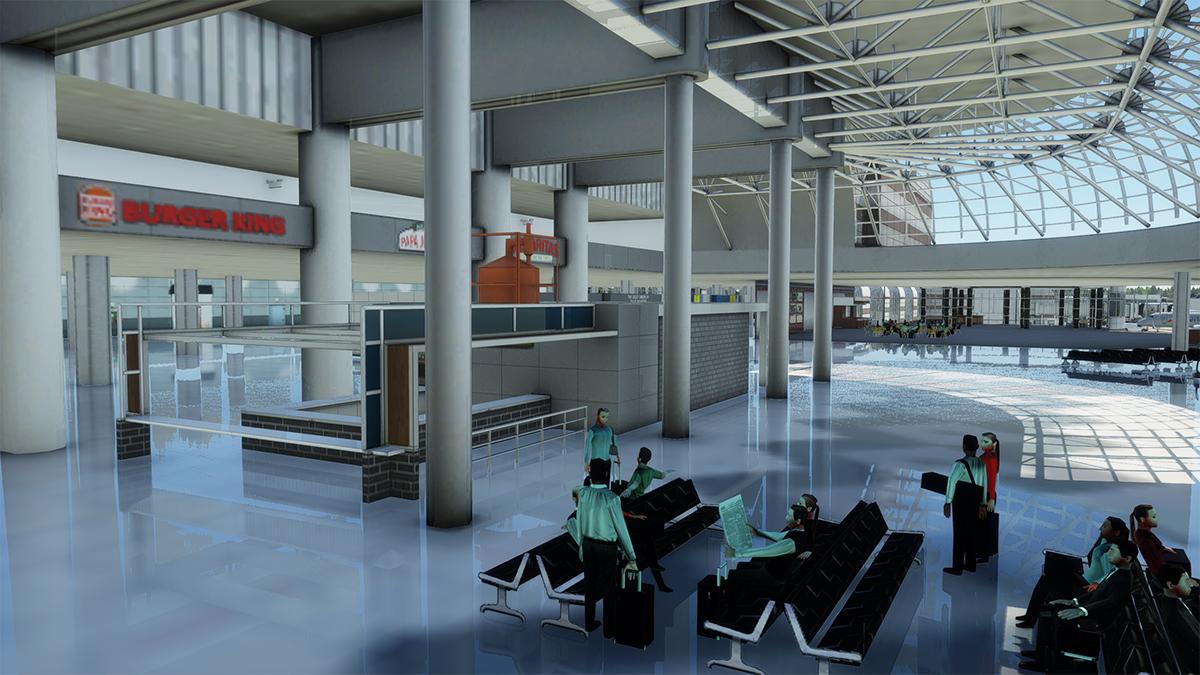

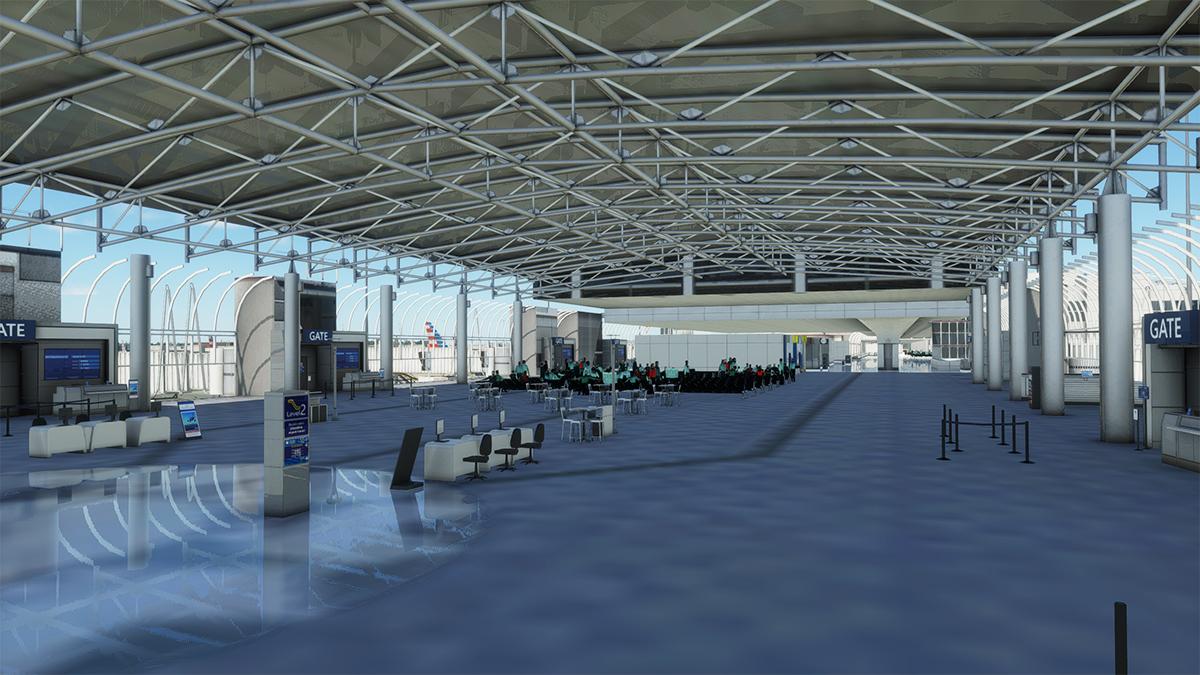
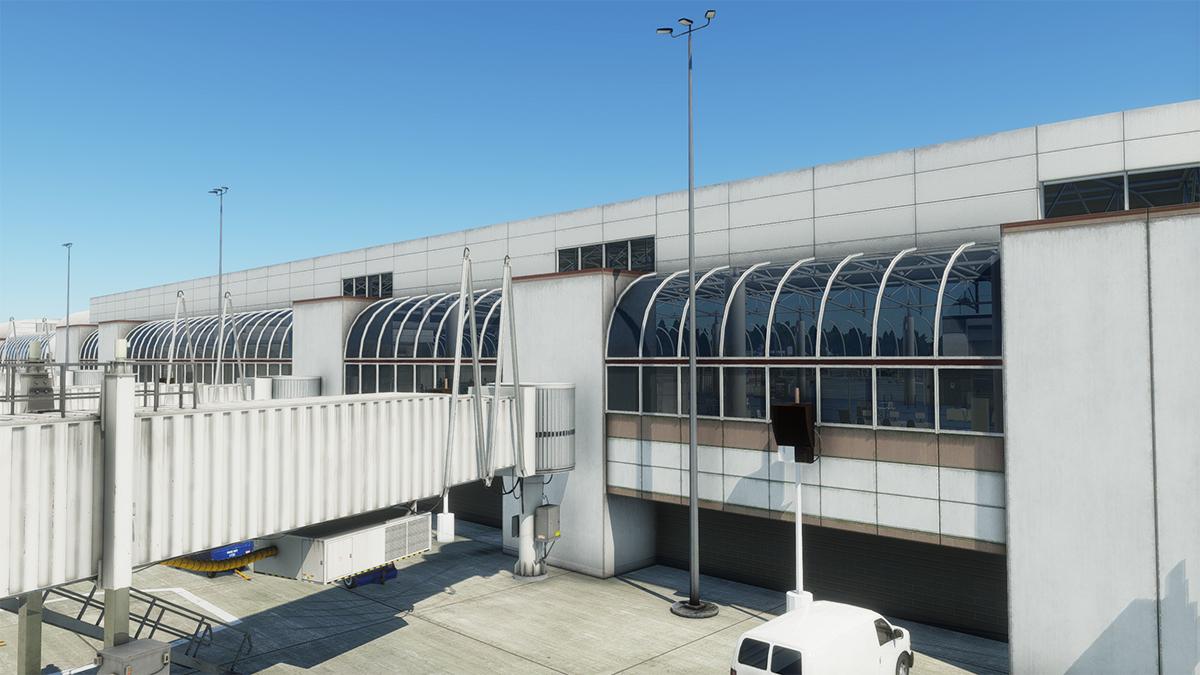
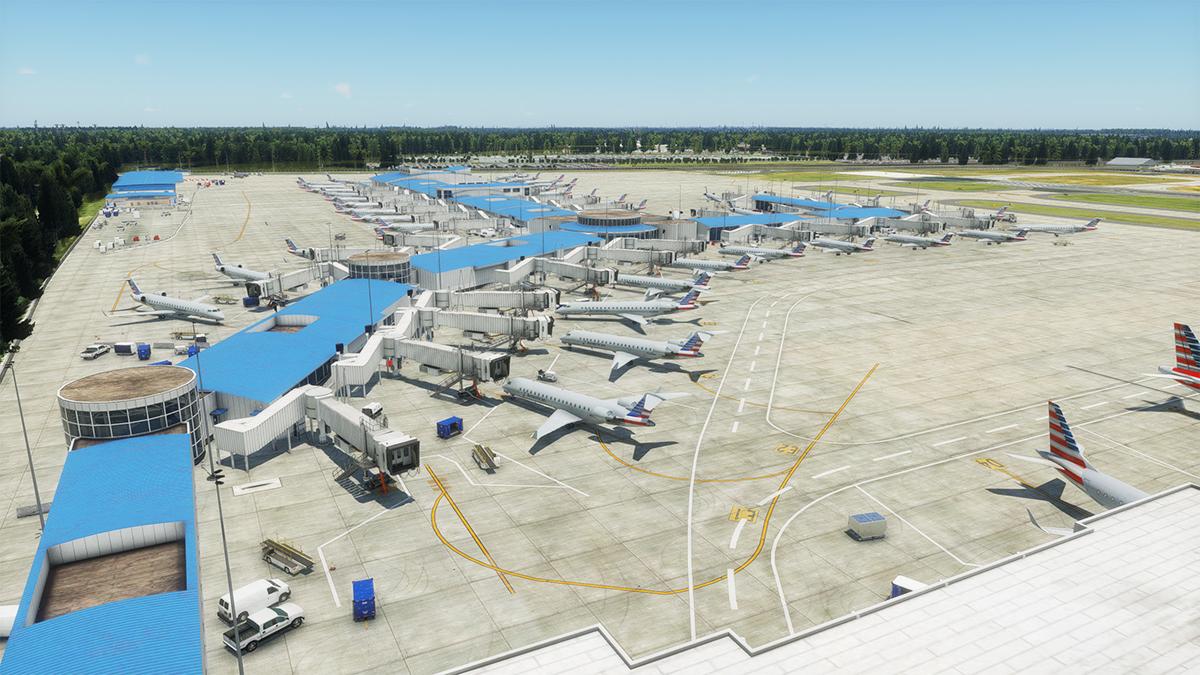
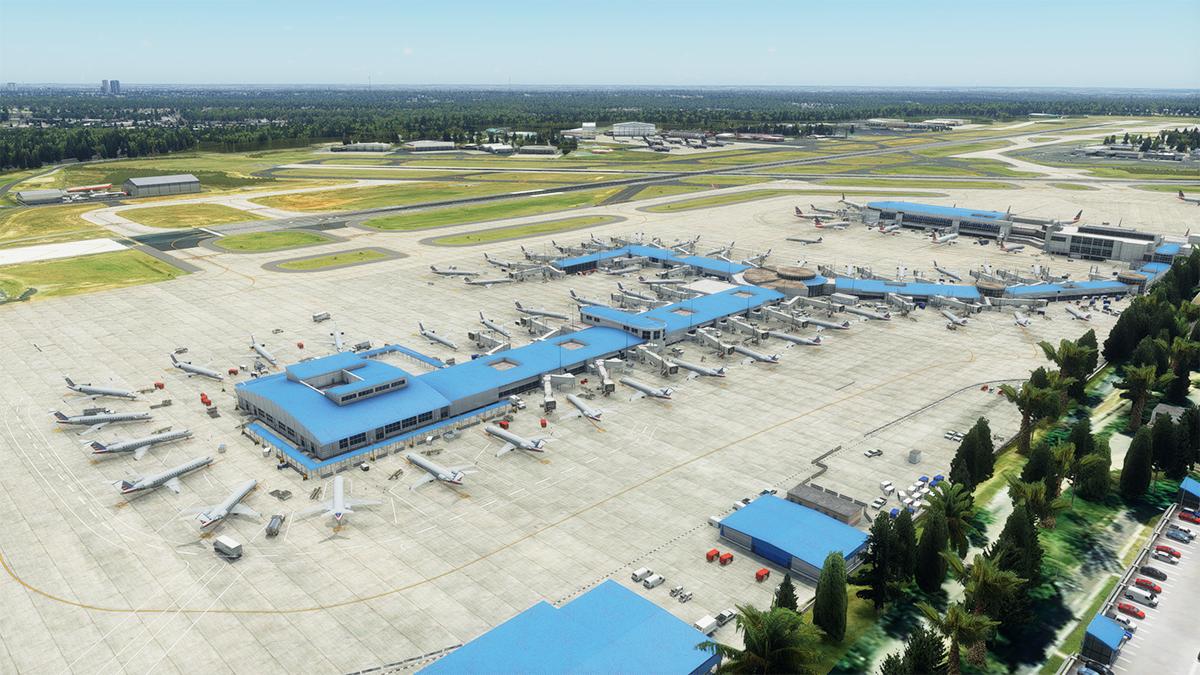
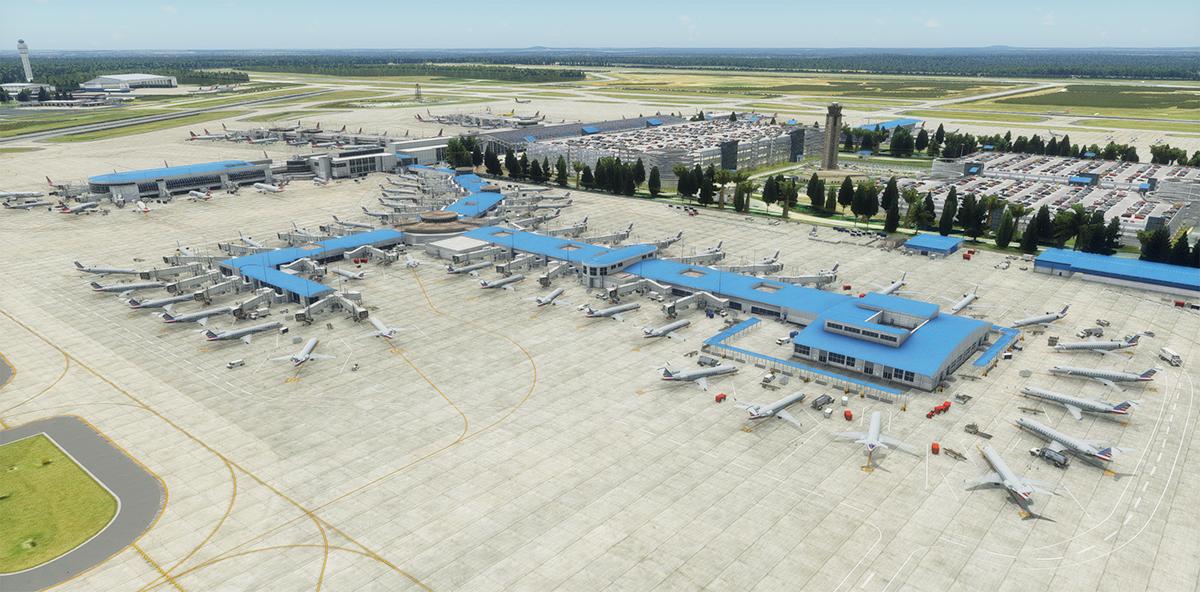
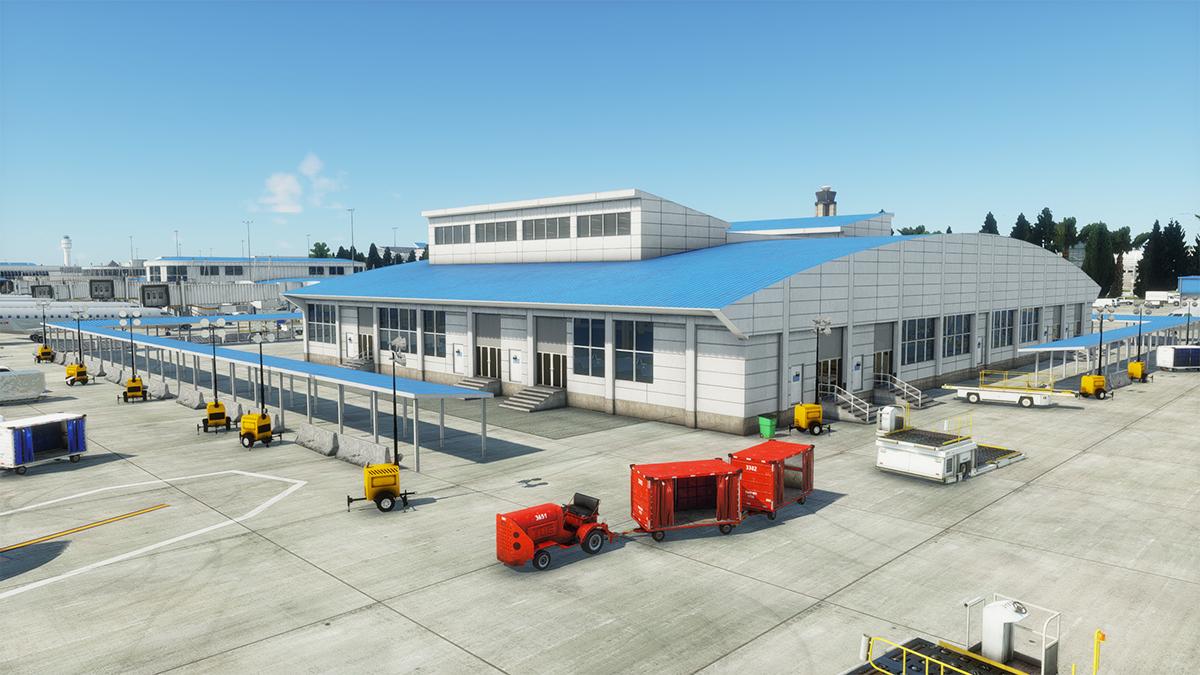
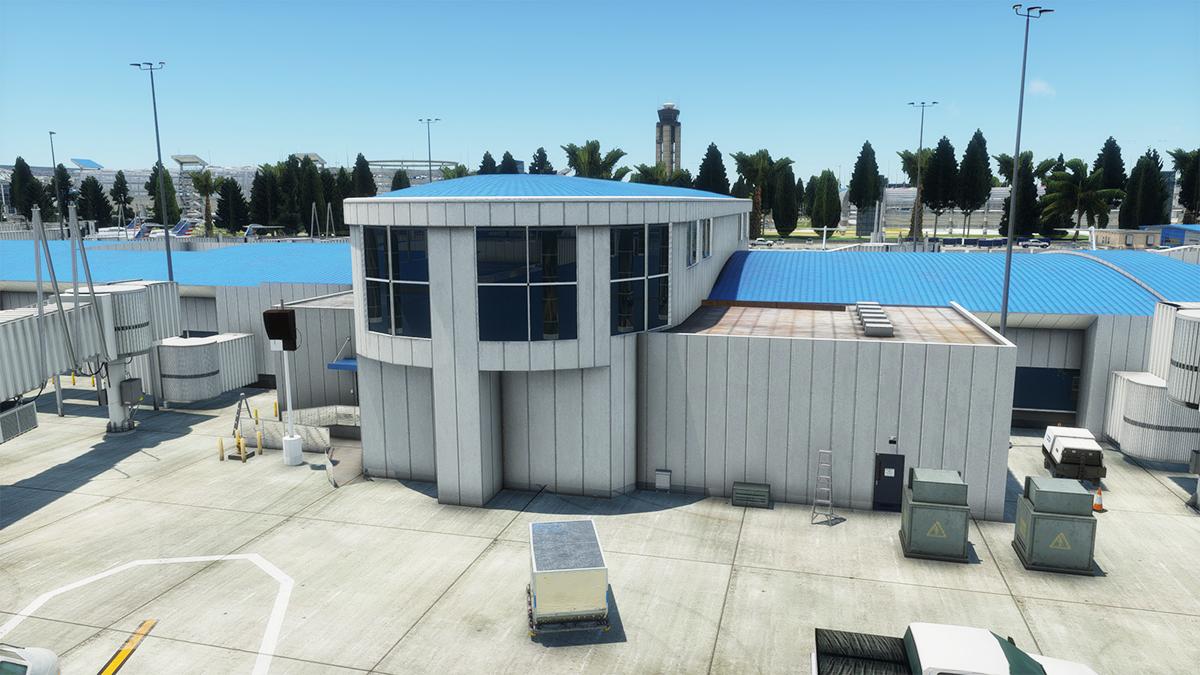
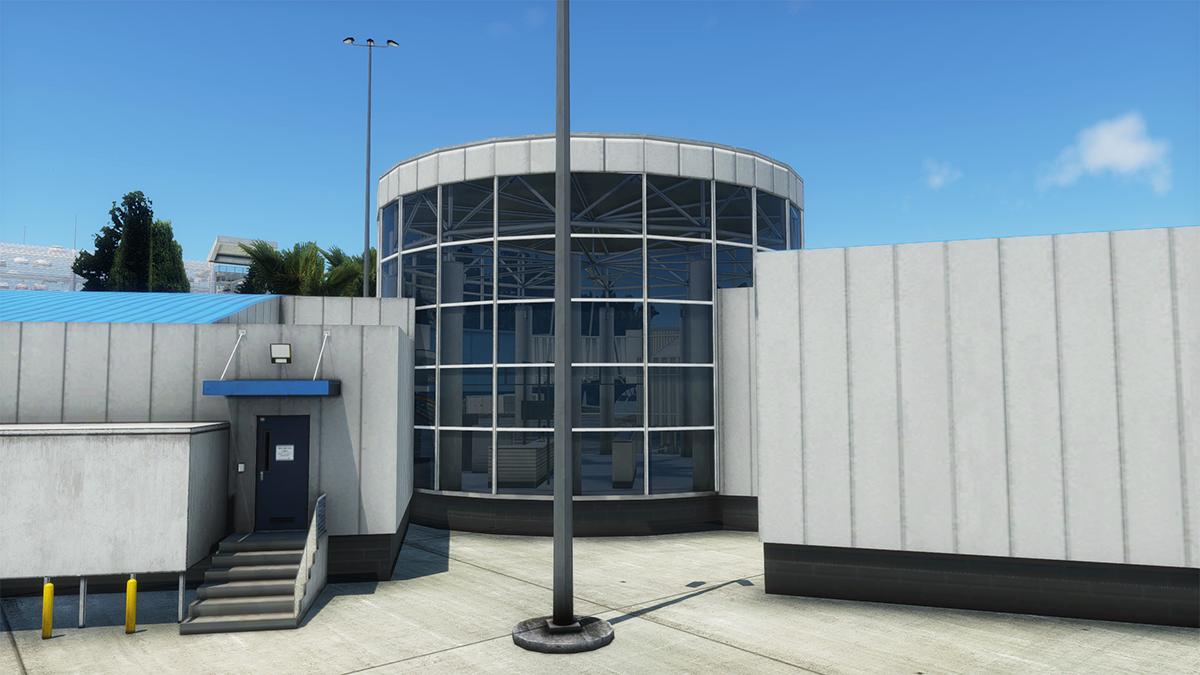
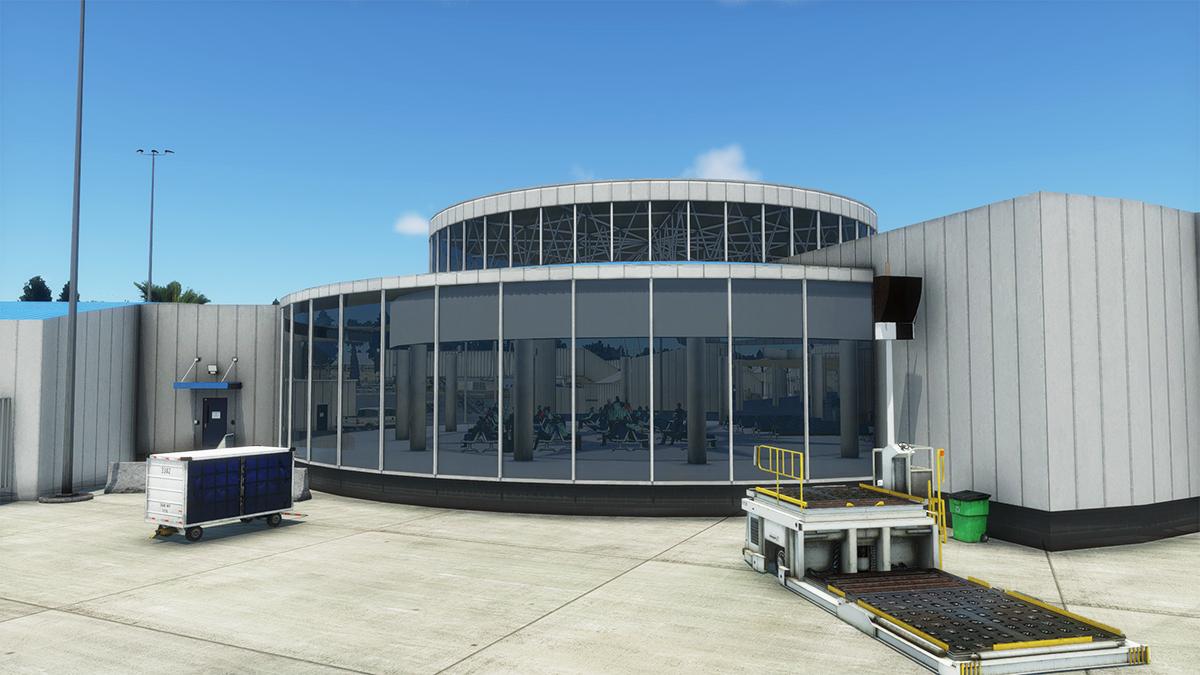
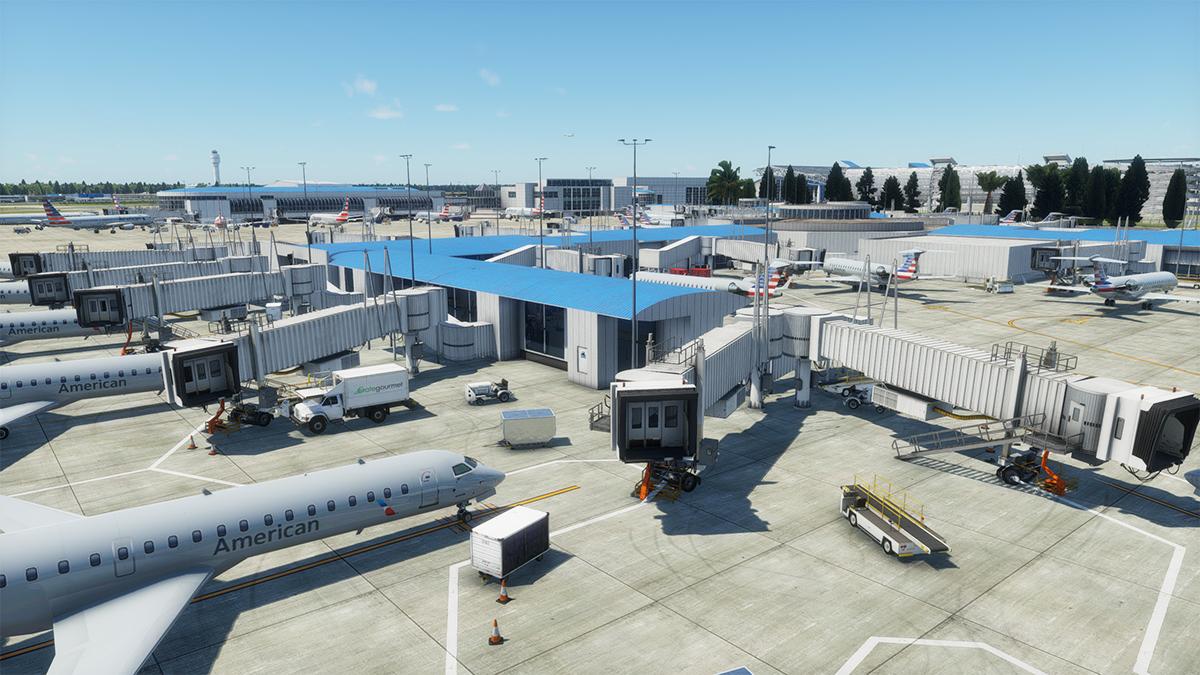

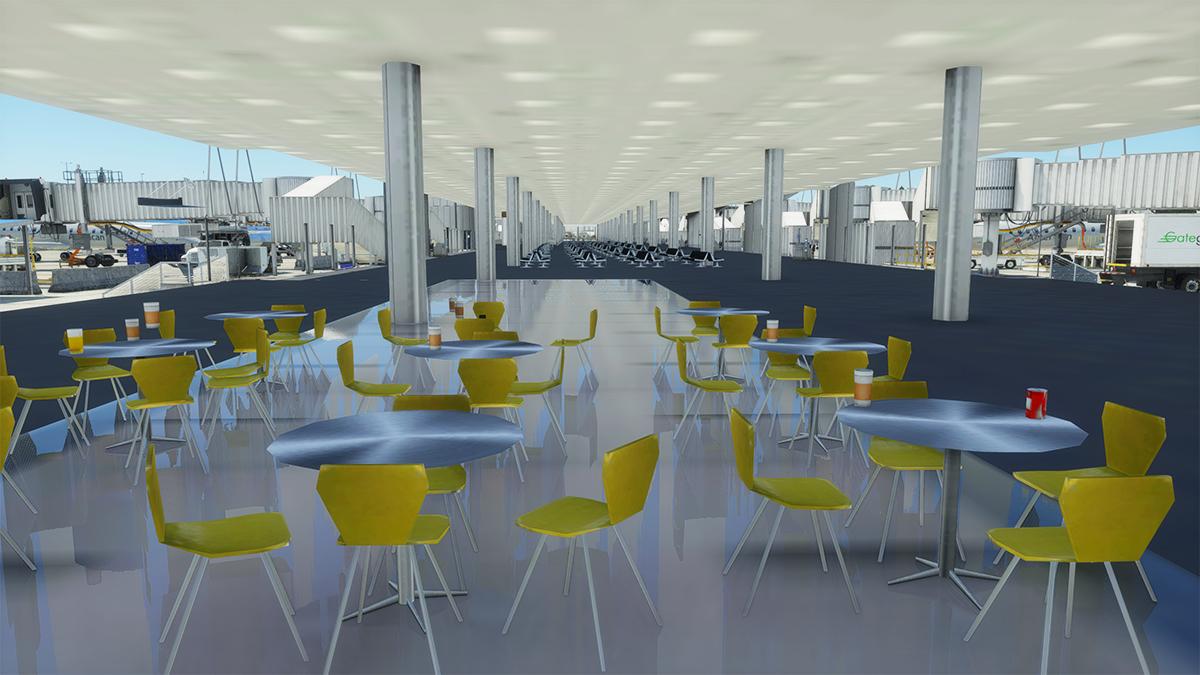
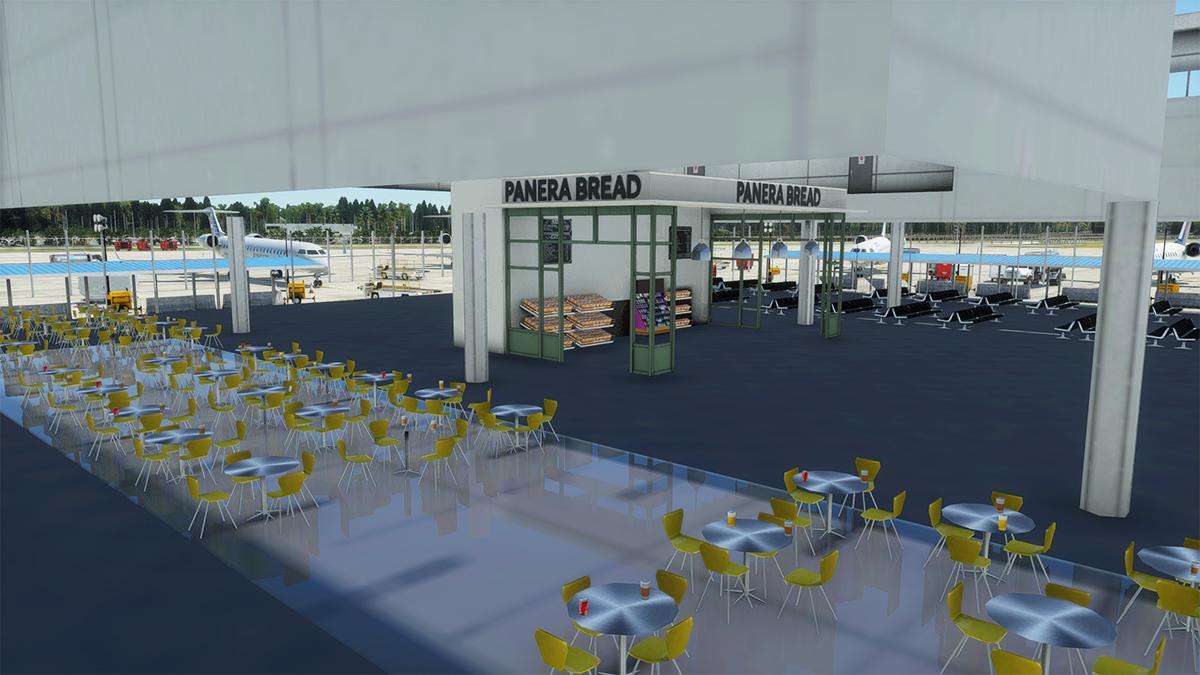
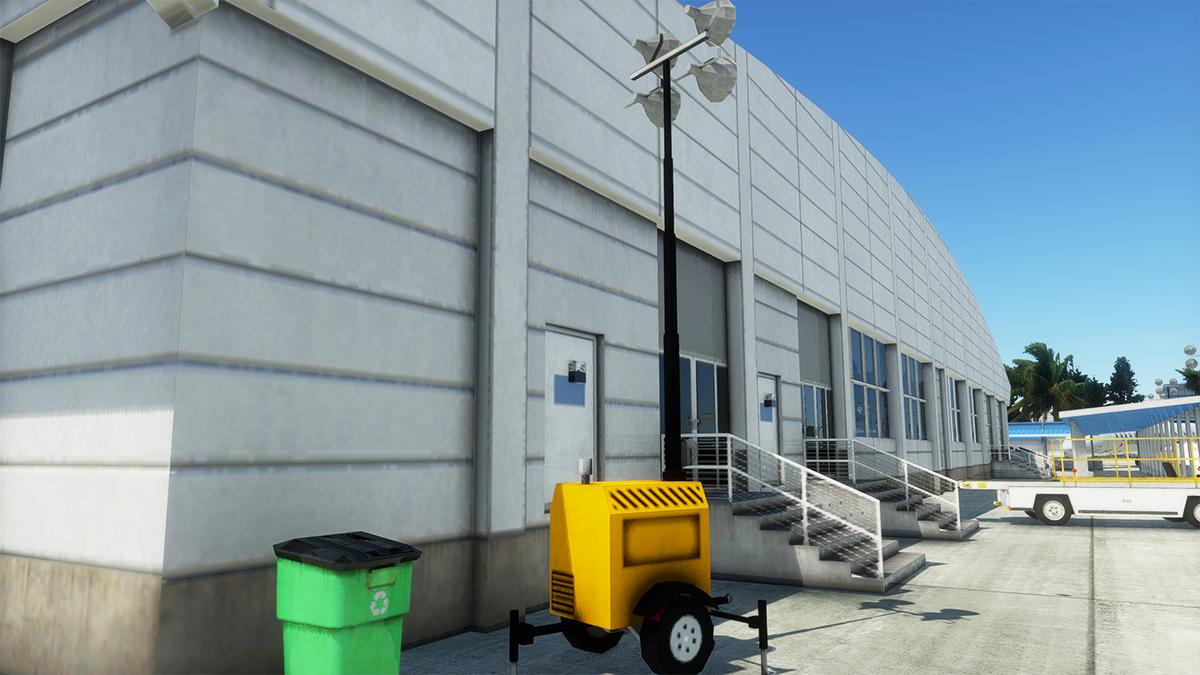
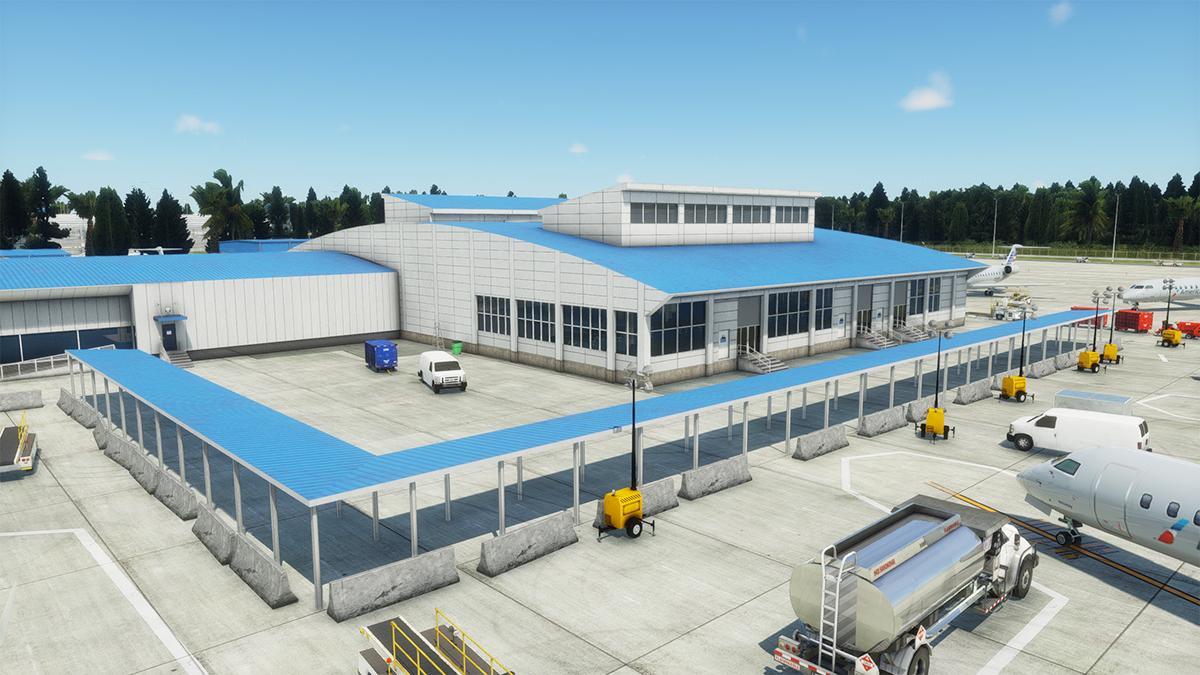
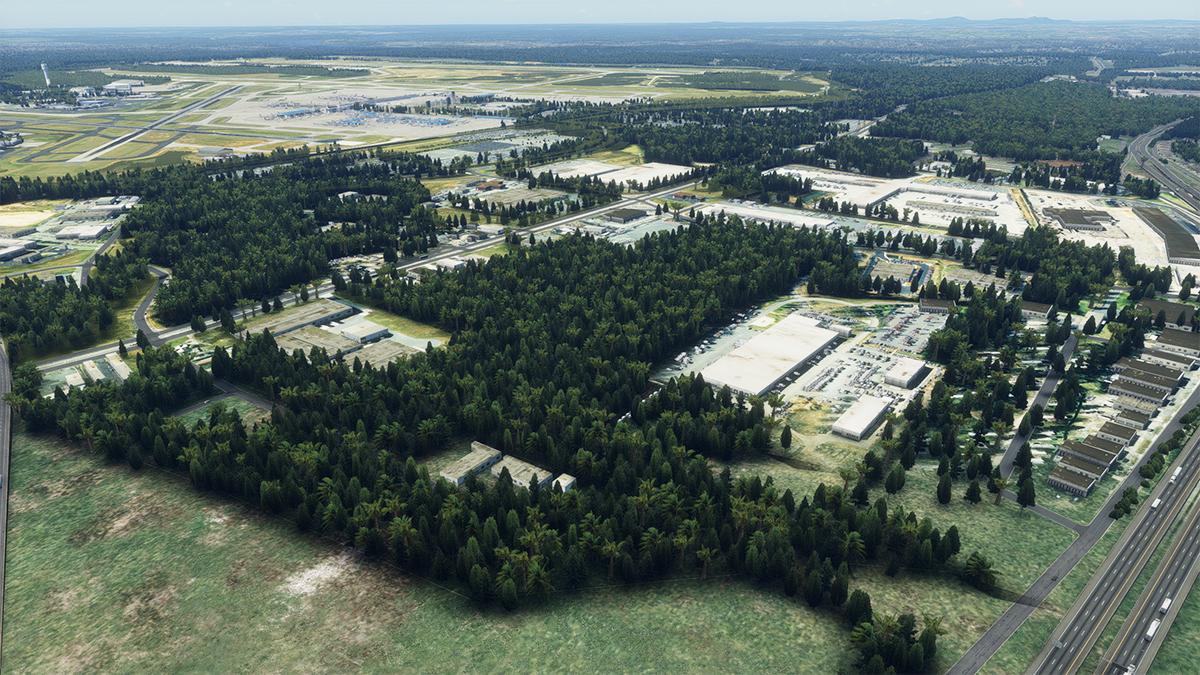
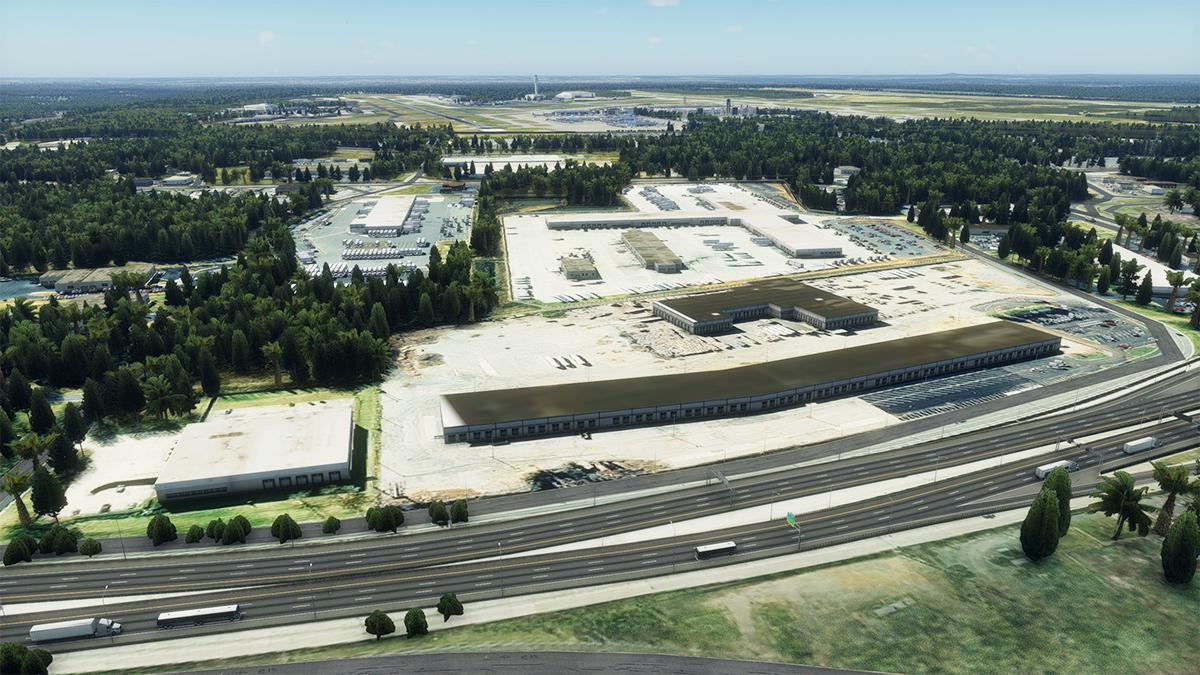

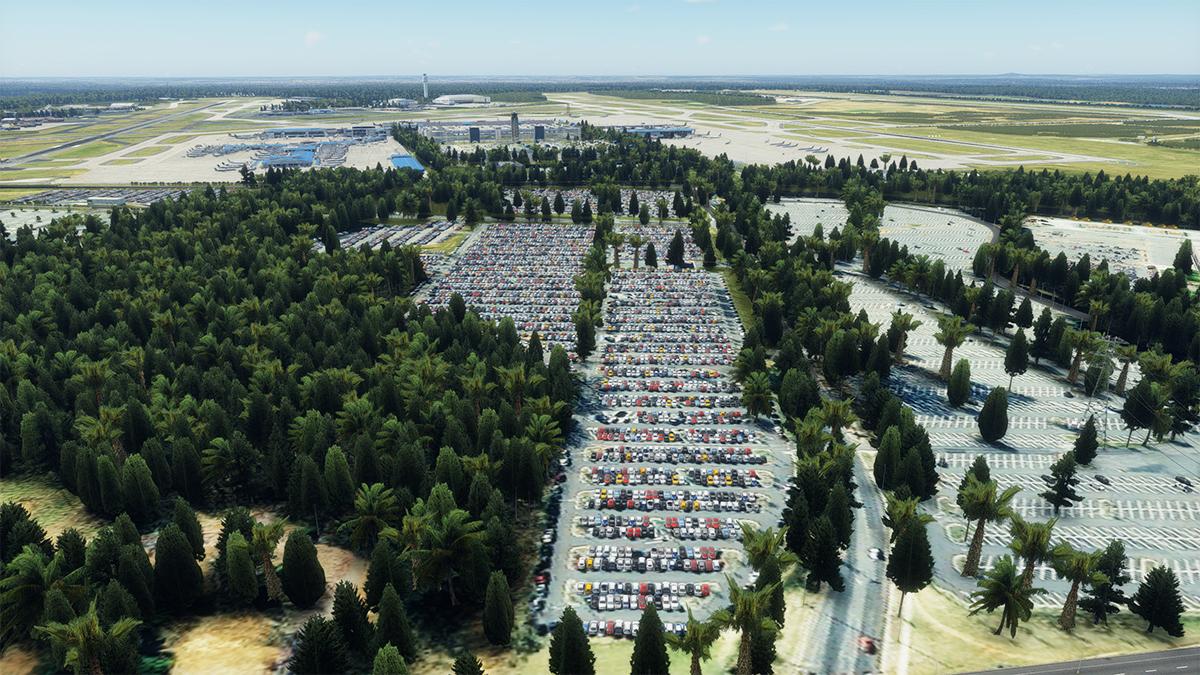
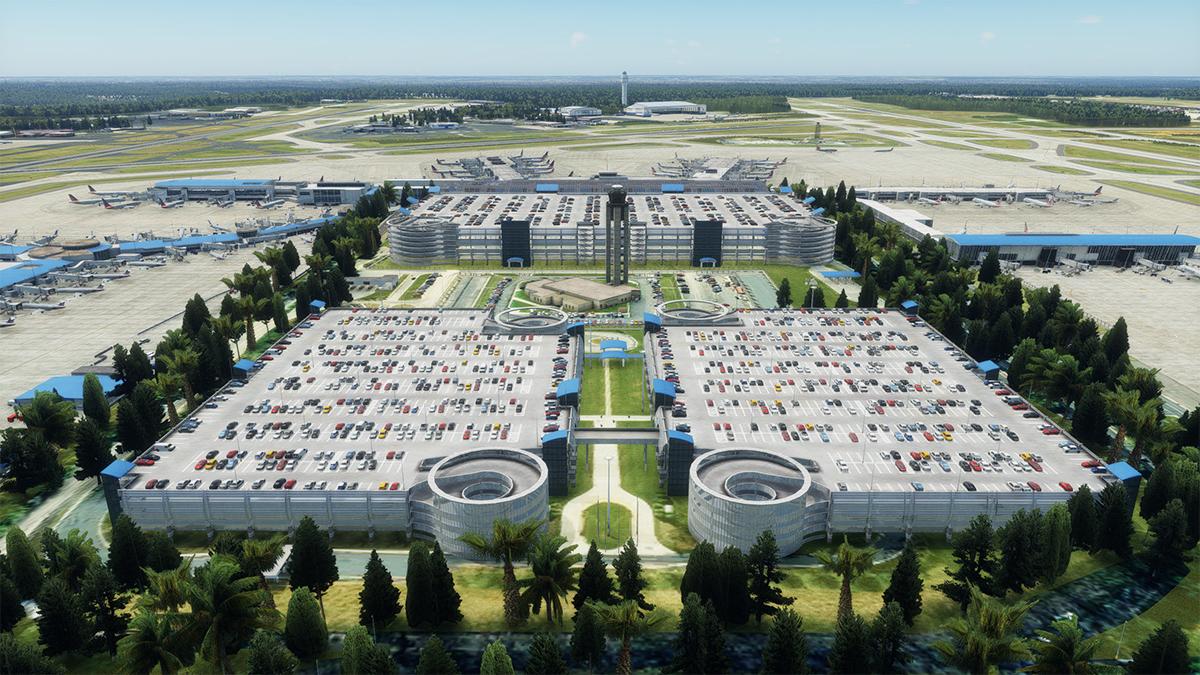
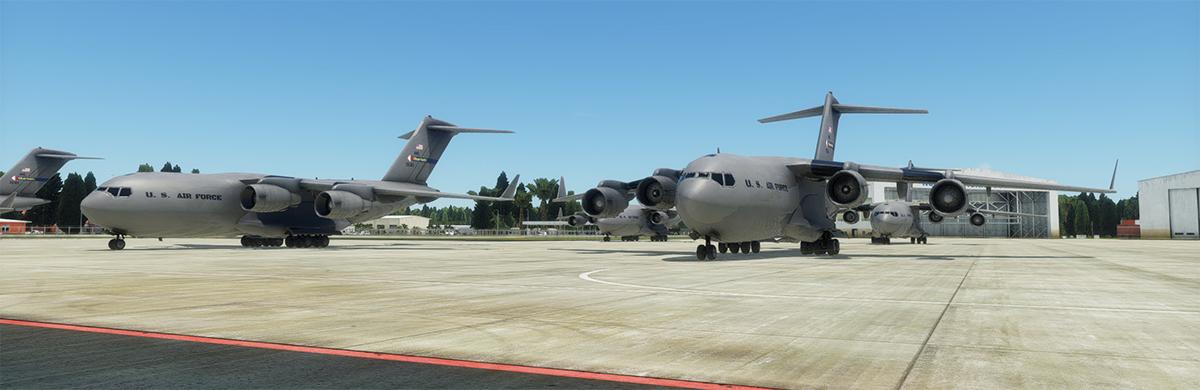
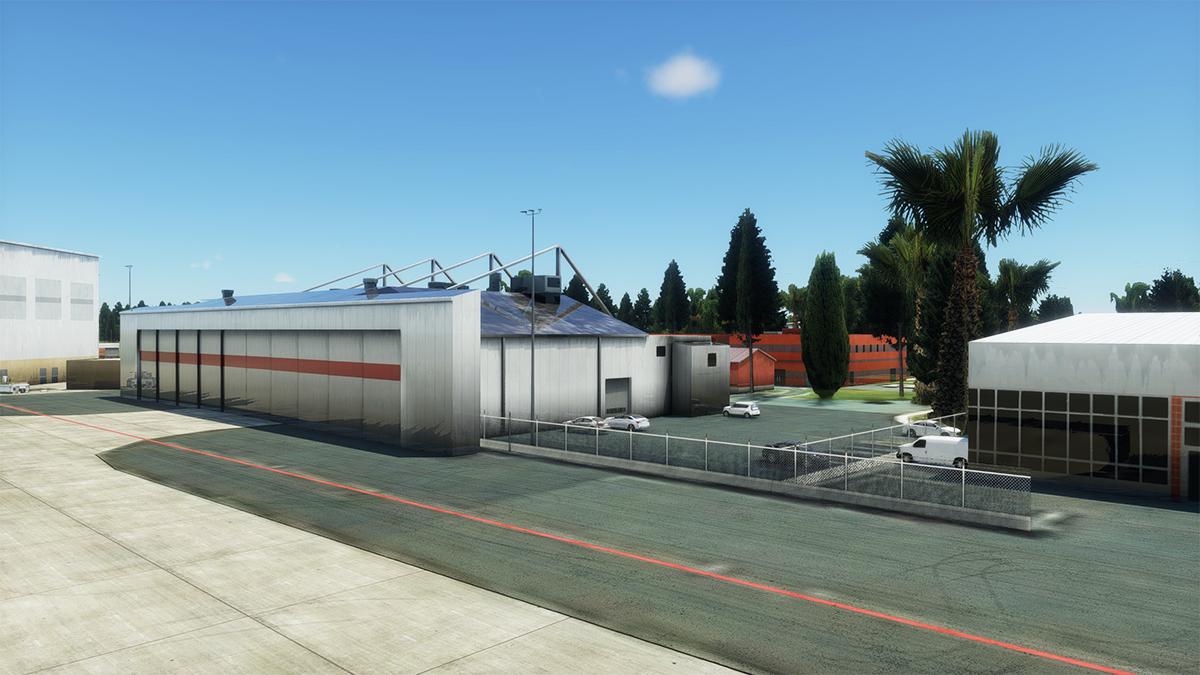
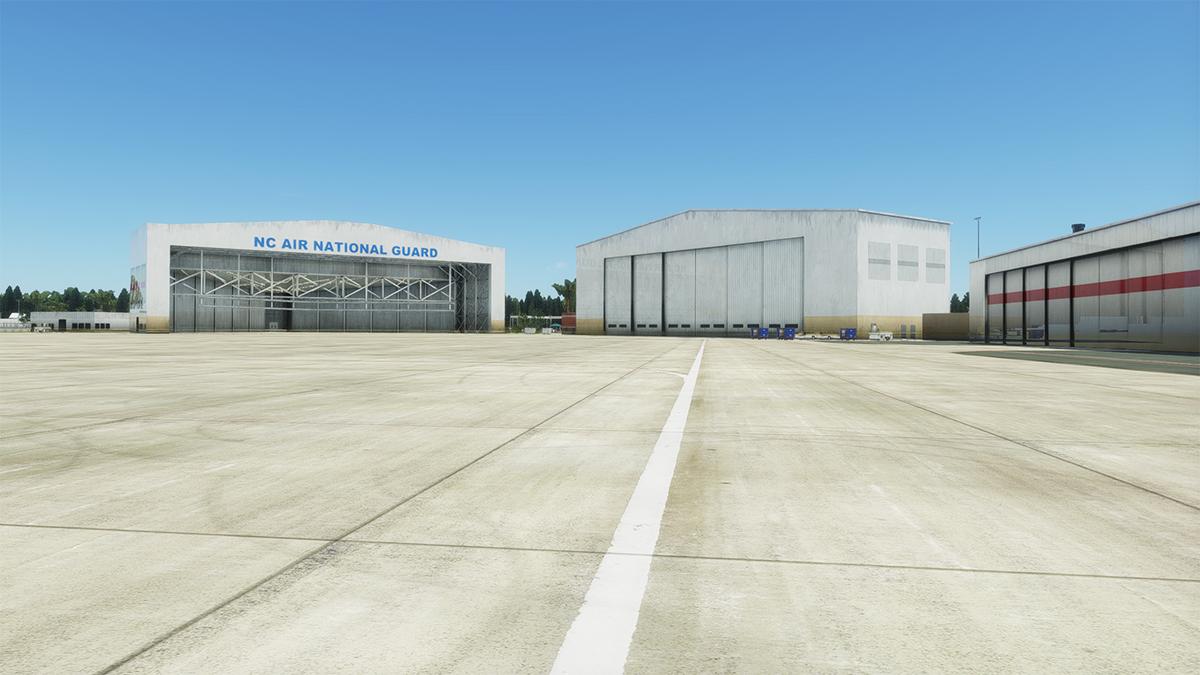
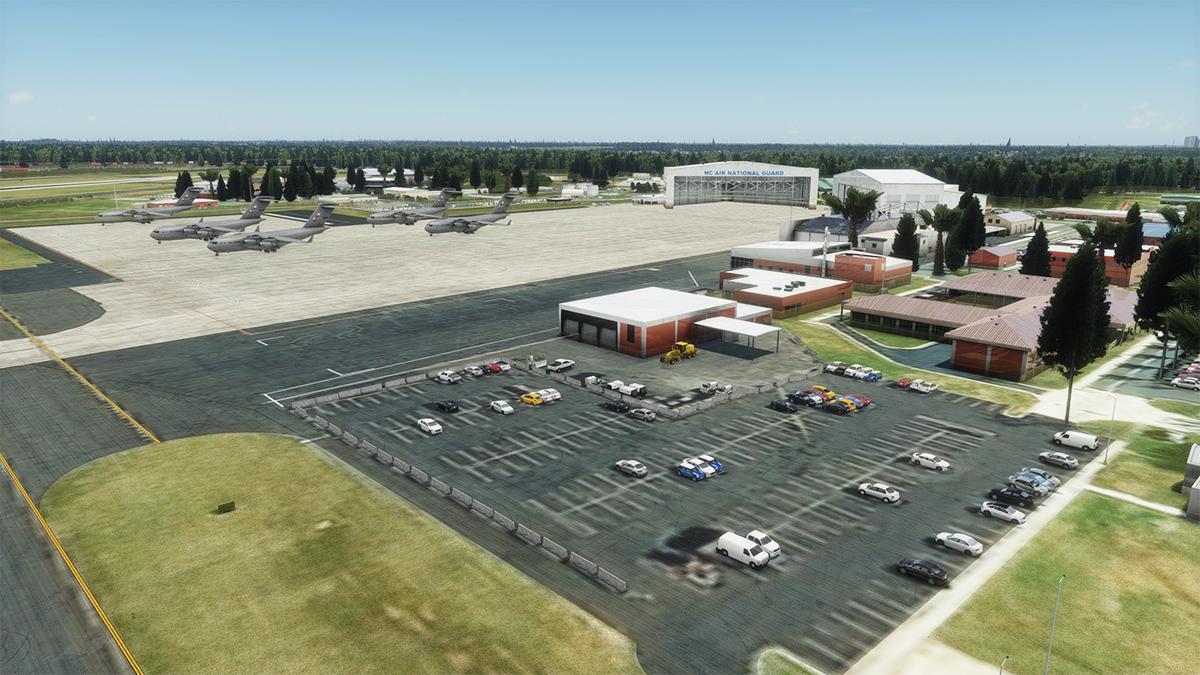
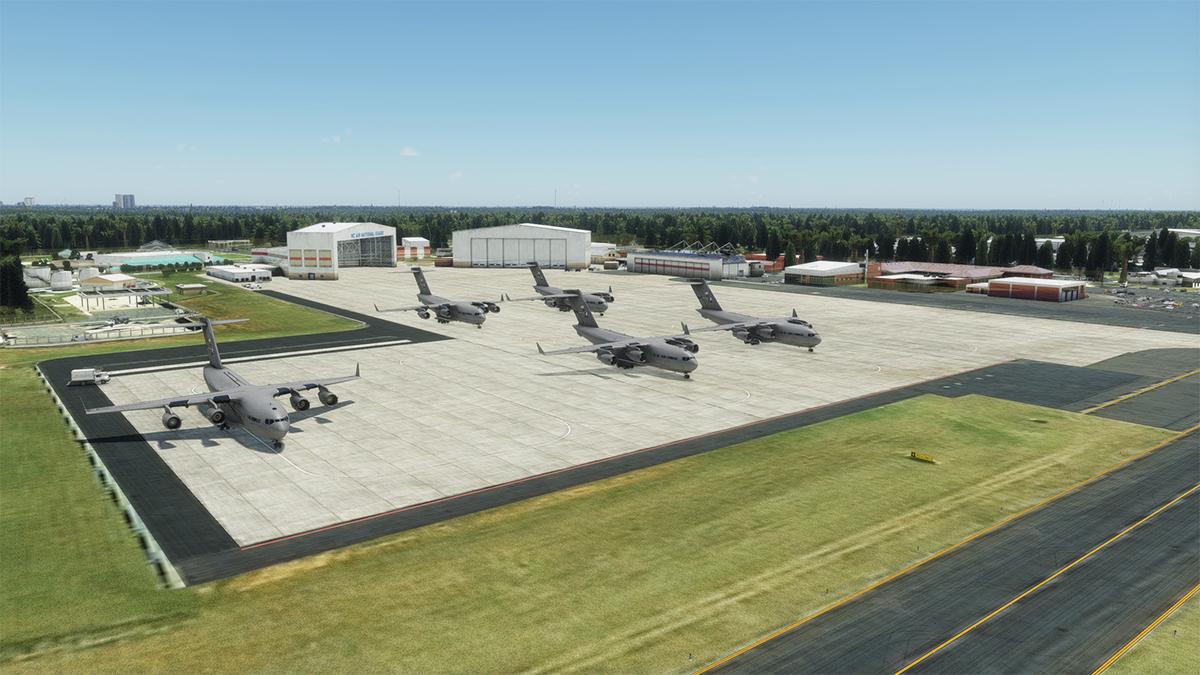
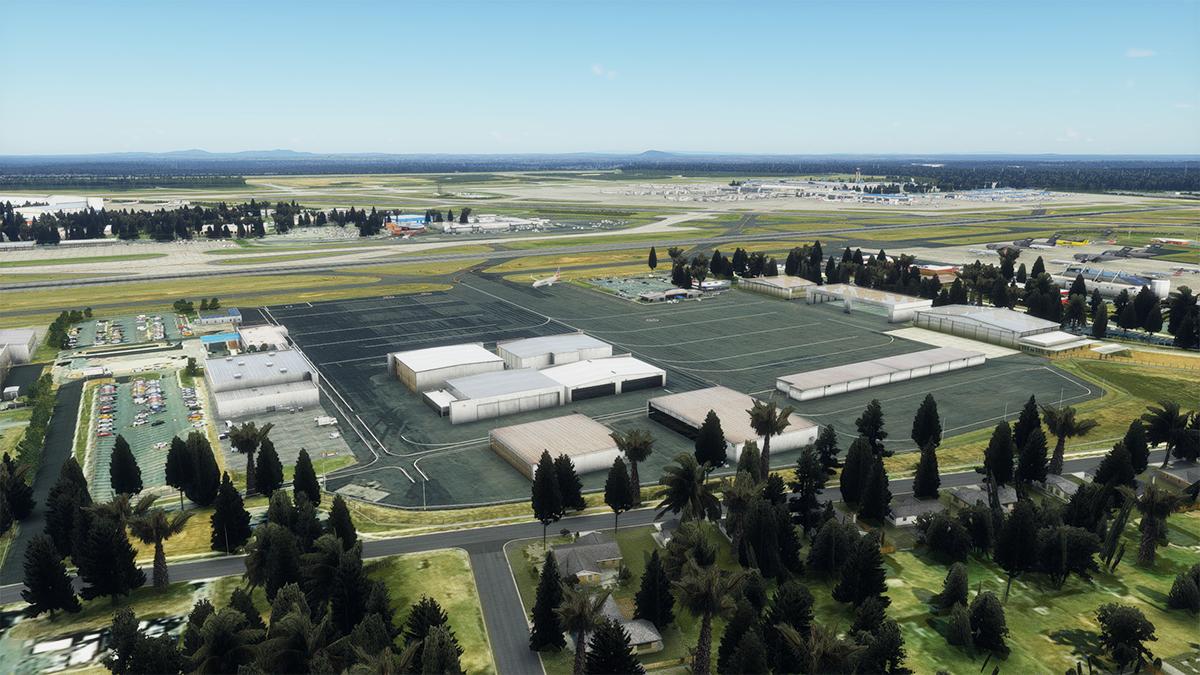
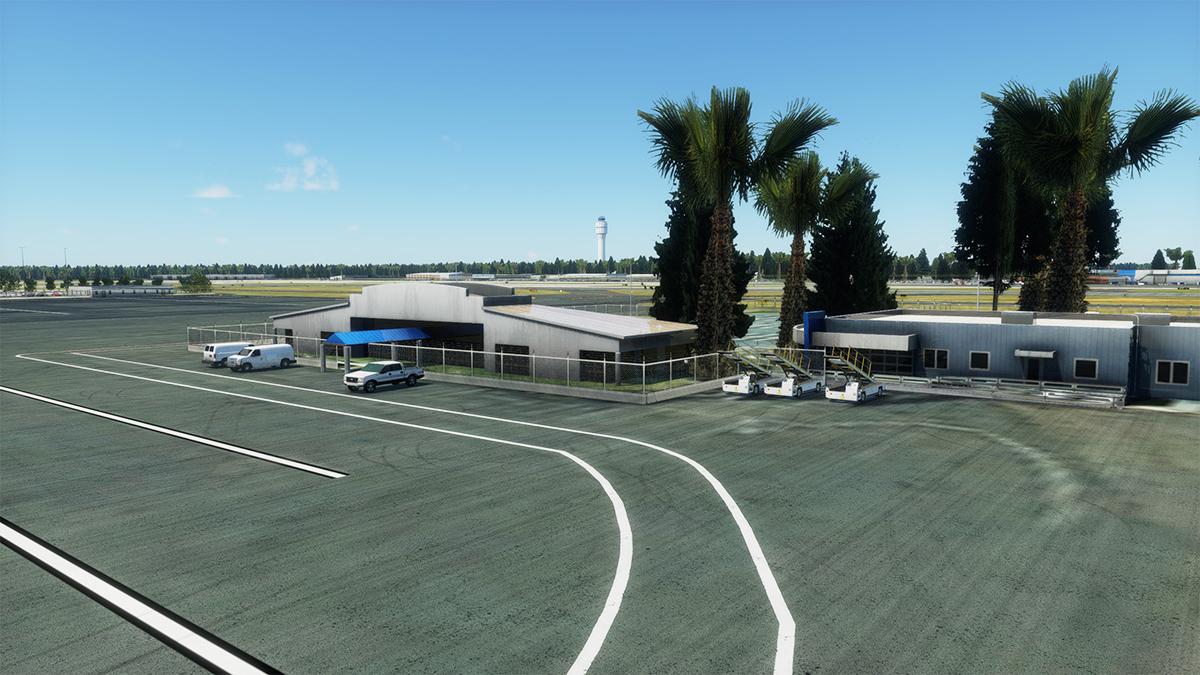

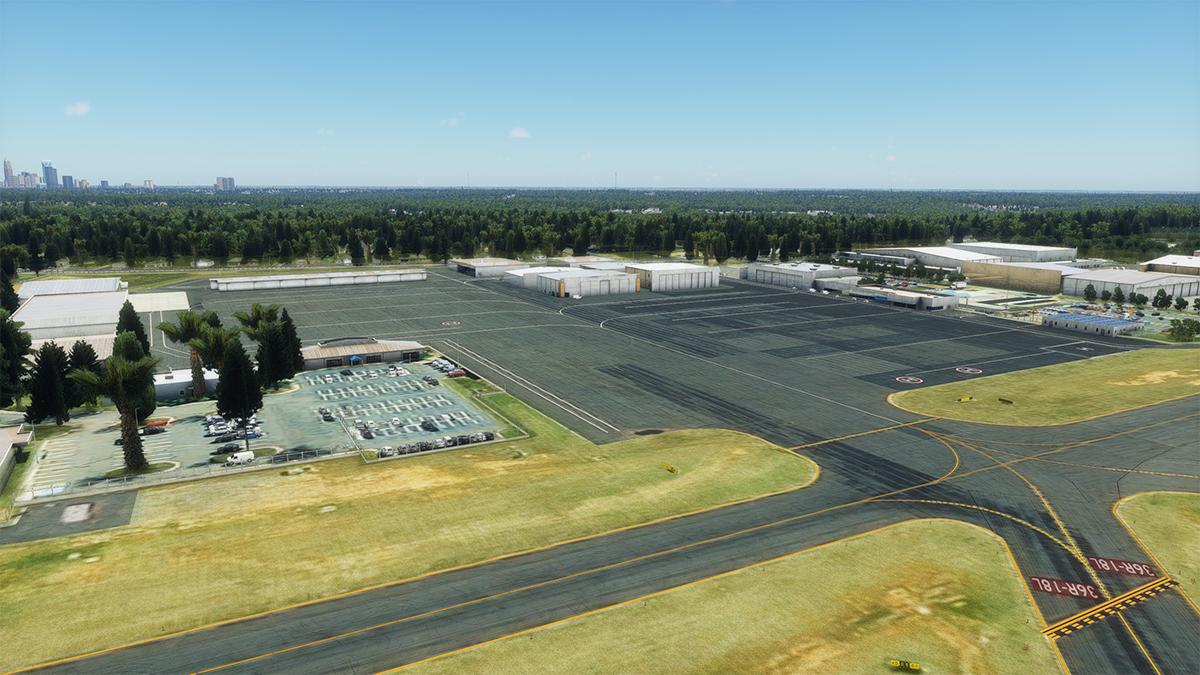
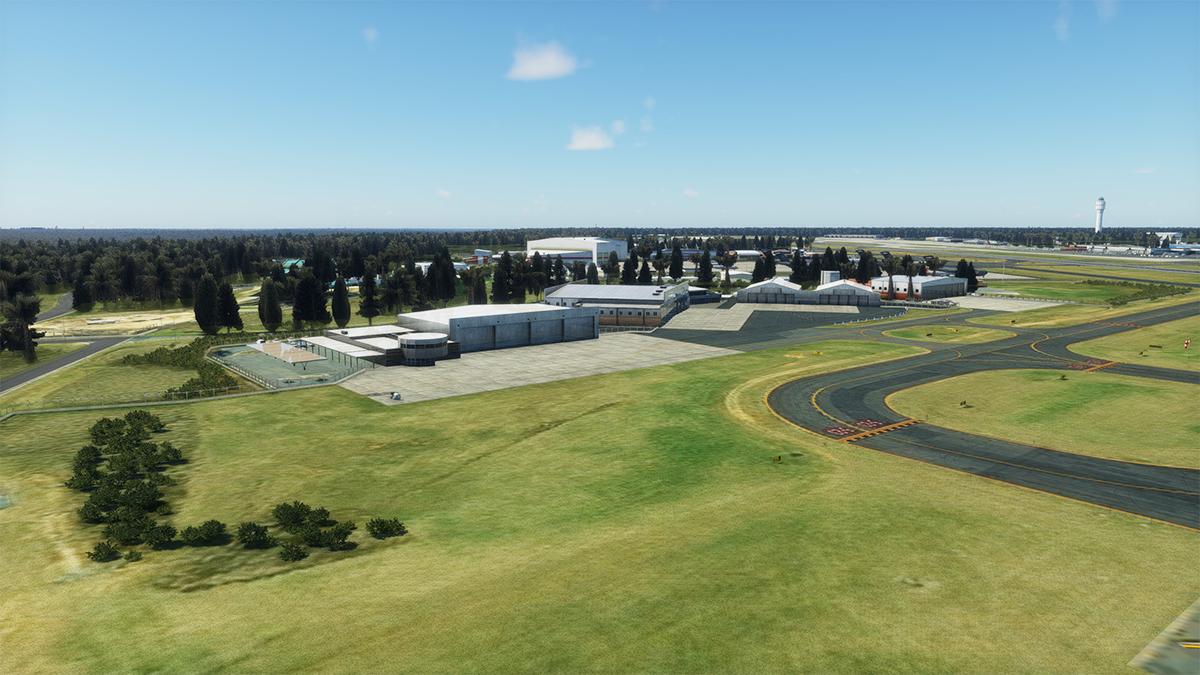
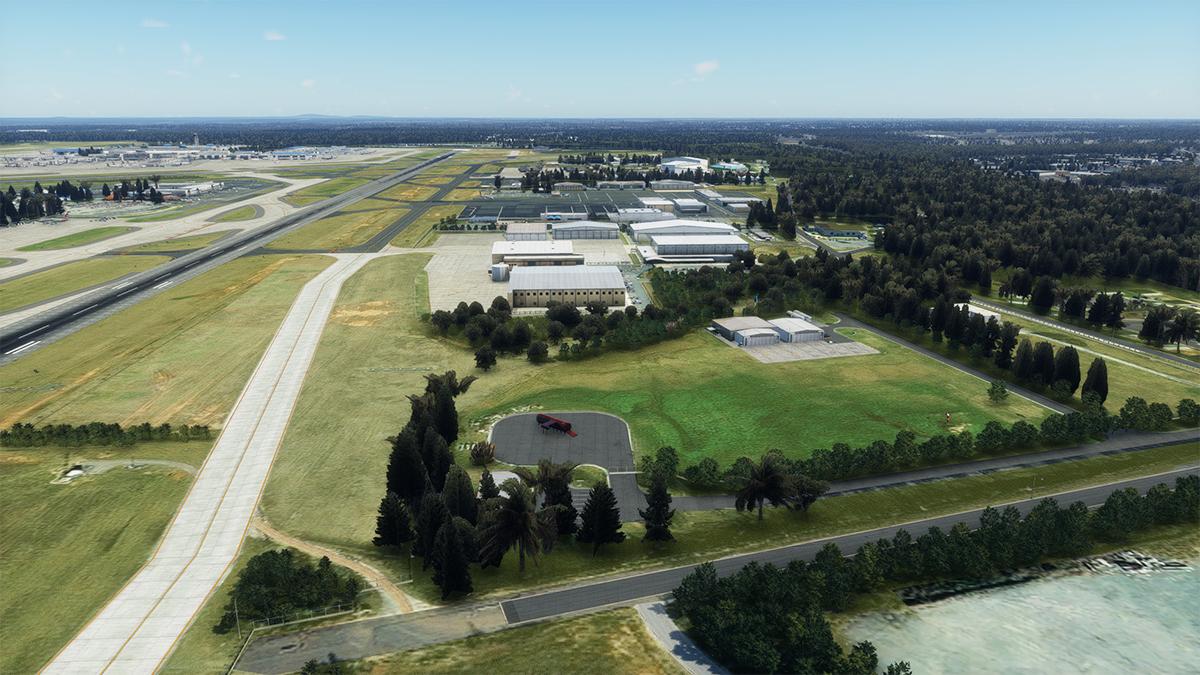
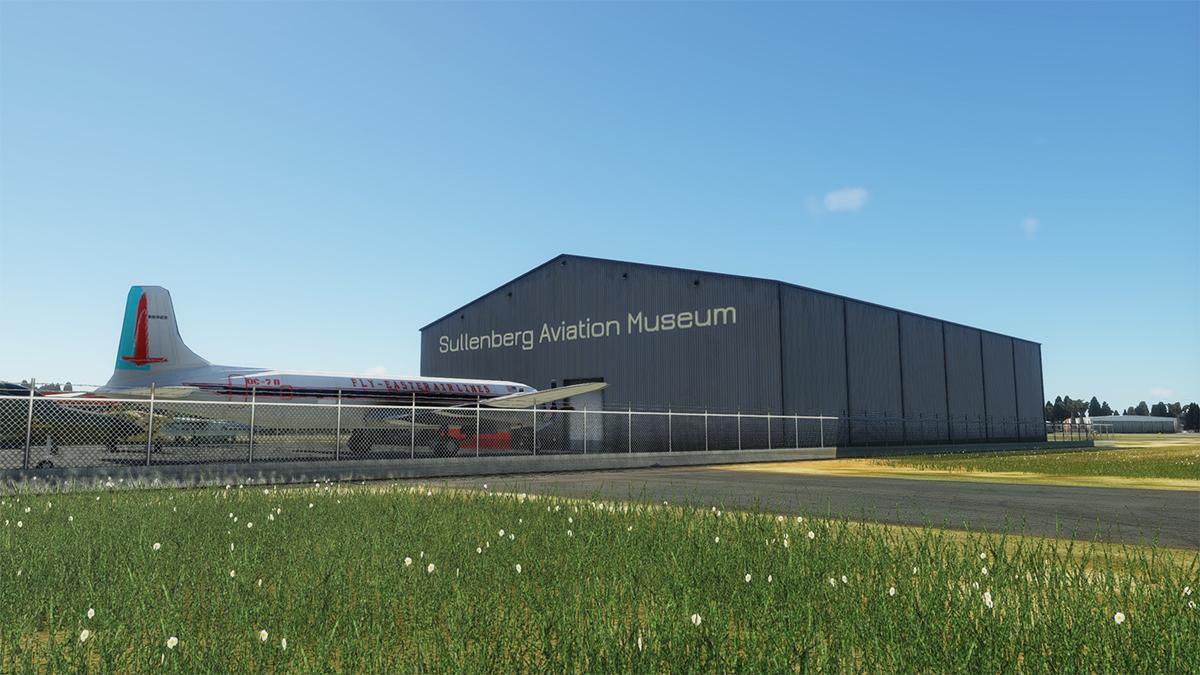
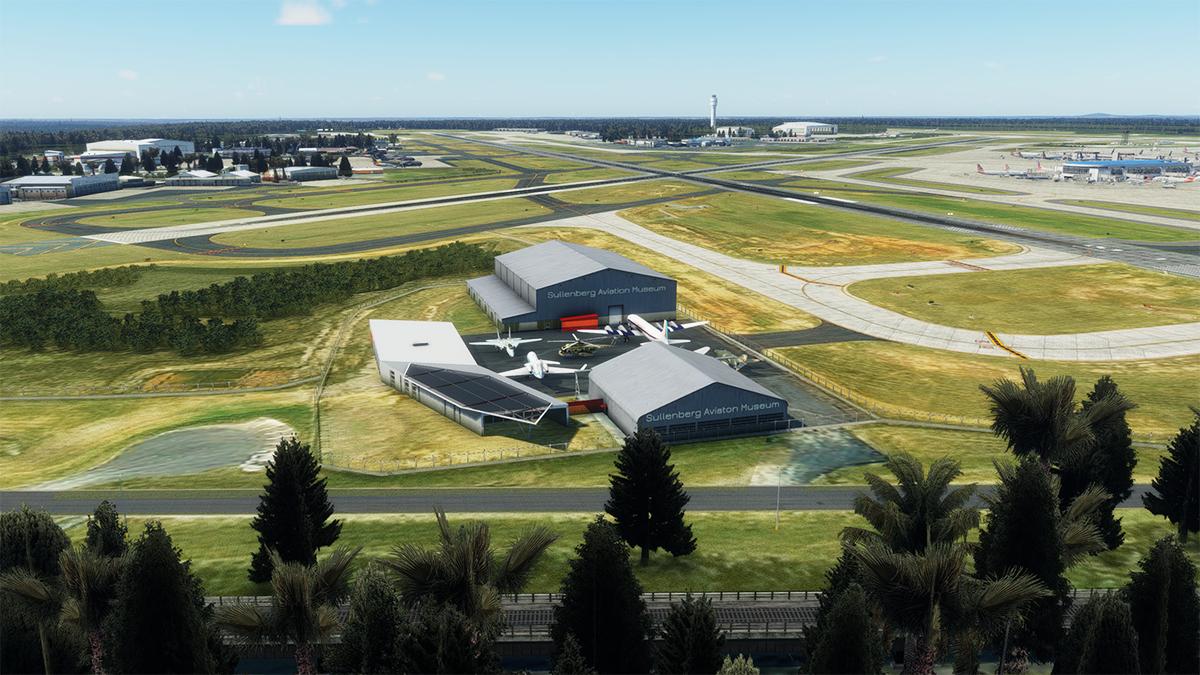
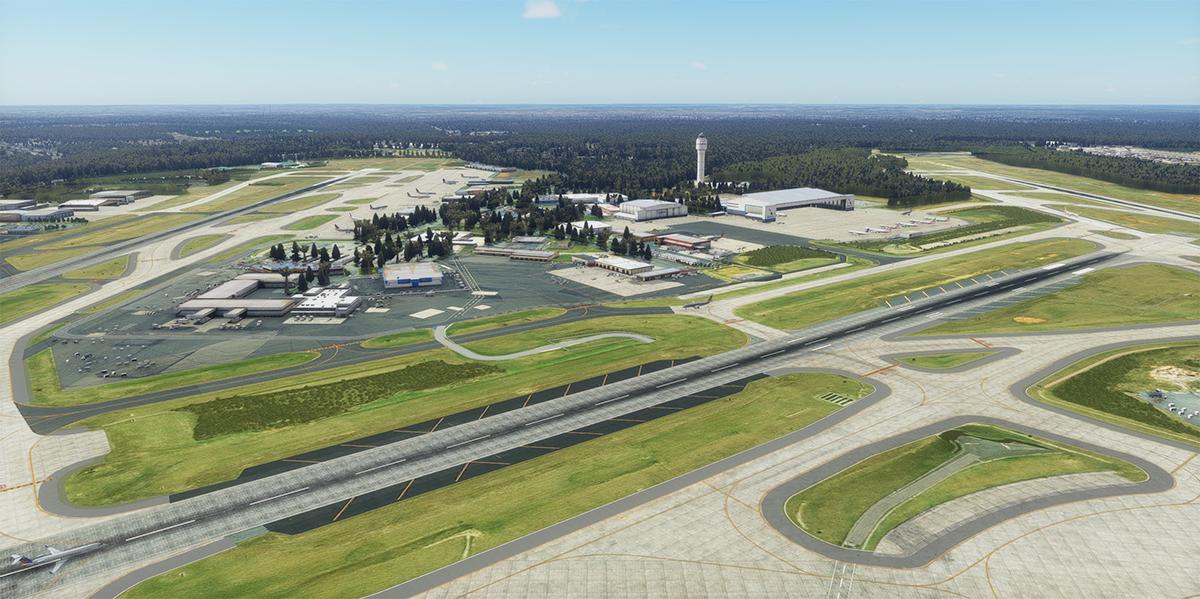
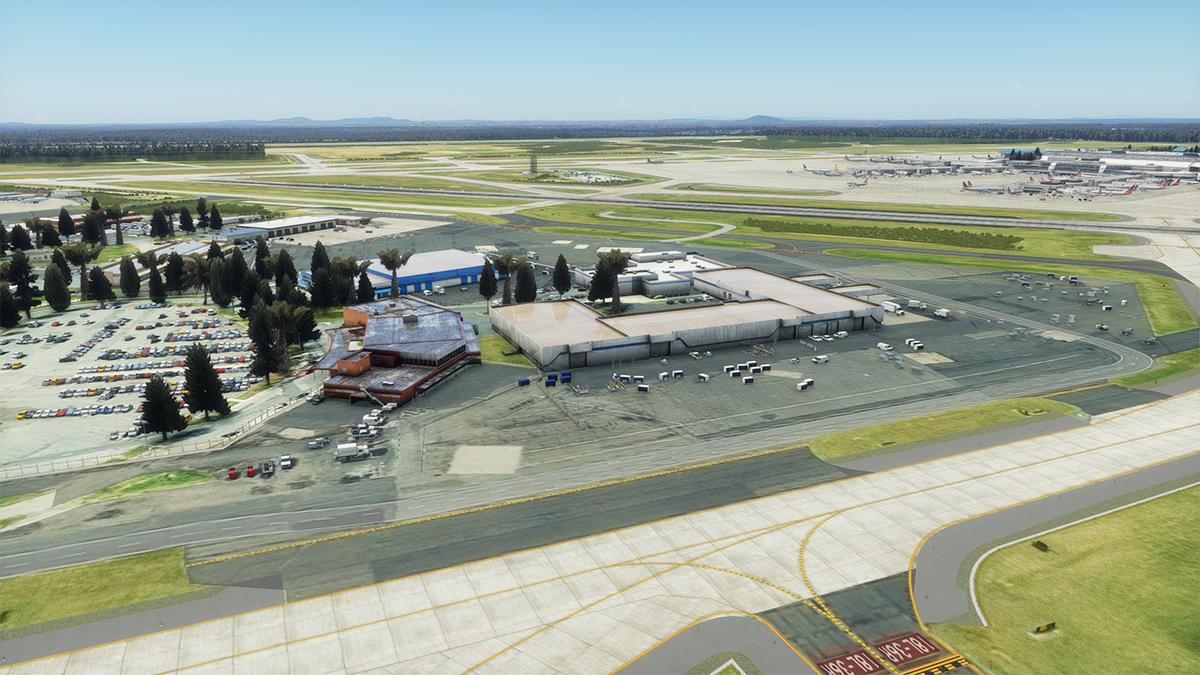
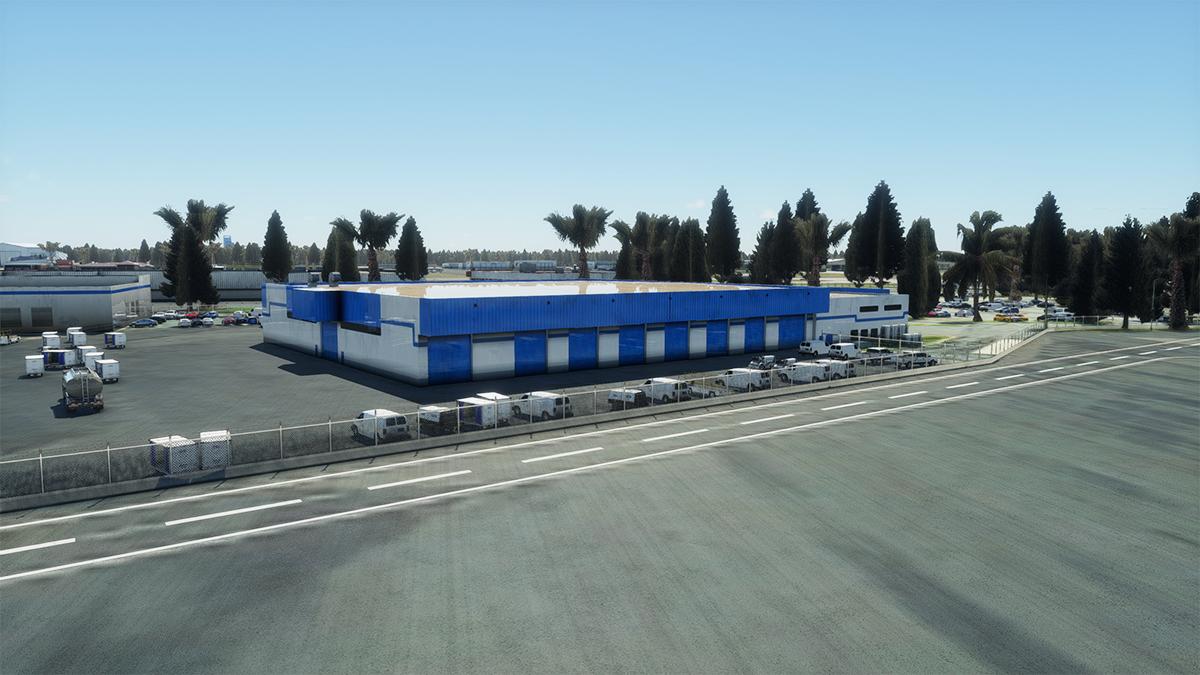
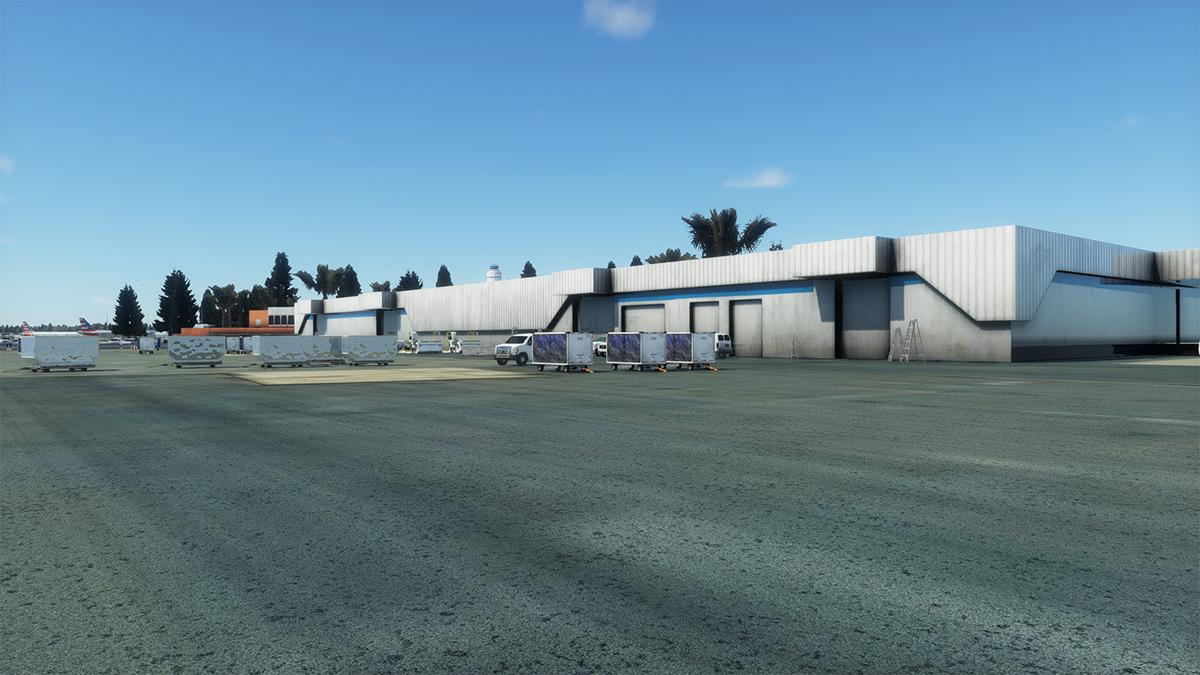
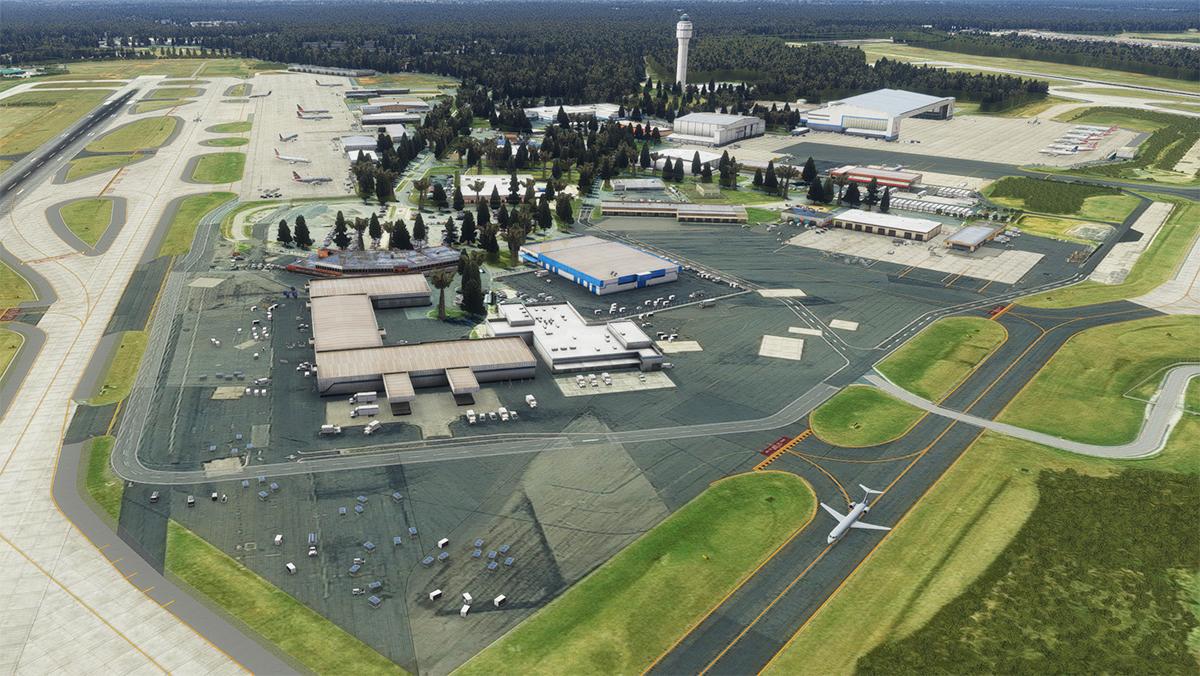
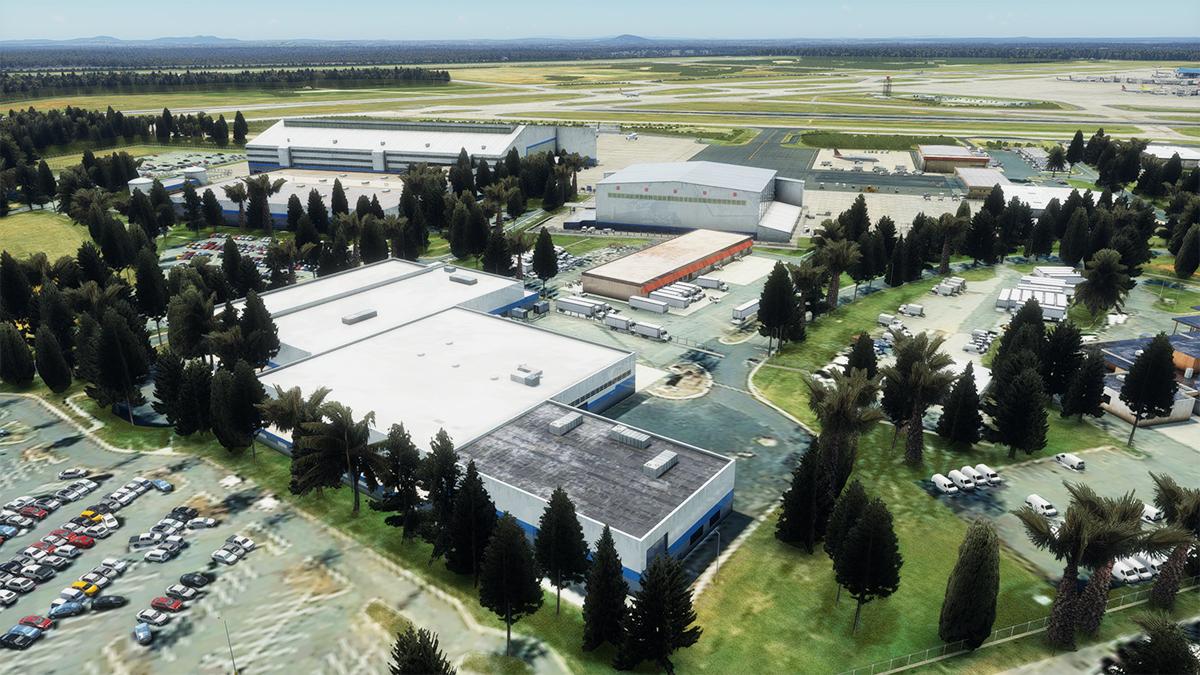

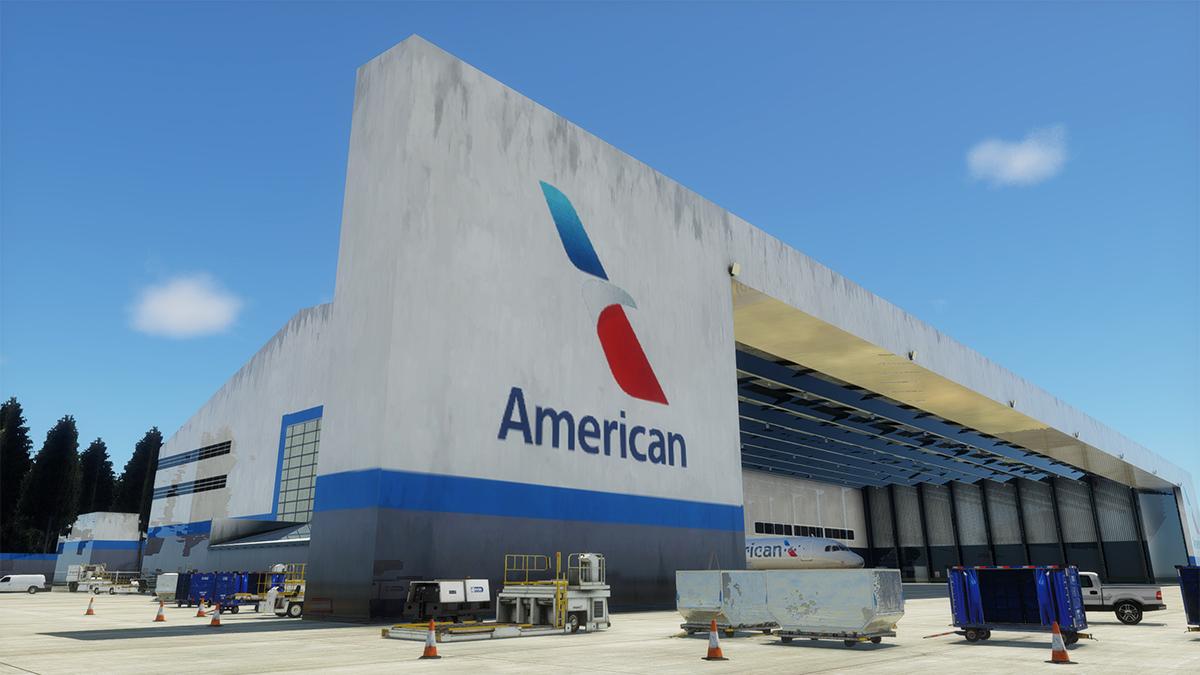
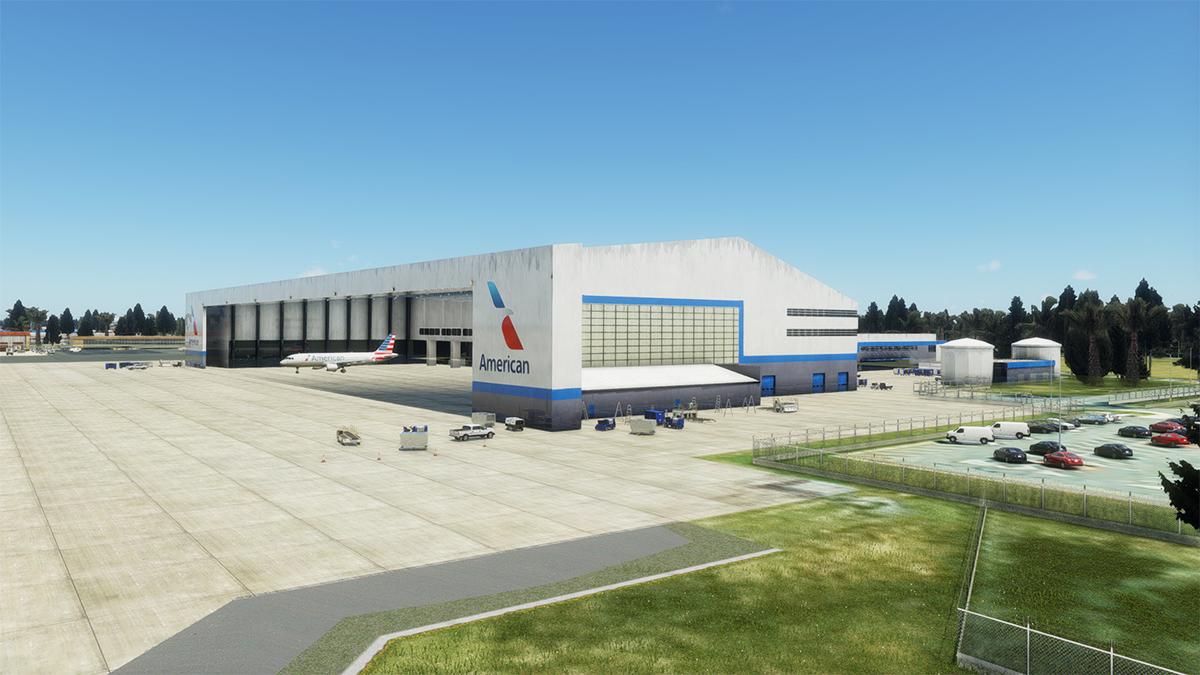
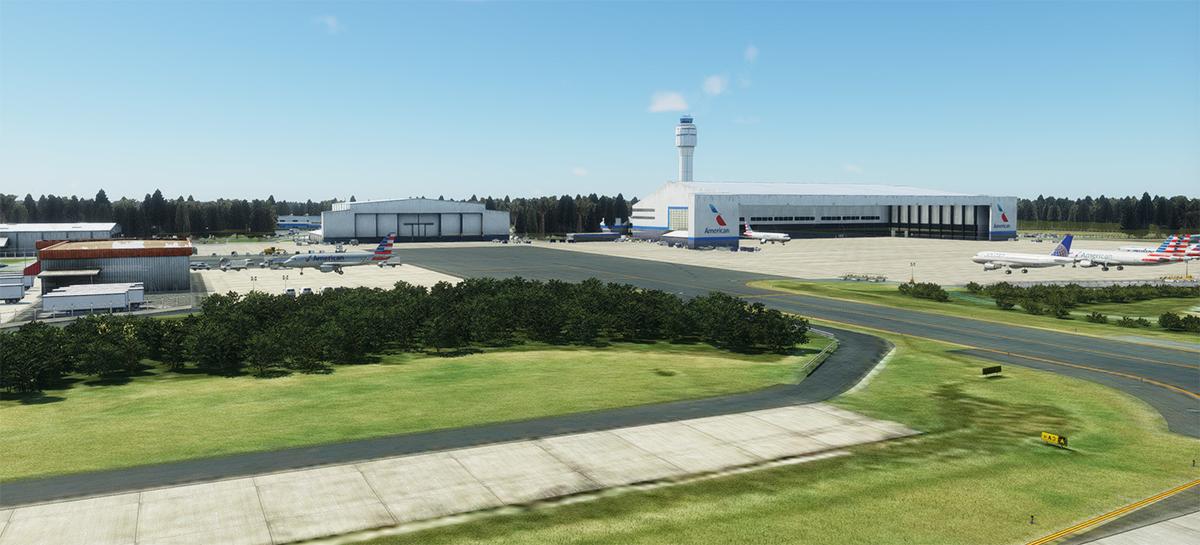

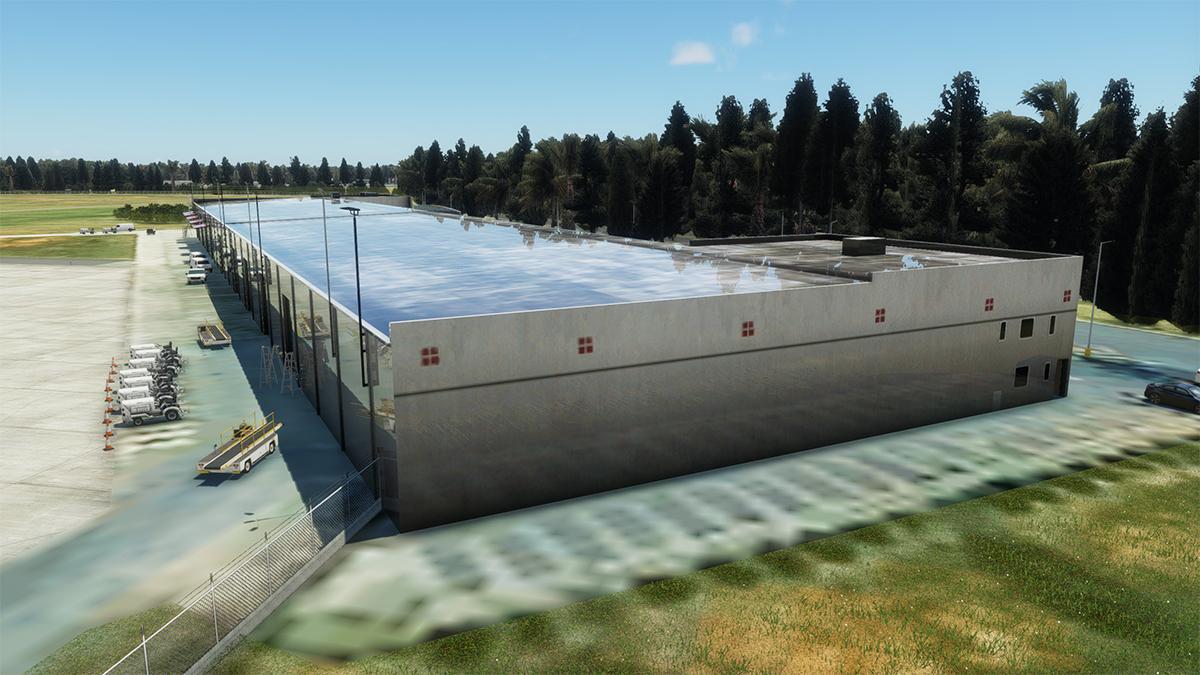
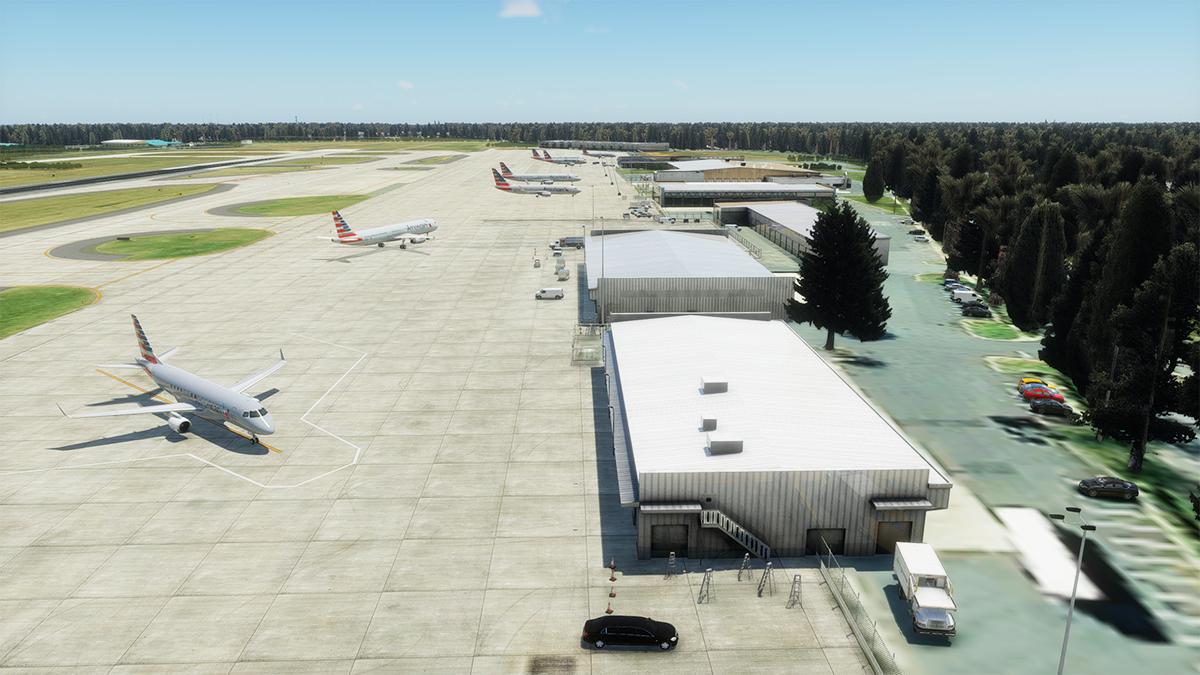

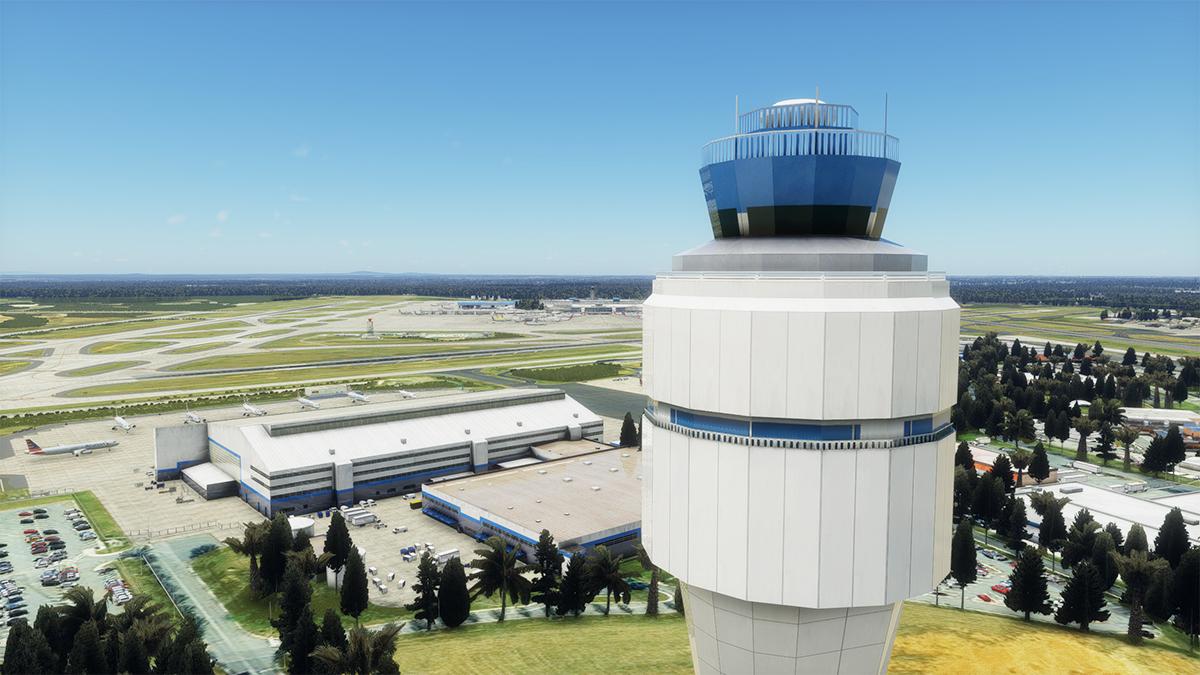
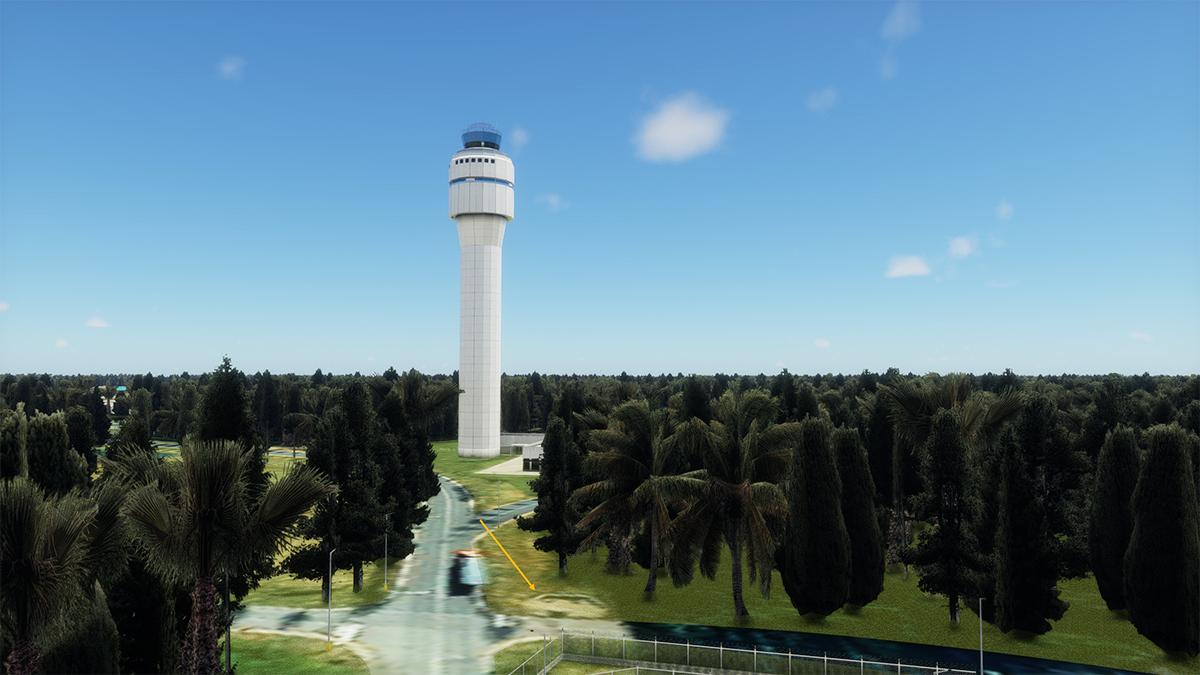
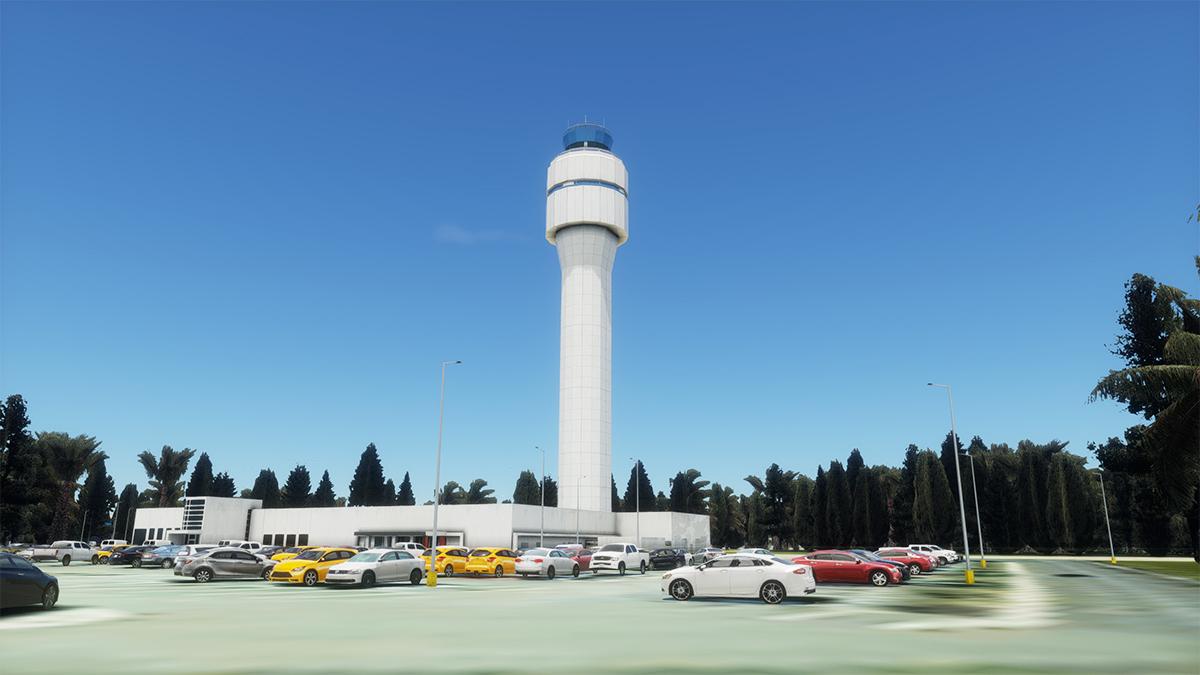
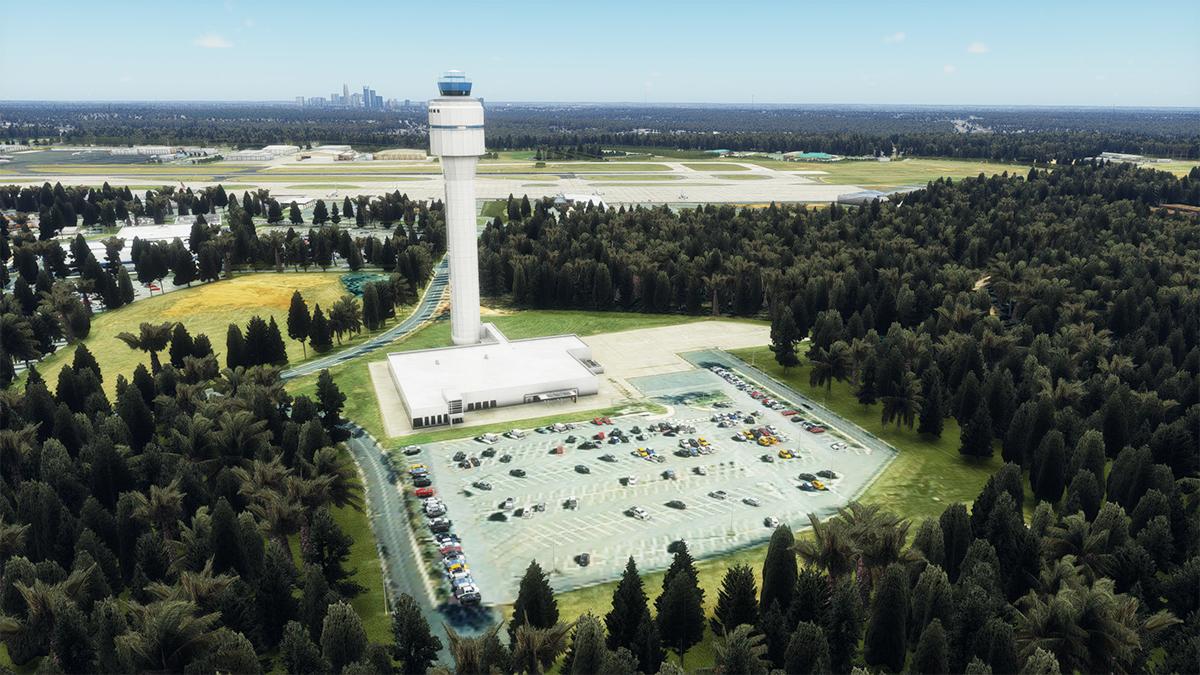
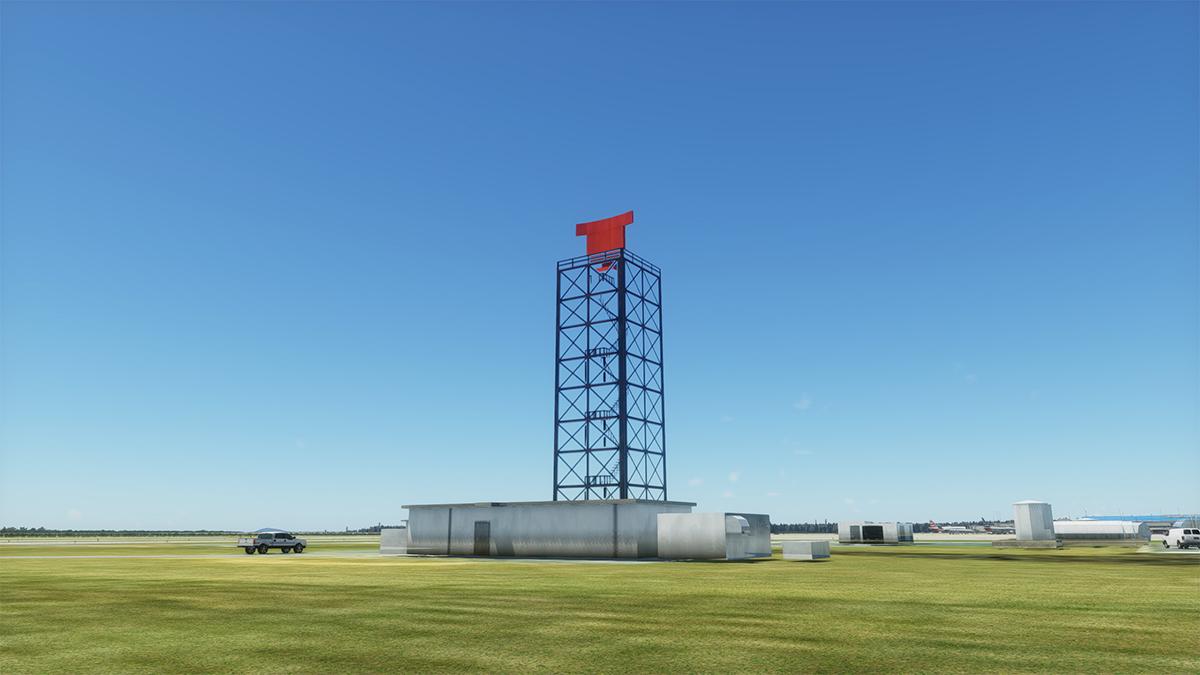
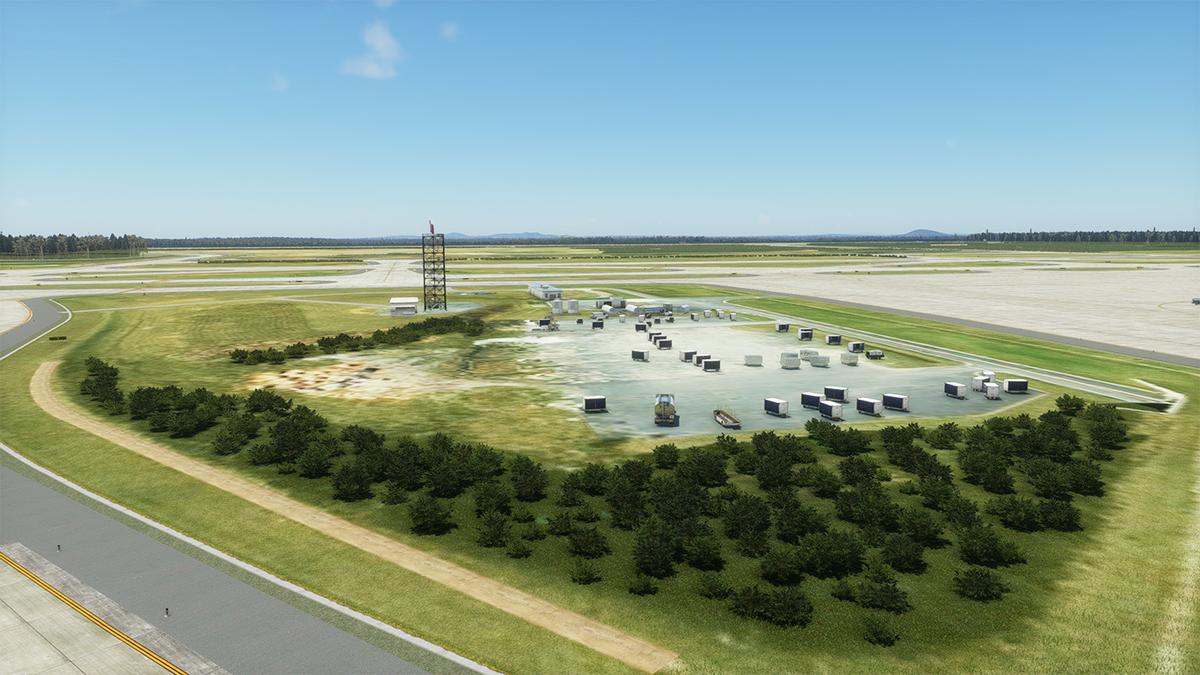
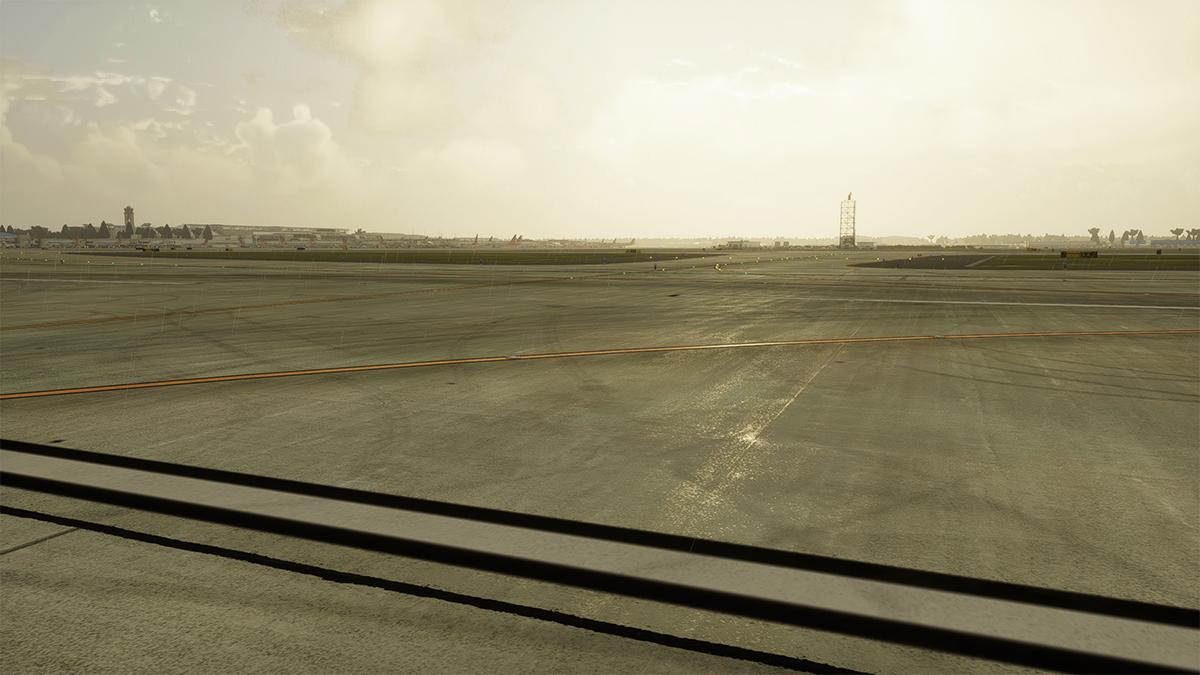
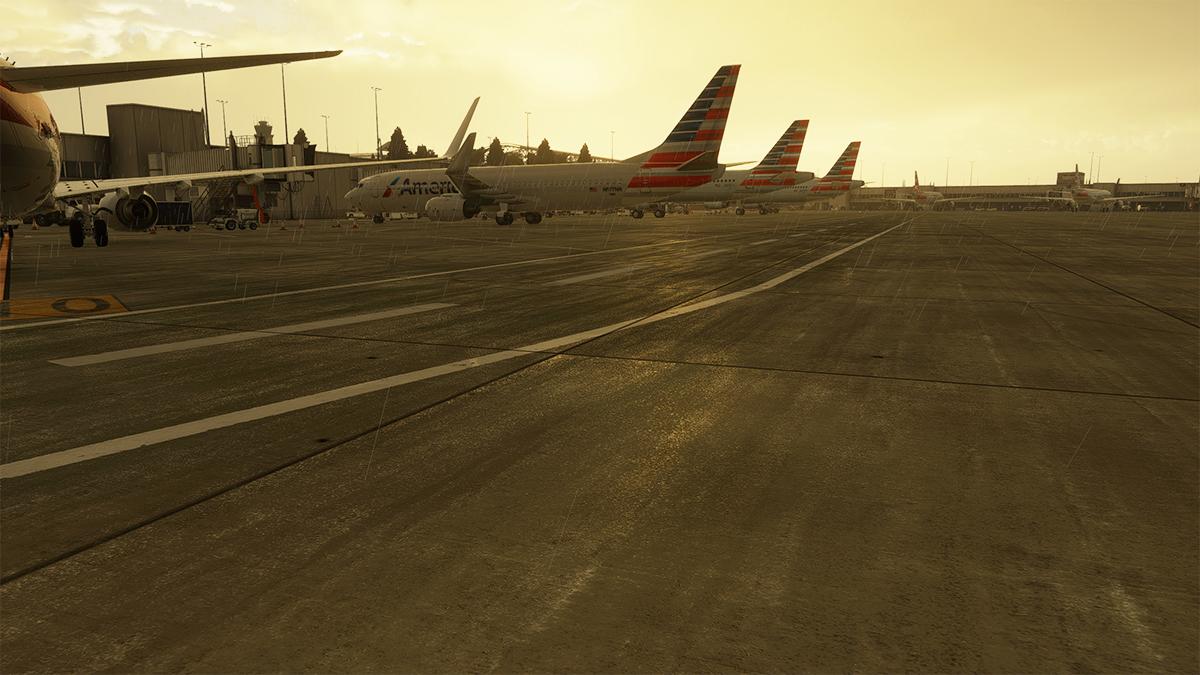
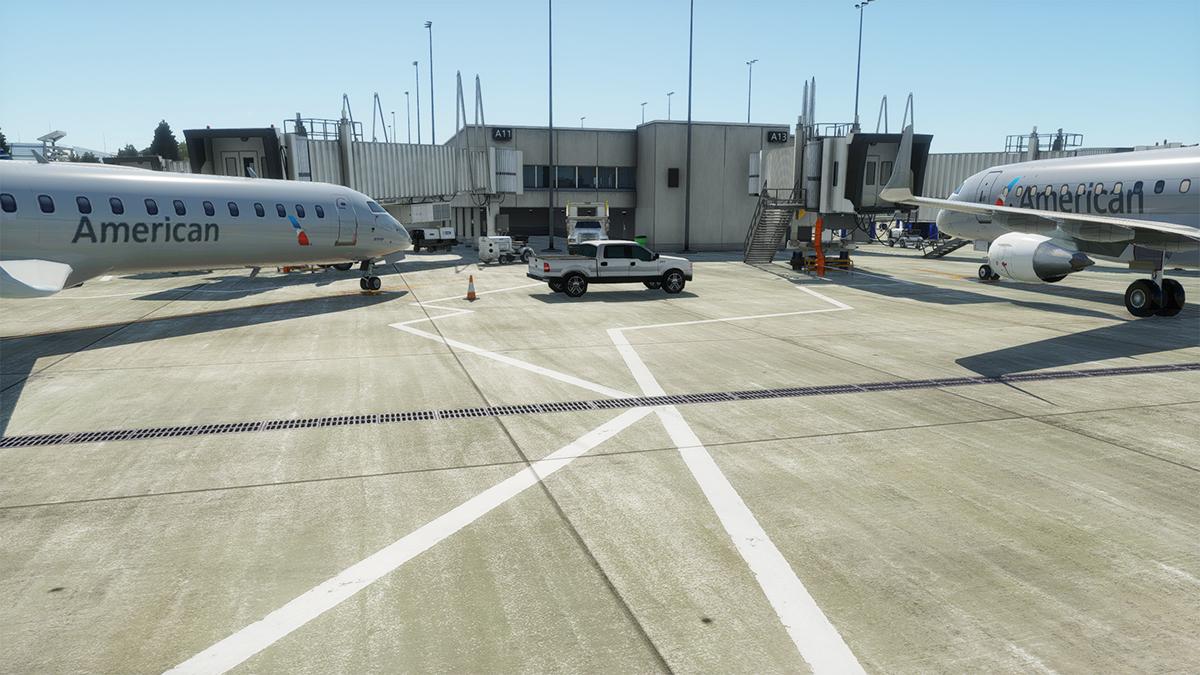
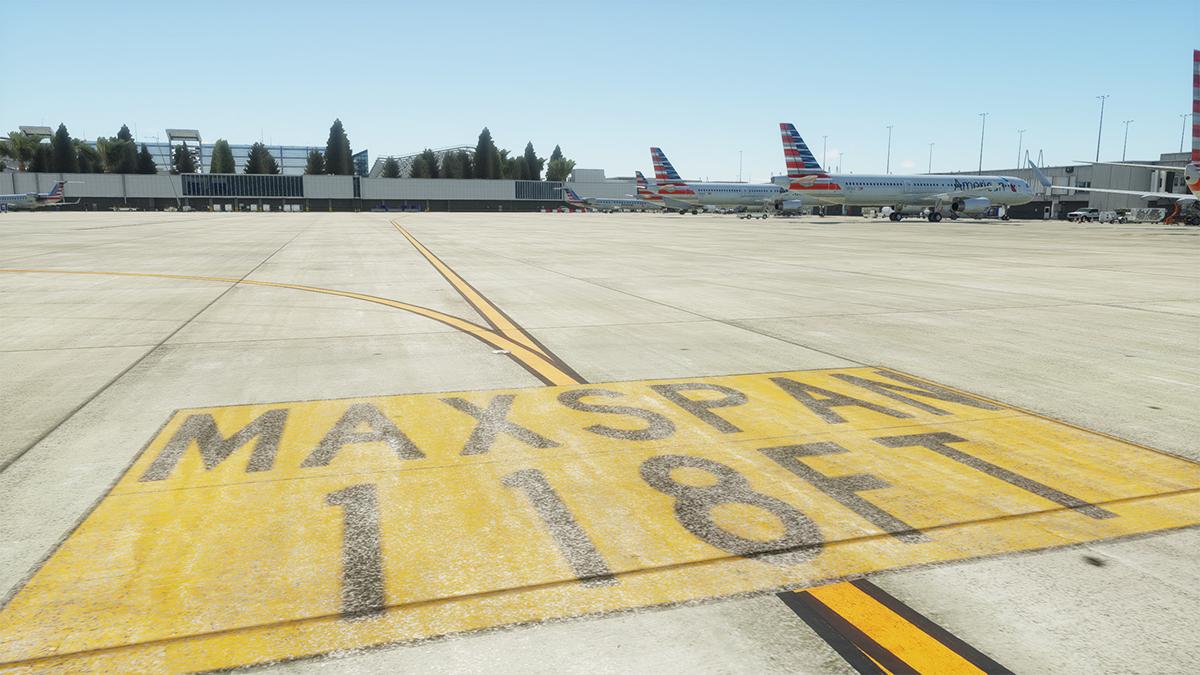
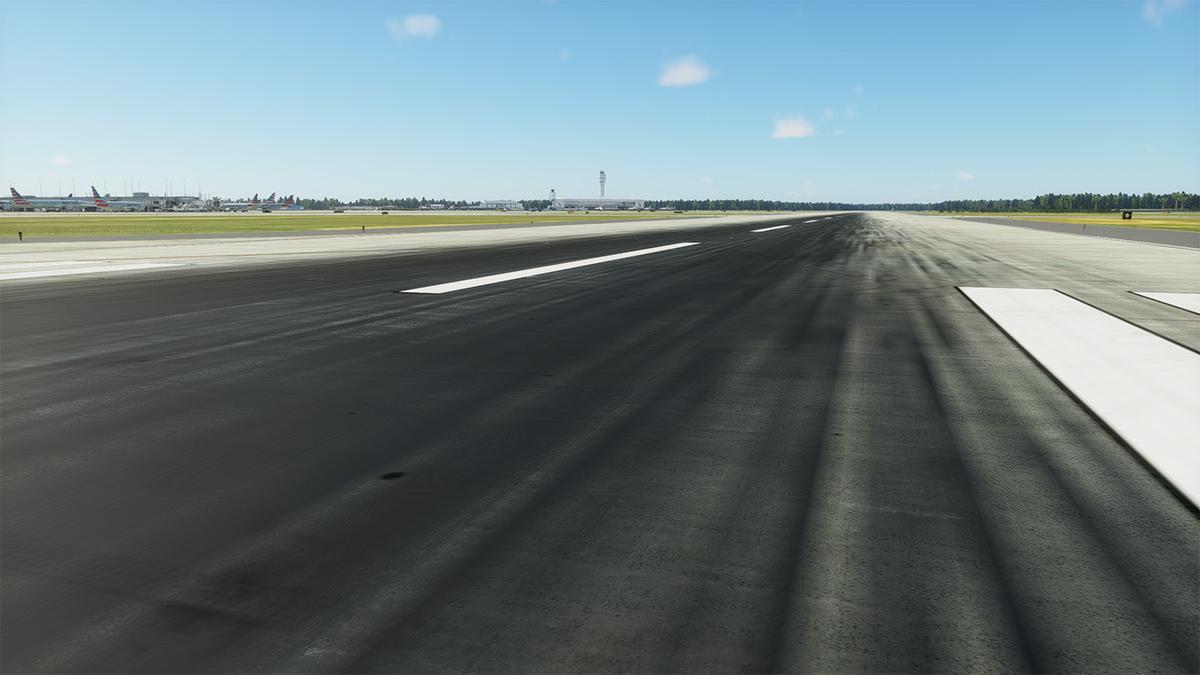
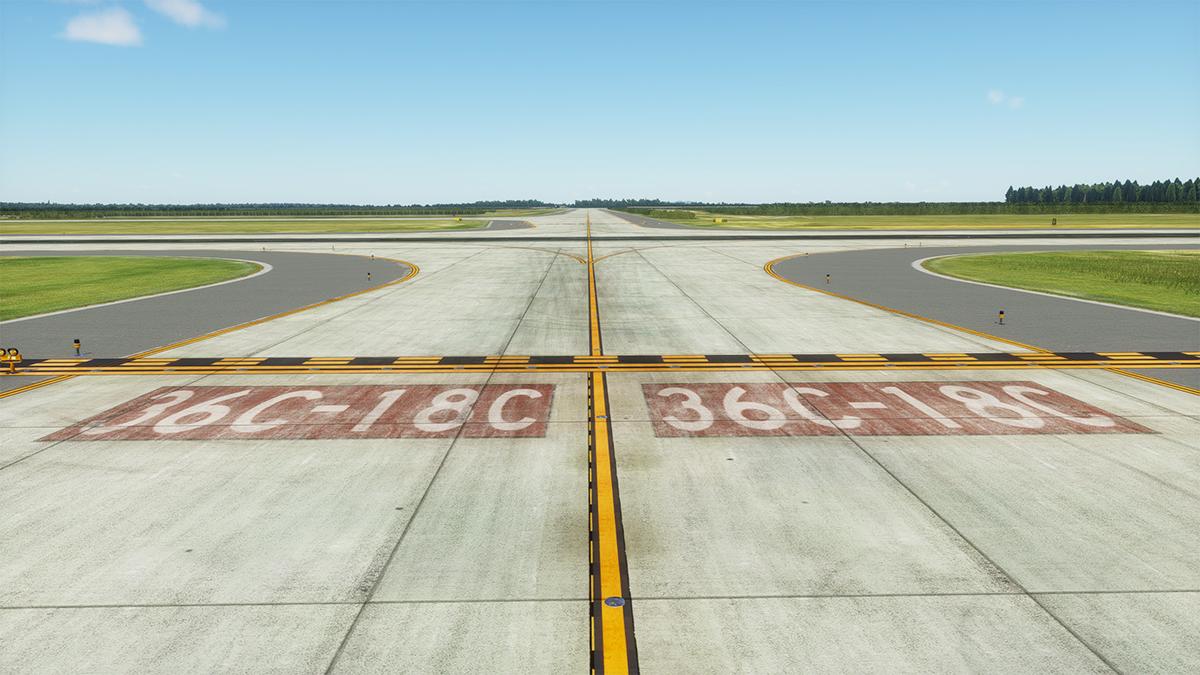
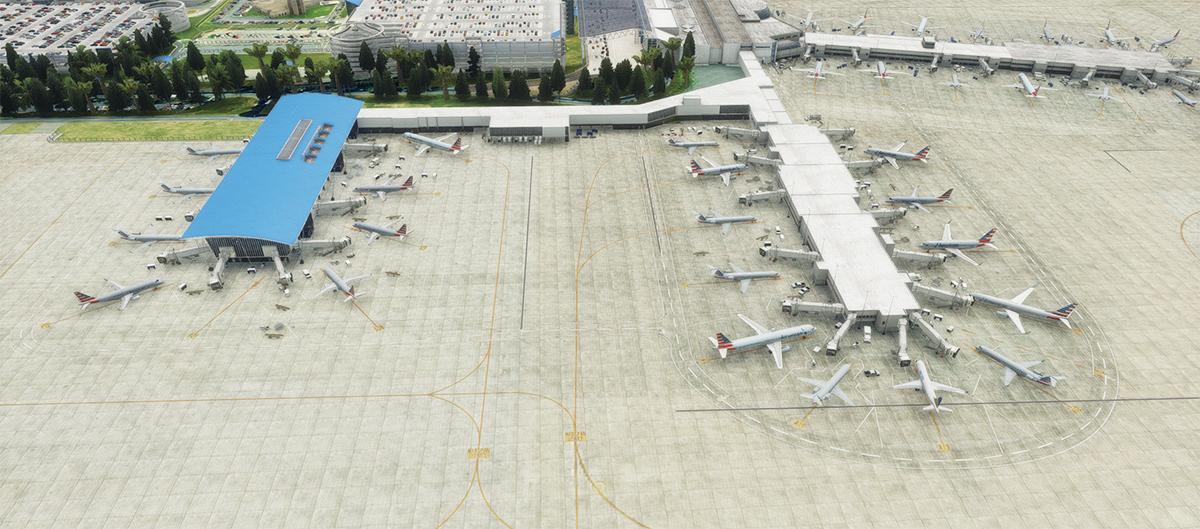
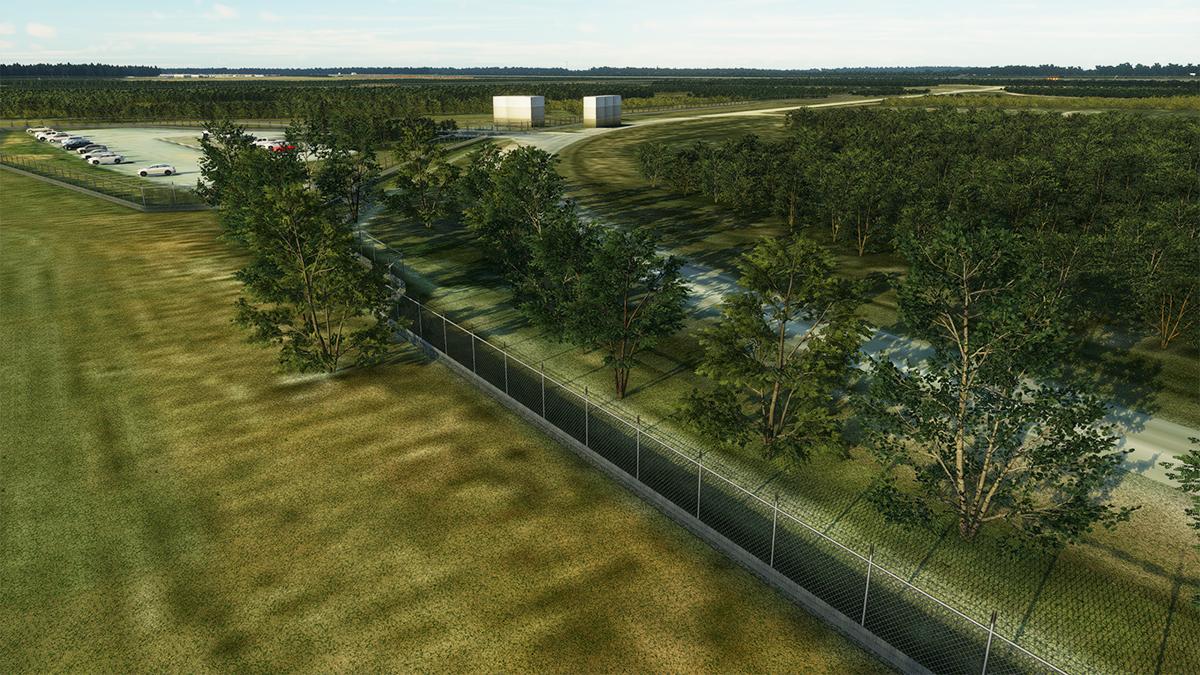
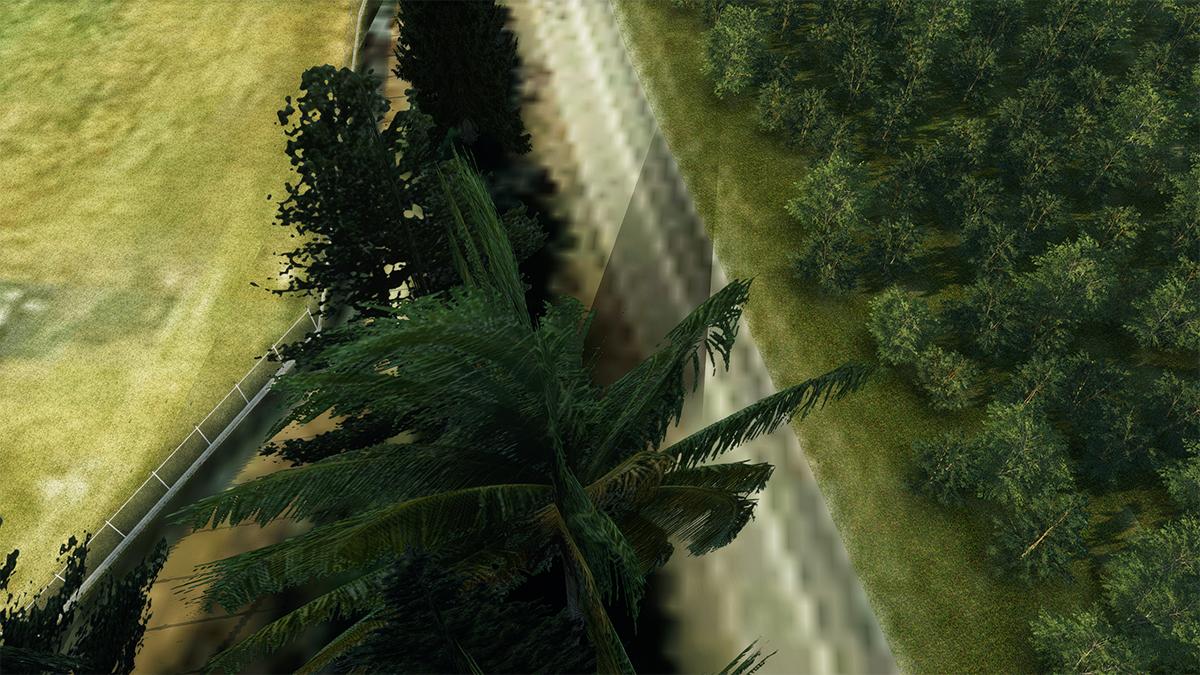
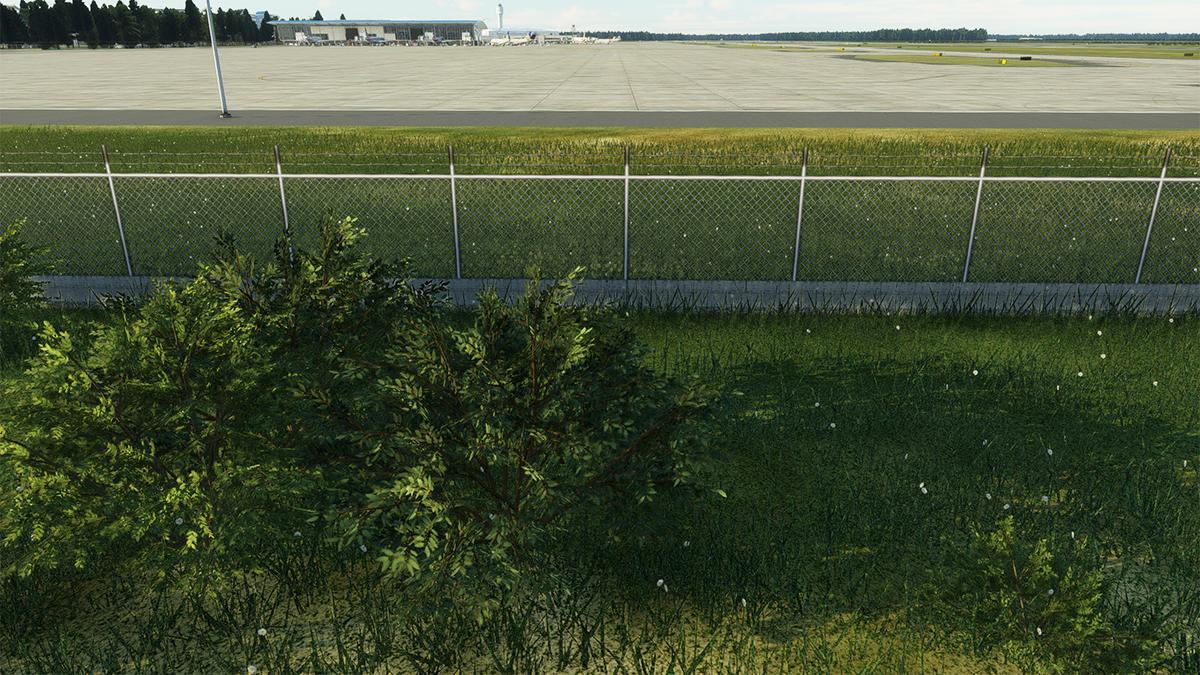
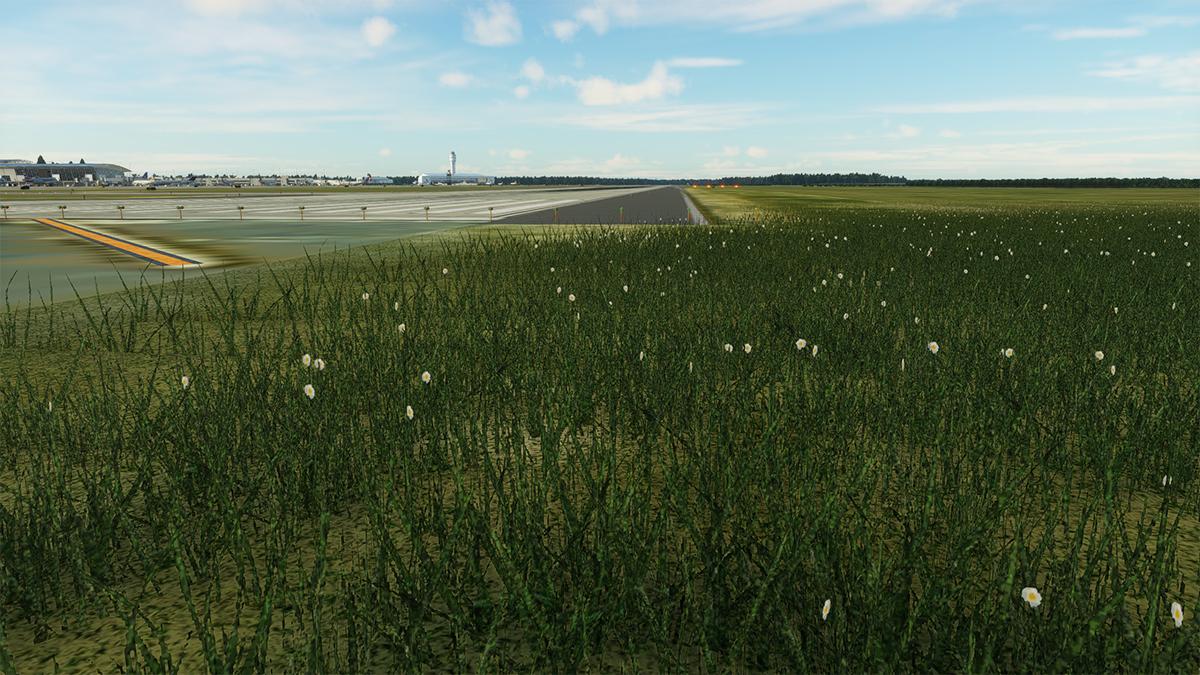
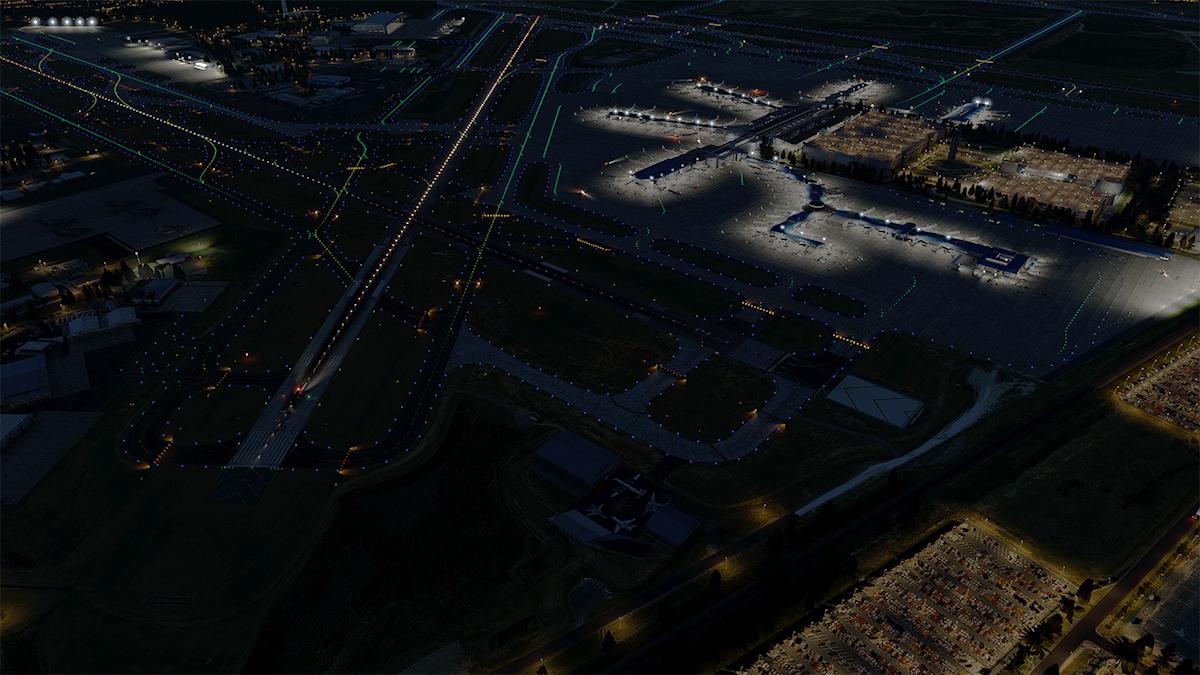
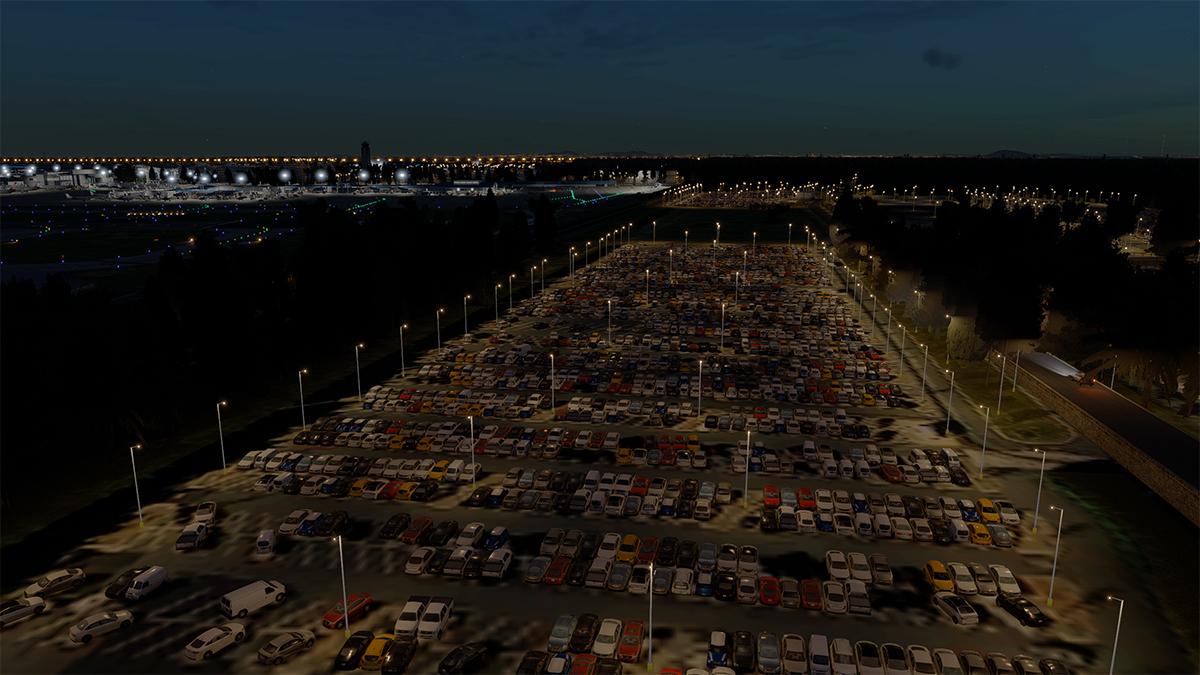
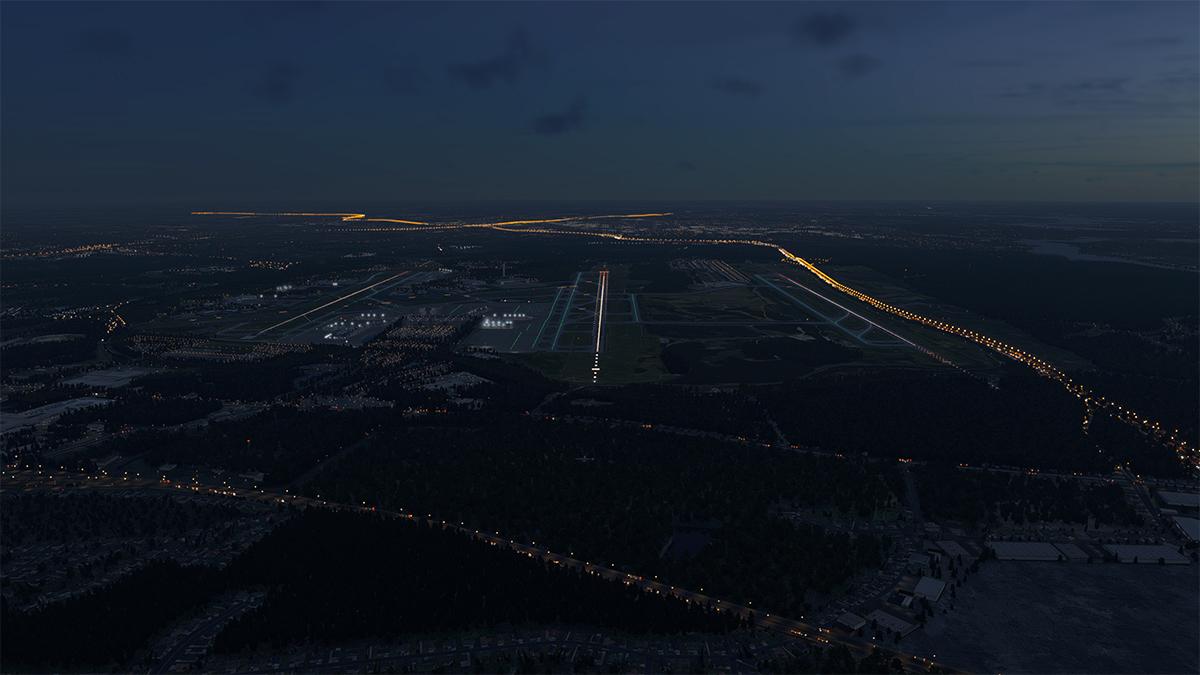
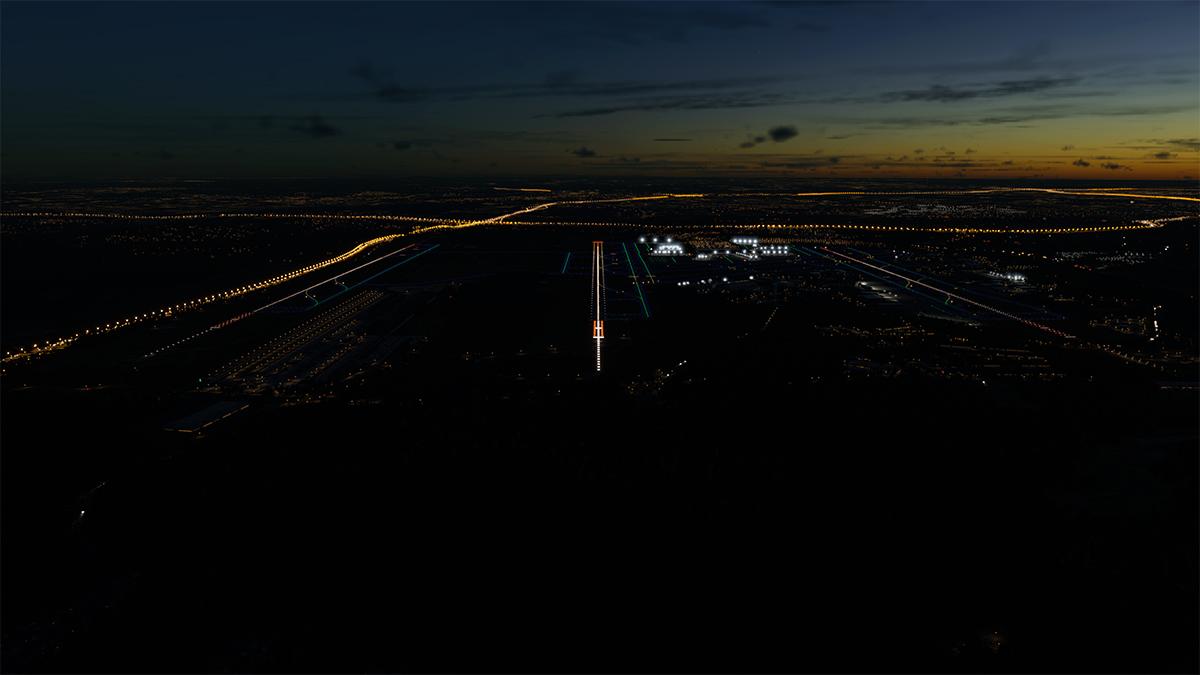
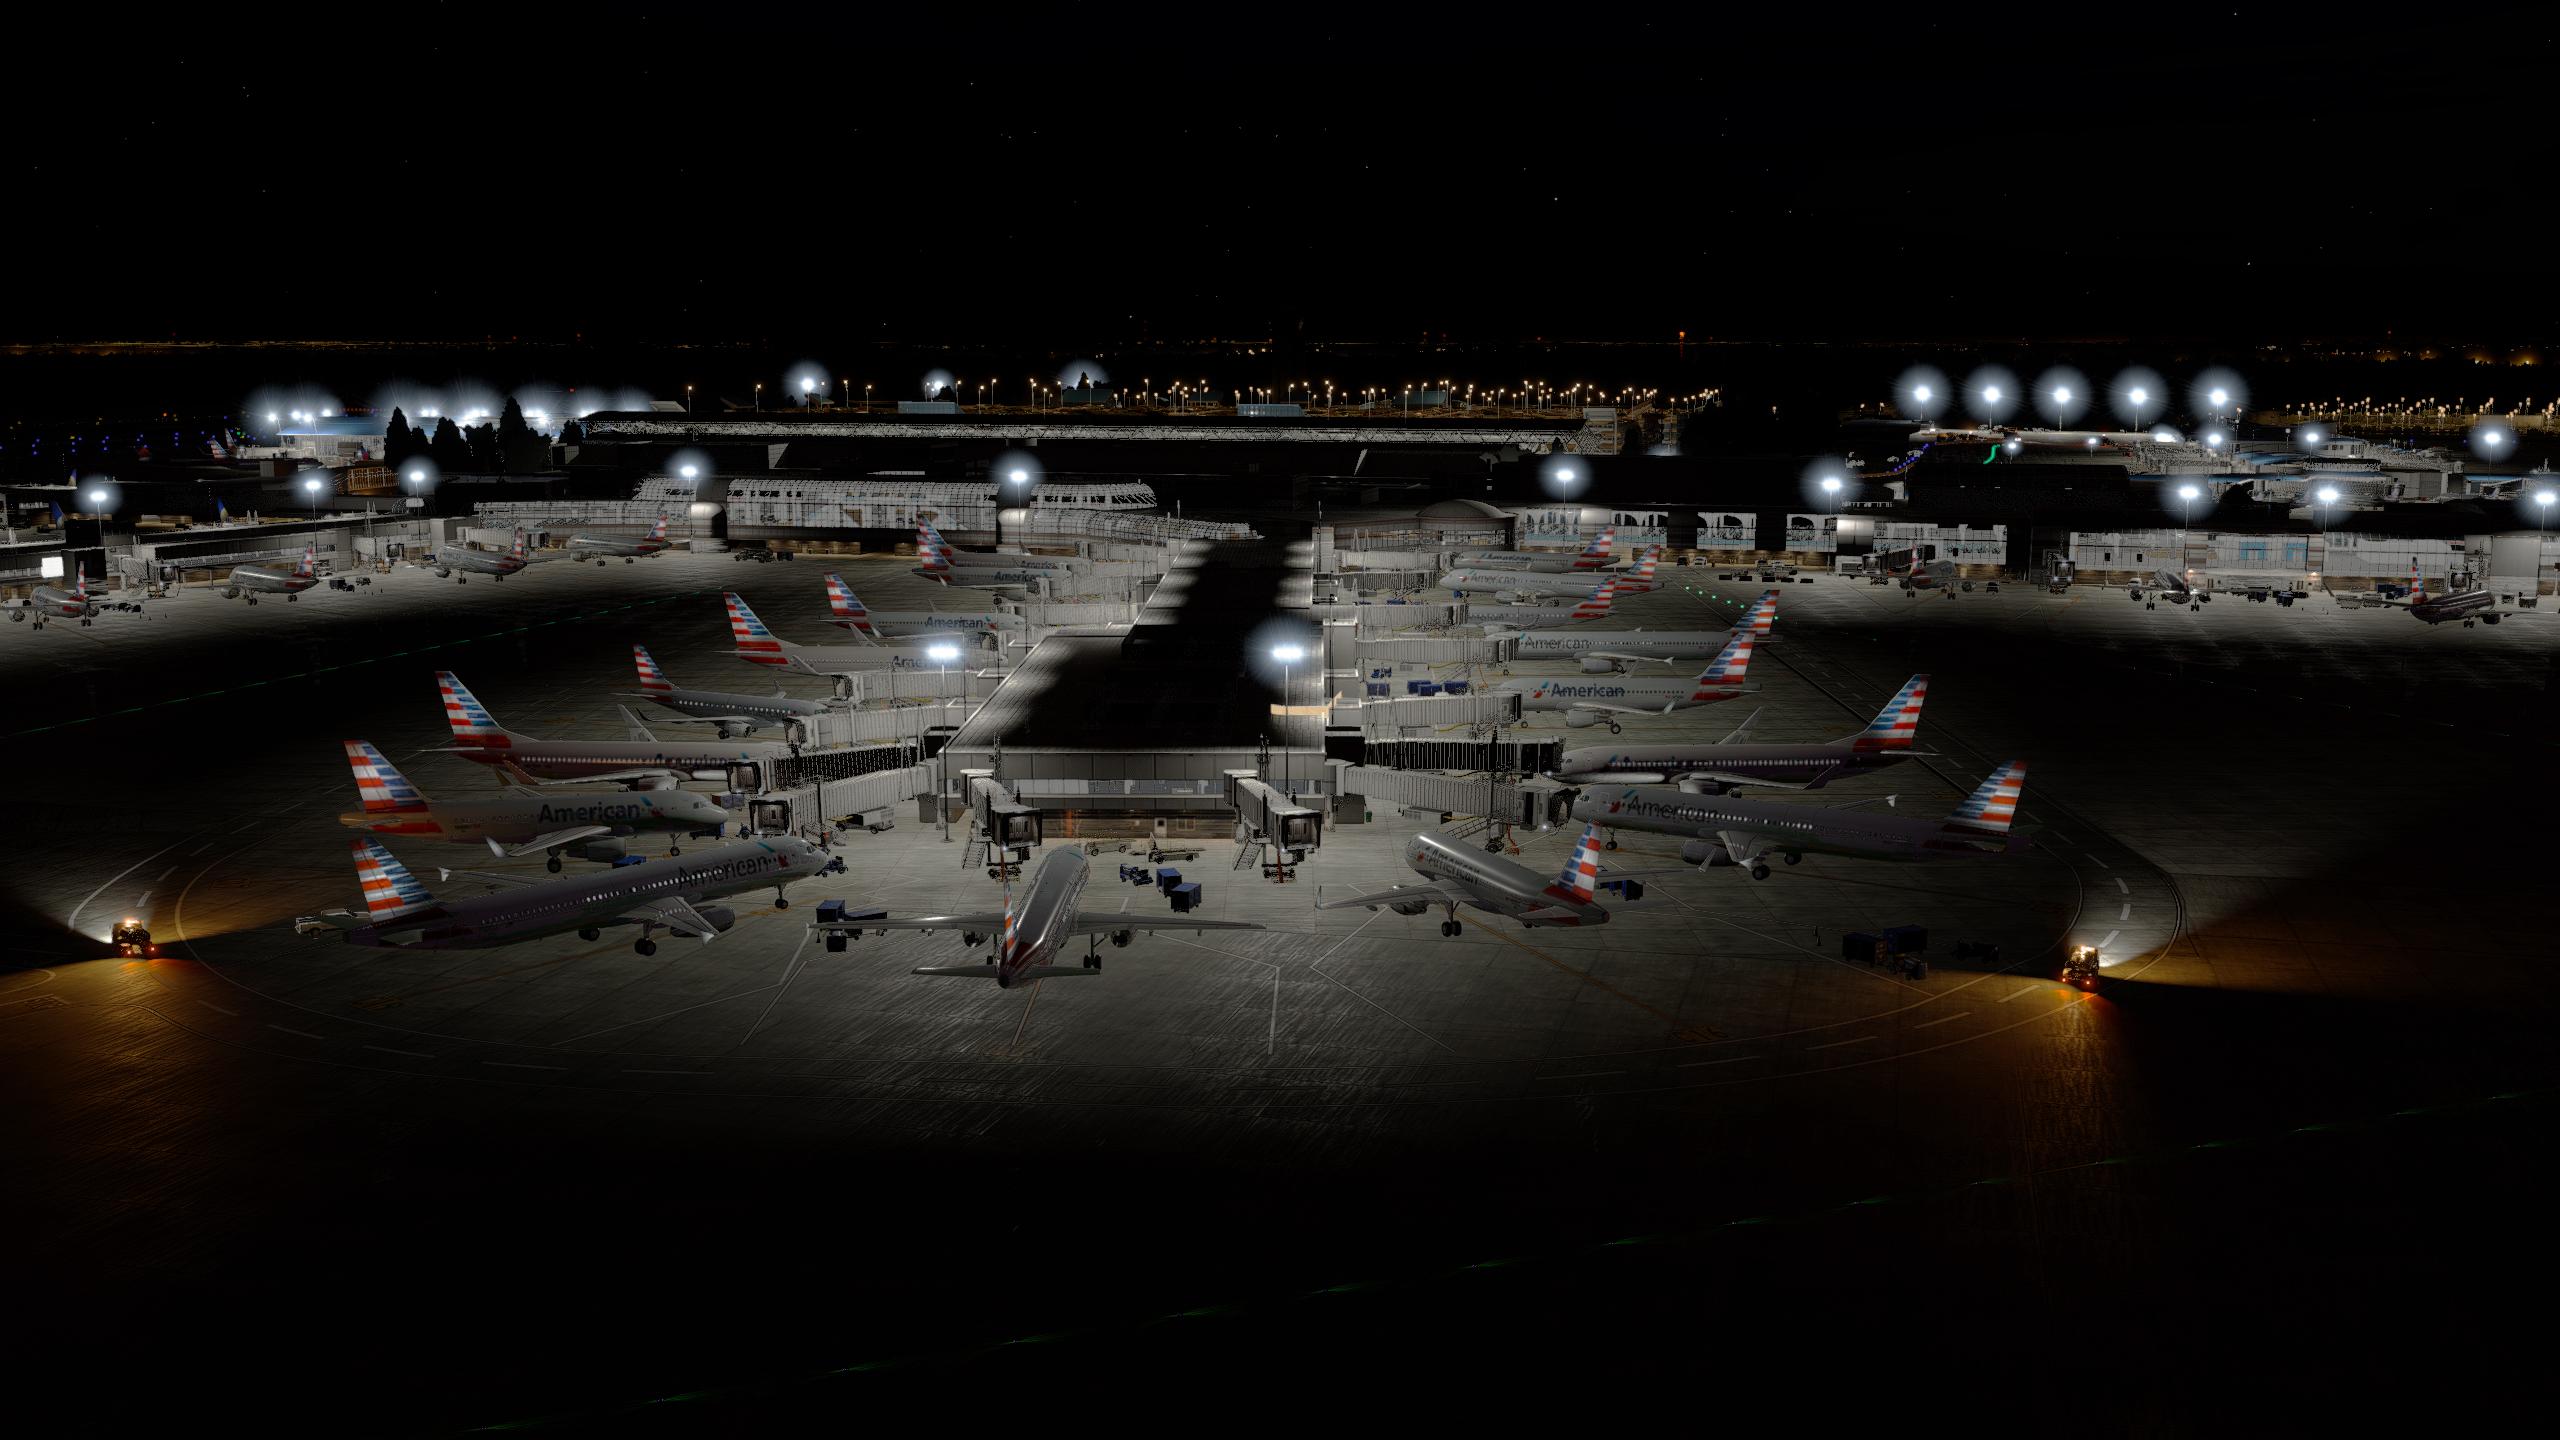
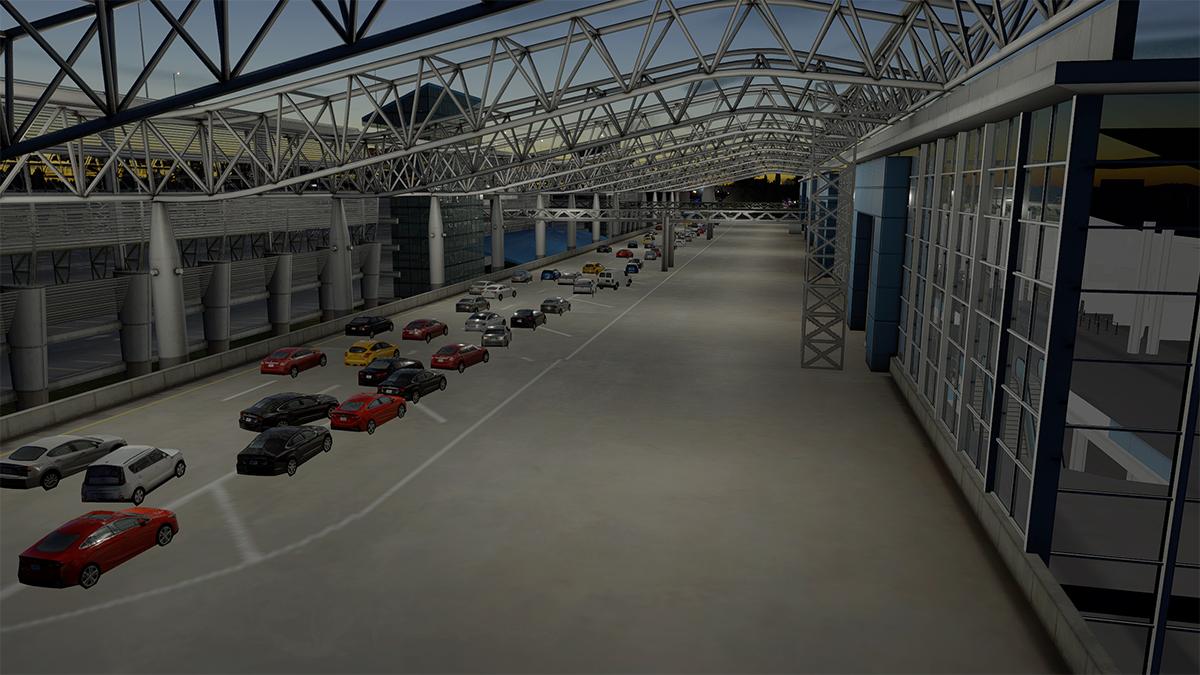
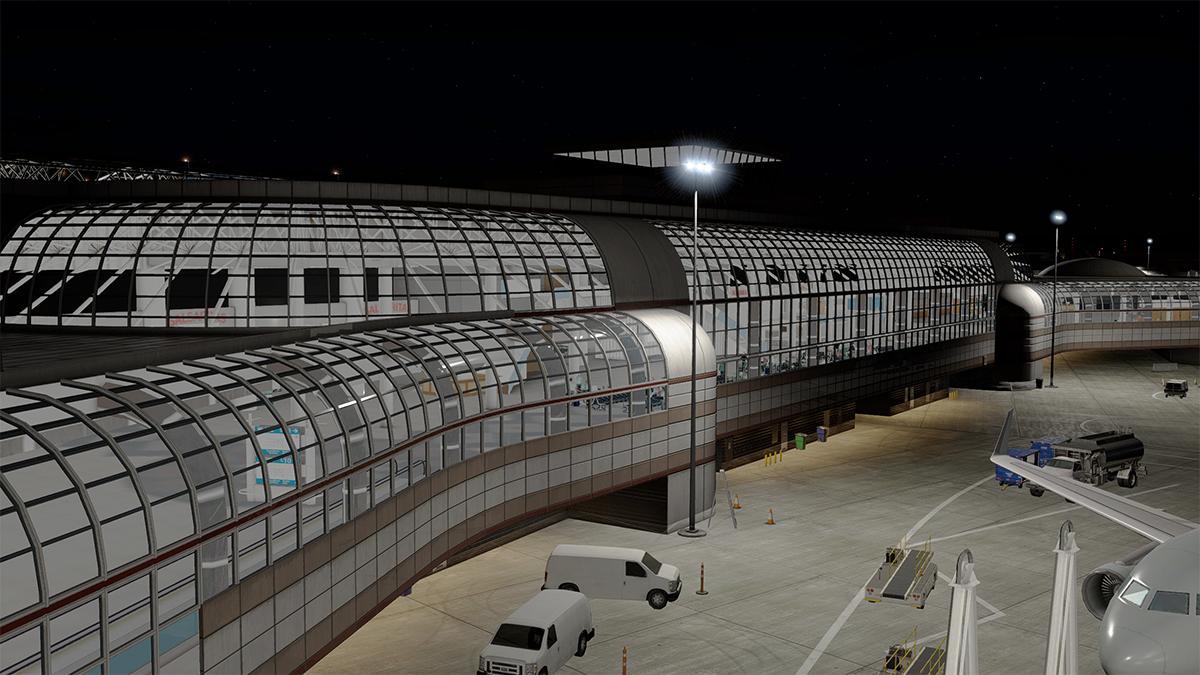
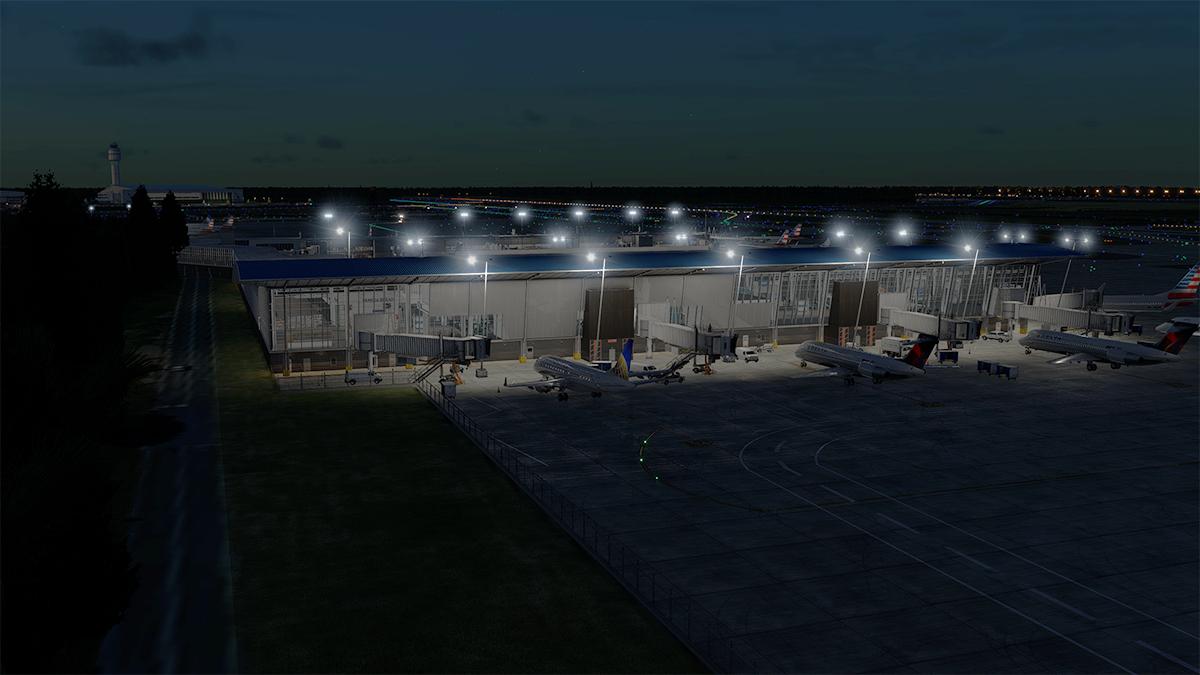
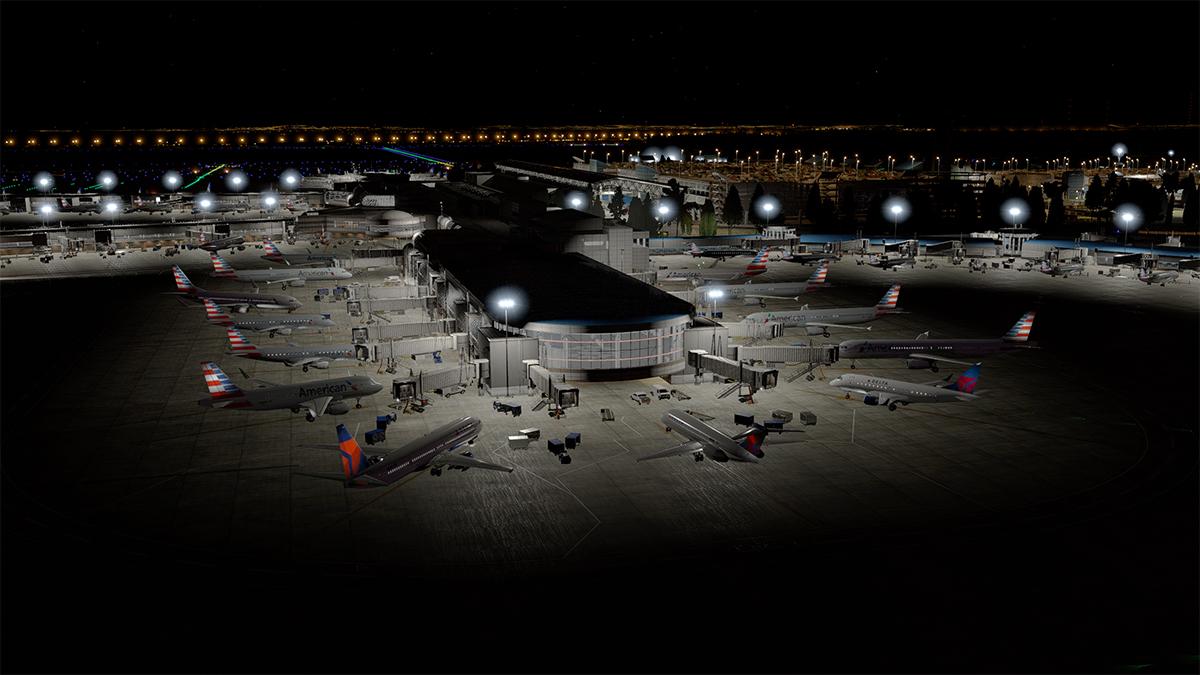
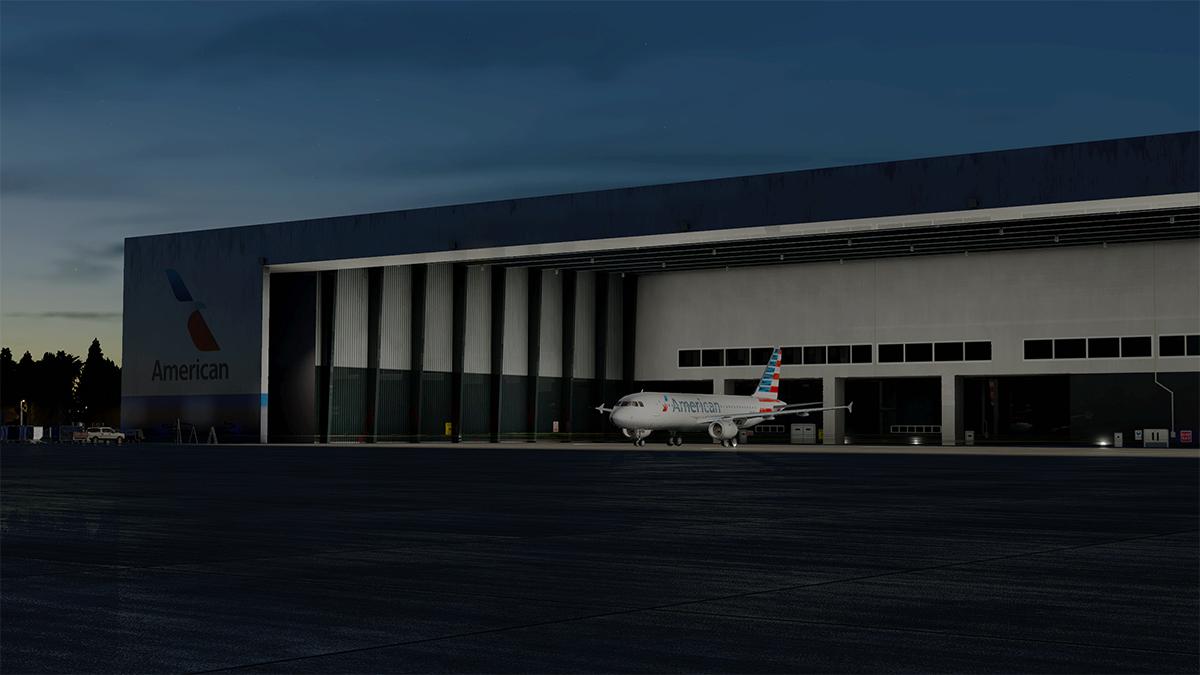
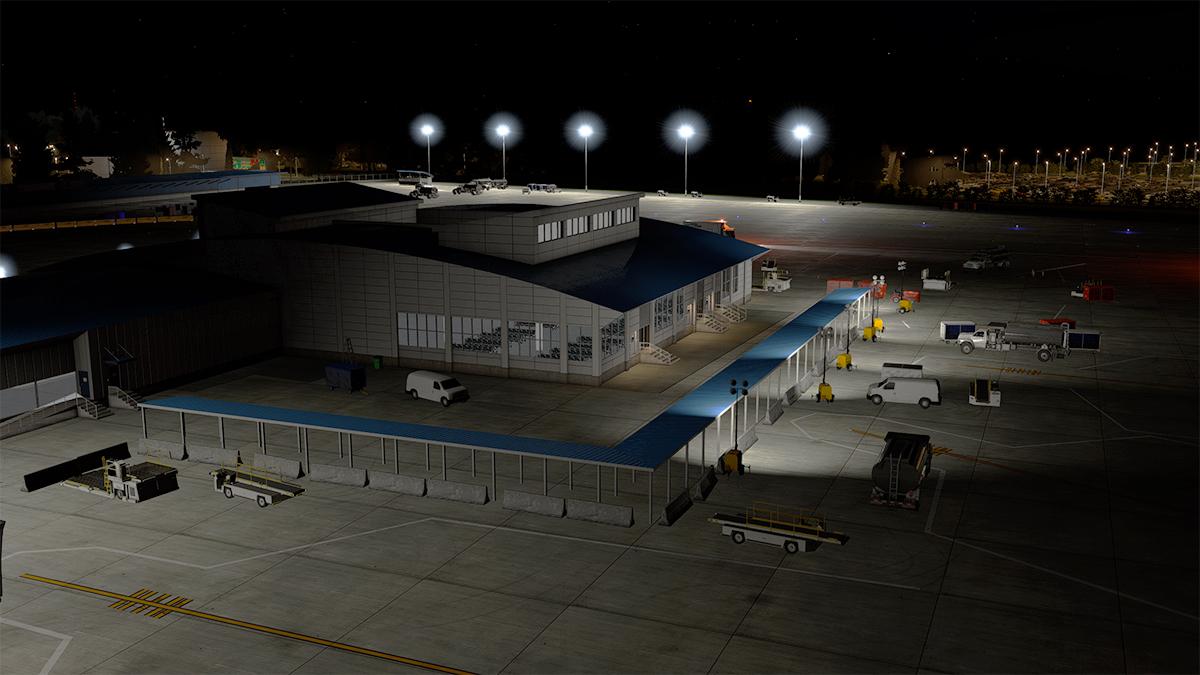
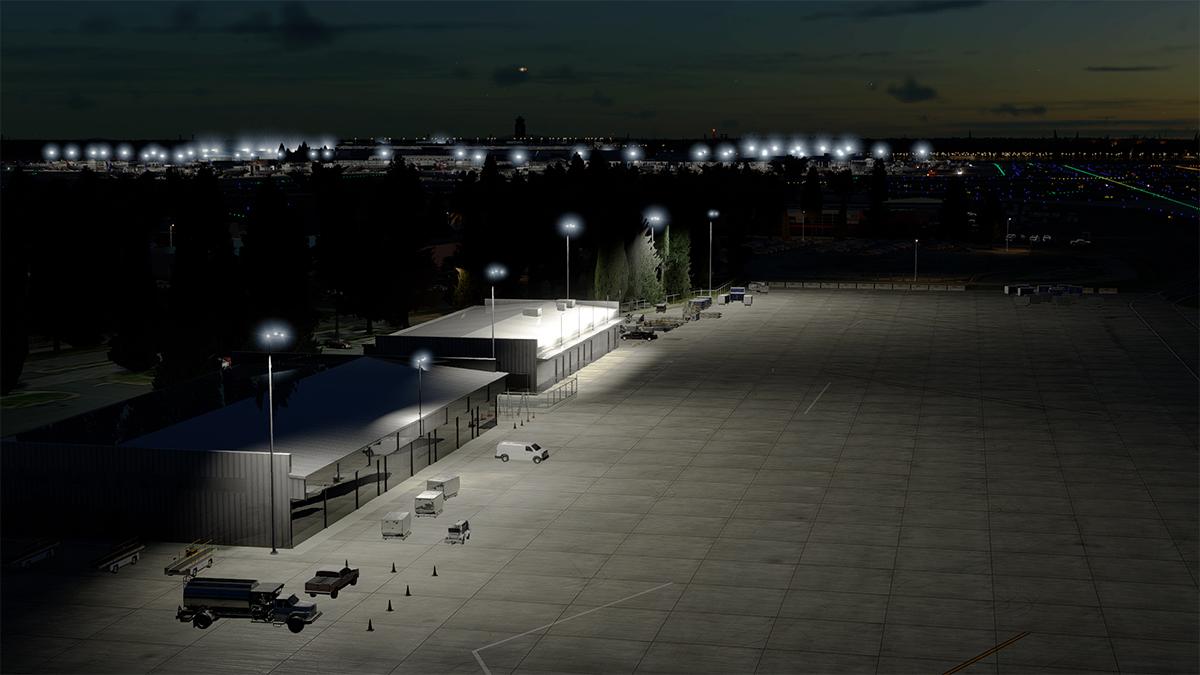
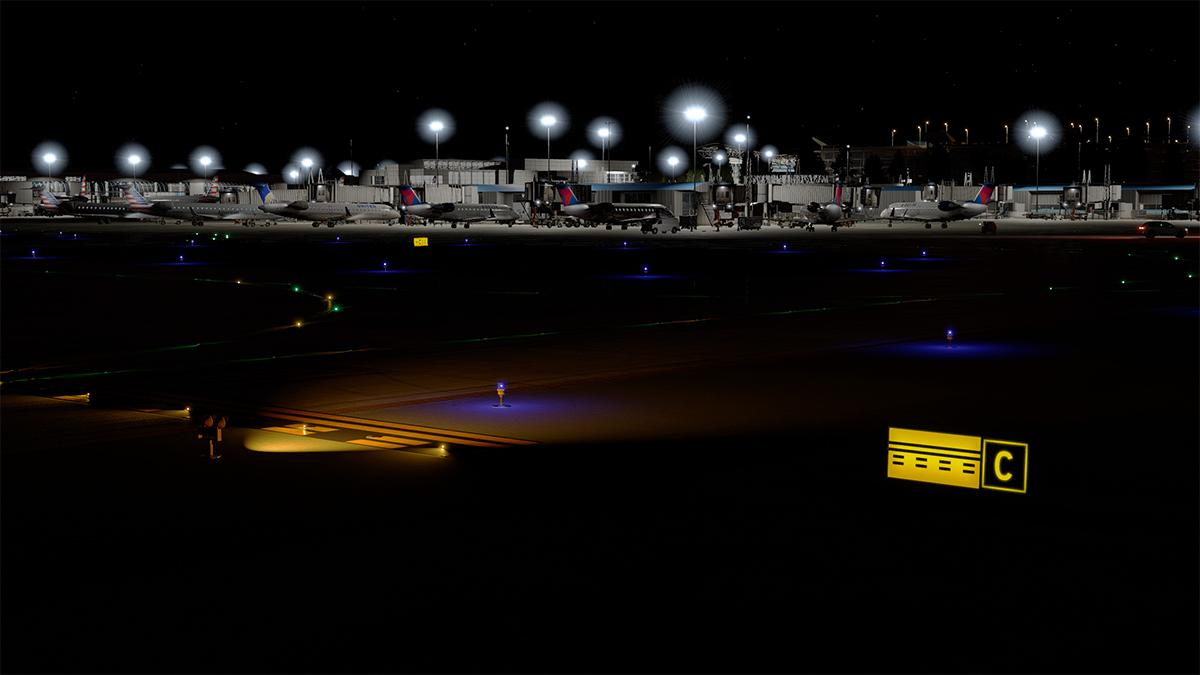
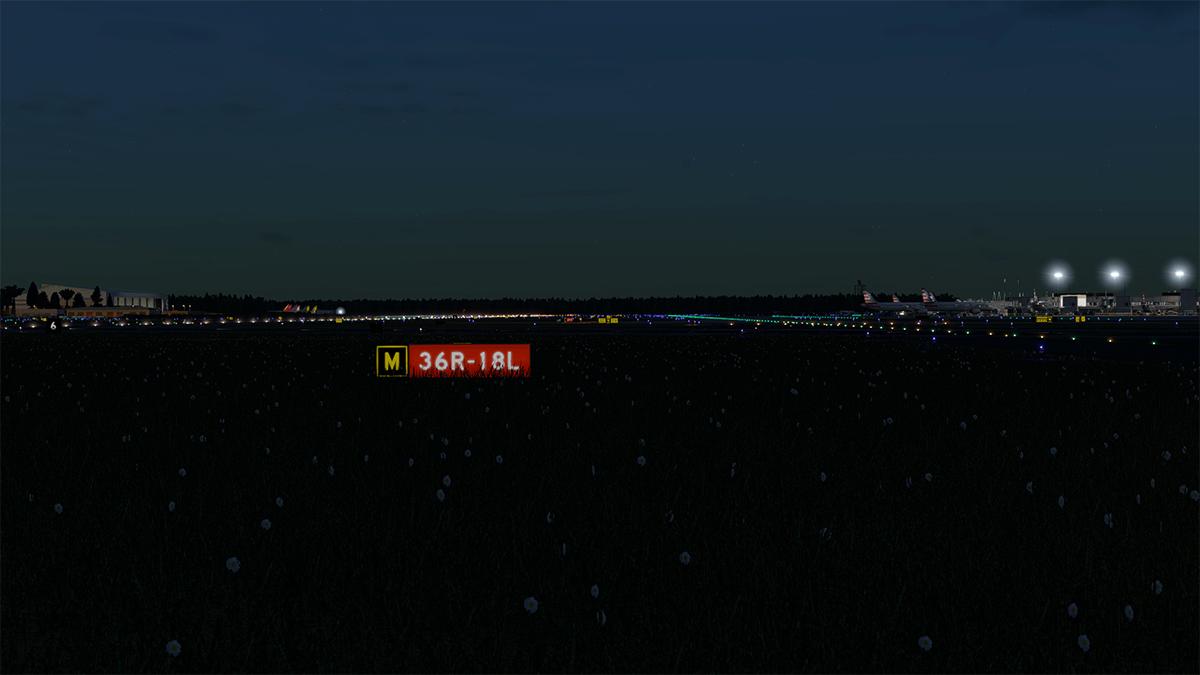
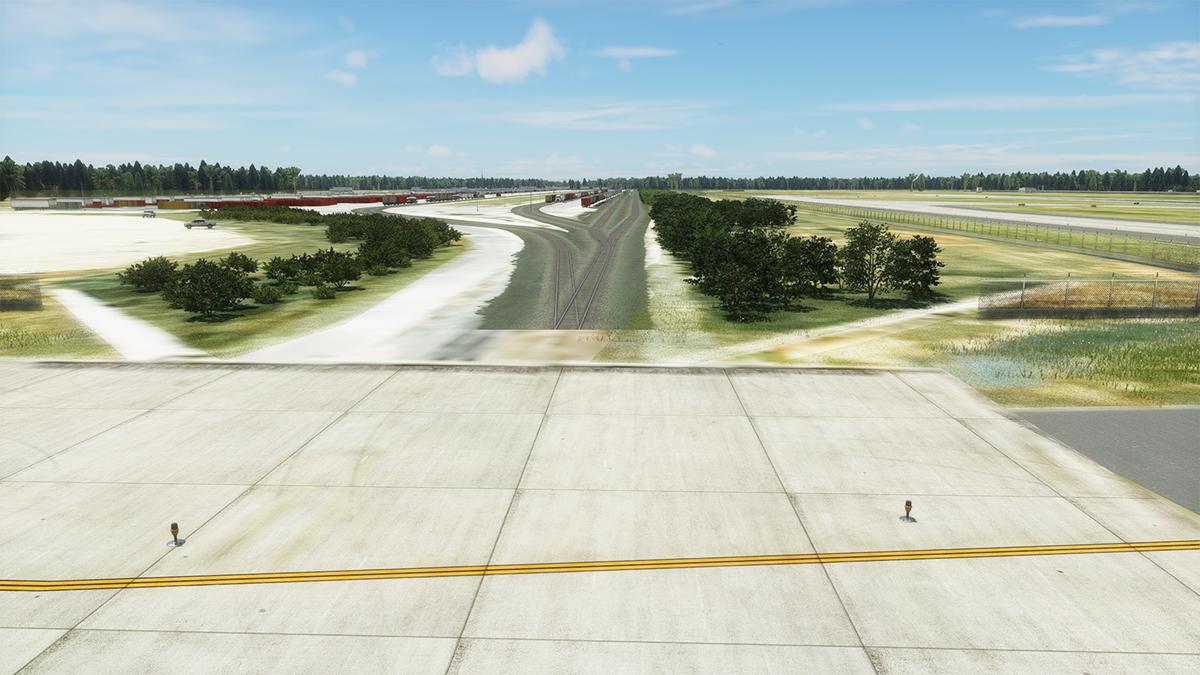
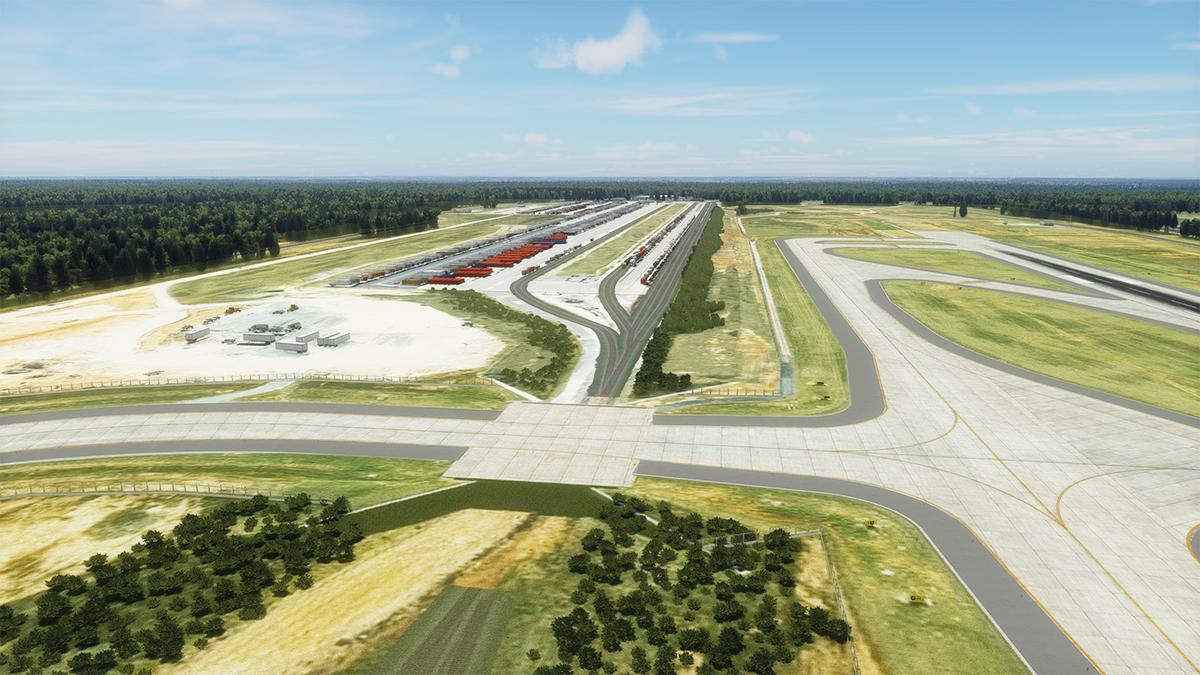
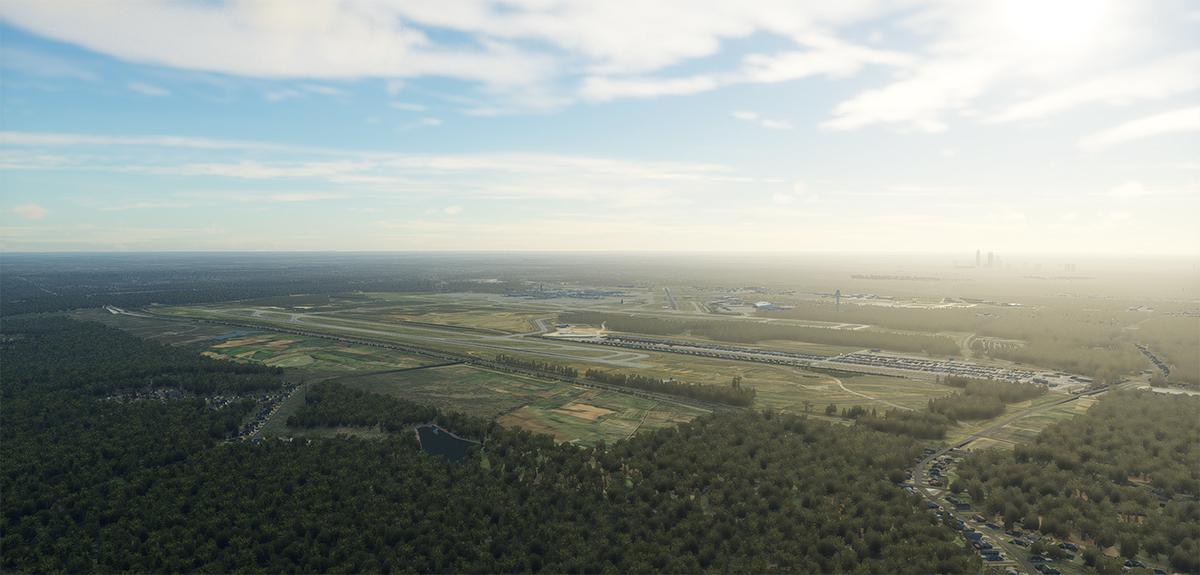

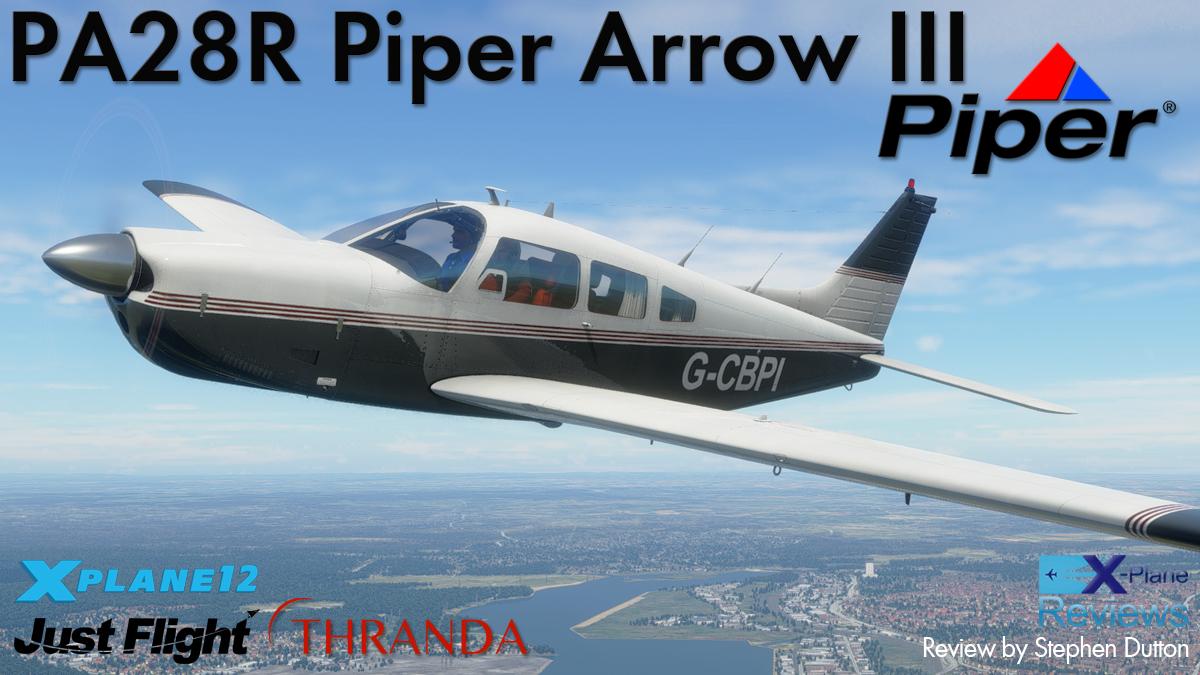

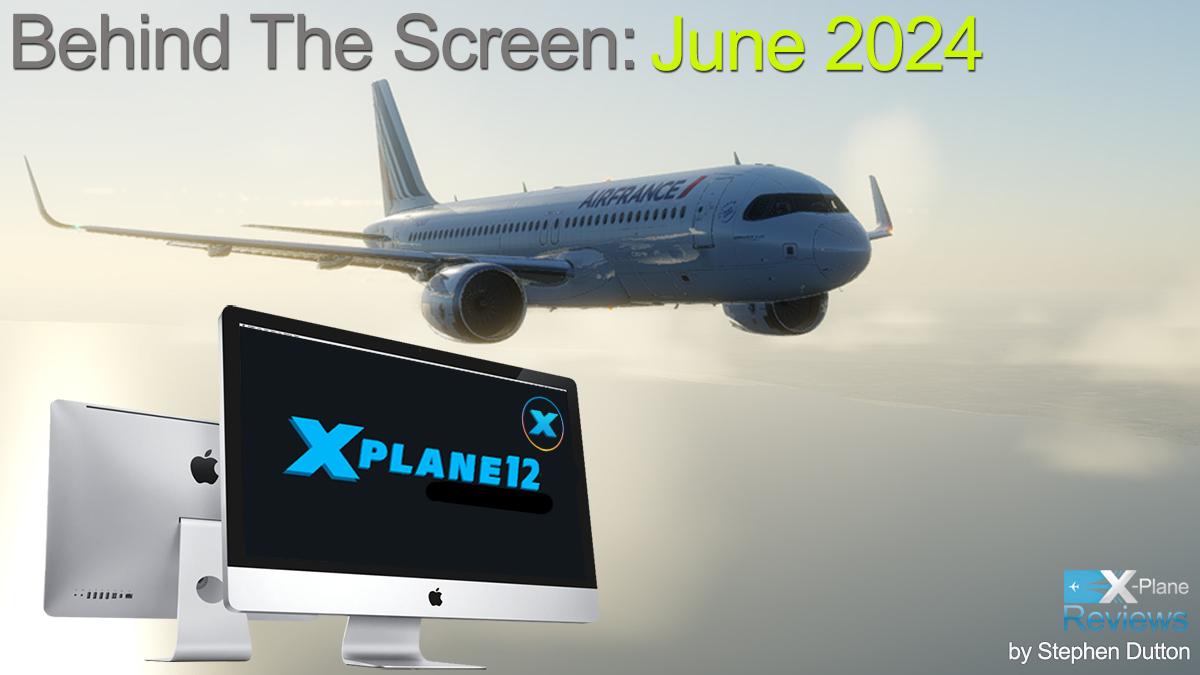


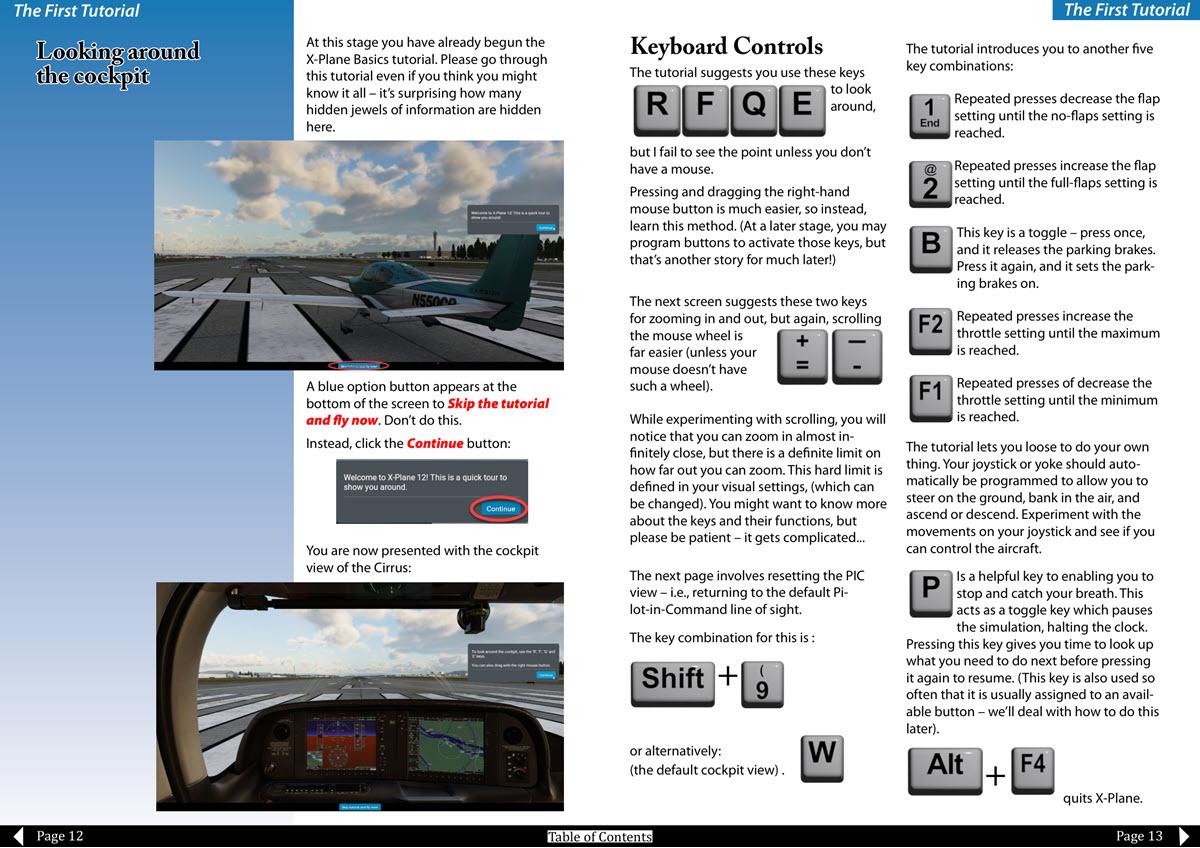
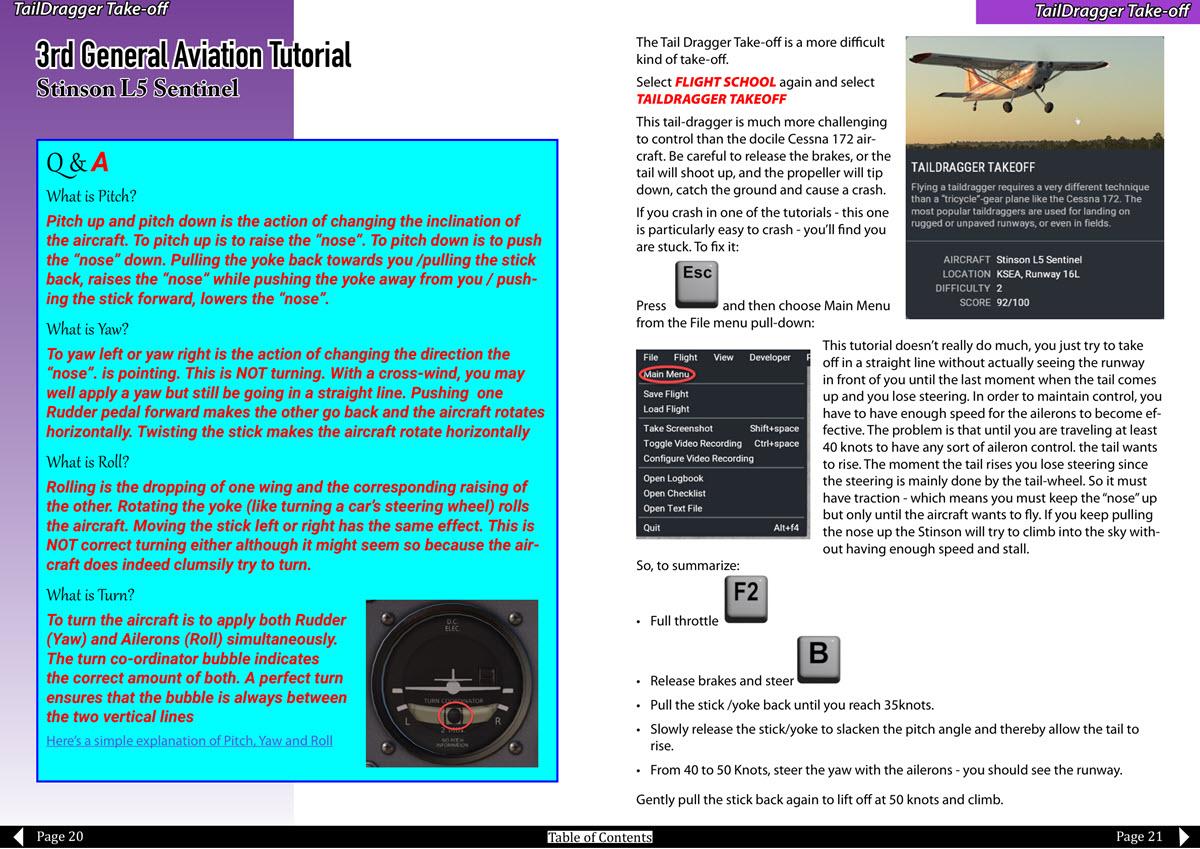
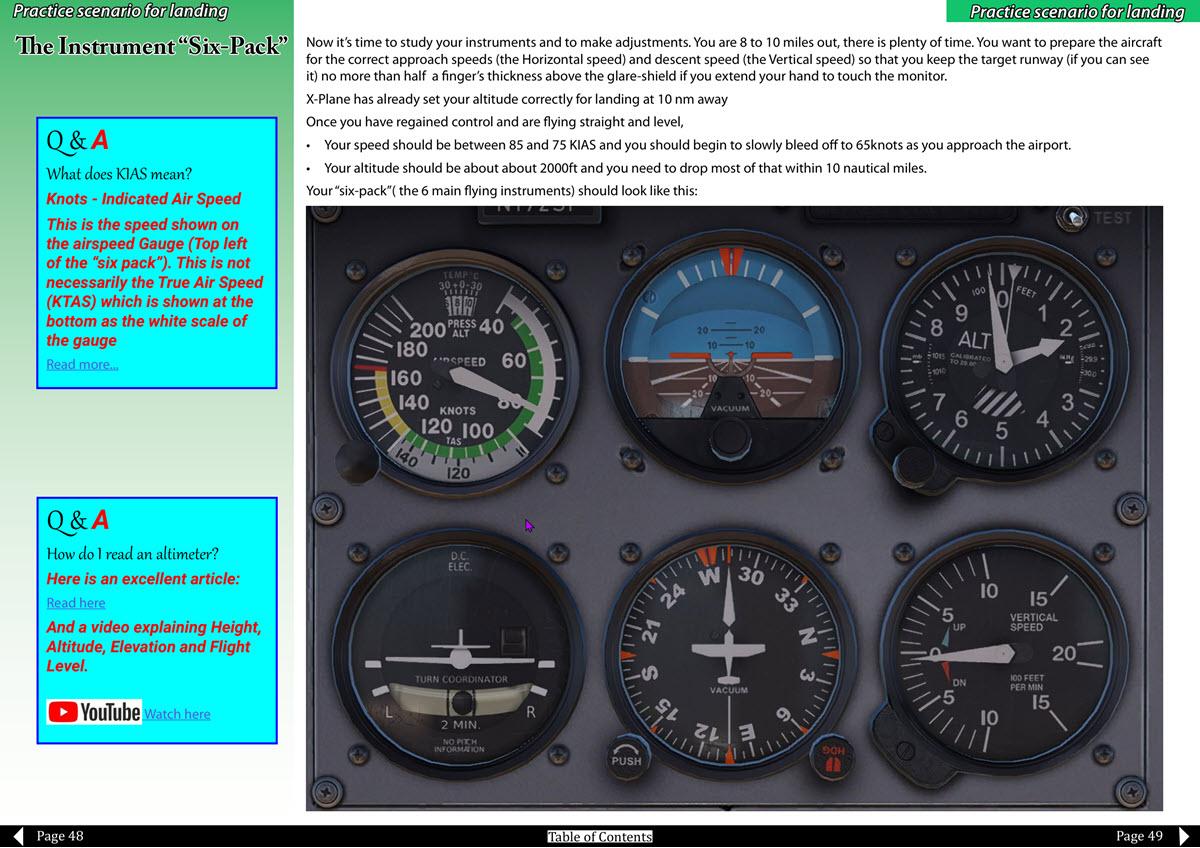
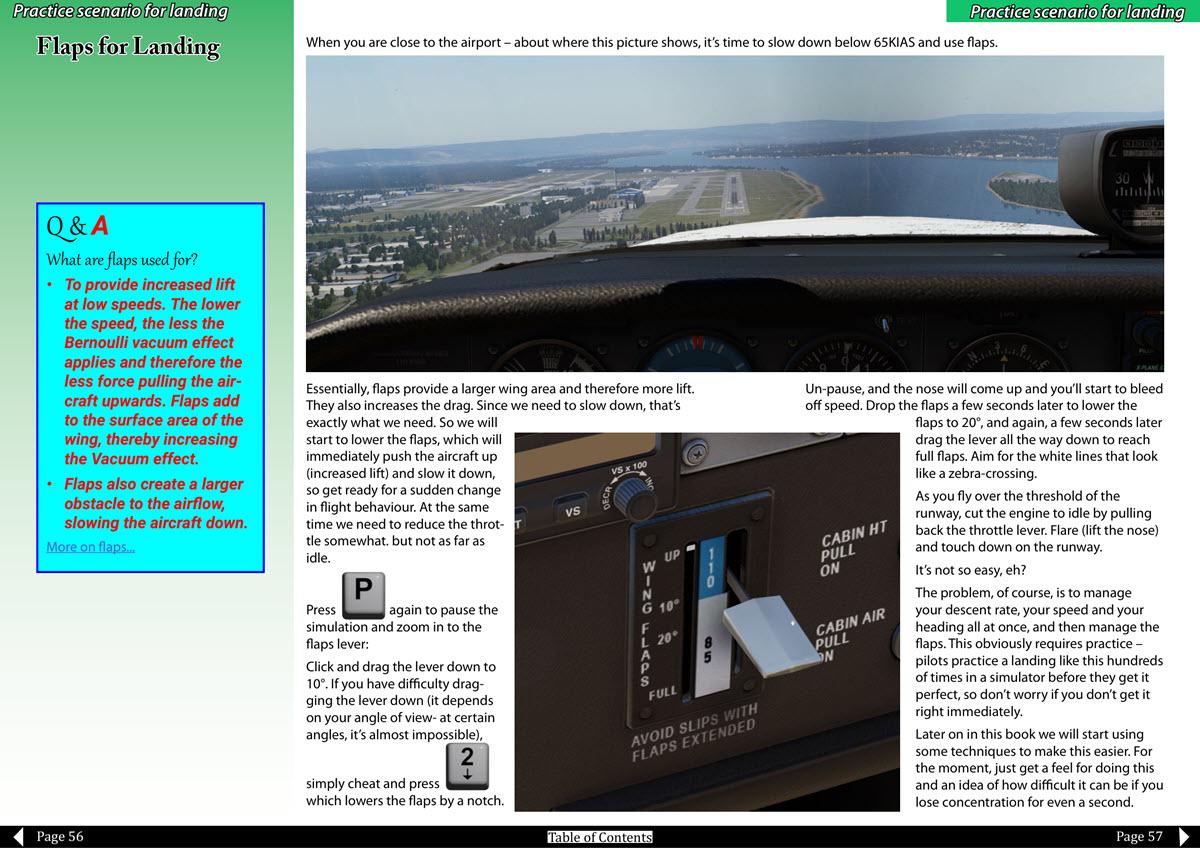
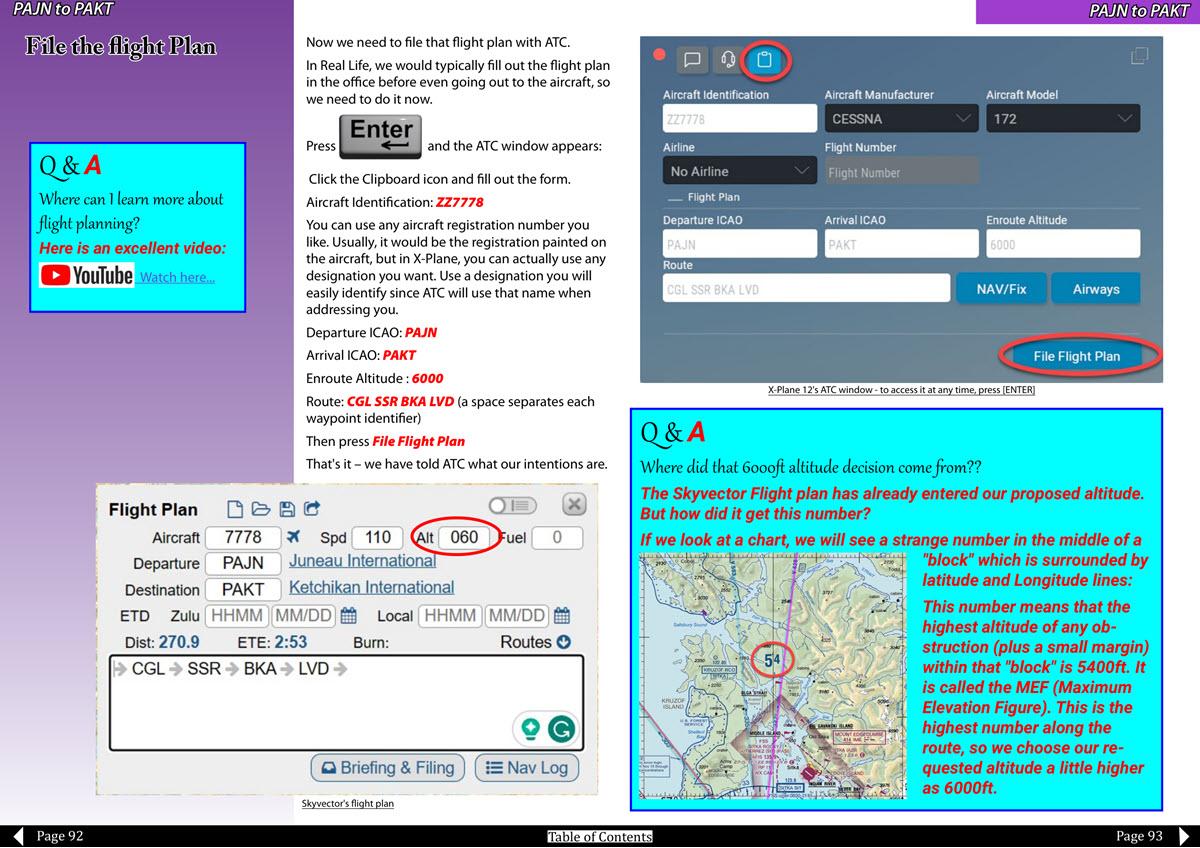
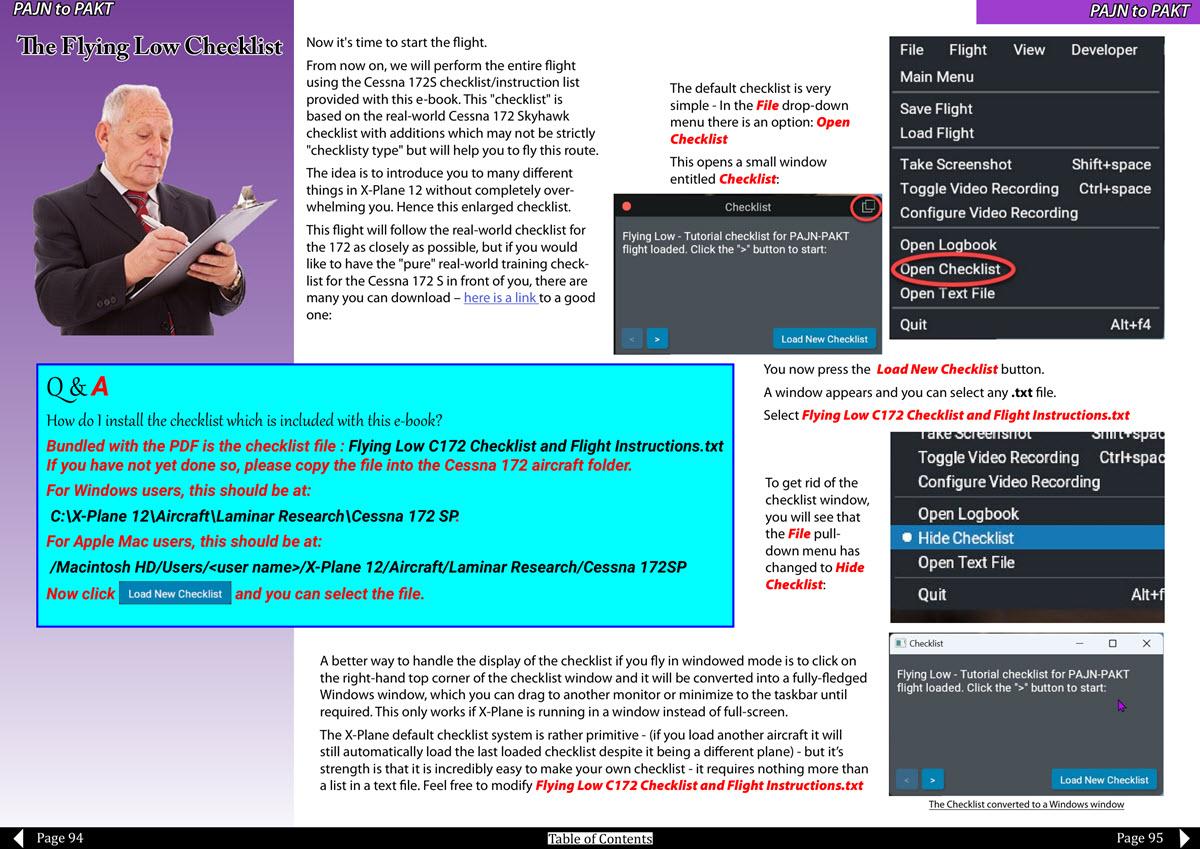
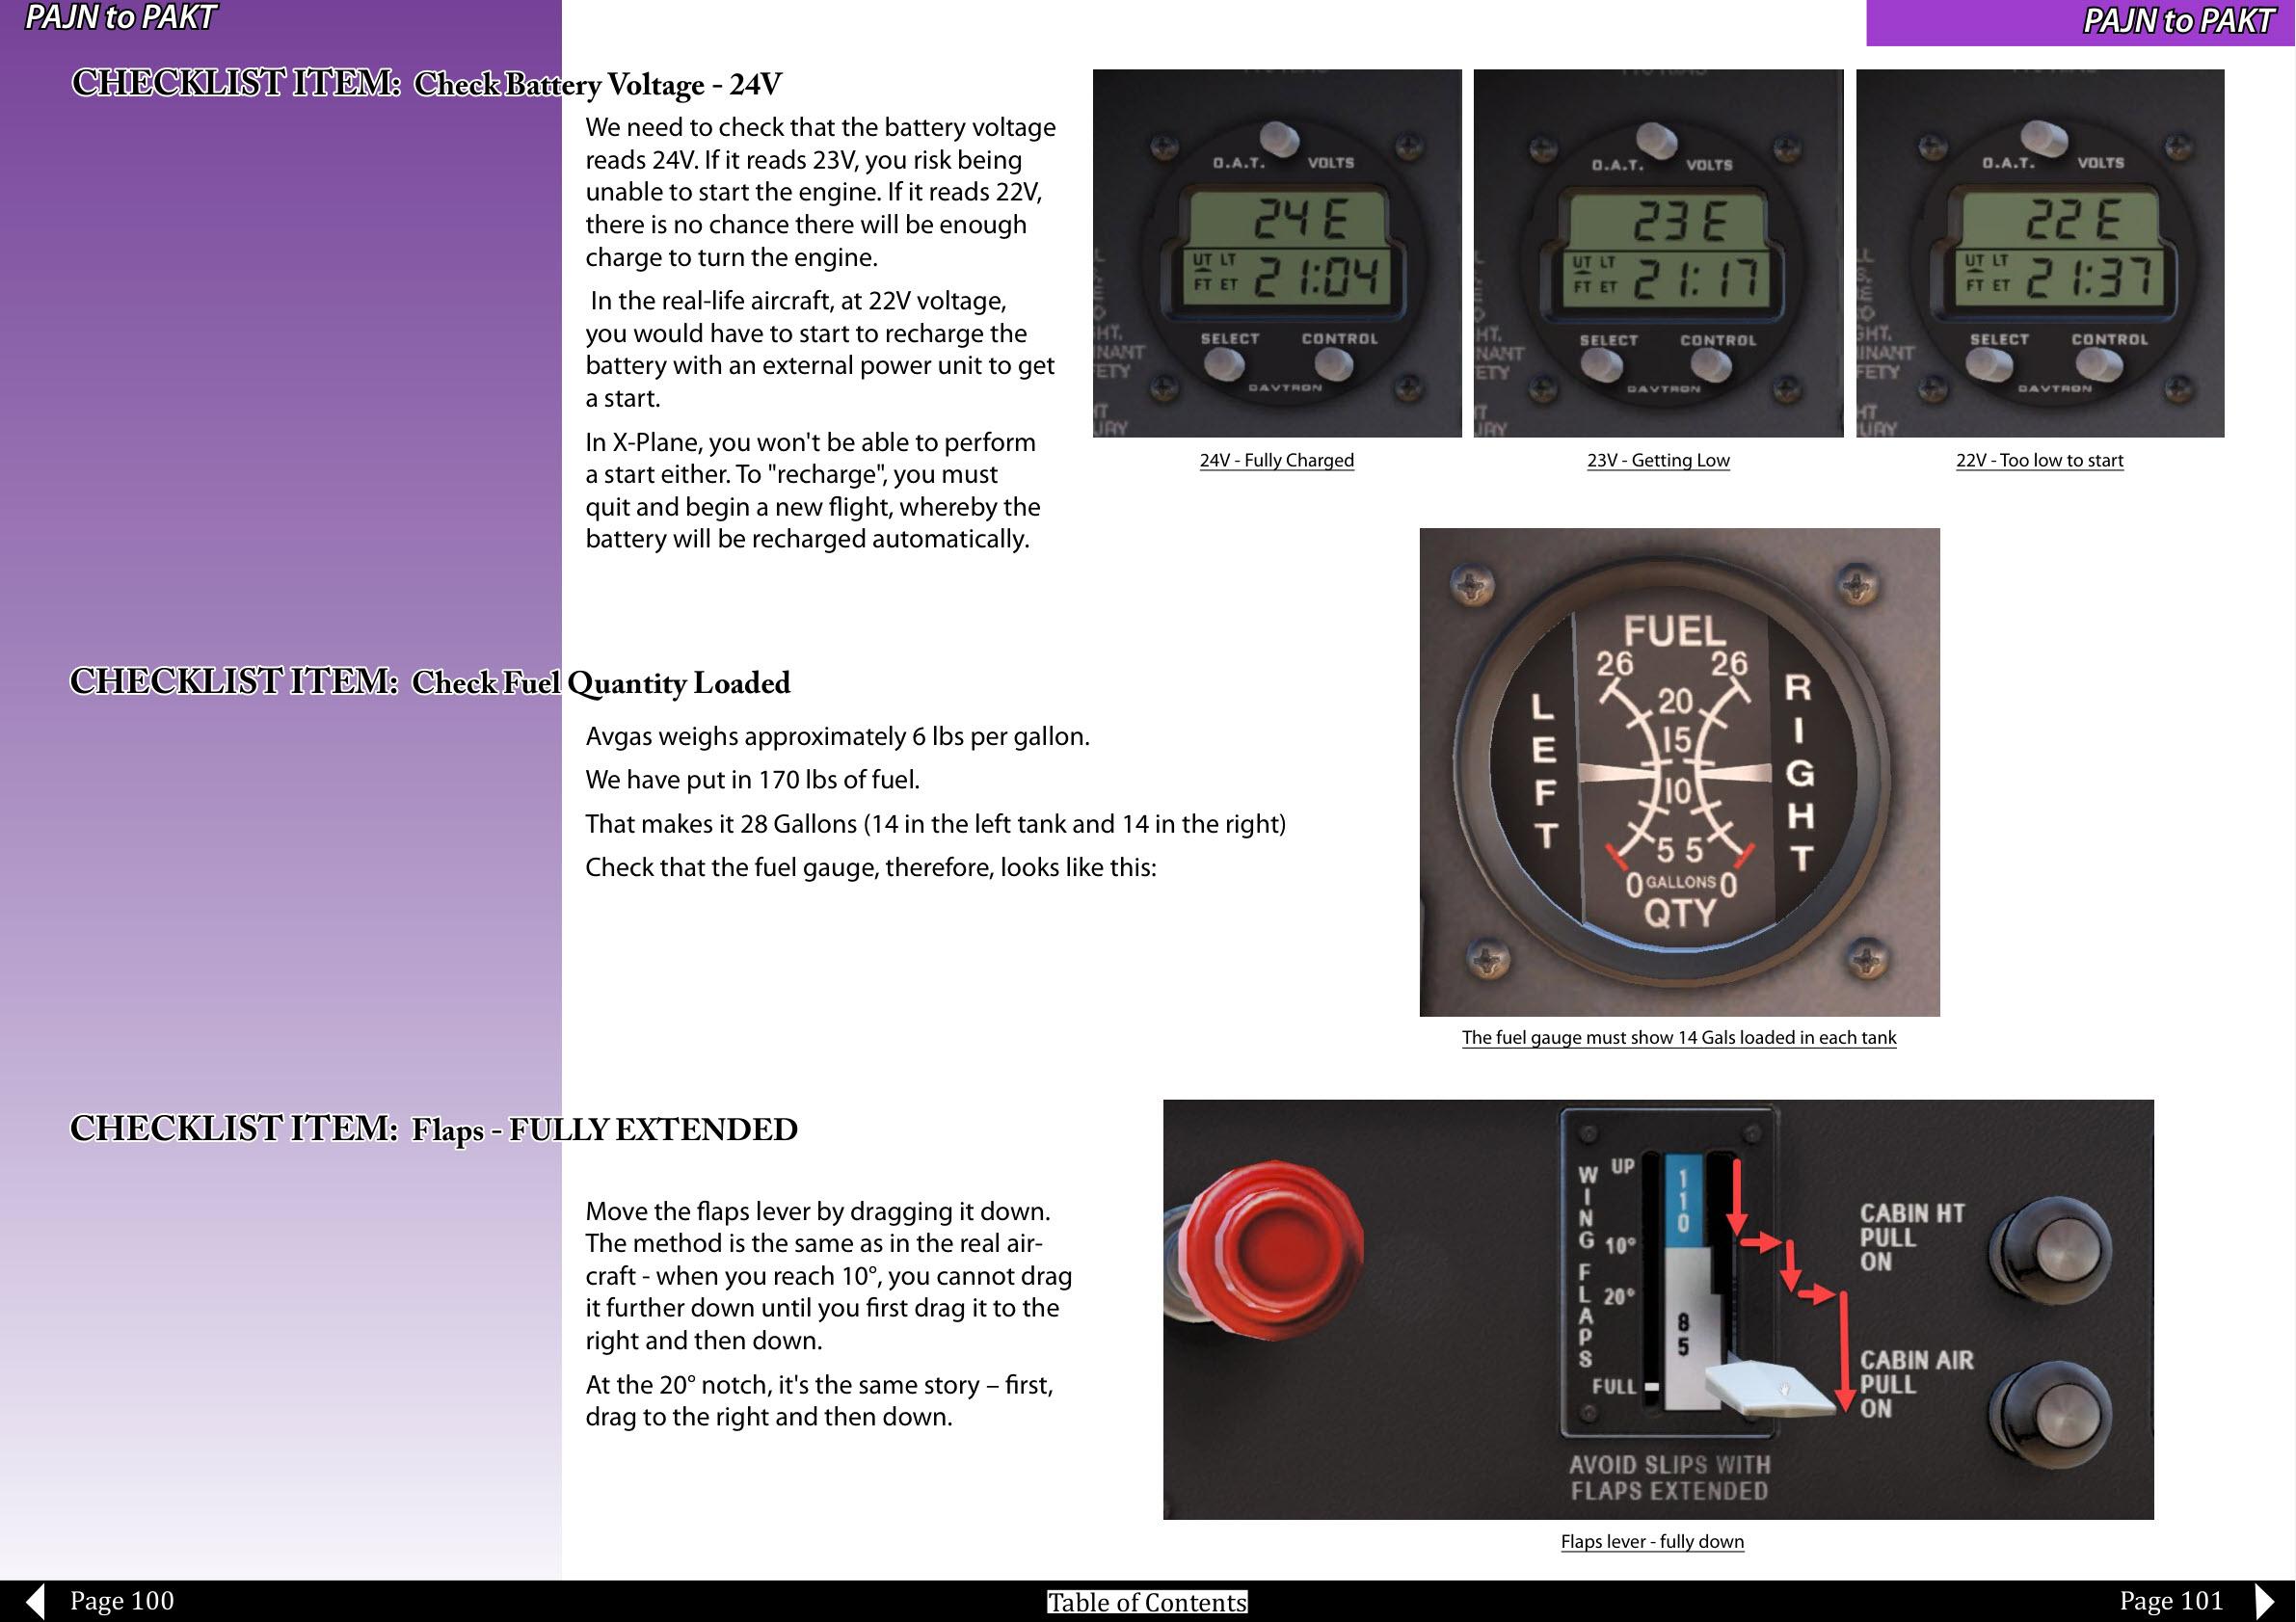
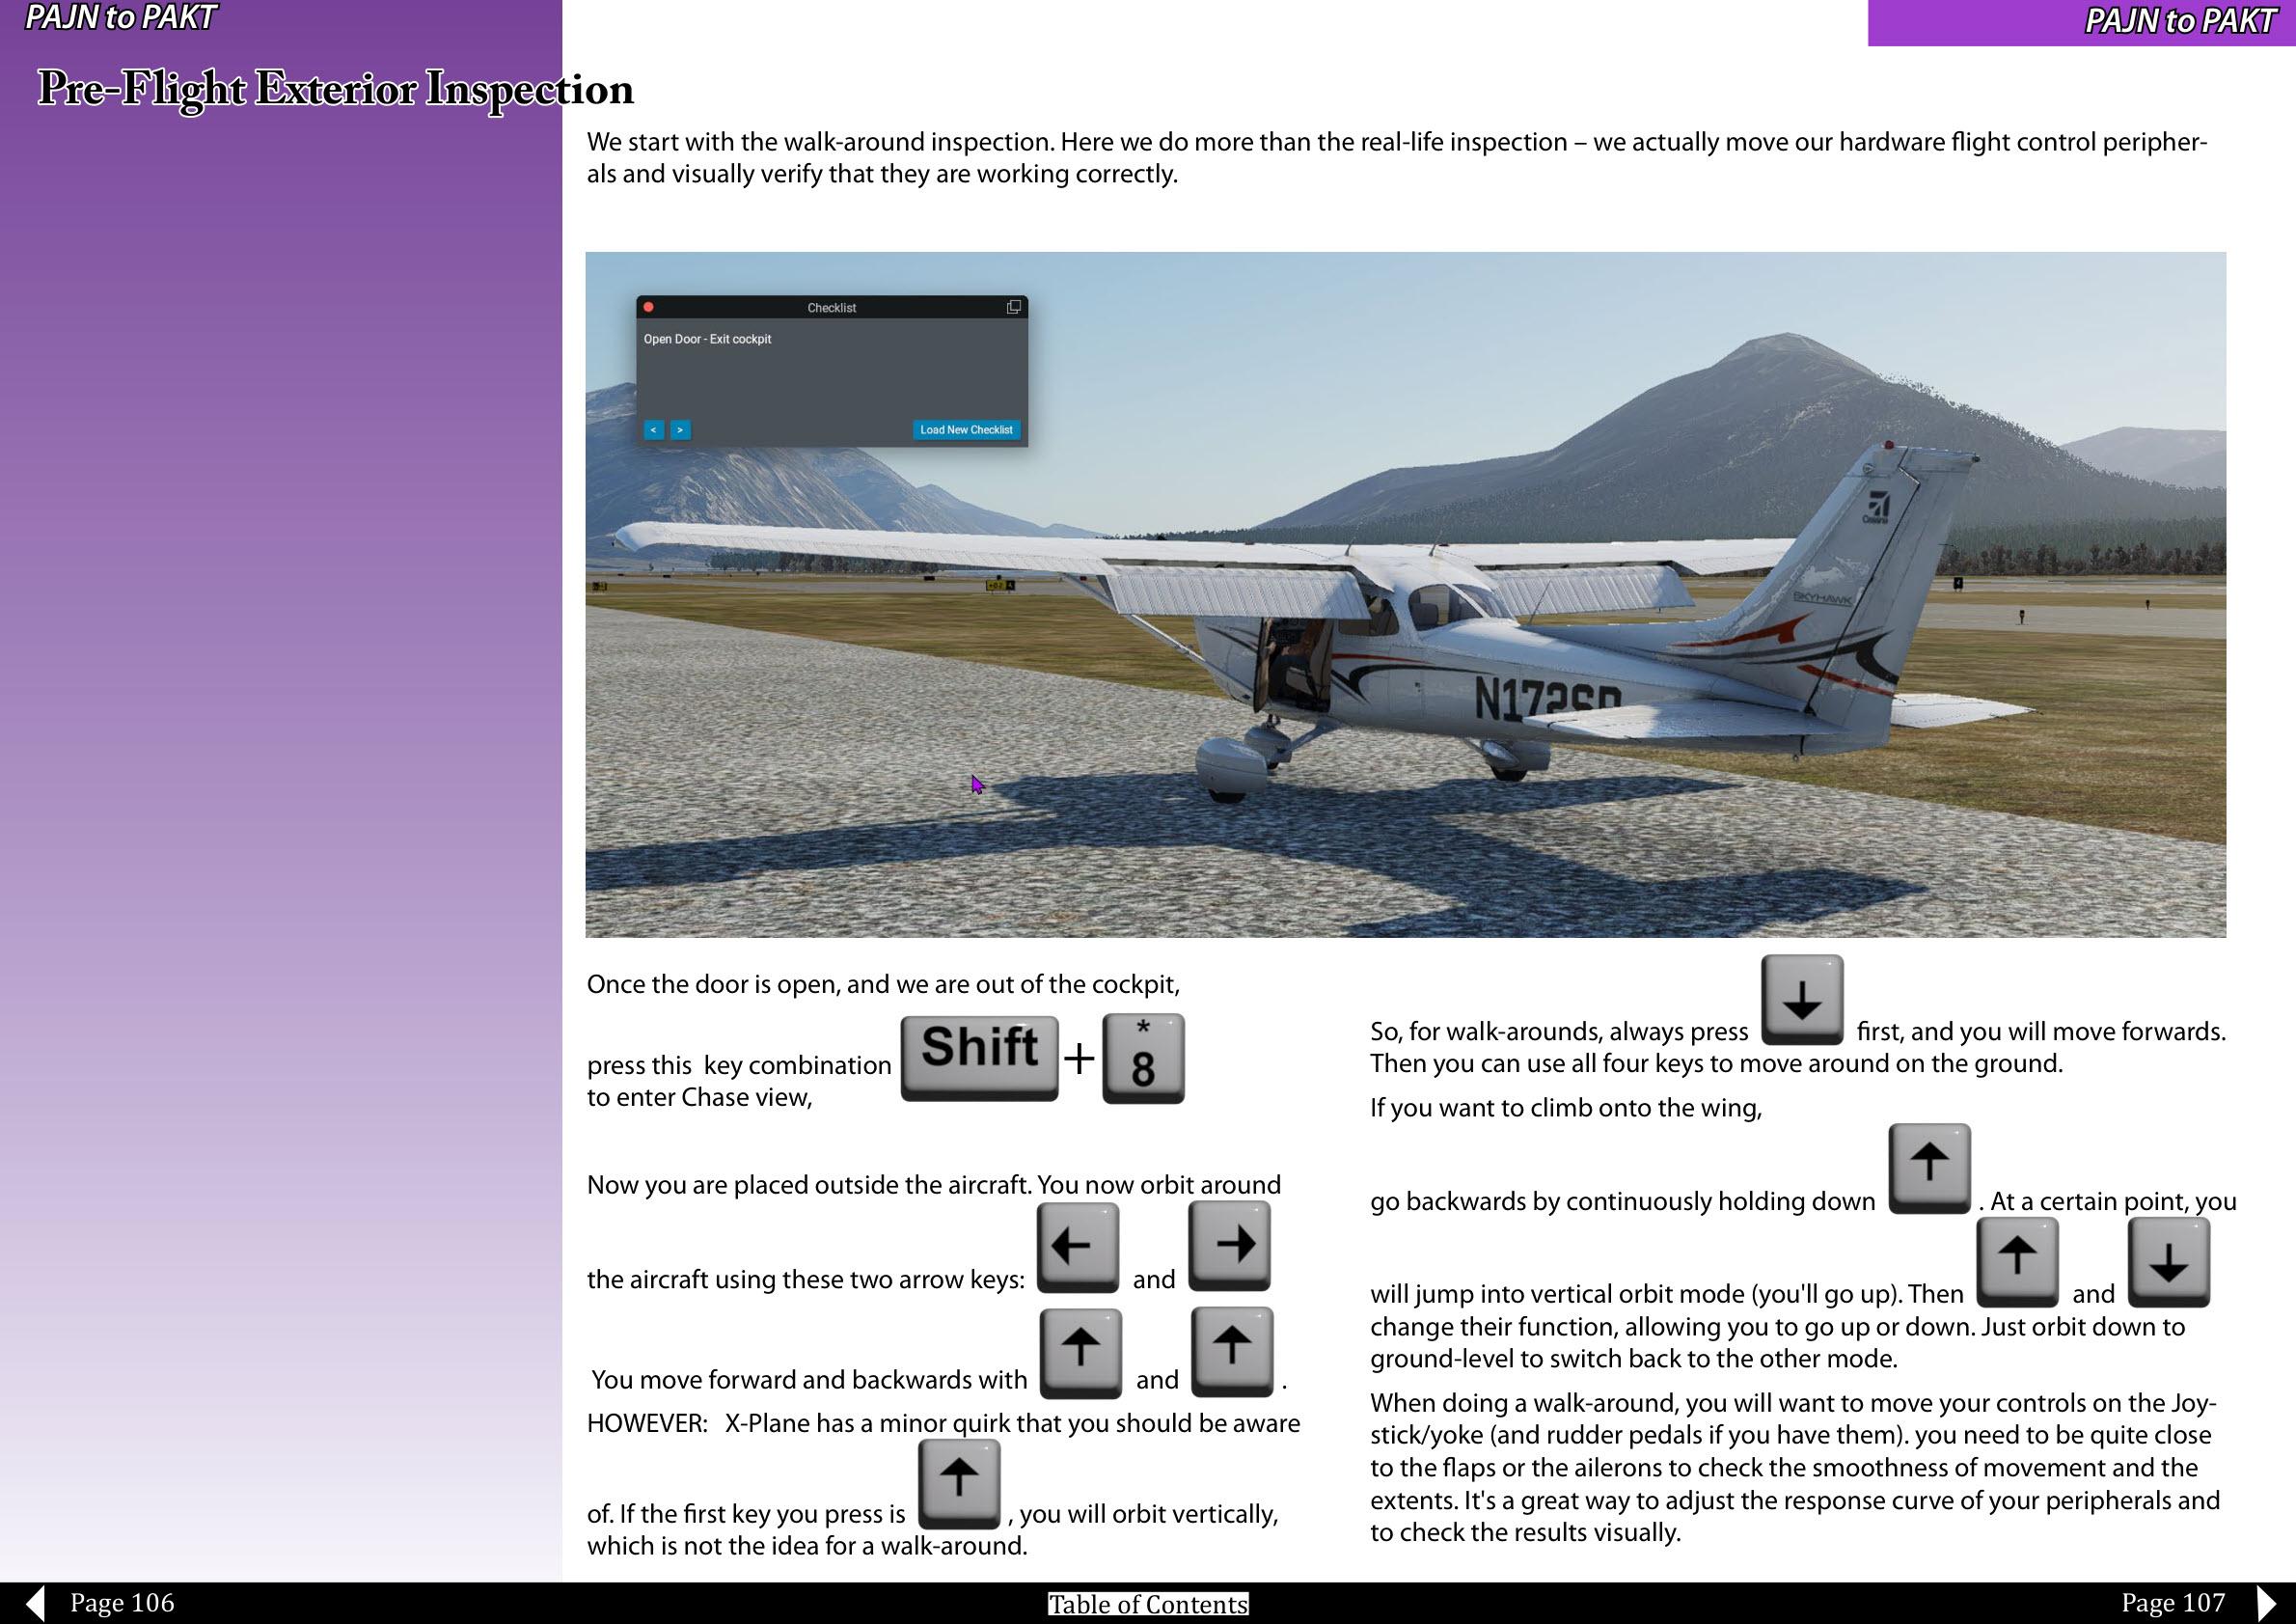
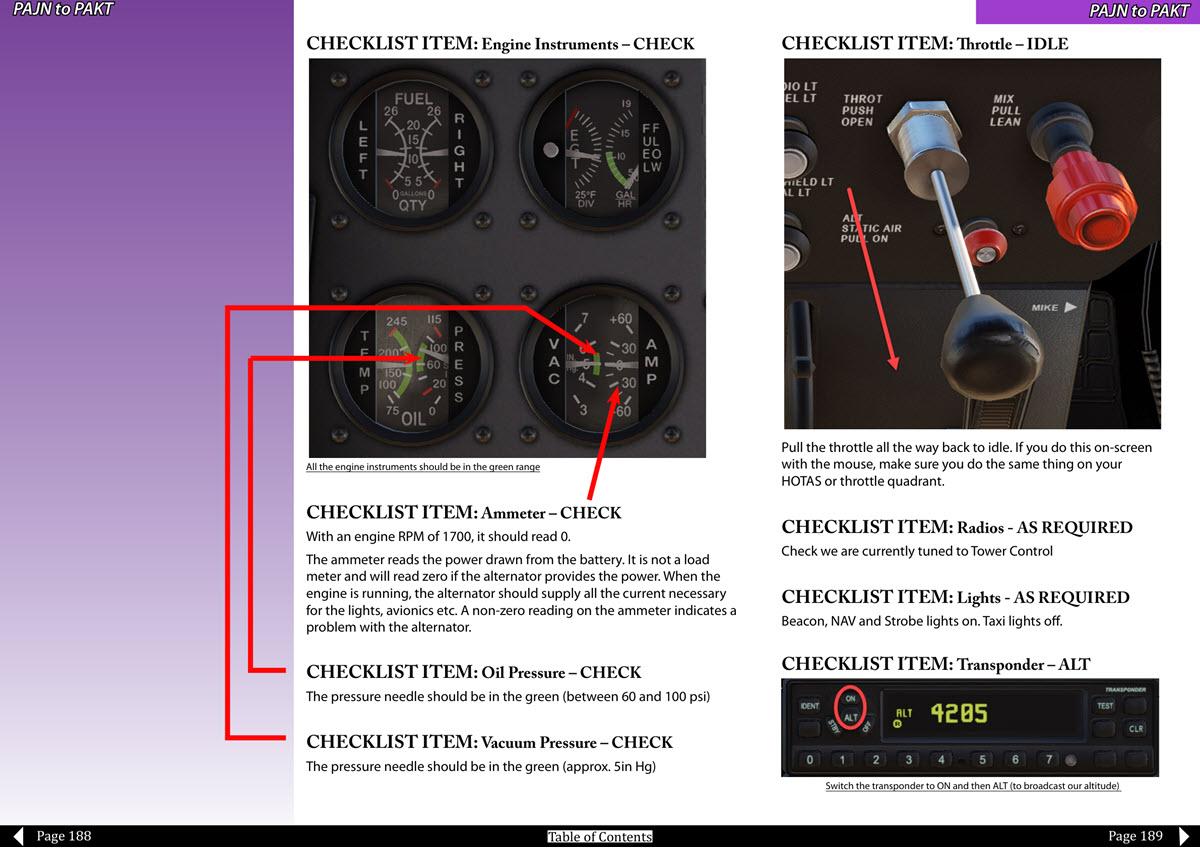
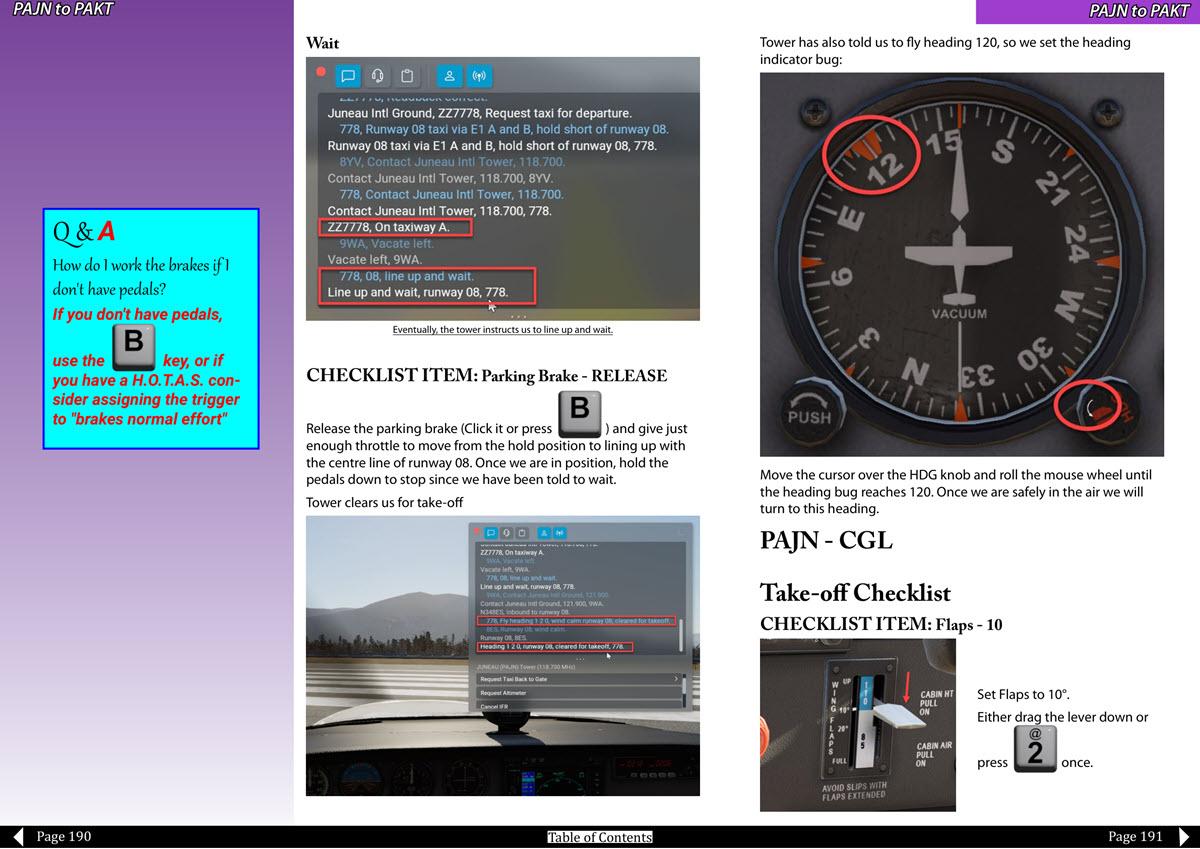
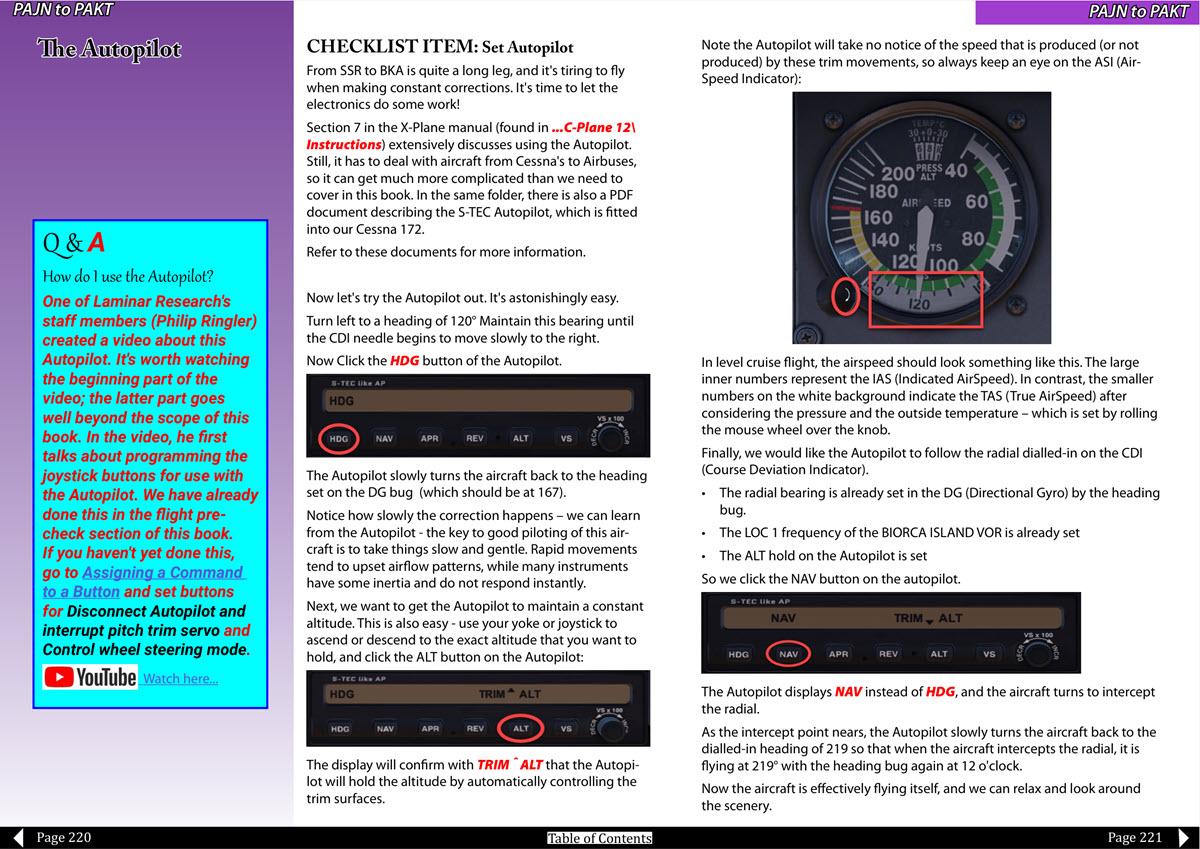
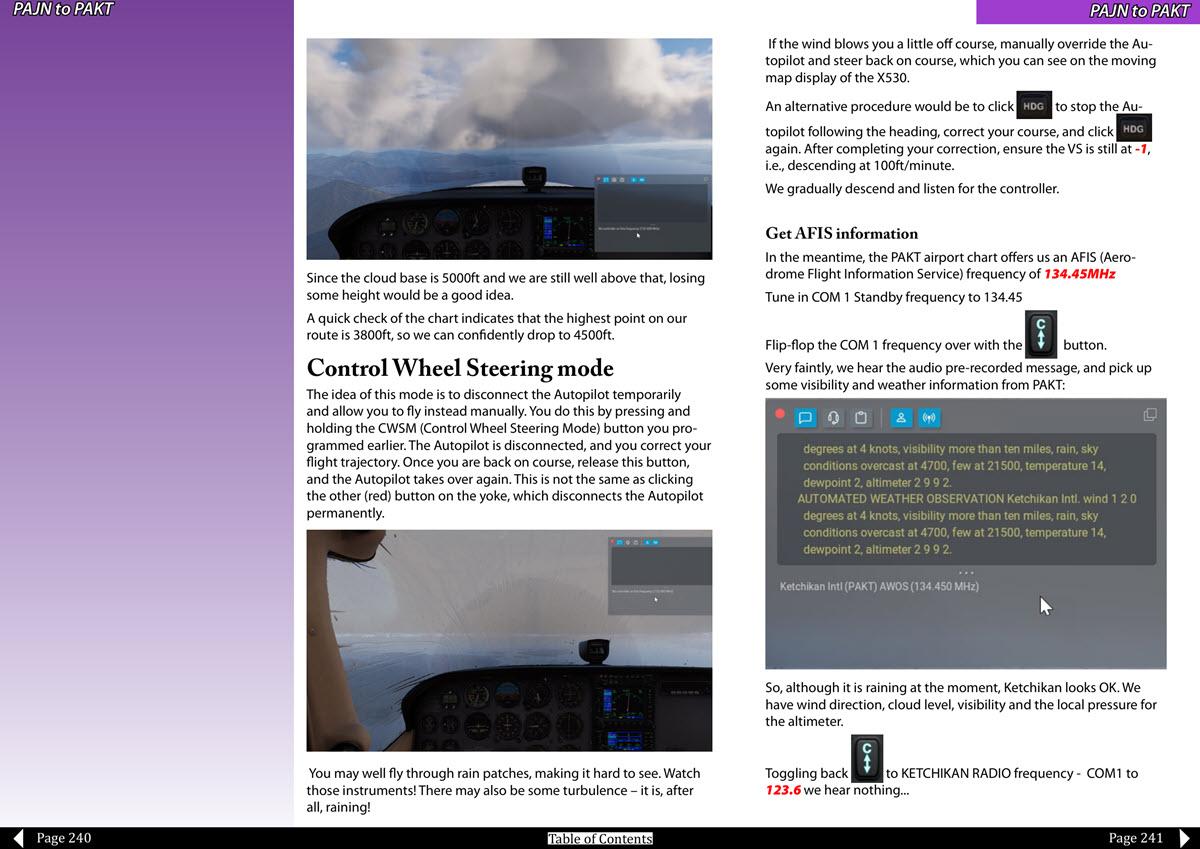
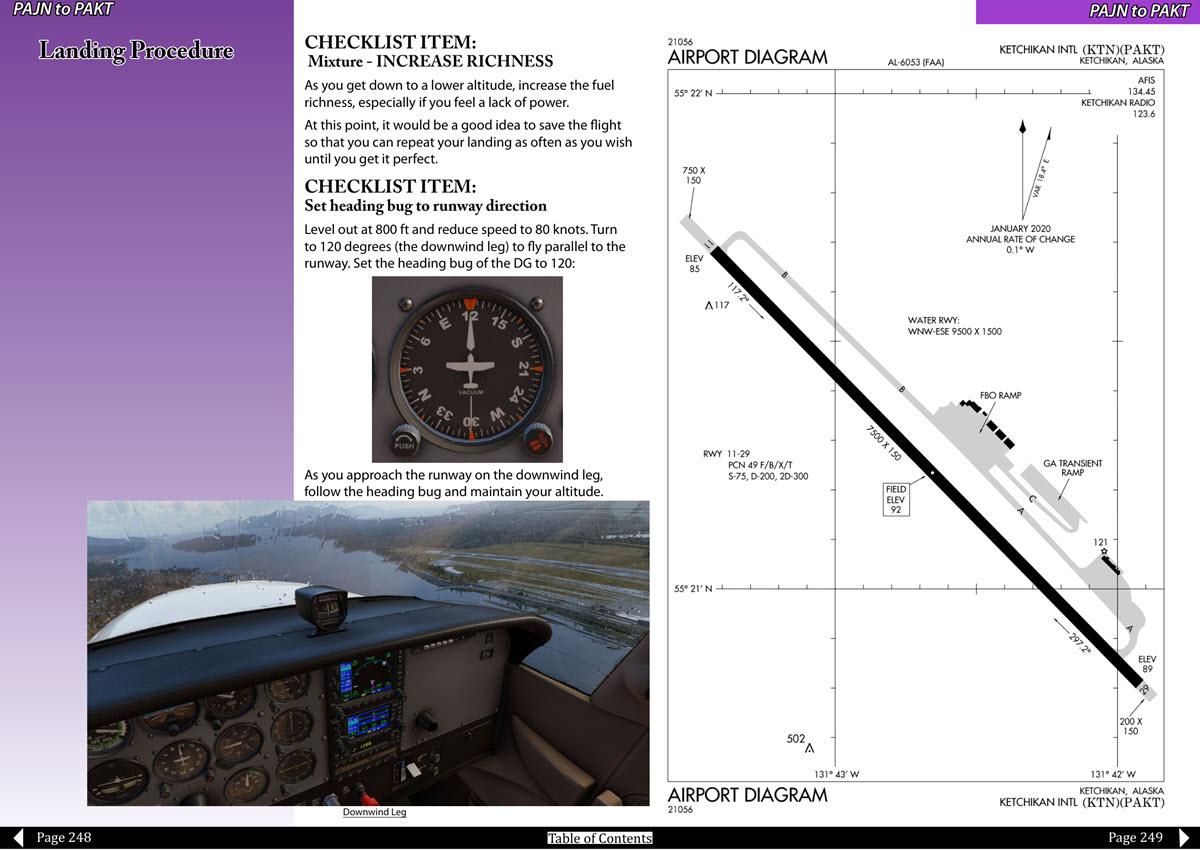
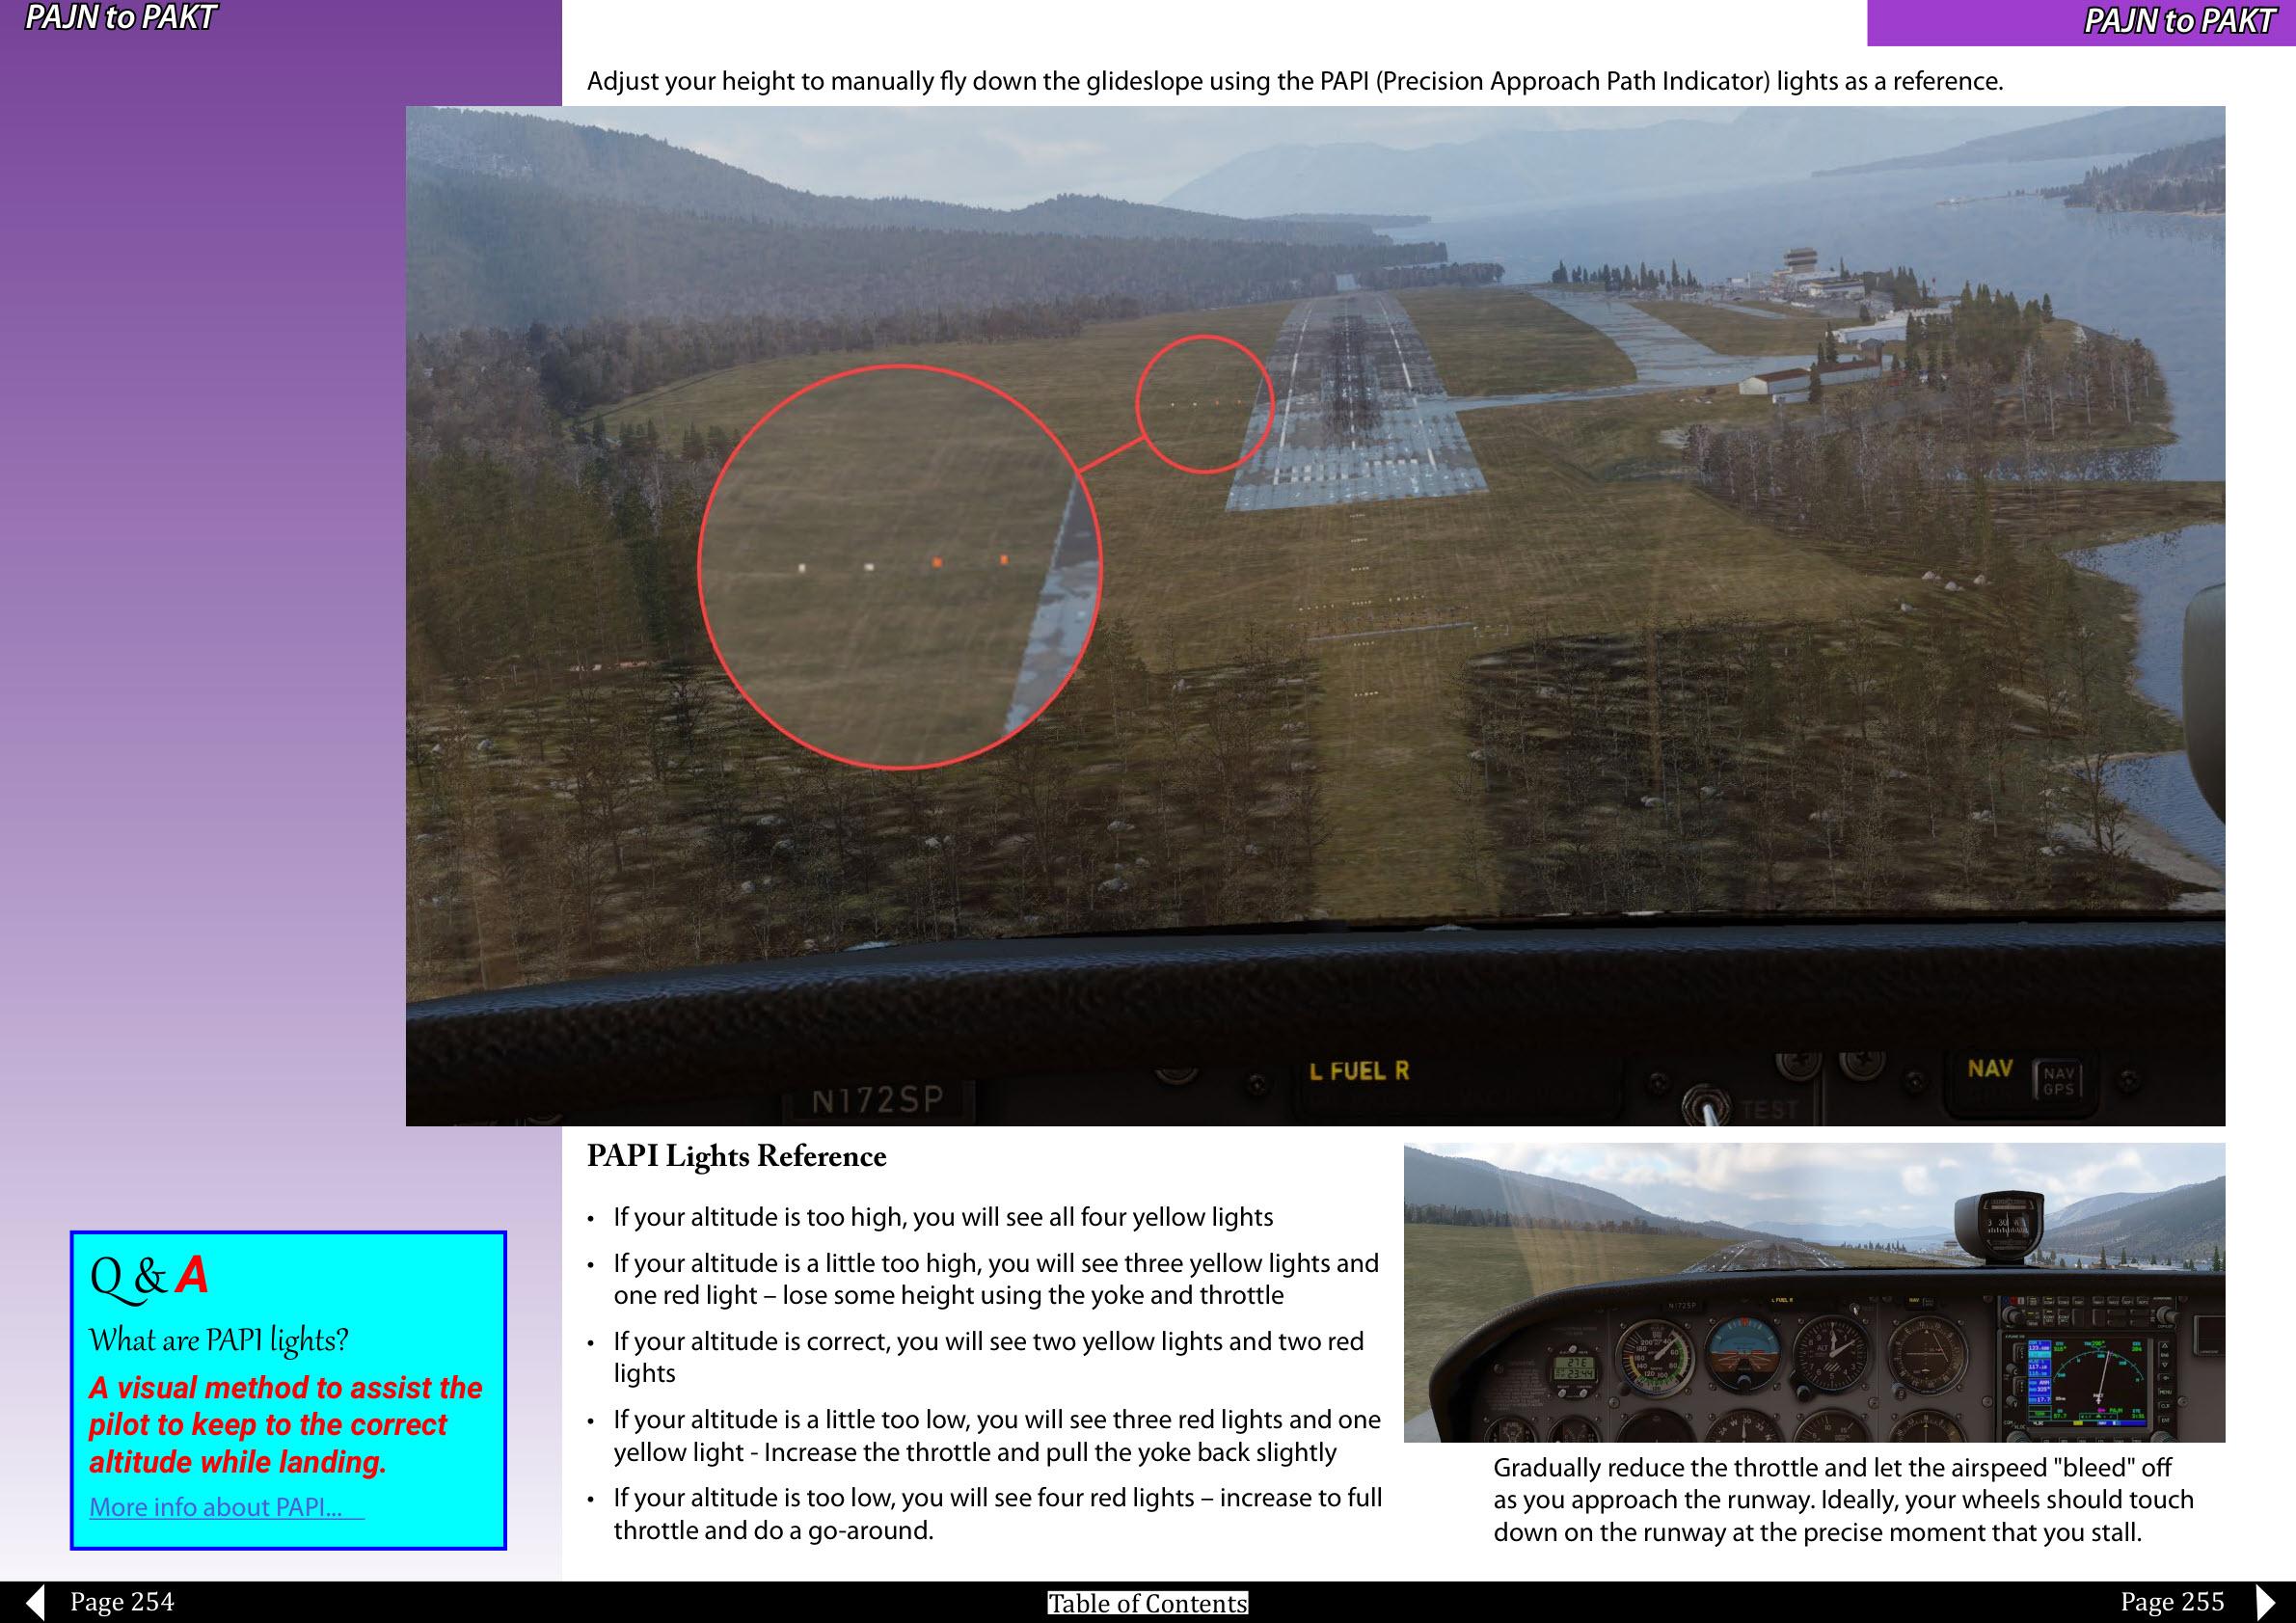
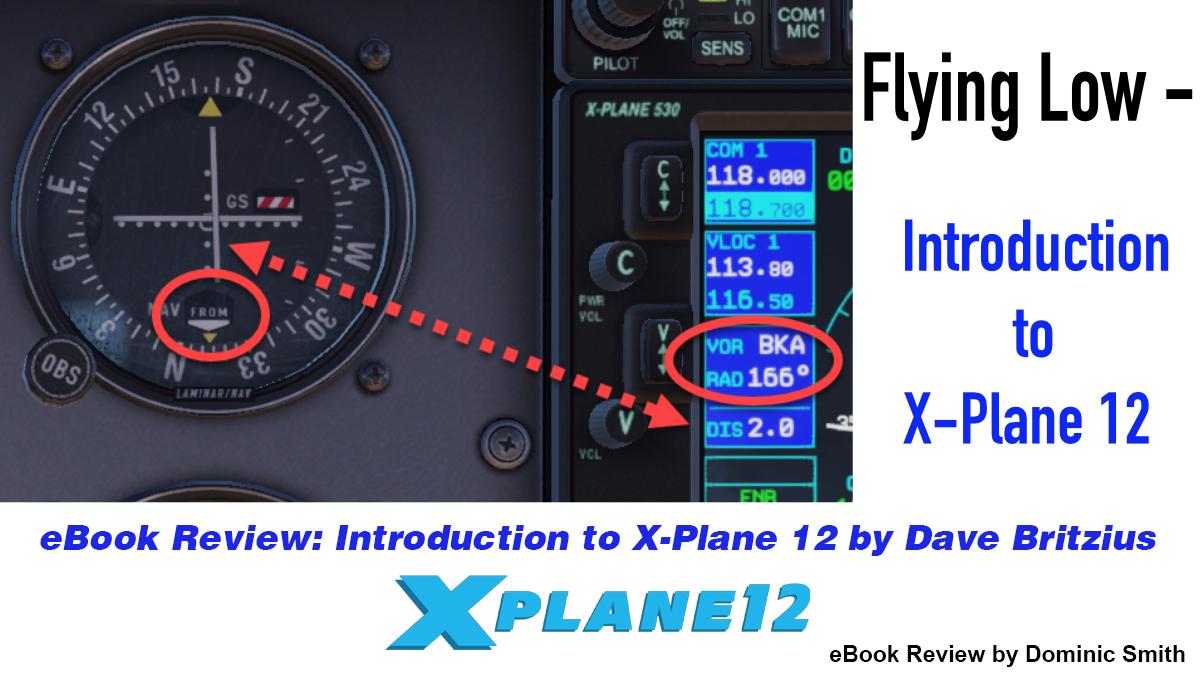


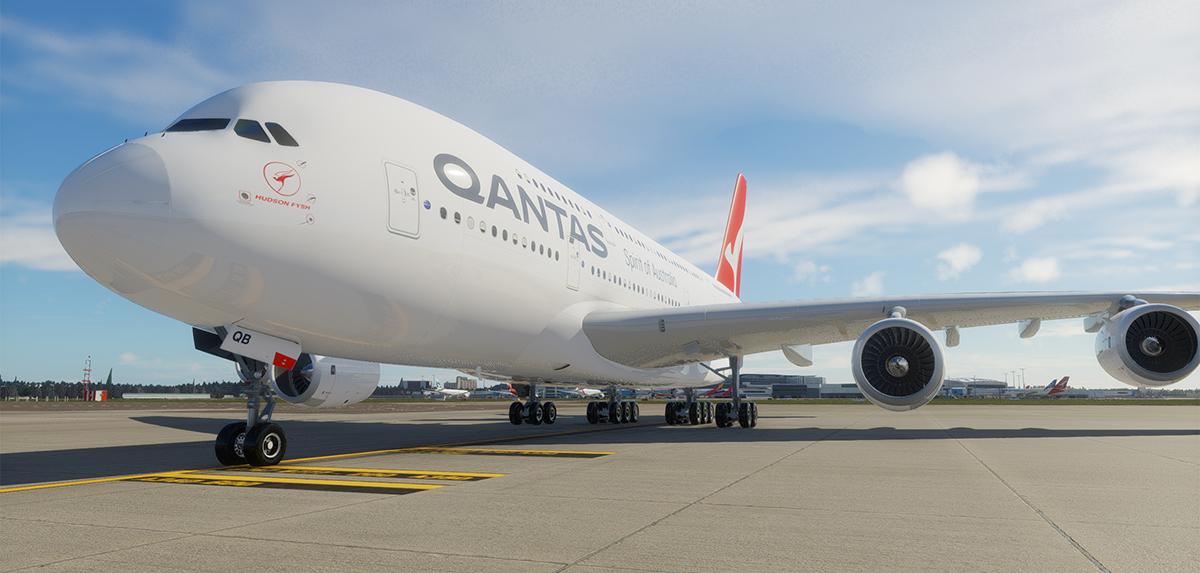
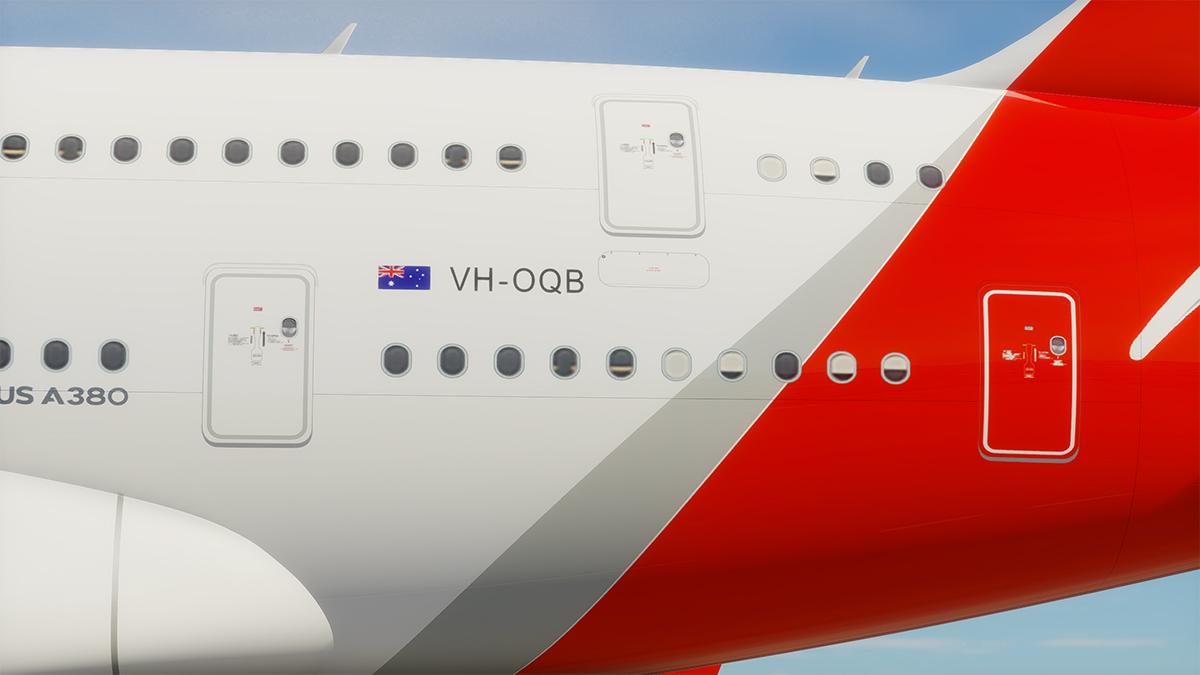
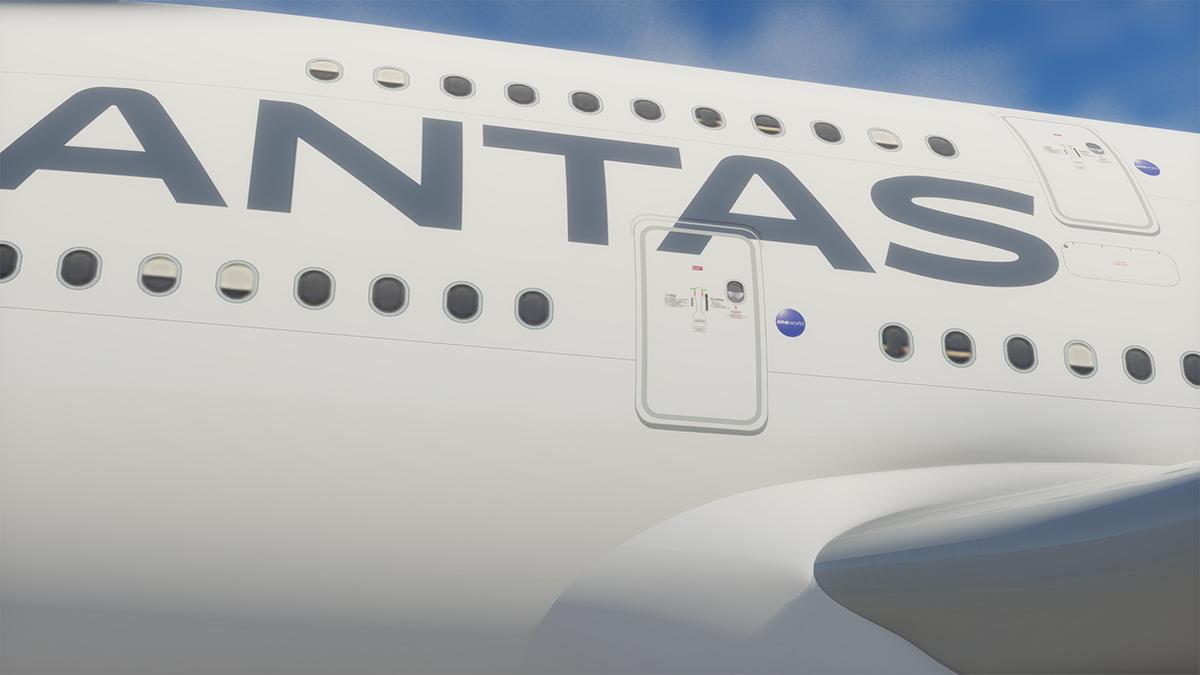
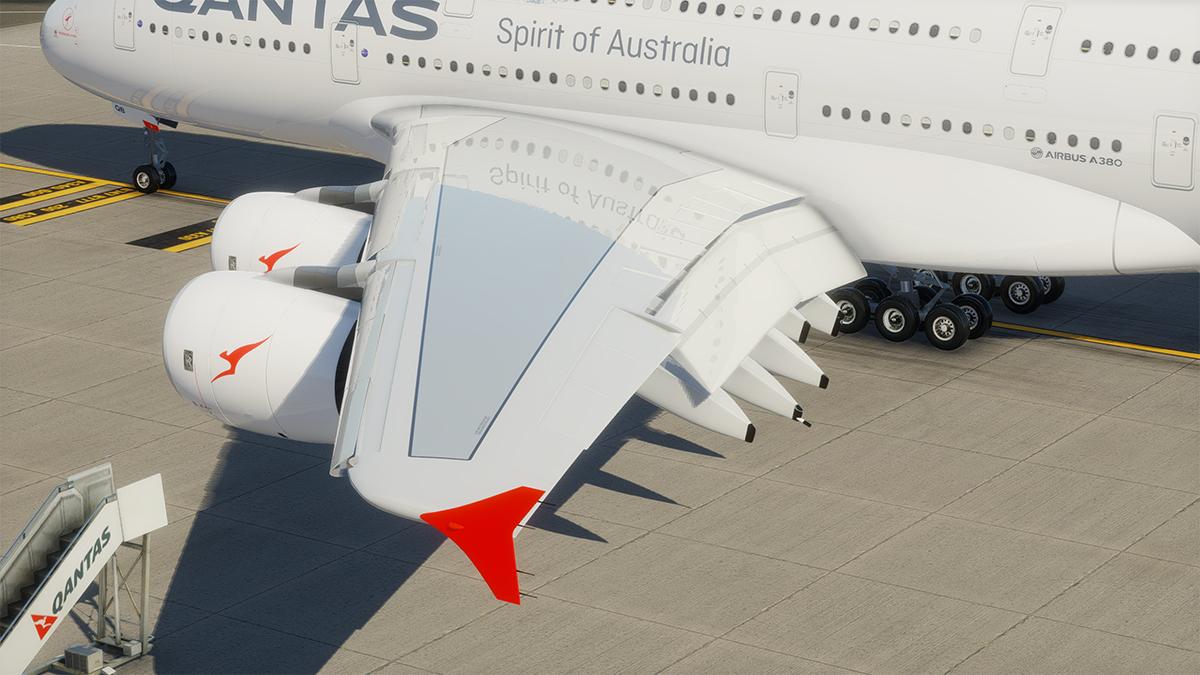
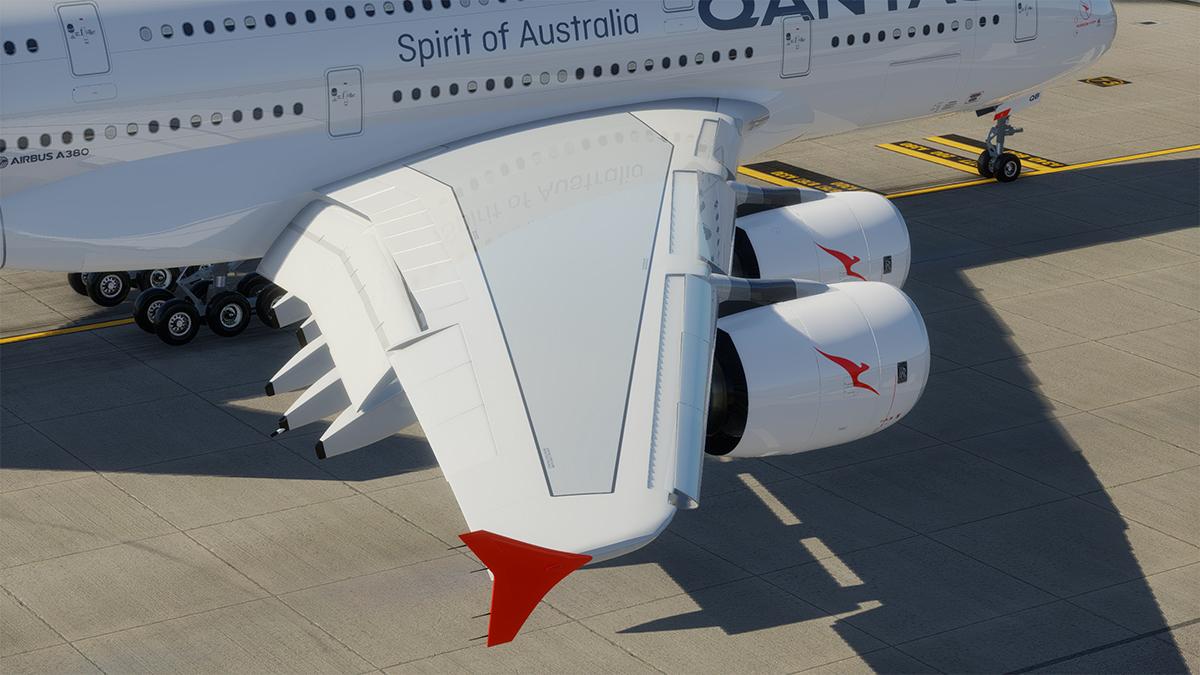
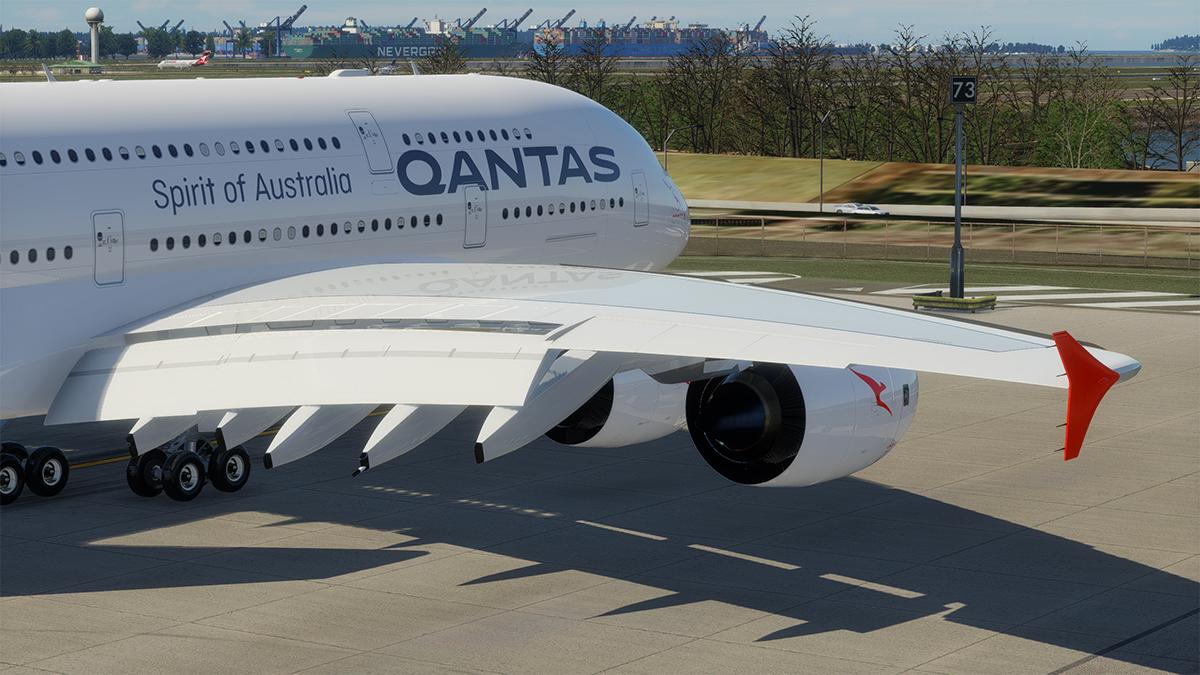
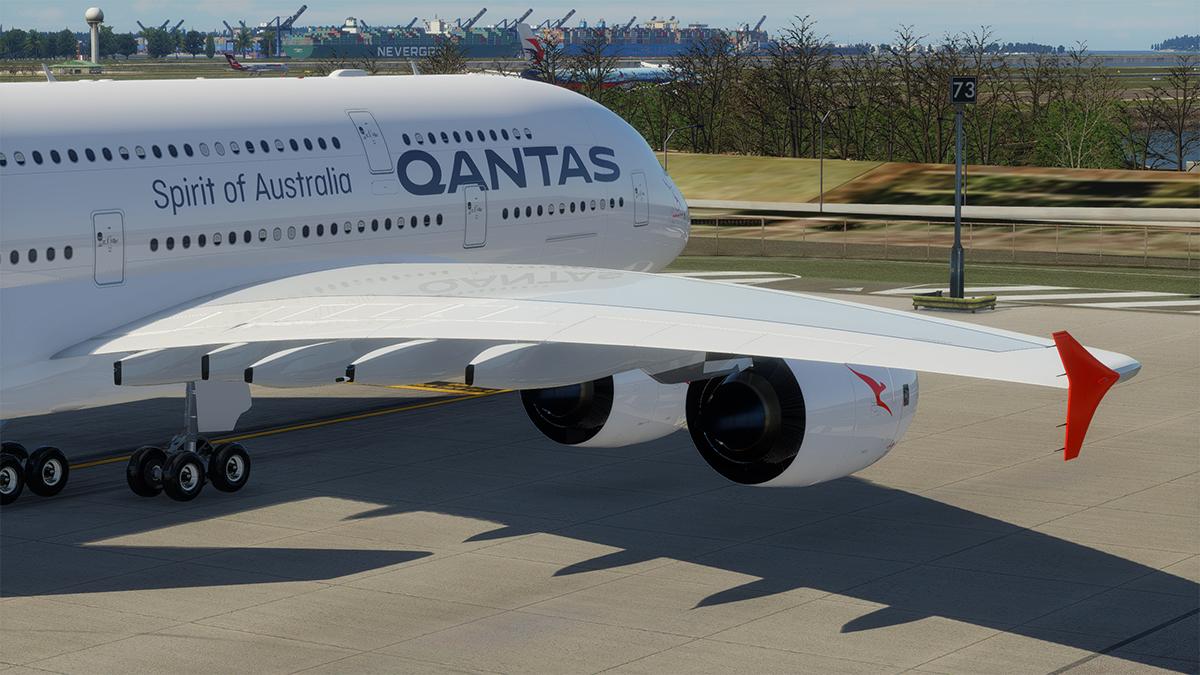
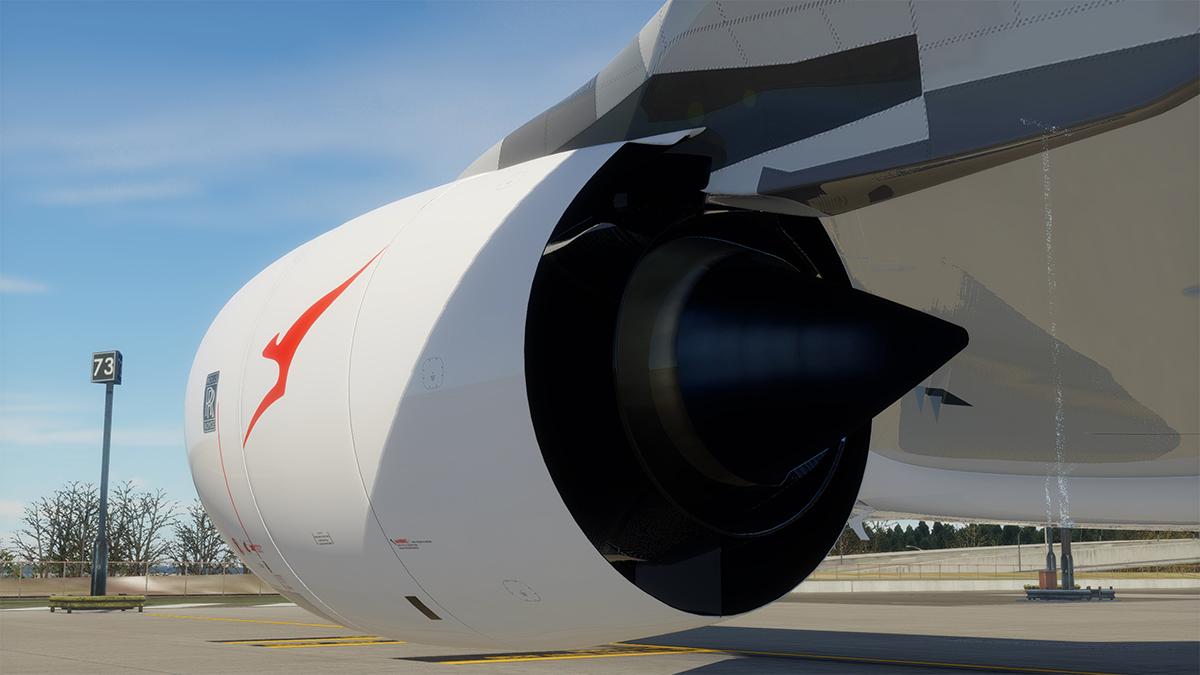
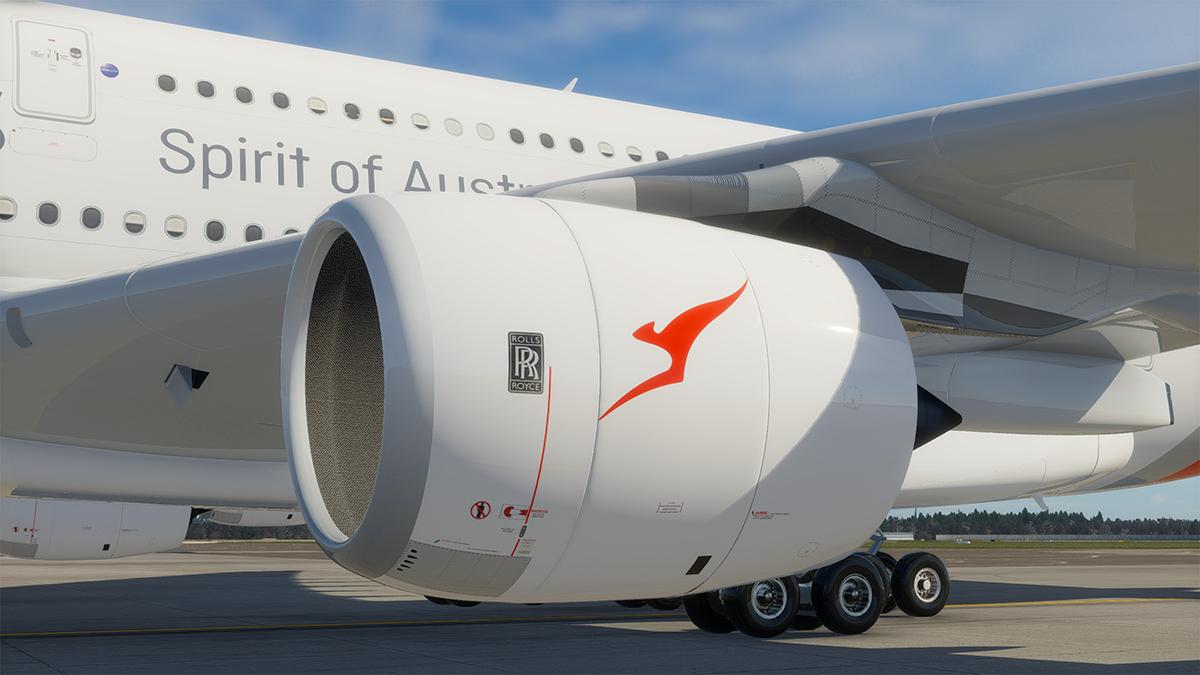
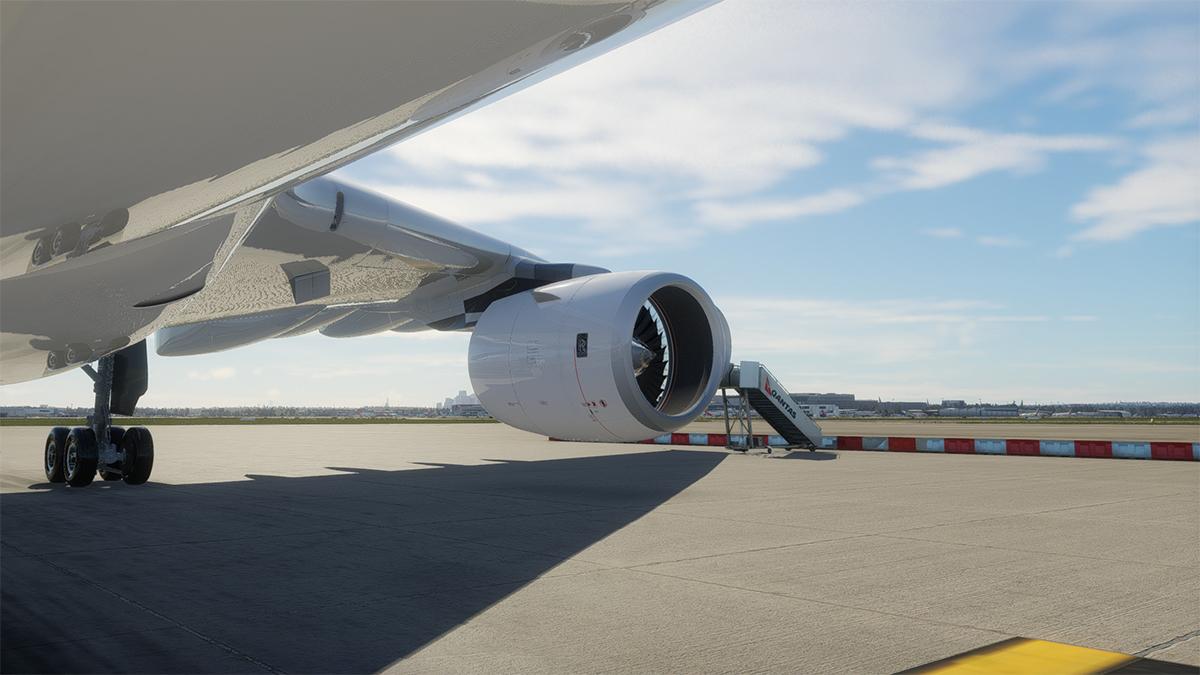
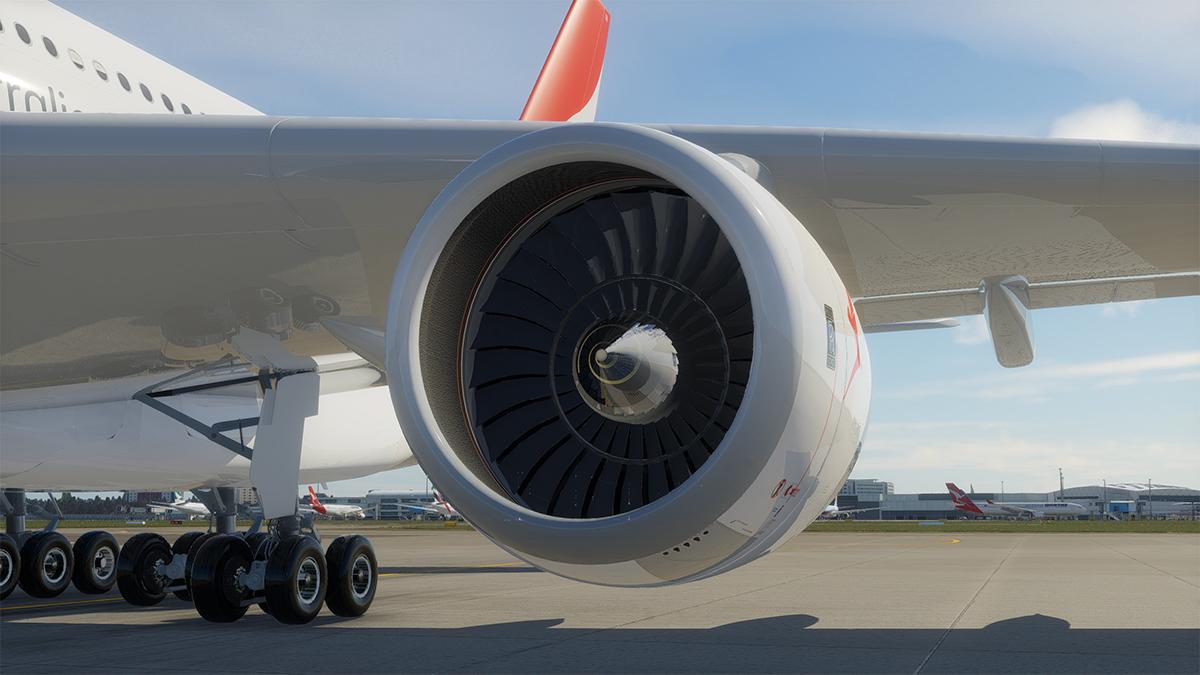

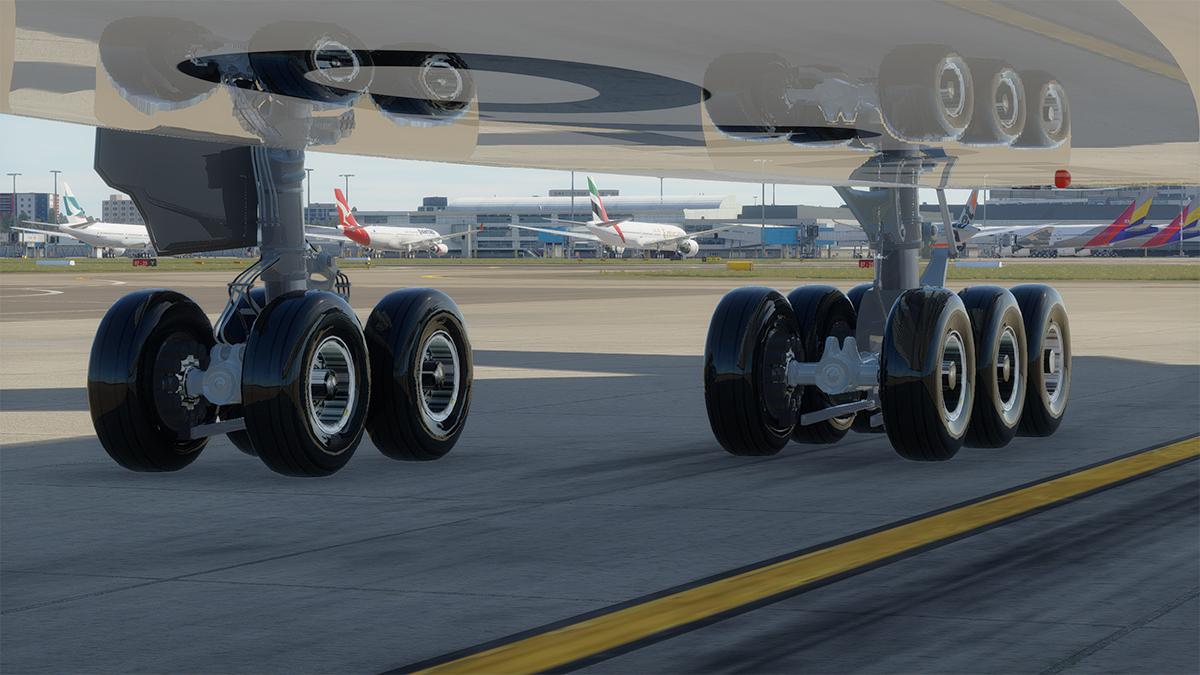
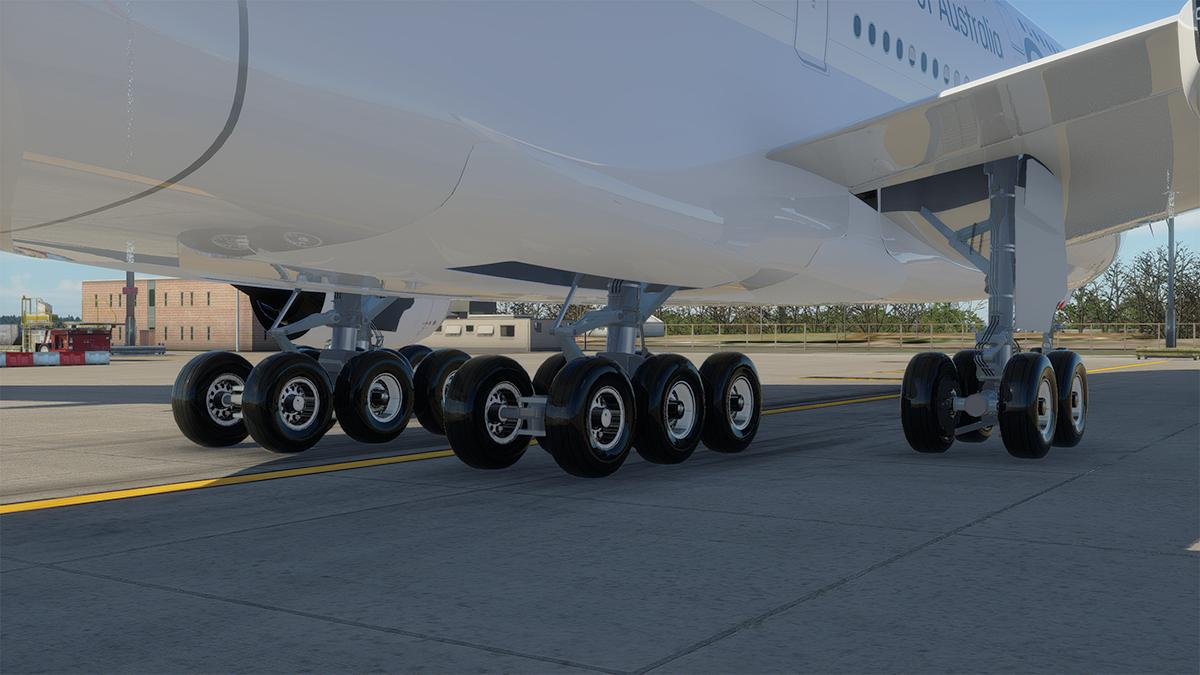
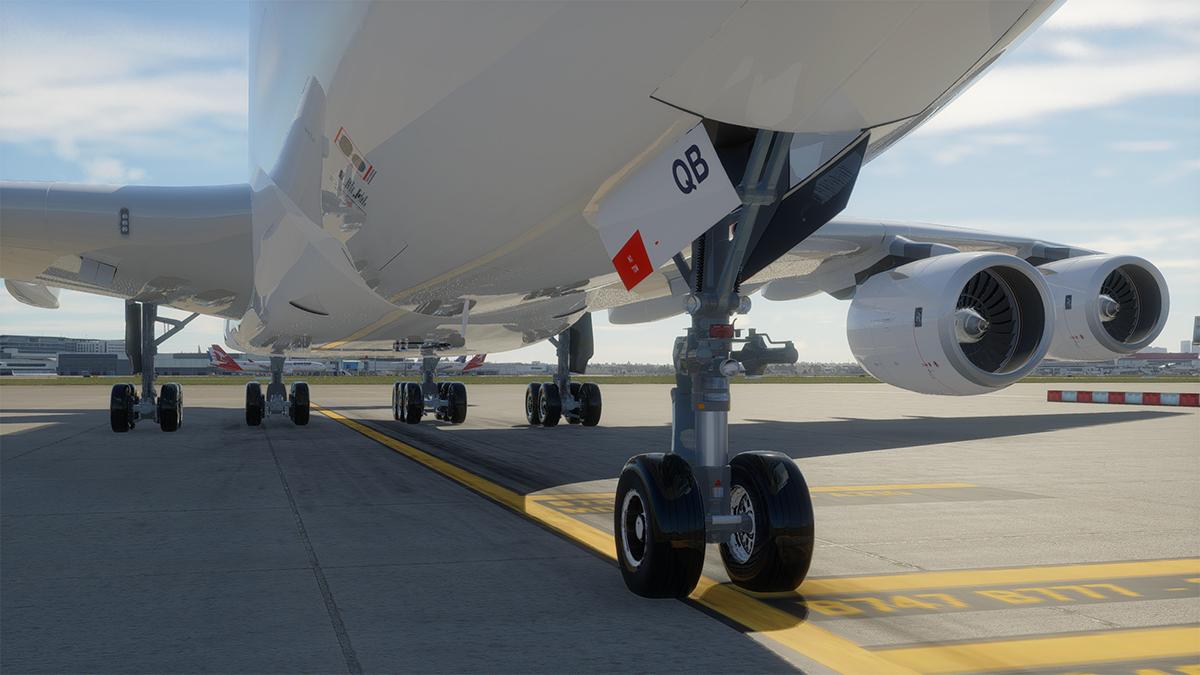
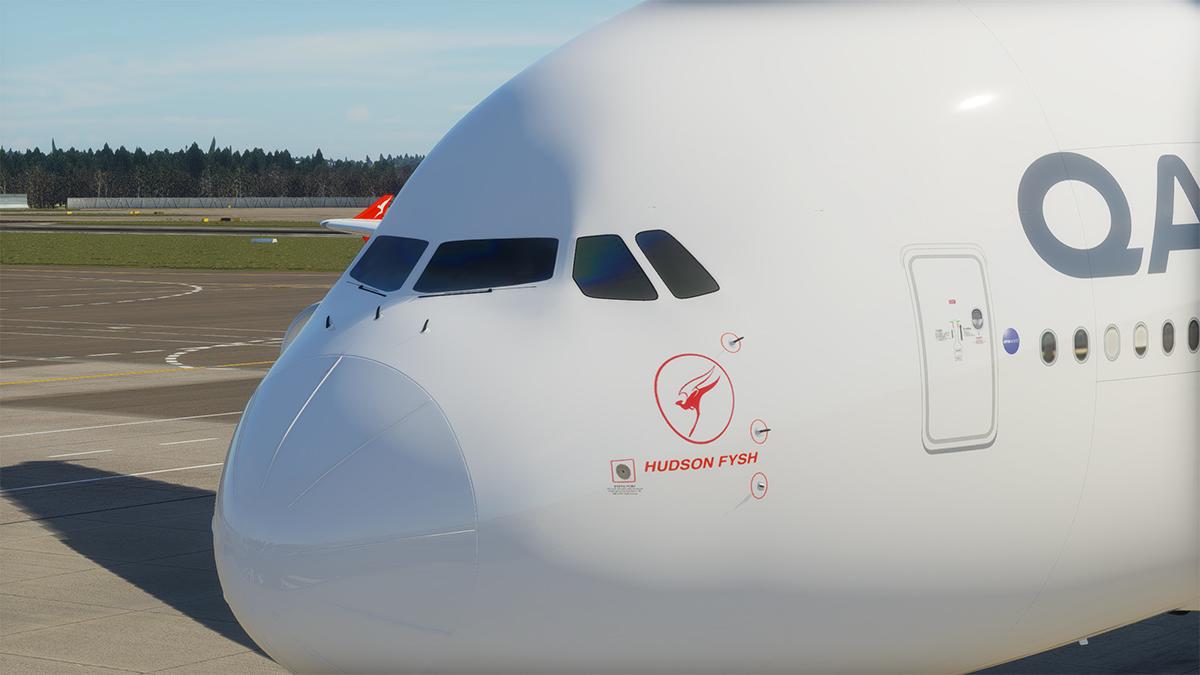
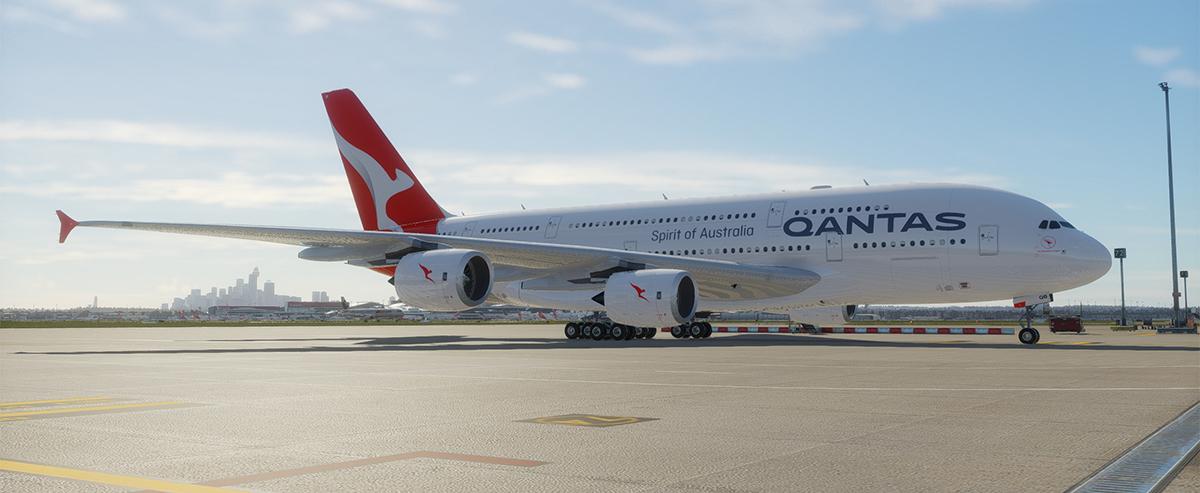
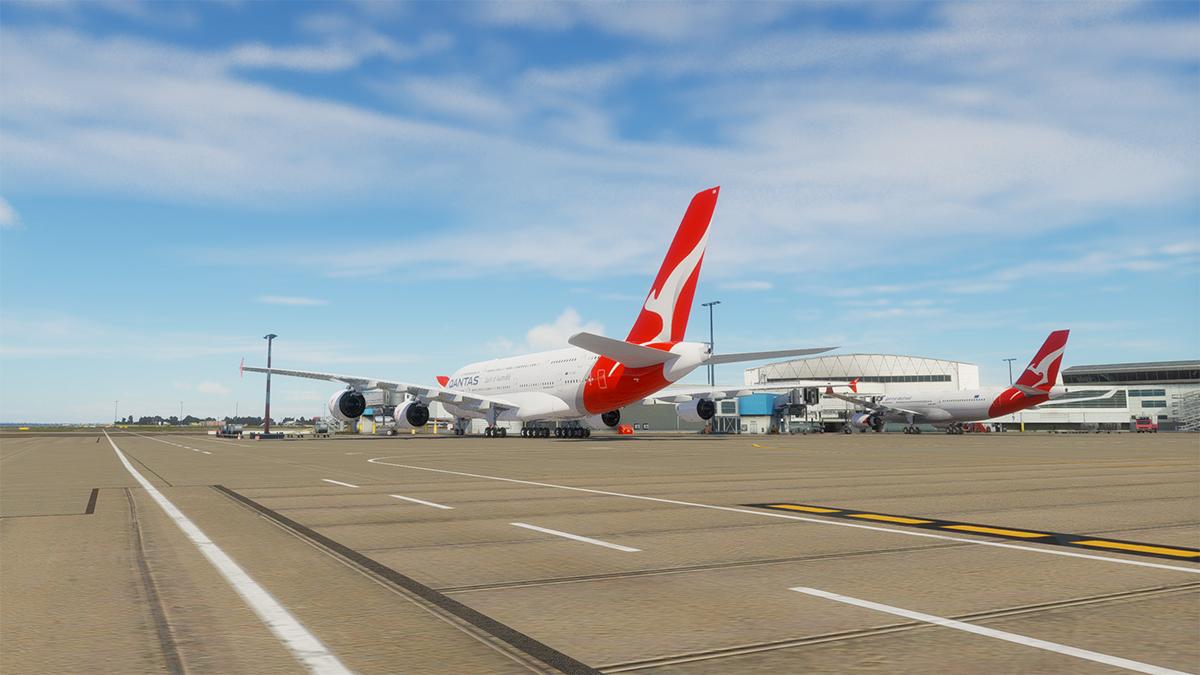
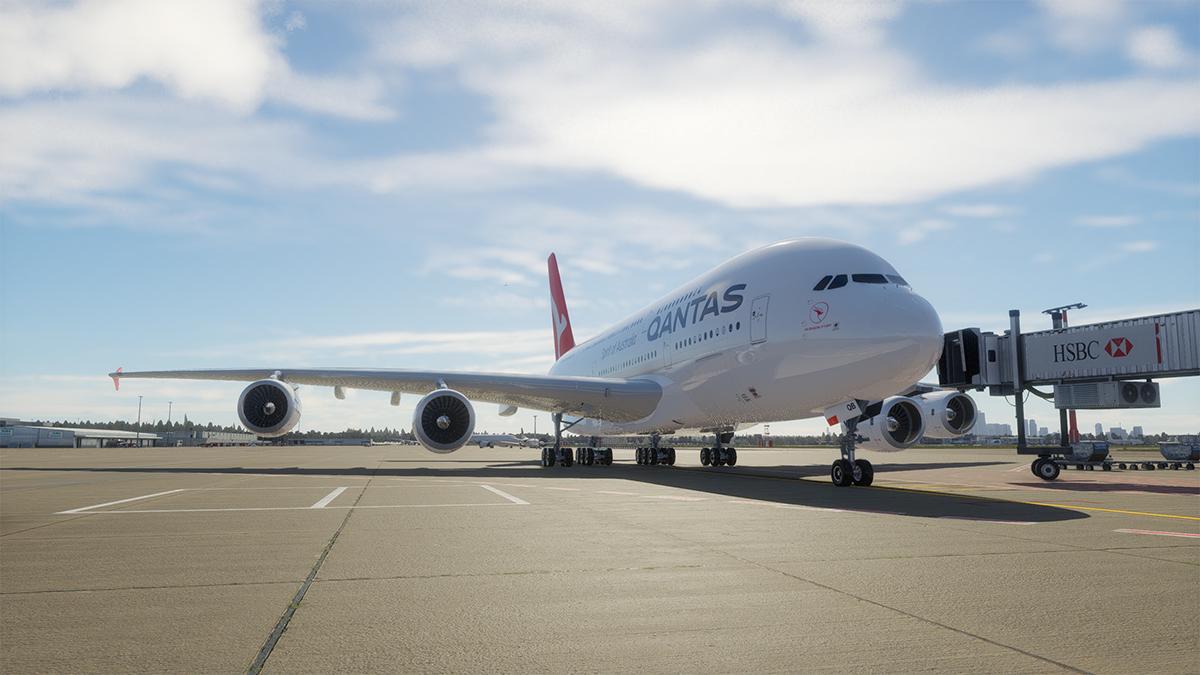
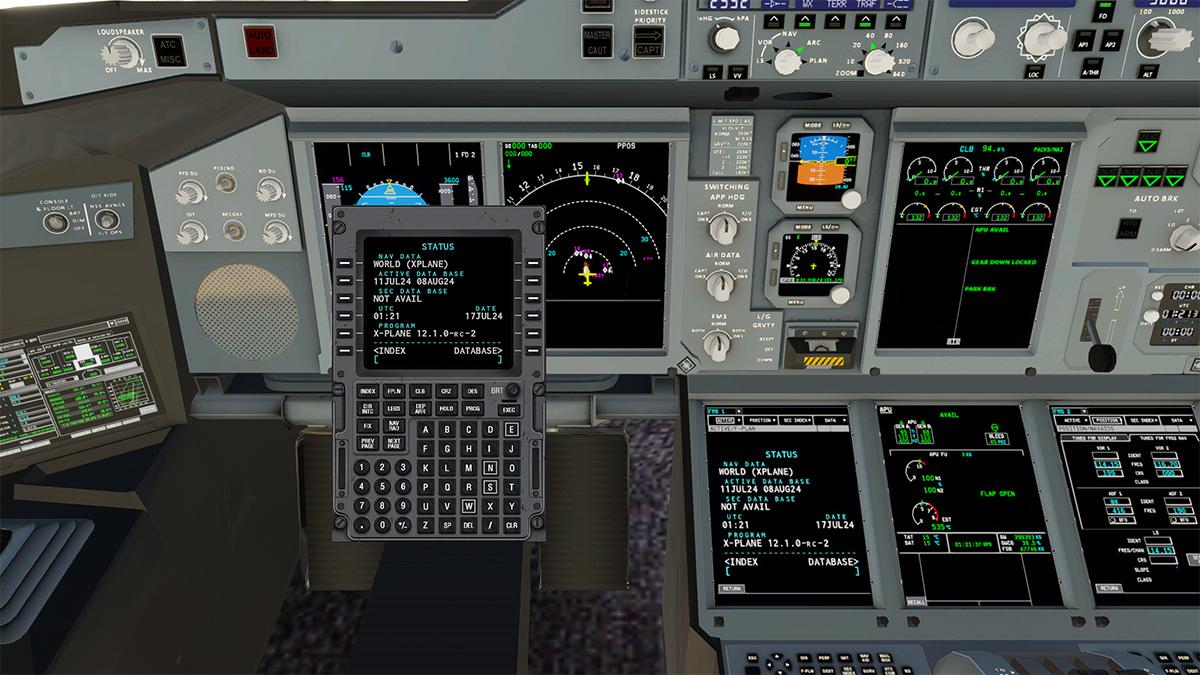
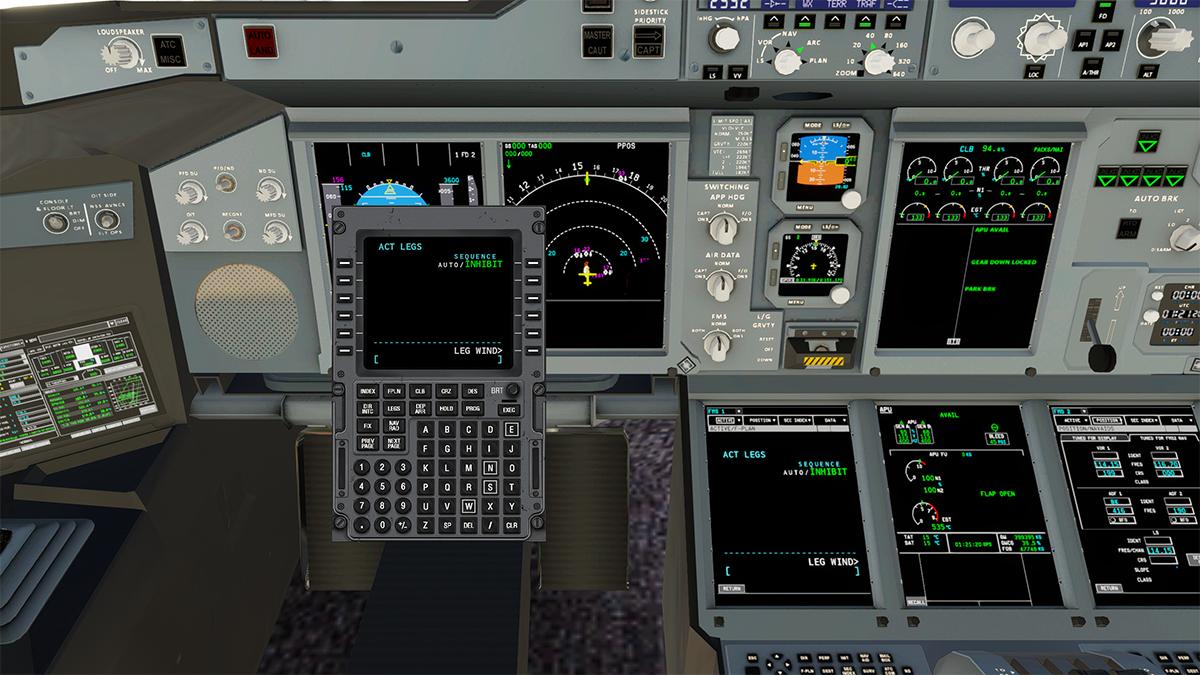
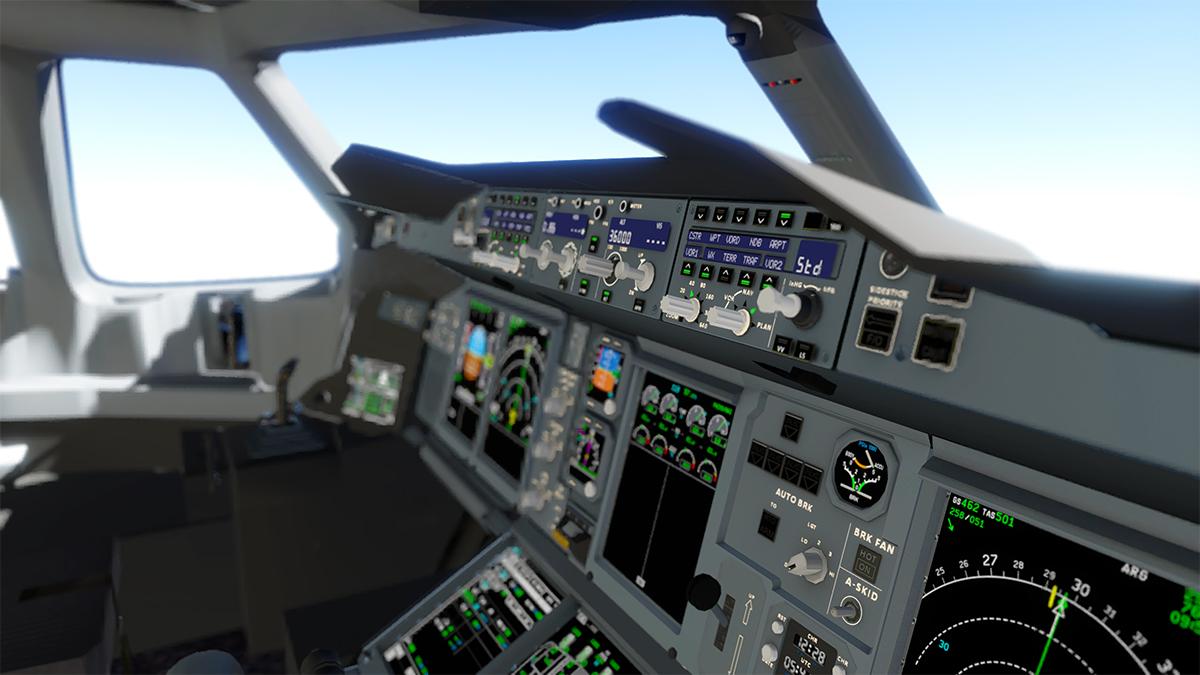
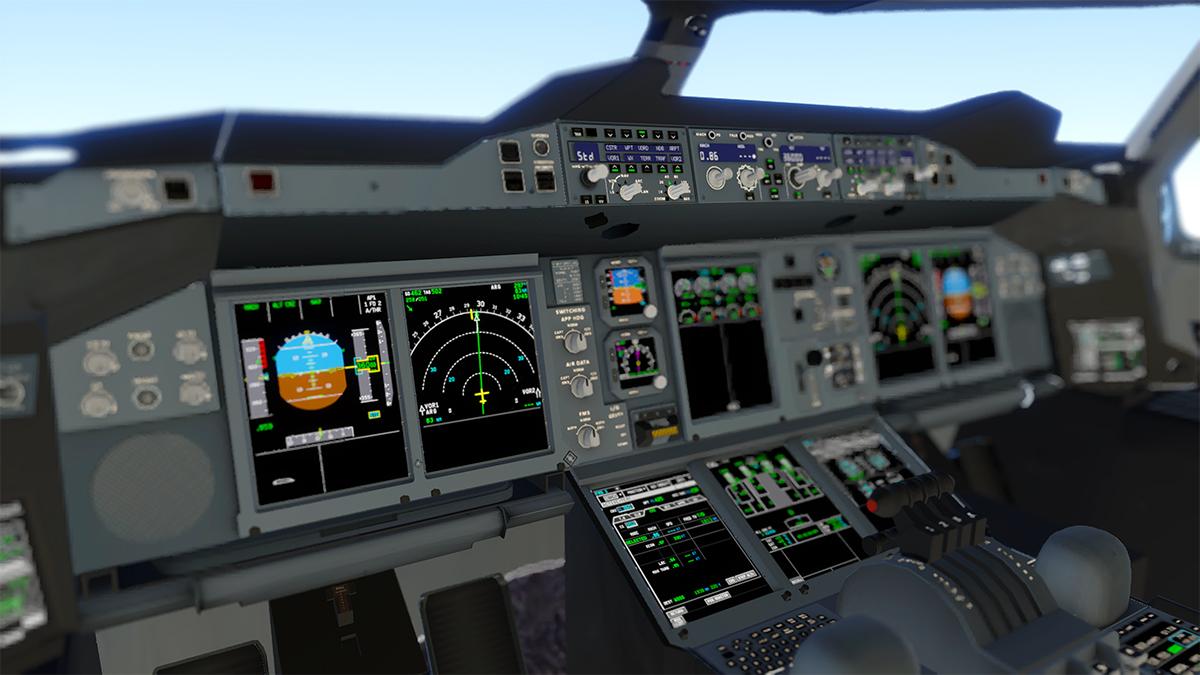
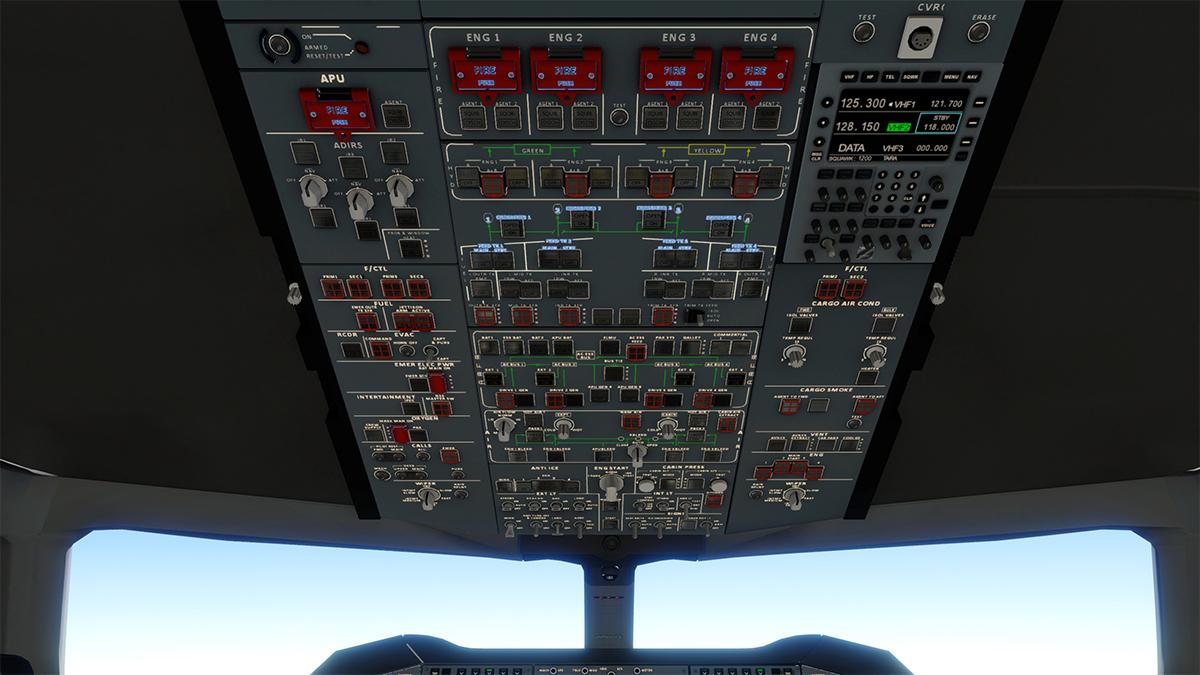
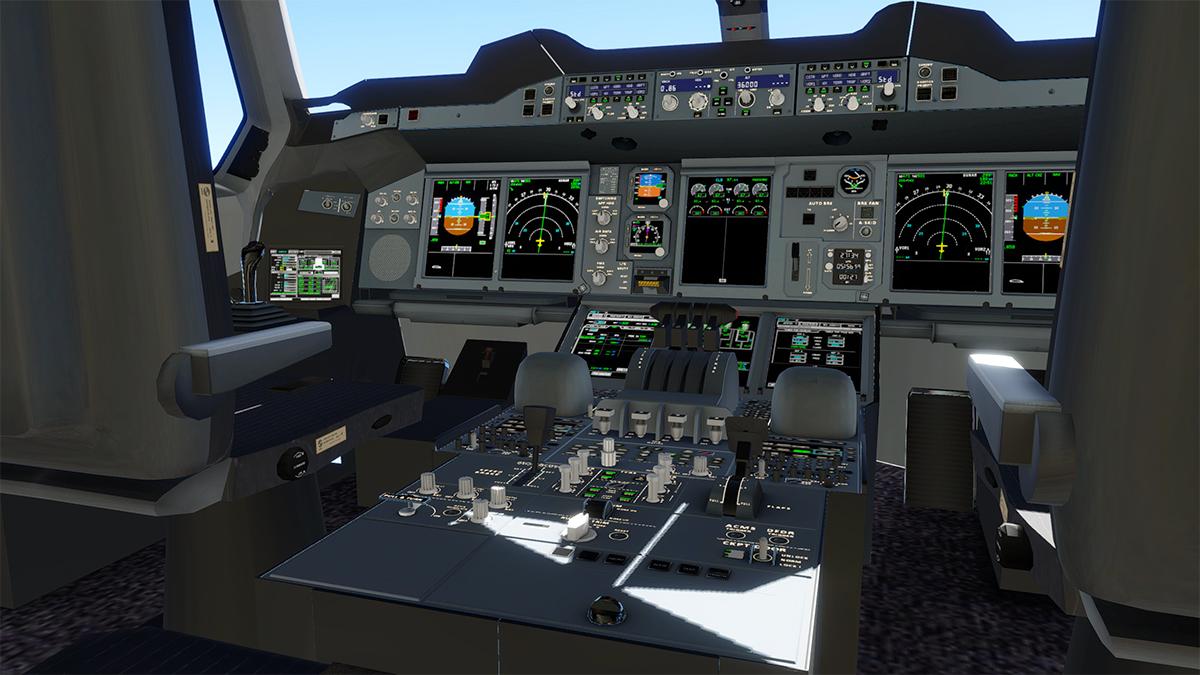
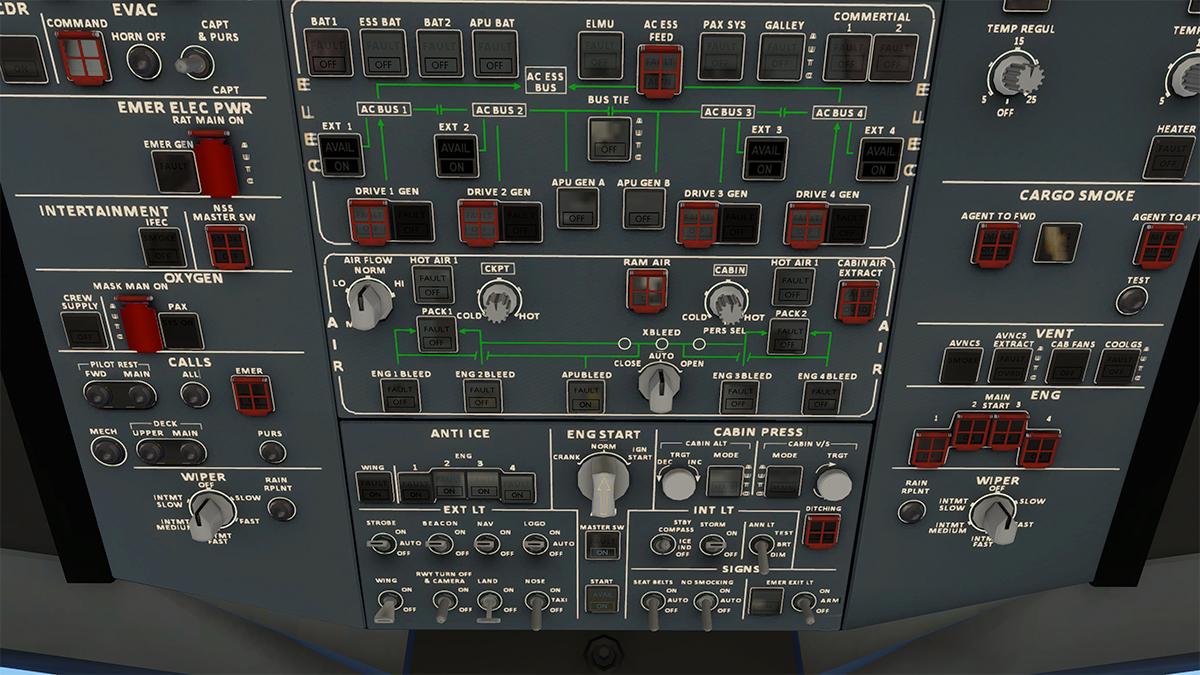
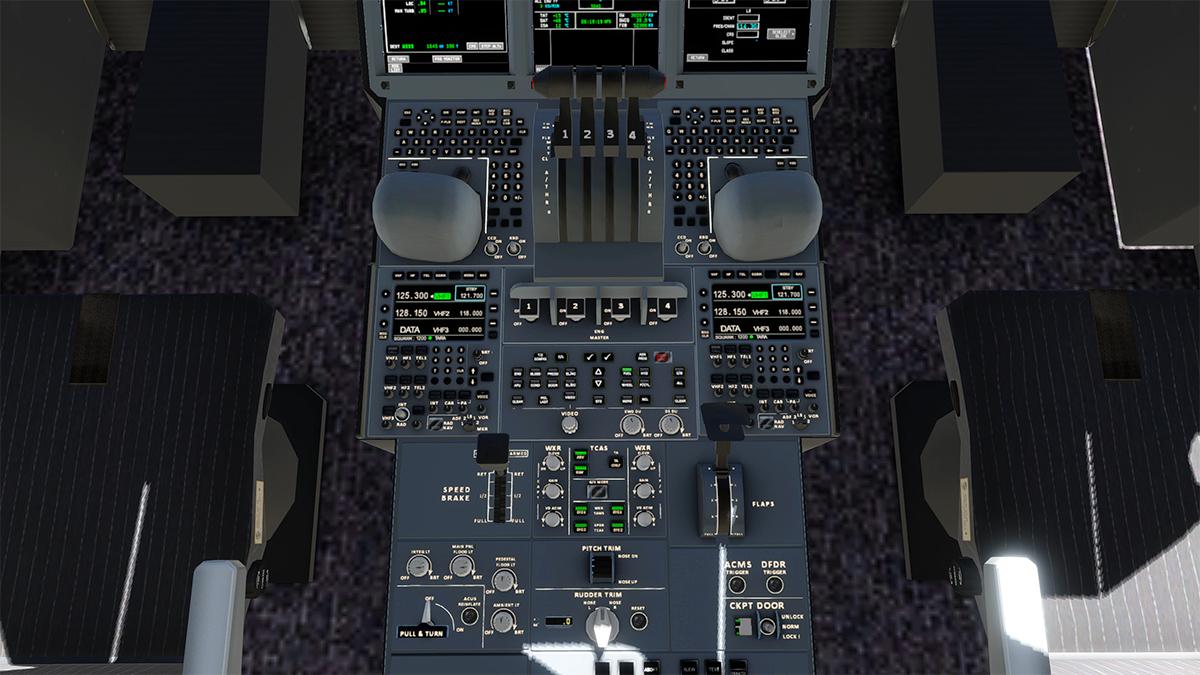
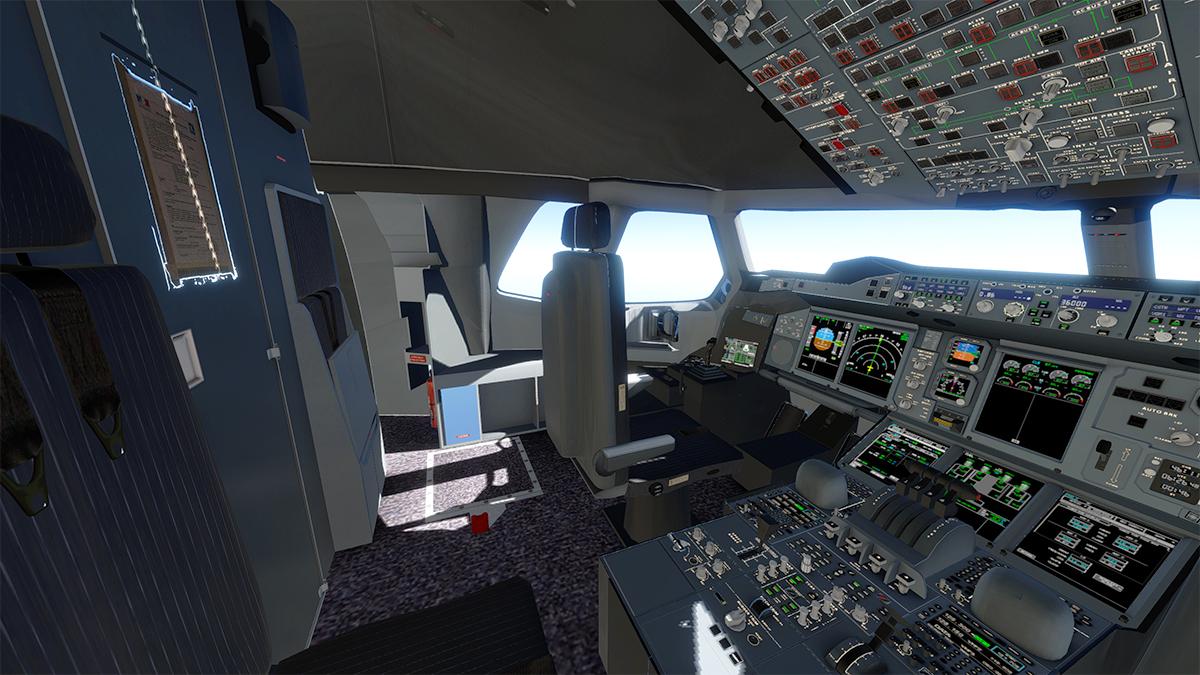
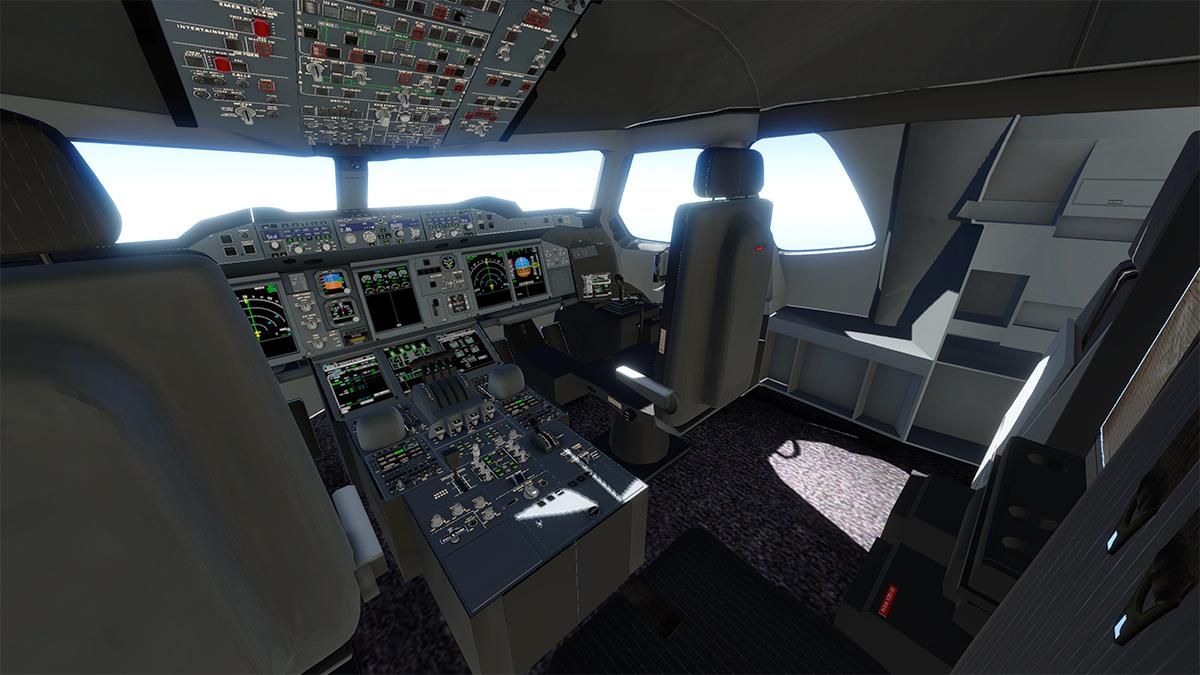
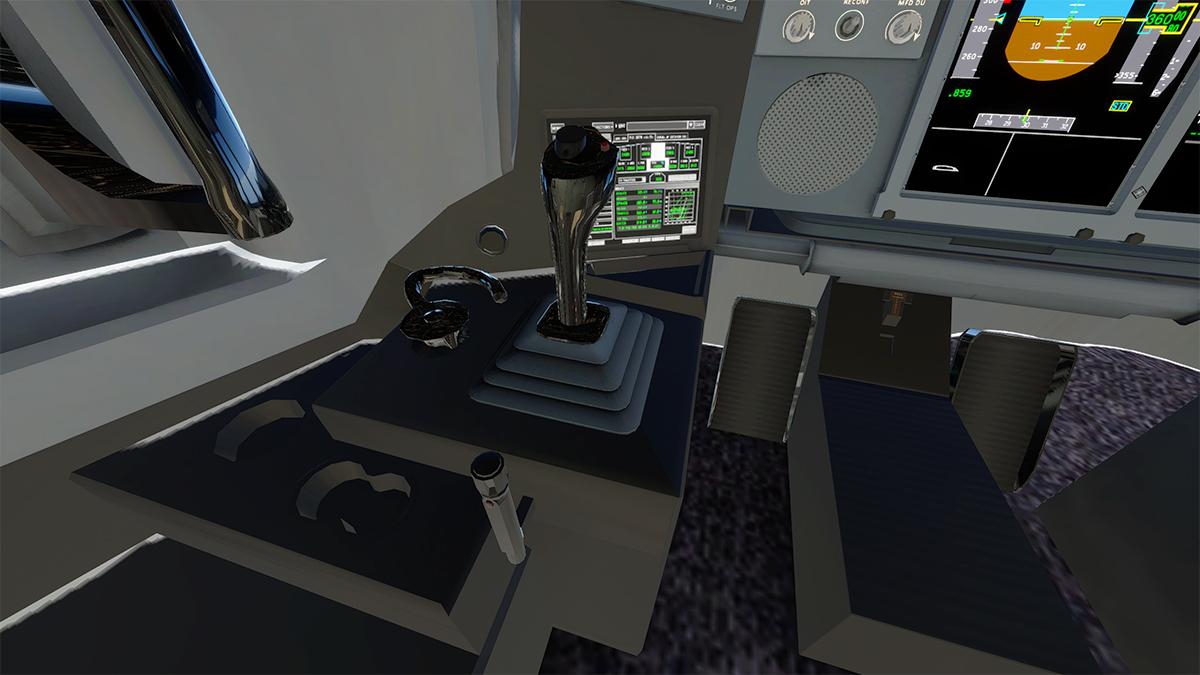
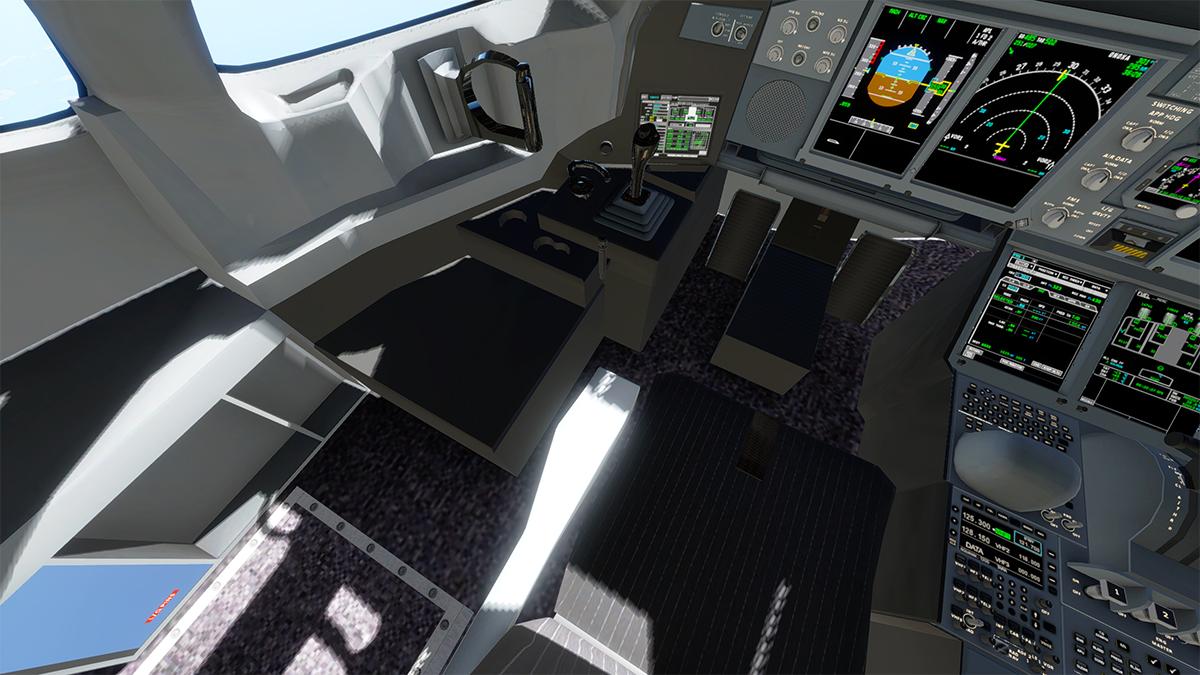
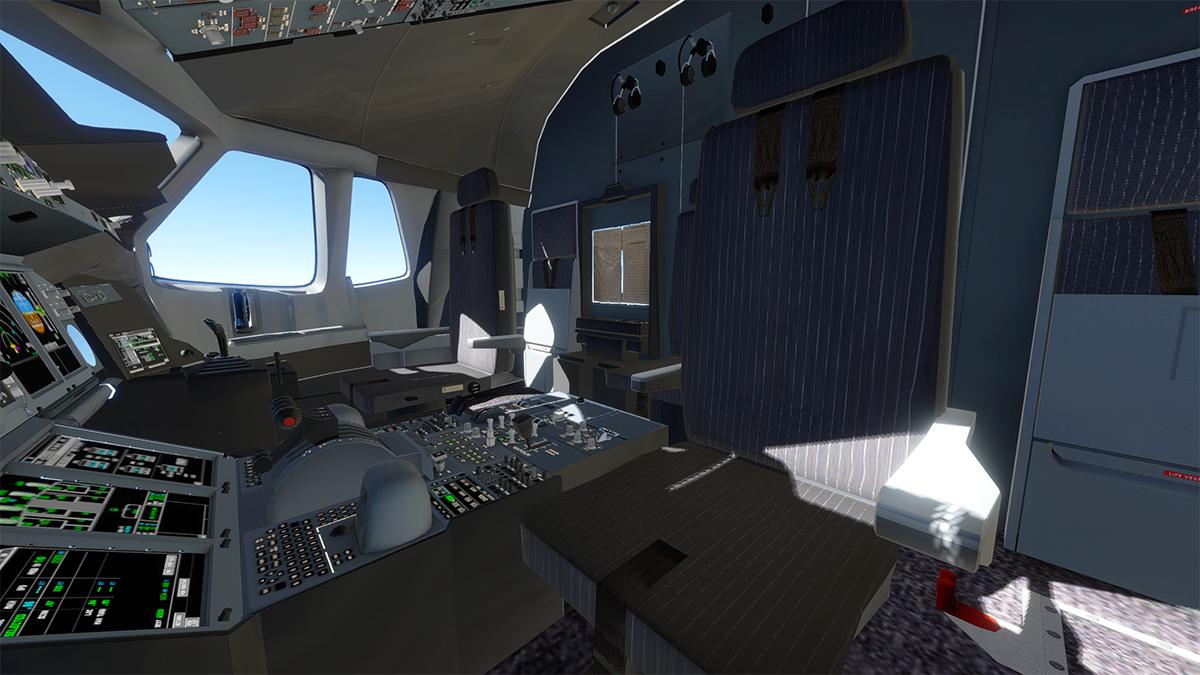
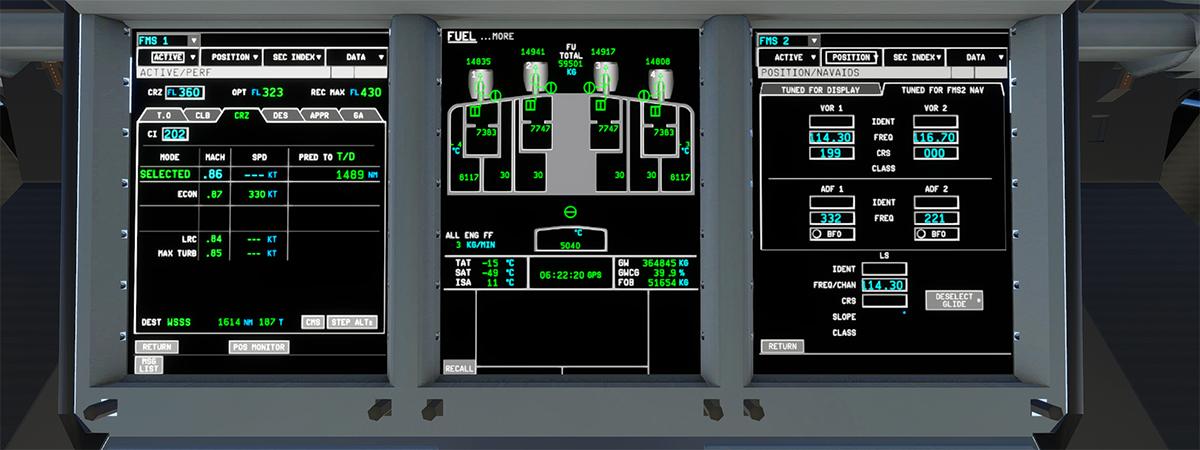
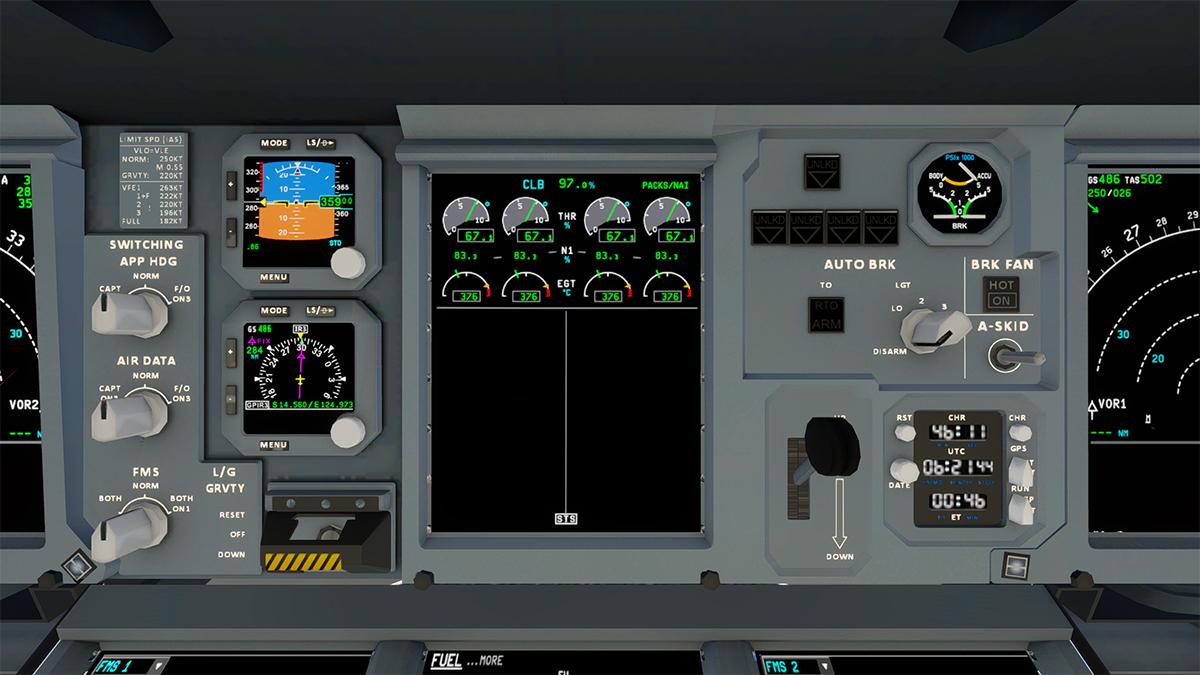
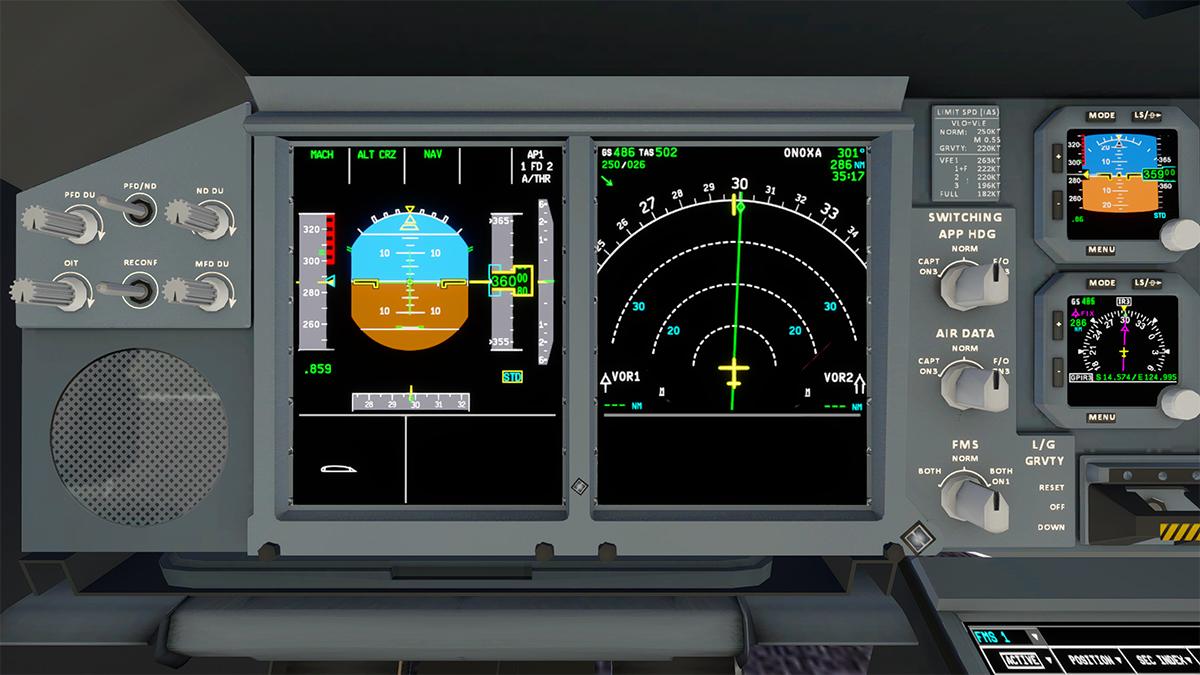
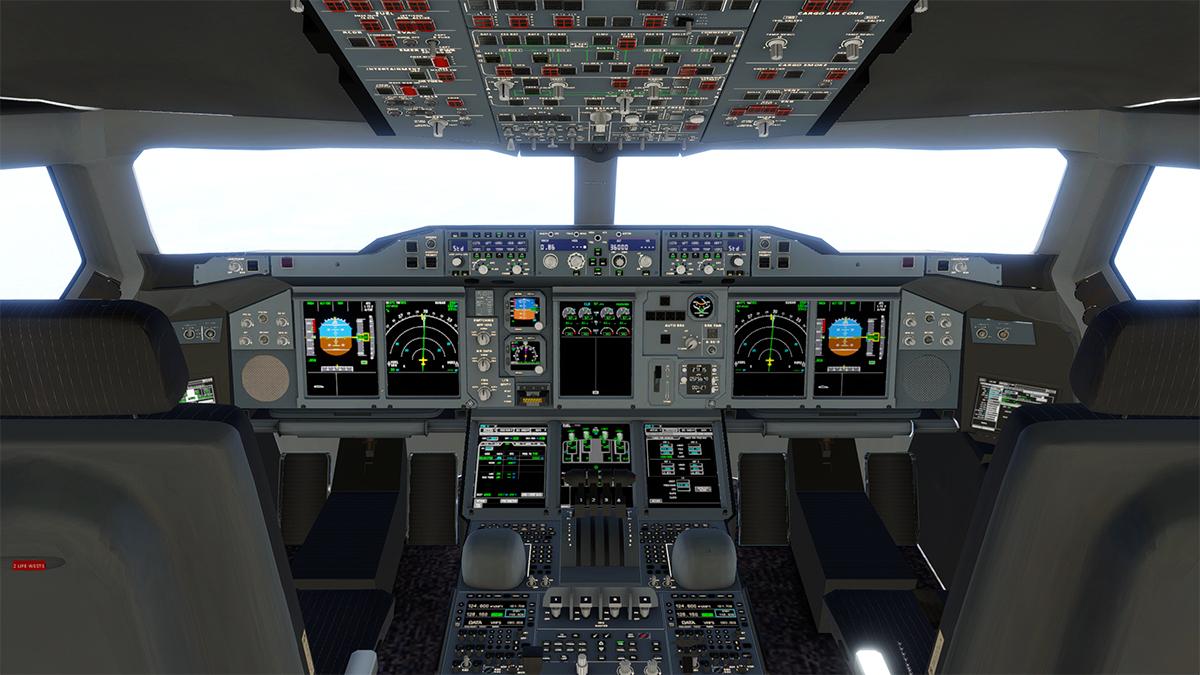
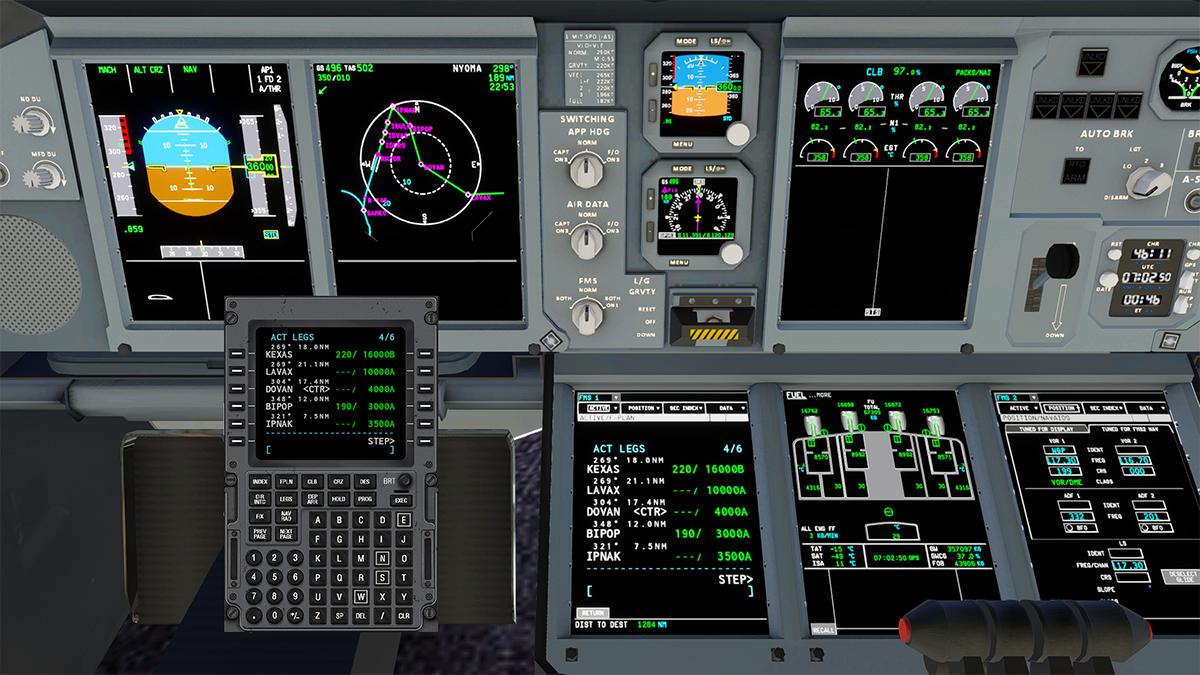
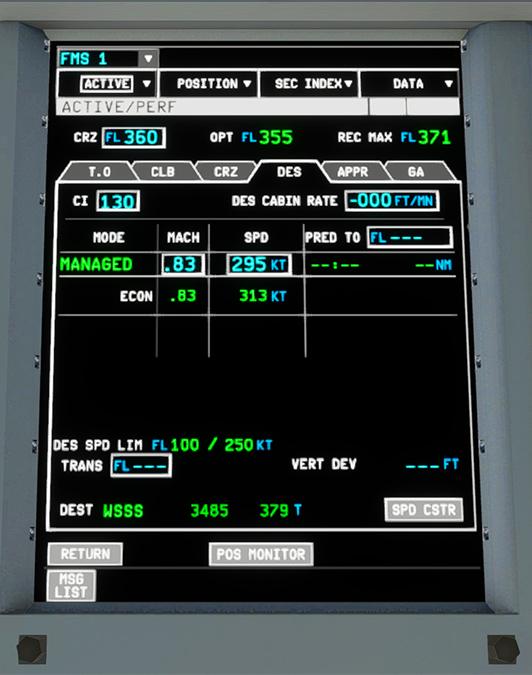
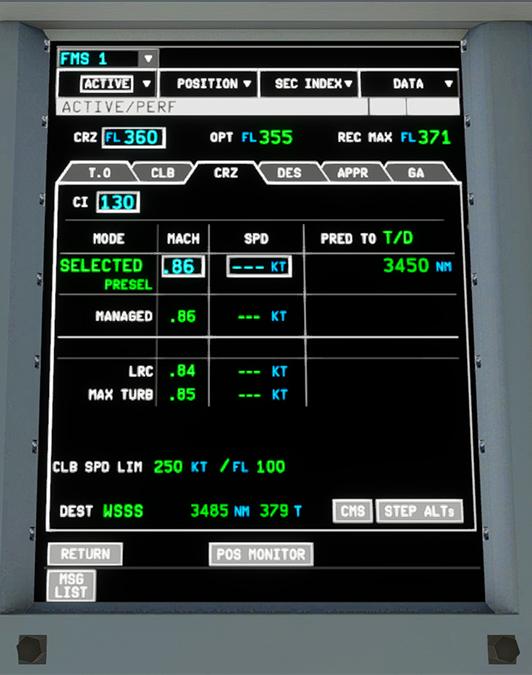
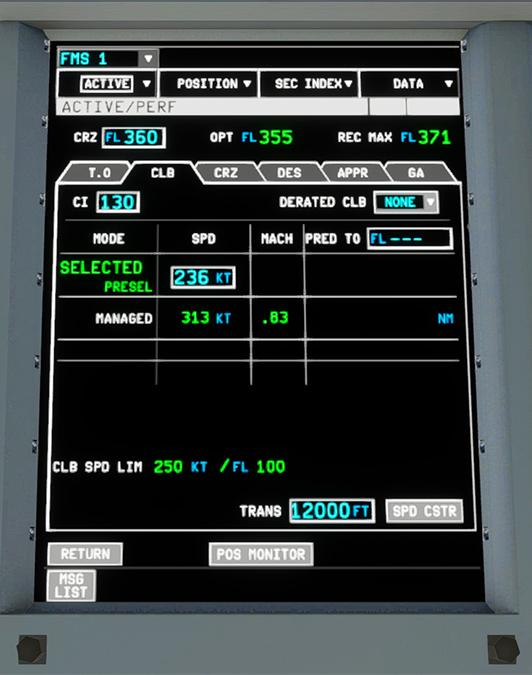

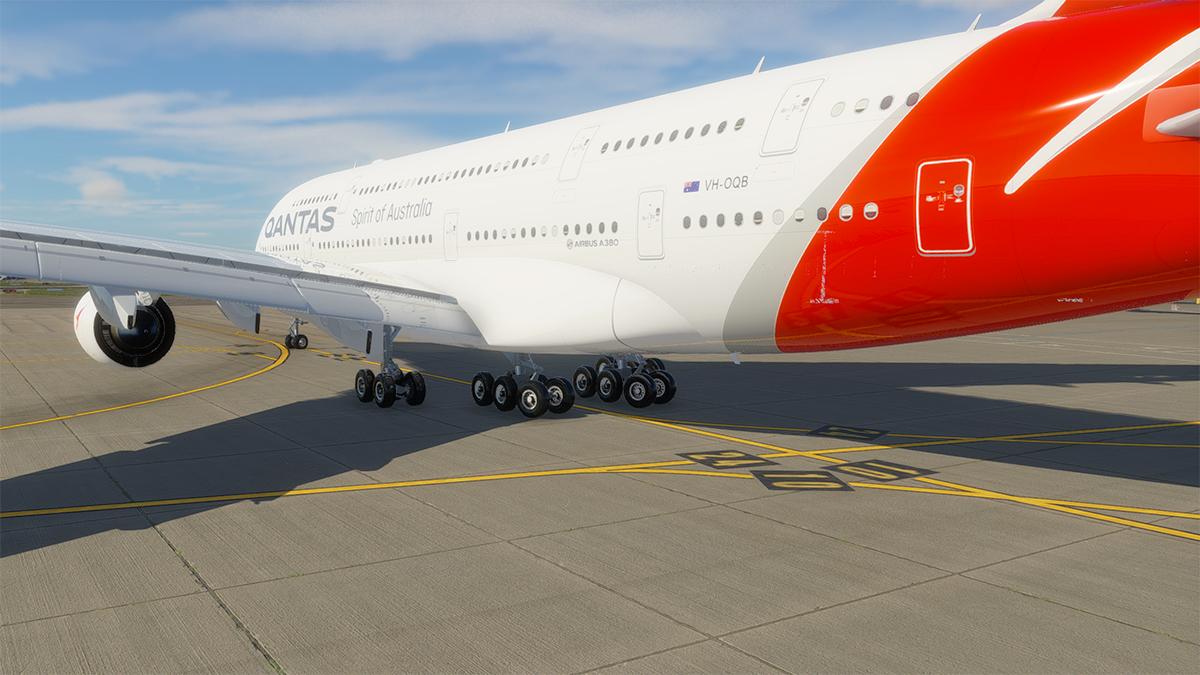
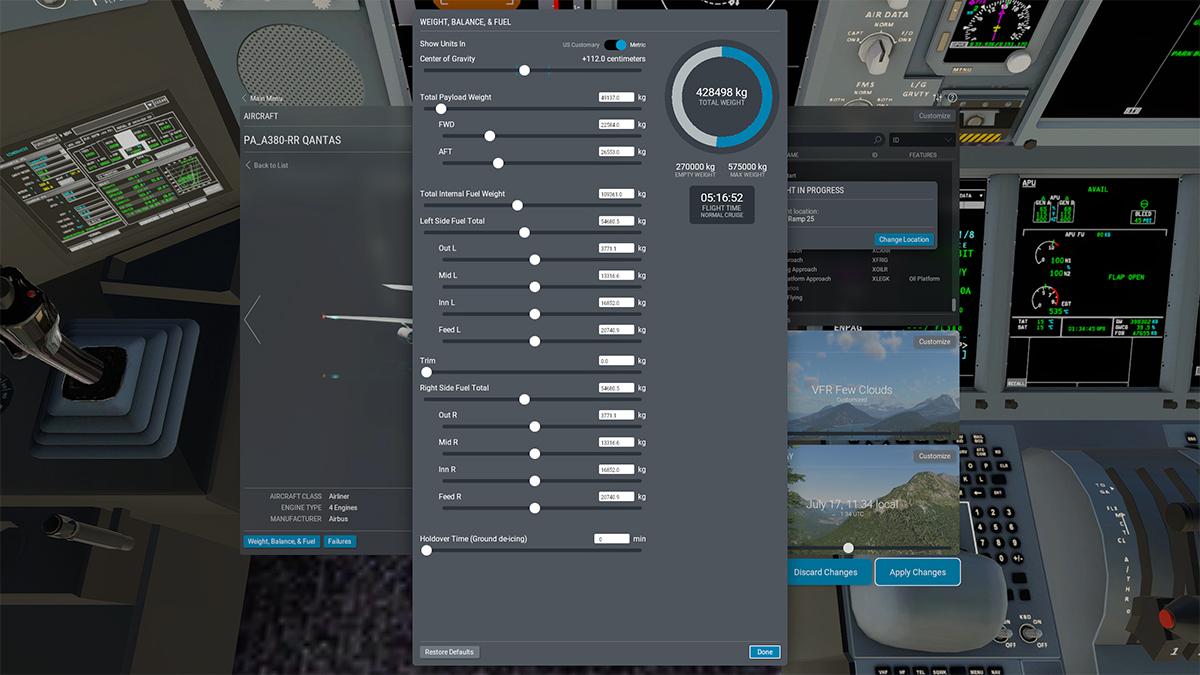
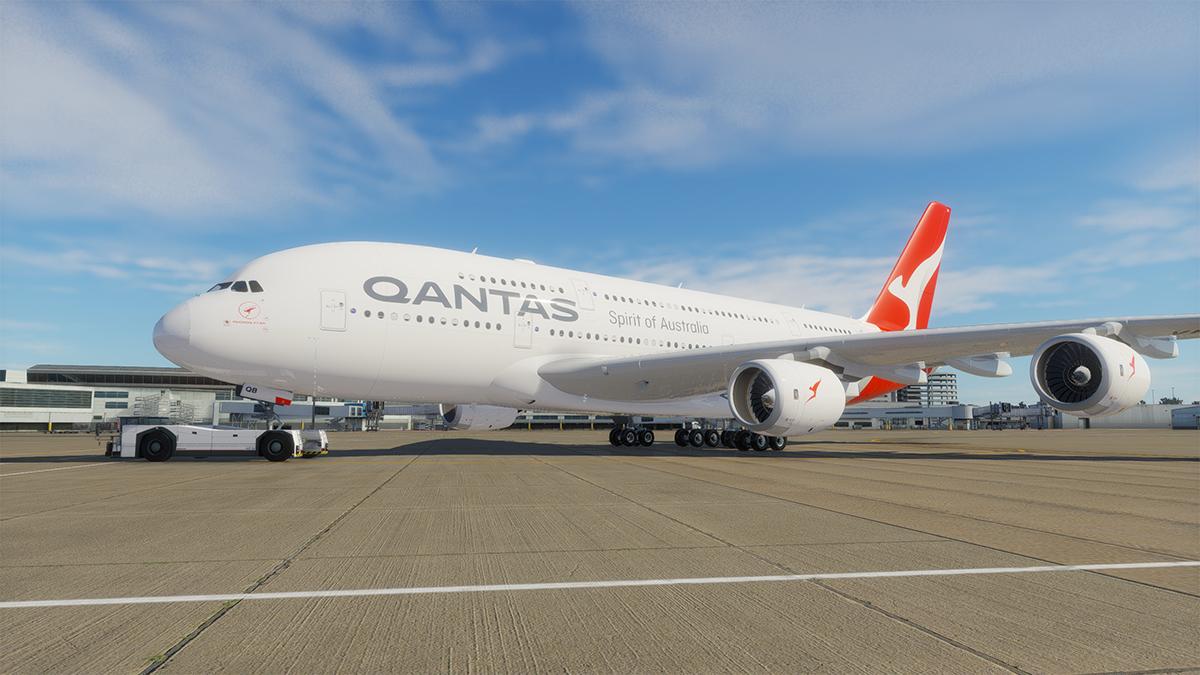
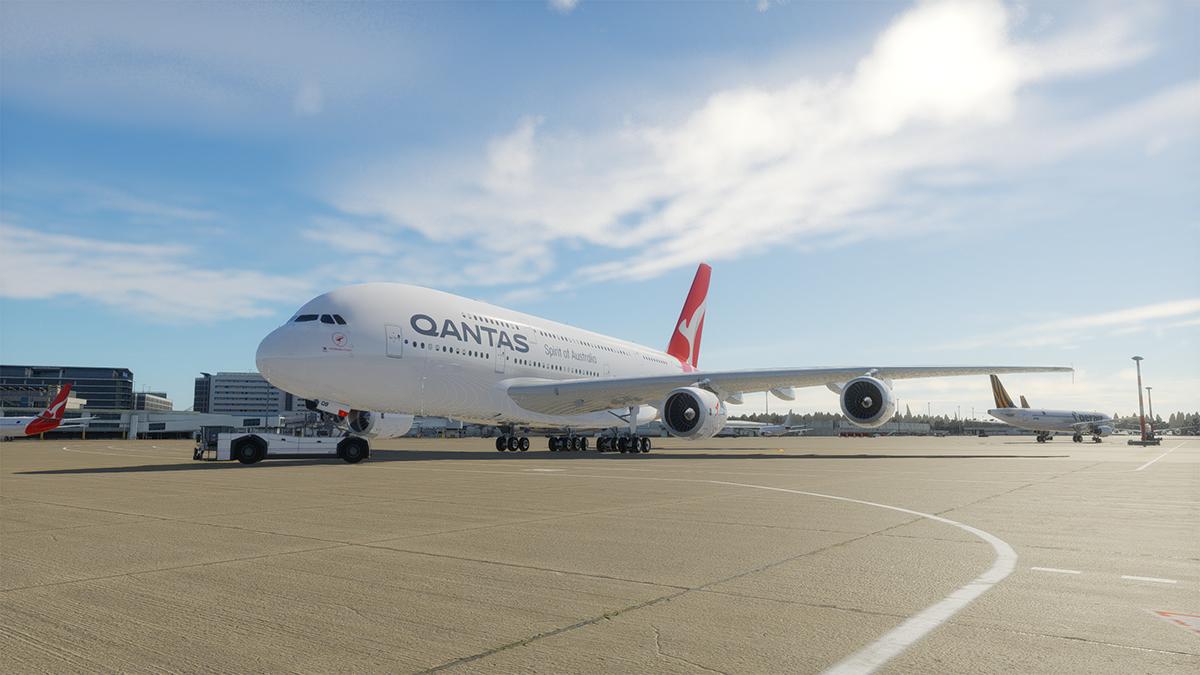
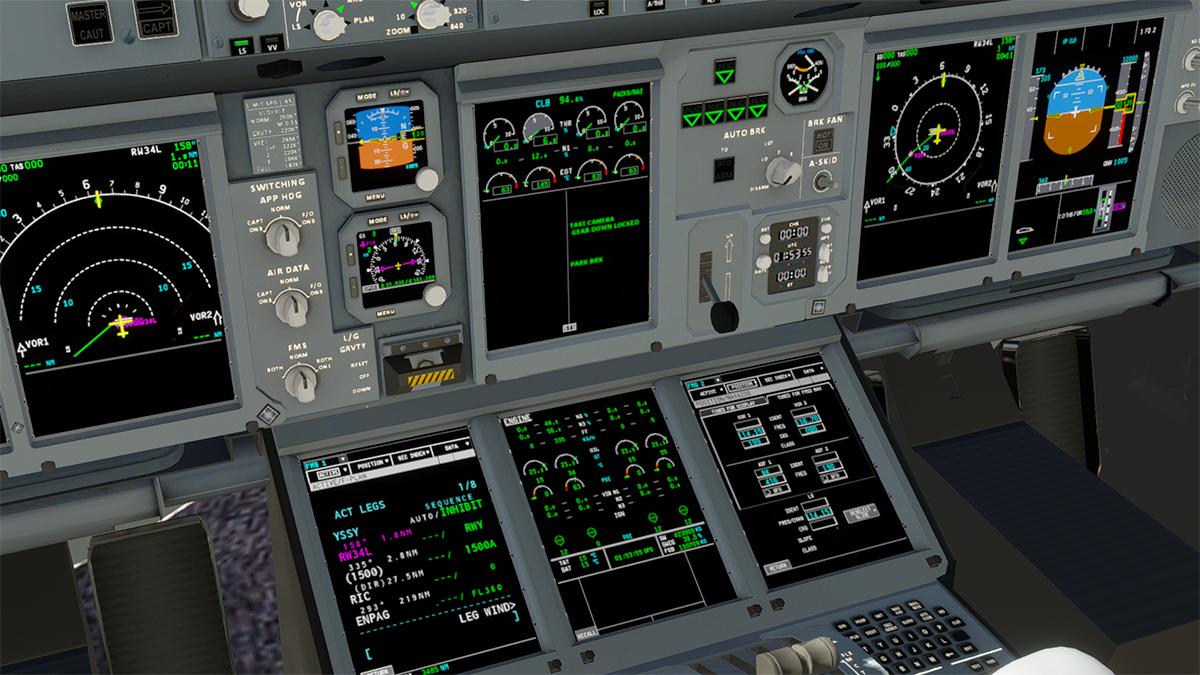
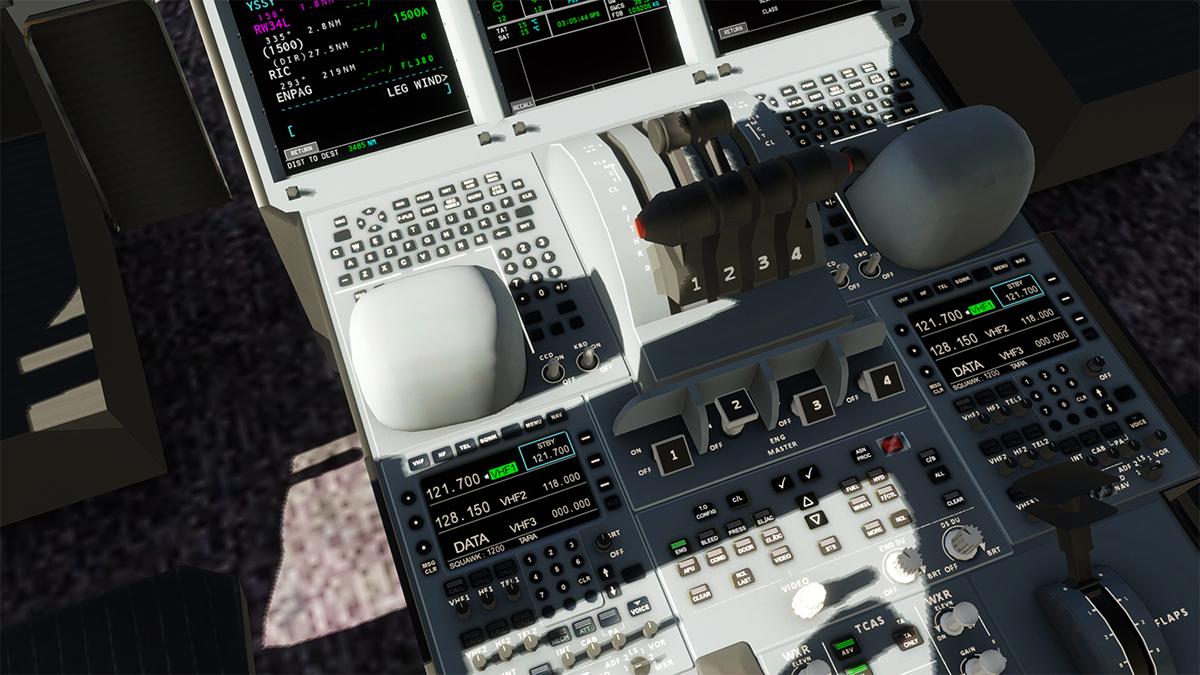
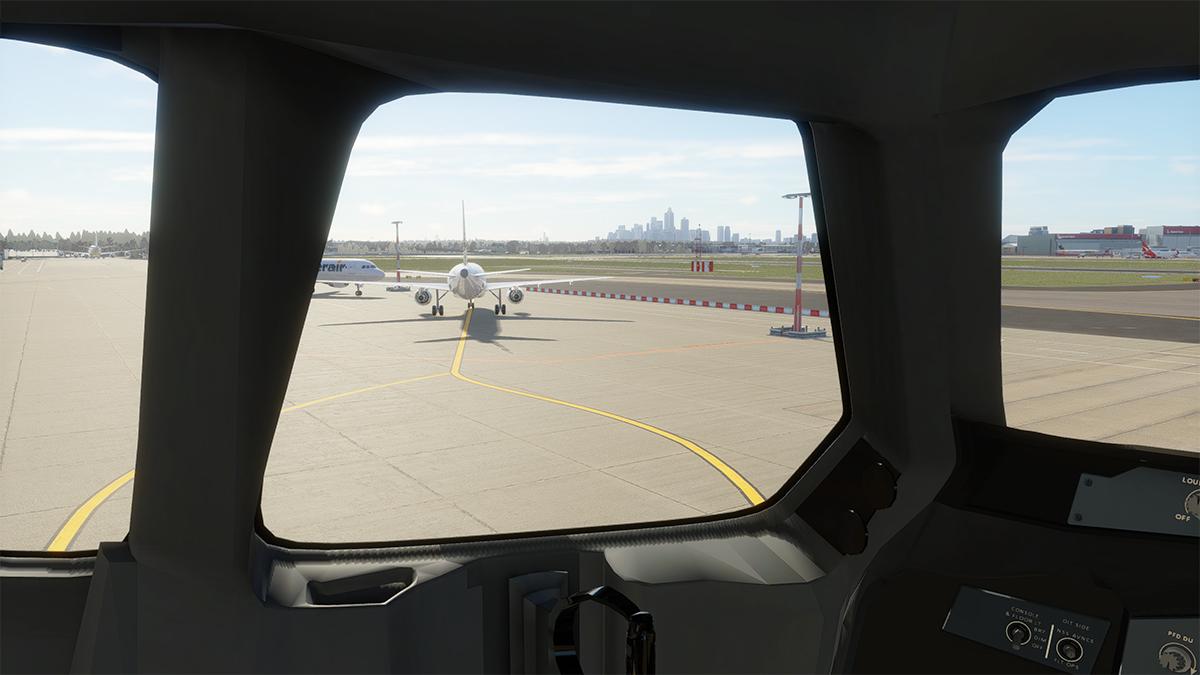
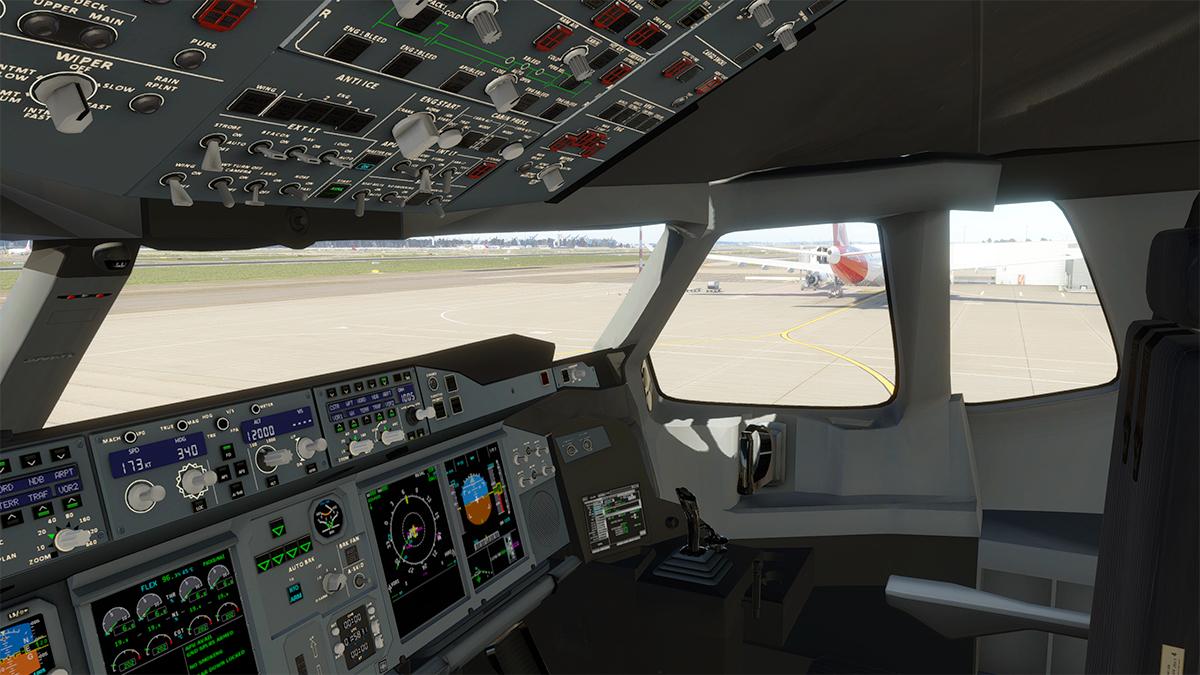
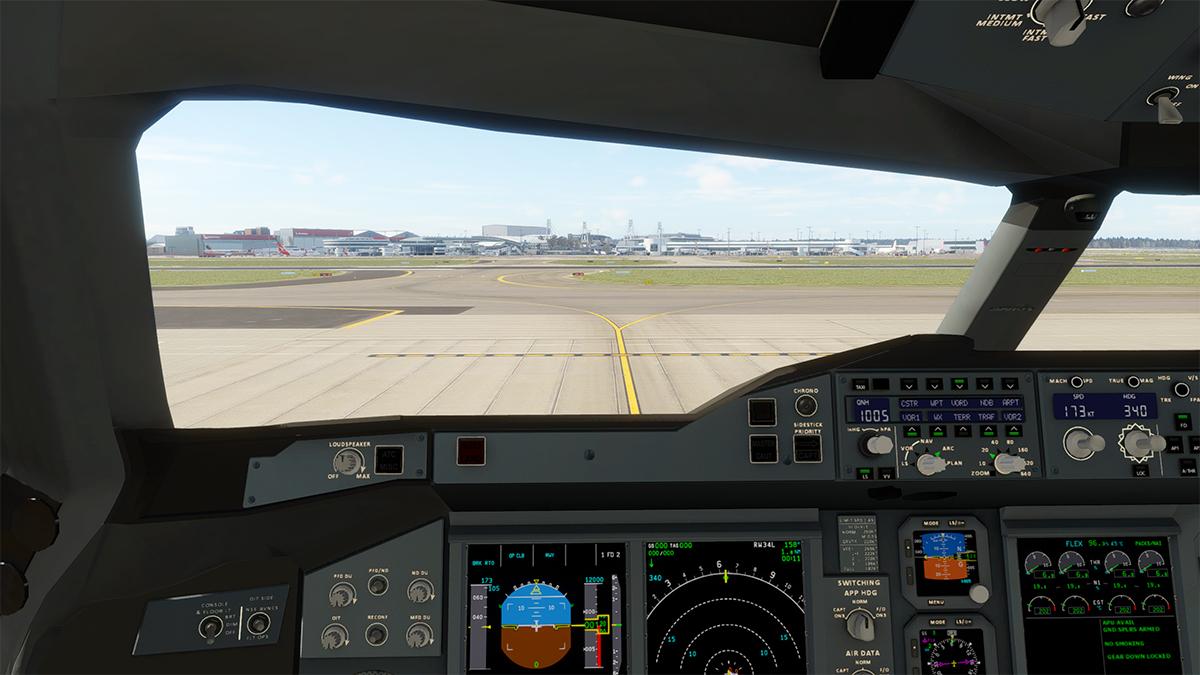
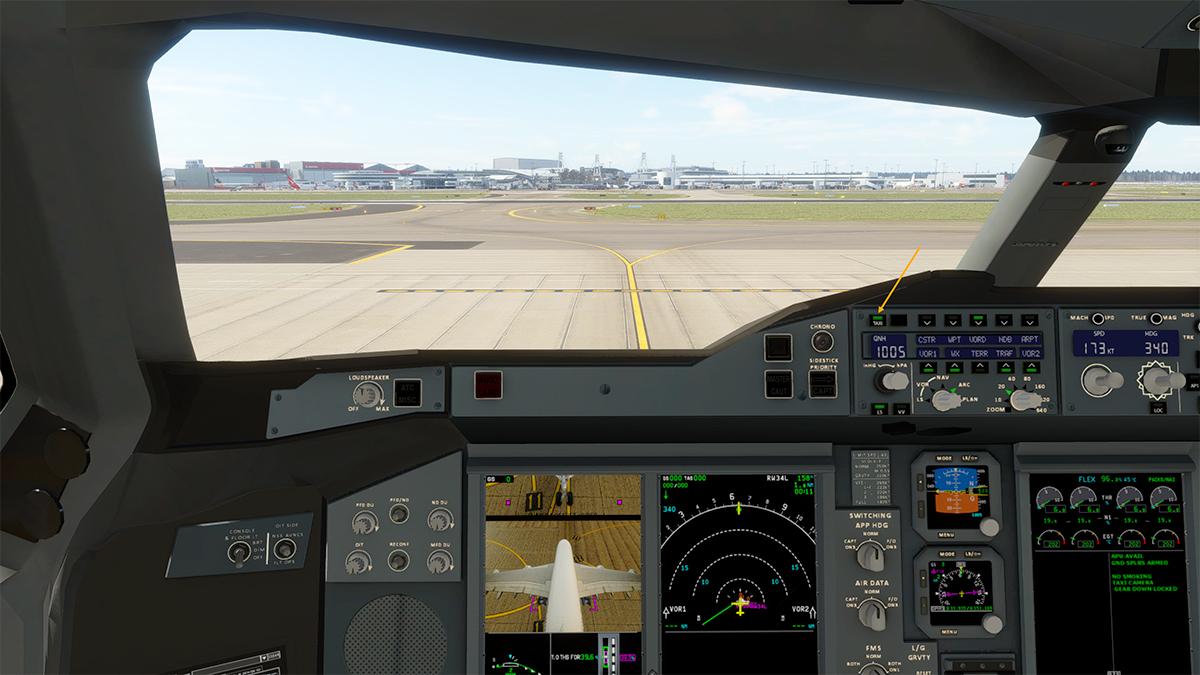
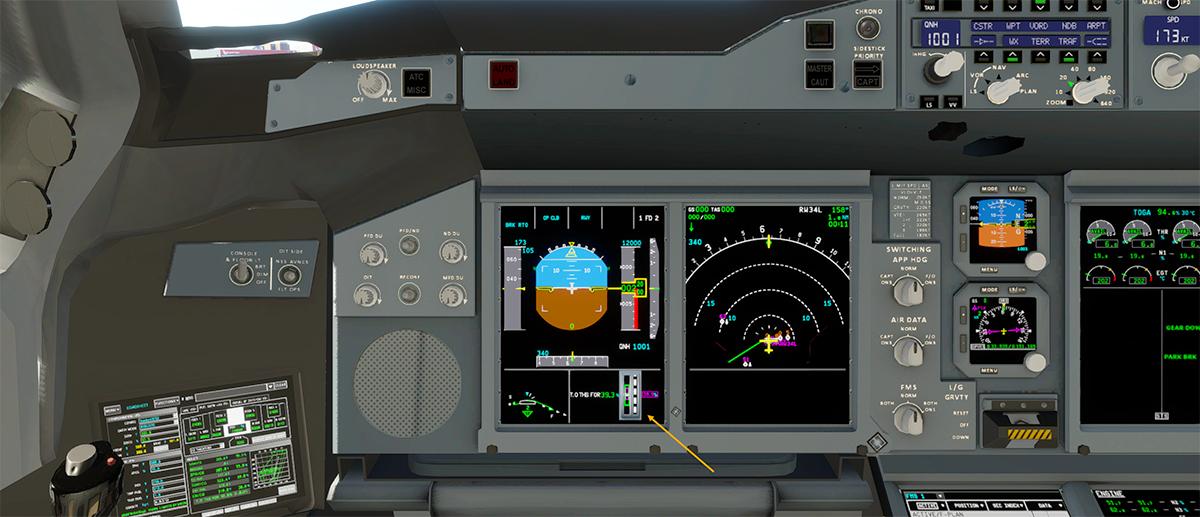
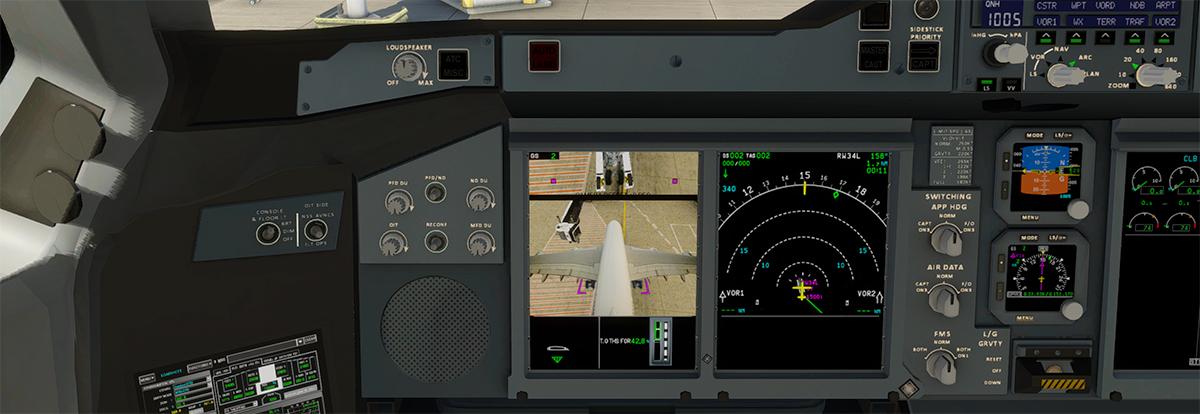
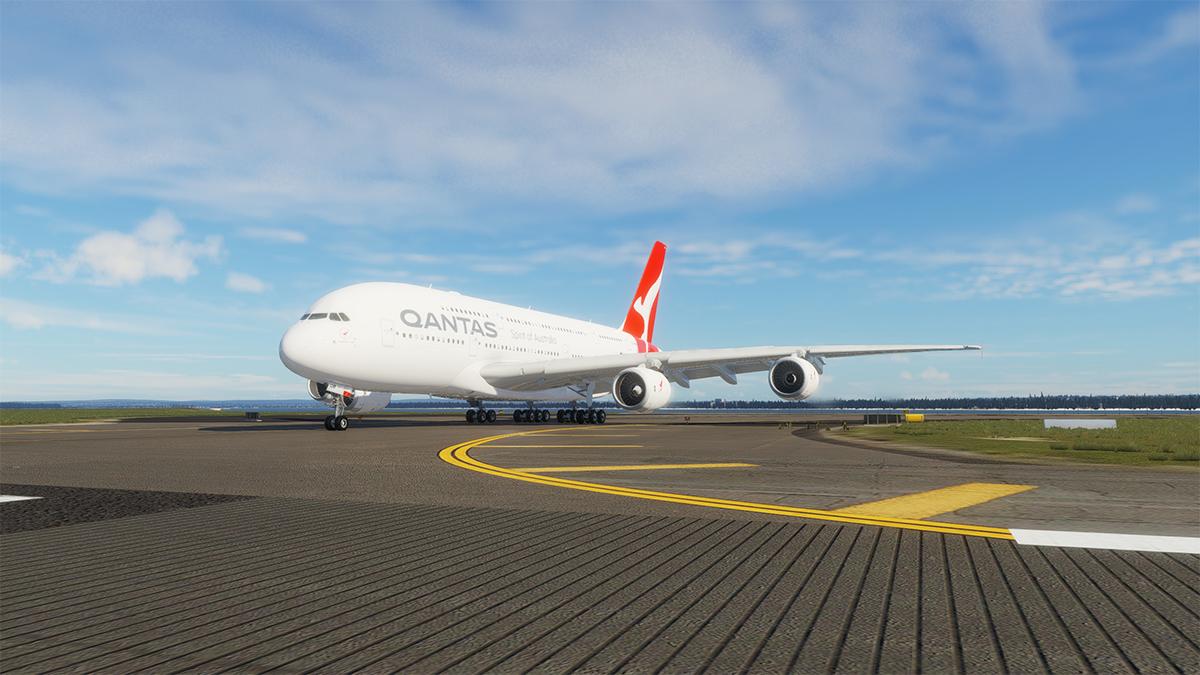
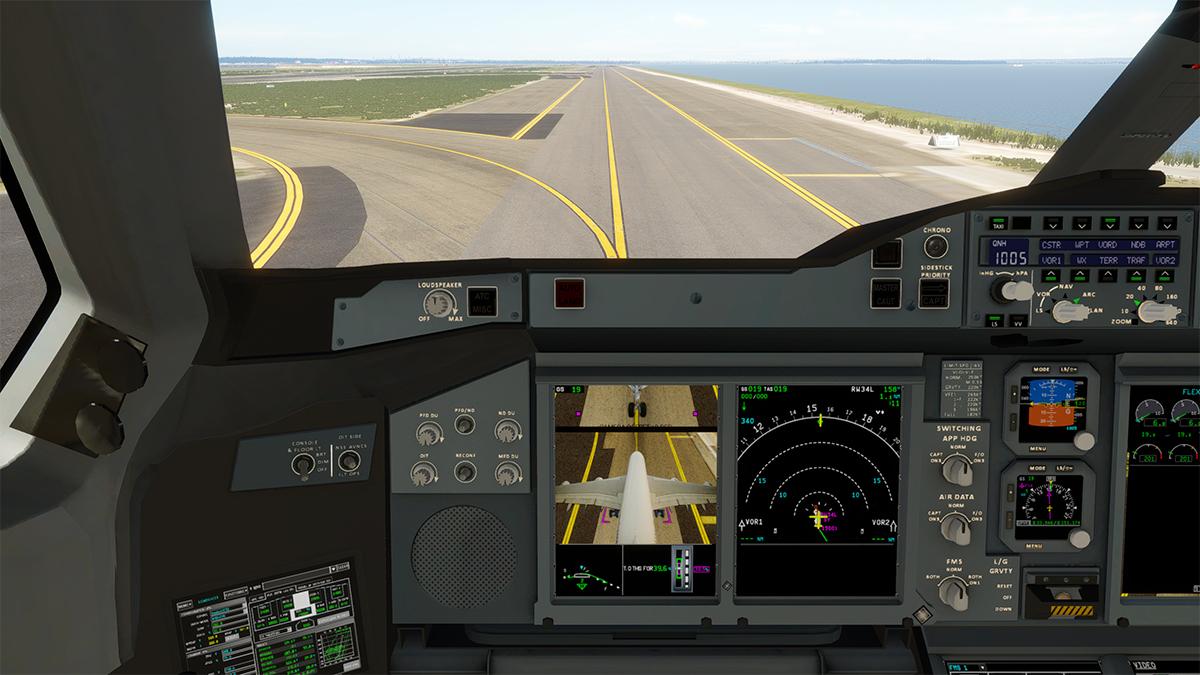
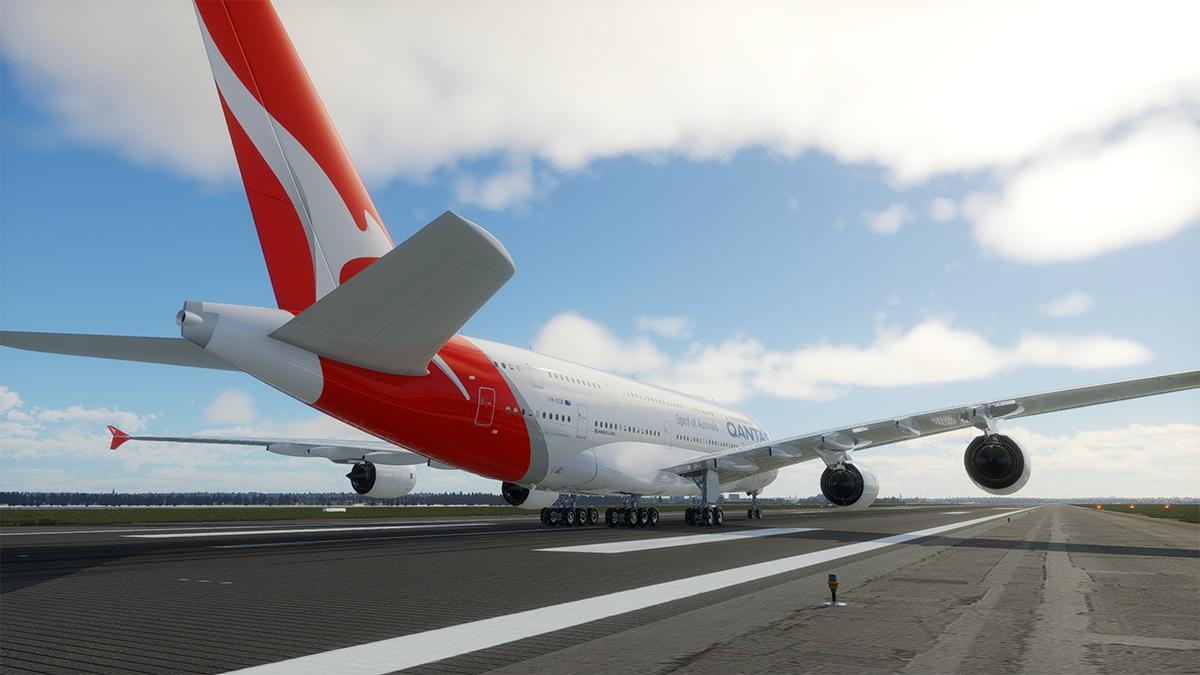
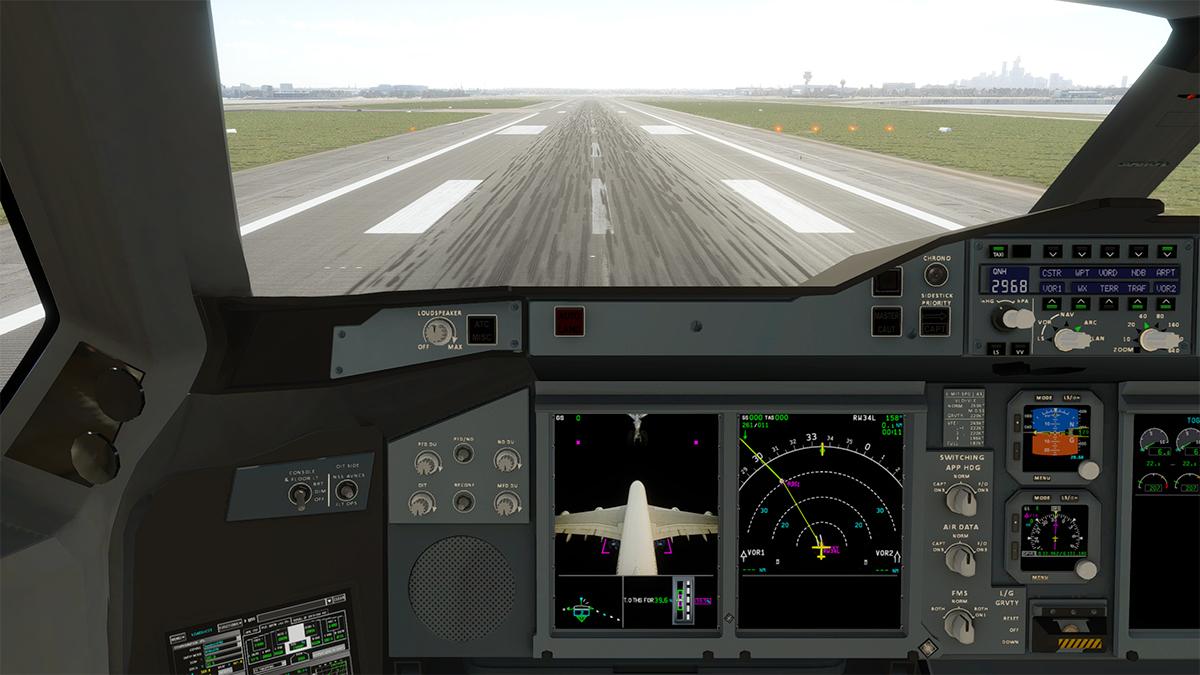
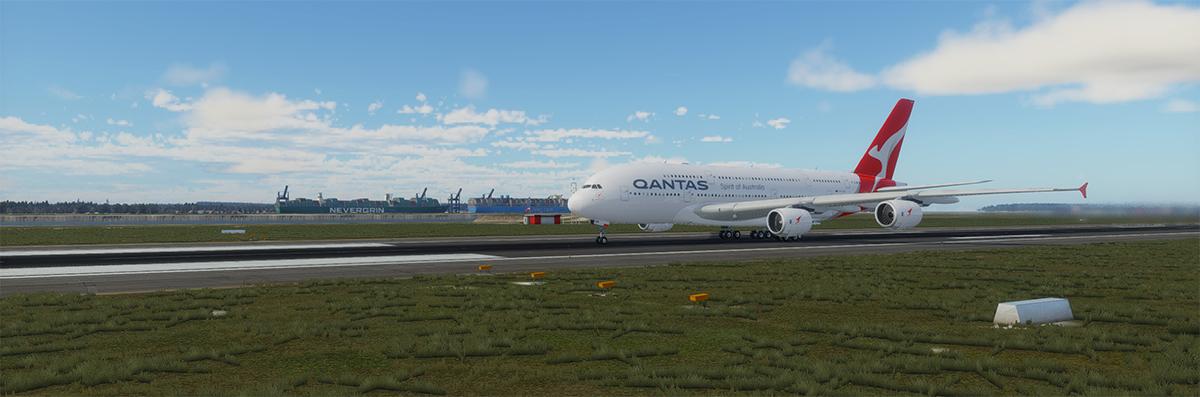
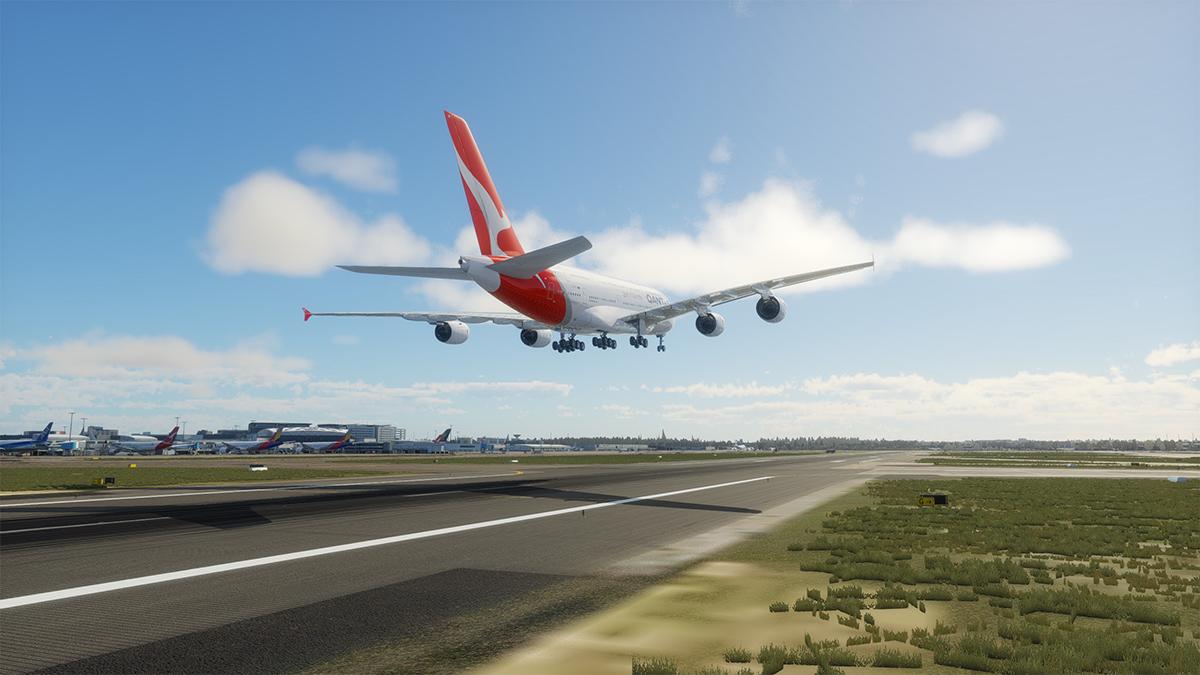
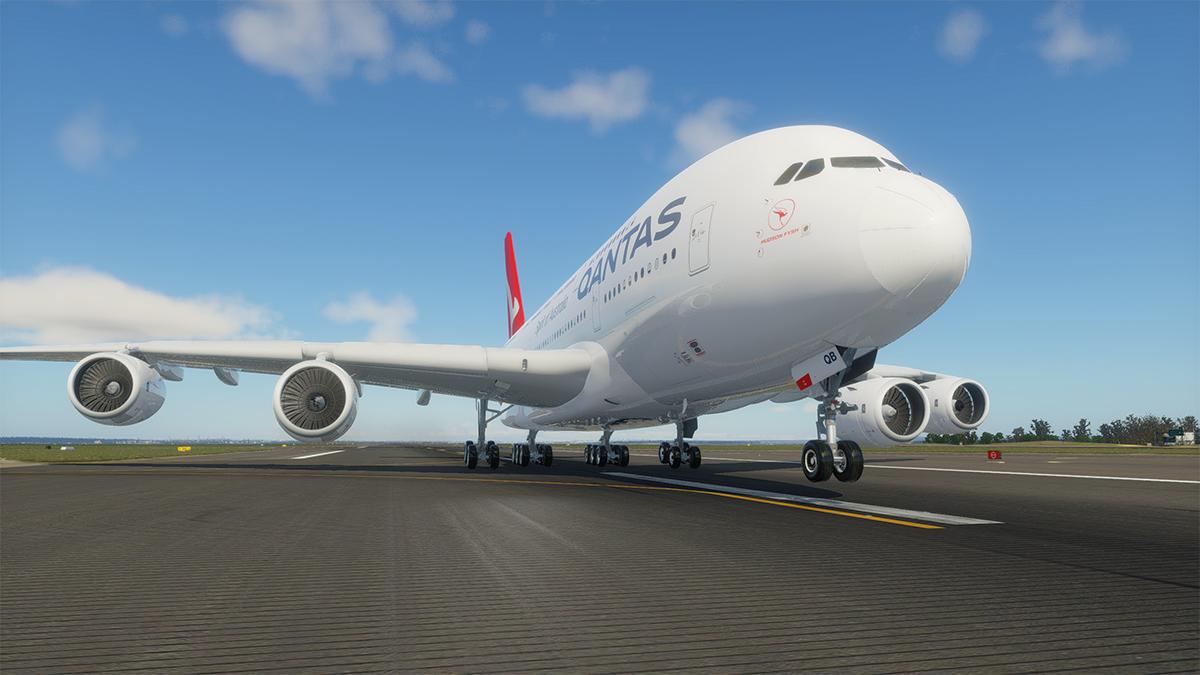
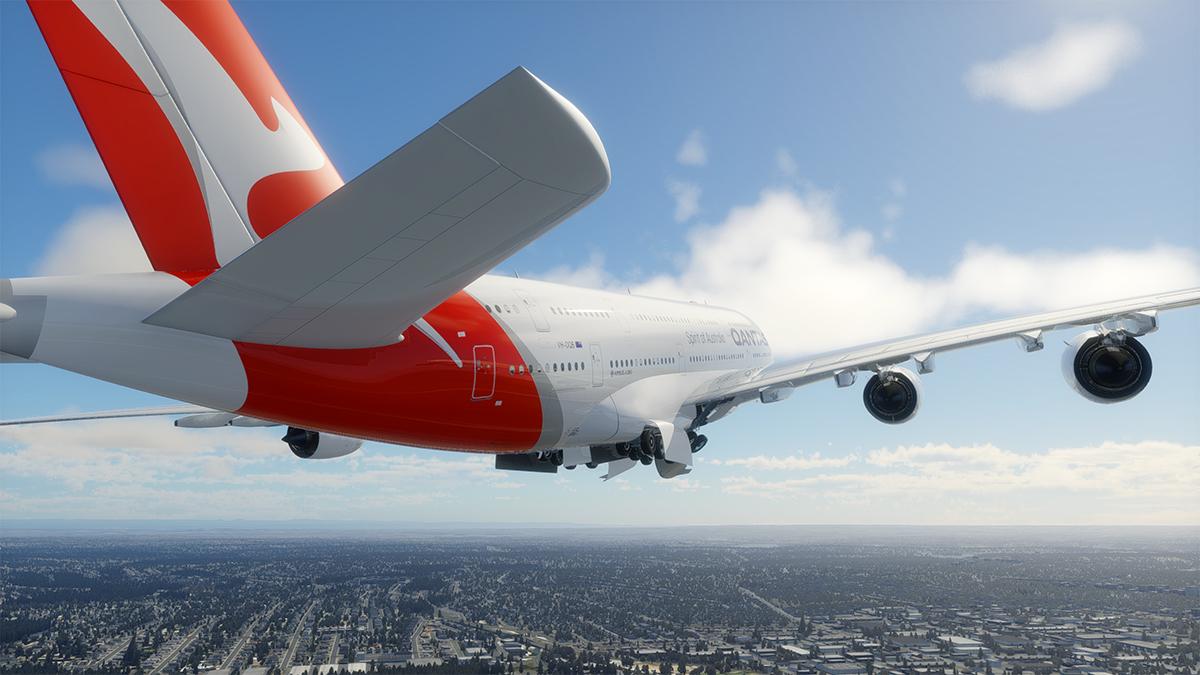
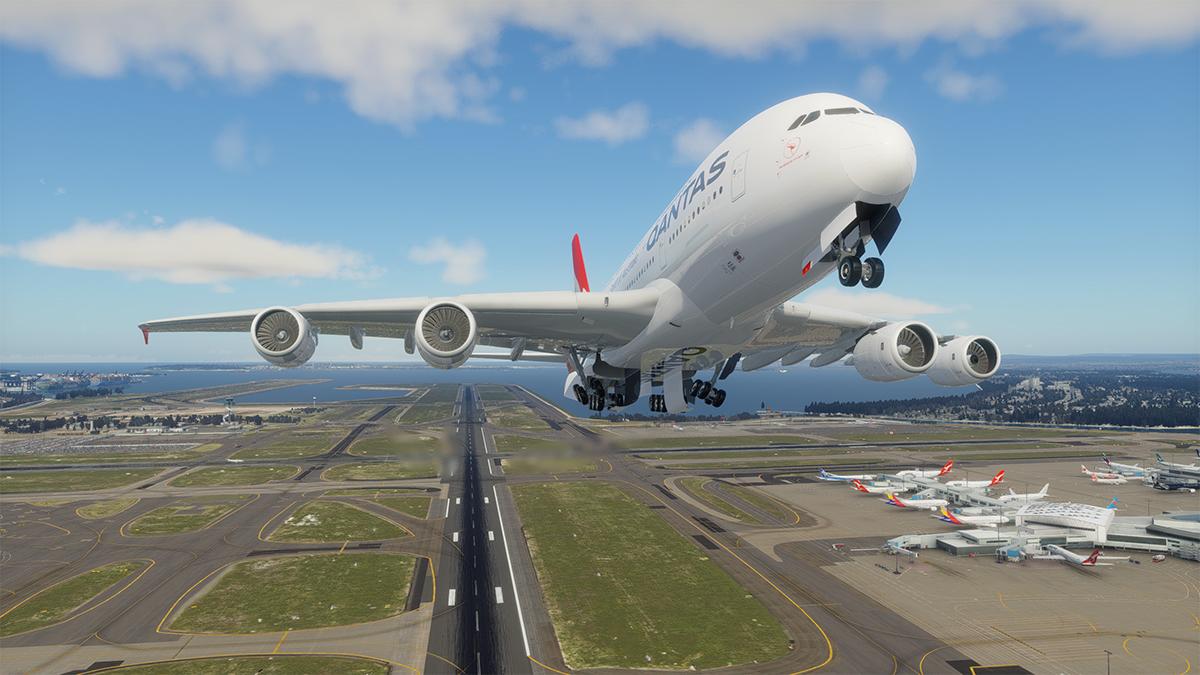
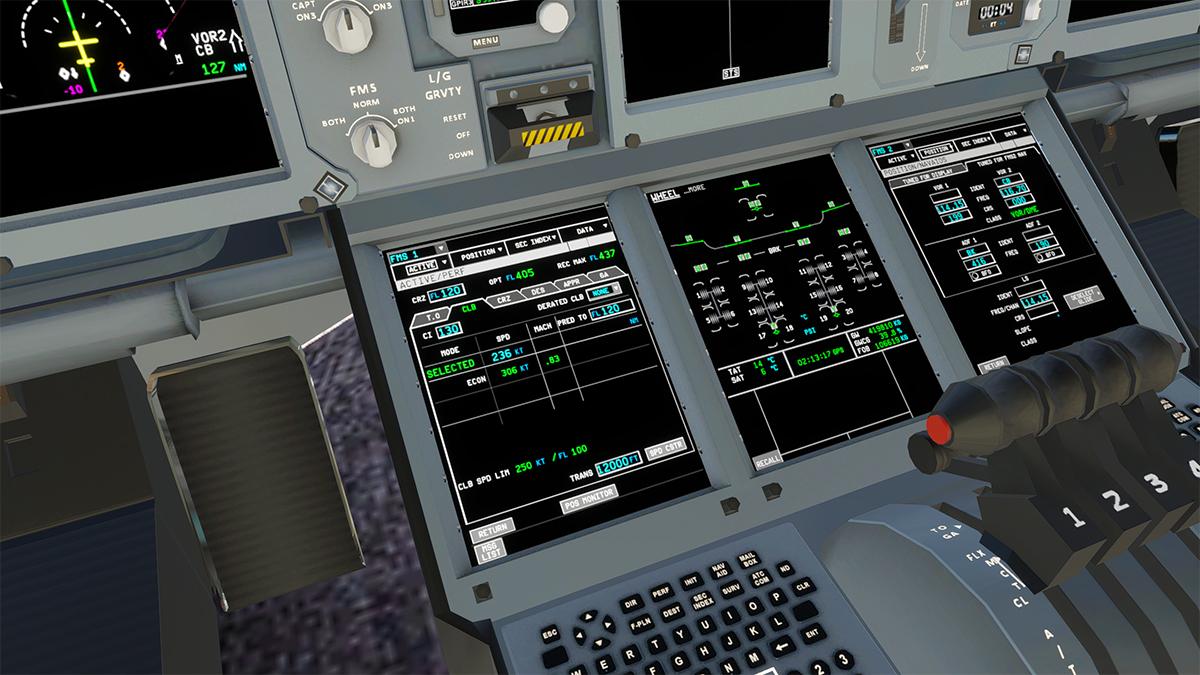
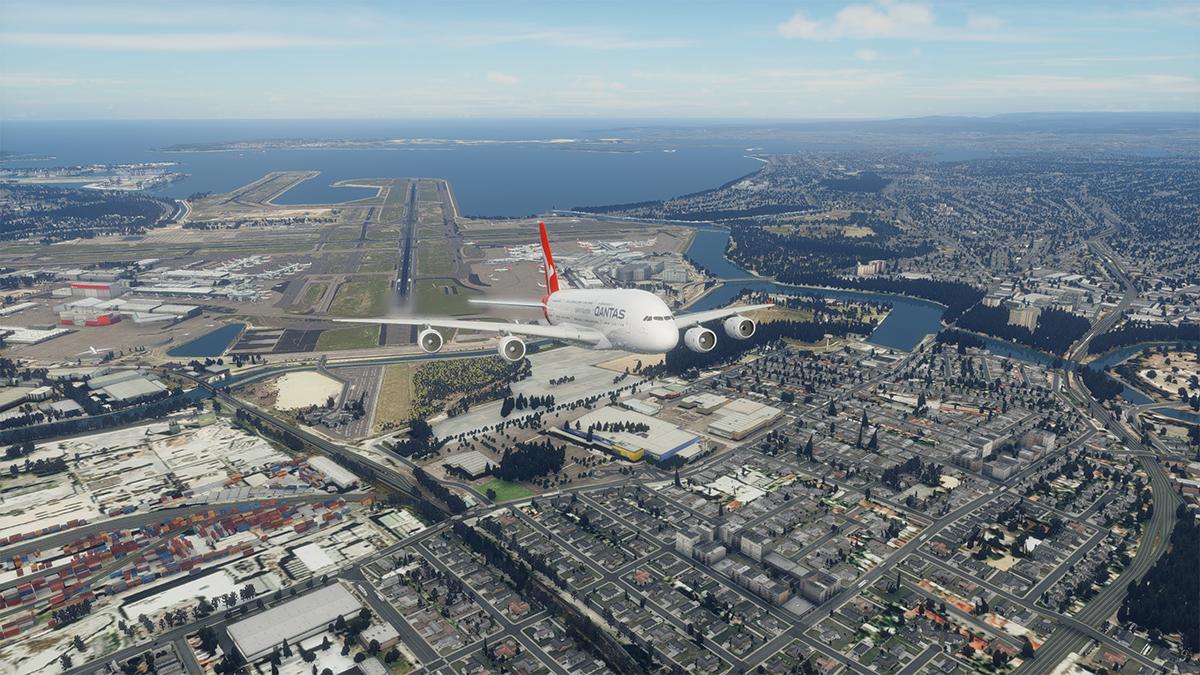
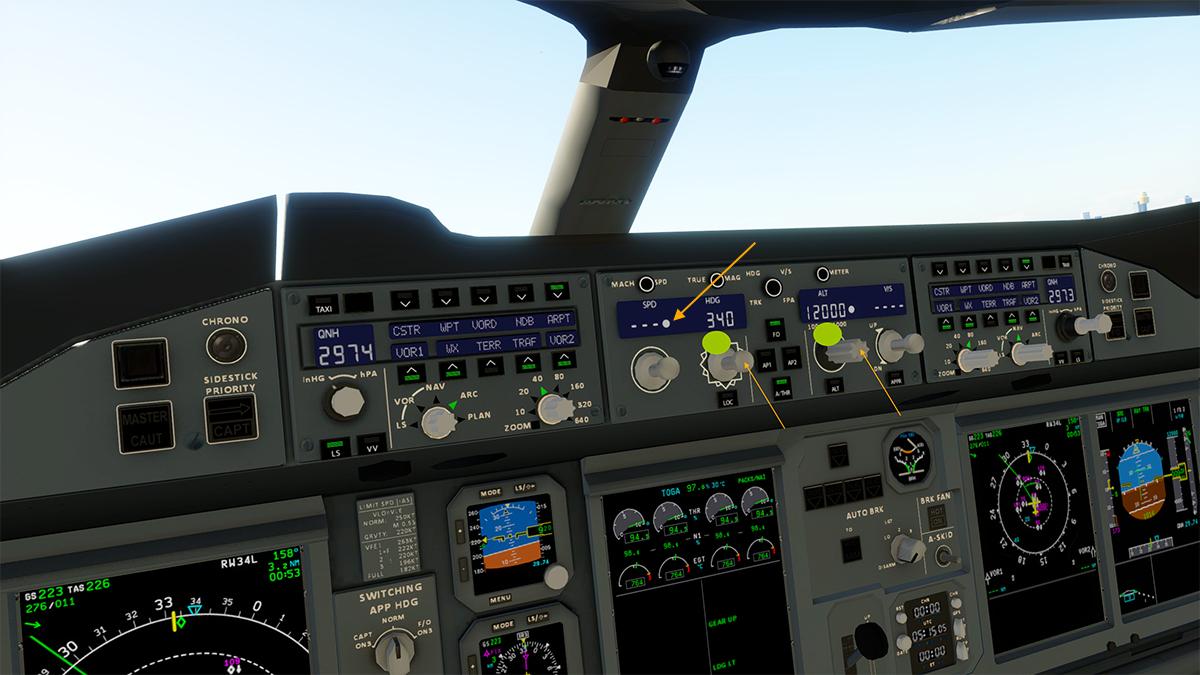
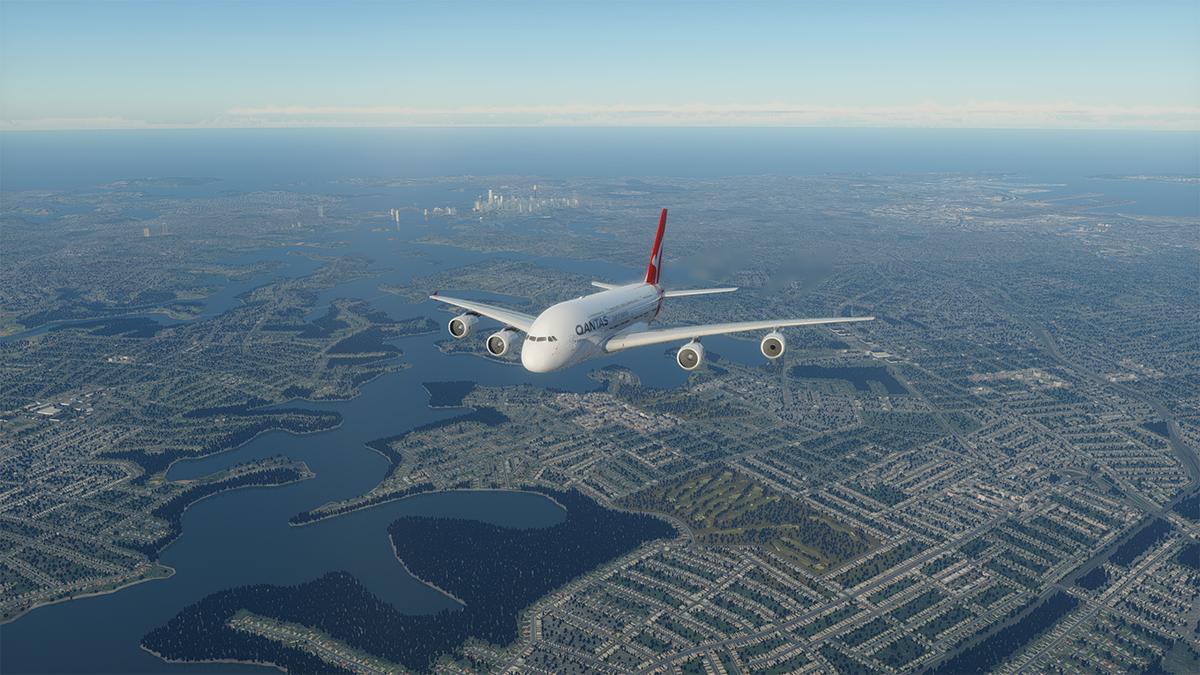
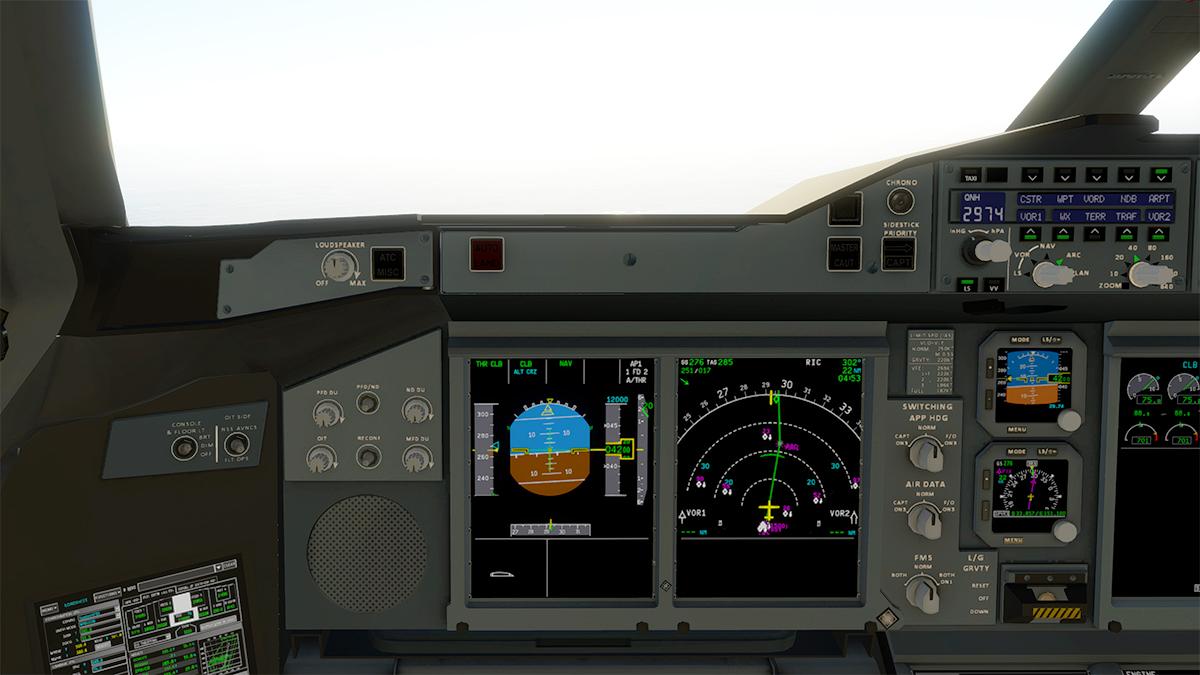
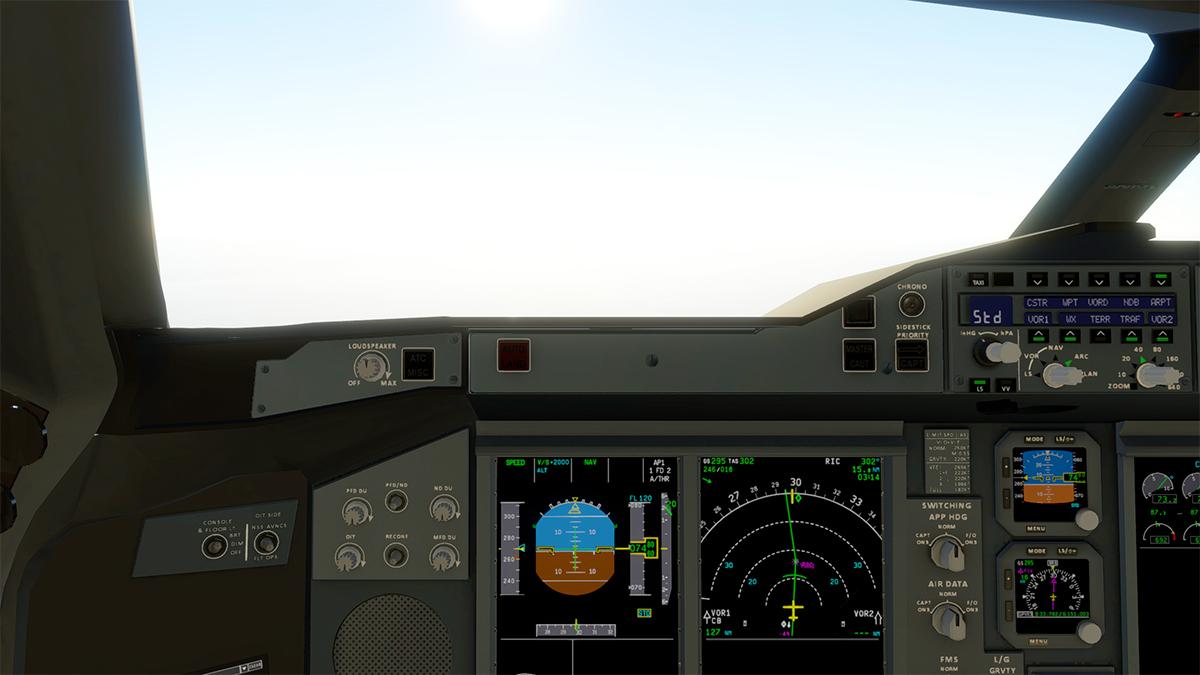

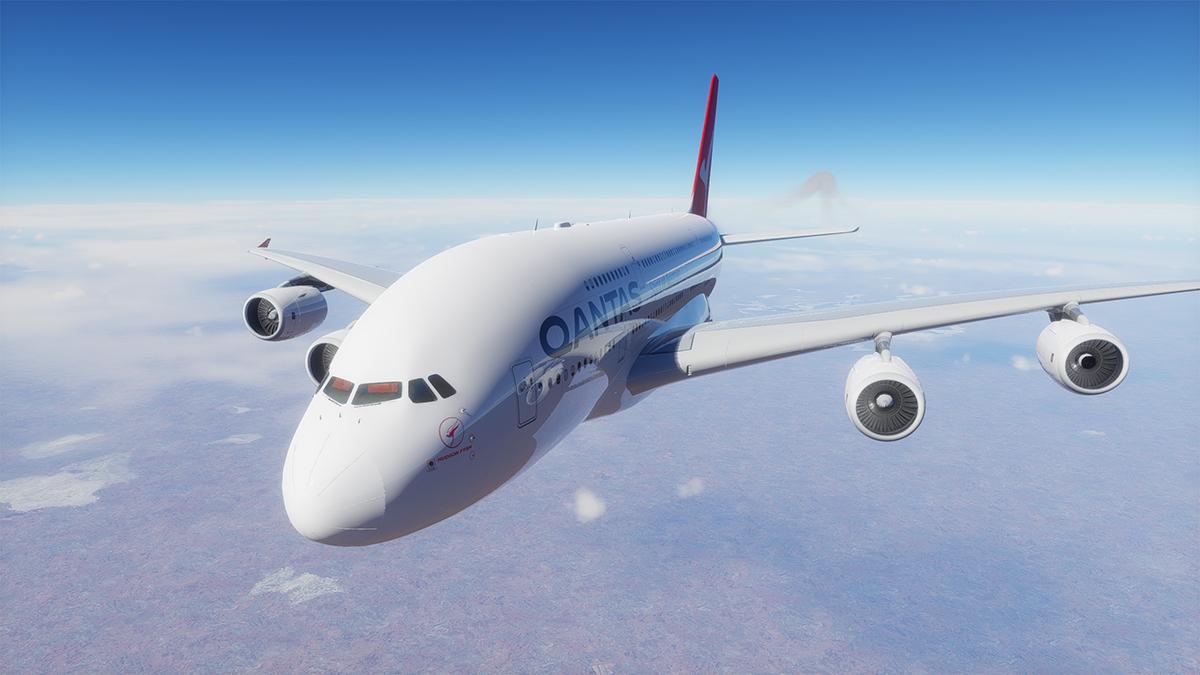
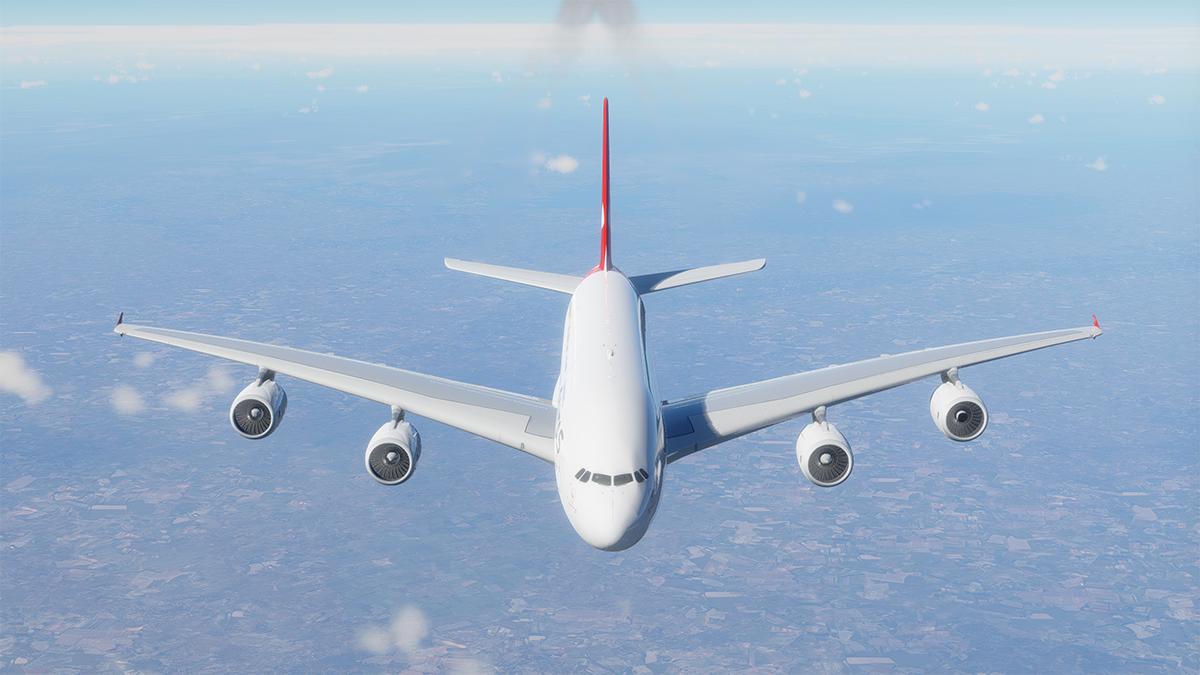
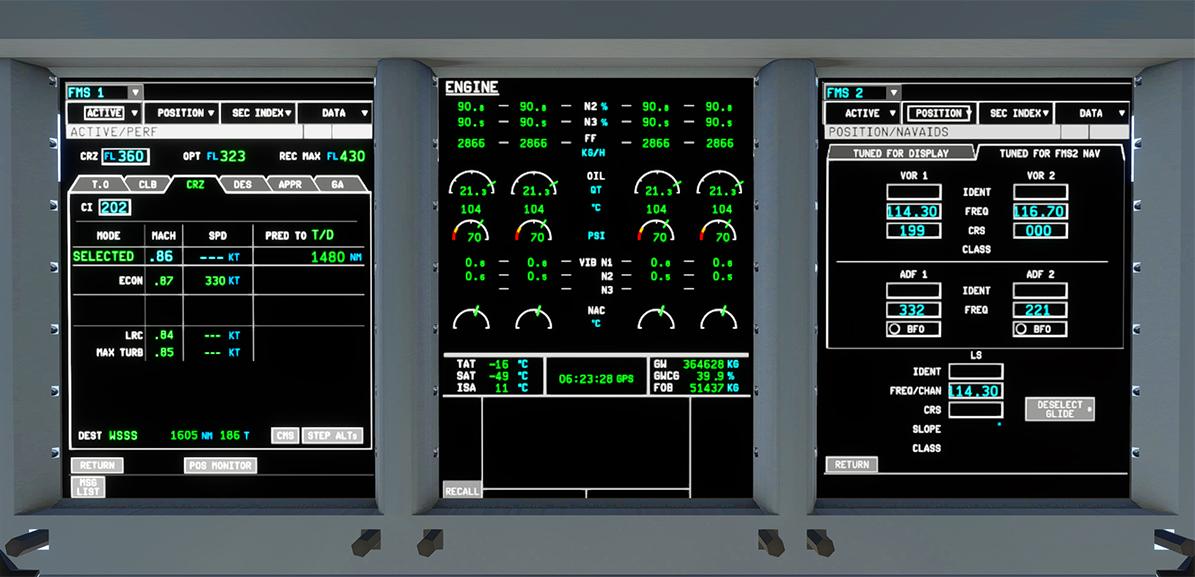
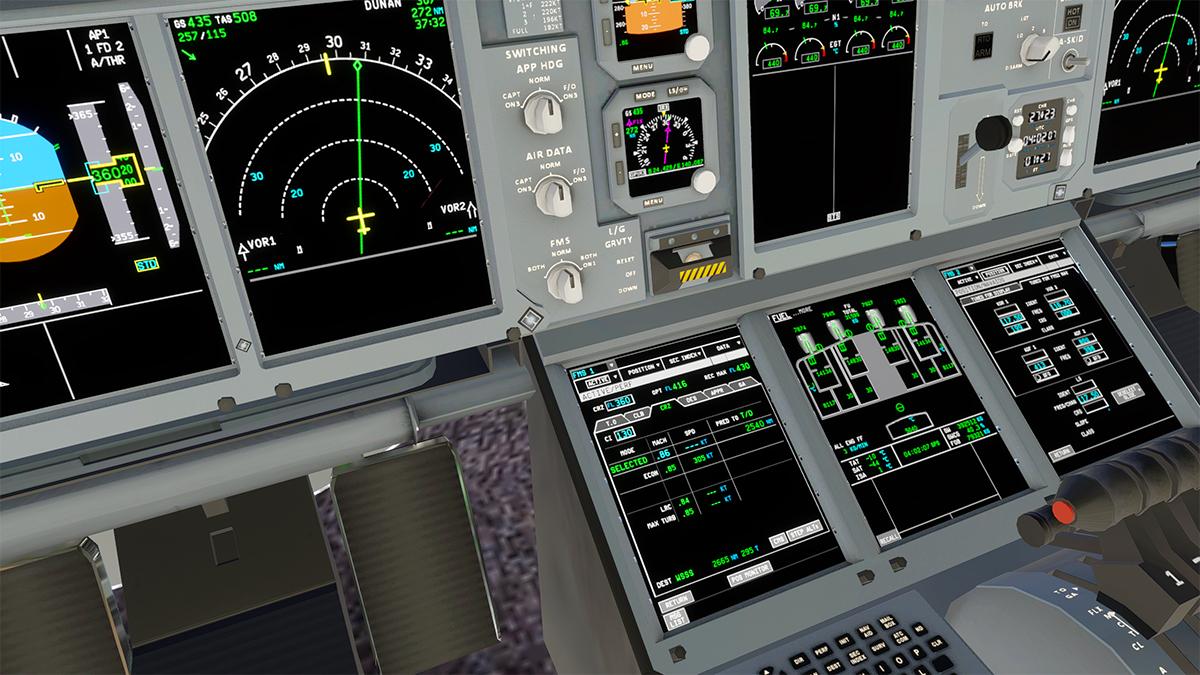
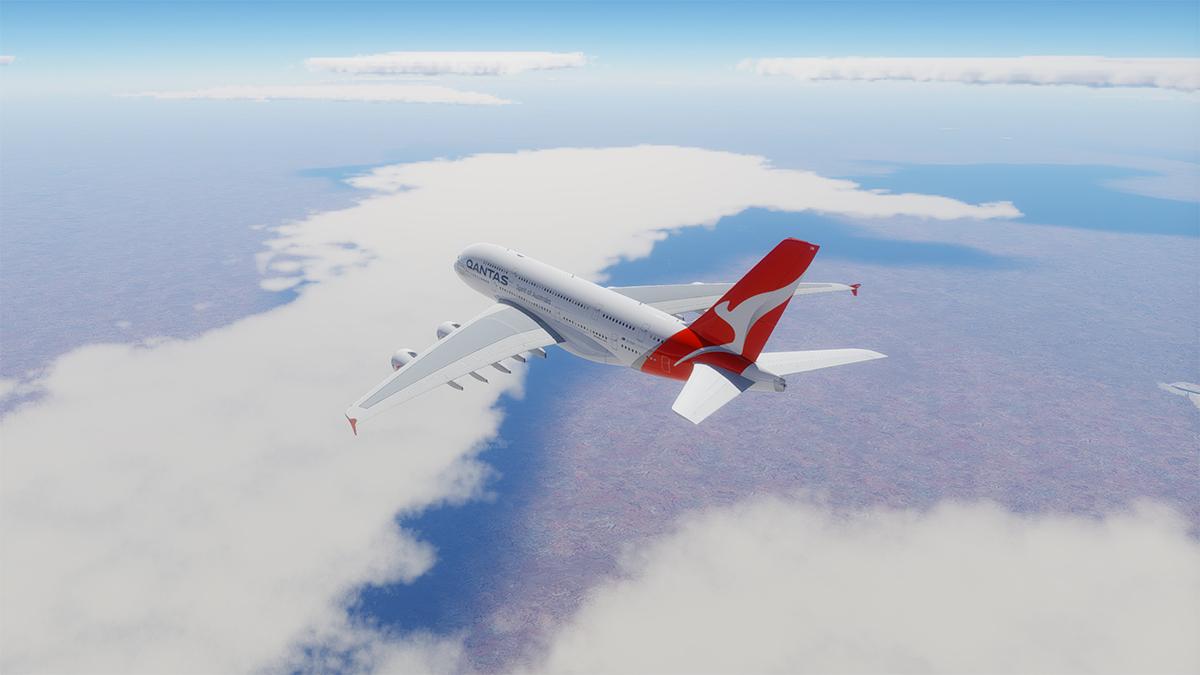
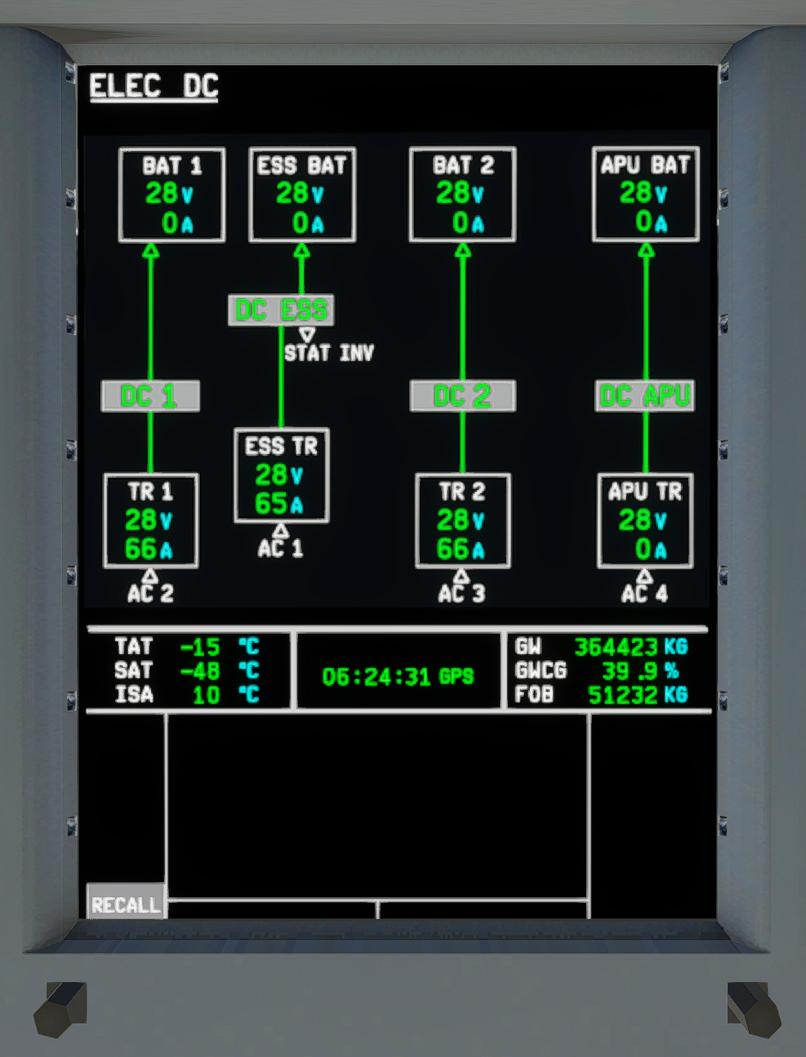
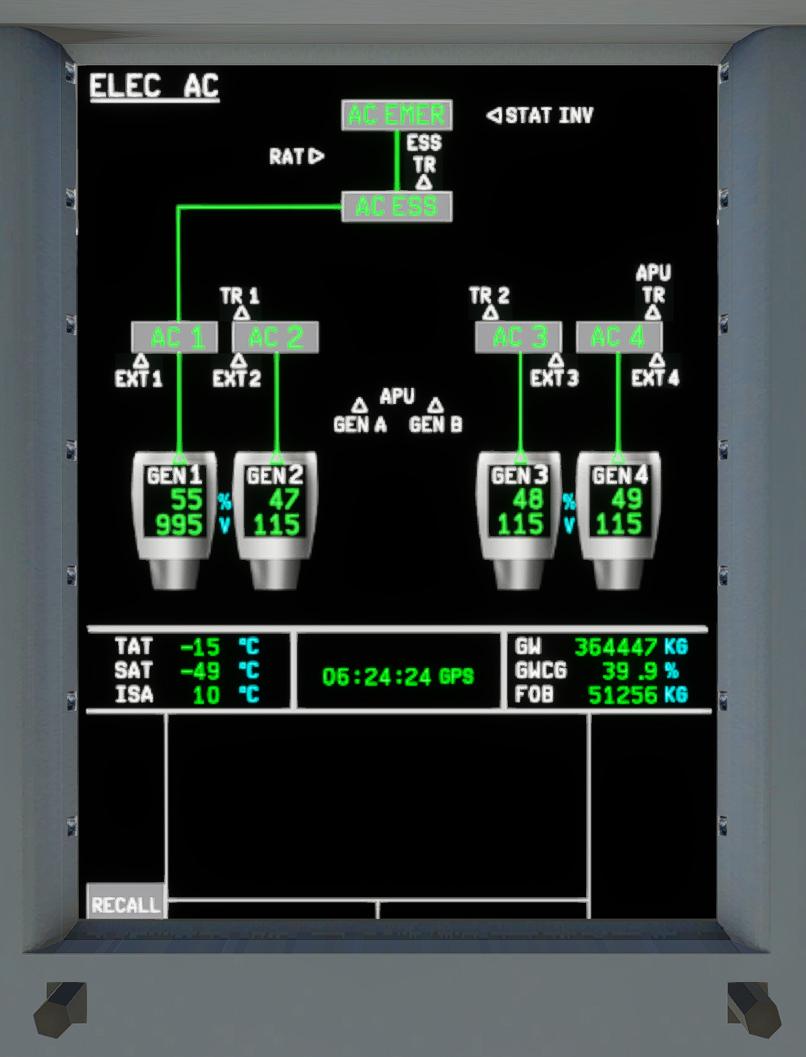
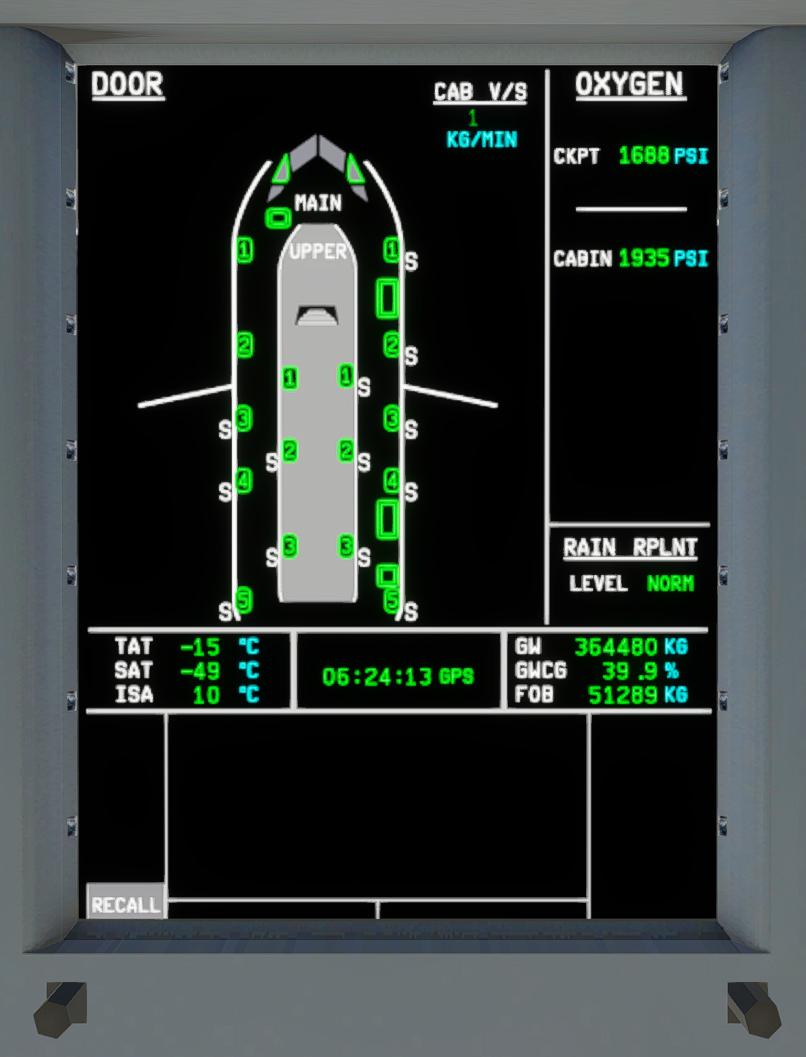
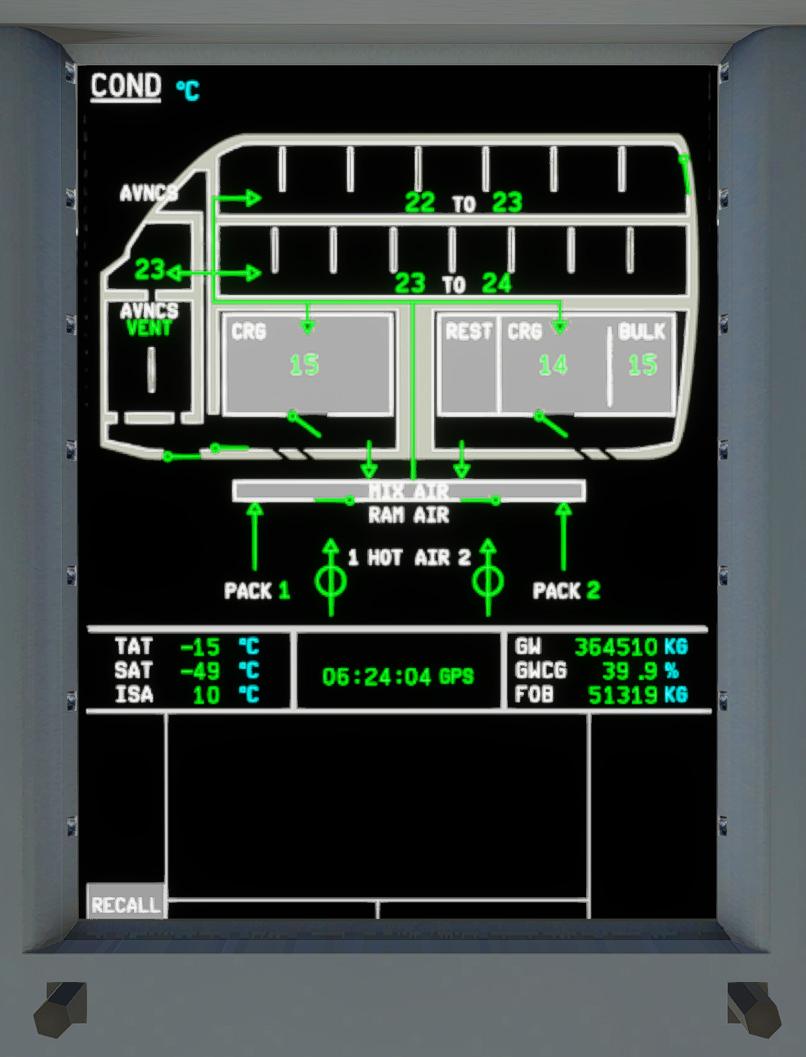

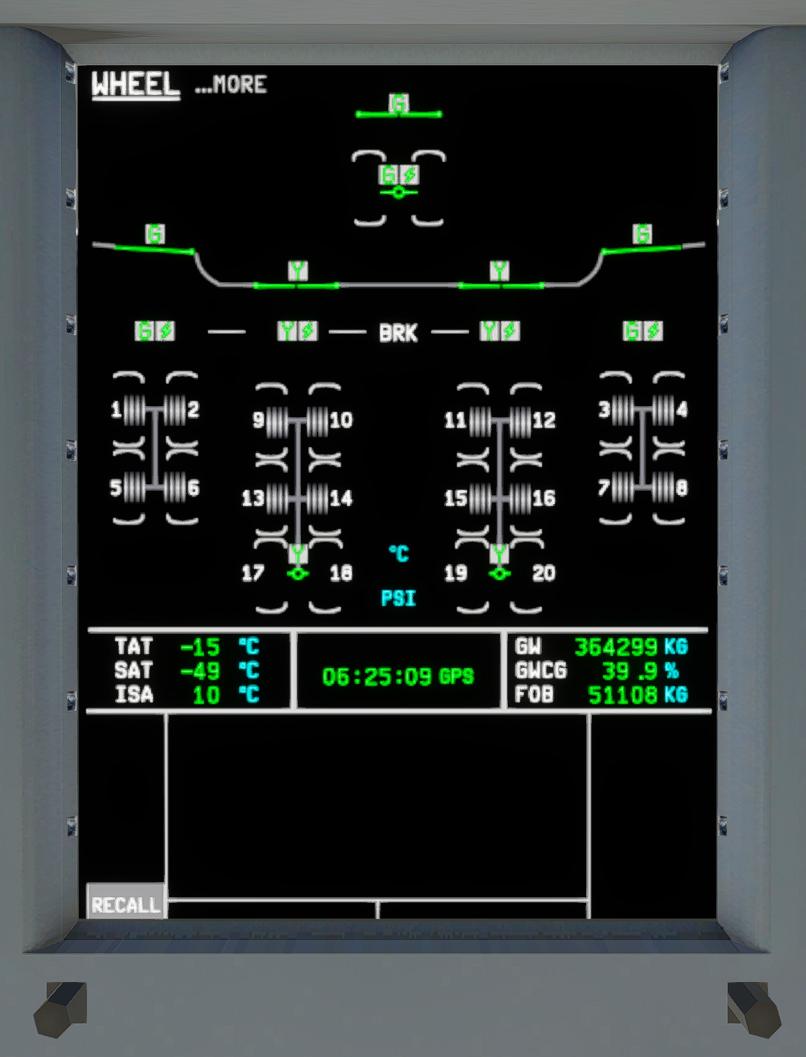
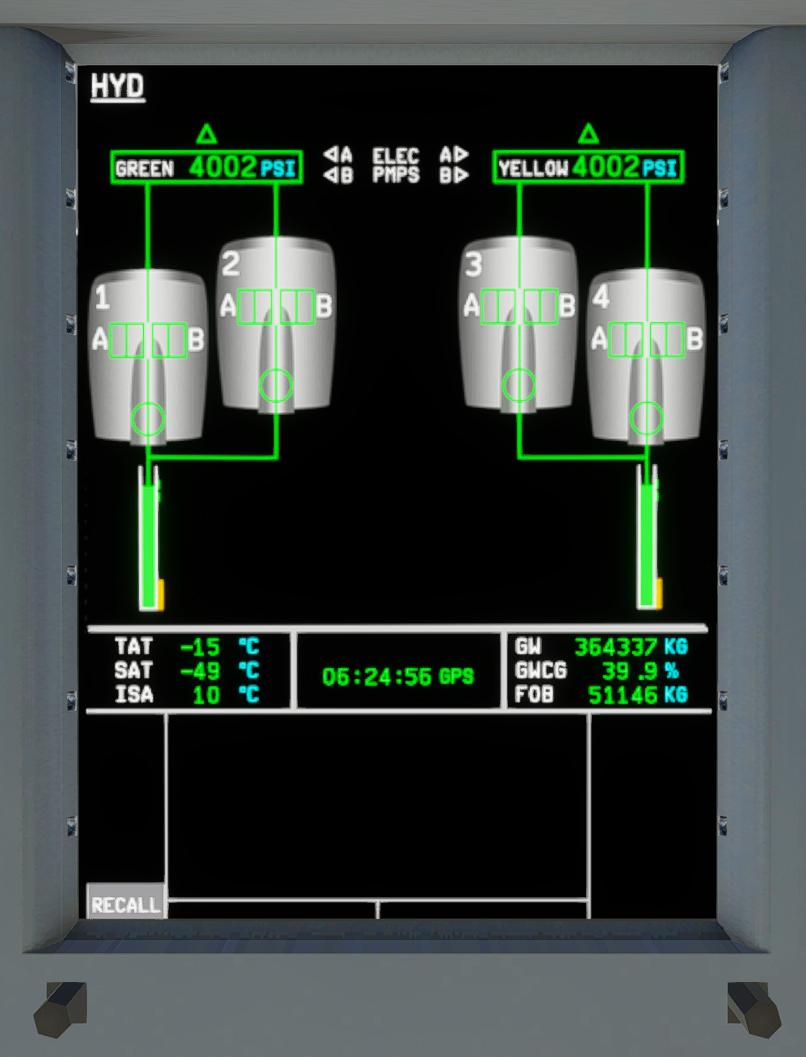

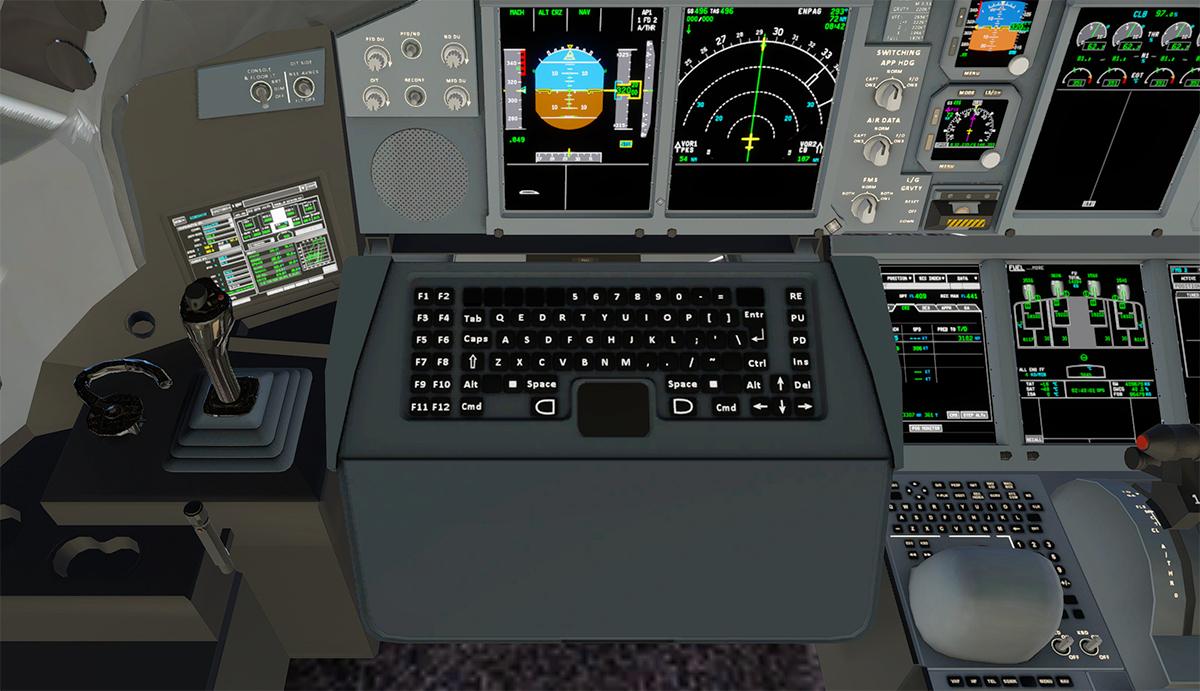
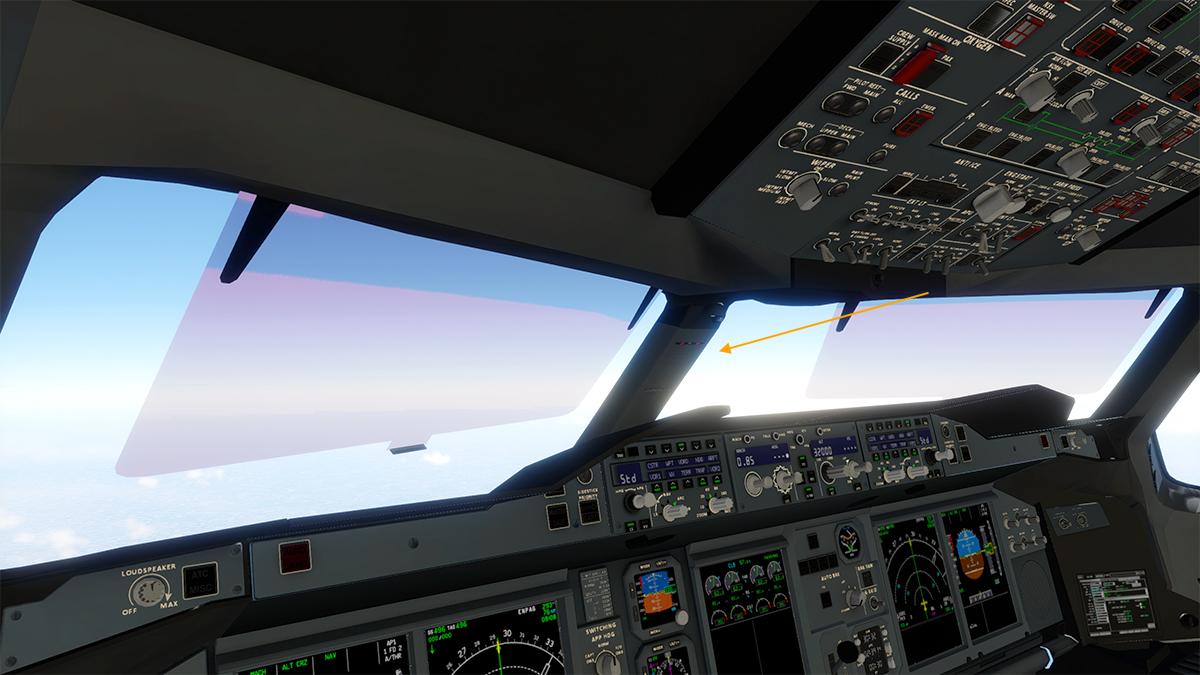
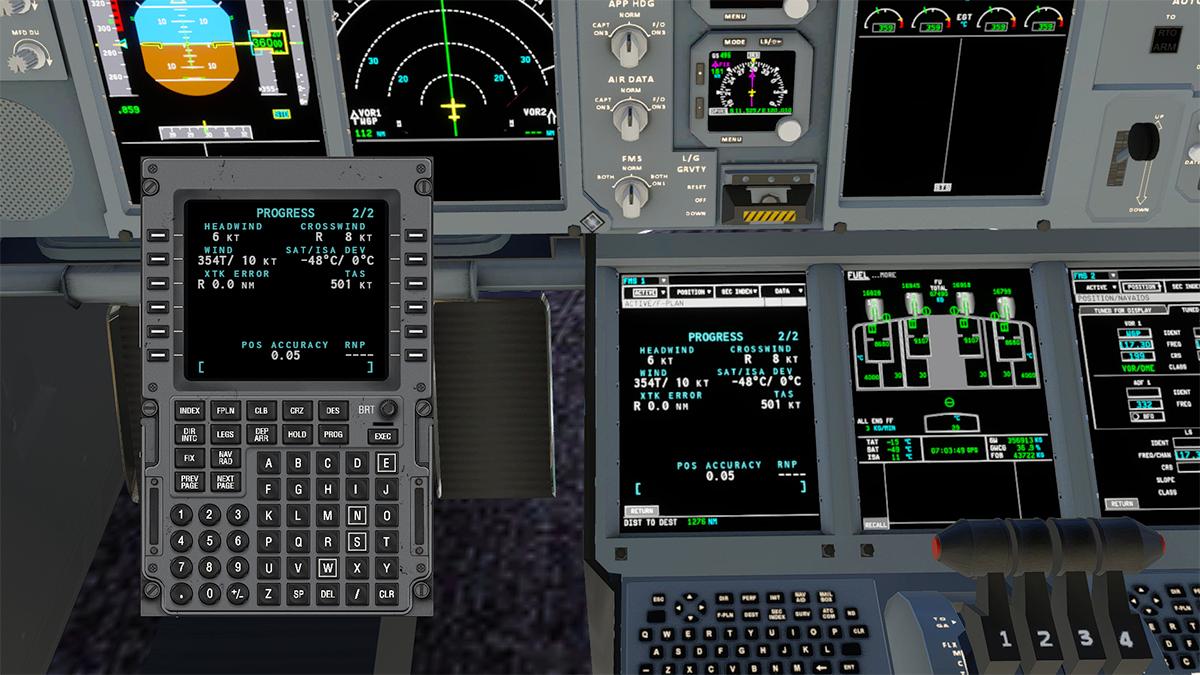
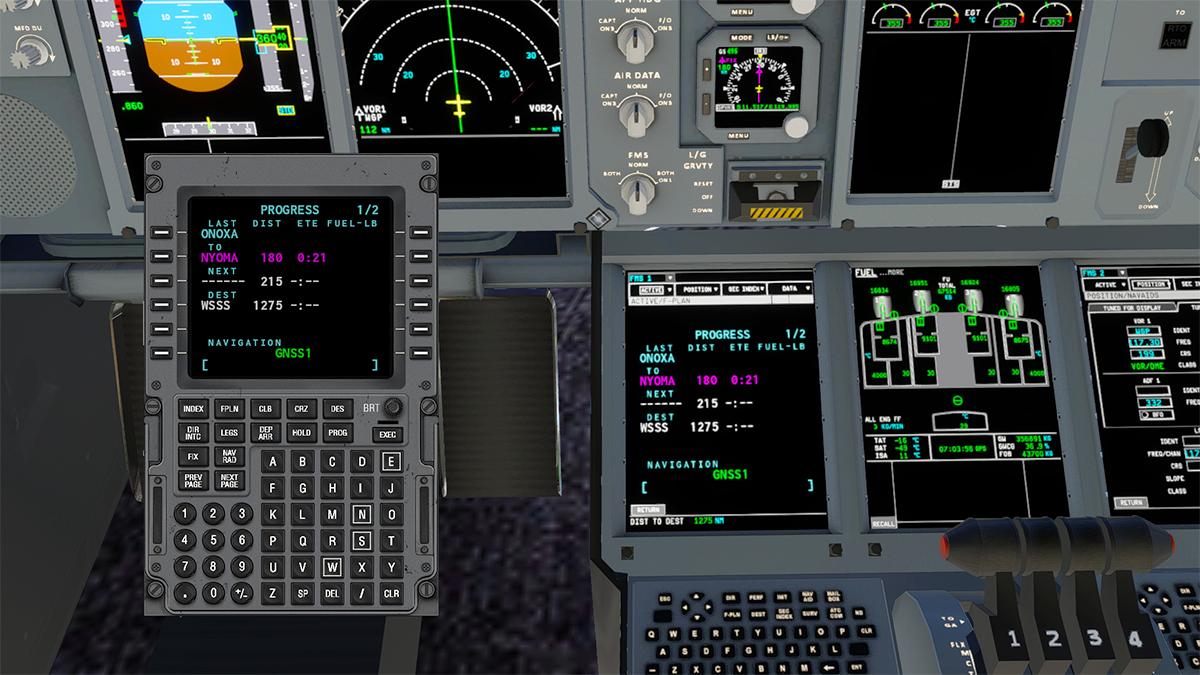
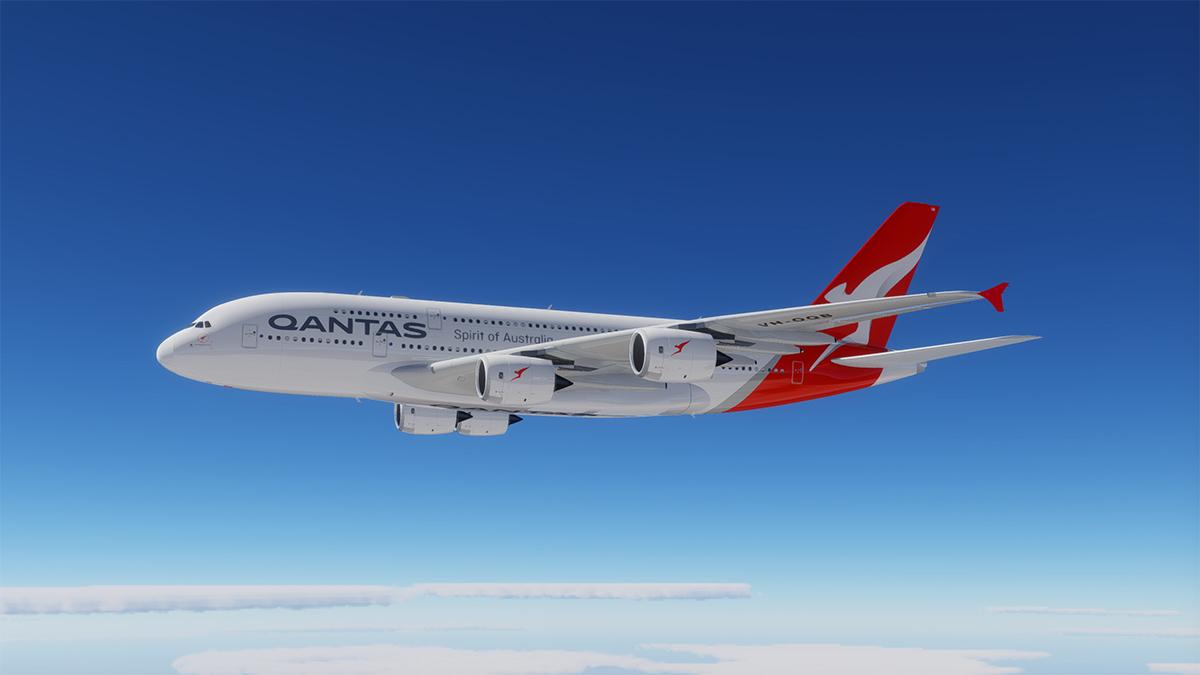
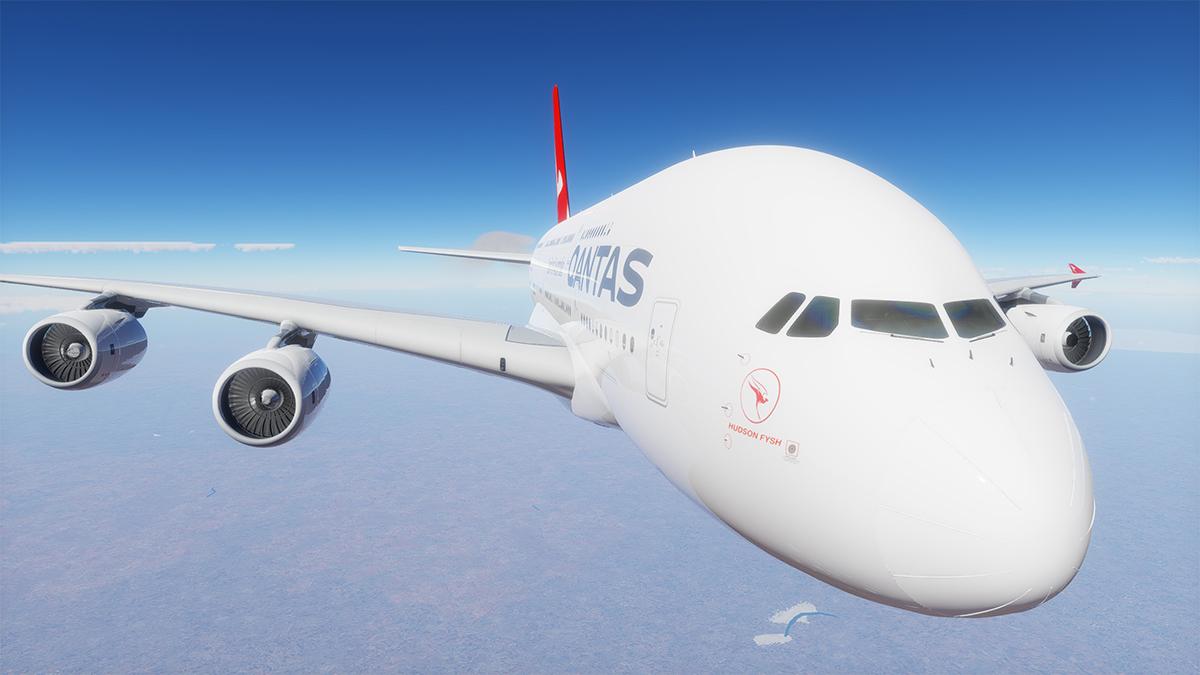
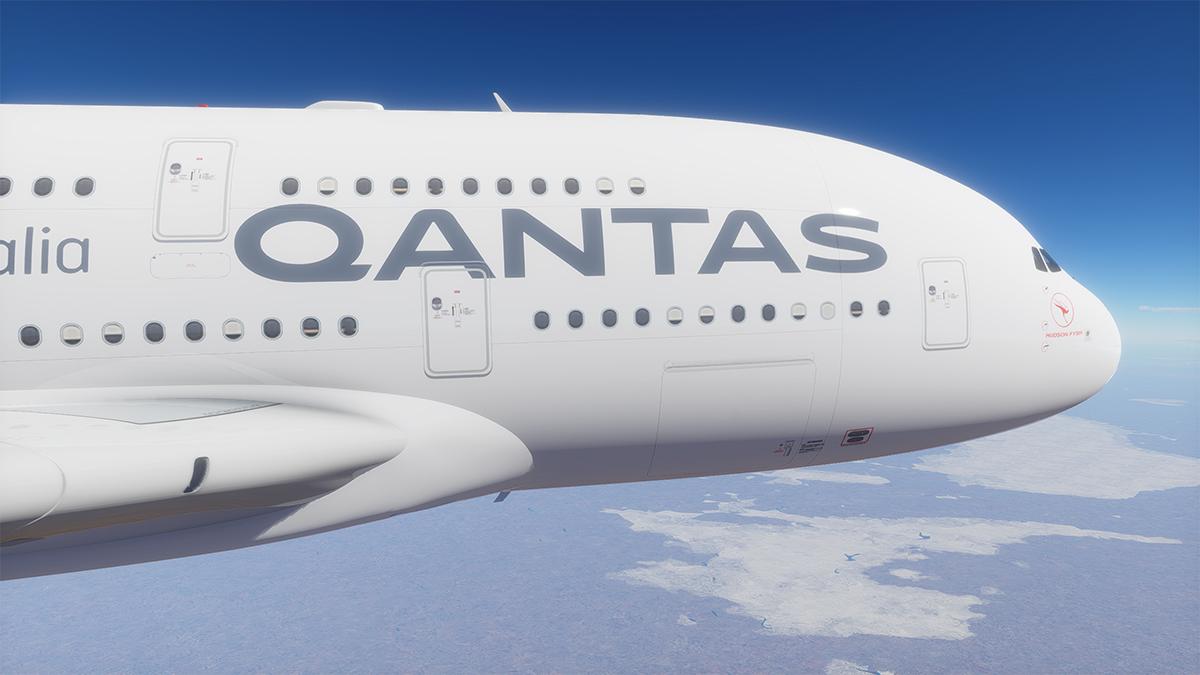
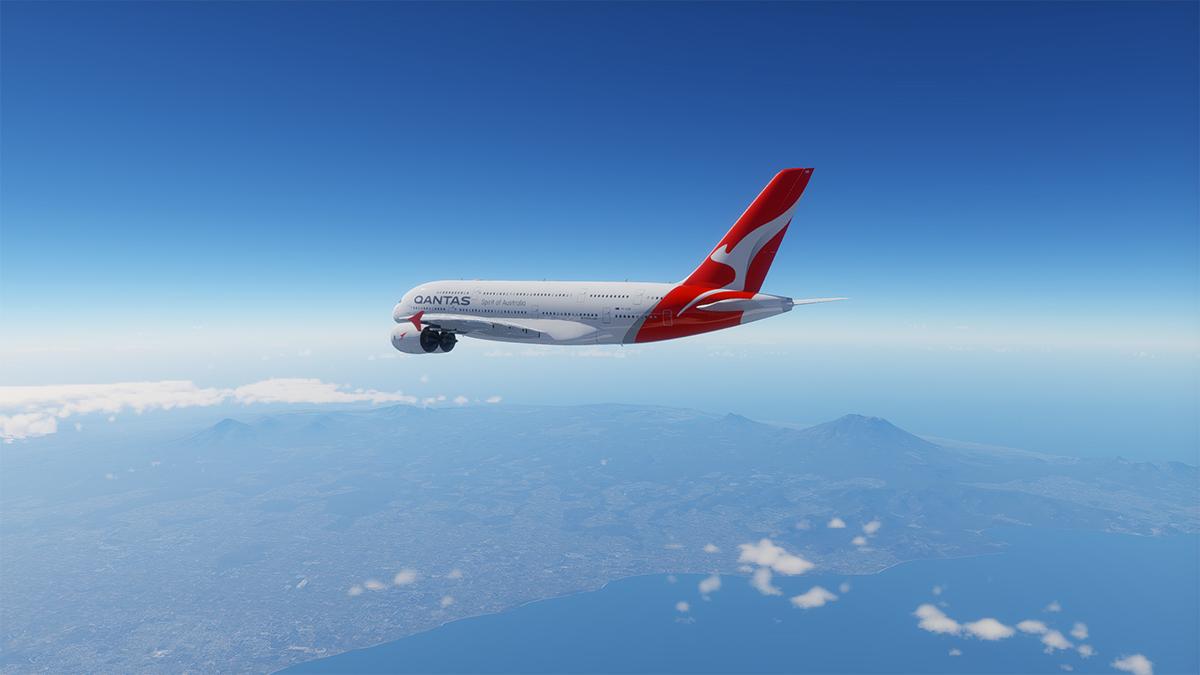
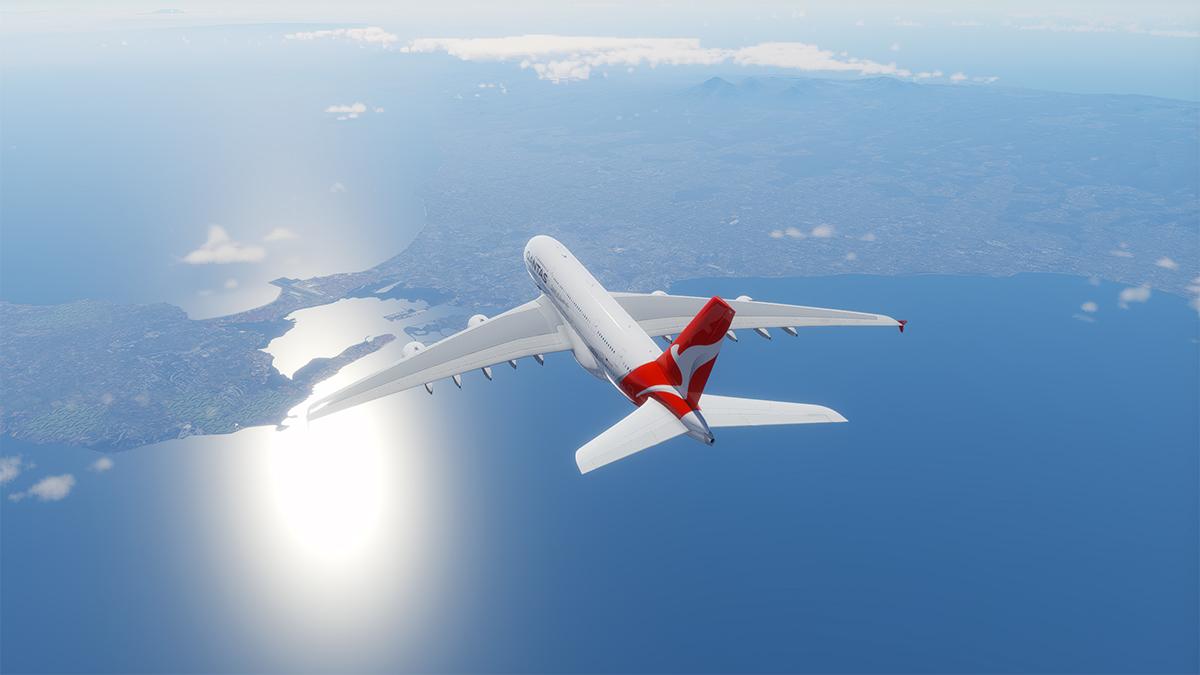
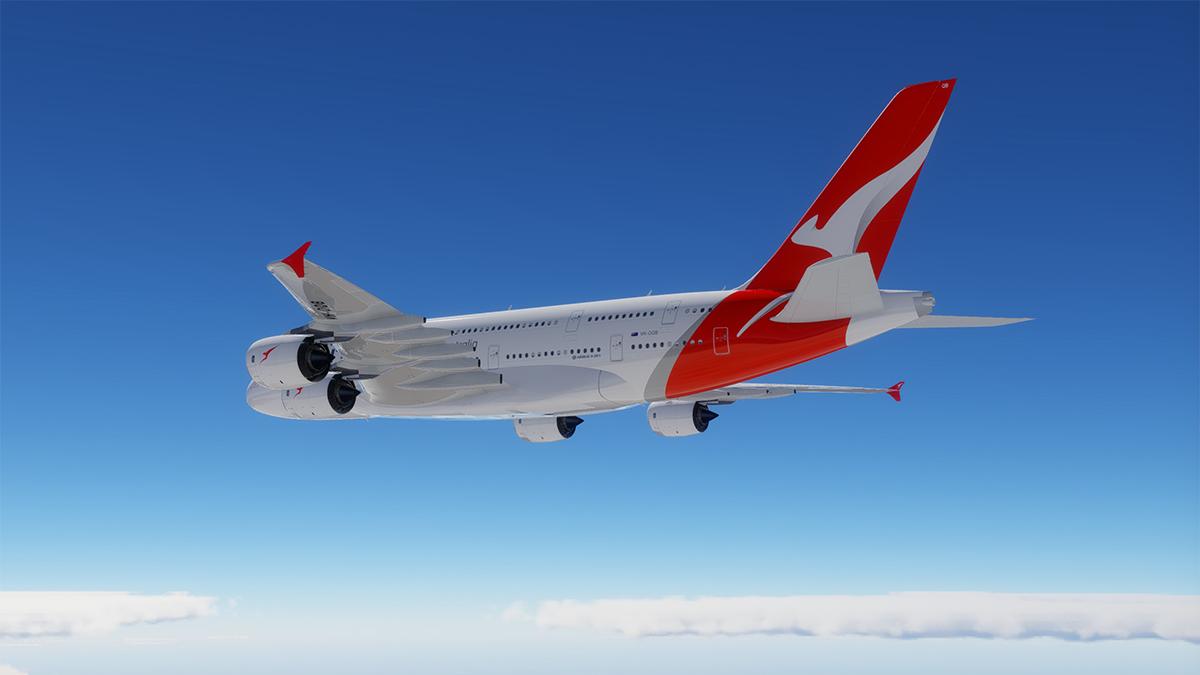
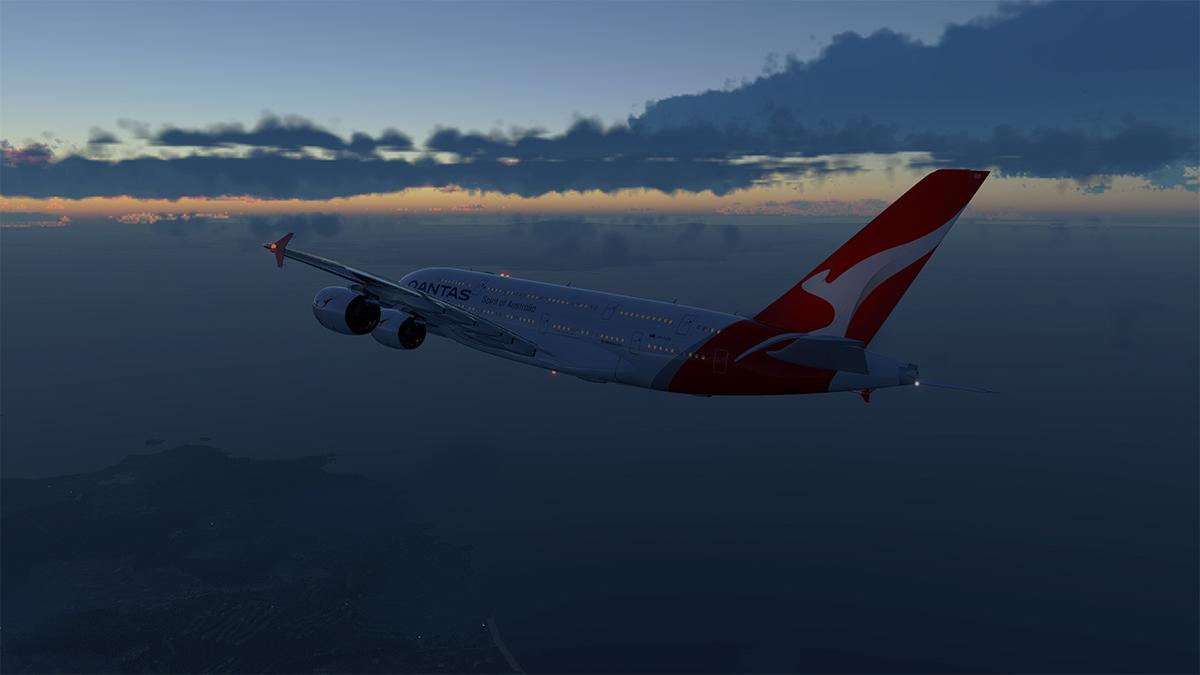
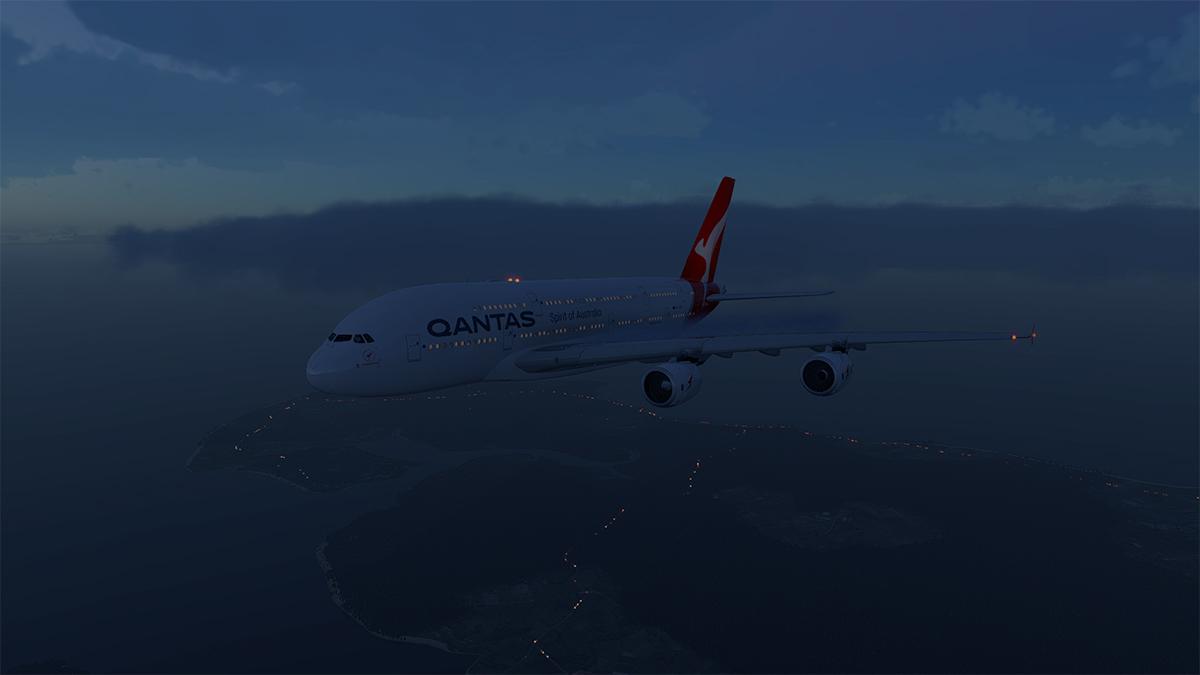
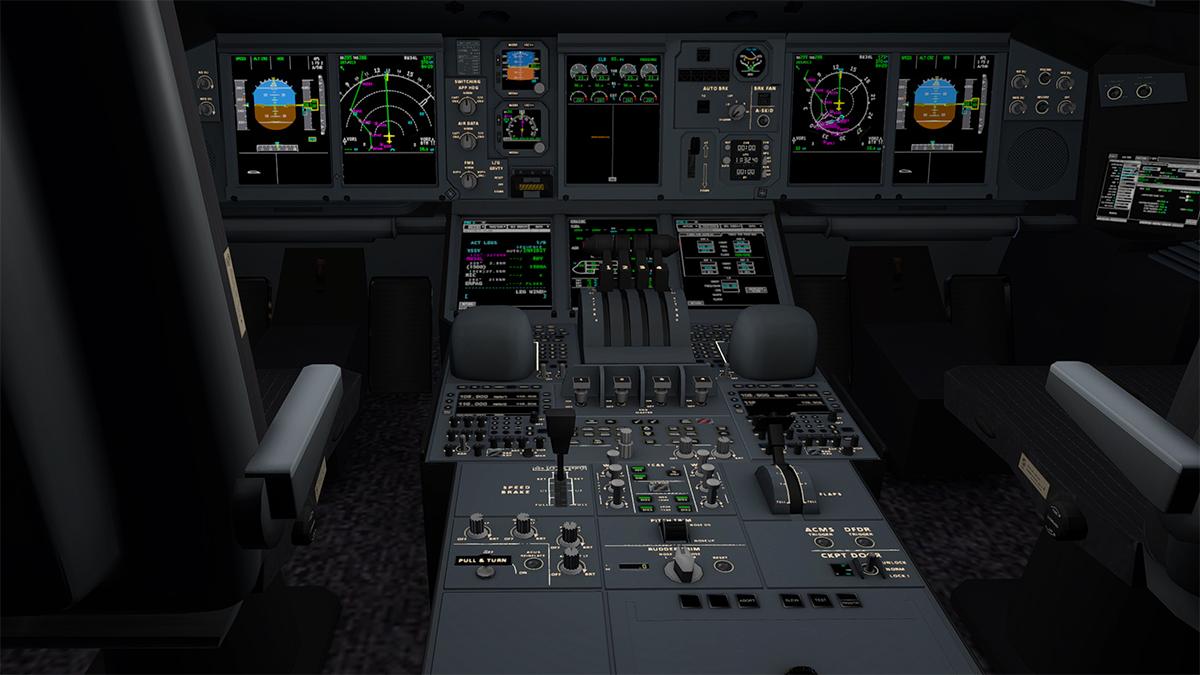

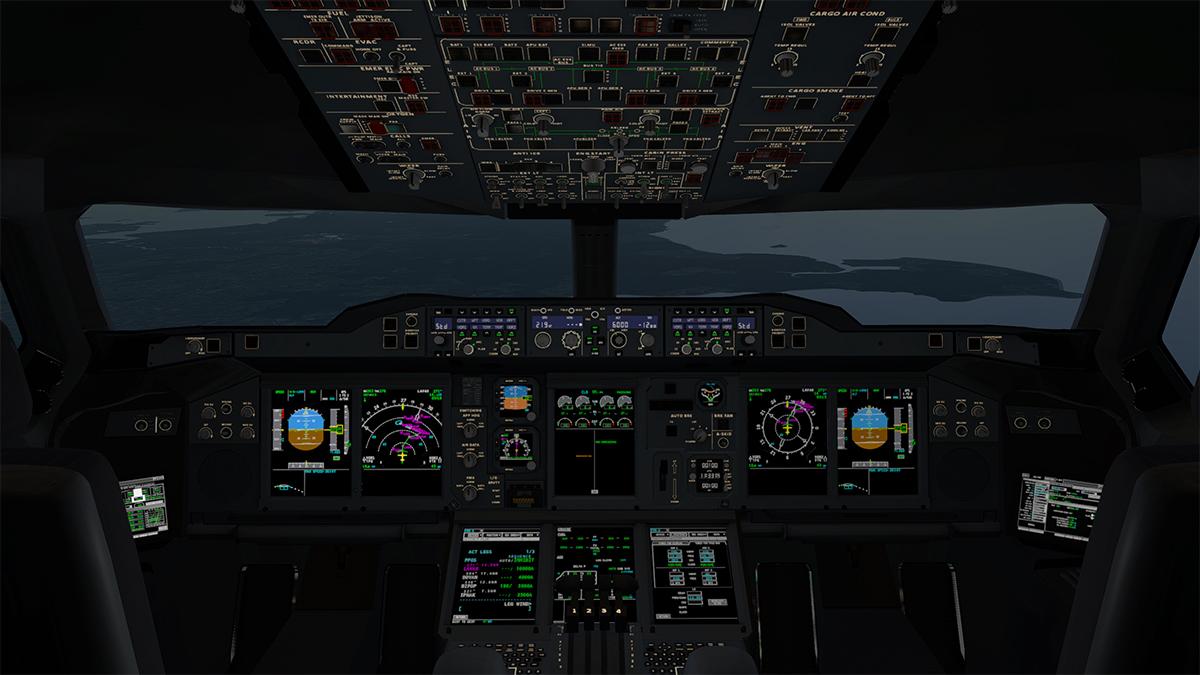
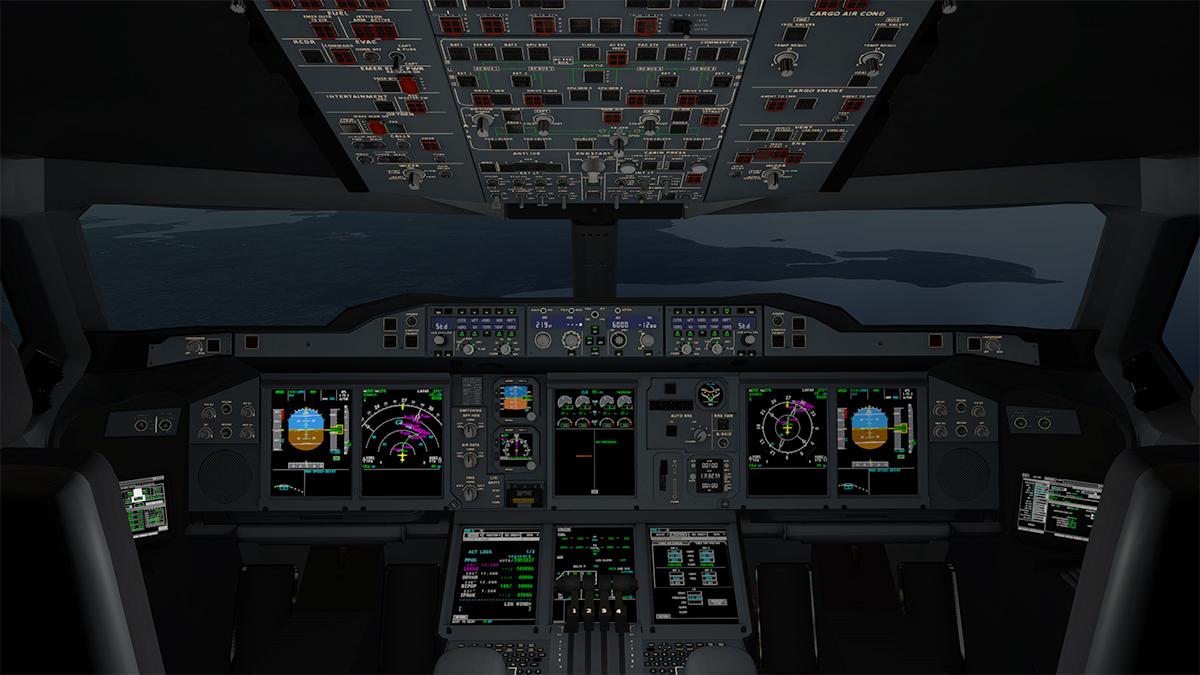
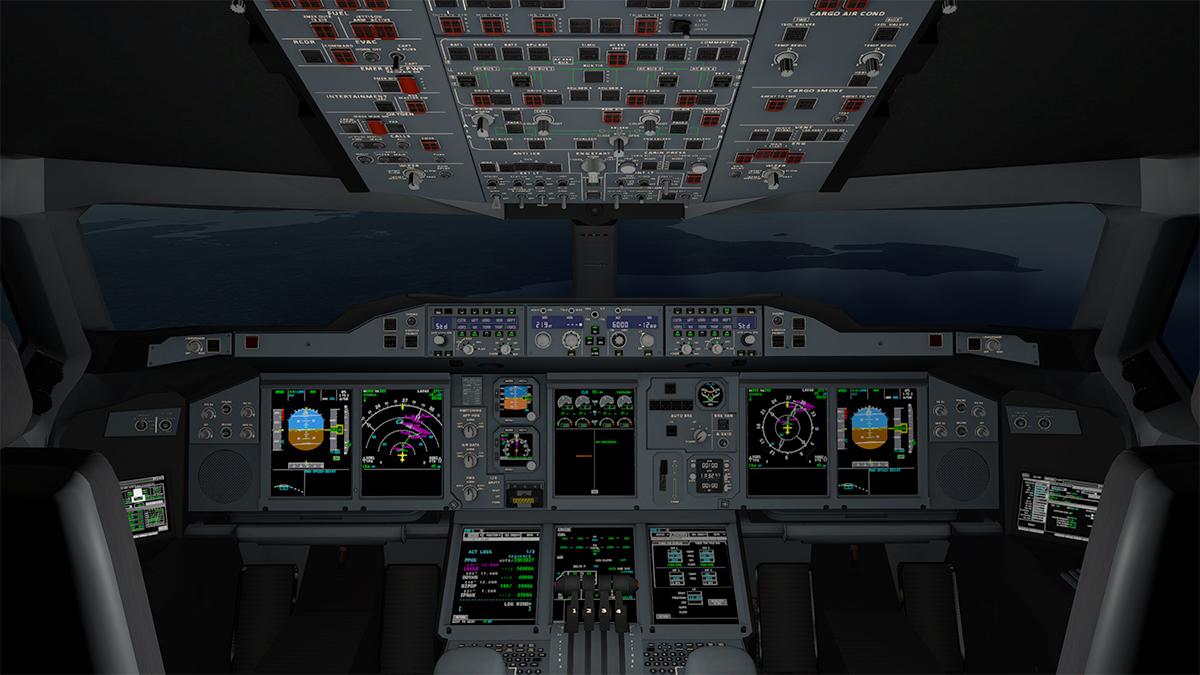
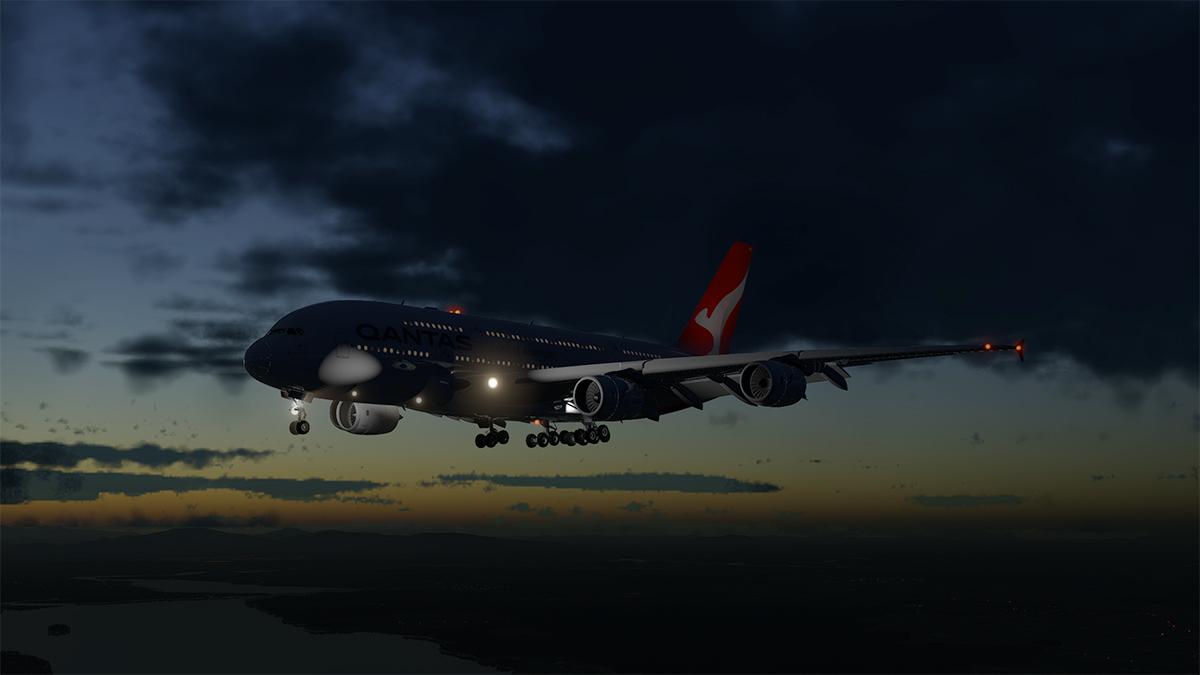

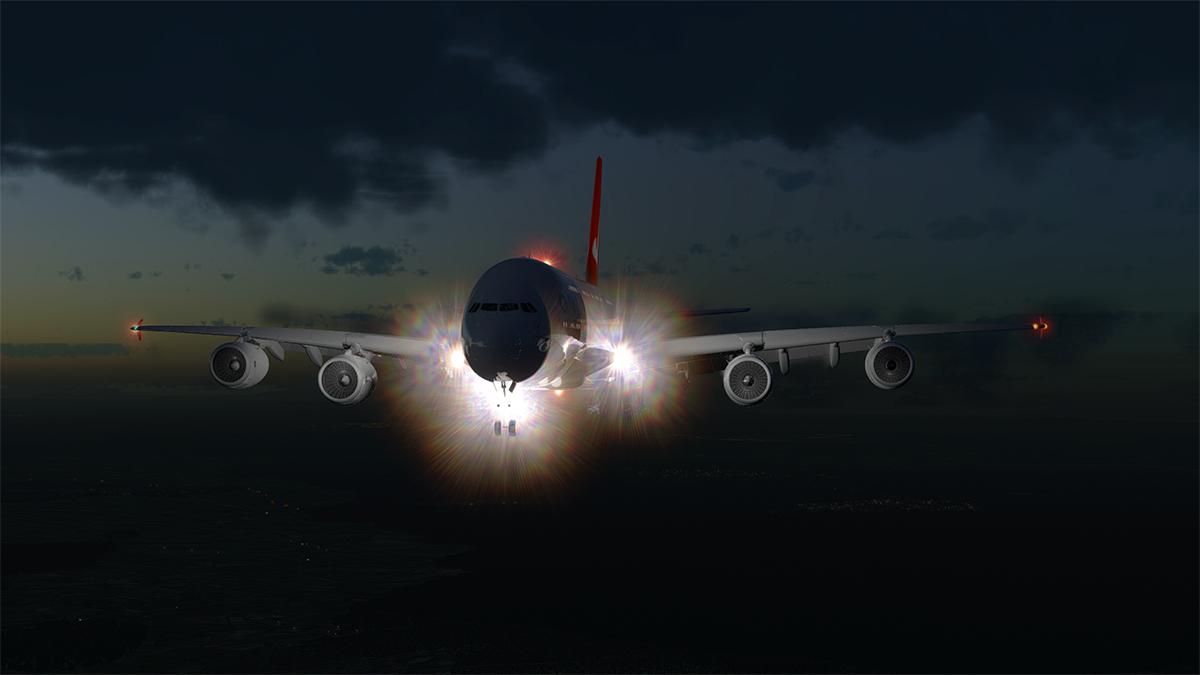
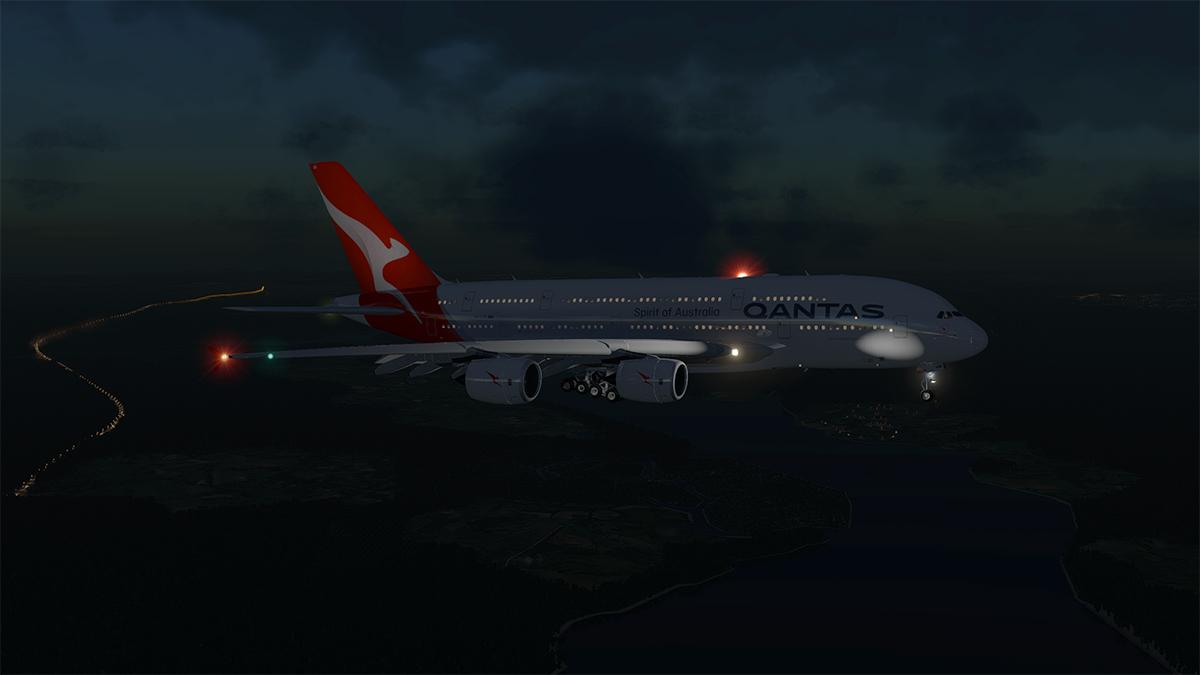
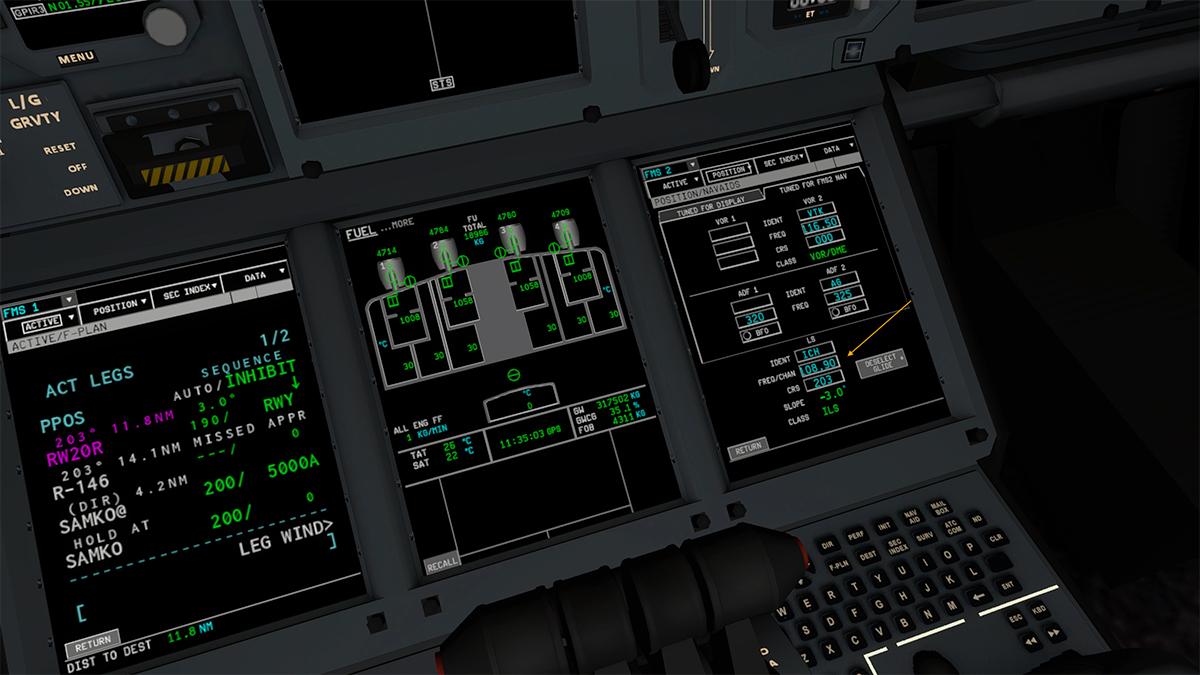

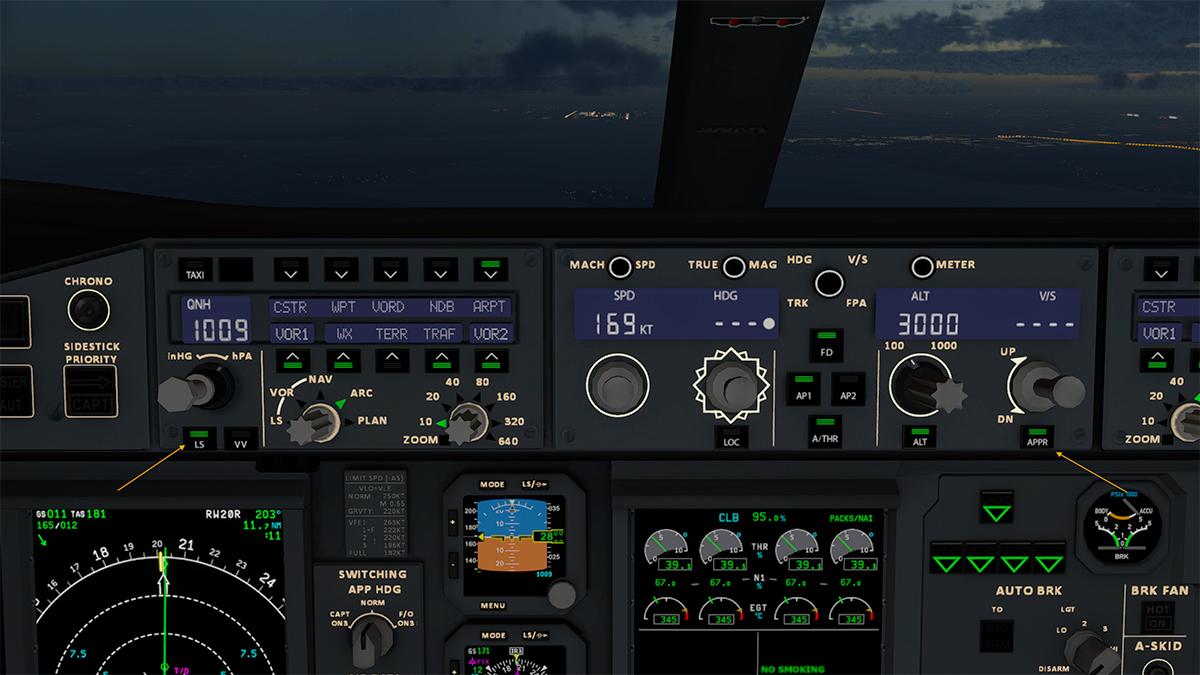
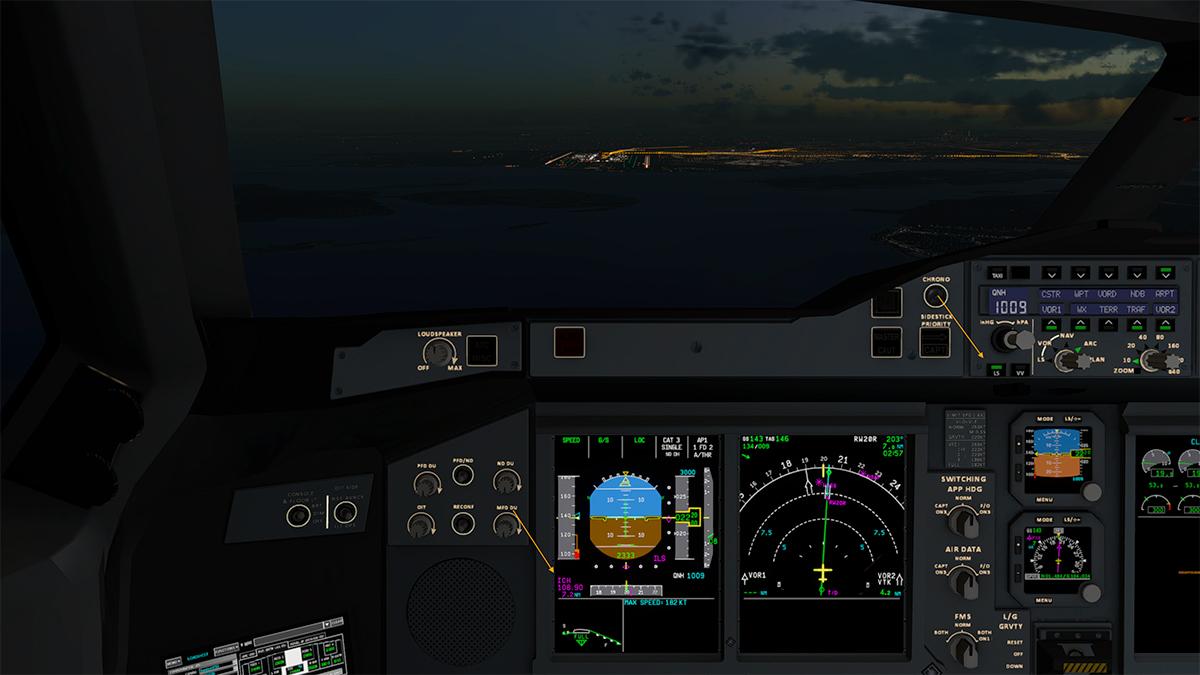
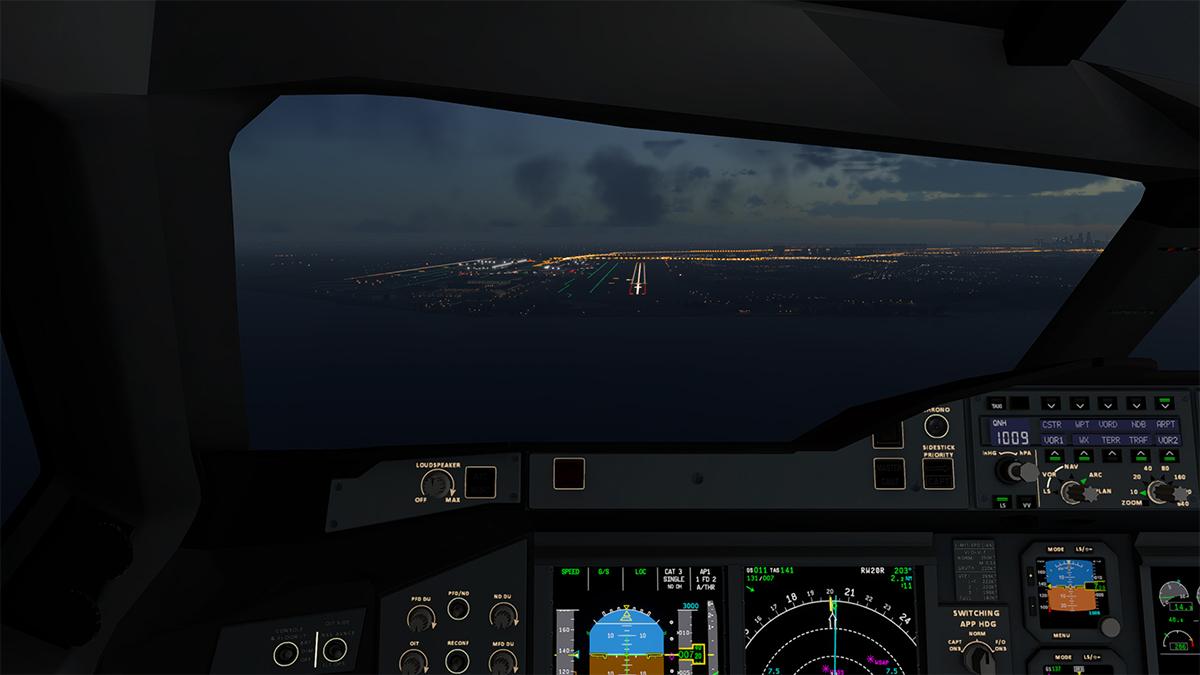
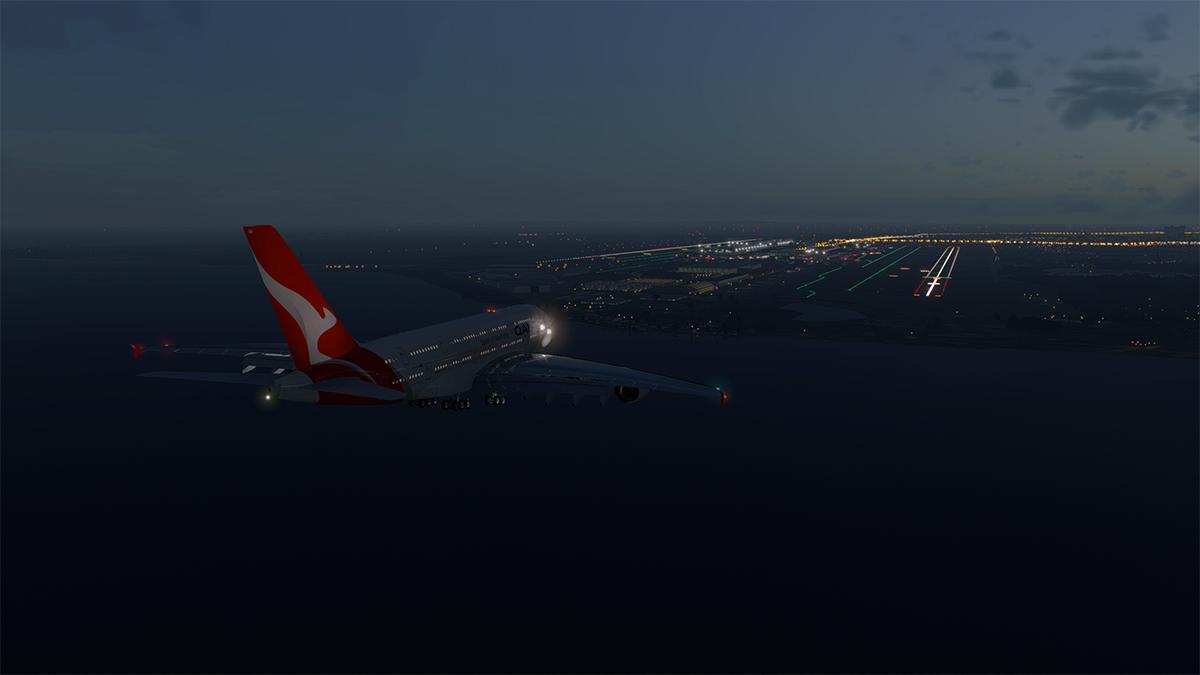


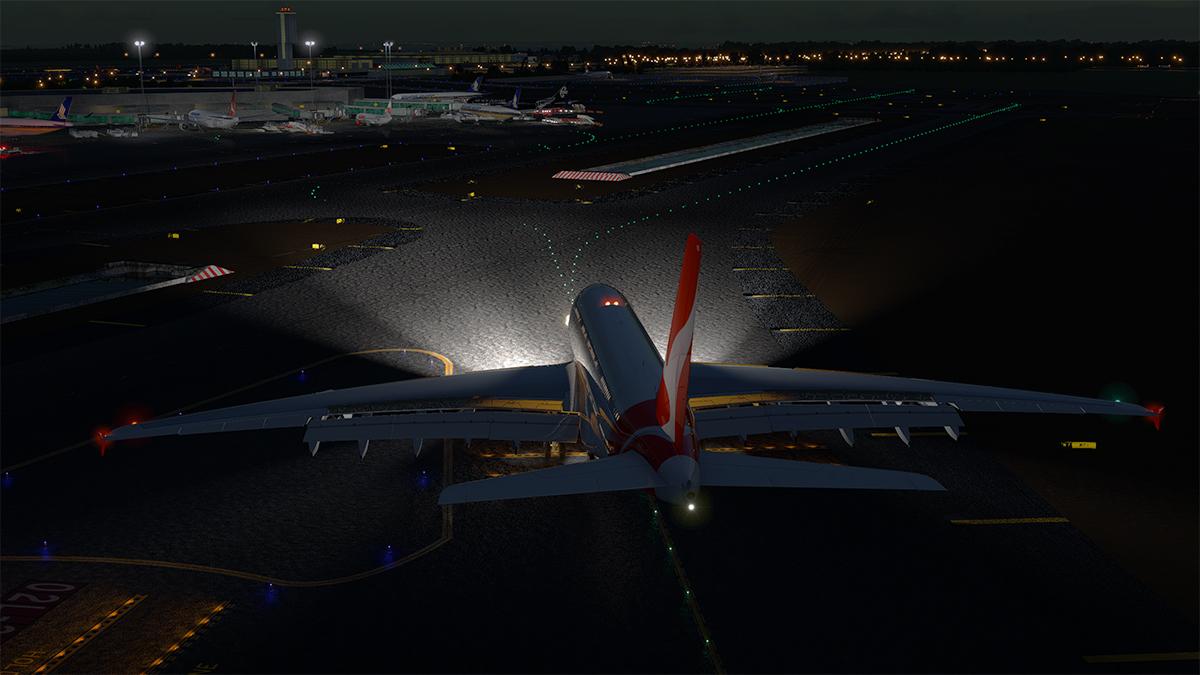
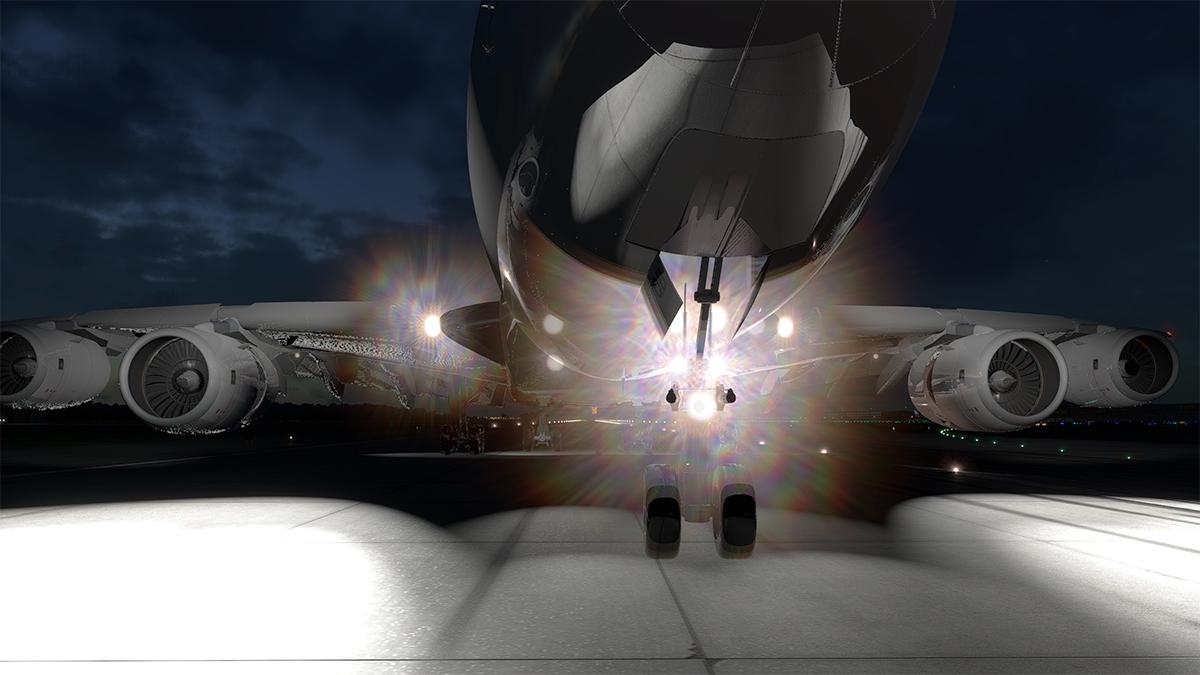
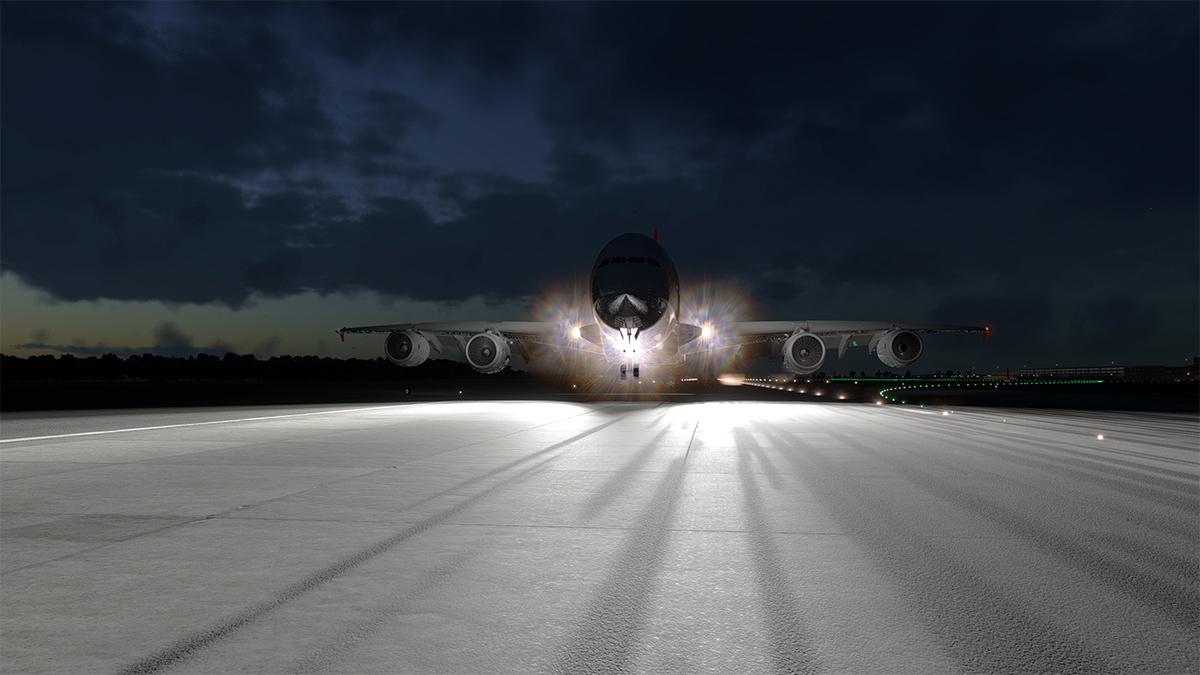
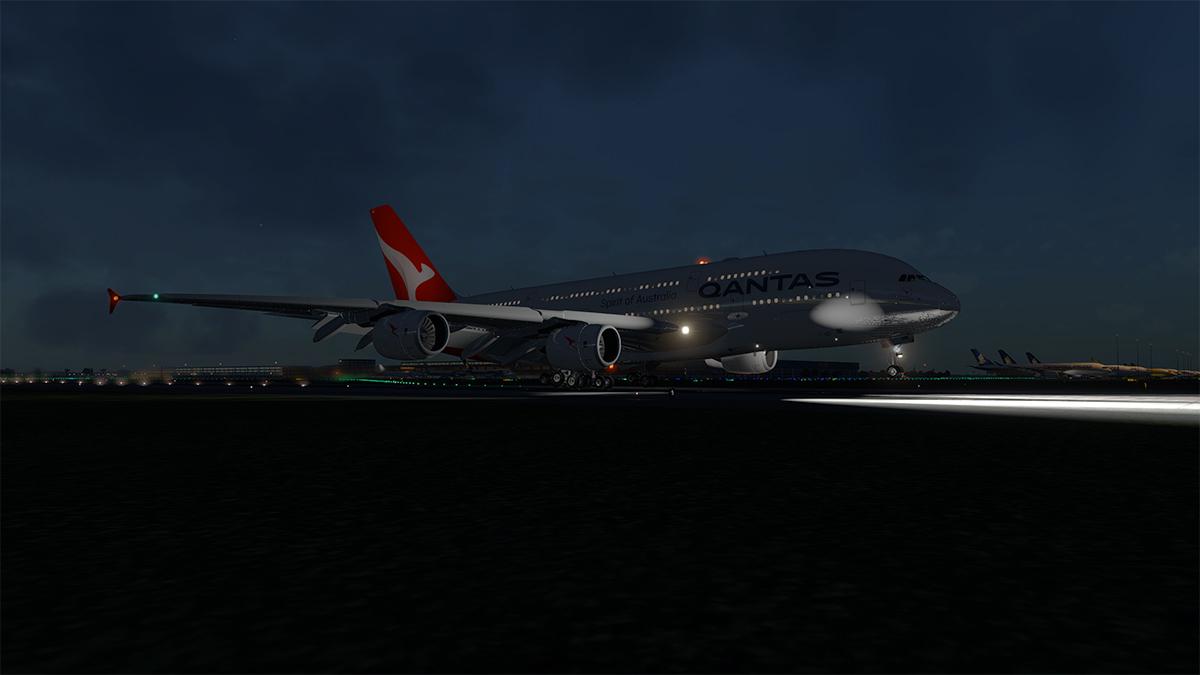
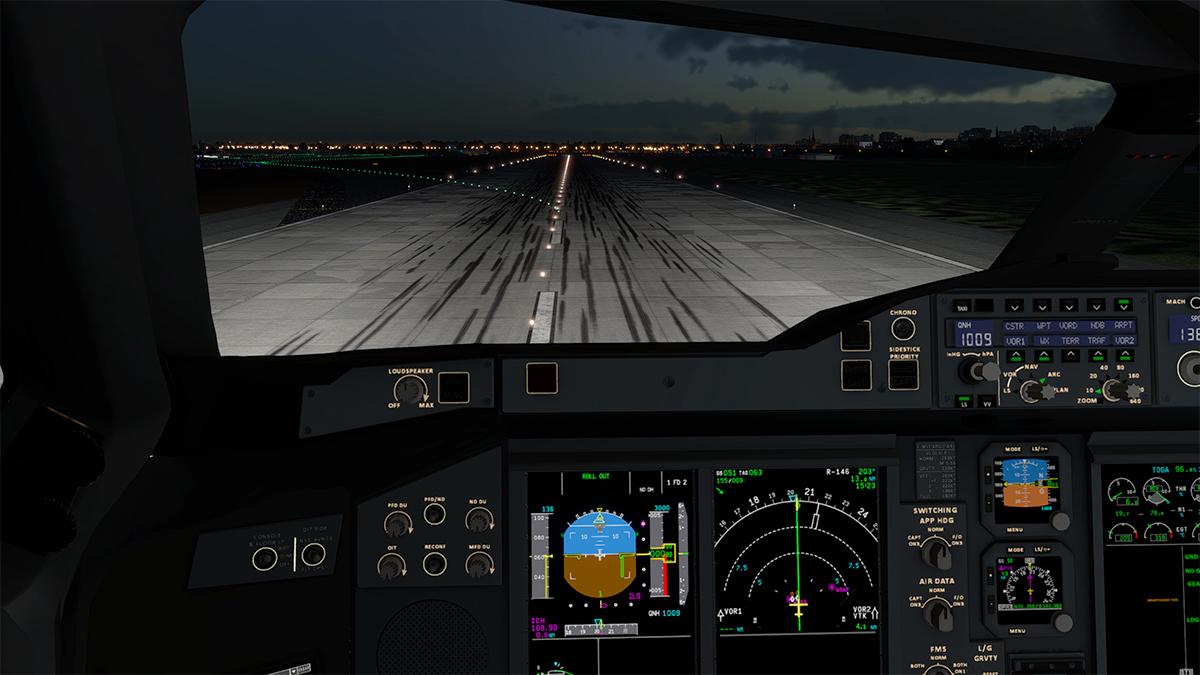
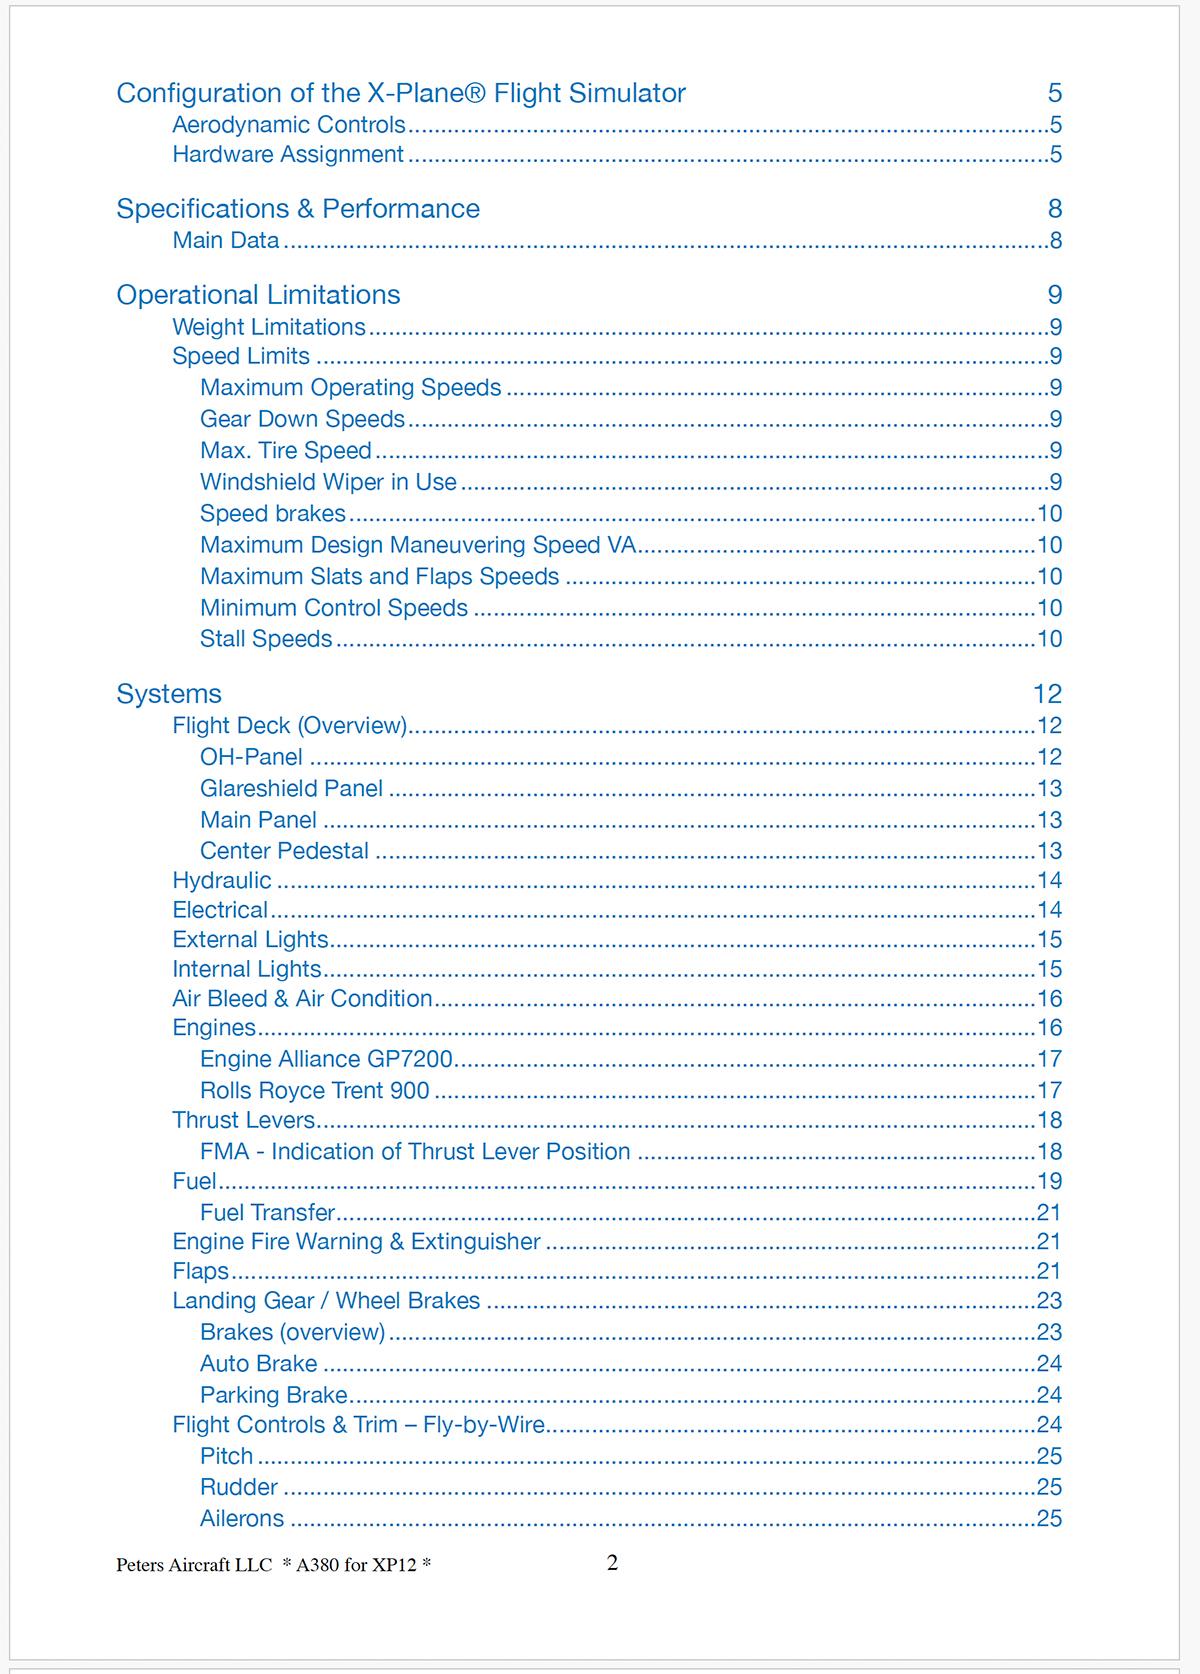
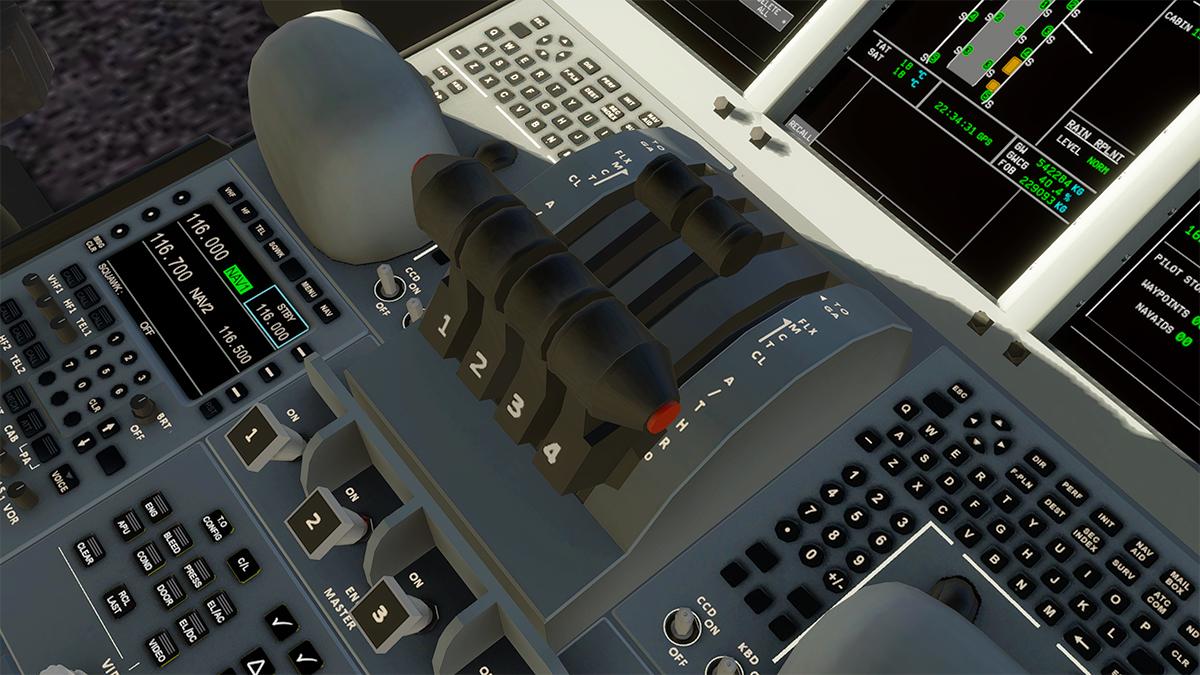
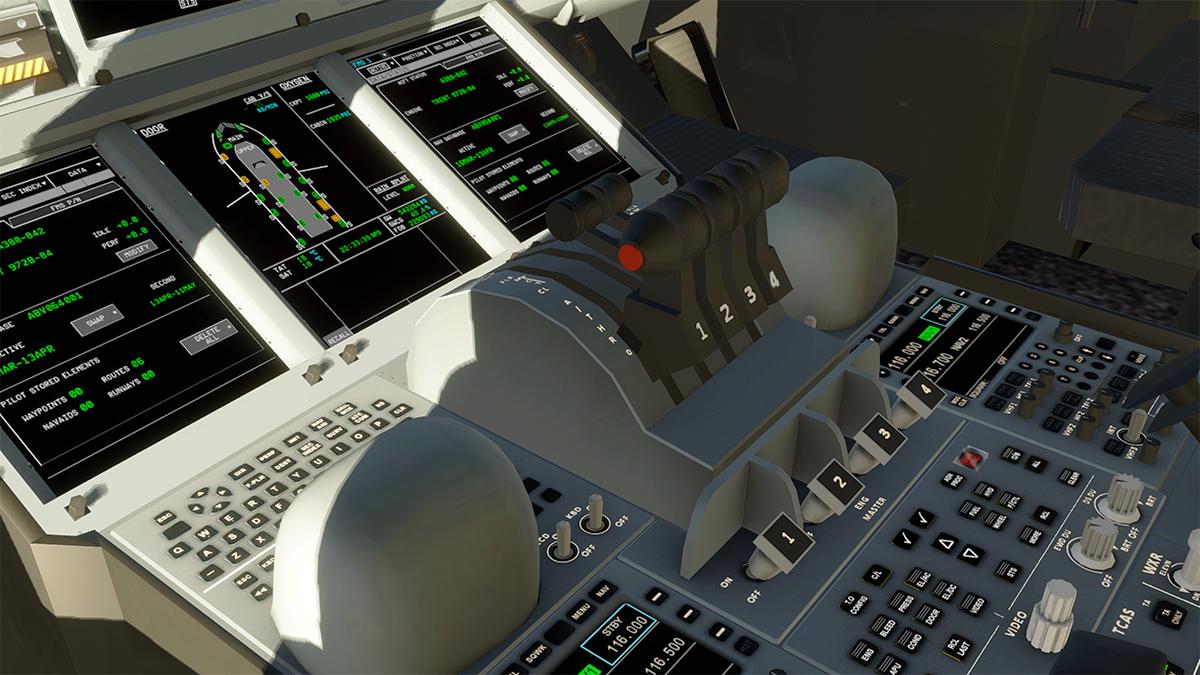

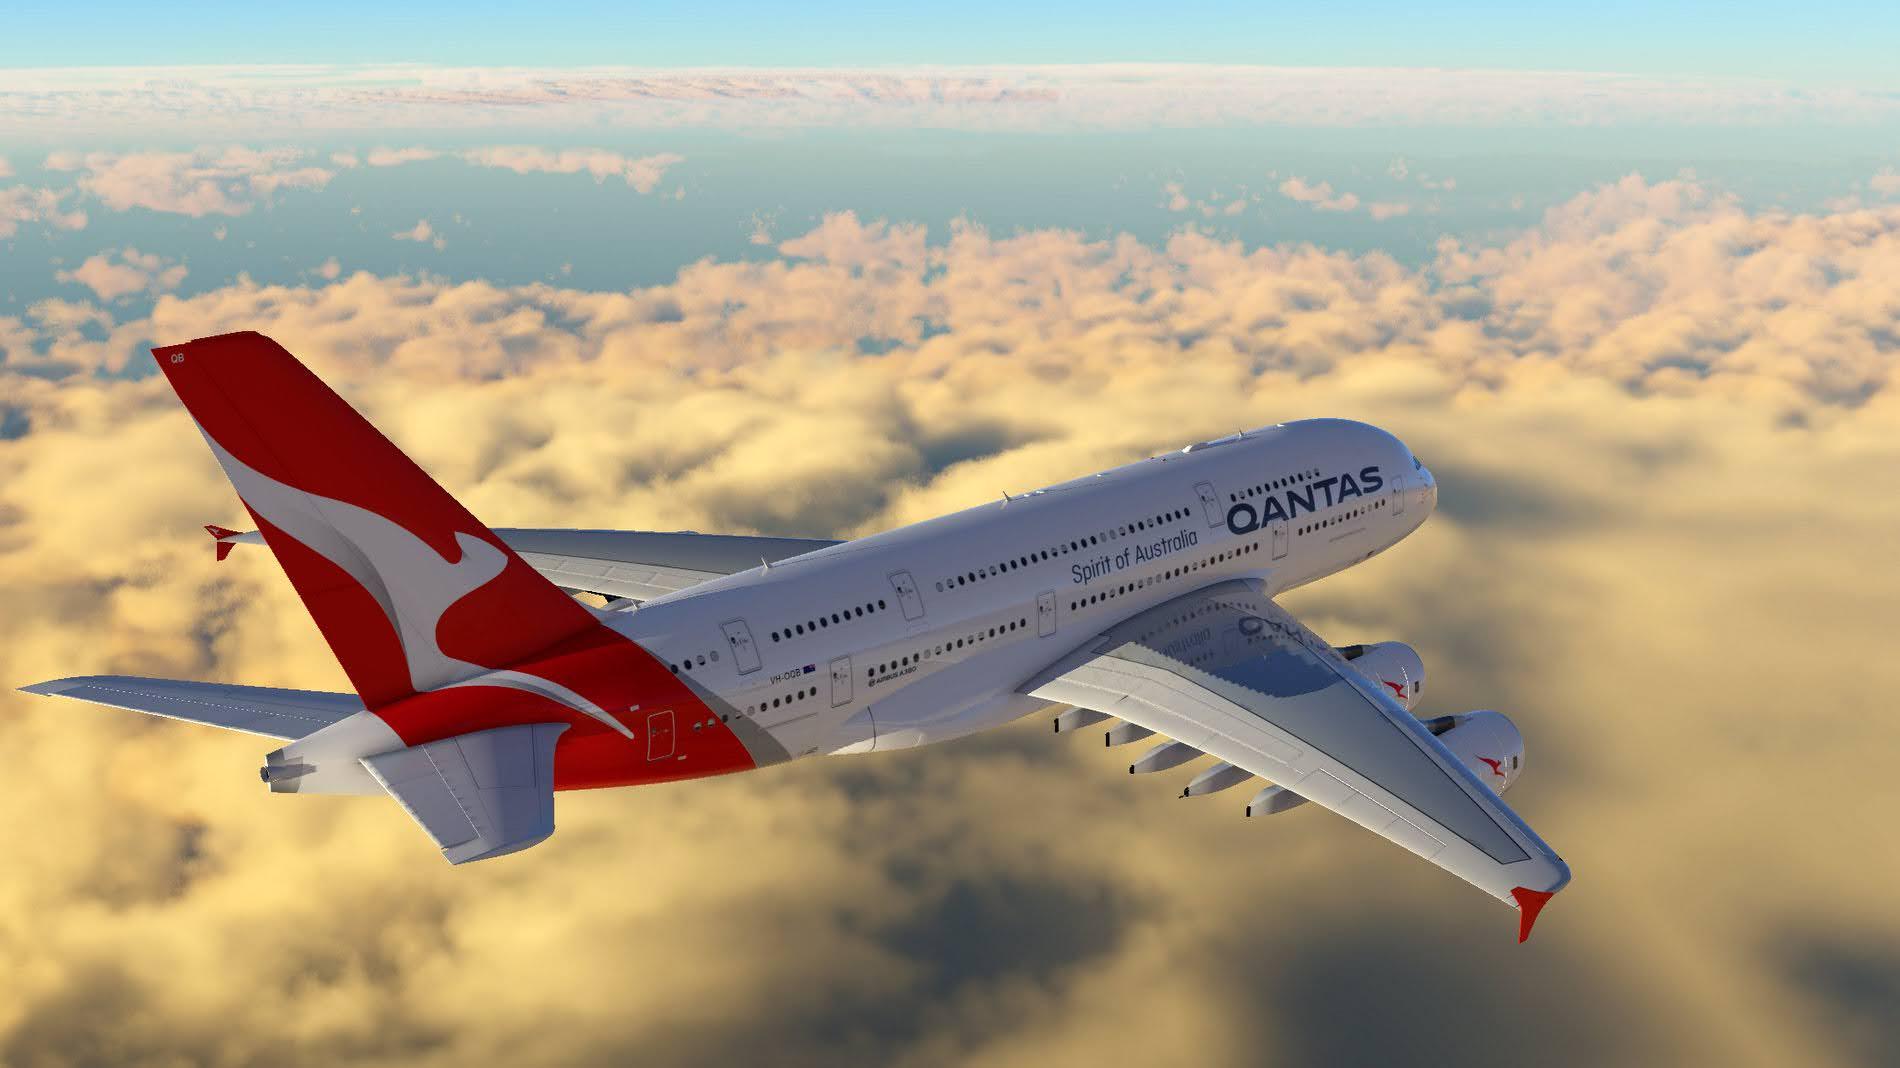
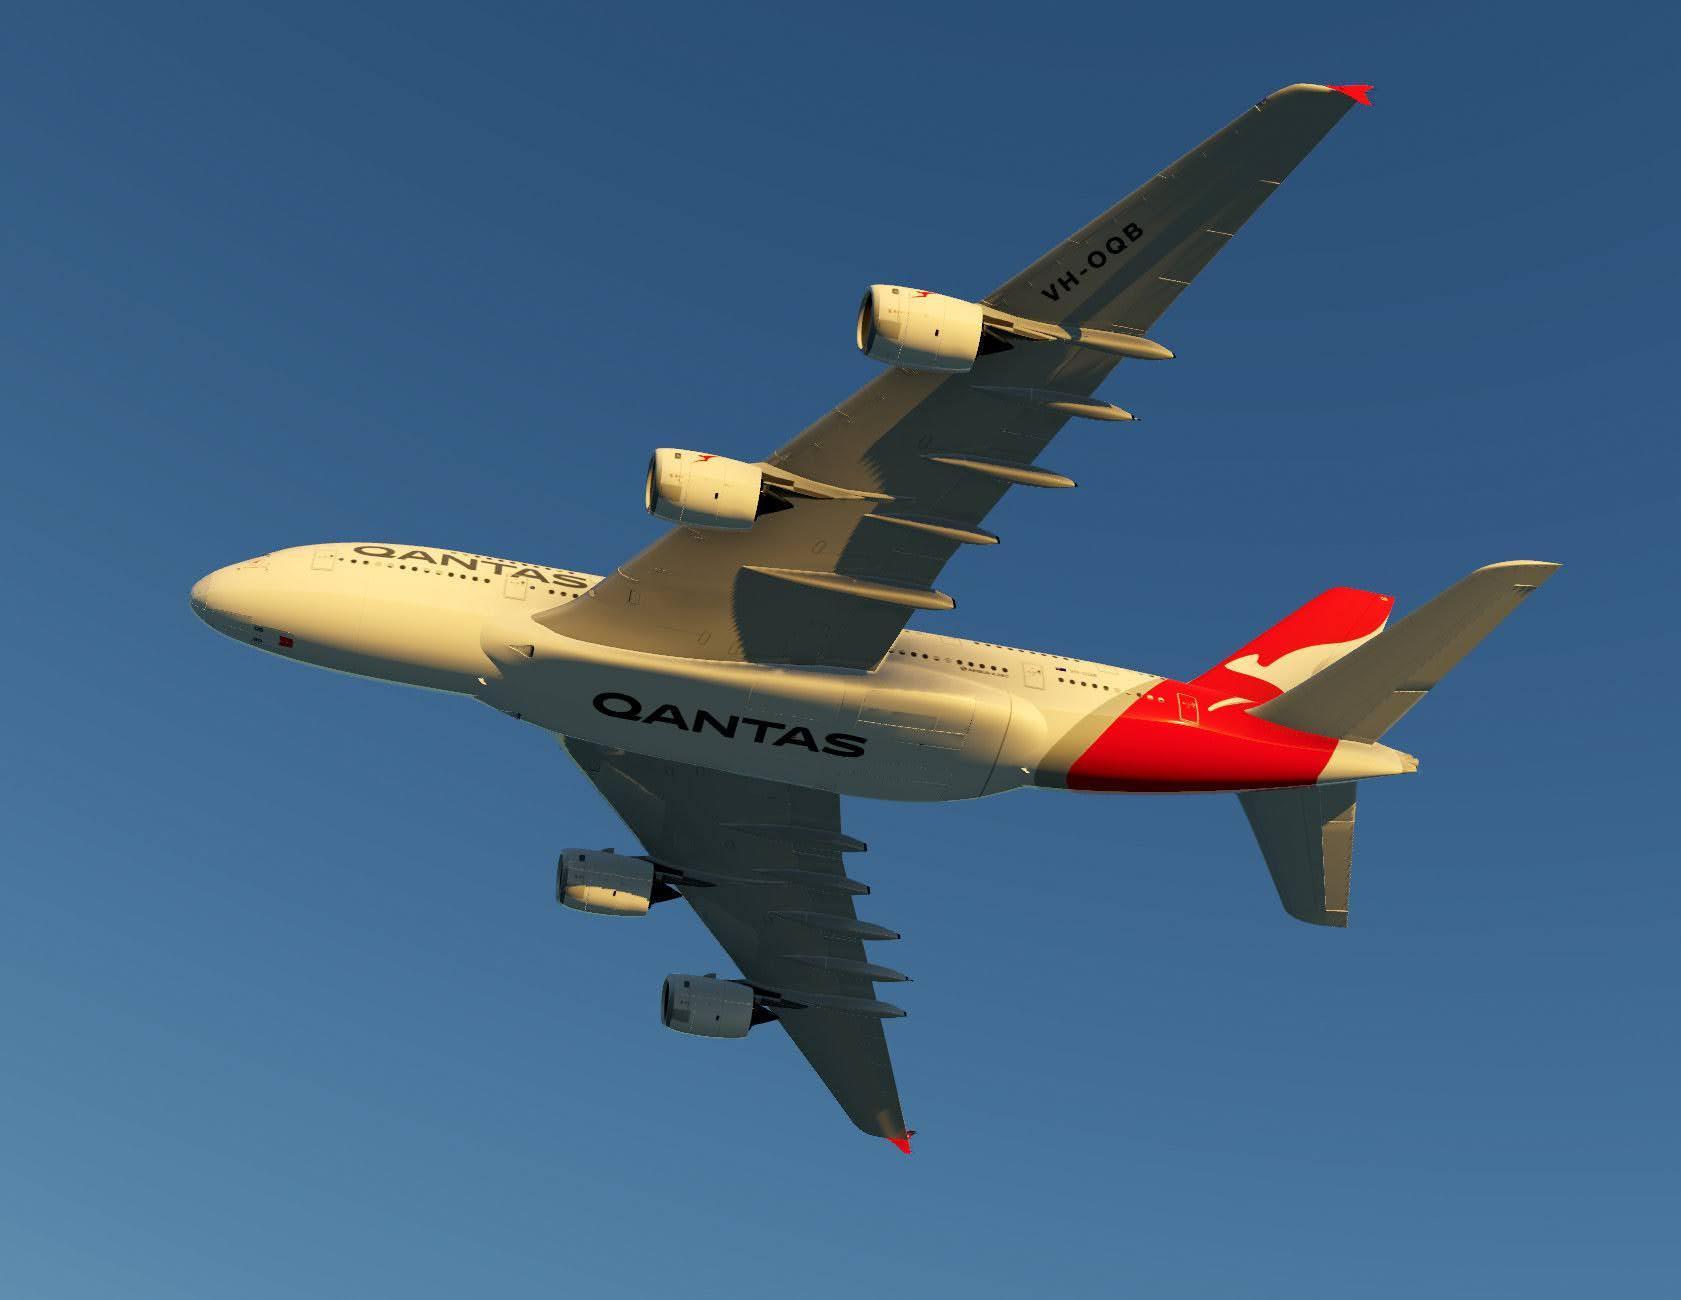
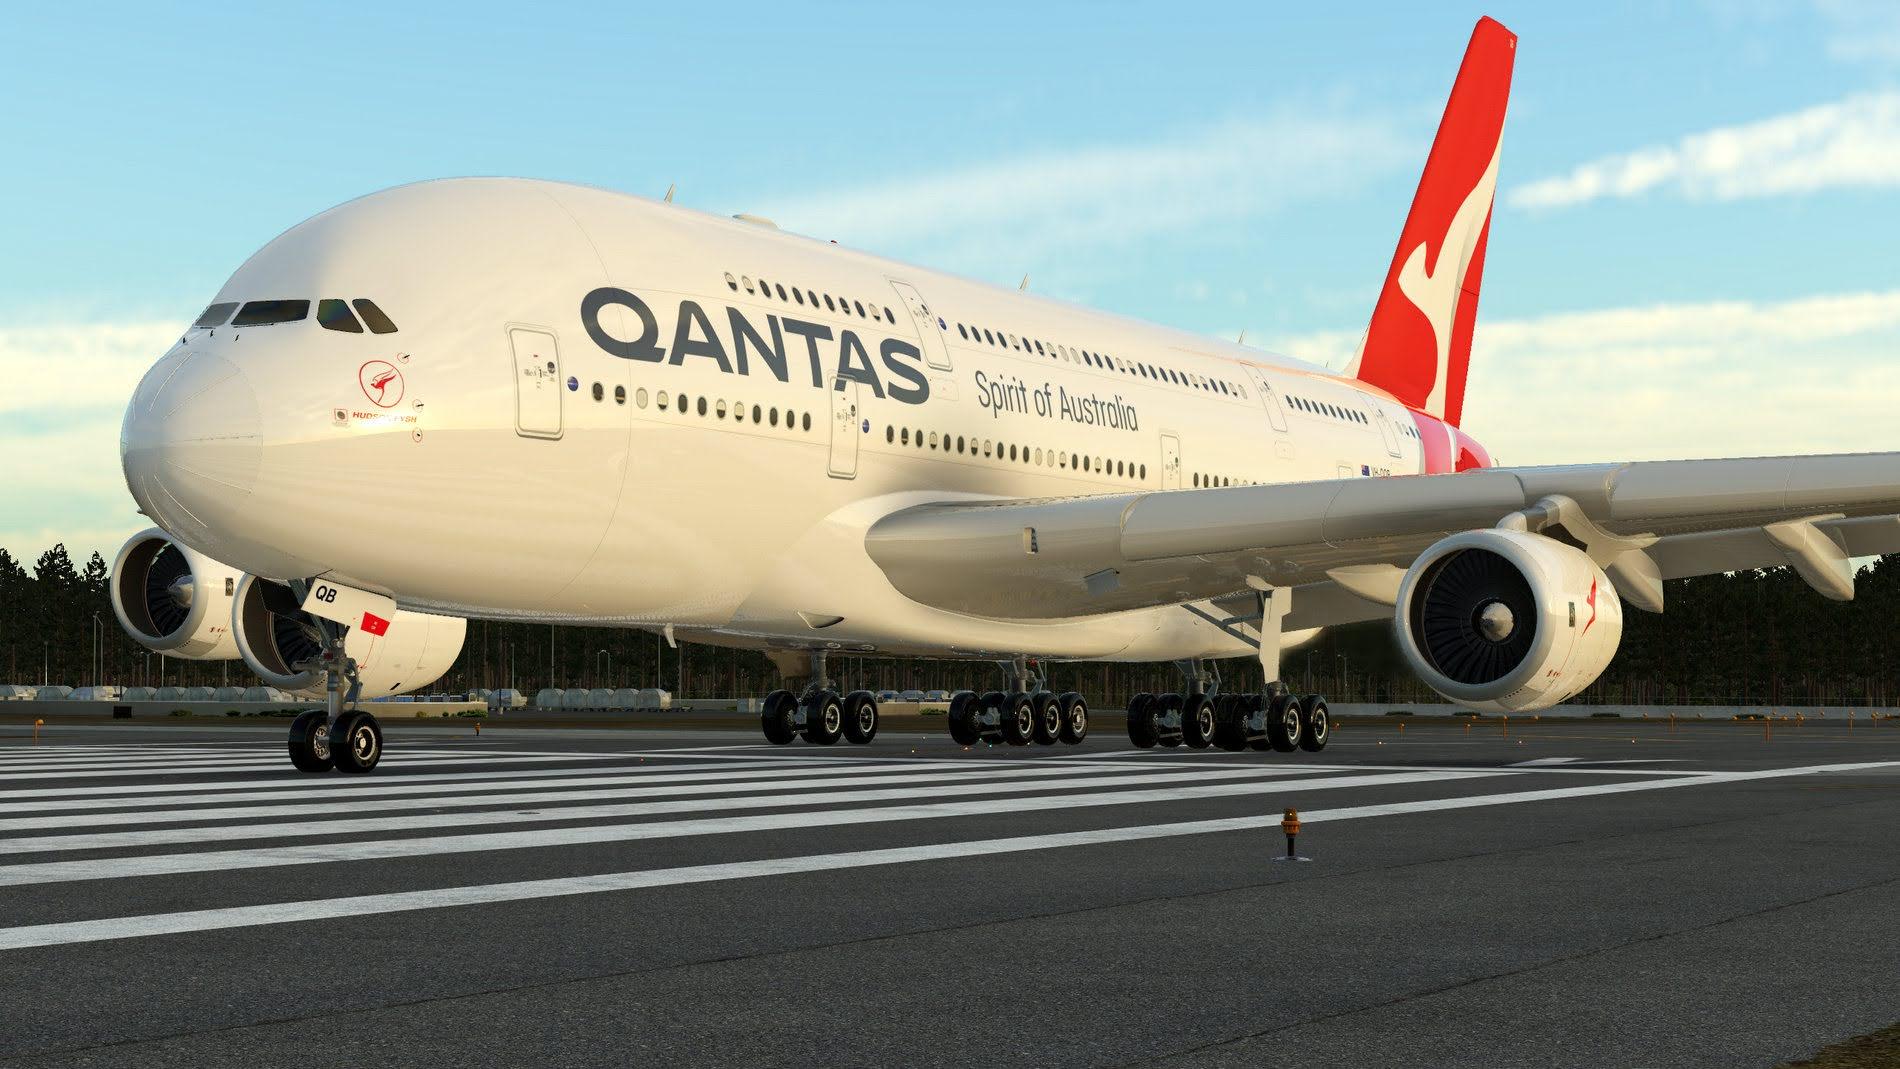
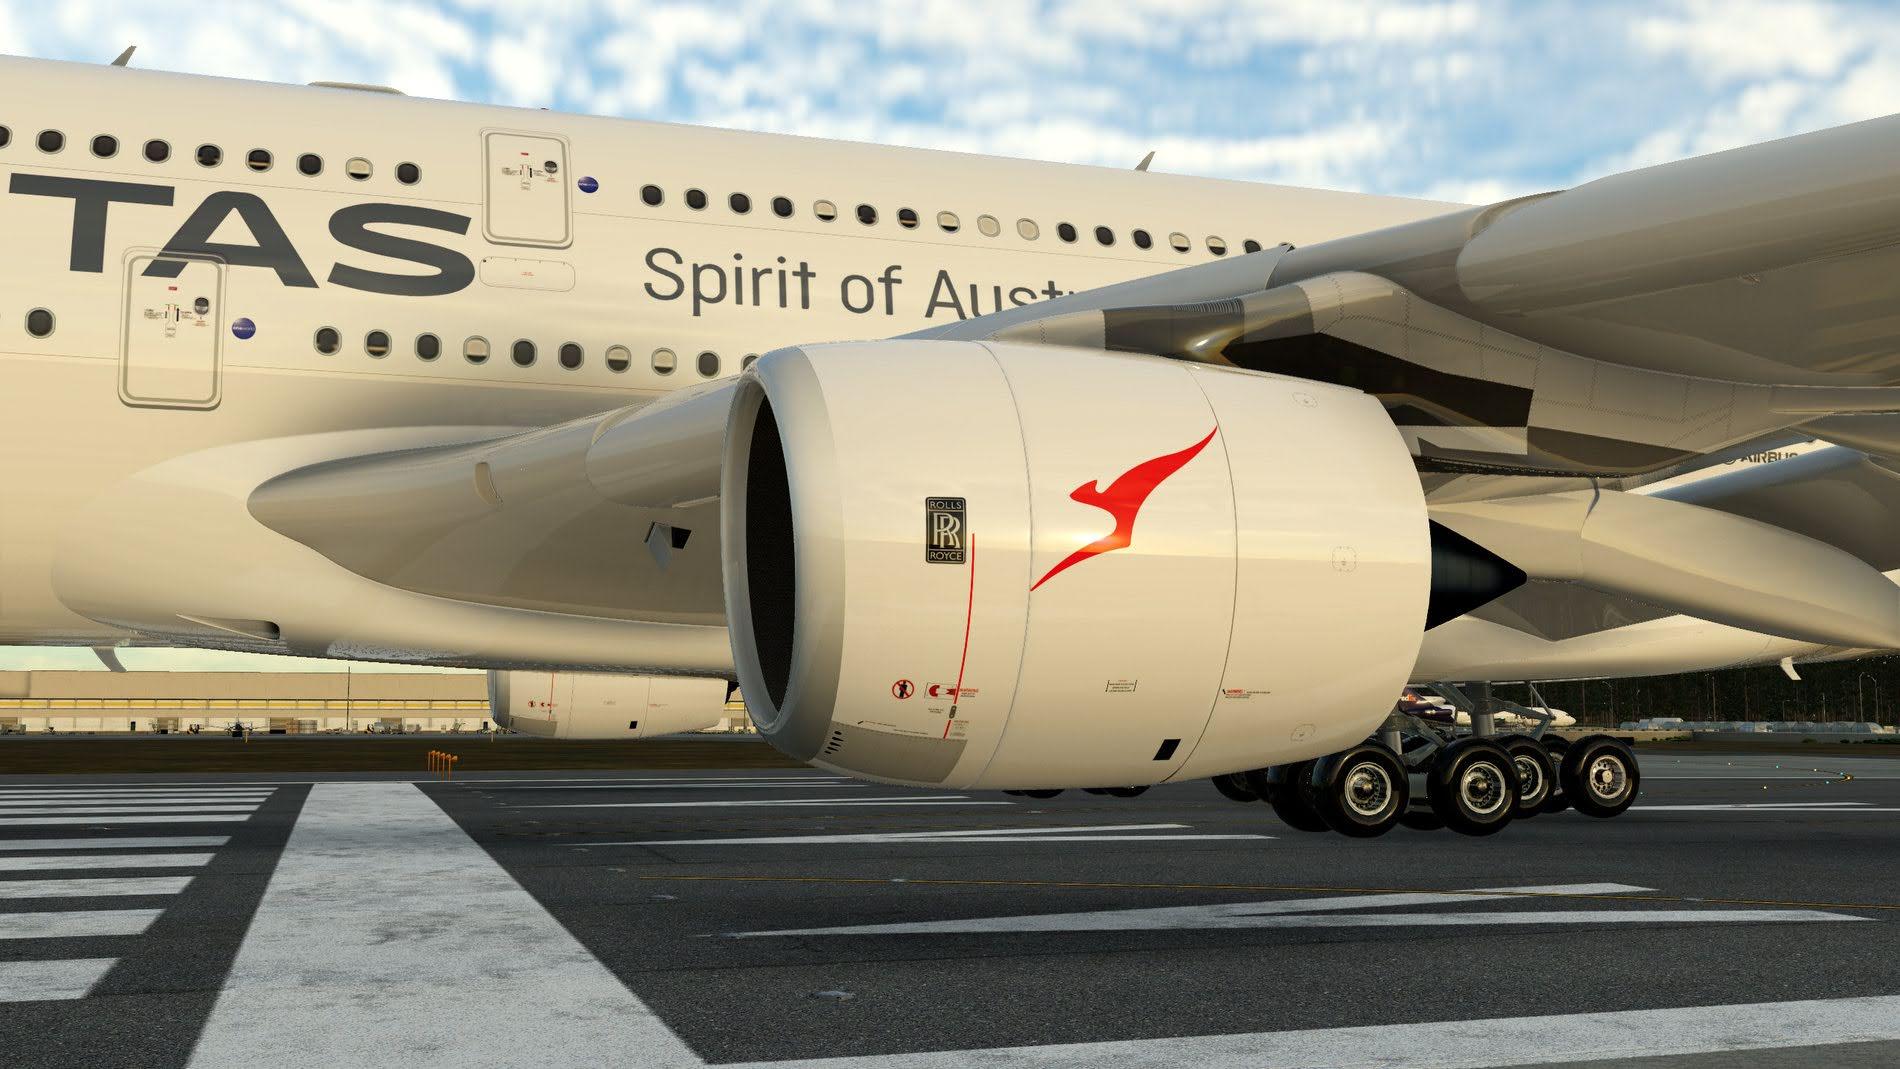
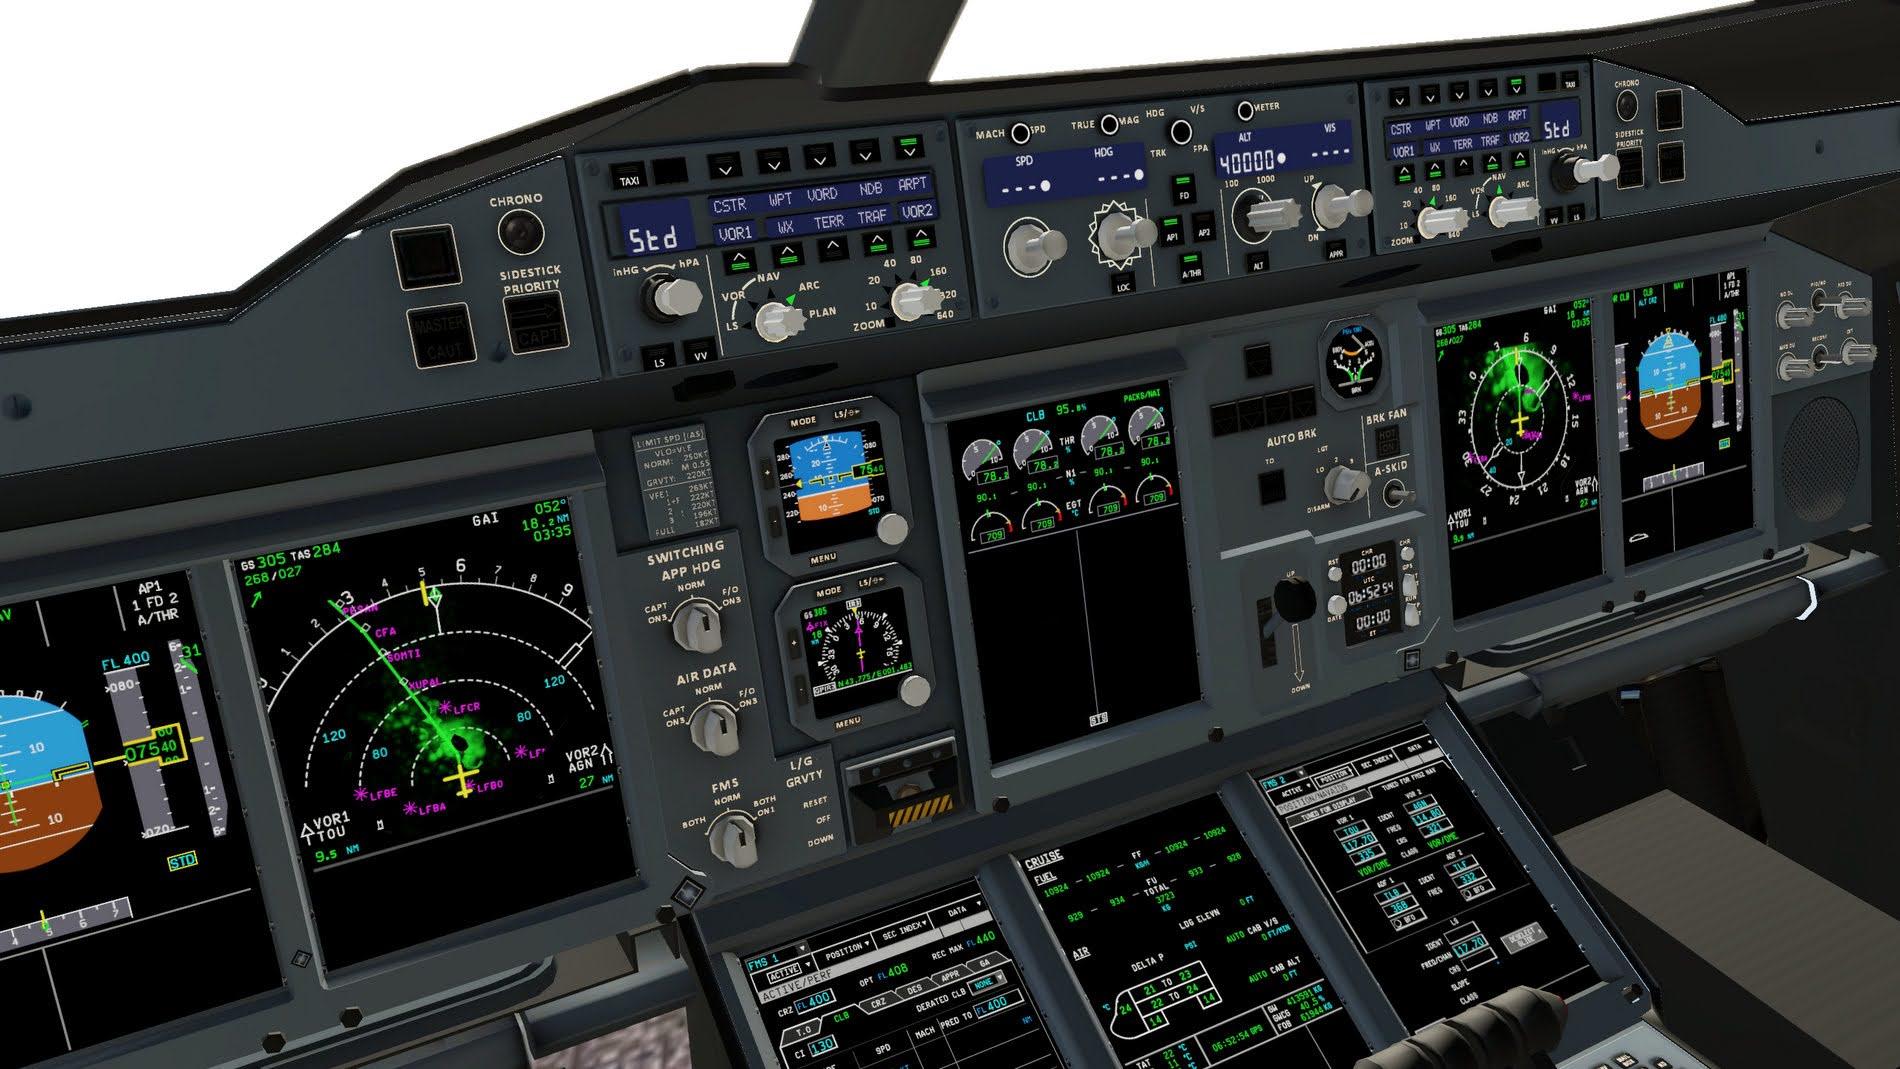
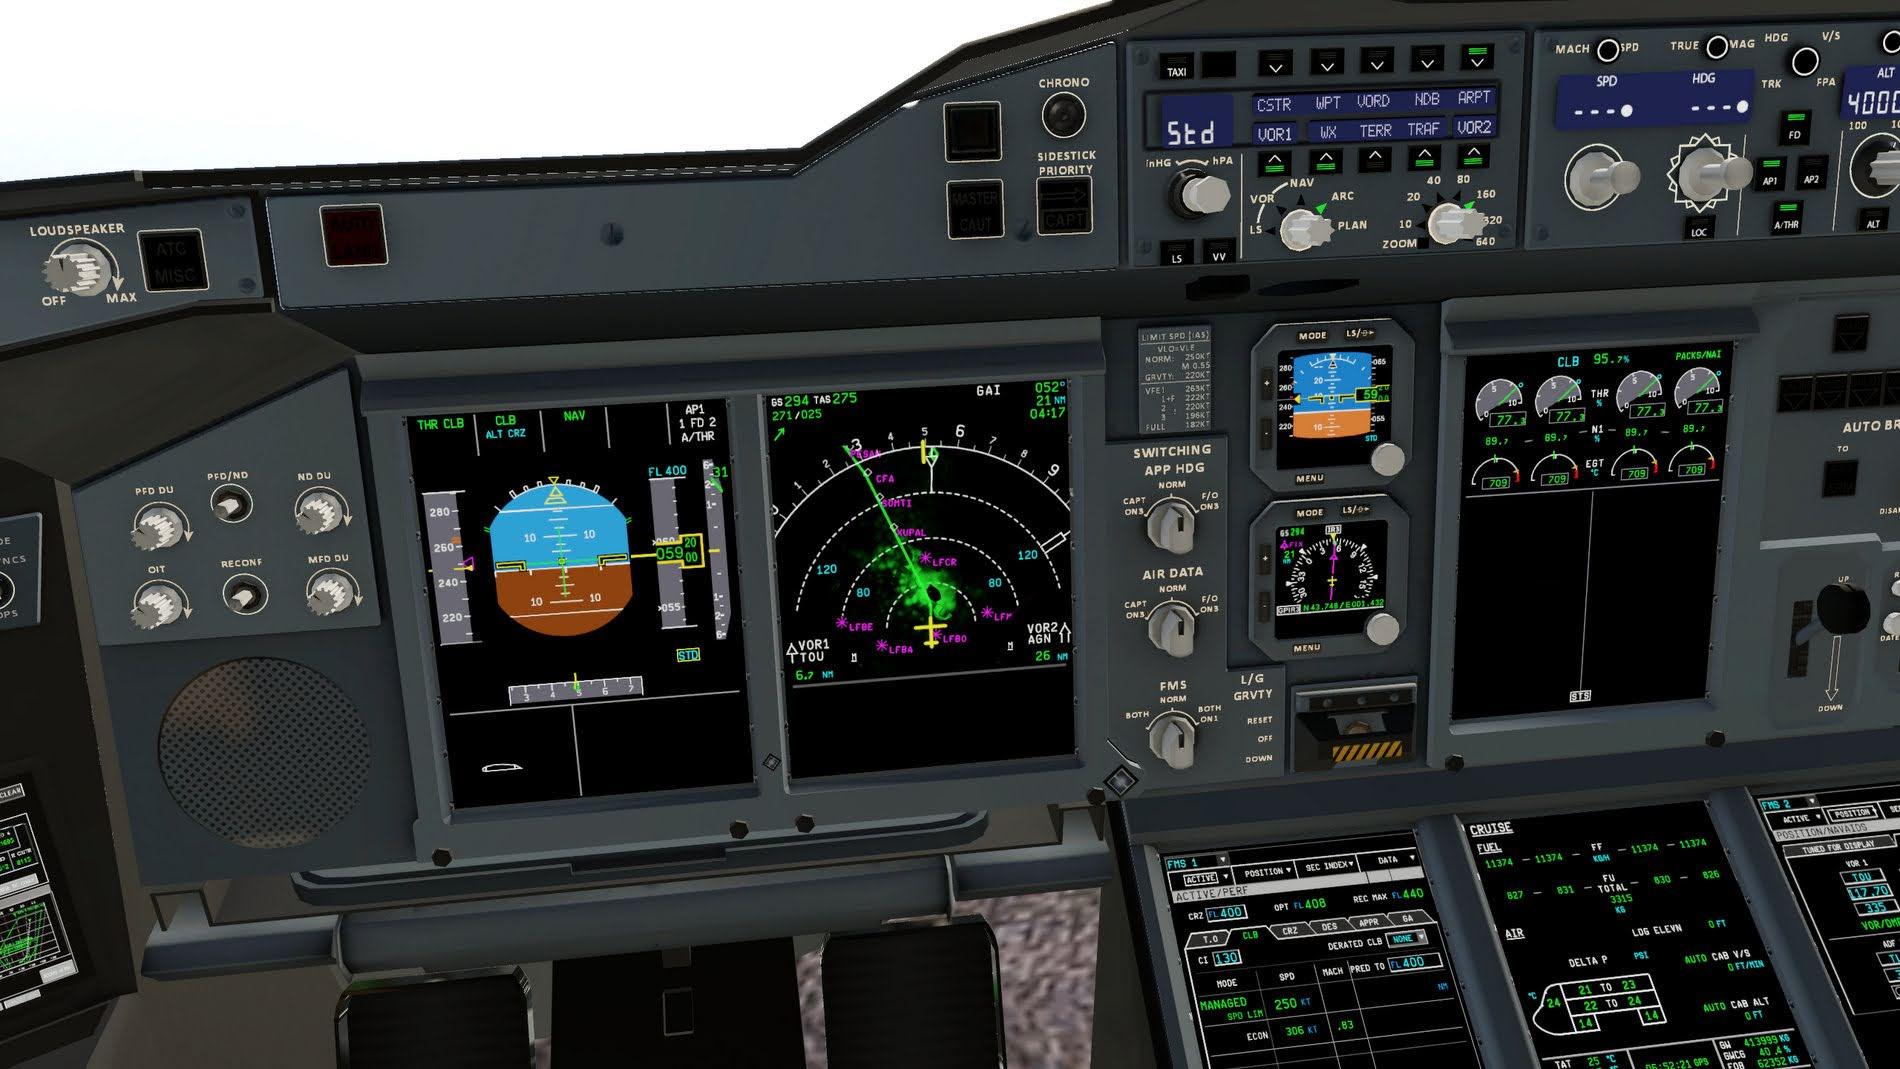
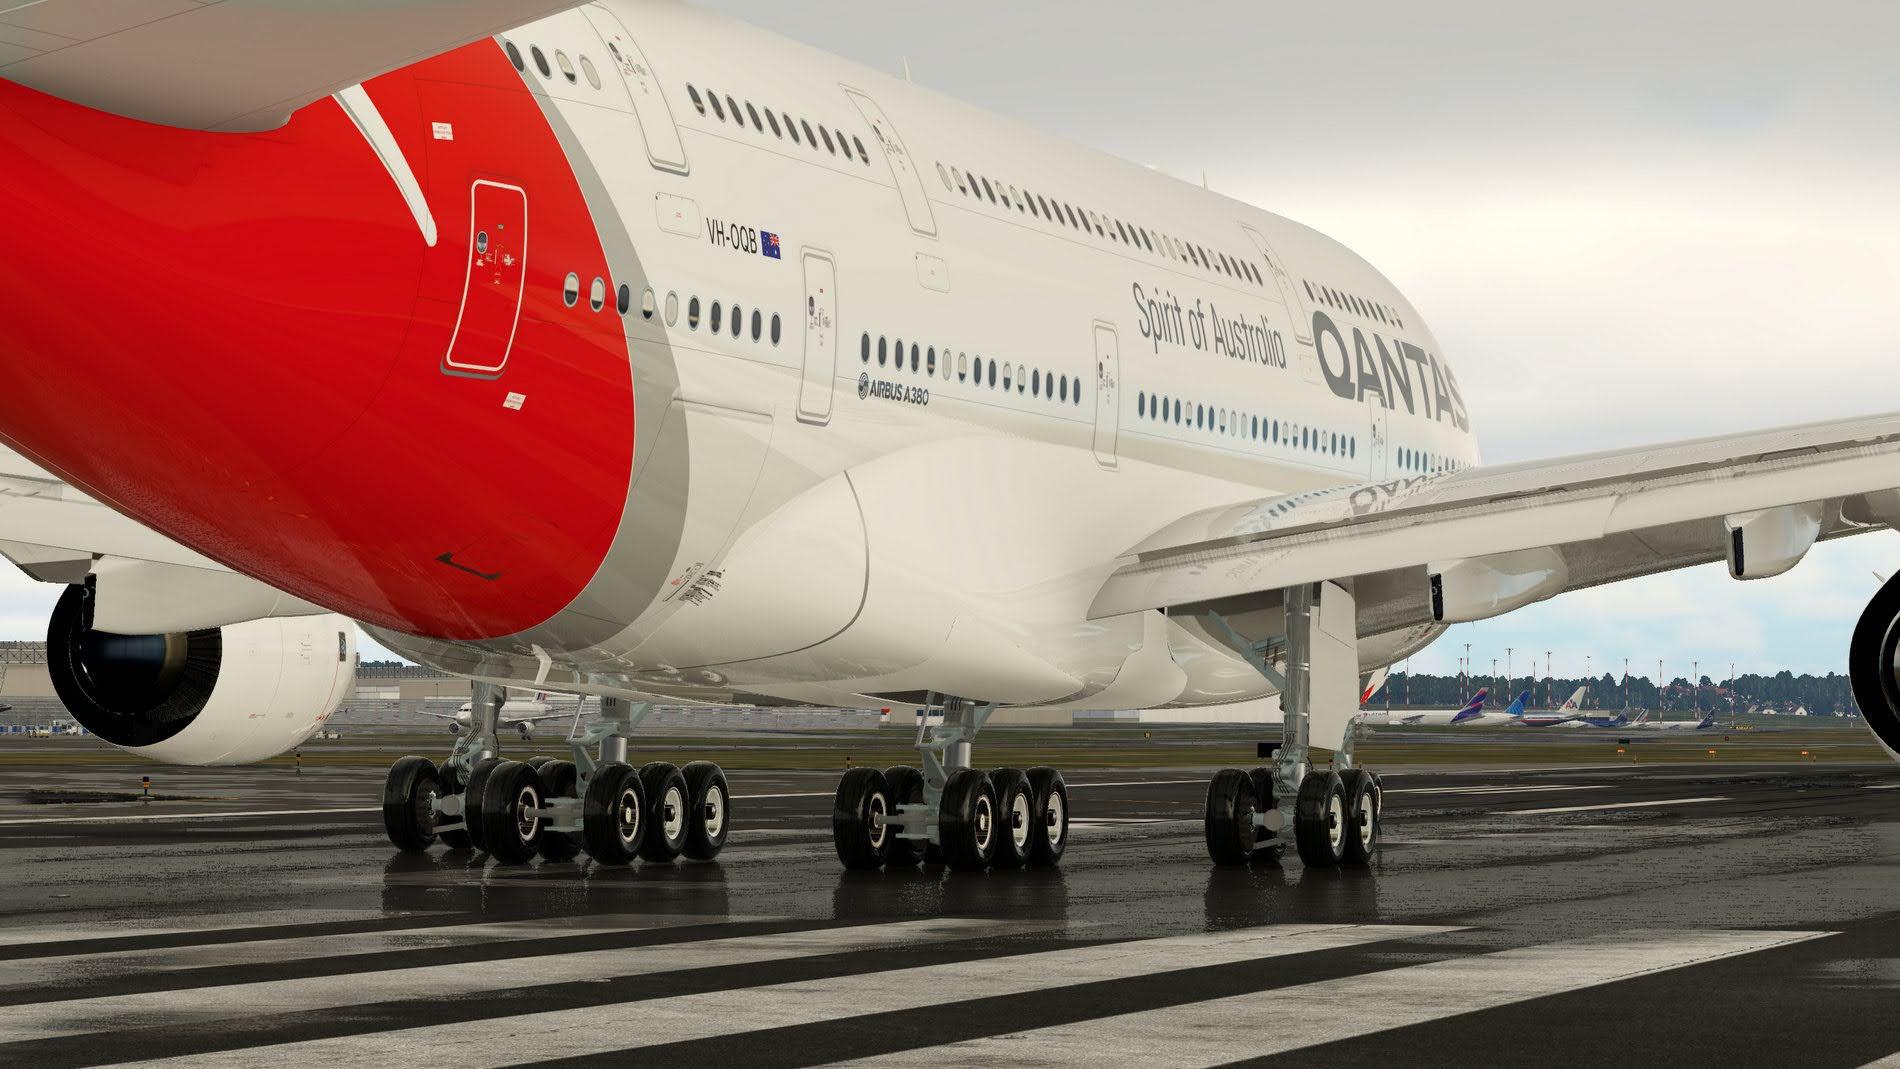
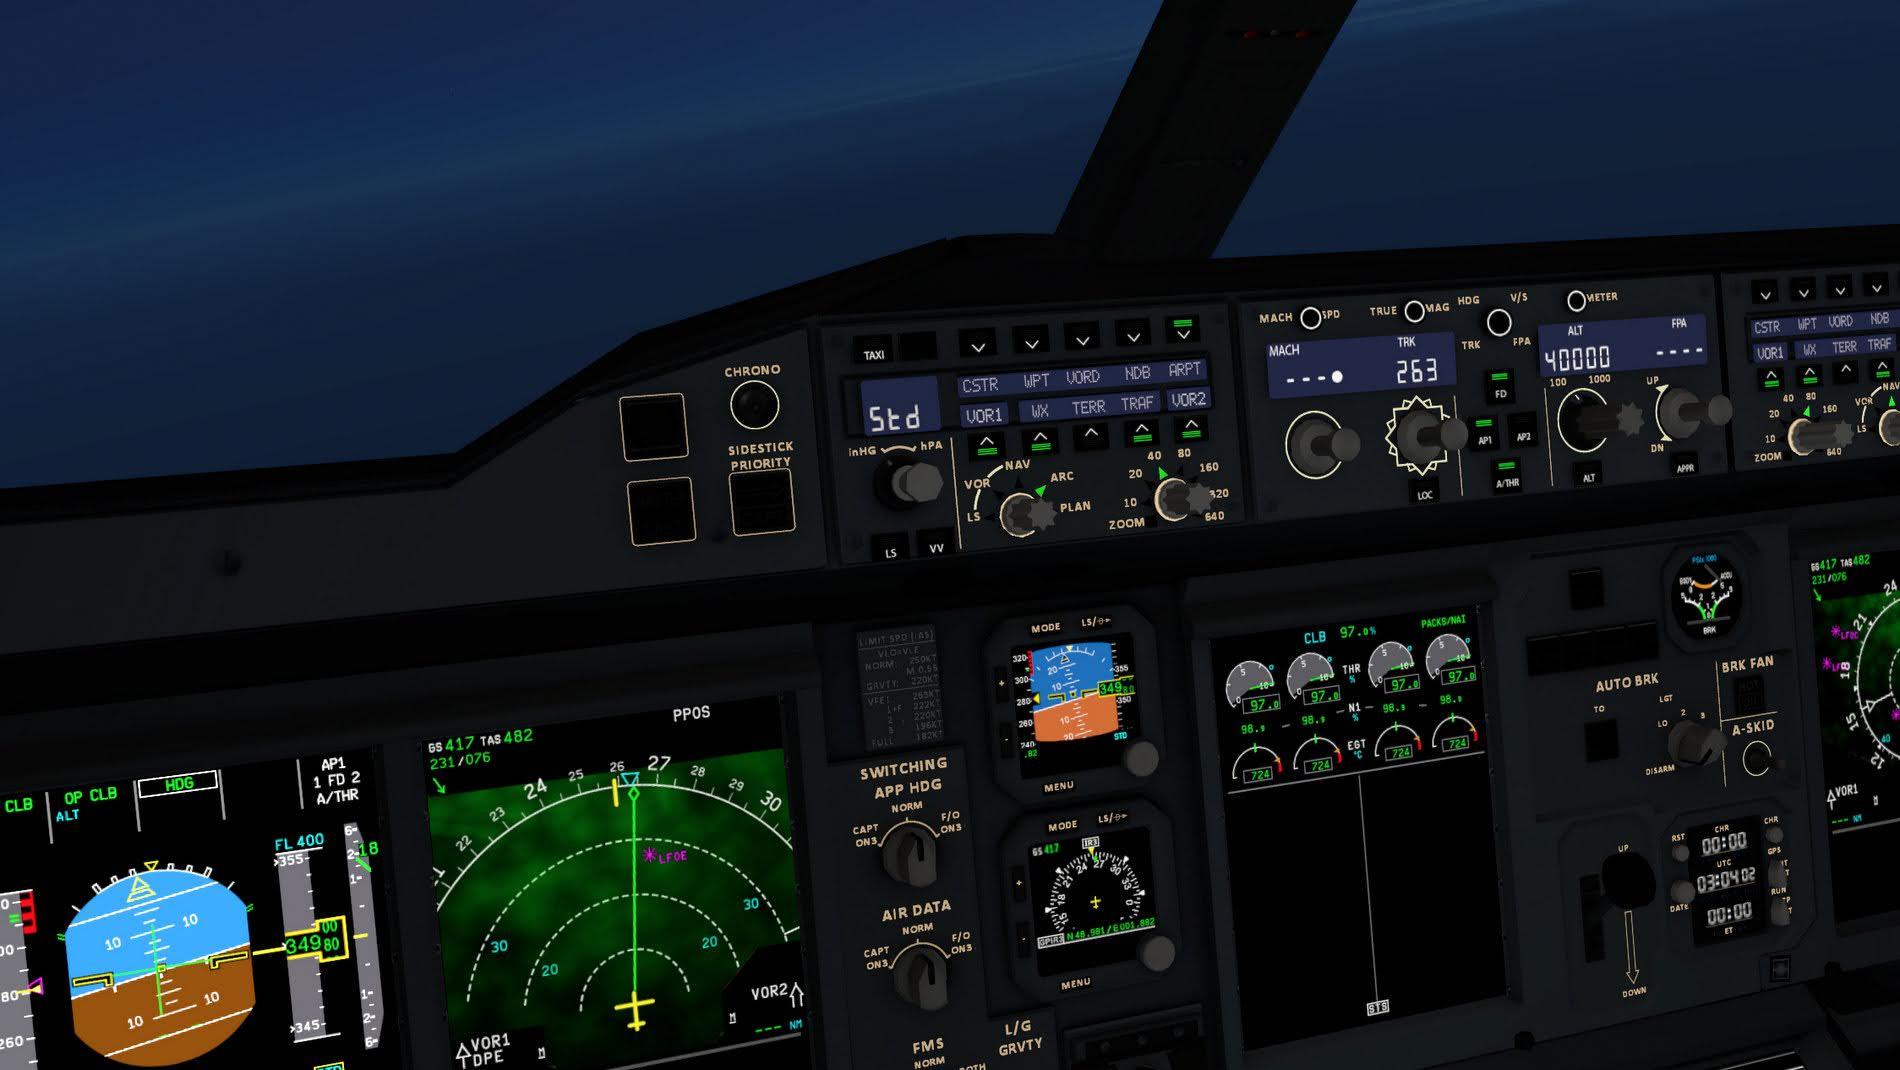


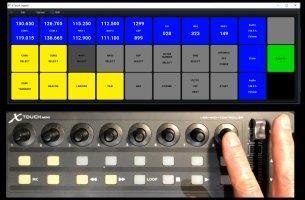
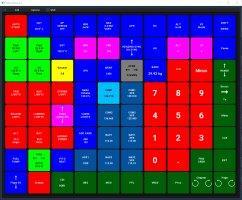
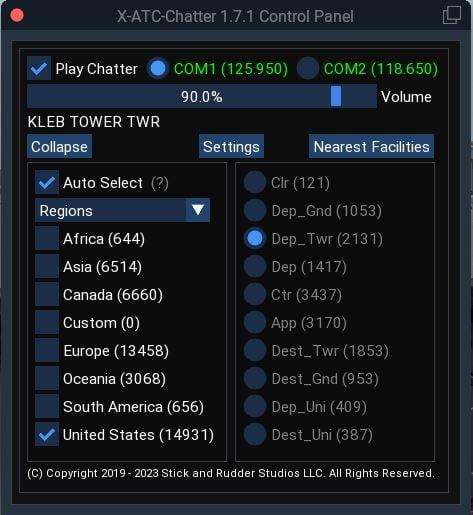
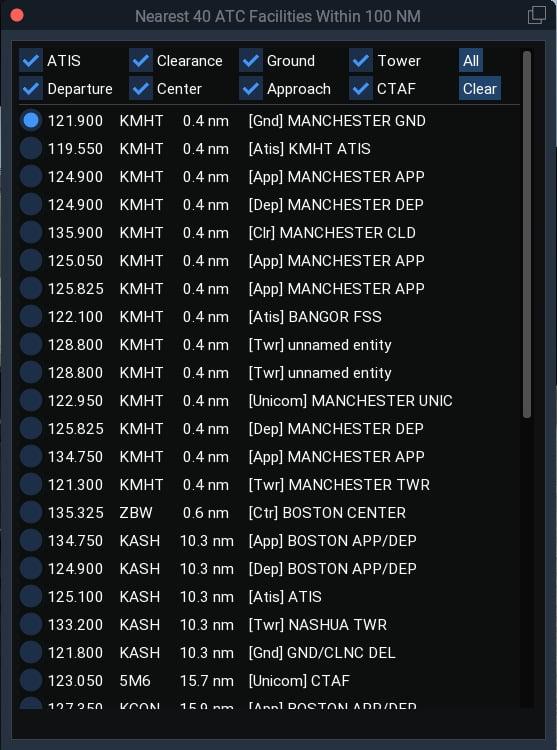


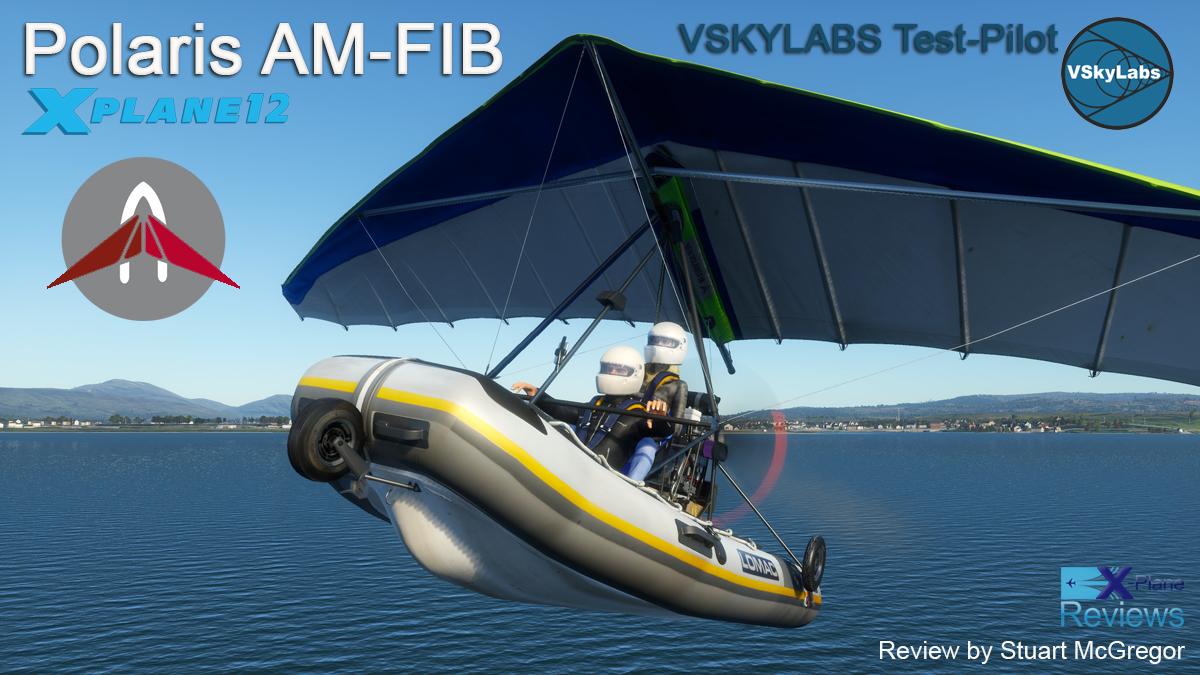
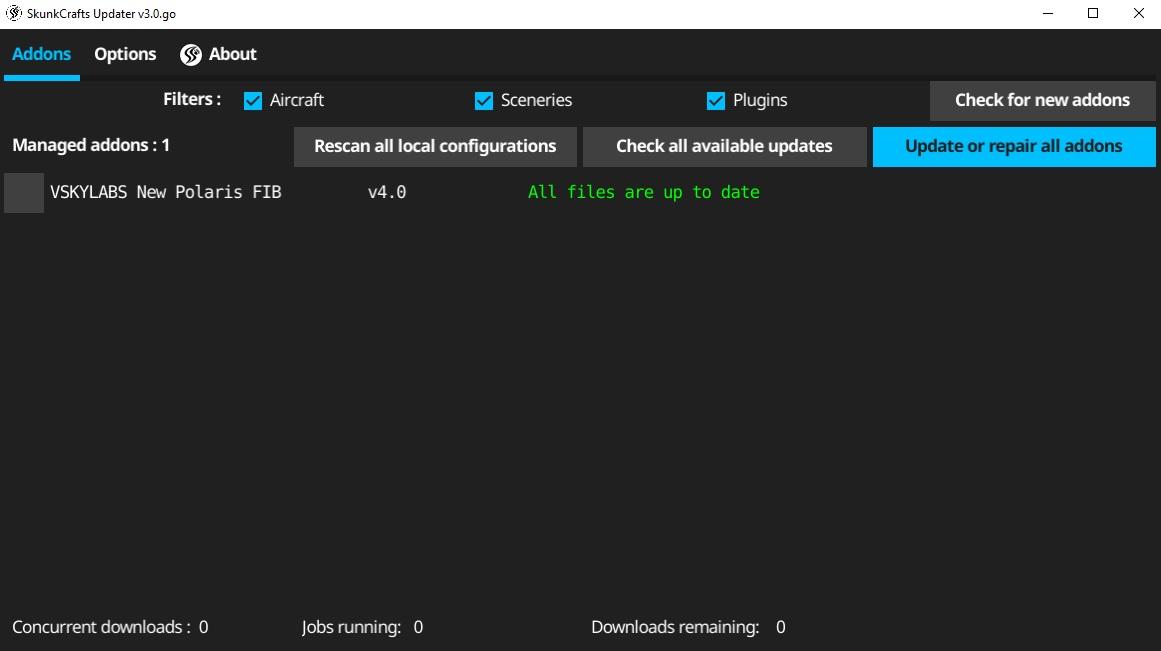
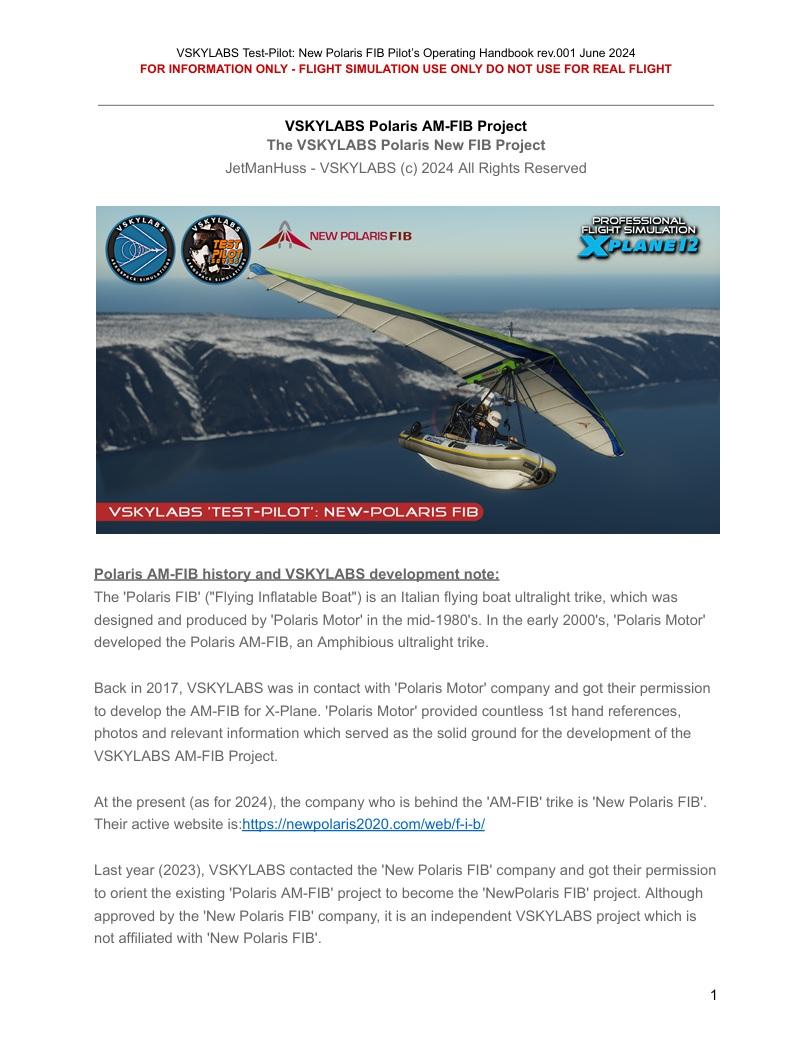

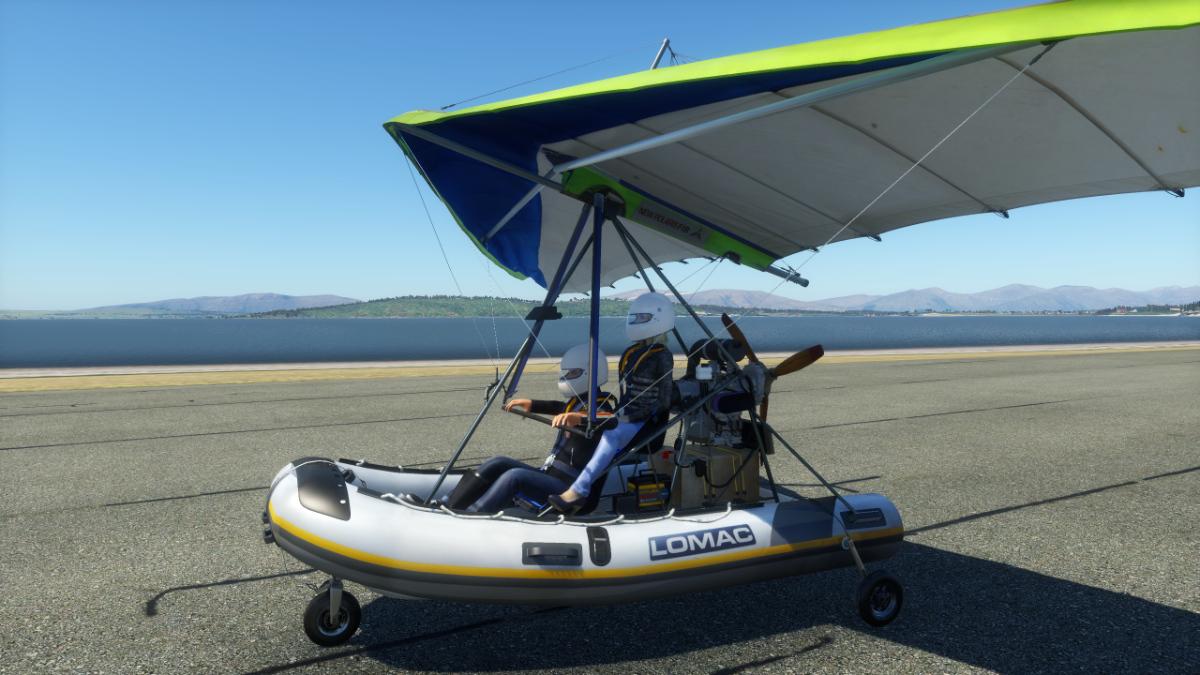
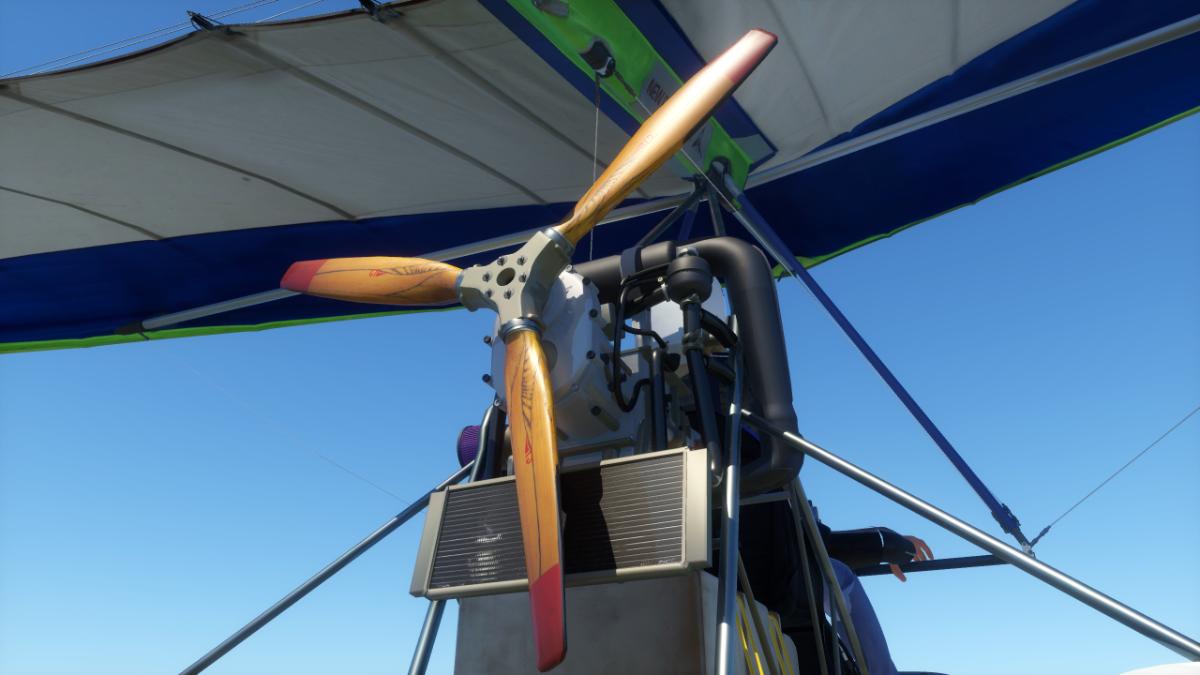
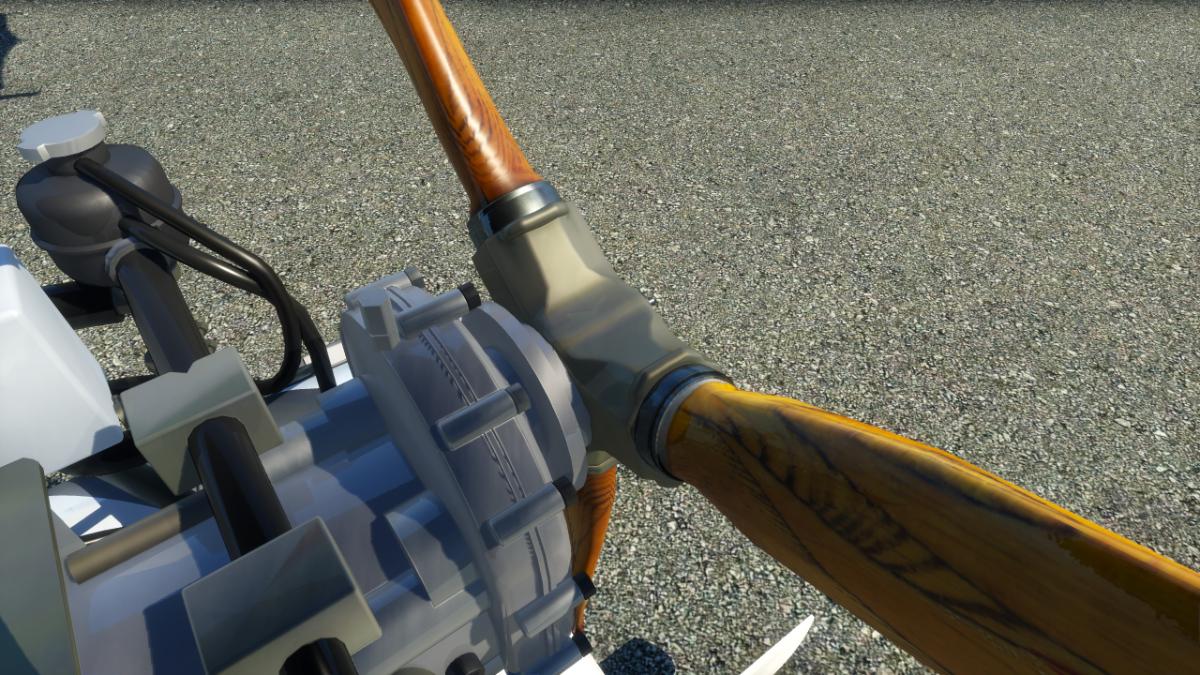

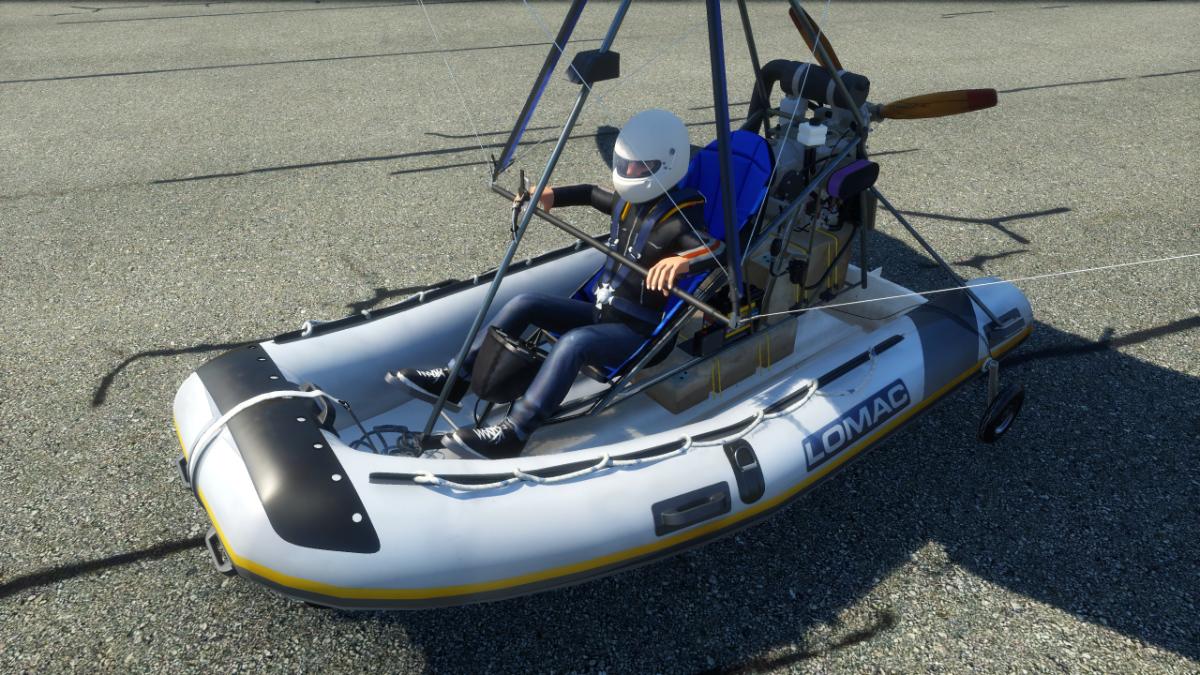
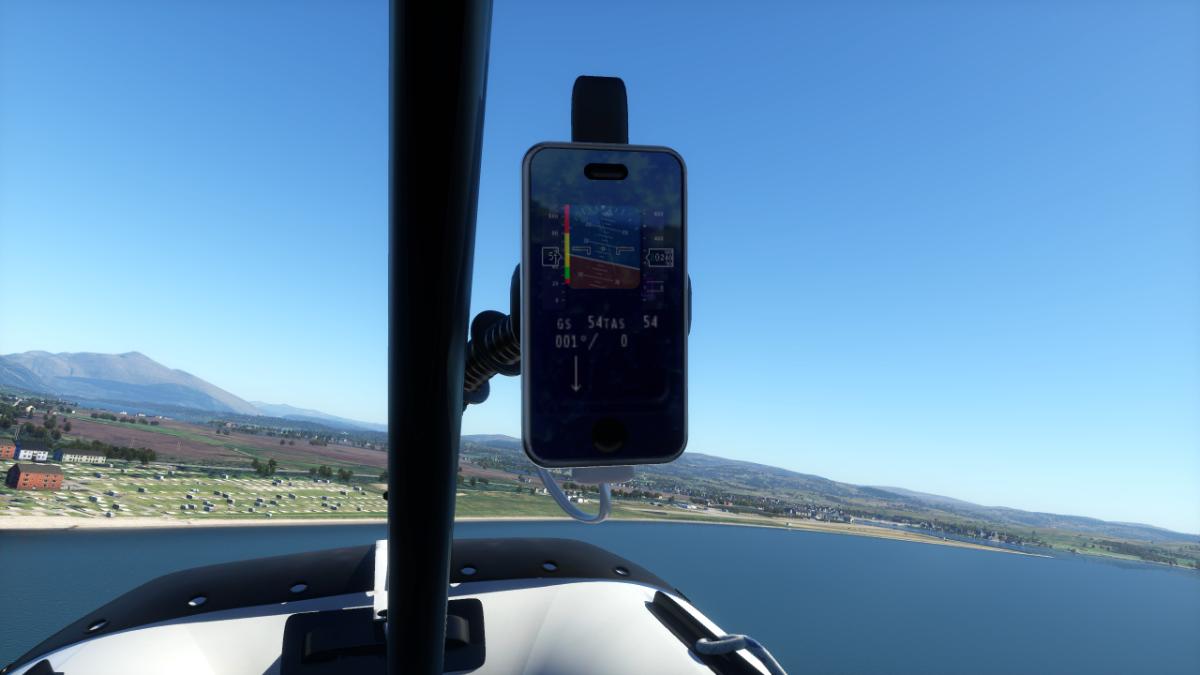

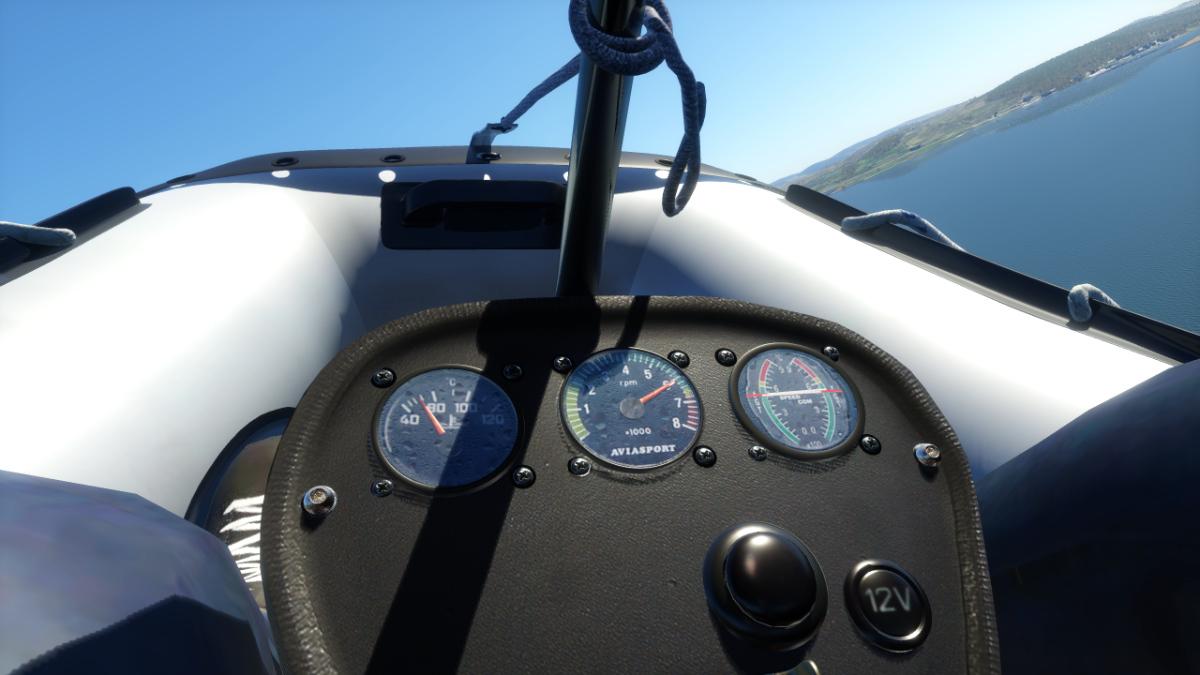
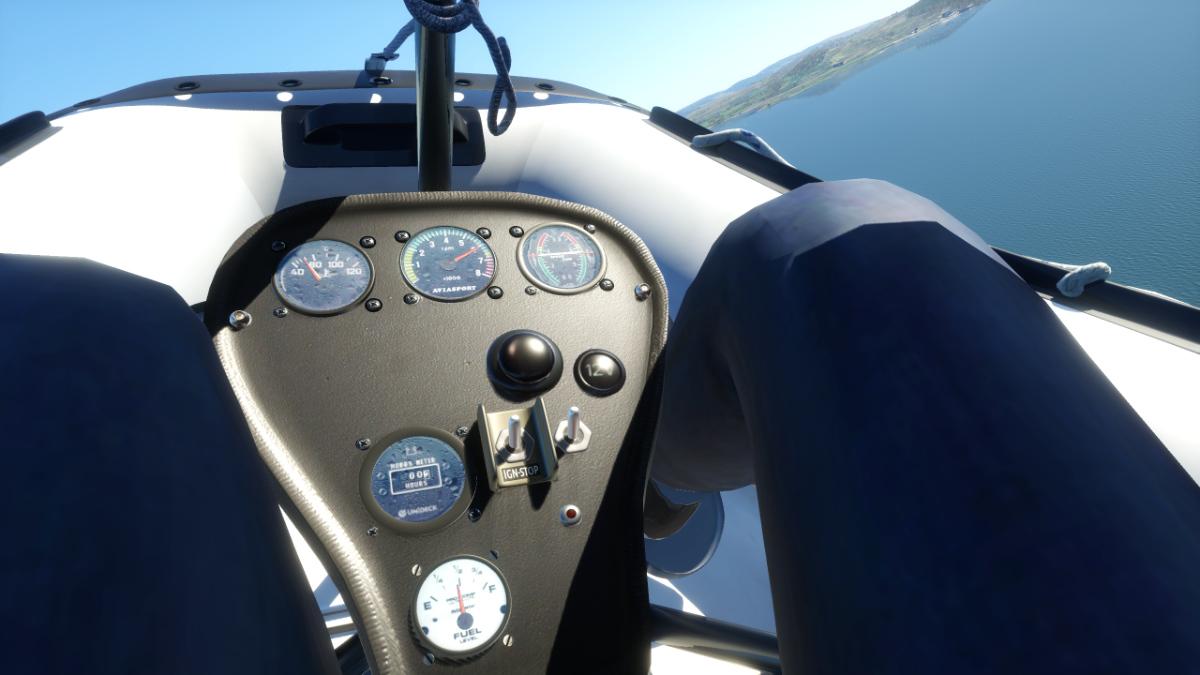
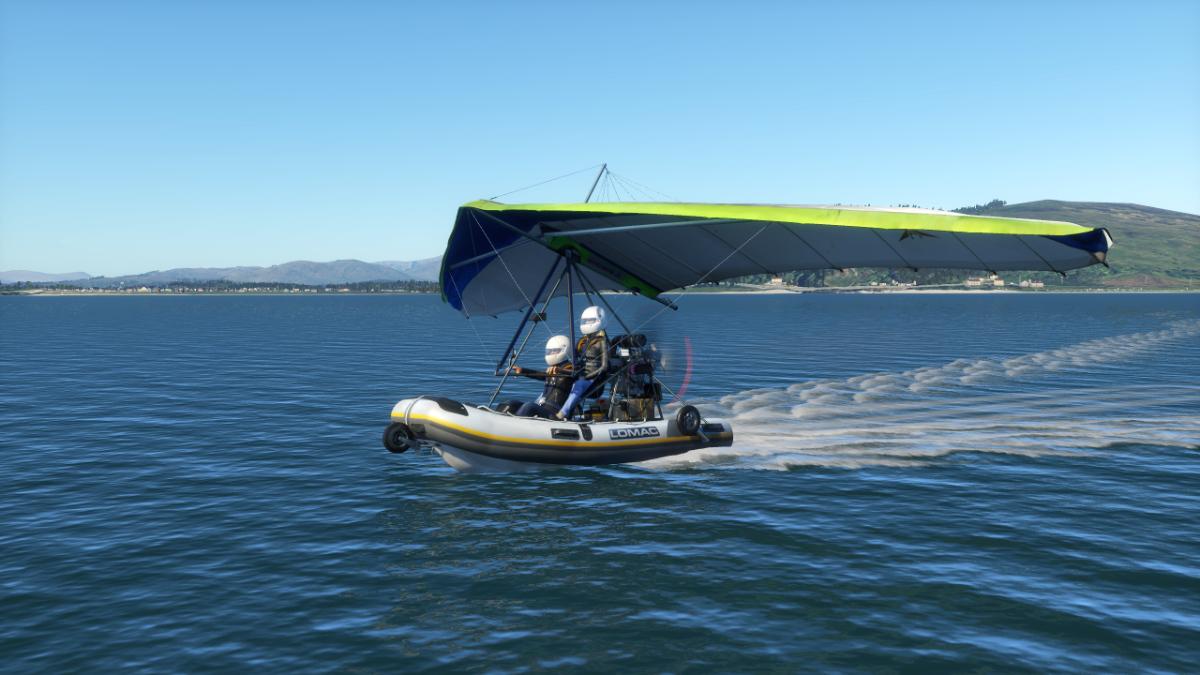
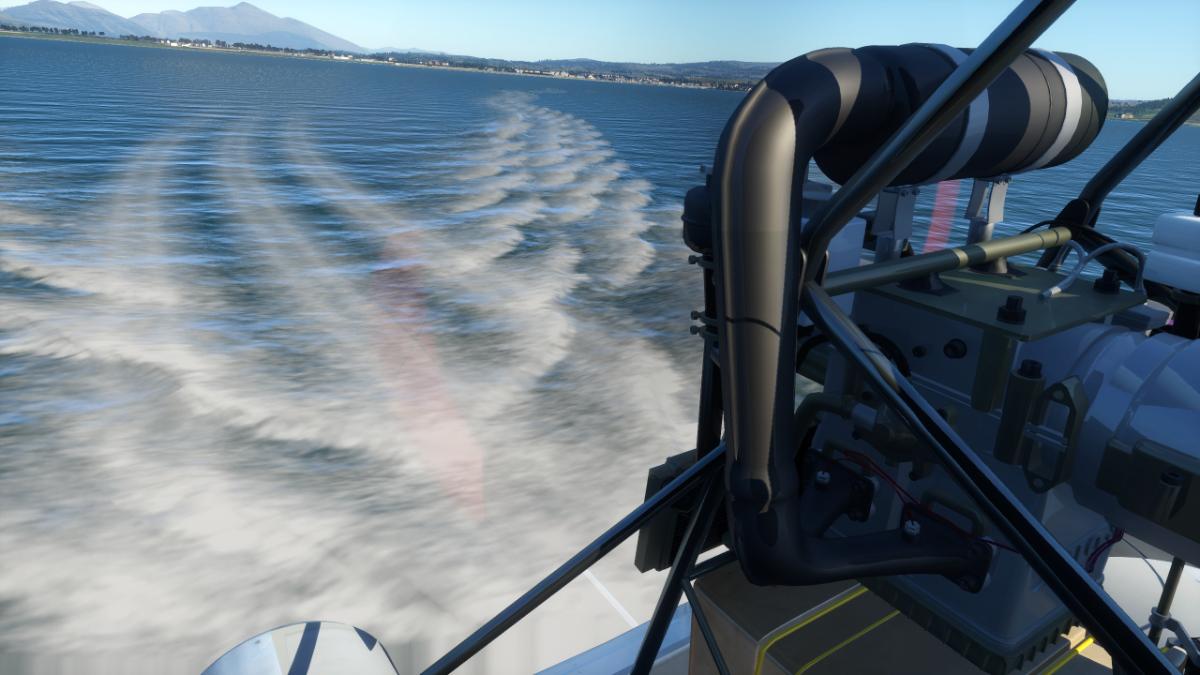
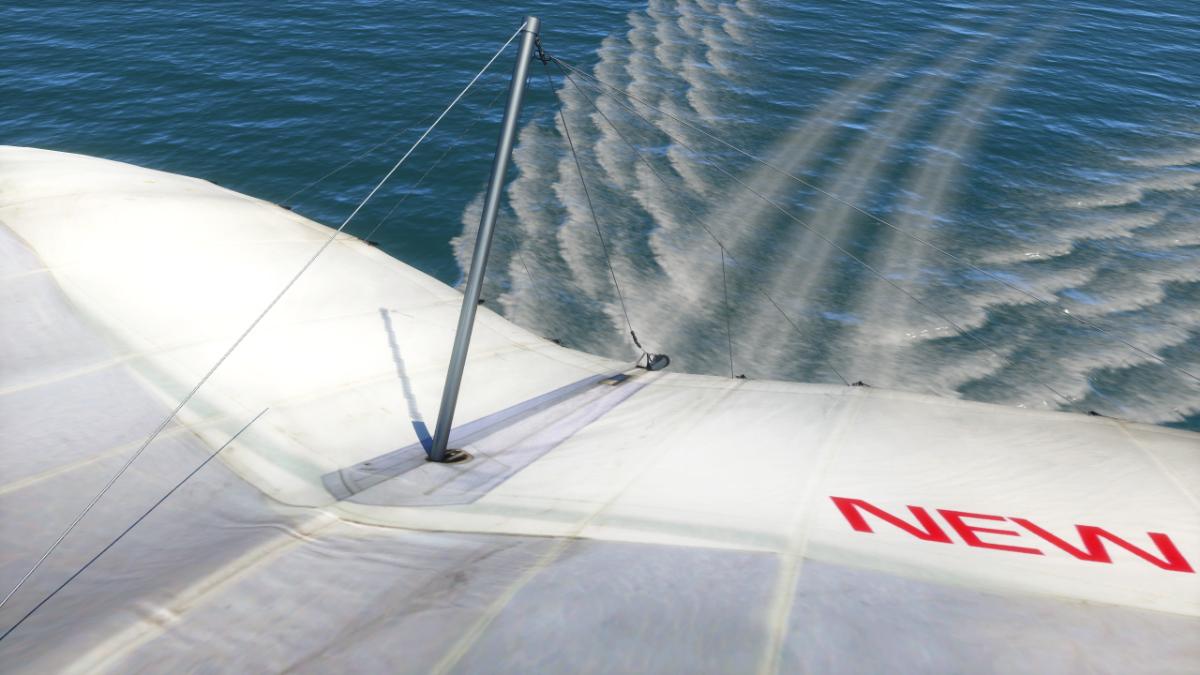
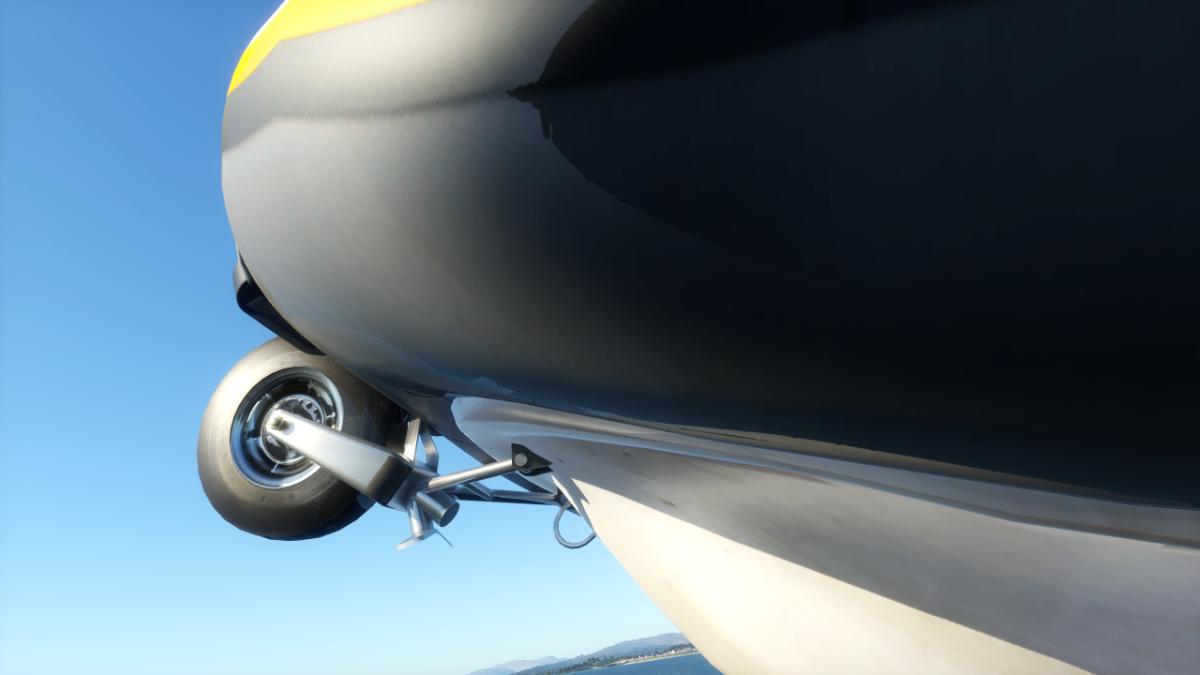
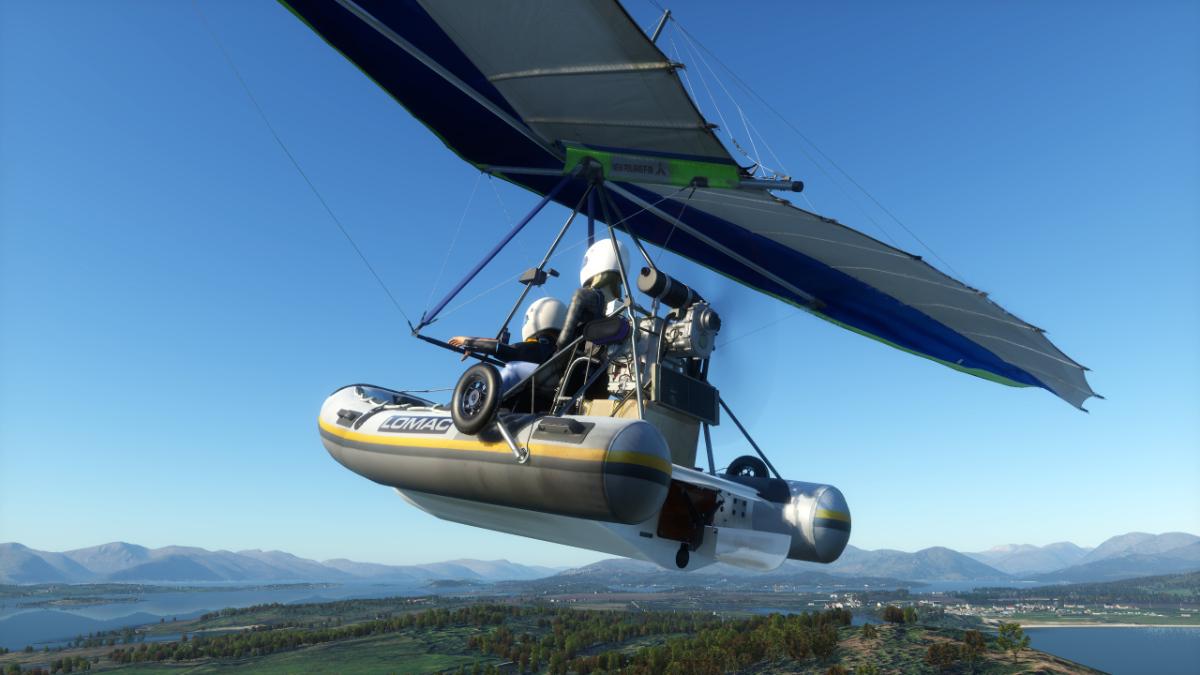
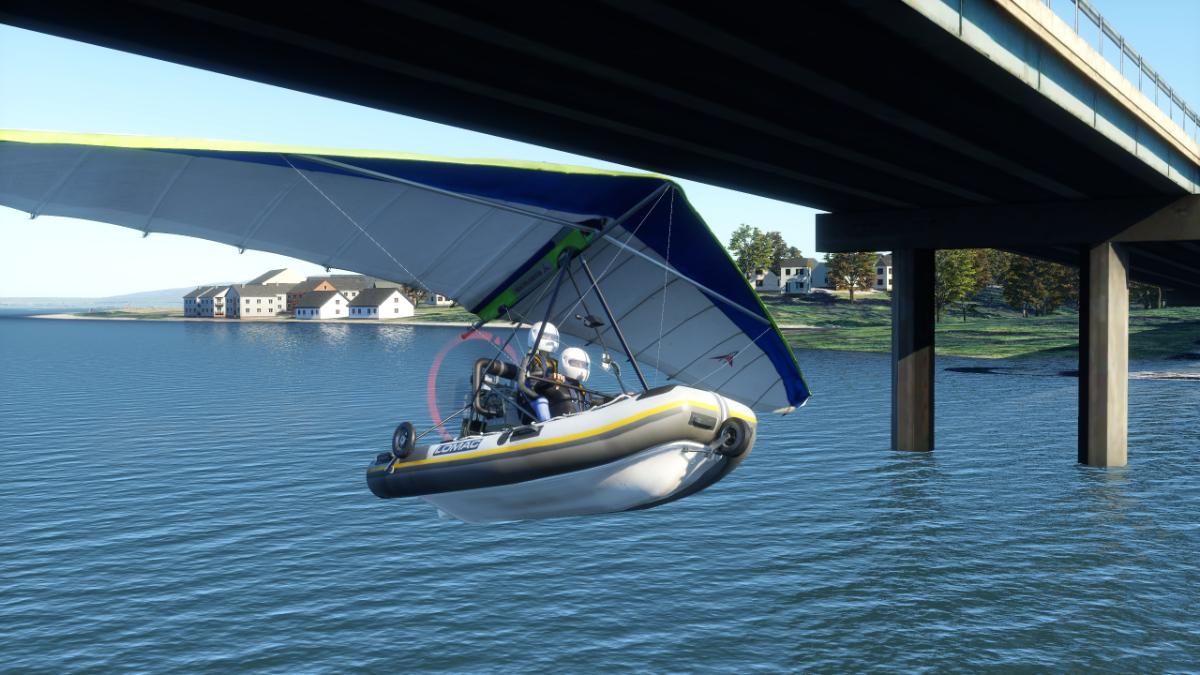
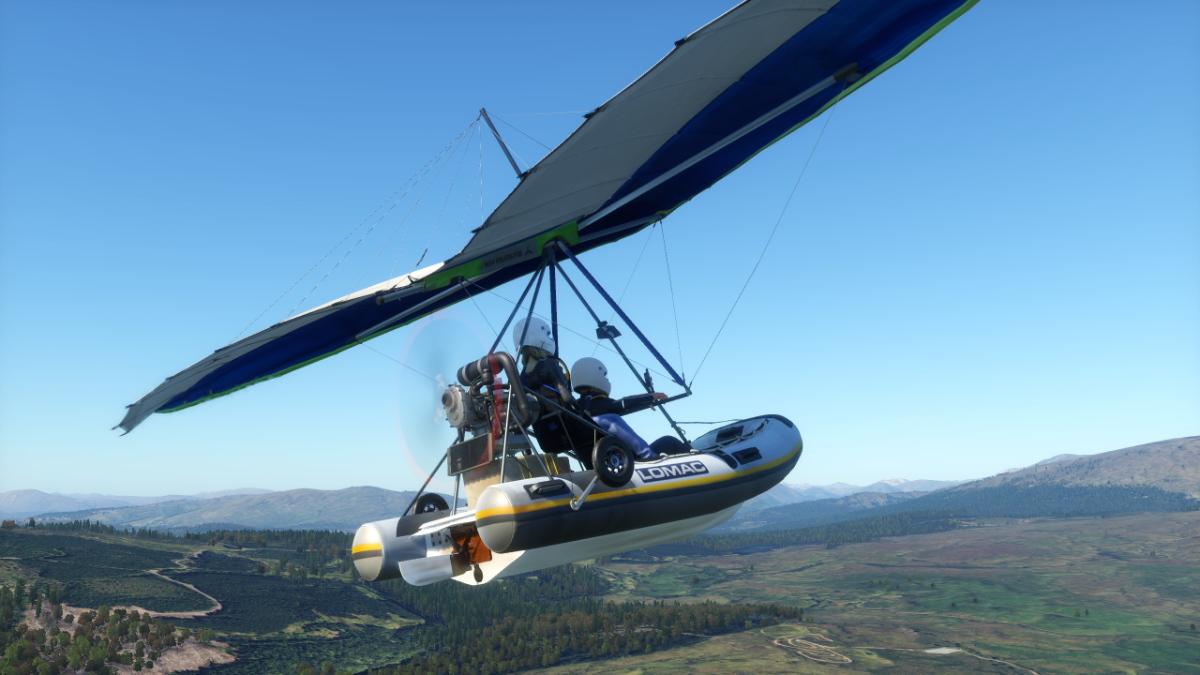

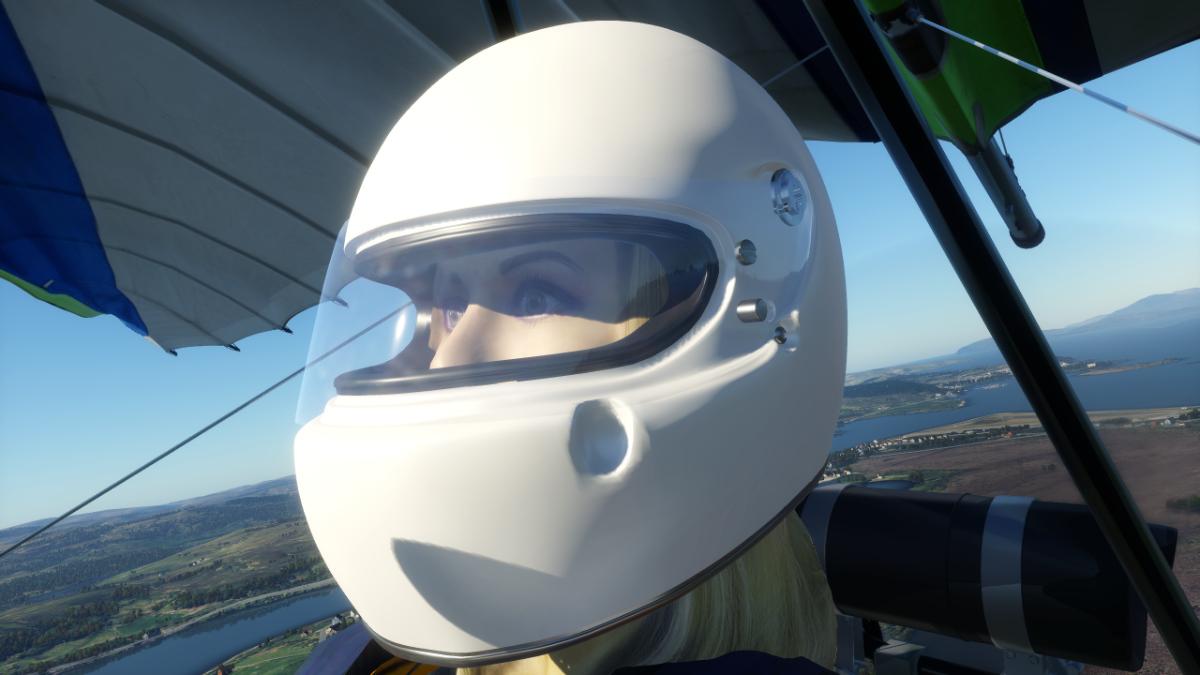
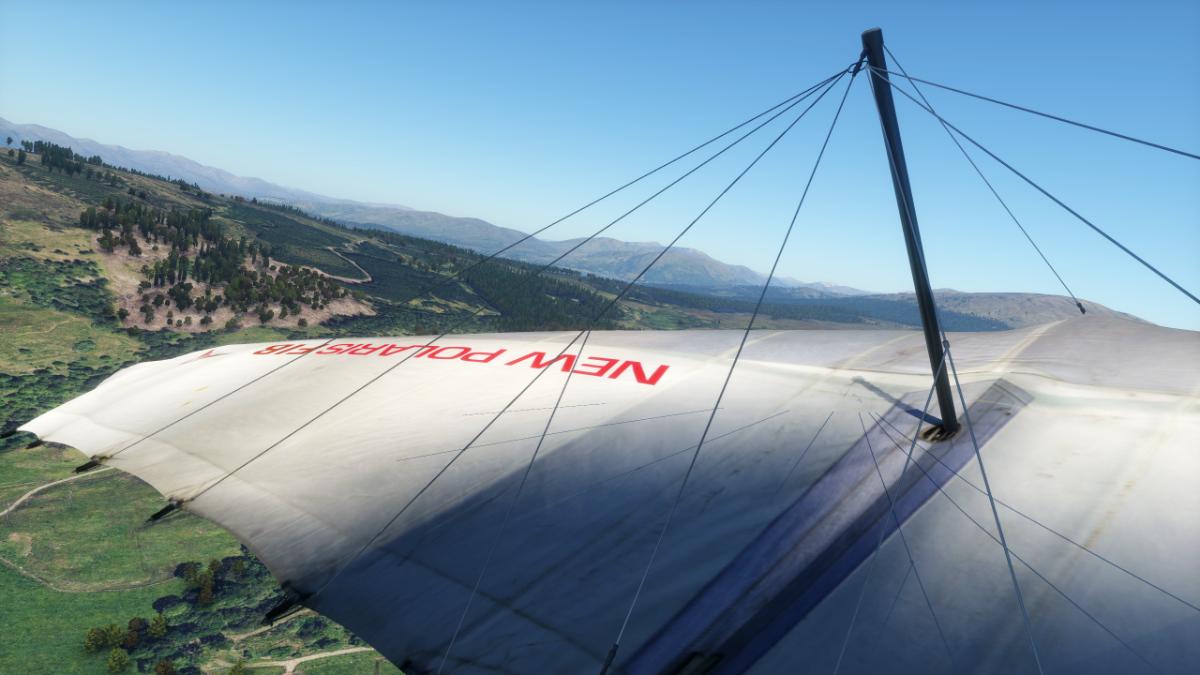
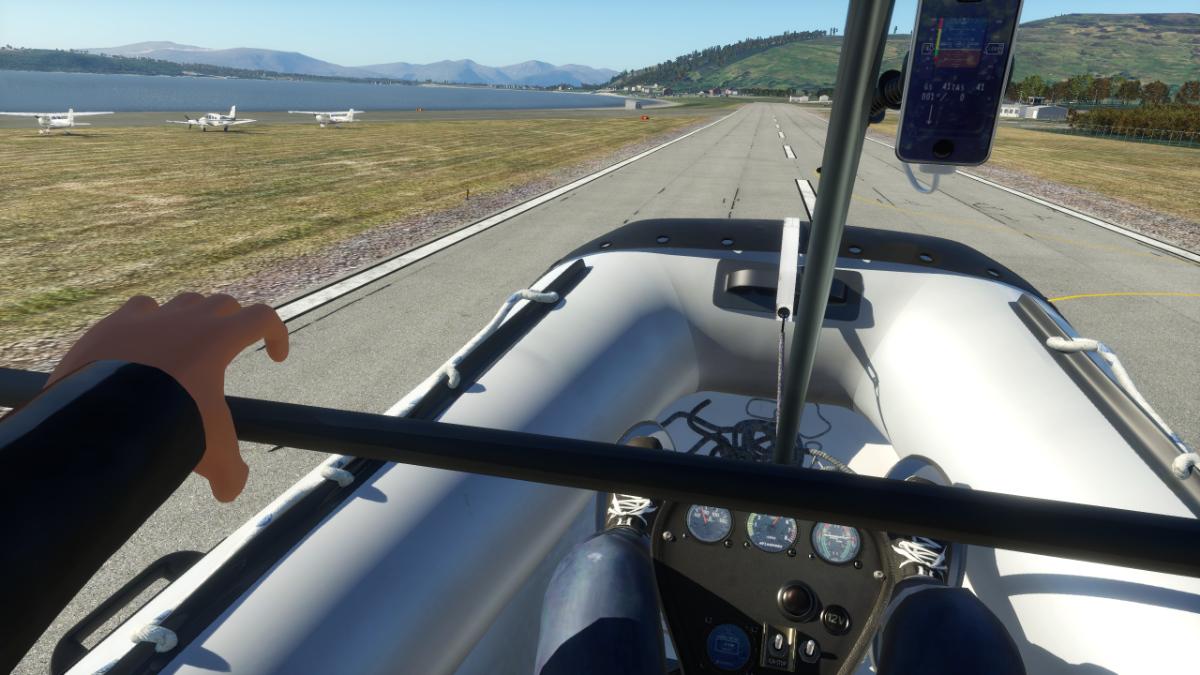
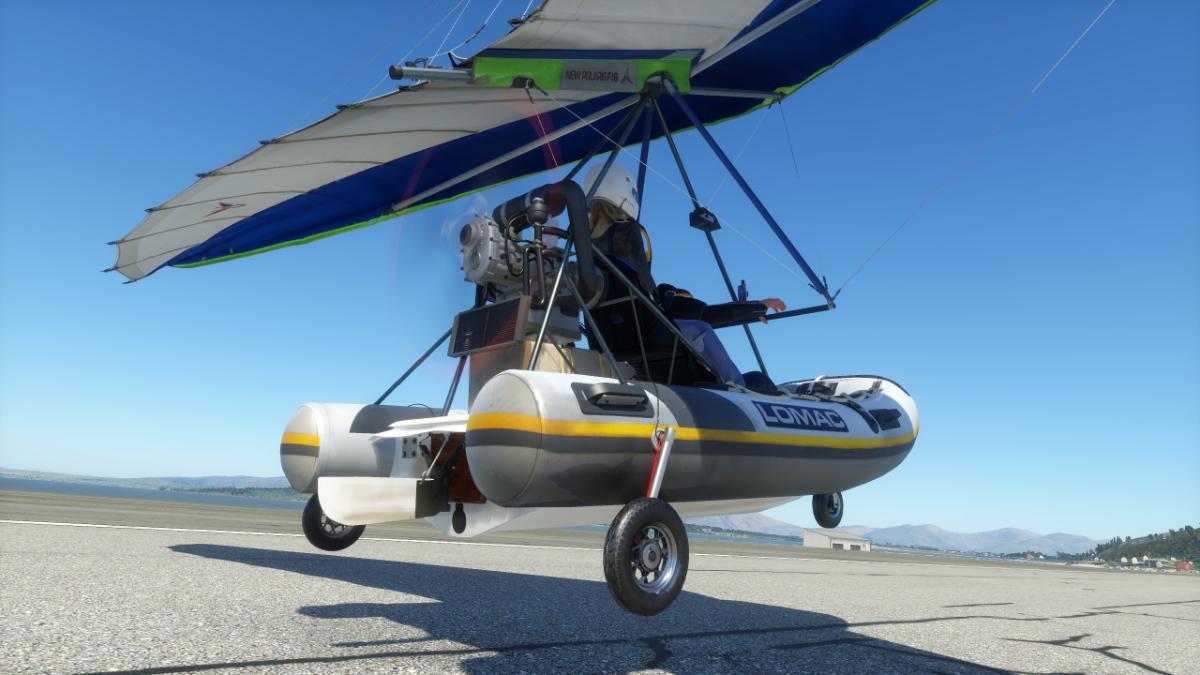
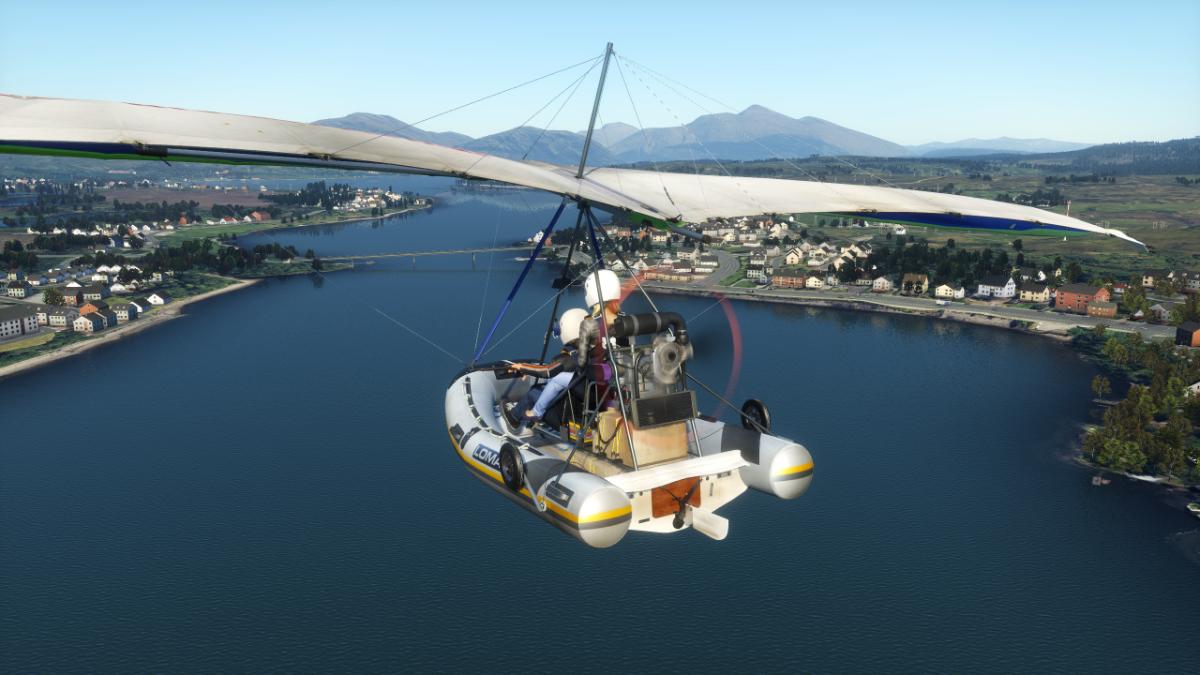
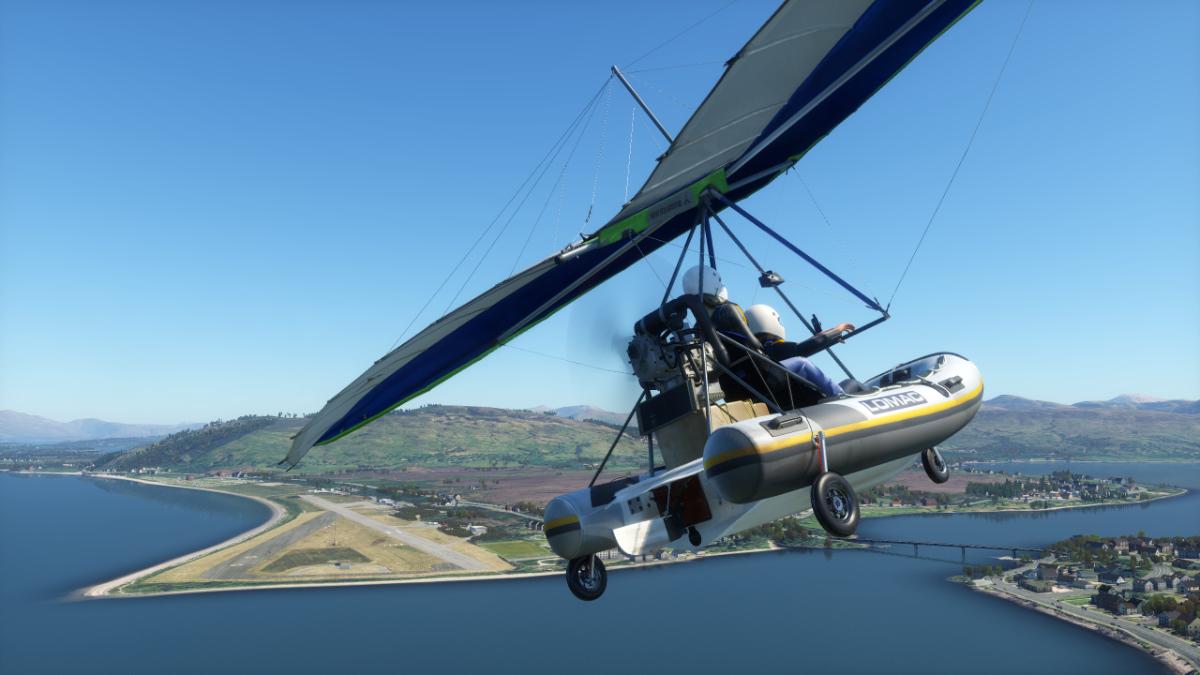
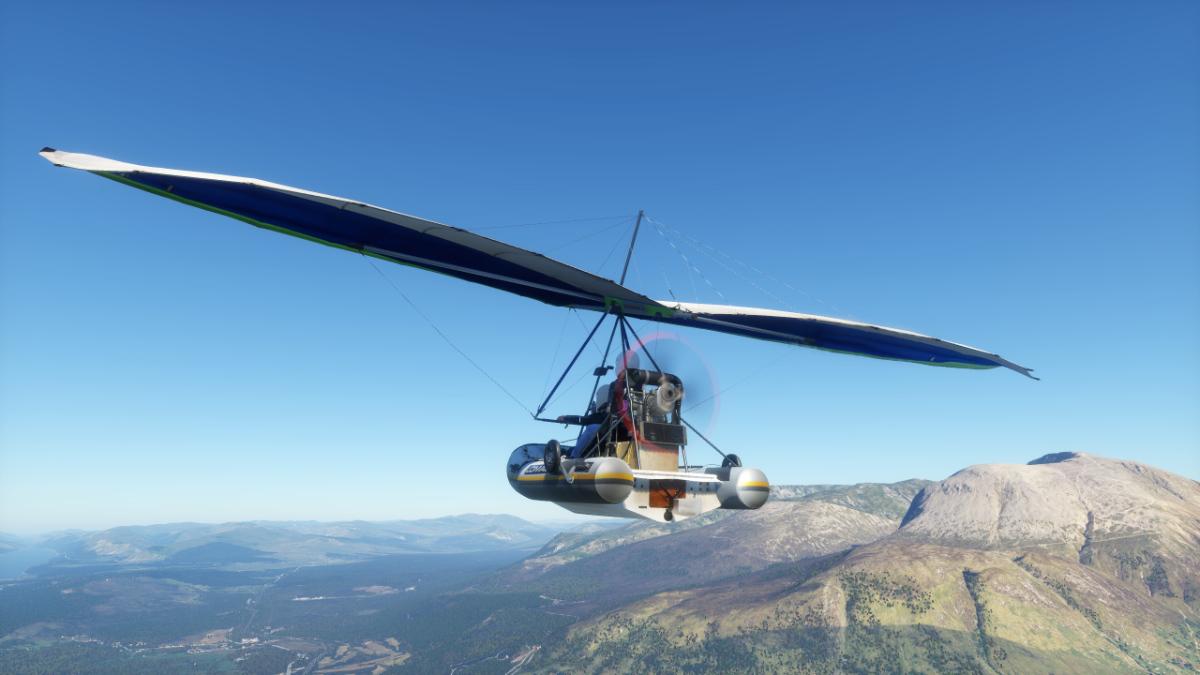
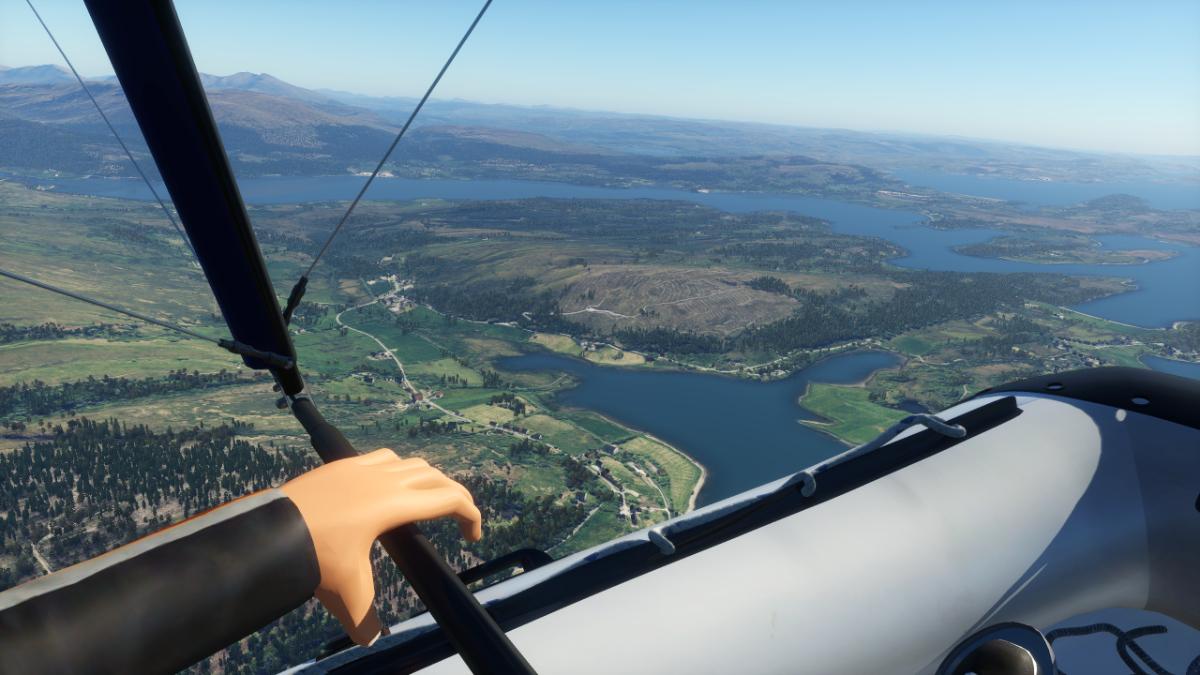
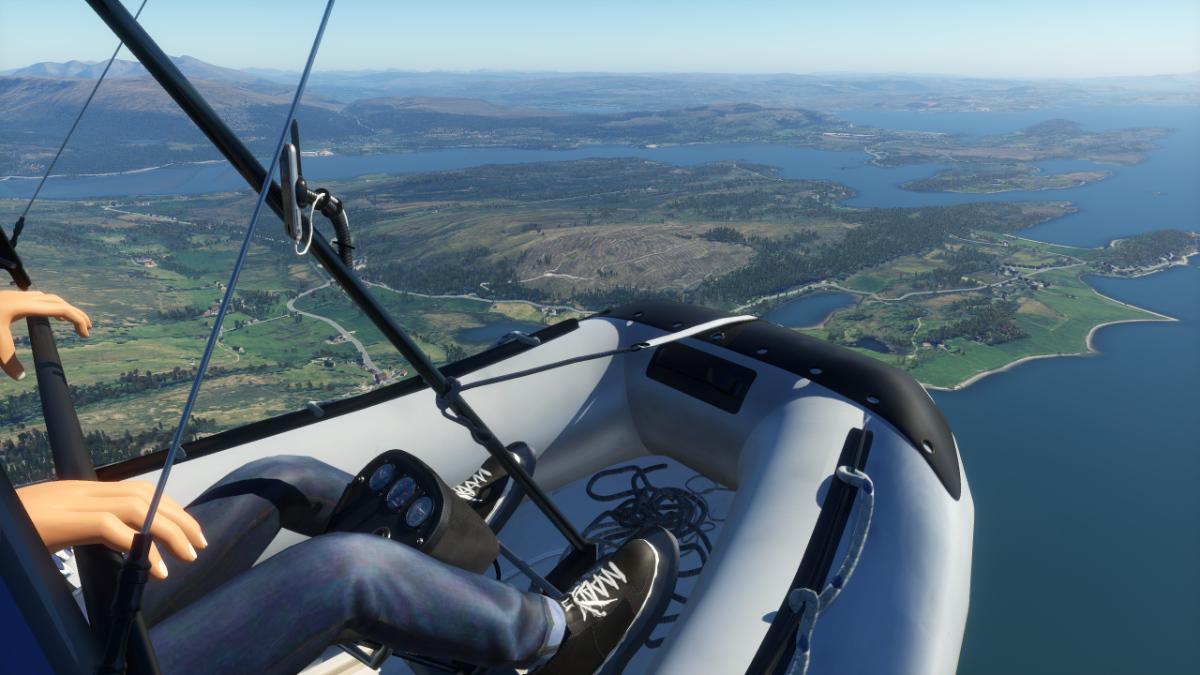
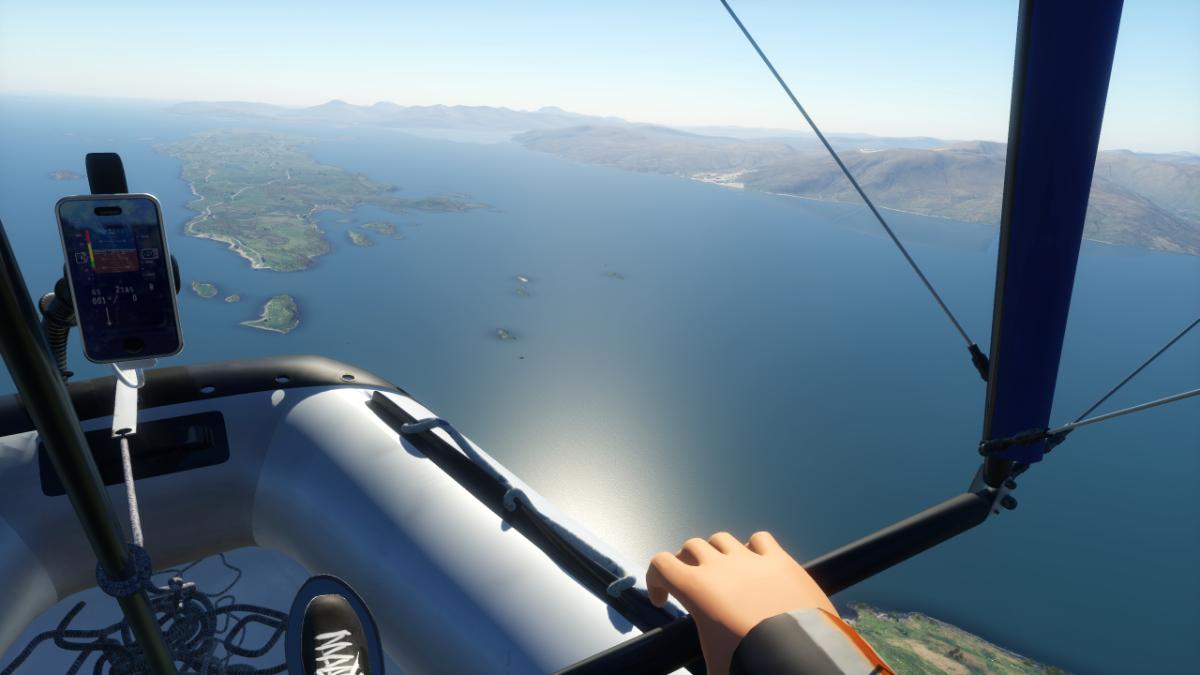

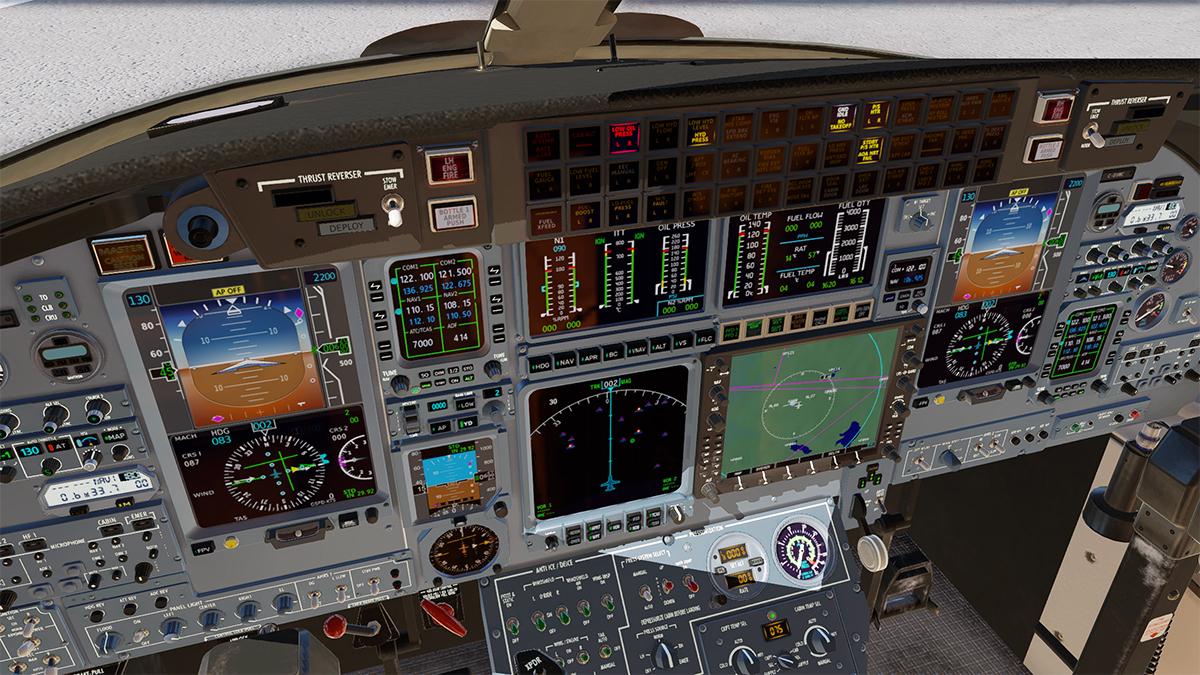
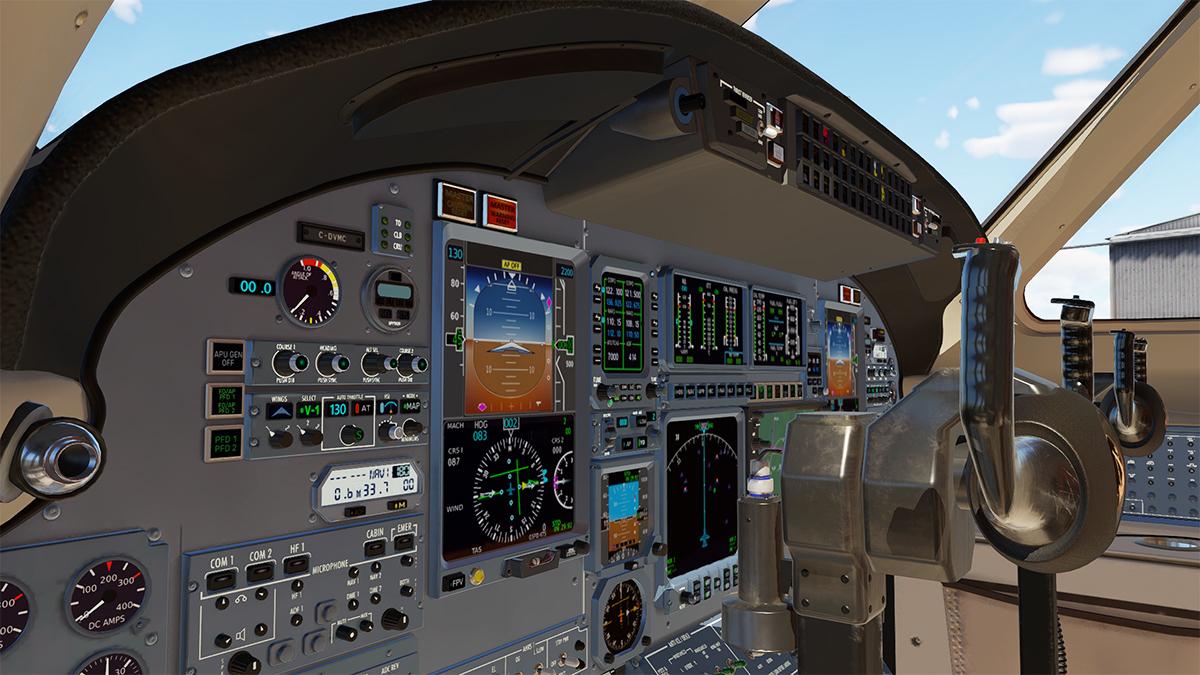
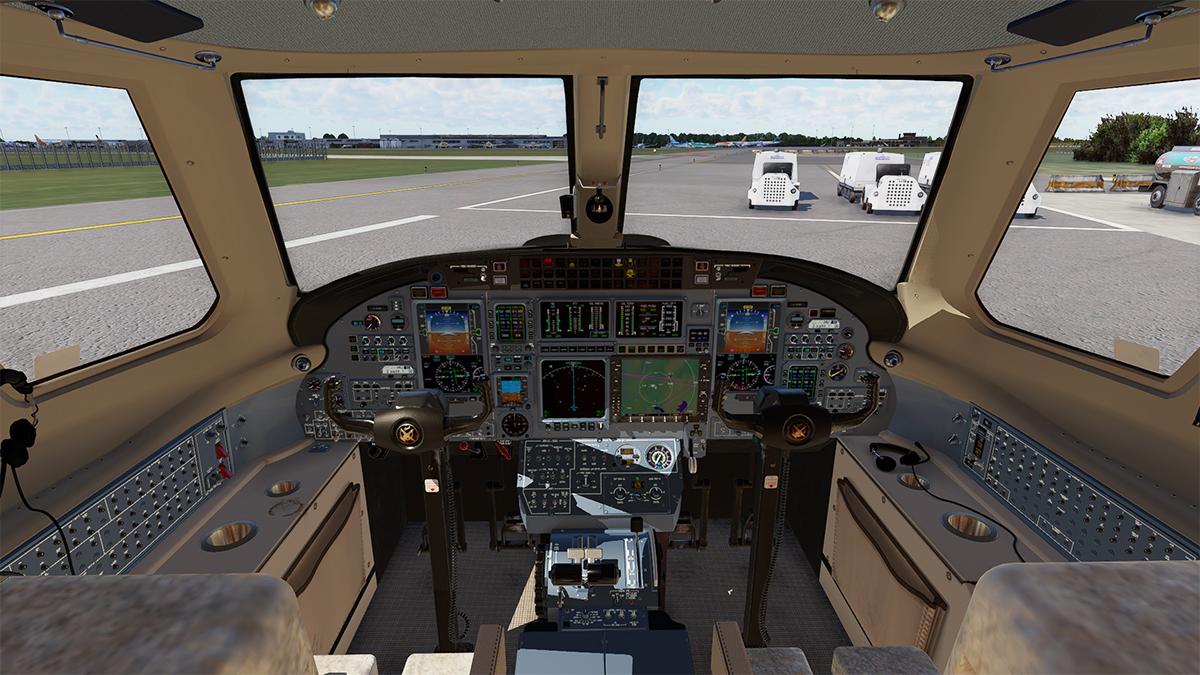
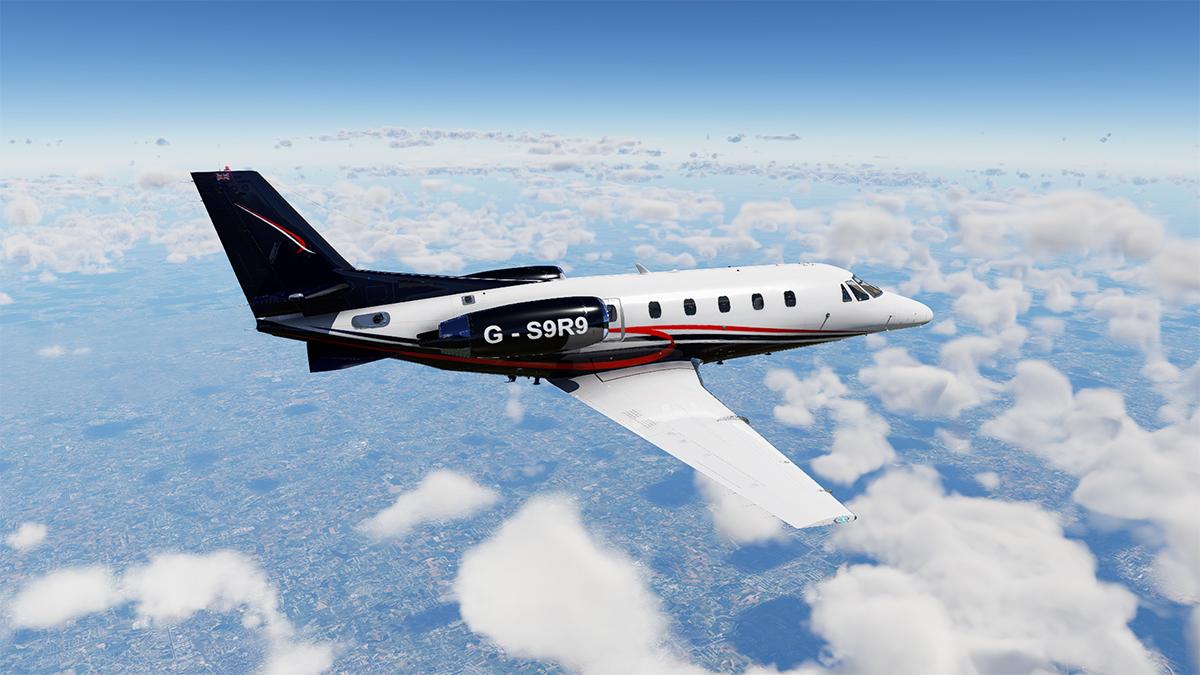


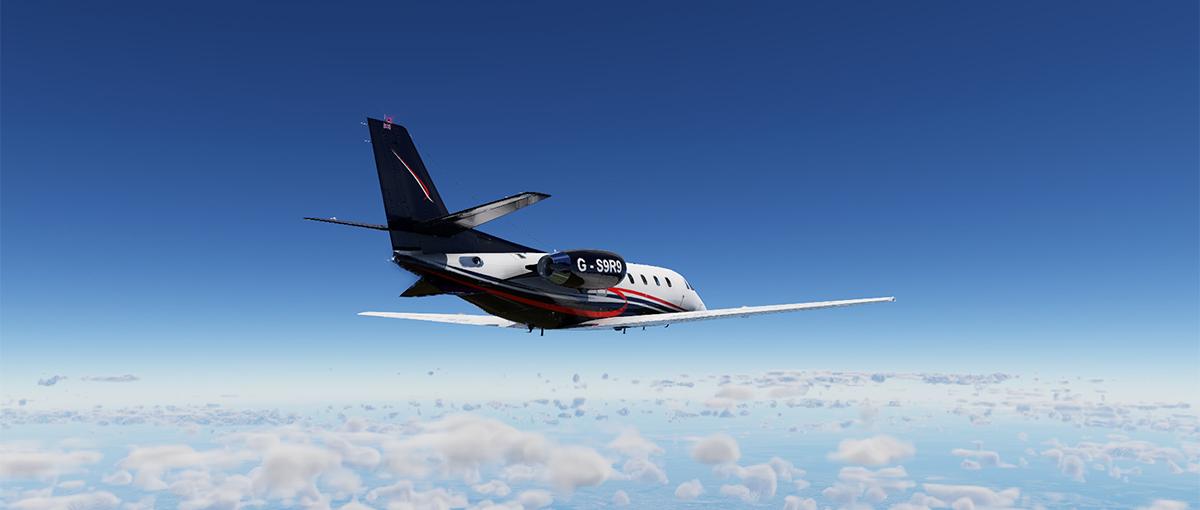
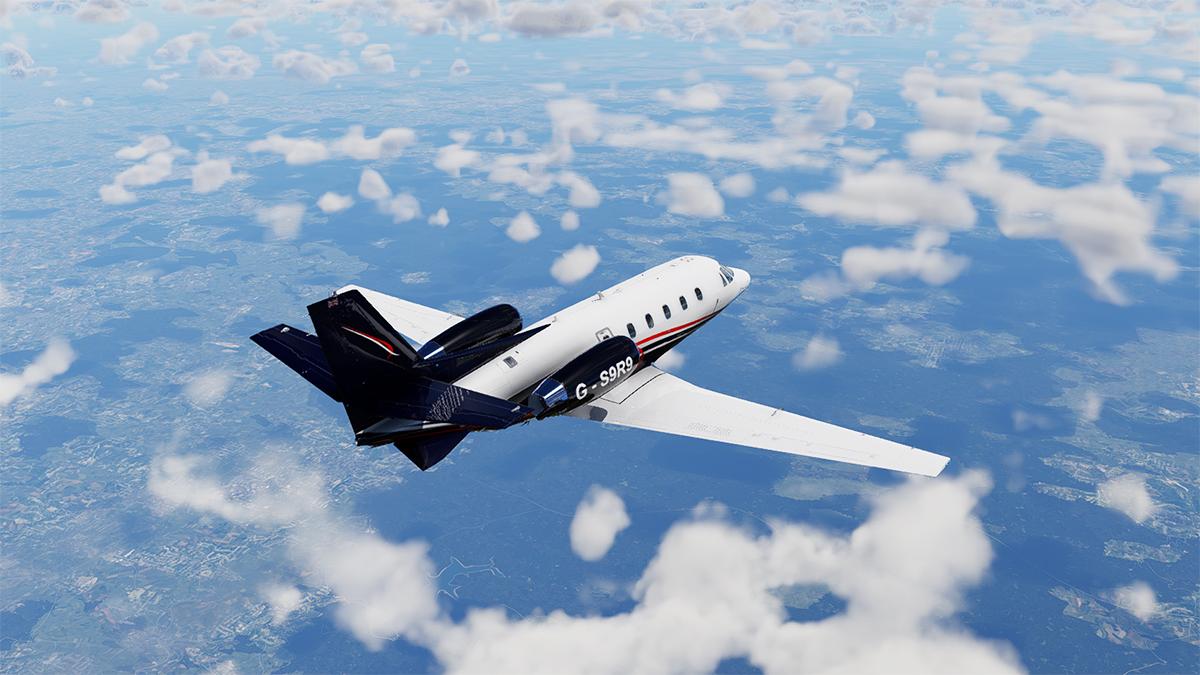
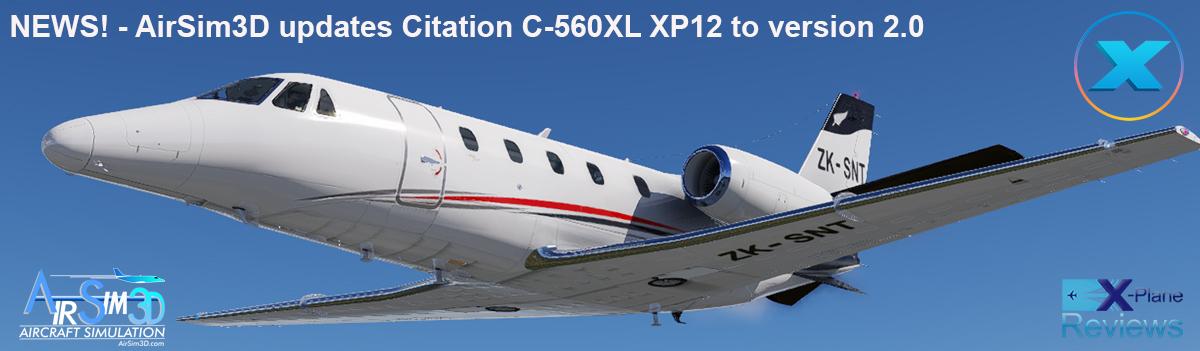
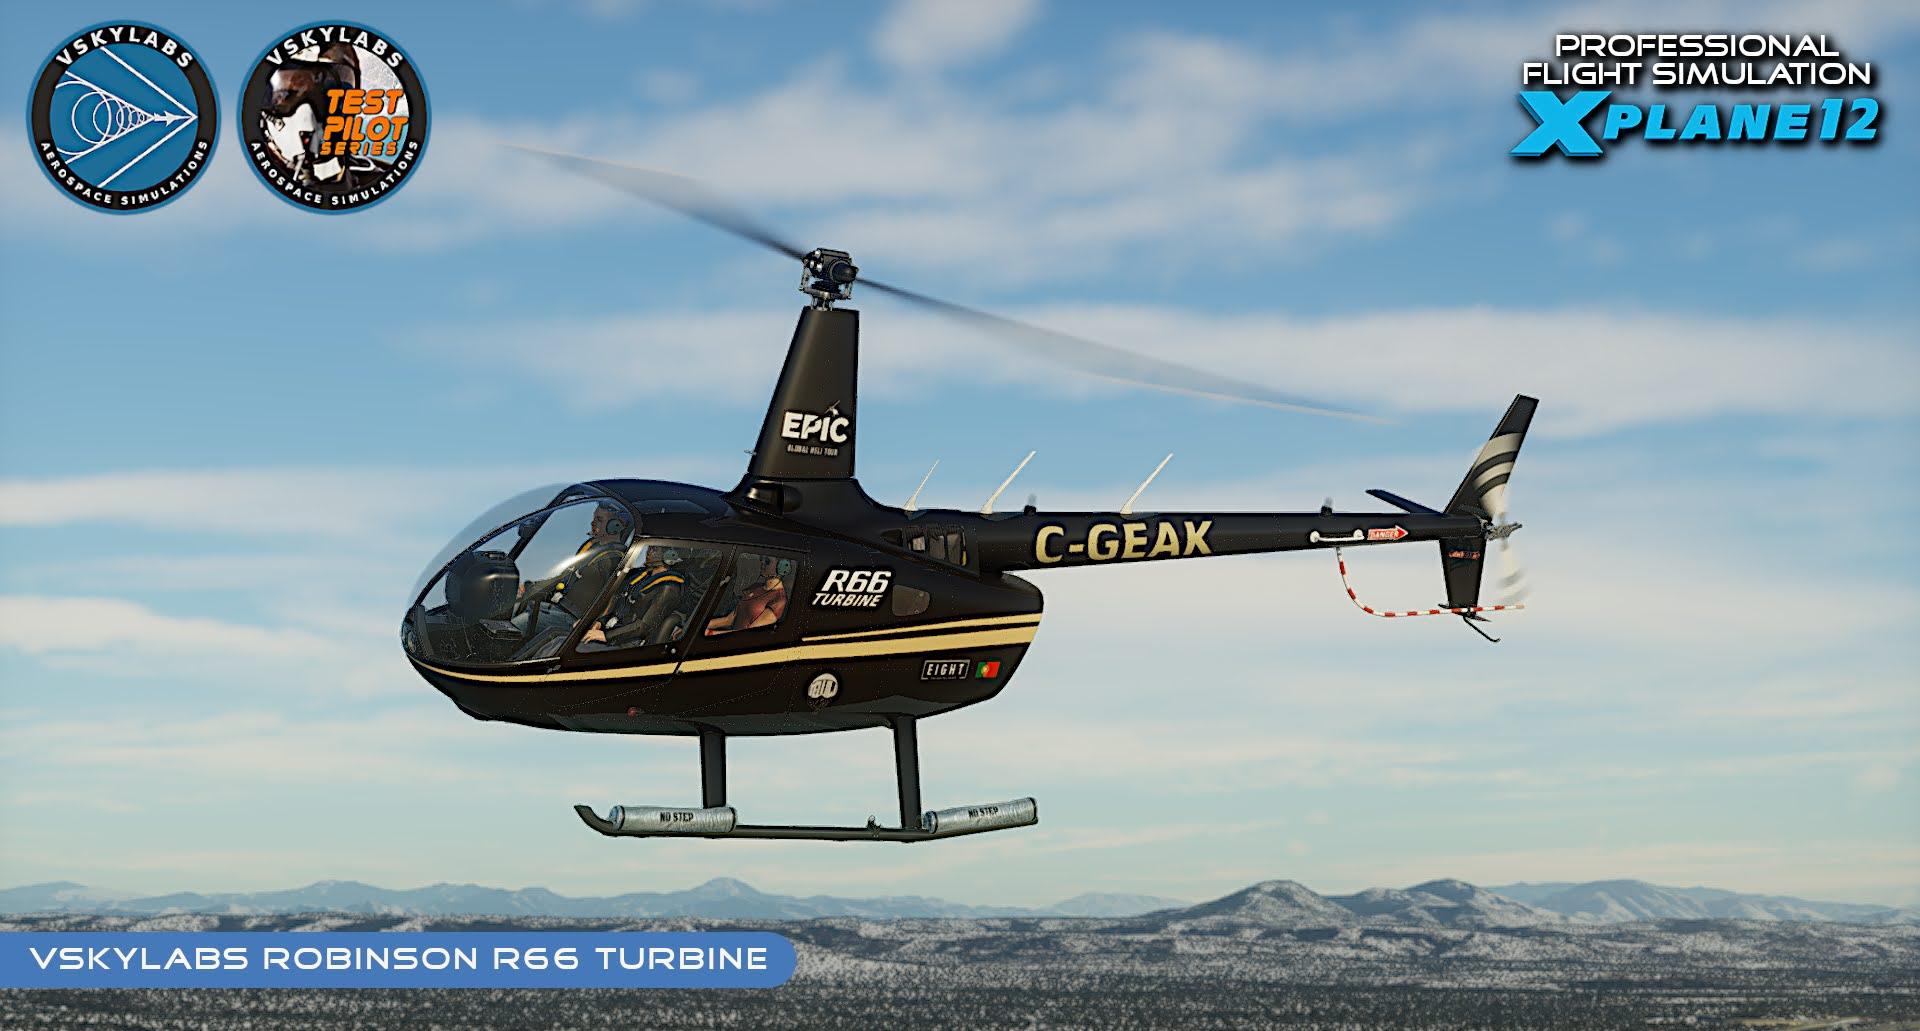

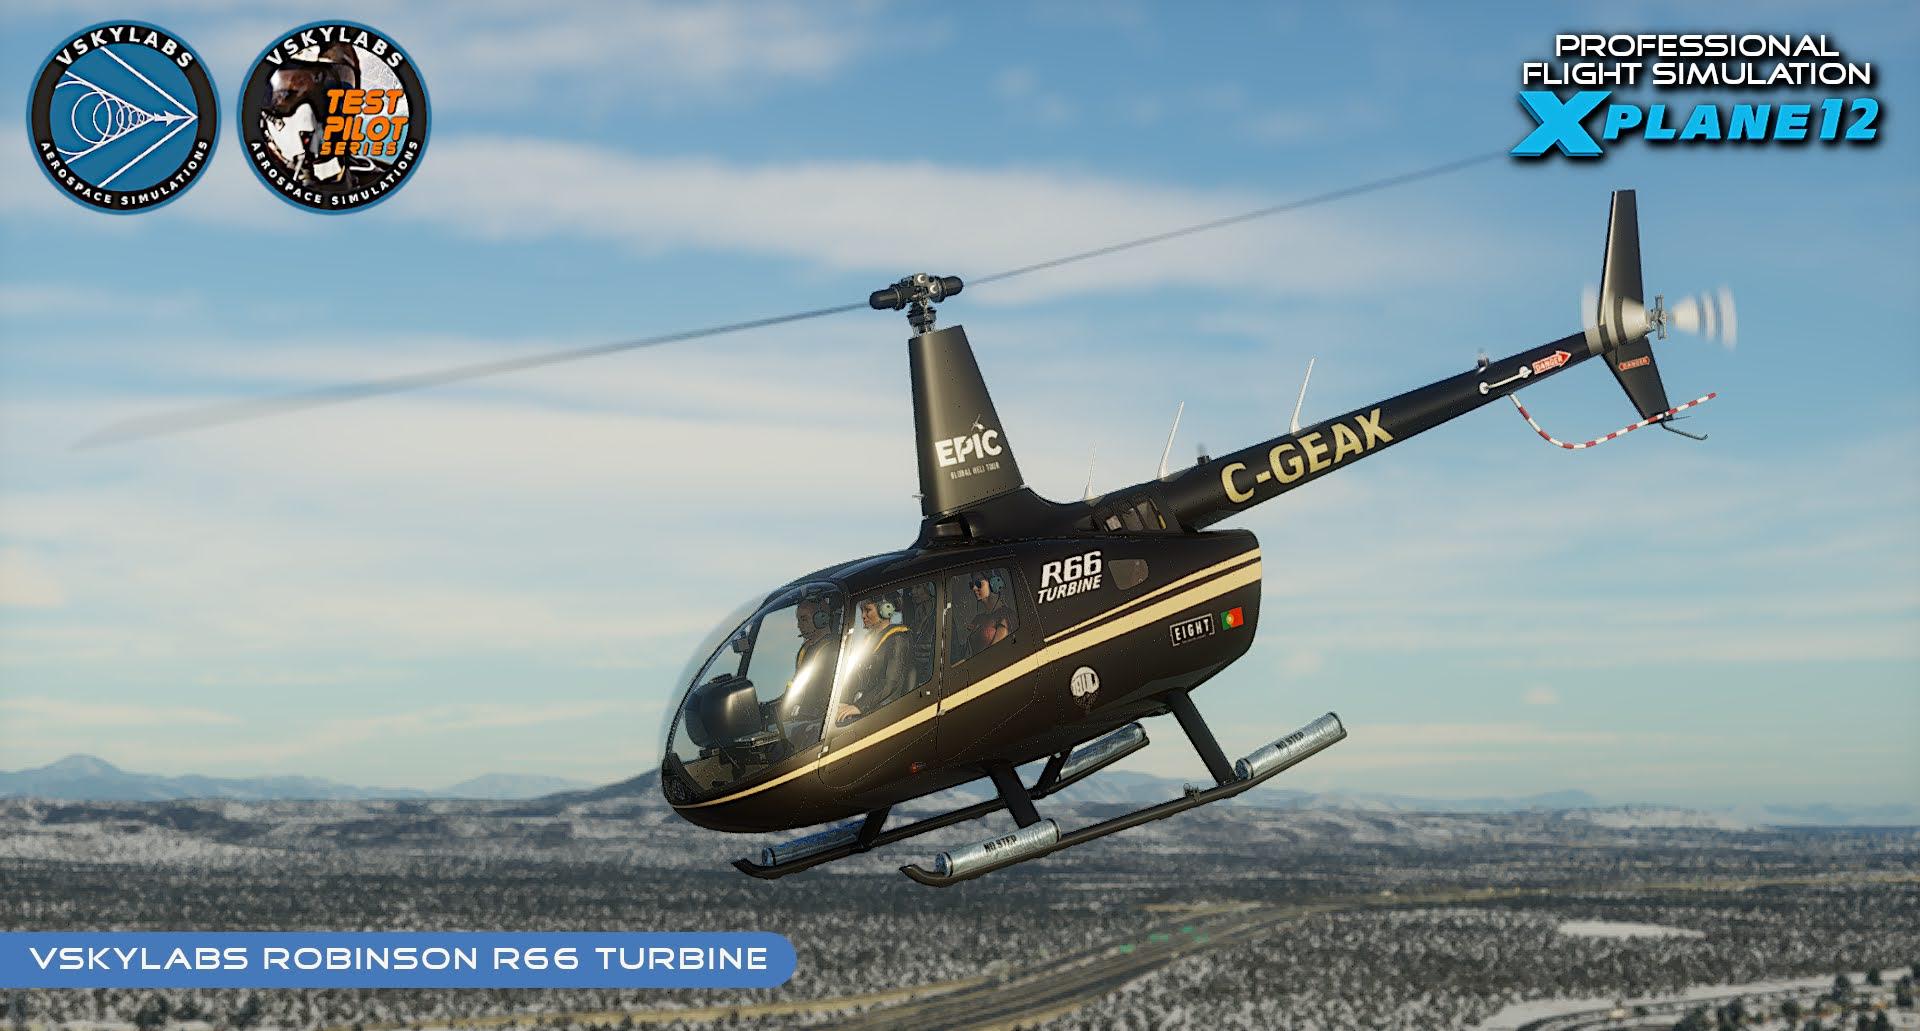
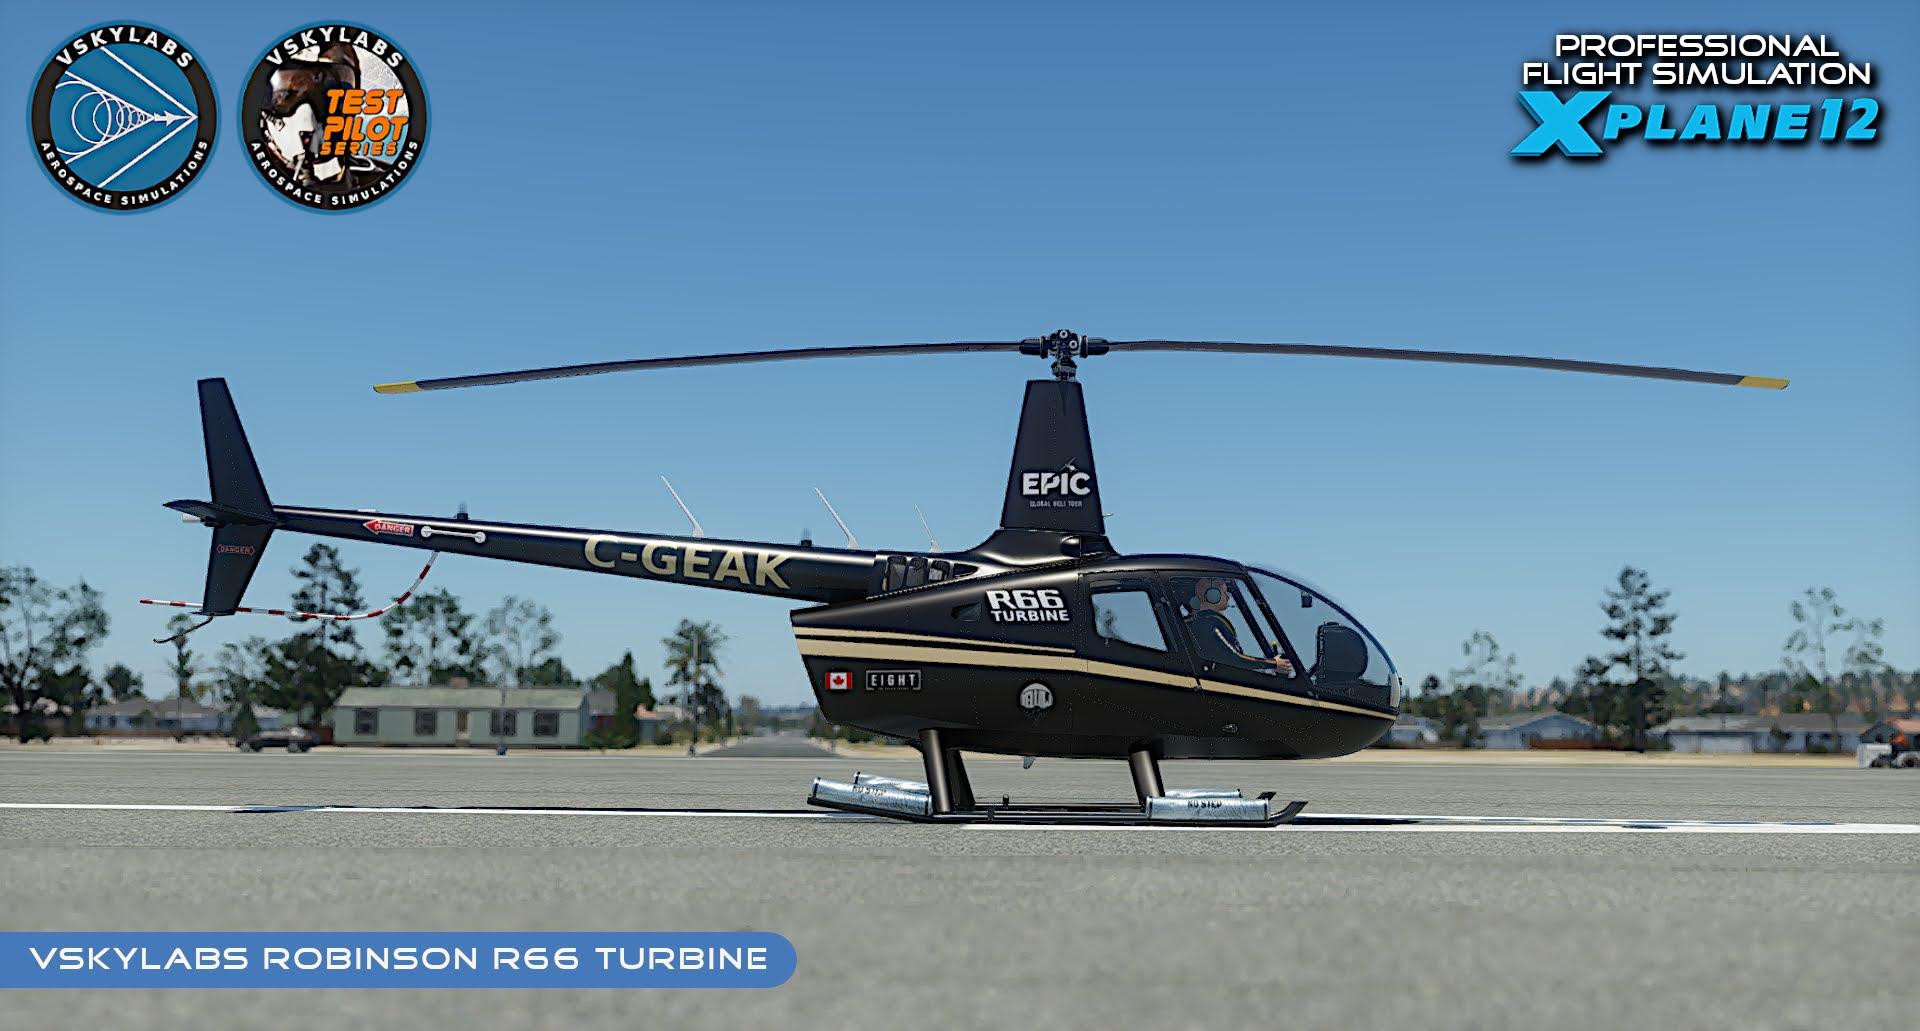
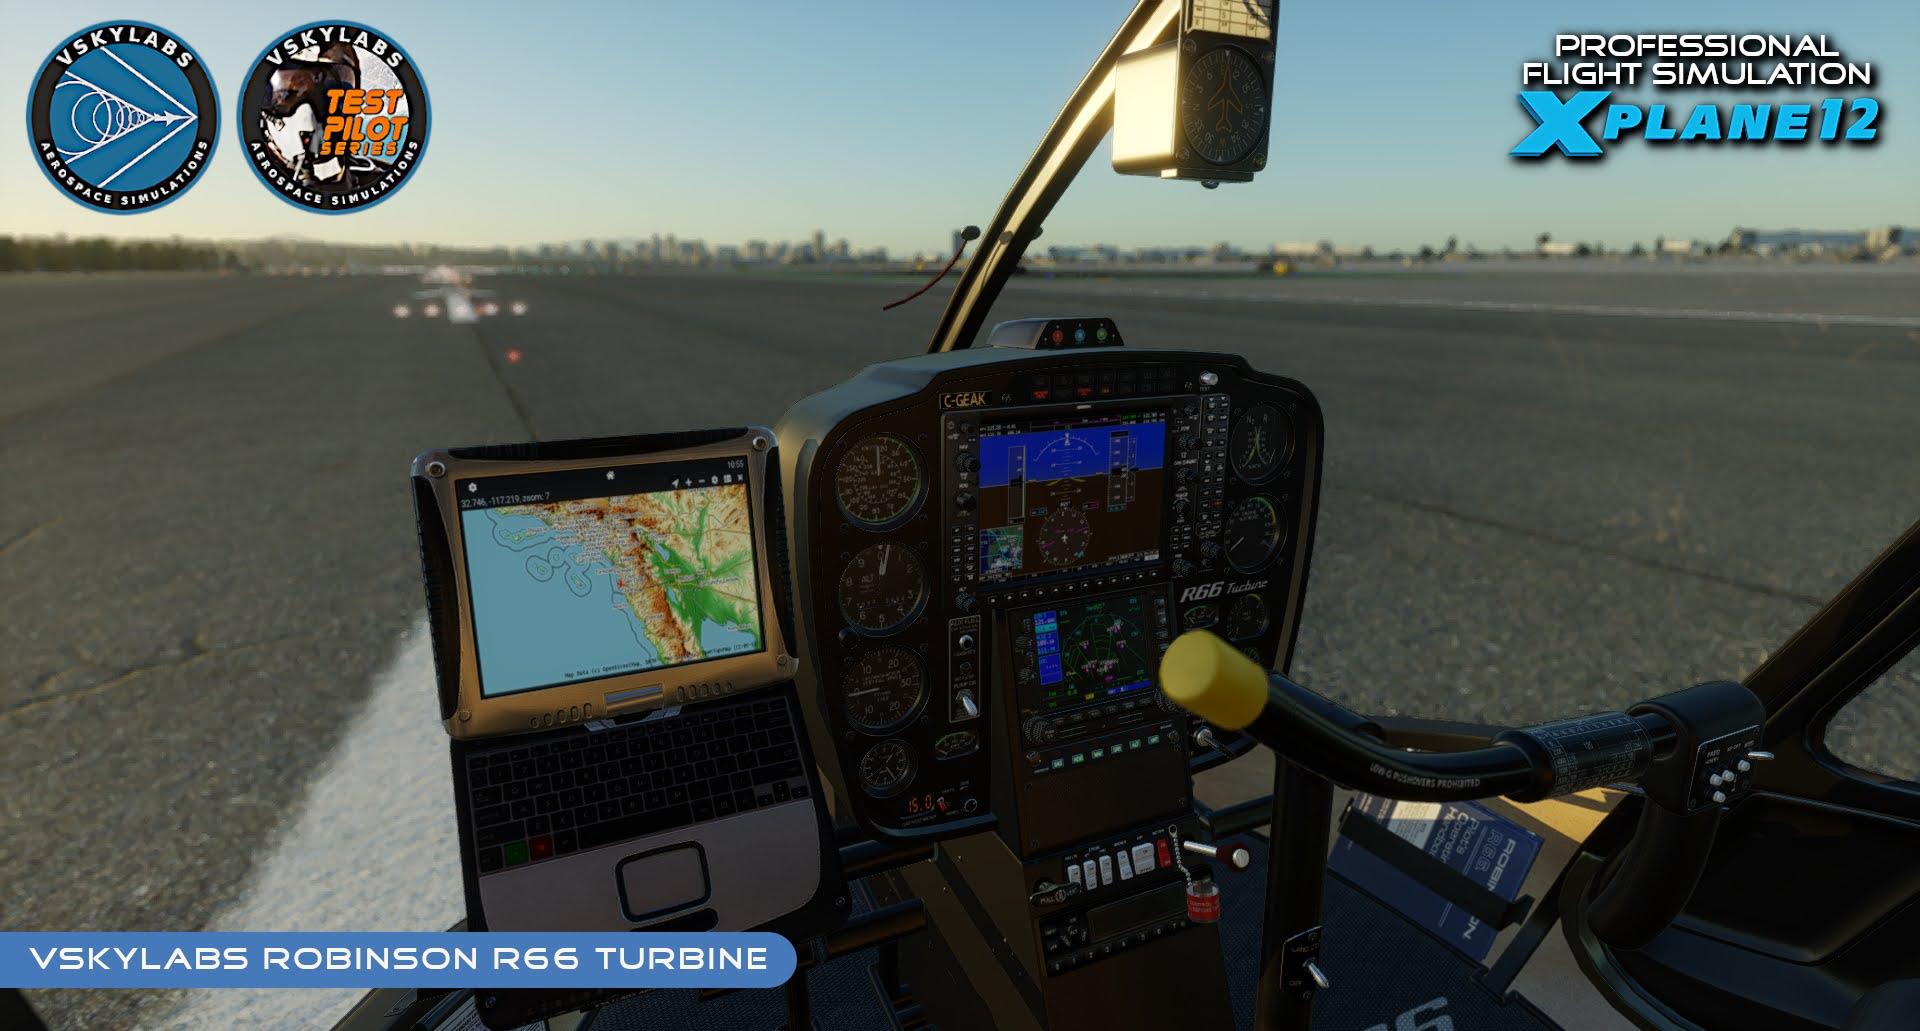
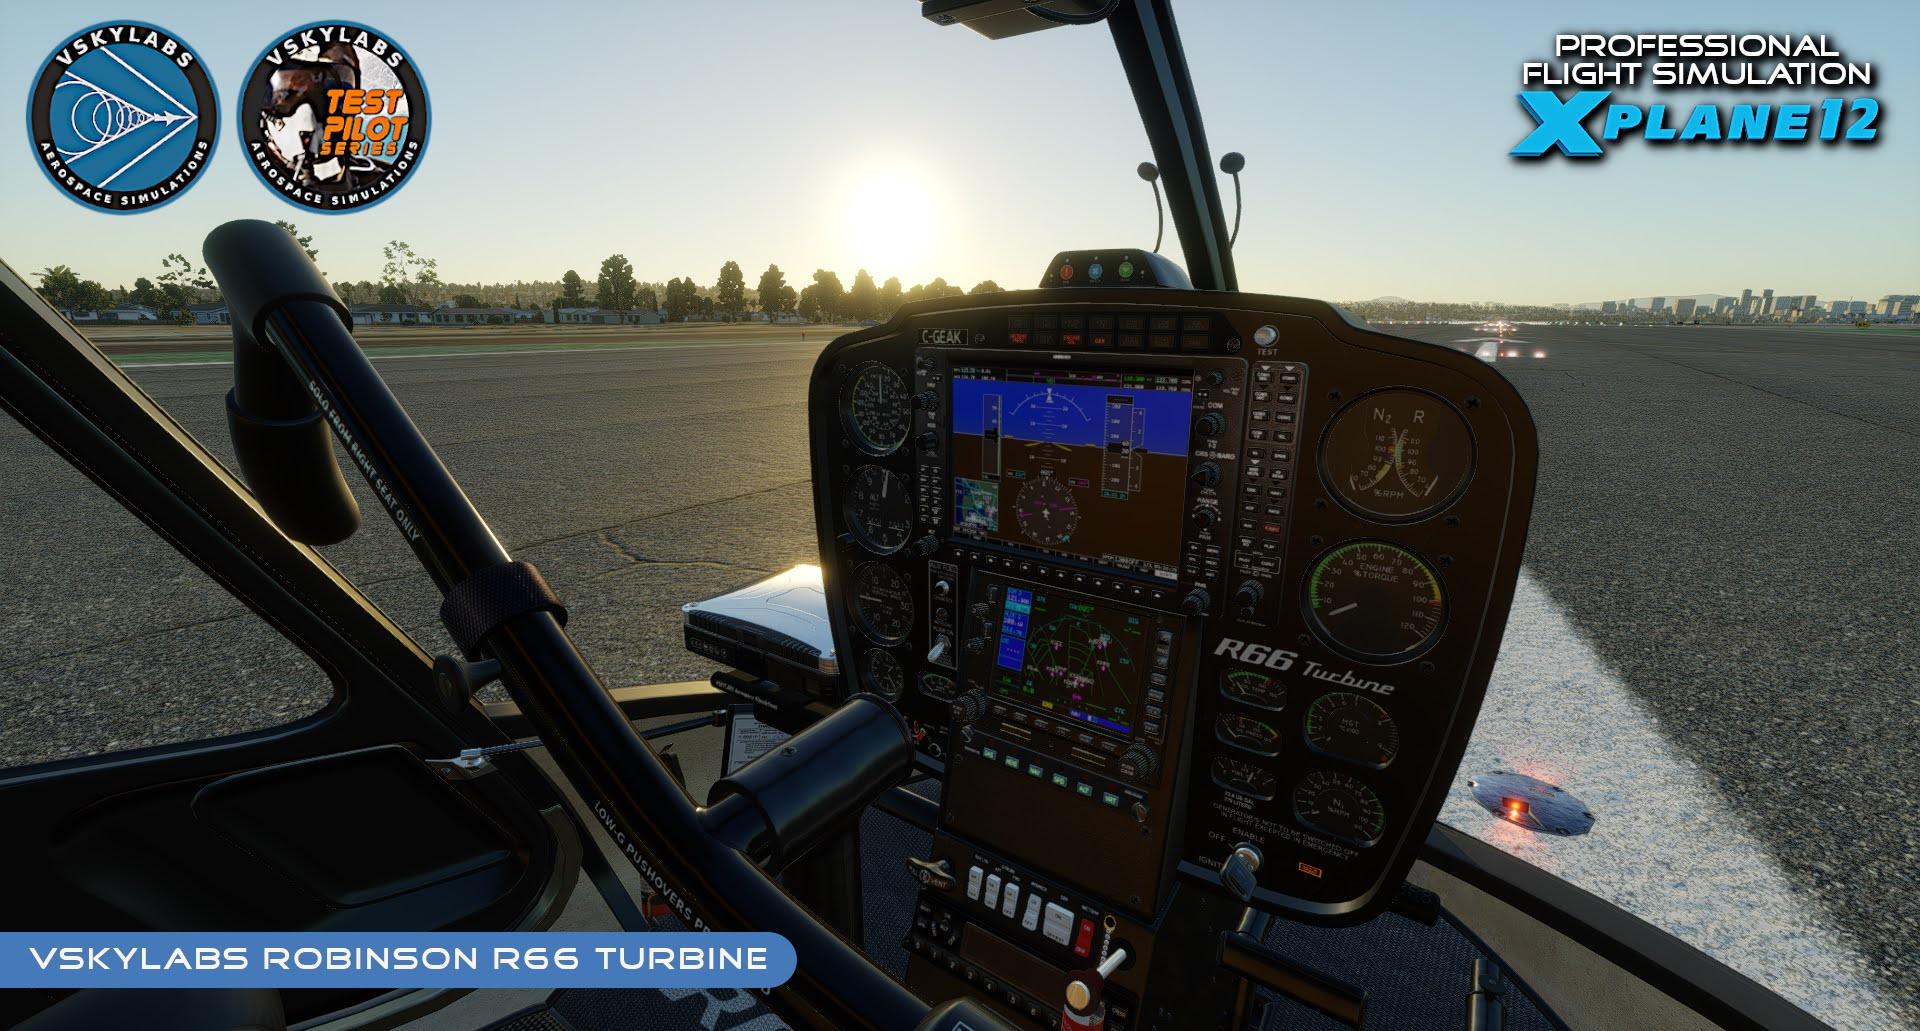
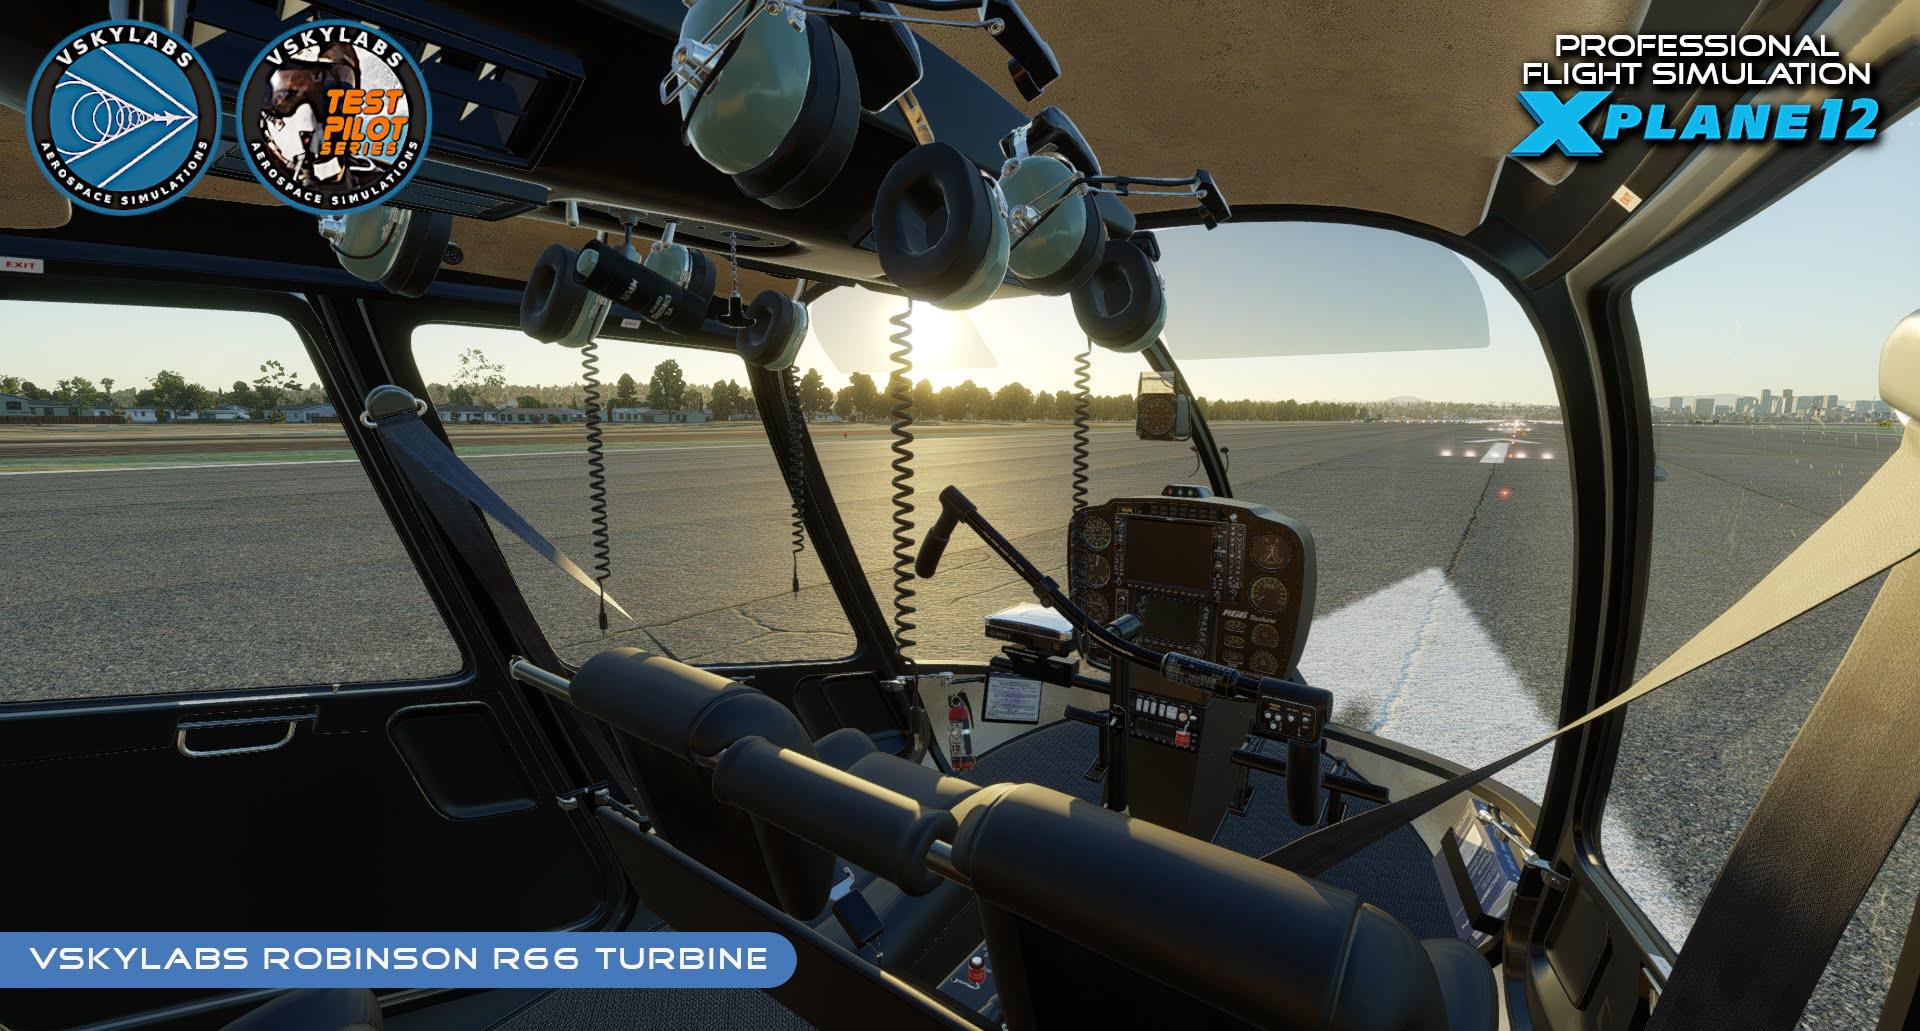
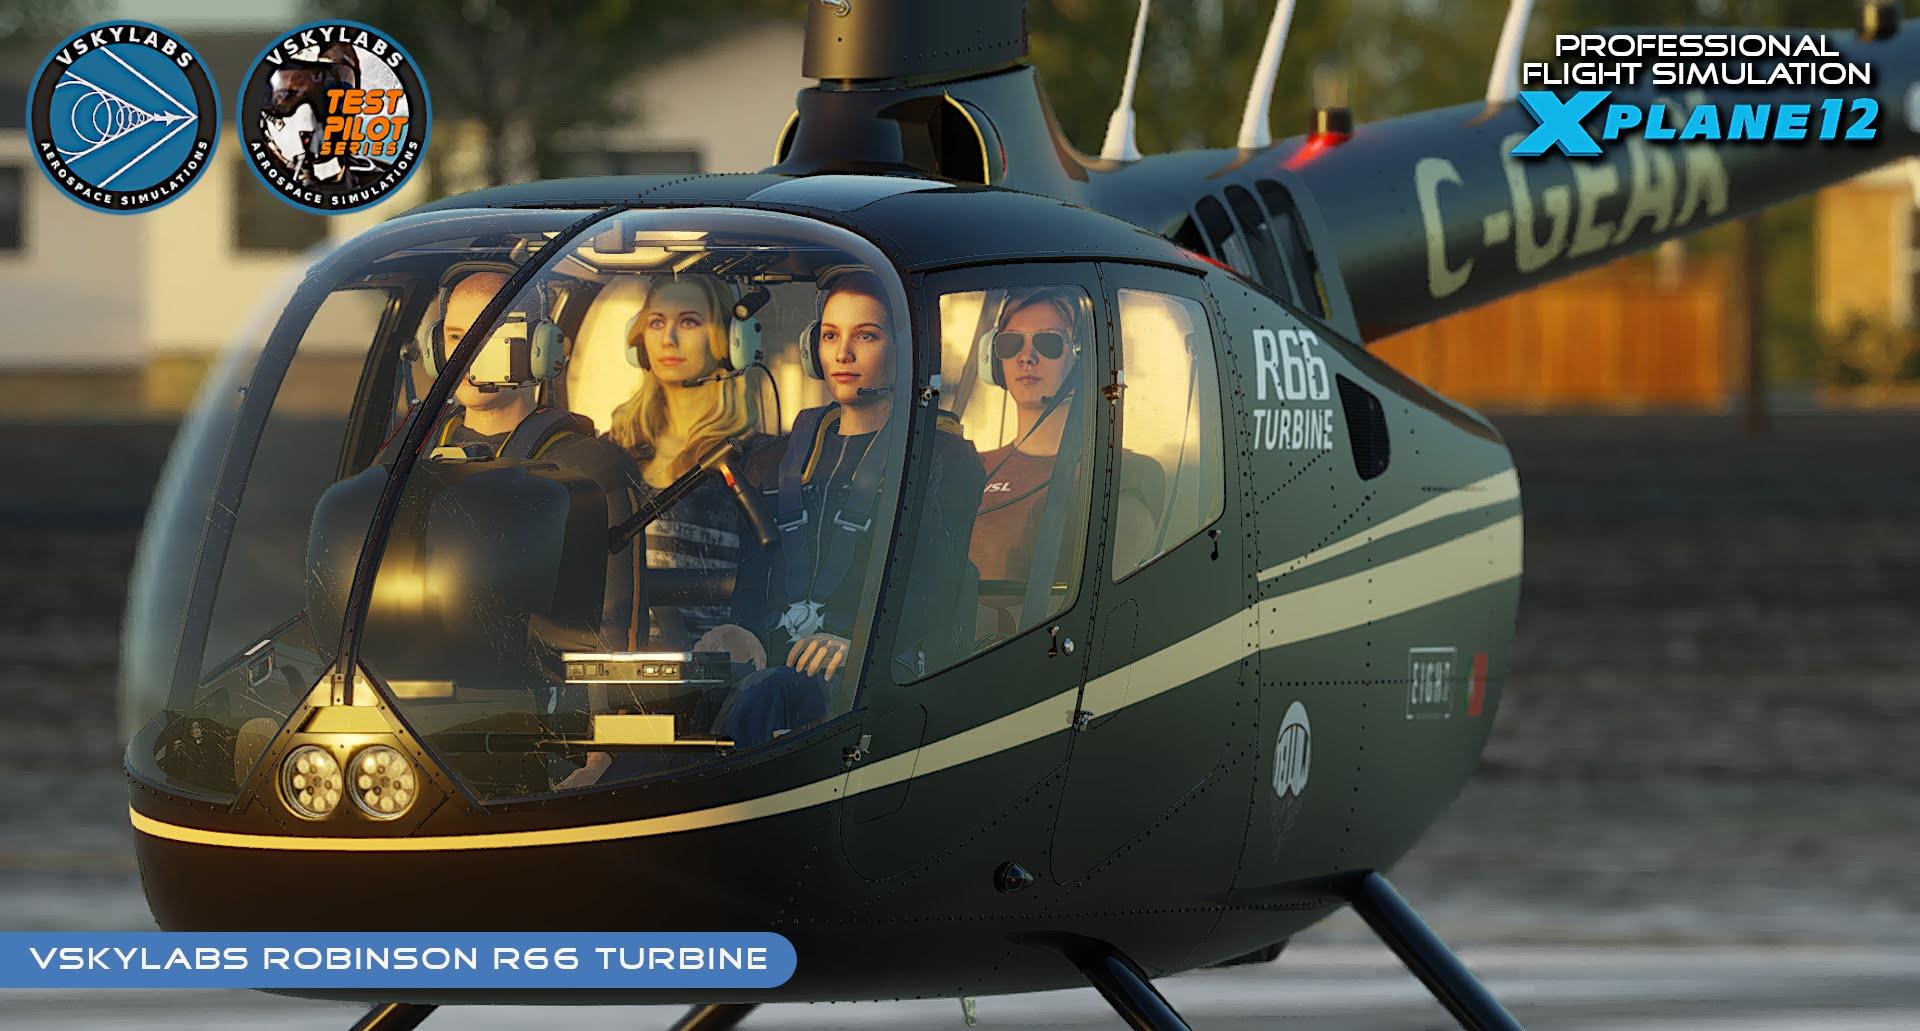
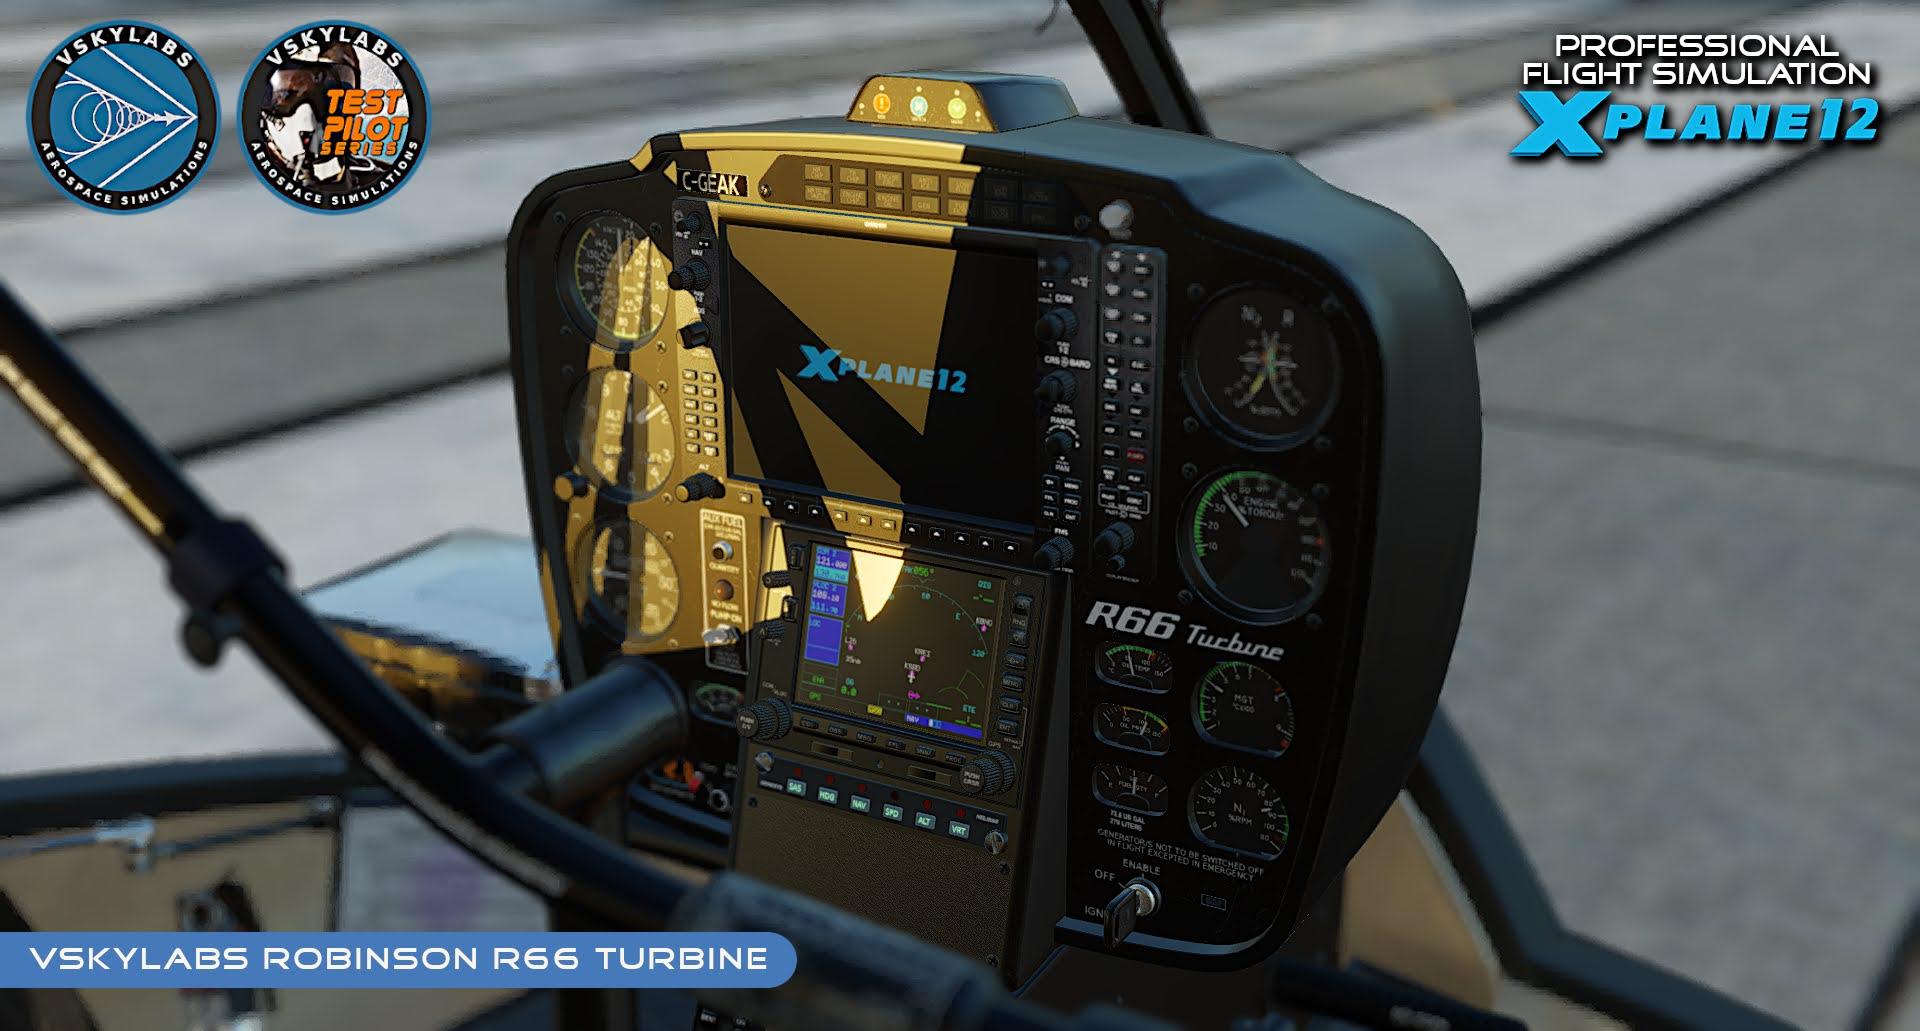
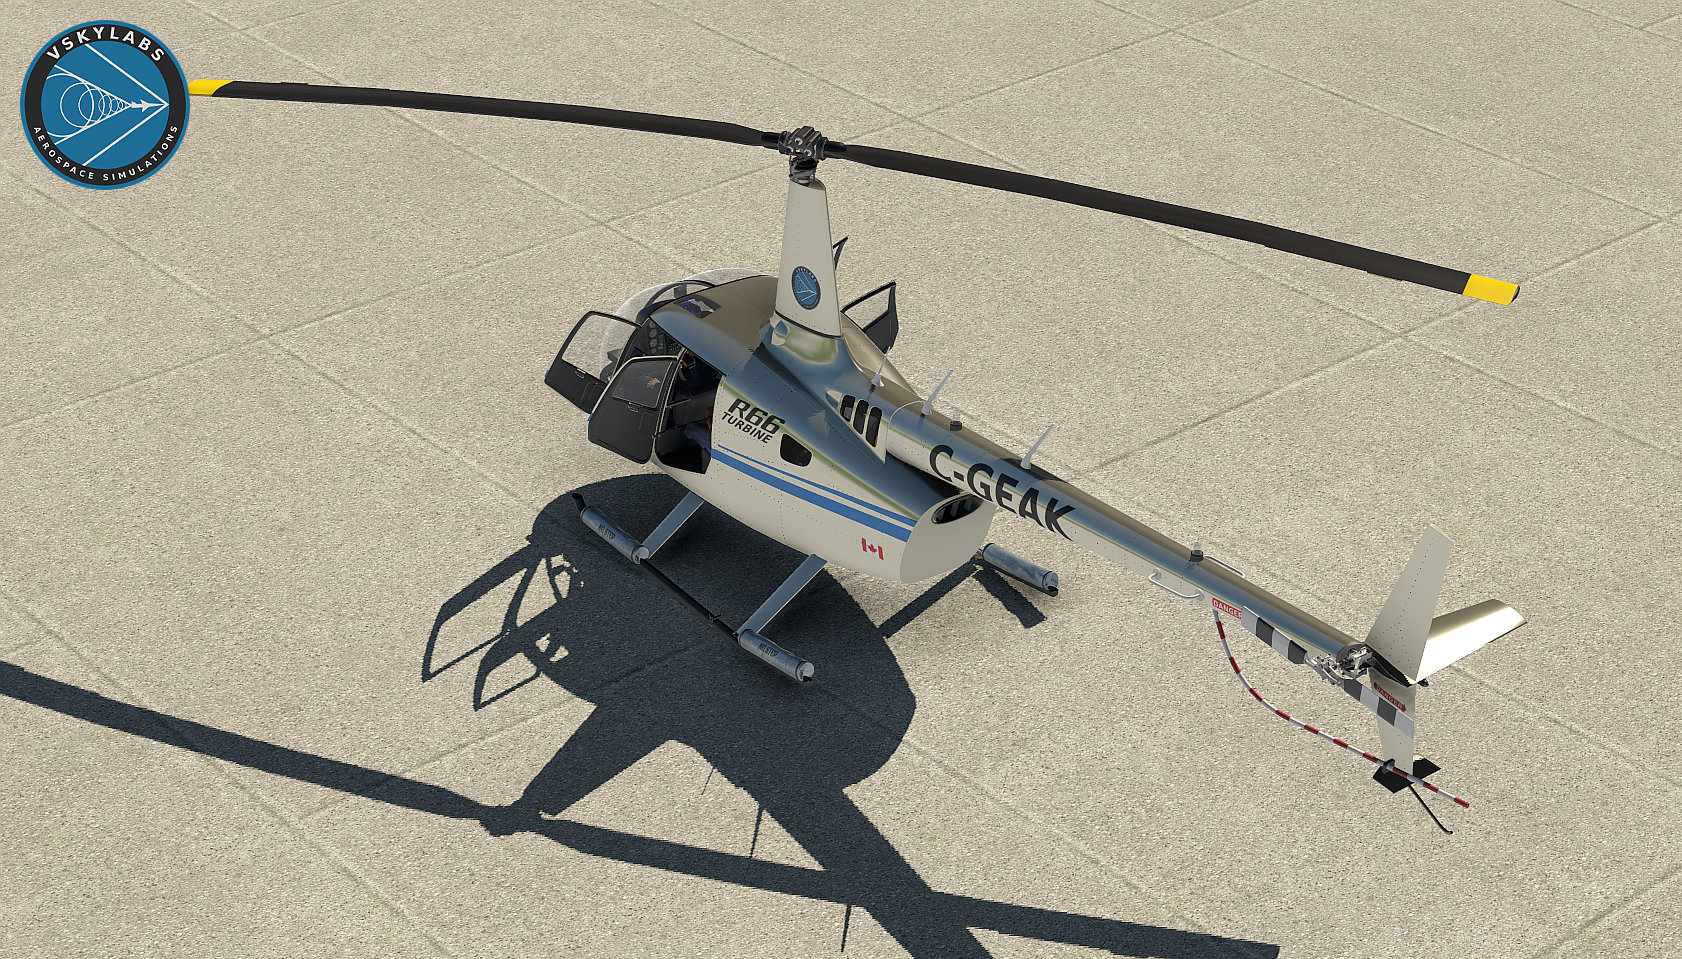
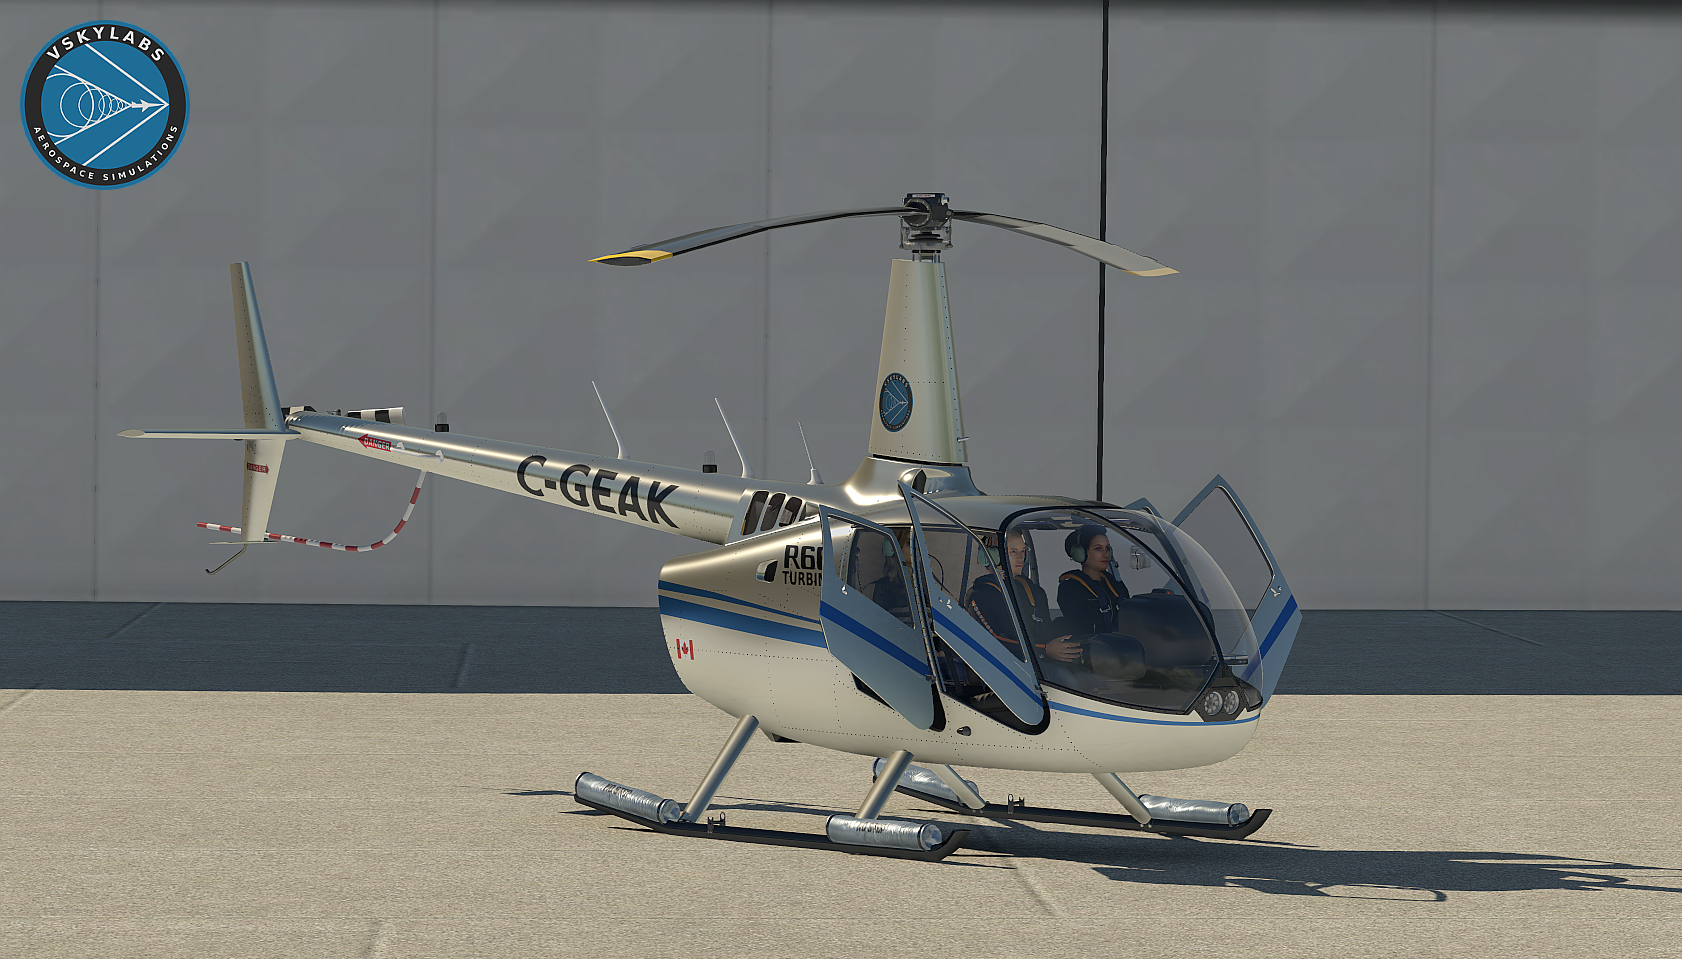
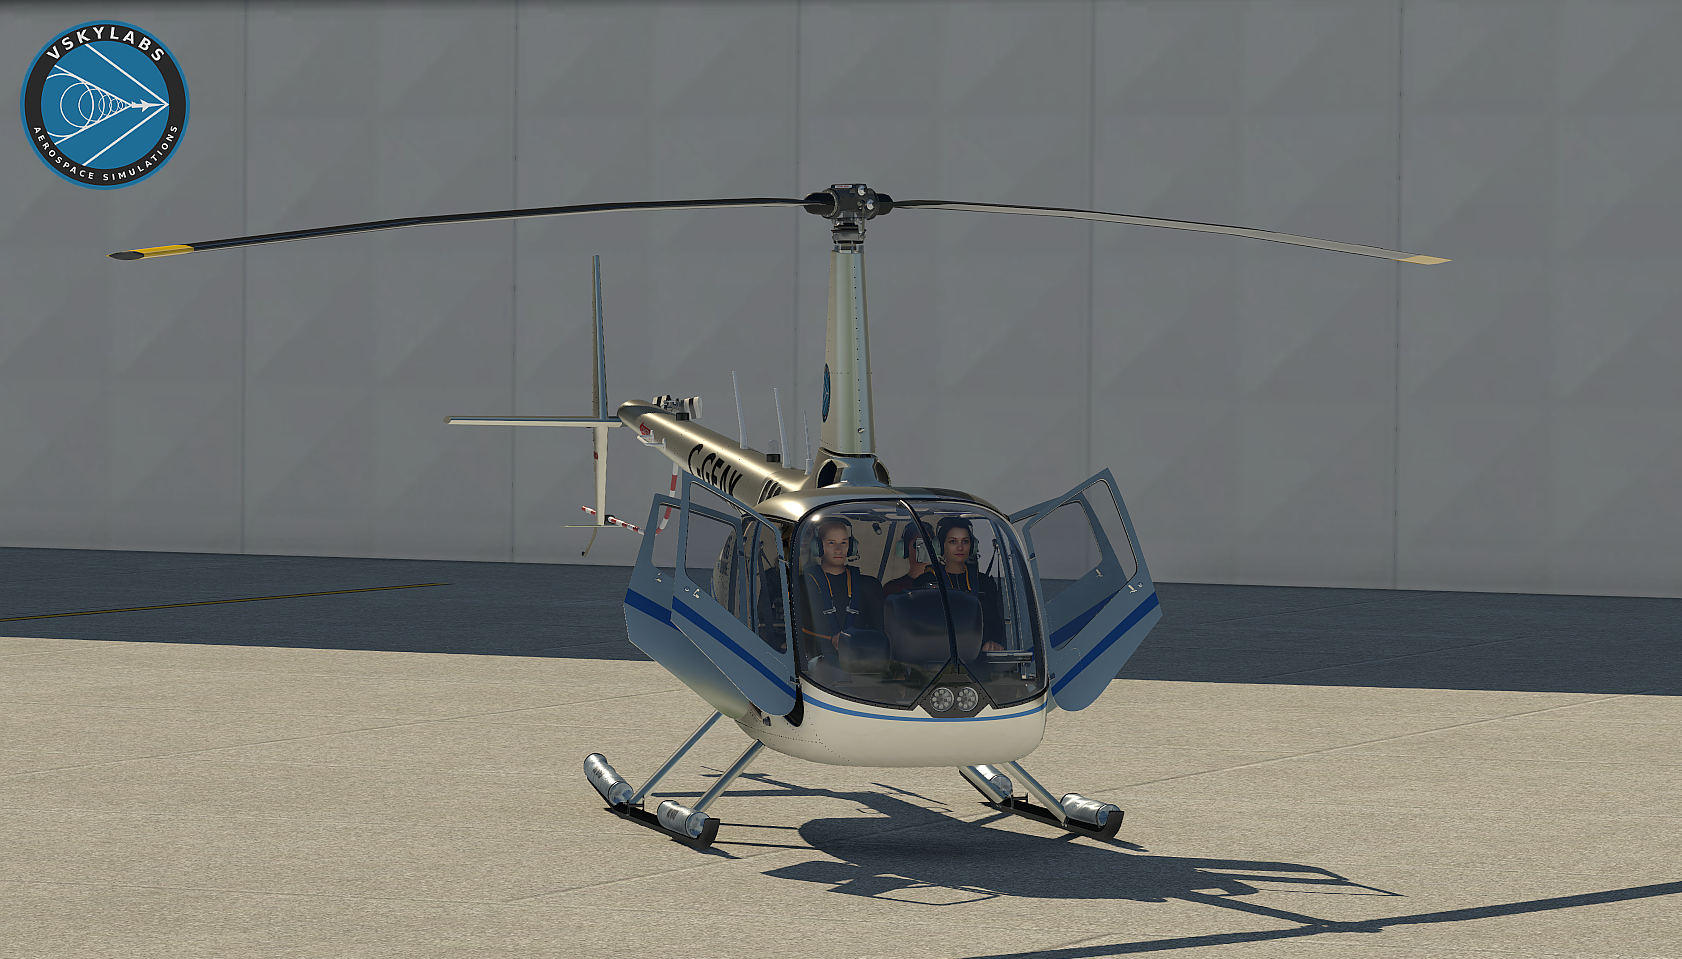
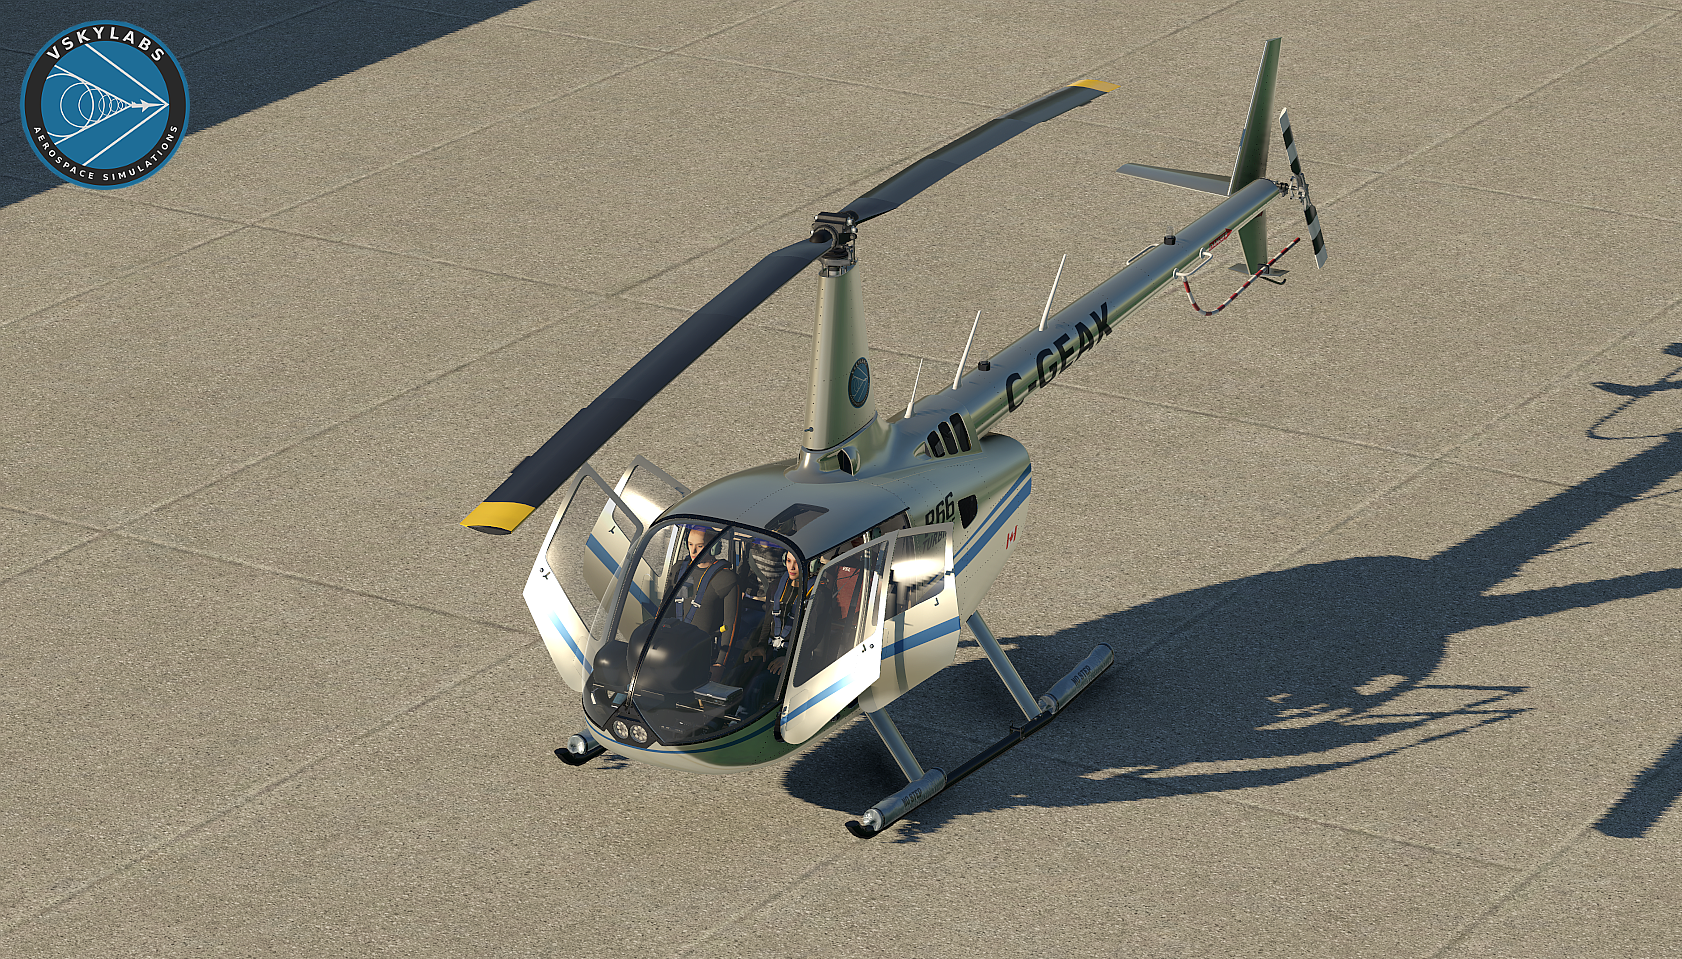
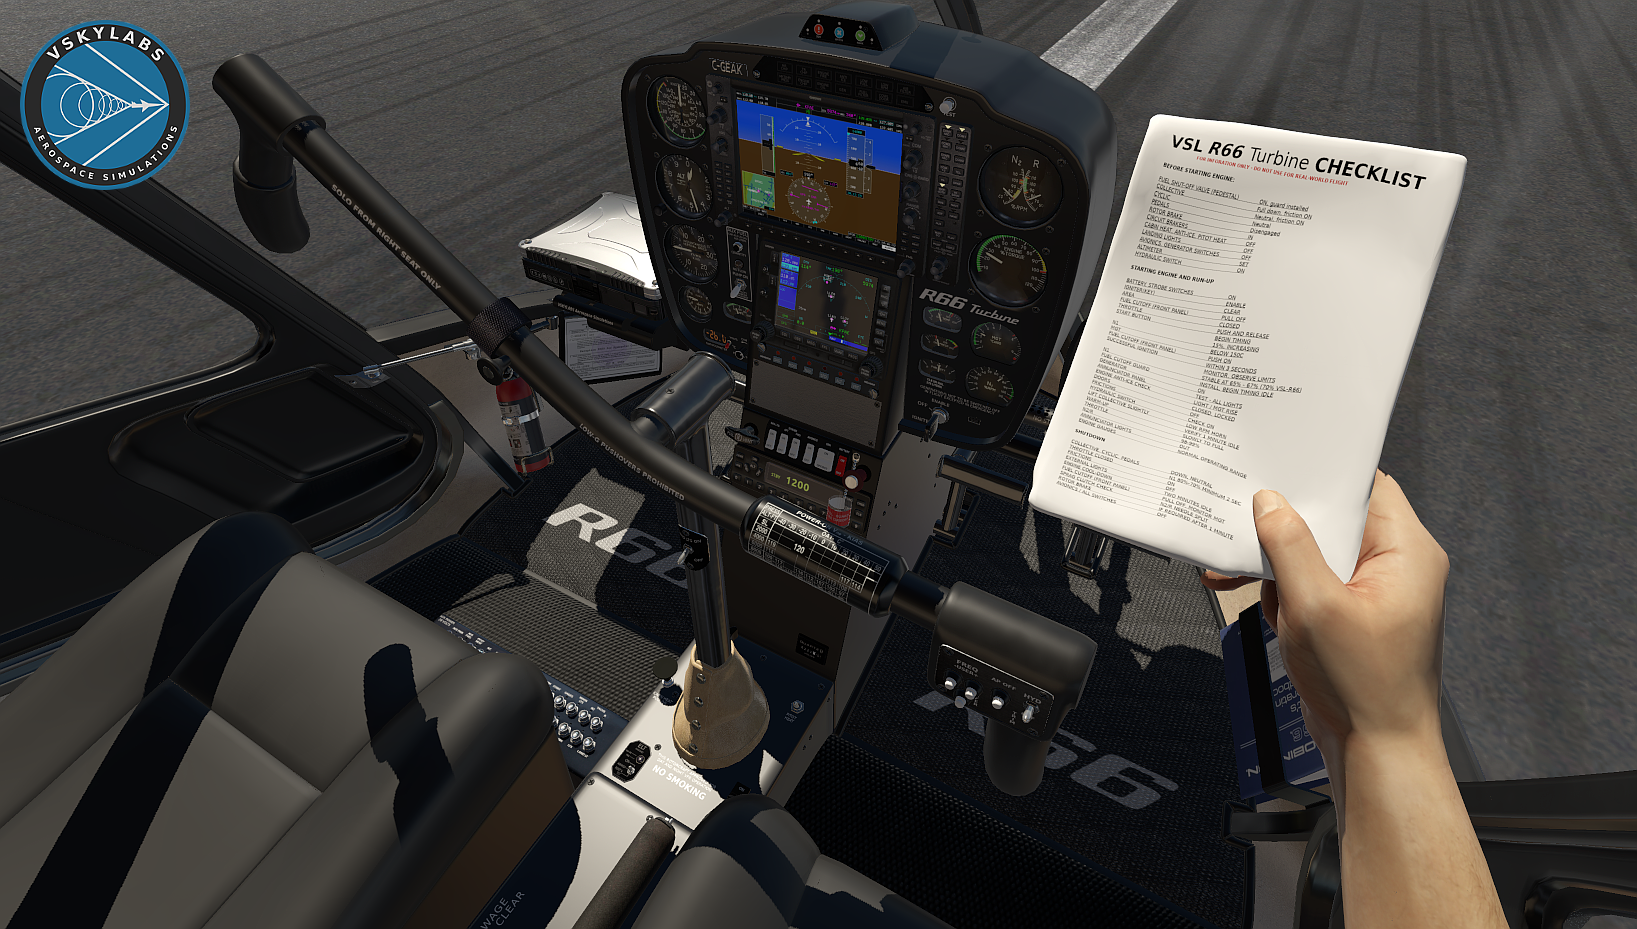
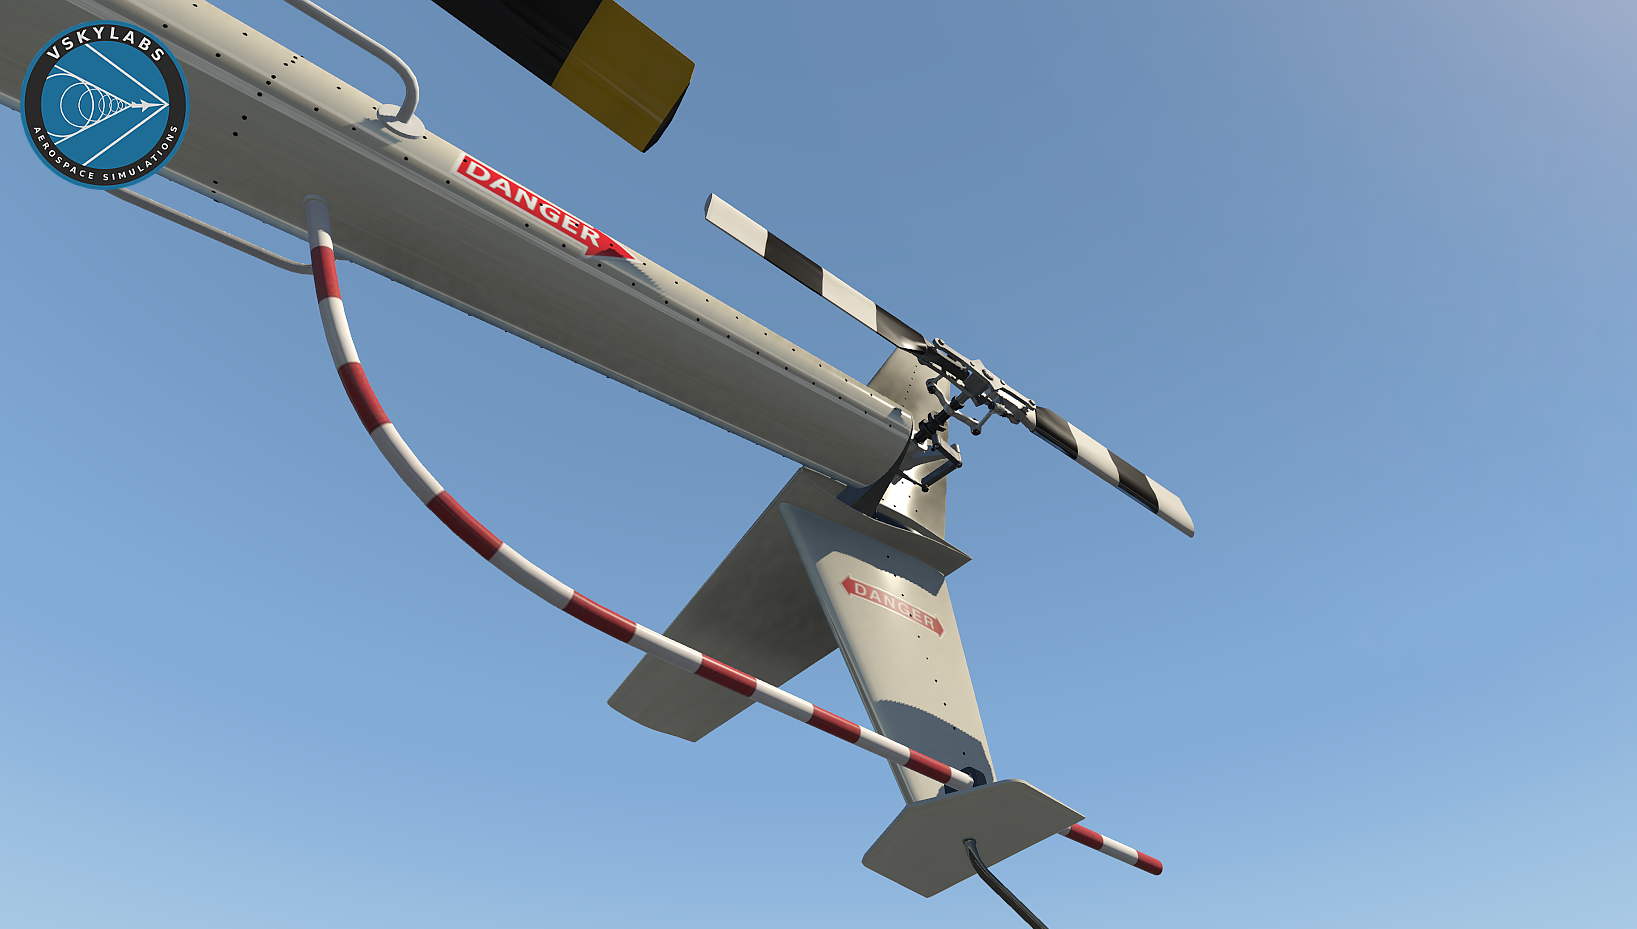
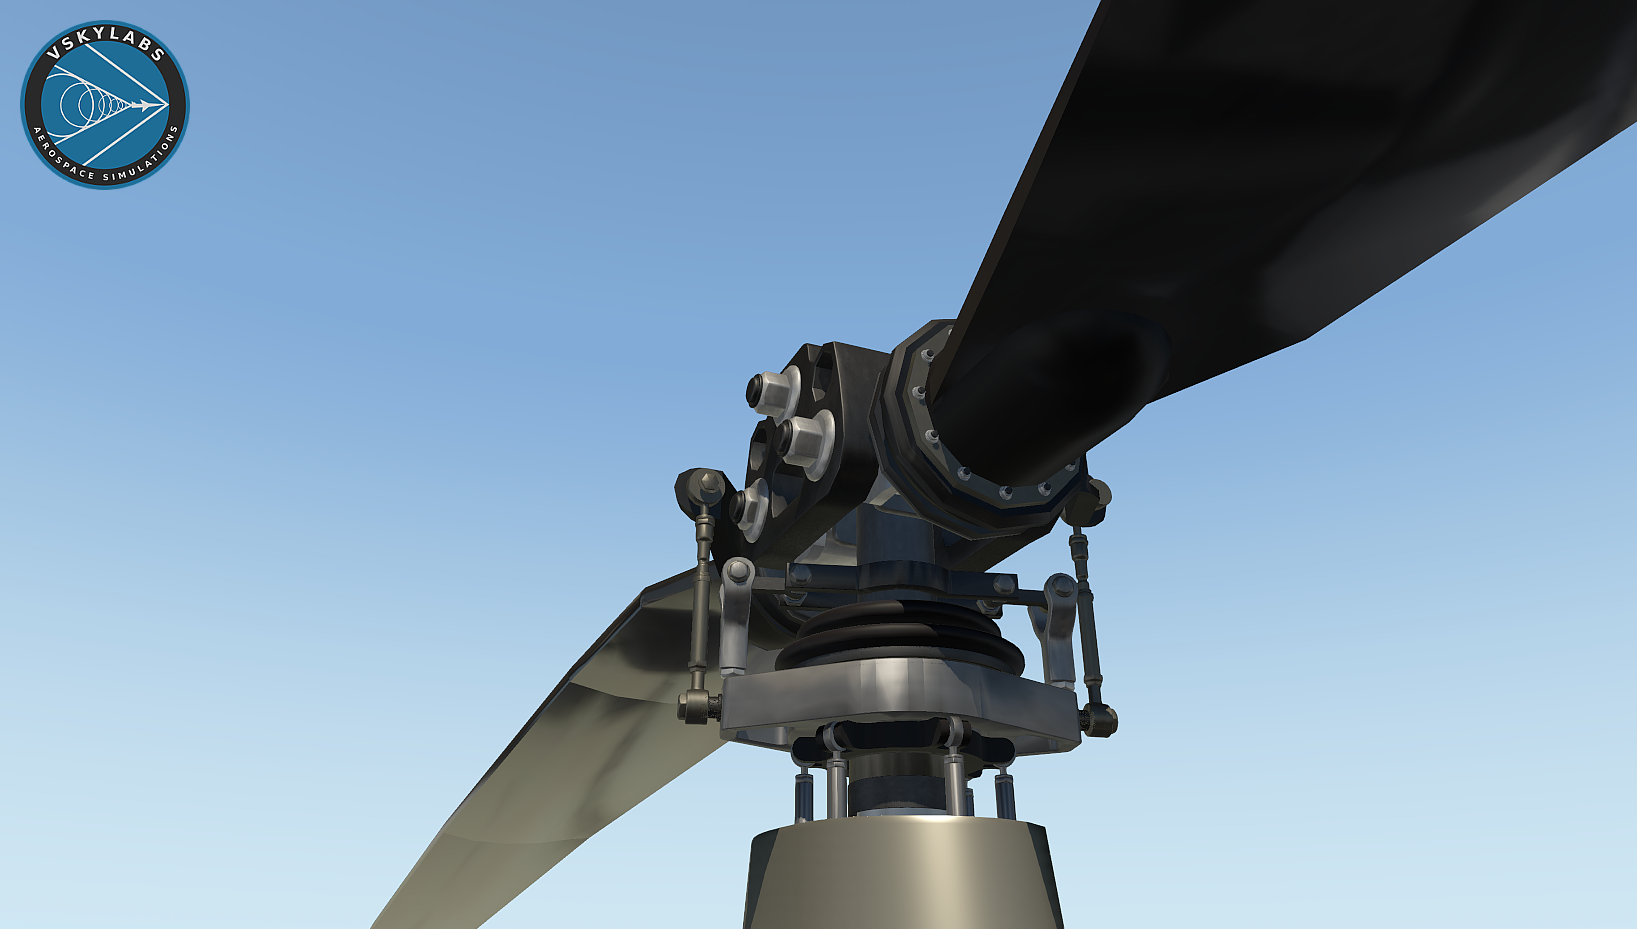

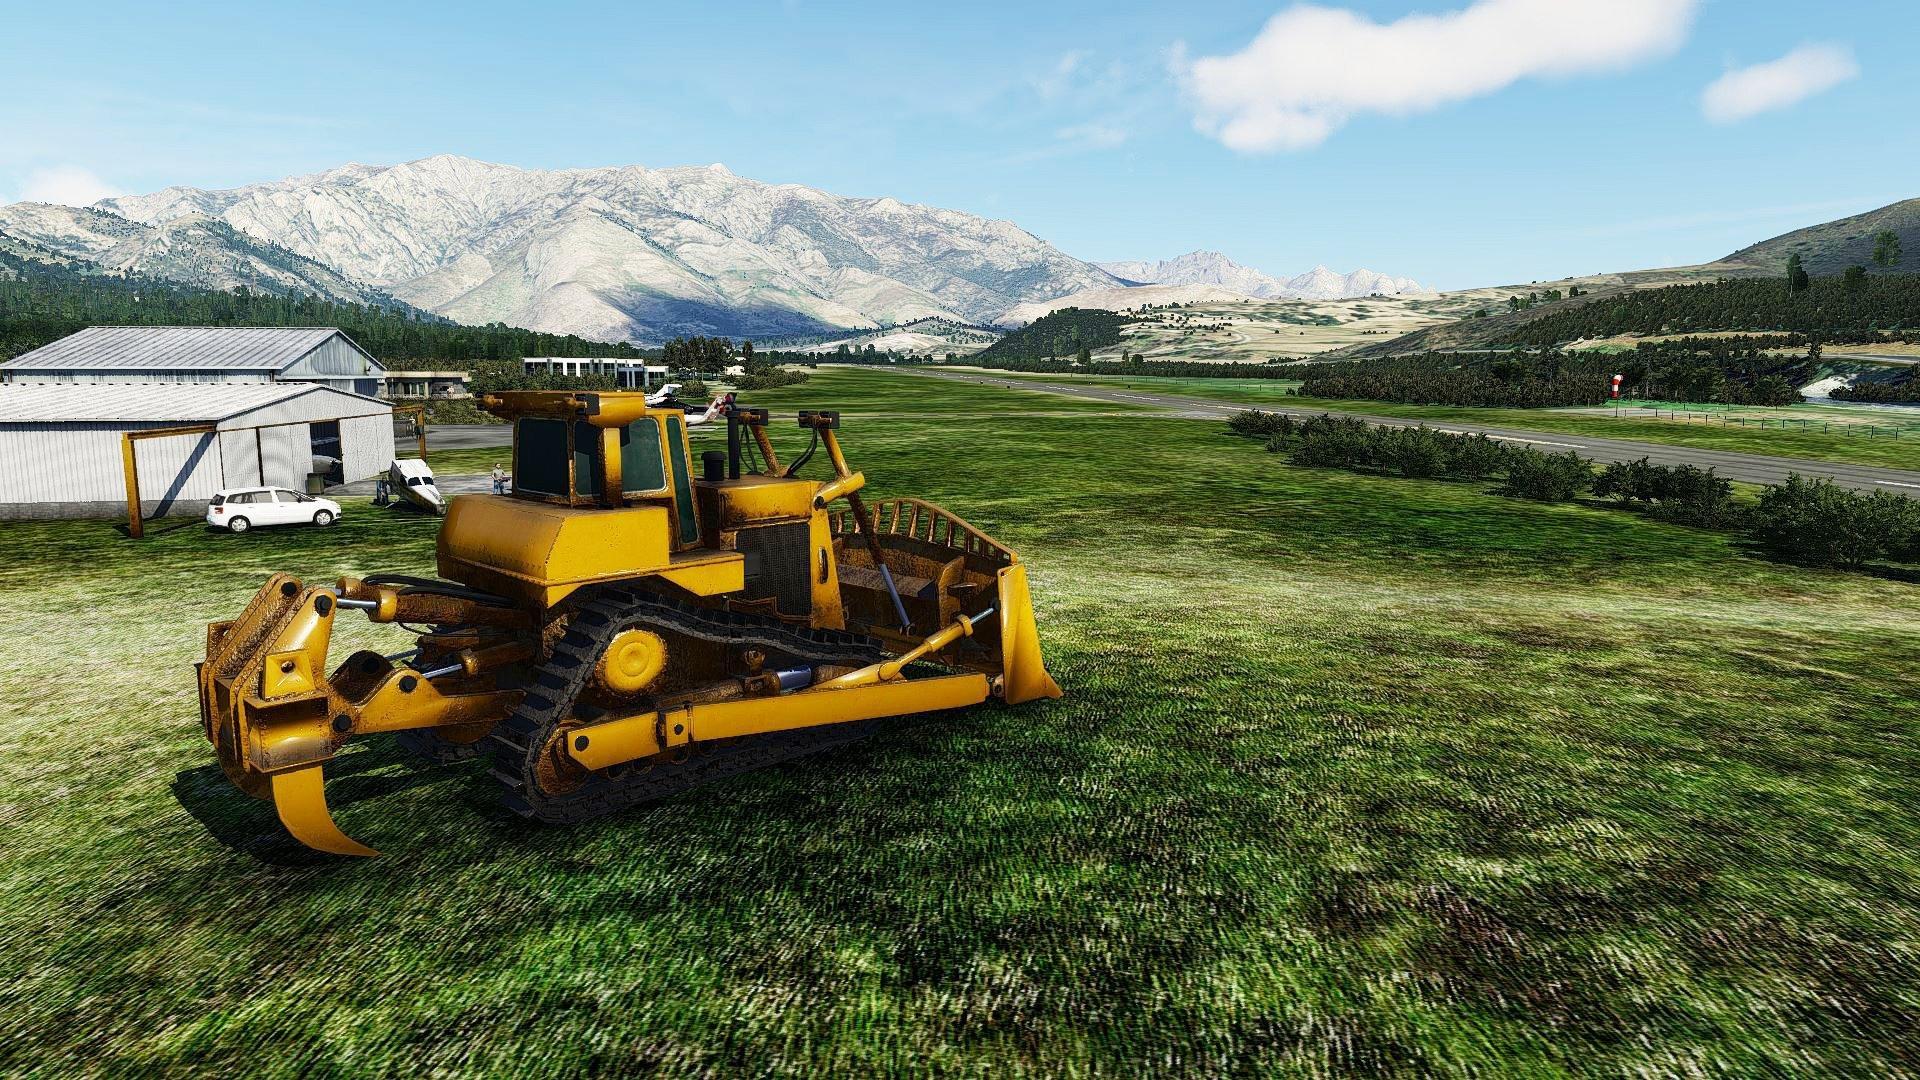
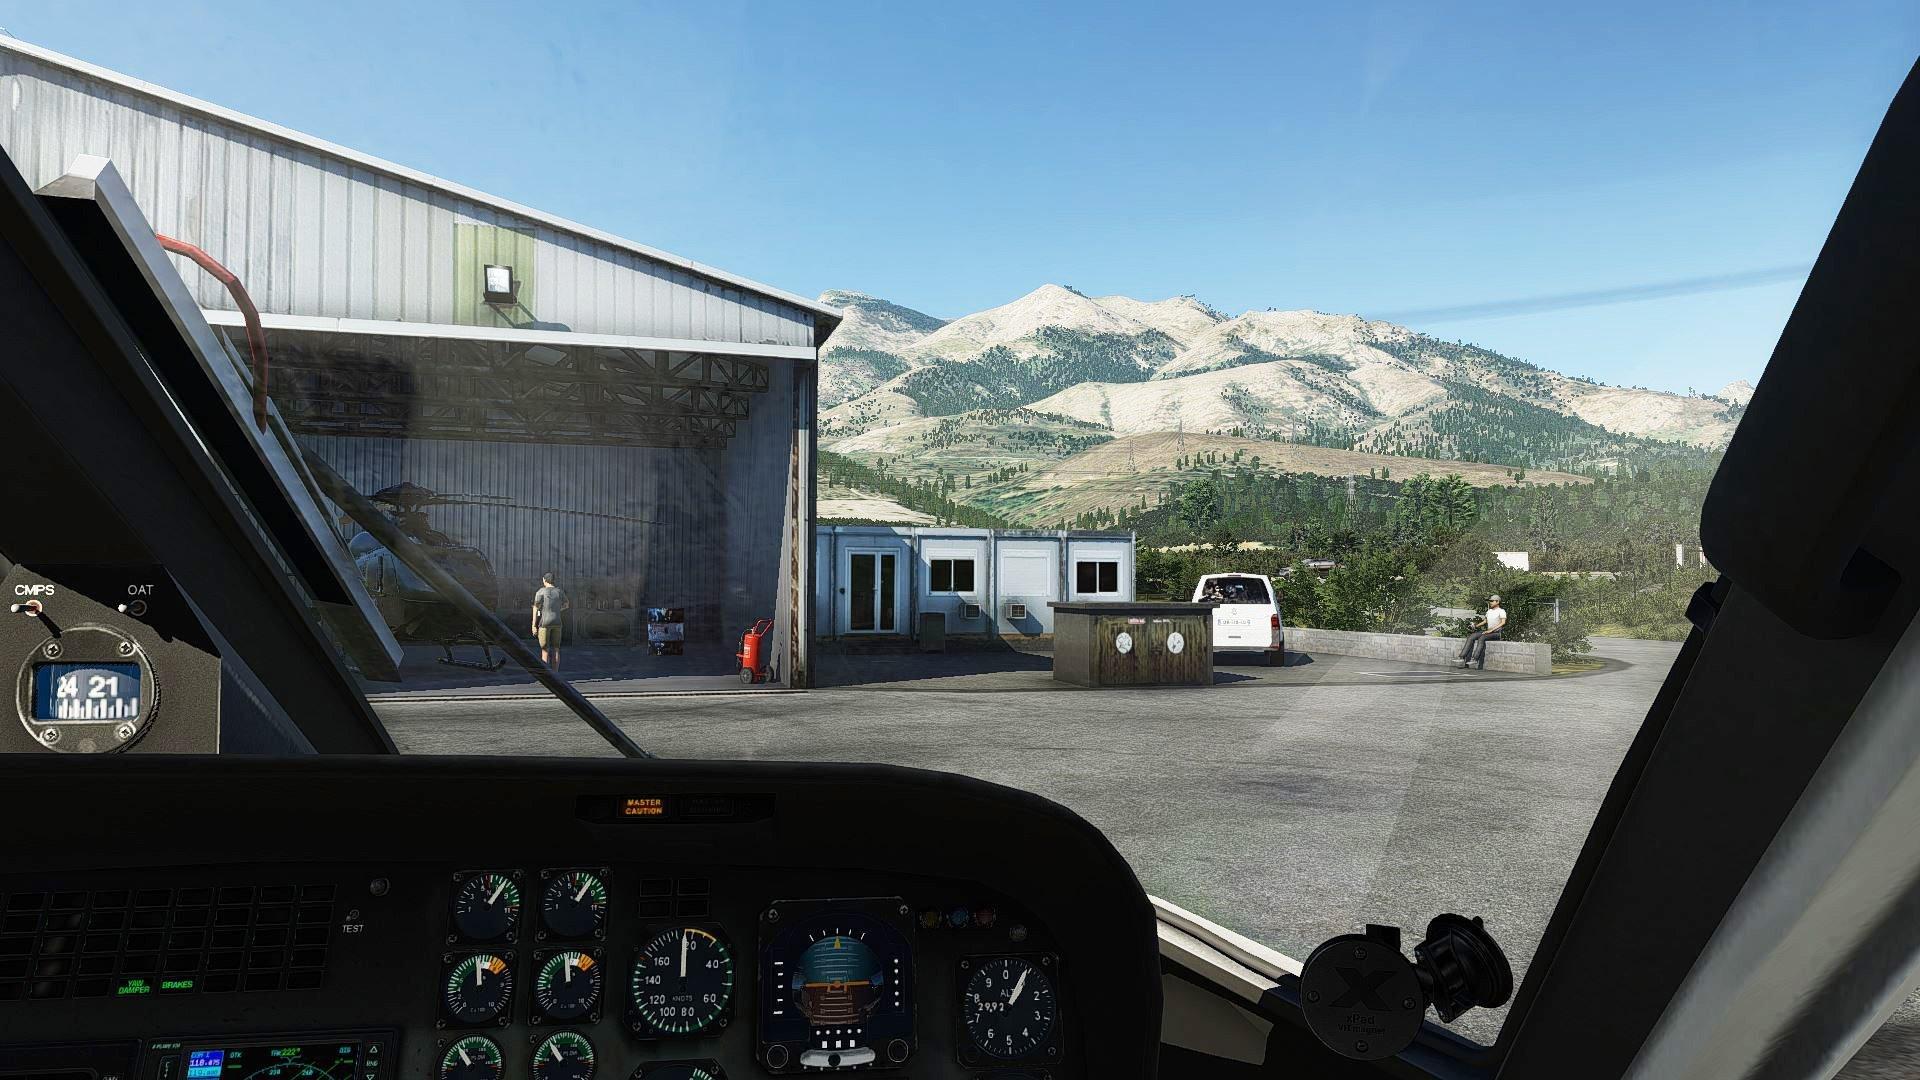
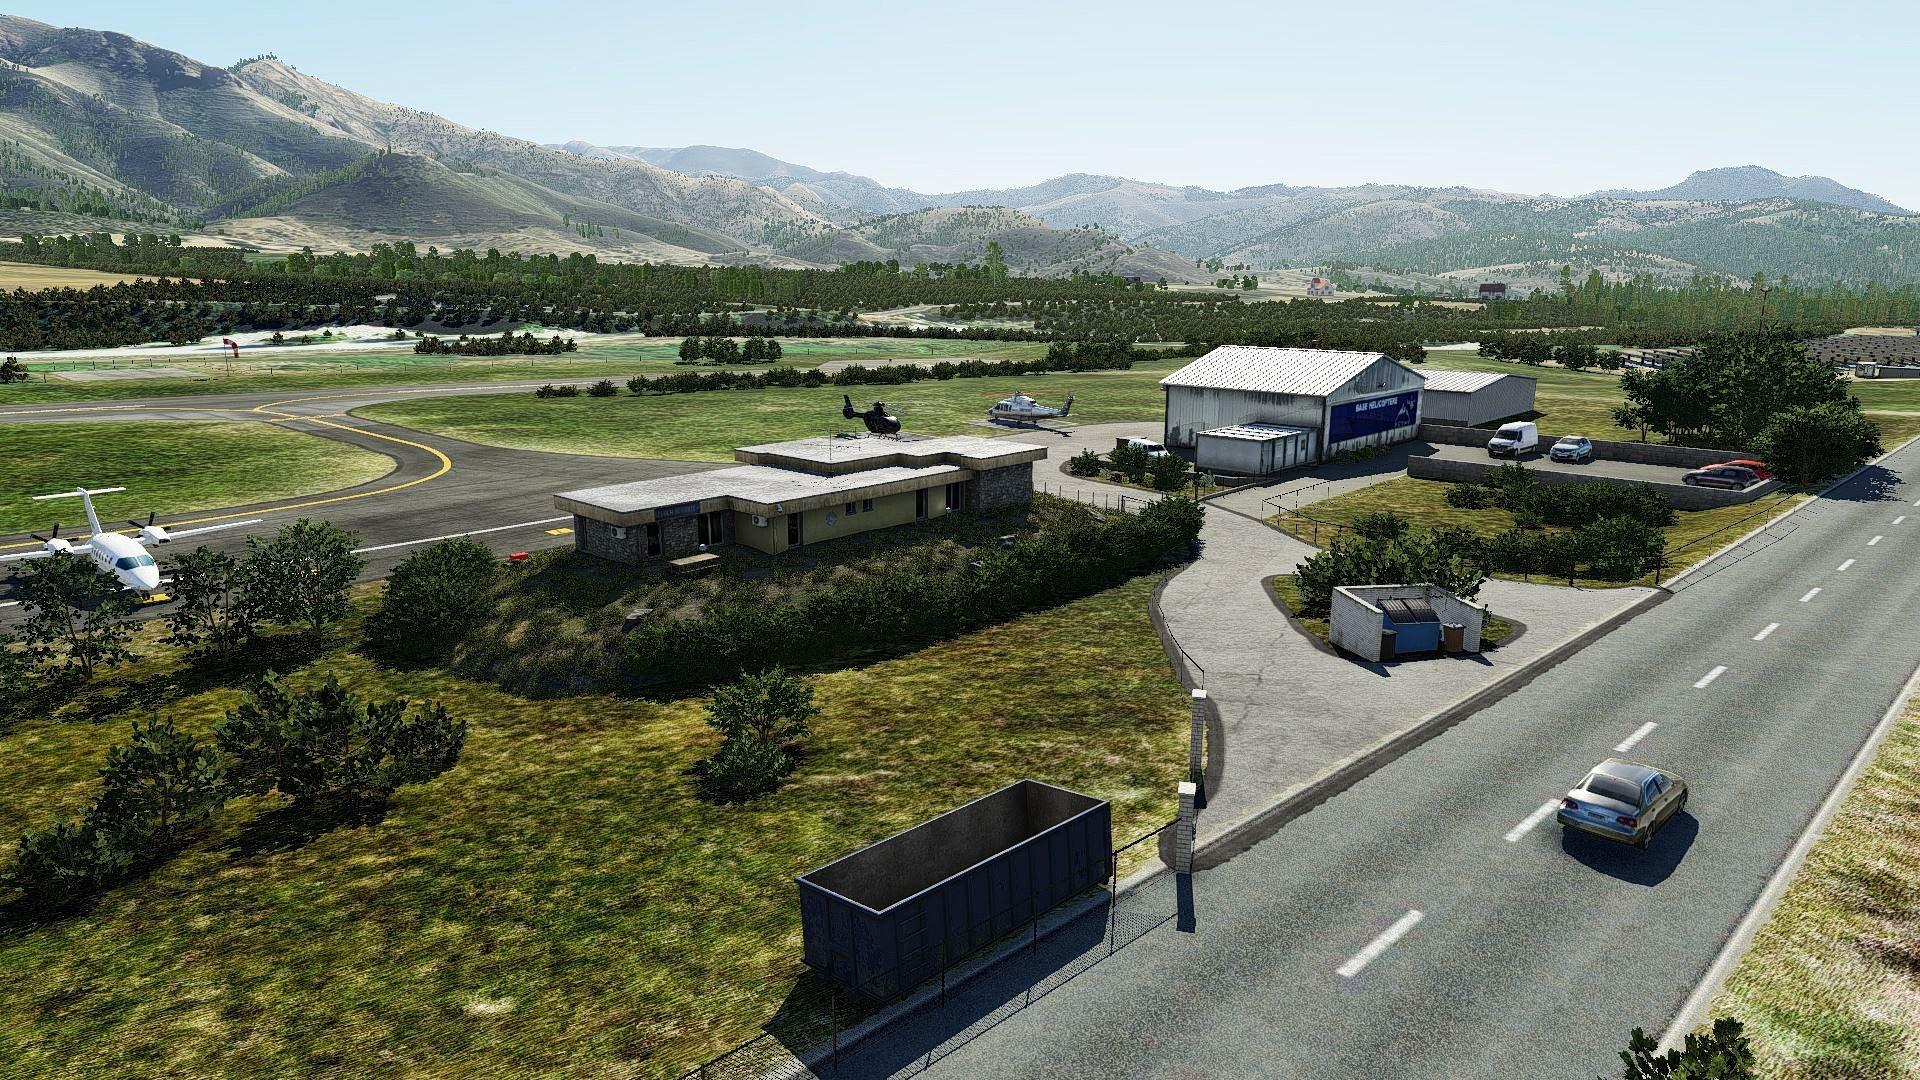
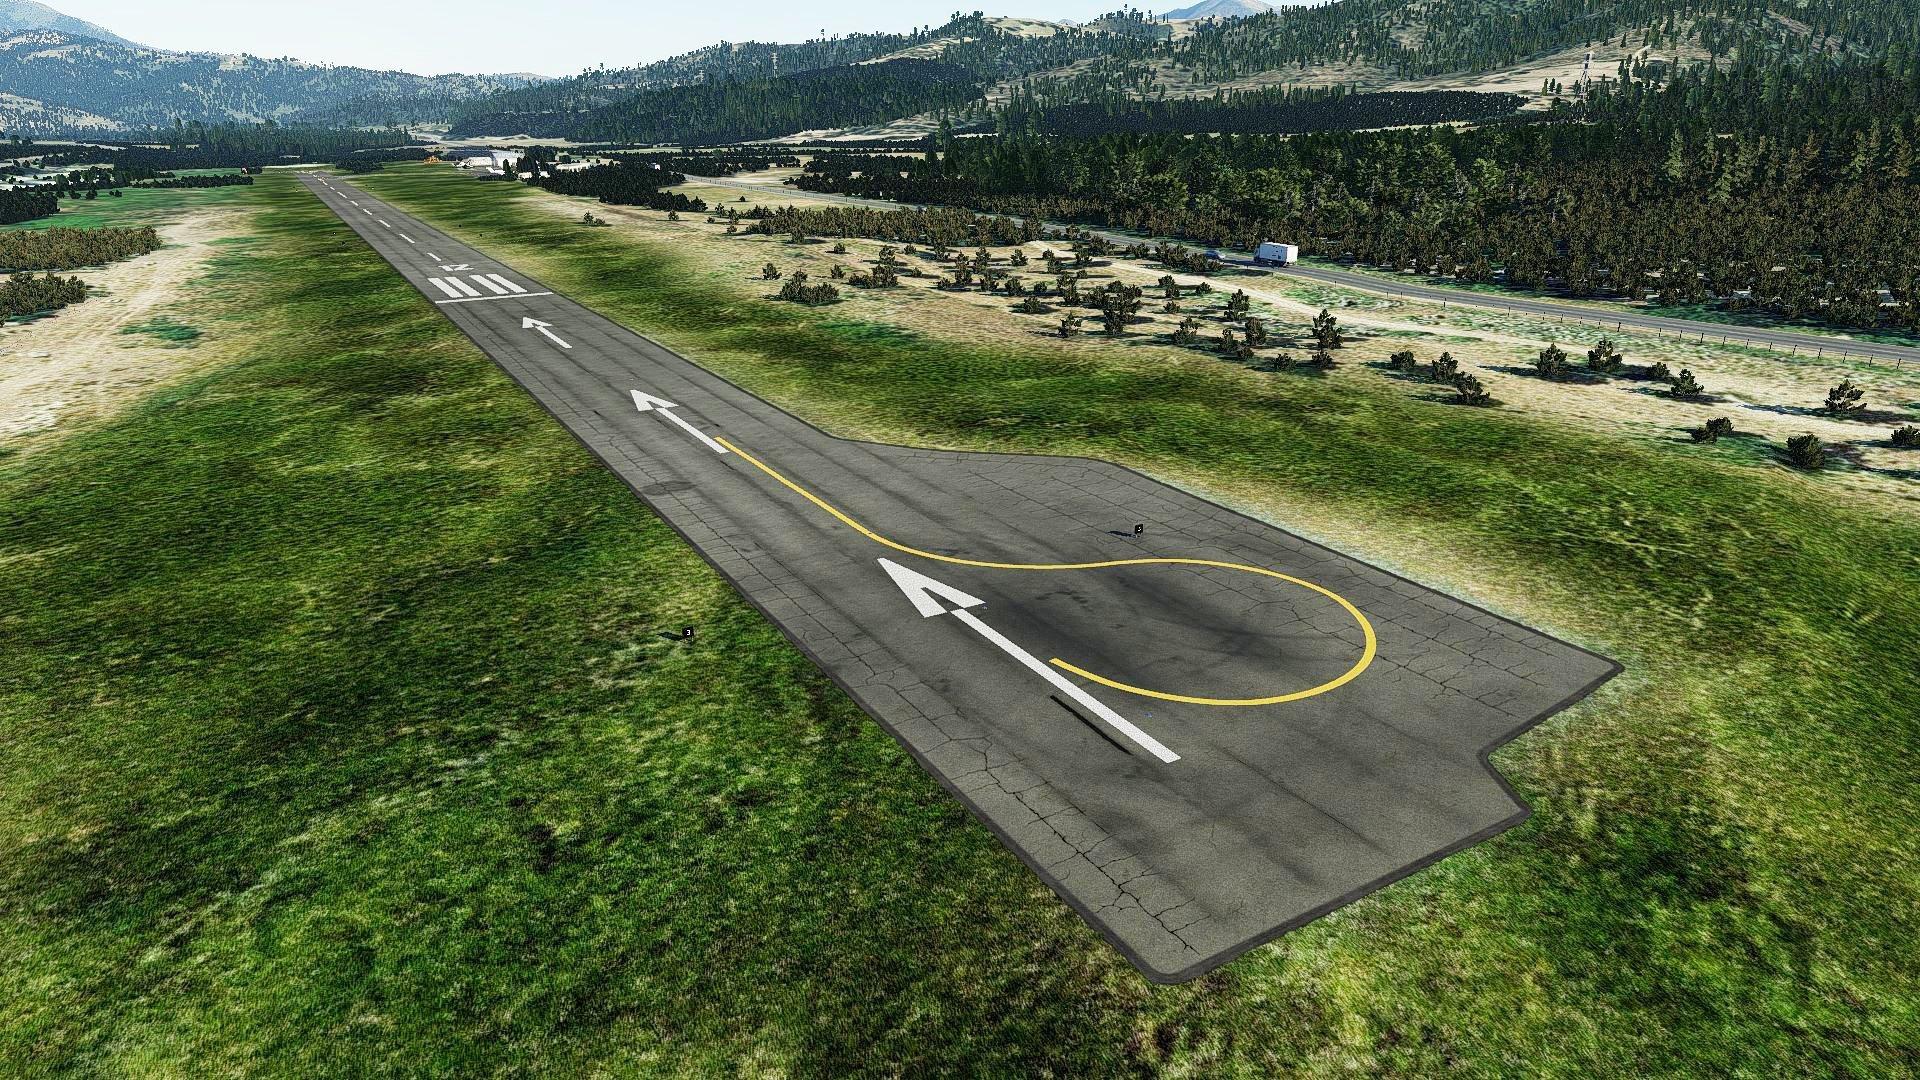

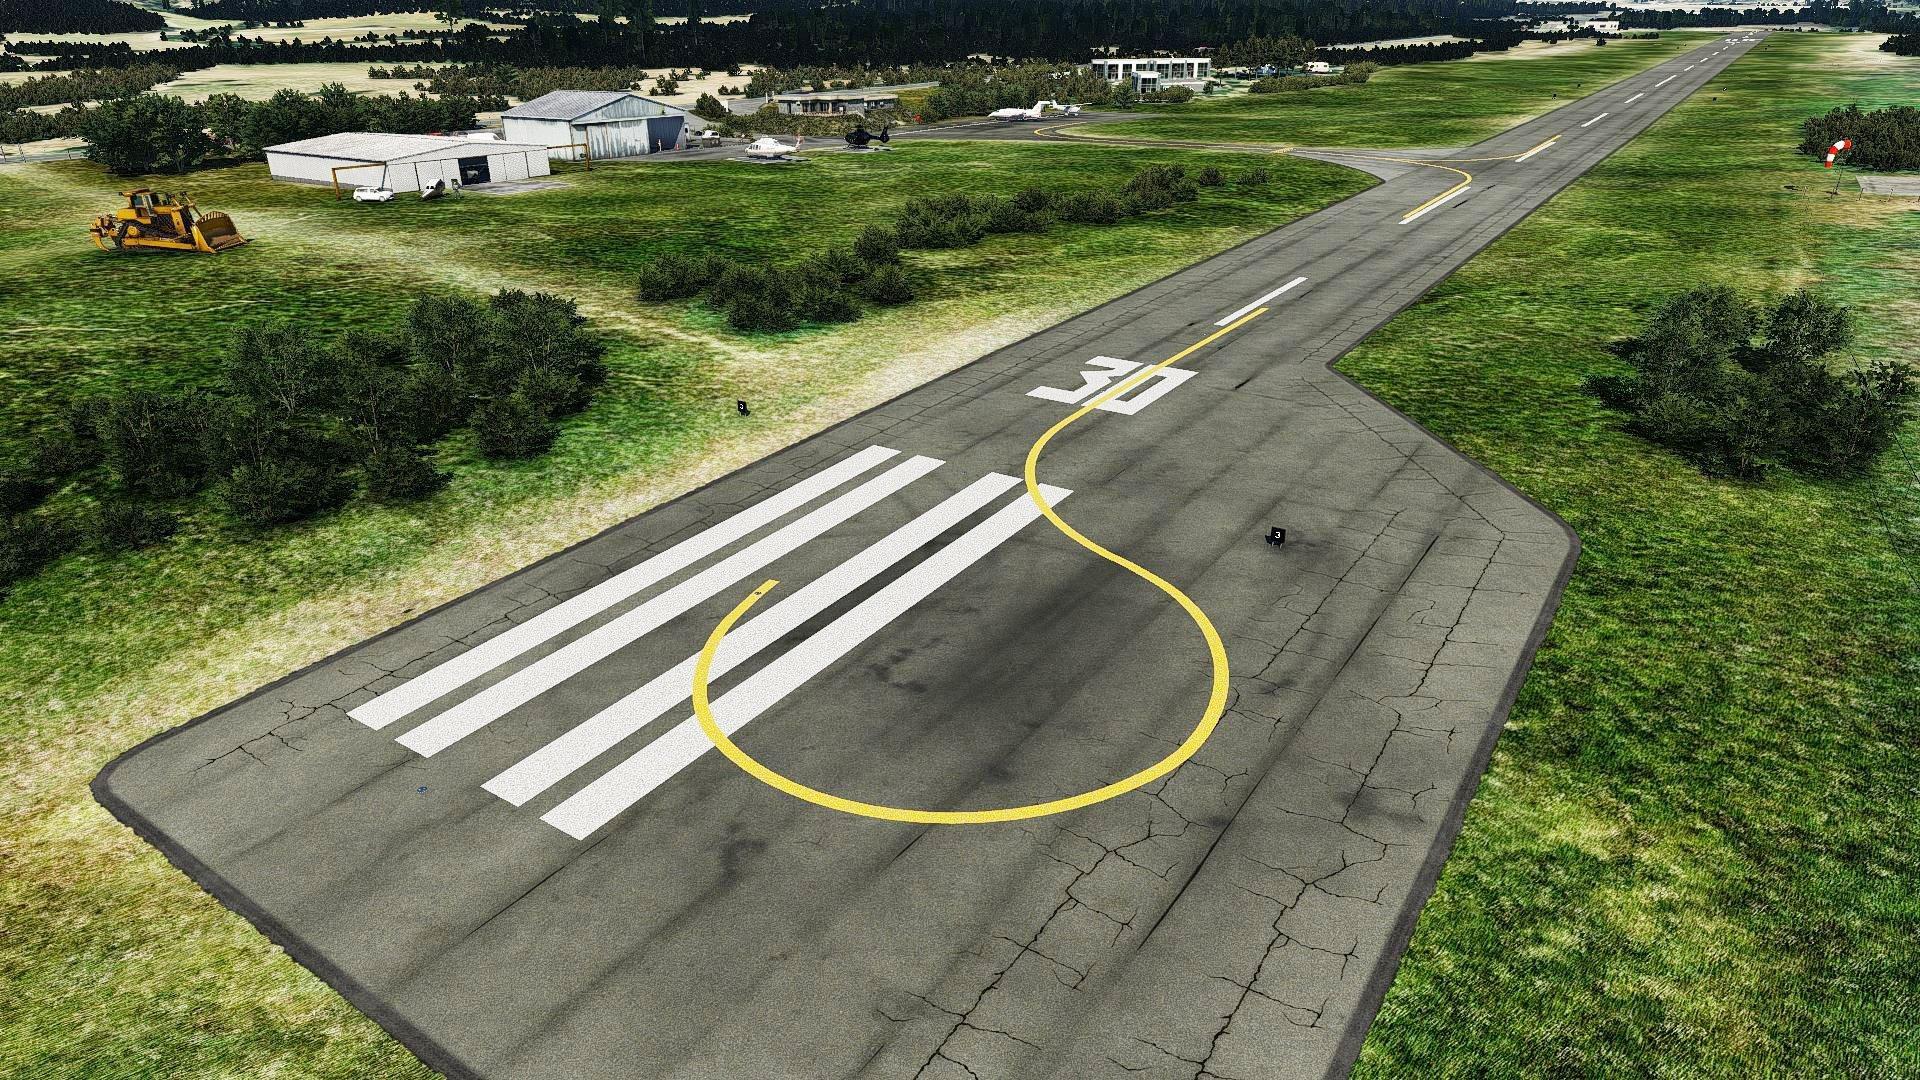
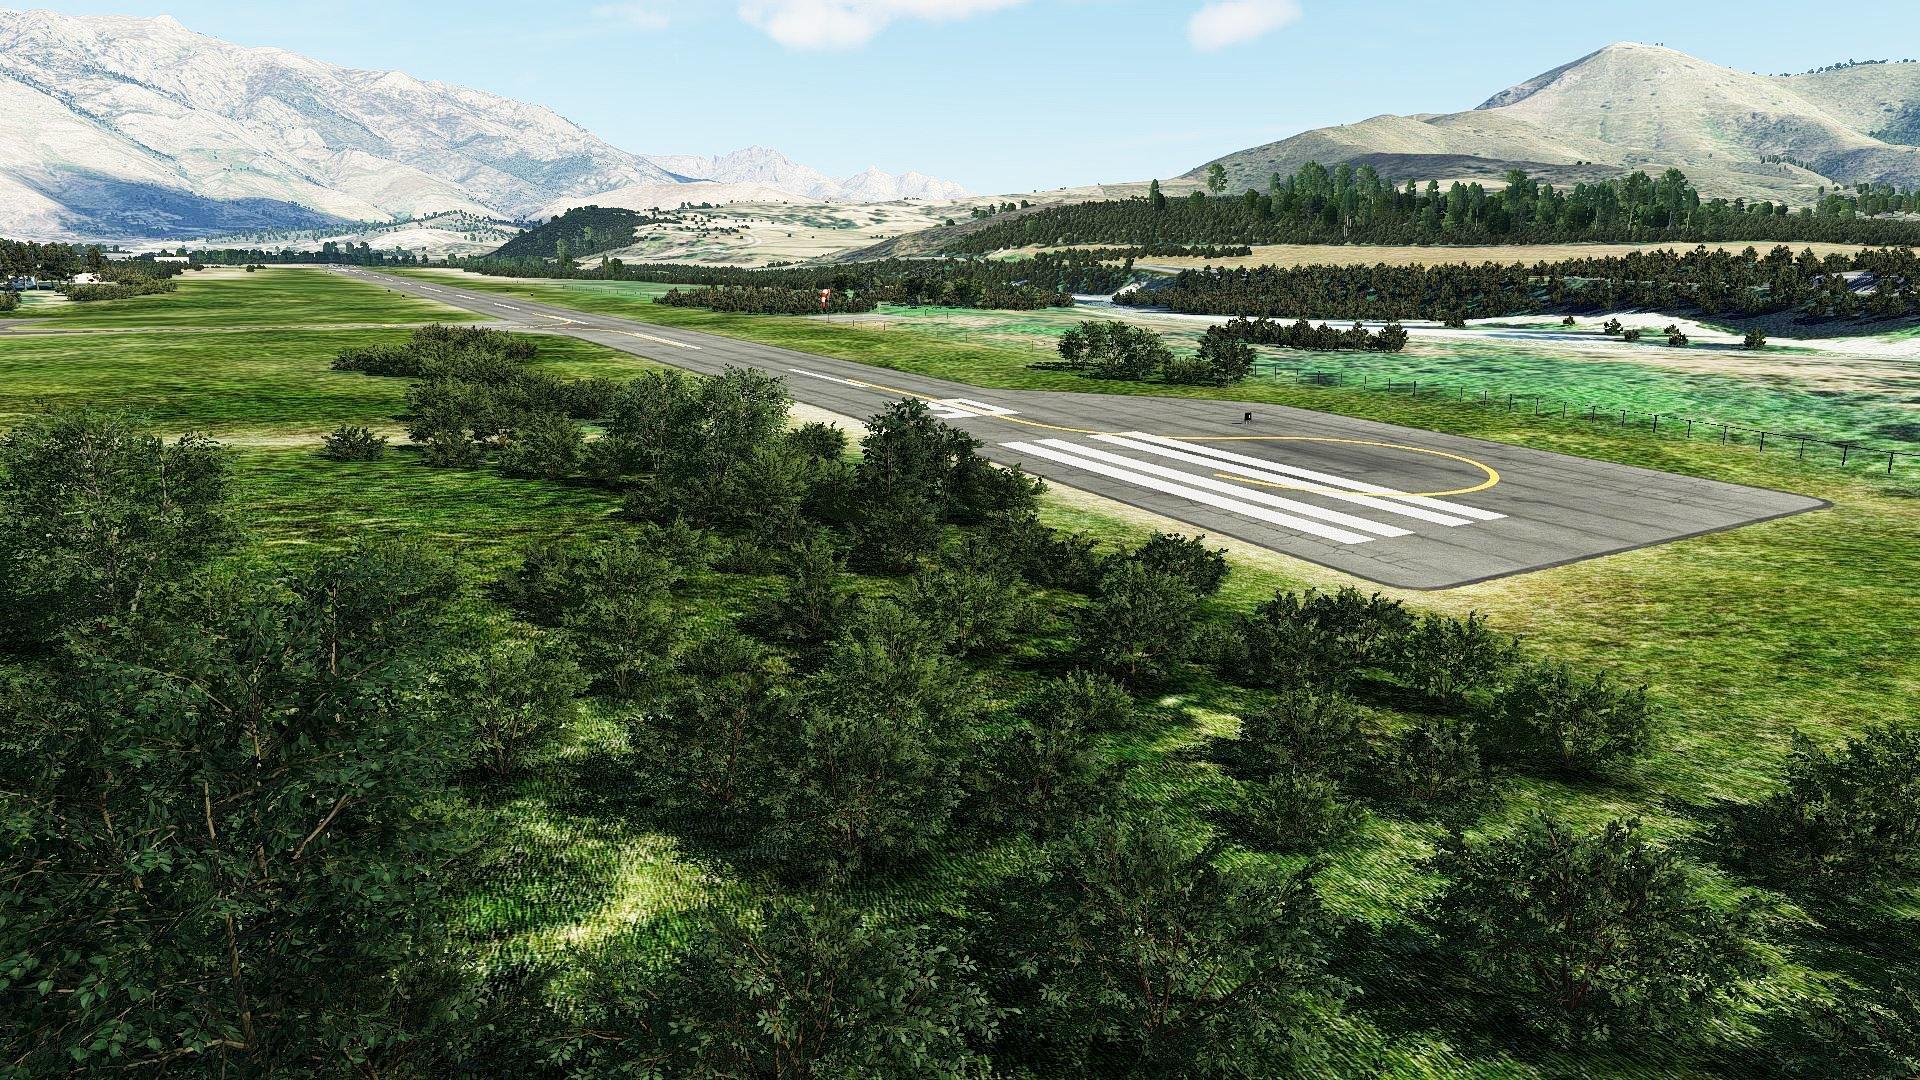
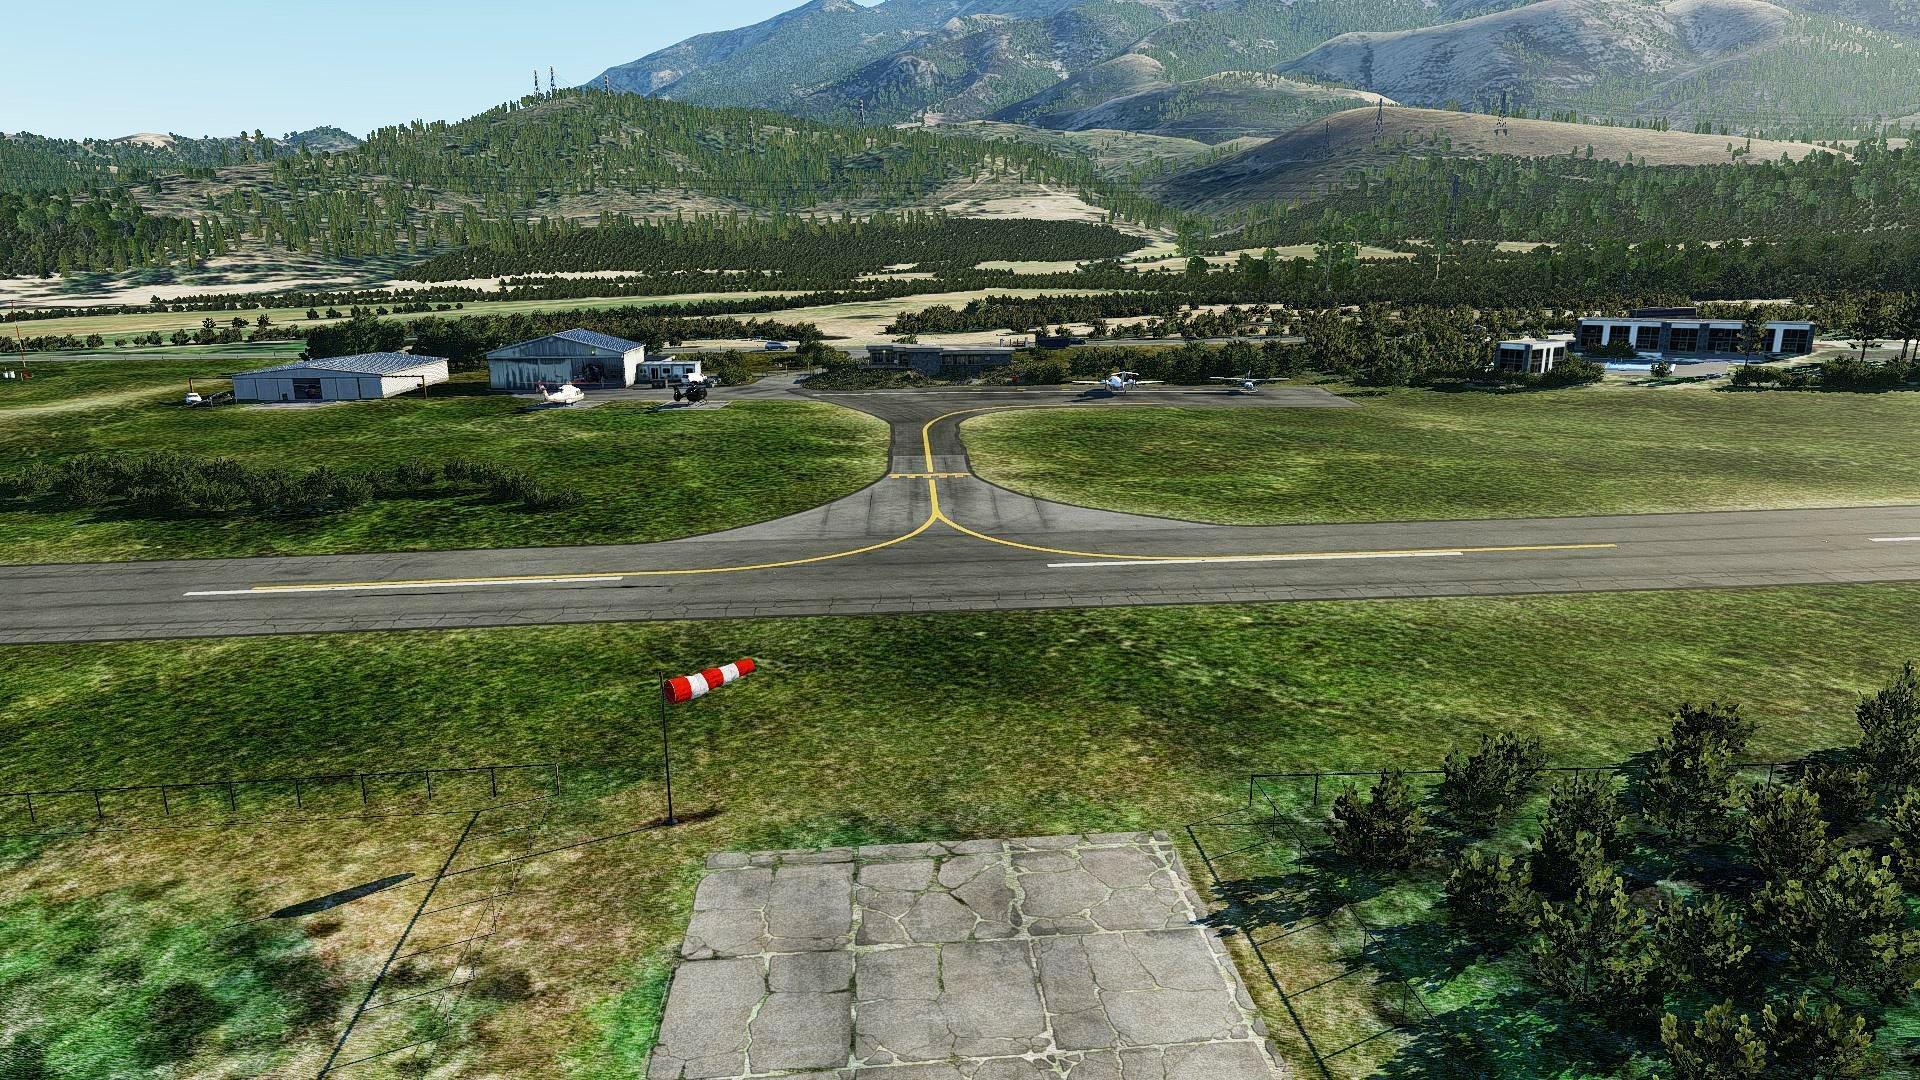
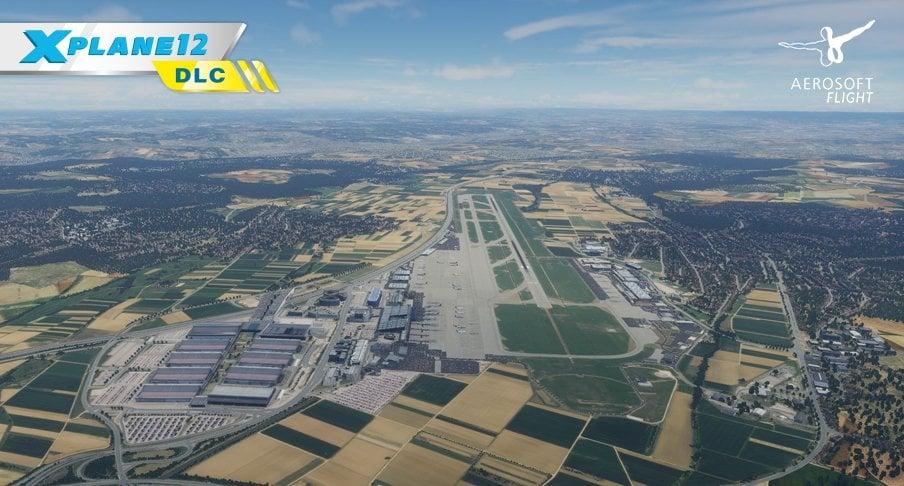
.jpg.90d1f1181a45f051b534a87b9393f2d7.jpg)
.jpg.f4441a893ca405d4ba73f1da173a2b3e.jpg)
.jpg.11a787e99407b1e39e103aab0e954460.jpg)
.jpg.6a26524aeb9f26cfee34ba8eff1e7be0.jpg)
.jpg.f8c08dff91b8a25f45d56897c2bc69e3.jpg)
.jpg.d3df0bd55fe4a0645b7df4871c68b1ae.jpg)
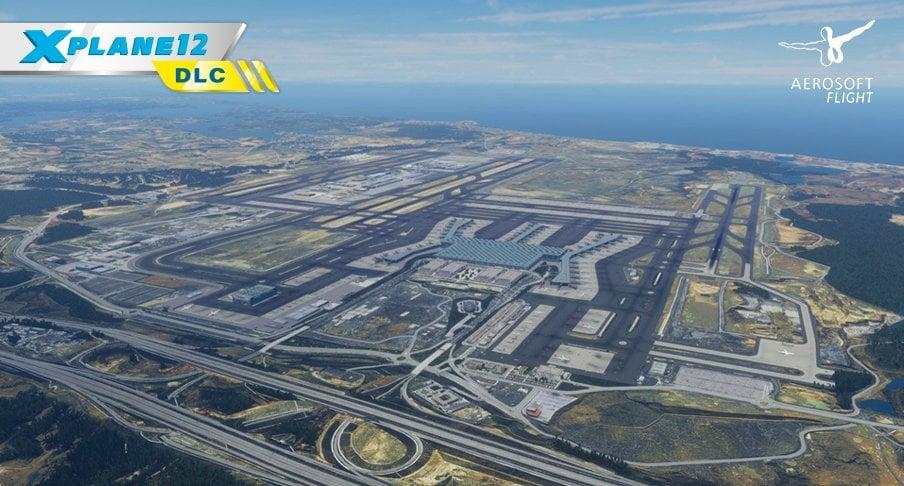
.jpg.fb463466f794d55c10c438211d0e7760.jpg)
.jpg.f9af17744f84b65316f53611f8f07396.jpg)
.jpg.8911c7bed3a8140b643b1c16629dd7d5.jpg)
.jpg.398b951cff0883c8780f63af4bd13561.jpg)
.jpg.f7cc6dd5d904cd2a99c01a8af7b5b6ac.jpg)
.jpg.6f710ab87ec84aed39a4d242200582b4.jpg)
.jpg.38d265acd4129714ce8818eb44f42e2e.jpg)