

Stephen
-
Posts
2734 -
Joined
-
Last visited
-
Days Won
355
Reputation Activity
-

 Stephen got a reaction from Kaminari in Aircraft Review : Alabeo Beechcraft D-17 Staggerwing
When Alabeo release an aircraft it is a bit like meeting Forrest Gump and him offering you something from his box of chocolates “you just don’t know what you are going to get”. There are a few clues though. It is usually highly different. It is usually very Iconic and it is usually very well done but not totally absolutely functional.
Their latest release is the 1930’s aircraft the “Beechcraft D-17 Staggerwing”. and it fill out all the criteria. It is different, It is Ironic, It is very well done and some small things don’t work.
The “Staggerwing” (Meaning the upper and lower wings are “Staggered” to give a better view out of the front windows) was the aircraft of the 1930’s that represented you as a person of high standing. It was well loved by the Hollywood royalty of the period. The sort of same image you will get today by flouting off your new G350 Gulfstream Jet. It stood for “Rich”, “Powerful”... and a global reaching exciting image! - Of course pilots loved the power of the machine as well.
History
Aircraft developer Walter H. Beech and airplane designer T. A. “Ted” Wells at the height of the Great Depression, joined forces to collaborate on a project to produce a large, powerful, and fast cabin biplane built specifically for the business executive. The Beechcraft Model 17, popularly known as the “Staggerwing” was first flown on November 4, 1932. It was not popular at first because of the high cost. Originally it was called the Model 17 with its negative stagger wing configuration (the upper wing staggered behind the lower) and unique shape maximized pilot visibility while negligibly reducing air interference between the wings. The fabric-covered fuselage was created with wood formers and stringers over a welded steel tube frame. Construction was highly complex and it was for its time the most innovated aircraft available with the Staggerwing’s retractable conventional landing gear, which was uncommon at that time that was combined with careful streamlining, light weight, and a powerful radial engine which helped it to perform very well. In mid-1930s, Beech then undertook a major redesign of the aircraft, to create the Model D17 Staggerwing (this Alabeo version). The D-17 featured a lengthened fuselage that improved the aircraft’s handling characteristics by increasing control leverage and the ailerons were relocated to the upper wings, eliminating interference with the flaps. Braking was also improved with a foot-operated brake linked to the rudder pedals.
In the Second World War the D-17 became even more popular as the need for a compact executive-type transport or courier aircraft became apparent, And so in 1942 the United States Army Air Forces ordered the first of 270 Model 17s for service within the United States and overseas as the UC-43. The U.S Navy also bought the aircraft and so did the British RAF and Royal Navy. Since then it has slipped in to fame and notes for its ‘muscular strength and delicate grace,’ and is rated highly for its ‘classic lines and symmetry.’”
Design
Alabeo is a sister studio with Carenado and so they share a lot of design ideas and features. The main feature is that the quality is just as good as the Carenado’s but in a just slightly different form in that usually the form is more of a whole and not as completely constructed as the very highly detailed Carenado’s are, and that is reflected in the lower price and being slightly under US$20. The same quality but with just a slightly different design approach. But still the same of where it really counts.
And so the detailing on the “Staggerwing” is exceptionally good on this beautiful aircraft, It does look and feel slightly bulky because of that huge radial engine at the front. Look inside the cowling and you can see the wonderful air-cooled cylinders. This version uses the 9 cylinder Pratt & Whitney R-985-AN-1 with 450 hp (340 kW) at 2,300 rpm, and only the geared “supercharged” 600hp engine was bigger.
The fine wires on the wings are magnificent as are the smooth wing pylons, although the rear tailplane and elevators look very standard for the period.
The highlight is the construction of the front and tailwheel (retractable) undercarriage. More art than design, Its is beautifully proportioned and detailed. Steel springs and levers and it is what we really love about simulation in the fact that just admiring these items can give you as much pleasure as flying the aircraft. The animation is first rate as well as even the tail-wheel retracts up into the tail which was unusual in this period
Alabeo use the same O (Options) menu panel as Carenado, but there are only three items listed here.
The options are: Transparent Windshield - Instrument Reflections and you can open the - Passenger Door. The door opens but strangely stops between the wires? Very odd.
Panel & Cabin
Aircraft where fitted out inside very differently in the 1930’s. It was either wire and canvas or like this Beechcraft a cross between a luxurious boat or an expensive automobile. Heavy leather and wood trim would sound crazy in today’s world of carbon-fibre and plastic... however the D-17 was created for the “Distinguished Business Gentleman”.
Alabeo have done a discerning job in the fit out of the cabin, with only one outstanding issue... You can’t really see any of the work - It is really black down in there, so dark you can’t even see the yoke never mind the rudder pedals.
You are restricted to using X-Plane’s Night-Vision to really find anything you want to usefully use. Lovely it all is in a sea of green. The Yoke can be positioned on the left or right by flipping it over to the new position, you can remove it completely if you want to as well.
Fumbling around you can find the lighting switches. A lovely thick clicky Ignition selector. A "press" to start the engine button that I really love to use and a great chunky trim wheel... The radio is a standard Bendix King 155A T50.
The dials are recreated vintage with the standard six. Perfect in design and feel. The right side instruments consist of engine dials in RPM, Manifold Pressure, CHT, Amp’s, Carburettor (remember those!), Suction, Temp and Oil/Fuel gauges (LBS) - and a Omni-Bearing Indicator (OBI). As noted you can switch off the glass reflections - But why would you do that? You really feel that 1930’s vibe,
The flap selector is a half metal square ring with three settings and flap use is restricted to under 95knts (110mph).
The panel lighting is gorgeous, I flew the “Staggerwing” in early morning light just adore those creamily lit dials. There is a red light situated high on the central windshield pillar to shine down on the dials at night. This effect turns the panel bloody red and again gives out a lovely feel to the cockpit.
There is the Carenado standard menu C (Camera) for setting “points of view” including the zoom function that is handy and the wing view (left or Right) with belly/tail cam are the highlight view points.
HDR switched on the night-lighting is good with each (retractable) landing light in the wing giving its own light throw. The beacon is also totally realistic in its rotation and reflection. The Bluey/Green and red navigation lights are set out in a pod in front of the lower wing and are very authentic.
Time to Fly
On the lower part of the panel and hidden behind the yoke is a pull handle to lock the rear tail-wheel. To taxi is easy in theory but harder in practice. With the tail-wheel locked you can go straight but only take wide turns with the rudder. Un-lock the tail-wheel and you go around in circles on the same position?... The trick is to use both. I don’t know if this is the correct real way you would control a tail-dragger like this, but you can’t have someone in a simulator to push your tail around to straighten you up on the runway either. And you have to be kind to the brakes as well. Hit the brake and with all that weight on the nose the aircraft will tip up at every touch of the handle - It looks like the aircraft has hiccups all the way to the runway.
Once on the centreline with the tail-wheel locked. The “Staggerwing” is lovely from the word go, You don’t need any flap as you have a huge amount of lift from those double-wings. You can’t lift off to quickly either as you need the speed to get your tail up and straight and the aircraft ready to fly. That huge radial sounds glorious as the sounds are all in 3D. The effects from different angles (certainly in the turns) are excellent.
All that weight helps you and balances the aircraft out to perfection, and so it is a really nice feel in your hands. There are no sudden movements but the best actions are to use slow maneuvers in what you want to do in that to either turn, gain height or simply hold a line to the horizon. One thing I did notice was that you had to get the right line of sight or angle of the aircraft to keep it at a level height. It was very easy to slowly wind downwards the altitude meter if you didn’t keep a close eye on the dial... And it is very hard to keep it there as well without gaining or losing height. The trim works well in this case (but you have to find it to use it).
Concentration is high as you don’t have any aids to carry the workload. So flying even across the state or around and 300nm to 400nm is going to tire you out. I loved those wide turns and the aircraft climbs with ease and power, It is no rocketship by today's standards but it must have felt like one back then - but that is the attraction.
Maximum speed: 212 mph (184 knots, 341 km/h), Cruise speed: 202 mph (176 knots, 325 (km/h), Landing speed: 45 mph (39 knots, 72 km/h)), Range: 582 nm (670 mi, 1,078 km), Service ceiling: 25,000 ft (7,600 m), Rate of climb: 1,500 ft/min (7.6 m/s)
Adjusting the flaps down (remember to drop off a lot of speed first) will only cause a slight bump in the airflow as the speed drops away nicely to slow to your 30-40knts landing phase. The aircraft is as sturdy as a rock in this configuration, nice with turns to the runway and keeping the runway line of sight straight are very easy to do. The drift down while dropping the power will give you an easy landing and for a tail-dragger it will stay pretty straight while tapering off the speed. You will need a lot of tarmac though to run out that speed as touching the brakes is not the thing to do. Just let the D-17 find its own pace to slow down and sink the tail down to a slow speed. Back on the ground you now only have to master the taxi all over again to get back to your parking area.
Liveries
There are Five liveries and the standard default “White”. You can get a little confused with the “White” because there is two of them... The one on the default file and another one in the “Liveries Folder”. The livery version is really Grey not white. The Beige is very white as well and is sponsored by “Gargoyles”... The blue is an “American Embassy” livery based in the United Kingdom. And finally the bright Red and Yellow. Liveries are HD and high quality, and all are excellent and with keeping in with the period.
Conclusions
Alabeo stands for something different and with a quality set at a value price, and that is what you get here. The only mis-match on the aircraft is the door sitting in the wires, the tricky taxiing techniques and that dark cavern of a cabin. Otherwise it is very hard to fault this “Staggerwing” of an aircraft. It is sublime to fly, you feel the aircraft well through the controls and bask in those lovely wide turns. It finds you reaching out for your vintage aviator sun glasses and posing in a suit like Clark Gable or Cary Grant, or if of the fairer sex then Kathleen Hepburn. Stars... Hollywood stars. And this is the aircraft to match theirs and your image.
The Alabeo Beechcraft D-17 “Staggerwing” is available now from the X-Plane.org Store : Staggerwing D17
Price is US$19.95
This Aircraft is available for X-Plane9 and X-Plane10
Documents:
Review By Stephen Dutton
10th September 2013
Alabeo : recommend certain settings for X-Plane 9 and 10... But frame-rate is a not really an issue as the D-17 has a very high frame-rate because of its low footprint.
Developers Site : Alabeo.com
Review System Specifications:
Computer System:
- 2.66 Ghz Intel Core i5 iMac 27”
- 6 Gb 1067 Mhz DDR3
- ATI Radeon HD 4850 512mb
Software:
- Mac OS MountainLion 10.8.2
- X-Plane 10 Global ver 10.22 (final)
- ExtremeSceneryMAXX
Addons
- Saitek x52 Pro system Joystick and Throttle
-
Stephen got a reaction from Kaminari in Aircraft Review : Grumman American AA-5 Traveler by vFlyteAir
Aircraft Review : Grumman American AA-5 Traveler by vFlyteAir
Route : Circuits - KLAL Lakeland Linder, Florida
First thought is "Quick flight and I'll feel out the aircraft". This is the new Grumman American AA-5 Traveler from vFlyeAir and it looks very good from the first time you look over the controls. "Flaps tooo".... but it is a guess because they are electric and they don't have any steps in their ºdegree angle, so the flap setting is noted as a "little bit". Power up and you are off with just a little of asymmetrical thrust from the two-bladed propeller that is easily corrected as taught by the Chuck Yeager School of Flying by applying the right foot a little to the right rudder pedal. Heading down the runway the AA-5 also needed a little push forward of the yoke to keep it level (back pressure) but at rotation I will leave the ground quite nicely... but you didn't really any flap to get off the ground either. As the Traveler will quite easily fly without any extra help and in fact the wing will easily lift you at around 55knts.
Climbing you have the time for a quick glance and a look around at the nice panel. The quality is very good and well above the quality that vFlyteAir has produced in the past. The cockpit is snug but well created and laid out. I have a twiddle of the autopilot switch but it just makes the aircraft just do long slow turns... very odd. I feel the handling and it is quite stable but an adjustment of the trim is always required to find the right level. In fact the trim is your friend in this aircraft and so you use it a lot. A turn (to the right) and the aircraft will slip a bit too easily into a steep degree turn, and if you get it wrong you can also easily drop a lot of altitude. So nice and easy turns with a lot of thought put into the turn is the best option to keep the aircraft in a nice clean turn and at the same height. You soon get used to it and it becomes second nature very quickly.
Holding the flap lever all the way to get to the lowest flap position will drain off the speed but you don't get that power drop too much in the fact you don't need a lot of throttle to counter-act it (The flaps will retract completely however with only one flick of the switch up, which is a great feature). Dropping the height and control is good as well and the aircraft is easy to place above the runway. But the Traveler has a demon in that the wing gives you a lot of "float", I then quickly found myself half way down the runway in no time before a bumpy touch and finally a grip of the tarmac. But that didn't help either as the speed was very slow in winding off, The brakes are useless at this speed as well?
I ended up on the grass past the end of the runway.
Flying Schools note the AA-5 as "to hot to handle" as noted in the manual, as I recommend to read before doing what I didn't do (which is first read the manual!). As you do, the first thing is to try that landing again. I did and the trick is to have full flap (every time) and get that speed down as low as you dare. You will however still float but at least try to get the wheels down on the hard stuff as quickly as you are past the piano keys - as you will need as much runway as can get to rub off the speed and finally get some grip from the brakes.
Well that was a lot of "hair-raising fun". The Traveler looks quite benign, but it was quite interesting to fly. I unhooked the canopy back and took in the fresh air (a fan by the computer) and you felt the freedom of space and air around you. Turns were fun in the fact of the view and openness. The pilot is a bit thin on top and I doubt he would last long like this in an Australian summer. I then pulled the "mixture" back a little to slow the taxi more and you have to be careful not to shut down the engine (That is what the mixture is for as well). but as the engine spluttered a small adjustment was needed and the engine recovered effectively and the effect (and sound) was very authentic.
History
Grumman American AA-5 series is a family of all-metal touring and training 4-seat, light aircraft. The aircraft was originally an American Aviation design that followed on from the success with the AA-1 Yankee Clipper which was a two seater light aircraft in built in 1969. The company then decided to produce a four-seat aircraft, and they started with a new "clean-sheet" design that was designated the American Aviation AA-2 Patriot. The AA-2 design did not meet its performance goals during test-flying and only one was actually ever built.
American Aviation still needed a four-seat aircraft to fill its product line, the company simply enlarged the external and cabin dimensions of the AA-1 Yankee to create the four-seater. This decision capitalized on the marketplace identification of the Yankee and its derivative the AA-1A Trainer and also resulted in 2/3 parts commonality between the two aircraft designs and in that saving development time and production costs.
This new four-place aircraft was named the American Aviation AA-5 Traveler, and was powered by a Lycoming O-320-E2G engine of 150 hp (110 kW). It would carry four people at 121 knots (224 km/h) cruise speed and was certified under US FAR Part 23 conditions. Production of the Traveler had just started in 1971 when American Aviation was sold to Grumman and became the Grumman American division. Grumman continued production of the Traveler and 834 Travelers had been produced when production of this model ceased in 1975. The AA-5B Tiger, AA-5A Cheetah, AG-5B Tiger where all variants of the AA-5 Traveler.
Specifications - Maximum speed: 143 knots (163 mph, 265 km/h) : Range: 686 nm (789 mi, 1,270 km) : Service ceiling: 13,800 ft (4,200 m) : Rate of climb: 850 ft/min (259 m/min)
Closer inspection on the ground reveals a more quality and detailed aircraft than what you expected at first glance. The Yellow (N954NL) default livery is not the best for the lines or detail. The Orange and Brown (N7164L) livery is a better choice. The detailing is excellent. Not quite to the extreme dirtyness and markings of a Careando aircraft, but it is very good and highly detailed with the panels and riveting perfectly recreated. No doubt it was Carenado style detailing that was the aim here and to a large extent vFlyteAir has certainly succeeded. Of any aircraft the Traveler is closest to is the Carenado Mooney in its application and feel, but without the ripped mats and really oily dirtyness of the Carenado machine. The wheels and undercarriage are very well done with excellent detail on the braking system (you can see the pads work). The front wheel on the real AA-5 does not turn (you use the brakes on the rear wheels) but here the Xplane feature is used. A luggage hatch can be opened with a switch on the panel with a case inside.
There are three menus : One a "Camera" Icon "View Selector" on the lower left of your screen that gives you seven interior views and eight exterior views. Two menus are also situated in the centre of the panel in vrefs and a checklist. The GPS unit can be seen or hidden, and basically it is a Garmin GN460 display set in a Garmin GPSplus housing. Opening the roof is above you via a handle that can reveal and a nice interior and great stitched leather seats. noted are the well created seat belts and headphones.
KY 97A TO50
When starting the Traveler from cold the first thing you are asked to do is pull the yoke pin. (if you start the aircraft with the key it will disappear here as well)
The standard six (Artificial Horizon, Altimeter, Airspeed, Heading, Compass and Vertical speed) are added by 5 more in the - Course, Bank turn, RPM and Temperature (EGT/CHT) and OBS - Omni Bearing Selector (VOR). A KMA 20 T50 COMM radio is set in the top of the panel. Lower down far left is the (turn) key and starter and master power switches (red). left lower panel is lighting and fuel pump switches with in the center Carb heat (carburettor), Throttle, Mixture and Primer sliders. Fuel tank selection is directly below. All panel detailing is excellent and even the vents move.
Equipment stack is well created with chrome (metal) panels. and includes a KY 97A T50 Comm radio, King KX170B COMM (1) - NAV 1 (VOR 1) The Nav 1 setting can be used as a VOR 2 unit and you can switch between the two types (tracker) of frequencies on the panel and for use with the OBS. Also there is a KR85 TSO ADF unit and a King T76A Transponder.
Noted also is an AMP, Oil Temp, Oil Pressure and Fuel Pressure gauges. On the right side of the panel is a glovebox that can be opened.
A quick start via switching on the key (swings like a Careando key) and pressing the starter (mixture slider in and fuel pumps on) and I'm off to the runway again.
My reason for the flight was in how to get the Autopilot working?
Oddly enough the Autopilot is on the bank/turn indicator... the left (magenta) knob is the heading (pull out) and the right is knob (green ) is the pitch. It is an odd arrangement in that you pull the knob and then turn the knob to change the heading but really it just turns the aircraft right or left. You can't set a heading, but just flow over to the point of the direction you want to go and then turn the knob back the other way to head in that direction. It is not very exact and a bit vague, but works. On the pitch it a bit more easier in that you can adjust in about 5º increments up or down and it is more effective. Turn the AP off on the center panel and you have control again.
Liveries
You have 1 White and 9 liveries... all are noted by their Registration Numbers and N5494L is the default.
They are all very good in quality but not spectacular or that anything really stands out in design. But you do cover mostly the UK and US registrations.
Aircraft Lighting
The panel lighting is very good with HDR on, there is an adjustment for backlighting the dials and a red glow over the panel.
A great feature is the adjustable light that can be used towards the panel or over your maps. The switch is two way with a rear dome/spot light as well.
Outside lighting gives you nice navigation lights and a strong landing light. However the beacon is far to overbright and so is the strobe effect. Sitting in the cockpit is like flying around a lighthouse!
Conclusions
No doubt is that vFlyteAir has come up with the goods, vFlyteAir are known for their micro light aircraft that were fun to fly and were also quite good in their designs and features. AA-5 is however a totally different direction and feel for vFlyteAir, and if you are accustomed to their earlier aircraft then the Traveler will come as a bit of a surprise. This is certainly a far more rounded aircraft from vFlyteAir and get in closer and the detail is really excellent. More clever liveries would have helped here as most look quite bland. the detail work on the liveries is however very good. Sounds are excellent all round from start up to shutdown, the noise rises as you open the canopy and that gives you that great open - wind in you hair feeling with the engine noise. vFlyteAir has also captured the Travelers unusual flying abilities and strange wing-lift behaviour. It is unusual to fly (certainly on landing) and you have to adapt to it... Again in many respects it is like the Mooney in that way in it behaves and looks. Frame rate is fine but it is a huge download of 459.80mb and expands to the same 459.80mb when placed in your General Aviation folder.
The Grumman American AA-5 Traveler is very good all round and an interesting change of direction aircraft from vFlyteAir. The AA-5 Traveler comes with good strong features and which is enjoyable to use and fly.
Yes! the Grumman American AA-5 Traveler is now Available from the X-Plane.OrgShop : Grumman American AA-5 Traveler
Price is US$26.95
Documents :
Developer Site : vFlyteAir
Review By Stephen Dutton
14th December 2013
©copyright 2013 : Stephen Dutton
Technical Requirements
Window Vista or Windows 7 (32 or 64 bits) or MAC OS 10.3.9 (or higher) or Linux
X-Plane 10.20 (or higher - 64 bit compatible)
Multi- Core 2 GHz - 4GB RAM/1GB VRAM- 500MB available hard disk space
Version 1.0 (last updated November 14th 2013)
Review System Specifications:
Computer System:
- 2.66 Ghz Intel Core i5 iMac 27”
- 6 Gb 1067 Mhz DDR3
- ATI Radeon HD 4850 512mb
Software:
- Mac OS Mavericks 10.9
- X-Plane 10 Global ver 10.25 (final)
Addons
- Saitek x52 Pro system Joystick and Throttle
- Rena desk Fan
Scenery
- KLAL - Lakeland Linder Regional Airport 1.3 - Drankum (personal items have been added)
-
Stephen got a reaction from Kaminari in Aircraft Review : Sikorsky SH-3 Sea King (S-61) by Virtavia and Dawson Design
Aircraft Review : Sikorsky SH-3 Sea King (S-61) by Virtavia and Dawson Design
Route : RAF Valley (EGOV) to Caernarfon Airport (EGCK) to Liverpool John Lennon Airport (EGGP) to RAF Valley
Introduction
In the 1960's or 70's the Sikorsky SH-3 Sea King was everywhere. You couldn't miss it. If it wasn't fighting in Vietnam it was pulling someone off the side of a mountain or out of the sea. Or more famously it plucked the returning moon astronauts out of the South Pacific or the aircraft flew the current American President around the country as "Marine One". In tactical roles it flew from ships to search out Cold War foes and was unbeatable in Anti-Submarine warfare (ASW). It was a major asset in the Falklands War, The first Gulf War and the Balkan war - and one Sea King had also the option of being outfitted to deploy the B57 nuclear bomb!
It's main roles were more mundane however, ship to ship supply, SAR (Search and Rescue) and Coast Guard duties. But one thing was sure, It was a significant contribution to aviation. Ask anyone to name a helicopter, any helicopter and the answer will usually be either... "The Huey" or "The Sea King"
The Sea King was a considerable advancement over previous helicopters because of its twin-turboshaft powerplant layout, which gave the gave the SH-3 a heavier payload capacity and a high level of reliability far in excess of previous anti-submarine helicopters. The S-61 is a Cold War creation as the Soviet Navy had elected to construct a large fleet of over 200 submarines, the US Navy then chose to counter this threat by investing in newer and increasingly capable ASW technologies and platforms. Sea Kings operating in the anti-submarine capacity typically had a four man crew; a pilot and copilot in the cockpit and two aircrew in the cabin area to operate and monitor the aircraft's detection equipment and to interpret the sensor data; the two rear aircrew were retained in other mission roles such as cargo transfer and rescue operations. The cabin can accommodate up to 22 survivors or nine stretchers in addition to two medical officers in a SAR capacity; up to 28 soldiers can be accommodated when operated as a troop transport.
The The first prototype took flight for the first time in March 1959, and carrier suitability trials were conducted on board the USS Lake Champlain; the trials were completed successfully in mid-1961. Production deliveries of the HSS-2 (later designated SH-3A) to the US Navy began in September 1961, these initial production aircraft were each powered by a pair of General Electric T58 turboshaft engines. In late 1961 and early 1962, a modified U.S. Navy HSS-2 Sea King was used to break the FAI 3 km, 100 km, 500 km and 1000 km helicopter speed records. This series of flights culminated on 5 February 1962 with the HSS-2 setting an absolute helicopter speed record of 210.6 mph. This record was broken by a modified Sud Super Frelon helicopter on 23 July 1963 with a speed of 217.7 mph.
Sikorsky also developed a variant of the Sea King for the civil market, designated Sikorsky S-61L. The first operator of the S-61L was Los Angeles Airways, who then introduced them to service on 11 March 1962. Another variant with a conventional hull, the Sikorsky S-61R, was also concurrently developed for transport and search and rescue (SAR) duties, and it was this type was that was extensively operated by the U.S. Air Force and the U.S. Coast Guard. Considering the success of the S-61 program, Sikorsky stopped production of the aircraft in the 70's to focus on the Sikorsky UH-60 Black Hawk.
But the Sea King story didn't slip away into history there. The British who saw a good aircraft when there was one, then licensed the design and redesigned the S-61 into the - Westland WS-61 Sea King.
Westland by integrating a significant proportion of components from British suppliers, and with key changes include the use of a pair of Rolls-Royce Gnome turboshaft engines and the implementation of an automatic flight control system made it a formidable aircraft. And the Westland's Sea King despite outward appearances is a very different aircraft from the original Sikorsky design. The first Westland-built helicopter, Sea King HAS1 first flew on 7 May 1969 at Yeovil. This aircraft was produced 1969–1995 and 344 aircraft were built. WS-61 Sea King still remains in operation in Britain, as well as multiple export customers (some under license) to: Germany, Norway, Egypt and India.
The aircraft has been highly successful in the Westland guises, it has performed in many different roles and with all branches of the British Services, notably with the Royal Navy and SAR. The Royal Navy also created a extensively modified variant called the "Westland Commando". The Commando (Sea King HC4) had capacity for up to 28 fully equipped troops and had originally been developed to meet an Egyptian Air Force requirement. It first flew on 26 September 1979, and has an operational range of up to 600 nautical miles without refuelling. Highly successful In British service, the Sea King HC4 was deployed on operations in the Falklands, the Balkans, both Gulf Wars, Sierra Leone, Lebanon and Afghanistan and 330 Sea Kings were built. Exports to the Indian Naval Air Arm, the German Navy, the Royal Australian Navy, and the Royal Norwegian Air Force were also highly successful.
(Specifications are for the Westland HAS 5) Maximum speed: 129 mph (112 knots, 208 km/h) (max cruise at sea level) : Range: 764 mi (664 nmi, 1,230 km) : Rate of climb: 2,020 ft/min (10.3 m/s) : Powerplant : 2 × Rolls-Royce Gnome H1400-2 turboshafts, 1,660 shp (1,238 kW) each.
Dawson Design and Virtavia and Installation
Virtavia produced the Sikorsky SH-3 Sea King (S-61) for the FSX/P3D market. But after the successful redesign of the Globemaster C-17 from Dawson Designs, the Sea King was chosen as the next conversion. There are many improvements for X-Plane over the FSX/P3D version that includes autopilot, hover control, working winch with winchman figure and rebuilt main and tail rotor heads, Higher graded textures, X-Plane 10 HDR lighting and the DreamEngine 3d Sound and many other new features.
Installation is to unzip to your upload file (326.80mb) to your Aircraft/Helicopter folder (full size file 620.70mb). To note there are two different Aircraft versions in the Standard SH-3 and the Commando version.
You can also map your joystick buttons for use in the "Hover" mode AFCC and activation (recommended). Included is a manual (24 Pages) and full checklist (3 Pages).
First Impressions
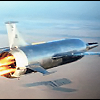
The Sea King is an iconic design, There are nine variations included in this series, the default version is the Royal Airforce HAR Mk3 in "Rescue Yellow". It is a five bladed design (Tail rotor is also five bladed) that was later upgraded to the "Carson" composite blades. First to note is the External Power (GPU) unit that is typical of what the RAF use. A switch on the OHP (Over Head Panel) or the menu selection will deploy the unit connected to the aircraft.
Externally the Virtavia design work is excellent. With excellent textures (updated by DD) and excellent features of the winch (and belly hook) radar domes and other major external fittings. One highlight is the bubble windows that protrude from the rear aircraft fuselage that are excellent in their design and glass reflection, notable also is all the excellent cockpit glass with the green overhead panels. Many of the variants also have different equipment attached from Flir cameras to flares and low flying-aids. The main fuselage door opens via the menu (or key shift-F2) to reveal the winchman.
Split left side is the crew hatch (door) that is also key switchable (shift-F1). Fuselage detail is enhanced by the excellent panel work (rivets) and detailing and aerials (including wire aerials). The Sea Kings wheel pontoons are expertly created with the (retractable) undercarriage, support legs and arms are perfect as are the wheels and tyres. In the variants (via the liveries) you can choose to have the huge FOD or Engine Advanced Protection System (EAPS) boxes in front of the engine intakes or not. Foreign Object Damage is icing, snow, dust, salt spray, sand, debris and hot gas ingestion (HGI) that can cause problems when flying at extreme low altitudes or in the hover mode.
The main rotors and the tail rotors and their linkages are the heart of any helicopter design. These have been totally reworked for the (finicky) X-Plane users. Get this part wrong and you can say to your credentials goodbye. Dawson Design's is however one of the best in the business. and the rotor head construction is first class craftmanship... so fully detailed, and you can move your controls to see the perfect movement of all the links and pieces.
Up the built in ladder and into the cabin and the S-61has and does give you a military machine feeling. I have been in a real S-61 many times and to a point the cabin shows its 1960's heritage. They are more basic in design than you come to expect today (The UH-60 is very basic as well with exposed wiring and pop-riveted panels. No composite in sight). The panel and OHP layout is exceptional and very functional (but again quite basic). All the detailing is first rate. The seats are metal piping with canvas packs and the pedestal is built up of metal paneling.
Rearwards it is mixture of SAR and ASW in the fit-out. SAR in liferafts, canvas seating and a stretcher, brightly coloured oxygen and fire bottles and the ASW in a operators post (cubicle) and (boxy) equipment racks.
You notice the lower texture quality in the rear and if your render setting are set low, then ASW post and equipment racks and the rear cabin matted walls are a little more fuzzy than the rest of the aircraft. Set in "too Much" in the render settings then it is not to bad. but the art and detail is quite basic but still authentic.
There are no problems however where it really counts, which is the main aircraft panel, OHP and the pedestal. All instruments and gauges are crystal clear and highly detailed. Knobs and switch gear is perfect and only a very few are not operational. The main panel consists of the engine dials (centre), warning lights (caution panel), Nav-aids (very few), fire/DC test and the pilots instruments (Radar Altitude, Altitude, Speed, Artifical horizon, compass rose/course, RPM, climb in feet, clock and engine torque) the last dial (hover gauge) I'll come back to later.
The pedestal is dominated by a huge green radar screen that has been converted to the standard Xplane map function. It is very realistic and the screen controls are set out below. Radios are very basic in VOR 1, ADF and COMMS1. Having the VOR 1 is a bit of a non-event in a non-ILS equipped aircraft. At least with VOR 2 you can use it for navigation, and to a point you still can as you can set the higher frequencies into the radio set and you do at least get a distance to the VOR. But you would think an SAR aircraft would be better equipped. and the ADF will give a direction to a nav-aid.
The other notable panel on the pedestal is the Automatic Flight Control System (AFCS) that can hover the aircraft at a set height and give you a flight pattern into and out of the "Hover mode", We will demonstrate this feature later.
Centre of the main panel is the Fuel gauges that are easily set with a pop-out fuel panel. Just use the slider to quickly set the correct fuel load.... nothing can be easier. Twin sets of gauges show the engines RPM (percent), Exh (Exhaust) temp, Oil pressure (psi), Oil Temp, Transmission (gearbox) pressure/temp and Hydaulic pressure.
So the aircraft is not complex to use and to operate, of which would be a surprise in that you would really expect the opposite in such a large machine... Take starting the engines for example.
All the main engine and lighting controls are set out on the OHP (Over Head Panel). The manual is good at noting the switch gear and dials, but there is no start up instructions. Print out the checklist a that is all you really need. most of the checklist is testing lights and functions of the aircraft. To start you first need the EXT power (red ring centre) or the APU running (Pedestal). You can use either system. Then switch on the "Master" and then the "Battery". Nothing really works until the "Battery" switch is thrown, then you can set the panel lighting via four knobs (excellent). Set the two Ignition switches to on (purple circle) and the two "Firewall fuel Valve" switches (on main centre panel) to on.
Start the beacon, anti-collision lights and the POS (nav) lights, pull off the Rotor brake (side/green arrow) and if you and the crew are all ready then start Eng 1 by pulling the main throttle/cutoff lever to GND idle (first position). With that last action the turbine above you stirs and the whine and start-up procedure gets into action mode. The dials come to life and then start Eng 2 by just pulling down the second lever to the GND idle position. Soon the gauges will show you your torque, temps....... Click the switch to hide the GPU and switch on the generators (1&2) and your ready for flight.
At this point you will need some paracetamol, The noise is deafing inside (but far quieter outside?) and we are still sitting at idle. This is a good point to use the "Menu" system.
The "menu" is situated on the main panel by the pilots instruments. It is a similar circular concept of what is in the AS350. You can select Liveries, views (inside and outside), Stability (It is set at 50%), (Sound) volume, FOV (zoom) and extras that can open the main/cockpit doors and switch on/off the outside GPU. (The action to swivel the large ASAC Radome should be here as well, but it isn't?)
Flying The Sea King S-61
Pull both throttle levers right down to the bottom and 100% of power and wait while the engines scream louder and settle. Like starting the Sea King. Flying it is just as easy!
The side thrust from the rear rotor is not very strong at all and with a pull of the collective and a slight rudder correction and you are very easily airborne. Pulling away with more collective grip the Sea King will easily move to a direct flight angle. low and fast is the best way to fly helicopters and the Sea King certainly does not disappoint.
For the purists they wouldn't like the Sea King. They like nervy, edgy machines and that is nothing like the S-61. It may be its weight factor and you can in the menu adjust the feeling to a more harder flying machine. But overall it is almost too easy to fly at the 50% setting. Don't get me wrong in that for the rest of us the Sea King is an open door to helicopter flying in all its forms. Anyone can really fly this helicopter and get so much in return in flying it around the area. I still recommend a good joystick and more importantly a throttle system set in reverse on the "Collective" setting to control the machine well.
My route from RAF Valley was to collect a injured person from EGCK (Caernarfon) which is only a very short ride over Anglesea. North Wales. Then fly him to Liverpool Airport (EGGP) just up the coast. 2000ft is enough to enjoy the scenery without running into it. The Sea King is very quickly up to a cruise speed of 130knts and the scenery is flashing quickly under me, reducing speed and landing is an art form, the hardest is the transition from forward flight to the hover mode or vice versa (called translational lift), the hardest of all is just stopping the aircraft from going forward... rule No.1 - The brakes don't work 50ft up off the ground!.... It is an art to get the process right. But the Sea King is very kind to you in all these areas. It will easily run off speed with a lift of the nose, and an easy balance between the collective and the cyclic (the stick between your legs) will easily help you put the aircraft down right (in my case in the centre of the runway) of were you want to land.
The rules of flying helicopters still applies, so if you are totally inept then you will still crash. But the Sea King is far kinder than most I have flown. As a learning tool it is exceptionally very good. But most of all it is good just to fly without all the sweat and tears that can accommodate most flying in this genre. It is just good genuine fun of an aircraft to fly.
Leaving EGCK I head north to EGGP, 2000ft is again my choice, It is very noisy and after a while even tiring over a distance. There are no pilot-aids, Your only aid is to find a comfortable grip on the cyclic/joystick and try to keep the aircraft as smooth as possible, and that is far harder than it looks. For ten minutes or so you are fine and then you are then slowly drifting up or down as your arm or wrist tires. You become obsessed with the rate of "Climb/Descend" (arrowed) instrument to keep the aircraft level. it is easy to do, but you keep tiring yourself out over a period of time. There are Pitch/Roll/Yaw Stability switches on the pilots side panel that helps. Landing was a breeze of coming into the hover and a slight move to the right to land on a blocked off taxiway.
Departure back to RAF Valley was just before dawn the next morning, You have a main cabin light on the rear bulkhead to bathe the cabin with a bright light, that is perfect solution for setting the aircraft up in the early light. In the dark the instruments show the great lighting and detail of the pedestal and the switches by the pilots right armrest have the cargo switch, audio switches and stability switches.
The bulkhead light can be switched to red as well. This bathes the cockpit in a red glow for night flying, both lighting modes look excellent. There is a main cabin light. but I couldn't find any lighting for the rear cabin? Above the main panel are two spot lights that can switched on to illuminate the centre of the panel (one light really)
The external lighting is very flexible. Standard Nav (pos) lights,Beacon and Anti-collision on the tail and under the hull. On the collective are two switches for three lighting functions 1) "Master-On /Retract-Off" will give you two main landing beams. 2) "Hover LT" will give you a single large light aimed downwards, "Flood LT" gives you a barrage of downward lights (one under the aircraft, one on each pontoon (2) with a third in the rear of the right pontoon. The Pos and Beacon lights are average with just really the colour of the light. In the daylight they can't really be seen at all.
Departure was in the first light and you were soon cruising along at 140knts and again at 2000ft. first again I followed the coast south and then cut straight across Anglesea. It was a long way back - but you were guided by the line of the beacons of EGOQ (Mona) and behind RAF Valley.
I was not going to be on the ground very long. There was another job on the board and it was to deliver a cargo pallet to Caernarfon Airport (EGCK).
Cargo Hook
You can attach a cargo pallet to the hook under the aircraft (switch is on the Pilots side panel). First go to the "Weight, Balance & Fuel" menu (aircraft) and you will see a new menu section. Here you can load a "cargo.obj" that is located in the main Sea King folder files under "Cargo Crate"... load the object and set the weight you want with the slider. "Slung load size is the length of the cable? but I am not sure about that.
Putting a large weight (max 8000lbs) under the helicopter will mean you skills in flying is about to get a whole lot harder, You have to lift it cleanly straight up or you will drag the load across the ground, or worse when it breaks free of the drag it will swing you violently from side to side or even pull you back down into the tarmac. Which is very expensive for the UK MOD. Even when flying nicely in straight line you have to be careful in that you don't allow the load to swing or gain momentum under you. If you do your ship will rock badly as well in the same direction. The more weight you select for the load means more care with the extra pull of gravity. But it is a whole lot of fun, coming in to place the load is getting the approach right and touching it softly on the surface. You can cut the cable via assigning a joystick button or key in "flightcontrols/jettison_payload". (only sad thing is the pallet disappears from view because Laminar Research has a bug in that the pallet or any load won't stay on the sim surface... annoying)
With the slung load gone we can see how the Automatic Flight Control System (AFCS) works. The idea is to help you hover the aircraft in an automatic mode. It also allows the winchman in the rear to take control of the aircraft to position it in various directions to use the hoist.
AFCS
The system is located on the rear of the pedestal. You can set the hover height (50ft) and the "Exit" speed (60knts). The "STAB" button activates the system. TRANS Down will take control of the aircraft and transition you down to the 50ft setting were it will hover there for you. It take a little getting use to and the aircraft shakes out of your control as it does the transition. You can help the system by positioning the aircraft where you want it and then pressing the button. If you want to go lower or higher then just change the height setting and you will go down or up very slowly (great fun). In the rear by the door (use the views in the menu to get there quickly) is a control joystick which is activated by the "Aux Hover Trim", and you can move it in four directions to position the aircraft. You can also switch the system back to the cockpit (Aux Hover Trim Off) so the pilot can regain control. Pressing TRANS Up will make the machine transition up to the "Exit" set speed 60knts) out of the hover mode. to get control back for the pilot then just press the "STAB" button again. But a bit of a warning on repressing the "STAB" button again. It comes out of the system with a thunk, and it takes a bit of practise to get a smooth line of control back with the collective and the cyclic.
Hover Gauge
Another tool you can use to control the hover is the "Hover" Gauge.
This is a cross-hair tool to create and keep a standing hover. and it has 3 modes (A,C and D) A mode monitors the ASE coupler and displays the milliampere input to the pitch, roll, yaw and altitude (but doesn't work here), C mode is off. D mode connects the hover indicator to the Doppler and you can use the horizontal and vertical bars to align your hover speed to zero. It is best used with the Radar Altimeter (left). But be careful as you align your hover as at that point you also lose lift. More collective for lift will then move the aircraft off your perfect cross-hair... practise makes perfect and you soon learn how to hover easily. The hover gauge is then a great tool to learn how to do this, and those skills can then be translated to other types of machines.
Liveries... The amount of liveries 17 and 9 different variants is mind boggling... The Default is the HAR_Mk3 with the FOD box
You have so many (to note) different attachments which include different radar domes and retracted refueling probes. The famous "Marine One" livery is missing from the package (In fact sadly there is no passenger civil version S-61L/N or Coast Guard either) but there is a (rough) Marine One version by PetJedi on the .org.
Westland Commando
The second aircraft in the package is the converted Royal Navy assault and utility Westland Sea King - Westland Commando. The pontoons are gone and have been replaced by outriggers to support the landing gear and various lighting and infrared devices. Inside it is a troop transport layout for 28 troops. As noted this version was a highly effective machine. There are three liveries. "Default" Royal Navy, Royal Navy IFOR and AREAF (Eygpt)
Conclusions
To sum up the Virtavia and Dawson Design Sea King in one word is easy, as it is "Accessible". The accessibility to easily get through the startup from cold to flight is not going to keep you in bed for hours reading manuals, a quick run through the checklist and your ready for flight. That is not to say the Sea King is not authentic because it is, and very good it is too. But the aircraft itself is not very deep. Secondly from the moment you first take off you realise that this aircraft is going to give you a lot excellent flying without all the worry of mastering a delicate helicopters (nervy) control needs. All helicopters are still basically unbalanced, but here you can at least enjoy the machines with out to much of the heartbreak that goes with them. In fact the Sea King is down right enjoyable to manoeuvre and fly (except for over very long distances with tiring wrist wearyness with no pilot aids).
The combination of Virtavia's FSX/P3D design and quality and the extensive reworking and added features for Xplane is a total win-win situation for us, and the aircraft is very good and that huge selection of liveries are excellent in design and quality. (on small thing to note is if you have an Xplane shutdown issue it is the Dreamworks sound engine, so update to the new version 0220 to rectify that (don't forget to install the plugin in both aircraft versions). Sounds are excellent with blade slapping, torque noise and 3D positioning but I did find the external doppler effect good and then to drop away a little too quiet as you move around the aircraft, inside it is just plainly noisy and hair tingling good. There is the feature of the Ge-Force plugin simulates the characteristics of human head behaviour as your brain instinctively usually stabilises your head (eye) movements. here the plugin flattens that feeling out and gives you a natural feeling of flying the aircraft.
Channel your inner English Royal family and join in their careers moments with the Sea King, Prince Andrew flew Sea Kings in the Falklands War and the current third in line Prince William flew Sea Kings out of RAF Valley on SAR missions (both were very good too).
No real faults except with the slightly average textures in the rear, but a few wishes. Rain effects would be great feature on the Sea King as you try to find that ship or oil rig in a storm, A passenger version would be also great for island hopping, and a Coast Guard version for those who love to guard coasts.
In real life the Sea King was a formidable aircraft, and its final service life was very long. For us we can with this V/DD aircraft find out why and enjoy this aircraft for its shear versatility and features. Every simmer dreams about flying certain aircraft. And to fly the Sea King was a childhood dream come to life. The most important thing is the Virtavia and Dawson Design Sea King didn't ruin a great aircraft but enhanced it beyond measure, Could that slip in a little bias in a review?. not in this case as it is so very good and a great investment in pleasure and flying... It is also excellent place to start to learn to fly rotary aircraft because of its stability and hover tools. Overall the Sea King SH3 an excellent aircraft.
Yes! the Sikorsky SH-3 Sea King (S-61) by Virtavia and Dawson Design is now Available from the X-Plane.OrgShop : Sikorsky SH-3 Sea King
Price is US$35.00
Developers Sites : Virtavia - Dawson Design
Support forum: Sea King Support
Review By Stephen Dutton
7th December 2013
©copyright 2013 : Stephen Dutton
Technical Requirements:
Windows XP , Vista, 7 or 8 (32 or 64 bits) or MAC OS 10.3.9 (or higher) or Linux
X-Plane 10.20+. 32 or 64 bit. (X-Plane 9 is not supported)
4GB RAM- 512Mb + VRAM Recommended. (no framerate issues)
Current version: 1.0 (last updated November 13th 2013)
Updated store#
Review System Specifications:
Computer System:
- 2.66 Ghz Intel Core i5 iMac 27”
- 6 Gb 1067 Mhz DDR3
- ATI Radeon HD 4850 512mb
Software:
- Mac OS Mavericks 10.9
- X-Plane 10 Global ver 10.22 (final)
Addons
- Saitek x52 Pro system Joystick and Throttle
Scenery
- EGOV - Valley : rcmarple .org
- EGCK - Caernarfon Airport v1.1 : supersport .org
- EGGP - Liverpool (John Lennon) : xplaneuser .org (there are a few Liverpool city sceneries also well worth downloading on the .org)
-
Stephen got a reaction from Kaminari in Aircraft Review : Antonov An-2 by Red Eyes
Aircraft Review : Antonov An-2 by Red Eyes (X-Plane aircraft design Bureau)
The Antonov An-2 is known endearingly by the Russian nickname of "Annushka" or "Annie" that was built by the Antonov Design Bureau (now State Company) to meet a 1947 Soviet Ministry of Forestry requirement for a replacement for the then popular Polikarpov Po-2. It is a Soviet mass-produced single-engine biplane for utility/agricultural use and hence its other nickname "Kukuruznik" which means literally "cropduster". The Antonov An-2 was a large single bay biplane of all-metal construction, with an enclosed cockpit and a cabin with room for seats to accommodate up to twelve passengers and cargo.
The first prototype was designated SKh-1, and was powered by a Shvetsov ASh-21 radial engine, and it first flew on 31st August 1947. The second prototype was fitted with a more powerful Shvetsov ASh-62 engine, which then allowed the aircraft's payload to be significantly increased from 1,300 kg (2,870 lb) to 2,140 kg (4,720 lb), and it was in this form it was ordered into production. It was first built in the State Factory 473 in Kiev, in the Ukrainian SSR where the bulk of up to 5,000 units had been produced by 1960. Later Soviet production (after 1965, of model An-2M especially) was at the State Factory 464 at Dolgoprudniy, Russian SFSR. After 1960, most of the remaining An-2s were built at Poland's WSK factory in Mielec, with over 13,000 aircraft being made there before full production ended in 1991. For the long period of 45 years the An-2 held the record of the aircraft of the longest period of any aircraft in production, that record was held until just recently when it was finally exceeded by the Lockheed Hercules.
The An-2 has many design features which make it suitable for operation in very remote areas with unsurfaced airstrips. The features include a pneumatic brake system, with the option of an air-line which is fitted to the on-board compressor. With the air-line you can change the pressures in the tires and shock absorbers which can then be adjusted without the need for any other special equipment, the batteries are large and very easy to remove, so the aircraft does not need a ground power unit to supply power, There is no need for an external fuel pump to refuel the aircraft, as there is an on-board pump that allows the tanks to be filled from simple fuel drums, the crucial wing leading edge slats that give the aircraft its slow flight ability are fully automatic, and are held closed by the airflow over the wings. Once the airspeed drops below 64 km/h (40 mph) then slats will extend because they are on elastic rubber springs! And the An-2 has a very short Take-off run of 170m and a landing run of only 21 m (these numbers will of course vary depending on take-off/landing weight, outside air temperature, surface roughness, and headwind).
Antonov An-2
To recreate a modern airliner there is without doubt a multitude of resources. But what about an aircraft that is over 64 years old? There are a few An-2's still flying and at last count it was around 72 aircraft. However you would be pushed to find the harder details to put such an aircraft together. Once over that hurdle then where would you start? To a point all modern aircraft have a sort of similarity, but the An-2 was created in a time before standardization became the normal and then on top of all that it was then created in Russia. Russian aircraft were very advanced for the period. But also Russian Aircraft tended to be more agricultural, practical and stronger than their western counterparts, because of their poor distribution and service networks over a very vast area.
The Antonov An-2 legend would come out of such beginnings and to make it one of the most versatile and practical aircraft ever built. However to recreate the legend it was going to take far more than being a hobby project - It would require dedication and passion for the aircraft to bring it to life.
One look of the cockpit alone and you can see the scale of the problem. The panel is a complex design of switches, dials and levers. Not a computer in sight or any real electronics either. This was the world before the micro-chip, silicon chip and even before the potato chip as they were called "Saratoga Chips" back then.
So the first view of the An-2 is it looks at first like a complex mess. and made worse in that it is all written in cyrillic. And is totally indecipherable to anyone this side of Poland. It is not that you couldn't work out where everything is, because there is a very ordered configuration of the items.... But what they are and what they do is another thing entirely. Ignore this and just go for a flight will mean you will just crash... badly.
At the heart of what everyone calls lovingly "Annie" is a deep procedural mechanical system, that has to followed to the letter to make "Annie" performs or at least fly a decent distance.
Close up the panel detailing is extraordinarily beautiful, gauges and dials are like crafted jewels and their glass has excellent reflections. The central pedestal is festooned with levers and switches that you can't wait to get your hands on. To be able to zoom in close with the 3d cockpit is a huge advantage in finding out the detail (or details). The Yoke is restrained by a tie to the crafted rudder pedals and has to be removed for flight.
The visual aspect is quickly added by the aural as well... A ringing telephone sound that sounds like the Kremlin is calling you. It is a low fuel warning that can be silenced (thankfully) by a switch on the pilots side panel.
But where to start to understanding the An-2? The best way is through the Menus's which are activated by a zone on the glareshield and they pop up on the lower left of your screen. There are four menu's available, and here are the first two.
External Visual Inspection/Ground Service : In the top section you can see the views on a walkaround of the aircraft and install or remove the tie-down cables, Tags and rudder-tags. In the lower section you can: Connect the "Ground Power", "Recharge the Fire Protection System", Add the "fuel pipe", add or remove the "recoil devices" (or Chocks to you and me) and Repair (Or reset failures).
Weight and Balance : Another menu is the weight and balance (W&B)sheet. To use the the W&B sheet is to use the first An-2 feature, which is using the on-board pumps to fill the tanks.
The fuel system consists of 6 tanks with three connected each side. On the side panel there is a big switch to select each set of tanks or back to the flow of fuel to the aircraft. First in the "Ground Service' menu you connect the external fuel pipe. Connect to "ground power" or the battery and then select the set of tanks you want to fill, when selected then flip the switch under the red cover. Deep within the aircraft the pump will then noisily fill the tanks selected and it will show the amount on the W&B sheet. The sounds on this aircraft are extremely realistic. pumps whirr and switches clunk and handles crank... Get the process wrong and the aircraft will complain at you very loudly. So you are very much involved in the process of the aircraft through these aural connections. You can then select in the menu the cargo weight and the number of passengers (and their weight), assign the fuel required to each wing and when completed you can press the "Load" button to activate the configuration (and the total weight).
Electrical Systems
Understanding the An-2 can go a long way if you can know how the way the electrical systems are installed on the aircraft. The An-2 has a main power supply unit : TCH-3000 that provides a DC voltage at 28.5V (volts) and a current supply at 100A, The standby (large batteries are 25V at 27Ah. The An-2 has an automatic system that if the Ah drop below 15-35A then the system will switch the supply to the batteries. You can see this on the Volt-Ammmeter (long yellow arrow) when the engine is past the idle position and is providing engine RPM. Pull the throttle back into idle and the voltage will suddenly drop to zero as it switches over to the battery supply (Short Yellow arrow). You can select either the battery supply or the External power supply by the second switch on the lower row of switches (for refueling).
There are other items however that require an AC voltage. To do this there is another converter, the NO-500 that converts the DC power of 27V to AC Voltage of 115V. And that is situated on the central panel. The NO-500's main purpose is to supply power for the APK-5 which is an early Navigation tool that can select the operation of the compass selector and adjust to a frequency of a Non-Directional Beacon (NDB) in the Ranges: 150 to 310khz - 310 to 640khz and 640 to 1300khz. A warning in switching on the AC current of the radio altimeter and the APK-5 (loading devices before the NO-500 is switched on. There are two NO-500's - a main and a backup that can be switched to by putting the three way switch to the bottom and the switch is noted as "operation - Off - Backup.
Pneumatics
The An-2 has an interesting pneumatic system. The red lever behind the pilots wheel (yoke) is your braking system, that uses compressed air to turn the aircraft and control the brakes. You can see (and hear) the system in operation by pulling on the red lever, which is set up using the X-Plane key request "brakes_regular". I already have that set on my trigger on my joystick and that works very well. Pull the lever to help with your taxiing and general braking conditions and the pressure is noted on the dial (both sides) on the dial on the side panel.
Starting "Annie"
Slightly different variations are required to start the An-2 with hot or cold conditions. Engine and Oil cowl's must be closed in cold weather and the start depends on ground power, or if enough voltage then you can start from the batteries.
Set the switches, then make sure the fuel tanks are "open". Then pressurize the fuel line by the knob by your left, Then prime engine cylinders by cranking the arm down to your right of the pilots seat. Setting the carburettor heat (green lever is to get the right setting). Pop the red lever full up to "open the cocks". The starter switch is on the top panel and set the Magneto switch to 1+2. Ready to start then pull then pull the (lower) KC-3 (starter, spin-up and clutch) when the engine starts to fire, then adjust the throttle to catch the sequence of cylinders lighting up the fuel... when you have a running engine then let it settle to 700-800rpm and then as the engine warms up up the throttle to 1200rpm.
Sounds easy. It isn't. It takes practice and a lot of patience to get it all right. This An-2 is a cantankerous old bird to get the sequences right, and you will never get it right the first time or the second. Do it four times wrong and you are looking at a grounded aircraft.
Checklists
To help you there is a set of "Checklists" in the menu to help you along. You go through the list and tick-off the done jobs. Ready to fly the An-2 is holding on the brakes. The detailing overall is very good, but there are a few unfinished objects like the flap runners, aerials and the front suspension. They could be noted as metallic gray, but they really look like untextured objects.
The double-wing flaps are unstepped, and so you really have to chose your degree of angle by just guessing and looking at the actual flap position. The An-2 is a tail-dragger and that creates a lot of unintentional fun while taxiing, It can flip on the tail if you push the rudder to far, but after a bit of practise you can steer "Annie" quite well.
Power up and the short take-off is very short. The flaps depend on the weight, and even then you don't need much angle. "Annie" will climb with all that lift as its cropduster heritage shows through. But don't get carried away...
...nothing is more critical that pleading with "Annie" to keep herself in the air. You have to caress her and gently adjust her controls to keep her in a very tight band of happiness. To help you there is a performance and data menu that you lie in bed at night and recite it, until it is known off by heart and then still do the mantra all over again and again.
If you don't want to pop off! a cylinder or two, then "Annie" has to be kept quite cool and at or under these critical numbers and data. It is not as easy as you think it is to do. Each lever is crucial in adjusting the dials to keep everything in check.
Yellow Arrow: Throttle or boost pressure. This matches the "Vacume Manometer" boost pressure that must be kept between 6-8.
Purple Arrow: Propeller pitch that has to keep the revs at 1600 in the Tachometer
Green Arrow: This is the carburettor heat/cold lever (Green) and dial. and the setting must be kept at 0 (zero)
Easy, from a distance yes. But it can be challenging over a period, get it right and "Annie" will fly all day. Another help to keep the engine cool is to adjust the cowlings for the Oil and Engine heat (The switch is behind the levers)
Once airborne "Annie" is endearing and great fun, The aircraft clatters it's way across the country side as you hold on to the vibrating yoke. The view is magnificent out of that huge glass cockpit. You have fans on each side that rotate (I had a fan at home and set it up next to the computer for realism... It stops the sweating from the stress). The windows open, and the wipers work and the ancient radio sits on the side.
It is quite brilliant to fly. Heavy as you would expect but not ponderous, turns have to be watched for loss and gain of height, stall is quite non-existent unless you do some thing really stupid, but otherwise fun to toggle along behind the banging and poofing cylinders.
No autopilot? Well yes there is actually. It called a Co-Pilot!. Red Eye has created an autopilot where you set up a Keyboard "Key" function (Via the custom cmnd) and assign a key (You can set the Scoop function the same way). Set "Annie" level and at the right height and speed and press your assigned "key". At first you think the Co-Pilot is a bit of a dork as the aircraft lowers or rises as the idiot takes the control "He say's something like "OH God" in Russian as well. But then "Annie" rights herself and flies on that heading until you change it. Then the aircraft will just keep the new course until you take command again via the say key stroke.... Brilliant.
Liveries
The liveries are exceptional. And there is a lot of them to choose from.
Aeroflot has the most in "Wright" (default) (top line)
Blue - Red -Yellow (second line)
Alaska - Arizona - Green - MCHS (third line)
Orenair - Polar old - VVS (bottom line)
"Polar old" is a masterpiece of faded paint, however all are very good.
Nightlighting
Back on the ground. The night lighting is very good. The cockpit is sensational at night with the glow from the instruments and lit switches. The yokes are also beautifully spot lit, Forward lighting has taxi, landing in the lower wings and Nav lights on the ends of the top wing. The aircraft has ultraviolet lights as well in patches over the wings and fuselage.
The cabin is quite basic with no cargo or any finer detailing except for some curtains and shelving. The rear door opens but only the cargo (larger) section via the F2 key slider. No frame-rate issues were noted - as the An-2 never went below 30fr in any situation.
Conclusions
In the first week "Annie" will make you curse. Then in the second week you will caress her and lovingly guide her and will be hoping you are doing everything right to keep her happy. If any aircraft has personality then the An-2 has it spades, Red Eyes has put his personality into the aircraft as well, with not only the great design and the detailing of the cockpit. But also with the sounds and mechanical movements of the activity of this past history of Aviation. It is a very hard aircraft to understand and to get behind its Soviet - Russianness. The manual In English and Russian does not help in the matter either. It is very authentic. And detailed. But it is missing the vital information that connects you to the aircraft that bridges the gap between helping you understand the systems and design. There are however excellent video's that can help (and the music is great as well) - all are listed below. But the An-2 does bring something very unique to your simulation world. An experience of the past and the joy of flying in an aircraft that was both before its time and now well behind its time. Loving "Annie" is sitting behind all that noisy chatter of that huge radial engine that shakes you and your yoke across the sky. This means you are flying in a time of freedom and the clear skies before the world closed in and regulated the dream to just regulations and on-time performance. This versatile machine stayed in production for so because it could do so many things. Master the machine and the An-2 gives you the challenges to do so much. If any aircraft is as rewarding as this for the experience that is returned - then I have yet to fly it.
________________________________________________
Yes! this amazing Russian aircraft is now Available from the X-Plane.OrgShop : Antonov An-2
Price is US$35.00
Documents :
Dev Thread : AN-2 Support - videos avaliable Video 1 - Video 2 - Weight and balance - Startup - Shutdown
________________________________________________
Review By Stephen Dutton
24th November 2013
©copyright 2013 : Stephen Dutton
Technical Requirements:
Windows XP , Vista, 7 or 8 (32 or 64 bits) or MAC OS 10.3.9 (or higher) or Linux
X-Plane 10.20+. 32 or 64 bit. or X-Plane 9.70
4GB RAM- 1GB+ VRAM Recommended.
X-Plane 9 version is not included in the download package but it is available on demand. Just place the order and send us an email to get it.
Review System Specifications:
Computer System:
- 2.66 Ghz Intel Core i5 iMac 27”
- 6 Gb 1067 Mhz DDR3
- ATI Radeon HD 4850 512mb
Software:
- Mac OS Mavericks 10.9
- X-Plane 10 Global ver 10.22 (final)
Addons
- Saitek x52 Pro system Joystick and Throttle
- General Electric 9 inch Fan
Scenery
- EDFH - Frankfurt Hahn : Aerosoft (X-Plane.OrgShop US$17.06)
-
Stephen got a reaction from Kaminari in Aircraft Review : Carenado C90B King Air HD Series v1.1
Aircraft Review : Carenado C90B King Air HD Series v1.1
Route : KHND - Henderson Executive to KGCN - Grand Canyon NP
One of the great tourist routes (on everyone's bucket list) is a flight over the Grand Canyon in Arizona, US$250 is the average fare. Nowhere else does the aircraft really come into its own for viewing spectacle than from the position of a couple of thousand feet above this monstrously huge gnawed dug out mountain in the Arizona desert.
Most operators leave for the Grand Canyon from Las Vegas's, McCarren International. But if you want the private exclusive tour then you would then head up north to Henderson Executive (KHND) and pick up a private operator that will treat you like a VIP or a celebrity for the day. It costs a lot more of course but you also get the free French champagne thrown in as part of the deal.
The ideal aircraft to fly four to six passengers in comfort is the Beechcraft C90B, with its big windows, but also the power to get to the Grand Canyon quickly adds to the benefits. In the fleet we also have the X-Plane Default C90B, and a very nice aircraft it is. If you have already bought X-Plane 10 (It comes with X-Plane9 as well, but not the upgraded version) then it comes free with the simulator, and it is with no-doubt the best default aircraft in your General Aviation Folder. For me though today I got the newest addition to the fleet the just released Carenado C90B. Outwardly they look very much the same aircraft but then get closer to the Carenado version and things start to get a lot better.
Carenado provide a menu (O) of Options (bottom left). Here you can give the C90B tinted windows, static elements (including chocks, warning cones but no tags, and the pilots stay seated in the cockpit), You can open the main "Passenger door" on the left rear and even open up the left and right engine cowlings. Want to check the engine oil or fluids before flight then, well now you can.... this adds to a great feature on the aircraft walkaround.
The C90 is a seriously nice looking aircraft, it comes with Carenado's HD (High-Definition) series textures (2048 x 2048) and it shows in the quality of the livery. Get in very close and the detailing is superb. Panel detailing (with rivets) and vents are all very lifelike. The undercarriage is excellent with full struts, hydraulics and braking systems, and are all as real as... the real things. The Propellers are the standard quieter Hartzell four-blade, constant-speed and full-reversing 90-in diameter versions. And not the Raisbeck Swept Blade Turbofans, which were retrofitted to later C90 models. The C90's four distinctive chrome exhausts are beautifully crafted here. The wings with the updated (v2) lighting is excellent and so is the tailplane and tall tail, looking side on at the dimensions and the full perspective of the aircraft - it looks perfect.
History of the C90B King Air
The Beechcraft King Airs are a little confusing as they are listed in to two separate families. The Model 90 and 100 series are known as King Airs, while the Model 200 and 300 series were originally marketed as Super King Airs, with the "Super" being dropped by Beechcraft in 1996 (although it is still often used to differentiate the 200 and 300 series King Airs from their smaller stablemates). The Model 90 King Air was conceived as the Model 120 in 1961. In May 1963, Beechcraft began test flights of the proof-of-concept Model 87 with a modified Queen Air and fitted with Pratt & Whitney Canada PT6A-6 engines. On 14 July, Beech announced a new type, and a month later began accepting orders for the "King Air", with deliveries to commence in the autumn of 1964. After 10 months of test flying the Model 87 was delivered to the United States Army as the NU-8F in 1964. On 24 January 1965 the first definitive prototype, by now designated Model 65-90 and also fitted with PT6A-6 engines, flew for the first time. The first production aircraft was delivered on October 8, and by the end of the month 152 aircraft had been ordered. The Model C90 was introduced in 1971, with the wingspan increased over earlier models by 4 ft 11 in (1.50 m) to 50 ft 3 in (15.32 m), Maximum Take-Off Weight (MTOW) increased by 350 lb (160 kg) to 9,650 lb (4,378 kg) and it was fitted with the newer upgraded PT6A-20A engines. The C90B (and C) were marketing names for the updated versions of C90A which were produced between 1992 and 2005 and were 456 built.
Maximum speed: 311 mph TAS (270 knots TAS, 500 km/h TAS) : Cruise speed: 260 mph TAS (226 kts TAS, 416 km/h TAS) : Stall speed: 90 mph (78 knots, 145 km/h) IAS (flaps down) : Range: 1,530 miles (1,321 nm, 2,446 km) : Service ceiling: 30,000ft (9,144 m) : Rate of climb: 2,000 ft/min (10.2 m/s)
The default C90 suddenly powers up and departs for its tour. So it is time to get on board and get the aircraft ready for our own passengers.
The easiest way to get inside the aircraft is using Carenado's © Camera menu. It is the standard menu on all Carenado aircraft. And it makes it easy not only to jump quickly into the 3d mode and into the aircraft, but you also have 9 other views and a "Point of View" slider.
Inside there are 4 large leather seats in a club layout. And two other (smaller seats) in one facing inwards on the right and one situated on the rear bulkhead. In theory you can carry six passengers, or four and an attendant or two. The internal cabin doors can be closed via the (O) Options menu for privacy in the cockpit.
The shutdown cockpit is unfussy, very clean and business like. It is not hard to find your way around everything, but there are some specialised items that we we will come to. On the overhead panel (OH) there is only the electrical dials and the lighting knobs for all the instruments and cockpit overhead lighting. One big switch on your left of the panel will turn everything On/Off in a one click each way.
The power now on and the panel lights up nicely with reflective lighting. All the main power/lighting switches are grouped down low behind the pilots yoke (removable). There is a Ext Power (External Power) supply that you must remember to switch off when not needed. On the pilots side wall there are the (twin) fuel gauges and fuel transfer and supply switches. The text here is quite blurry, but easily remembered. The small windows open on both sides and the engine noise is quite significant when the open gap is there. This is great for starting the engines. Detailing is simply excellent, some switches are hard to read but very much in keeping of the panel design... Carenado are masters at this sort of detail application and it shows here with this sort of depth and quality.
Each engine has its own "Ignition ON" switch, and then another switch to start the each engine that both sets are situated low and behind the yoke. It takes awhile to wind up and then start each turbine to full power. Multi-track stereo sounds are excellent as the whine and then the power as the engine comes into life. When running, don't forget to turn off the Ignition ON switches as displayed on the glareshield. Ignore the RVS, as it notes the levers are not in the up position. You can do a full test of all the alerts and very impressive it is.
I set both the Prop (feather) and Idle to as low as I could get away with... In the full up position of both of these levers the C90 will taxi like a speeding bullet, you need to calm the engines down for an effective taxi.
One of the highlighted features now on Carenado aircraft are the rain and Ice effects.
The rain drips down the windshield, and the wiper clears it away (but the rain spots are not replaced), Ice covers the windows (but I couldn't see anything on the wings). But with both the rain and ice together is very effective.
Pulling away from the stand the taxi is good if you have controlled the RPM, only small nips of the brakes are required to keep the speed. You don't use much flap, just 20º. On to the power slowly because it will leap away, and then build up the speed. As both props rotate together in the same direction there is a slight pull to the right, but only a little left rudder is required to keep the center line straight. Rotation is clean and you don't need a lot of angle to climb out, once you have a certain speed then let the C90B climb.
In The Air
If you have flown the X-Plane default C90, then at this point in climbing away from the runway, you will have to usually move to the Autopilot (A/P) that is situated down behind the pedestal. The problem with this is that you have to scroll away from the horizon and your forward view. To a real pilot it is only a glance down to the right and then adjust the autopilot by feel... but for you it is usually the situation that when you come back to the forward view after setting the A/P that you will either be - inverted or going in a totally different direction?
In Carenado's version you have a popup (A/P) that is selected by the (A) or Autopilot on the lower left menu. This beautiful rendered panel is an excellent A/P, but it is quite large. It can thankfully be moved anywhere around you screen, It can be also resized as well by the lower right corner into any size you like. Close the A/P and come back to it later and it keeps the position and size.
"Heading" is selected with the left knob and the "Course" is selected with the right. Press the center of either knob to select current heading or course. Vertical Speed (V/S) has a few different variations. You can either just set the V/S or press the rocker switch to go either up or down. The best however is "CLIMB" or "DEC" (descend). Select your height (higher or lower) in the center panel and then press either the CLIMB or DEC buttons and the A/P will set you on a - or + 800fpm altitude change. It will set the ALT SEL (Altitude Select) automatically as well to level you out when you get to correct set altitude.
The Autopilot is also connected to the EFSI (Electronic Flight Instrument System) that is connected to the Electronic Attitude Director Indicator (EADI) and the Electronic Horizontal Situation Indicator (EHSI) on the main (PFD) aircraft panel.
The EFSI is very detailed and functional and the displays on the small Glass panels are excellent. The EDHI has many functions including Autopilot Mode Annunciators, Marker Beacon indicator, Glide Slope Indicator and Lateral Deviation Indicator (bars), Flight Director Guide, Ground Altitude and Decision Height Annunciator. The EDSI panel has Identifier and distance to VOR or Waypoint, Course Control Symbol, VOR TO/FROM indicator, selected pointers and lateral deviation and Course selection (degrees). The various EHSI functions include In-depth and accurate fuel logic and it works like the real thing, and also takes all the failures into account. However you must turn the system EFIS system on, and the switch is on the A/P panel?
Note above the EAHI is the terrain (TERR) warning system, turn it on and you get alerts from 1000ft to 500ft of your lower terrain values.
In the center of the main aircraft panel there is an AVIDYNE Entegra EX500. This unit is very good but limited in application. It has fixes, but they are way to small to register. And you can have the Heading or Rose modes. The weather is also displayed and this is best function of the display. A standard GARMIN GPS400 and the standard radio (COMM and VOR) tuning knobs complete the equipment package.
All powerlines lead to our first attraction - The Hoover Dam. The C90B was powering along at comfortable 200knts and easily climbed to 12,500ft. (it will climb 2000fpm with ease)
In the air as on the ground the C90B is a lovely aircraft. At every angle you like the silhouette against the desert sky. It flies wonderfully as well, light to the touch and easy on the turns (just a touch of power sometimes). There is a small warning though in using to much power in the cruise as if you push the engines too hard for long periods at full throttle they will simply burn out. The trim is easy to set up and you have to be careful because the trim switches work on the craftmanship yoke. The window shades (both sides) are clever as well, They are movable right around their tracks and adjustable up and down as well. The main cabin windows can also be dimmed as well.
Liveries
Liveries are the standard white (default) (top), BlueGold, Deepbluered, Silverblue (upper line), Beigered, Ejercitodelaire and the famous Japanmaritime (lower line)
The Grand Canyon (Hopi: Ongtupqa; Yavapai: Wi:kaʼi:la) is 277 miles (446 km) long, up to 18 miles (29 km) wide and attains a depth of over a mile (6,000 feet or 1,800 meters). It has been carved over billions of years as the plateau raised up out out of the desert to the elevation of 2,600 feet (800 m) to an average of 8,000 ft (2,438 m) above sea level. In fact the Canyon is a big plateau with a huge gap carved through it. The biggest misnomer is the that everyone thinks the canyon was big cut down into the ground, when in fact it is the opposite in that it rises up very high. To cover this you have to quickly fly high. 12,000ft will then put you only at a slight height above the canyon. For the C90B this was an easy task.
I started my run from the west looking for Point Sublime and then followed the zig-zag off to a slight angle to give the passengers the best view. The French champagne was out with a small meal that is helped by the foldaway tables. The view outside the windows was spectacular and so was my view from the cockpit. Keeping close to South Rim and over the Grand Canyon Village you turn North at just before Zuni Point and then held that heading until past Chuar Butte and then flew out over the plateau before doing an almost 170º turn back and heading down the eastern side of the "Palisades of the desert".
The view right out of the cockpit windows was spectacular, and every time you do this Canyon run it will always run a tingle up your back.
The Carenado C90B has great nightlighting... The panel is simply beautiful at night and entirely adjustable via the OHP selection of lighting knobs.
There is the new feature of the swivel lighting on the roof of the cockpit. You can move the light in any direction and bright or fade the lighting on the light itself. This shows the power of the HDR in X-Plane and how versatile the HDR system is. In the rear cabin (switchable) the lighting is spot lit on to the seating. The ambience inside is excellent, but the HDR switched on is a real framerate buster. down to only 2-3 frames on my system.
Grand Canyon National Park Airport (IATA: GCN, ICAO: KGCN) is just south of the South Rim and Village. I did another 90º turn to the West and another 90º turn to line up with RWY 03, but watch your elevation here as it is 6609ft (ASL), and the C90's height radar is the item you keep your eye on.
Reducing height with the DEC makes your life very easy, and the EADI shows you your cross hairs with the glideslope. Manually or automatic the descent is very easy as you reduce your speed. Flaps will slow you effectively, and the deployment is not going to give you too much lift if you get the correct speed at each drop, but watch that stall speed that is quickly in the red zone at 80knt's, so you aim for just above at 90knts to 95knt's. In the flare you add a little power before settling down the wheels and reversing the propeller pitch for reverse thrust. (well noted on the pedestal) The thrust is very effective and KGCN's runway 3/21 at 8,999ft (2,743m) is very long for a General Aviation aircraft so in fact you can take your time to slow down or flare late to get to the terminal that is situated at the far north end.
The company does the tagging system to return passengers back to Henderson, I will sit here and refuel quickly as the first group will return soon that went out on an earlier flight, my group will come back to KGCN in a few hours of seeing Canyon from the visitor centre.
Conclusions
As Carenado aircraft get larger, then so does the file size. The C90B will average around 460mb so if you have only 512 VRAM (like I do) available you are going to start to feel the pinch. 1gb VRAM is recommended by Carenado and I second that recommendation. If you have downloaded your C90B from Carenado (ver1.0) then I recommend to update as soon as possible because the 1.1 version (the .org version is the correct 1.1 ver) fixes a lot of - if not all the issues with framerate on the Mac and a few lighting issues. The review here has been updated to the v1.1 version. And the updated version is now very good. And yes because of the minimum VRAM available you are going to have to compromise somewhere if you are running very large sceneries or if the weather is heavy on your system. In this review I averaged 50-40fr dropping as low as in the high 20's with clear skies, and that is very good.
Direct comparisons to the X-Plane default C90B is always going to be put forward. Because the aircraft is very good in its basic form. I have had many hours behind its controls and it has a place in my heart if not the earliest of my own X-Plane experiences. The Carenado C90B is however a far more advanced and far better quality machine. It's detailing and functionality is way above the standard version. Outwardly they look the same. But on closer inspection they couldn't be more further apart in quality, equipment and certainly in the outstanding features.
Fly the C90B once and you won't want another twin. And that is big claim with so many twins in the Carenado hangar. It is a lovely large machine. The A/P is very comprehensive, convenient and resizable. The only issue is the HDR on less powerful equipment in that it brings the framerate to its knees. But in every other area of quality, functionality, cockpit lighting, excellent 3d surround sounds and system realism it is simply outstanding. Value!... In value it is a Carenado aircraft, and that is always a great investment. And the bigger the Carenado aircraft grows then the better it seems the value and the return for your money. Overall the Carenado Beechcraft C90B HD series is excellent.
Yes! the Carenado C90B King Air HD Series is now Available from the X-Plane.OrgShop : C90B King Air HD series
Price is US$34.95
Documents :
Developer Site : Carenado
Dev Thread : X-Plane.org
___________________________________________
Review By Stephen Dutton
20th November 2013
©copyright 2013 : Stephen Dutton
Note: Carenado have released an C90 King Air Service Pack, dated 20131119. that addresses the ver1.0 framerate issues, HDR lighting has been updated and other minor tucks and fixes. Go to Carenado to login and download this updated 1.1 version
Technical Requirements
:Windows XP, Vista 7 or 8 (32 or 64 bits) or MAC OS 10.3.9 (or higher) or Linux
X-Plane 9.70 or X-Plane 10.20 (or higher - 64 bit compatible)
4GB RAM/1GB VRAM
Version 1.1 (last updated November 19th 2013)
Review System Specifications:
Computer System:
- 2.66 Ghz Intel Core i5 iMac 27”
- 6 Gb 1067 Mhz DDR3
- ATI Radeon HD 4850 512mb
Software:
- Mac OS Mavericks 10.9
- X-Plane 10 Global ver 10.22 (final)
Addons
- Saitek x52 Pro system Joystick and Throttle
Scenery
- Hoover Dam & the Grand Canyon version 10 - chris noe (X-Plane.org)
- KLAS - KHND (Glitter Gulch) - Tom Curtis (X-Plane.OrgShop US$24.95)
- KGCN Grand Canyon National Park Airport - myb (X-Plane.Org)
-
 Stephen got a reaction from BWolf7 in Aircraft Release : FlightFactor Boeing 757 - Series
Ramzzess Aircraft and Phillipp Munzel have announced the imminent release of the Boeing 757-Series.
Their Boeing 777-Series was the aircraft of the year in 2012/2013, So will the Boeing 757-Series be the same for 2013 and 2014? There is no doubt that the B757 is one of the most anticipated aircraft in X-Plane at the moment. If you already have the Boeing 777, then you would already know what to expect in detail and depth of systems...
Officially licensed By the Boeing © Corporation
Accurate dimensions based on 2D and 3D drawings supplied by Boeing ©
For X-Plane 10 64bit- Mac, Windows and Linux
The Cockpit is comprehensive and highly detailed in systems and functionality.
With a fully integrated FMC that is separated for use on the Pilot or Co-Pliot stations.
The menu and Checklist system is also comprehensive and excellent in detail.
Highlights are - Easy settings for aircraft functions - Full compliment of ground vehicles including Pushback Truck) - Custom failures - Brilliant cabin announcements (PA) - Opening Cabin Doors - virtual cockpit with crisp details - Dynamic reflections - Custom 3D sounds.
The comprehensive checklist has the feature of leading you through the correct procedure of switches... Is just brilliant. Detailing (below) is also highly visible and outstanding in quality.
Special Effects include - Aircraft Fire and Rain (Window) effects - Active window blinds and a fully detailed cabin.
Price will be US$59.95 for the standard RB211-535E4 Release Version.
Liveries will be US$1 per livery in packs of 10.
Four liveries with the release version are British Airways (classic), Air France, Lufthansa and the Boeing House.
There is no doubt this is an outstanding aircraft and once released X-Plane Reviews will give you a thorough detailed review of the aircraft and its systems.
Some features:
Detailed and functional FMS - Works like the real 757 FMS Advanced auto-pilot Super high resolution 3D cockpit with every switch functional Multilayer dynamic reflections on all glass objects
Spatial rain simulation with high detail
Very detailed passenger cabin graphics (kitchen and toilets)
Inn-cockpit custom sounds
3D stereo sound system for the engines
In flight announcements
Interactive communication with the crew (fault reporting)
Ground vehicles and push back track – all operational
Very detailed exterior modeling with extensive use of normal maps
Blue-out and other visual and auditory reactions to the situation
Additional eye-candy features: real working oxygen masks both in cockpit and cabin, dynamic window shatters that react to sunlight etc..
Use of particles to generate smoke, fire, sparks…. Detailed and deep simulation of almost every system in the real aircraft
A multistage custom failure system with in-browser instructor’s console
Ability to fix failure by following proper procedure
Interflight failure and maintenance system – something will spill over to the next flight
Custom menus for loading/unloading fuel and passengers, calling for pushback…
Ability to customize the plane with winglets and set other options to be saved or default
A fully interactive electronic checklist with all procedures programmed in
Auto mode for the checklist where the AI automatically preforms the procedures and the pilot only watches and checks
Tutorial mode where the pilot follows the AI’s instructions and visual aids
Stephen Dutton
2nd November 2013
-
 Stephen got a reaction from BIMMERKID21 in Aircraft Release : FlightFactor Boeing 757 - Series
Ramzzess Aircraft and Phillipp Munzel have announced the imminent release of the Boeing 757-Series.
Their Boeing 777-Series was the aircraft of the year in 2012/2013, So will the Boeing 757-Series be the same for 2013 and 2014? There is no doubt that the B757 is one of the most anticipated aircraft in X-Plane at the moment. If you already have the Boeing 777, then you would already know what to expect in detail and depth of systems...
Officially licensed By the Boeing © Corporation
Accurate dimensions based on 2D and 3D drawings supplied by Boeing ©
For X-Plane 10 64bit- Mac, Windows and Linux
The Cockpit is comprehensive and highly detailed in systems and functionality.
With a fully integrated FMC that is separated for use on the Pilot or Co-Pliot stations.
The menu and Checklist system is also comprehensive and excellent in detail.
Highlights are - Easy settings for aircraft functions - Full compliment of ground vehicles including Pushback Truck) - Custom failures - Brilliant cabin announcements (PA) - Opening Cabin Doors - virtual cockpit with crisp details - Dynamic reflections - Custom 3D sounds.
The comprehensive checklist has the feature of leading you through the correct procedure of switches... Is just brilliant. Detailing (below) is also highly visible and outstanding in quality.
Special Effects include - Aircraft Fire and Rain (Window) effects - Active window blinds and a fully detailed cabin.
Price will be US$59.95 for the standard RB211-535E4 Release Version.
Liveries will be US$1 per livery in packs of 10.
Four liveries with the release version are British Airways (classic), Air France, Lufthansa and the Boeing House.
There is no doubt this is an outstanding aircraft and once released X-Plane Reviews will give you a thorough detailed review of the aircraft and its systems.
Some features:
Detailed and functional FMS - Works like the real 757 FMS Advanced auto-pilot Super high resolution 3D cockpit with every switch functional Multilayer dynamic reflections on all glass objects
Spatial rain simulation with high detail
Very detailed passenger cabin graphics (kitchen and toilets)
Inn-cockpit custom sounds
3D stereo sound system for the engines
In flight announcements
Interactive communication with the crew (fault reporting)
Ground vehicles and push back track – all operational
Very detailed exterior modeling with extensive use of normal maps
Blue-out and other visual and auditory reactions to the situation
Additional eye-candy features: real working oxygen masks both in cockpit and cabin, dynamic window shatters that react to sunlight etc..
Use of particles to generate smoke, fire, sparks…. Detailed and deep simulation of almost every system in the real aircraft
A multistage custom failure system with in-browser instructor’s console
Ability to fix failure by following proper procedure
Interflight failure and maintenance system – something will spill over to the next flight
Custom menus for loading/unloading fuel and passengers, calling for pushback…
Ability to customize the plane with winglets and set other options to be saved or default
A fully interactive electronic checklist with all procedures programmed in
Auto mode for the checklist where the AI automatically preforms the procedures and the pilot only watches and checks
Tutorial mode where the pilot follows the AI’s instructions and visual aids
Stephen Dutton
2nd November 2013