

Stephen
-
Posts
2734 -
Joined
-
Last visited
-
Days Won
355
Content Type
Profiles
Forums
Articles
Posts posted by Stephen
-
-
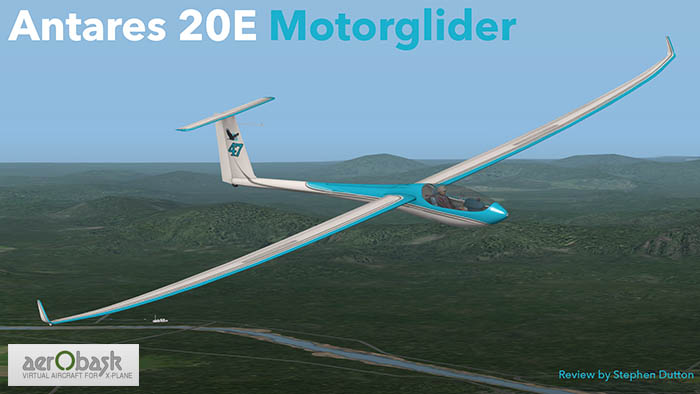
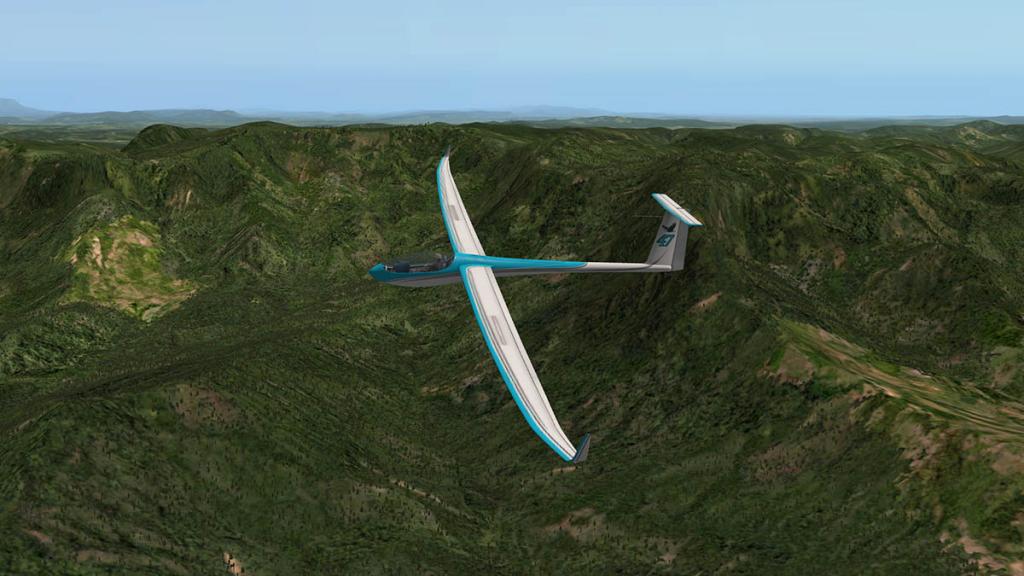
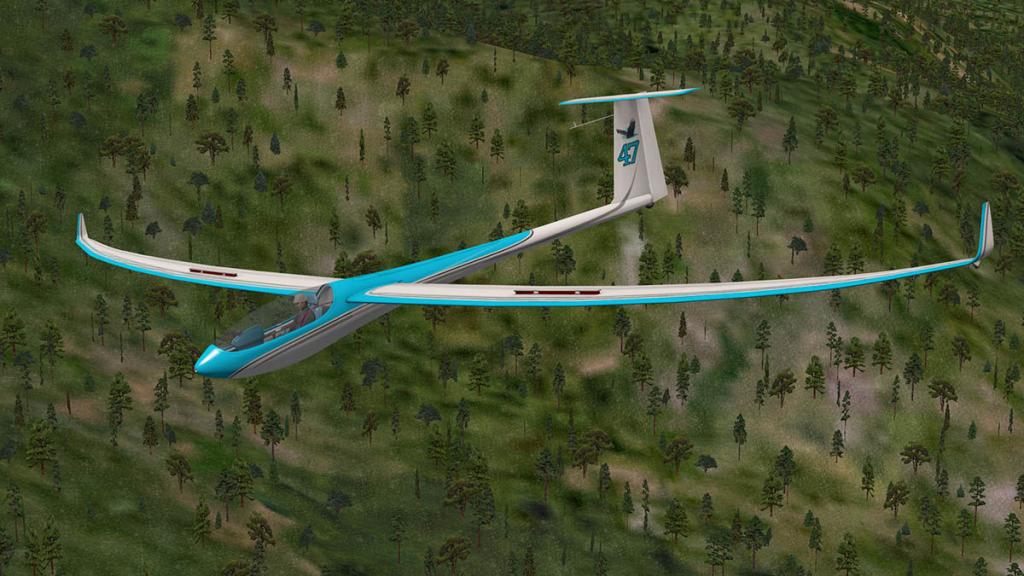
Aircraft Review : Antares 20E Motorglider by Aerobask
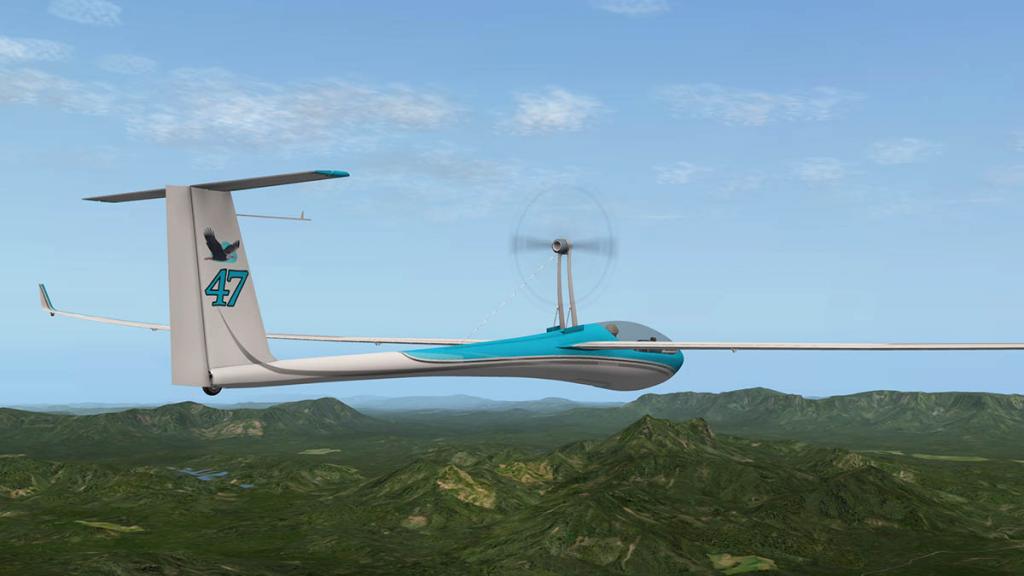
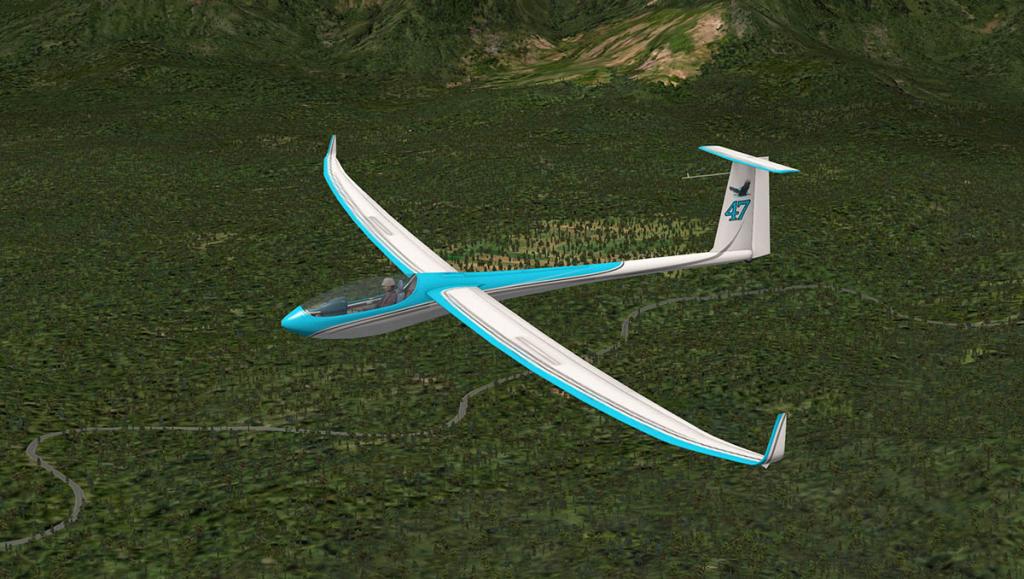
If you want a minority strain of aviation in X-Plane then Gliders would be it. New gliders are very rare and in fact this is the first review I have ever done on a glider. But like any facet of flying they are very interesting and has mostly the question to be poised is that has the free spirit of these thermal machines been given at most a good aircraft to fly. Well that aspect is changed here, because Aerobask has created the Antares 20E that is a quality motorglider and not just a basic or average glider to fill in a category or be a machine to in fill a basic need. Many pilots would love to learn and fly gliders and with this aircraft that will give them now the chance to savor the quieter and more purer aspects of flying.
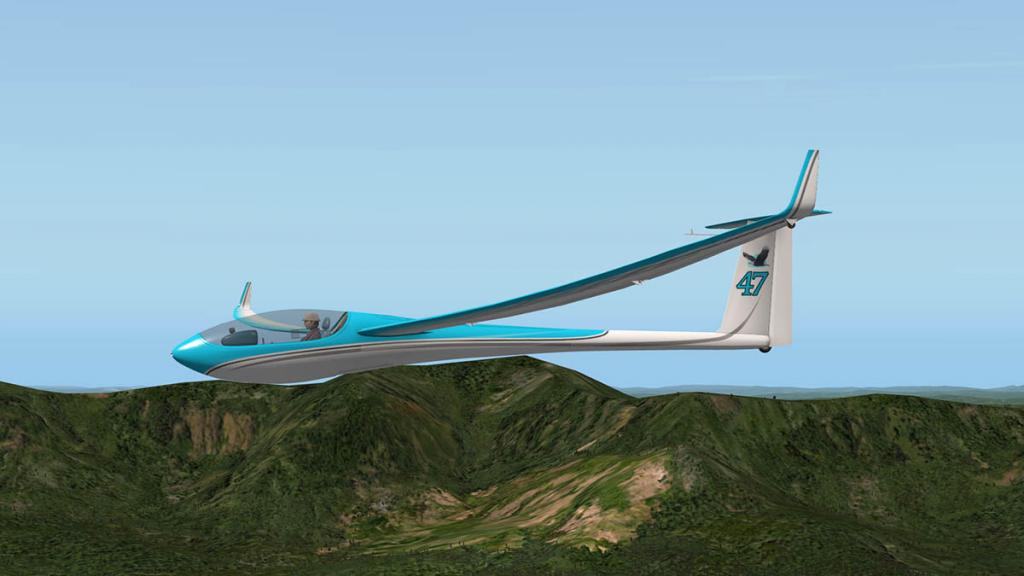
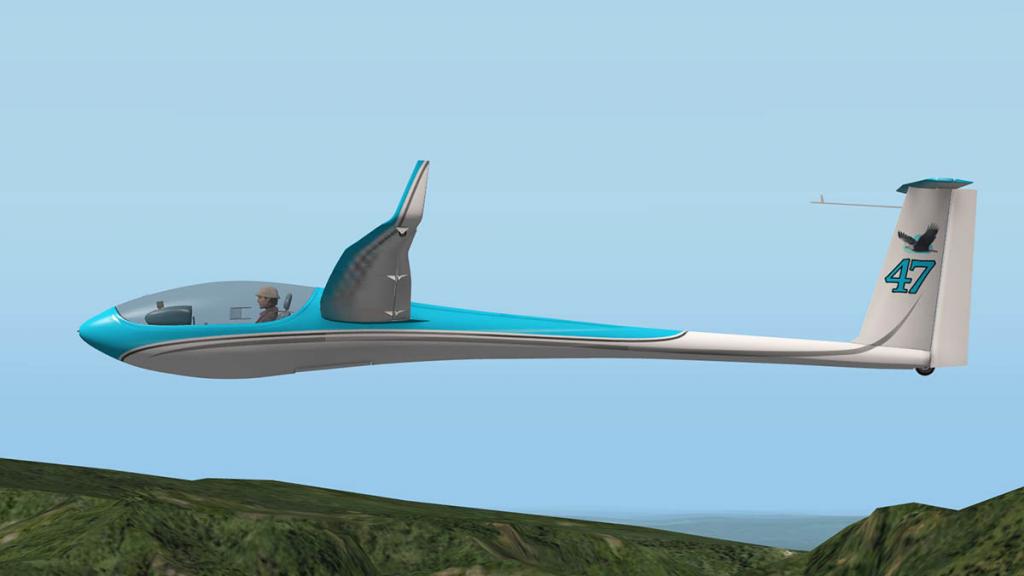
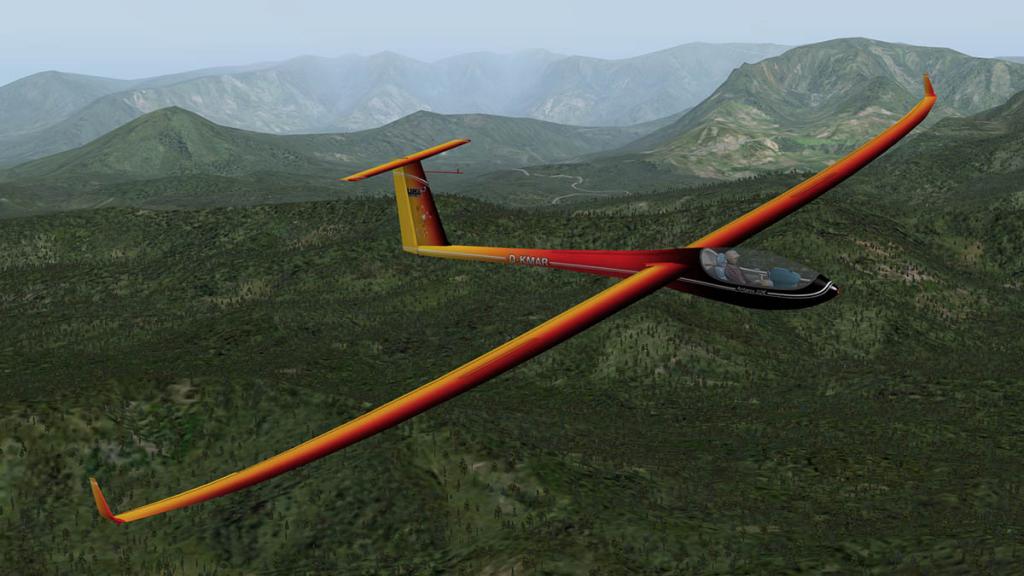
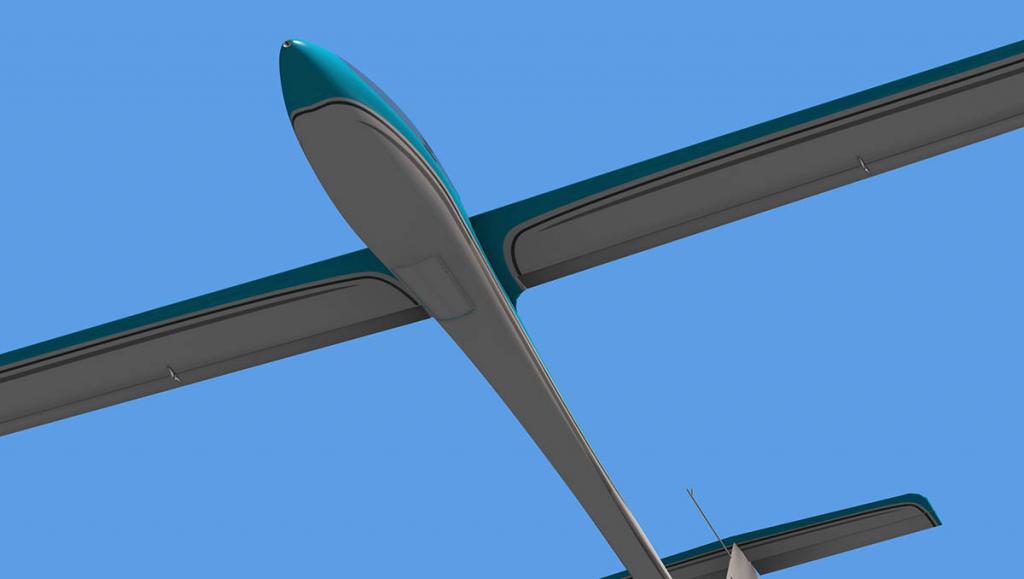
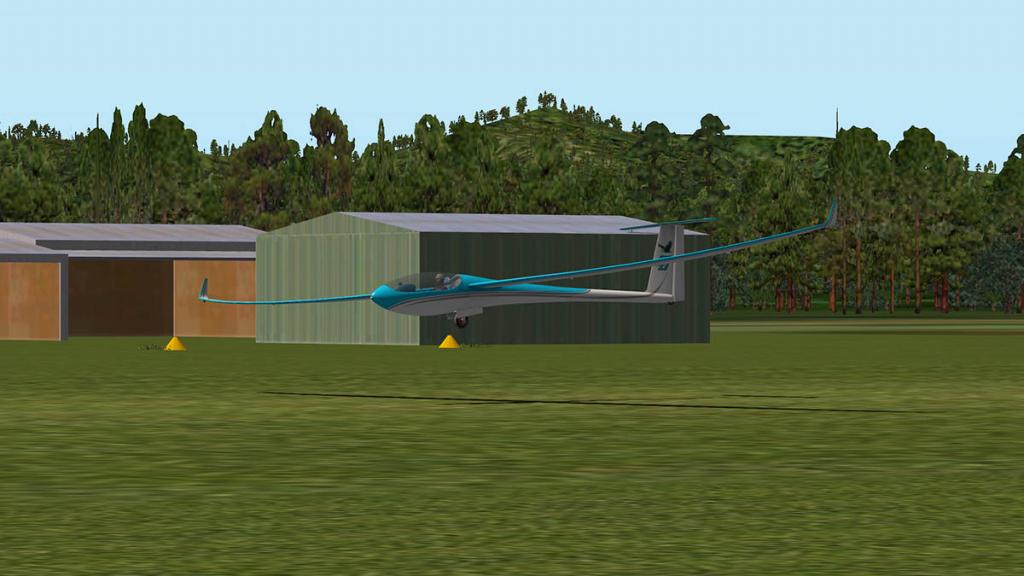
Aerobask's designs are very much based on the composite designs that are prevalent with very modern aircraft. That aspect of course is also perfect to design a glider. As the clean air smooth shapes and build materials are very much the same.
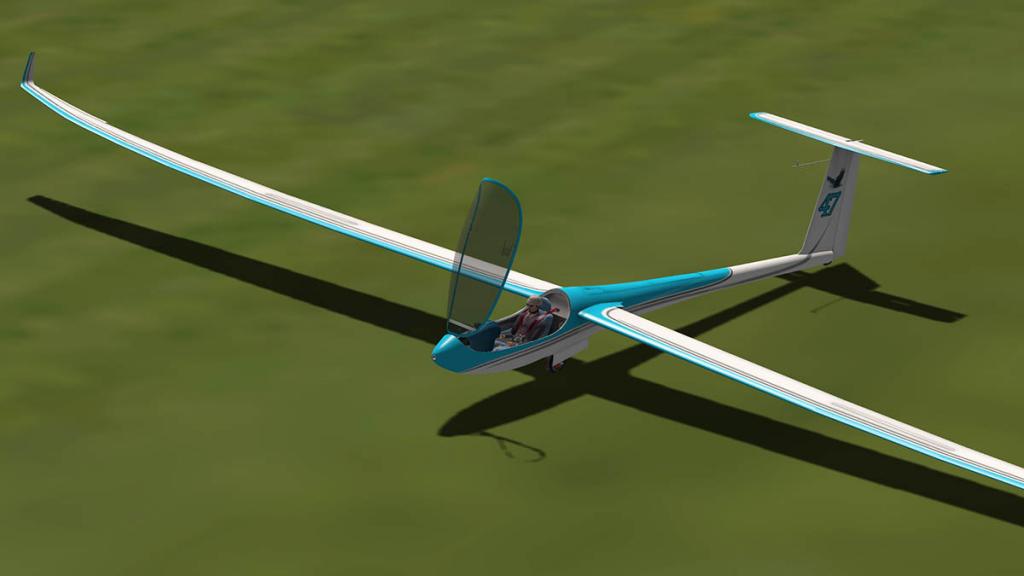

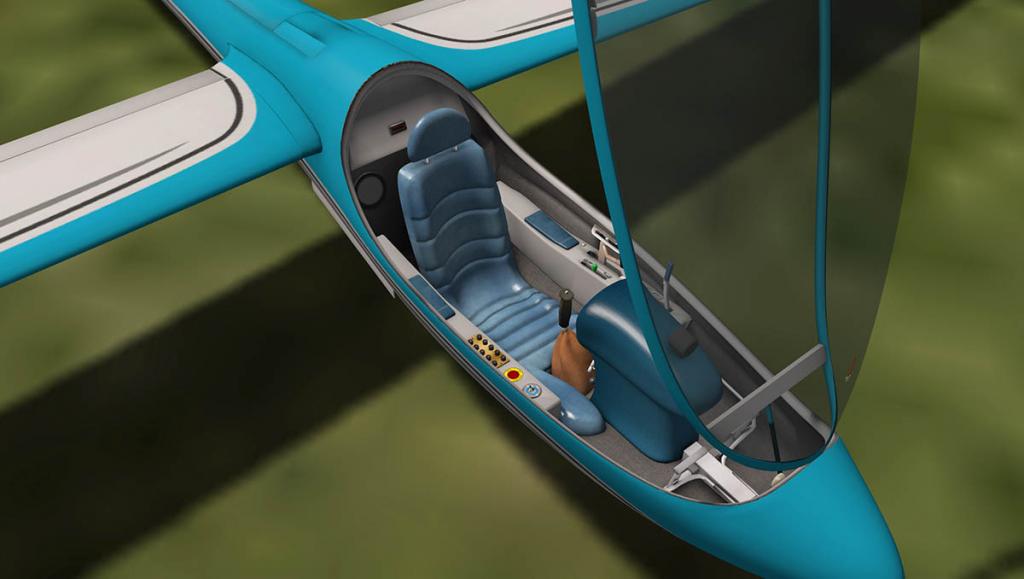

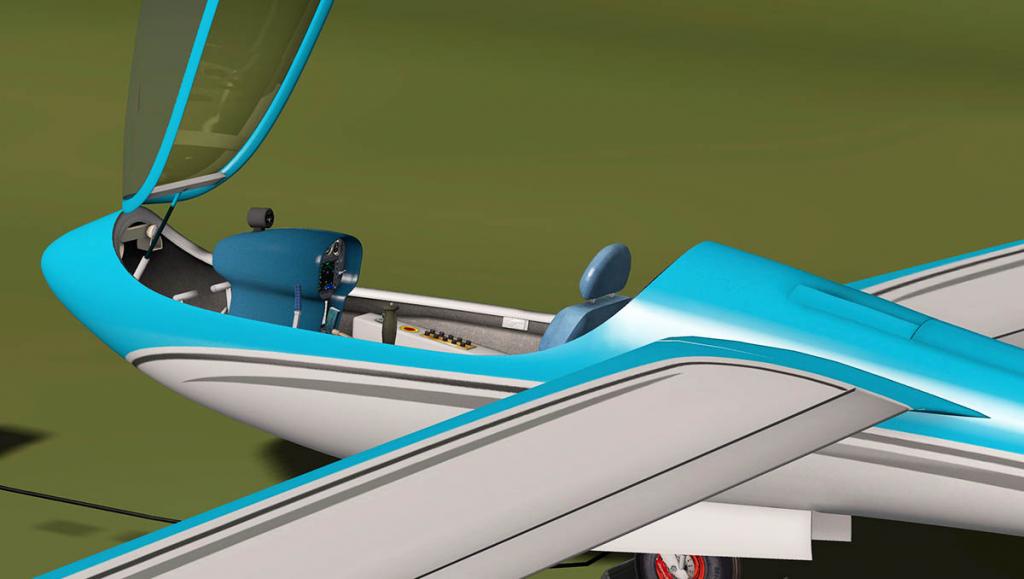
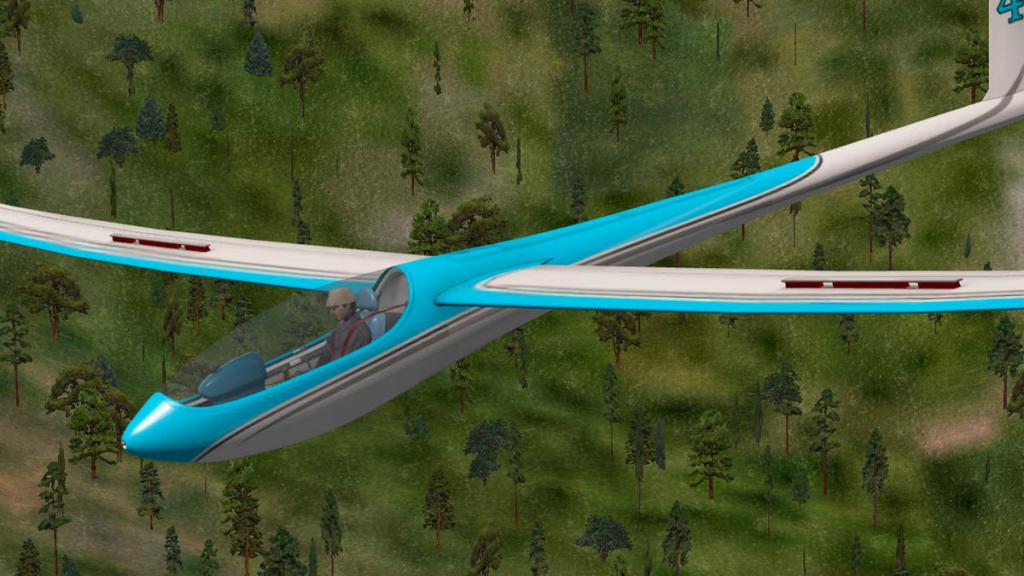
Design wise the Antares 20E is first rate, and like I mentioned a real quality glider in detail and fittings that is usually absent from these sort of aircraft. Too true is the fact that gliders are very basic flying machines. There are no rows of switches and in fact there not much in the way of complex systems or lighting at all for you to master. The main aspect of flying gliders is well "the seat of your pants" or your natural instincts of staying in the air as long as you can.
For a first time guide to gliding, then Aerobask has included a tutorial called "Fly_your_glider_in_X-Plane" in the documents folder, and it is worth a moments to understand the way these machines work the thermals to do what they do. But some feel to aircraft in knowing how even the basic aircraft fly and how you operate them can go a long way here as well.


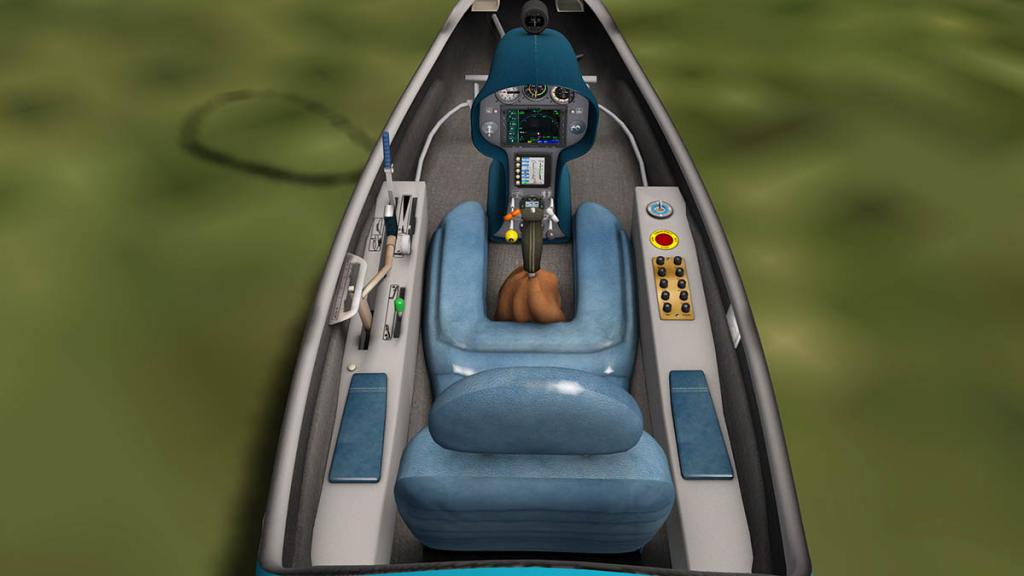
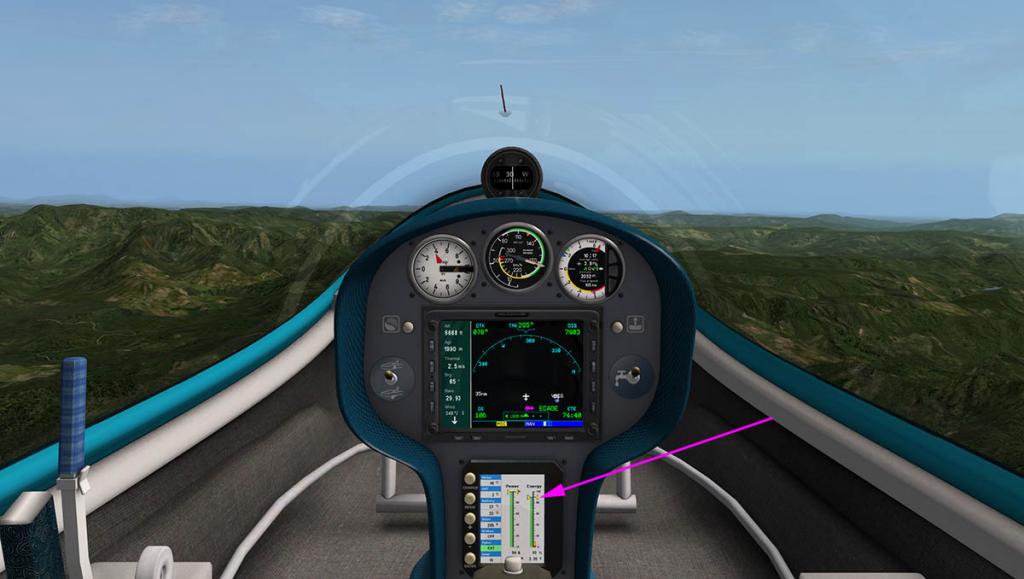
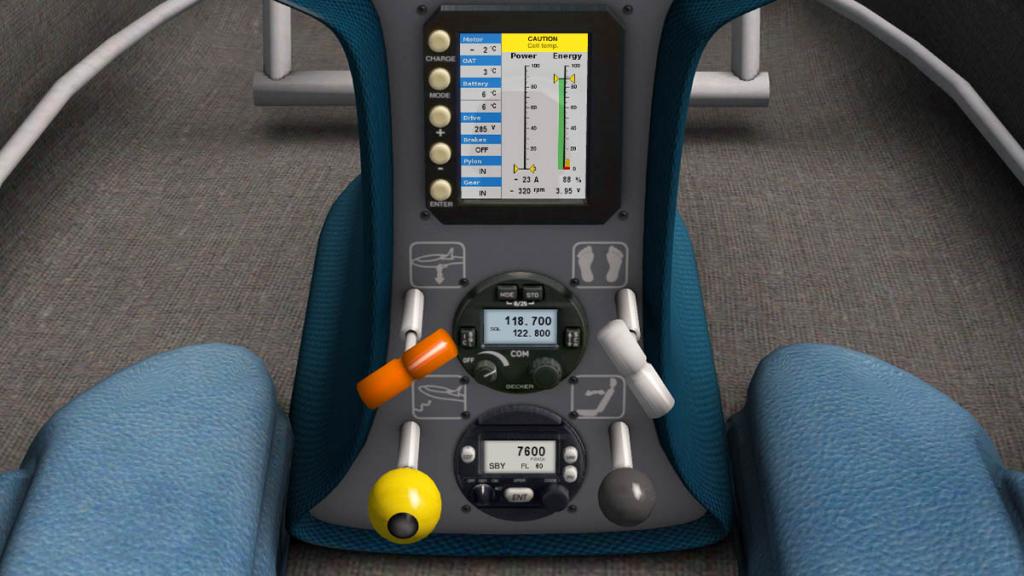
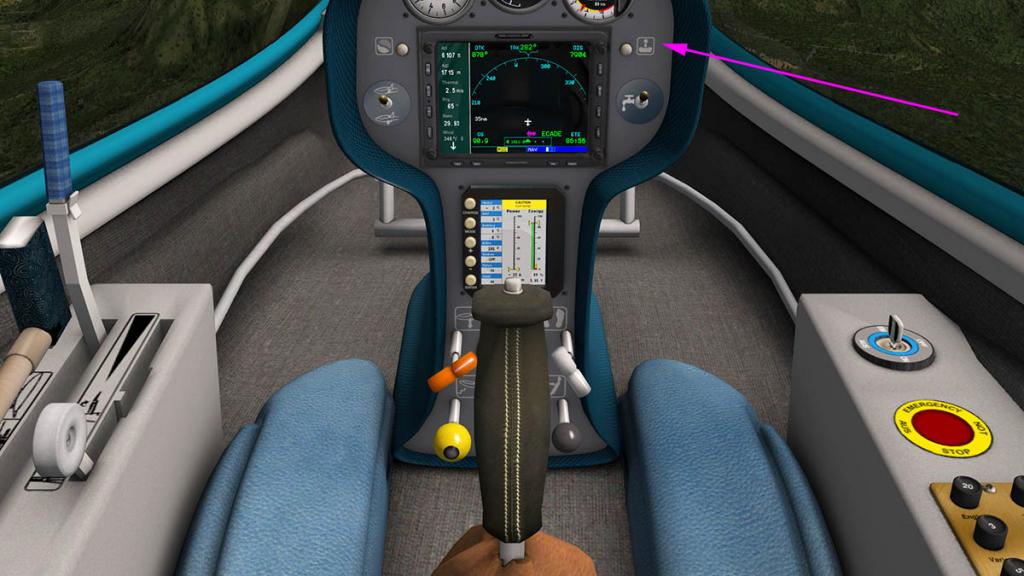
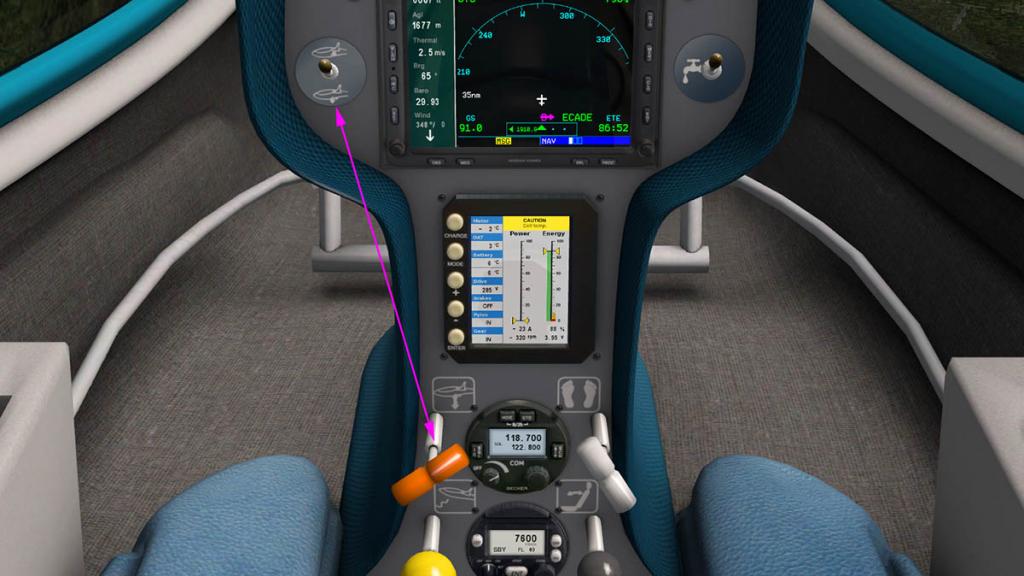
To power up you just turn on the key on the right hand panel. Remember from the moment you turn the power on, until till you either turn it off or the power dies is to be aware of that this is a one way power discharge, there are no generators on a glider or a very long power cable to keep everything running when the battery runs out. But the systems are also very power efficient. There is a way to recharge your battery, as you can attach a portable generator to the glider (Note: for the generator to work you have to be in "Start each flight with engines running" box ticked off (MenuBar/Settings/Operations & Warnings) or a cold start and all the power switched off on the glider or it won't appear) You operate the generator by the large buttons on the energy display.
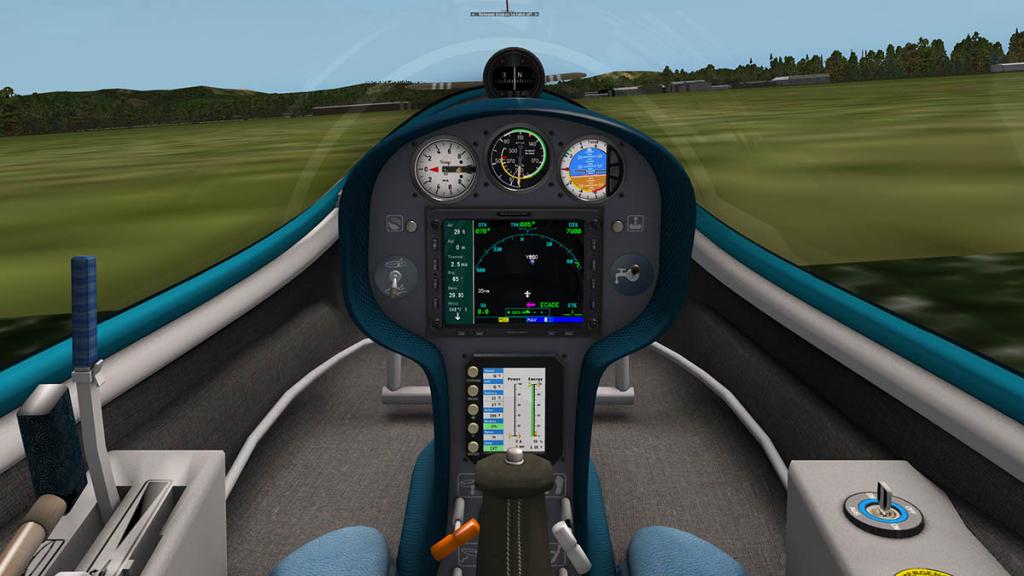
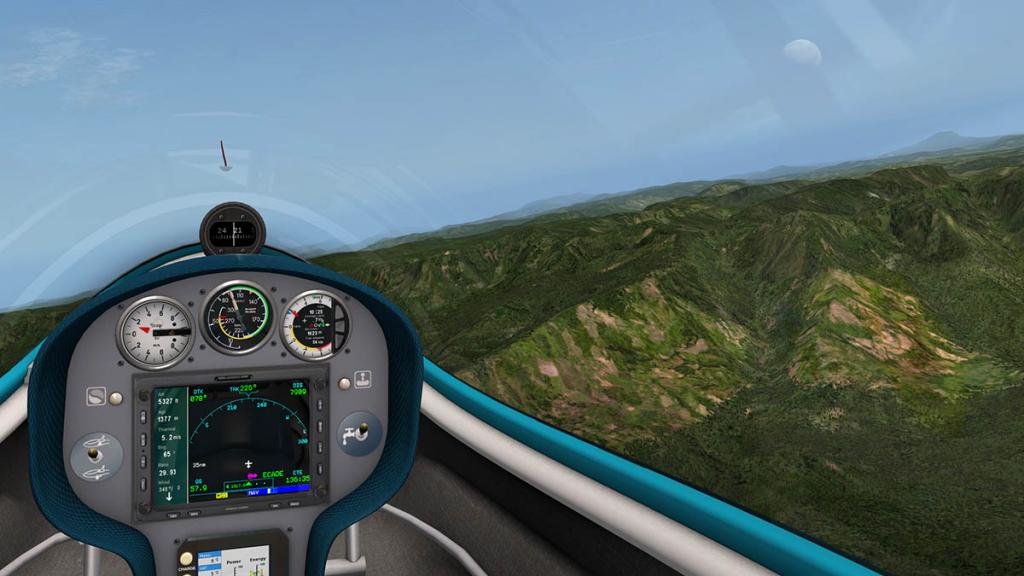
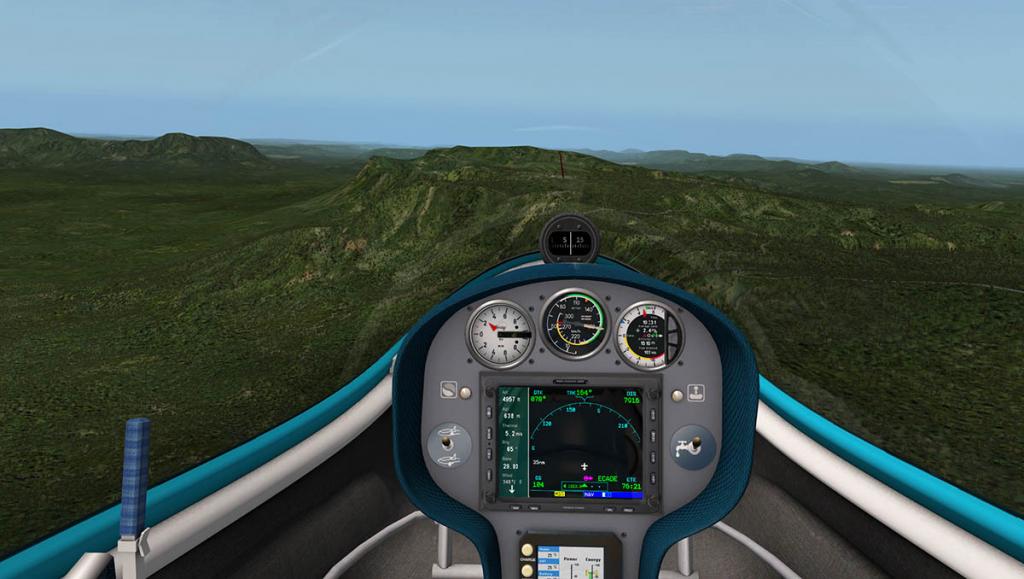
Ahead of you is a main display which is a hidden GNS530 with some basic access buttons (mostly a MAP view) and essential glider instruments on a side display (including: Power on/off, FLARM Radar, MacCready Estimate, display checklist polar and set Baro and you can set the MAP zoom (range) and MacCready blue triangle adjuster as well. Set out below is a power display for energy used and power (being) used.

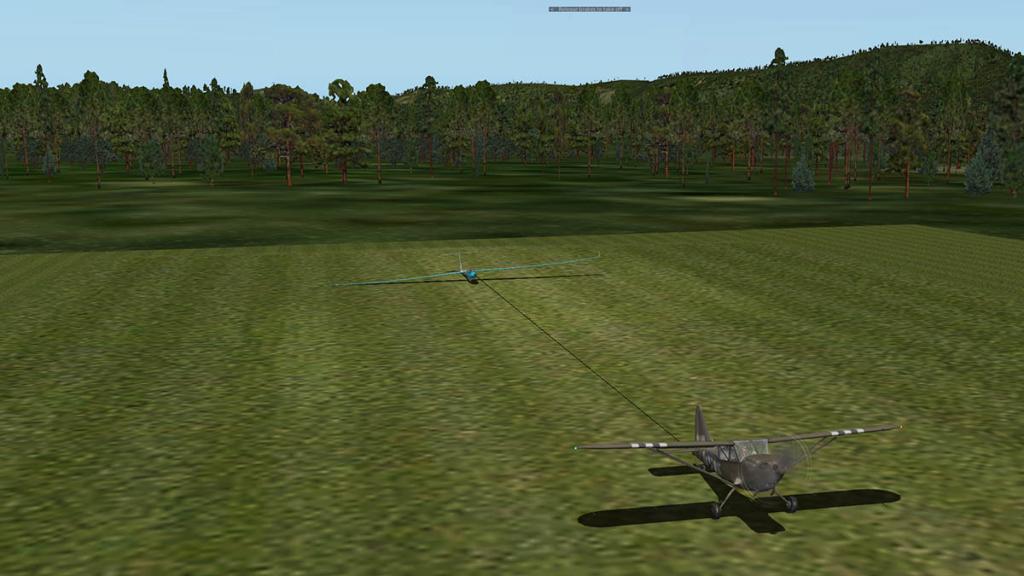
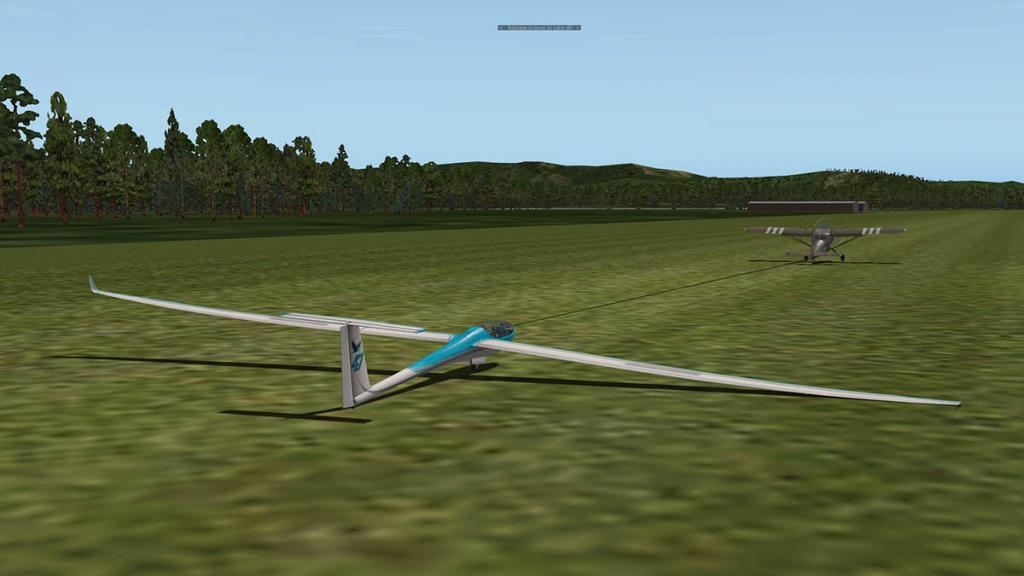
X-Plane thankfully provides a way to get yourself airborne. In the X-Plane menus "Aircraft/Aircraft & Simulations/Glider-Tow" you can attach a StinsonL5 aircraft to tow your glider into the air.

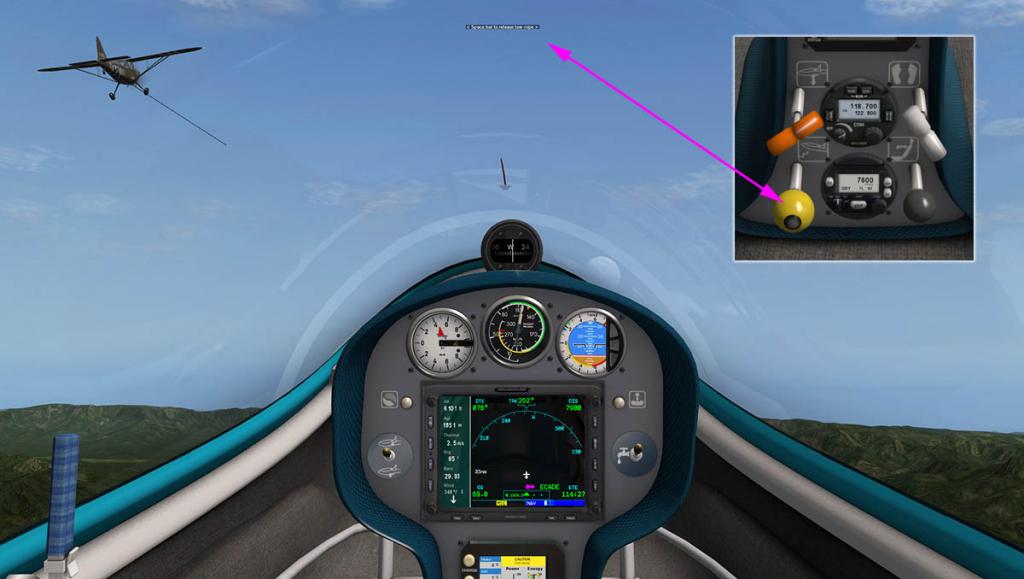
To activate the tow you just release the ground brake (or key) and the Stinson will simply drag you into the air. As the Stinson climbs you up in a left hand circle rotation, it takes a little practise to get the right flow in the tow and stay in the right place behind the towing aircraft. Next is the release and the best point to make is too make sure you release in the right direction that you want to go. There is no point just releasing and then finding that you are pointing in the wrong direction as you will lose energy in correcting that mistake. To release from the Stinson then press your spacebar or pull out the yellow knob on the main lower panel... In an instant it is all very quiet and the Stinson immediately vanishes (shame it does not just fly away?).
In most cases you won't be in the right position to start your gliding effectively. But you do have a great feature that fixes that problem.
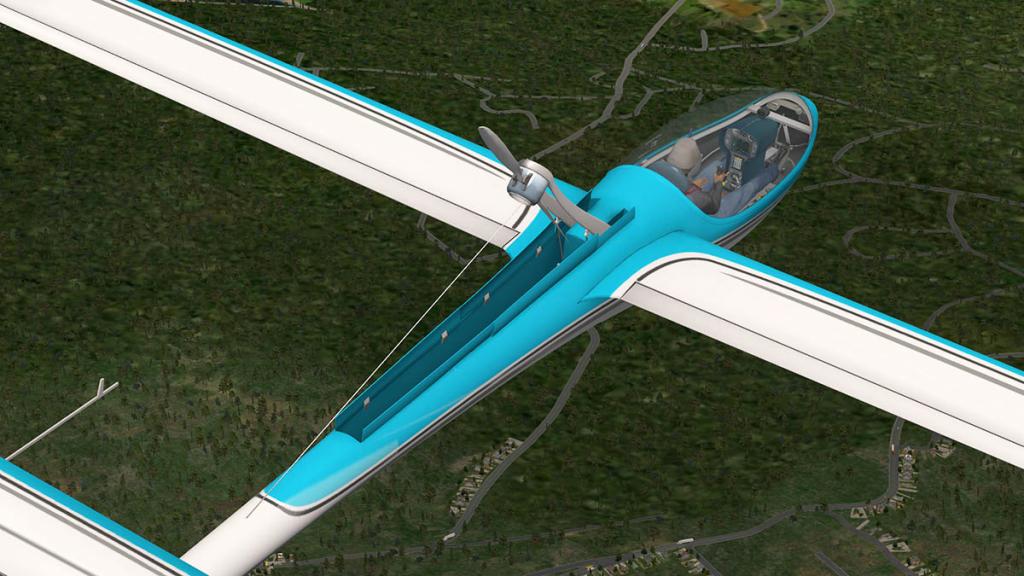
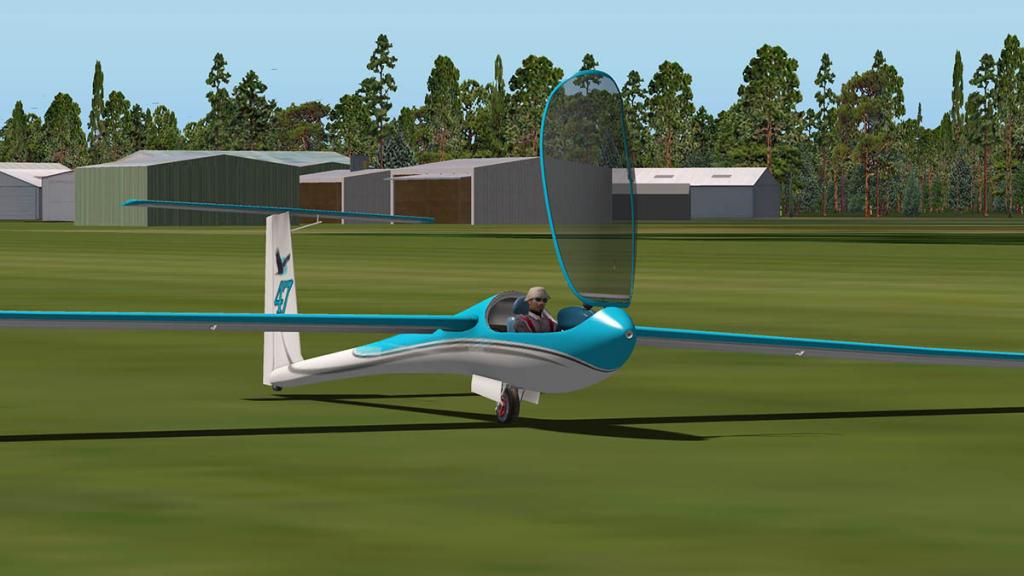
Push the knobbed lever on your left forward and you will get a lot of clanking going on behind your head... then as like in a James Bond movie up comes an electric driven propeller! push the throttle forward and away you go. You can also use this push power source from the runway, but that will just use up a lot your of valuable battery life, you have however with a full battery charge the capacity of a direct climb right up to 10000ft.
I preferred to use this tow option for two reasons, 1) to push me into the right position and then climb up quickly to the correct altitude after releasing the tow, and 2) if I lose too much height later on, I can then simply push myself back up again to recover my lost (valuable) altitude. The power currently being consumed by that electric propeller is noted on the display as is the loss of of power already discharged. The electric motor is brushless-fixedshaft running on DCDC current and running at 190 288V, and pulling up to 160A. The EM42 is a 42kW (57HP) motor that can deliver maximum torque over a wide RPM range, with a total efficiency of 90% and a maximum torque of 216 Nm, the motor is exceptional and not only within aviation.


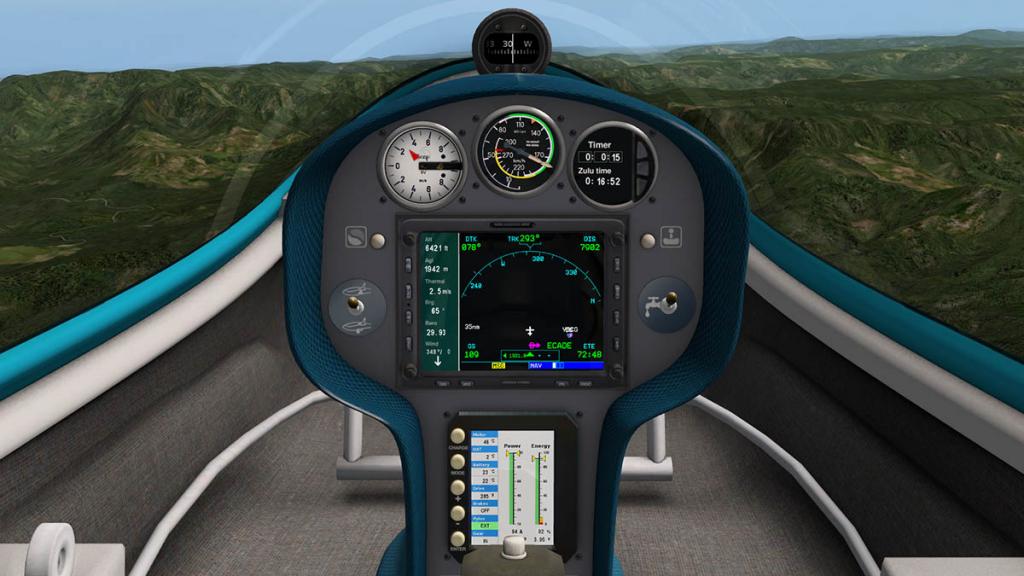

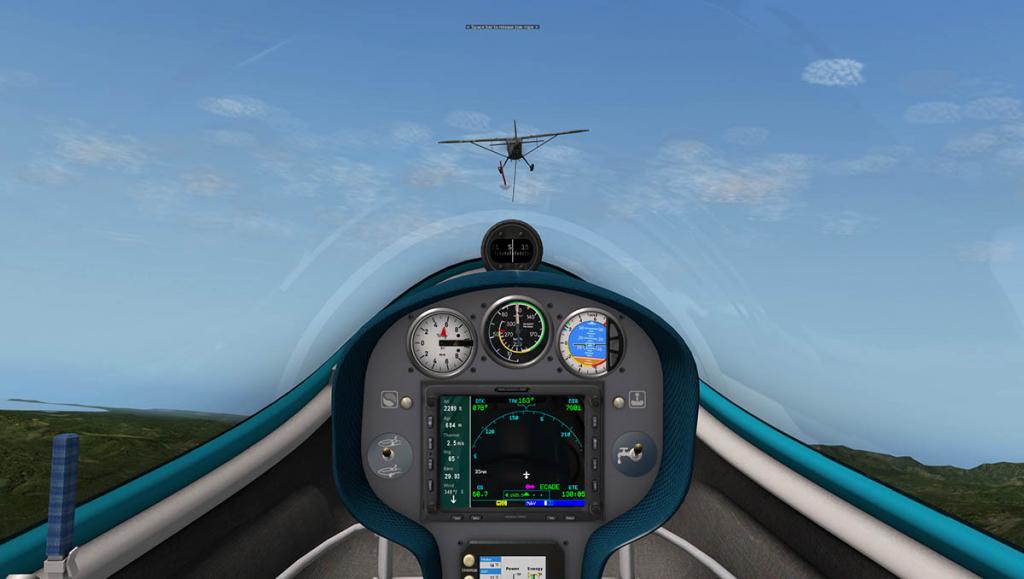
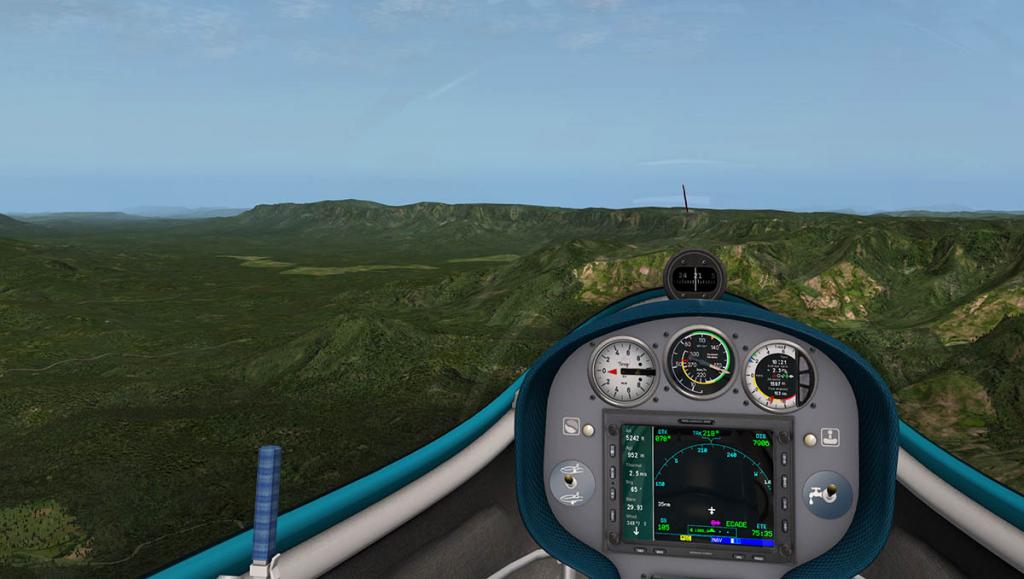
You have three main instruments in left: Variometer (vertical speed), centre: airspeed indicator right: three settings in one as the Variometer V80 in a "Total Energy" - "Artificial Horizon" - "Timer". The Total Energy has a built in vario sound that gives you an aural positive or negative warning (It can be switched off). vario sound is very helpful when flying in thermals because the sound pitches inform you about parameters in the strength and the direction of the thermal. And with this it allows without constantly keeping an eye on the panel in that you can fly more safely by watching the outside exterior environment.
McCready Setting: This instrument computes the estimate gliding time (in mn) and the range (in NM) you can fly, according to the actual conditions (altitude and glide ratio). Mix this informations with GNS DMEfunction (DIS) to see if your next waypoint or airport can be reached. MacCready triangle Speed to fly Set estimate thermals strength on the ring with the rotating knob on the left top of the main MAP display. According to blue MacCready triangle, the V80 screen shows you your optimal speed to reach next thermal.
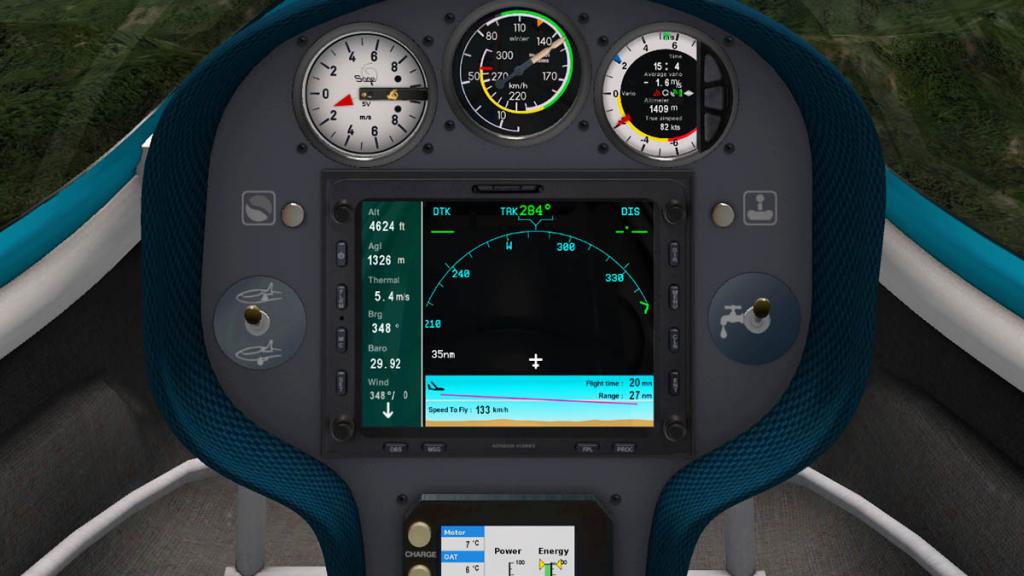
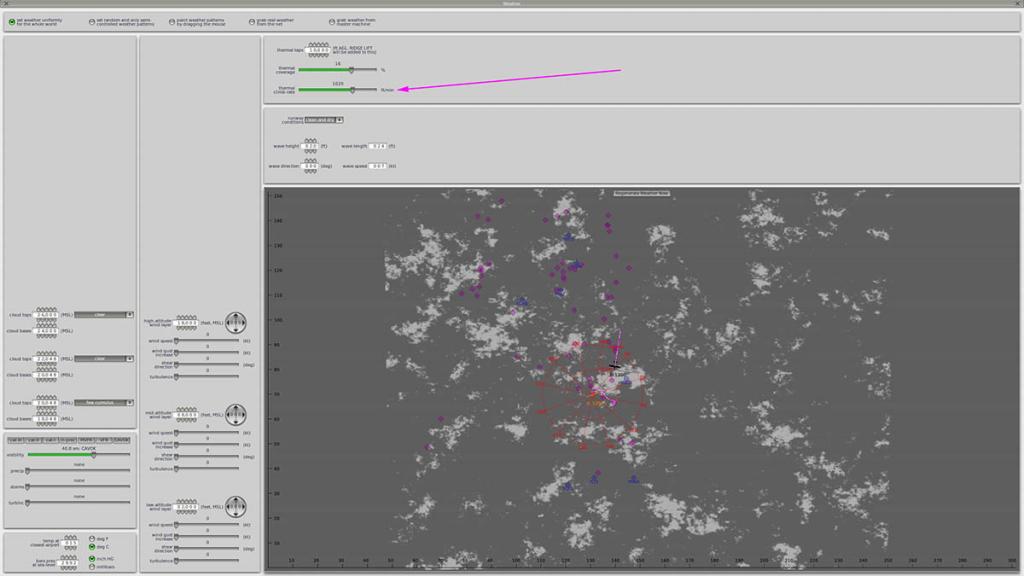
The "MC" button will show you a graph on the lower display that gives you your STF (Speed to fly) - Vz - Range/Flight Time Estimate. You can adjust your X-Plane thermal settings on the "MenuBar/Environment/Weather/Set Weather Uniformly for the whole world" page in two sliders for "thermal coverage" and "thermal climb-rate". X-Plane does however simplify a lot thermals management, it is not perfect... but it does work on quite a good level here.
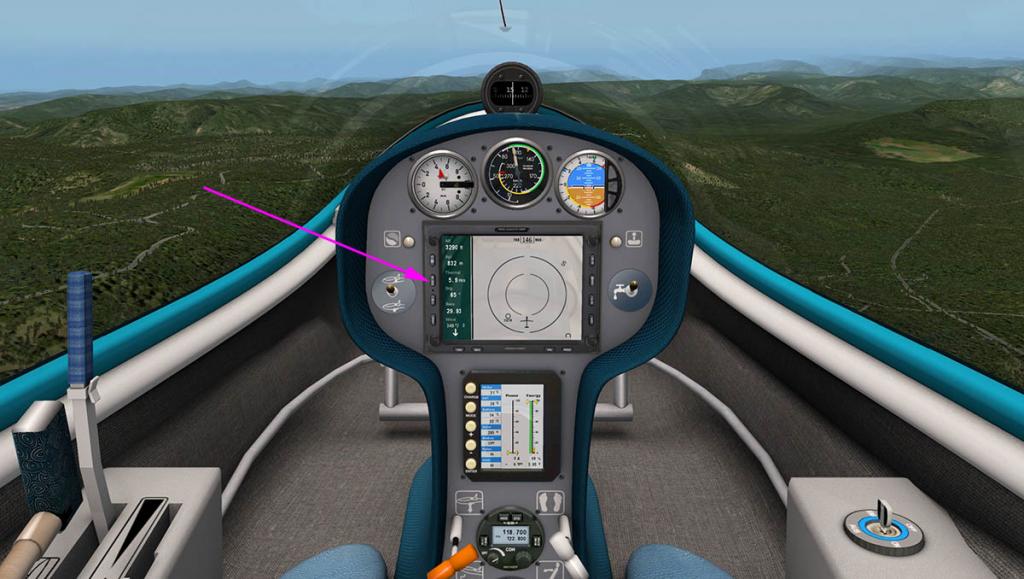
The FLARM (Grey Screen) is an electronic alarm system to prevent crash risk between gliders or the ground and this is specific to gliding, but is closely related to TCAS in commercial aviation. Red diamonds are traffic near your position. The little red arrow indicates if it is climb or descent, and the black number is the relative height with your plane (in hundred feets : 5 FT and down arrow means this plane is 500 ft below your current position). A vocal "traffic" alert will ring if you are to close.


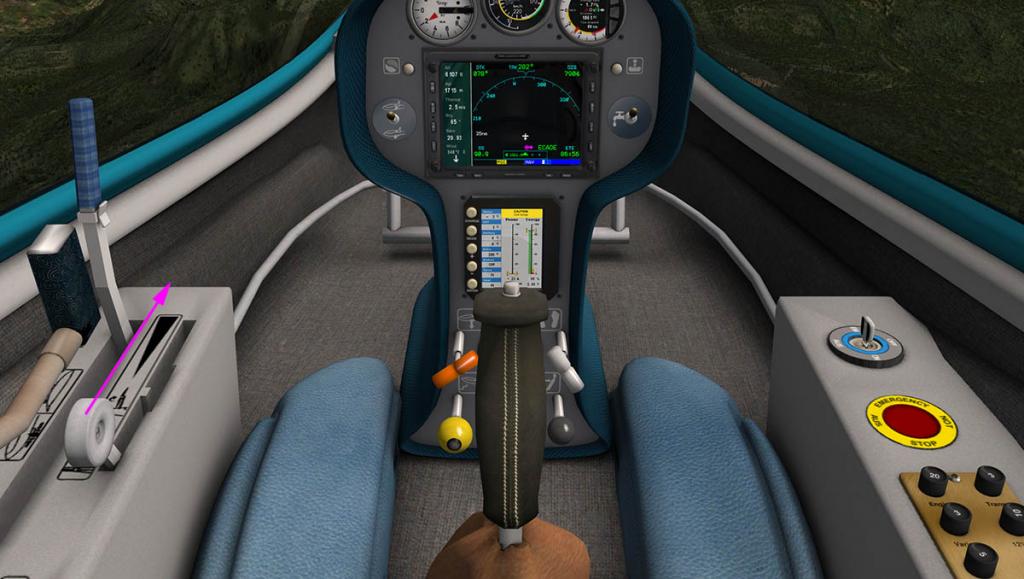
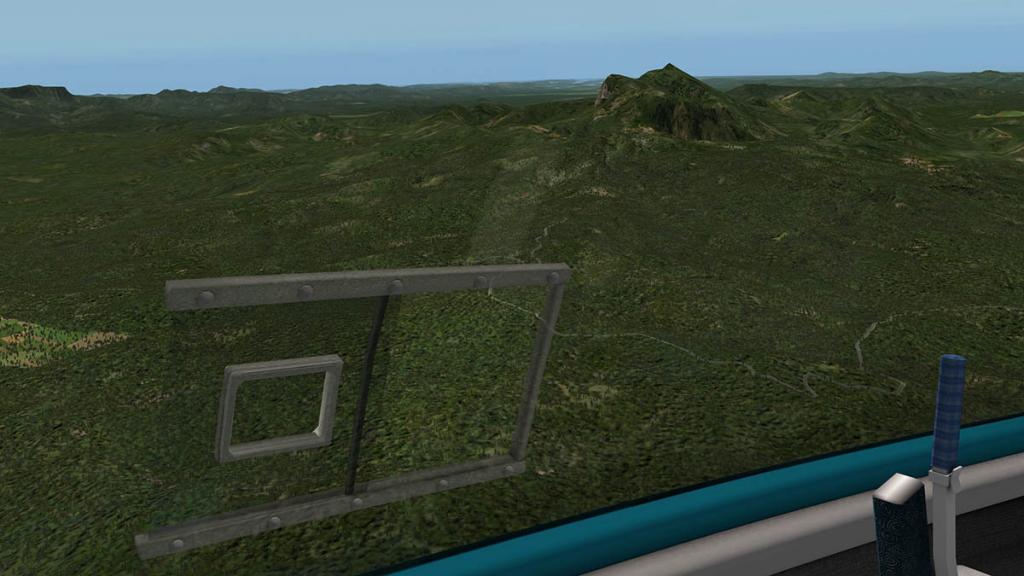
The rest of the controls and instruments are simple. Flap lever and large AirBrake levers with a neat "Trim/Pitch" lever are on the left and on the main panel is "Reflections" (on/off) "water ballast". With no water ballast your sink rate will be low, with water ballast your sink rate is higher, but it can also translated to a higher cross-country speed. You can refill the water ballast by using the X-Plane (MenuBar/Aircraft/Weight & fuel) menus and adjusting the "slung load weight" slider. You can also hide your joystick as well by the button top right.
Lower Instruments are a "Becker Avionics" AR6201 VHF AM/VHF transceiver and a "Trig" TT22 Mode 2 Transponder, both are supplied with excellent manuals and a third manual covering the LX9000 series Variometer system, all are worth reading and studying to get the best performance out of the glider.

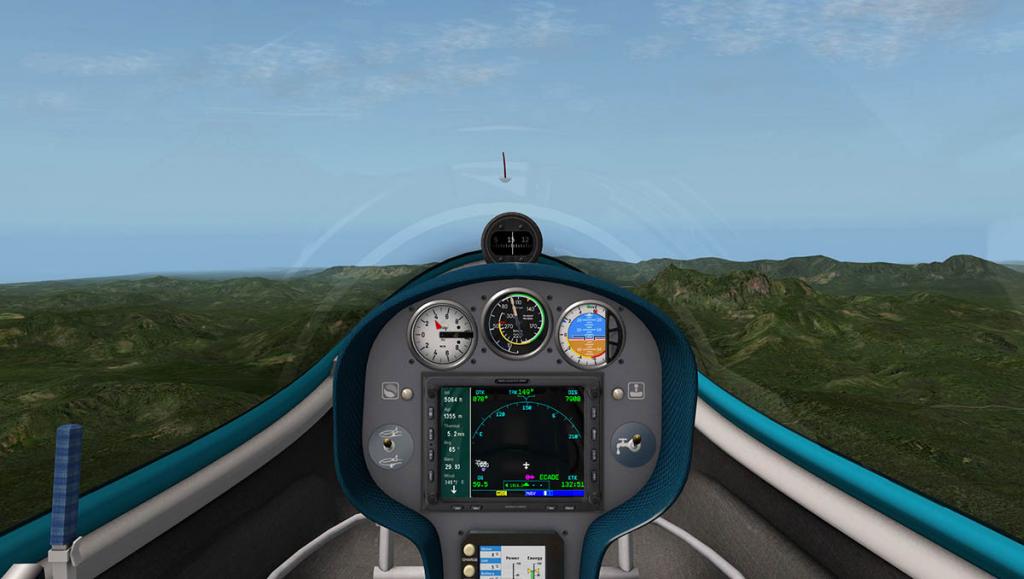

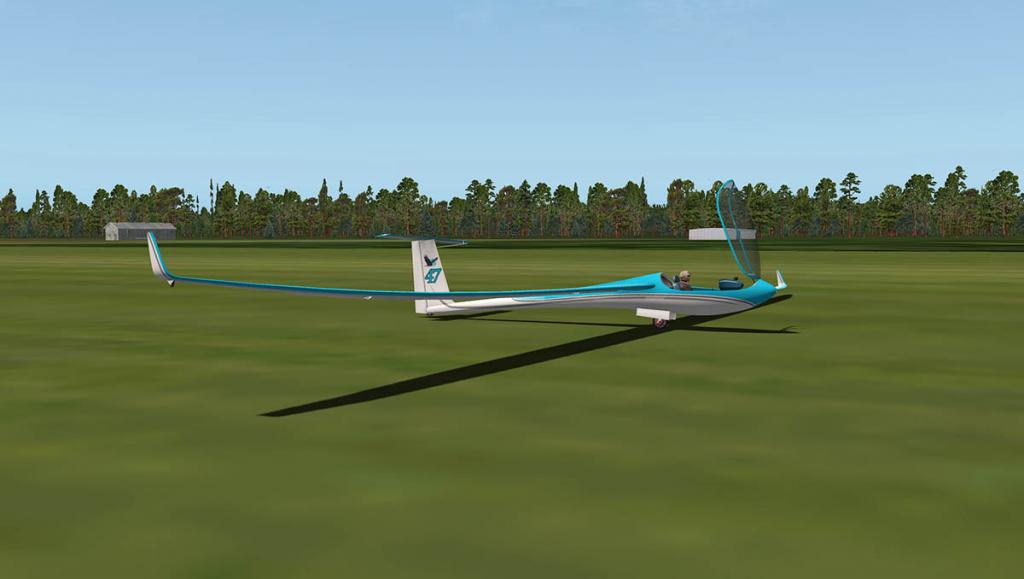
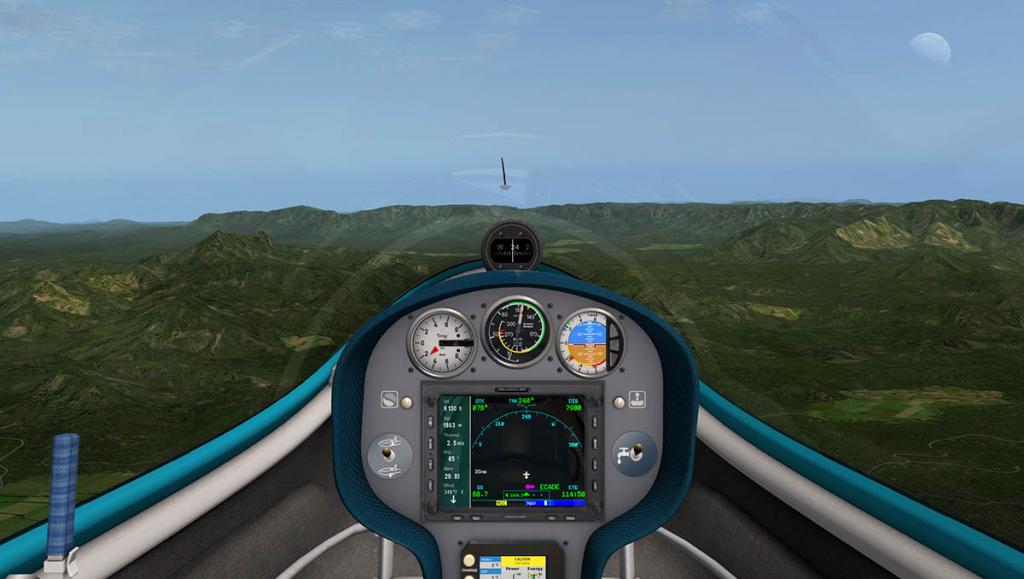
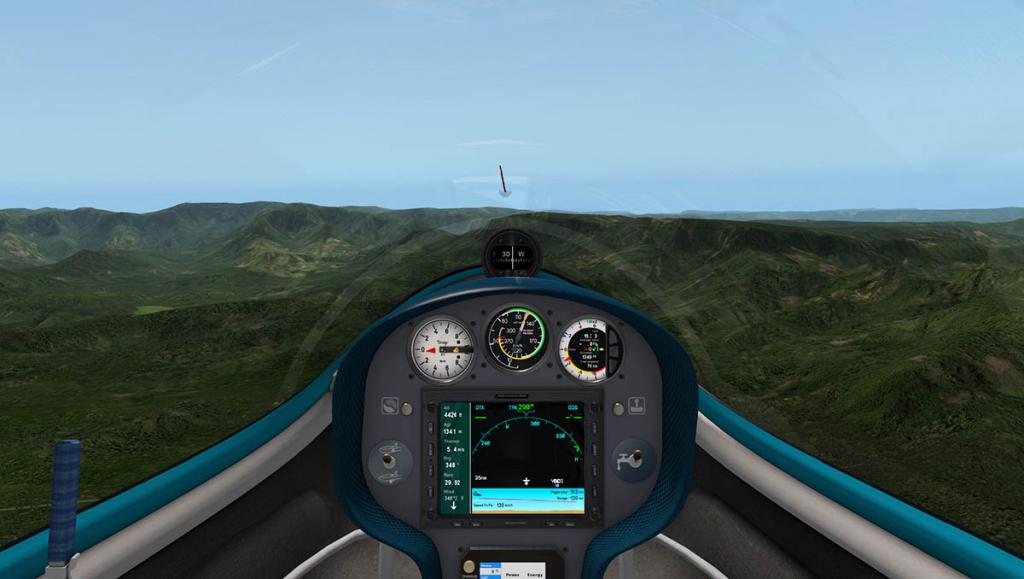
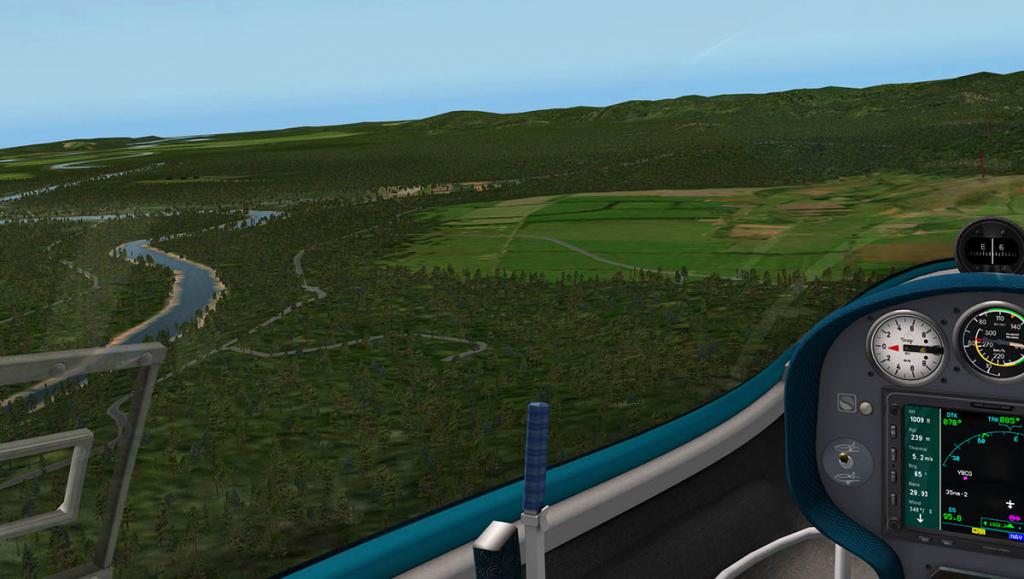
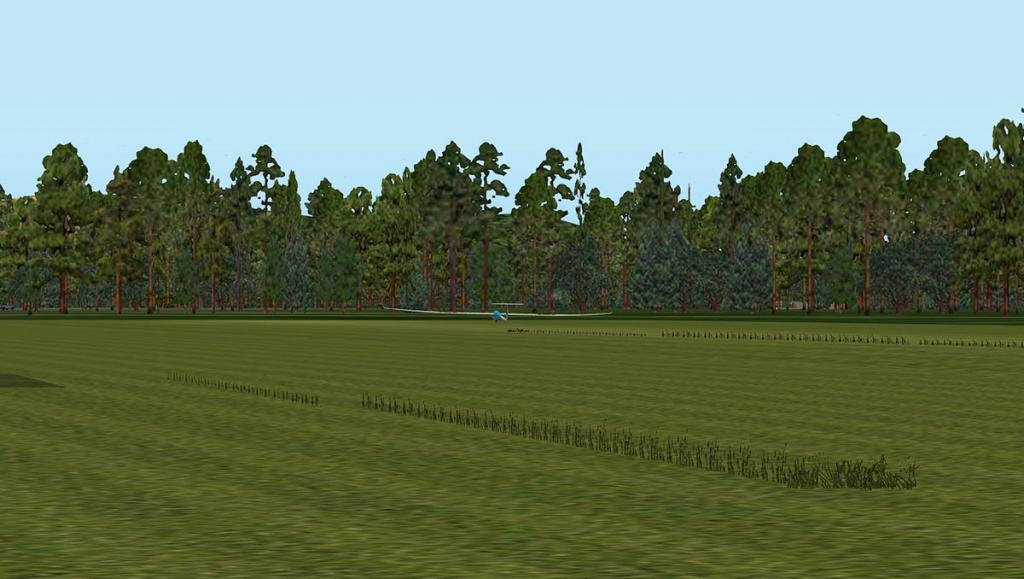
I'm no gliding expert, and I am the first to admit that. But I did find it quite easy to retain my height and even increase my altitude quite significantly. The area around North Tweed in Northern N.S.W, Australia is excellent glider country with the sheer cliff faces of the Macpherson Ranges proving excellent updrafts and of course the heat that comes with a tropical Australian summer. You are glued to the McCready instrument searching for those thermals... everyone says gliding is totally relaxing and serene, but I found it stressful and worrying as I looked anxiously at the gauges to find any lift and hints of survival with the dead calm around me.
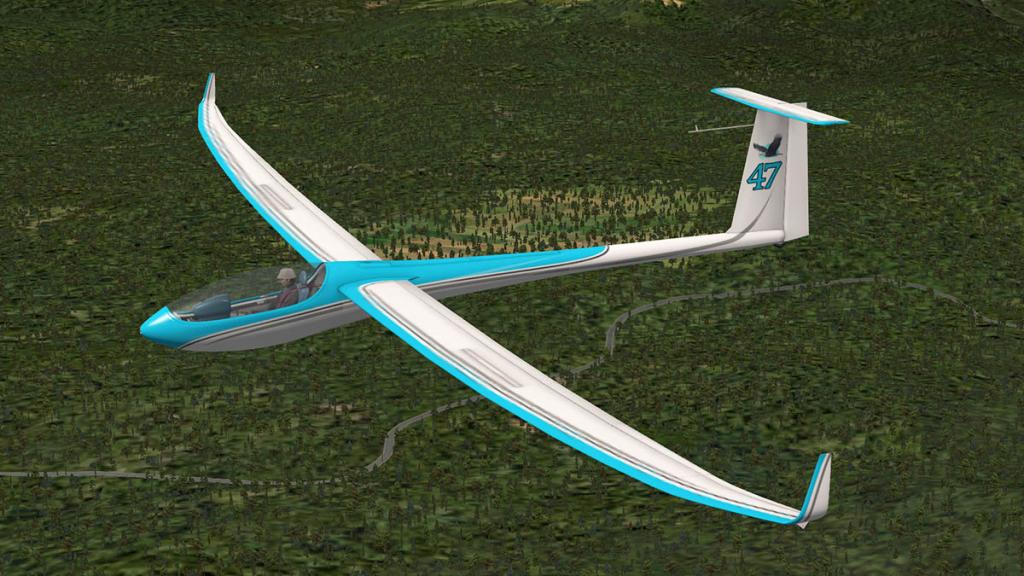
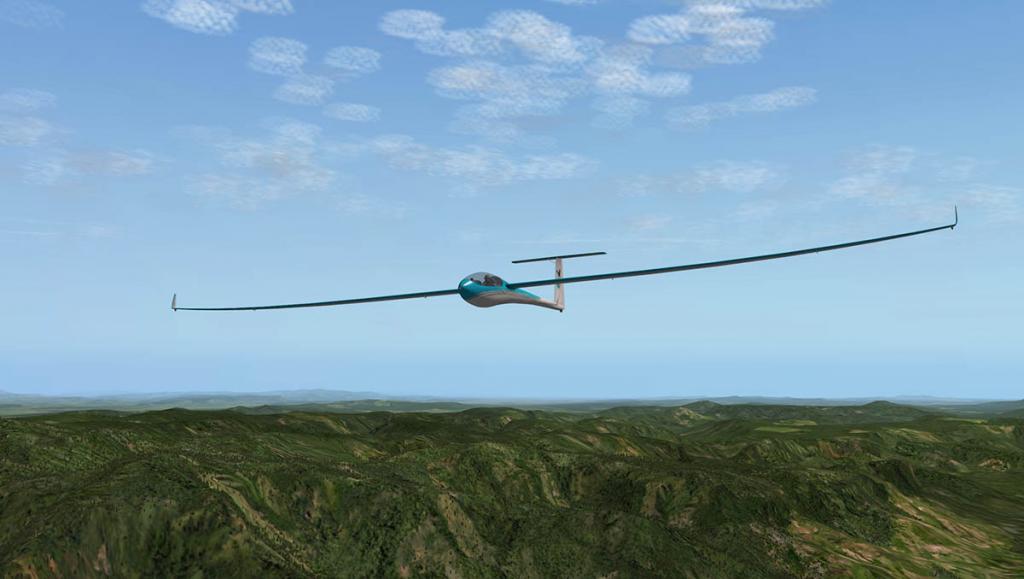
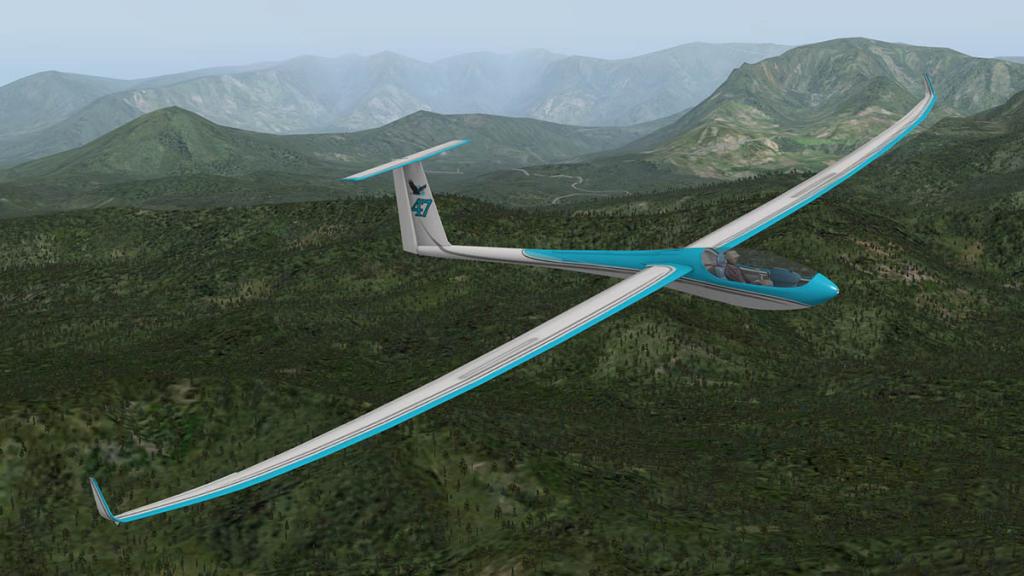
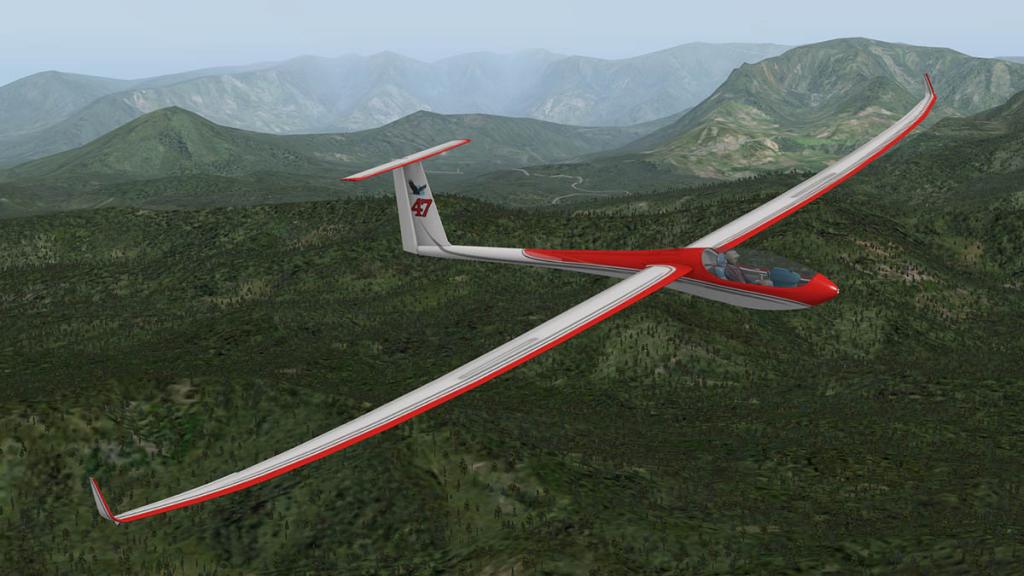
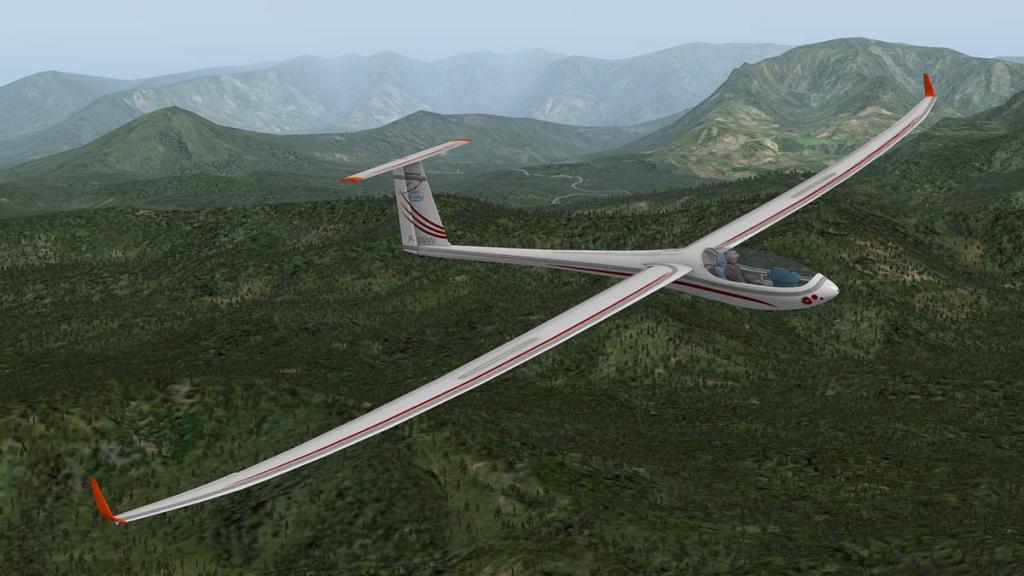
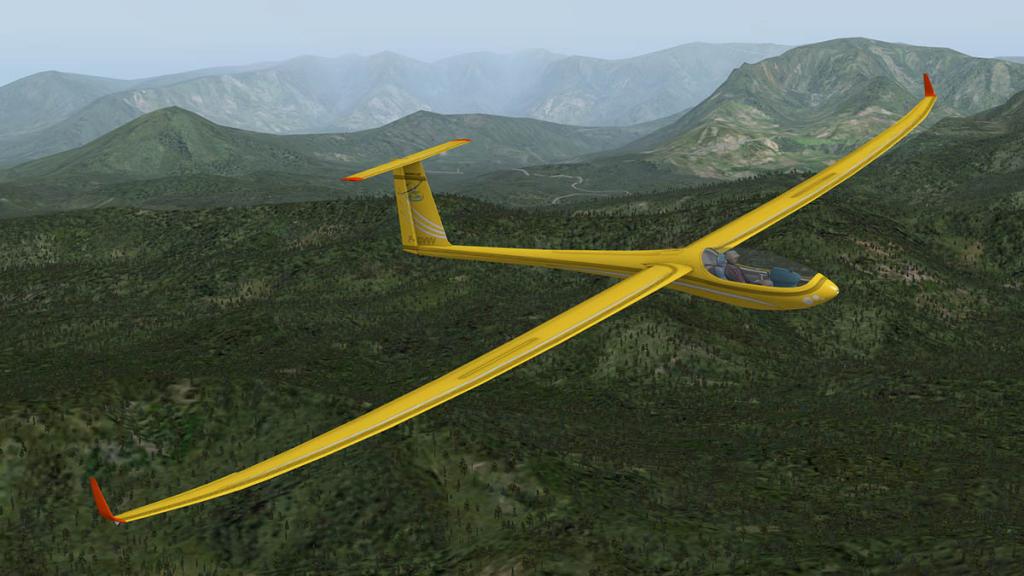
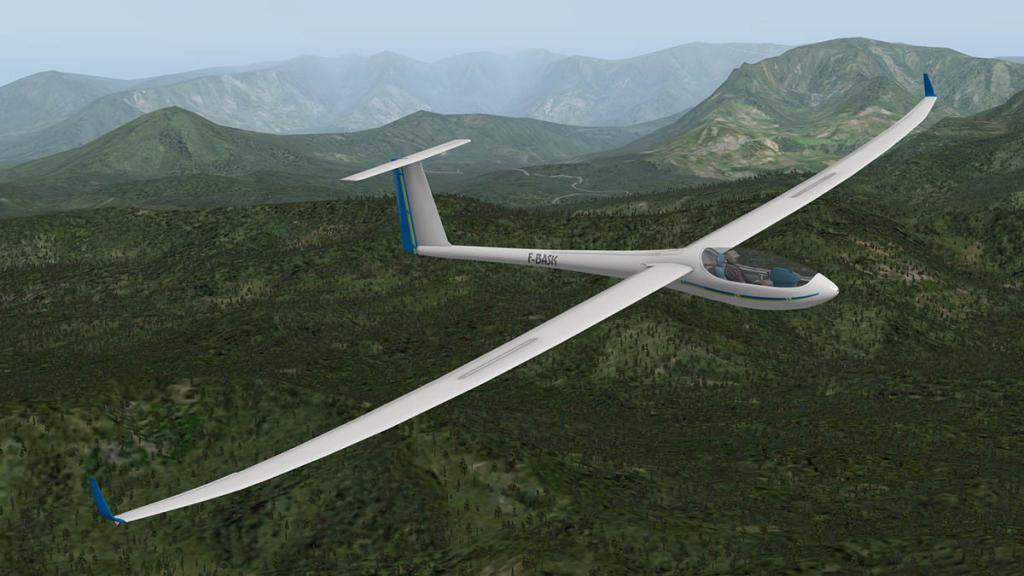
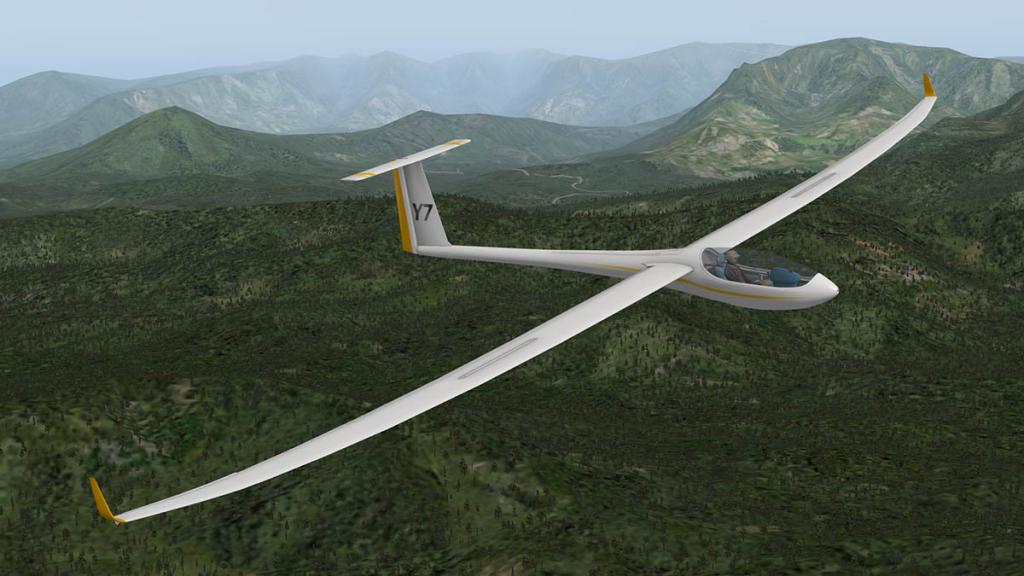
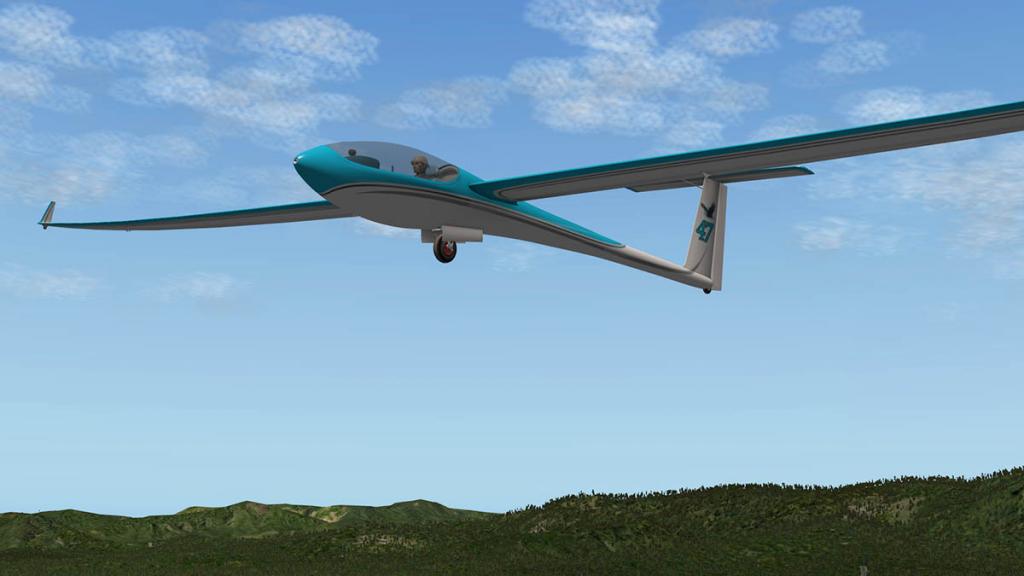
There are nine liveries with the German basic as the default. All are of high quality but a little blurry at low texture settings, but you are not going to get really extravagant designs on this airframe.
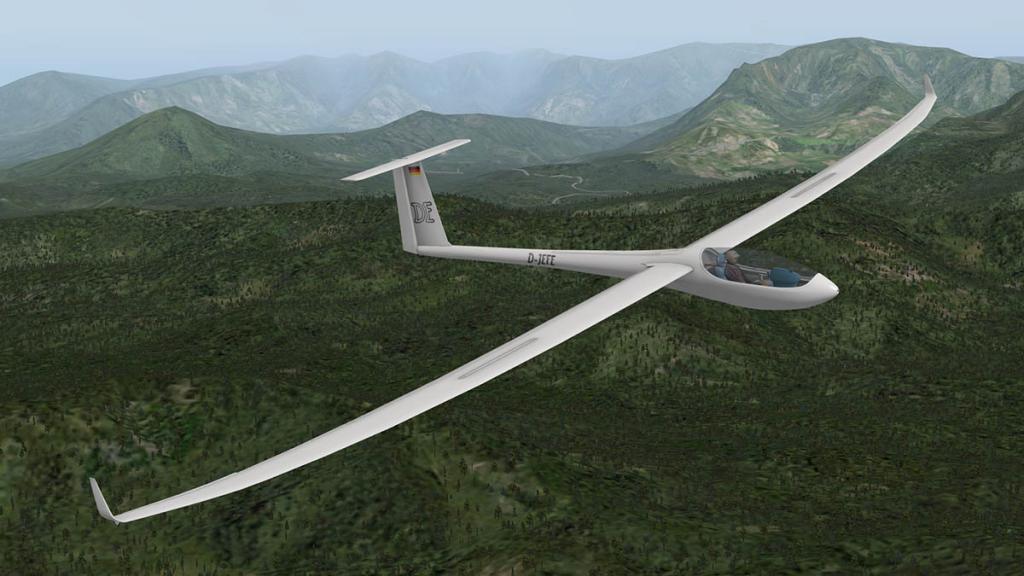

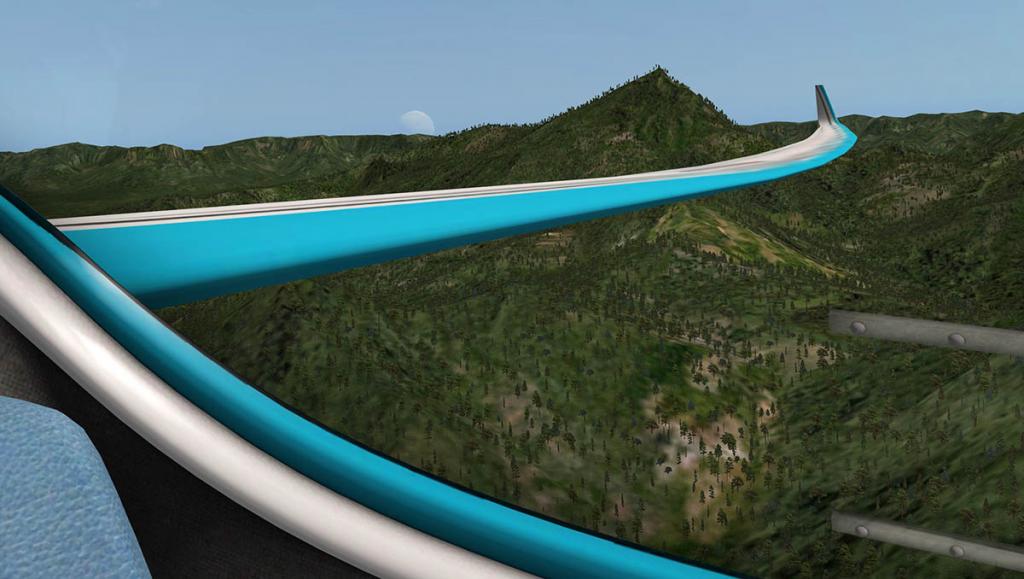
As you pitch down the speed rises. The sounds are simply excellent as the winds rush past the cockpit, the faster you go the higher the noise which is highly realistic. Open the little hatch in the canopy and the wind noise goes even higher... I loved it.
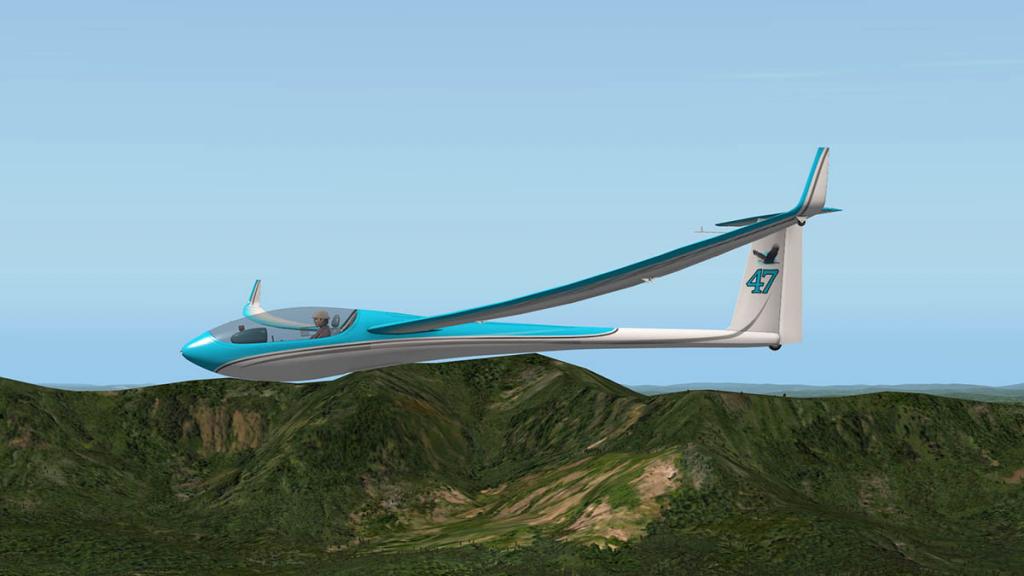

As the valley closes in around you, you feel more venerable... but somehow completely under control. The airbrakes are very efficient, as you can easily control your speed and so your descent. Threading your way down is a skill, but I found it far easier than I expected it to be.
Falling into a landing pattern keeps the airfield to my left, I found the height to distance quite easy to do and over a many flights never over-run the grass runways.

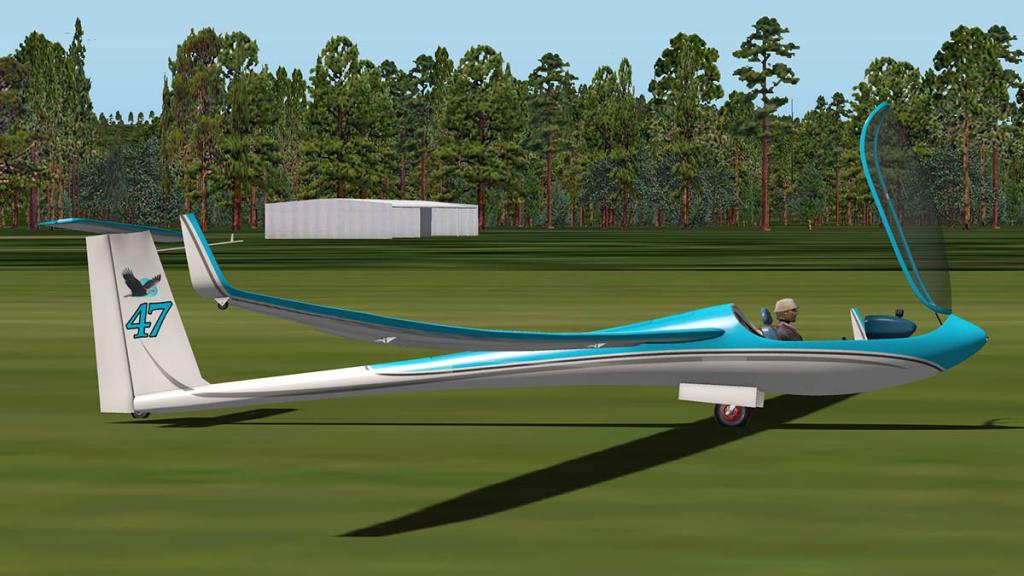
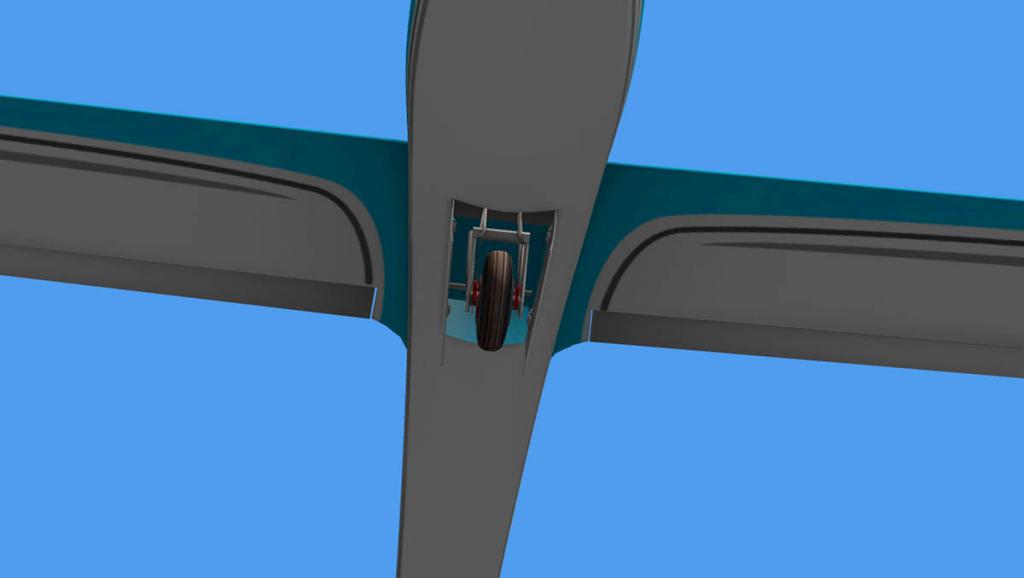
The main landing wheel is electrically operated by a switch on the panel, (up/down). There is a fail-safe drop handle (Orange) that will release the wheel manually, but once activated (pulled) the electric version won't work any more.
The flaps will reduce your speed but sometimes I needed a touch of the speedbrakes to correct the final speed on approach.
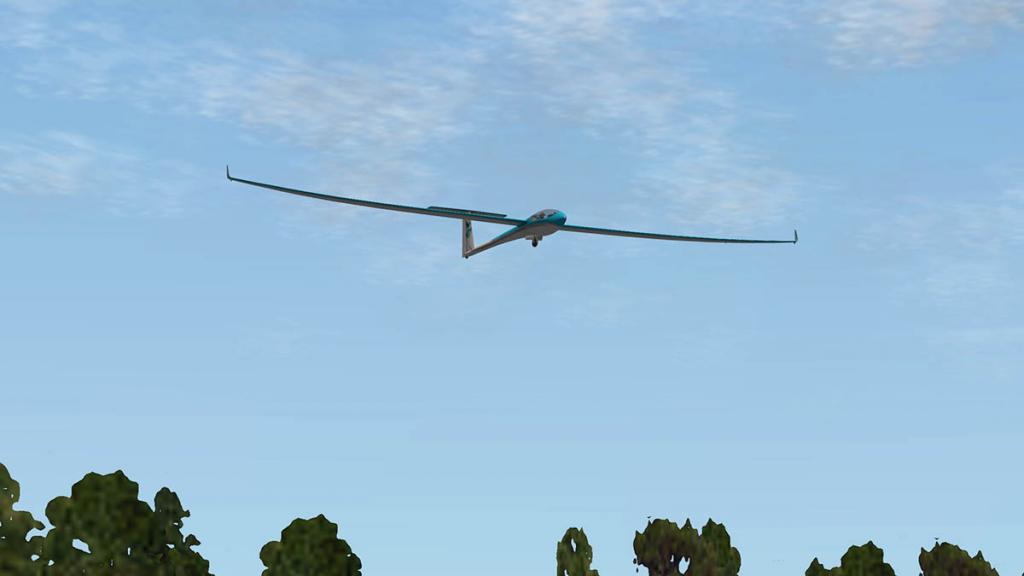

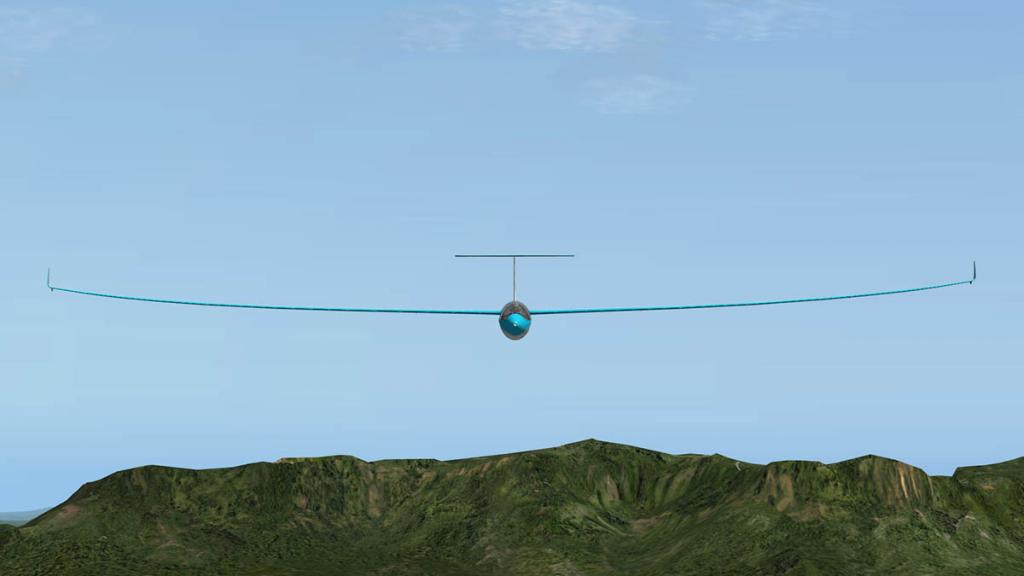
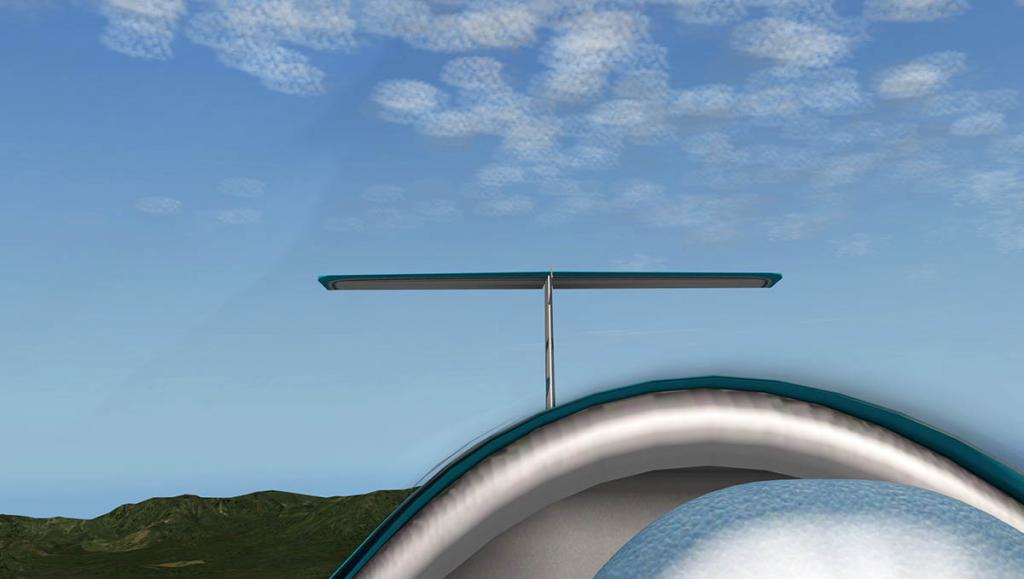
Stalling a glider is almost impossible, crashing is easy but low speeds are easy to control, so landings can be very easy and soft. and the control is far easier on approach than what you think they should be, those long wide wings make the aircraft very stable... but only in low winds.
Summary
The Antares20E is a great introduction to gliding, and for the experts finally a decent quality glider to fly. Gliding is easier that it looks if you are already quite proficient in the basic GA flying. and that elecrtic propeller will get you out of trouble as well if you are learning. I found I didn't need to use it much, mostly to up my altitude or move the aircraft to a better thermal location. The gadgets provided really also help you find and navigate the thermals like an expert, if you understand how they work. and that is the main reason to purchase this glider as those tools are modern and effective and not available on the usual basic gliders in the simulator. So the Antares20E is a great overall design, the best in this glider category that I know of... easy to learn and easy to fly and it also has the important depth required for the experts to fine-tune their skills.
So overall the Antares20E is simply excellent.
Review by Stephen Dutton
the Antares20E Motorglider by Aerobask will be available soon from the NEW! X-Plane.Org Store here : Antares 20E Motorglider
Price is US$19.95
Installation and Documents: ''Download is 237.00mb which is unzipped to your X-Plane in your Glider folder at 274.10mb'' : Start with the "Start each flight with engines running" box ticked off for the portable generator to work.
All documents are included and are excellent :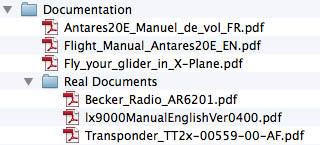
Support Thread : Antares 20E Motorglider
Copyright © 2014 : X-Plane Reviews
11th December 2014
Technical Requirements:
Windows, MAC or LinuxX-Plane 10.30 or higher - 32 and 64 bit compatible. (X-Plane 9 not supported)1GB VRAM Video CardCurrent version: v1.0 Last updated: December 6th, 2014Review System Specifications:
Computer System:
- 2.66 Ghz Intel Core i5 iMac 27”
- 6 Gb 1067 Mhz DDR3
- ATI Radeon HD 4850 512mb
Software:
- Mac OS Mavericks 10.9.4
- X-Plane 10 Global ver 10.31 Final
Addons
- Saitek x52 Pro system Joystick and Throttle
- Bose Soundlink WiFi Speaker
Scenery
- YMUR Murwillumbah Airport by VOZ (Barry Roberts)

-
-
That is very odd?... have you tried raising the gear by a key input on the keyboard and see if that works?
-
Sorta okay, but looks and feels slightly underdeveloped...
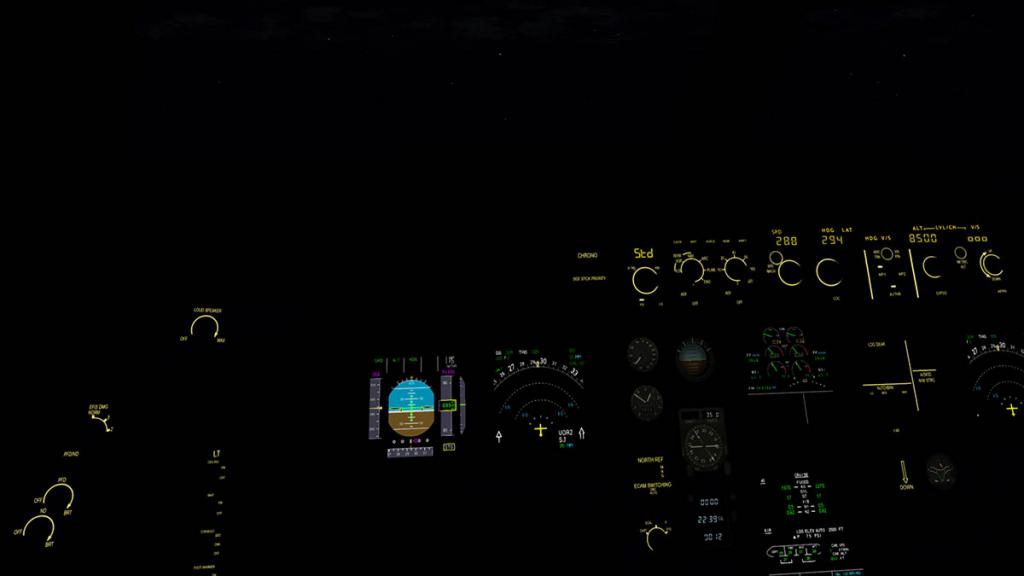

Cockpit was too dark for me, just needs a few more lighting details.
SD
-

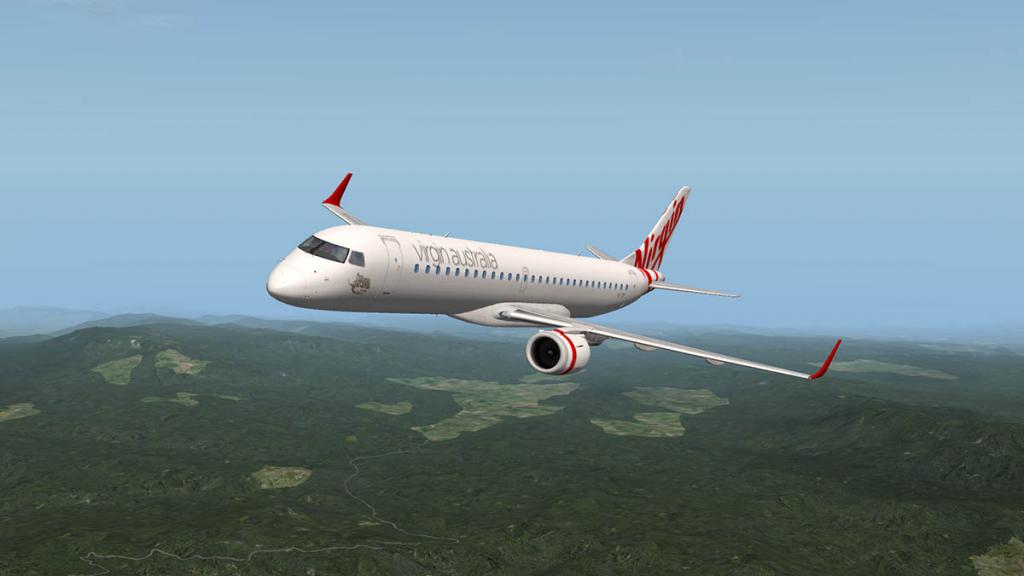
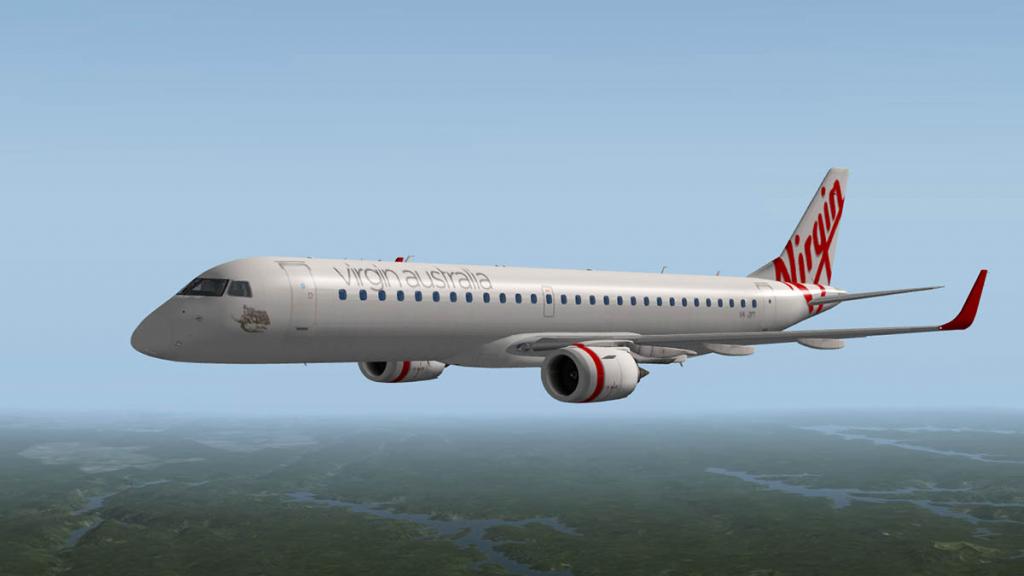
Aircraft Update : Embraer ERJ-195LR v1.2 by X-Crafts
In early August 2014 X-Crafts released their first aircraft for X-Plane. This was the Embraer ERJ-195LR and very good it was, to make things better here is already the first real upgrade in v1.2 (v1.1 was only a bug fix upgrade)


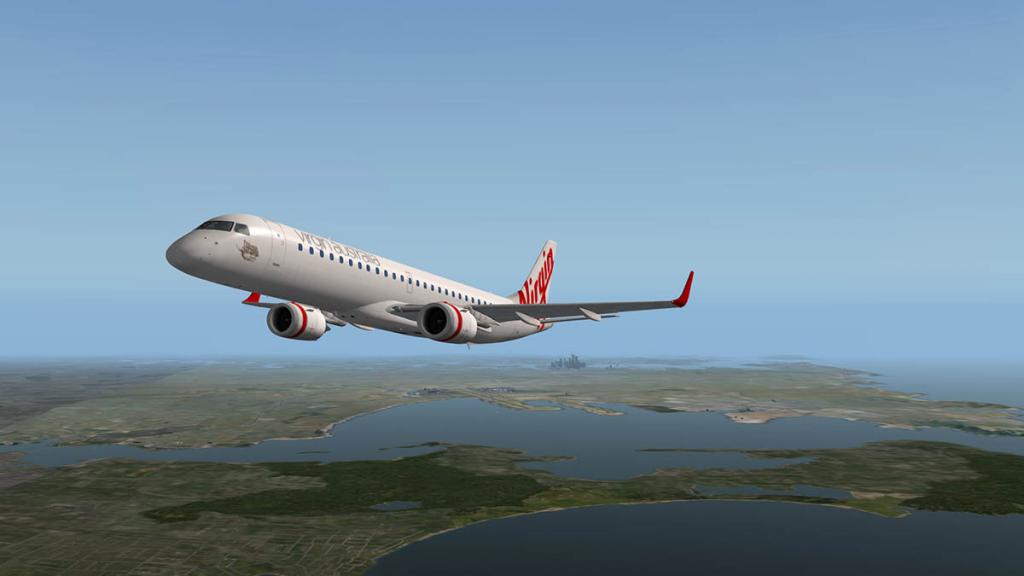
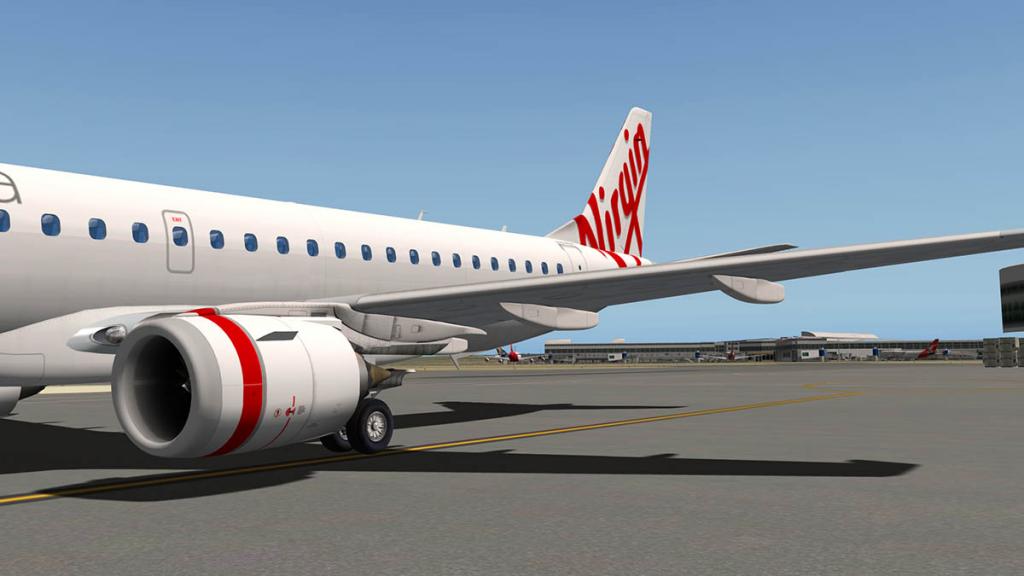
From the release version (1.0) this upgrade is quite significant. I noted in my release review that the aircraft needed just a basic refinement and a few of the bugs cleaned out. That has been done here with the update and the ERJ-195LR now feels at where it should have been at the release point. There are few minor niggles but overall this aircraft is becoming very impressive. The design work is really lovely and clean. All textures and liveries have been updated to 4K quality and also have been refined to give a better frame-rate reduction, you certainly notice the difference in the quality.
The X-Craft's ERJ-195LR is far better in the Captain's seat than version of the ERJ-190LR from SSG (Supercritical Simulations Group). And fly the aircraft hard as I did around the Australian triangle traps (YSSY (Sydney) - YSCB (Canberra) - YBBN (Brisbane) and it rewards you with great performance and flying abilities and the 190LR will climb powerfully at 2200ft per minute with a full load easily, with the maximum of a recommended 2565 ft per minute and with then a medium load you can still climb just under that pitch.

There has been the addition of a 15º Bank selector that helps with less tighter (and unnatural) turns at altitude. Now the aircraft glides from one heading to another, 15º banks are automatic above 25,000ft... a welcome addition.


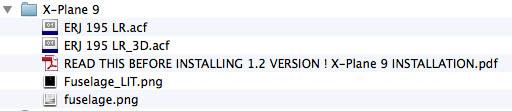
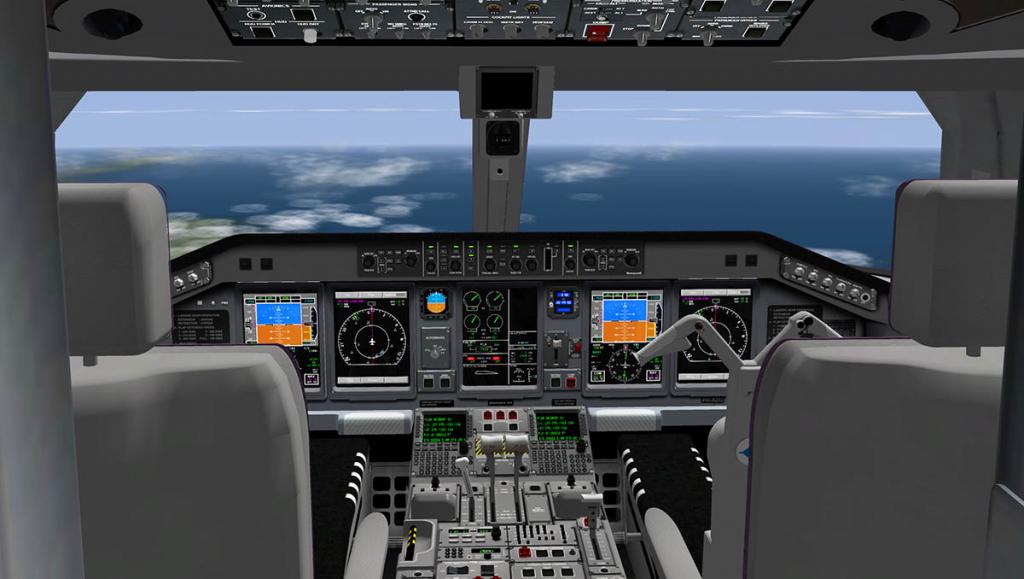
You can choose between a 2d/3d cockpit or just a 3d cockpit by replacing the .acf (aircraft) file - ERJ 195 LR_2D.acf to ERJ 195 LR.acf, The 2d version has a HUD (coming to the 3d version). I personally only prefer the 3d cockpit version.
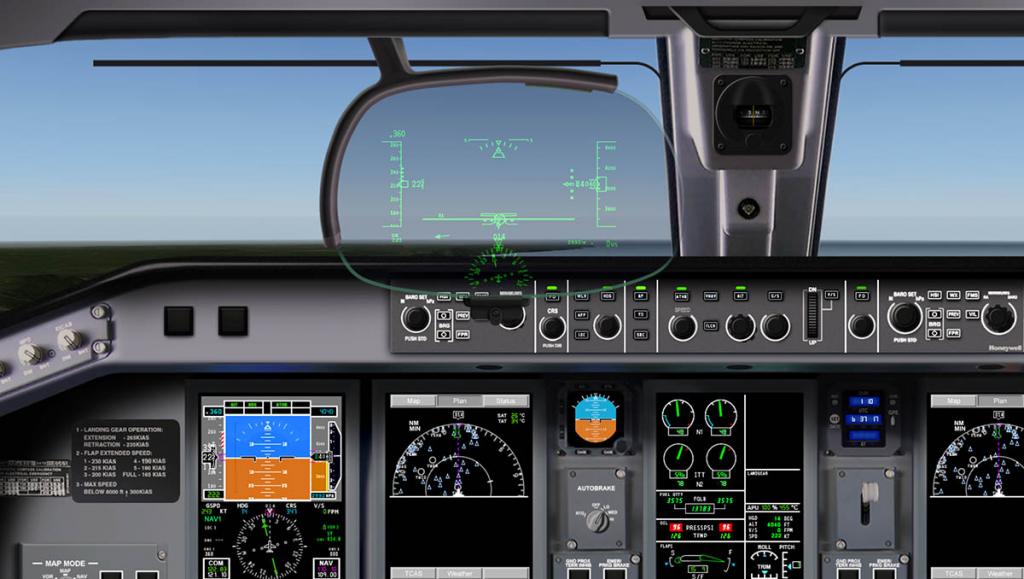

You can also create an X-Plane9 version if you wish to as well. It does however require a change of textures (provided) as X-Plane9 does not support 4K textures like X-Plane10 does..
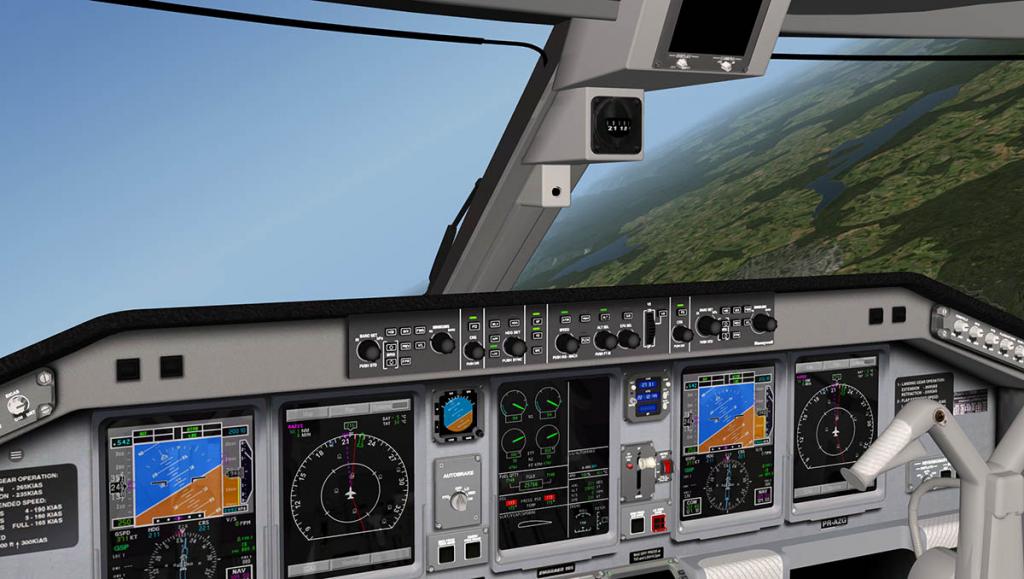
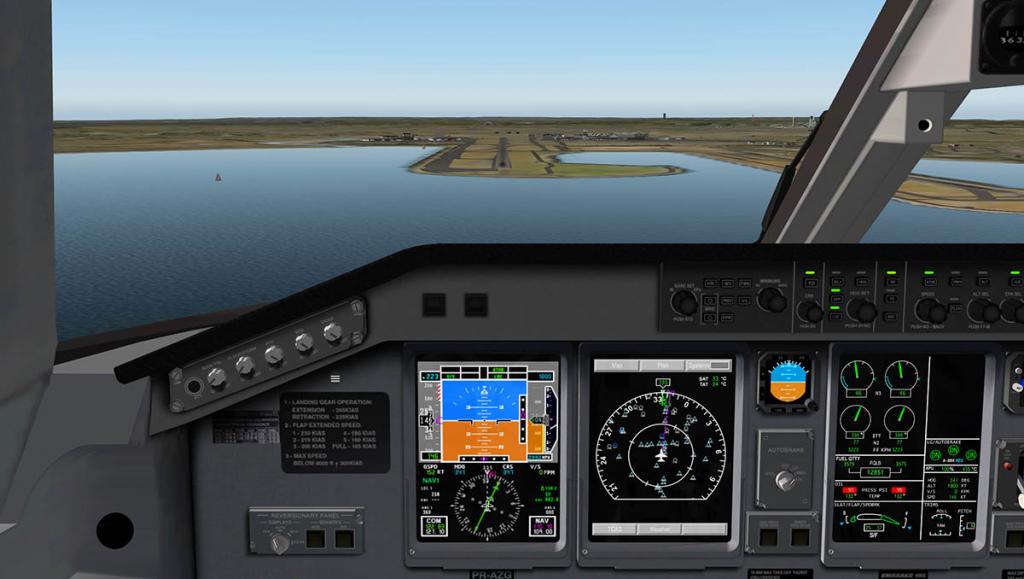
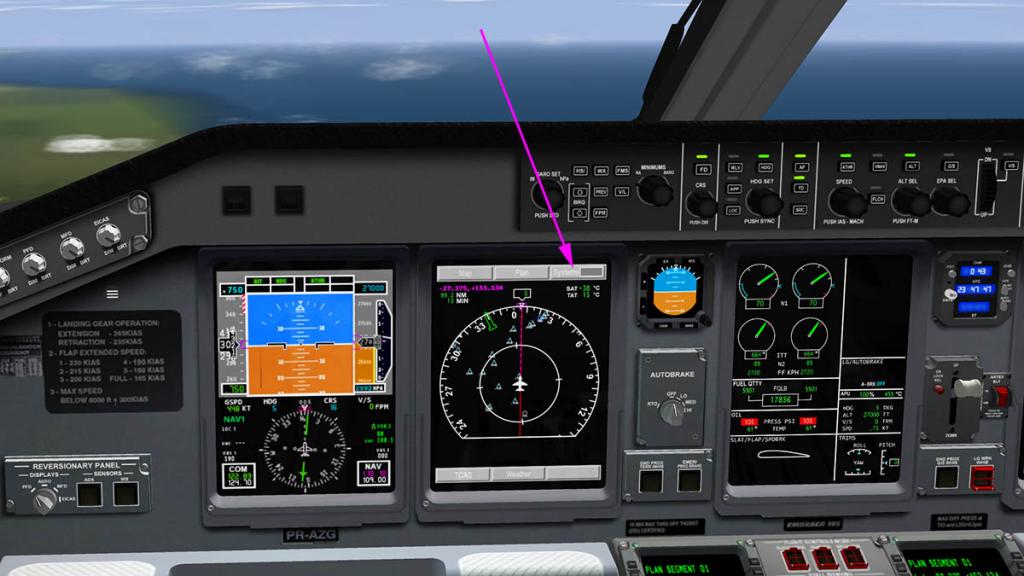
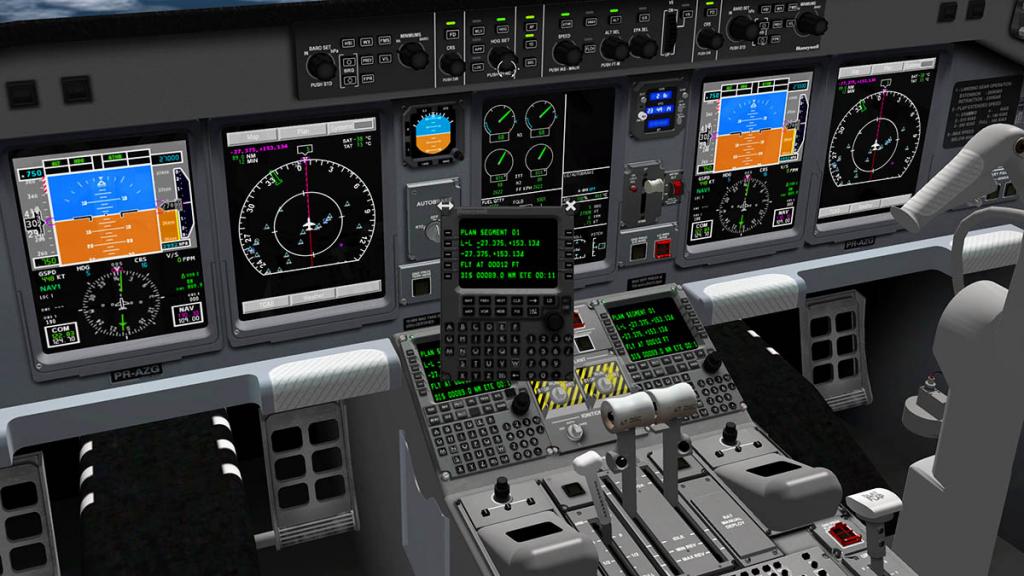
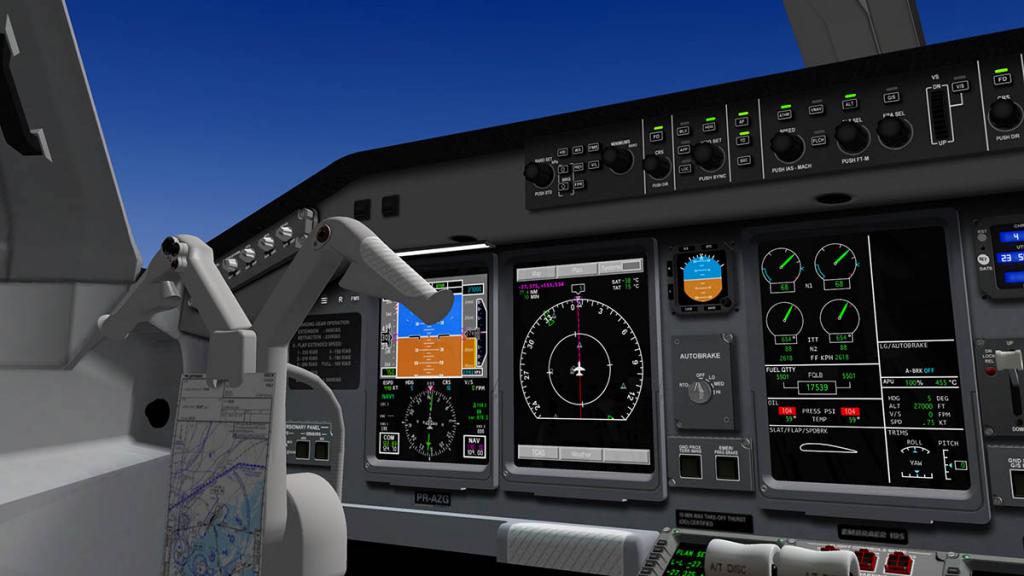
Panel displays have had a large amount of changes to make them excellent... clearer and far more defined than the original version, they are far easier on the eyes and they pop-out as well if you require that feature. The NAV/MAP display is now far better with the map the correct size, the waypoints however are still rather small and hard to read, but overall it is now easier to track the aircraft to the correct heading without squinting closely.
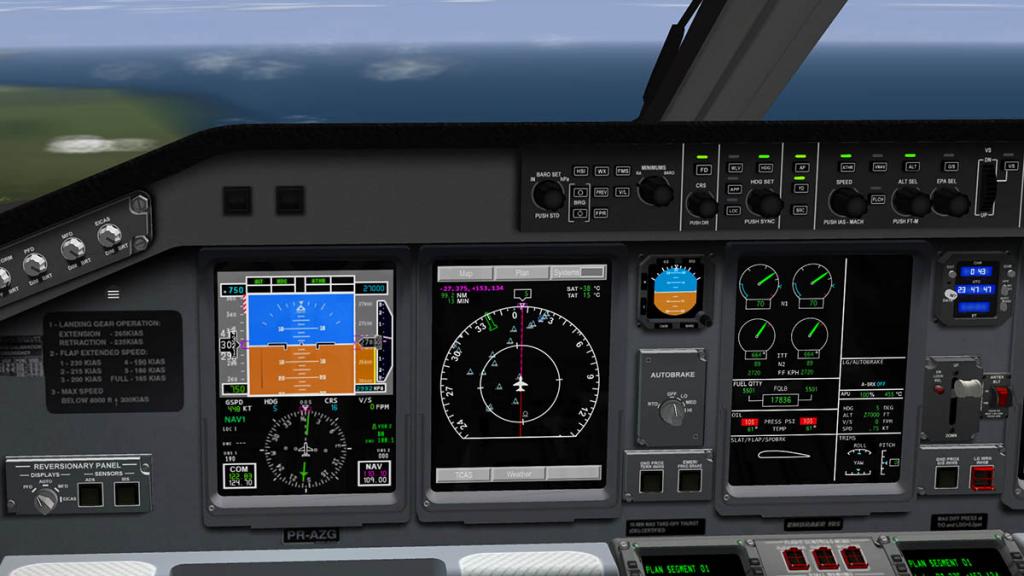

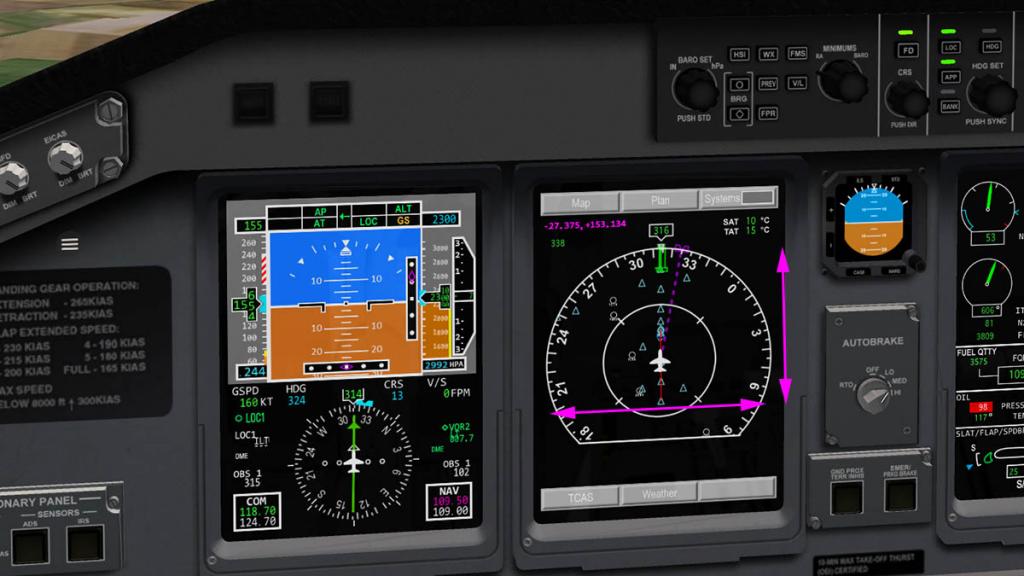
The systems and the actual menus on the Nav/Map display have been also cleaned up and work better.
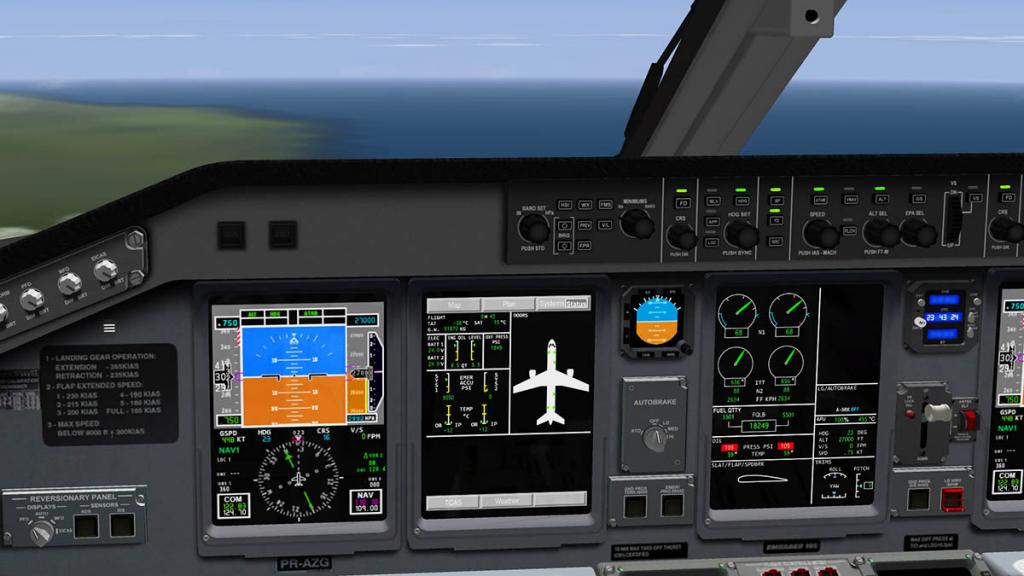
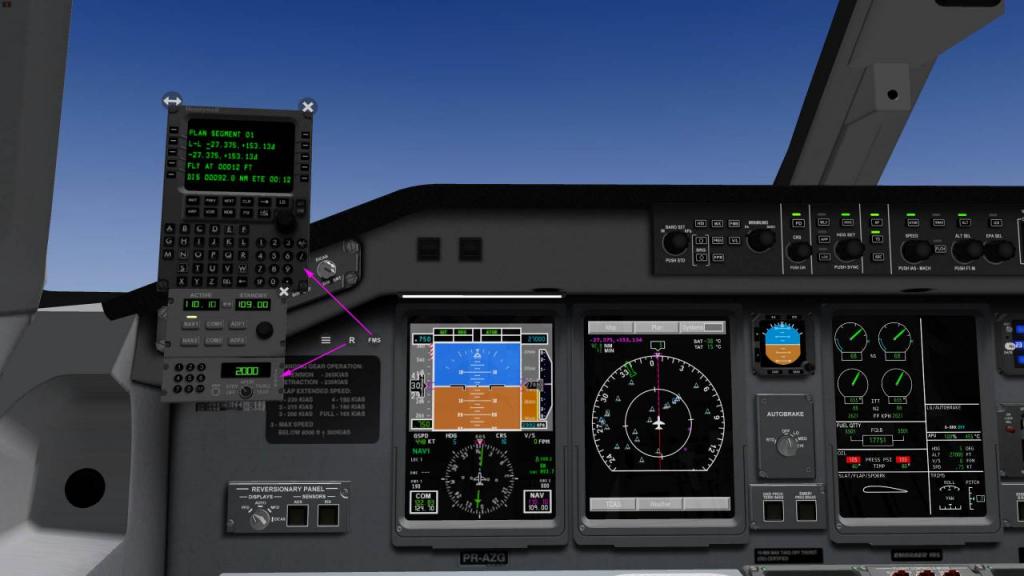
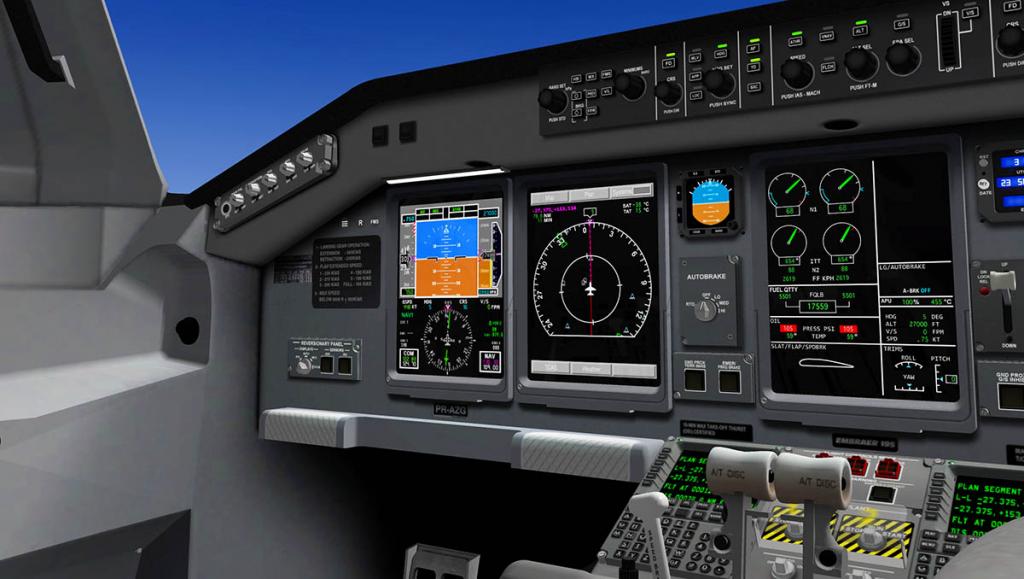
Pedestal is glorious in design, clean and efficient. The Reverse-Thrust has been fixed, it was designed to go into auto-reverse on landing, but now you have control back (thank god, as it activated too early). You have now pop-outs for the FMS-X-Plane Standard and Radio panels, the menu buttons are directly in front of you on the panel.
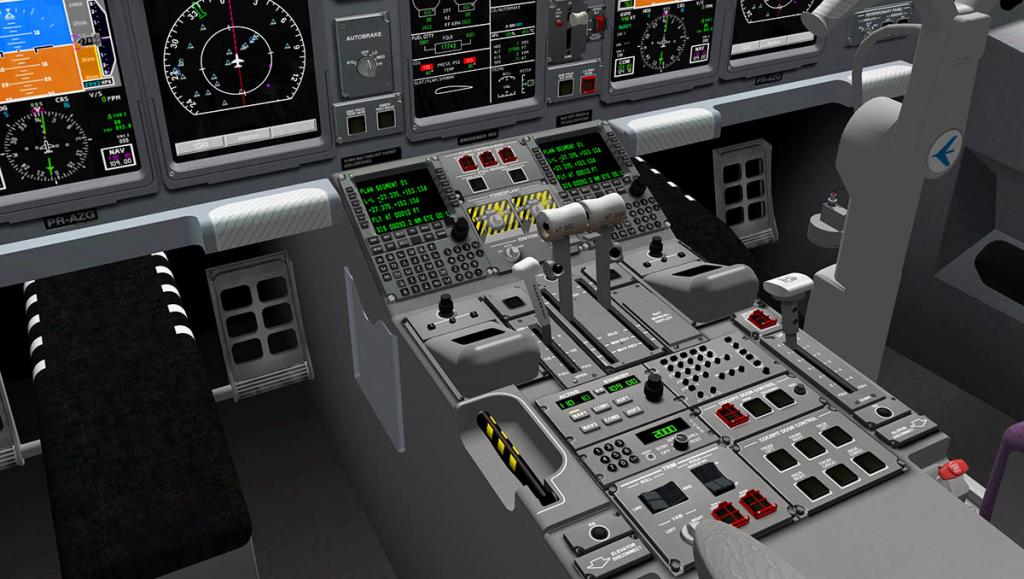
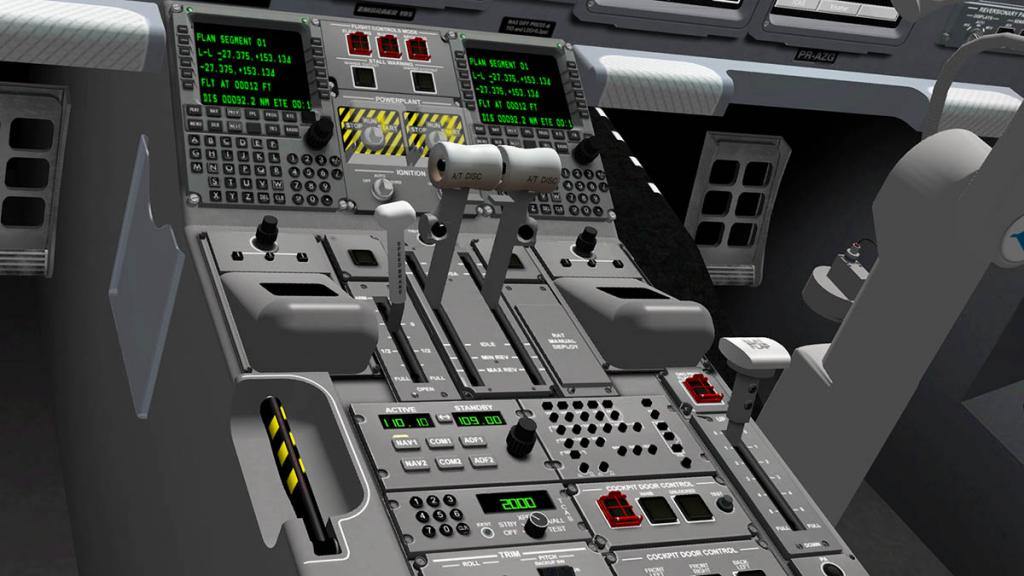
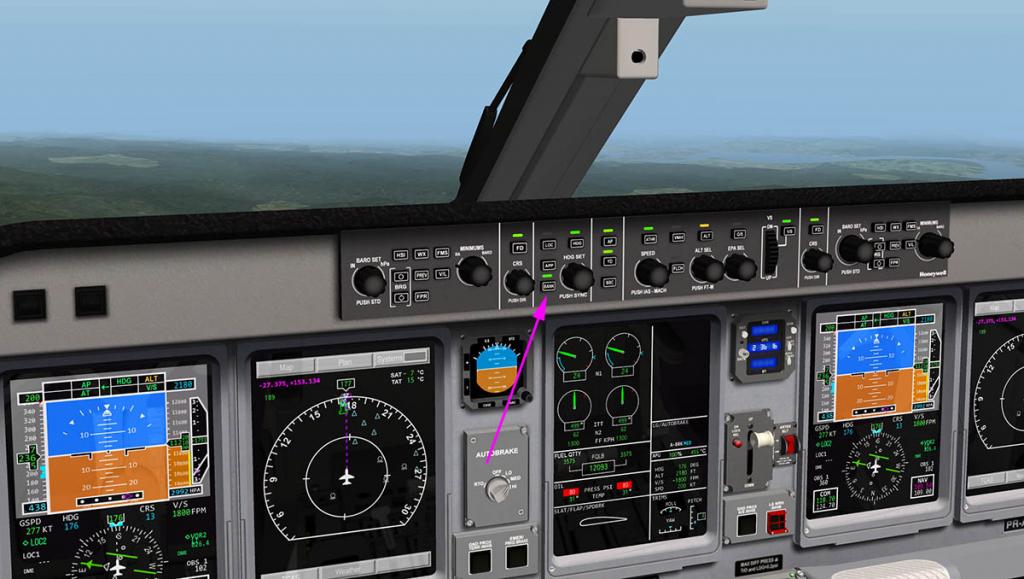
Right through the cockpit buttons and knobs have been made to work or fixed, the knobs have been tuned better and you don't have to do wide long swipes across the whole panel anymore to change your height. Everything feels by touch more tighter and controlable, there is still the odd thing, like the press one knob like for the ignition switches and you turn both switches for both engines?
On the ground the doors still open separately, and the cargo doors have had a complete overall, they look great but inside the hold it has also been completely redone, very nice. Turnoff the engines and the APU and you get chocks for the wheels and static cones around the aircraft.

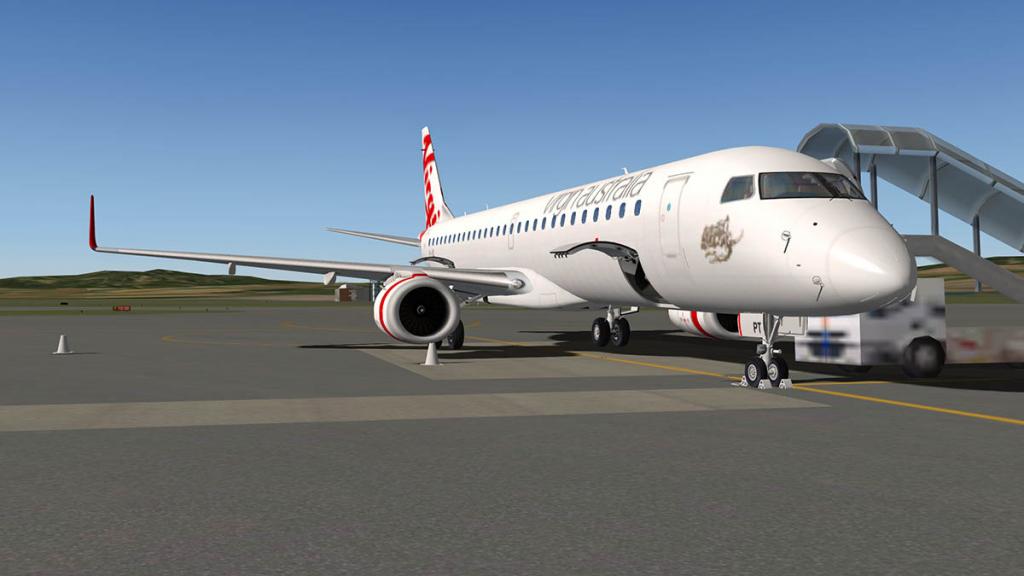
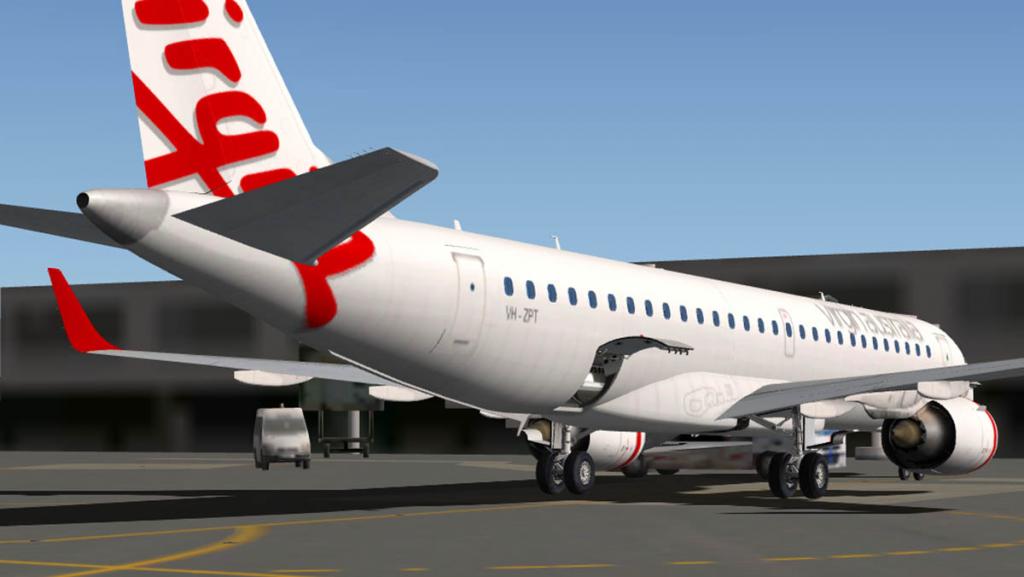
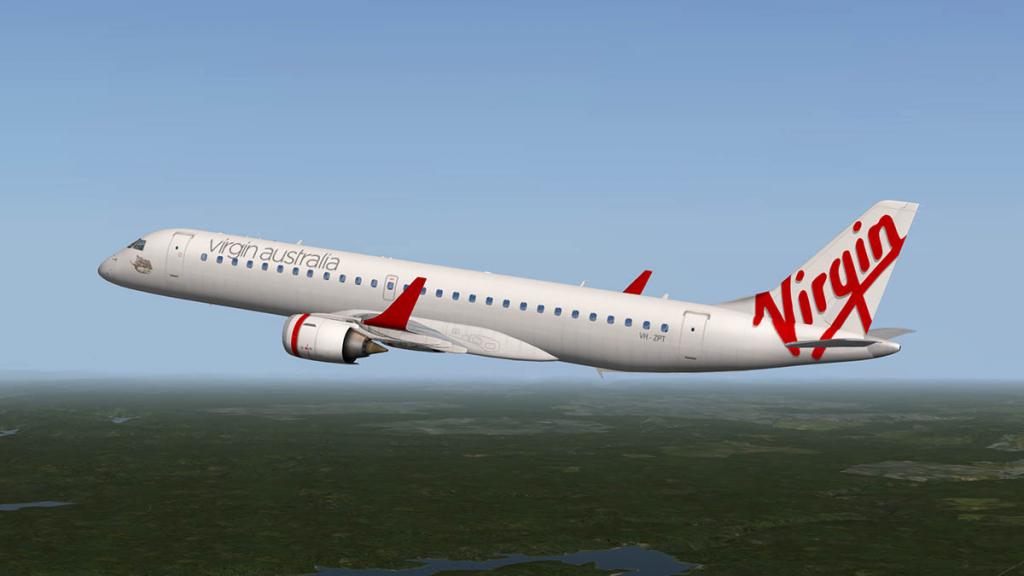
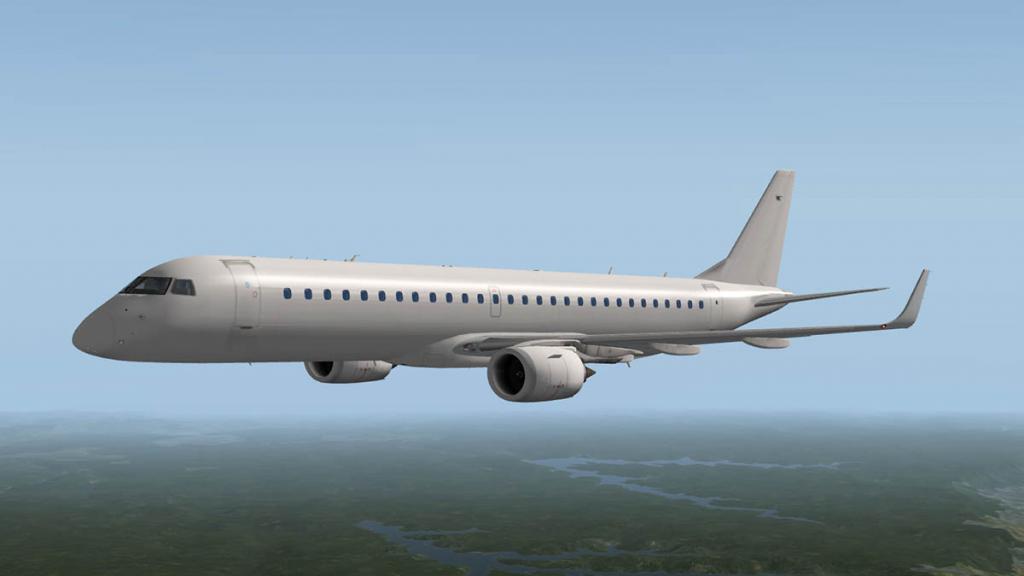
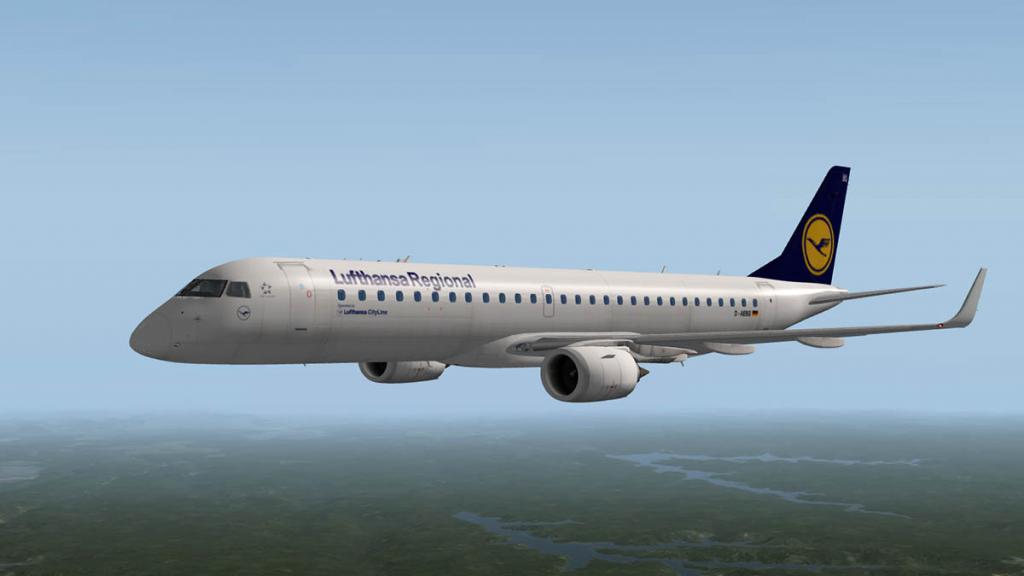
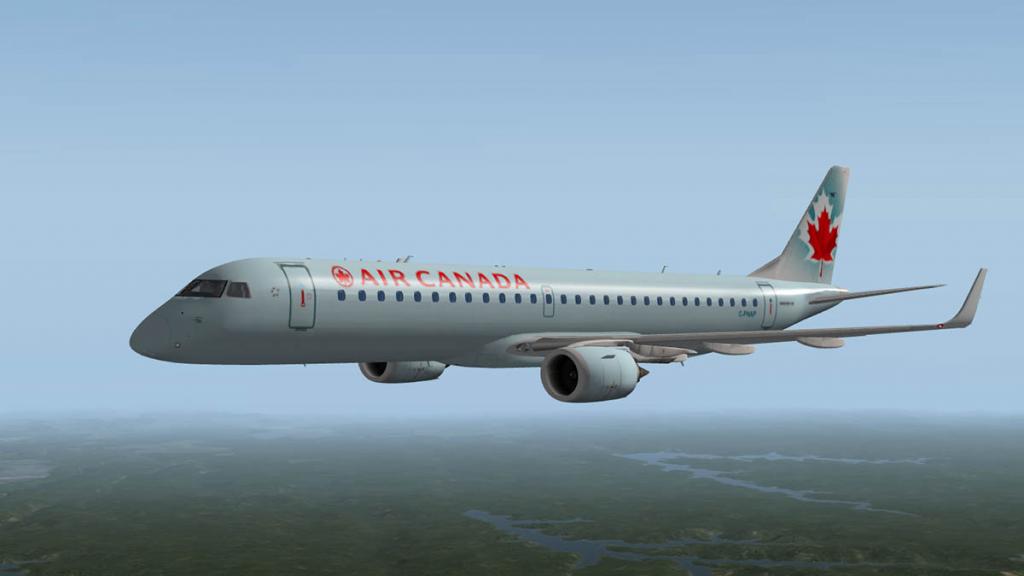
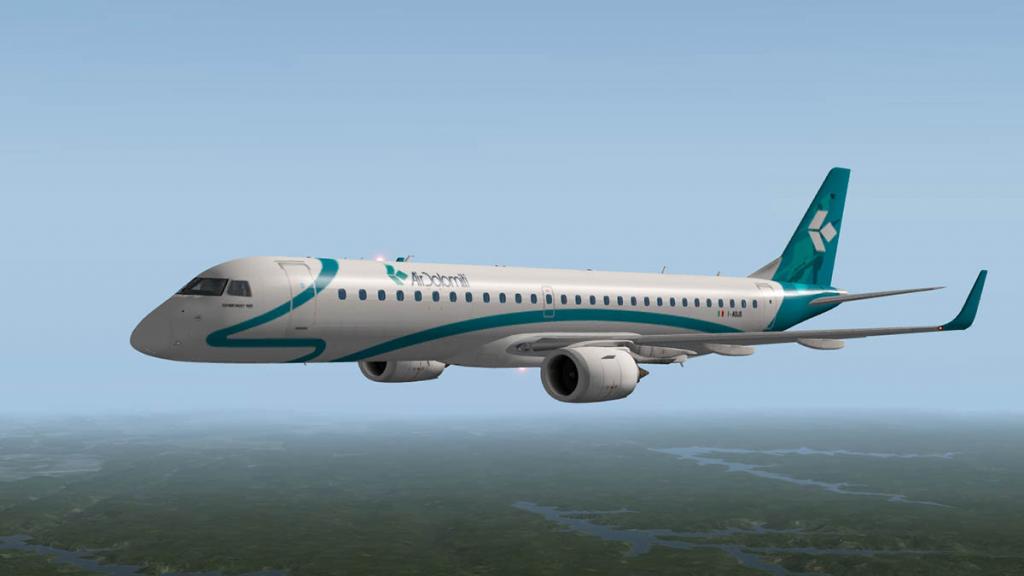
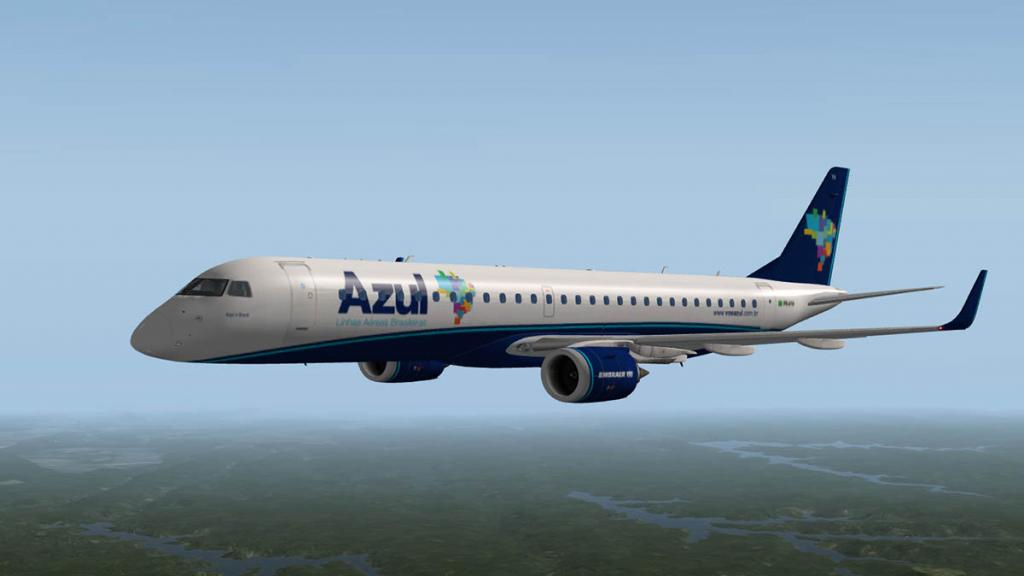
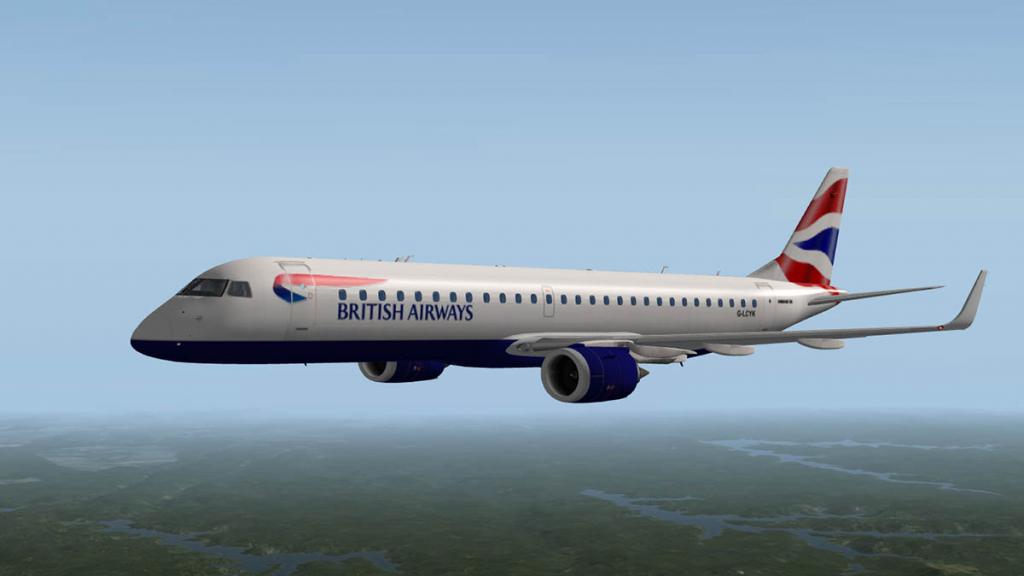
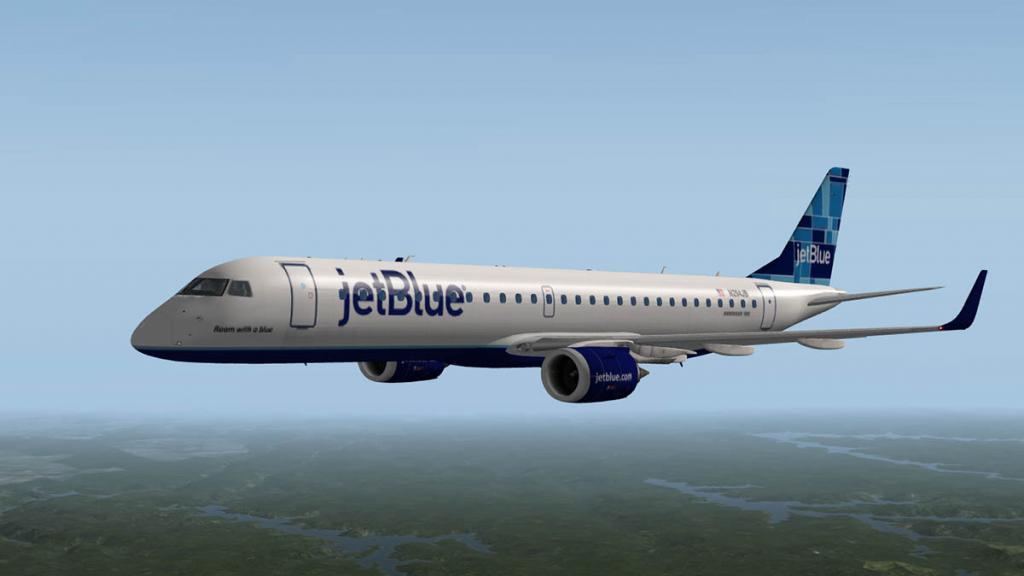
Liveries
All the liveries are now 4K textures, great variety and great detail. Two whites in clean and dirty versions, a single house and four Jet Blue signature designs. And a few great airline standards that is currently a collection of 17 liveries.


Update Summary
When I first flew the Embraer ERJ-195LR from X-Crafts it was a total tour-de-force, brilliant design but very compromised by detail and fine tuning. Was it then released too early and did the aircraft really need more time to refine it?, Yes it properly was and the time was needed. .... but this 1.2 version update totally brings the aircraft up to being a very worthy and entertaining machine. Frame-rate wise on a fast machine with the 1gb VRAM recommended you will find it perfect. If you have a slower or older computer with limited VRAM like me then you will find you will have compromise sometimes on having a large amount of objects or heavy settings of X-Plane autogen running with the 3d cockpit (view), The ERJ is now nowhere as bad as the release version and in fact is far better now than a lot of these sort of heavy files as with the Carenado King-Air series. In all cases I found the aircraft quite good in every area I flew into or out of for this update review.
X-Crafts ERJ-195LR certainly is now a quality aircraft at a really great price and there is a lot more to come yet with this package in features and ideas. It looks just so good and now it has the ability to match as well as the looks to enjoy good point to point regional flying, I wanted this aircraft so desperately to achieve its potential because it has so much there to be released... now you are seeing what that early potential is becoming, it's not totally absolutely perfect, but it is certainly a great investment if you want the best ERJ of this class, Just check out the video by Quep below on how great the detailing is on this great aircraft.
Yes! the Embraer ERJ 195 LR by X-Crafts is now available from the NEW! X-Plane.Org Store here : Embraer ERJ-195LR
Price is US$19.95
Installation : Download is 395.30 mb which is unzipped to your X-Plane in your regional Jet folder (if you have one or "Heavy Aircraft") at 839.10mb with the extra liveries loaded.
Note: The version flown here is the 1.2.1 version, The current version on the X-Plane.Store is 1.2 version, which is still very good, 1.2.1 will be available after the weekend 29/30 Noevember 2014.
Support Thread : ERJ-195 by X-Crafts
Update Review by Stephen Dutton
Copyright © 2014 : X-Plane Reviews
24th November 2014
Technical Requirements:
Windows, MAC or Linux - X-Plane 10.25 or higher - 32 and 64 bit compatible. Joystick required
1GB VRAM Recommended
Current version: 1.2
Review System Specifications:
Computer System:
- 2.66 Ghz Intel Core i5 iMac 27”
- 6 Gb 1067 Mhz DDR3
- ATI Radeon HD 4850 512mb
Software:
- Mac OS Mavericks 10.9.4
- X-Plane 10 Global ver 10.30 Final
Addons
- Saitek x52 Pro system Joystick and Throttle
- Bose Soundlink WiFi Speaker
Scenery
- SYDNEY YSSY Version 4.0_.3b 2 SYDNEY4.0_.3b 2. by MIKX
- YSCB Canberra by VOZ (Barry Roberts)
- YBBN Brisbane by VOZ (Barry Roberts)
1.2.1 Change log- Performance optimized for X-Plane 10.31- Optimized frame rate (getting minimum 25 fps in 3D cockpit)- 15º Bank selector added with automatic bank above 25,000ft- New cargo area modeled with new lit textures- 4K default fuselage texture- Completely new 3D Cockpit lightning- New static objects (front wheel chocks, cones and Remove before flight tags) appear when engines and APU are off- Non-working keys on the FMS fixed- High resolution PFD- Pop-up displays (Click in the middle of the displays in order to open or close the zoomed ones)
- Objects lighting optimized- Size of the map on the MFD is increased- Size and colors of symbols in the map changed and increased- Dynamic exposure added- New LIT fuselage and tail textures- New 'MAIN PNL' knob added to the pilot and copilot side panels enabling you to change the Main panel lightning- Lit textures of the fuselage are only visible when the Landing lights are on- xfeed bug fixed! (Check the manual)- All knobs on overhead and main panel have lit lines on them indicating the position of the knob- Transponder bug fixed (The display didn't work on the pedestal)- More shininess added to fuselage- Heading knob bug in 3D cockpit fixed- Changed direction of the V/S rotary- New Pop-up fms lit texture- Clickable area for the speed knob inreased in 3D cockpit- Clickable area for the auto-brake knob inreased in 3D cockpit- Cargo door bug fixed- Nose gear lights are not shining through the cockpit floor anymore- Fast spinning fans animation fixed- Back wall of the cabin modeled- New cabin walls textures- Many other minor bugs fixed- Normal maps added to some cockpit objects- 'Noise on some objects when light shines on them' bug fixed- Fire extinguisher manipulator now works in 3D- Autothrottle speed displayed in PDF BIGGER- Digital vertical speed dial indicator in PFD
-
There is an update overdue for the Challenger 300, Dden noted around Christmas 2014... There is an issue with X-Plane 10.31 with frame-rate as noted here : Bombardier Challenger 300 dev thread
-
The A350 XWB is not yet available... but it is coming very, very soon.
-
First question first... The .OrgShop is in transition at the moment to a new store front. And things are still being put in place and other things are not set yet, once sorted the aircraft will be available
 Second question... The reviewer (me) had a beta and more beta's and has followed the project from the start. X-Plane Reviews work with some the developers to understand the aircraft and their (mostly always) complicated systems to explain them to you, the dear users in what the best features there are and how best to fly them... other times I just cry and beg. SD
 -
It will be available very soon!
-

Aircraft Review : Boeing B-29 Superfortress by Virtavia and Dawson Designs
8.16.... 6th August 1945. Then for a brief second the world stopped and in a moment later the first Atomic Blast took place as "Little Boy" 1,900 feet (580 m) exploded above the city of Hiroshima, Japan. Three days later on August 9, 1945, Bockscar, flown by Charles Sweeney's crew, carried "Fat Man", with Kokura as the primary target and Nagasaki the secondary target. The weather and earlier bombing smoke made Kokura a poor target and Nagasaki then became the second and last atomic target at 11:02.
The delivery aircraft for both of those atomic raids was the Boeing B-29 Superfortress, In just those few days both the attacks and the aircraft that carried the weapons were joined together in history. Enola Gay and Bockscar are now both museum pieces (Enola Gay is currently in the Steven F. Udvar-Hazy Center at Washington Dulles International Airport and Bockscar is now situated in the National Museum of the United States Air Force in Dayton, Ohio). these two aircraft are the title bearers of the 3,970 Superfortresses that were built, but only one more name in B-29's still lives on in "FiFi", in that it is still the last flying B-29 left which belongs to the Commemorative Air Force (one more is under restoration).
But the Atomic (gadget) aircraft are only a small part of the long history of this four-engine propeller-driven heavy bomber which was designed by Boeing and was flown primarily by the United States toward the end of World War II and during the Korean War. It was one of the largest aircraft to have seen service during World War II and it was a very advanced bomber for its time, with features such as a pressurized cabin, an electronic fire-control system, and remote-controlled machine-gun turrets.
Boeing began work on pressurized long-range bombers as early as 1938. Boeing submitted its Model 345 on 11 May 1940 for the United States Army Air Corps request, in competition with designs from Consolidated Aircraft (the Model 33, later to become the B-32), Lockheed (the Lockheed XB-30), and Douglas (the Douglas XB-31). Douglas and Lockheed soon abandoned work on their projects, but Boeing received an order for two flying prototypes, given the designation XB-29, and an airframe for static testing on 24 August 1940, with the order being revised to add a third flying aircraft on 14 December. An initial production order for 14 service test aircraft and 250 production bombers was placed in May 1941, this being increased to 500 aircraft in January 1942.
The first prototype made its maiden flight from Boeing Field, Seattle on 21 September 1942. But because of the aircraft's very highly advanced design and challenging requirements, and immense pressure for war production the development was deeply troubled. The second prototype, which, unlike the unarmed first, was fitted with a Sperry defensive armament system using remote-controlled gun turrets sighted by periscopes then first flew on 30 December 1942, this flight being terminated due to a serious engine fire. On 18 February 1943, the second prototype experienced an engine fire and crashed.
In fact the troublesome engines which were Wright R-3350 Duplex Cyclone radial engines then later went on to become a more trustworthy workhorse in large piston-engined aircraft when updated as the later Pratt & Whitney R-4360 "Wasp Major's", but these R-3350 early models were beset with dangerous reliability problems in mostly in keeping them cool and in one piece. Takeoff was known as being an "urgent struggle for airspeed" (generally, flight after takeoff should consist of striving for altitude). But these large radial engines needed a lot of airflow to keep them cool, and failure to get up to speed (or collect that vital airflow) as soon as possible could result in an engine failure and risk of fire.
Interim fix measures included cuffs placed on propeller blades to divert a greater flow of cooling air into the intakes, which had baffles installed to direct a stream of air directly onto the exhaust valves. Oil flow to the valves was also increased, asbestos baffles installed around rubber push rod fittings to prevent oil loss, and thorough pre-flight inspections made to detect unseated valves and the frequent replacement of the uppermost five cylinders (every 25 hours of engine time) and the entire engines (every 75 hours).
In wartime, the B-29 was capable of flight at altitudes up to 31,850 feet (9,710 m), and at speeds of up to 350 mph (560 km/h) (true airspeed). This was the aircraft's best defense because Japanese fighters could barely reach that altitude, and the few could catch the B-29 even if they did attain that altitude. The B-29's revolutionary Central Fire Control system included four remotely controlled turrets armed with two .50 Browning M2 machine guns each. All weapons were aimed electronically from five sighting stations located in the nose and tail positions and three Perspex blisters in the central fuselage. There was five General Electric analog computers (one dedicated to each sight) that increased the weapons' accuracy by compensating for factors such as airspeed, lead, gravity, temperature and humidity. The computers also allowed a single gunner to operate two or more turrets (including tail guns) simultaneously. The gunner in the upper position acted as fire control officer, managing the distribution of turrets among the other gunners during combat.... now you know why it was called the Superfortress!
The crew enjoyed, for the first time in a bomber, full-pressurization comfort. This first-ever cabin pressure system for an Allied production bomber was developed for the B-29 by Garrett AiResearch. The nose and the cockpit were pressurized, but the designers were faced with deciding whether to have bomb bays that were not pressurized as sited between the fore and aft pressurized sections, or a fully pressurized fuselage with the need to de-pressurize to drop their loads. The decision was taken to have a long tunnel over the two bomb bays so that crews could crawl back and forth between the fore and aft sections, with both areas and the tunnel pressurized. The bomb bays themselves were not pressurized.
The B-29 was the first strategic aircraft and formed the mainstay of the required combat equipment of Strategic Air Command when it was formally formed on 21 March 1946. Other significant B-29 versions were used to drop the famous Bell X-1 supersonic research rocket aircraft (Chuck Yeager fame) and as a basis of a commercial airliner in the Boeing 337 Stratocruiser. There was only one other significant variant know as the "Silverplate", which was formally the B-29's code reference for the participation in the Manhattan Project, So these versions of which there was 65 converted airframes (Including Enola Gay and Bockscar) are all the atomic aircraft used in the raids or testing of the Atomic Bombs.
In time the B-29 was finally superseded by jet-engined powered aircraft like the Convair B-36 "Peacemaker" and the Boeing B-47 Stratojet, which in turn was then replaced by the Boeing B-52 Stratofortress. But there can be no doubt of the aircraft's incredible performance and certainly in the B-29's role not only in the famous Atomic raids but in turning the shape and tide of the Second World War in the Pacific Theater and in Korea.
Performance: Maximum speed: 357 mph (310 knots, 574 km/h) : Cruise speed: 220 mph (190 knots, 350 km/h) : Stall speed: 105 mph (91 knots, 170 km/h) : Range: 3,250 mi (2,820 nmi, 5,230 km) : Ferry range: 5,600 mi (4,900 nmi, 9,000 km,) Service ceiling: 31850 ft (9,710 m) : Rate of climb: 900 ft/min (4.6 m/s).
Virtavia and Dawson Designs, Boeing B-29 Superfortress
The B-29 Superfortress from Virtavia and Dawson Designs is originally a FS (Flight Simulator) aircraft converted extensively for X-Plane. As in the past with these conversions, X-Plane users seem to get the best from each simulation platform in great design qualities from FS and the great features and flying characteristics from the X-Plane universe. And the B-29 here does not disappoint.
The B-29 is a bit of an illusion in that it has always looked a far larger aircraft than it actually is... It is only 99 ft 0 in (30.18 m) in length as the B-17 Flying Fortress was 74 ft 4 in (22.66 m), but the B-52 Stratofortress is a massive 159 ft 4 in (48.5 m) or 60ft longer than its famous predecessor. Design wise the aircraft here is simply excellent, because of the tubular (pressurized) shape it can be very easy to get the aircraft wrong. But here it looks perfect.
Externally the aircraft is undramatic, clean and functional. Internally it is in another dimension, with the ribbing and with that huge glass paneled nose. And you will need to love the colour green.... a lot.
At first it feels at first like an earlier version of the "Millennium Falcon" of Star Wars fame, but no doubt that pilots converting from the B-17 must have thought the same thing in that they were in some sort of a future spaceship in the way the cockpit design was set out. So the comparison is valid. But in a short time you do find the B-29 quite familiar as you learn where everything is and what it does, but for the pilot and co-pilot a clean line of sight ahead it is still a bit of a challenge.
From the bomber aiming position deep in the nose the view is simply excellent. The pressurized front section is like capsule, of which in reality it is in being an airtight vessel. Going rearwards from the far front is first the Bombardier's aiming area and then the pilot and co-pilot's elevated positions... The next on the right behind the co-pilot is the Flight engineer's station and on the left (behind the pilot) is the Navigator.
At the rear on the right is then the Radio Operator.
The rear of the cockpit is the lower pressure hatch to the unpressurized forward bomb bay. Above is the tunnel to the rear or central positions of the port and starboard waist gunners, top gunner and radar operator, far rear is the tail gunner.
Sadly you can't go to the mid-section or into the tail... which is disappointing.
B-29 Versions A and B
This is a good point to note the different versions you have with this B-29 aircraft. They are the A and B versions.
The "A" could be noted as the "Fortress" version, because it has the number of machine guns in the forward dorsal turrets was doubled to four, and there was three turrets in forward one on top of the fuselage and one below and one on top mid-section.
The "B" had all the defensive armament removed except for what was in the tail turret. Initially the armament was two .50 in M2/AN machine guns and one 20 mm M2 cannon which was soon changed to three .50 in M2/ANs. The weight saved by removing the gun system increased the top speed from 357 mph to 364 mph (574 km/h to 586 km/h). Also incorporated on the "B" version was an improved APQ-7 "Eagle" bombing-through-overcast radar fitted in an airfoil shaped radome under the fuselage. All the "Silverplate"aircraft (Including Enola Gay and Bockscar) are "B" versions.
The two versions can also be seen inside the cockpit with the "A" version having a huge turret base hanging from the roof, and in the "B" with it removed.
Flying the Superfortress
The pilot's position is quite unusual and you need to familiarise yourself with the controls and the certainly the instruments before flying the aircraft, a quick "I want to fly" will find you scrabbling around trying to find things and the aircraft not performing as you wish it to. All the instruments are all noted here but some are not in the usual form. The manual needs a look over to note what you have. The huge (but beautiful) yoke obscures a few of the instruments and you easily find yourself looking over or around it to see what you want to.
Thankfully it does retract downwards and out of the way and line of sight.
The three main instruments are positioned separately on the top of the panel. These are your... Airspeed (in miles per hour) - Rate of Turn/Slip Indicator - Vertical Speed Indicator. Directly below on the main panel is your Artificial Horizon. Far left on the panel is your Altimeter and compass.
Engine in Manifold Pressure and RPM instruments are on the right of the panel, but are noted in just two dials for each set of engines? But doesn't the B-29 have four engines and not two? The system used here is that each dial has two needles labeled 1 or 2 (on top) and 3 or 4 (on top), only when an engine is running off the speed of the other engine does the needle of that engine show. It is very clever in that if one engine on one side of the aircraft is running not to the performance of the other engine then the needles will distinctly show the differences between the two engines, this system is used throughout all the engine displays.
The heading instrument is unusual in that the compass is locked. if you turn the heading to the west (W) then the aircraft will fly west, but unlike modern headings it does not turn as the aircraft turns. It feels a bit odd at first but it is great for navigation. Inset in the heading as well is a Radio Magnetic Indicator (RMI) with a Nav 2 bearing and NDB pointer. These needles will show you the direction of a Nav-Aid on the compass.
On the pilots right hand side is a console that has the a basic, but very good autopilot. It is overall very simple to operate with a MSTR switch (on/off) - HDG (heading) - ALT Hold (Altitude hold) - NAV (holds a VOR2 course) - APPR (Standard X-Plane APP). There is a knob top right that adjusts your pitch, or in this case moves the aircraft's rear elevators up or down to climb or descend. There is a metal guard to switch off or reset the AP in one go.
On the very top of the console is a red set of four buttons that are the propeller feather buttons. These buttons will allow the require propeller to just windmill and reduce drag or stress on the other engines. Lighting switches and Turbo Boost (used sparingly) and prop speed switches (high or low and again used sparingly) and under flaps are undercarriage raise and lower, and opening or closing of bomb doors (front and rear). Attached on to the side of the console are a rack of radios, In reality they are standard X-Plane radios in a Garmin GNS 430 GPS with pop-out screen (this is your Comm 1 and Nav 1), a Comm 2 and Nav2 radio, transponder and audio selection panel set. They don't look to out of place in a WW2 era aircraft, but there are handy in any case.
The co-pilot station has only the main flying instruments, and the aircraft's flap setting in degrees. The B-29 has a very large continuous flap adjustment to 45º and a minimum of 25º is required for takeoff. RPM limits (high) are noted here as well.
Panel lighting adjustment is via huge knobs on the side and top of the panels. Huge bucket rudder pedals dominate the floor and they with the engine (four) throttle levers and large trim wheels duplicated at both flying stations. The big Red handles are just the humble parking brake!
The Flight Engineer's station is very comprehensive that covers, Main Hydraulic Reservoir Quantity - Main Hydraulic System Pressure Indicator - Carburettor Air Temperature Indicators - Wing Leading Edge De-Icing System Pressure - Cabin Air Temperature Indicators - Engine Fuel Flow Indicators - Emergency Hydraulic System Pressure Indicator - Cylinder Head Temperature Indicators. In a yellow boxed area are the, Engine Oil Temperature Indicators - Engine Oil Pressure Indicators (forward, nose and rear tanks). In the center in blue are the Manifold Pressure and RPM instruments. Red area below is the Fuel Pressure Indicators. In the Grey area are the flight instruments (mostly a duplicate of the pilots instruments) but with a Cabin Differential Pressure Indicator. The B-29 also has a built in APU (Putt Putt) that is started on the lower panel. There are also two (rotary) lighting knobs for the lower and upper panels.
This aircraft shows how complex aircraft became when the pressurization systems became a requirement, but also how they started to automate many of the standard functions to cater for that complexity. The engineers station, besides the scanning of the aircraft's systems was also in control of the aircraft's main controls as well, the only thing missing here is the yoke. The view out of the side (small) window is excellent with those huge propellers running hard in the slipstream.
Cooling is helped by using the cowl and oil cooler flaps on the engines. These are activated by the switches on the FE's left side. You will need to keep an eye on all the engines temperatures and keep them well into the green zones with these aids, but can't be used high in the cruise zone.
The forward Bombardier's station is very well designed and well done.
There is a moving gun sight that can be moved into the central position for aiming the automated turrets. If not in use it is positioned on the right and the lower bomb aiming-sighting device is then used.
The bombs can be seen through the porthole window in the rear cockpit pressure door. The control panel is on the left wall and the four switches will arm the bombs.
The bomb doors can be opened by switches (covered red) on the console by the pilot or by a lever on the floor by the bombardier. you have two firing options in when the left lever is in the mid-way position it will drop each bomb separately, or full forward you get a salvo drop of all the armed weapons. You can reset the armaments by the standard X-Plane Aircraft/Weight and fuel/Ordnance menu.
There is a great bombing guide reference in the manual to help you aim (or destroy) your targets... you get the standard X-Plane explosions and smoke. Sorry no nuclear weapons here, just standard bombs.
In The Air
Aircraft like these fall into two categories in one, average and easy to fly and a bit of fun. Or two are really deeper than they seem to be on the surface. The B-29 Superfortress falls easily into the second category. This is an aircraft that gives you back more the more you invest in it, it has to approached in a more serious way than just as a bit of retro fun. Point is this is a heavy bomber, and heavy bombers are ponderous and slow. But the skill here is to fly them with skill and intelligence. Do that and the B-29 rewards you with a great experience.
It is the unusual pilot's seating position that makes the aircraft interesting, the views as you control the aircraft are simply excellent, but it is the feel you get back as well as move this heavily laden aircraft to its destination and back. You need that 25º flap to get you into the air and the aircraft does so and quite quickly, you still need that lift, but also flaps give you lots of drag as well so you are now having to find the best compromise between speed and lift. The aircraft is not a fast climber, 900ft per minute is the maximum anyway (loaded) so 700fpm is a nice start, once clean and more speed above the 200mph range then 500fpm is the best compromise to your final height if you are going above 25,000ft.
Climbing slowly to a high altitude will take forever, and it feels like it, but there is a satisfaction in getting the right performance out of the aircraft and keeping the engines within those cooling parameter safety zones. The sounds are excellent as you gradually drag yourself higher and the propellers are biting the thinner air with their lives, the constant drumming gets you into a rhythm that feels safe and powerful.
As you leave the coast (Still climbing...) you start to feel what those brave souls must have felt as they left the secure world behind and headed into the dangerous world they were going to. It is fast for an aircraft of this era at nearly 200knts in a low altitude cruise (FL250) and nearly 300knts in a high altitude maximum cruise (FL300), the aircraft will power away and cover the distance at a fast pace, But it soon becomes very lonely, with just you and the aircraft flying up there in empty space. Thankfully the B-29 feels safe and magnificent around you.
There are nine liveries all together... The "Dina Might" is the default, and easily the best. The rest includes - Boomerang - Celestial Princess - Enola Gay - FiFi - Gone with the Wind - Heavenly Laden - Pioneer - Wild Hair which is a mixture of standard, A and B versions
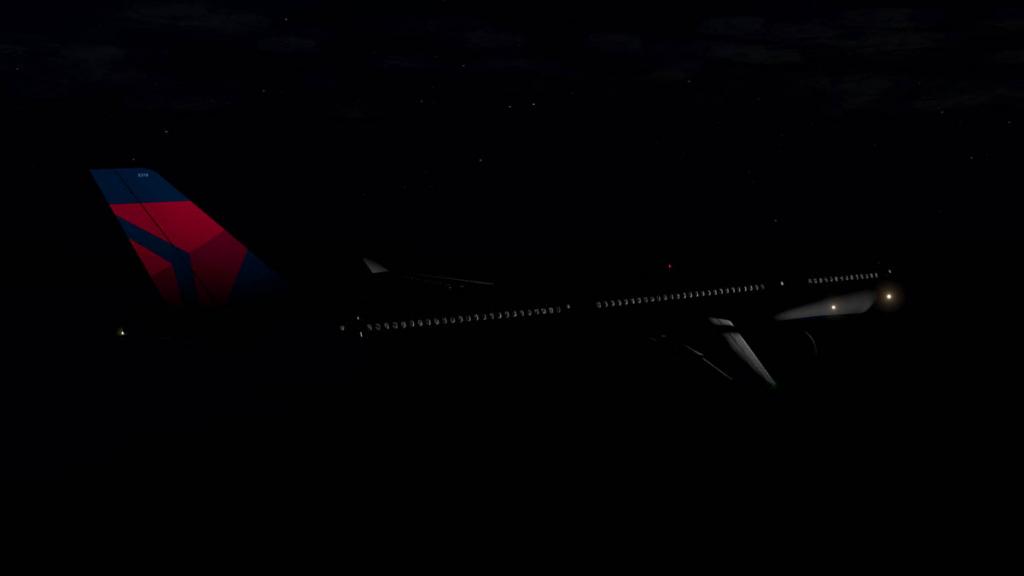
Night-lighting
This is a wartime aircraft so the the lighting is very discrete. instruments can adjusted as noted, but you cannot adjust the red cabin lighting, it is on or off only... but looks good. Outside there are formation lights and three colour recognition lights which can be set at flash or steady.
Arriving back home and the aircraft is lighter, but still no machine to toss around the sky. The thrill is getting the B-29 right for landing. Like going up the descent takes time, so you have to plan and start coming down early. the aircraft is quite nice in your hands and you can easily enjoy the view as you do sweeping turns as you get lower and into single digits in altitude. I am doing no artificial aids here like with the X-Plane APP (Approach) or using the GPS on a flightplan. It is just me and me flying the machine with the NDB pointer to guide me in.
A long approach is best to get the aircraft pitch down slightly and slowing up the speed, 150mph to 120mph is nice under full 45º flap, but the final approach speed was around 100mph. Frame-rates overall were excellent and always very high (30's and 40's) until I arrived at the final approach to McChord AFB, something was absorbed and it dropped to a unhandling 5 frames, and then as quickly as it came it went back to normal? I tried the approach 4 times with the same effect... no idea what causes it as it does it absolutely nowhere else even with a high default autogen setting?
You feel the difference between the heavy and light loads, but the handling is very good at slow speeds, the aircraft will hang there if you let it and the correct slight downward pitch is important, otherwise an approach is very nice and and controllable.
In the flare it is same story and the aircraft will balloon if you let it float, keep the B-29 in control and the landing will come nicely, but don't bounce it on those huge rear tyres. Once down you easily run off the speed and take the taxiway.
The engines throb away nicely on the taxiway at minimum throttle and you can again enjoy the great view through the windows.
Powering down and shutting off all the fuel valves and the aircraft is silent. The nosewheel has a tendancy to stay off the ground when empty, so you have to adjust the CoG (center of gravity) a little to the front to make it make contact again. Entrance and exit into the B-29 is by a hatch above and through the front undercarriage compartment, and it opens with a great view downwards... shame there is no ladder.
But the B-29 is a majestic aircraft, an iconic machine as well.
Summary
On the surface the B-29 Superfortress looks quite bland, the average textures in areas on the outside and inside and not a lot of surface detail on the outside skin can give this impression. However in most cases you don't notice that, and the tradeoff there is the excellent frame-rate. But inside the detailing of this complicated design is excellent, and you really enjoy being at the controls of such an iconic aircraft.
In features it is a little sparse, with just opening bomb doors and weapons, and no access to the central or rear areas. No entry ladder or static items, no X-1 of Chuck Yeager fame or a Little Boy or Fat Man Atomic Weapons and a lot of dials, switches and firing buttons that are just for show and don't work.
It is in the way you approach and fly the Superfortress is the way you get your rewards from it. I didn't have the time here to do a full mission, but I did do a lot of flights. And the B-29 is a very subversive simulation and even the more so when you design and plan and use the aircraft in your missions. It is slow and ponderous, but that is the huge attraction here, you settle in for a time and really fly the aircraft, watch its delicate systems and manage them over the important takeoff points and delicate landings and those long climbs and descents, and it is really great being in the moment and in there with those huge radials booming away and driving you and your crew to your destination and back. I expected the B-29 to be an average ride to be honest, but came away loving it because it requires a lot of attention and detail to fly it well and pull off that perfect mission, Finally you can fly an aircraft that did change the world in a significant way.
____________________________________
Review by Stephen Dutton
The Boeing B-29 Superfortress by Virtavia and Dawson Designs is Yes!... Now Available from the X-Plane.Org Store.
Price is currently US$ 34.95 : Get the - B-29A Superfortress - Here.
Documents and Install, Download is 209.10mb, that is unzipped into your Warbirds Folder of 309.40mb. The aircraft will only fly in X-Plane version 10.30.
Developers Sites : Virtavia - Dawson Design
Dev Thread : Support forum for the B-29
12th Nov 2014
Copyright©2014 : X-Plane Reviews
Technical Requirements:
Windows, Mac or Linux
4GB RAM - 1Gb VRAM Video CardX-Plane 10.30+Current version: v1.0. Last updated: November 13th, 2014
Updated store#
Review System Specifications:
Computer System:
- 2.66 Ghz Intel Core i5 iMac 27”
- 6 Gb 1067 Mhz DDR3
- ATI Radeon HD 4850 512mb
Software:
- Mac OS Mavericks 10.9.4
- X-Plane 10 Global ver 10.30 (final)
Addons
- Saitek x52 Pro system Joystick and Throttle
- Bose - Soundlink Mini
Scenery
- Gateway to Boeing Country by Tom Curtis US$29.95 (Seattle, WA - Gateway to Boeing Country)
-
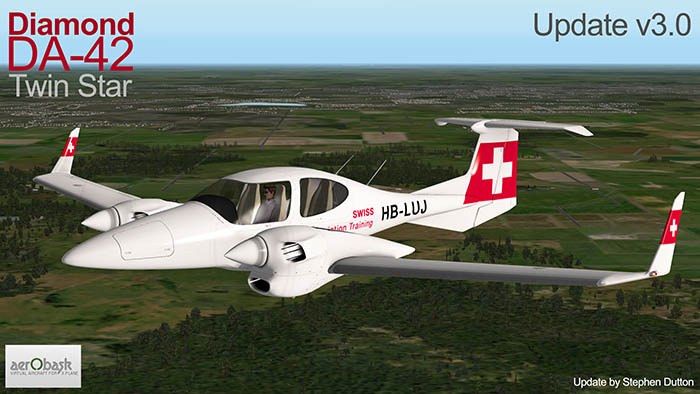
Aircraft Update : Diamond DA-42 Twin-Star v3.0 by Aerobask
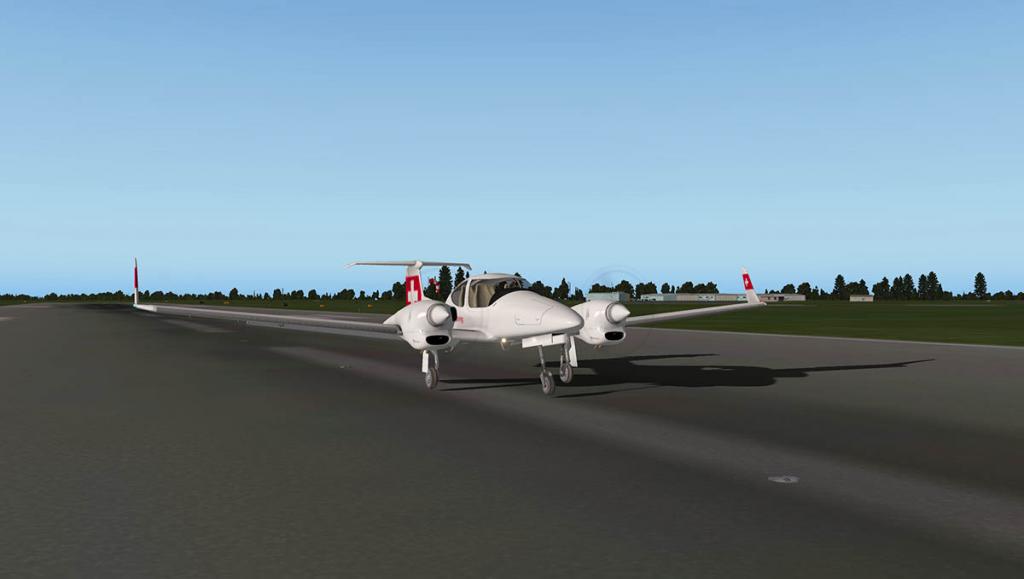
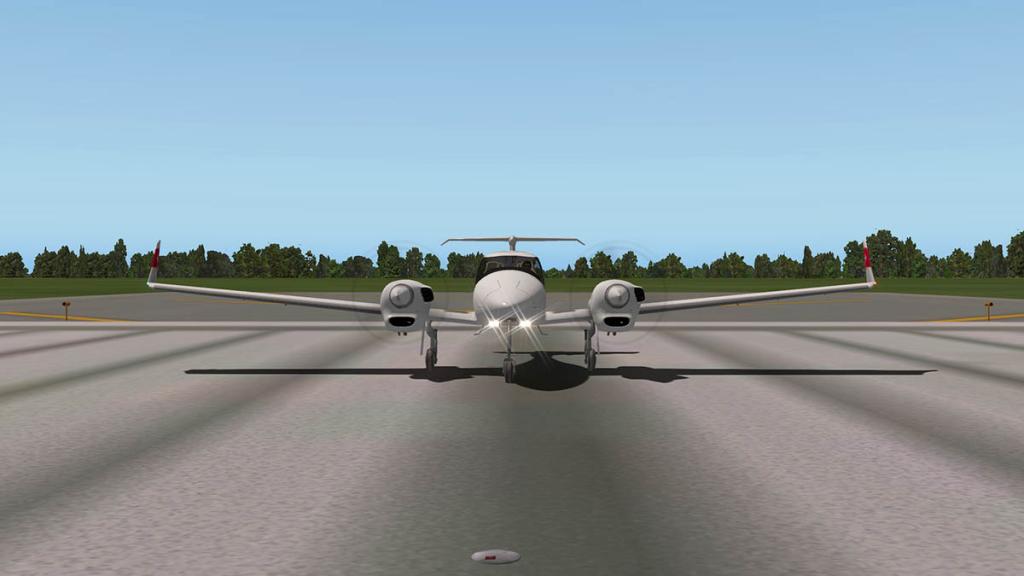
Aerobask have updated their Diamond DA-42 Twin-Star to X-Plane version 10.30 in this the second update of this remarkable twin engined composite aircraft. Released for X-Plane in August 2013, the aircraft has had a significant morphing from an aircraft that was very good in the beginning to something that is now a very mature aircraft. But there is more to this upgrade than meets the eye. As Aerobask is willing to change in this version a significant component of the aircraft to make the design not only more contemporary but also more flexible in the way you fly the aircraft.


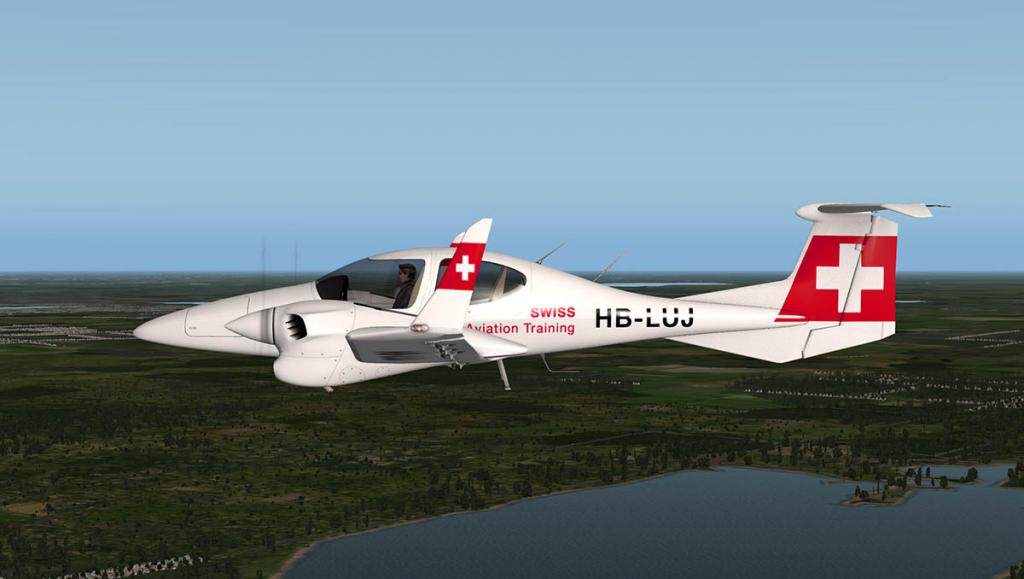
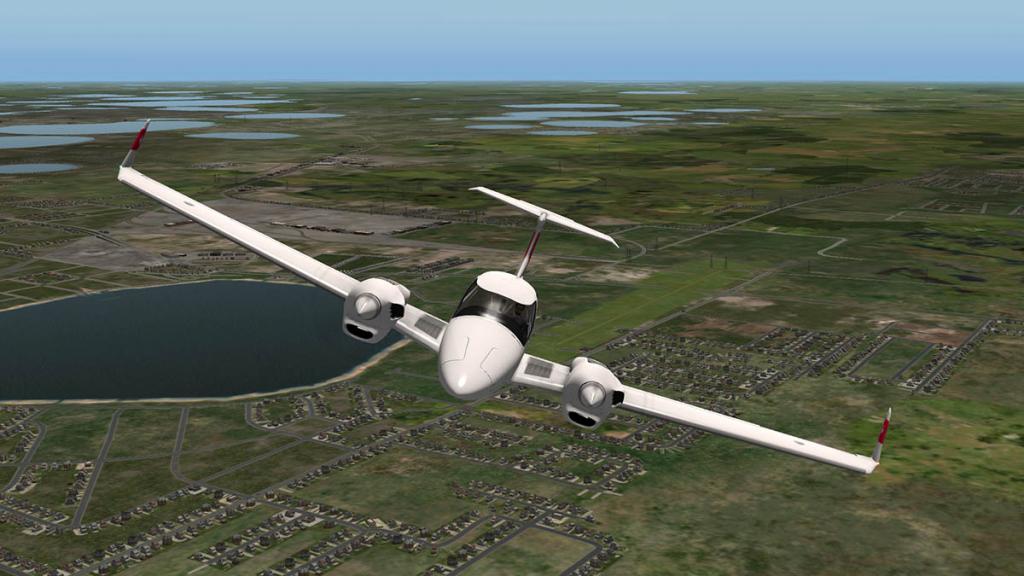
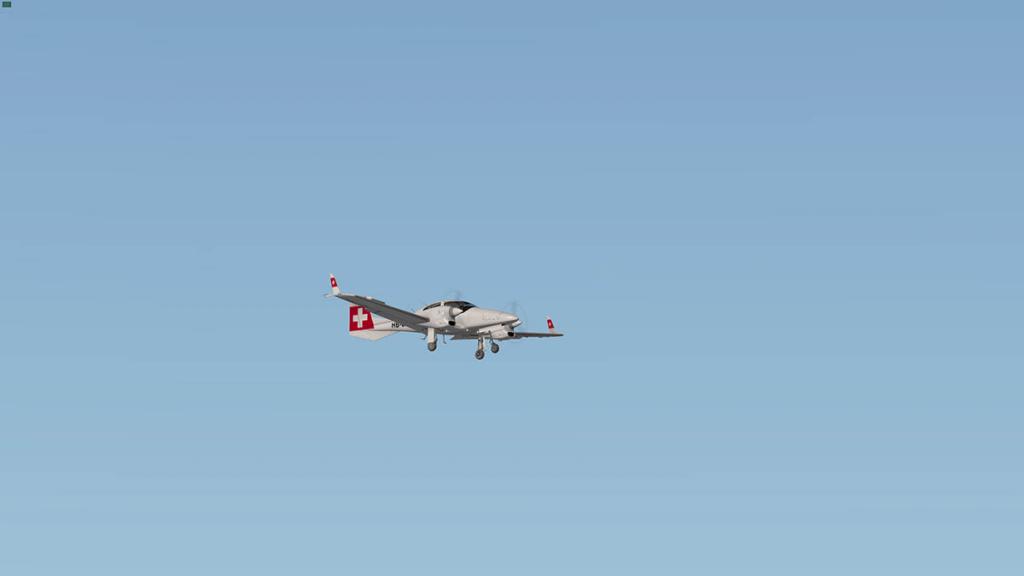
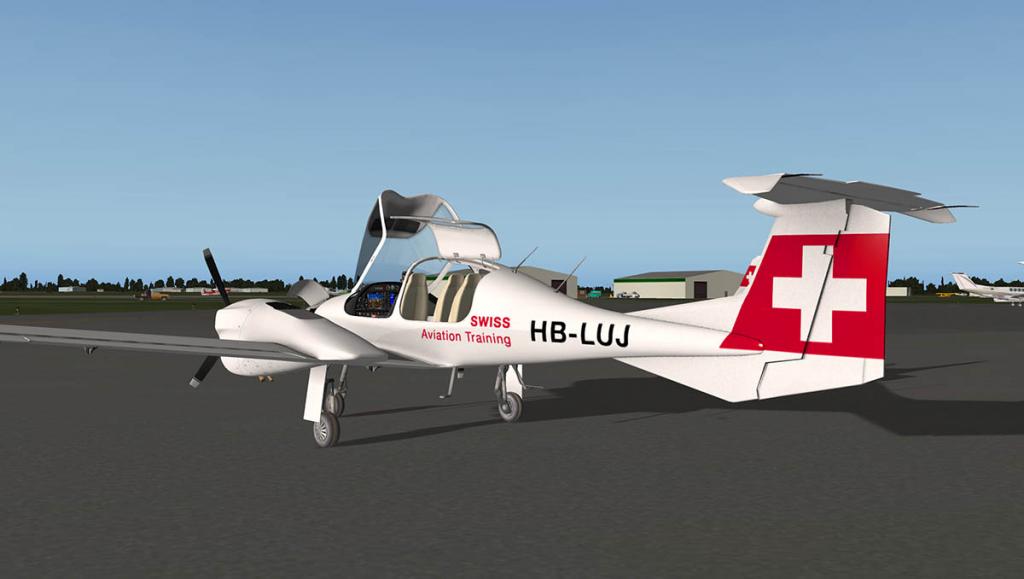
The DA-42 is a very modern and striking aircraft in design, on the outside th ere is not much new in v3 to notice except an improvement in the textures, and a new livery in the "Swiss Aviation Training" which looks very clean. You do notice the slight difference in the texture quality, as all the liveries look slightly sharper, but are also more frame-rate friendly, but that was never an issue with this aircraft in the first place.


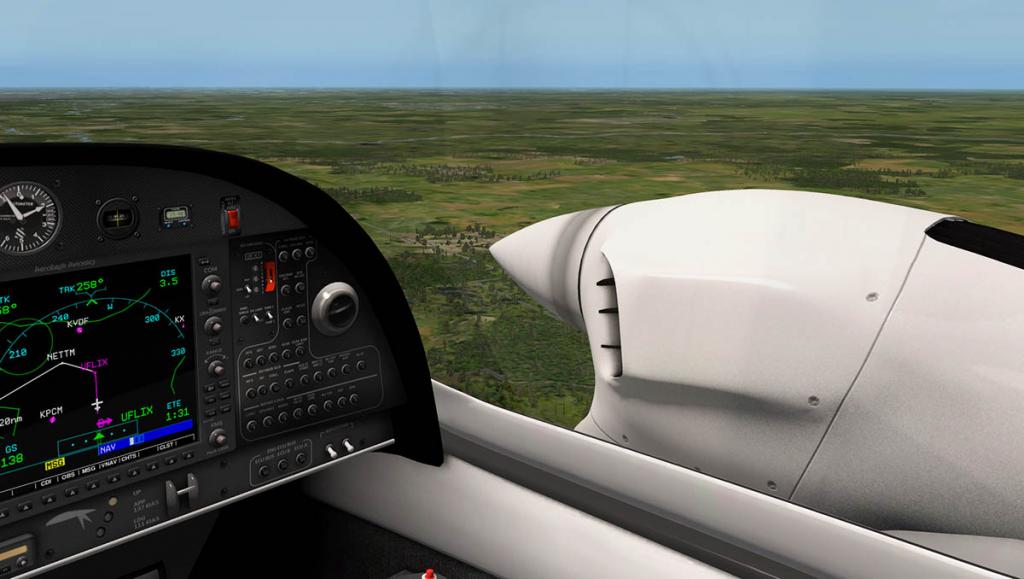
The significant difference here is the inclusion of the Garmin GNS530 into the panel of the DA-42. Looking back at the old panel (below) you can see that the X-Plane Flightplan/MAP version has been discarded for the new look GPS.
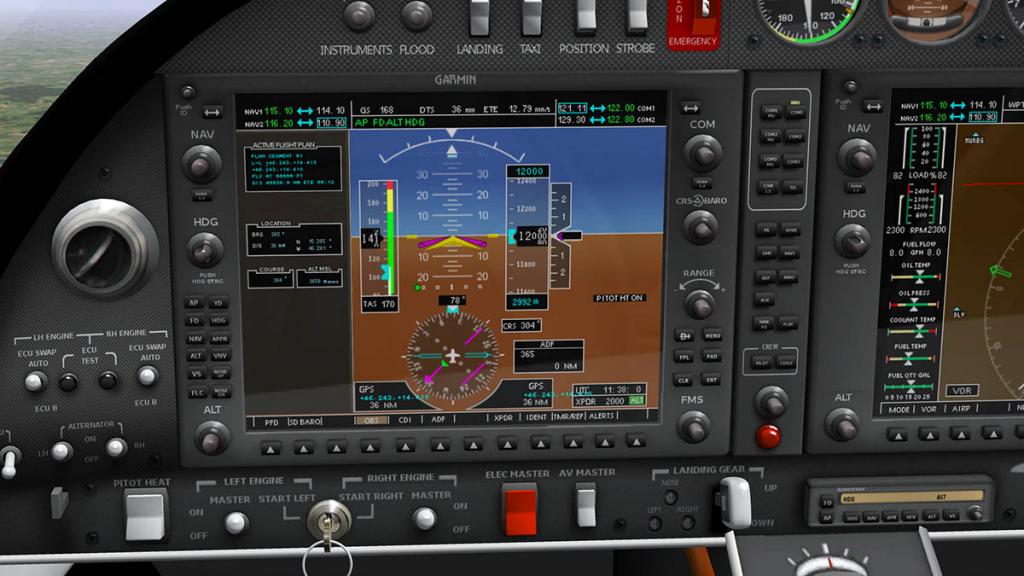

And what a difference it makes... Not only is the GNS530 one of the biggest in X-Plane, it has also been supremely intergrated into the composite display design.
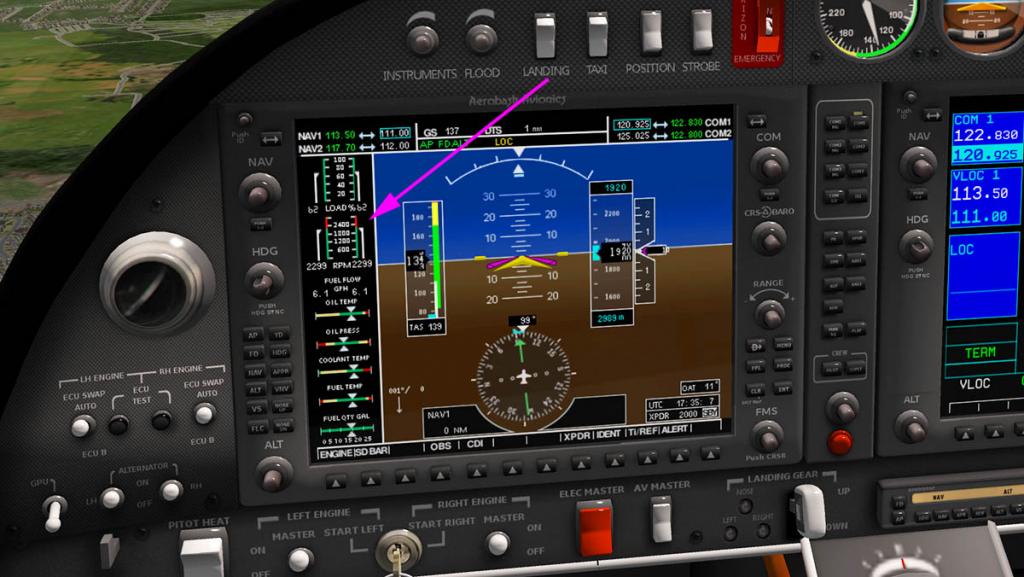
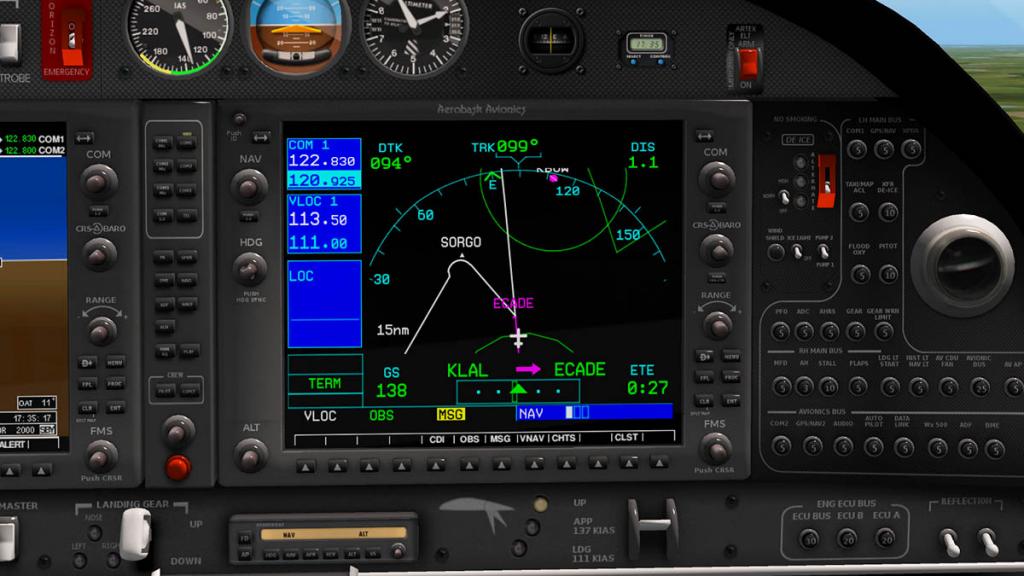
The GPS screen does still pop-out but that feature is not needed here as the screen is large enough anyway and in fact it is small than the panel version. You will need a bit of an adjustment to note the slight difference in the placement of the GNS530 knobs and buttons, but it soon becomes second nature as it is a very functional design... The engine display or EIS engine readouts, Load%, RPM with other items Fuel Flow, Oil Press, Coolant Temp, Fuel Temp and Fuel Qty, are now only on the left of the Primary Flight Display and not switchable as before. I found the EIS better now on the PFD as the engine readouts are simply closer to the flying parameter readouts and you don't have to change screens to get the engine and fuel numbers that was on a glance to your right. This is great for setting the RPM for takeoff or landing. The GNS530 is also a better fit with the GFC-700 Autopilot situated lower center panel. The whole panel setup looks now far more professional and workman like and the displays are slightly darker but look far better in quality and depth. And that GNS530 gives the aircraft tremendous versatility for long distance flying as the aircraft had a very good range at 1,693 km (1,052 mi; 914 nmi) before, and with the new GNS GPS it now makes that range very useful and easily more accessible.
Other avionics that have had attention are new radio frequencies in 8.33KHz and an added bearing pointer on the HSI.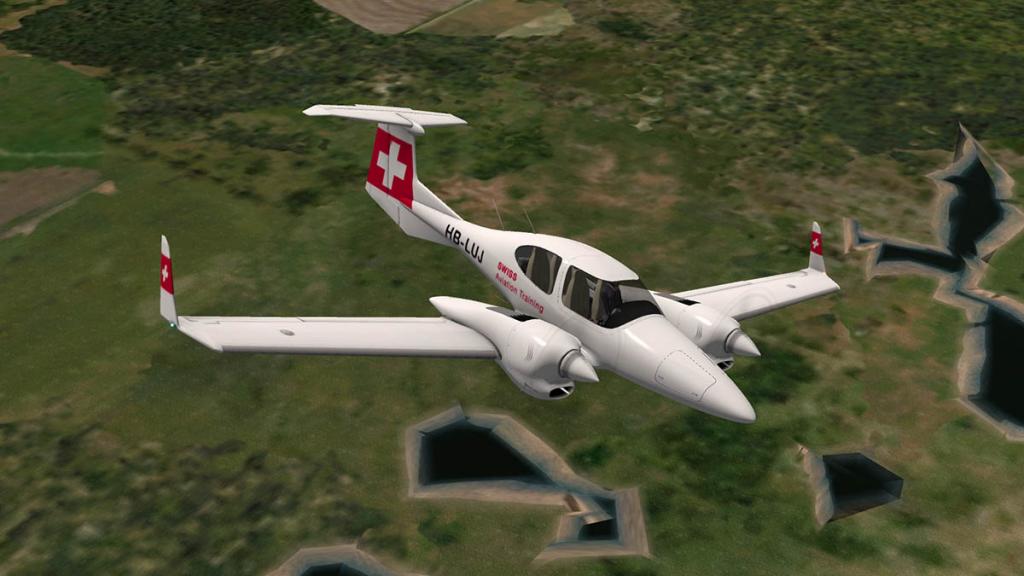

Flying conditions are slight improved as well with corrected trim and better FLC mode nose up/dn rates that has taken out most of that bobbing efect. But still the DA-42 is a very nice aircraft to fly. With a huge amount of power and a very stable airframe, it has matured very nicely since the original release.
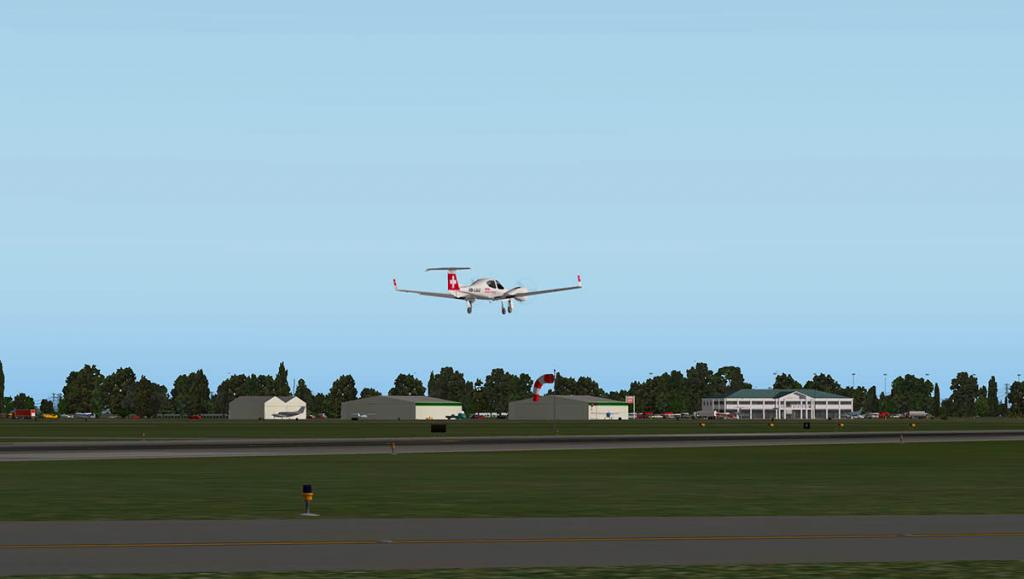

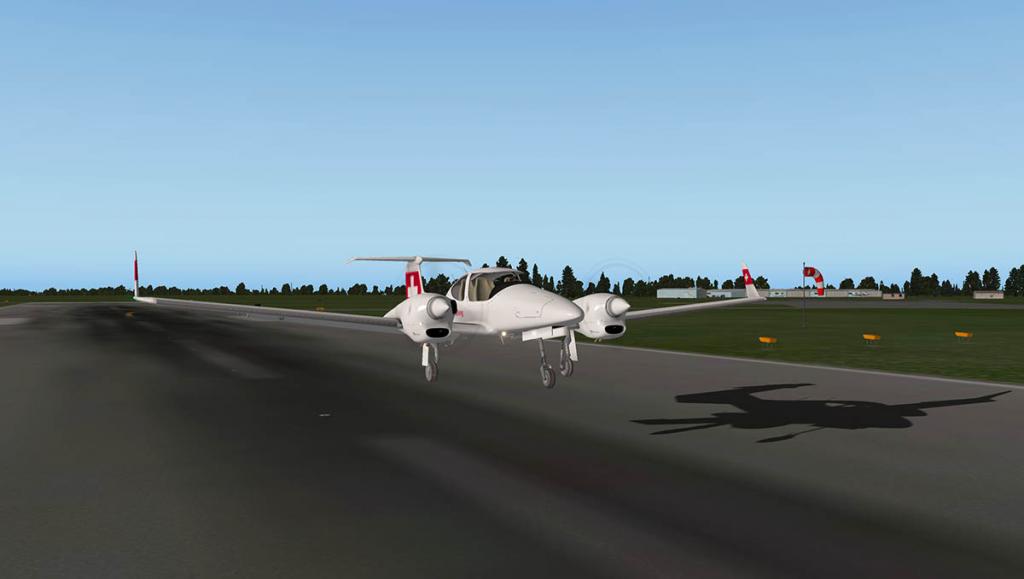
The hard stick like undercarriage now has some give and the landings feel far better because of that, the wheels will now absorb the runway and not bounce you back hard upwards, in that it made you having to get the speed and contact point almost perfect to create a good landing, it now feels more realistic in operation. You still have to be careful with the correct speed in the ILS capture though. Get the speed wrong and the aircraft won't descend on the glidescope easily but fight it. In most cases you won't use the ILS aid, but be wary of that if you do.


Two entrance/exit doors and one storage door are animated and the pilot in the aircraft is all new. Like noted the aircraft is very nicely designed and feels very complete now.
v3 Summary
In all of Aerobask's designs from the Lancair Legacy FG and the Pipistrel Panthera there is a maturity now and design completeness, not that these aircraft where average on release, because they weren't, as they were still very good. But there is a feeling the developer is over the period of being new to producing aircraft and now is a noted producer of exceptional and interesting aircraft. The quality is now up there and Aerobask's ideas in like fitting the GNS530 in the DA-42 and more importantly making it work so well with the way it is intergrated into the panel shows the expert attention that comes with these aircraft.
The DA-42 Twin Star is already a very popular aircraft in X-Plane... this upgrade now cements its already excellent reputation.
The 3.0 update is now available from the X-Plane.Org Store.
The 3.0 update is free to all users that have purchased the v1 Diamond DA-42 Twin-Star, go to the Diamond DA-42 Twin-Star X-Plane.OrgStore page (below) and "Log-in".
Price is currently US$19.95: Diamond DA-42 Twin-Star v3.0
For the FULL Review and more information and details of DA-42 Twin Star (v1) the go here : Review :
V2 Update Review is here : Developer Update :
Developer Site: Aerobask
Dev Thread : Support forum for the DA-42Update Review By Stephen Dutton
8th Nov 2014
Technical Requirements:
Windows, MAC or Linux
X-Plane 10.20 or higher - 32 and 64 bit compatible. (X-Plane 9 not supported)
Current version: v3.0. Last updated: November 8th, 2014
Updated store#
Review System Specifications:
Computer System:
- 2.66 Ghz Intel Core i5 iMac 27”
- 6 Gb 1067 Mhz DDR3
- ATI Radeon HD 4850 512mb
Software:
- Mac OS Mavericks 10.9.4
- X-Plane 10 Global ver 10.30 (final)
Addons
- Saitek x52 Pro system Joystick and Throttlev 3.0.7 full Changelog
- New GNS included on the MFD screen, fully functional virtual 3D cockpit.
- EIS moved on PFD
- New radio frequencies 8.33KHz
- Add bearing pointer on HSI
- Fixed FLC mode nose up/dn
- Fixed transponder mode
- Now, damping gear are animated
- Improvement textures
- New liverie by XFlyer : Swiss Training Aviation HB-LUJ
- New pilot
- Update flight manual

-
How to cabin pressurization, the screen darkens above 13000ft.
I don't think the problem is the ATR? but the X-Plane setting "dim under high G-Load or hypoxia" it is selected on or off on the Rendering Options menu. SD
-

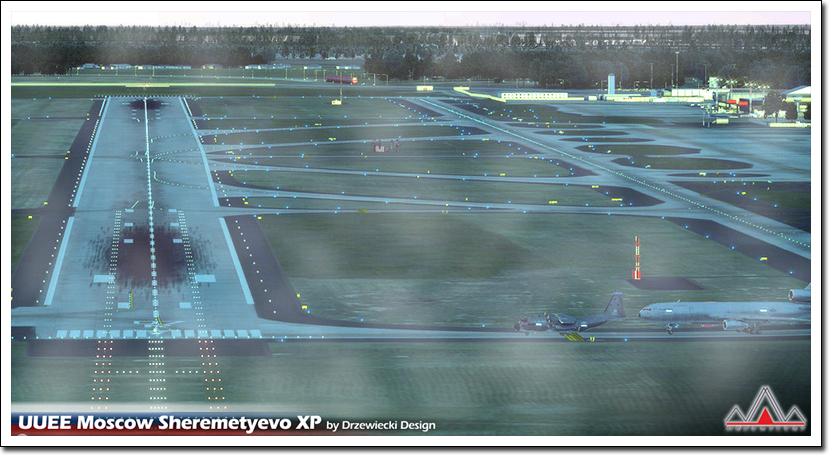
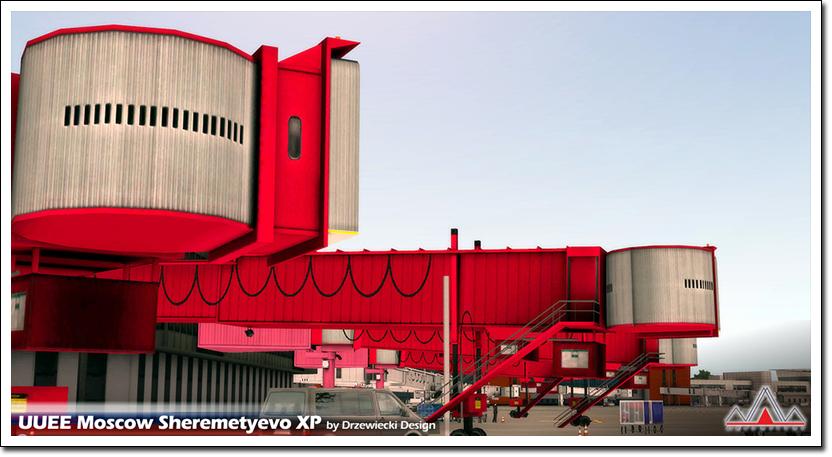
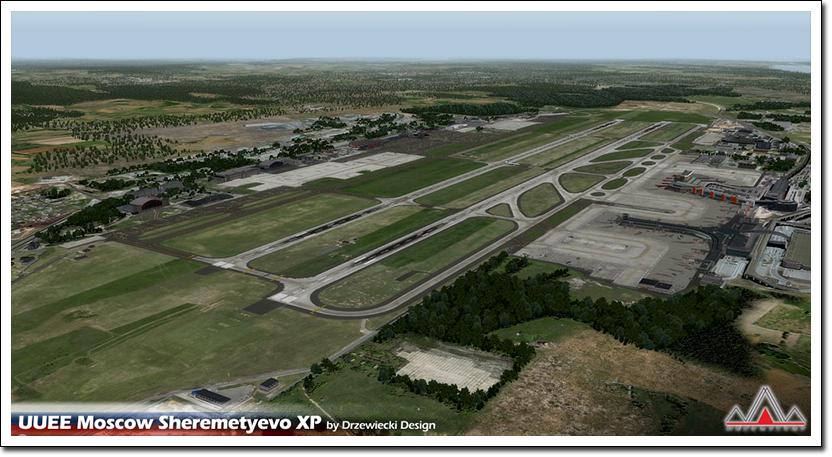
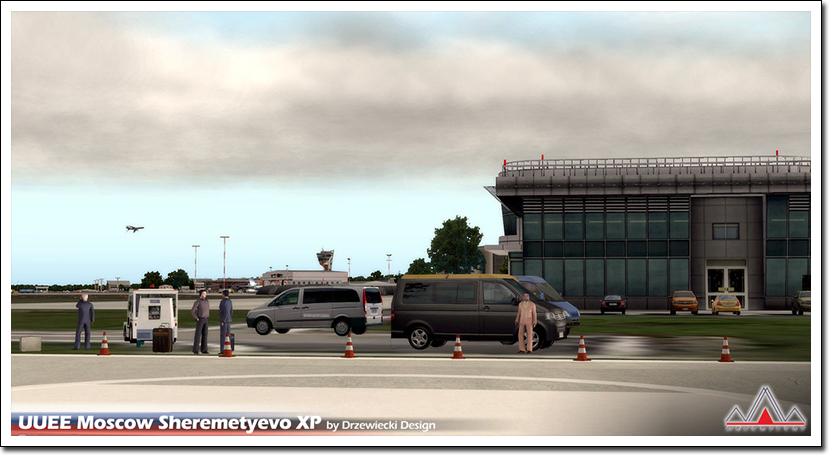
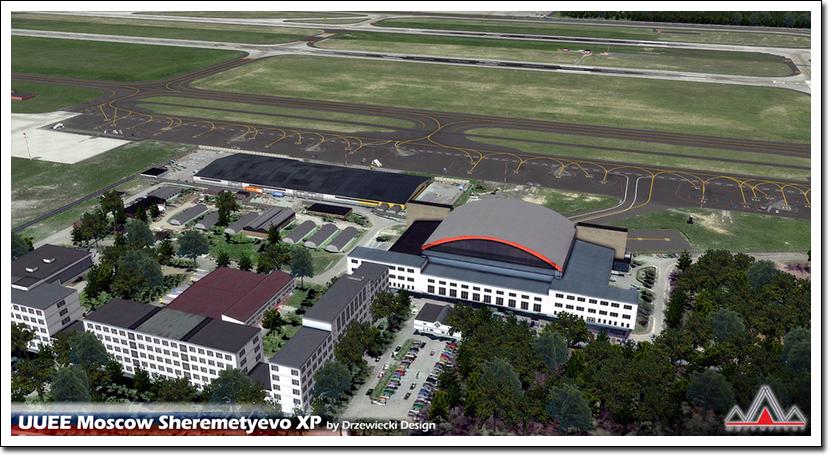
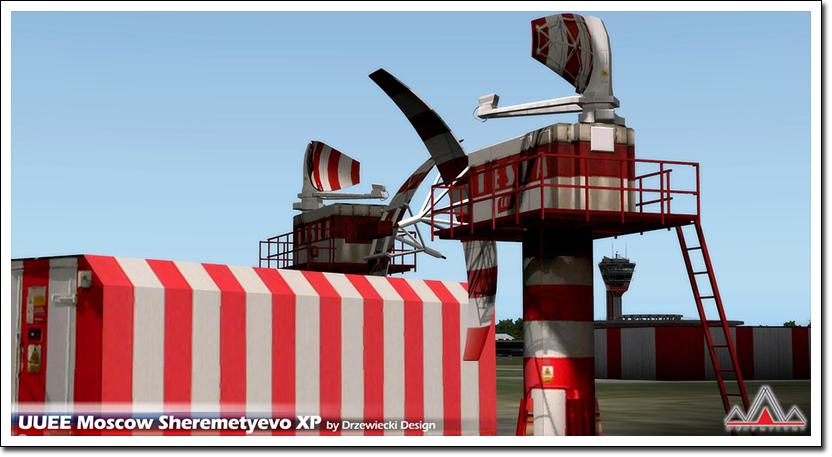
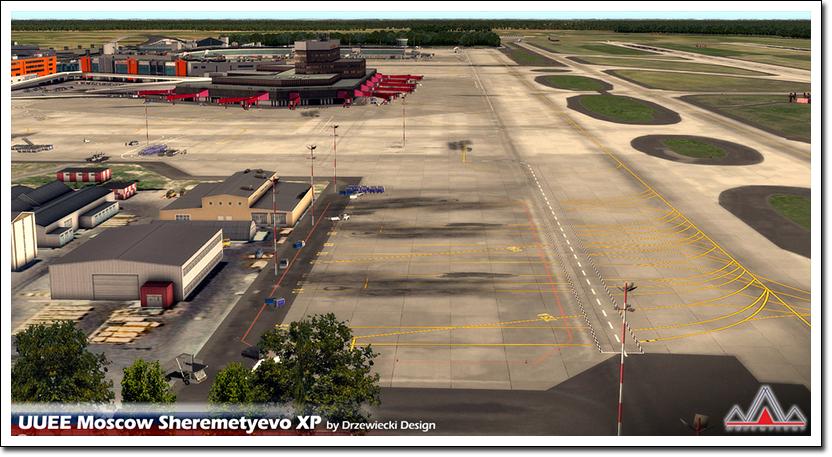
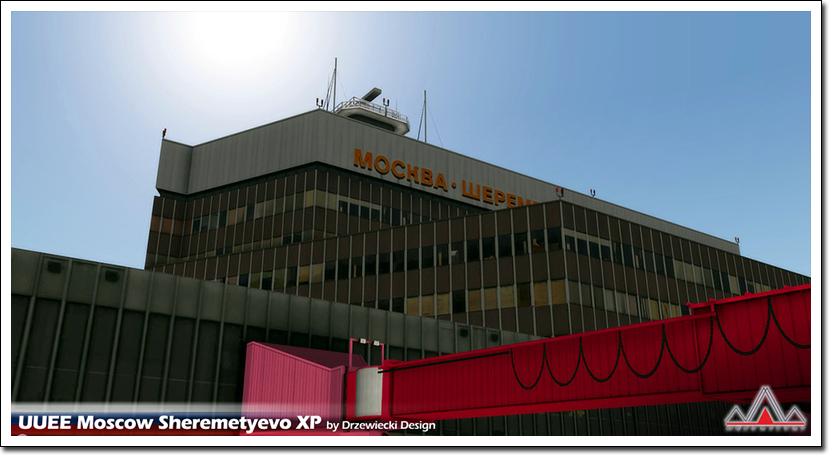
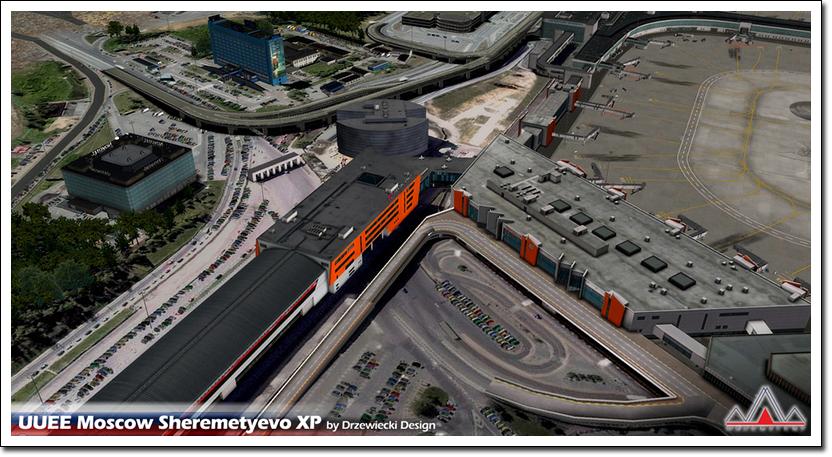
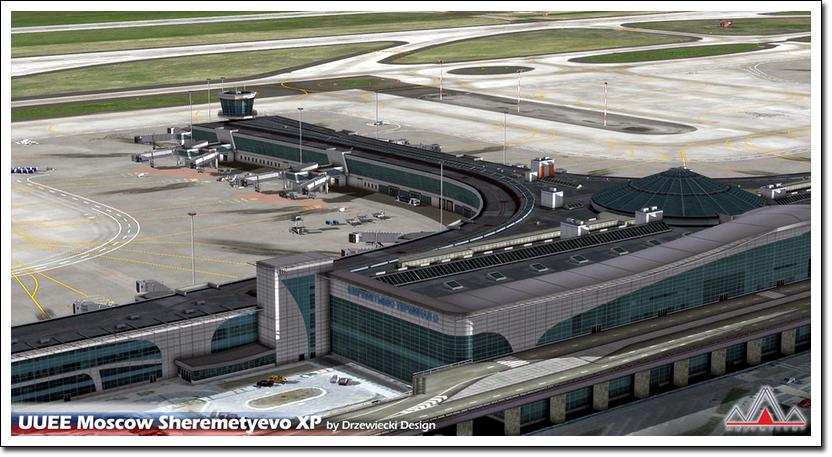
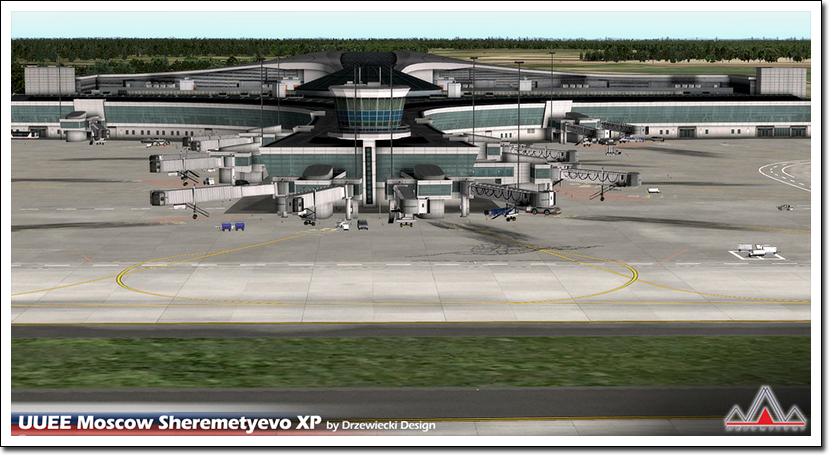
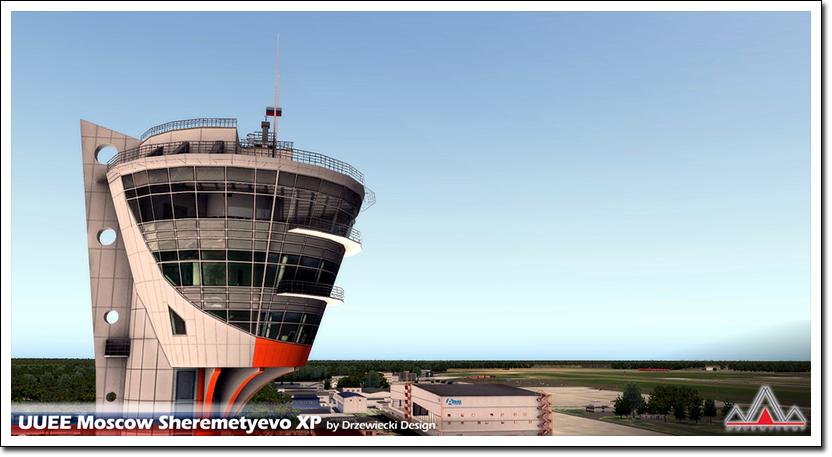
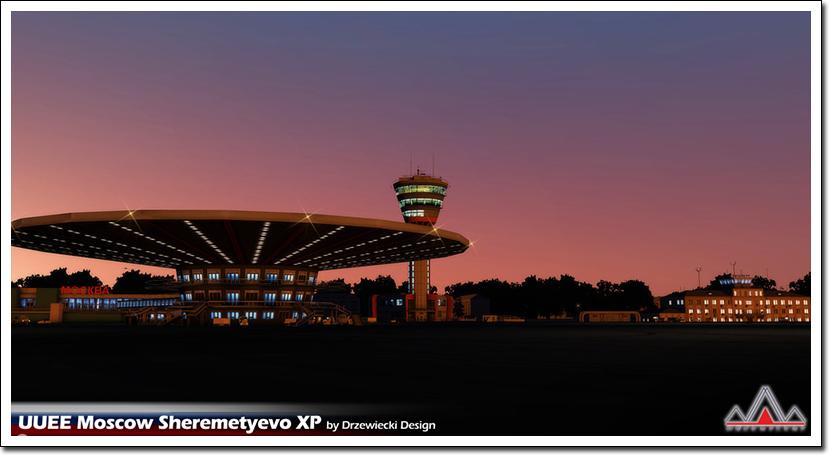
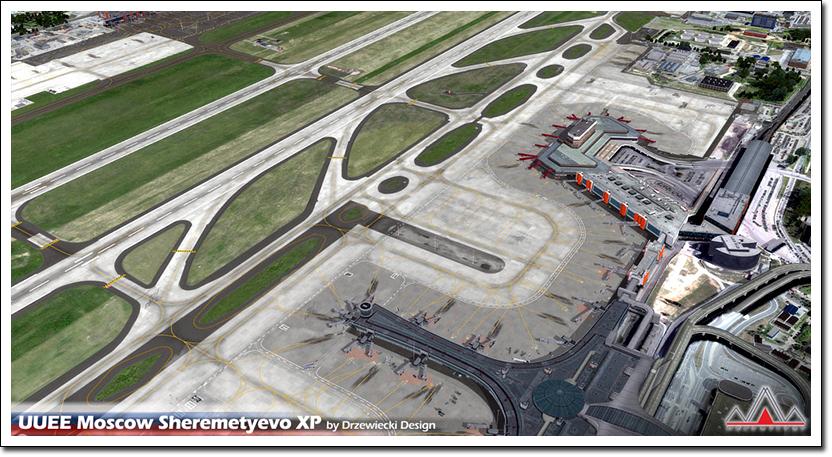
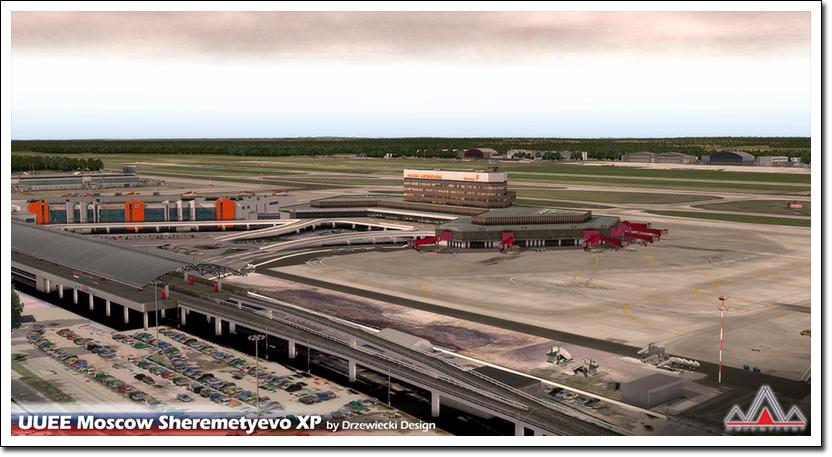
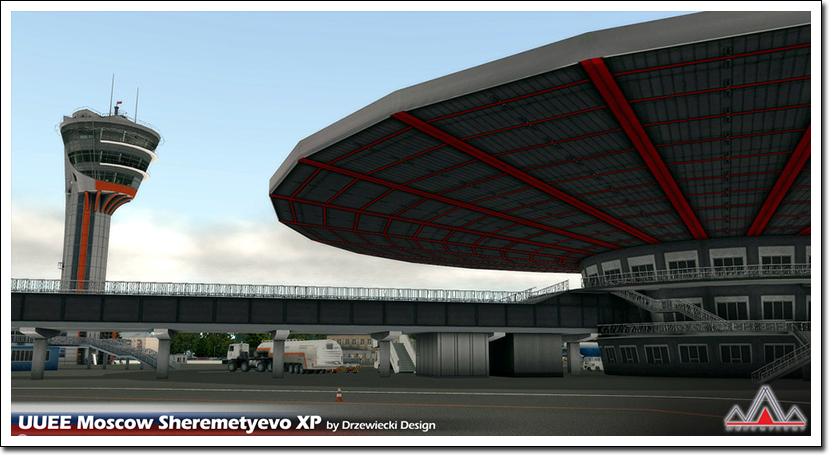
Airport Release - UUEE - Moscow Sheremetyevo by Drzewiecki Design
Drzewiecki Design is a Polish company that has developed products for simulation since 2003. Specializing mostly in scenery for FS/FSX and Prepar3D the design house has now started to release scenery for the X-Plane Simulator. The first scenery released was for EETN Tallinn XP. But it is this scenery of UUEE - Moscow Sheremetyevo that looks extremely interesting... Highly developed and comprehensive this scenery is well worth adding to your collection.


Features Include:
Compatible with X-Plane 10
Highest level of accuracy in geographic positioning, modeling and texturing
Removable high quality static aircraft
Up-to-date scenery including newly constructed terminals, aprons and taxiways
HDR or 2D apron lights
Navaids and mesh for the whole area
Product includes custom-made charts in PDF format


System requirements:
X-Plane 10.30 (32 / 64 bits) or higher
Windows XP (SP2), Windows Vista, Windows 7 or Windows 8 (with the latest Service Packs), Mac, Linux
2.6 GHz Dual core processor or better
2 GB RAM (4 GB recommended)
3D graphics card with at least 512 MB (1024 MB recommend)
Download-Size: 660 MB


Price is 19,99 € (US$24.95)
For more information then go here: Drzewiecki Design
Stephen Dutton
6th Nov 2014
Copyright©2014 : X-Plane Reviews
All images courtesy of Drzewiecki Design

-
Por favor. Como fazer o dump funcionar acima de 13000ft?
Como você despejar ? Ou você quer dizer subir para 13 mil pés
-

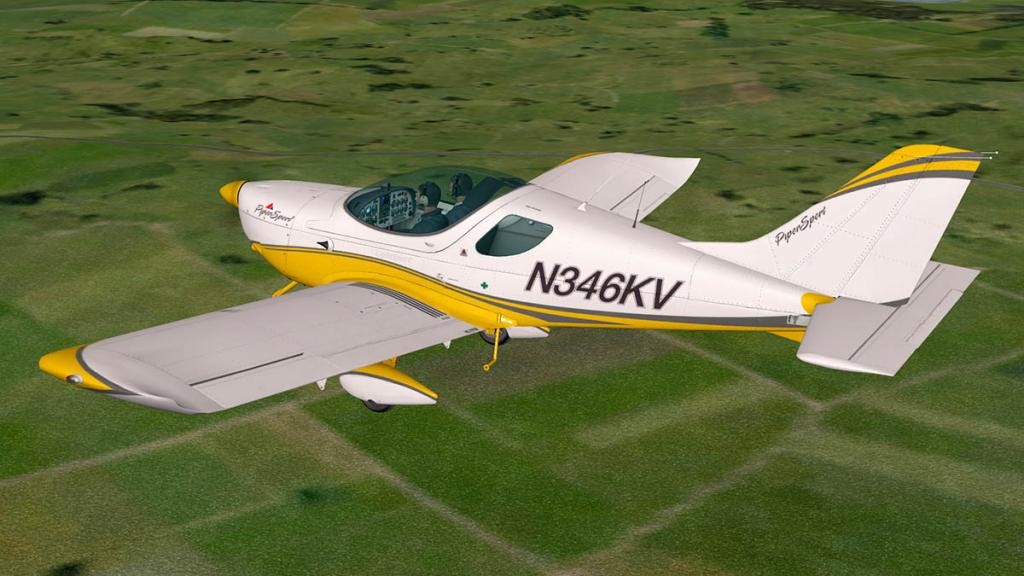
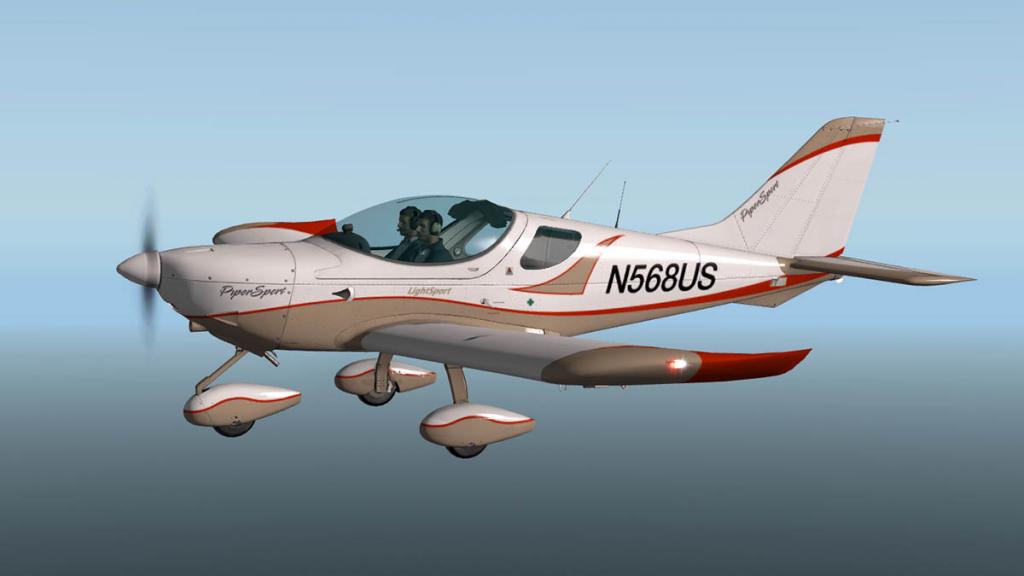
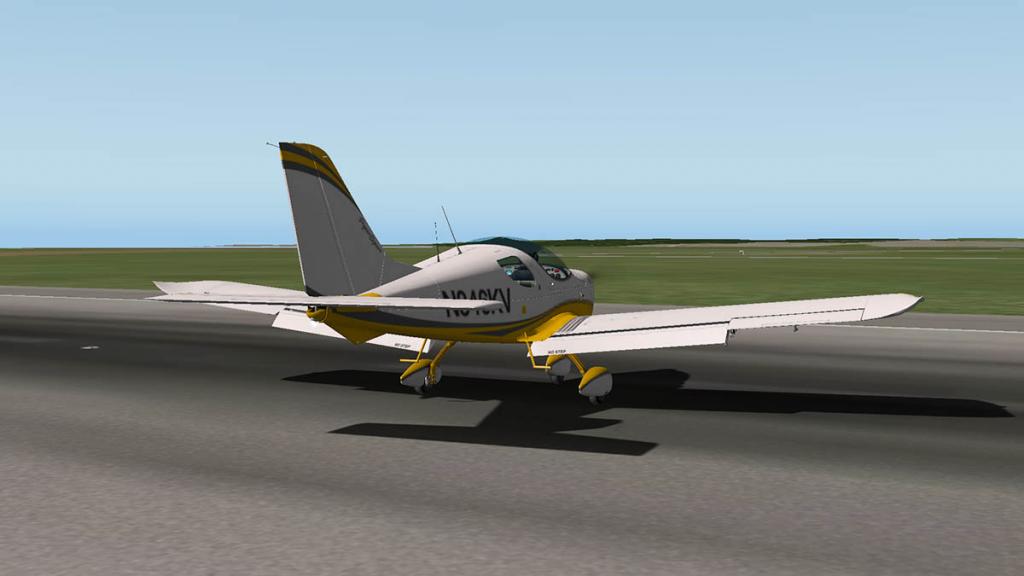
Aircraft Review : Cruz PiperSport PS-28 by Alabeo
This aircraft does not look anything like your usual American Piper. That is because it isn't actually a Piper at all? This is because PiperSport was originally created by the Czech Aircraft Works (CZAW) as the CZAW SportCruiser in 2006 in and released in Europe. The aircraft was then later licensed to Piper in January 2010 and renamed the PiperSport. CRUZ was also added to the name as well because it was four-letter ICAO designation for the SportCruiser. The license arrangement however lasted barely 12 months as the American and Czech companies had to many different approaches towards marketing, and the contract after selling only 45 aircraft was torn up. Piper noted that the aircraft's slow sales in the past year had been related only to marketing issues and not any deficiencies with actual the aircraft design. Piper never actually built any of the aircraft anyway as they were still assembled in Czechoslovakia. Both fully built and in kit form. The aircraft was offered in three different trim and avionics configurations, with higher end models offering the Dynon Avionics D100 glass cockpit and autopilot. And the aircraft is still available via Importer U.S. Sport Aircraft and is now known as the CSA PS-28 Cruiser and the "Classic" version is the one with the Dynon Avionics suite. All the aircraft versions (or badge engineering) use the Rotax 912S powerplant of 100 hp (75 kW).


Cruz PiperSport PS-28
This version here by Alabeo is the basic aircraft in with no autopilot or Dynon Avionics, it is a basic stick and rudder aircraft that is ideal for basic training. It does however have a nice Garmin GNS530 GPS that will gladden your heart, but it is only really for navigational and radio purposes as installed here.
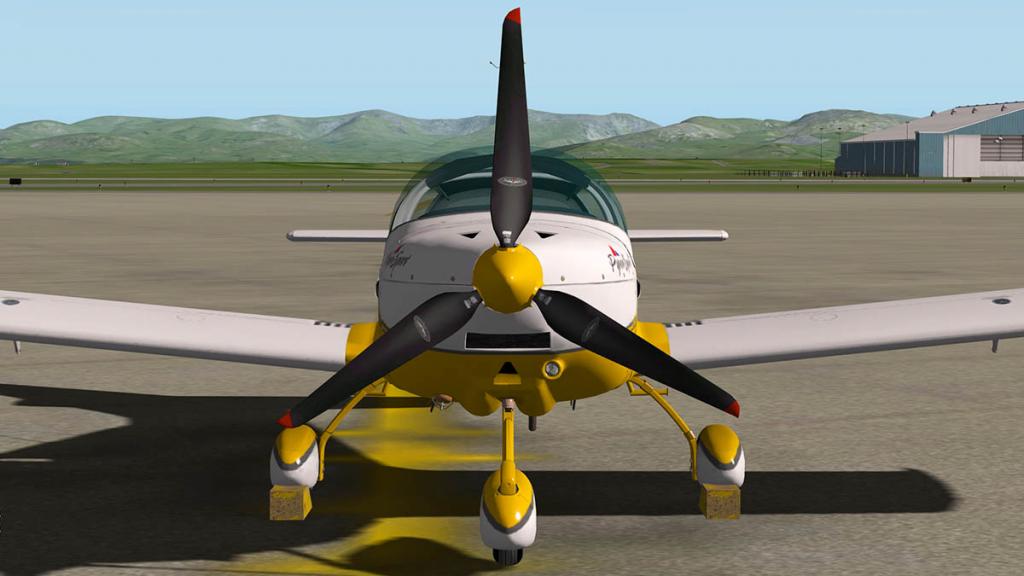
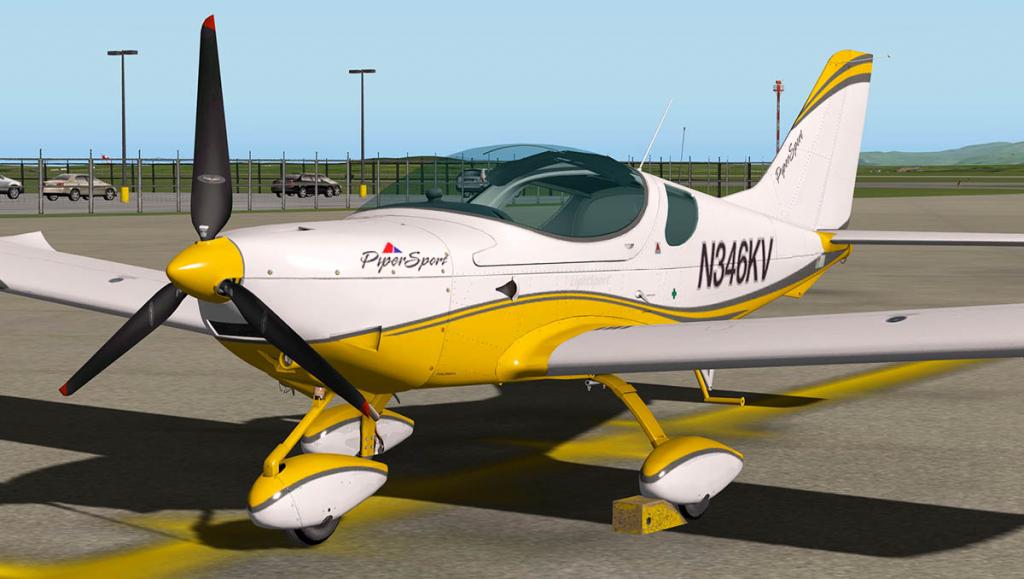

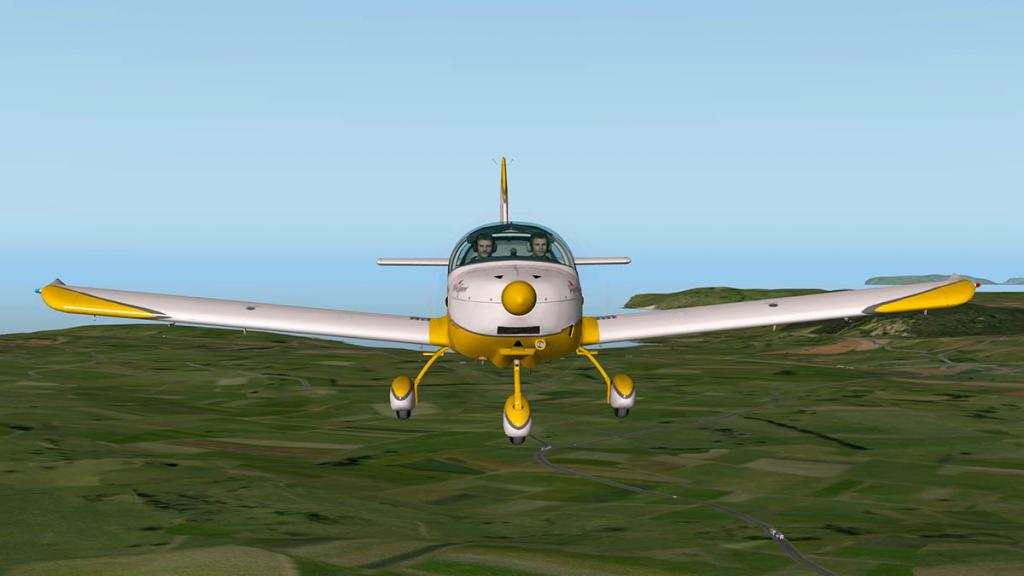
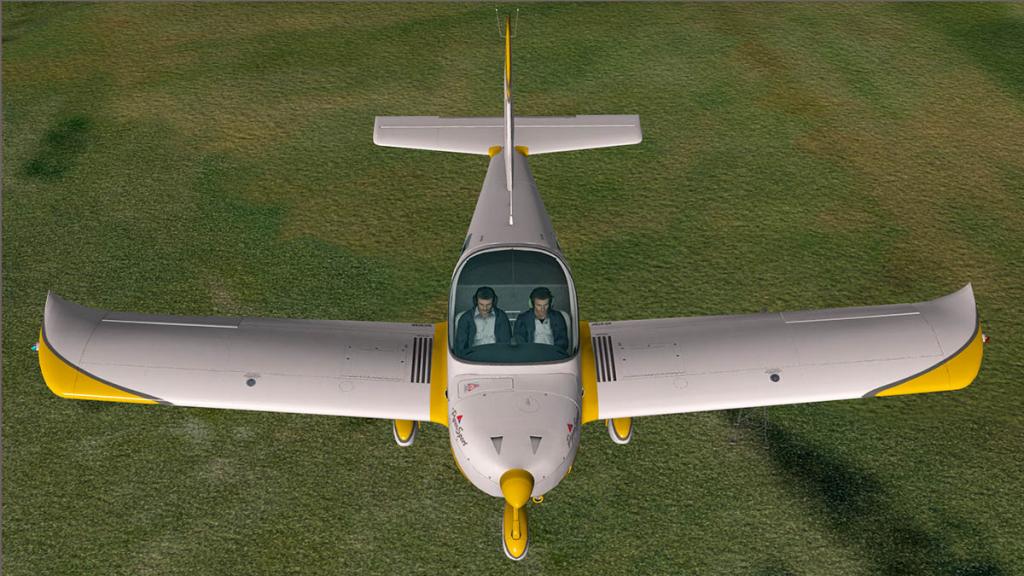
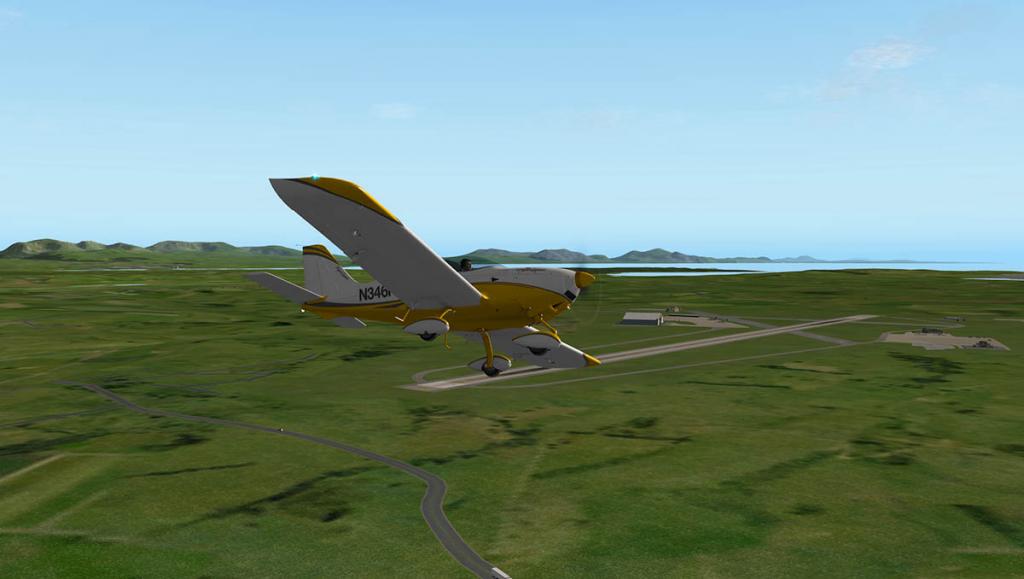
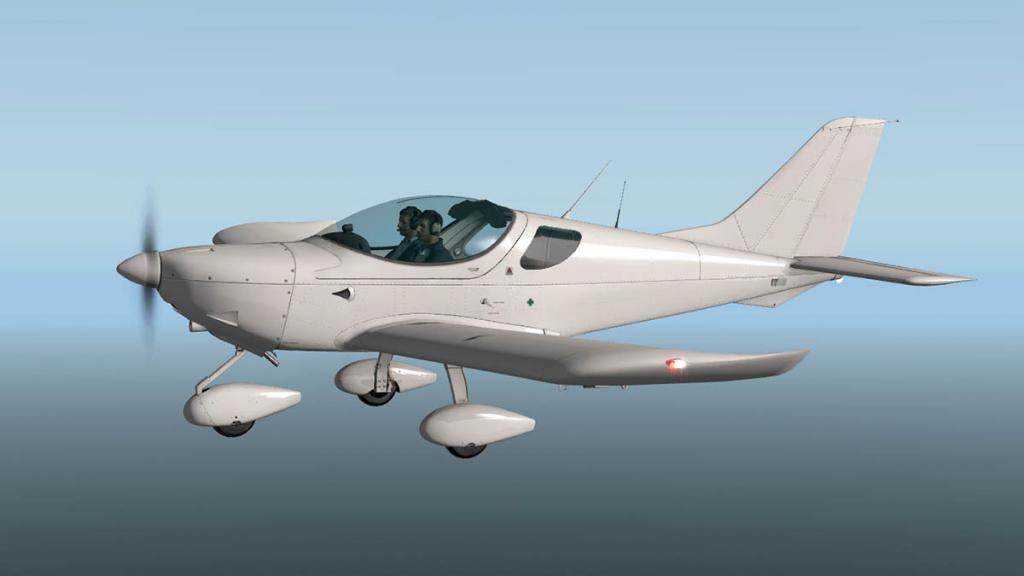
This is a very nice tight design the Cruz, and does look more European than American in hindsight and more in the style of what type of design the French or Italians would produce. Alabeo have certainly done great a reproduction of the design with excellent panels and minor details. There are no cheat items either positioned on the textures, as everything that can be is created in 3d. everything from piping, to brake assemblies, flaps and supports and cooling (NACA) inlets.


There are the standard two menus that usually come with a Carenado or Alabeo aircraft... The lower menu (situated lor left of your screen) is the (- O -) Options menu that has the options: Transparent Windshield (front), Instrument Reflections, Static Elements, Cockpit Door and a new one in Scroll Highlight. The top menu is the (- C -) Camera or views menu with zoom and sound adjustments.
New Manipulators
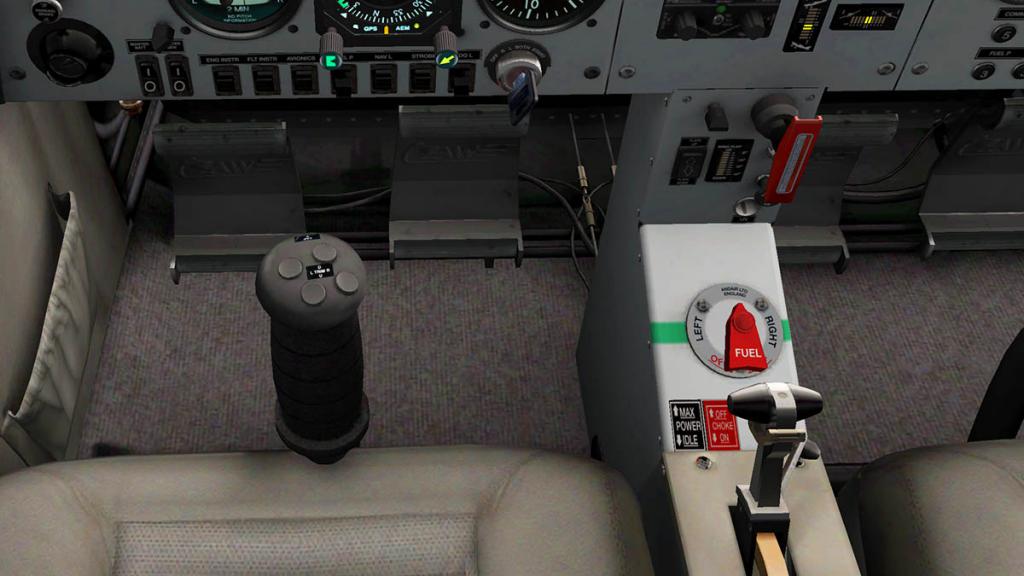
On the outset the "Scroll" system looks the same as the ones on all of the type in the latest v2 (10.30) Carenado's. But actually it is another step in the development of trying to create a better manipulator system for X-Plane of which the default is quite basic in operation. In the earlier "Scroll" system you used your mouse scroll wheel (a gesture mouse will work as well) to operate the knobs or buttons. Here the system goes one step further in that you can not only scroll (with the wheel) but still also use the standard Carenado directional adjuster at the same time, both manipulations can be used together to turn knobs and flick switches on or off. The colour system to highlight what operations (knobs or switches) can be manipulated can also be switched on or off via the menu selection. It works very well, better still if you have a scroll wheel mouse, of which I don't (single click mouse on a Mac), but it does take a little getting used to and in the PiperSport you are flying with one hand and adjusting with the other.
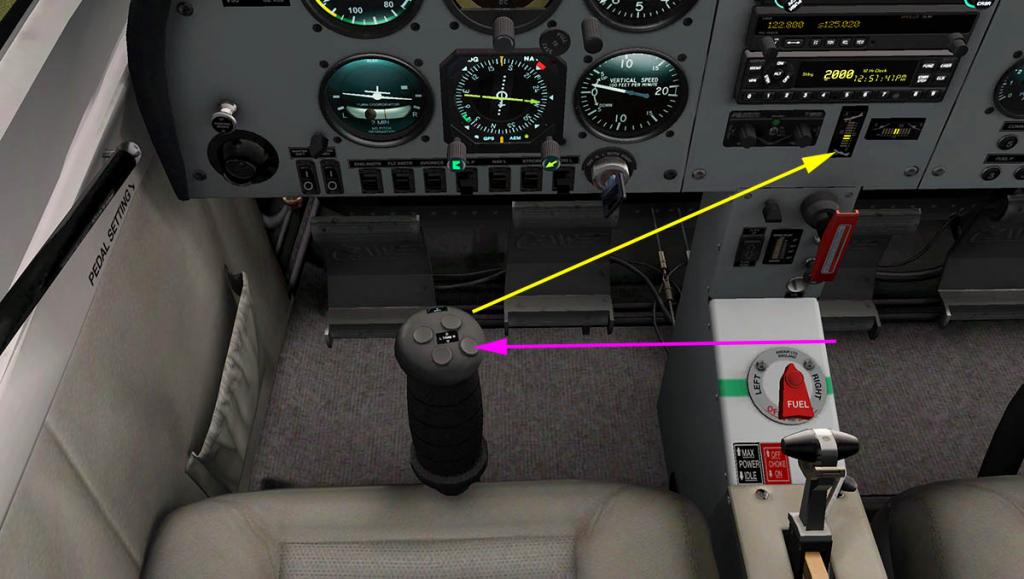
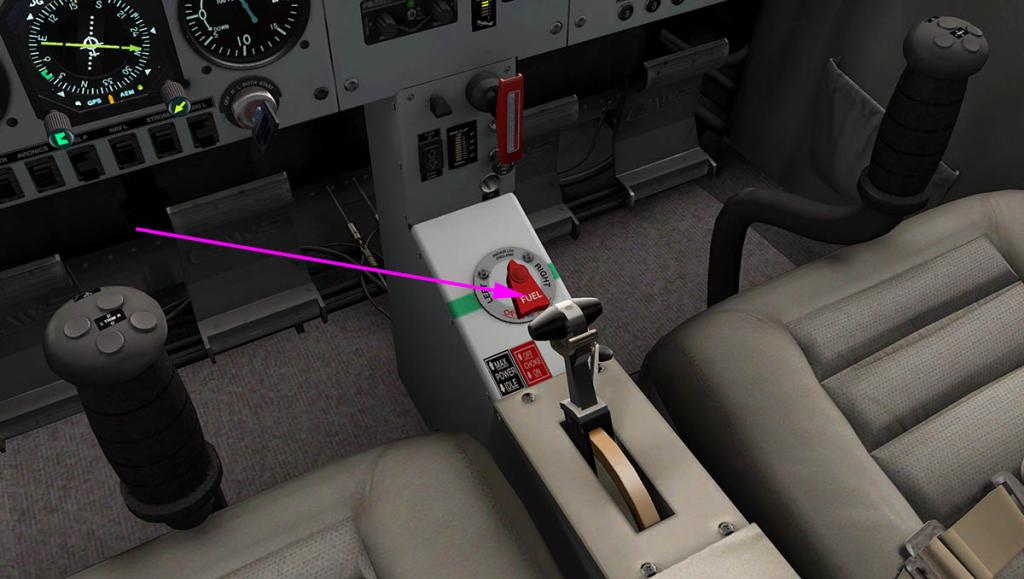

Besides the manipulator ease of programming the GNS530 GPS (It pops out for ease of use), the scroll is best for use in trimming the aircraft with the buttons on the control stick, which the trim is displayed on the lower central panel. It makes the fuel selection a one click operation as well. The usual Tom and Jerry pilots that are seen in every Alabeo and Carenado aircraft also make another appearance here as well. But they do have great animations.
The inner cockpit is a beautiful place with real leather beige contoured seats and brushed carpet on the floor, when the static items are selected there is a red brace on the pilots control stick.
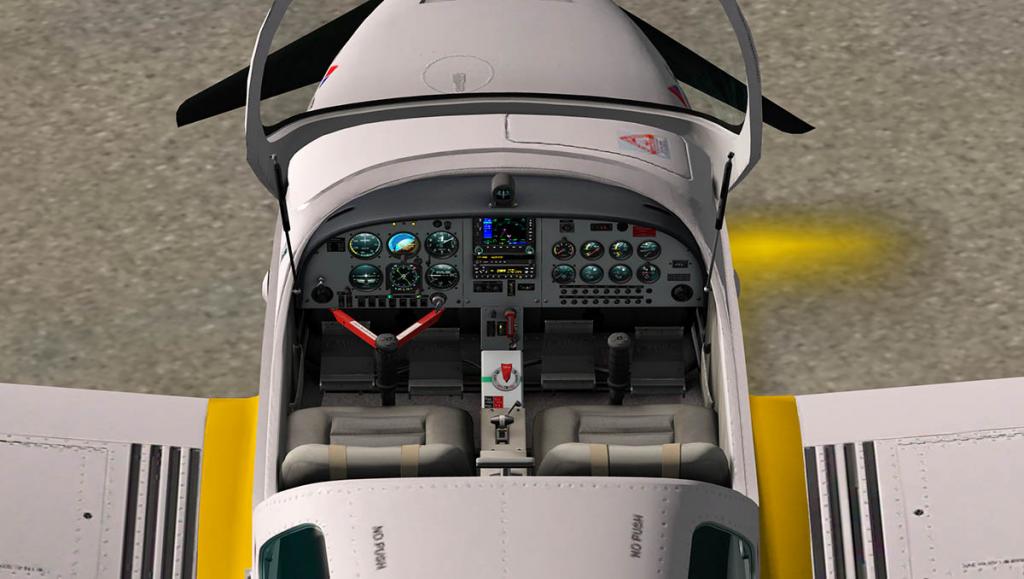
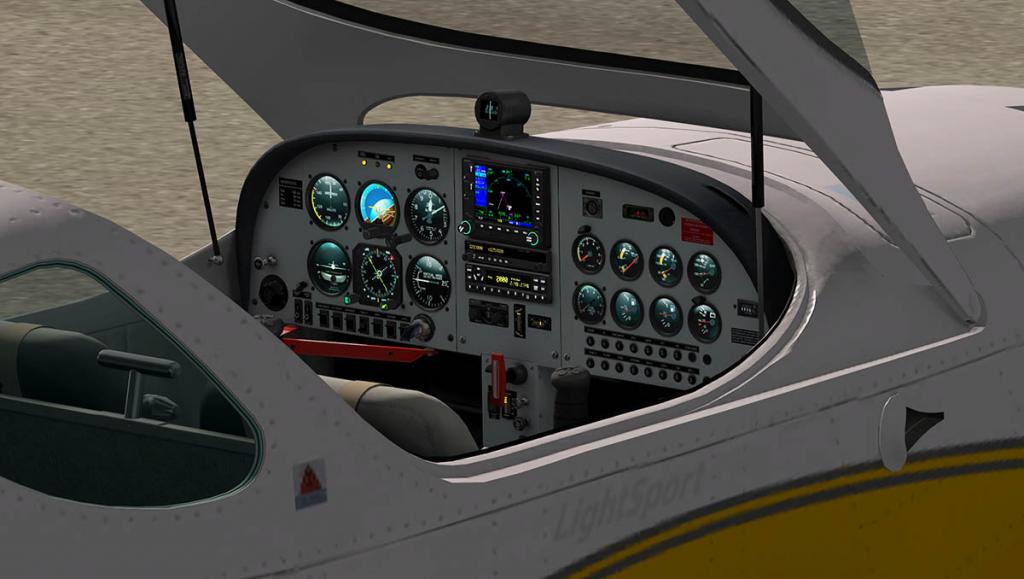
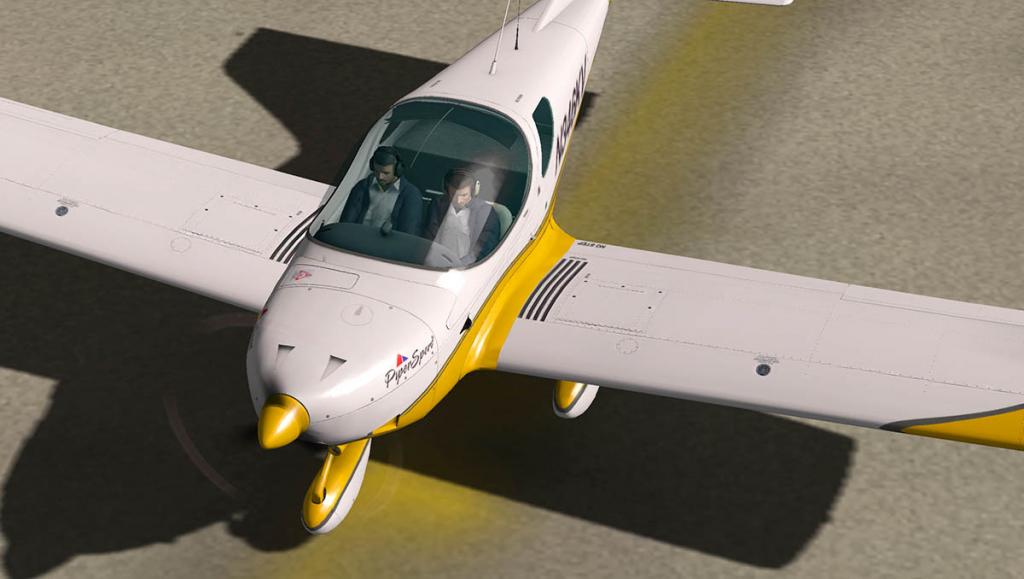
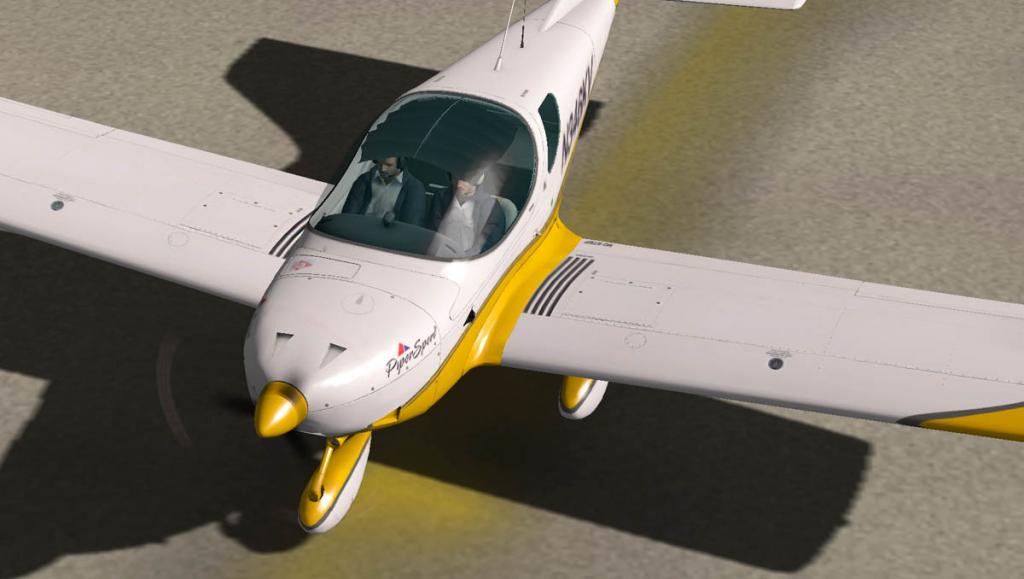
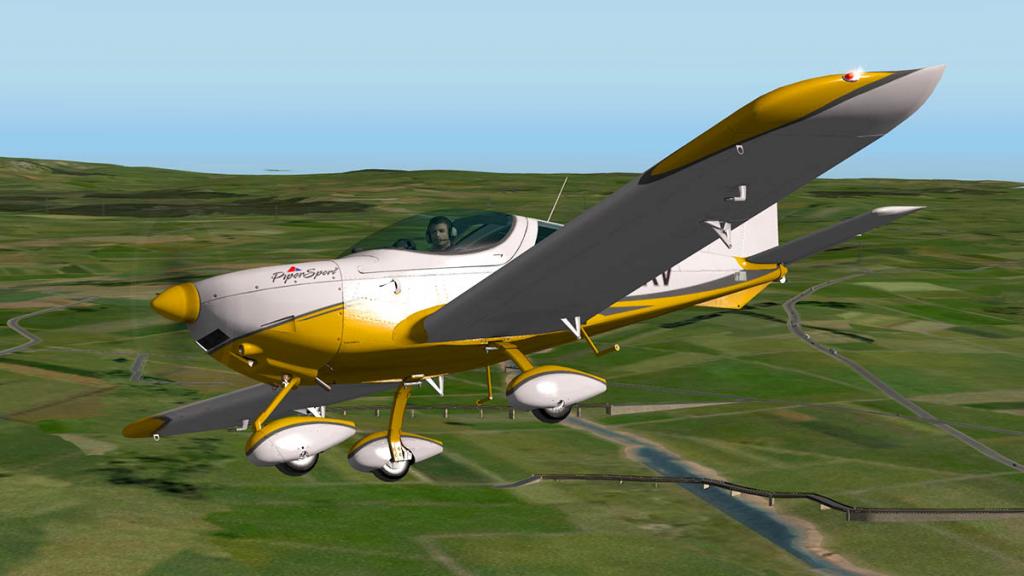
THere is blind set out over the pilots heads that can pushed right back to give a clear view upwards through the canopy.
Flying the PS-28
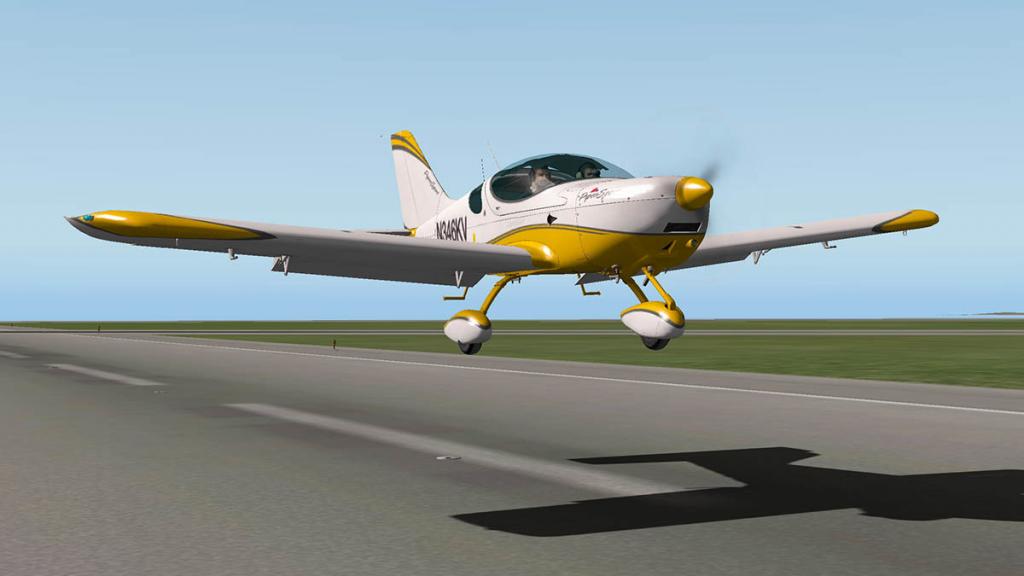
Even with just 100hp on tap to use, the aircraft feels powerful... when starting the aircraft it immediately exhibited a movement of a nose down stance as the prop begins to bite into the air, and the tri-constructed undercarriage legs then each reacted independently to the forces, as the engine ticked over with a genuine Rotax (3D) sound.
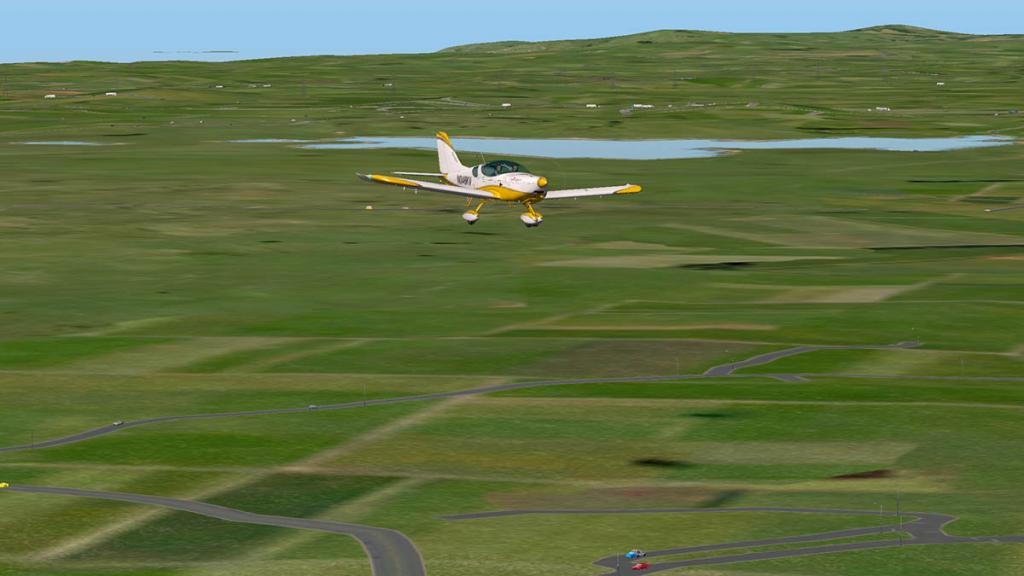
The PiperSport pulls away from the runway hold quite sprightly and you have to control your line, as per Alabeo aircraft the front turn on the wheel won't turn unless you are moving forward, so you have to be ready when it does gain some direction, locking it out early (with the "nosewheel_steer toggle") is not advisable either until you have got your direction at a low speed sorted as you need the control. The aircraft does need a fair amount of runway to gain the lift, surprising in that the speed gets up there quite quickly.

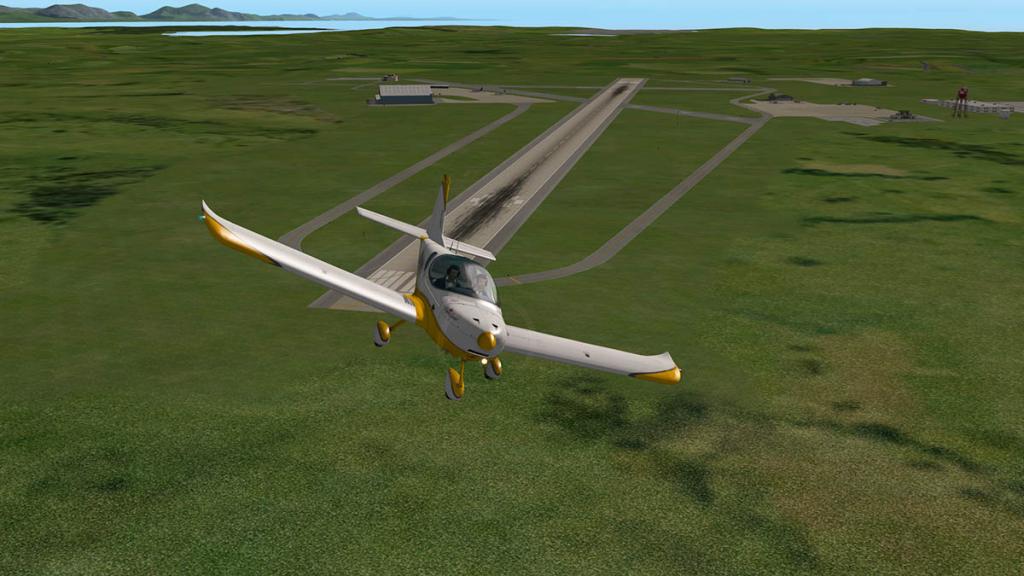
But you have wait to well into the green zone of the power band or around 85knts-90knts before you can rotate. Once airborne the aircraft then feels quite nice and can easily climb and can bank quite effortlessly. Once your height and heading is sorted out, you will find the aircraft needs constant attention to keep it level, the trim works hard to find that balance point, but it still on top of that needs a lot of input to keep the aircraft in line and to stop the aircraft from moving around and into and out of pitch. This constant workload can make the aircraft tiring without any artificial aids to help you fly for those long periods. You do find a rhythm, but I couldn't fly it for 300nmn or some distance like that. The coloured power bands on the are airspeed indicator cover - White : 32knts to 75knts - Flap Range, Green : 39knts to 108knts - Normal operating range, Yellow : 108knts to 138knts - caution and maneuvers only in still air and Red : 138knts - Maximum speed allowed. And I like the way that instrument works, as it is very easy and clear on what you are required to do.

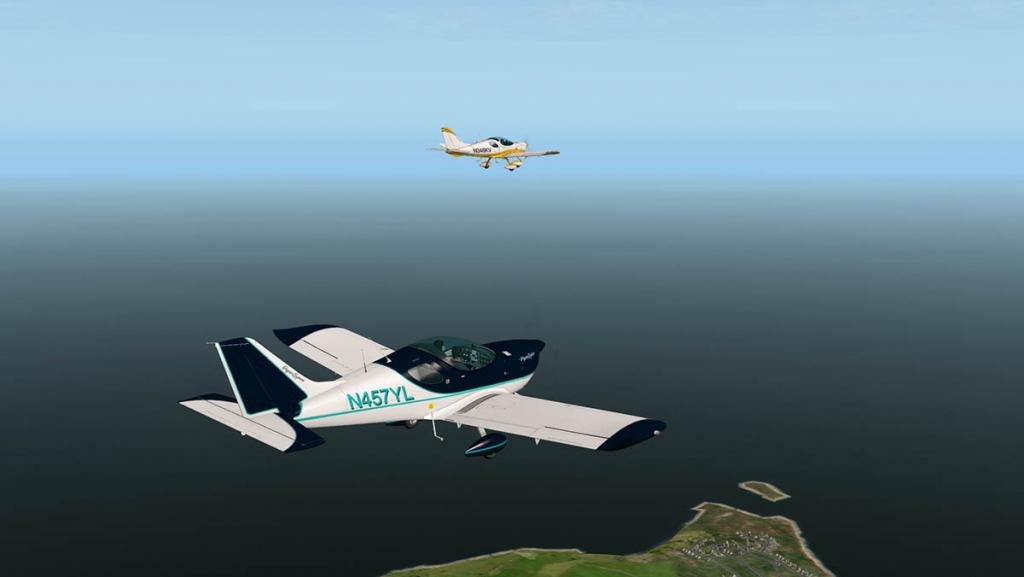
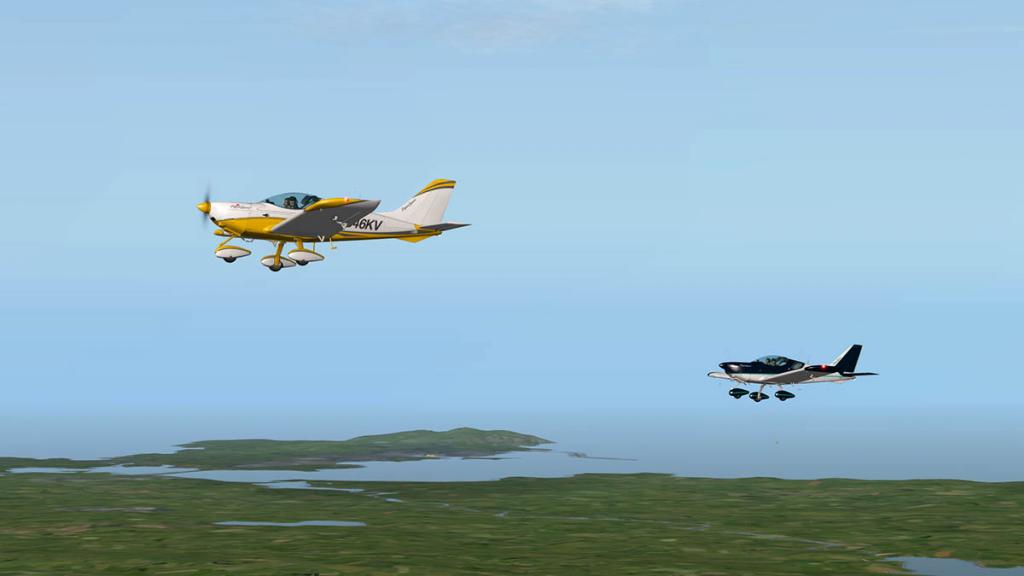

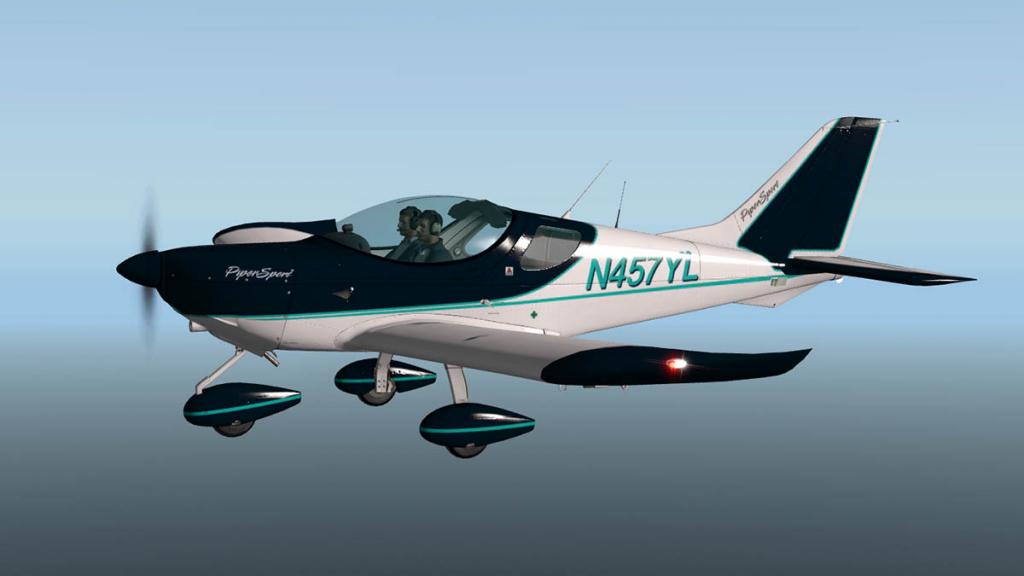
I was soon joined by another PiperSport that was crossing over Anglesey, and we had a few mutual admiration moments before I carried on reviewing the aircraft.

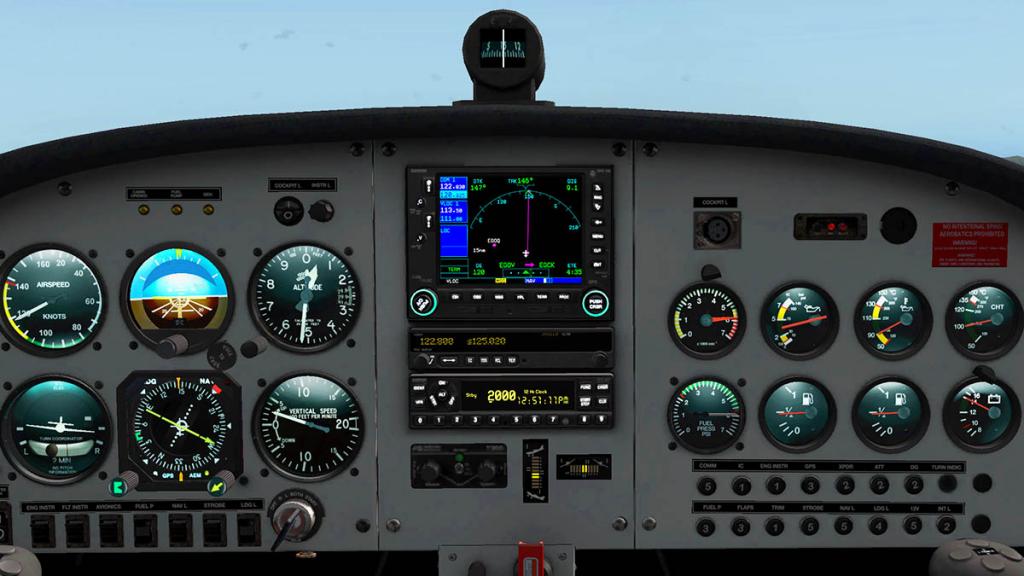

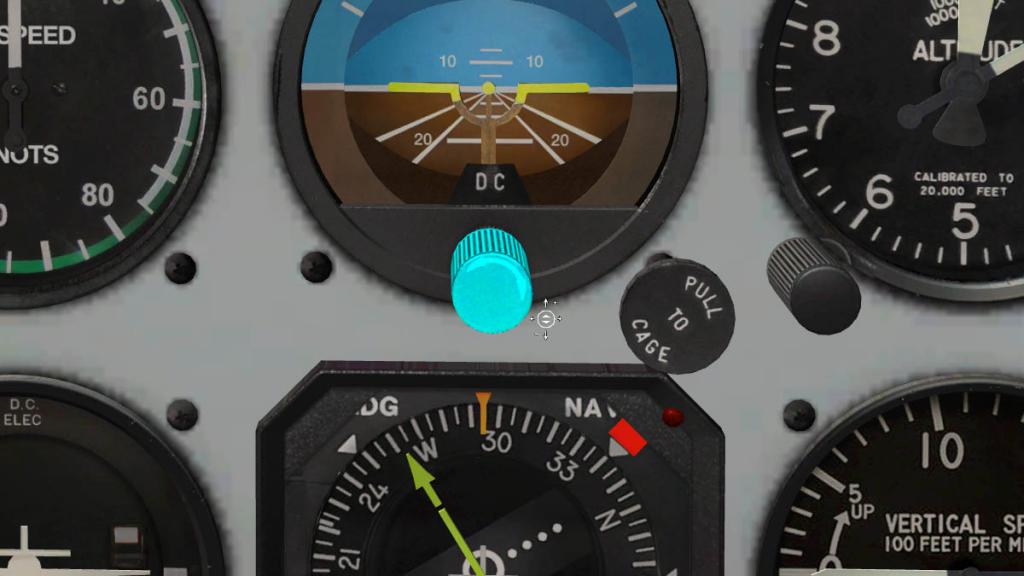
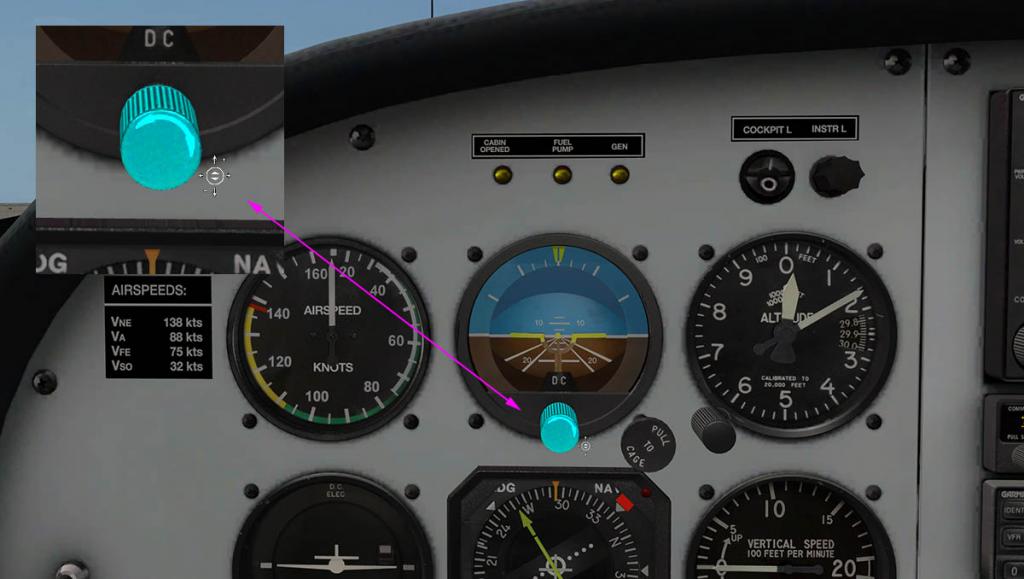
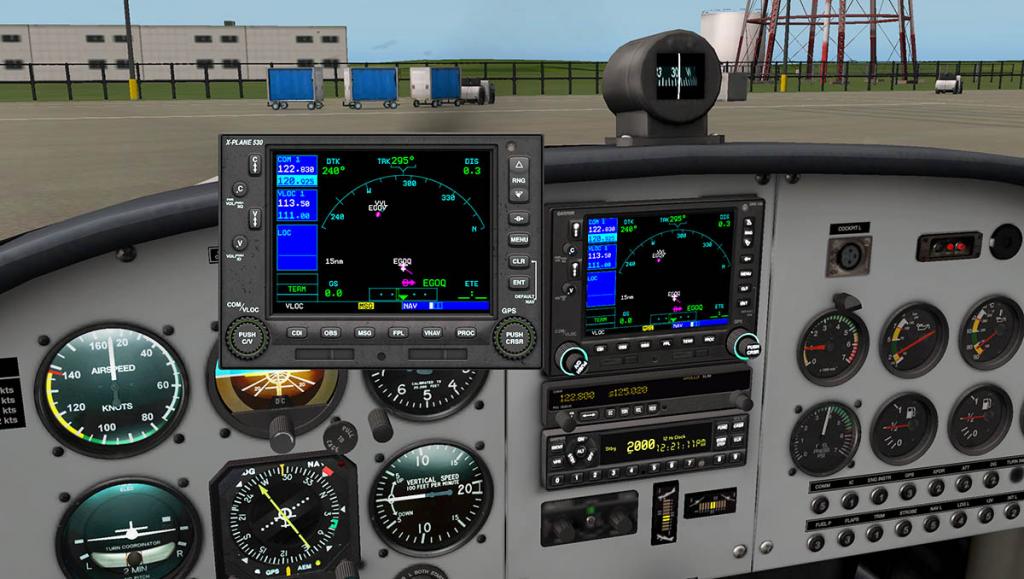
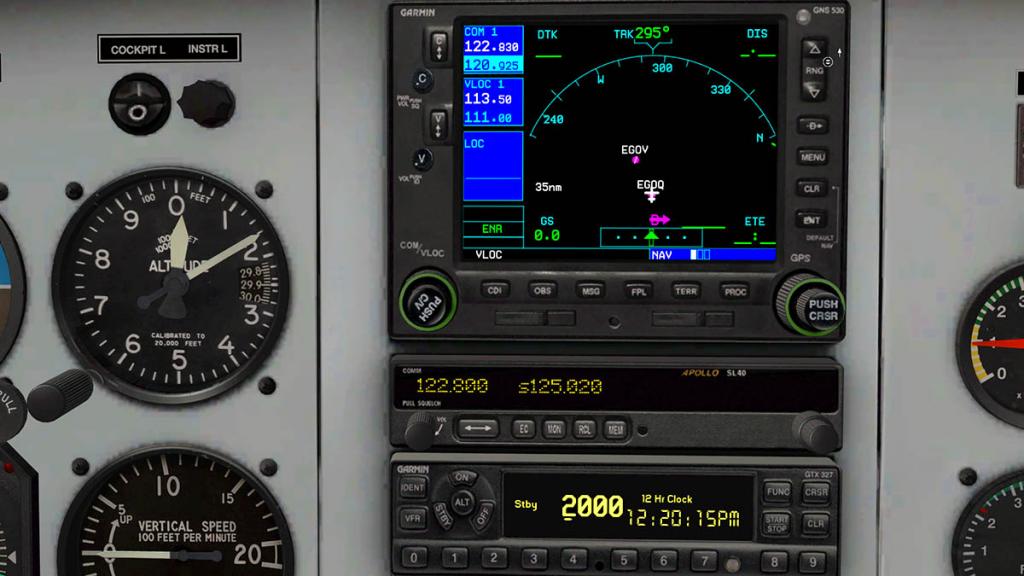
The panel is built around simplicity. The Standard Six instruments ( Airspeed Indicator, Attitude Indicator or Artificial Horizon, Altimeter, Turn Coordinator and Vertical Speed Indicator) are all very large and easily readable, lower panel is a selection of rocker switches that cover the - Main Power in Master and Instrument, Then panel lighting in Engine, FLT (Flight), Avionics, Nav Lights, Strobe, LDG (landing lights) the only odd switch is for the fuel pump. And a key turn starter switch. A very large compass is situated on top of the glareshield.
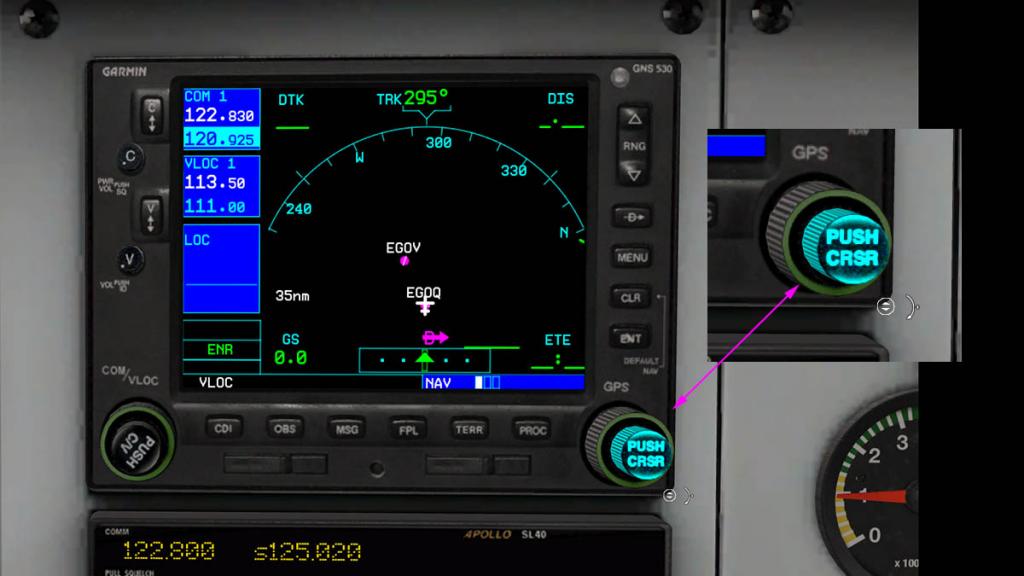
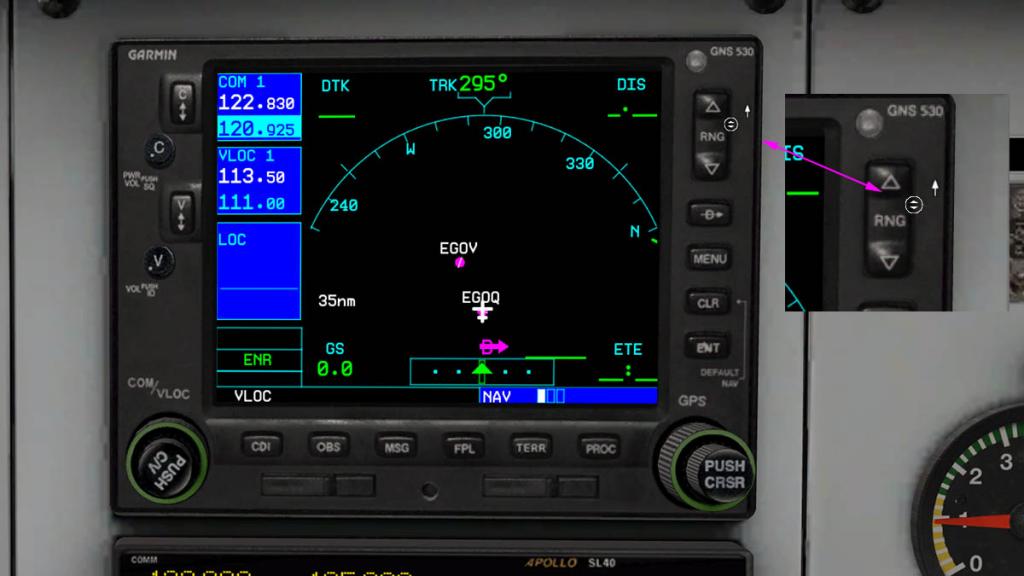
Central to the avionics pack is the Garmin GNS530 GPS which is the X-Plane 10.30 default, There also an Apollo SL40 Comm radio and a Garmin GTX327 Transponder unit with clock. Not the most lavish setup but still very versatile and useable. On the right side of the panel are eight gauges and dial instruments that cover (top) - Engine rev counter x1000 min, Oil pressure, Oil Temp, CHT (Cylinder Head Temperature) - (lower) Fuel Press (PSI), Left and right Fuel tanks and Battery condition. Very right on the panel there is a flight hour counter.
There is a bright red handle that says "Don't touch me!" It is the parachute release!, but pulling it will only send you back to the start and sitting on the runway again... so don't touch it!


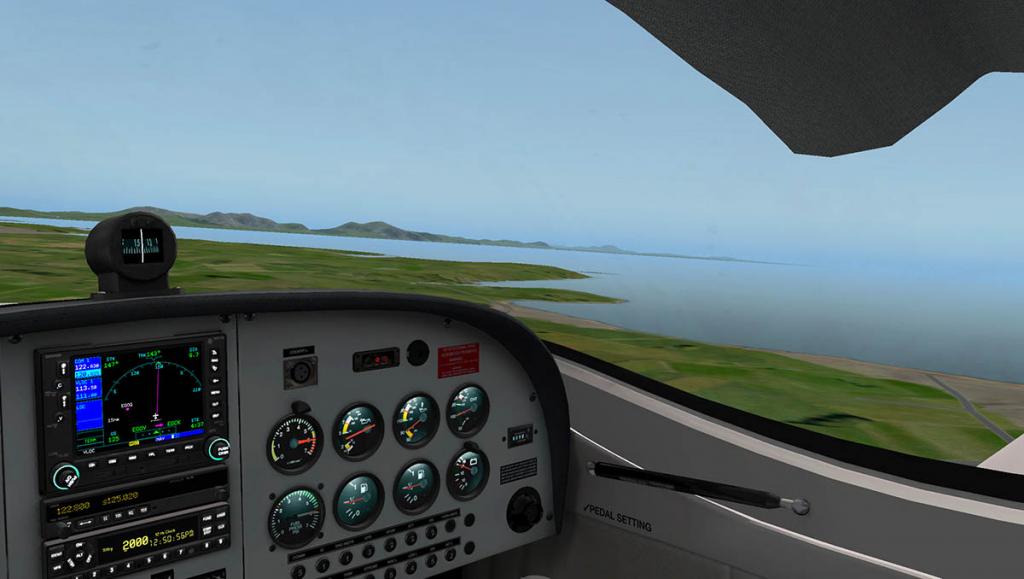
The view out is excellent as there is nothing to spoil the view, the overhead blind can intrude but otherwise there is plenty of observation awareness.
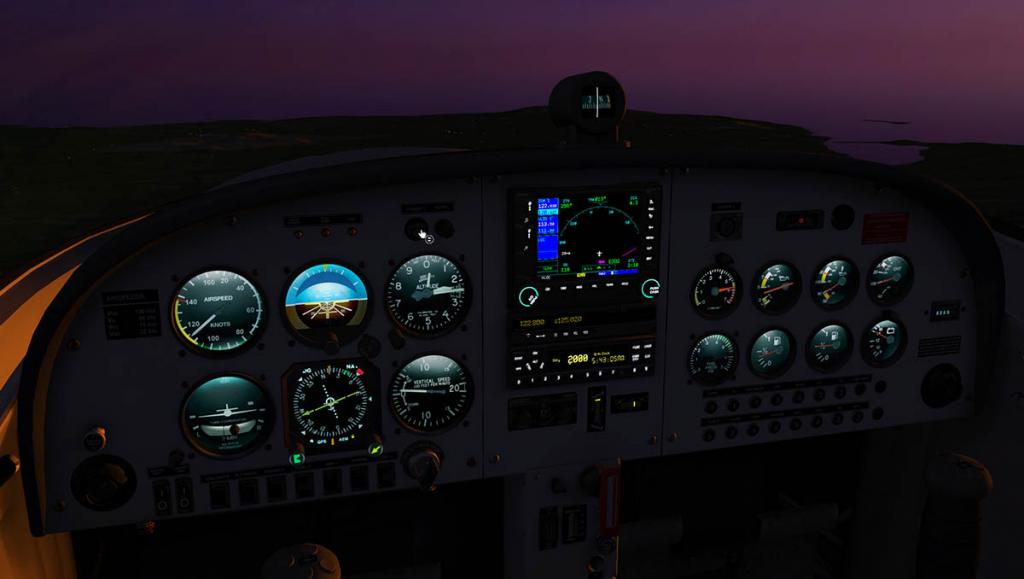
Night lighting
The panel lighting is quite basic, you switch the instrument dials on or off, but there is no fine adjustment. There is a noted "Cockpit Light" but this just illuminates the top of the panel area. But that said the dials are very well lit and look good day or night.

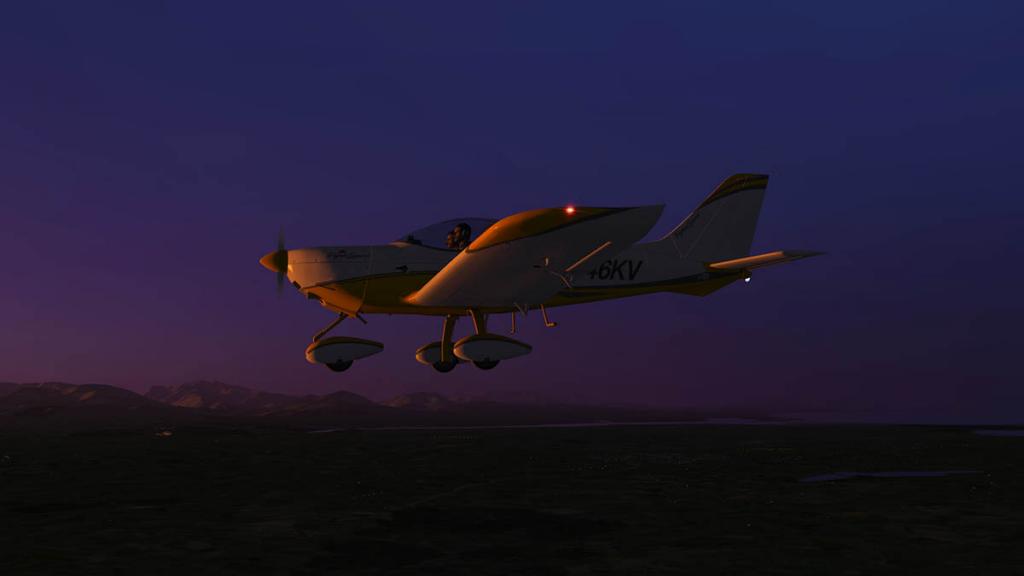
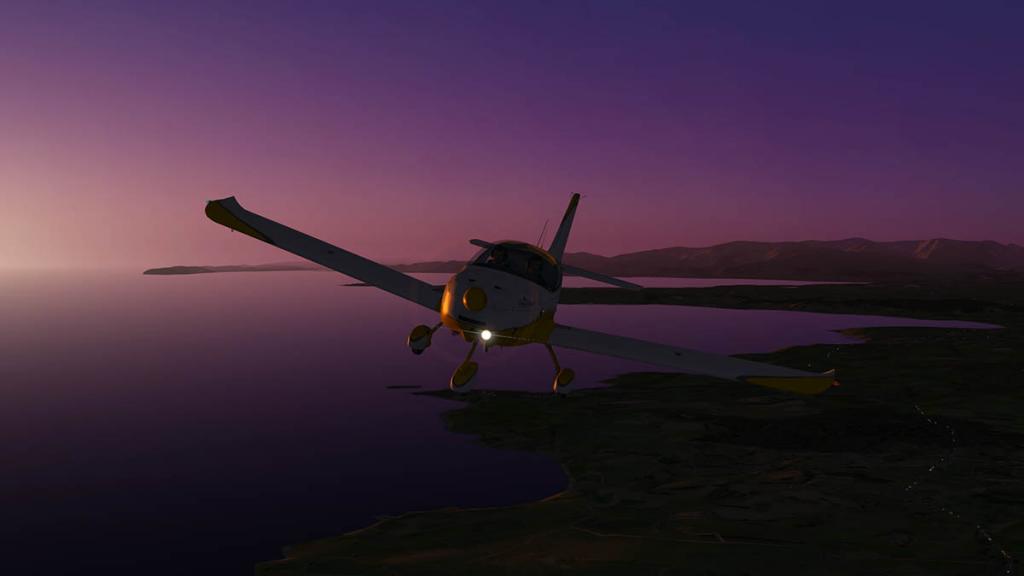
Outside there are Nav and Strobe lights and a singular landing light in the nose.
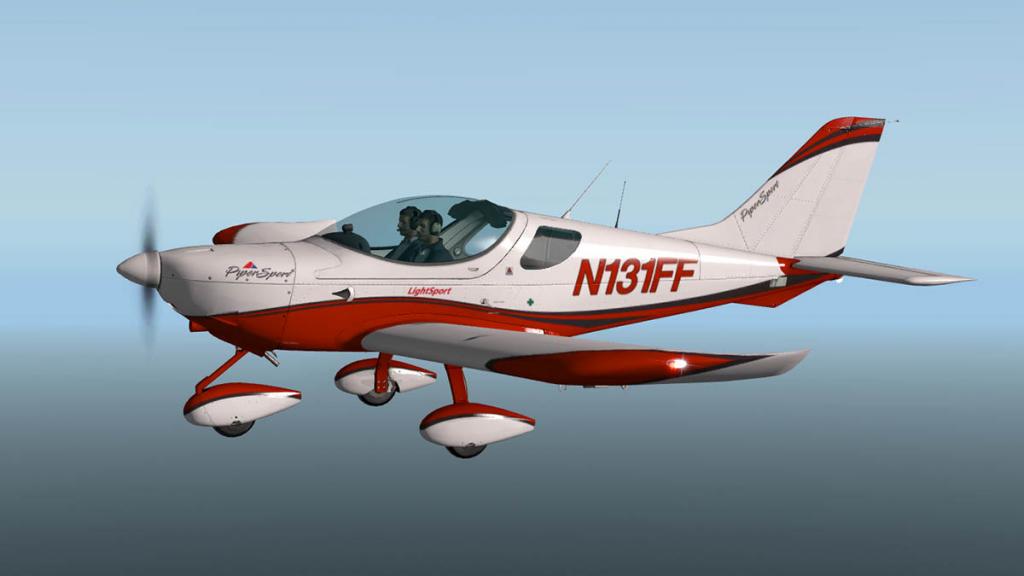
Liveries
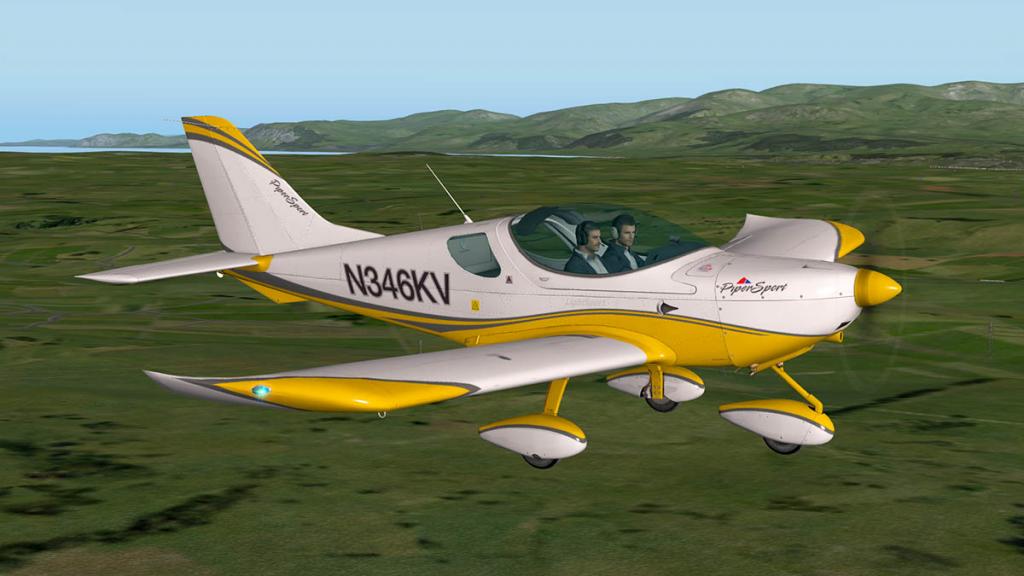
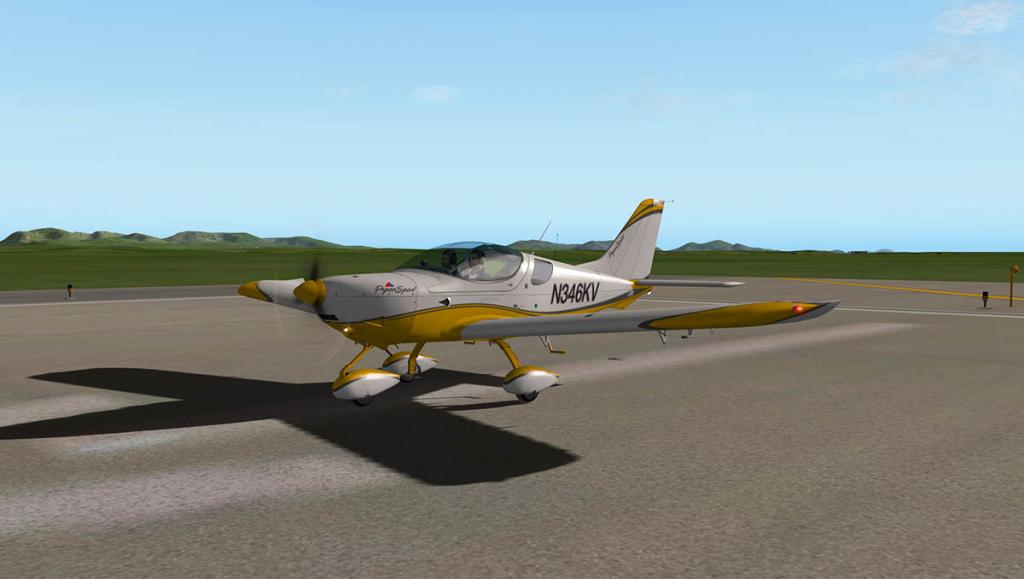
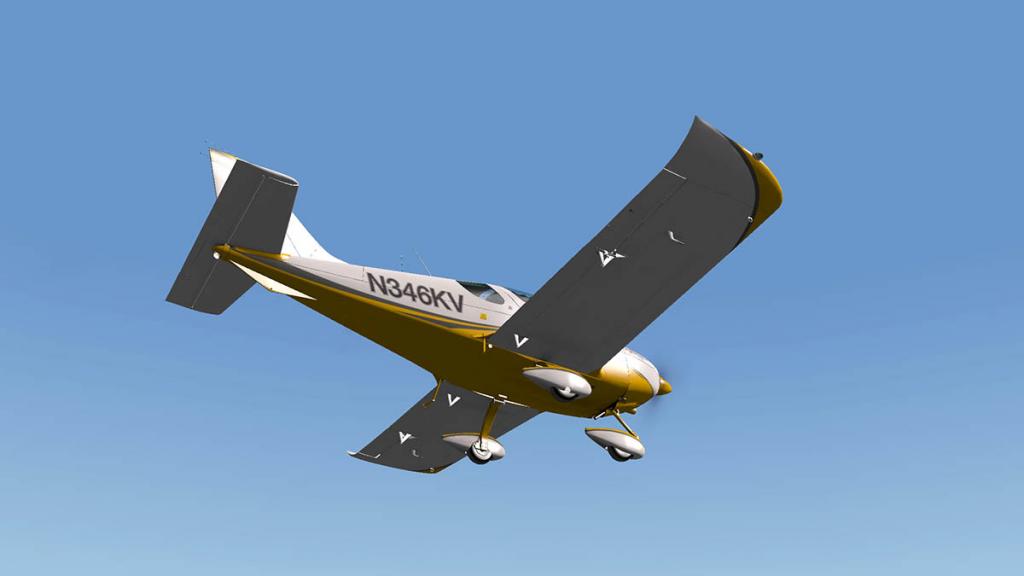
Liveries are also standard Carenado/Alabeo in one default white and N131FF in red and white - N544JL in grey and white - N568US with a tan, red and white - N457YL in a blue, white and turquoise - N346KU with yellow and white tones of which I liked the best, but all are American registrations.


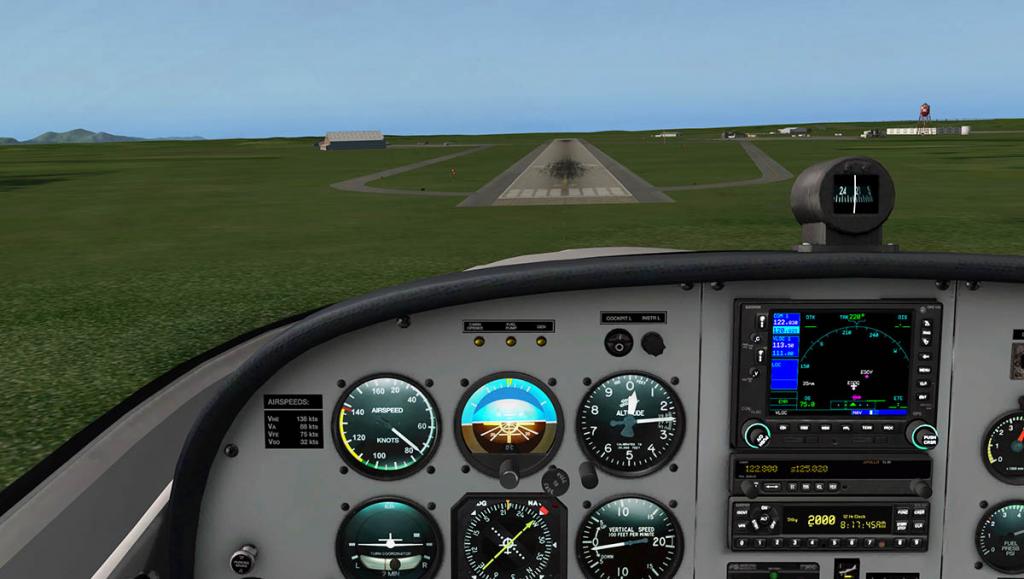
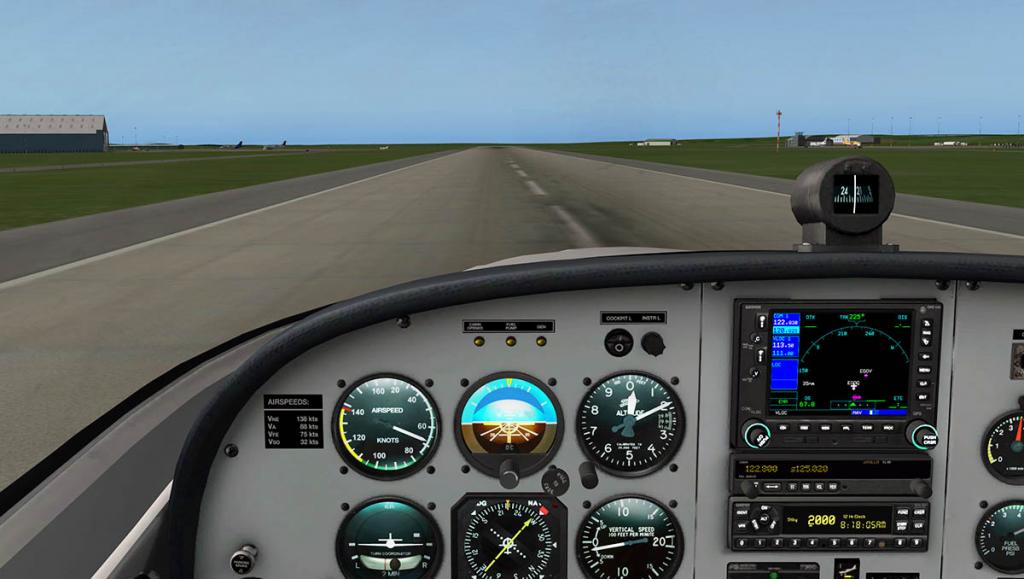
Approach and Landing
Your speed zone on approach is quite small between 75knts and 65knts, you keep the speed closer to top of the white (flap) zone until you need to descend, which is quite easy with the throttle and not the pitch. The aircraft is highly maneuverable at low speeds and very stable, I also like the look of those upturned wingtips that are quite efficient.

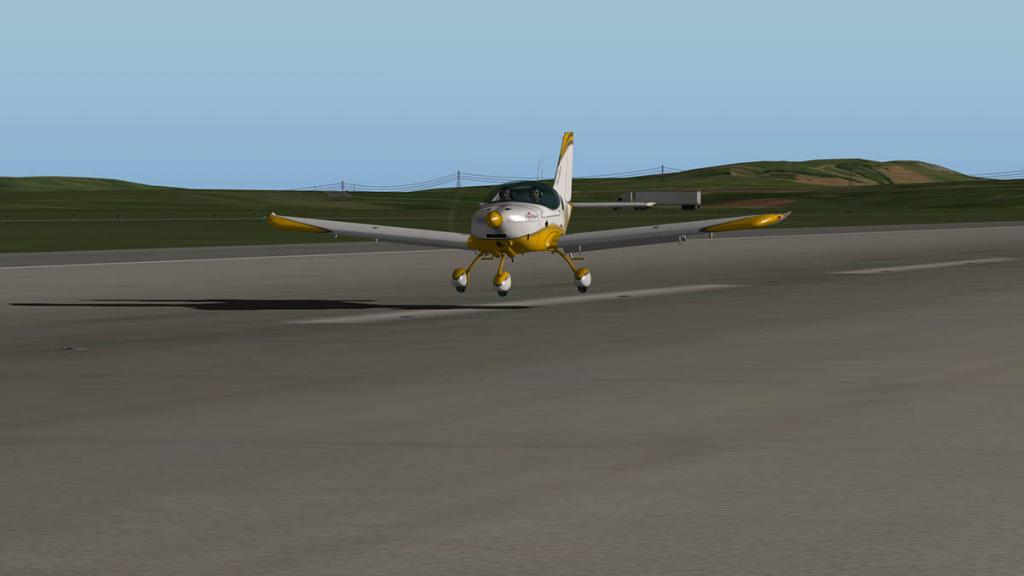
You have to be careful not the bang the aircraft down square on its tri-undercarriage (absorbent as it is) as that is very easy to do, and too much pitch nose up is awkward as well, the difference between them is very small but worth getting right for nice smooth landing with no bounces. brakes are very good but the aircraft does need a fair amount tarmac to run off the speed even from 60knts. Once down you can easily taxi to ramp.
Summary
The Cruz PiperSport PS-28 is a great little hand's on trainer, this is not an aircraft to fly any distance in (unless later Alabeo add in the Dynon system), It is just too needy and wanting to correction that it tires you out when going long periods in a straight line and that is quite hard to trim out. But for local flying and like said training it is excellent, tootling around the sky is a lot of fun because the aircraft is quite fun to dip and soar and can be great and steady at low speeds.
Quality is the usual Alabeo/Carenado excellence, great detailing and perfect design work. Sounds are excellent and a perfect reproduction of the Rotax engine. The new manipulator system is a great new feature but needs time to be really proficient with using it. But it is clever.
Overall the PiperSport (that is not really a Piper) is another quality great single propeller, two seater aircraft of the lightsport category. Easy to use and easy to fly around the local area... The Cruz PiperSport PS-28 is another winner from Alabeo.
And the Cruz PiperSport is available from the X-Plane .OrgStore right now : Cruz PiperSport
Price of the Cruz PiperSport PS-28 is US$22.95
Developer site : Alabeo
Features
HD Textures
Default X-Plane 10 GNS530
Volumetric side view prop effect
High quality 3D model and textures.
Blank texture for creating your own designs.
Accurately reproduced flight characteristics
64-bit compatible.
Plugin-enhanced
FPS-optimized model.
Scroll wheel support
Technical Requirements
Windows XP-Vista-7-8 (or higher) or MAC OS 10.6 (or higher) or Linux
X-Plane 10.30 (or higher)
Pentium 2 GHz - 1GB RAM
276MB available hard disk spaceupdated store#
Installation : Download 208mb, unzipped and Installed (in your general Aviation Folder) 288.60mb. For Mr 3d animations with MONA - EGOQ you will need the "Ground traffic" by Marginal plugin.
Documents supplied :
Review by Stephen Dutton
1st Nov 2014
Copyright©2014 : X-Plane Reviews
Review System Specifications:
Computer System:
- 2.66 Ghz Intel Core i5 iMac 27”
- 6 Gb 1067 Mhz DDR3
- ATI Radeon HD 4850 512mb
Software:
- Mac OS Mavericks 10.9.4
- X-Plane 10 Global ver 10.30 (final)
- Hi rez planet textures from ISDG
- Hi-Res Runway textures by Jack Skieczius
Addons
- Saitek x52 Pro system Joystick and Throttle
- bose Soundlink -Mini portable speaker
Scenery
- EGOQ Mona by Mr 3D (EGOQ_Mona with ground traffic .org)

-
Hello I would like ask You if it will available for X-plane v 9. Best regards and thank You for response. Jan Rippl (If it will, I will purchase it immediately)
Sorry no, the B727 Series is available in X-Plane10 only. That is because of the special features like the lighting require the latest X-Plane version.
-
Boeing 777 Worldliner Pro + Extended Pack V1.7 by Flightfactor-VMAX
FlightFactor-VMAX has updated the Boeing 777 Worldliner in Professional and Extended packs to X-Plane 10.30. After game-changing J Rollon CRJ-200 Regional Airliner the next significant step in X-Plane was the FlightFactor Boeing 777 Worldliner series. The aircraft pushed X-Plane forward into the realm that gave the simulator the credibility it deserved in that that this was a world class simulation aircraft. Amazingly it is now over two years from that original release and here we are with another version update in 1.7

In many ways the aircraft has matured into a real quality aircraft, not that it was average on release, but very far from that. But there is a clean and almost perfect operation of how you fly this machine in your simulation flying now, everything is almost perfect, with very few bugs or distractions.


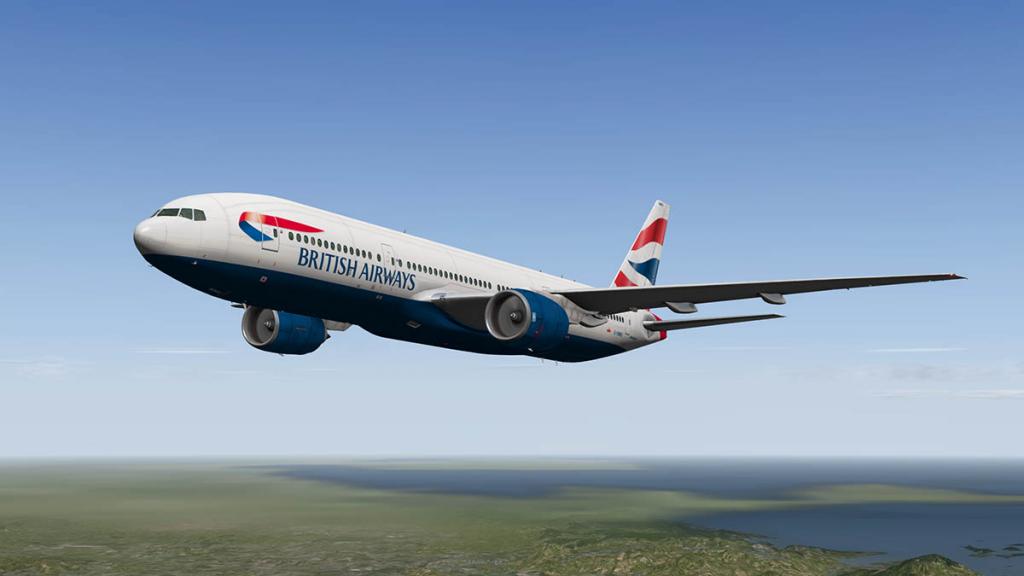
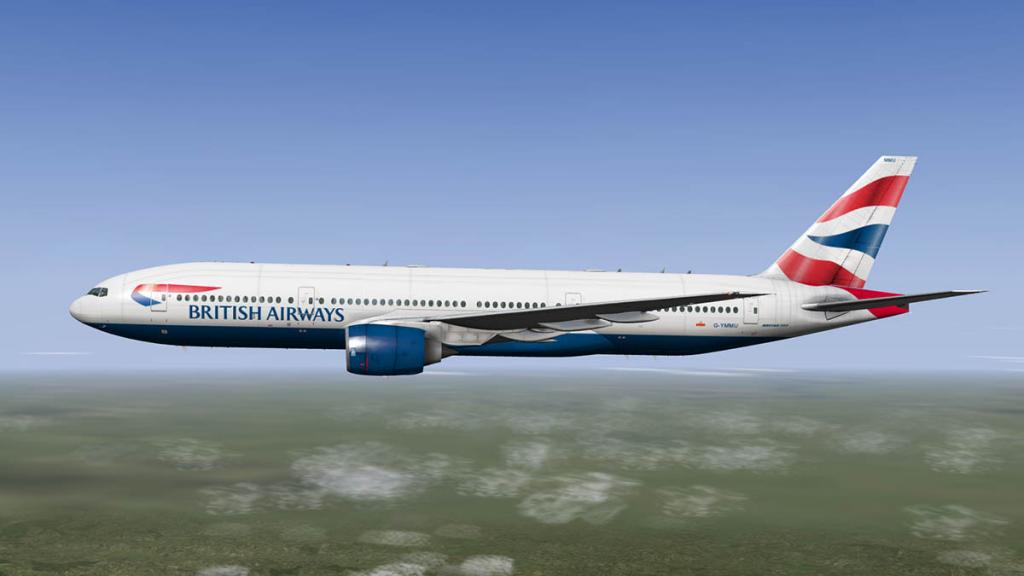
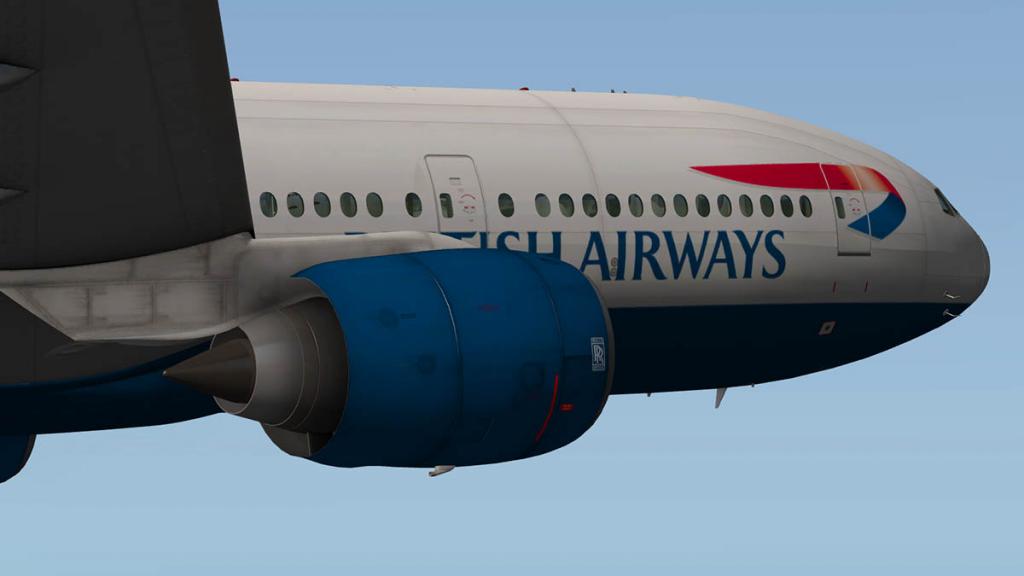
The quality of the Boeing 777 is outstanding and the aircraft has a real presence and after many hours of flying this most popular of airline almost homely familiarity. FlightFactor have also been in keeping the aircraft constantly fresh by delivering clever new options. And on the v1.7 in the Extended Pack you now also get the Rolls-Royce Trent 892-17 engine option on the B777-200ER.
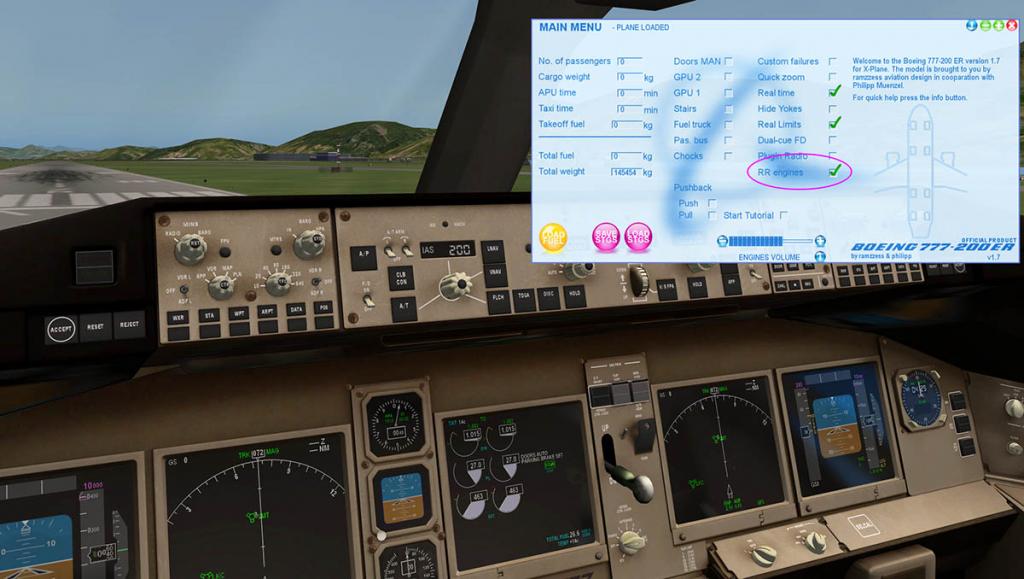

The RR developed RB211 engine option can be selected on the menu panel, It is noted as well on the FMC readout... When the RR is selected there are EICAS differences for the three-spool Rolls-Royce Trent seen on the Engine display.
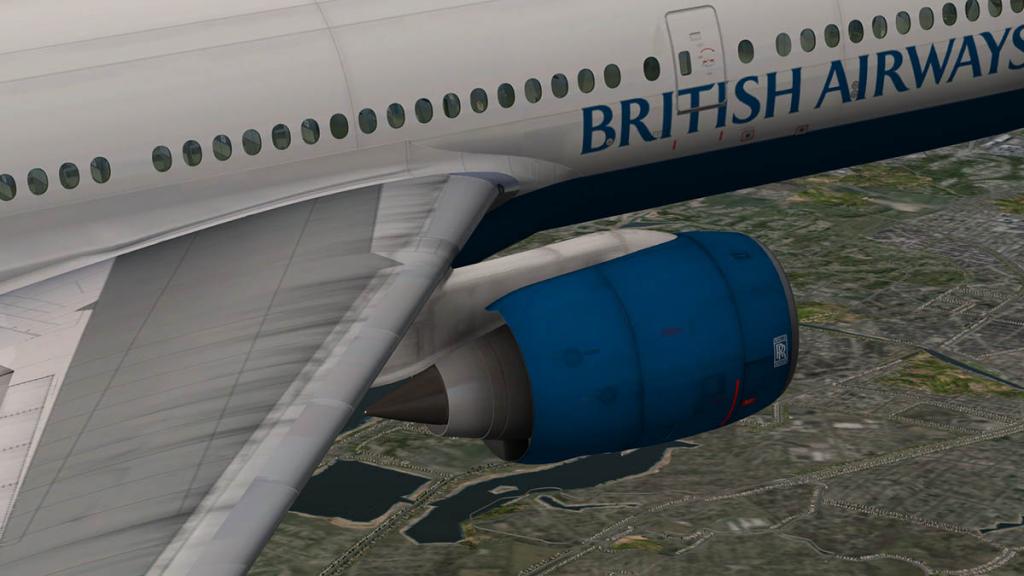

The Trent 800 family powers the Boeing 777. It is available on the 777-200, 777-200ER and 777-300 variants, with thrust ratings spanning 75,000 to 93,400 lbf (334 to 415 kN). The engine is the lightest in its class; a Trent-powered Boeing 777 weighs up to 3.6 tonnes less than General Electric and Pratt & Whitney-powered versions. In 1990 Boeing abandoned its planned 767X and instead decided to launch a new, larger aircraft family designated 777 with a thrust requirement of 80,000 lbf (360 kN) or more. The Trent 700's 2.47 m (97 in) diameter fan would not be big enough to meet this requirement, so Rolls proposed a new version with a 2.80 m (110 in) fan diameter, designated Trent 800.
Trent 800
General characteristics
Type: Three-shaft high bypass ratio (6.2–5.7) turbofan engine
Length: 4.37 m (172 in)
Diameter: 2.79 m (110 in)
Dry weight: 16,500 pounds
Components
Compressor: Eight-stage IP compressor, six-stage HP compressor
Combustors: Single annular combustor with 24 fuel injectors
Turbine: Single-stage HP turbine, single-stage IP turbine, five-stage LP turbine
Performance
Maximum thrust: 93,400 lbf (415 kN)
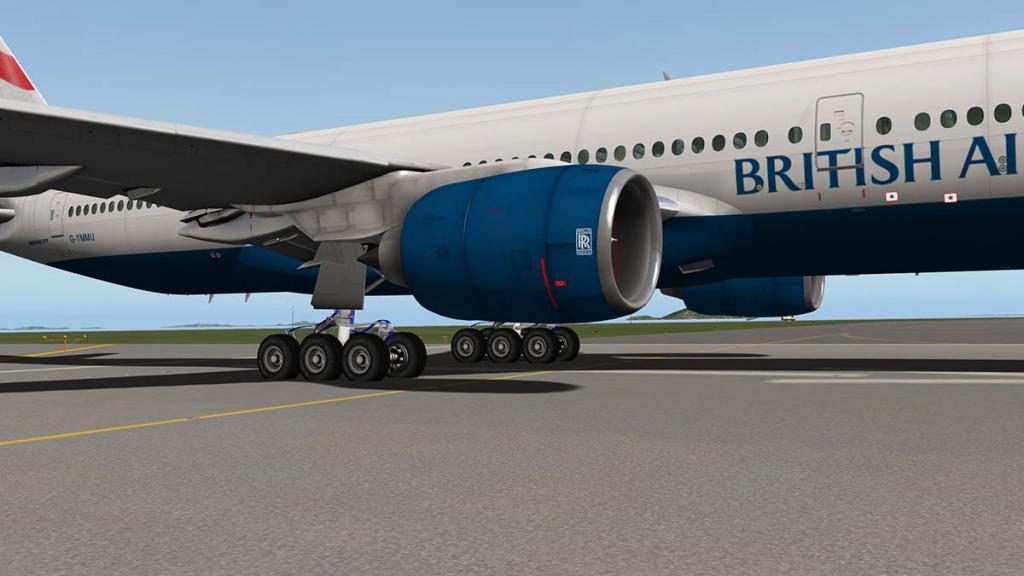
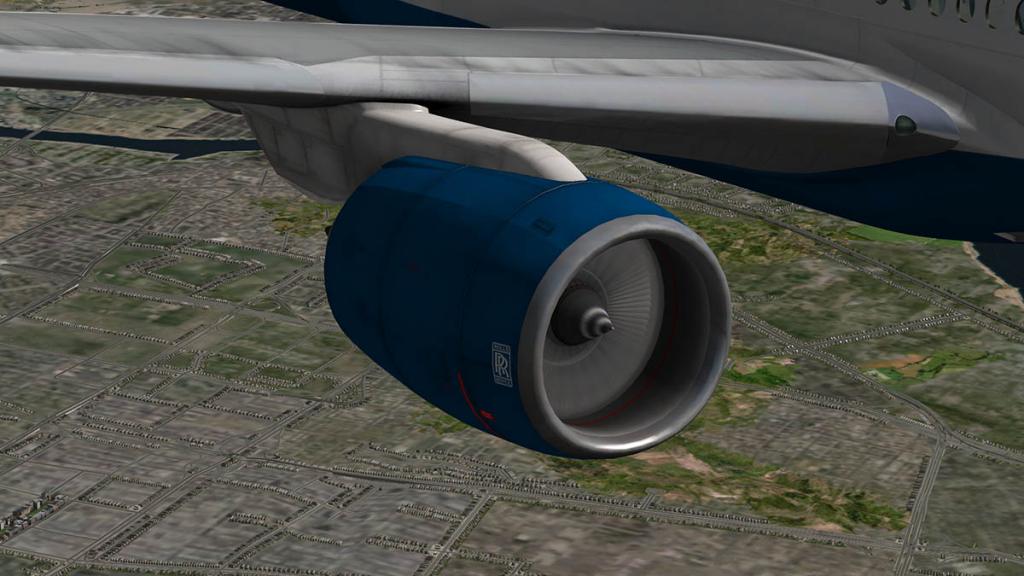
It sounds great on the wing of the FF B777 version as well with a completely new sound set for the Rolls-Royce Trent variant. It looks very good as well, nobody has created great or better turning fan blades than FlightFactor, and here they look really good.

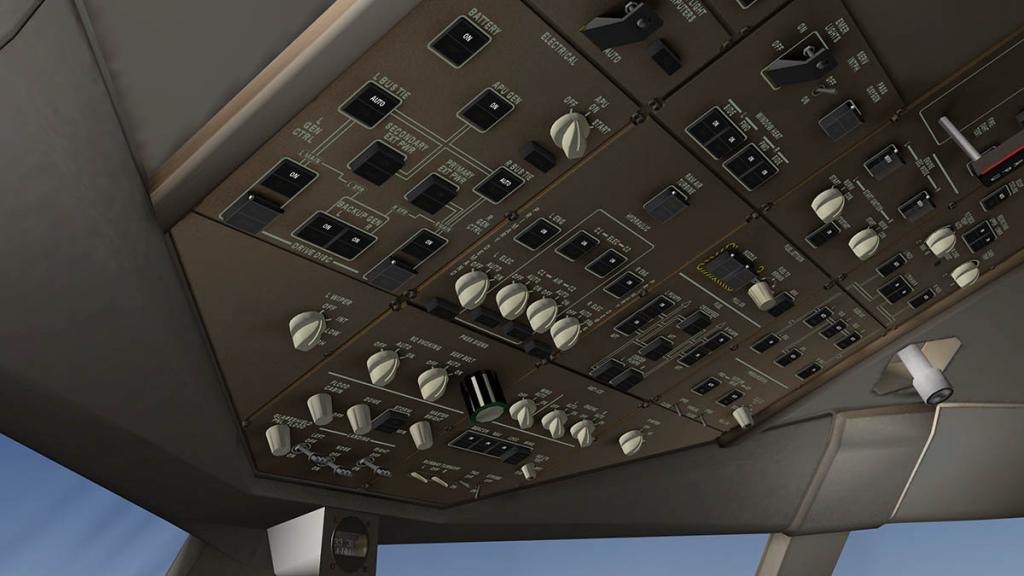
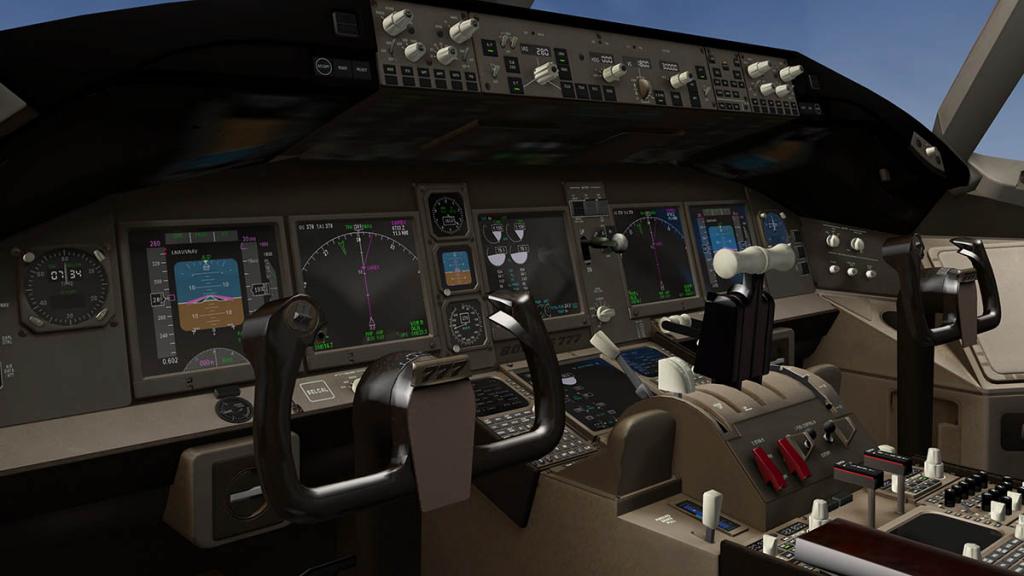
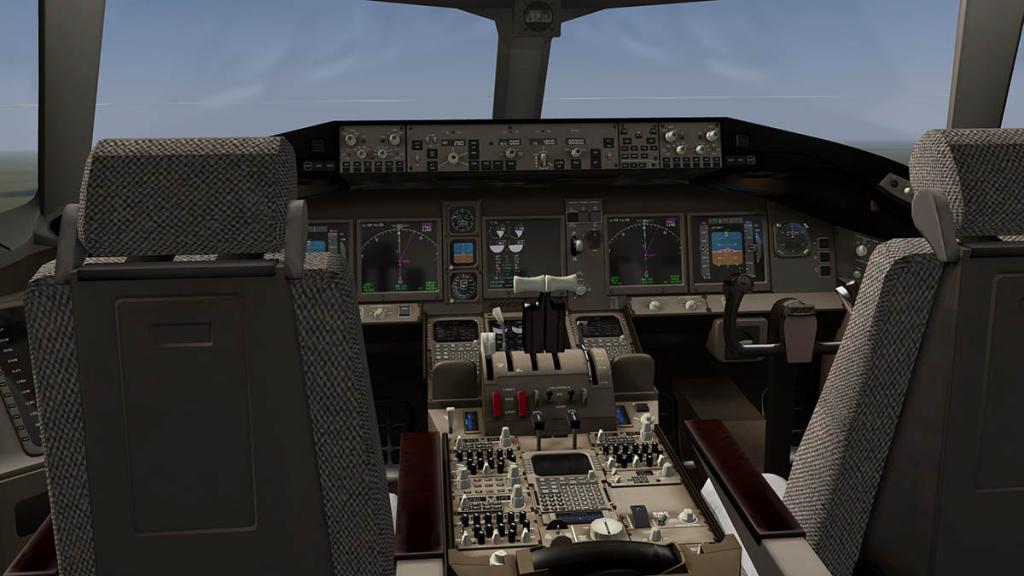
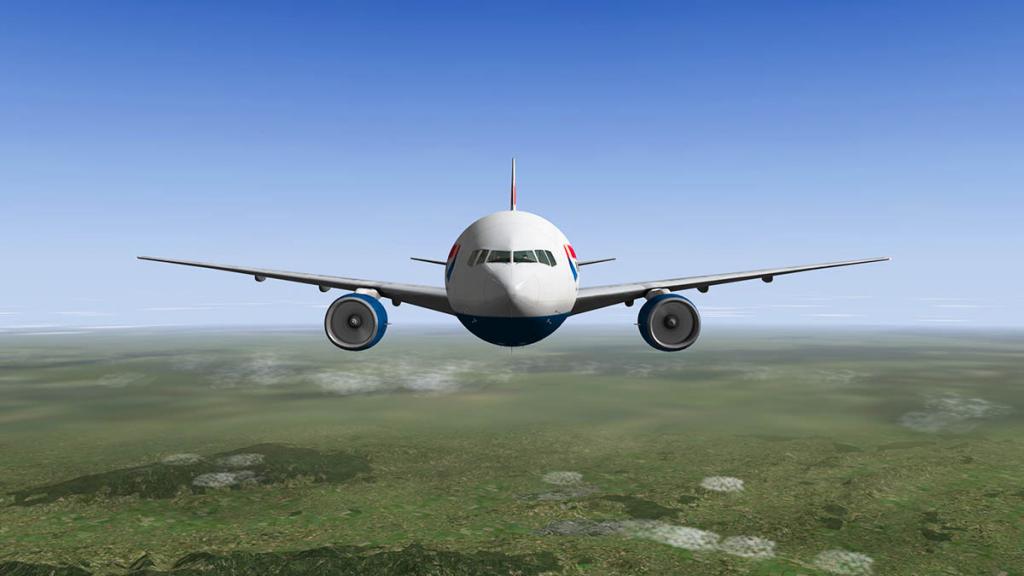
The B777 cockpit is still one of the very best in X-Plane, beautifully reproduced it is quite perfect. But only one request, in that could the Co-Pilot's NAV/MAP display and FMC be switched like on the B757 separately from the Pilot's? and have access to to the aircraft from the right hand seat.

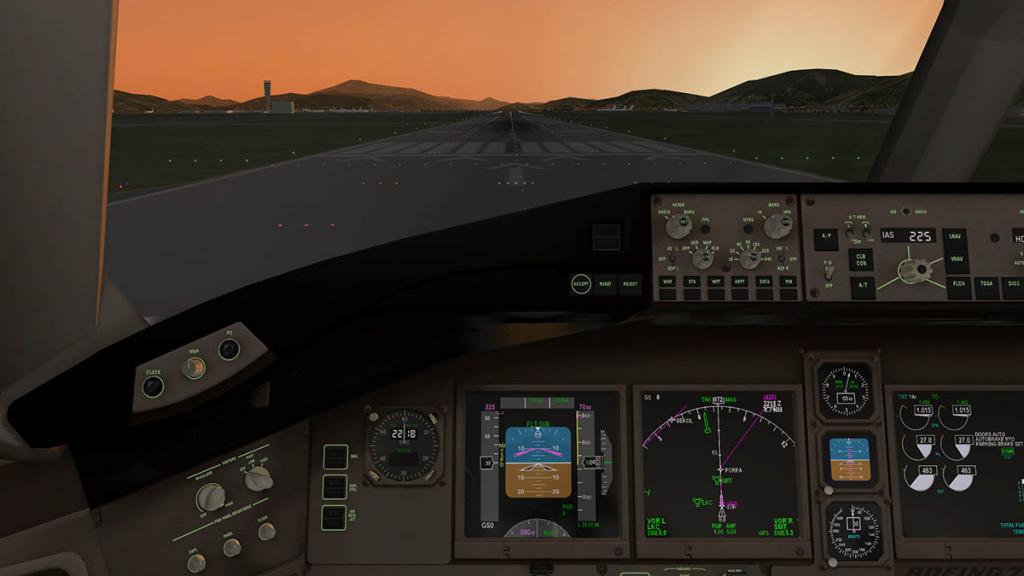

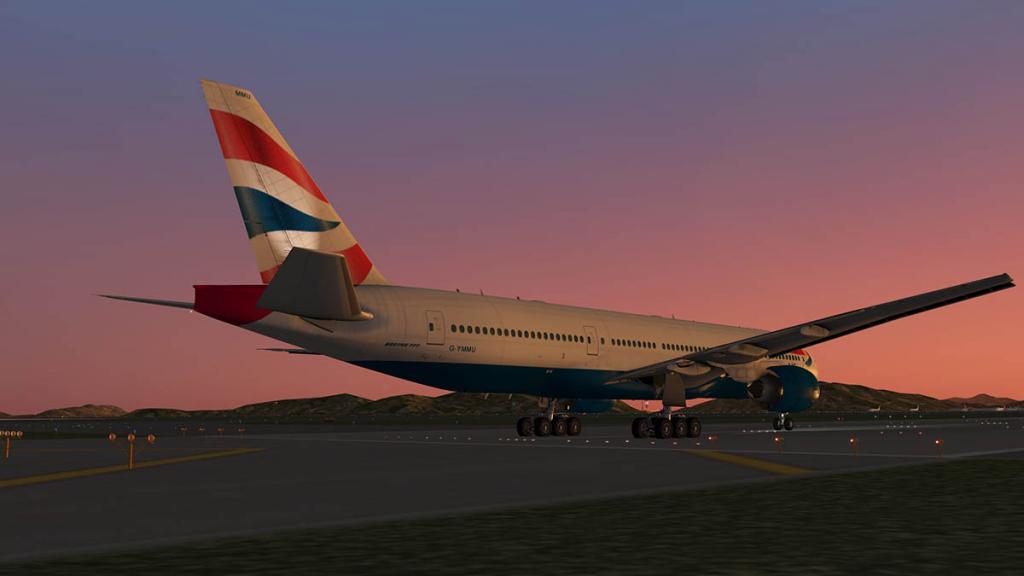
Internal night-lighting in the cockpit and instrumentation is first rate and in any flying mode you cannot but be awed when doing low pass turns.
Other 1.7 (version 10.30) changes include both the Pro and Extended packages are:
-NEW NAVDATA FOLDER in X-Plane 10.30: The 777 will now load navdata from the Custom Data/ folder of X-Plane. So by installing the navdata update for X-Plane, you automatically have the latest data in the 777 also
-optimized the FPS in general
-optimized CPU usage on low end machines taking advantage of 10.30 rendering features
-improved taxiing simulation with higher tire grip
-corrected 25KHz spacing on the COM radios
-fixed a bug in loading direct-to legs from from .flp file
-fixed a bug on Windows that would not let you load .flp files from the ROUTE REQUEST page
-display approach glide path angle on LEGS page
-improved depiction holdings in lieu of a procedure turn
-fixed a bug in distance indication on the FIX page
-added vertical bearing and FPA indication to the VNAV DES page
-fixed a bug in choosing too low a cruise speed on the last leg to the T/D
-corrected waypoint selectable for approach intercept, based on selected transition
So the separate packages now include:
Boeing 777-200 LR - (Boeing Worldliner Professional)
Boeing 777-200 ER - (Extended Pack) With Pratt&Whitney PW4090 and Trent 892-17 engine options
Boeing 777-200 F - (Extended Pack)
Boeing 777-300 ER - (Extended Pack)
This is another great timely update to what now is a classic aircraft in X-Plane, It was always very good and now it is just really very good.
The 1.7 update is now available from the X-Plane.Org Store here :
Price is US$59.95 - Boeing 777 Worldliner Professional
Price is US$84.95 - Boeing 777 Worldliner Professional - Extended Pack
- Designed by FlightFactor (Philipp and Ramzzess) and produced by VMAX
The 1.7 update is free to all users that have purchased the Boeing 777 (Pro and Ext) Series. Just go to to your X-Plane.Org Store account and login
Developer Site: facebook
Dev Thread : X-Plane.org
Update Review By Stephen Dutton
25th October 2014
Technical Requirements:
Windows XP or Windows Vista or Windows 7 / 8 (32 or 64 bits) or MAC OS 10.7 (or higher) or Linux
X-Plane 10 fully updated. 32 or 64 bit
4GB RAM/512 MB VRAM (1GB VRAM Recommended)- 1Gb available hard disk space
Current version : 1.70 (last updated Oct 15th 2014)updated store#
Review System Specifications:
Computer System:
- 2.66 Ghz Intel Core i5 iMac 27”
- 6 Gb 1067 Mhz DDR3
- ATI Radeon HD 4850 512mb
Software:
- Mac OS Mavericks 10.9.2
- X-Plane 10 Global ver 10.22 (final)
Addons
- Saitek x52 Pro system Joystick and Throttle
- Bose Soundlink mini

-
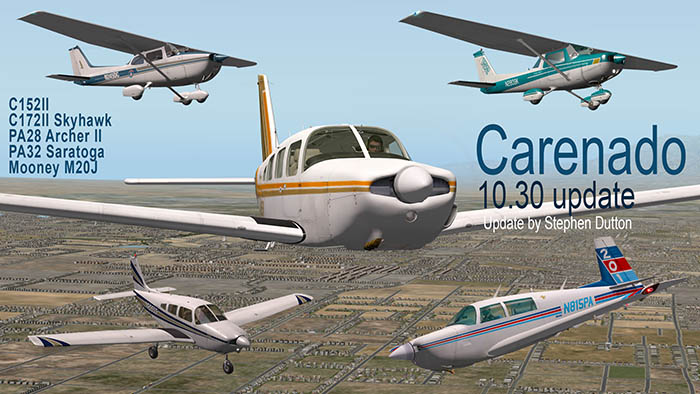
Aircraft Update : Carenado Aircraft to 10.30. C152II, C172II, Archer II, Saratoga and Mooney M20J
Carenado have updated their earliest aircraft releases to X-Plane version 10.30. The Aircraft to updated to v3 includes the:
C152II
C172II Skyhawk
PA28 ArcherII
PA32 Saratoga
Mooney M20J
In most cases an upgrade includes just minor changes but here we have a few more significant steps that are worth noting. I was still around Las Vegas after Tom Curtis's review so I headed out to KHND - Henderson Executive Airport where Carenado had laid out the five updated aircraft to give each a quick spin round the basin.
So lets see what we have, aircraft by aircraft.
Cessna 152II

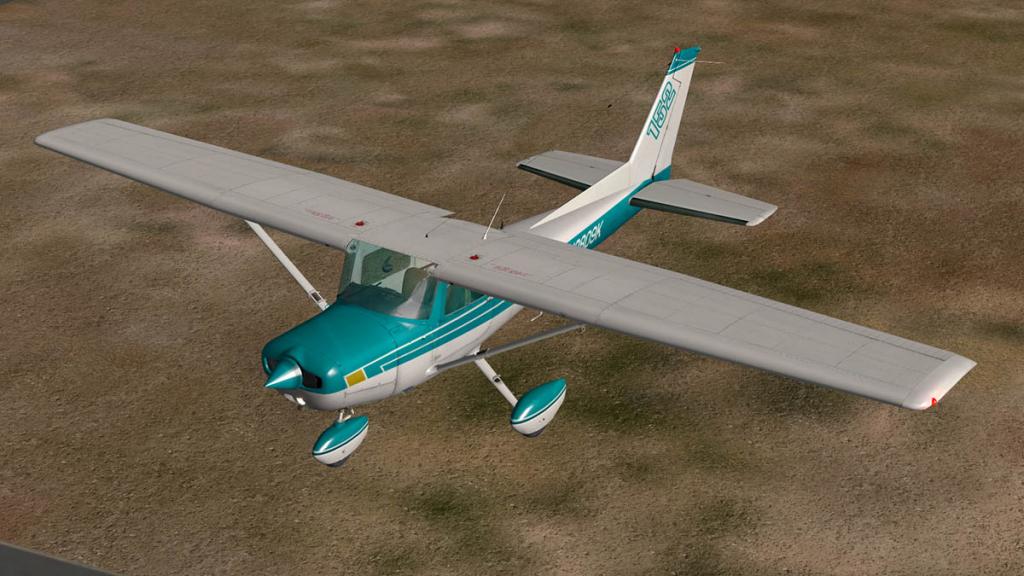
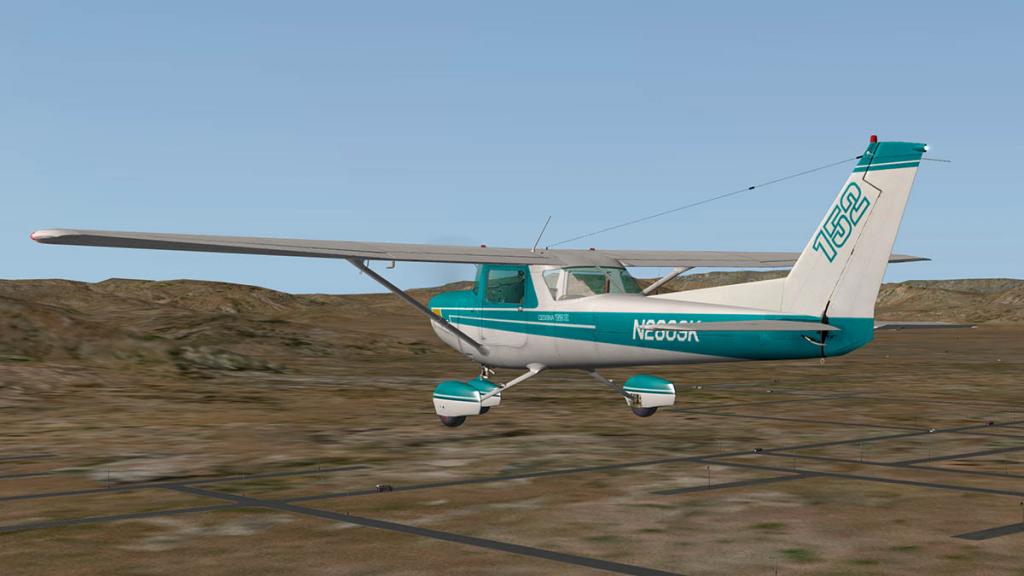
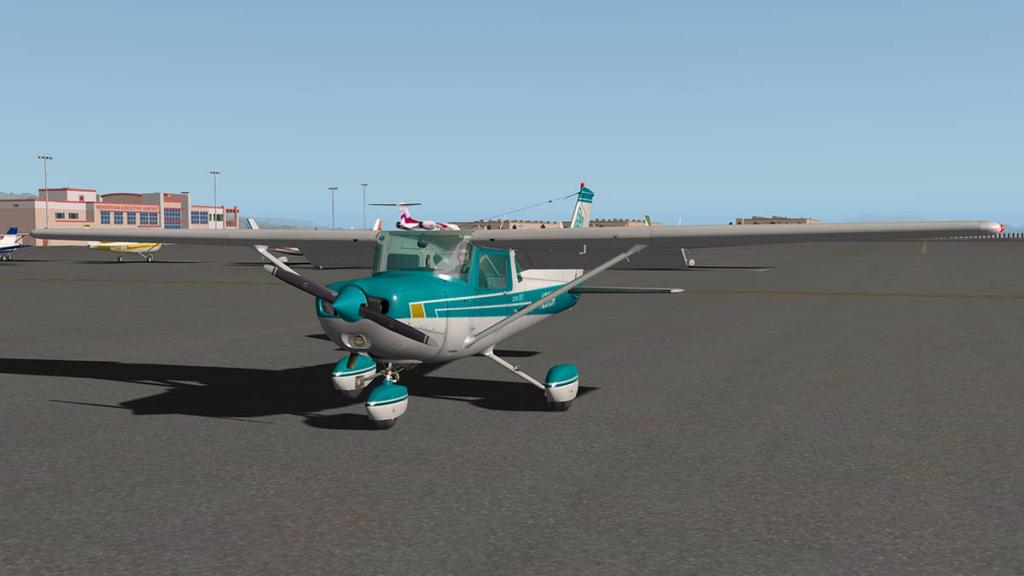
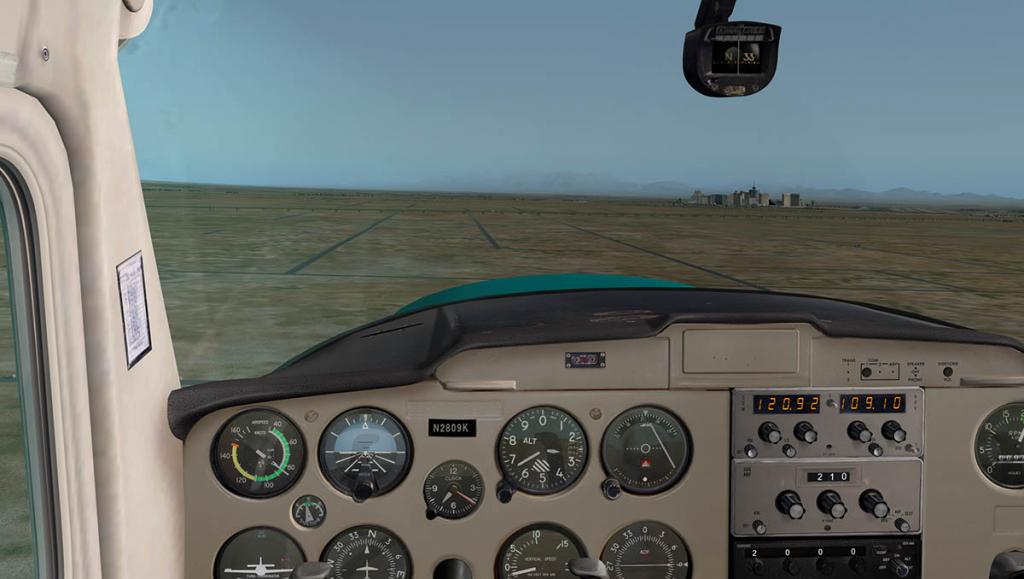
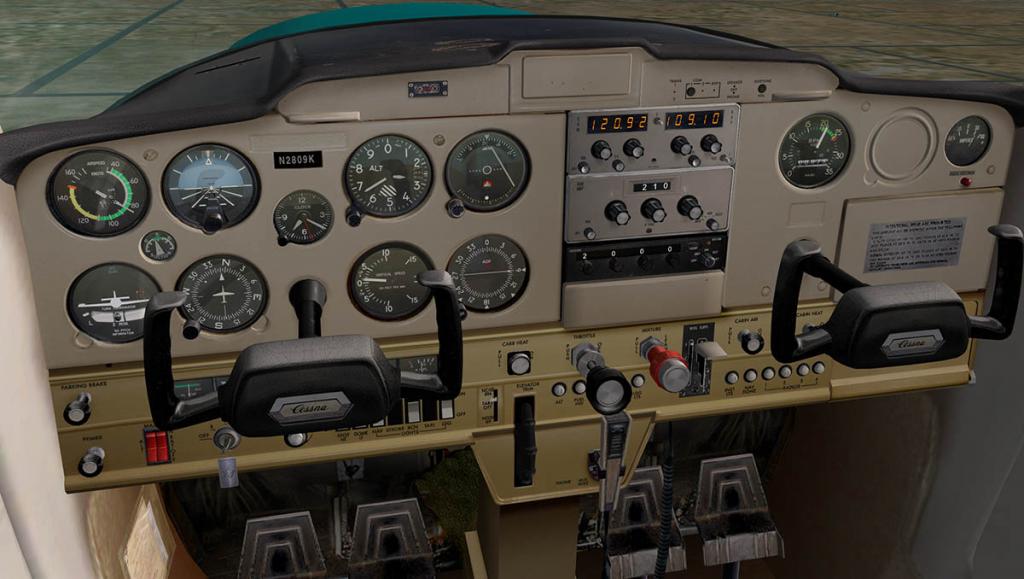
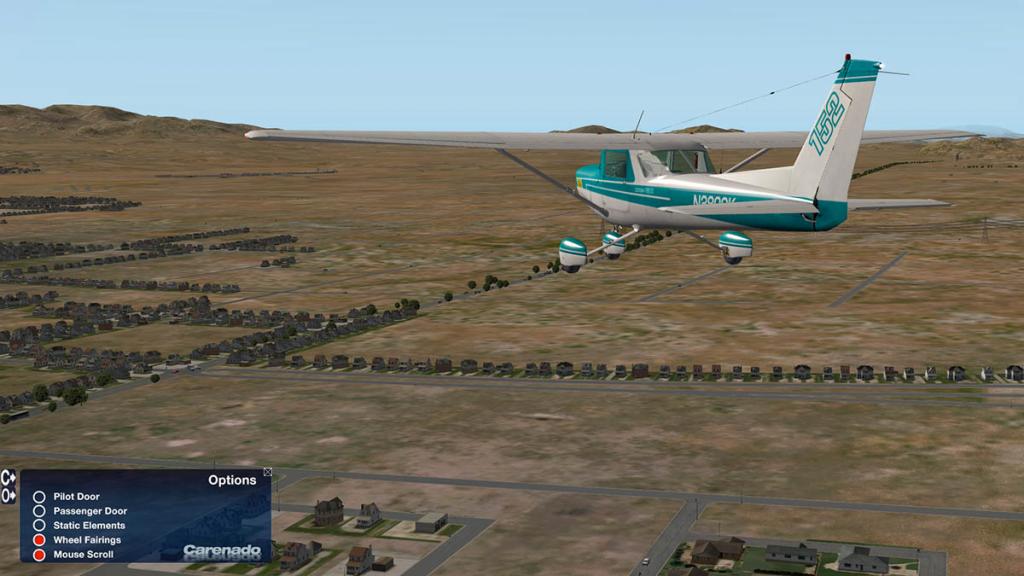
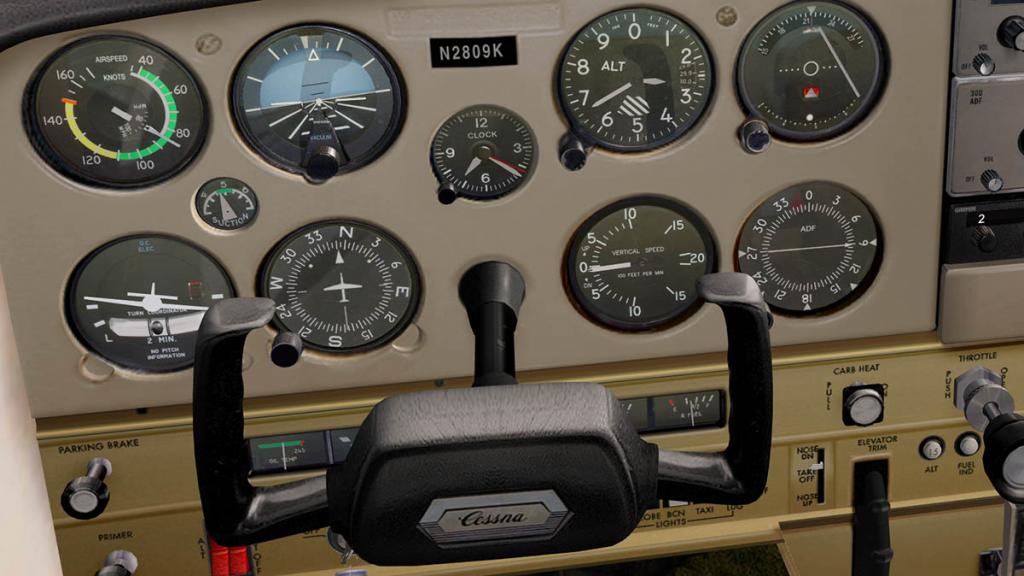
The smallest and most basic aircraft in Carenado's range is the C152II. First thing you will note is the "Mouse Scroll" feature is now available on all Carenado aircraft and the switch back to the standard mouse selection is on every menu in every aircraft listed here. A feature that has divided users in that half really love it and half don't like it at all. But it is a very good feature to have. The aircraft is a great trainer because it is just that... basic. With nothing to divert you from just flying the aircraft except for your basic instruments and hands and feet coordination. But that does not mean the C152II is not a lot of fun because it is. Careando have taken out all the X-Plane9 conversion files to make this upgrade now totally X-Plane10. And you really feel that as soon as you leave terra firma. All the aircraft flown here are all much more smoother and cleaner in their operations, and noticeably so... which is perfect for this trainer.
Shop.OrgStore Price US$24.95 - C152 II
Review : None
Cessna 172II Skyhawk
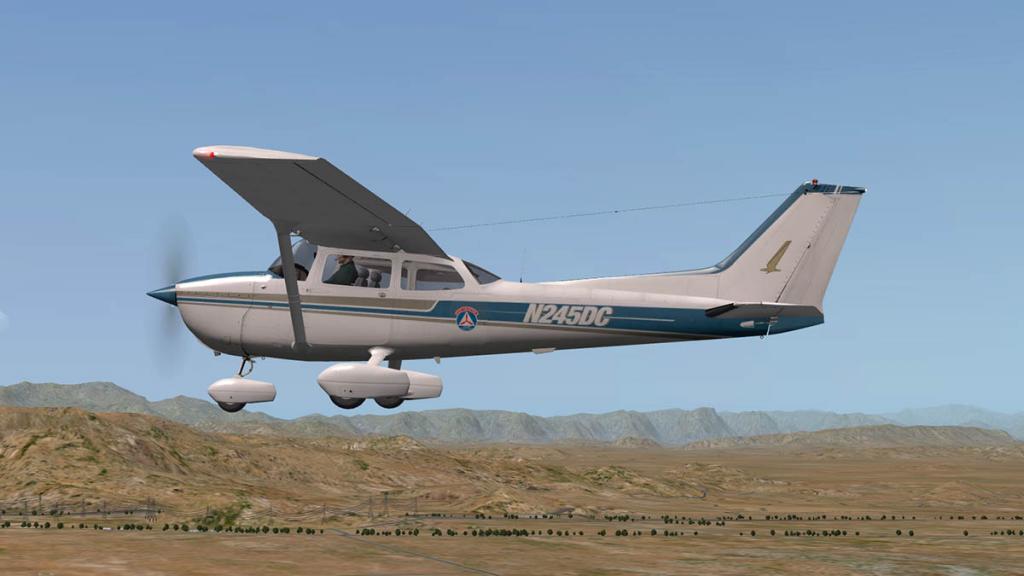
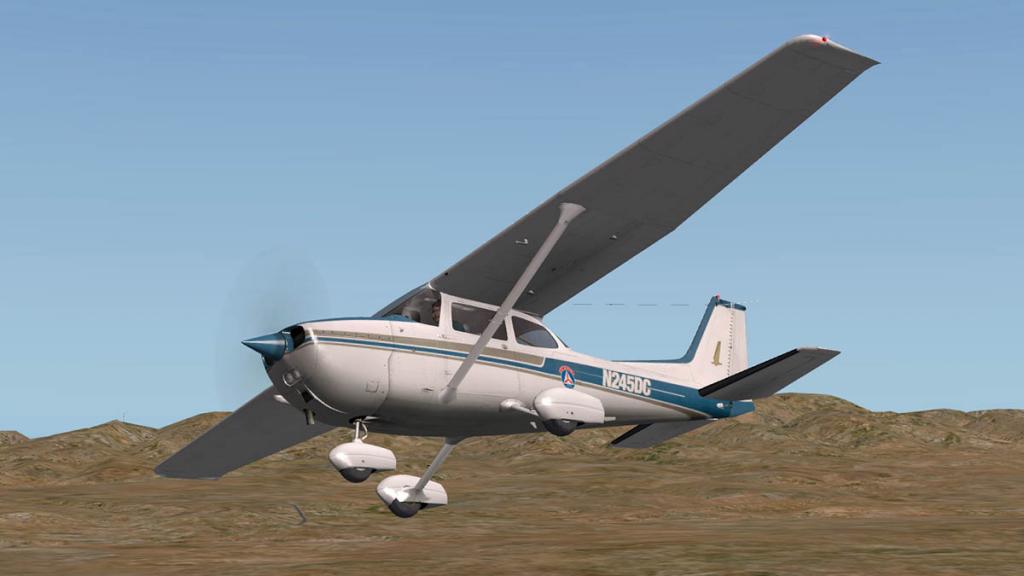
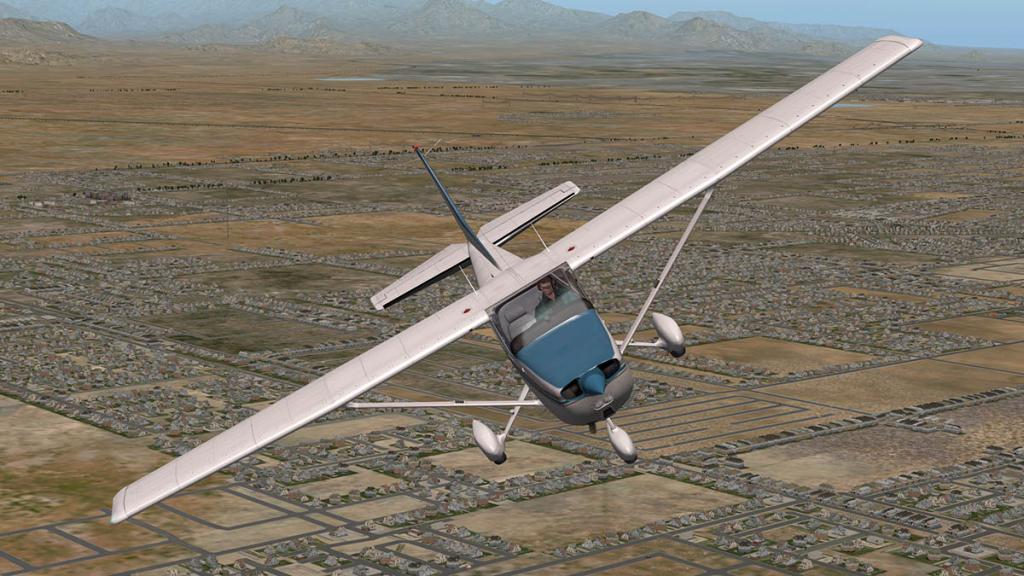

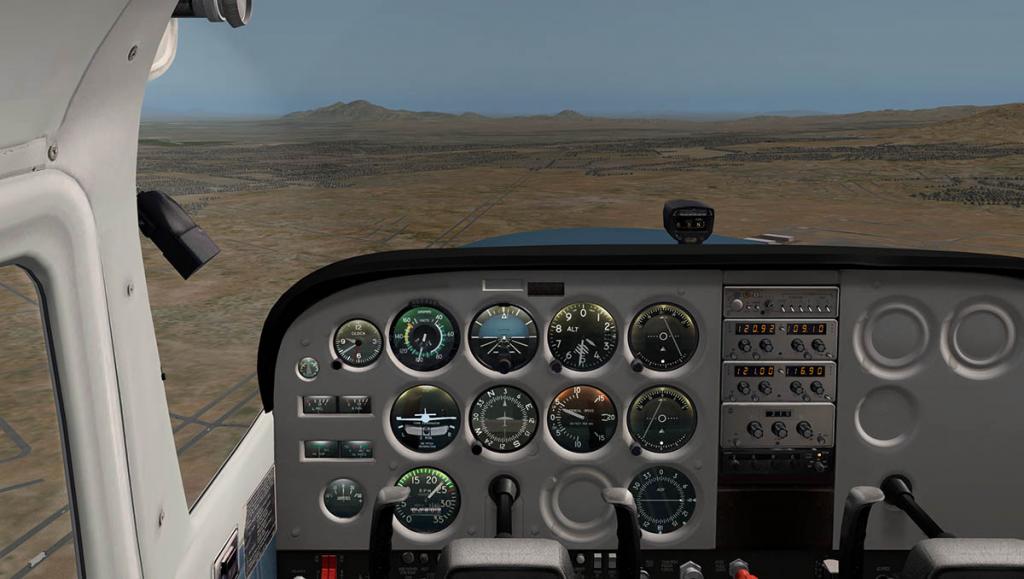
The C172 II is slightly bigger in size and a four-seater compared to the C152II. But it is still a basic simple aircraft to fly like the smaller aircraft. Carenado have updated the textures in 10.30 to match the latest aircraft in its range to the .dds format and that gives you a far higher quality texture but at a better frame-rate equation. This highlights the textures better and it is noticeable here in the C172II even in the smaller details which is again the high Carenado quality we have come to expect and quicker load times. There is a floats version included with this aircraft as well.
Shop.OrgStore Price US$24.95 - C172N Skyhawk II
Release Review :
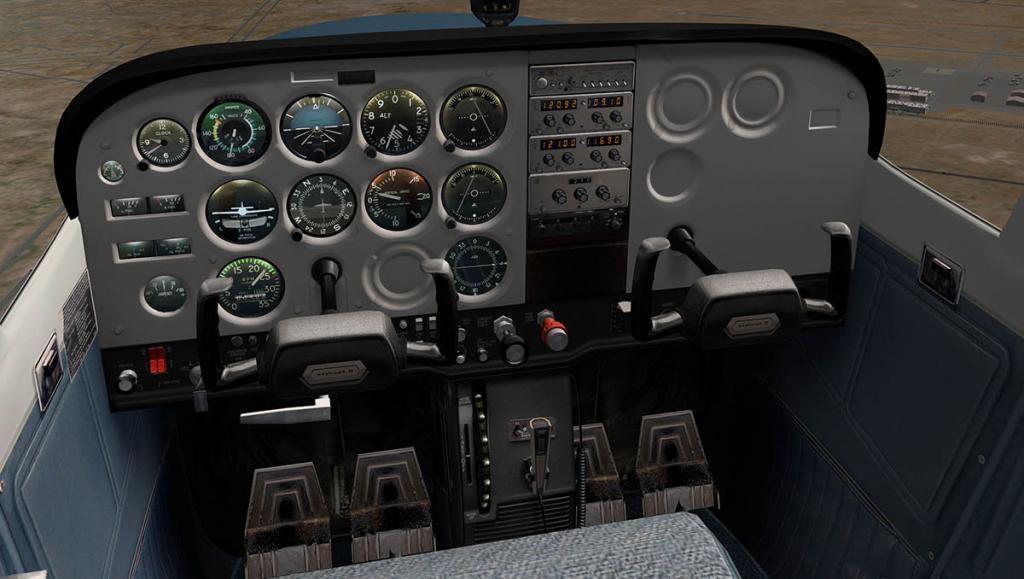
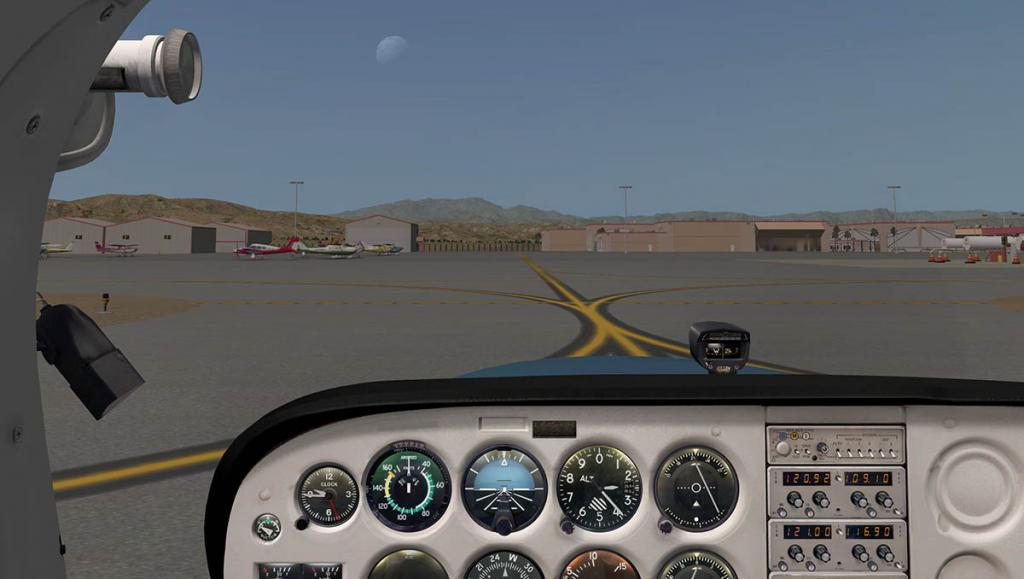
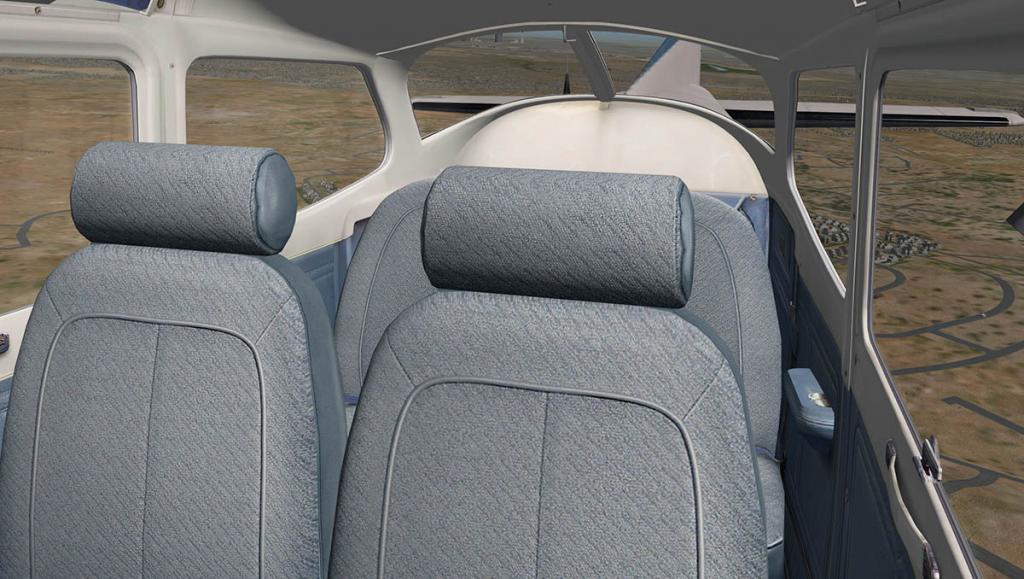
PA28 181 ArcherII
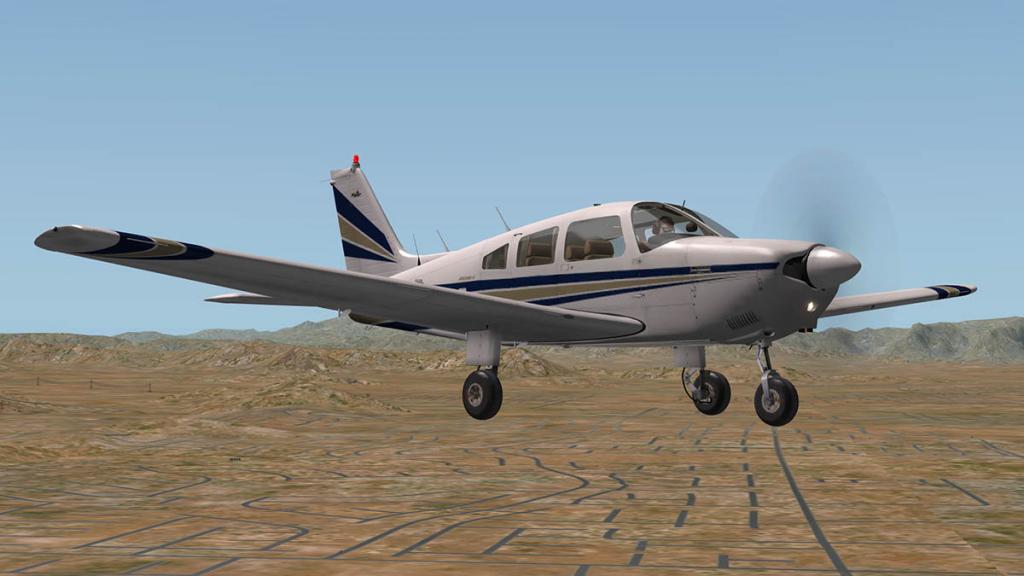
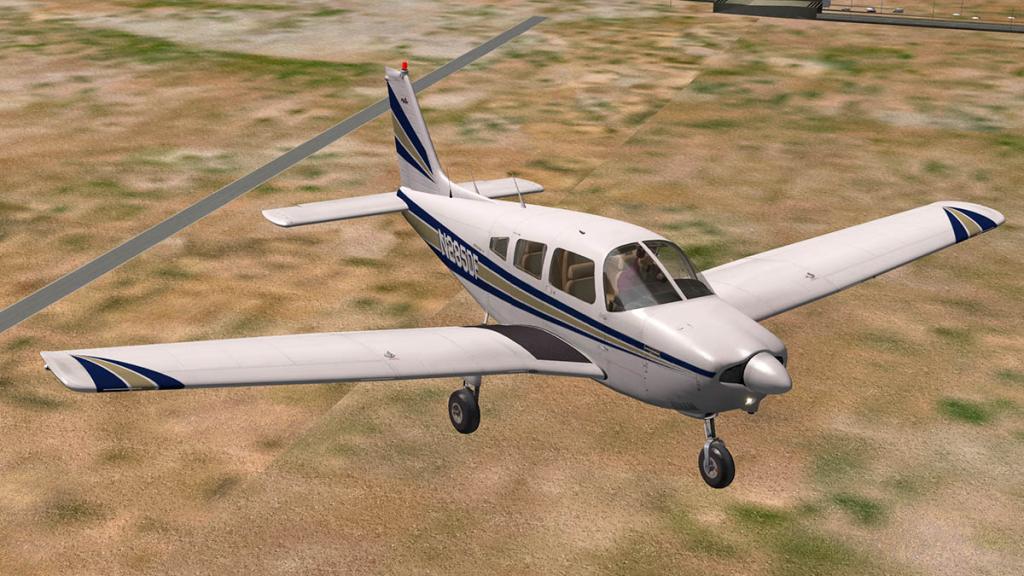

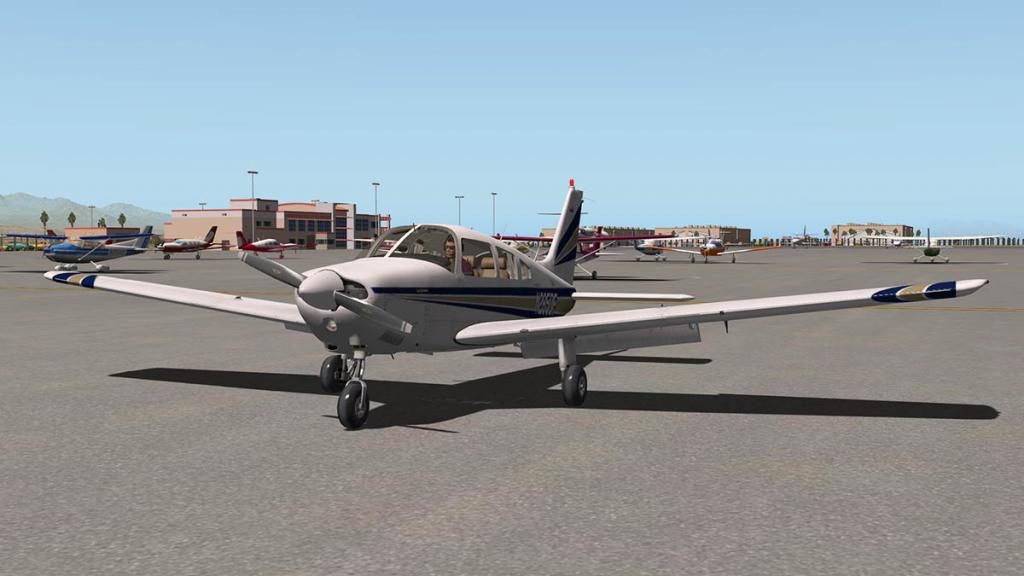
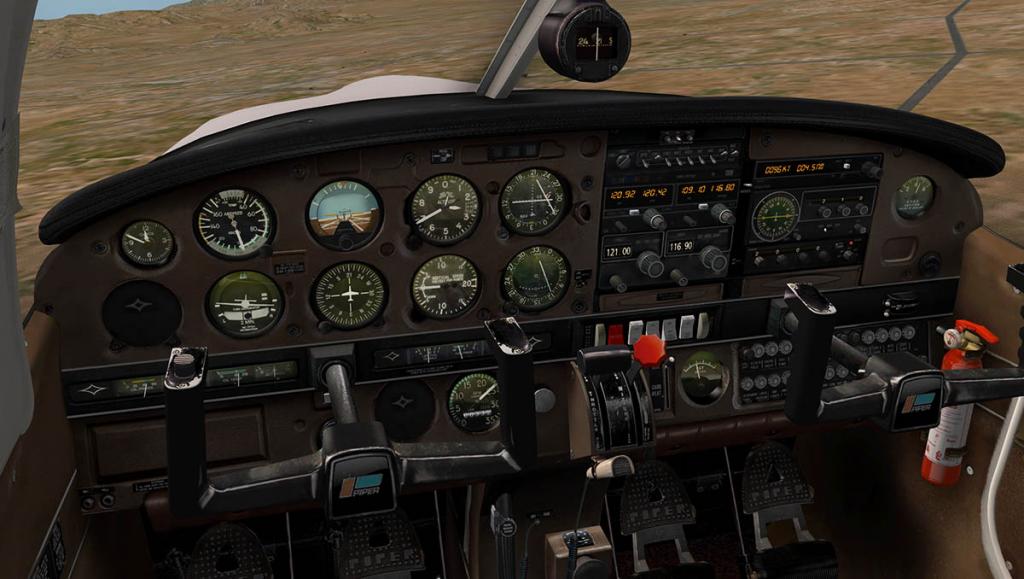
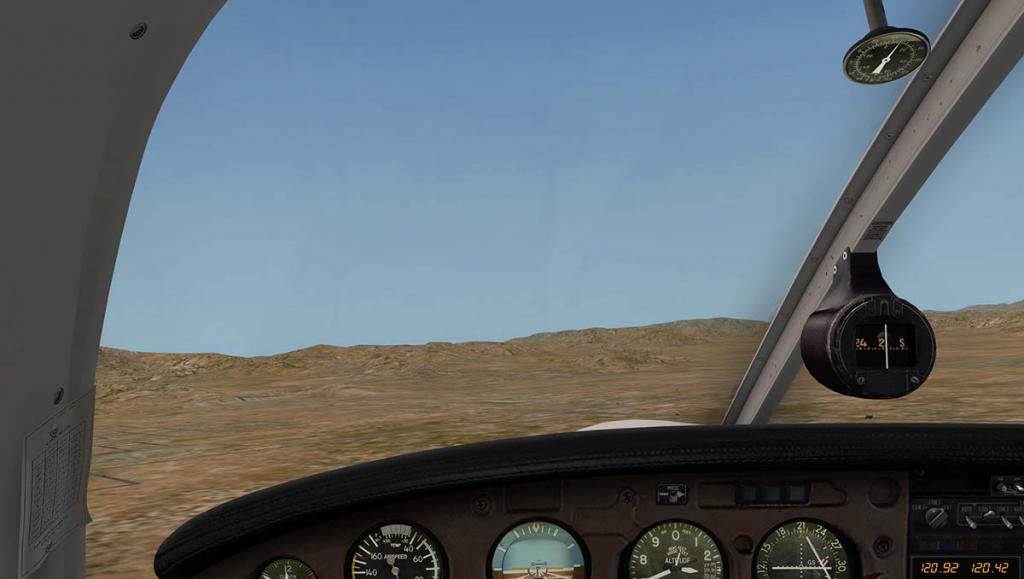

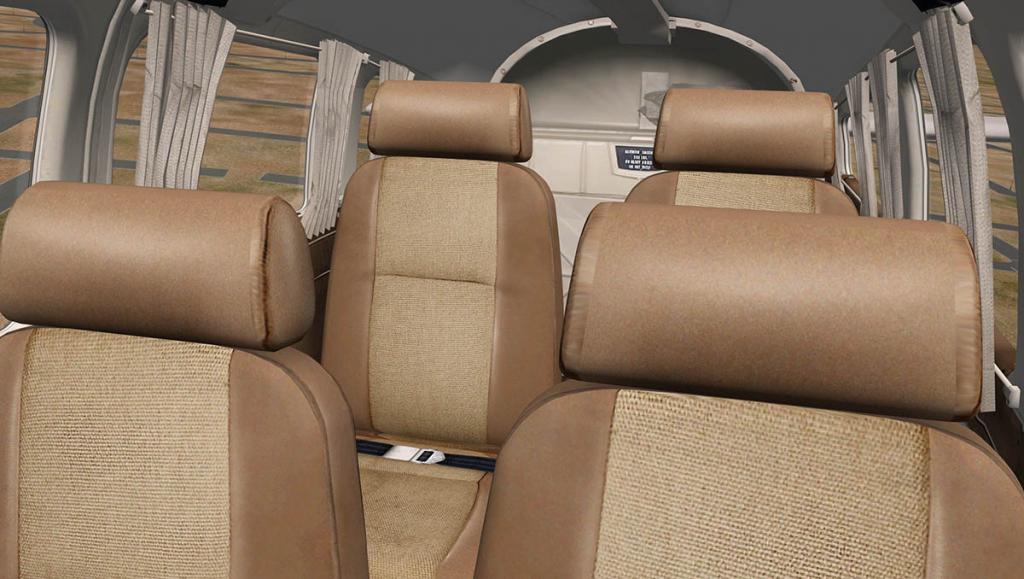
The Piper ArcherII adds in VOR and direction finding capabilities to your general aviation flying. So you have a much more competent (if slightly old-fashioned) radio stack installed in this aircraft. So that makes the aircraft a nice little tourer. In the update the aircraft has had a few touches to the handling and eliminated noise during load with engines running and reduced Doppler-related pitch intensity, Small things, but again in 10.30 the Archer feels much more nicer, smoother and more balanced in the air.
Shop.OrgStore Price US$24.95 - PA28 181 Archer II PA28 181 Archer II
Release Review :
PA32 Saratoga SP
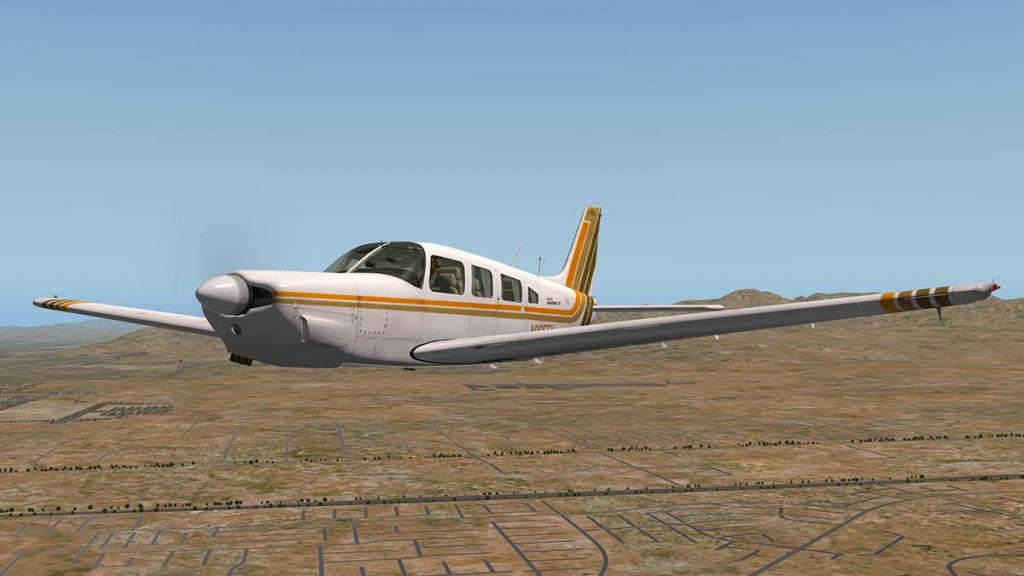
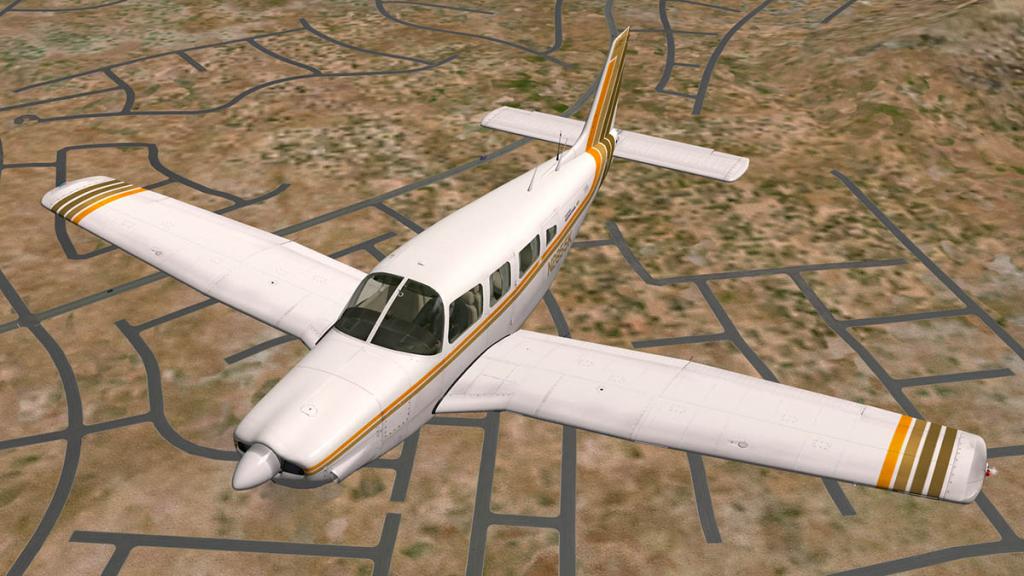
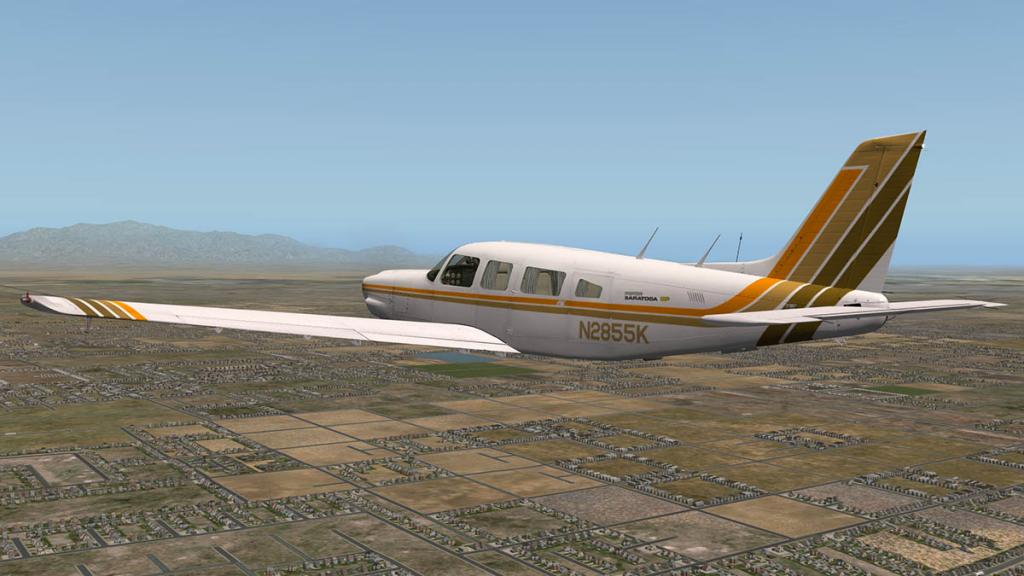
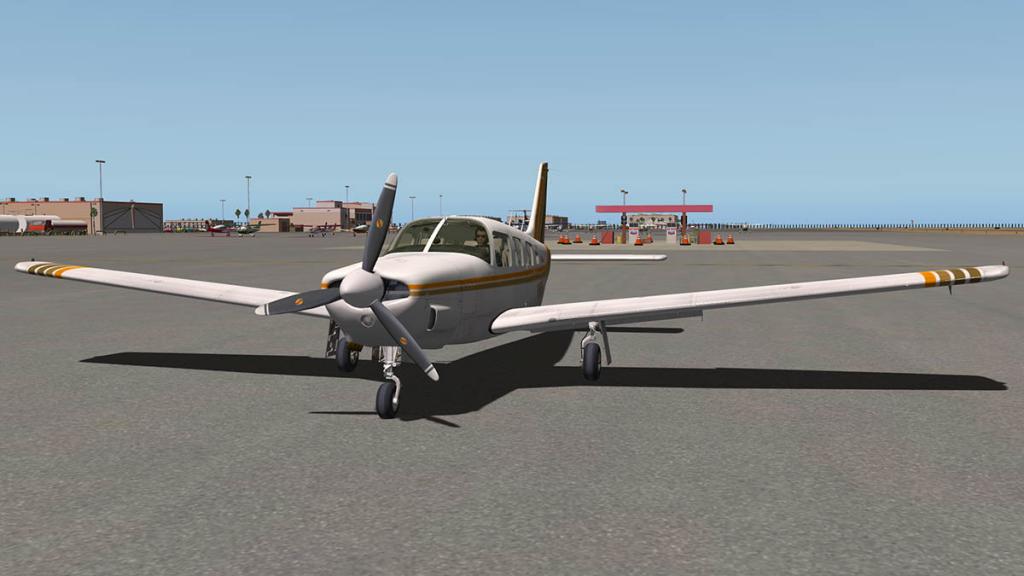
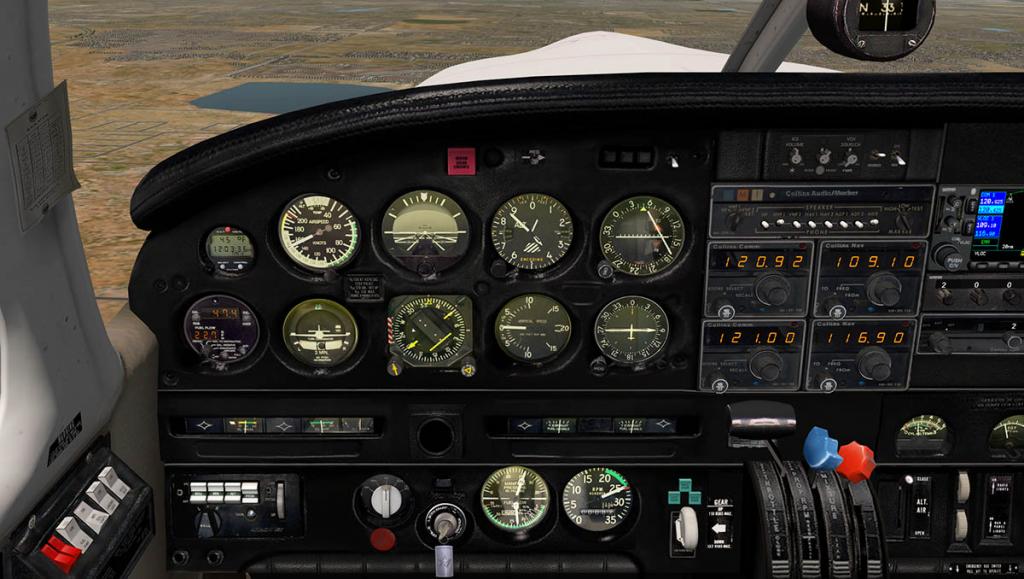
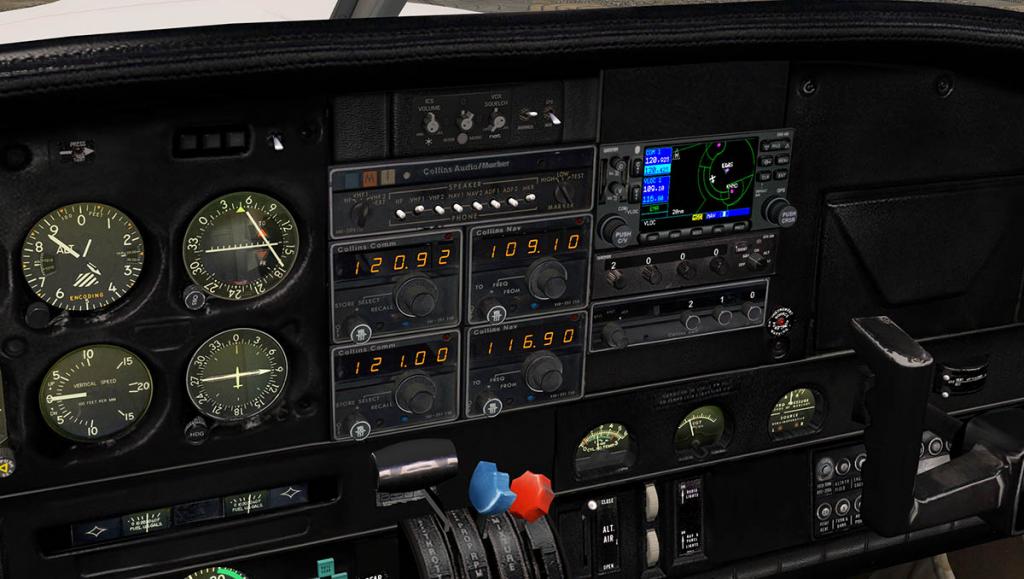

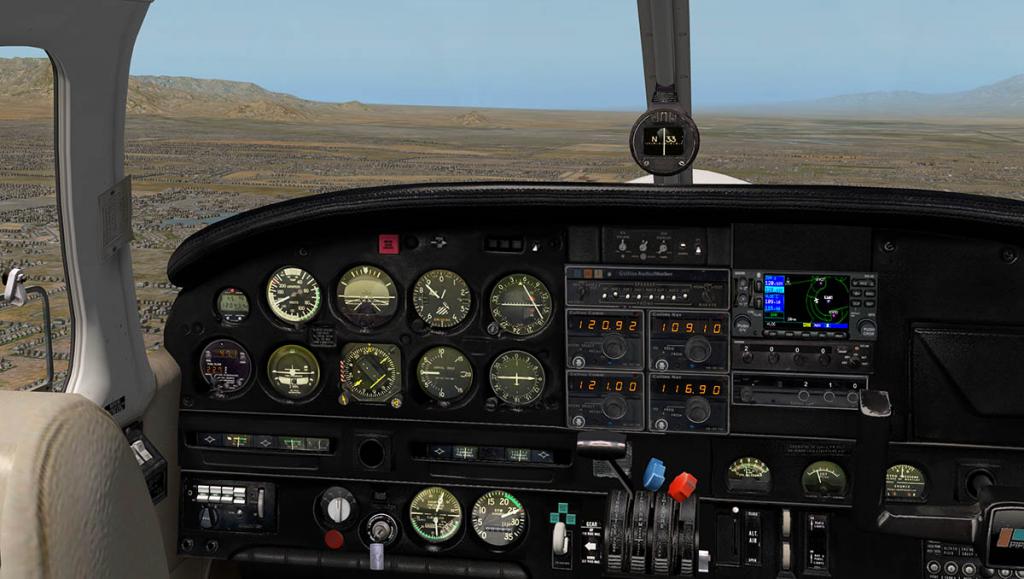
The Saratoga is a big broad 70's style aircraft that has a serious cruising range of 840 miles (1361 km). It helps that you have in the Saratoga's cockpit a basic autopilot (It works very well) and of course it now has installed the excellent GNS 430 GPS system that was introduced with X-Plane 10.30. Both features make this aircraft even easier for that long distance cruising. Other changes on the PA32 also include a reduced torque effect on the engine, so it flies slightly better as well.
Shop.OrgStore Price US$26.95 - Saratoga PA32R
Review : None
Mooney M20J
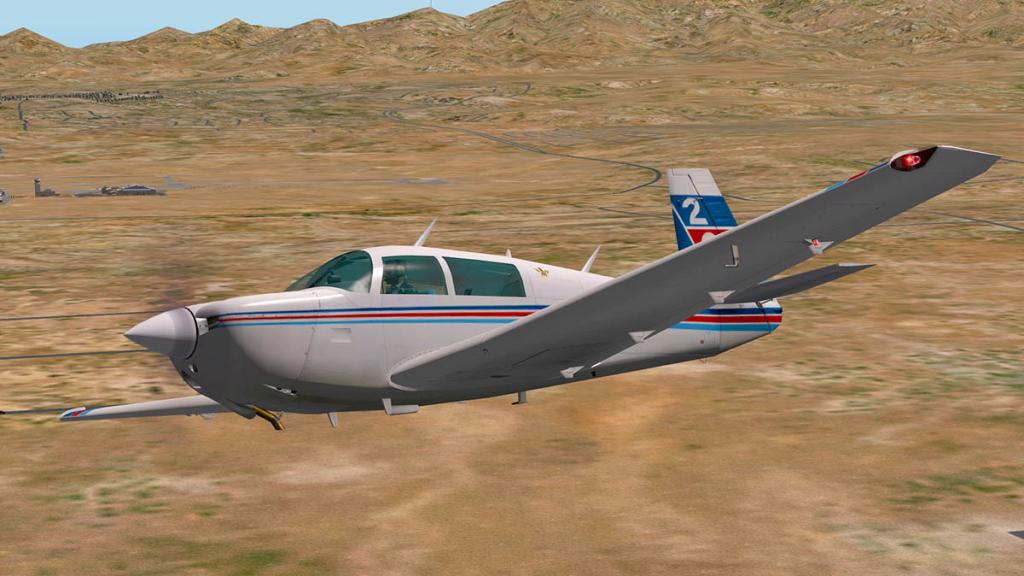
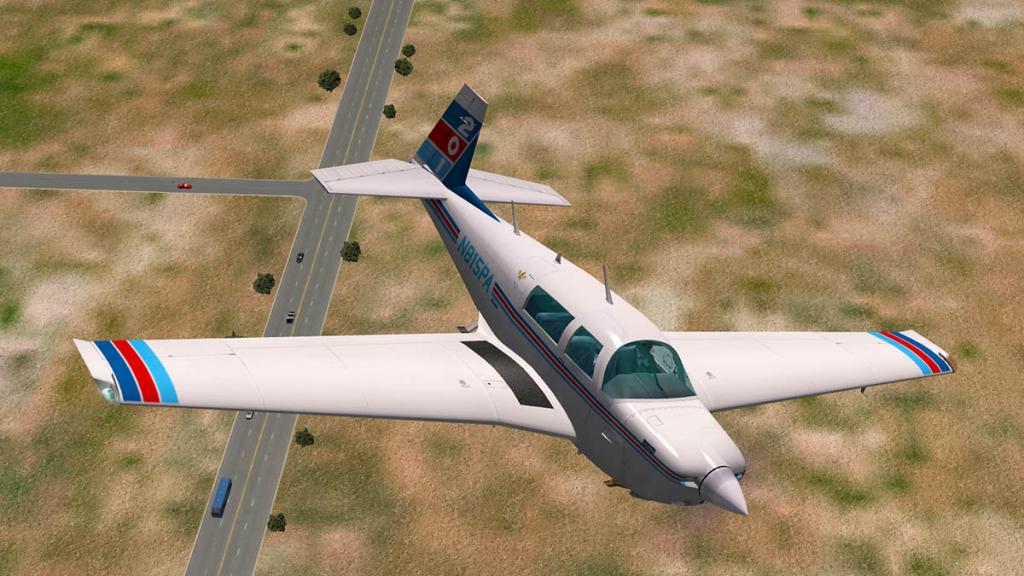
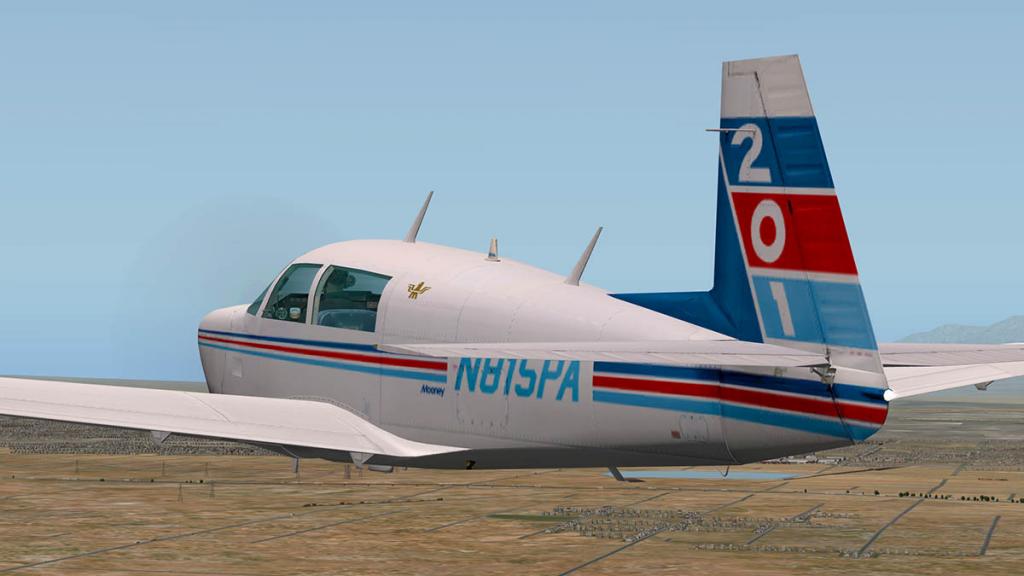
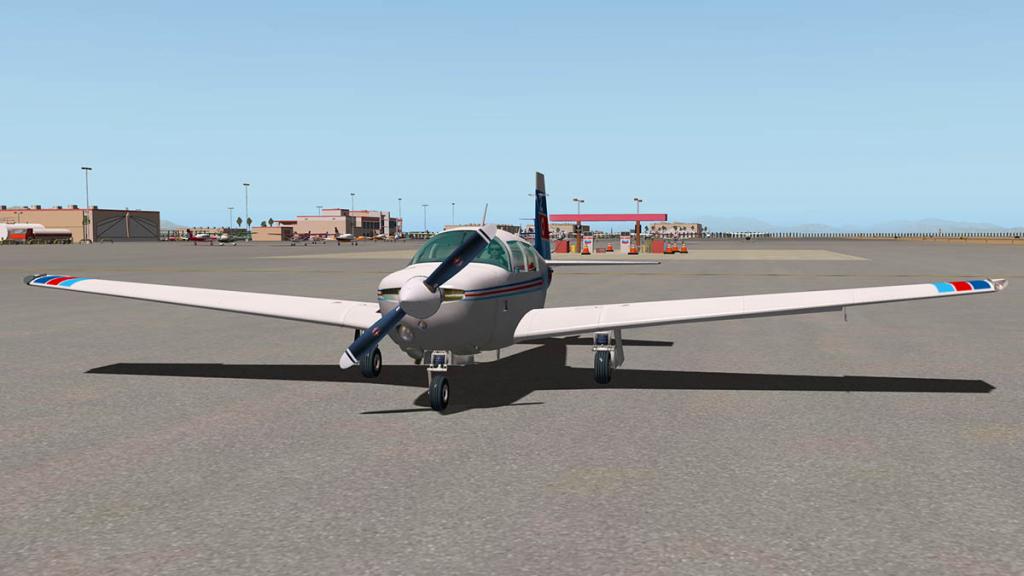
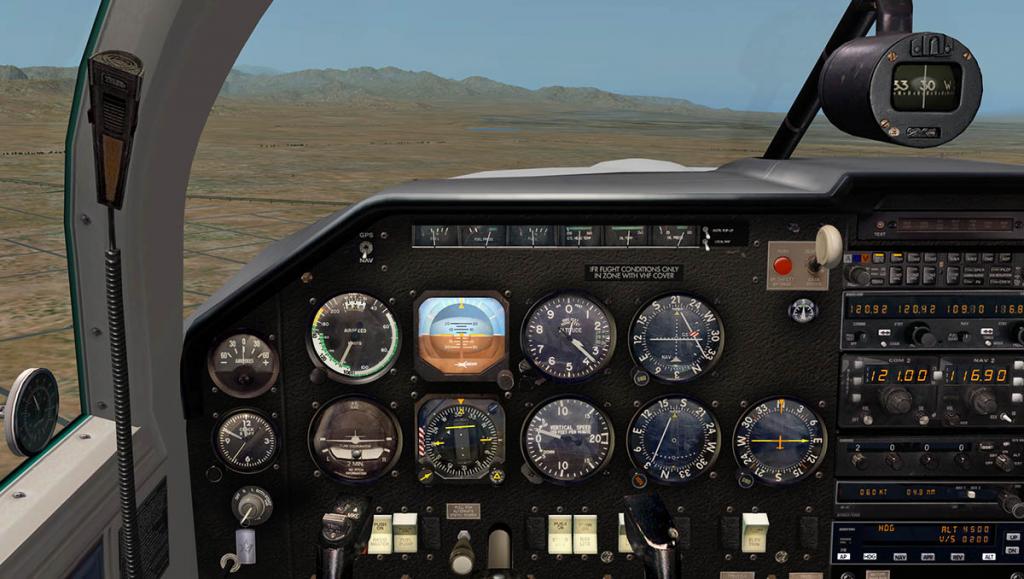


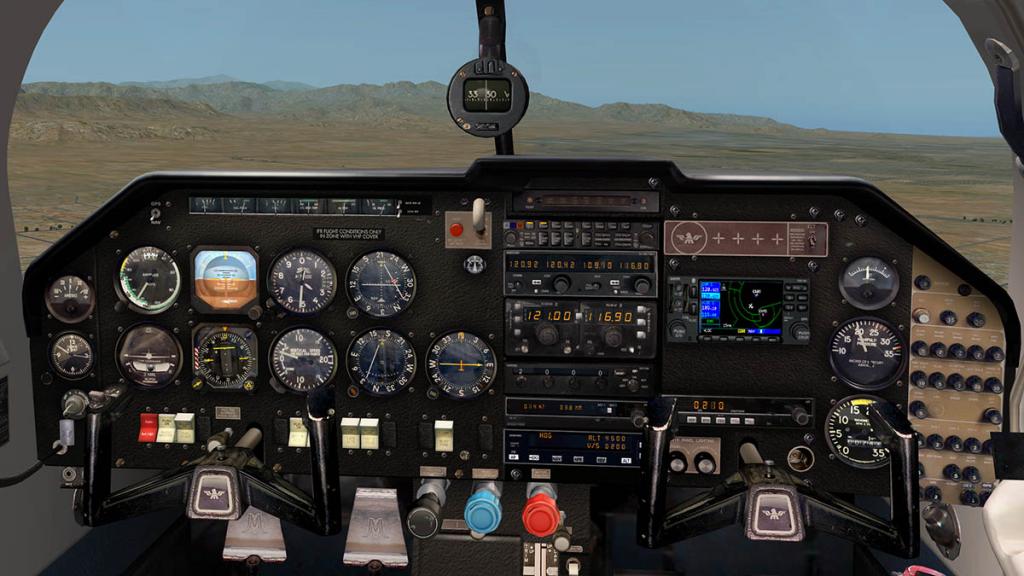
The M20J is known as the “Porsche of the Skies” and it goes like crackers at 200mph. Installed is the comprehensive equipment stack and the fact you get the full width of the panel stacked with these instruments, That then makes the Mooney great with all this instrumentation for very long VOR flights across country. It has now the 10.30 GNS430 GPS system installed for you to also do some serious good flight-planning to move things along even better. Also Internal dynamic reflections have been improved (can be turned off) and so has the aircraft's handling, but it is still and feels very heavy to fly.
Shop.OrgStore Price US$26.95 - Mooney M20J
Review : None
To recap, in the update every aircraft has had their textures converted to .dds, the new "scroll feature" and where required the replacement of the GNS340 GPS to the X-Plane 10.30 version. All aircraft are now only available X-Plane10 with these features and there is no compromise to X-Plane9 and all the aircraft feel far better in X-Plane10 for the change of that.
All the aircraft here are excellent, and the quality is very good. No doubt the other aircraft in the Carenado's X-Plane10 range will be updated in due course also to X-Plane 10.30 before Christmas and 2015. As they are released we will again check them out to see what modifications that has been done with the updates.
If you have an account and a previous purchase of any of the above aircraft with the X-Plane.OrgStore, then check your account to download the v3 (10.30) updates
Update Review by Stephen Dutton
20th October 2014
Copyright © 2014 : X-Plane Reviews
Developer Site: Carenado

-
any custom sounds?
The best in the business.
-
When will Mr. Dden have an upgrade for the Challenger?
Dden is usually very quick with his updates. So I doubt we will have to wait long.
-
-
Tom Curtis Update : KLAS Glitter Gulch v1.4
Tom Curtis from Scenery4XP has updated his Las Vegas Glitter Gulch scenery to version 1.4. This update includes now in the package KLSV - Nellis AFB which is situated just to the east of sin city. To check out the scenery I flew the Bombardier Challenger 300 in U.S. Air Force colours to deliver a high ranked VIP to Nellis AFB from Tom Curtis's other large AF base at McChord Field in his Scenery Review : Gateway to Boing Country by Tom Curtis scenery.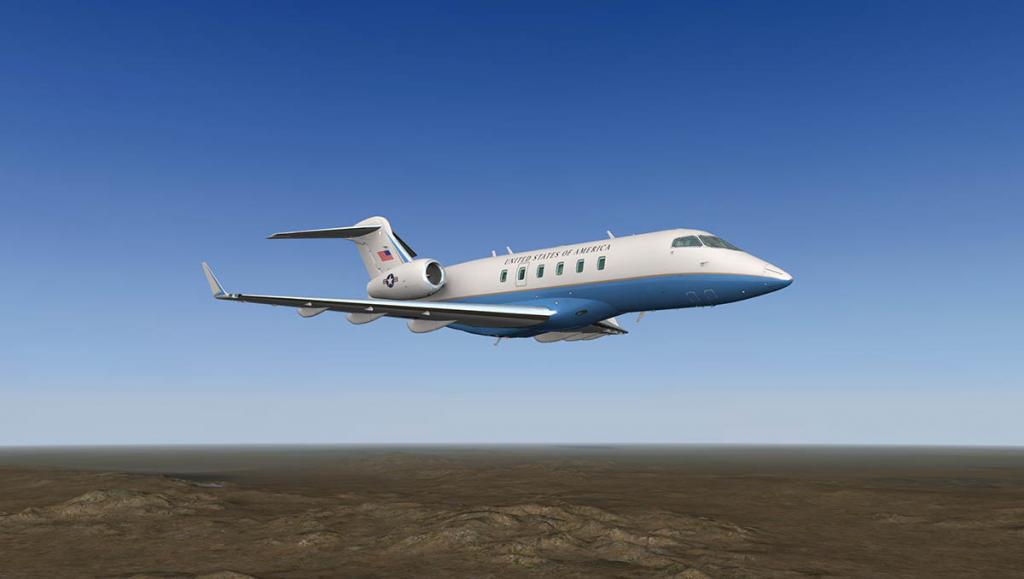
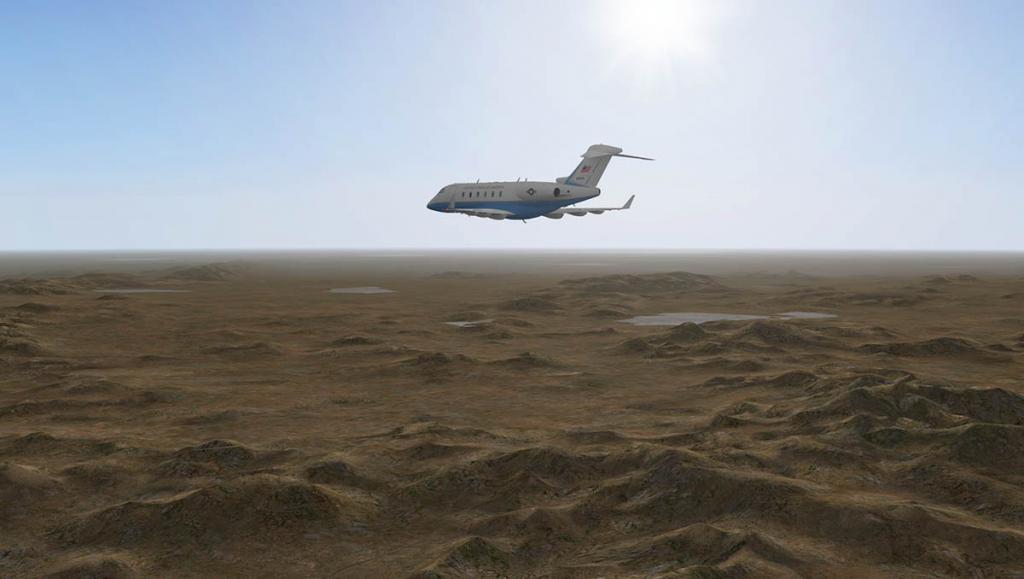
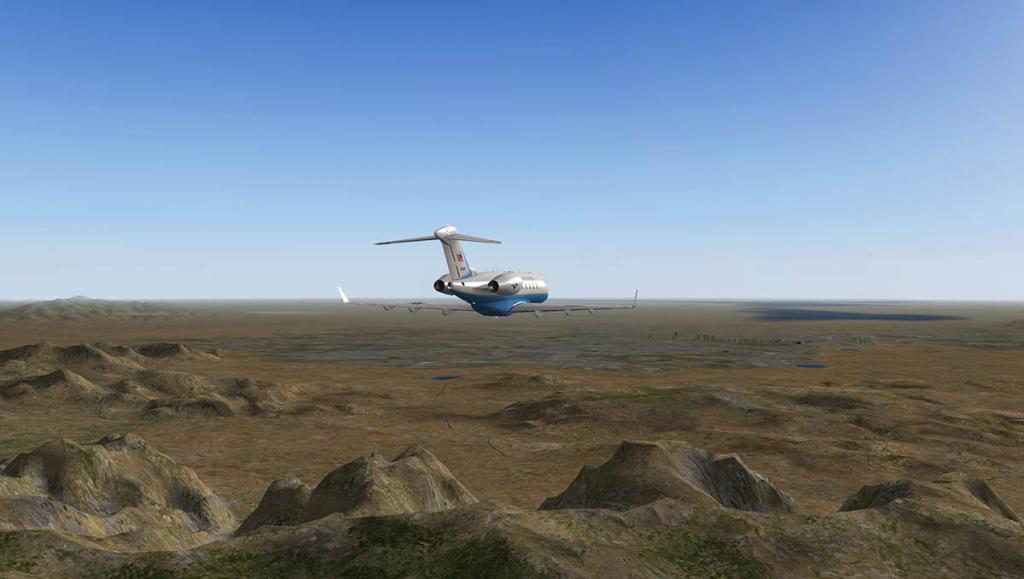

The area around Las Vegas is mostly desert, and is one of the most significant areas in the world for not only in aviation but also for the famous military testing grounds of places like Edwards AFB, China Lake, MCAS Miramar, Tonopah Test Range Airfield and the not supposed to know but everyone does know "Area 51" in Groom Lake. This is "Top Gun" territory and Nellis AFB is dead centre of all the training and "Red Flag" advanced aerial combat training exercises. That the Air Base it is positioned just a stones throw from Sin City is just a coincidence... right.
Tom Curtis's original "Glitter Gulch" release included McCarran International Airport (IATA: LAS, ICAO: KLAS) and Henderson Exeutive Airport (IATA: HSH, ICAO: KHND), There was also included in the package a Las Vegas skyline and the review can be found here: Scenery Review : KLAS - Glitter Gulch by Tom Curtis A second update (v1.3) was released a few months later in November 2013 which included "Autogates" to Concourses C, D and E and more buildings in the Las Vegas skyline and the update can be found here : Tom Curtis Scenery : KLAS Glitter Gulch v1.3 update.
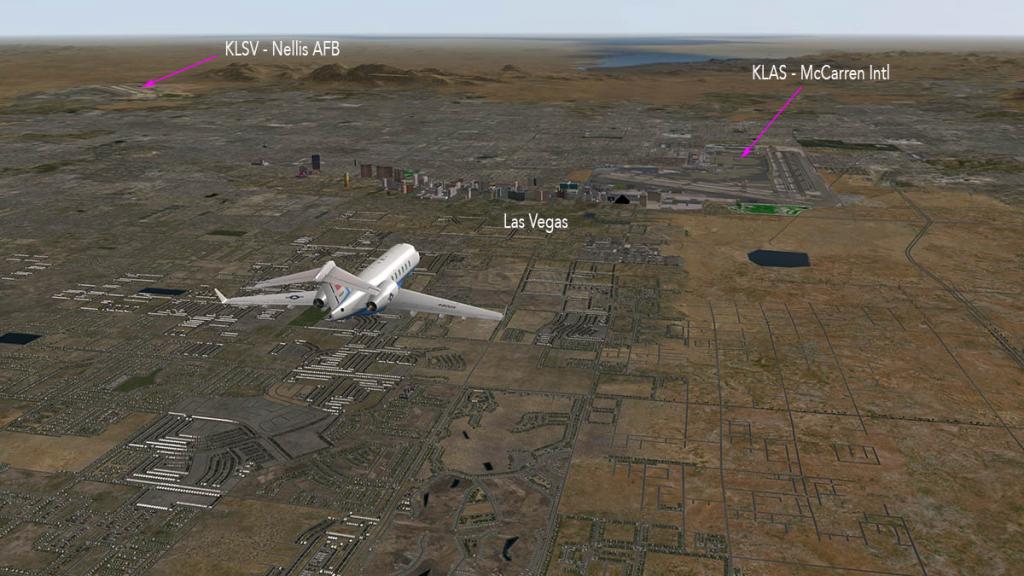
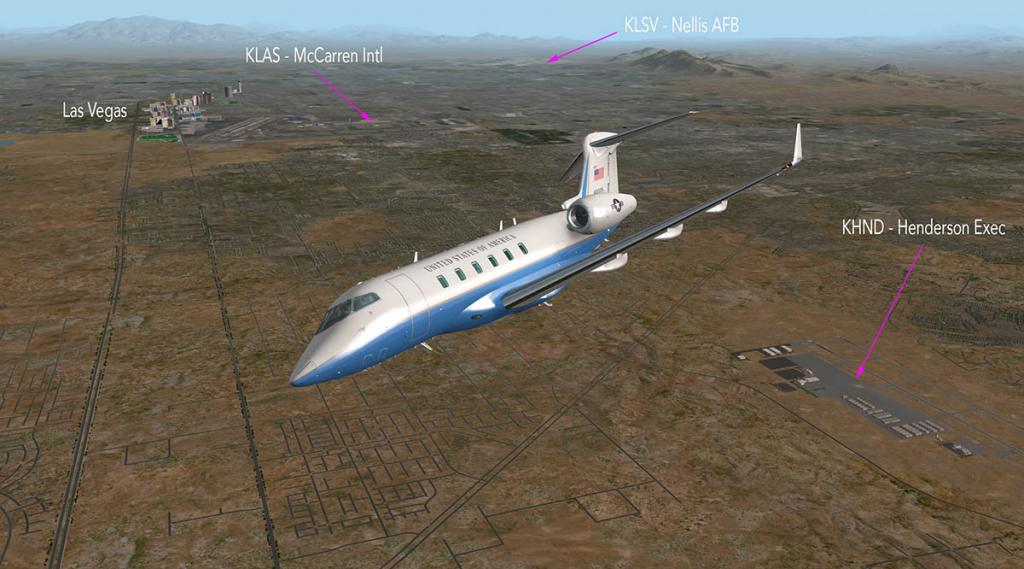
Approaching the Las Vegas area you will note that McCarren Intl is right in the heart of Las Vegas, Henderson Exec is to the west and Nellis AFB is directly to the east.

03L/21R 10,123 (3,085m) Concrete
03R/21L 10,055 (3,065m) Concrete
Elev 1,867 ft / 569 m AMSL
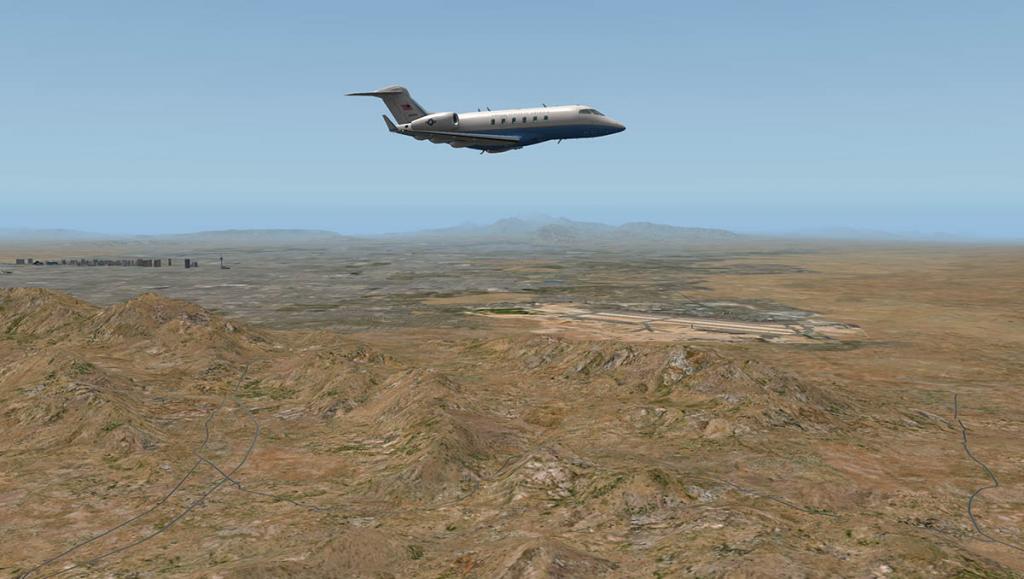
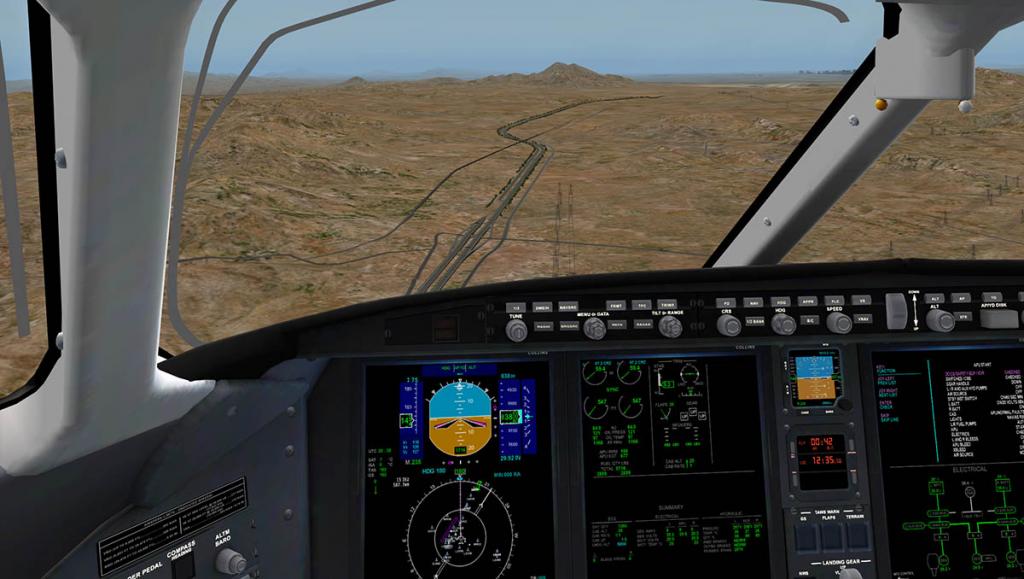
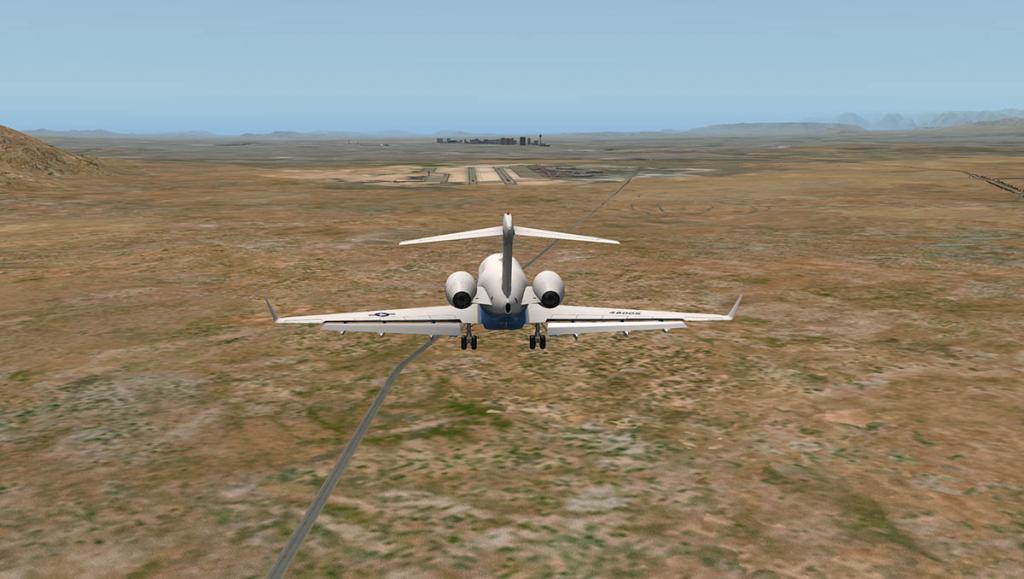
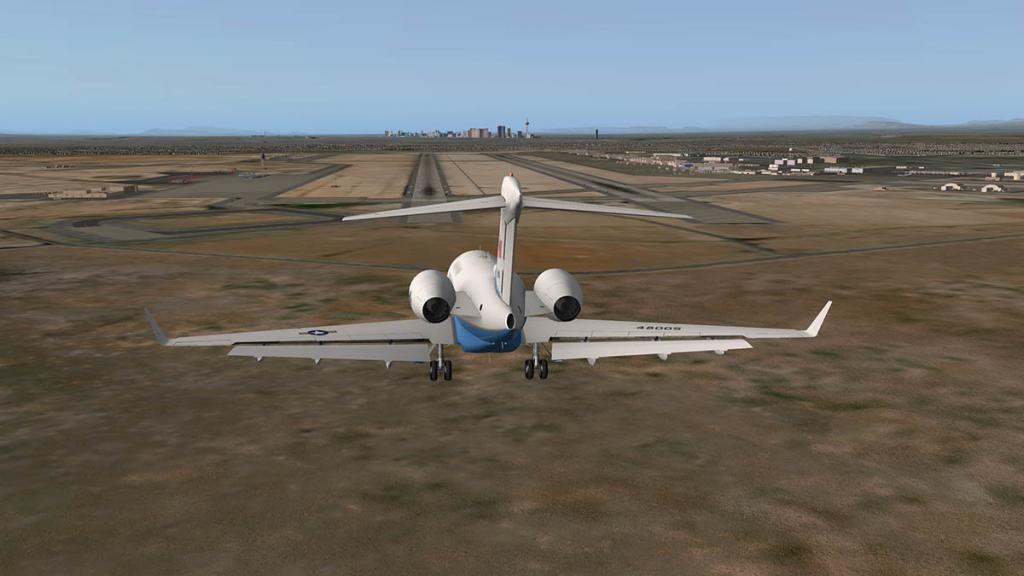
Approaching runways 03L/03R from the southwest is over Las Vegas and Las Vegas North itself and almost parallel to KLAS 01L/01R. If you want an ILS approach then that is only on RWY 21L and that approach is from the north-east. The problem with the north-east approach is that it is closed in on both sides by high ground and ranges, and you have to fly up a valley basin over the Las Vegas Dunes Rec lands to finally collect the ILS on RWY 21L. Tricky? Yes it is. You can try the very tight turns into Nellis coming from each approach path at 90º but that means you will have to be really low to collect the ILS and it is really very tight. Maybe this approach is easier in a GA at a very slow speed, but in a Jet or Military Heavy then you would have your work cut out.
So my approach was the slightly easier way of cutting between the ranges and heading directly towards Lake Mead and then doing a 21º heading that puts you on a parallel course to the airbase but on the other side of the range. You follow the basin right up to "Crystal" before doing a total 180º turn back down the other side of the range and follow the lines of the "Great Basin Hwy" (15) almost directly to RWY 21L. I say almost because at the last moment you still have to dog right to finally collect the ILS. It is challenging, and it requires a lot of skill when you get down to your final approach height.
Once in the clear of the ranges then KLSV opens out before you and Las Vegas sin city is directly in the distance. Most of the buildings and installations are on the north-west side of KLSV and the tower and DOE (Department of Energy), Bomber Pad areas are on the south-east boundaries.
The military airport is very wide and very open, and the runways are very realistic in textures, well signed and taxiway markings are excellent. There is only one cross taxiway mid-field (-B-) and so you have to taxi down the runway a fair way before being able to turn off. Taxi distances are large as the airport is very well spread out and a turn right along Taxiway (-F-) to Base Operations well to the north of the base can take a fair time. You do however take in the various areas and homes to the many air-wings that are based here and including the The USAF Air Demonstration Squadron ("Thunderbirds") as the air demonstration squadron of the United States Air Force (USAF), which are assigned to the 57th Wing. There are simply rows and rows of aircraft positioned here (capacity 300), in fact more aircraft than small country would have all in one place.


The Nellis Base reception centre/base ops is a nice welcoming building and the VIP general got all the red carpet treatment. Air Force One or any Government aircraft would not look out of place here. It is important you have the "CustomSBDatarefs004" plugin installed your resources/plugins and it is provided in the package, because it will bring the many flags to life by them moving in the wind, and here at the reception centre they look very good.
Nellis Air Force Base Complex
Nellis AFB covers about 11,300 acres (4,600 ha) in the northeast corner of the Las Vegas Valley in the Basin and Range Province. Nellis has about 7,000 acres (2,800 ha) of undeveloped space; has areas added since WWII, e.g., Area II in 1969; and had 1 WWII runway removed. The base has 3 areas (I, II, III), and the GNIS names 5 different USGS locations for the base: "Nellis Air Force Base", the airfield, the post office, a Community College of Southern Nevada campus, and the census-designated place (CDP).
Nellis Area I has the airfield (2 runways and ramp space for up to 300 aircraft), recreation and shopping facilities, dormitories/temporary lodging, some family housing, and most of the command and support structures in with Suter Hall for Red Flag operations.
Nellis Area II northeast of the main base "at the foot of Sunrise Mountain" (formerly the U.S. Navy's Lake Mead Base) has the Nellis Gun Club, the 820th RED HORSE and 896th Munitions Squadrons, and the largest aboveground weapons storage complex[specify] in the United States.
Nellis Area III is west of the main base with family housing, administration and industrial areas, and the Mike O'Callaghan Federal Hospital, (the base's "unincorporated town is called Sunrise Manor". Area III also includes a 23.4 acres (9.5 ha) munitions response area (MRA XU741) which had WWII storage for small arms ammunition, pyrotechnics, and chemical bombs and that now includes 2 remaining WWII buildings (numbers 1039 & 1047), 5 modern igloos, & the RV storage.
The Nellis AFB missions of advanced combat training for composite strike forces is commonly conducted in conjunction with air and grounds units of the Army, Navy, Marine Corps and allied forces. The base also supports operations at the nearby Creech Air Force Base, the Tonopah Test Range and the Nevada National Security Site. Nellis ground systems for range operations (e.g., by callsign "Nellis Control") include the Computer and Computed Subsystem used to receive microwave signals from the NTTR Ground Based Stations of the Tracking and Communications Subsystem (TCS) for presentation on Nellis' Display and Debrief SubSystem (DDS).
Assigned Commands are:
79th Air Base Group, 7 July 1941
70th Base HQ and Air Base Squadron, c. 14 August 1942
82d Flying Training Wing (Flexible Gunnery) 8 January 1943 – 16 June 1946
Assigned Units are:
3595th Pilot Training Wing, 1 April 1948[24]:54 – 1 July 1958
4520th Combat Crew Training Wing, 1 July 1958 – 1 September 1966
4525th Fighter Weapons Wing, 1 September 1966 – 15 October 1969
474th Tactical Fighter Wing, 20 January 1968 – 15 October 1989
57th Wing (Various Designations), 22 August 1969 – present
554th Operations Support Wing, 1 March 1980 – 1 November 1991
USAF Fighter Weapons School, 1 January-1 September 1966; 30 December 1981 (USAF Weapons School on 15 June 1993)
4477th Tactical Evaluation Flight ("Red Eagles"), 1 April 1975 – 1990
USAF Tactical Fighter Weapons Center, 1 September 1966[41] (USAF Warfare Center on 15 November 2005)
Nellis Air Force Base was named on 30 April 1950, and the 20 May 1950 dedication was attended by Lieutenant Nellis' family. By 1 July the Air Force had directed ATC to accelerate Korean War training for a new 95-wing Air Force. The first school opened at Nellis, and ATC redesignated the 3595th Pilot Training Wing (Advanced Single-Engine) as the 3595th Training Wing (Combat Crew).On 17 July 1950, Nellis began a replacement pilot training program to provide 115 FEAF F-51 Mustang pilots and 92 combat-ready F-80 Shooting Star pilots. Nellis' advanced single-engine pilot training transferred to Alabama on 1 September 1950. Nellis assumed fighter-bomber training, and ATC established its USAF Air Crew School (Fighter) on 14 November 1950, equipped with F-80s and early-model F-84C Thunderjets. On 1 October, Nellis AFB base management functions transferred from Williams AFB. In early 1951, ATC assigned recently graduated airplane and engine mechanics to Nellis to learn jet aircraft maintenance.
The airfield was expanded 1951-4 with longer jet-capable runways, reconfigured taxiways and a larger aircraft parking ramp; and WWII wooden structures were replaced with concrete and steel structures (e.g., barracks and base housing for married personnel). The first Wherry houses were completed in 1954, with updated Capehart houses being completed in February 1960. Nellis AFB has more military schools and more squadrons than any other USAF base.
Tom Curtis - Nellis Airforce Base
The airbase is separated between the north-east side and the south-west side by the two runways. The layout by Tom Curtis is excellent and is underlined by using photographic plates under the scenery. Here though the plates have been intergrated into the landscape very well and you can't tell the areas were they join up with the default X-Plane scenery. So the outward view of the airbase is excellent.


There are a huge amount of hangars, buildings and covered ramp areas on the north-east side, the buildings just go on and on into the horizon. All buildings are functional and are a great reproductions of the original airbase buildings and barracks, you can spend hours just picking out which building is related to whom. Highlights are the Red Flag buildings, USAF Air Demonstration Squadron ("Thunderbirds") complex, Fire Station, 57th Wing operations and the Base operations areas. Great areas of detailed carparks are laid out and with real 3d cars and not just flat photo style images... excellent. In some areas there is a flatness between buildings with the photo underlays, but KLSV is much more better than these sort of bases in the past and the areas are very well covered. In the far north section there are helipads and rotorcraft support areas, that are excellent if you do helicopter support.

The ramps are full of static aircraft and their support covers, the areas covered are huge, but this is certainly a great place to base your fighter operations. Off site there are fuel tank areas and other small buildings with great detail spread around a fairly large area. Tom Curtis notes "Numerous aircraft are parked on the ramp in various stages of mission preparation. Some are in the process of refueling, some are uploading bombs and missiles, and several are waiting in the arming area at the end of the runway in preparation for launch. Along with the aircraft you’ll see all of the support equipment required to “turn” the aircraft. You’ll see bomb loaders (Jammers) loading live and inert bombs and Mavericks on several aircraft. The End Of Runway Arming crew can be seen pulling the safety pins from the weapons just before the aircraft take the runway for takeoff".
The south-west areas are far less populated, and are mostly a collection of separate cluster areas. The Bomber command areas are to the south of the centrally positioned control tower with the DOE (Department of Energy) ramps to the north.
All the south-west ramps can be seen from the excellent tower view including the wide scope of the north-east side. And notable is that although the complete Glitter Gulch scenery is very comprehensive, Tom Curtis's work does not lean very heavily on your computer. So you get both sides of the deal in that it is great detailed scenery, but it is also very kind to your processing power, and that alone makes any Tom Curtis sceneries very worthwhile.
Nightlighting
The airbase's night-lighting matches in well with KLAS and far away Henderson, but Las Vegas looks a little gaudy on the horizon (Las Vegas gaudy! heavens no)


The lighting is comprehensive, but not very different in the types of styles. But overall it is very good. Building texture lighting is very good as well, certainly if you can run your textures res at a high setting, runway lighting is very good, but remember at night those dark shadows are high terrain monoliths and ranges that tower over you... landing at night from the north-east is for the highly skilled only.
Other version 1.4 features
Also added to the "Glitter Gulch" package in this version (1.4) is the “High Roller”, which a large ferris wheel that towers nearly 300’ high and provides the riders a panoramic view of the entire valley, it is animated as well as it slowly rotates around. Also added are three rooftop heliports on some of the hotels along the strip. You can now start your flight at the Excalibur Hotel, Bally’s Hotel, and Treasure Island Hotel. Just flying around trying to spot them is like a "Amazing Race Around The World" Roadblock task, get all three and you can move on!

The 1.4 update also includes a new feature in Jonathan “Marginal” Harris and Mr3D’s animated marshaling crewman. You can now get parking guidance on the Cargo and UPS/FedEx cargo ramps at KLAS and several of the parking spots at KLSV - Nellis AFB and have someone to wave you in. First point to note is that the aircraft you are using has got the the correct settings that are used to connect the "Autogate" to the aircraft. These settings are located in PlaneMaker if your marshaller does not work, of which mine did not with the ABSim DC-10.
To set them then go to PlaneMaker, load the aircraft and select the "viewpoint/default" panel. Then set the three coordinates for the boarding door settings are on the lower right of the panel, then save your aircraft and load it into X-Plane... Tom Curtis does provide with the package the full set of instructions on how to do this and also full sets of coordinates for fighter aircraft that don't have boarding doors.


The marshaller himself is totally brilliant... turn into the gate and he comes to life guiding you into the bay... brake when he crosses his hands and he will then go back to normal when you turn the engines off.
Summary
The 1.4 update to "Glitter Gulch" is quite comprehensive in adding in KLSV - Nellis AFB to an already highly set out scenery. KLSV - Nellis AFB alone is worthy of a download, but to be included extra into this already comprehensive package is a really great deal all round. As a side note KVGT - North Las Vegas Airport is part of the default (lego) airports of X-Plane 10.30 that is automatically installed and it is very good. So that area (below) is also filled as well until Tom Curtis replaces it in another GG upgrade.
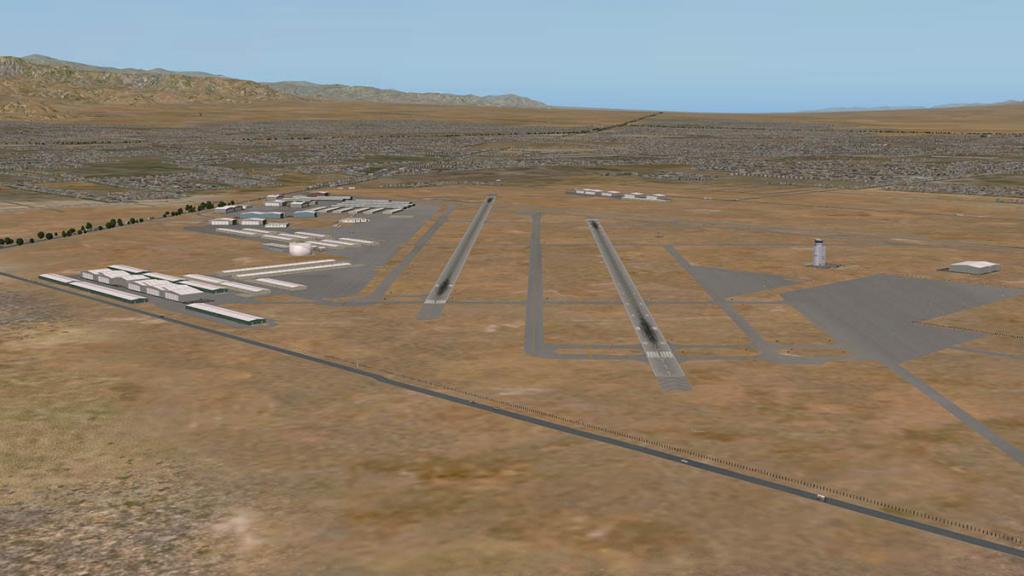

Once there was only desert out there, but this Las Vegas scenery is starting to get crowded, but in a great way. Totally comprehensive and frame-rate lite, and all at such a great price, then Glitter Gulch has it all. And for flying around this area it is one of the very best you can think of, You have all the military ranges and training areas to test your "top Gun" skills, local visual hotspots in the Hoover Dam and Grand Canyon and it is brilliant General Aviation country... What more do you want?
Yes! the "Glitter Gulch" scenery by Scenery4xp (Tom Curtis) is now Available from the X-Plane.OrgStore : KLAS - GLITTER GULCHPrice is US$24.95
If you already have purchased Scenery4XP "Glitter Gulch" then the v1.4 update is free. Just go to your account on the X-Plane .Org Store and check into your account for the v1.4 download.
Features
This scenery pack includes faithful reproductions of the following airports:- KLAS - McCarran International Airport
- KHND - Henderson Executive Airport
- KLSV - Nellis AFB
- Traffic animated on the KLAS Airport
- Autogates to Concourses C, D and E at KLAS
- 24 Las Vegas Skyline buildings and a Ferris Wheel
Update Review by Stephen Dutton
16th October 2014
Copyright © 2014 : X-Plane Reviews
Installation: Download is 109.8meg to an expanded 301.80meg that is required to be inserted into your "Custom Scenery" Folder. Any older "Glitter Gulch area sceneries must be removed In another folder are the plugins that are required for the animations in the scenery in "AutoGate" and "CustomSBDatarefs004" and HANGER OPS ( Courtesy of Shade Tree Micro Aviation ) which animates various hanger doors and other objects. These items are to be inserted into the Resources/Plugins folder in X-Plane unless you have the latest versions already installed. All details are supplied in the OPEN ME! Folder. X-Plane9 version of Glitter Gulch is available on request.
Technical Requirements:
Windows, Mac or Linux
X-Plane 10.32 or 64 bit mode
X-Plane 9 version is not included in the download package but is available on demand. Just place the order and send us an email to get it.
8GB RAM/512MBVRAM (1GB VRAM Recommended)
Current version : 1.4 (last updated October 16th, 2014)
Review System Specifications:
Computer System:
- 2.66 Ghz Intel Core i5 iMac 27”
- 6 Gb 1067 Mhz DDR3
- ATI Radeon HD 4850 512mb
Software:
- Mac OS Mavericks 10.9.4
- X-Plane 10 Global ver 10.30 (final)
Addons
- Saitek x52 Pro system Joystick and Throttle
Aircraft
- Bombardier Challenger 300 Captain Edition by Dden Design - the X-Plane.org Store $24.95 : Bombardier Challenger 300 Captain Edition

-
Aircraft Review : Beechcraft 1900D HD Series by Carenado
Route : PAJN (Juneau, Alaska) to PASI (Sitka Rocky Gutierrez)
In the commuter 19 seater aircraft market only one aircraft stands alone... The Beechcraft 1900D. The aircraft does compete with the Swearingen Metro and the British Aerospace Jetstream. The Metro production ended in 1998 and the Jetstream also ceased production in 1993, but the 1900D soldiered on until Raytheon ended production of the Beechcraft 1900D later in the next decade in October 2002. And because it was the latest and most popular in this light commuter market, many if most of the 695 aircraft produced are still working in service with 443 examples in operations with 50 airlines or small service operators.
A good example of the type of services that perfectly suit the B1900D is ERA Airlines of Alaska (now known as RAVN Alaska). That does very short distance services (usually the average distances are up to 300 miles (480 km)) and to sometimes very short runways. Here we are going from Juneau, Alaska out to Sitka on a coastal Island in that which is a very small distance, but requires very high performance because of the high mountain ranges between the two ports.
In many ways the B1900D is a sort of hybrid aircraft, It looks slightly ungainly with such a tall cabin (to let passengers stand up the cabin) and it is the largest of the series of Beechcraft's famous King Airs. Yes the 1900D is a King Air! This is an aircraft has been stretched not only in length but also as noted in height as well. In fact the aircraft is performance wise and weight wise 10,434 lb (4,732 kg) empty - (17,120 lb (7,764 kg) Max/Takeoff) compared to the still large B200 King Air at 7,755 lb (3,520 kg) Empty - (12,500 lb (5,670 kg) Max/Takeoff) very different aircraft again, but oddly from behind the controls it looks and feels (except for the weight) the same aircraft. The only significant visual difference is that the engines and propellers are not right there in view to the left or right of the cockpit, but are here they are set well back and so you are required to look hard over your shoulder and view through the engine the rear most cockpit window.
The 1900 is Beechcraft's third regional airliner. After the very famous Beechcraft Model 18 which was a 6- to 11-passenger utility aircraft produced from 1937 to 1970, and which was used by the military, airlines, charter operations, corporations for executive transport and freight carriers. The 15-passenger Beechcraft Model 99 Airliner then replaced the Model 18 and was produced between 1966 and 1975, and also from 1982 to 1986, but was not successful as the former earlier design.
The Beechcraft 1900's design lineage is different than the Model 18 and Model 99 aircraft, but the story still began back in 1949 with the Beechcraft Model 50 "Twin Bonanza", which was a 5 passenger, reciprocating engine utility aircraft designed for the U.S. Army. A larger passenger cabin was added to the Twin Bonanza's airframe and that variant was called the Model 65 "Queen Air." This aircraft was then in turn, further modified by adding turboprop engines and cabin pressurization and named the Model 90 "King Air." Then another stretched version of the King Air was later developed and designated the Model B200 "Super King Air". Beechcraft developed the Beechcraft 1900 directly from the Beechcraft Super King Air, because the B200 was pressurized aircraft and could fly as high as 25,000ft.
Performance : Cruise speed: 280 knots (518 km/h, 322 mph) at 20,000 ft (6,100 m) : Range: 707 km with 19 passenger payload (439 mi) : Ferry range: 2,306 km (1,432 mi) : Service ceiling: 25,000 ft (7,620 m) : Rate of climb: 2,615 ft/min (797 m/min)
Once the passengers are seated and their baggage is stored in that huge cavern of a baggage hold, you can shut all the doors and start the engines. Once the right temperatures of the engines are correct and the flightplan on the GNS 350 GPS is verified, you are ready for clearance and departure. One thing you notice is that if you move the tiller the front steering wheel does not turn? Only when the aircraft has movement can you turn in the direction you want to go. My guess (and it is a guess) is that the aircraft is too heavy on the wheel to turn it standing still, but requires the movement to allow the tyre not to grip so firmly. Once moving however and the tiller is quite light and you can turn in quite a tight circle. Taxiing you can keep the throttle at idle and still have the right pace, but that pace is ideal in that it not fast or too slow, but you do need to give the aircraft a little shove of power to turn any tight turns to the runway.
The size of this Beechcraft in that it is in one respect small for an airliner but big as a large GA machine and that does have a significant effect on the performance were the weight is concerned, If the aircraft is half full at say around 13,000 Ibs the 1900D will on power up will simply burst out of the starting gate like a jackrabbit on heat. You will need a little forward pressure to keep the nose down as well, but the performance is staggering from those mighty two PT6A-67D engines, of each are rated at 1,279 shaft horsepower. But go to Max weight at around 17,000 lbs with a full load of 21 people aboard and all their luggage and a big fuel load and the effects are highly noticeable.
The aircraft does not turn into a ponderous beast (although it should). But you certainly feel the effects from the two seats at the front. The 1900D will take in far more runway to get the speed it requires and when it lifts you don't accelerate or climb nothing like you did when when it was significantly lighter. So you have to adjust your flying skills to the moment. I do as in most aircraft like this, I only give the throttles usually only a slight push until I have the air and the control of the tail feeling from the rudders and only then do I give the aircraft its full power. Power up from the start of the runway will mean you will fight the aircraft a little until finding the control, and this is very noticeable in the 1900D, certainly when it is heavier and it will track more straighter. But that rudder control is needed from the start.
Once in the air and the aircraft climbs like a freight train pulling 20 carriages behind it, It feels so powerful and the torque is simply overwhelming. At a light weight and you can easily climb at the recommend 2500fpm (feet per minute), It just goes up and up and you can be at a high 20,000ft (25,000ft ceiling) easily within a short distance from your departure point and still with the speed needle static in the whole ride up to the heavens. Full weight and 1500fpm to even 1800fpm is still easily achievable as the aircraft just leaves those peaks below and down there in the distance. But you still have to ride the engines on the soft side, I found that heavy it is best to aim at 180kts and not to push your luck too far past that performance. Even when leaving terra firma you need to find that nice spot just under full throttle that gives you the required push, but will not also over strain the engines. Get that right and the aircraft is simply perfect. In many ways the 1900D does feel like the B200 in that way, but with better performance and feeling more powerful.
The aircraft feels better heavy than light. It has a sturdy feel and is more balanced. Once the trim is fine tuned the aircraft feels very nice through the yoke and the turns are very sedately, and you feel the movement of the turn only when looking at the regions around you. In a way you would think when that for an aircraft which is really a compromise it shouldn't really fly like this but it does... More lighter the 1900D is, then the more jiggly it feels... but you feel the speed far more effectively as well and the aircraft is closer to the B200 to fly at this end of the scale.
A new feature on the B1900D is the "Scroll" wheel, of which you can adjust various items in the cockpit if you have a scroll wheel on your mouse, a gesture mouse will work as well, If you don't want to use the feature you can turn it off. personally I didn't like it, just grabbing the item with the mouse and moving it is in my mind still quicker, but many would love it and I am sure it is a worthwhile feature (I didn't like the colours it created in the cockpit as well?). On the trim you can either move the trim wheel or move the trim switch on the yoke, the effect is the same and the choice is yours. The speed dial has great set bugs for maximum speed and Vrev takeoff speeds or flap and minimum speed settings on landing, and they were very handy for with the different weights you are carrying.
The yellow "Master Warning" light on the glareshield can annoy you... pressing it does not solve anything as it is only a warning and not a significant problem (That's the red one next to it!) When you start up you will find both pitot tubes "heat" are not on, so you can fix that by flicking the switches, The "engine-auto to on" switches are the same. The battery can take time to recharge itself if you use an amount to start up the aircraft from cold, so that warning glares at you for ages (the B200 is the same). The one that does confuse you is the "Autofeather"? The autofeather sync switch is on but the warning will flash? only when you are airborne will the "Autofeather" sync and the warning lights will turn finally green. My point is you will look around to find switches to turn off to kill the warnings, but they go off automatically once they reach their right condition. In the mean time you have this warning light flashing in your eyesight worrying you have not set something correctly.
The aircraft comes with the latest GPS GNS 530 system (X-Plane 10.30 is required) and it is again glorious in an aircraft like this. It pop's out for setting and using. The autopilot (AP) is the same as the excellent one in the C90 and the B200 and it pops out for the ease of use. Although the AP arrangement is the same with the autopilot panel situated on the pedestal. You also have a push button version right in front of you on the main panel. This is a great change and even means you don't have to use the pop up all the time... but you can not change the heading or the vertical pitch rate from here.The pop up AP can still also be made smaller or larger which really helps when flying and if you need it on the screen at that period in time. The autopilot is part of a system that is called the EFIS or Electronic Flight Instrument System by Rockwell Collins, which includes the Electronic Attitude Director Indicator (EADI) & Electronic Horizontal Situation Indicator (EHSI) and the altitude selector. All three work together as one system that in effect gives you a very comprehensive automated flight control system, That is although complex it is very easy to use and here in the 1900D it is very effective.
In doing short service sectors like from PAJN to PASI the aircraft this aircraft is unparalleled. You have the huge amount of power to climb quickly and then the speed to get to your destination quickly. With also the GNS350 and Autopilot tools at your disposal flying the aircraft is excellent even if you want to switch off all the aids and fly the aircraft manually. Views out are excellent with brilliant reflections (you can turn them off if you want to) making the aircraft very realistic from either of the two front seats.
Again that odd feeling that you are flying one aircraft in the B200 is shown in the oddness that the panel is the same, but certainly it is not. Because the B200 (right) panel looks far more empty than the 1900D panel, no doubt the workhorse environment of the 1900D shows how much more equipment is required. The most significant thing that I didn't like is the artificial horizon on the B1900D is very dull, and that shows how much here ( I tried the adjustment knob under the ADF and this is still at full brightness?).
The aircraft can fly out of and land on short runways. But at maximum weight you would have to check if the runway is not too long or short and would a compromise be required? Stika's runway (11/29) at 6483ft does not give me that problem, but it is worth noting.
There is a speed warning at 140knts? noisy and trilling it notes not the speed but that the undercarriage is up? If you want to rub off the speed and set the flaps down a few degrees you can't do that unless you lower the gear... your choice is to lower 17º of flap at 150knts, but you will lose speed in the drag right down to 135knts and will have to put up with the noise and until youcan power it up again over the 140knts noise limit with the flaps now set. The 17º limit is still set a lot higher at 188knts, but be warned that the stall speed on the 17º is only 92kts so you have to be prudent with your workflow and not lose too much speed with the drag.
With great balance you can use 35º of flap (under 150knts) to get the best approach speed of around 120knts. And try to use the flare in not bouncing the aircraft too hard on a landing which is very easy to do, so your throttle to yoke control here has to be quite skilled to get it just right.
Once down on the runway then pull throttles right back in the gate to activate the reverse thrust which is highly effective and will push you forward into the seatbelts with their powerful thrust. Your landing distance is really reduced significantly once they take effect, which is highly needed in airports like PAJN - Juneau because there is high terrain on both sides of the runway and in many cases you touch down a long way down the runway, mostly when coming in from the North on RWY8, Then a taxi to the terminal and is quite easy to a shut down of the engines.
Carenado HD Series B1900D
The B1900D is the largest aircraft to be released by Carenado for X-Plane to date. But all the qualities that signify the aircraft from Carenado are not at compromised here in any area. The B1900D is superb in quality and features. The work is simply outstanding in every area. At this level of design and delivery you don't really look at the aircraft as simply a reproduction of an airliner, but in most respects more of a clone of the real thing on a computer screen. Walk around the machine and you would be seriously hard pressed to find any fault. Nothing has been compromised or poorly executed... It is quite simply perfect. Textures are 4K which means high-Definition (HD), and they have a depth of quality you only dreamed of a few years ago. The textures have been highly processed to give the highest quality to the best frame-rate in performance.
Detailing is highly commended from items smaller than you can imagine on an aircraft of this size to the intricacy of the undercarriage assemblies, I love the part front plate that covers the top of the retracted nosewheel and when on the ground has the hole for the taxi light to shine through. It looks brilliant in the day but amazing at night. The huge Hartzell composite four bladed propellers are beautifully reproduced and have volumetric side view prop effects that are highlighted by the HQ digital stereo sounds are recorded directly from the real aircraft. Yes the 1900D sounds great, highly realistic and will send you almost deaf if you play these 3d sounds at high volumes like I do on my bose sound system.
The aircraft comes with three tabbed menus on the left lower side of your screen, bottom to top, the first (A-Autopilot) is the pop-up EFIS panel that I usually close by clicking the menu again and rather than closing it by the close/cross on the panel itself... It is far quicker action that way.
The second menu tab is the (O-Options) that gives you your main options menu. The first two options cover the window and instrument reflections. The third is the static elements that includes "remove before flight" tags, engine inlet covers, wheel chocks and removes the pilots from the cockpit. The next three options allows you to open and close doors in the Cockpit door, main external passenger door and that large baggage door. The last option is to switch on/off the mouse scroll feature. The menus to a point are quite simple but are highly effective and efficient.
The top and final menu is the (C-Camera) or views menu. This is the standard Carenado views menu that also has a built in zoom slider. The standard X-Plane menu system is better for me around the cockpit, because I can set my views up to the same key in points with every aircraft I fly. The X-Plane key default is however not quite as good when you get out of the cockpit and here the menu view options are far better to going very quickly to the rear cabin and for the multitude of external views. You can also adjust the sound here as well.
B1900D Cockpit
The B1900D cockpit is certainly the most comprehensive cockpit from Carenado they have produced yet for X-Plane. As note above in that I thought the B200 cockpit was quite detailed and highly loaded with flight instrumentation, but this aircraft is levels above again. The detailing is simply overwhelming, and everything works and switches just like the real Beechcraft. When the aircraft is cold you find yourself admiring the full set up and how realistic it all really is, the instrument reflections alone are simply staggering. Can you realistically expect any aircraft to be better than this... that is a big ask and I don't think any other aircraft in X-Plane can deliver this sort of quality.
The panel really has the same set up as most King Airs, but it feels like everything is beefed up for the aircraft to be used as a more larger workhorse than the the private/executive aircraft of the smaller King Airs. The standard six instruments are well presented, but the Rockwell Collins EFIS or Electronic Flight Instrument System and the EADI & EHSI here take the places of the artificial horizon and the heading indicator. The airspeed indicator, and the RMI (automatic direction finder) is on the left and the altimeter and Vertical speed indicator (VSI) is on the left. Above is the Collins autopilot button panel and below is the propeller sync switch.
The standard twin sets of King Air of gauges set down the right of the main panel and they cover the engine ITT (*Cx100) - (Interstage Turbine Temperature), Torque (FTLB x 100), Prop - RPM, Turbine % RPM, Fuel Flow and Oil temps.
Central panel there is that great GNS350 dominating the central panel and a AVIDYNE Entegra EX500. This unit is very good but also limited in application. The COMM panel is above and has a nice touch in "Avionics by Carenado" signed on it and two engine fire handles set out top of the panel. Below is the ADF and IDENT tuners and the final part of the EFIS system in the altitude selector which shows a zigzag alert below 10,000ft and none above and a warning alert light.
On the co-pilots side the instruments are almost a mirror of the pilots, but has an oxygen outlet pressure gauge instead of a Collins slew selector. The main warning lights are set in a panel on top of the glareshield.
Both of those beautiful yokes will disappear at a touch of their bases, the pilot's center hub has a chronometer function and the co-pilot's has a round clock. The left lower panel is focused on the electrical/power systems and Ice protection (anti-Ice) switches.To start (engine-auto to on) then flick up the "Ignition and Engine Start" switch for each engine to start the start sequence which will take a fair while before they churn noisily into life. The "engine-auto" start switches are already switched on and the warning lights will note to turn them off once the engines are running. Note the warning light "pitot heat" switches are here as well. Right lower pilot's side of the panel is also the undercarriage knob and indicators. On the co-pilot's lower panel are the environmental, temp and oxygen switches and gauges, with also a "bones of mercury" vacuum gauge.
Centre pedestal is a work of art in design with (twin) Throttle with built in "Go around", Prop (feather) and Condition/fuel cut off. Flap lever in "up - 17º - 35º" settings, lower/side of the pedestal is the ailerion/rudder trim knobs and wheels. You have a set of instruments set at the top of the pedestal that are standard KIng Air in the Flap position, Cabin Climb (pressure) and Cabin altitude. Above the gauges are a banks of warning lights and alerts. Lower pedestal is the radio and main EFIS controls, and a very welcome set of cupholders for coffee!
On the right side of the pilot is the fuel panel gauges and backup fuel pump switches, the panel is quite simple in operation and is again pure King Air in function. At night it looks excellent.
The darker side of life
All lighting is controlled by the switches and knobs on the overhead panel. The lighting systems are very effective, flexible and certainly very impressive with HDR switched on. The panel is simply gorgeous in that faintly blue colouring and the above spot lights will twist and focus to your hearts content. You can get away with HDR off here, certainly you lose the spot light and feature functions, but the basic lighting is still very good because it is so flexible via all those knobs.
In the rear passenger cabin it is again a wonderful place to be, both in the daylight and at night. And again the detailing is so overwhelmingly good.
Outside lighting is just as good as the internal systems.
The tail lighting at night is excellent, and so is the ice lighting on the wings. There are two landing lights each side of each engine and two "RECOG" (Recognition lights) right out on each wing tip, they are more effective however as extra landing/taxi lights as they illuminate the edge of the runway/taxiways. strobe lighting and Nav/beacon lighting is also excellent and there is a taxi-light on the front wheel support. Lighting spread is very good on the ground and finding your way around taxiways to the runway is a breeze.
Night operations are highly realistic, the aircraft is very easy to use around the airport and looks very good when parked or waiting for passengers... A small tip is to leave your landing lights and recog lights on to help the passengers board if you are on a dark ramp, but watch your battery levels!
Effects
Carenado are always polishing and enhancing their aircraft and effects... here is just one example in the rain/ice effects.
Raindrops splatter on the windows, and if you turn on the wipers the water is swept away. Note that they are as real on the outside as from the comfort of the cockpit.
Put the power up and as you speed up the droplets then get smaller, or bigger if you are landing? clever stuff. The pilot's have regained their motion again after a few pilots in the last few Carenado releases were more static, they look up and down and also glance around at the engines, which is very realistic. Their salary and food requirements however are still quite high, Pilots are still pilots and they are still expensive to employ to fly your aircraft as those costs come out your own pockets.
Liveries
The aircraft comes with a set of liveries that have very fancy names... AzureWisp, BlackGold, BlueShark, OrangeWisp and SwissAir the white/blank is default.
There are six extra airline operator liveries that you can download from the Carenado site once you have purchased the aircraft, and these include - ERA, Air Canada, Air NewZealand new and old, Next Jet and United Express.
All liveries are exceptional in detail and design, the 4K textures help here as well.
Summary
Carenado notes the minimum requirements to use the B1900D and they are a "MultiCore Processor with 2.6 Ghz or faster - 4gb RAM - 3D video card with at least 1gb". The aircraft does demand a powerful computer as it is highly complex and dense in what it requires to be processed. But this is not in the way you think it is. Most frame-rate issues usually stem from processing the graphic overload of textures and the requirements on the X-Plane simulator itself. But that is not the issue here. In most cases I used the 1900D well under my graphic limits of 512mb at usually around 365mb when flying the aircraft. The HD textures here are highly processed to be as frame-rate efficient as possible, in fact they are the very best out there in quality and efficiency.And the actual aircraft as been processed to take advantage of X-Plane 10.30 features that can reduce frame-rate with objects that can be disabled when they are not in view, it is noted as "Dynamic loading/unloading of 3D parts and plugin logic for FPS optimization". It is very clever stuff and without both of these enhancements then aircraft of this nature would not be as efficient as they are. But the B1900D does still require a machine that has a lot of computer grunt. more so if you run a large monitor size in pixels. There is also a lot of similarities with the other King Air's in Carenado's HD series. If you struggled with power with them then the 1900D will be a little bit better but not by much. I found a common issue was the panel lighting across all of the King Airs that hurt my frame-rate and I don't have the power to over-ride that (strangely it issue does not effect other Carenado aircraft?). but that is not saying the aircraft is bad in this area, if fact the opposite is true, the aircraft is the best yet in this heavy loading simulation with the demands of X-Plane features as well, so it does require the power to run it, If you have the minimum requirements then you will have no issues.
Certainly if you only have 512mb and a slower machine you will have to make compromises in your X-Plane settings or screen size... But that does not mean you can't use or fly the 1900D, as it is still a very, very worthy aircraft to have in your hangar.
In quality and as an investment then you really can't go past the Beechcraft 1900D. At this price it is simply a bargain in what quality and features that you receive. As a simulation it is a level and size again above other Carenado aircraft and they were already impossibly good. The aircraft is powerful and is full of very clever features to put a smile on your face anytime you fly it, It has the GNS530 GPS as standard and that great Rockwell Collins EFIS system in that if you have flown any of the other Carenado King Air's you will feel totally at home here as well. The design and outstanding workmanship is the very best on offer in X-Plane at the moment, so are the HQ digital stereo sounds and visual lighting and it all comes with an aircraft performance that will take your breath away (well for a regional airliner anyway).
Again X-Plane as a simulator is highly enhanced with an aircraft like this, It shows how really great the simulation is now achieving in quality and features and also feel. The B1900D is just simply brilliant and is the best investment you can make for the future and in having the very best aircraft to fly._____________________________________________________________
The Carenado B1900D HD Series is now available from the X-Plane.Org Store.
Price is currently US$34.95 : Get the - B1900D King Air HD Series - Here.
Included in the package is:
5 HD liveries - 1 HD Blank Livery
B1900D Emergency Checklist PDF - B1900D Normal Procedures PDF
B1900D Performance Tables PDF - B1900D Reference PDF
B1900D EFIS X-Plane PDF - B1900D EVVI X-Plane PDF
Recommended Settings PDF
Documents and Install, Download is 302.10mb, that is unzipped into your General Aviation Folder (or if you have one a Regional Aircraft folder) of 676.70mb. Extra liveries are 223.30mb and the full installation is 970mb. The aircraft will only fly in X-Plane version 10.30.
I also recommend to download this Raytheon Beechcraft 1900D-Limitations pdf. It has excellent B1900D aircraft performance limitations and operating limits.
Raytheon_Beechcraft_1_00D-Limitations.pdf
Developer Site: Carenado
Review By Stephen Dutton
9th October 2014
Technical Requirements:
X-Plane 10.30+. Windows XP/Vista/Windows7/8, Mac, Linux
MultiCore Processor with 2.6 Ghz or faster - 4 GB RAM -3D video card with at least 1 GB
Version 1.1 (last updated 8th October 2014) Includes the Service Pack 1Review System Specifications:
Computer System:
- 2.66 Ghz Intel Core i5 iMac 27”
- 6 Gb 1067 Mhz DDR3
- ATI Radeon HD 4850 512mb
Software:
- Mac OS Mavericks 10.9.4
- X-Plane 10 Global ver 10.30 (final)
Addons
- Saitek x52 Pro system Joystick and Throttle
- Bose - Soundlink Mini
Scenery
- Final Frontier version 10.2 by Tom Curtis (X-Plane Store $24.95) For a full overview of the updated "Final Frontier" by Tom Curtis then go here:Developer Update : Final Frontier version 10.2 by Tom Curtis
-
awesome looking a350 livery and the plane its self
 flight factor developed this plane so well could yall make a Kuwait airways livery for the a350 please
Yes I really love that carbon livery... There is no Kuwait Livery on the list, as I have checked. So you might have to request that on the .Org.


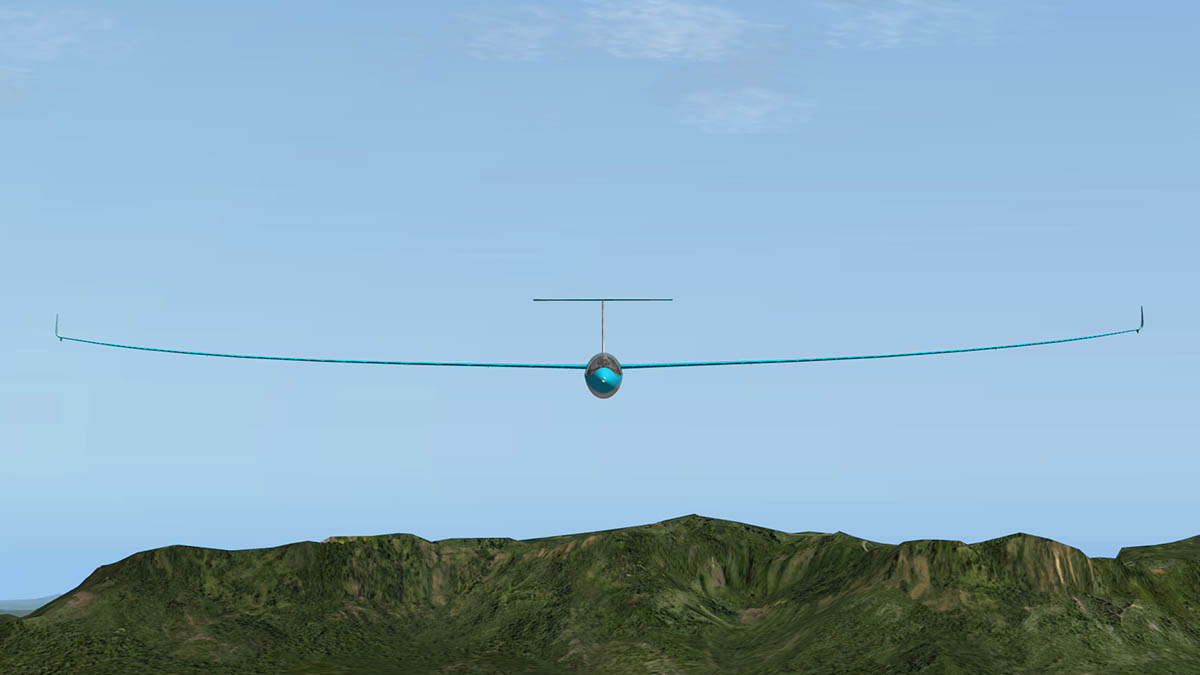


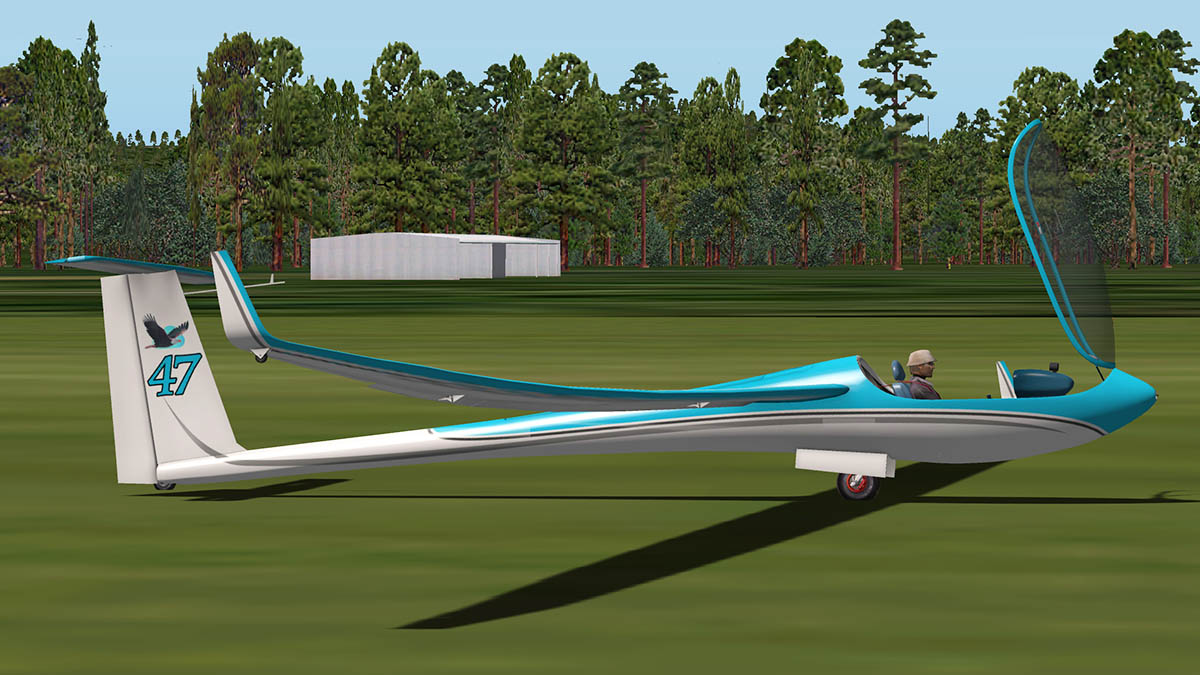

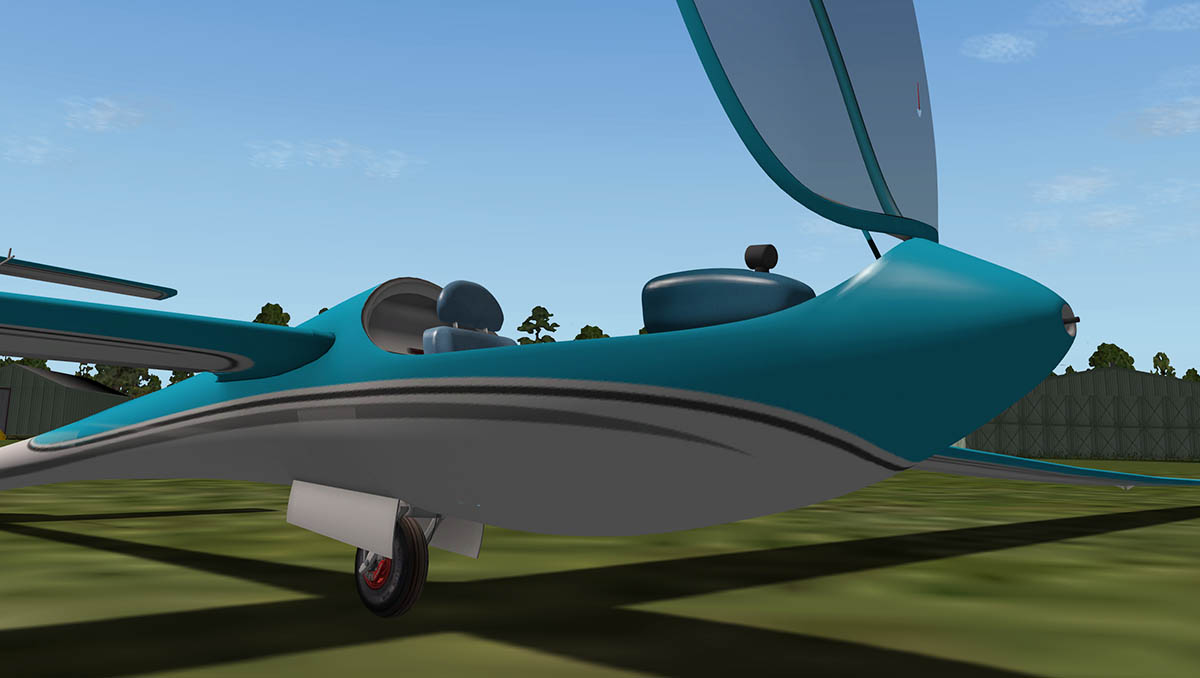


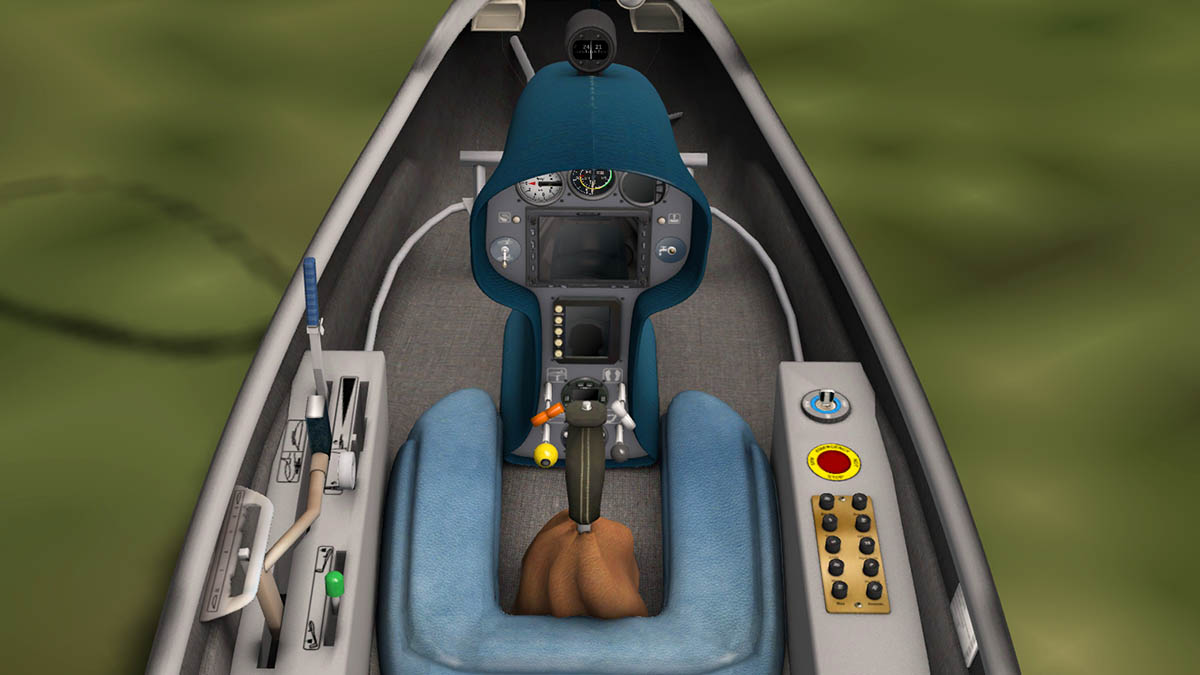


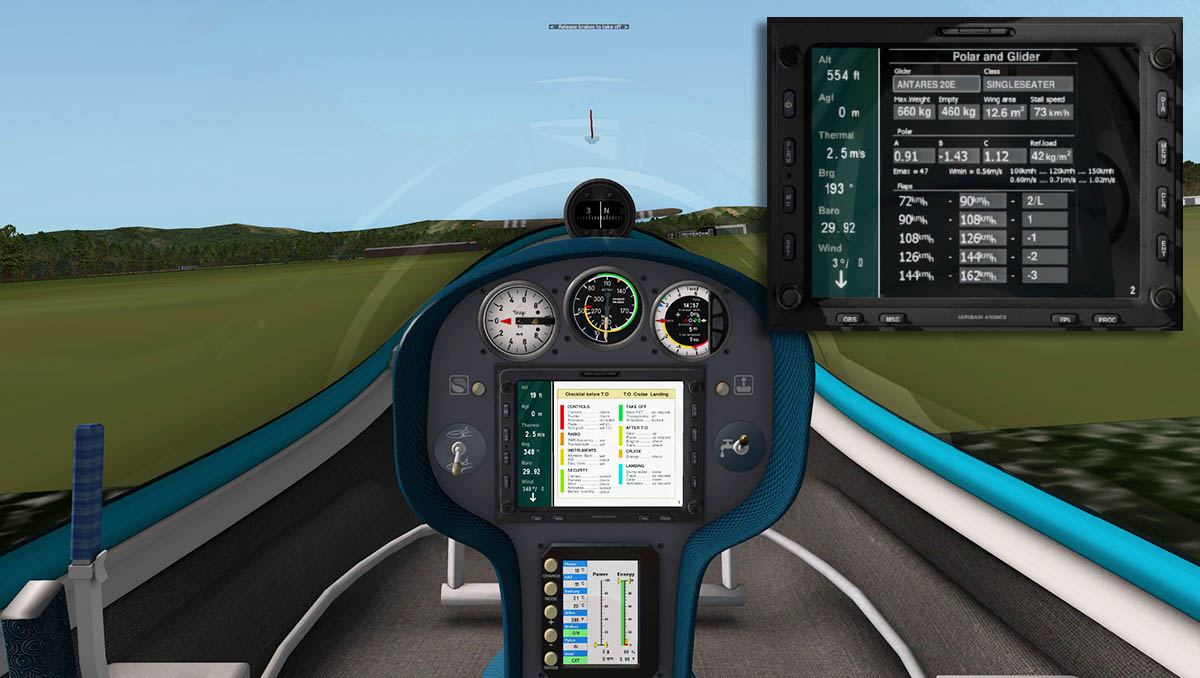

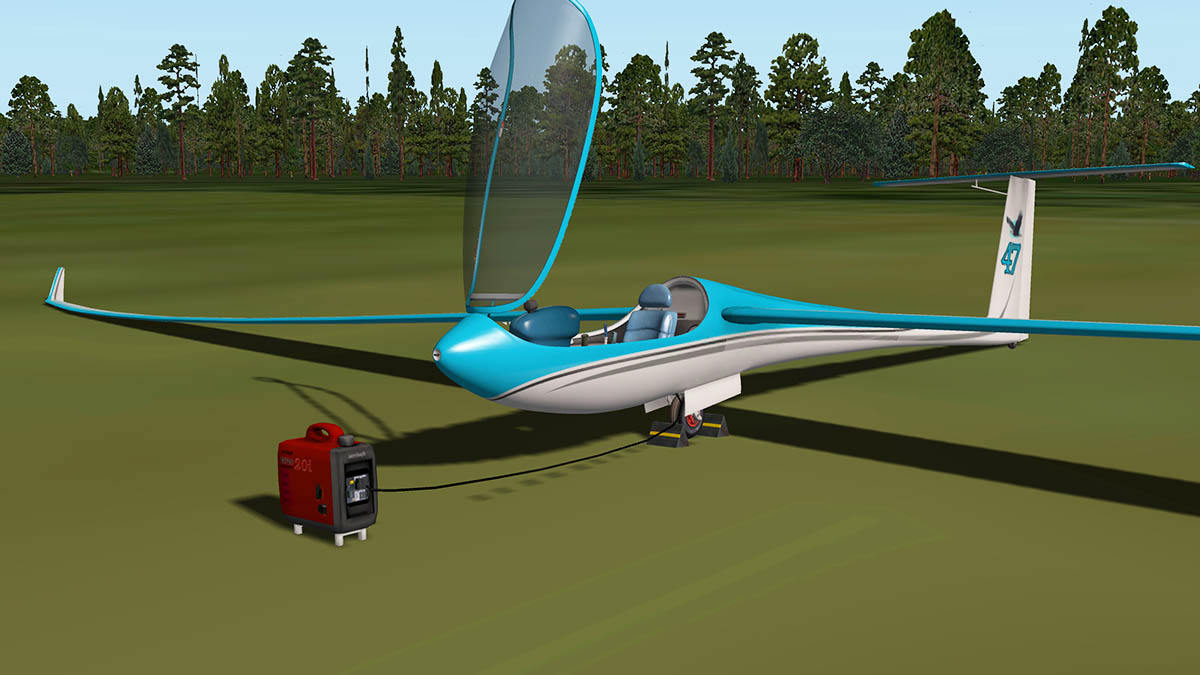
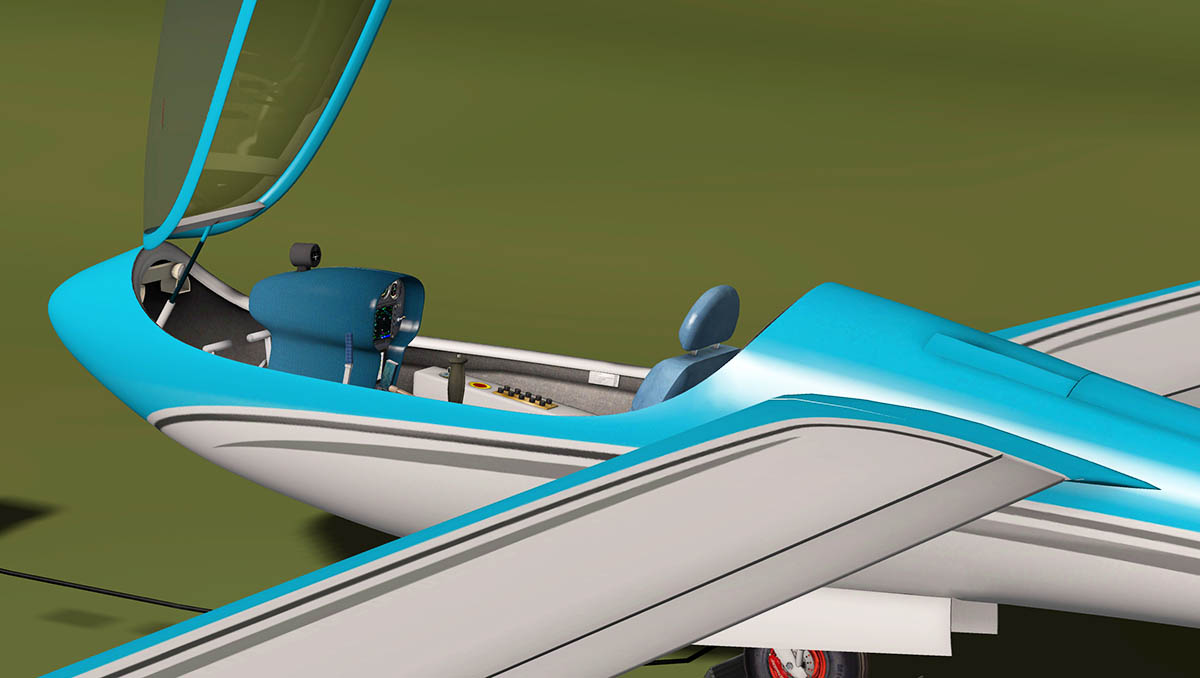
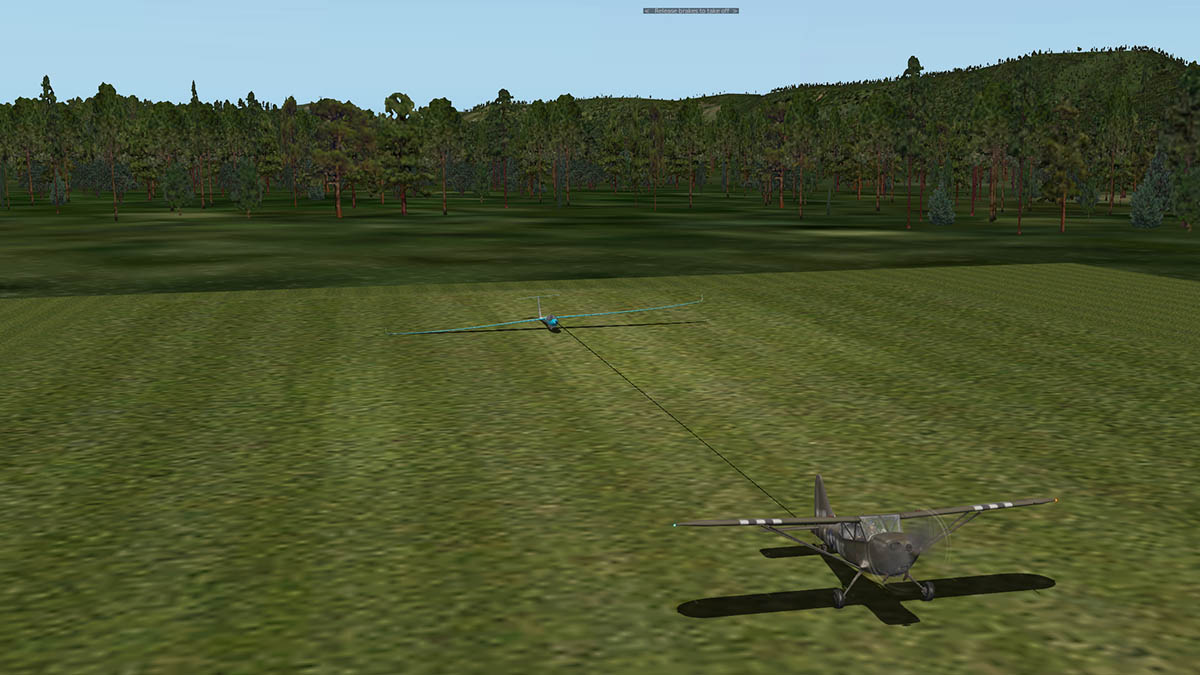
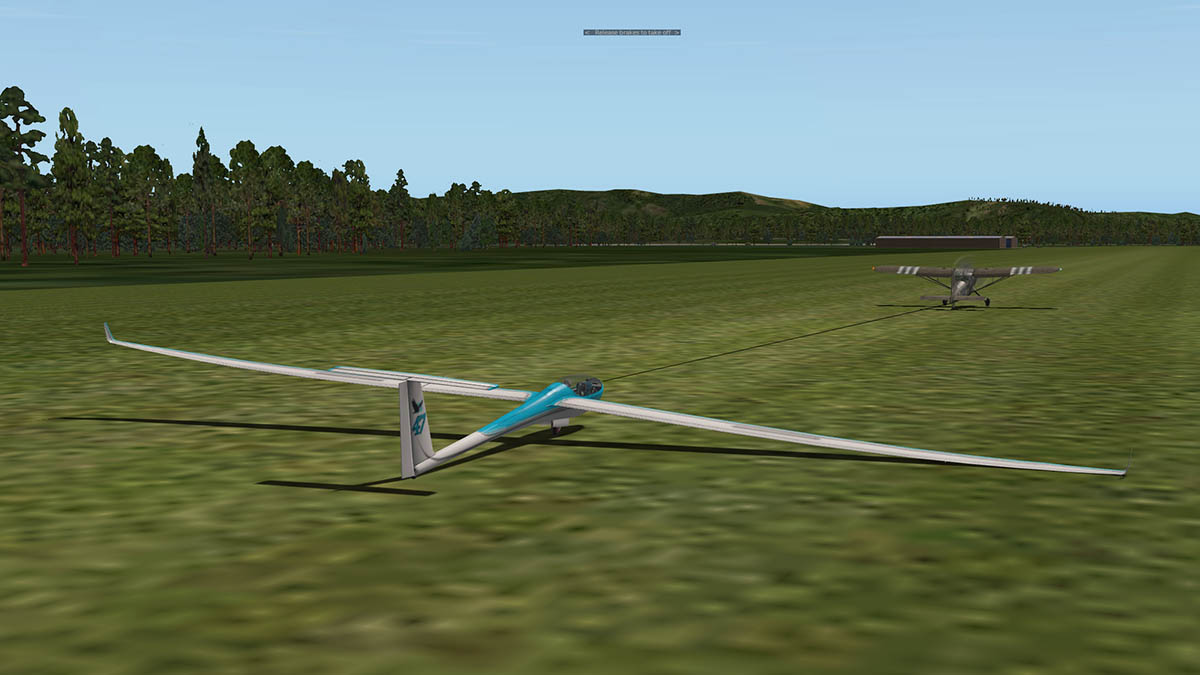
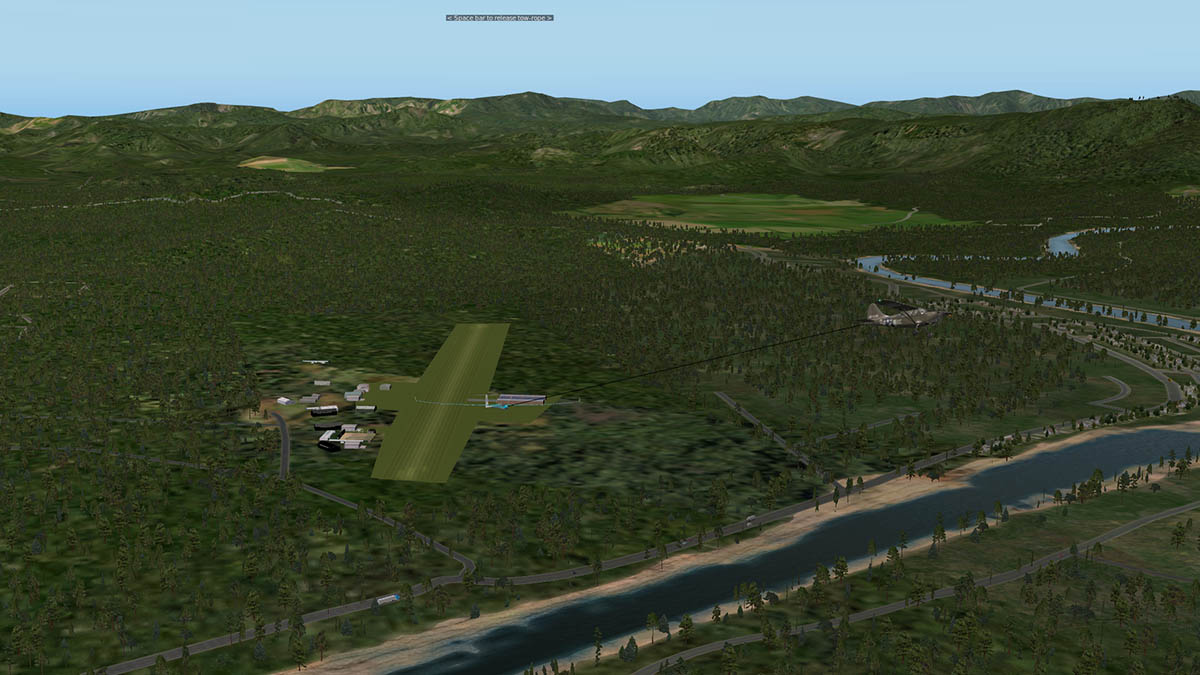
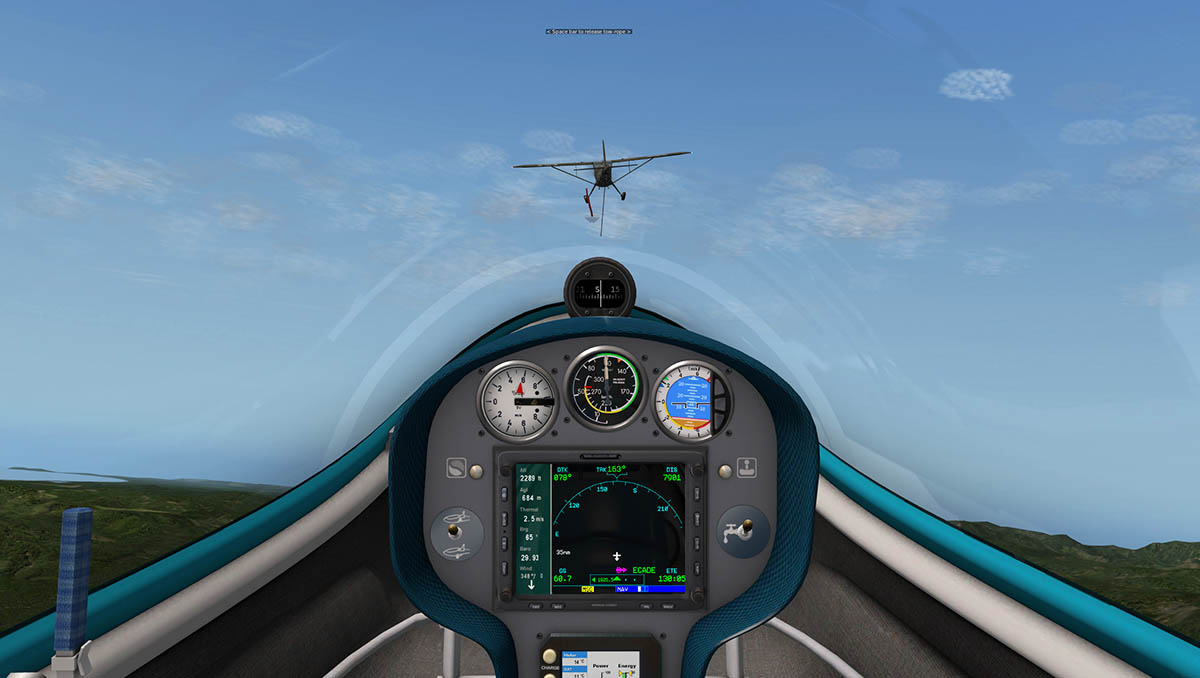


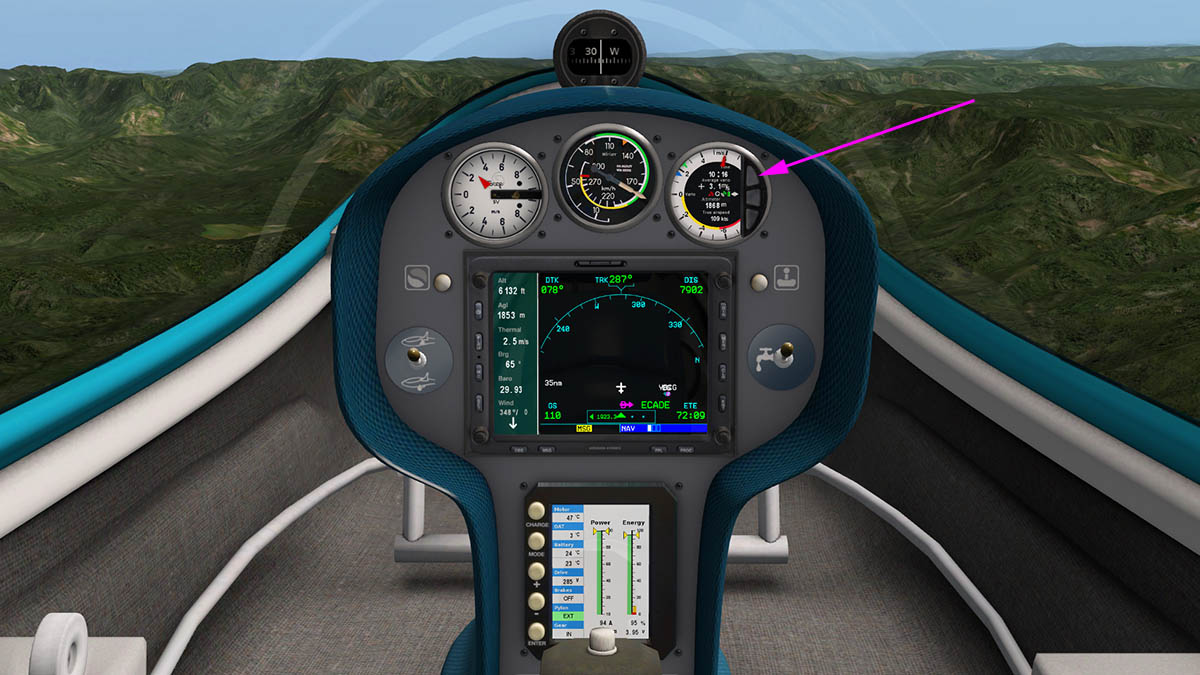


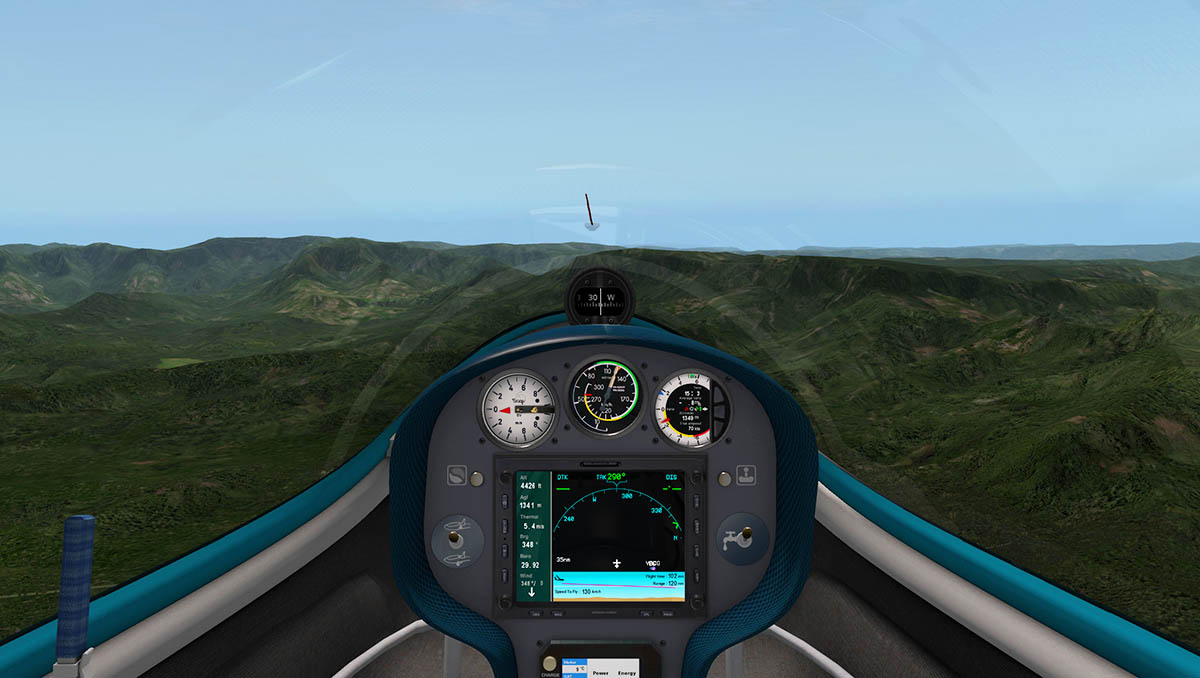
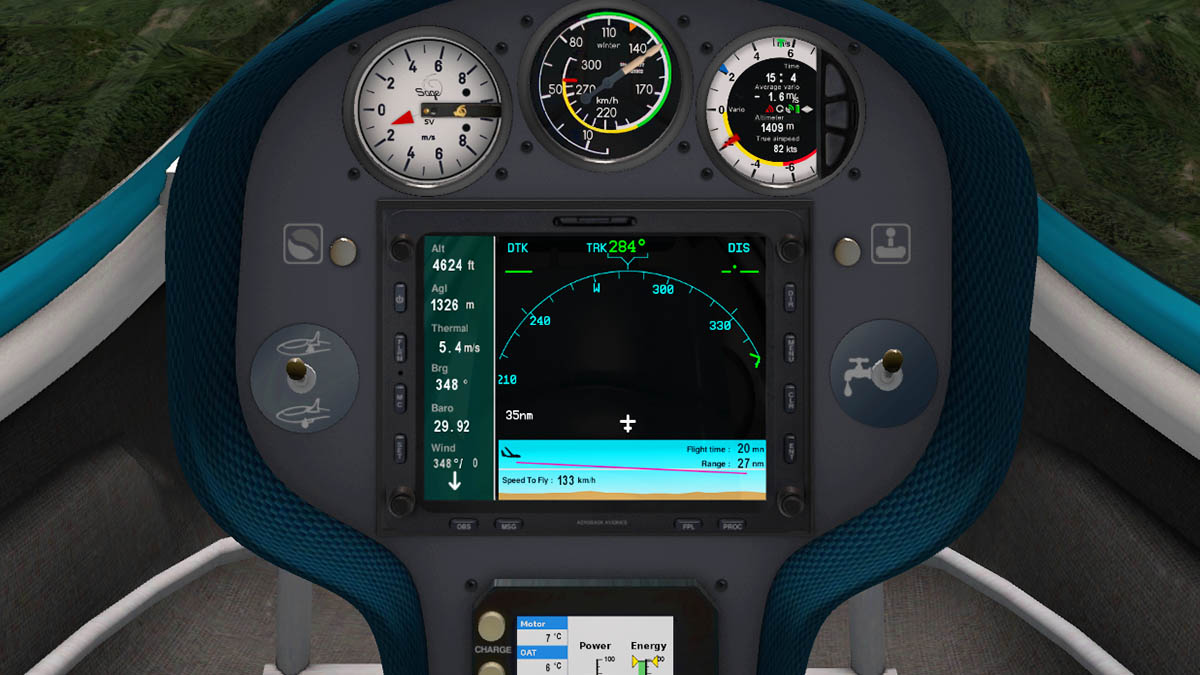
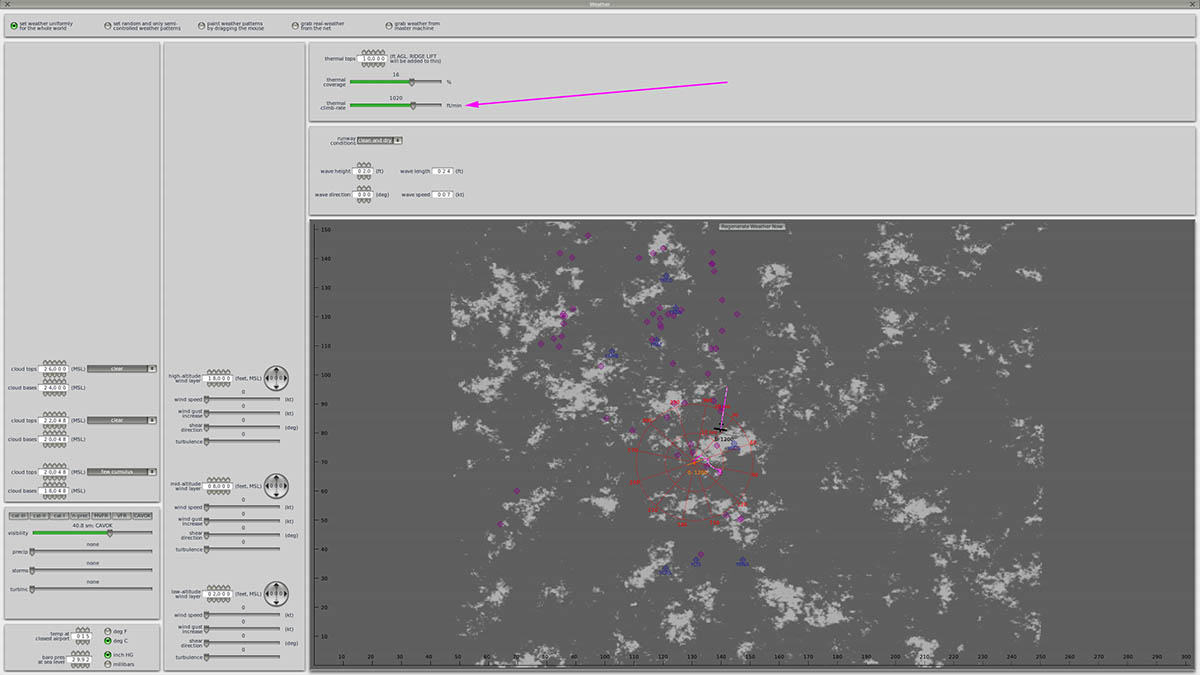
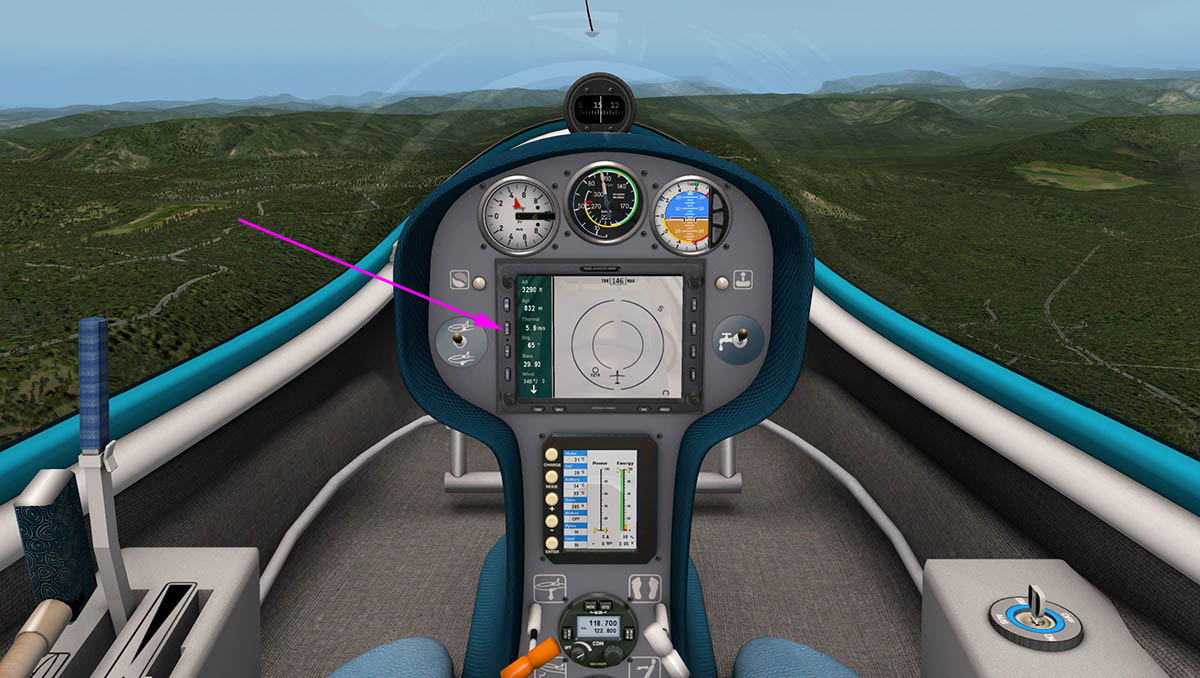
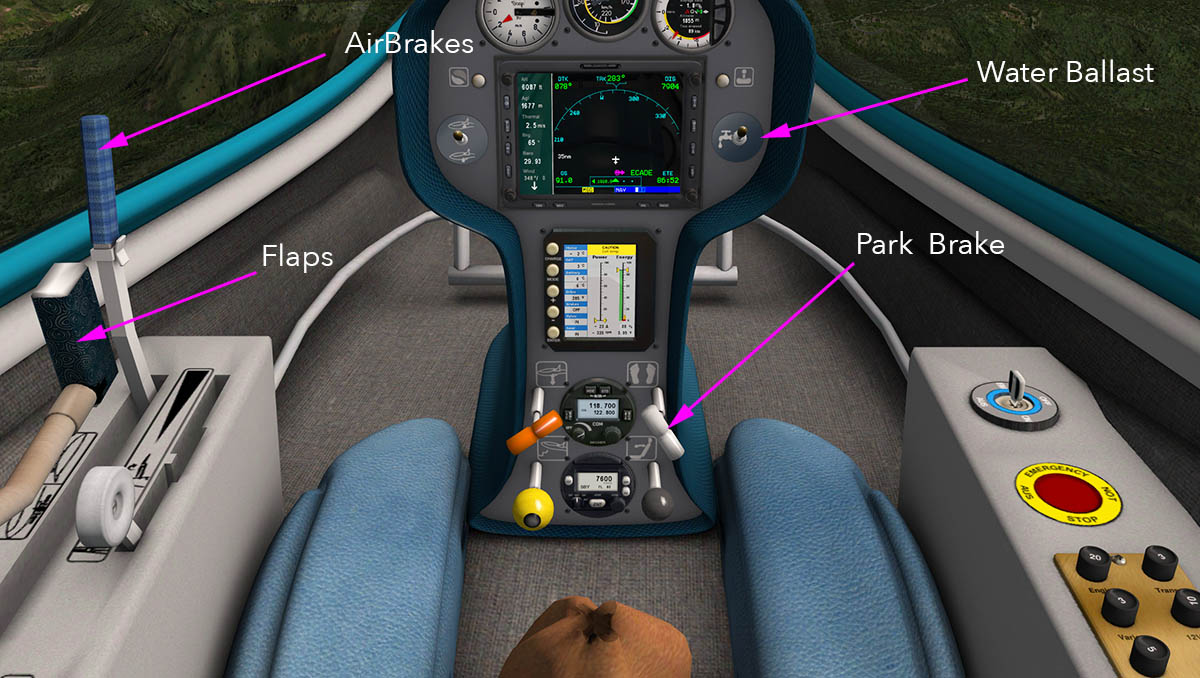


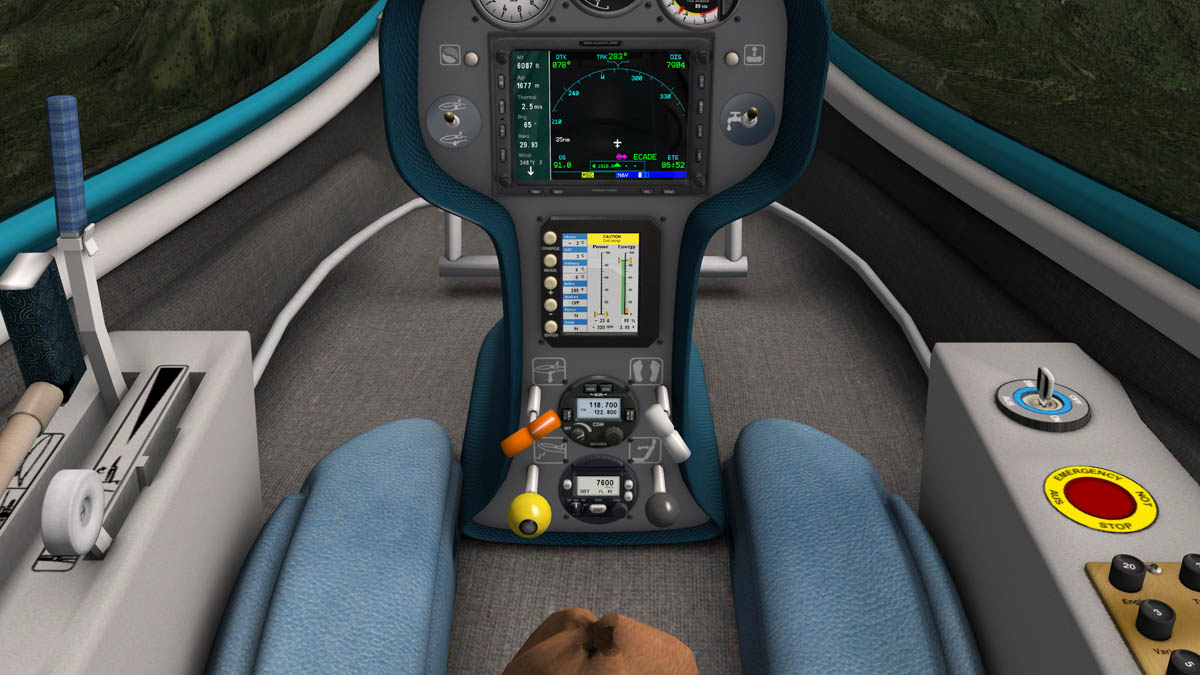
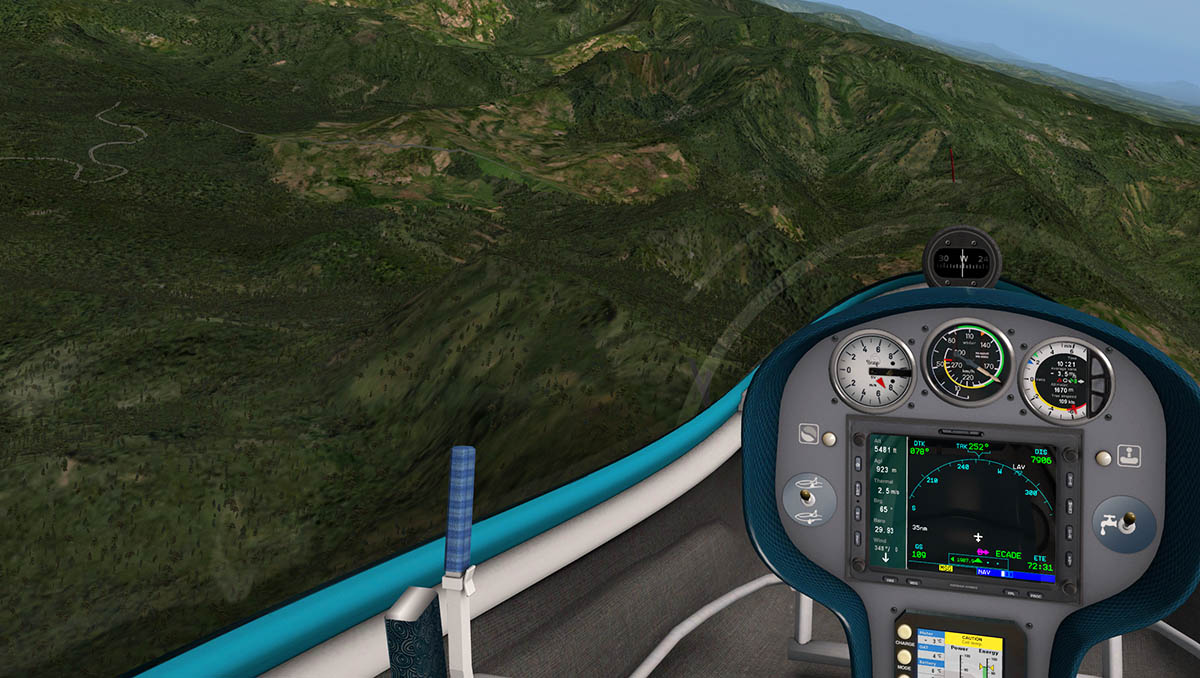


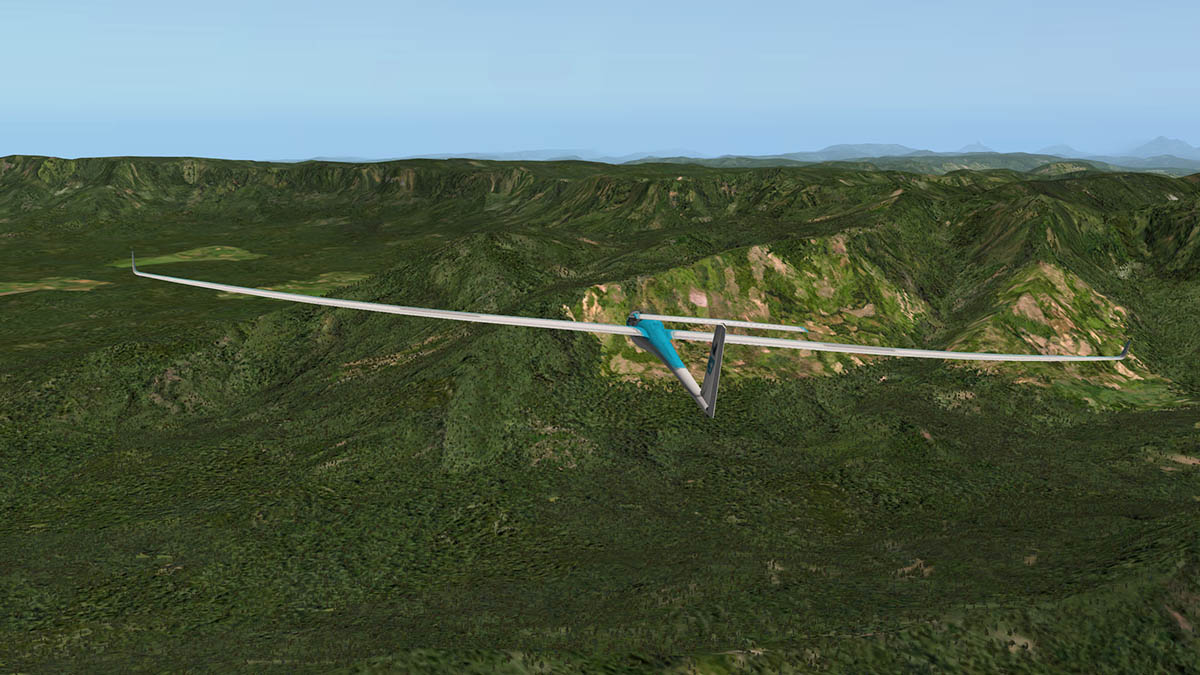


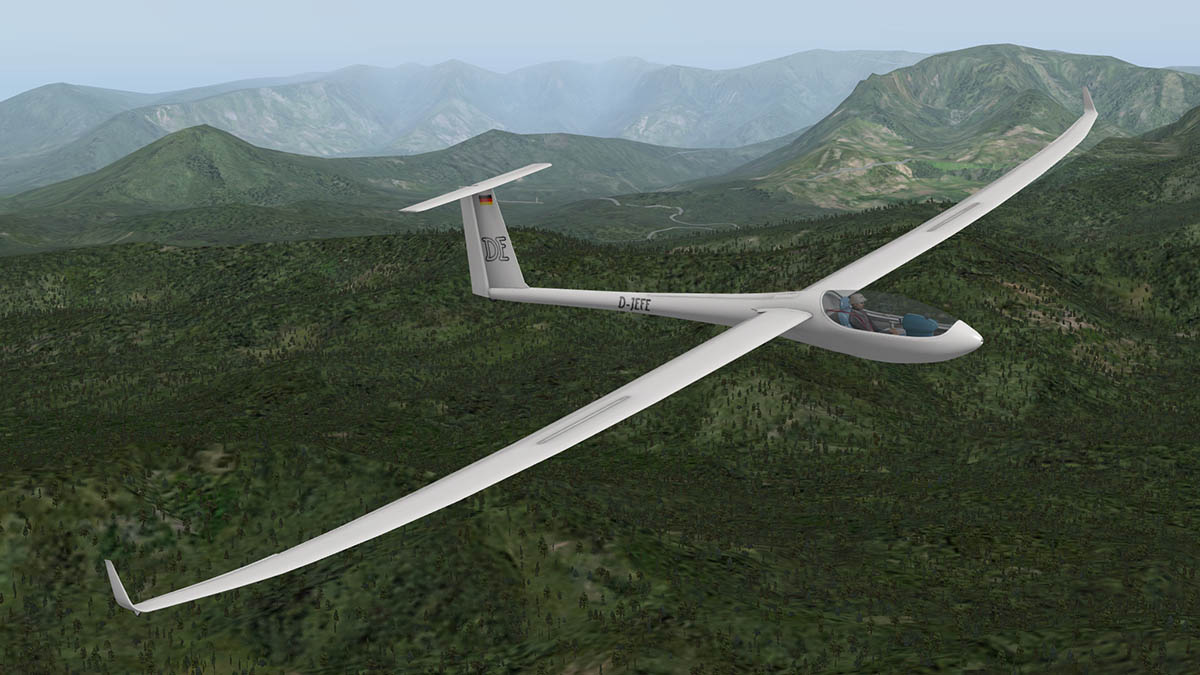
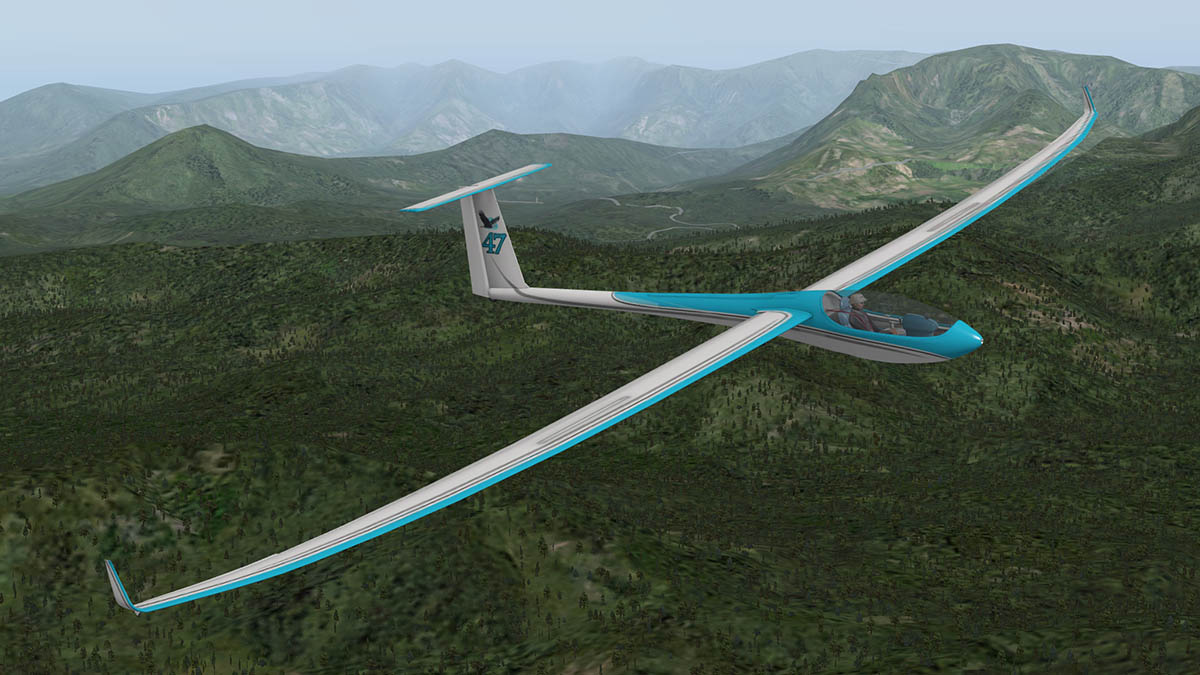
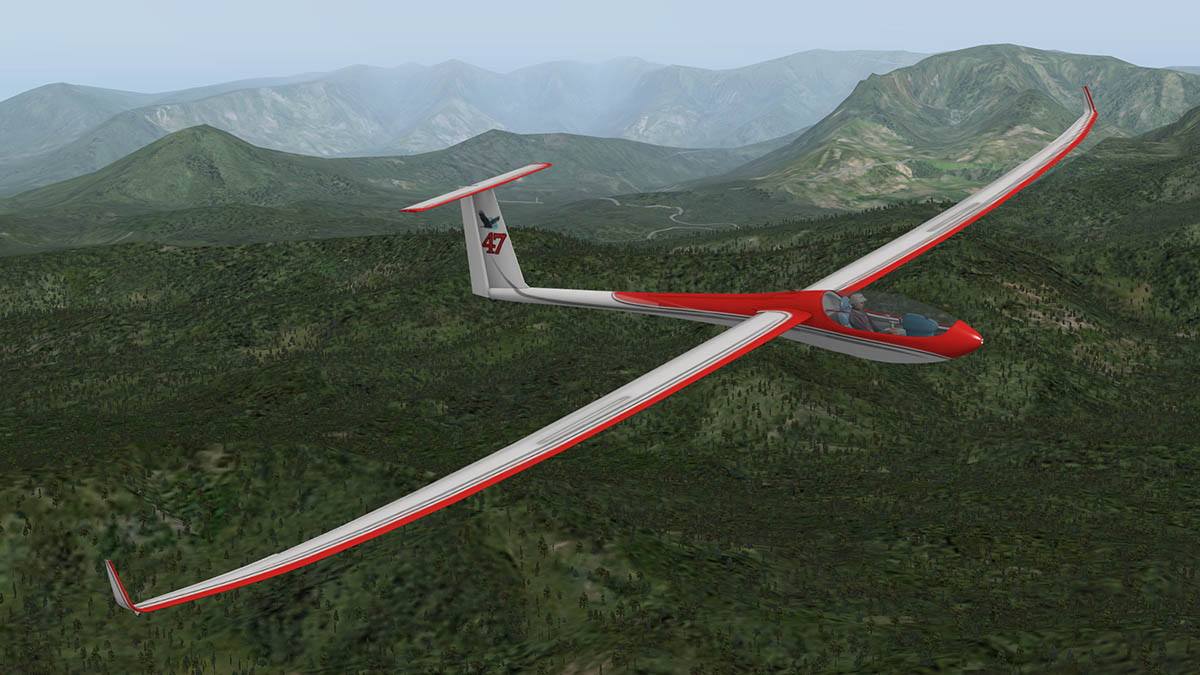
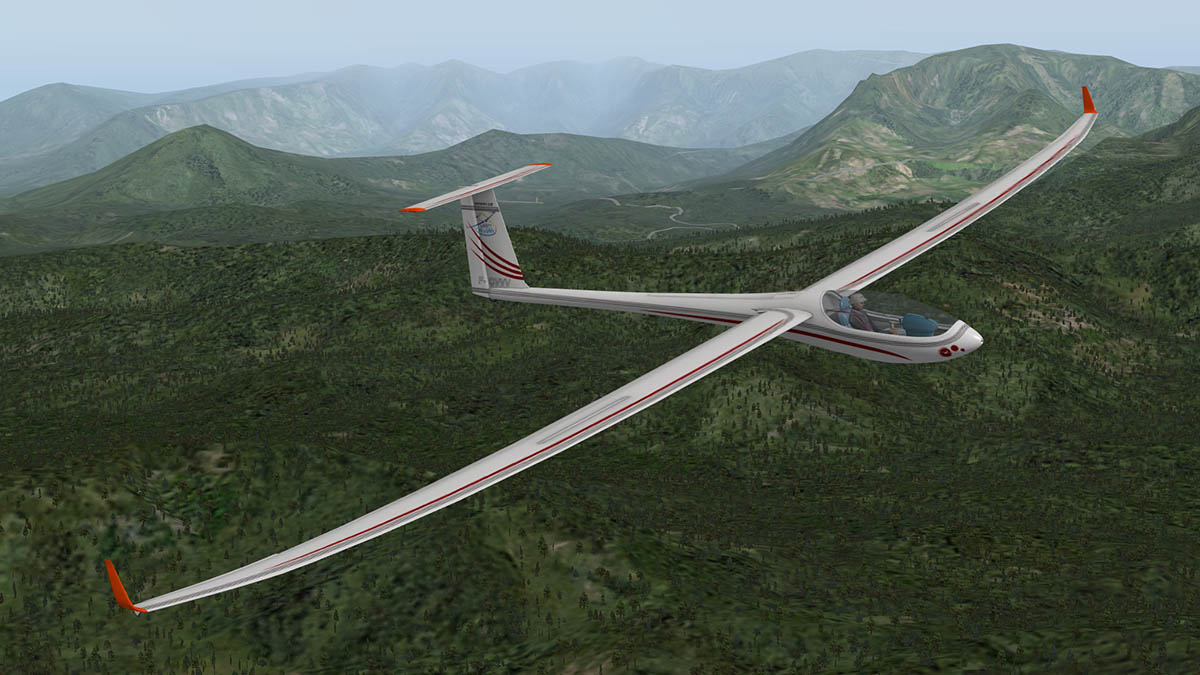


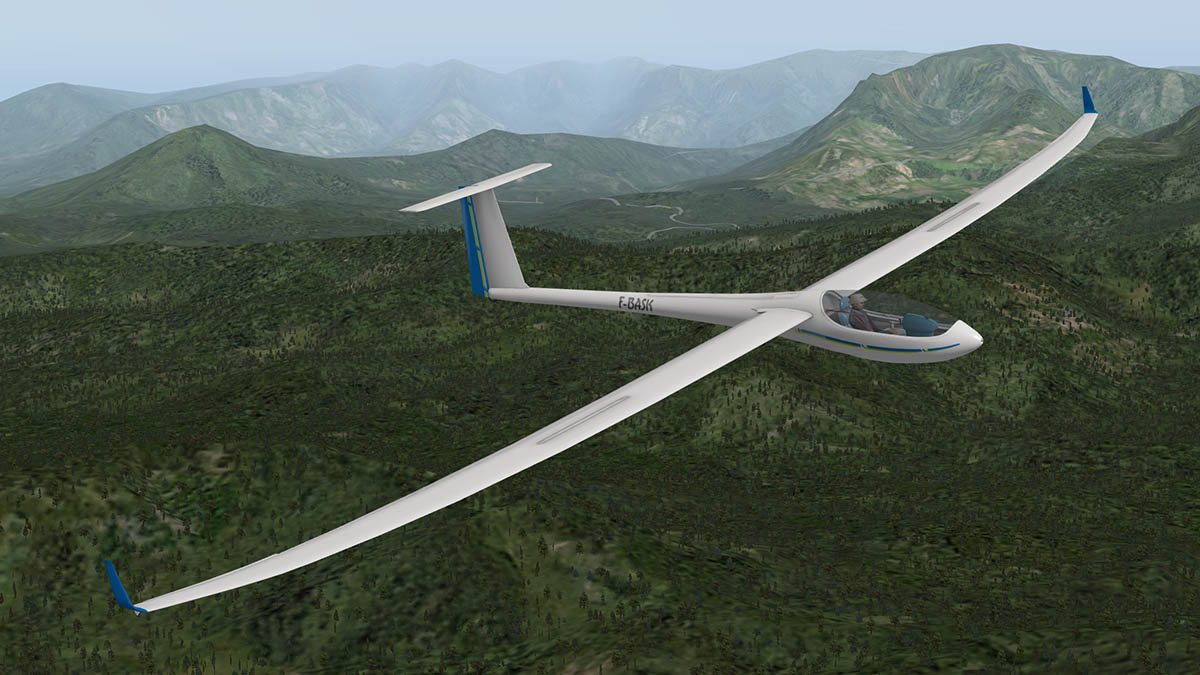
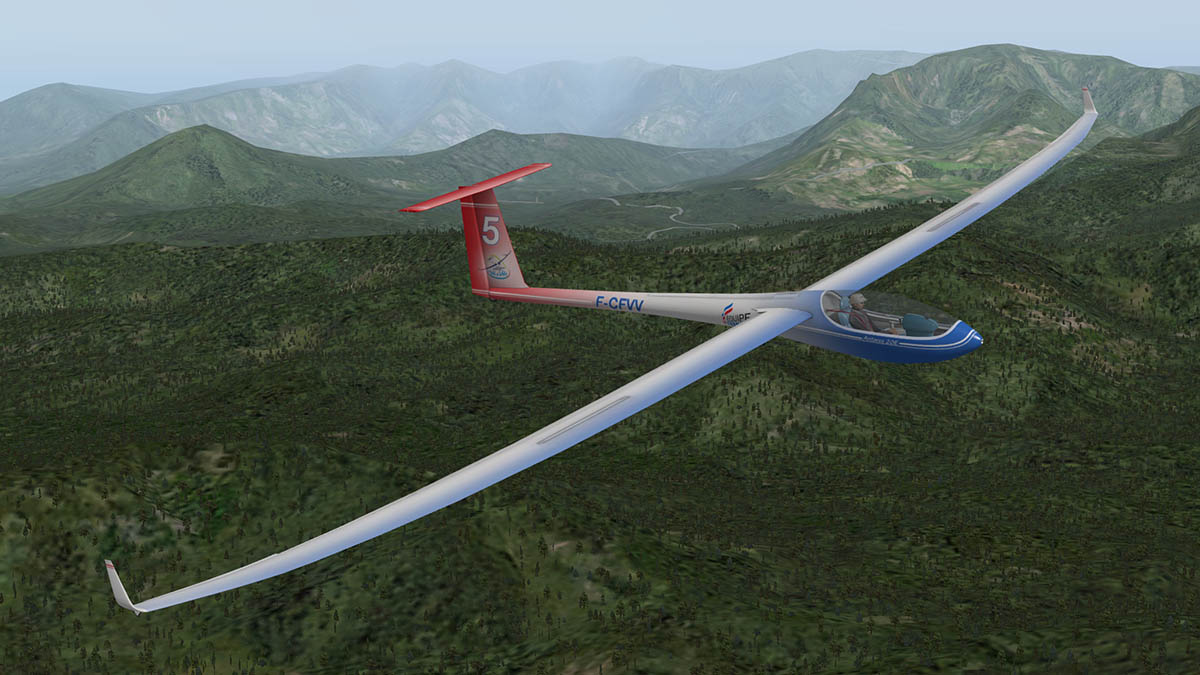
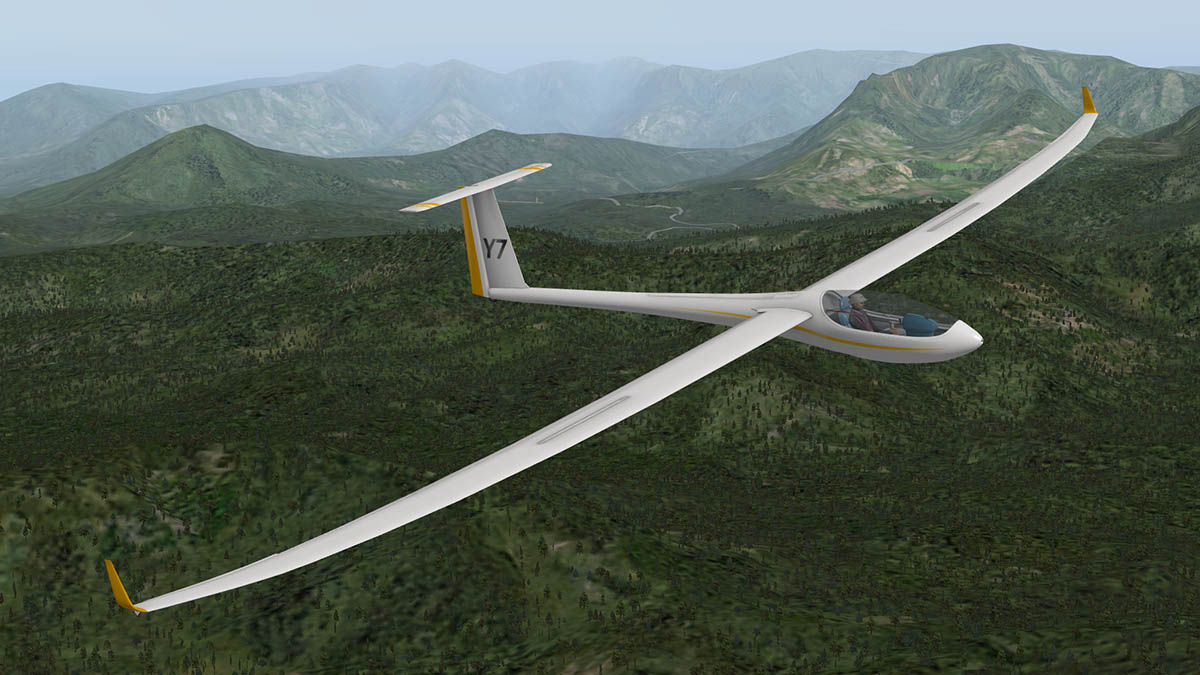

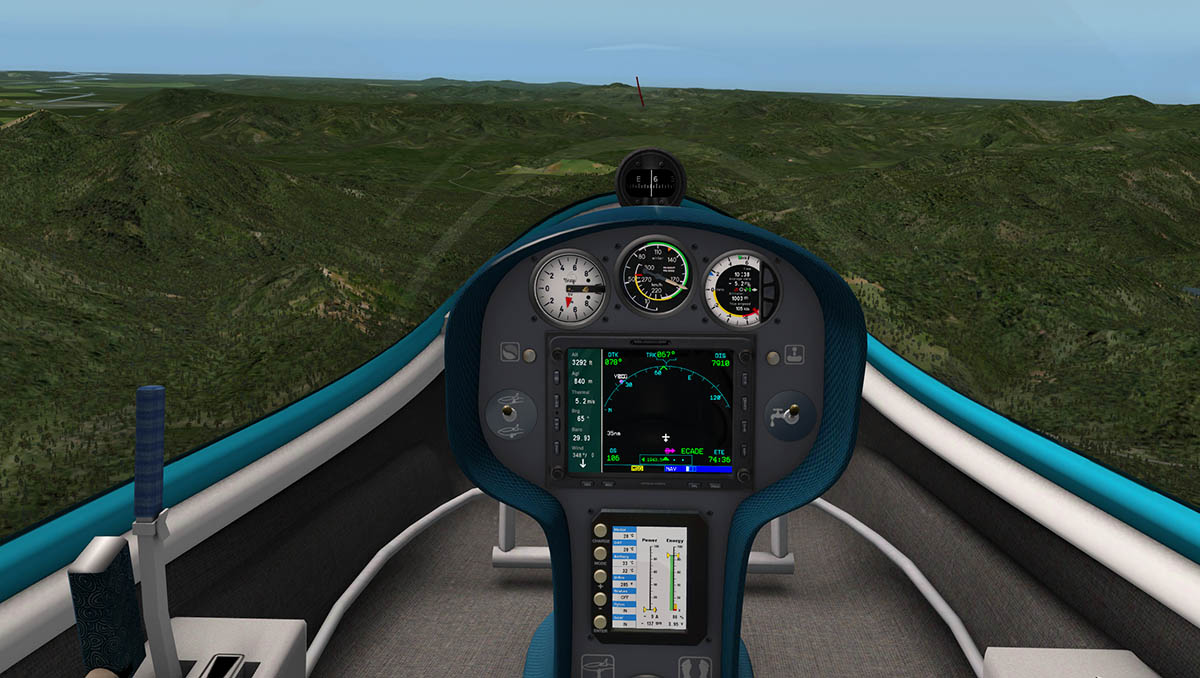

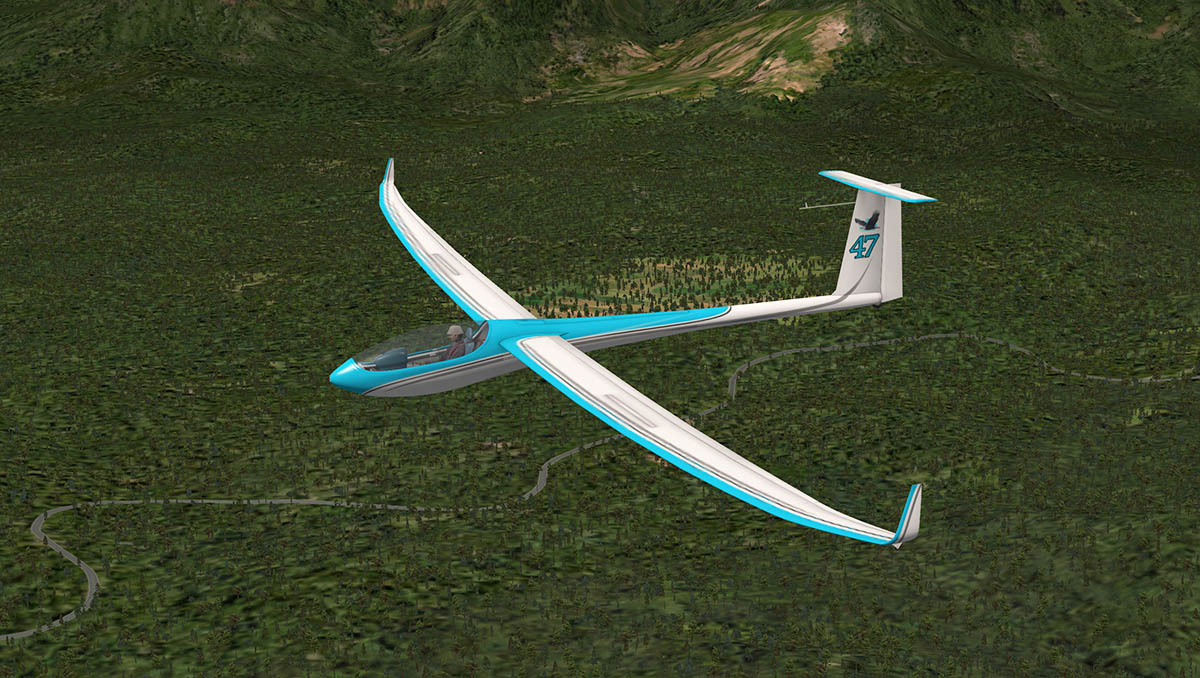


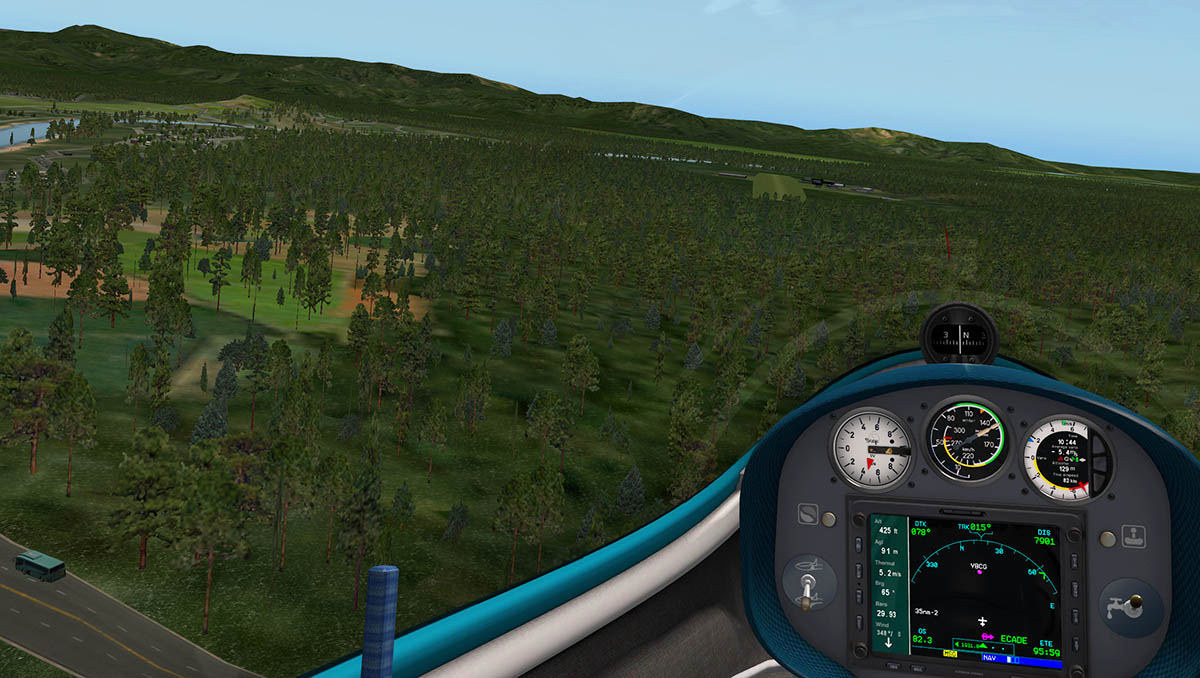


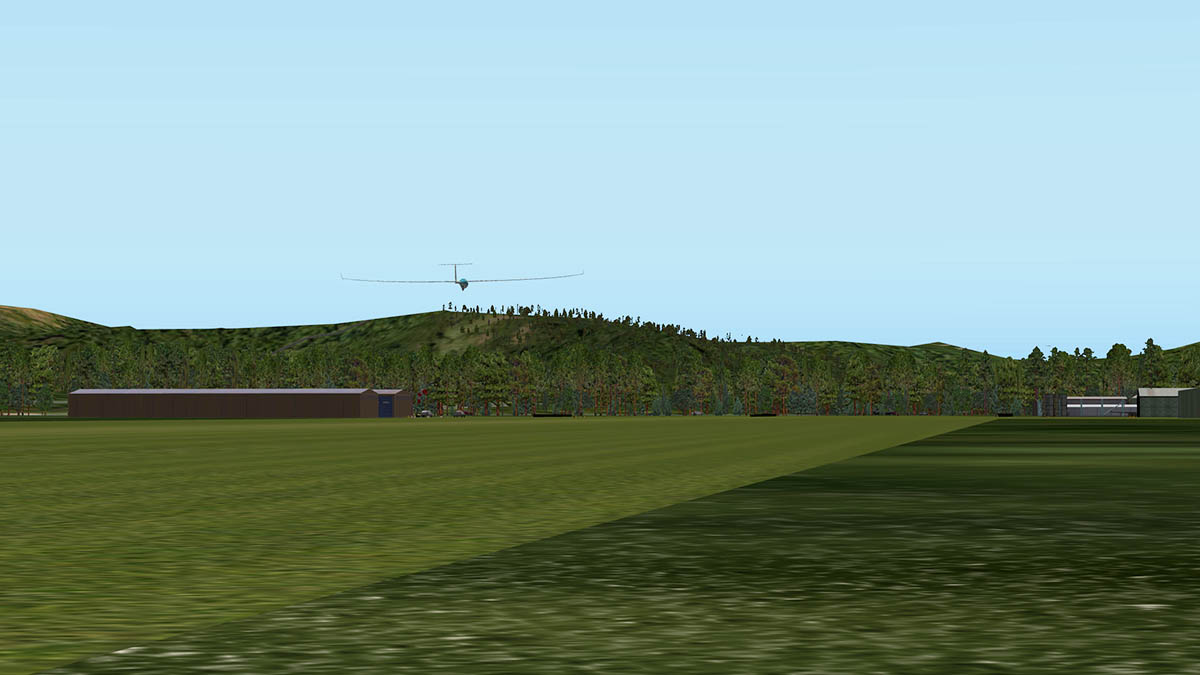
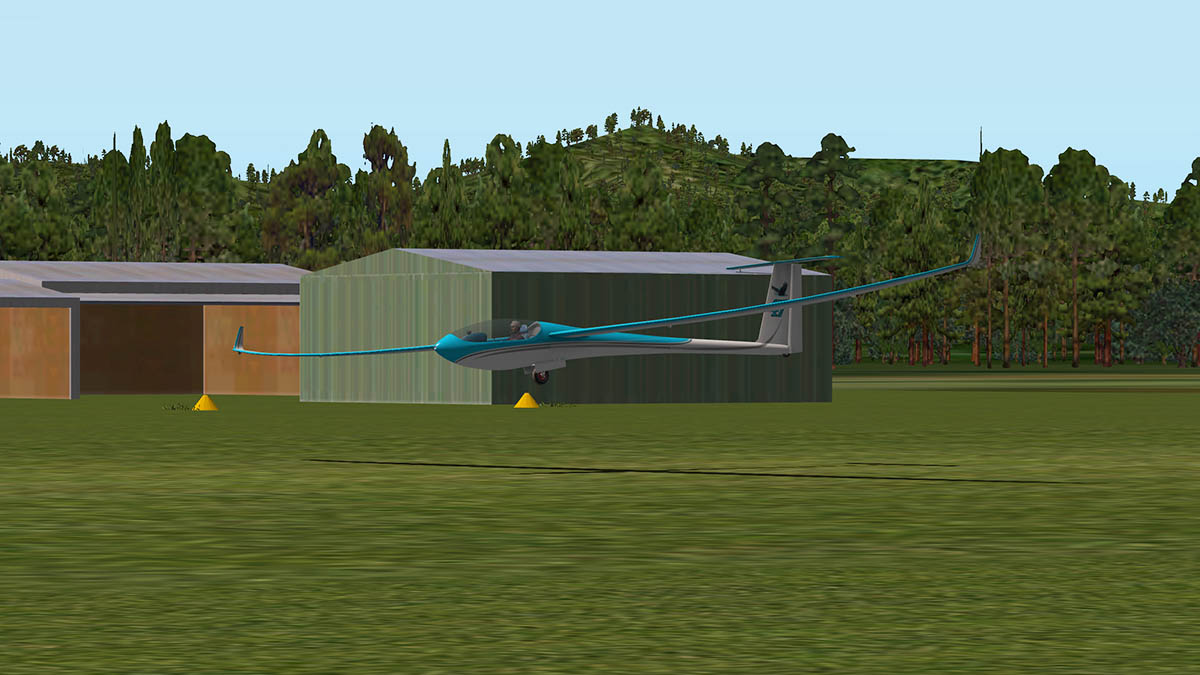
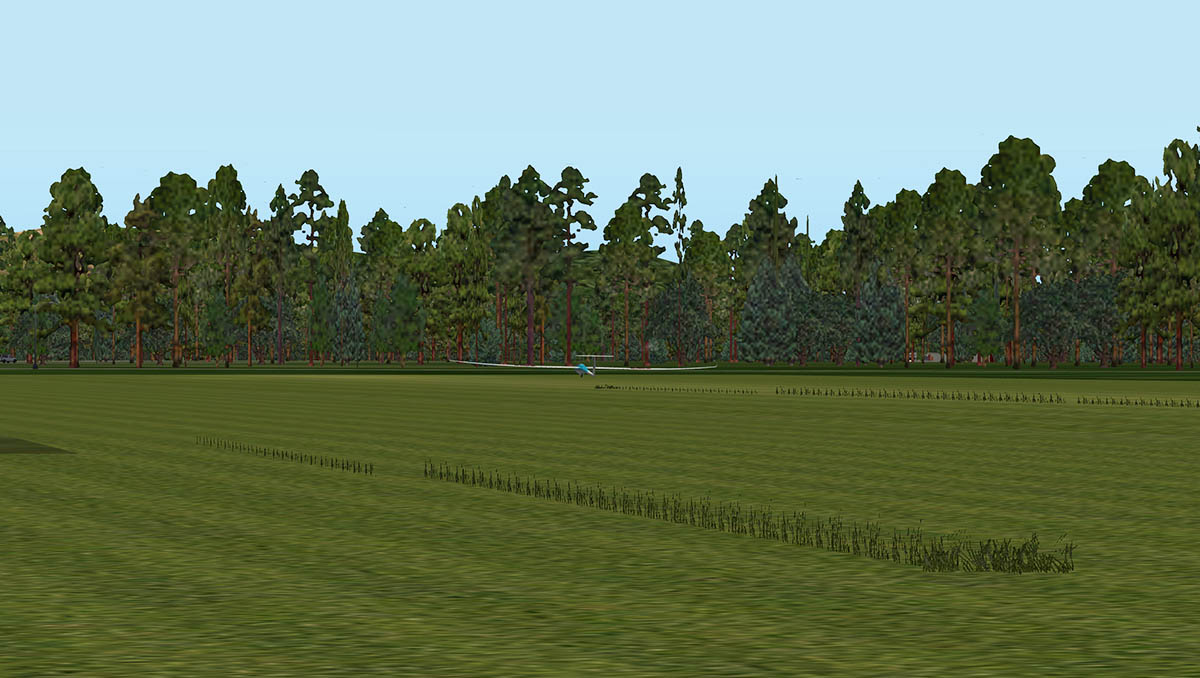


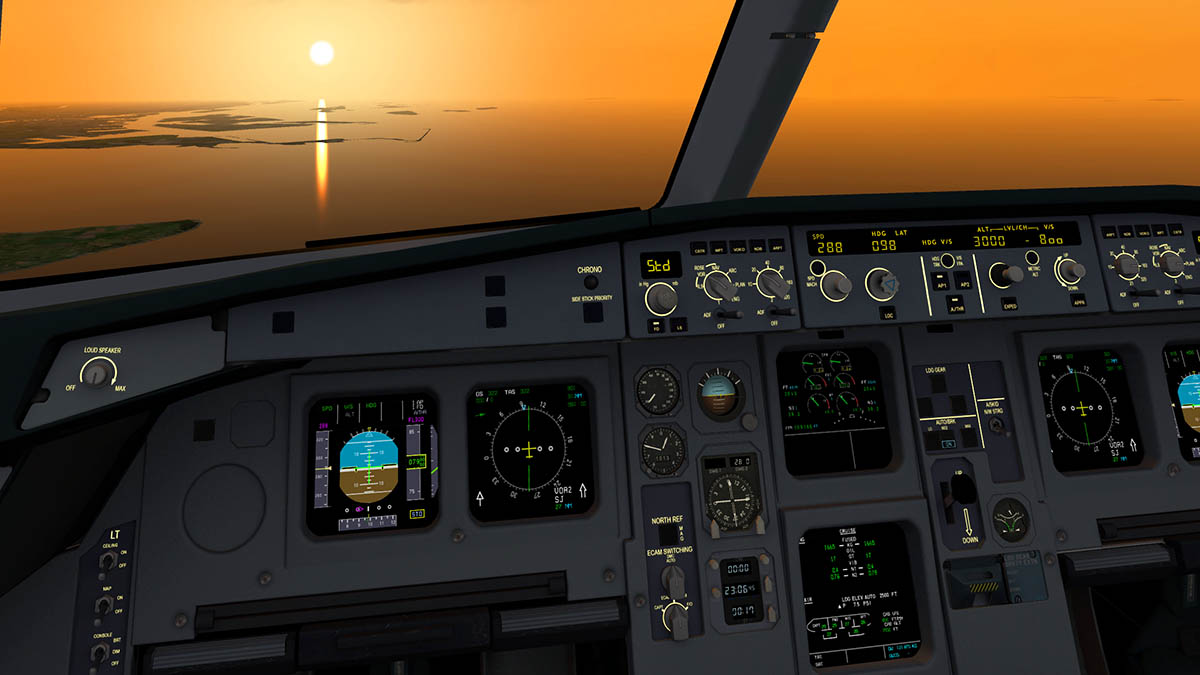
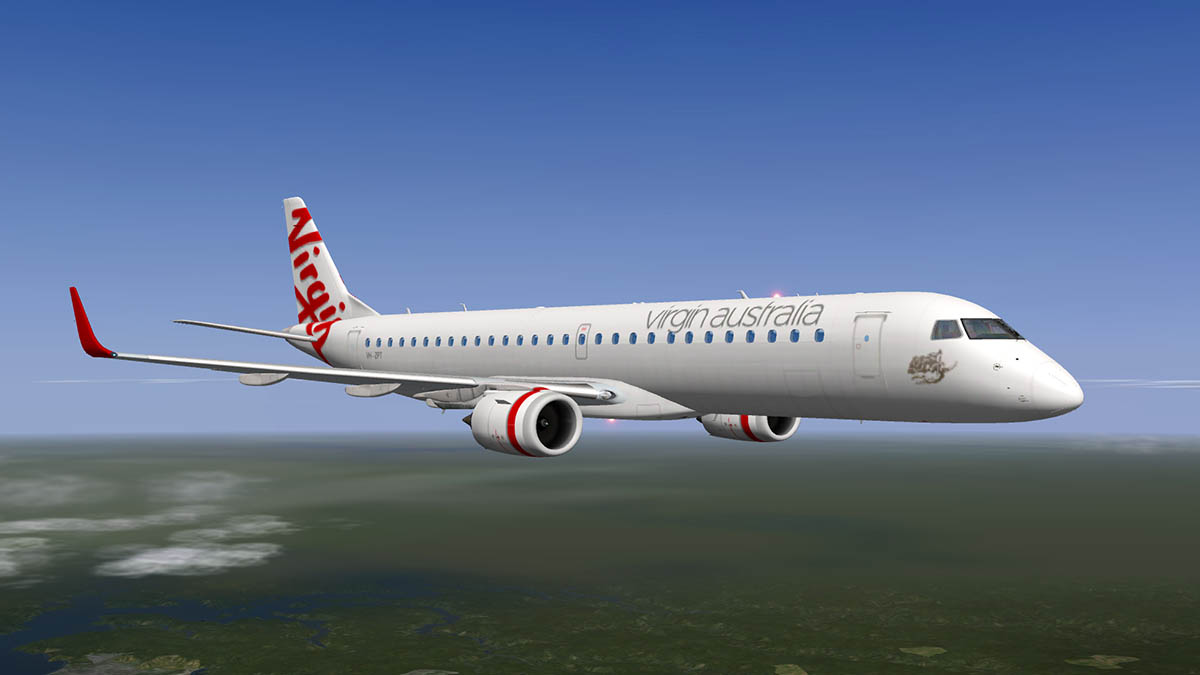
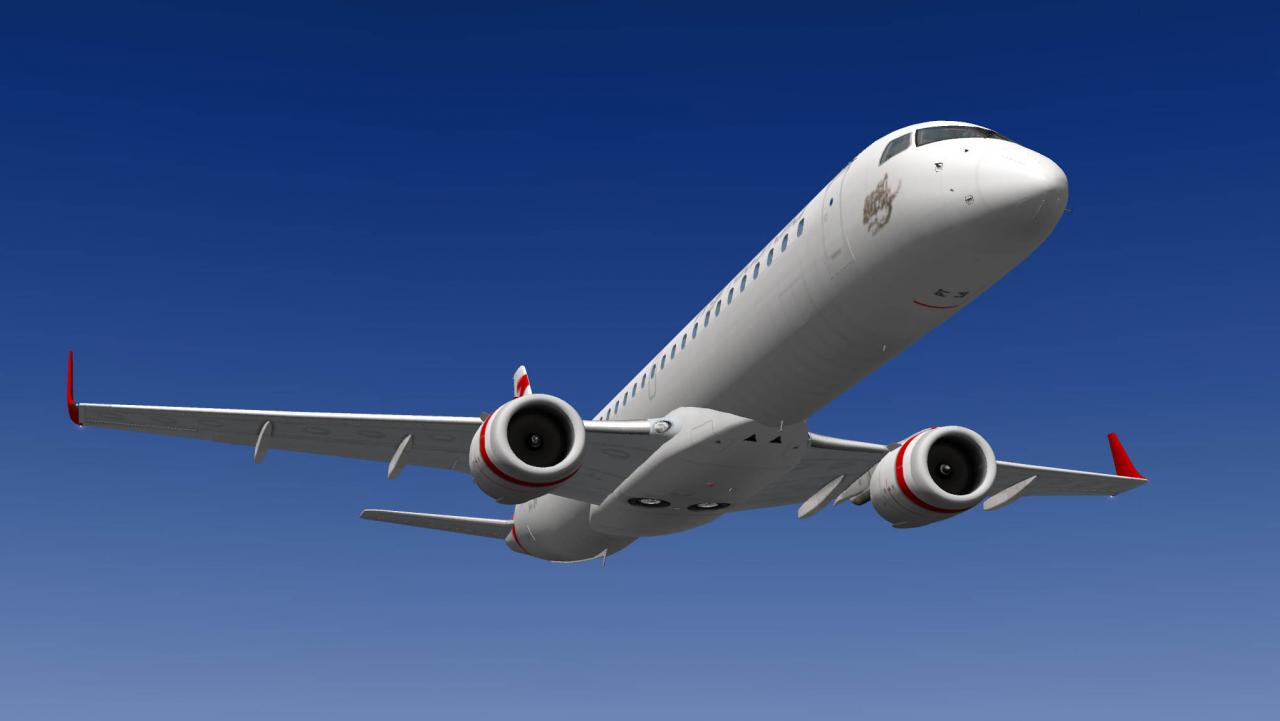
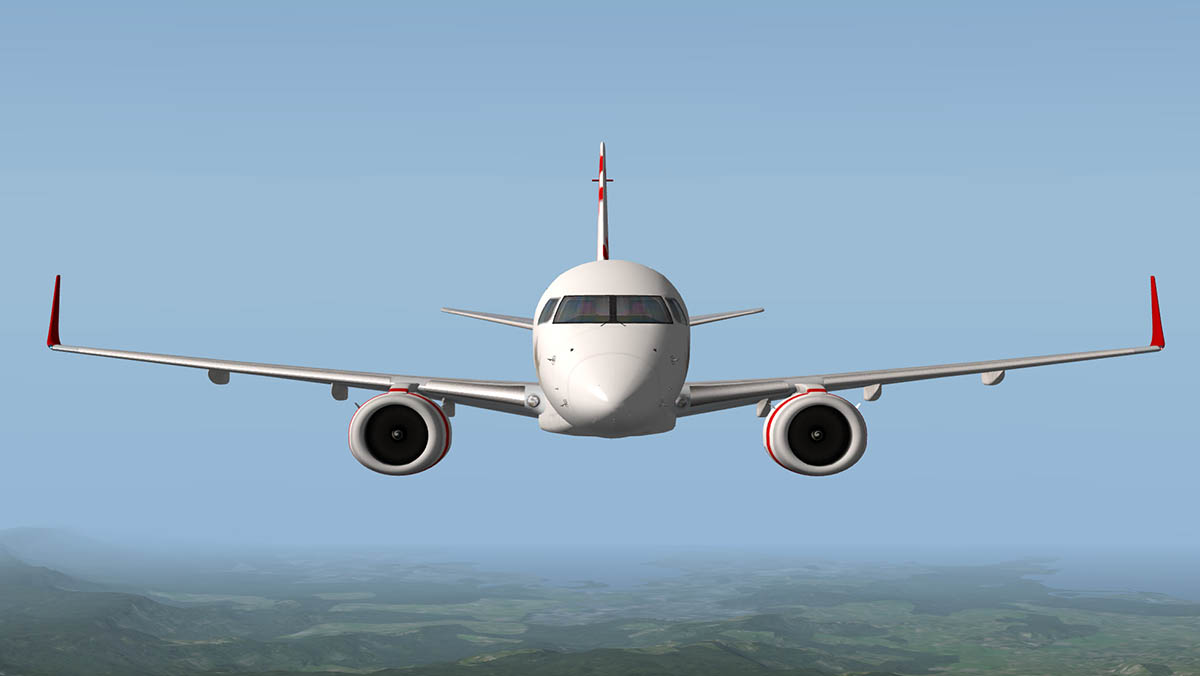
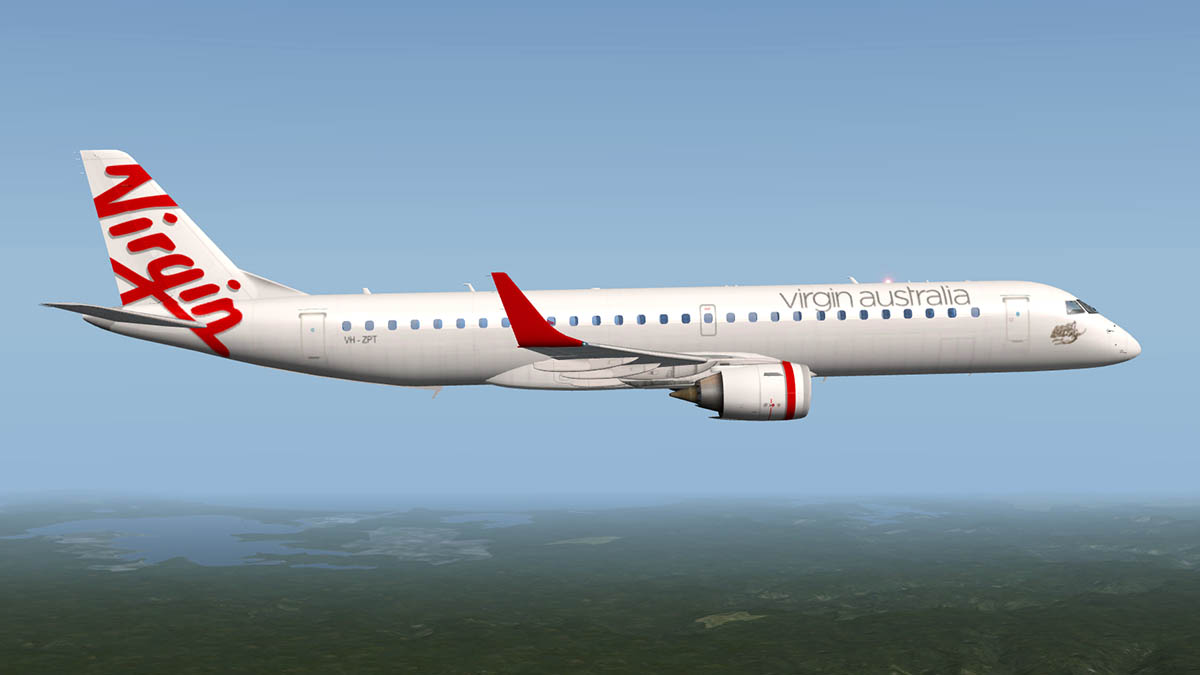


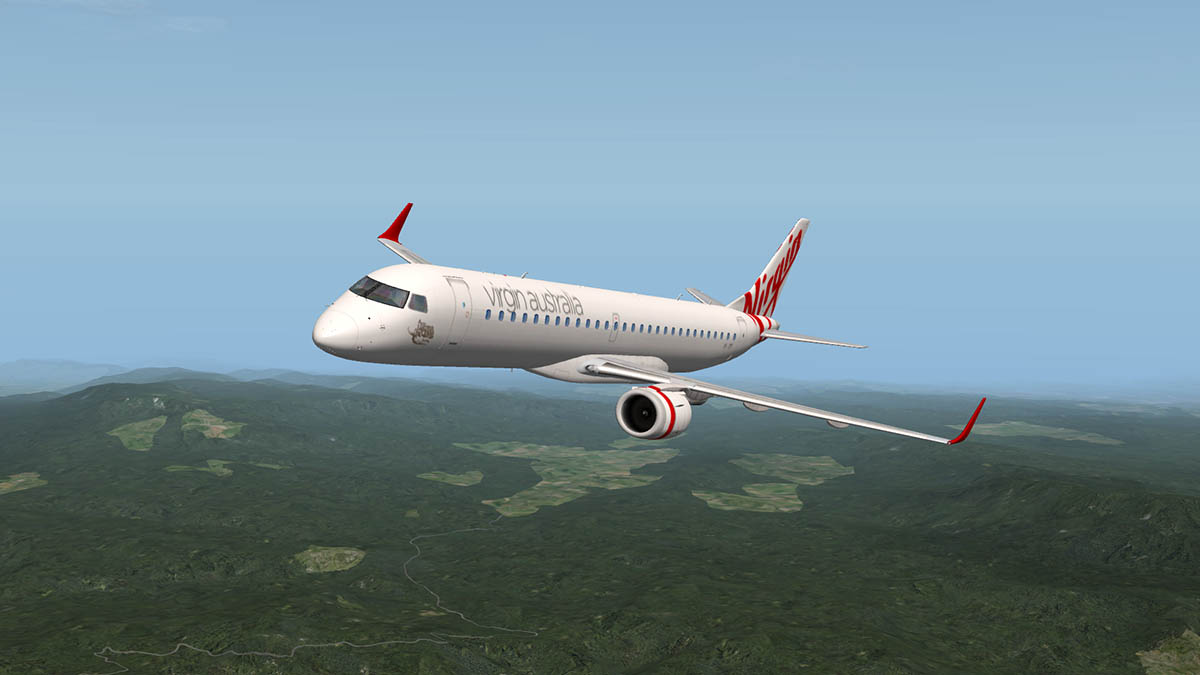


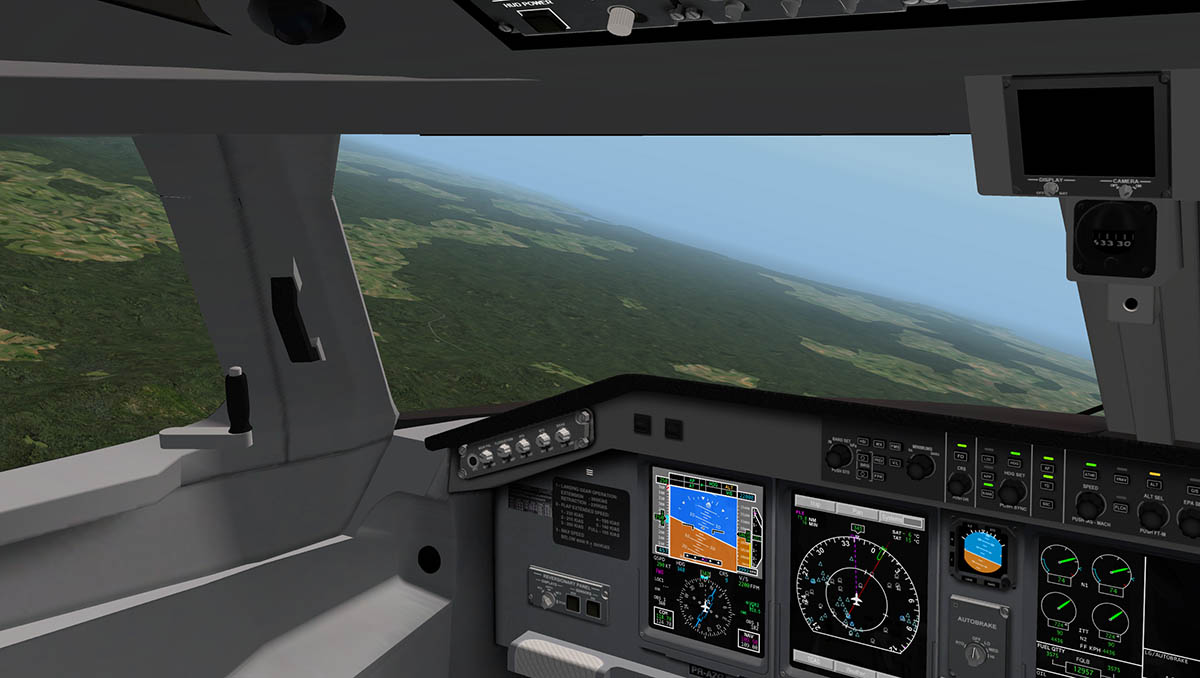
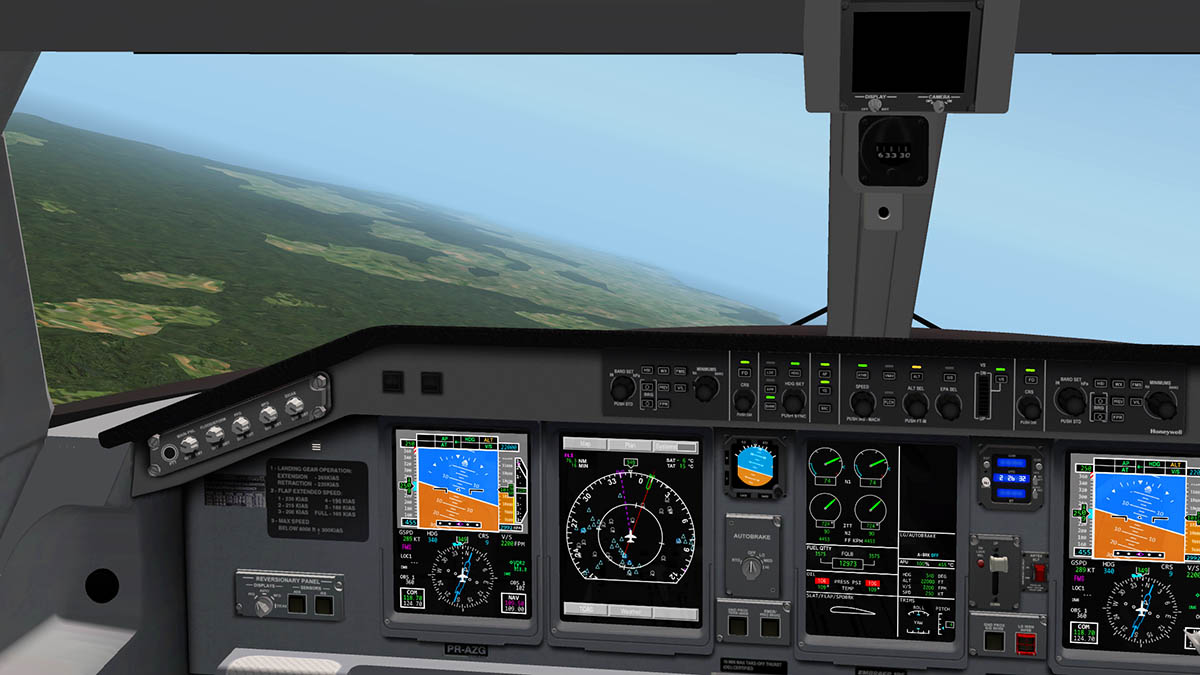


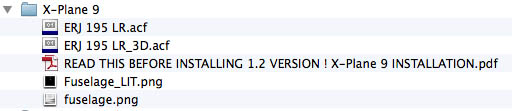
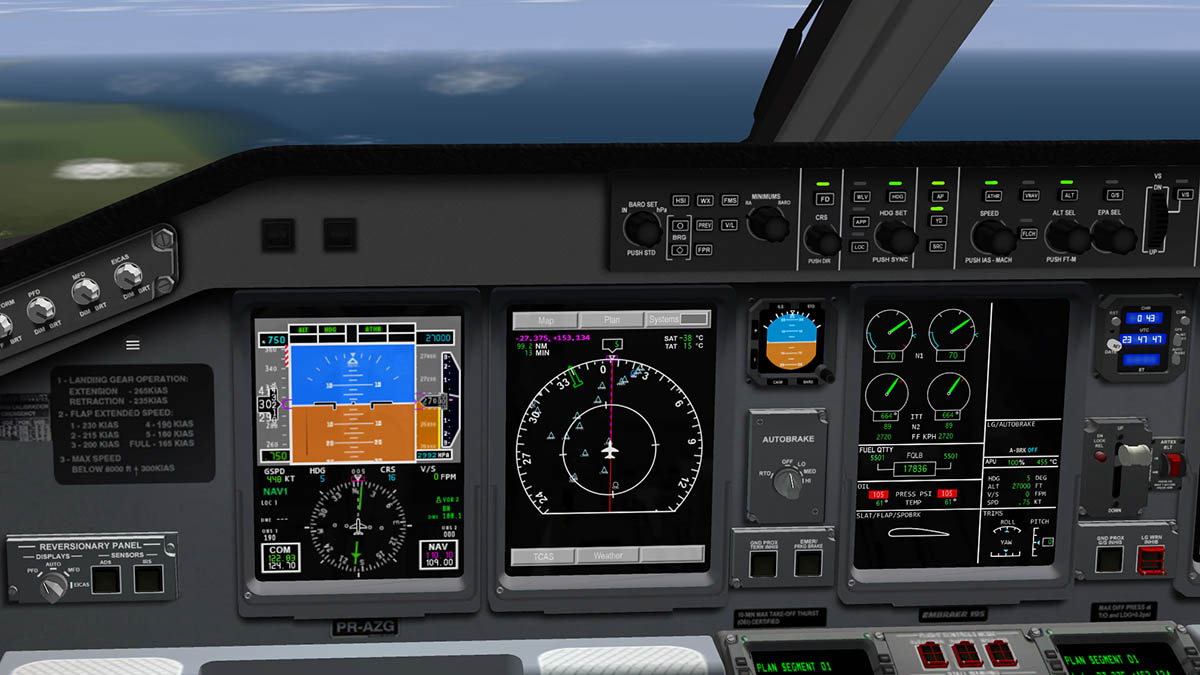
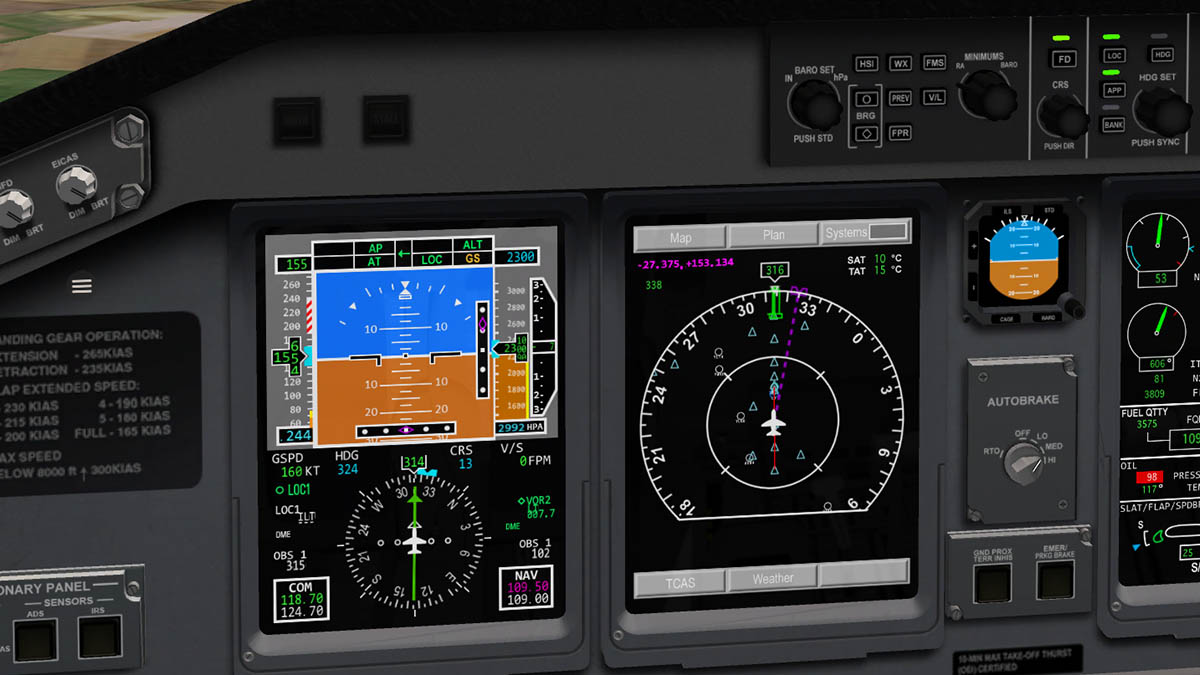
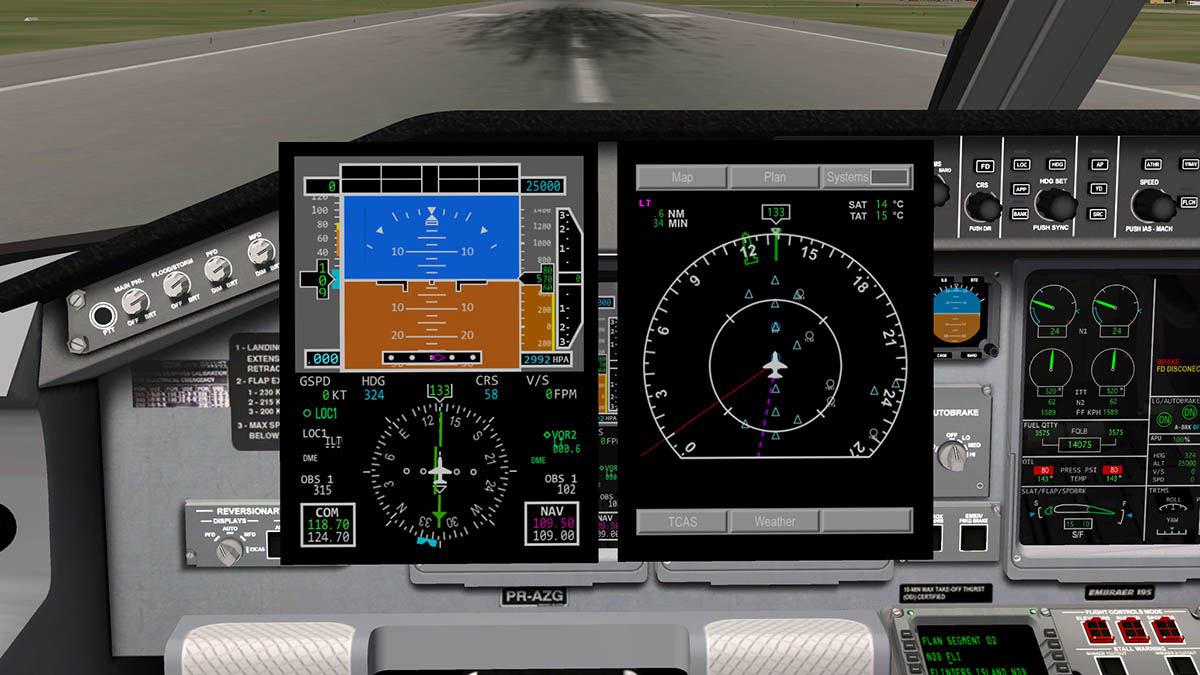

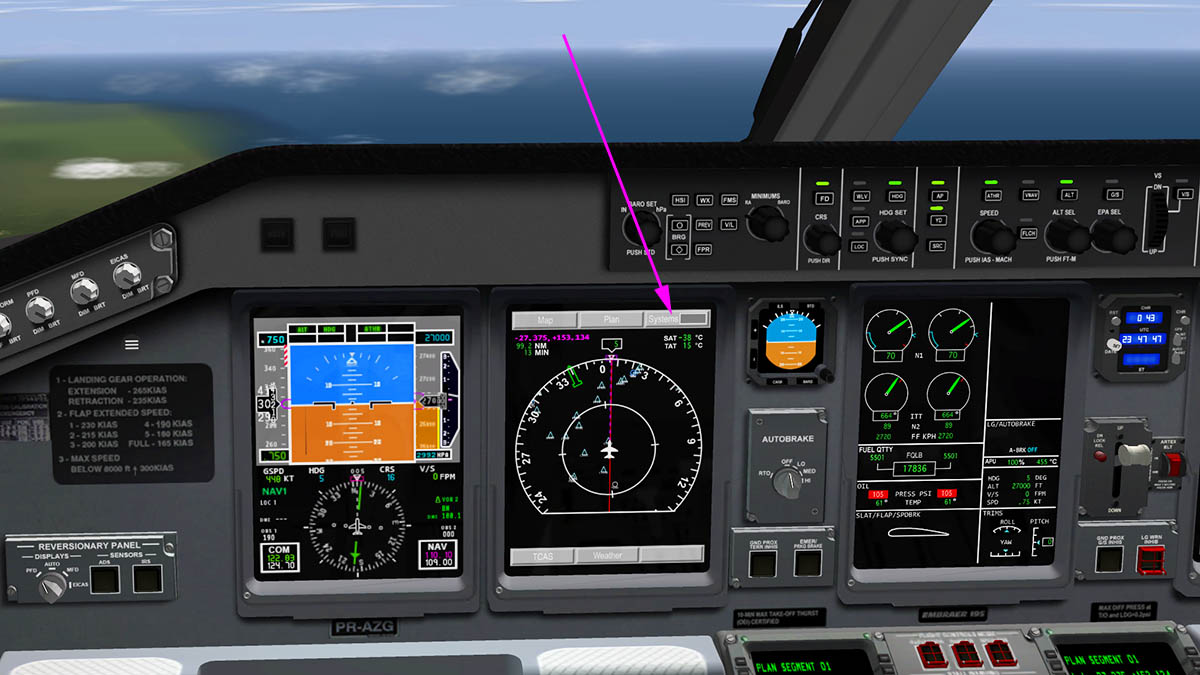


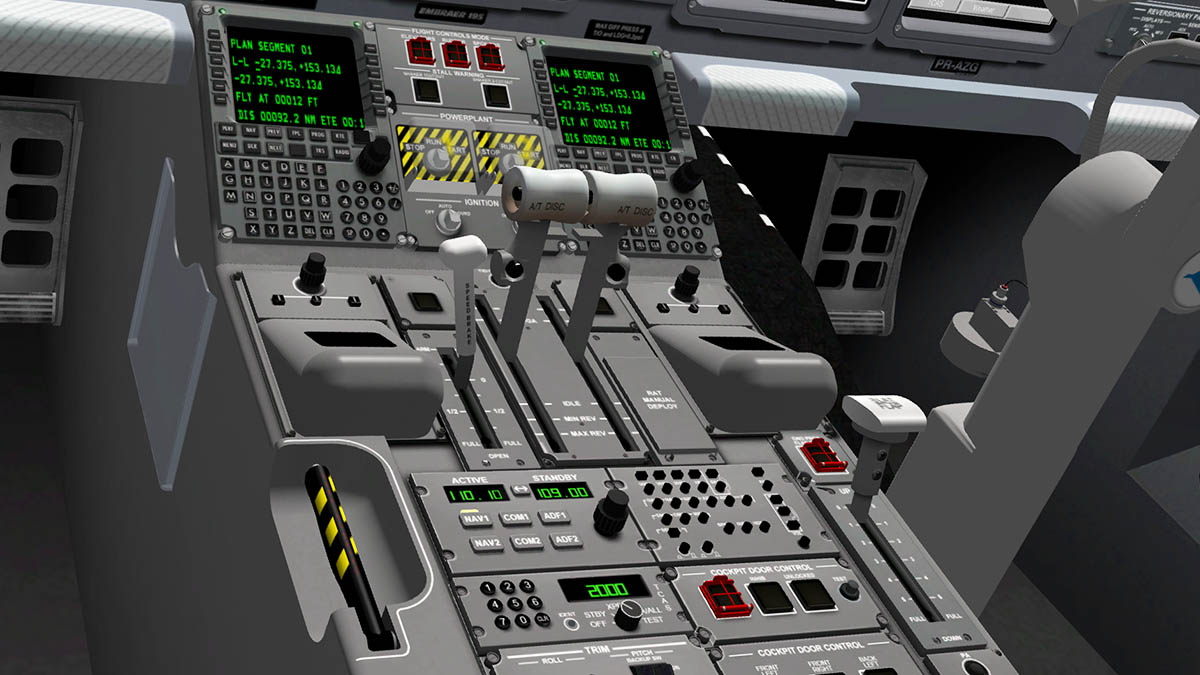


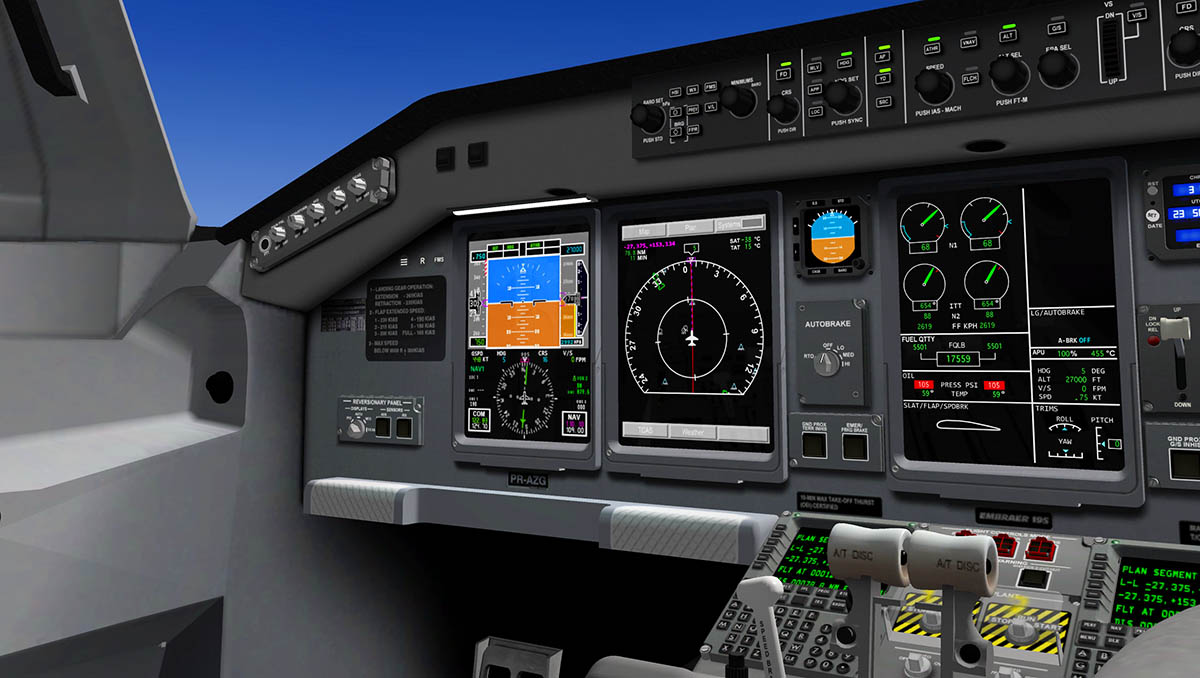

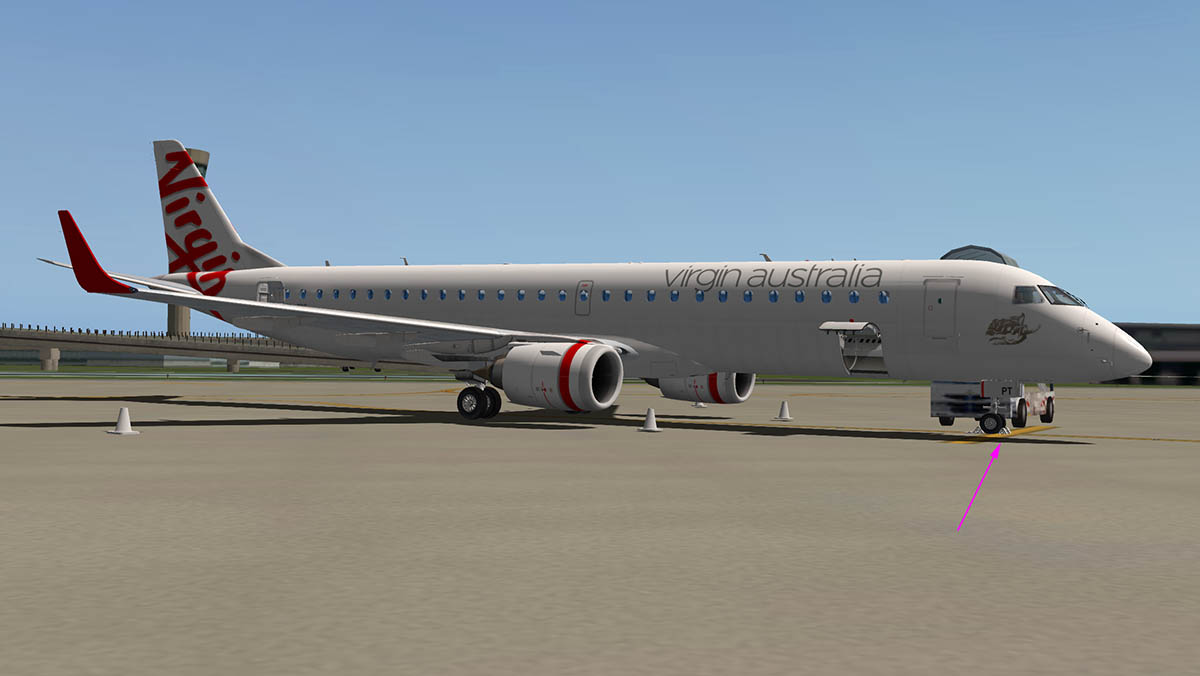


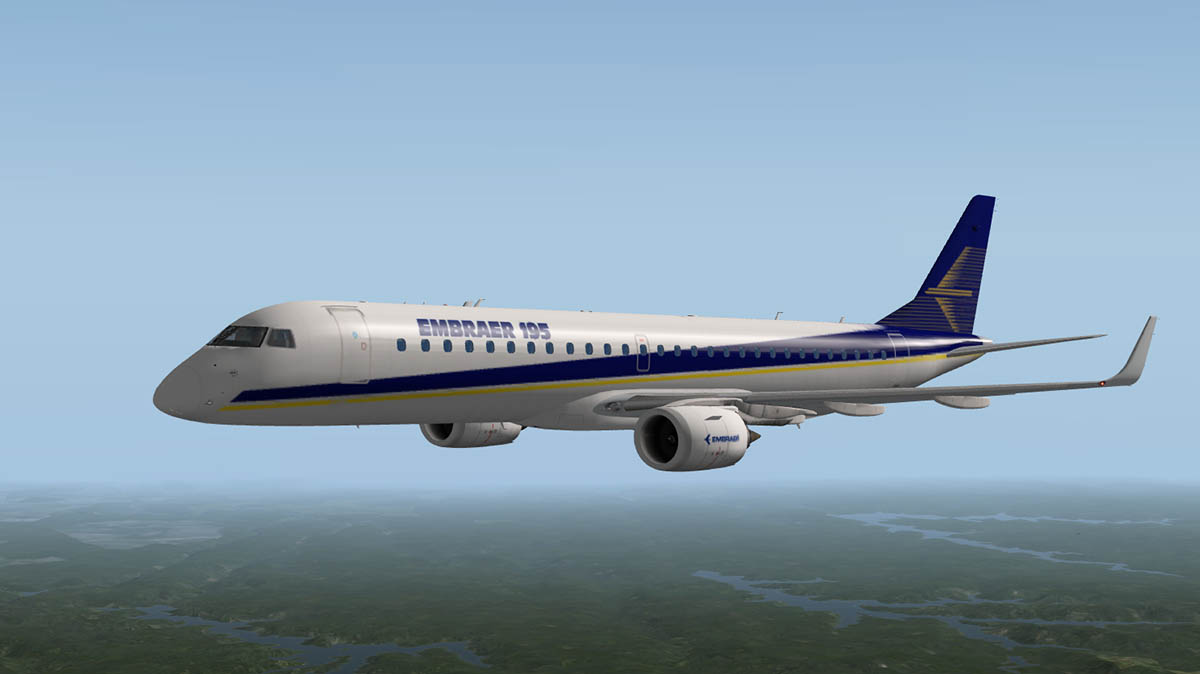

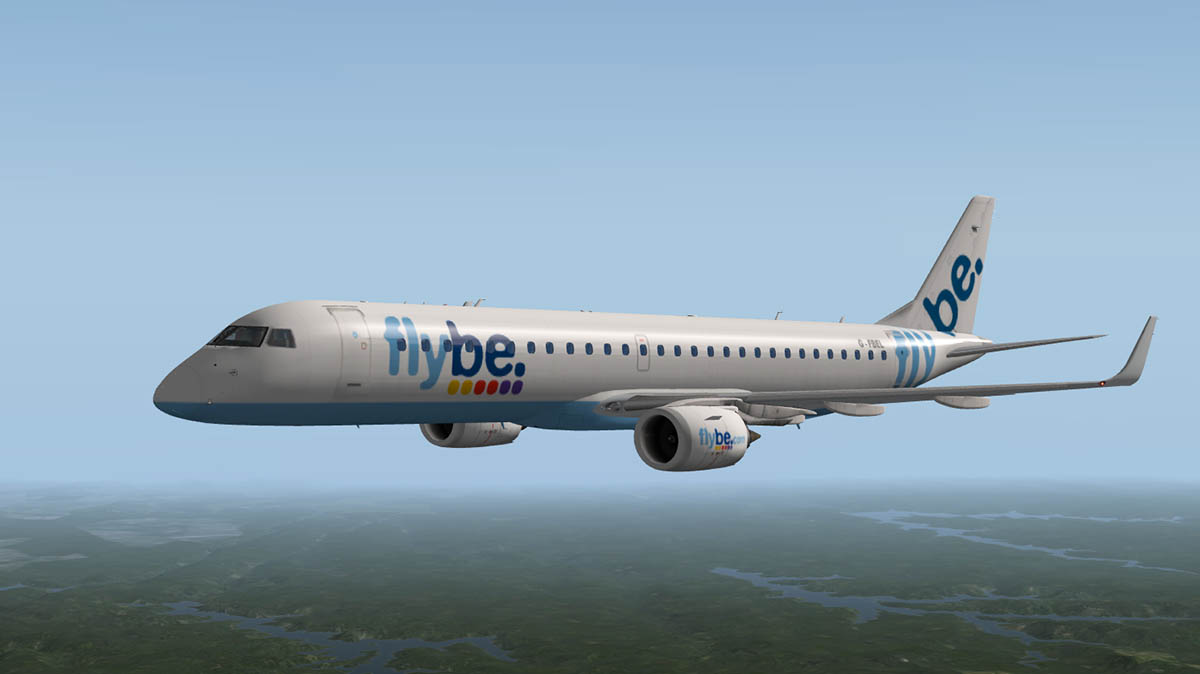
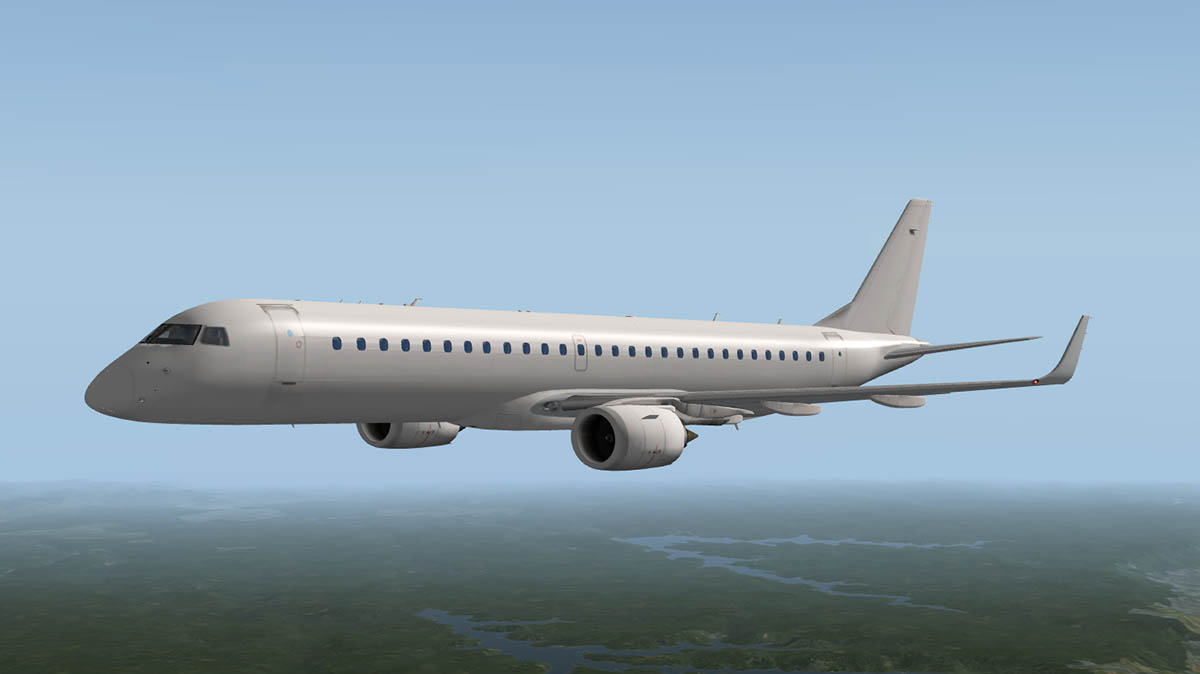
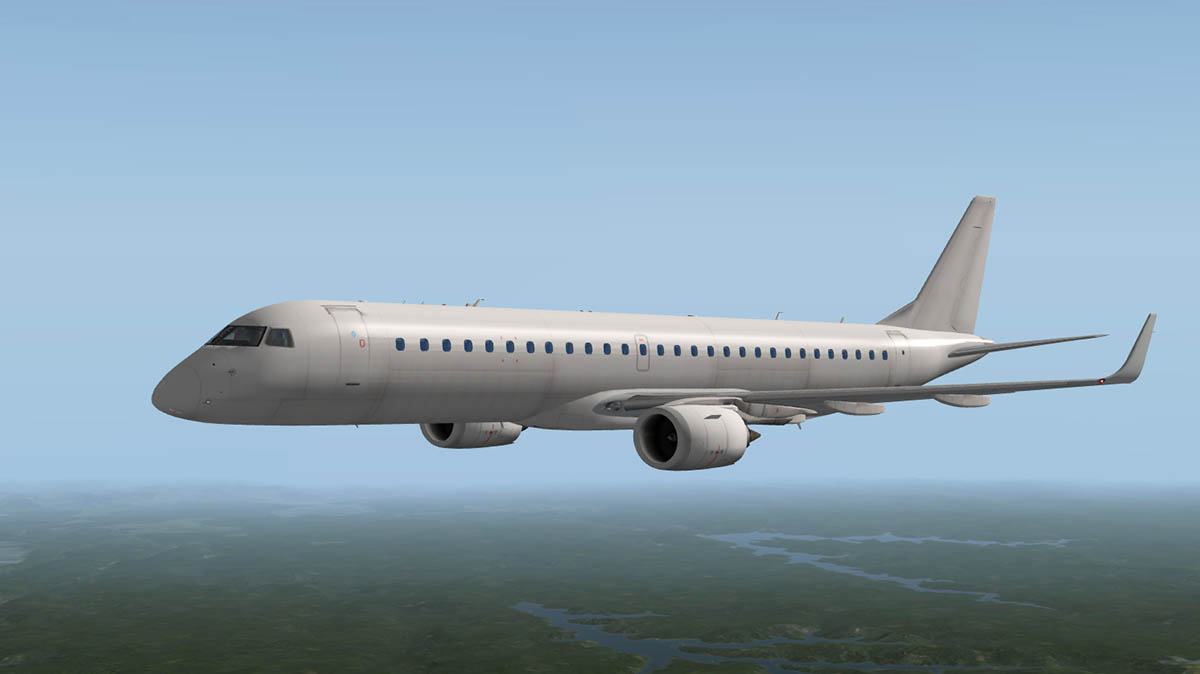
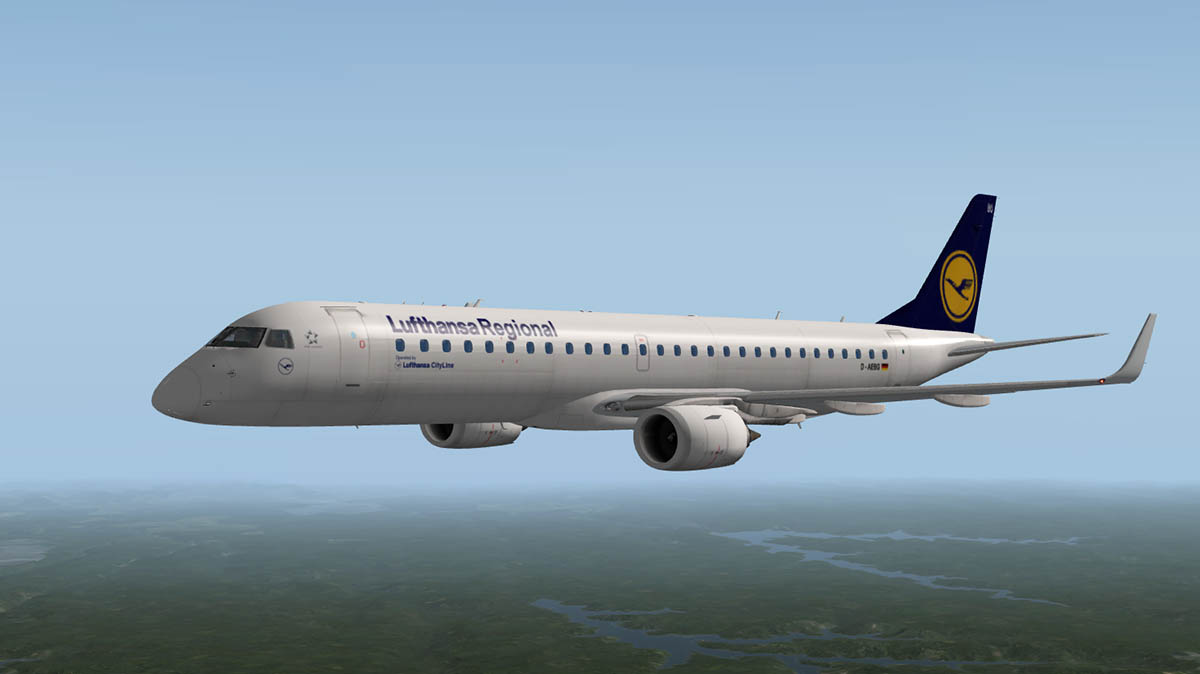
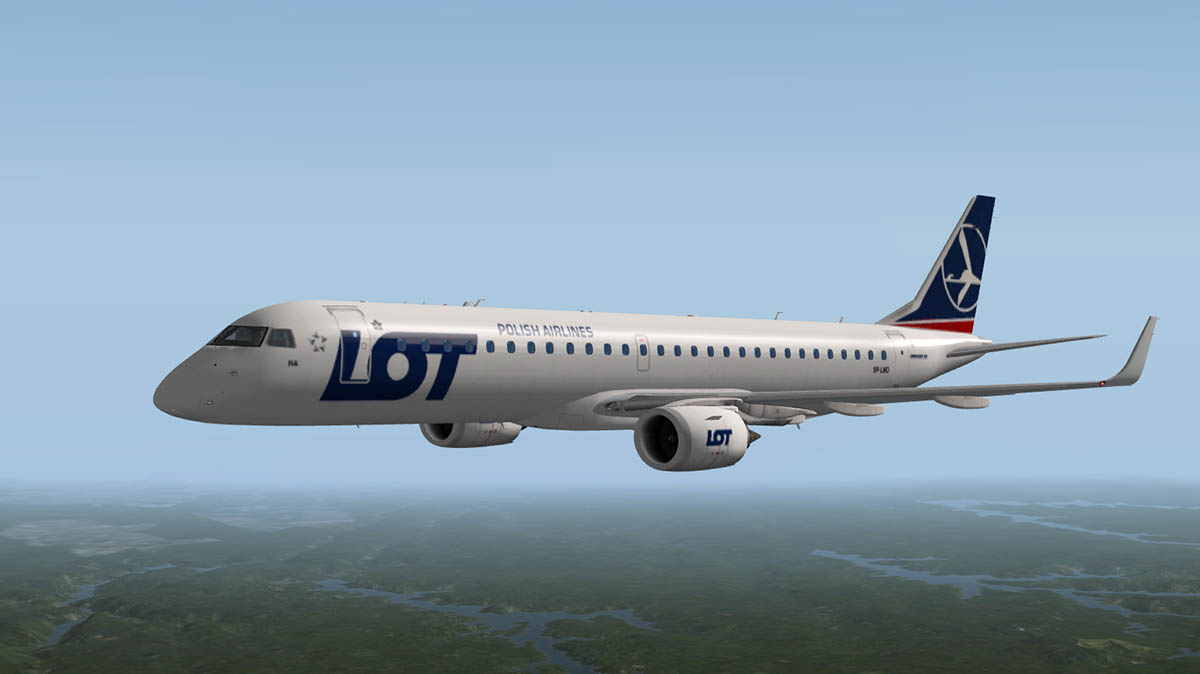

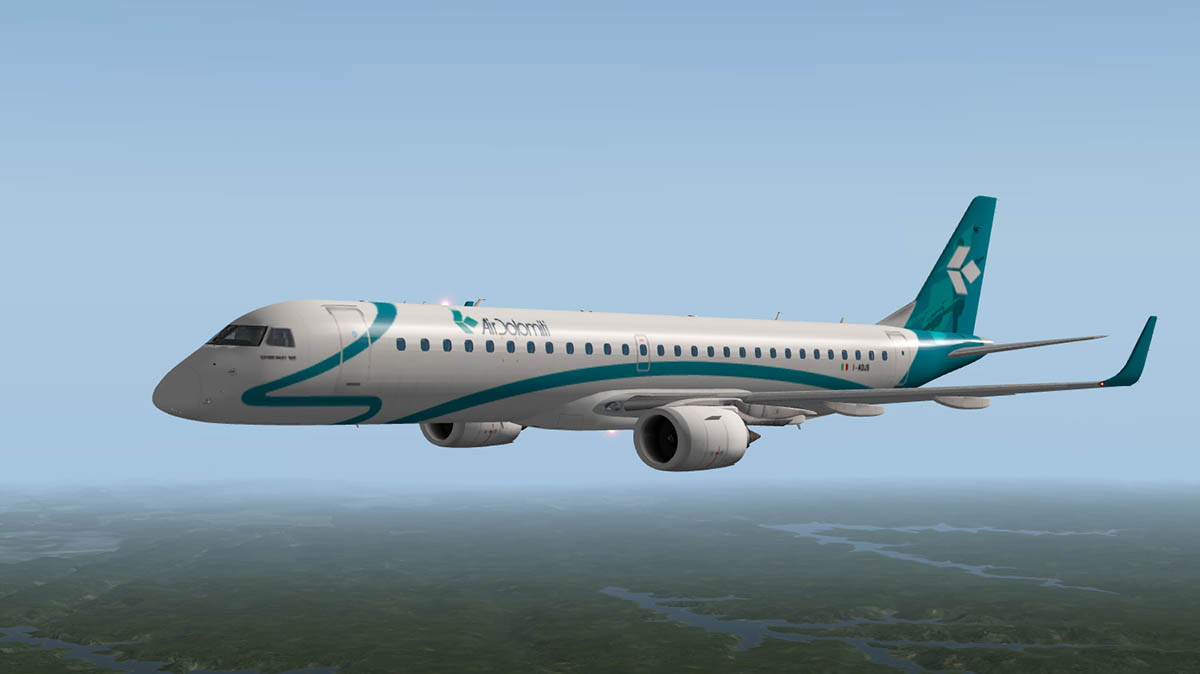

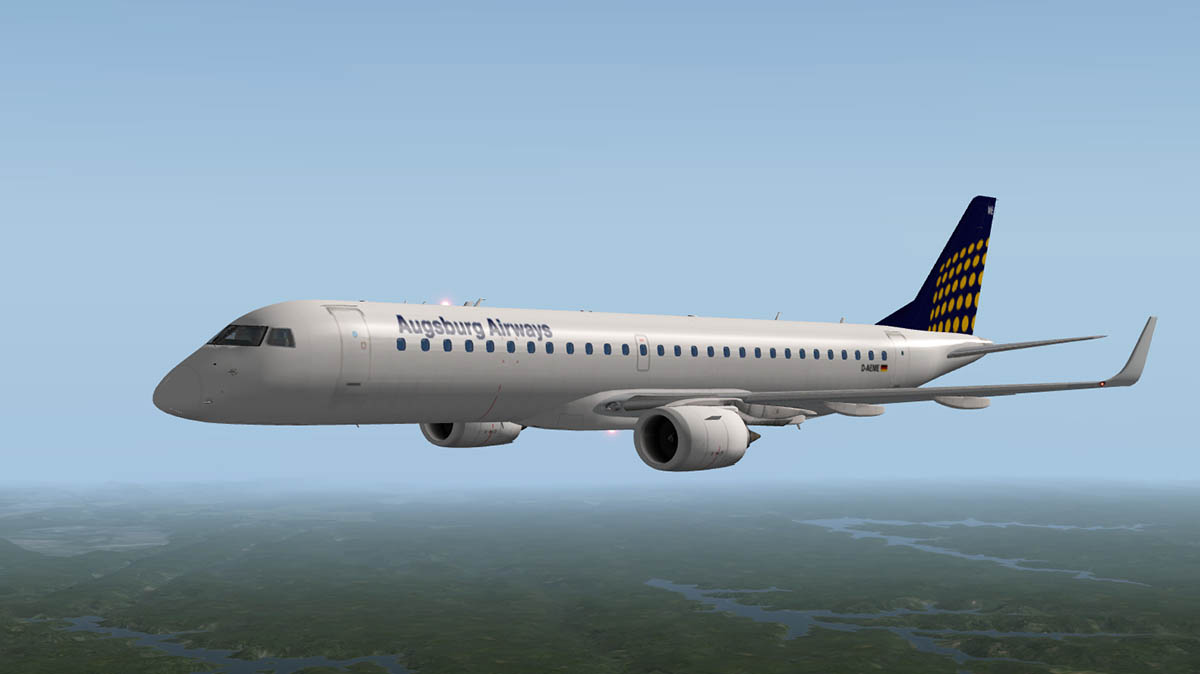
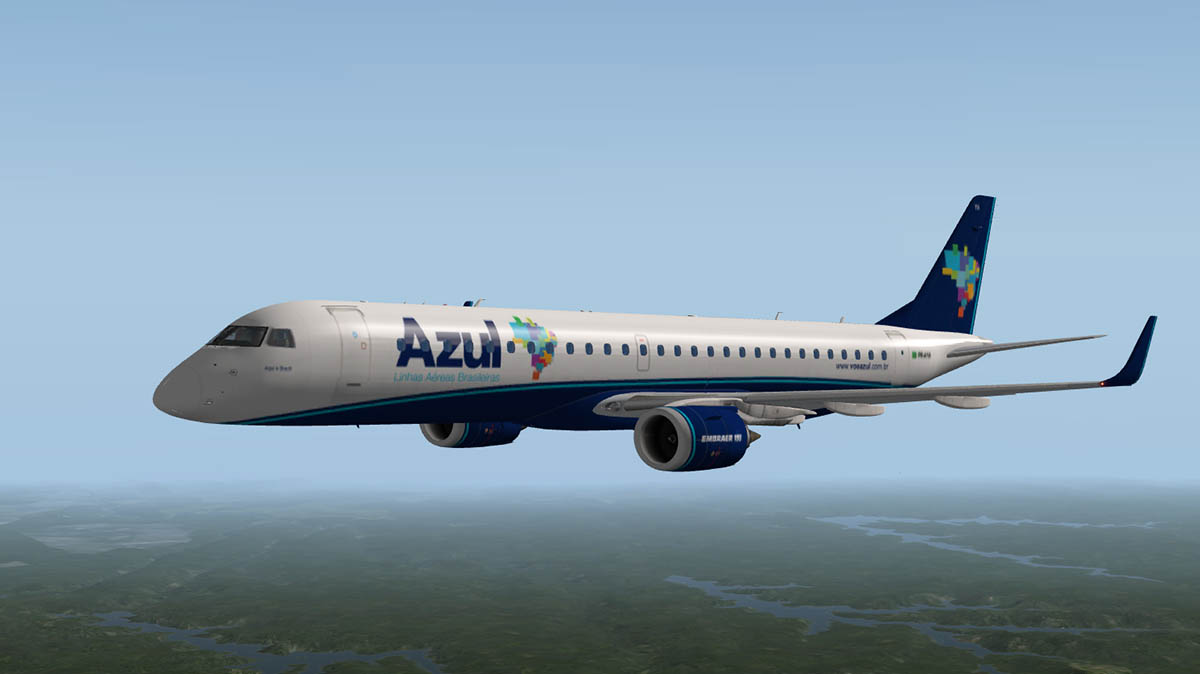
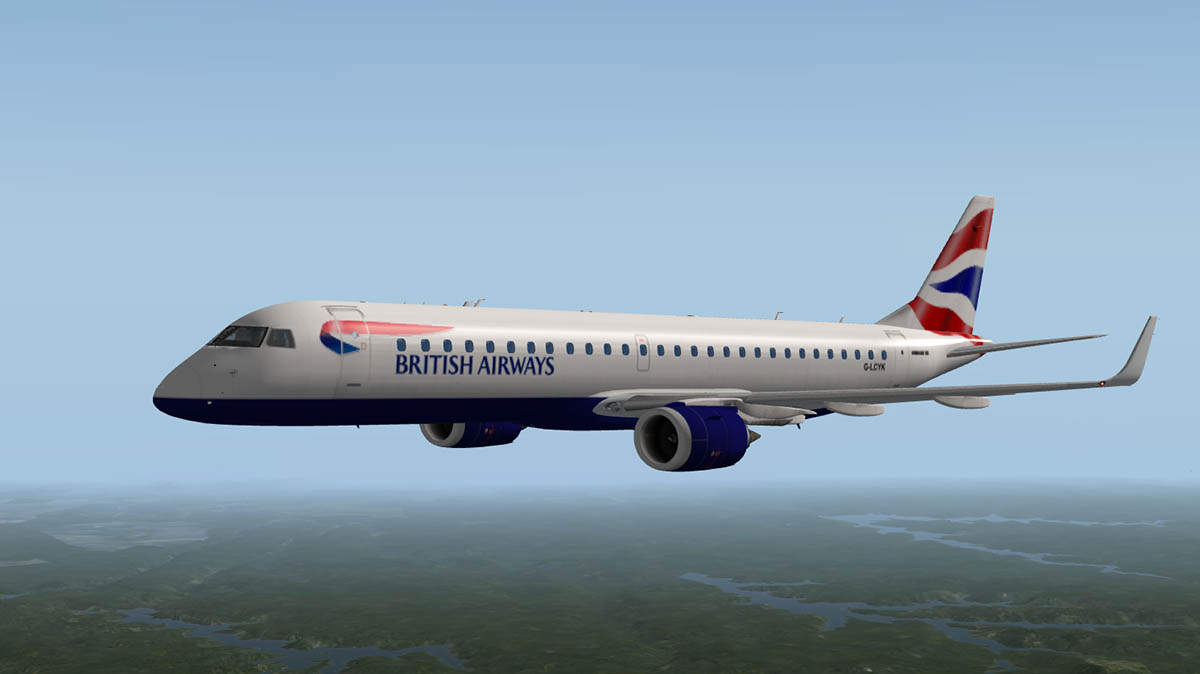

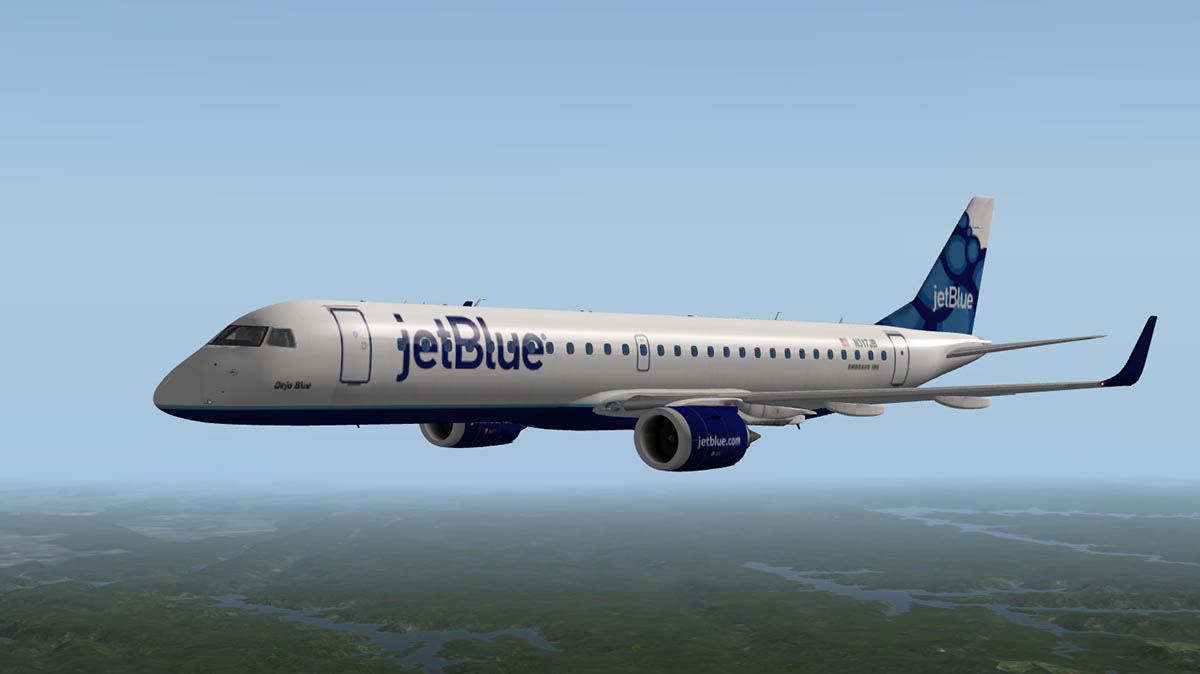
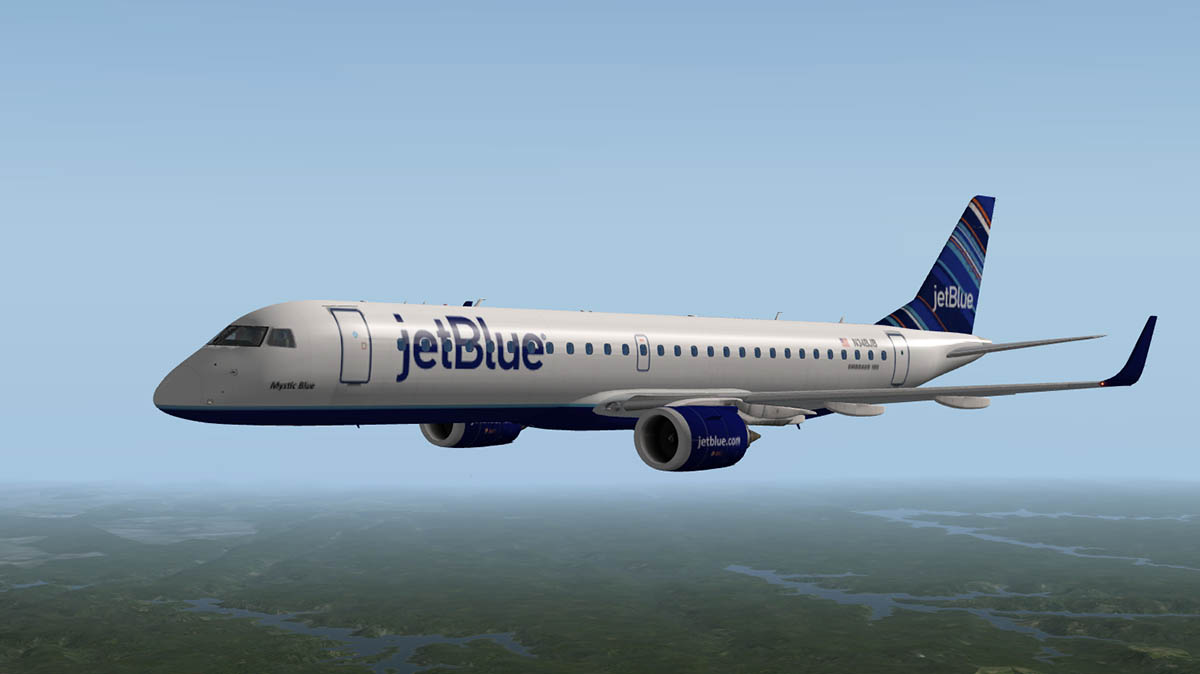
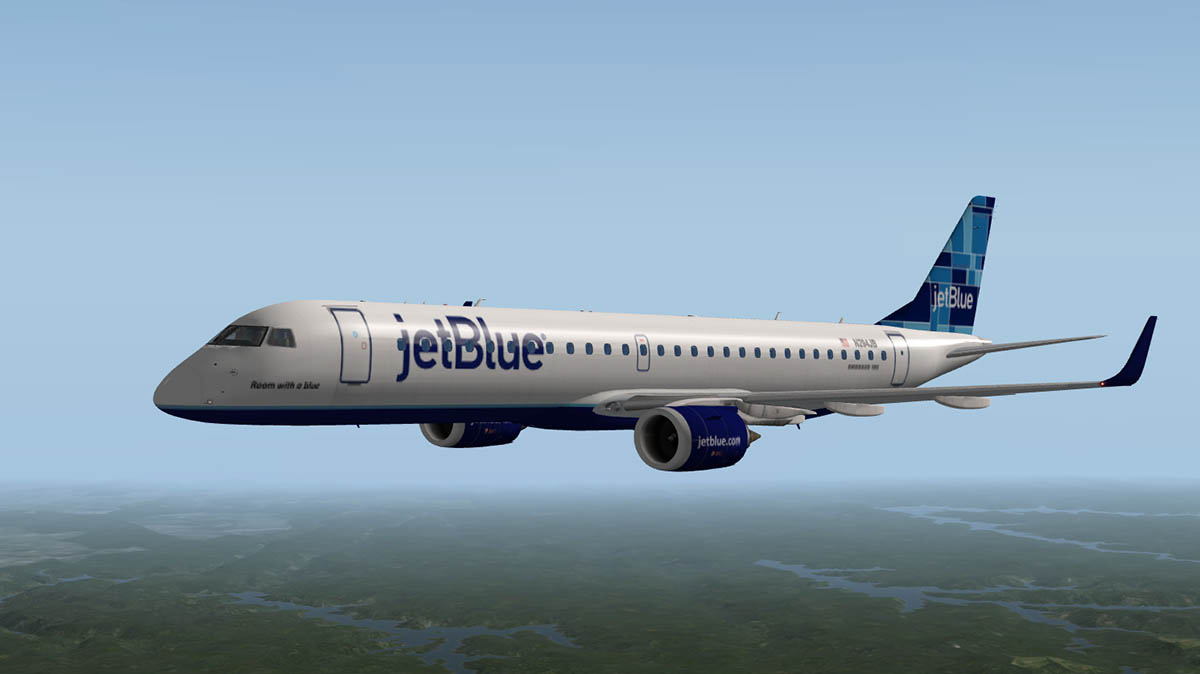


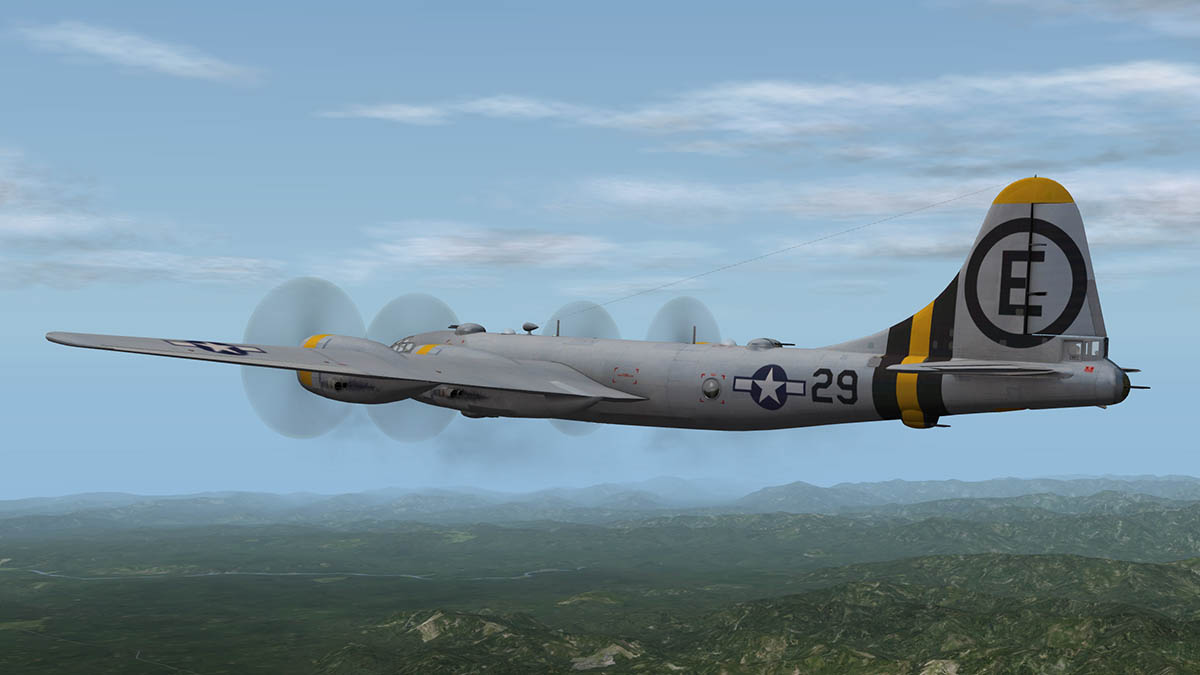
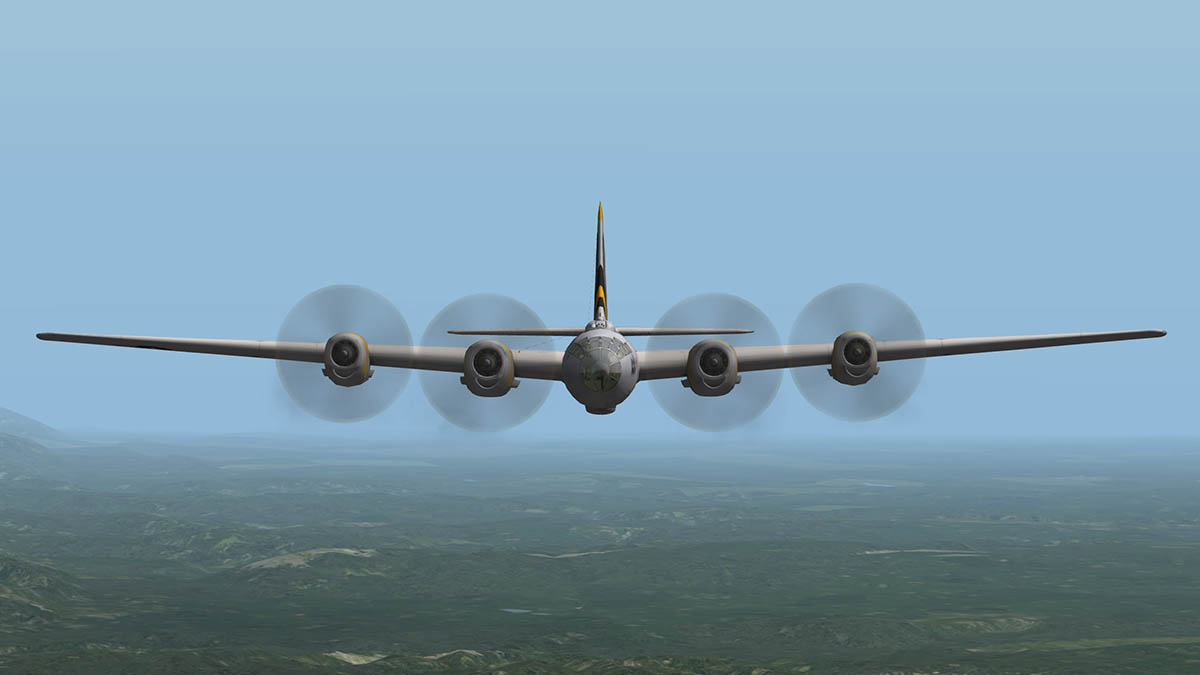
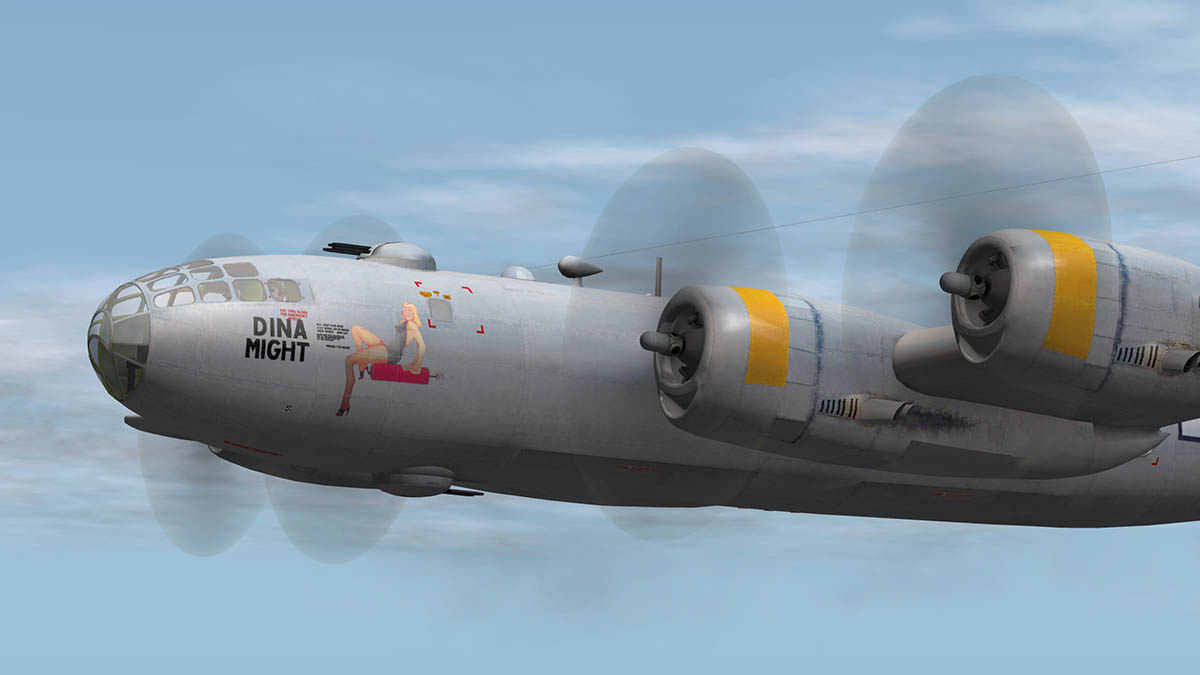
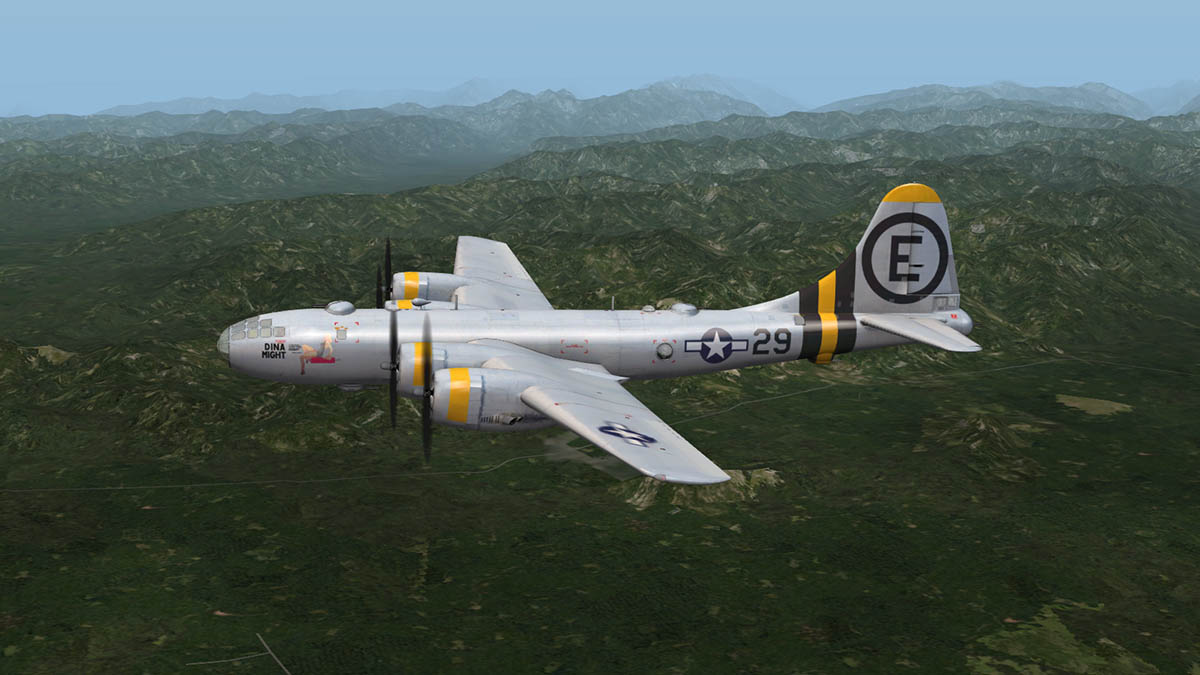
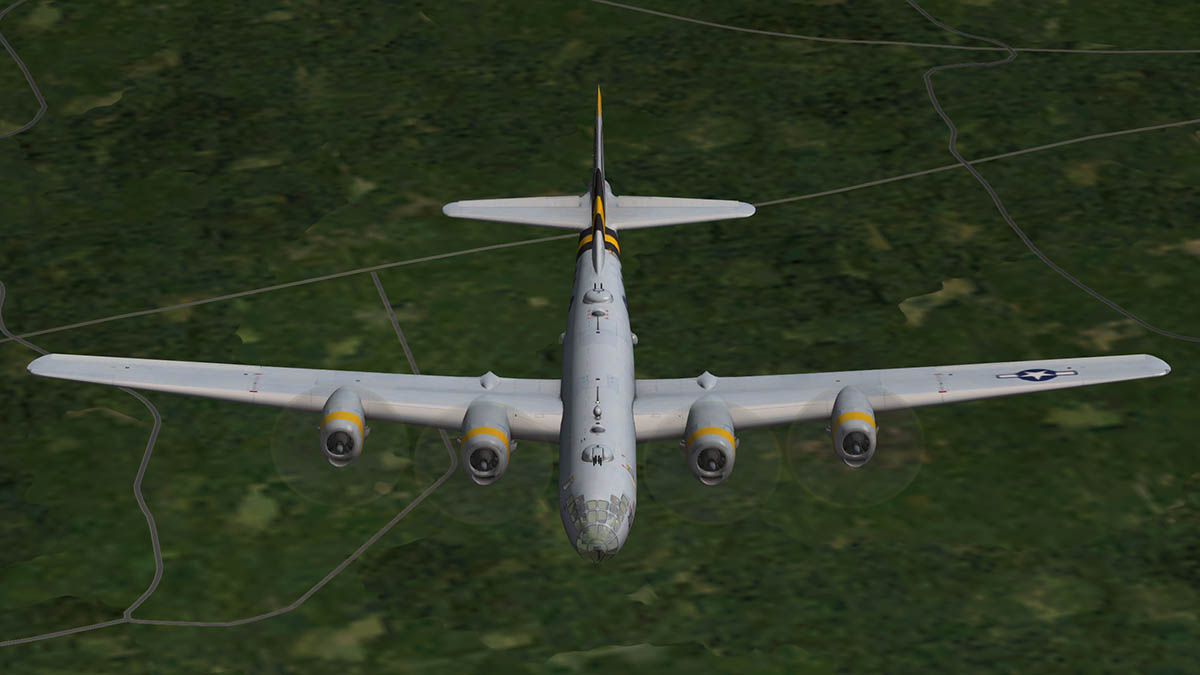
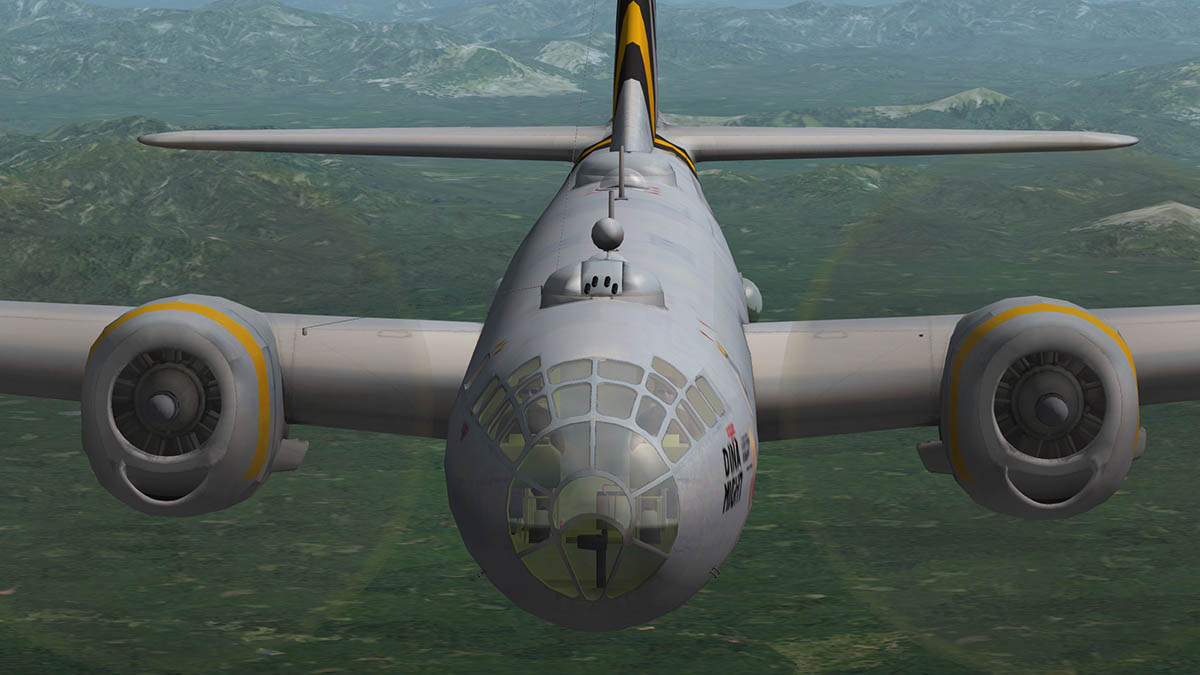


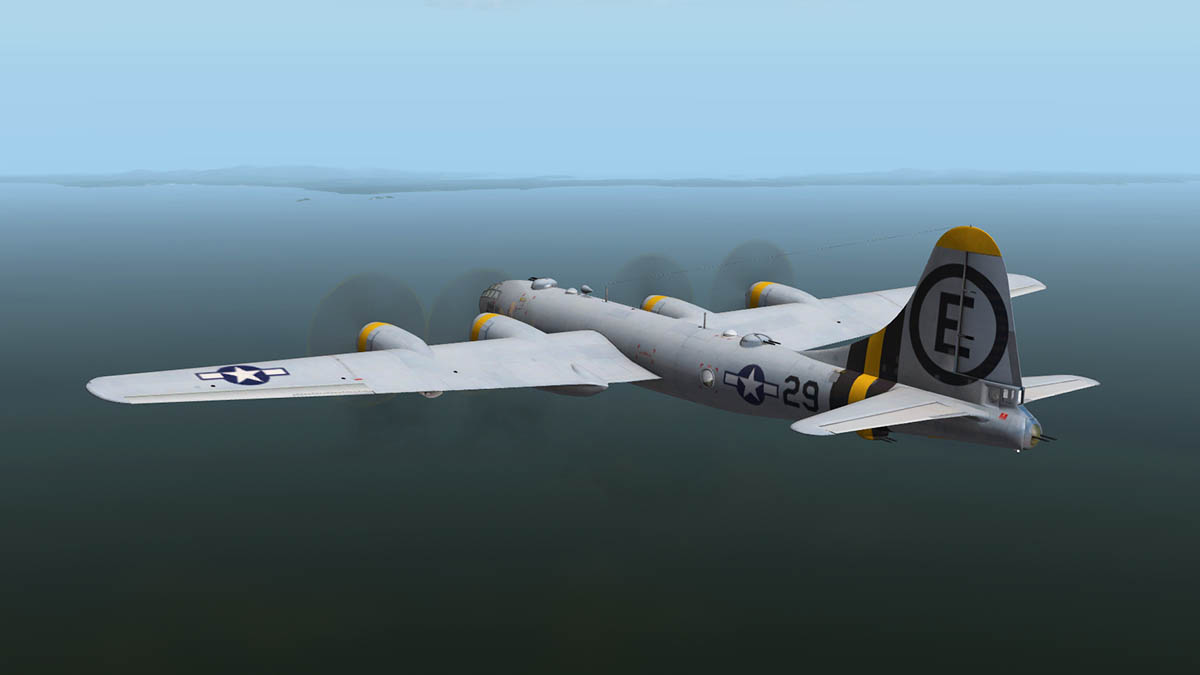
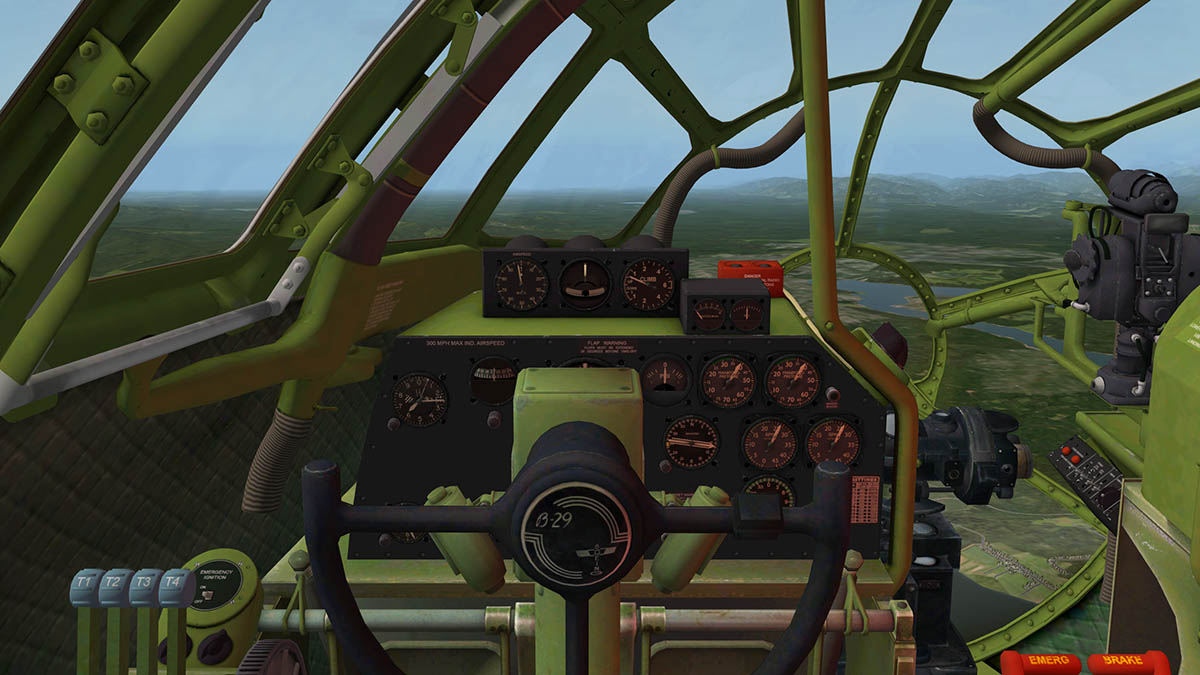


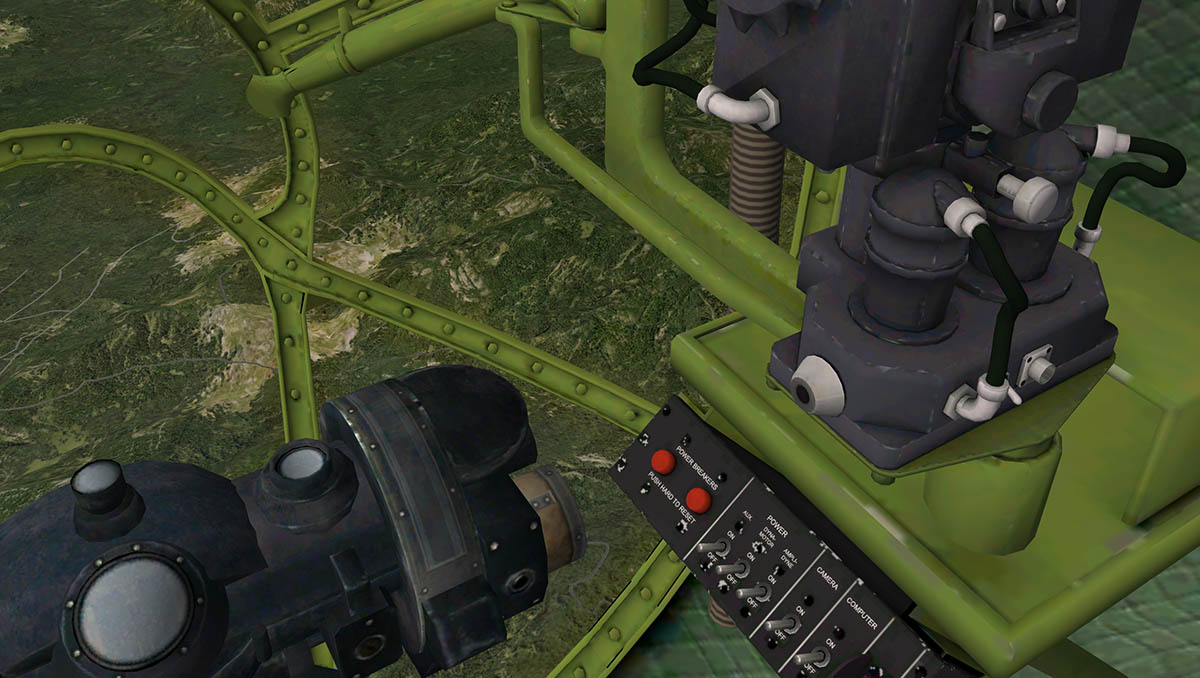
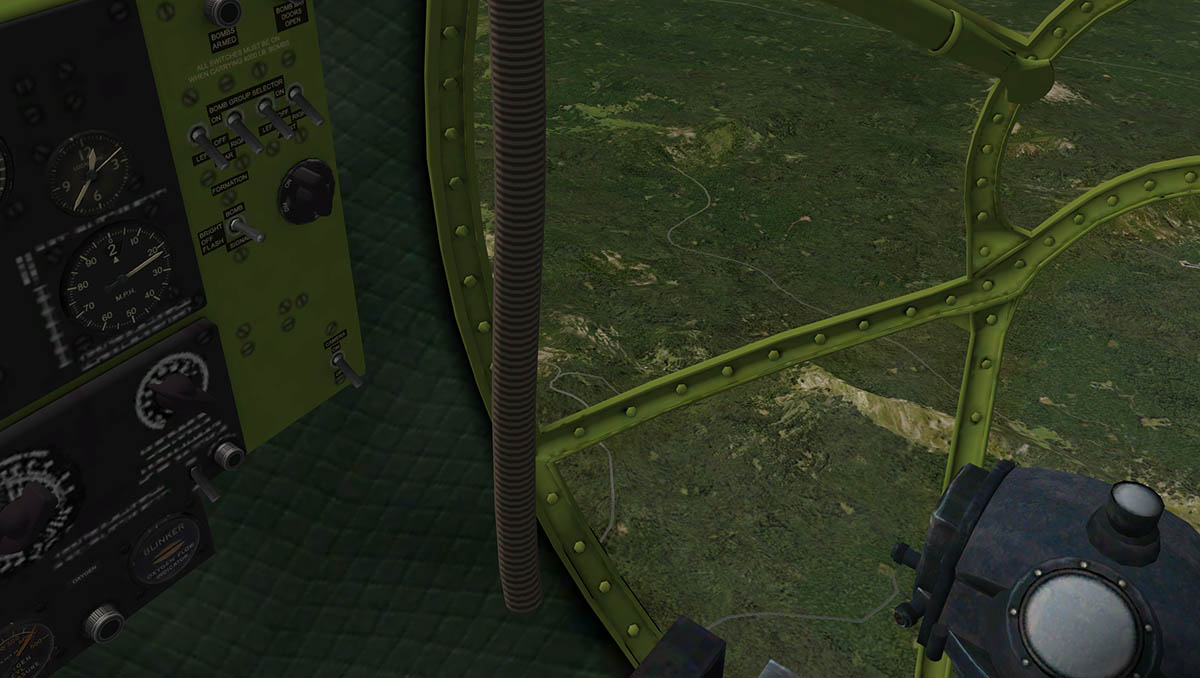
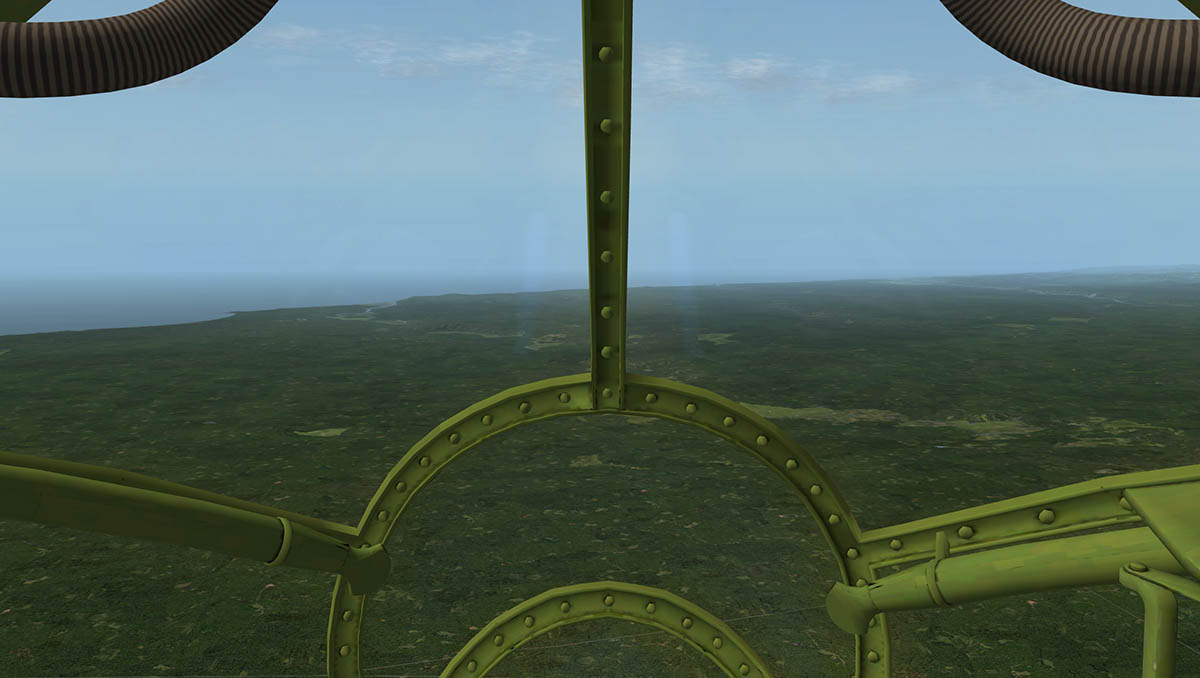
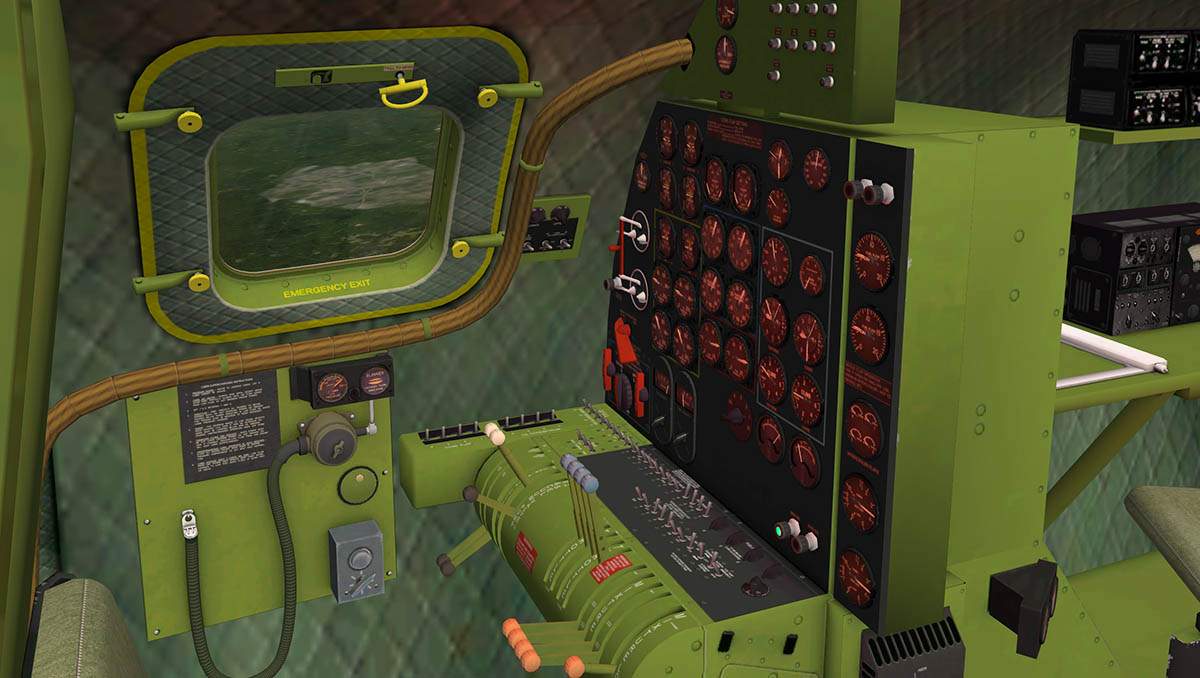
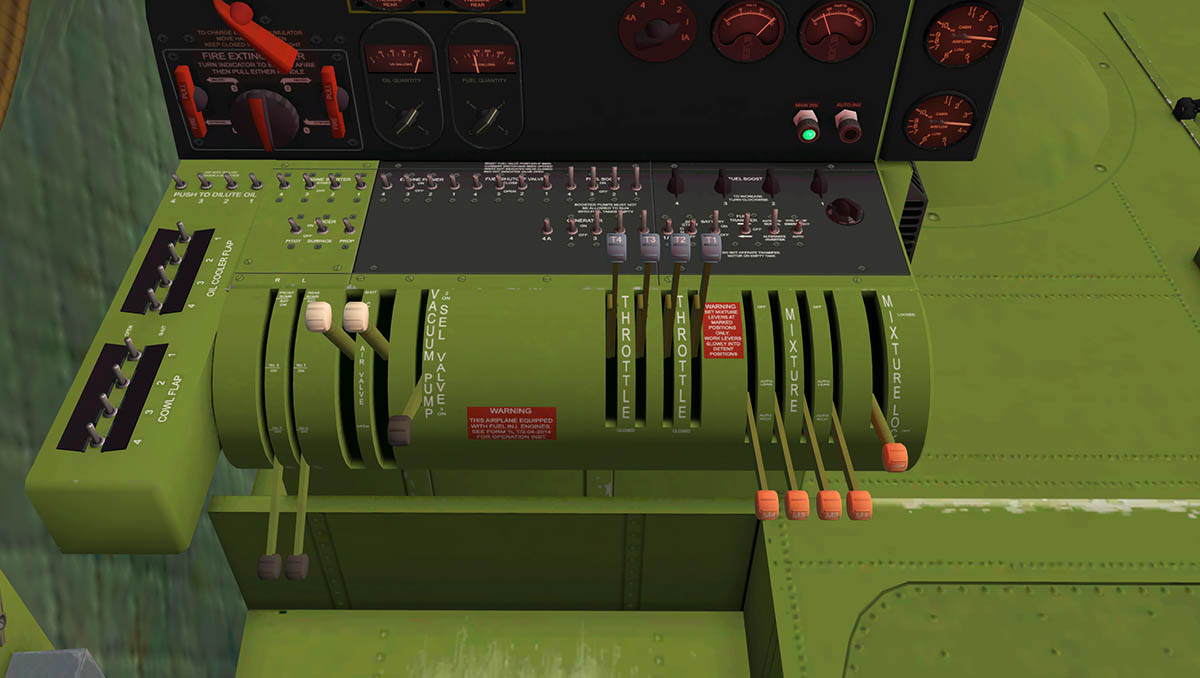
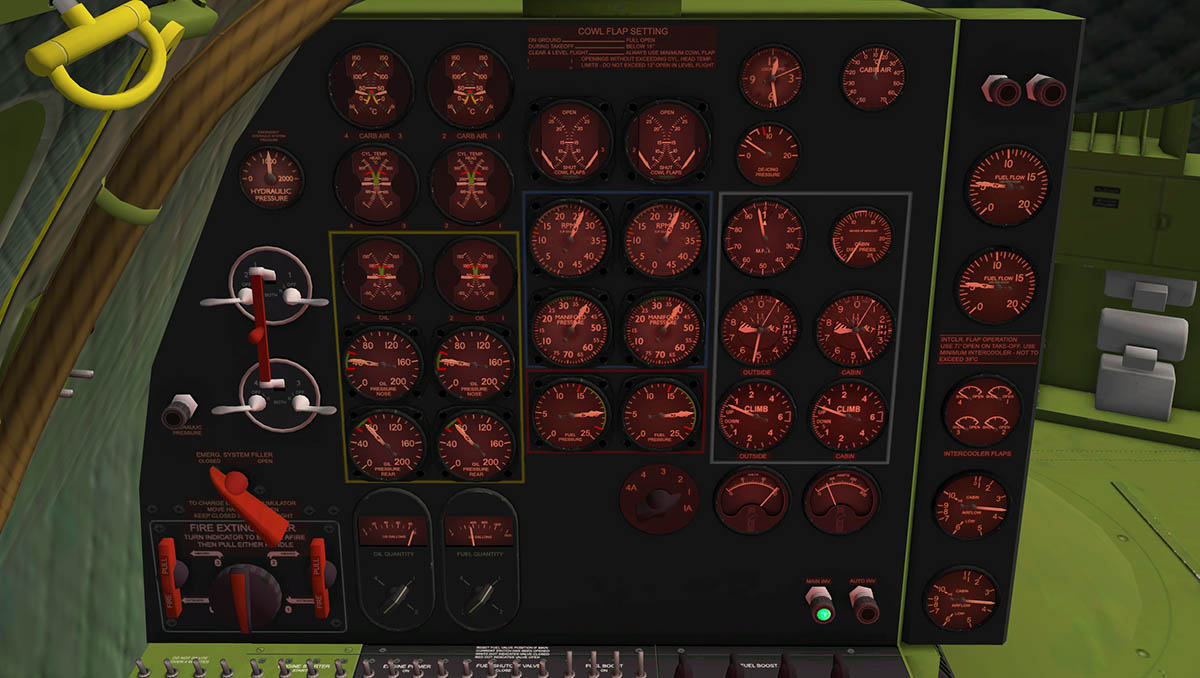


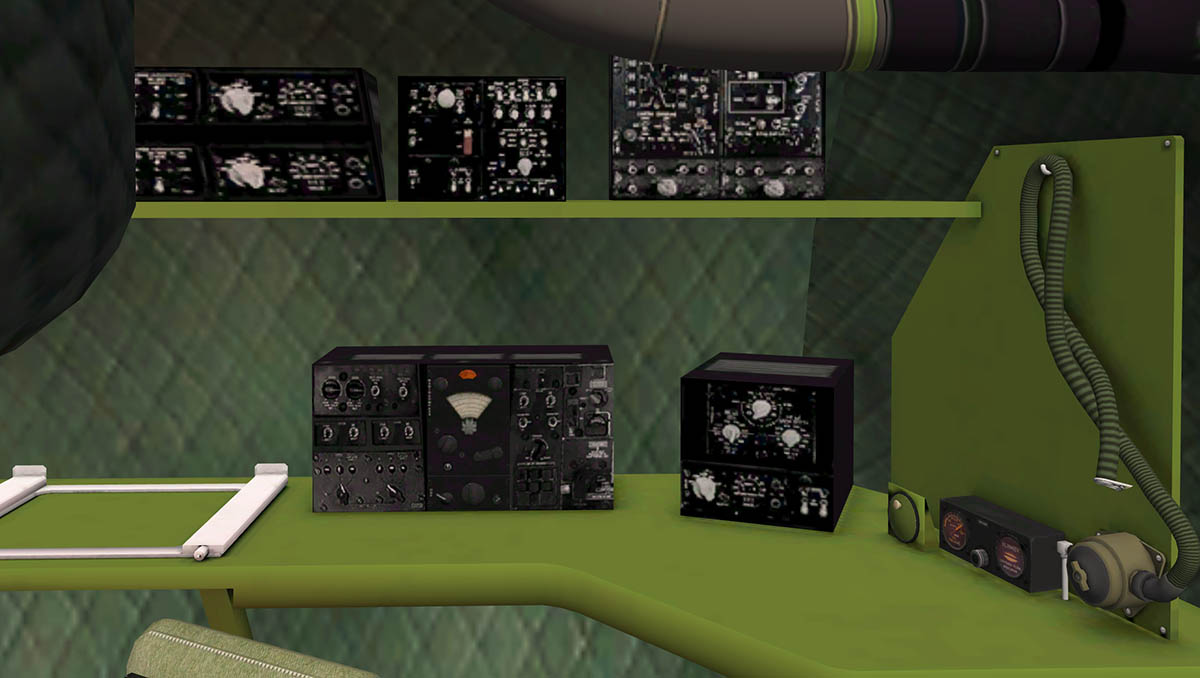

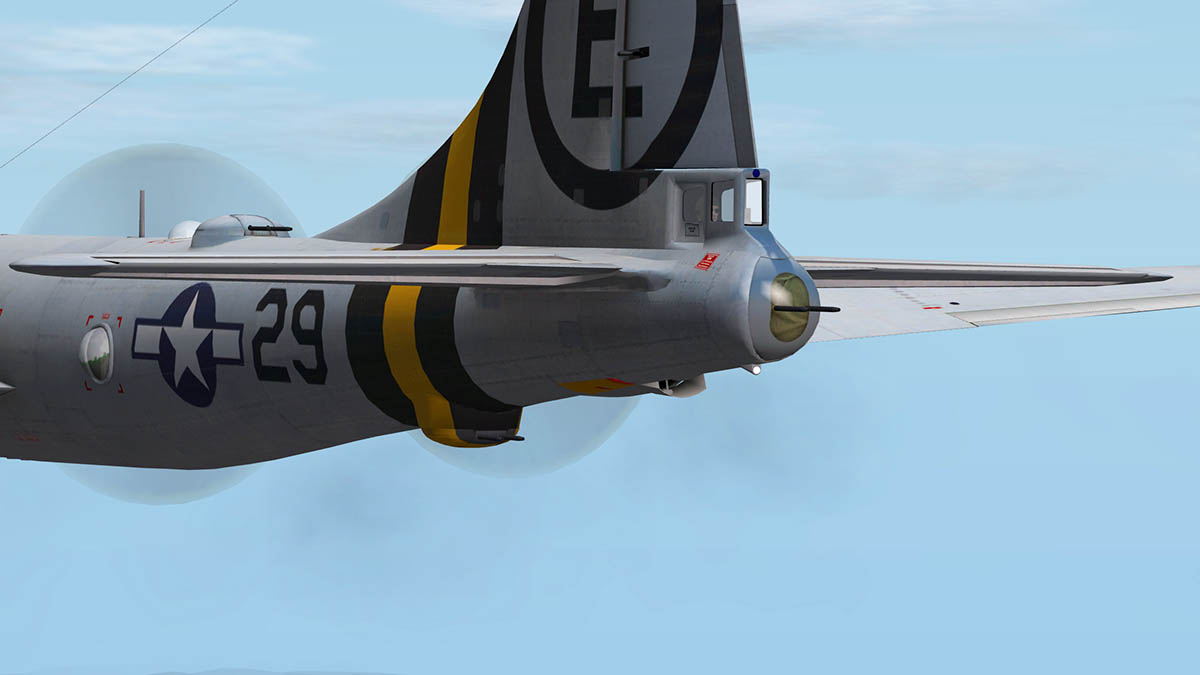


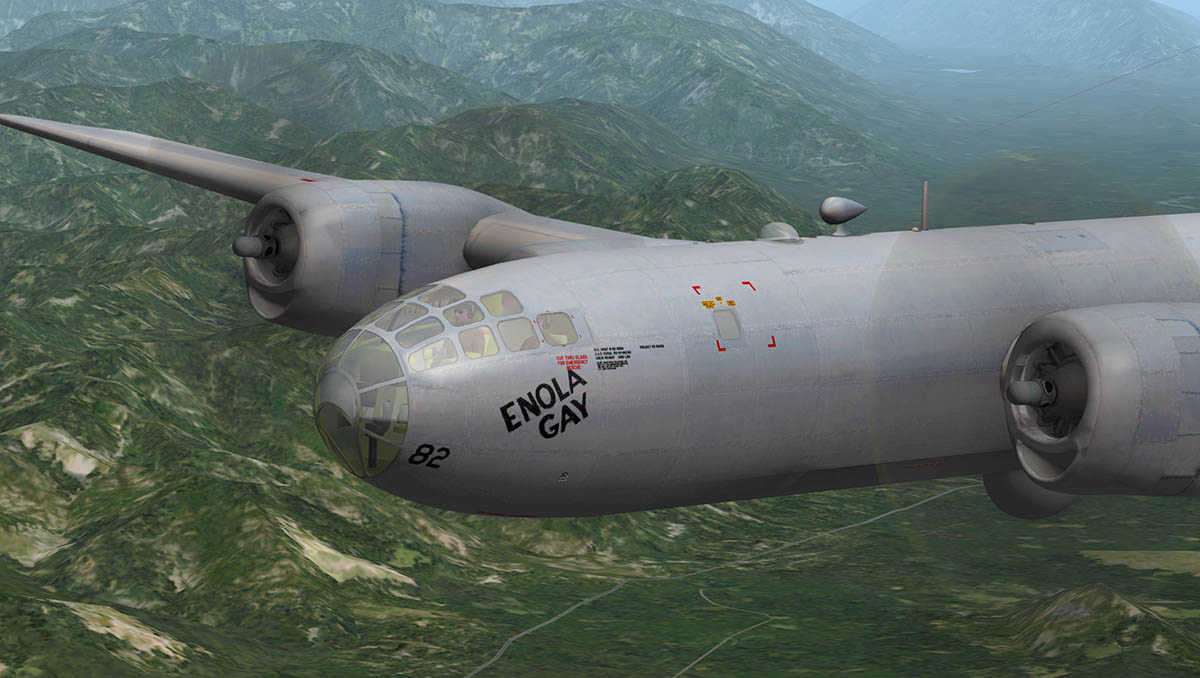
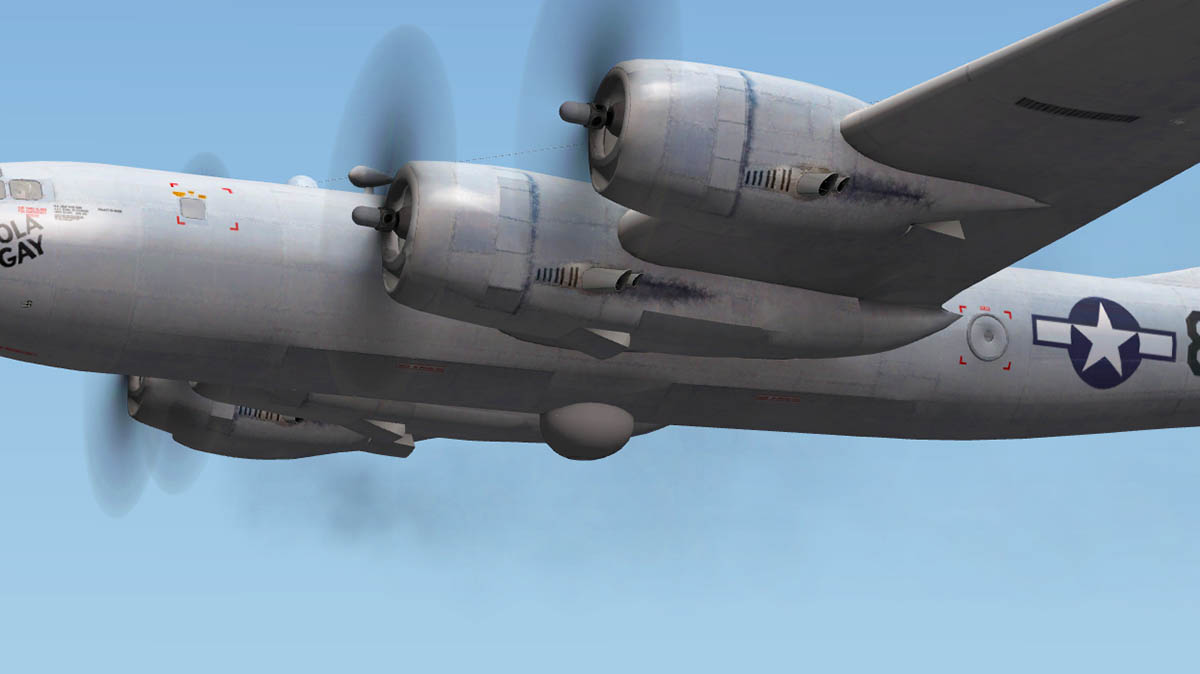
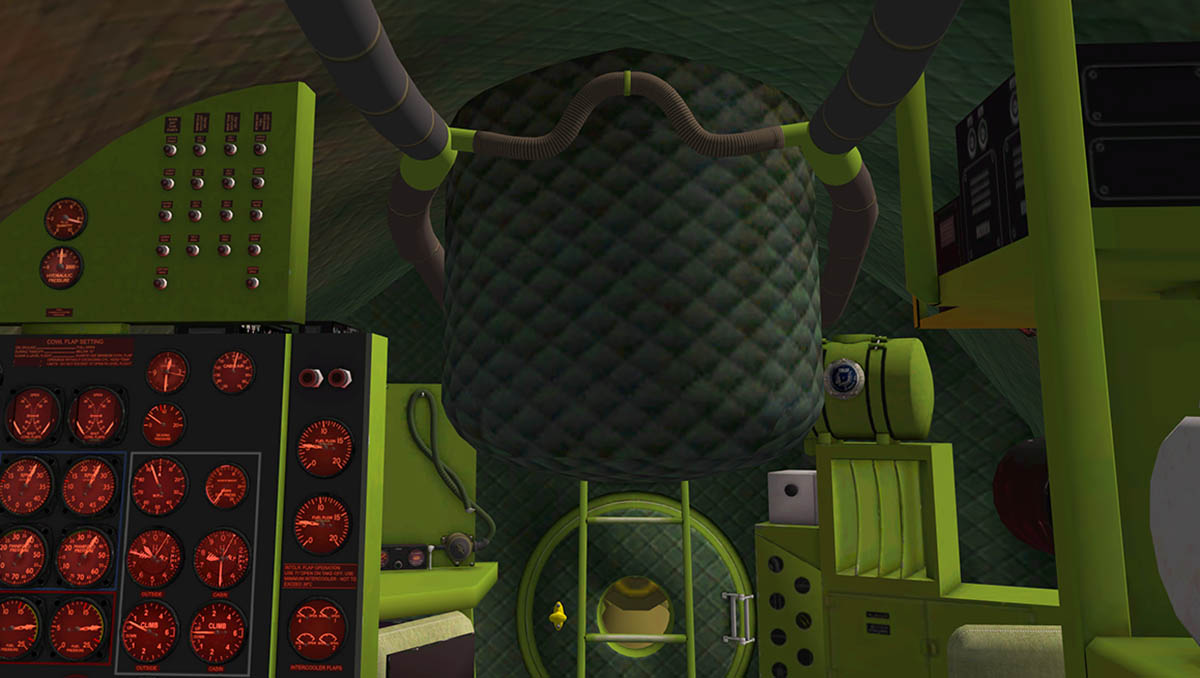

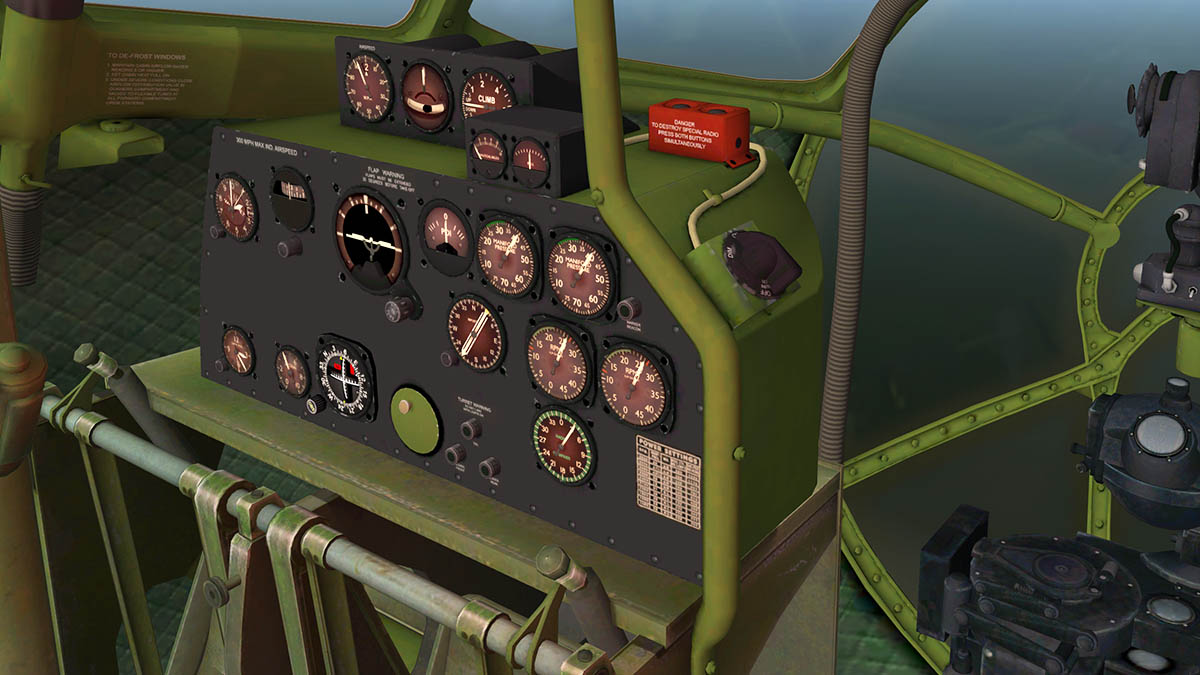
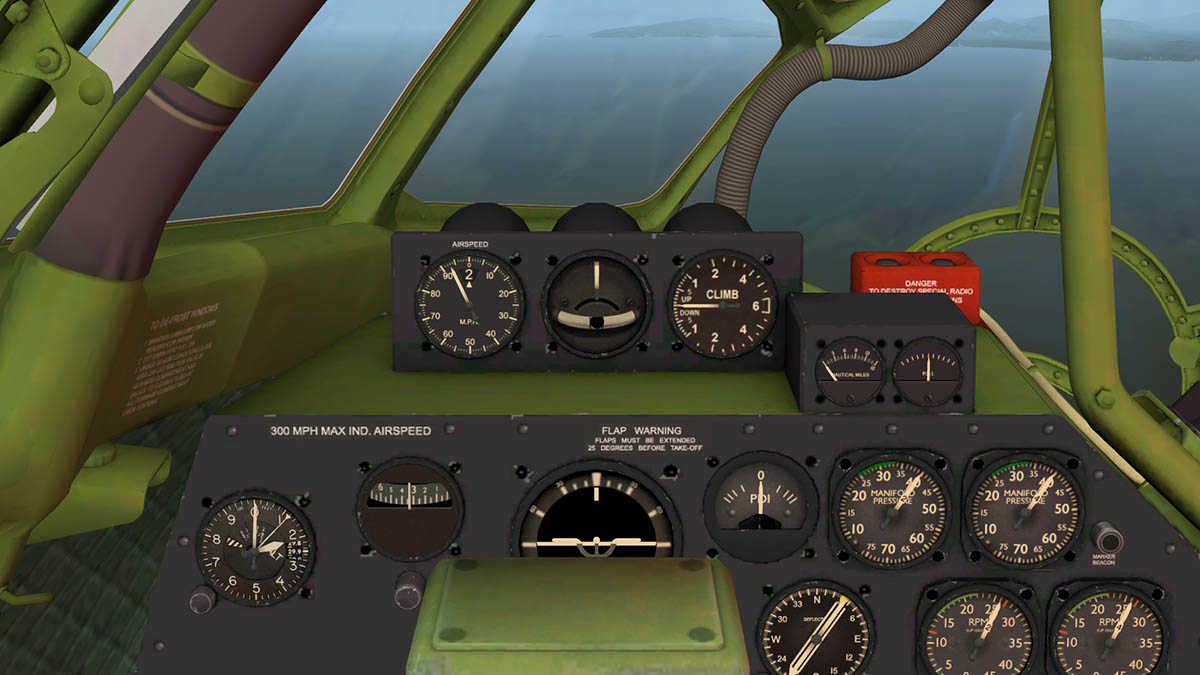
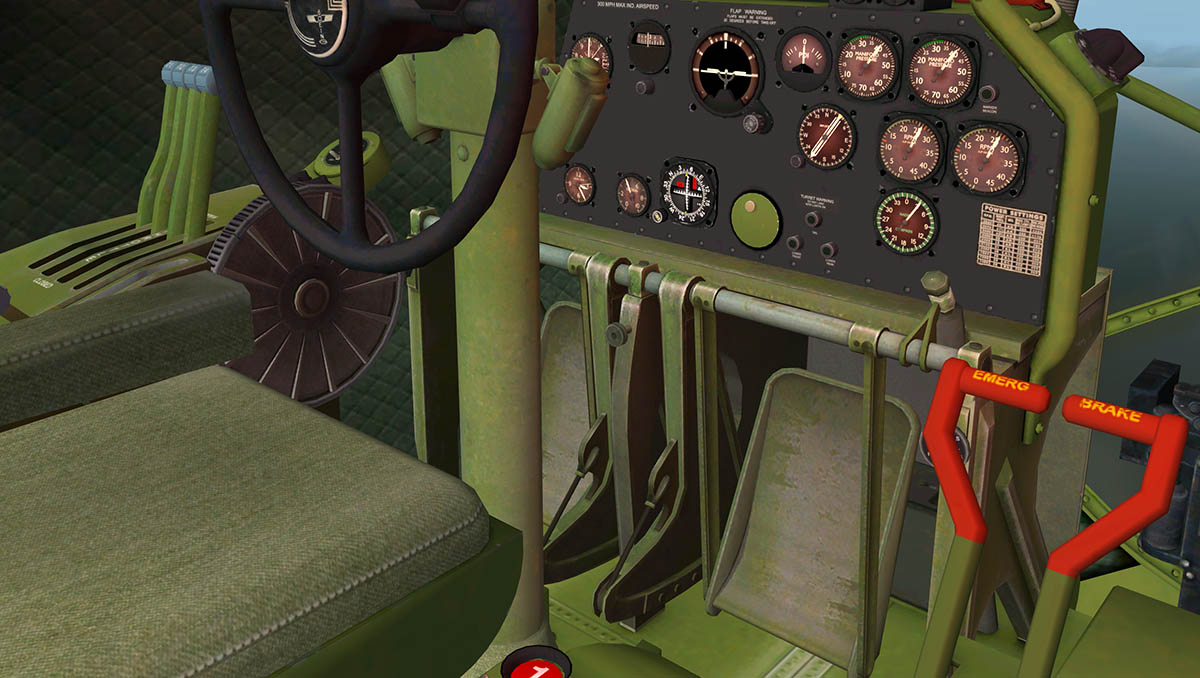

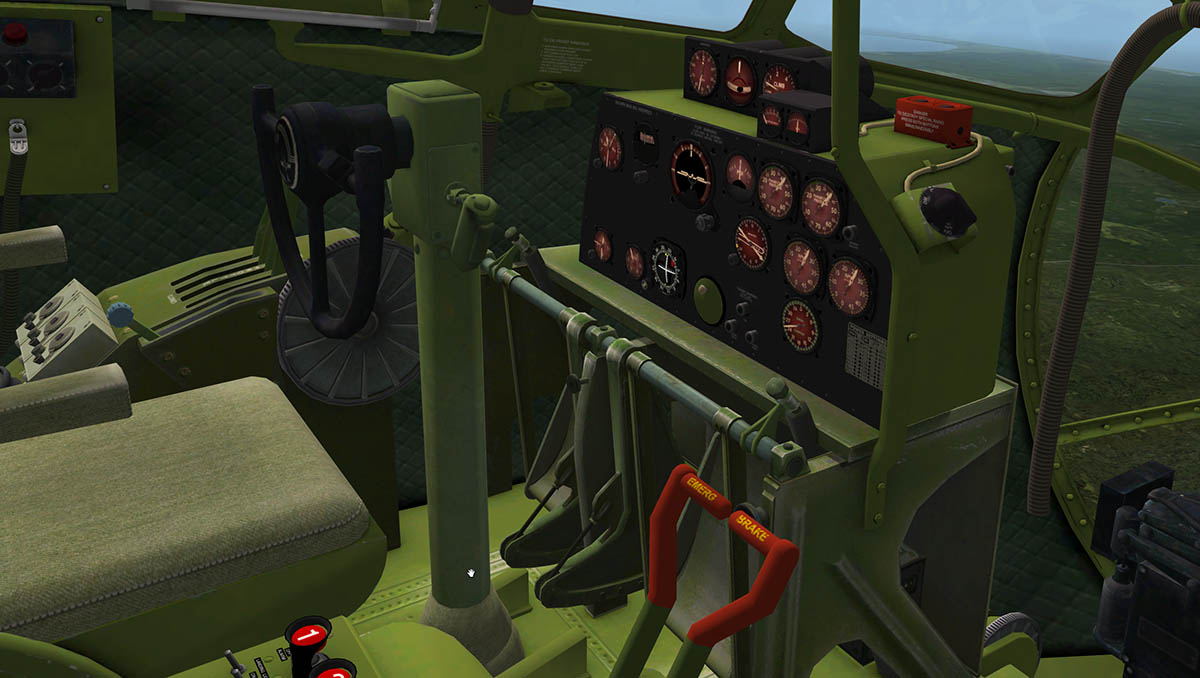

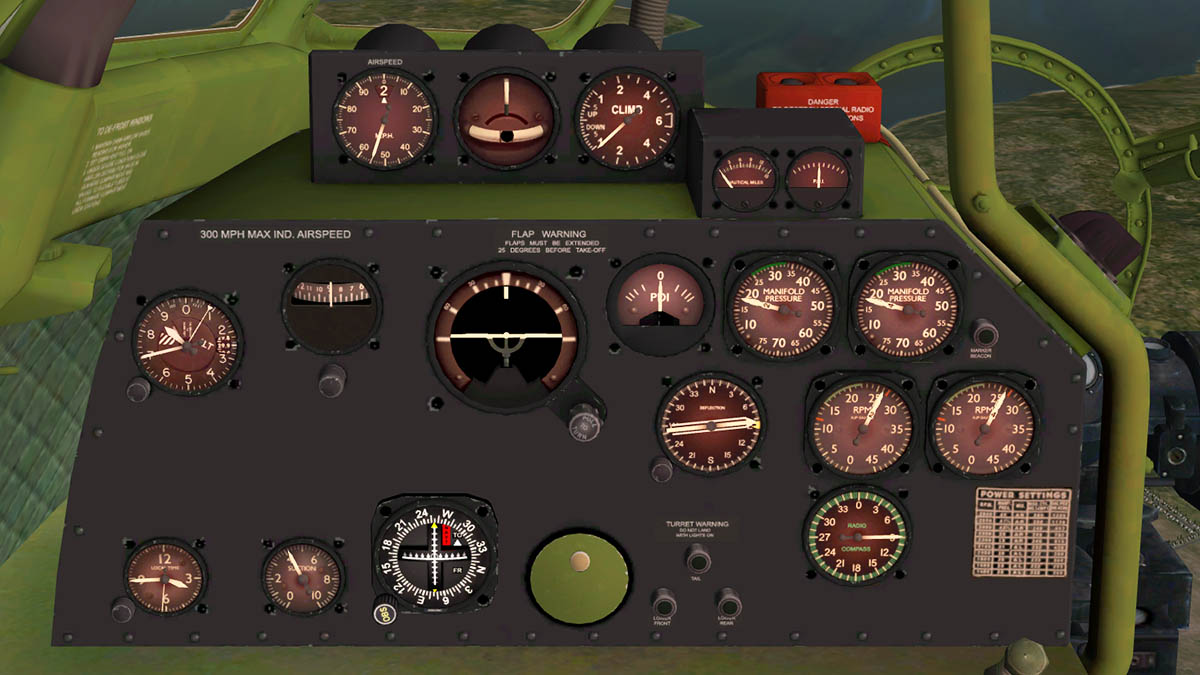


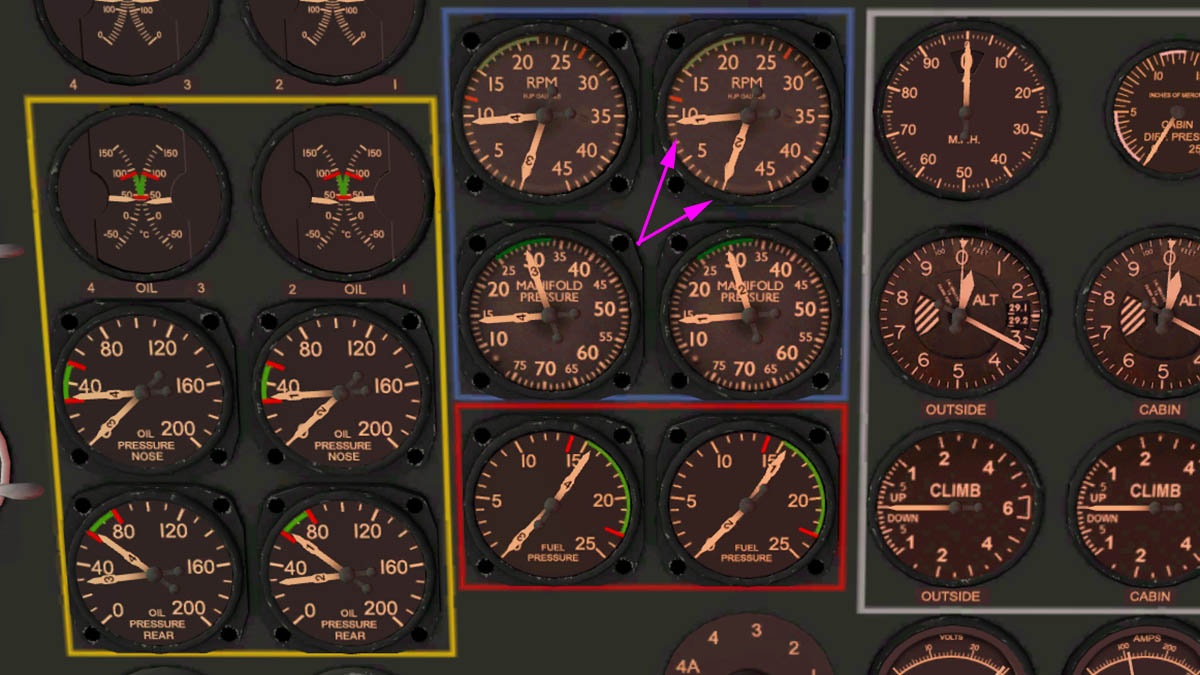
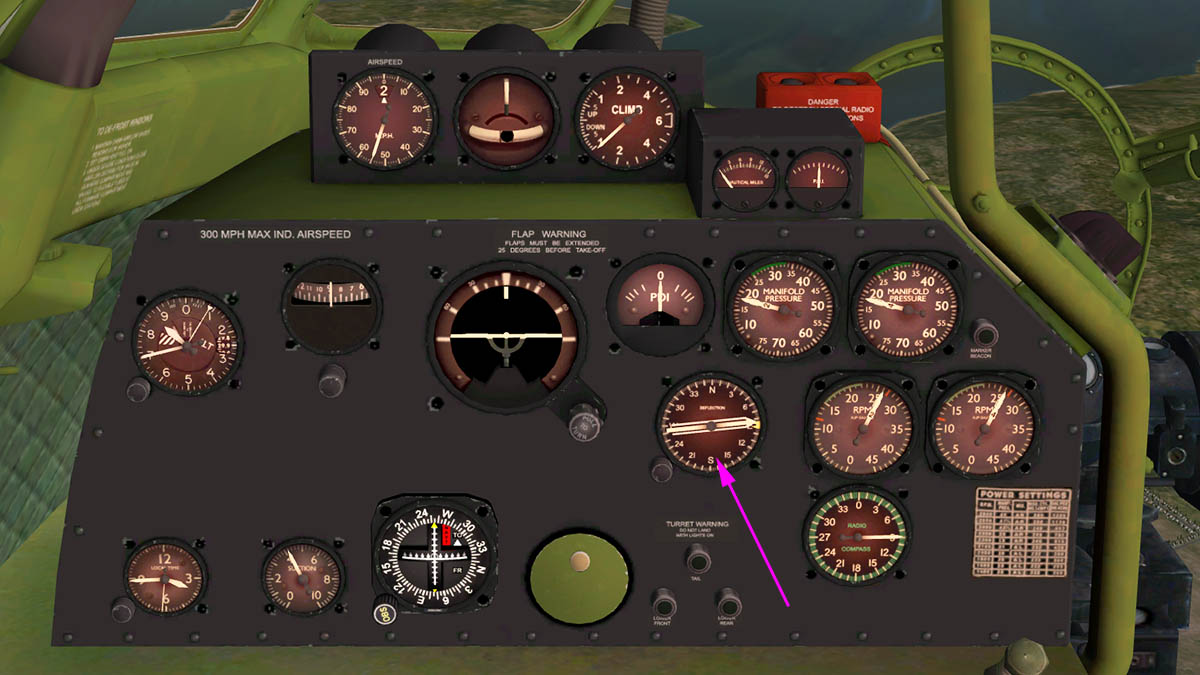
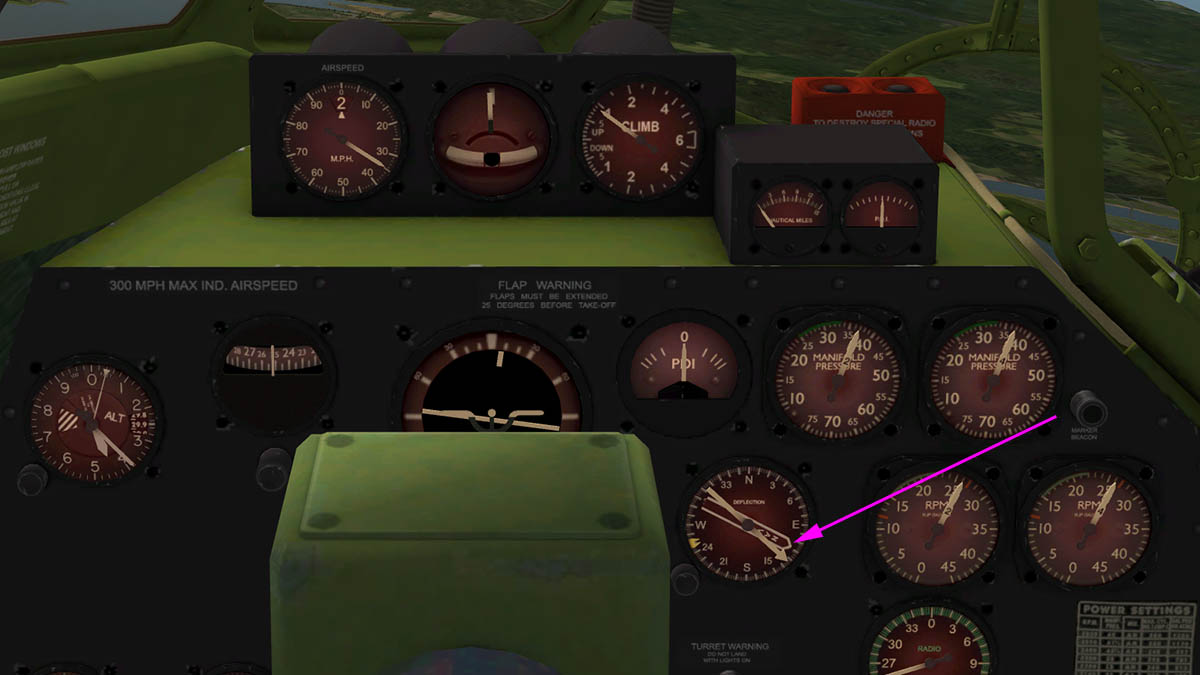
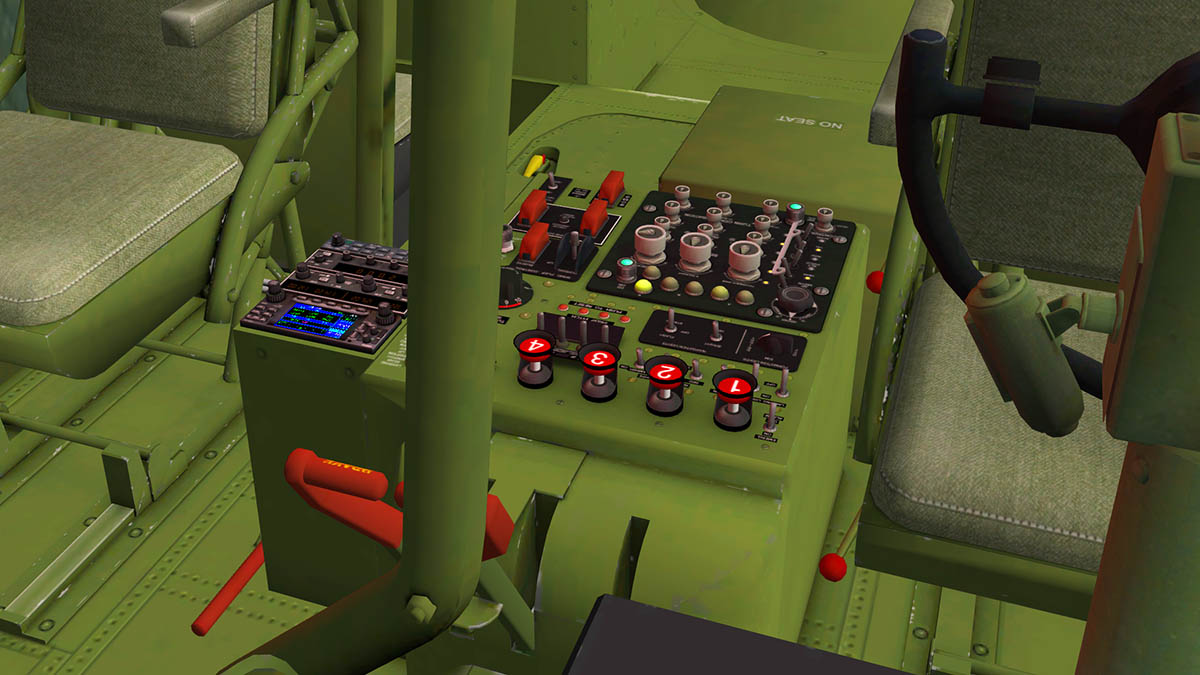
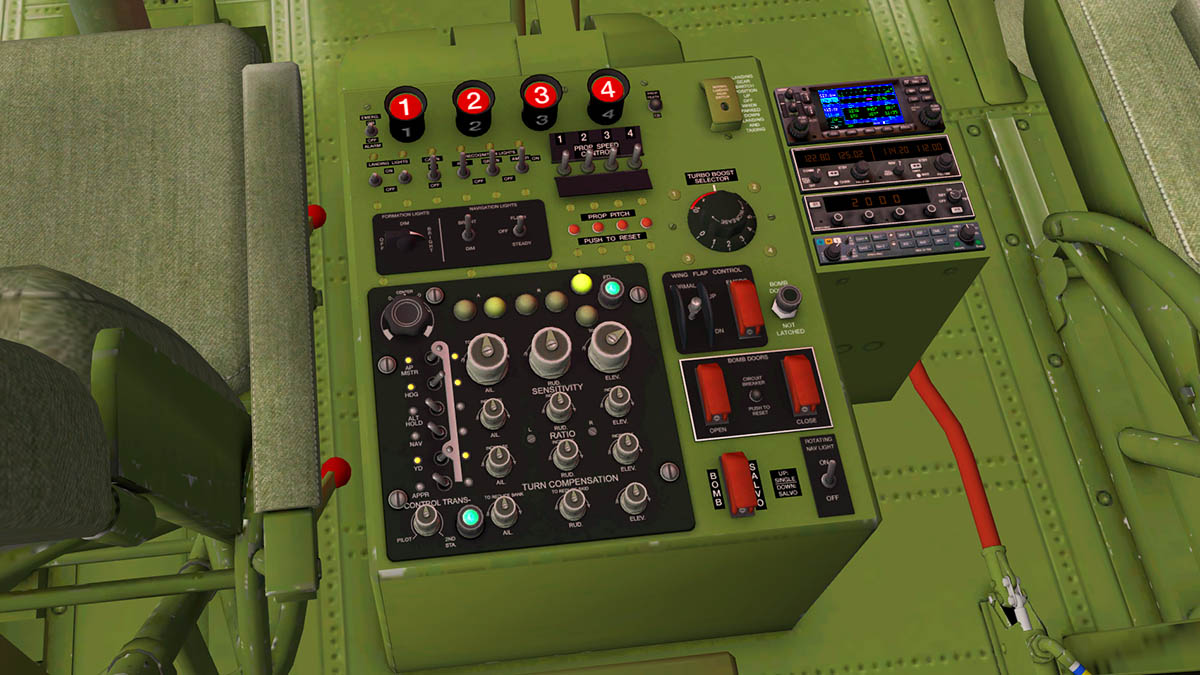
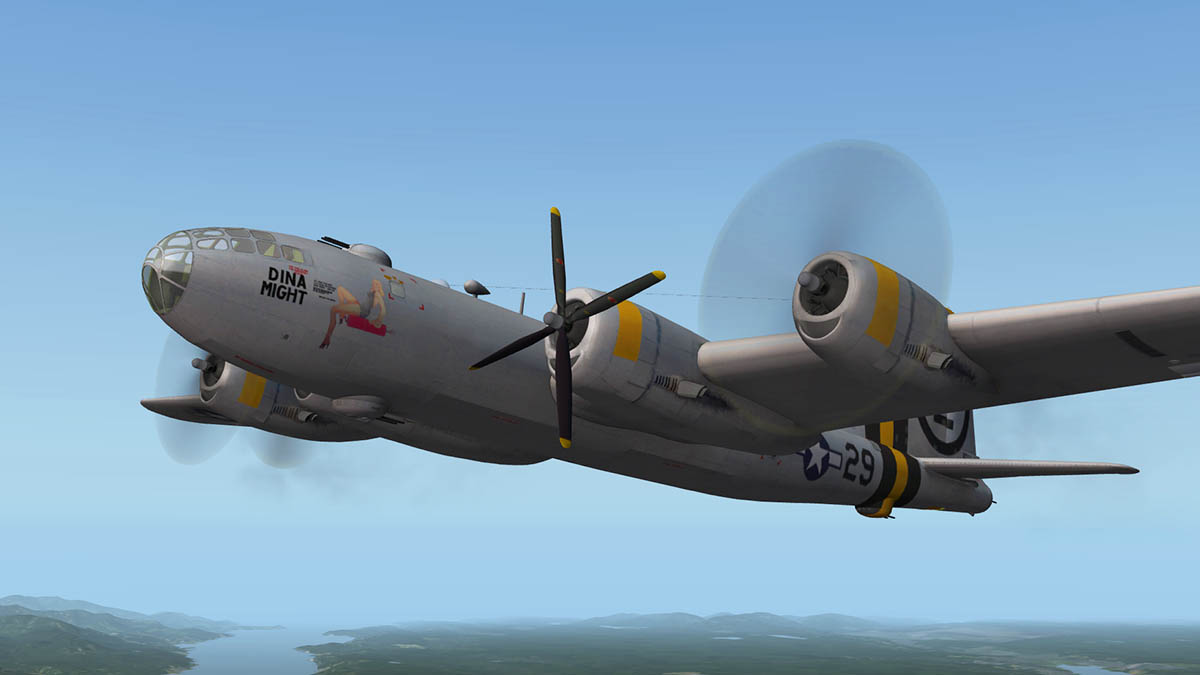


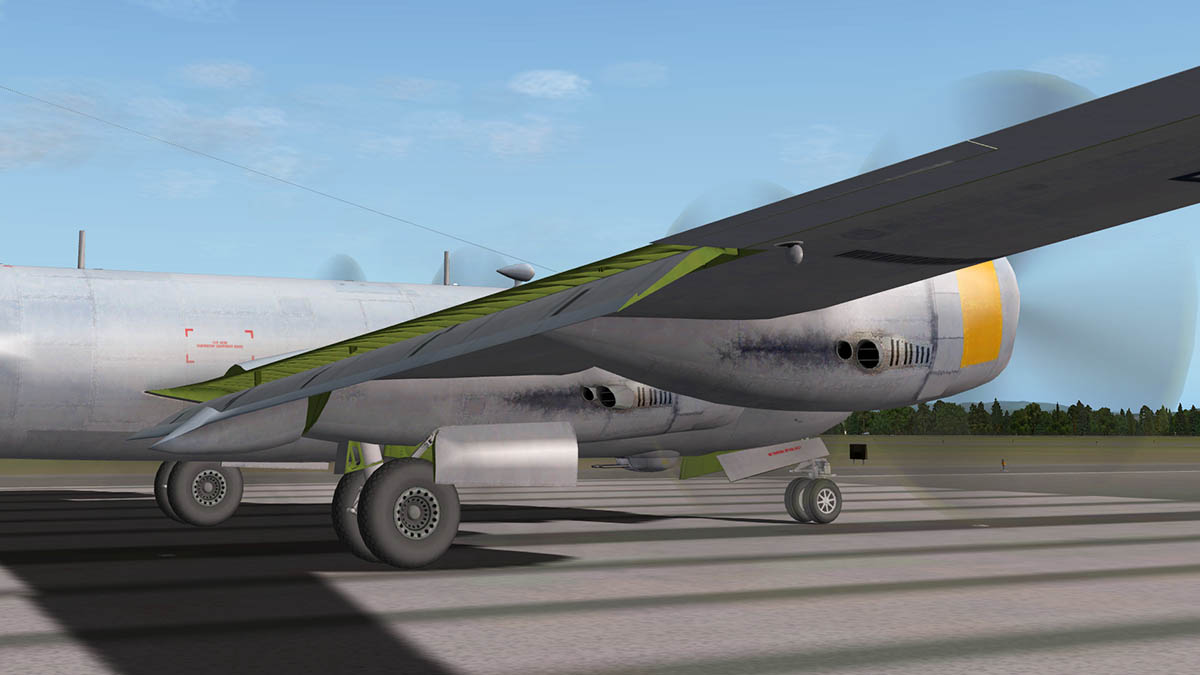
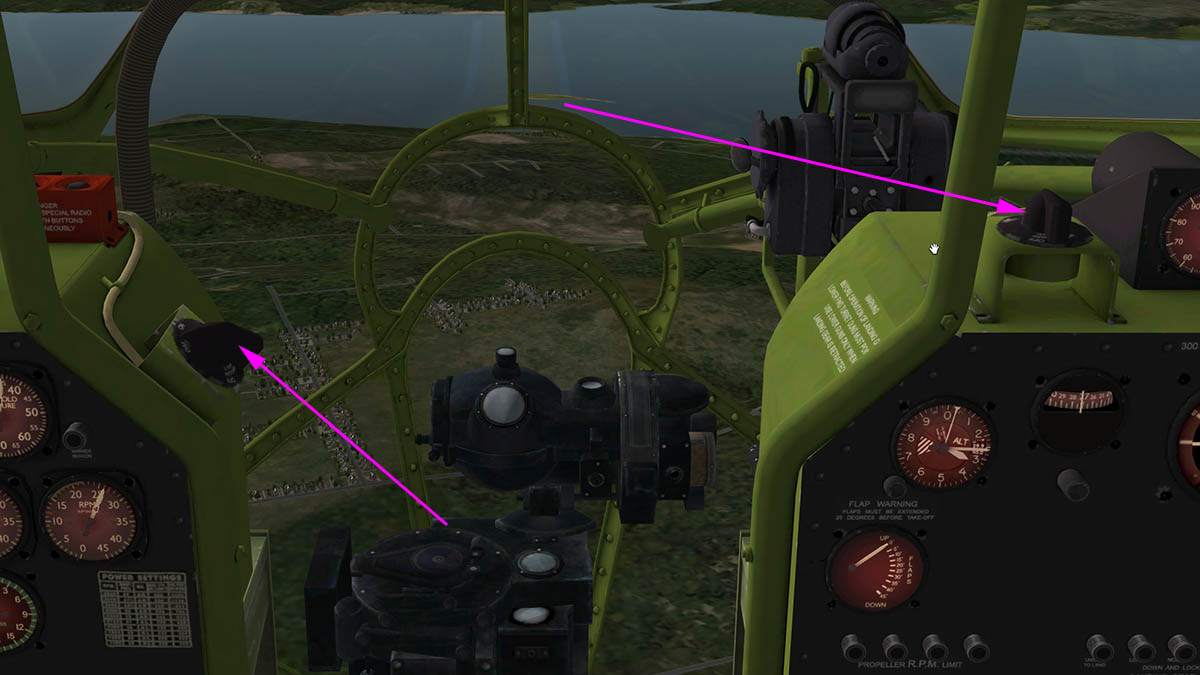
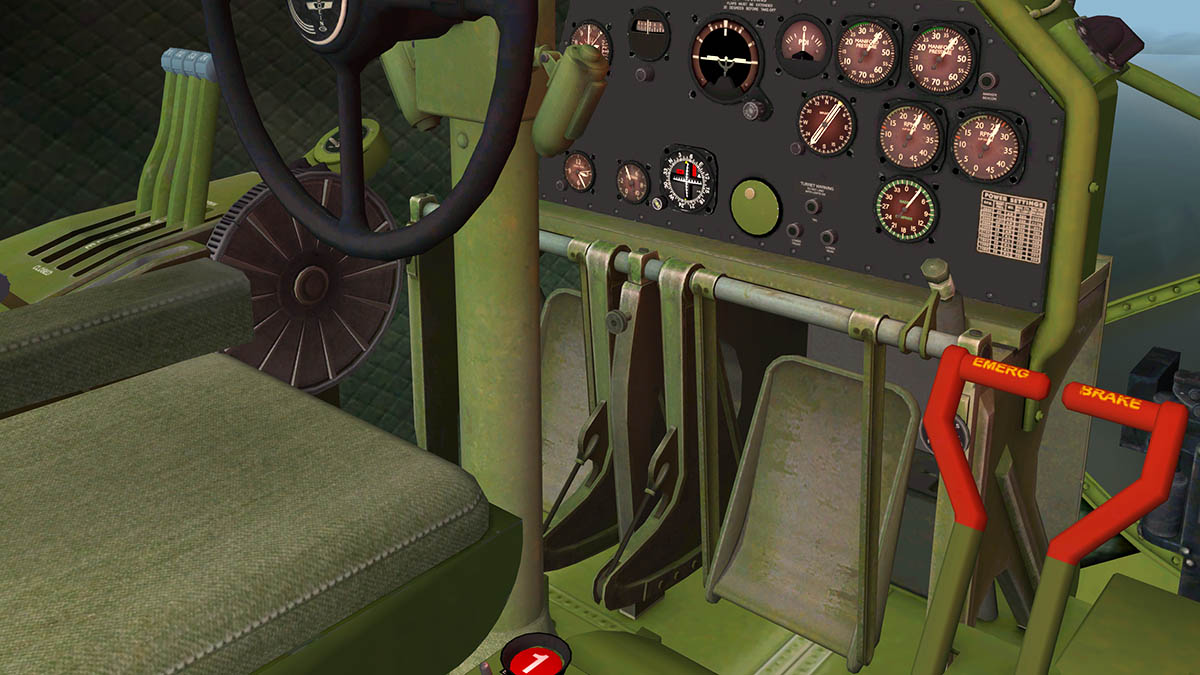
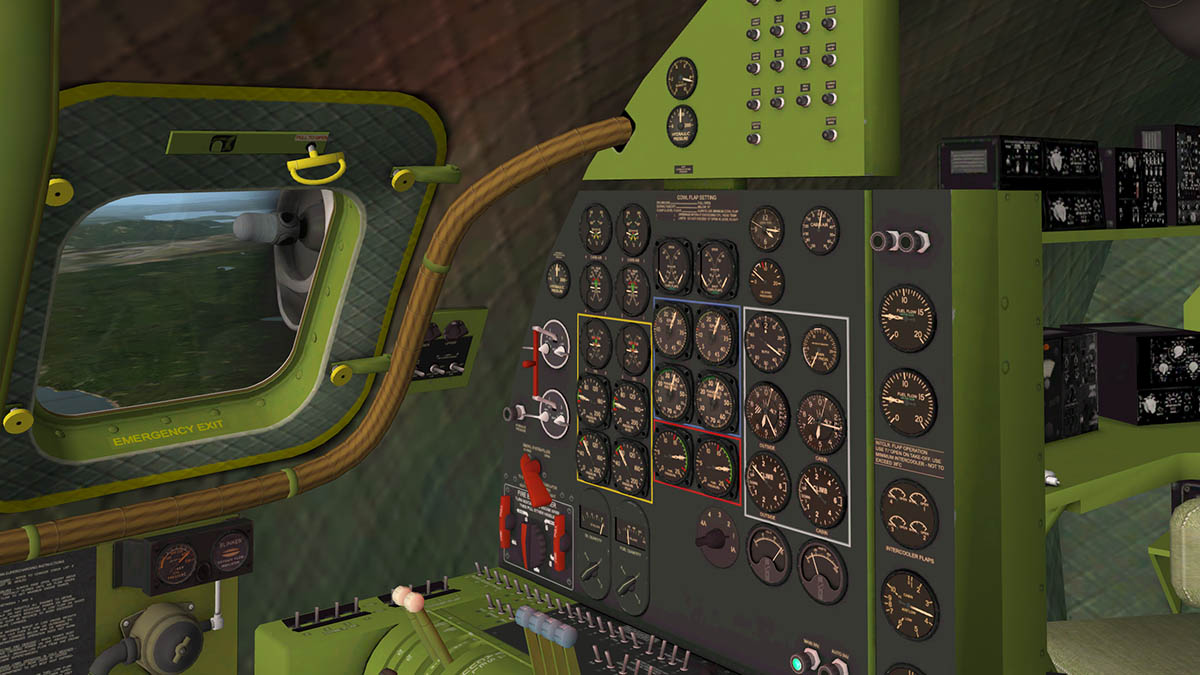
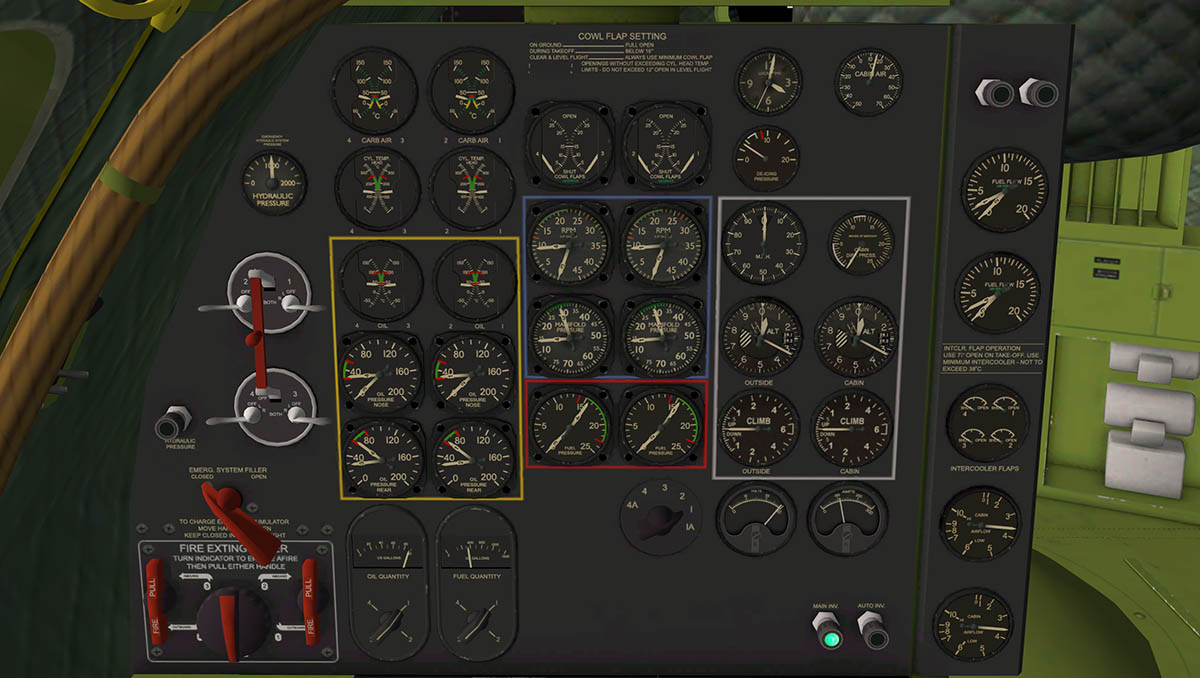
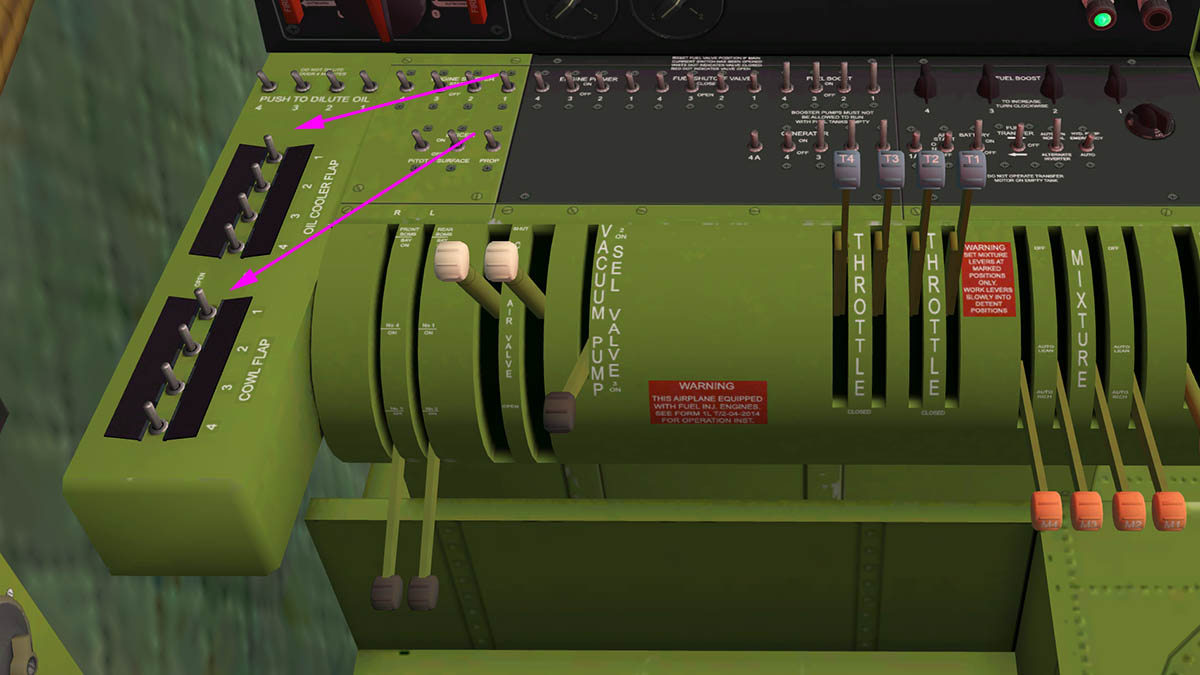
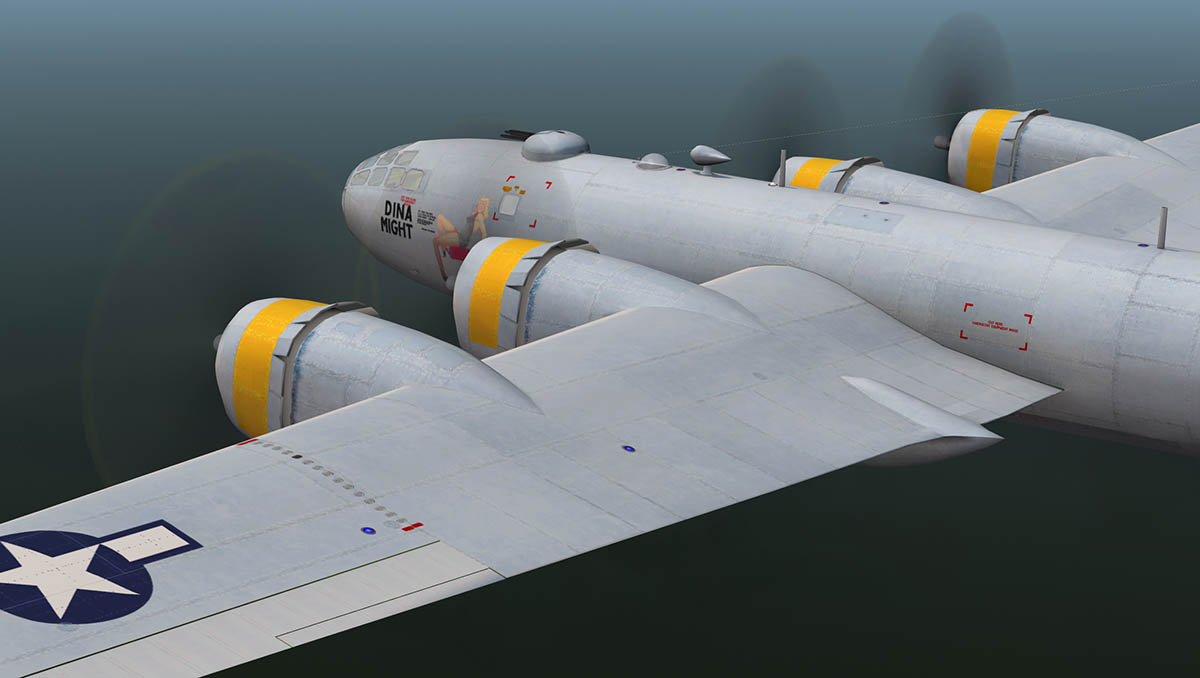

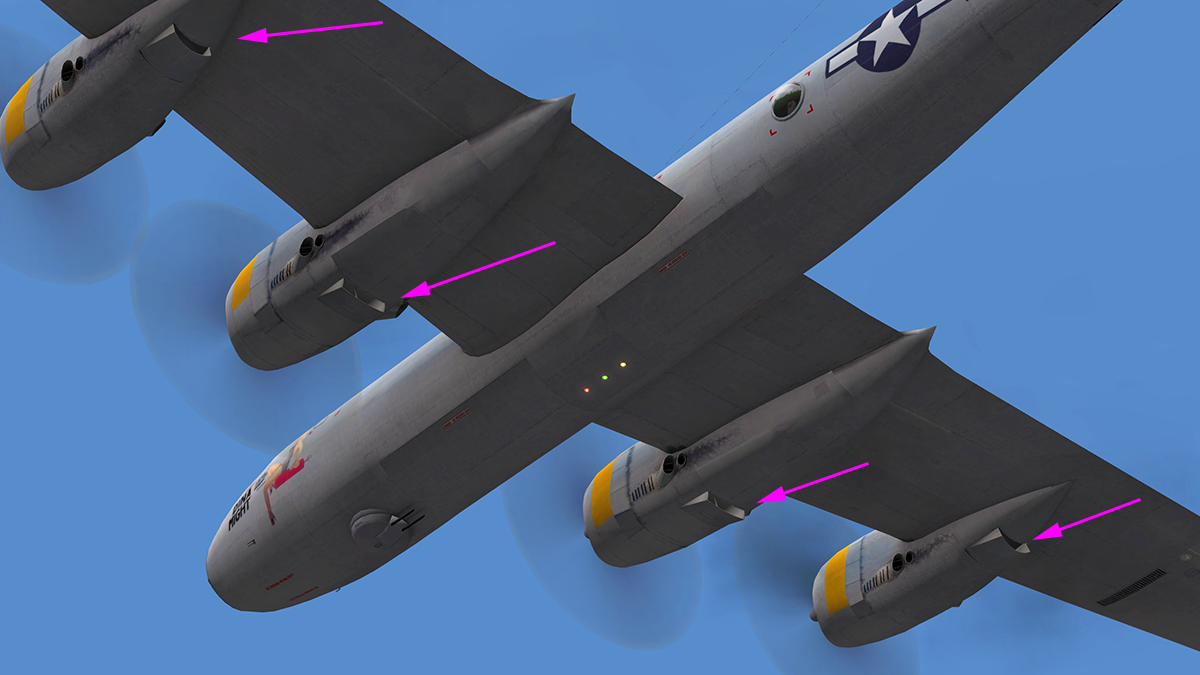
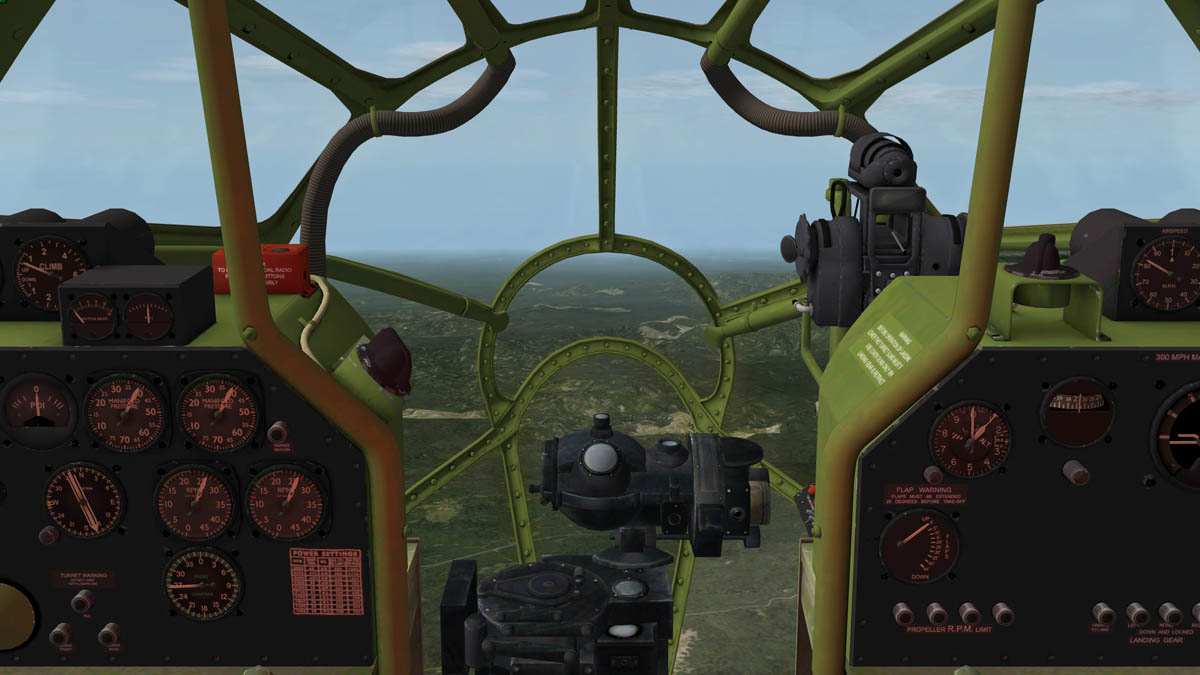
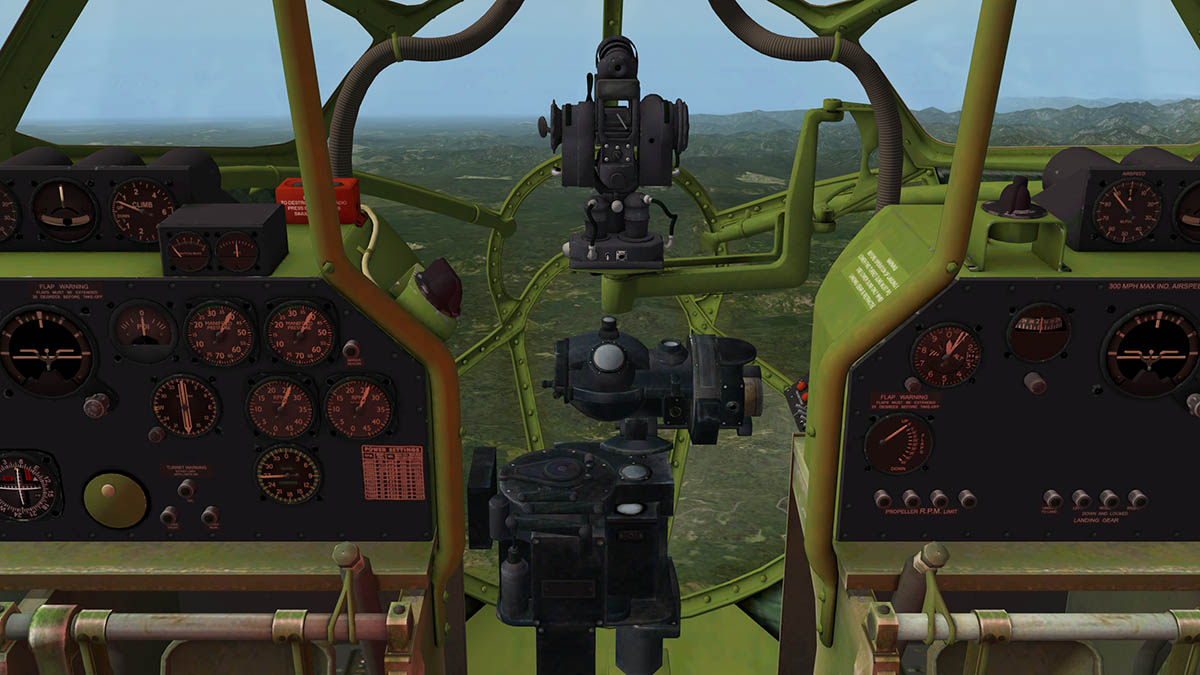
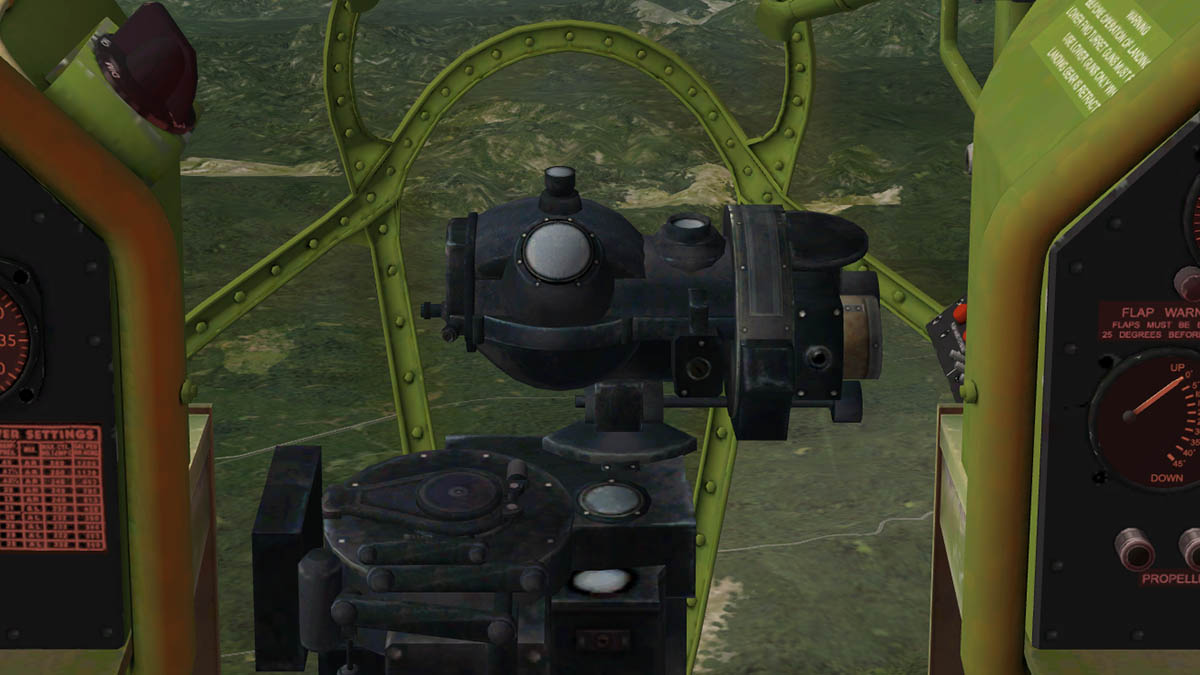
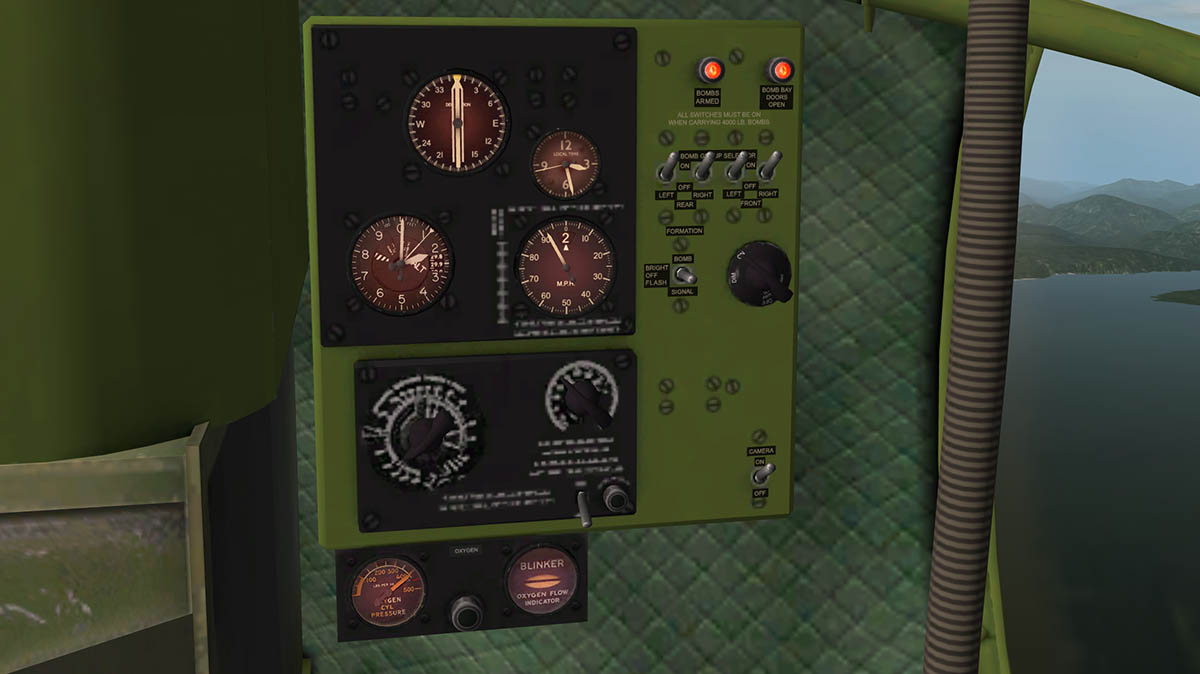
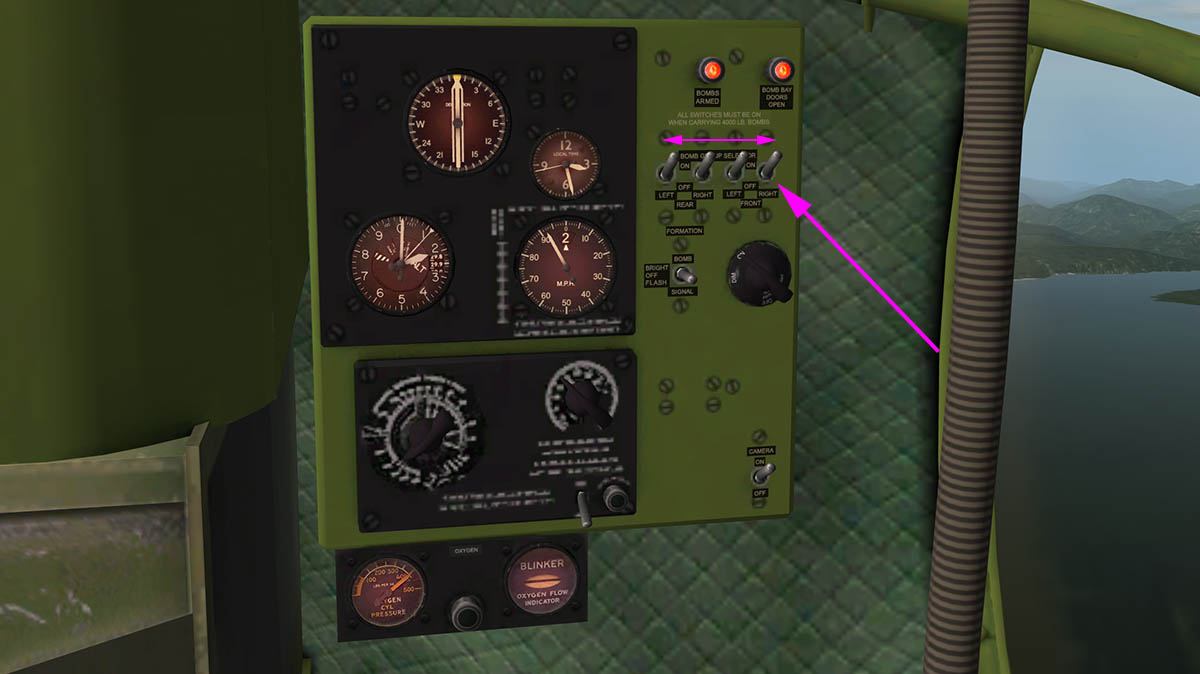


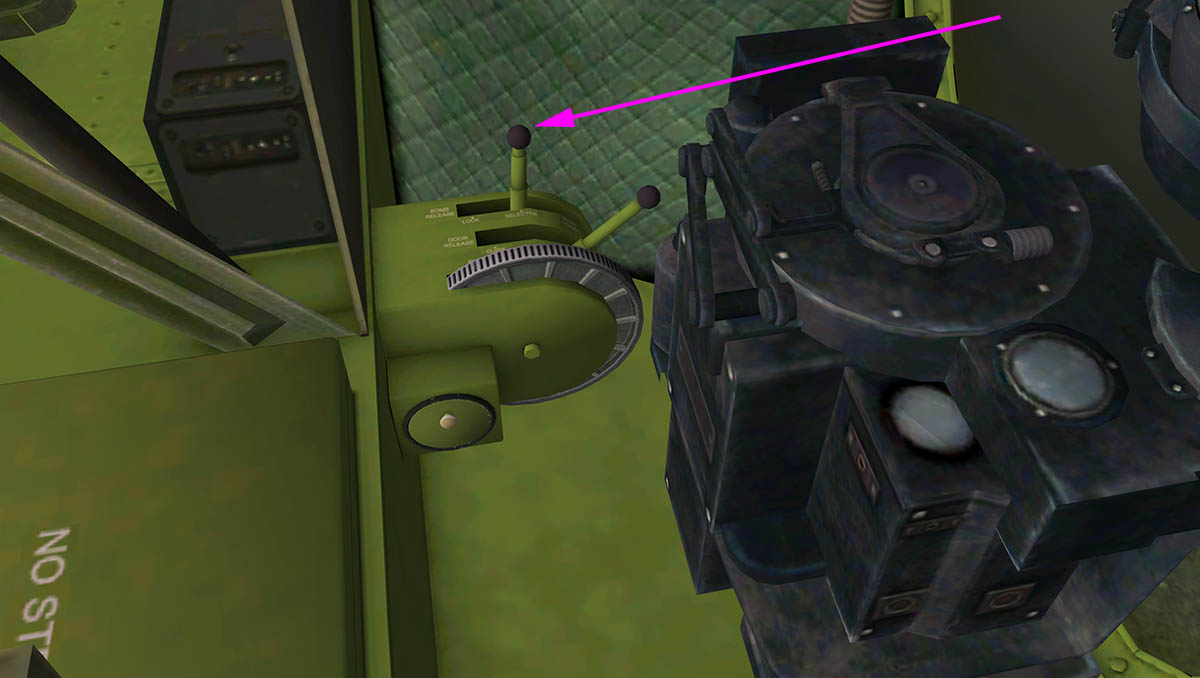
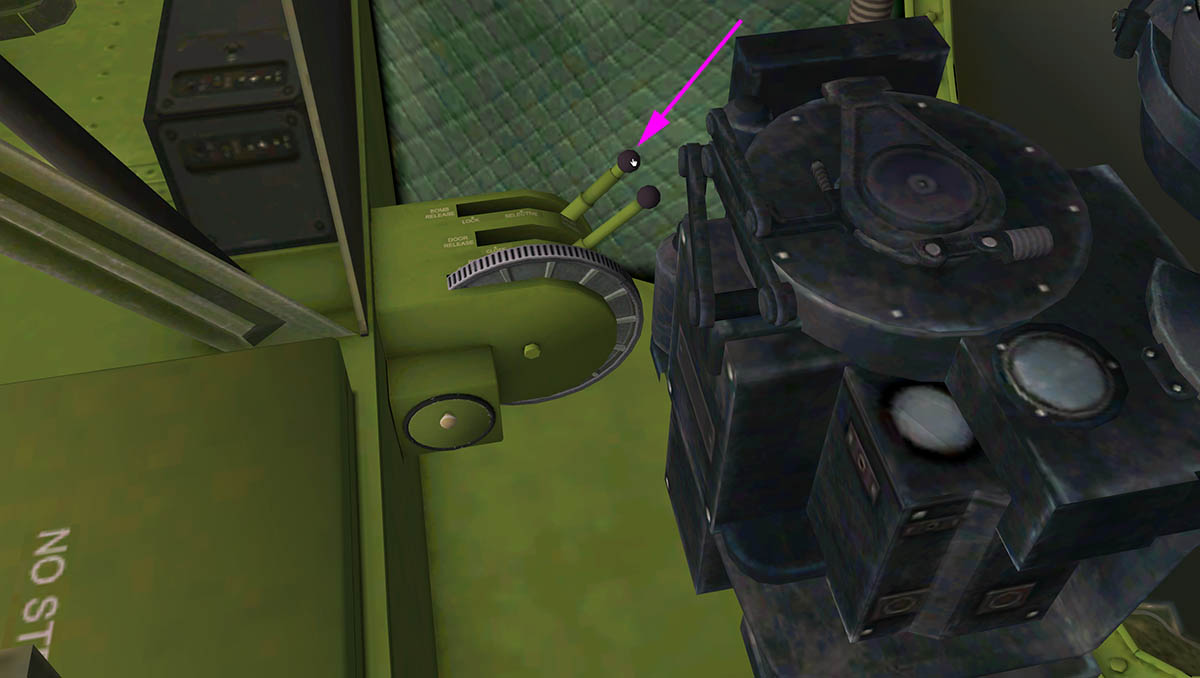
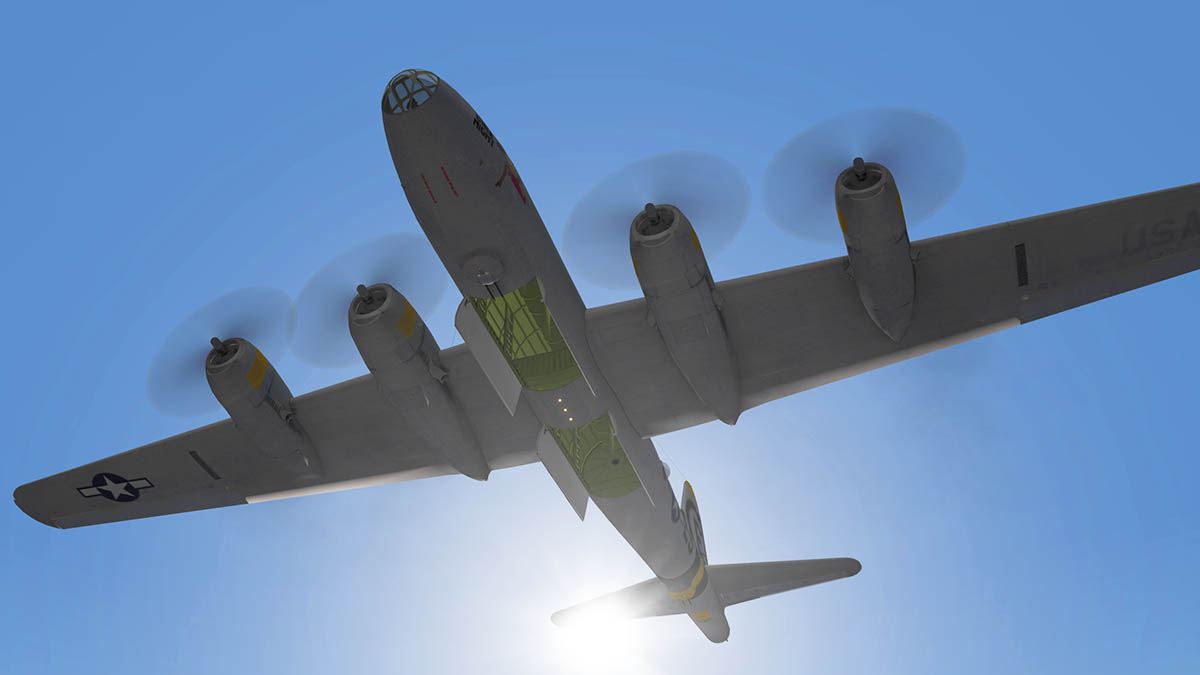

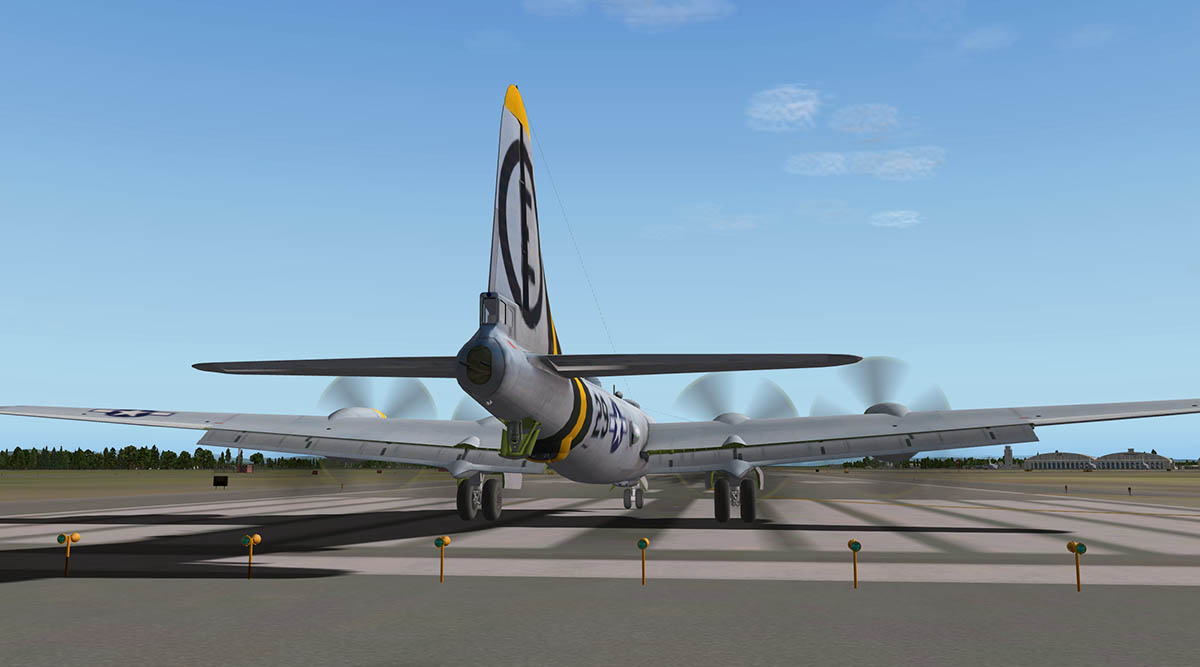
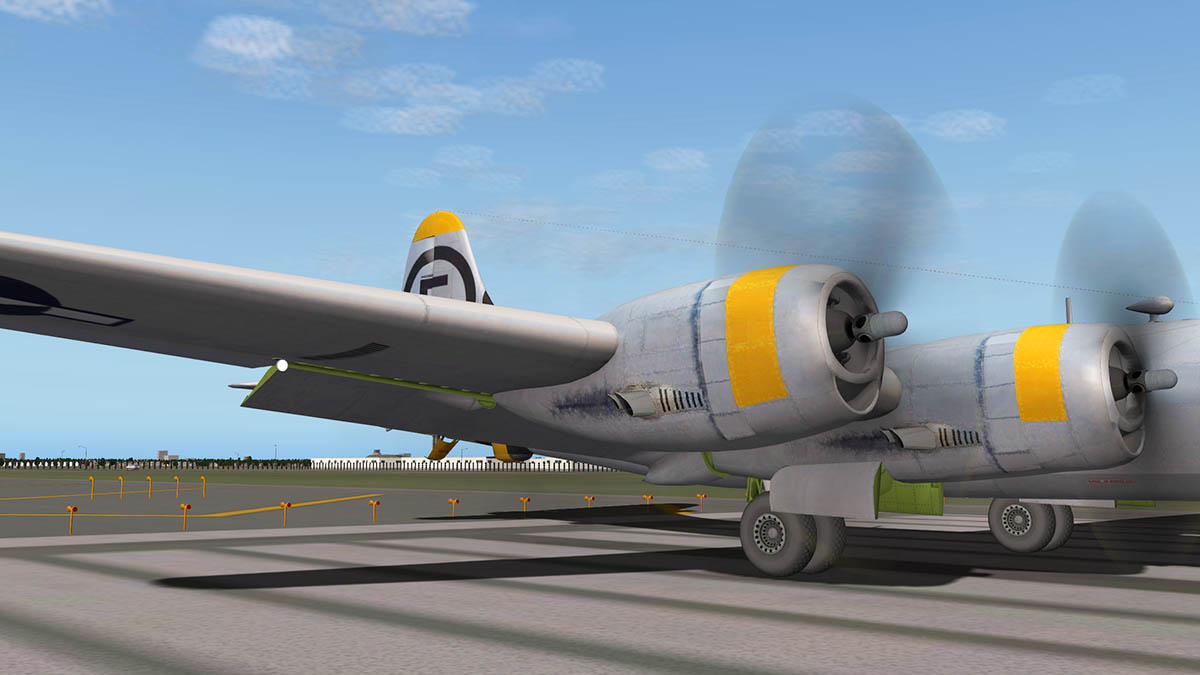
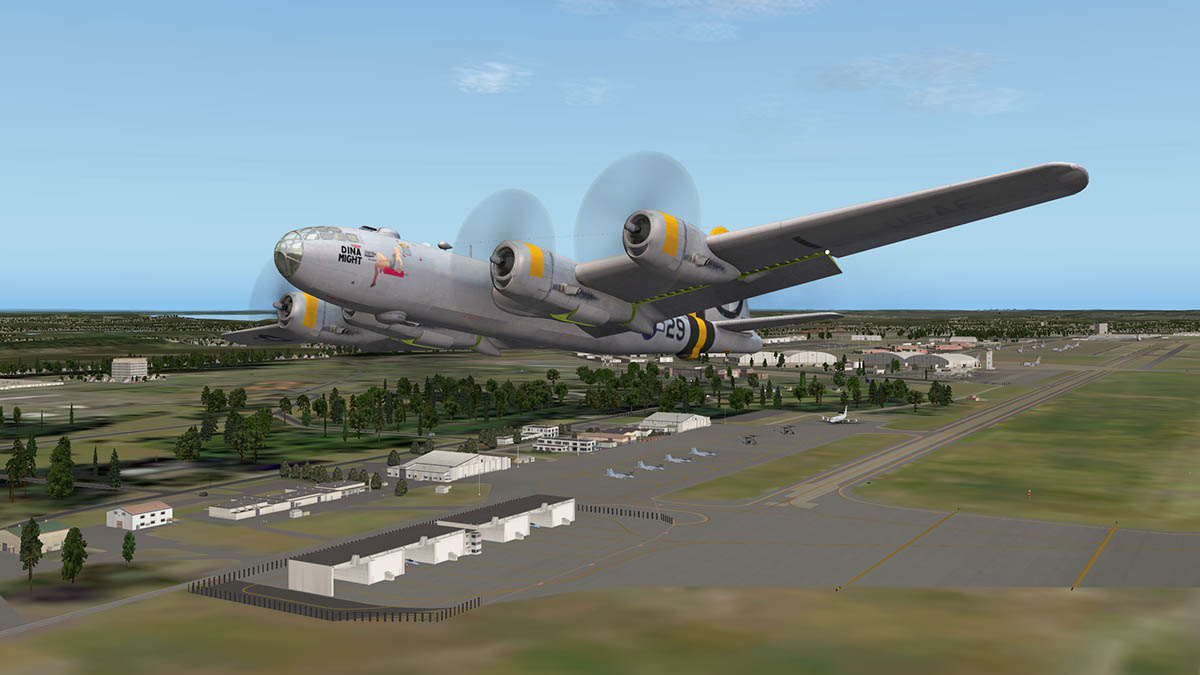


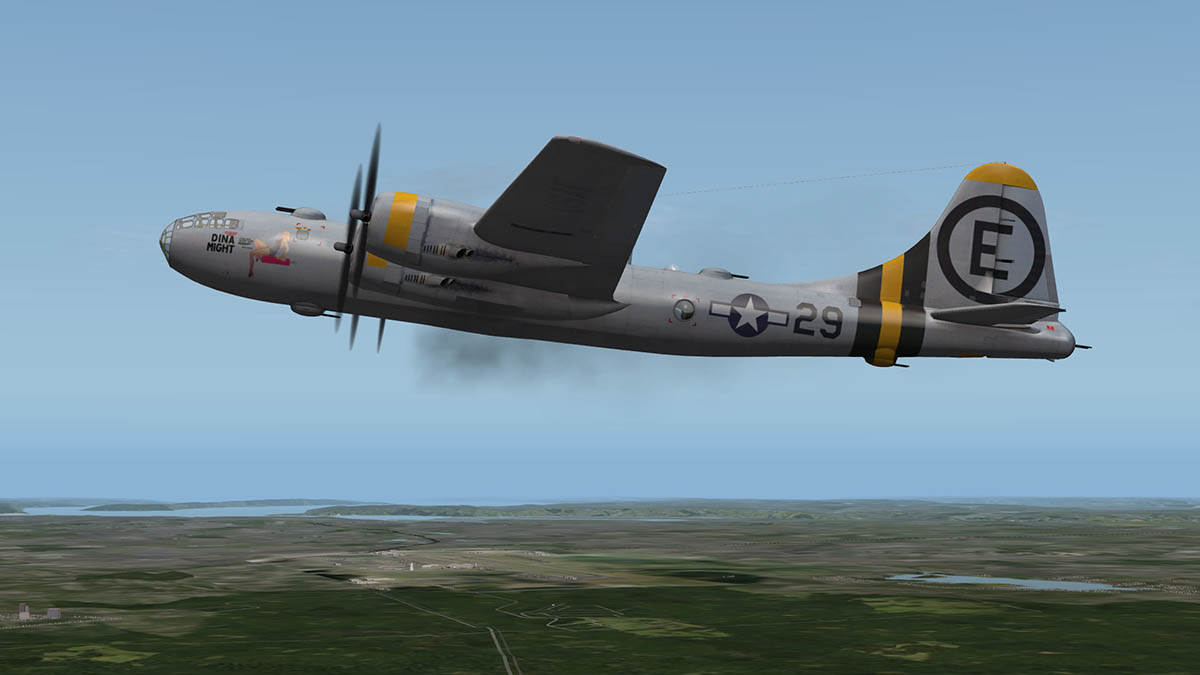
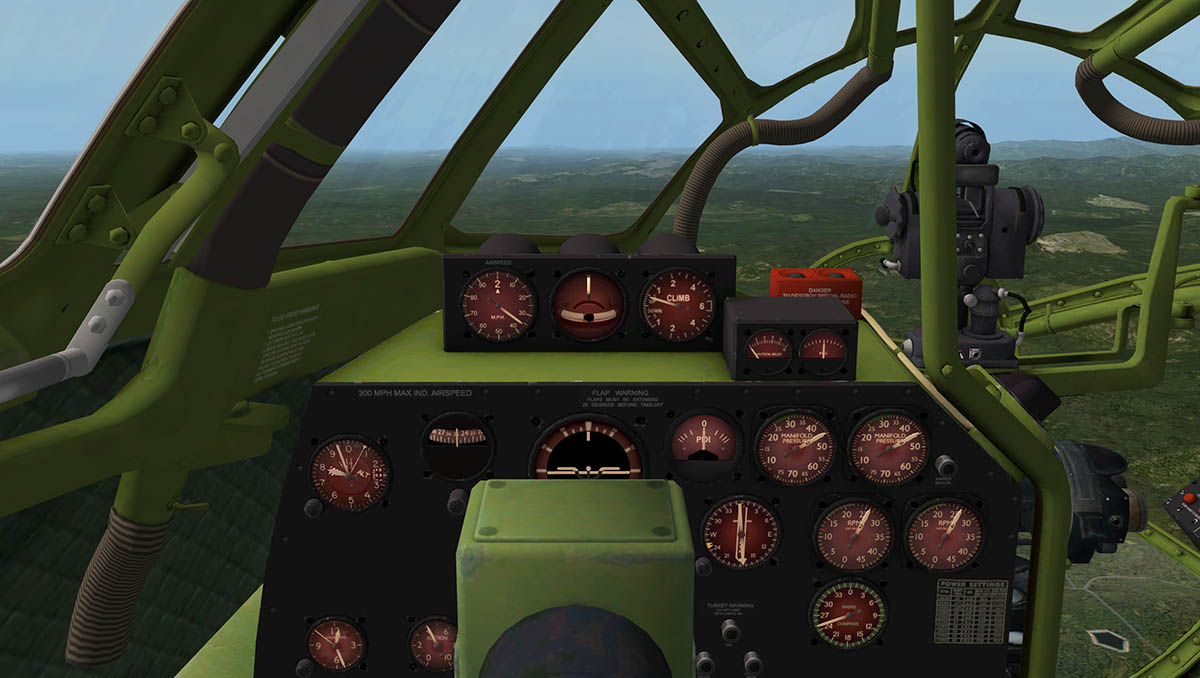
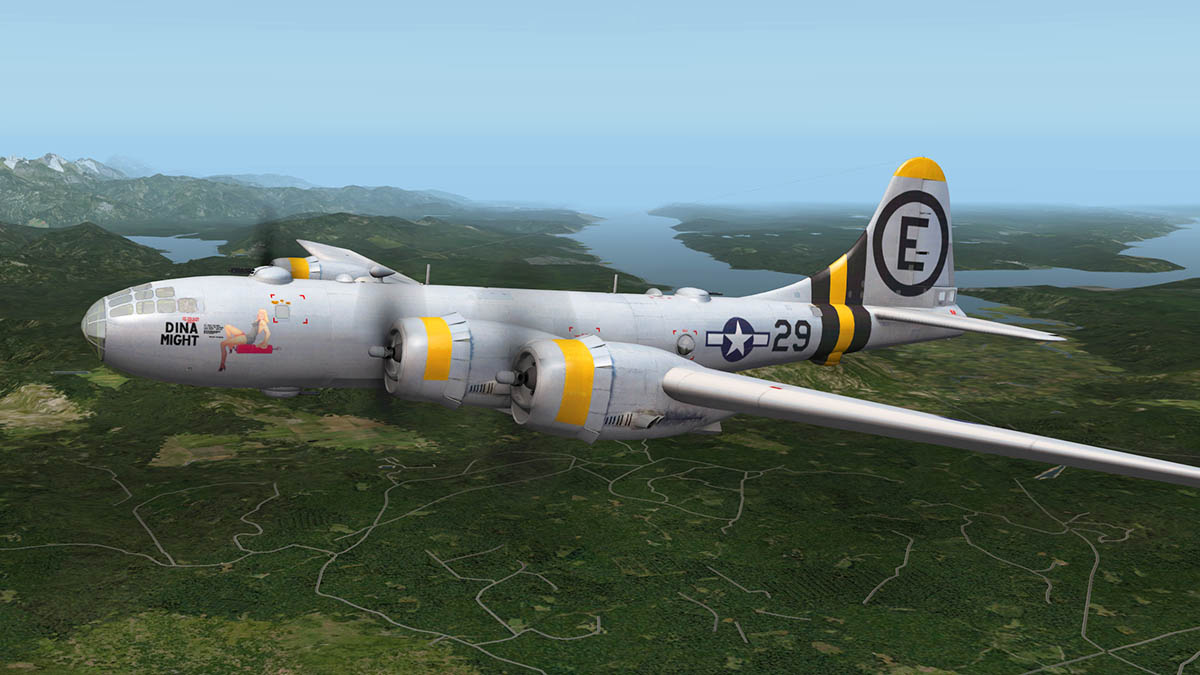


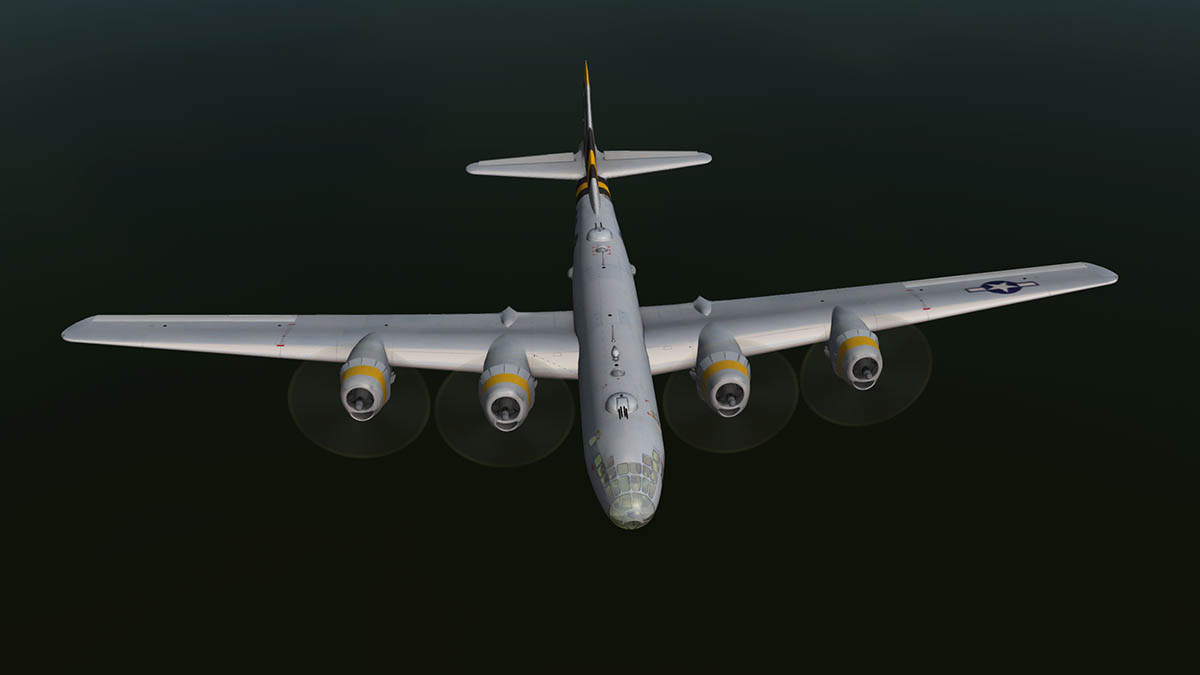
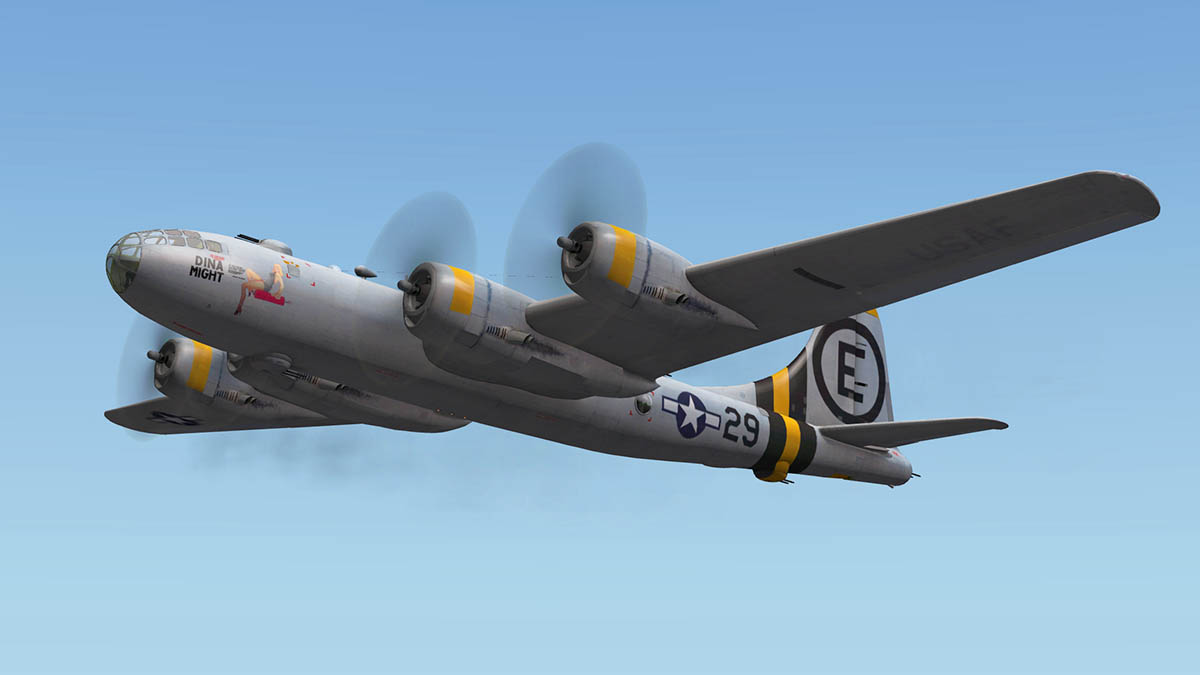
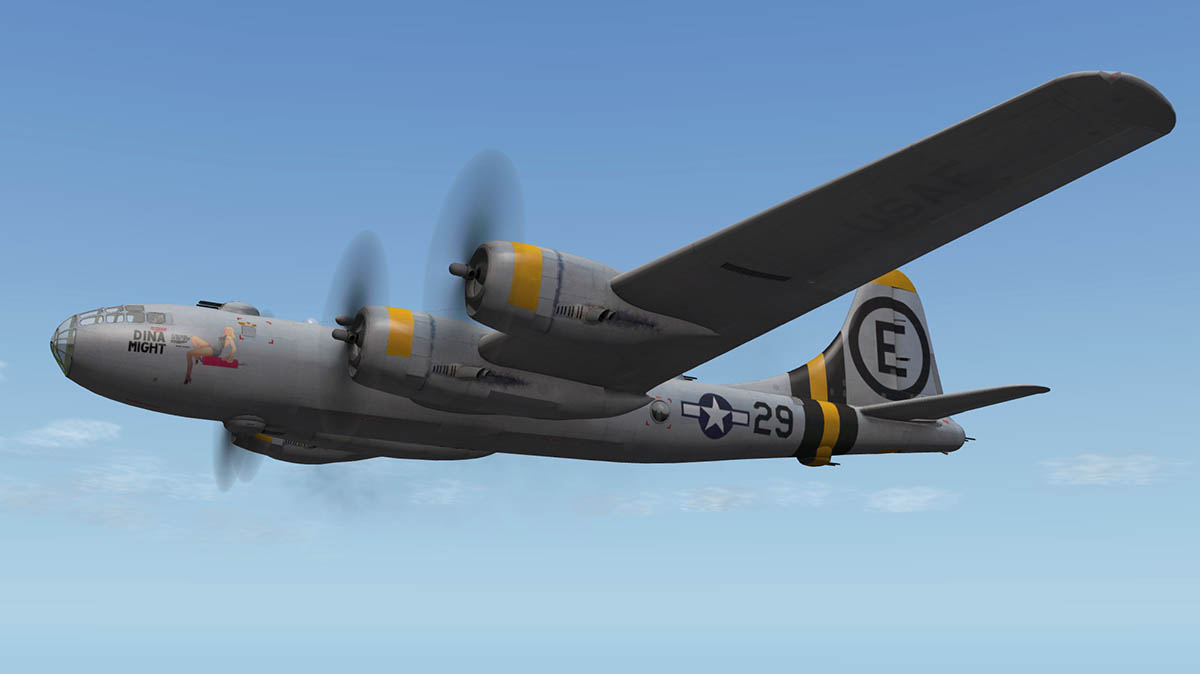

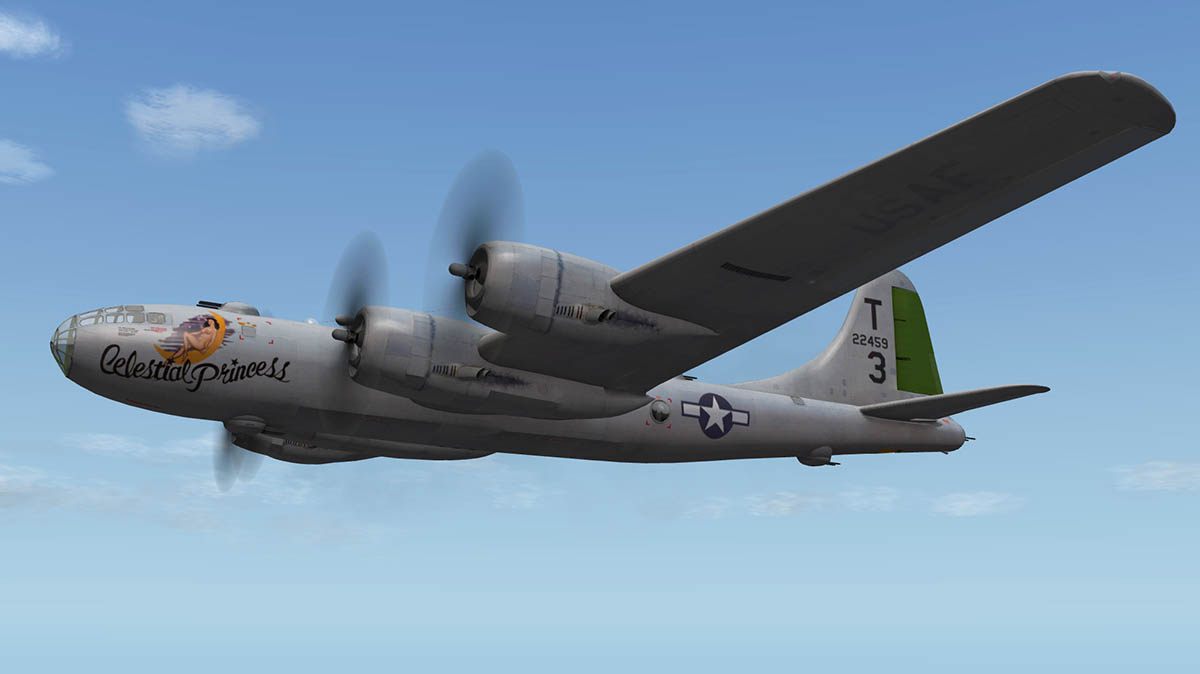
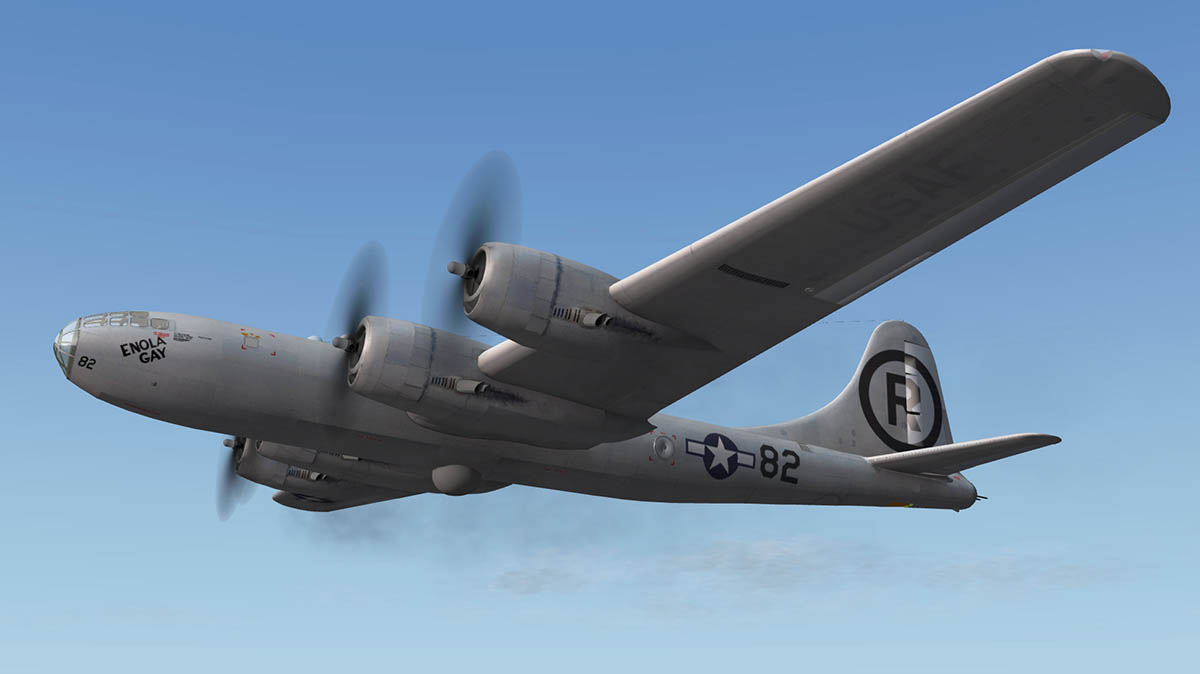
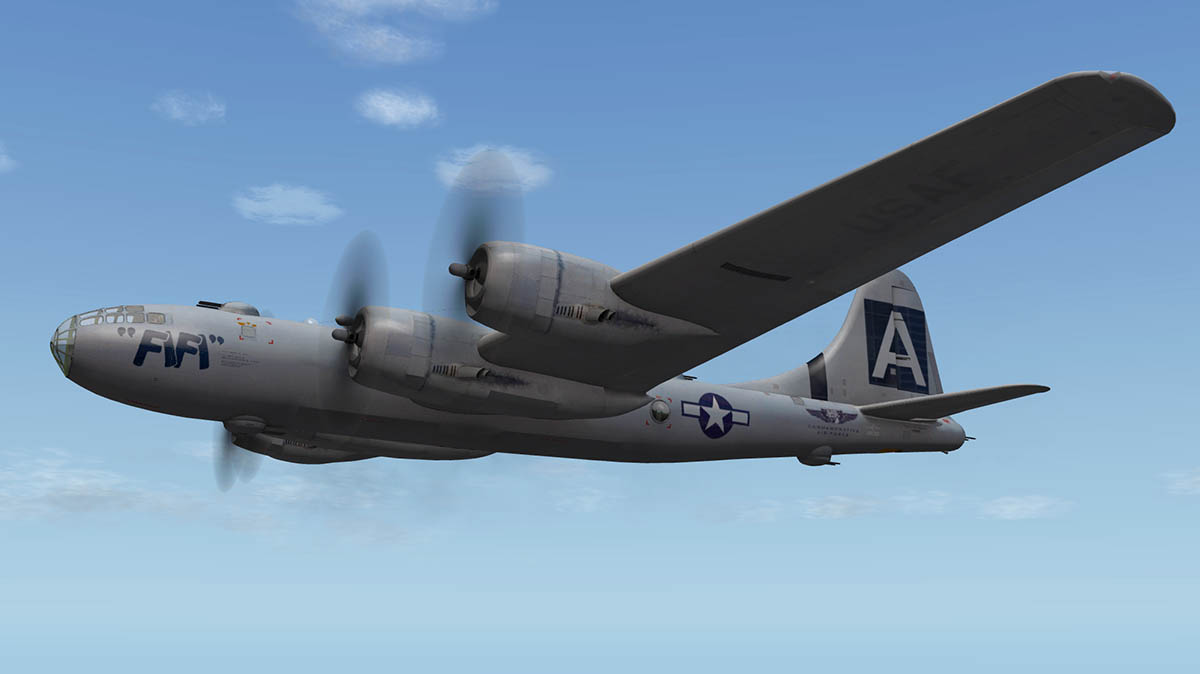
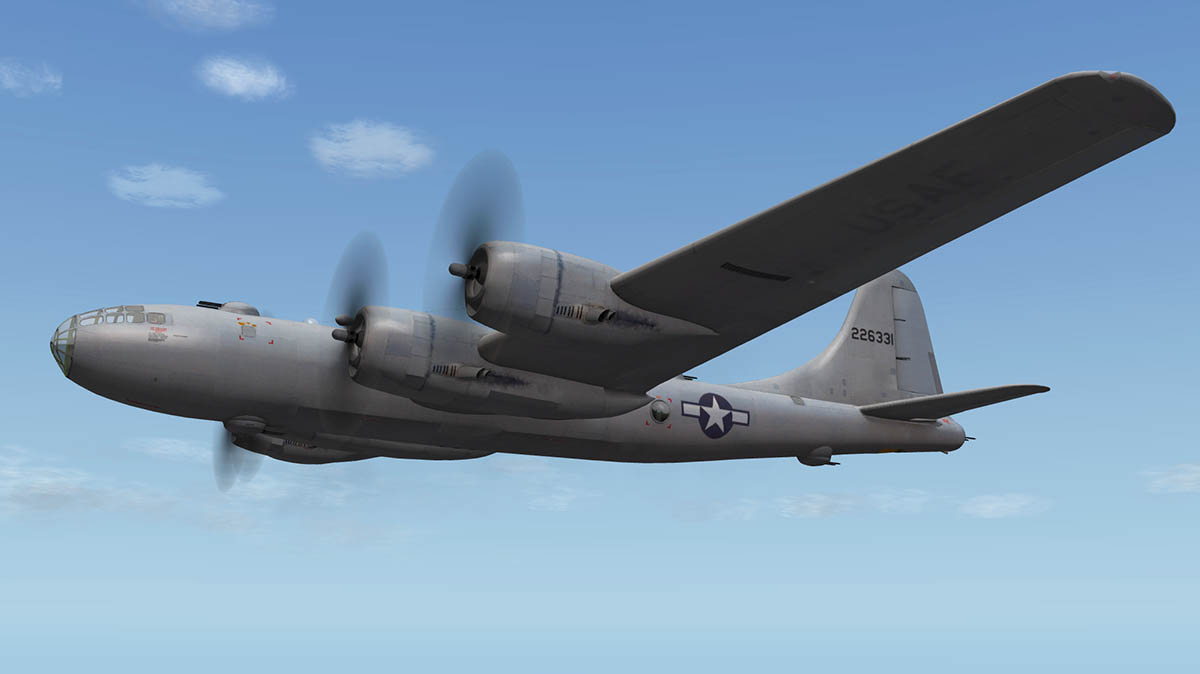
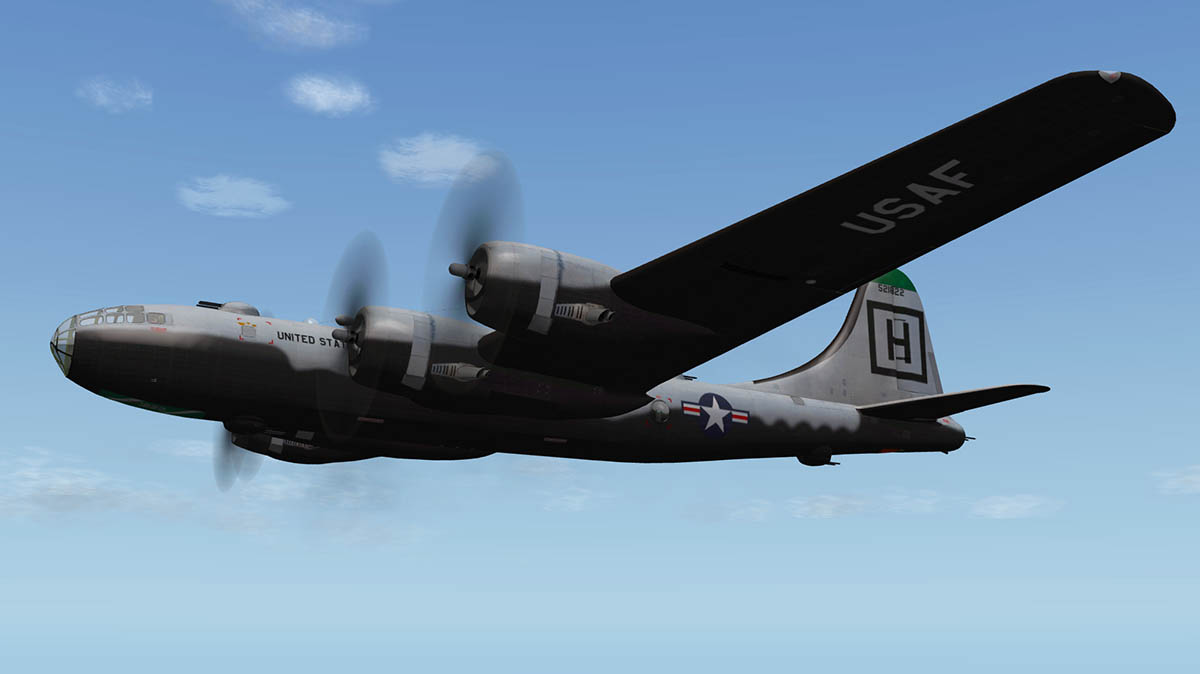

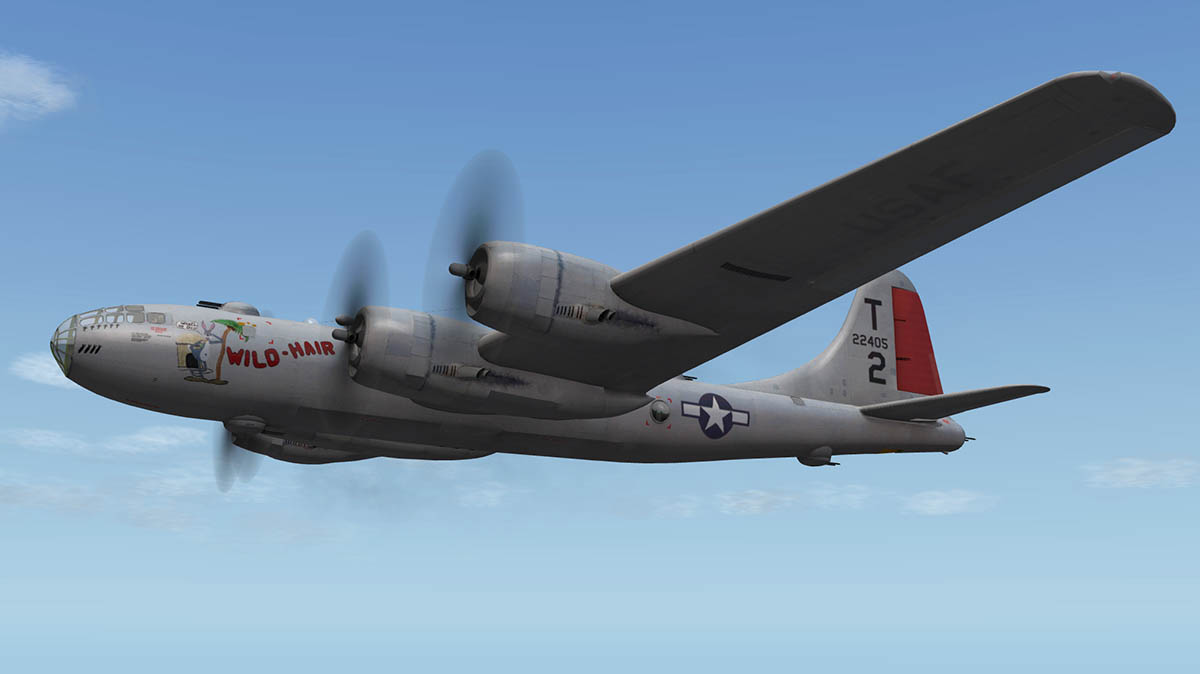
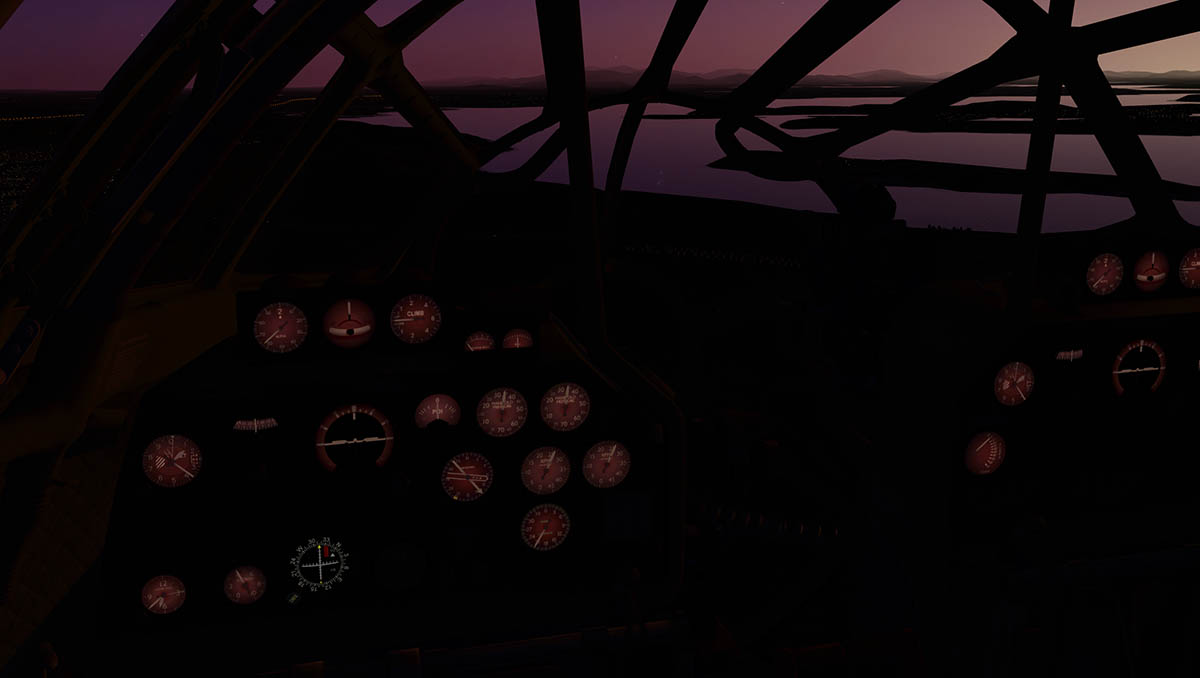
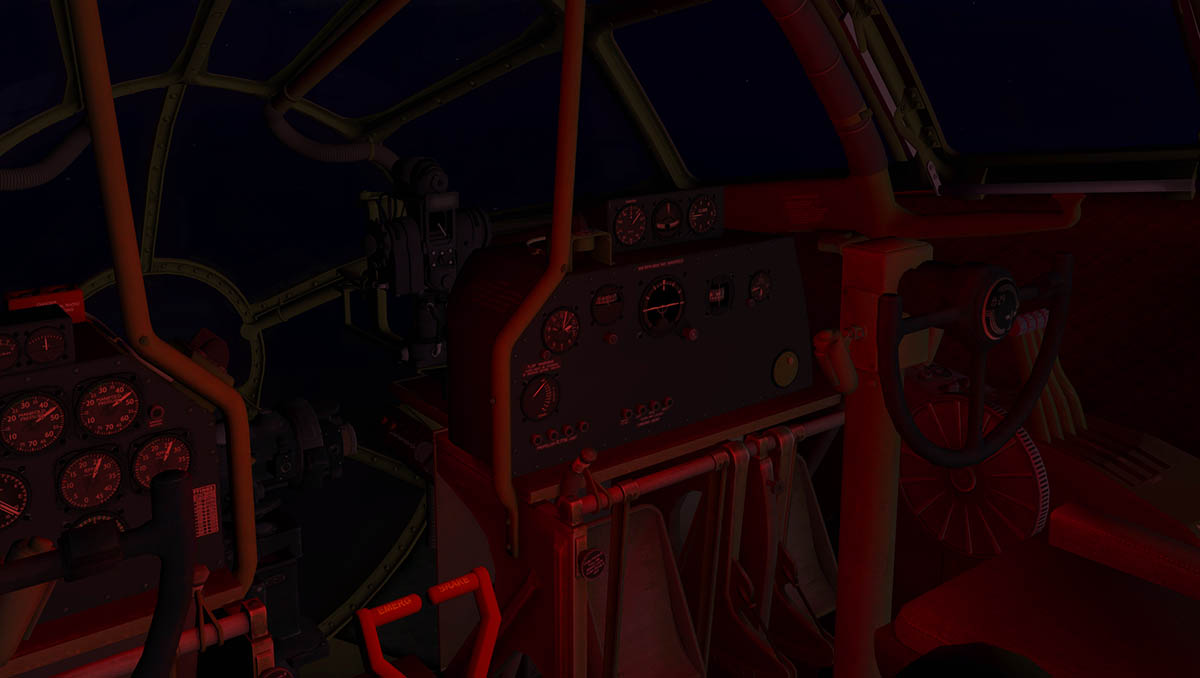
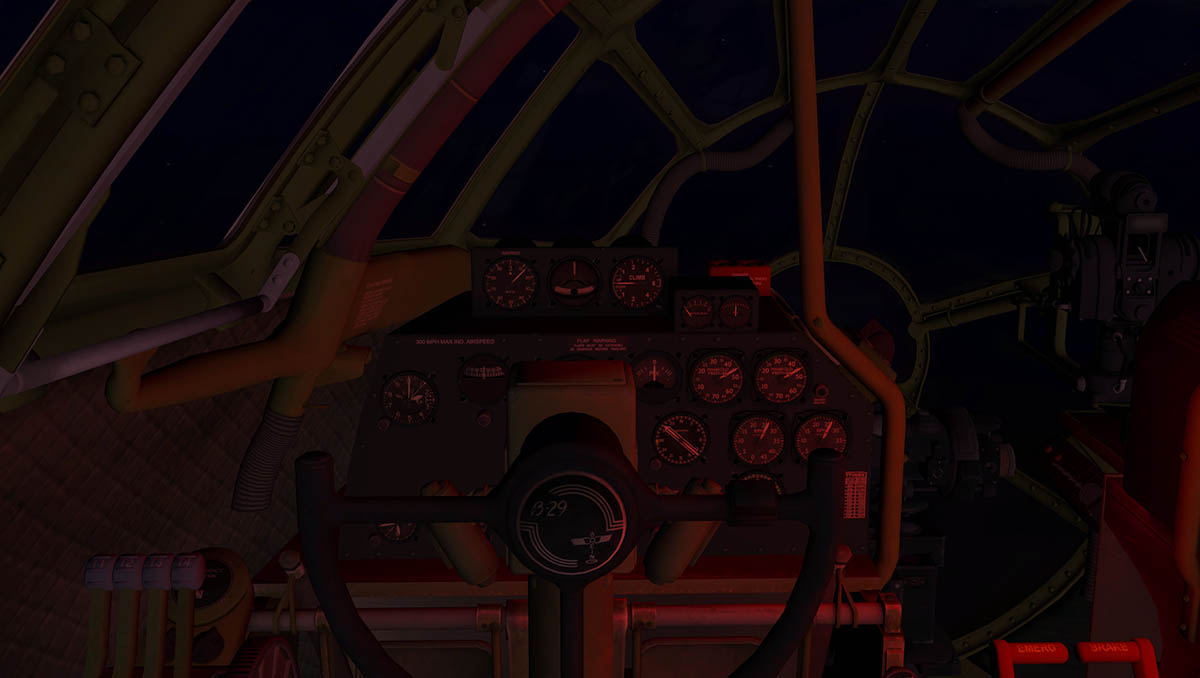
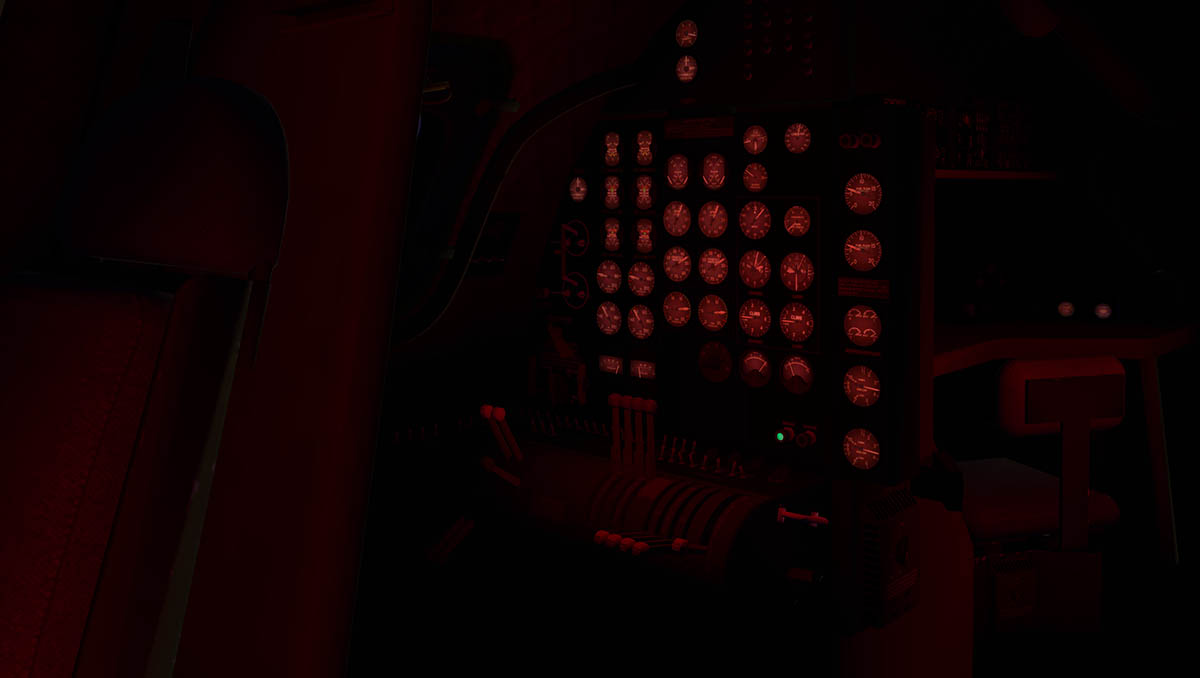
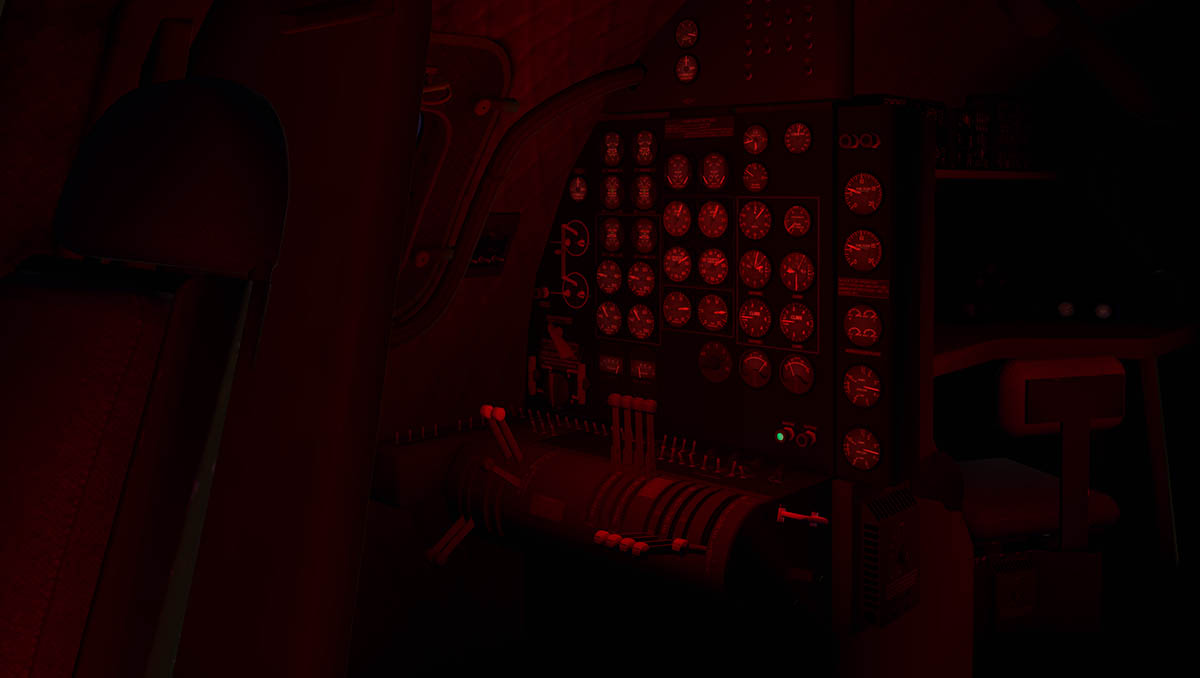

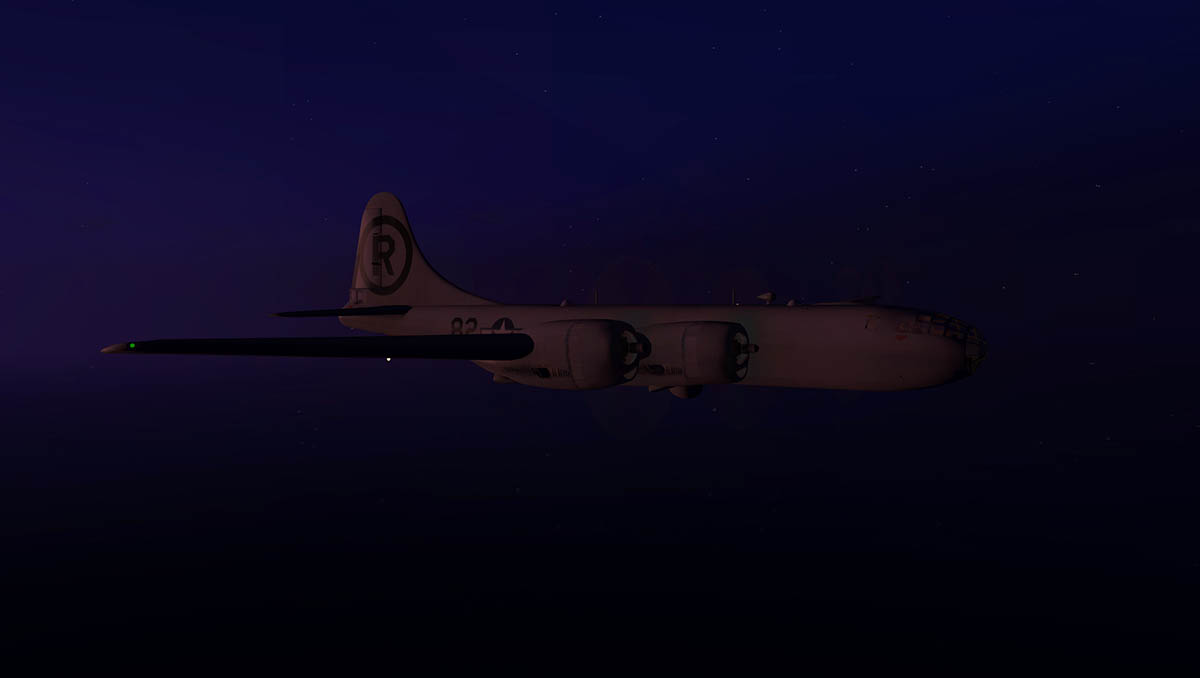
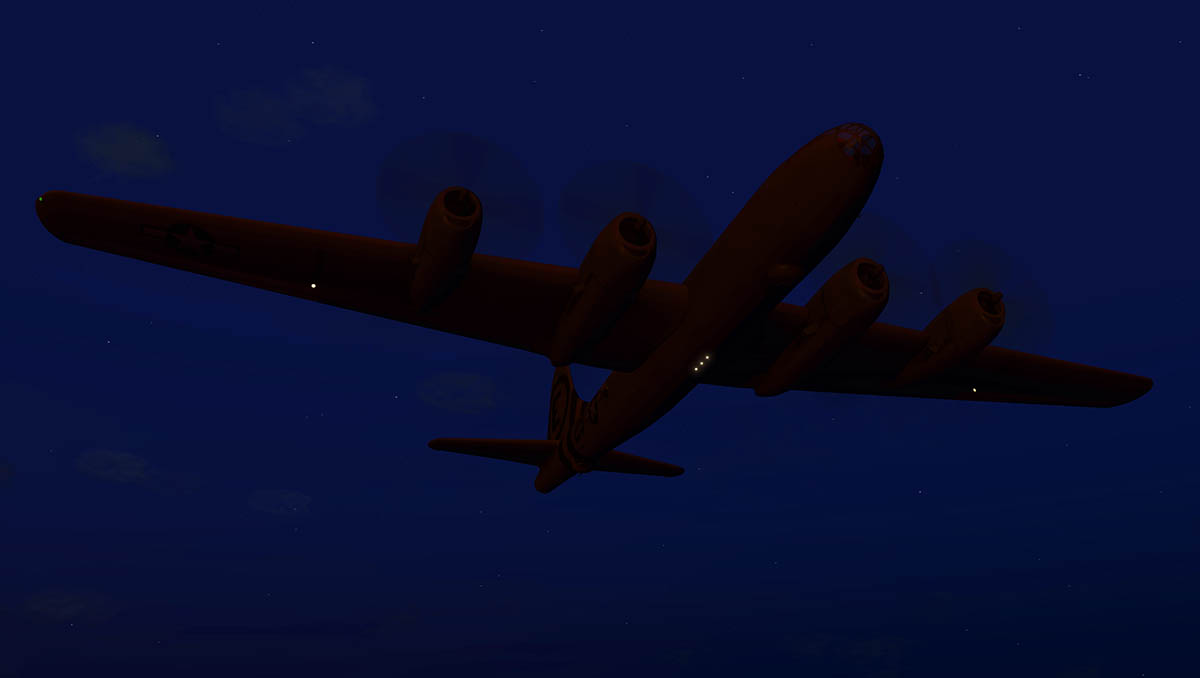

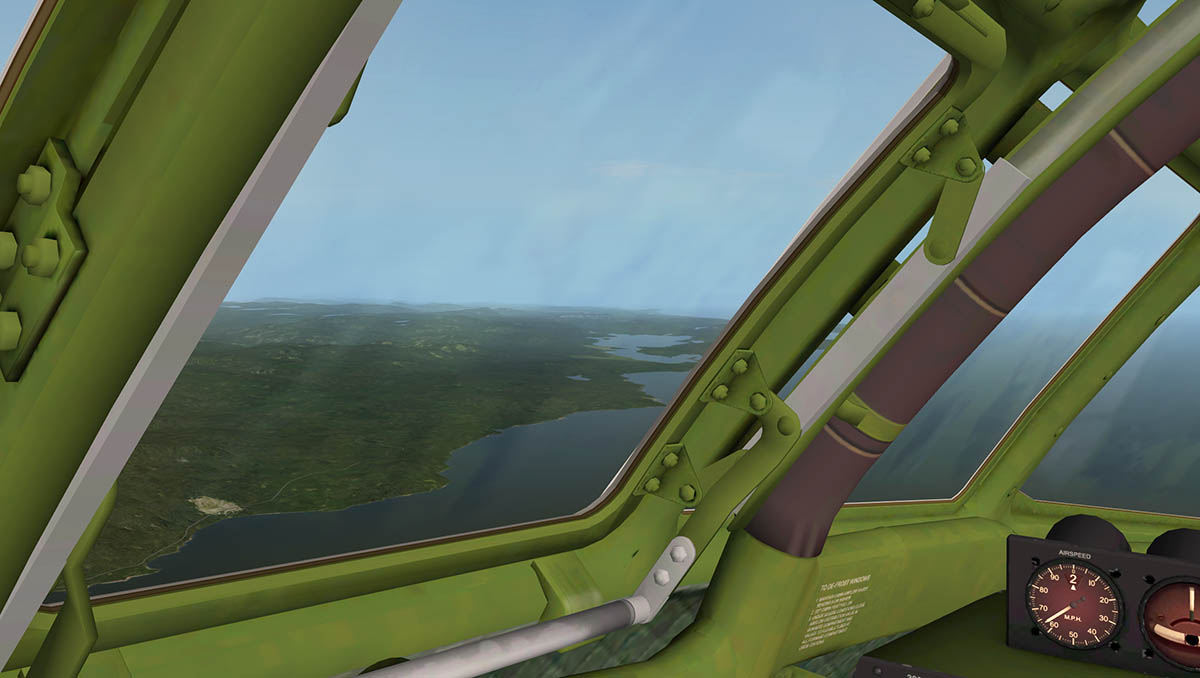


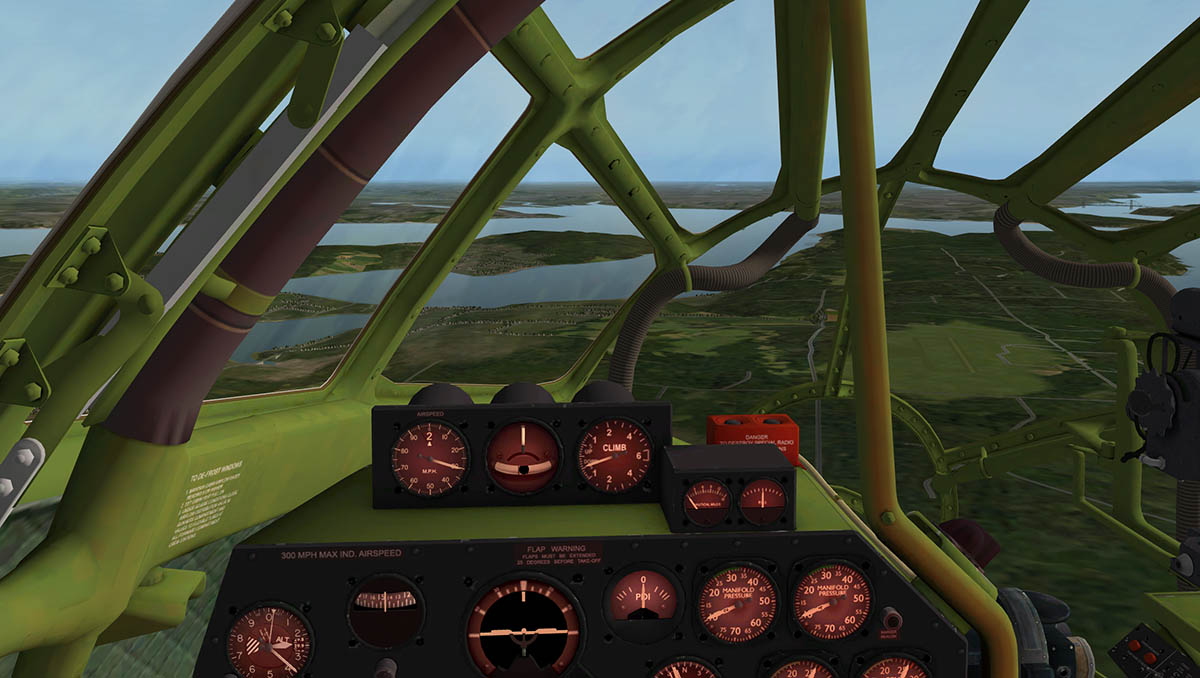
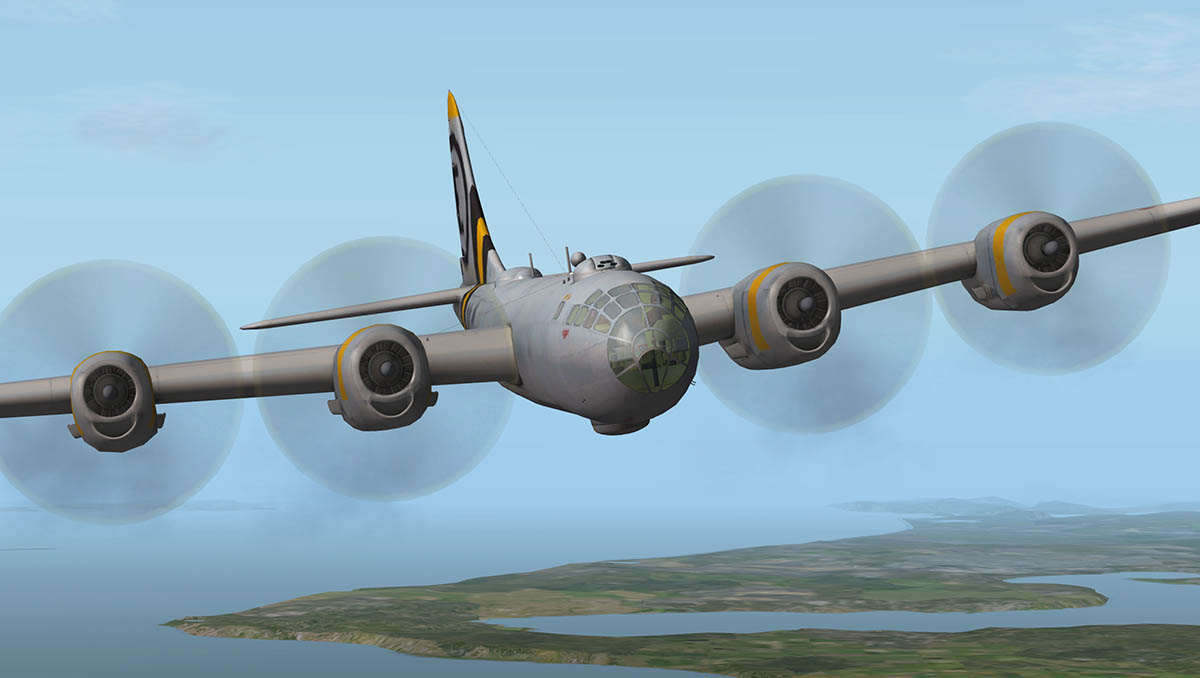
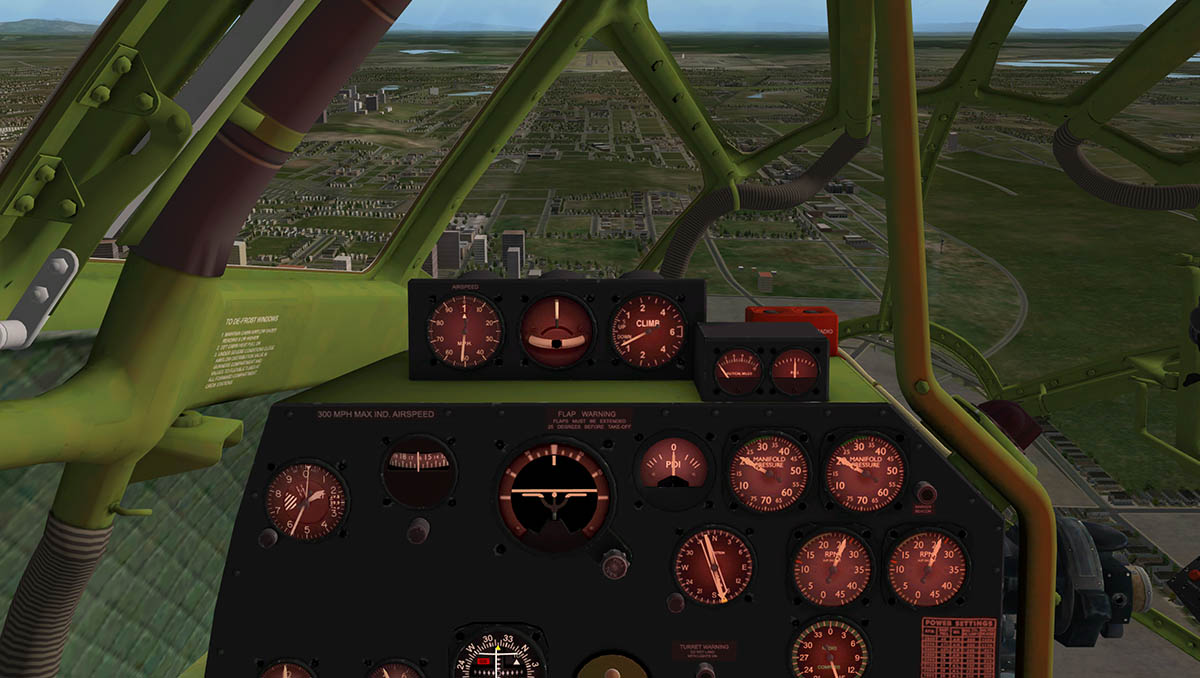
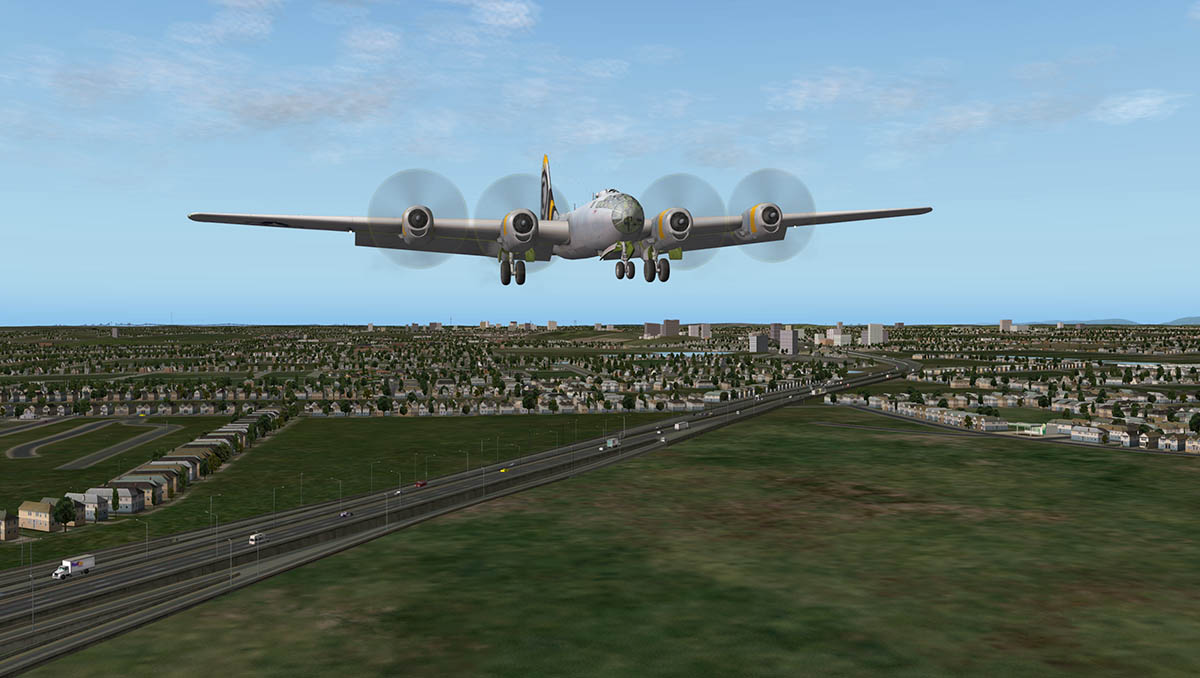
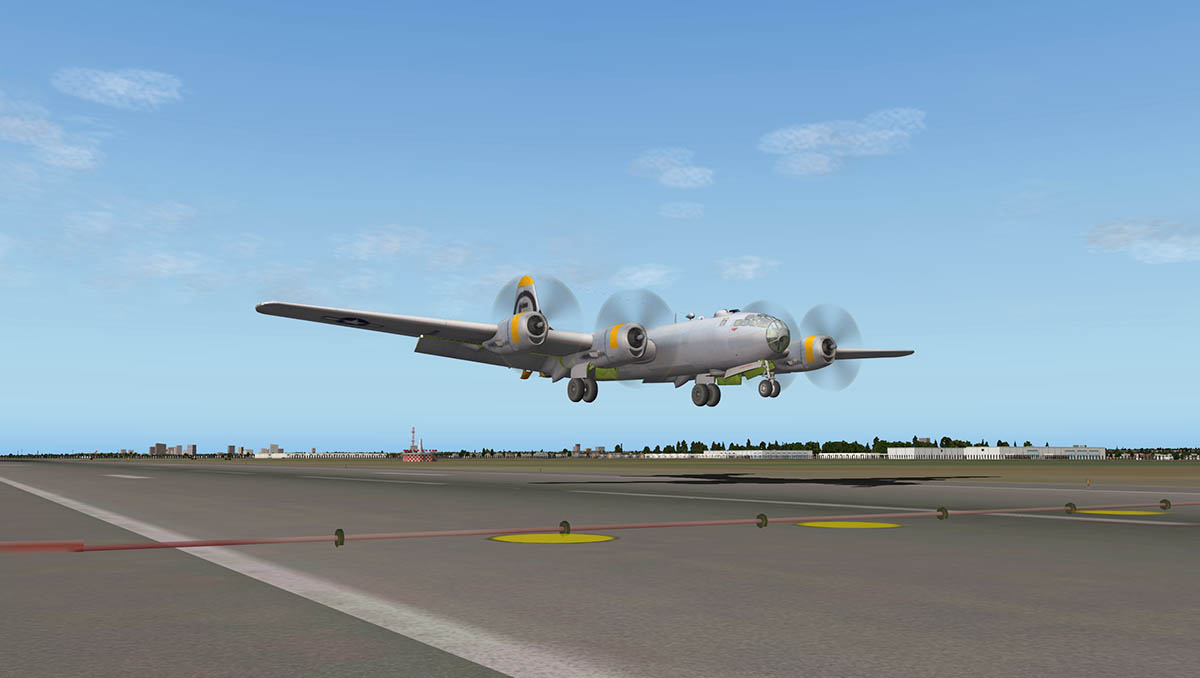
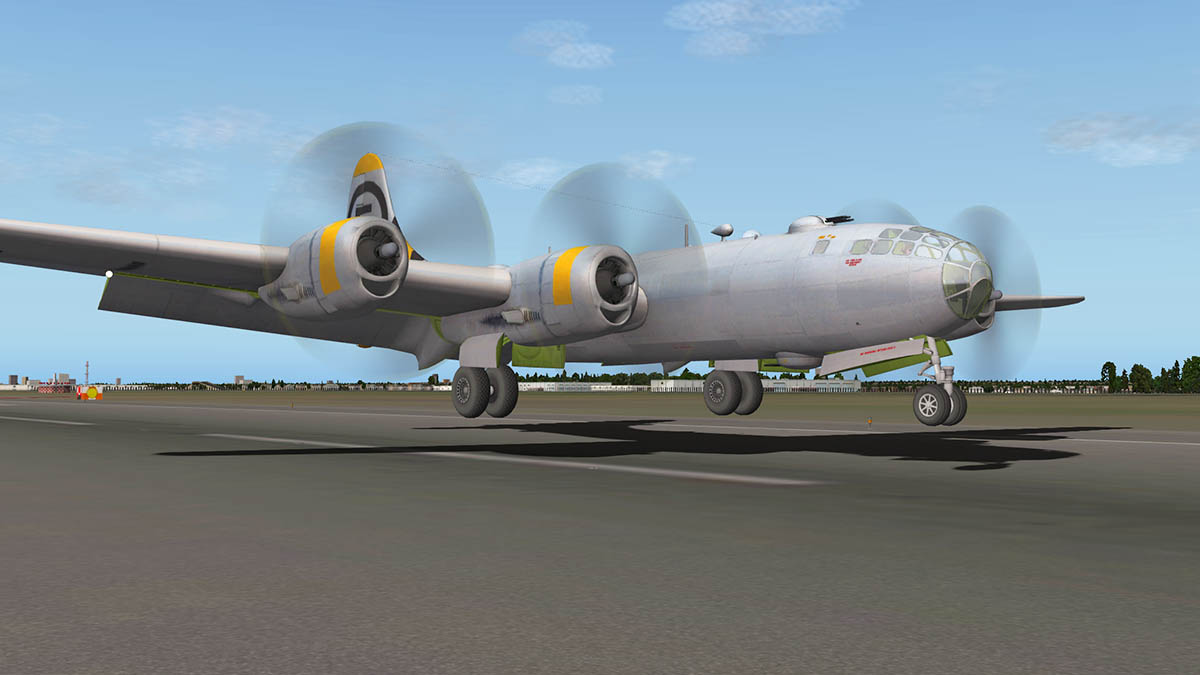

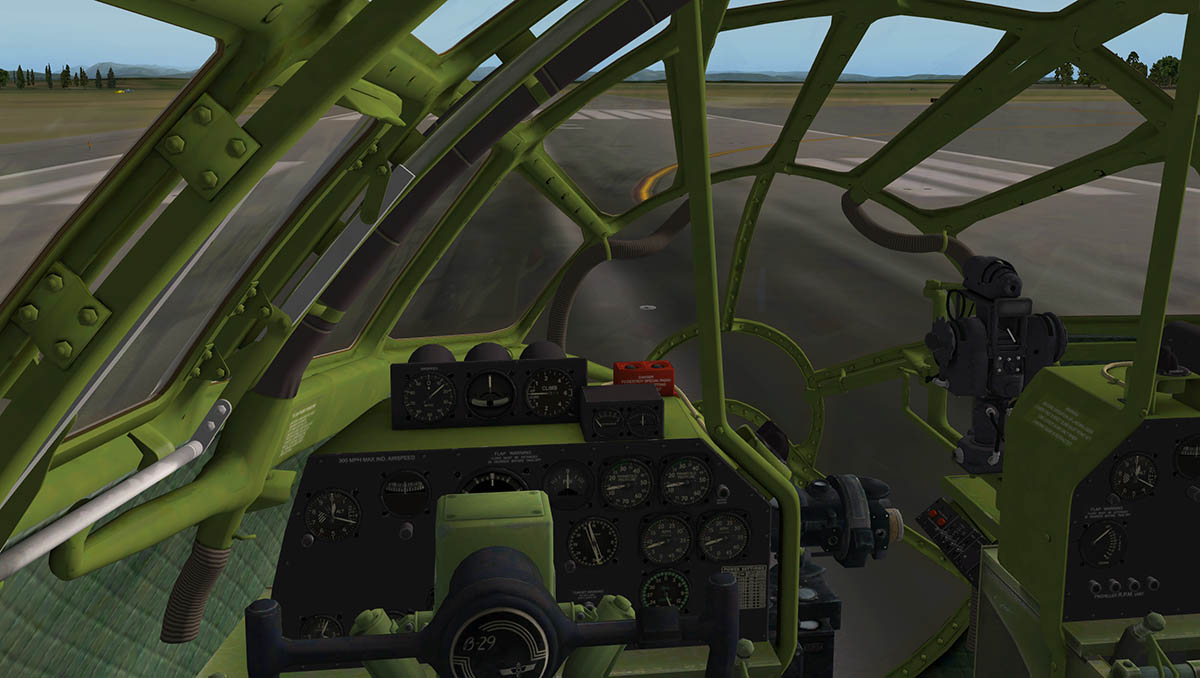
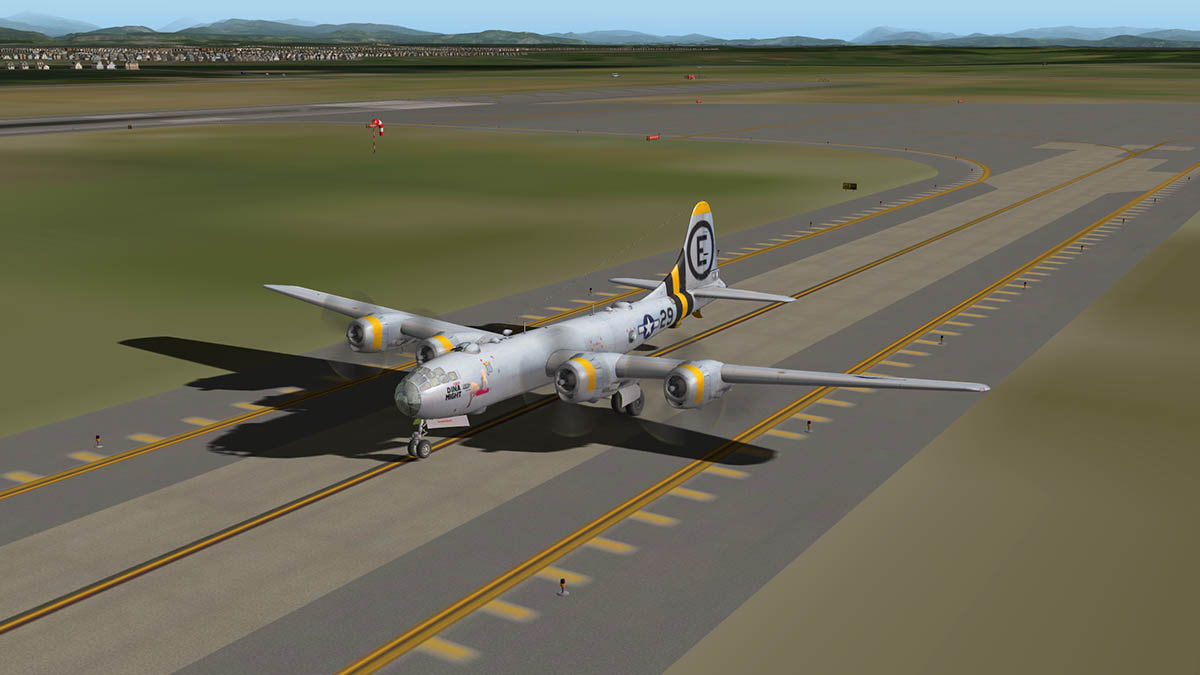
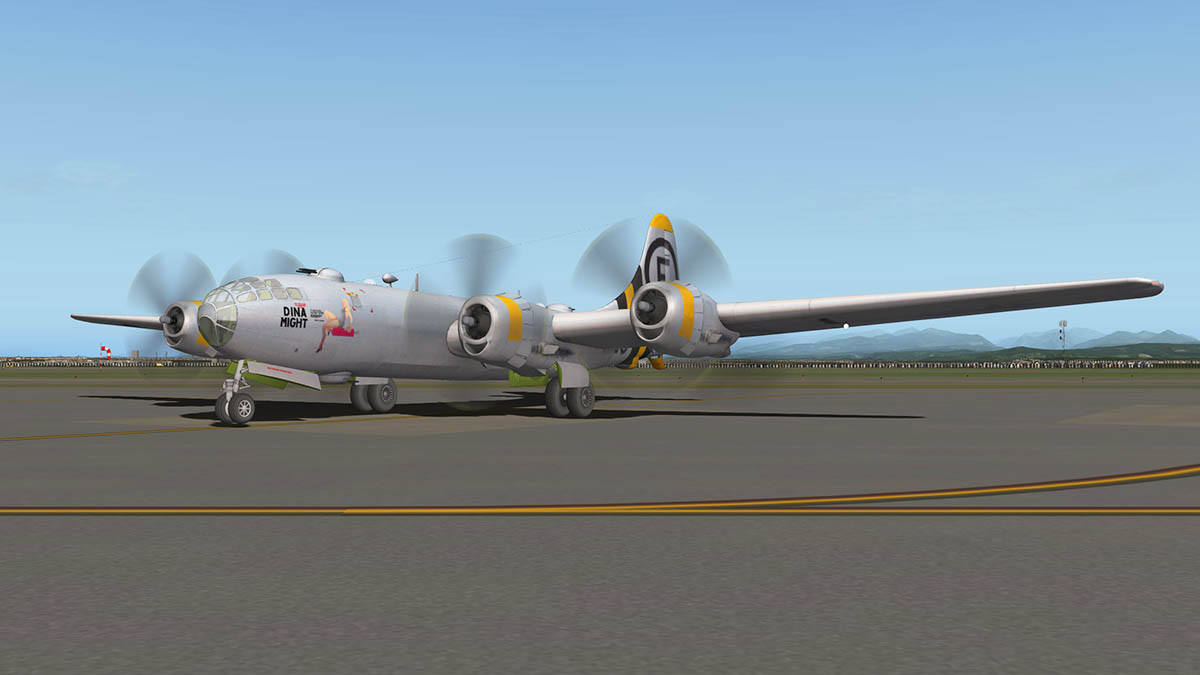

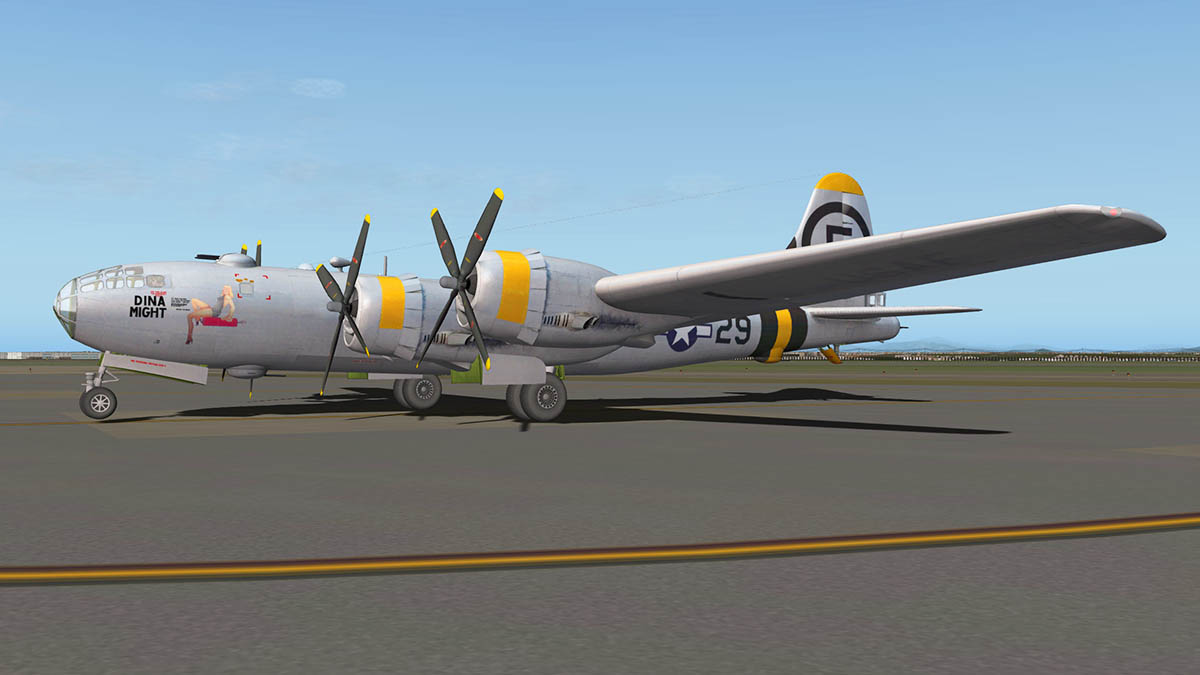
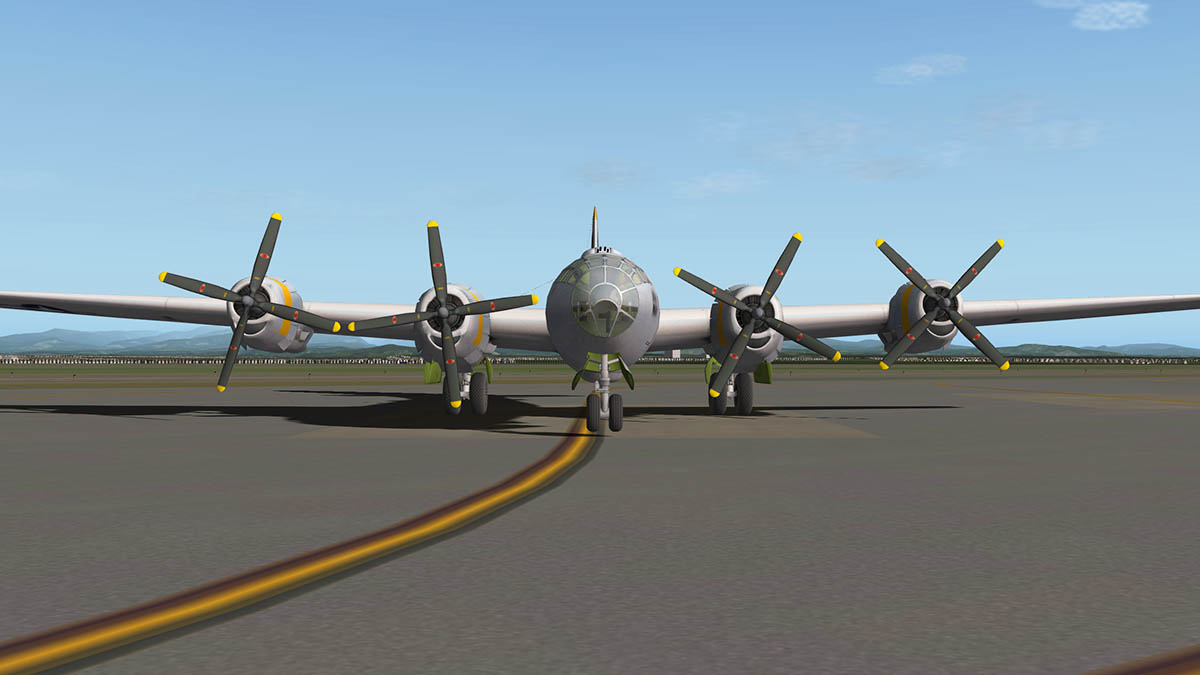
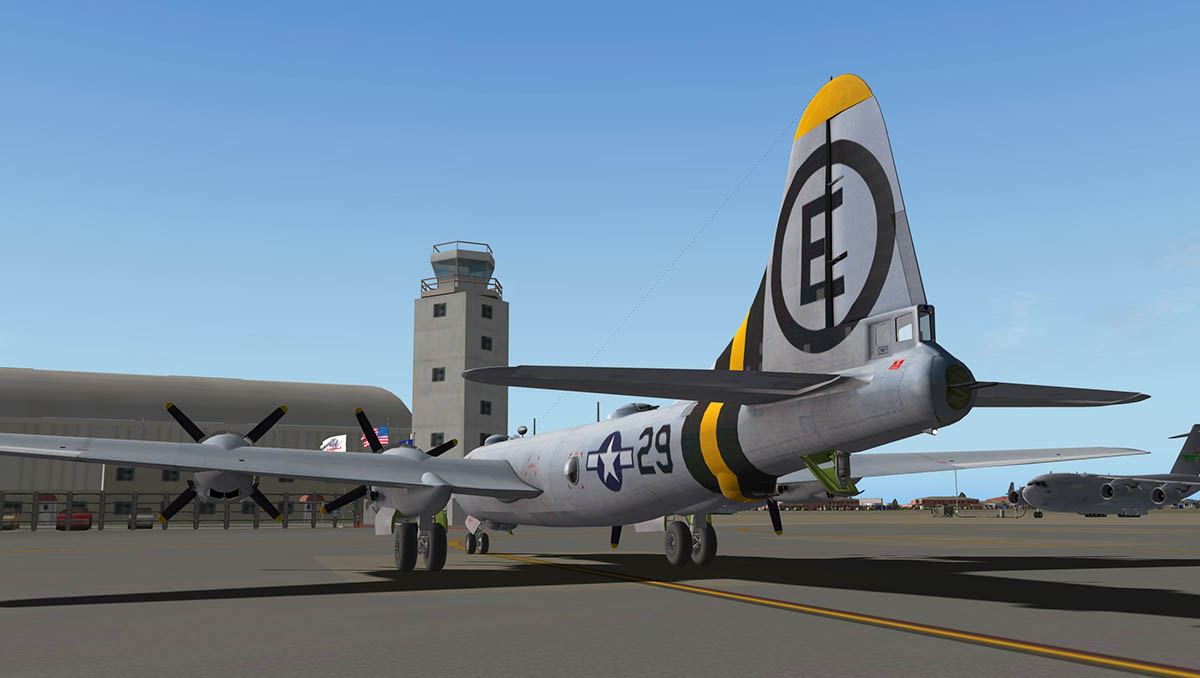

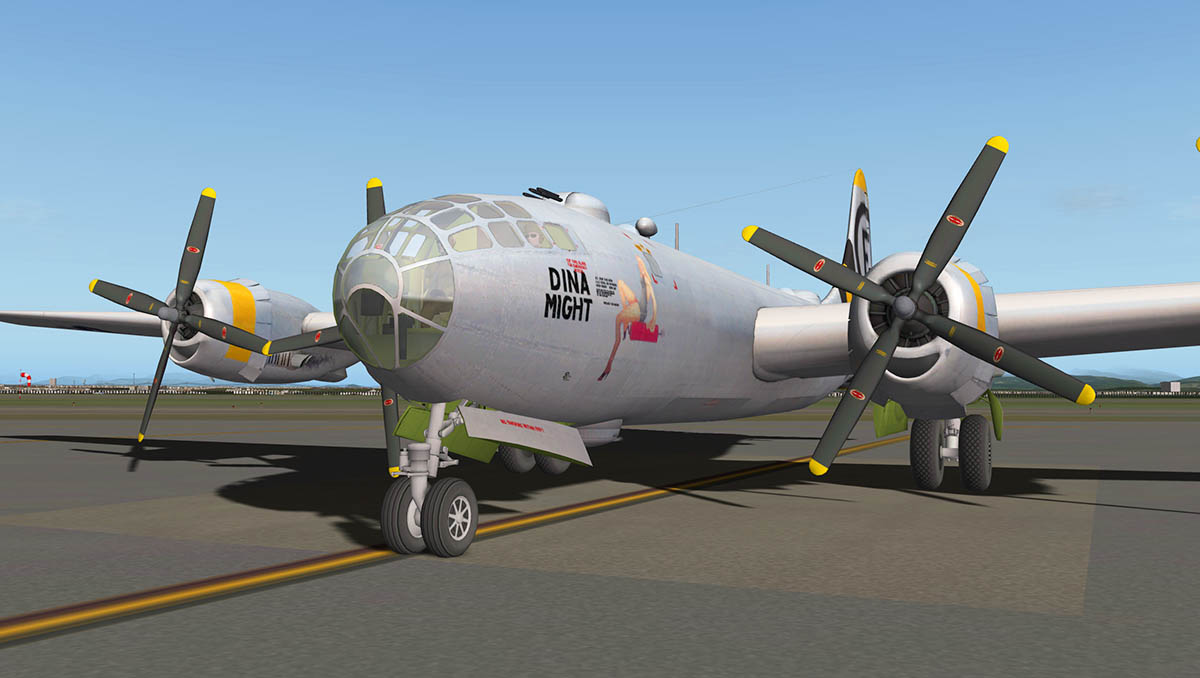


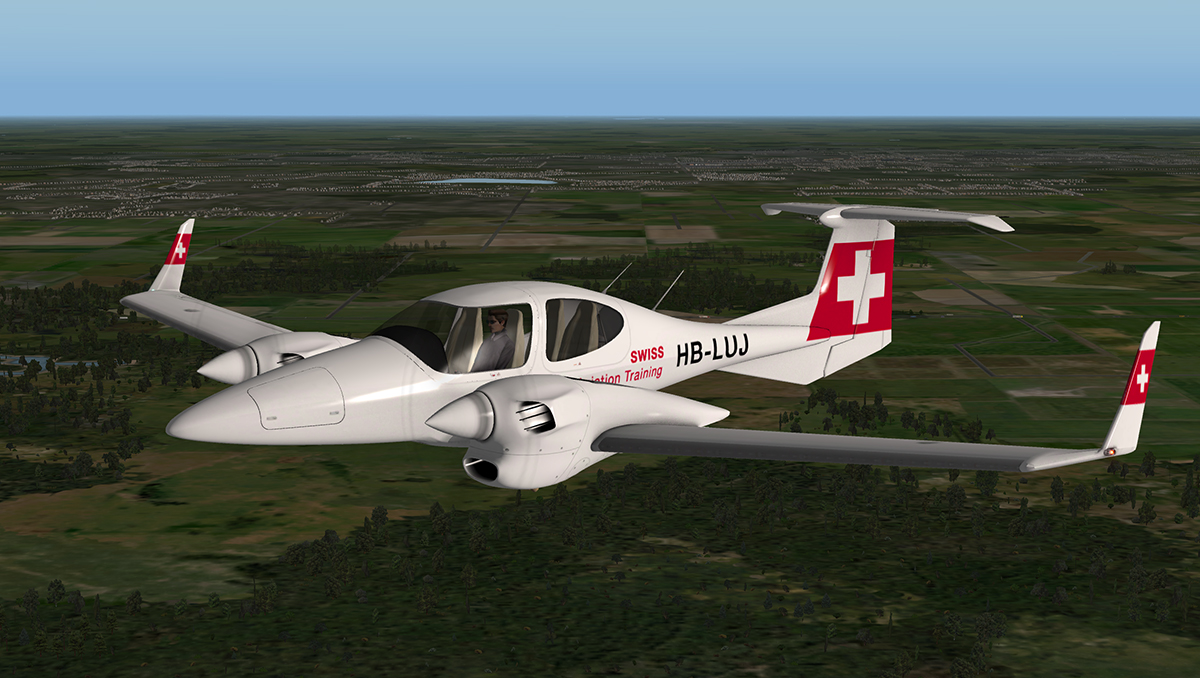
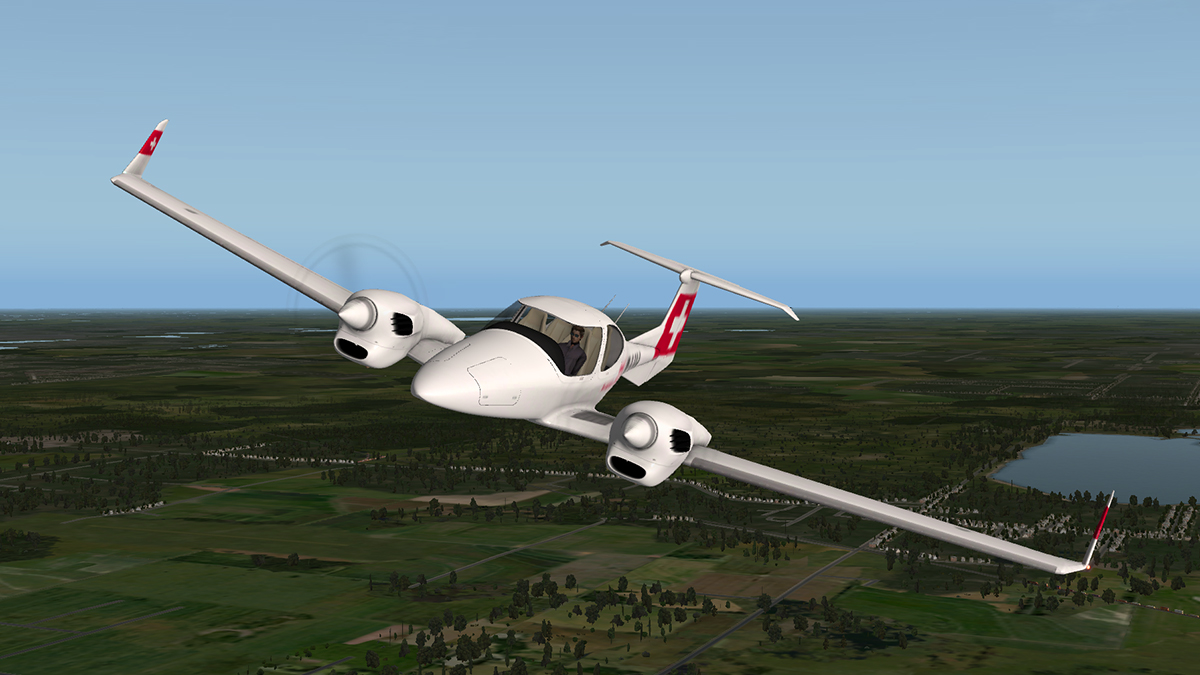
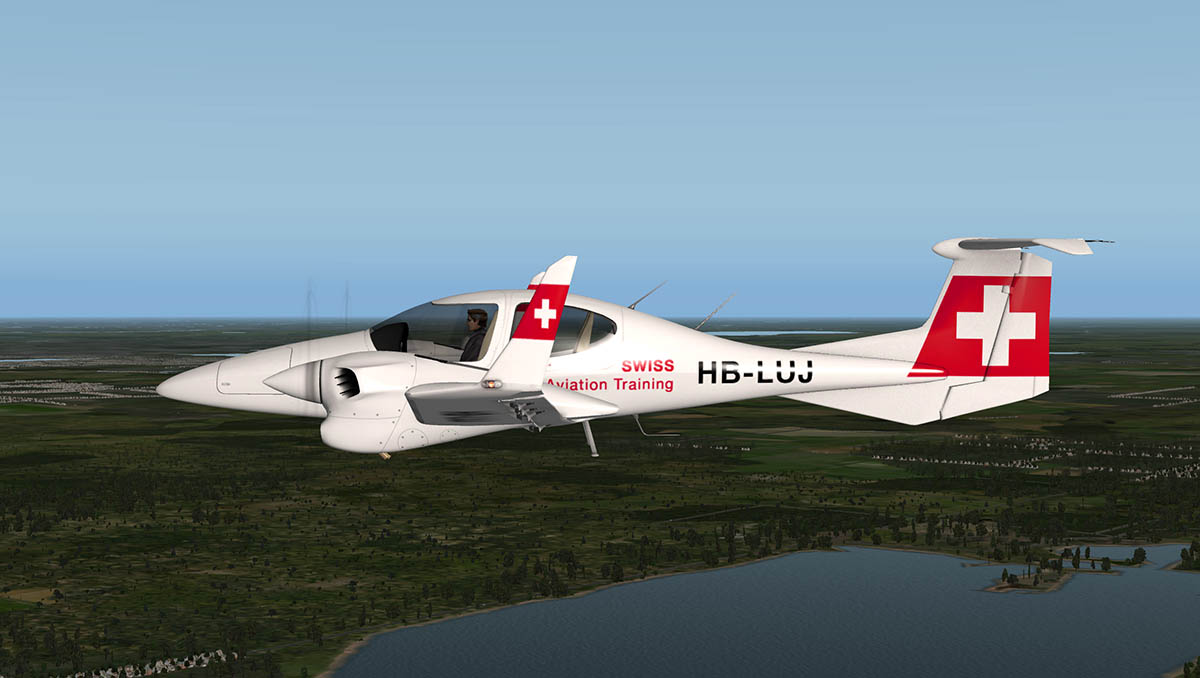
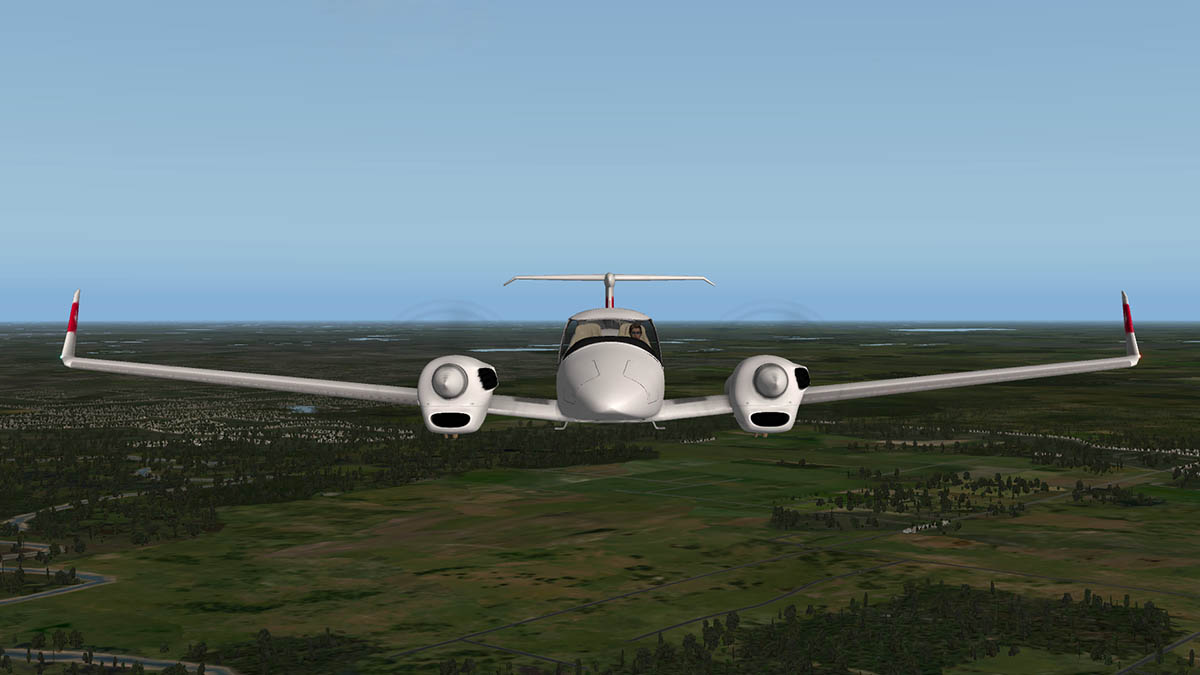

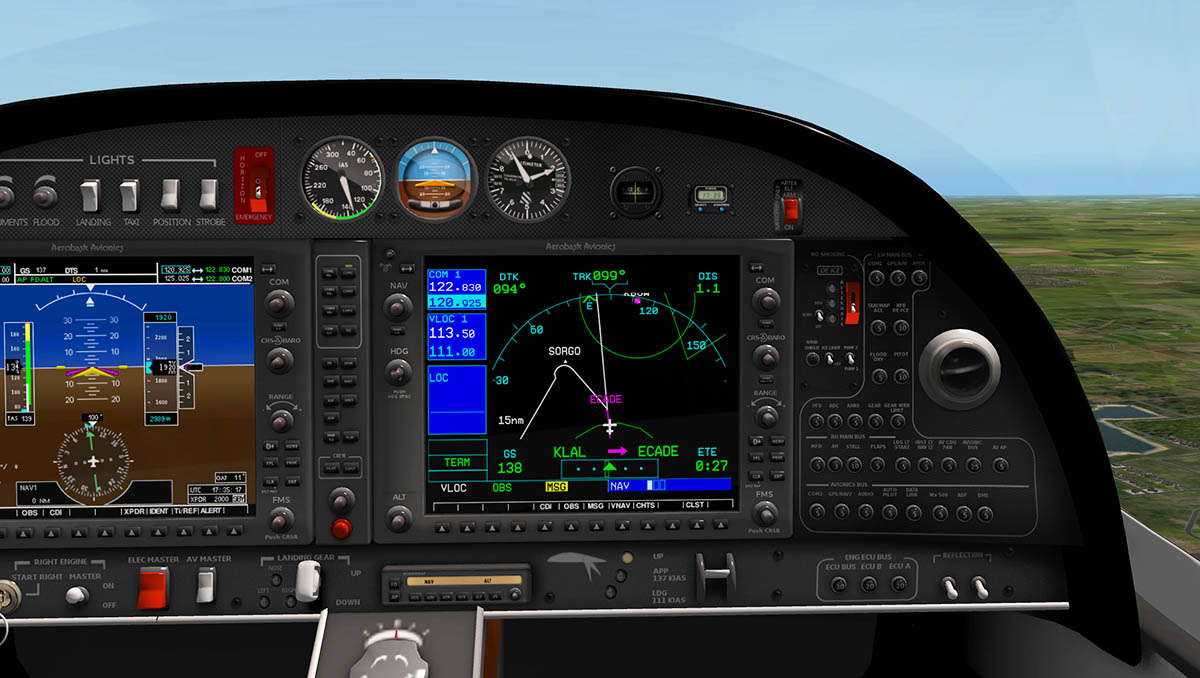

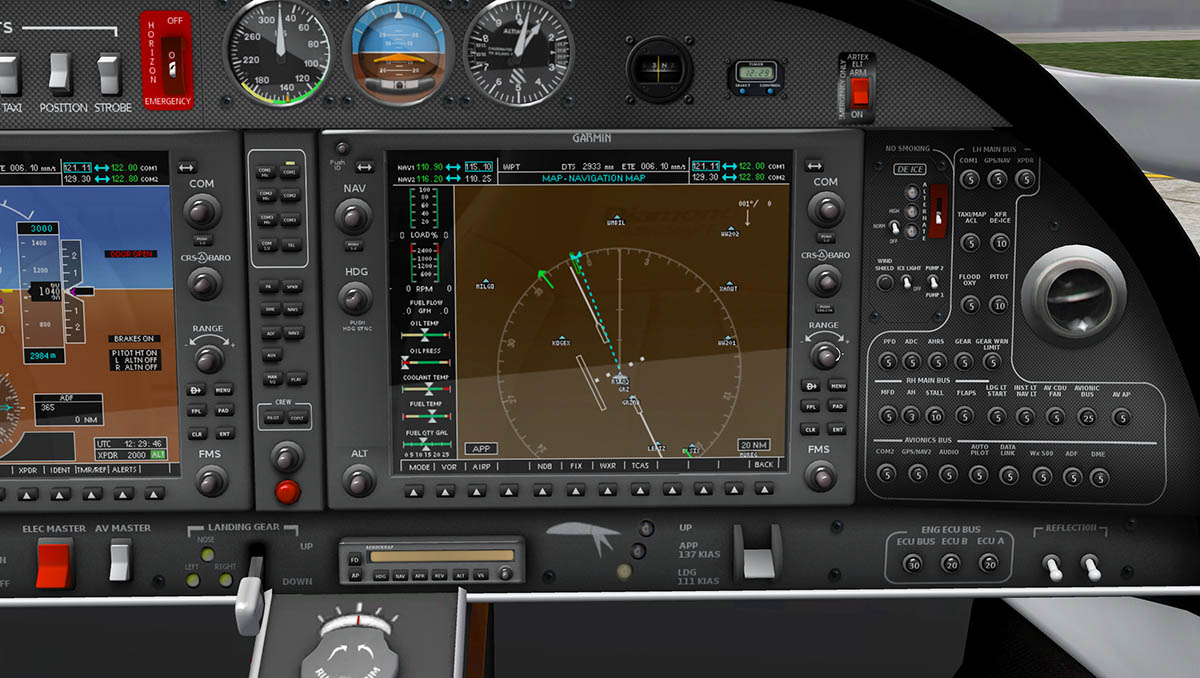

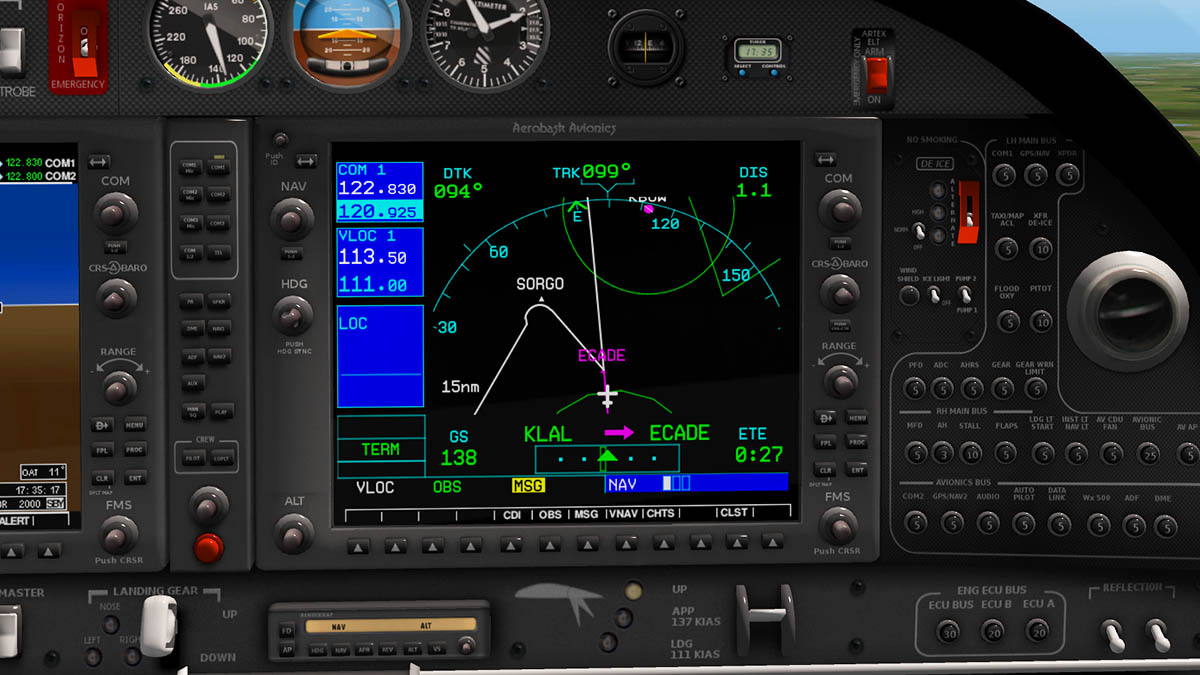


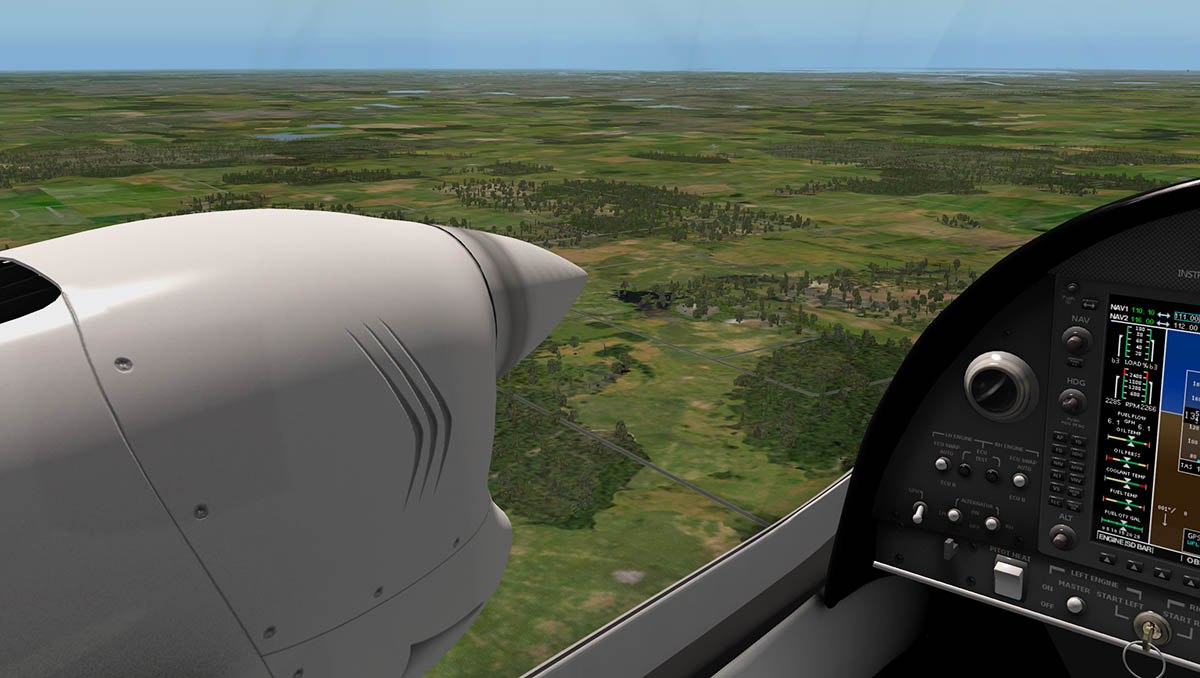

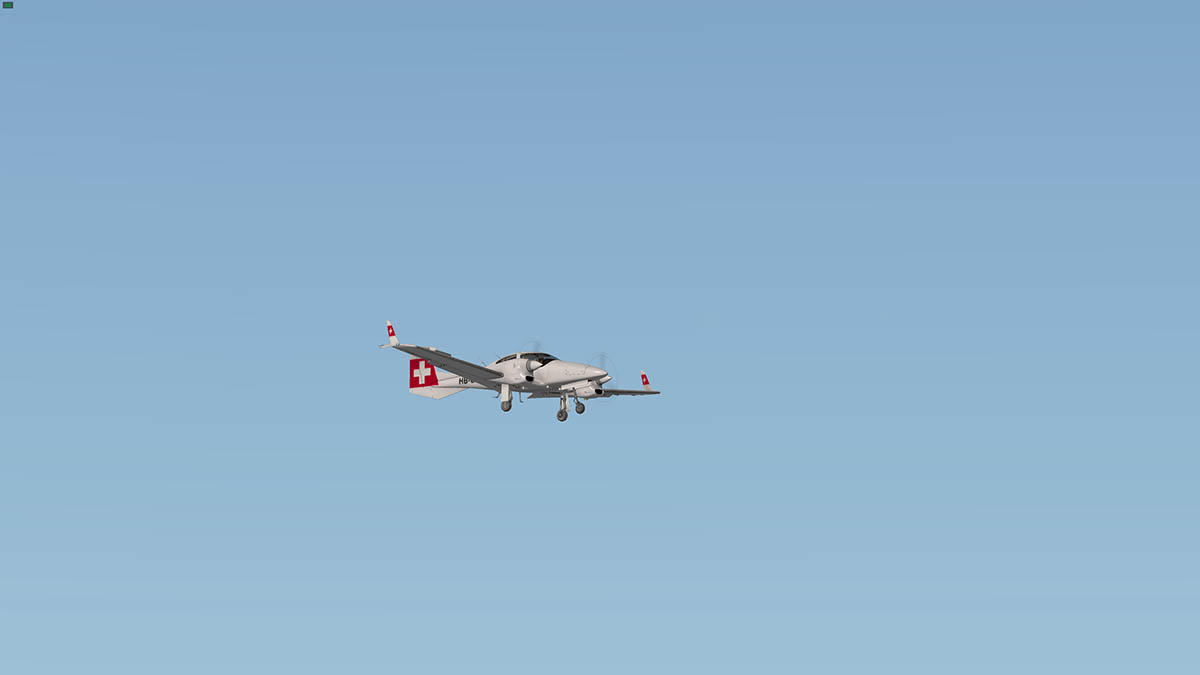
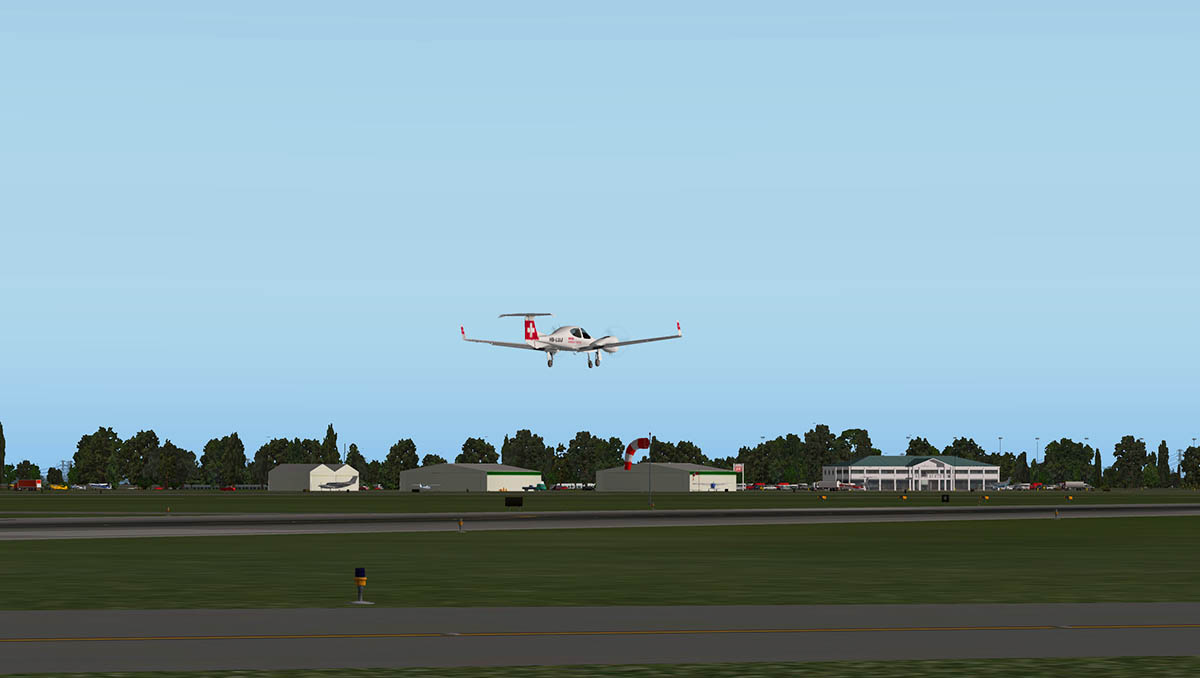
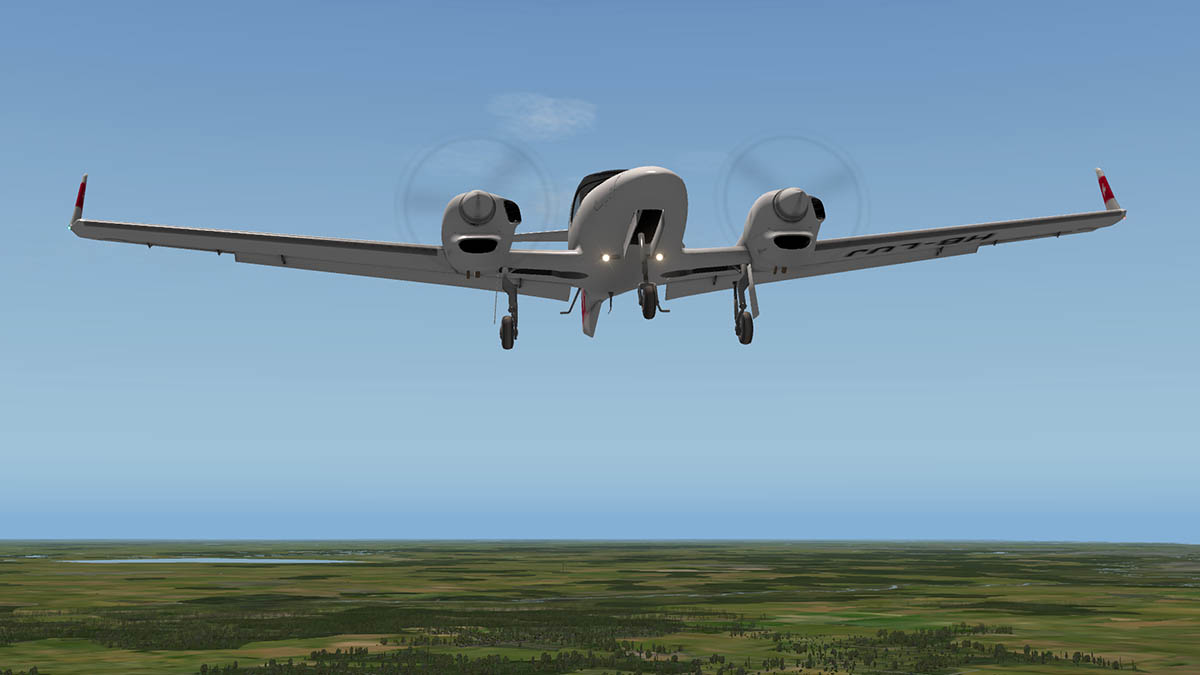
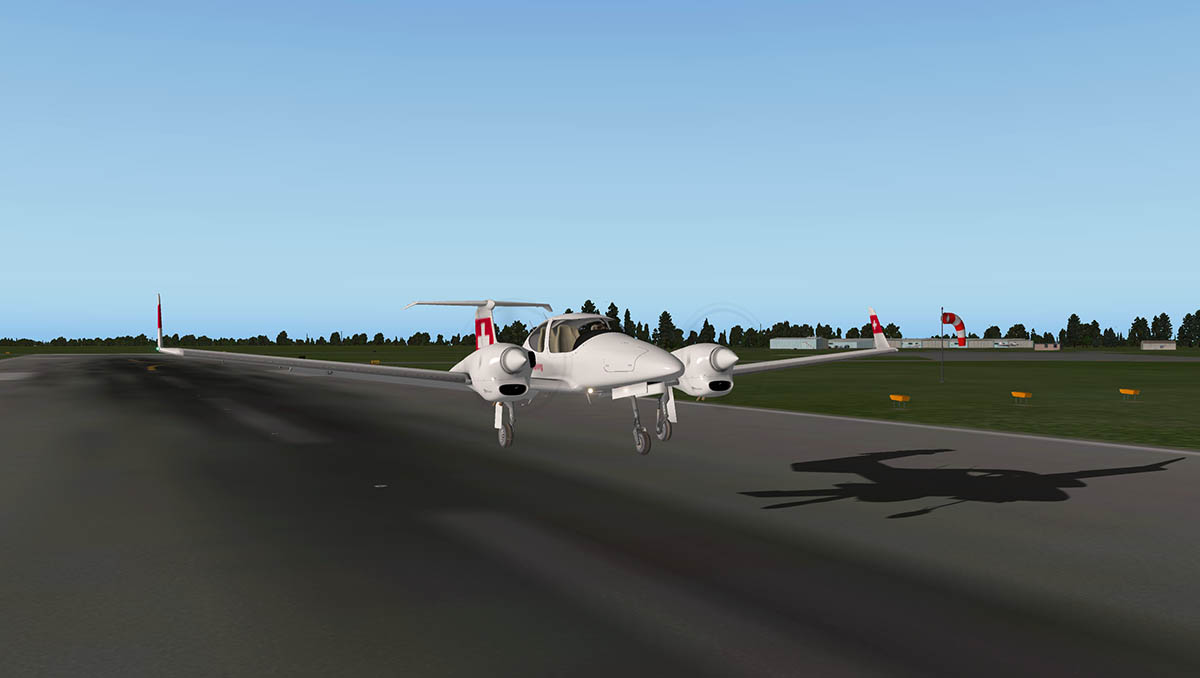
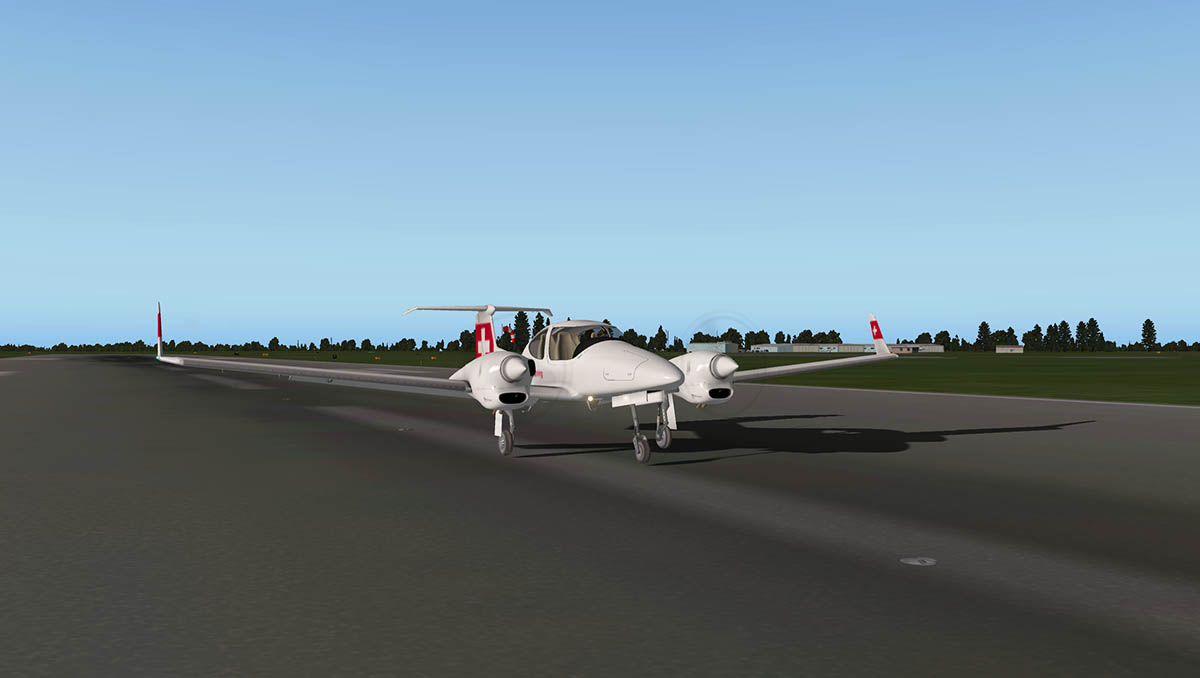
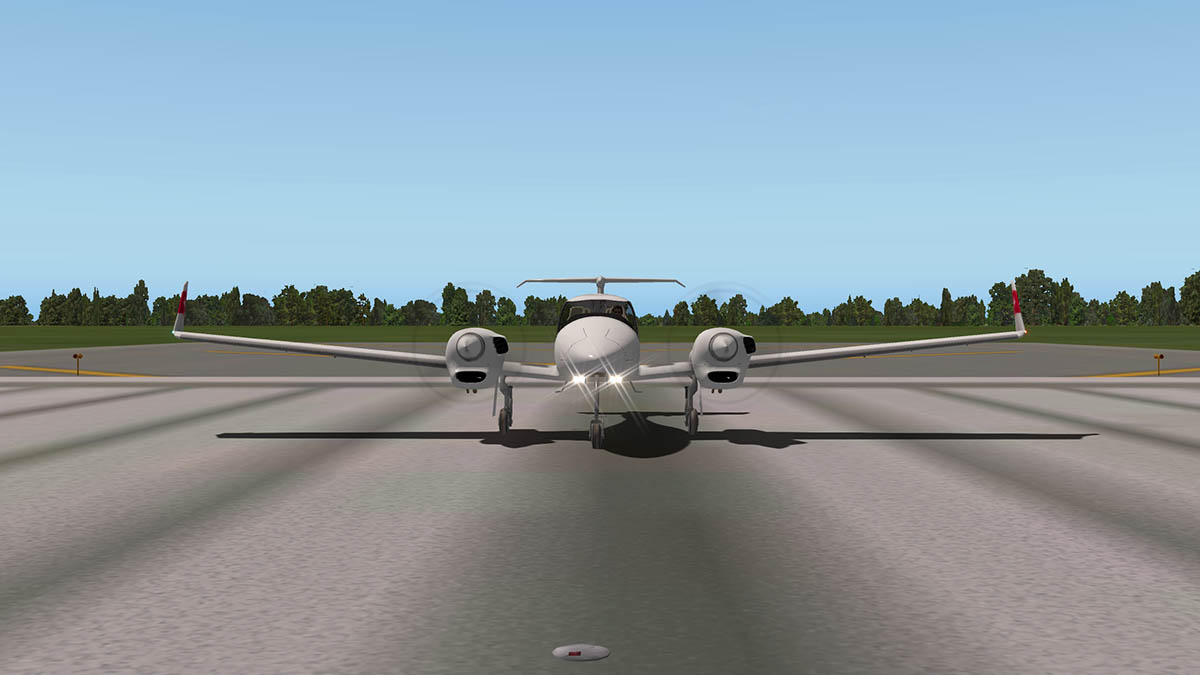
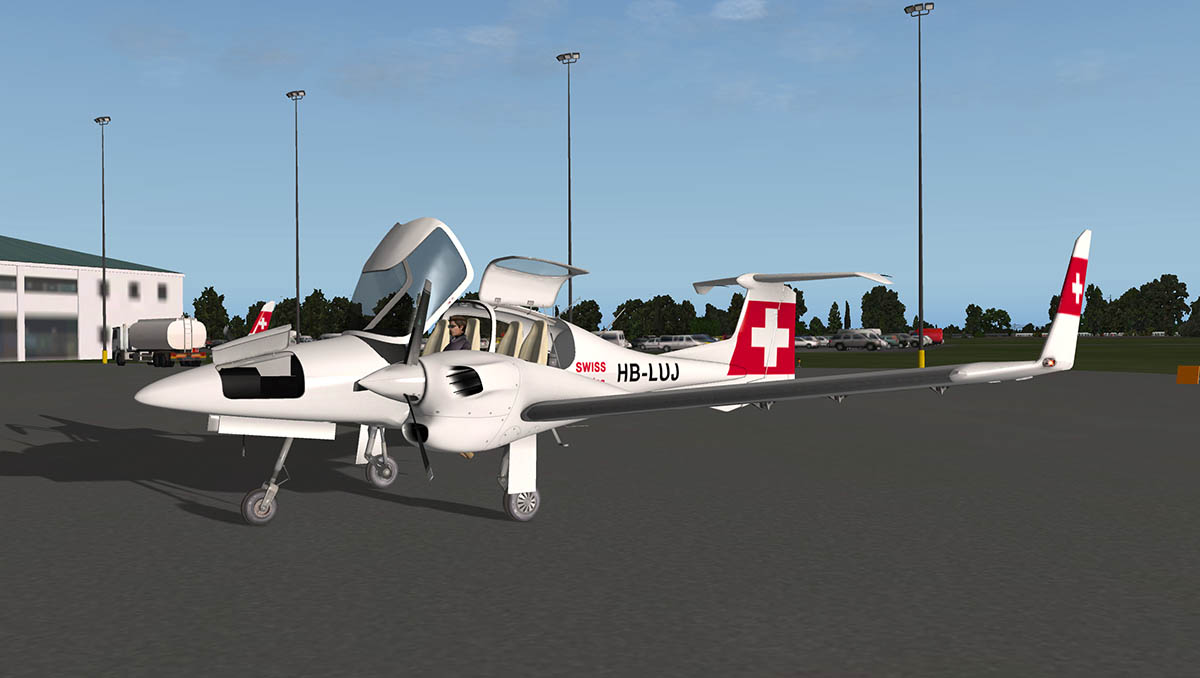
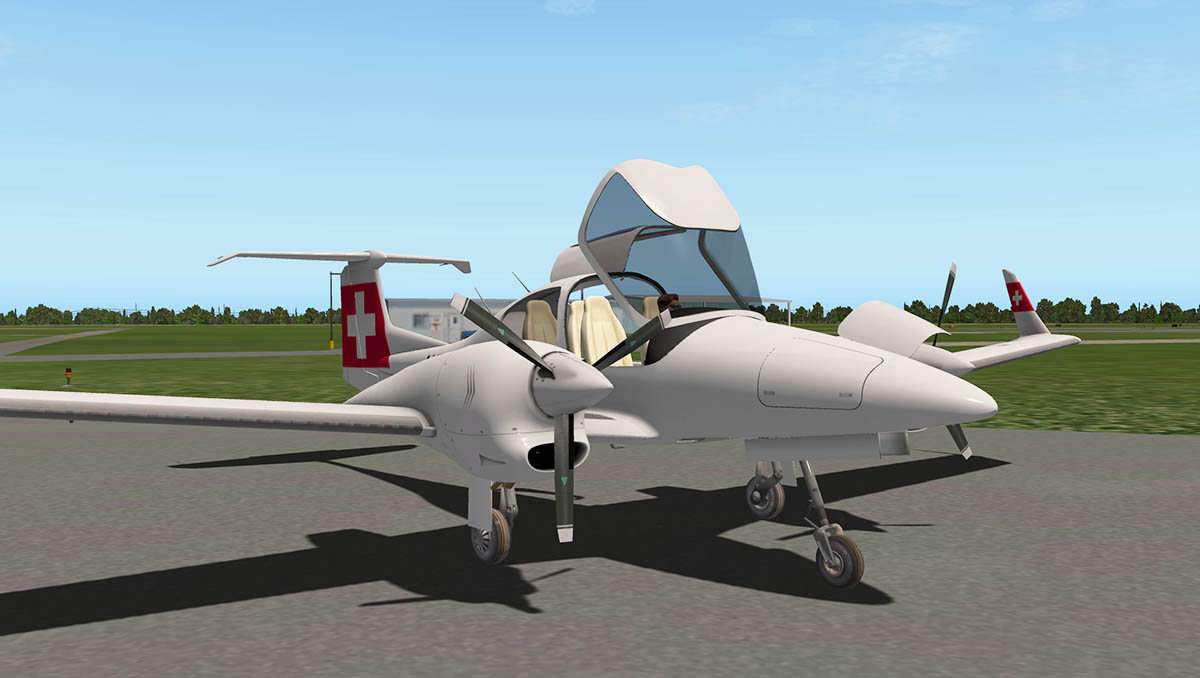

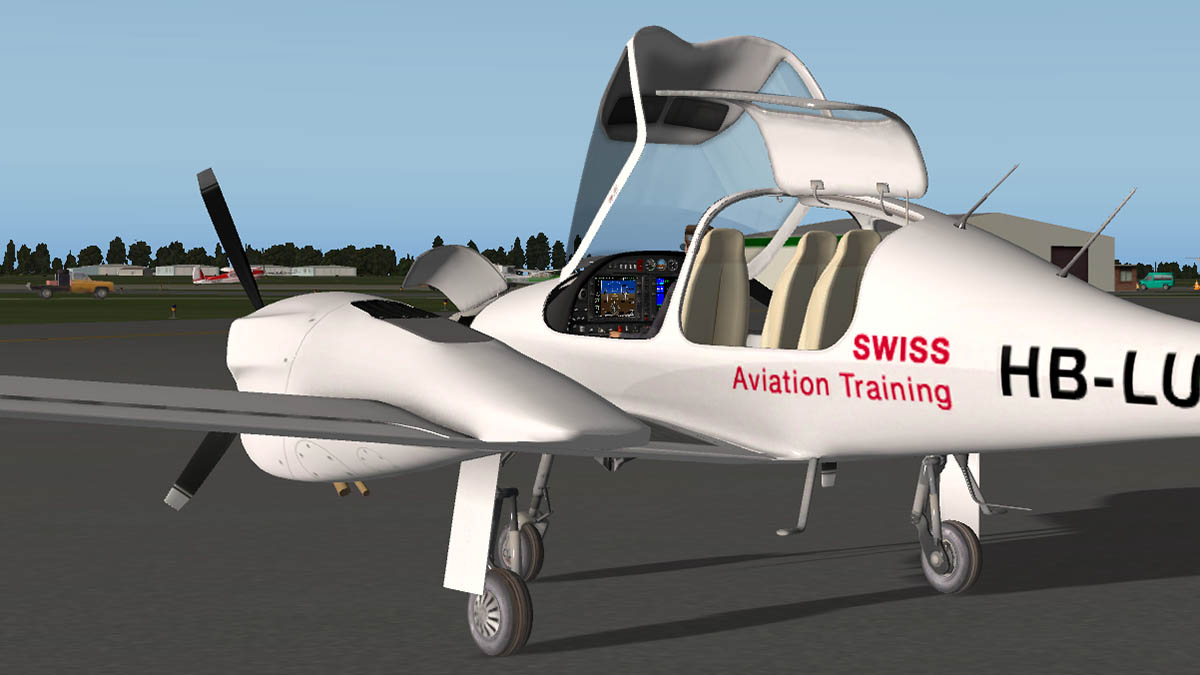
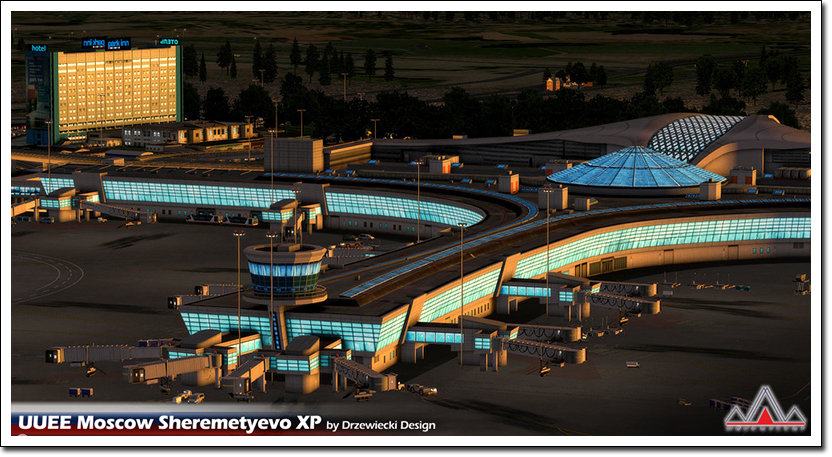


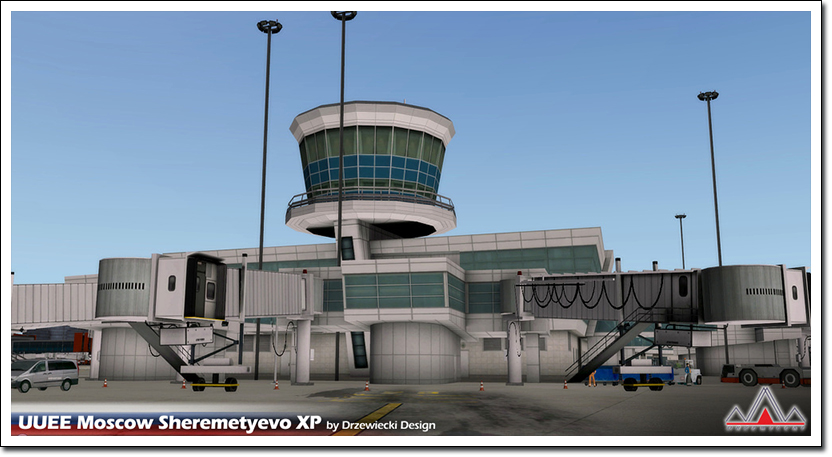

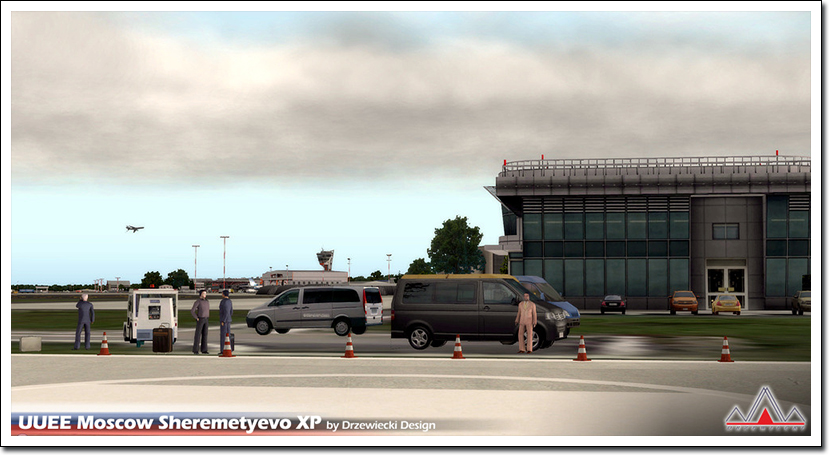
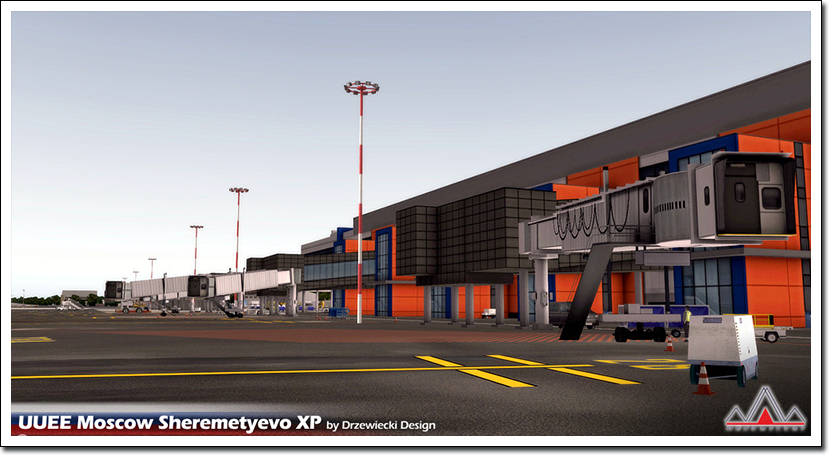
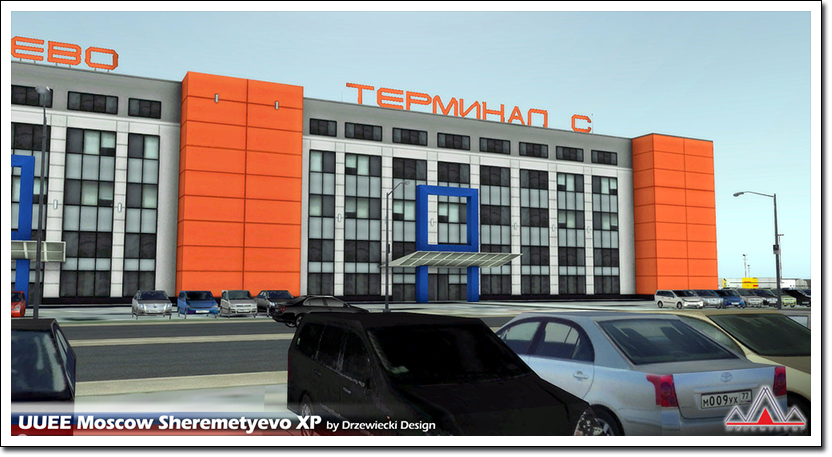
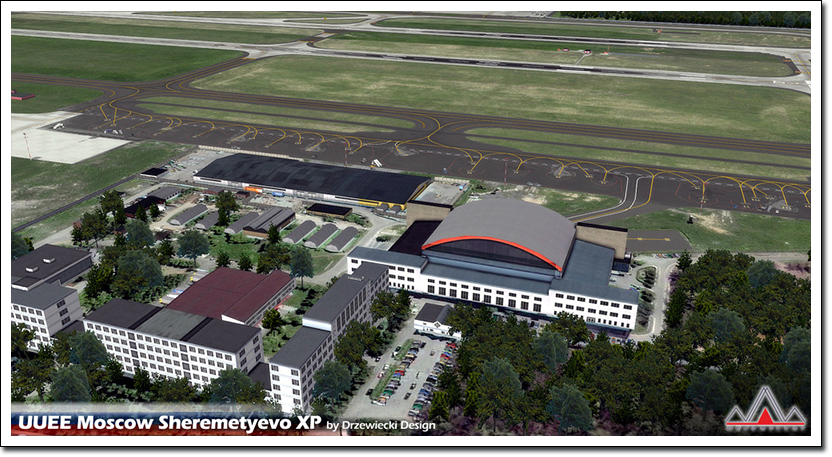
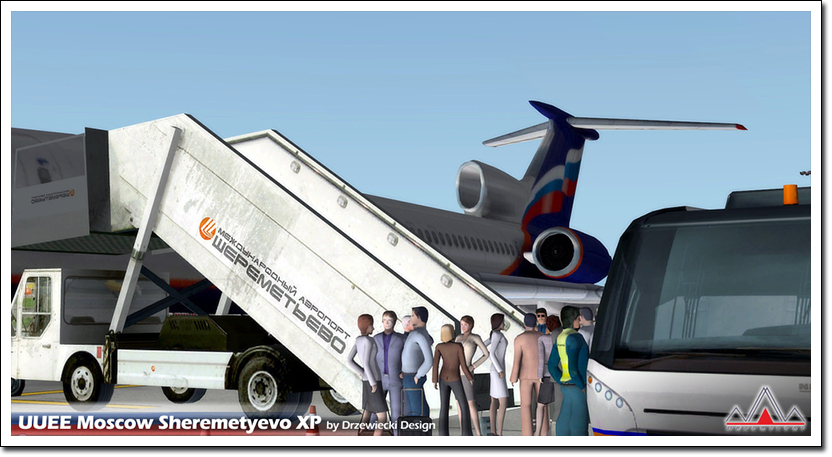


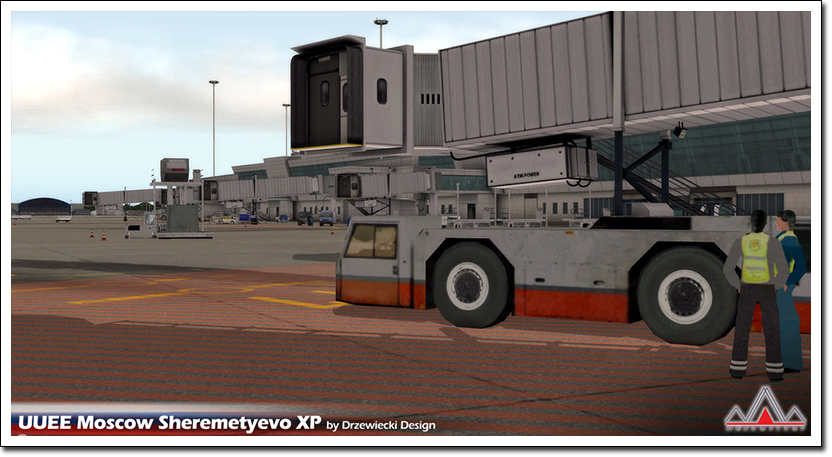


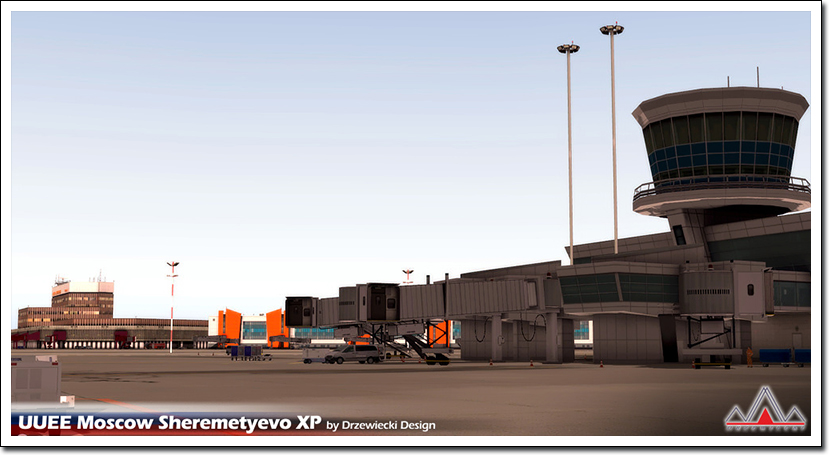


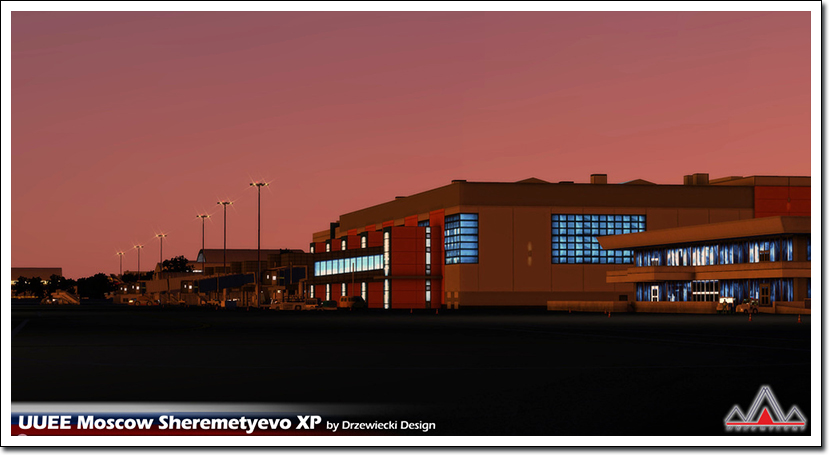

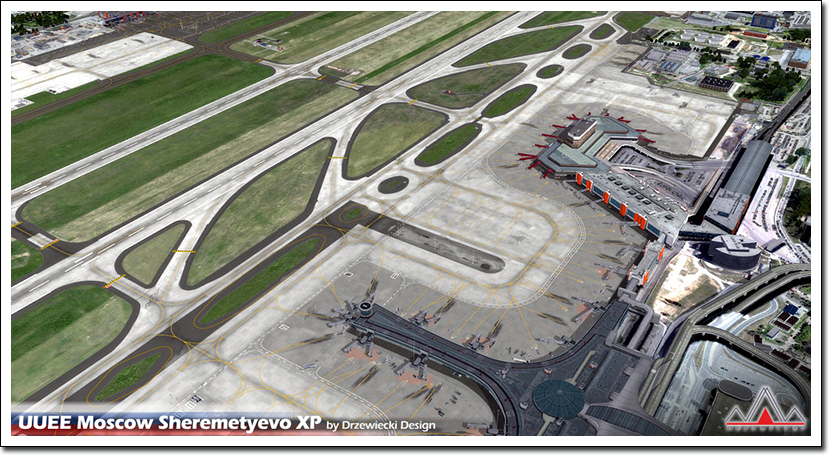
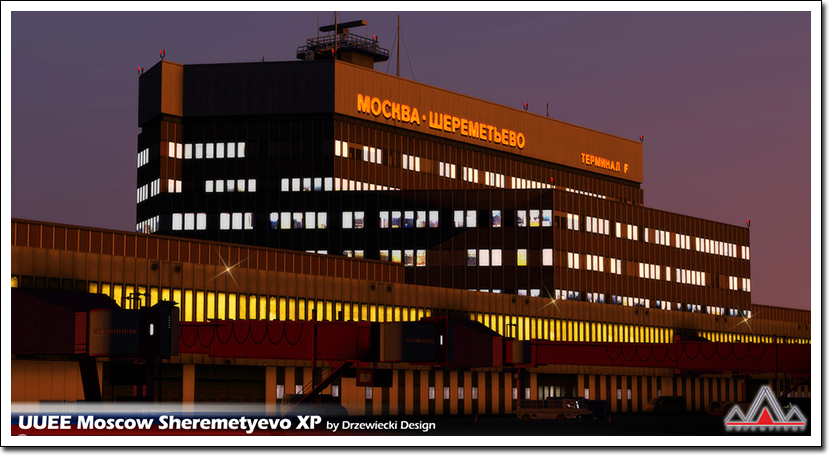

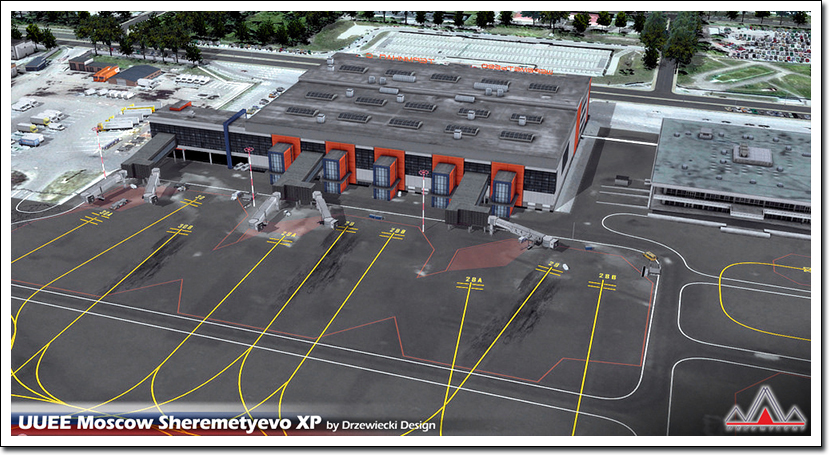

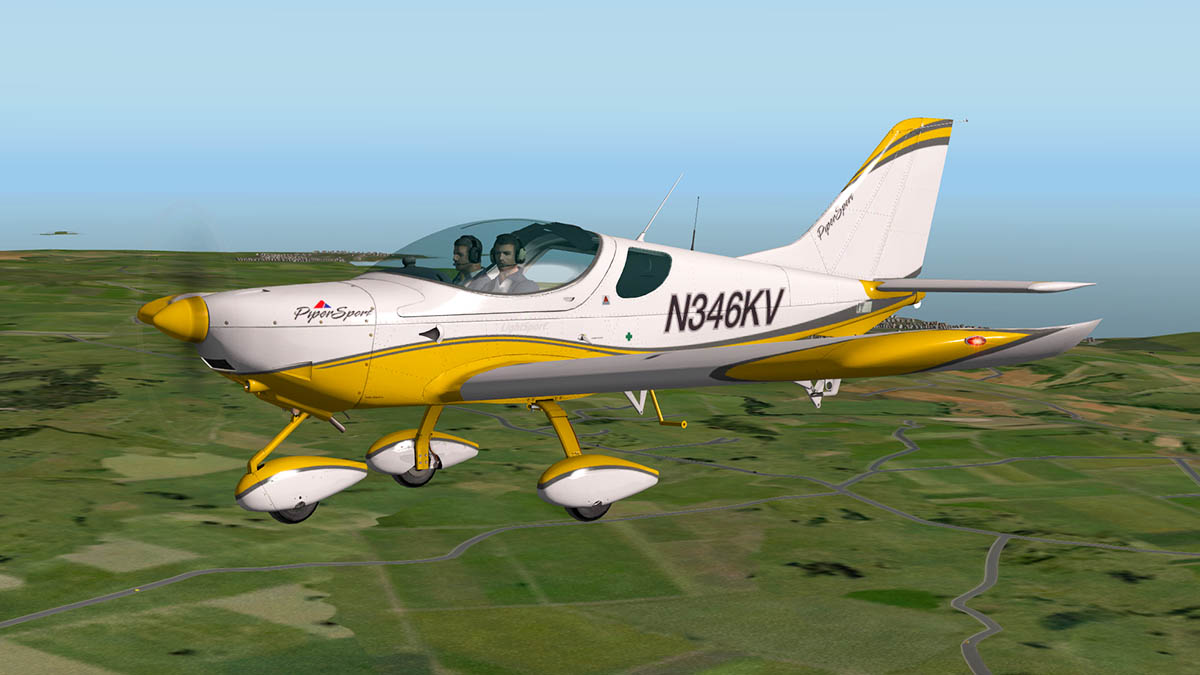

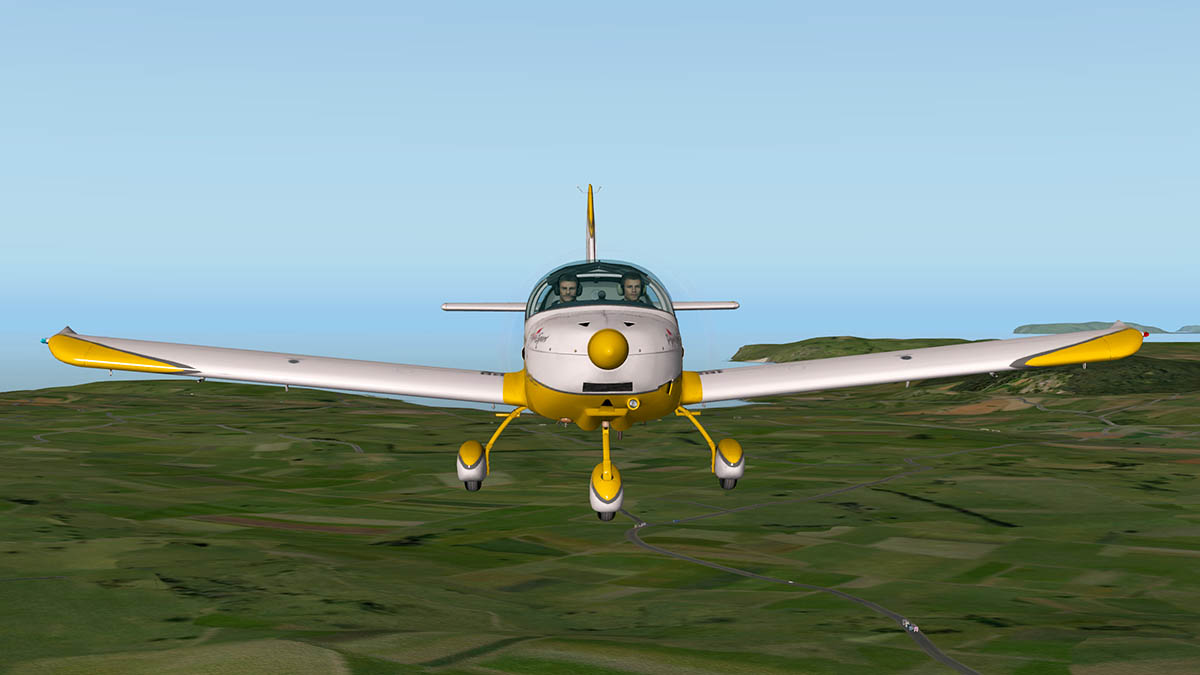
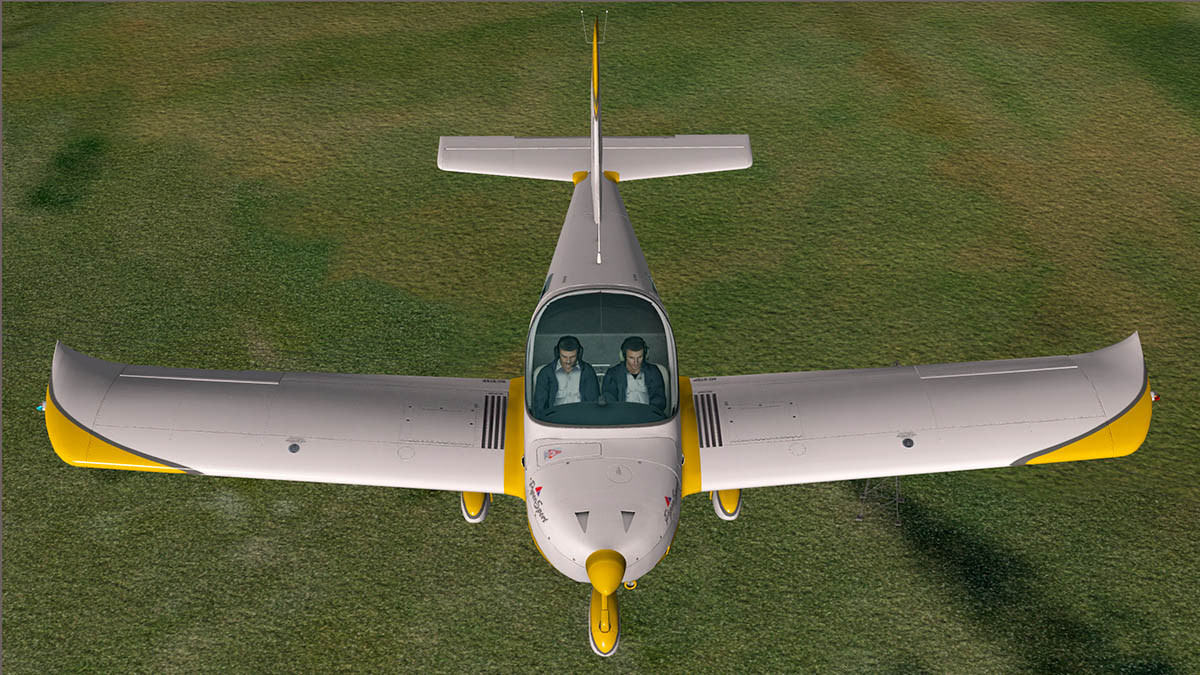

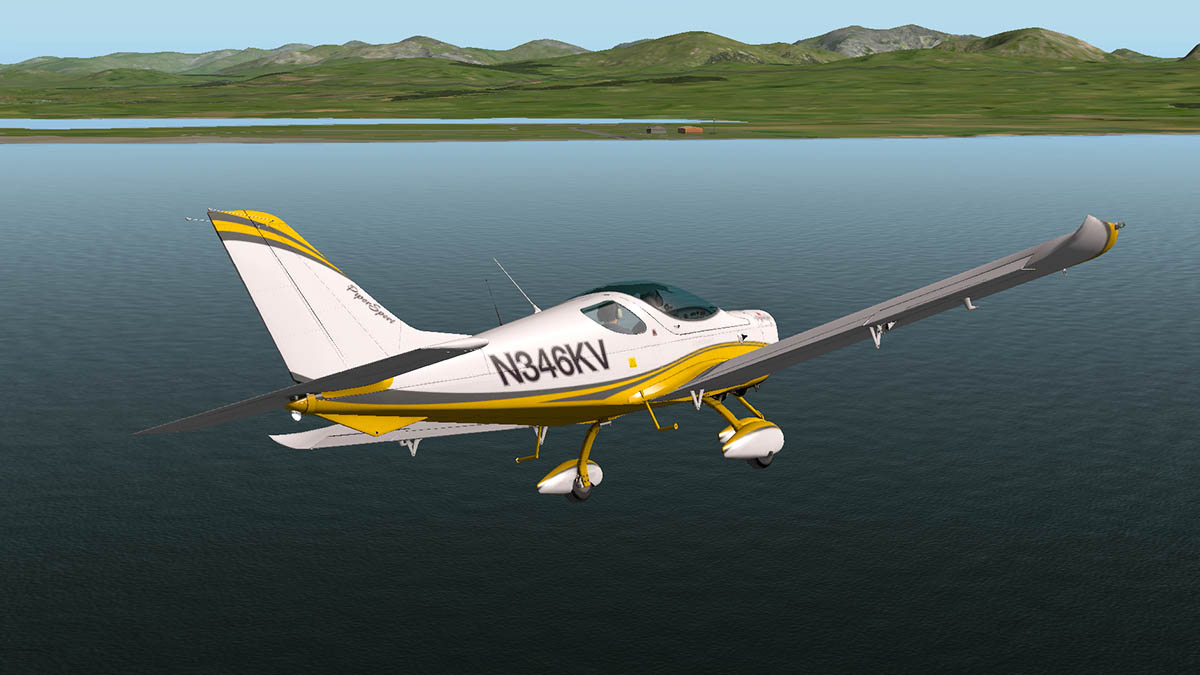


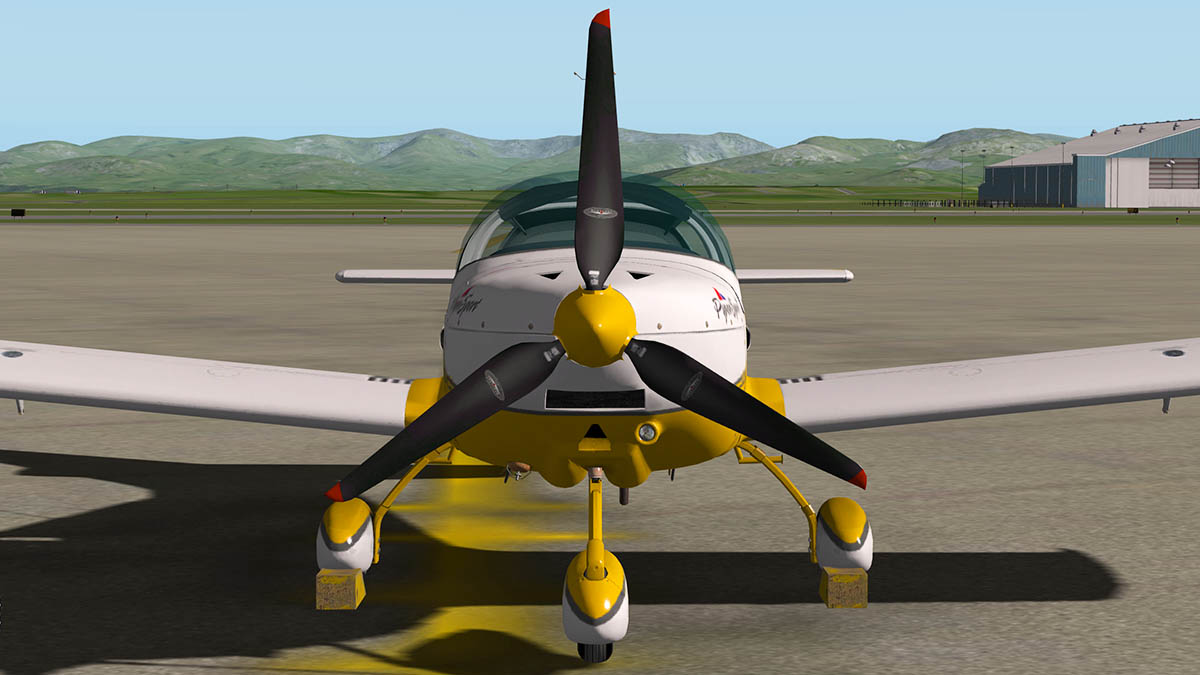

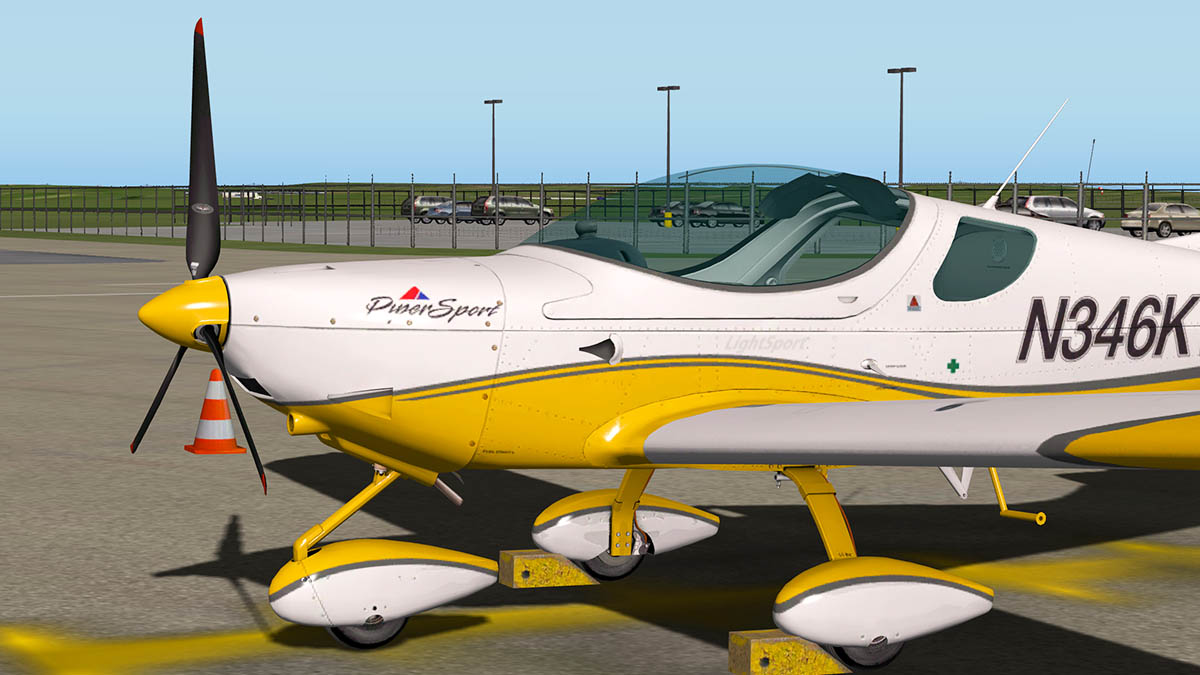
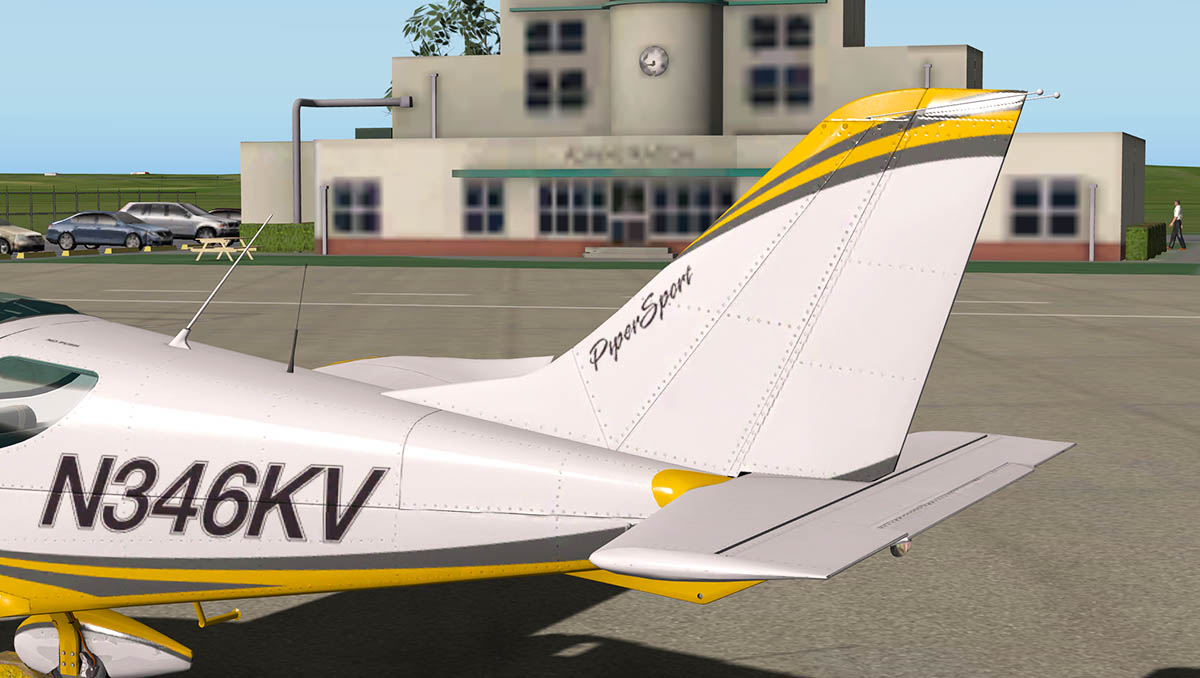
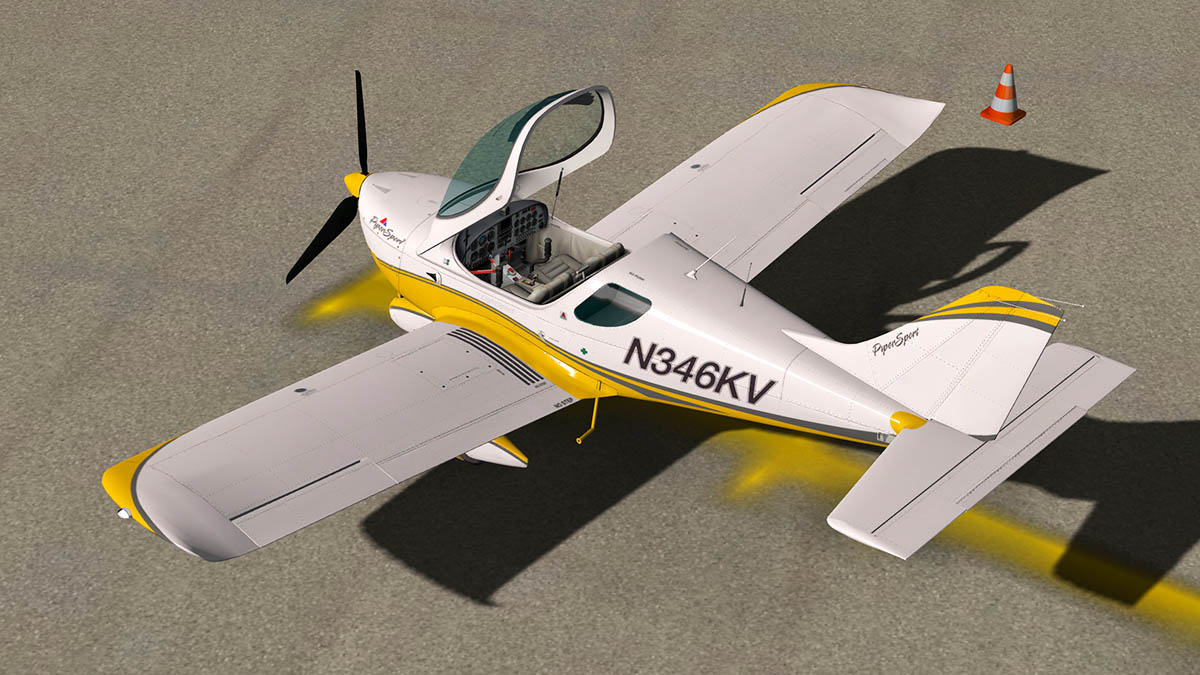
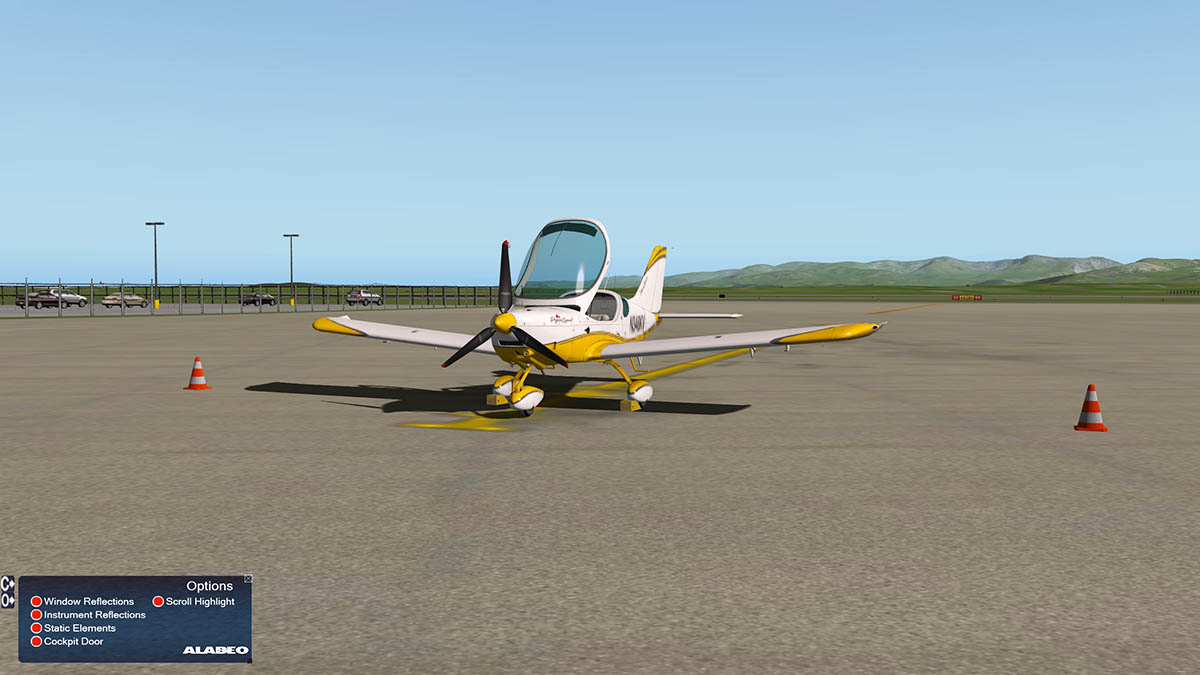
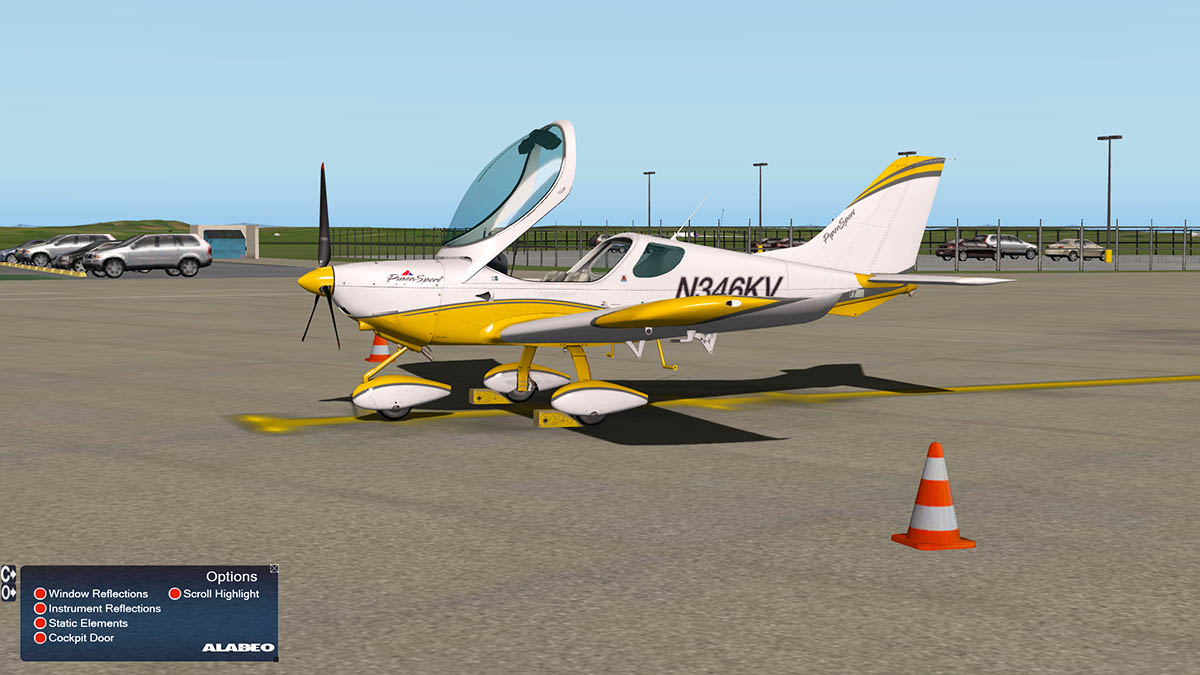
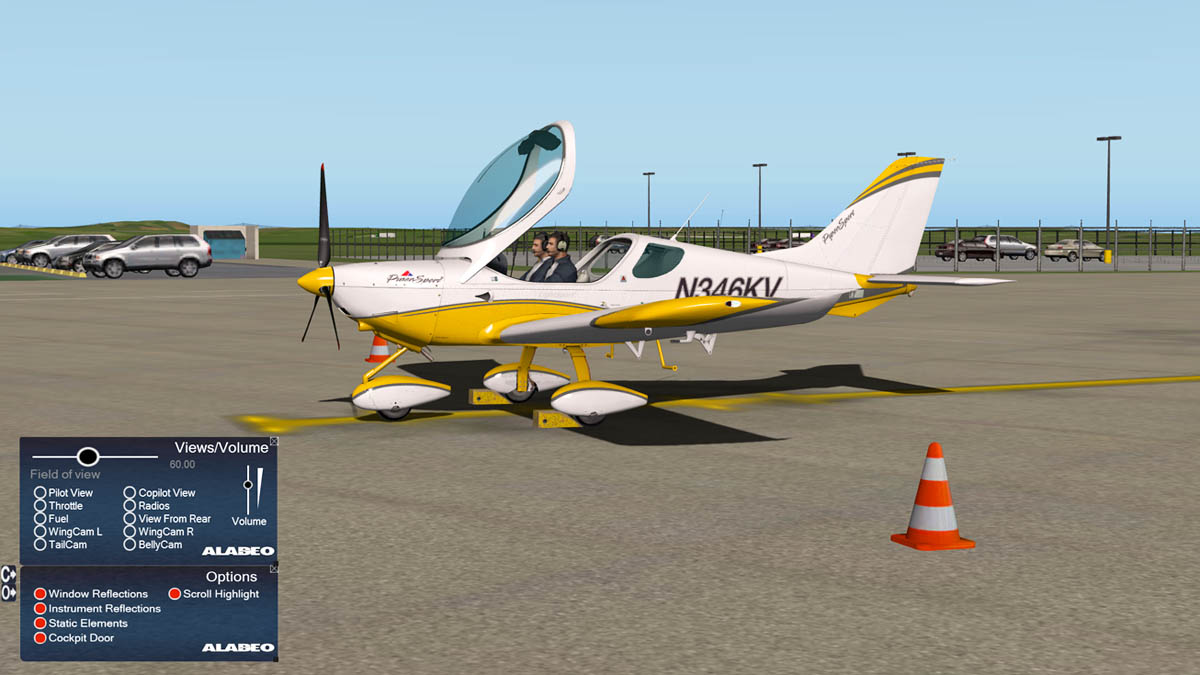
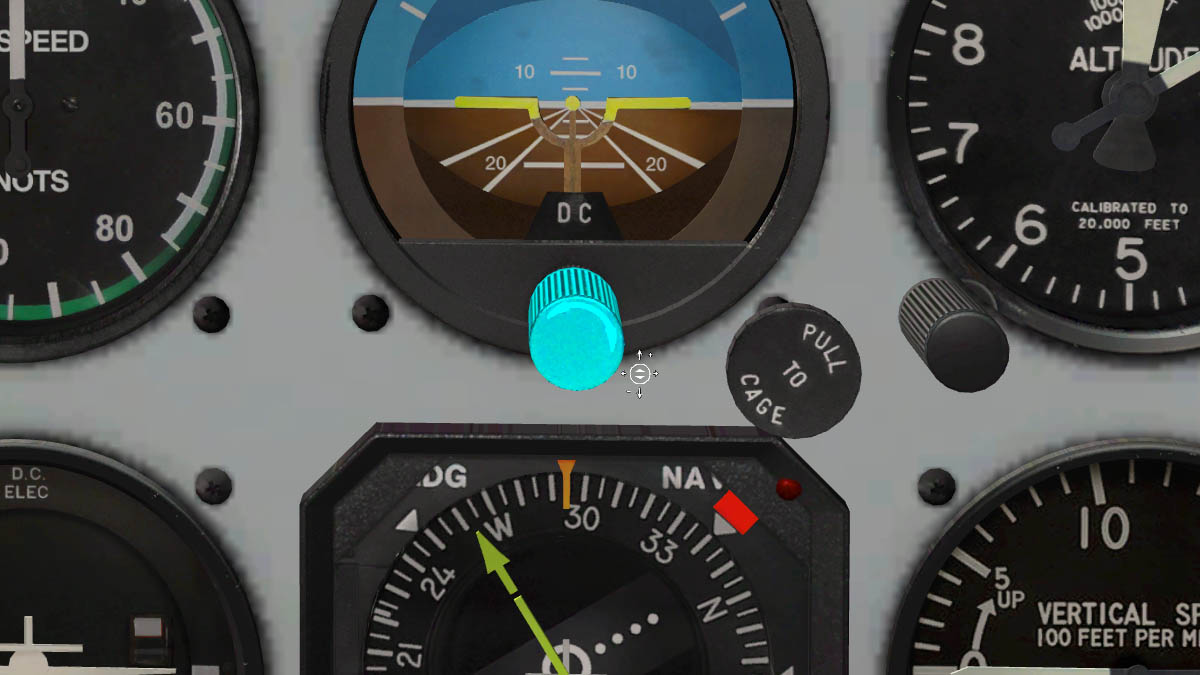


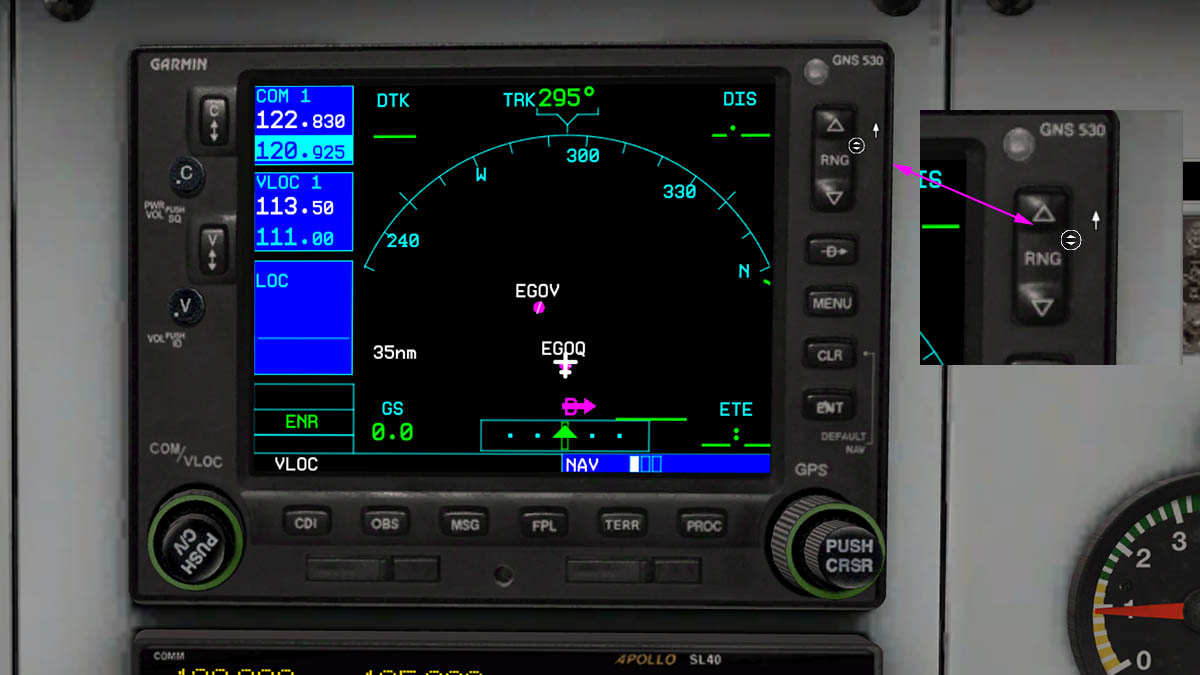

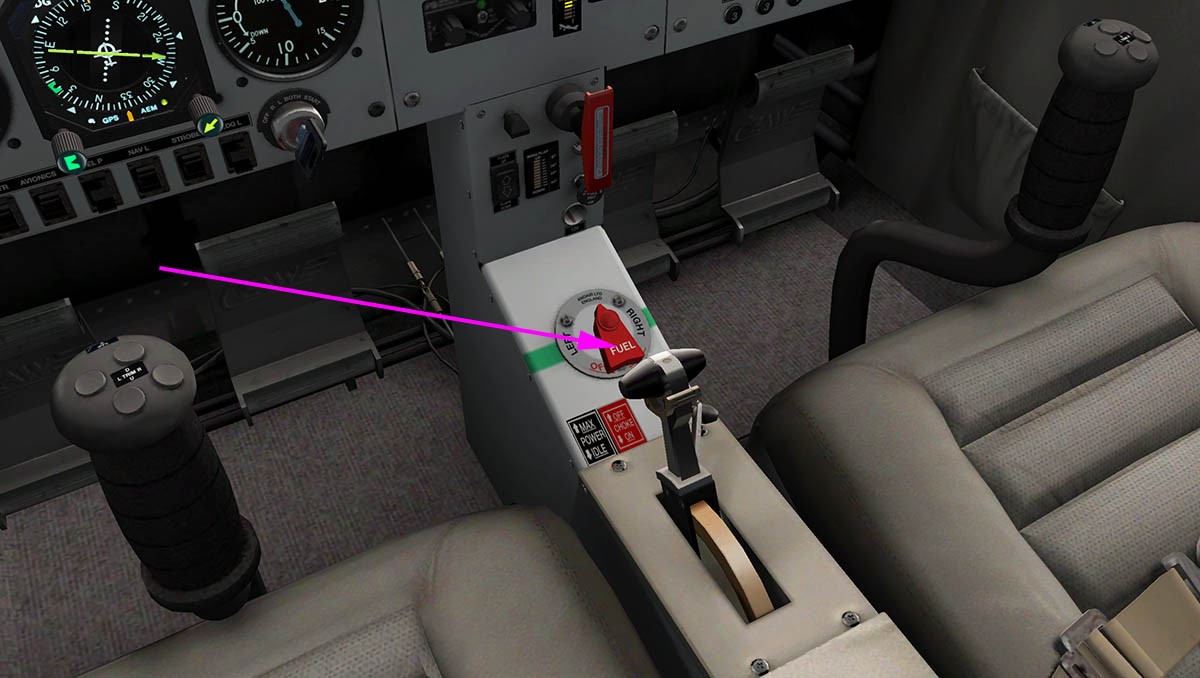
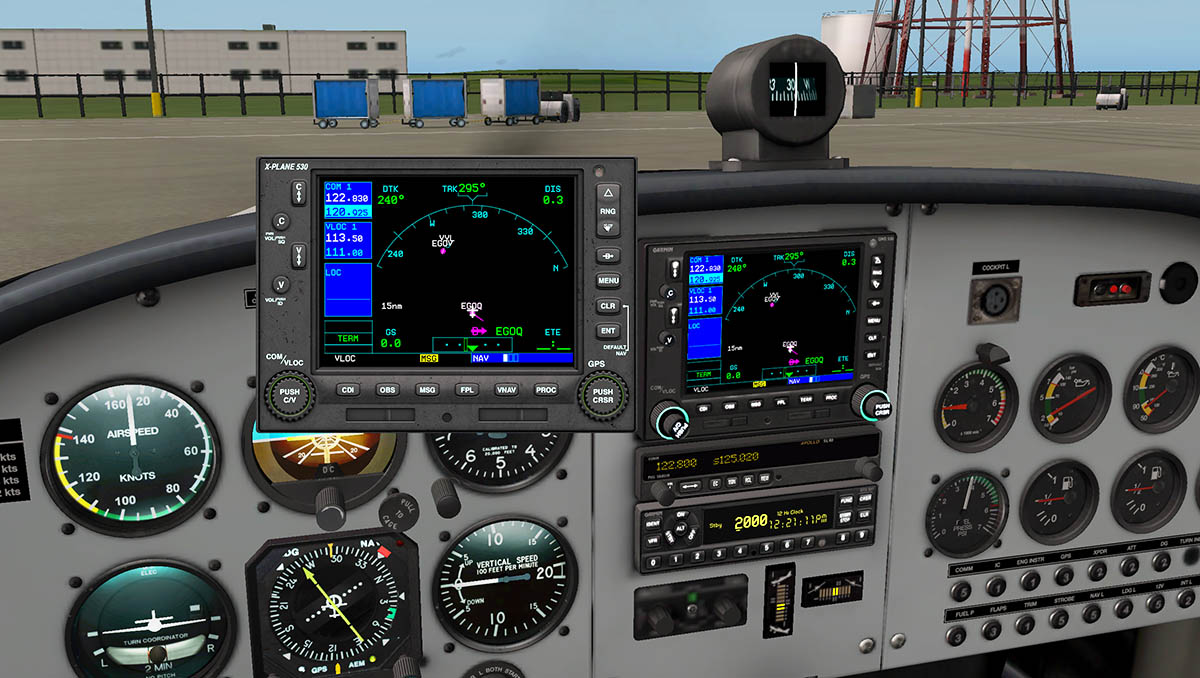
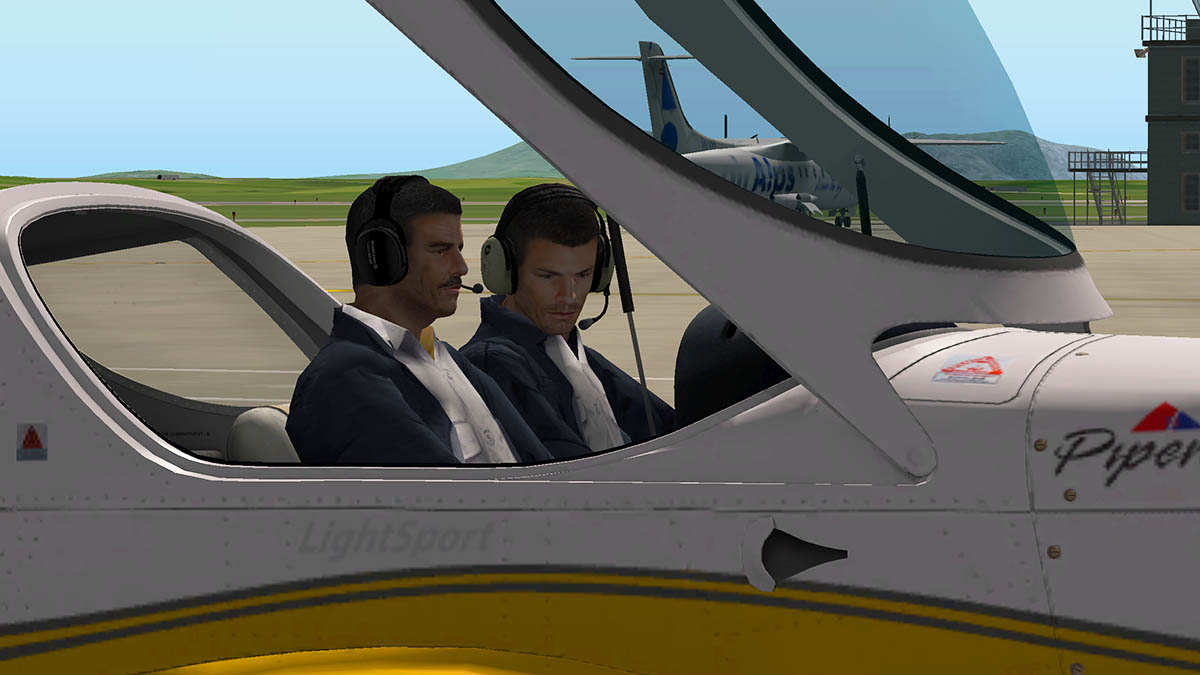

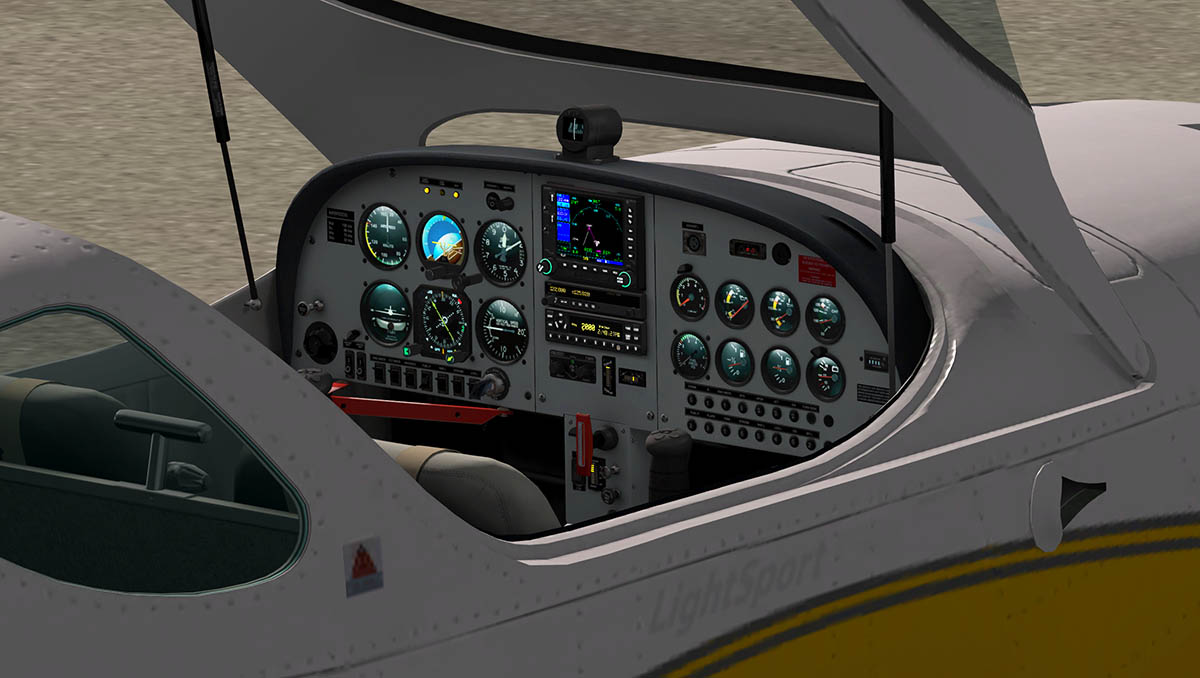

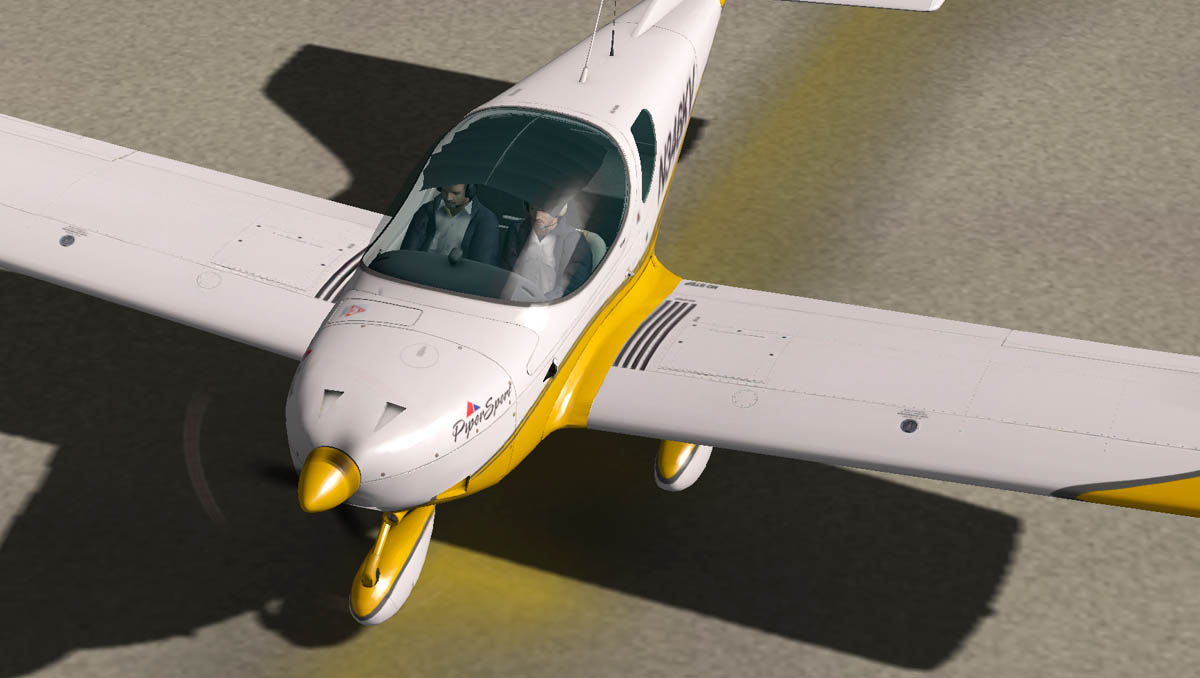
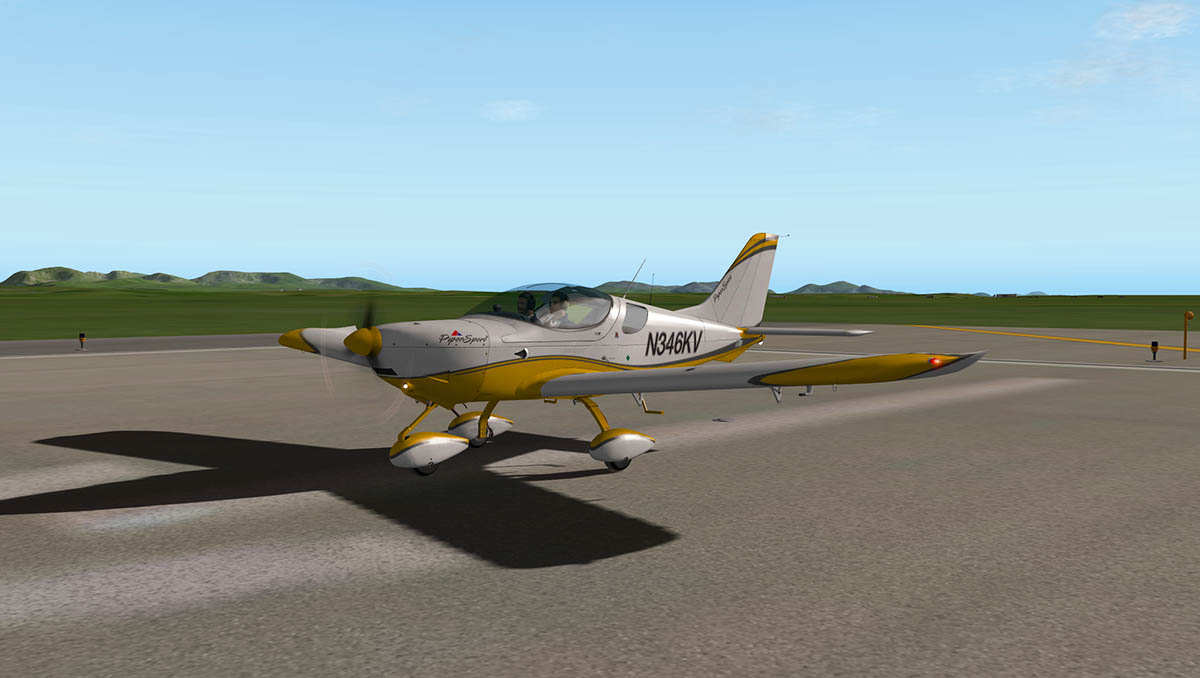


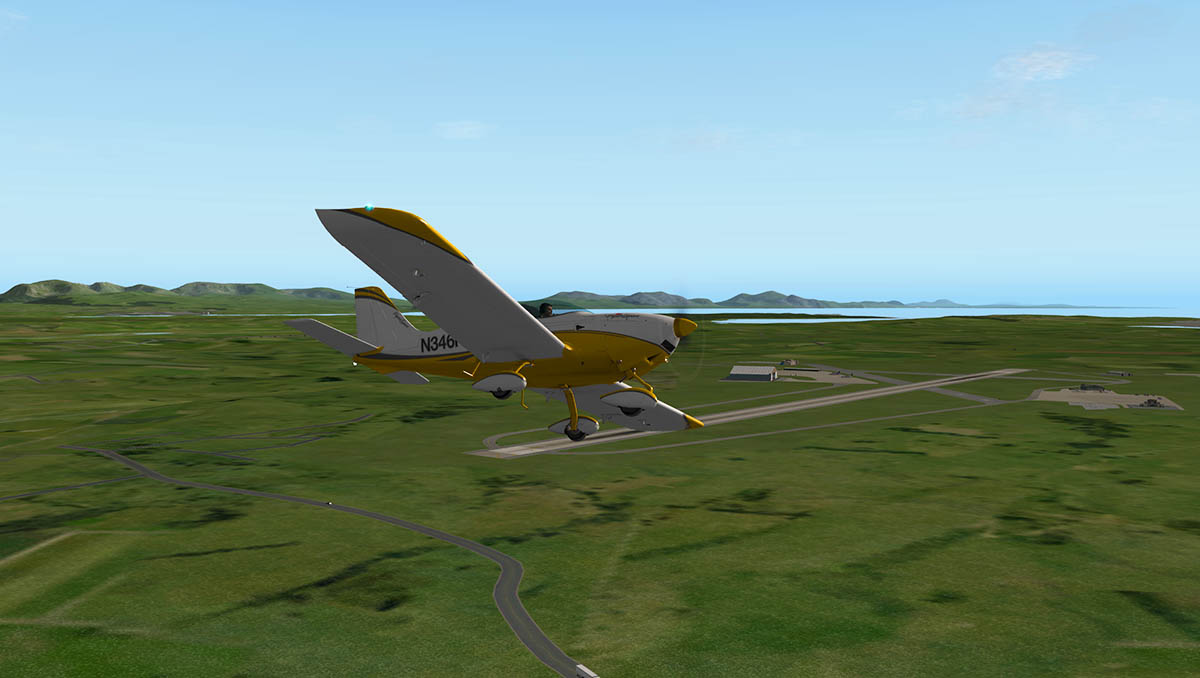
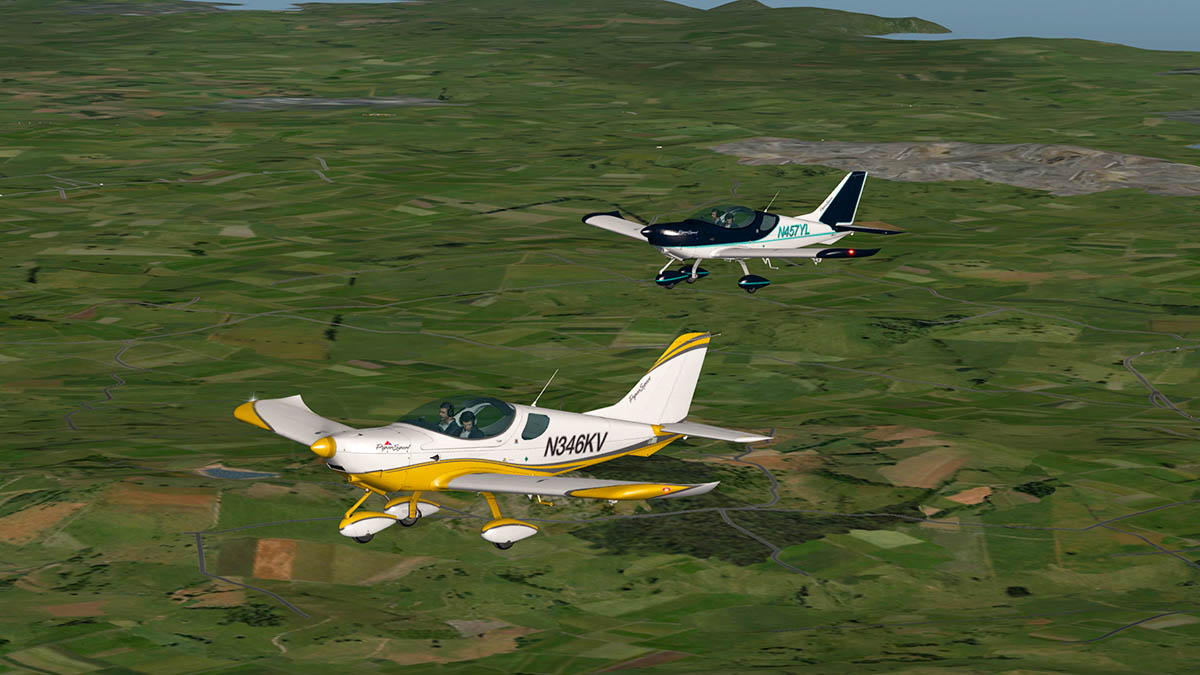


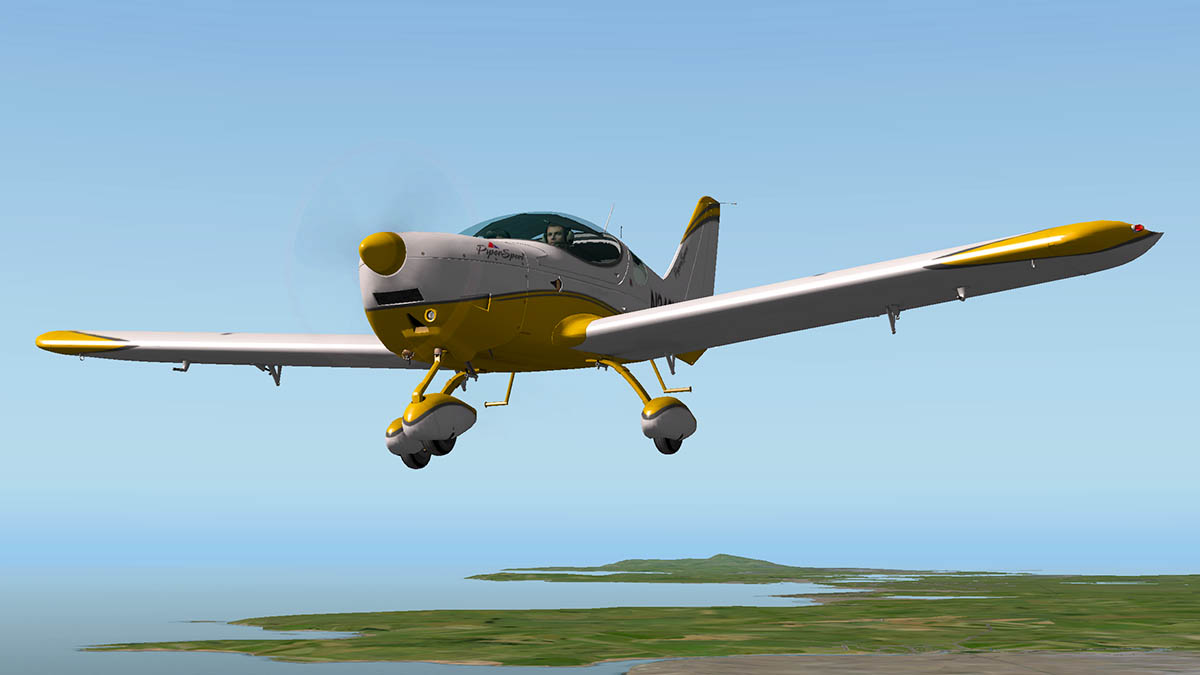

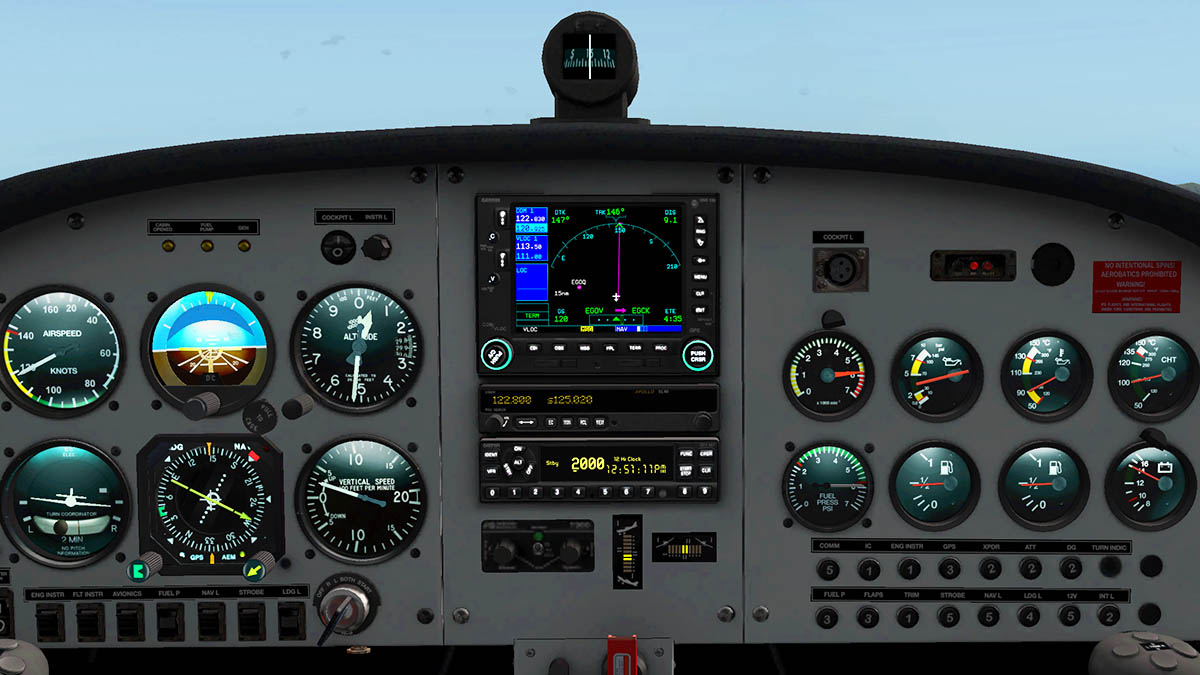
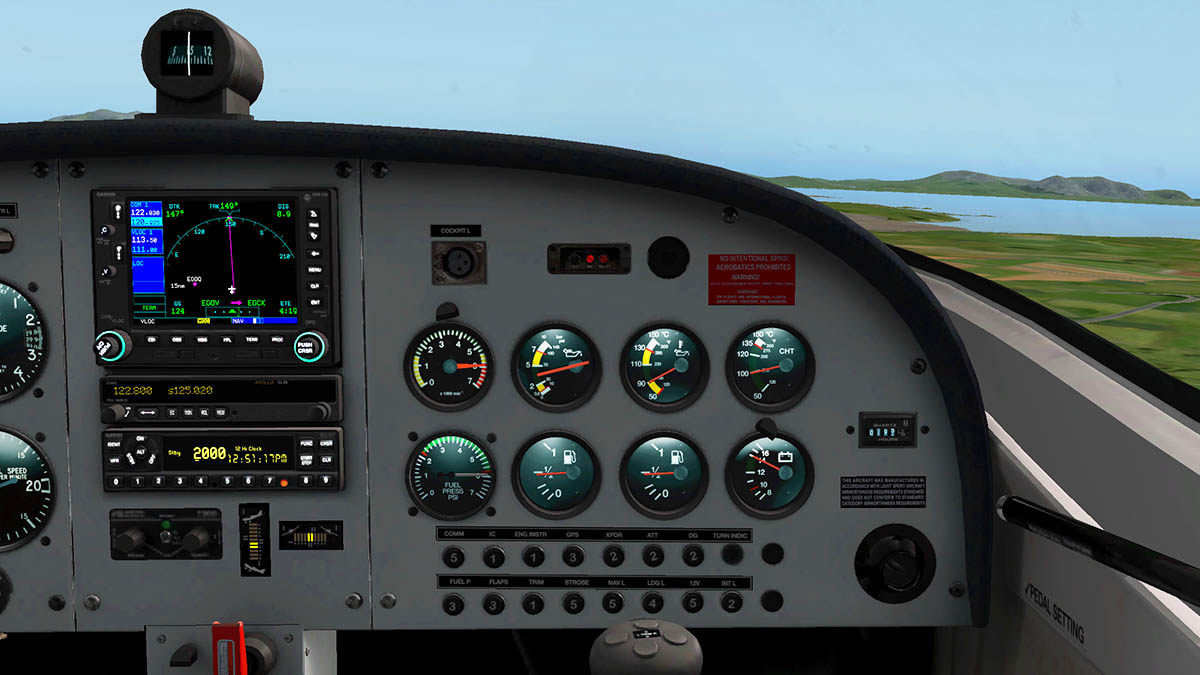

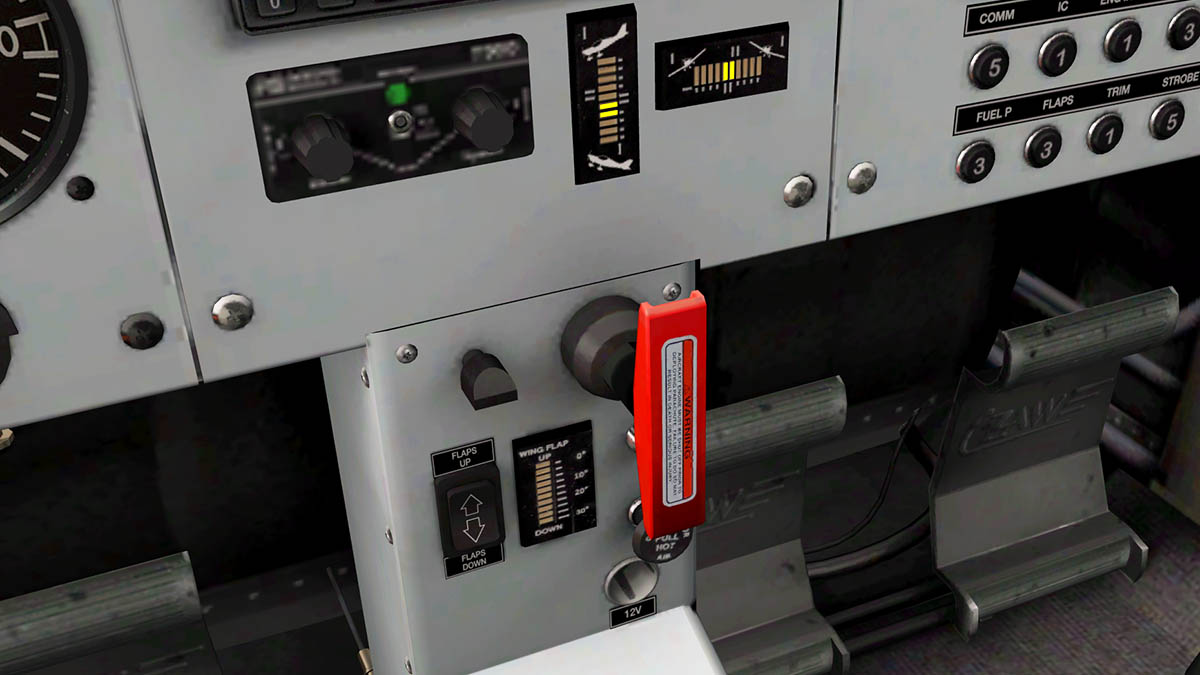
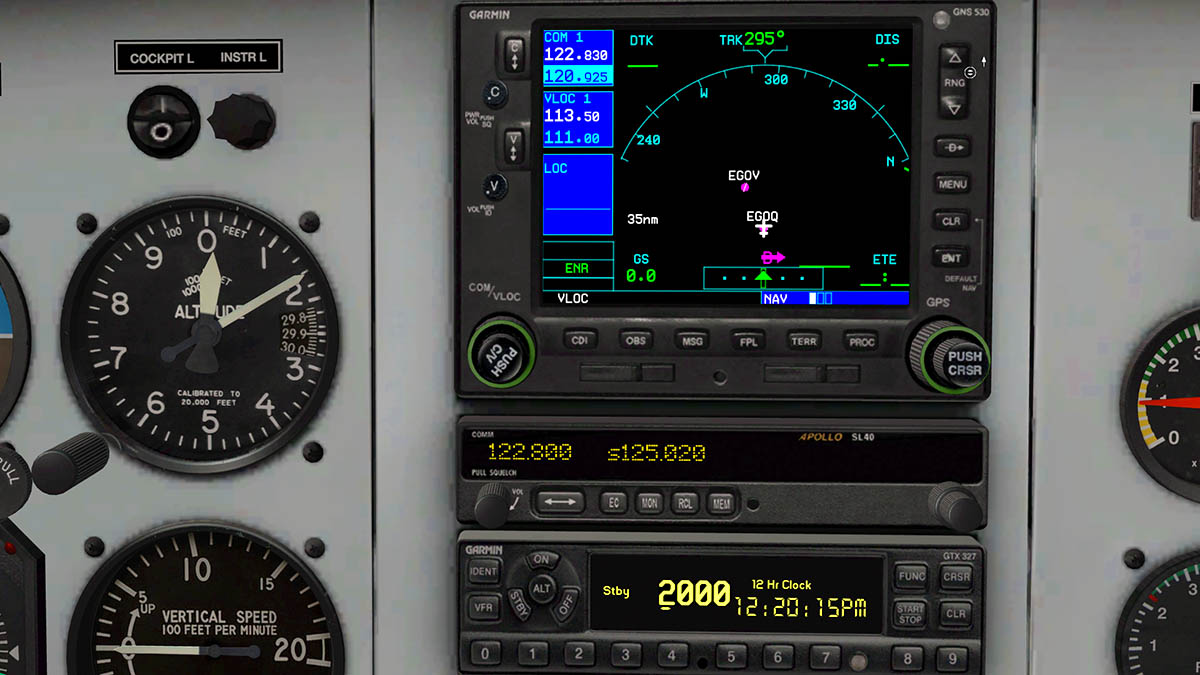
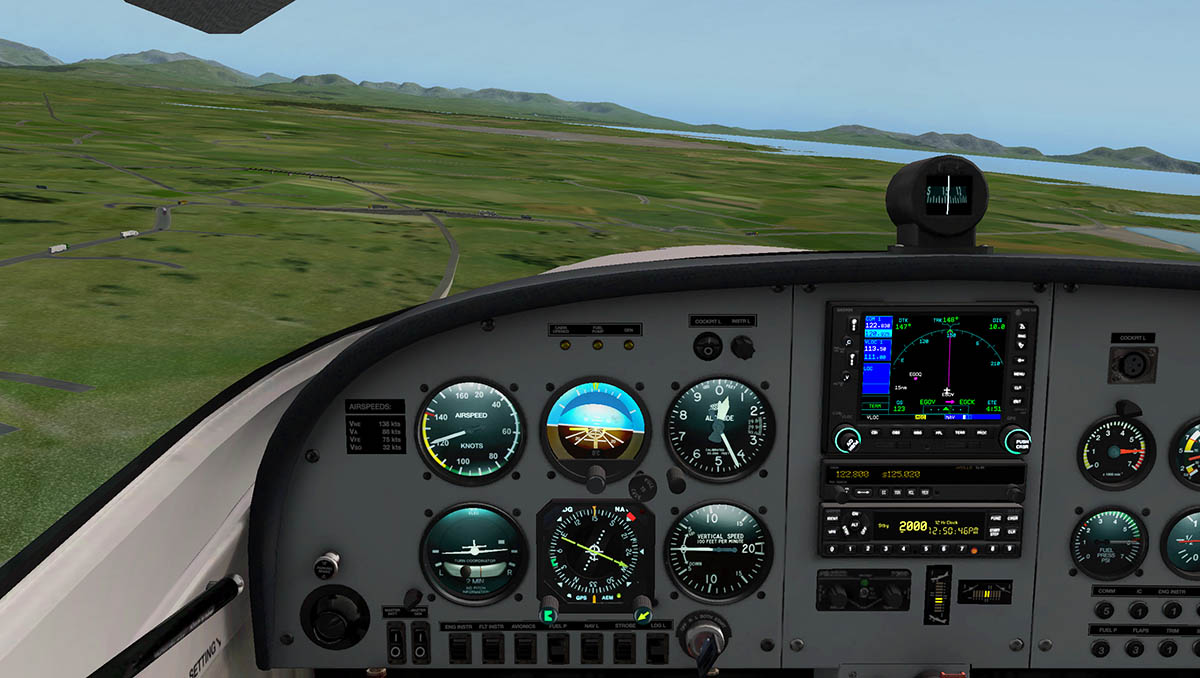
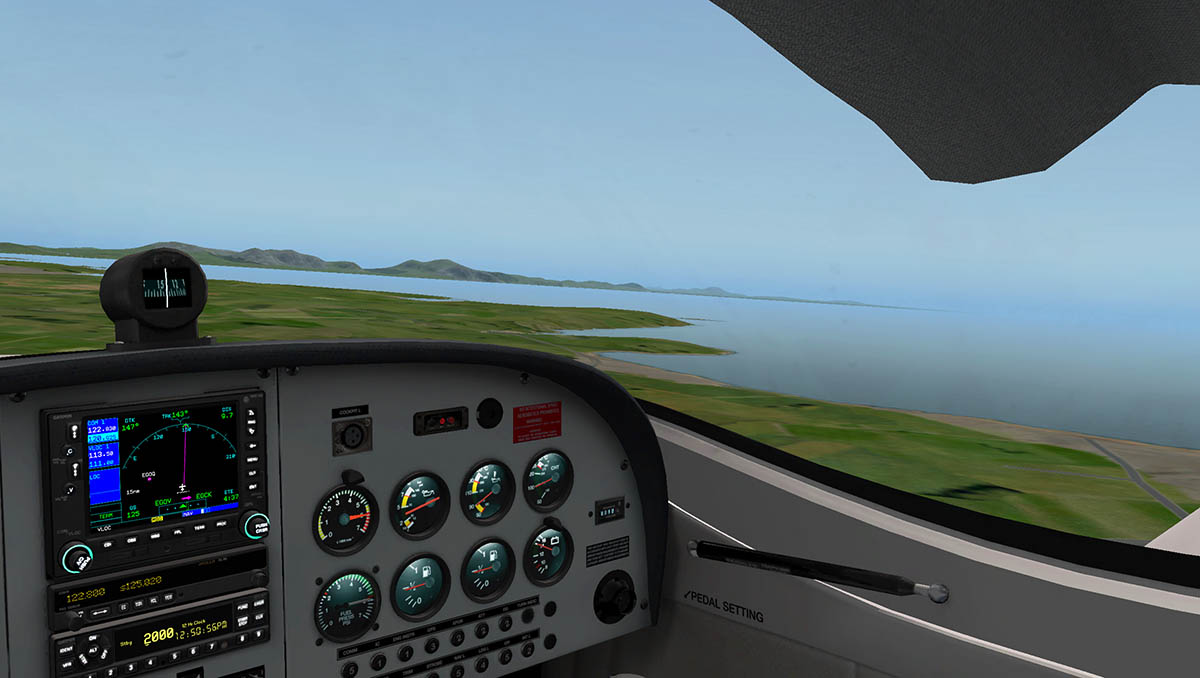
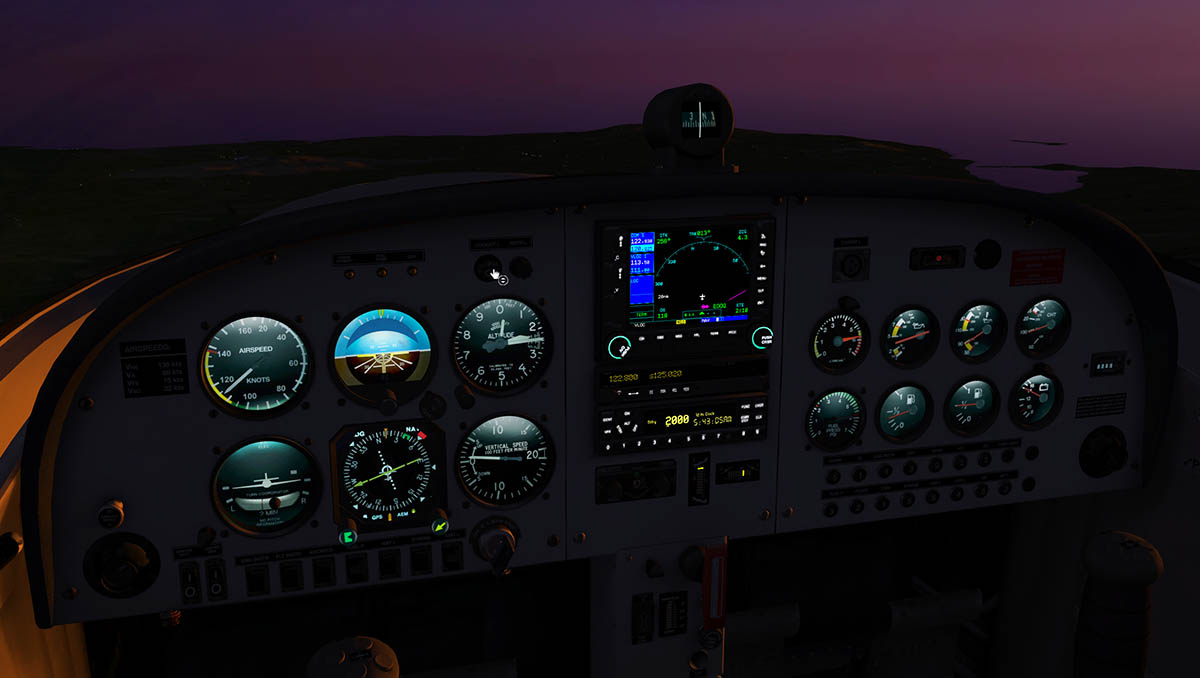
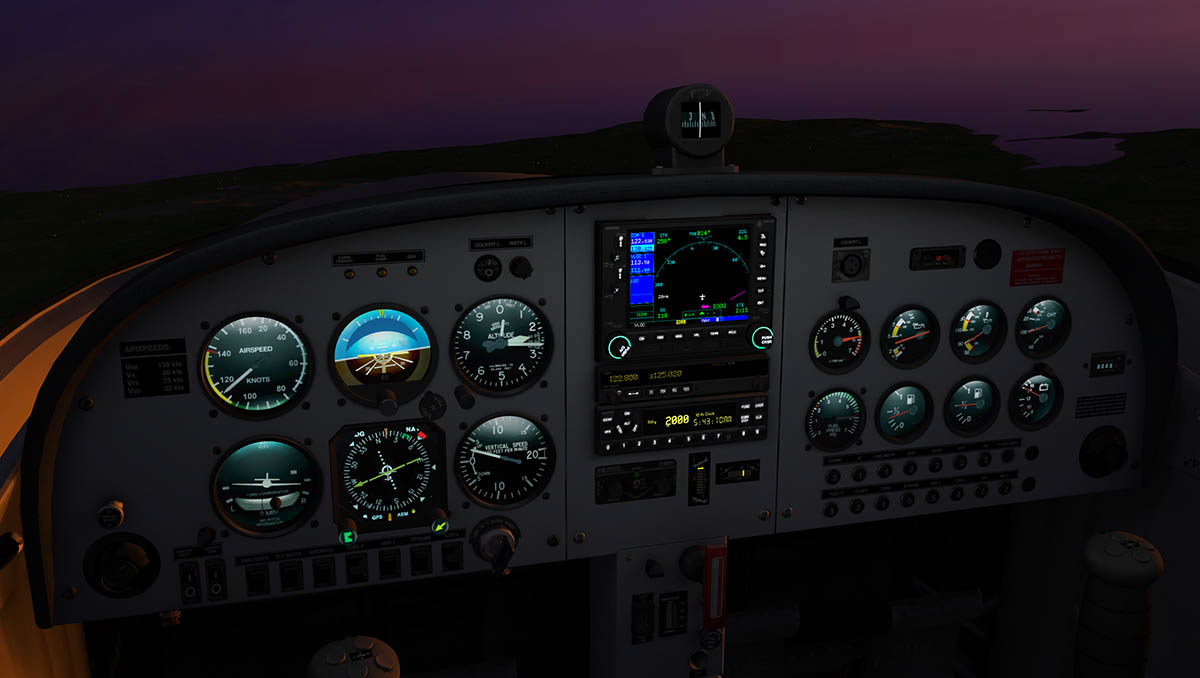
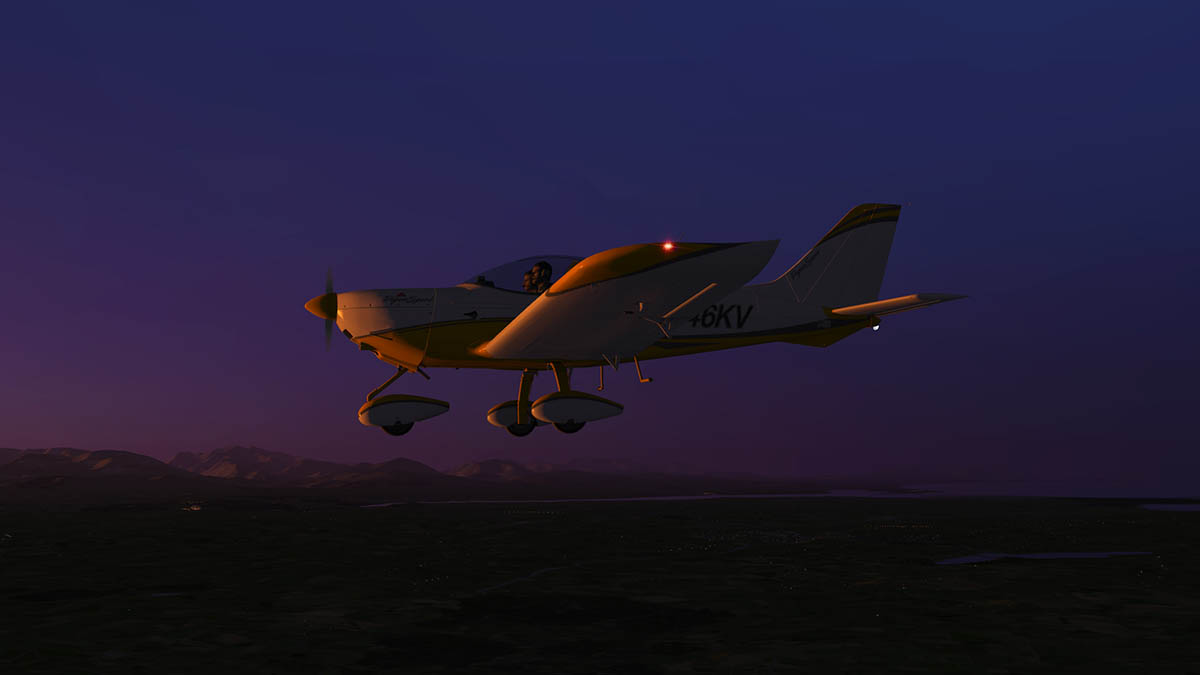
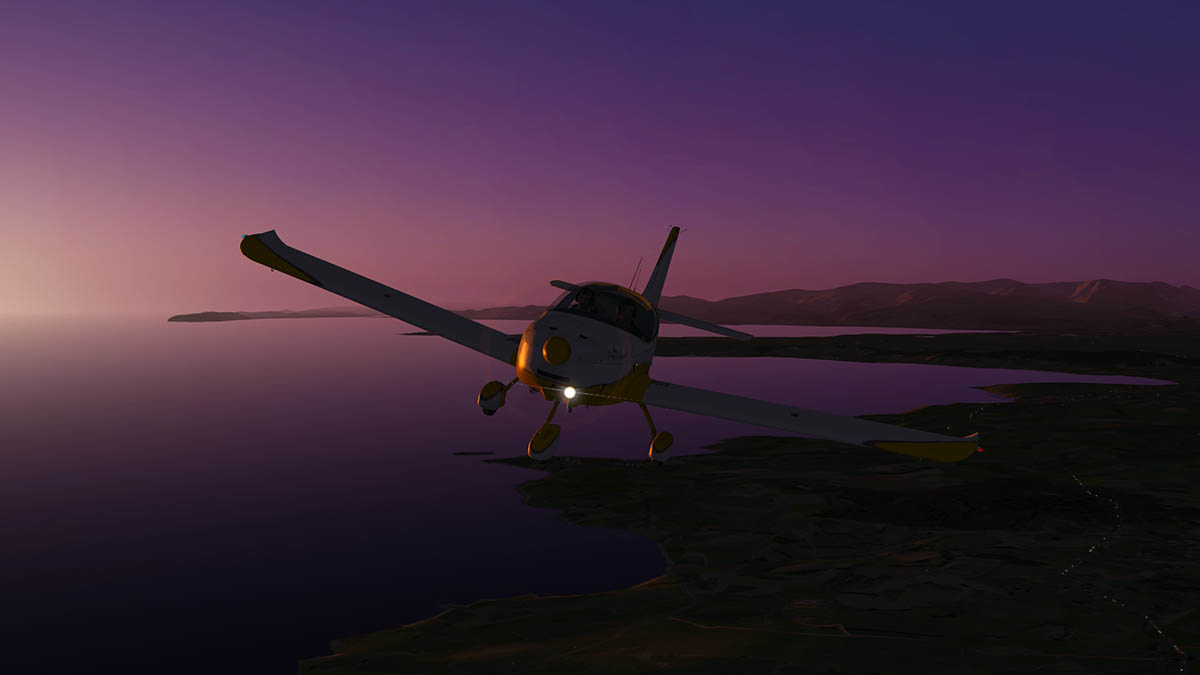

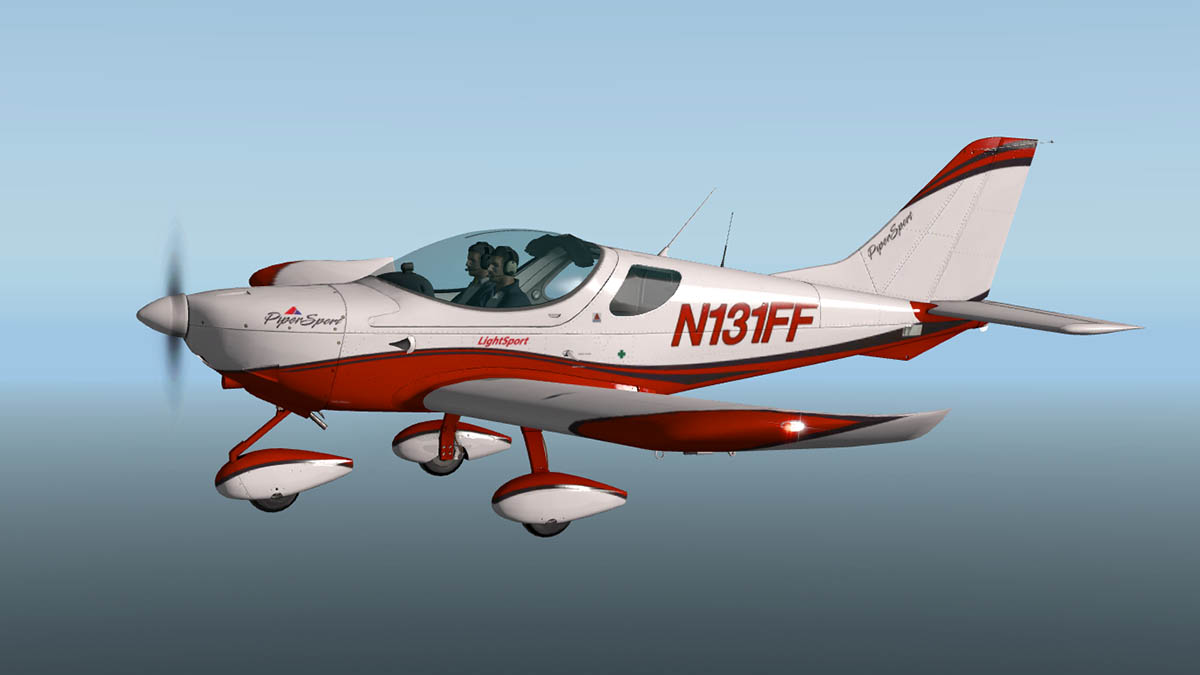
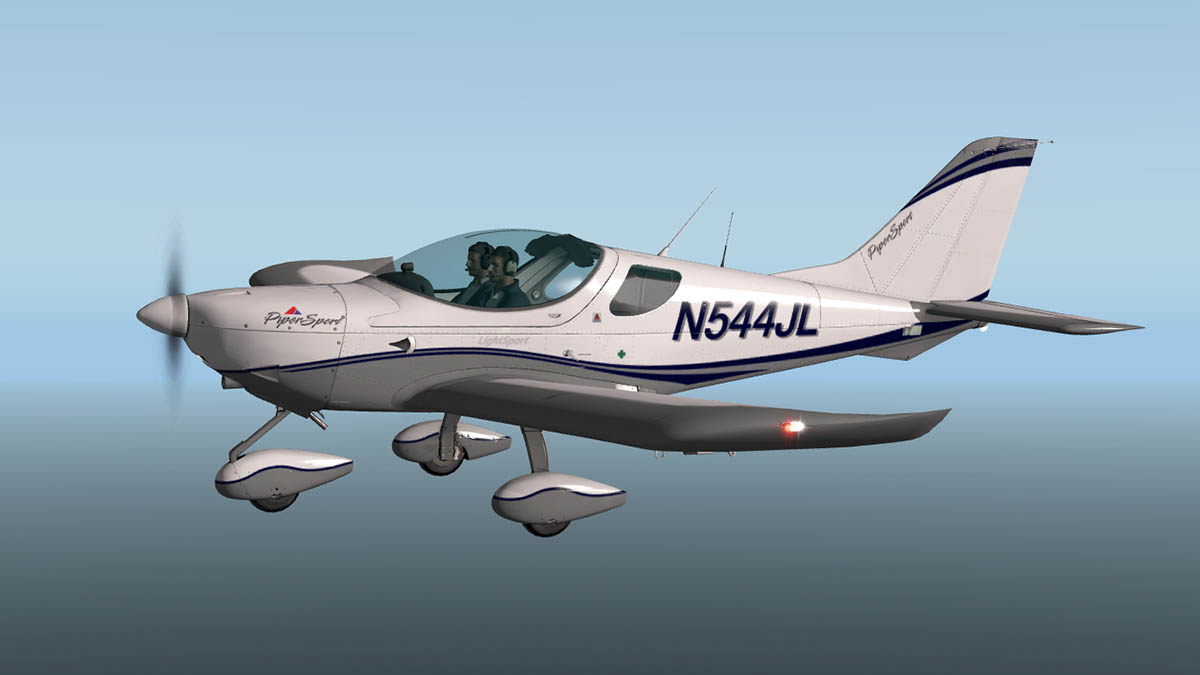


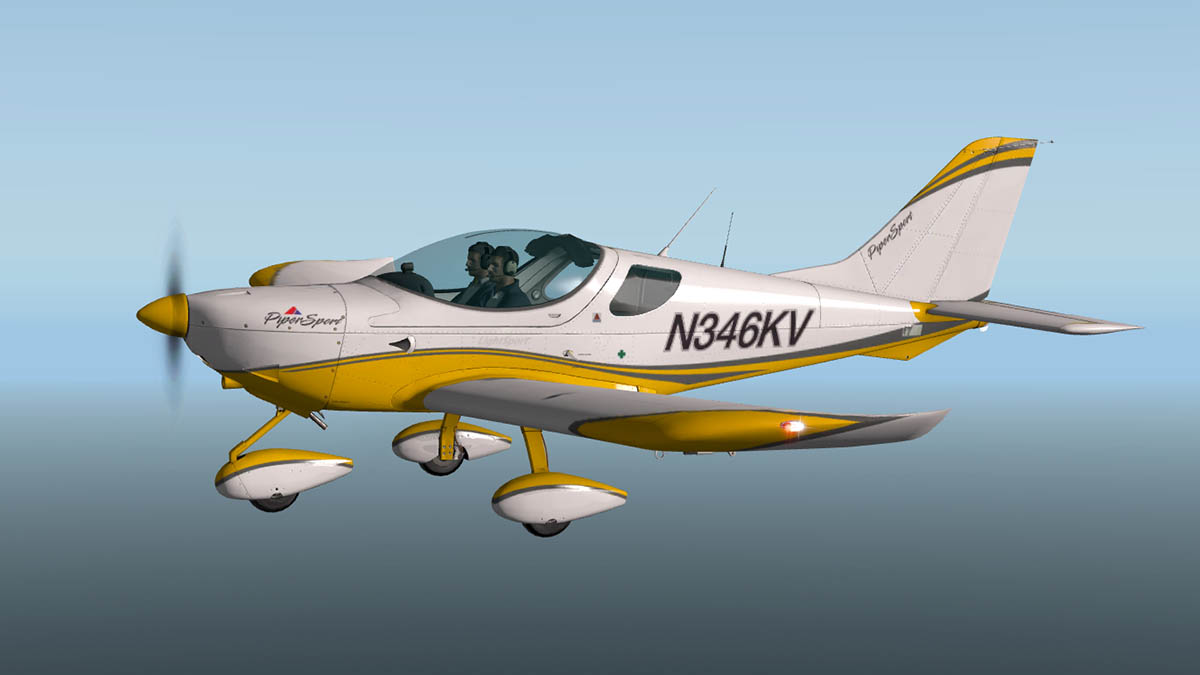
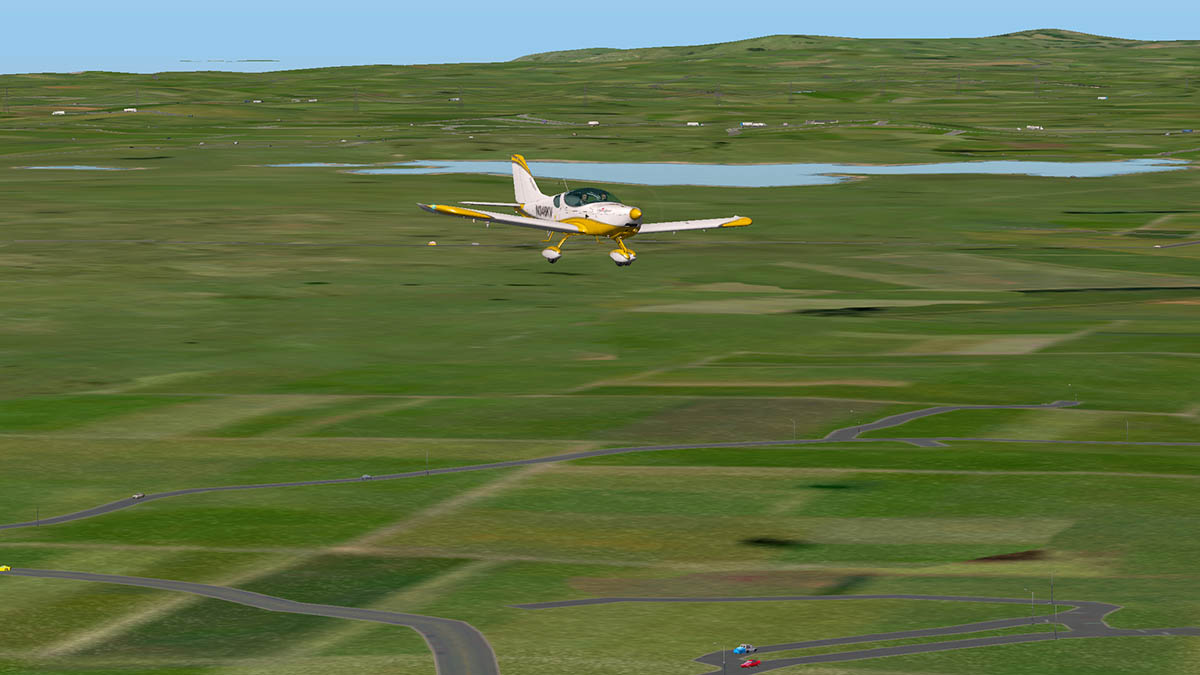

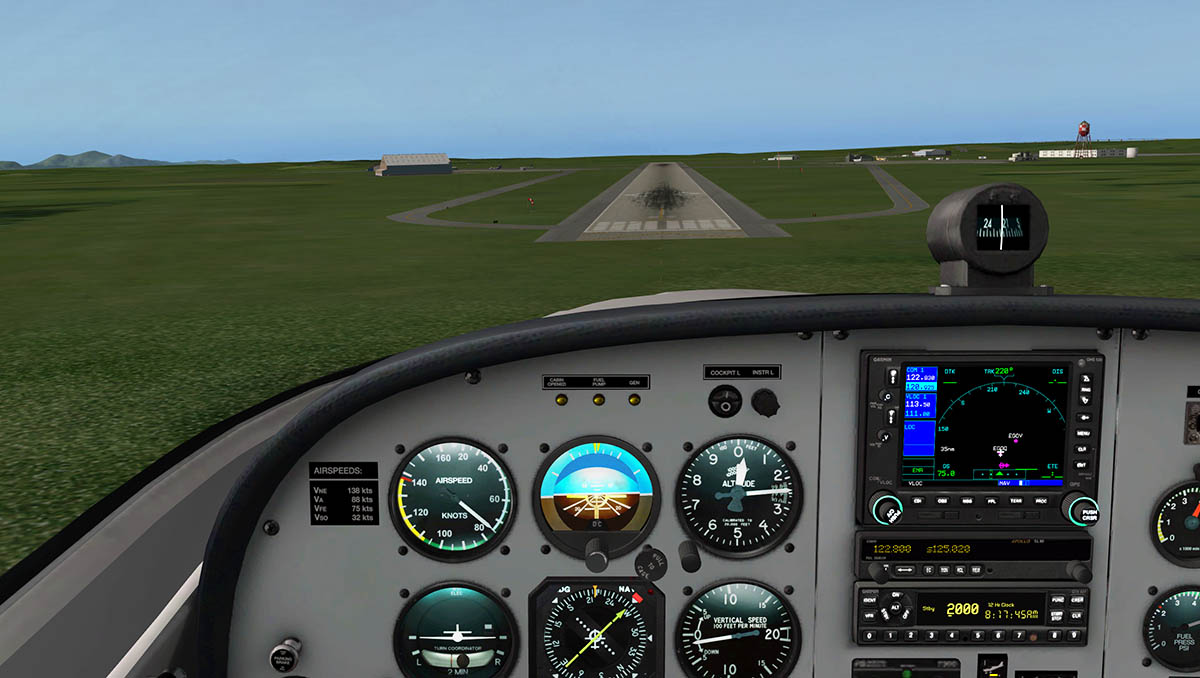

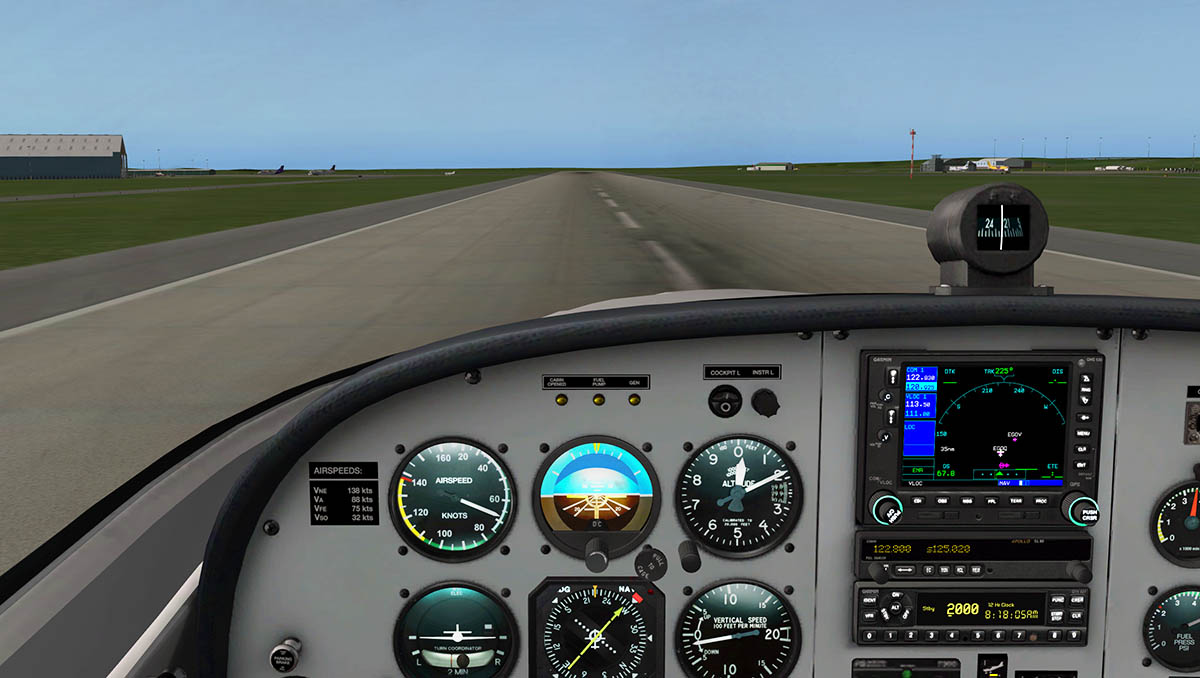

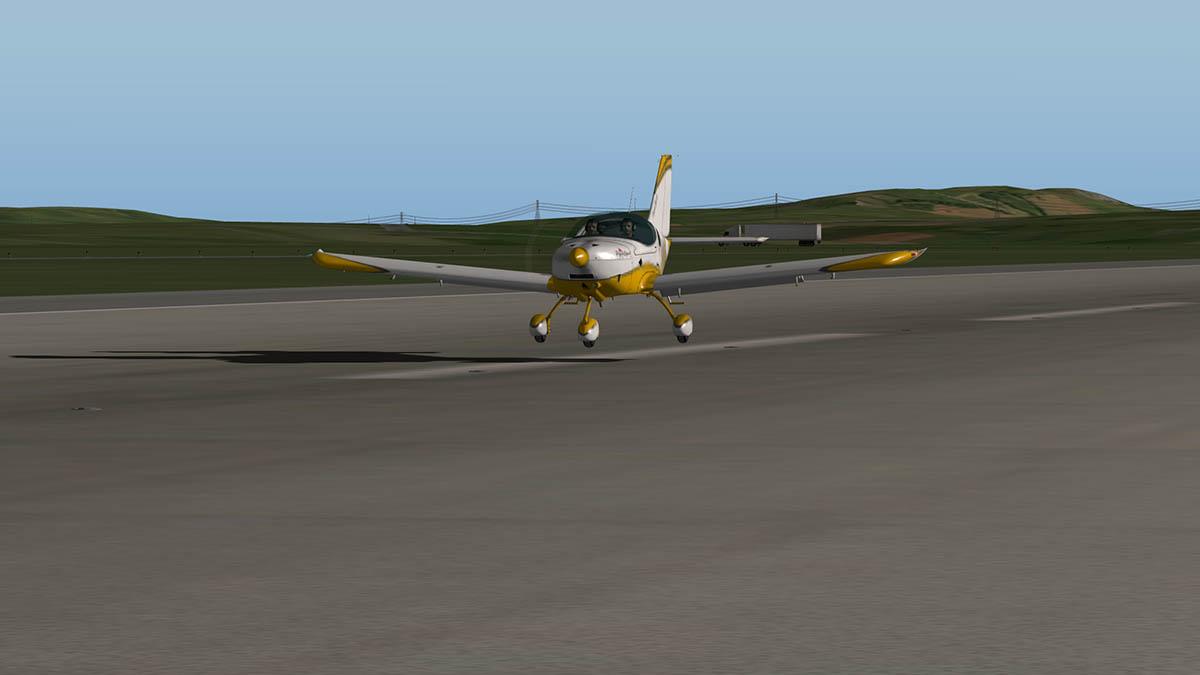
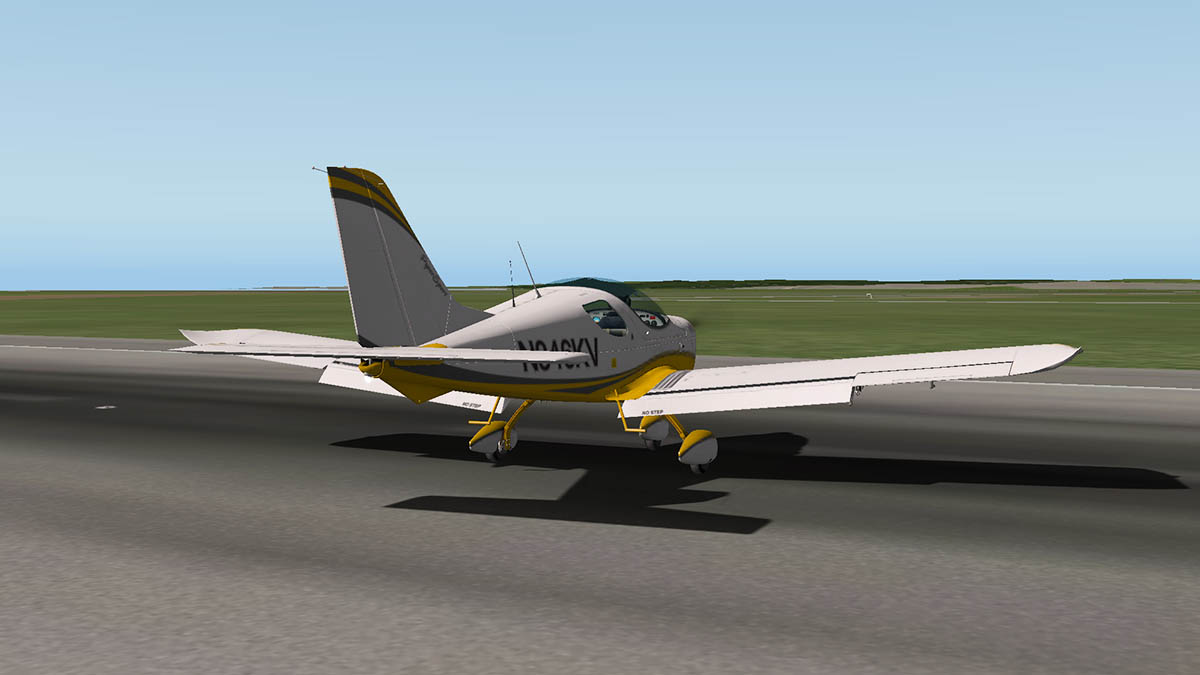

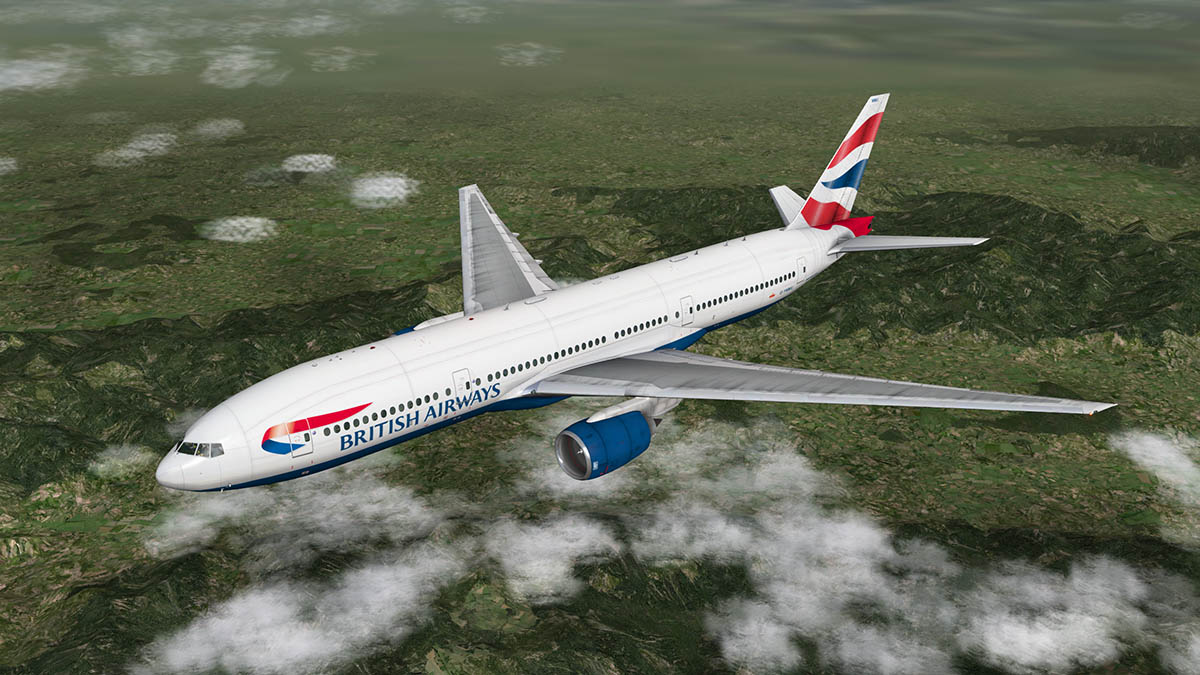
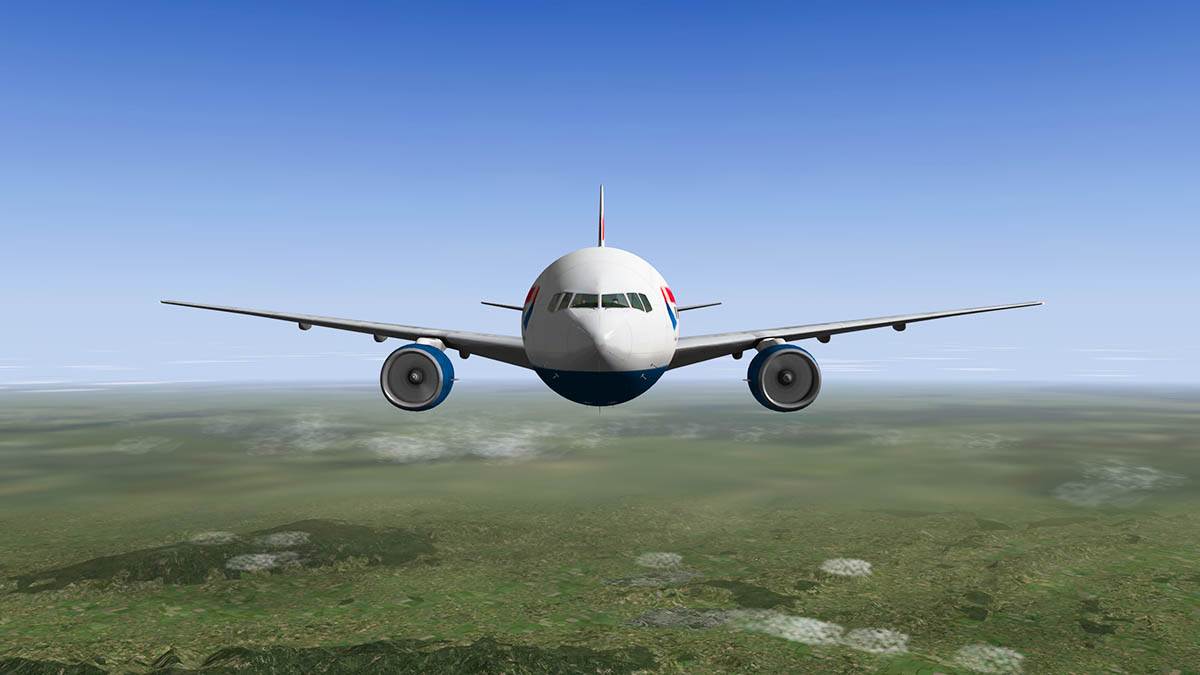

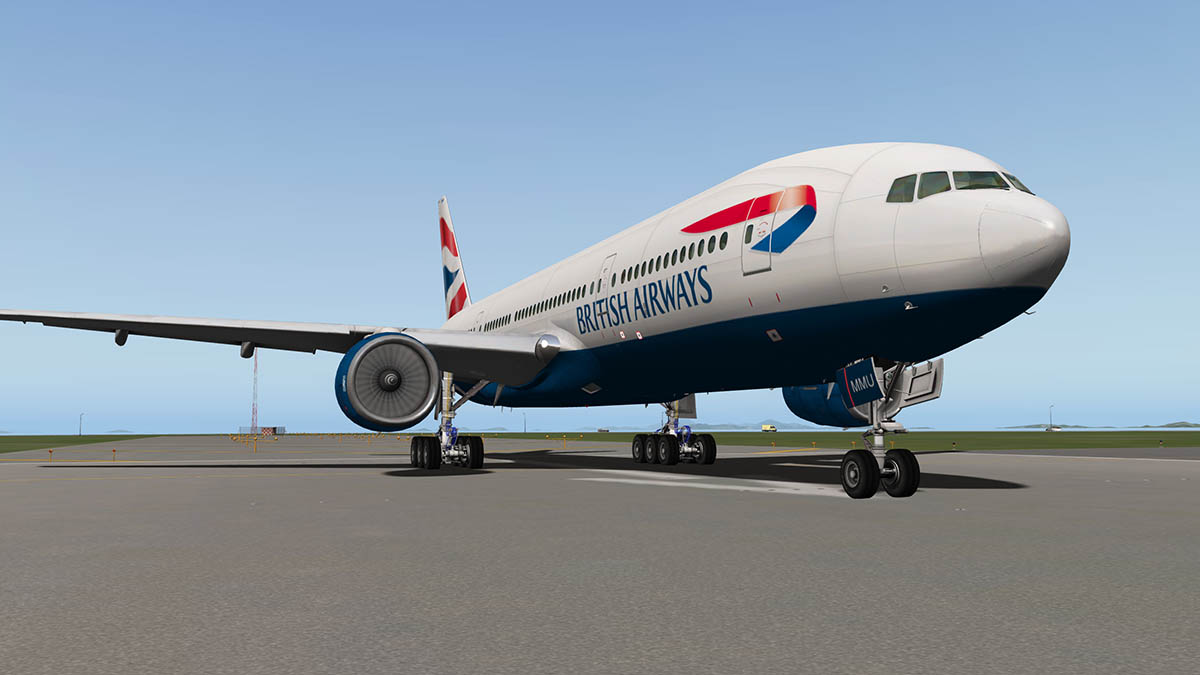


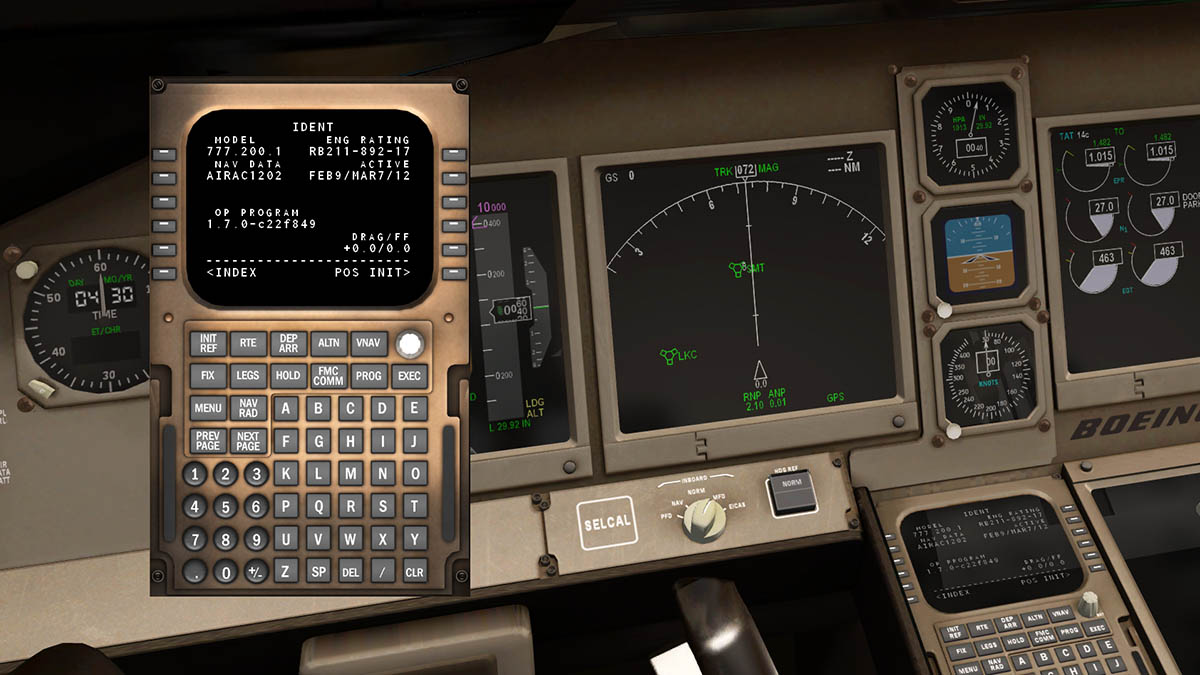

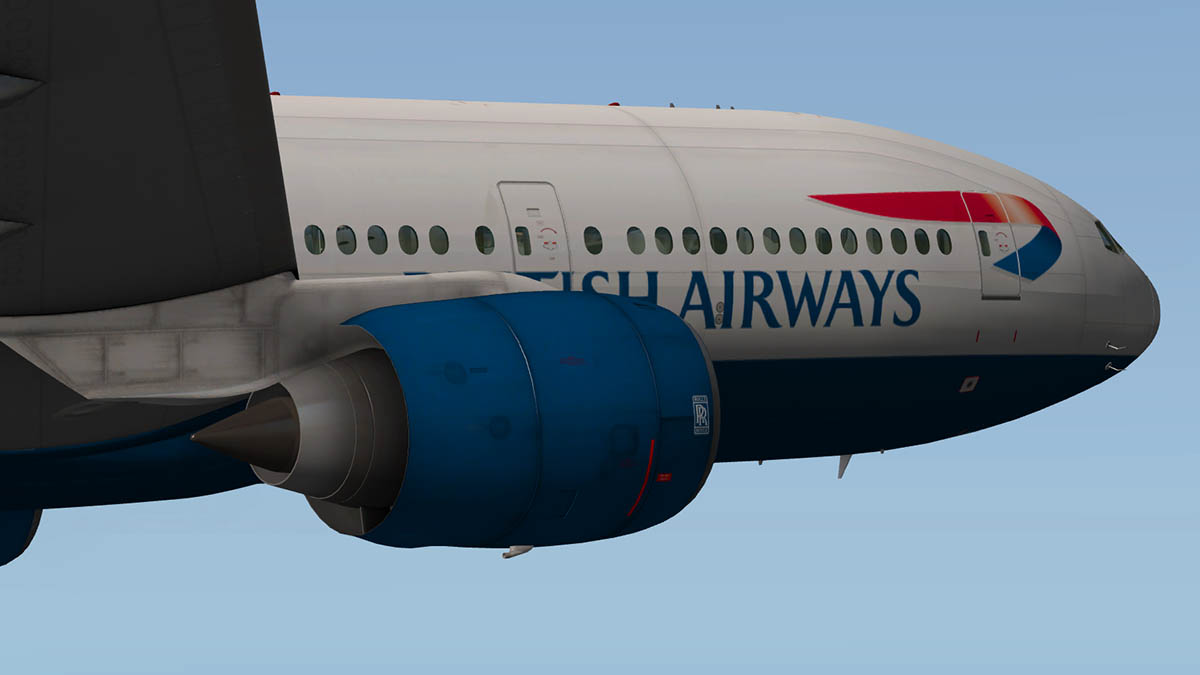
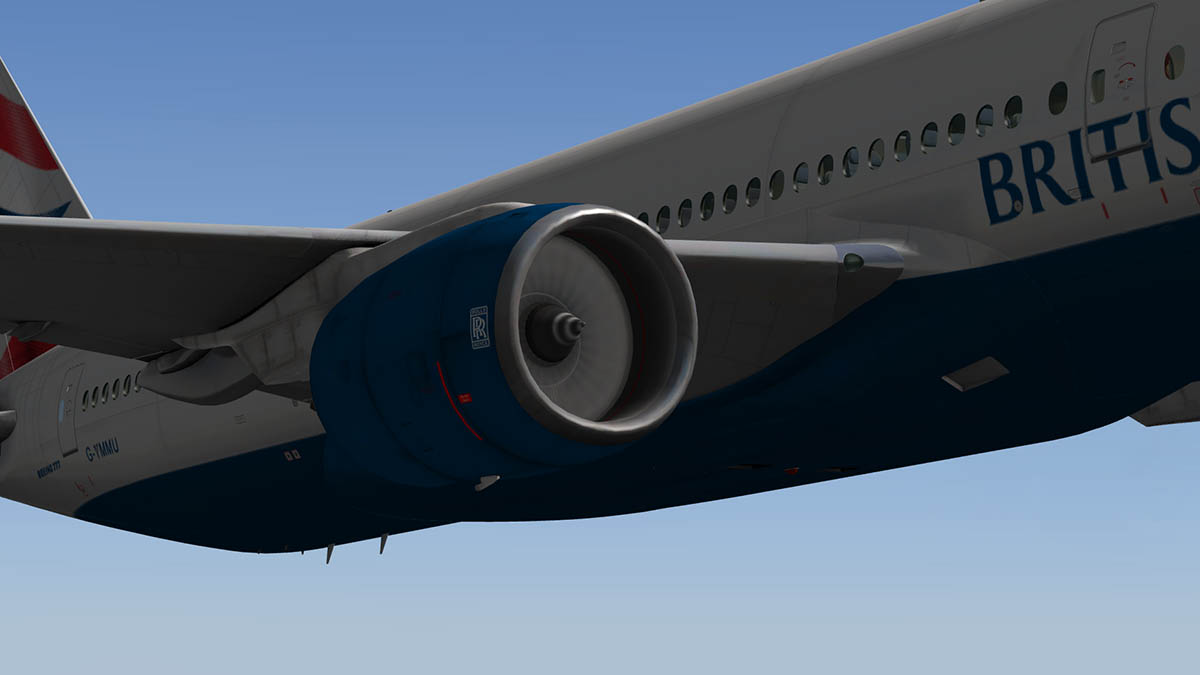

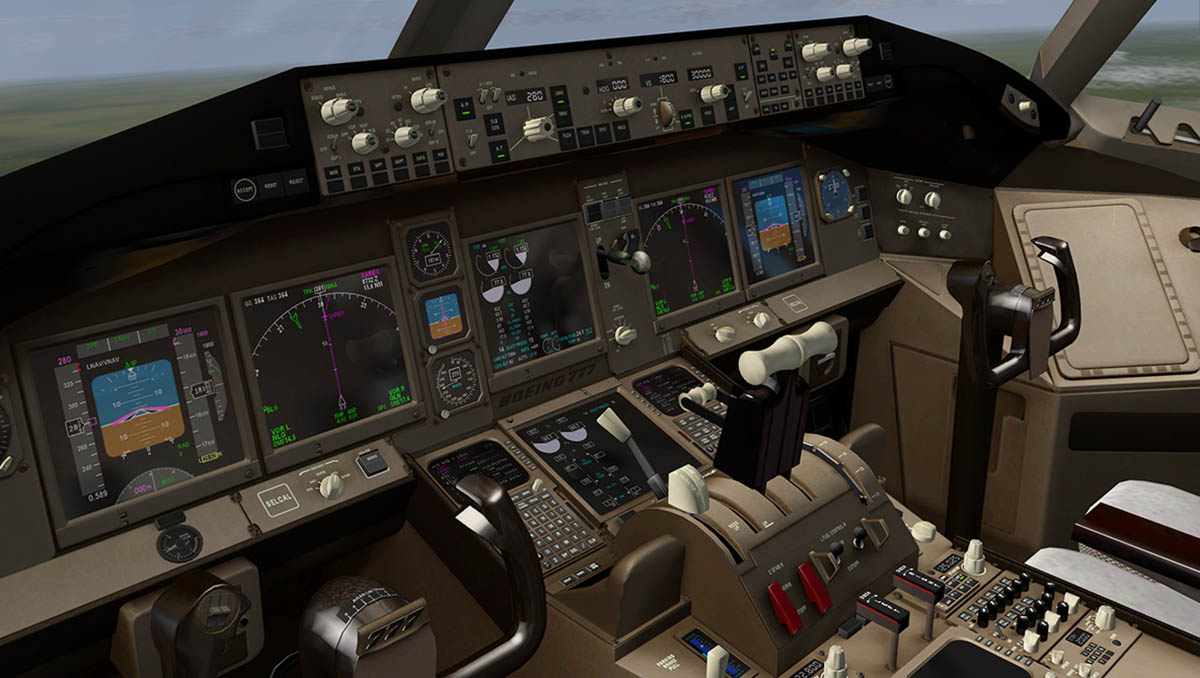
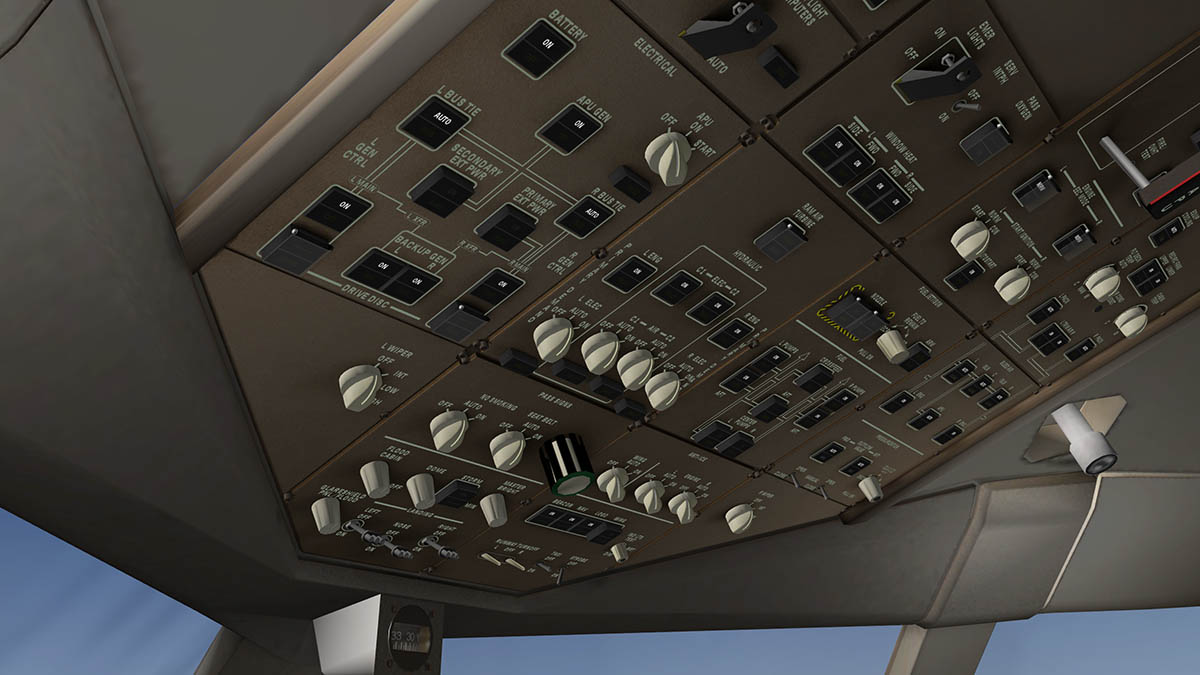


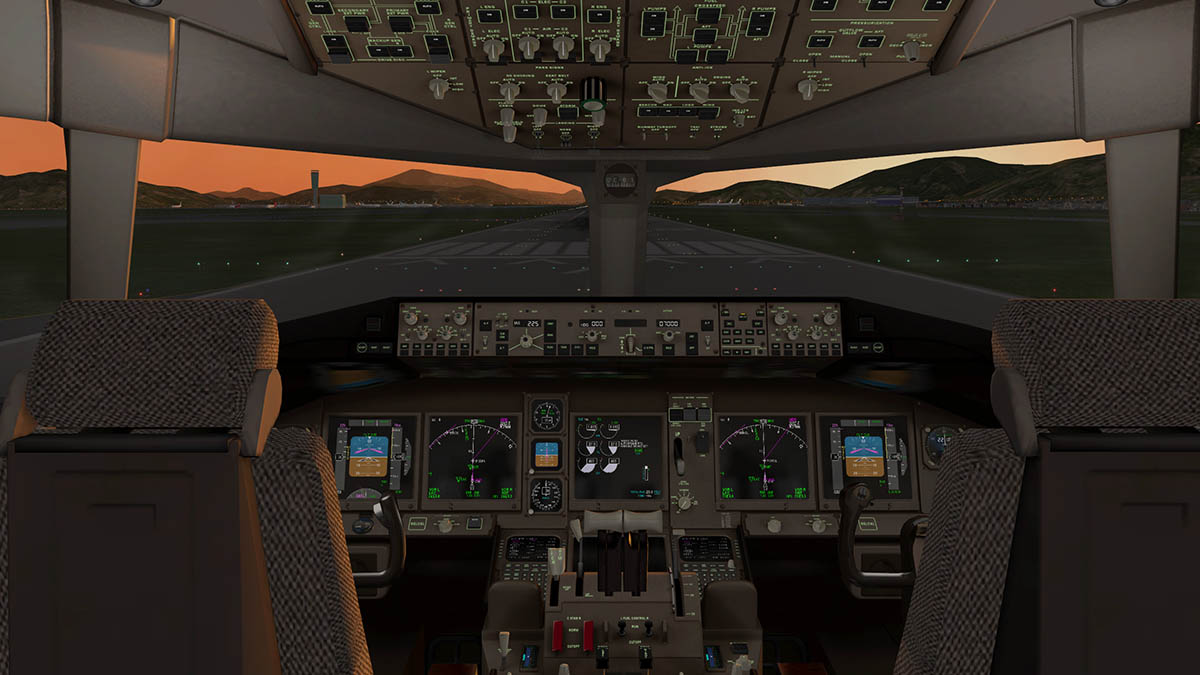

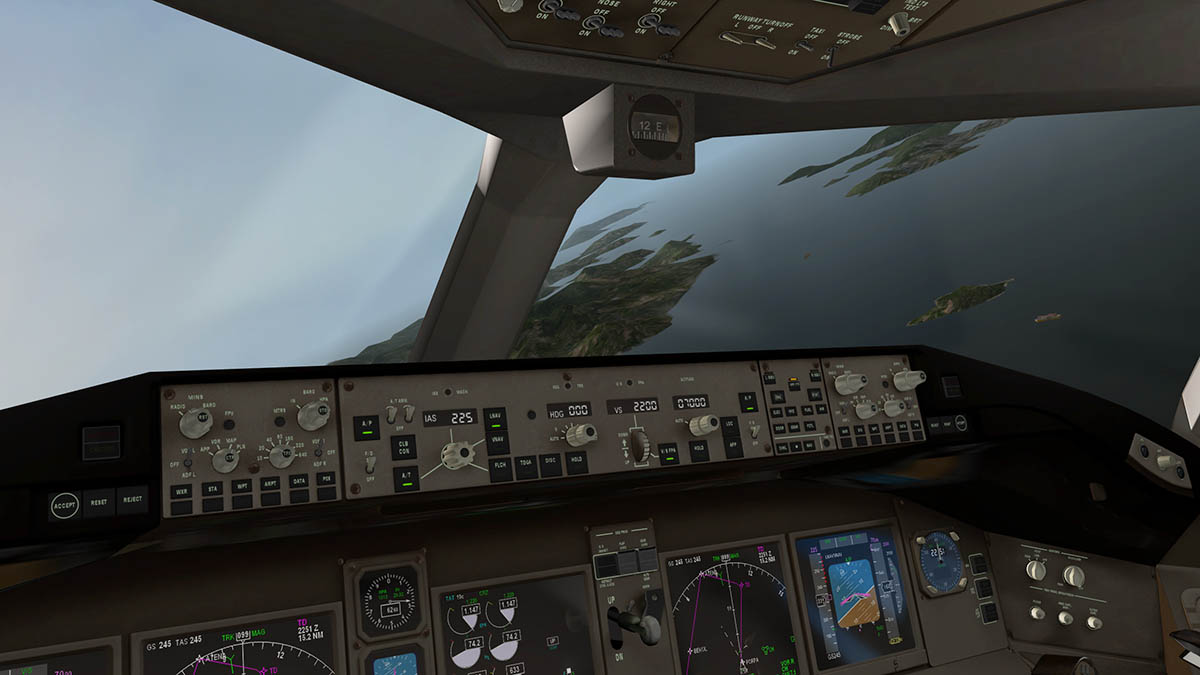

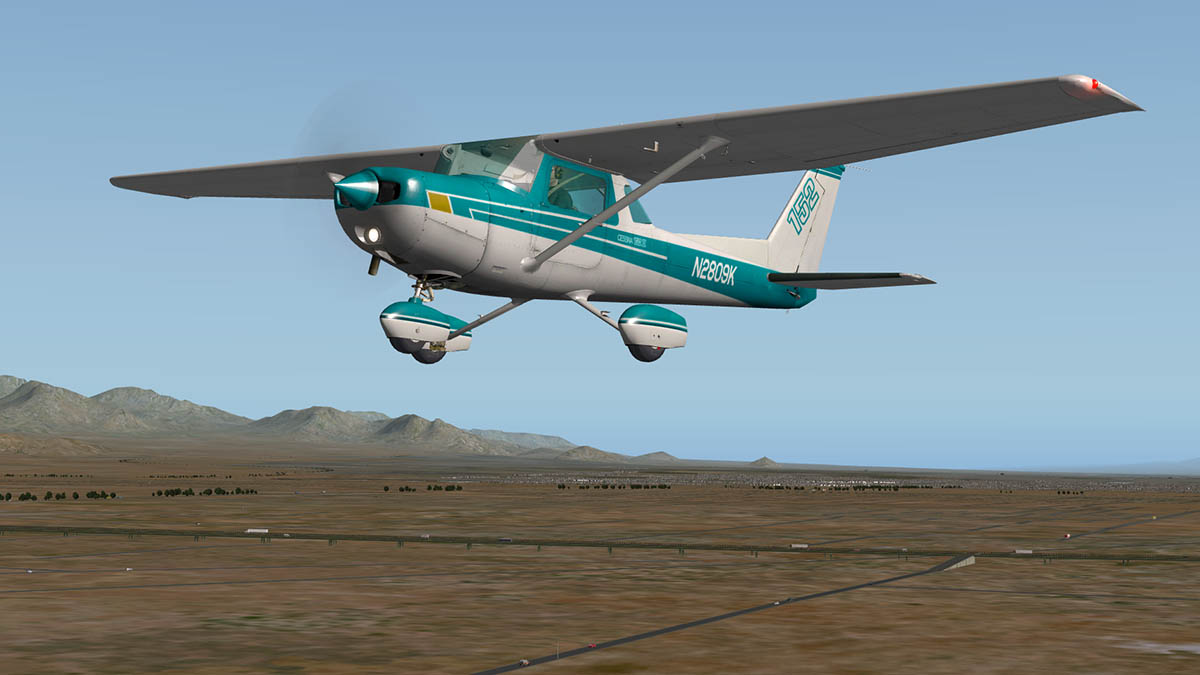

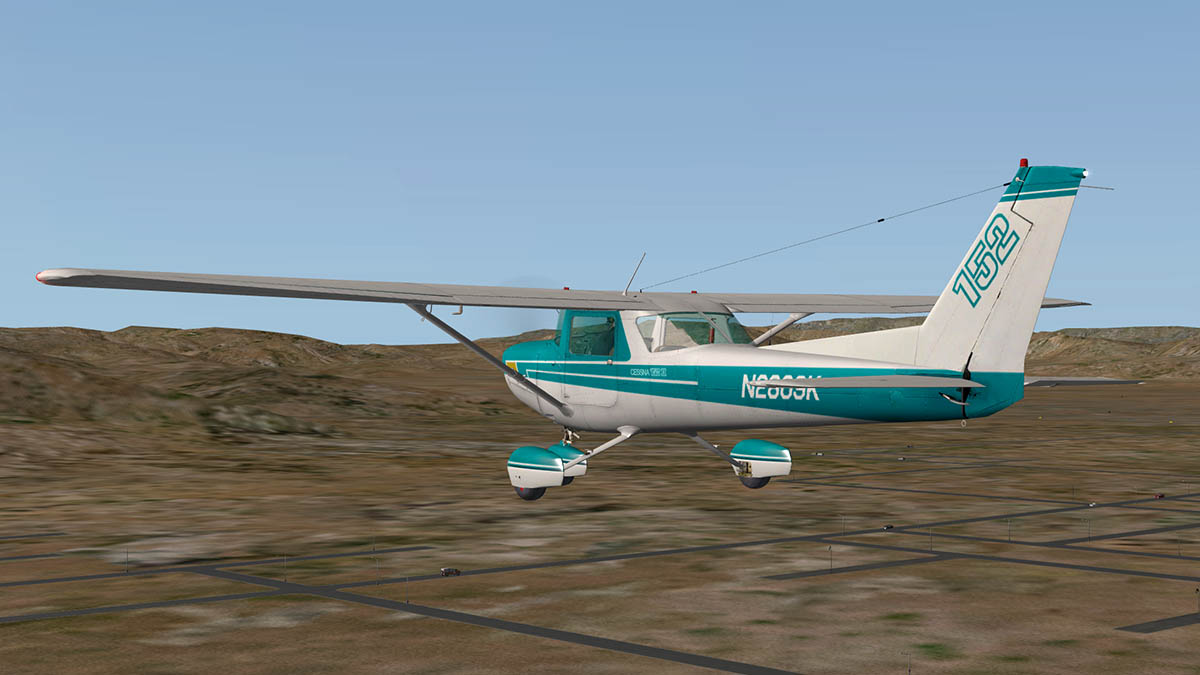


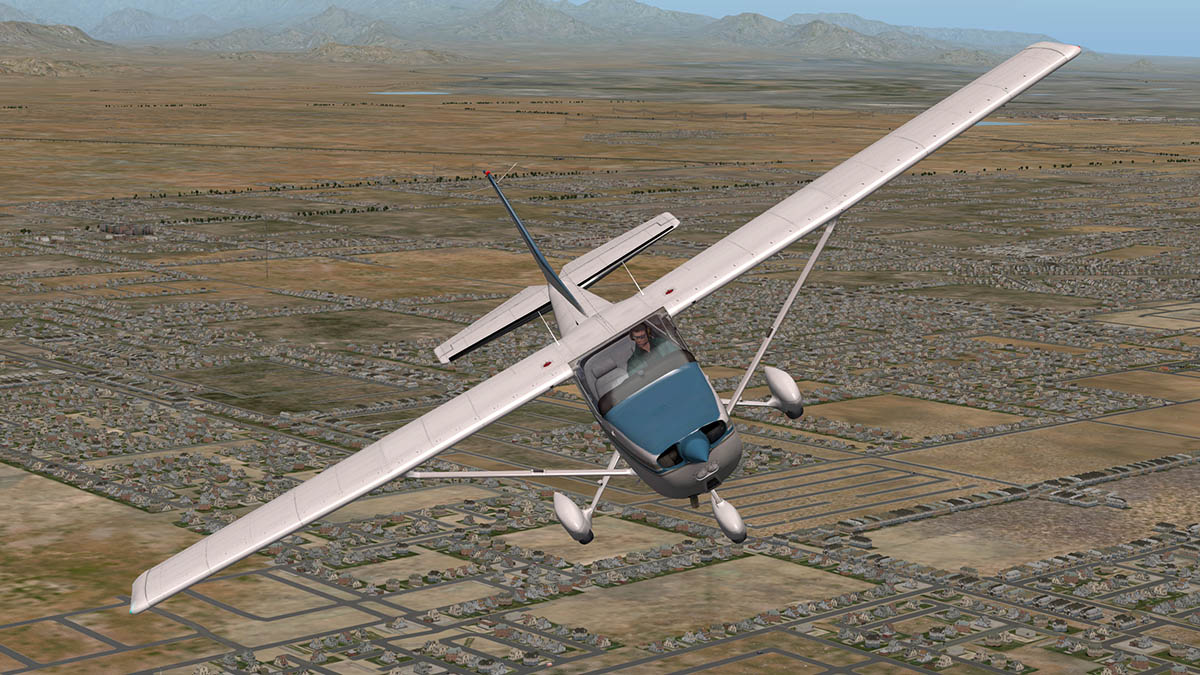
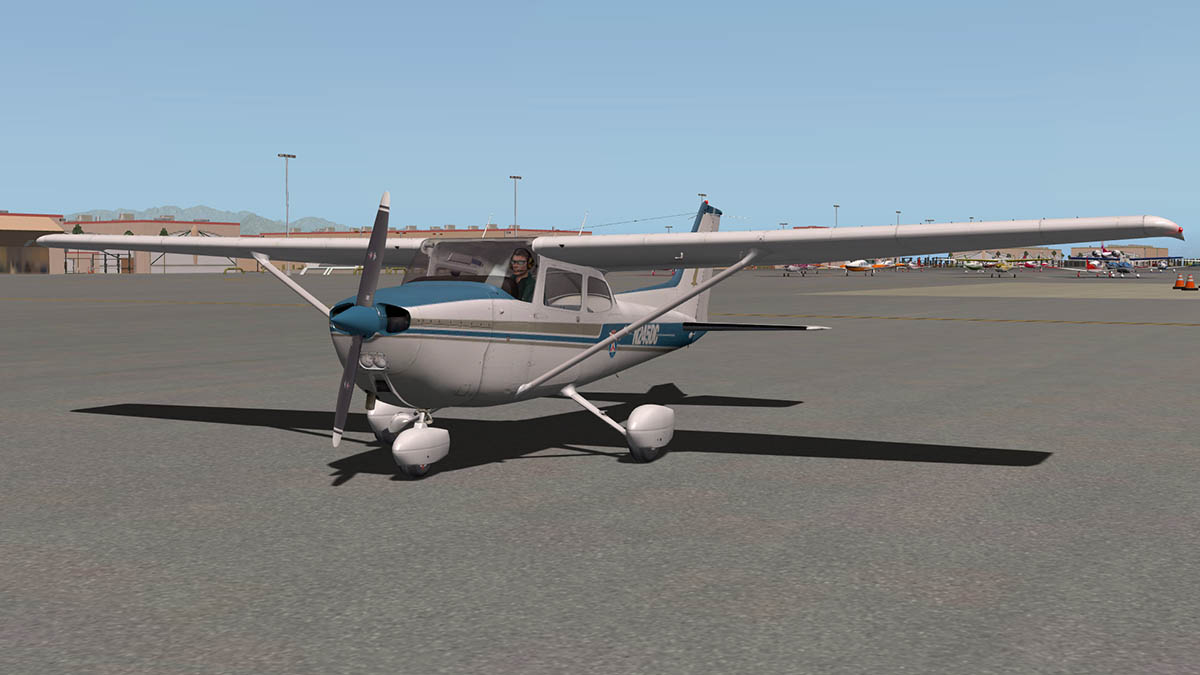

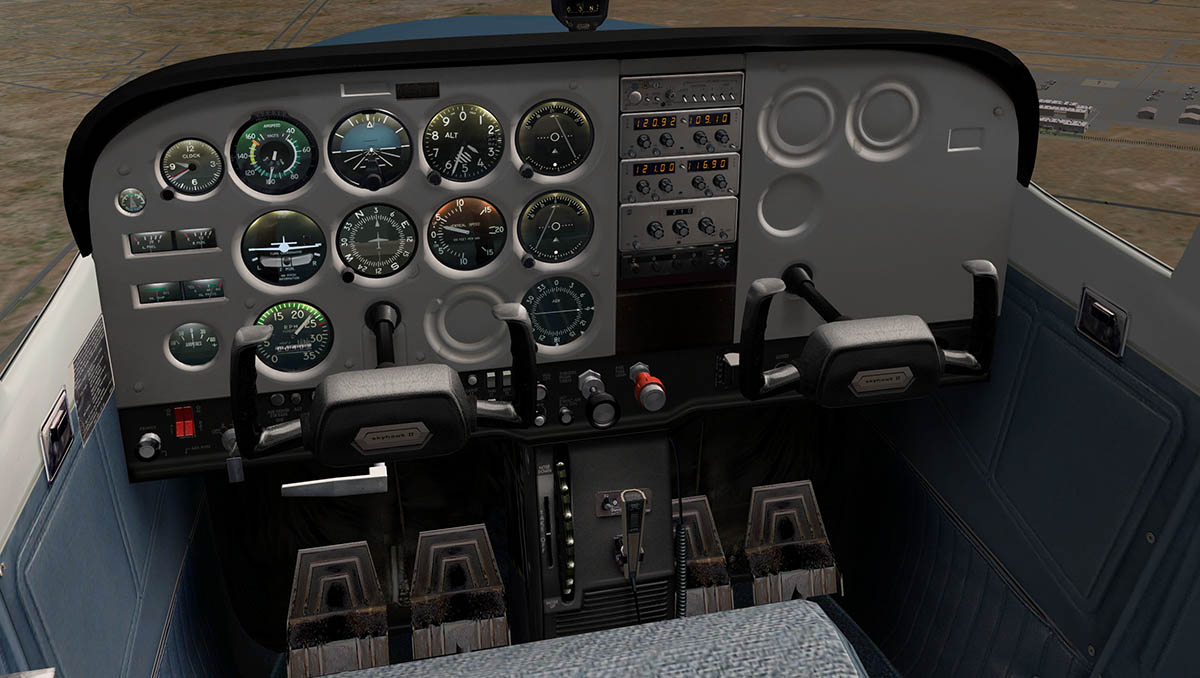

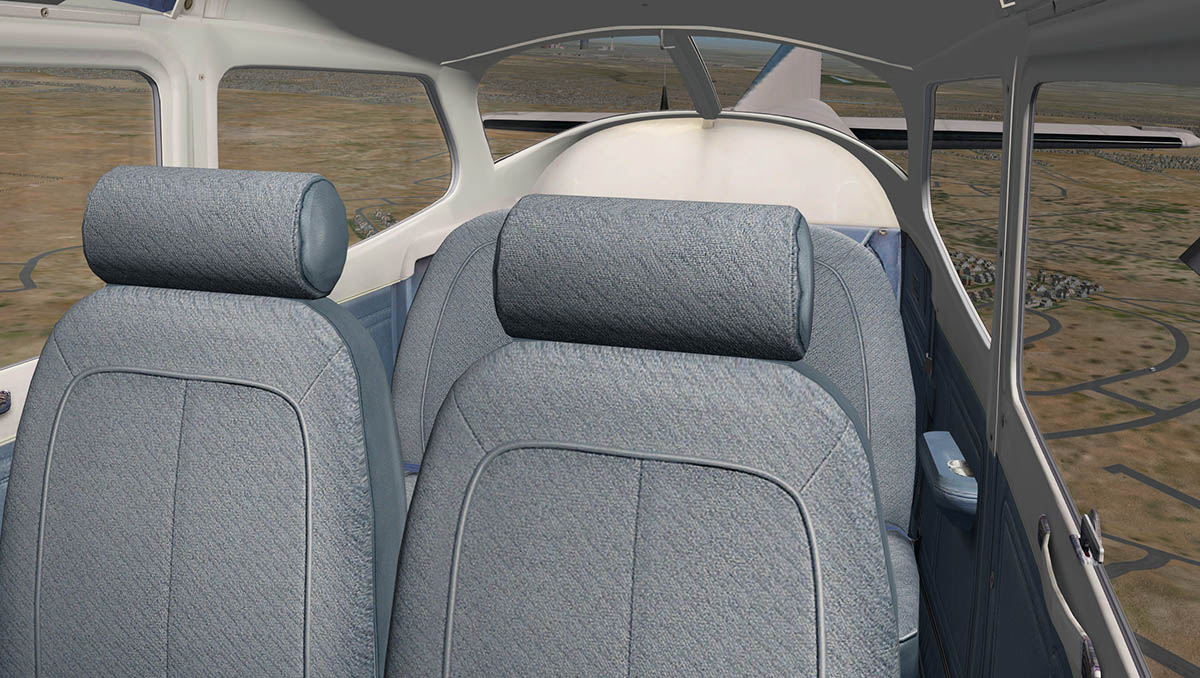

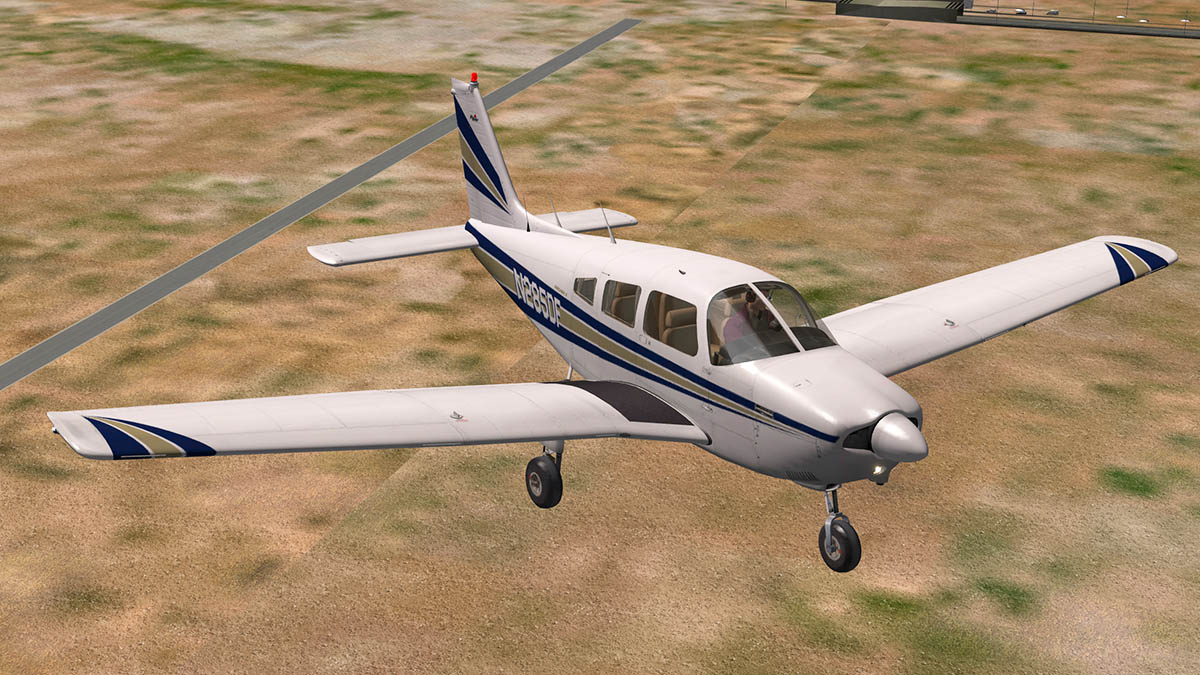
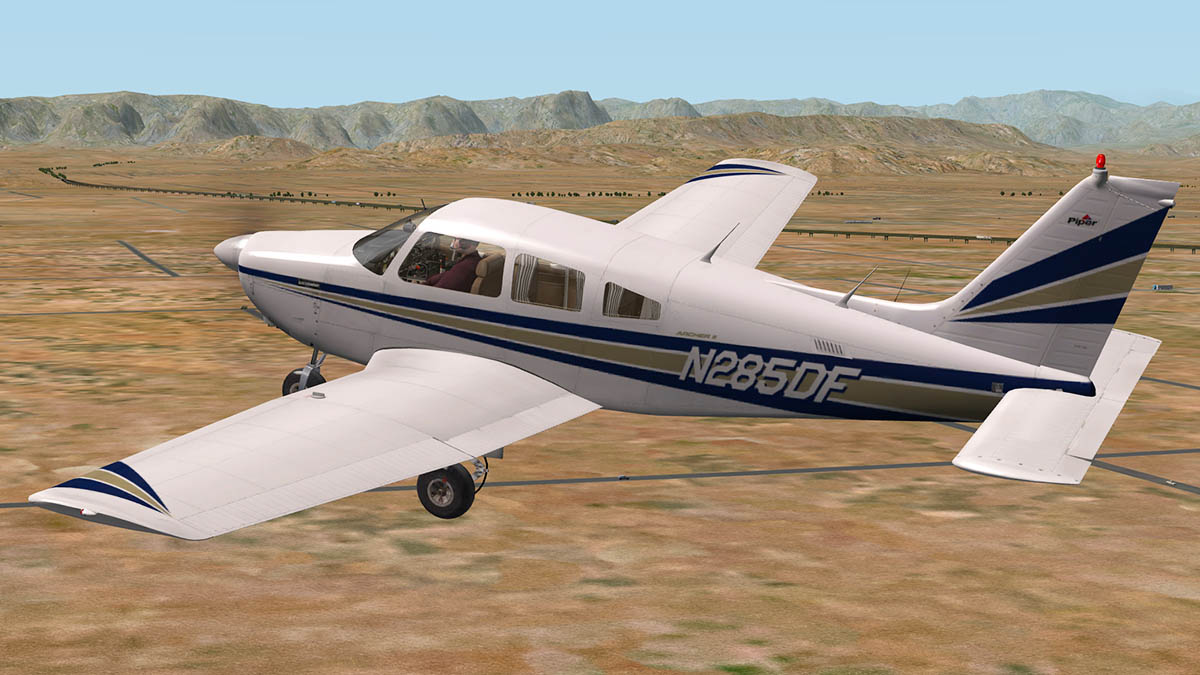

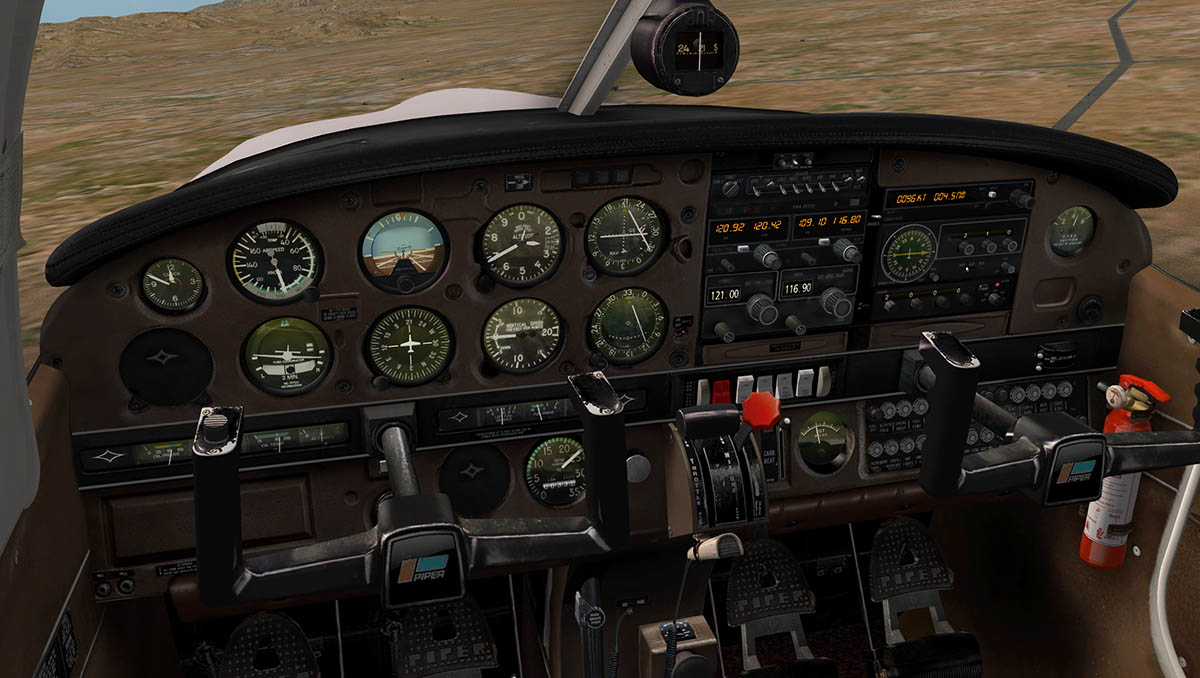
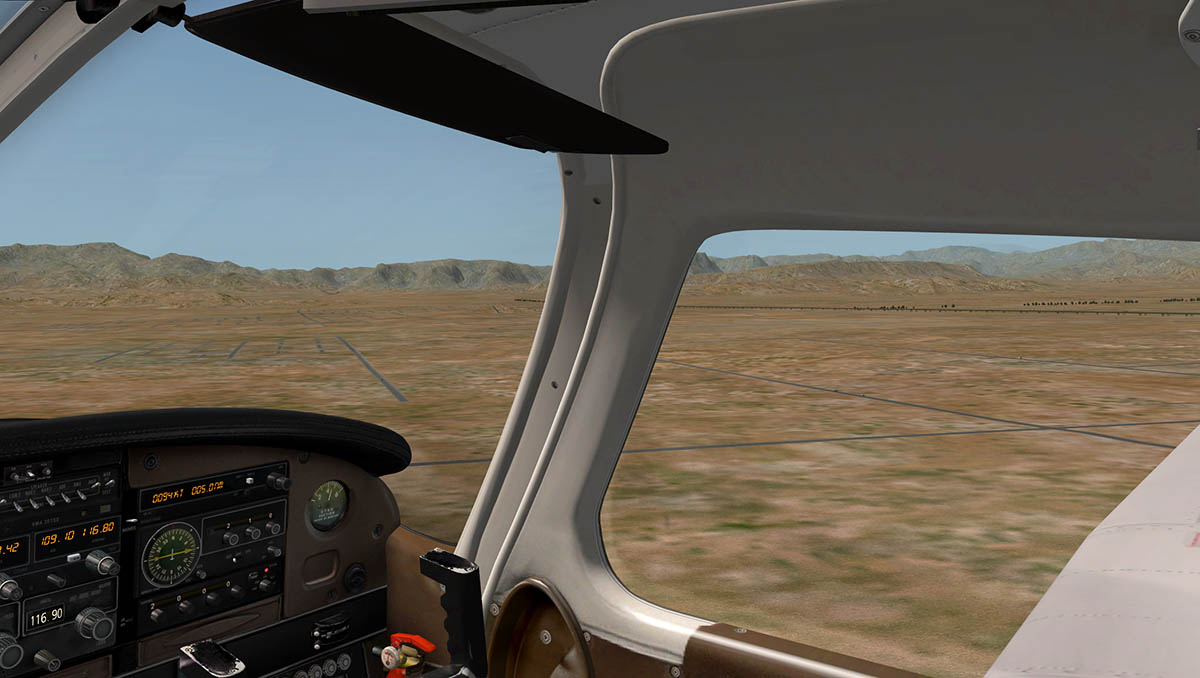

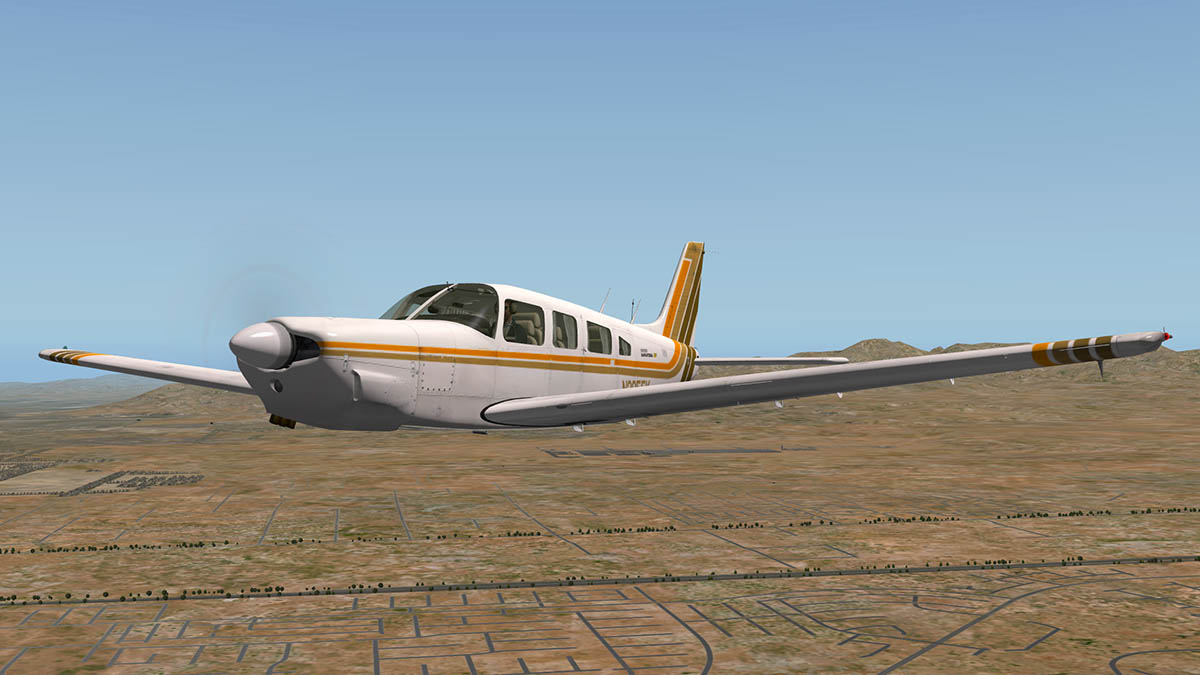

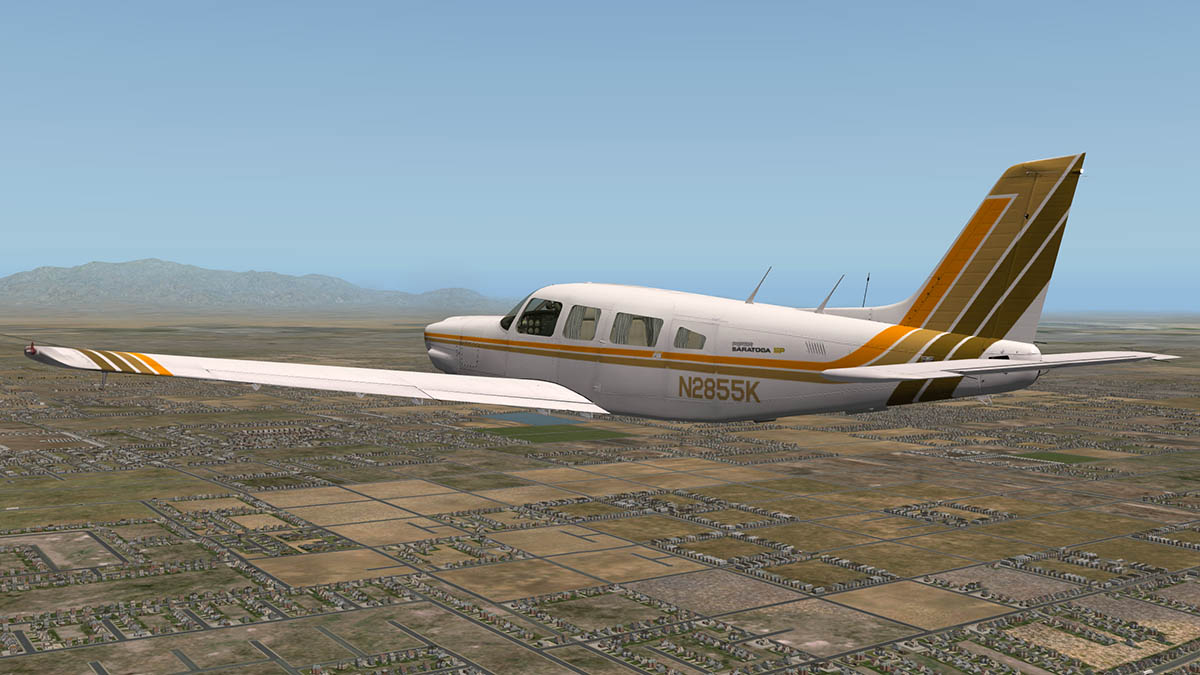
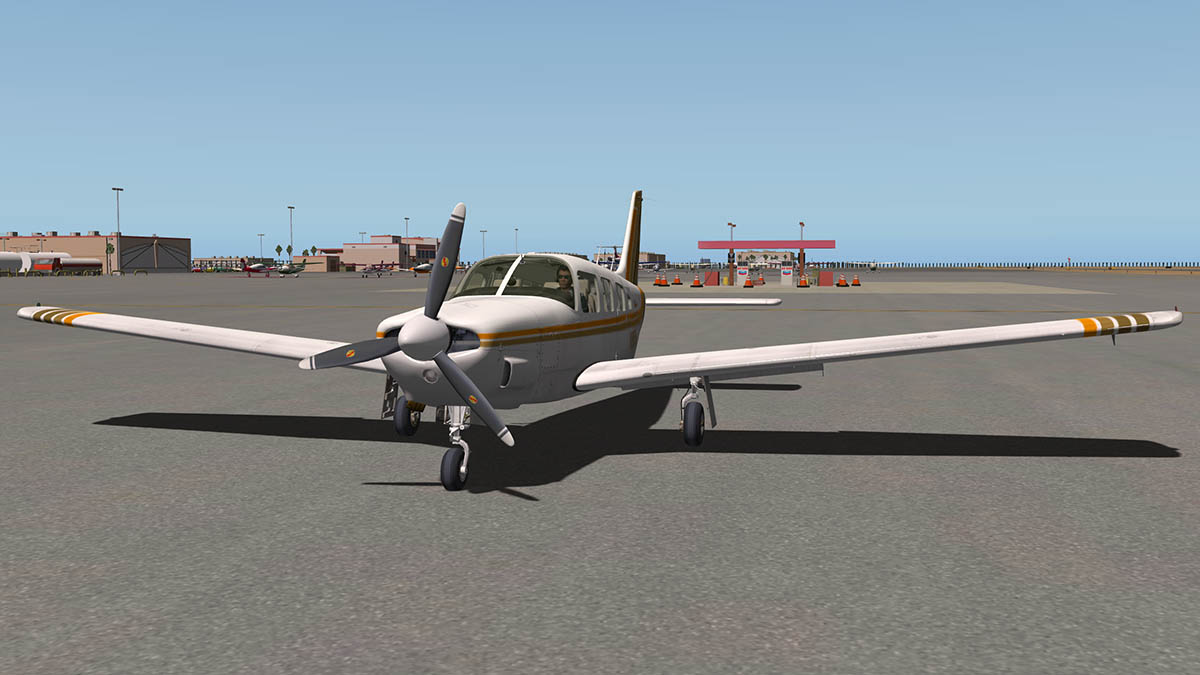
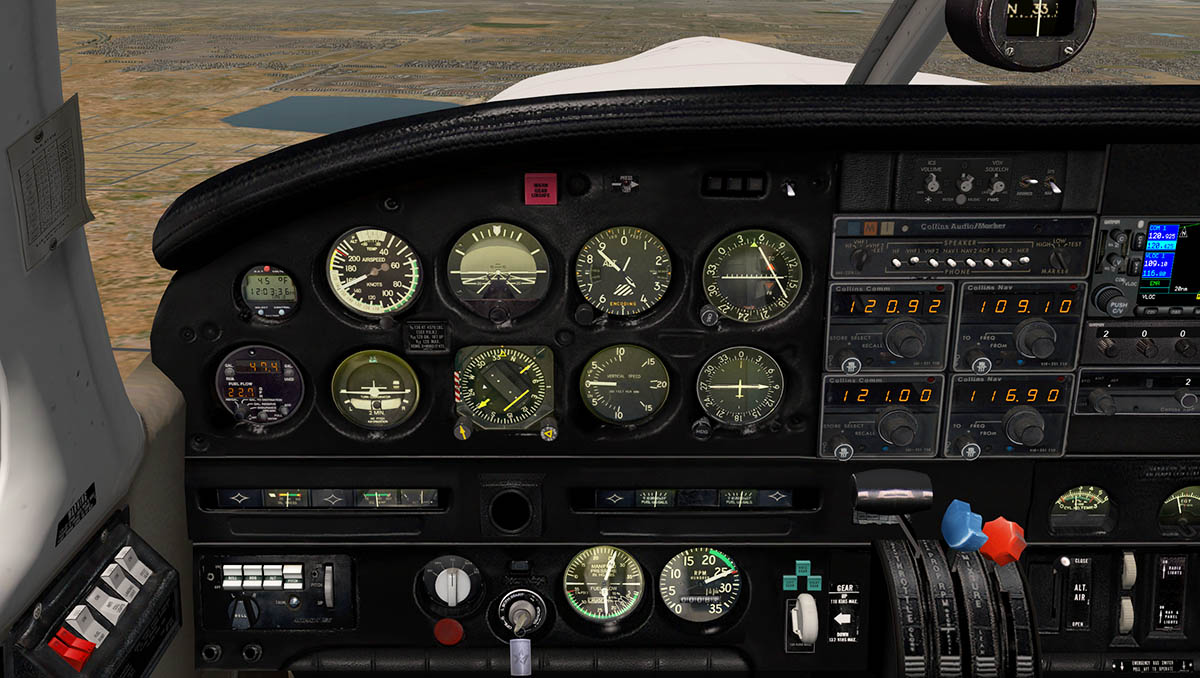

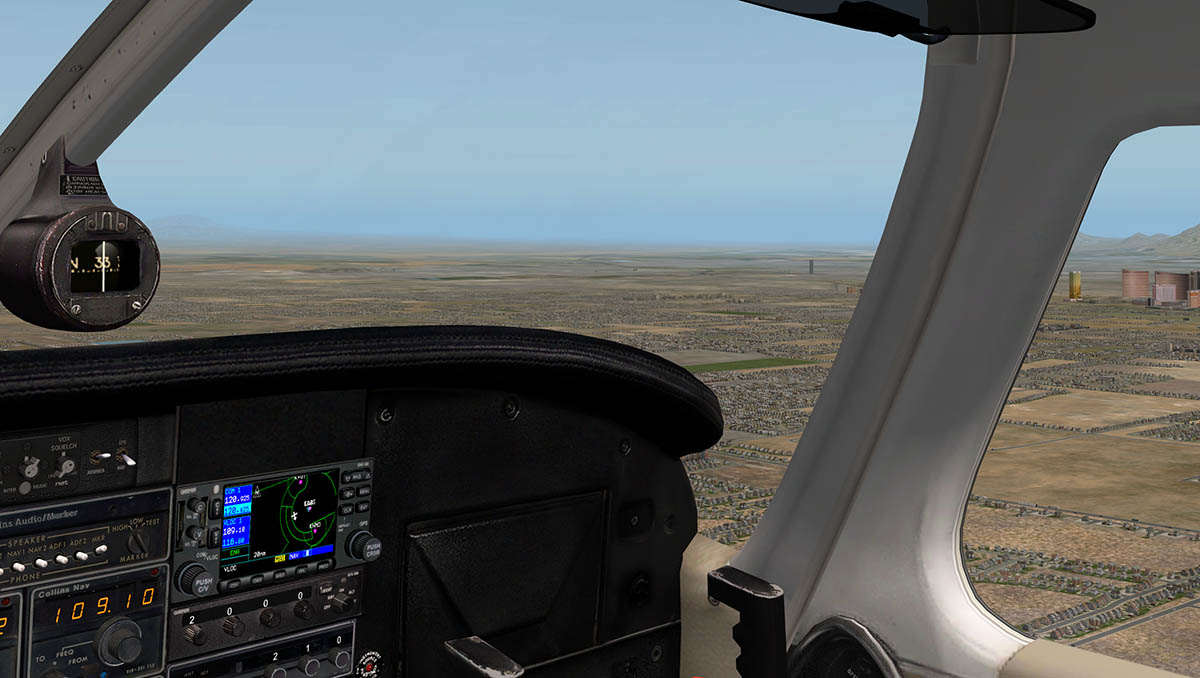
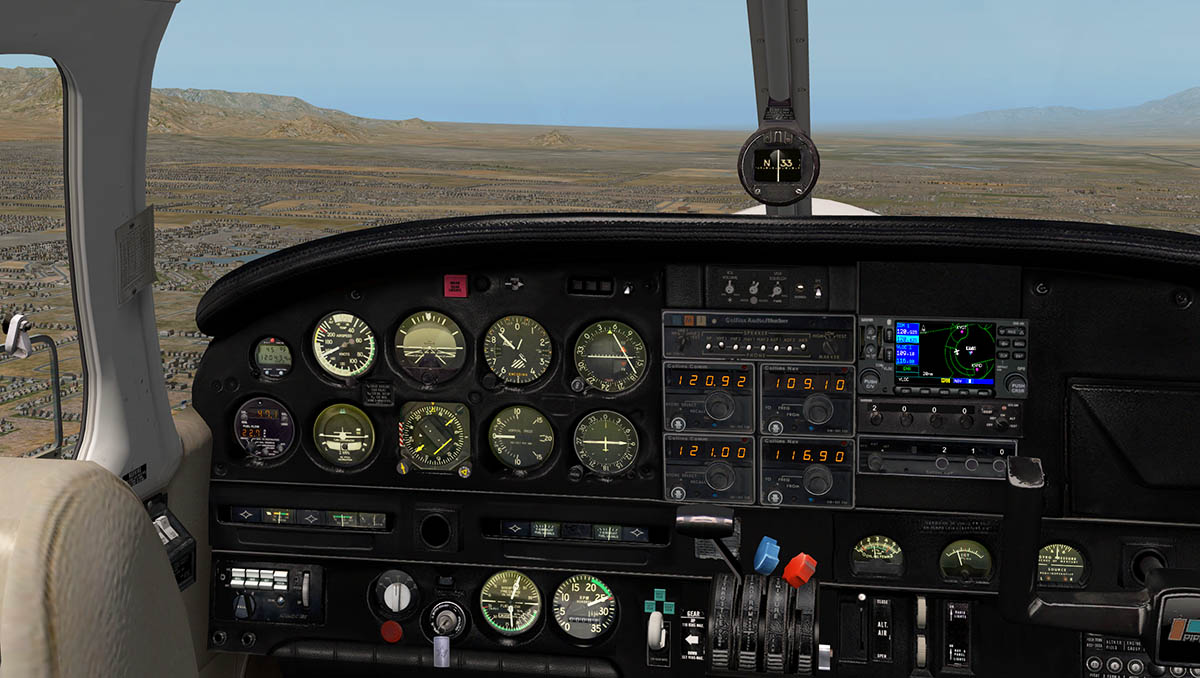
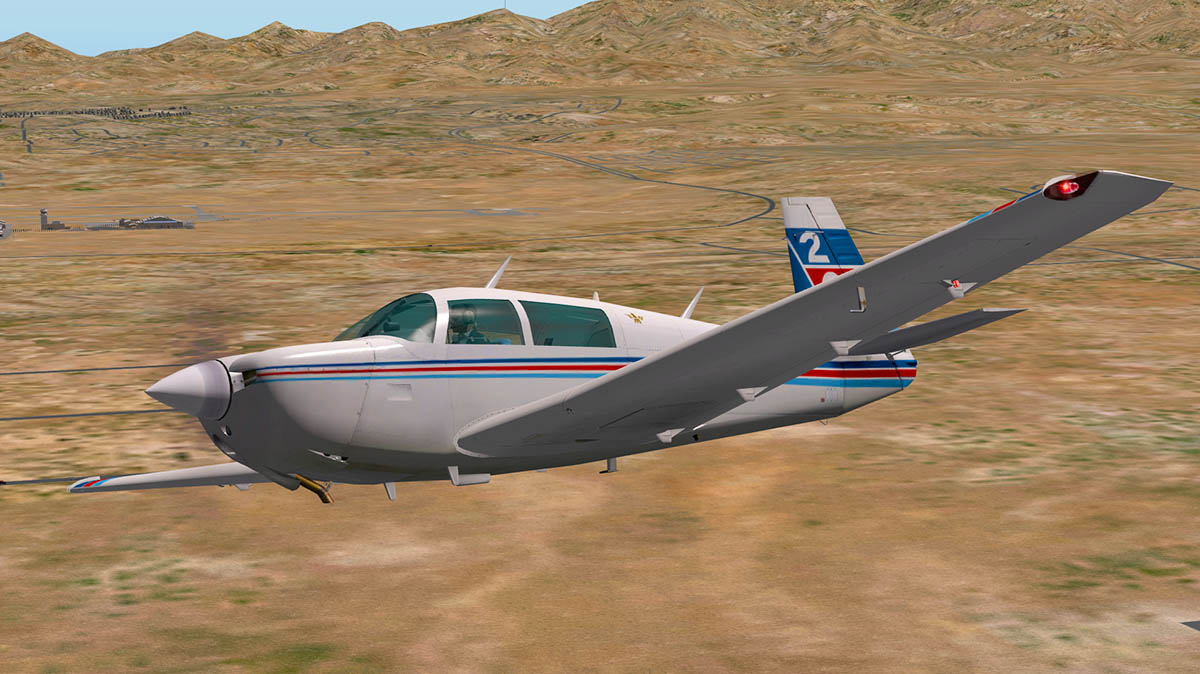

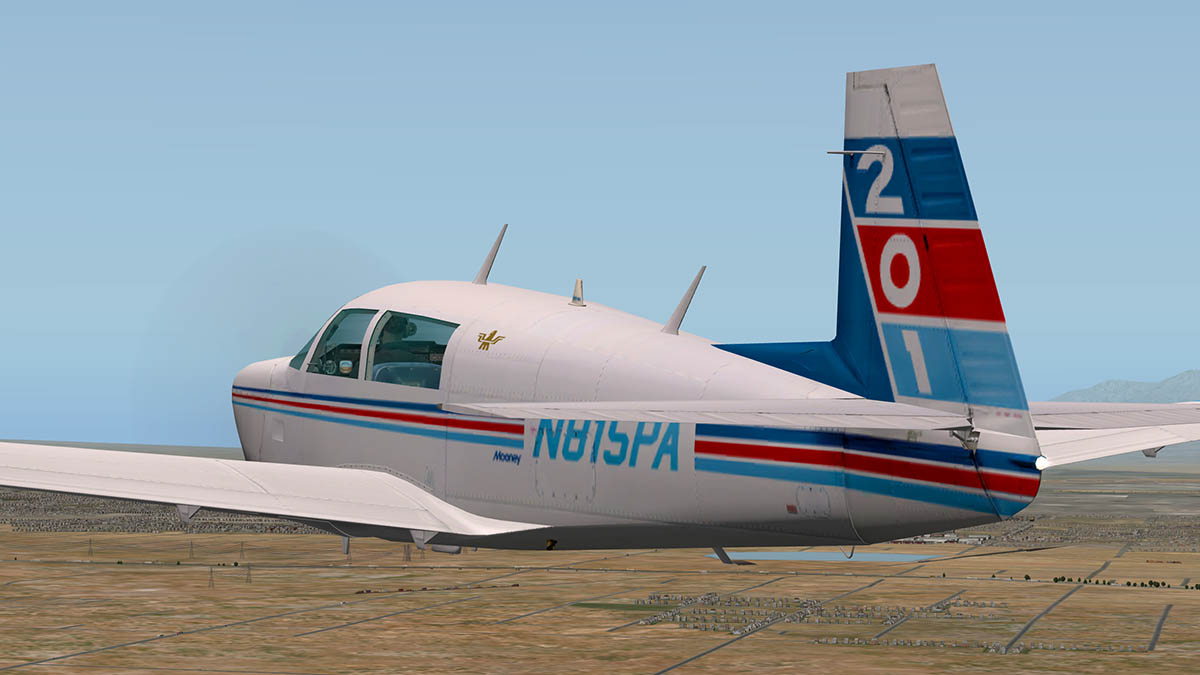


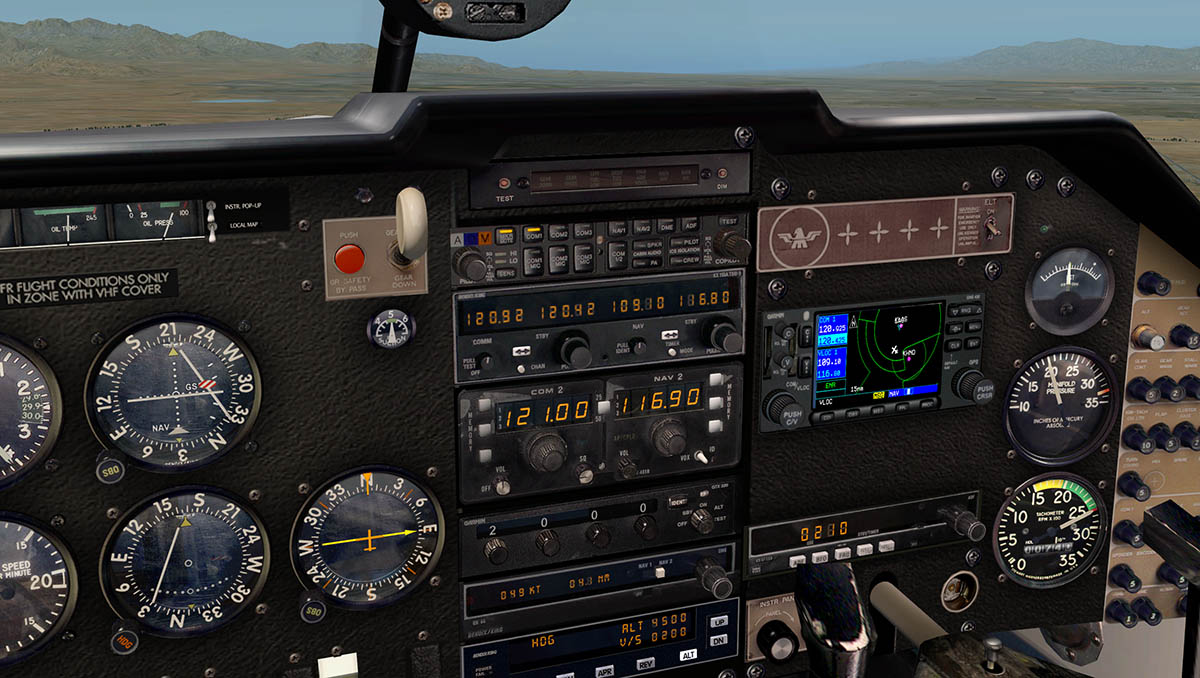


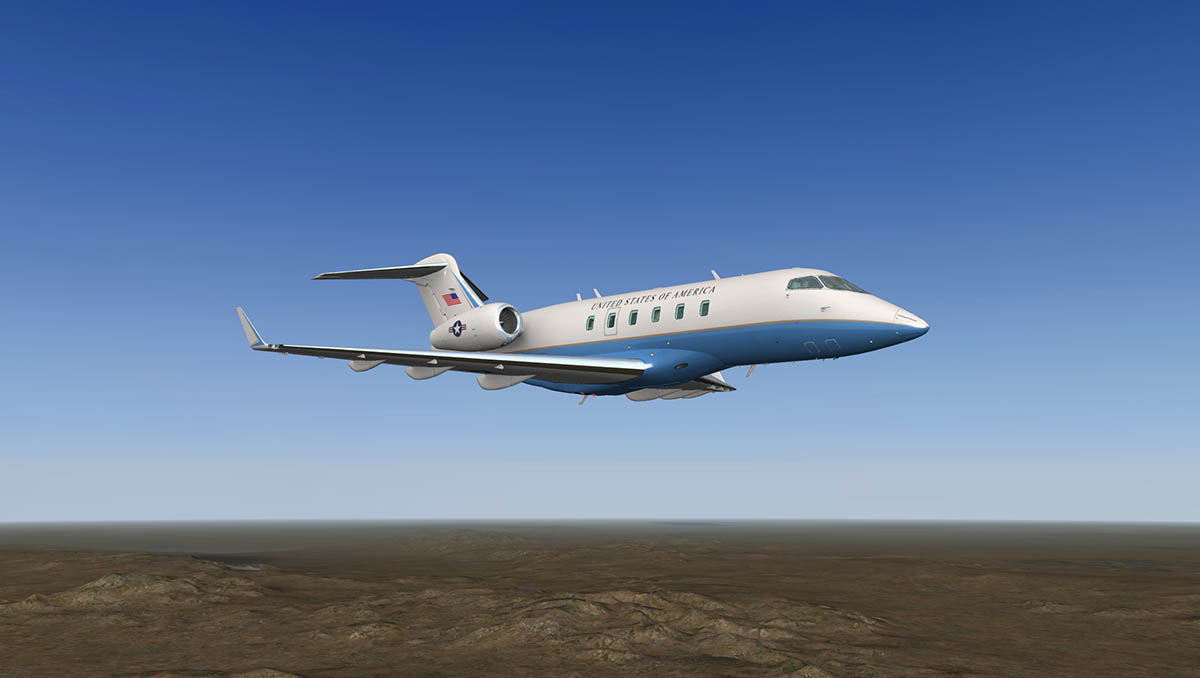


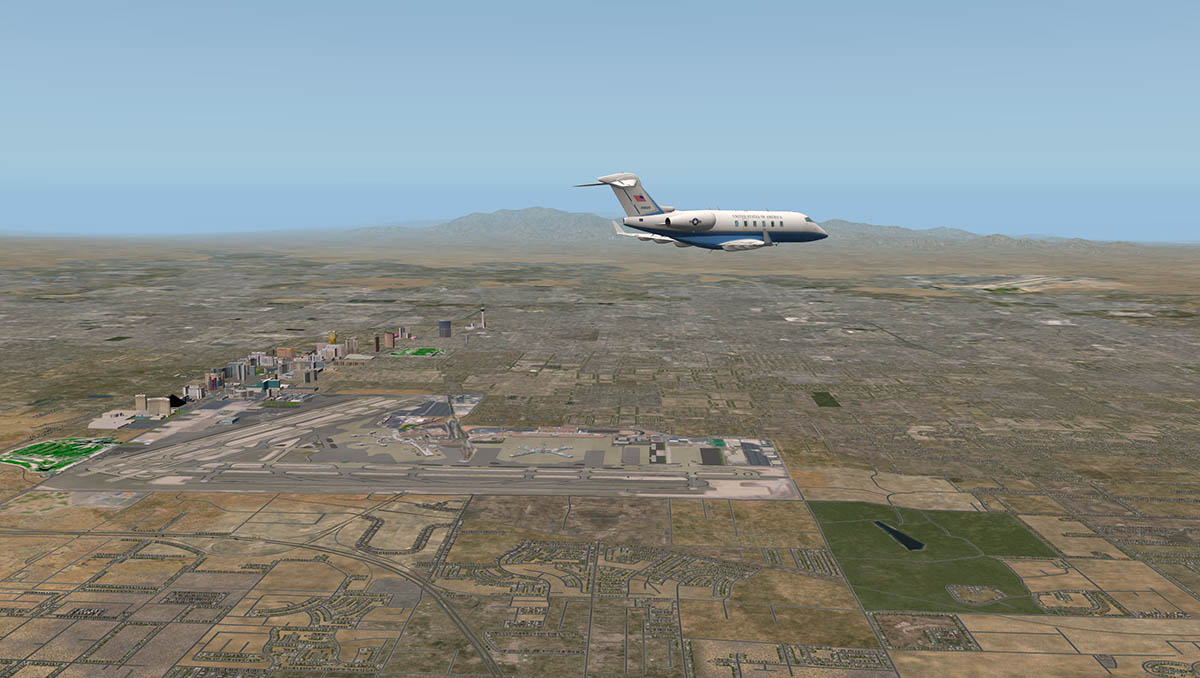

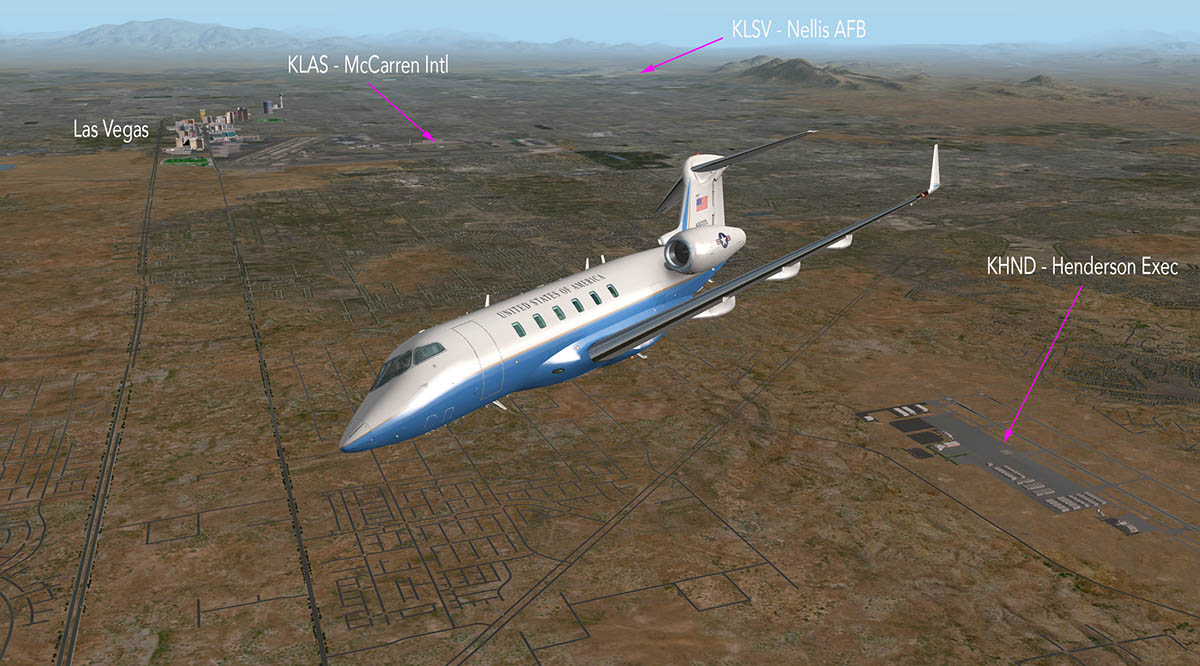
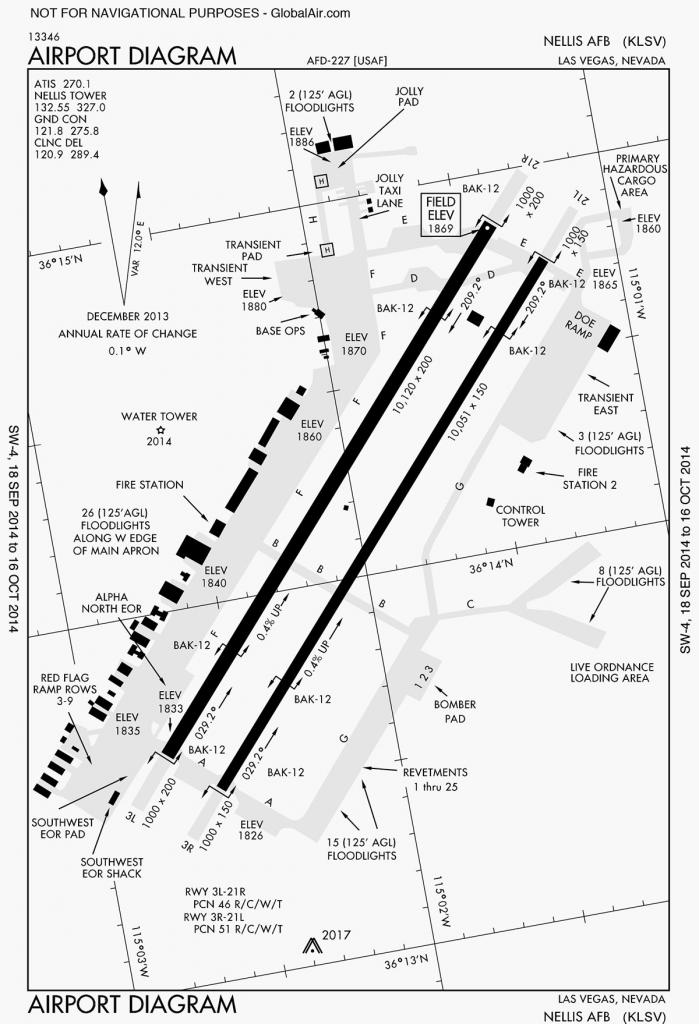
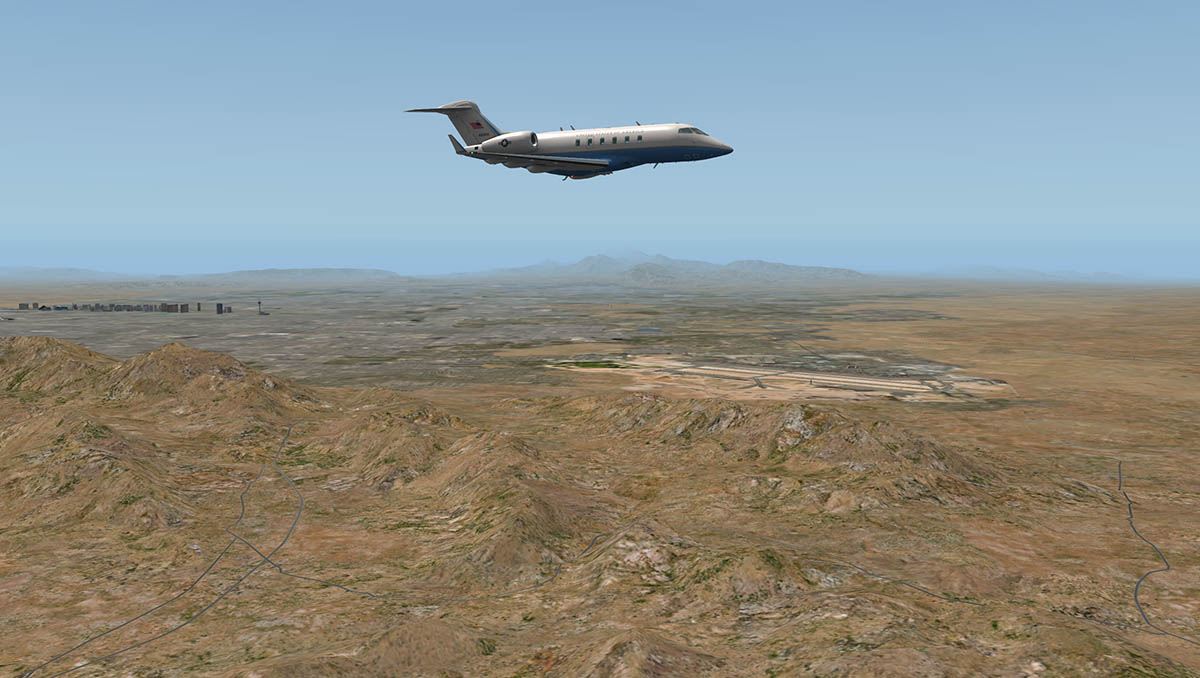


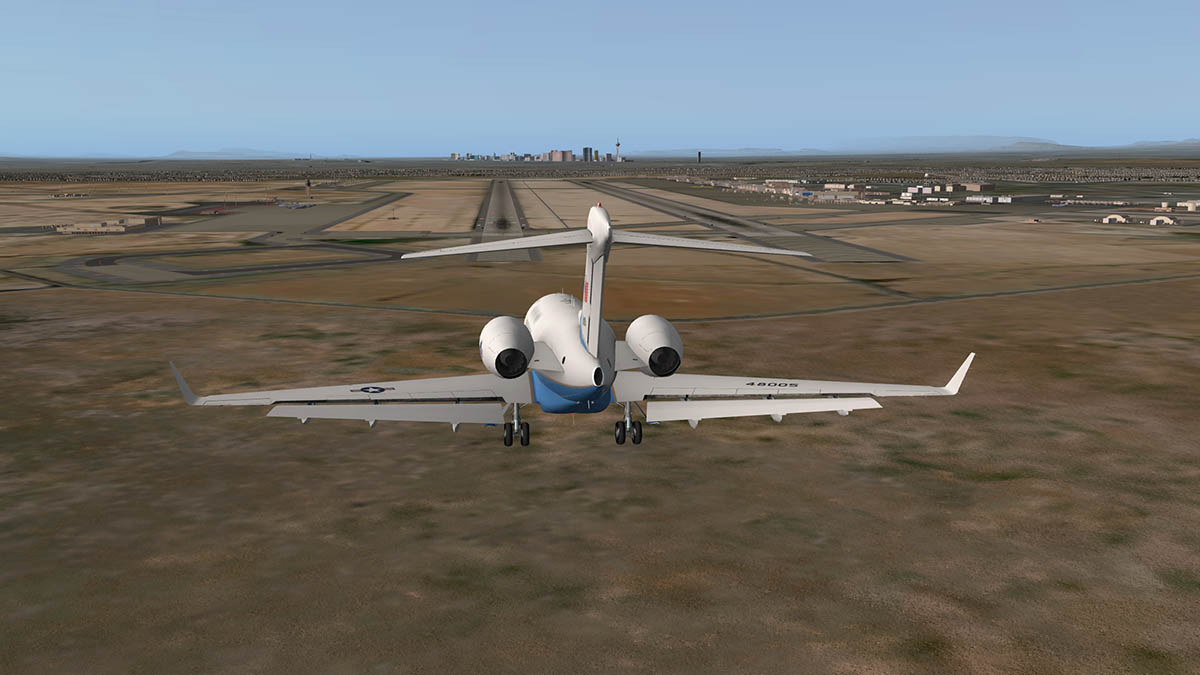

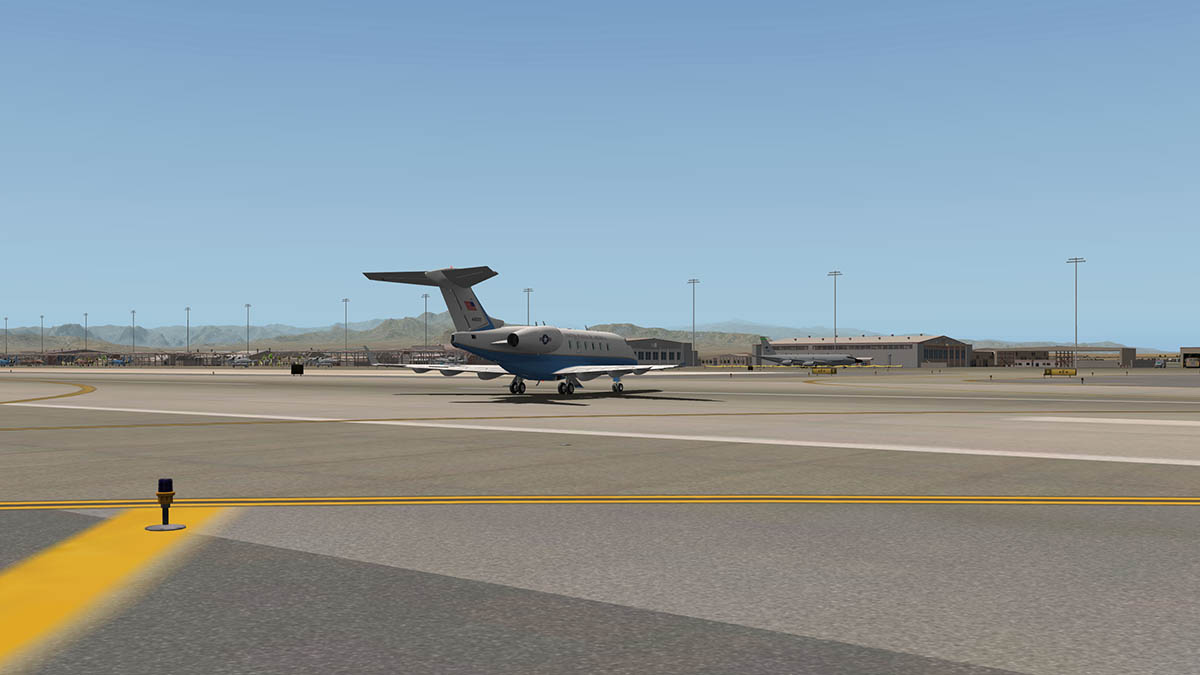


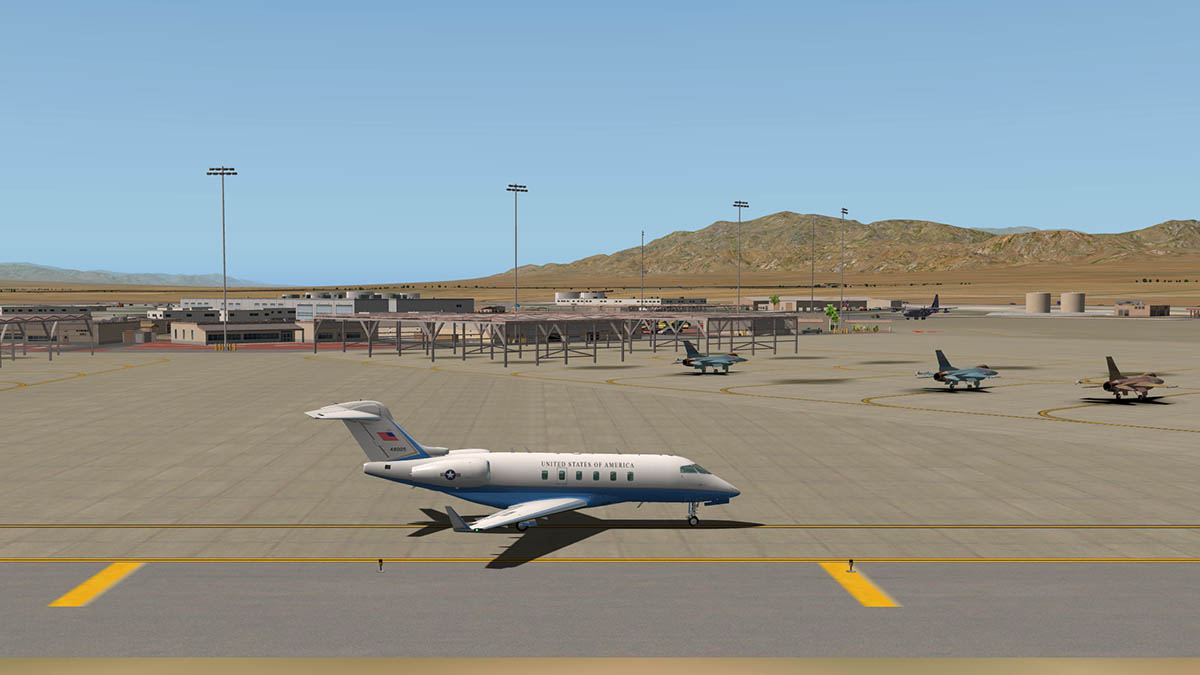
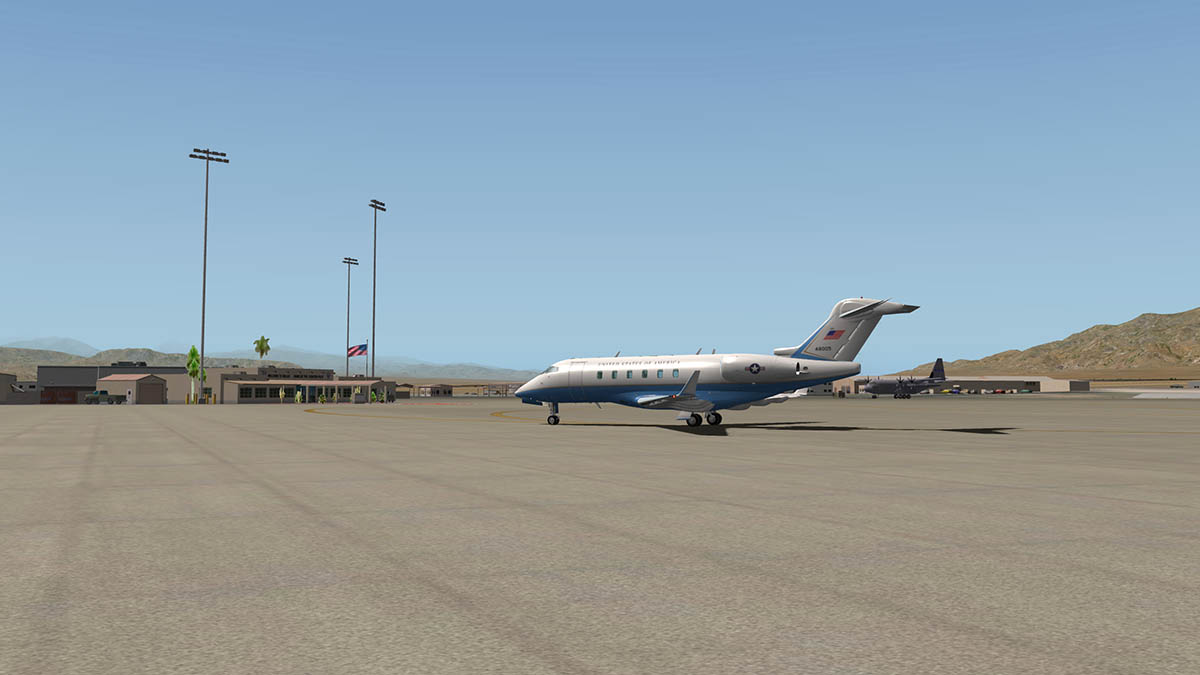
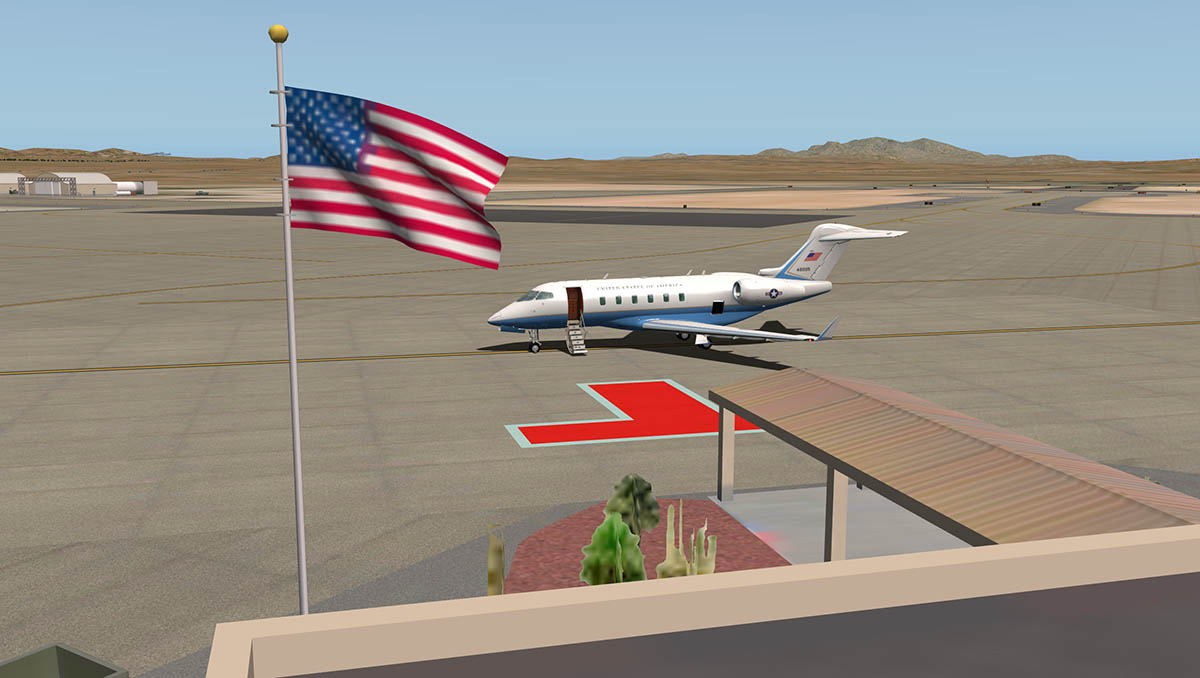


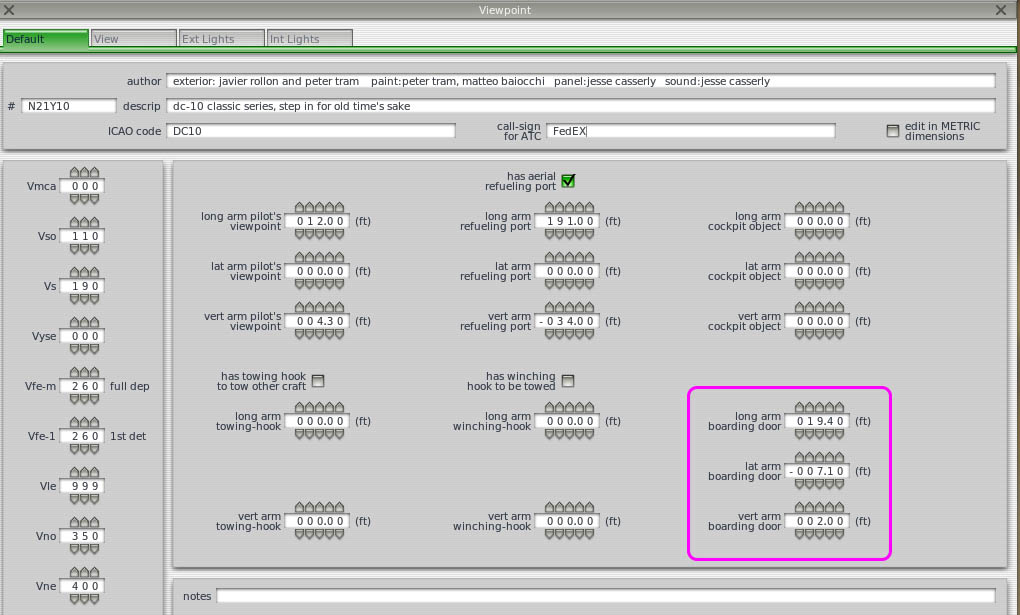


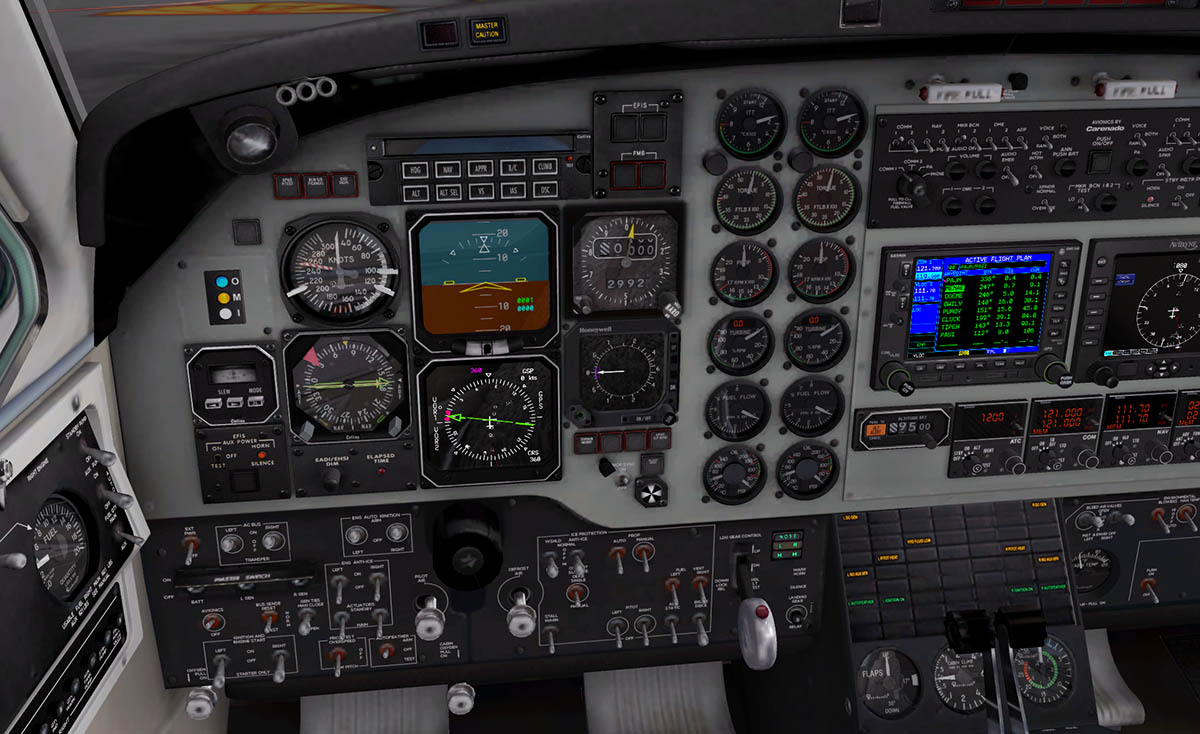


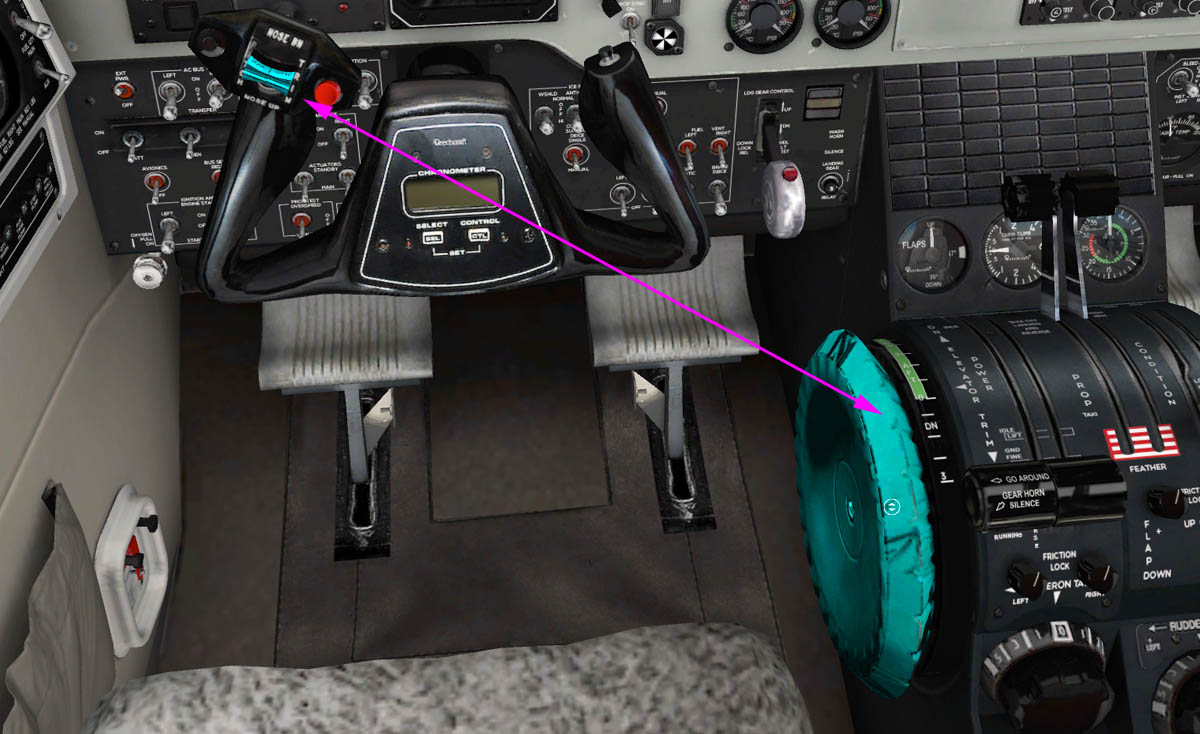
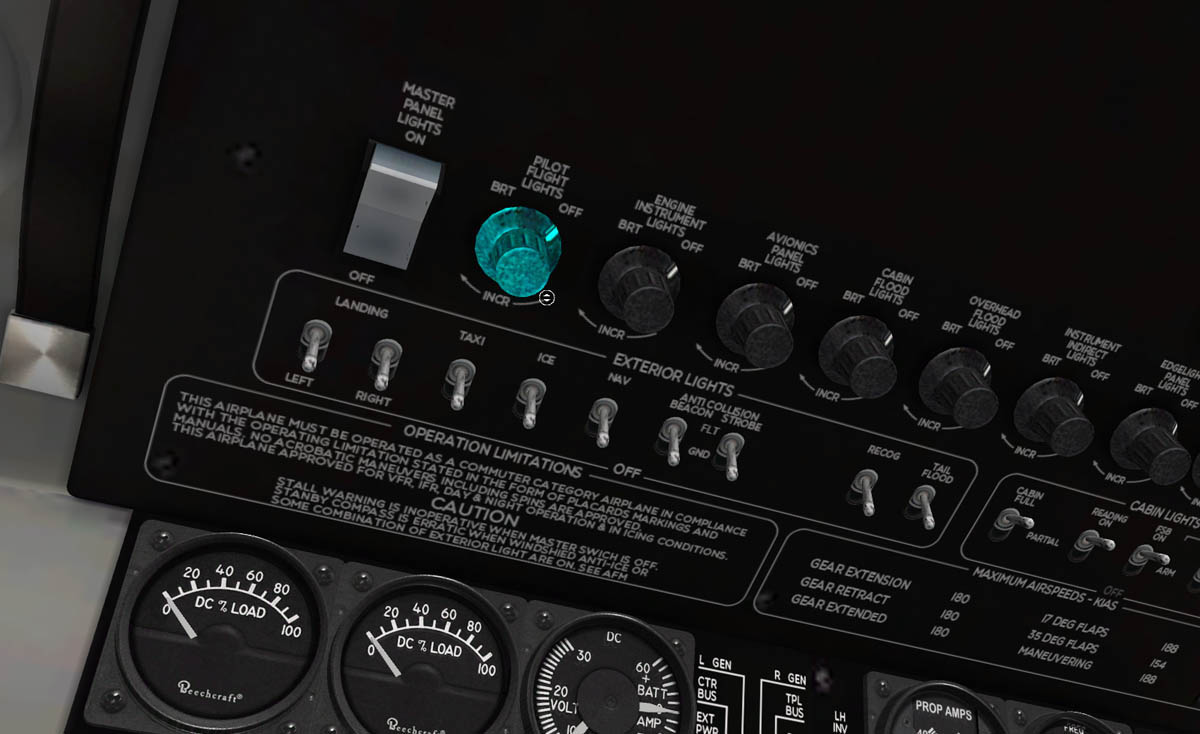
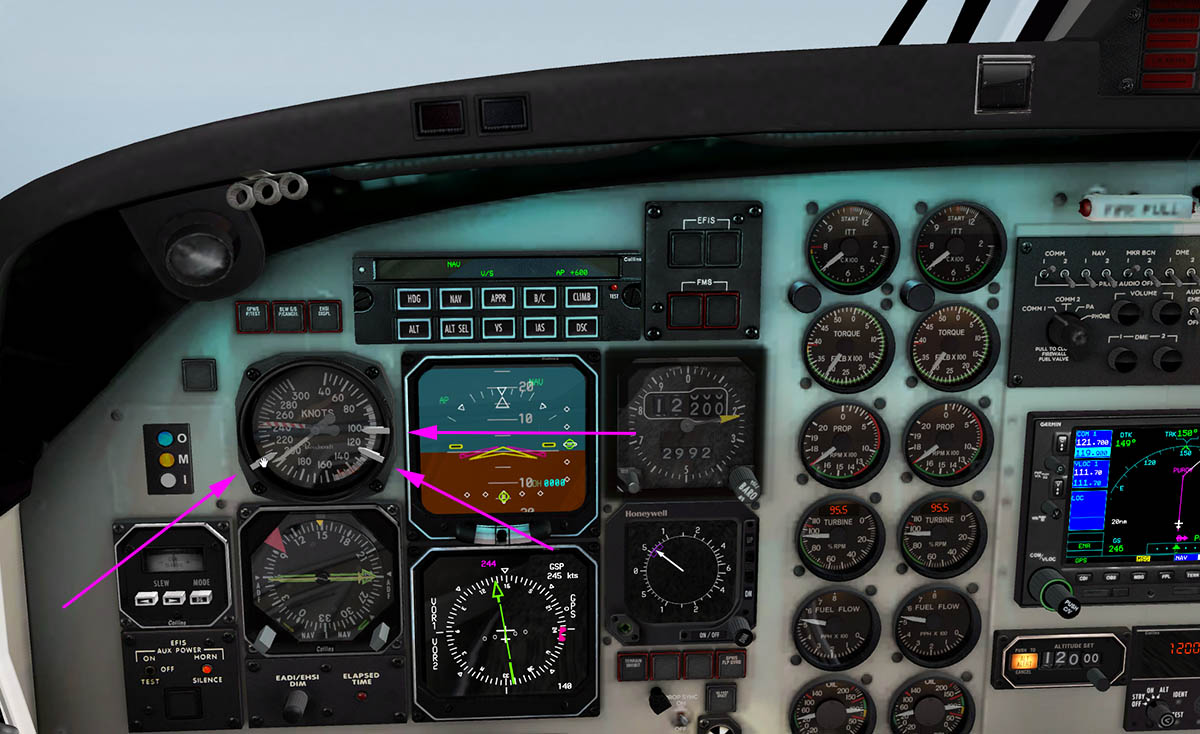

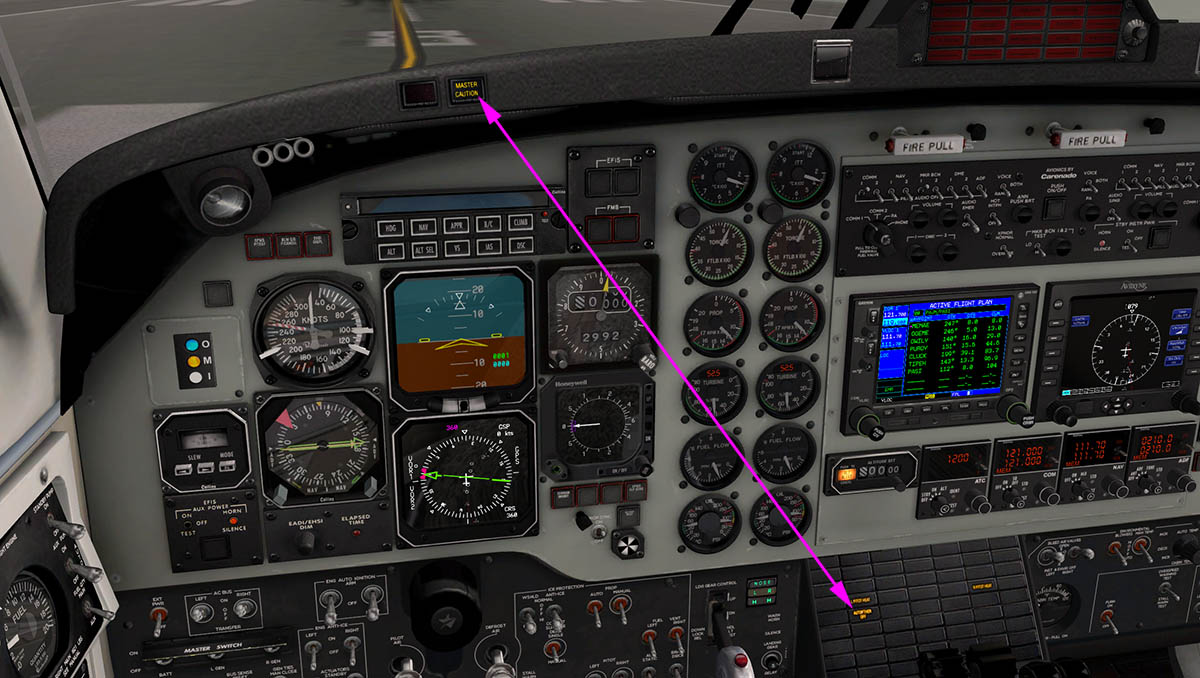
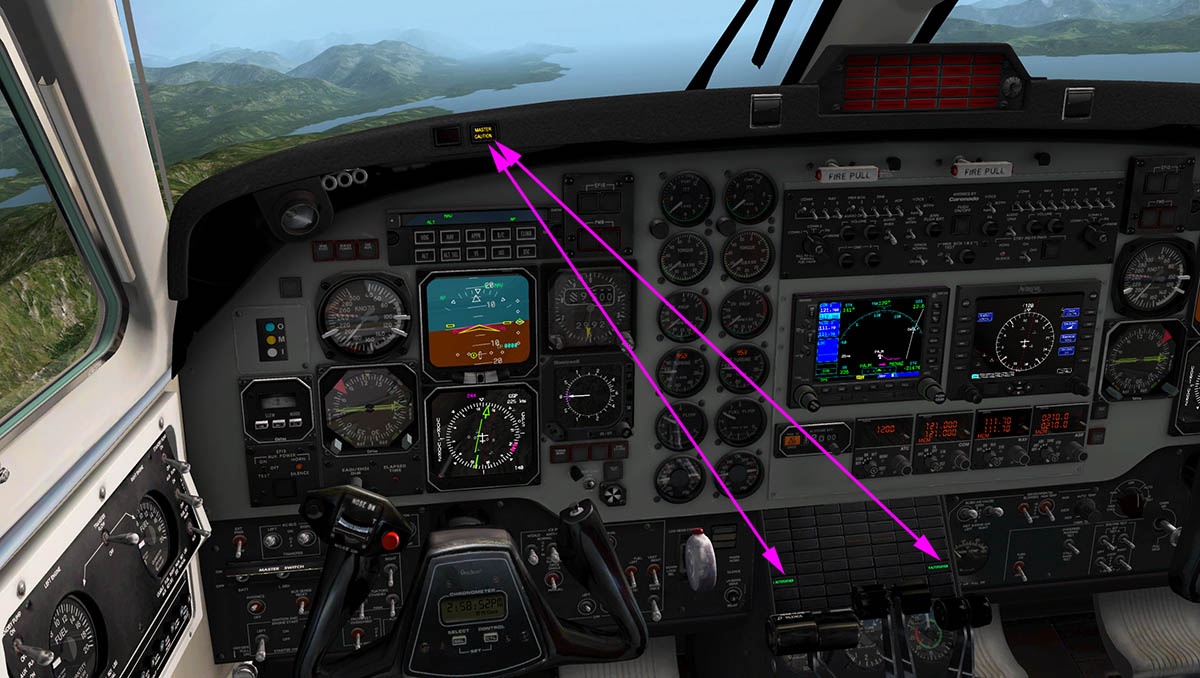
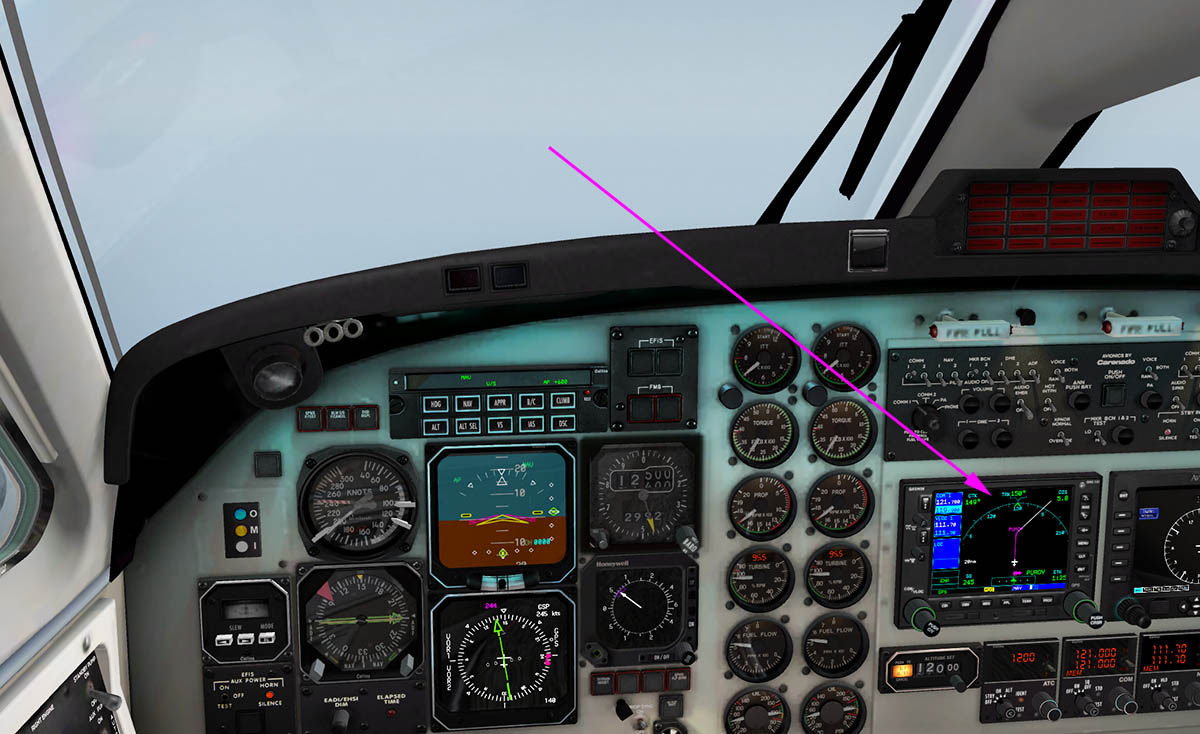
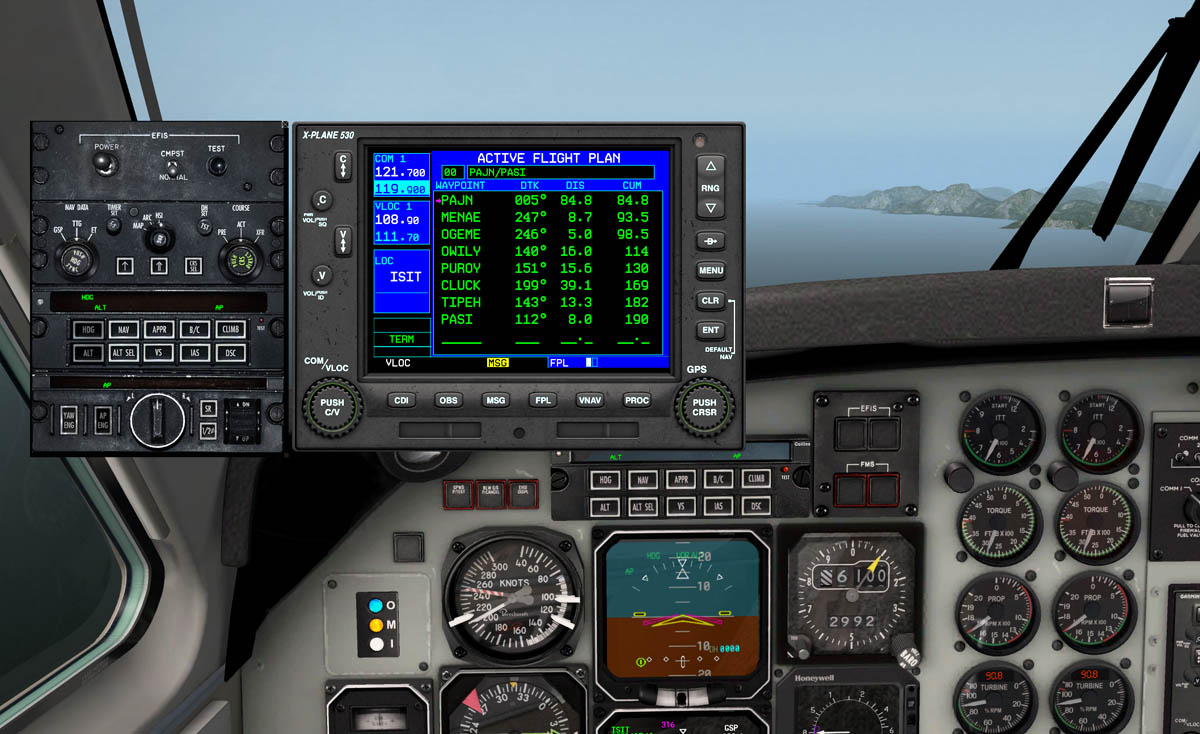
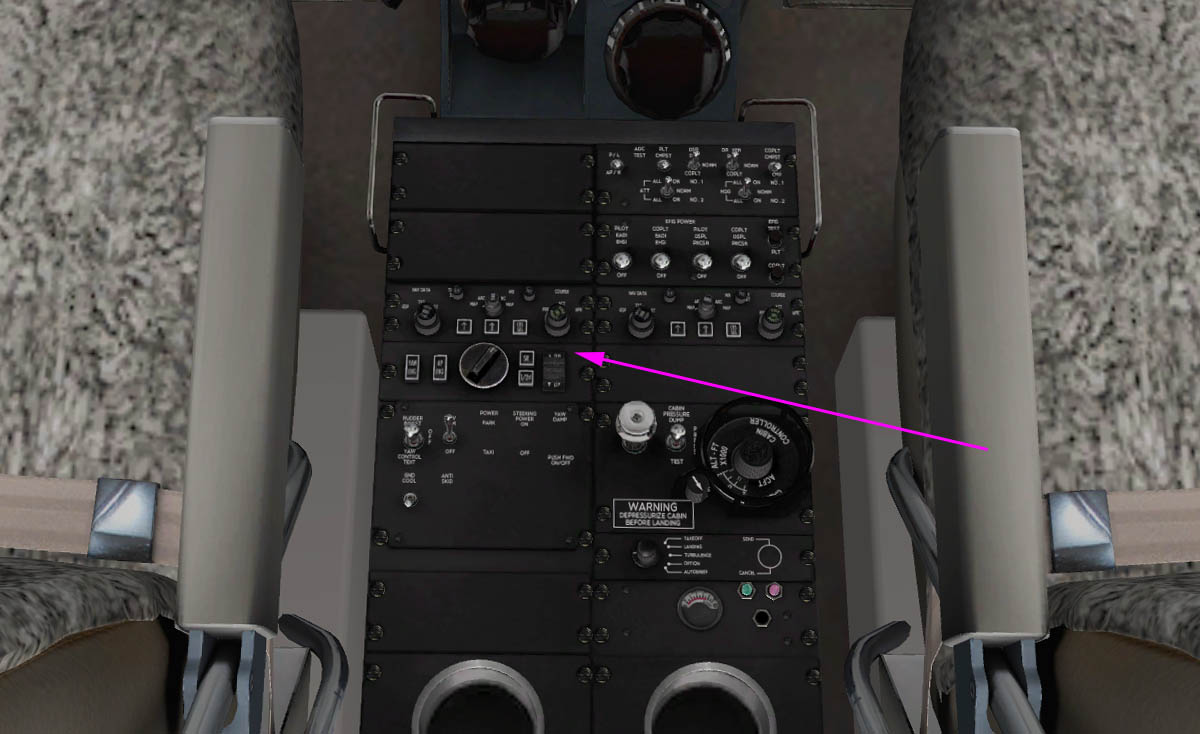

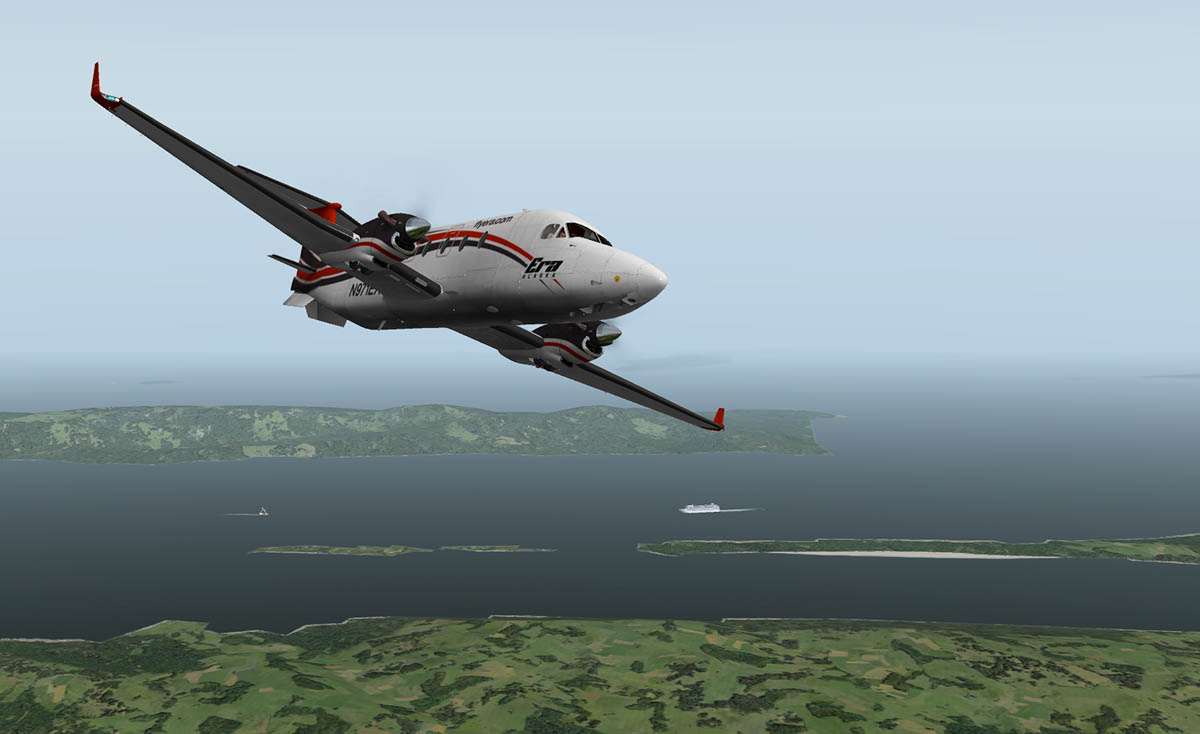

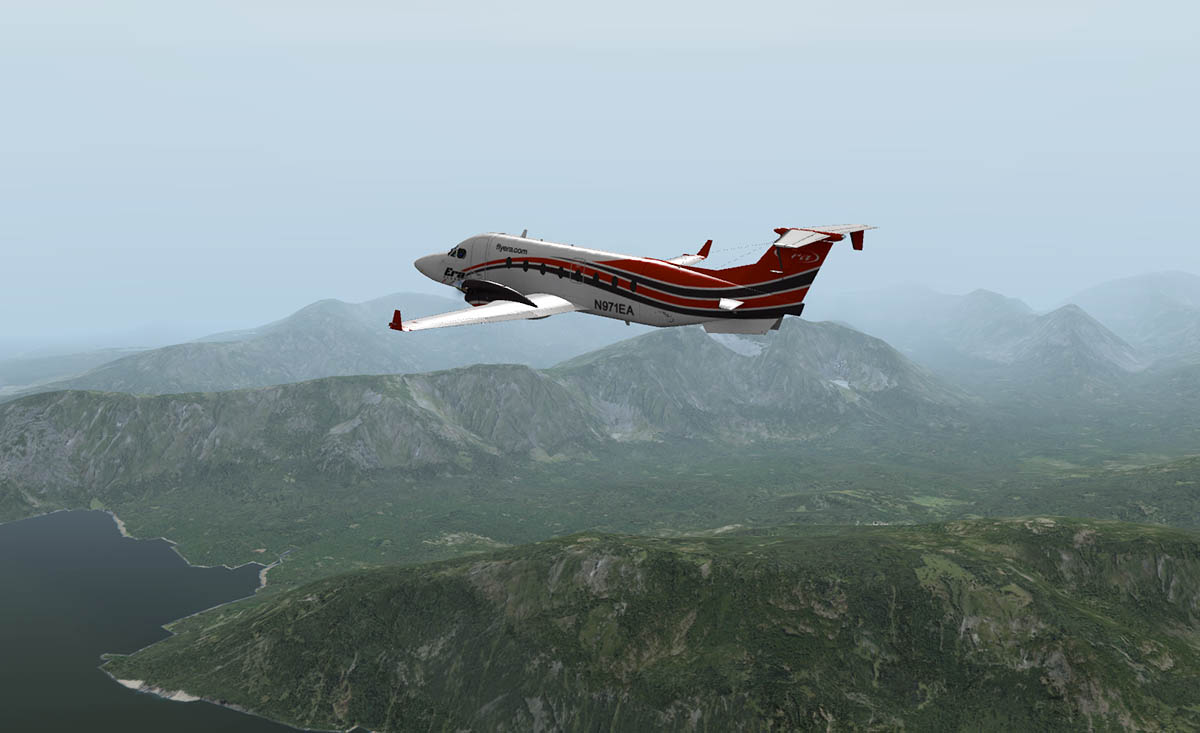
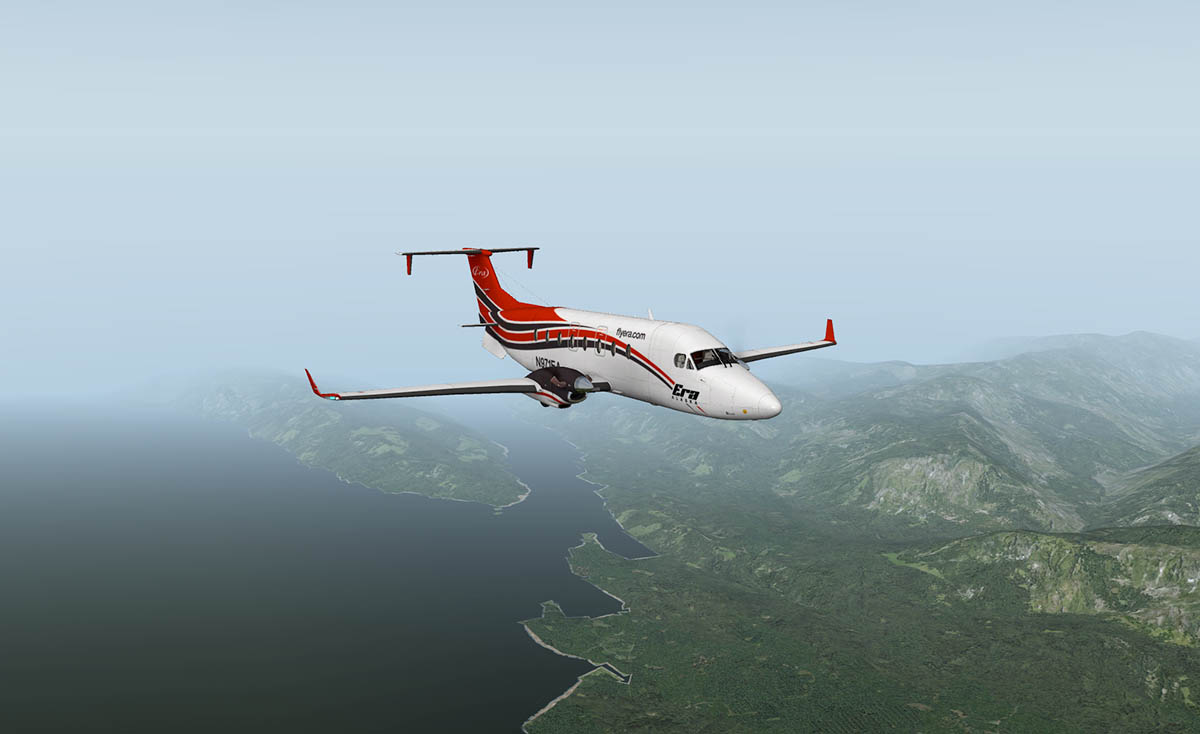
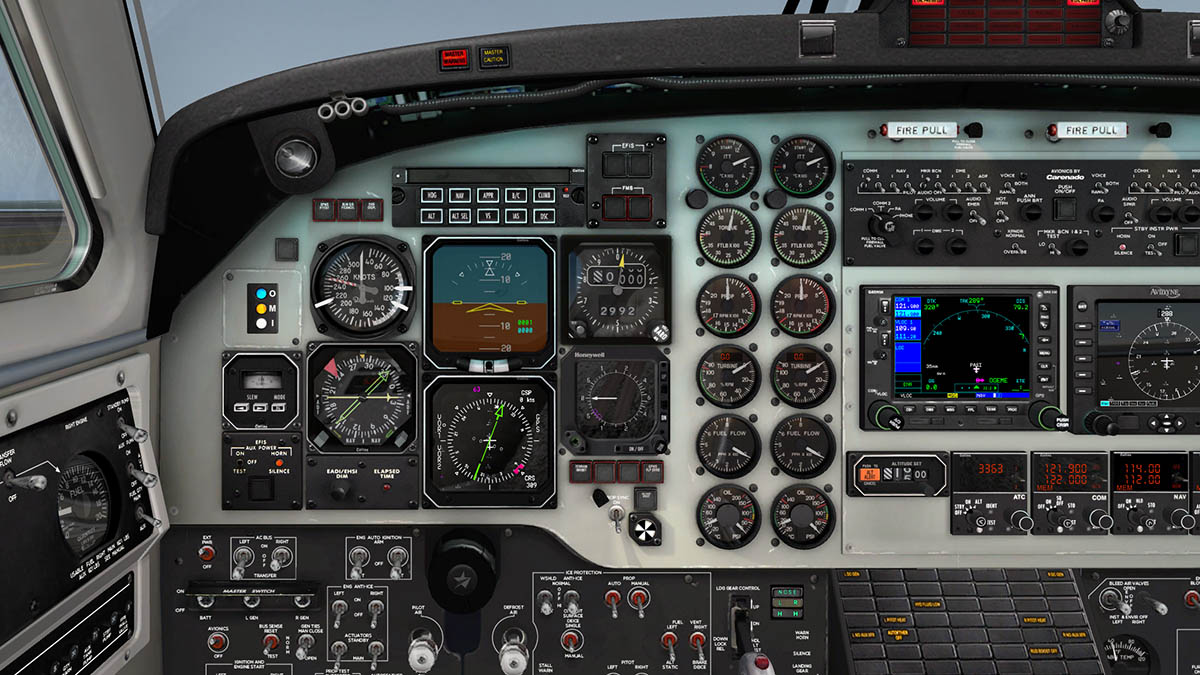
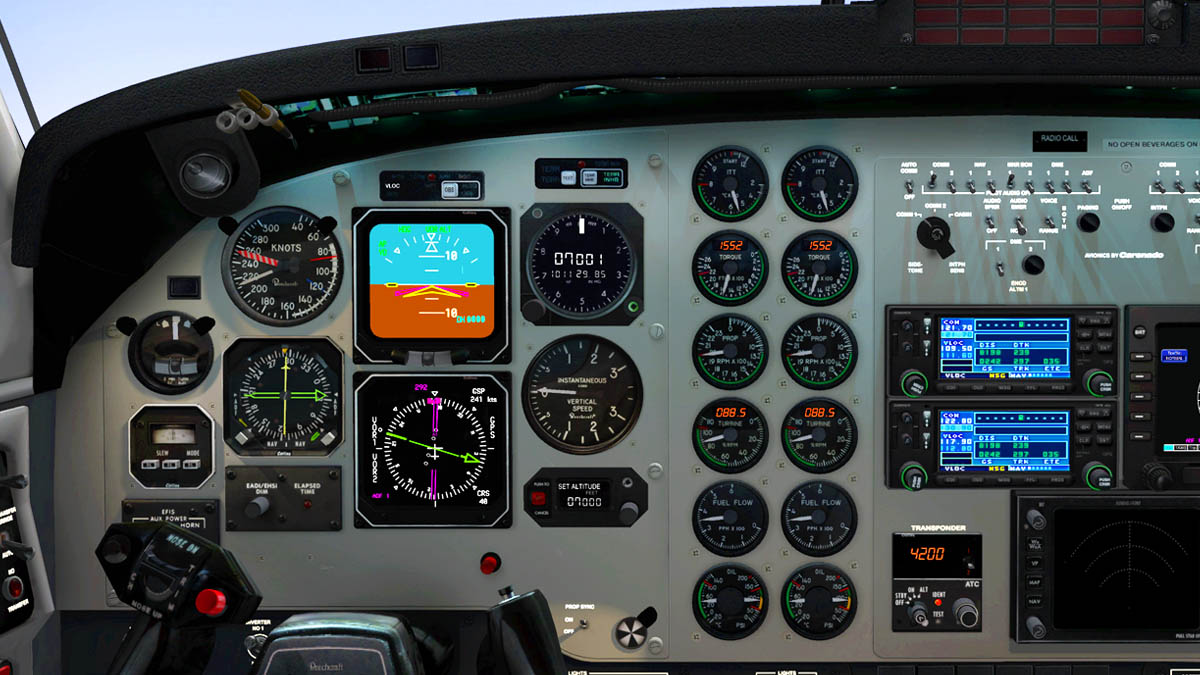
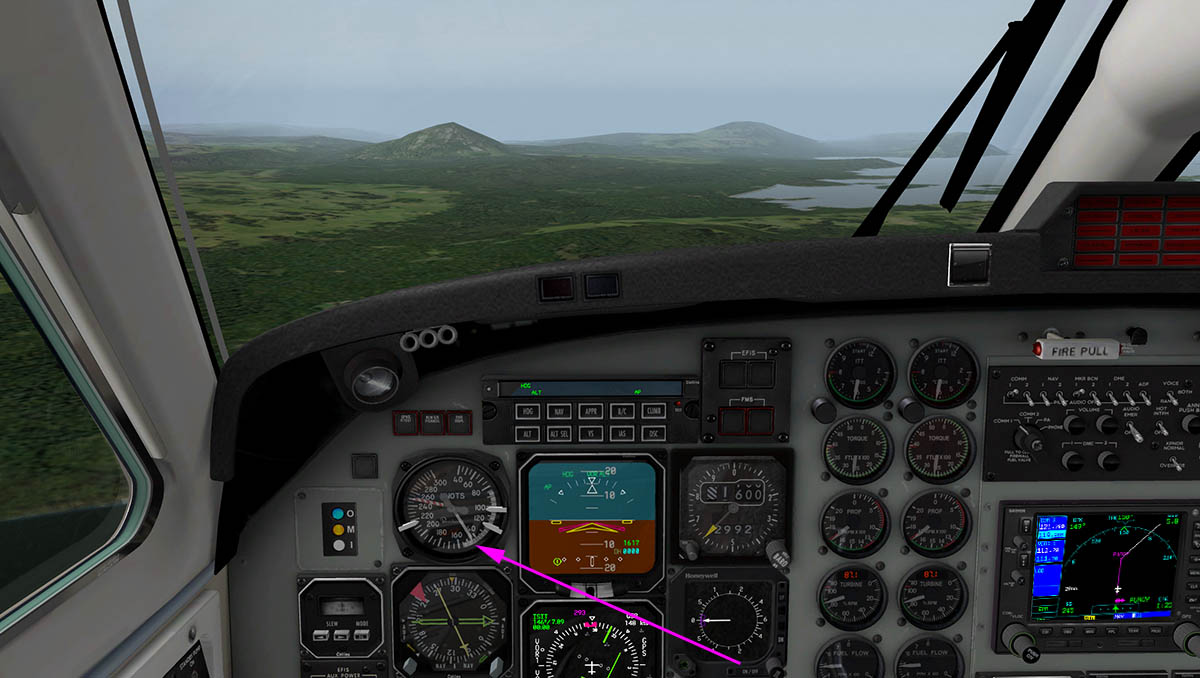


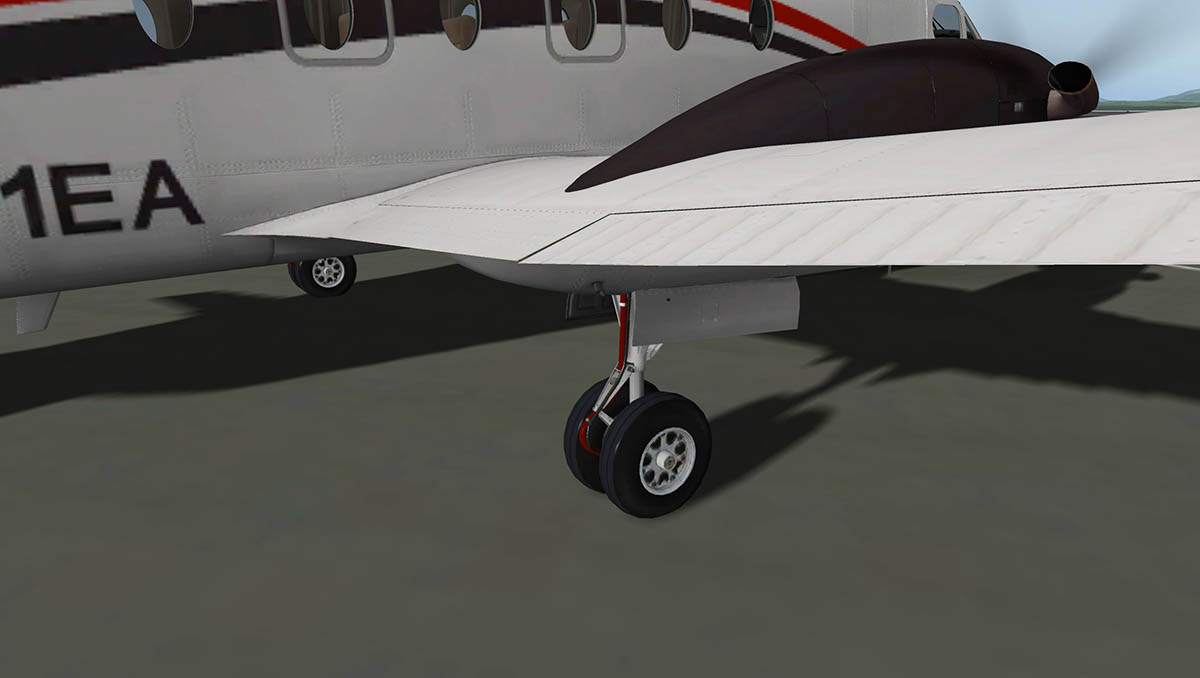

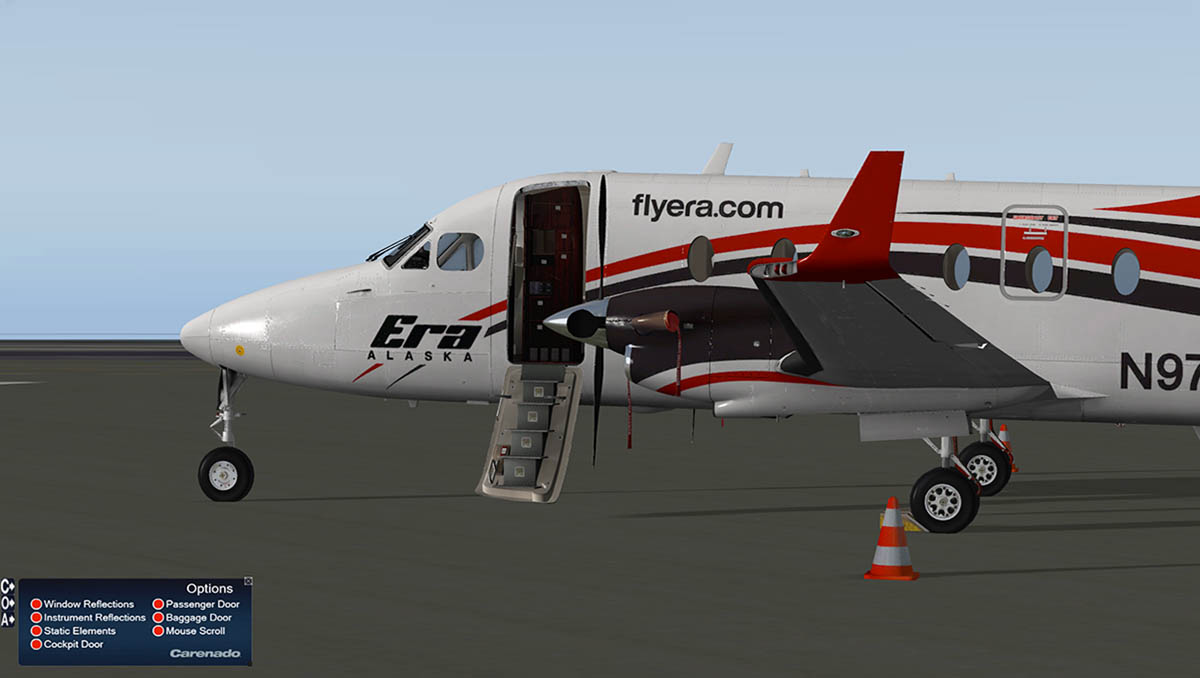
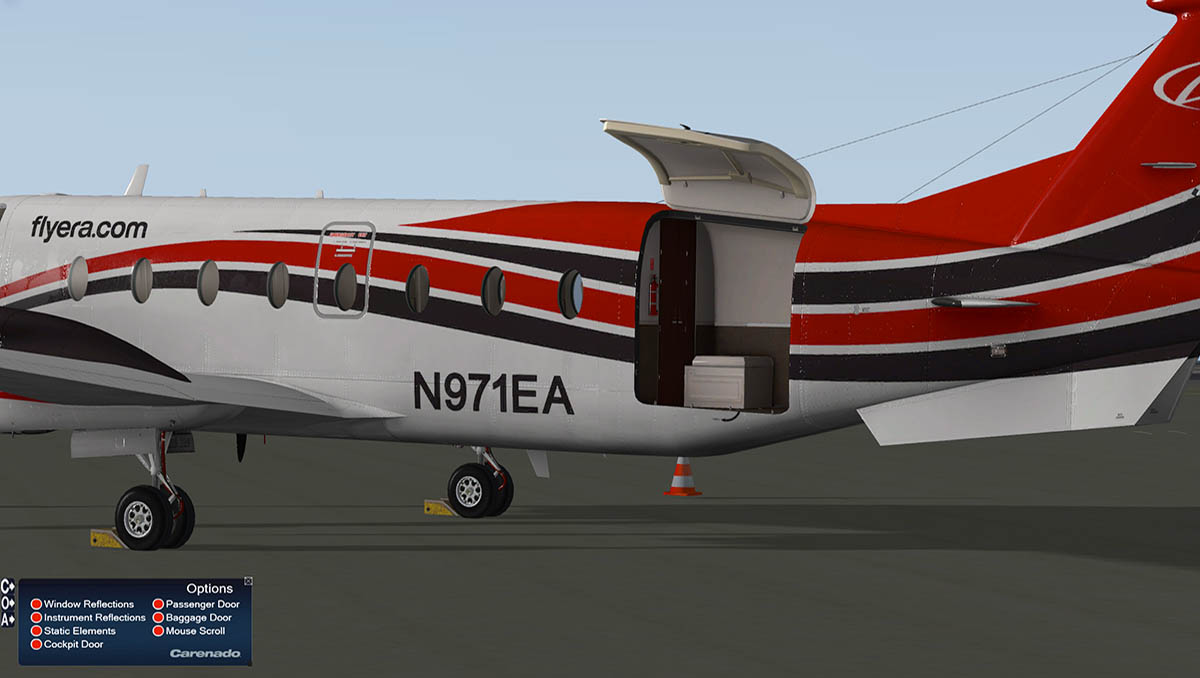
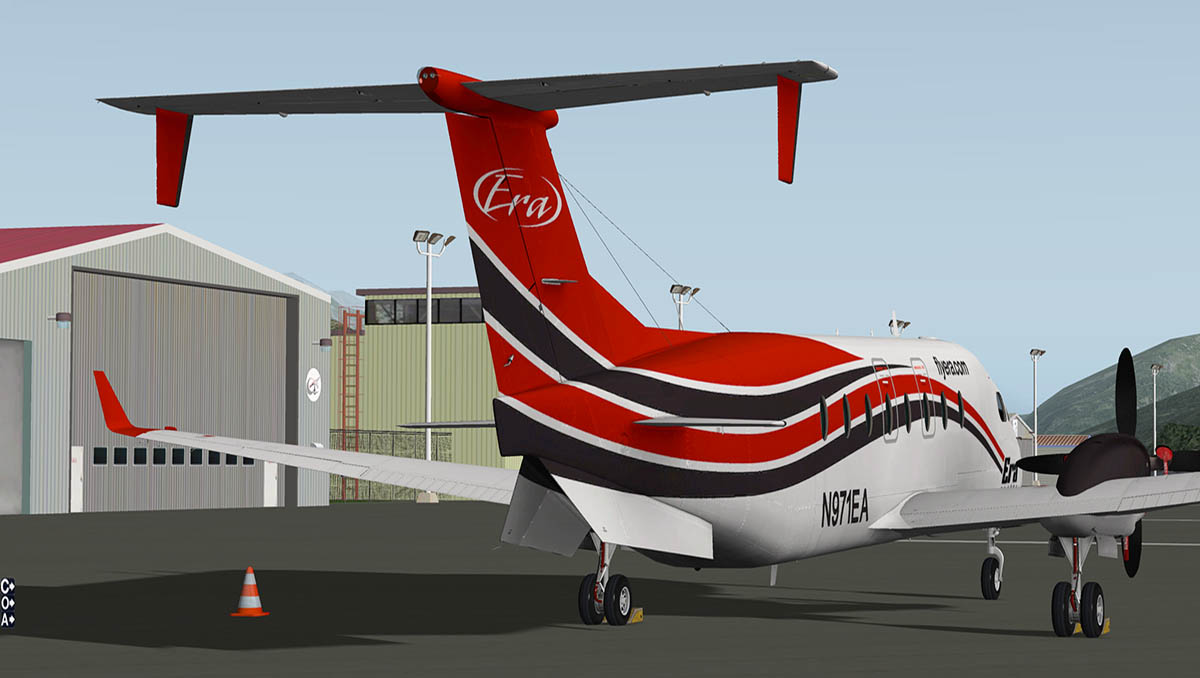
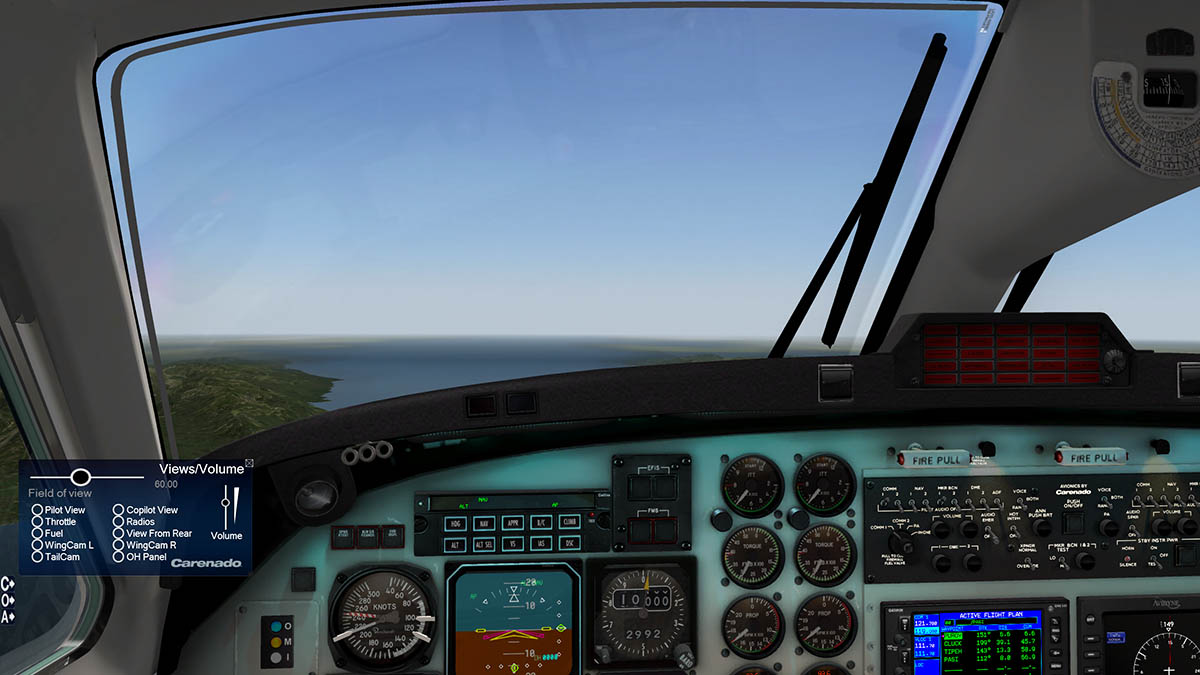


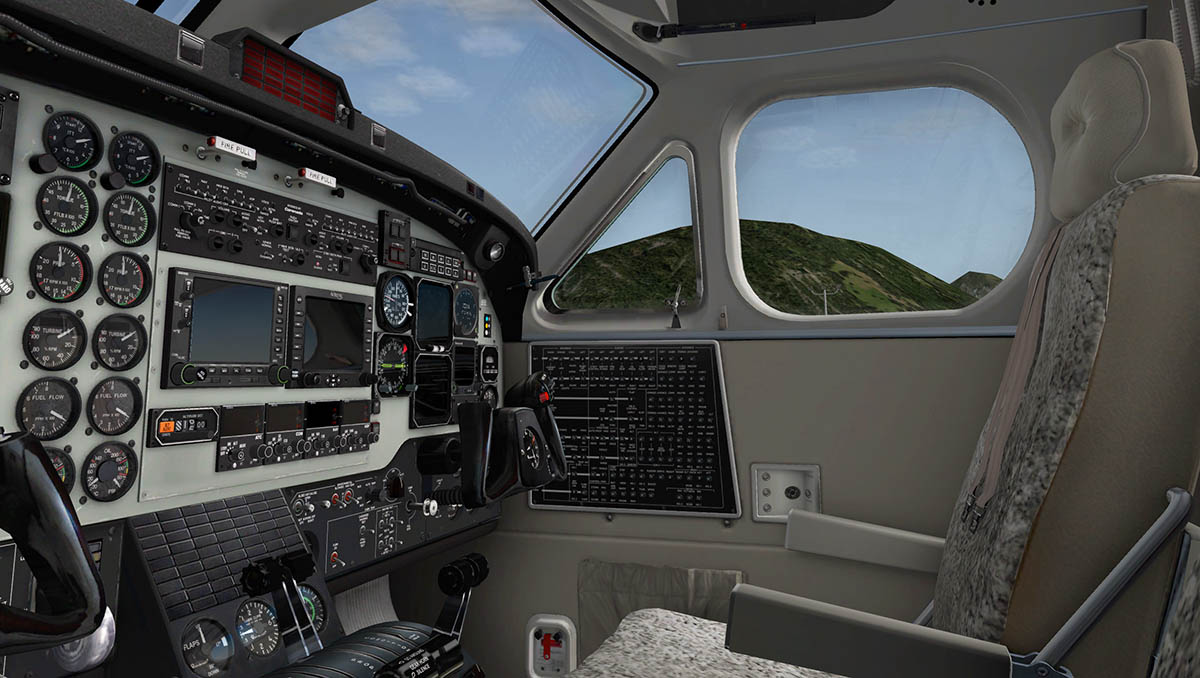
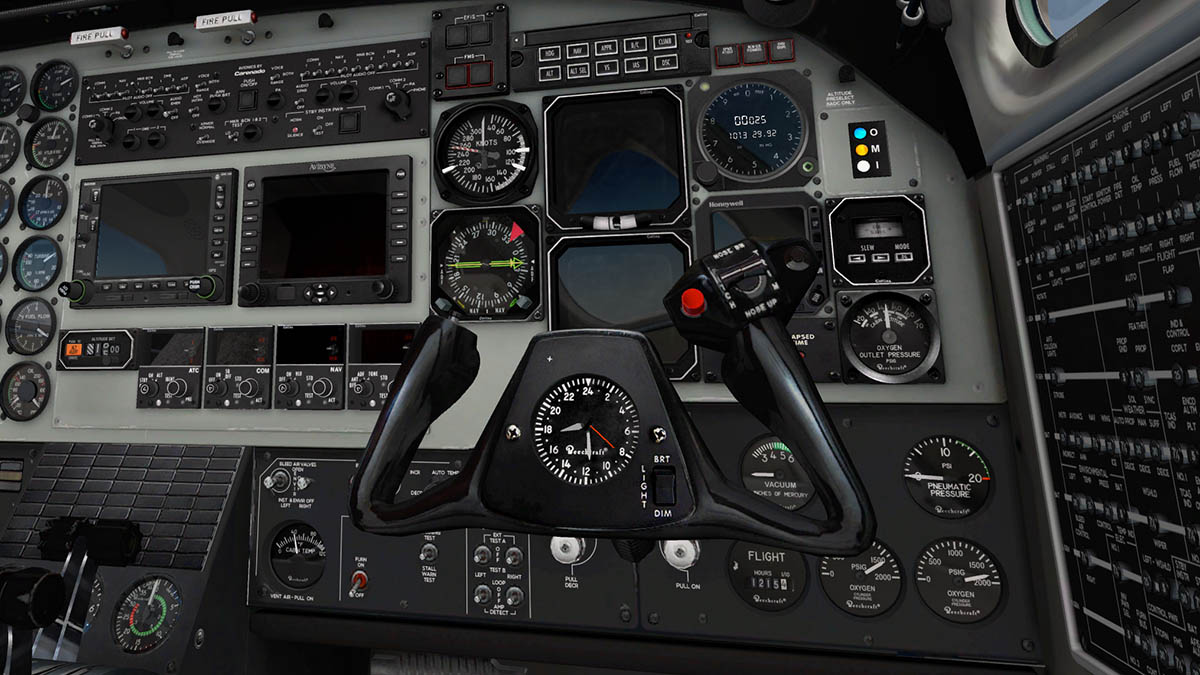
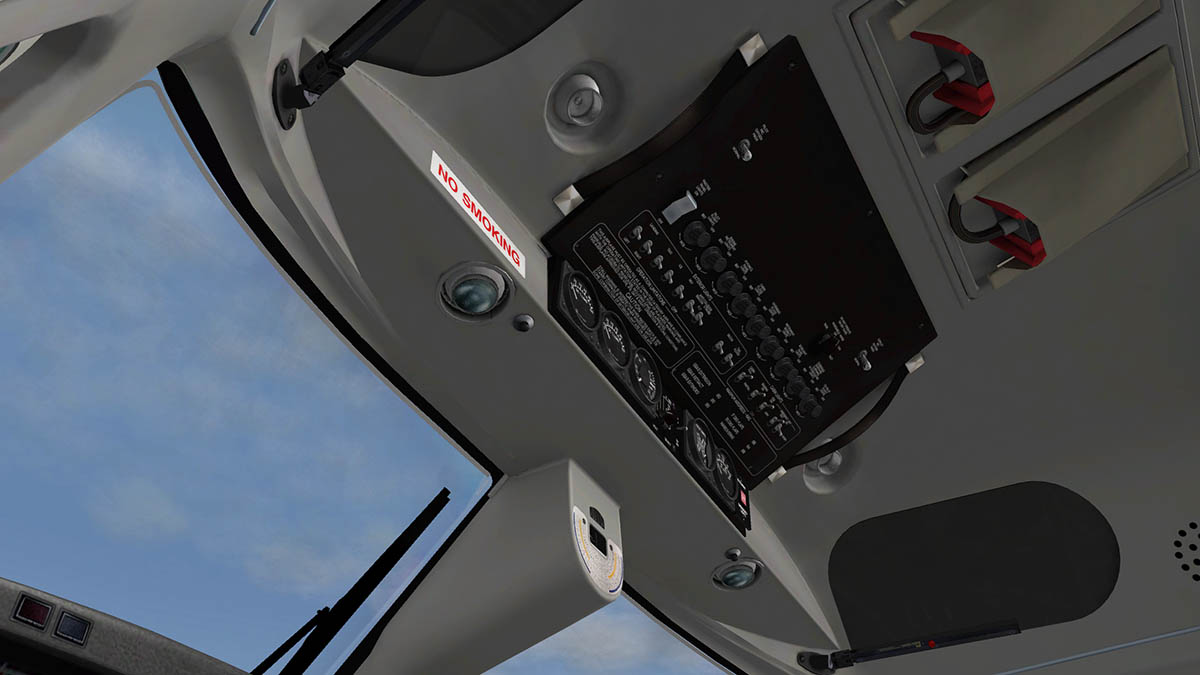
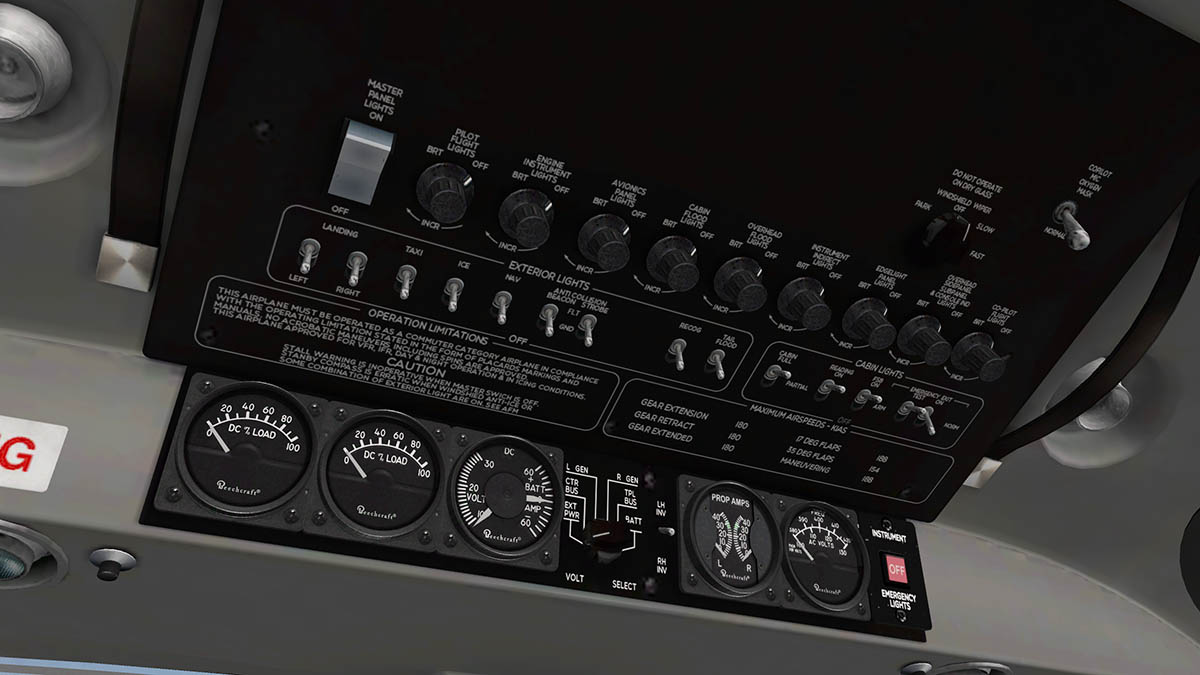


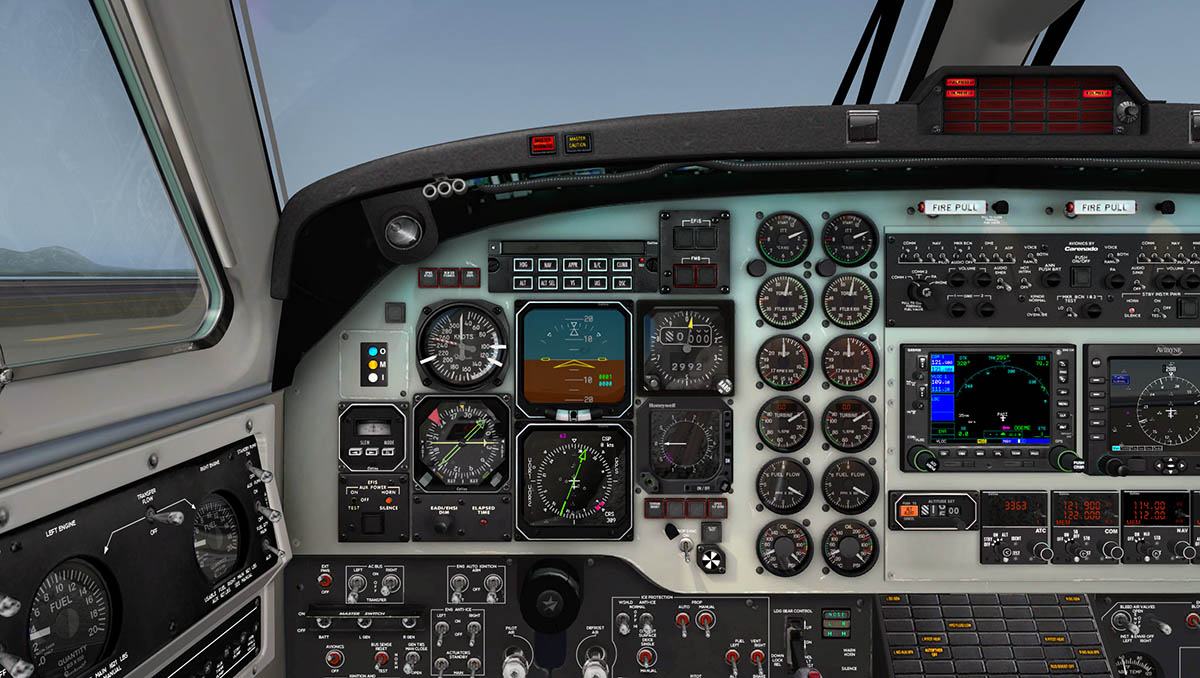
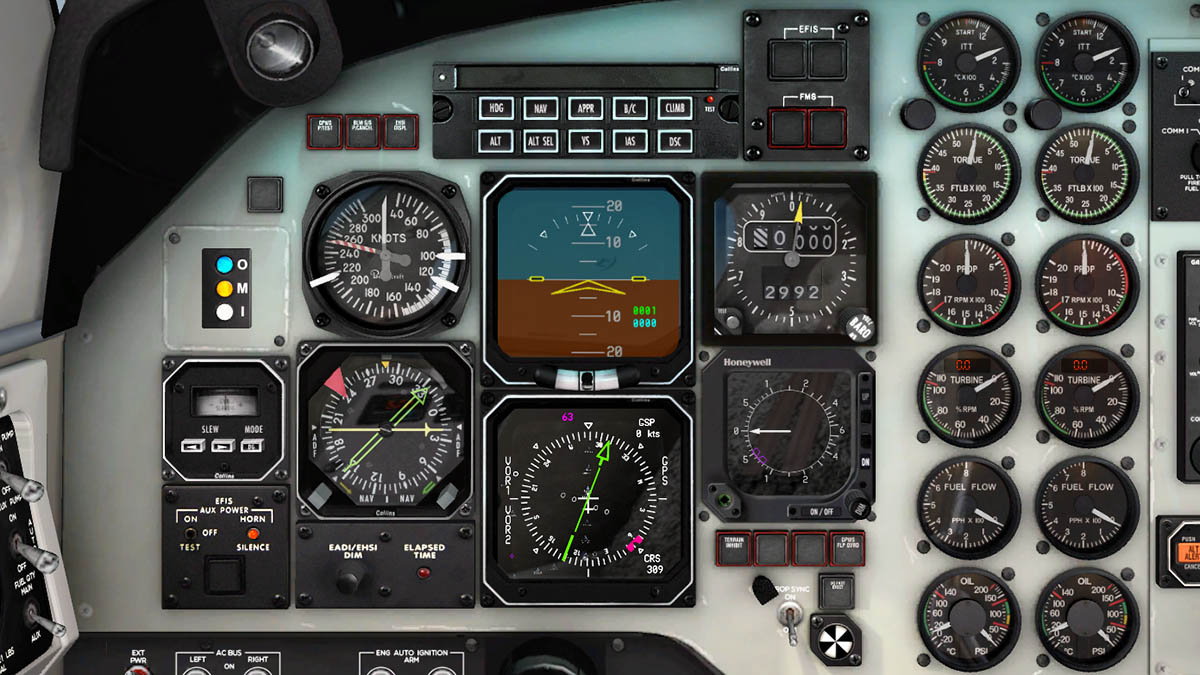
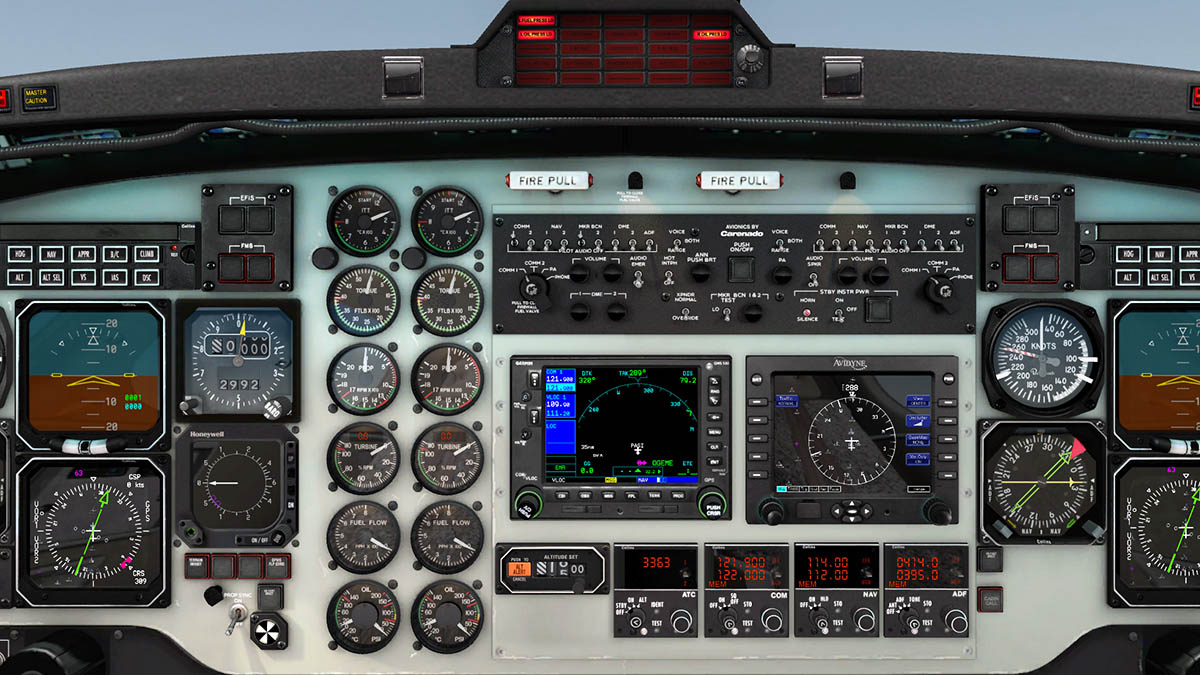


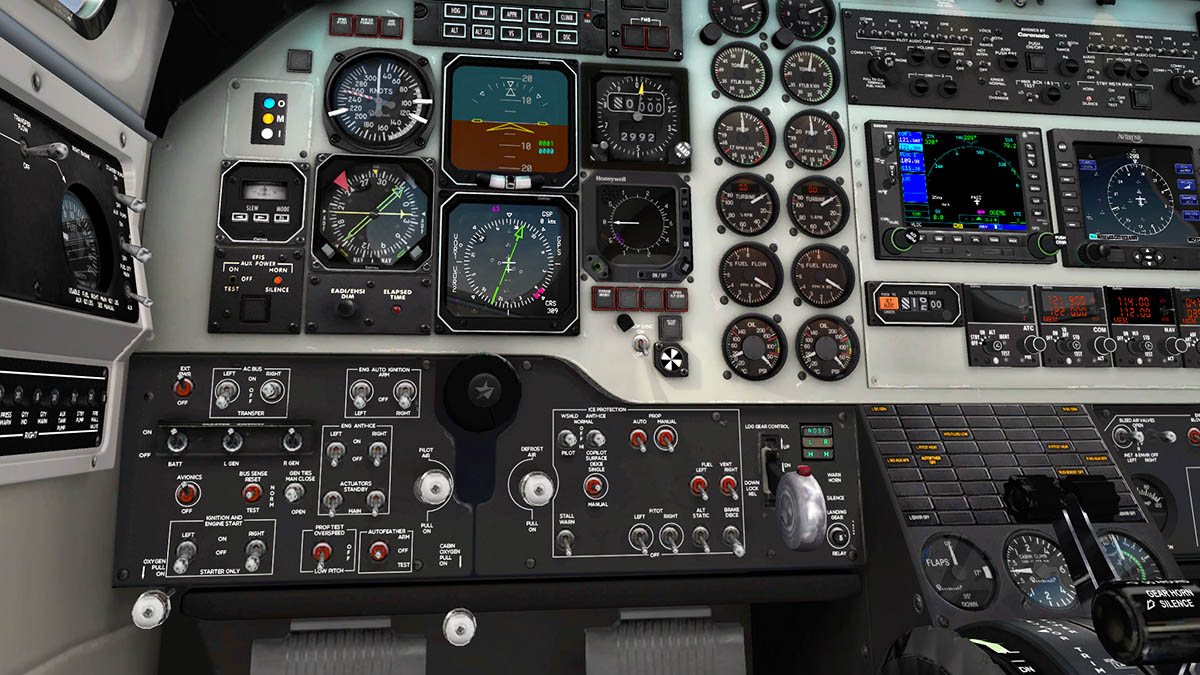
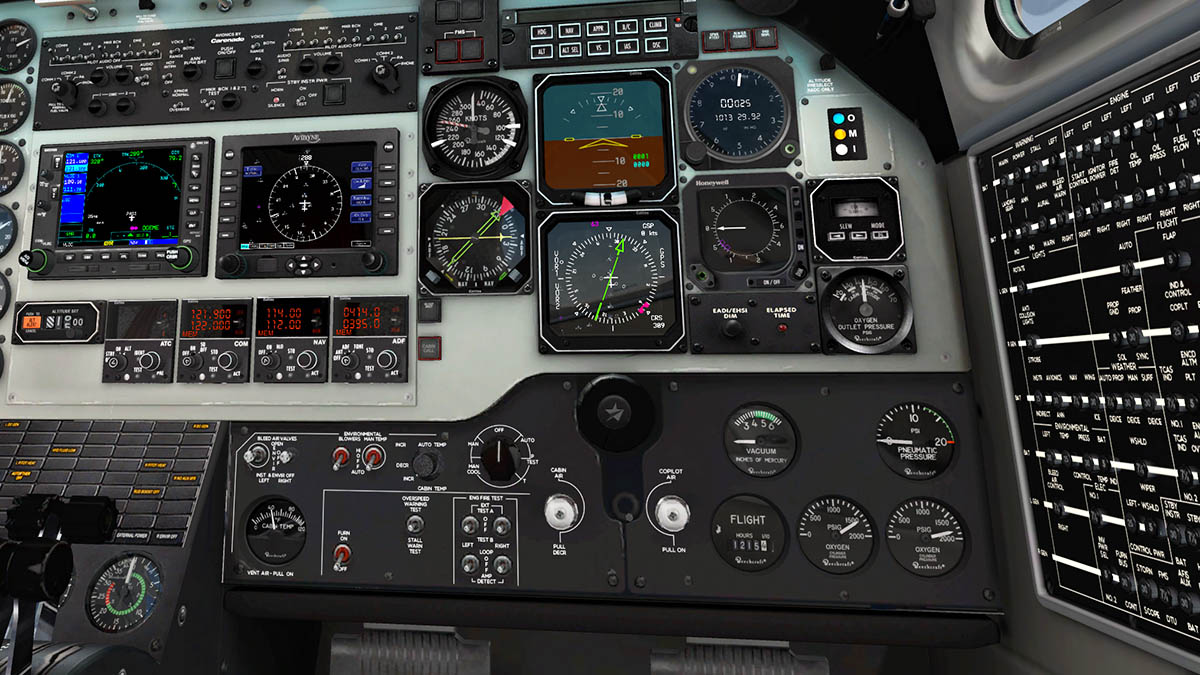
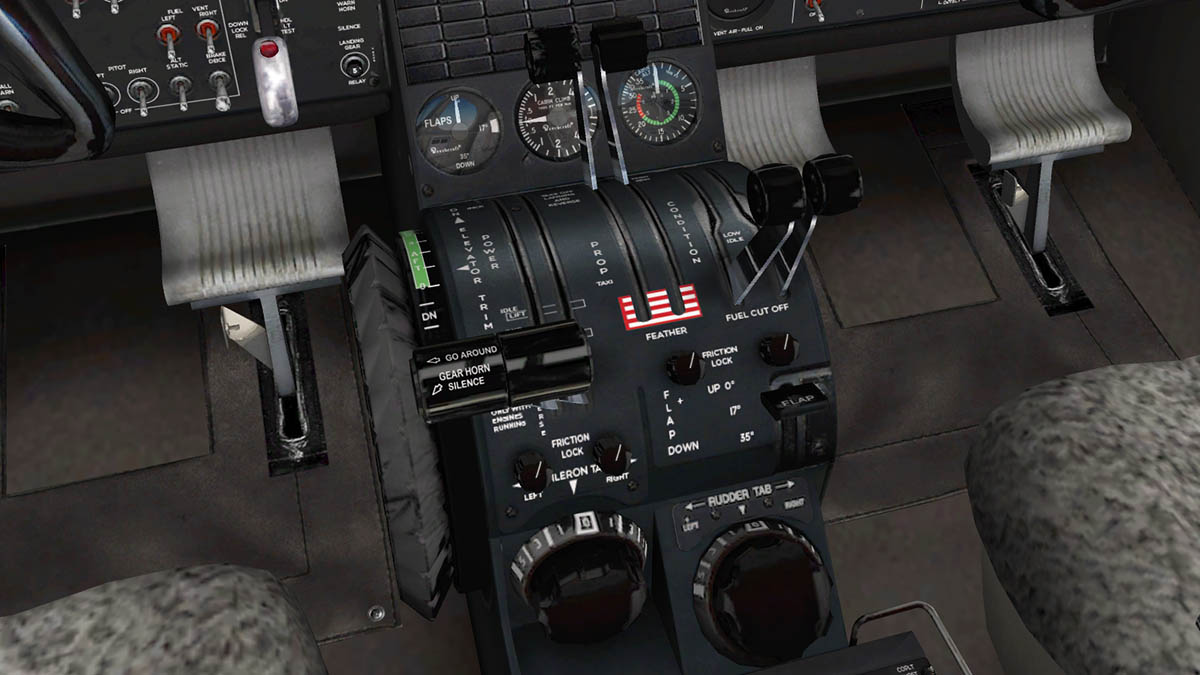
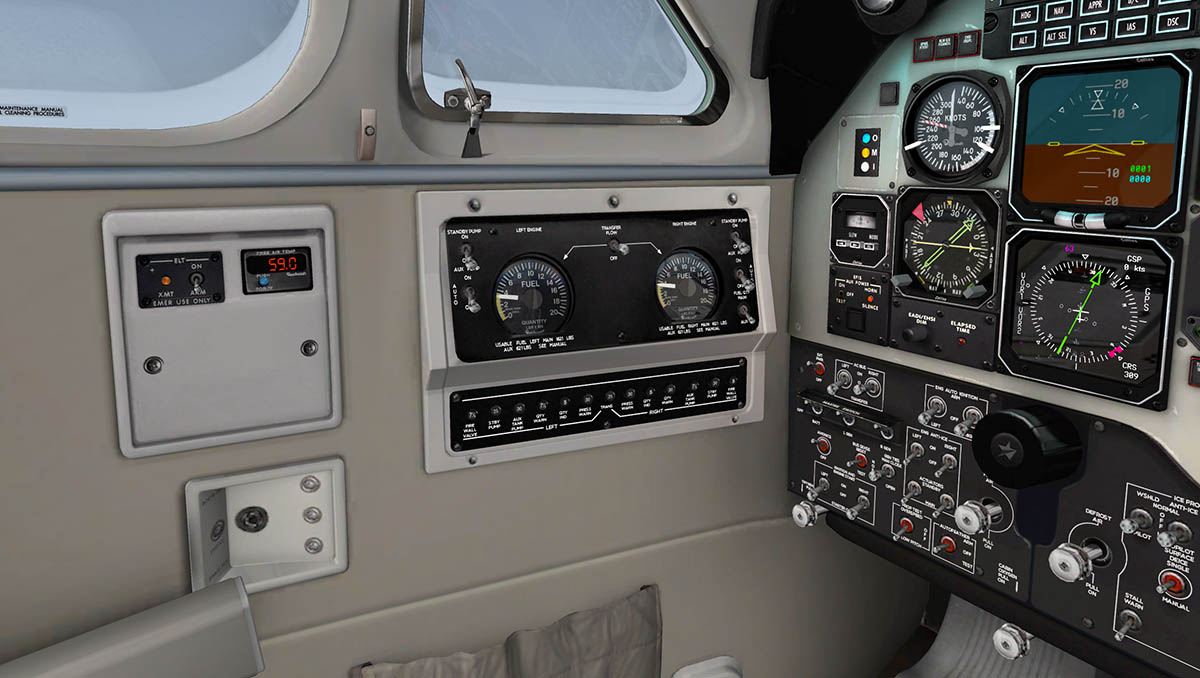


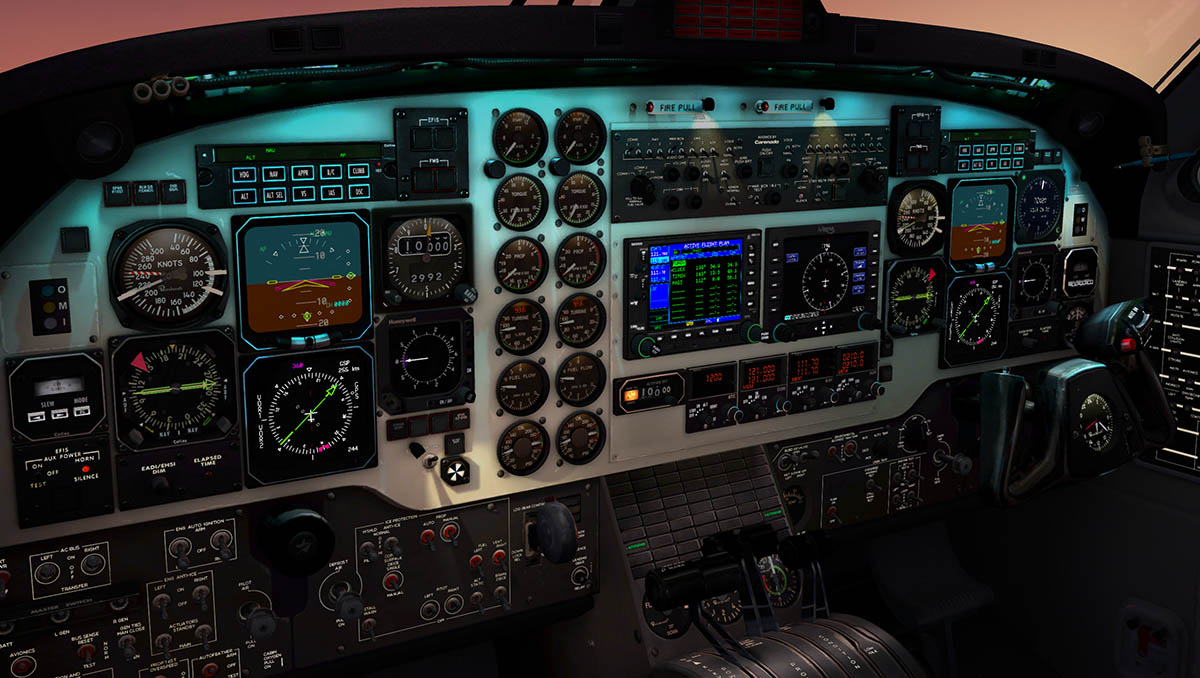
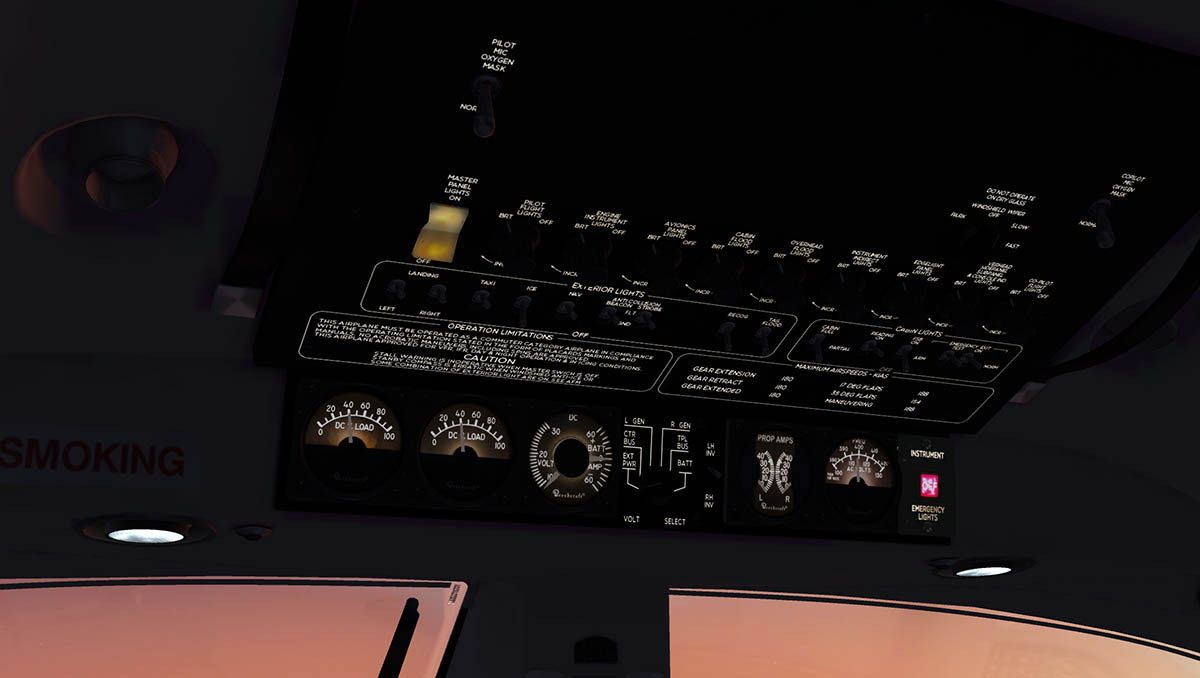
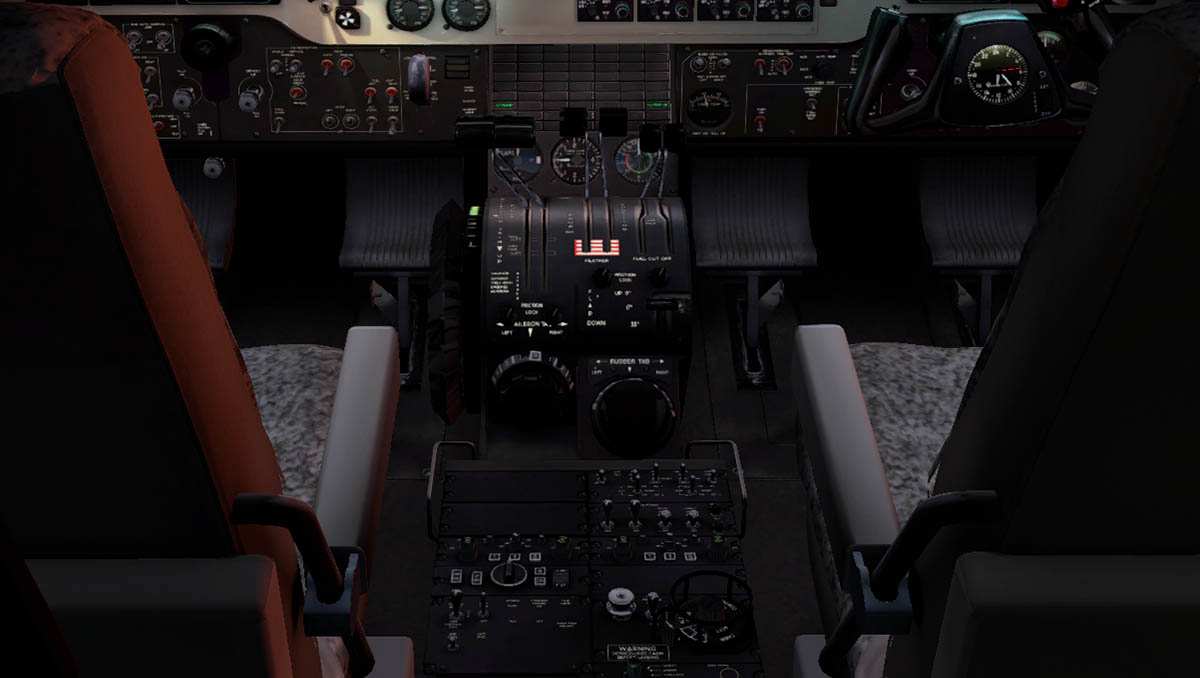
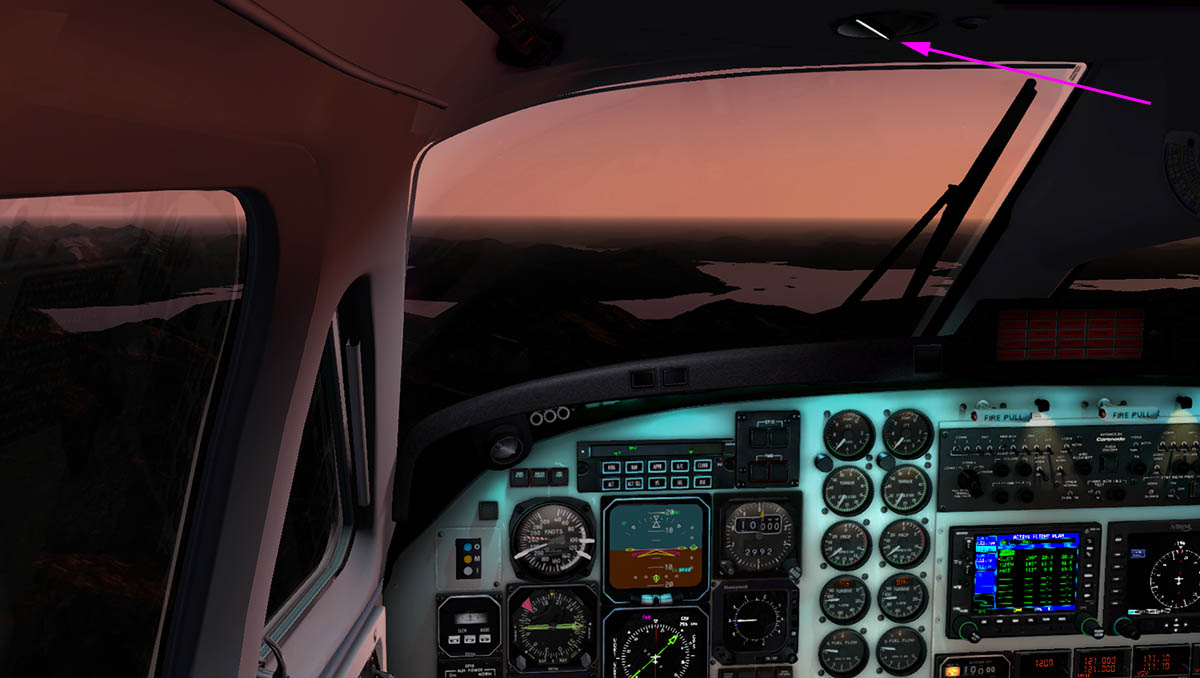
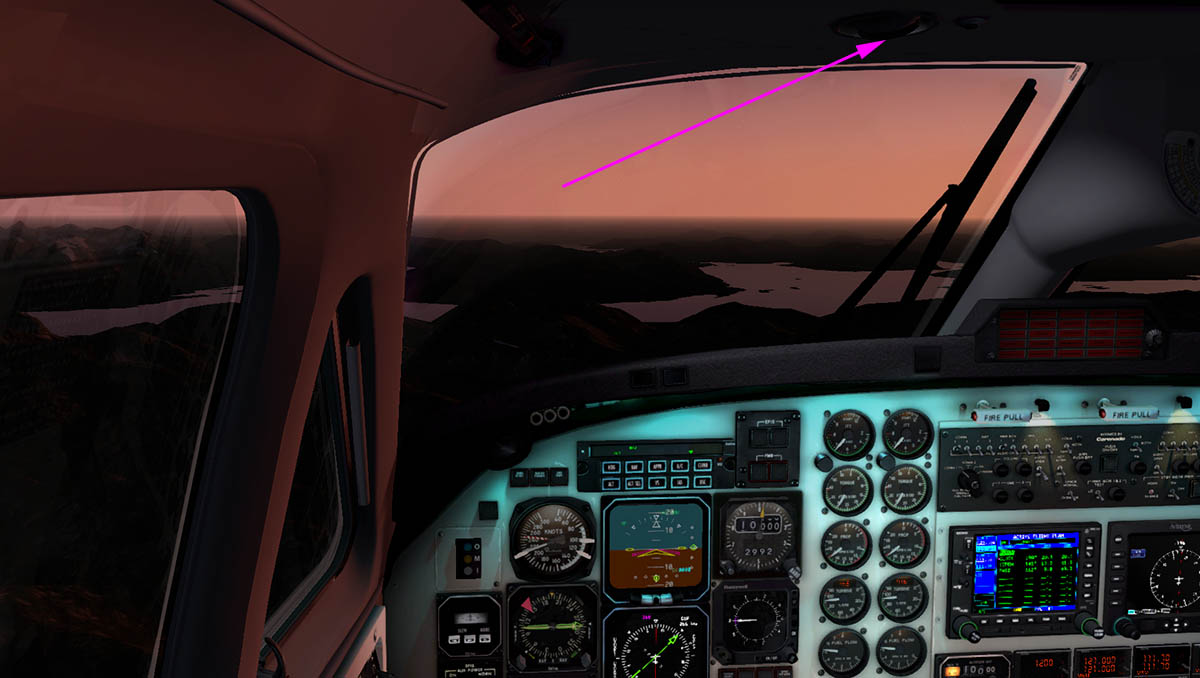

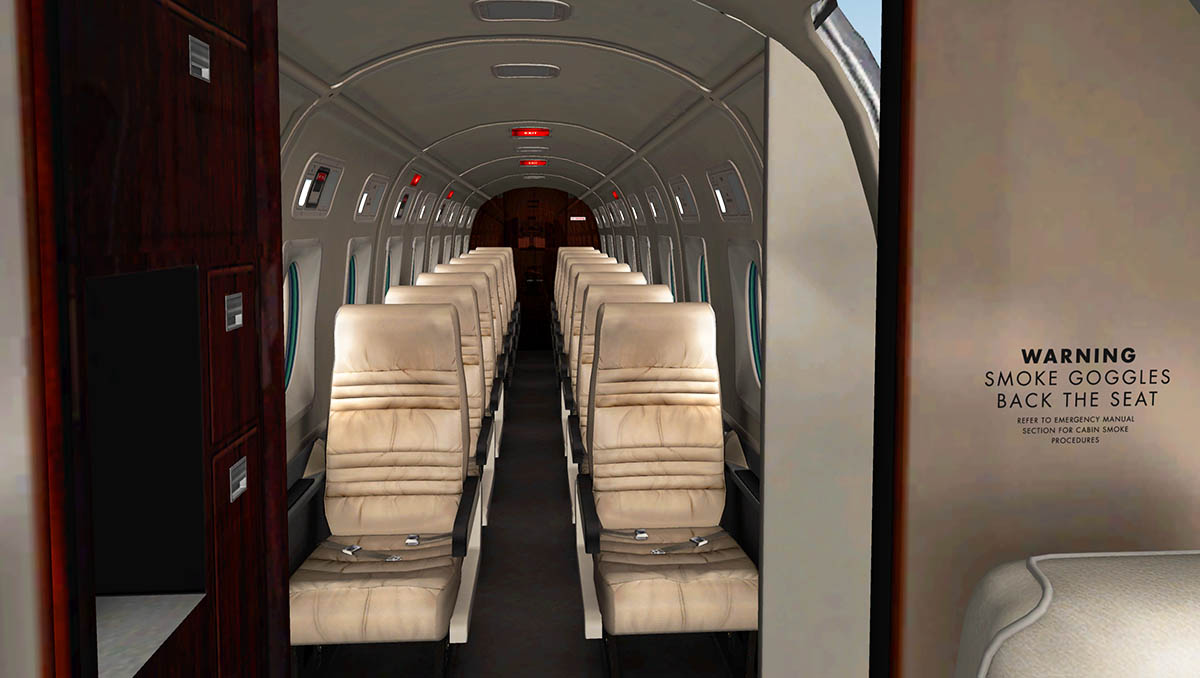
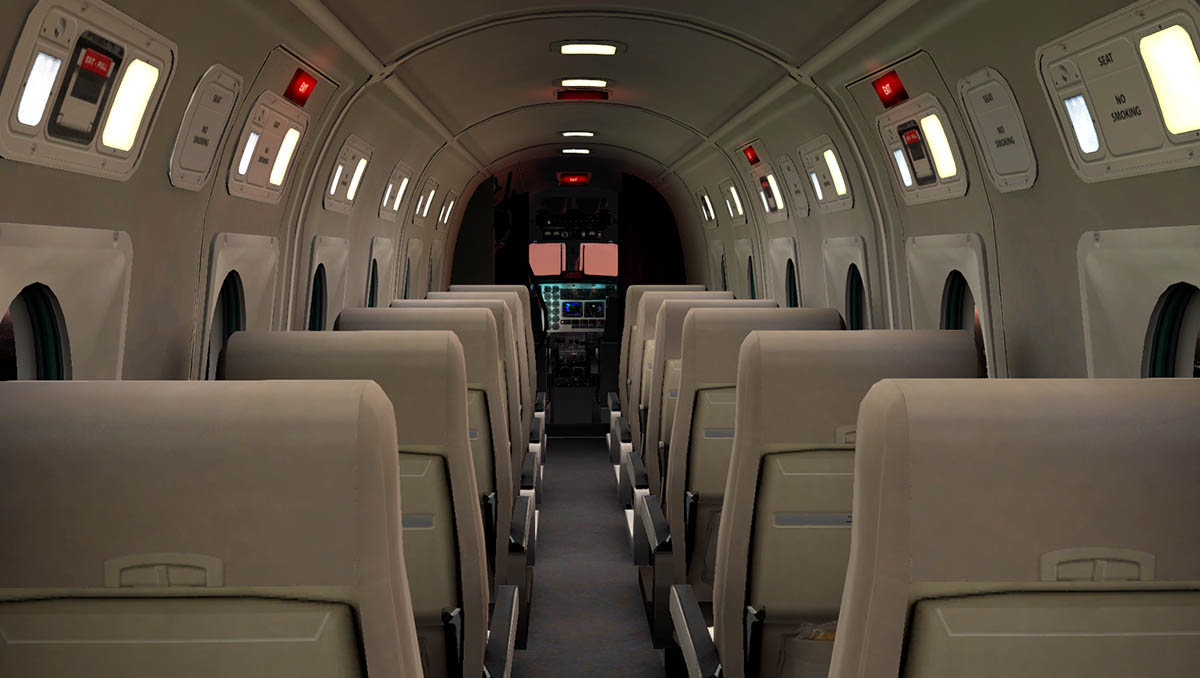
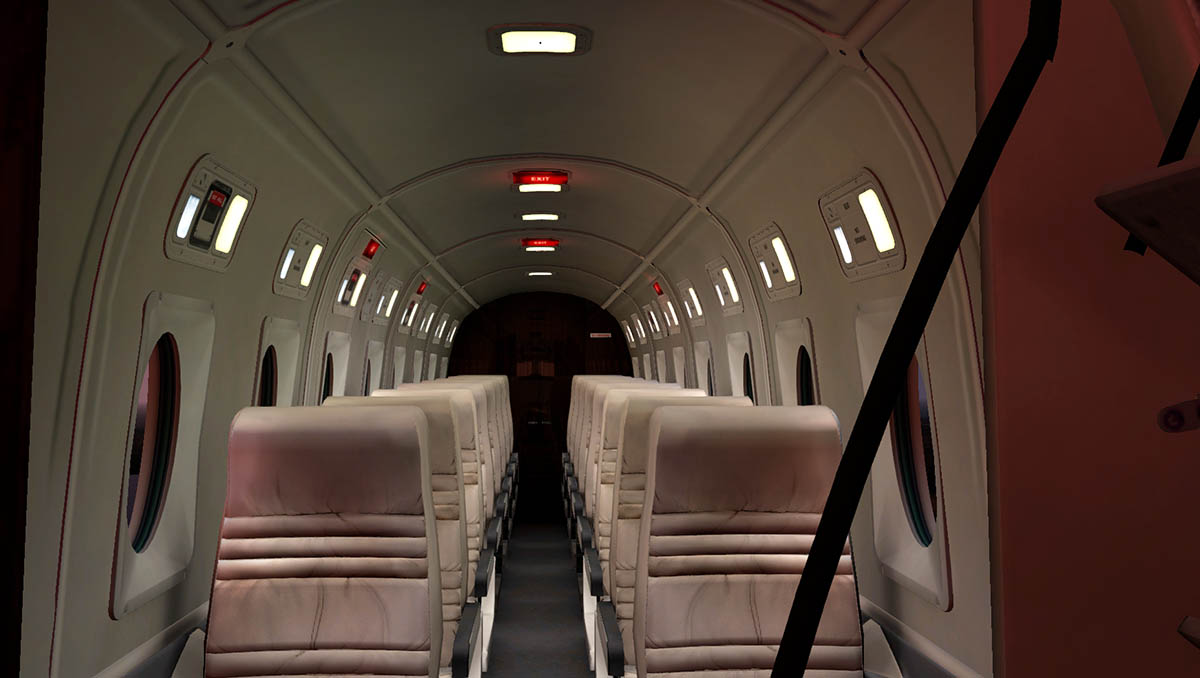


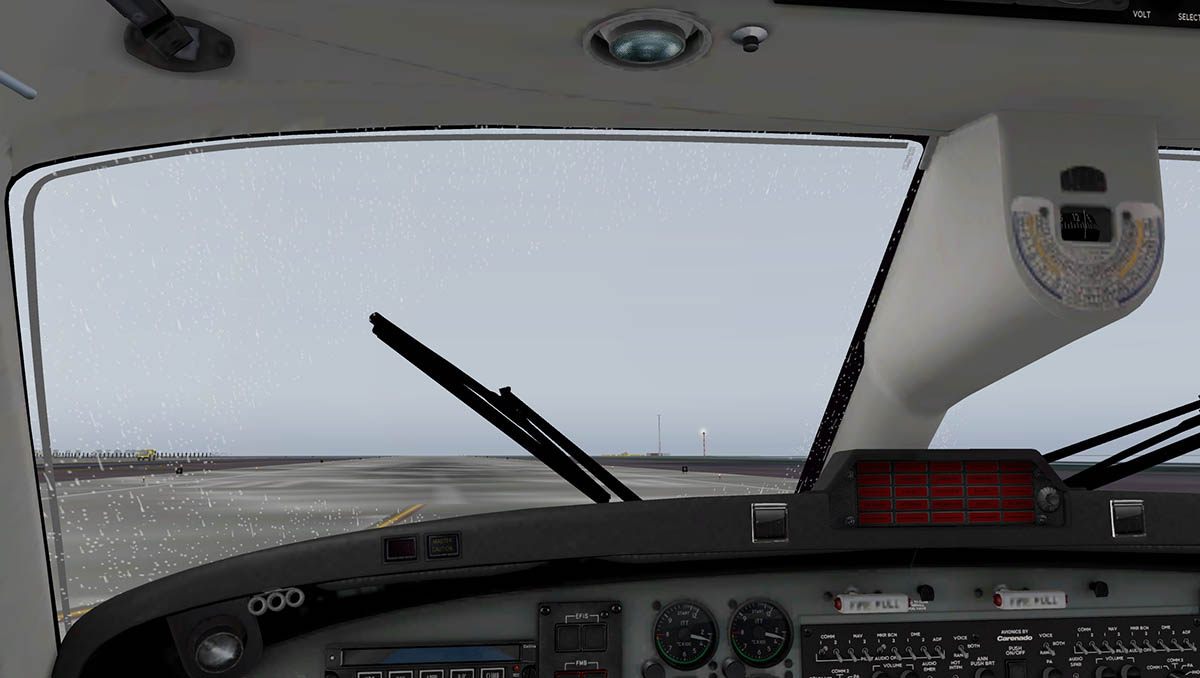

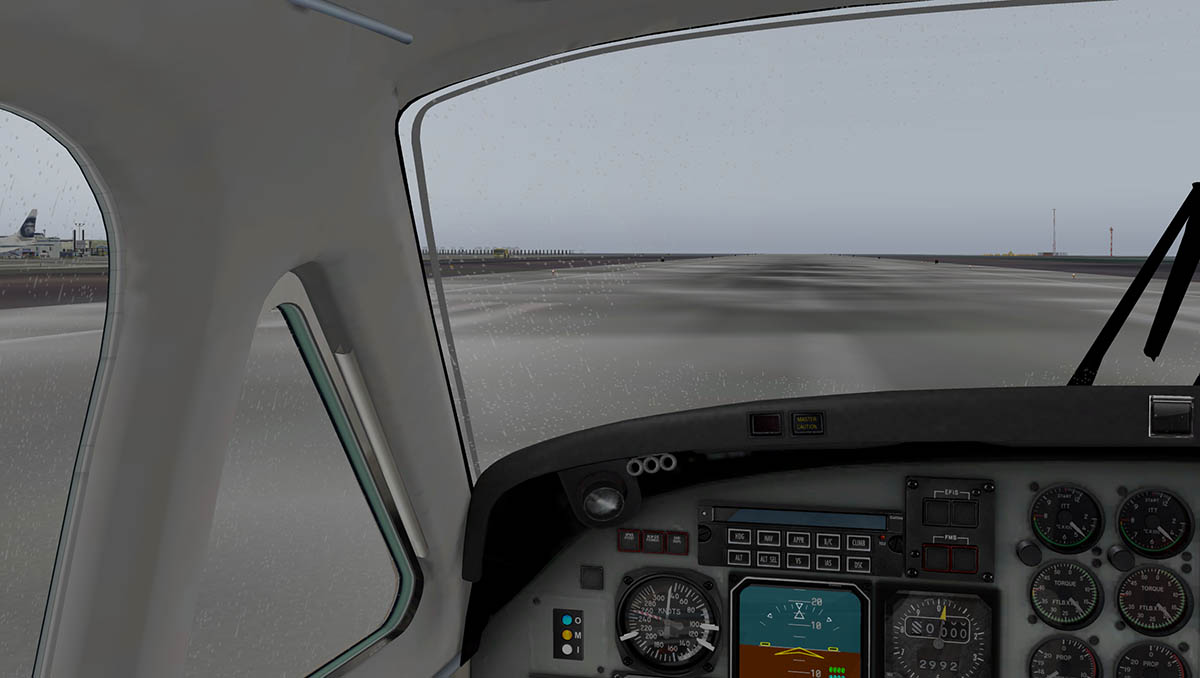
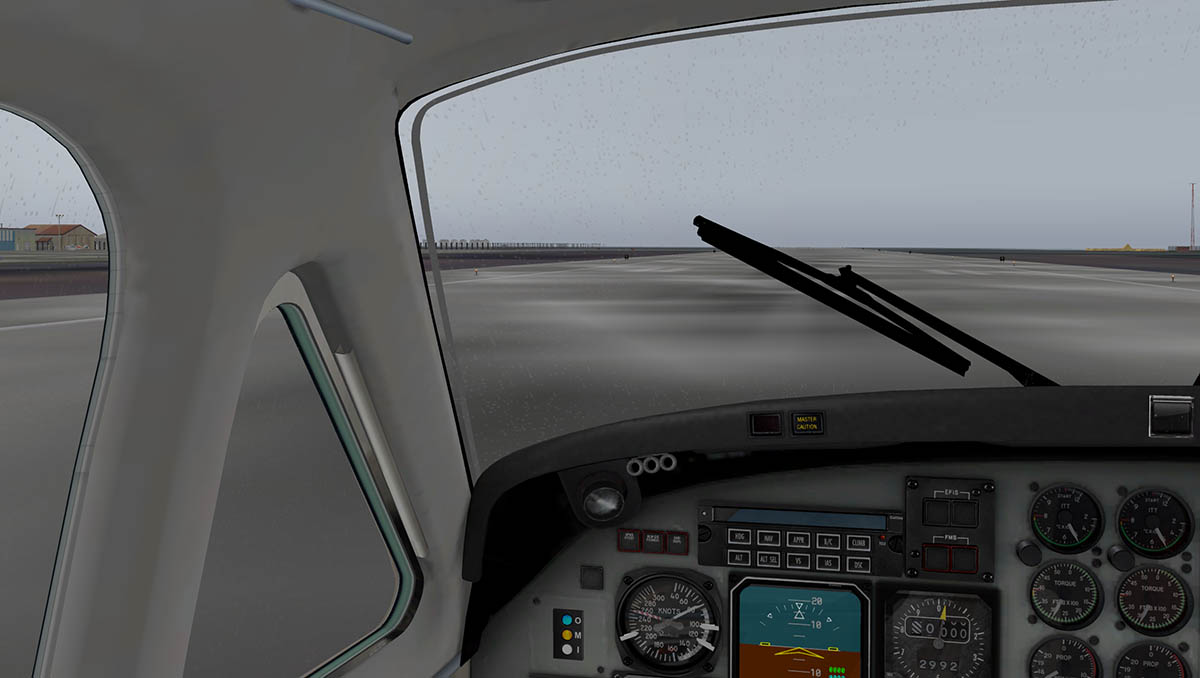

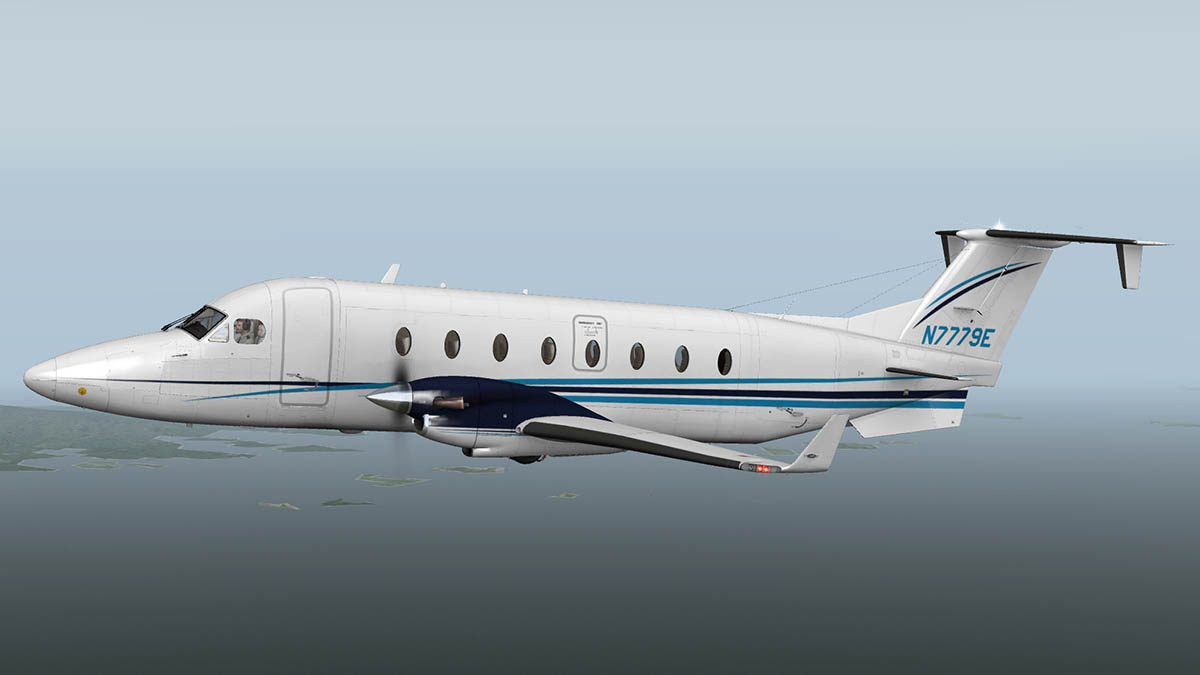


Aircraft Review : Airbus A350 XWB Advanced by FlightFactor
in Airliners Reviews
Posted
Aircraft Review : Airbus A350 XWB Advanced by FlightFactor
Of all the battles for supremacy in commercial aviation then nothing is going to compare with the twin engine market. It already has been a ding-dong battle between the Airbus A320 Series and Boeing's 737 Series and between them they have racked up thousands of sales, ongoing now is the next generation in the A320neo and the 737max to battle it out over the next few decades. A size up in aircraft category is also very complicated, as each manufacturer in Airbus and Boeing are both trying to lock in certain sizes in what is known as the "Big Twins" of the market. The Boeing 777 Series in dominating the market in replacing the veritable Boeing 747 has been very successful, but as airlines move away from the large hub and spoke model and back again to the original point to point services, then what was bigger is now not always better. Point to point markets demand very economical and high frequency services and to fit tightly the 200-350 seater markets, known as long and thin.
The Airbus A330 filled this market, but its range and now being an old aircraft by today's standards and is also uneconomical, it's problem is that the -200 version has the range at 13,400 km (7,200 nmi) but is in the 250 seat market in a two class layout, the -300 can reach 300 seats but its range is restricted to 11,300 km (6,100 nmi). So one or the other don't fit. Boeing's solution is the 787 Dreamliner in 7,850 nmi (14,500 km; 9,030 mi) for the 250-300 seats with the -800 version and sweet spot 8,300 nmi (15,400 km; 9,550 mi) 280-330 seats with the -900 version. That slots the B787 nicely below the Boeing 777 and the coming 777X and fills the market.
For Airbus it has been a two pronged attack to find an aircraft to fit below the A380 and go head to head with the Dreamliner and even the lower hanging fruit of the older 777's. Their solution is the A350-800 with 275-300 seats at 15,300 km (8,260 nmi) and the -900 at 14,350 km (7,750 nmi) with 280-350 seats, and the -1000 to cover the 350 - 370 seat market over the same 14,800 km (7,990 nmi) range which is B777 territory... and to just make sure to fill in all points just below the A350, the A330 will be updated to the neo (New Engine Option) to bring that aircraft up to date and competitive. To change things around and make life interesting the -900 version has been produced first to fill in the gap above the B787-800 and go head to head with the B787-900 and the -1000 version will be next for first flight to go for the B777 replacement sales of the earlier built and well into service aircraft.
After the nightmares of the A380 development. Airbus could not want to have any problems in getting the A350 into service and quickly and as efficiently as possible. The timetable was tight, but Airbus in a way played it safe in using the tested, tried and true components from the bigger A380 and not going for a full composite fuselage like Boeing did with the Dreamliner. The results was an almost perfect first flight that was on time and date, and a testing program that ran almost like clockwork, the aircraft received its type certification on 30 September 2014 and the FAA certification on the 12 November 2014, and it is expected to meet its EIS (Entry Into Service) with Qatar Airways due 13th December 2014 with the first commercial service on the Frankfurt - Doha route in mid-Jan 2015.
At this point the -1000 version of the A350 with a 15,600 km (8,400 nmi) and the 350-370 seats range is due next as the -800 version has stalled with the A330neo option filling in the gap quicker. Cathay Pacific expects to take delivery of its first Airbus A350-1000 in February 2016.
The biggest battle confronting the A350 XWB is it's in service performance figures. Naturally the A350-900 will go almost head to head with the B787 Dreamliner in many markets, but the Dreamliner has a major advantage in it has a 20% reduction in fuel costs. Take this ANA Seattle-Tokyo leg for example as a 747-400 needs at least 136,000kg (300,000lb) to make that trip.
The smaller, leaner 777-300ER needs nearly 100,000kg. But the Dreamliner, the only needs 63,500kg for the same Pacific crossing That is less than half of the B744. Yes they are in some ways different sizes of aircraft but the Dreamliner still has a notable 20% operating cost advantage. And those figures will certainly note the end of the B747's reign once the larger A350-1000 and B787-900 become more prominent around the ramps. The B787 does certainly have an operating cost advantage, but its still weaking 98.3% despatch reliability is going to be Airbus's number one target of the EIS of the A350 and its subsequent in service reliability and more importantly also meeting those high % percentage operational savings will only then mean a full order book or the success of the A350 XWB program.
FlightFactor Aero
No one doubts the quality of FlightFactor aero aircraft. Their Boeing 777 and 757 aircraft have been hugely successful and clever in the extension of the different variants in the "Extended" packages. The surprise was the change to another manufacturer in European Airbus in their next project which is this Airbus A350 XWB.
Another challenge was the fact that Airbus aircraft are very highly intergrated with their Fly-By-Wire and Flight Control Laws, the two Boeing's were very good if not excellent in their flying characteristics, but the Airbus is completely a very different animal and only a few developers can or have been able to duplicate these complex systems for the X-Plane simulator. The best is Torsten Leisk that contributed to the QPAC Airbus A320-232 and Peter Hager's Airbus A380 Series, and here the flight laws and associated airbus fly-by-wire systems have been used in this FlightFactor A350 have been created and enhanced for this next generation of aircraft. In other words you fly the A350 more closer to philosophy and laws of flight than any other Airbus aircraft yet developed for X-Plane.
FlightFactor aero have also with this aircraft created a new category or have split their product line into two separate types of aircraft in professional models (i.e. B777 and B757) and now another in the “advanced” version in that pro models have like lighting effects, particles, menus, high HD 3D graphics, textures and totally fully functional cockpits, and the "Adv" versions are noted as not so in depth but are still as hard to fly as the real machines. But in all but most cases here this "Adv" aircraft is still a very in depth simulation and the aircraft delivers more on flight and systems than most other aircraft in this price range and category, in this case you will not or never feel wanting there is something or a lot missing in the operation of the A350-800.
Design wise with the aircraft power off the A350 XWB is very well designed and developed. detailing outside and inside is excellent, but I found the modeling slightly dark and more so inside. Airbuses have a very bright but grey corporate look about them and it is hard to get any directional light in here to lift the gloom a little. That is not to take away the excellent design work on show here. It is first rate and the best you can have today in X-Plane. Detailing abounds... look at the ailerons with no hydraulic pressure to support them... they all droop down. Why bother doing that? but this is the sort of detail you have around you, and excellent it all is. A start up will give you standing figures around the aircraft, this gives any ramp a busy feel and is well done.
The A350 aircraft is a hard aircraft to model in the fact there is not that much information available except what Airbus gives out with their promotional material, there is no official documents and no in service details to gauge how the aircraft performs or is configured to everyday airline use. Remember FlightFactor would have started this project with even less data than what is available now. In that context they have done remarkably well, but we will have to forgive if in a few areas (and certainly in performance) that the numbers can be slightly off until the official ones start to drip through. Same is to be noted if a few things are missing or slightly wrong with the modelling. On the surface it looks absolutely perfect and very well detailed. Some small items look slightly odd at first in the fact the rear bogies are positioned front down and not rear down as with the B747 hanging undercarriage system. It is correct and so you can be sure if items like this are correct then other details are to.
But close up the undercarriage here is surpremely well done, you expect a lot from a design of this price range and the A350 XWB does not disappoint.
Powering up the A350 XWB
Nothing will really work until you give the aircraft power if you want the full immersion of starting from cold. On the overhead (OH) panel there are two main and two backup power battery buttons.
With power supplied you then need to set the ADIRS (Air. Data Inertial Reference System. ) which are three switches top left of the OH panel. Unlike some Airbus (JARDesign) aircraft there is only a short time frame for the ADIRS's to align.
You have to tell the ADIRS the current position of the aircraft. This can be done two ways with the easiest by pressing the "Force Align IRS"on the "Options" page on the menus and that will align the aircraft to the its current position and start up the ND-Navigation Display. The second option is to select the FMS (Flight Management System) on the rear of the center console (it pops out) and insert your current airport (LFBO) and your destination airport (FAJS) in the FROM/TO box. This will then ask you to "Align IRS" and set up the alignment in that option.
A350 XWB Displays
The A350 comes with six large display screens. (left to right) Capt Outer OIS (Onboard Information System) - Capt Inner EFIS (Electronic Flight Instrument System) which has the PFD (Primary Flight Display) and the ND (Navigation Display) - Center Up is the ECAM (Electronic Centralized Aircraft Monitor) that includes the ED (Engine Display), SD (System Display), Permanent Data, Mailbox and WD (Warning Display) - Center Lower is the MFD (Multi-function Display) which displays the same information as the two outer OIS's - both right displays are a mirror of the Capt's Inner EFIS and and outer OIS for the First Officer. The Lower MFD function is the same as both the outer OIS displays
These three info displays also have a "Cross Pointer" (on the real aircraft displays) that can be aimed to select functions on the screens, some areas on the screens can also have direct input from the keyboard when required. There is another selection for Mouse Users that have scroll wheels... You can select "Manipulate" to scroll, or "Zoom Only" to use the mouse for normal selections. I use the standard single click mouse select way. (the scroll is set in the "Manipulate" state when you start up). You also have the choice to have the FlightFactor Crew visible all the time or just from the outside view
The Lower MFD and the OIS displays can be changed around on both the Capt's side and the F/O's side, not only in their actual position but the inner screens can be switched around as well with the buttons on the pedestal. Noted as "Capt OIS on Center" to move from the outer OIS to the center display and "Display Cycle" to move the smaller split screens around on any of the displays. This makes it very versatile for having the right screen where you need it, I liked the Flight-plan switched around on the right side next to the PFD, and all the panels "pop-out" for ease of use (visually) if you need that function and selection.
Display Menus
The MFD and OIS displays have a lot of menus, almost overwhelming in detail and far too many to do in absolute complete detail here... but we will cover the main areas.
Top left are the main seven menu selections in: (Options) - Ground Service - Weight and Fuel - CAB(in) Announcements - Users Guide - Charts - Options.
We start with the "Options" page that it is not related directly to the A350 but the noted FlightFactor options. You can set the speed you want the simulation to go at in "Time Flow", Difficulty Level, Structural Limits, Baro selection, Default Trans Altitude (direct input), ILS Auto Alighn on start up, Draw lines and Flushing option to default, Auto Pause, FCU Font, MFD Control (the pop-up screens) Mouse Wheel (Scroll) and Auto Helper. Other menu choices are "Auto Cockpit set up" that does all the hard work for you in setting up the aircraft, "Force Align IRS" (see above), "Jump 100nm" and "Jump to next Waypoint" both of these options require the flightplan to be loaded in the FMS. You can adjust the overall sound levels and save all these "Options" settings as default for future use or use the "Restore" to the default option settings.
Ground Service: The menu is split into three selection pages in: Doors & Hatches - Ground Equipment - Pushback.
Doors & Hatches - Pushback
There is a big menu screen that will open and close all the aircraft's doors and cargo hatches. Just select the door you want to open via a tab on the menu. All doors and hatches open and close with a very vocal sound that can be easily heard from the cockpit. You can also "Open" and "Close" all doors and hatches in one selection. The "pushback is very good and simple to use... You have the choice of either to "Push" or "Pull" and selecting one of these will call the tractor and hook it up ready for use. Brakes off and the you can steer and use your throttle to control the tractor.
Ground Equipment
Ground service covers all the equipment attached to the aircraft or servicing the aircraft on the ground. The first left column is all the equipment available to service the aircraft (return to that in a sec..),
The second centre column is the power provided to the aircraft in two GPU's (Ground Power Units) that can be accessed on the OH Panel and required if you don't start up the APU (Auxiliary Power Unit) on-board and either one or the other power source is required to set up the aircraft. The High-Pressure Unit (ground cart) is used to start the engines (or you can use the APU) and can have the AIR or Air-Con to cool the aircraft. Third or right column is the Maintenance Items (not available with this version).
You can select "Stairs" to put a set of stairs at each front left side doors, Or press "Plane at gate" to put a single set of stairs on the rear left door. You wish you could select each door on the left for a stair as the two at left front feels like too many or simply have one at the front and one at the rear, but you can't.
The rest of the ground equipment is a smorgasbord of vehicles and equipment... available are - Chocks, Passenger Bus, Fuel Truck (required for loading the fuel), Luggage Loader, Air-Conditioning unit, ULD Train and a Cleaning (Food?) Truck. All these items make it a very busy area around the aircraft and certainly give a great turnaround service feeling to the simulation.
Weight and Fuel
Here you have three menus that cover both Passengers and Fuel to be loaded (or is loaded) on the A350.
First in "Passengers" you have an excellent menu to select passengers/cargo and set the aircraft's weight. You have four classes to select from and choices of cargo containers "96" Pallets and "LD3's". There is the simple option to select either Light-Middle-Heavy loads that fill the aircraft in one or the other configurations and load your preferences, you can clear the aircraft in one selection as well.
Selection of "Fuel" can adjust your range which is handy because even with a light pass/cargo load can still mean a long range is required between certain long distance point to point flights. You can also cover all the other variations like with contingency and alternative requirements. Then you can load the fuel (Fuel Truck required to be attached) and you can see the loading from the ECAM displays on the flightdeck. When done you will have your correct final aircraft weight and see the fuel distribution.
Third is "Cabin" where you can adjust the lighting and check out the trash and water levels.
CAB (cabin) Announcements
You will have a great time playing with the cabin announcements for your passengers in the rear cabin. There is a lot of choice, but the announcements are very low and inaudible sometimes? Just select what you want announced and press the play button as many times as you want to and annoy them. The cabin is very well appointed and designed in those four classes and the A350 has a great bar and passengers!... a few anyway in the first two classes, and you certainly notice the XWB (Extra Wide Body) of the aircraft with all the space inside.
Users Guide
There is a great built in users guide, that is a manual as well. It is also provided in a .pdf version if you like me use it on an iPad. The User Guide is very highly detailed, with the best way to set up the A350 in X-Plane with features and settings including the (plugin) "key" settings in the X-Plane "Keyboard" menu. For the biggest part though the manual (Users Guide) concentrates on the A350's systems and details, but there is no item by item descriptions on start up or instrument adjustments.
A good companion to the user guide is a full checklist selection, that goes through every item to checked off or needs to be (you just have to know where they are), and itemises each selection as you work your way through the highly-detailed checklists. I recommend to study them to understand them all before using them in a current simulation, if not you will spend too much time sitting on the ramp working them and the positions of where everything is located.
Charts
You have Jepperson charts on your OIS, these are .png images of each chart page and that means you can't just drop in a .pdf downloaded from the internet. There are instructions in the aircraft folder on how to create your own charts and how to insert them for use... Charts provided are for airports: EBBR - EDDF - LGAV and LZIB.
Options is the main menu...
MCDU
The MCDU (Mulifunction Control Display Unit) is positioned at the rear of the pedestal, and as noted it pops-out for convenience.
The MCDU is a quite a simple but powerful affair on the A350. It is certainly not as comprehensive as the FF B777 or B757 versions which are replicas of the real FMC's on the Boeing Aircraft. It is noted that the later "Professional" version of the A350 XWB will have a full working Airbus MCDU. But you are not lacking here in the required basics. In fact it is quite clever in mating the real MCDU to this X-Plane slanted version. The bonus is you can load an already created X-Plane .fms plan from your current flight-plan folder and the MCDU will take care of the rest. You may sometimes have to do the odd join-up in clearing out any F-PLN DISCONTINUITY's to complete the flight-plan and have to also create your own SID/STAR's but I found these items easy to do and sometime far easier than spending hours trying to match up the correct SID/STAR to start or end a flight-plan. I found it just easier and faster to get the damn chart and input the fixes directiy.
INIT You load in a .fms plan on the INIT page via the RK1 (Right Key 1) "
F-PLN gives you your Flight-plan and you can scroll up or down through the fixes and Nav-aids. You can add in the "Overfly" (waypoint) preference if you want to as well. And input any speed/altitude constraints on the route. And you use the "Scratchpad" for input. You can see the flight-Plan on the OIS if you switch the displays around and it is excellent there for following the progress of the flight. The centre fix of the Flight-Plan will show on the ND (Navigation Display) if the NAV switch is set to PLAN.
DIR DIR-TO (Direct-To) you have the direct-to option and the MCDU give you a list of options
PERF You can insert your performance constraints in v1,vR and v2 and select your TRANS ALT in Transition Altitude. Thrust reduction/acceleration altitudes and temp FLEX that not must be below the outside air temperature OAT. PERF pages include: Take Off, Climb, Cruise, Descent, Approach and Go-Around.
Like noted the MCDU is quite comprehensive where it really counts and gives you quite a lot of control over your performance, so the pro's will not be lacking in their ability to input their own constraints and performance tables. Ditto for the learners of this style of FMC in that it is also extremely easy to set up and fly this aircraft and learn the basics on how MCDU/FMC's work differently from a standard X-Plane FMC.
It is well worth filling out all your MCDU data and complete in your preferences in every "single" box. Not only for the obvious in the way the aircraft performs, but also that the data is reflected on the MFD/OIS displays. You can't stress here enough of the importance of the pref data in the way it affects the flight of the aircraft. There are not a lot of entries by comparison to aircraft of this nature, but every data entry is important in the way the aircraft's performance at takeoff and the in the landing.
You have a huge selection of data available from your OIS or MFD displays, In many ways it does mirror what is on the MCDU, and you can input directly into any of these data pages and load even your flight-plan. But the MCDU is quicker as you can do the same inputs on different pages that the MCDU will do once, and you could actually miss a page because there is so many. The Menu is the same as the MCDU buttons in: F-PLN - PERF - Fuel & Load - WIND - INIT, sub-menus cover a myriad of items about performance and your GPS positioning, radio settings, waypoints and fuel. It is really a nerd's heaven in cockpit management.
Your Flight-Plan is one of the best features to monitor. You can select and install it just like you do in any X-Plane FMC (using the MCDU as noted is quicker) But it is the amount of information displayed that keeps you happy in the small hours. And also gives you the biggest note that will actually be there and still flying in the wee small hours? It is important that you set up your X-Plane "Time&Date" slider in how you want to do the flight...
Living in Australia I will set my T&D to early morning or Zulu time to fly in the day. But as all you long-haulers know, the time you leave is calculated to the time you arrive, and here the A350 gives you an advantage, because it not only notes your time at every waypoint on the route but your actual arrival time! And here it is a mind-numbing to bed late 02.28 am in to the next day (or night), more cleverly is that it adjusts as you fly, so if you adjust the speed or have bad headwinds then the time will change to reflect that. So on one flight I lost 9min ETA in a speed change. You have to note that the actual time does not sync to your T&D until wheels up, which is slightly annoying, but once in the air the information is priceless including an update of your fuel load at arrival. It also notes your full distance and each waypoint distances.
So you can see the importance of giving the aircraft all and more importantly the right data for the flight, the more data entered then the more information you get back.
A350 Cockpit
Except for the six display layout which is really the extra two OIS screens on each side, the panel and instrument layout is pure Airbus, If you know the layout of one and even the A320 layout then everything here will be in exactly the same place or position. The only item that is different is the Braking selection in "Autobrake Armed RTO" is a button press for take off and for landing you only have to adjust the braking action to the runway conditions.
The PFD is the standard display with Speed and altitude tapes and V/S (vertical speed) on the right, The artificial horizon with turn indicator and landing ILS bugs are also standard issue. The PFD has the noted Auto-Pilot modes, alpha protections and flight director bars and in the lower section is the trim and flap position. Next is the ND (Navigation Display) with LS-VOR-Nav modes and ARC and PLAN and standard zoom adjustments.
On the OH (Overhead) the aircraft comes with full systems in Top to bottom, Fire, Hydraulics, Fuel, Electrical, Air-Conditioning - Bleed, Anti-Ice and APU-Lighting, I recommend to read through the comprehensive manual on all the aircraft systems, because they are very well detailed. The center ECAM gives you a full display of all the systems and warnings, visual displays cover: Engines, Doors, Wheel, Fuel, EL/AC, EL/DC, Hydraulics, F/CTL, APU, Bleed, Cond (Air) and Press. All systems are functional and superbly reproduced in the center upper display. All pure airbus. The only real disappointment is that you can only fly from the Capt's side? you can't switch or control the aircraft from the F/O's side? and you miss that functionality.
The Autopilot (AP) panel is standard Airbus, but you can only select one item at a time on the ND, you can have your Waypoints or your Nav-Aids but not together. The A350 also has the new X-Plane function of "Pull" or "Push". You can have the aircraft in "Selected" mode "pull" or manual selection or "Managed" mode "push" or automatic by the AP. Just make sure you know which mode you are in. The NDB/VOR selection for the MAP display is here in yellow.
Central pedestal has the Radios, but it is in the MCDU that you set the frequencies for the VOR and ILS Nav-Aids. The ECAM selection buttons are here as is the flap selector in five selections: 0 (retracted) - 1 (1+F) - 2 - 3 - Full. There are 12 slats, 4 Flaps and 2 droop nose devices on the leading edge. Speed brake lever that is quite notchy to select the "Armed" position, so make sure it is engaged on the WD. Engine start is under the throttles to select engines IGN START (1 or 2), The throttle levers are really well done and have all the airbus modes A/THR - FLEX - TO-GA zones. The Reverse Thrust (toggle) is set either as a key or joystick activation on the X-Plane setting "thrust_reverse_toggle" (not "thrust_reverse_hold" like I usually do). To use you pull the throttles back to idle on contact with terra firma, then select the REV toggle (button or Key) and then throttle up to provide the REV thrust. Then Back to idle when required and re-key to disable the REV-THR. This system gives you great flexibility on how much thrust you want to provide for the REV thrust.
Undercarriage actions and animations are first rate. But you have to get the landing right with those forward tilted bogies, the point the rear wheels touch if you get it right should be level with the runway, but it is not as easy as it looks, and they will trip if you get the first set of tyres on the tarmac before the rear set. (on a side note, you have to contact correctly... if you touch down too lightly the thrust reverse doors don't operate?)
Lighting
The internal and external lighting is first rate. The cockpit is a nice place to be for any period of time. It is not that highly adjustable with no moving focus lighting, but still very good with a spot light directly over the pedestal which is very handy. I found a nice sweet spot in just showing the edges of the panel with the overhead lighting as you get a dark panel with just bright buttons and displays with the setting of the overhead turned right down.
And lighting in the footwells which most developers don't do. The reflections are very strong (but very good), but that requires an adjustment of the lighting to see out or landing at night.
External lighting is excellent. Nose (known as take-off lights) and Wing landing lights and Taxi lights, There are very good Runway turn off lights and Wing scan (Ice) lights that light up the leading edges of both wings, both strobe and logo lights can be set to auto or manual on/off and in the right livery the logo-tail light looks excellent. The rest are the standard Nav and Beacon lighting. The cabin lighting is adjustable via the OIS menu "Cabin"and it is very good, but full brightness is to bright, and this menu also shows other items that are related to the cabin and door status.
Liveries
There are eight liveries with the A350 XWB package that includes a White (default), Home, Carbon and Qatar Home. The first four liveries are related to the A350 testing fleet, the other four are the airlines: Air France, British Airways, Lufthansa and a (Tulip) United.
There are sets of 10 liveries you can purchase from different regions of the world that includes Oceania, Africa & Middle East, Asia, Atlantic, Europe 1, Europe 2 and Pacific. That adds up to 70 liveries plus the 8 with the aircraft. Quality is very good but not every airline (like Qantas) are flying the A350 XWB.
Flying the A350 XWB
The Airbus is extraordinarily interesting to fly... To a point you do allow the systems to do the work for you, but it is in the way the aircraft does this that makes it interesting, and how X-Plane now is seeing such great programming in flight. If you have flown an Airbus flight system before then you know how easy it is to set up... set your altitude (32,000ft) and just give the speed and HDG (Heading) buttons a push each to set them ready into "Managed" Mode.
One of the great features here is the VD, or "Vertical Display" on the bottom of your NAV/MAP display. The importance (again) of programming the MCDU is highlighted here. If your flightplan is installed and the prefs "preferences" are filled in then the VD will show with the zoom out over a distance your profile of the climb to your set cruising altitude. The aircraft is very good at finding the very best climb rate (pitch) known as "Op Climb" (Open Climb). The aircraft will over the climb to altitude change the V/S (Vertical Speed) to match the conditions of the climb. That includes the points you retract the flaps and your transition point. Takeoff is brutal, and you can climb easily between 3,500ft per minute to 4,300ft per minute, or in other words almost straight up. Certainly if you have a heavier weight the aircraft (Open Climb) will adjust to the load factors. It is then important you match the correct high pitch on leaving the runway or you will get alarms or the aircraft when you activate the autopilot will pull the aircraft nose up to match the required Op Clb profile.
Once you have left hard stuff and 300ft at the right pitch, then you select the AP1 (Pilot) and ATH (Auto-Thrust) and bring your throttles back into the "A/THR" detent or "THR CLB" on the PFD and the aircraft will then go to the flightplan and correct climb speed while managing the correct thrust and climb rate. To a point it is like riding a Saturn V, you are just sitting there as your climb profile adjusts to the correct vertical speed and is constantly adjusting the speed to flap retraction and transition altitudes. You will find around the orange marker the V/S will drop to about 1400ft per min and then resume when the speed has built up back again to a faster position to 3300ft per min till it again resumes a more relaxed 1600ft per min and continues forever on climbing upwards. Spread out your zoom into the distance and your waypoints (fixes) are noted with the climb profile all the way to your set altitude.
At fixes heading changes then pull the zoom back to 10nm and note the curve of the flightplan to the new heading. The aircraft will turn with a smooth grace along the flightplan line. After the initial FL320, I stepped up to my final cruise height of FL365.
Sounds are very good right through from start-up to cruise, I did find them a bit whiny in the cruise mode and after a period of time they gave me a slight earache. But high-pitch sounds don't agree with me, so that is personal thing... but I'm not that crazy about it... I have been 100m behind the nozzle of a Dreamliner and these new-gen latest high-bypass engines are whisper-quiet "is it actually running?" is how quiet they are, we may need to hear a real A350 XWB to see how different they really are.
You have dual adjustable screens Nav/Map screens, which are great for different perspectives on the landing pattern. And the VD (Vertical Display) is used the same way as the half-moon line on the Boeing 777 to target your initial and final approach heights. The landing brakes are set to their setting and shown on the PFD as: BRK LOW - BRK 2 - BRK 3 - BRK HI (High), the 2 or 3 is medium in the old way. Note the smooth turn curve at a low speed and height, it banks the aircraft perfectly for a final approach.
On finals I took control of the speed and selected, "Selected" mode and 160knts, the purists will roll their eyes but I found the aircraft going too fast in "managed" mode or 270knts and needed to pull that speed back to get ready to align up the runway. You however don't really move out of "managed" mode on descent, So I found it was very important that the QNH "nautical height" is set on the MCDU (FMS). So to set the QNH correctly for the aircraft is to set and adjust the speed to the height (or pressure). Flying an approach with the QNH set correctly was very different than if it was not set, and the speed was then controlled perfectly in the descent.
Handling at low speed is very good, the aircraft will depending on the weight will land even as low as 140knts, the A350 does tend to point nose (pitch) down on the ILS and that can create the issue of pulling the aircraft nose up to flare... but that can be quite compromising in that if you get it wrong in to much high pitch you will suddenly balloon and float (X-Plane issue) or land nose wheel first (not enough pitch) the middle (perfect) position is a bit of a feel to find at first, but possible and easy after a few landings.
Once down and after the armed speedbrakes have activated, then activate the THR-REV (key or joystick button) by opening the REV doors and powering up the throttle. I love the control this system gives you on the amount of thrust you want... off the throttle and then rekey the REV doors to close. Once at taxi speed you can then clean up the aircraft and head for the stand.
Summary
It is in a way a contradiction the A350 XWB from FlightFactor aero. It is massively detailed and certainly with the menus and systems, but there is a simplicity to it as well. It is a clever contradiction because it covers a lot of bases from users that are new to simulation and others which require the very deep immersion that you expect from aircraft of this price range. The A350 will keep both camps very happy indeed, but it is not as deep or as involving as the Boeing 777 or Boeing 757, but then again it is not meant to be either and maybe the "Pro" version will fill in those small gaps.
Like many aircraft released today for X-Plane the A350 XWB is another aircraft that the more you put into it then the more you receive back out again, It is very deep into systems and menus, so a bit of study and flight pre-planning will go a long way in getting the depth that will reward you, so a good start is putting aside some time to study the (excellent) manual that will certainly help in understanding the aircraft and get the best out of it. likewise it is also far easier to quickly set up and fly (certainly with your flight-plans being X-Plane .fms plans) that can allow you to set and fly a flight in a very quick amount of time, even from a cold startup. So you won't be spending a hour or so programming the FMC, if you don't have any saved routes like you do with the B777, B757 or JARdesign's A320neo. However the total replication of a FMS (Flight Management System) like on the B777 and in this case the SID/STAR component is missing for now, do you miss this? well yes and no, no doubt we want the aircraft to be an almost perfect duplication of the the real cockpit, but the ease of programming the route and flight prefs does make it far quicker and gets you flying almost immediately. I miss the First Officer (F/O) point of view of flying the aircraft, and the option of switching from the Capt to the F/O for takeoff and landings, you can assign the joystick to either position, but it is for a visual point only and has no control (or movement on the F/O side). For value, the aircraft is very well priced even if it is as noted not the full "Pro" version, I found the aircraft more feature loaded and with great quality than most aircraft in this competitive price range.
Features abound and you will be the happiest pilot on the ramp of any hub with the way you can set up and service the aircraft. I like to fly the whole deal from start-up to shut down and everything in between including loading and unloading the aircraft. It is not just the flying in simulation that counts, it is the total experience.... and in that department the A350 XWB does not disappoint.
In the flying experience it is very Airbus with the fly-by-wire, alpha protections and control laws, It has the best X-Plane Airbus plugins and you will want for nothing. This is the very best in Airbus flying yet in those perfect airbus automated procedures and laws, even if the aircraft does a better job than you... and that is the Airbus way of flying.
_____________________________________________________________________________________
The Airbus A350-900 XWB Advanced from FlightFactor is NOW Available from the X-Plane.Org Store.
Price is currently US$ 49.95 : Get the - Airbus A350 XWB Advanced - Here
Livery packs at US$10 for ten liveries are available here: A350 Liveries Include: North America, Oceania, Africa & Middle East, Asia, Atlantic, Europe 1, Europe 2 and Pacific.
Documents and Install, Download is 209.10mb, that is unzipped into your Heavy Aircraft Folder of 309.40mb. The aircraft will only fly in X-Plane version 10.30. You have to insert a key to activate the A350 XWB, and it is highly recommended you totally restart and reload the A350 XWB from scratch from the desktop. To align the (SASL) plugin correctly.
Features
Fully custom aircraft systems (elec, hyd, air cond, ADIRU, etc.)
Fully custom ECAM monitoring system with all screens and functions included
Fully functional airbus style alert system with multiple status and procedural lists
Fully functional interactive airbus electronic checklist system
Airbus a350/a380 unique “touch screen” interfaces with dozens of screens and hundreds of functions
Fully custom and unique MFD (multifunctional display) system with most of flight planning pages implemented in a new graphical interface, as well as FCU and radio backups just like on the real plane
Full OIS screen system with options, ground equipment control, passenger and cargo loading, and even a full user’s manual inside the plane.
Old style MCDU and fully functional aux instruments as backup.
Full FBW with Highly realistic implementation of the Airbus “normal law” by QPAC – the most realistic fly-by-wire implementation for desktop flight simulation.
In v1.0 an advanced flight planning interface (based on XP native data)
Basic SID/STAR implementation using X-plane fms-files that you can create yourself and share with the community.
"What you see is what you fly" flight path indication on the ND (i.e. curved trajectories with the turn radius properly computed based on speed and angular turn distance.)
Implementation of all Airbus AP modes, except some non-precision approach modes (Selected and managed modes, speed constraints respected, "at or below" contraints in phase climb, "at or above" constraints in phase descent.)
Full PFD and ND displays with fully independent display and different data sources for the captain and copilot displays.
Independent autopilots
Many new options like scroll wheel support for switch manipulation
A very advanced 3D model with HD textures and complete and animated mechanics.
______________________________________
Review by Stephen Dutton
7th December 2014
Copyright©2014 : X-Plane Reviews
Technical Requirements:
Windows - Linux Fully Supported
Mac: Beta version at this time only - Please only buy the Mac version if you feel you can be a beta tester.
1Gb VRAM, 4Gb RAM
Current version: v1.0. Last updated: December 7th, 2014
Updated store#
Review System Specifications:
Computer System:
- 2.66 Ghz Intel Core i5 iMac 27”
- 6 Gb 1067 Mhz DDR3
- ATI Radeon HD 4850 512mb
Software:
- Mac OS Mavericks 10.9.4
- X-Plane 10 Global ver 10.30 (final)
Addons
- Saitek x52 Pro system Joystick and Throttle
- Bose - Soundlink Mini
Scenery
- LFBO Toulouse-Blagnac - Aerosoft (New X-Plane.OrgShop US$21.50)
- FAJS O.R. Tambo International Airport - tdg (Free .Org)