

Stephen
-
Posts
2740 -
Joined
-
Last visited
-
Days Won
359
Content Type
Profiles
Forums
Articles
Posts posted by Stephen
-
-

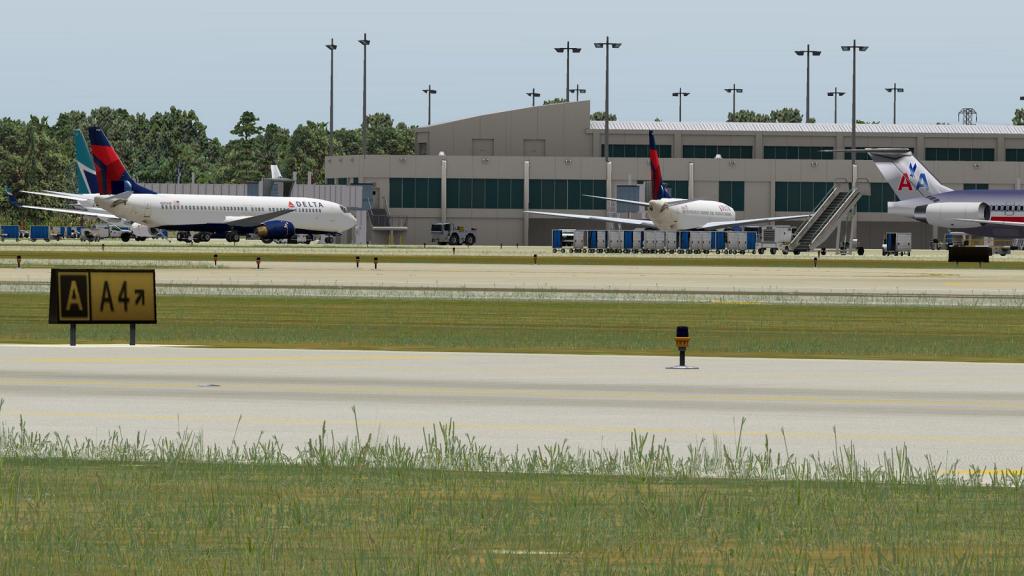
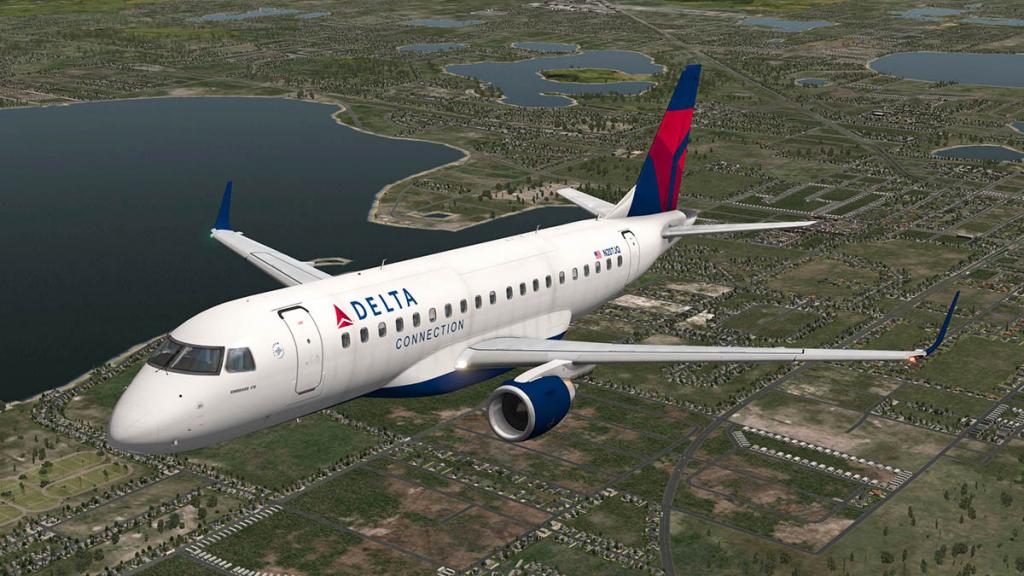
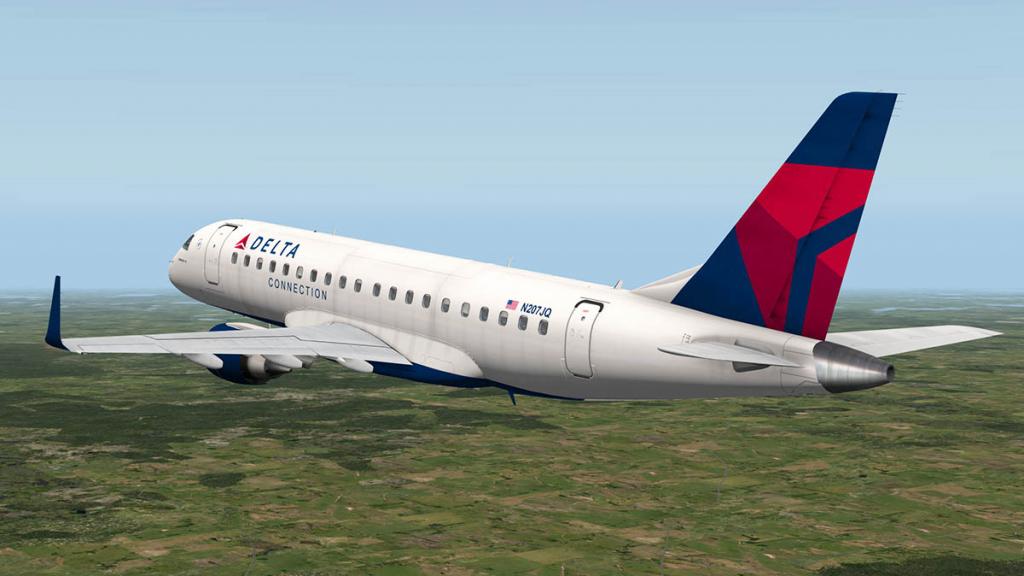
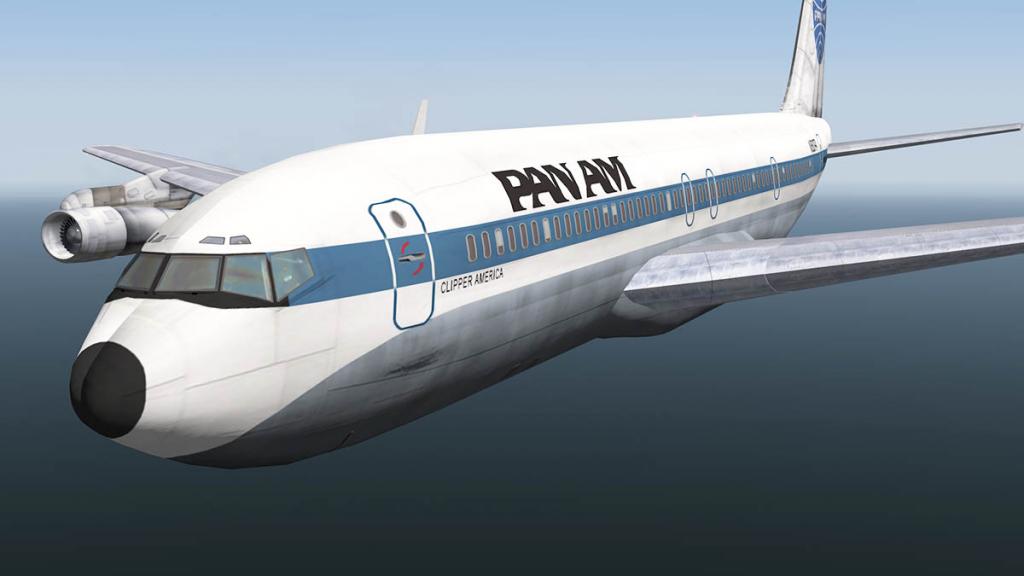
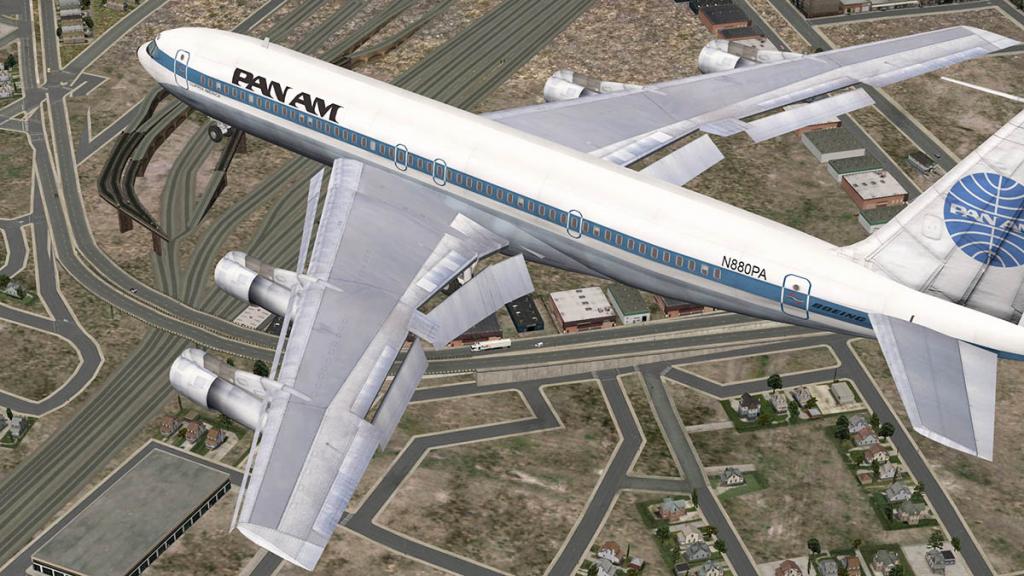
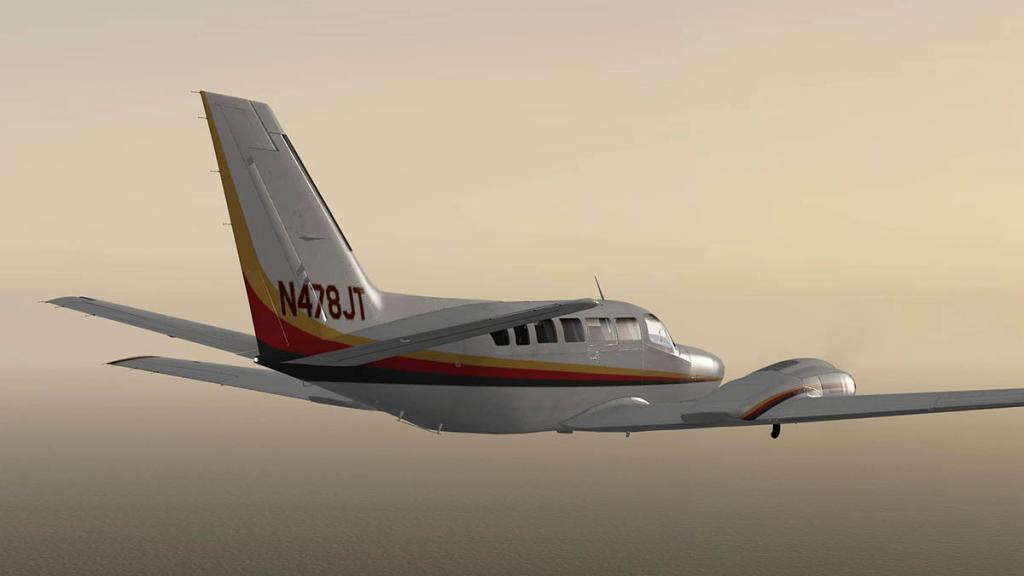
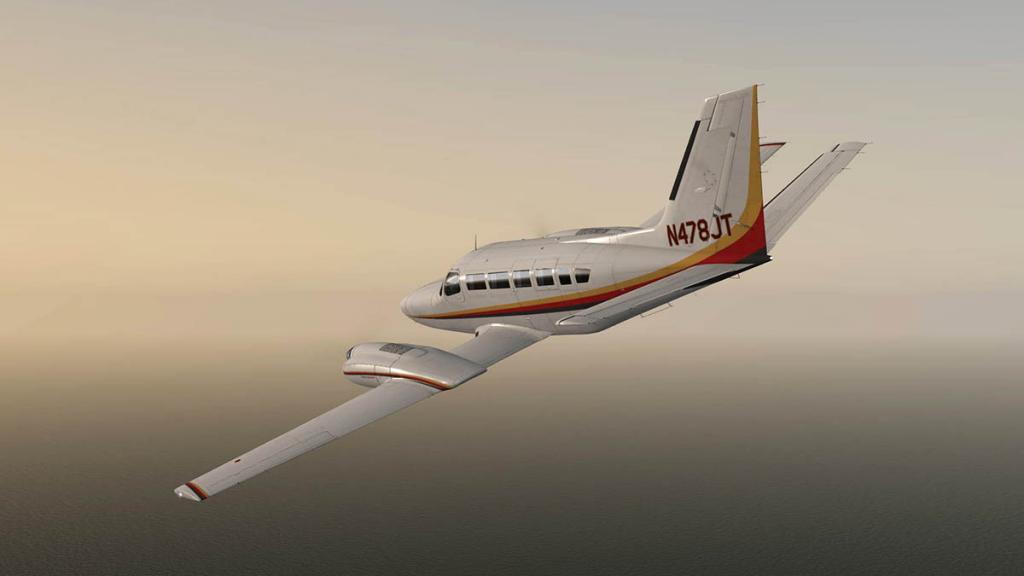
Aircraft Release: McDonnell Douglas MD-88 by Rotate
Rotate has released their version of the McDonnell Douglas MD-88. This aircraft is available on the X-Plane.OrgStore NOW!.
This is not a review but a preview and my very first impressions of the aircraft to give you guide on what the MD-88 is actually like and what is available on the aircraft.
One thing I will make clear is that the MD80-88 series is my holy grail aircraft (only the Vickers VC10 is above this series in desirability). I have watched countless hours of YouTube in cockpit videos of the MD-Series that have sent my family against me and would put me in court if they could... guilty as charged. So the release of an aircraft of this desirability could but won't make for a bias against the aircraft... in other words the aircraft had a lot to live up to, with almost impossible standards of what I wanted in X-Plane from this machine. And from the moment the first images appeared on Rotate's site (Rotate.Com) they drove me more and more delirious but also more and more worried of the amount of expectation of the aircraft matching my actual orbital expectations.
My biggest morbid fear was that the MD-88 would have everything I wanted, absolutely everything... but I wouldn't be able to actually fly it?
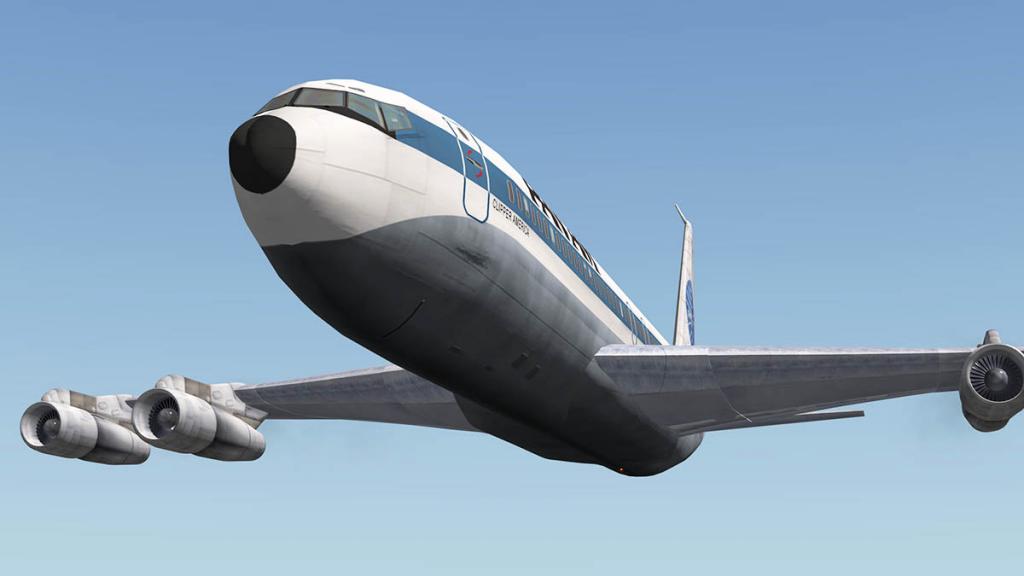
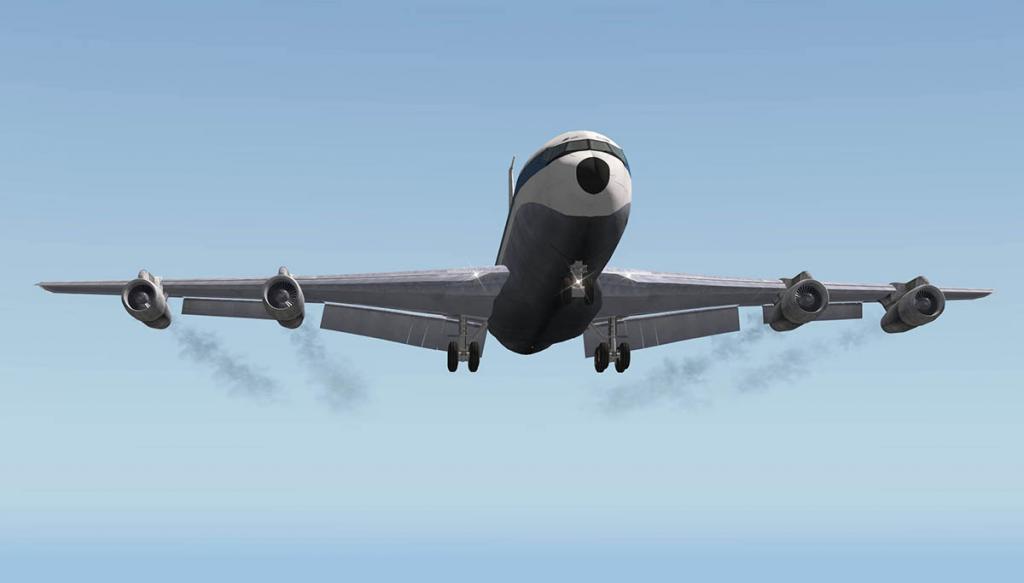
The aircraft textures are huge, in size and quality. Average size is around 200mb and first reports were as the aircraft was a frameweight killer, that would be a sink hole of pain for me. So the first big relief is that the MD-88 is very good on framerate and about the same as most other similiar sized and featured aircraft in X-Plane, so as to using it and flying the MD-88 I have only the same usual routine things to deal with that is just normal simulation use... a real phew! moment.
Yes it is a heavy aircraft on your frameweight, but usability is still easily possible, and there is a few tricks as well that can take a little more weight out of the aircraft if you are pushing the framerate boundaries, overall for what you get it is extremely good.
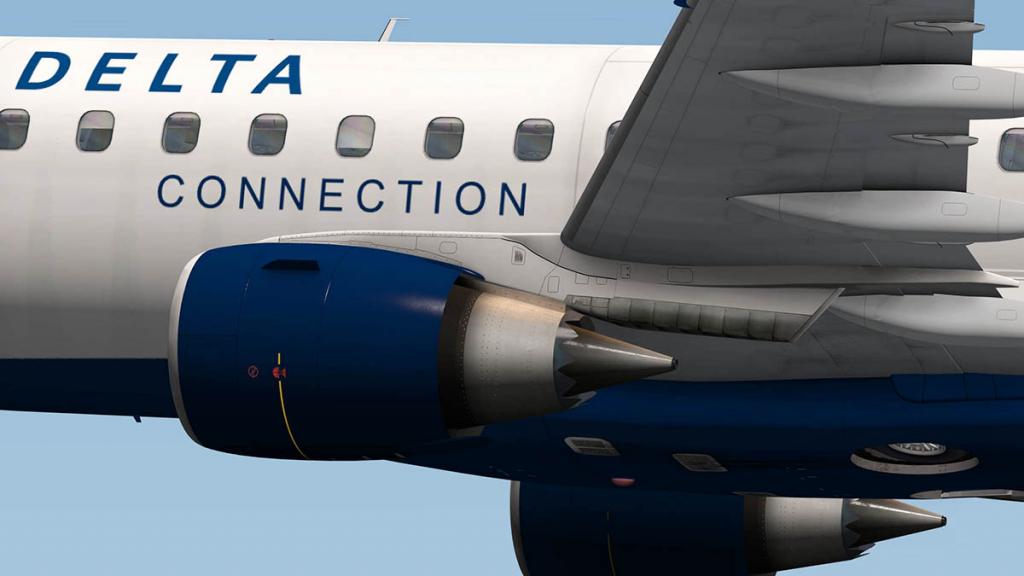
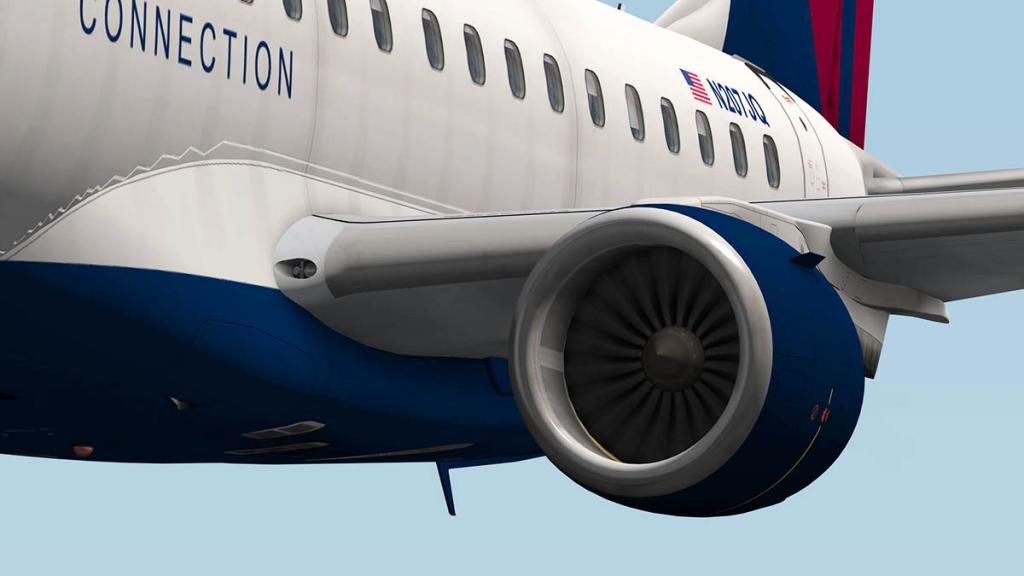
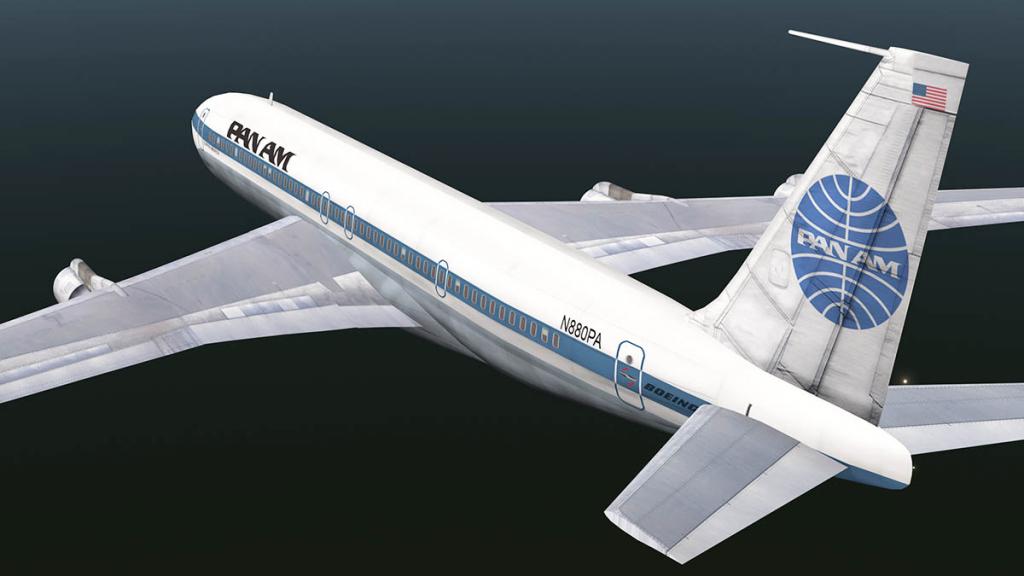
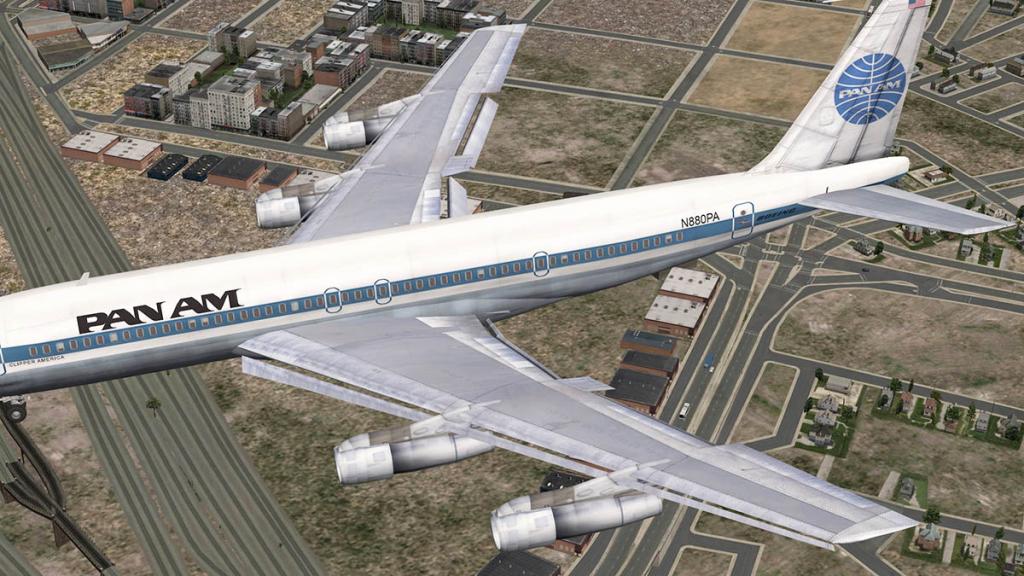
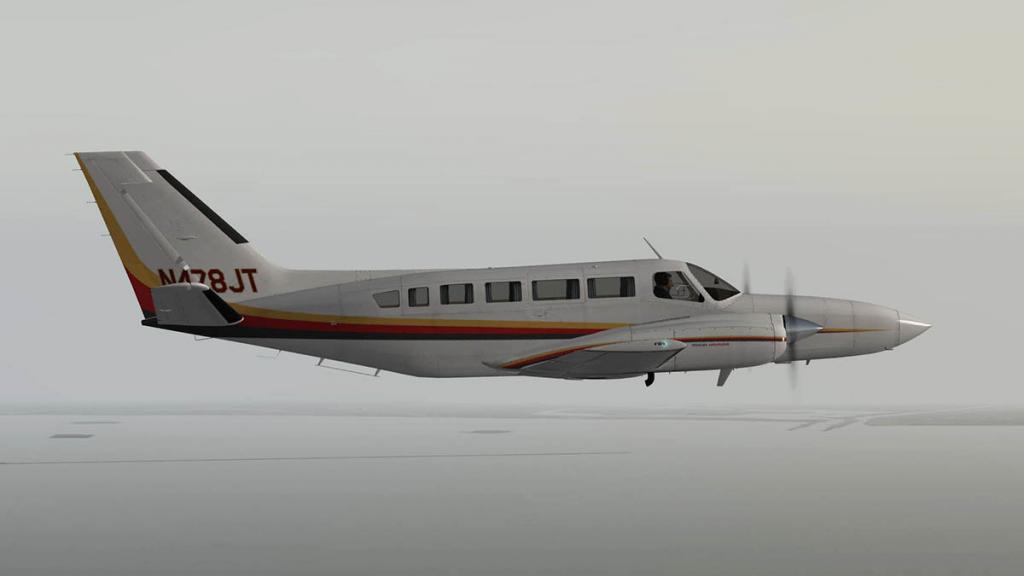
With that sort of quality large (I mean huge) livery texture files then the detailing here is off the planet, brilliant to excellent.
So there is no doubt Rotate's MD-88 looks the job, it is very, very good.
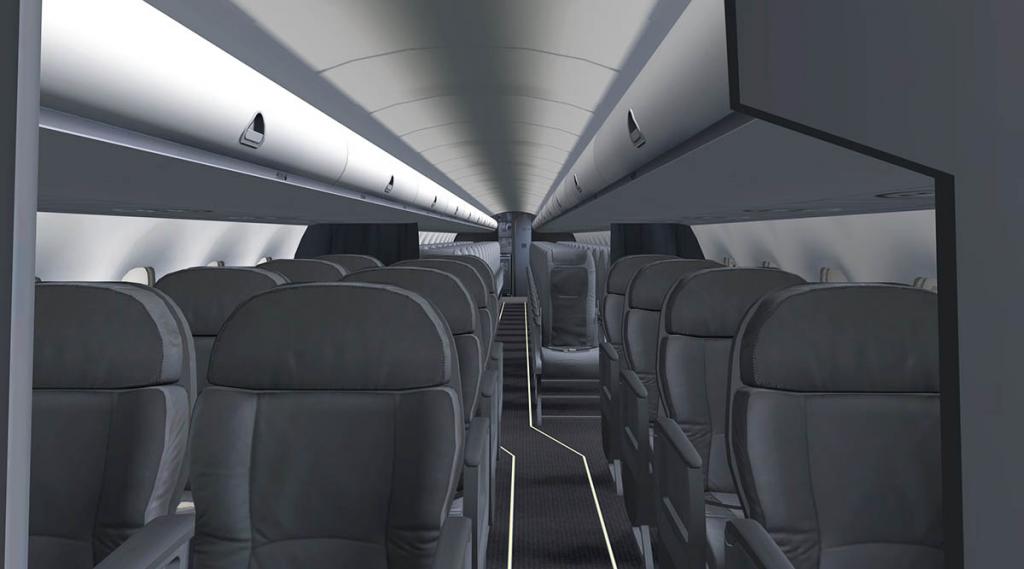
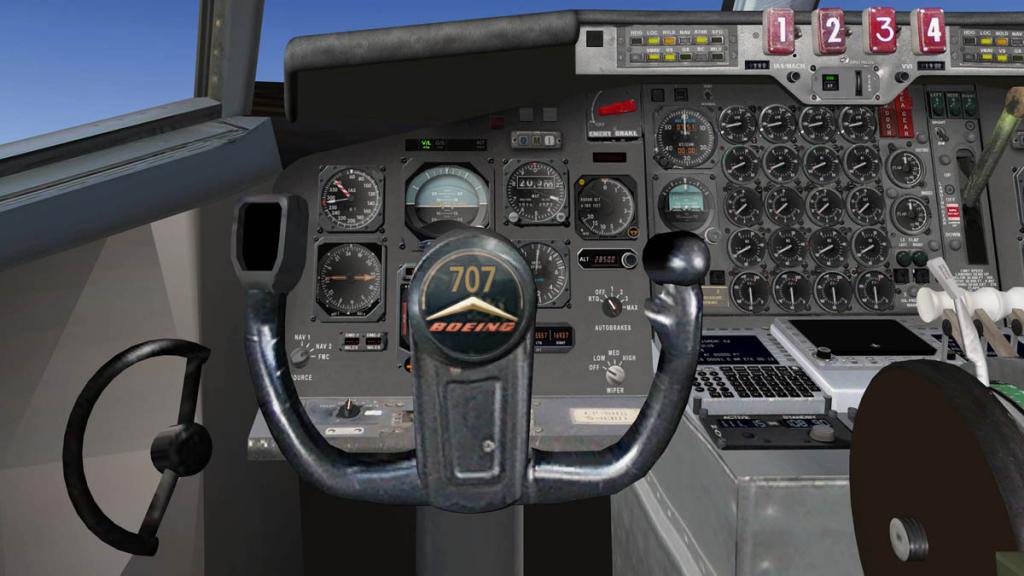
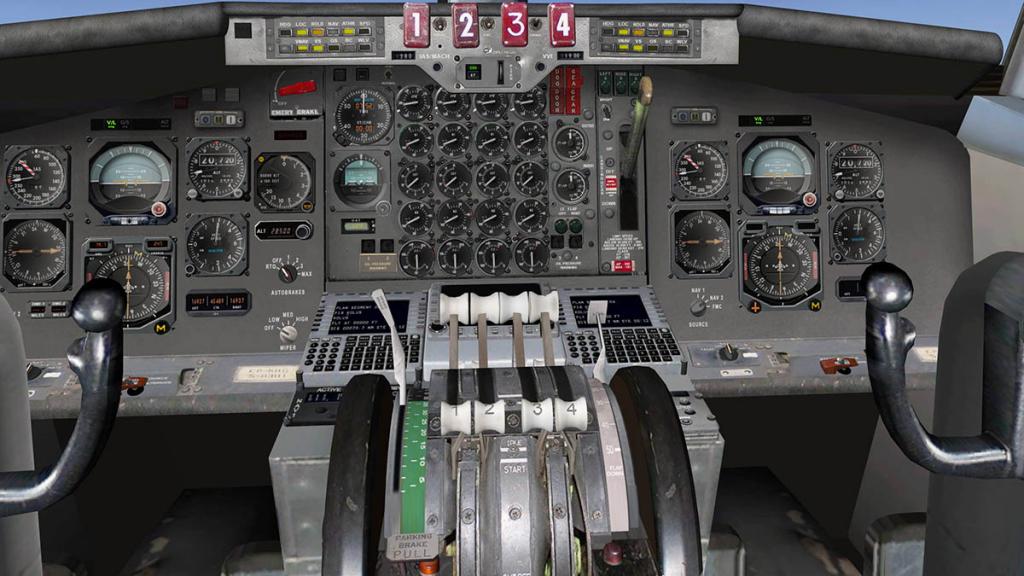
The cockpit is very highly detailed and has a sort of FlyJSim B727 feel about it, but that maybe because it is the same period design as the MD series was a follow on from the iconic 60's DC-9 aircraft.
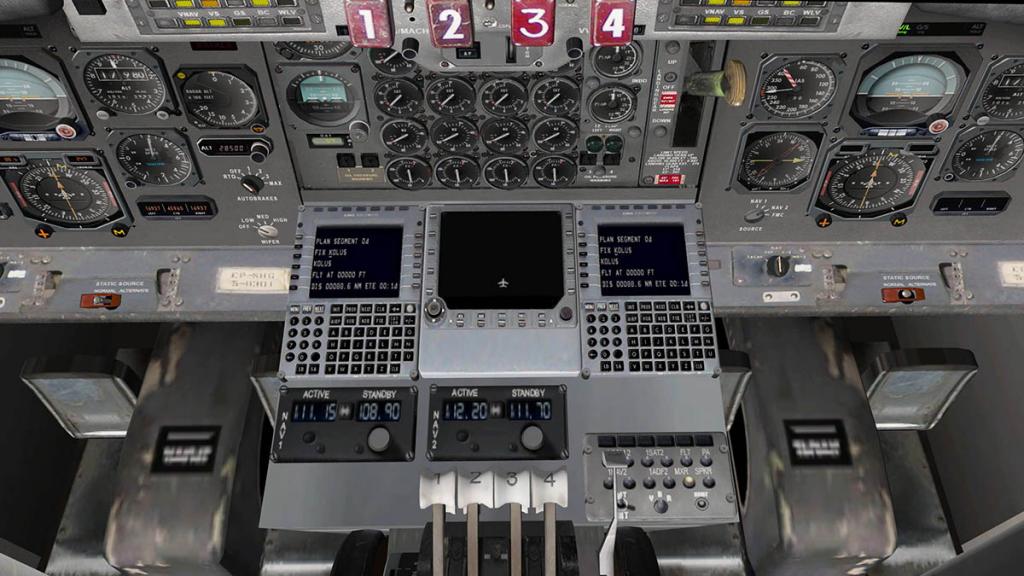
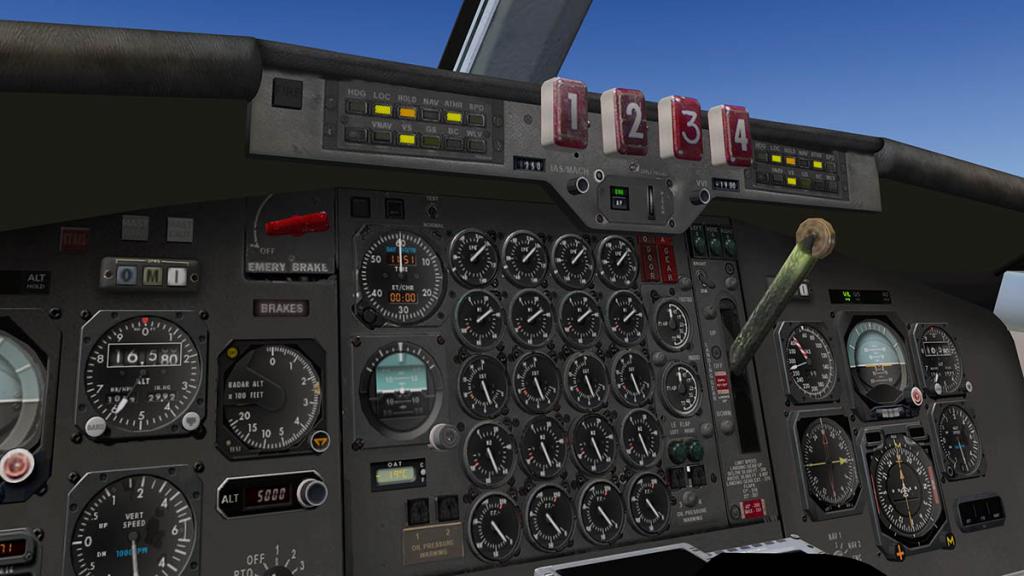
The cockpit is that sweet period between the old analogue world and the newfangled electronic glass panels design, which is mostly analogue with the PFD (Primary Flight Display) and MAP/NAV screen in glass panel instruments. but it is beautifully done. This is the MD-80 series cockpit you dreamed about, and here you are finally in the drivers seat...
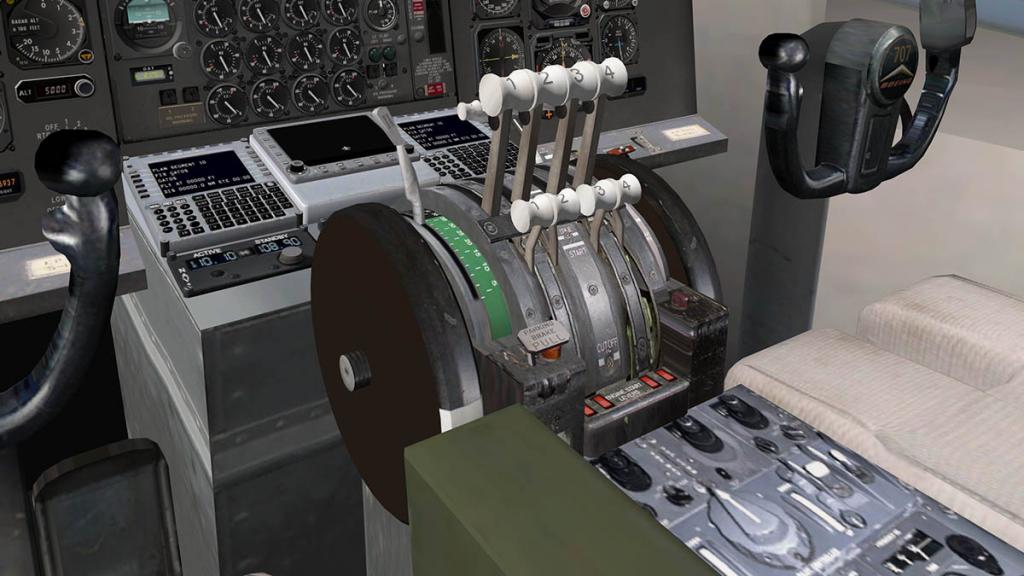
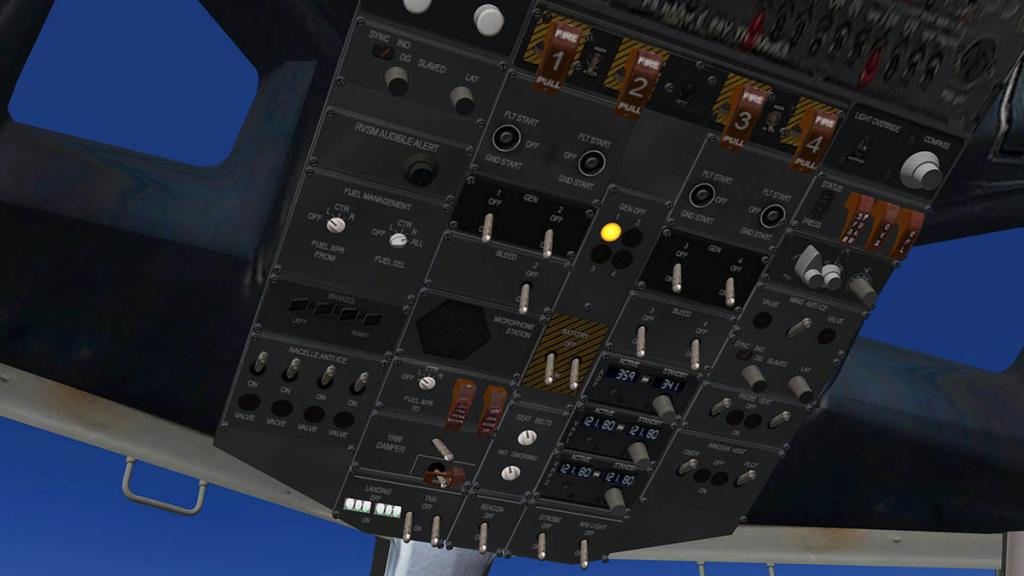
The overhead panel is a dream or a nightmare depending on which angle you to come to it on, Yes it is well laid out and functional, but boy there are so many switches and knobs that you will need a lot of time and focus to get the whole lot into your head, even now I am still feeling my way around the board, but the biggest advice I can give is that there is both a very good aircraft manual and excellent Tutorial Flight manual and I suggest you understand both well before doing any serious flying... The aircraft is complex, it has a lot of settings and switches and parameters to set up and adhere to, and you won't fly the MD-80 like a complete pro for many, many flights. It is complex and huge fun and a brilliant simulation. A note that not every single switch works, most aircraft systems are reproduced here so you are wanting nothing in that department, but some of the minor switches are just dummies, hopefully they will be activated in future updates.
The MD-88 aircraft was called "Mad Dog" for a reason, yes the initials make up the name, but the reasoning behind the name is that if you press the "Go-Around" button the aircraft as quoted "The throttles go all the way to full power, the nose shoots up, the airplane rattles and roars like never before." it is known to scare the living daylights out of any seasoned pilot... I haven't had the nerve to try that one yet.
Flight instruments are excellent, but the yoke hides the lower MAP/NAV display. The Autopilot is wonderful, but it is nothing like your standard Airbus or even Boeing standard layout... but in operation you will love its functionality.
Start up and shut down procedures are long, complex and hugely enjoyable if you are a procedure freak like me. I want realism, and you certainly get that here, but the lead up to flight times are long...
The FMC (Flight Management Computer is thankfully rock solid and very detailed and versatile. There is the odd SID/STAR editing, but that is par of course in most cases anyway, but there is no popup display.
One thing you do notice is that it is a very noisy cockpit, not the actual sounds which are excellent, especially the engine start up which turns up hairs on your neck... but the alerts and alarms, they are loud and they are frequent and even off putting when you are in critical stages of flight. But they note that the real MD-80 pilots got used to them and edited them out, but if any pilot would end up in the loony bin with strange loud noises in their heads it is these MD flyboys.
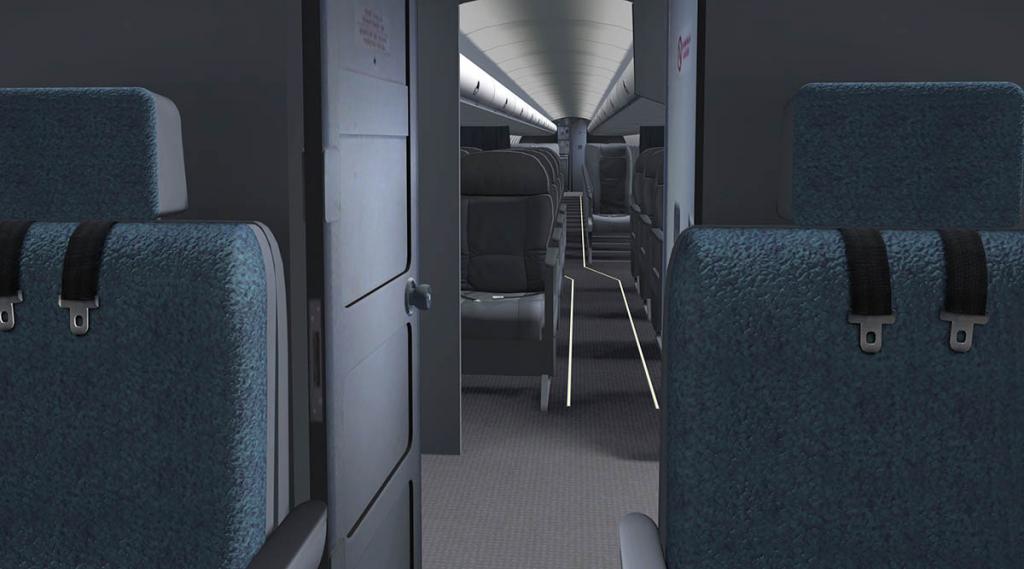
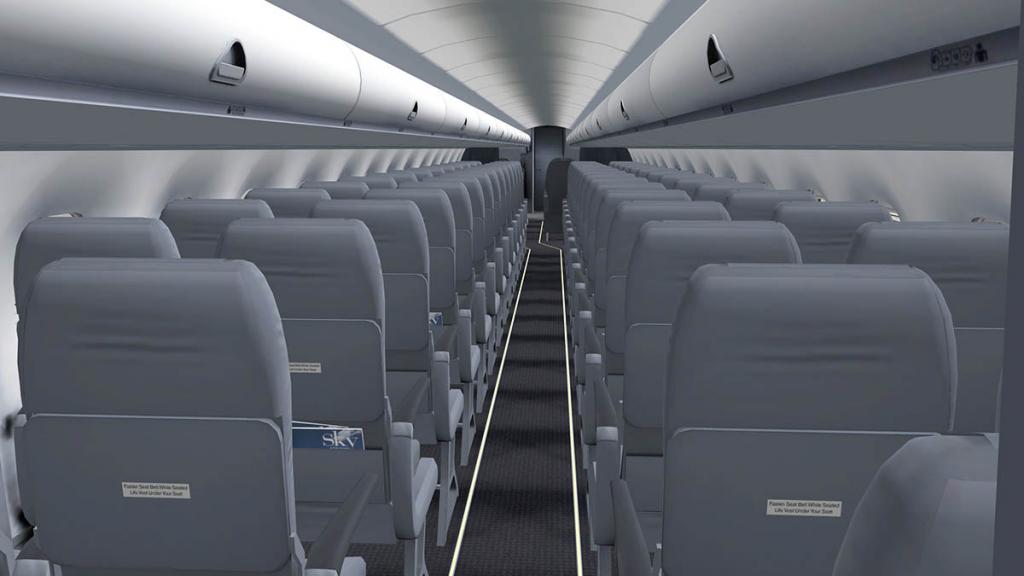
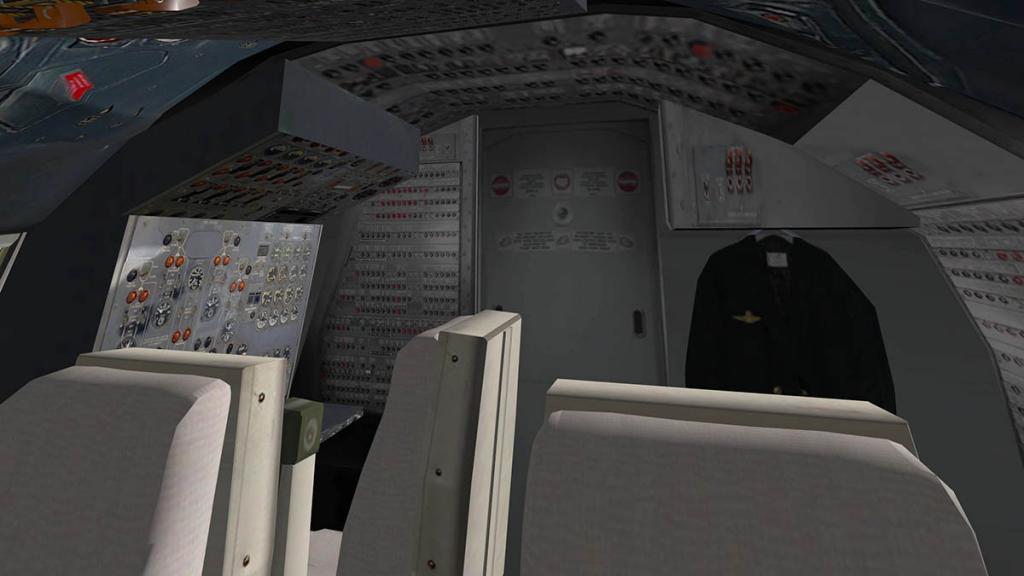
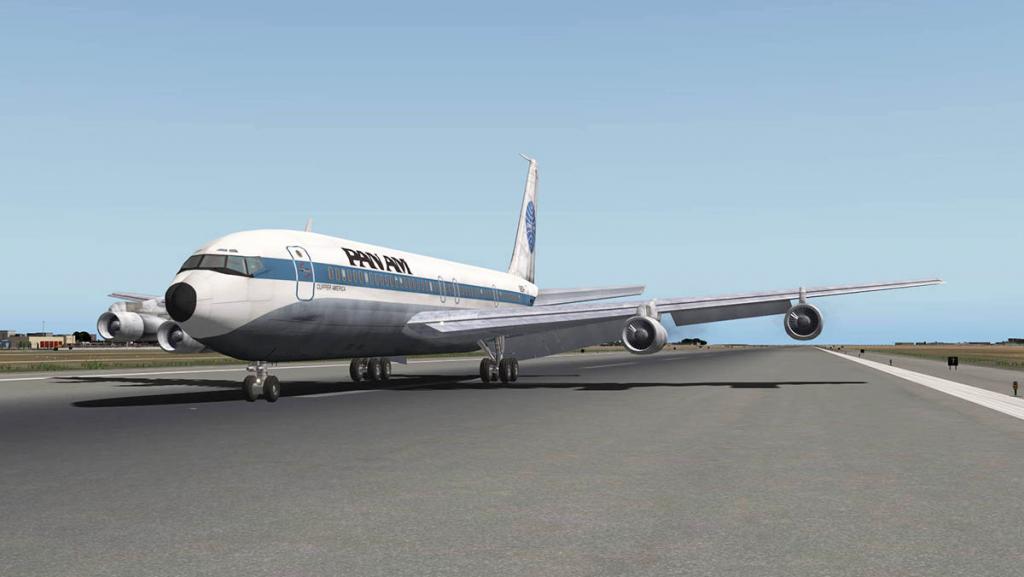
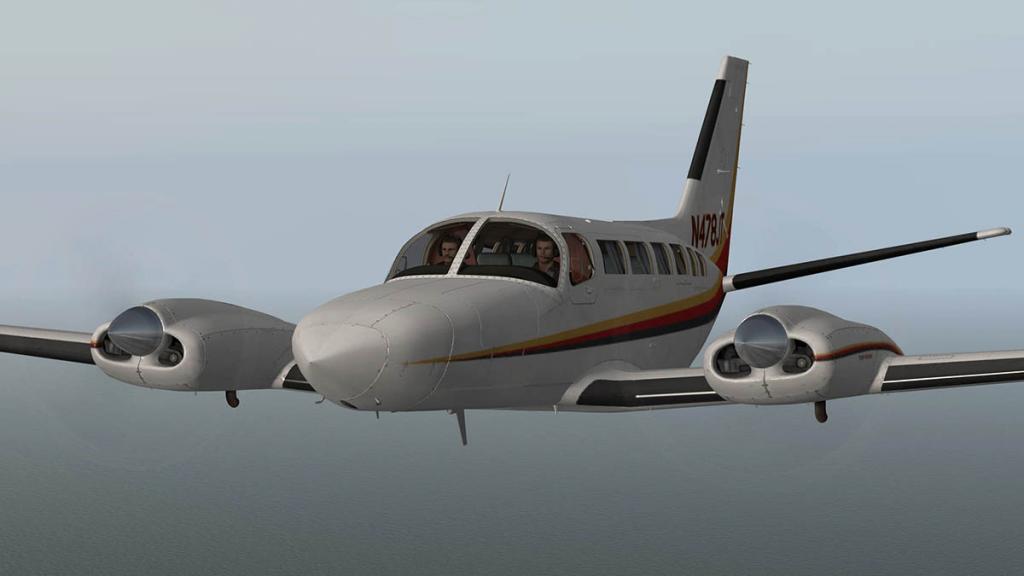
Full cabin is modeled and is very well detailed, very realistic. For the window-huggers (yes I am one) the view out is excellent.
For external features you get opening front and tail doors (beautifully animated and detailed) and three side cargo doors, and a GPU (Ground Power Unit) all controlled from the MCDU. but no pushback truck, chocks, visual checklist (there is a good printout checklist provided) or special effects like rain or misting which would have greatly enhanced the package.
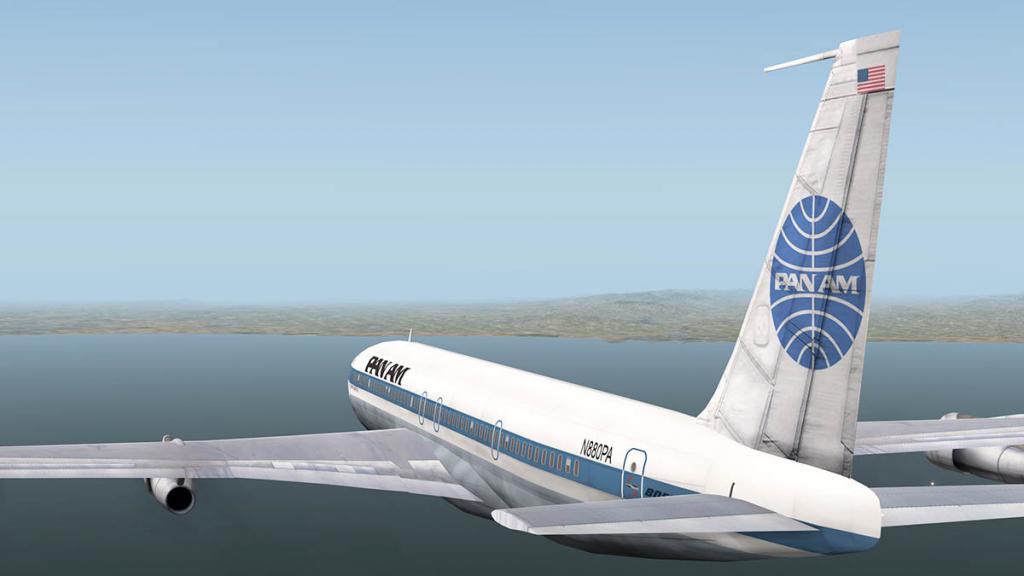
Liveries
As noted the quality of the liveries are outstanding. Rotate's own livery is default, with Alitalia, Air Liberte, Two Delta's in the "Wavy Gravy" or "Flowing Fabric" version which satisfy none one as the modern version is the "widget' version (odd choice), the old Delta "Classic", SAS, Iberia, American Airlines (metal classic), Allengiant, German Wings and an old BIA (British Island Airways)
So did the Rotate MD-88 live up to my disproportionate even excessive exorbitant standards? Yes it did, in the end I am a realist in what it actually delivered. It is tricky to fly, noisy, lots of set up, lots of detail to get through, but isn't that the reason we fly these complex aircraft in the first place... I note it will take time to be totally immersed in this aircraft, but then again time is one thing that is free and let us note "it is the journey, not the destination" that makes it all worthwhile... even if it changes you slowly into a raving "Mad Dog".
Yes! the McDonnell Douglas MD-88 by Rotate is NOW available from the new X-Plane.Org Store here :
Price is US$59.95
Developer Rotate - Rotate.Com
Developer Support - MD80 - X-Plane.Org
____________________________________________________
Features
Custom Flight Management System (FMS) and Automatic Flight- Route, departures and arrivals procedures (SIDs and STARs)
- Save and load route to/from text file
- Performance management, cost index and optimal altitude and speed calculation
- Custom VNAV. Climb, cruise and descend management with altitude and speed restrictions
- Takeoff and approach speed management
- Custom Navigation Display
- Improved autopilot with specific horizontal and vertical modes
- All EPR performance modes
- Flight Mode Annunciator
- Aerosoft NavDataPro (2014) included (for updated database third party subscription is needed)
Detailed simulation of systems- Power plant
- Electrical
- Pneumatic and pressurization
- Slat/flap controls with dial-a-flap feature
- Takeoff trim computer
- Customized alert and failures
Hyper-realistic visuals- Highly detailed 3D cockpit, passenger cabin and exterior model
- Normal and specular maps for enhanced detail
- Thorough HD day and night textures
- Accurate animations, including wing flex animation
- All external and internal lights\
Liveries:- A set of ten ultra-high resolution liveries, including a paintkit
Custom sounds- 3D sound engine with stereo and doppler effects
- High quality multi-layered engine sounds
- Cockpit ambient and custom alerts
__________________________________________
Requirements
64 bit operating systemWindows Vista/7/8/10, OSX 10.8 and up, Linux Ubuntu 14.04 (or compatible) and upX-Plane 10.31+ (any edition) running in 64bit modeProcessor: Multi-core Processor 3.3GHz8 GB RAM -Hard Disk: 3.3 GBGraphics: 2GB VRAM (3 GB VRAM or more for best performance)____________________________________________Preview by Stephen Dutton8th December 2015Copyright©2015: X-PlaneReviews
-
18 minutes ago, Guest said:
Hallo Stephen,
my question is if the scenery includes also air traffic on ground and above the airport?
I saw the official video and it shows a lot of aircraft movements, but you didn't discuss this point........
Regards
ilankrt
I noted in the review
"Turn to taxiway N is required but you can't stay on this section. If you run the WorldTraffic 2.0 plugin from Classic Jet Simulations (highly recommended) there are some great sets of ground routes available for SBGL here: GroundRoutes_SBGL v1.0"
WorldTraffic is plugin that creates ground and air traffic, very good it is as well, but it is not included with the scenery, and only as an add-on plugin.
-

News! - Sale! - Black Friday Sales
Yes people it is that time of the year again and the wallet is going to get a big work through... Black Friday Sales are here and the goodies are just stacked up and waiting...
You will get 20% to 50% off some great selected products and many are ones that have passed through this review site over the last year.
So go to your excellent:
 Store
Store
And have a browse!
Go Here:
Note the excellent WorldTraffic is on sale, and future updates are included! (my choice).
Stephen Dutton27th November 2015Copyright©2015: X-PlaneReviews
-
2 hours ago, Guest Shyu said:
Do we have KRHV?
There is no Payware version of KRHV - Reid-Hillview San Jose. But there is good KRHV version on the X-Plane.Org - here: http://forums.x-plane.org/index.php?app=downloads&showfile=17856
There is "global Airport" version as well so be careful they don't clash... SD
-
7 hours ago, Guest said:
I thought my money was well spent with this product. It's such a beautiful airplane I just stare at it parked on the ramp. Still learning to fly it but it's worth the patience. I know others will want more with no not complaints from me. They will help a great product get even better. Great job!!!
Yes lovely isn't it and DDen is bringing us next the amazing new Bombardier Global 6000, can't wait for that beauty. SD
-
News! - Now Released! - KRSW Aerosoft Southwest Florida Intl by Aerosoft
KRSW is now available at the price of US$24.95
Images have been released of KRSW - Southwest Florida Intl in Fort Meyers, Florida as Aerosoft's newest scenery release.
Features include:
- 10 cm/pixel aerial orthoimagery covering the entire airport (approx. 8.41 sq. km)
- 1 cm/pixel custom ground detail/markings
- True-to-life pavement, not repetitive textures
- Never-before-done, hand-placed pavement seams covering the entire airport apron, runway and taxiways
- Baked-in, ray-traced ambient occlusion on all major buildings
- Baked-in, ray-traced night illumination on the airport terminal building
- Specular reflections and all-HDR lighting (no hand-painted lighting)
- Accurate building heights, measured using LIDAR (Light Detection and Ranging) elevation data
- Designed using efficient modelling techniques and X-Plane 10-native methods for maximum performance without compromising on quality
- Animated jet bridges and marshallers at all gates (using the freely available AutoGate plugin by Jonathan Harris)
- Static aircraft as an option
- Animated and static ground vehicles
- Volumetric grass
- Road traffic
- Compatible with HD Mesh Scenery v3 by Andras Fabian


The Airport Southwest Florida International is located on the south-western coast of Florida and is the second busiest single-runway airport in the U.S. handling around 8 million passengers a year.
This model of the Southwest Florida Intl Airport for X-Plane 10 offers a highly detailed reproduction of the real airport thanks to its 10cm/pixel aerial image and 1cm/pixel ground layout. The developer made sure to use non-repetitive textures. Baked night illumination and ambient occlusion as well as HDR lighting complete the visual impression, while static aircraft, road traffic and both animated and static apron vehicles create a lively area. Additionally, the scenery is compatible with the AutoGate plug-in, adding animated jet bridges and marshallers at all gates, as well as with the HD Mesh Scenery by Andras Fabian.
______________________________________________________________________
Yes! the KRSW - Southwest Florida International Airport by Aerosoft is now available from the new X-Plane.Org Store here :
KRSW - Southwest Florida International Airport
Price is US$24.99

Southwest Florida International Airport XP
Price is Eur €20.13 (no VAT)
______________________________________________________________________
Requirements
X-Plane 10.40 + (any edition)
Windows Vista / 7 / 8 / 10; Linux; Mac
Multi Core Processor (CPU): Quad Core 3,0 GHz
Minimum 8 GB RAM
2 GB Free Hard Disc Space
2 GB of on-board, dedicated VRAM
Download-Size: 1.46GBStephen Dutton
Updated : 21st November 2015
Copyright©2015: X-PlaneReviews

-
News! - Updated - Boeing 747-8 Series V1.4 by Supercritical Simulations Group (SSG)
Supercritical Simulations Group have updated the huge Boeing 748 Series to version v1.4.

SSG below have noted the main changes....
"This update brings terrain displays to both pilot and copilot navigation displays (NDs). This is part of the Enhanced Ground Proximity Warning System (EGPWS), which is installed in the real aircraft, and is quite complex in operation and capabilities. However, the most visible part of the system is the terrain display on the NDs. The terrain display is much like that of a radar, sweeping the flight path ahead of the aircraft and showing terrain that might pose a threat to the aircraft in color coded fashion from green to red, even showing areas of water in blue. As the aircraft climbs and descends, or the range scale is changed on the ND, the terrain display changes accordingly."


Also, external textures and normals (the textures that create realism and raised surfaces) have been enhanced with added details and all the default liveries have been redone.
Other improvements, bug and fix changes in v1.4 include:
- Fixed issue where some users experienced moving artifacts in the external model.
- Fixed issue reported by some users where the parking brake would switch off when changing aircraft loads.
- Problem with some cockpit sounds activating incorrectly has been fixed.
- Added functionality to the switch that allows the ND and PFD to switch between magnetic and true heading.
- Improved TCAS function with targets now limited to those within 9,999 feet and with arrows to show whether the target traffic is climbing or descending.
- Transponder now has different modes working rather than just ON/OFF, primarily TCAS.
- Added the AUTO function for the engine and wing anti-ice systems with proper logic to allow for those systems to activate in icing conditions on their own like in the real aircraft.
- Addressed bug in which an engine shutdown message appeared on the EICAS even though the engines were merely at an idle setting.
- Improved the speedbrake operation and message logic.
- Improved runway presentation on the ND to make it closer to the real aircraft’s.
- Modified external model properties to gain FPS on some systems.
- Added an option on the EFB to disable rain effects.
Various FMC and autoflight improvements such as:
- Reduced delay/lag in FMC display functions
- Flightplans now are stored in an x-plane/Custom Data/UFMC/FlightPlans/ folder so they are not overwritten any time the aircraft is updated and will work for any add on using future versions of the UFMC (V3.0+) and/or x737FMC (V3.2+) , which can read/write flight plans.
______________________________________________________________________
Yes! the SSG 747-8 Intercontinental Advanced by Supercritical Simulations Group is now available from the new X-Plane.Org Store here :
Price is US$45.00
Price is US$69.00 - Includes both versions
- 747-8i Intercontinental Advanced
- 747-8F Freighter
If you have already purchased the SSG 747-8 Intercontinental Advanced/Series then go to your X-Plane.OrgStore account, log in and download v1.4 from your account.
______________________________________________________________________
Requirements
Windows 7,8,10; MAC OS 10.7+; Linux 64bit
X-Plane 10 fully updated. 64 bit. (X-Plane 9 not supported)
4GB RAM/512 MB VRAM (8GB RAM and 1GB+ VRAM Highly Recommended)
Current version : 1.4 - last updated November 20th 2015SSG X-Plane.Org Support forum
Stephen Dutton
Updated 21st November 2015
Copyright©X-Plane Reviews: X-PlaneReviews

-
News! - Beech Model 18 updated by STMA
The classic Beech 18 was created by Heinz Dziurowitz, who sadly passed away earlier this year. Goodbye and Fly High : The passing of Heinz Dziurowitz.
Most of Heinz's work has been distributed around like minded developers to keep his work alive and current, One of the best is the excellent Beechcraft 18 that X-PlaneReviews reviewed here earlier in 2015. Aircraft Review : Beechcraft 18 by Heinz Dzuirowitz.
This aircraft has been transferred into the capable hands of STMA or Shade Tree Micro Aviation, and STMA have done an update on the aircraft.
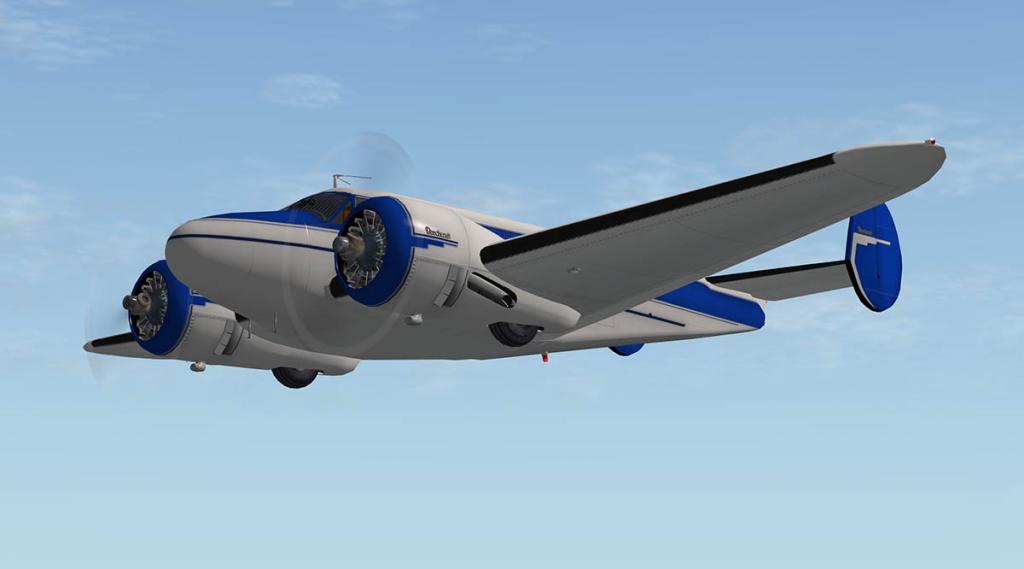
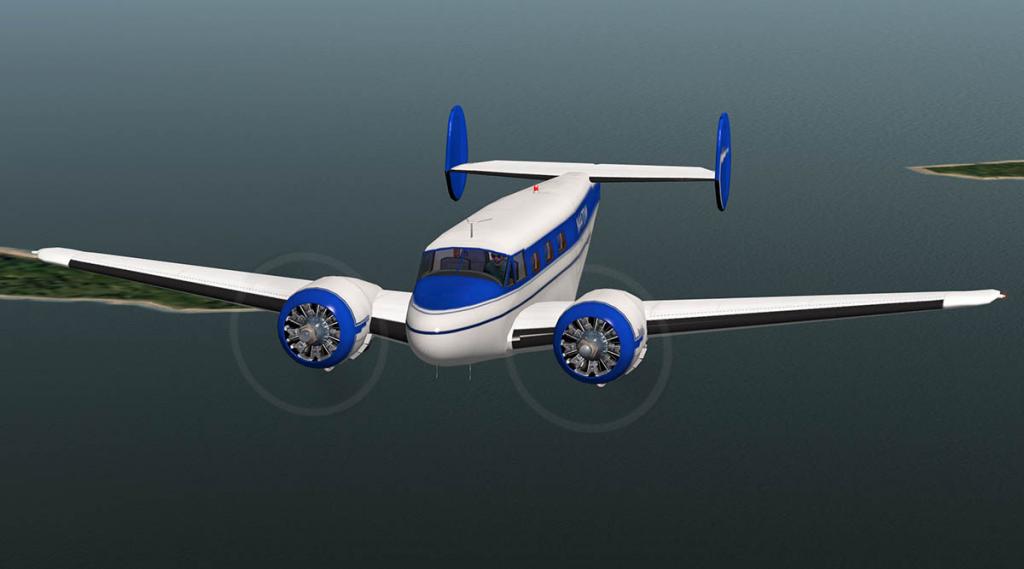
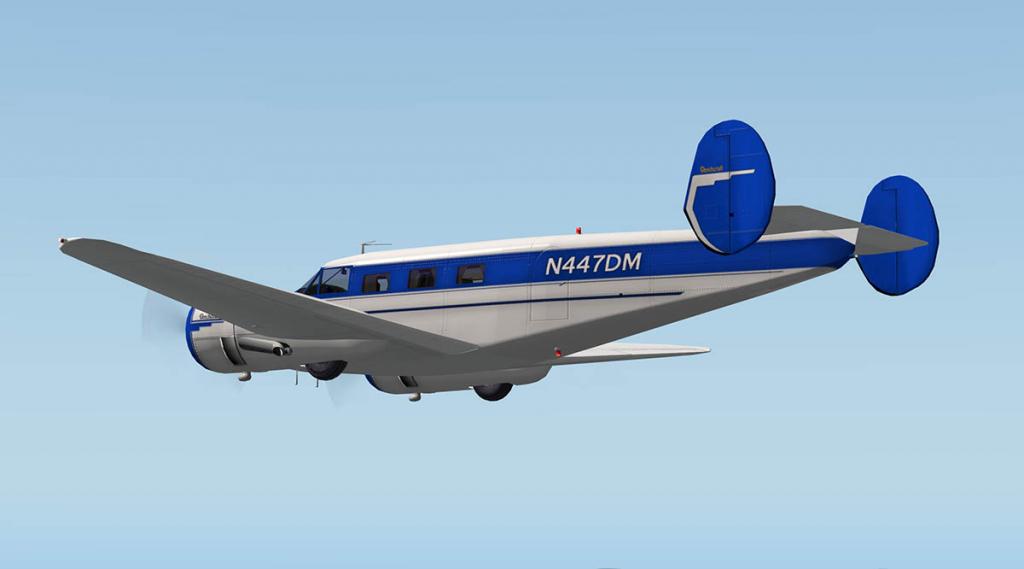
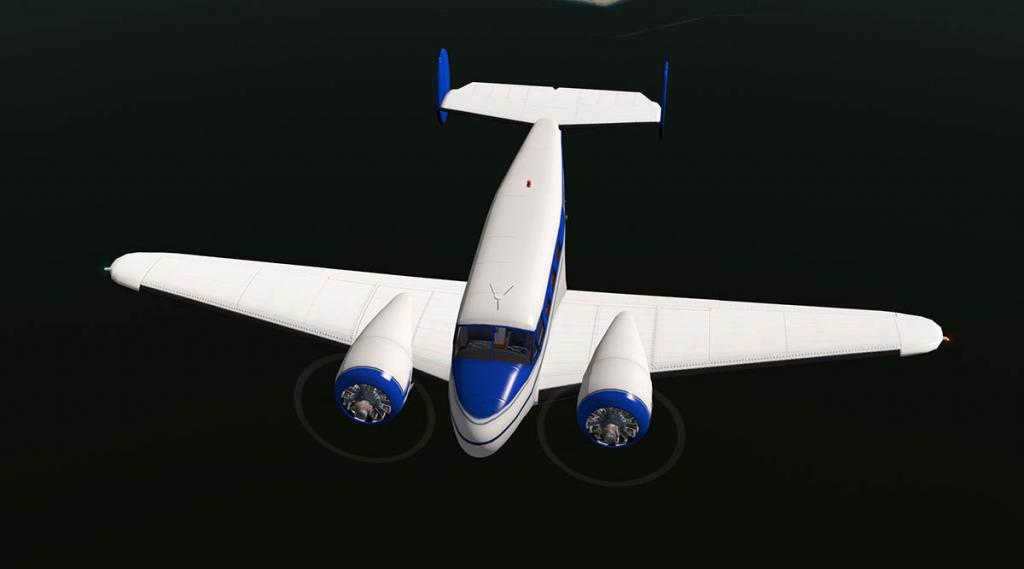
Noted STMA notes are:
New Features and improvements:
"We pulled the Beech 18 into our STMA Hangar and Repair Shop and stripped them down to their basic components and rebuilt them using the Federal Aviation AdministrationType Certificate Data Sheet (FAA TCDS) and flight manual for the Beechcraft D18S as our guide."
- More custom gauges, many with Data Ref driven components
- Sun-visor added, just click on the sun-visor to toggle for use.
- Interior glass now employs textures that will enhance realism
- New 3D toggle and rocker switches for more immersive experience
- New higher resolution liveries
- Includes paint kit in PSD format
- New INN and OUT engine sounds
- New cabin interior with added animation
- Improved 3D bump maps.
Our rebuilding efforts yielded performance and other benefits:
- Improved 3D modeling of the airframe, cockpit, and cabin.
- Realistic fuel system.
- Realistic ignition system.
- Realistic elevator, aileron, and rudder trim systems.
- GNS 530 bezel with fully functioning 3D controls without having to use the pop-up.
- A fully functioning 3D ADF which models a real world unit.
- A modern Horizontal Situation Indicator (HSI) replaces the DG to compliment the GPS
- Other Instrument panel improvements which more accurately reflect the features of the D18S instrument panel.
The v10 Beechcraft 18 by STMA (Heinz Dzuirowitz) is now available from the New X-Plane.Org Store here :
And is priced at only US$20.95
As this Aircraft is now being developed by STMA and is now noted on their X-Plane.OrgStore listing and not Mr Dzuirowitz's
Note: Owners of Heinz's Beech 18 should send an email to [email protected] or [email protected] to receive a discount code and will be able to purchase this new updated model for only $10.95.
Stephen Dutton
Updated 20th November 2015
Copyright©X-Plane Reviews: X-PlaneReviews
-

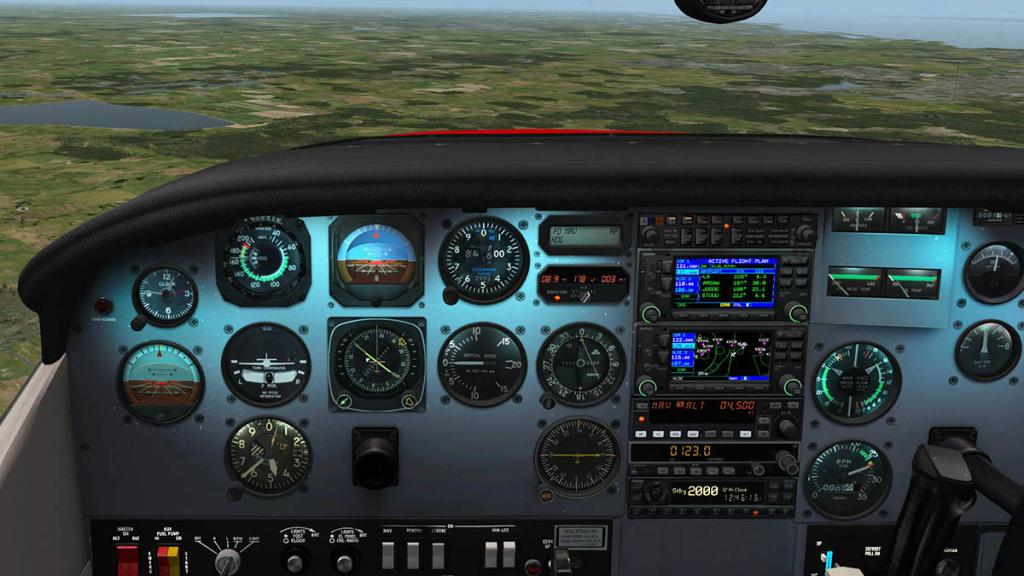
Aircraft Update - CT210 Centurion II v3.1 by Carenado + Reality Expansion Pack by SimCoders
The main v3 updates for the Carenado aircraft were done this time late last year, this v3.1 update is not a full complete version change, but more of a tweaking in bringing the aircraft current and to update with the finalisation of Laminar Research's v10.42 X-Plane serial change.
A note that the whole Carenado range will be updated to this v3.1 version by Christmas, so check your accounts to download the newer versions.
As there has also been released an addon Reality Expansion Pack (REP) by SimCoders, I have included that package as part of this update review and so this post is divided into two parts with the v3.1 update first and the REP later.

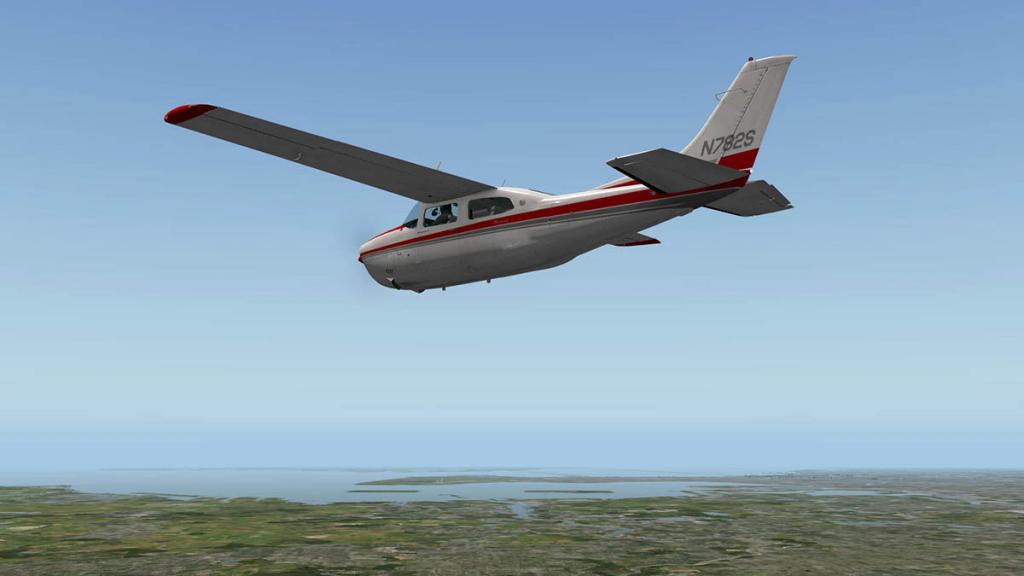

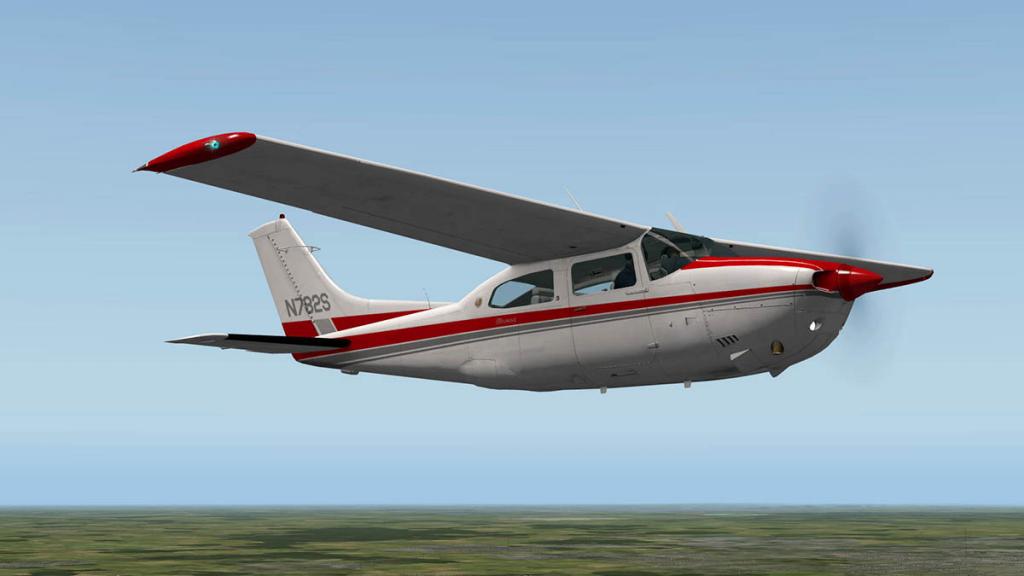
The CT210 is the aircraft with the retractable spindly landing gear. This gives you a very clean aircraft with just the fuselage, tail and the highset wings in profile.
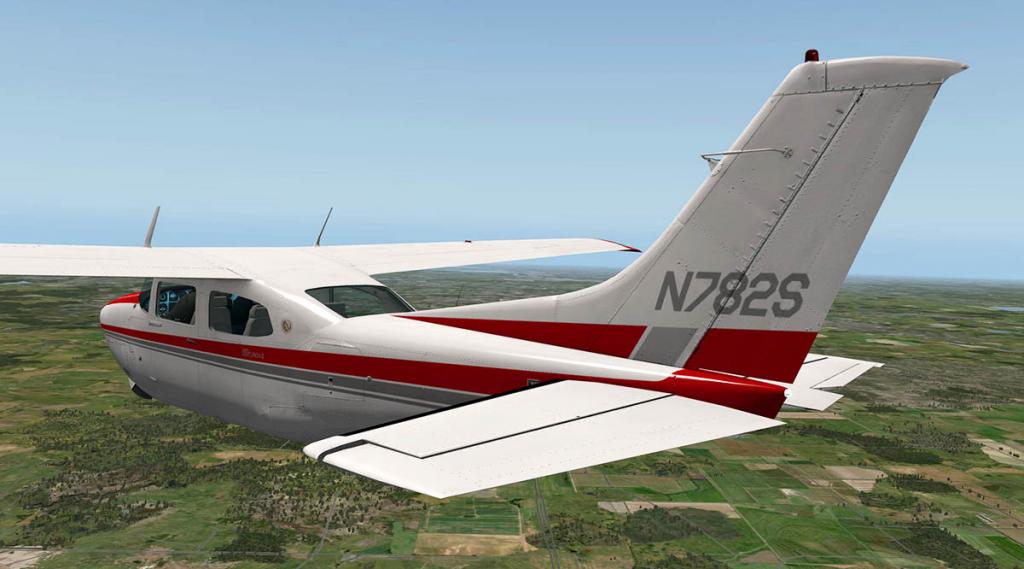
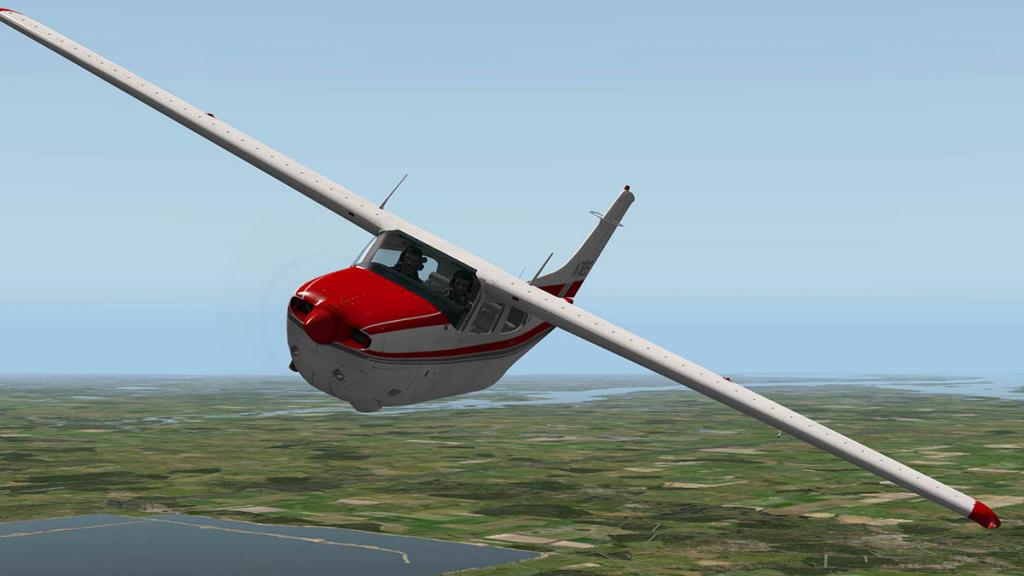
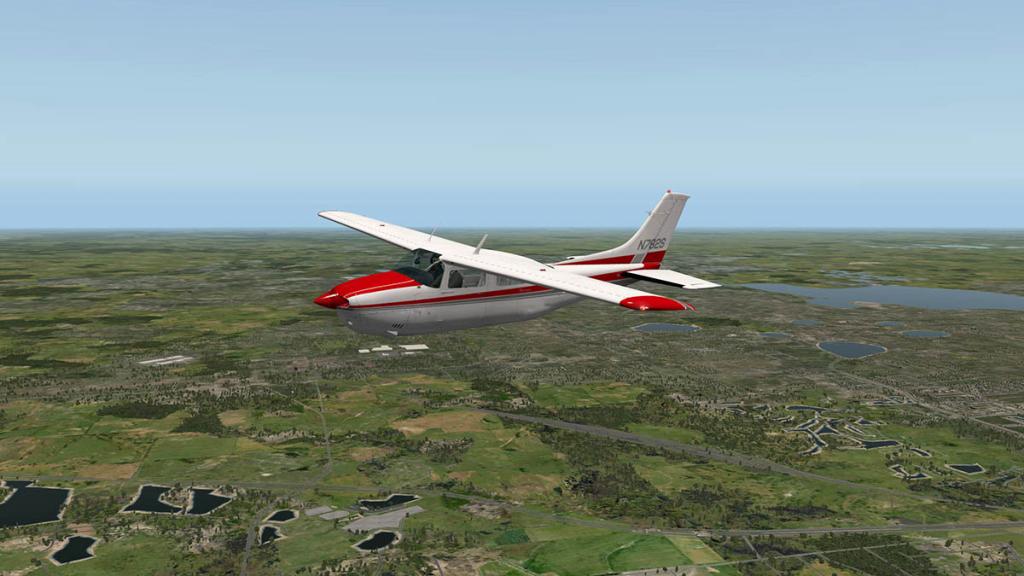
The Centurion II is a six-seat, high-performance aircraft with retractable-gear, and a single-engine turbo IO-520-L engine with 300 hp (224 kW) that covered the versions K,N and R and was built from 1972 to 1986. Our Review : Mini Review : Carenado CT210M Centurion II HD Series - Ver 2.0 is here.
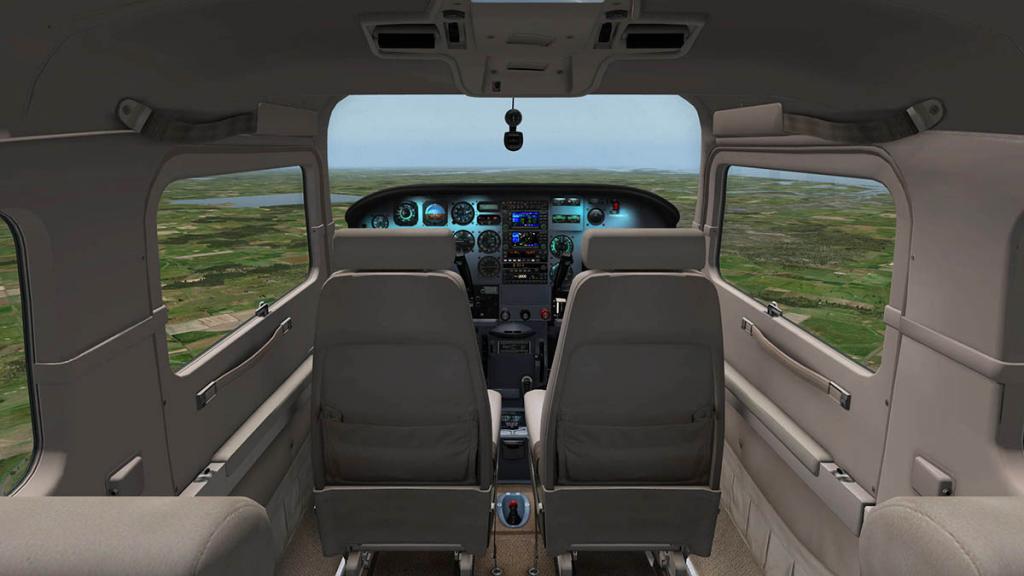

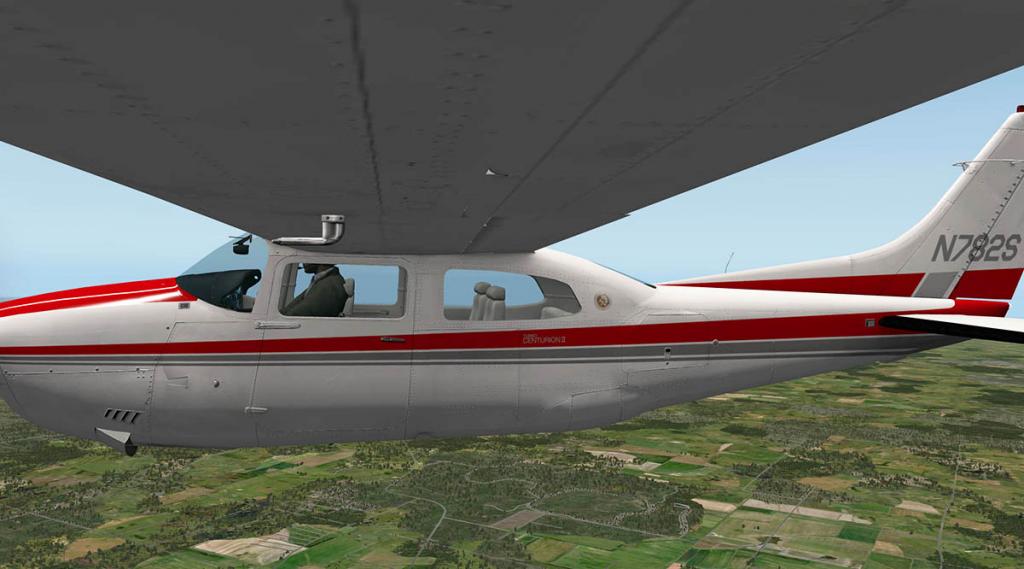
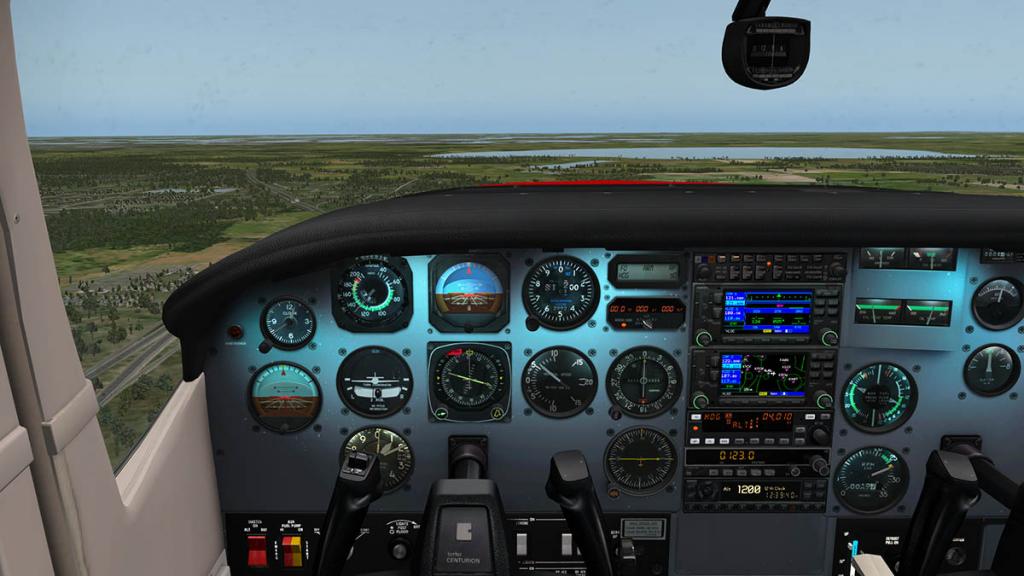
This is a very nice but tight cabin aircraft with the inside and outside detailing it delivers all the usual Carenado qualities, the main panel is outstanding.
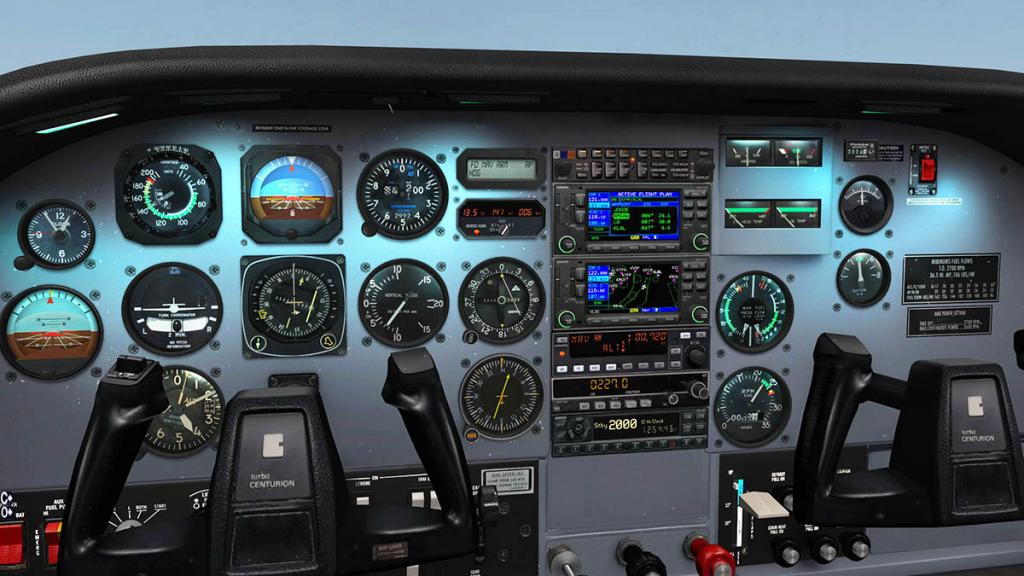
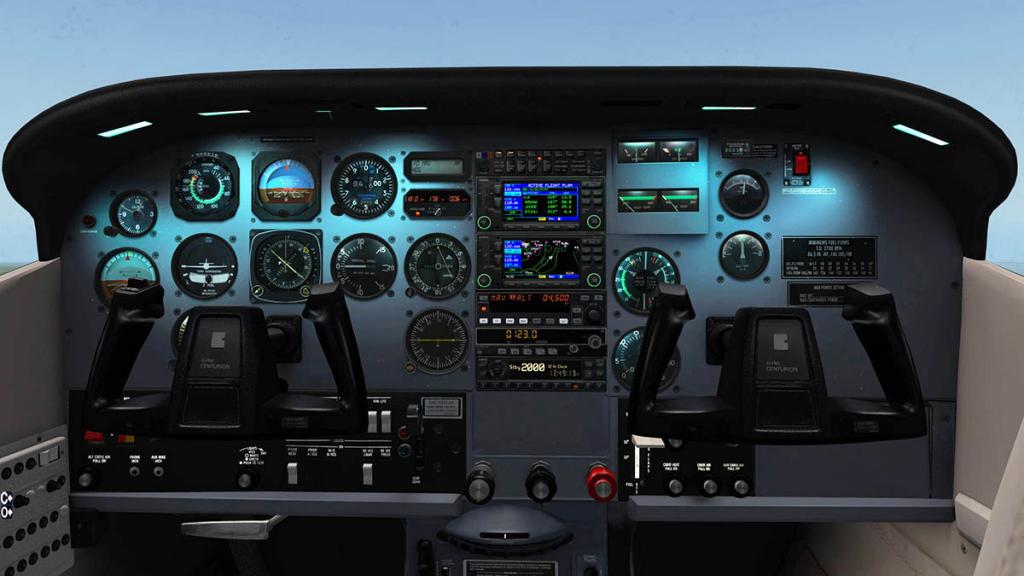
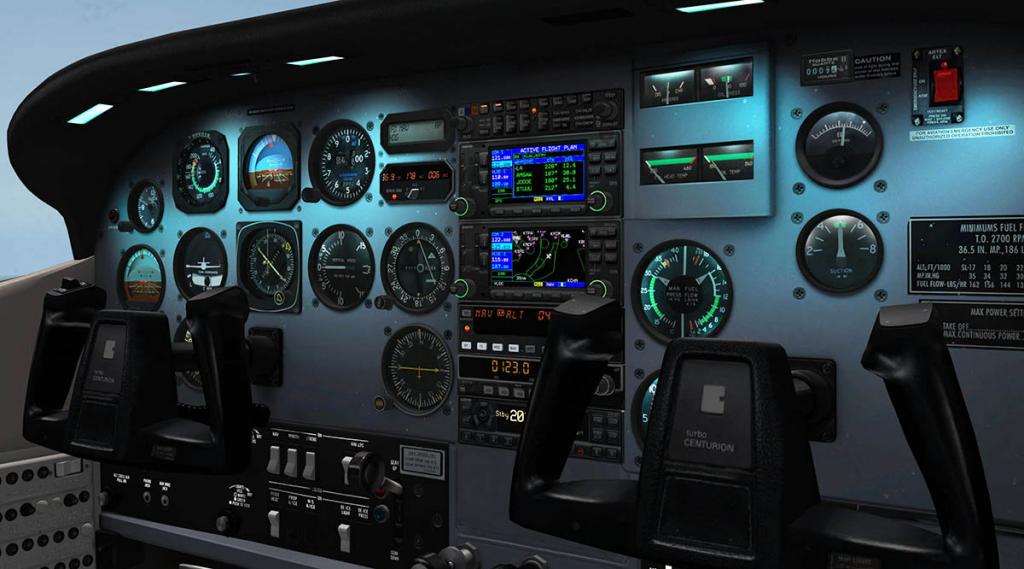
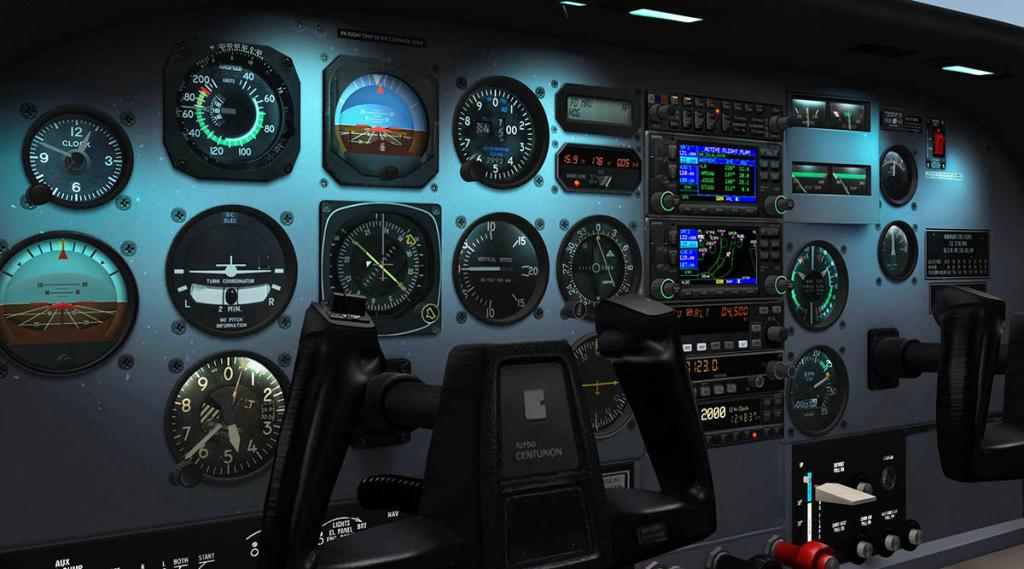
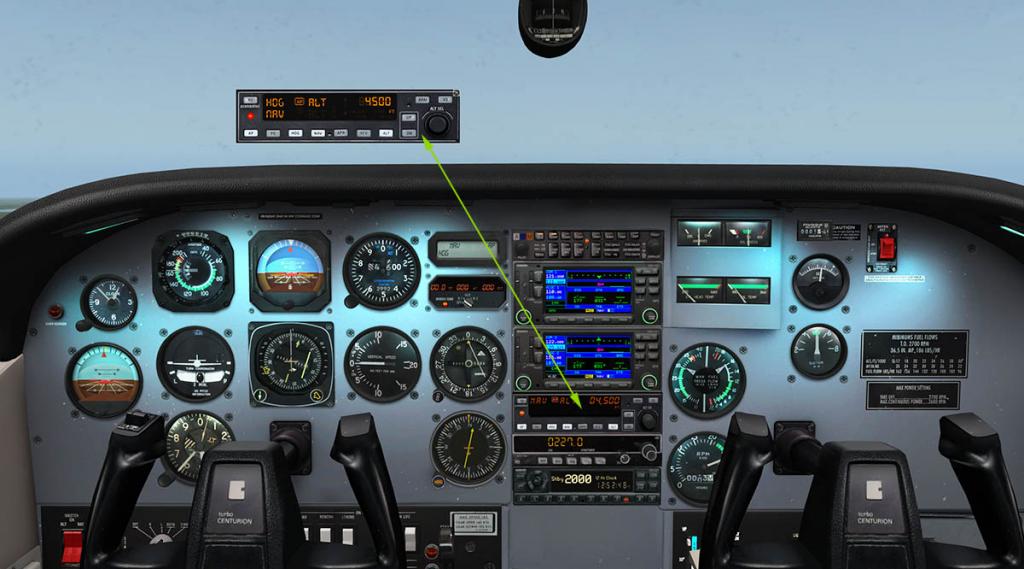
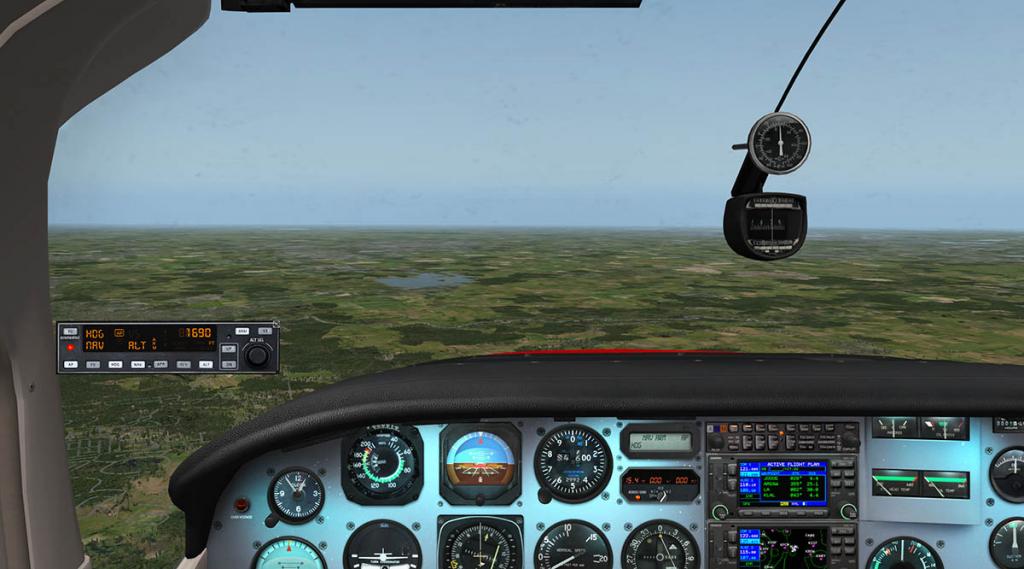
I love the blue tinged lighting, it is a really nice place to fly an aircraft, the CT210 is very well equipment wise fitted out as well. The Autopilot is a Bendix King KFC225, with the highlight of the great digital readout, which I really like.

CT210 Centurion II v3.1 update
The v3.1 update is not very large but still quite significant in what it changes and delivers. First off is the KFC225 Autopilot panel now pops out for use, which is very handy on approaches.
A lot of work has been done on the aircraft sounds. The linked volume to the internal sound now allows for the X-Plane's (audio) settings to transfer to the plugin-based sounds. The mute button is now also directly controlled the same way. The sounds differences are certainly noticiable in and outside of the aircraft, in being more clearer and distinct.
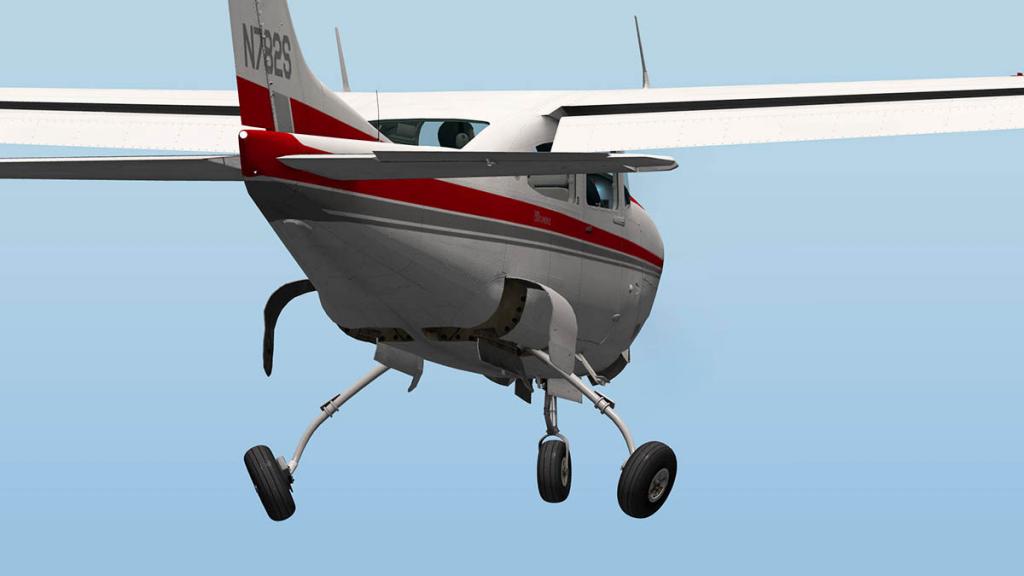
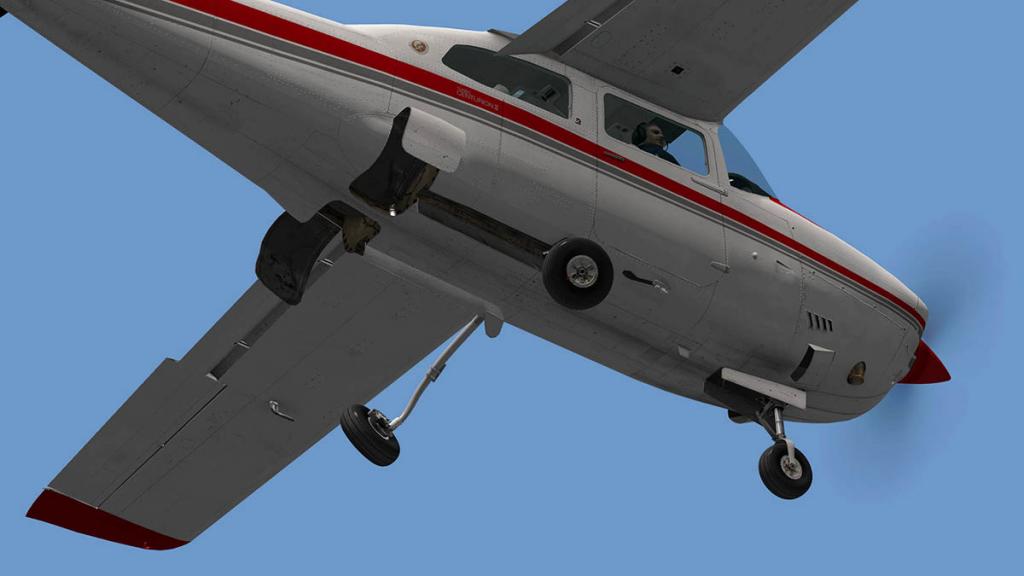
The undercarriage gear sounds have been highly improved to match that excellent gear stowaway animation.
The main lighting in taxi and landing lights have been made 10.40+ compliant (Halo size remastered, so it doesn’t look huge on large monitors)

Carenado have got the halo sizing correct, as too many aircraft now in X-Plane have blobs of light and not aircraft lighting, here it is excellent.
The Garmin 430 GPS units (Two Sets here) where installed in the v3.0 update but are still a significant feature in this aircraft.

The POV (Point of View) has had a tweak change from 120 to 150, this is for multi-monitor use.
Interestingly Carenado have shied away from .dds files and brought back .png textures. They note because of the .dds poor appearance, and some transparency problems. The excellent texture efficiency of the aircraft is not changed, but I agree the aircraft does look (a little) better.
Finally the flight dynamics have been tweaked and the auto-toe-brake infrastructure has been removed, since X-Plane 10.40 now has that feature built-in.

The panel lighting has had some fine tuning, and very nice it is.
The overhead lighting is red (above on the roof) and you can control the left and right sides of the panel lighting...

Outside the lighting feels tighter and more sharper.
That covers the v3.1 update. Full changelog notes are listed below.
_____________________________________________________________________________________

You can purchase for the Carenado CT210 Centurion II v3.1 an addon extension pack from SimCoders. This extensive package will change the aircraft into a more deeper simulation very similar to the style on the Cessna 172SP Skyhawk by AirfoilLabs.
Installation
The Expansion pack comes with a large set of files (left) that have to be inserted within the Carenado aircraft folder, I made a duplicate aircraft and noted the Expanded version REP. There is a full set of instructions provided to understand of how to set up the files correctly and what folders certain files have to changed or replaced (right). Note, this REP package is not in any way connected or endorsed by Carenado, so any changes, bugs or failures are not the responsibility of the developer.
Also required are two extra plugins from the SimCoders site:
HeadShake Plugin - HeadShake v1.5
Xsaitekpanels (lin+win+mac+32/64) 2.46 - Xsaitekpanels If you have a set of Saitek instrument panels, this plugin will allow you interact with them. the "xsaitekpanels.ini" has to be inserted in the Carenado CT210 Centurion II v3.1 (REP version) aircraft folder to work.
Once the installation is complete you will need a key code to activate the Expansion Pack that is included in your purchase receipt.
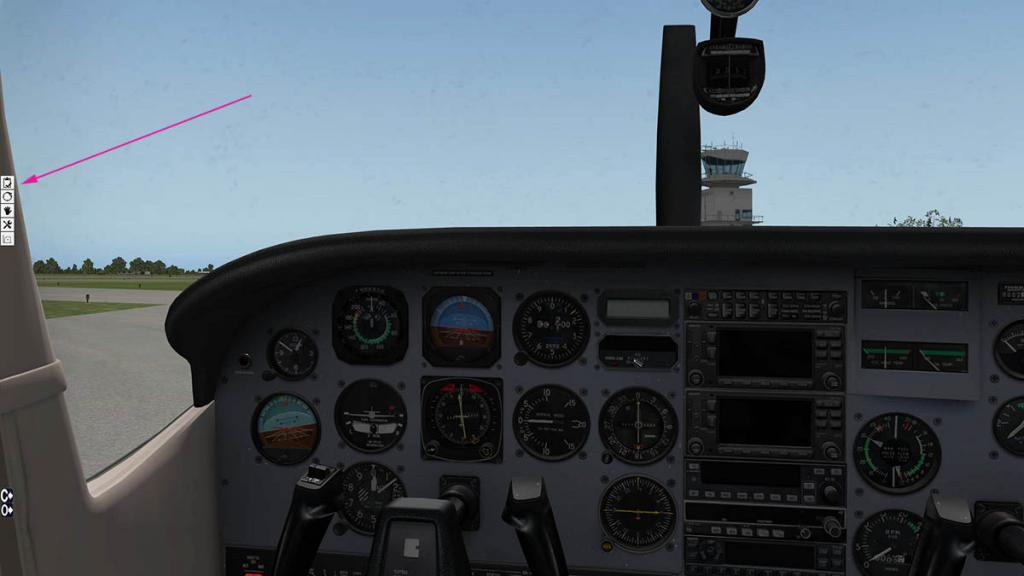
On start up you will notice an added menu to the left side of your screen, this menu covers from top to bottom:
- Checklist
- Walkaround
- Tow
- Maintenance Hangar
- Weight and Balance
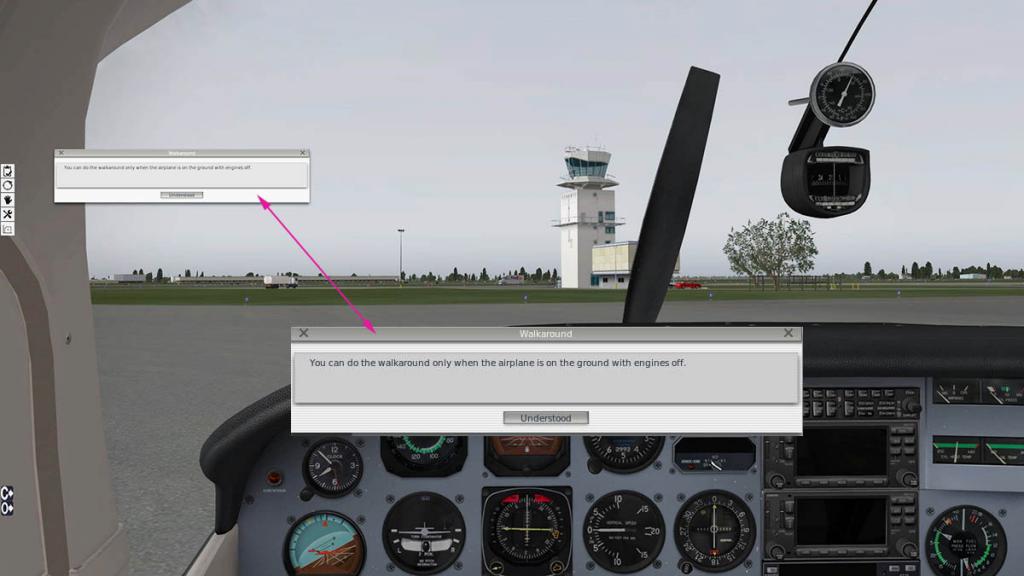
But you can't access it? If you try any of the tabs (except the Checklist tab) you get a warning that you can only use it if your "aircraft is on the ground and the engine is off"?
Well there is no doubt I am sitting on the ramp and I guess with the propeller sitting straight up and not moving would mean I do actually conform to the arrangement? Turn off all the electrics and I am still in a no go mode, with the warning boxes still telling me to put the aircraft in a static position?
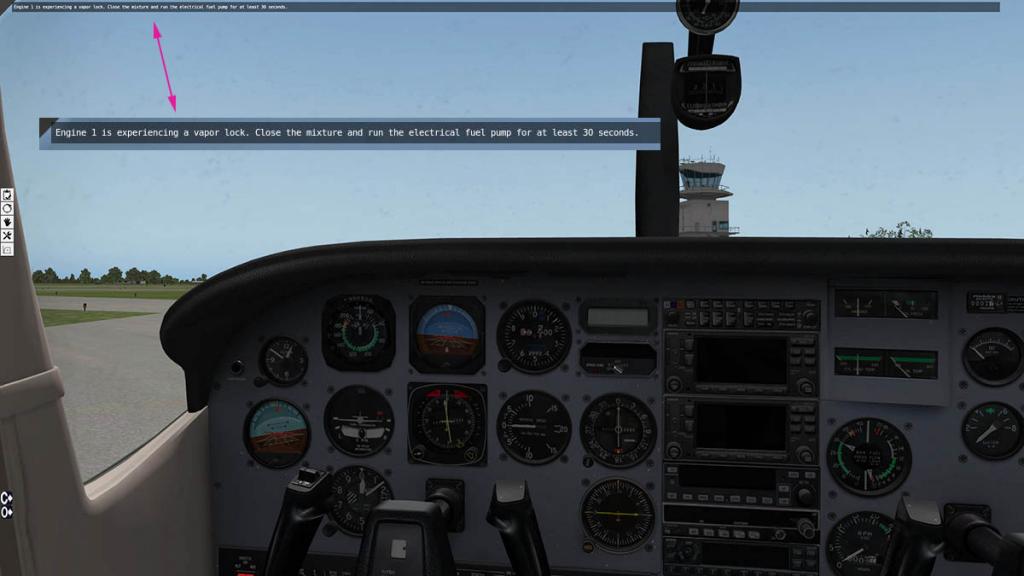
Then I get another banner to note that my (inert non-moveable, unpowered) engine is experiencing a "Vapor Lock"? and to turn on the fuel pumps.... hummmm.
To get out of this cycle of warning boxes you have to restart the aircraft in X-Planes" startup in the "Cold and Dark" setting (operations and warnings menu). Then the side tabs will work.

The banner for the "Vapor Lock" is joined then by another jolly fun alert strip in "The Engine is flooded with fuel" which is fine, but if you turn on pumps then it will be won't it?
And on it goes? The odd thing is that the aircraft is still turned off electrically... even the pumps?
You can thankfully actually disable the in-flight tips on the screen by going into "Plugins" then "SimCoders.com - REP" and into "Settings" and change them there.
I understand what it is in this aircraft in what it is supposed to do, so don't get me wrong here in the idea to create a cantankerous old aircraft that does not live by the rules.
Note: the above notes were written in the context of my introduction to the REP package, that was ver2.0... Since then v2.1 has fixed the issues and include the annoying you don't now need the aircraft to be in the "Cold and Dark" mode (yahoo for that) and with the main battery switch turned off you don't get the another annoying "Flood" alert. But as the images are done in the V2.0 context the alerts will still show.
You can fix the "Vapor Lock" by turning on the power and the pumps, but again it flooded the engine. To start the engine you have to close the "Mixture" Push in the throttle to "full" and crank the engine till it runs your battery down?
The trick is to turn the pumps on and to only really prime the engine and then quickly turn them off again, and with that the CT210 will actually thankfully start, if you don't get the process right and you will lose 30 minutes of trying and flatten sixteen sets of batteries? By this time in the standard Carenado CT210 aircraft I would usually be half way across Florida to Miami from Lakeland.
While we let the fuel slowly vaporise out of the carburettors we will look at the menu tabs...
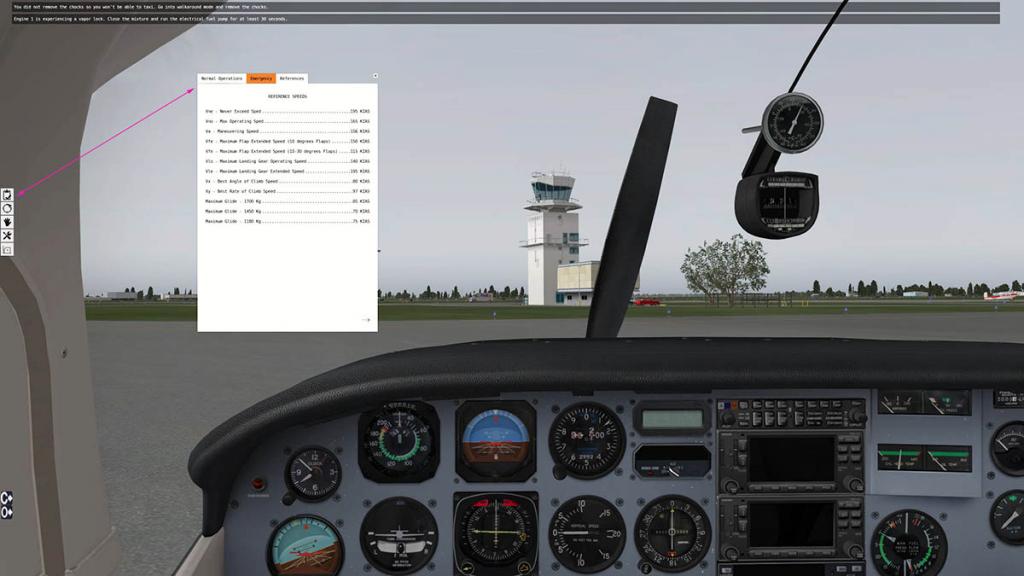
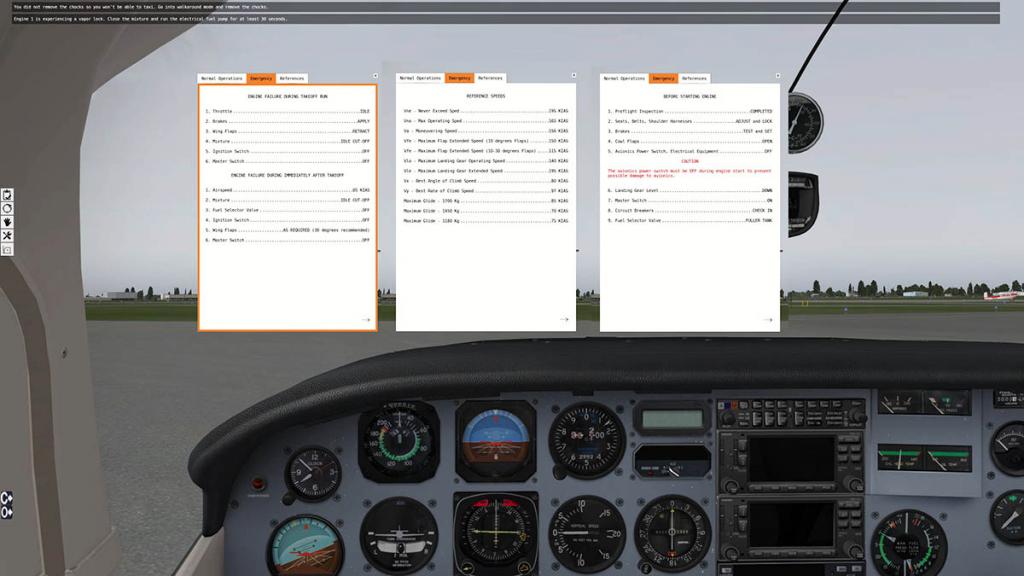
Checklist: There is three page checklist that covers : Normal Operations" - "Emergency" - "References" the pads can be moved around the screen for the best reference. Only annoying thing is that they have a habit of appearing if you are adjusting the radios. The checklists do however pop up when setting the radios because a mouse gesture is enabled by default, the kneeboard opens when you move the mouse over the right-hand side of the screen. You can disable this in the Plugin "settings" as well.
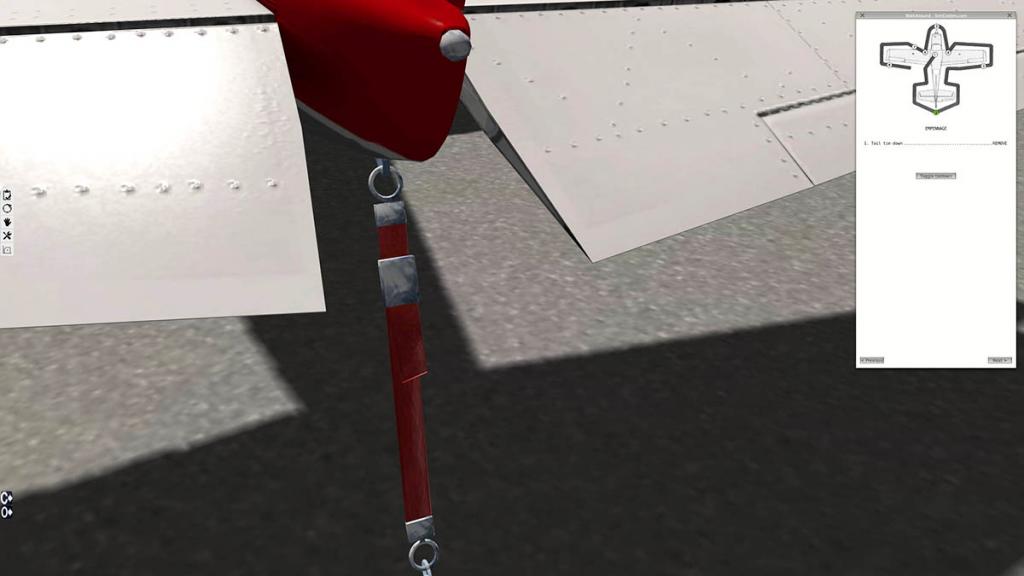
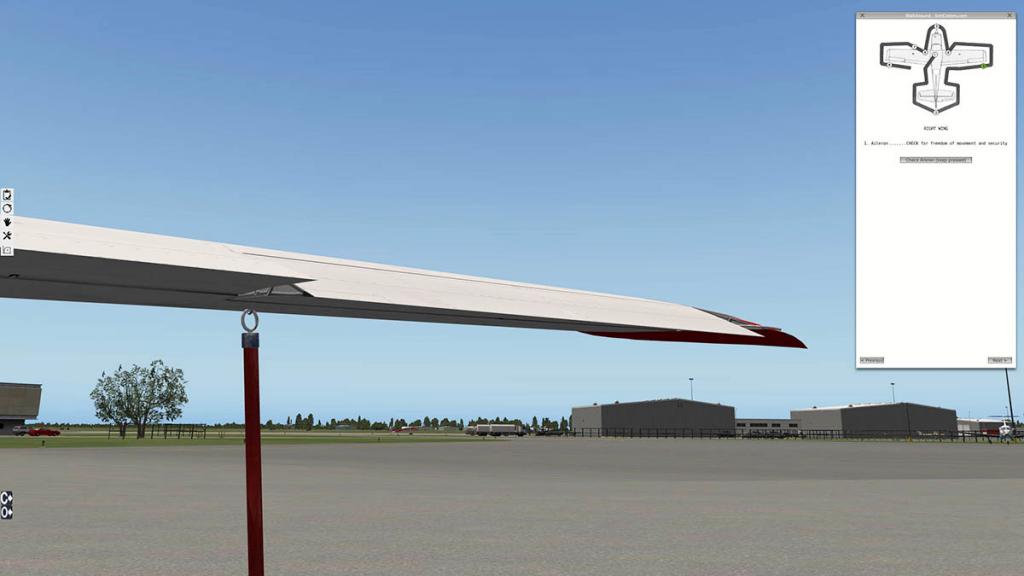
Walkaround: The "Walkaround" tab (feature) is very good, on pressing the tab you get a map of the aircraft with the various points that you go around and checkoff your list.
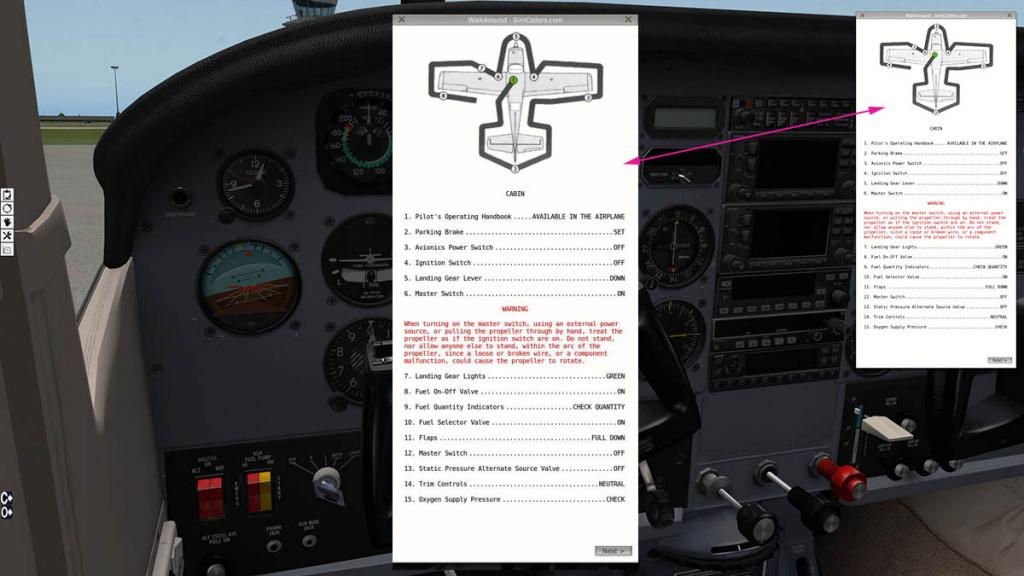
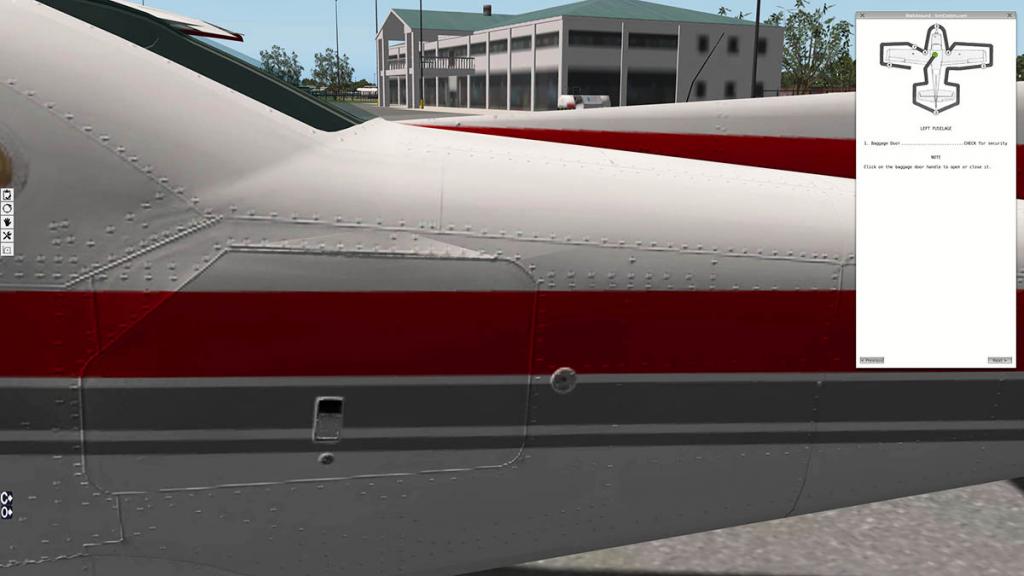
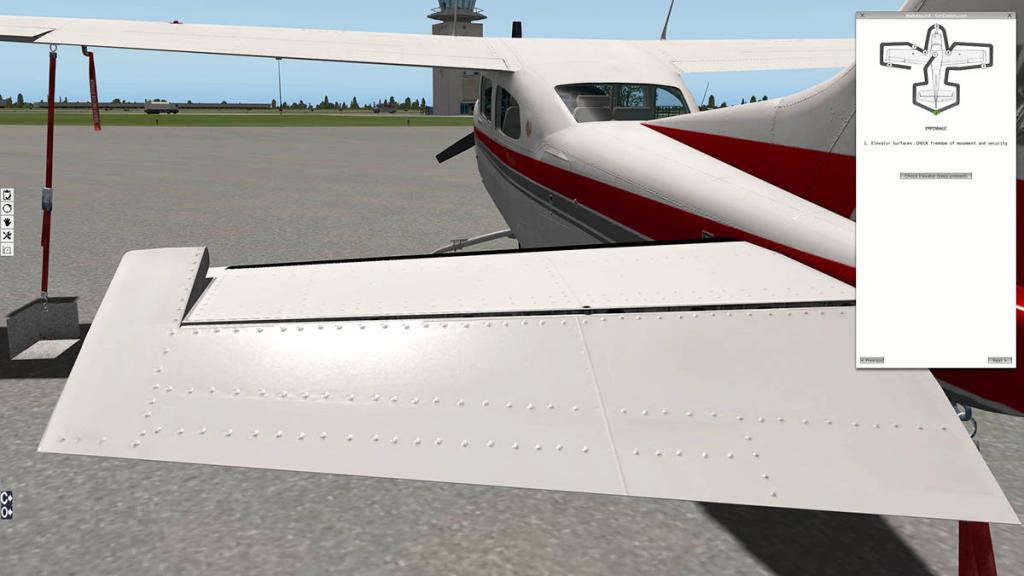

You not only get a checklist of what you have to do around the aircraft, but you can by pressing the buttons check each of the aerodynamic surfaces (move them) and hide the separate static elements like chocks and tie-down lines. Other clever ideas are the wear of the tyres and the removal of the pitot tube and engine inlet covers.

All round it is very good (no Pun intended).
Tow
You can move the aircraft around on the ground by using the "Tow" feature.

This is best ground tow unit I have ever used. If you have a joystick then the more you pull back or push forward increases the speed in that direction, to turn just move the joystick sideways... brilliant.
Maintenance Hangar
The aircraft's maintenance and general wear and tear is controlled from the "Maintenance Hangar" tab. This gives you a popup with four top tabbed pages that cover "Engine" - "Electrical/Avionics" - "Oxygen System" - "Landing Gear/Brakes".
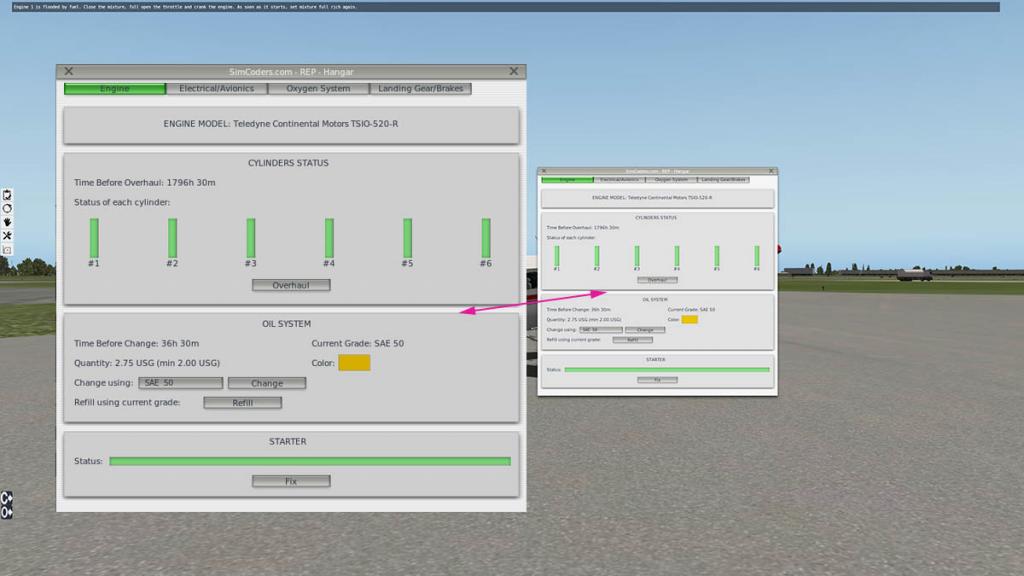

Engine
This page shows you your wear and tear of the engine status, and very good it is too. It covers the condition of each of the six cylinders and the time in h/m before an overhaul, you can then do an engine overhaul.
Lower is the Oil status with again time h/m before oil change and type, you can top up and watch the colour change as the oil gets older.
Bottom of the page is the starter, you can fix this and considering the time you spend churning the engine to start then you fix this a lot.
Electrical/Avionics
Here on this tab you can see the charge left in your battery (usually not much, see above) so you can recharge to start churning again, you can disconnect the battery which is a good idea as the battery will discharge overnight if you don't. A note is that all items on the aircraft wear and are used in long term conditions, so they change and details are remembered over a long period of use and don't reset up every time you start up the aircraft in X-Plane.
Another small note is that when you start up the aircraft the Avionics are switched off, and you leave them switched off until the engine is running as it may cause issues with the radios, the switch to activate the avionics is on the lower fuse panel by the pilot.

Part of the package is to give you guidance and warnings on operating the aircraft, It works but can get a little annoying after using the aircraft for a period and you know then what to do, a switch off option of the feature would be a welcome relief.
Oxygen
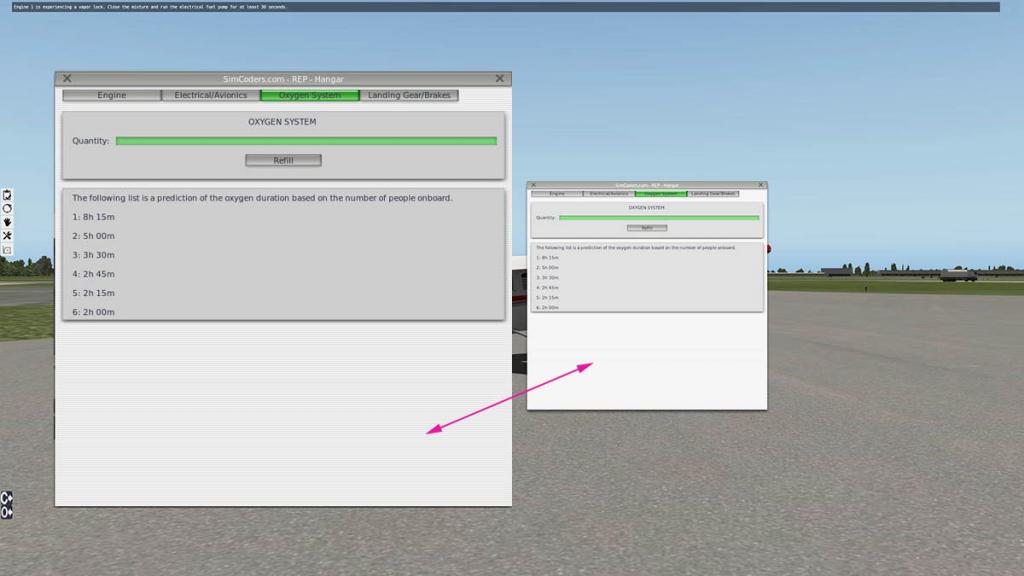
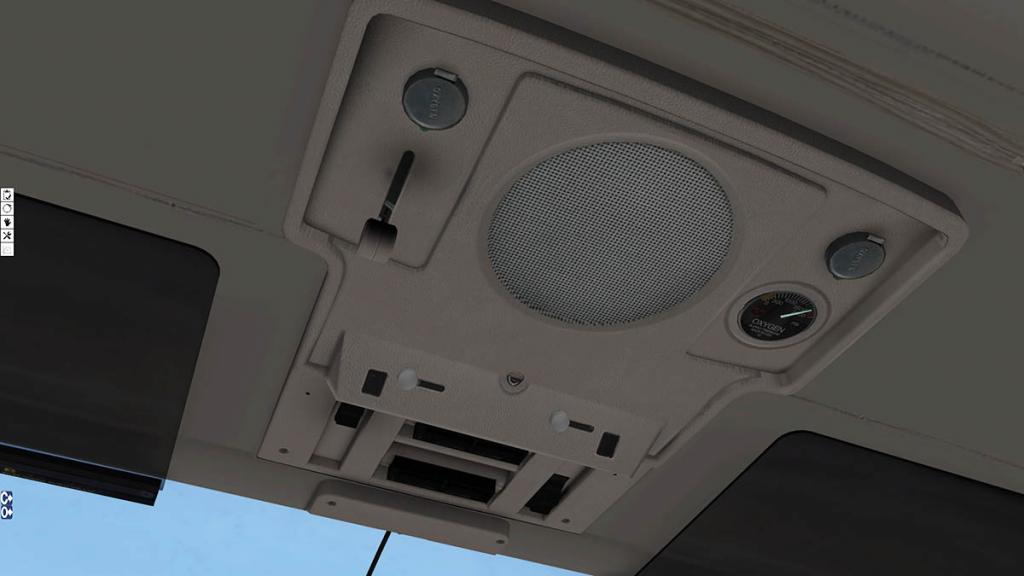
Next Maintenance Hangar tab is the "Oxygen. On this page you can note the amount of Oxygen available via the number of people aboard the aircraft, and refill the tanks if necessary (On the ground). The Oxygen controls and Gauge are above your head on the forward cabin roof.
Landing Gear/Brakes
Wear and tear on your tyres and brakes are actually critical on this aircraft, you have to be light on the brakes as well in case you don't bend those spindly outset wheels. So braking heavily from speed is a no, no.
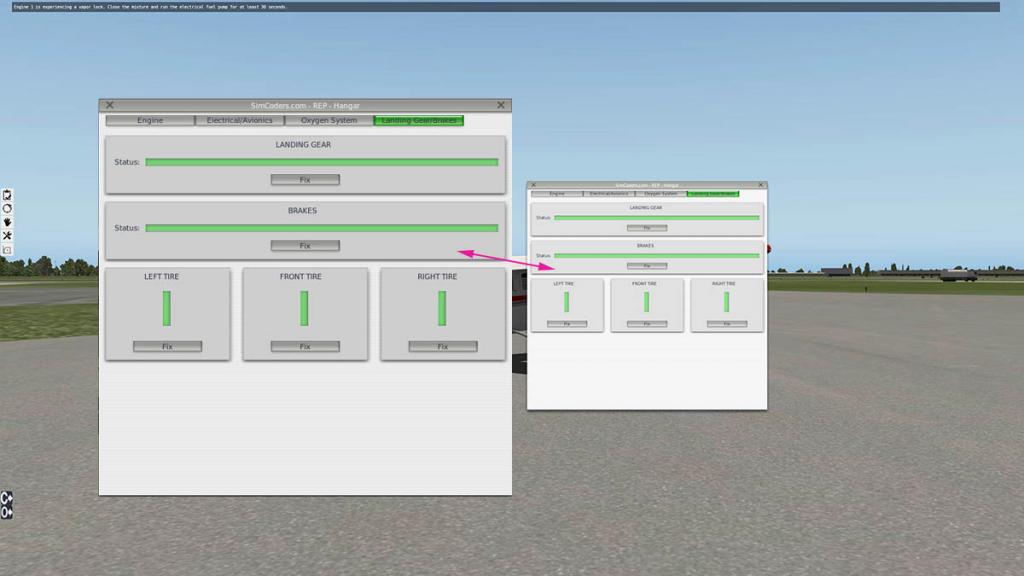

You can see the status of the gear in the tab Landing Gear/Brakes page, your tyre wear and brake pad condition. All can be "Fixed" and repaired.
Weight and Balance
Final menu tab is the "Weight and Balance" page.

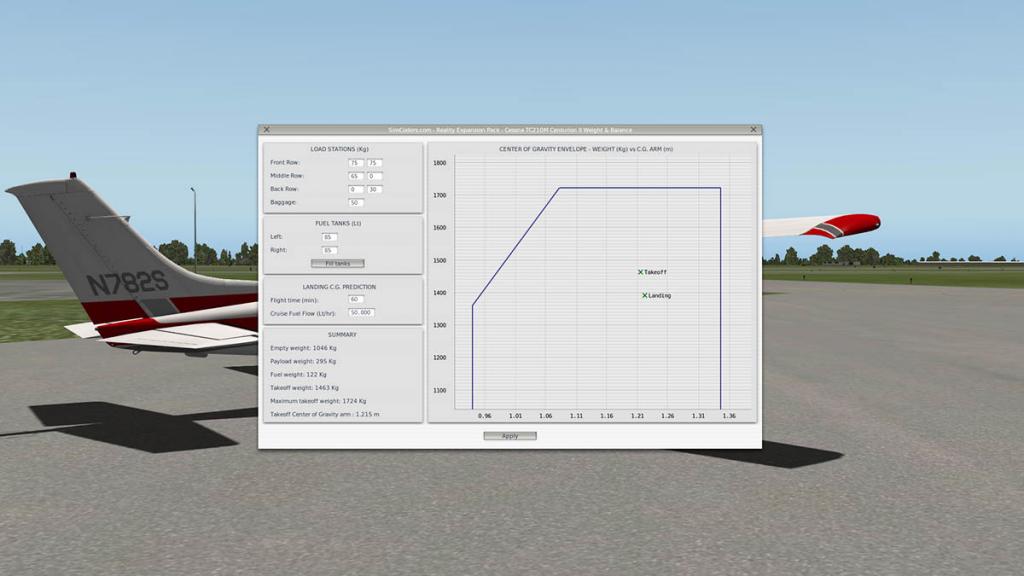


On this page layout you can set your weight and distribution of the weight on the aircraft. There is an excellent graph to note your CoG (Centre of Gravity) and one image above is set with too much baggage to see the out of bound effect, other images note the passenger weight and different fuel weights. On the out of CoG settings the aircraft was sitting almost on its tail on the ramp so it shows the weight and CoG is correctly transferred the aircraft. You can refuel here and there is a complete summary of the completed choices.In flight the Extended package changes a lot of the original Carenado settings in noted...
Realistic stall speeds & behavior
Realistic climb speeds
Realistic cruise speeds
Realistic Weight & Balance
Realistic taxi behavior
It certainly felt a little better to fly actually than the Carenado version, as I have had problems rubbing off speed even in a shallow down pitch, but in the REP I was able to get down into the 60kt - 70kt zone to make a smoother less faster (less bouncy) landing. But the headshake and extra bounce on the front wheel can bounce you up and down more than I wish too, it doesn't work well with turning front wheel either. And you can actually damage as noted the undercarriage if you are not kind to it.

There is realistic simulation of alternate static air, with the airspeed indicator, the altimeter and the vertical speed indicator can introduce a reading error when the alternate static air is on.
There is a complex "Damages System" that is triggered by the pilot actions based on real world data that targets every system in the aircraft and this is to teach you how to correctly manage an airplane.
In the realistic realistic startup procedures and other advanced TSIO-520 Engine Simulation, it is a balance between being realistic and frustrating. I think it is just on the border of frustrating in that you will find it quite slow if you want to get the aircraft airborne quickly, in part you have to wait, sometimes too long for the temperatures to stablise, and the vapor lock and starting procedure just a little too much on the dramatic side.
No doubt the information has been gathered by a real CT210 performance data and real world operations, but the aircraft used must have been a really old cantankerous thing to operate. Certainly familiarity and use of the aircraft over a long period of time will reduce these operational matters.
Sounds are certainly very good, but as noted above Carenado have updated the sound package in the v3.1 release, and personally I prefer the Carenado version... At low revs you get a lovely bass thrum and were as the REP package is more a higher dum, dum sound. At speed outside the REP version is a high very buzzy noise but the aircraft sounds nice inside at the controls. Open windows or dropping the undercarriage for great wind noise or in the walkaround you have realistic sounds if you check out the aerodynamic surfaces. So overall it is a great sound package.


Summary
I starting this review with the original v2.0 version it was fraught with frustration and the REP package was just buggy, to the point this review could have been a more negative result. I left the comments in to show that a reviewer's life is not easy sometimes, and how easily a few wrong set items (bugs) can deride a result that is detrimental to the plugin and reflect on sales.
Thankfully v2.1 fixed the issues at hand and the REP package is certainly a great addition to the excellent CT210 Centurion II v3.1 by Carenado, however if you are a setup and go straightaway pilot, then you may find the REP package a little slow and frustrating in just wanting to fly.
For the absolute fanatical sort of person that likes the ticking of a cooling engine then the addon REP is right down your street. Certainly a good addition to the Cessna 172SP Skyhawk by AirfoilLabs as they are very similar in this disguise.
The manual must be read to get the best performance and tips on using the aircraft with this package, it explains how to fly the aircraft in these conditions and what to do when you go outside those flight parameters or aircraft performance positions.
So both the CT210 Centurion II v3.1 update from Carenado and this additional REP package is a great combination together. There are certainly slight differences of if you have the REP package installed or go for standard Carenado aircraft, it in a way in the end it really depends on how you want to fly or approach the CT210 Centurion II for your simulation needs.
______________________________________________________________________
Yes! the CT210 Centurion II HD Series v3.1 by Carenado is now available from the new X-Plane.Org Store here:
- CT210 Centurion II HD Series
Price is US$29.95
If you have already purchased the CT210 Centurion II HD Series then go to your X-Plane.OrgStore account, log in and download v3.1 from your account.
Developer site : Carenado.com
Developer Support : Carenado - Alabeo Support X-Plane.Org______________________________________________________________________

Yes! the Reality Expansion Pack for Cessna Centurion (REP) by Simcoders is now available from the new X-Plane.Org Store here:
- SimCoders Reality Expansion Pack for Cessna Centurion
Price is US$19.99
Developer site : SimCoders
______________________________________________________________________
Requirements
Windows, MAC or LinuxX-Plane 10.30+ - 64 bit compatible
4GB RAM/1GB VRAM - 250MB available hard disk spaceversion 3.1 (last updated November 3rd 2015)The CT210 Centurion by Carenado above is required for this add-on. It will not work on other aircraft
Current version: 2.01 (last updated November 17th 2015)______________________________________________________________________Review by Stephen Dutton
19th November 2015
Copyright©2015: X-Plane Reviews
Review System Specifications:
Computer System: - 2.66 Ghz Intel Core i5 iMac 27”- 9 Gb 1067 Mhz DDR3 - ATI Radeon HD 6970M 2048 mb- Seagate 512gb SSD
Software: - Mac OS Yosemite 10.10.4 - X-Plane 10 Global ver 10.42 (final)
Addons - Saitek x52 Pro system Joystick and Throttle : Sound - Bose Soundlink Mini : WorldTraffic v2
Scenery or Aircraft
- KLAL - Lakeland Linder Regional Airport 2.01 by Drankum (X-Plane.Org) - Free (note: personal added items in an office (okay demountable building and vehicles)
______________________________________________________________________
CT210 Centurion II HD Series V3.1 change log
-Broadened FOV to 150 (Useful for multi-monitor use, where 120 didn't cut it).
-Linked volume to internal sound infrastructure (No more detached control over plugin-based audio and X-Plane internal audio. Now, X-Plane's settings transfer to plugin-based sounds).
-Created mute button, which is synchronized with X-Plane’s internal sound infrastructure
-Deleted .dds files, due to poor appearance, and some transparency issues.
-Fixed lights to be 10.40+ compliant (Halo size remastered, so it doesn’t look huge on large monitors)
-Flight dynamics tweaked (Removed auto-toe-brake infrastructure, since X-Plane 10.40 now has it built-in, and could cause conflicts with plugin).
Additionally, the CT210 received the following updates:
-Added pop-up autopilot
-Tweaked landing gear sound
-improved panel night lighting
-
7 hours ago, Guest 787pilotdabomb said:
Hi Stephen I'm really looking forward to the release of this plane. One thing that I really miss in any embraer product right now is the fact that there is no verticle guidance to show the vnav path at the bottom of the mfd. will this be included?
Thanks
No at this point I don't think that feature is on there, but I don't doubt it will be on another update. SD
-
12 minutes ago, Guest said:
World Traffics awesome! In my humble opinion, it totally changes the experience in X-plane for the better, adding a sense of realness to airports and airspace. It's really fun. Sometimes I pause at airports and just watch the planes come and go in awe. It's very convincing. Of course, flying with all this traffic is really a treat, too. World Traffic is not diffcult to use. The random traffic generation is a great way to fill airports you may frequent. If ground routes do not exist for a particular airport, there are some free 3rd party tools that allow you to create your own ground routes to/from various gates and taxiways. I have used a free visual ground route editor that overlays the paths right on the airport so you can lay out the routes perfectly between runways and gates. In addition to the excellent default aircraft with fully functioning lights, flaps, wheels, etc., there is a wealth of add-on aircraft for World Traffic with various liveries. World Traffic is a game changing add-on. Once I experienced it, I could not imagine flying in X-plane without it!
Yes totally agree, I am a huge WorldTraffic fan... totally, any airport without WT is empty and cold, yes love it.

-
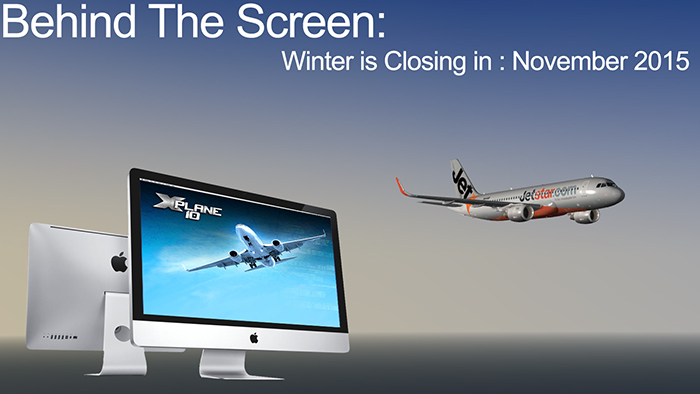
Behind the Screen : Winter is Closing in : November 2015
The title is rather odd in the fact I live in Australia, it is spring here going into summer, extremely hot, moody, cataclysmic weather events and not your Northern Hemisphere yule tide freezing cold and blanket snow. I have lived in Australia since my teens (1973) to be exact, but still use the Northern Hemisphere seasons as my guide, why? Well as a weird twist of fate our winter in Queensland, Australia is like an English Summer in beautiful balmy days and clear blue skies, odder is that in the hot summer months you barely go outside but live under freezing air-conditioning conditions, leave the house and you get into a freezing air-conditioned car to go to another freezing air-conditioned shopping centre? odd isn't it, but perfectly normal. I went to Hong Kong in August once and was greeted by hotel staff in ski jackets and frozen over windows in the height of an 40º Asian summer, odd world.
Winter Textures
So I am looking forward to winter this year as I am prepared for some real Arctic conditions, X-Plane seasonal Arctic conditions that is. When the excellent Winter_Package 1.1 mod by Xflyer was released last year it was a great step forward in creating a better seasonal conditions to fly in. But it was also a bit messy to change over to the winter textures? that has been fixed by the MOD texture exchange tool Generic Mod Enabler (Mac users use Wine) that allows you to switch root files in X-Plane, and since then Laminar Research in v10.40 has done a seasonal fix by allowing developers to use data-ref seasonal textures, like here by Enstein with his Seasons - dataref-driven libraries 1.3.
It is still all very new, but there is still one component missing in that a lot of payware built scenery have standard textures as part of their package. Some developers do include winter textures like EFRO - Rovaniemi by DAI Media, to see the astounding winter results then read the review Scenery Review : EFRO - Rovaniemi by DAI Media.
This vista created a desire to be winter ready next year, but a lot of winter textures are missing. The Austrian Crew at AT X-Plane have full sets that cover most Austrian airports and that includes WIEN LOWS (Vienna) here: Winter in X-Plane and they are exceptional, but still winter textures are in the minority X-Plane wise.
So that left to do for winter sets for airports I required myself, batch processing can be the only way in Photoshop to cover the sometimes 500 or so textures that make up a top professional scenery today, but the results are worth the effort.
Noted here are the results of converting Aerosoft's EGCC Manchester...
Sadly copyright requires I can't distribute the files, there are a huge amount of them anyway and the size is 700mb. But if anyone wants the photoshop action to do the conversion then I have added the action below to download. But it works, and I have over the last few months converted the main airports that I want to use over the winter season, and is astounded by the results. I am winter ready.
World Traffic
Another great addition to X-Plane has been Greg Hofer's amazing World Traffic plugin. Released in April 2013 it has to be honest had a difficult birth, but it was also extremely complicated as well to create. But something gelled later this year to turn the plugin into something really special. It reached a sort of "Critical mass" as the many elements came together to make the whole thing work. The major one was the release of v2.0 but it is the huge range of aircraft and tools available that now takes out a lot of the confusion and setup work that was once required. To be fair to Greg Hofer a review on X-PlaneReviews has been in the works since early 2014, but I felt it had to reach a certain position to deliver the plugin to the masses, we have reached that point and yes I have been working on a review to capture the WT experience at its best, but WT has also dominated my personal time in the last year because I believed in the idea and the concept, when it works, you will be amazed as it turns boring airport scenery into buzzy busy places (watch out for those takeoff and landing aircraft!)... brilliant.
Preferences
Since I started in X-Plane Reviews I have a bit of a difficult relationship with my iMac 27" desktop computer in framerate. I even burnt out a graphic chip last year because of this problem, but in all cases every care was taken in Reviews to give the correct information on how your computer absorbs the X-Plane Simulator. The issue is compounded by the fact is the problem an X-Plane Laminar Research issue or a physical Apple Mac related one, to a point in this case it was both.
Now I don't know if this is related to Windows application of the simulator, but certainly it relates to large screen Mac users. My issue was that as I was using the simulator the framerate would drop down to a usual running of around the base of workable framerate of 19 frames (fr), but in many cases it would drop down into the sluggish area of 15-fr to 17fr, trying to fly in these conditions is simply frustrating and not very realistic, so you pull back on the simulator setting to almost the basic render settings on X-Plane, point is it made no difference?
The other point to consider was the fact you know that a certain position (place/airport) and certain aircraft does give you a certain framerate output, but when the same settings of place/airport and same aircraft can give you wildly different framerate numbers their is another element at work in the system.
The problem is compounded by the fact the framerate drop is slow and small over a period of time, so suddenly you realise the computer is simply unworkable, reset the settings and it makes no difference. And it is really hard to get the machine out of its funk, worse was the fact was you could not actually see why the computer was doing this. And this annoying scenario has created havoc for two years and lost me countless hours in frustration and work time.
This all came to a head in early August 2015 in the computer was simply unusable. Early in the year I had with my new faster and larger graphic 2g chip had seen some boundless framerate and revelled in the fact I could run features and special effects that I thought was never possible with my older 500mb graphic chip, yes it was a great feeling to have a machine that could deliver the X-Plane Simulator at the sort of performance it deserved, but by August I was in the deepest of deepest struggles of despair in just doing simple tasks.
So I cleaned it all out and reset everything from the very bottom (which was not a bad idea anyway), I got my machine back and then it was quickly in the funk again? clean it out again and it works, then back to the dregs...
Lovely Chris K of Sydney gave me a hint of the issue, because he runs a 27" Mac like me. And the culprit was pointing to the "Preferences".
Chris had the same problem and noted it is caused by the way X-Plane saves the information relating to the size of your computer monitor, or what I would surmise doesn't save? X-Plane is very clever in adjusting to your machine (or refining) its settings to maximise your framerate or you could call it efficiency. But in my case it was working against me instead of for me in the way it calculated the pixel area of my Mac's screen.
Chris K would adjust this by switching off his full screen and then switching it back on again so X-Plane recalculated the correct pixel area, it worked of course but in fact then didn't stay there.
What I found was that every time I was saving my "Preferences" when I came back to the computer it was resetting up the simulator with the wrong settings, worse it was adding in pixels I didn't have on top of the pixels I did have creating the situation of the computer then processing thousands and millions of pixels that didn't exist, so hence the very poor framerate and my Mac slugging its way all the way through the processing dogmire.
The fix was simple, set up a set of refined and efficient set of "Preferences" and don't save over them. And the problem went away. This does mean you can't update your current settings of X-Plane if you change things around in the render setting panel. But I found a better solution there, I created different sets of X-Plane "Preferences" for different jobs, like I have my default set of "Preferences" that if I stray to far away and the computers starts recalculating my pixel count, so at anytime if I put those default "Preferences" in my "Output" folder I am instantly back at my perfect default settings, If I want to run very heavy scenery I have a set of "Preferences" set to do that, HDR heavy settings, I have a set for that also and on it goes and to the last count I have 8 different sets of "Preferences" for different jobs. Want instant night time conditions then throw in at X-Plane startup the Night HDR render setting "Preferences" and in one startup you are set to go... and everything is already adjusted, and there is no need to then start up, go to your render settings panel and adjust, then you wait for the reprocessing of the settings before flying, it is all done at startup in one go.
If you need to keep a certain set of settings to continue the next day then by all means rewrite over your "Preferences" to save them, but in most cases when I have finished a task they go two ways. if they are updated and are good and running efficiently then they are then saved in my "Preferences" filing to use again, if not I throw them away... One thing I don't do now is overwrite them at the every ending of an X-Plane session and keep using the same settings and then always rewriting them over and over again.
So the results are great in knowing that if my set default "Preferences" are installed I can easily calculate the frameweight (My definition of the framerate absorption of certain scenery or aircraft on the simulation) to see how the scenery or aircraft relates to a basic set of settings.
Since the change I have had no framerate issues with my Mac, and I am off the stress medication.
X-PlaneReviews site
As you may have noticed X-PlaneReviews have done a gradual if glacial change to this site. Yes the house looks different and has new paint and layouts. Most of the changes are behind the scenes which have been gladly received in making X-PlaneReviews a better more efficient place to produce what we do. We are powered by the excellent "Invision Power Board" software also known as IPS and the change over was created by the release of IP.Suite 4.0 which was released in April 2015 although the first in house release was in November, 2014.
We updated in late July, but a lot of bugs were evident and that has transferred over to our slow makeover. Another update in early Oct 2015 fixed most of the issues and now we only have some fine tuning left to do, so yes it was slow and we thank you for staying on board as we did all the changes, but if you don't change and update, then you risk the issue of being left behind. Overall it is a great new look.
What I am flying
Personal flying time is like gold sometimes in X-PlaneReviews, yes we fly everyday usually but that is in the parameters of the review or testing, in many ways the flying is very different, long hauls which are my favorite type of flying is very rare now as you can lock up the computer for a whole day going from London to Singapore, and the review site can't wait that long for you to just get a few jelly babies of fun and some serious long distance flying in. But computers like the long distance simulations more than the constant changing settings of review or testing simulations, It allows the computer to absorb the software on a better scale.
But my love at the moment is the first General Aviation payware aircraft I ever bought, the lovely Carenado F33A Bonanza, which has just had an update to v3.1. The strange thing about this story is that when I first bought the F33A years back, I flew it then pretty well left the aircraft in its hangar for years. Yes I pulled it out for a few various reasons but mostly it just gathered dust under the groundsheet.
Then I updated the machine for some reason which I think was it just needed updating and you haven't been able to drag me out of the cockpit since.
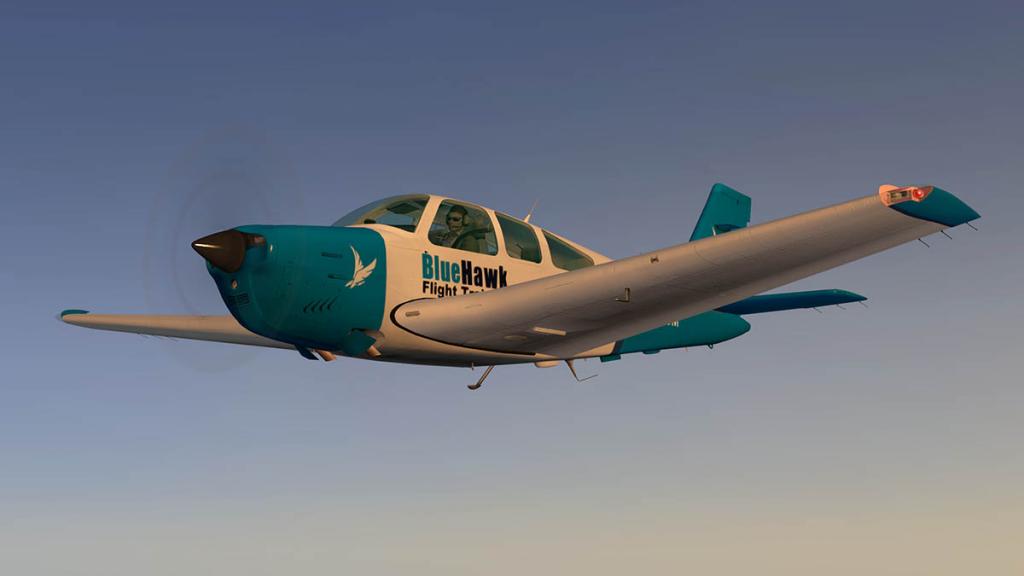
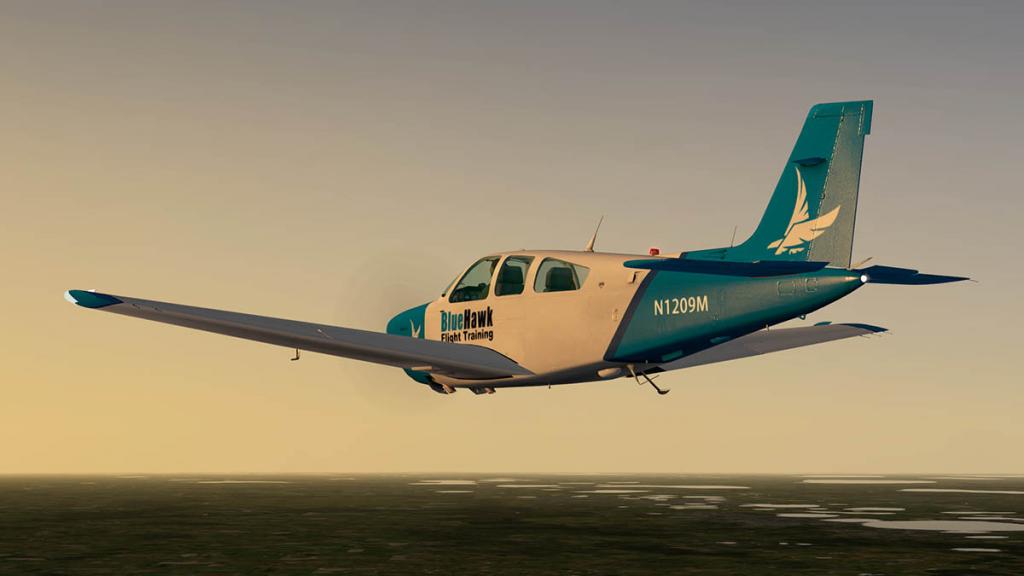
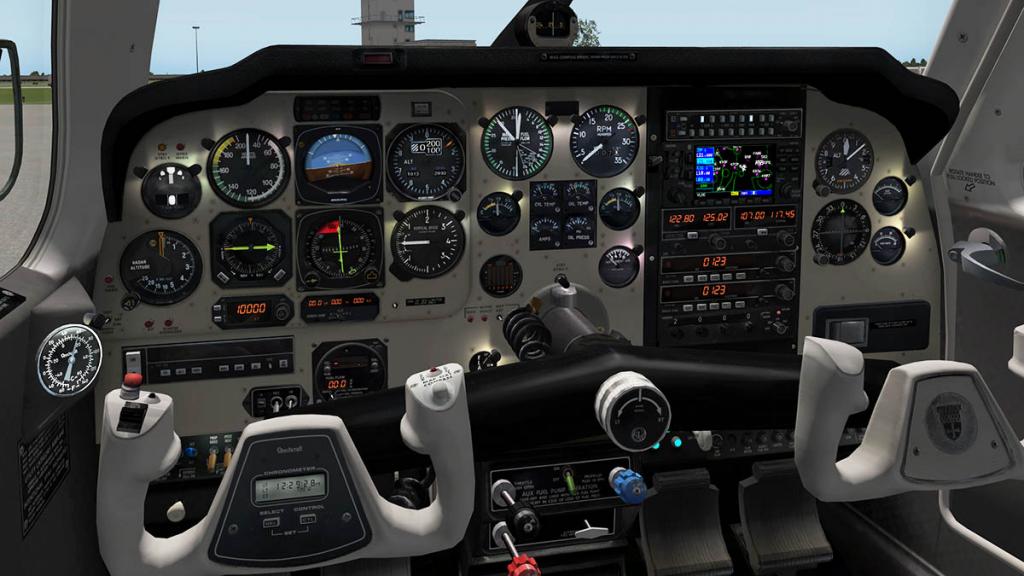
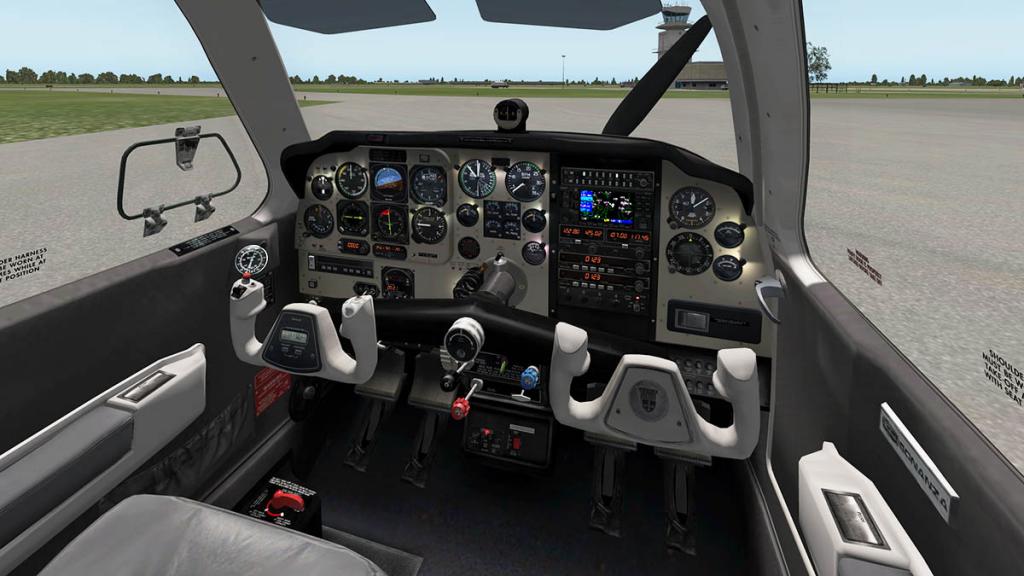

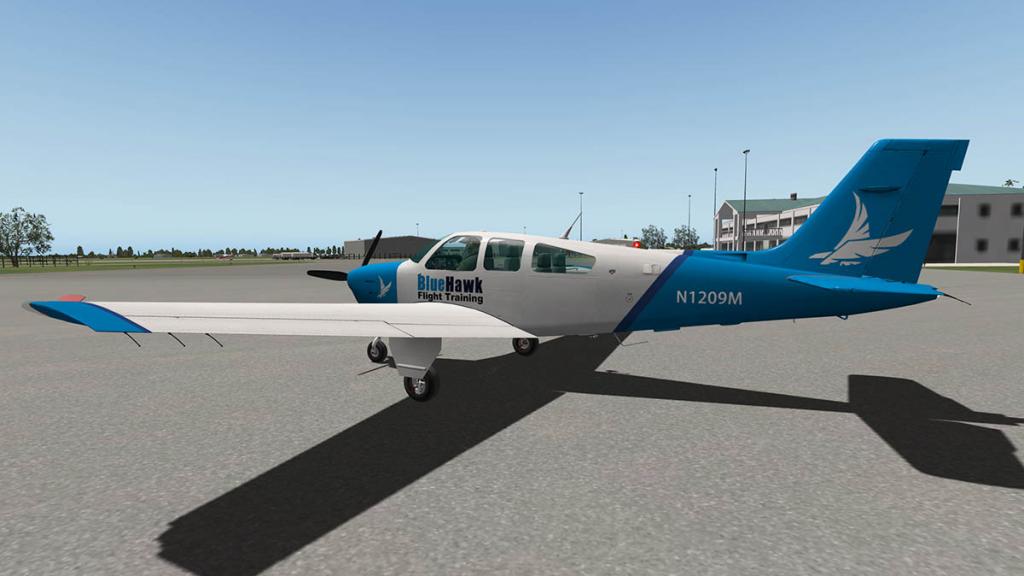
There is something super right about the F33A for me, I love the old style gauges and great variety of VOR navigation tools and in the v3 you have the excellent GNS 430 GPS. I think the biggest reason is that my flying skills have also caught up with the aircraft over time, now I use the course and NDB directions for navigation and in circuits and have also learnt how to really utilise the tools you have at your disposal and the F33A ticks all the boxes in these features, it flies really well and the lovely BlueHawk Training livery is extra special, both the aircraft and myself have matured to come together to really enjoy GA flight at its best, love it to death. Note check your X-Plane Store accounts as most Carenado aircraft have been updated quietly to v3 (Oct 2015), they are really good clean updates.
FlyJSim's great B727 (Boeing 727 complete series) is a great simulation, I have been routing around Australia to get the best out of this challenging aircraft.
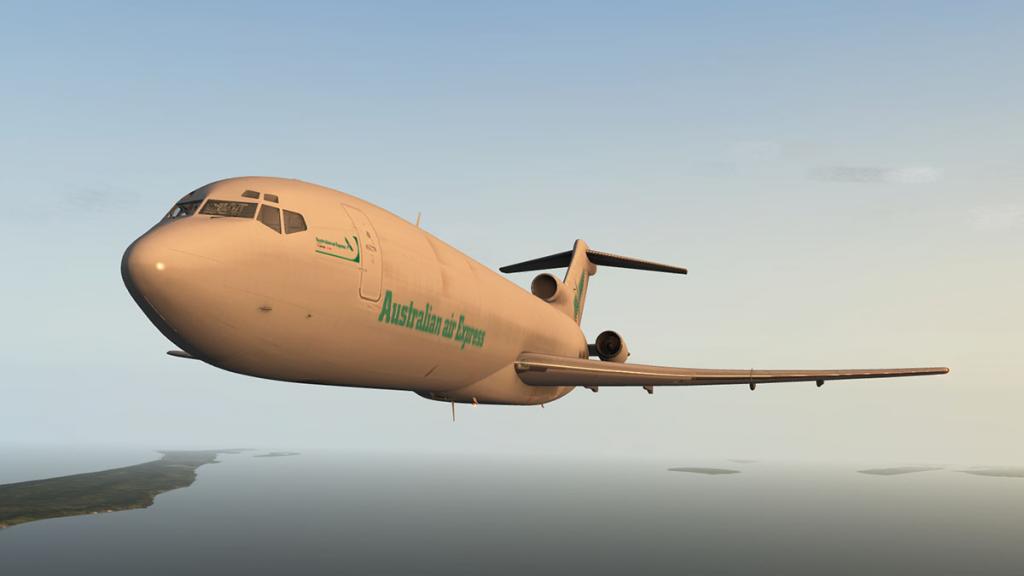
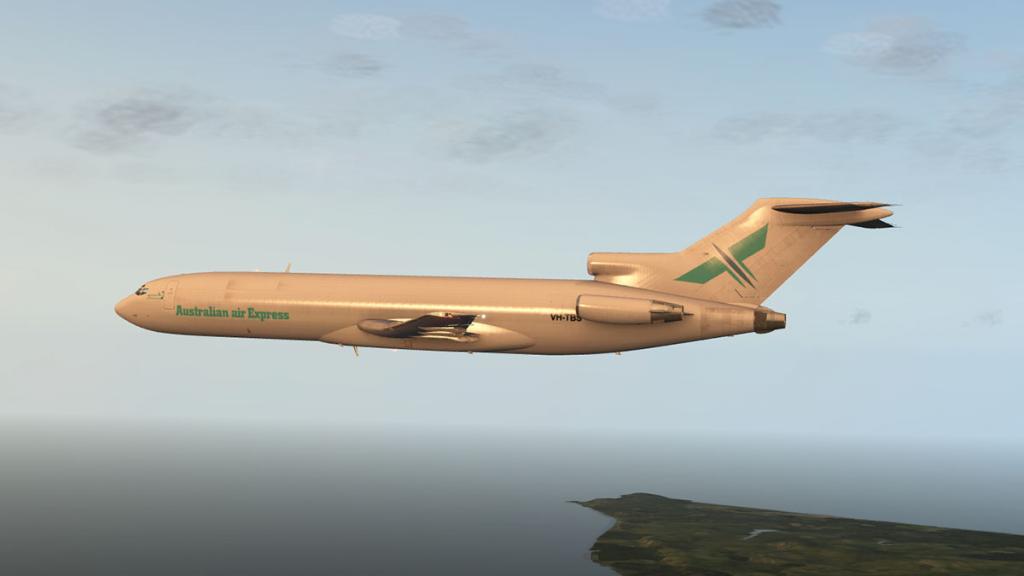
I have been bouncing into most major Australian ports (and a few over the Tasman in New Zealand) with my Australian Air Express liveried B727F, and have been having a great time of it, It is a complex, hard working aircraft that is a real handful on approaches... but great simulation.
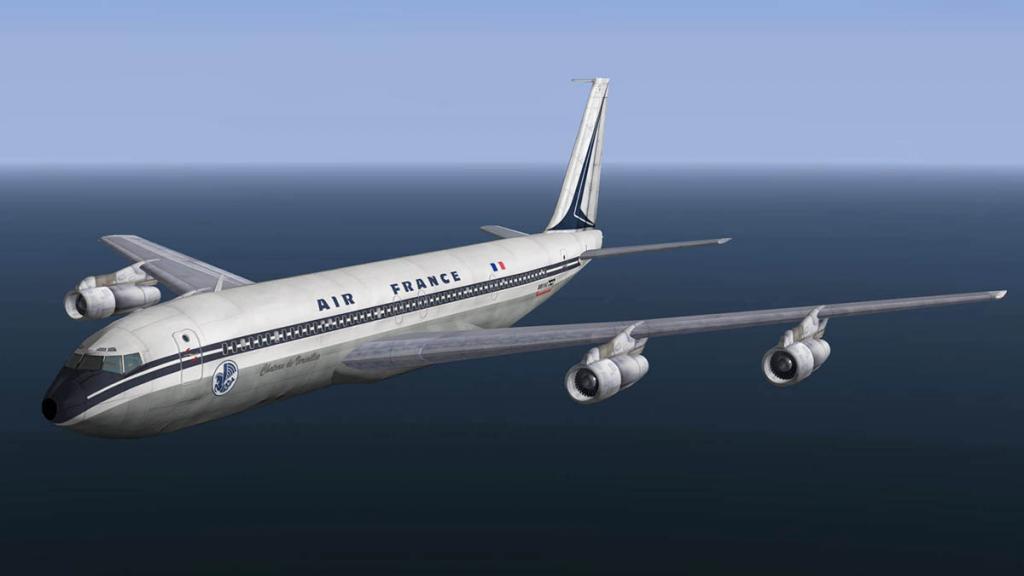
This naturally lead into the great Boeing 707 update from Mike Wilson.

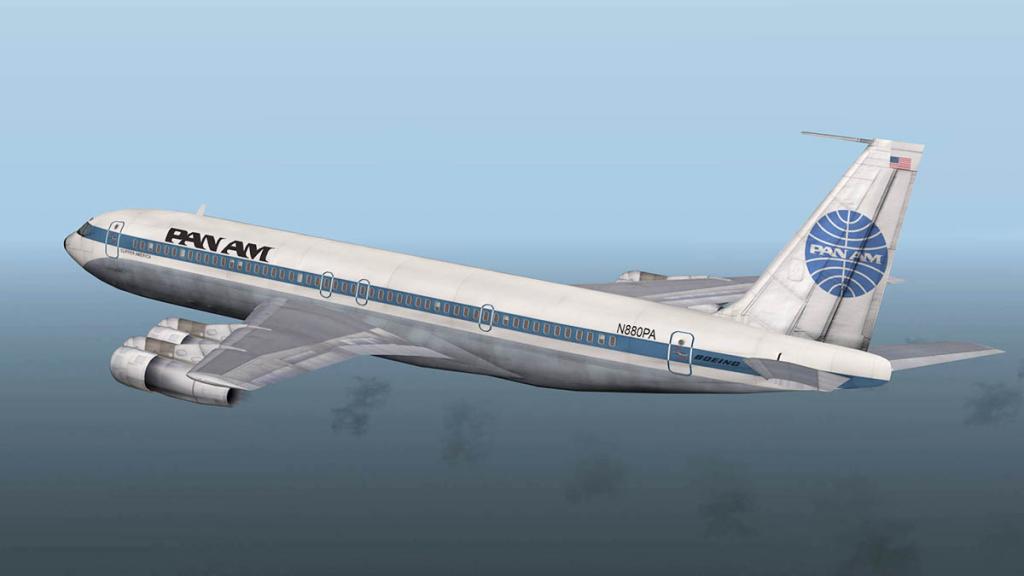
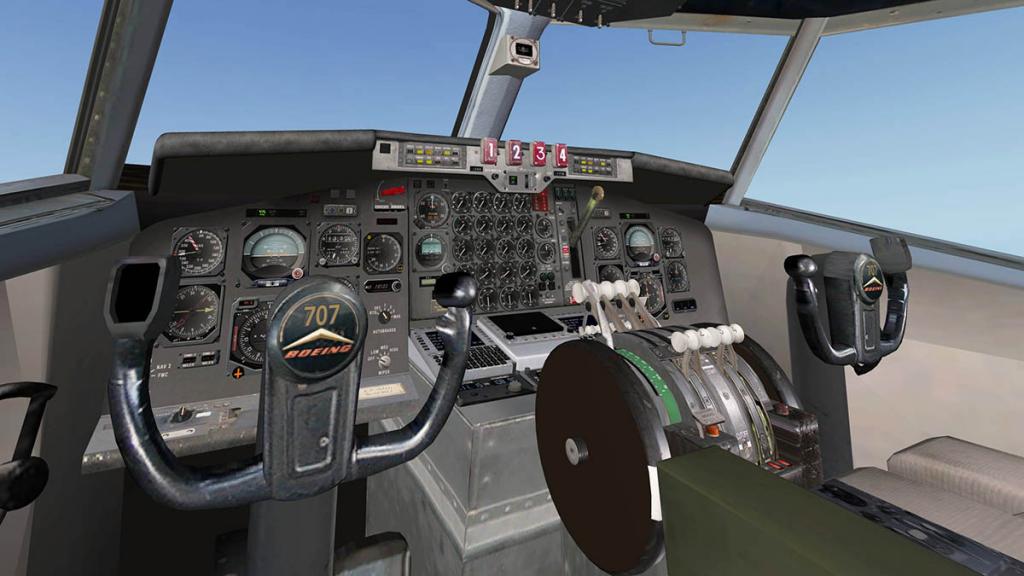

Again another aircraft I bought as a birthday present to myself and I promptly hangared it. It was good but was missing the complex simulation I desired. This 3D cockpit update really changed all that and so I went on with my 1960's devotion to the era. My aim was and still is to rerun the global routes of the sixties, running out of the UK to the States or the round the world staged routes that were the order of the day, it really was the time of the great global expansion of aviation.Top of the season
In the X-Plane world like in the real world the Thankgiving/Christmas season (sorry I am not a "Happy Hoilday" person) is almost here, where did 2015 go? gone that quickly. But don't doubt the end of the year is chockablock of really great releases, I think it is going to be an expensive Christmas with so much coming on offer, but I would rather have it that way than a few slim pickings.
The strange thing is and the above aircraft prove the fact that the very best or most expensive aircraft don't always deliver the best love and affection, but the big ones will always draw a crowd and a hunger for more features and experiences. There are some special ones coming this 2015 Christmas, so we could be looking at a very lonely Christmas and New Year, It will be just you and a computer and a lot of nice shiny toys to fly....
_____________________________________________________________________________________
This action was created in Photoshop CC 2015
Unzip and load action by clicking on the Actions Palette menu button (located in the top-right of the Actions Palette. Select “Load Actions” Select the downloaded .atn files
Different sceneries may require fine tuning of the action, but it should cover a majority of the textures, batch processing is certainly required to process the huge amount of textures and test one texture to make sure it converts correctly and you will need to convert the textures from .dds files to .png files to process them.
_____________________________________________________________________________________
Stephen Dutton16th November 2015Copyright©2015: X-PlaneReviews
-
7 hours ago, Guest glennc said:
Looks good but a fully working FMC is top priority too me. I have burnt my fingers enough on planes that are 80% finished and then the developers go on to other things not mentioning names but everyone knows who they are. There are 2 coming out soon which I will buy first and await more reviews of this plane as it does seem good.
X-craft's are a small tight team, and the E175 has been a very different approach than the first release E195 like I mentioned in the preview. From the developers side the E175 has been fully developed, but the FMC is outside that area from a third party but I doubt it will be released unless it is completely developed. On saying that any release including the big players will have issues on a new release, that is to be expected, it is the way the issues are quickly corrected that separates the pros from the average developer. SD
-
20 minutes ago, Guest said:
Can you load a .fms flight plan?
The basis of the new MCDU (FMC) in the E175 is still .fms flightplan data, so I will say yes it should accept a .fms plan, but with most MCDU's you may have to just make sure it is a clean plan when loaded in the waypoints are inserted correctly and there are no breaks or bad co-ordinates. SD
-

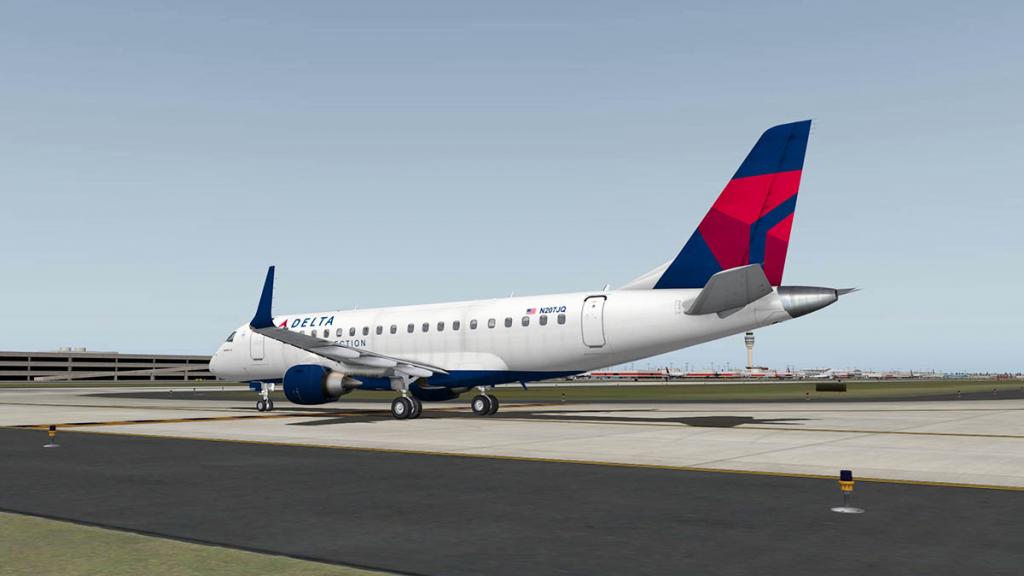
On Approach - Embraer E175 by X-Crafts
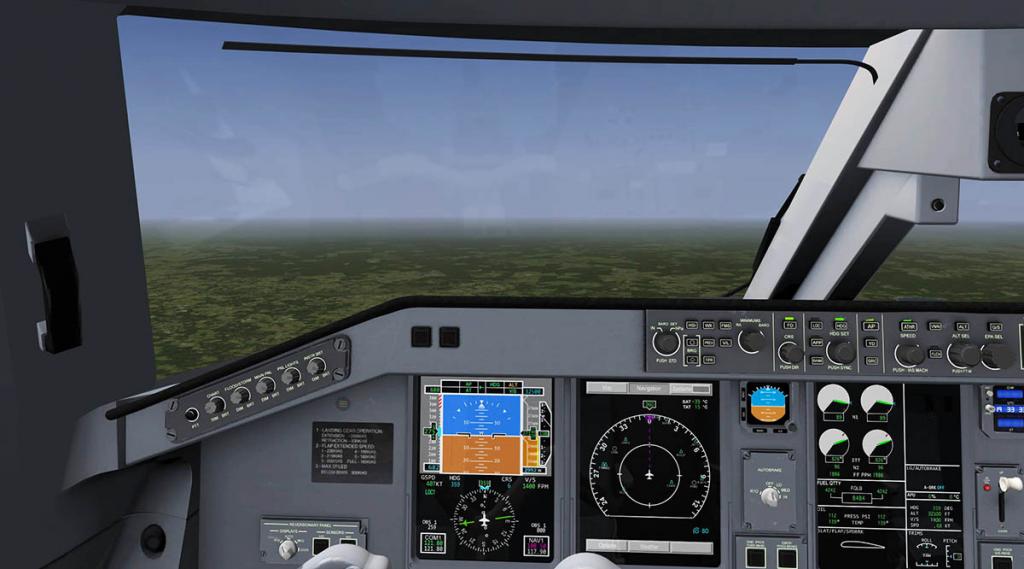
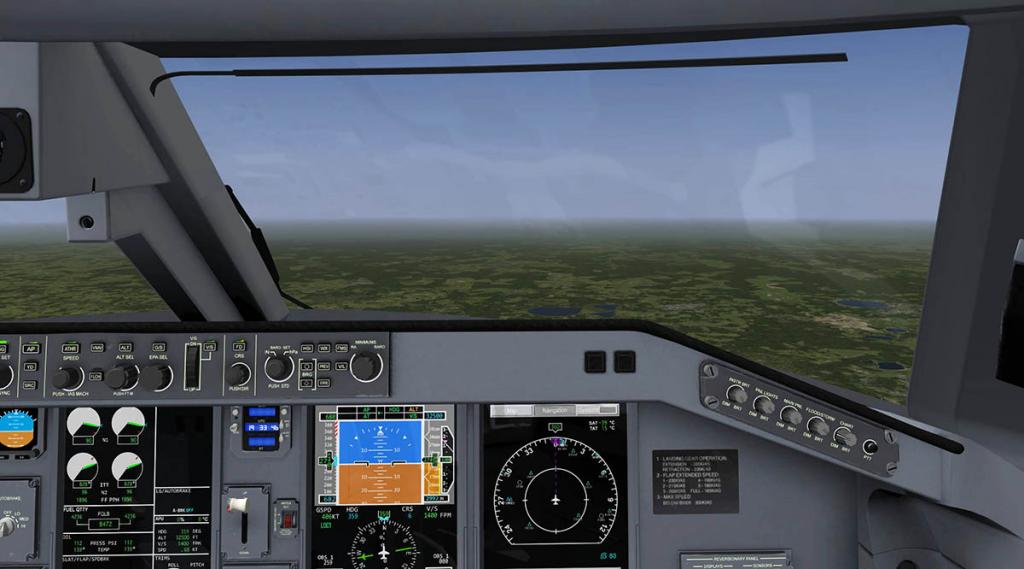
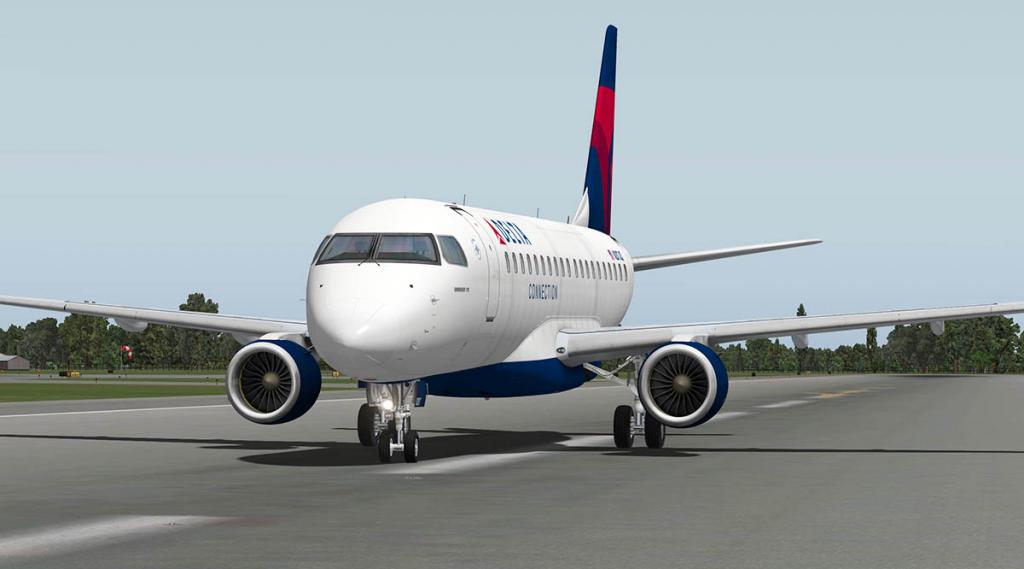
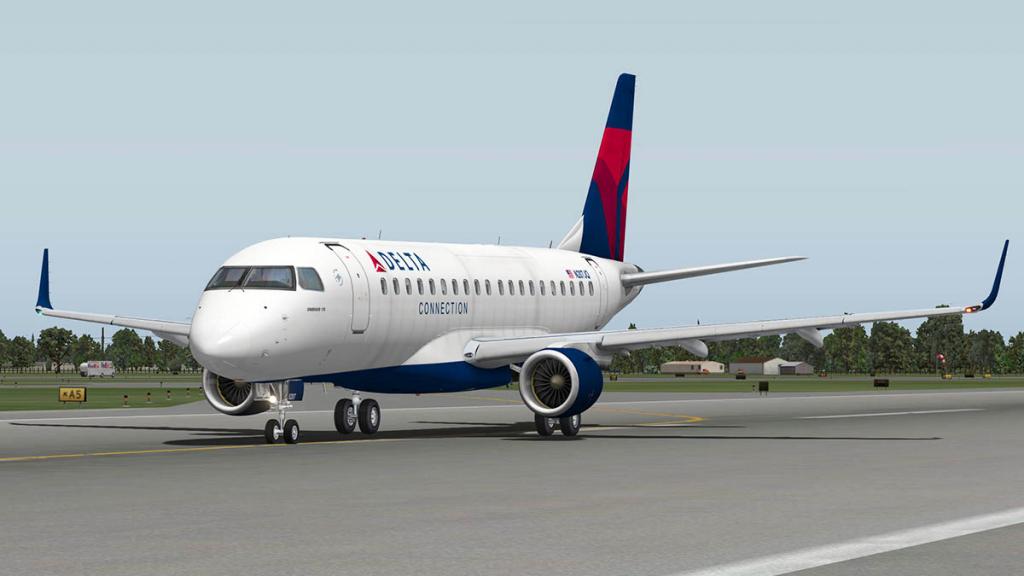
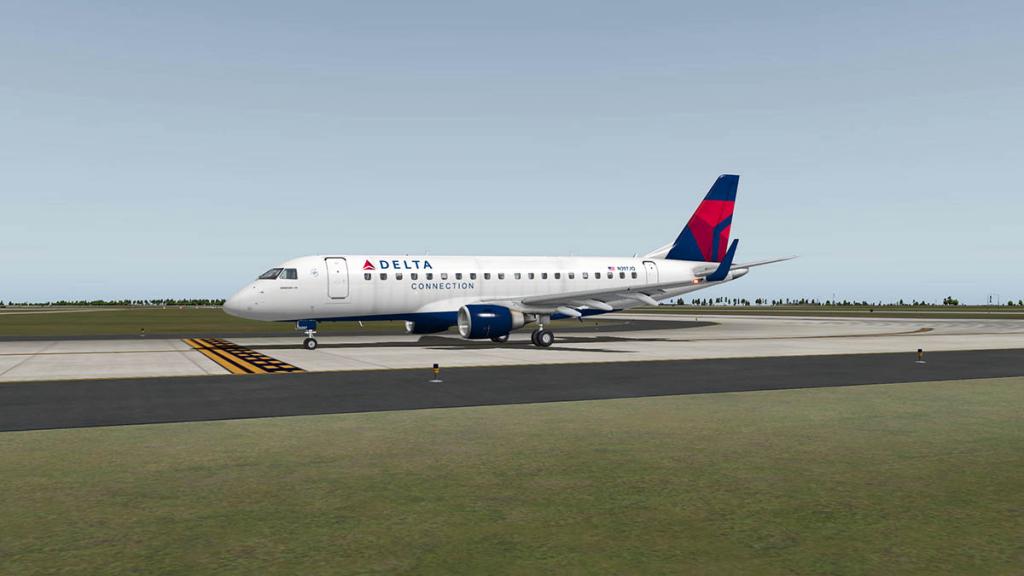
Coming soon is the latest aircraft from X-Crafts, the Embraer ERJ175. This is a follow up release to X-Crafts other EJet the 195 LR that was released in August 2014. Here we have a quick look at the aircraft that is still in a beta stage of development, and ask how long that will be is going to get the answer of "No idea" for reason's that are noted later, but X-Crafts have noted an early December release.
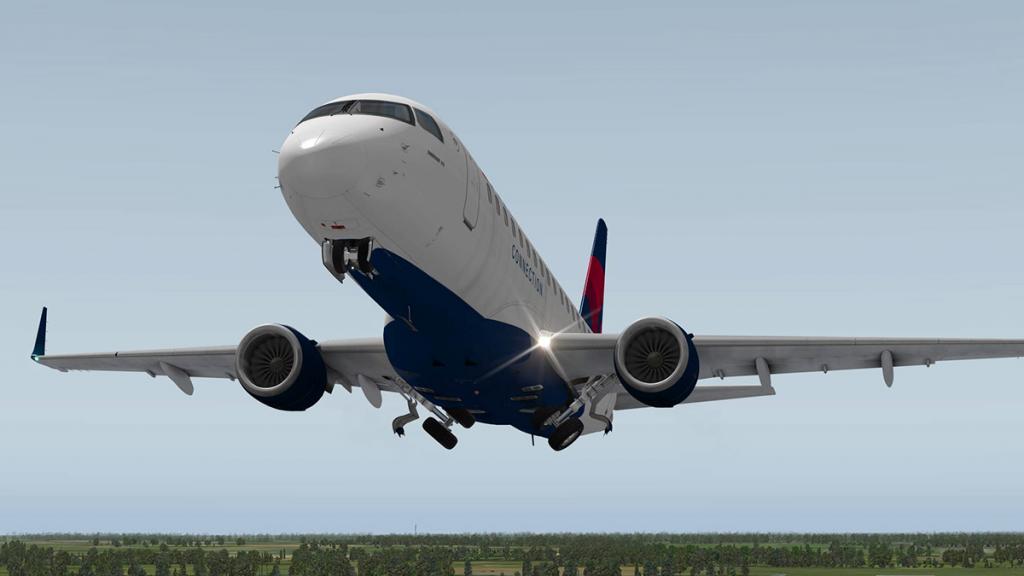

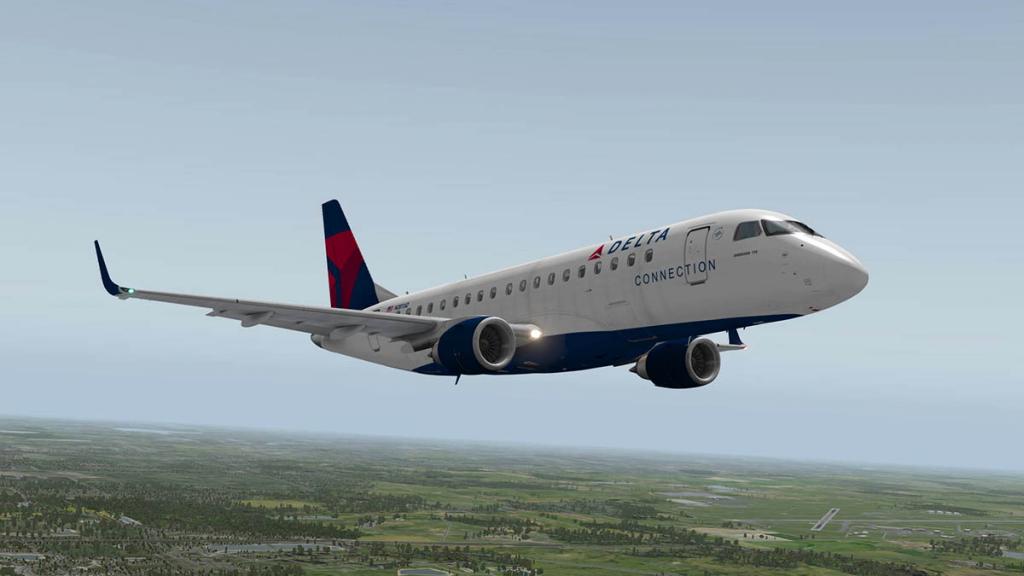
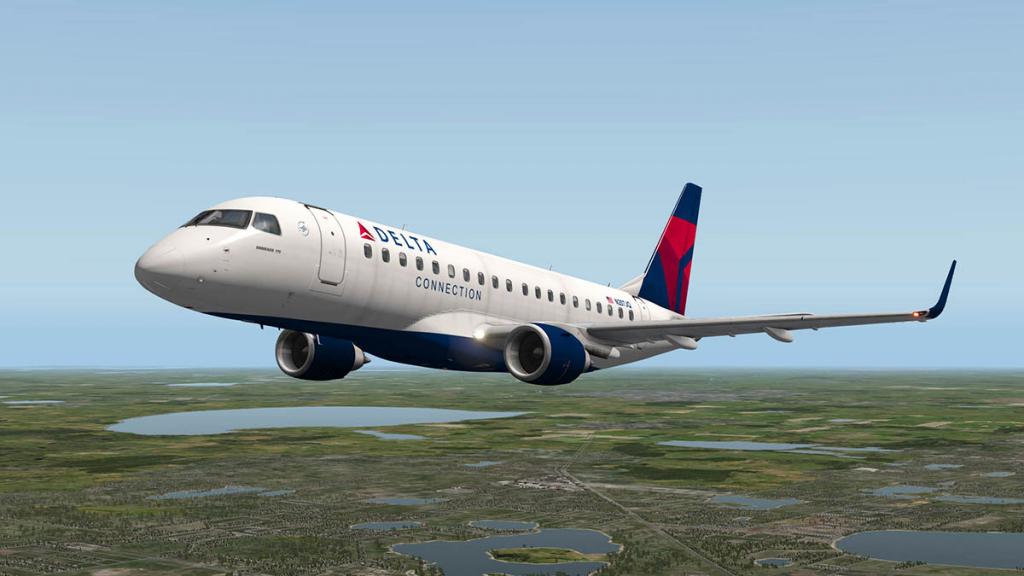
Outwardly the aircraft looks a duplication of the current EJet 195LR, but that would be the easy way out. X-Crafts have however 95% remodeled the aircraft from the ground up, it is the same, but now far more certainly better. The one thing I really loved was the quality of the original E195, it was a really well created aircraft, but was let down by being a first release from X-Crafts and the issues of maturity were needed to bring the aircraft up into a more respectable condition that was done over the year in a series of updates. This E175 however comes with more experience and a completely more level higher standard and complete aircraft. This is a lovely sweet flying machine.


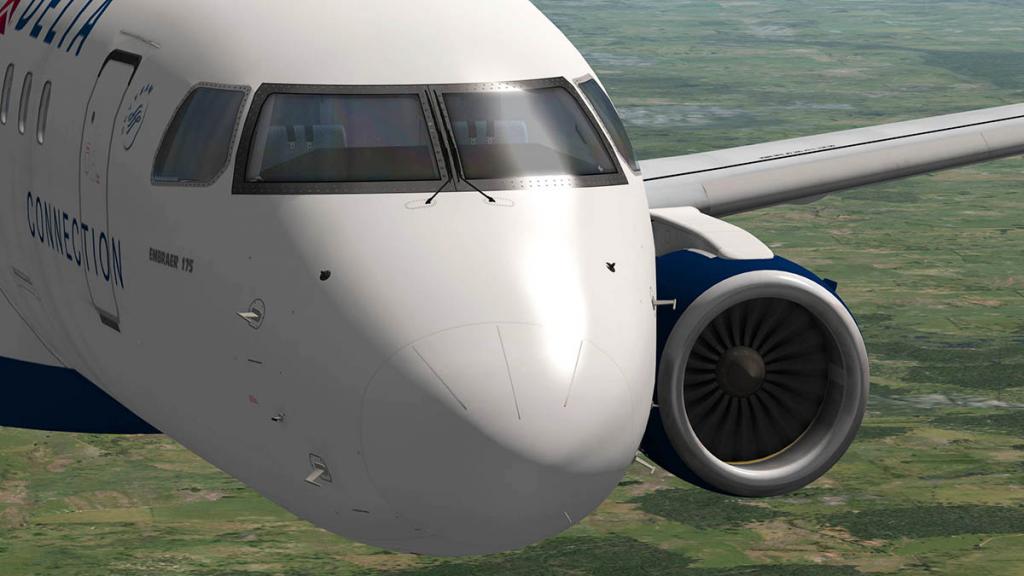
Quality and detail just oozes out of the E175, superb detailing, it is an aircraft I just want to look at for realism.
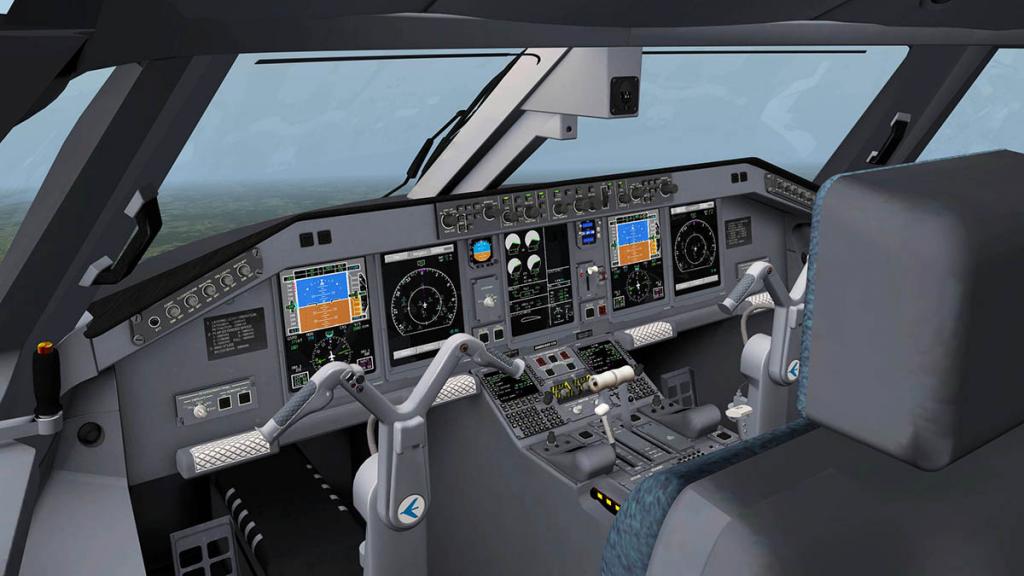


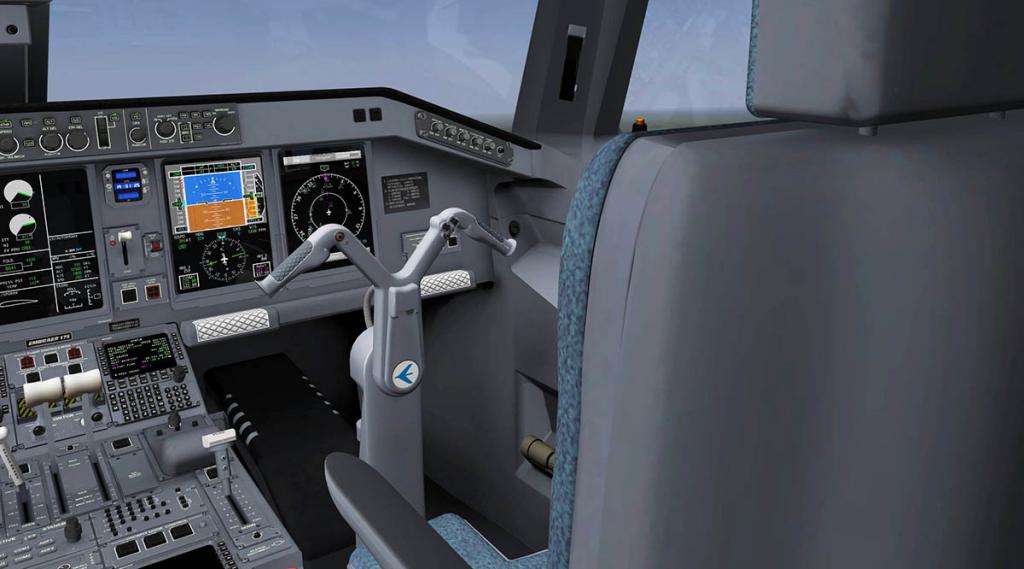
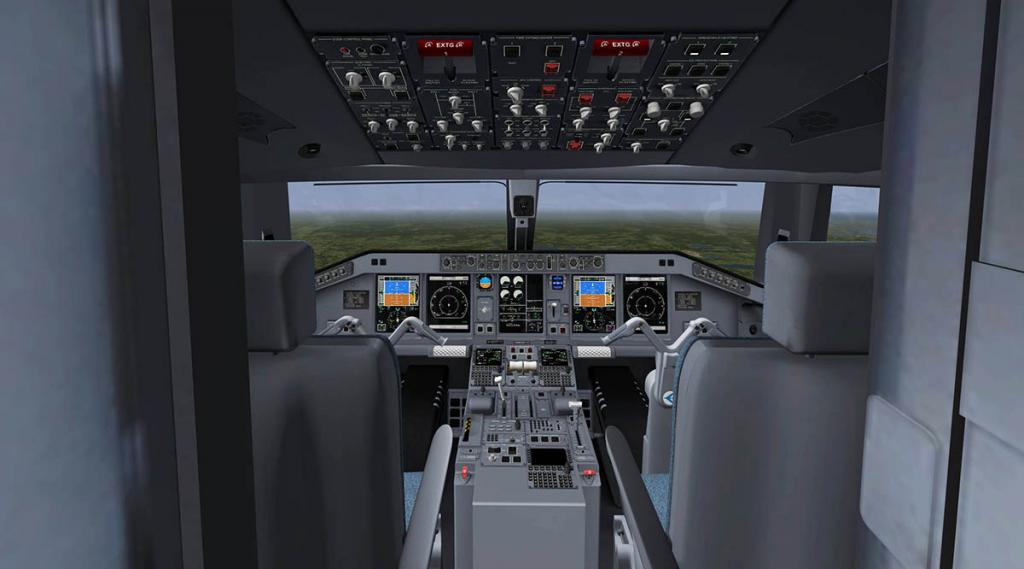
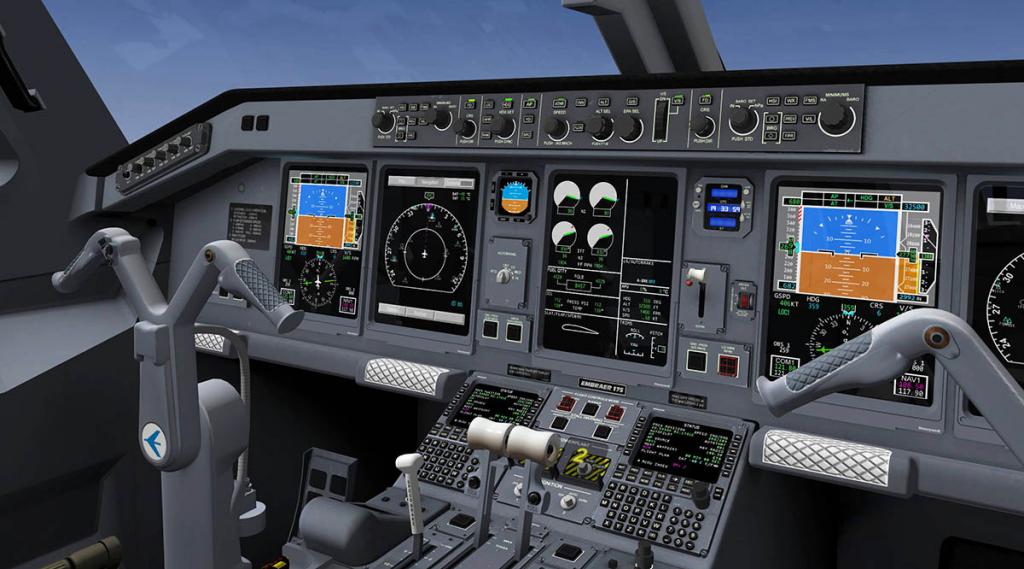

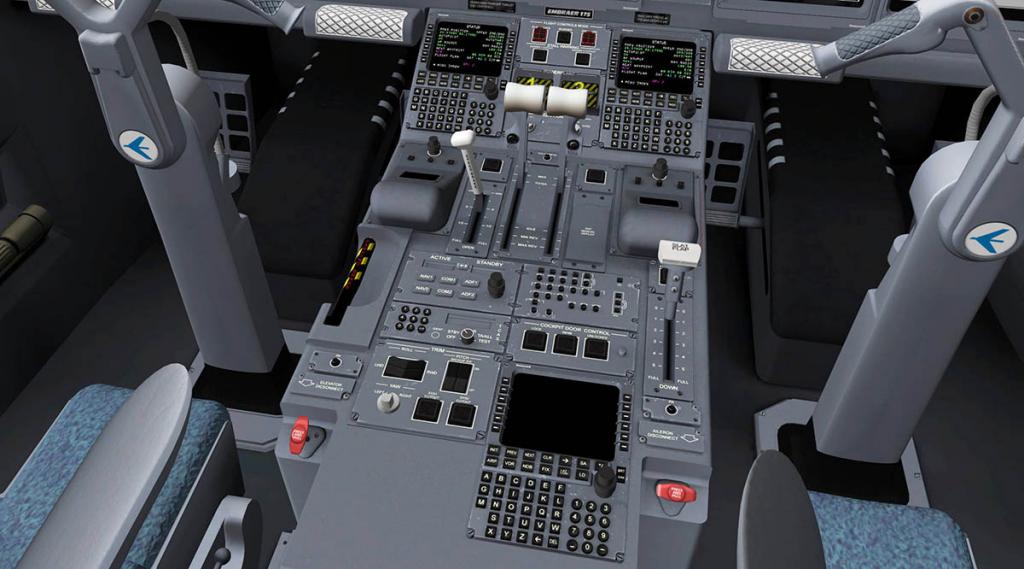
Although the E195's cockpit was beautifully created and again that detail is replicated again in the cockpit of the E175. But it is in the more complete functionality and fine tuning that makes the big difference, knobs have better tuning (altitude is three way) switches for lighting and start up are now all individual settings. Almost all areas from the displays, switchgear to the menus have all been fine tuned and improved.
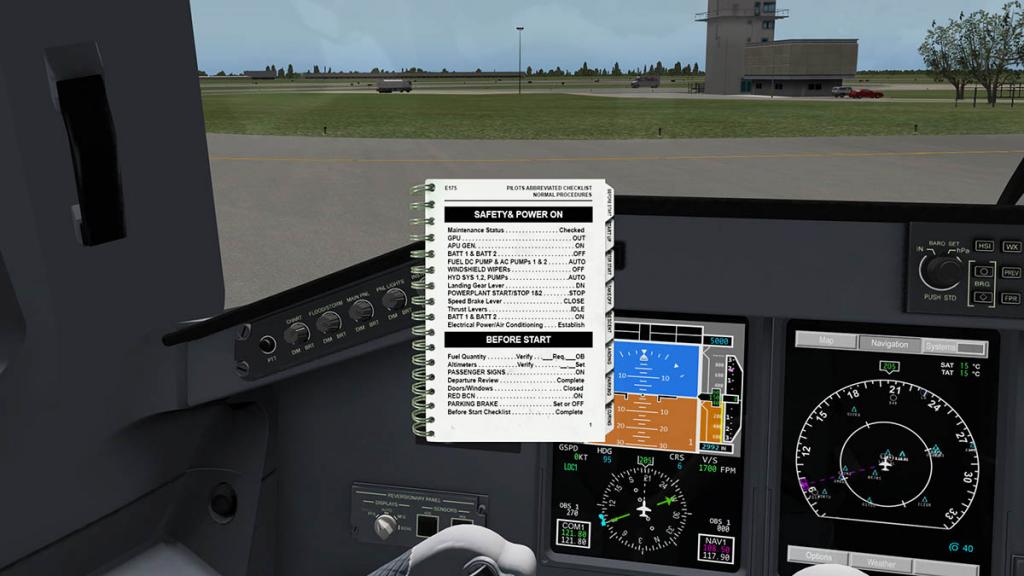
The main feature of the release is a built in complete Honeywell FMC by Steve Wilson. Note these images are still in beta only and anything can change, but this is an excellent FMC system, it looks excellent.
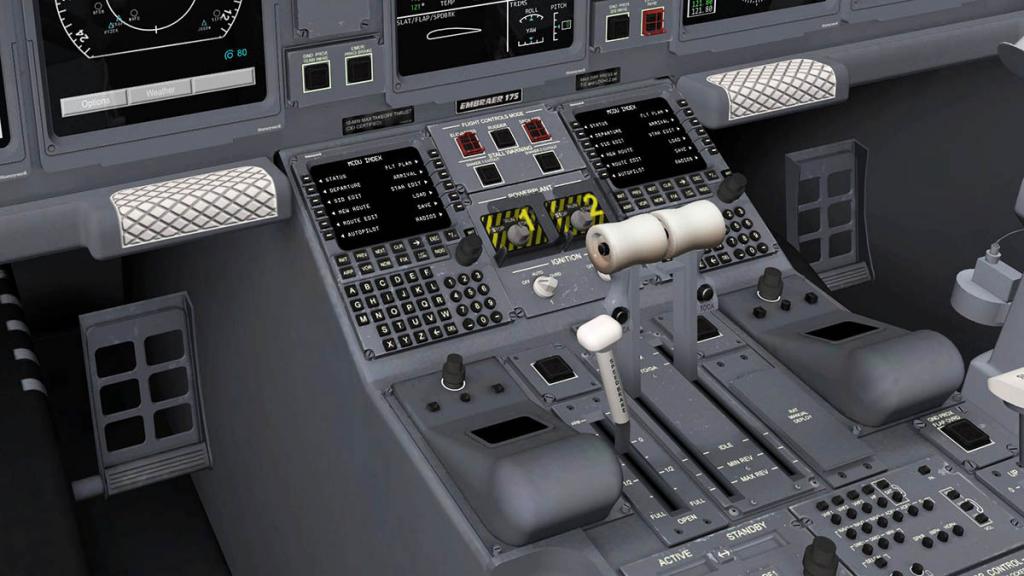
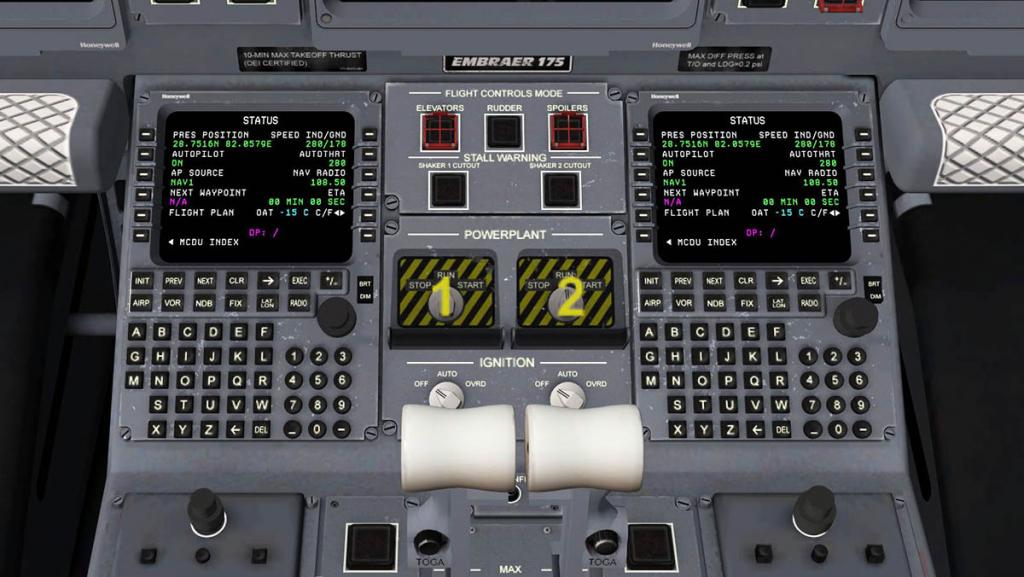
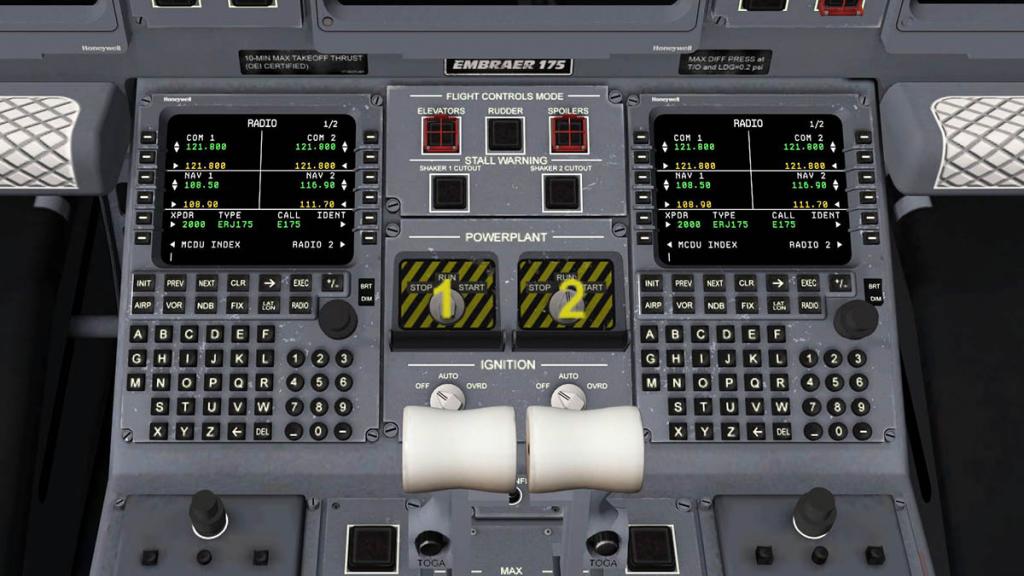
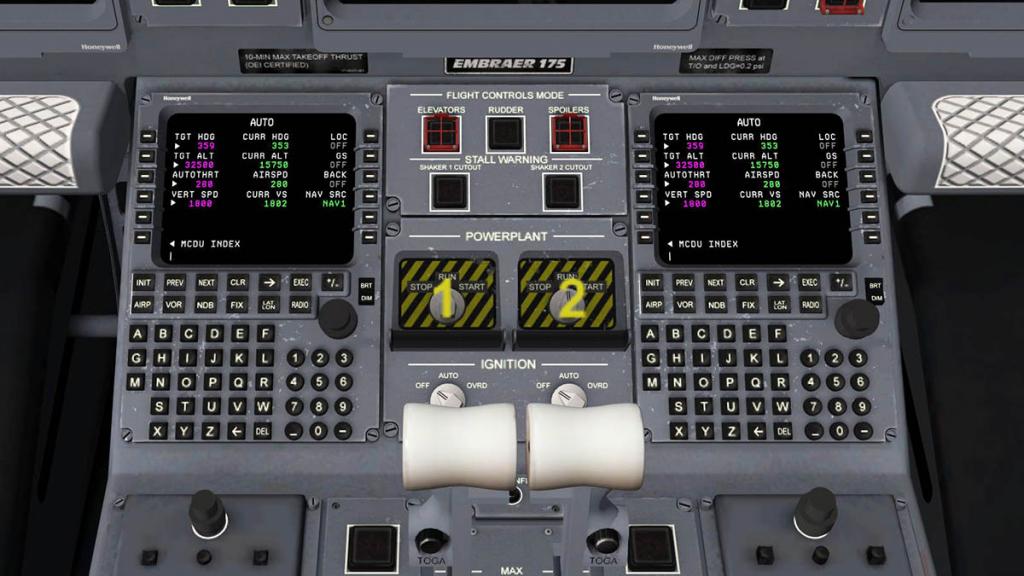
The addition of the FMC has delayed the original release of the E175 as that was going out originally on a release around late Sept/Early Oct, still being in beta it may even delay the early Dec release point, but the wait will be well worth it, it will be sensational.

Cabin detail is very good, if not excellent, small details like the food trolleys are beautifully crafted, sitting in the back is a nice place to be.
Sounds are very good, and great in the cruise.


External detail in undercarriage and wing, flap engine design is exemplary devotion to detailing.
On the ground the E175 looks brilliant, has a real presence, lovely aircraft.
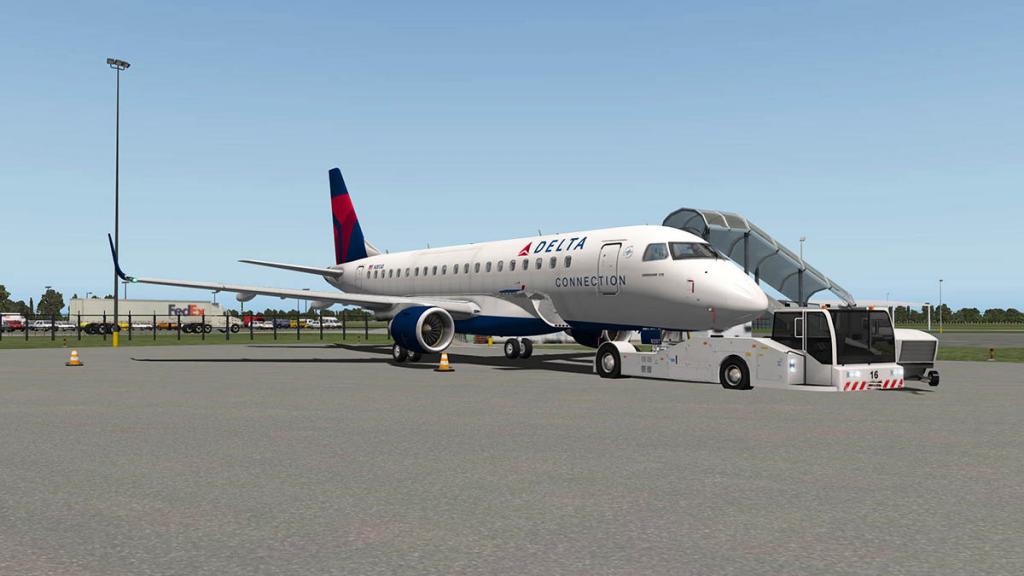
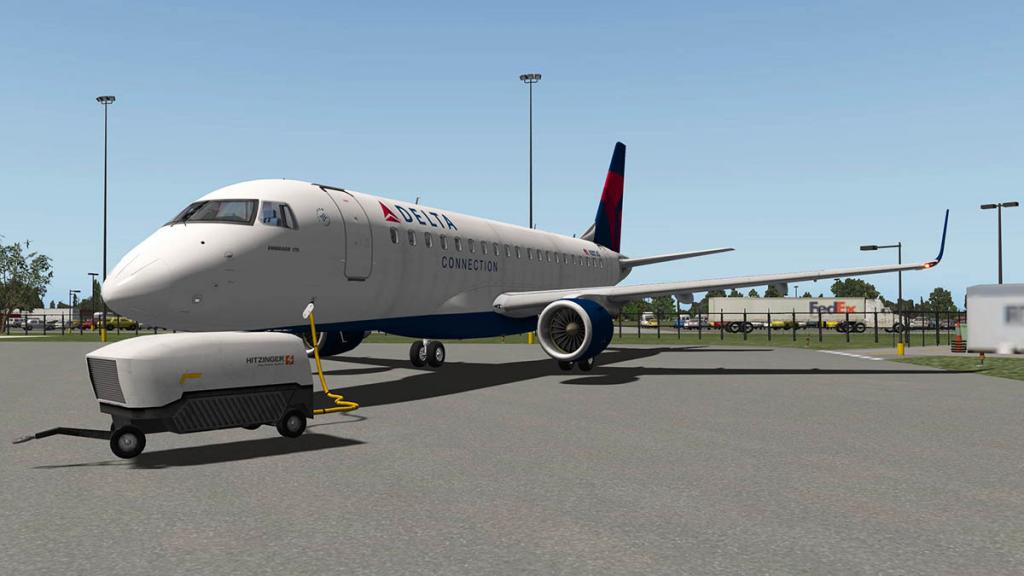
Static elements, built in GPU and pushback, there will be set of JARDesign's "Groundhandling" vehicles available as well (plugin available here Ground Handling Deluxe) note, the "Groundhandling" plugin is not part of the E175 package.
Checklist, is now in a cockpit wire manual form.

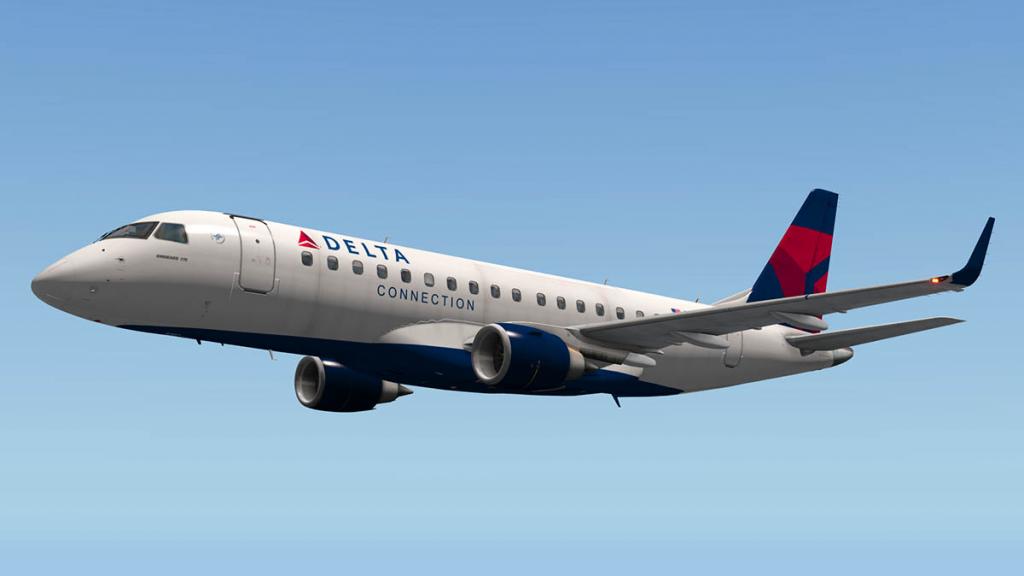
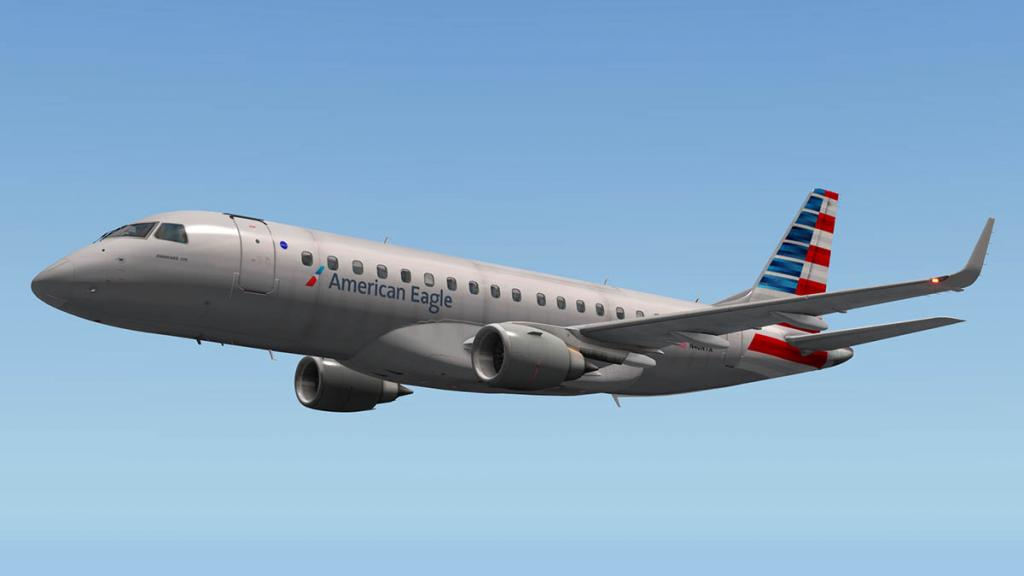
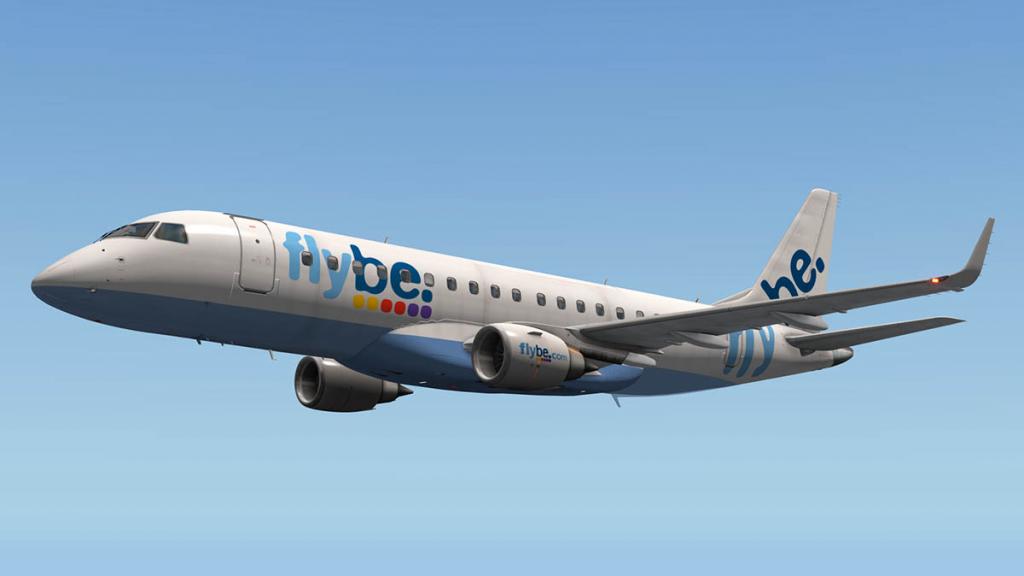
Liveries, include a blank and seven airline colours in Alitalia (default) Delta, American Eagle, both White and dark blue US Airways, Flybe and Air Canada. Quality is outstanding and hard to pick the best... I love Delta... The AAEagle is good, Alitalia!.... to hard?


The one thing that does stick in my mind more than anything else, is that this Embraer E175 from X-Crafts is such a nice aircraft to fly. Its design is as a regional aircraft and you can really enjoy multiple sectors and stops within a single day and really come to love the aircraft. At cruise it is excellent. I love it.
It is coming soon, Embraer ERJ175.
Developers: Marko Mamula_____________________________________________________________________________________
Stephen Dutton12th November 2015Copyright©2015: X-PlaneReviews
-
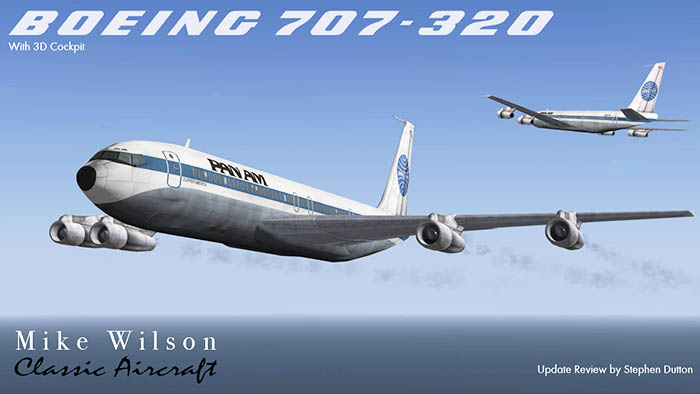
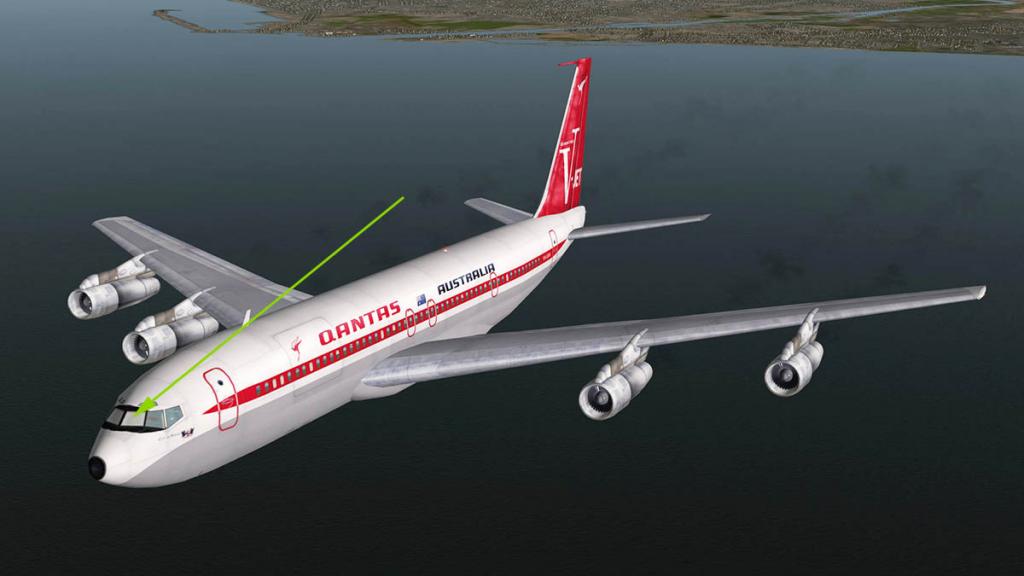
Update Review - Boeing 707-320 by Mike Wilson
After devouring FlyJSim's excellent Boeing 727 Series and Boeing 732 baby Boeing then your Classic 60's appetite for these incredible aircraft will still want feeding. You love the feel of aircraft from the Golden Age of Jet travel and one aircraft (well three actually with the Vickers VC10 and DC-8) represented the era with sheer dominance, these were the great years of global domination and speed without all that earth warming and noise pollution restrictions that we are well regulated with today. The FlyJSim B727 and B723 were only medium range machines, if you wanted to go global then you needed the Boeing 707.
You could go to church and pray hard that FlyJSim would create a Boeing 707, but otherwise there was only one good option in Mike Wilson's version of the B707 aircraft.
Now Mike Wilson has been around X-Plane as long as X-Plane itself, In fact he was one of the very first payware developers on the simulator, so let us say he is an old hand at this aircraft building game.
So I wanted a B707 and so as a birthday present exactly two years ago (yesterday the 8th Nov) I bought myself the Classic Aircraft (Mike Wilson) B707 to go 60's global. It was not bad, but the aircraft was only available as a 2D cockpit design and I will note up front that this aircraft is an old design with a few good nips and tucks over the years. But it was still a B707, I liked it, I flew it, but the aircraft felt old compared to more modern designs with fully functioning 3D cockpits, but every now and again I would pull the old bird out of the hanger and do a few sorties in it, good, but not the full simulation I really wanted.
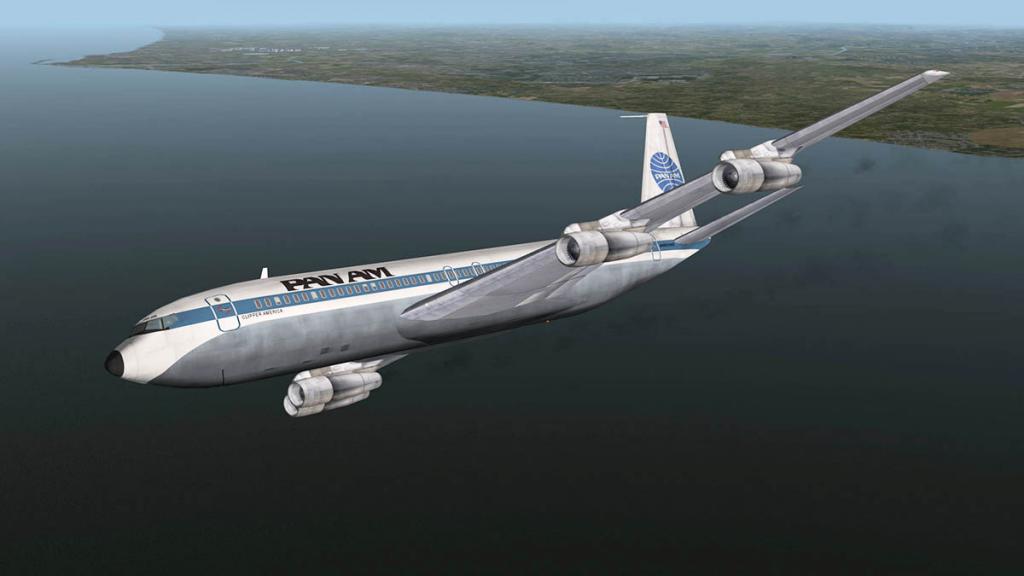


So herald my surprise when a download was posted on the X-Plane.Org that a 3D cockpit had been created by Julien Brezel for my dear old venerable B707!... gotta have that one people...
3D Cockpit Upgrade

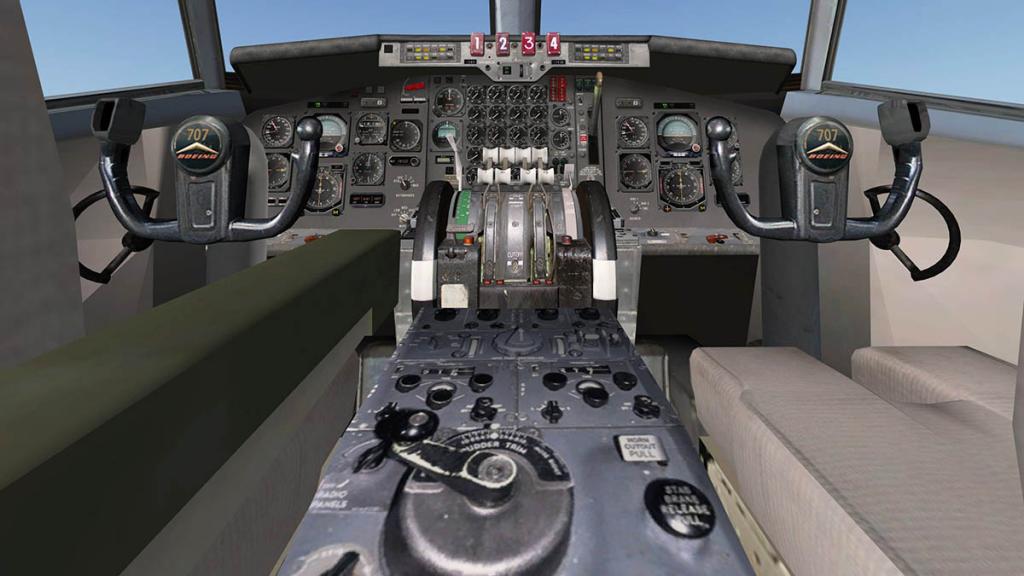


Putting my paws on a 3D B707 yoke for the first time was "Love this" and not bad a job it is either, it is certainly no FlyJSim and a lot of the areas in the cockpit are just flat graphic images, there is a engineer's seat but again that is just visual design and not a working panel either and there are a lot of basic X-Plane default instruments and switches... but, but... I simply love it.
Better is the 3D cockpit brings the Boeing 707 to life, makes it real and creates a good workable aircraft. The main important areas like the excellent four engined lever pedestal have been lovingly recreated by Julien Brezel, as have the great vintage yokes and the overall panel is very realistic.
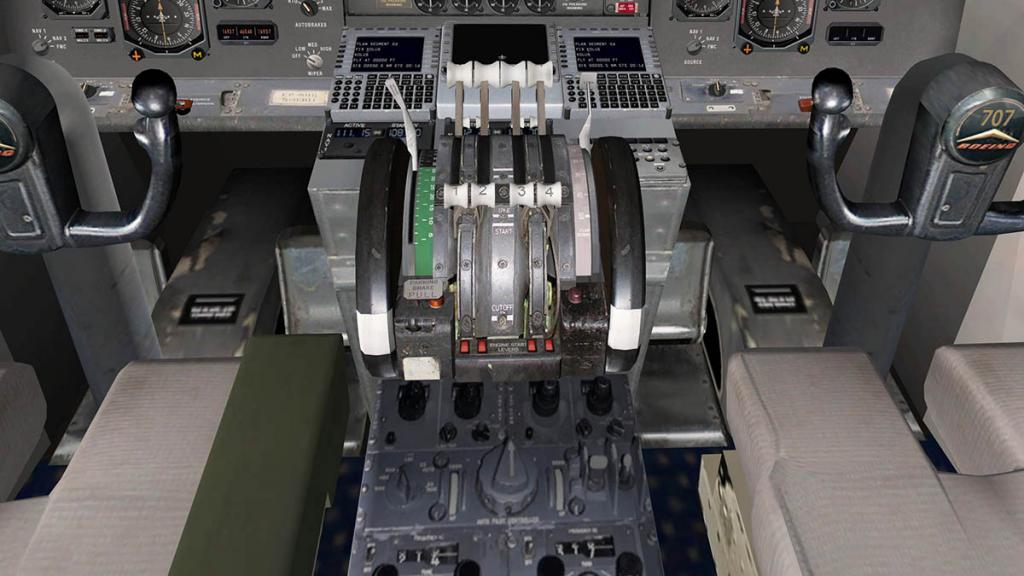
The Pedestal is certainly a highlight, lovely in design, but not as functional as it looks, you can't select the flaps, or speedbrake selections and the fuel flow levers are on off by the buttons only. I have all these operations in flap change, speedbrake, throttle on my Saitek joystick and throttle, so I didn't miss anything, but it would be harder to use manually.


There is the same feel and look as the FJS B727 thankfully, but not the functionality, instruments are basic and so is the switch gear, but you will soon find yourself operating the aircraft as a pro, it works well... even in this minor capacity.
Instruments consist of the Standard Six - Artificial Horizon (sometimes known as the attitude indicator) with built in pitch/turn indicator, Heading, Compass, Vertical Speed, Altimeter and Speed (in knots and Mach speed), added centre are the back up instruments of Radio Altitude, Altitude, Clock, Artificial Horizon and Altitude selector. The DME 2 - NAV 2 (distance) is also situated lower down right. The Co-Pilots set of instruments are very similar with just the Standard Six pack.
Centre panel is dominated by the four rows of engine parameters. Pressure Ratio (RPM), N1, EXH (Exhaust) Temp, N2 (RPM) and Fuel flow to each engine". Flap position indicators (two) are to the right of the engine dials.
The top glareshield autopilot is basic (X-Plane) but functional and easy to use, It does not look as bad as it should do, and it is well intergrated.
FMC is standard X-Plane and uses your standard fms. files, it works but there is no red line to check if it is locked in?
Roof mounted switchgear is not completely realistic as it covers also for the blank engineers station, but it is still laid out quite well for use, not totally functional, you have what you need and nothing more.
You need your "texture resolution" set very high. In the usual mid-rage settings the cockpit text is very blurry and unreadable. I didn't need the "extreme" setting (here it is set to "very high") to get better usability and readability, and there is the huge bonus in the aircraft claiming almost no framerate penalty at all, X-Plane sees almost right through it, so with the "texture resolution" set at the top settings then framerates were still in the high 60's and 70's and at a few times even 100fr and it was as almost as the B707 didn't exist to my computers processing channels... nice.
It is nice in the 3D cockpit version at night, a dark yellowish glow gives the cockpit a 60's feel without the hallucinogenic effects of the period.


Turn down the overhead lighting, and the dials glow, but they are more misty than they really need to be and can be hard to read and making them more darker would create a more realistic feel, but the overhead panel looks very nice. Overall though it works and feels very good.
If you are still feeling nostalgic for the full X-Plane v9 version, then the original 2D cockpit is still in there, but looks very outdated now compared to the lovely newer 3D version.
External Boeing 707-320
First off before looking at the outside of the of the aircraft I will note a personal change.


The aircraft comes with very light (or whiter) main cockpit windows compared to the top and side windows... I personally didn't like that, as it looked "well odd" or even "awful"? So I fixed up the front windows to match the others, and I think it is a visual major improvement... to everyone's taste, and if you want the changed file it is located in the Install section of this review.
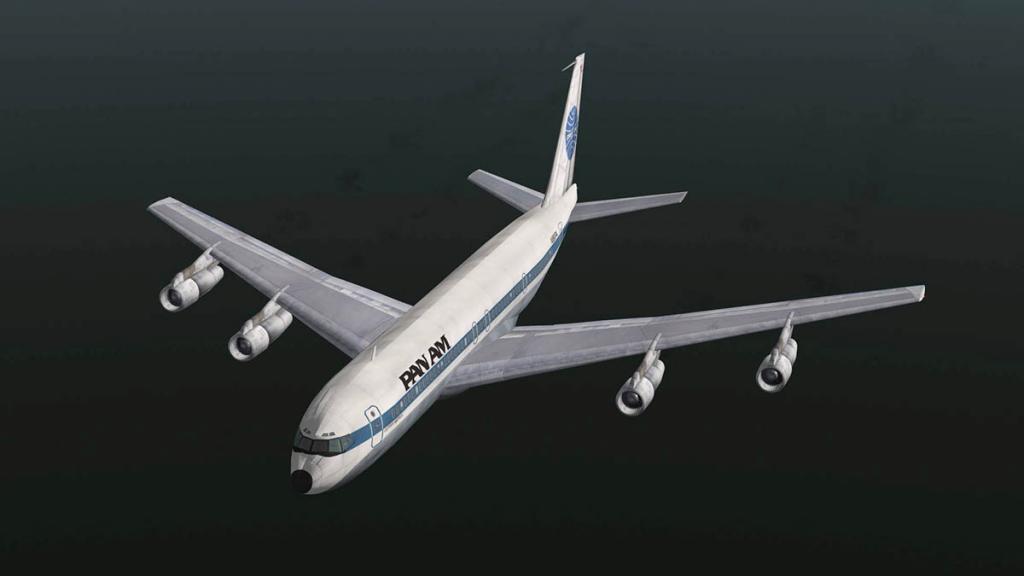
The aircraft is not going to win any design awards, but where there has been a lot of attention in the design's translation to X-Plane10, like the fuselage, tail and updated (livery) textures it is very good (even brilliant if you compare it to the original poor resolution textures), I particularly like the battered tail fin, and the detailing there. Wings have flex as well.

But the main comedown on the aircraft are the wings? For one they are so old they don't really match the rest of the aircraft. They feel v8 X-Plane and not the current v10 they should be...
Drop down the flaps and leading-edge devices and well?... It is not good let us just say that, and both the sets of front and rear edge aerodynamic devices are not even connected to the aircraft?

The undercarriage is not bad and is well detailed but the front gear is too fat, they also fold up through the fuselage and not into an open box.
Lighting are blobs of light on the aircraft X-Plane style but the wing navigation lights are not bad. There is very little detailing of this sort but the engine fans do rotate.

But the Boeing 707 does sound and smoke like it was from the unregulated 60's era. All sounds are the JERA sound system and are recorded from a real 707, and they sound excellent outside and inside the cockpit at cruise, the dirty smoke is heavy and brings a smile to your face.

The aircraft looks quite nice at night with the HDR lighting doing a nice job in illuminating the tail, I like the high porthole front door window.
Liveries
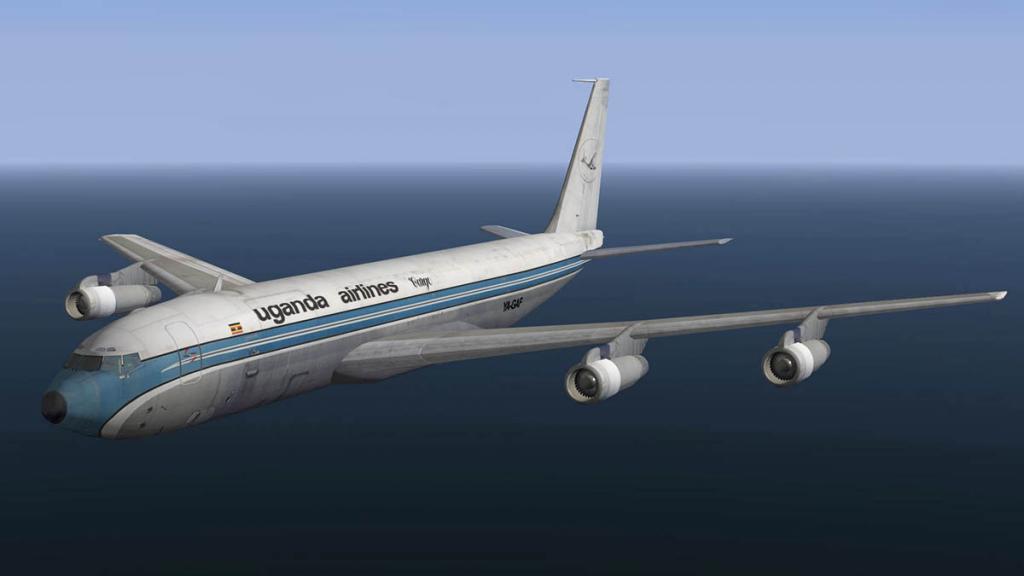
There is a huge selection of liveries from very good, to some average, the aircraft comes with Sara Air, Sudan, TWA (Mike's edit), Uganda Cargo, Air France, American, Lufthansa and Pan Am. White is default and there is a photoshop .psd paint kit in the package.
You can download 27 more B707 liveries (35 in all) here: forjets


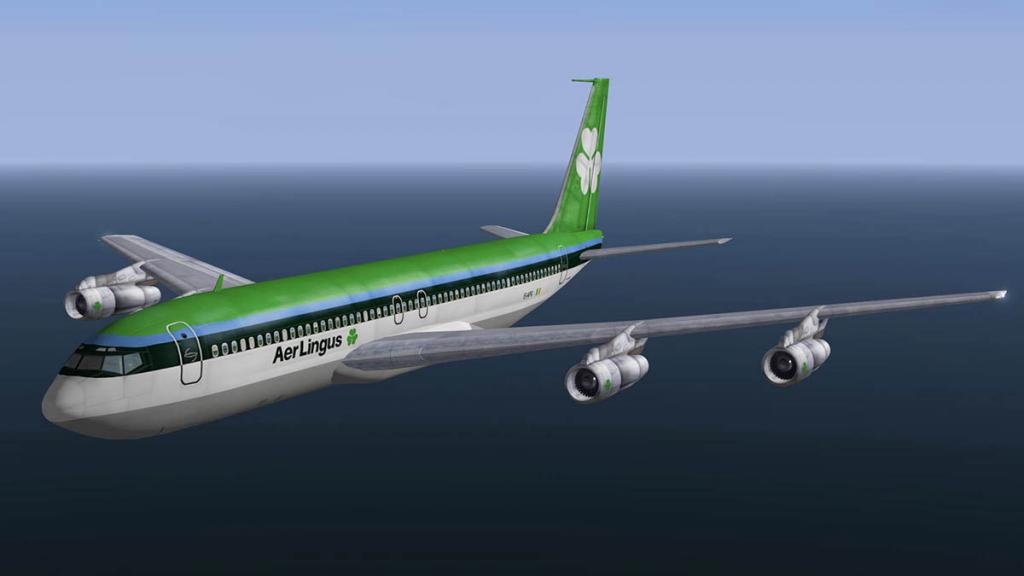


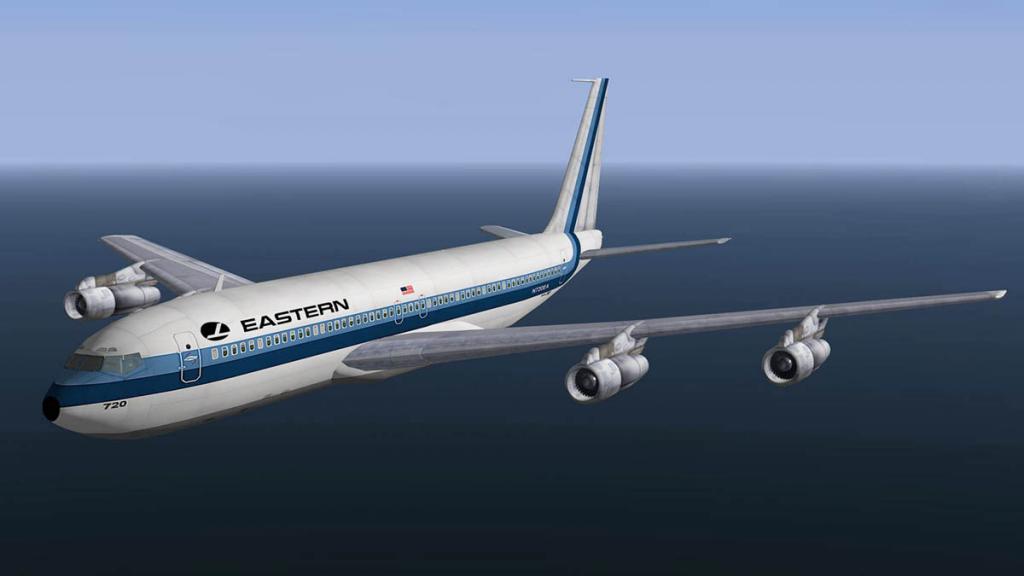
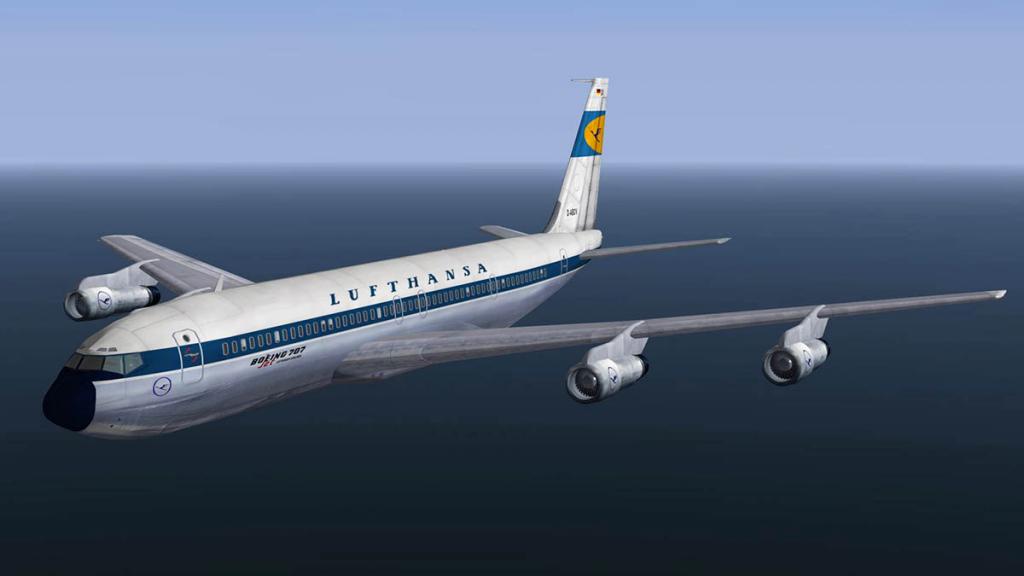
These are a few of the livery selections available, there is some great Retro versions and airlines that have gone to the great airport in the sky, and some need the odd touch up (mostly the glare paint around the front cockpit windows) to make them great. But the quality overall is very good... a note the earlier liveries don't work with the updated fuselage.
Summary
Like a lot of its real world 707 counterparts, the Mike Wilson Boeing 707-320 keeps on flying on. A constant small stream of updates and development has kept this bird in the air and here this has been the biggest and best update so far... a great 3D cockpit.
No doubt this aircraft will never be in the FlyJSim design or feature category, but that does not mean you won't love it, the style and feel of the this late 50's and 60's globe trending aircraft will still draw a crowd.
In the flight model, sounds it is very good, the real age of the design is only shown by the original wing and engine pod design in need of better graphics (better engine fans however have been added), and a future update with a better design in those areas would certainly benefit everyone.
But for now it is the best B707 in X-Plane, for myself, I flew the aircraft with the 3D Cockpit from LIRF Rome to LEVC Valencia and loved every single minute of it, this is still another great 60's aircraft and one that can cover global distances, yes that 3D cockpit makes a huge difference to the aircraft and it is certainly a fun place to be, overall the thought mostly in my mind was... "There is still a hell of a lot of life in this old Girl yet"... amen to that.
______________________________________________________________________
Installation : Download file size is 139.00mb to your X-Plane - Heavy Aircraft Folder. Installed file size is 169.30mb. This review ver
Yes! the Boeing 707-320 by Mike Wilson is still available from the new X-Plane.Org Store here : Boeing 707-320
Price is US$20.00
if you already own the B707-320 by Mike Wilson then the 3D cockpit upgrade is free, go to your X-Plane.OrgStore account, sign in and download the updated (v15) version.
______________________________________________________________________
Installation : Download file size is 139.00mb to your X-Plane - Heavy Aircraft Folder. Installed file size is 169.30mb. This review version is noted as the "Boeing 707-320 v15 wide panel - 3D cockpit" There is a standard 2D cockpit available as well.
Notes: As noted I updated the front windows of the B707, This is the "707_cockpit_OUT" file and you just unzip the file below and replace this png file with the older one in the main aircraft folder.
Documents : There is a full original B320 AOM (Aircraft Operation Manual) that you can download: 707_Manual
Tabbed and filled with very good information on the aircraft.
Developer Contact : Mike Wilson Aircraft
______________________________________________________________________
Requirements :
X-Plane 10.30+
Windows, Mac, Linux
512Mb VRAM Video cardCurrent Review Version: v15 (last updated November 6th 2015)______________________________________________________________________Update Review by Stephen Dutton
10th November 2015
Copyright©2015: X-Plane Reviews
Review System Specifications:
Computer System: - 2.66 Ghz Intel Core i5 iMac 27”- 9 Gb 1067 Mhz DDR3 - ATI Radeon HD 6970M 2048 mb- Seagate 512gb SSD
Software: - Mac OS Yosemite 10.10.4 - X-Plane 10 Global ver 10.42 (final)
Addons - Saitek x52 Pro system Joystick and Throttle : Sound - Bose Soundlink Mini : WorldTraffic v2
Scenery or Aircraft
- LEVC - Valencia-Manises by DAI-Media - cost is 25.00 € LEVC - Valencia Manises
-
2 hours ago, Guest said:
What is the effect of this scenery on frame rates ?
Not bad really compared to the complexity of the scenery. There is not a lot of autogen around the airport and that helps a lot with the frame-rate. Only point is that there is a lot of candlepower lighting in the scenery, so with HDR on, and a high resolution anti-alias HDR setting it will take a bit out of the system... SD
-
4 hours ago, Guest Kuba said:
Hi,
Is this air plane will work with X-Plane on Steam platform under linux ?
Don't see why not? X-Plane is WIN/MAC/LINUX compatible and Linux Ubuntu 14.04LTS or compatible (older versions are not supported) is the requirement.
-

Aircraft Review : Cessna 404 Titan by Alabeo
Just slightly flying off the California Coast, the morning sun glistened off the paintwork of the C404 Titan. The aircraft is a twin-engined workhorse, created for small airlines to carry nine or less passengers on either scenic tours or short regional charter flights. My flight is a short one from KSMO-Santa Monica Muni to KPSP-Palm Springs in a "I have just got to get out of LA... Darling" flight for some overpaid actor and his partner.
But up here I am far away from the dramas of the world for awhile, as the Titan is powerful, smooth and thankfully quiet.
A pilot's life is usually pure hell, and then a period of pure euphoria, reflection or boredom (on long flights) and then pure hell again, In am thankfully in that middle euphoric stage, away from the earth and just the correct headings to cover.

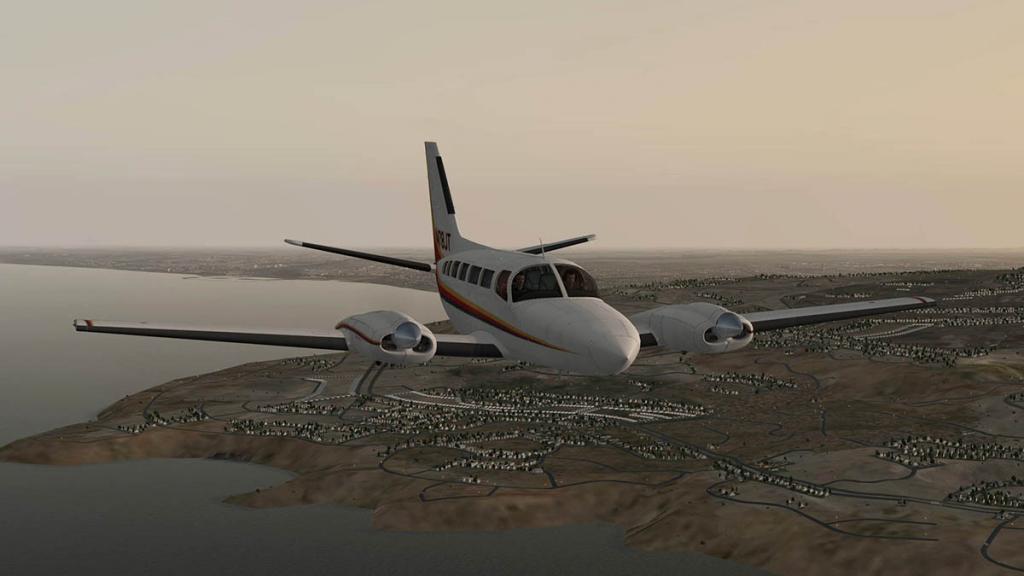
Visually I find the C404 similar to the Seneca II, but the cabin has been stretched and blown up a size larger, certainly a great commuter aircraft... but to fly it is very different in size and feel to the Piper aircraft. It is very confident aircraft taking off and you can easily climb out at 1500-1800 fpm (feet per minute), set the course and climb easily to your heading.
The Cessna 404 was a development of the Cessna 402 with an enlarged vertical tail and other changes. The prototype first flew on 26 February 1975. It is powered by two 375 hp/280 kW turbocharged Continental Motors GTSIO-520 piston engines. Two versions were offered originally; the Titan Ambassador passenger aircraft for ten passengers, and the Titan Courier utility aircraft for passengers or cargo. Seven versions followed with a full cargo version with a strengthened floor. As noted this is a commercial/charter aircraft and not a private ownership to fly on the weekends type of design. Just under 400 (396) aircraft were built and last Titan rolled off the production line in 1982.
Performance : Maximum speed: 267 mph (430 km/h) - Cruise speed: 188 mph (303 km/h) - Range: 2,119 miles (3,410 km) - Service ceiling: 26,000 ft (7,925 m) - Initial rate of climb 1940ft/min.
C404 Titan by Alabeo
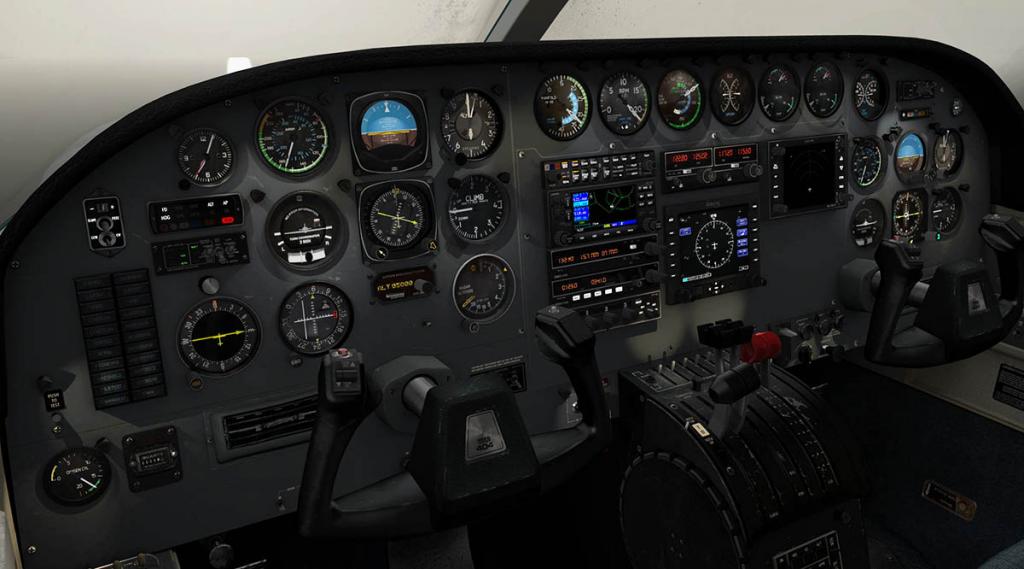


In the front it is a 70's classic view. Still very old standard but very familiar place to be, you will feel at home here very quickly.
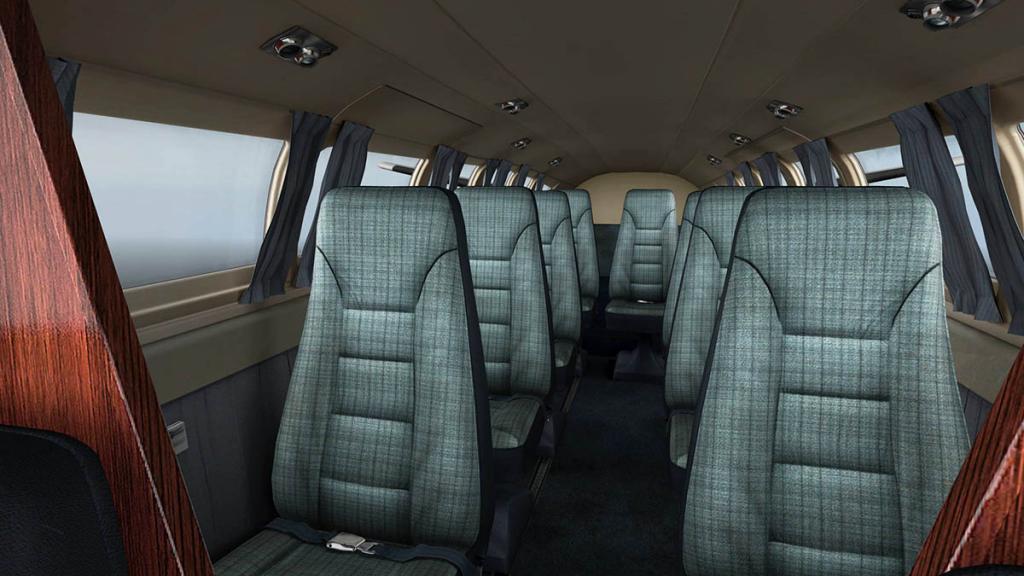
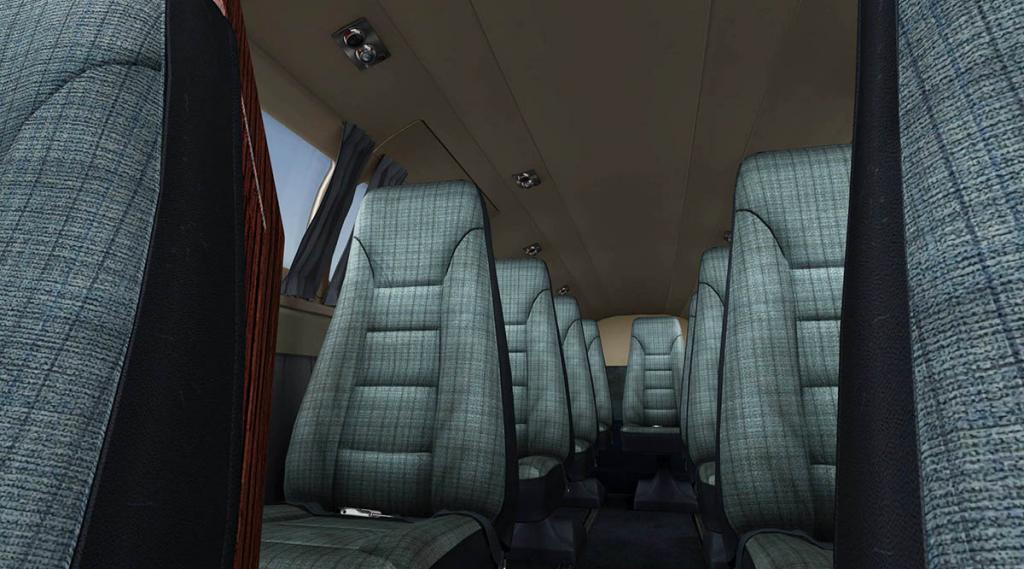


A glance over the shoulder and the cabin is a nice place to travel. With lovely hard wearing fabrics, the well designed seats will survive the worse of rough denim jeans treatment for years. Curtains look a bit naff today and show the age of the aircraft, but they do add to the cosy feel inside the aircraft. The roof lining is extremely well crafted, again age is showing around the edges but it is very realistic.
The office is very well appointed, but in the old style way and not with a lot of modern gizmos.
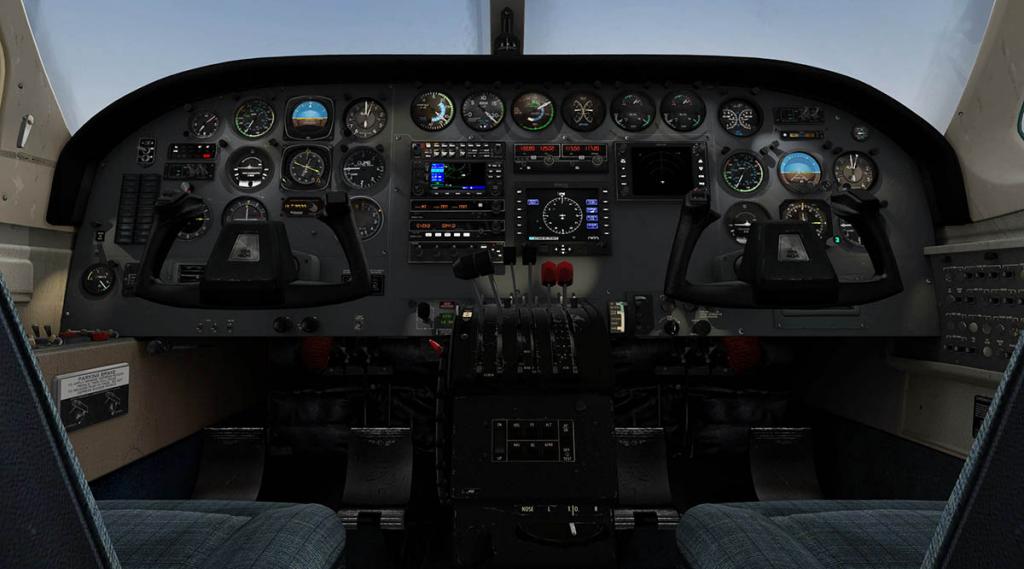
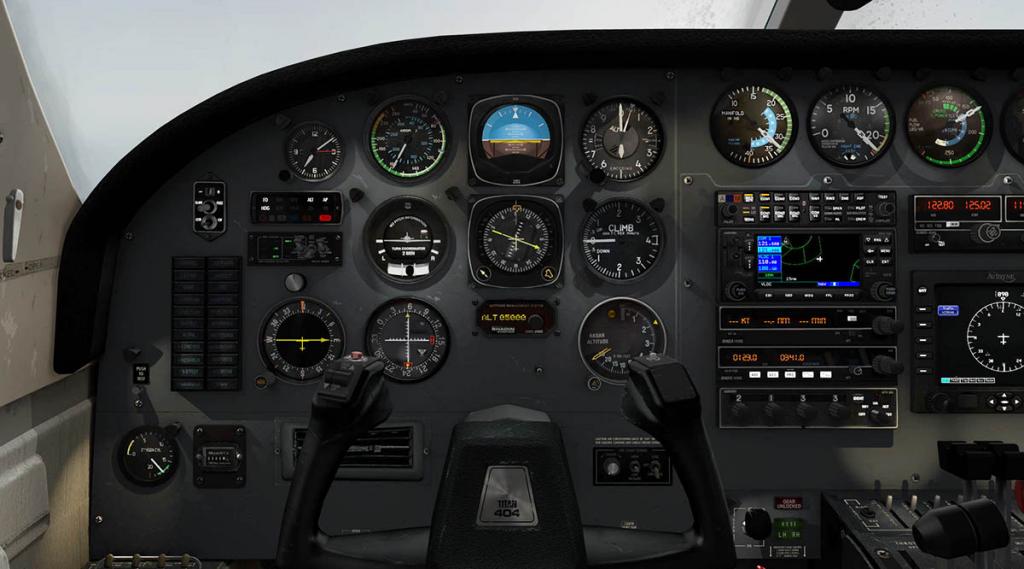

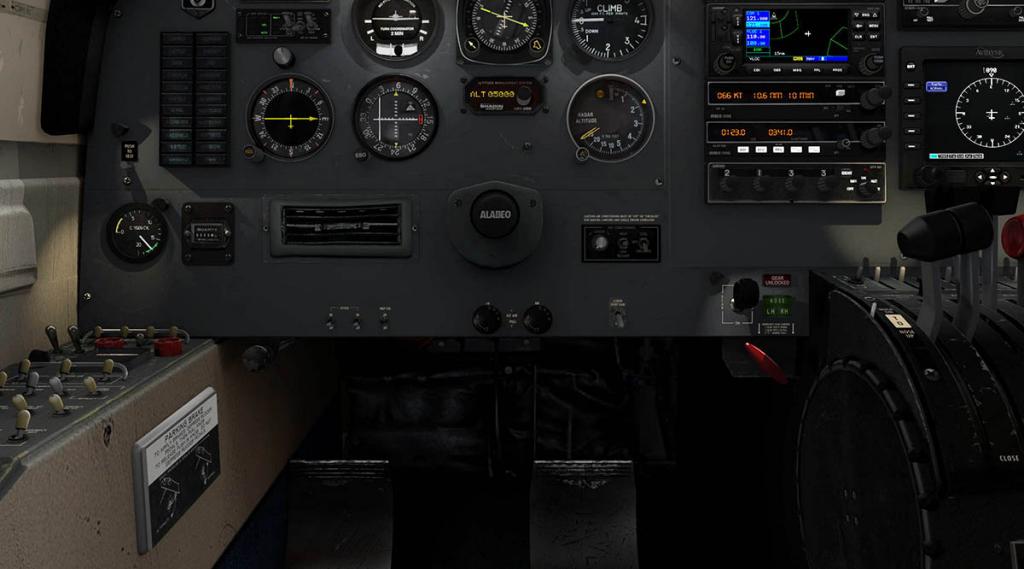
You have a full set of instruments but very little switchgear on the panel. The standard six instruments (Airspeed Indicator, Attitude Indicator or Artificial Horizon, Altimeter, Turn Coordinator and Vertical Speed Indicator) are high and central on both pilot's and co-pilots sides of the panel, with the Artificial Horizon having built in CRS (course) and CDI (course deviation indicator) built in.
Other surrounding instruments include a clock (top left) and (lower left to right) NDB pointer, VOR 2 course deviation indicator (CDI) and radar height display. In the middle is the setting for the "Altitude Management System" to set your altitude for Autopilot cutoff when you climb or descend, but for the life of me I couldn't find the arm switch?, no manual in instrument placing does not help either, arm is noted on the autopilot display?
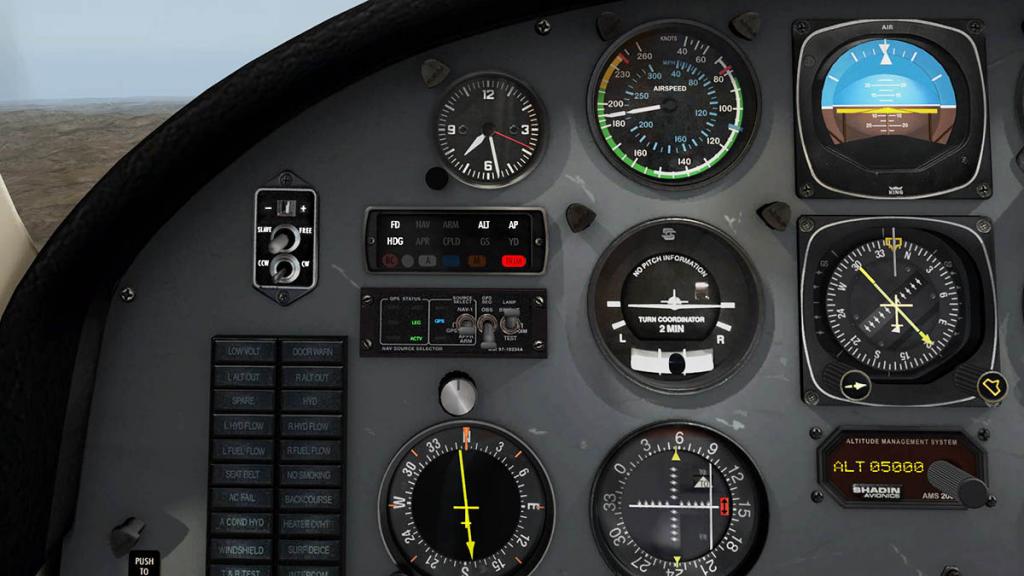
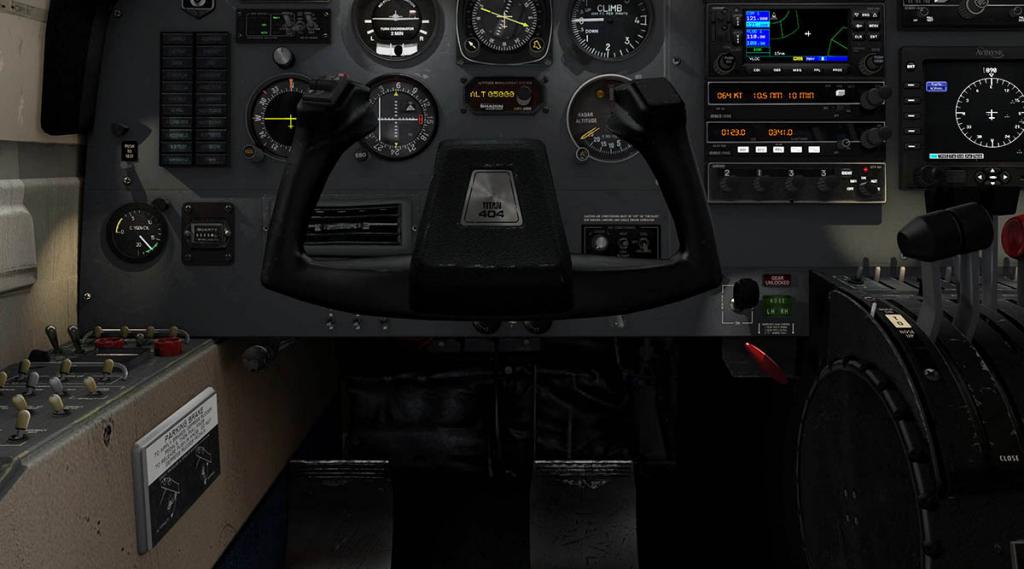
The autopilot (AP) display is set on the left with the Nav 1 - GPS source select below, a full set of annunciators with test option fill out the left side of the panel.
Nice yoke but no lower switchgear behind the control, just "Prop Sync". Left an Oxygen tank supply gauge and "Hobbs" meter.
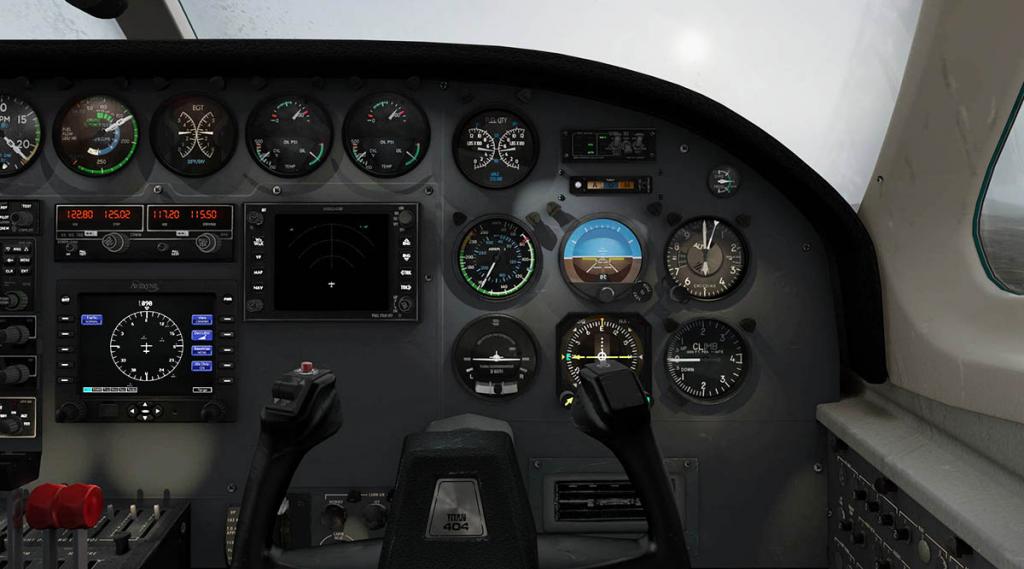
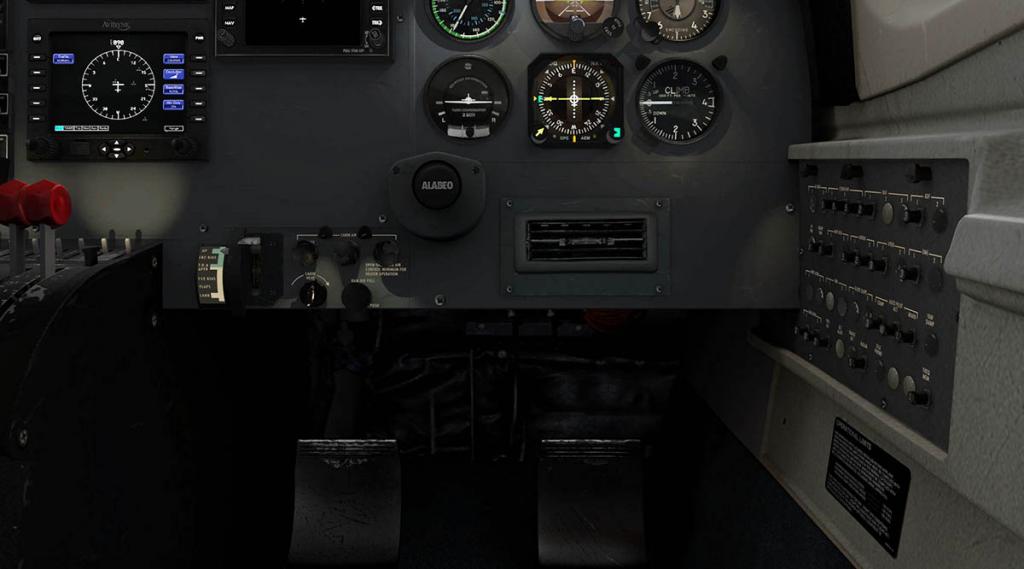
Co-pilot's side has only standard six instruments and cabin heating controls, and flap indicator (UP 183 KiAS - T.O. & APPR 152 KIAS - FLAPS - LAND) and selector, Flap lever is hard place to adjust for the pilot.
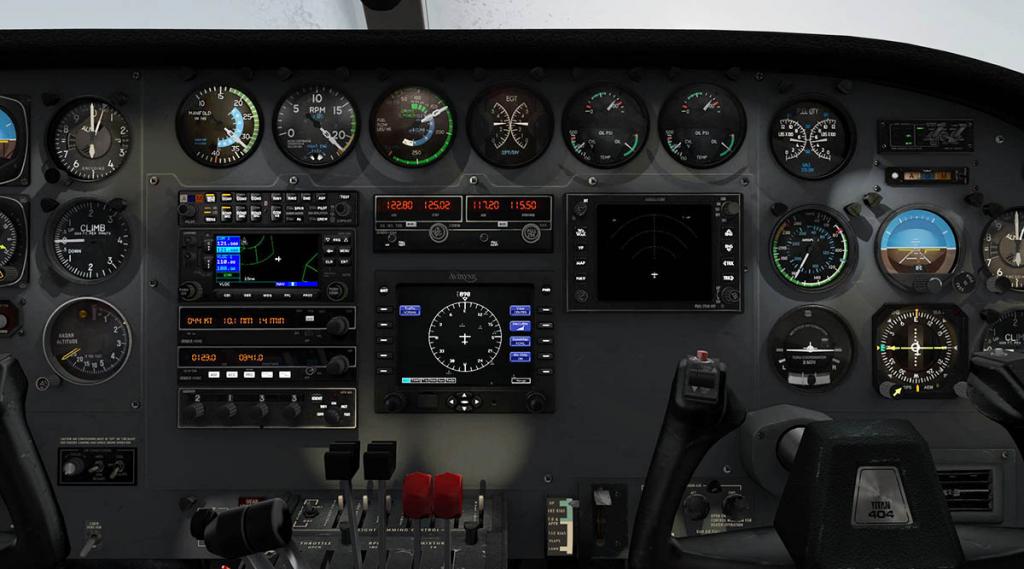
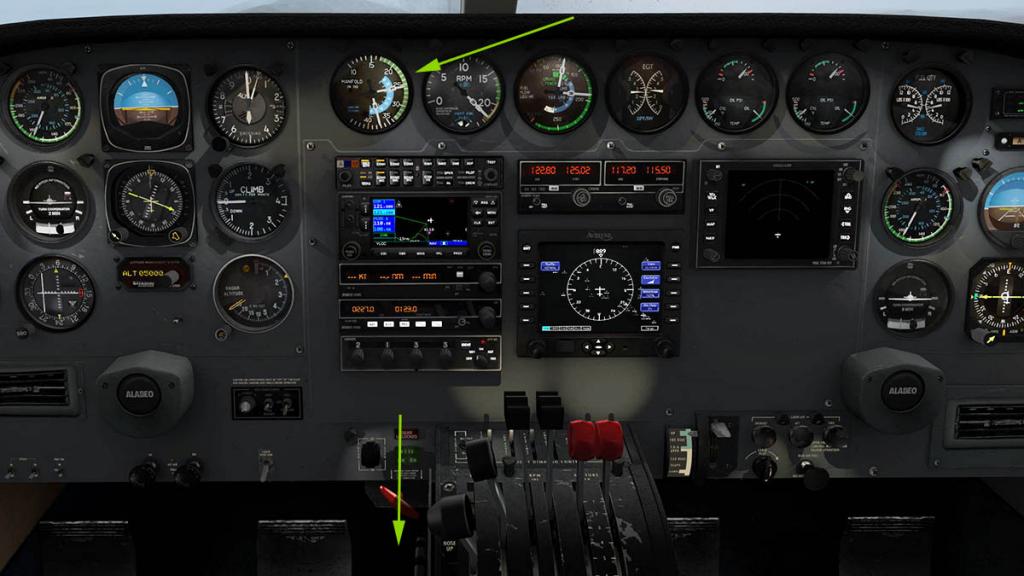
Centre Panel has the engine performance dials in a single line across the top. The engine needles are for a twin, but run together. Pull one engine throttle down to see the separated needles for both engines... (left to right) is Manifold Pressure - RPM - Fuel Flow - EGT (Exhaust Gas Temp) - Oil (Pressure & Temp) one for each engine (two dials) - Fuel Qty (gauge).
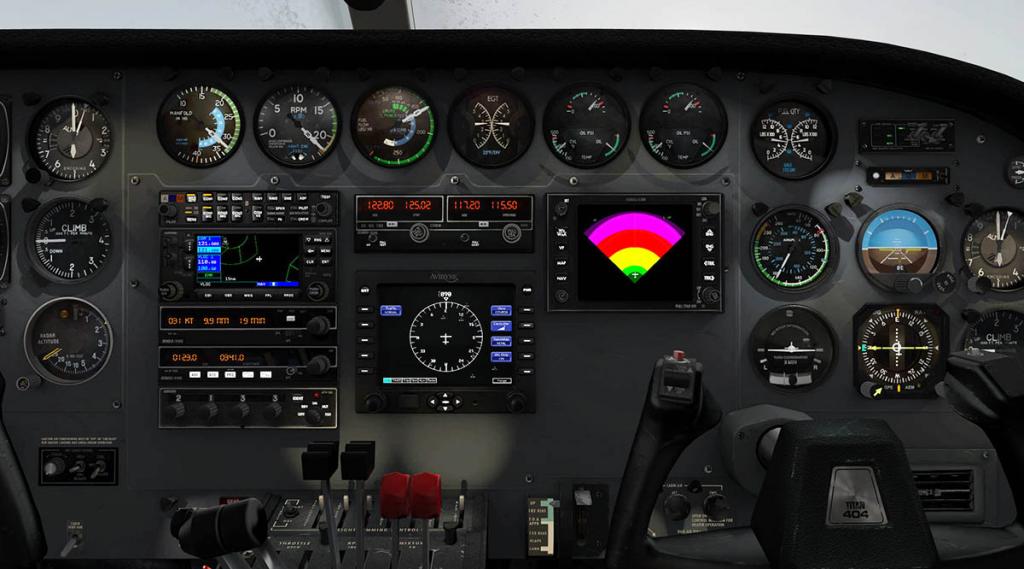
Radio Equipment is spaced in the middle across the panel. All Bendix-King except for the transponder.
Garmin 347 TSO Audio set with a Garmin 430 (X-Plane standard) - KN 64 DME... this unit will display VOR distance, speed and time (similar to the BK 62A) - ADF KR 87 TSO with built in flight timer (FLT) and elapsed timer (ET) - Garmin GTX 320 Transponder - KX 165A TSO Radio for COM2/NAV2 settings (GNS 430 is used for COM1/NAV1) - AVIDYNE display (fairly useless) - Bendix-King weather radar (X-Plane standard)
The radio equipment is all period based, mostly standard (meaning oldish) but functional, there are NDB pointers but the VOR2 direction is the CDI type.
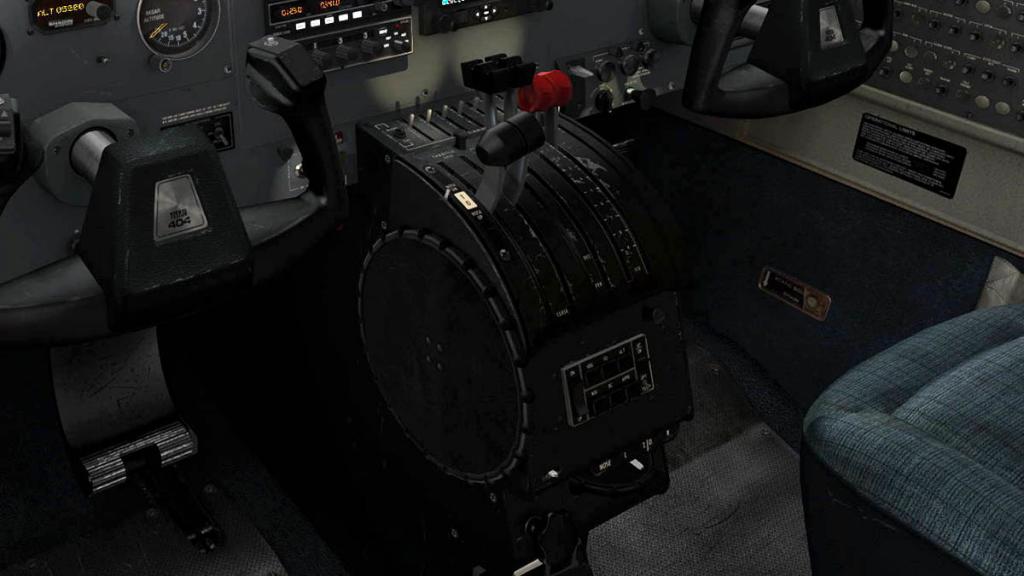

The throttle quadrant is a nice bit of kit, dual levers for the twin engines in throttle, RPM and mixture, all beautifully done and worn, there are lighting sliders (again very well done) above the levers covering: Side Console - LWR Panel - LEFT INSRT - ENGINE (Instruments) - RADIO - COMPASS & PED (Pedestal) - R FLT INST, left is a lighting switch for the overhead cockpit (spot) lights.
Front and left side are the excellent trim wheels with takeoff neutral markings.
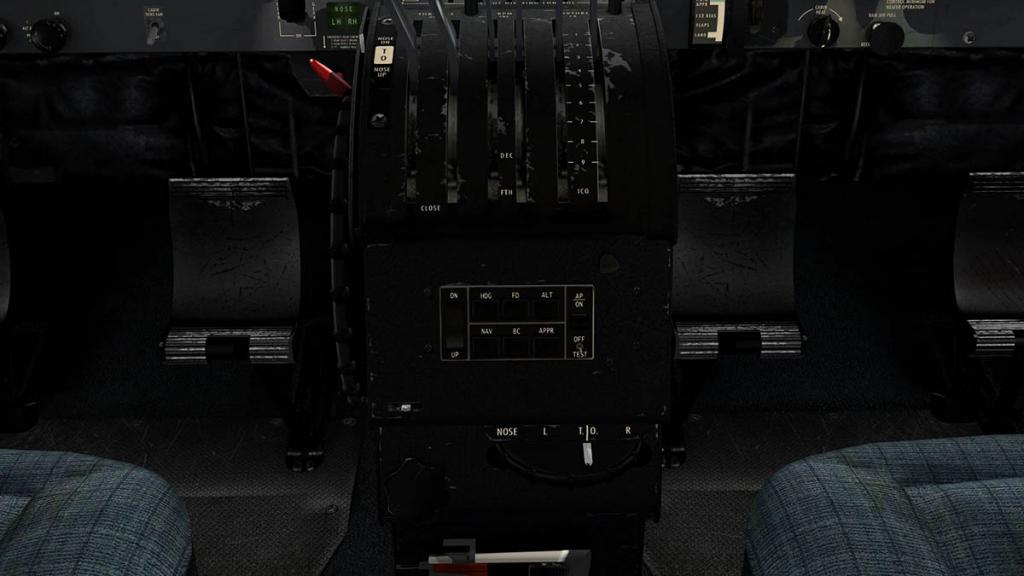
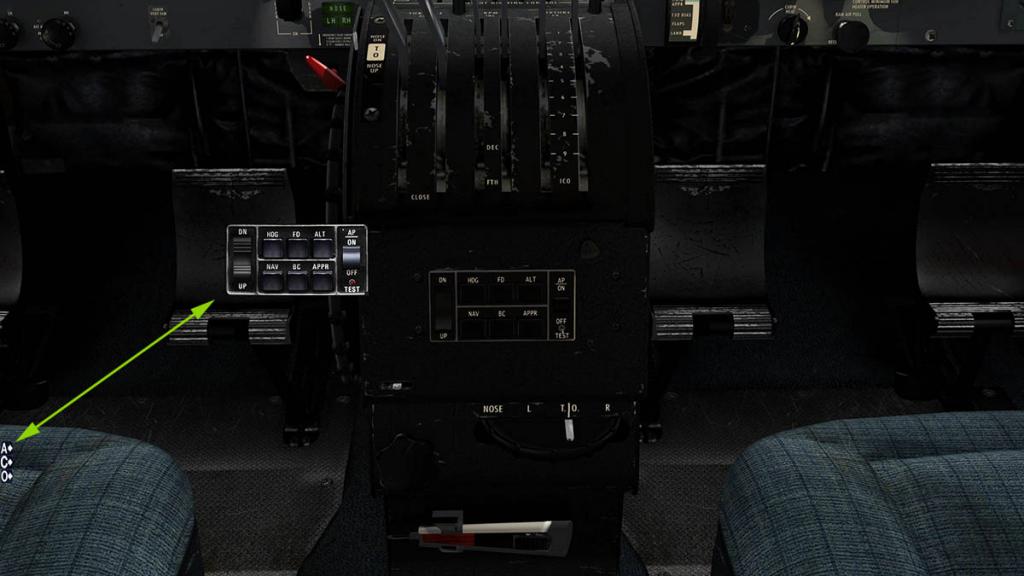
Situated lower down (on the front) are the autopilot buttons. This is also available as a pop-out tab (A) that is situated on the bottom left of your screen, the pop-out can be moved around and changed in size to fit your needs. Altitude is either on on or off, you need to turn on the altitude button to adjust the pitch to go up or down, then activate it again to hold the altitude. As noted if you press the altitude button during a climb or descend it adjusts holds your altitude and does not "Arm" the system. As switched off it then is still not armed and you keep climbing till you press the altitude to hold it, so it does not arm in either context?
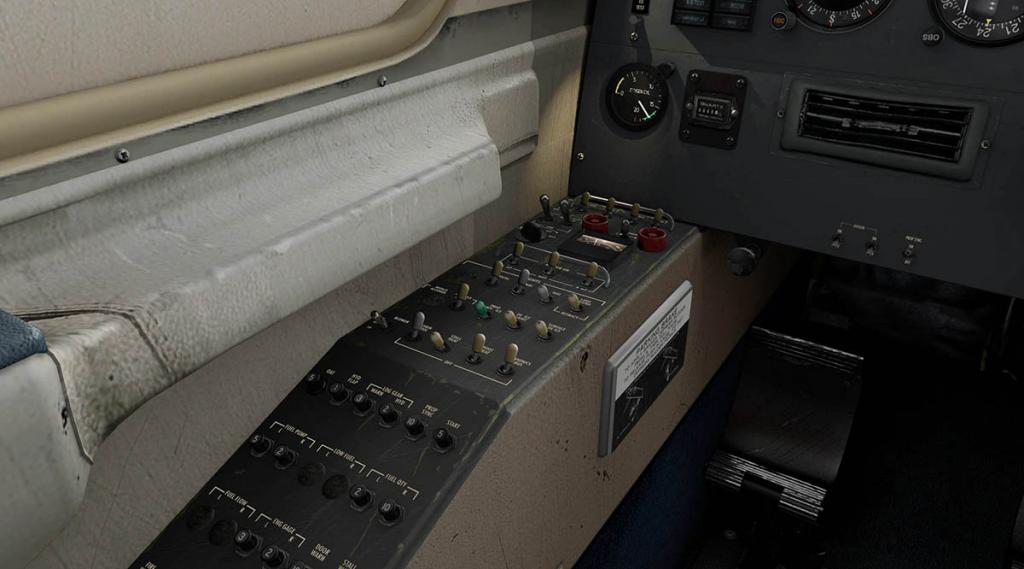
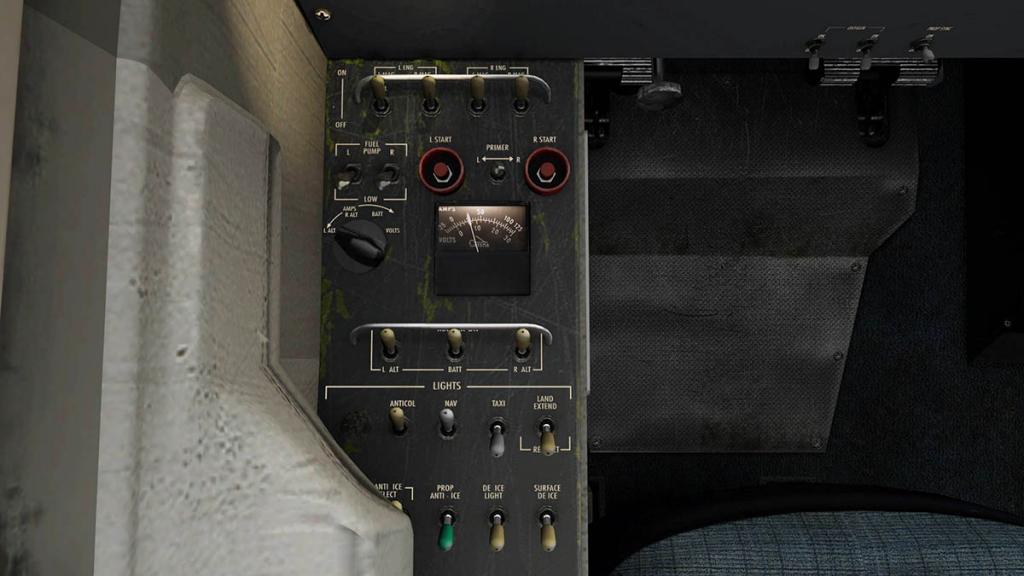
All your switchgear, fuses and electrical are positioned on the left side panel. Well done but hard to read in the pilots position. Switchgear covers all external lighting and ice-protection, top are the main power switches and a lovely voltage indicator, which is switchable.
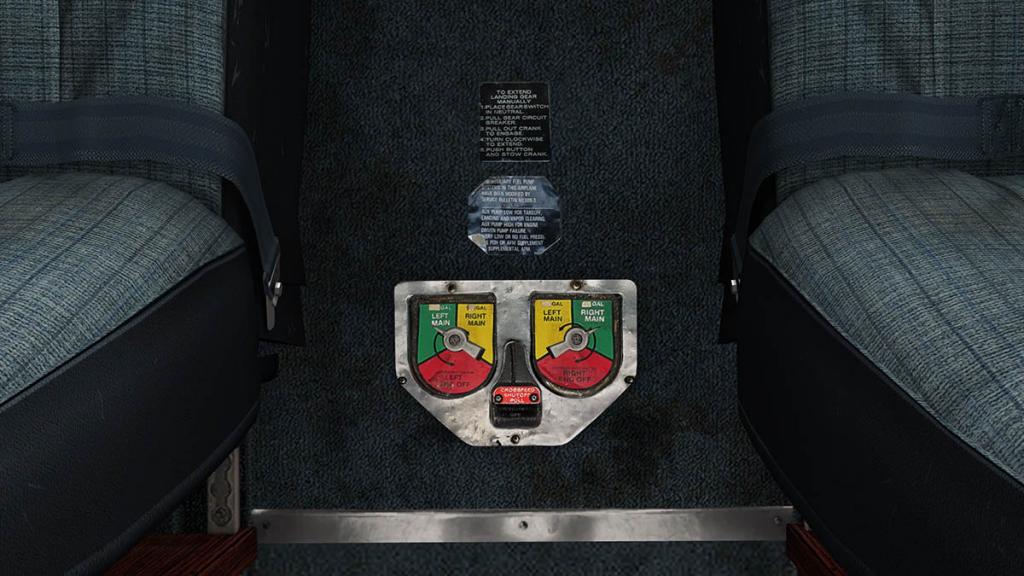
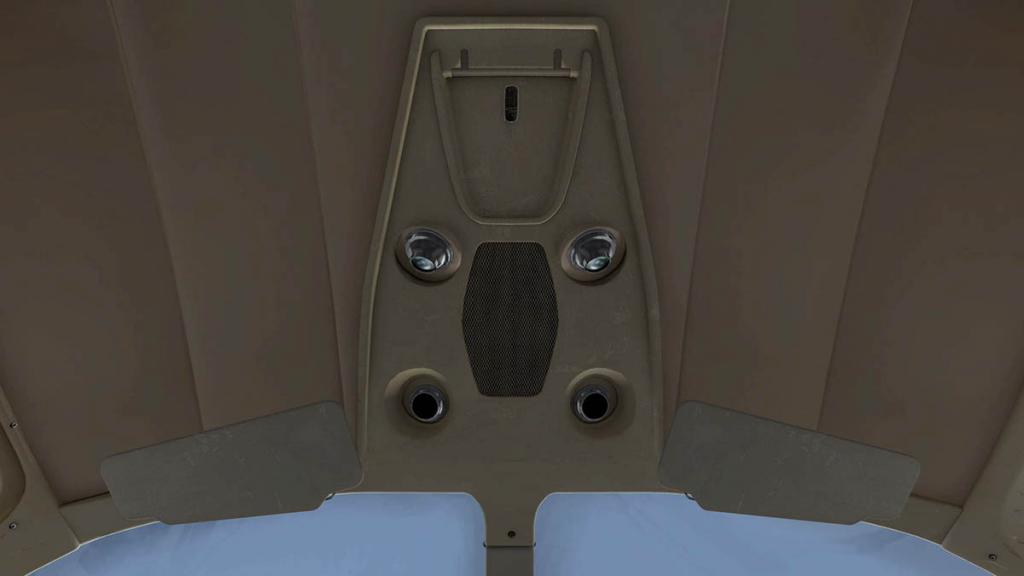
Fuel tank switches are on the floor between the seats, beautifully bashed and worn, perfect. Roof detail is lovely as well, air-vents and two spot lights are great fittings.

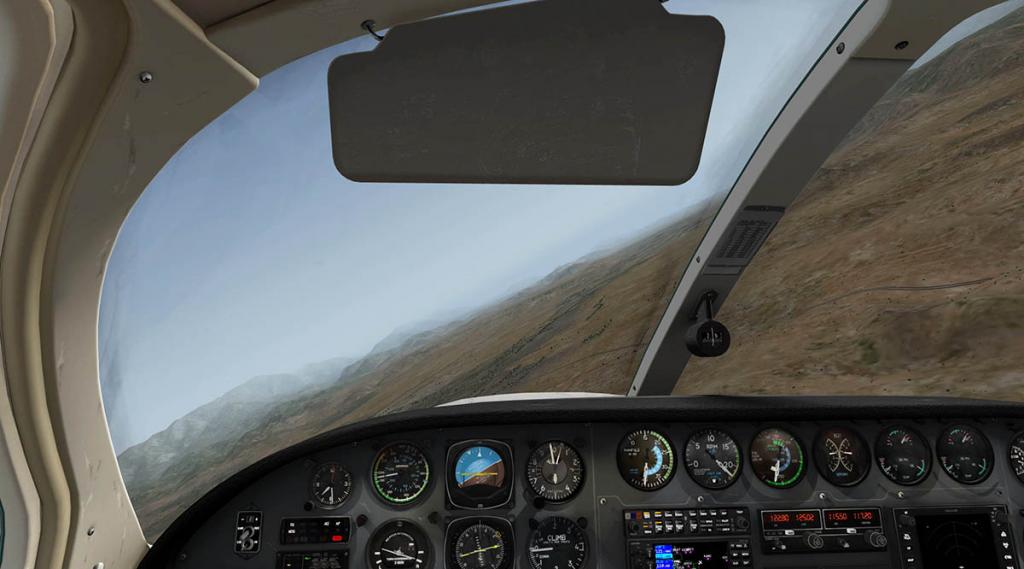
Blinds are animated and turn down only, but very nice.
Between the San Bernardino Mountains and the San Jacinto Mountains there is a valley you can slip through to get to desert floor of where sits Palm Springs.
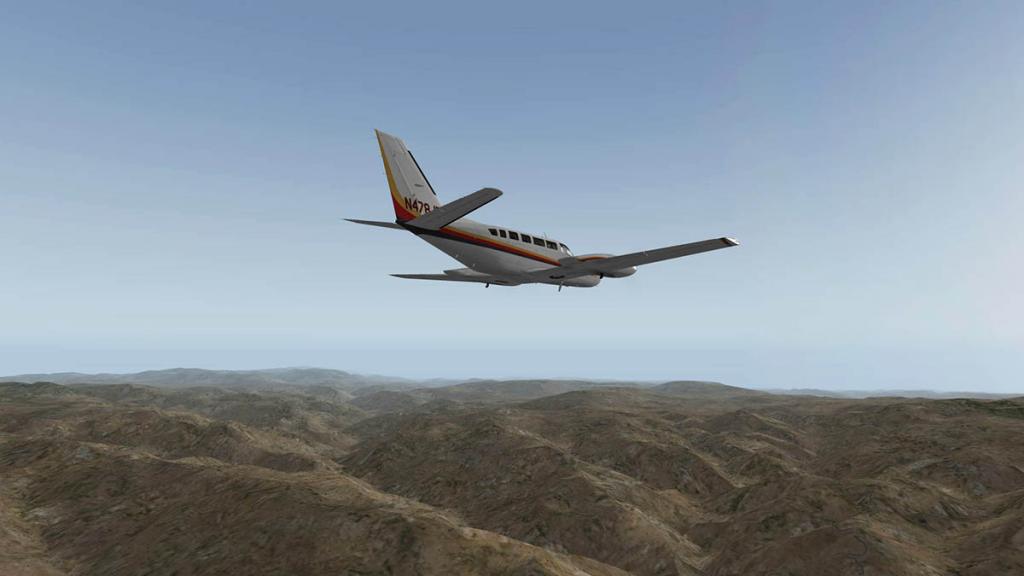
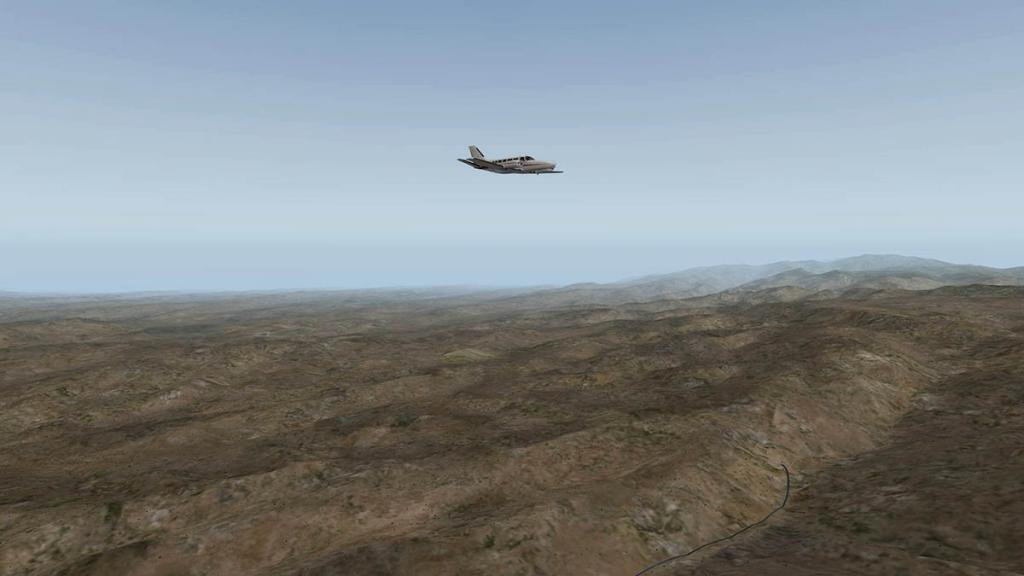

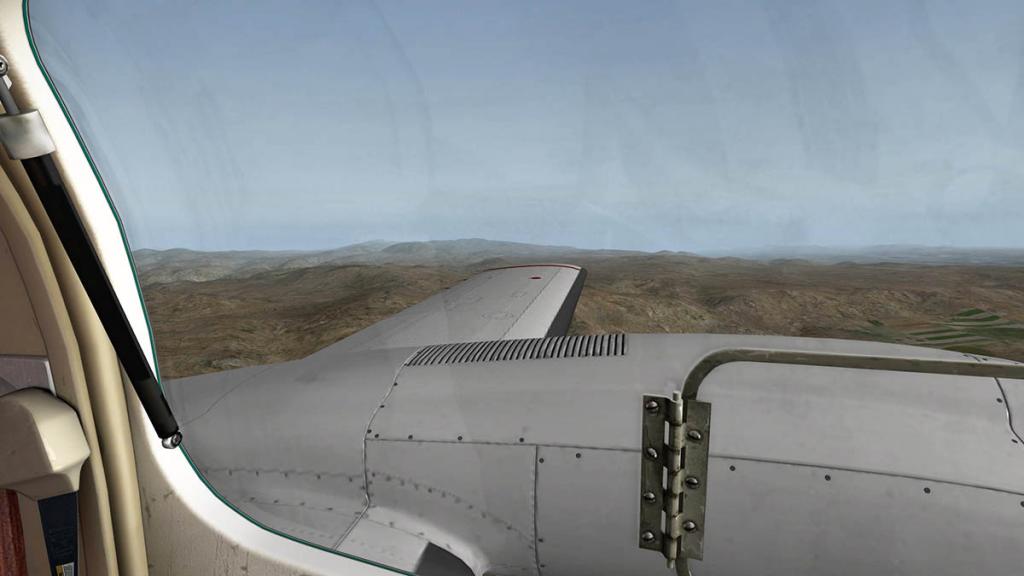
Inside the Titan is is very hush, hush... too quiet, well that is debatable, turn the sounds right up and its still only a murmur so I would question if that is realistic, open the small window flaps and the outside noise is violent, so in many ways the quietness is soothing and a change from the clatter and noise of the many latest releases. These smooth Continental Motors GTSIO-520's power you along, look great and sound simply awesome on the ground, noted are the sounds are real C404 recordings and it shows. Note the excellent window reflections, Carenado/Alabeo were always the pioneers of great effects.
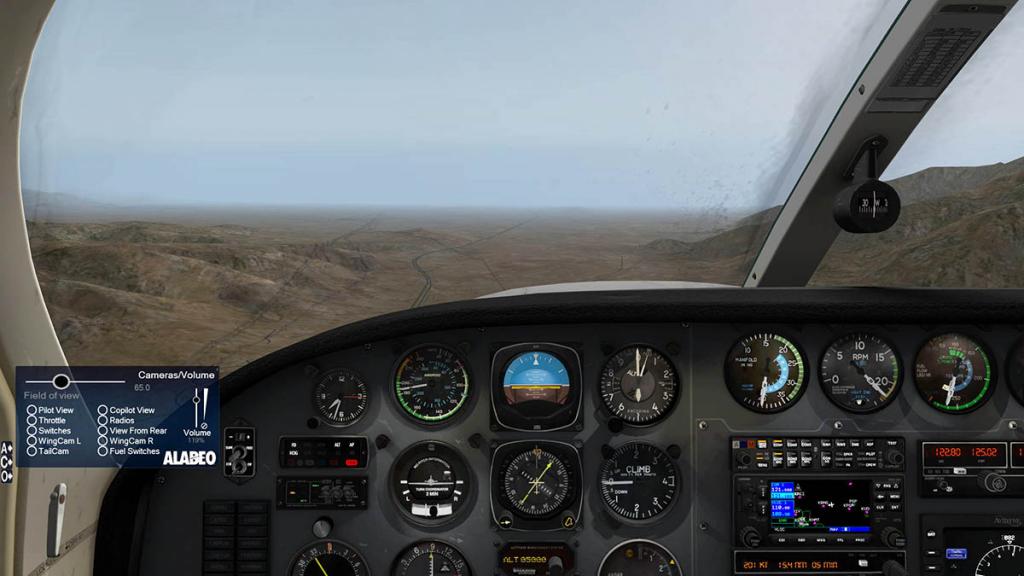
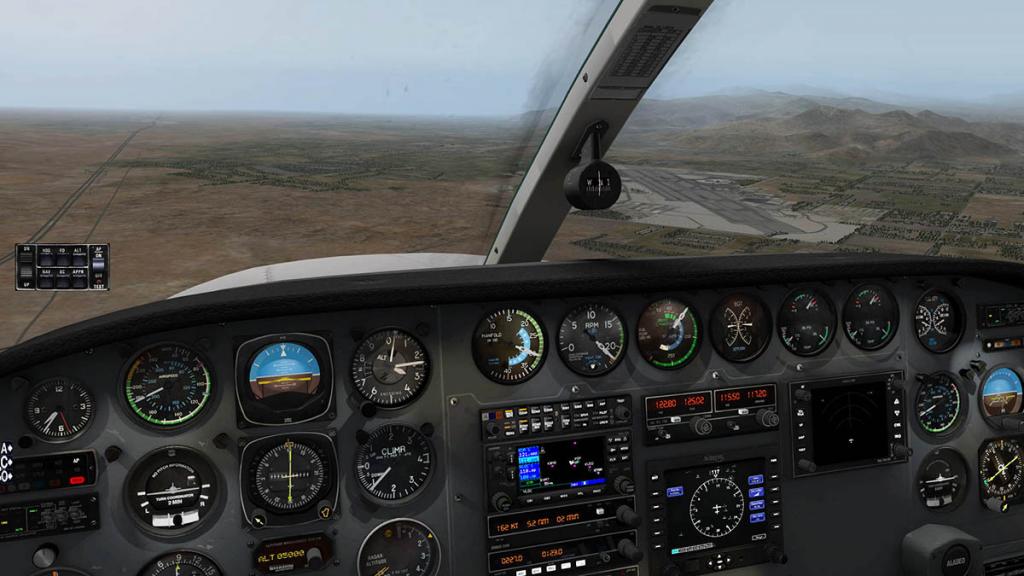
Another tab (C) menu pop-up is the standard Carenado views. Some worked but most didn't? Only really the pilot and fuel tank view worked, but all the outside view were dud? The "Field of View" and sounds "Volume" are here also. note - (C) Camera views has been fixed, see "notes" below).
Popping out of the other end of the canyon and Palm Springs appeared directly on our right, I was going to do a complete circuit and land to the north on RWY 31L, note 31R is only a small 1,500m runway...

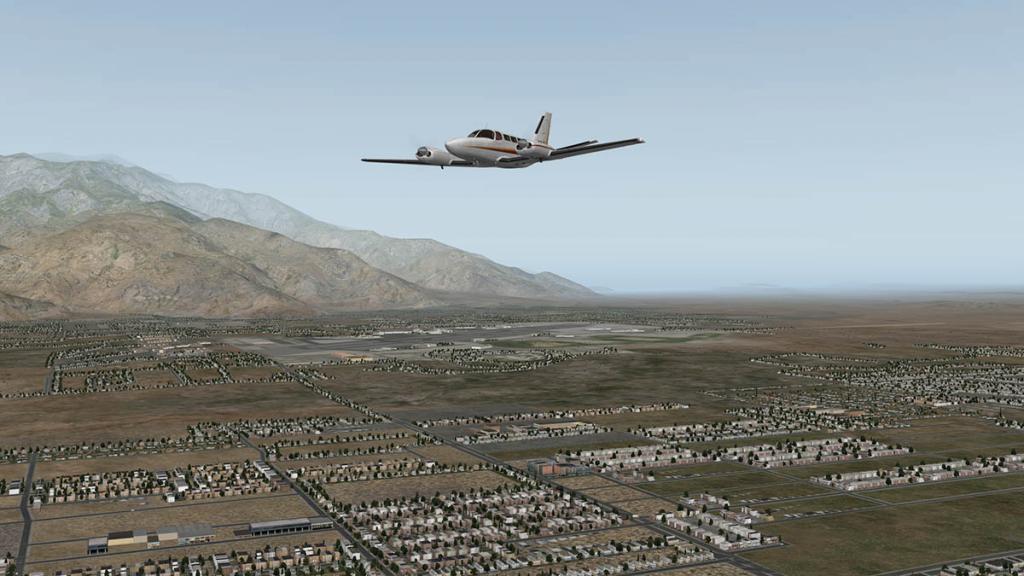
The C404 is quite tricky to land. Worse when you have an outcrop of mountain range in your flightpath, and that means a sharp turn in to RWY 31L approach. So speed is critical, drop the flap a notch and you can still balloon upwards while still trying to rub off the descent speed, even while well under 100knts.... that can ruin any good landing.
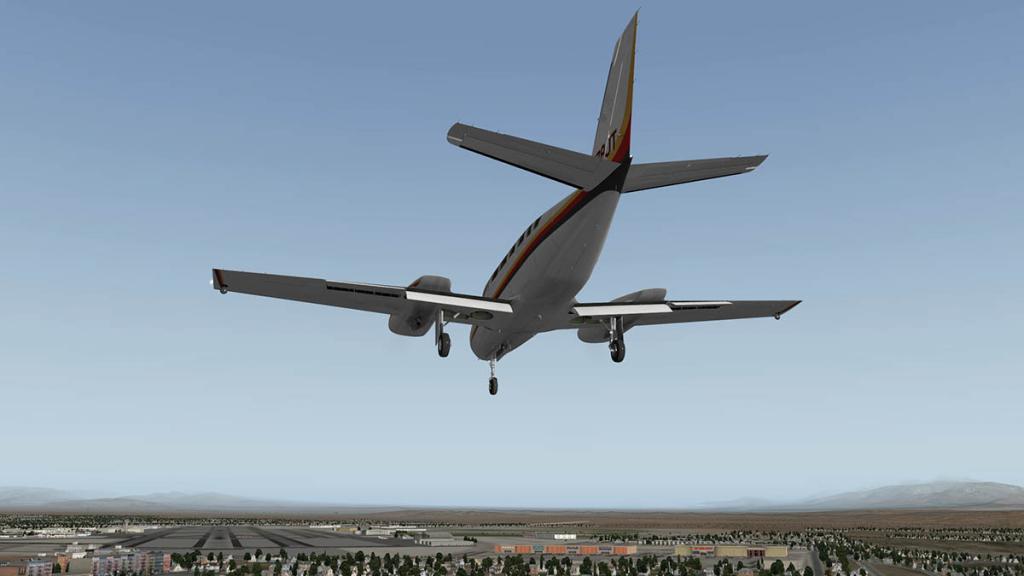
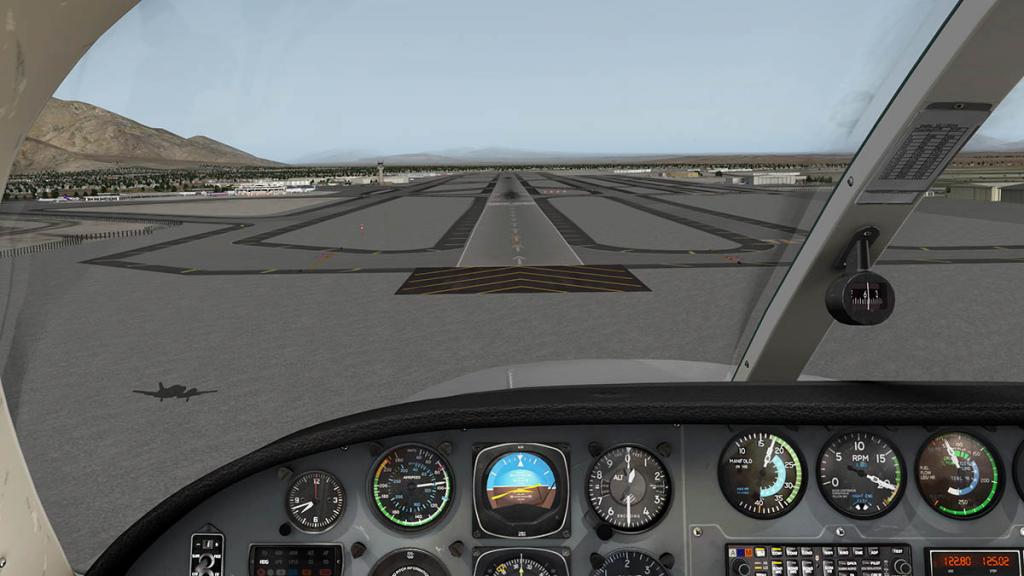
The main undercarriage is trailing arms, and to note the whole detailing of the gear is exceptional, but trailing arm undercarriage can be quite soft on landing... and that is the case here.
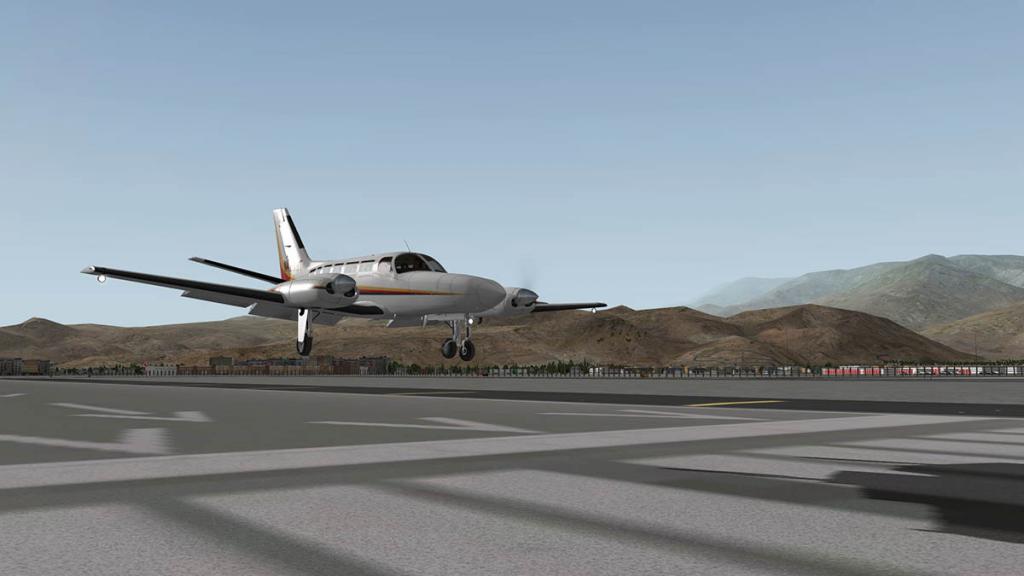

70ktns red line is the stall speed, but even just a smidgen over at 80kts and you are still way too fast... get the flare wrong and you are hopping the aircraft with the champagne in the rear splashing all over your roof lining, and few "sorry about that" comments to the passengers.
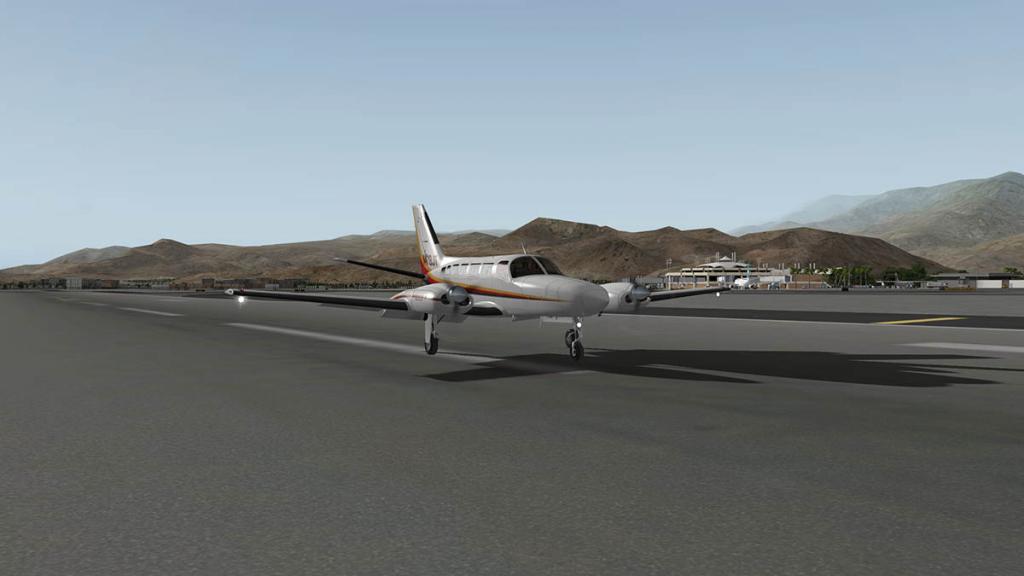
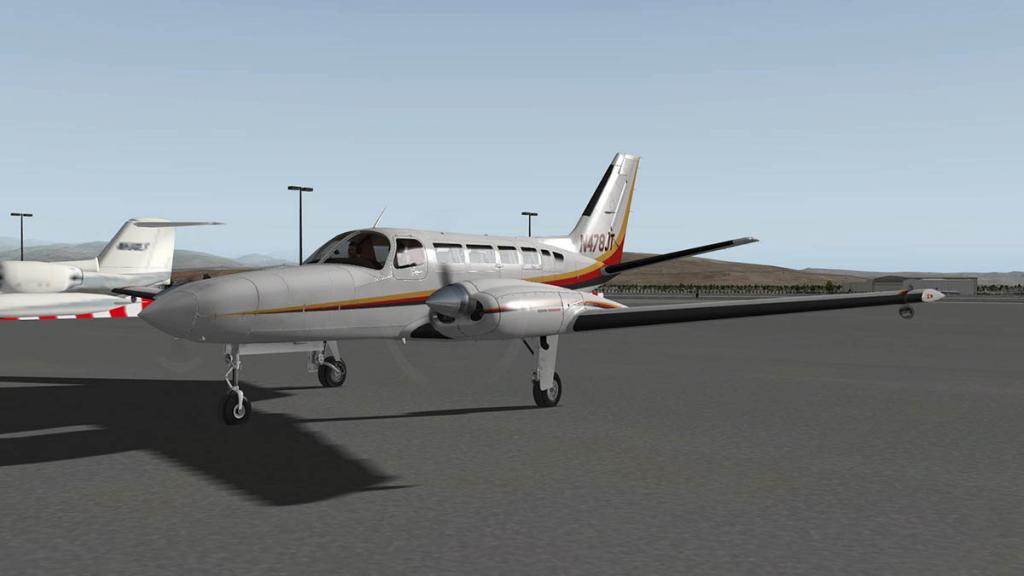
Getting as close to the stall speed is a trick done well. I got it right, but that was after three landings...

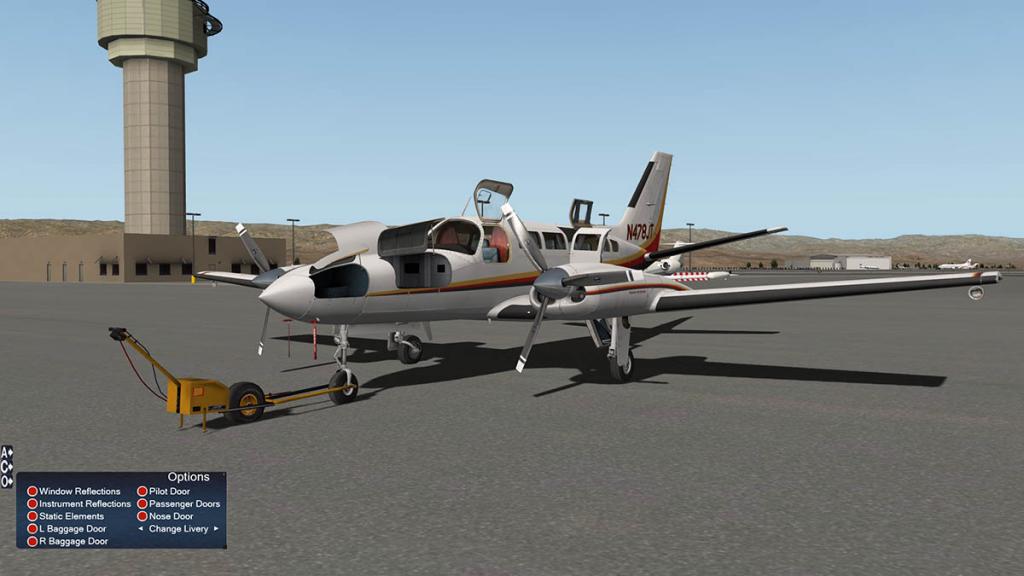
There only one more tab menu to note of the three... the (O) options menu.
You can select to change the window and instrument reflections, and have access to open and close all the doors and baggage compartments... and there is a lot.
They include three nose baggage compartments, left and right main and a smaller nose door. No baggage though and here a few bags would not go amiss, it is quite empty in there. The rear double door with split stairs and upper hatch is extremely well done, you wish there was a cargo version.
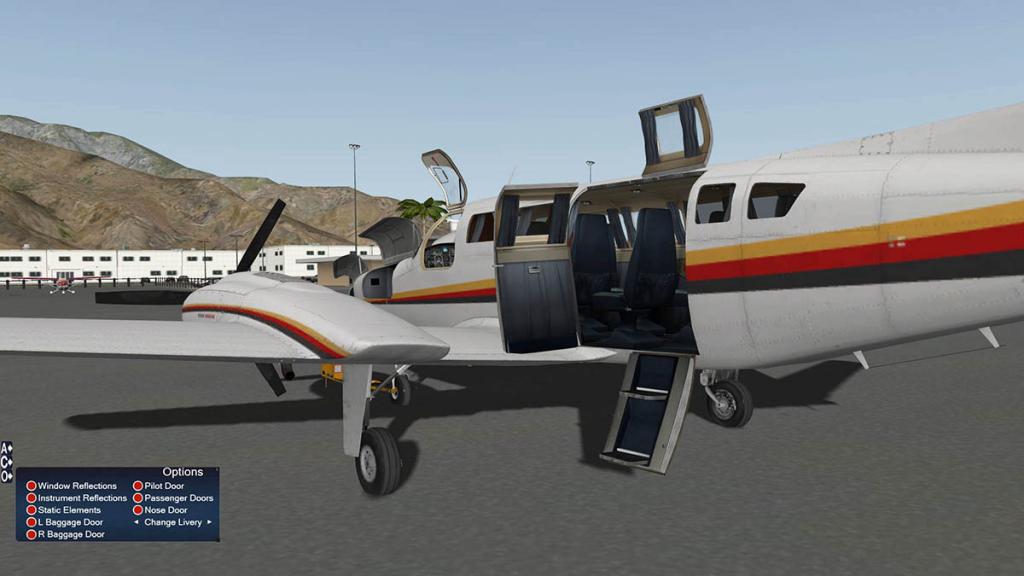

The neat small pilot hatch (door is a bit of an overstatement) is excellent, fresh air in the hot sunshine while preparing the aircraft, or bailing out if the need arises.
There are static objects featured, but they are a bit thin on the ground. you get a hand-pull tractor, and some pivot covers and our two pilots disappear but that is about it? No wheel chocks?, no engine inlet covers, no hanging tabs, so you feel a bit short changed.
Nightlighting
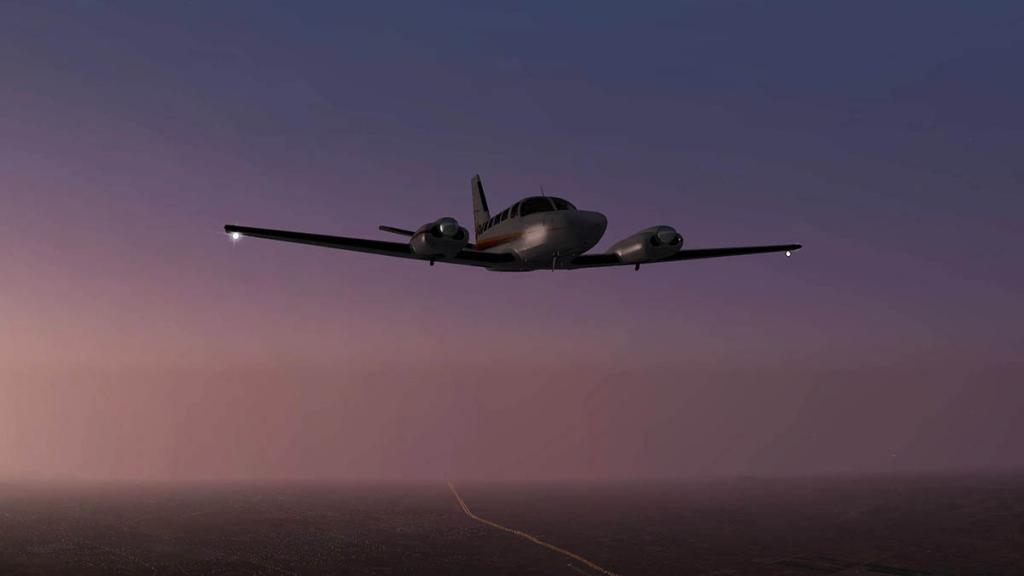
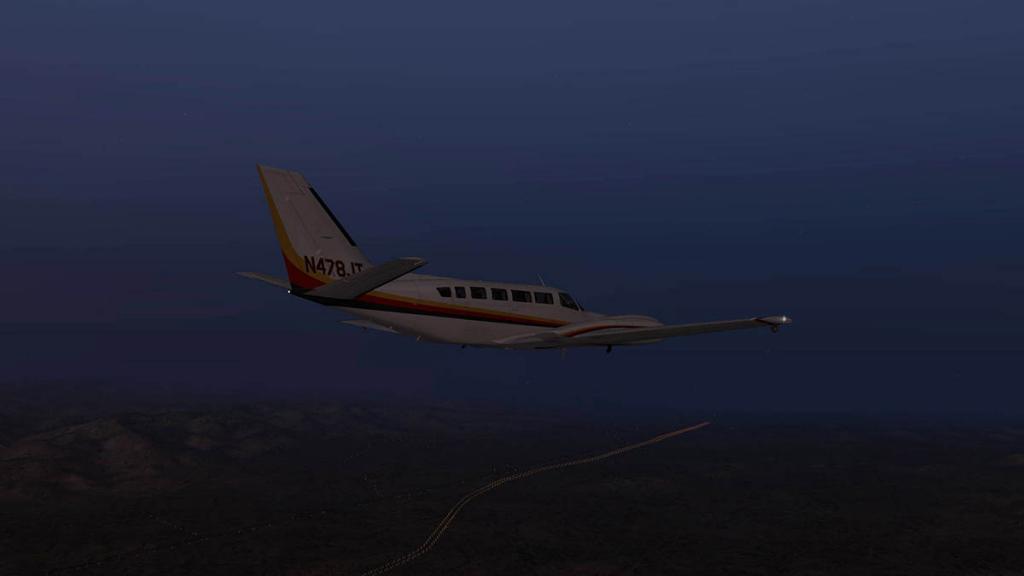
There is no beacon on the aircraft and that makes the lighting a bit sparse on the outside. Navigation lights, strobe lights are good, there is an ice light on the left wing but it does not shine on the actual wing area? The wingtip landing lights are good and retractable, but if you use a joystick or kety to switch on your landing lights (I do both landing and taxi lights on my Saitek joystick) it is a double action deal, in that the button will turn off the lights, but you need to retract them by the switch on the side panel.
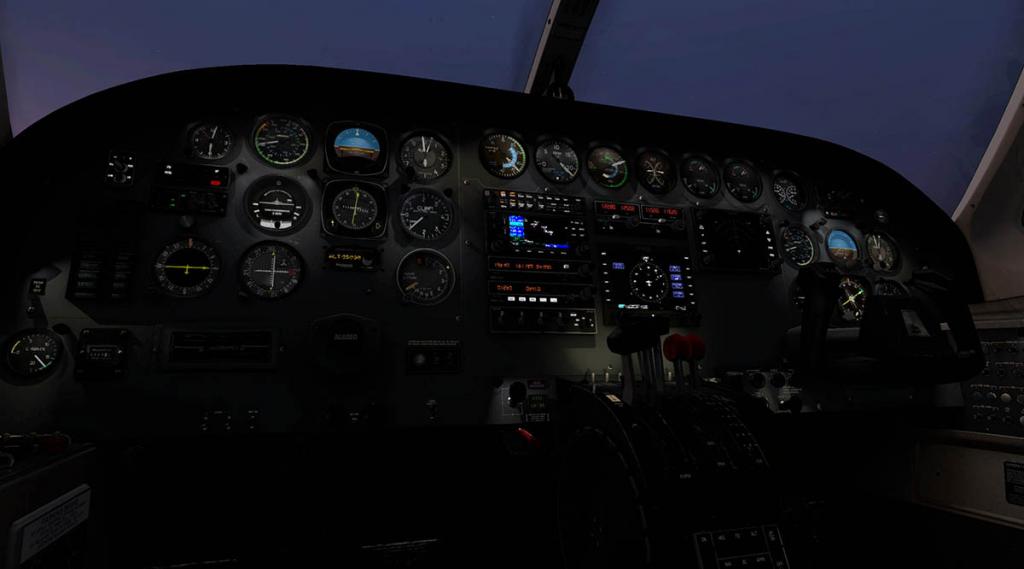
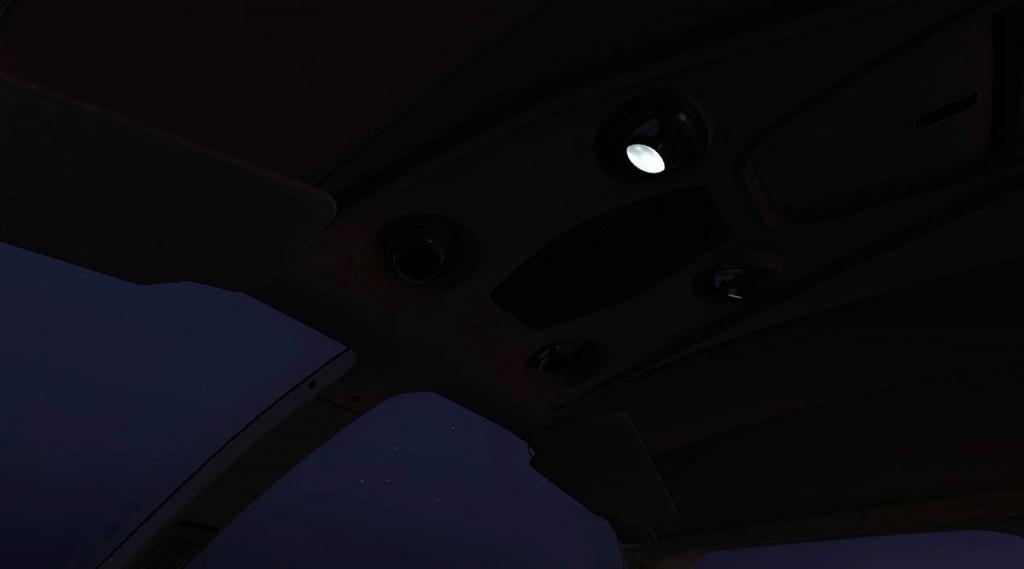
Internal lighting is excellent, the panel is very adjustable and the overhead spot lighting is great (switch is top left on the pedestal), but not movable that has been a feature in the past.
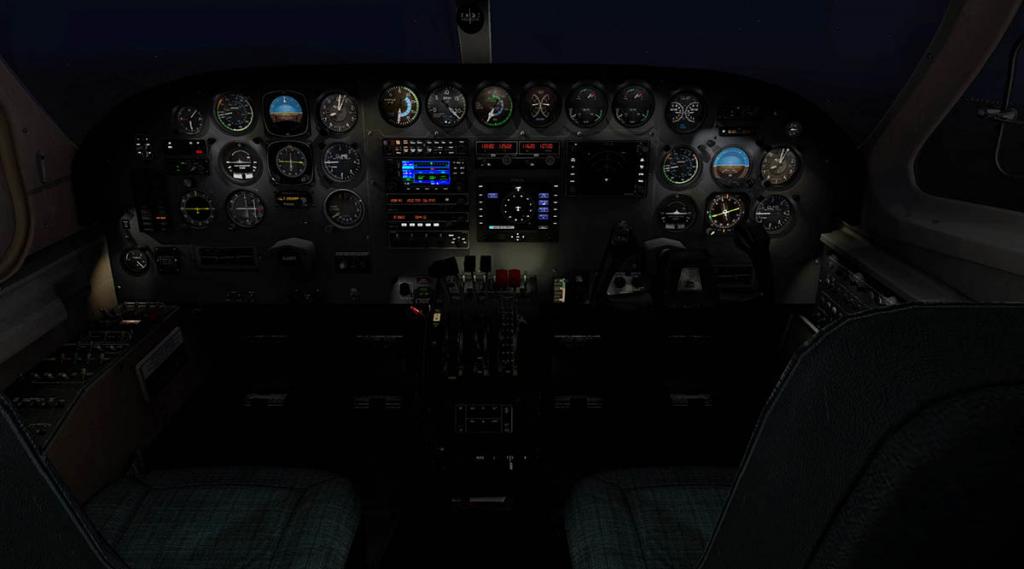
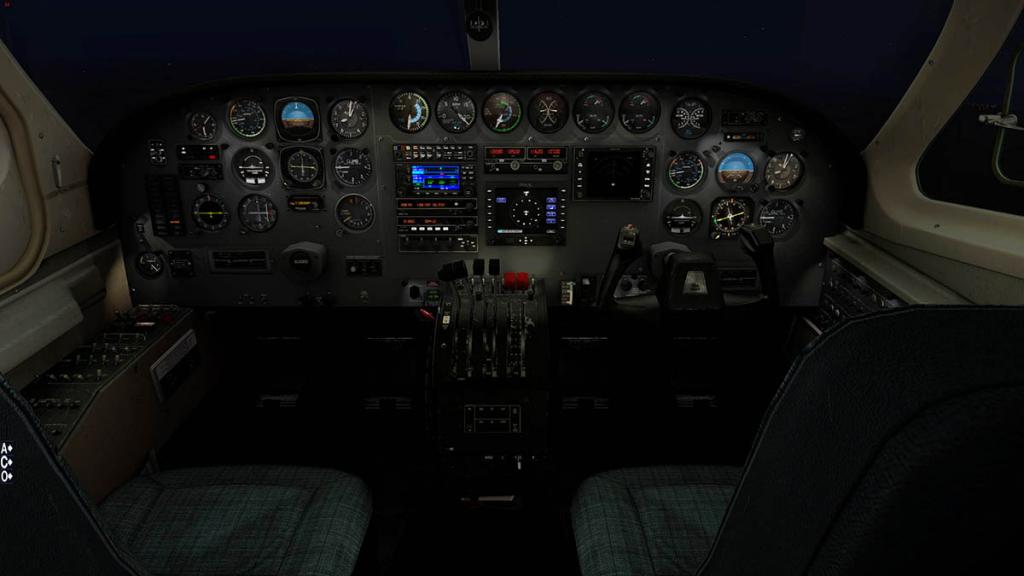
Standard instrument lighting is adjustable via the row of sliders on the very top of the pedestal. And it is very easy to find the right amount of light for takeoff or landings.
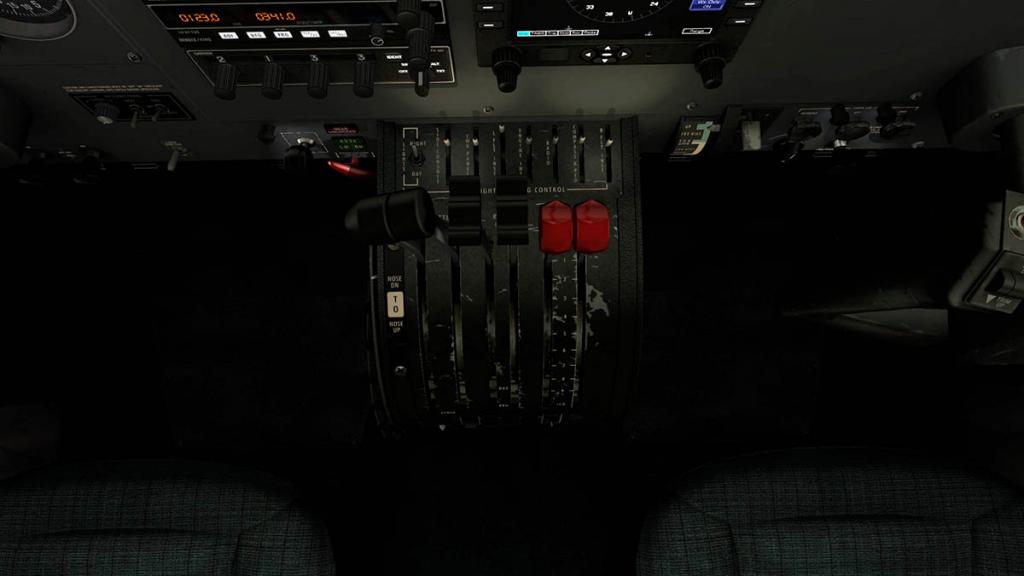
The light on the fuel selector is nice touch.
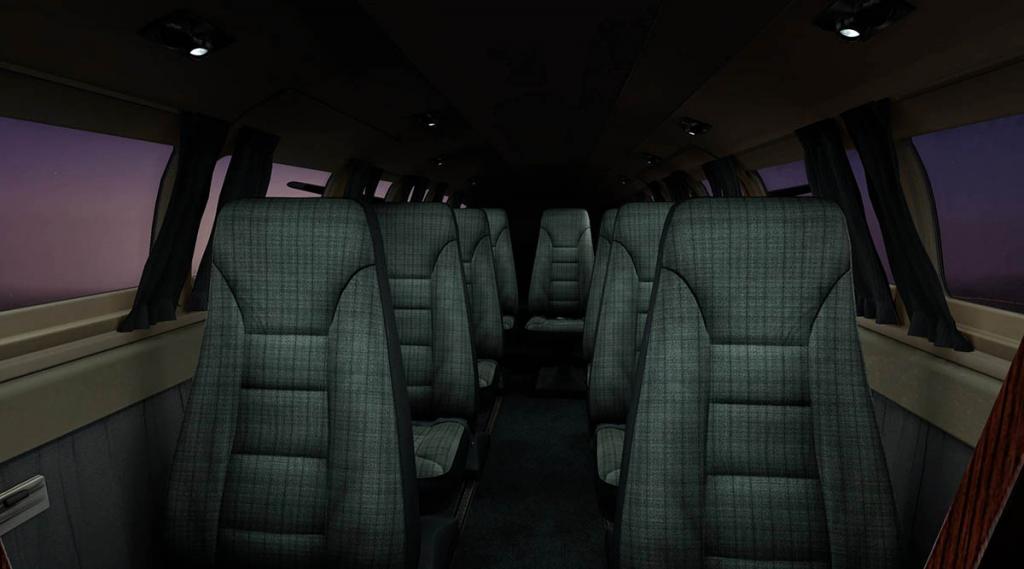
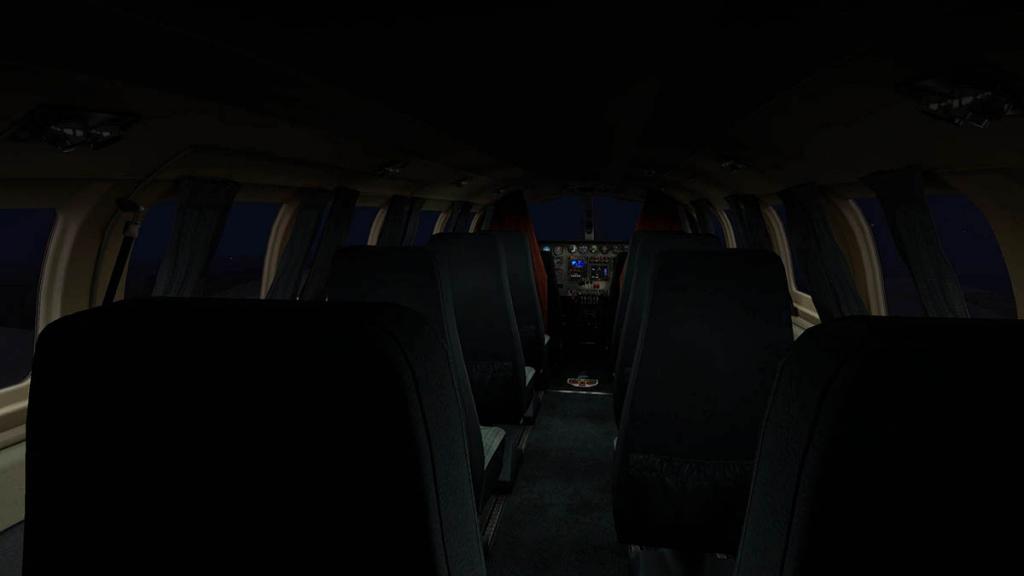
Rear cabin lighting is excellent, with nice (switchable) spot lighting over each seat, it gives you a nice feeling when flying late.

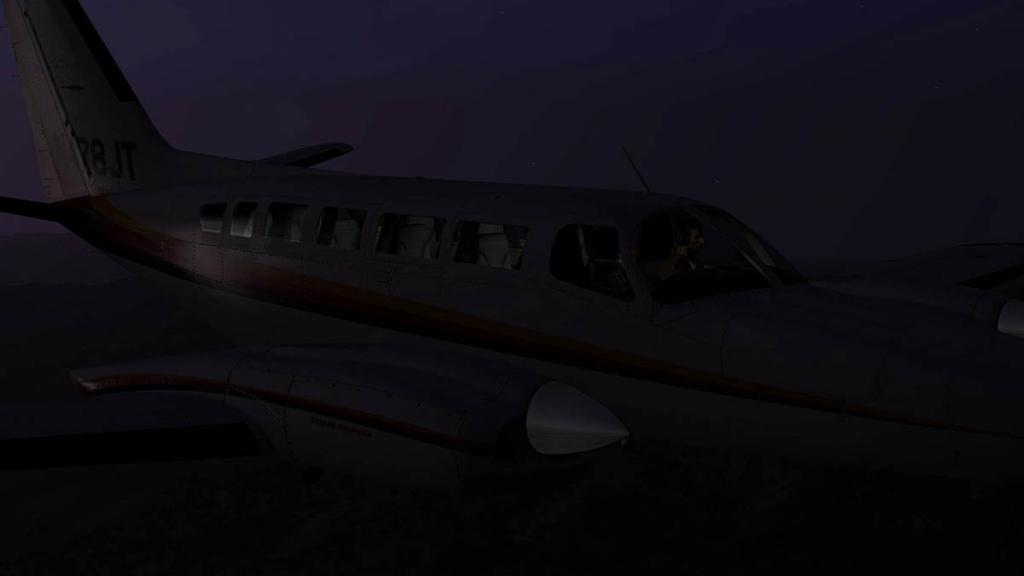
This extremely internal great lighting looks really good outside, the pilots in half light look very realistic.
The landing and taxi lighting is very good on approach and on the ground.
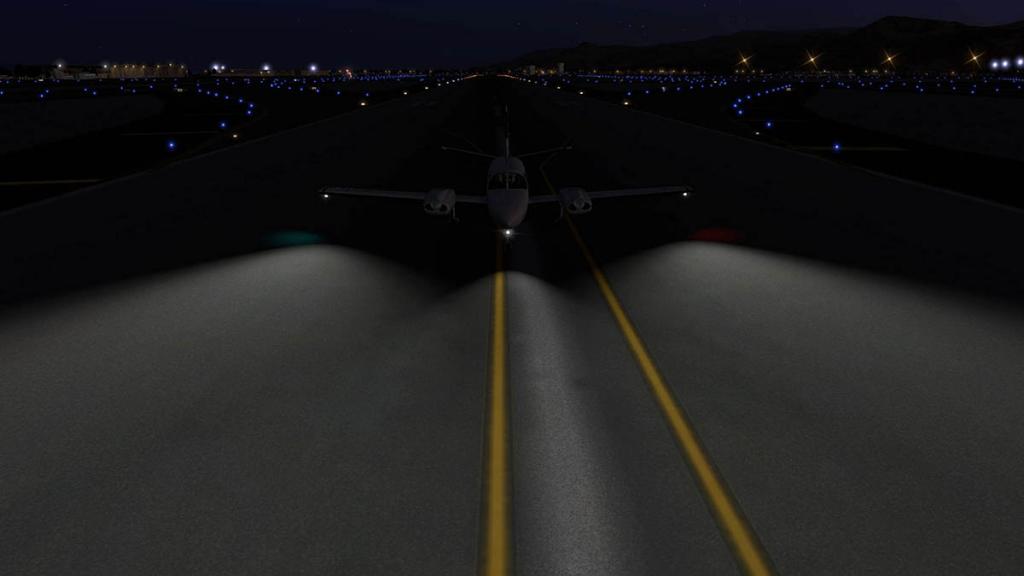
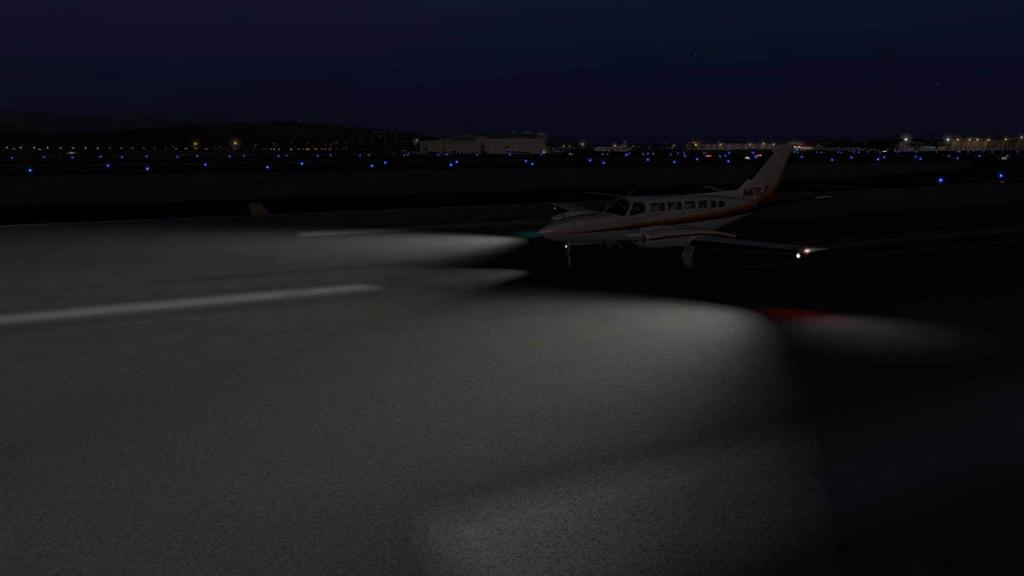

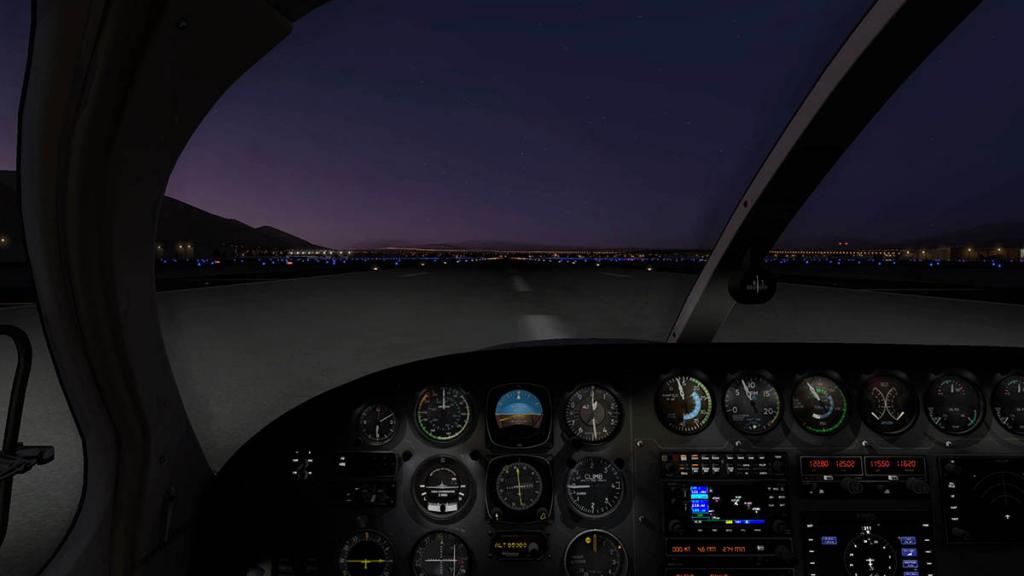
The spread of the wingtip landing lights and central front strut support taxi light give a very wide arc of light, very easy in the cockpit to navigate dark taxiways and lonely runways at night.


The day's work is done and it is time to wrap up the aircraft, very nice it is as well.
Liveries
There is one blank livery and five graphic liveries in the C404 package, all are 4K hi-quality textures, refined for good frame-rate.

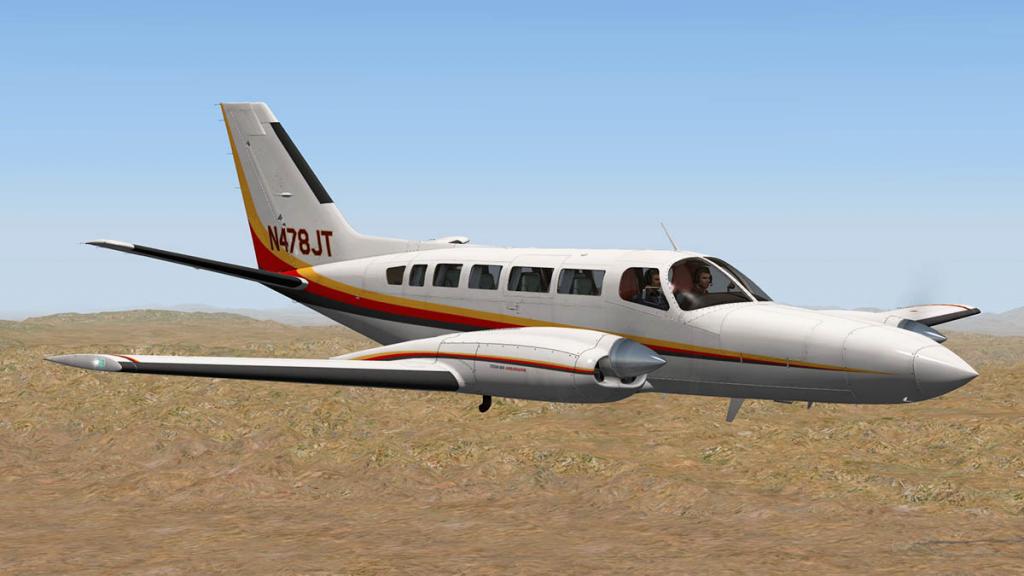

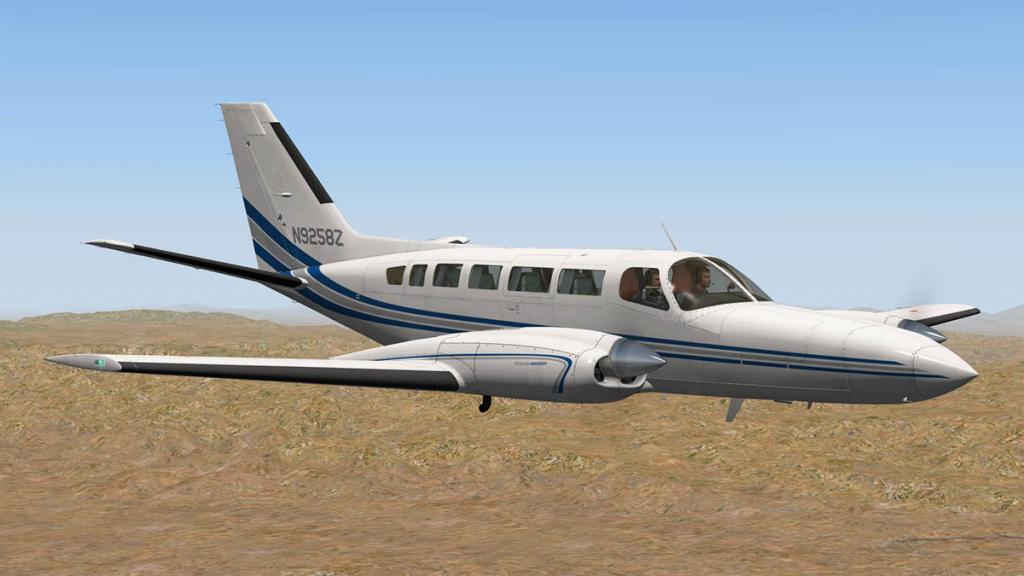

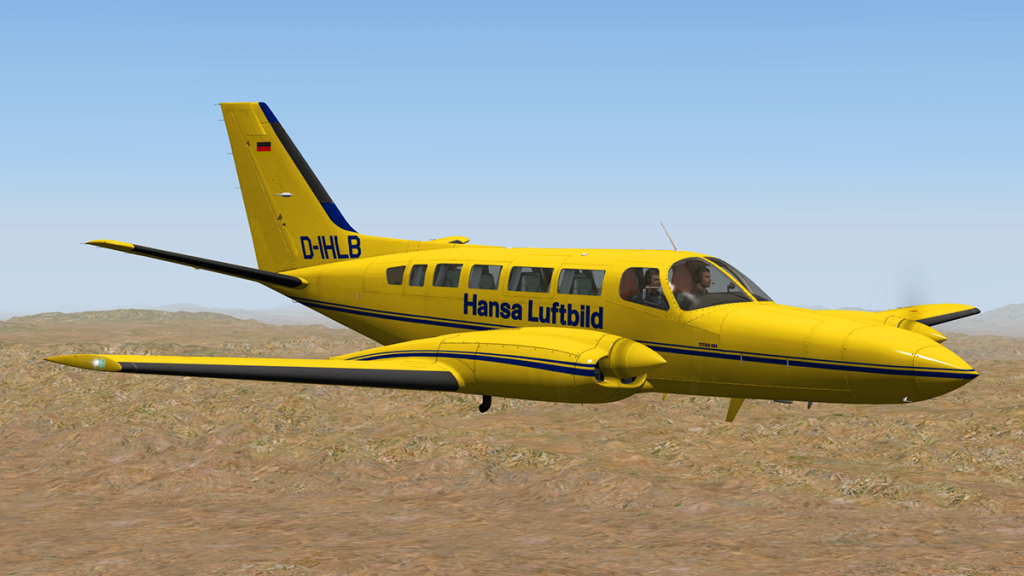
Summery
Some aircraft come along and in time will become a fixture in your favorite list. When you need a certain aircraft to do a certain job or flight it is usually the one aircraft you will pick. My F33 Bonanza will always be the go to single light engine aircraft, The C208 Caravan for utility work and so on. No doubt this C404 will become my large twin because it is a great aircraft, quiet, powerful and has a great range.
Quality and detailing is the usual high standard you expect from Alabeo, there is a certain 70's feel about the aircraft but that is its charm as well and the great dirty worn feel of the interior means you have an aircraft of hours of work behind it, its real and comfortable.
Alabeo originally represented the budget side of Carenado, all the quality for usually under US$20, so for the price you expected to have a few none working areas and extras... but this C404 Titan is now right up there in the Carenado US$30 cost bracket, I'm not saying the value and quality is not in the aircraft because it certainly is, no doubt.... but you do for the price expect a full set of Static Elements?, the excellent animated forward roof mounted spot lights? baggage that seems to have gone missing from Carenado/Alabeo aircraft lately, and working views (Camera - Fixed see notes below)... very small stuff in the large scheme of things, but you do pay for the features in this category.
One for the hanger? No doubt, a lovely aircraft in every area and the more time spent in the pilots seat the more I love it, quality is high and you will revel in your own pure private euphoria as you skim along your own coastal fringe, California will do me for now and a few more hours in the C404 Titan Ambassador is certainly the best way to fly.
______________________________________________________________________
Yes! the C404 Titan Ambassador by Alabeo is now available from the new X-Plane.Org Store here : C404 Titan
Price is US$32.95
Features
High quality Alabeo model- Volumetric side view prop effect
- High-Resolution 3D model and textures (4K)
- Custom C404 Titan sounds
Alabeo custom Systems- On screen menus
- 64-bit compatible
- Plugin-enhanced
- FPS-optimized model
- SuperManipulator scroll wheel support
- X-Plane 10 GNS430
Other features- Five high-resolution paint schemes
- Blank texture for creating your own designs
- Accurately reproduced flight characteristics
- Complete documentation with procedures included
______________________________________________________________________
Installation : Download file size is 294.10mb to your X-Plane - GA Aircraft Folder. Installed file size is 361.00mb
Notes: There has been a fix for the (C) Camera view popup, download and install : C404_Titan_prefs.txt.zip
Documents : Full set of C404 Procedure and Performance manuals and tables, Credits and Recommended settings.
Requirements :
Windows 7-8-10 (or higher) or MAC OS 10.6 (or higher) or LinuxX-Plane 10.40+ (Any edition)1GB Video card405MB available hard disk spaceCurrent Review Version: 1.1 (last updated October 30th 2015)______________________________________________________________________
Developer site : Carenado.com
Developer Support : Carenado - Alabeo Support X-Plane.Org______________________________________________________________________Review by Stephen Dutton
5th November 2015
Copyright©2015: X-Plane Reviews
Review System Specifications:
Computer System: - 2.66 Ghz Intel Core i5 iMac 27”- 9 Gb 1067 Mhz DDR3 - ATI Radeon HD 6970M 2048 mb- Seagate 512gb SSD
Software: - Mac OS Yosemite 10.10.4 - X-Plane 10 Global ver 10.42 (final)
Addons - Saitek x52 Pro system Joystick and Throttle : Sound - Bose Soundlink Mini : WorldTraffic v2
Scenery or Aircraft
- KPSP - Palm Springs International 2.0 by GPB500 (X-Plane.Org) - Free
-
6 hours ago, Guest xpflyer said:
The aircraft has no pilots, right?
No pilots in the aircraft, but you still have to do your bit in getting the aircraft from place to place....
-
News! - New images of FlightFactors Boeing 767
Flightfactor have released some great new cockpit images of their coming Boeing 767.... It is noted as going into beta very soon.
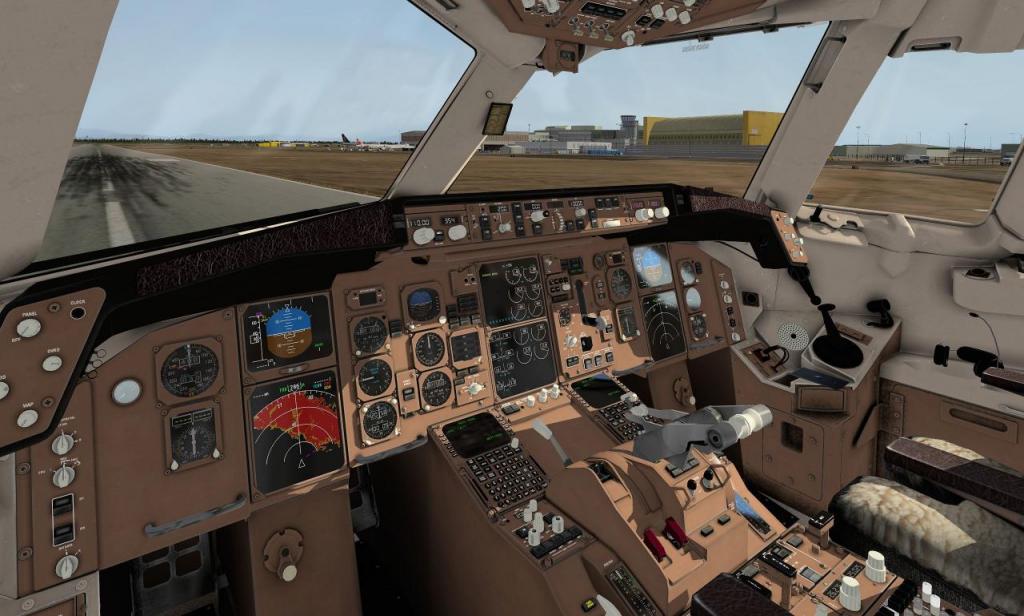

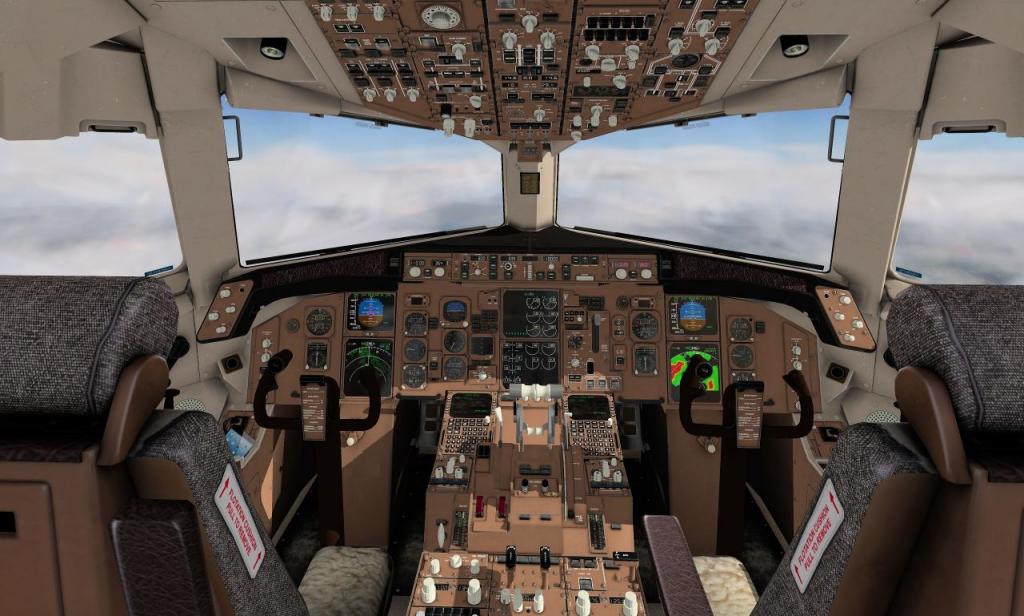
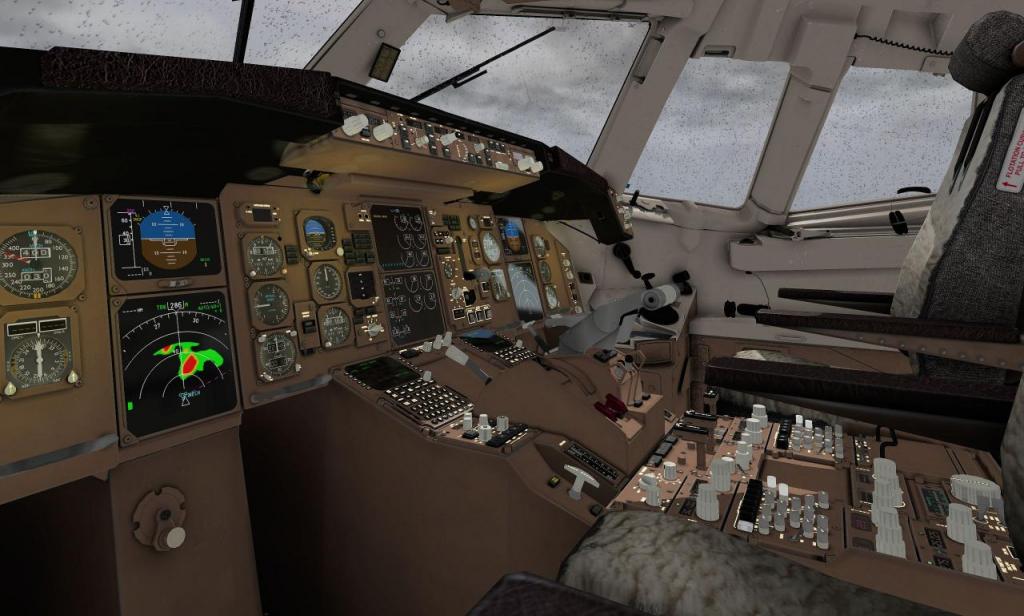
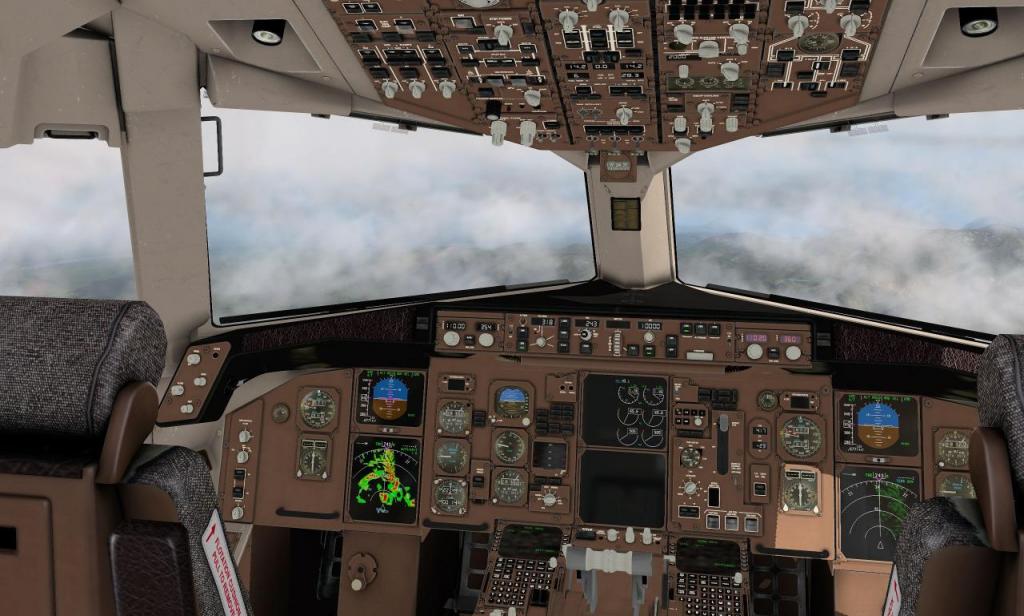
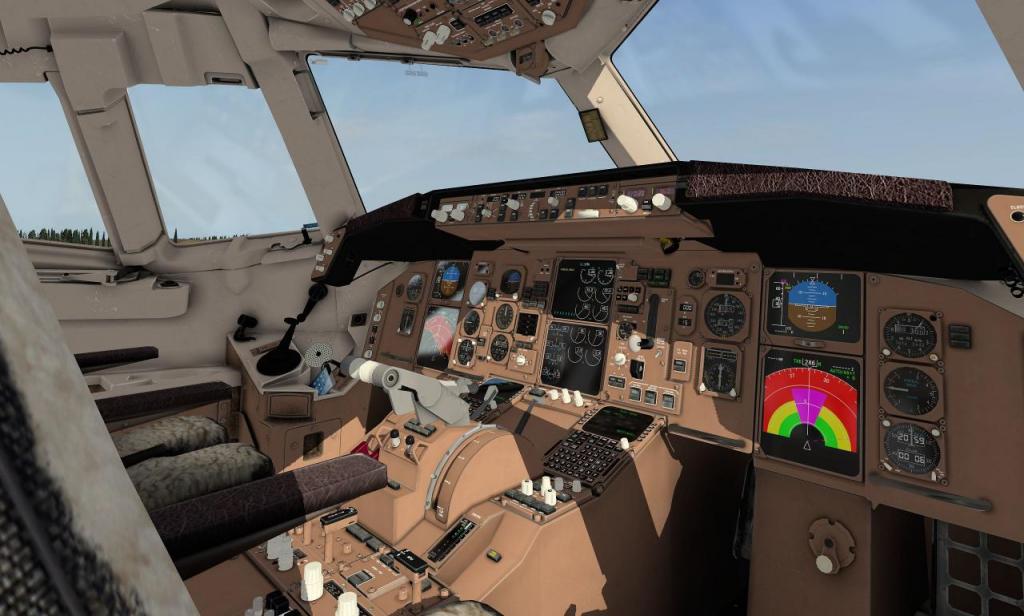
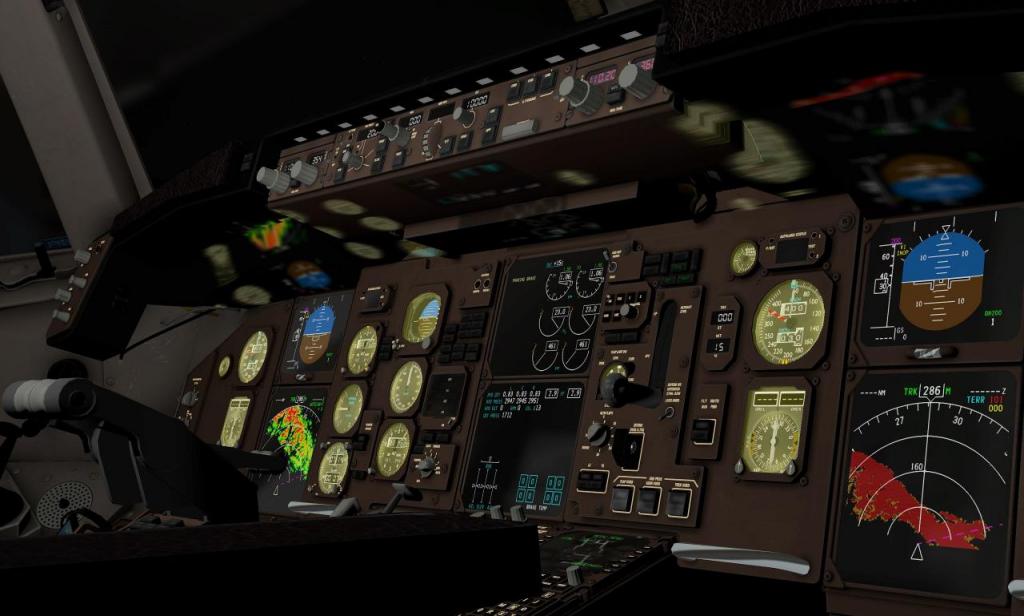
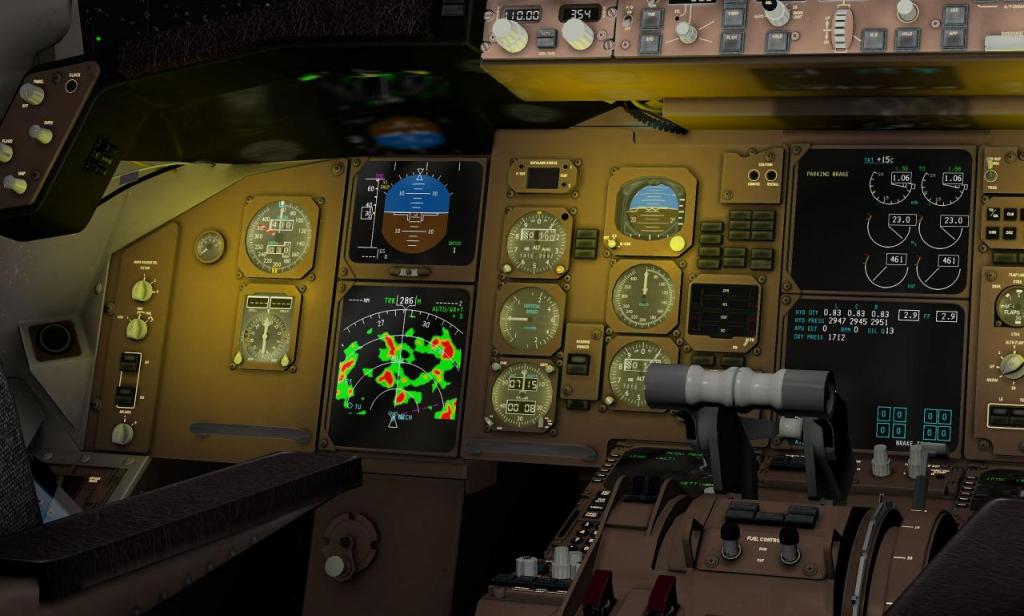

Images are courtesy of FlightFactor
_____________________________________________________________________________________
Stephen Dutton2nd November 2015Copyright©2015: X-PlaneReviews
-
News! - Coming soon - DHC-6 Twin Otter -300 series update v1.2 by RW Designs
The Twin Otter DHC-6 -300 Series by RW Design's is getting an upgrade soon to v1.2.


On of the most visual changes in v1.2 will be the choice of either the original long-nose version... or the new short nose version.
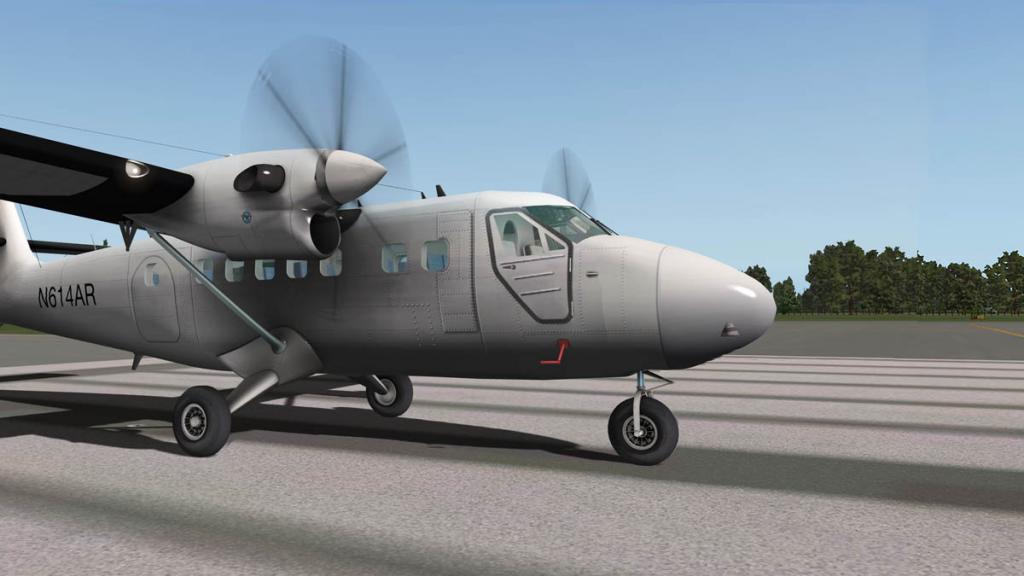
The different noses will be available with every variant, including the standard wheel version (above), Ski, Float and Tundra version. Choice of nose is via a popup panel at your change of variant.

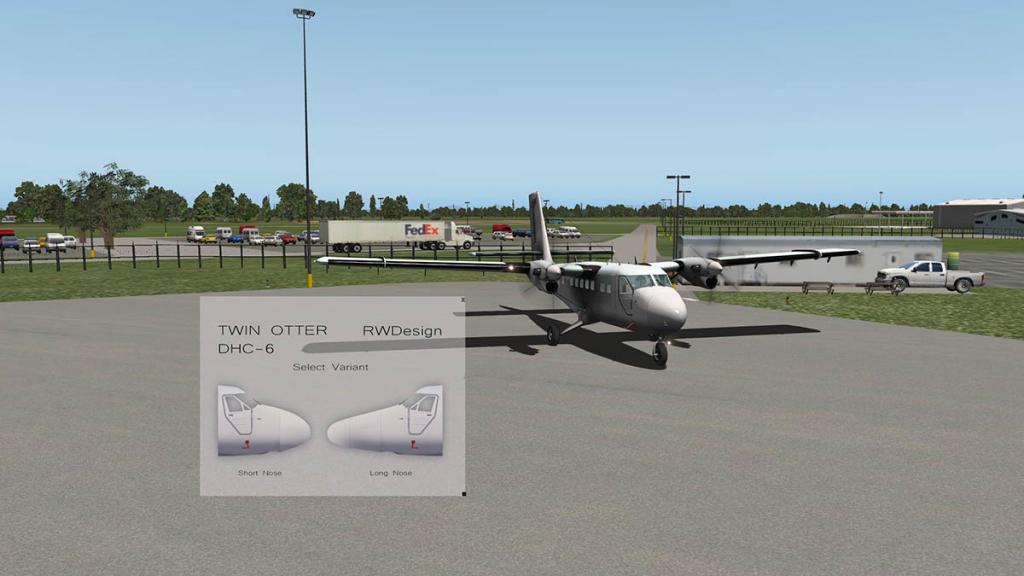
Sounds have been completely overhauled and are now plugin SASL driven and not basic X-Plane sourced sounds.


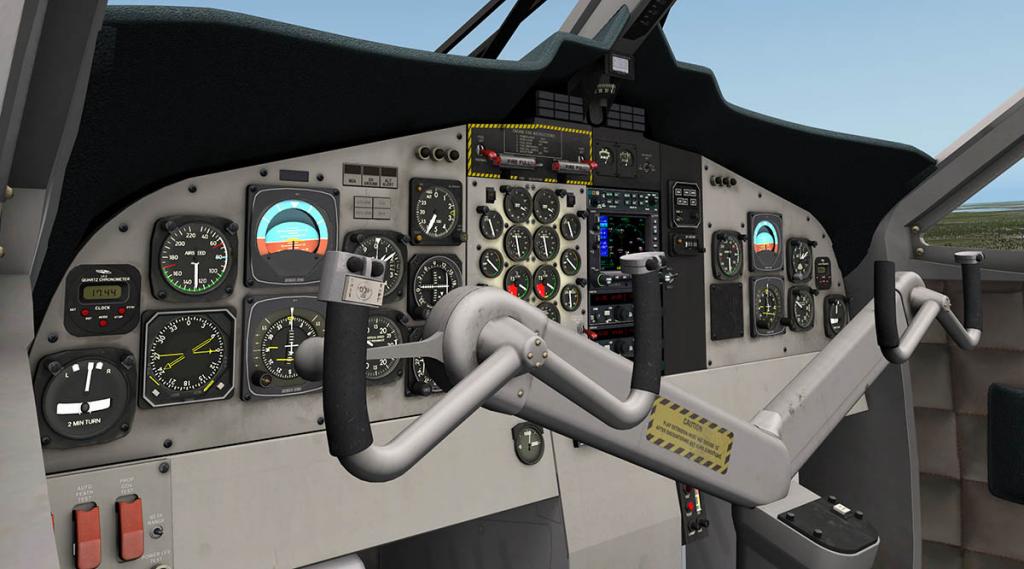
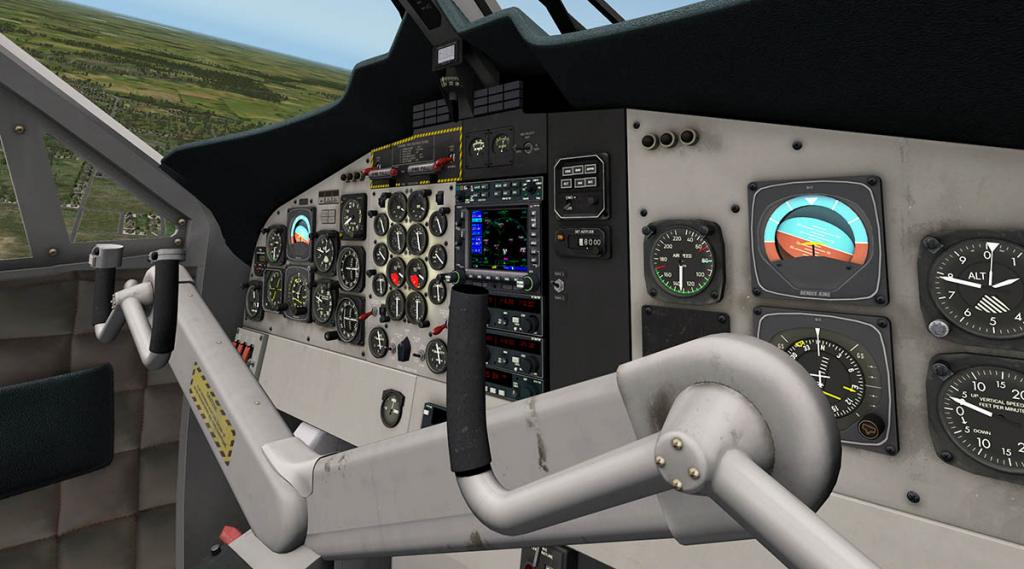
Great cockpit now has VOR 2 direction needles, these were missing on the origiinal releast version and were sorely missed, certainly when hopping island to island and you need a heading bearing.
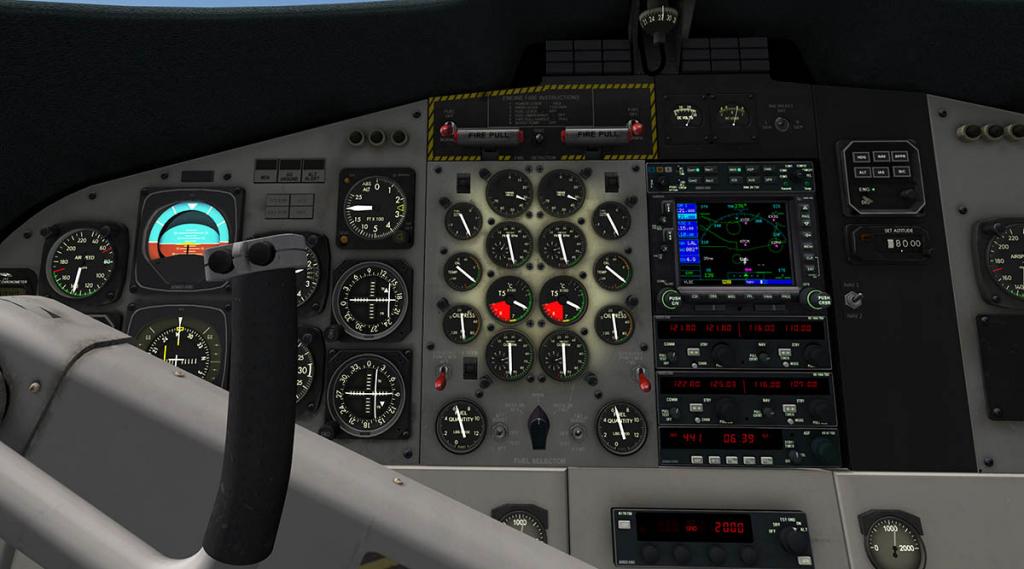
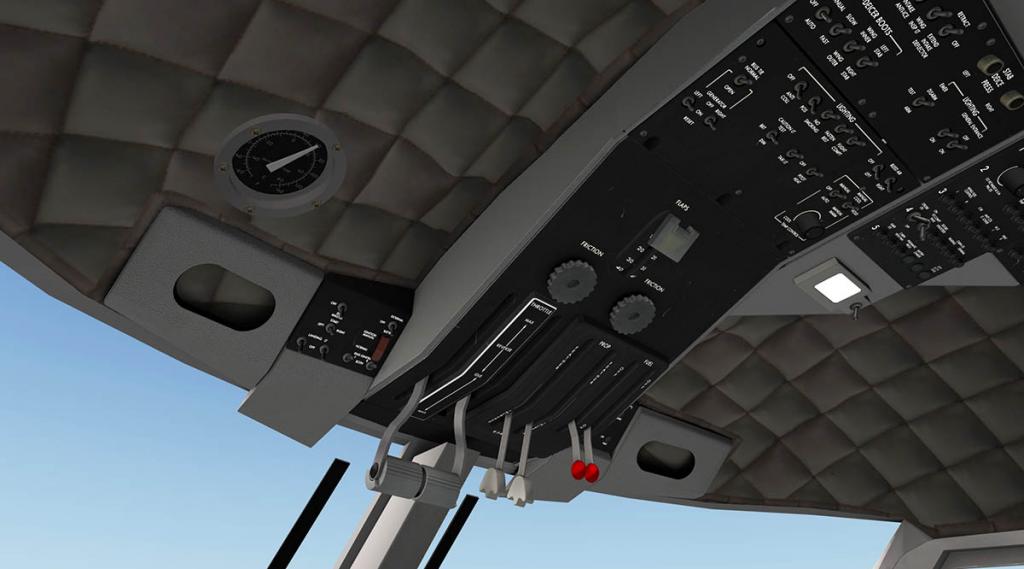
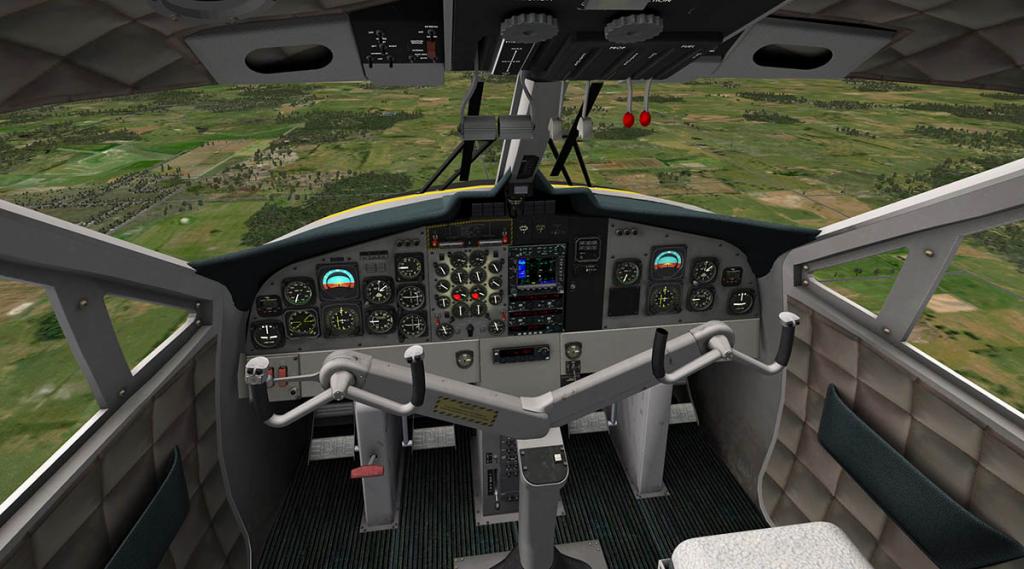

Flight model has had some fine tuning and the aircraft behaves far better under climb and far, far better under descent conditions...
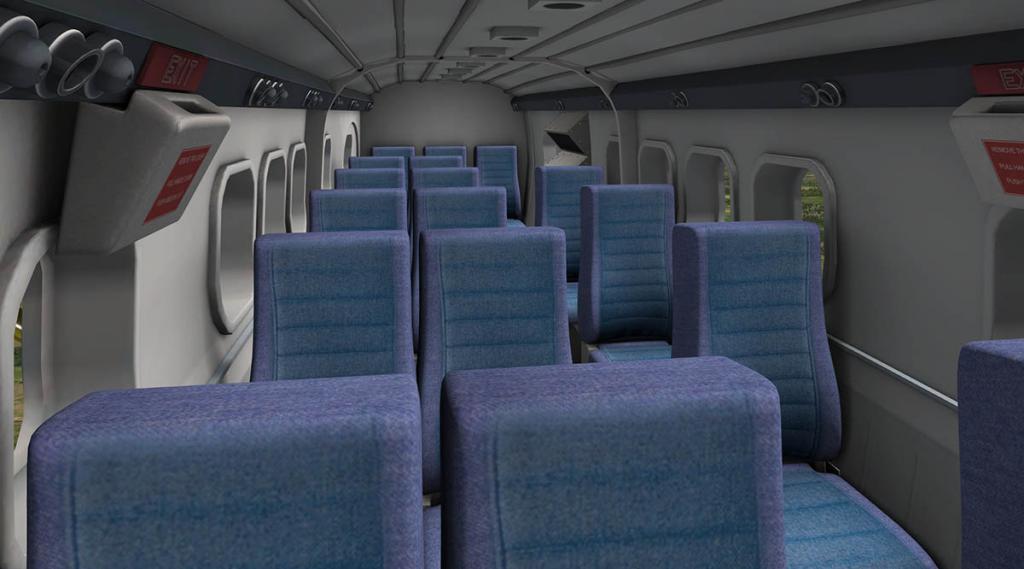
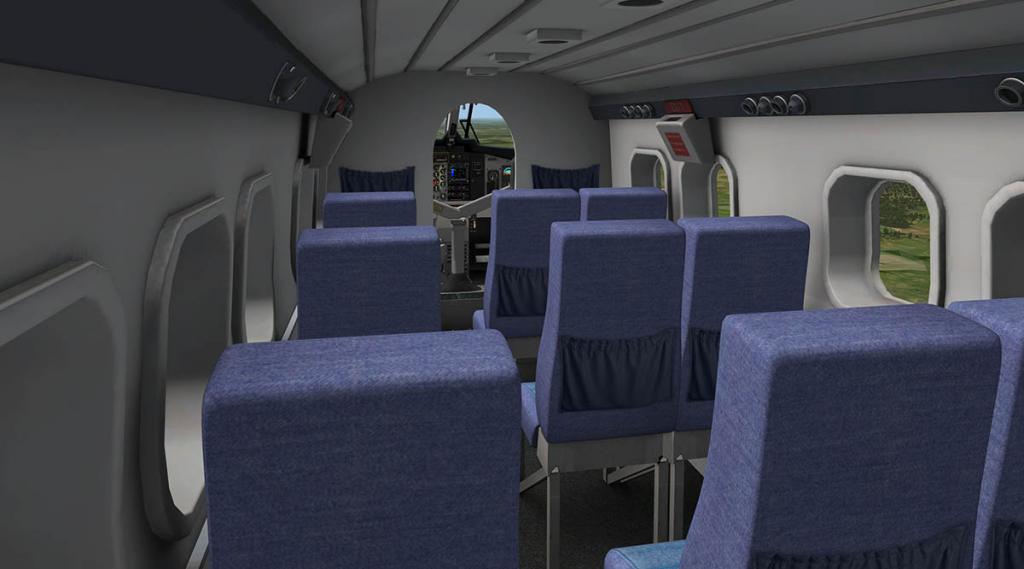
All the features are still here, and this is a great short-sector aircraft.
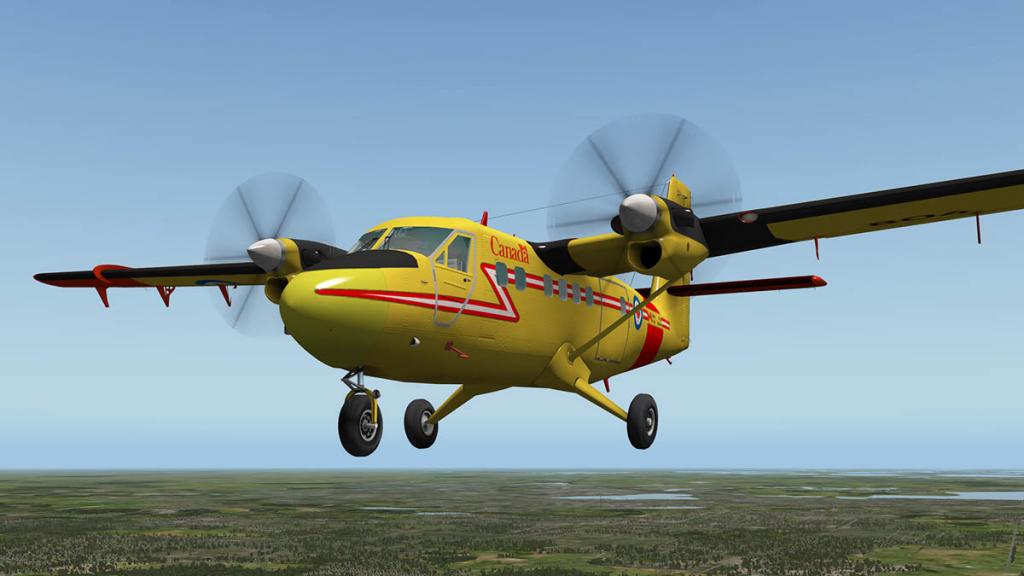
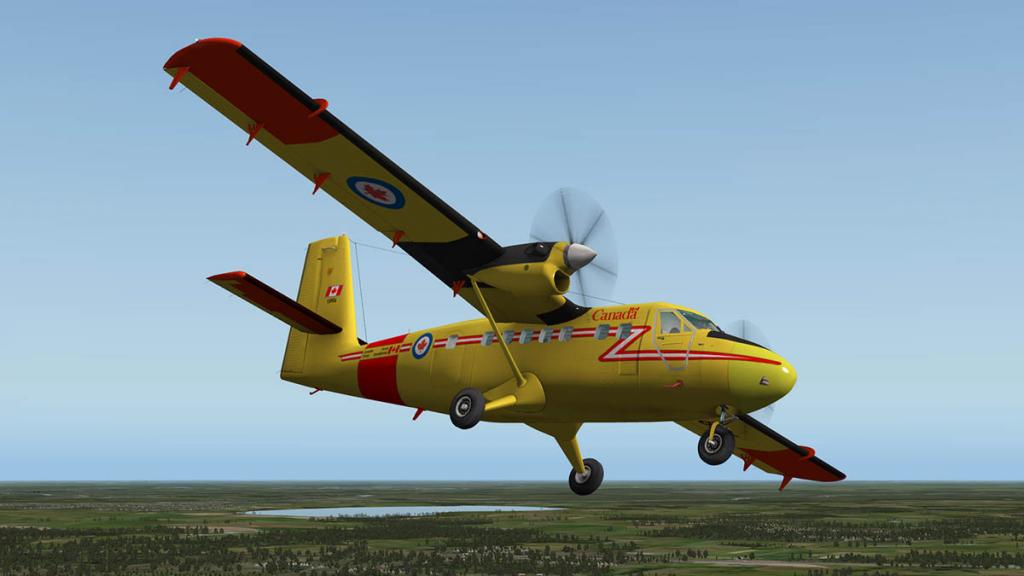
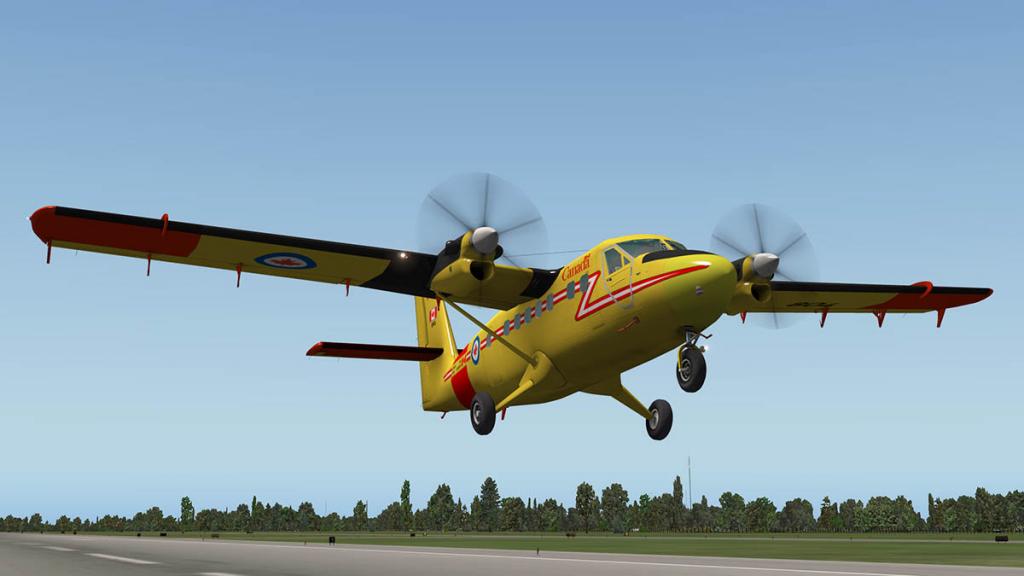
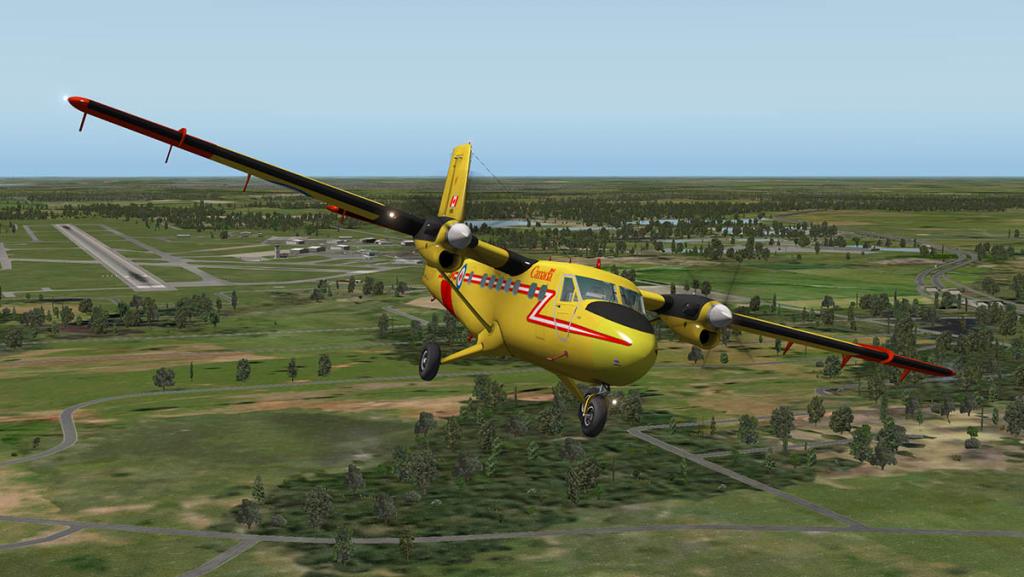
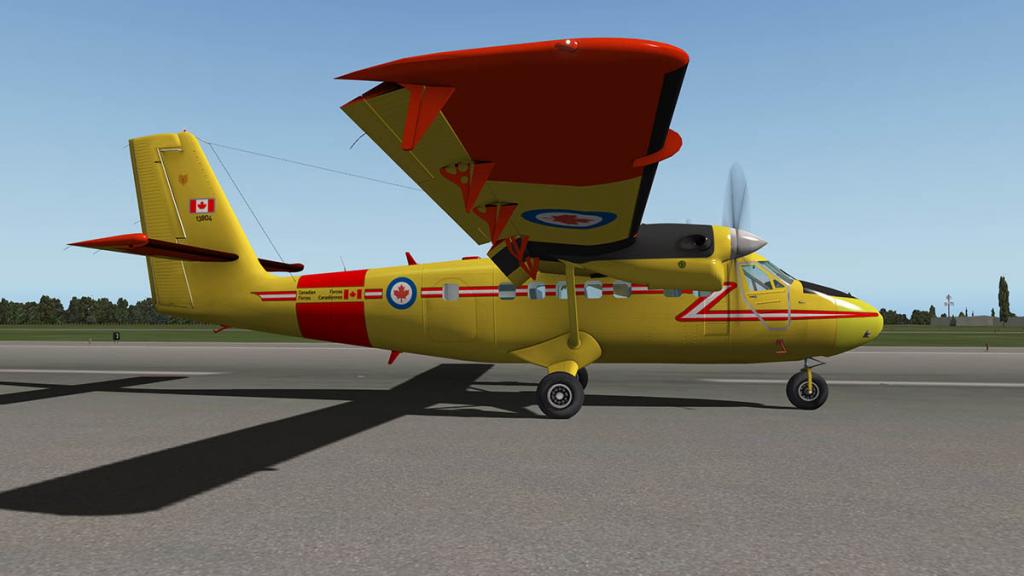
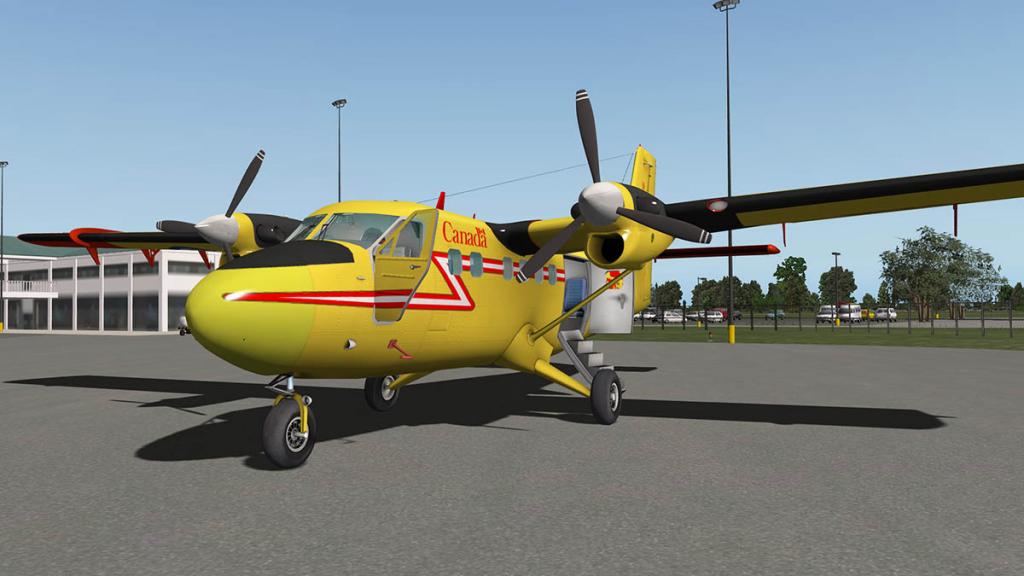

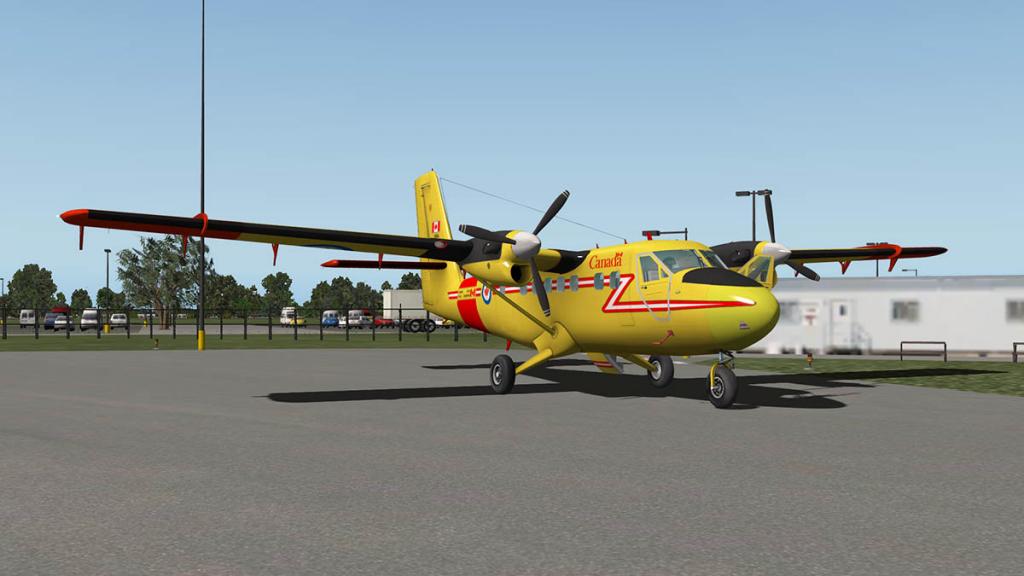
No date has yet been given on the v1.2 update release, but it is noted as... soon.
You can read X-PlaneReviews full v1.0 release review here: Aircraft Review : DHC-6 Twin Otter - 300 Series by RWDesigns
And the current version can be purchased here:
The de Havilland Canada DHC-6 Twin Otter -300 Series by RWDesigns is now available from the New X-Plane.Org Store here :
DHC-6 Otter 300 Series and is priced at only US$27.95
Features include:
4 versions of the DHC-6 Otter- Wheels (standard)
- Tundra - Land in the bush
- Floats - For lakes and oceans
- Skis - For glacier operations
High-Resolution 3D Model- 3D Cockpit
- Hi Res 4K textures
- Full 3D exterior model
- HD Night Lighting
- Interchangable liveries between versions.
- 7 paint schemes
- Custom Prop/Engine sounds
Custom Systems- Programmed Radios
- Customized GNS 530
- Custom airfoils and flightmodel
- Custom electrical and de-Icing systems
_____________________________________________________________________________________
Stephen DuttonUpdated 2nd November 2015Copyright©2015: X-PlaneReviews
-

Scenery Review : SBGL Rio de Janeiro Intl by Richard G Nunes Scenery
Nothing was more exotic or remote in the 60's than Rio de Janeiro, it was the sounds of the music that brought it into context or the refrains of Bossa Nova "new trend" which is a lyrical fusion of samba and jazz. And at the same time aircraft became fast and global through Jet propulsion and the VC10's, Boeing 707's and DC8's now ruled all hemispheres and the Jetset were on the move in their thousands. Airline posters of the day (I have a fair collection) where of these exotic destinations... India, Hong Kong, Egypt, South Africa, Japan and Australia, They infused early a dream of world traveling that is still my deepest desire and love.


But for a wannabe jetsetter Rio was the big one, visions of coming into land past the gaze of the "Christ the Redeemer" iconic statue was right at the top of one of my biggest set of bucket list of destinations, the holy grail of travel... the really big one. I never got to Rio (well not yet anyway) but many others have been crossed off the BOAC list, but the dream lives on.
So any X-Plane scenery that can at least fulfill even a slight longing of flying to Rio de Janeiro was always going to be a big deal, it is and here is the main destination for any arrival in that Southern Continent's most vivid city in Rio de Janeiro/Galeão–Antonio Carlos Jobim International Airport .
Rio is also in the news for other reasons lately, the Football World Cup has been won and done, but in 2016 is the turn of the behemoth Olympic & Paralympics Summer Games to grace the city, and SBGL - Galeão will be again at the forefront of the public reception point for the city. The airport is located 20 km (12 mi) north of downtown Rio de Janeiro.
First Impressions.
My entrance to SBGL was via a short flight from Sao Paulo going north and approaching the city from the south. My fantasy of gliding past "Christ the Redeemer" was not going to happen as there is actually no approach path across the front of the summit of Mount Corcovado where the statue is placed. Instead I would be using a direct approach via SANTA CRUZ VOR (SCR-113.60) and MERITI NDB (IT- 290) that gives you a direct approach into SBGL RWY10 though the valley east of Serra do Mendanha. NARA 10 STAR will give you both north and south arrival patterns through SANTA CRUZ VOR.


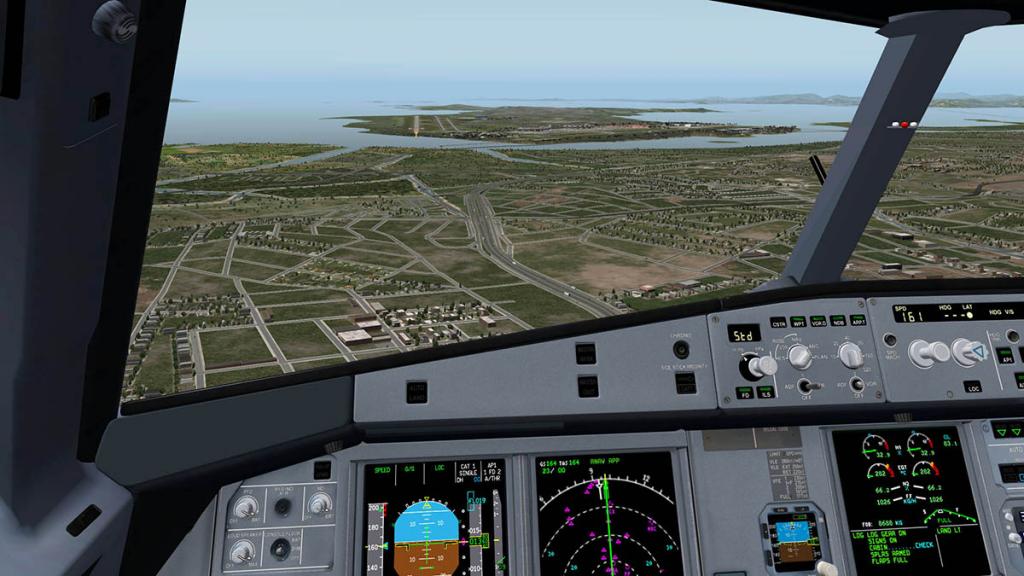
Visually it is a great approach, but you can't see any of the iconic Rio visual feasts in the forementioned "Christ the Redeemer" or "Sugarloaf Mountain". SBGL Galeão Airport itself is built on its own complete island called Governador Island (Ilha do Governador, in Portuguese) and is the largest island in Guanabara Bay. The name Galeão was a beach on the island.
The history of the airport begins on May 10, 1923 when a School of Naval Aviation was established near Galeão beach on Governador Island. On May 22, 1941 with the creation of the Brazilian Air Force Ministry, the school became the Galeão Air Force Base; a terminal and hangars were built and the runway extended. Those buildings still exist and Galeão Air Force Base is still active. When Brazil declared war against the Axis on August 22, 1942, the aerodrome began to be used intensely by the Allies for military operations related to the World War II.
At the end of the war, Santos Dumont Airport was unable to handle the increased tonnage of aircraft flying on international routes and number of passengers. For this reason, international flights were gradually moved to the site of the Air Force Base. The services were however precarious and a decision was made to build a brand new passenger terminal, opposite to the Air Force Base, and set across the runway.
On February 1, 1952 the new passenger terminal was opened and remained in use with enlargements until 1977. This terminal is used by passenger flights operated by the Brazilian Air Force. The cargo terminal is also located in the area and all-cargo aircraft usually park at its adjoining apron. The whole complex is now informally known as the "old Galeão."
On January 20, 1977, when the airport was receiving all of Brazil's major international flights, this new terminal was opened and all scheduled passenger flights were transferred to the new building. This building is known today as Passenger Terminal 1. During the year 1991, Passenger Terminal 1 underwent its first major renovation in preparation for the United Nations Earth Summit held in 1992. Its annual capacity was increased to 7,5 million passengers/year. On July 20, 1999 Passenger Terminal 2 was opened. (wikipedia)
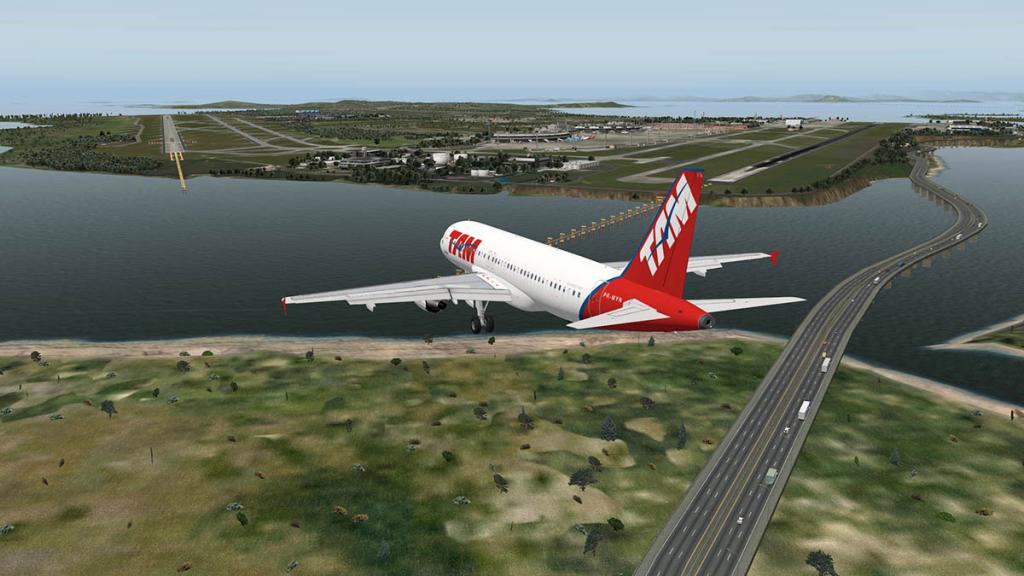
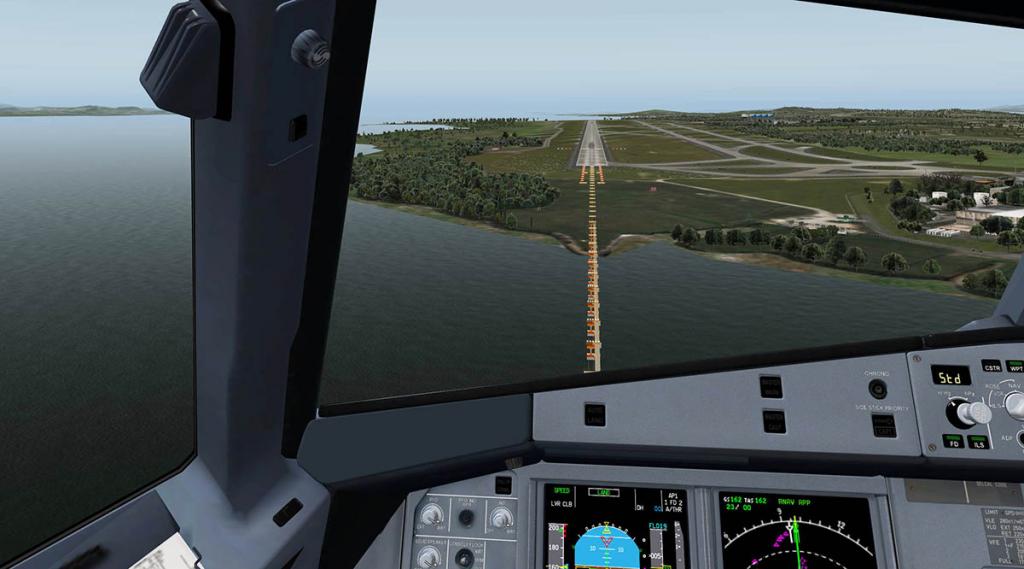
Both runways 10/28 and 15/33 are in a wide V shape coming from the southern direction, with excellent overwater RAIL lighting (Approach Lights Systems (ALS) to guide you in. The main airport terminal complex is in the centre of the V and is an excellent visual sight on both RWY10 or RWY15 approaches.
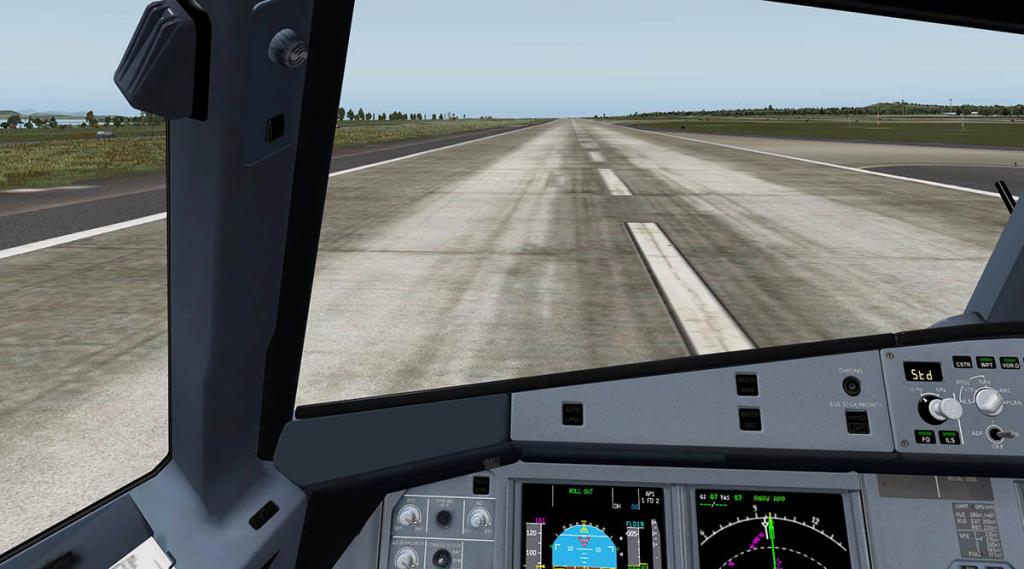
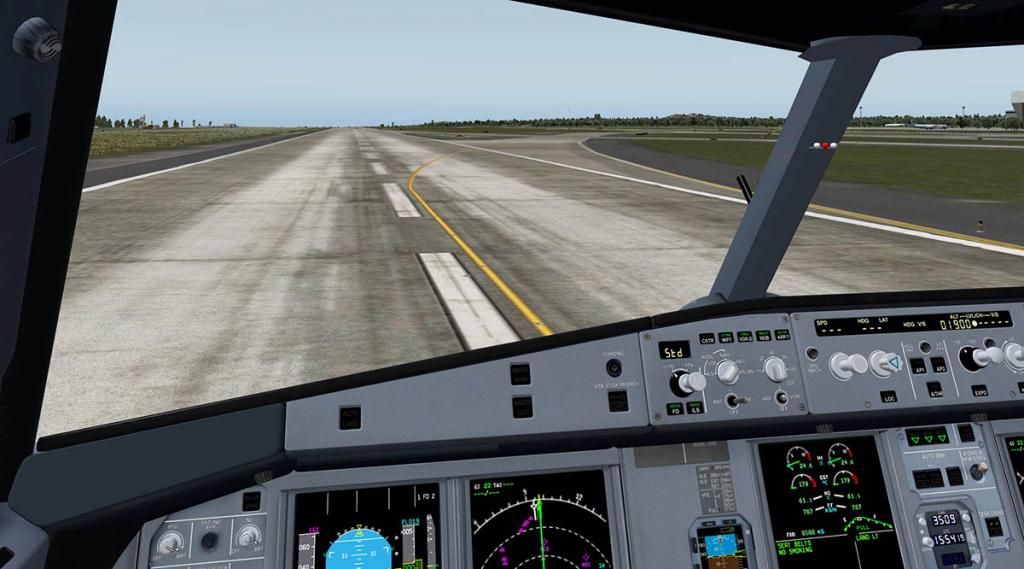
Runway visual features and runway textures are simply excellent 10/28 is concrete (15/33 is Asphalt) and are highly realistic in wear and rubber marking. There is grass, but on approach it looks a whitish than a more darker grass, but still a nice feature. Taxiways are concrete center and runoff wider tone asphalt, and very well done. Departure from RWY10/28 was by link taxiway CC to main taxiway N. On taxiway CC you have the excellent large TAP maintenance & engineering hangar and service ramp area. (yes the same Portuguese TAP, the area was bought from bankrupt VARIG in 2005).
Turn to taxiway N is required but you can't stay on this section. If you run the WorldTraffic 2.0 plugin from Classic Jet Simulations (highly recommended) there are some great sets of ground routes available for SBGL here: GroundRoutes_SBGL v1.0
But no routes. I have listed my settings for the WT Route Generator below as a download to get the routes I created for SBGL and they look brilliant in operation. But one thing is noticeable in that taxiway N is the north direction main departure route and Taxiway M is the south direction route to the terminal area. so you need to dogleg at link taxiway W to get off N to get to M as soon as possible between traffic flows if the departures are to the south.

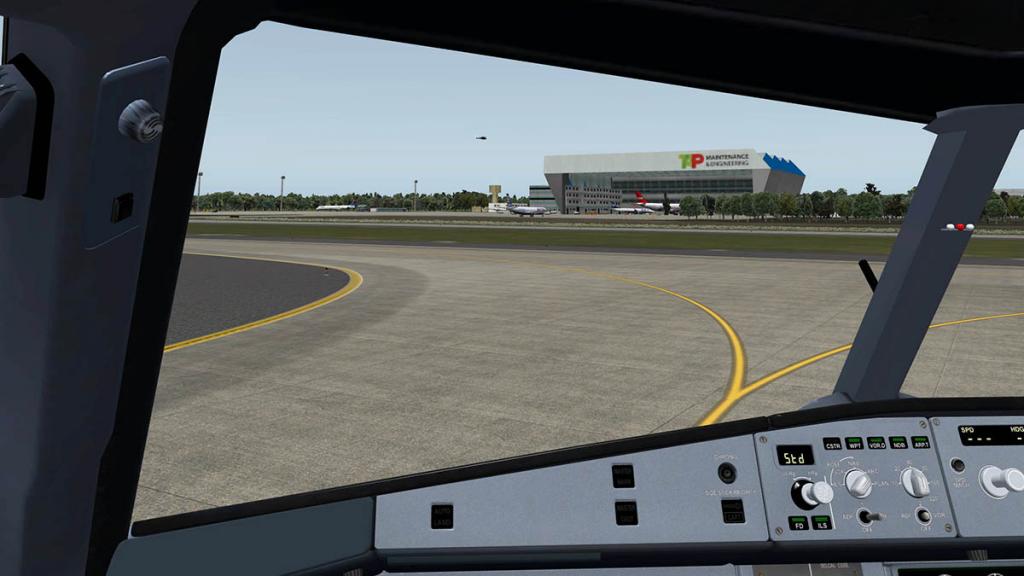
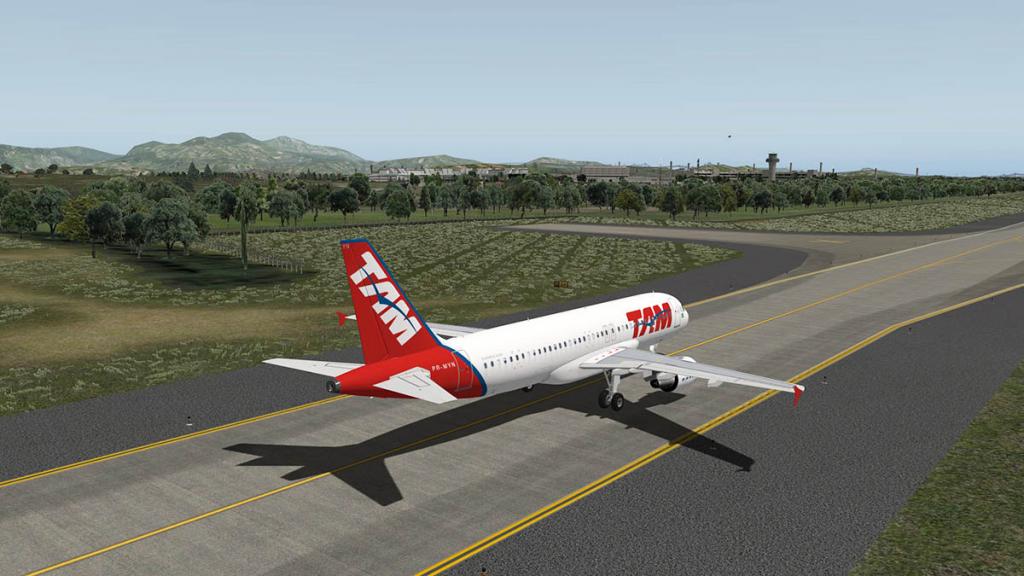
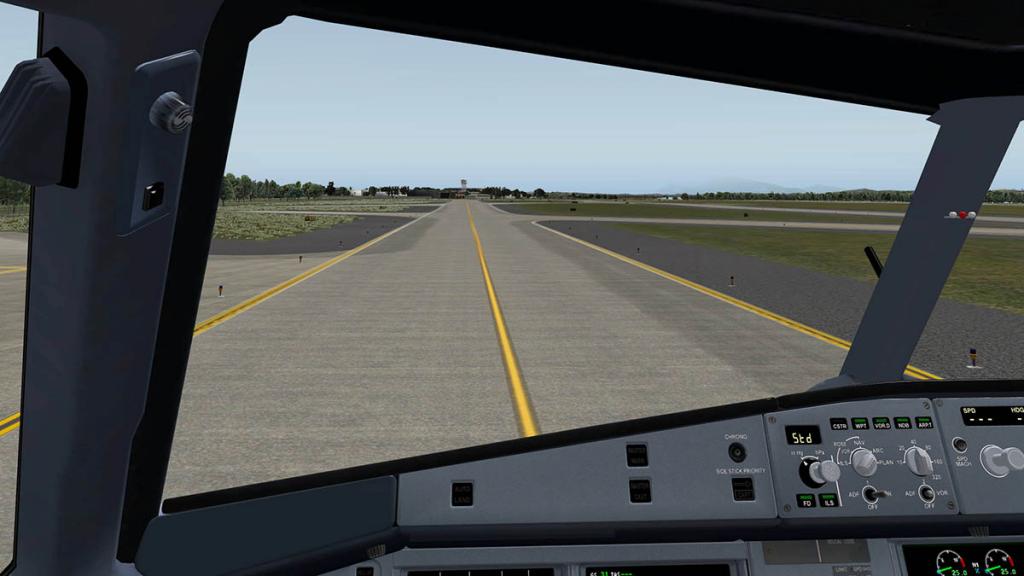
One thing must be stressed early in using this Richard Nunes SBGL is that the "runways follow terrain contours" tickbox must be on. There are many reasons for this but the main two are that if not the RAIL approach lighting will be very odd and sit well above the runway?
Secondly is for a great feature of the scenery, as taxiway M goes past the main junction of Q and O link taxiways you then cross over a taxiway bridge, M for going west and another bridge for taxiway N going east. Brilliantly done you enjoy the view as an WT aircraft crosses on the other bridge (If "runway contours" is off the bridges will sit too high?)

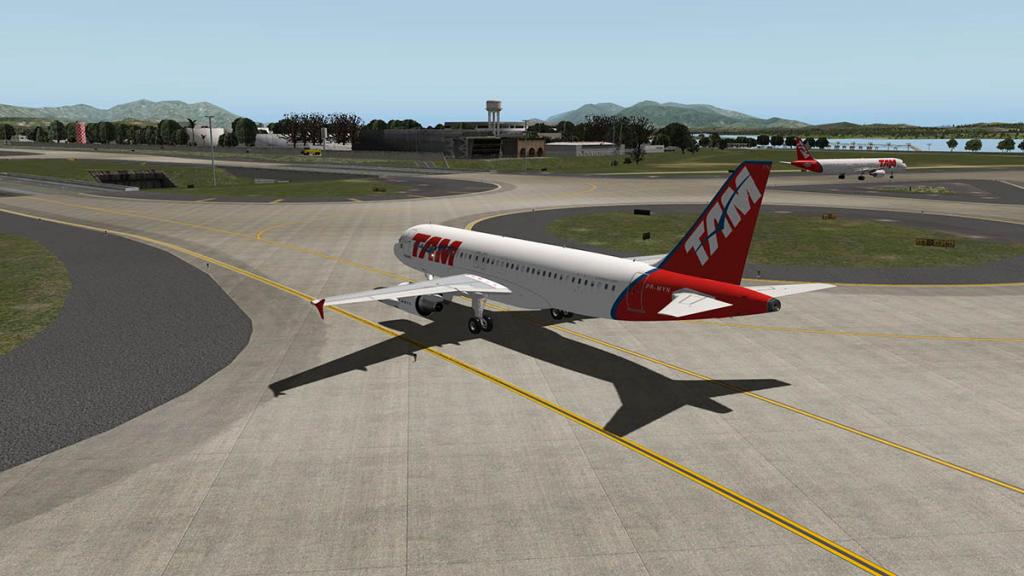
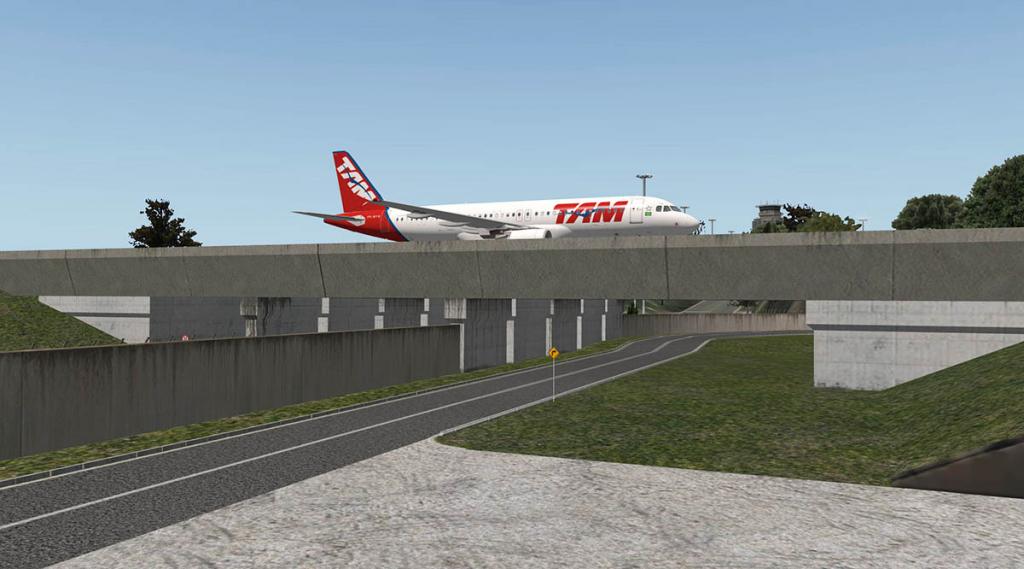
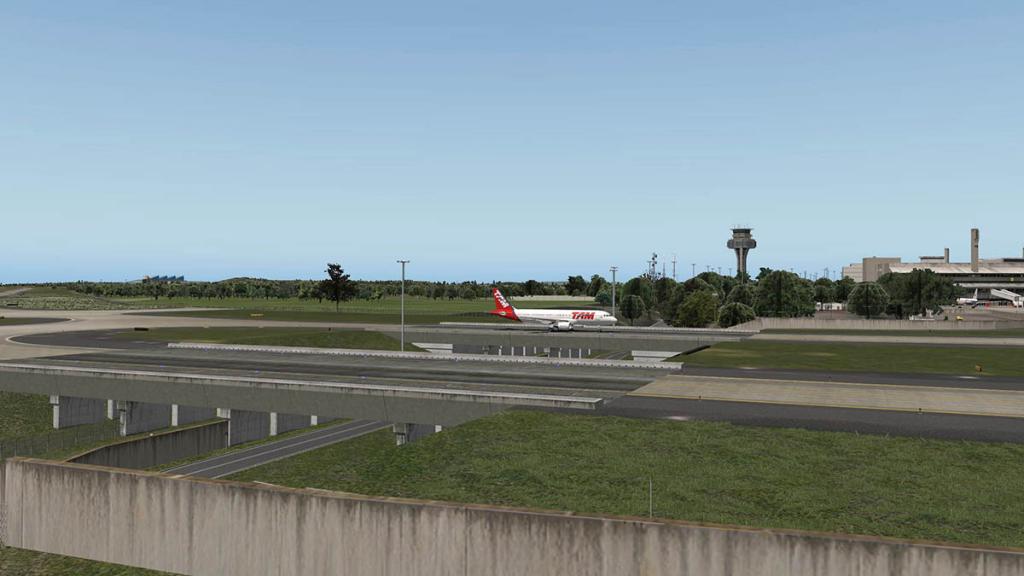
The one area X-Plane misses out on is this sort of traffic and high taxiway crossings, but here it is an excellent way to create such a solution.
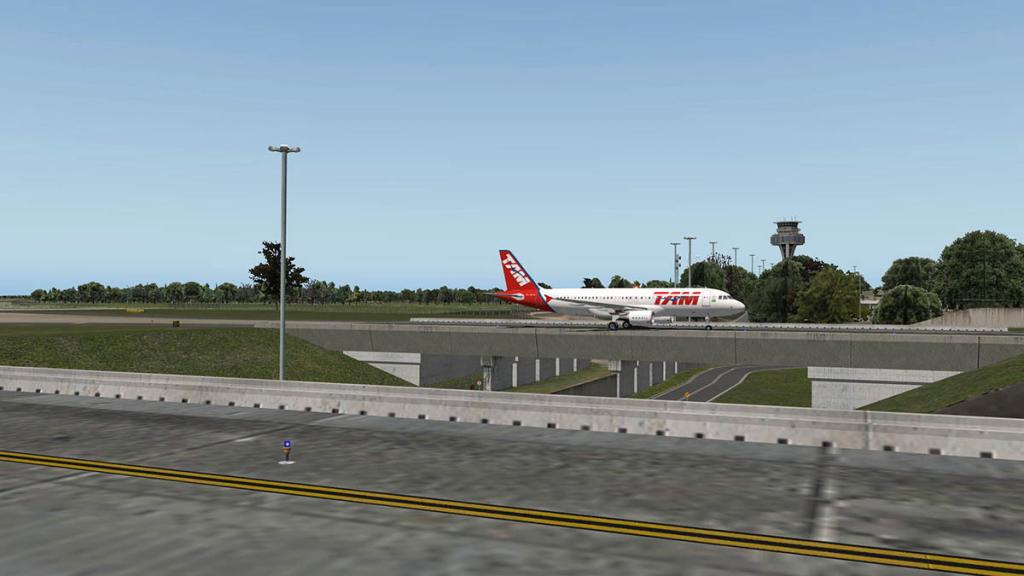

Over the taxiway bridges there is on the right is a fuel storage and airport maintenance collection of tanks and buildings.
On the left is the appearance of the terminal and ramp areas. The whole area is created like a semi circle amphitheatre, dominated by these huge high concrete lighting towers, it feels very Aztec at a first arrival it is an amazing space. Taxiway and ramp linage is excellent, but going on to the main ramp area it can get confusing with so much lineage, so you do find yourself turning in long wide arcs to get around to the gates

The double huge semi-circle terminal buildings are extremely well represented, highly realistic and there is a large amount of well positioned and well selected static aircraft to fill in the gates (If you do use WT you may have to edit a few gates to get the right mix of static and WT aircraft).
This is a very busy ramp area as well, not only the moving WT aircraft but the scenery comes with a lot of animated vehicles, there is everything going on here in buses, fuel tankers, tractors, tugs, catering and baggage trucks. So you have to be very careful on not hitting any crossing vehicles.
Around the outer rim of the ramp area there is a huge amount of nose in remote parking, and my parking gate 51 was on the second terminal set of gates. All gates have built in (marginal) animation and aircraft parking guidance indicators. In the gate there are also walking worker animations, not that many but they are all spread around the airport work areas going about their business. (the gate marshalls however are static).

So first impressions are very impressive, very realistic and a great way to arrive in Brazil's and Rio's most significant airport.
SBGL Rio de Janeiro International Airport
SBGL Galeão–Antonio Carlos Jobim International Airport
(IATA: GIG, ICAO: SBGL)

10/28 4,000m (13,123ft) Concrete
15/33 3,180m (10,433ft) Asphalt
Elevation AMSL 9 m / 28 ft
With the airport layout set on an island gives you many ways to make a scenery great, and that is the case here with SBGL. There is a slight colour (darker) difference between the airport ground textures and the surrounding X-Plane default textures, but not enough to cause any visual angst. So the layout is very good from any angle, very realistic while on approach or departure. There is great default traffic and bridges around the north of the island that connects the airport to the mainland in two places and traffic flows around and directly into the scenery itself.
The concrete and asphalt differences between the main runways are excellent and the quality of the scenery does show from the attention to detail of all the different ground textures.


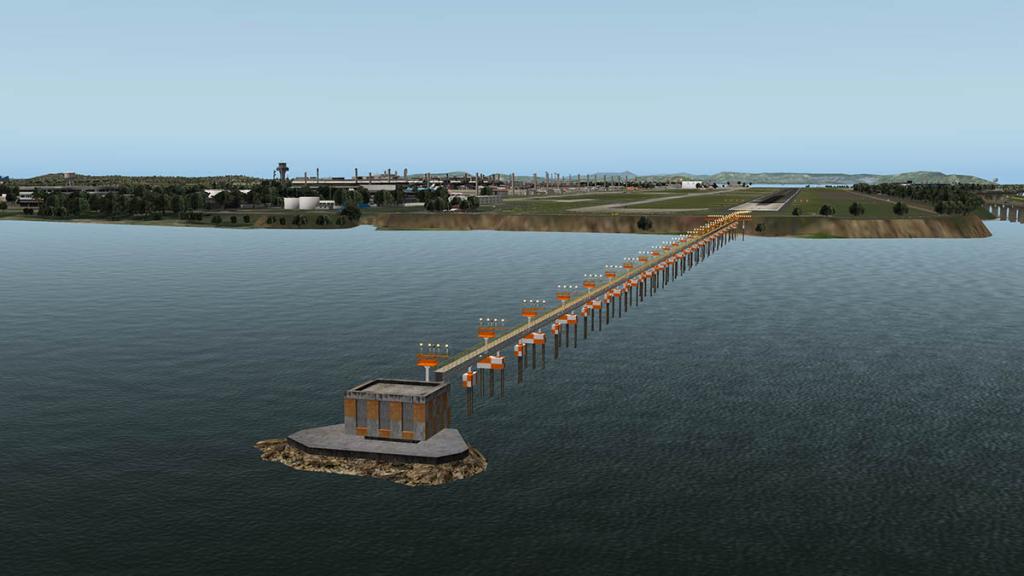
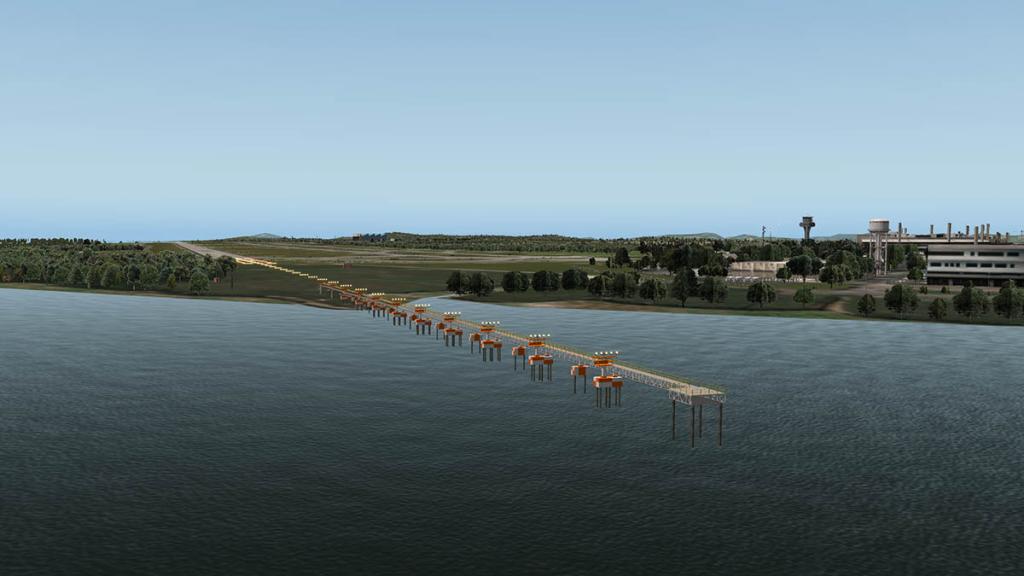
Highlight is the detailed Approach Lights Systems (ALS). A lot of work has gone into this element of the scenery by Richard Nunes and it shows, These features are the ones that standout and make exceptional scenery, visual an approach at almost minimum light and limited visibility and then the RAIL is showing you the way home...
Terminals


Outwardly the two huge terminals look like they were built at the same time, but there is differences and Terminal Two is certainly more modern. There is no separate Domestic or International areas or terminals, but Terminal One covers more International flights. There are no A380 flights to SBGL yet, but both Emirates and Lufthansa run heavy equipment into the airport and a change to the A380 is always possible as the airport is already code F A380 certified with three gates and the Olympic Games will attract aircraft of this capacity.
Terminal One
Terminal One has gates 1 - 12, is presently served by Aerolineas Argentinas, AeroMexico, Air France, Alitalia, Avianca, Azul, British Airways, Copa, GOL, Iberia, KLM, & Taca Peru airlines.
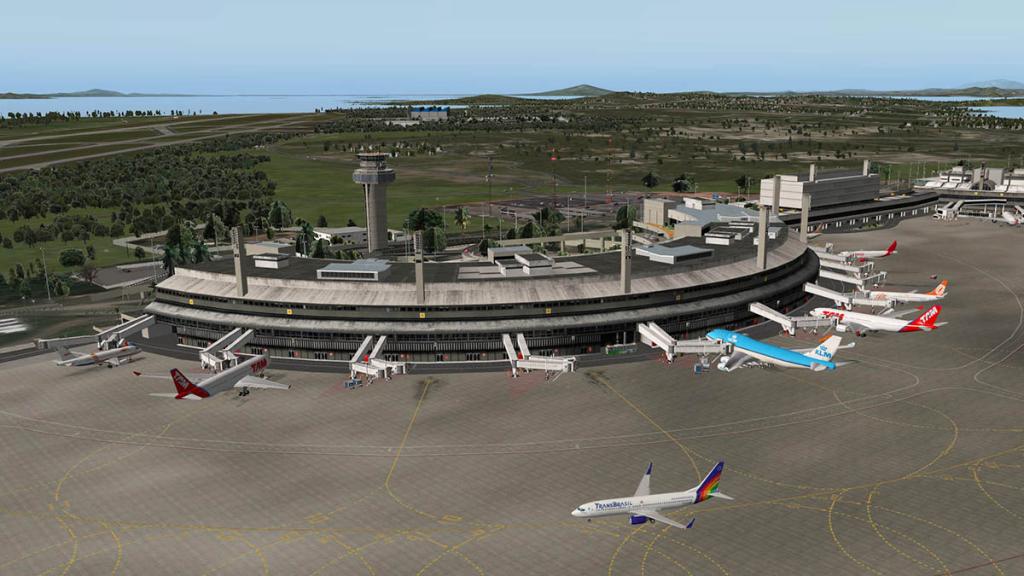
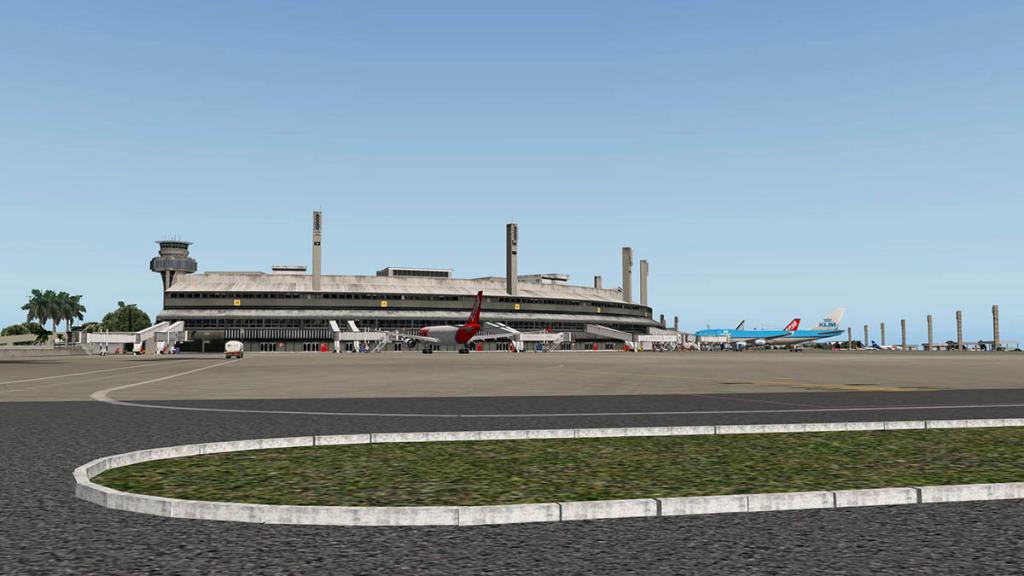


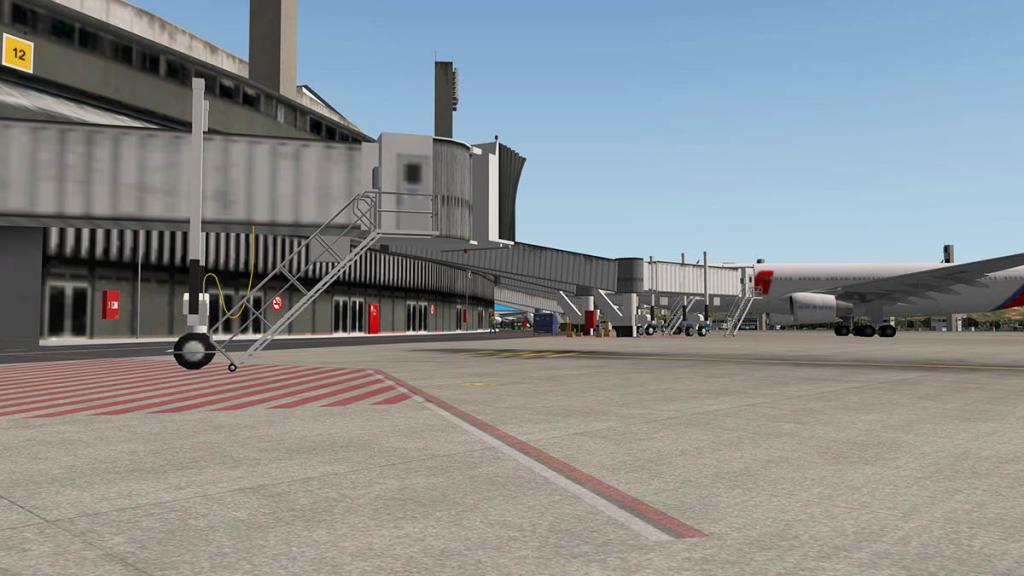
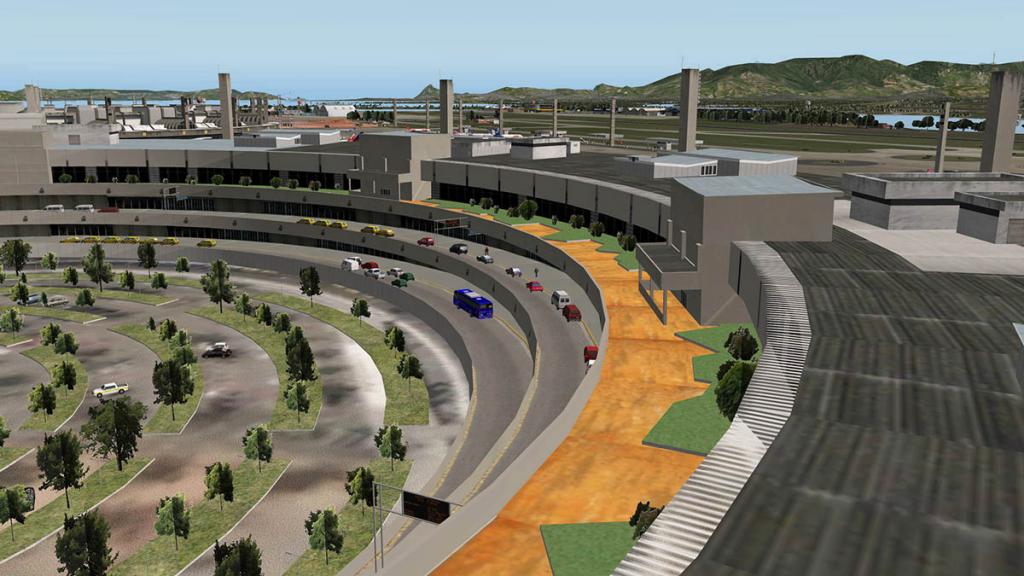
The building is set out in a semi-circle design and the construction here is excellent with great textures covering the faded aged concrete worn look gives the building a real authentic air. There is a huge amount of detailing in covering not only the actual terminal, but the surrounding elements of both the ramp and arrival sides of the building. Vehicle animation is prevalent throughout the scenery and right around the arrivals areas, giving you a great buzz of activity. There is some good ramp equipment, but placement is not overwhelming in that every gate area is saturated with the usual amount of equipment that aircraft servicing requires, walking staff do add to the activity feel.
Those distinctive huge concrete lighting towers are also placed around the the outside of the terminal adding to the feel of the airport and its different cultural aspect... you know you are somewhere different.


Galeão's distinctive Control Tower which is situated at the rear of Terminal One is well reproduced as along with a lot of associated administration buildings and carparks. It is a great design and the tower can be seen from all points of the airfield to note the location of the central terminal area for good orientation.
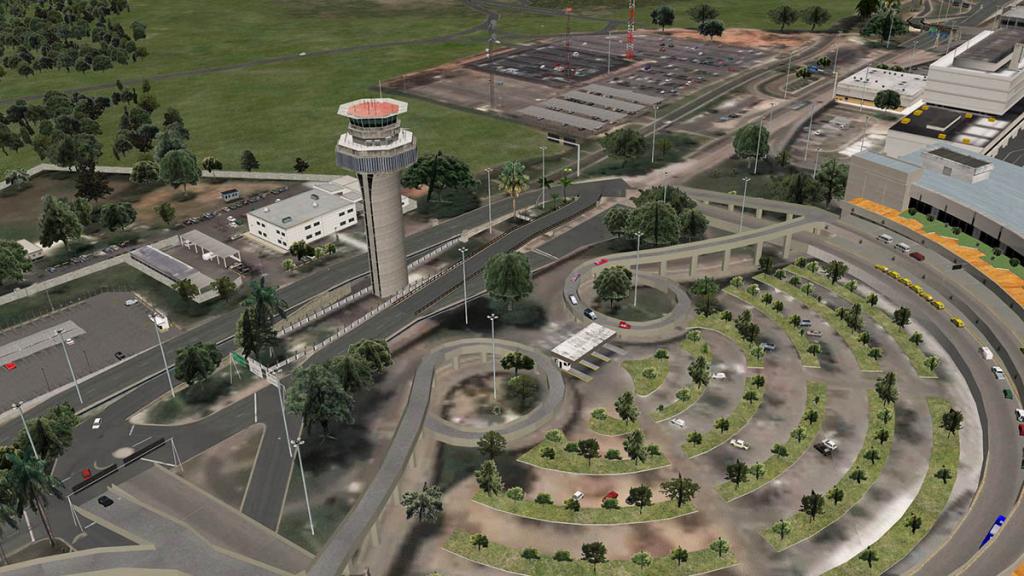

Tower view is good, but confined into a window based viewpoint, you can love or hate this sort of viewpoint for aircraft replays, but it does work well here and gives you a great overview look of the airport.
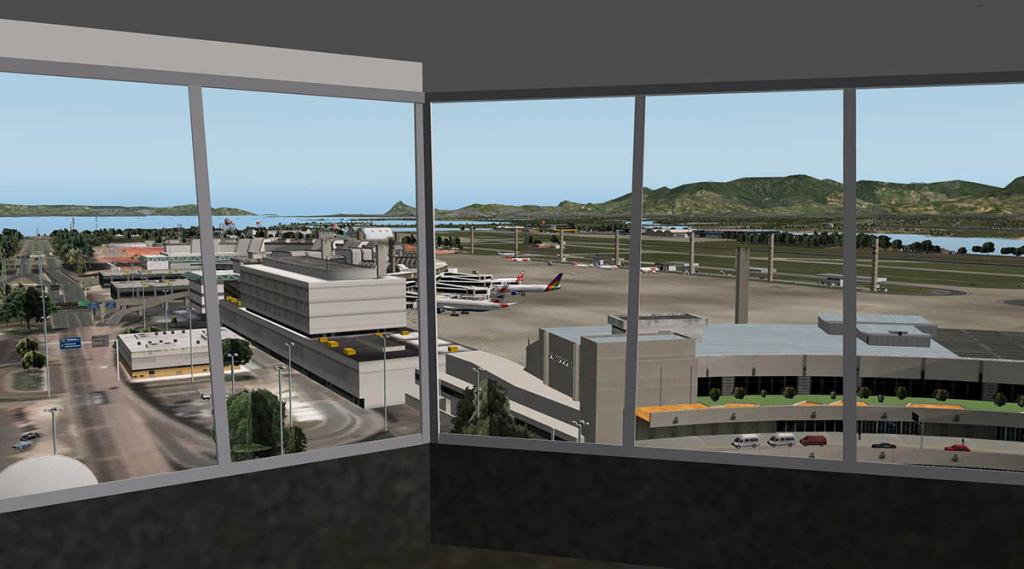
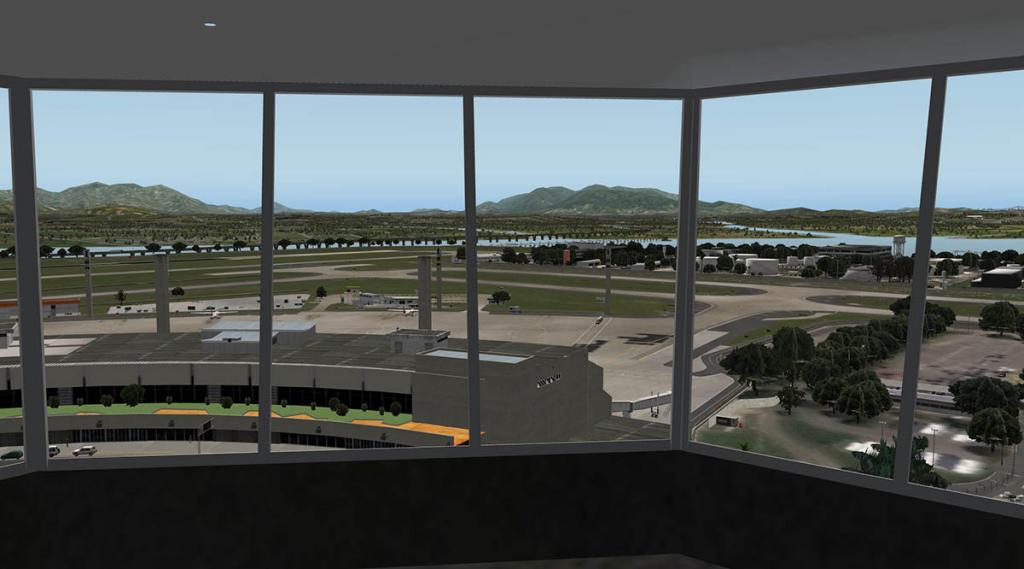
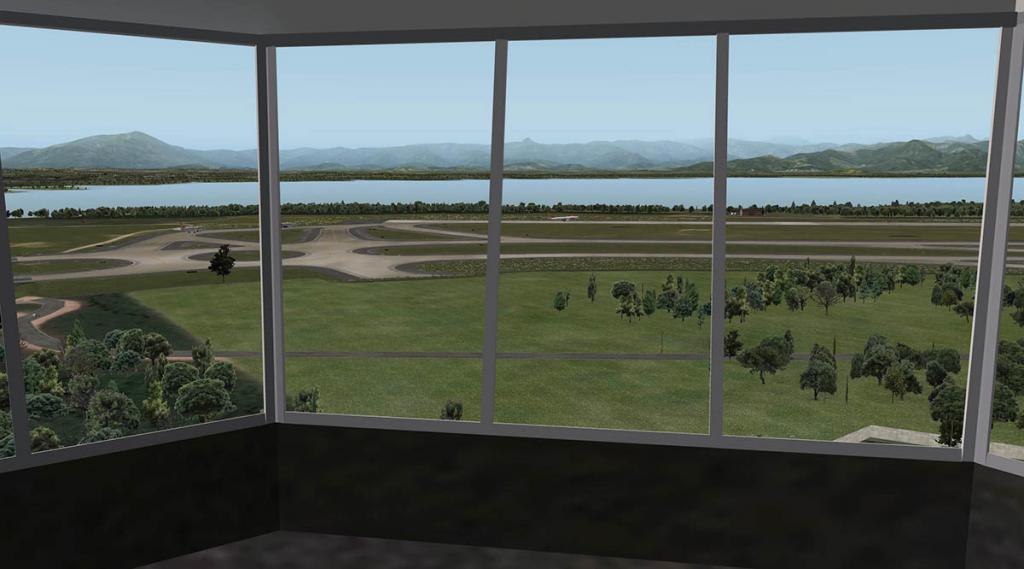
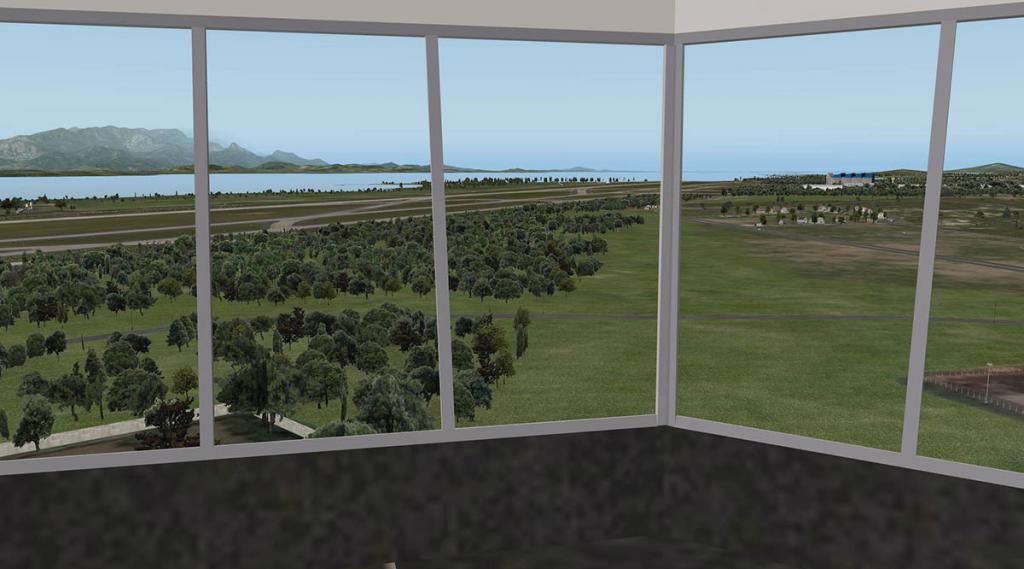
There is a large Airport Administration building that connects between Terminal One and Terminal Two.

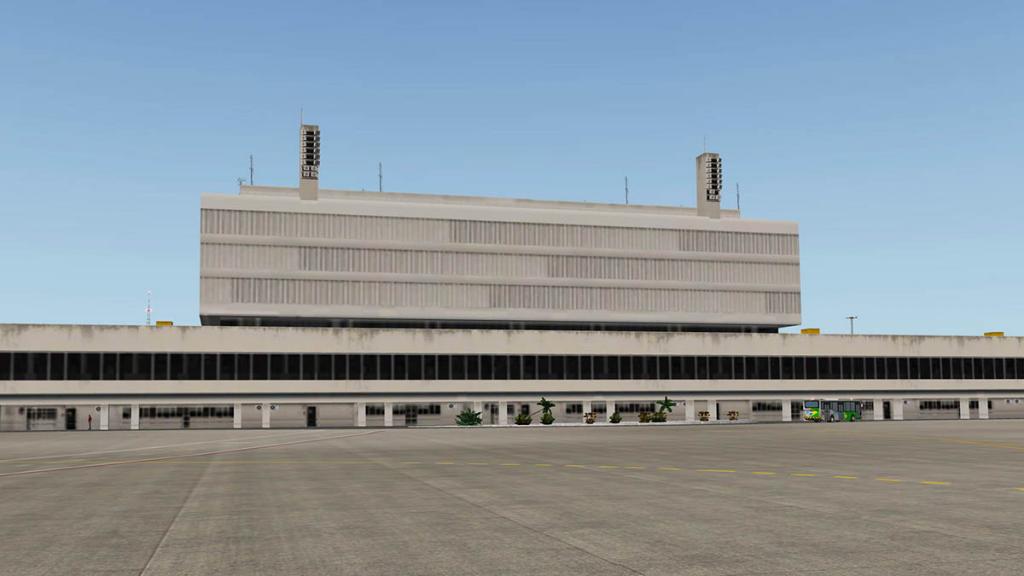

Like all buildings in the scenery the Admin building is a great reproduction of the real counterpart and adds a great deal to the overall look of the airport. Detailing at the rear is very good and right down to the excellent road systems, lighting, foliage and signage. There are however a few objects (mostly roofing) that are not placed correctly from these lower angles.
Terminal Two
Has gates 22 - 39, and is currently served by Air Canada, American, Delta, Emirates, Lan Chile, Lufthansa, Passaredo, TAAG, TAM, TAP, United & US Airways airlines (American Airlines).
Outwardly T2 is similar in design to T1, but on closer inspection it is quite different. Roof elements and glass at the rear are a totally different design, and there is a large multi-story carpark built in unlike just a flat open carpark at T1. Again the terminal is faithfully reproduced and well designed.
All gates have full docking (Marginal Plugin) facilities and aircraft parking guidance indicators as noted.
Remote parking
All around the outer rim of the main ramp areas are a lot of nose in remote parking stands. 13-36 are main rim stands and stand 37-43 cover the south boundary.


In front of the stands are the numerous depots of various fuel suppliers, from the well worn to the modern they are all very well represented with animation of vehicles transferring their products around the airport.
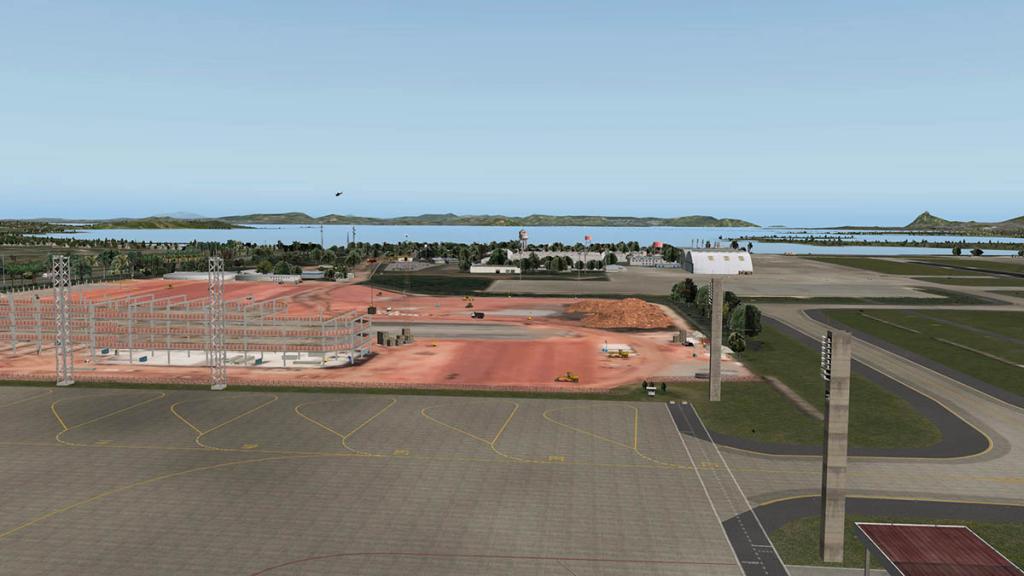

The south ramp boundary parking and another good parking area zone adjacent to the Military Base is a fully working building site. Cranes swing and tractors level the red earth, it is busy place and well done, I hope in the future the scenery changes to represent the completed buildings and areas.
Galeão Air Force Base – BAGL (ICAO: SBGL) Terminal do Correio Aéreo Nacional (Terminal of the Brazilian Air Force Passenger Services).
Part of the scenery on the southern island boundary is the original Galeão airport and the current Brazilian Airforce base.

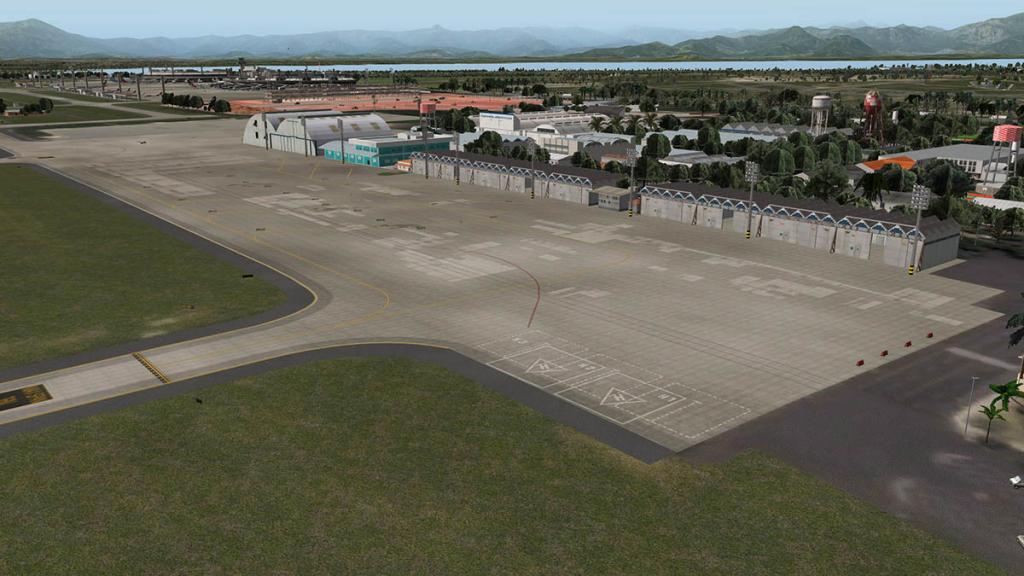
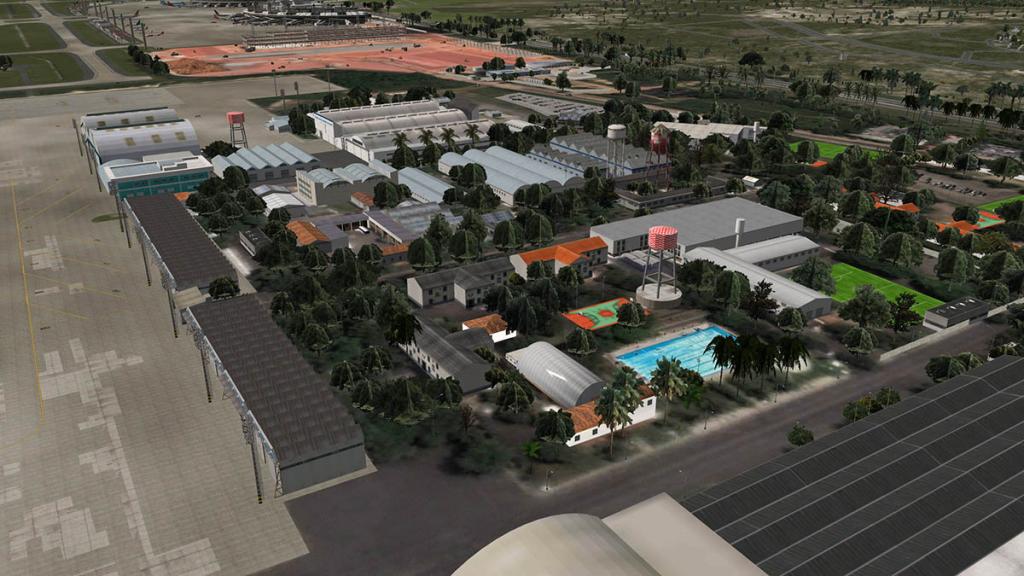
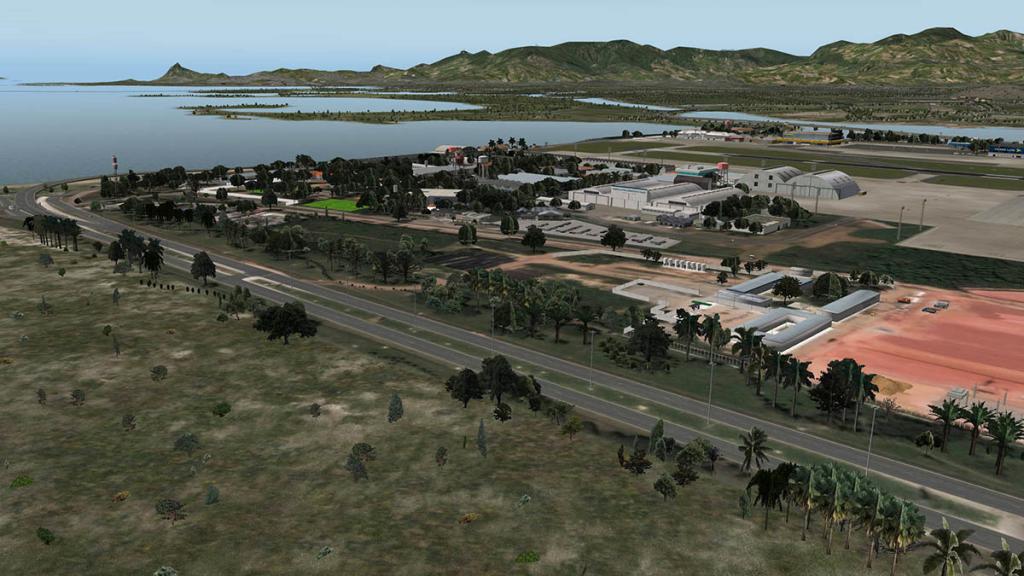
There is a huge amount of objects in here covering a fair area, this would be a significant scenery just by itself... Outwardly it looks more like a Hollywood Film Studio, with not only with its dense maze of buildings, but with chequered water towers, tennis courts and swimming pools.
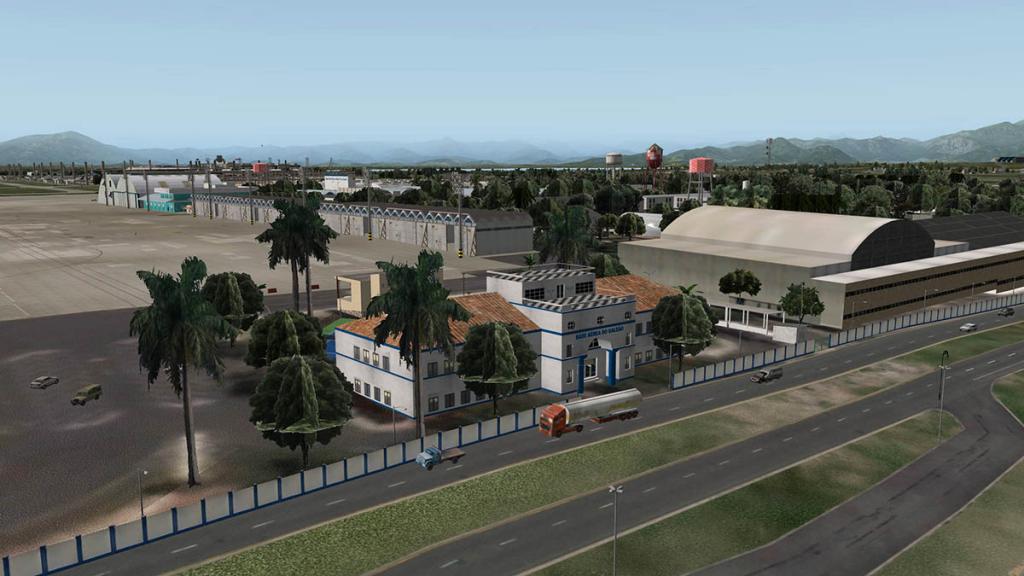

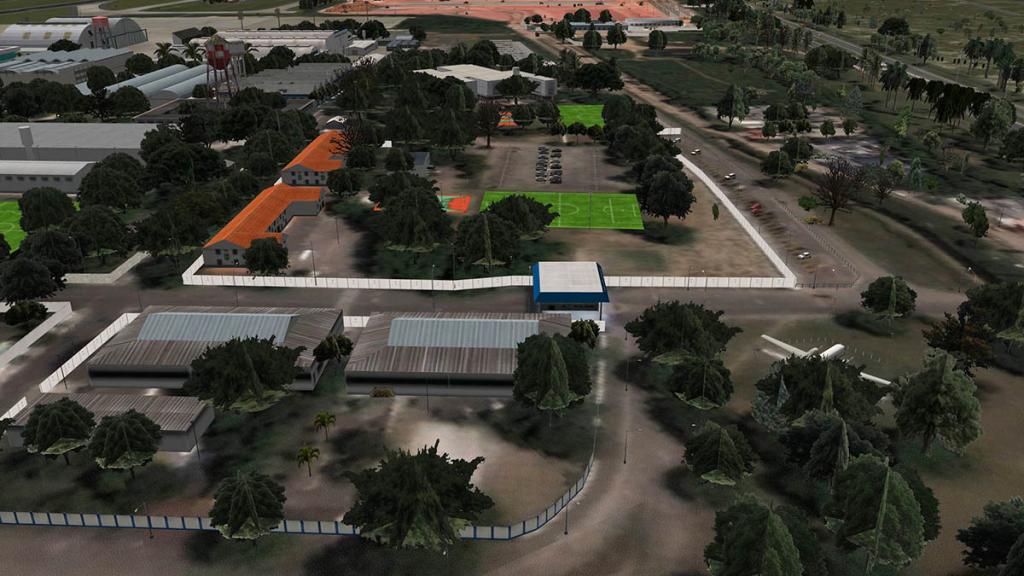

There is a lot going on in here and it is all very well done to represent a significant part of Rio's aviation heritage.

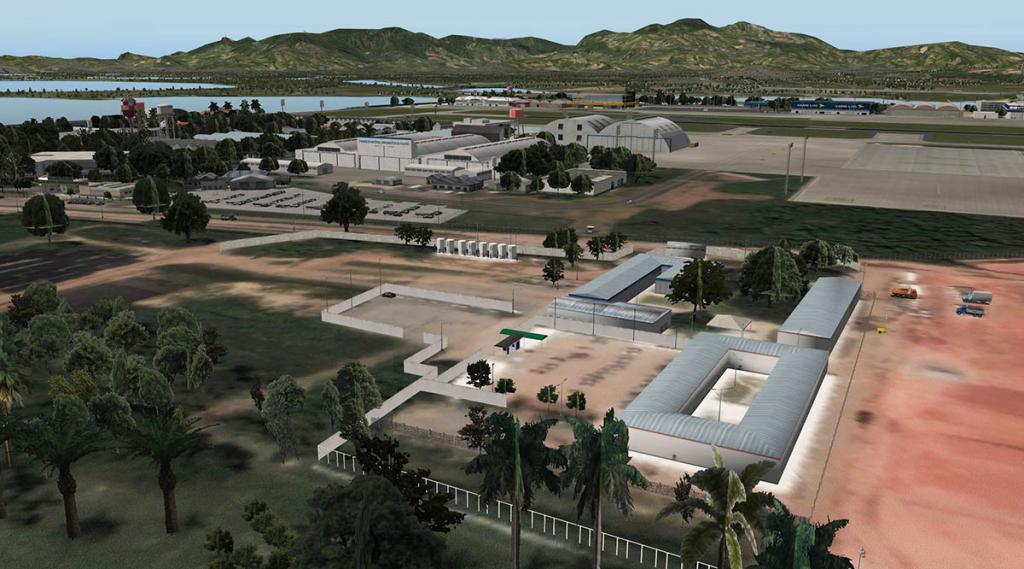
Galeão Cargo
When the existing relationship between the Airforce Base and Passenger division became overwhelmed as more and more the passenger traffic grew it became time to move the passenger division to a more spacious and separate area. So on 1 February 1952 the passenger terminal area was transferred and opened across the southern end of runway 15/33. This area was operational until January 20, 1977, when the main airport facilities were again moved to what is now Terminal One. After the transfer the older passenger terminal area was converted to the main cargo area for the airport.
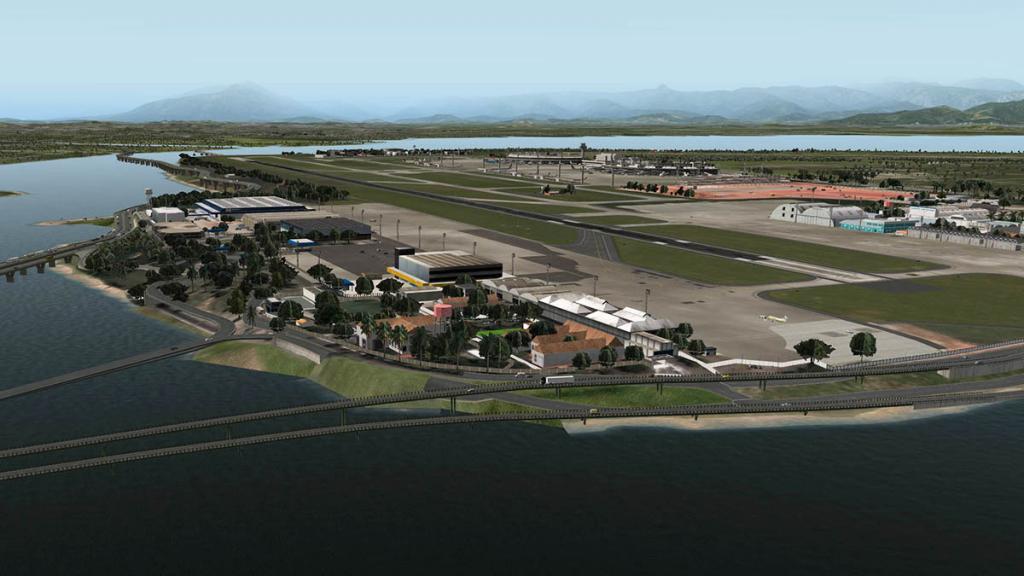
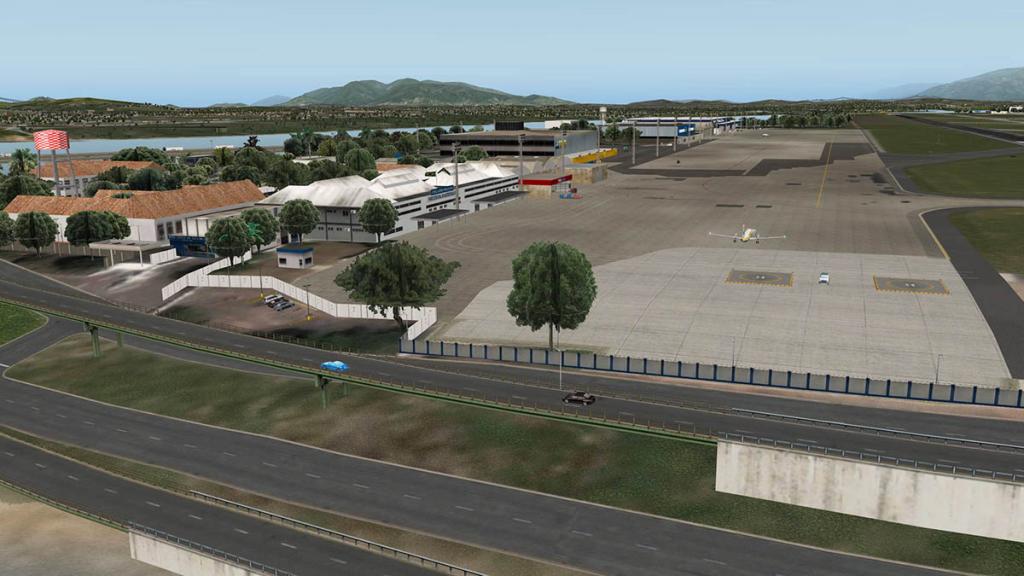
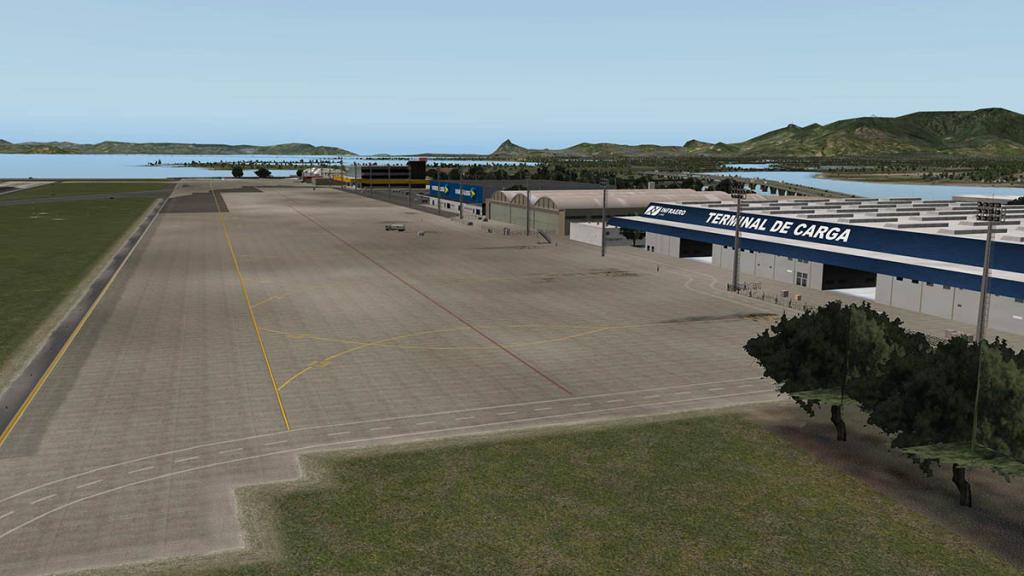
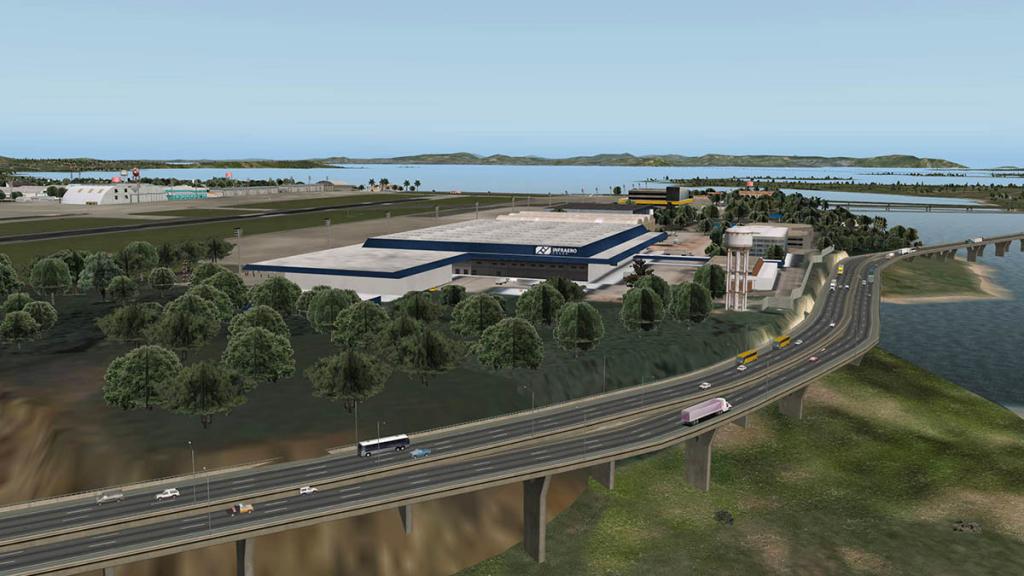
In reality the old terminal is there and the area is not much changed over the decades, reproduction of the area like most of the scenery is again excellent... It certainly is not a modern cargo port but that is of course its attraction. There are two main cargo facility buildings and an odd sort of hangars and cargo covered areas.
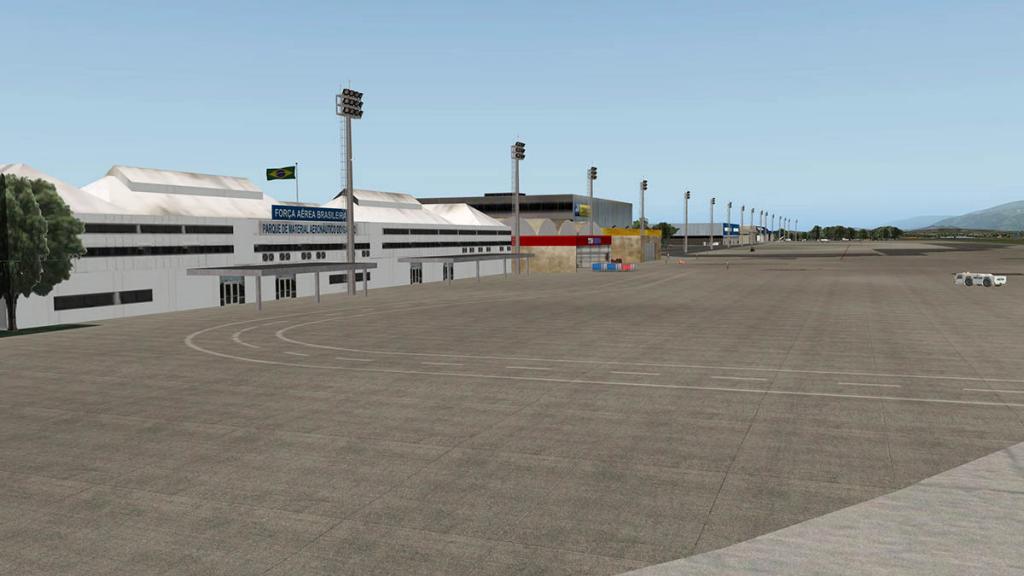
Cargo ramps are well done but a little empty of activity except for the odd tug, however a few cargo aircraft and equipment would not go amiss to fill out the scene a little.
Road traffic is excellent around this southern western boundary, X-Plane works its magic to create great traffic, so have your settings up high.
Fuel Depot and Airport Maintenance
To balance out the dense building area of the Brazilian AirForce Base in the south is the same for the fuel depot and airport maintenance area on the north boundary.


The fuel depot tanks dominate, but there also a lot of maintenance buildings and offices to fill out the area, the area is very prominent on both RWY10 and RWY15 Approaches... well done.
There are many various airfield buildings and towers dotted around the areas, all very authentic and great visual fillers from the aircraft and seen on the taxiways.
Night Lighting
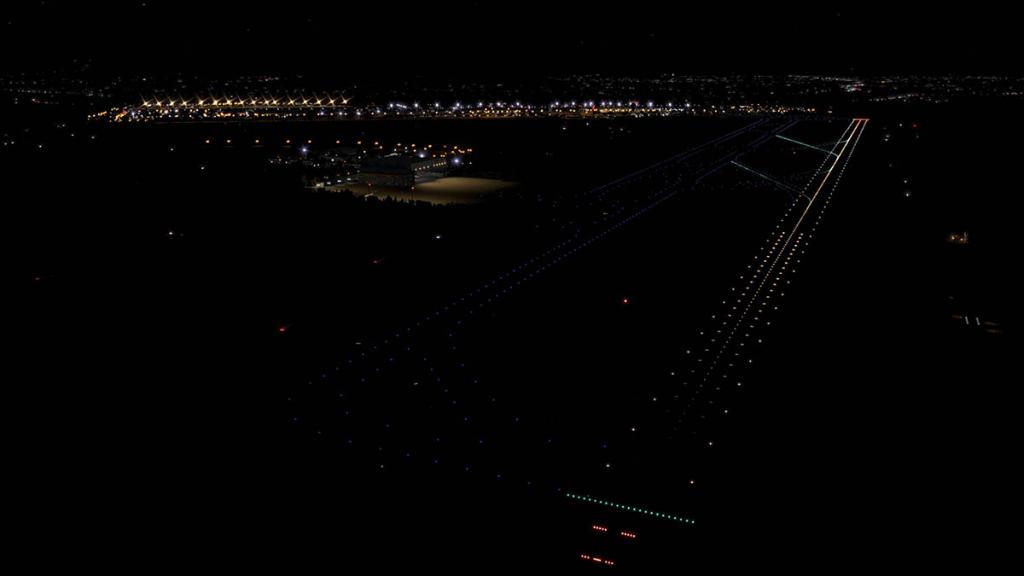
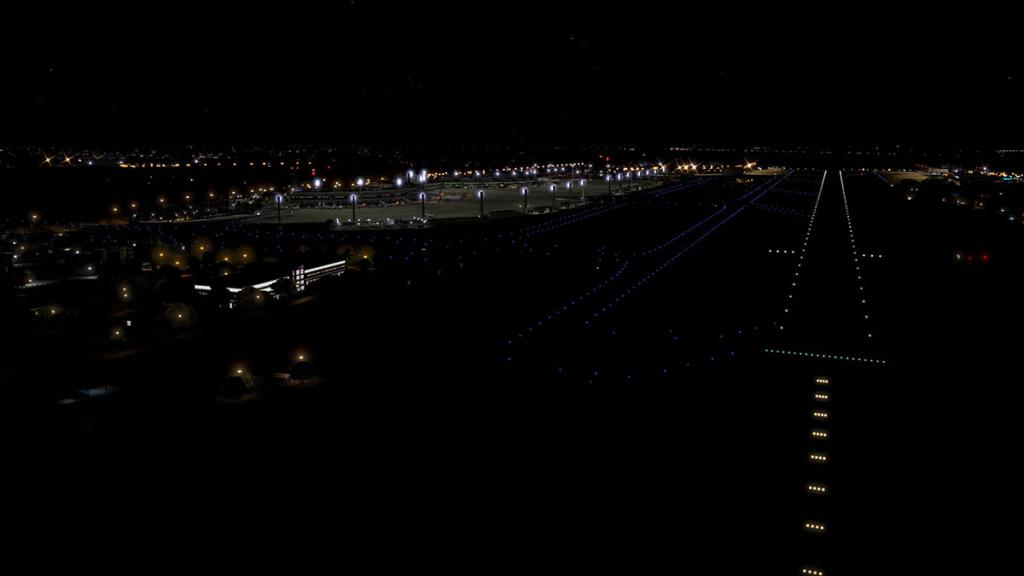
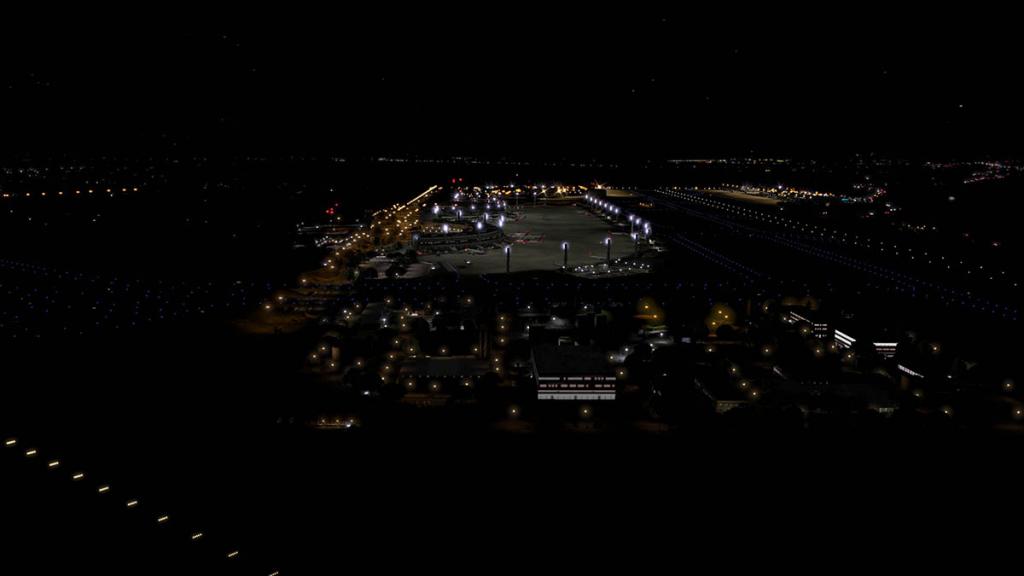
Airport lighting is excellent, really good. You get great lighting area variations with numerous different styles of lights, from any approach SBGL looks brilliant. Runway 10/28 is excellent in lighting and as are taxiway directions, but runway 15/33 does not have any centerline lighting or centerline taxiway (green) lights? so it is a dark trek to the terminal area...
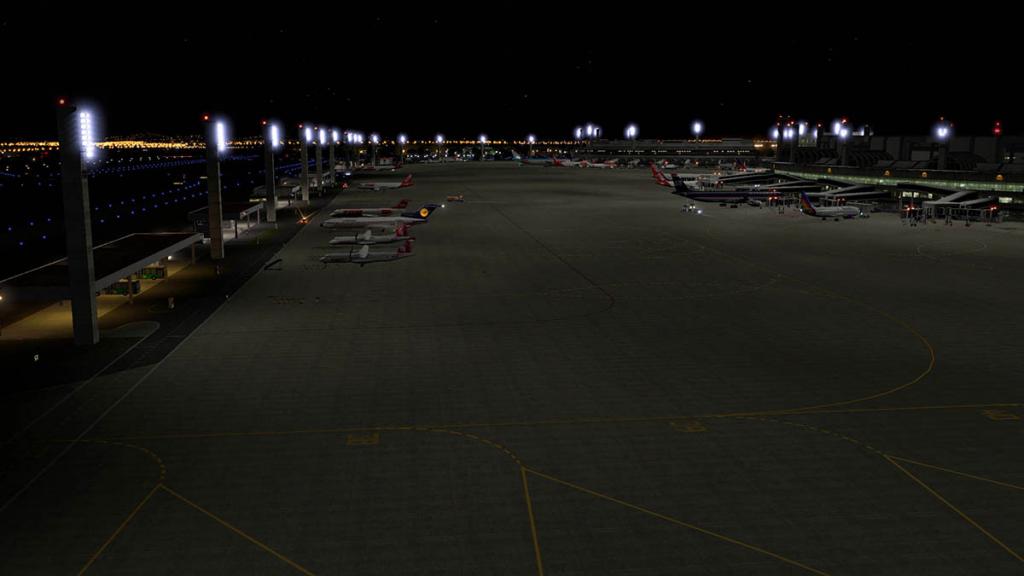
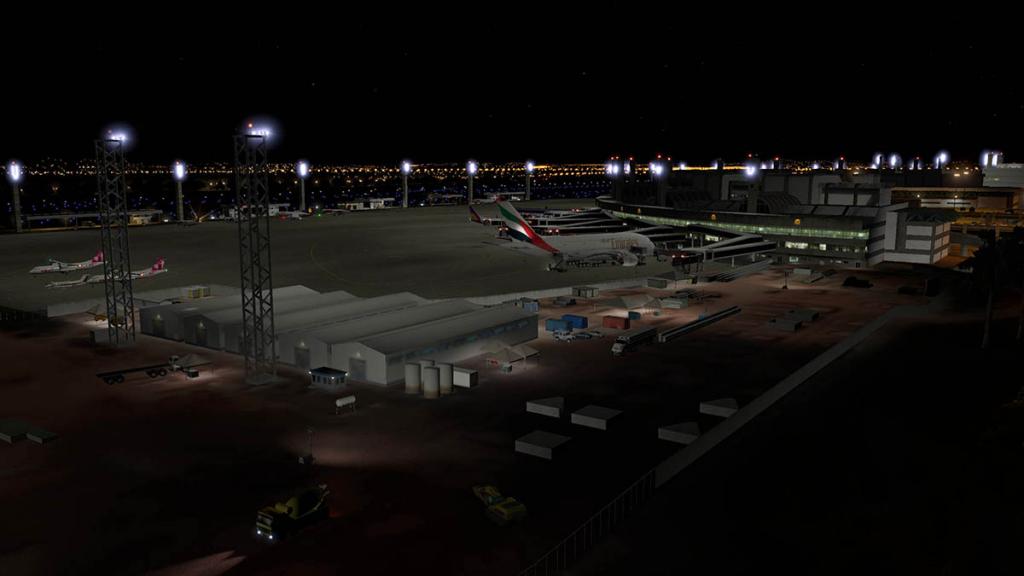
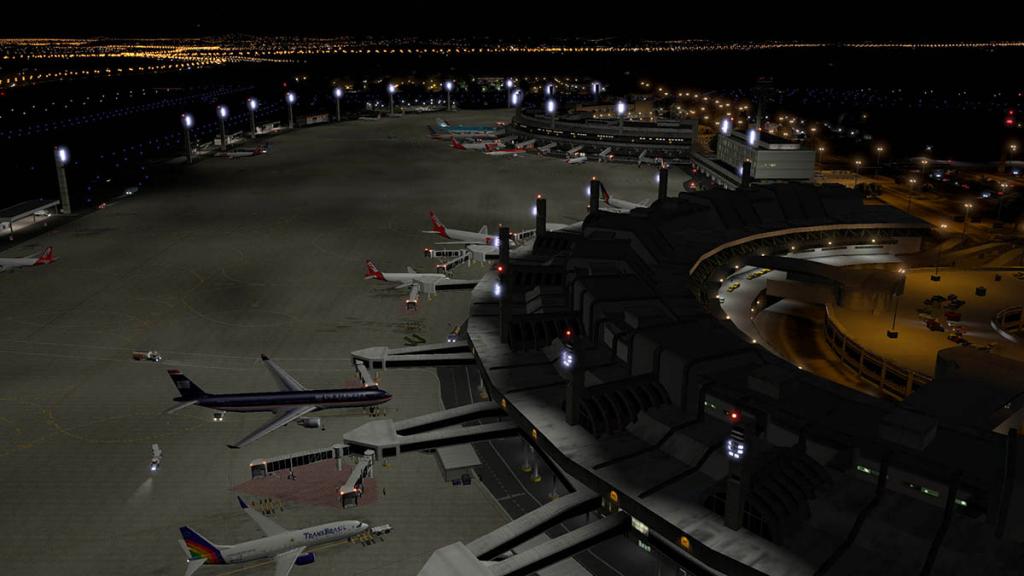
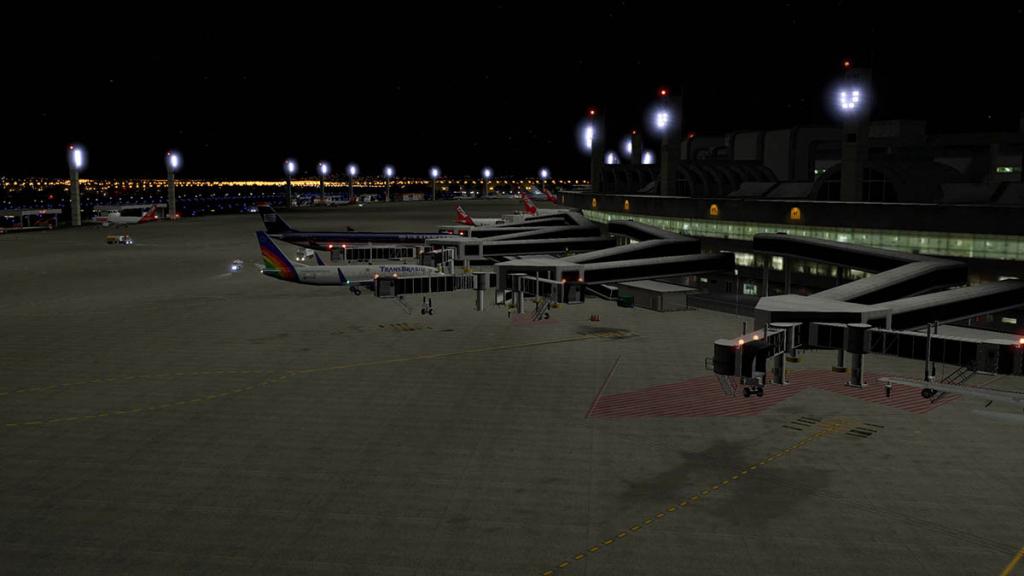
The chance not to use those high concrete towers could have been easily missed, but it wasn't. High powered lighting covers the ramps and it is a spectacular arrival or departure with great flood lighting while working on the ramp, well done done there.
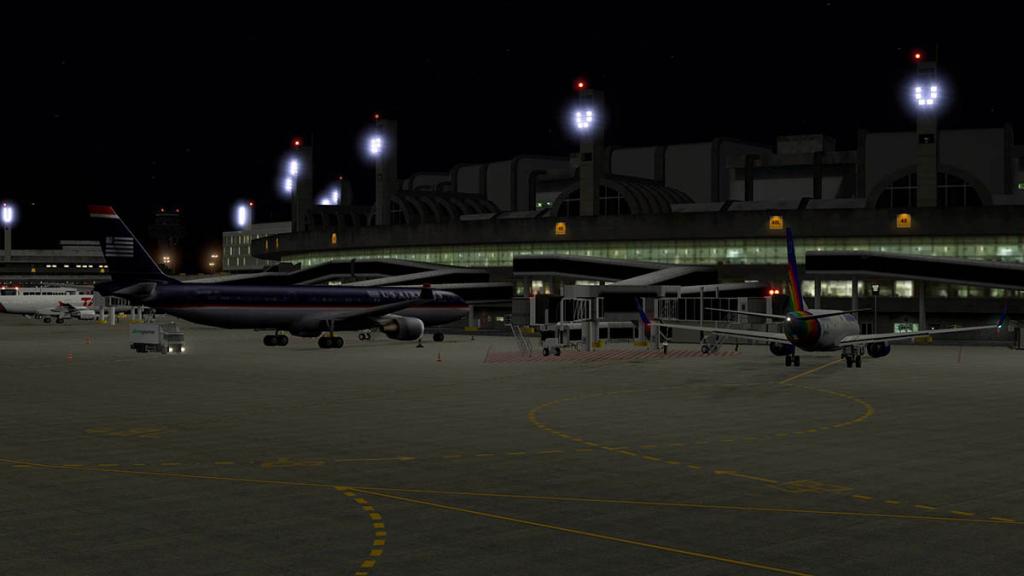
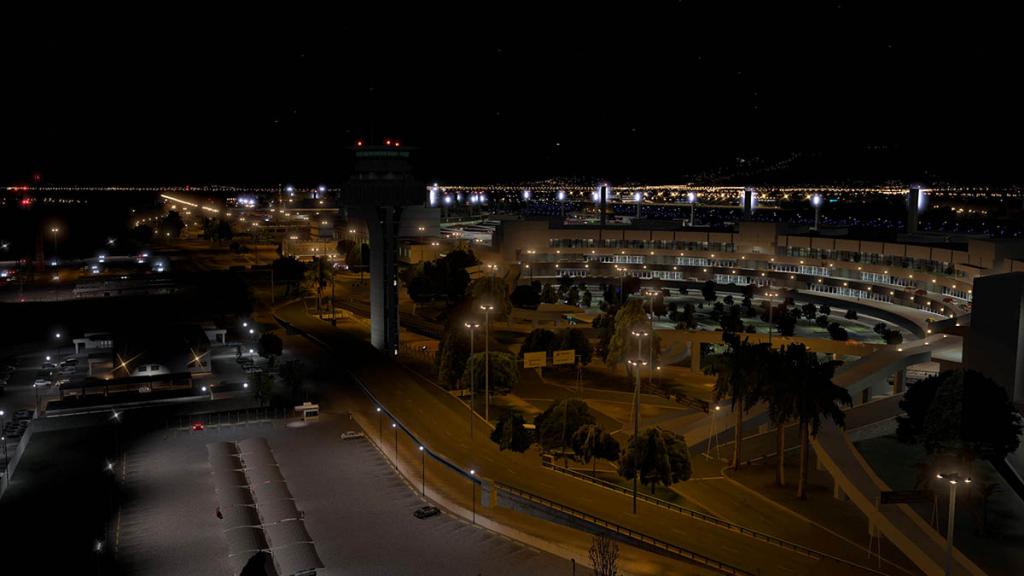
Terminal night textures are also very good, so is the arrival lighting and area coverage with great spot lights.
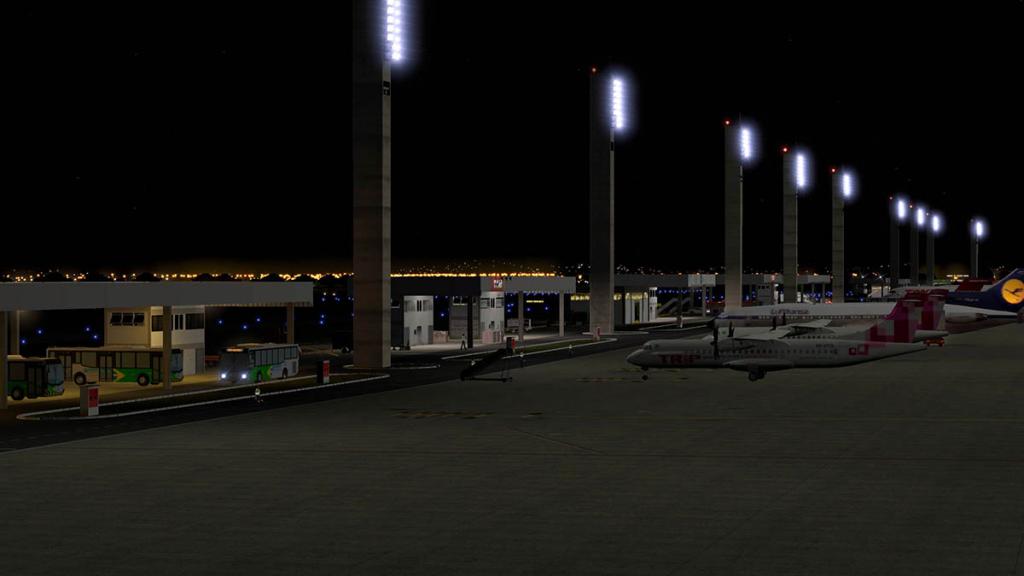

Fuel depots and the TAP maintenance area is also very good lighting wise and realistic.
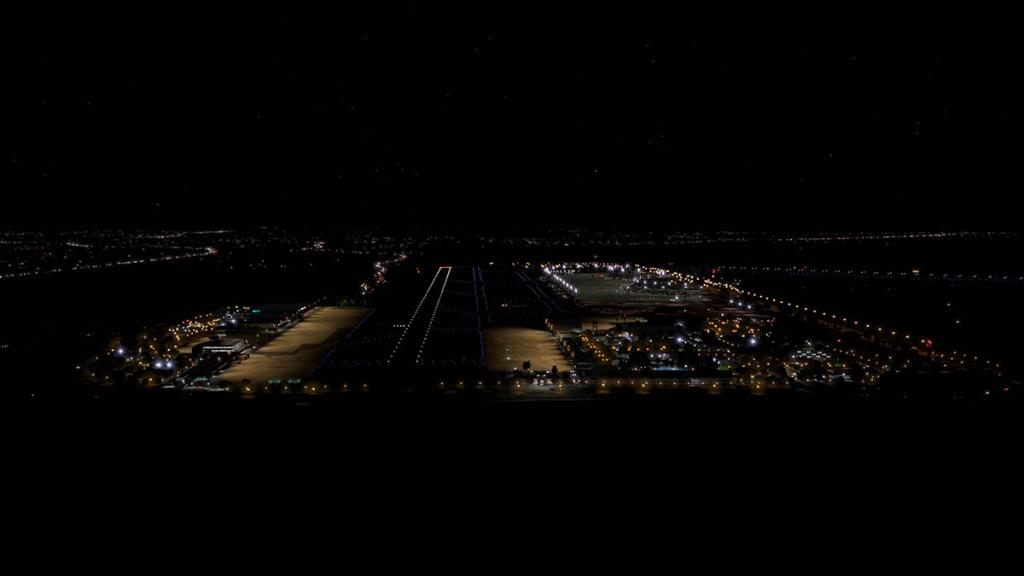

Southern boundary areas are also good, with the AirForce base having well lit tennis courts and a swimming pool for a late night game or swim, cargo area is on par with the rest of the airport, and turn up the traffic settings for great night activity.
Christ the Redeemer Statue

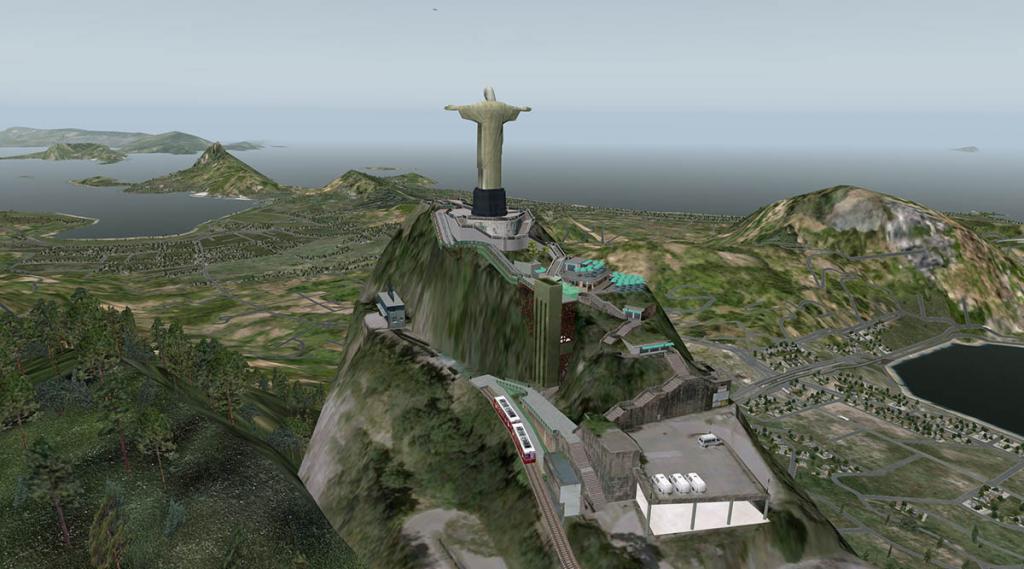

The iconic Mount Corcovado "Christ the Redeemer" Statue, can just be seen from Galeão Airport, yes it is just a speck in the distance, but what scenery in Rio de Janeiro would be without it.... it just wouldn't work. It is like having no "Statue of Liberty" in New York's approaches, it just is not on.
Thankfully you get a great statue reproduction here, a really great version to watch over Rio, to get a better look then jump in a chopper or GA and take a flight over to see the Rio-ness of it all.... love it.
More than just the actual statue is that all the tourist trap elements are also covered, ticket booths, cog railway, buses, cafes and their umbrellas are all here, great stuff.
If you thought that "Christ the Redeemer" is great in the daylight, then the wow factor really comes out at night, as it is totally brilliant


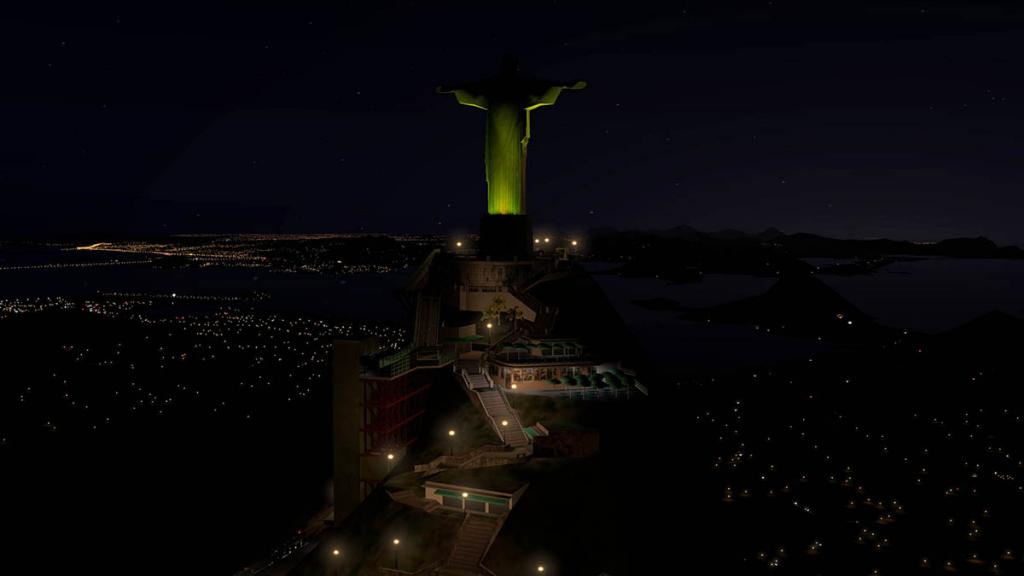

"Christ the Redeemer" has all the X-Plane world to watch over as the lighting snakes away to the horizon and Galeão Airport gleaming in the distance... heaven.
Routes and ServicesRio is dead center of the eastern seaboard to cover any roads of South America. This southern continental area is great for exploring and a flights to all points of the continent are interesting and with great visual vistas. International routes are many and varied. Connections to Europe (London and Paris is very popular) and North America in Miami, Atlanta or New York are old routes to be savoured. And don't forget the Olympics in 2016.
Most international popular destinations are:
Passengers- Argentina - 249,305
- United States - 171,124
- France - 80,478
- Chile - 80,001
- United Kingdom - 66,447
- Italy - 57,061
- Germany - 55,865
- Portugal - 43,380
- Spain - 35,135
- Colombia - 23,563
Cargo Operations covers
- ABSA Cargo Airline - Belo Horizonte–Confins, Cabo Frio, Campinas, Ciudad del Este, Curitiba, Manaus, Miami, Porto Alegre, São Paulo–Guarulhos
- Centurion Air Cargo - Miami
- LAN Cargo - Amsterdam, Buenos Aires–Ezeiza, Frankfurt, Miami, Montevideo, Santiago de Chile
- LANCO - Bogotá, Lima, Miami, Quito Rio Linhas Aéreas - Recife, Salvador da Bahia, São Paulo–Guarulhos
- Sky Lease Cargo - Miami
Summary
To cover Rio de Janeiro/Galeão–Antonio Carlos Jobim International Airport was always going to be a huge task. It is a big area of scenery and in parts very dense with buildings and infrastructure. The airport has a distinct feel as well, those huge lighting towers means you are nowhere else on the planet... it all covers a very impressive arrival.
Quality and detail is excellent as is the sheer number of objects and item presented in the scenery, faithful to the airport, and as scenery and the best scenery for Rio this SBGL cannot be discounted, you even get Jesus! (as a statue)
So I know what you are thinking "All this must come at cost somewhere", well it does but not on the dollar values as it is great value scenery for what you get.
You however need a recommended 2G of VRAM (just get away with 1GB) and a pretty powerful computer to process all those objects. No doubt that this scenery is frameweight heavy. You can reduce your object settings to "default" to help, but even then in my case I was still on the line, switch HDR on and all that lighting effects is another world of power unless you have the fastest HDR resolution setting available.
Great scenery and in a great destination is a wonderful combination in your investment in X-Plane. It's Rio de Janeiro! It is Brazil, now we have the means and now a great destination to deliver another great experience of simulation, Yes SBGL Galeão airport is certainly that, a great destination._____________________________________________

Yes! the SBGL- Rio de Janeiro Intl Airport by Richard G Nunes Scenery is now available from the X-Plane.Org Store here :
SBGL- Rio de Janeiro International Airport
Price is US$24.95
Features
- Orthophoto textures and Occlusion environment
- The Christ the Redeemer statue is included in this scenery package
- Custom Runways, ground and taxiways textures
- 3D Grass, based on the lawn type found at Rio Airport
Auto Gate Ready
- AutoGate Plugin by Marginal (included in the package)
- Custom Jetways
Animated Traffic
- Animated objects, vehicles, people and aircraft
- Ground Traffic and aircraft traffic
- Using Ground Traffic by Marginal
Many extras
- Modeled Underpass under runways M and N (Bridges)
- Customized Approach Lights Systems - ALS
- Night texture and HDR lighting
- Construction work on current expansion is included
- Charts included
_____________________________________________________________________________________
Documents and Installation :
Download: 817mb : Installed main scenery 1.73gb, and mesh file (24.10mb) and roads file (15.20mb)
Installation requires three files - SBGL - International Rio de Janeiro Airport v1.1 / SBGL - Mesh / SBGL - Roads.
Roads and Mesh need to installed below (or at the bottom of your ini file) to allow the mesh to conform to the taxiway bridge features.Runway ILS alignment data needs to be changed and all instructions and X-Plane co-ordinates are supplied (read the manual).
Marginal's "Auto Gate 1.6" and "CustomSBDatarefs004" plugin are supplied for airport docking and animations.Full set of 62 charts and airport layouts, English and Portuguese manuals included.
Attachment : WorldTraffic SBGL Generator settings, just download and unzip the image.
SBGL_WT Generator Settings.zip
_____________________________________________________________________________________
Requirements
X-Plane 10+ - Windows, Mac or Linux - 1Gb VRAM - 2Gb VRAM recommended
Current version: 1.1 (Last updated October 16th 2015)
_____________________________________________________________________________________
Stephen DuttonUpdated 31st October 2015Copyright©2015: X-PlaneReviews(Disclaimer. All images and text in this review are the work and property of X-PlaneReviews, no sharing or copy of the content is allowed without consent from the author as per copyright conditions)Review System Specifications:
Computer System: - 2.66 Ghz Intel Core i5 iMac 27”- 9 Gb 1067 Mhz DDR3 - ATI Radeon HD 6970M 2048 mb- Seagate 512gb SSD
Software: - Mac OS Yosemite 10.10.1 - X-Plane 10 Global ver 10.42
Addons - Saitek x52 Pro system Joystick and Throttle : Sound - Bose Soundlink Mini : WorldTraffic Plugin
Addons
- Saitek x52 Pro system Joystick and Throttle
Aircraft- Airbus A320-214 CFM Engine by Peters Aircraft (X-Plane.OrgStore) US$54.90

-
News! - Released! C404 Titan by Alabeo
Alabeo have released the Cessna 404 Titan that was the Cessna's company largest twin piston-engined aircraft at the time of its development in the 1970s. he Cessna 404 was a development of the Cessna 402 with an enlarged vertical tail and other changes. The prototype first flew on 26 February 1975. It is powered by two 375 hp/280 kW turbocharged Continental Motors GTSIO-520 piston engines. Two versions were offered originally; the Titan Ambassador passenger aircraft for ten passengers, and the Titan Courier utility aircraft for passengers or cargo.
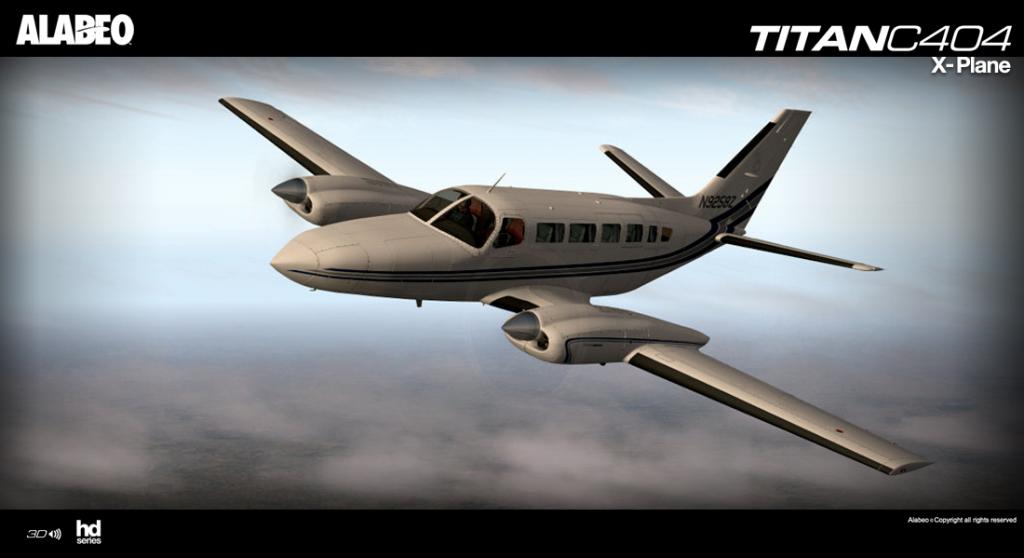
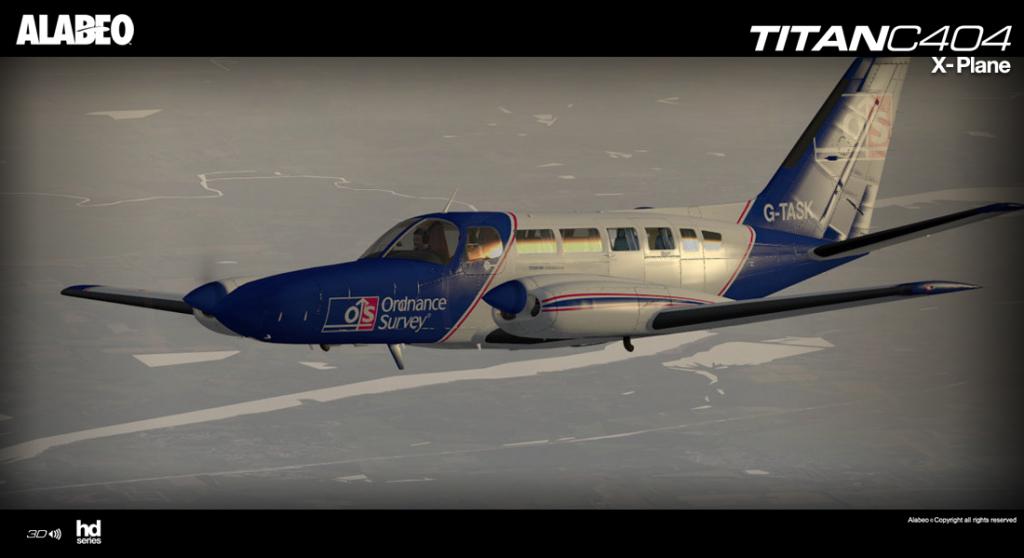
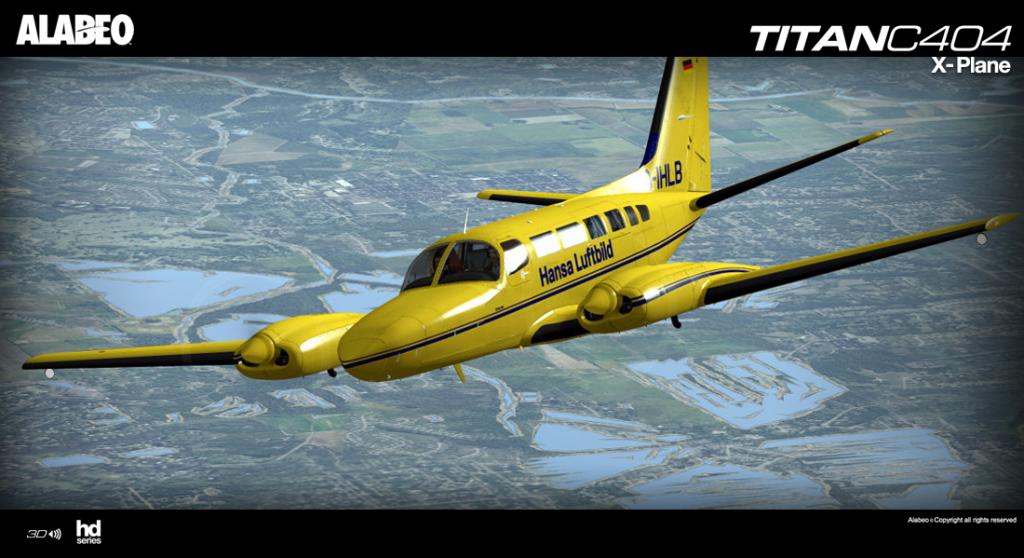
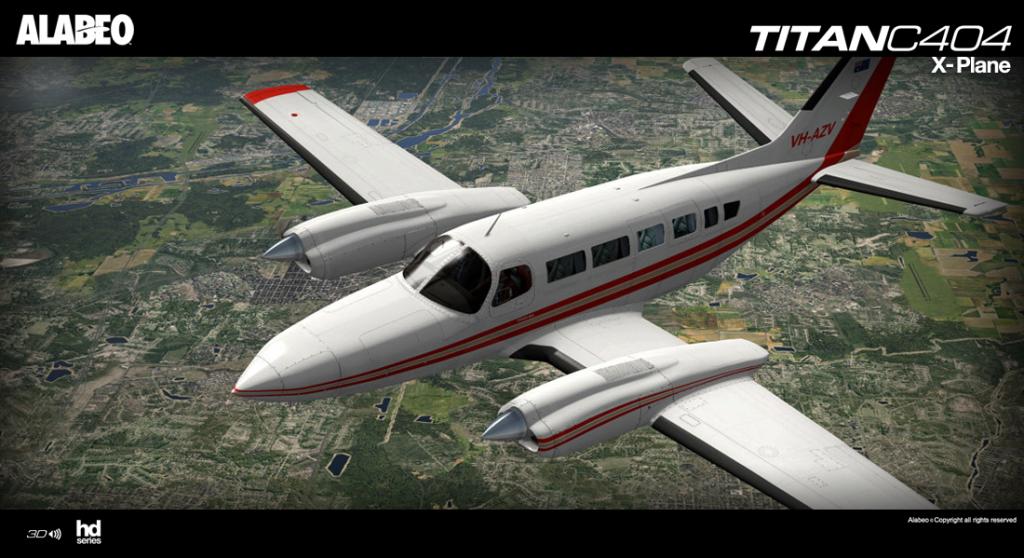
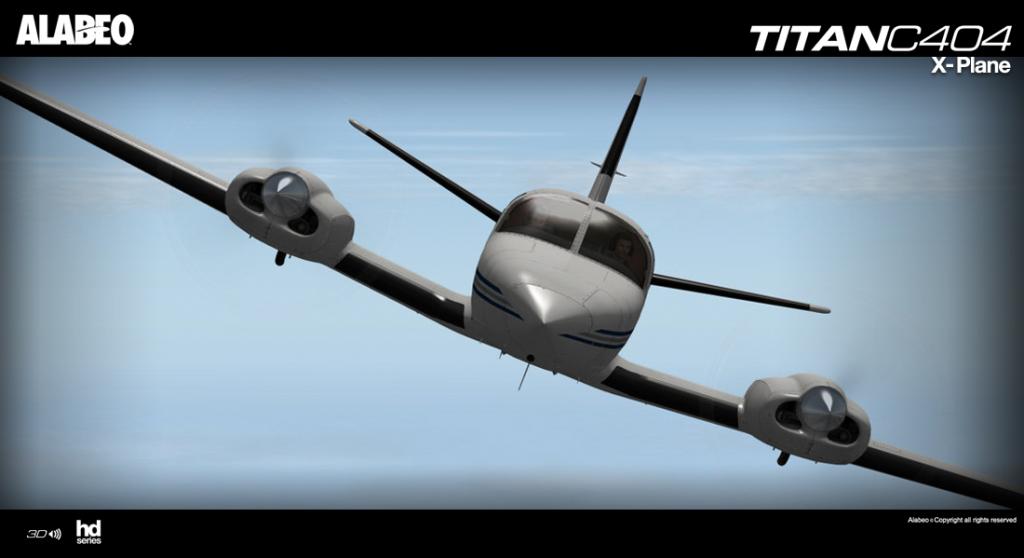
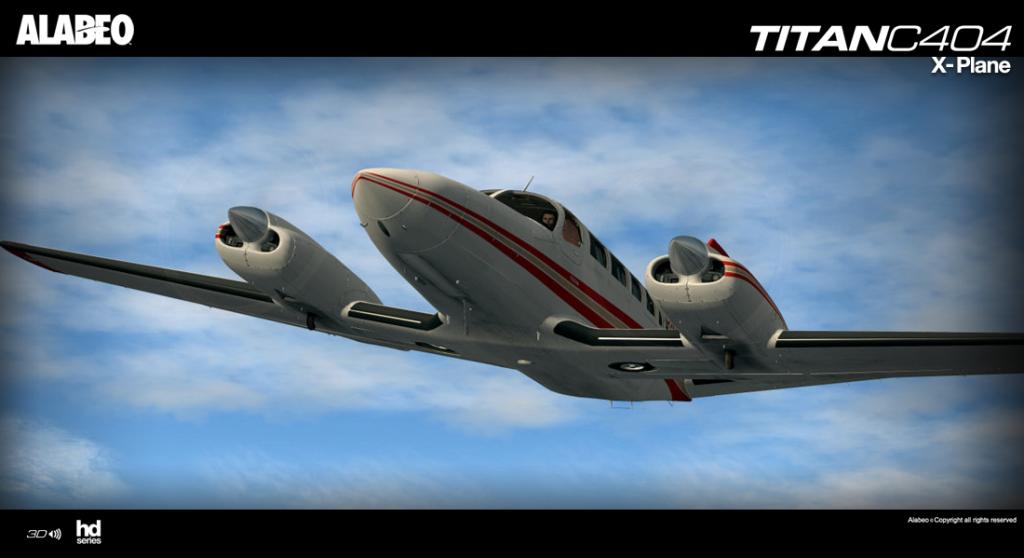
Features Include:
Custom C404 Titan sounds
Default X-Plane 10 GNS430
Volumetric side view prop effect
High quality 3D model and textures.
Blank texture for creating your own designs.
Accurately reproduced flight characteristics
64-bit compatible.
Plugin-enhanced
FPS-optimized model.
SuperManipulator scroll wheel support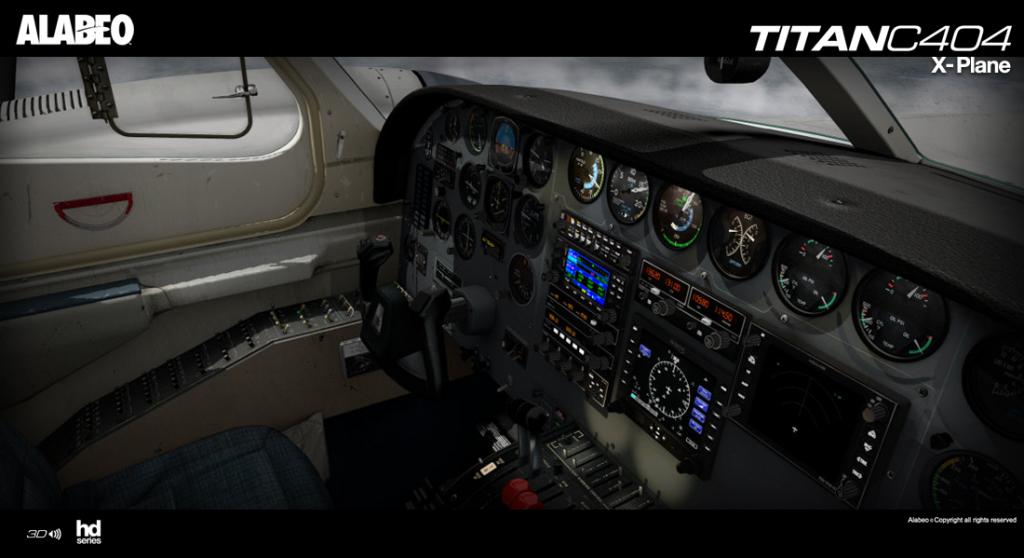
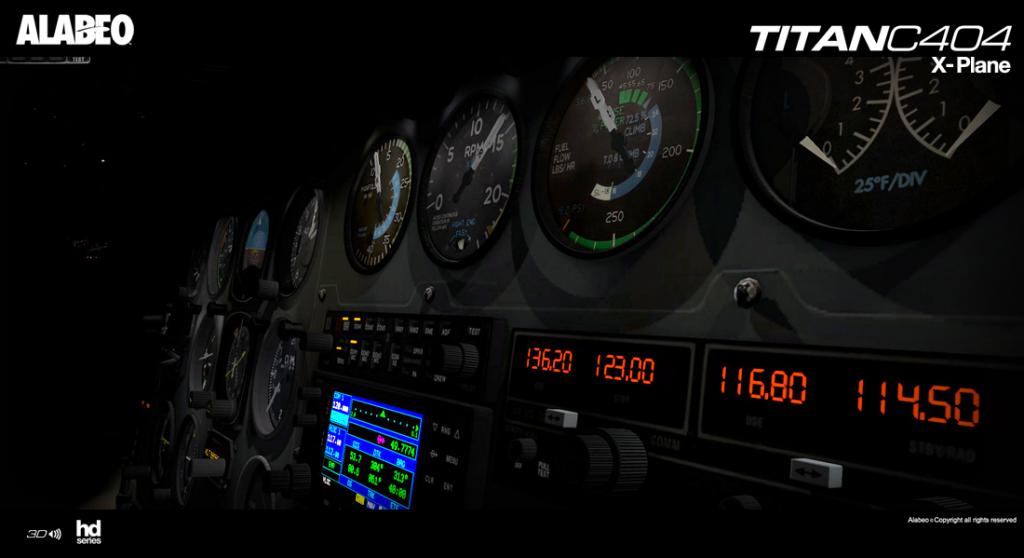

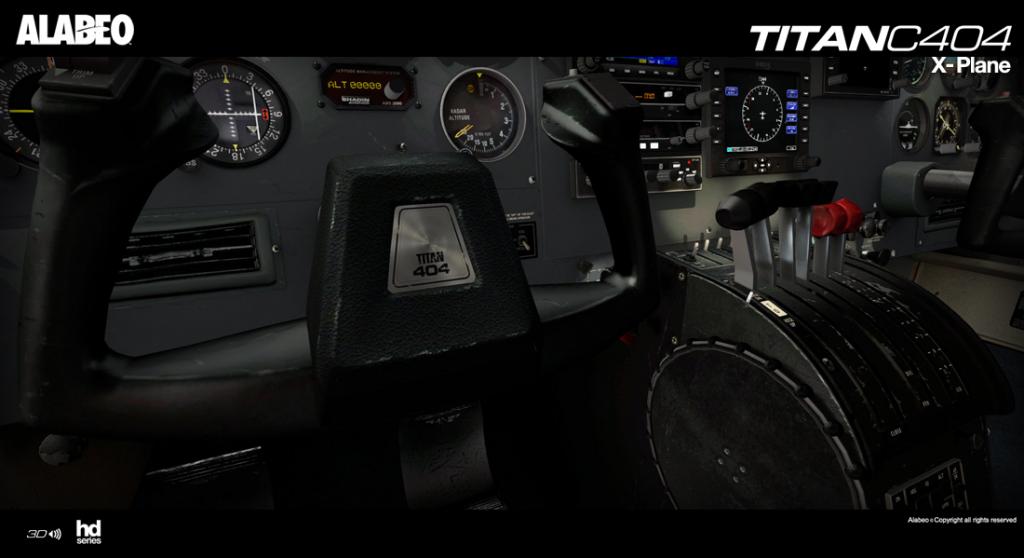
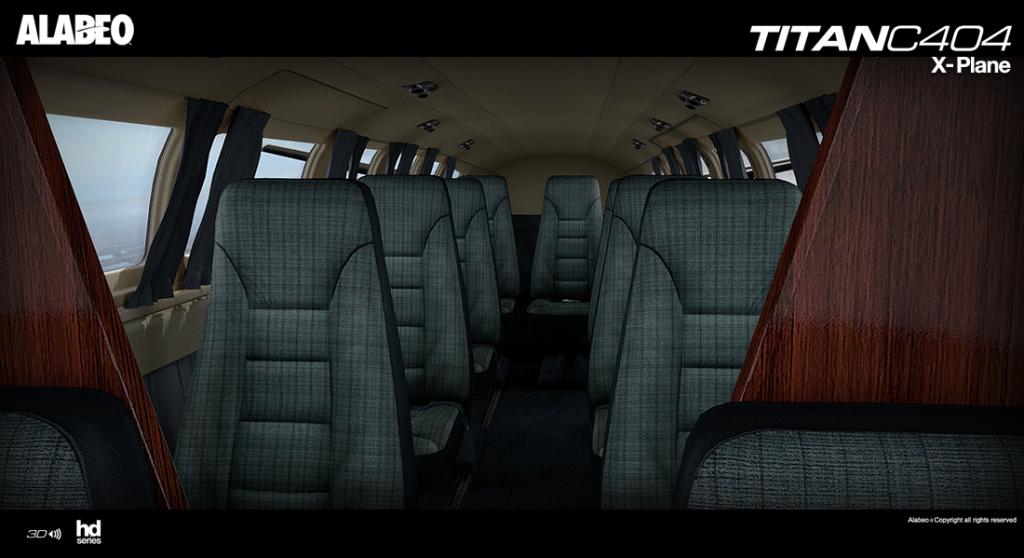
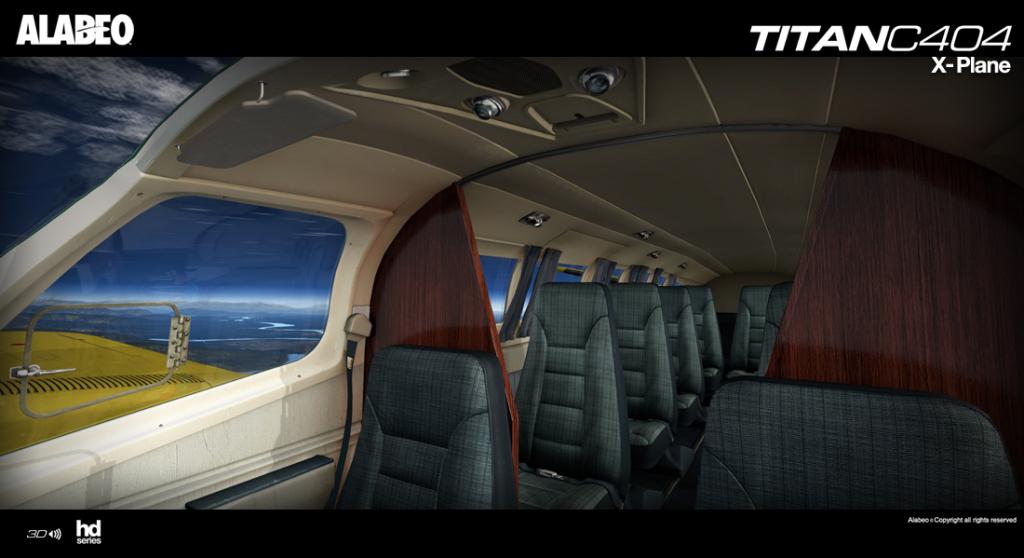
Also Included:
5 4K HD liveries
1 Blank texture
Normal Procedures PDF
Emergency Procedures PDF
Performance Tables PDF
Titan Limitations PDF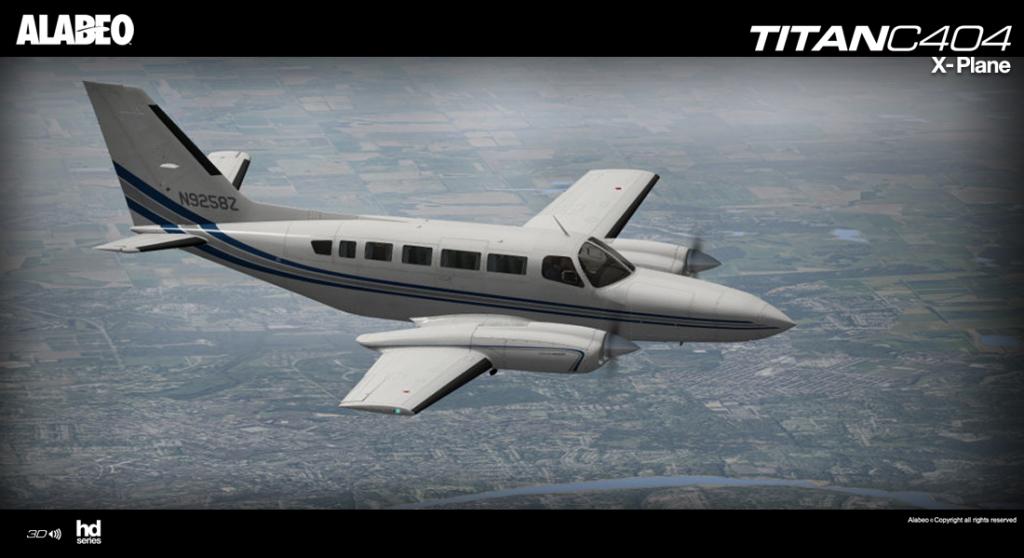
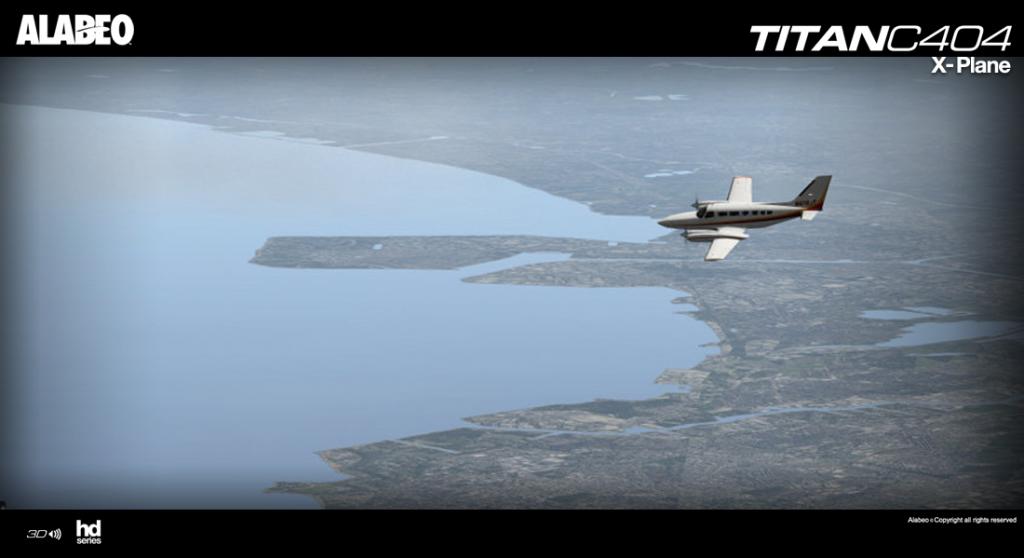
Yes! theC404 Titan by Alabeo is now available from the new X-Plane.Org Store here : C404 Titan - Price is US$32.95
Requirements
Technical Requirements
Windows XP-Vista-7-8 (or higher) or MAC OS 10.6 (or higher) or Linux
X-Plane 10.40 (or higher)
Pentium 2 GHz - 4GB RAM - 1GB Video card
405MB available hard disk spacePrice is US$32.95
Images are courtesy of Carenado©
Developer site : Carenado.com
Stephen Dutton
Updated 31st October 2015
Copyright©X-Plane Reviews: X-PlaneReviews


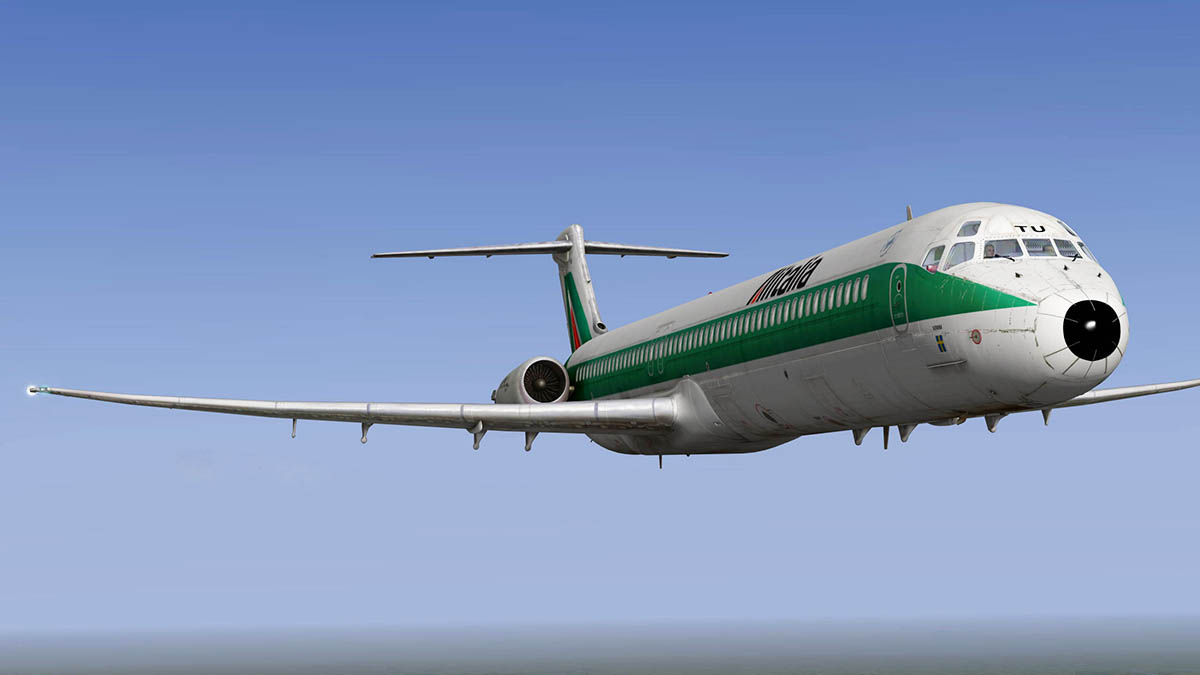
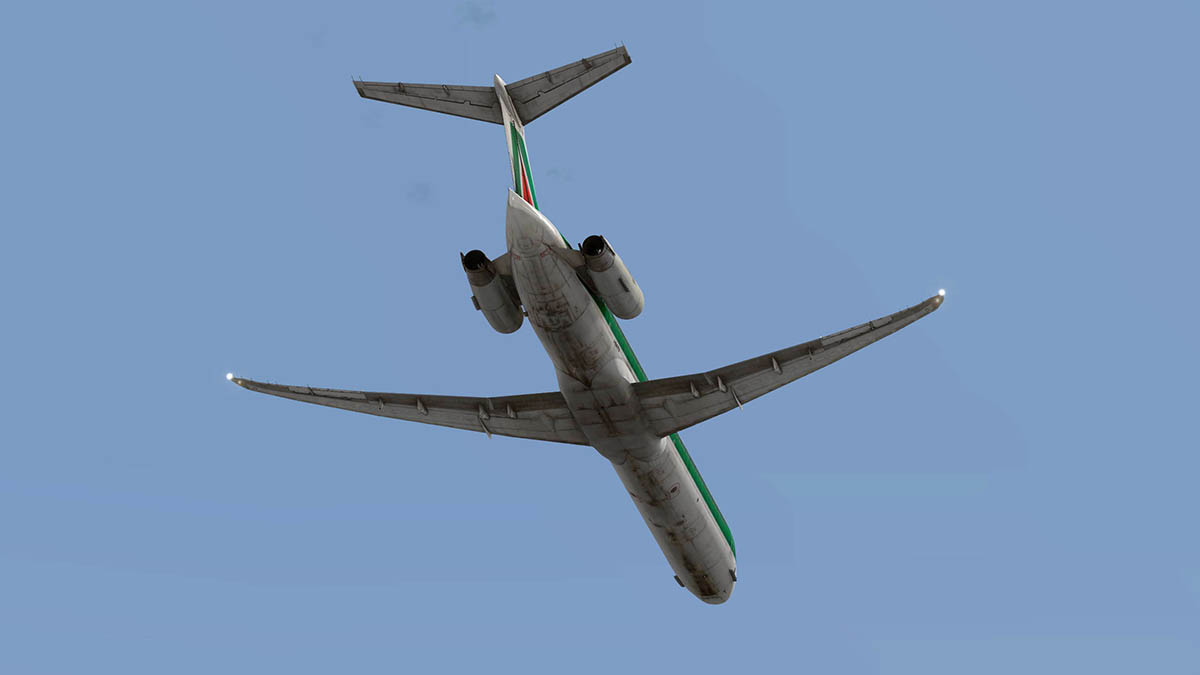

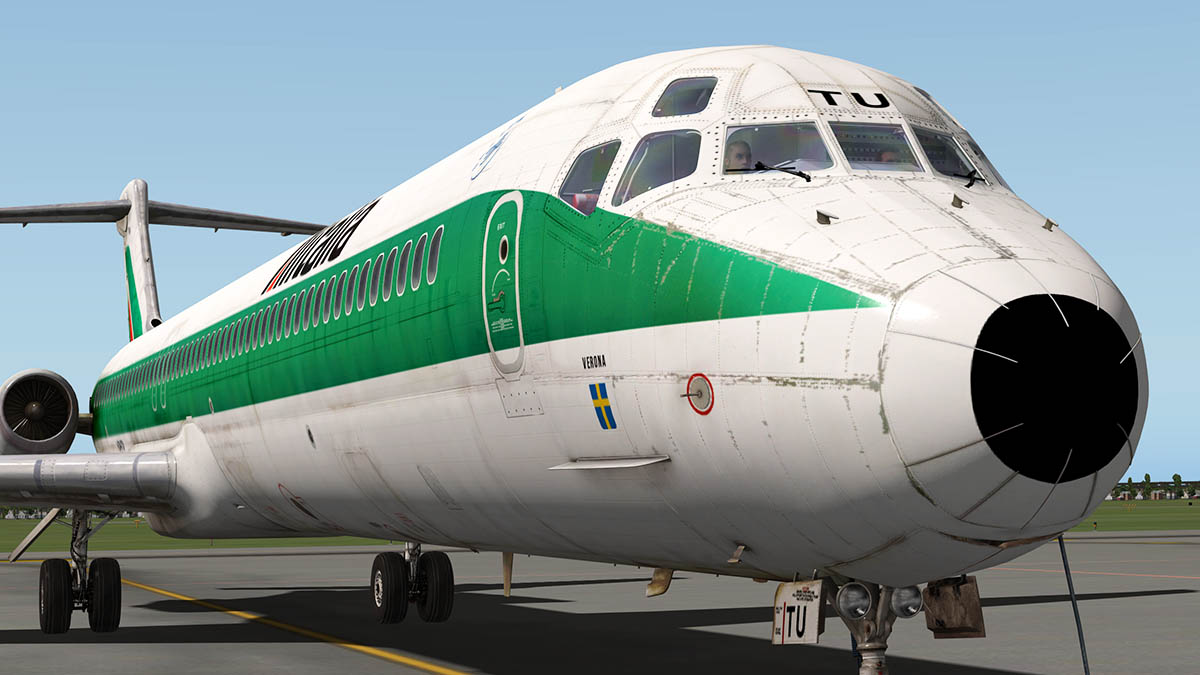
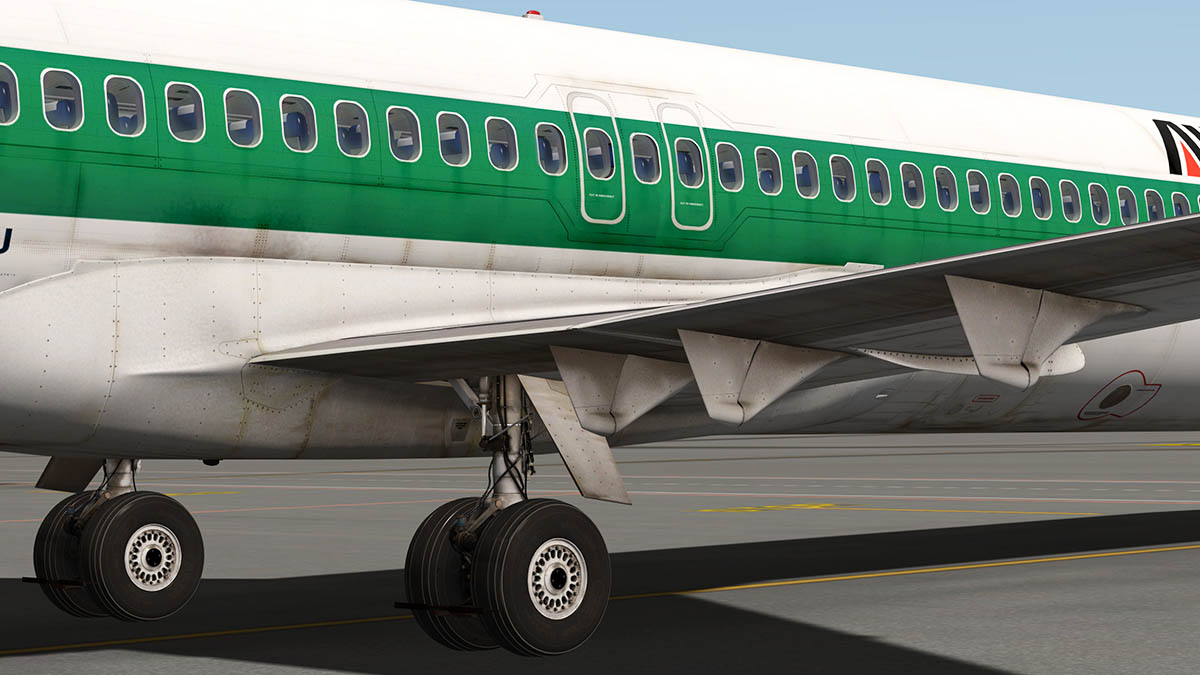

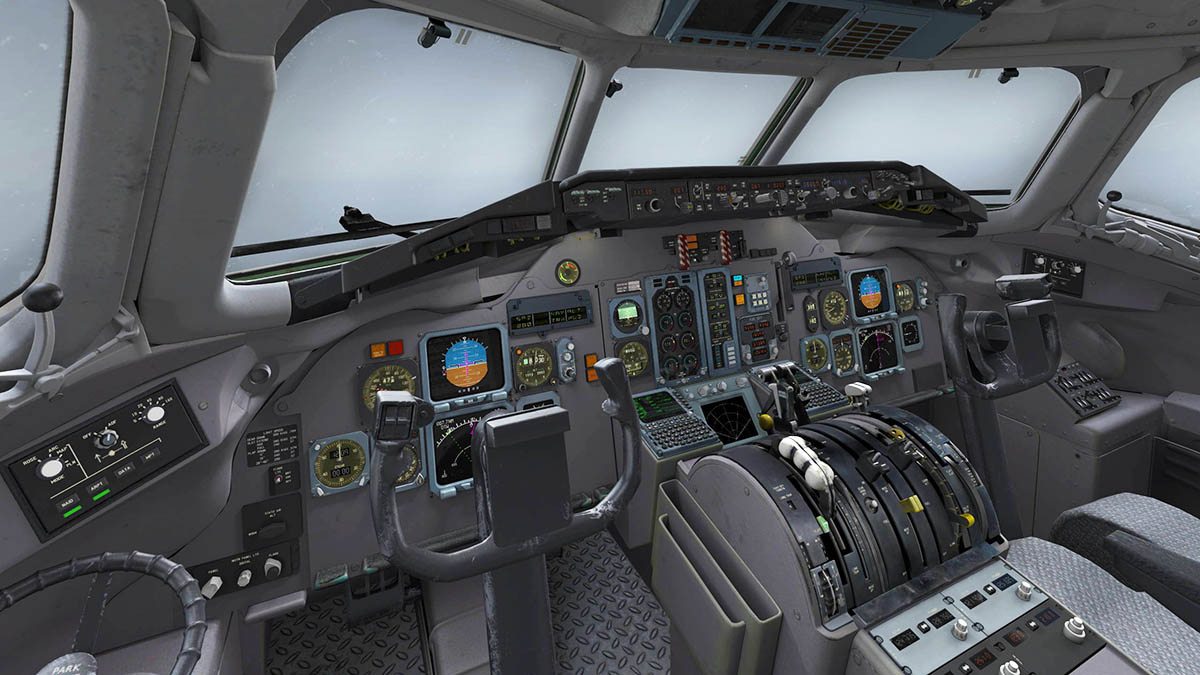
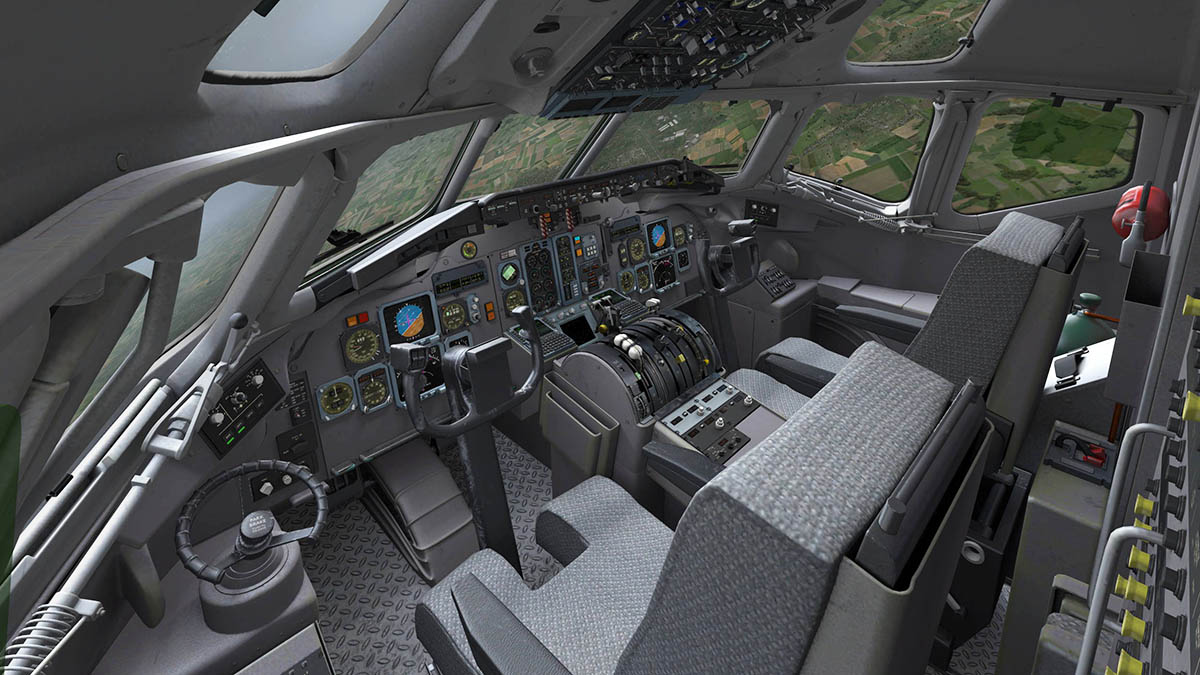
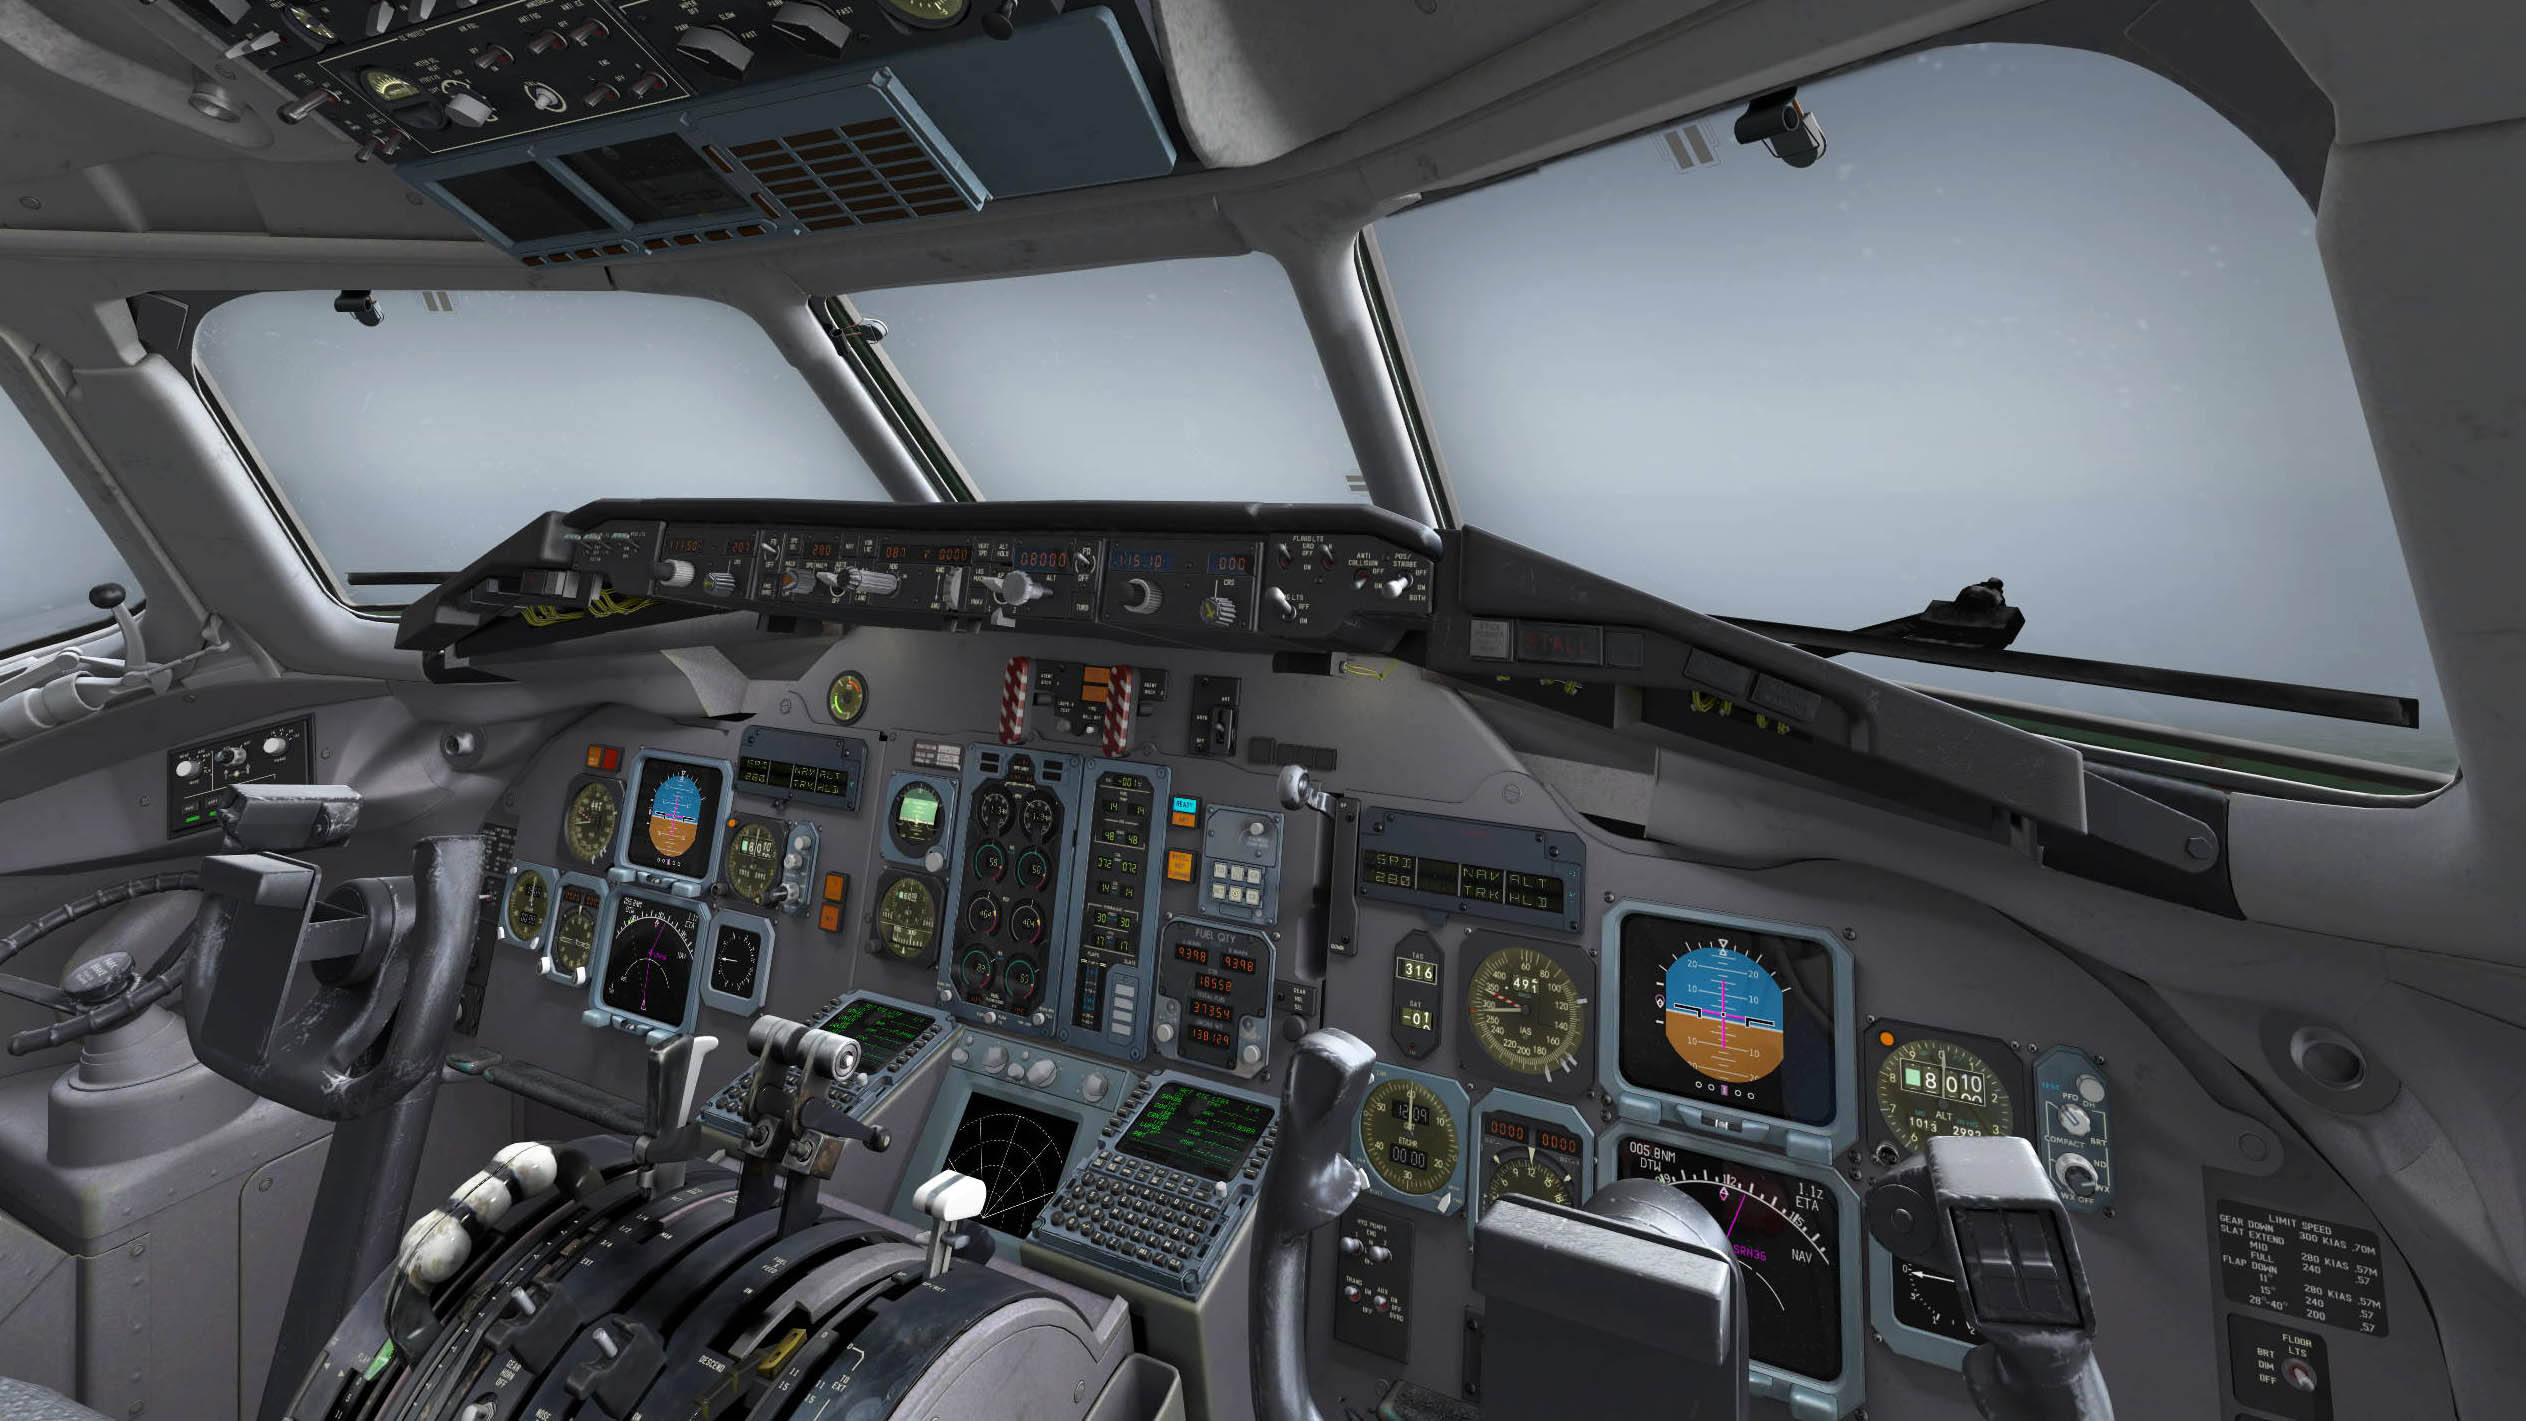

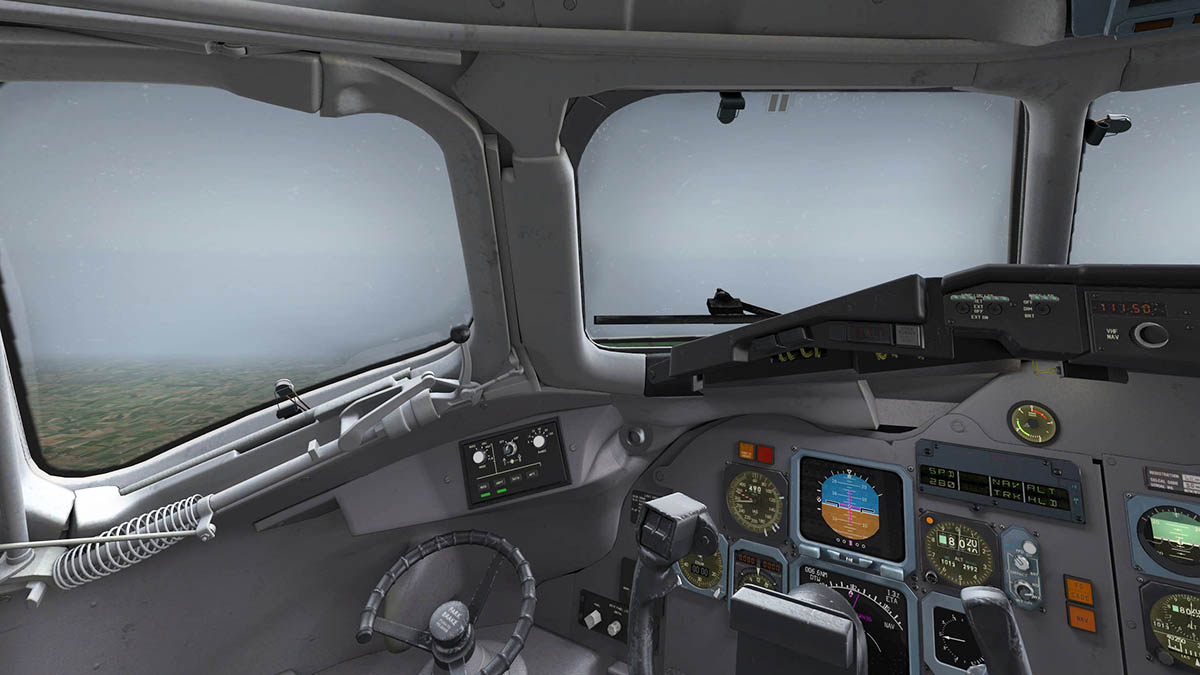
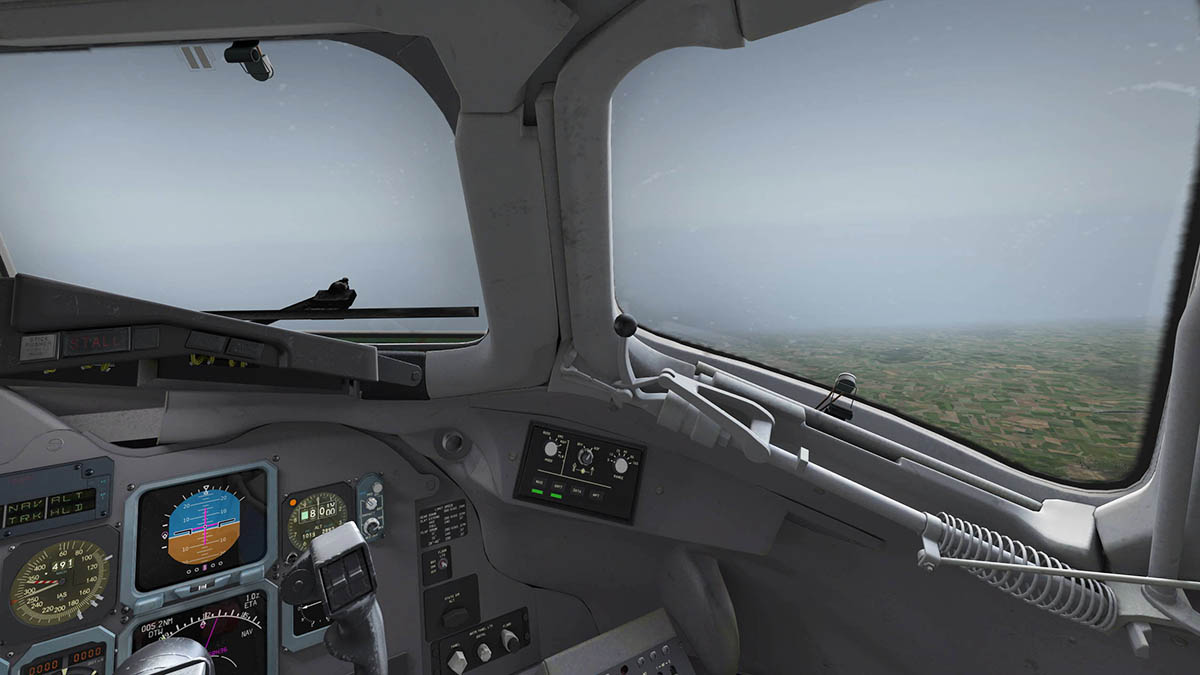
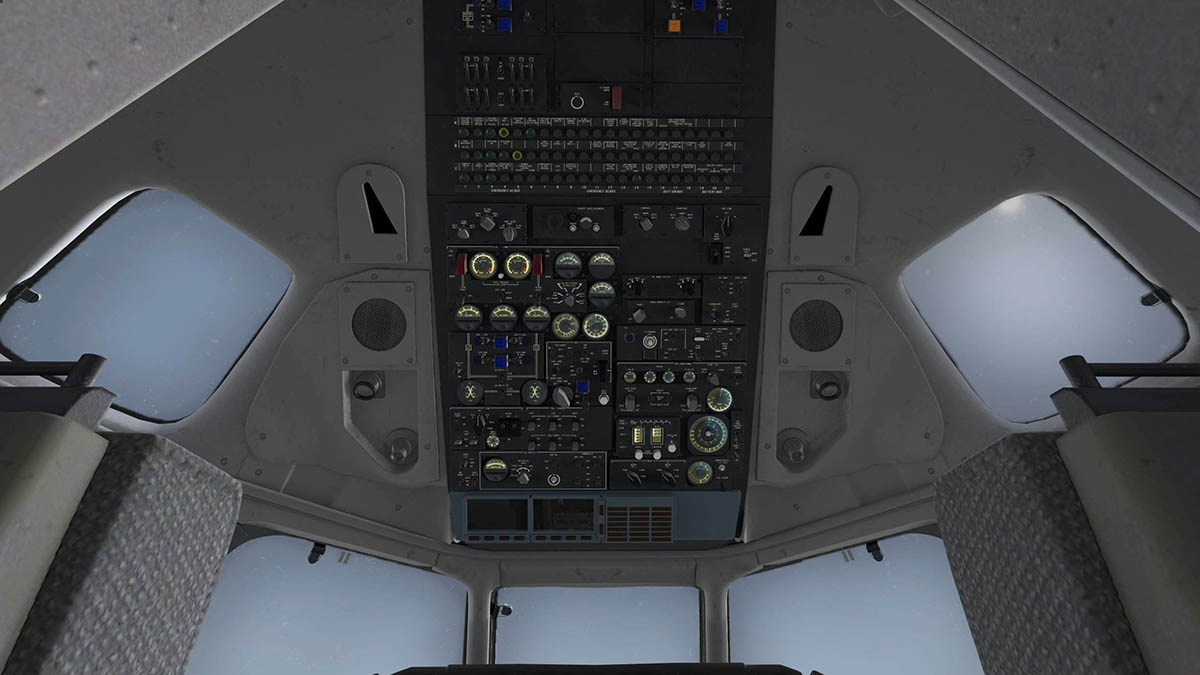
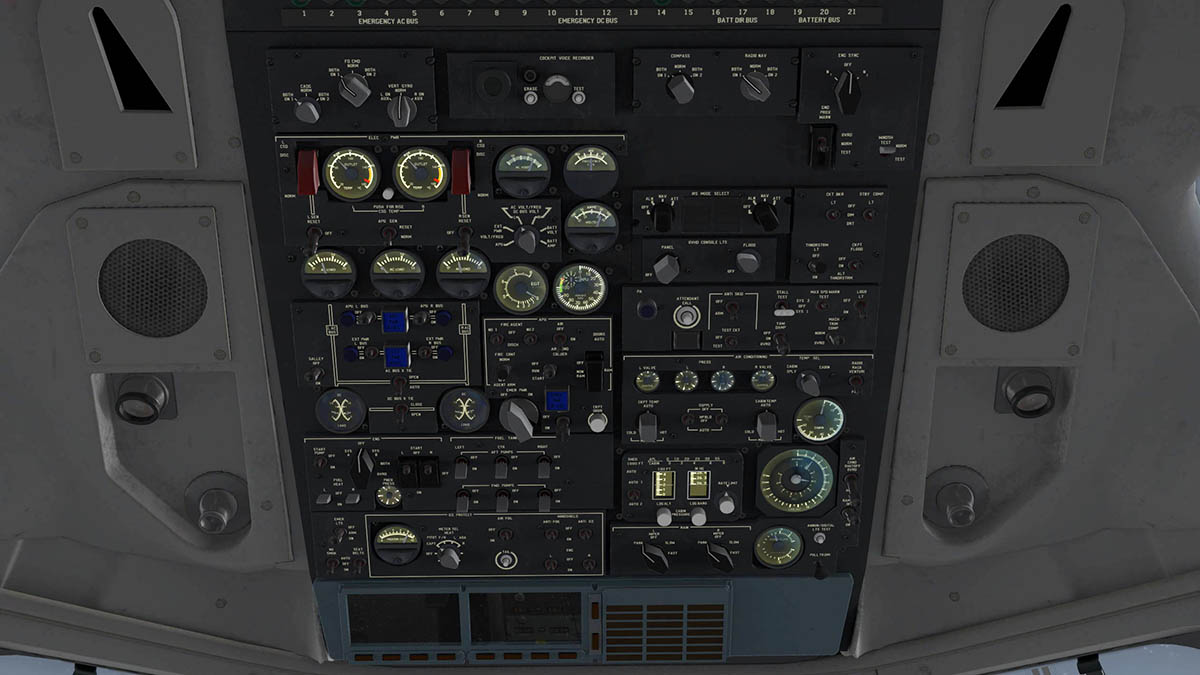
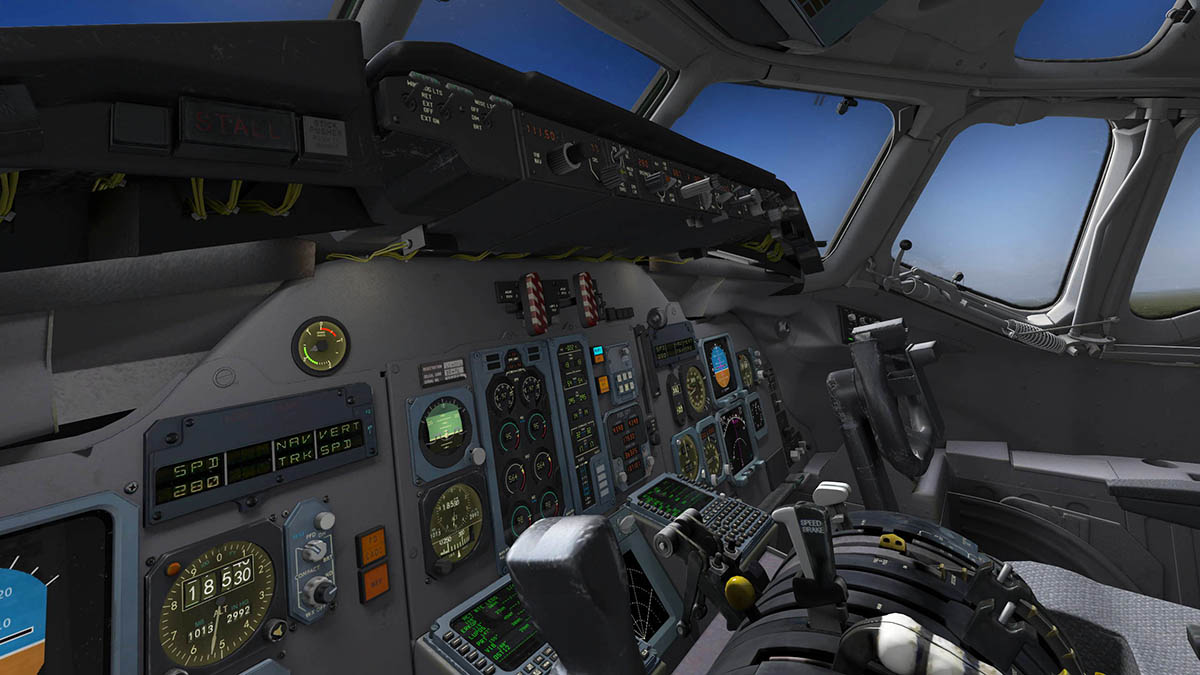
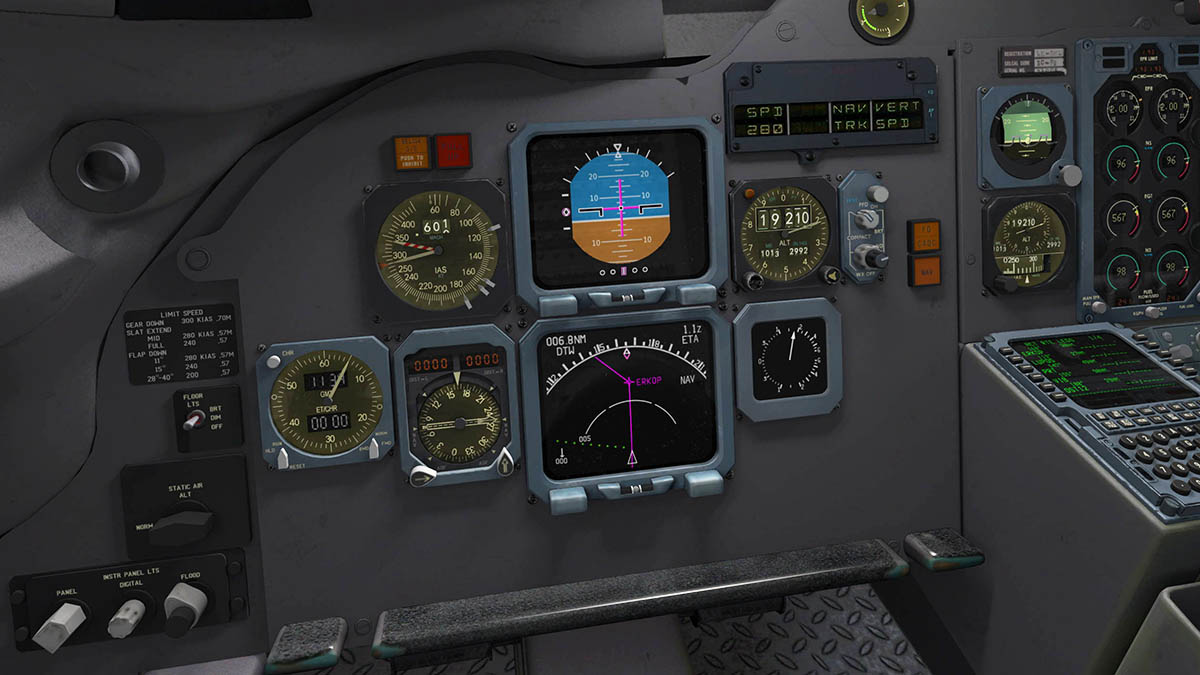
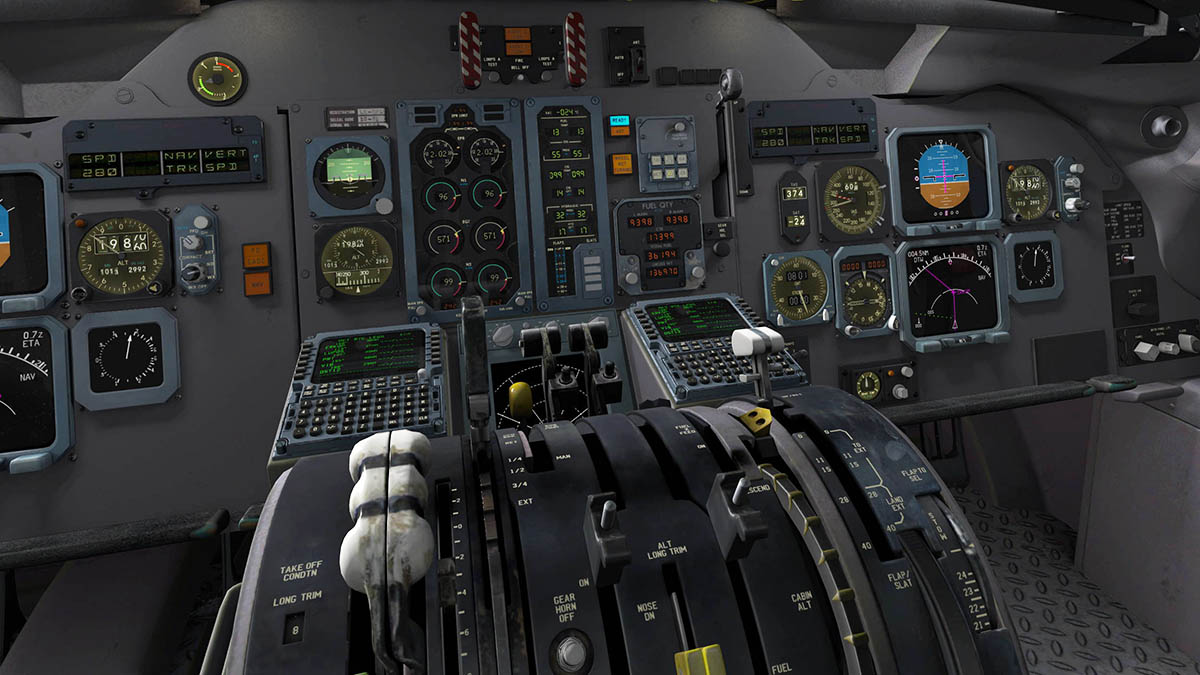
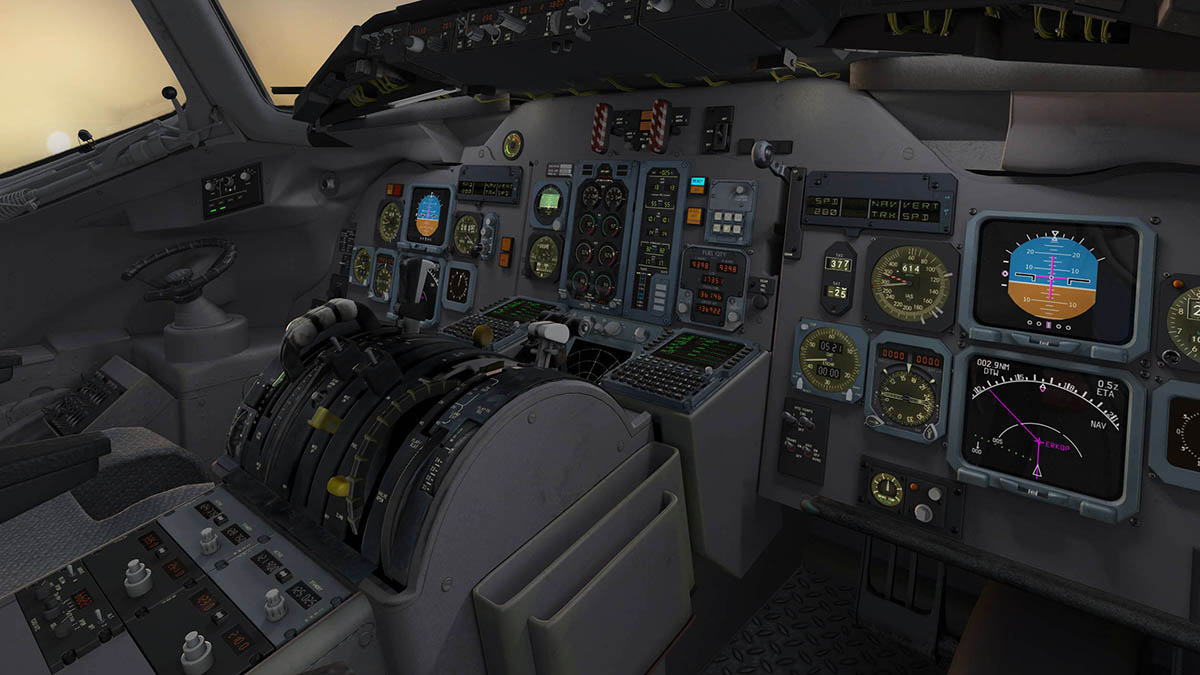
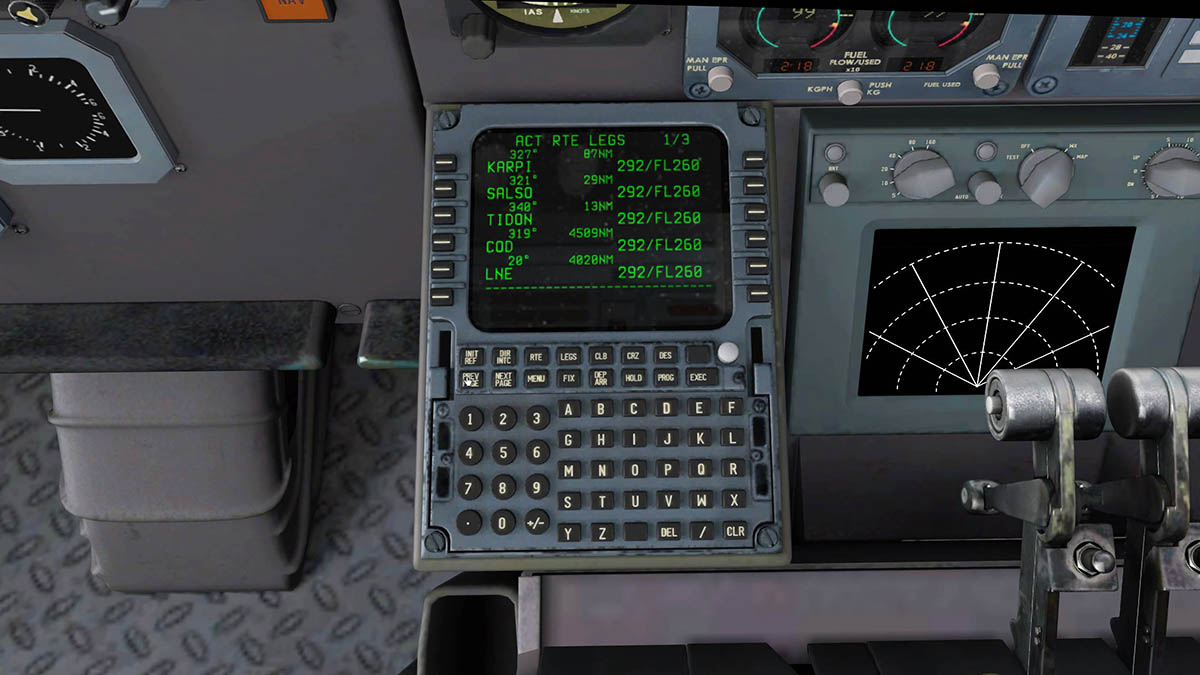


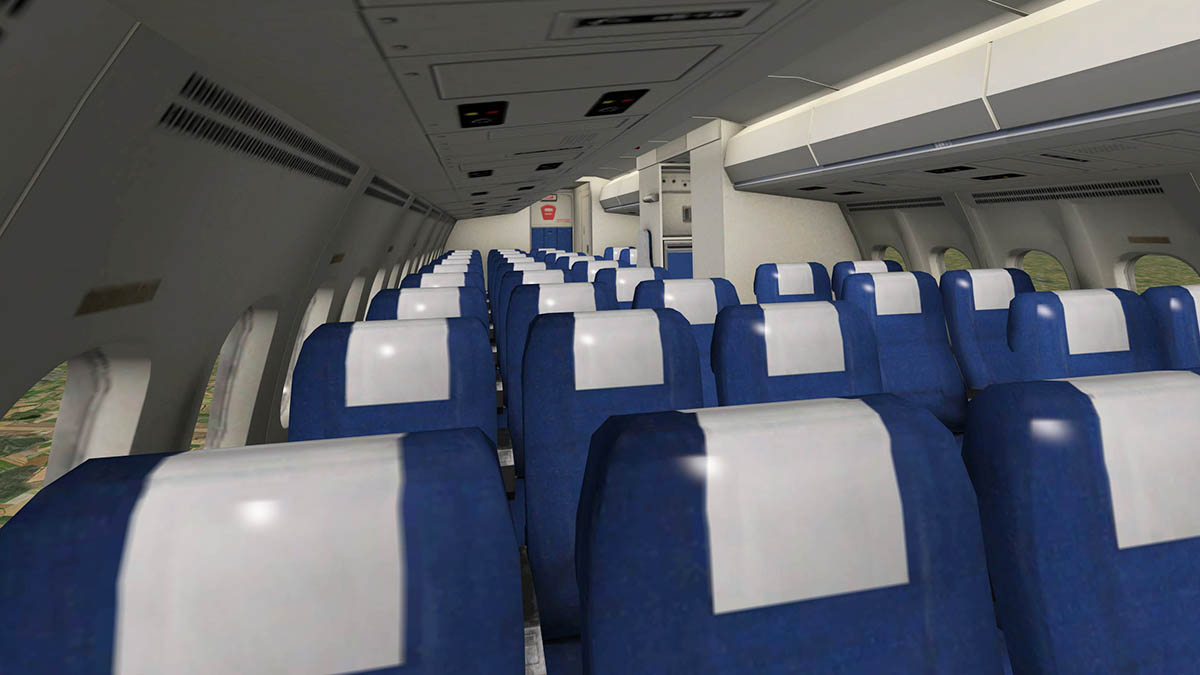
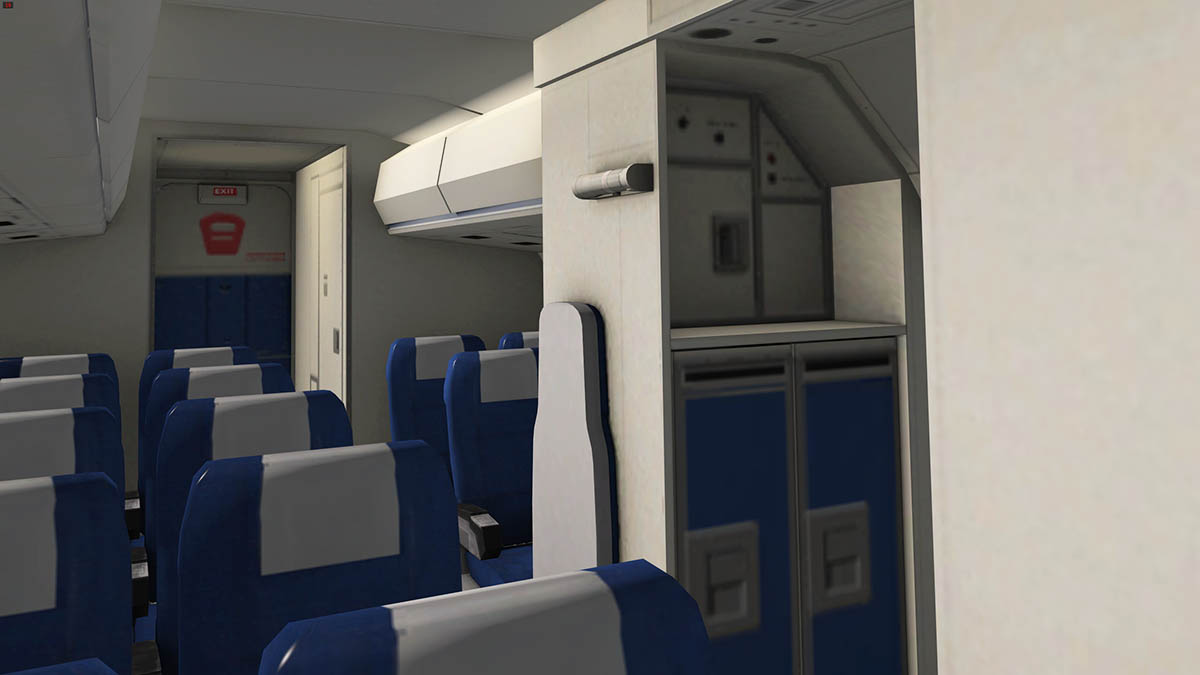

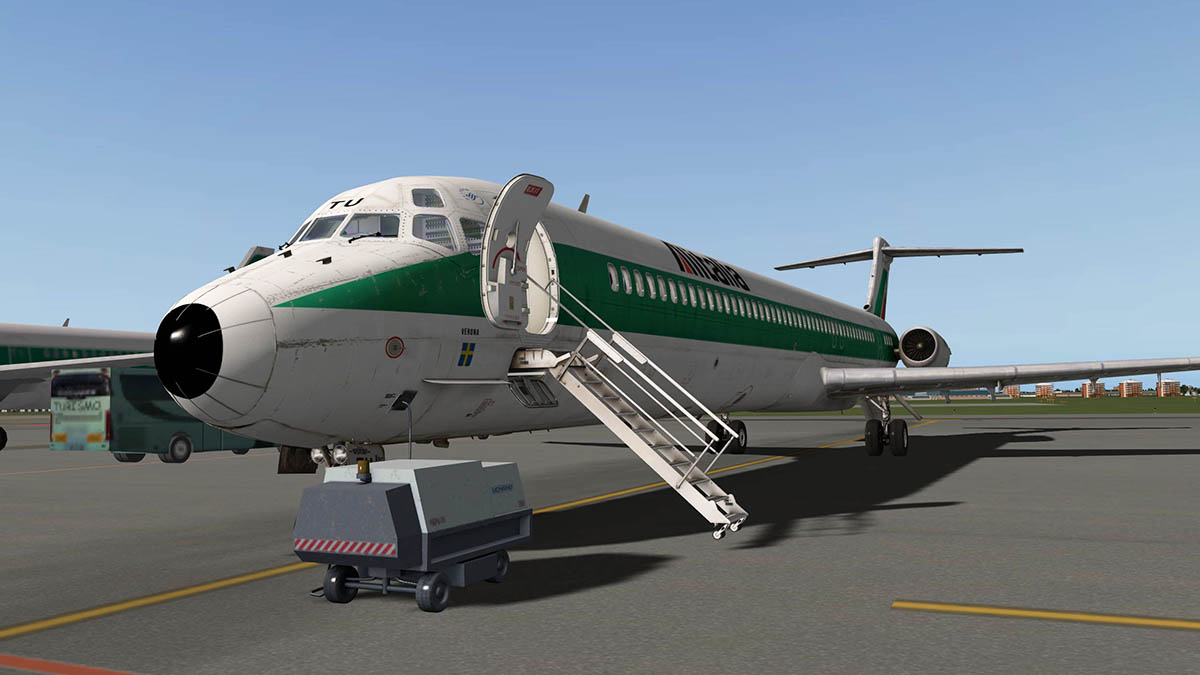
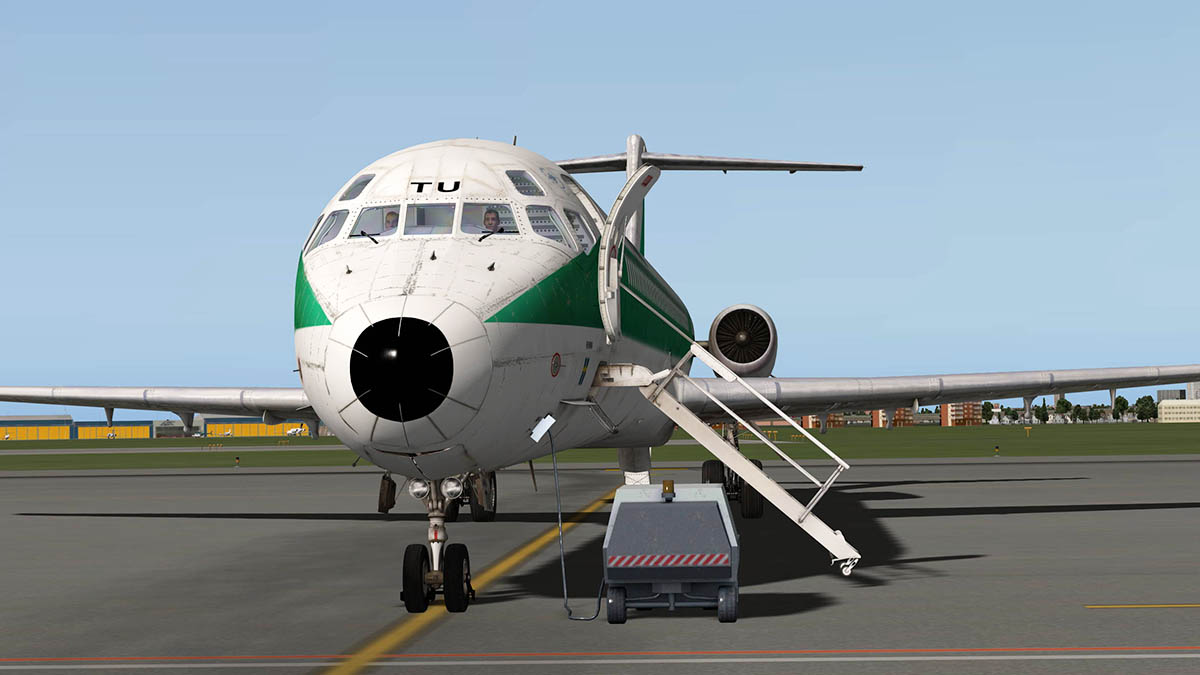

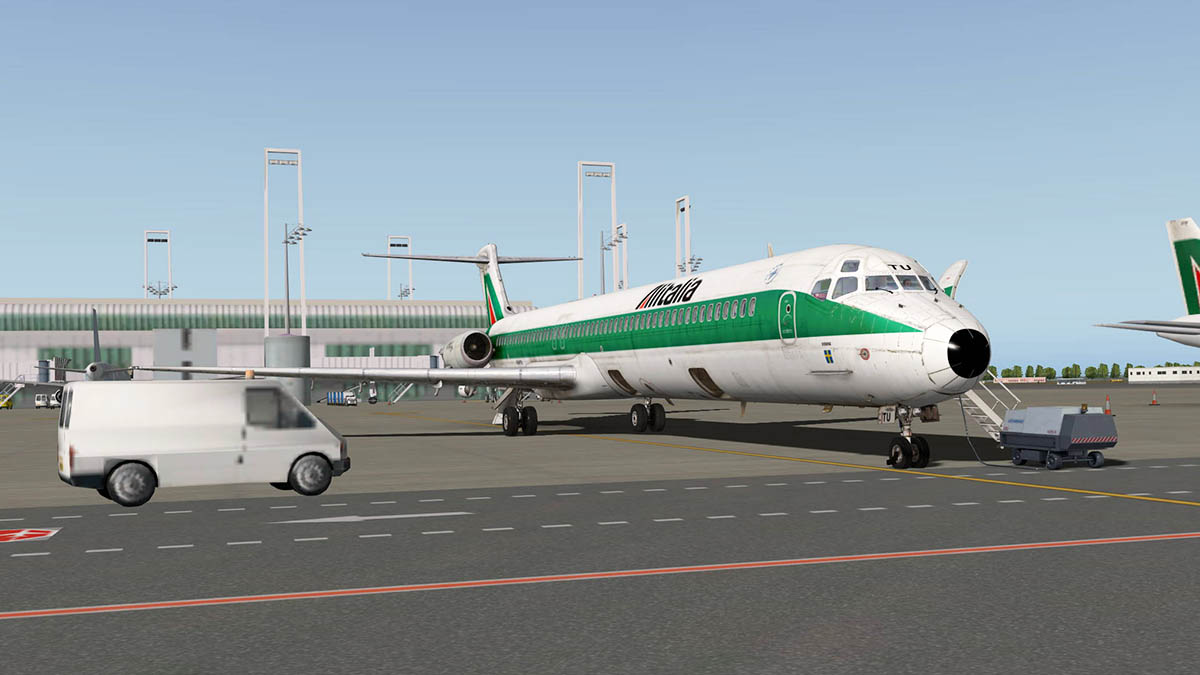
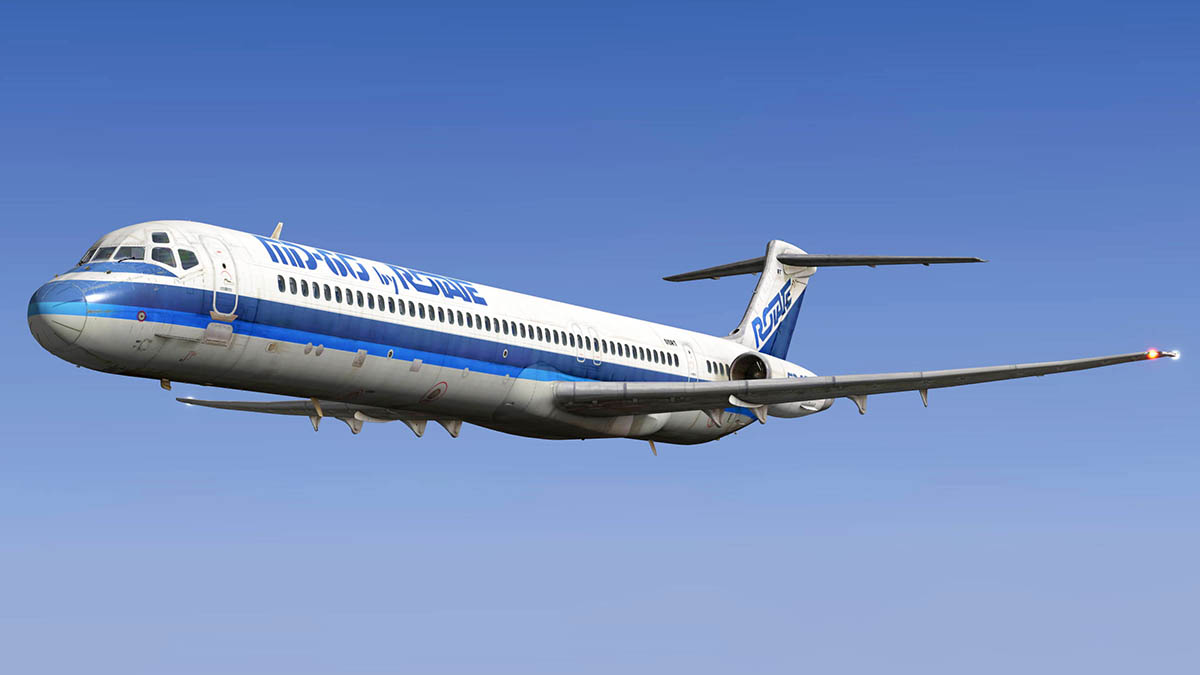


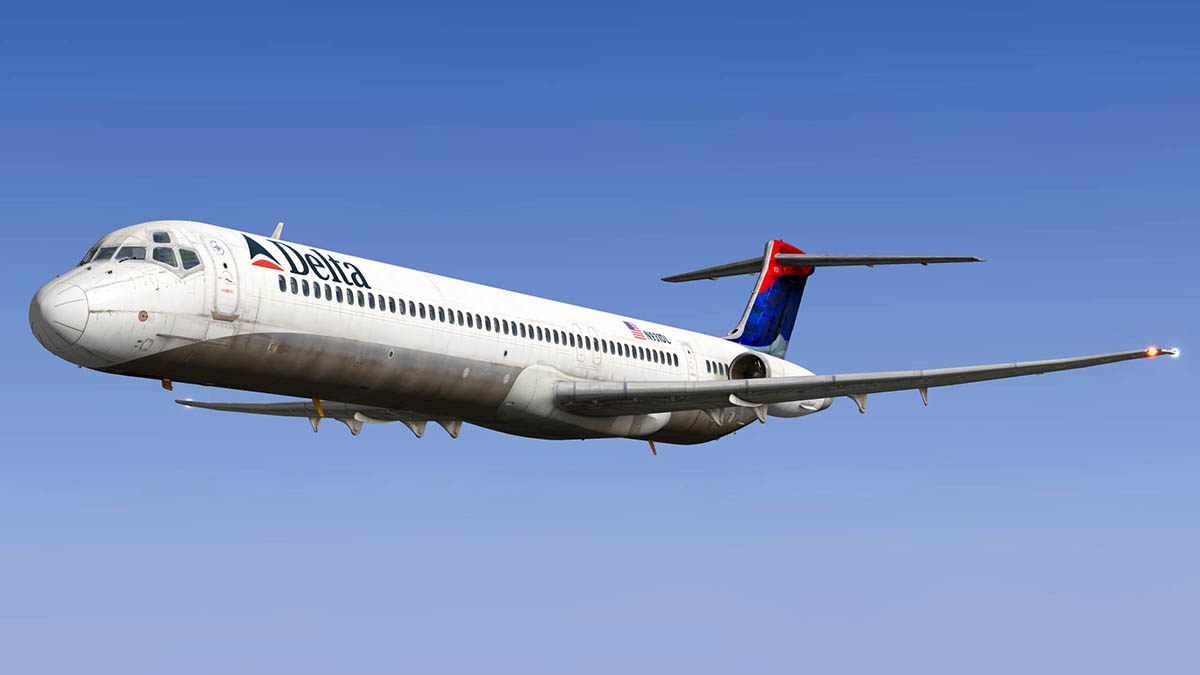
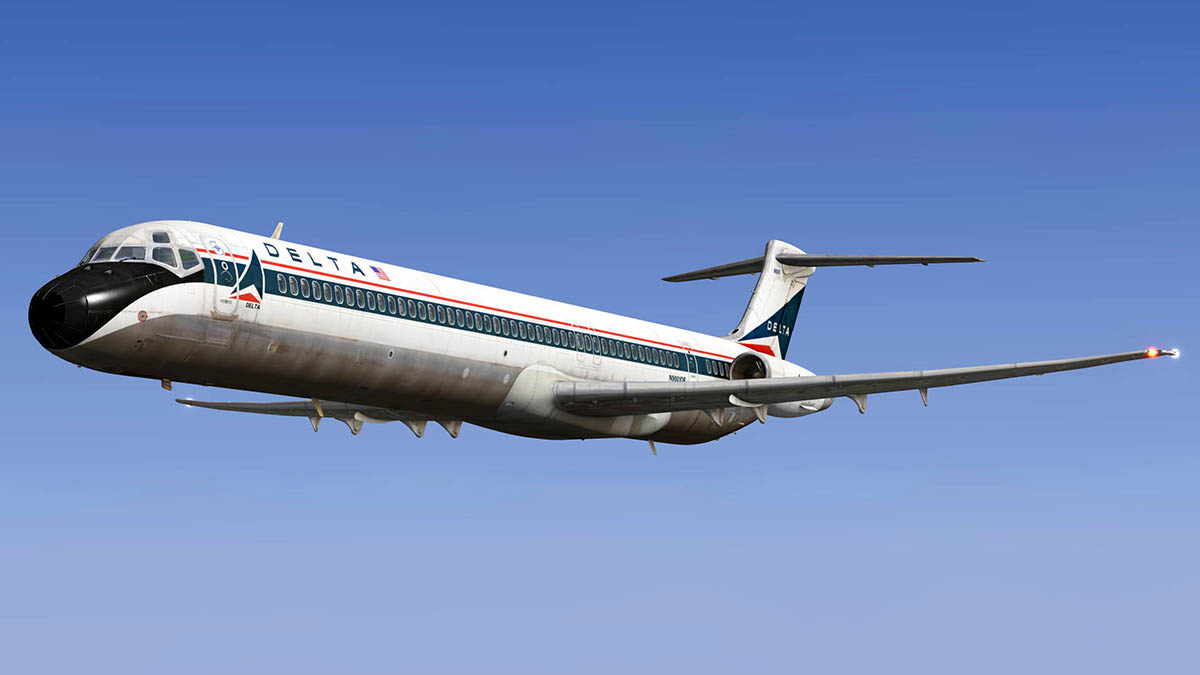


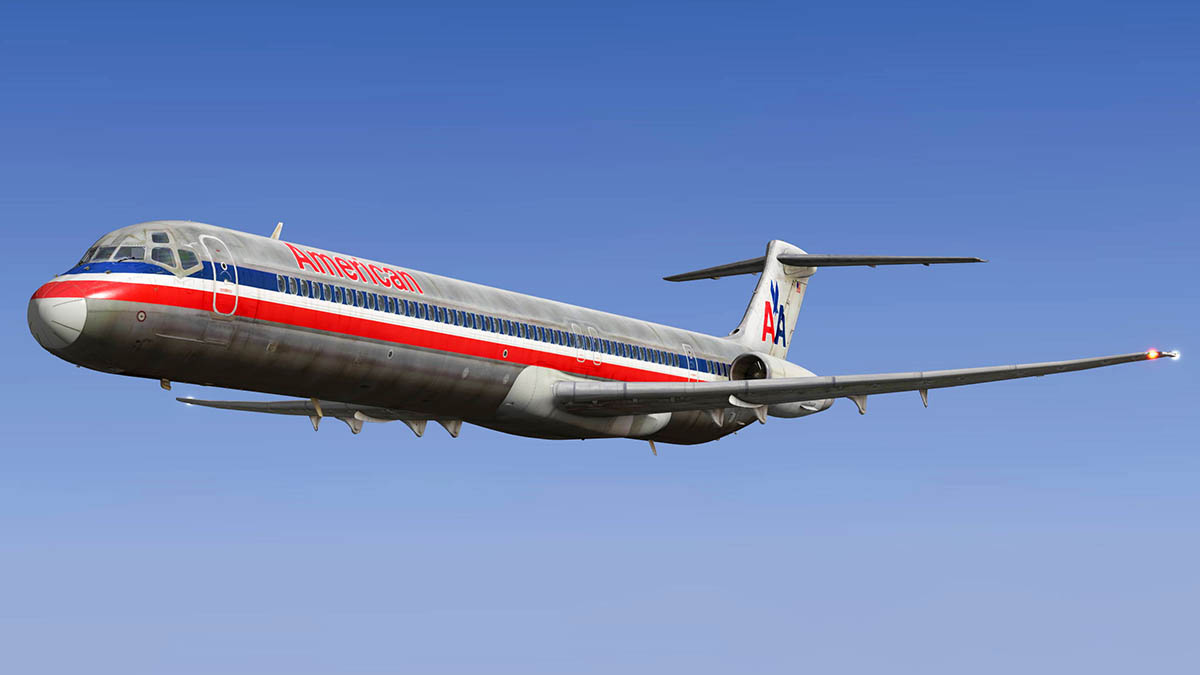
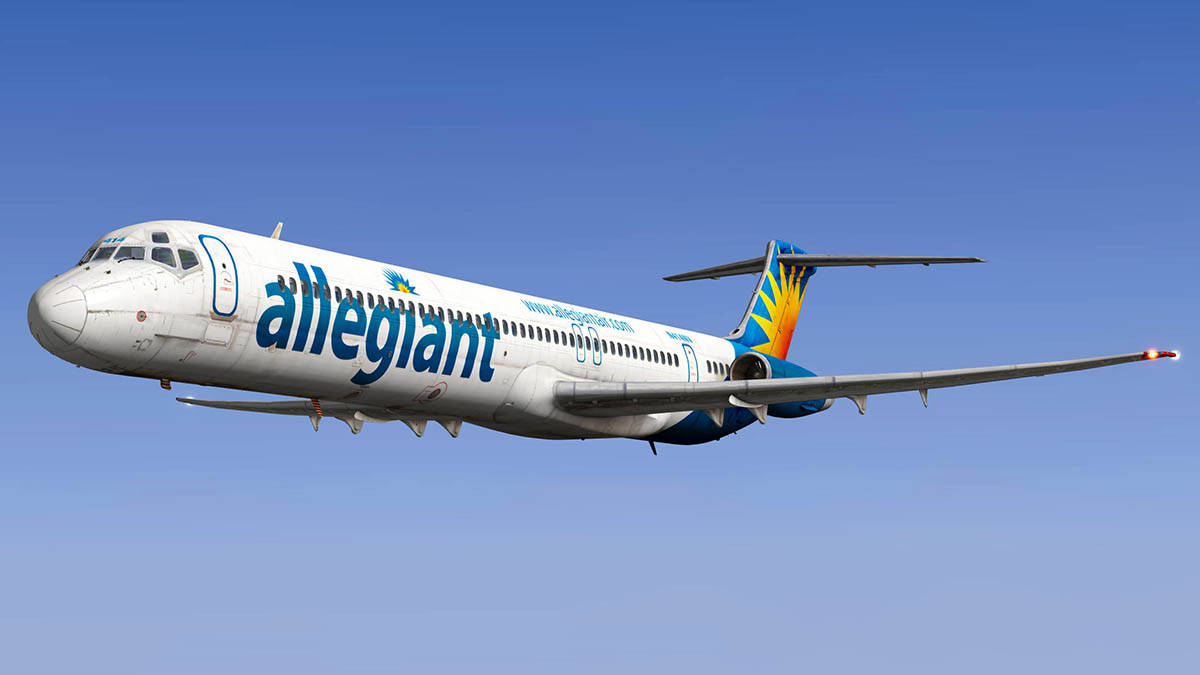
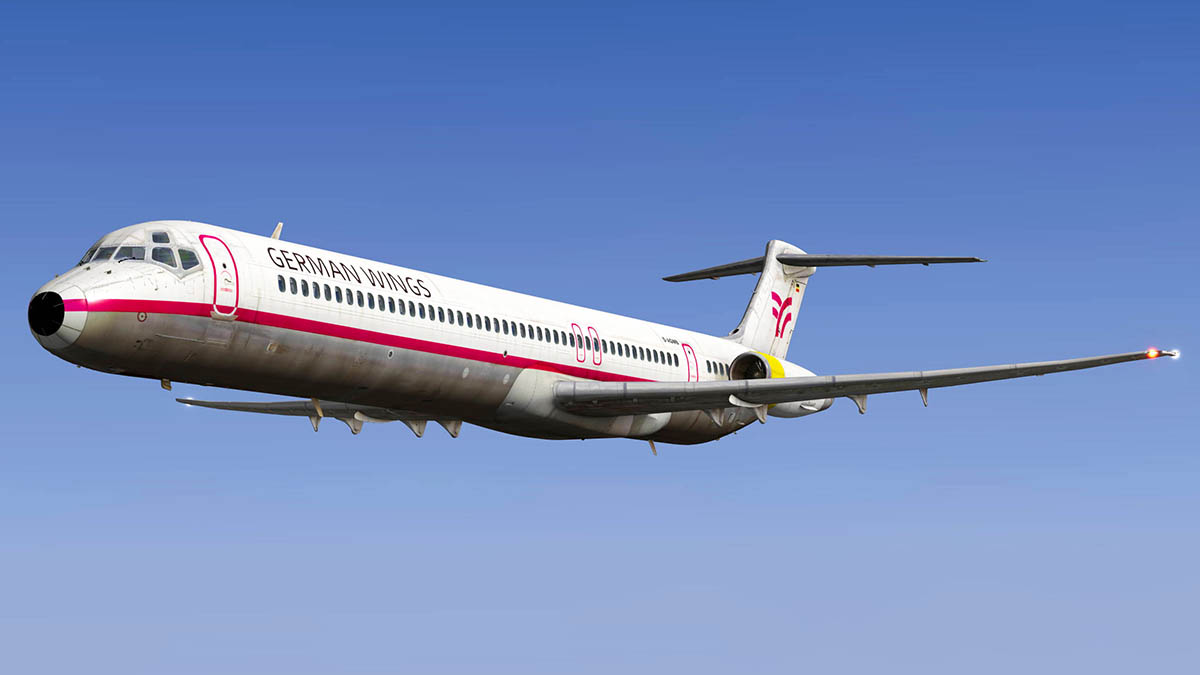
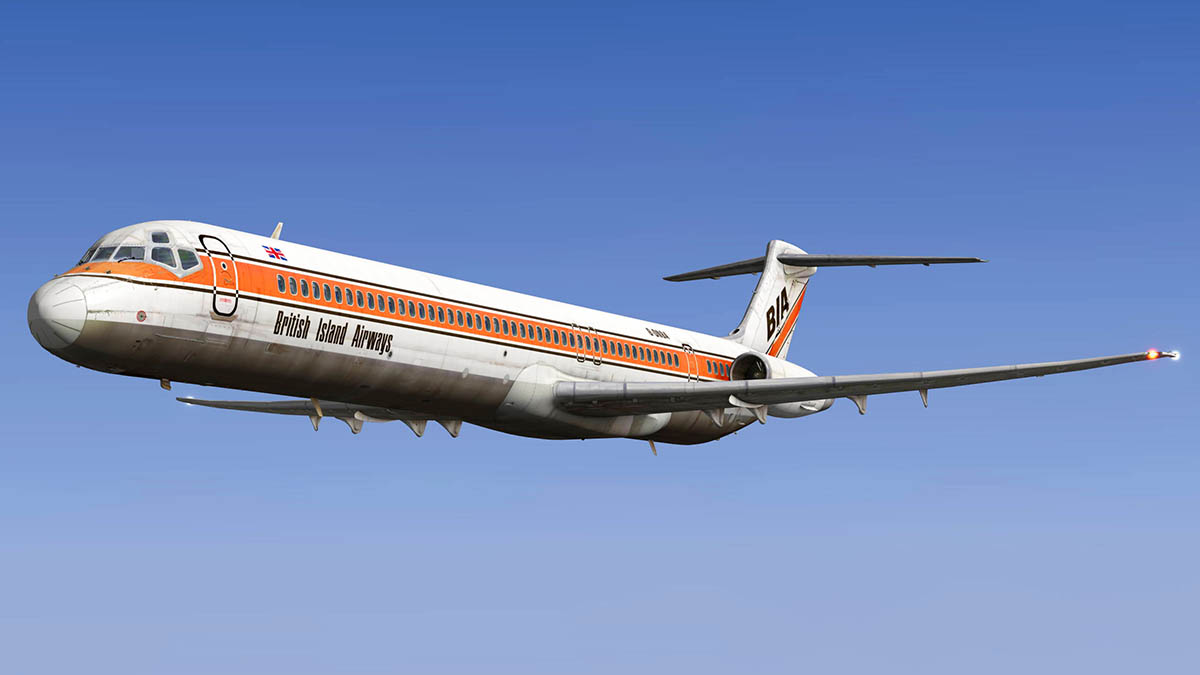


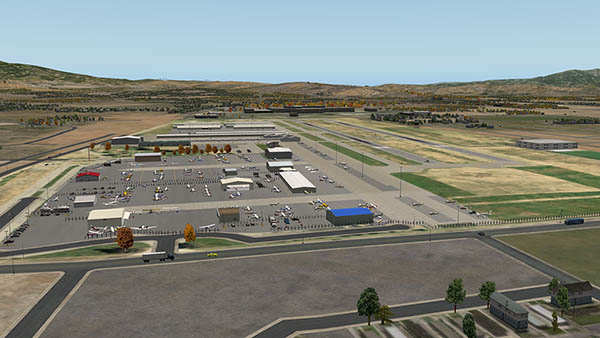


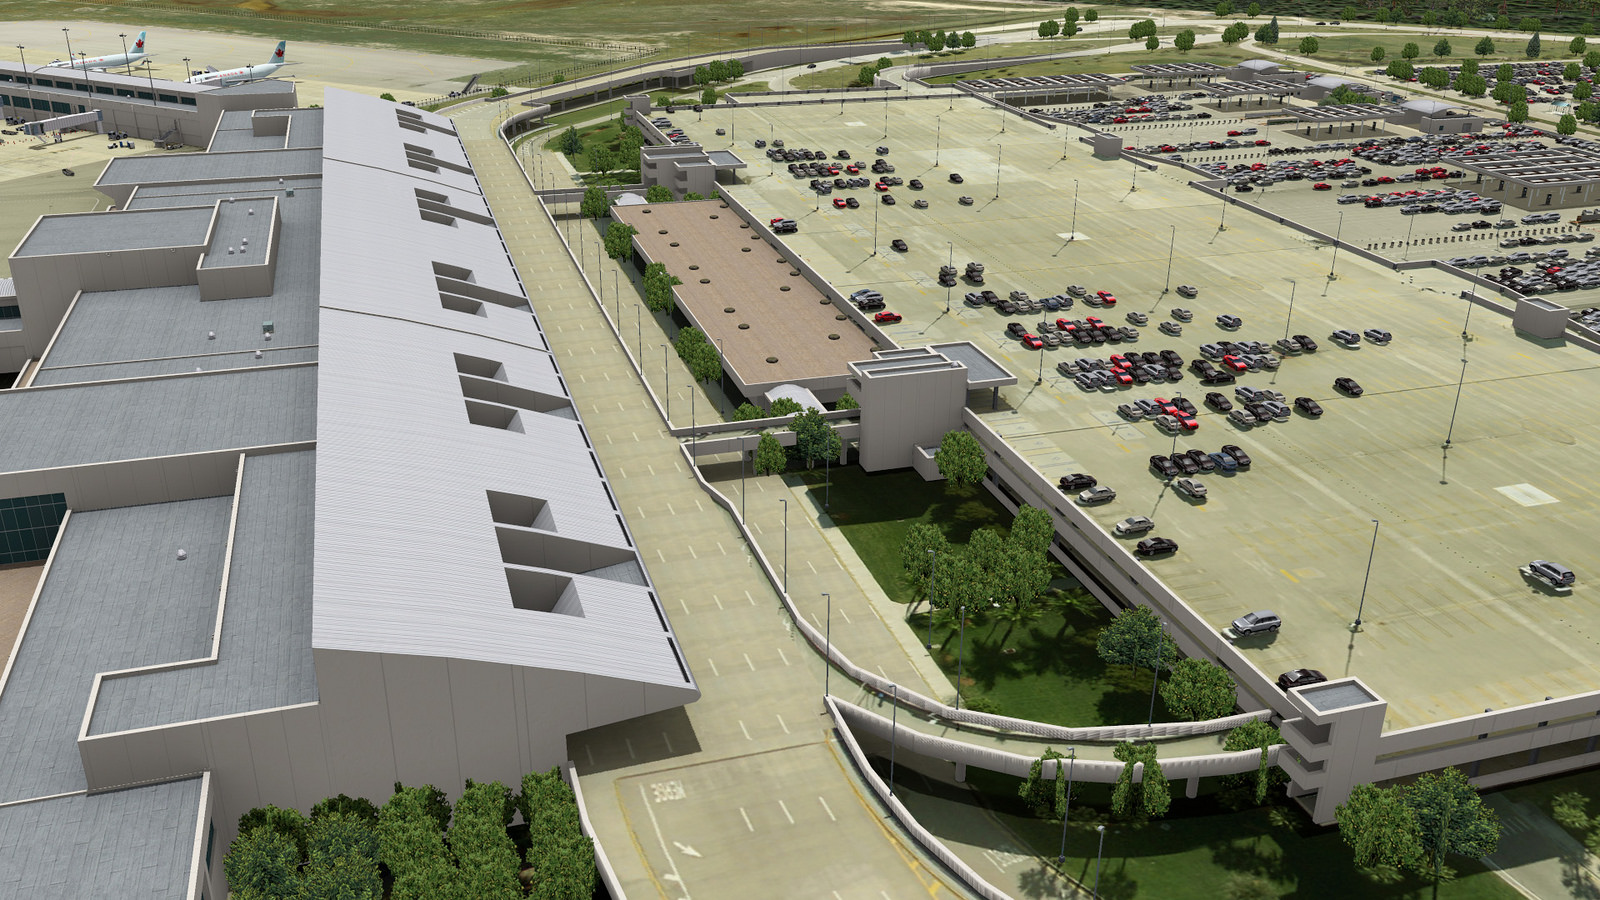
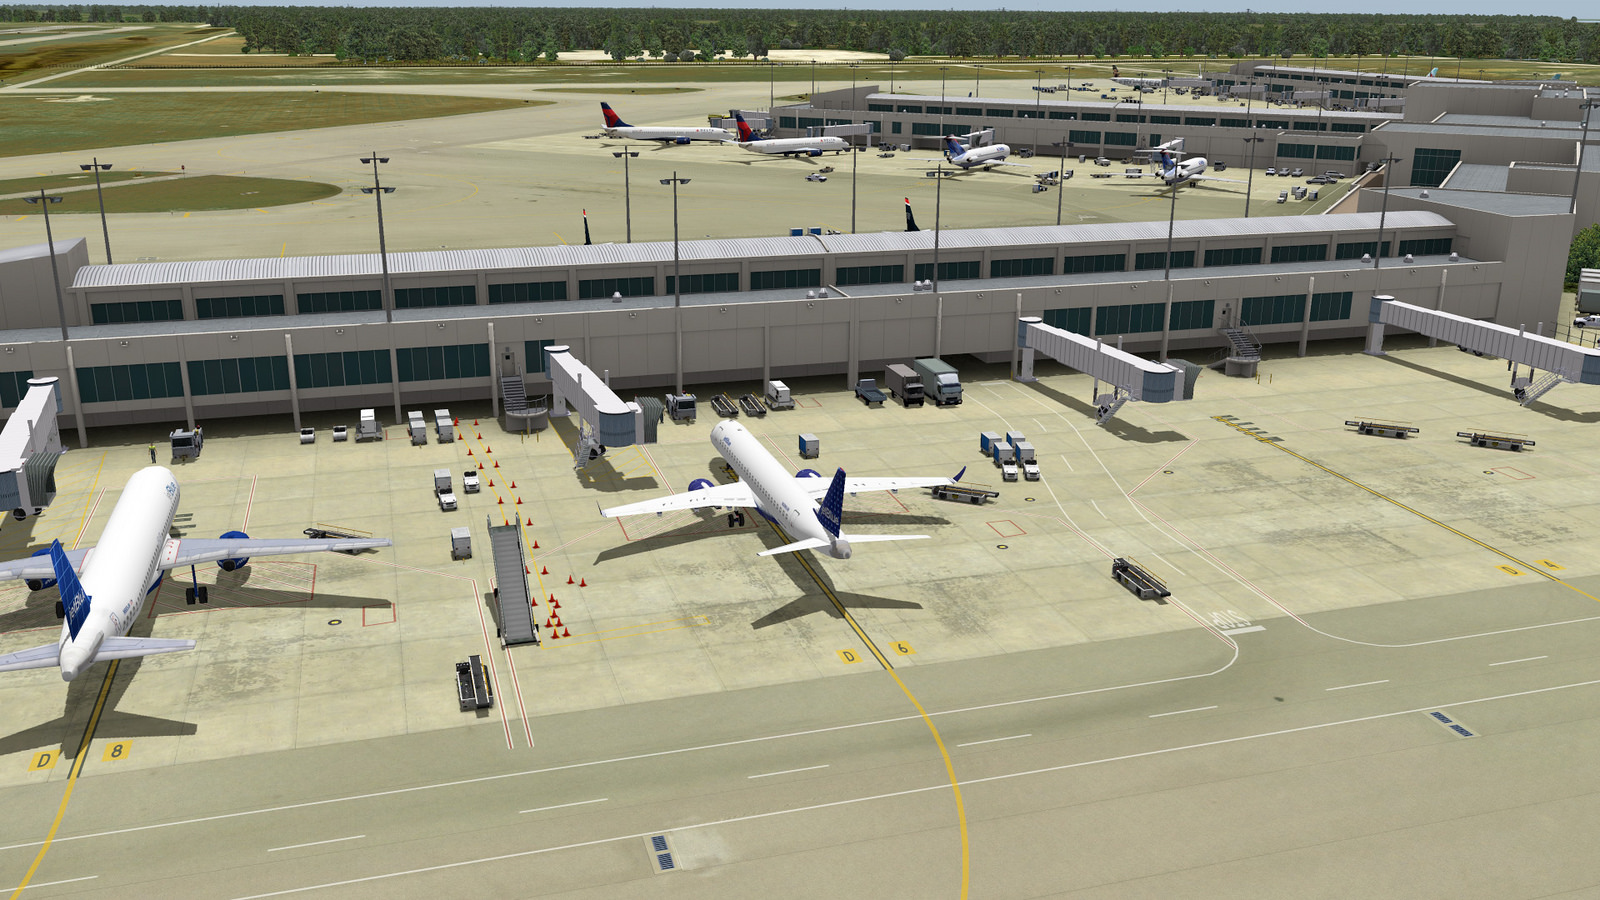


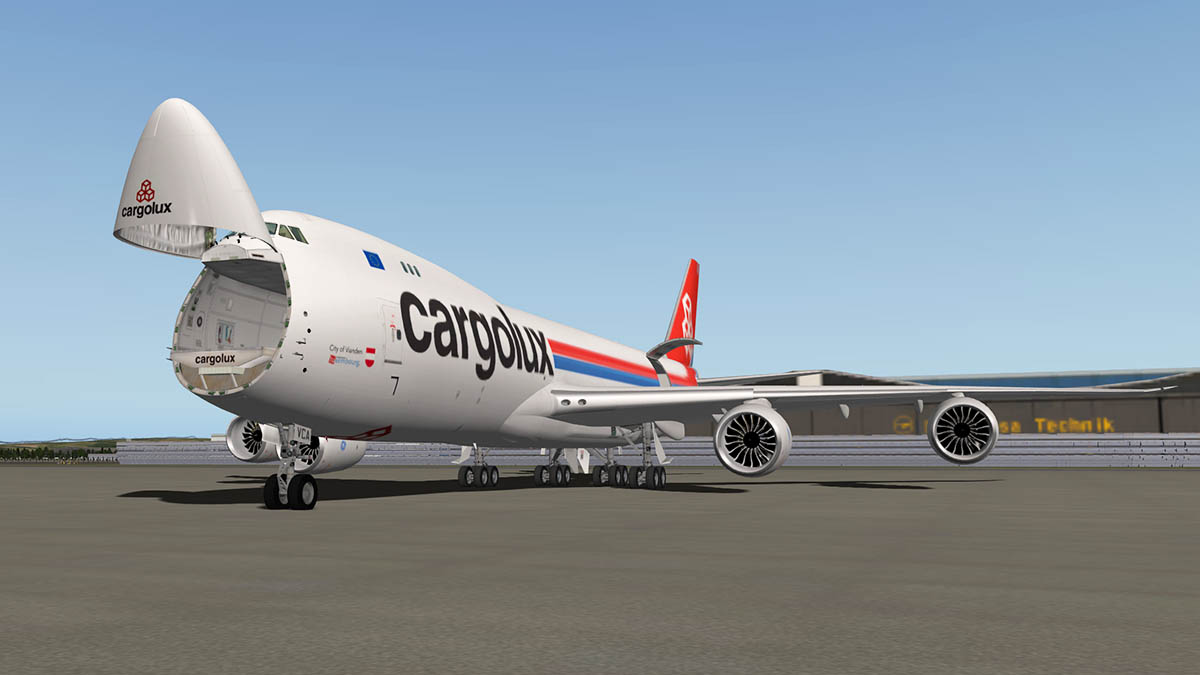
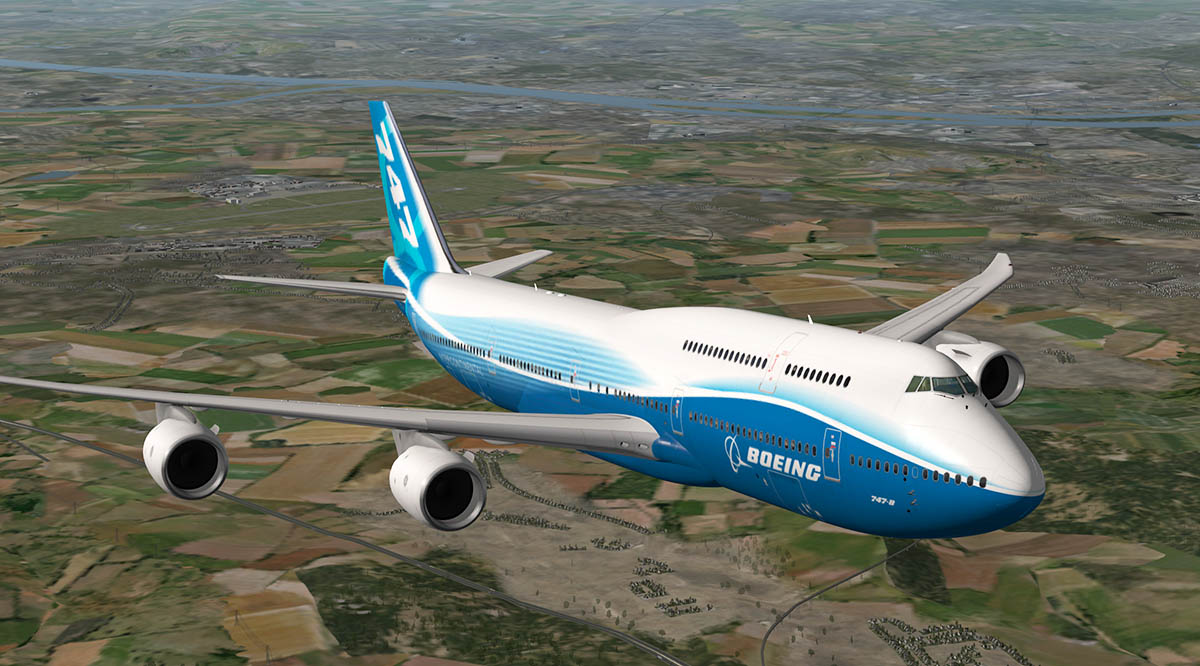
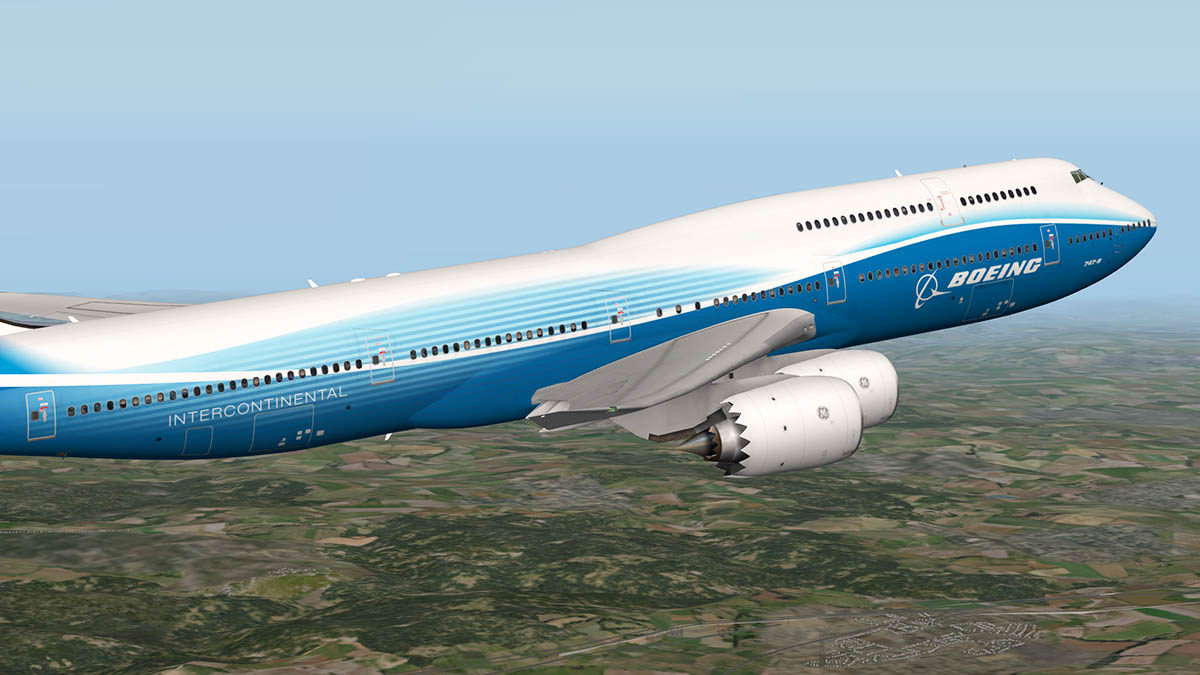


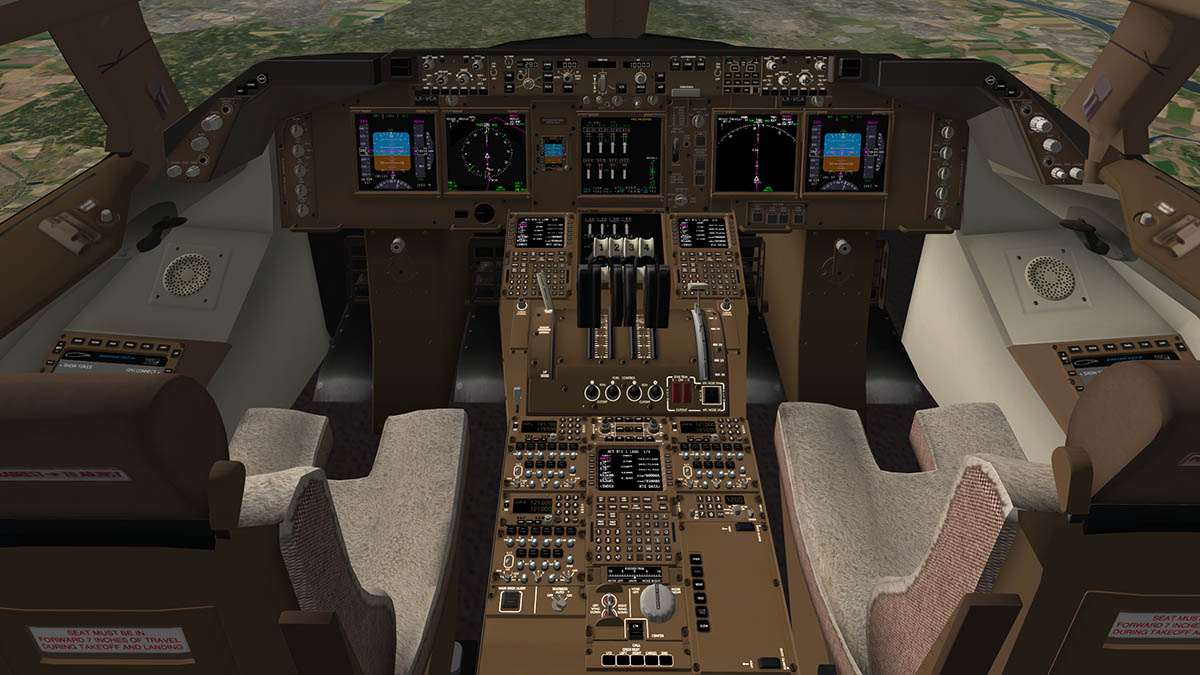
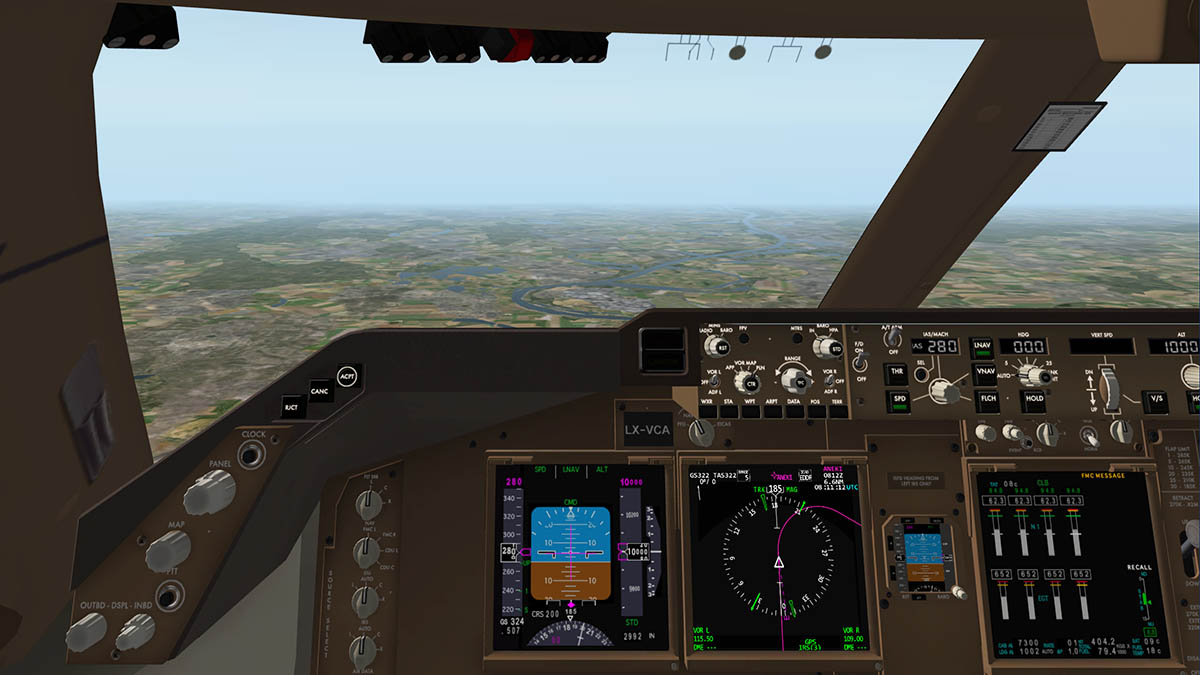
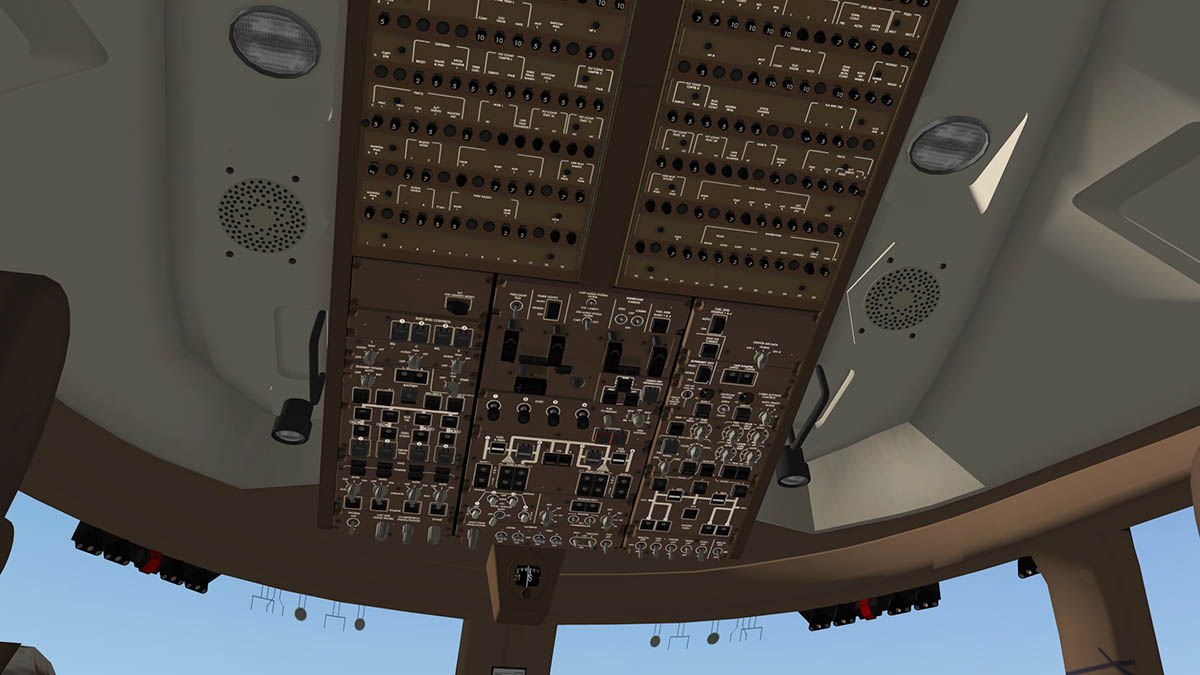

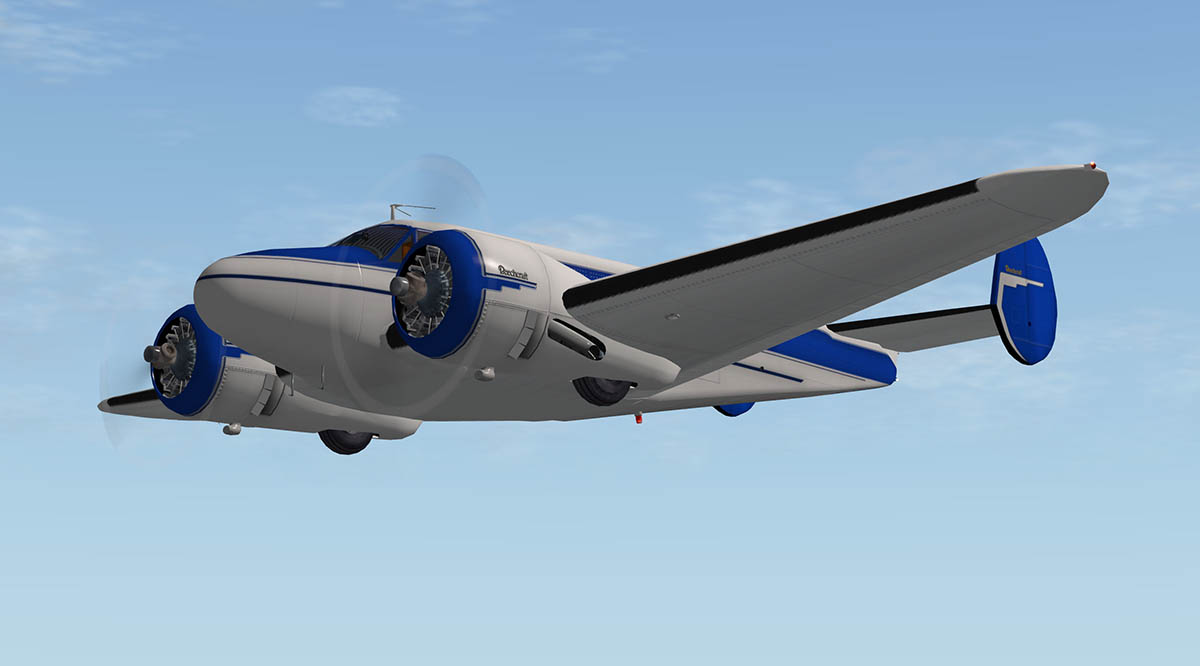


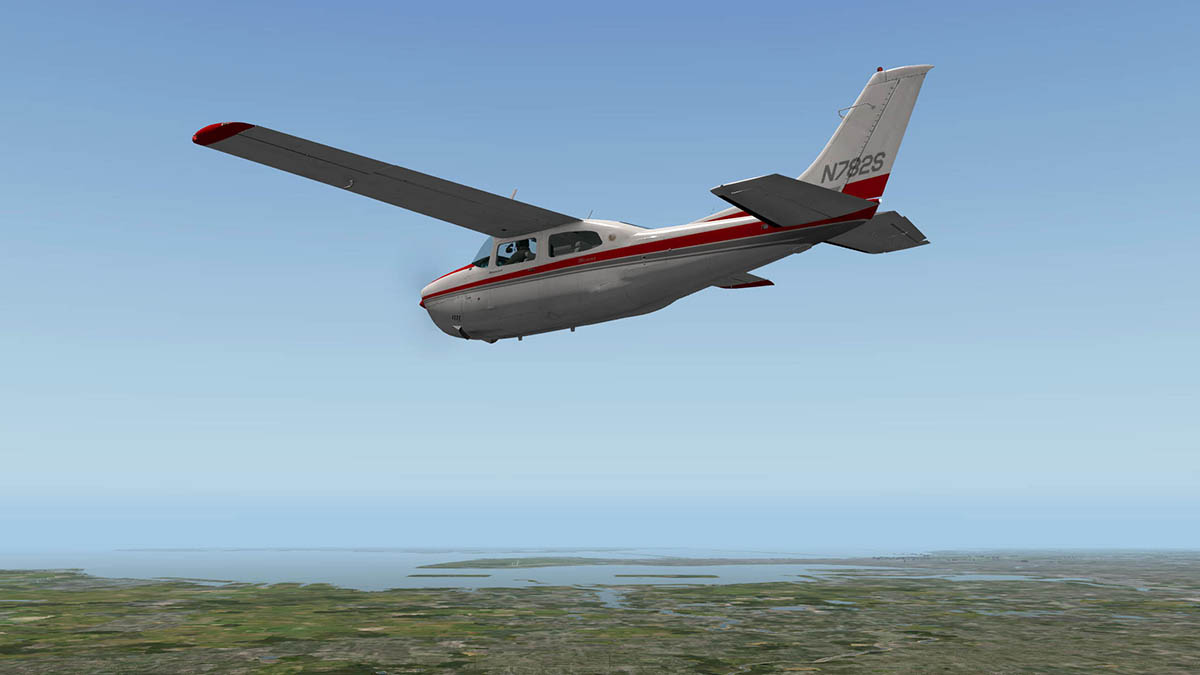
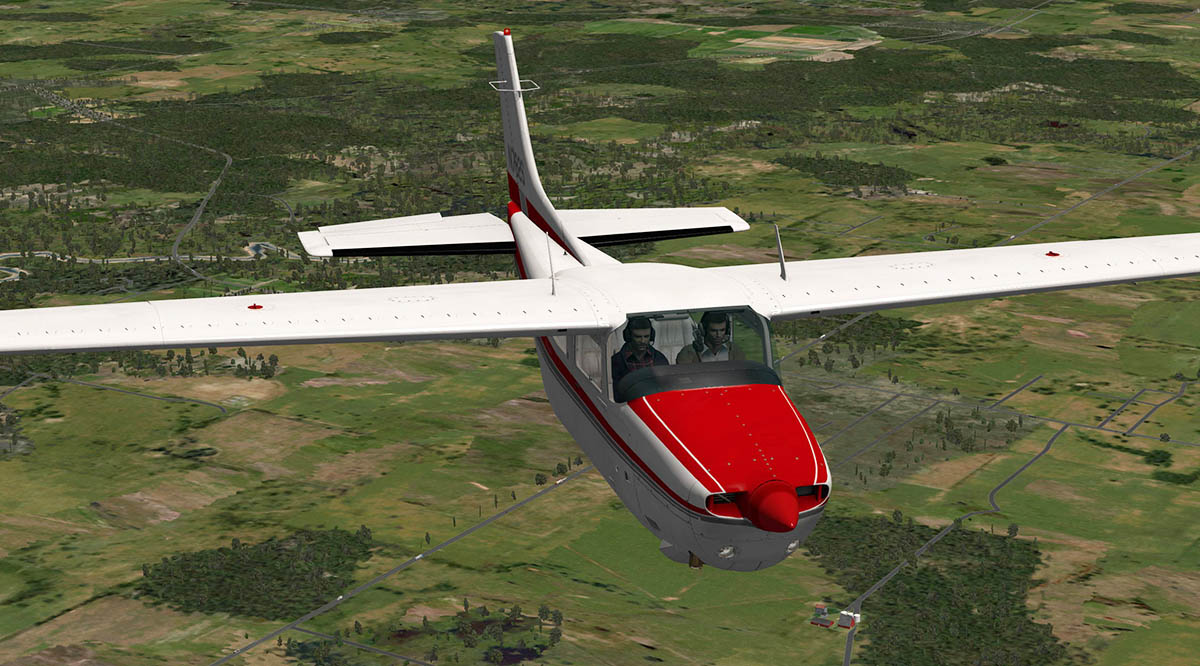
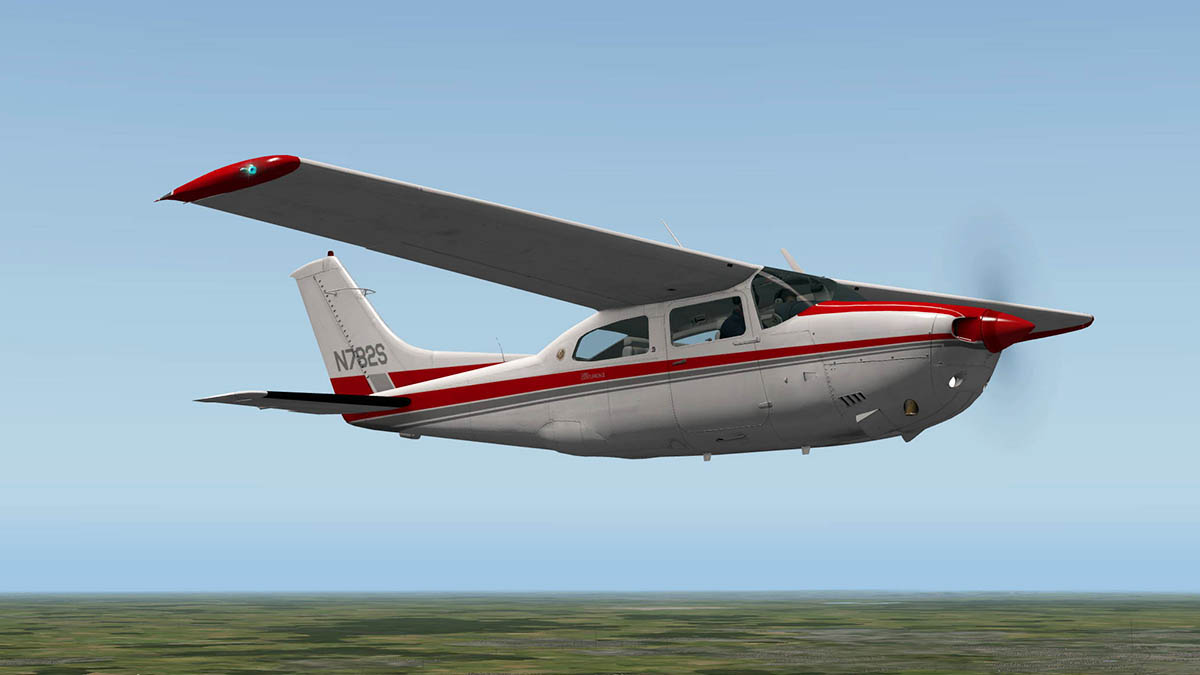


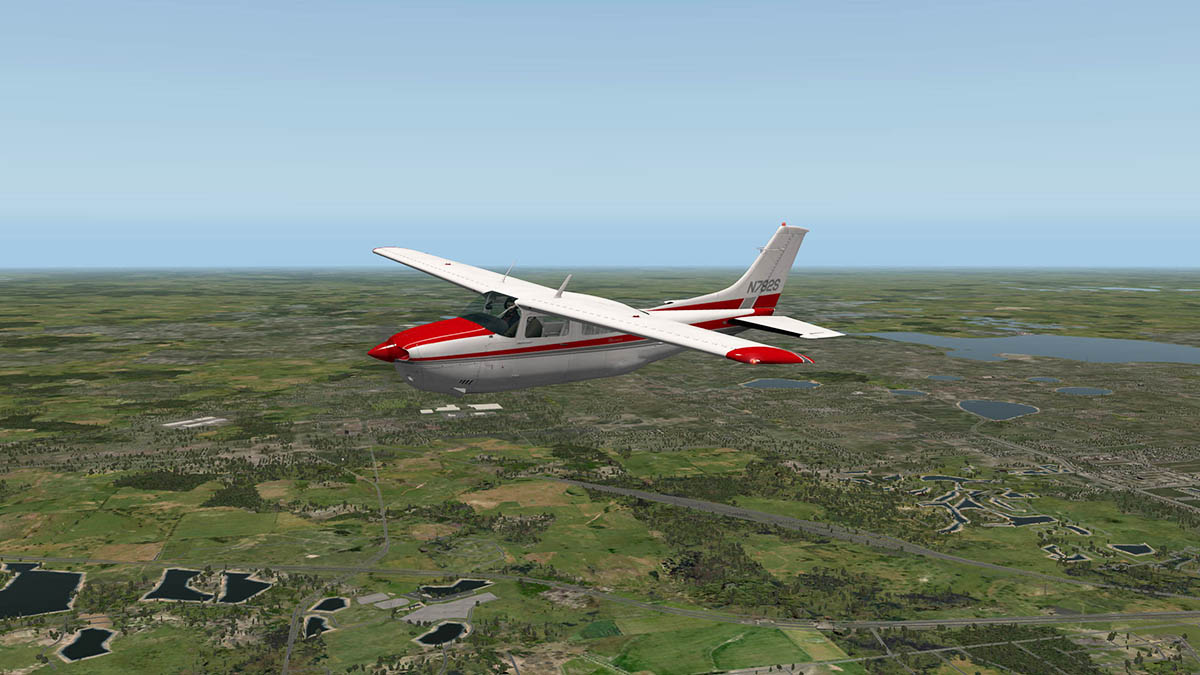
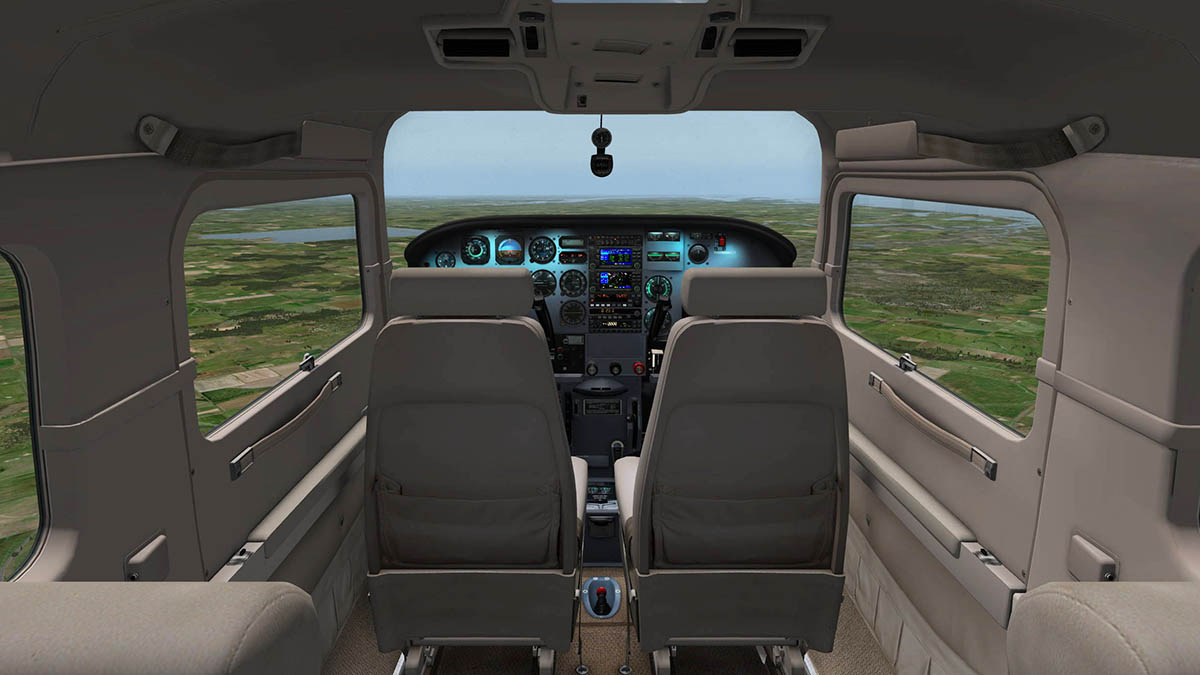
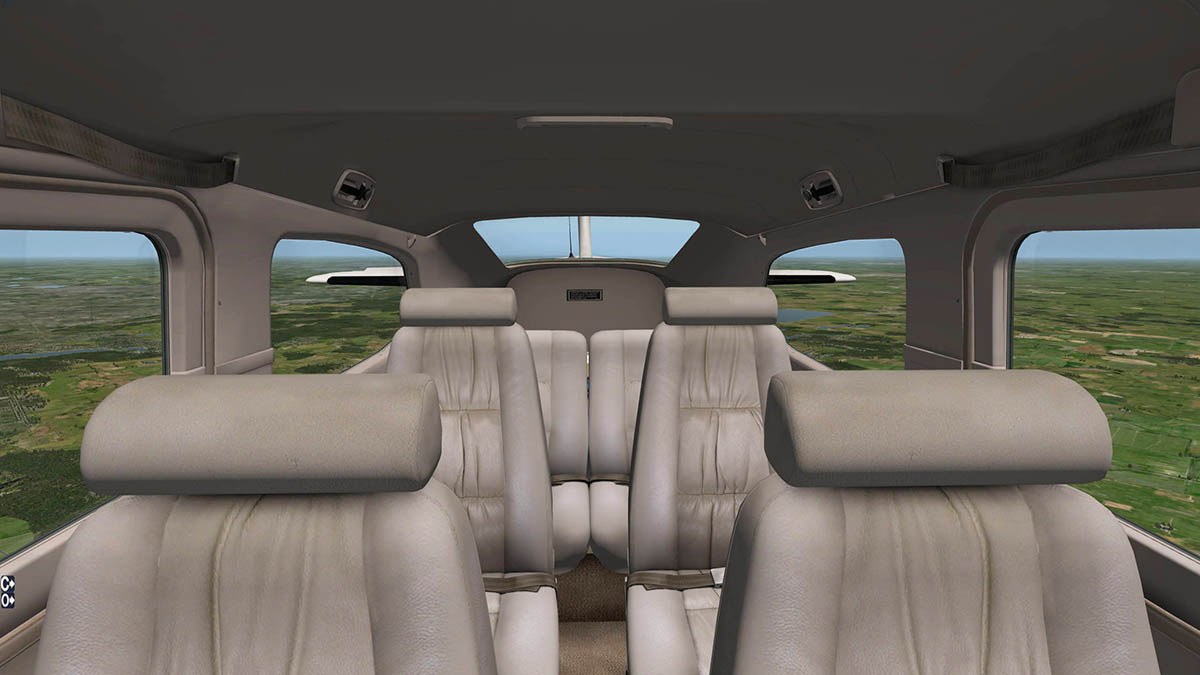


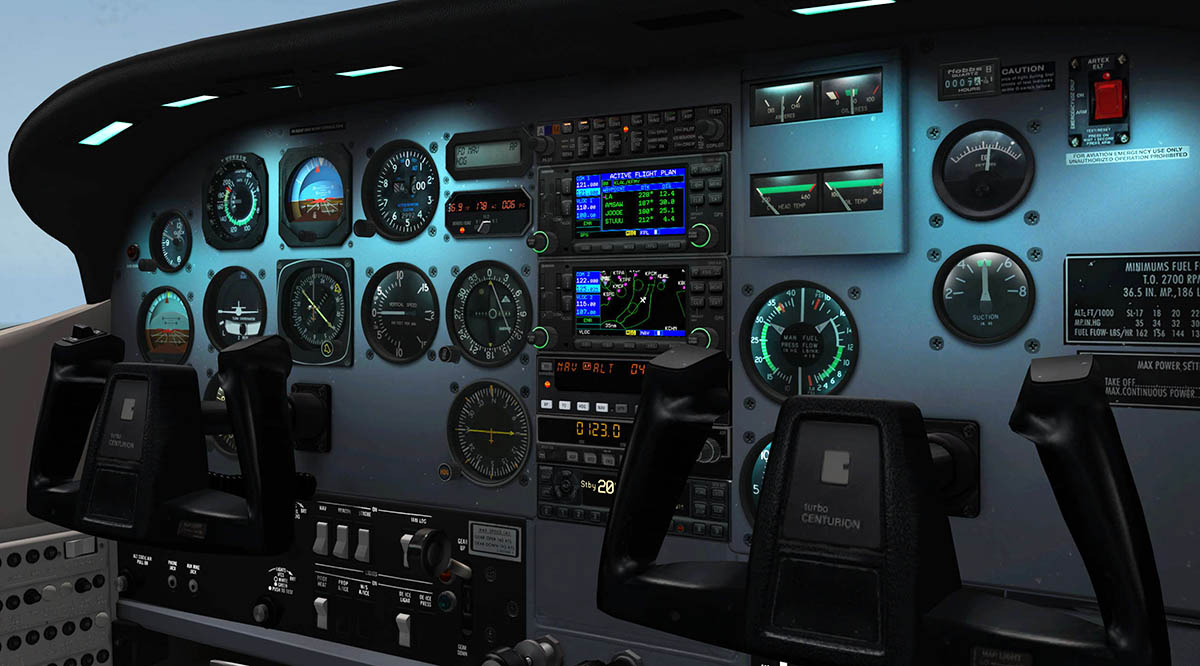
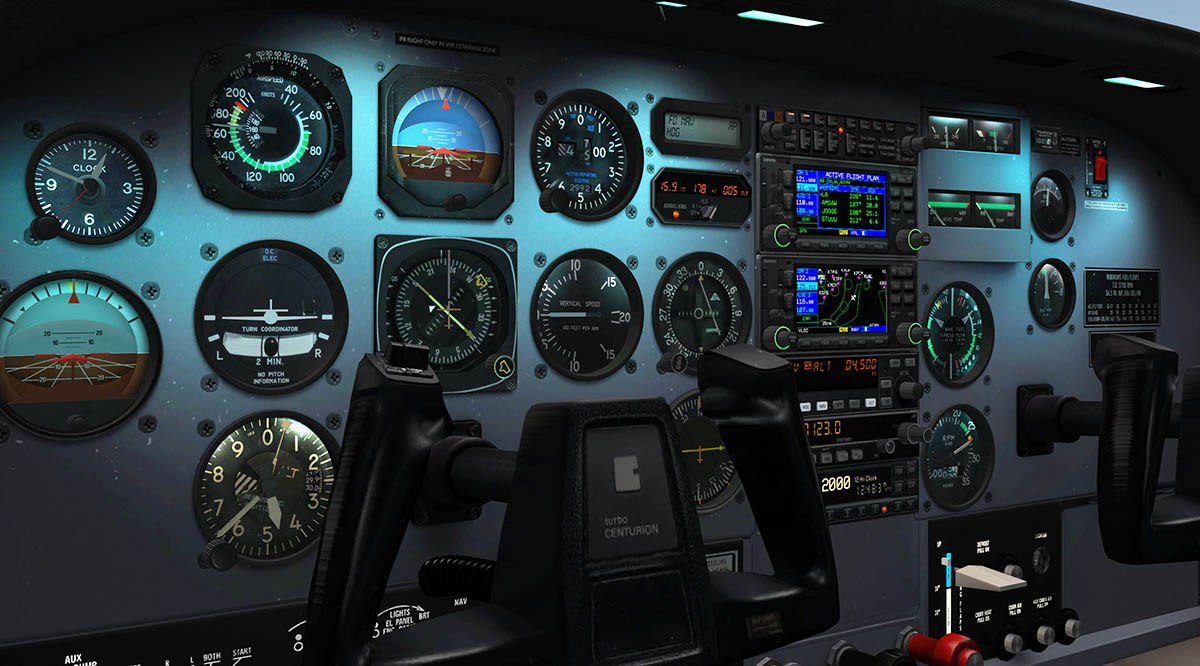
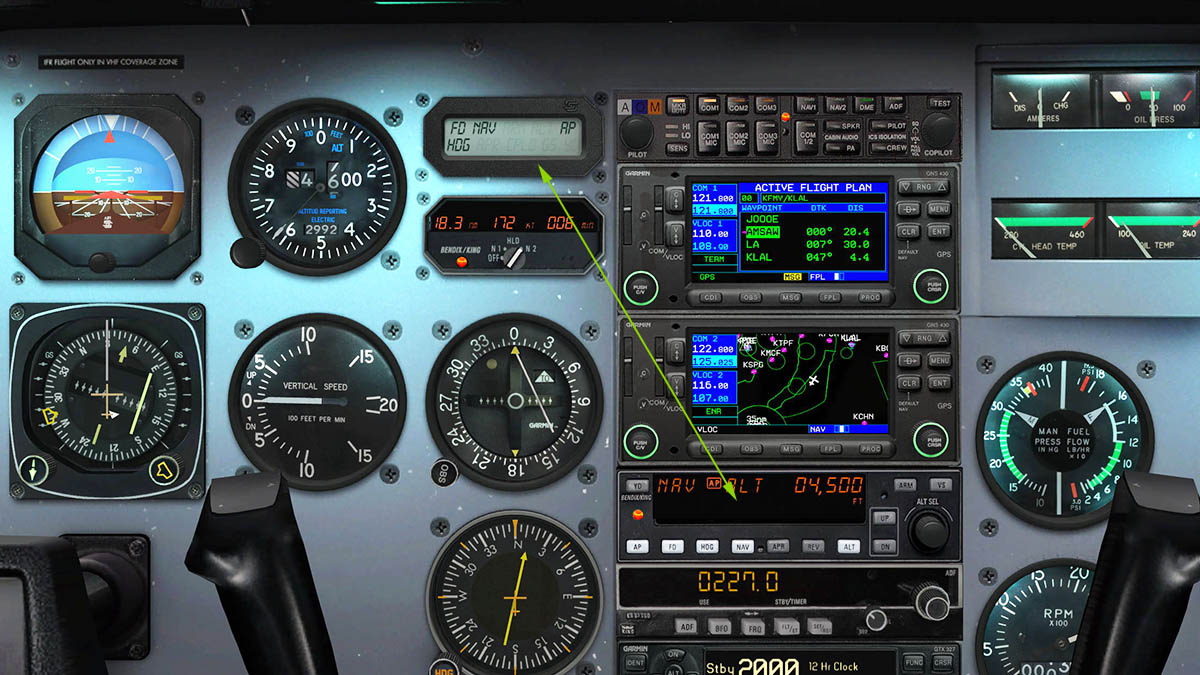

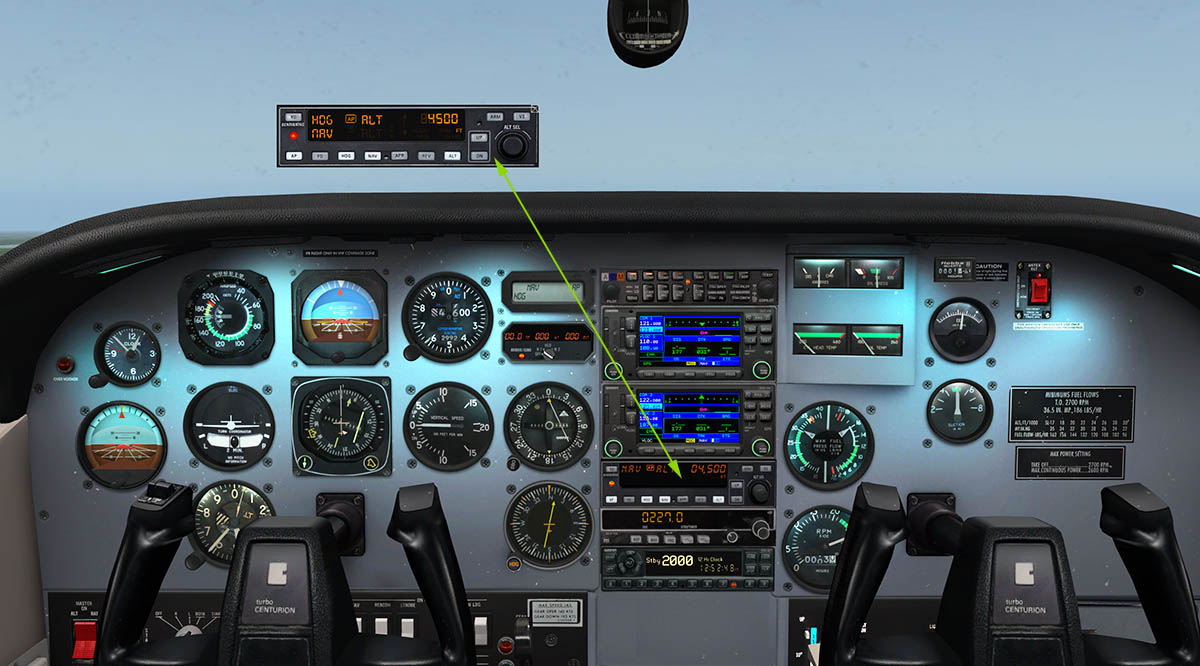


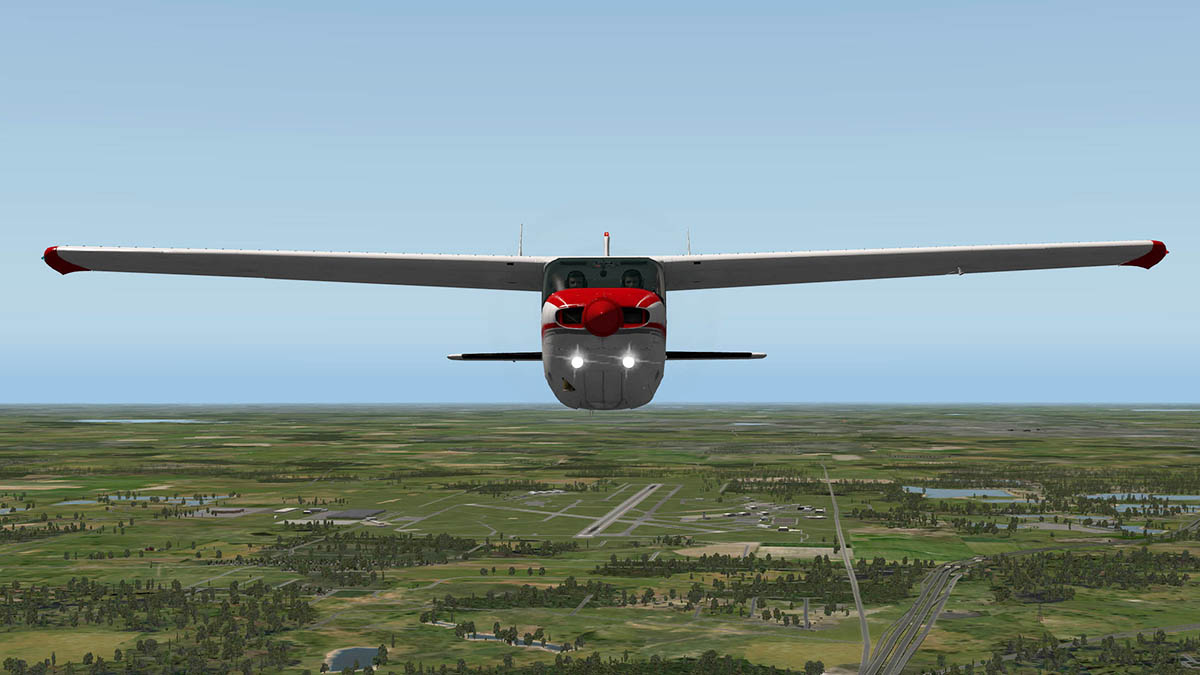
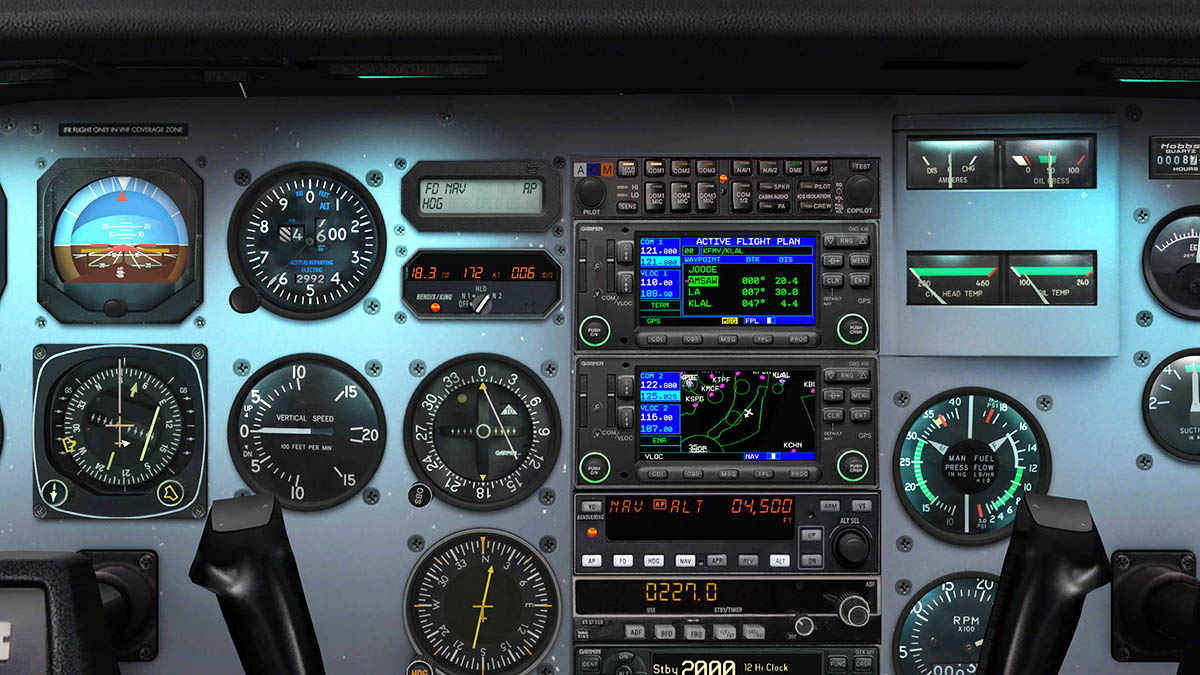
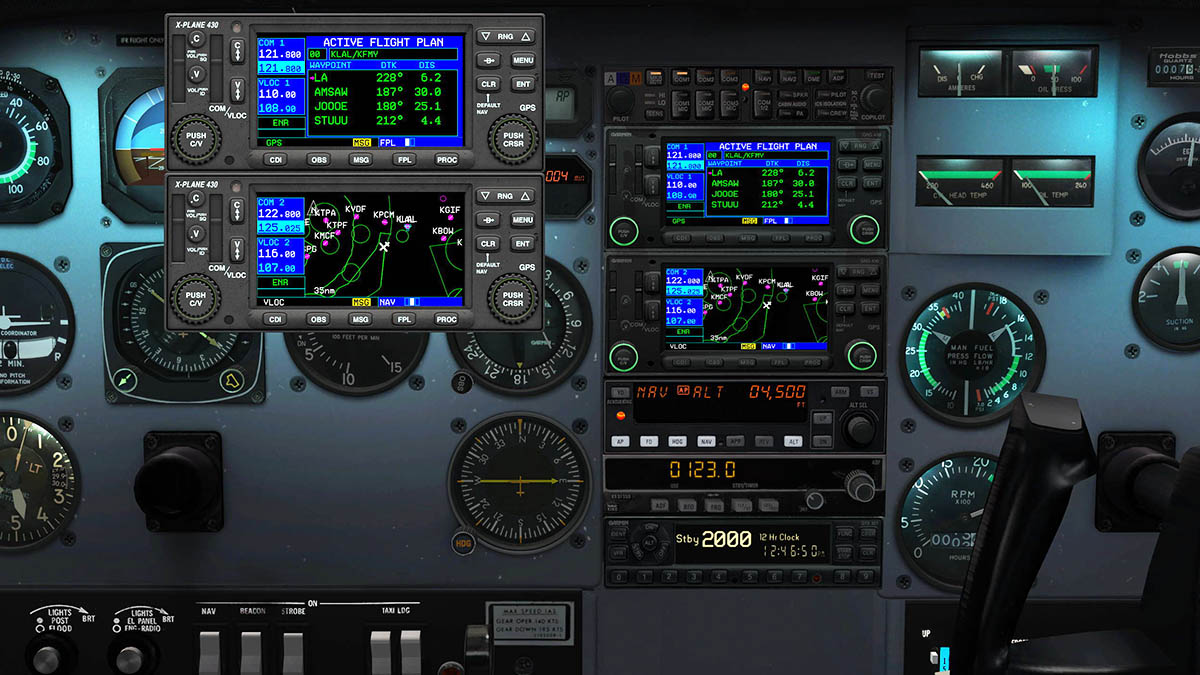

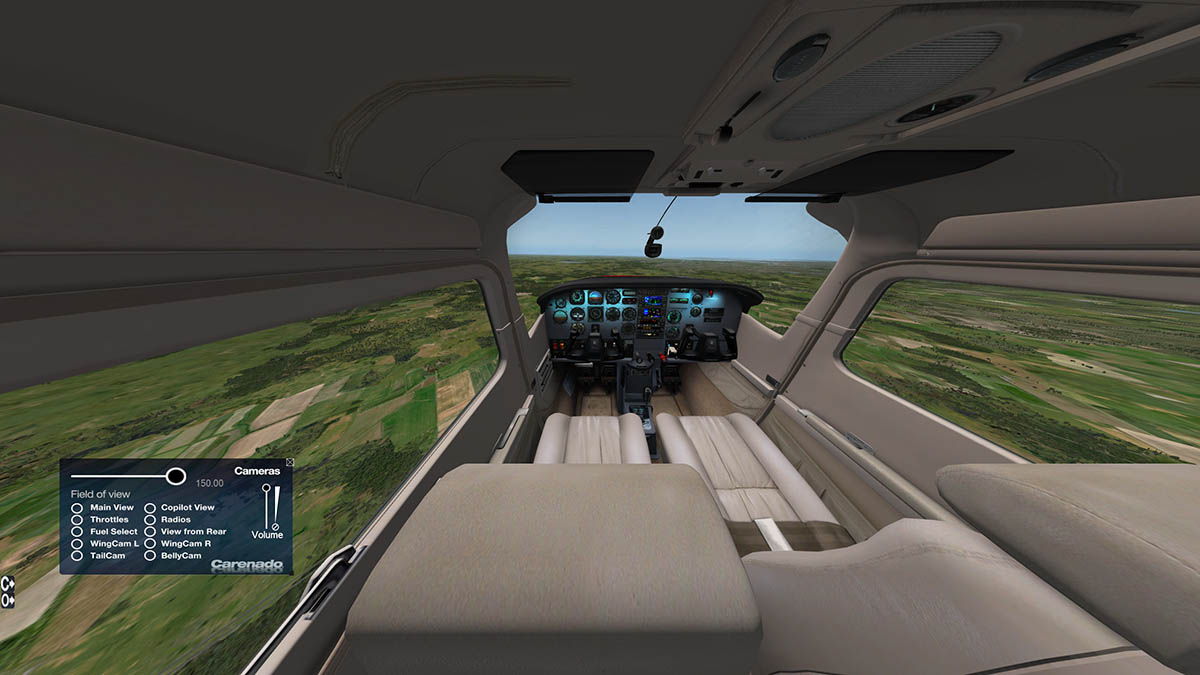
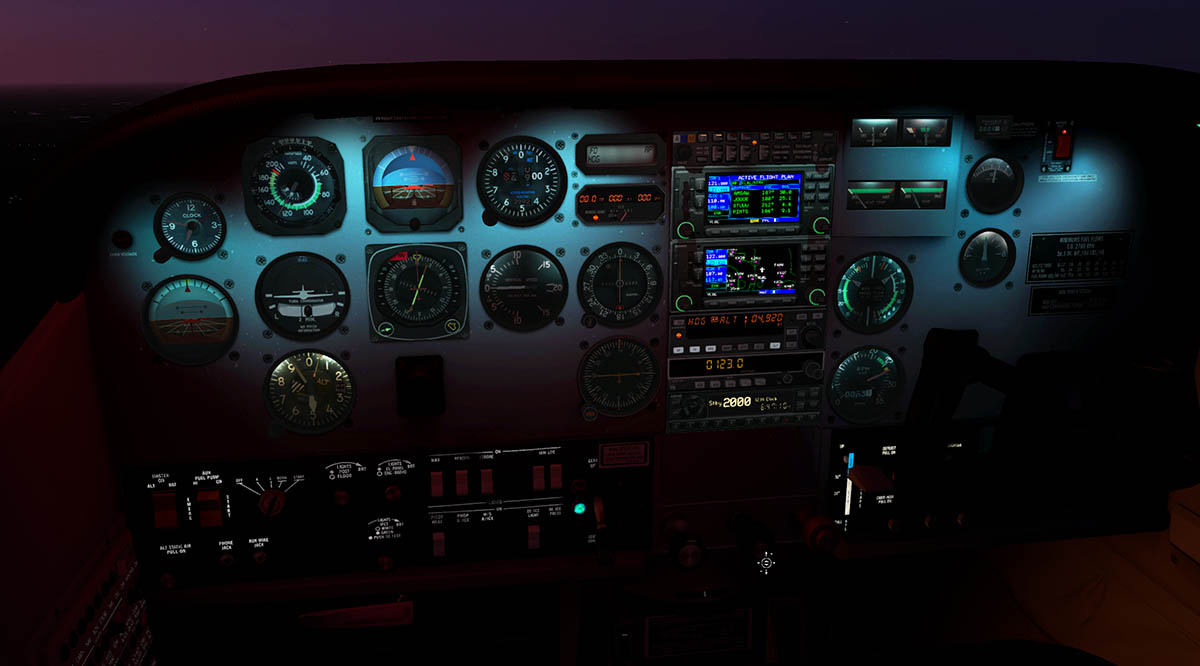

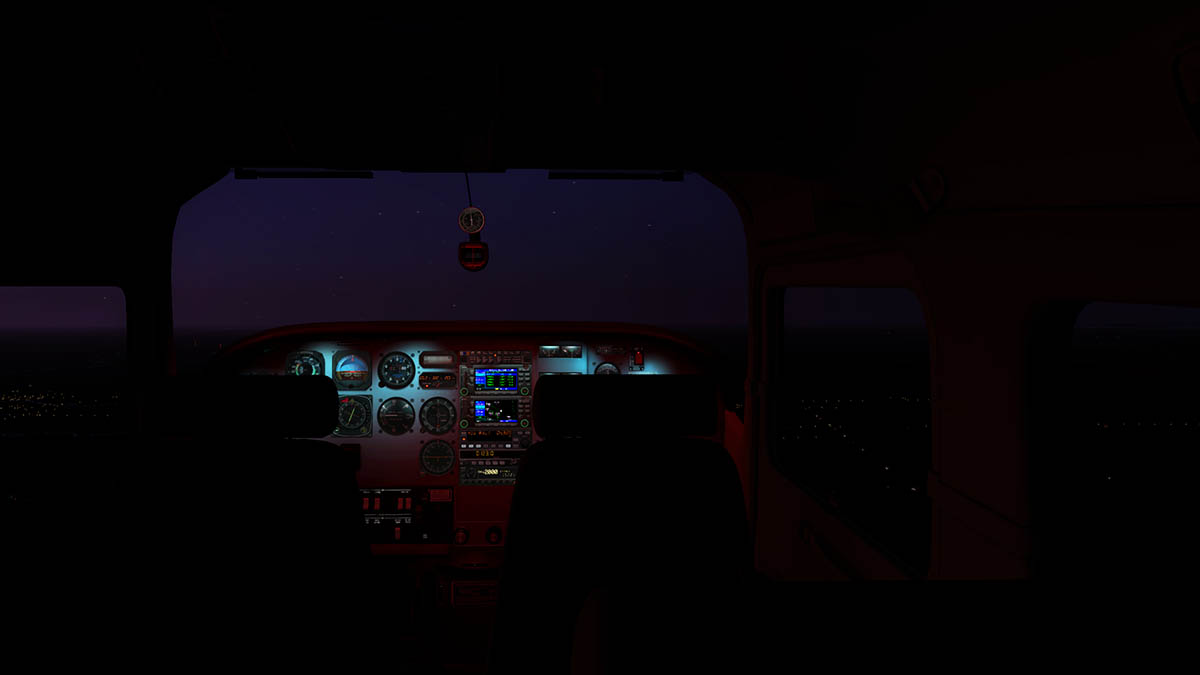
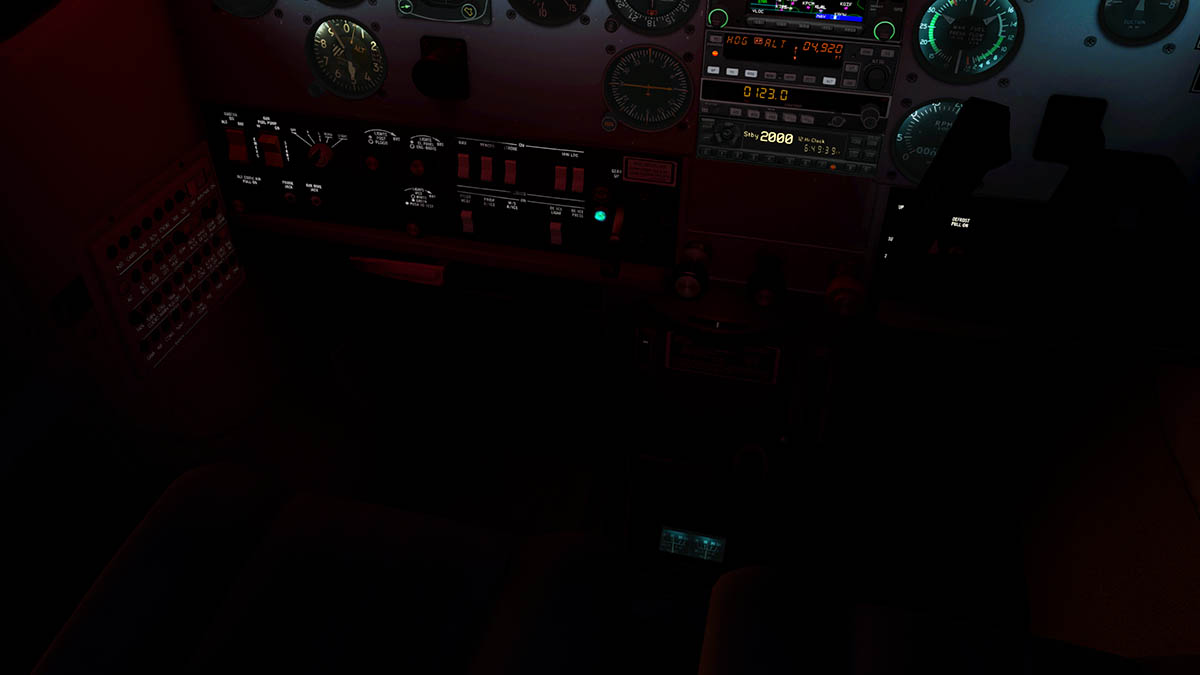


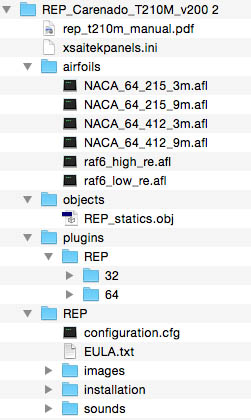

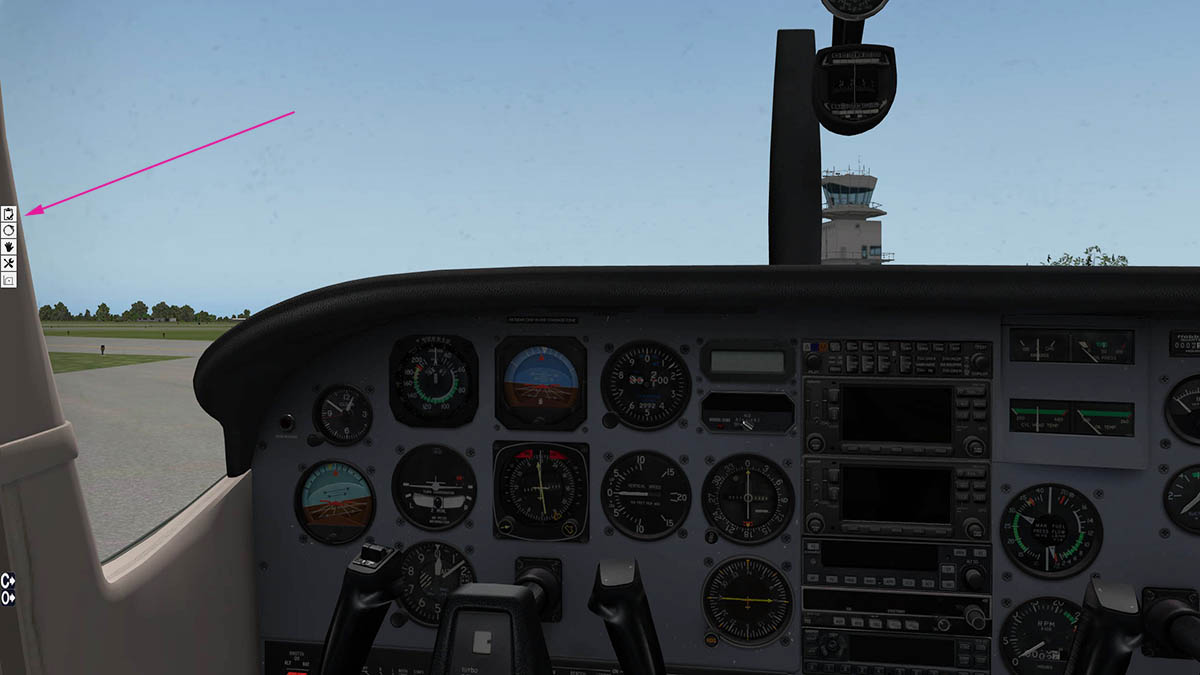
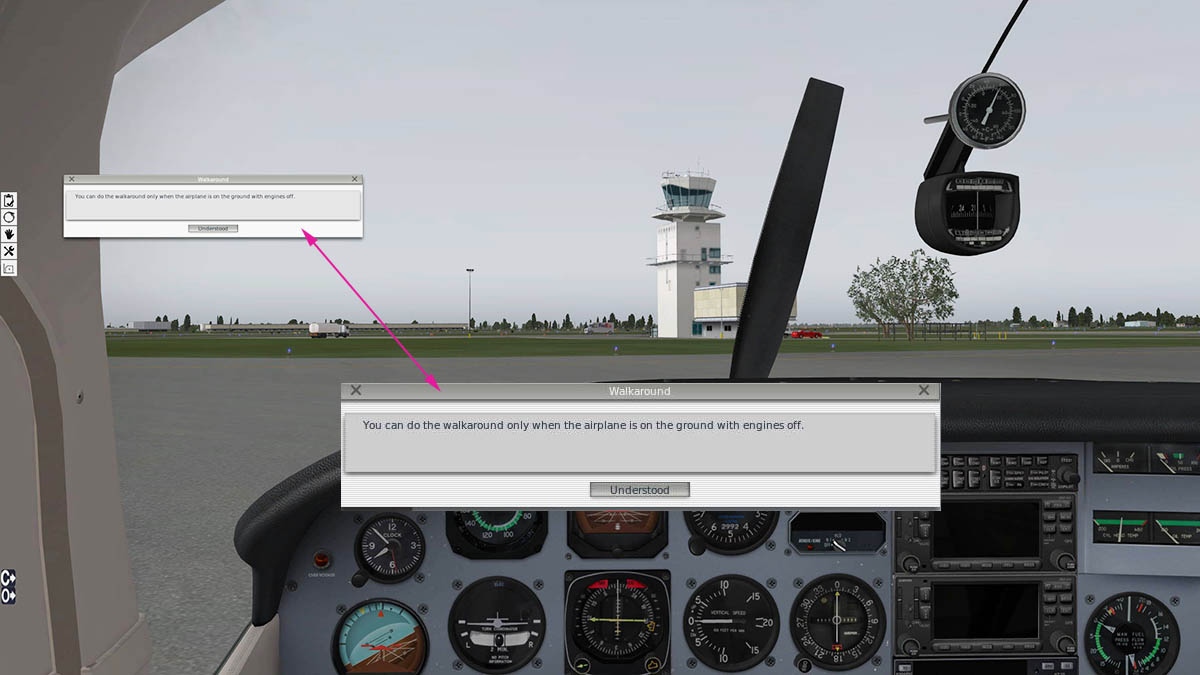
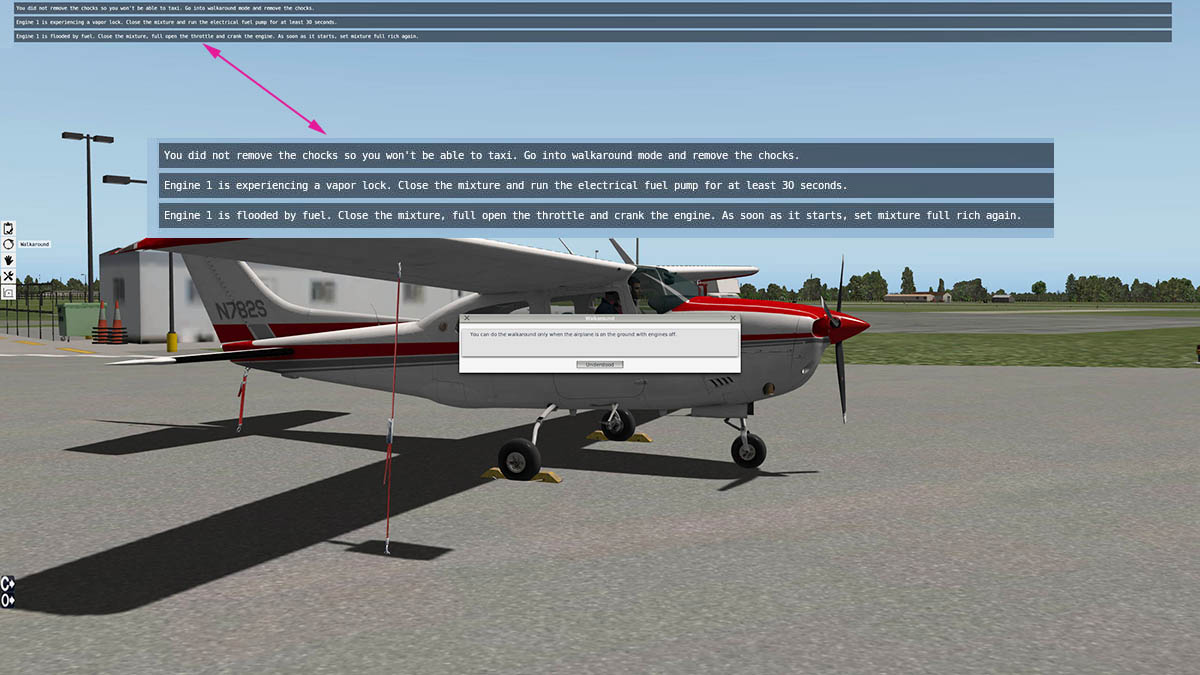

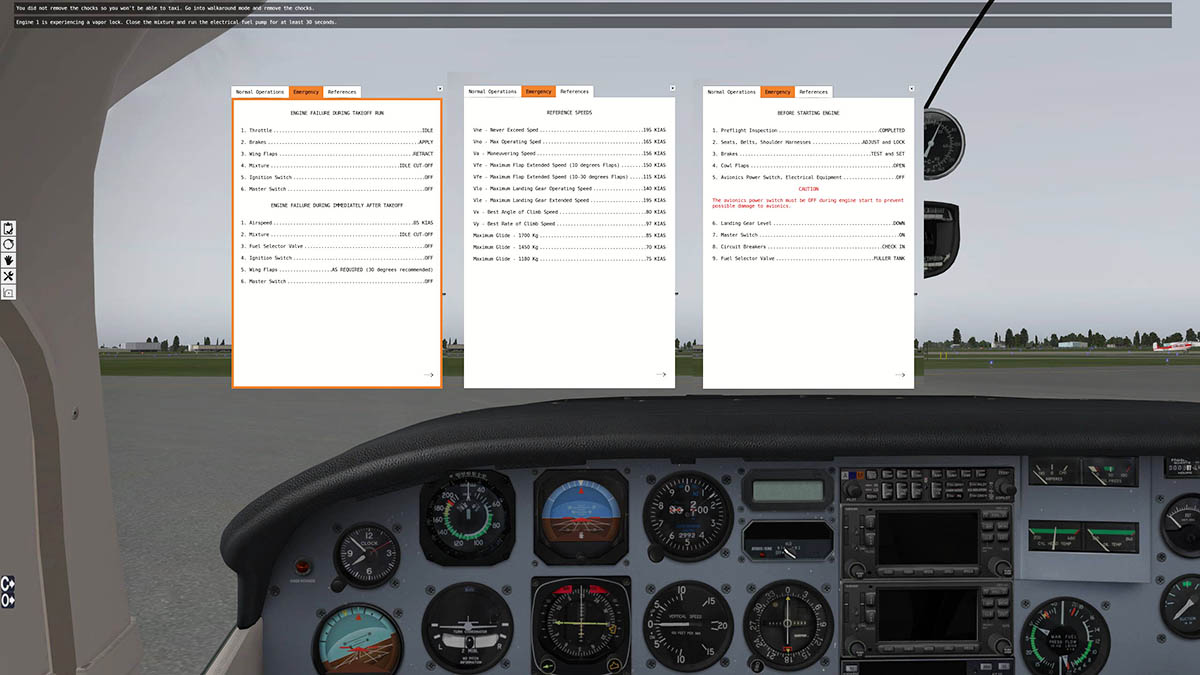


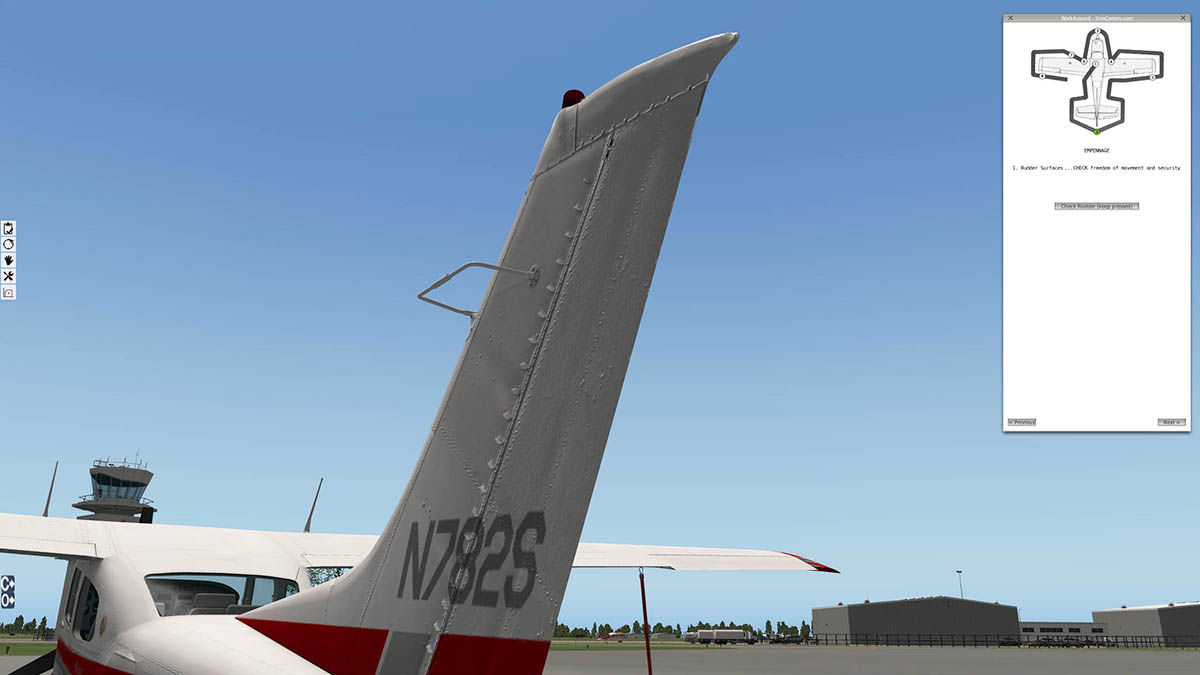
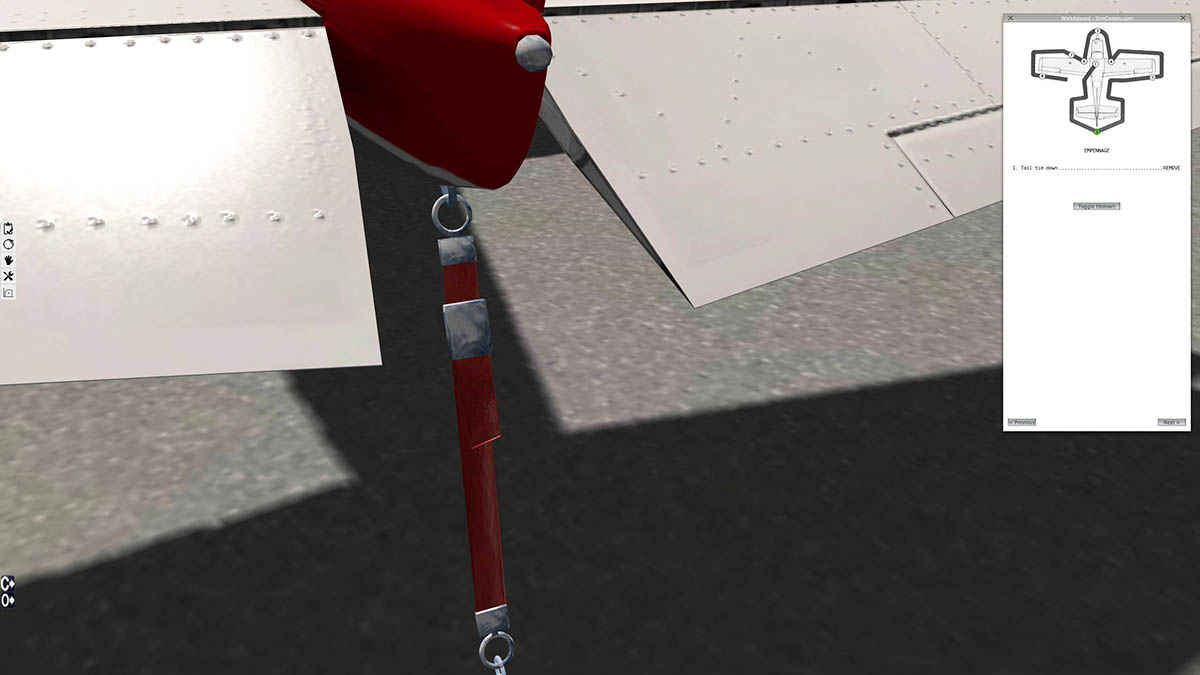

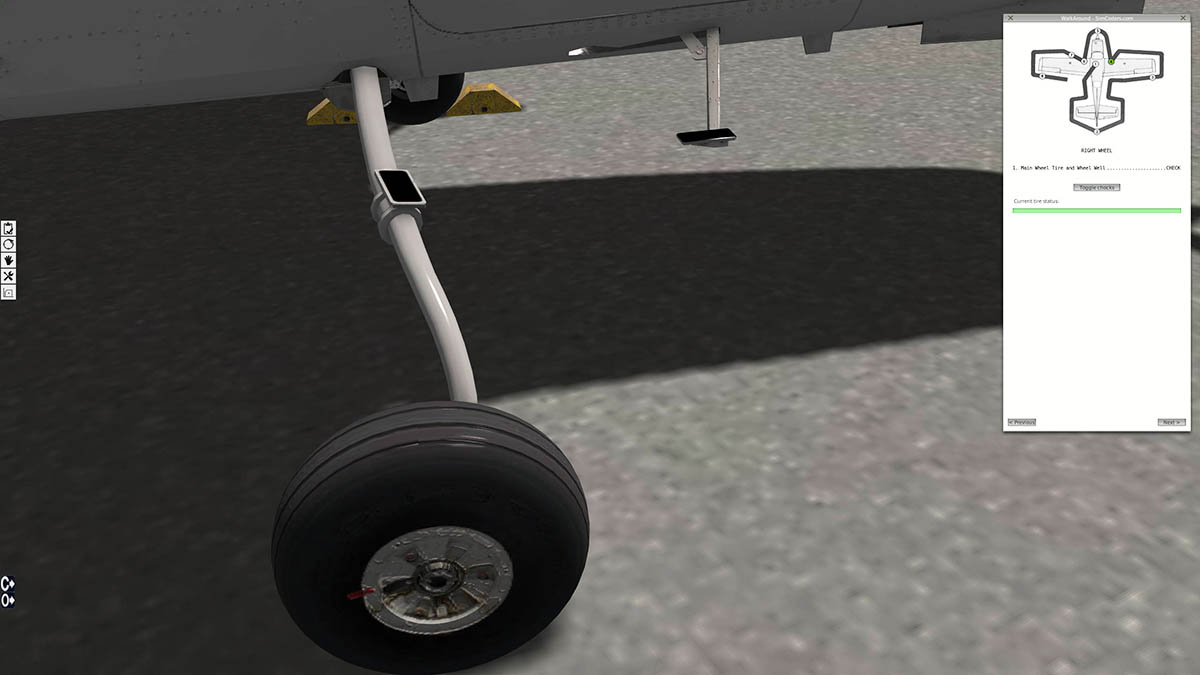
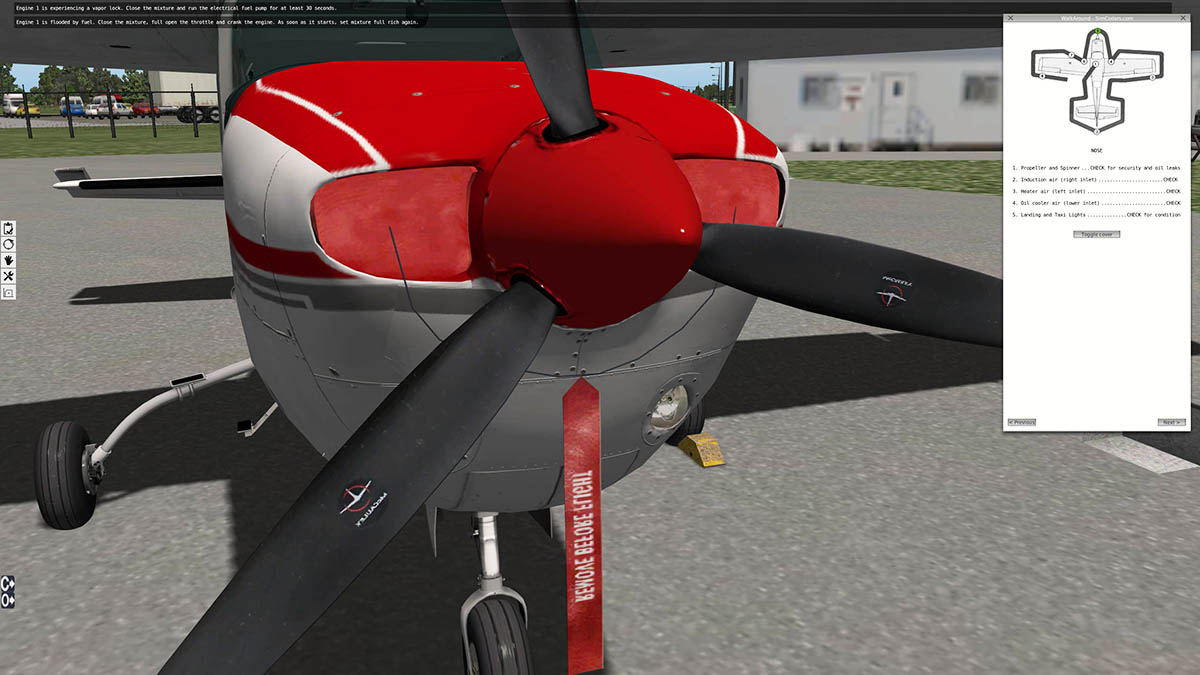


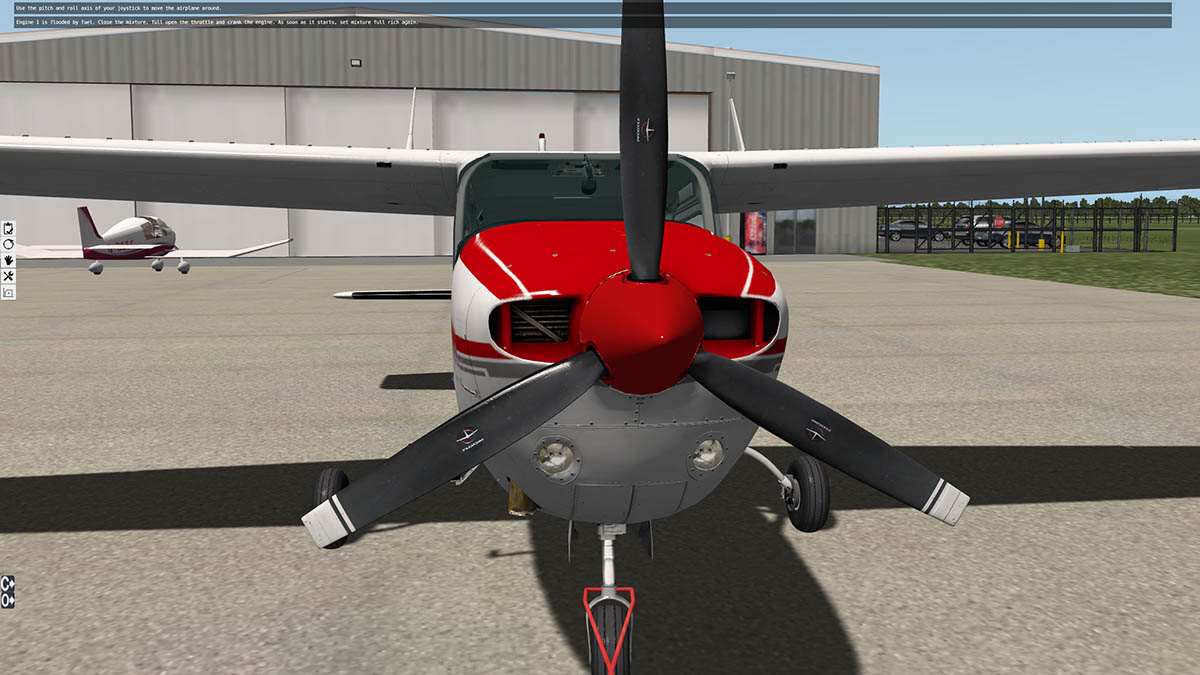


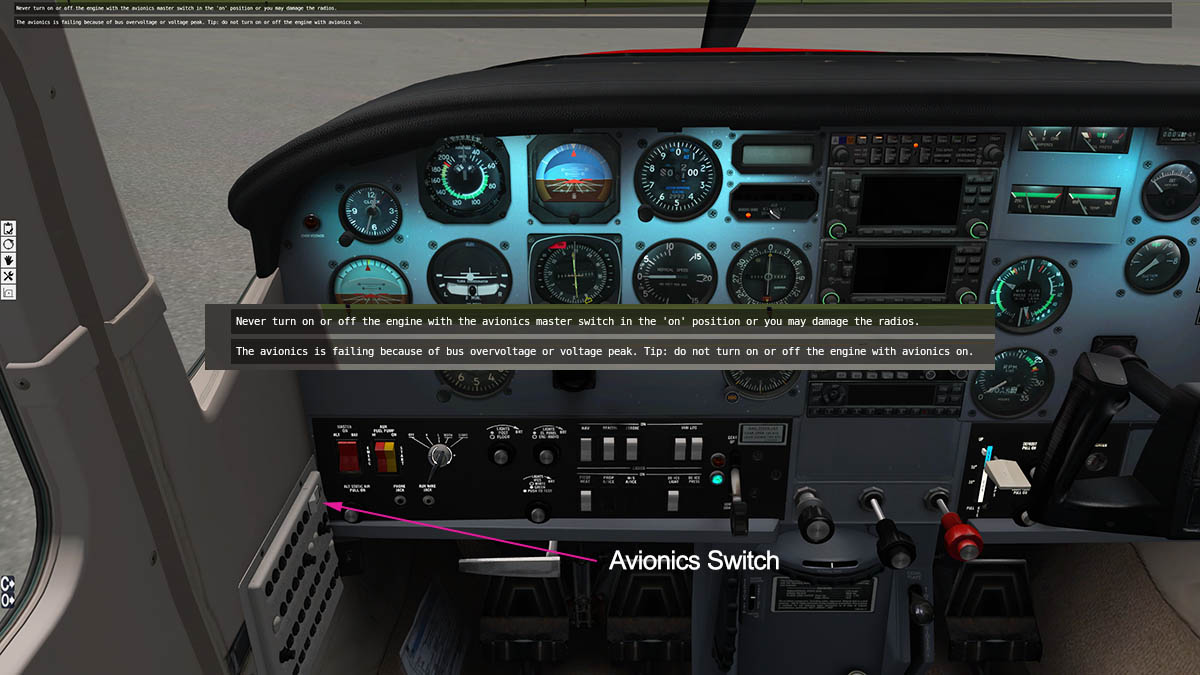
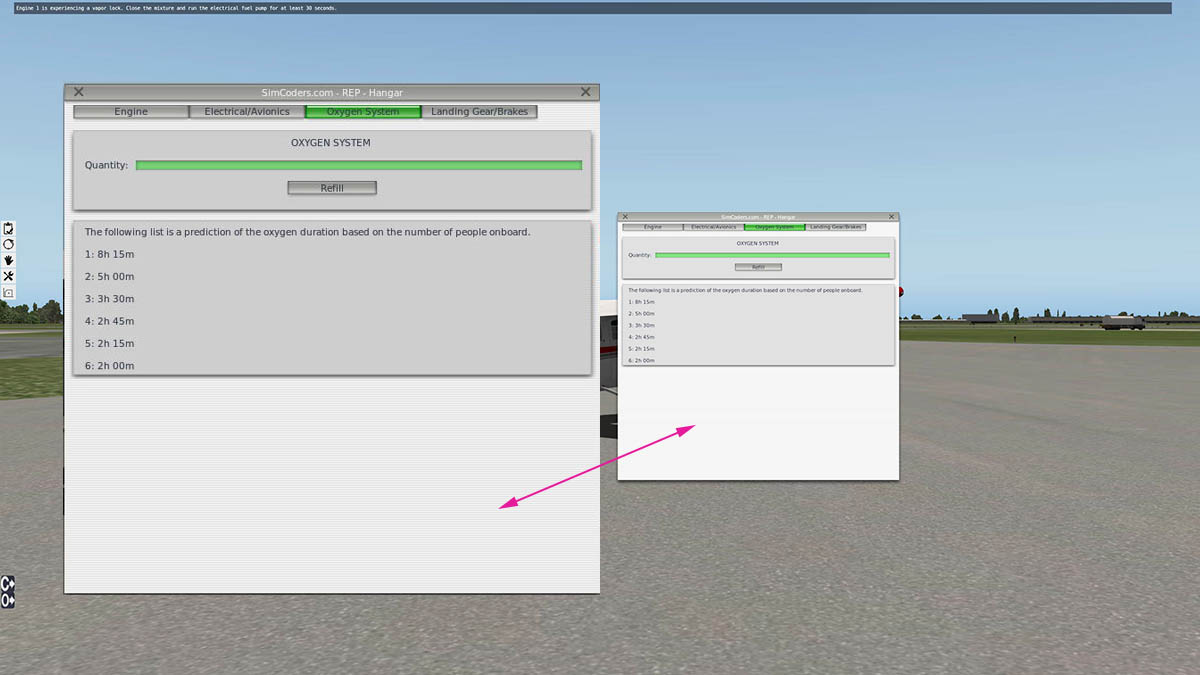


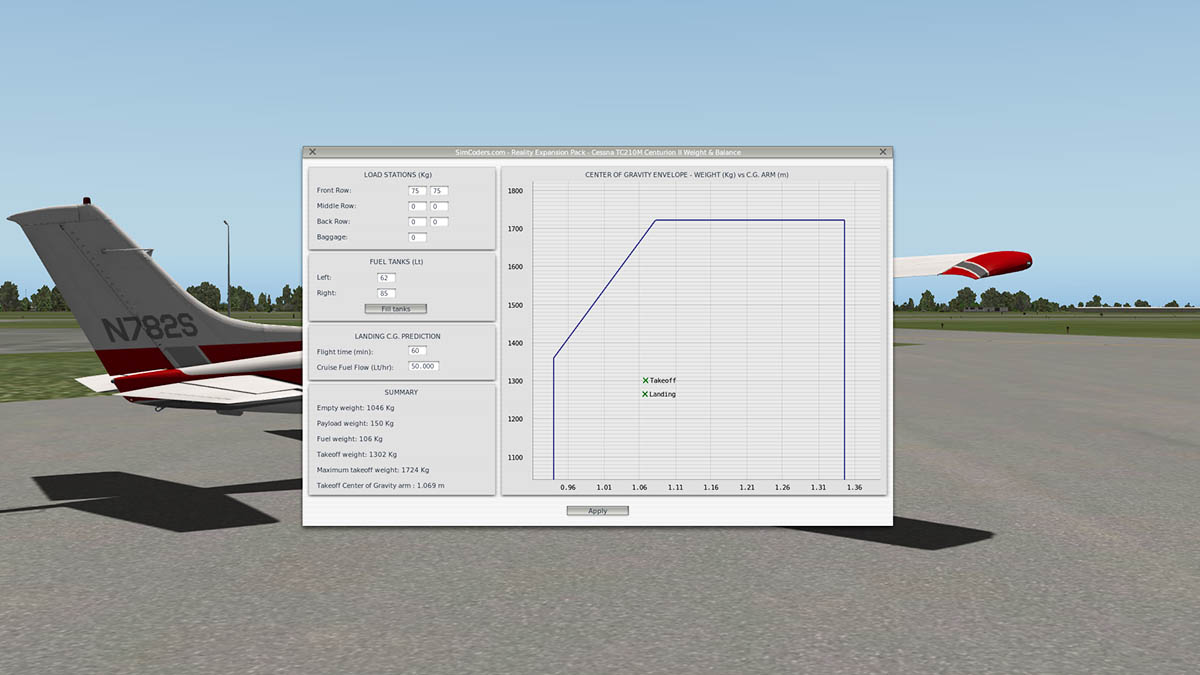
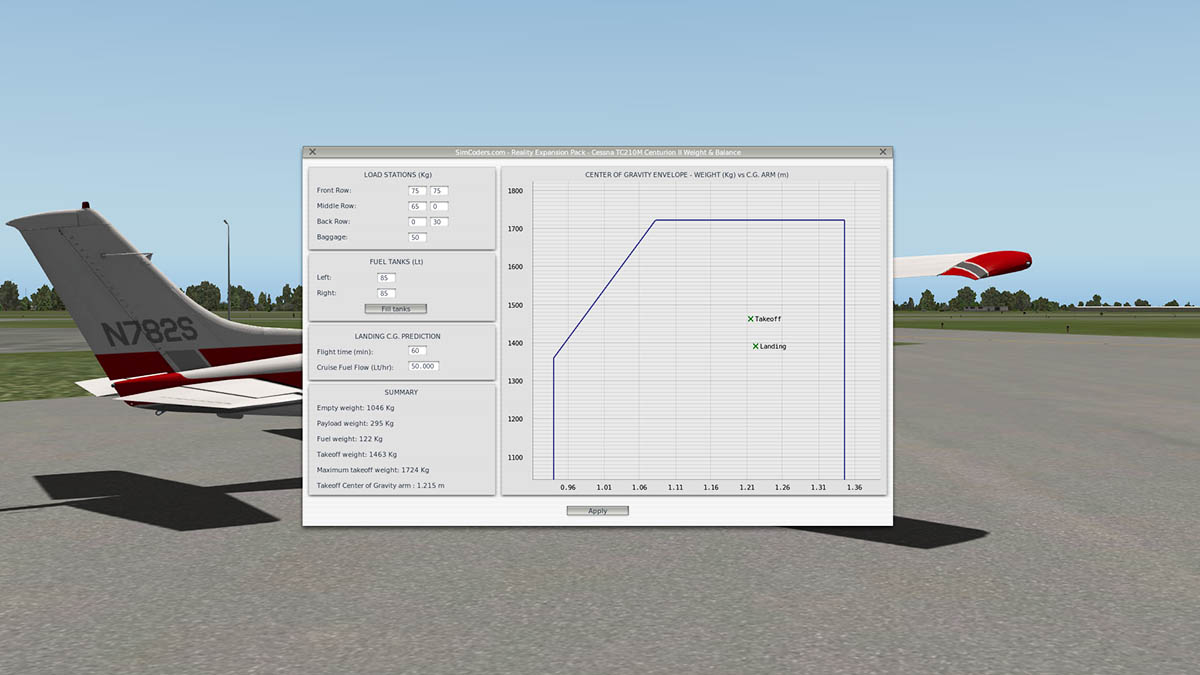
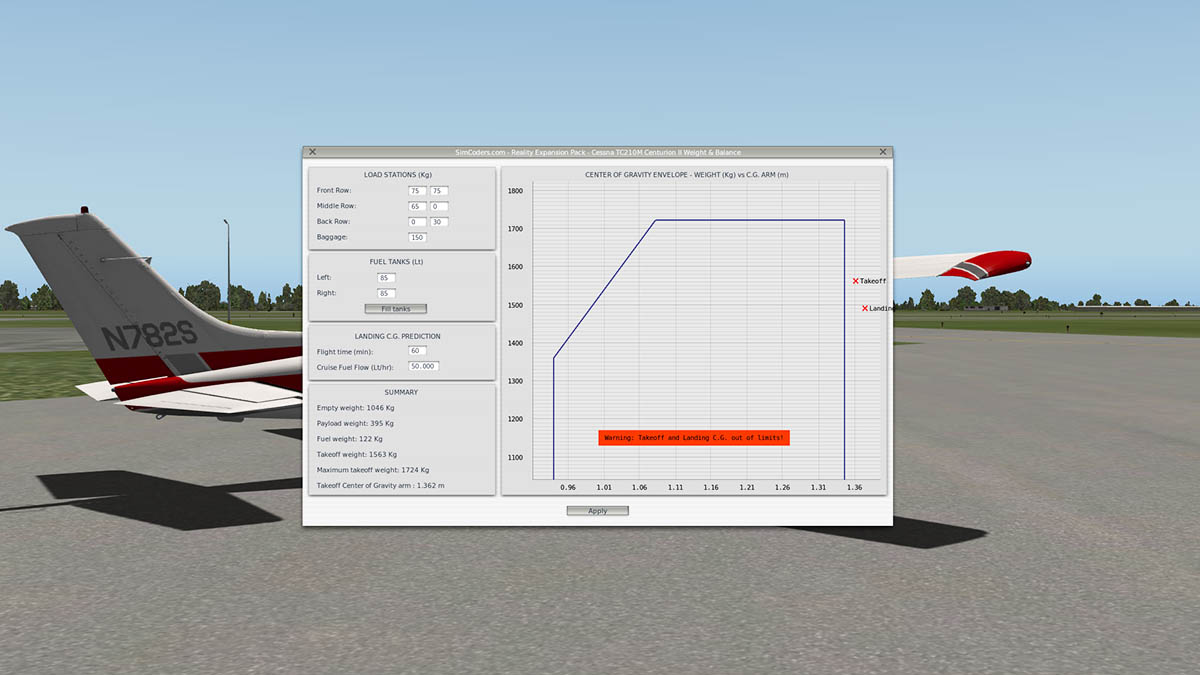

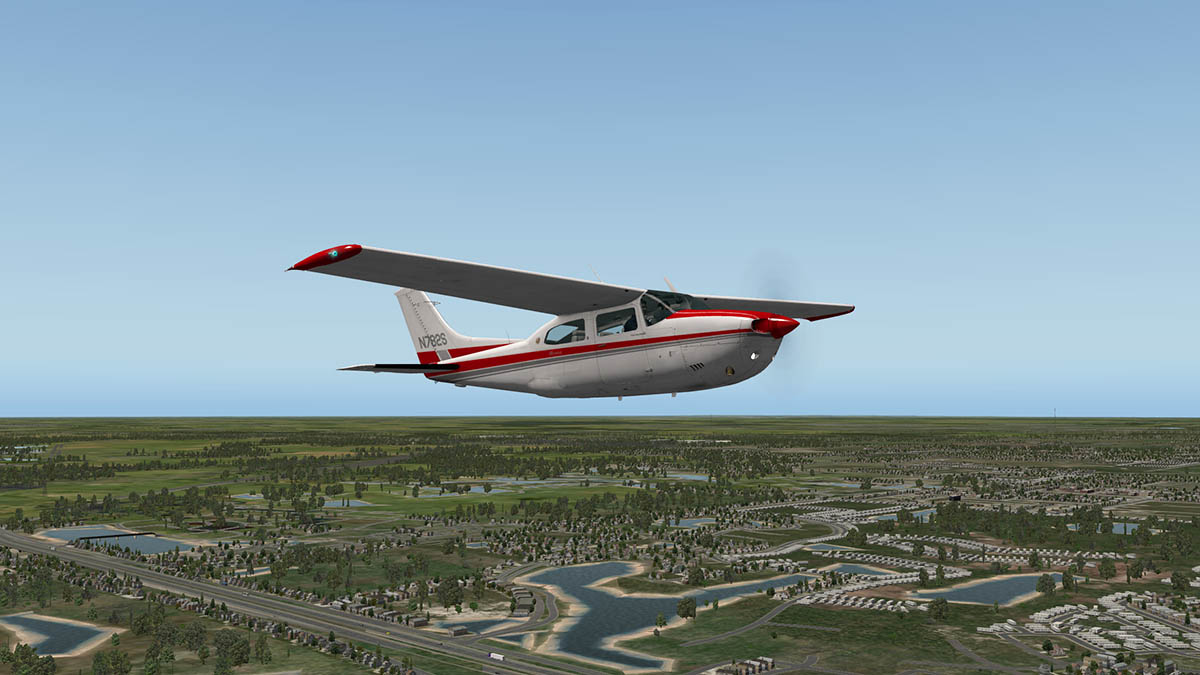
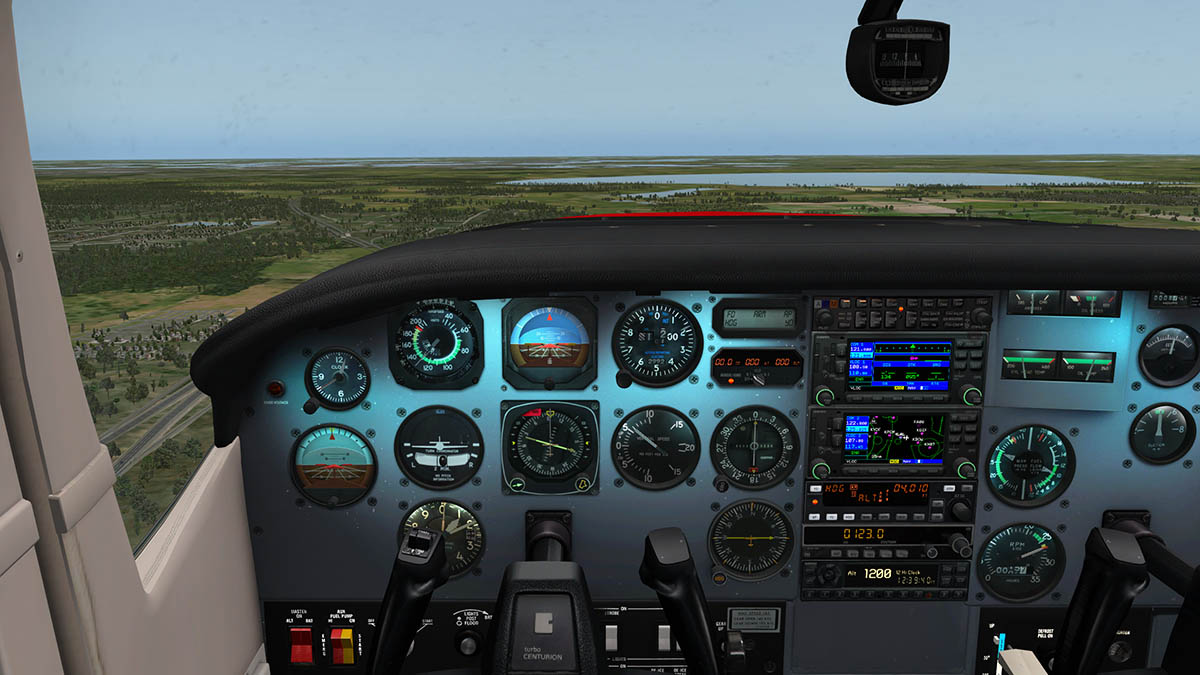
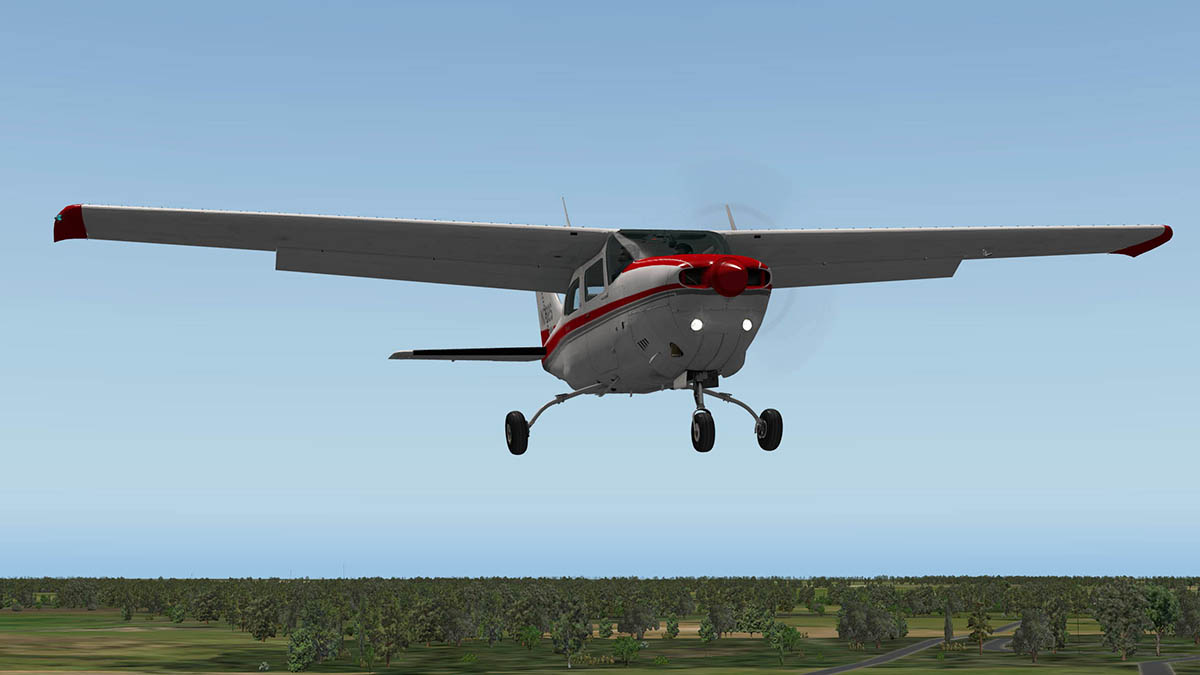
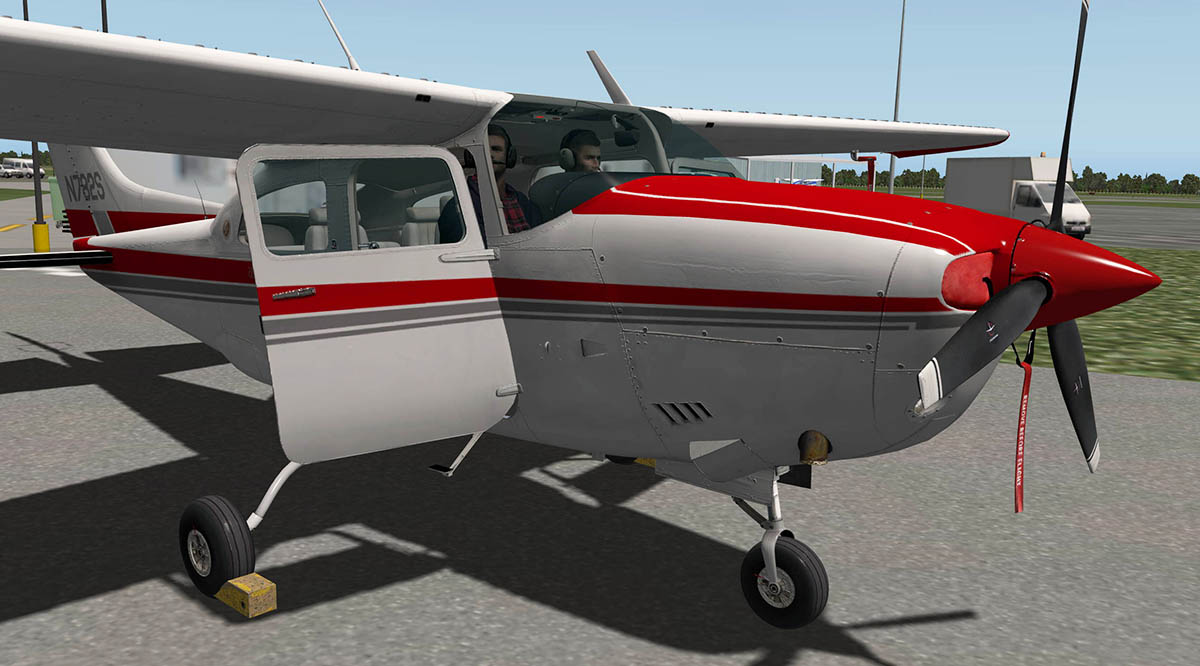

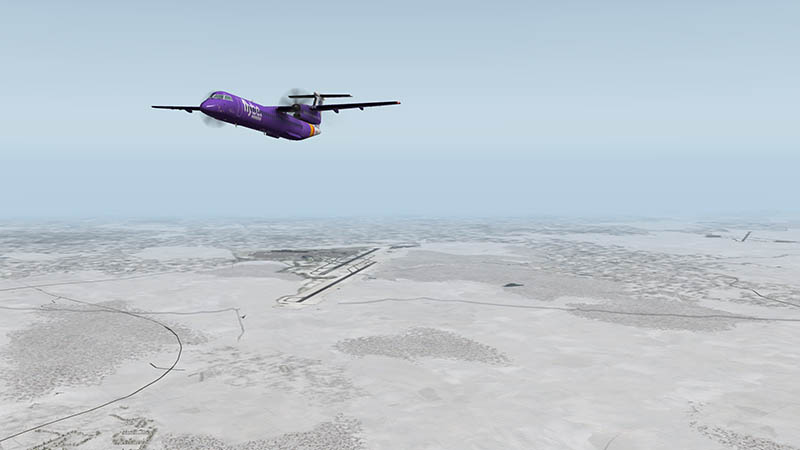


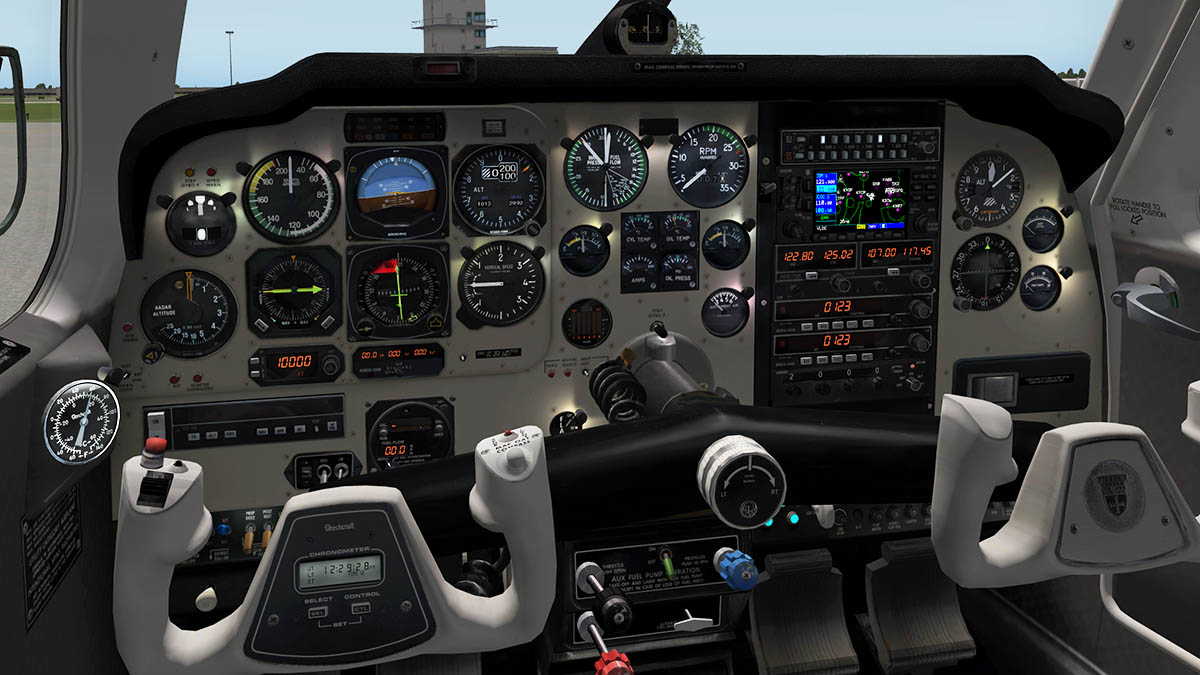
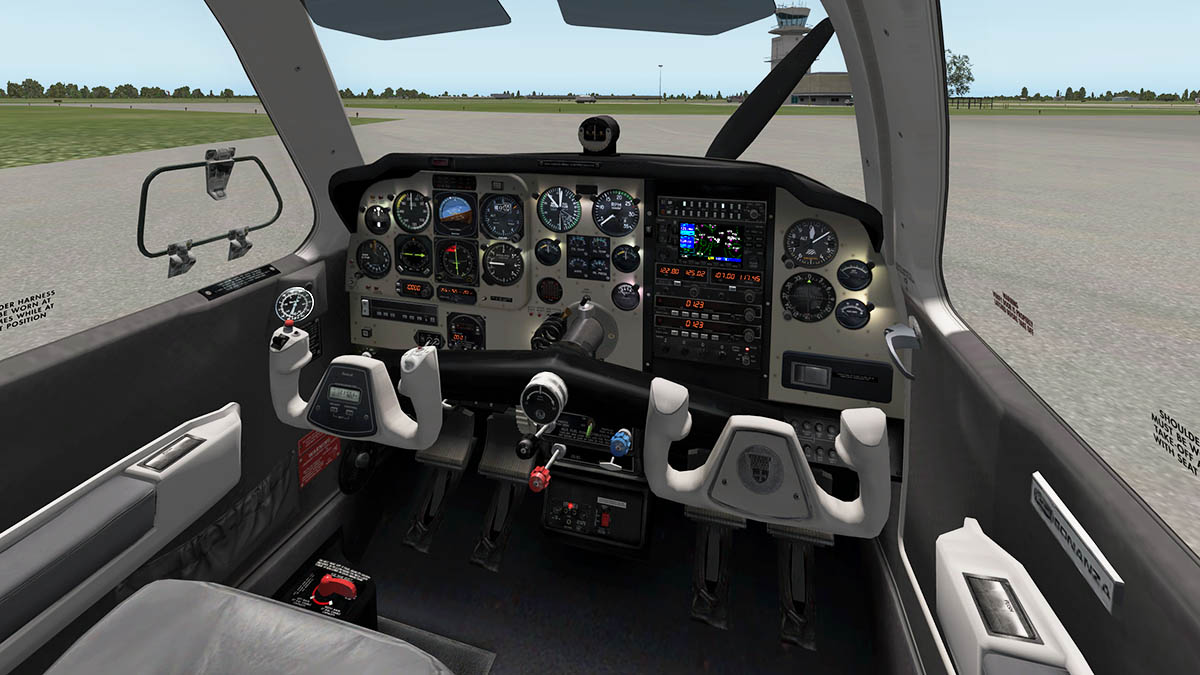
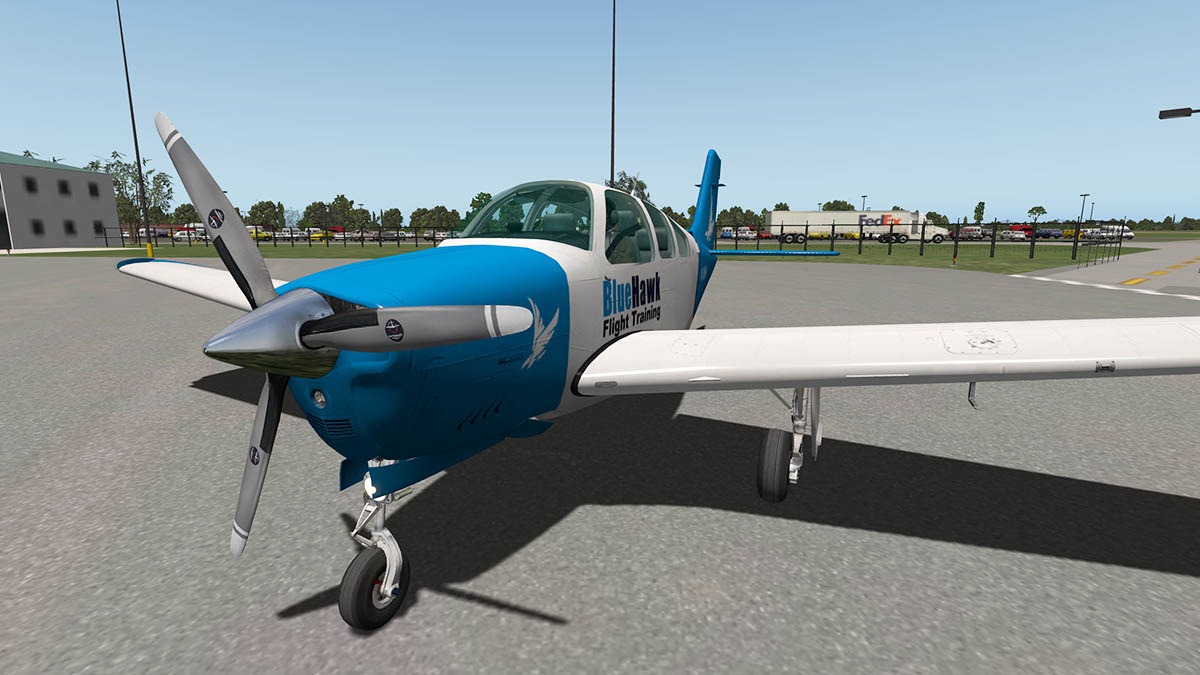

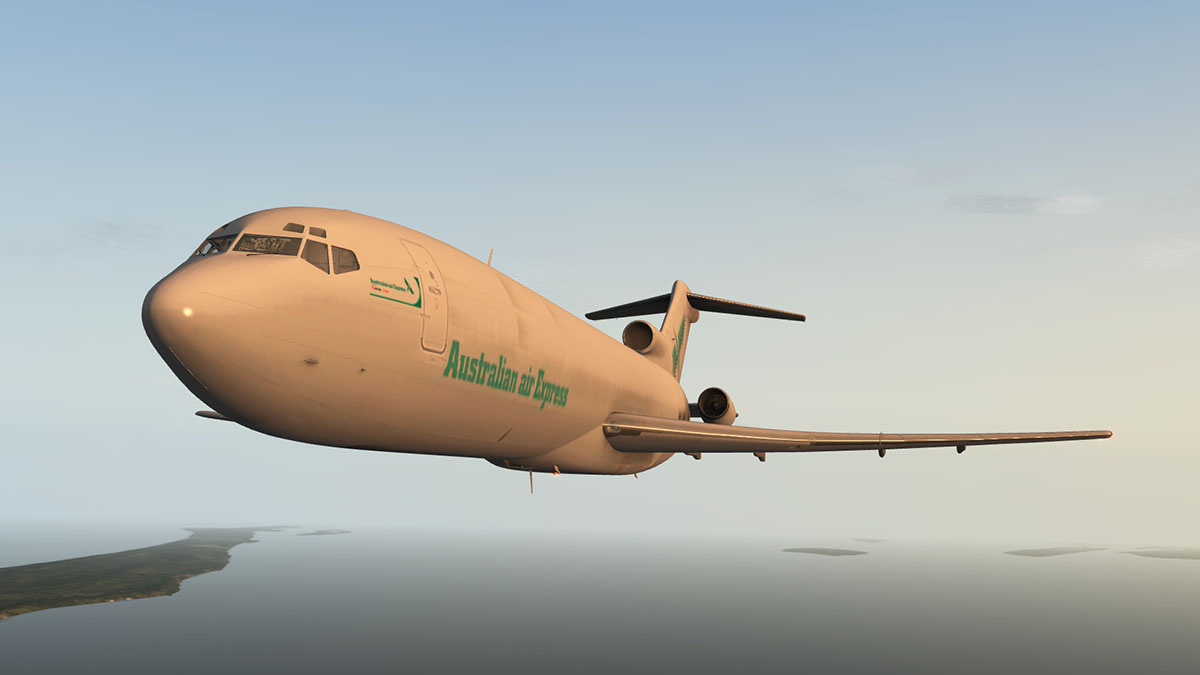


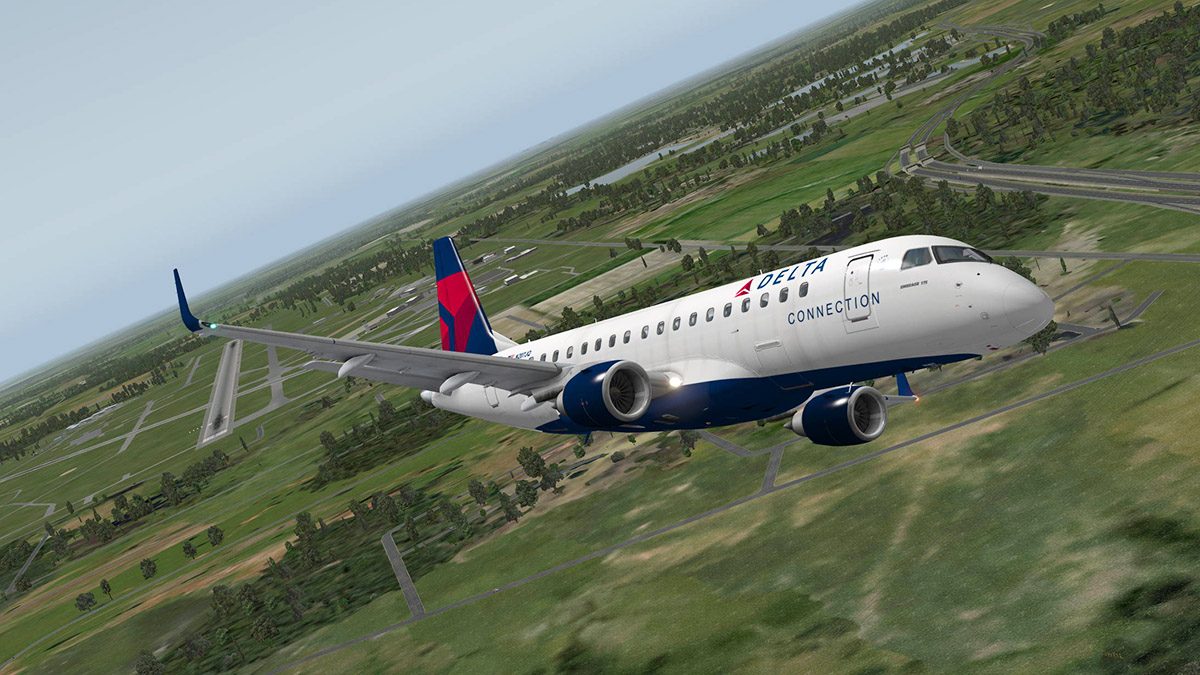


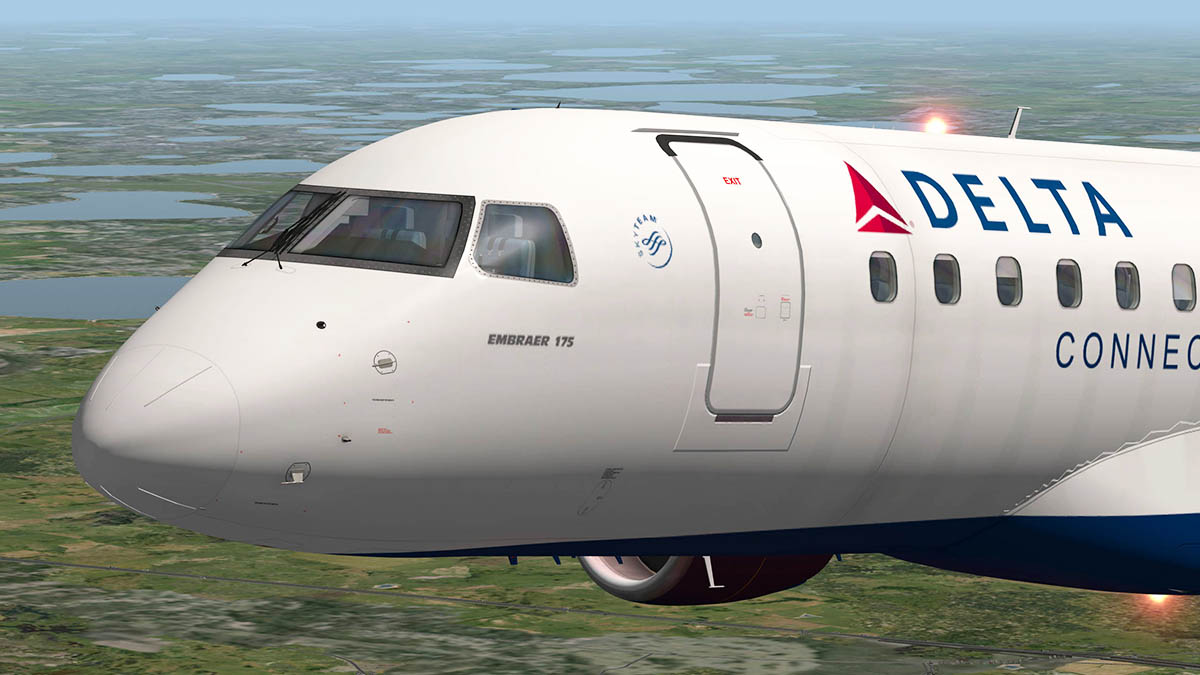
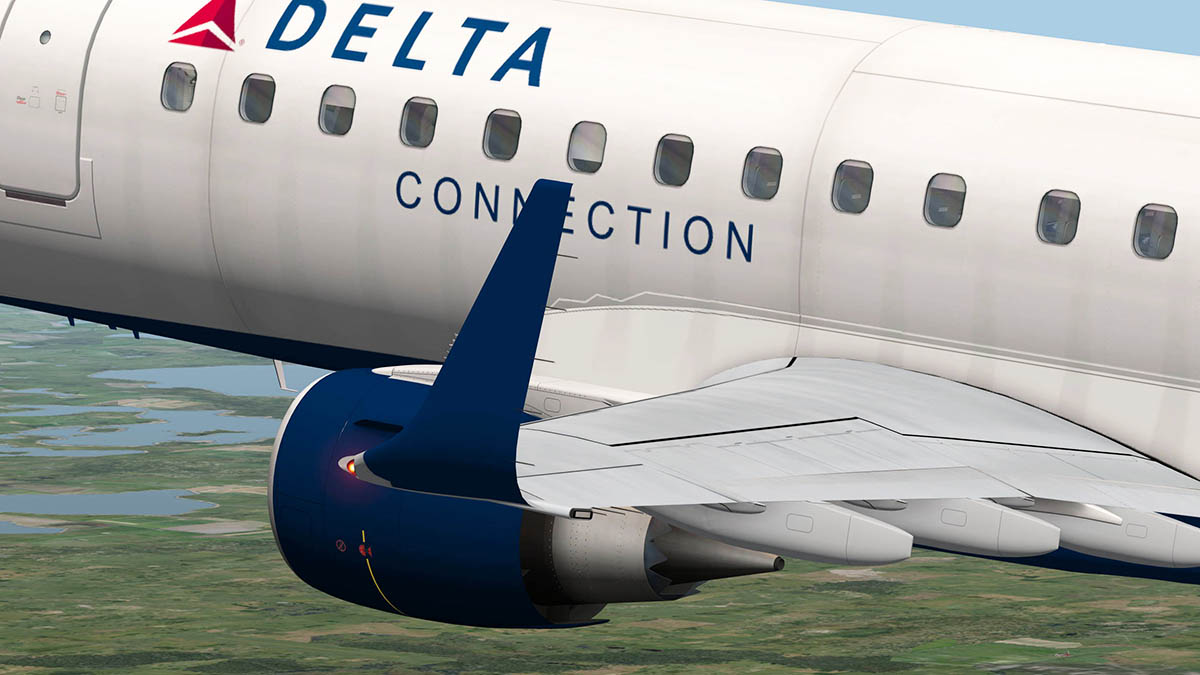
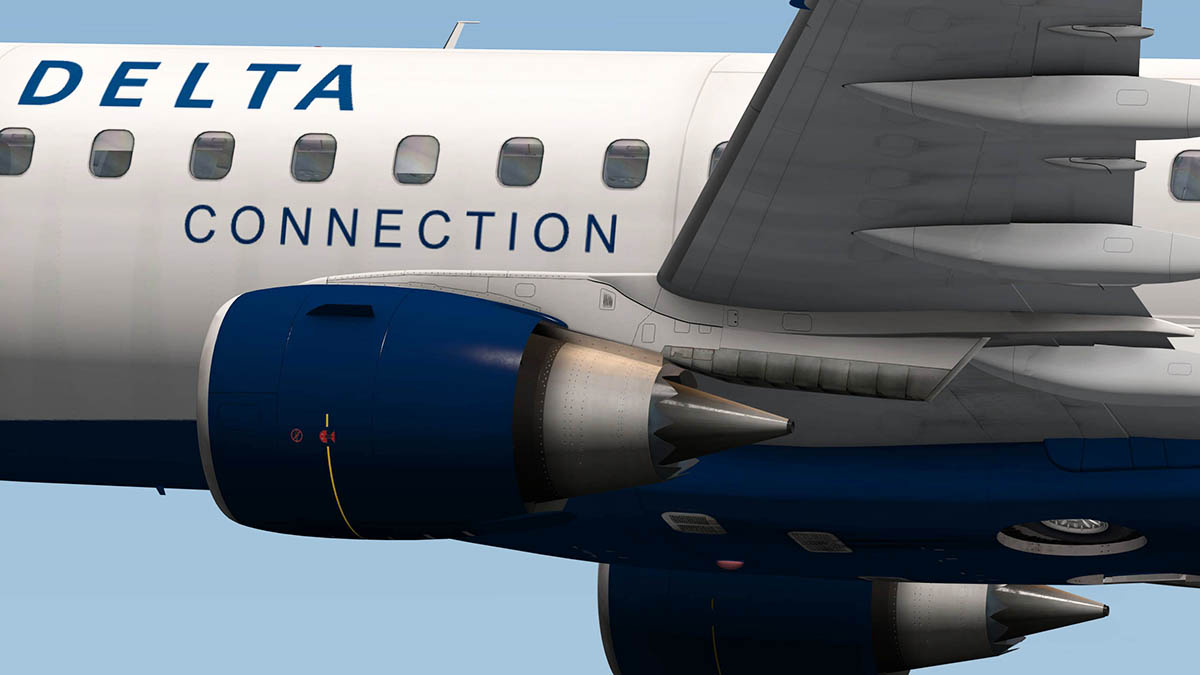
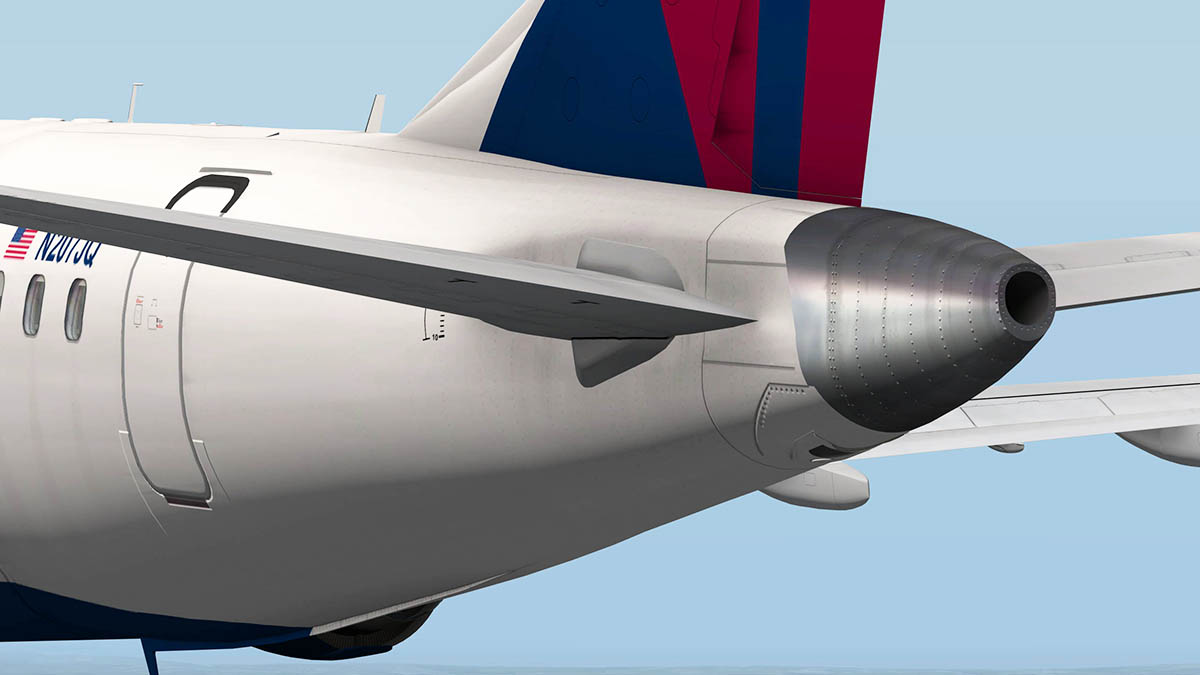


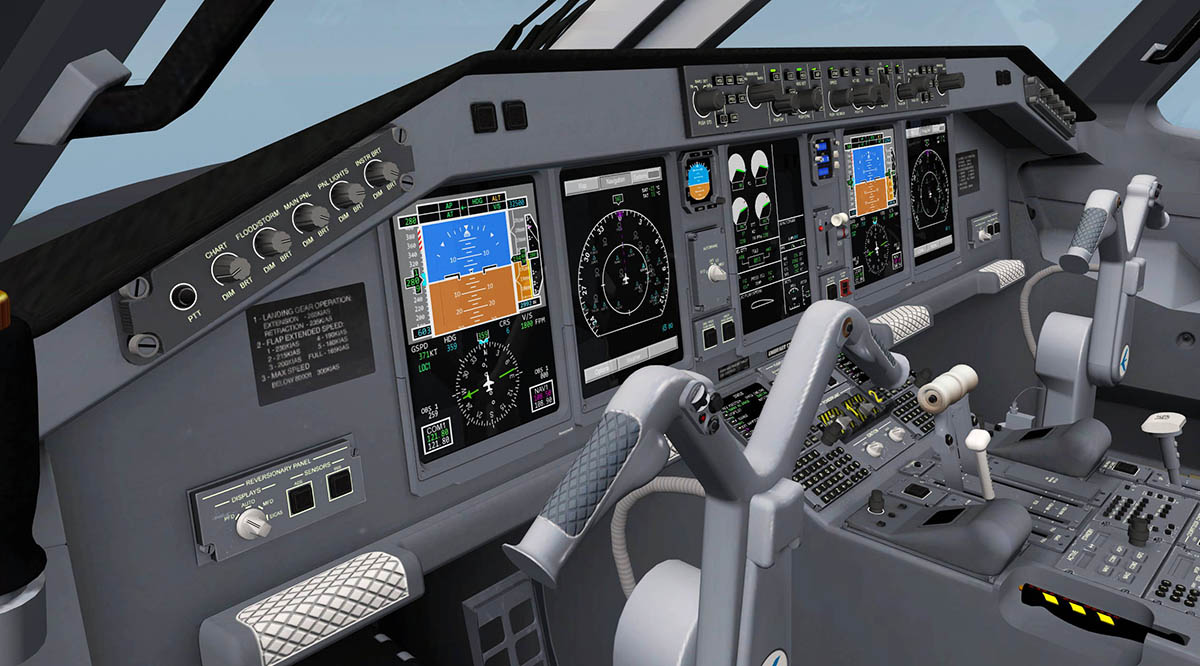
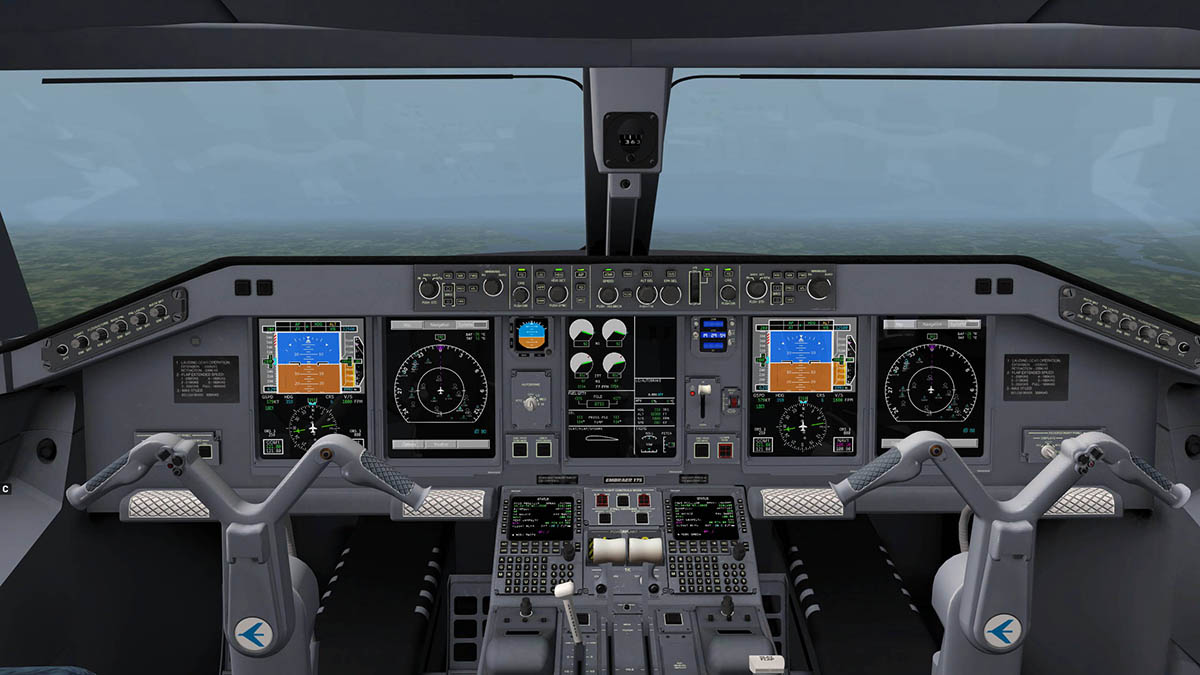


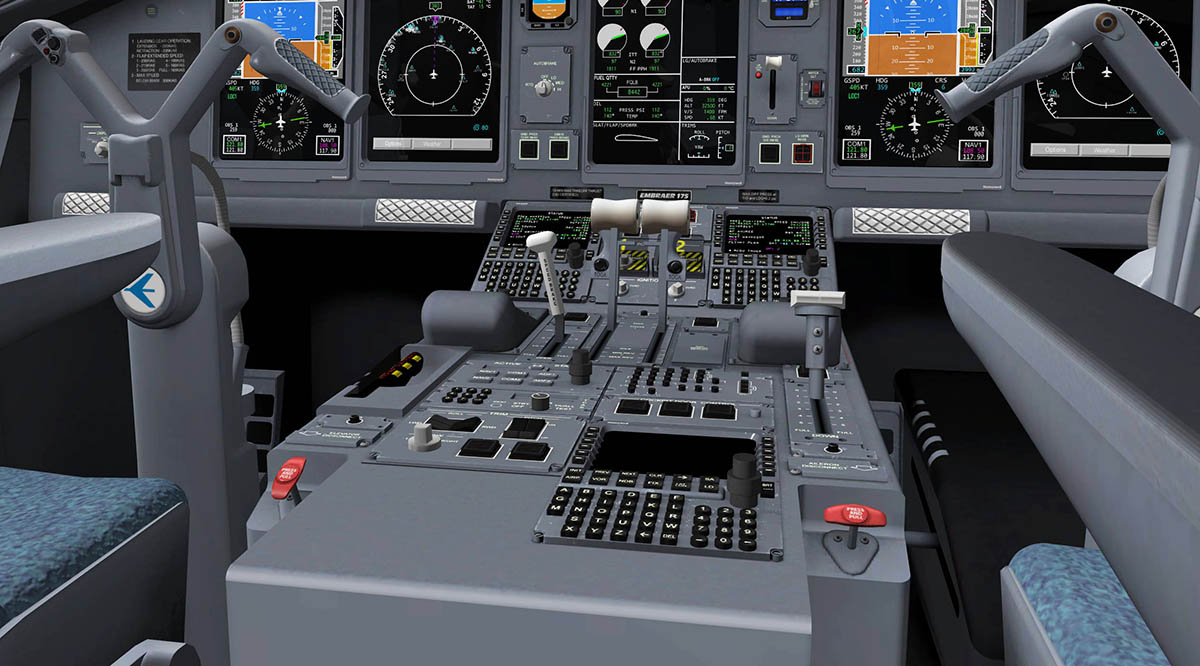

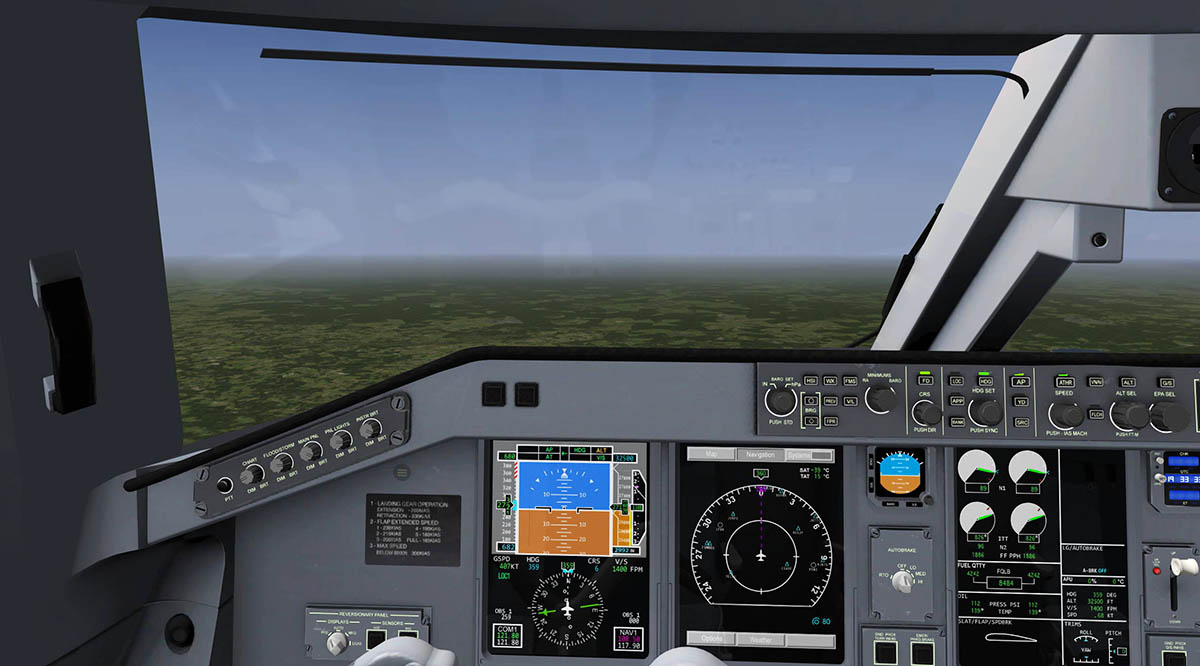


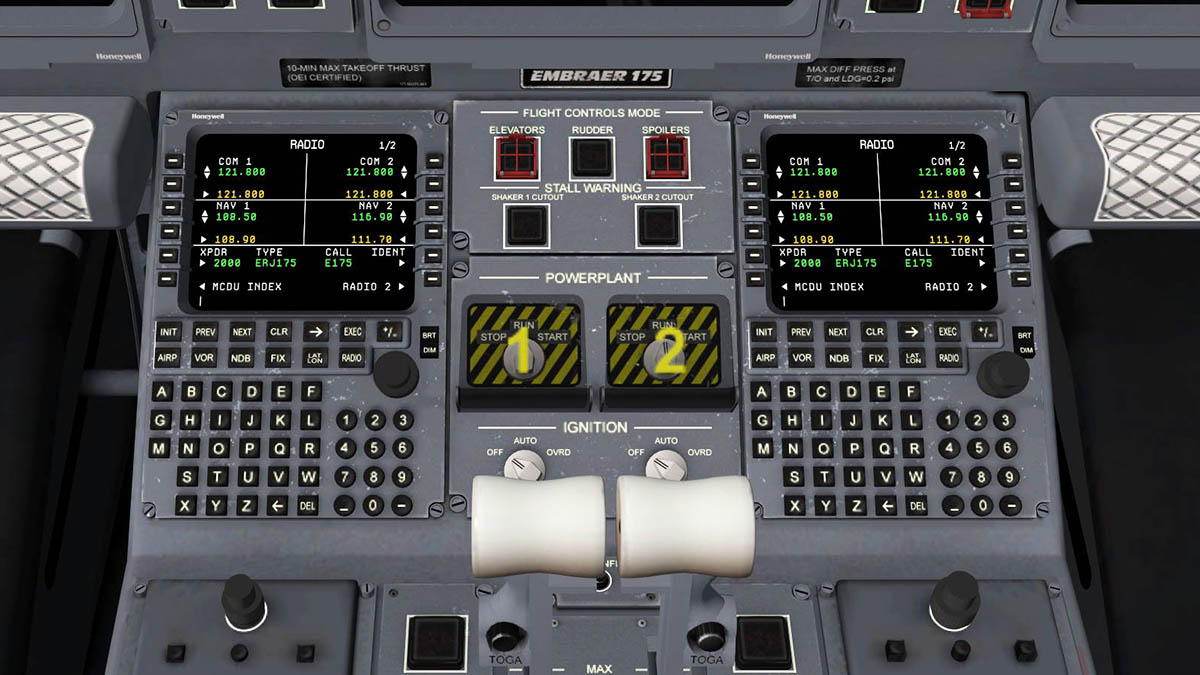
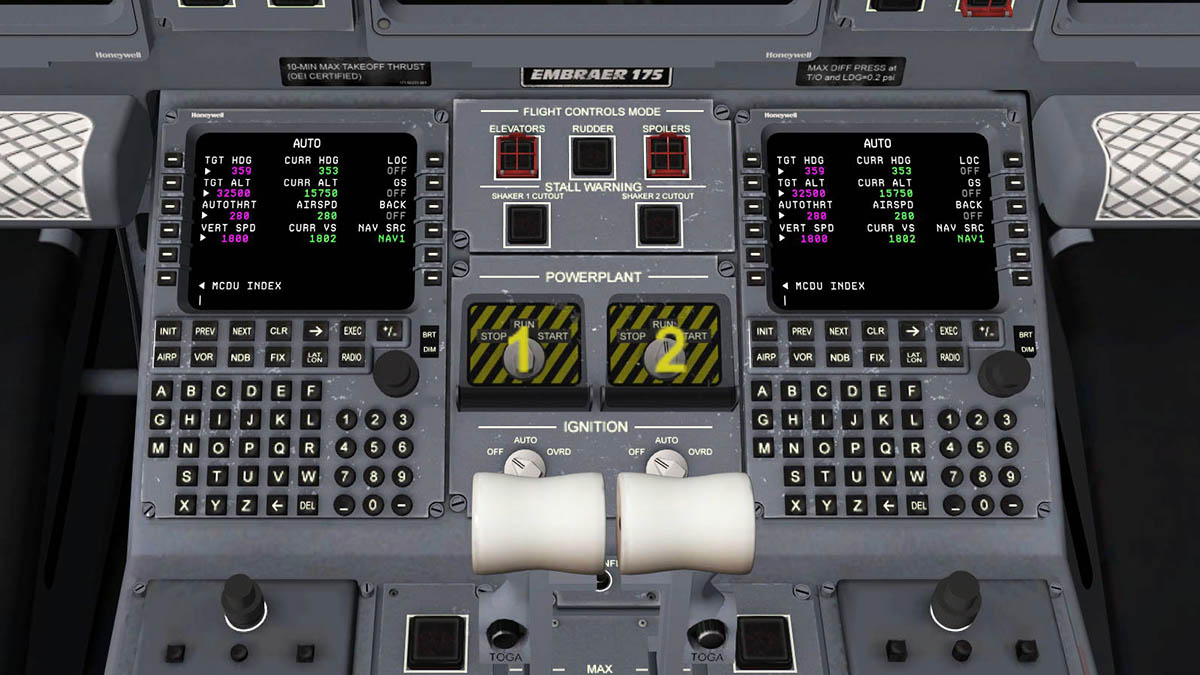
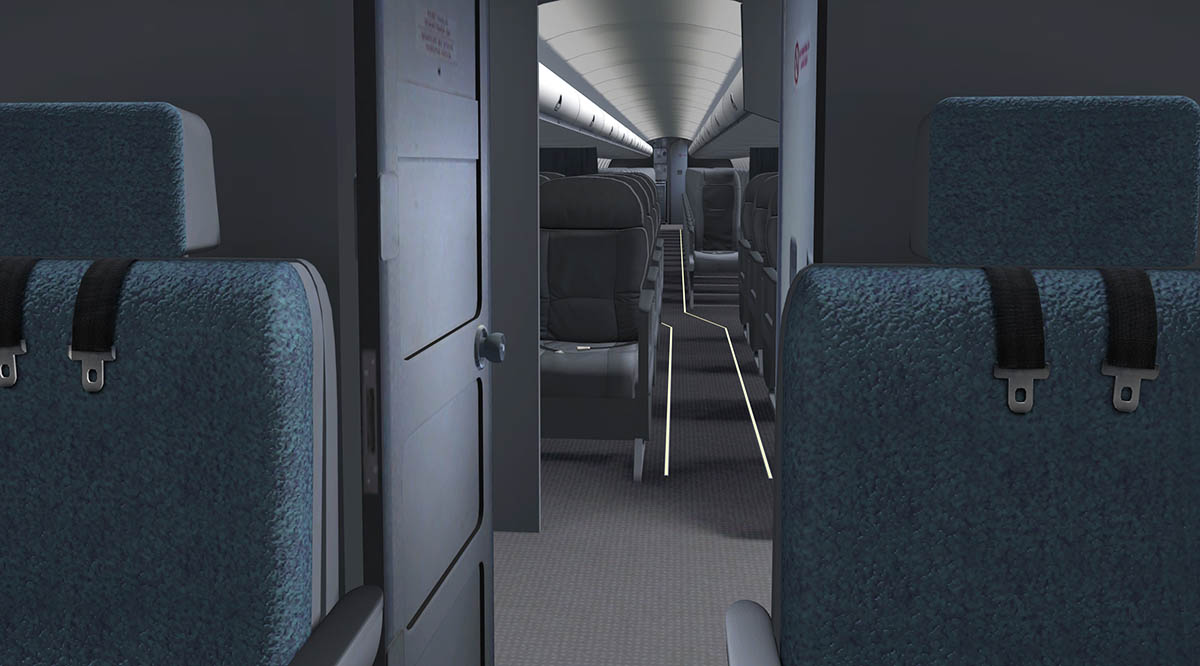
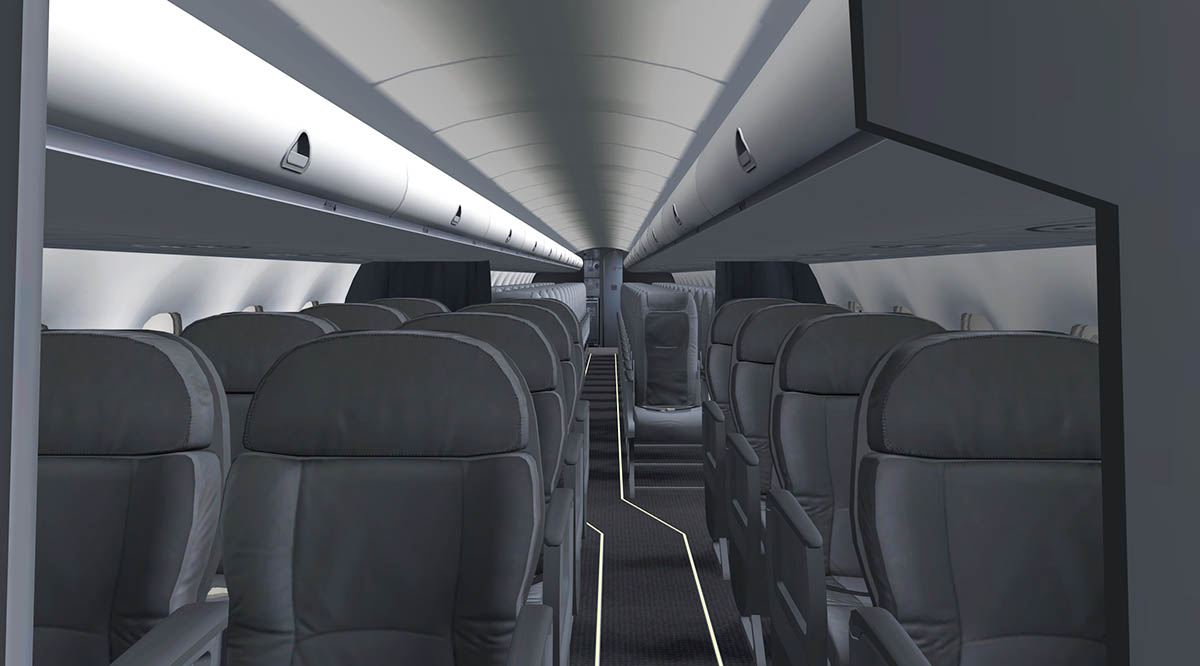
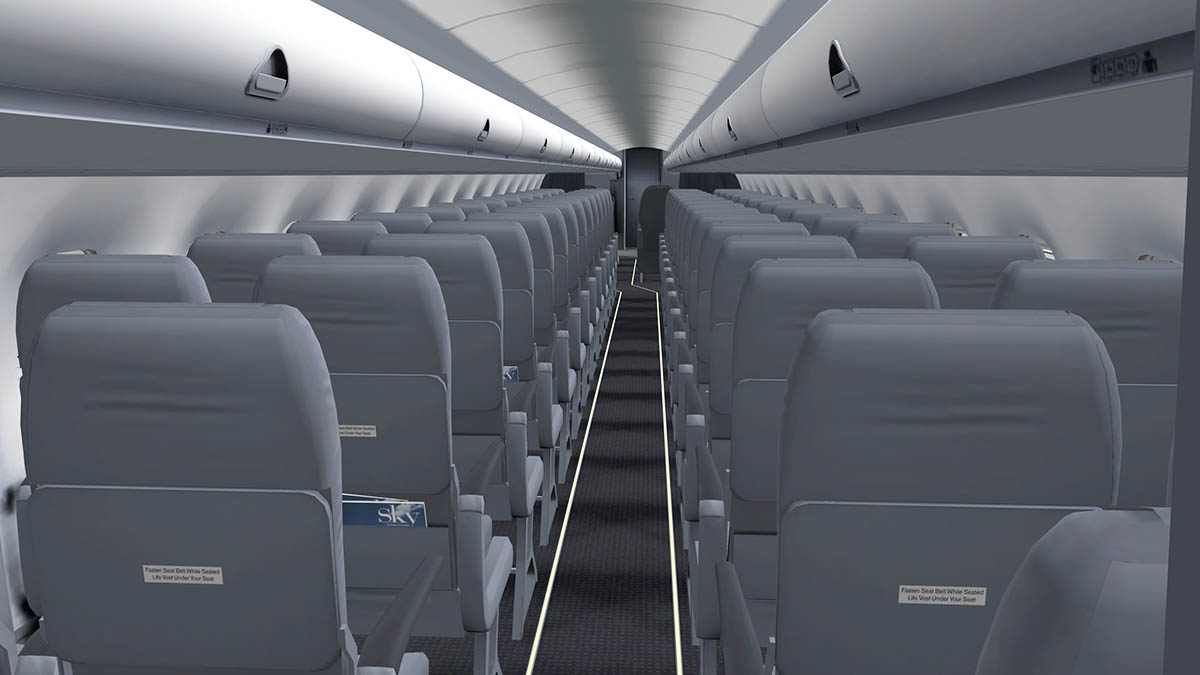
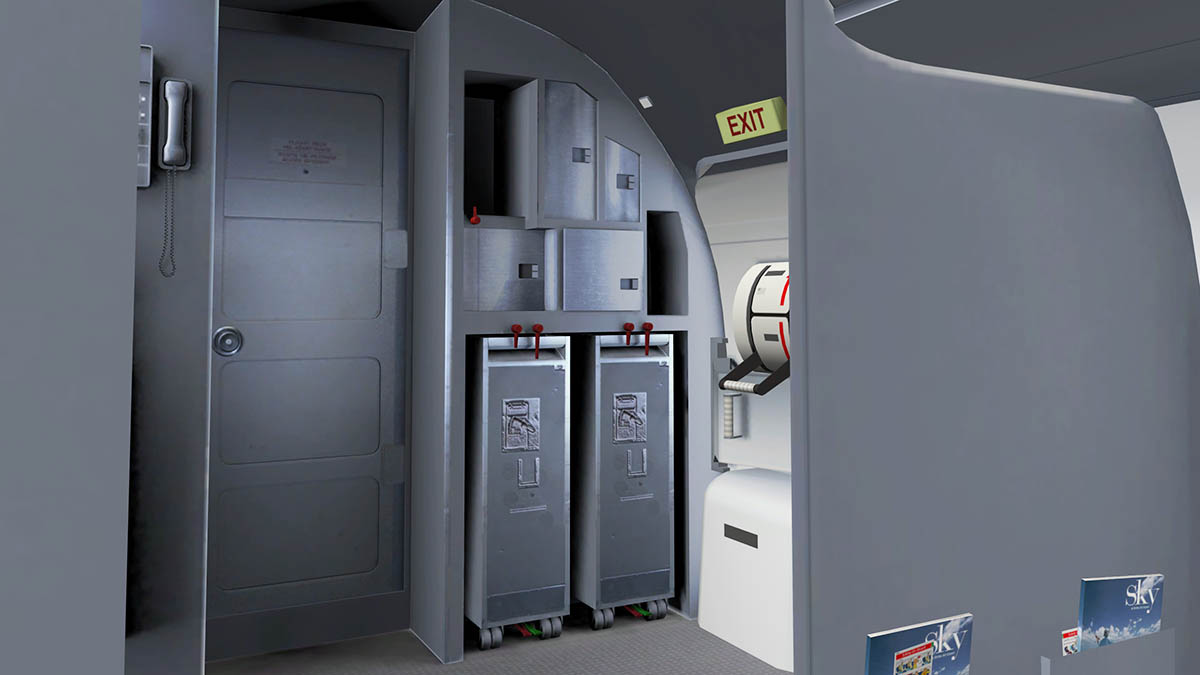

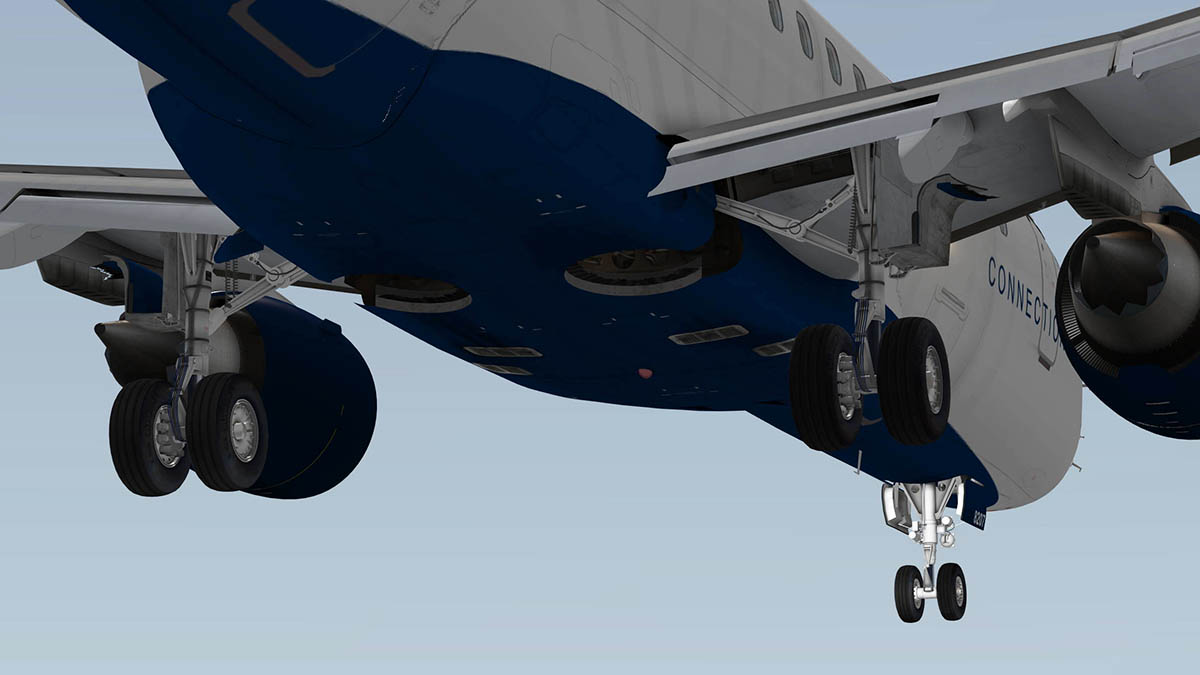
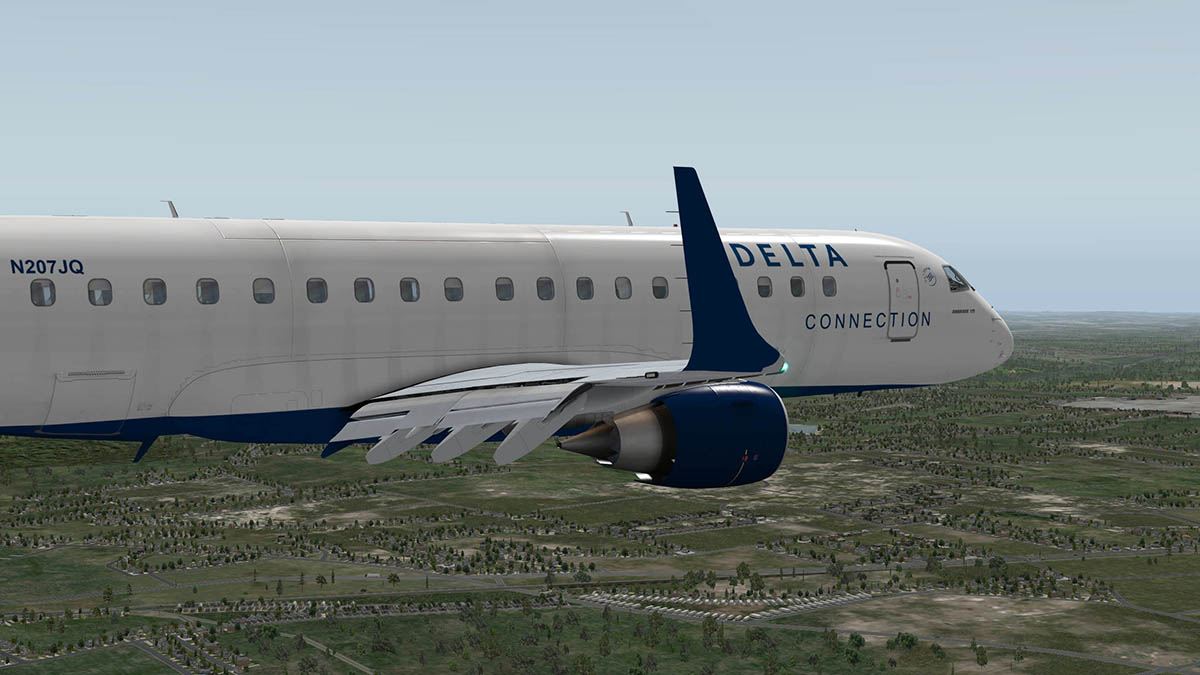


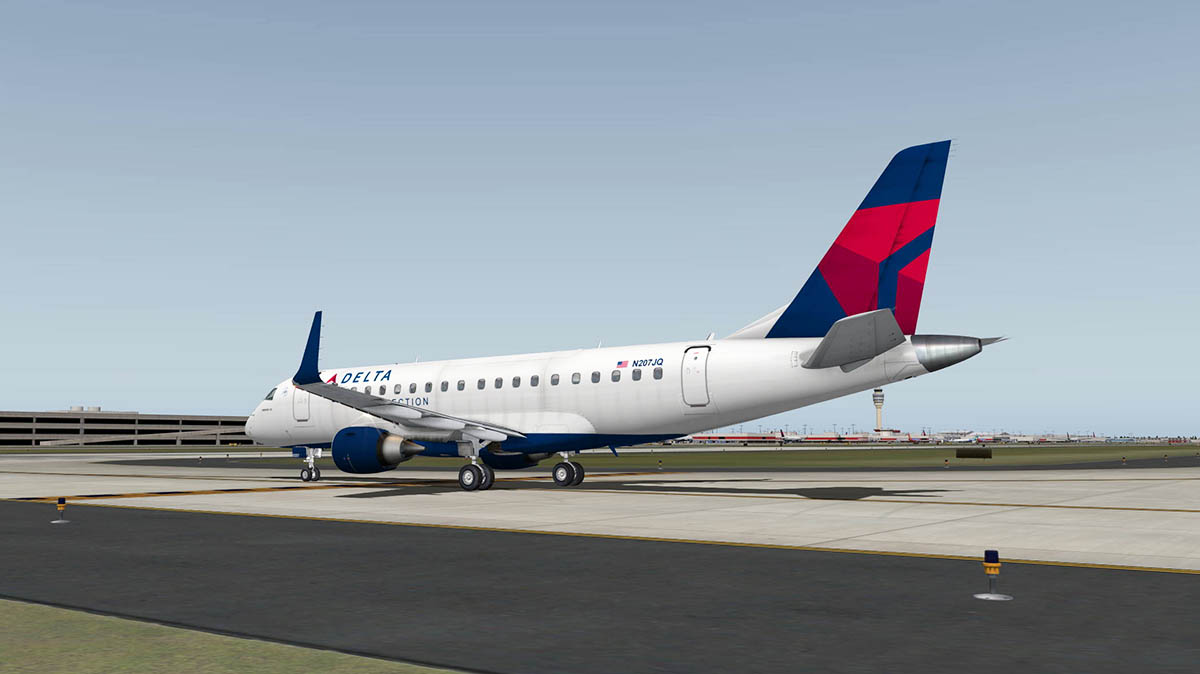


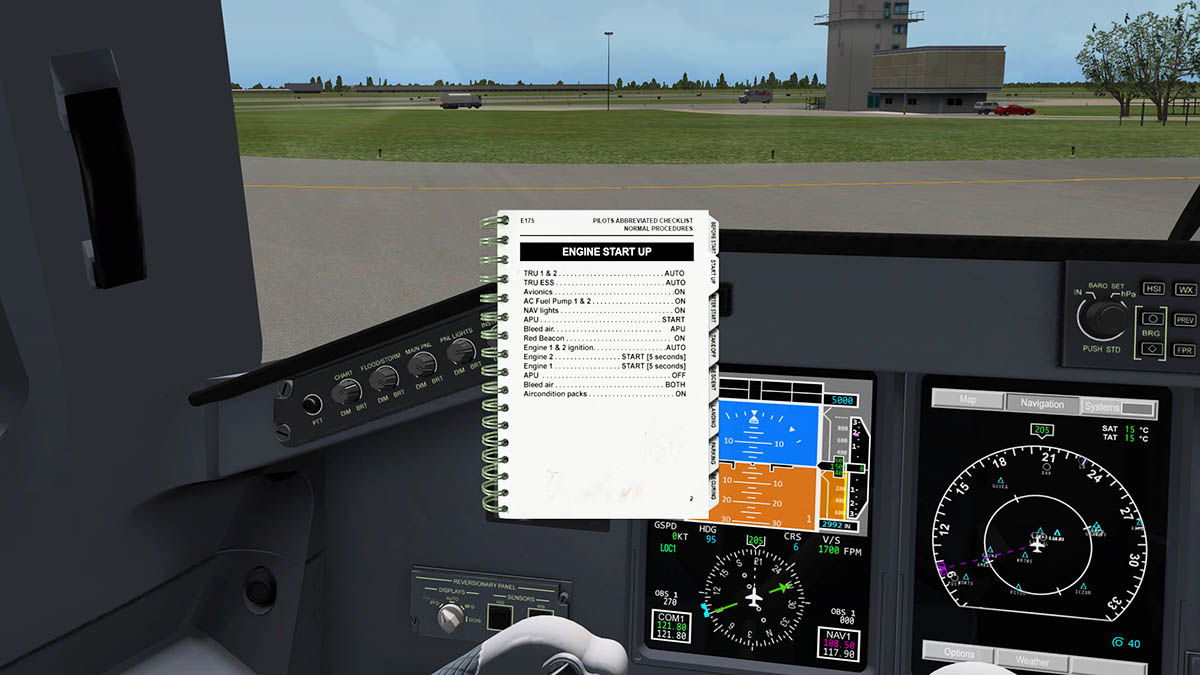
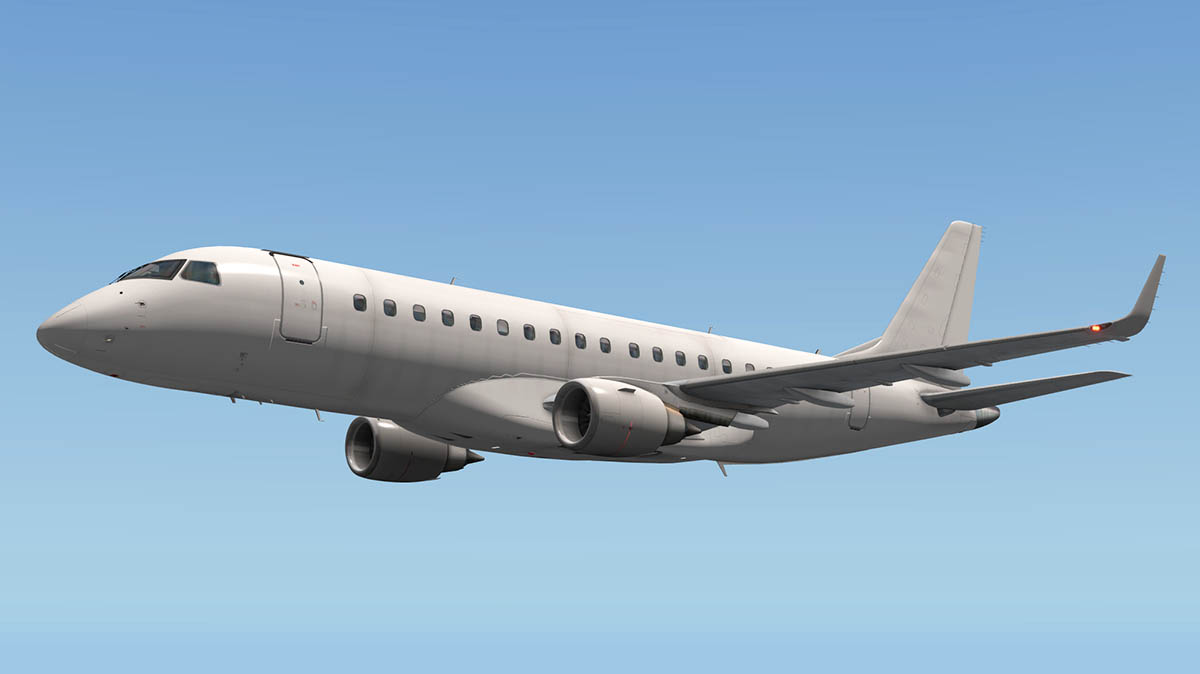
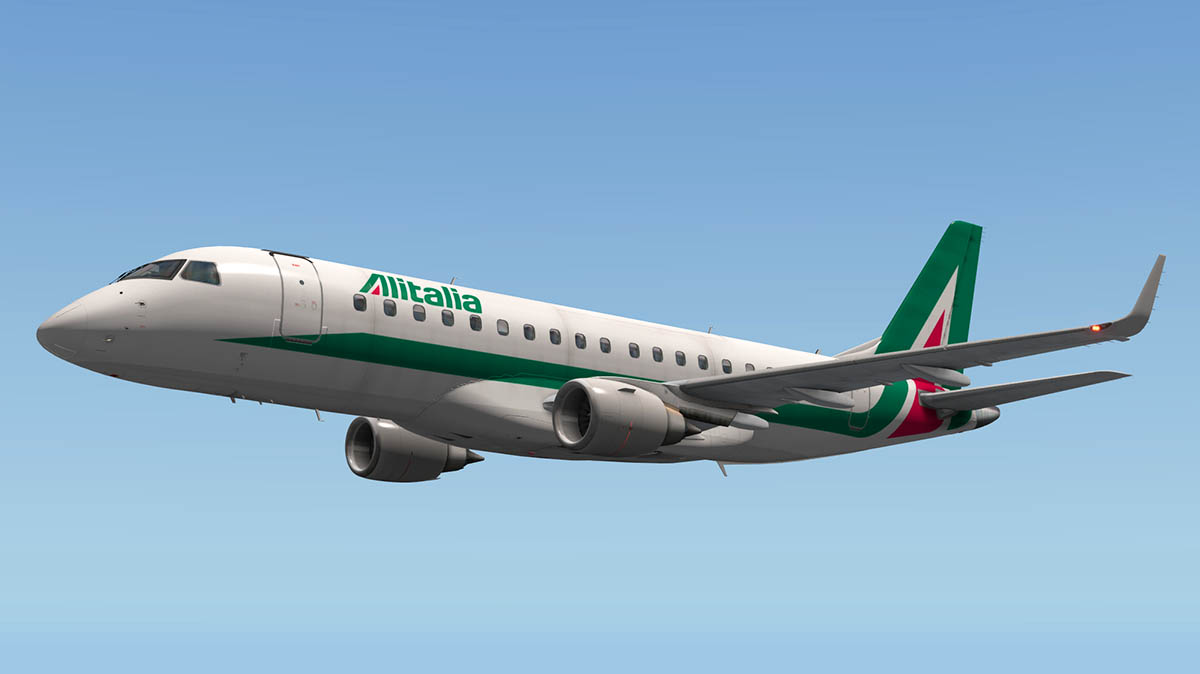
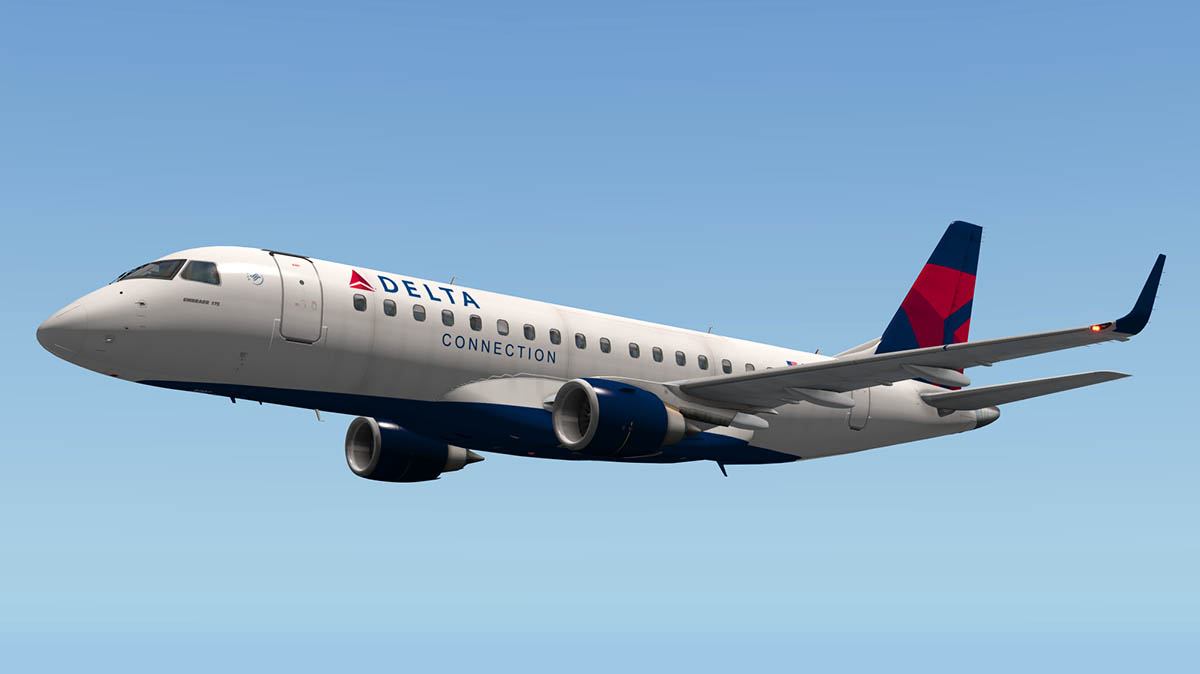

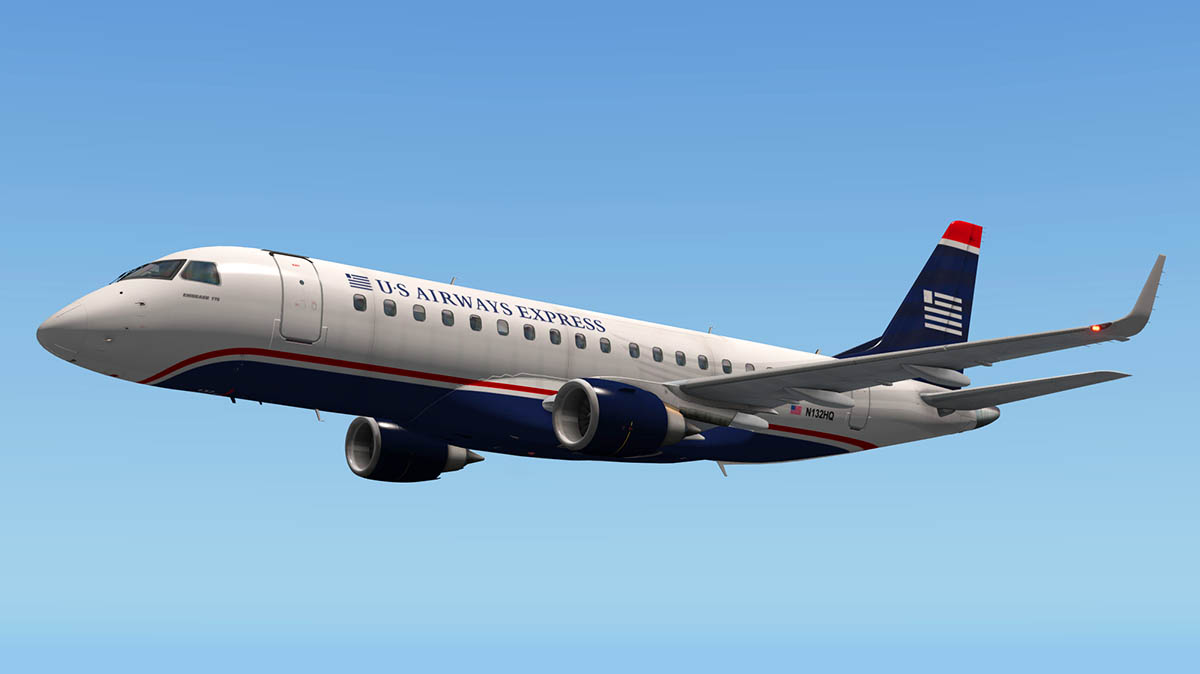
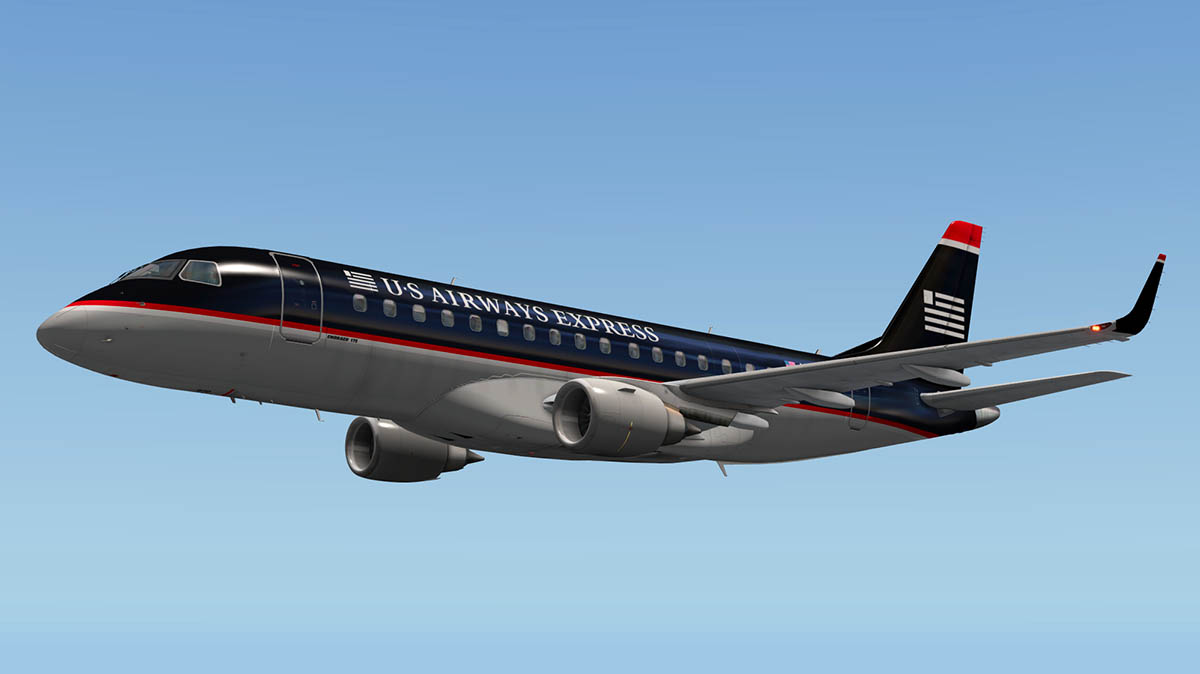

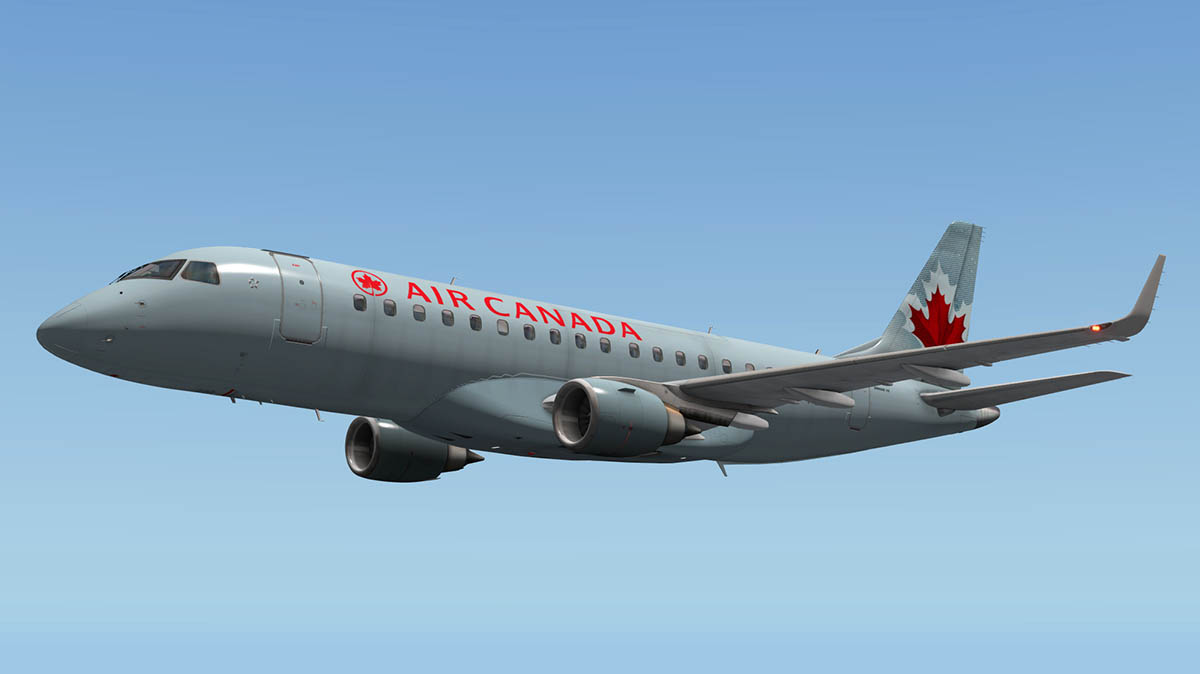


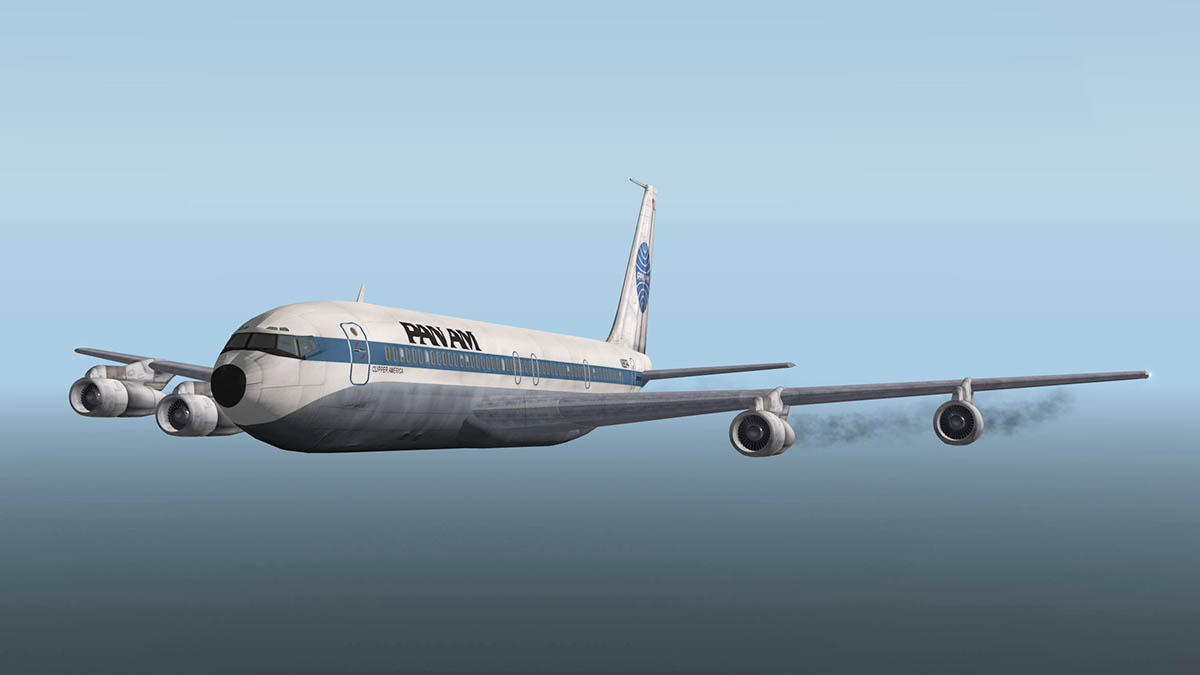
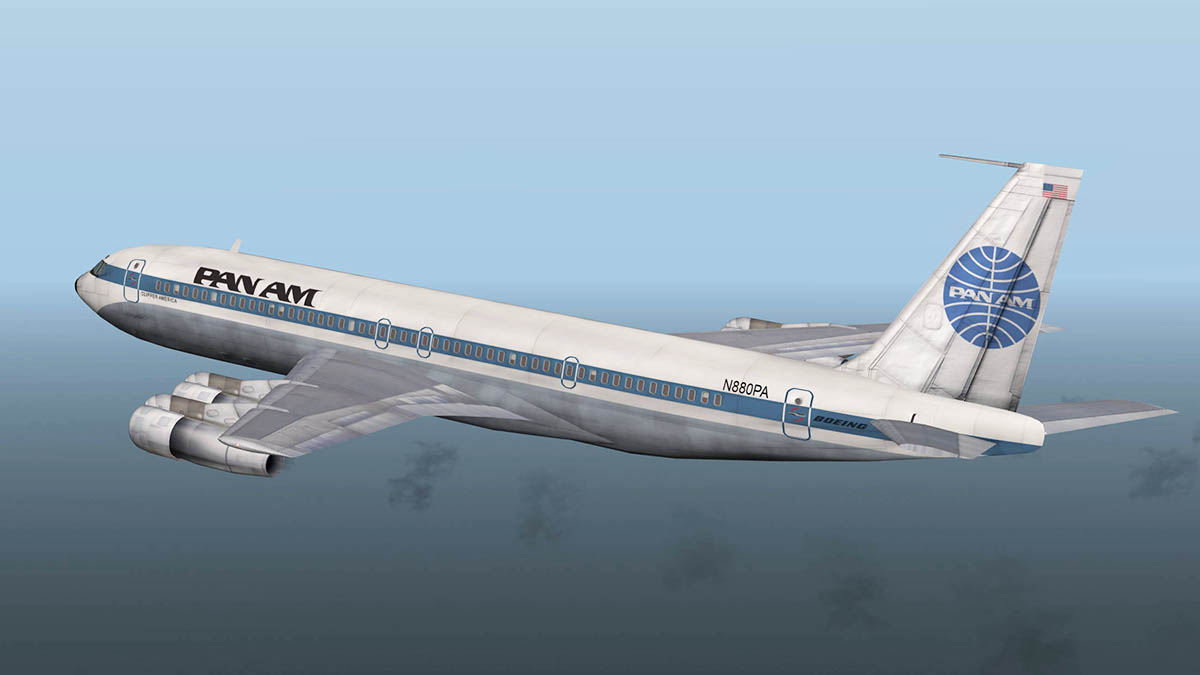
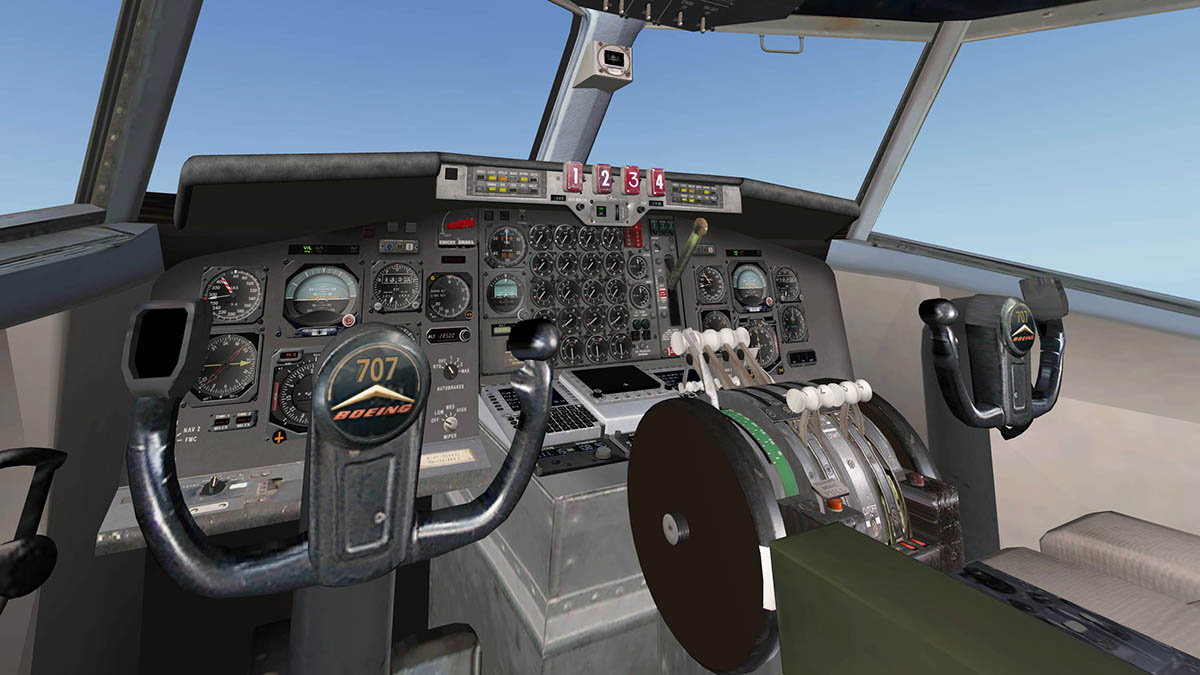


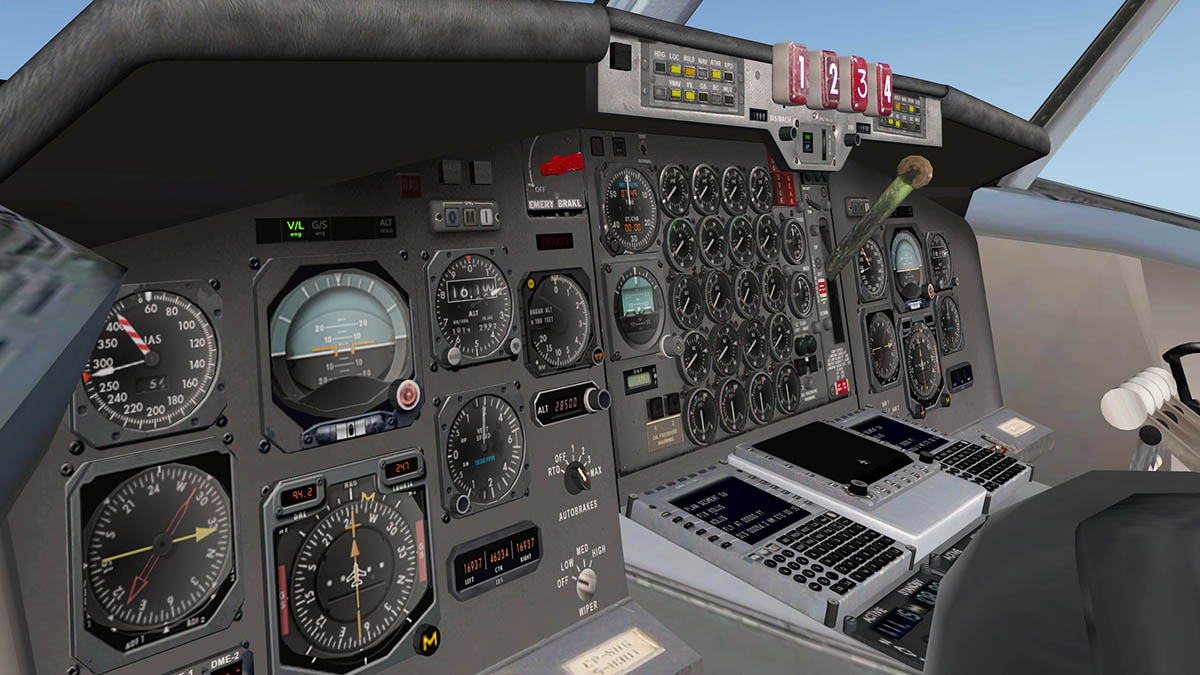
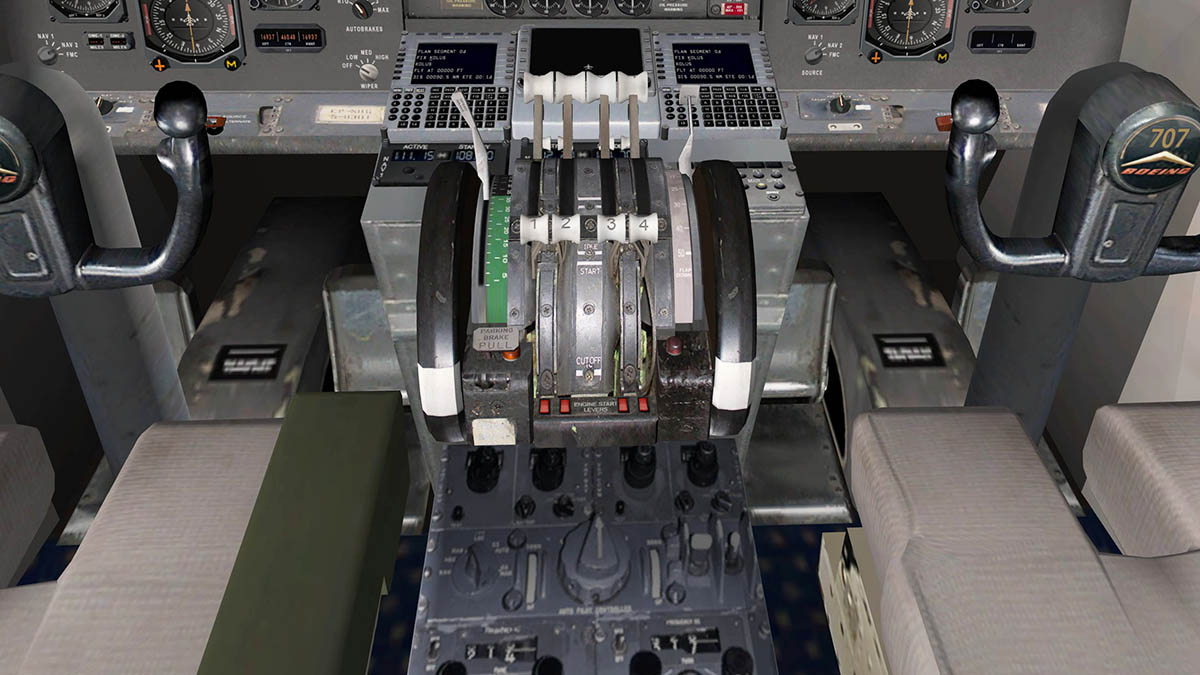
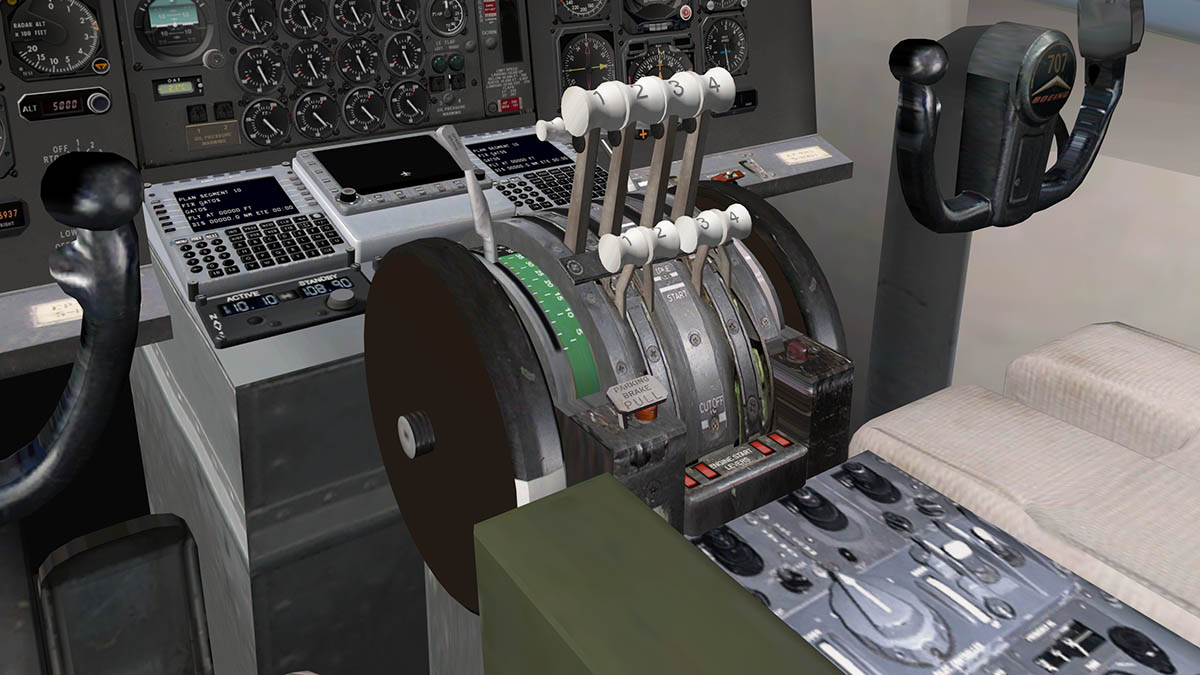

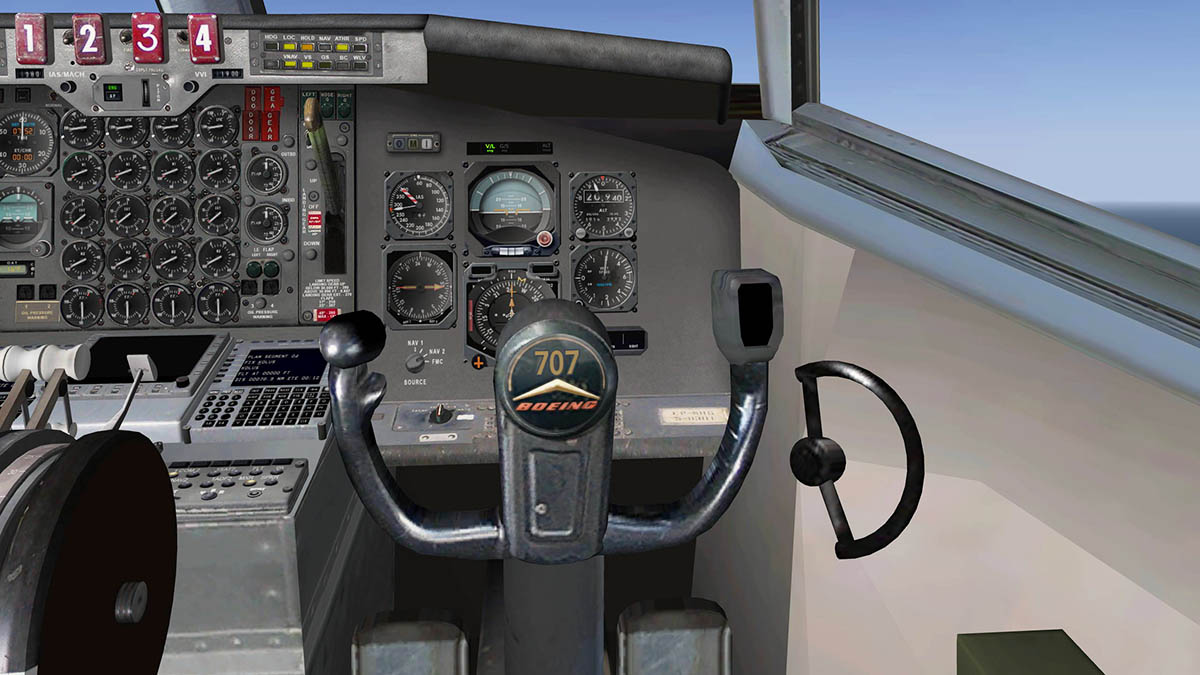
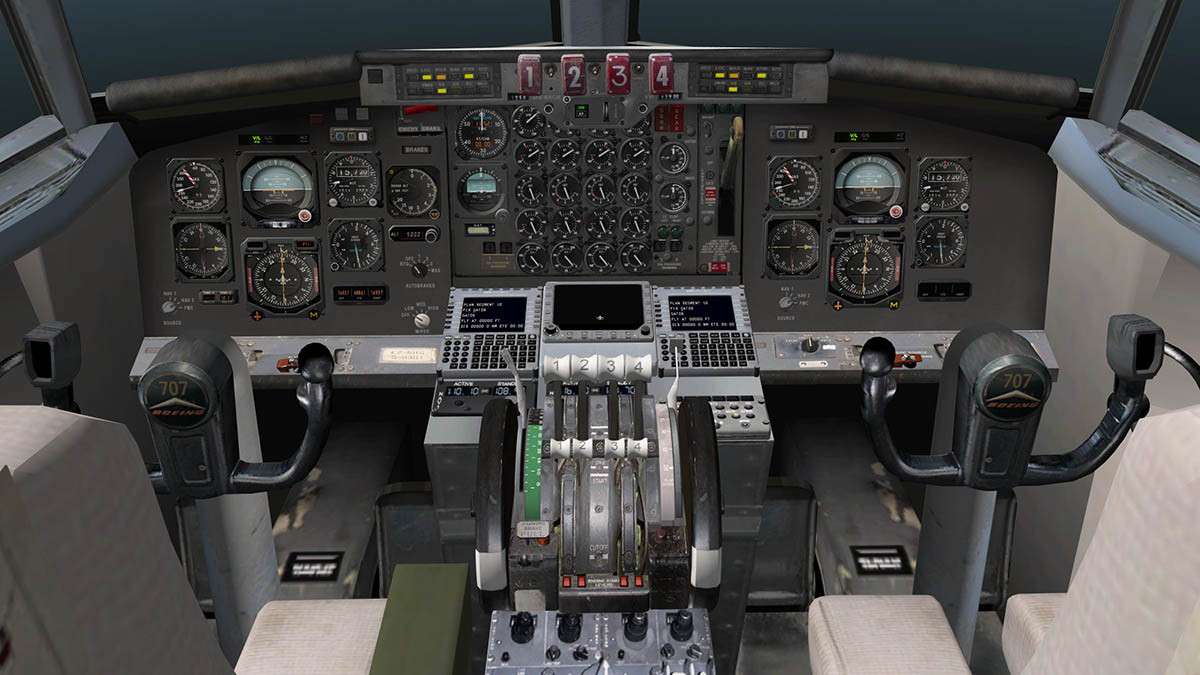


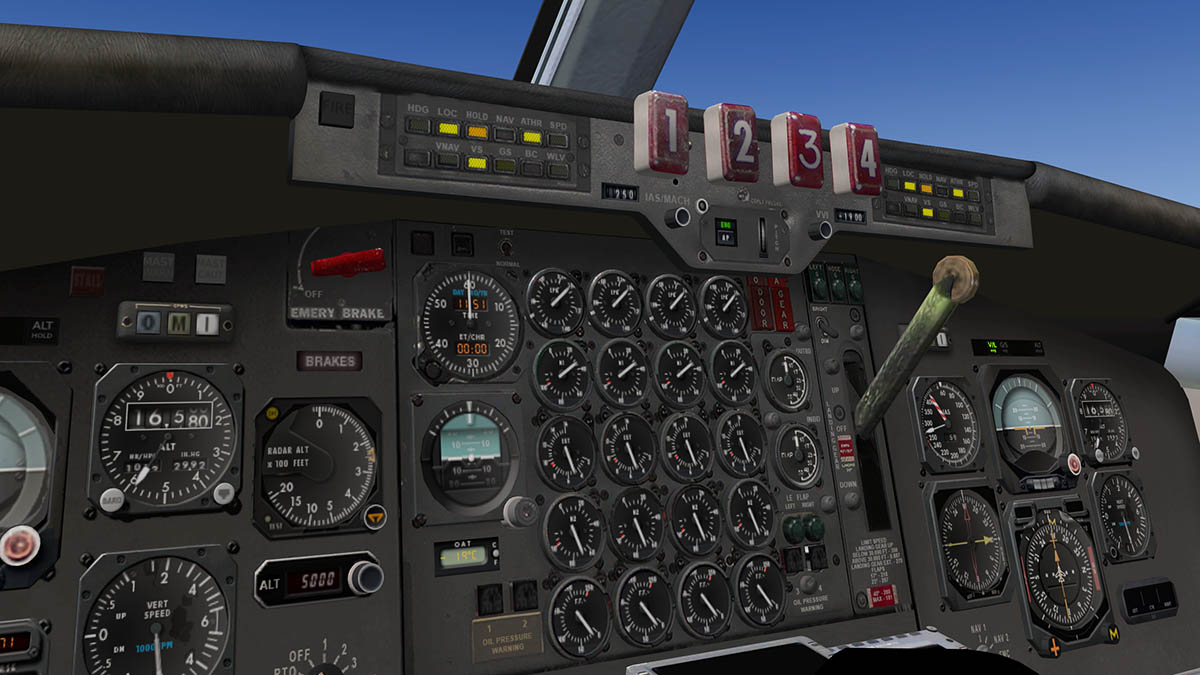
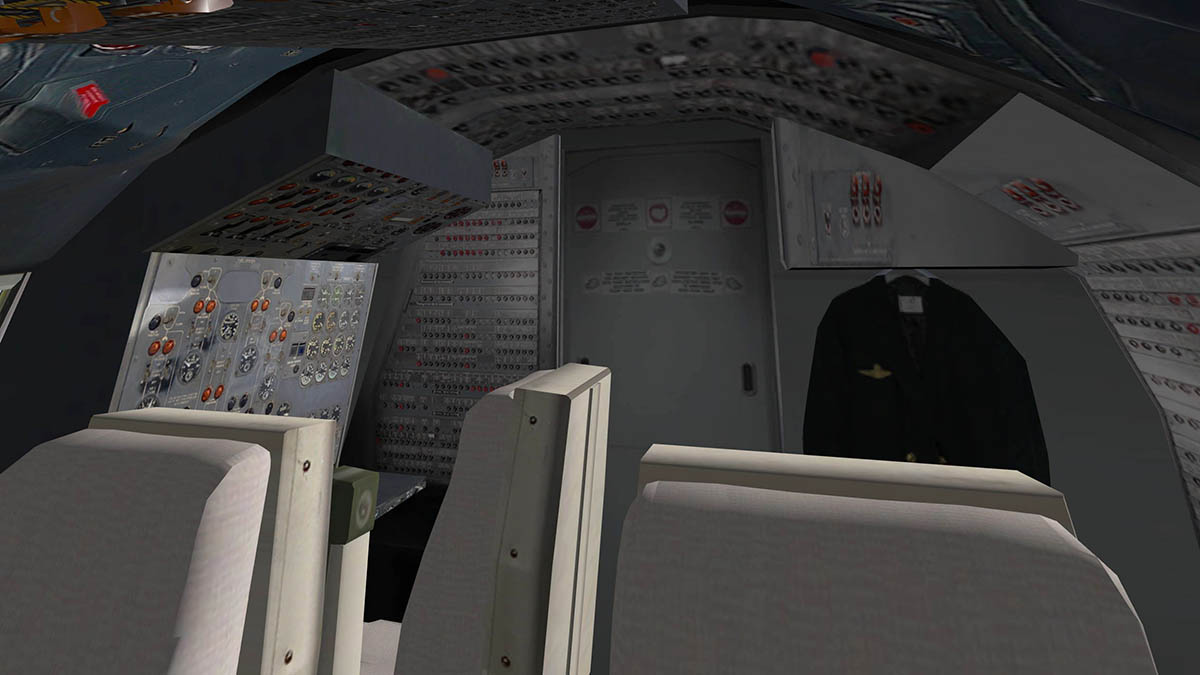
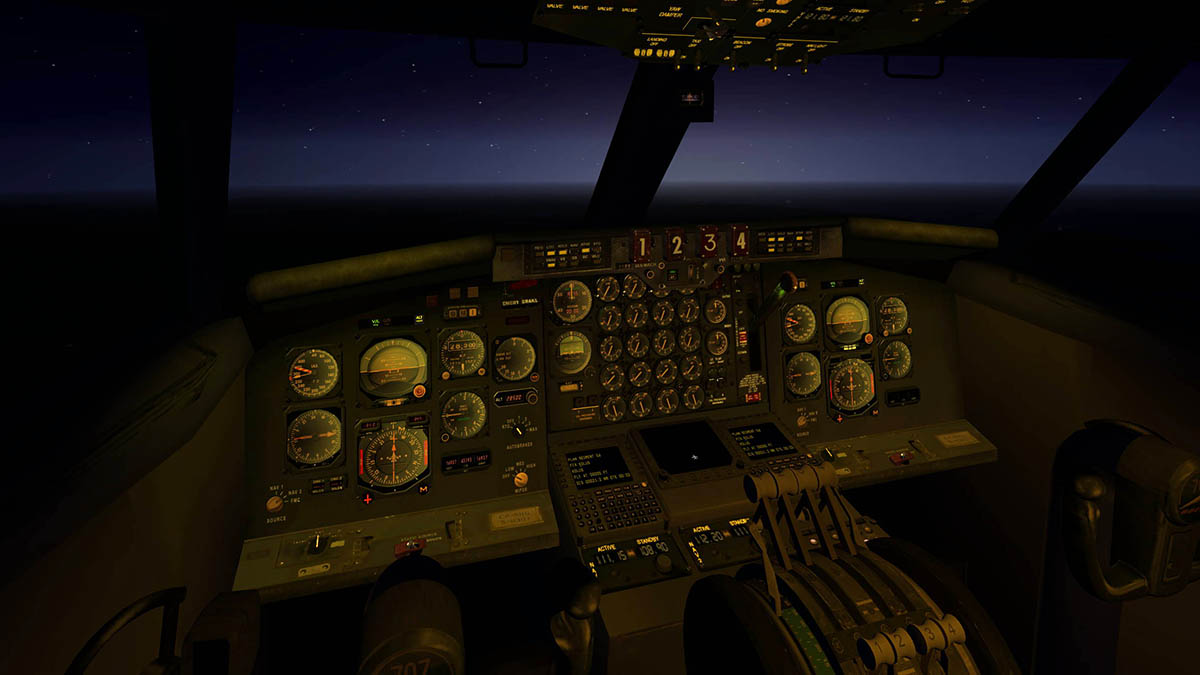
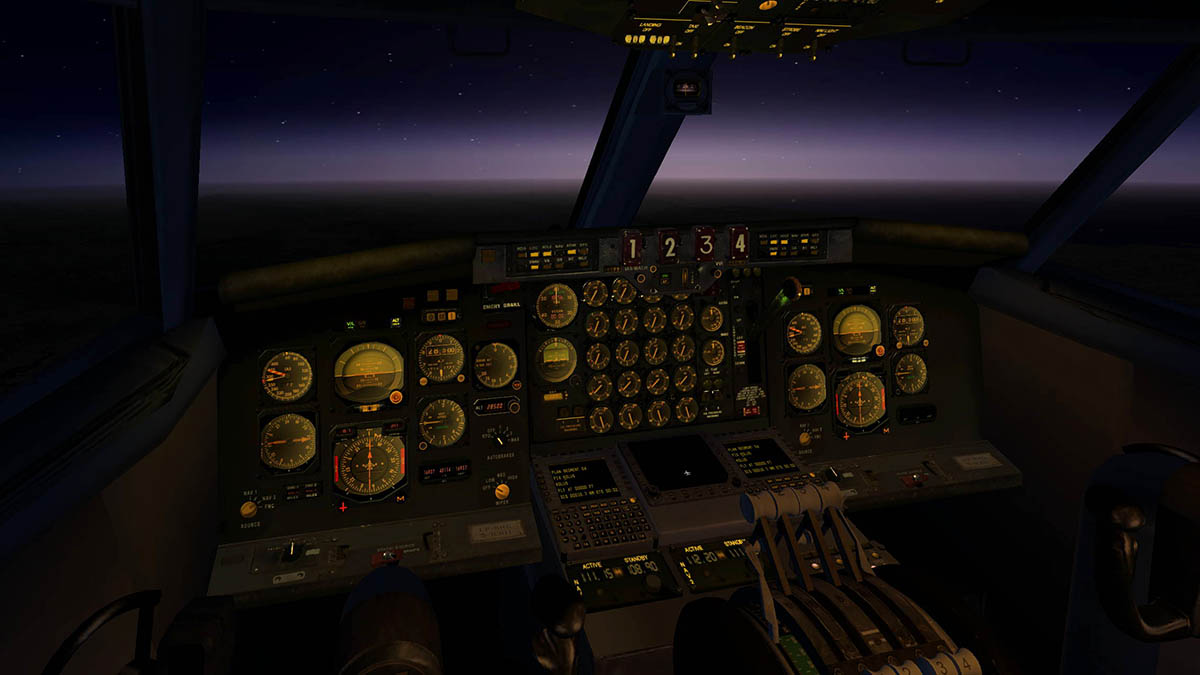
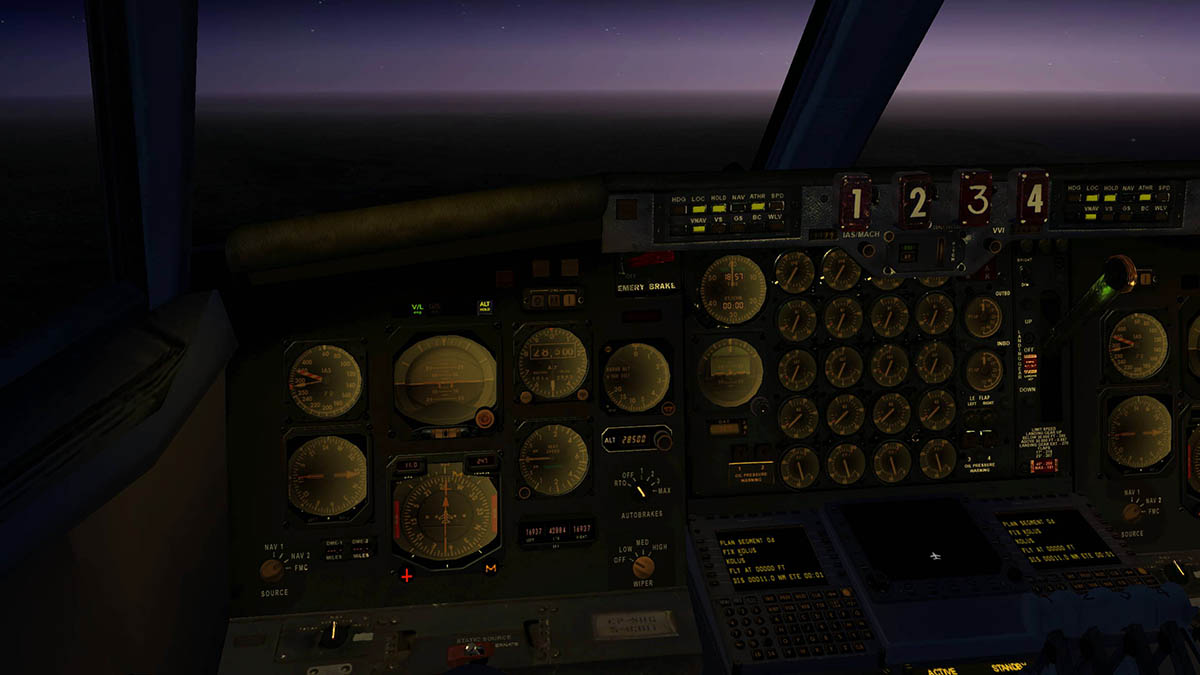

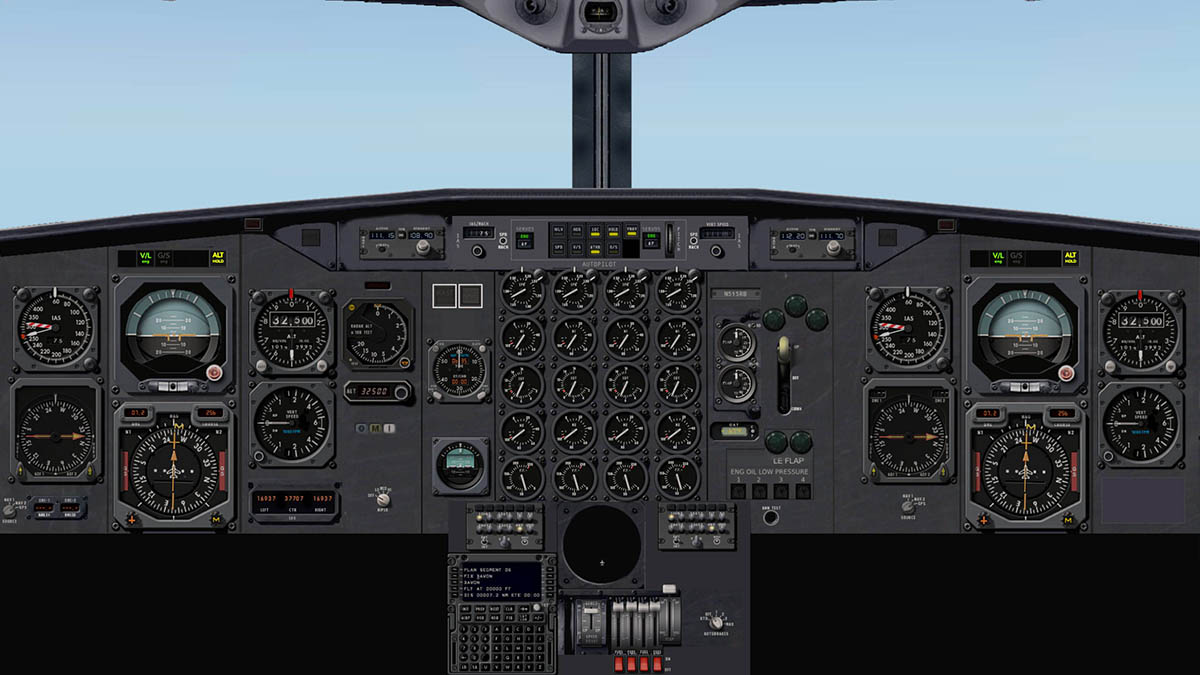


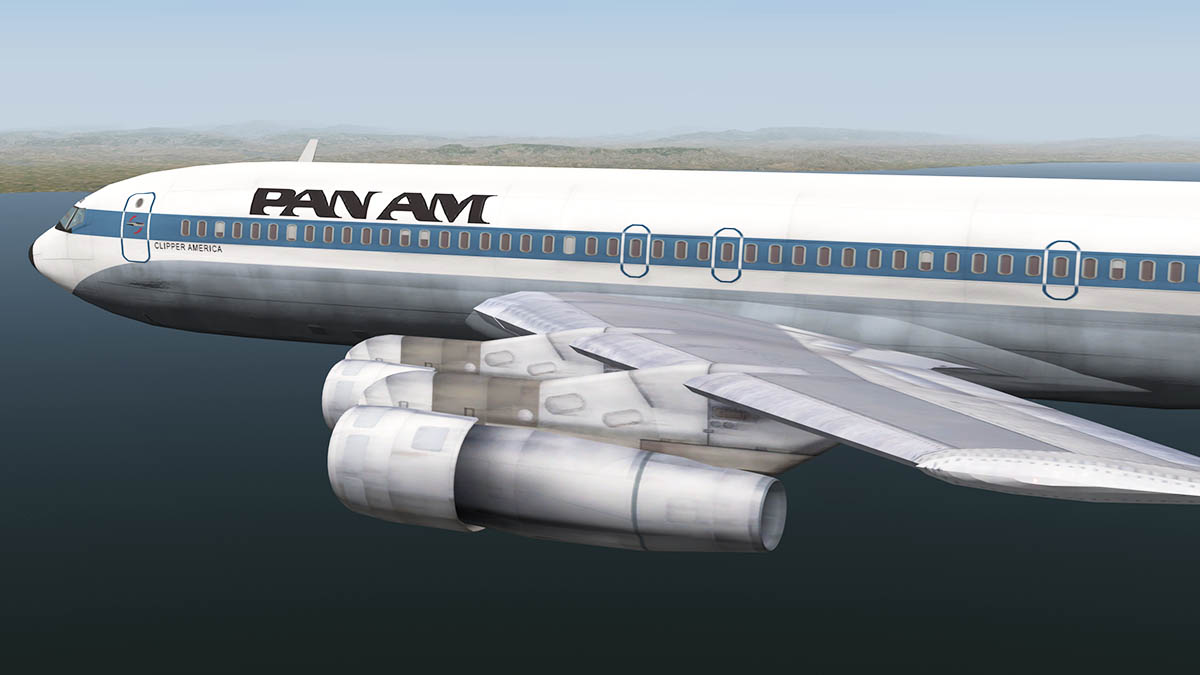


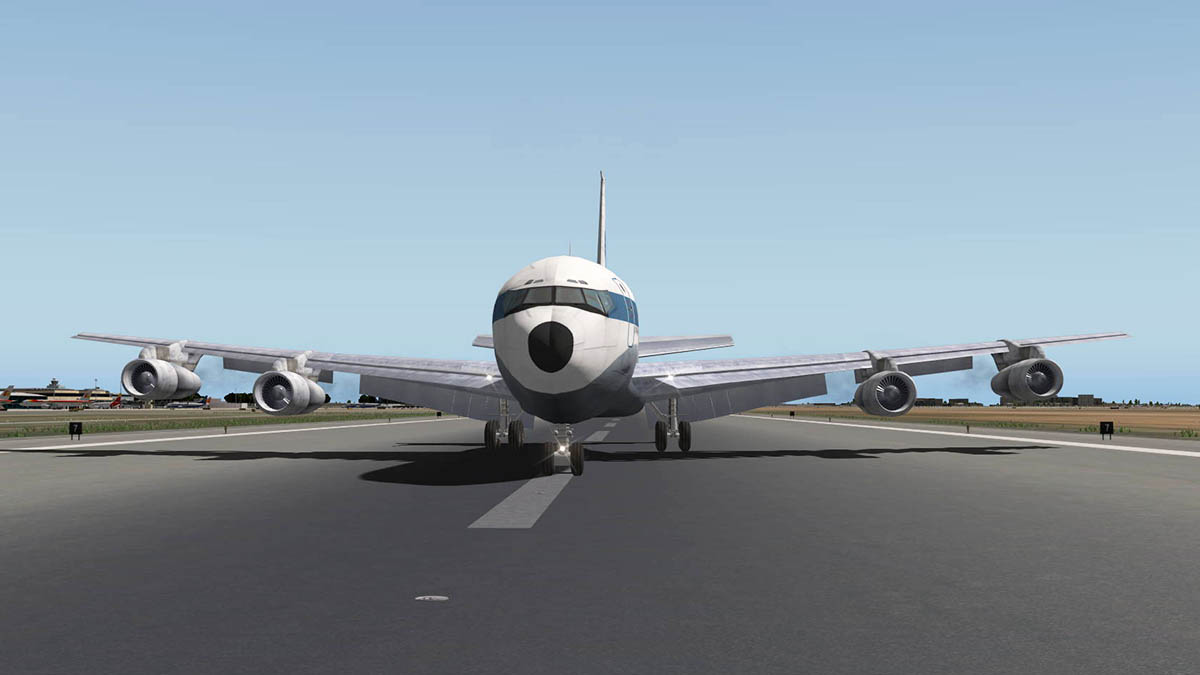
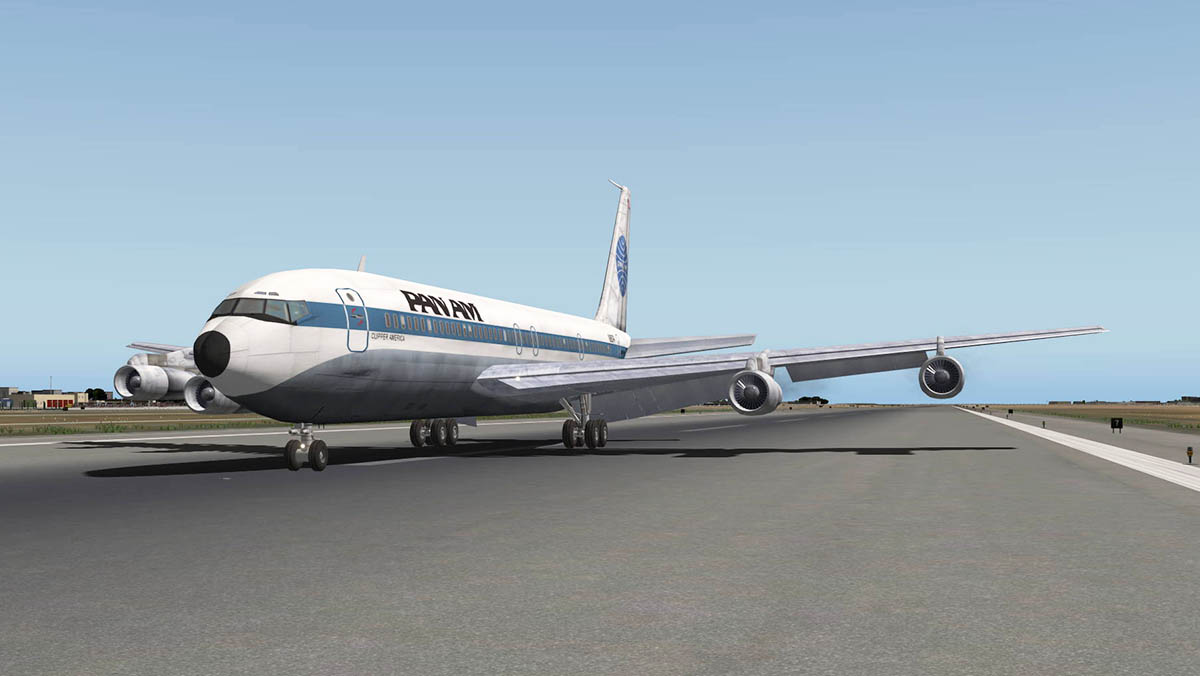


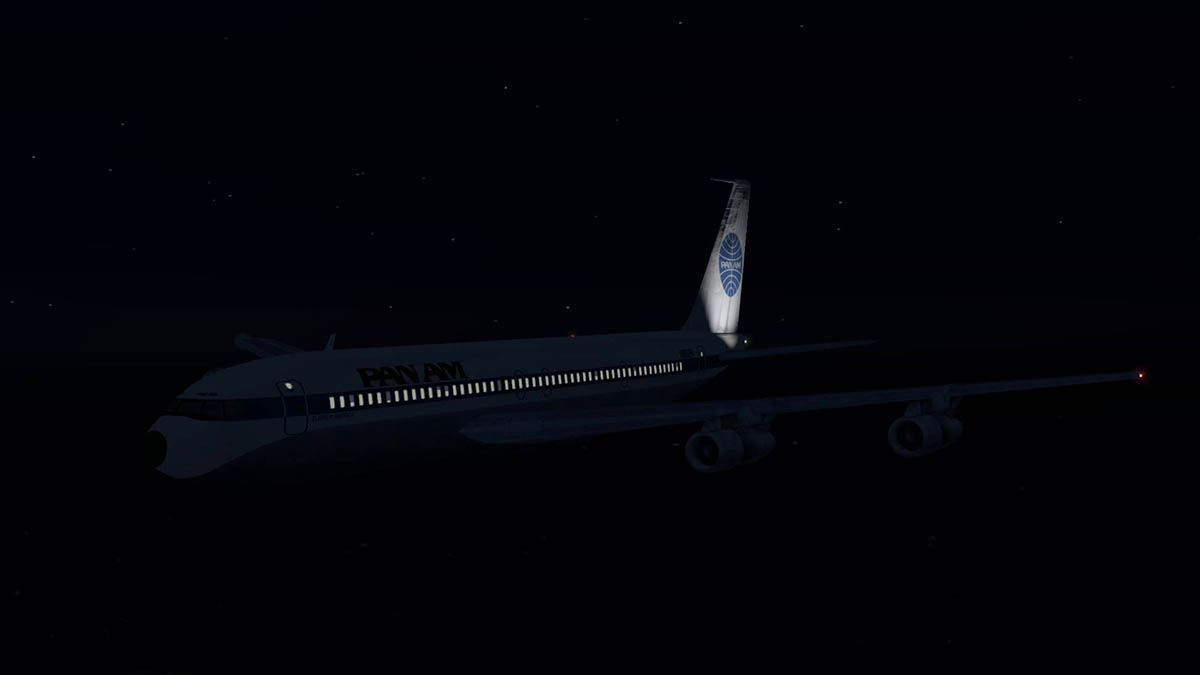


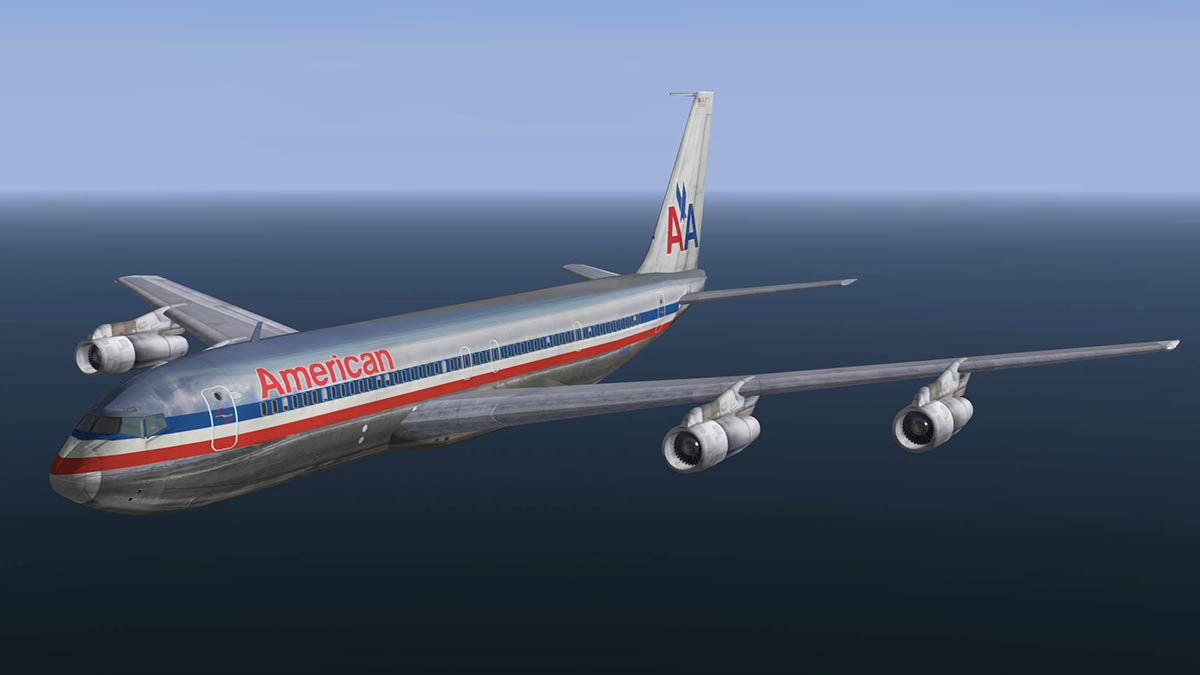
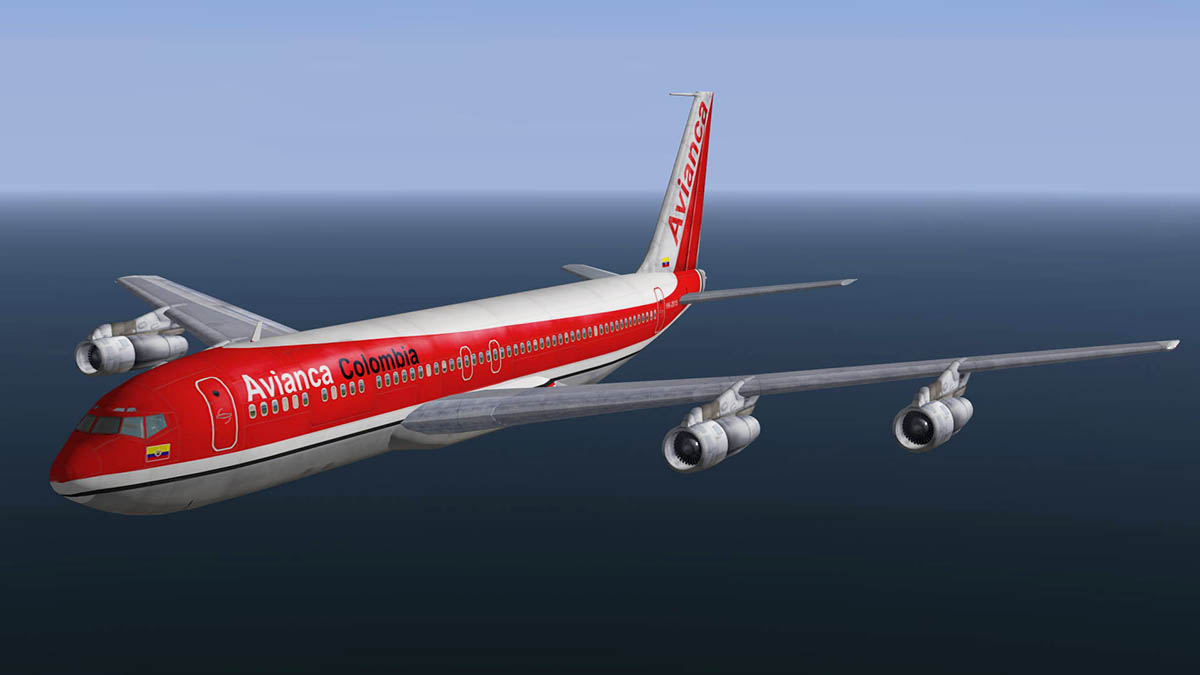
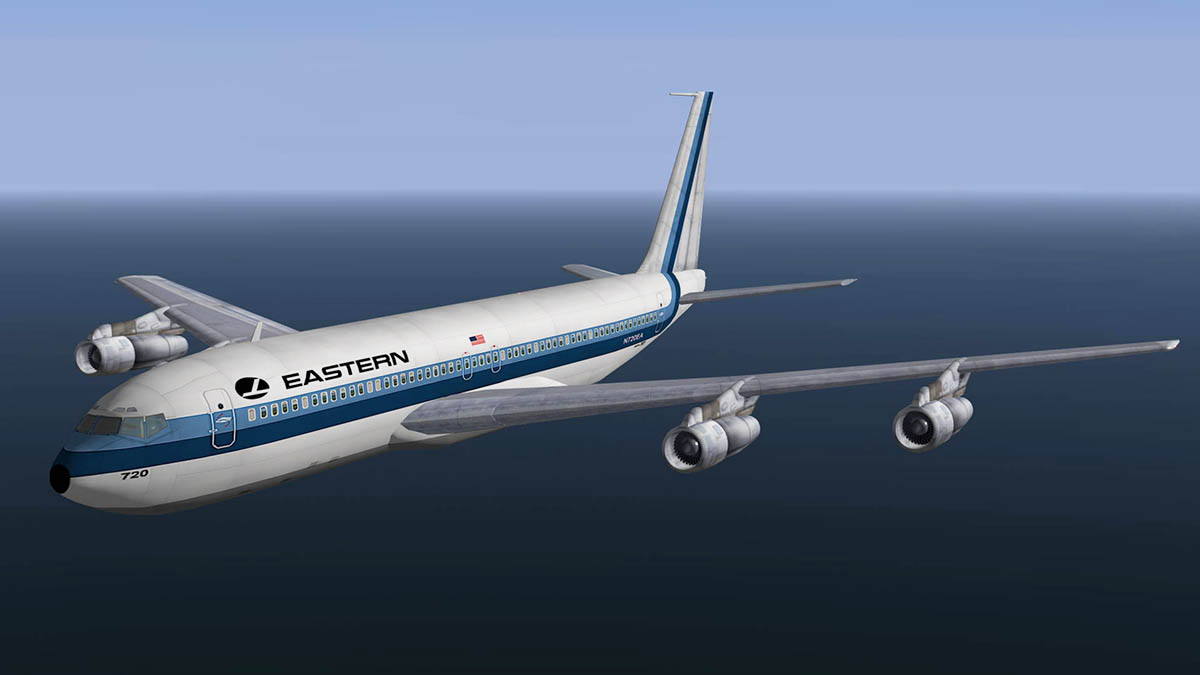

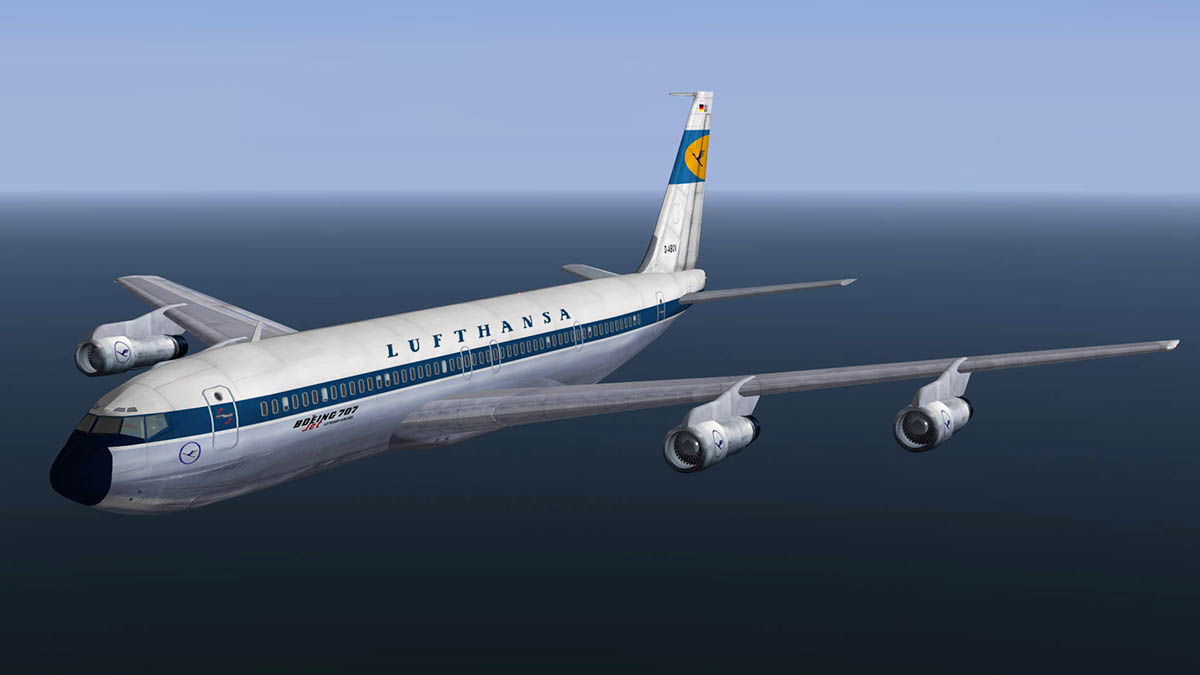
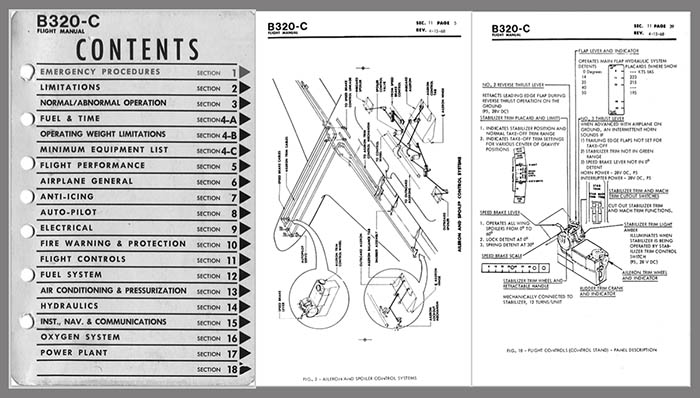


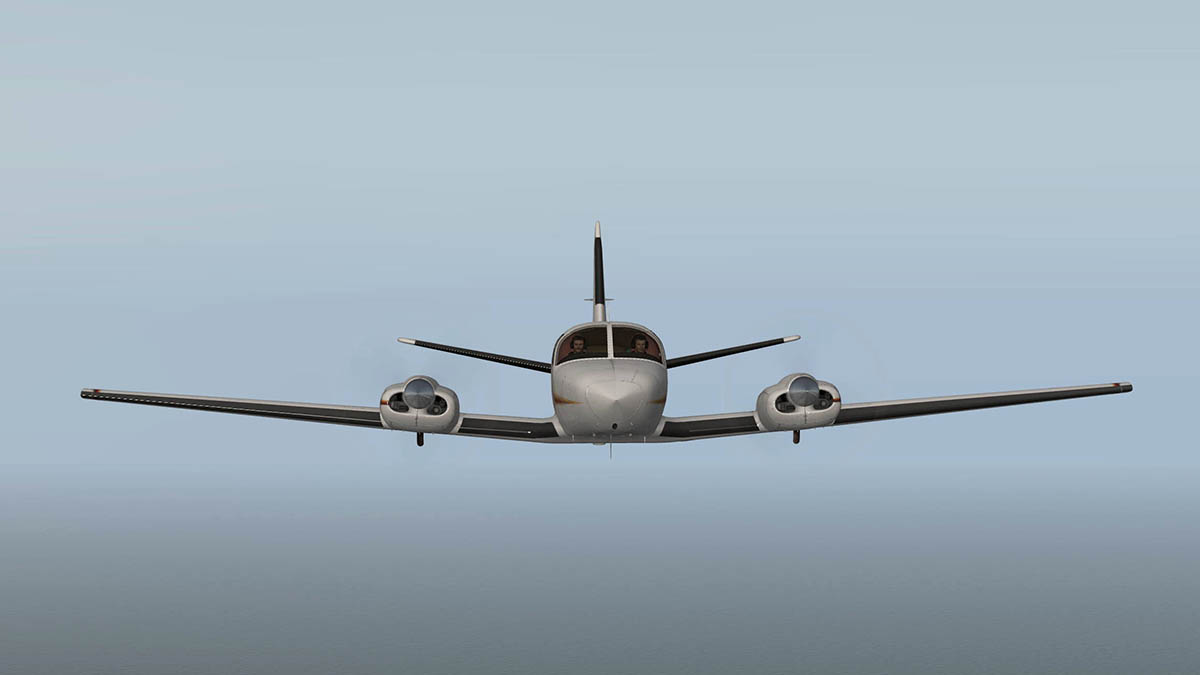

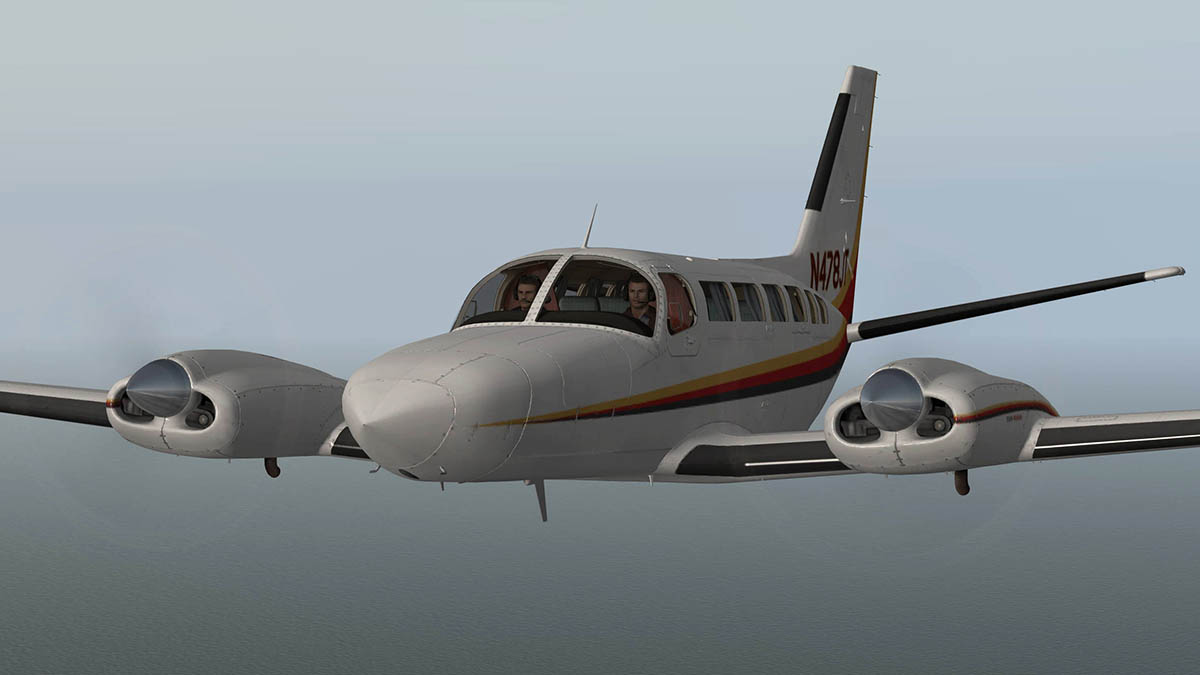

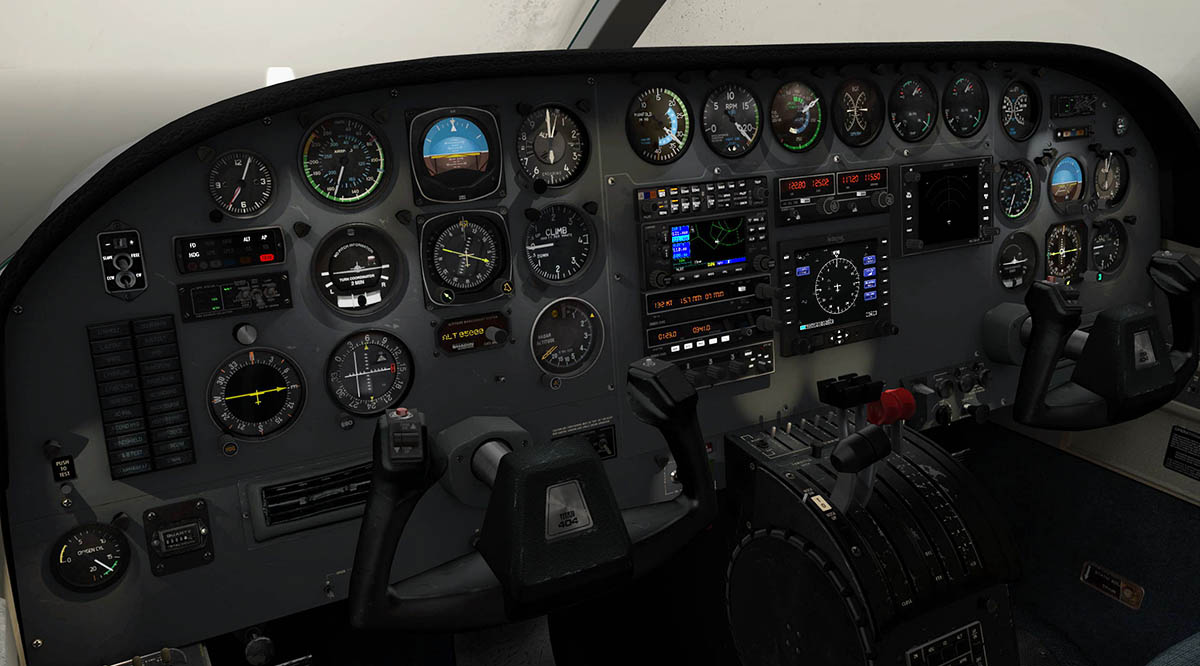

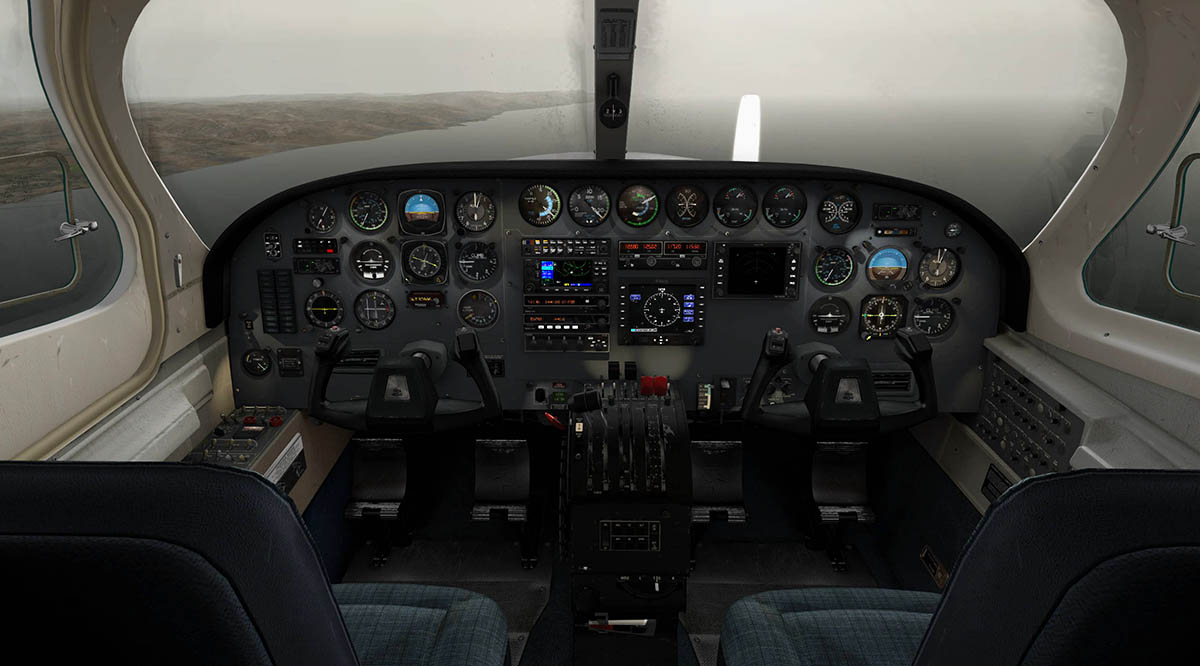
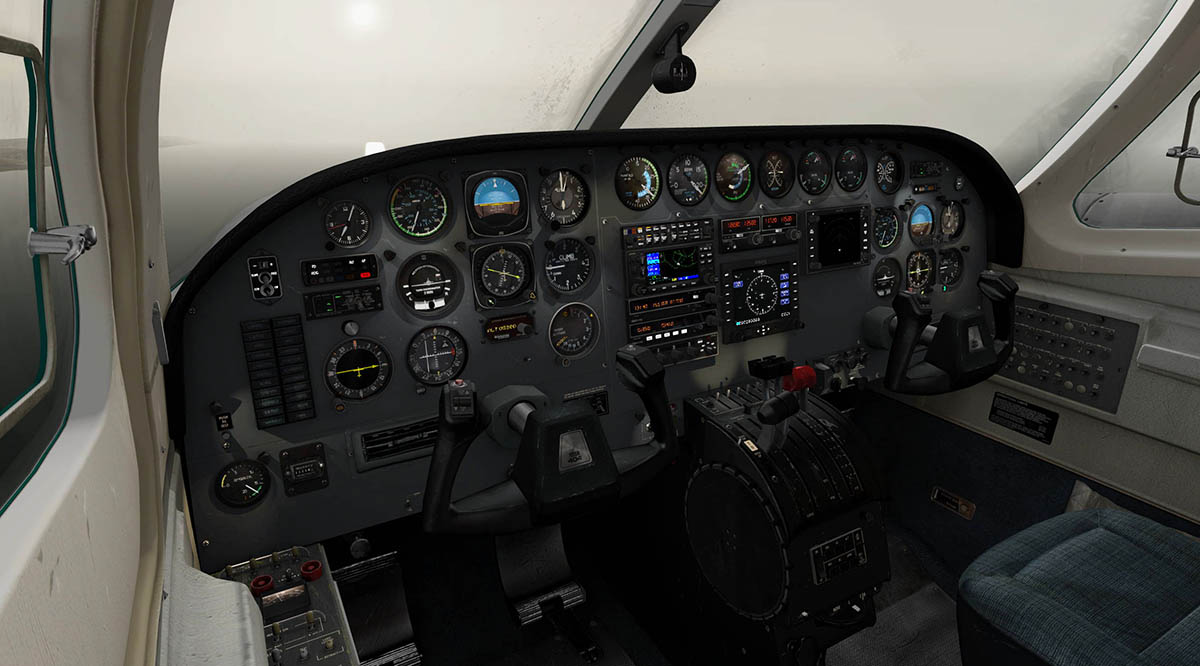


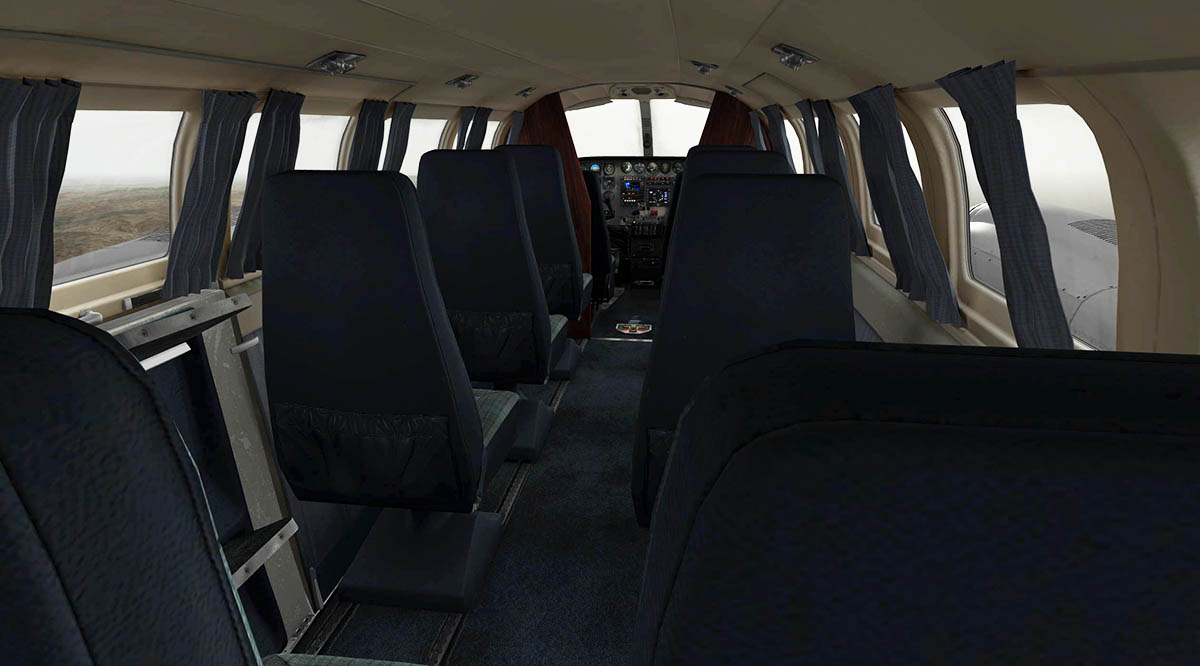
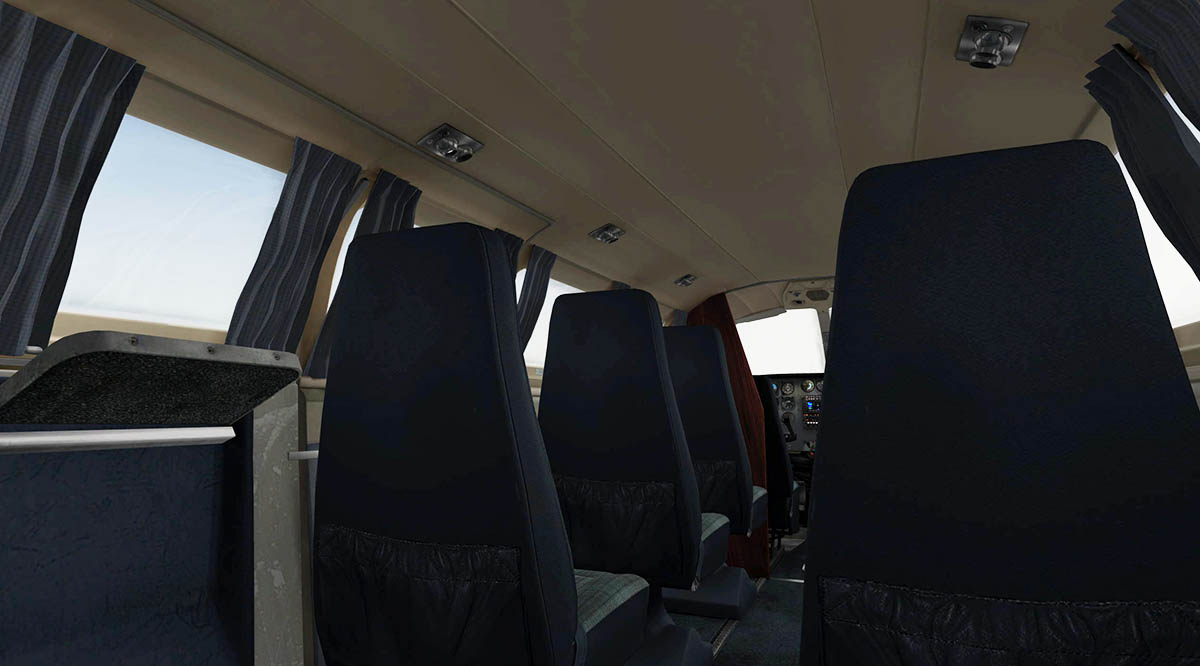
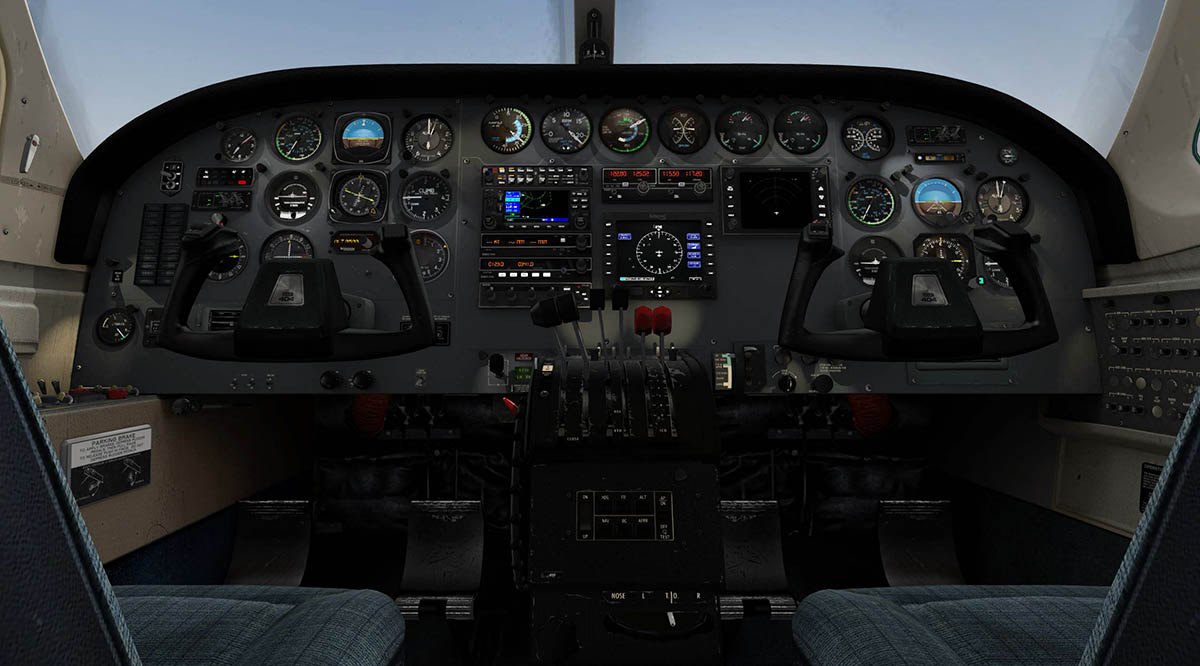

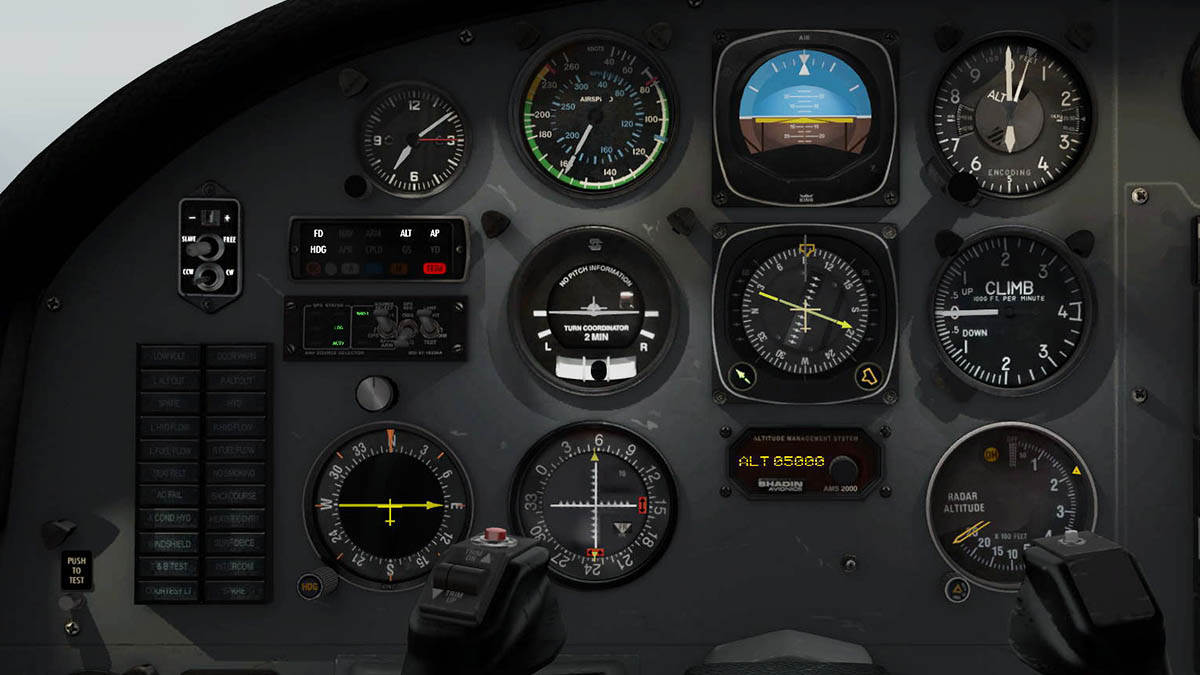
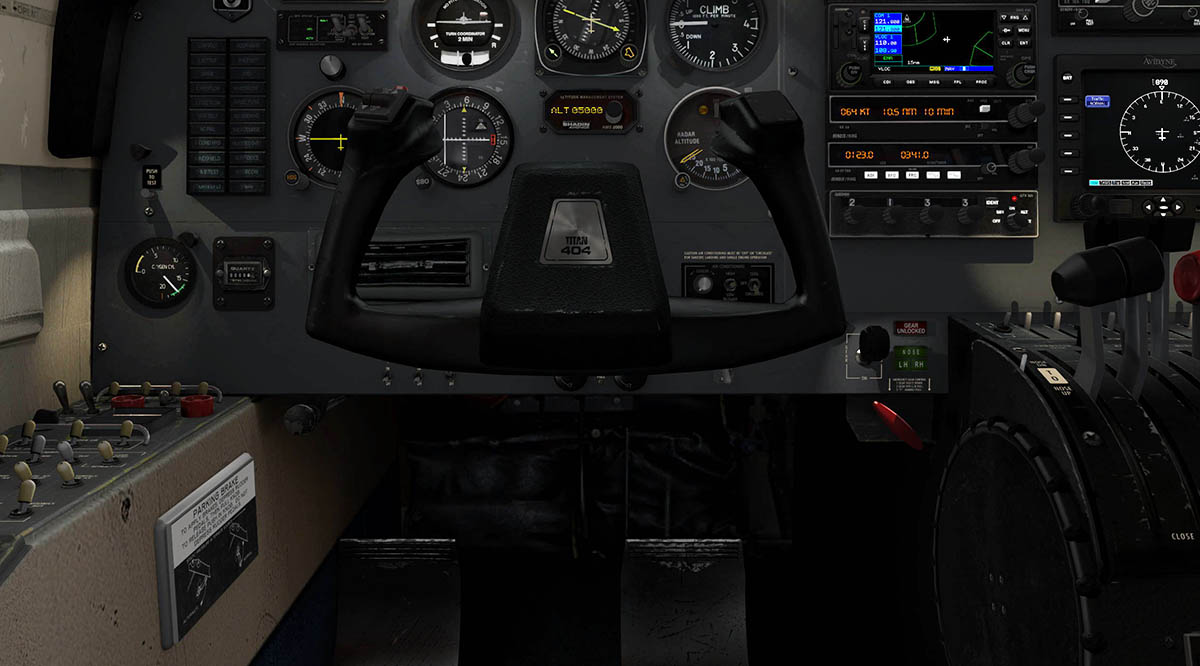
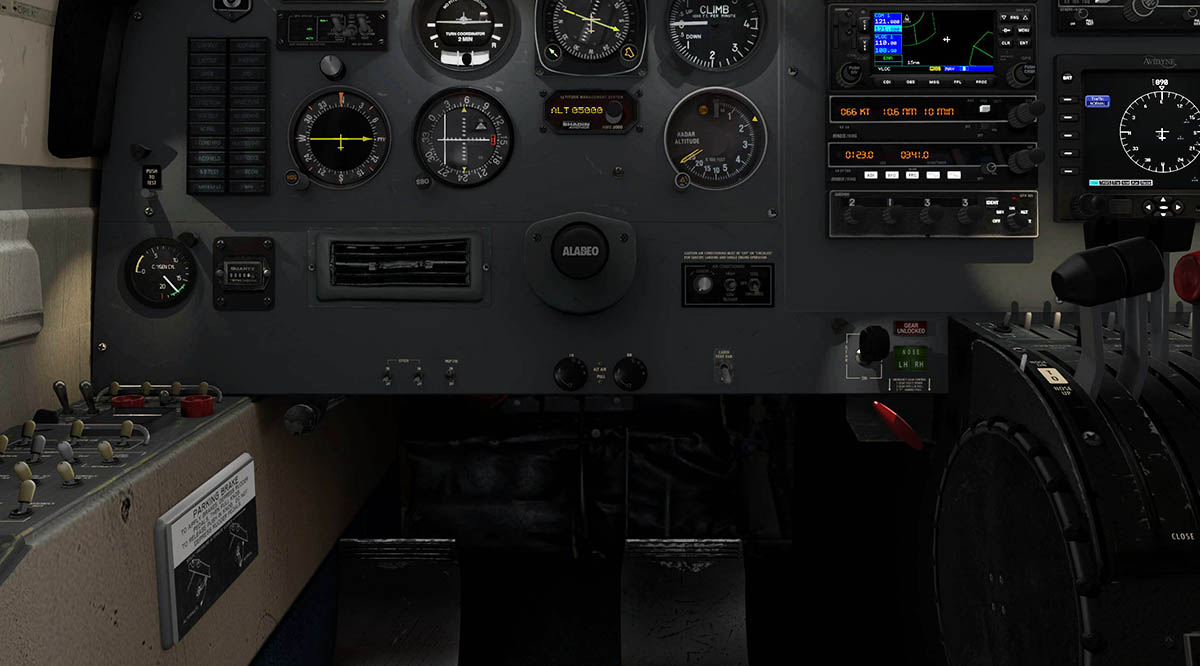


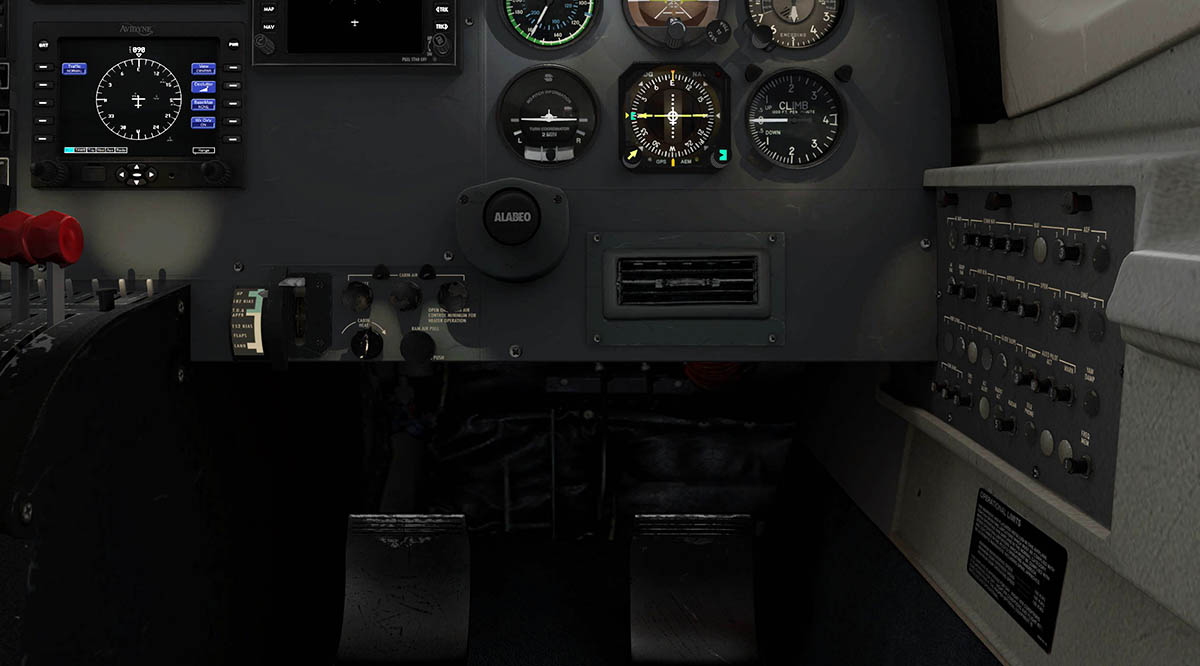
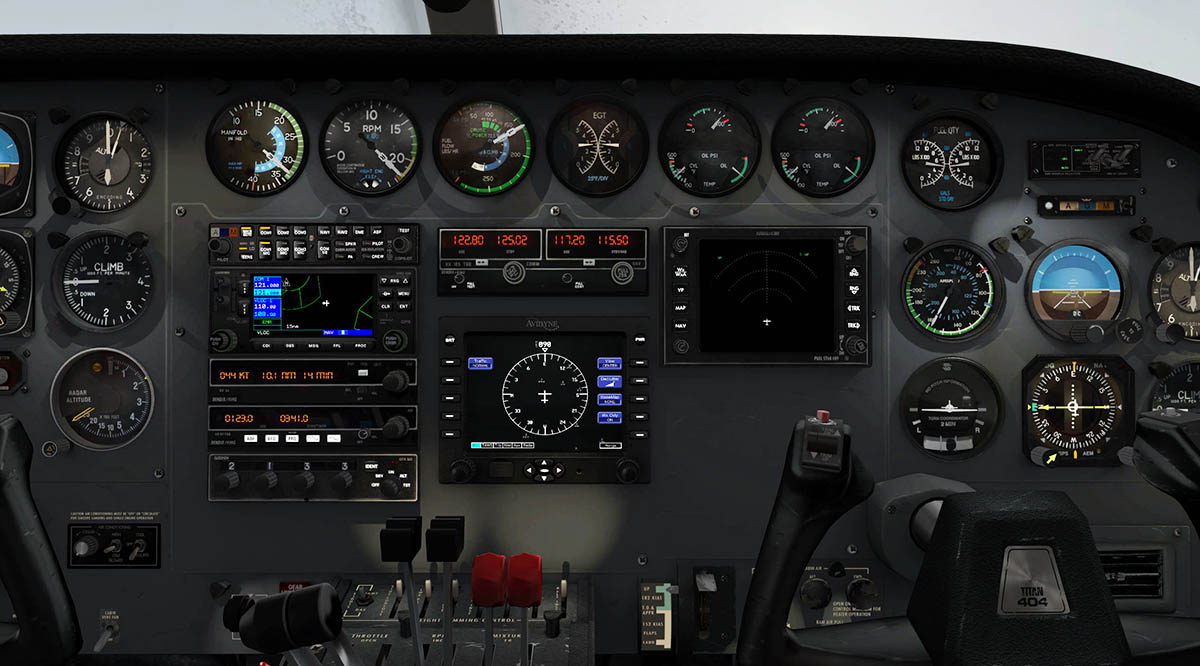
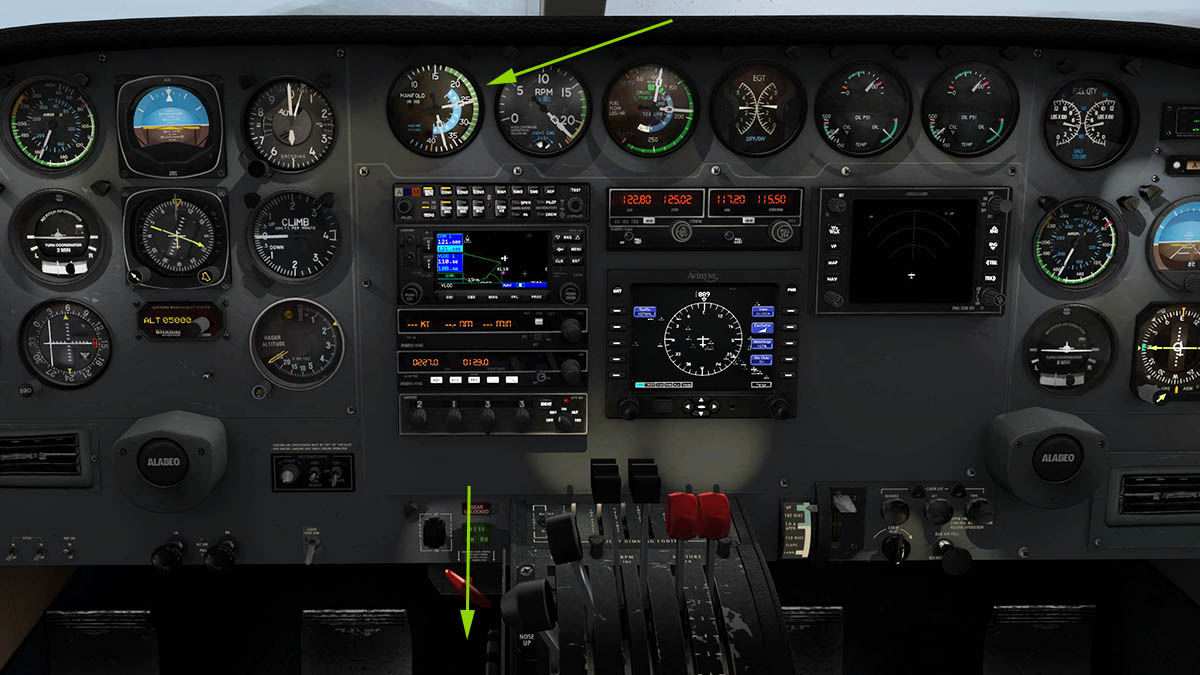

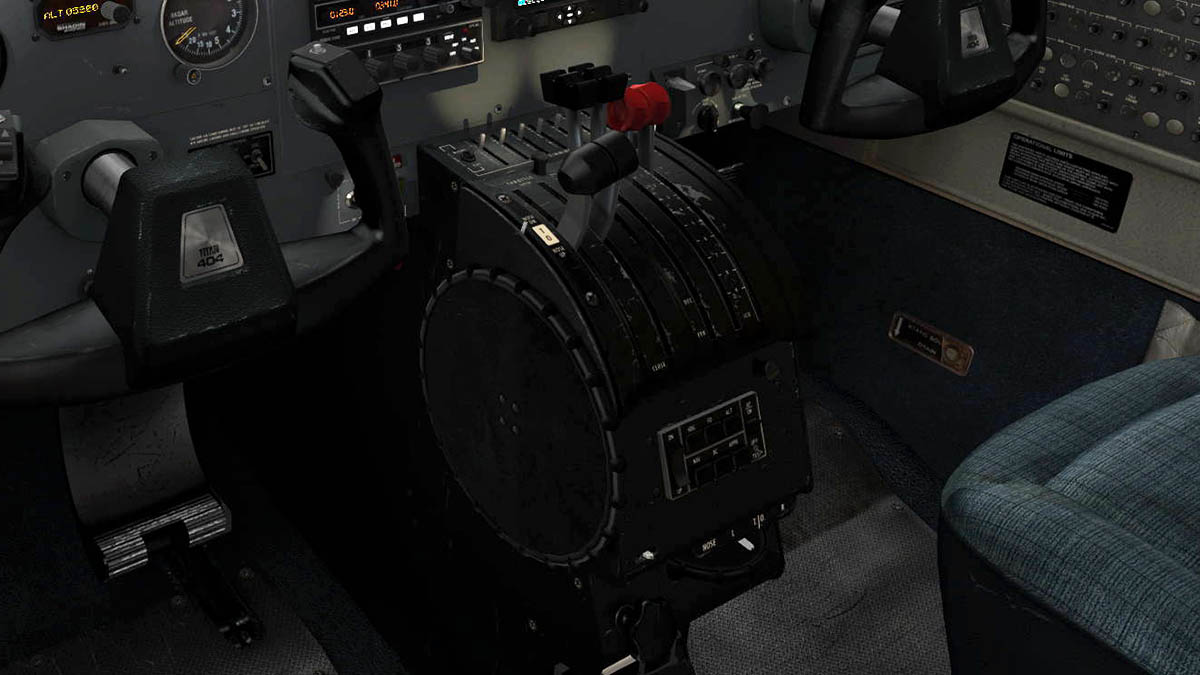
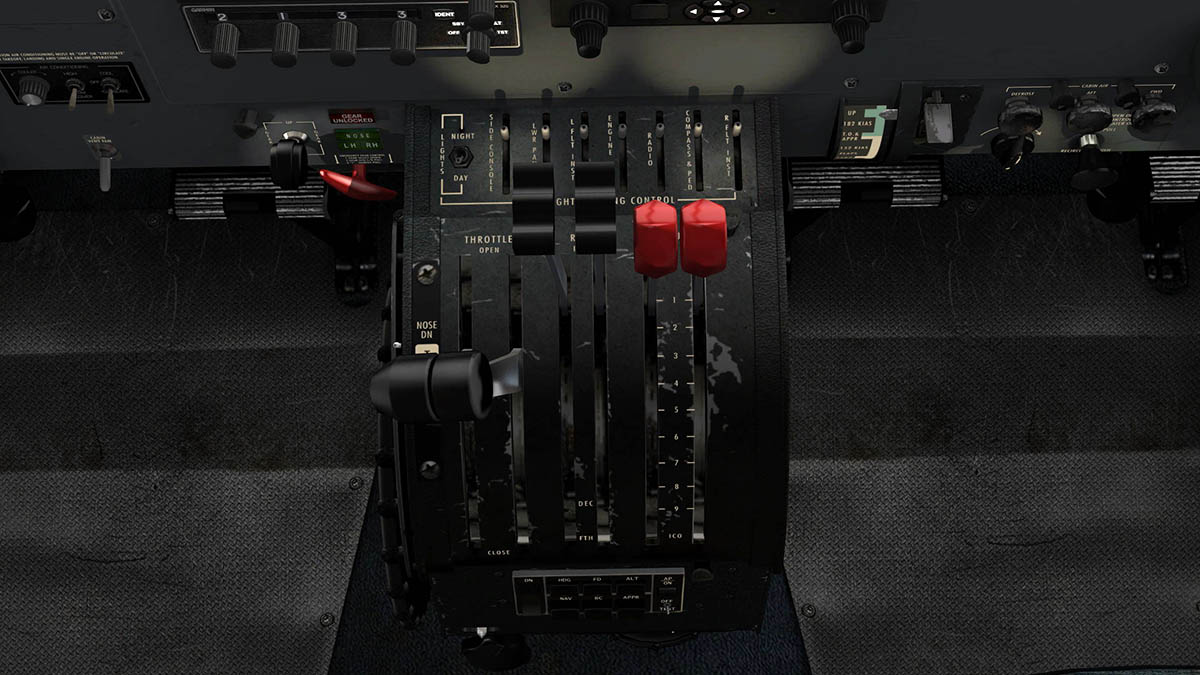
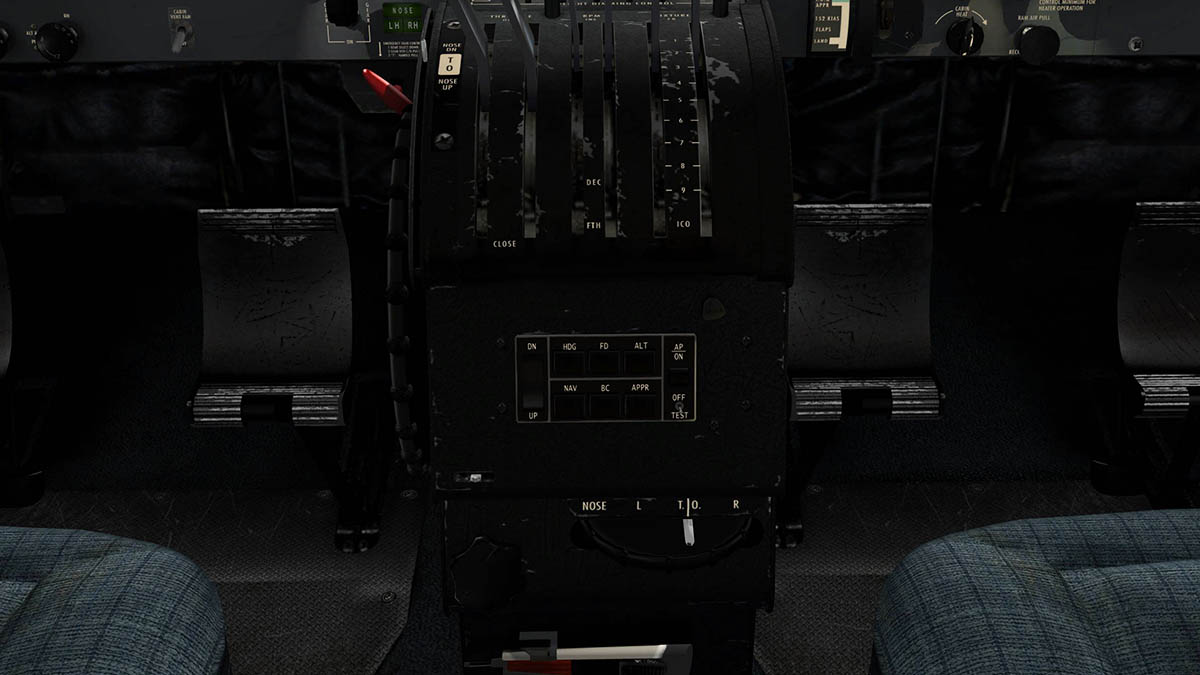
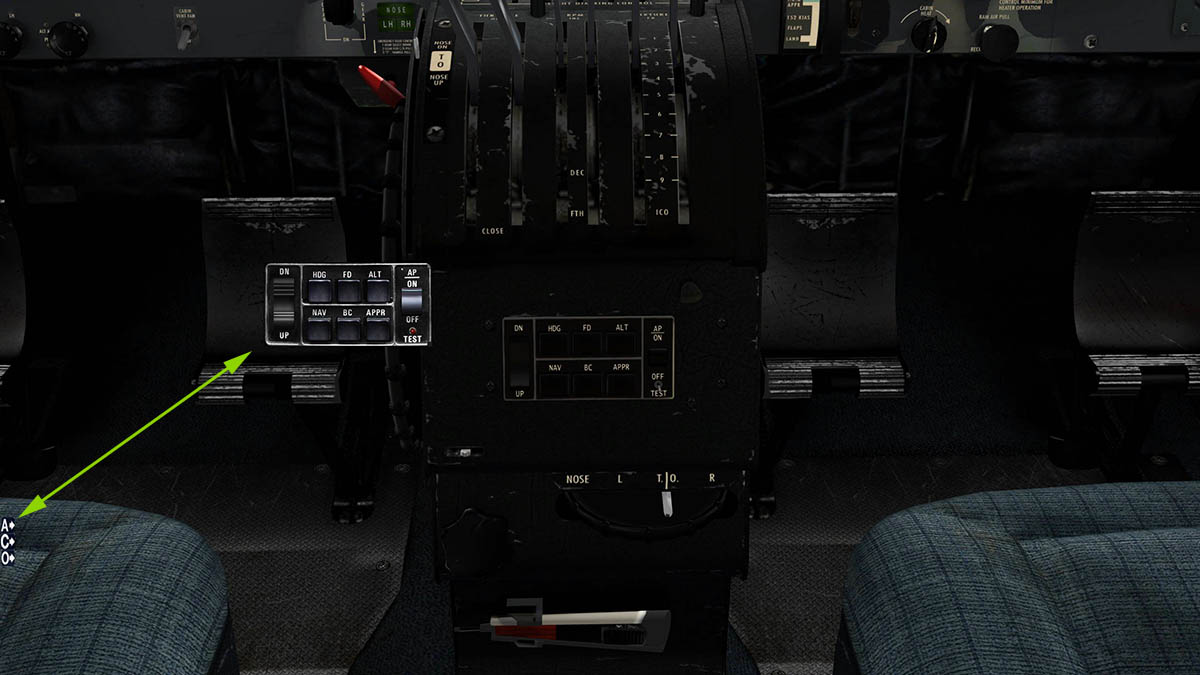
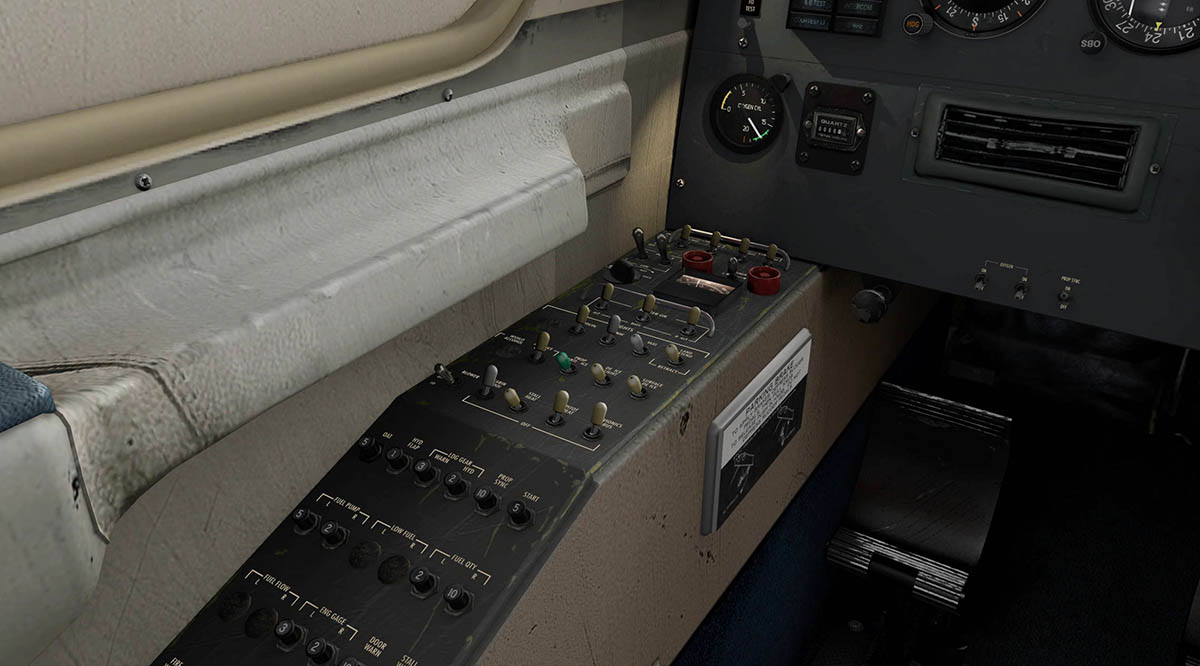
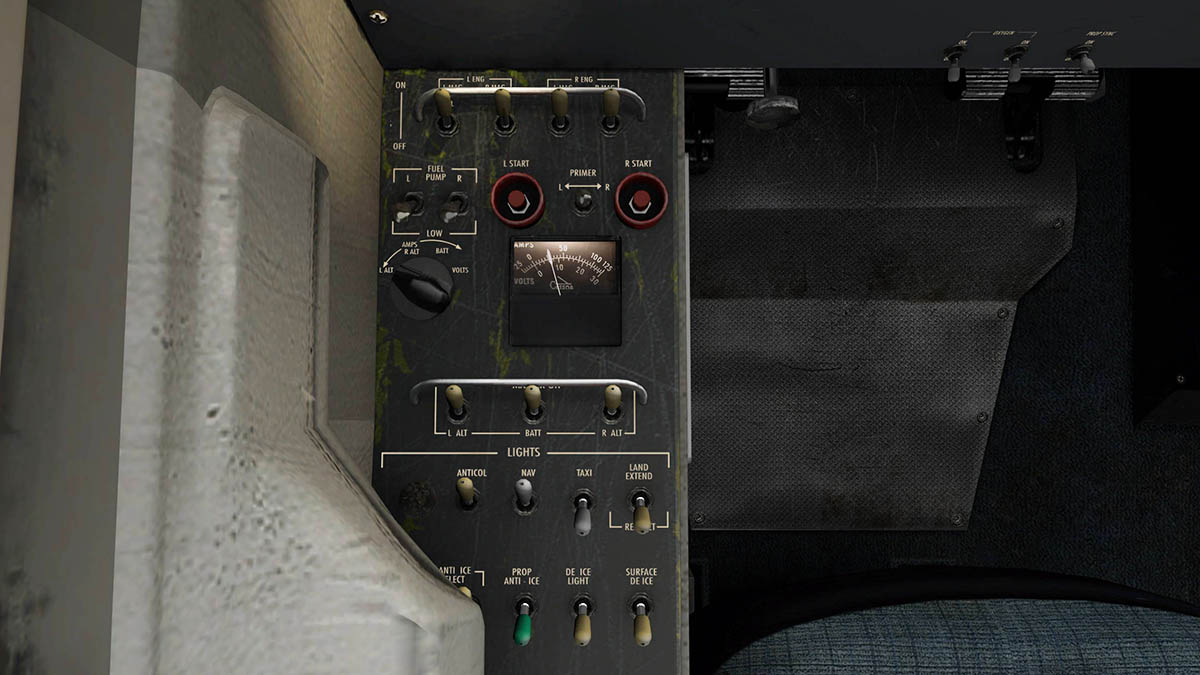
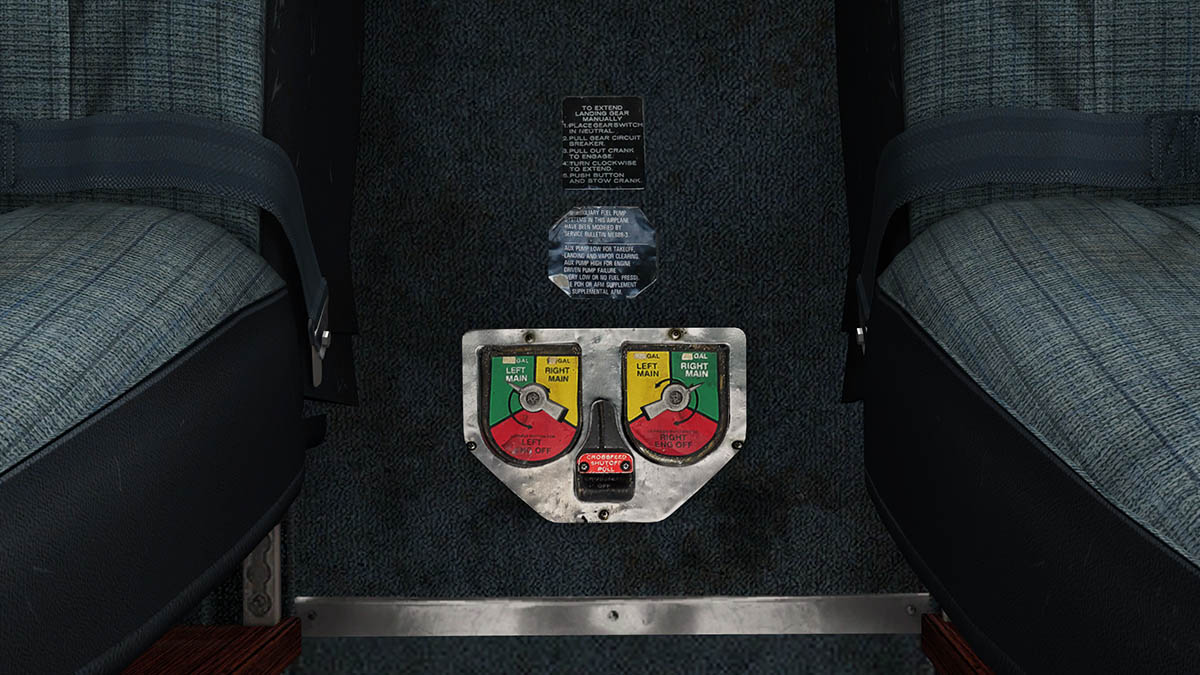
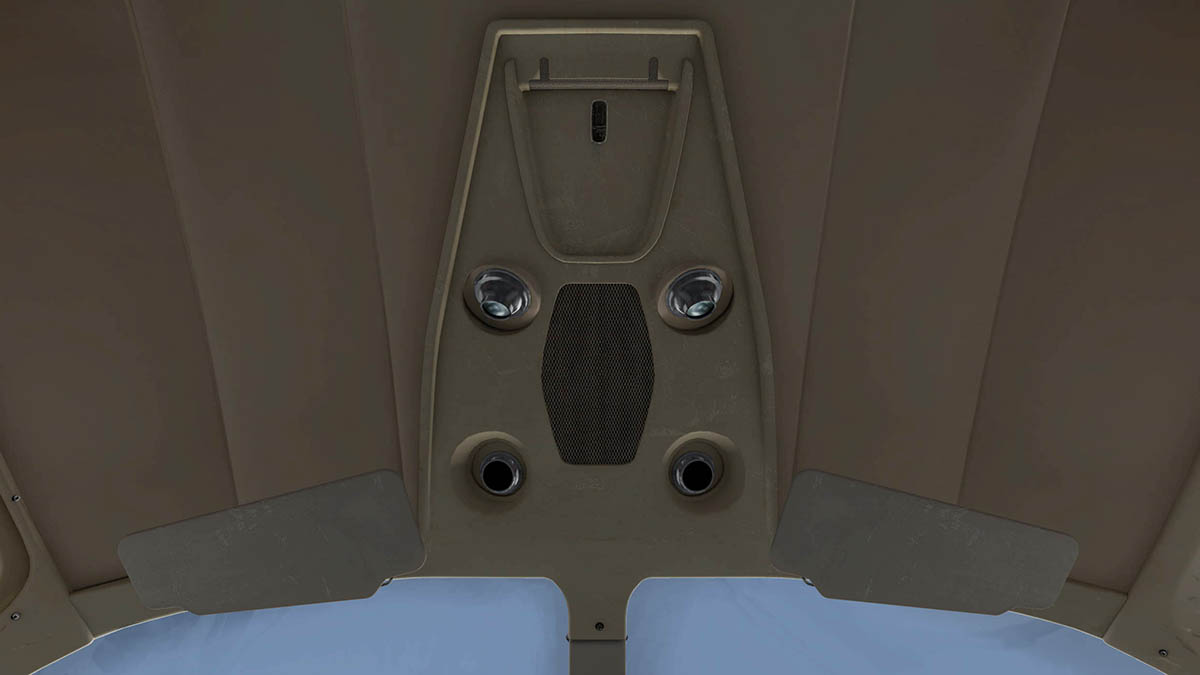

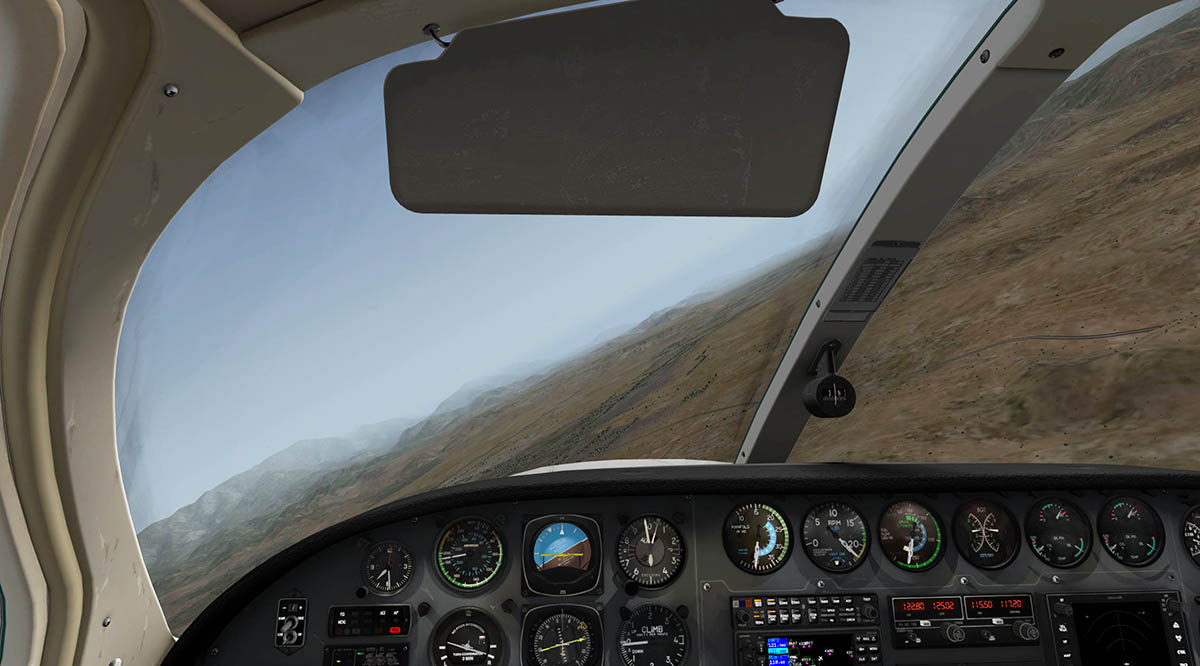
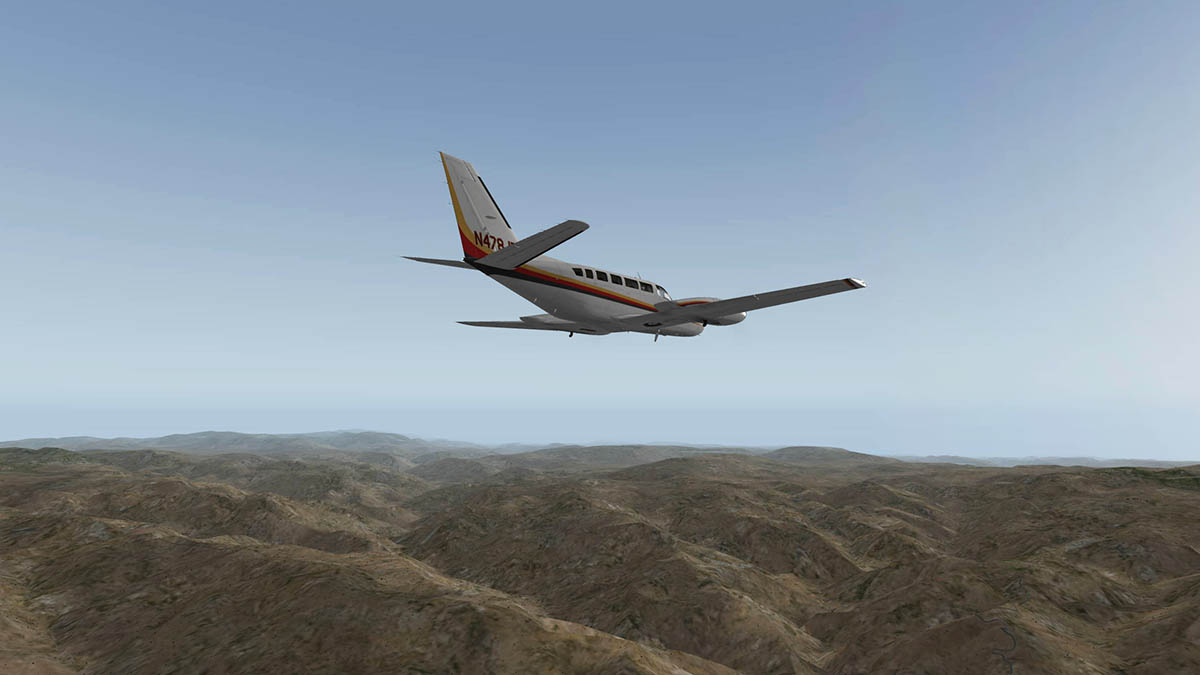
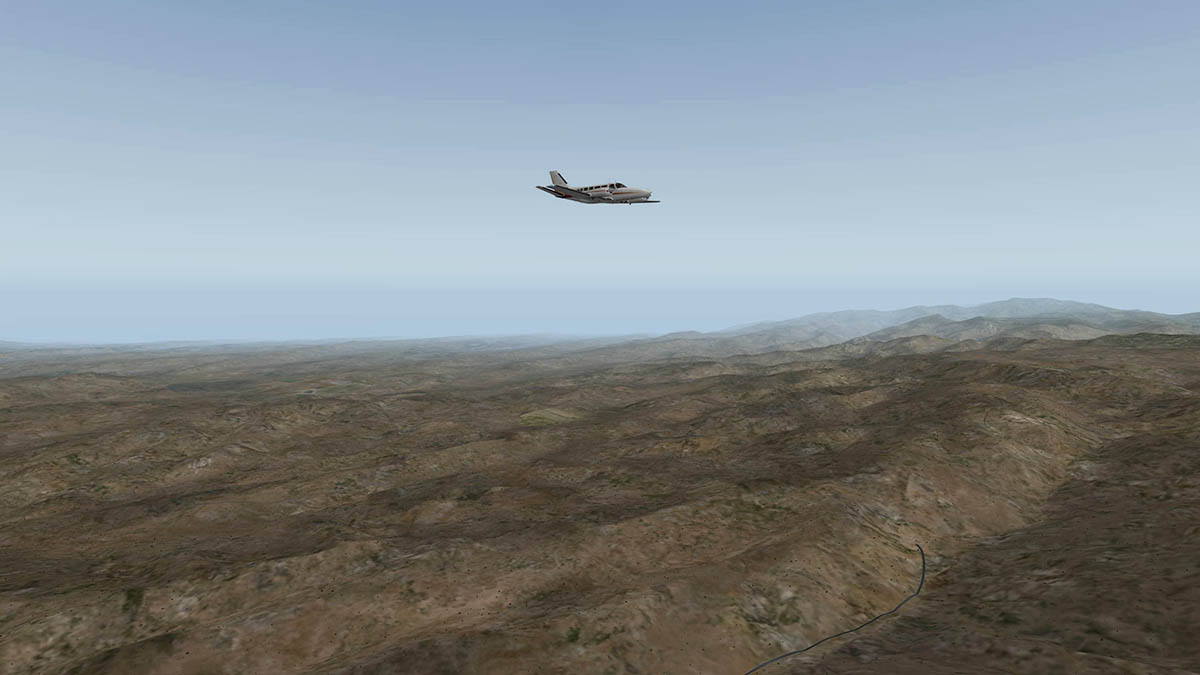
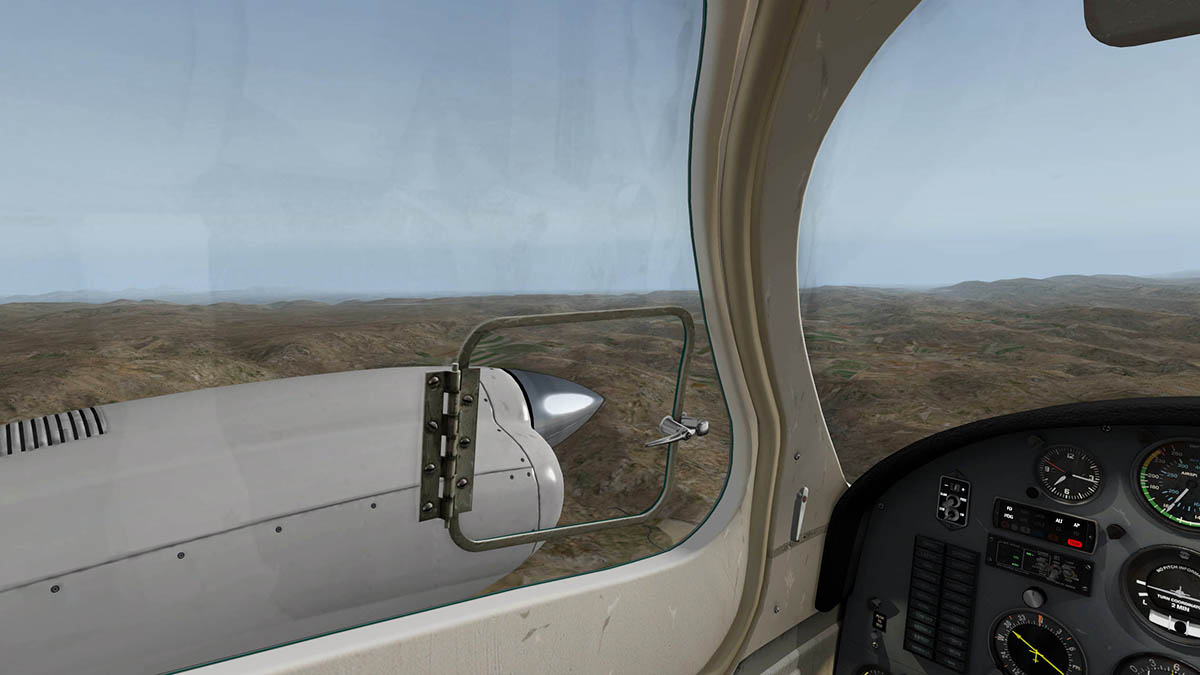


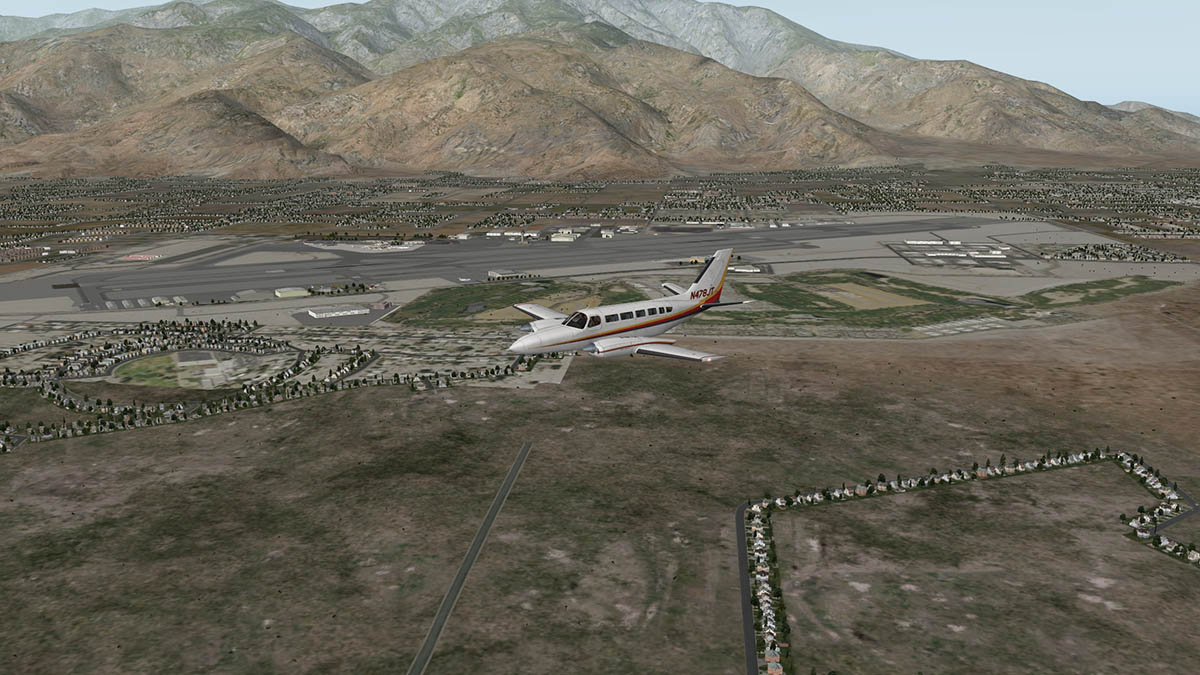
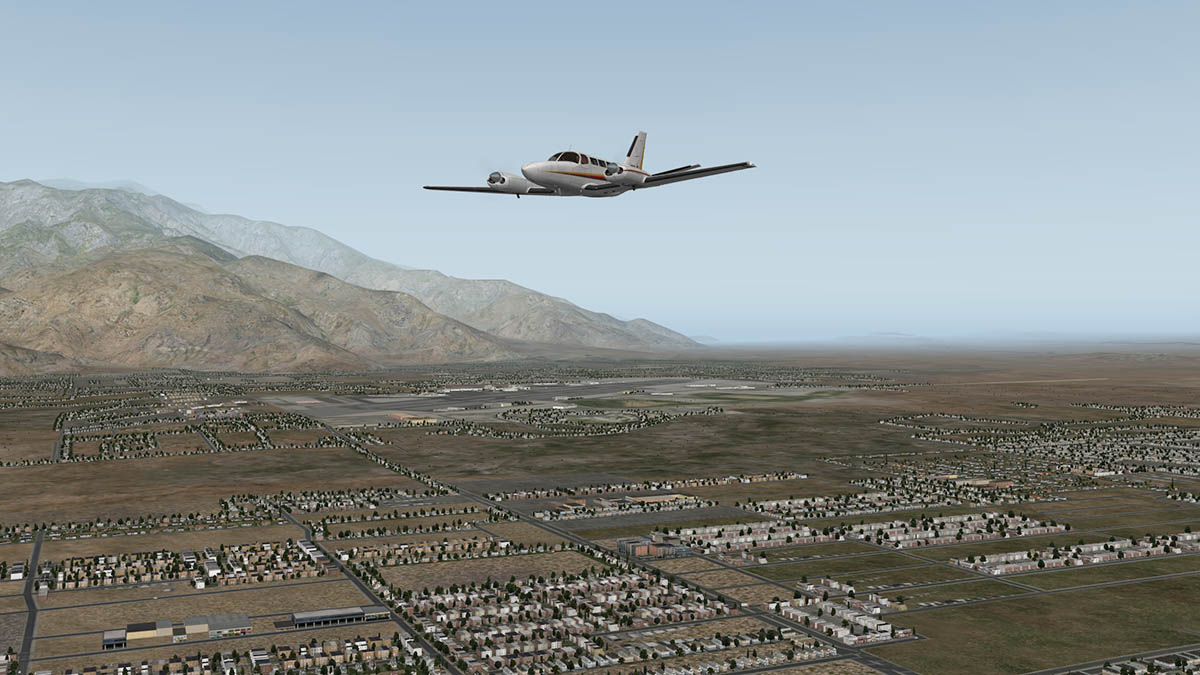

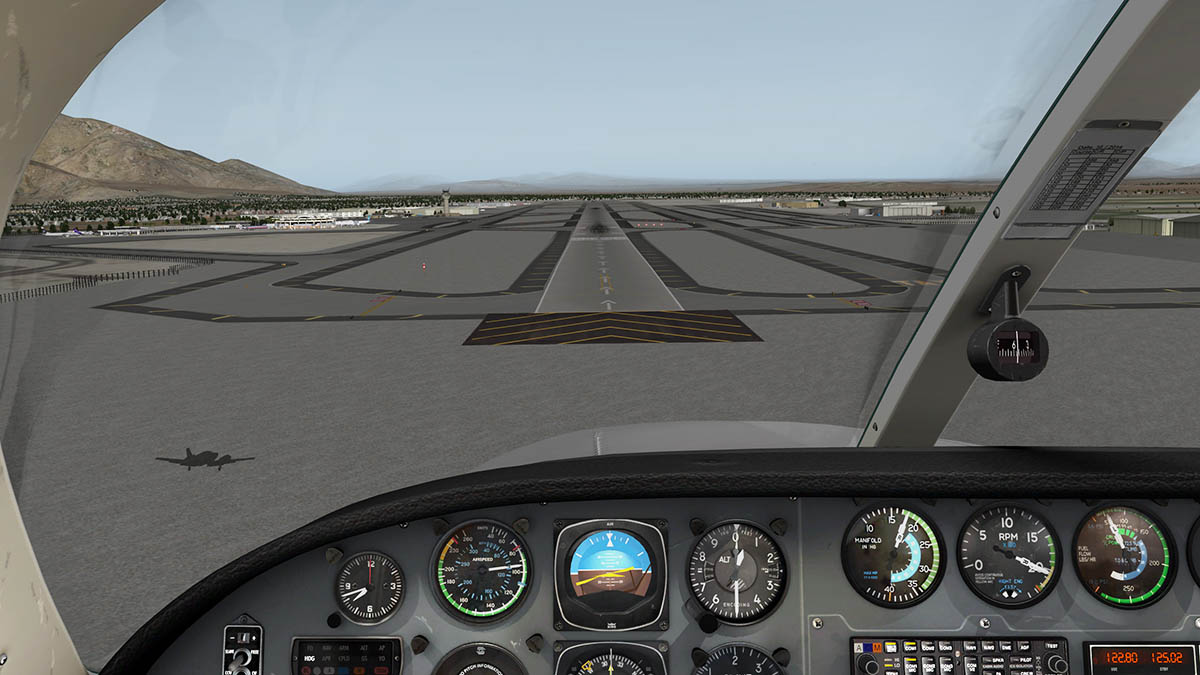

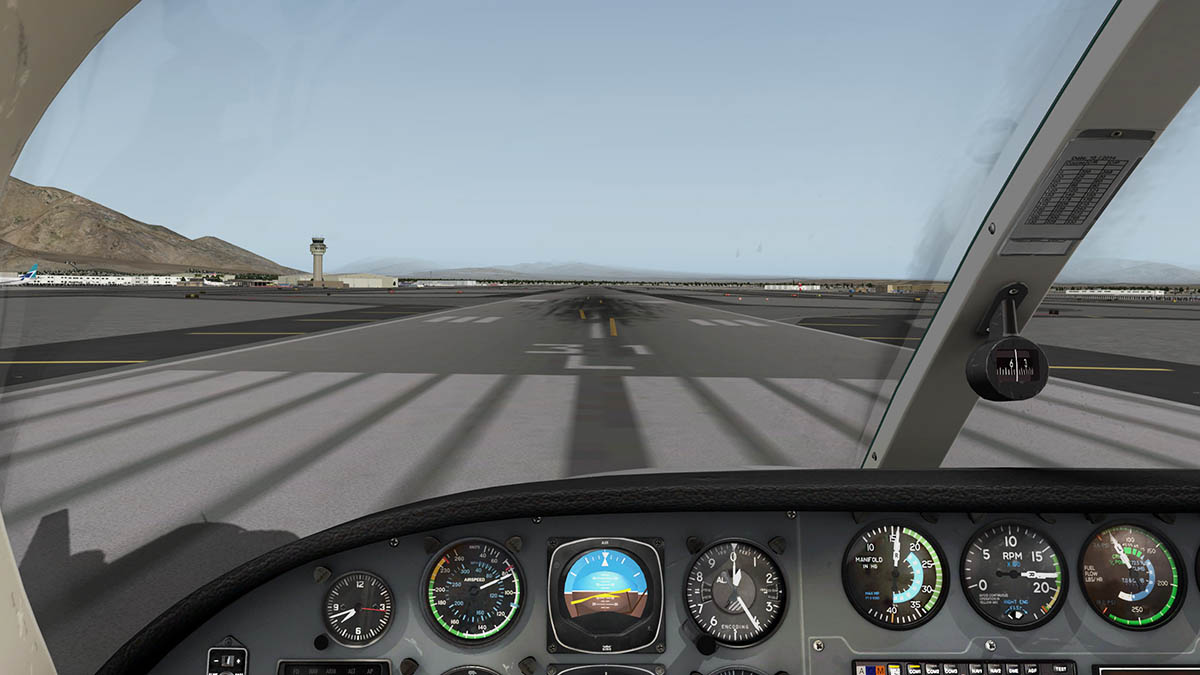


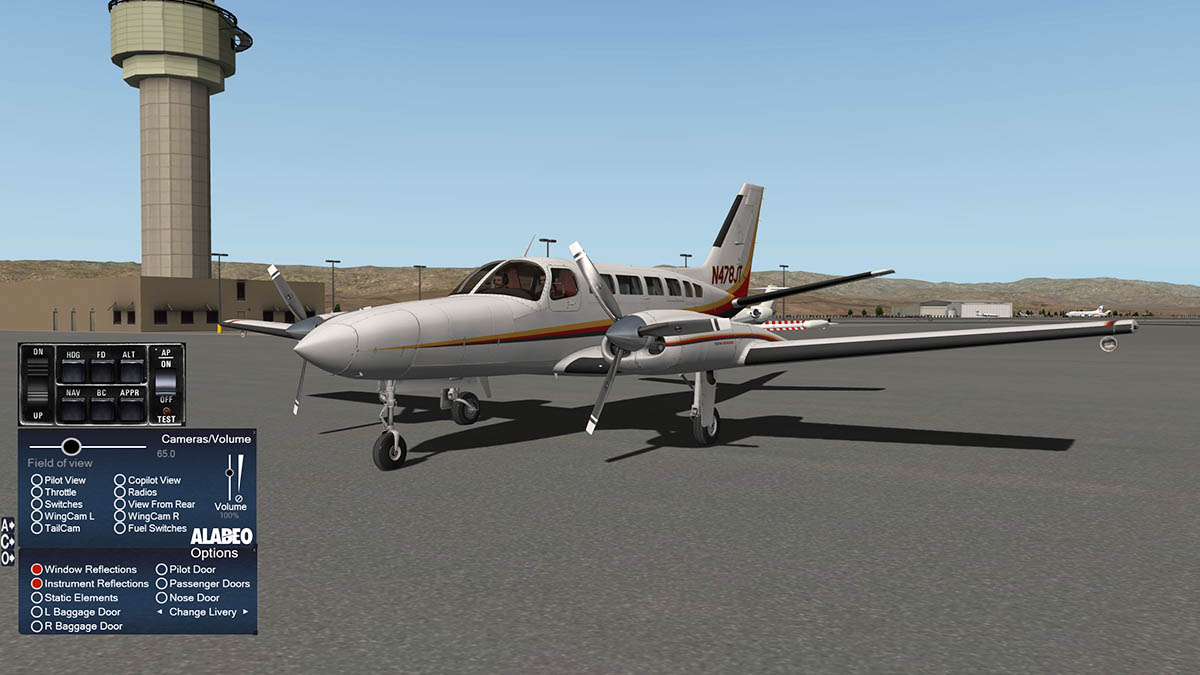


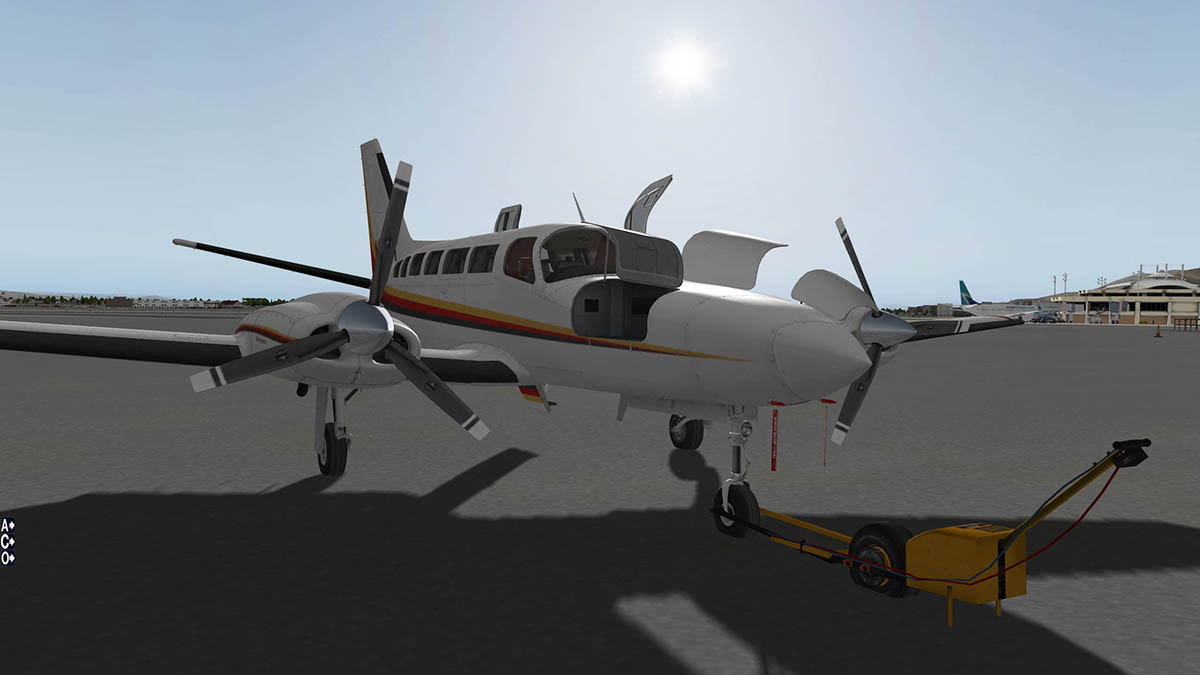


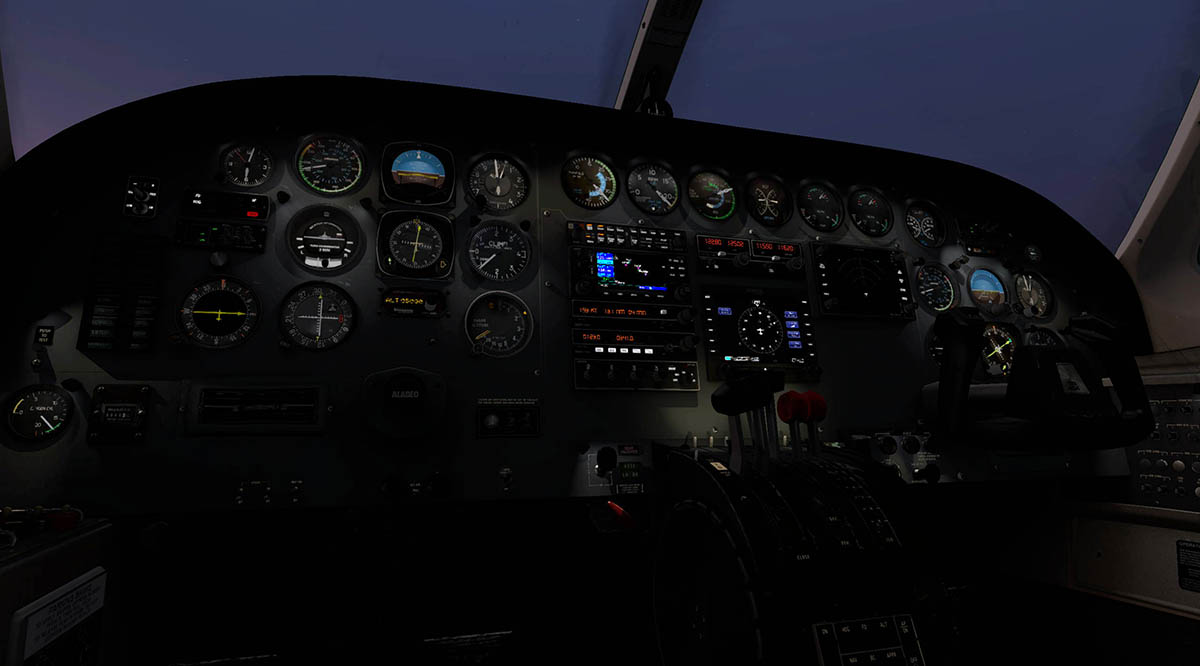
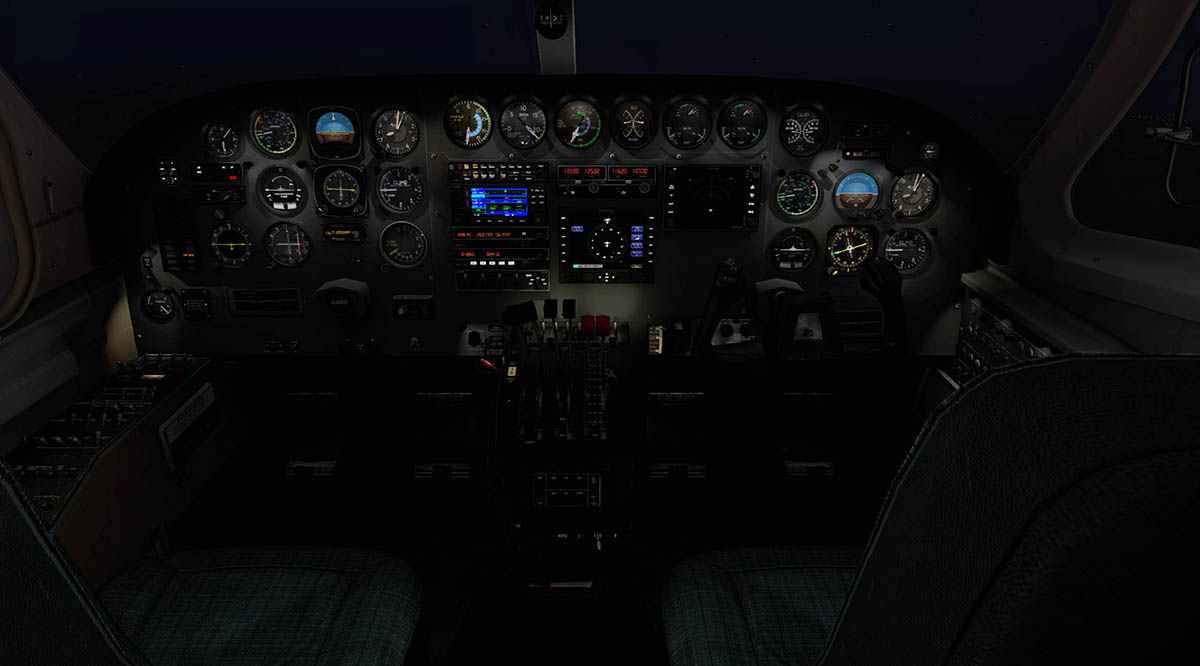
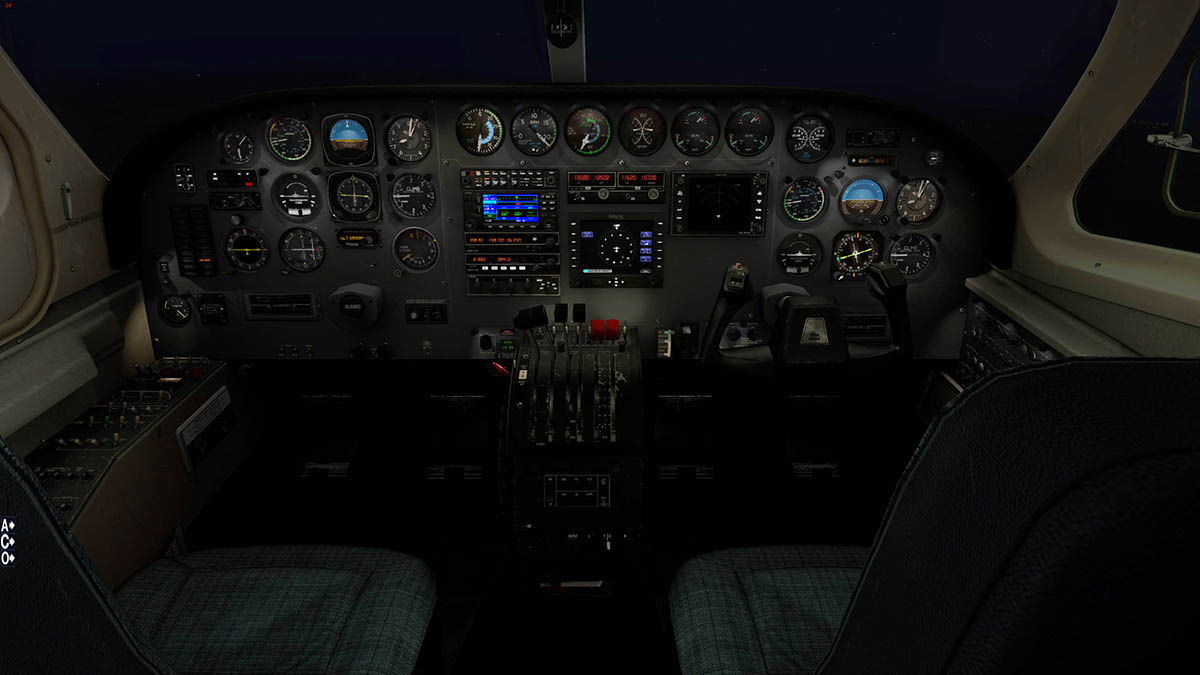
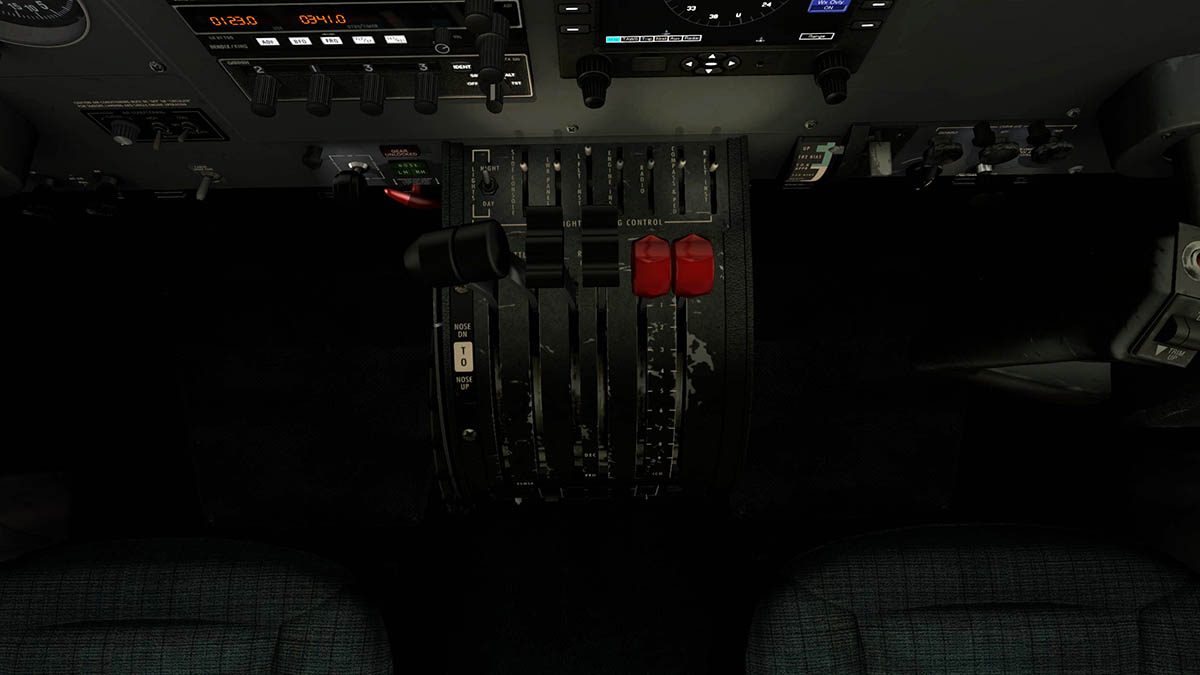
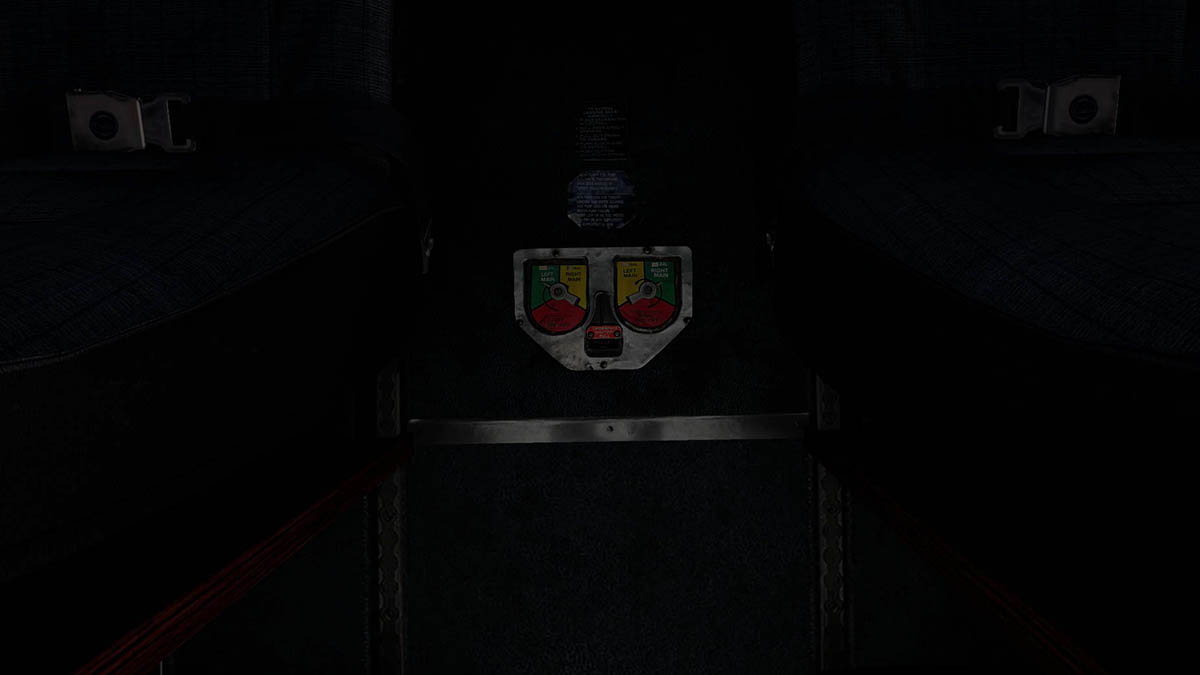
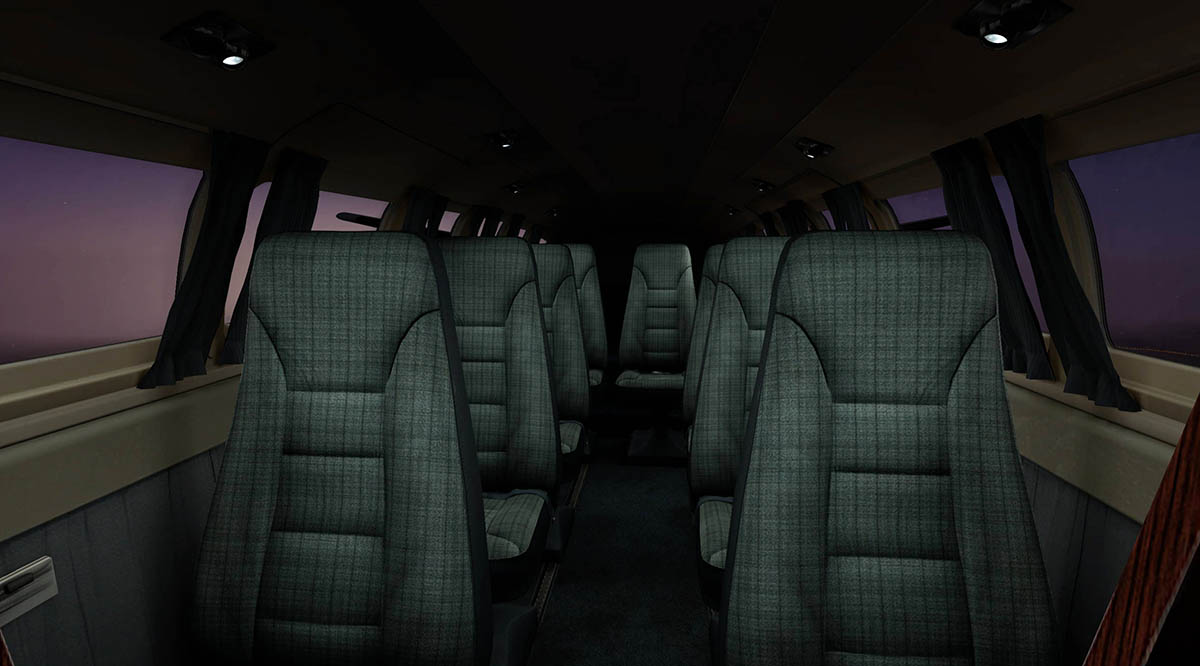

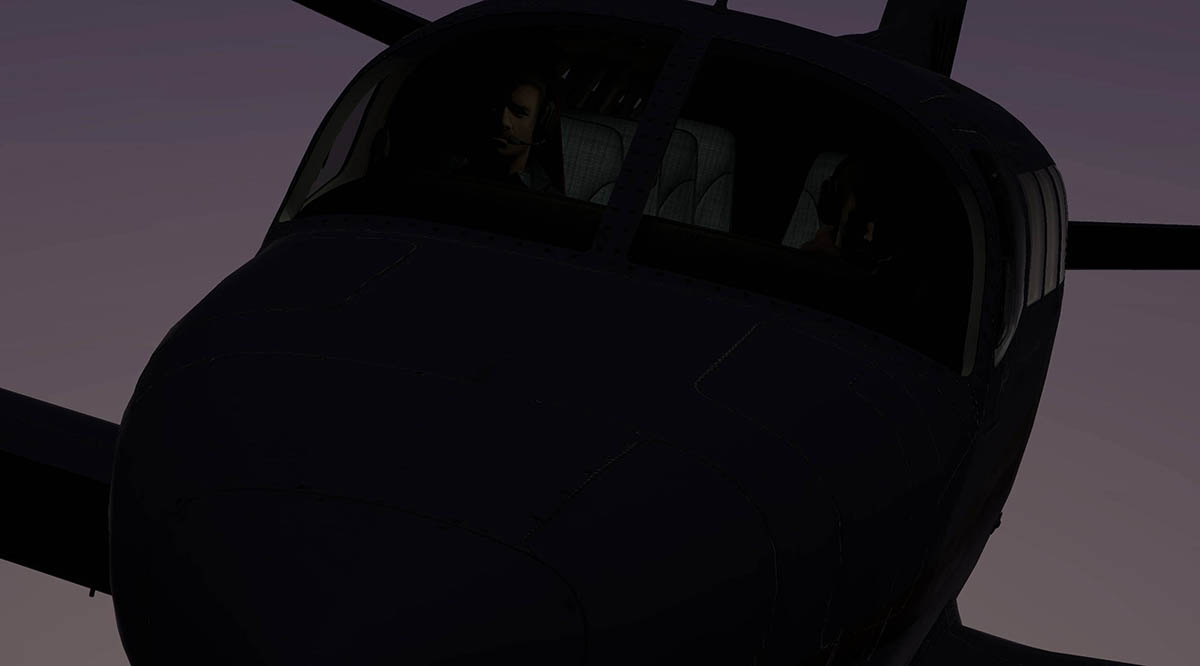
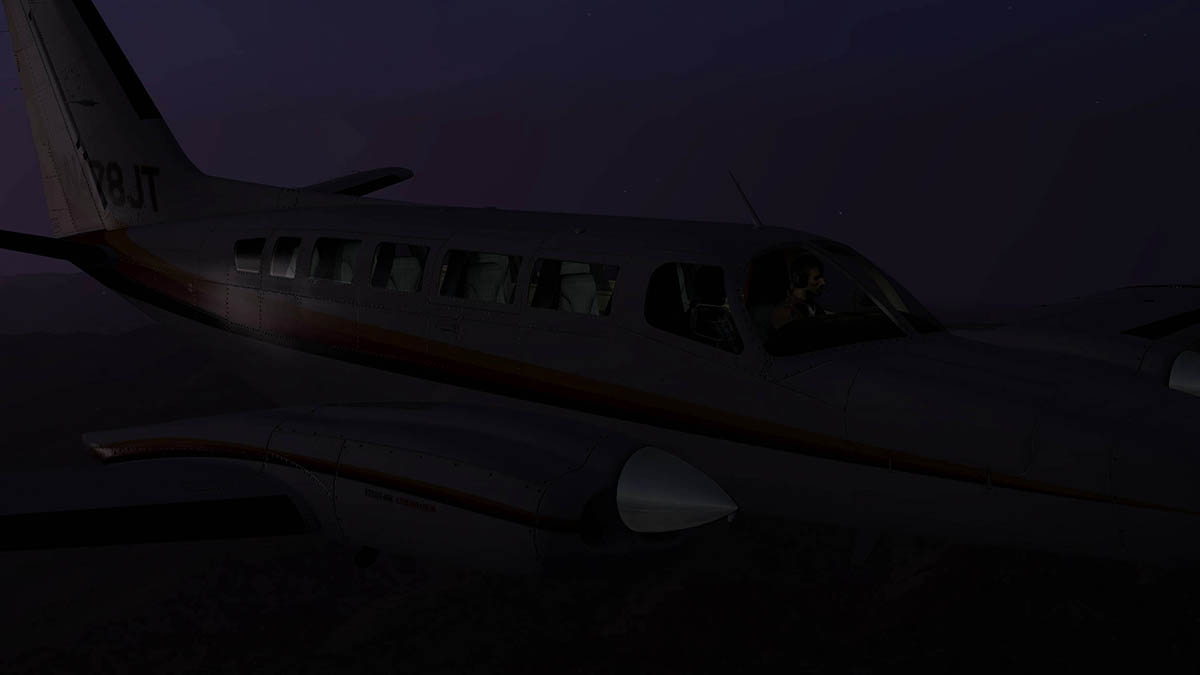
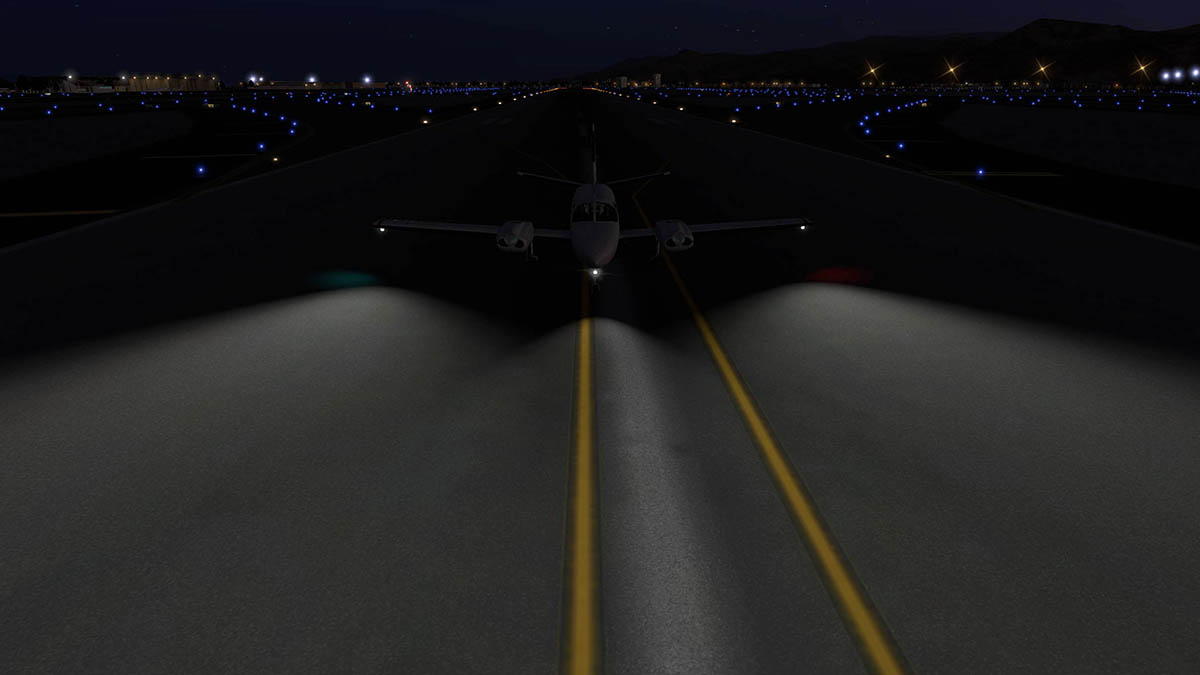

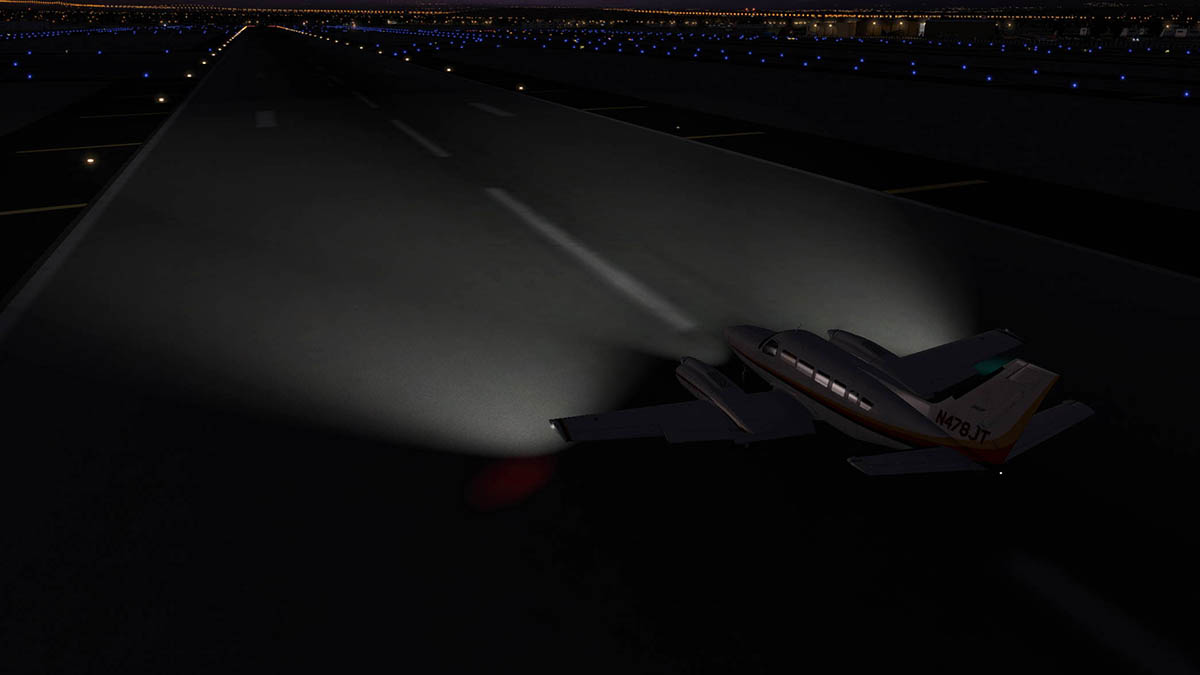
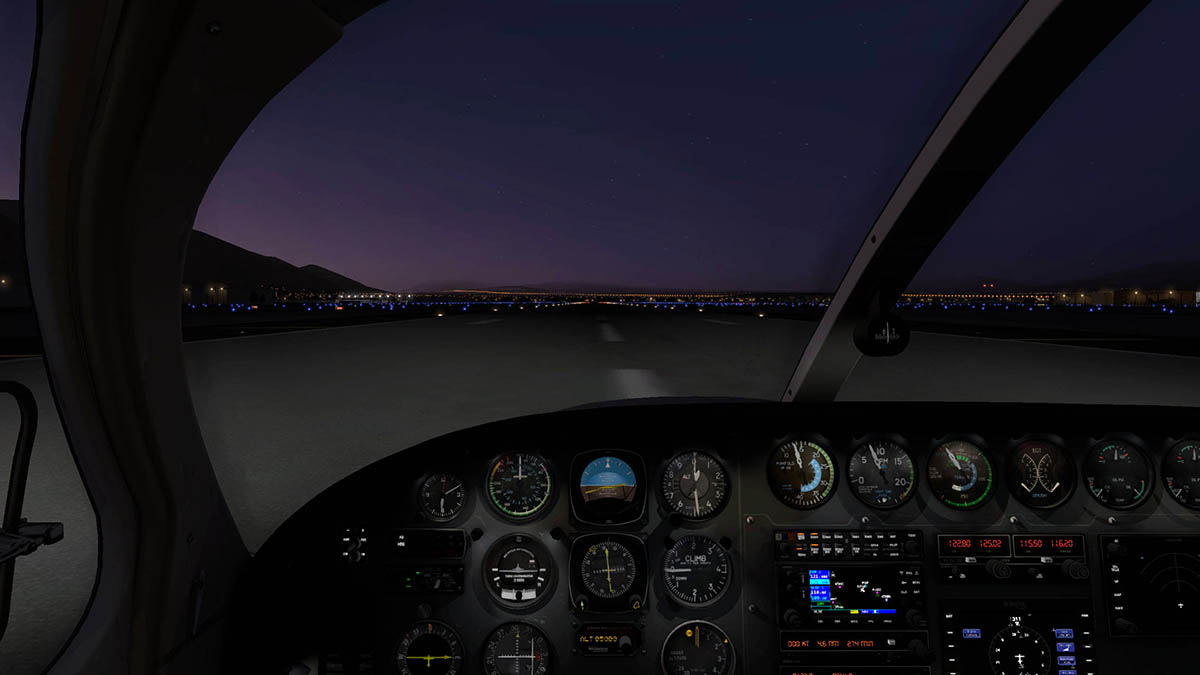
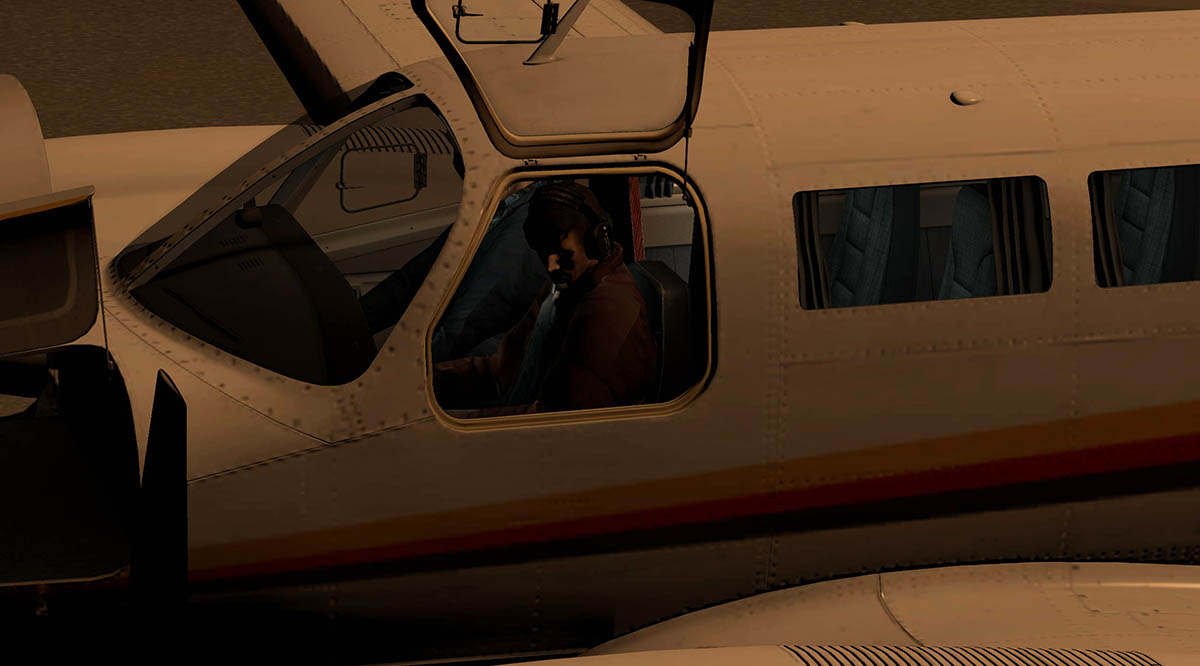
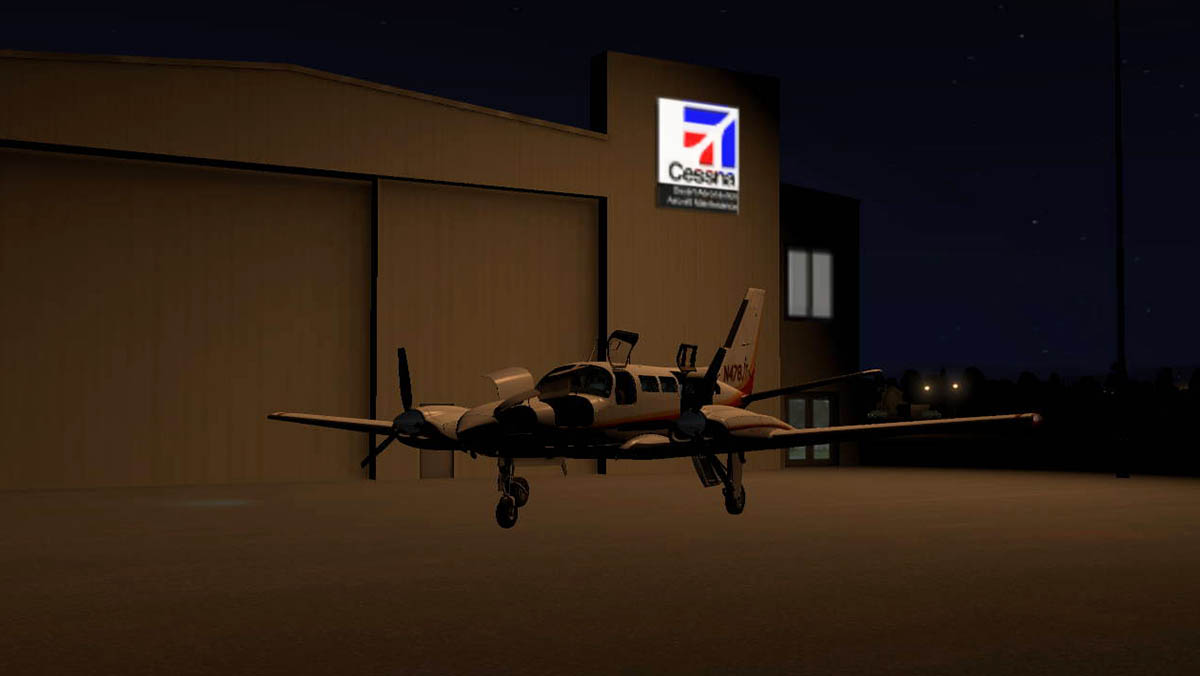
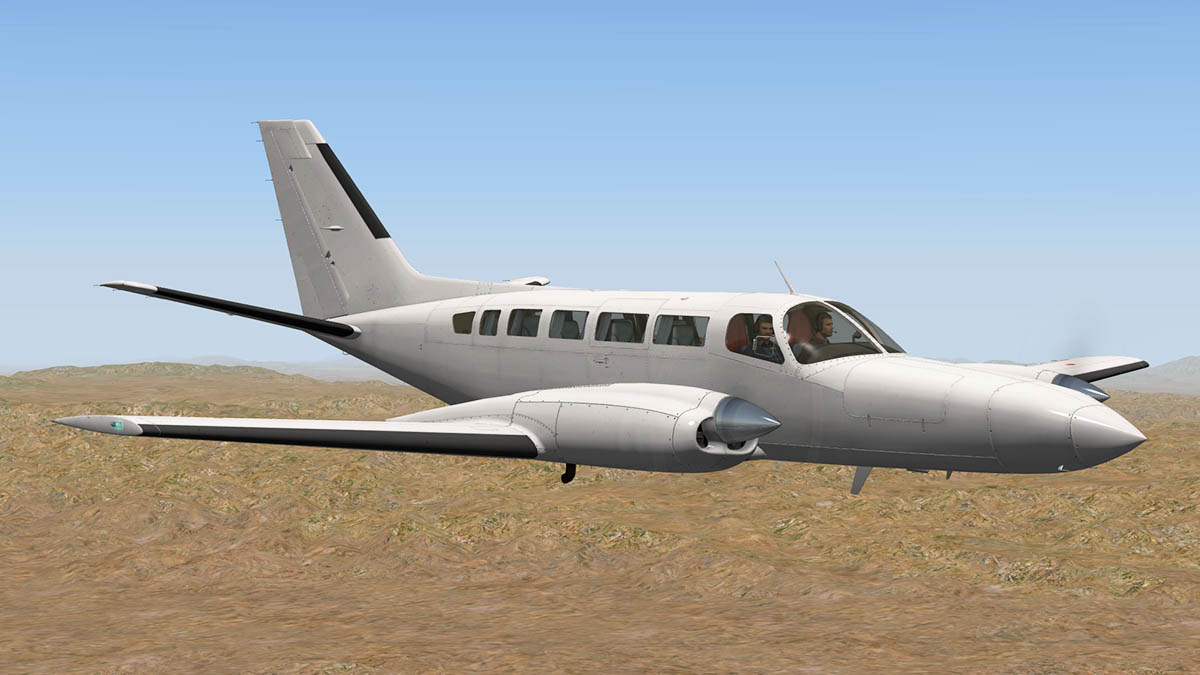


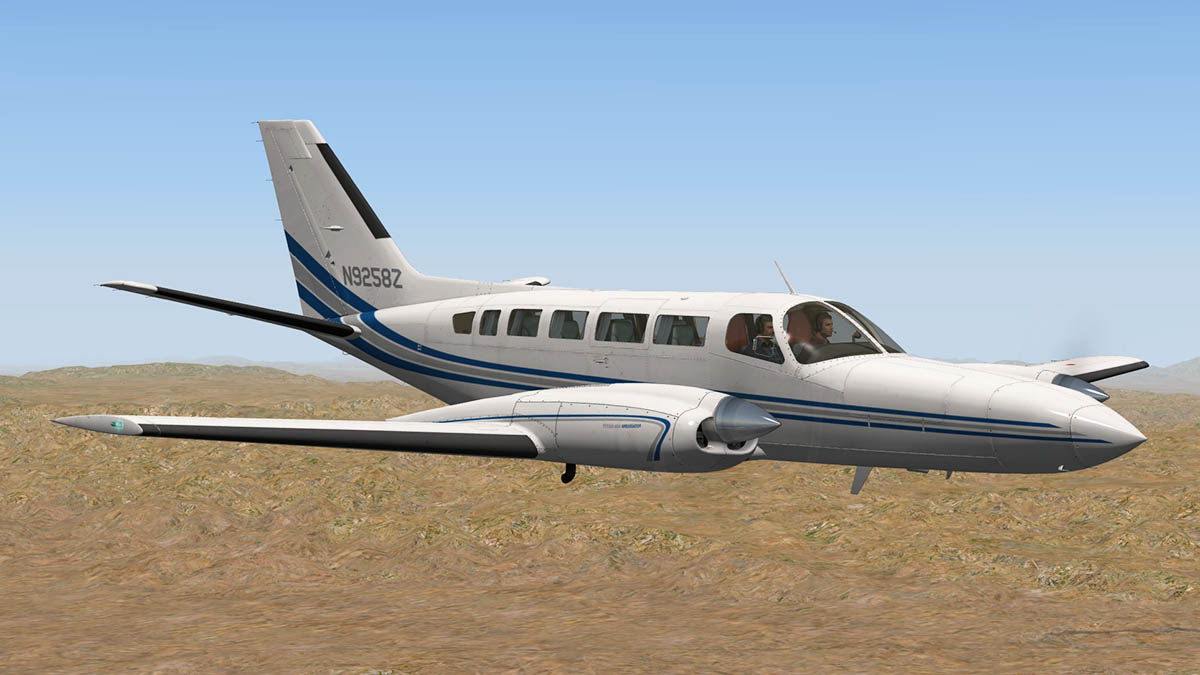
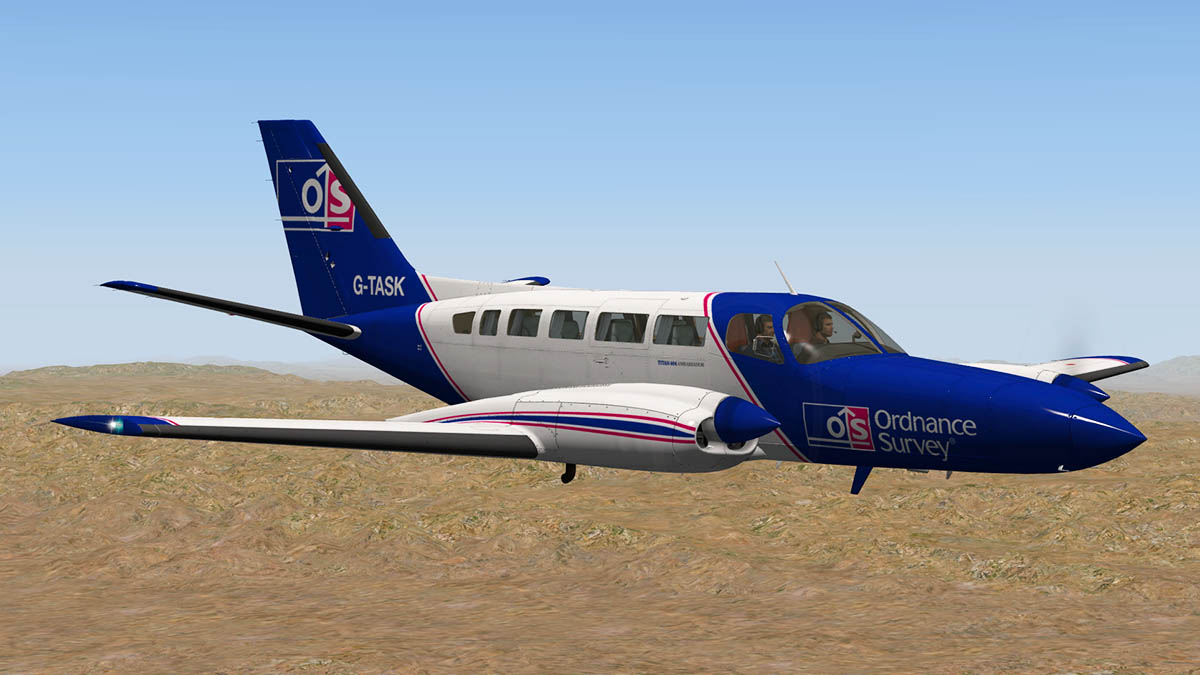

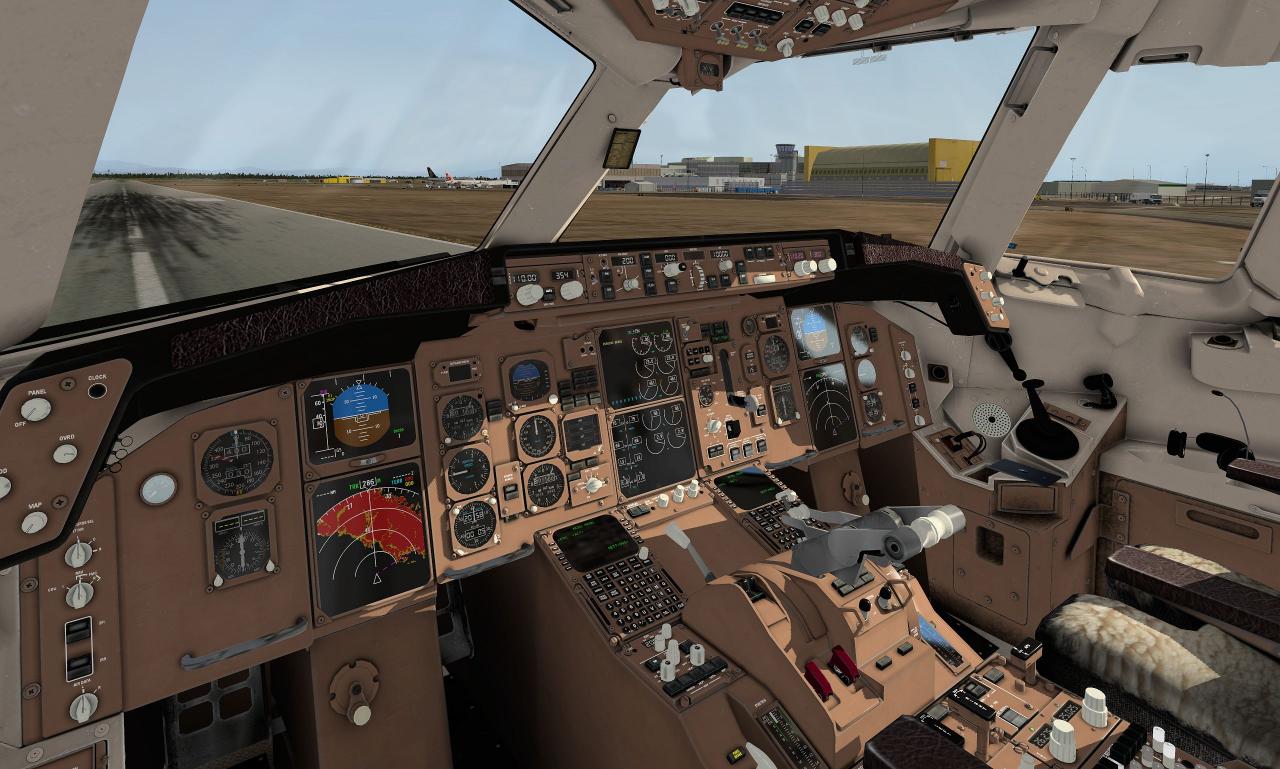
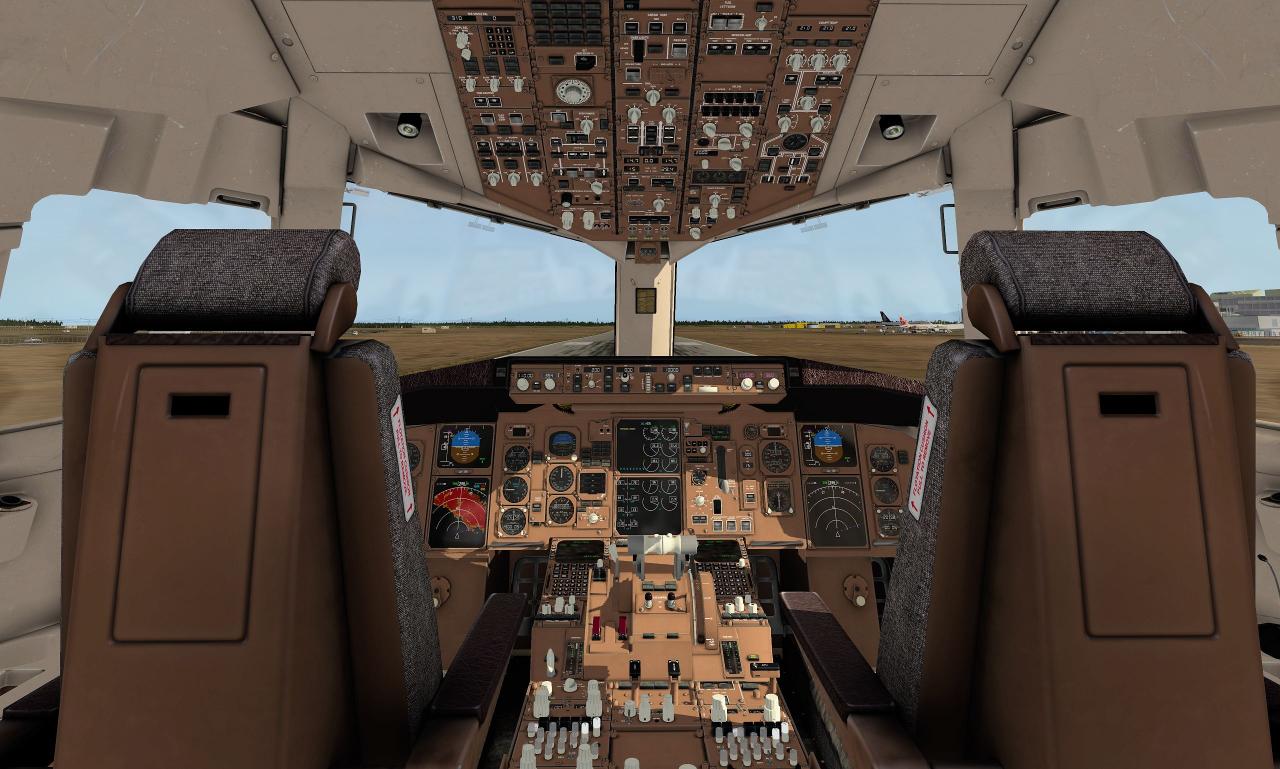

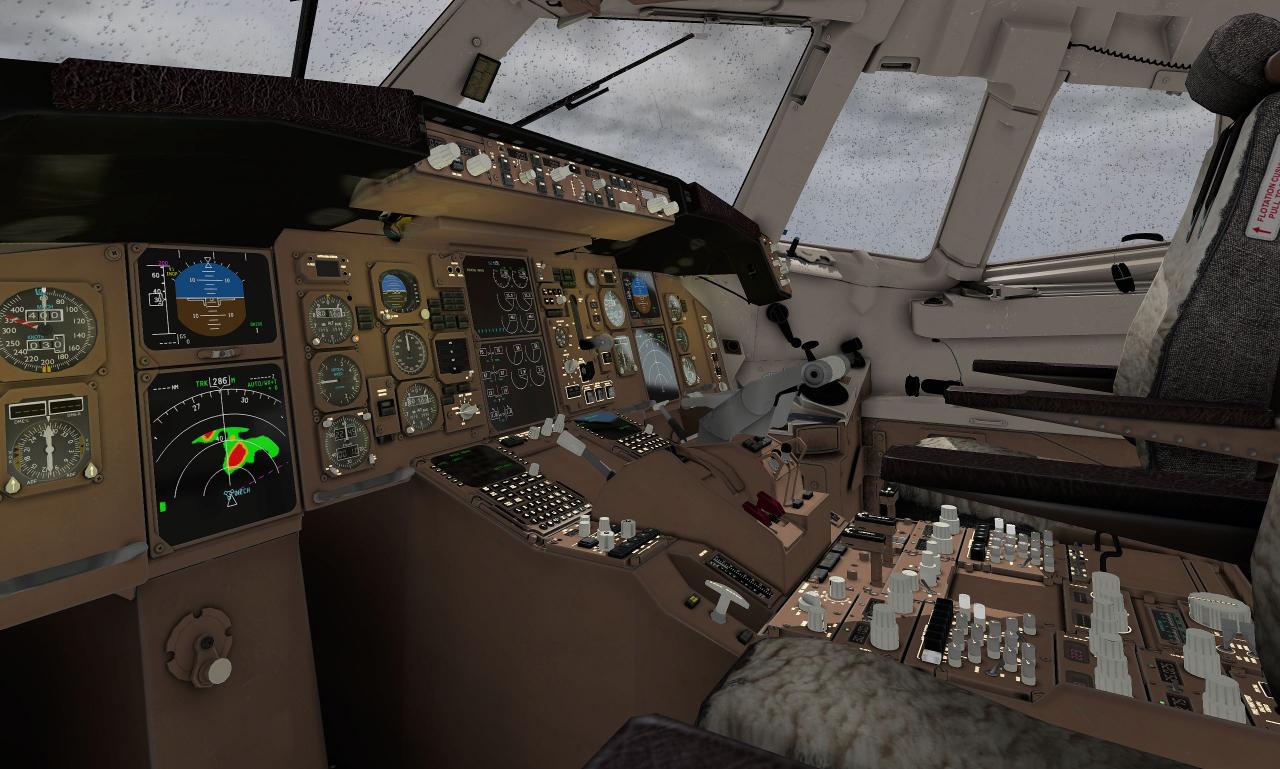


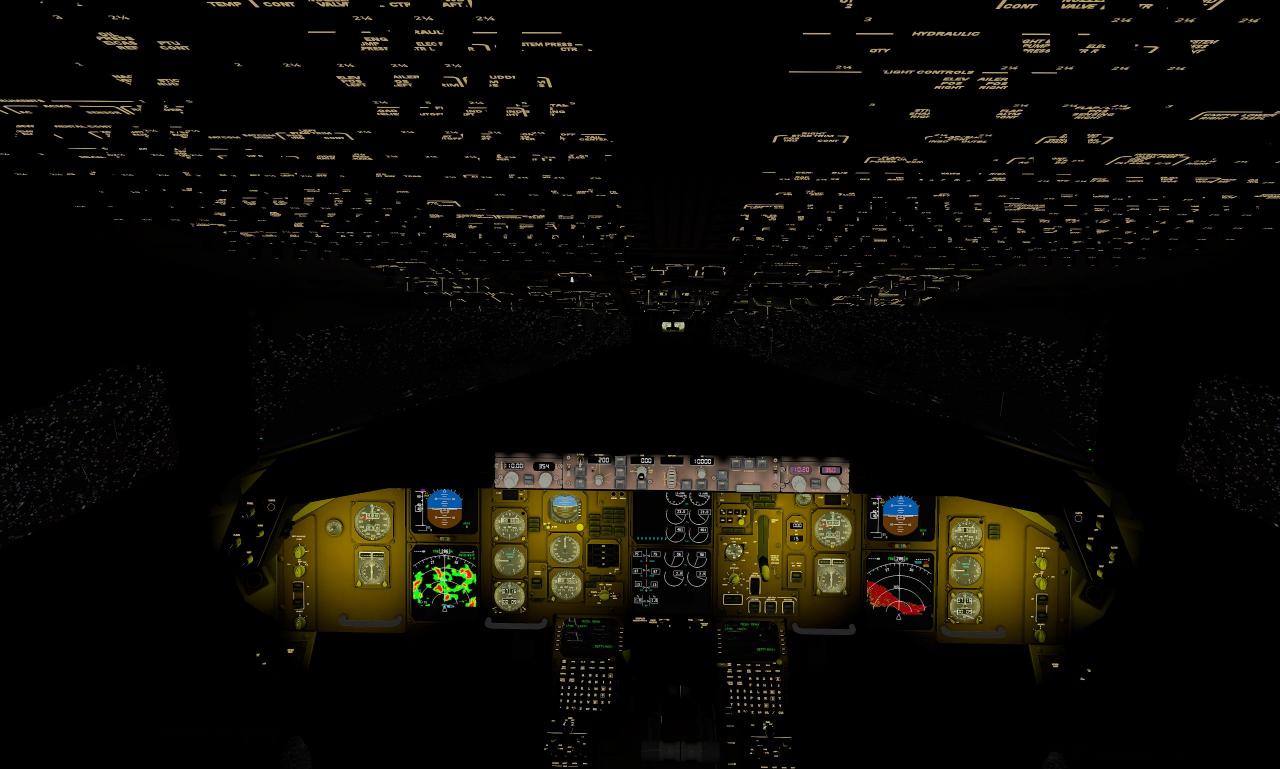
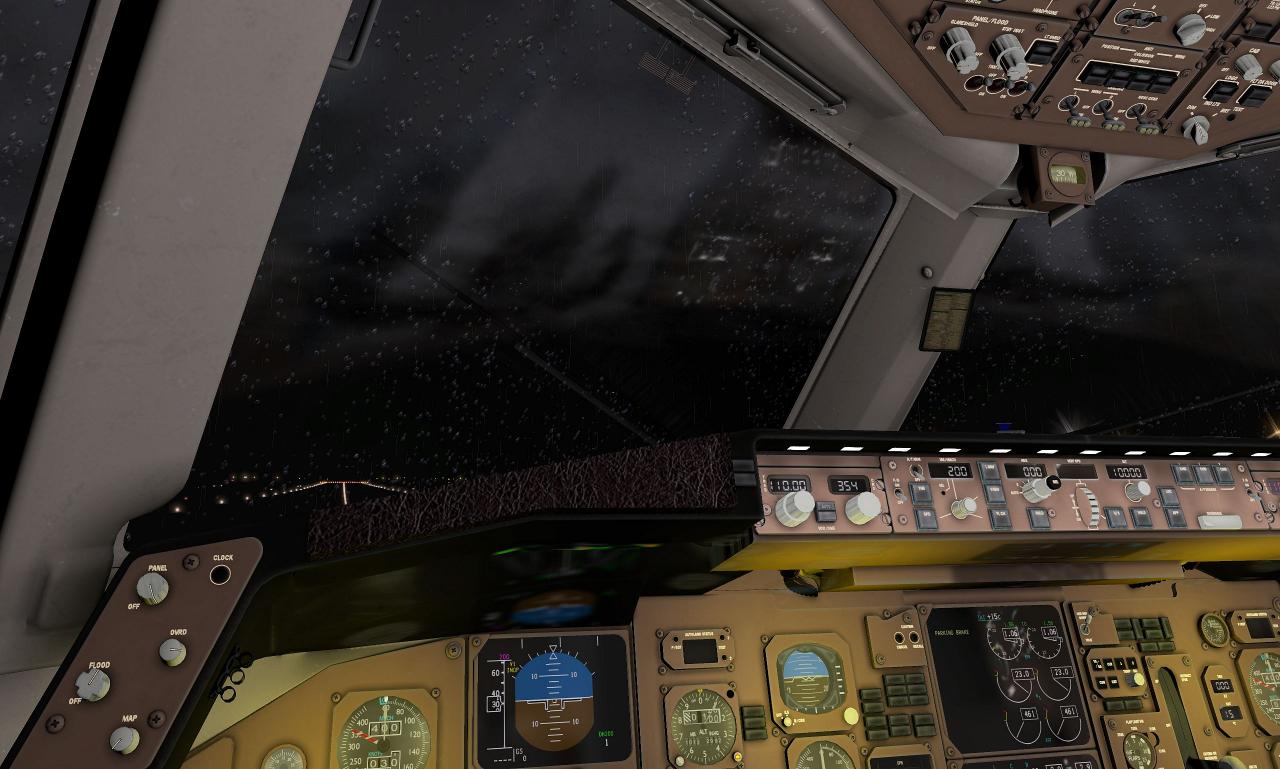


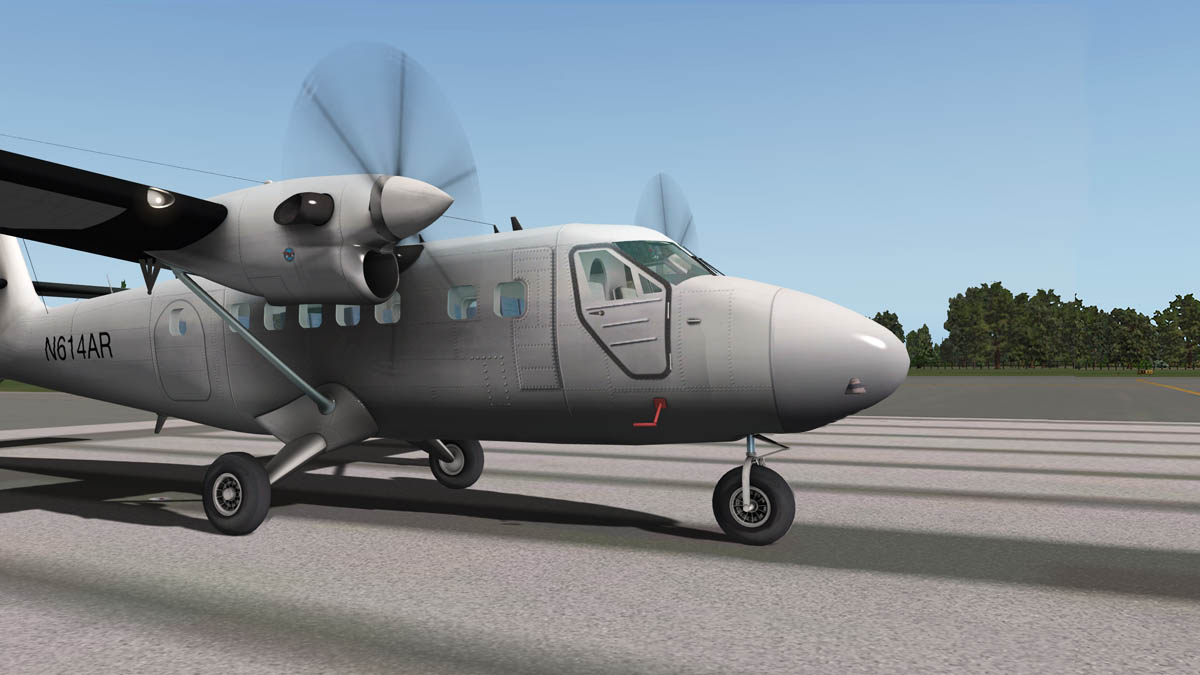


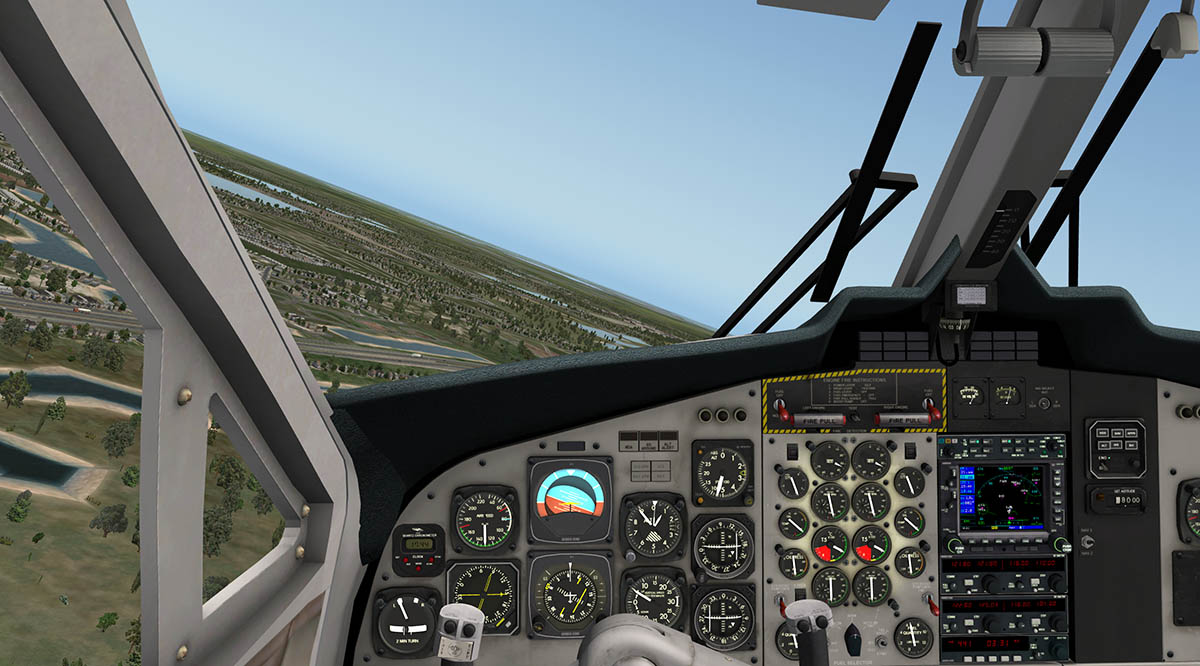
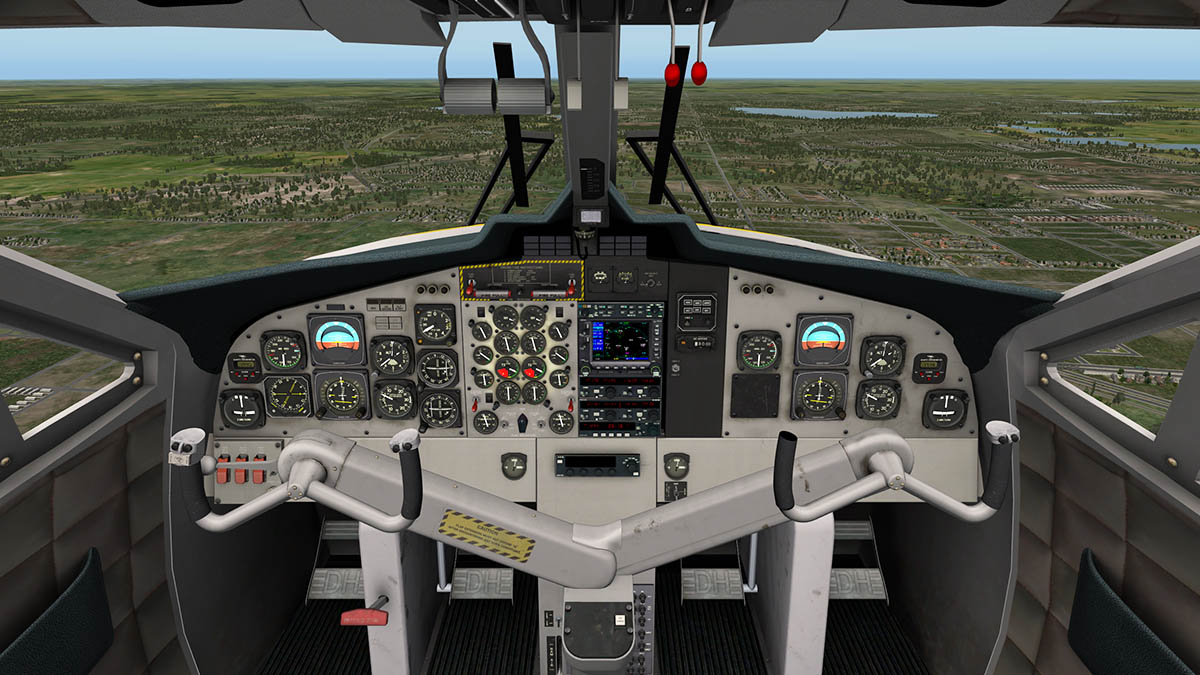


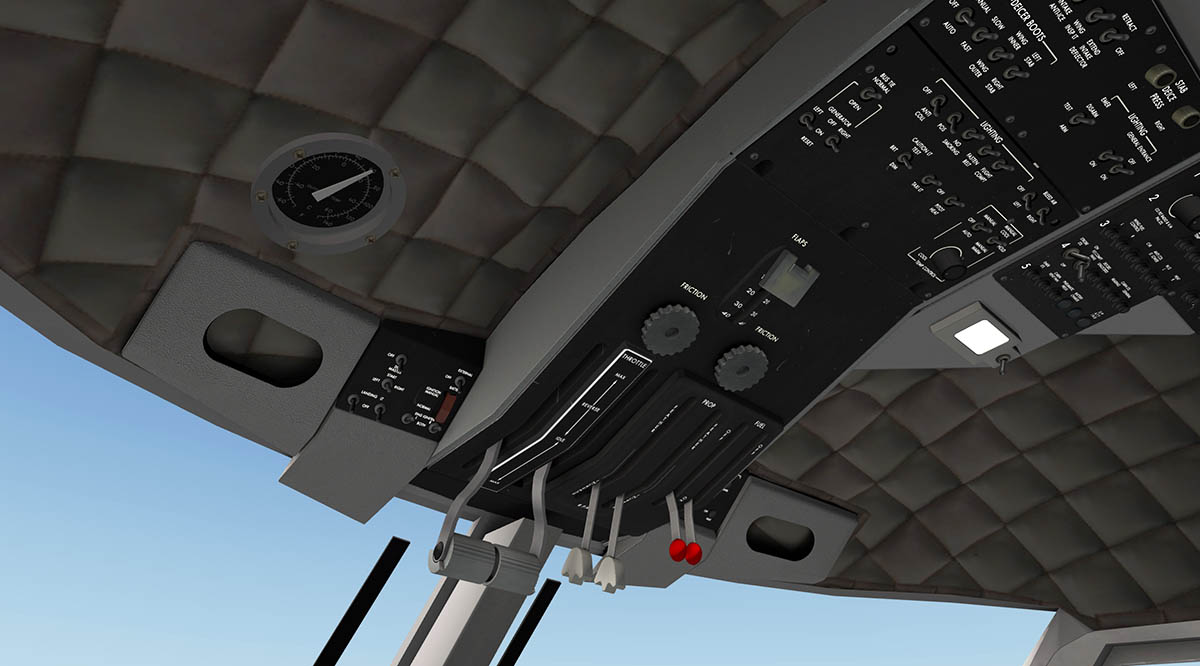

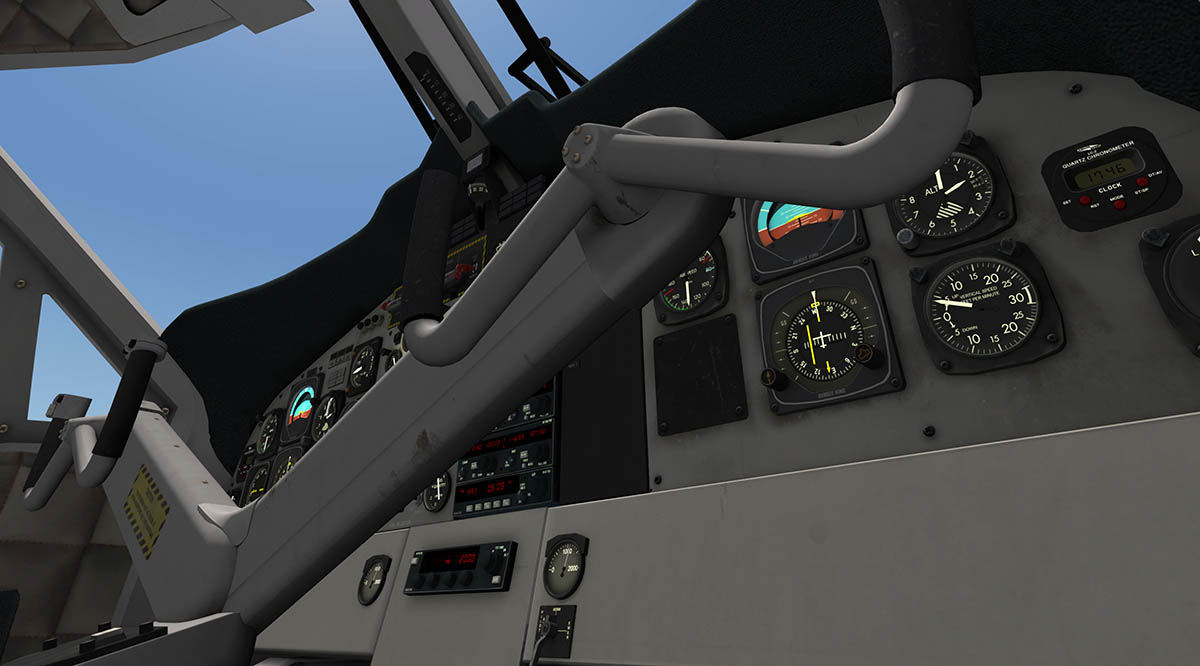
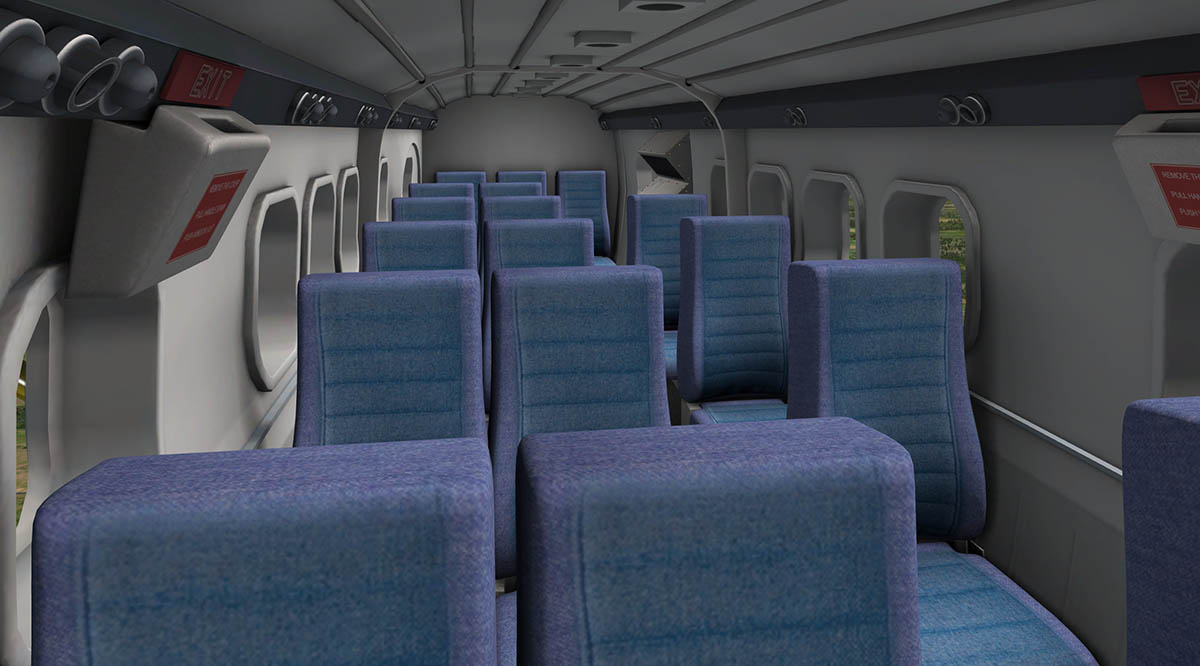

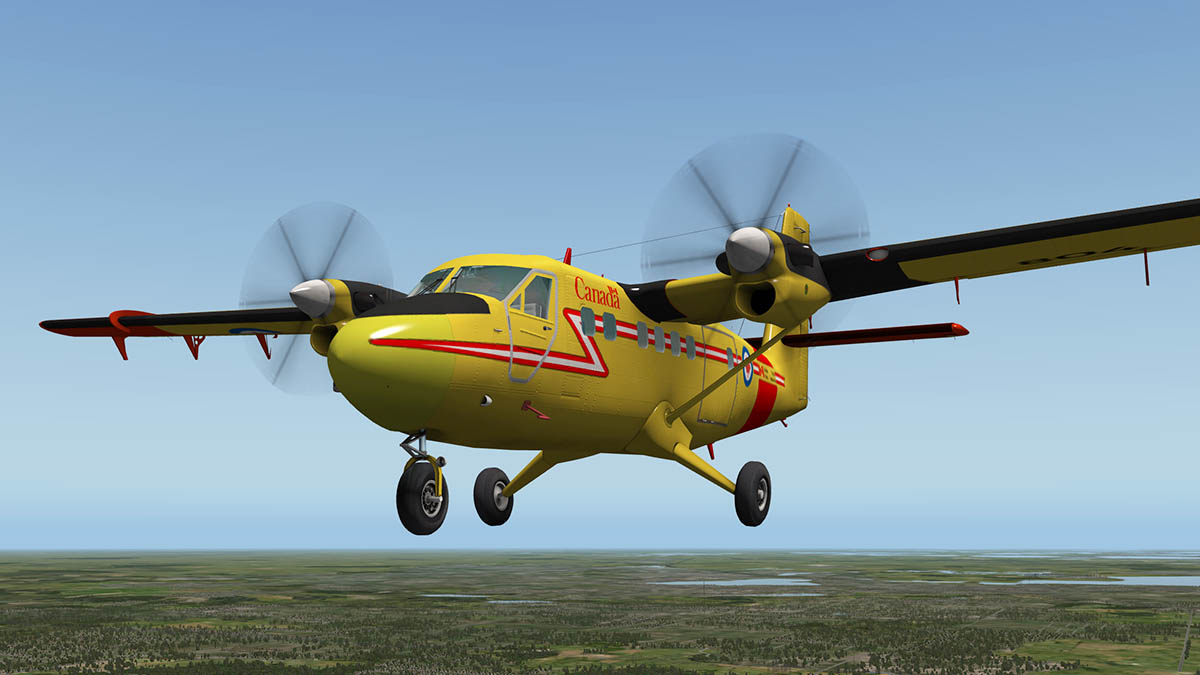
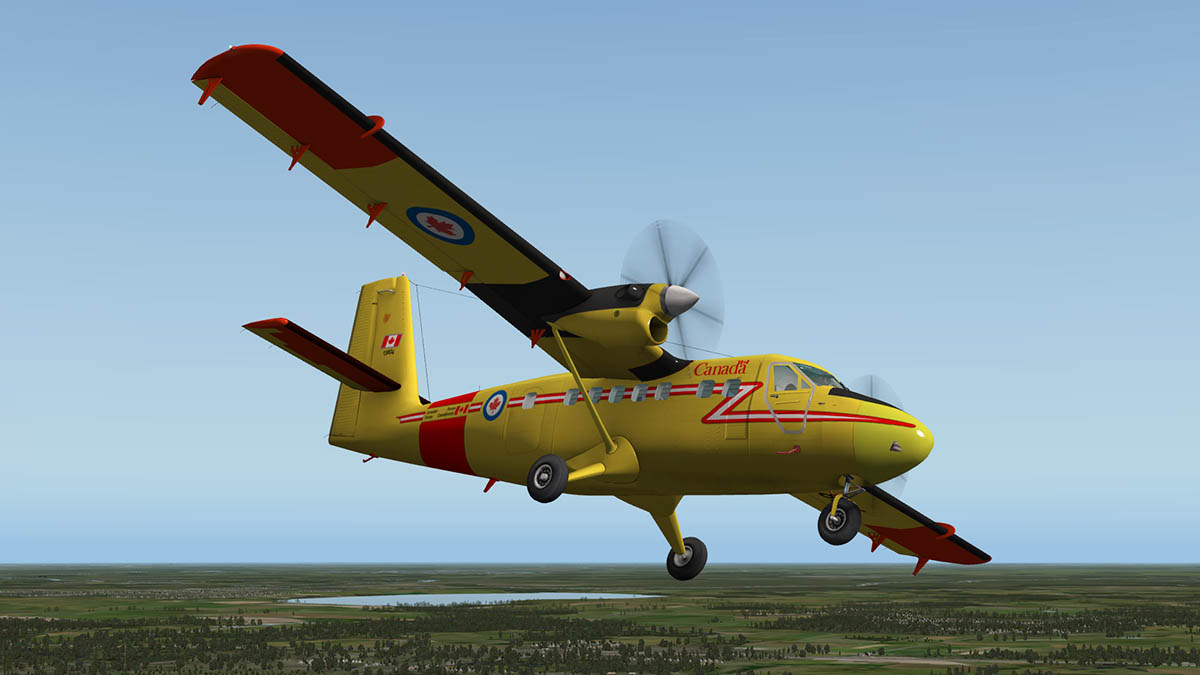


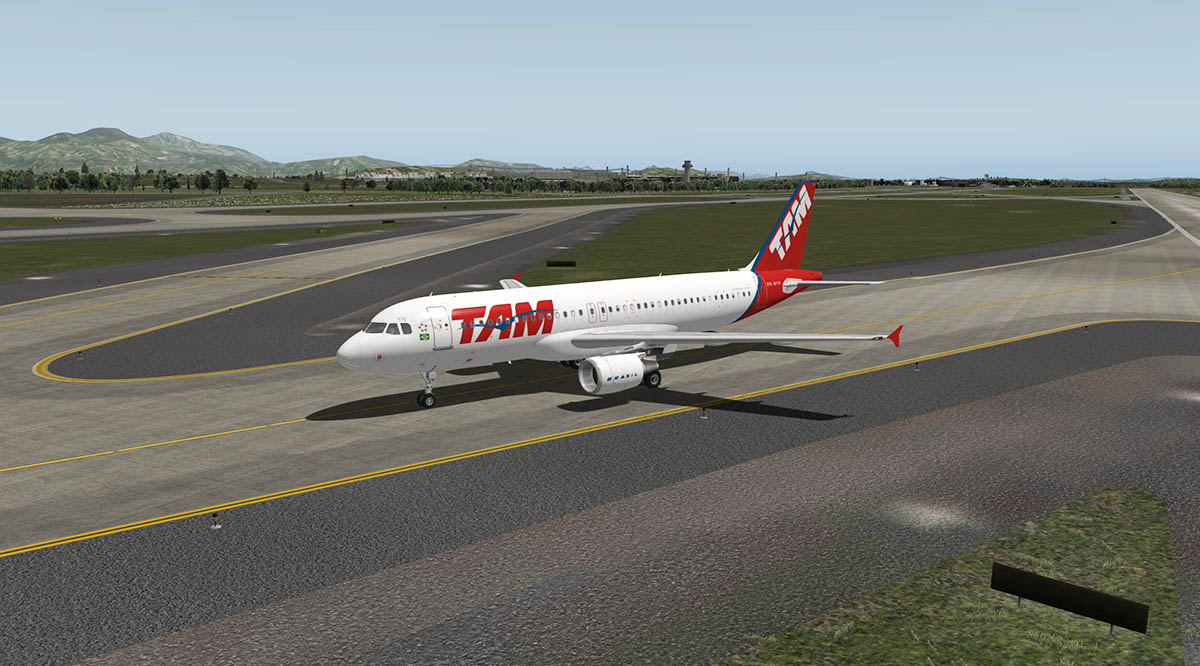


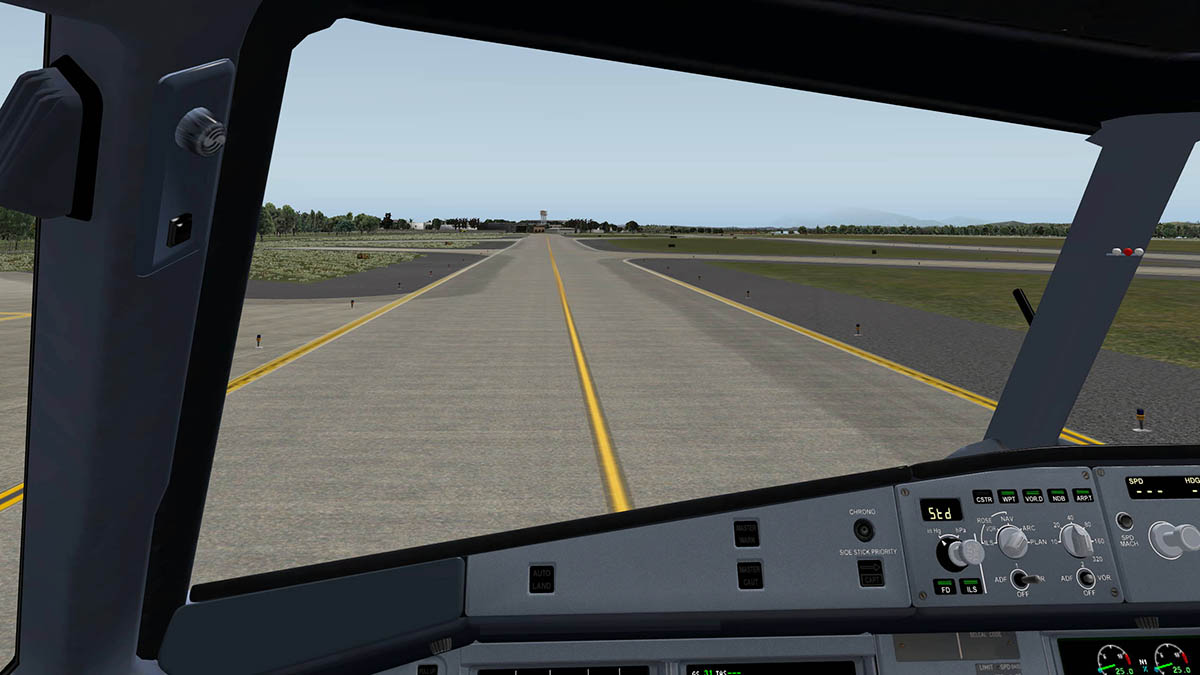
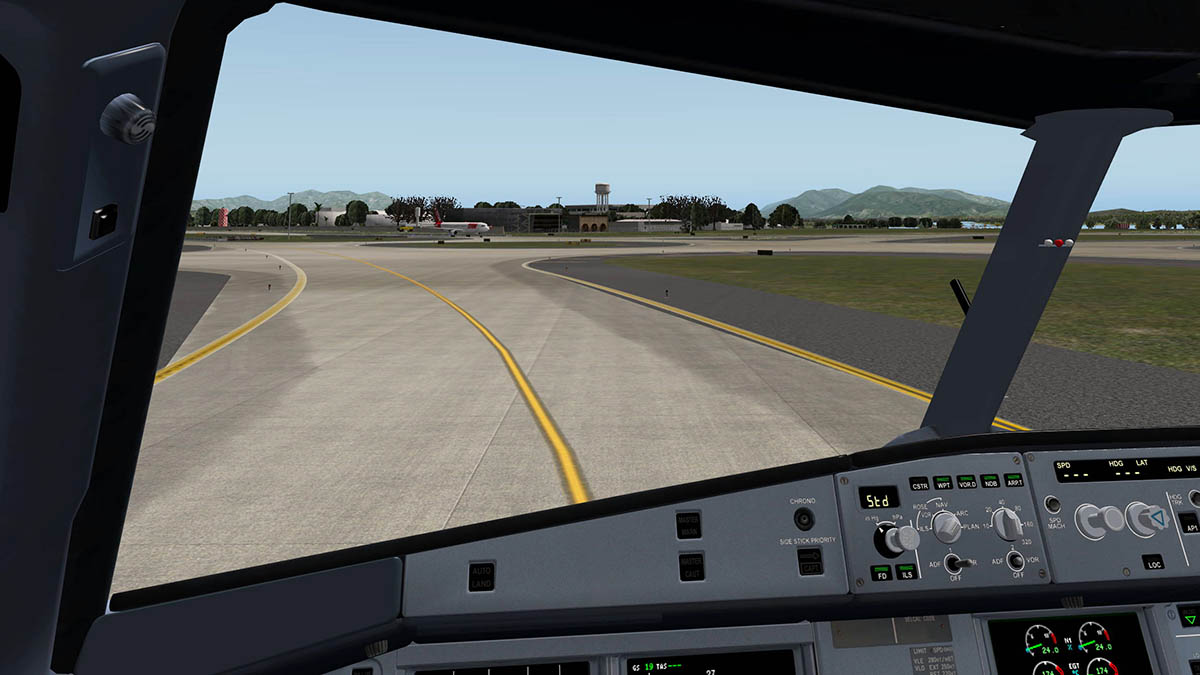
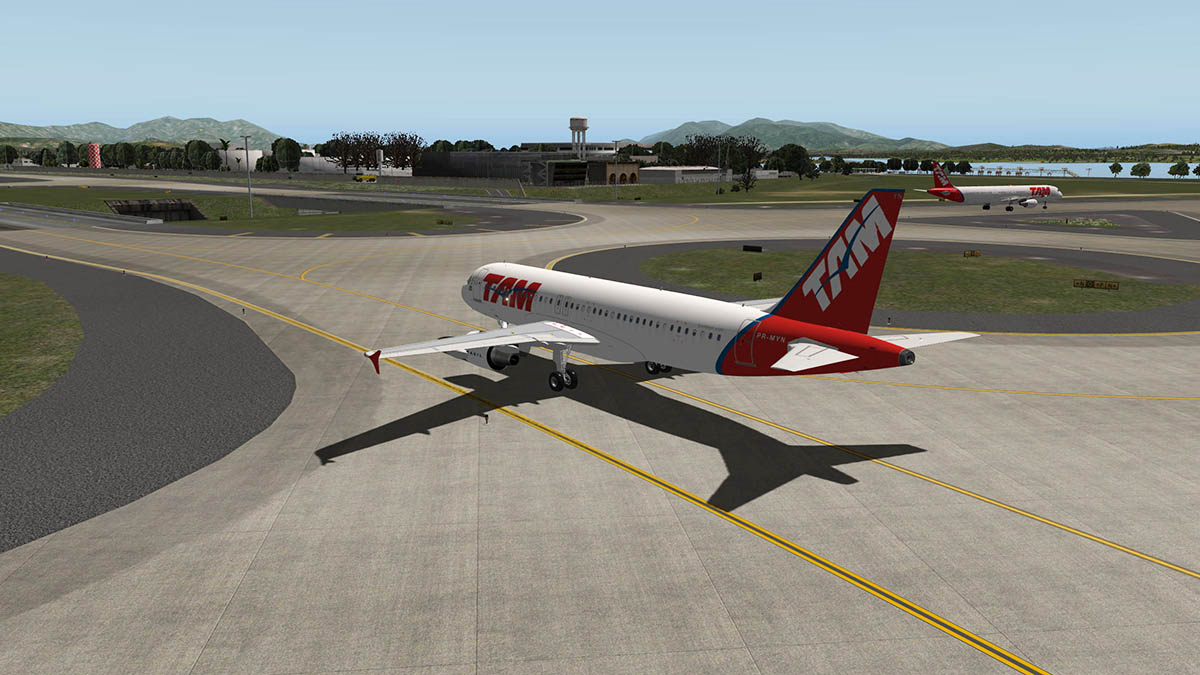


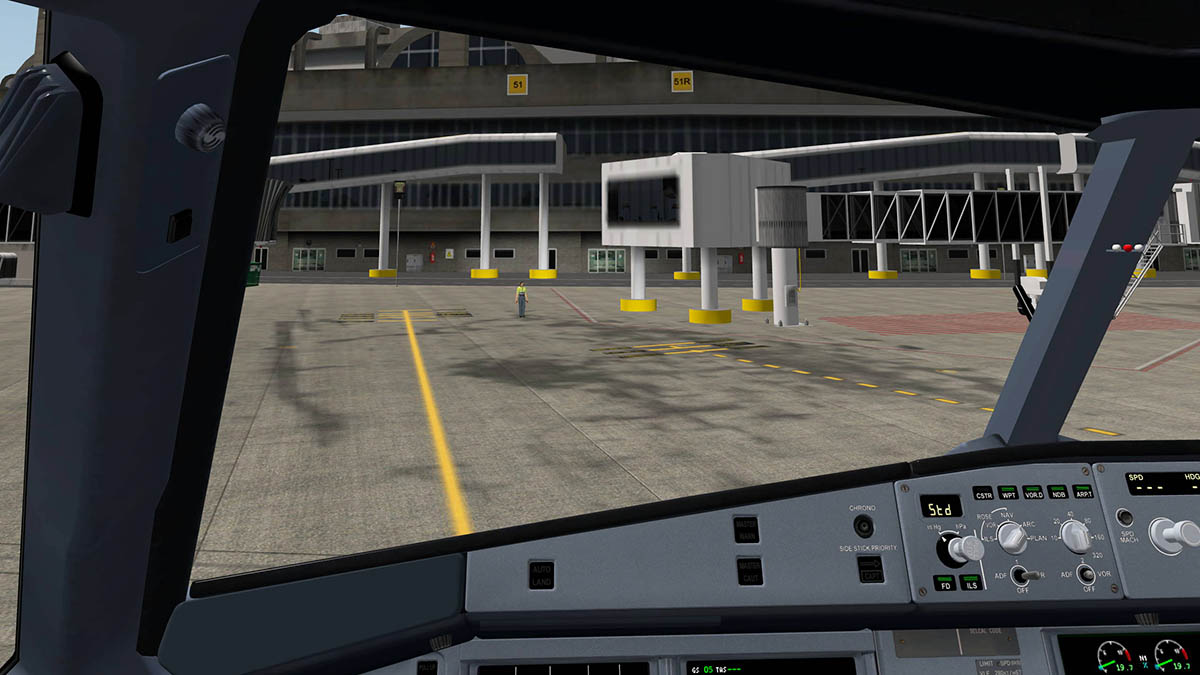
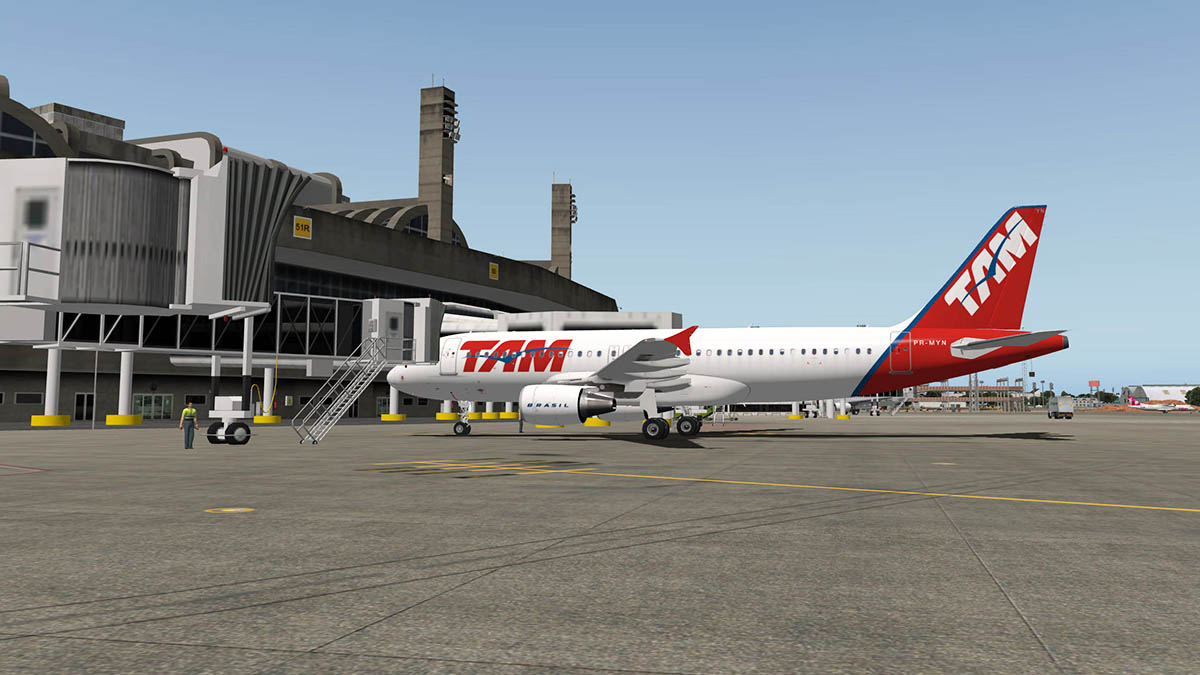
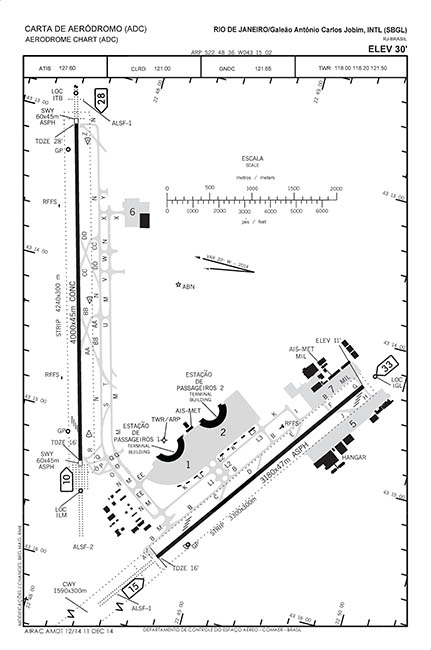
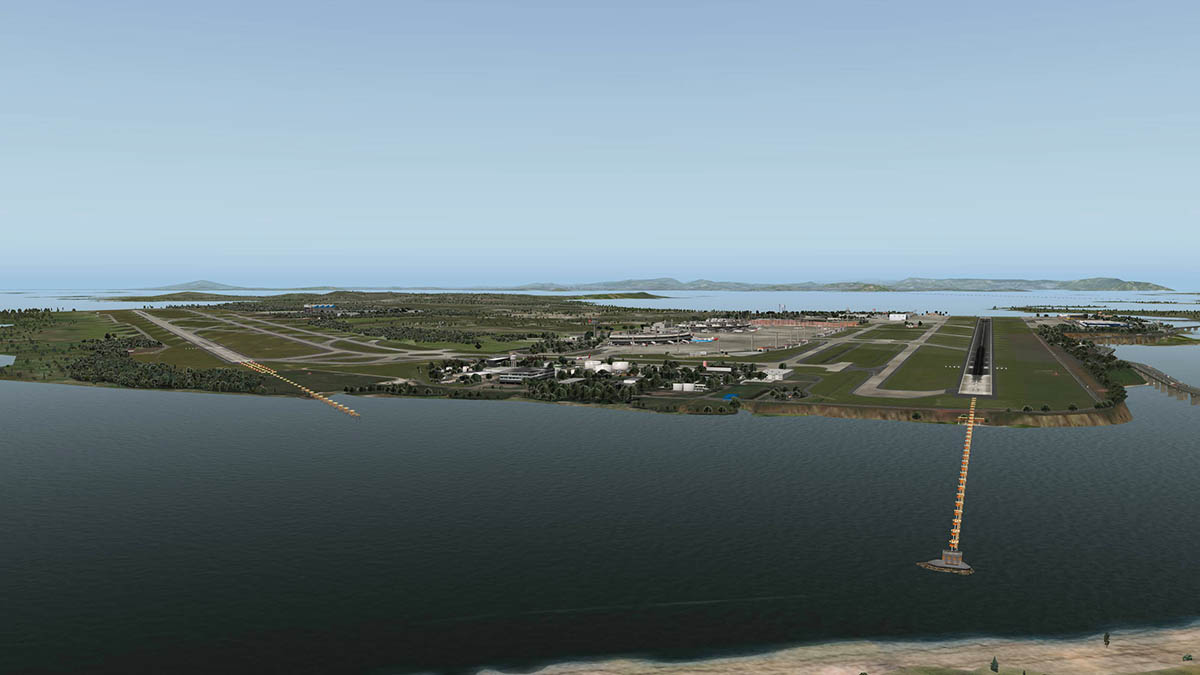
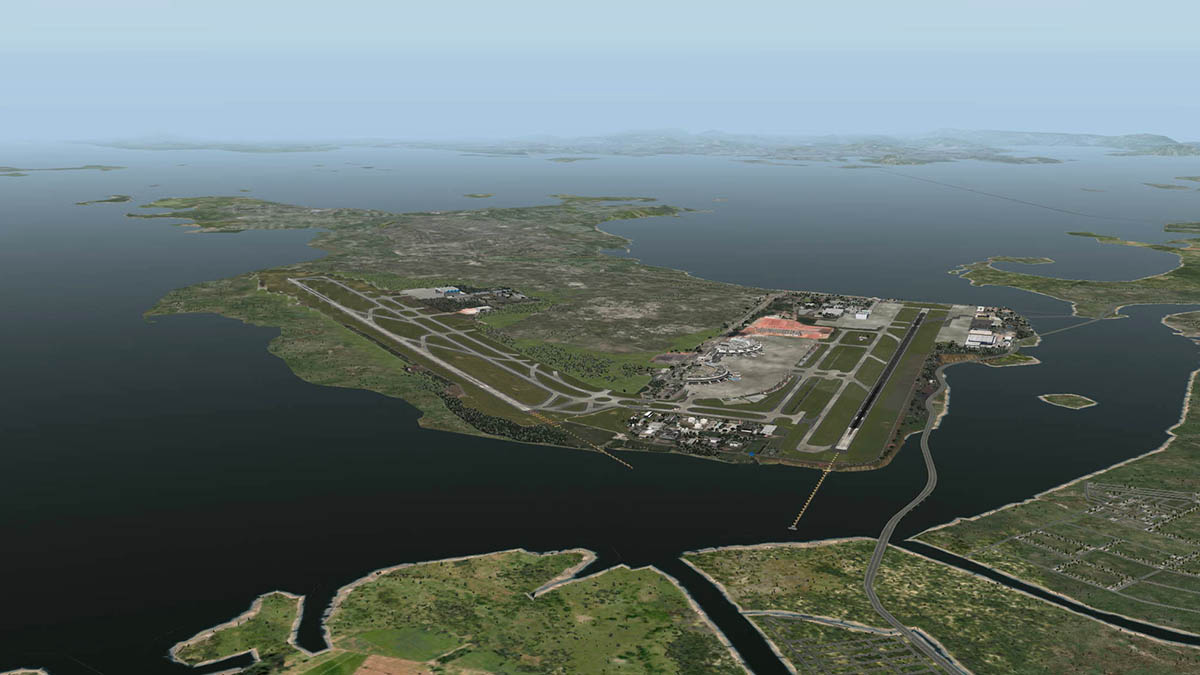


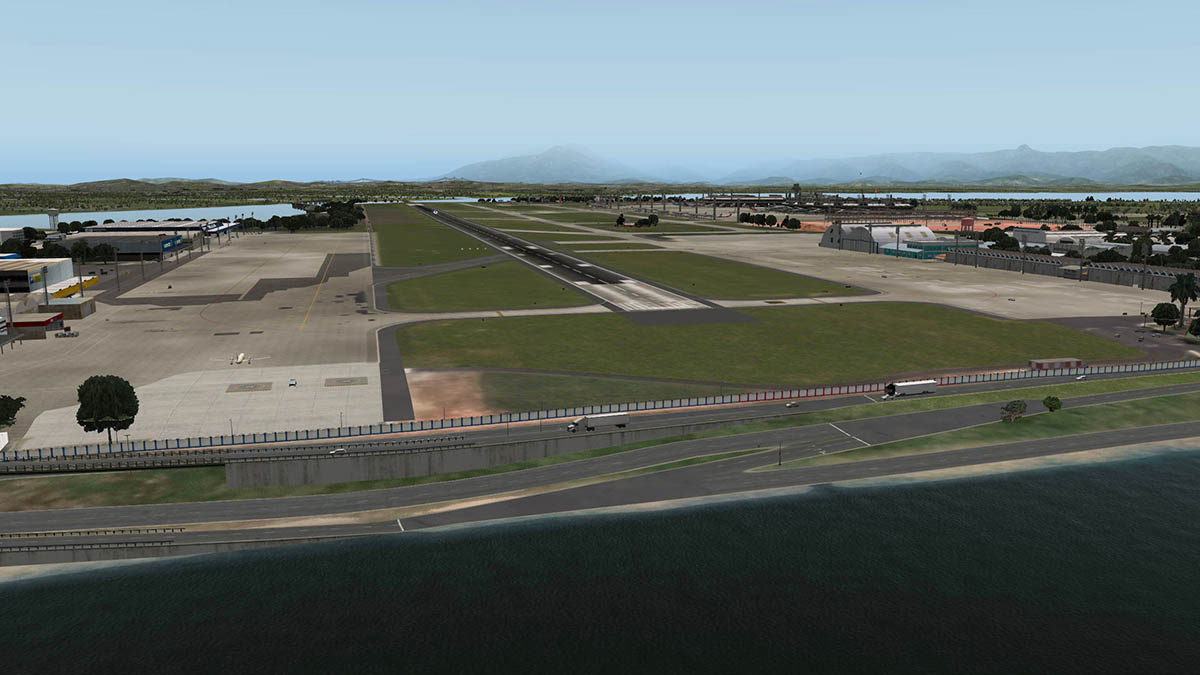

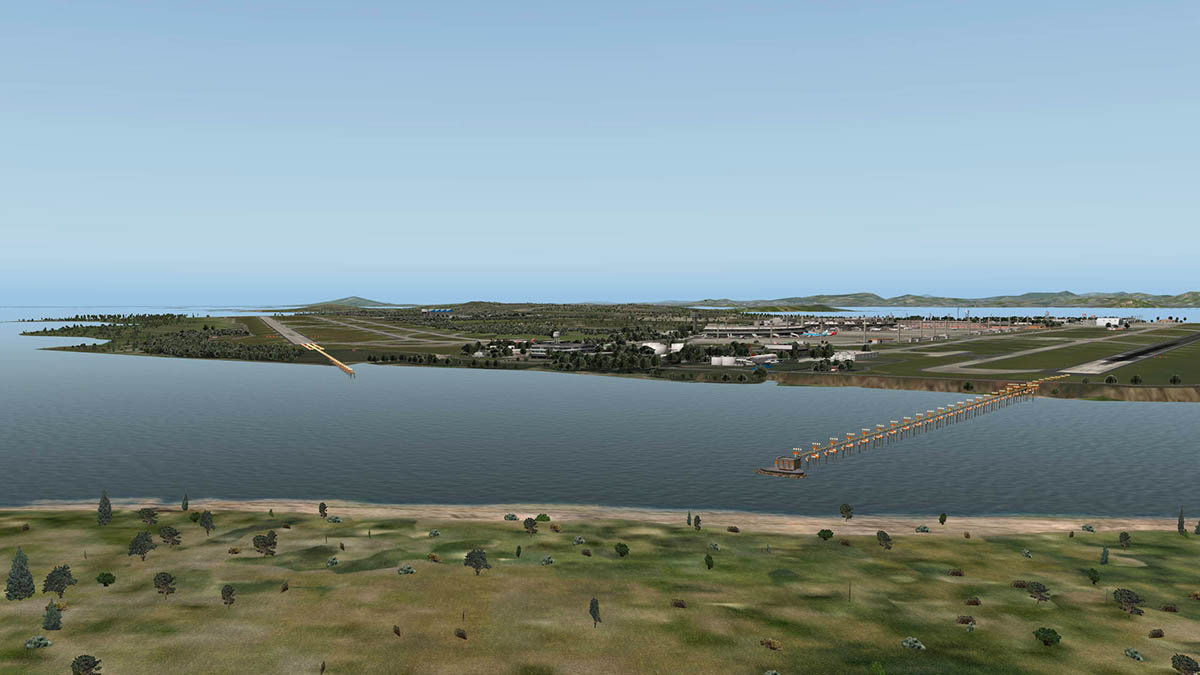
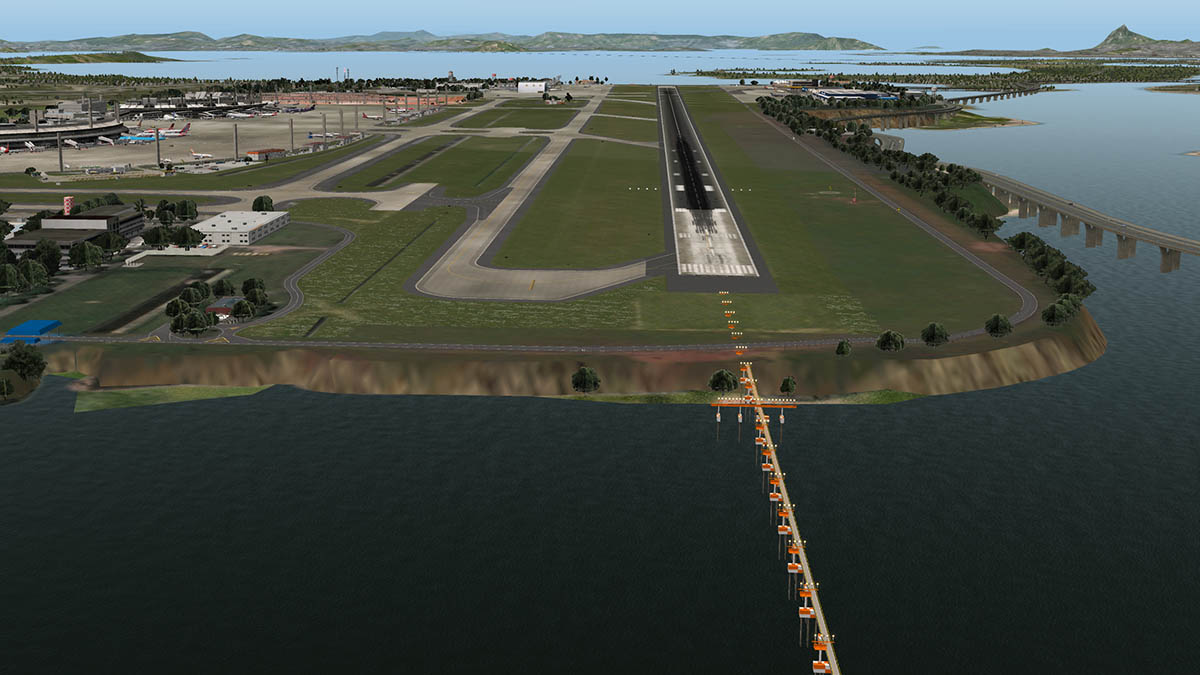


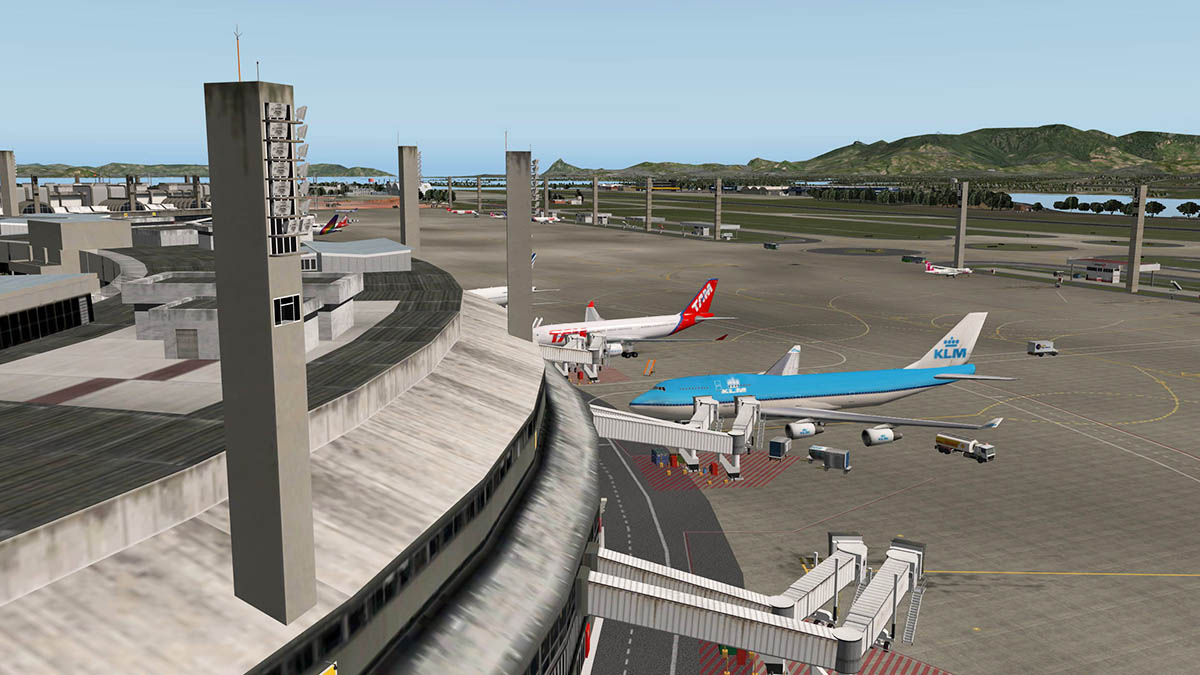
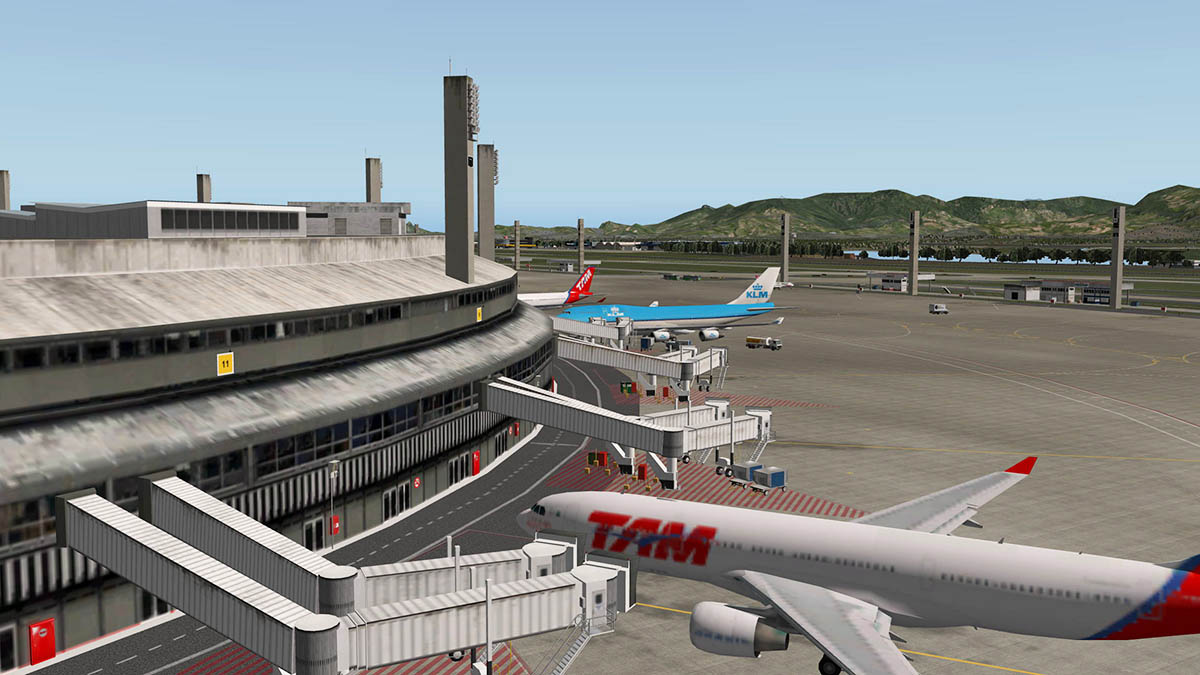
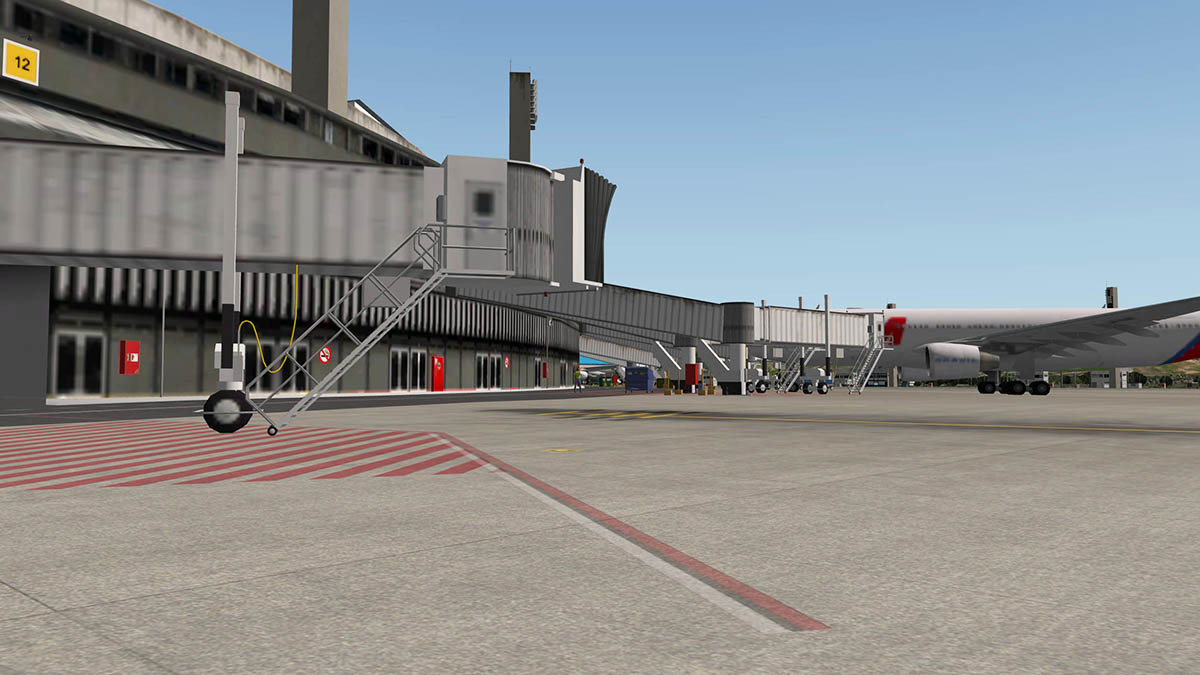
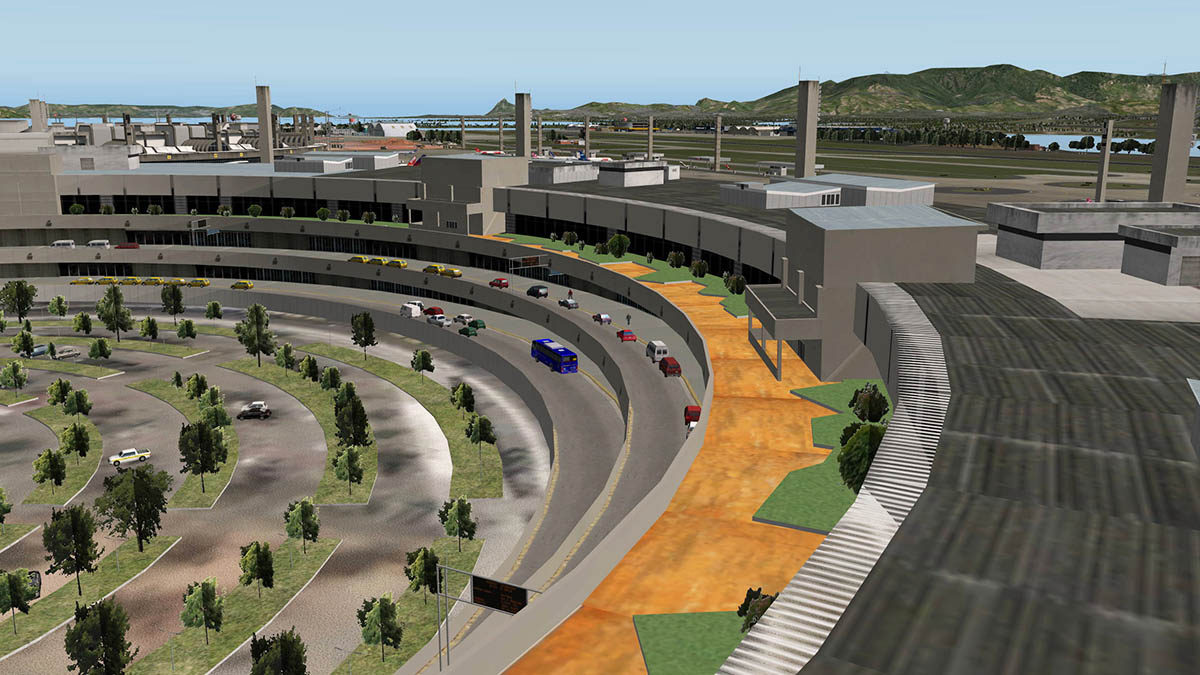


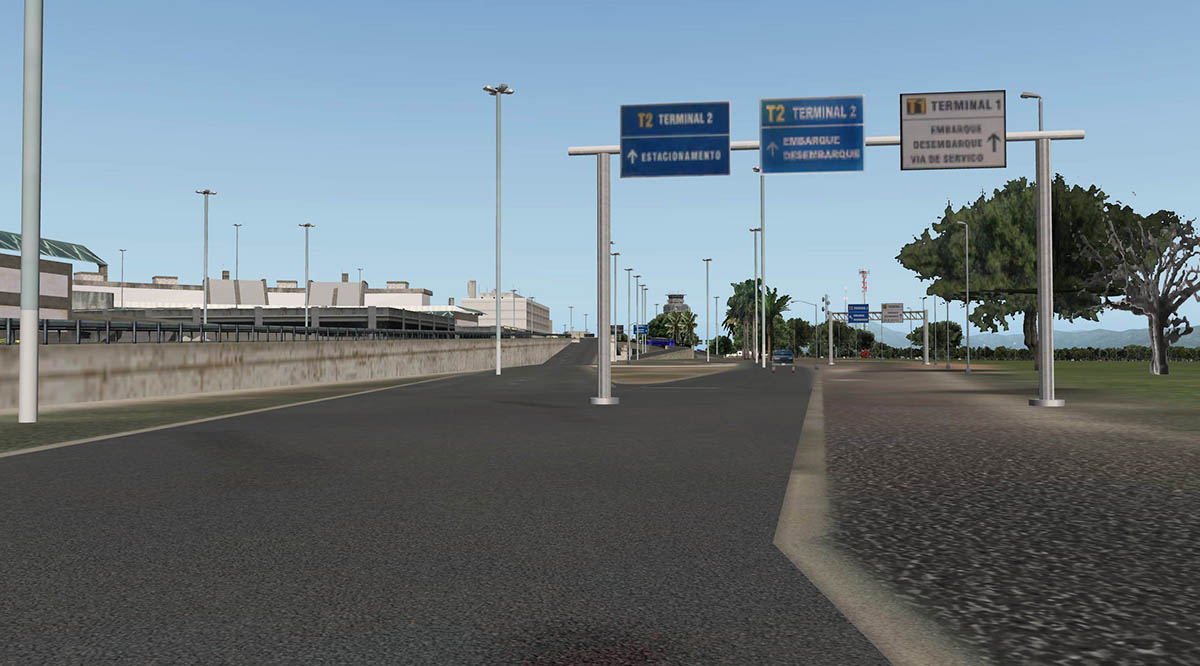
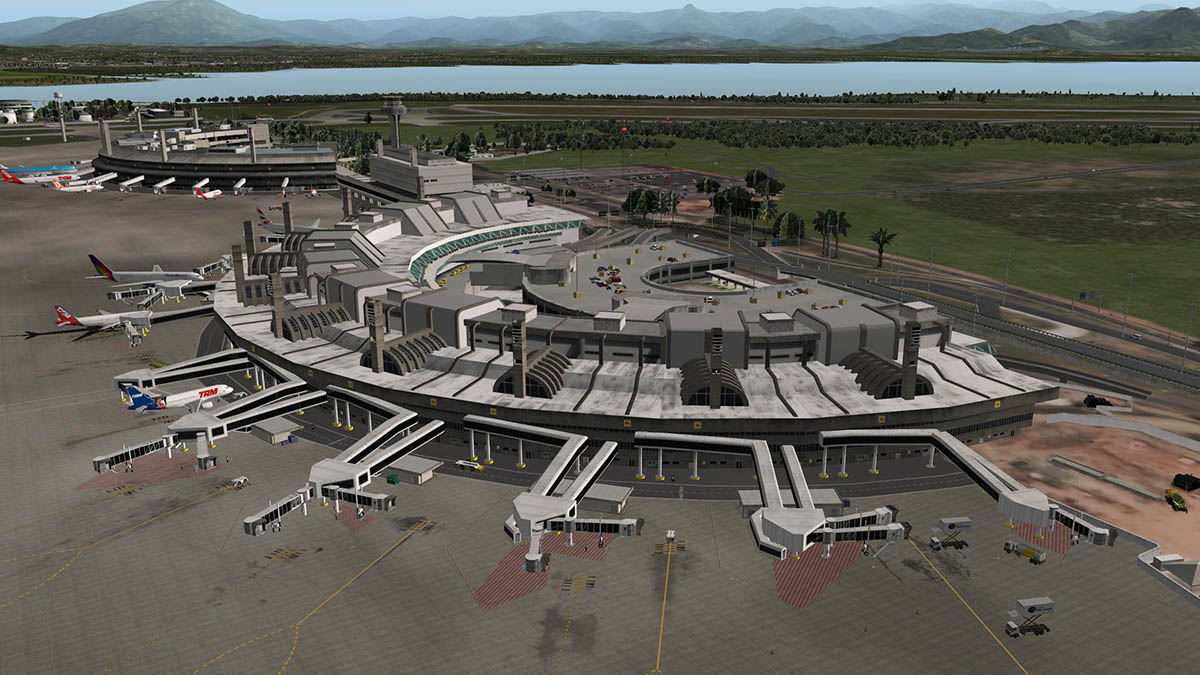

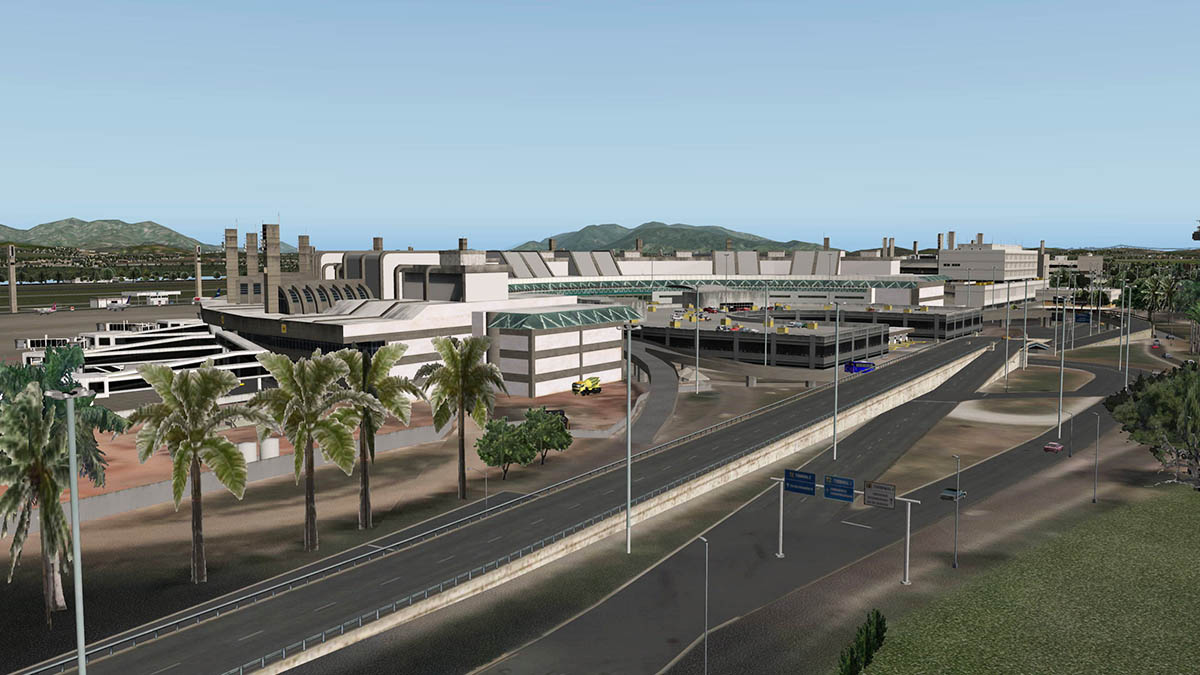
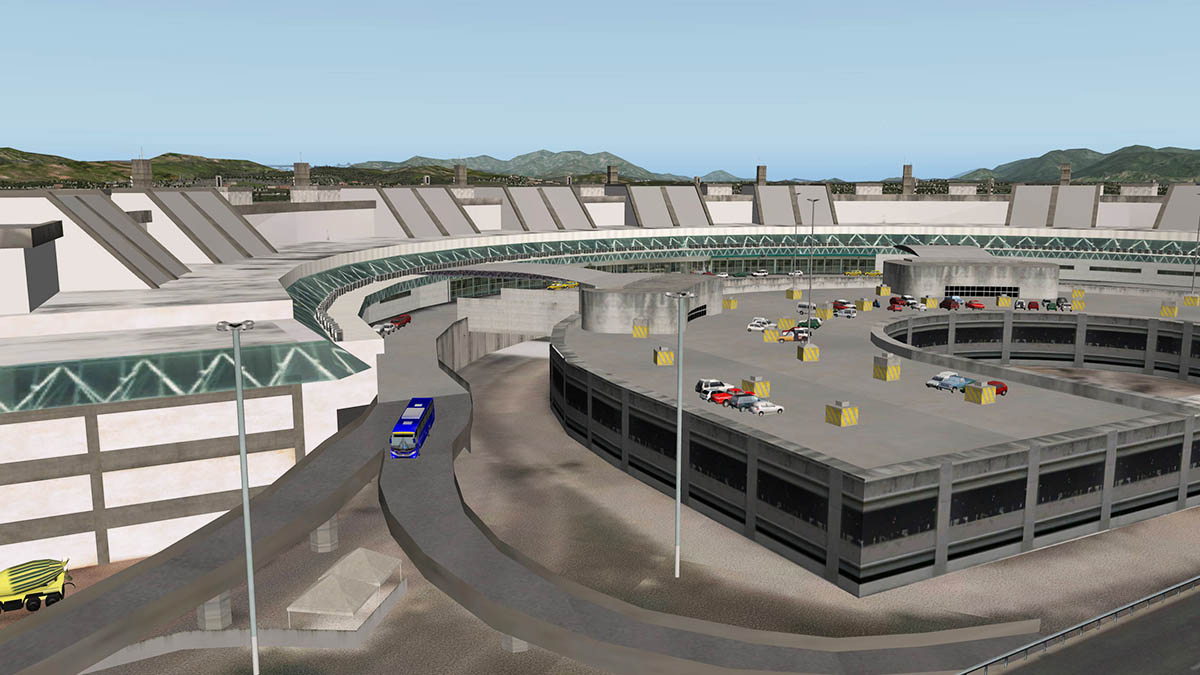
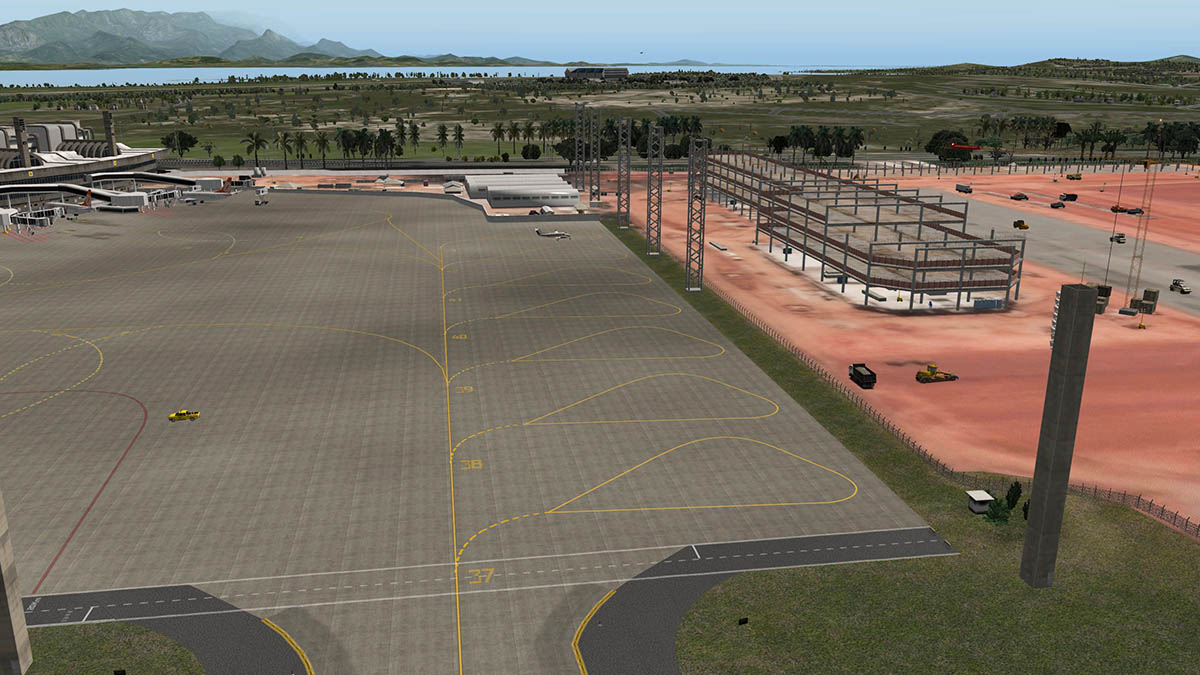
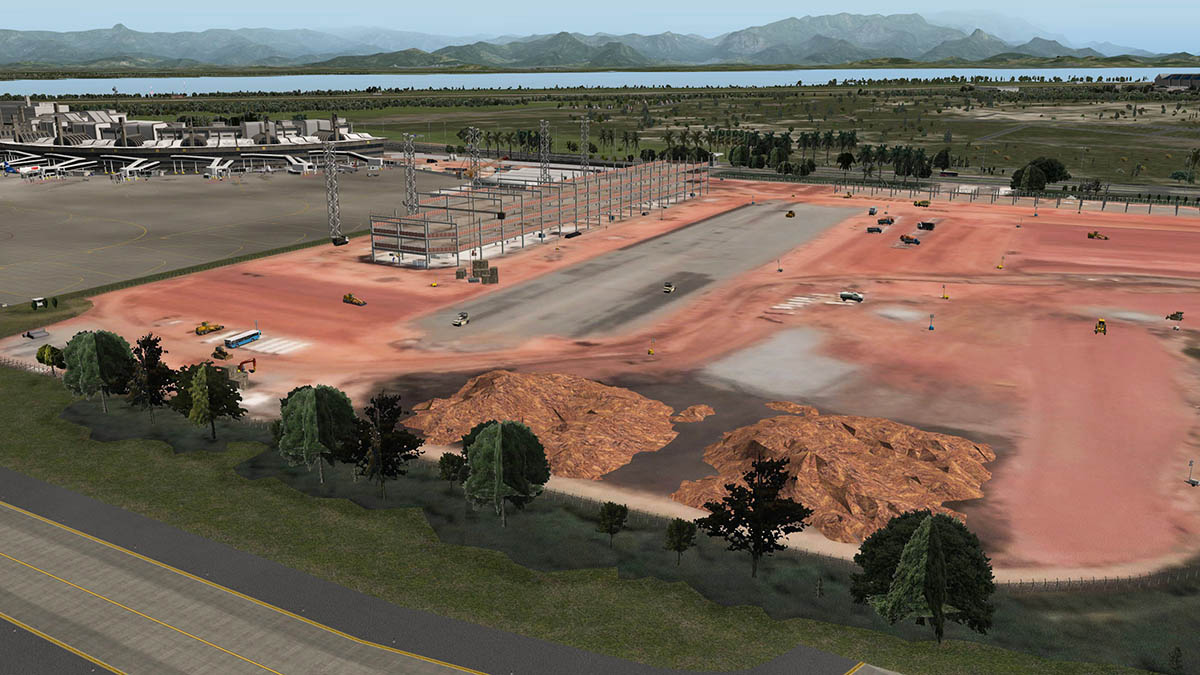

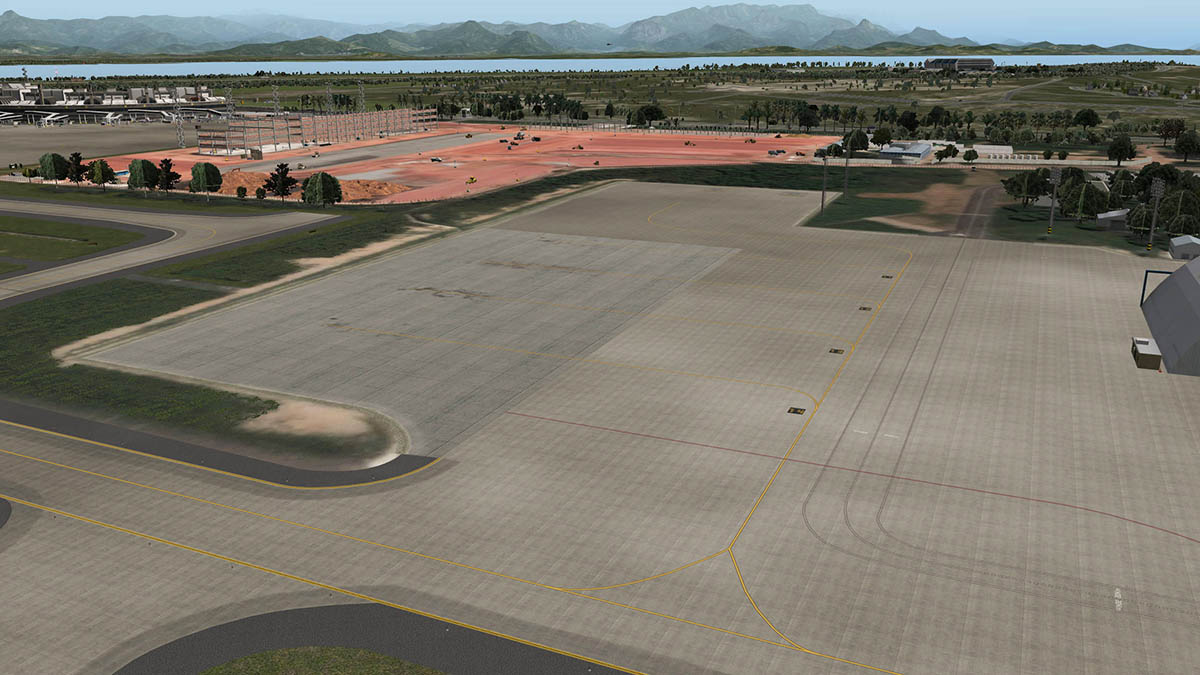
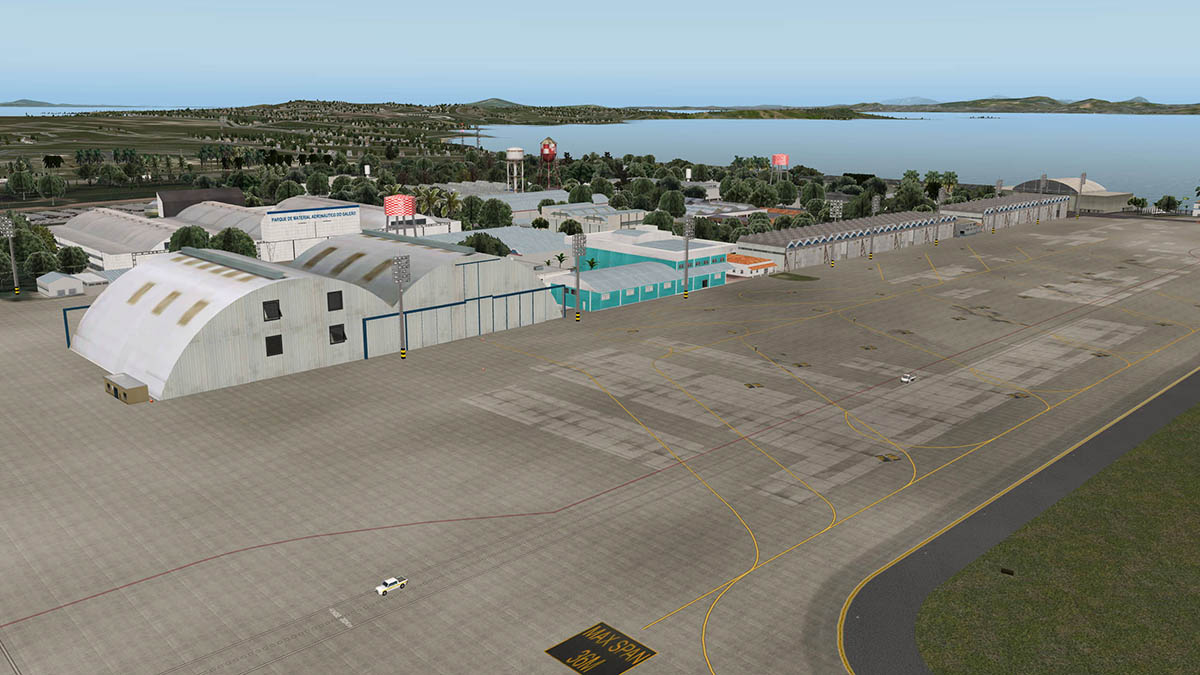


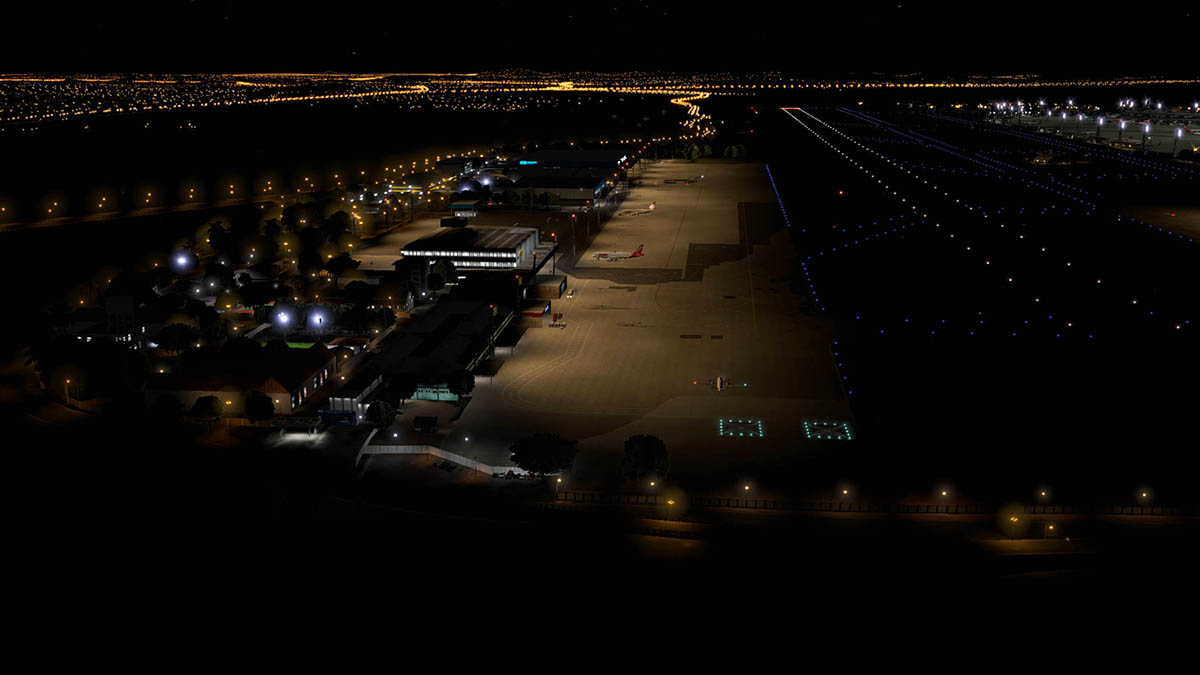
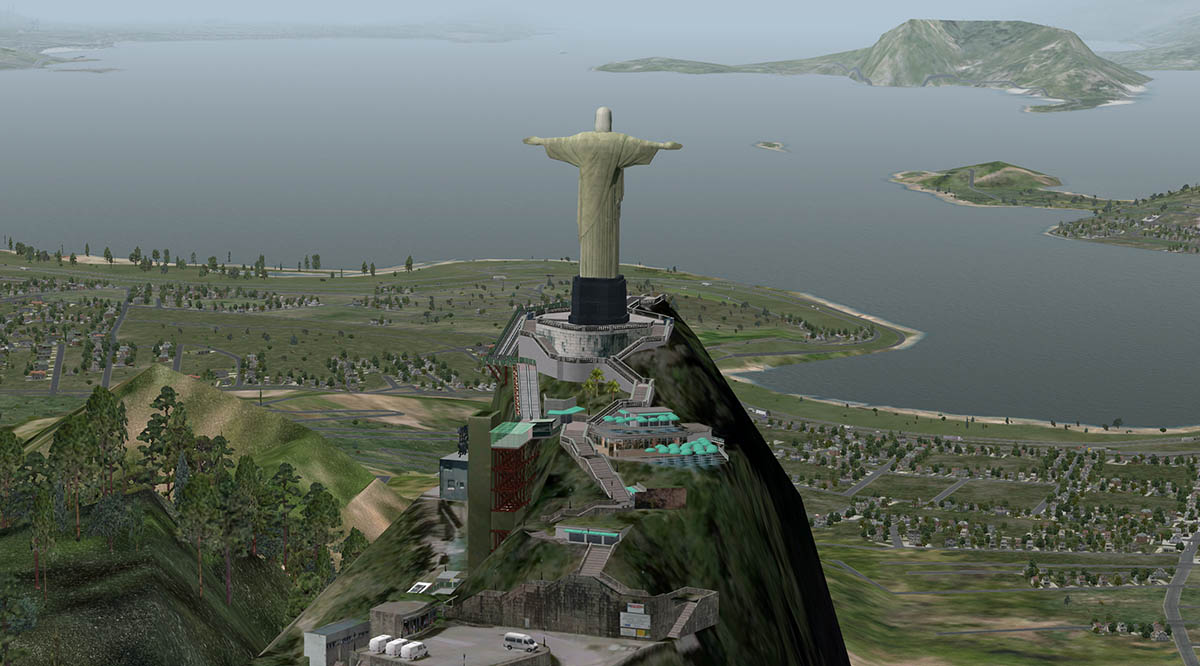


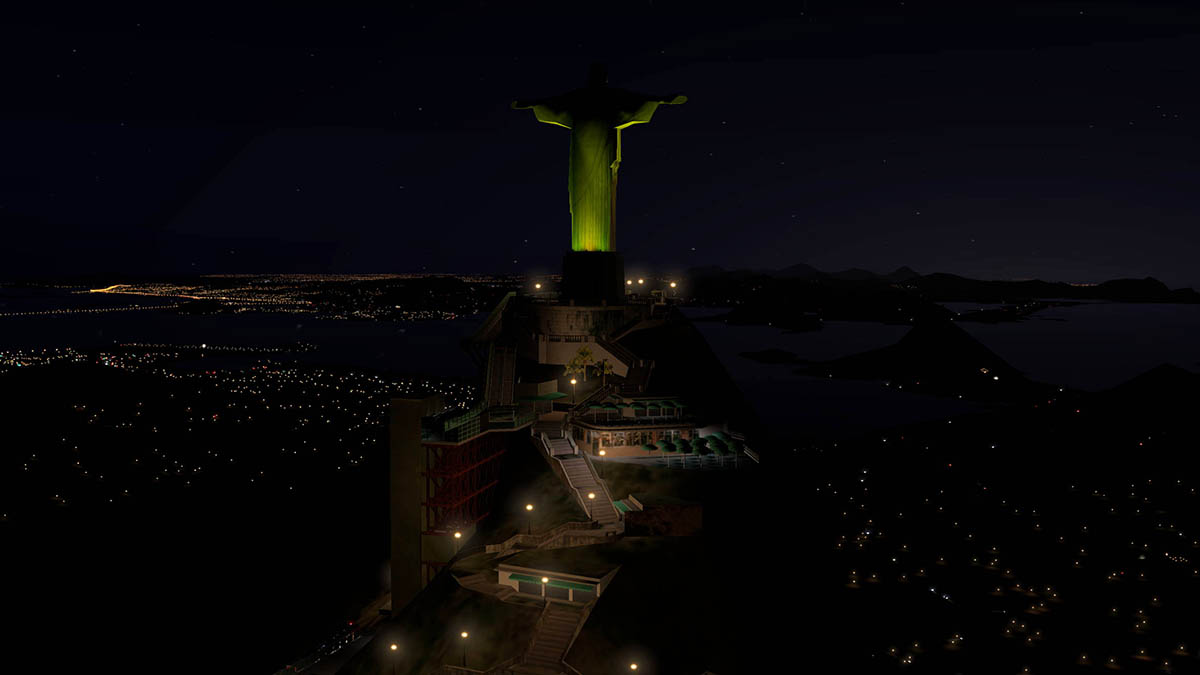


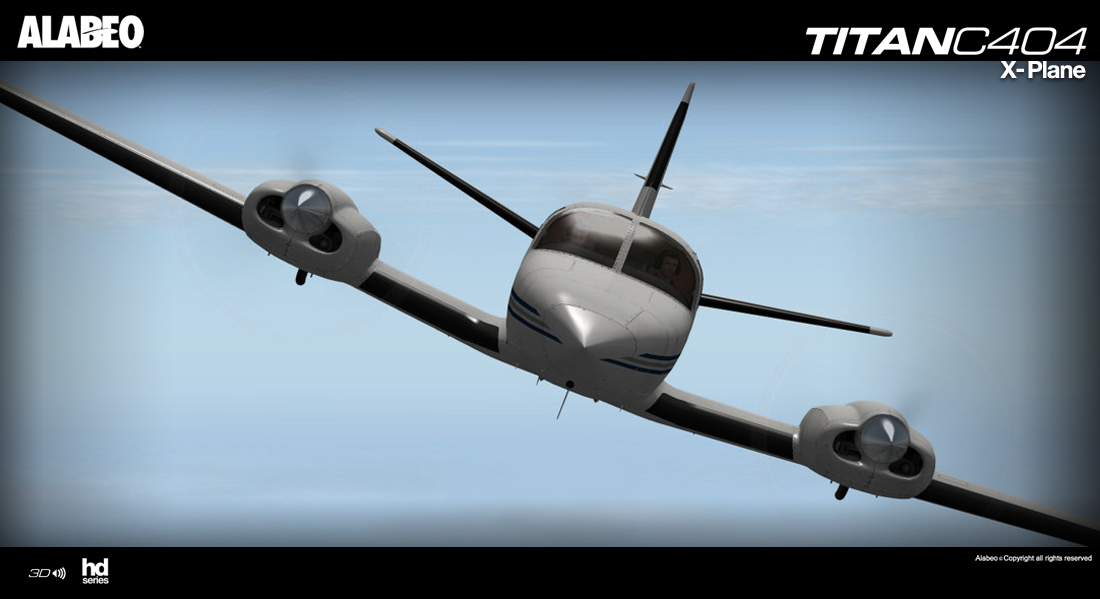
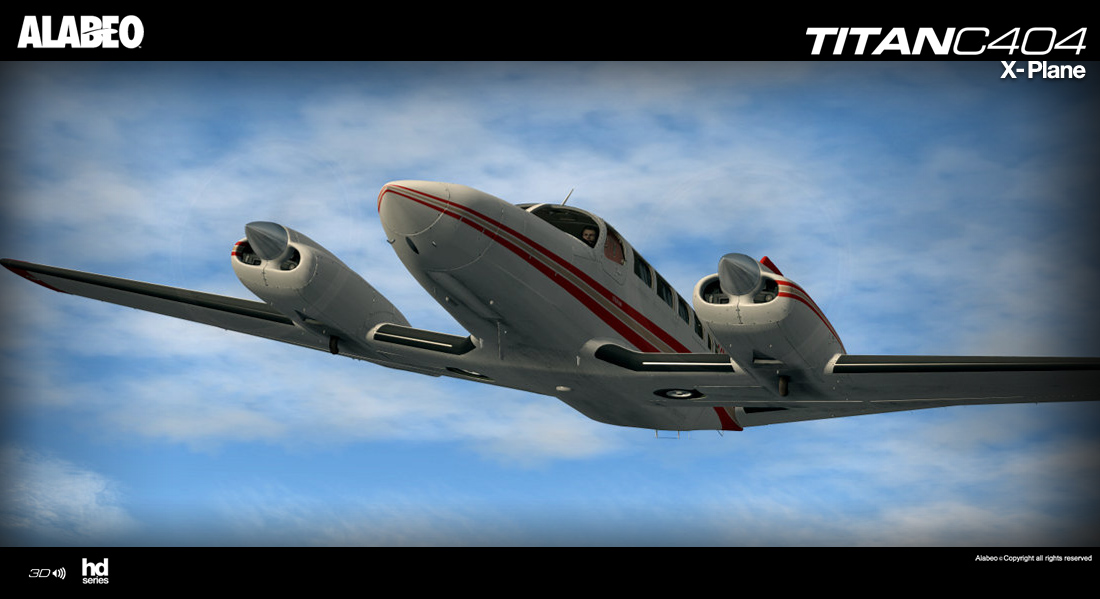
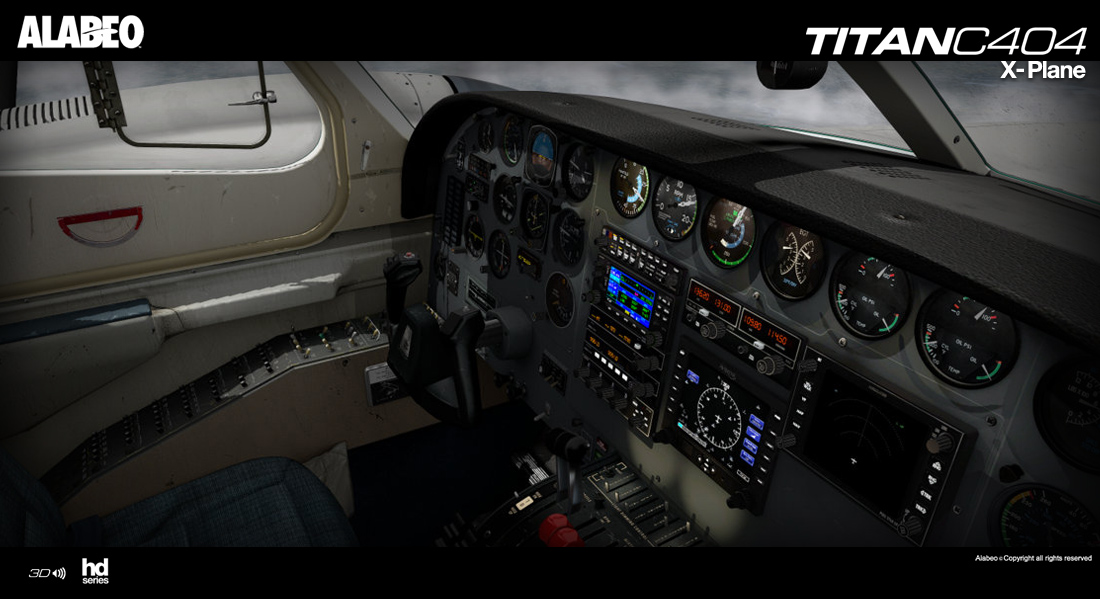

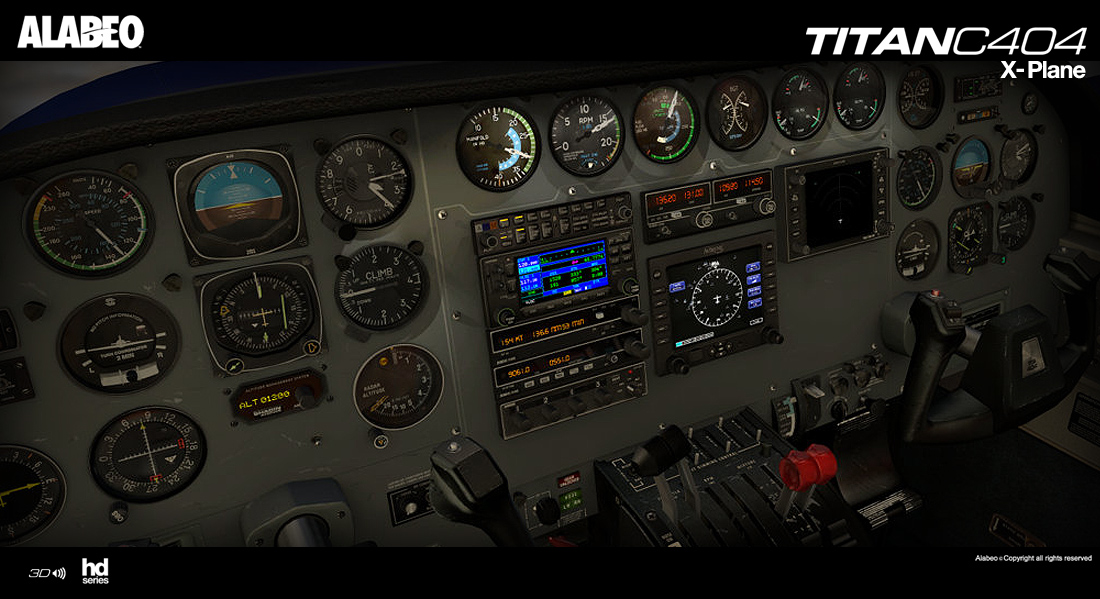


Aircraft Review - Embraer E175 by X-Crafts
in Airliners Reviews
Posted
Aircraft Review - Embraer E175 by X-Crafts
In regional aviation for airlines the biggest revolution has been the replacement of 70-110 seat turboprops with economic new generation jet aircraft. Of these two aircraft companies have dominated in Bombardier Aerospace with their CRJ Series and coming C Series, but the real success story in this regional jet category is the Brazilian Embraer company with their E-Jet family of aircraft.
These fast efficient modern aircraft have revolutionised the hub and spoke system of aviation networks in that you can today step out of that modern long haul cabin and straight into a regional aircraft cabin of the same standard, space and quality and have the same speed factor than sitting in a droning turboprop for hours.(yes economics have again swung the pendulum back in favor of the ATR's and Q400's, but only over short distances).
The first delivered aircraft was an E-170 in 2004 to the Polish Airline LOT and the larger stretched version with two extra rows of seats (88 to 80) was the 21,810 kg (48,080 lb) E-175, that first entered service a year later with Air Canada in 2005.
X-Crafts Embraer Aircraft
X-Crafts came into X-Plane in August 2014 with their first release aircraft E-175 LR: Aircraft Review : Embraer ERJ 195 LR by X-Crafts
I was immediately impressed with the quality of X-Craft's design and excellent 3D modelling and an excellent looking aircraft it is. As this being a very first release it did note and require a small refining period, but by the time of an update to v1.2 in early Nov 2014, you were looking at a pretty nice looking aircraft at a great purchase price.
This Embraer release is the follow up aircraft in the smaller E-175. And outwardly it looks extremely similar to the bigger earlier E-195 LR, but it is not as this aircraft has been 95% remodeled from the ground up, and it is in the details that shows how far the difference is between the two aircraft, and the E-195 LR is still very good in the first place. The equation that is important to remember here is the amount of detail and quality you get for your money. Yes certainly a FlightFactor aircraft gives you an amazing amount of systems and general spectacular features, but it comes at nearly three time the cost of the X-Crafts aircraft and you are not skimming here as the aircraft is very high in quality and has a lot of very good features for a very nice price, it is a very nice aircraft to fly as well as we will find out... In X-Plane terms, the E-175 is an excellent, quality aircraft and amazing value compared to aircraft even only a few years ago.
Exterior
Sitting on the ramp the aircraft simply oozes quality, it is a nice sized and looking aircraft as well. but if you get in closer then the detailing starts to really jump out at you.
On an aircraft this size I don't think I have seen better detailing, it is extremely well done and detailed. Ribs, latches, handles and pitot probes are all expertly done. Door animation (latches as well) are excellent for all four fuselage doors and the two lower cargo hatches.
The beautiful (If you into great engineering) GE CF34-8E uprated 200 turbofans are astounding in quality and execution, and the central wing attachment strengthened areas are very well and realistically done.
Undercarriage construction, links, hydraulic pressure hoses, wheel supports and hubs are expertly created, it is all as good as it could get.
The detailing is carried on around the tail and rear elevators, the metal heat shroud for the rear mounted APU (Auxiliary Power Unit) is exceptional as is the detailing for elevator maintenance access panels.
Menu's
There are three "Menu" tabs in M, P and C on the left lower point of your screen.
M-Menu (main)
The top "M" menu popup covers opening and closing the four fuselage (Two front and two rear service) doors and the two lower Cargo hatches. Three other items cover the "Ground Objects" which include chocks, cones and pitot covers. GPU (Ground Power Unit) and pushback truck.
If the box is ticked off you get an "Alert" of the pushback truck is disabled, click the box and the pushback truck appears, we will cover the use of the "P" pushback truck later when we use it.
C-Checklist
There is a spiral bound checklist book (current fad at the moment).
There are eight tabs on the checklist manual covering "Before Start - Startup - After Start - Takeoff - Descent - Landing - Parking and Secouring" All procedures are very clear and precise, and so this is a handy guide to operating the aircraft.
Interior and Cockpit
On entering the E-175 the cabin is very well done and two class, only small point is the chairs feel a bit too big a scale and the distance between the chair height and the luggage bins is quite narrow, but you can't fault the detail, nice touch is the rows of seatbelt and no smoking signs above each row when activated. Both the forward and aft galleys are excellent and really well modeled and detailed, separate highly detailed food carts are the highlight here.
Like the outside in the cockpit at first glance it looks exactly like the earlier X-Crafts E-195 LR, but the subtle differences are there, it is better and more detailed, the five display panels are more cleaner, brighter, sharper (although that can bring out a little more anti-alias at lower resolutions because the lines are finer) It is certainly the new improved version of the last one, but overall the panels look and feel more complete and that feeling is carried through over the whole aircraft.
The Pedestal was beautifully done on the E-195, and that design has been carried through here as well, and even the rear FMS displays information when programmed, small but welcome details.
The five main display panels are switchable via the Reversionary Panel which swaps the displays between four different modes. PFD and the MAP/NAVIGATION displays are your main two screens for both Pilot and Second Officer, central screen covers the engine and aircraft parameters. There is only a backup Artificial Horizon and clock timer on the central panel with the Autobrake and Gear selection.
The aircraft and systems is powered by the Honeywell "Primus Epic®Integrated Avionics System" that covers every aspect of the avionics and flight management of the aircraft. As a nice touch the Honeywell logo pops up on the displays on startup.
Main engine items include N1, ITT (Turbine Inlet Temperature), N2 and FF (Fuel Flow Per Hour). Fuel QTTY (Quantity), Oil Pressure (PSI) and Temperature. Slate and Flap position indicator, LG (landing Gear) position and Autobrake settings, APU percentage (running) and Temperature. Aircraft data and alert/information displays, lower bottom is the aircraft "TRIMS" settings.
PFD (Primary Flight Display)
The main PFD is the standard glass cockpit primary display in having an Artificial Horizon with built in rate of turn and bank indicator. either side of the Artificial Horizon is the speed and altitude tapes with the vertical speed (V/S) on the right. The Horizontal ILS CDI (course deviation indicator) is ever present and the vertical indicator appears when the approach mode is armed. Across the top is the Flight Mode Annunciation (FMA). And this subdisplay indicates the autopilot modes that are active and armed.
Lower in the PFD is the navigation section that covers a compass rose (built in course/CDI) with VOR and DME overlays, navigation source mode indication, heading, VOR and COM radios frequencies, and NAV/FMS data.
Map - Navigation Display
There are two main displays for Navigation and Plan modes (route).
Popup menus give you access to Map Range (shown on display) and Nav-Aid/Fix indicators. Weather includes Light Storm and Alfa Atn. Top right menus give you access to seven pages of aircraft parameters covering - (Current) Status - Flight Controls (Ctrl) - Hydraulics - Fuel - Electrical - ECS (environment) - Anti-Ice. All displays can be adjusted for brightness via the far left knob lighting panel, which unlike the same on the E-195 in that all the knobs now work independently of each other.
Overhead Panel
The overhead panel (OHD) is surprisingly straight forward, in most actions are just automatic. All systems really take care of themselves with access needed only really to set fuel tank operation and aircraft lighting controls, even the GPU or APU access is controlled by the active unit.
Autopilot panel is nicely laid out and easy to use. Nice features are three way altitude adjustments to set large different altitude settings, making things quick and easy, a few more things we will come to on the AP when we fly the aircraft, but one item that needs pointing out is the VOR1 - VOR2 and FMS (Flightplan) selection. "FMS" is the button on the top, but the "VOR1" (ILS Landing) and "VOR2" selection is noted under "BRG"?
MCDU - Multi Control Display Unit
One of the features of X-Crafts E-175 is a MCDU/FMS unit. To be clear it is only loosely based on the Honeywell avionics system, it looks like the system and you access it the same way as well, but under the skin it is a very highly developed X-Plane default FMS, and that is best kept in mind when using it.
It works in the context of creating a flightplan with three elements, those are the:
SID (Standard Instrument Departure) - Route - STAR (Standard Terminal Arrival Route)
It may look like a standard MCDU flightplan formatting layout, but it is not. For one the three elements are totally separate until they are activated together as a complete flight plan, It is clever as well because you can change each element separately without affecting the other two. The central "Route" section is a standard X-Plane .fms flightplan and it is saved and loaded as such a file, but with each time you load in your saved .fms flightplan you will then have to create the SID and STAR elements from new.
Start page is the "MCDU INDEX" This is main central place menu you go to to do all the various elements of creating, changing, saving, loading flightplans, two other bottom keys allow you to access the AUTOPILOT and RADIO pages.
We start at the "STATUS" page by accessing the L1 (Left - key 1). This page shows you the current "Status" of the aircraft, It includes the general condition of the aircraft at this point in "position" Autopilot (on/off, AP Source, Next waypoint, Flightplan, Speed, AutoThust setting and NAV Radio settings.
To create a route then we start with the DEPARTURE point or airport, press the L2 key to create a start to your flightplan and create a SID.
Type in the lower scratchpad your DEP Airport, in this case "KRSW" SouthWest Florida Intl and input L5 Key. Select your departure runway by the R3 Key. All navigation on the MCDU is done via two sections of the lower input knobs, outer (larger) knob allows you to move up or down the list, smaller inner knob is used to select or activate your choice.
Select a SID by pressing R4 Key and again go down the list via the outer knob. If you reach the bottom of the list, the list will not scroll, so you have to go to the next list page by pressing the NEXT button or to go back to the previous page then press PREV, again press the centre inner knob to select your SID.
With the SID Stored it is time to load or create a route... You have two options in "ADD ROUTE WPTS" or LOAD (.fms flightplan)"
We will look a the LOAD First. The .fms flightplans are stored in the X-Plane "Output/FMS plans" folder, and you use the standard navigation of outer knob for moving up or down the list and inner knob for selection. The PREV and NEXT buttons navigate the pages of flightplans, and in fact is a far quicker system to find your flightplan quicker than using an endless scroll like most selection processes.
If you have loaded your route then you can go to the next step of ARRIVAL, if you need to create a route then you press ADD ROUTE WPTS
Creating Waypoints is easy. Select your chosen NavAid via the AIRP (Airport), VOR, NDB, FIX or Lat-Lon keys (FIX is default), then insert your NavAid/Waypoint ICAO code on the scratchpad and input via the L3 Key, you also have option to add in the altitude via the L5 Key, if correct then press SAVE R5 Key. On VOR/NDB you may be given a choice of waypoints to chose from, select the one you require. In all scratchpad inputs you have a reverse arrow <- on the bottom row of the MCDU to go back one space or DEL to clear the waypoint.
When you SAVE the next segment (WPT#) then appears, repeat till you have all your route segments completed, then use MCDU INDEX to go to main menu page.
Now the final element is the ARRIVAL STAR. Press on the MCDU INDEX page ARRIVAL R2 Key.
Input your ARRIVAL airport... KATL L5 Key, then SELECT RUNWAY R3 Key to select your arrival runway and activate via the inner knob.
You have a choice of FINAL approaches in ILS, RNAV or VOR/D and select the one you require.
Last approach choice is the STAR you require, select from the list and again activate via the inner knob.
Now you have created all three elements in the SID - ROUTE - STAR and to Execute the full flightplan you press EXEC to load the plan into the system. Press R1 Key (FLT PLAN) to see your Flightplan.
You can review your route on the MAP/NAV (PLAN) display and as you scroll down the list it will go through the various waypoints on the plan. If you want to you can input a route name and SAVE it to your "Output/FMS plans" folder. You can use any .fms X-Plane flightplan, but remember it can be only the centre section of the SID - ROUTE - STAR layout.
Editing any element in SID - WAYPOINTS (route) - STAR is selected by the assigned key on the MCDU INDEX page, and you again go back to the MCDU INDEX page and press EXEC to reload the flightplan.
Last two selections on the MCDU are the RADIOS R6 Key pages and AUTOPILOT L6K.
RADIOS is a full Radio Frequency page for Radio management. All frequencies are covered and there is a duplicate manual version on the middle pedestal, but inputting is so much easier here with the key pad.
Very nice to use it is as well... COM 1 and 2, VOR/NAV 1and 2 and your XPDR Transponder identity code and visual reference on page one and ADF/NDB frequencies on page two. The AUTOPILOT is just a general information page (no progress page) as yet.
Overall this is a hybrid MCDU, a very good one though and it works very well and it has been extremely well put together by Steve Wilson. And no doubt it forms the basis of a more featured system that was not possible because of current time constraints. But certainly the enhancement of a better map display and rather than the usual X-Plane red route marker would be the first enhancement I would execute. But the basics are in place and very clever it is in operation.
Flying the Embraer E-175
You can start the engine from either the GPU or the built in APU. The start sequence is mostly automatic and by just turning on the ignition switches and then the start switch for each engine. From the E-195 LR I didn't like the way both switches moved together, in one start sequence they still do, but like a lot of changes from the E-195 they are now independent operations.
Sounds are first rate, really authentic and the startup sequence is very good.
If you select the "Pushback" option from the "M" menu then you can activate the pushback truck via the "P" menu.
You need to design the pushback you want in, straight back, pivot right or left or to park the tractor, then you set your distance and press "Accept" to activate the plan, you then do a acknowledgement to "confirm" or "Abort", then click off the brakes and off the tractor goes...
It works very well, but we are used to throttle controlled, joystick manoeuvring trucks today, so I found it a bit restricting.
Power up and off the brakes and the aircraft nice to taxi...
To get the best clean takeoff and flight transition it is best to set up a lot of the AP (AutoPilot) ready before takeoff, but don't activate the AP.
FMS is selected and so is LOC for flightplan lock in, Setting and arming the V/S (Vertical Speed) which is set here at 2300fpm, both Flight Directors (FD) on and the speed set at 220knts and transition speed altitude set at 15,000ft. Don't activate the ATHR (AutoThrust) if you don't want to find yourself taxiing fast through the airport carparks (yes at full throttle it is scary). Flaps set to 2.
You can switch off the window tinting and excellent reflections, by pressing the left side window frame.
The activated flightplan will show the aircraft's position, this maybe before the actual airport. but that is normal.
Sometime like here if you have changed you runway direction and as KRSW does not have an available SID to the first waypoint of RODDE You sometimes have to do a -> DIRECT TO to the RODDE waypoint.
To active this you press the -> Arrow that is used for DIRECT TO functions... The MCDU will note the DIRECT is EXECUTED.
Using the DIRECT function is easy as well. Just use the outer knob to scroll down your flightplan list to select the waypoint/Fix you want to go DIRECT TO and press the arrow to activate.
Brakes off and power up to the yellow band and your rolling... power build very easily and I rotate at 165knts and have a positive climb.
The aim is to get the aircraft clean as soon as possible (Flaps housed and wheels up) before selecting the AP (Autopilot) button. If you have any flap lowered even at low speeds it affects the transition to V/S, and you will find yourself in a negative pitch and totally ruining your takeoff/climb phase, even the transition from manual flying to automatic can be problematic if your speed and flap position is wrong. Get it right and hit the already armed AP button and you just cruise upwards in a perfect linear climb and LOC straight into your flightplan. Just reset your speed for the right ATHR match and your aircraft will power its way in this case my 15,000ft speed transition altitude.
The E175 is a seriously nice aircraft to fly. The length proportions compared to the longer E-175 LR make the machine more balanced, in manual control it is a really nice aircraft, take out the weight of passengers and a heavy fuel load and it has almost personal jet performance... curve away from the airport while slightly climbing and you could turn yourself into a fighter pilot with a passenger jet... so balanced and great handling.
But today it is all business, passengers in the back and cargo hold full of weight, but the performance is still very good, you can easily climb (way) above the 2000fpm marker all the way to 30,000ft, but I am more gentler than that on my machines but still 1800fpm was no issue above the MACH change of 25,000ft.
Cruise
I personally love the way this aircraft looks in the air... picture perfect. The light captures it really well and it look great at any point day or night.
It is very easy to slip back and enjoy the view from FL320, you are just purring along and monitoring the aircraft. On the right and left of the panel are three buttons to show two popup screens of the MCDU and the Radio panel, but they are static and can't be moved around or resized.
Approach
Like most regional flights KRSW (South West Florida) to KATL Atlanta is 1h 20m which is a usual sort of flight of this nature.
Leading edge and flap extension is excellent with great animation and design, even small sections of the flap extensions open and close to clean up the system. Approach speed is around 136knts at full flap before ILS capture, but you have to watch you first two flap extensions as the wing is very efficient and the drag noticeable and will heavily adjust your pitch.
Final approach is around 125knts, and you have push the aircraft down a little to make a secure contact with the runway (RWY27R) and then make sure the nosewheel is hard in contact as well, as the aircraft can be a little light on the nose.
Thrust reversers are very effective, but make sure you pull back on the throttle and close the engine doors without lowering your speed too far, as the engines take a fair while to spool right back down for taxiing thrust. I found that a ATHR off approach is the best so for better speed control and the chance of the ATHR spooling the engines back up again...
Clean up the aircraft and you can head to the gate.
Lighting
Cockpit lighting is good, but there is only really three adjustment positions and no click area spot lighting.
But there is no denying it is a nice place to be at night, the cockpit feels and looks very good and very modern in design, it has been very well conceived and beautifully created.
The rear cabin lighting is very good, but attached to the cockpit overhead lighting, so when you dim the cockpit overhead lighting for landing it goes dark in the back? Highlight is the excellent row seatbelt and no smoking signs overhead.
Outside lighting is good if you can see past the X-Plane blobby lights (which I hate by the way) Aircraft looks very nice at night, but the logo tail lighting is connected to the Ice/wing lights, which I really don't like at all. They are for different uses.
Landing lights are two set inner wings and one on the nosewheel, a second light on the nosewheel is used for taxiing.
First impressions of the landing light reflections was "oh they are not that great, are they", but then they became very effective, so yes they are very good... but there are no runway turnoff lights, which is not to big a deal here as the lighting spread is quite wide.
Strobes and smaller lighting is very good with HDR on.
Liveries
Liveries, include a blank and seven airline colours in Alitalia (default) Delta, American Eagle, both White and dark blue US Airways, Flybe and Air Canada. Quality is outstanding and all liveries are 4K HD (fuselage 10000px/meter squared) quality.
Summary
I am going to admit I really like this aircraft, as from the start of X-Crafts entry into X-Plane the modelling quality has always been exceptional, and the E-175 here is a very high standard... It just always looks so good in the light and flying hard through the sky.
Yes there are quirks, and a few items that need a little refining over time (any aircraft is always needing a refining process), but the step even from the E-175 LR is noticeably higher, and as noted it looks the same outwardly but look and feel closer to the aircraft and you will see the quality and smaller detailing coming through.
Don't likes, not much but a few quirks like double lighting switches, more control of the pushback truck, oversized cabin seats and the default X-Plane map interface.
It is a really nice aircraft to fly, but you have to be and work at flying it really good... It can be a little difficult at lower flap speeds on takeoff more than landing, but time and a feel for the aircraft will eliminate those areas as you get really confident with it, then it all becomes automatic and the E-175 will become part of the fabric of your everyday flying.
The new MCDU based on the Honeywell avionics system is to be noted as very new, and a new approach to setting up the aircraft. Again get used to it and it is easy to program and use, but in a few areas and mostly in a visual sense the X-Plane base is evident and there is certainly a bit more room for a bit more future development and refining here... as I said it is very new here on this release but it will certainly become more powerful, deeper in systems and obviously will become very good going forward.
But if you like your flying regional, and like a gem of a great small 100 seater aircraft and one that is nice to fly, then it is really hard to go past the Embraer E-175 from X-Crafts... all round it is gem of a good machine.
Yes! the Embraer E175 by X-Crafts is NOW available from the new X-Plane.Org Store here : Embraer E-175
Price is US$34.95
Features
CUSTOM FMS
INTERIOR:
EXTERIOR
OTHER FEATURES
______________________________________________________________________
Installation : Download file size is 254.70mb to your X-Plane - GA Aircraft Folder. Installed file size is 576.90mb
Notes:
Documents : Both an extensive Manual and MCDU operating guide.
There is also a good video on how to use the MCDU by Steve Wilson: X-Crafts MCDU - Steve Wilson (mp4 download)
Requirements :
Current version: 1.0 (last updated December 2nd 2015)
______________________________________________________________________
Review by Stephen Dutton
2nd December 2015
Copyright©2015: X-Plane Reviews
Review System Specifications:
Computer System: - 2.66 Ghz Intel Core i5 iMac 27”- 9 Gb 1067 Mhz DDR3 - ATI Radeon HD 6970M 2048 mb- Seagate 512gb SSD
Software: - Mac OS Yosemite 10.10.4 - X-Plane 10 Global ver 10.42 (final)
Addons - Saitek x52 Pro system Joystick and Throttle : Sound - Bose Soundlink Mini : WorldTraffic v2
Scenery or Aircraft
- KRSW - South West Florida Intl by Aerosoft (KRSW - SouthWest Florida Intl - X-Plane.OrgStore) - US$24.95
- KATL - Atlanta International by Butnaru (KATL - Atlanta International- X-Plane.OrgStore) - US$23.95