Stephen
-
Posts
2734 -
Joined
-
Last visited
-
Days Won
355
Content Type
Profiles
Forums
Articles
Everything posted by Stephen
-
 That is not like him? Ask him on the X-Plane.Org? and let me know, thanks Stephen
 -
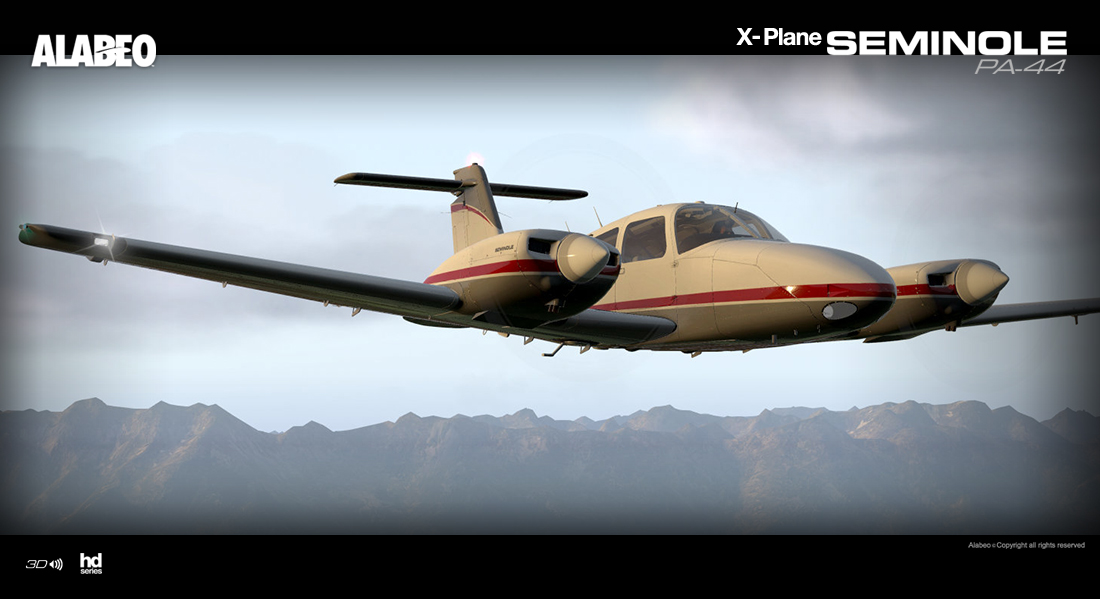
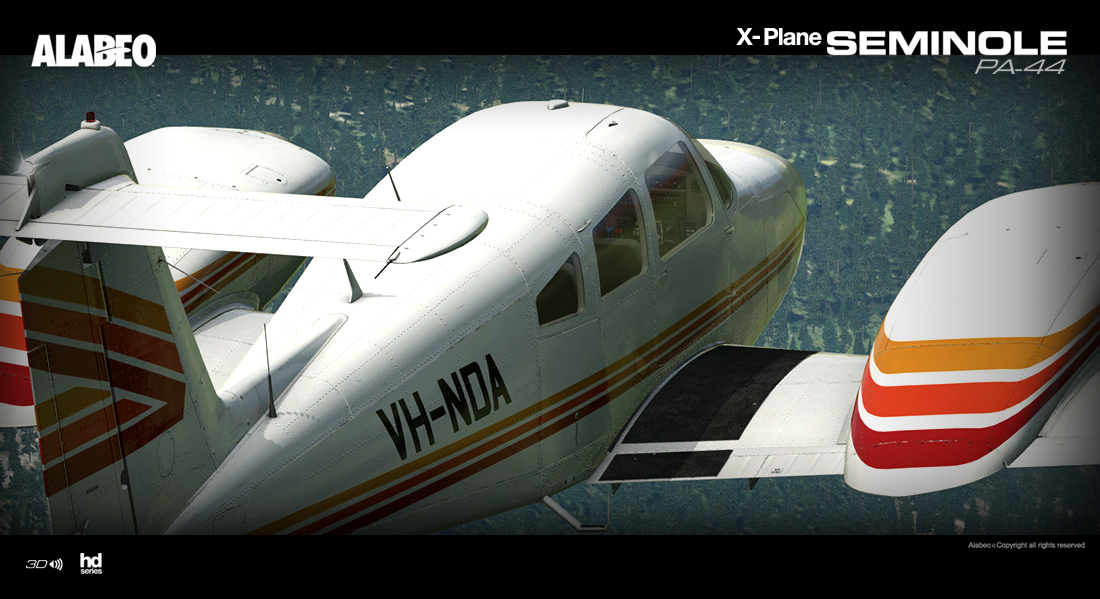
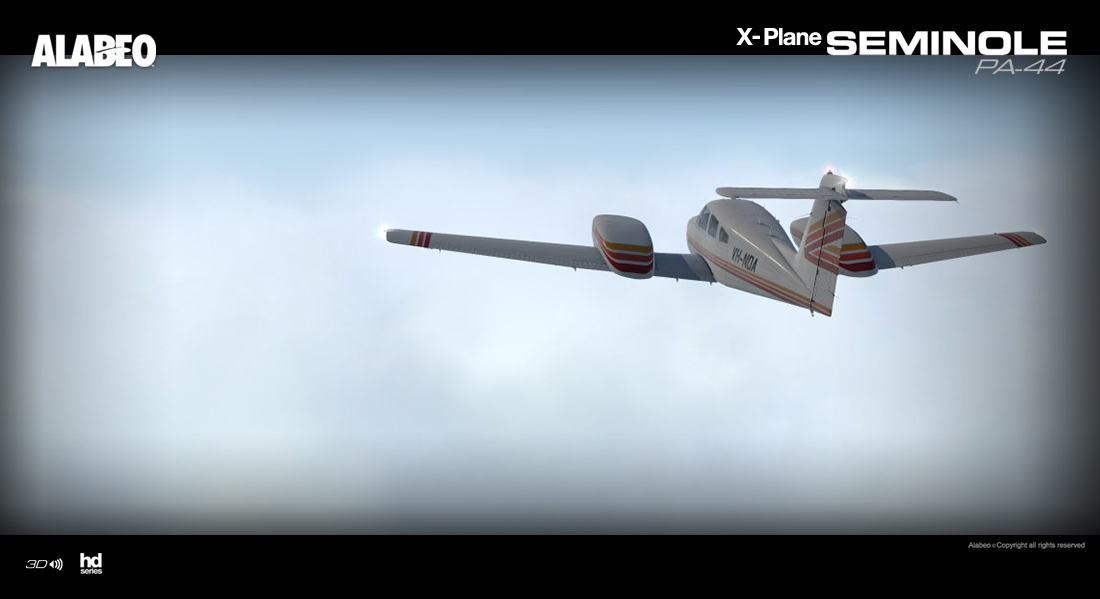
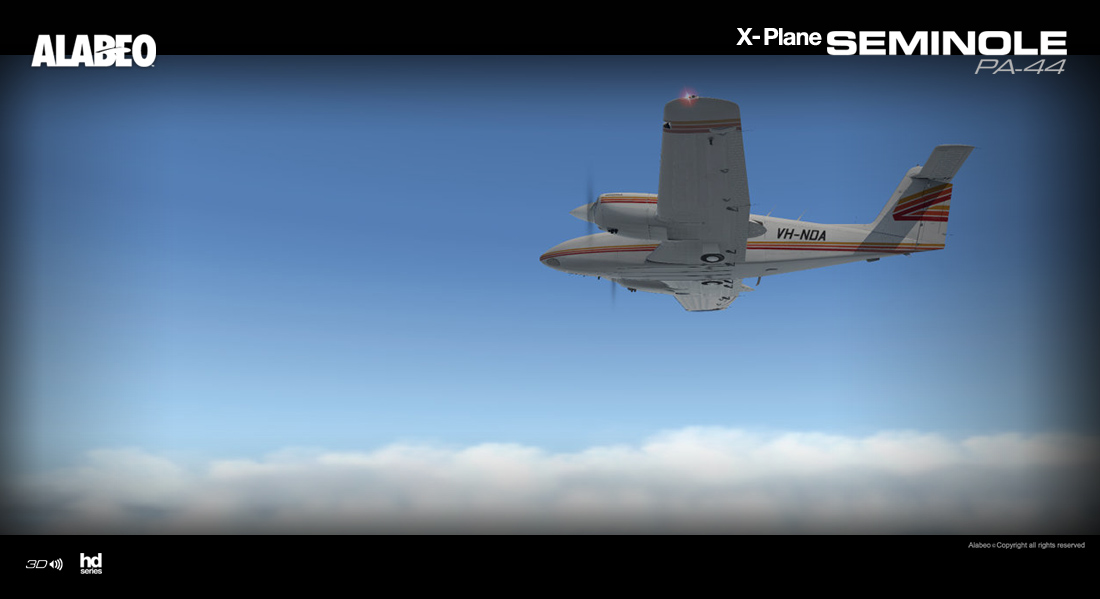
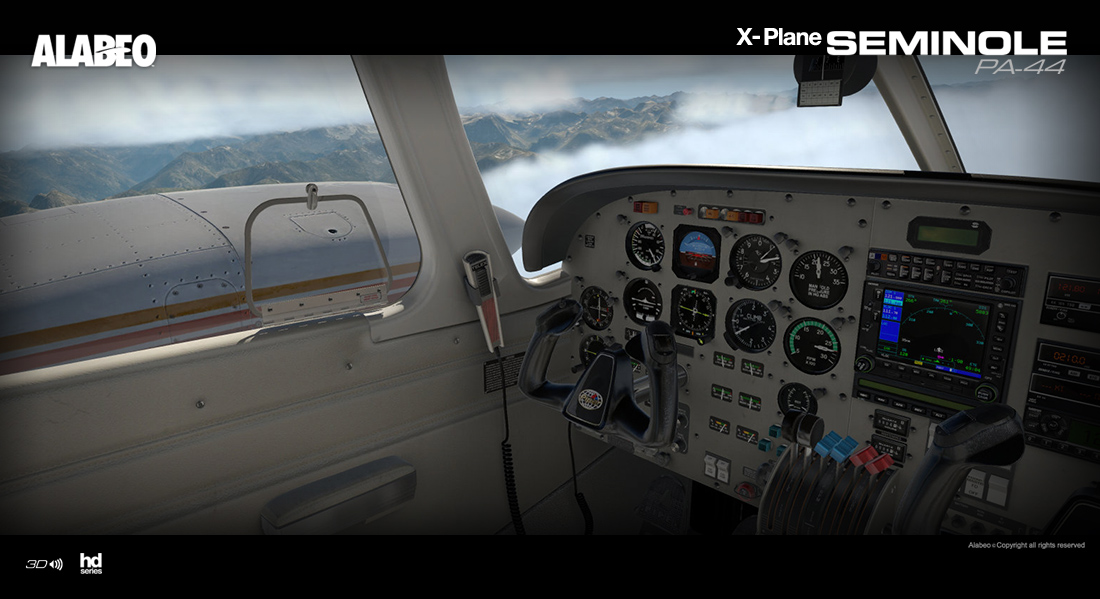
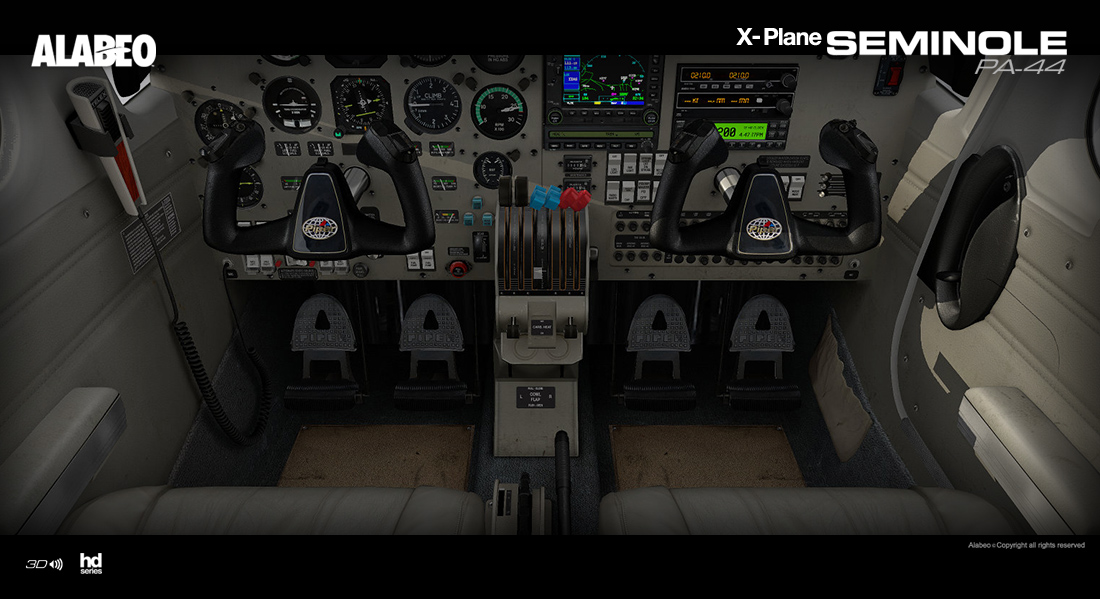
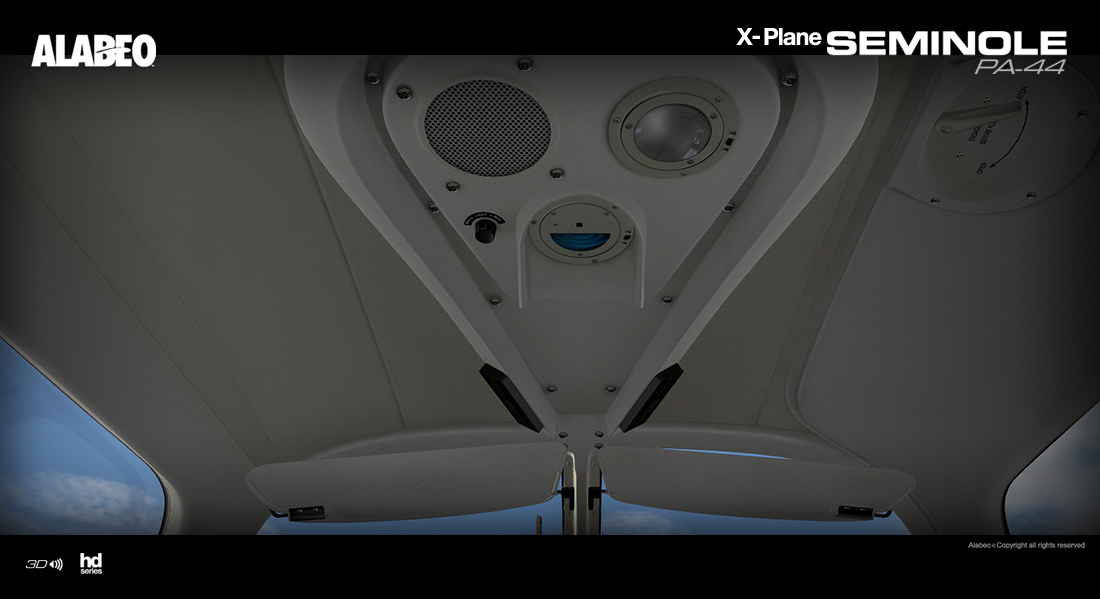
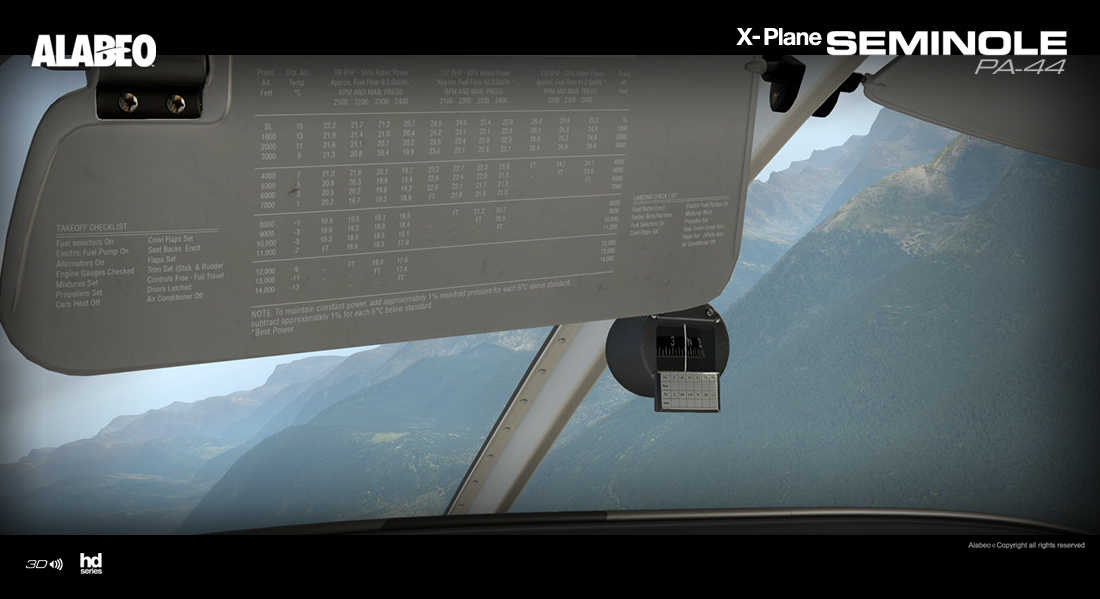
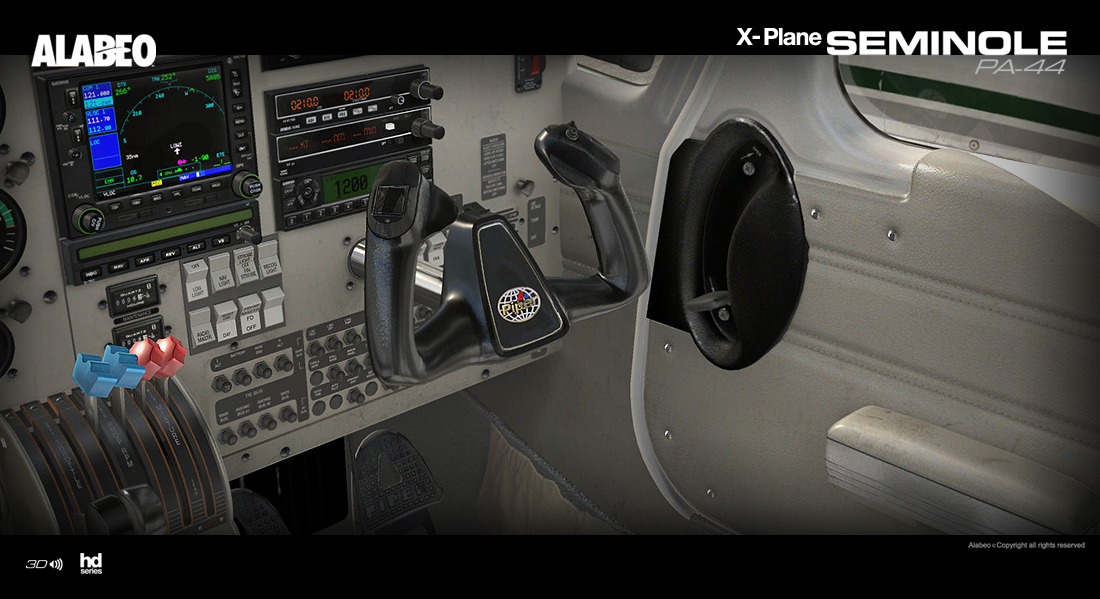
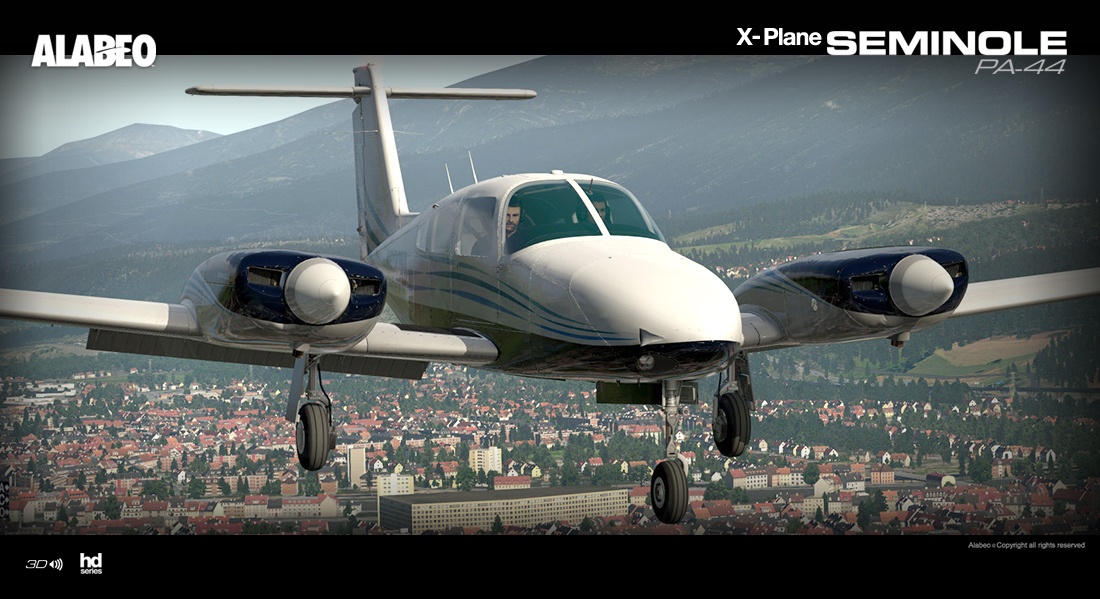
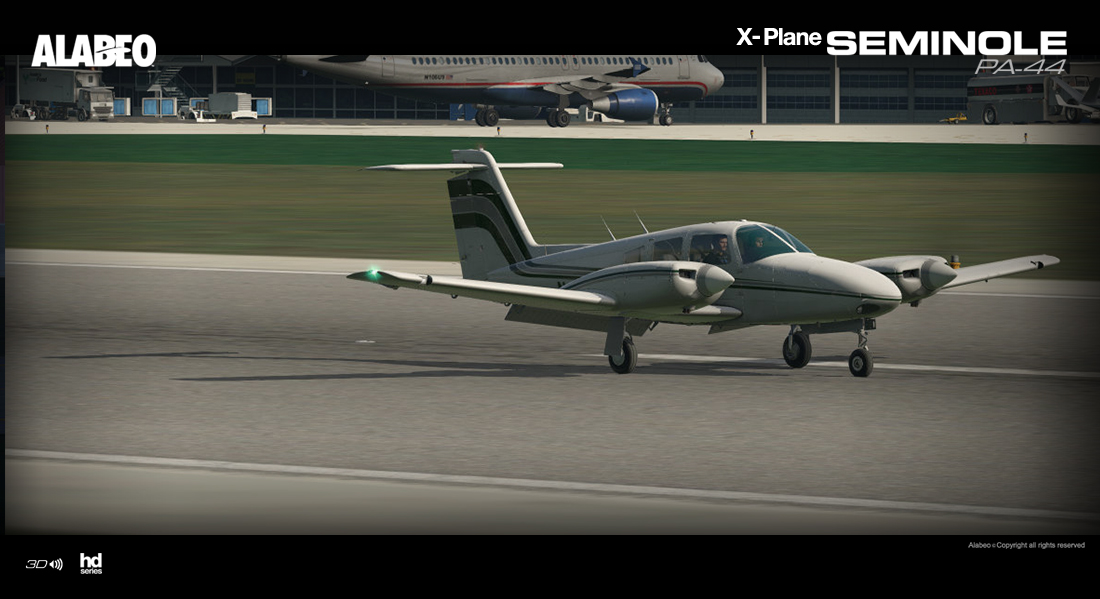
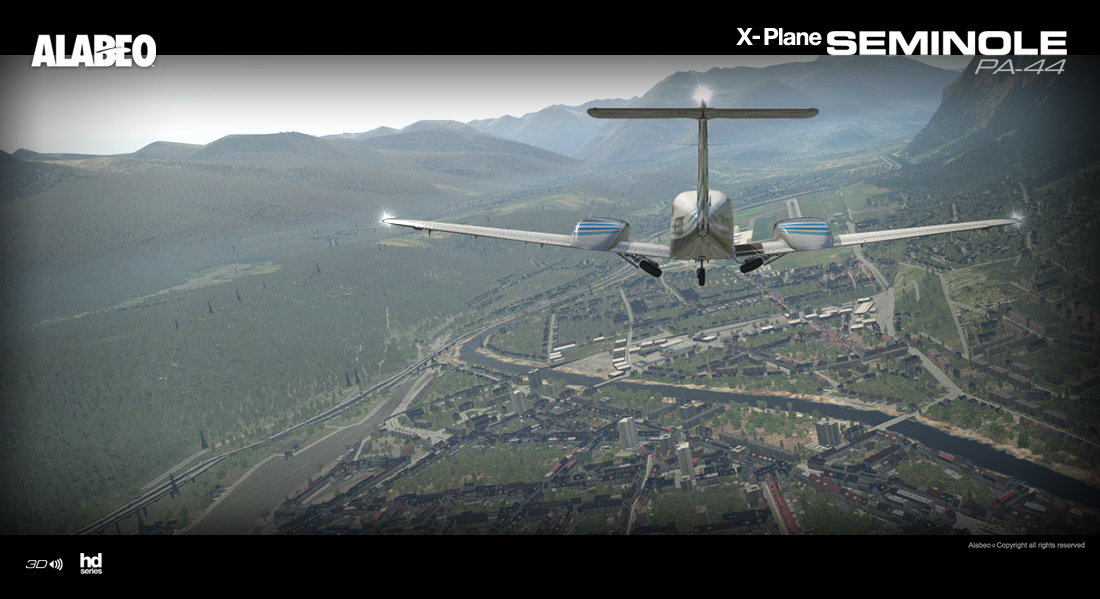
News! - Aircraft Release - PA-44 Seminole by Alabeo Continuing the run of Native American aircraft names after Navajo, Chieftain and now here comes the PA-44 Piper Seminole from Alabeo for X-Plane. The Seminole is a twin-engined development of the a development of the Piper Cherokee single-engined aircraft and is primarily used for multi-engined flight training. The aircraft has been in production since the Seminole was built in 1979-82, in 1989-90, and again since 1995 to the present. The Seminole resembles the competitive Beechcraft Duchess because of its high-T tail configuration. The Seminole is designed with the old world dials and gauges, but a very nice equipment stack gives you the best of both worlds. High quality Alabeo/Carenado design insures great flying and in comfort. Features Include: Custom sounds Full Xplane 10.5 and X-Plane 11 compatible Volumetric side view prop effect High quality 3D model and textures. Blank texture for creating your own designs. Accurately reproduced flight characteristics 64-bit FPS-optimized model. Included in the package is: 5 hd liveries 1 Blank texture Normal Procedures PDF Emergency Procedures PDF Performance tables PDF PA44 Autopilot PDF Quick Reference PDF Recommended Settings PDF Technical Requirements required are: Windows XP -7-8 (or higher) or MAC OS 10.8 (or higher) or Linux Fully XP11 Compatible or X-Plane 10.5x i5 (or equivalent) 2.5 GHz - 8GB RAM - 2GB Video card 435MB available hard disk space The PA-44 Seminole is available right now from Carenado for both X-Plane10 and X-Plane11... ______________________________________________________________________ The PA-44 Seminole by Alabeo is NOW available! here : PA44 Seminole Price is US$32.95 Images & Text are courtesy of Carenado© Developer site : Carenado.com ______________________________________________________________________ Stephen Dutton 5th May 2017 Copyright©X-Plane Reviews: X-PlaneReviews

-
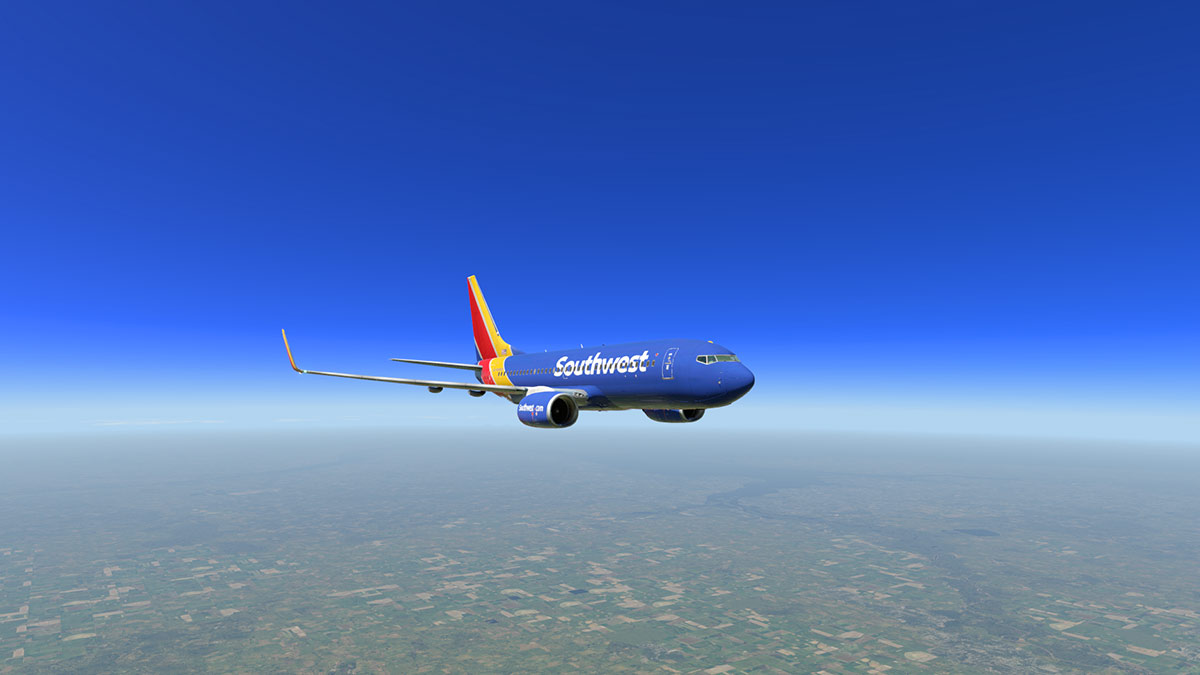
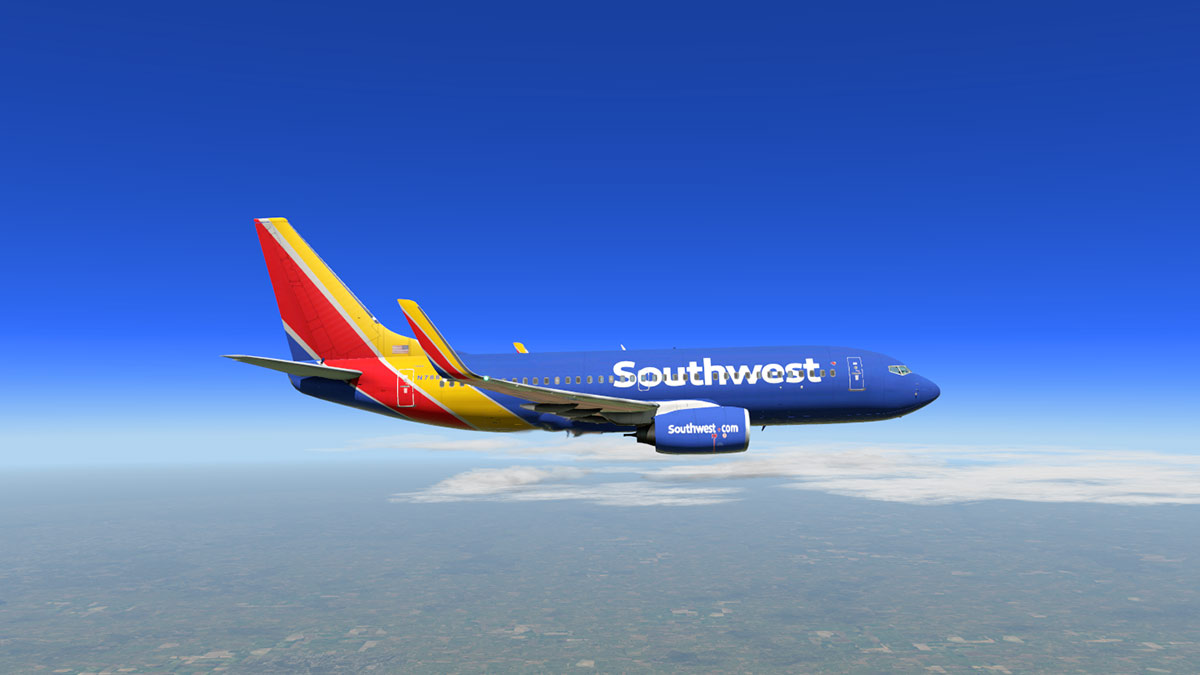
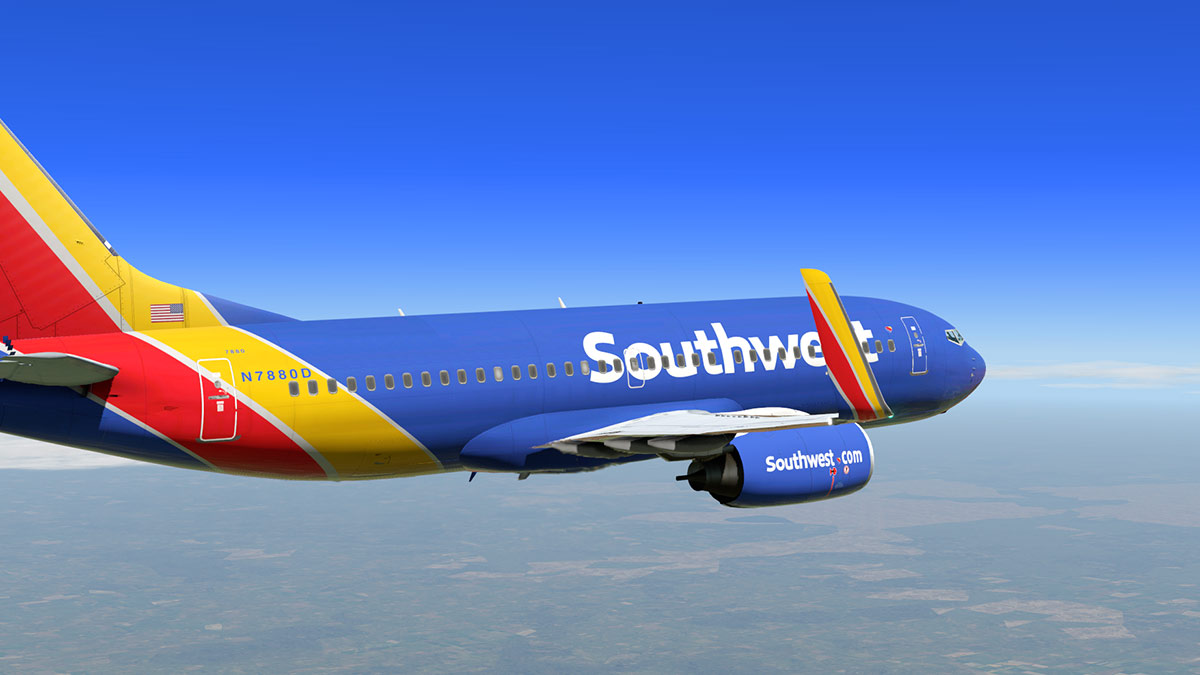
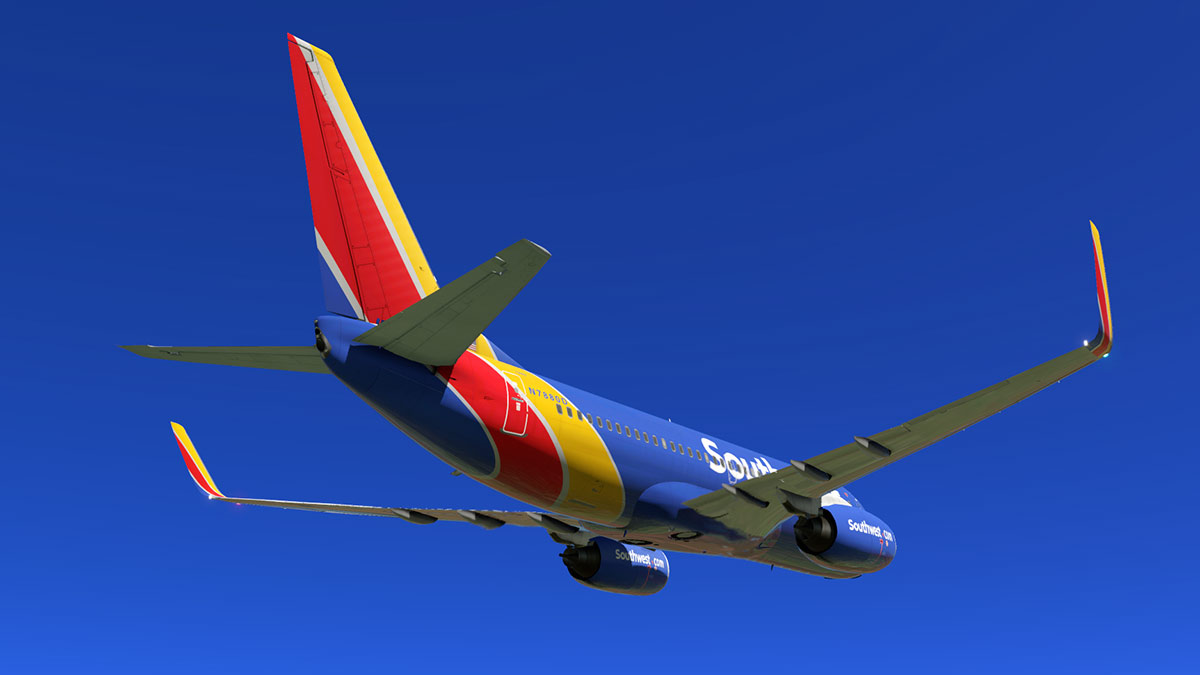
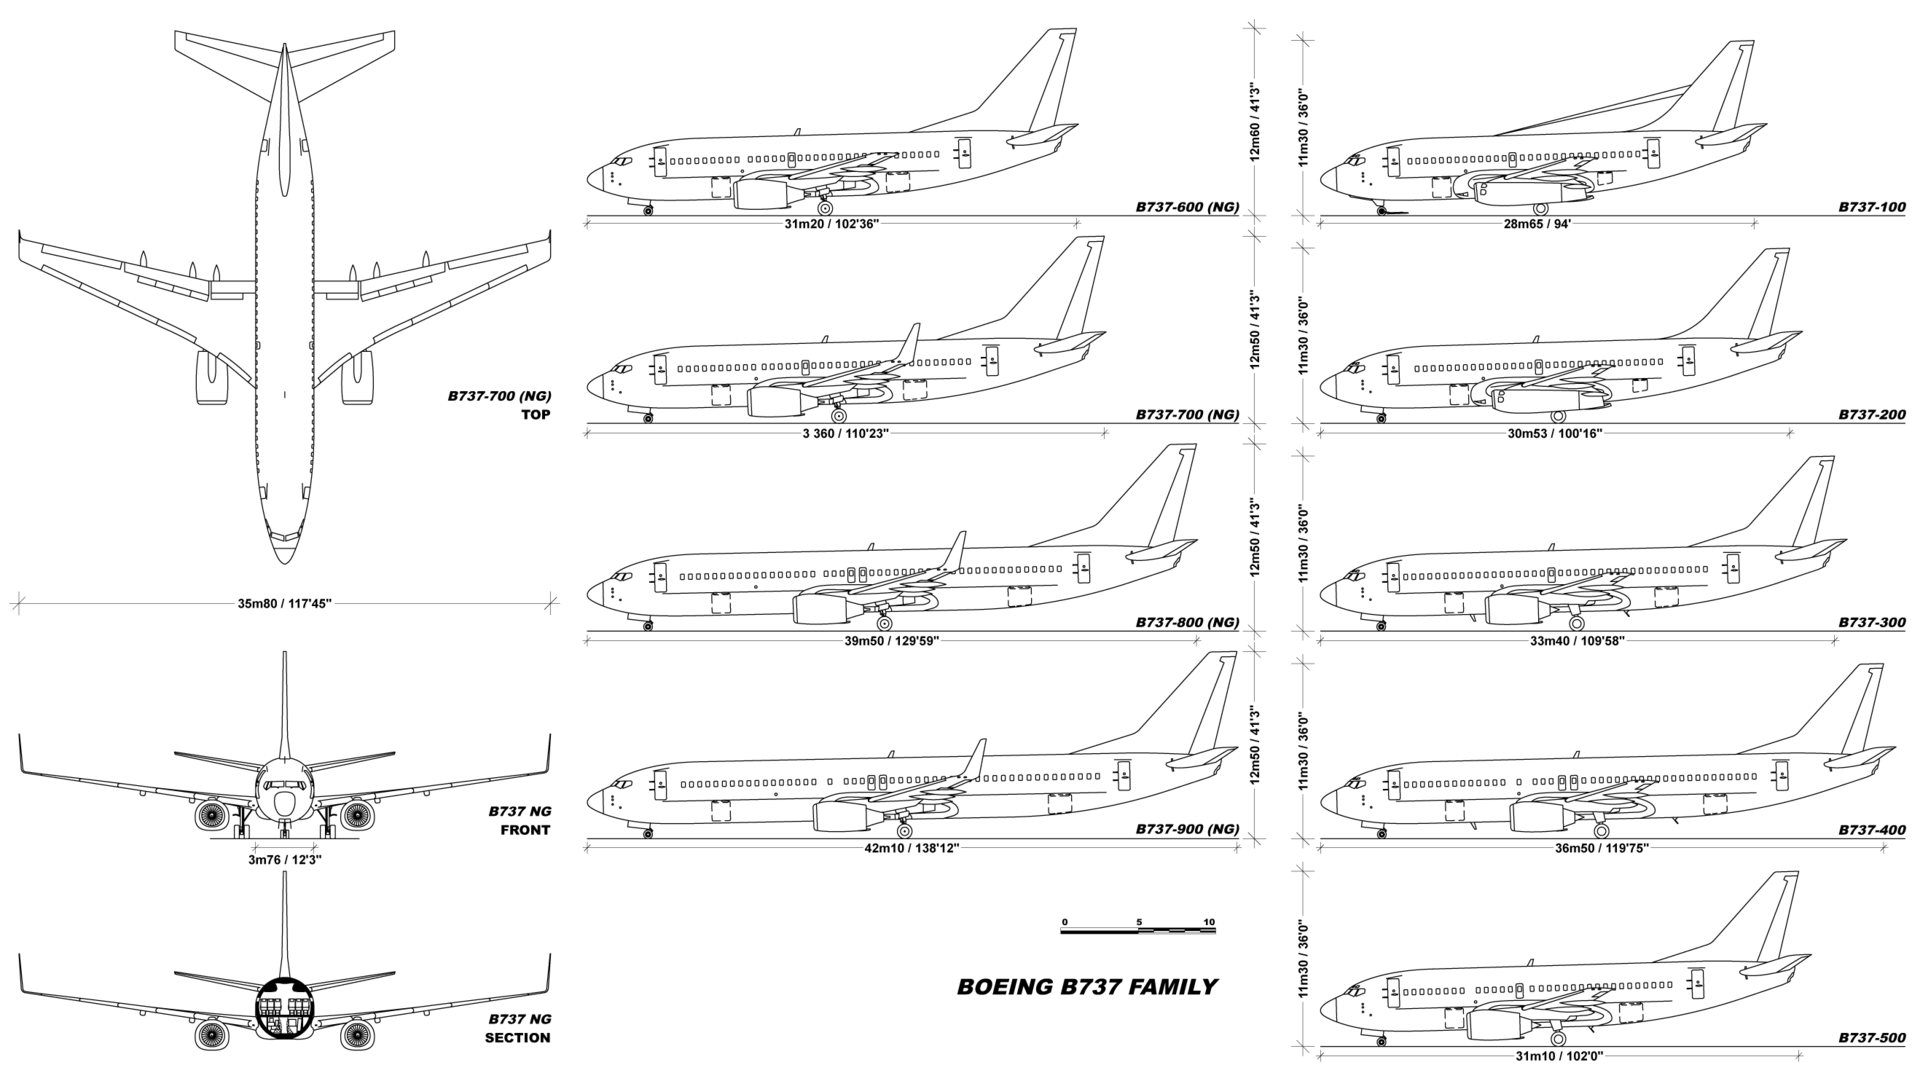
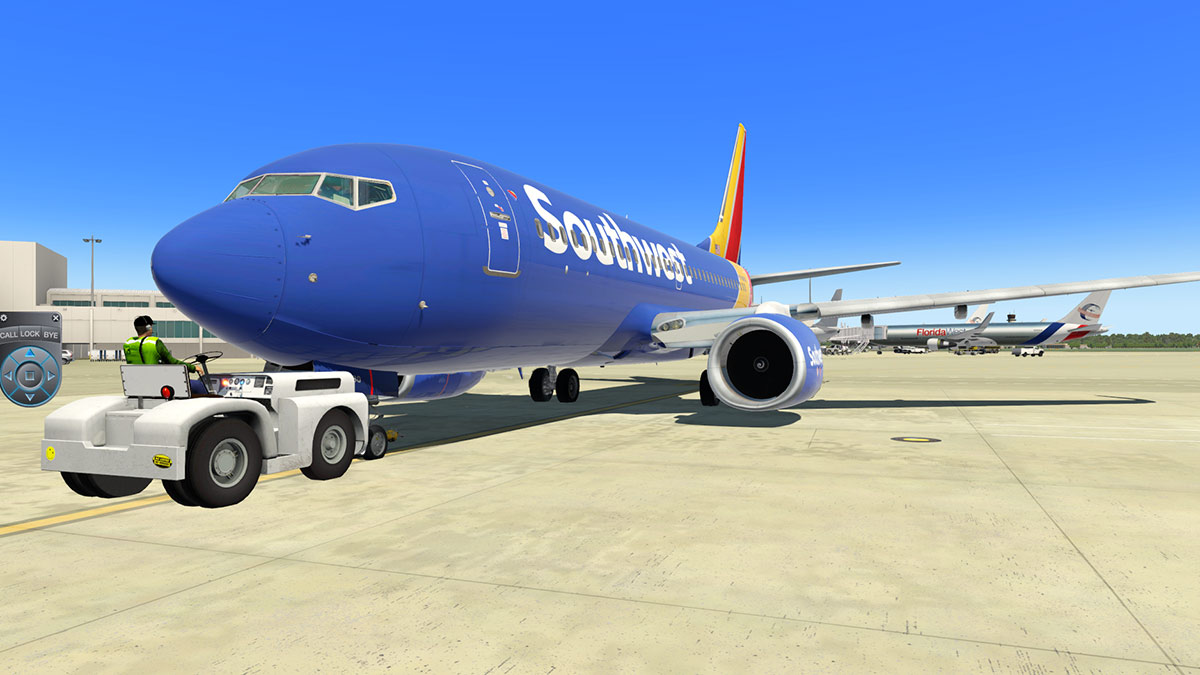
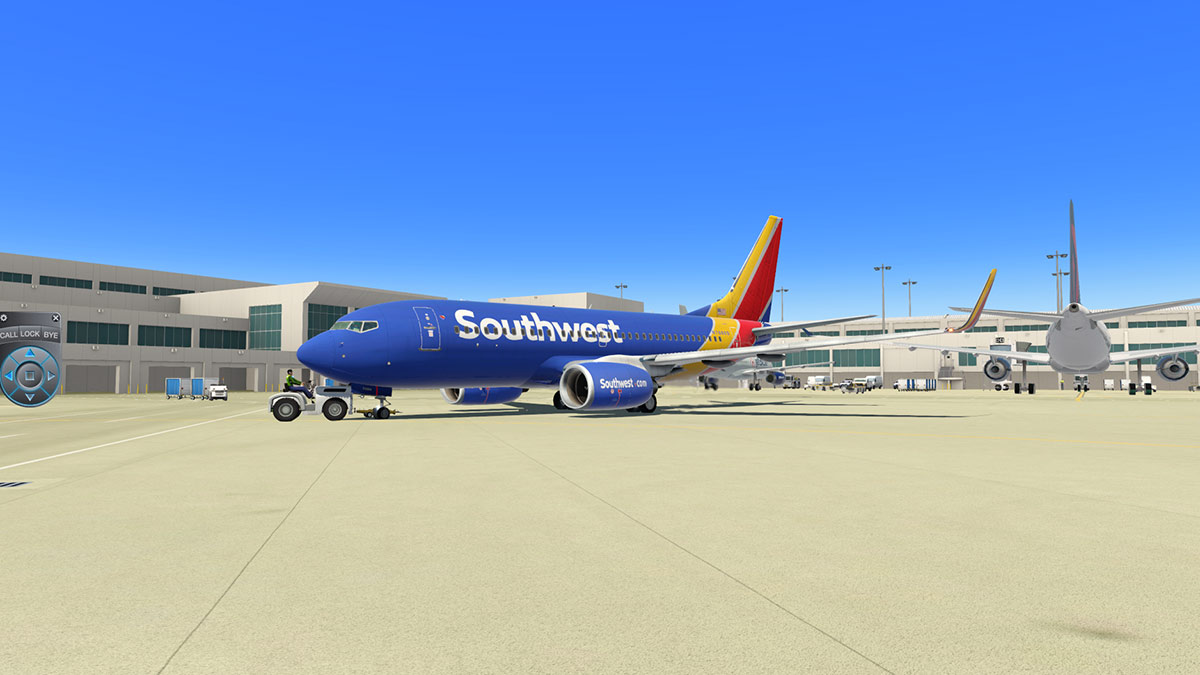
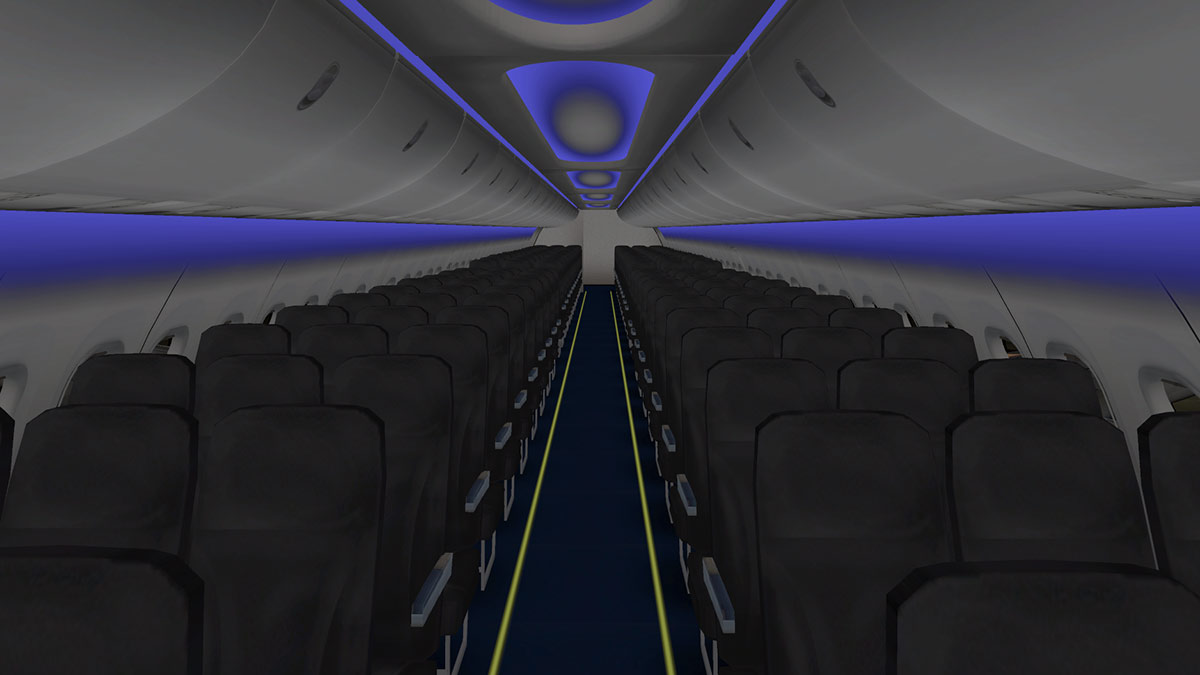
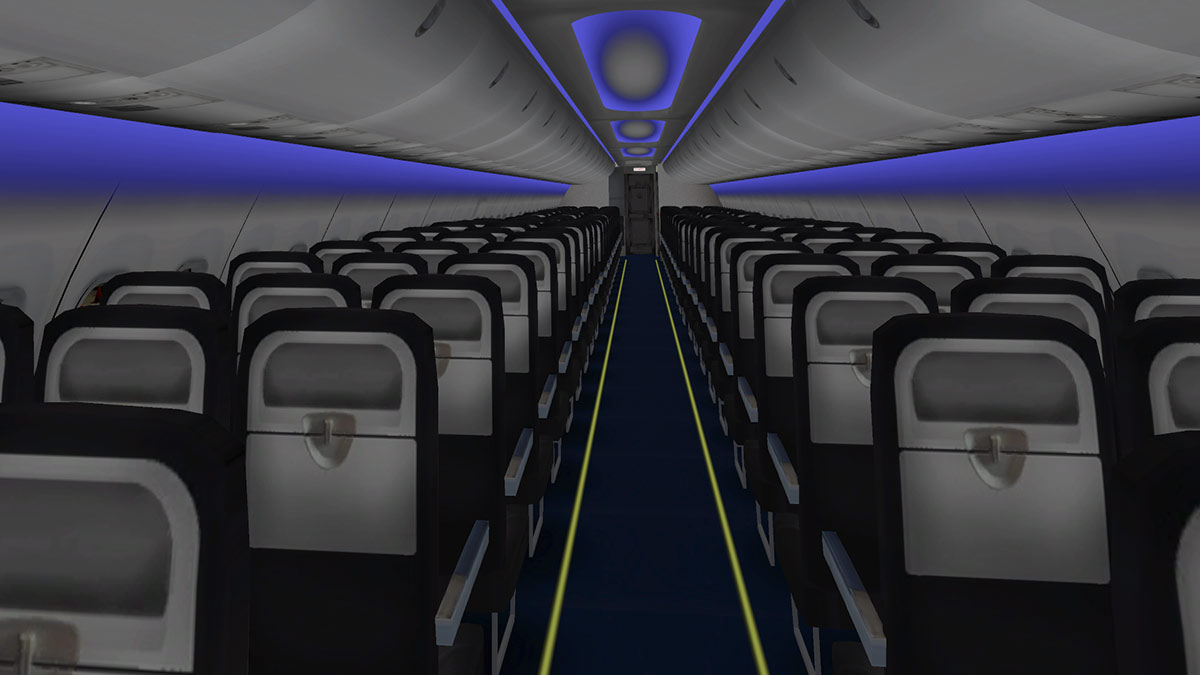
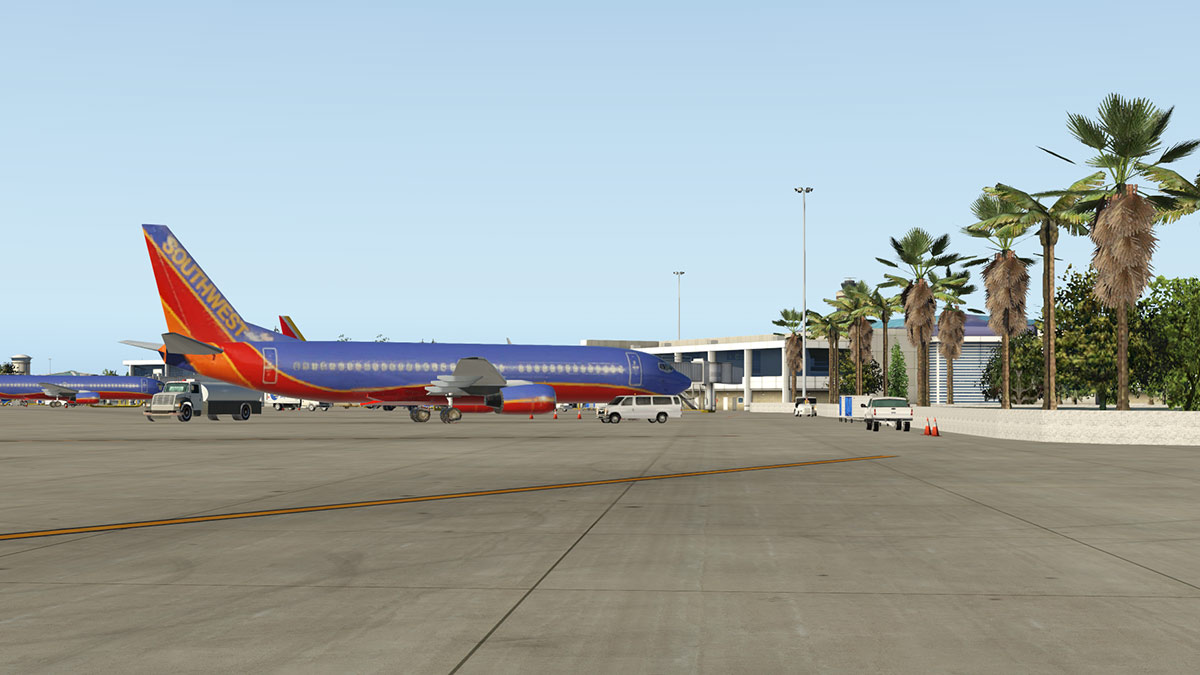
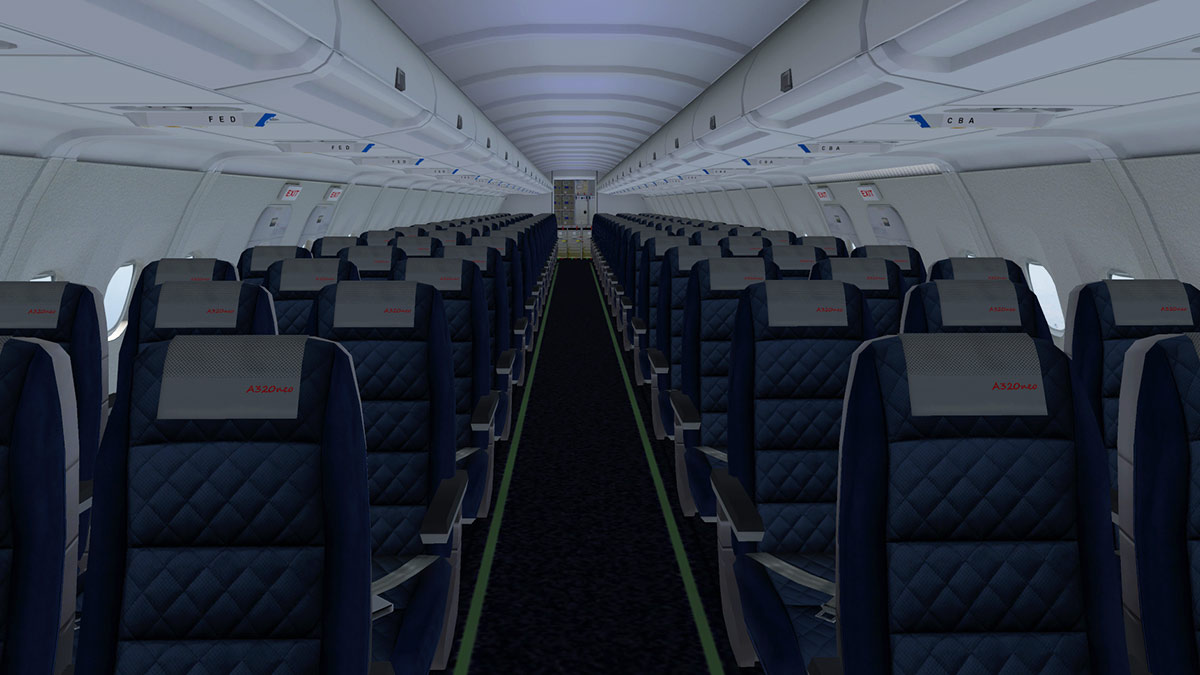
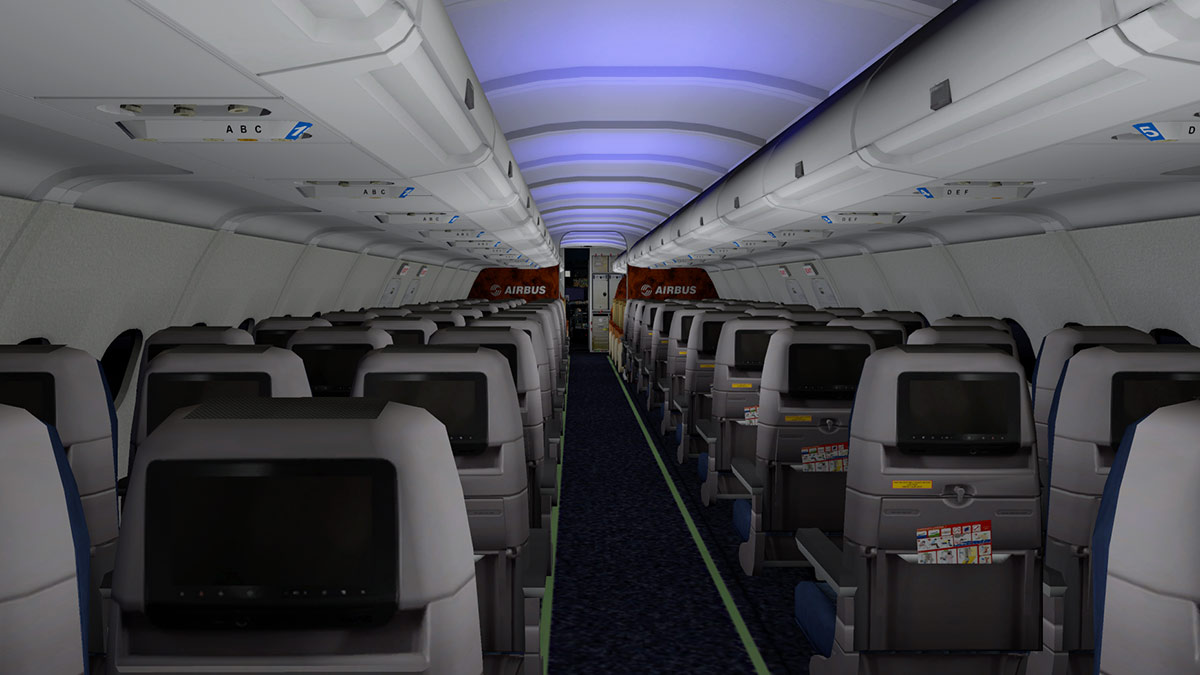
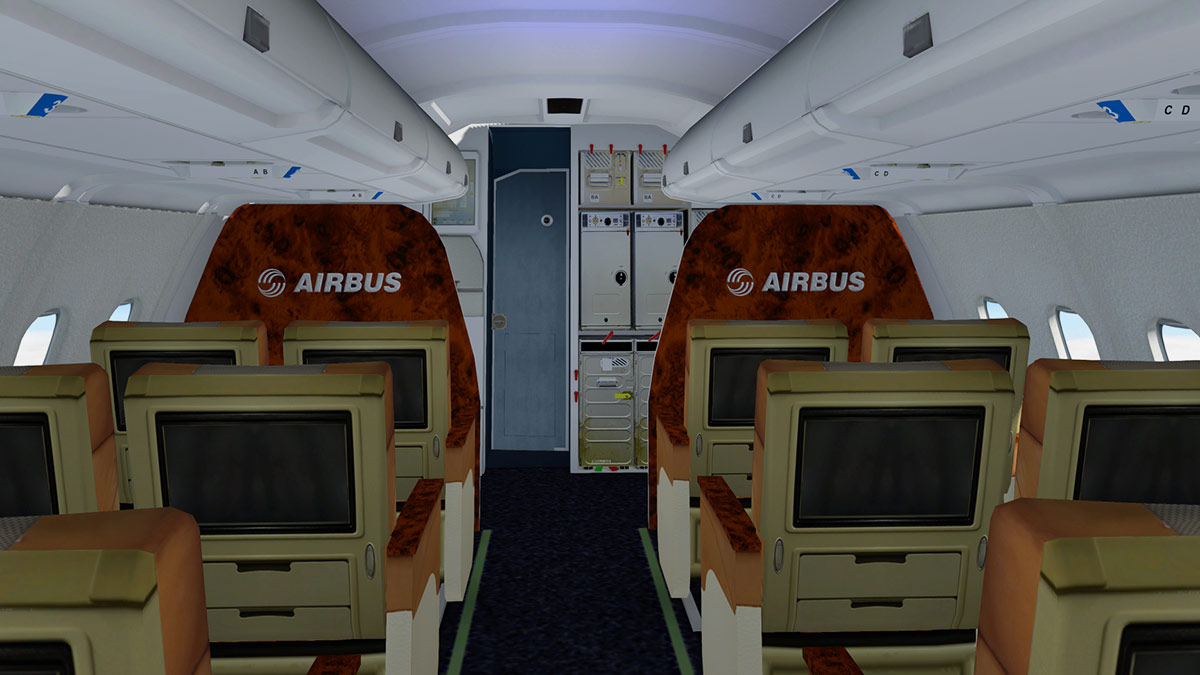
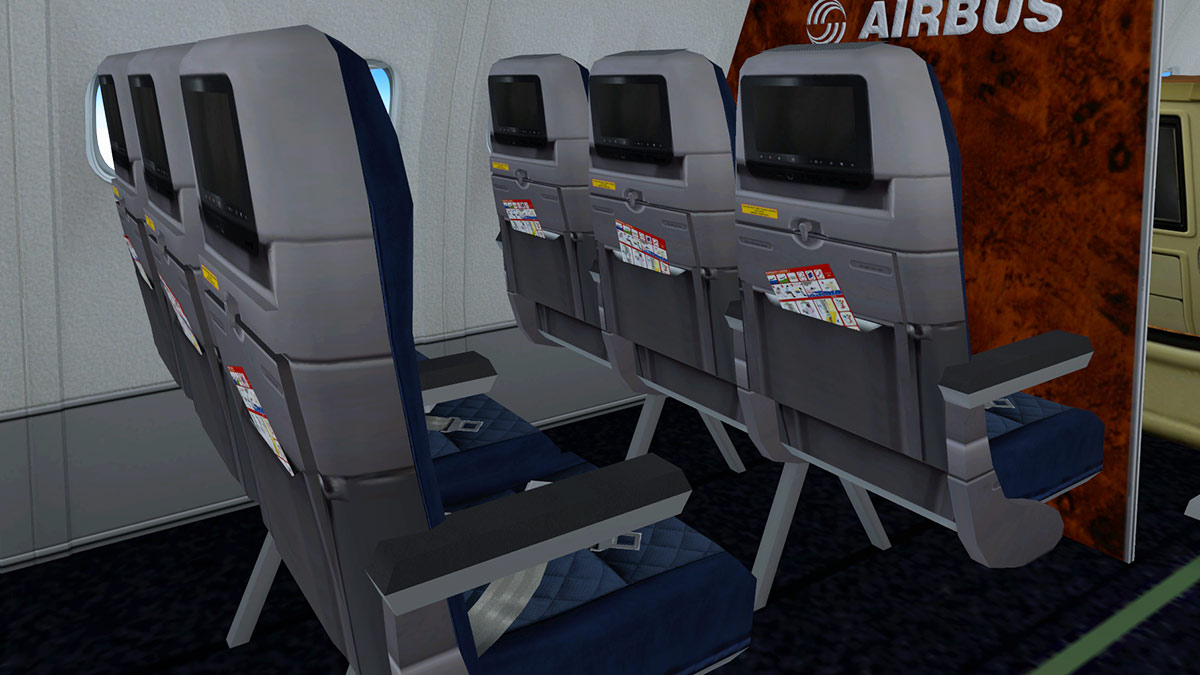
News! - Aircraft Released! : Boeing 737-700 by EADT European Aircraft Developer Team (EADT) have released a new version of their excellent x737 project in the Boeing 737-700 variant. To counter the threat of Airbus and their A320 series Boeing totally revamped their excellent 737 to NG or New Generation series in 1991. This series comprised of three variants in the -600, -700 and -800 models. Without doubt the -800 series went on to be the mainstay of most airlines, but the -700 was a cheaper buy, cheaper to run and a better fit on certain routes. All three variants first flew within months of each other in 1997. The B737-700 was actually the first to fly on February 9, 1997. Obviously the biggest difference is in the aircraft's length with the -700 110 ft 4 in / 33.63 m in contrast to the -800 129 ft 6 in / 39.47 m, the barrel size is the same at 12 ft 4 in (3.76 m) as are the wings 112 ft 7 in / 34.32 m, with winglets: 117 ft 5in / 35.79m. Currently the largest operator (if not the largest operator of all B737's) is Southwest with 490 of the variant, so it is fitting that the aircraft shown here is in Southwest colours. Delta has 10 and continental has 36. Most of the new version is the same as EADT's current x737-800 version, which we covered in this review last year : x737project v5.0 Overall the cockpit is the same as the original -800 but the flying profiles have been changed to suit the -700 version. The only real internal difference is that the cabin has been given the "Sky" theme makeover. EADT do note this "Sky" theme will be on their -800 version as well in the next update. Yes you can fly both x737 variants in X-Plane11, and X-Plane10 is still supported, so the... x737-700 is available for X-Plane 10 and 11, Mac/Windows/Linux 32/64bit. And currently there are more than 30 liveries from all over the world available. x737project simulation provides realistic systems like autopilot, fuel systems, pressurisation and directional sounds to the simulation. The x737FMC system by EADT is also available. The EADT aircraft is free. But we certainly approve of any donation to support the project, anything is a nice reward for all the hard work that Benedikt., Pierre and Lukas put into this of all classic X-Plane projects. _____________________________________________________________________________________ You can make a donation to EADT here : Donate for the x737 Project! Or purchase the excellent x737 add on in Javier Cortes x737FMC which a custom fully built in FMC made for just this x737 aircraft. The X-Plane.Org is a proud sponsor of this x737 project and has supported the project since its inception almost 11 years ago. For more information go to the EADT x737 website here: x737 Project for X-Plane Download the x737-700 v5.0 here: x737Project 700 - EADT Download the x737-800 v5.0 here: x737Project 800 - EADT ____________________________________________________________________________________ Stephen Dutton 2nd May 2017 Copyright©2017: X-Plane Reviews (Disclaimer. All images and text in this review are the work and property of X-PlaneReviews, no sharing or copy of the content is allowed without consent from the author as per copyright conditions)
-
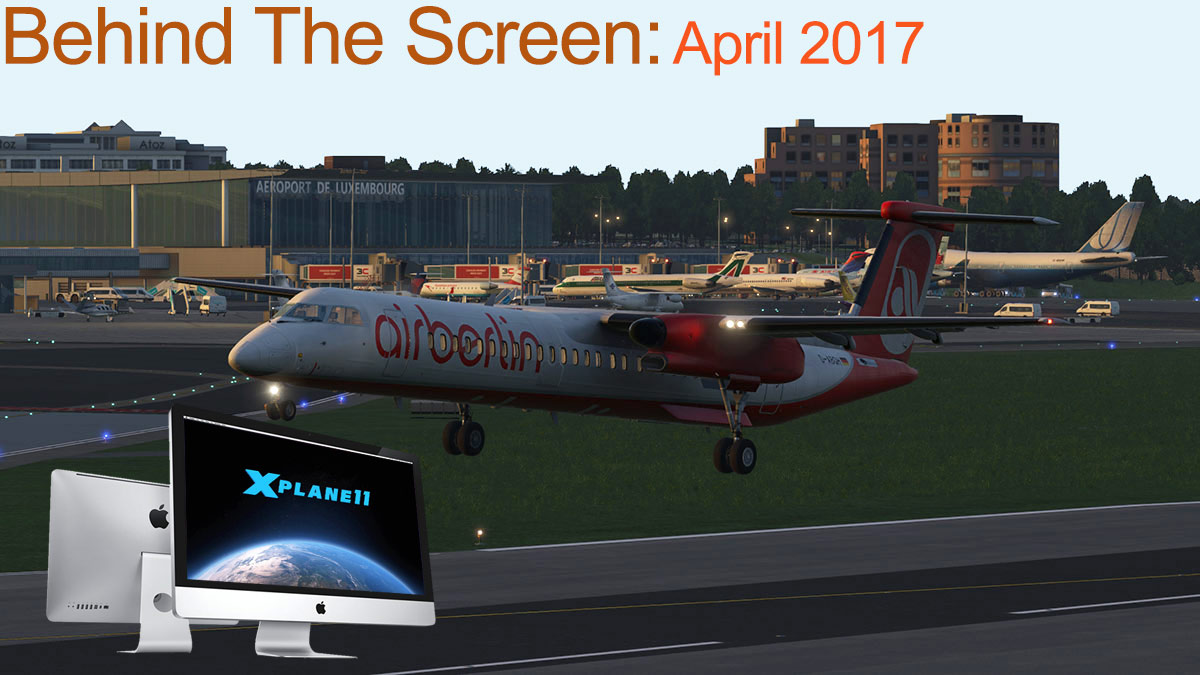
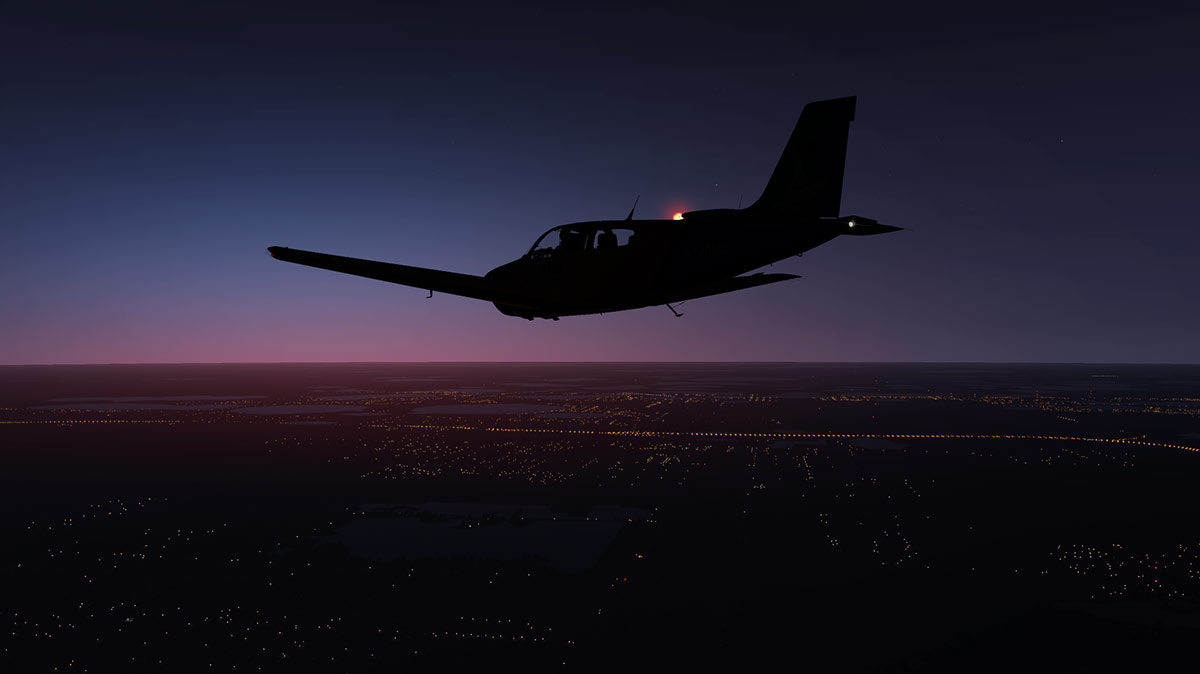
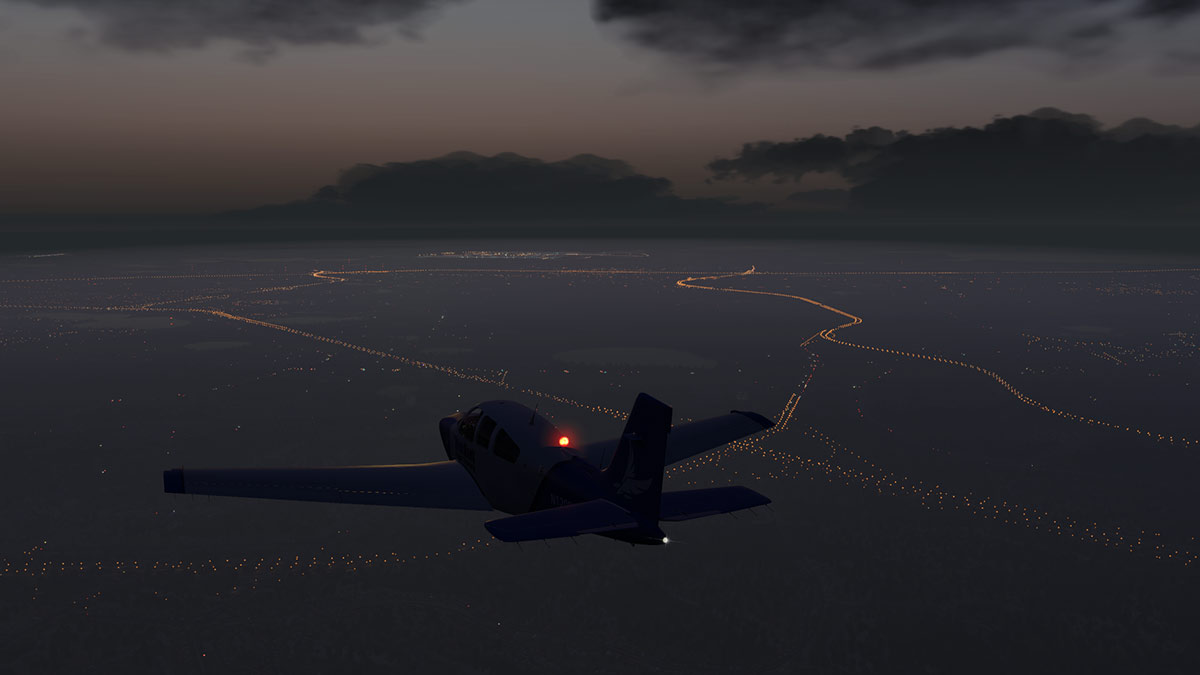
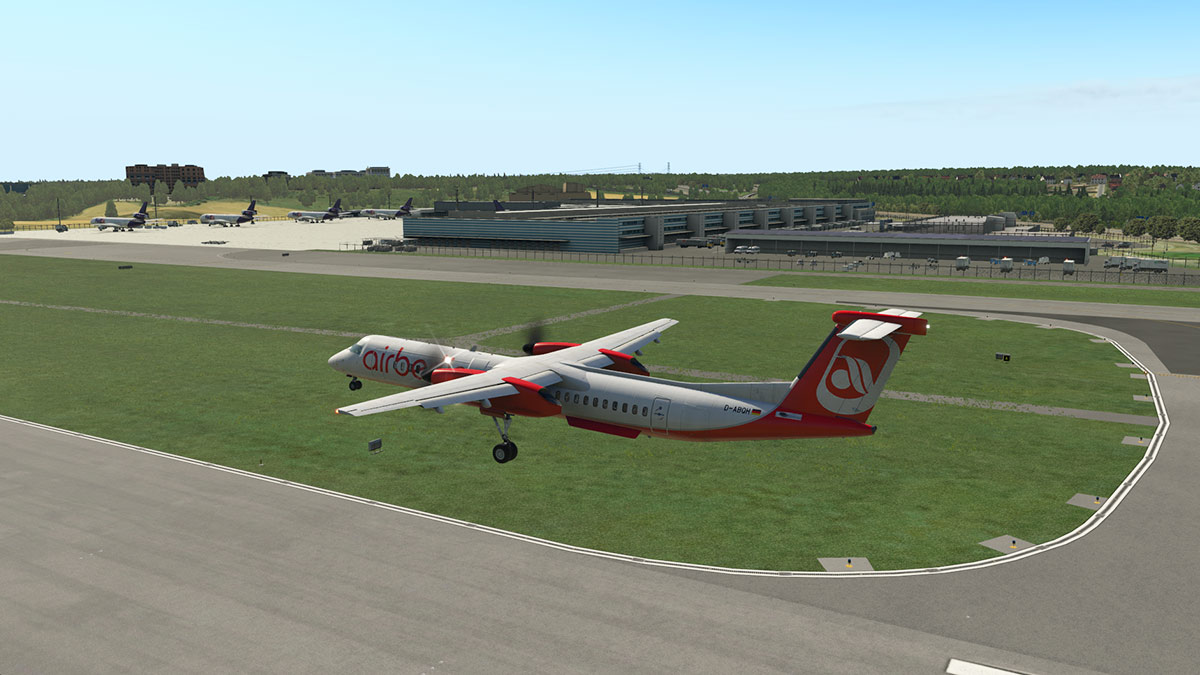
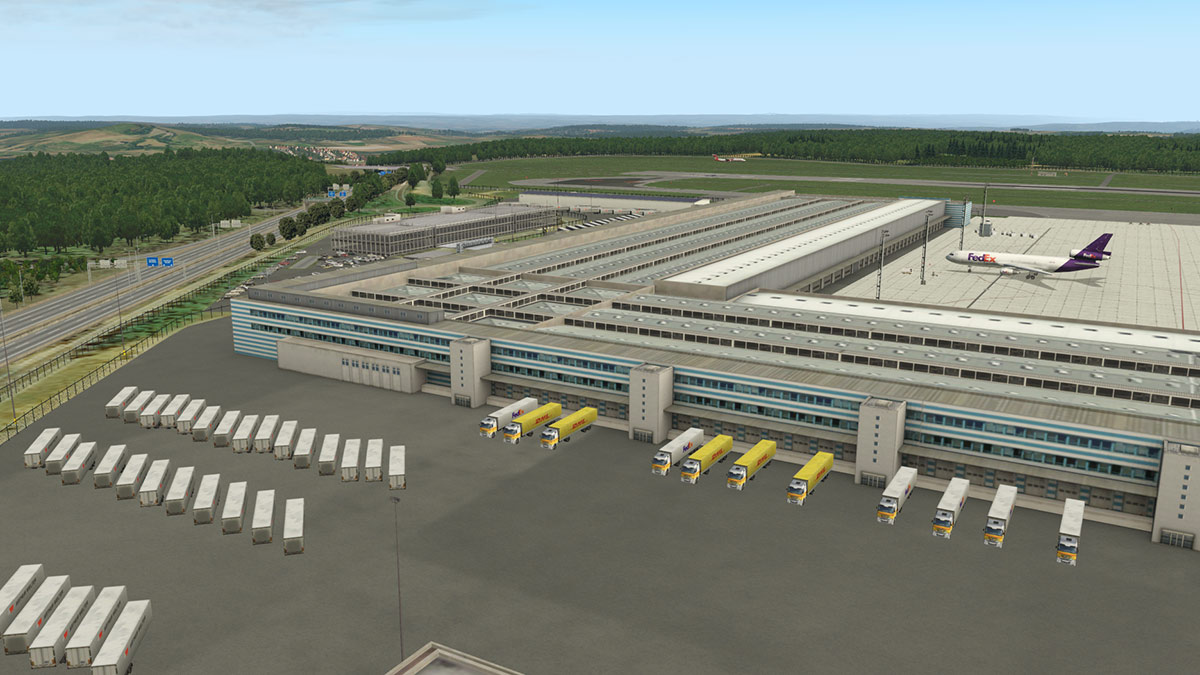
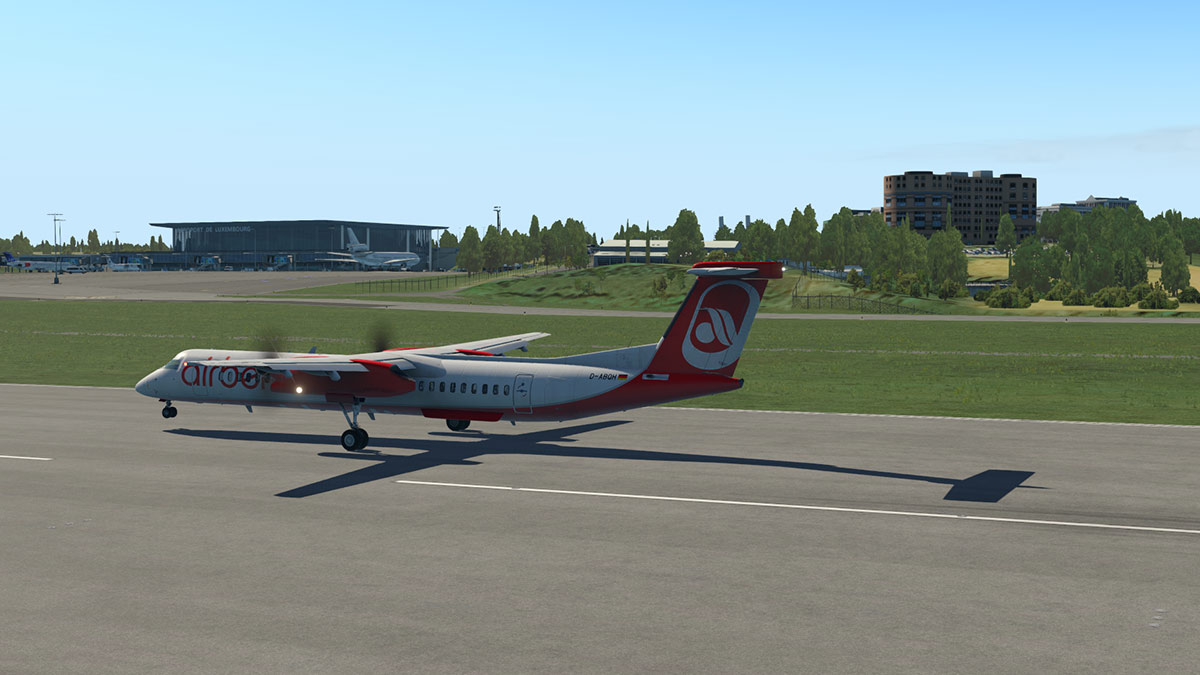
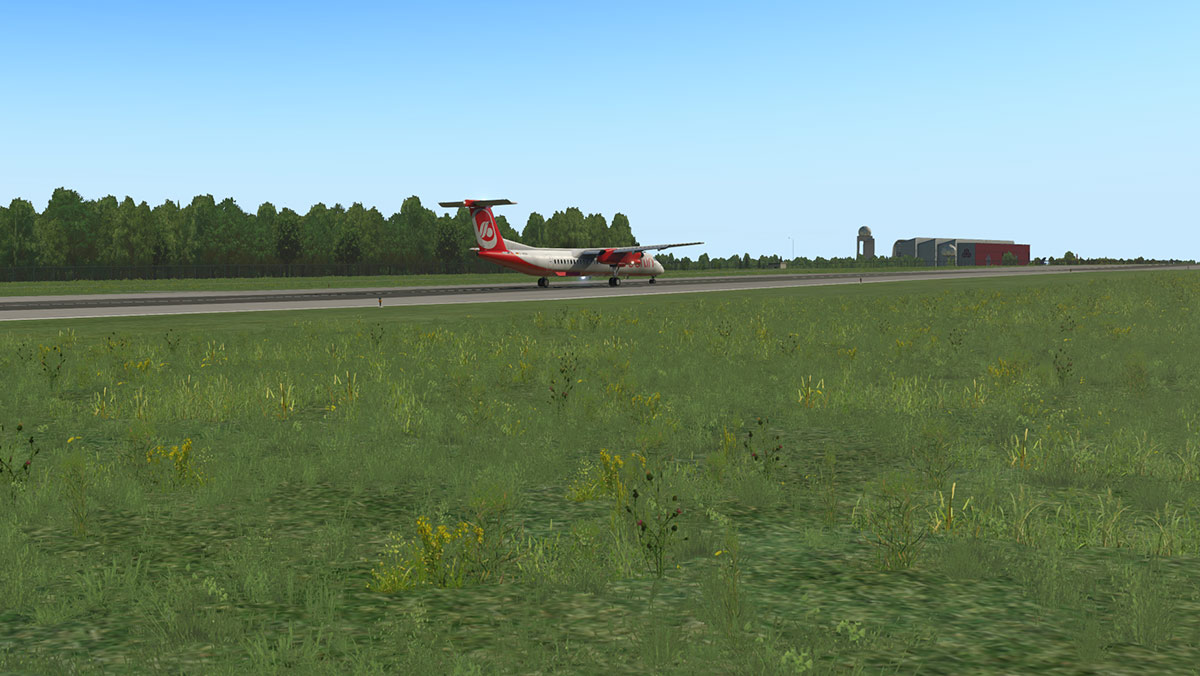
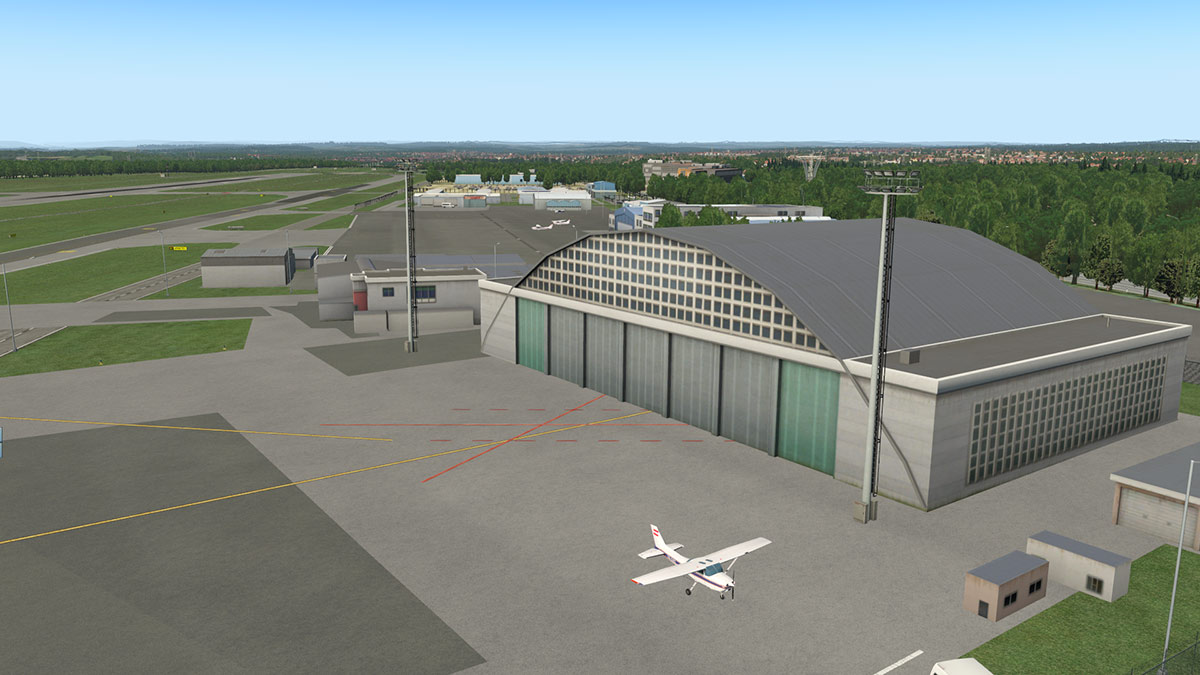
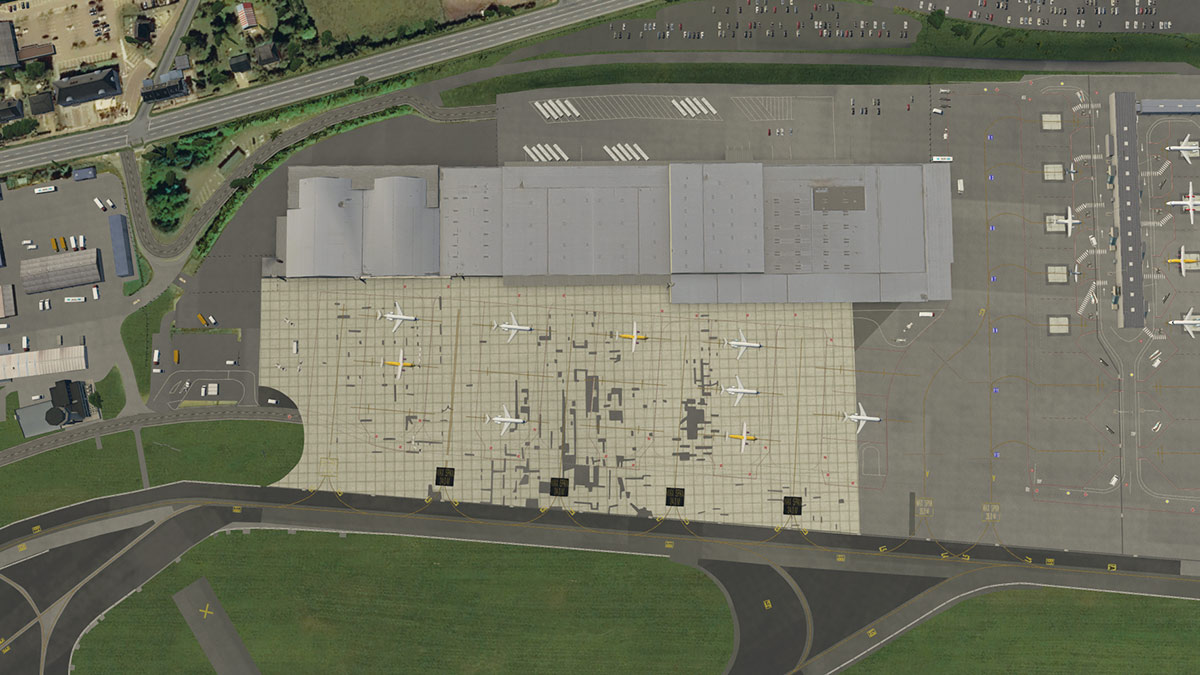
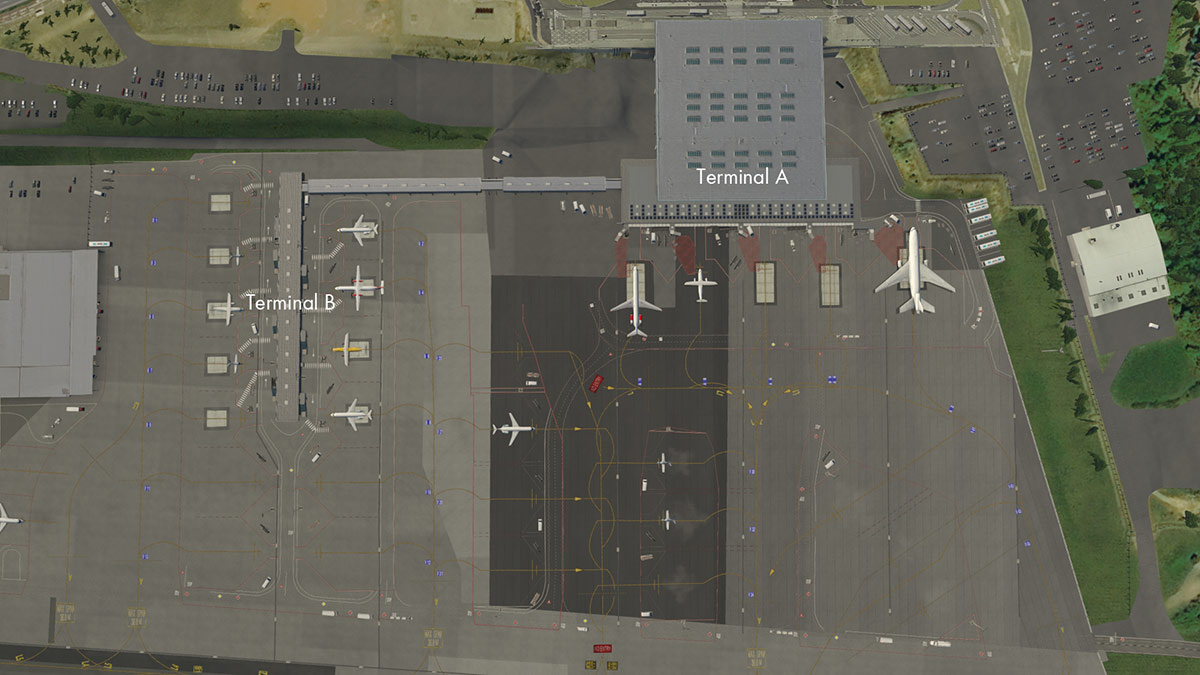
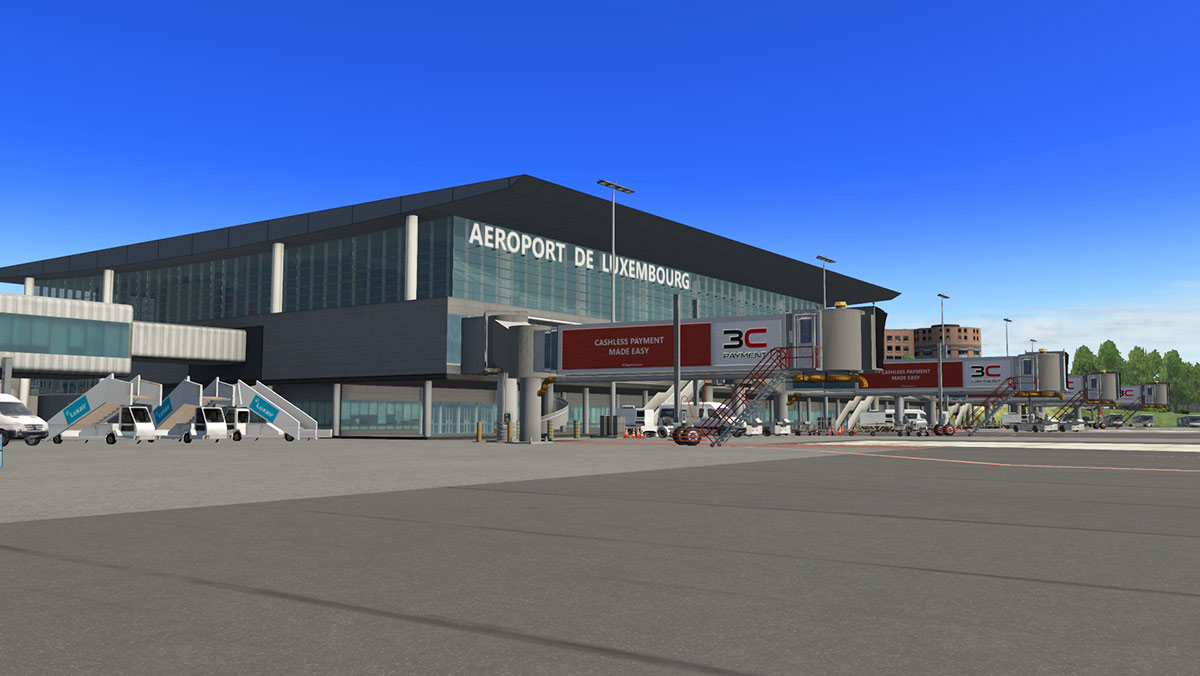
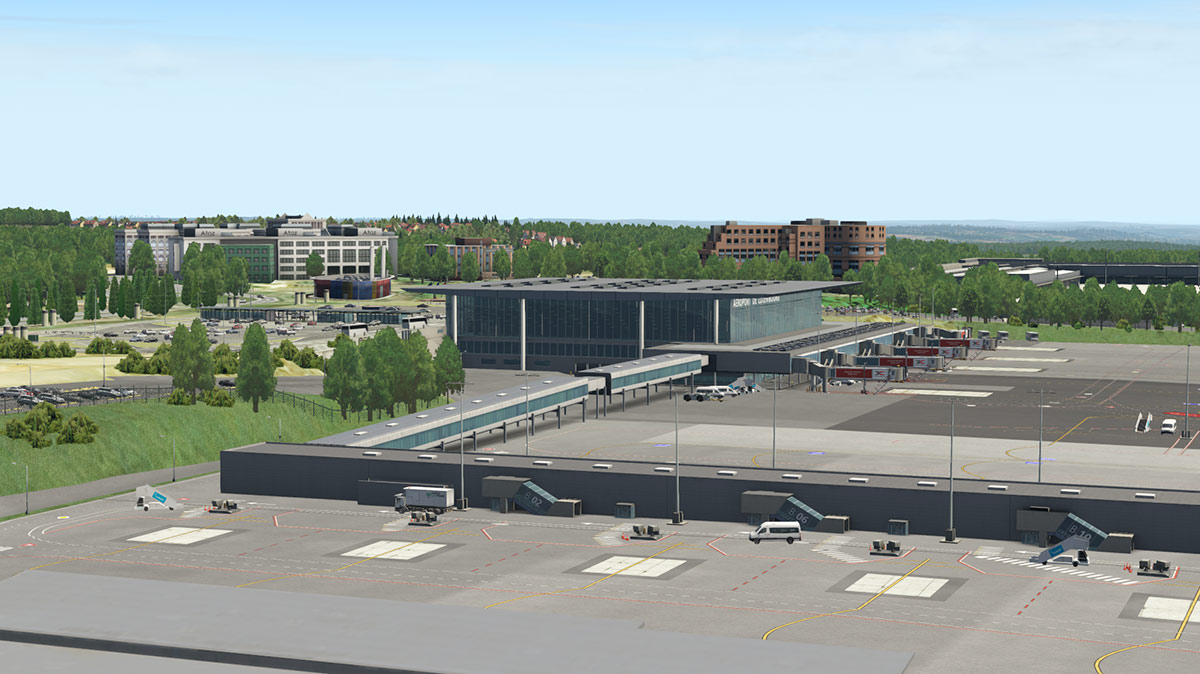
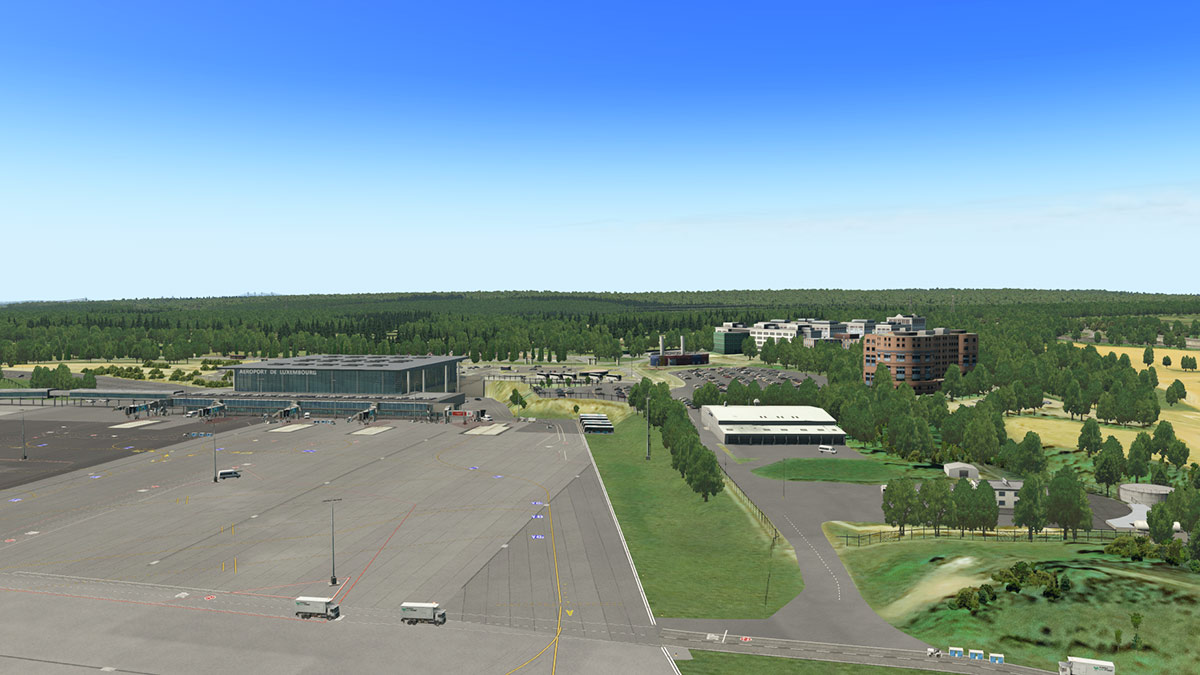
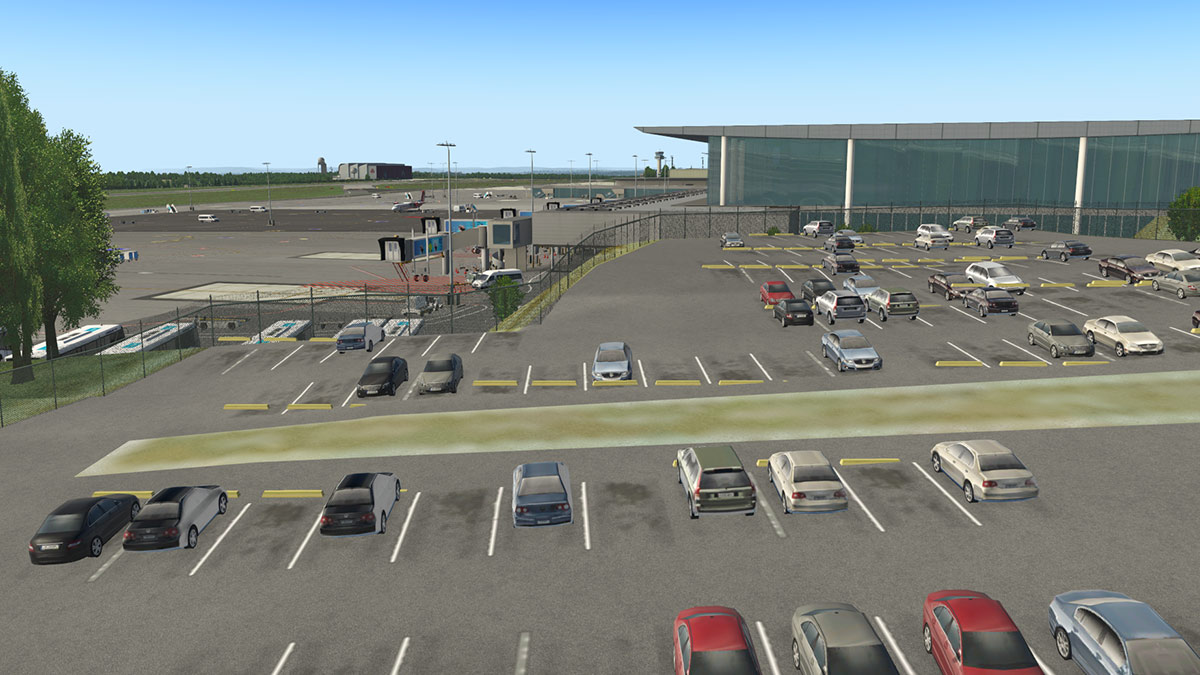
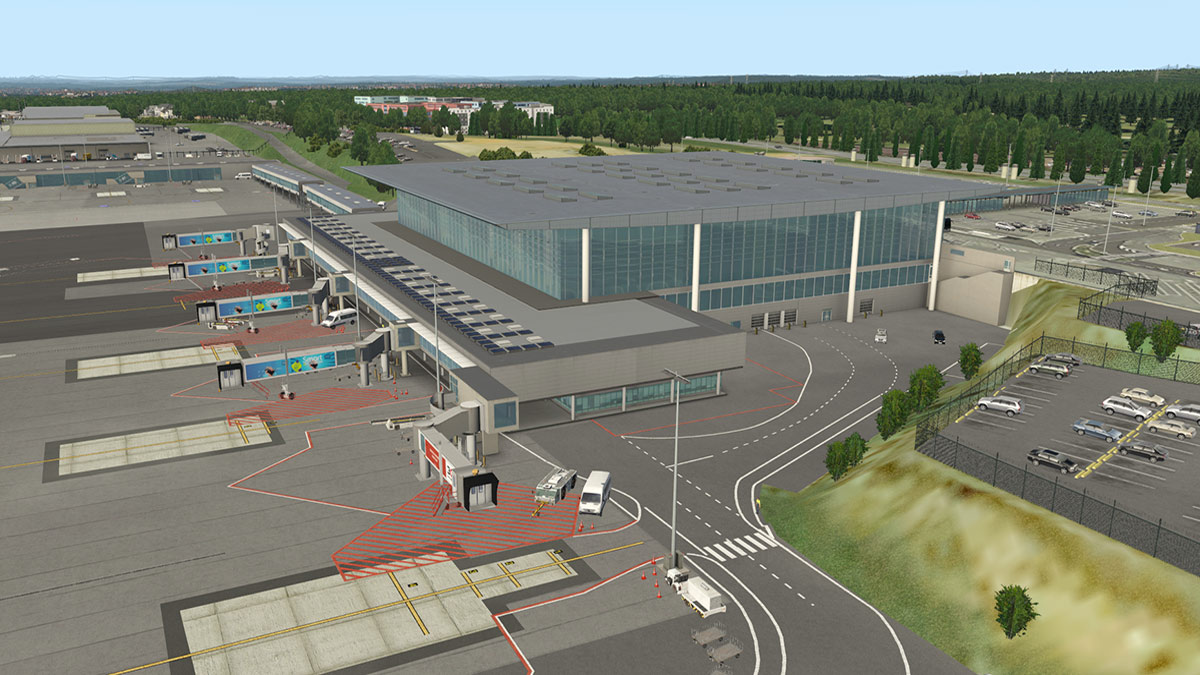
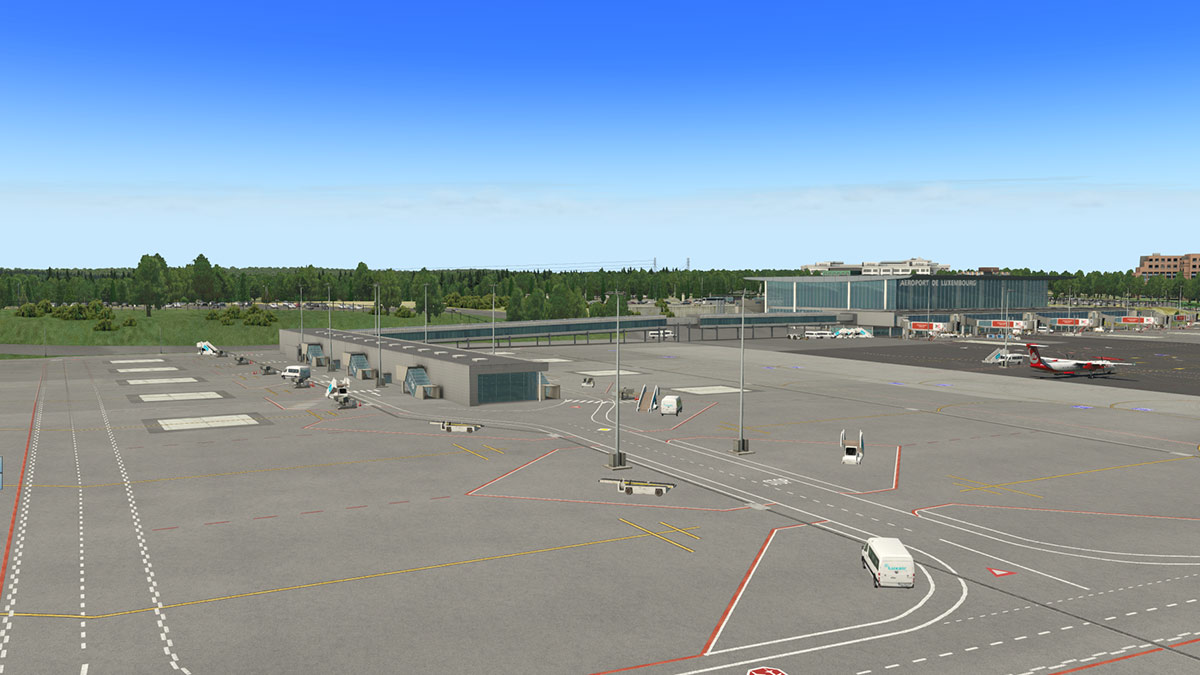
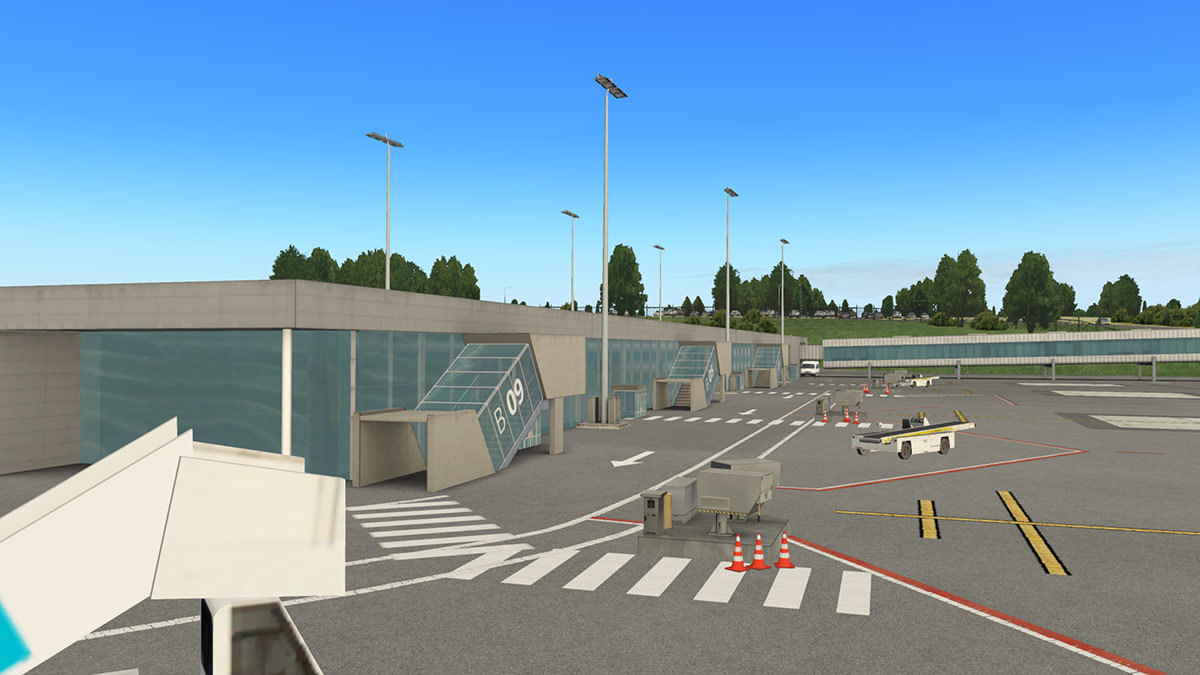
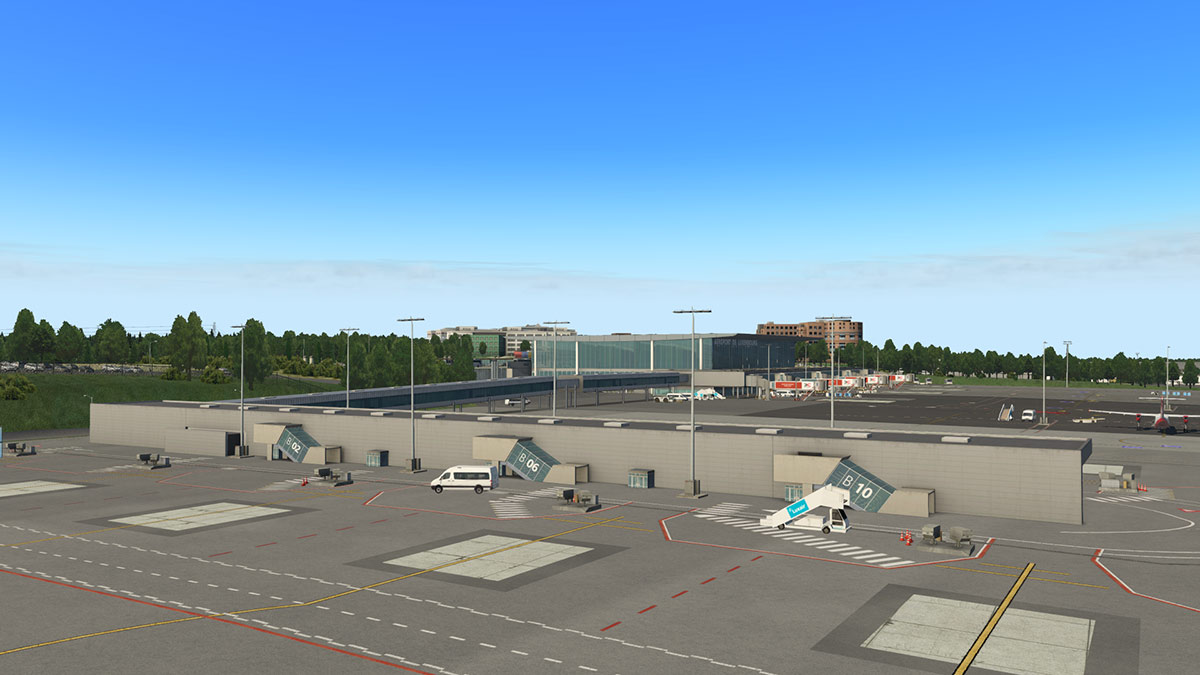
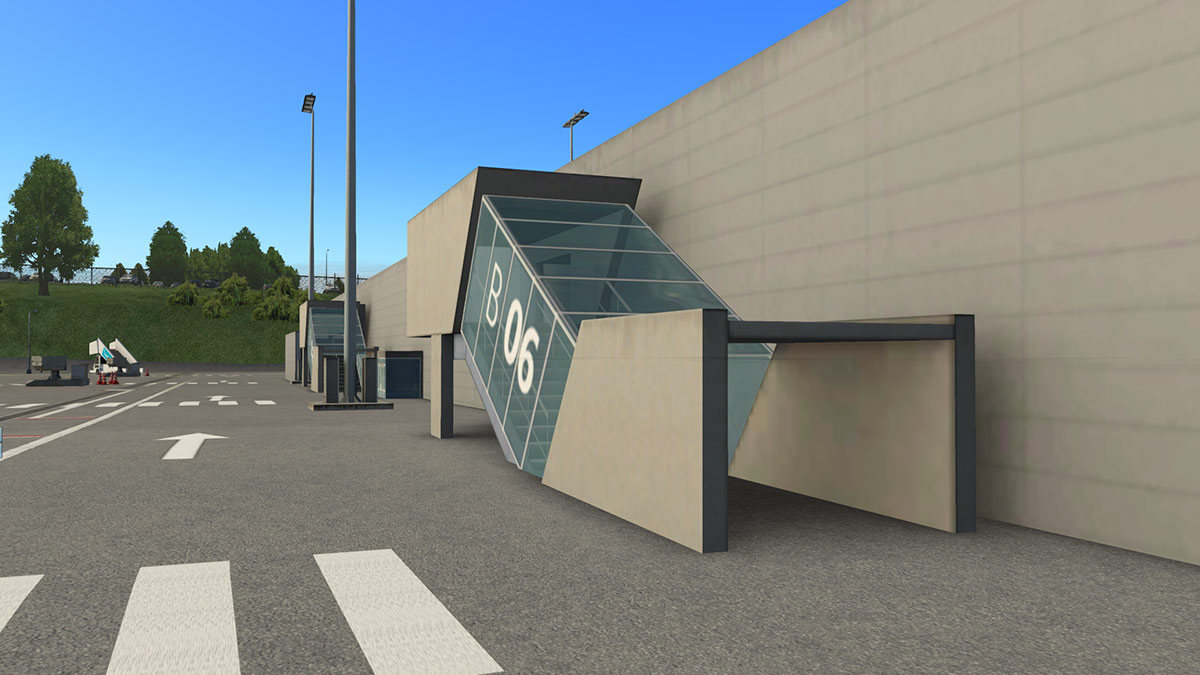
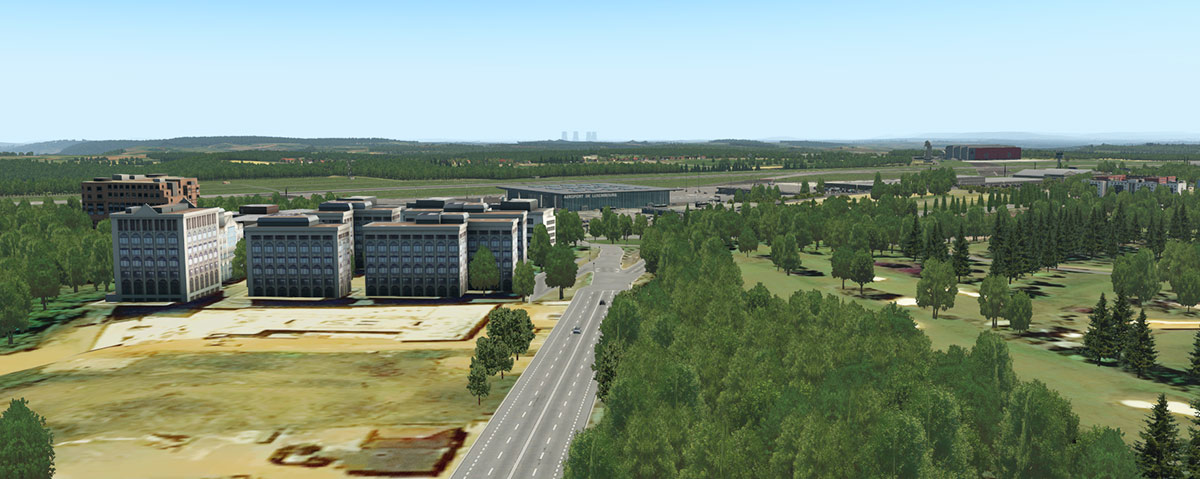
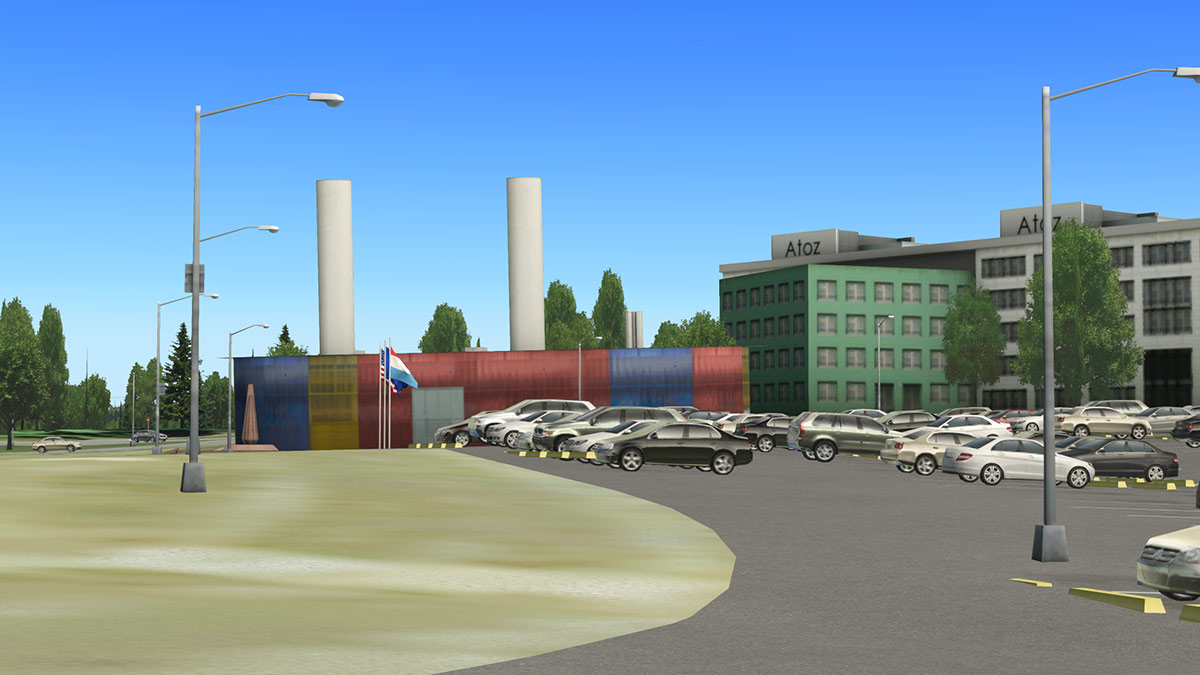
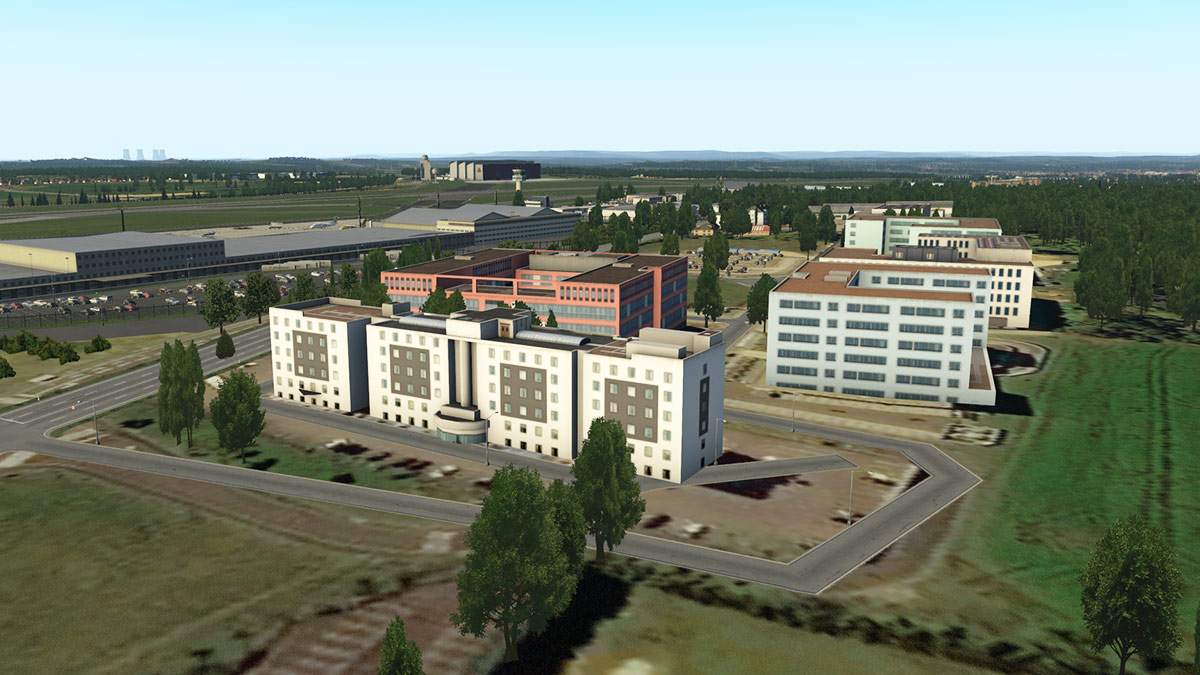
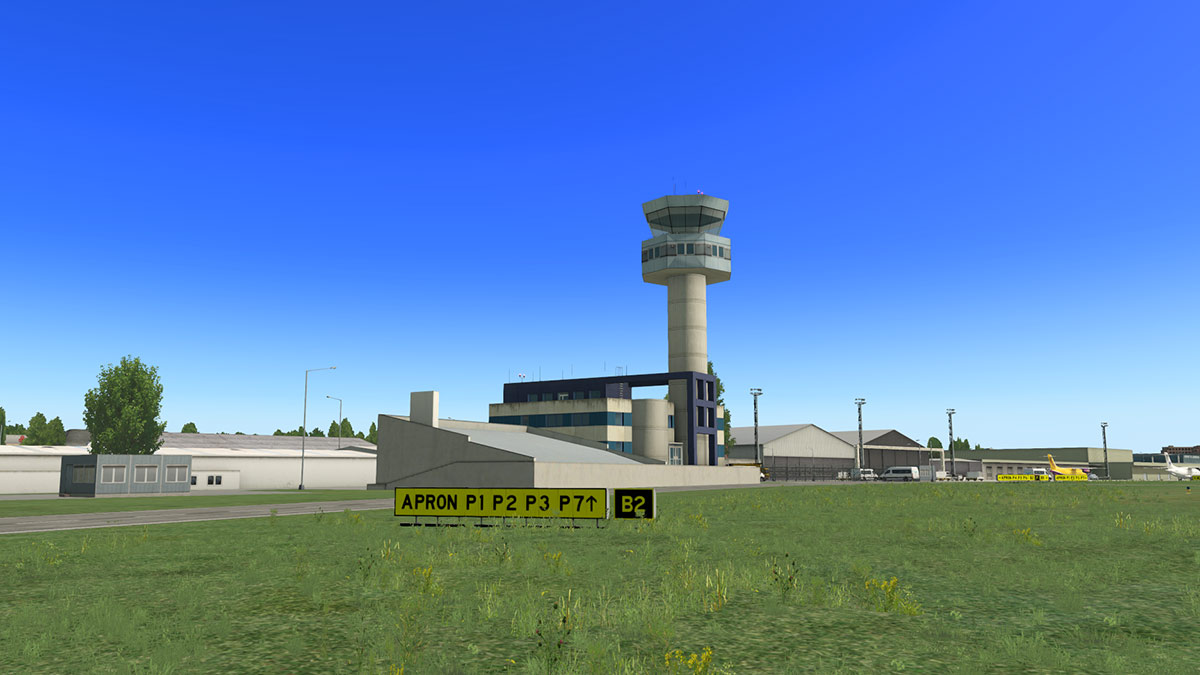
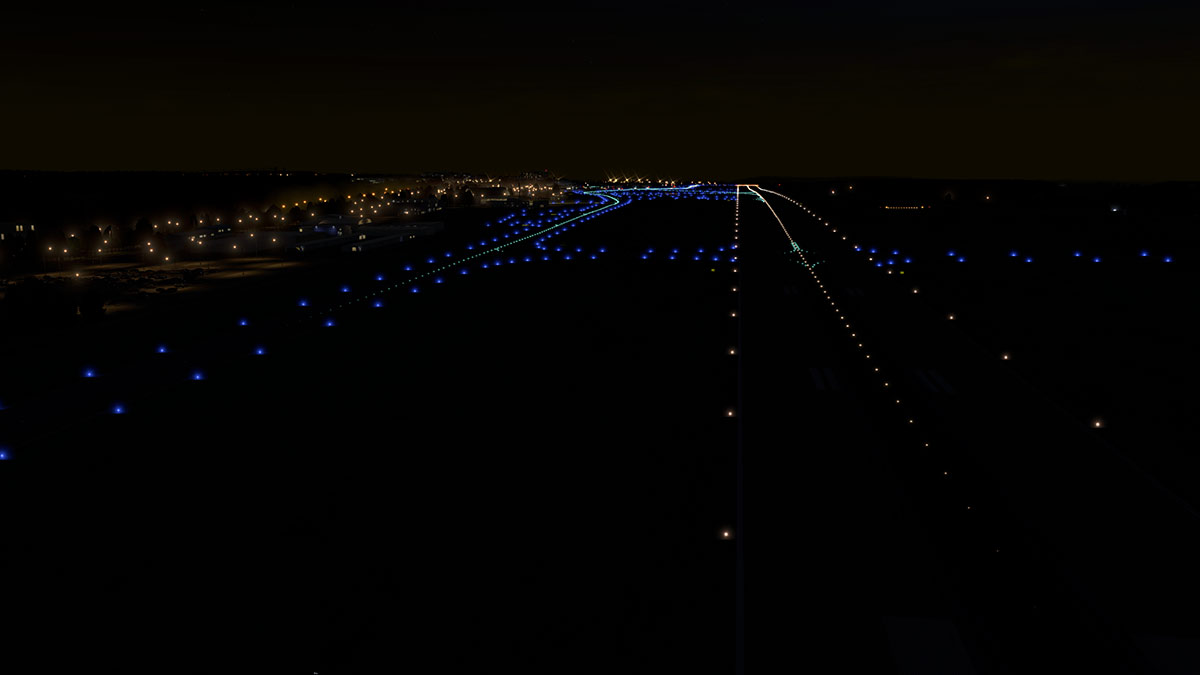
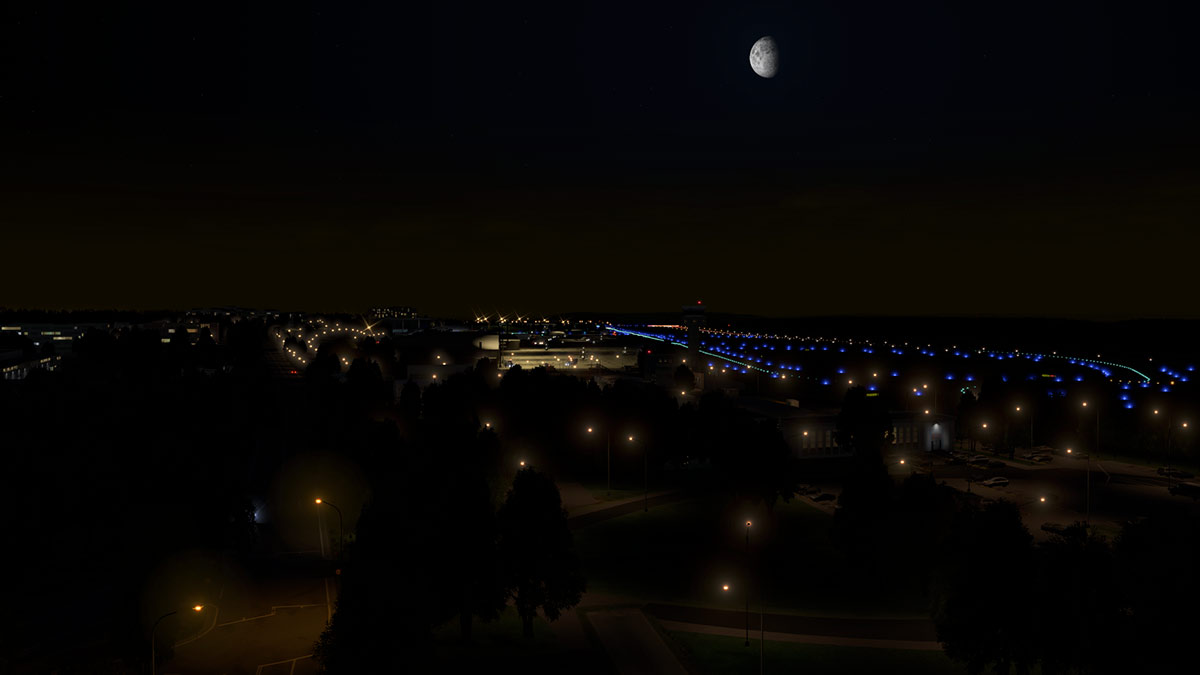
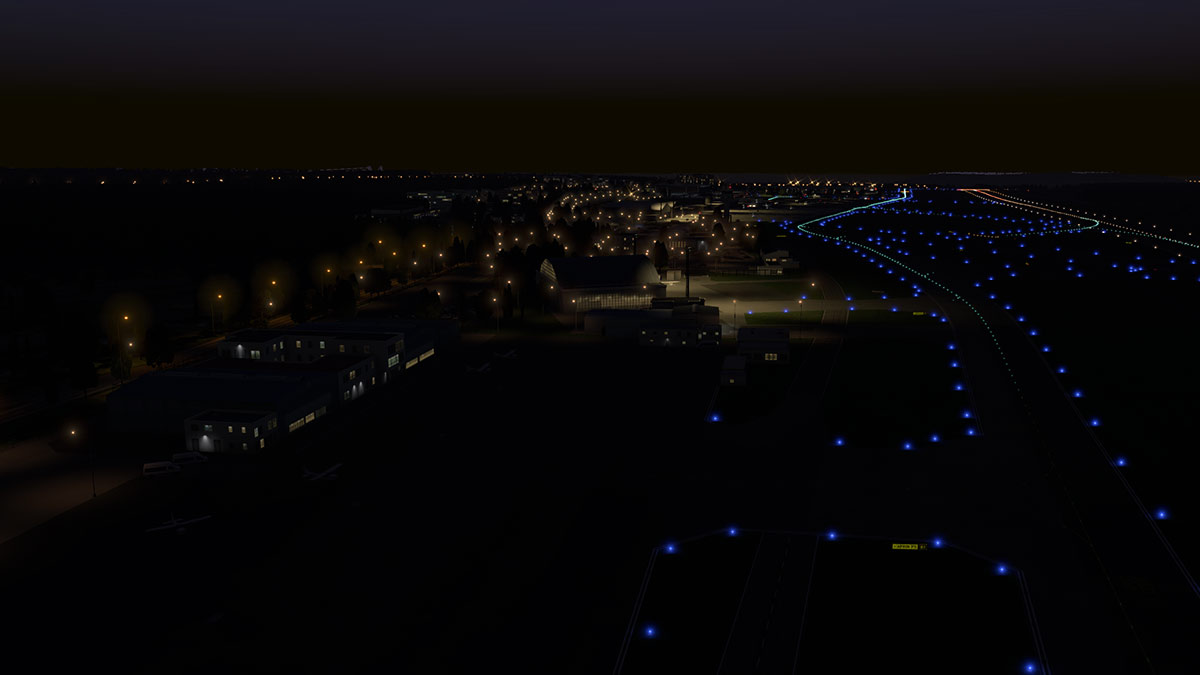
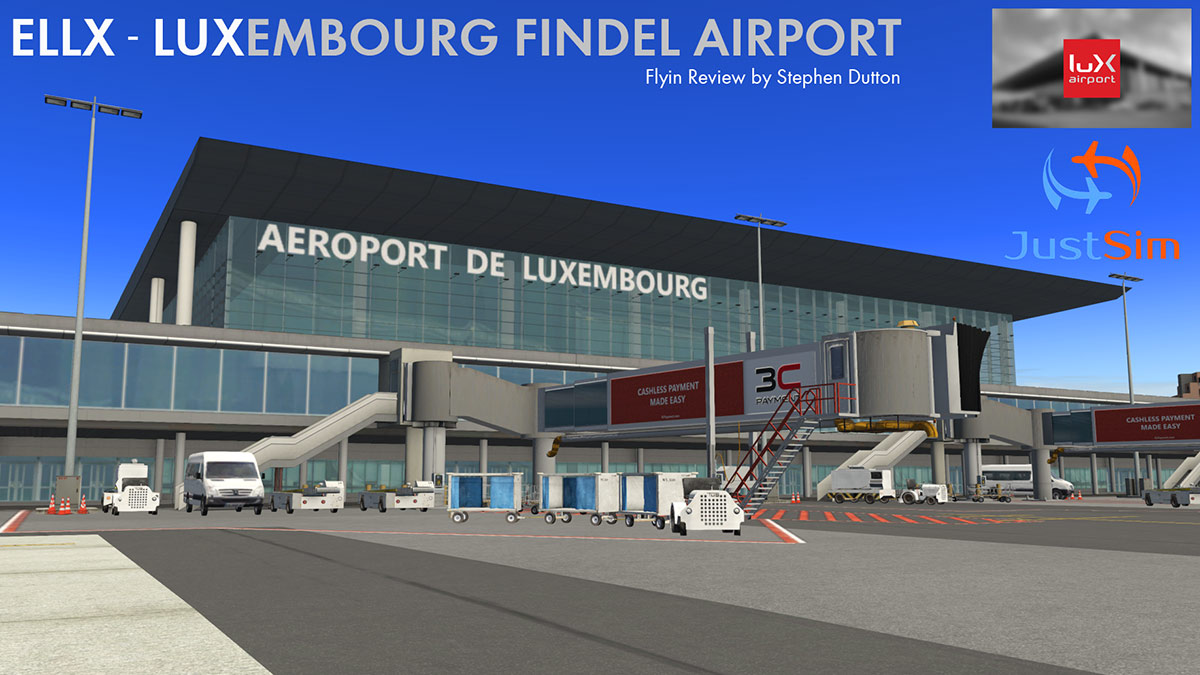
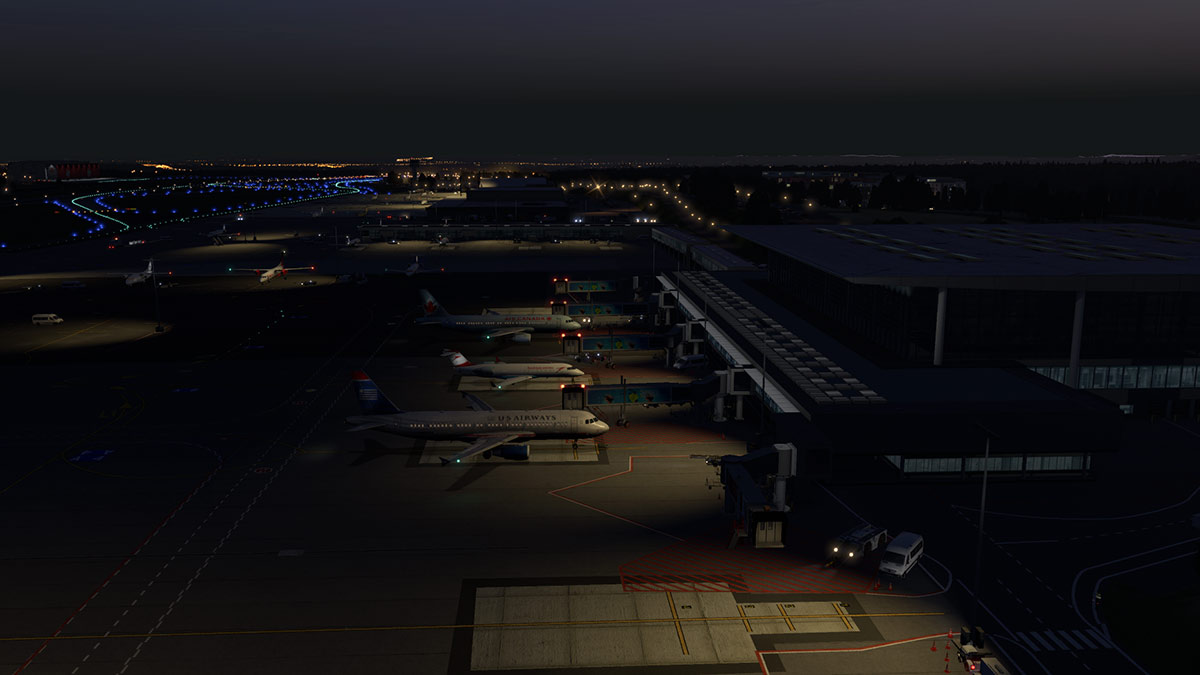
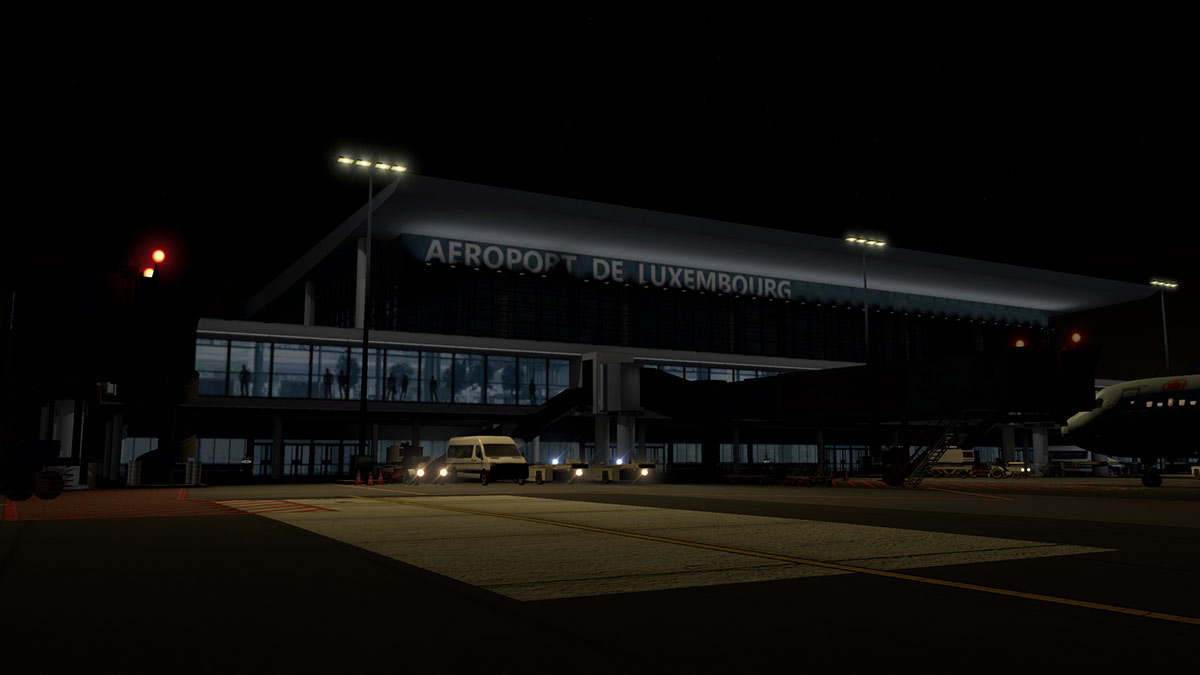
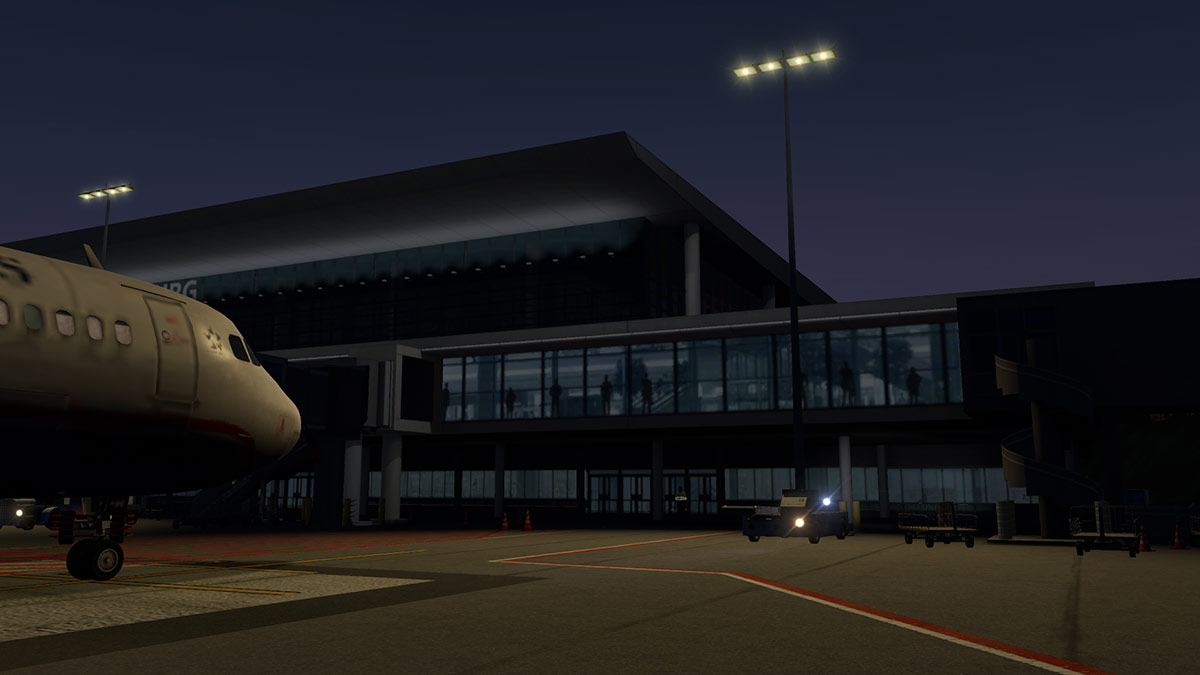
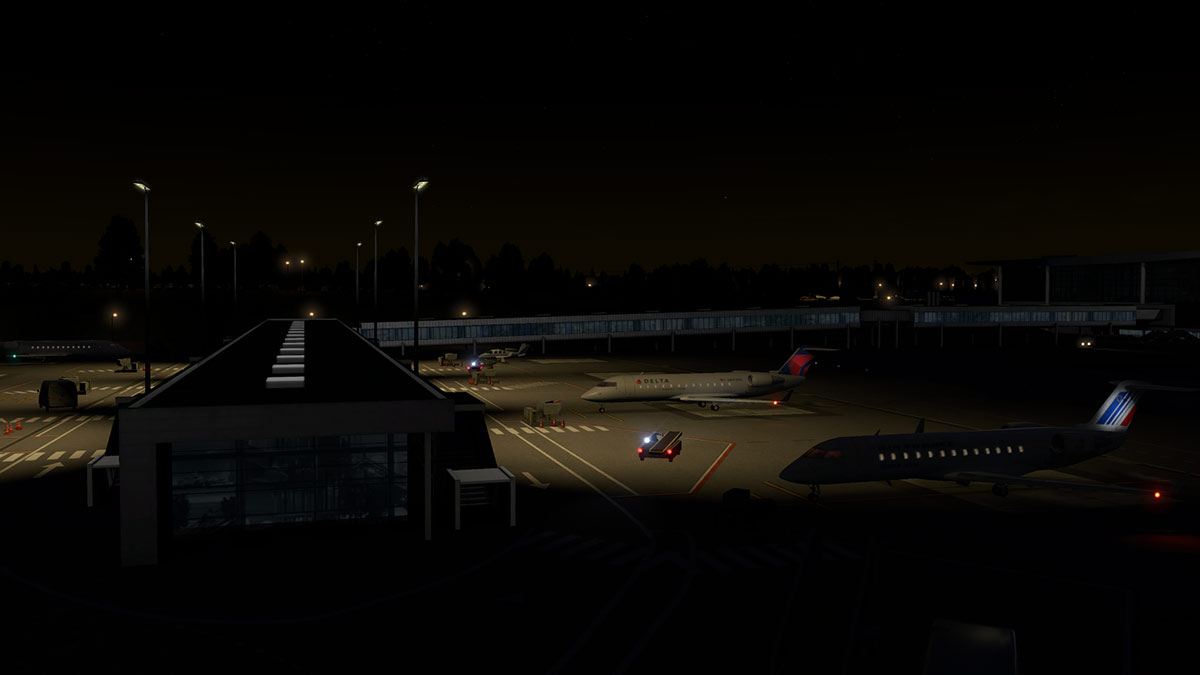
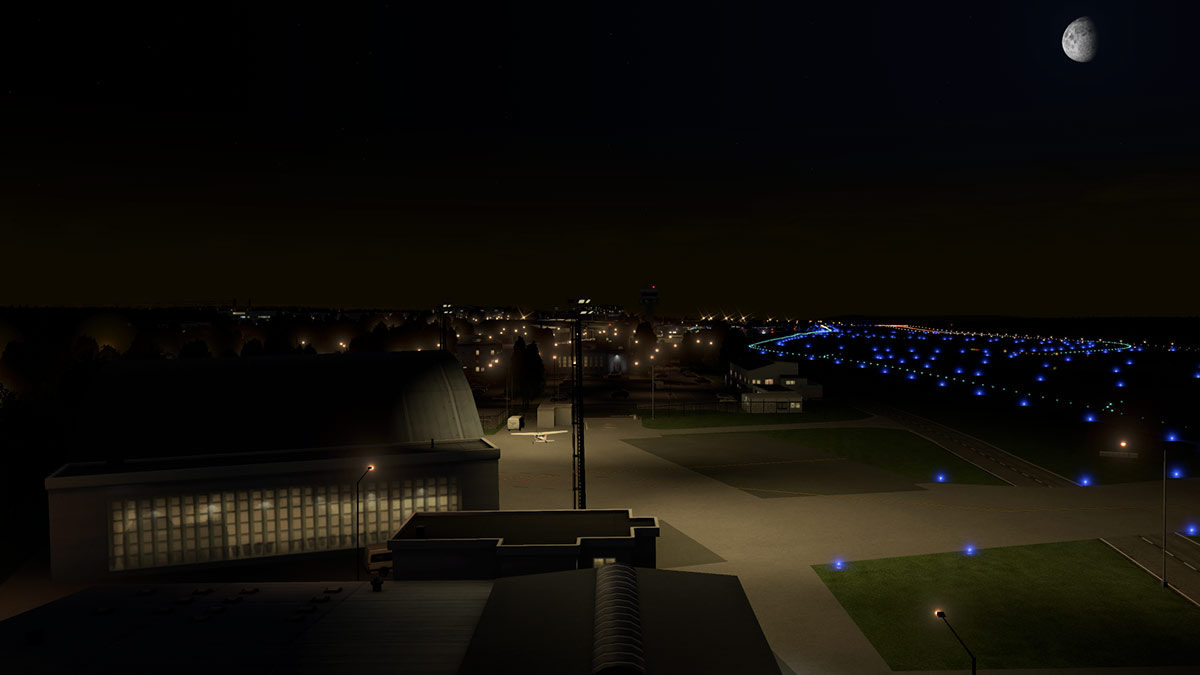
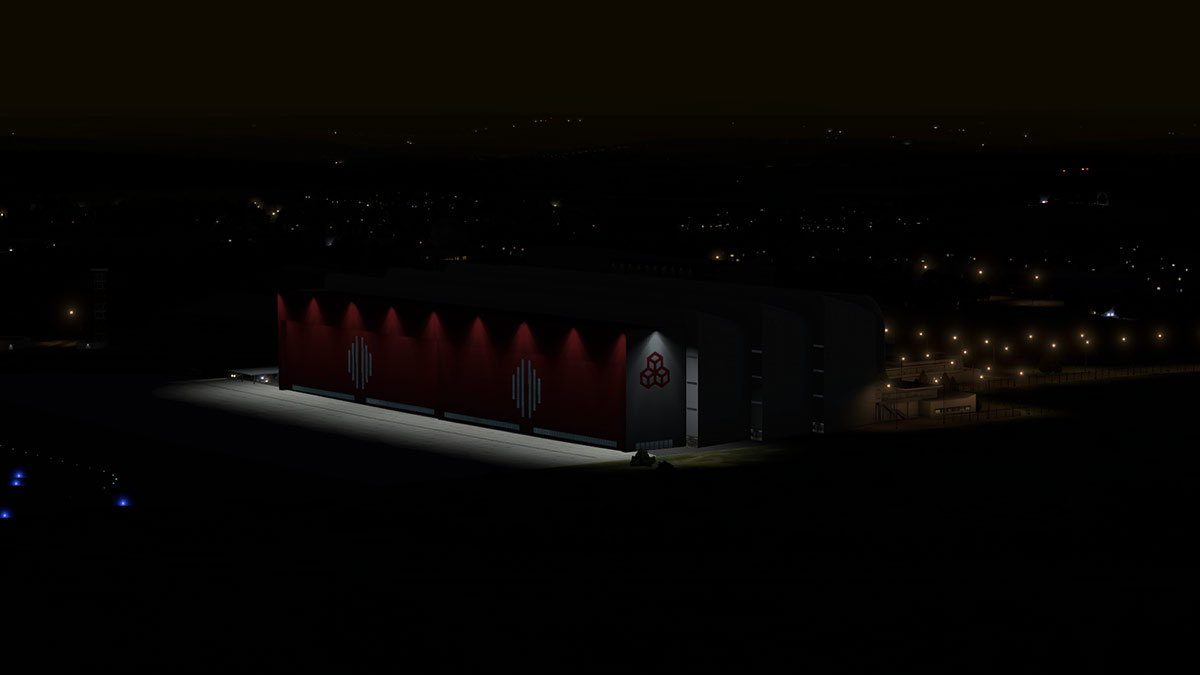
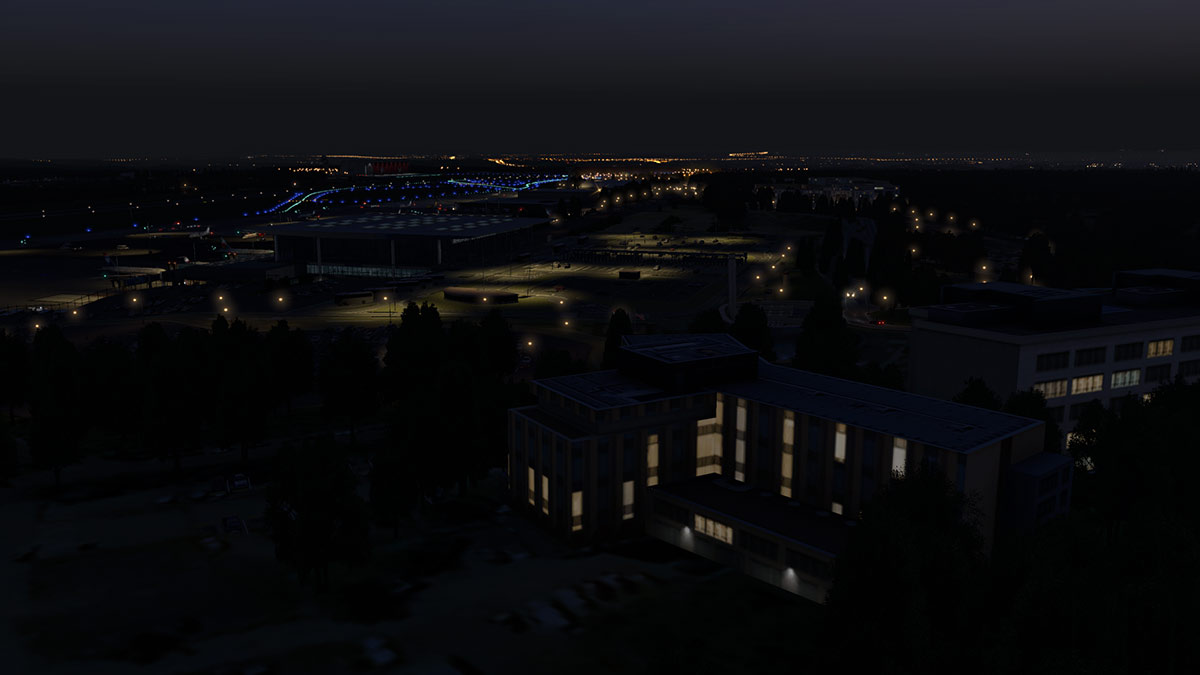
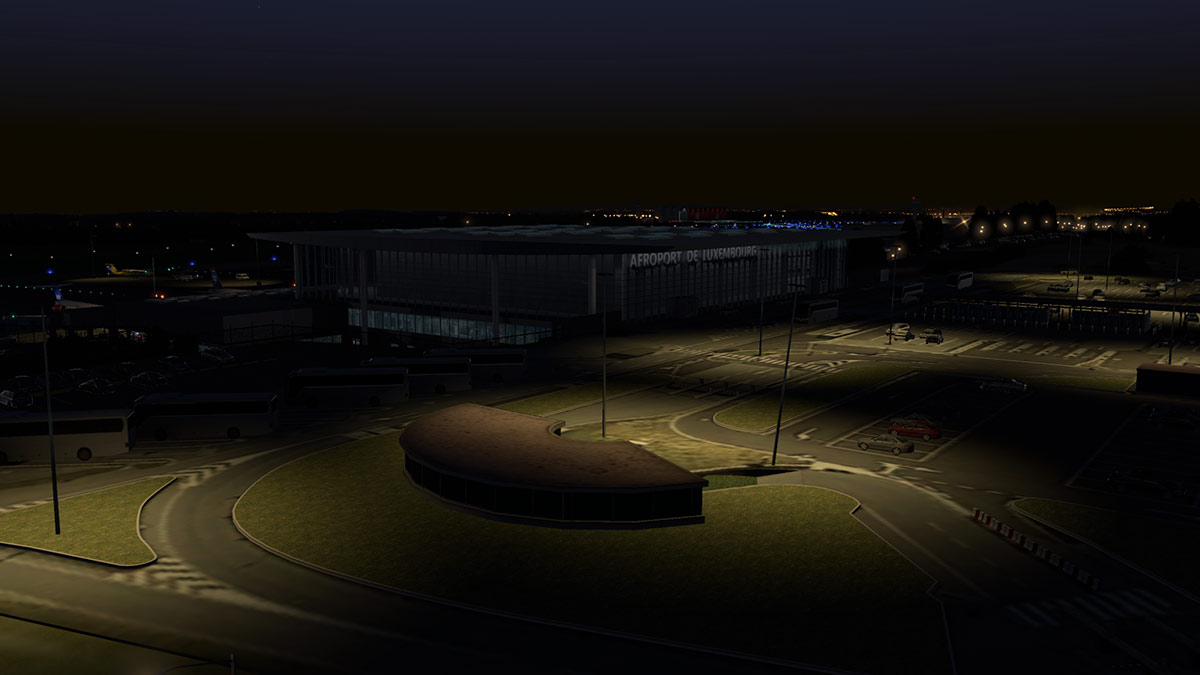
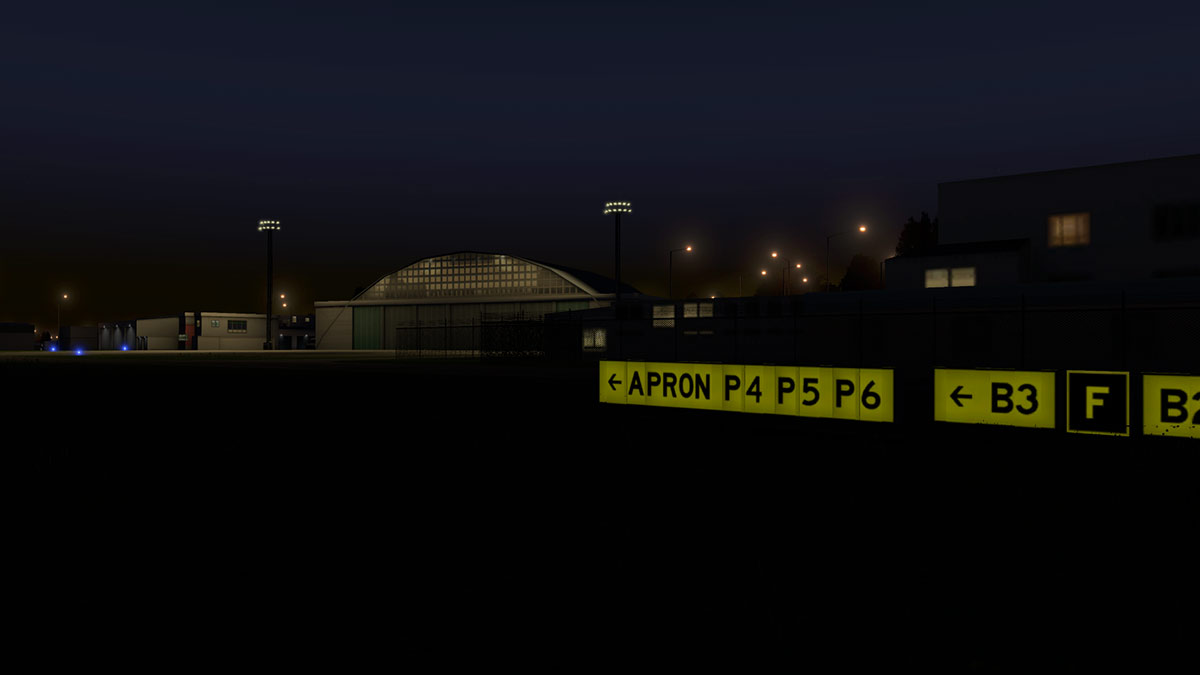
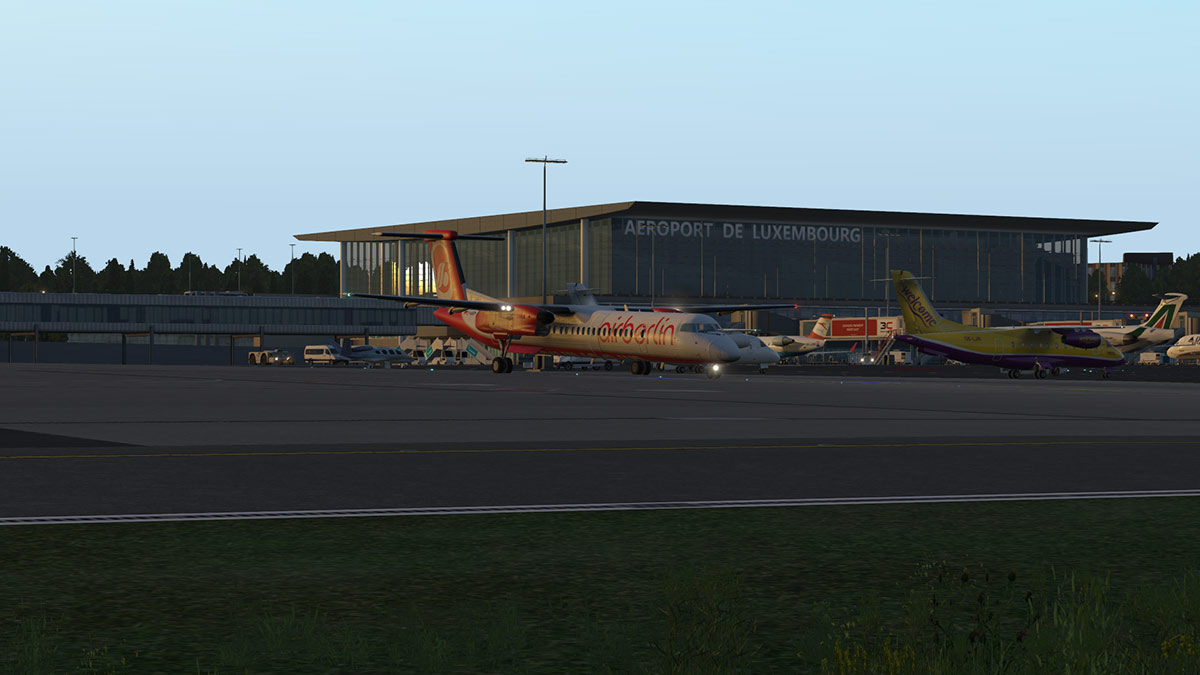
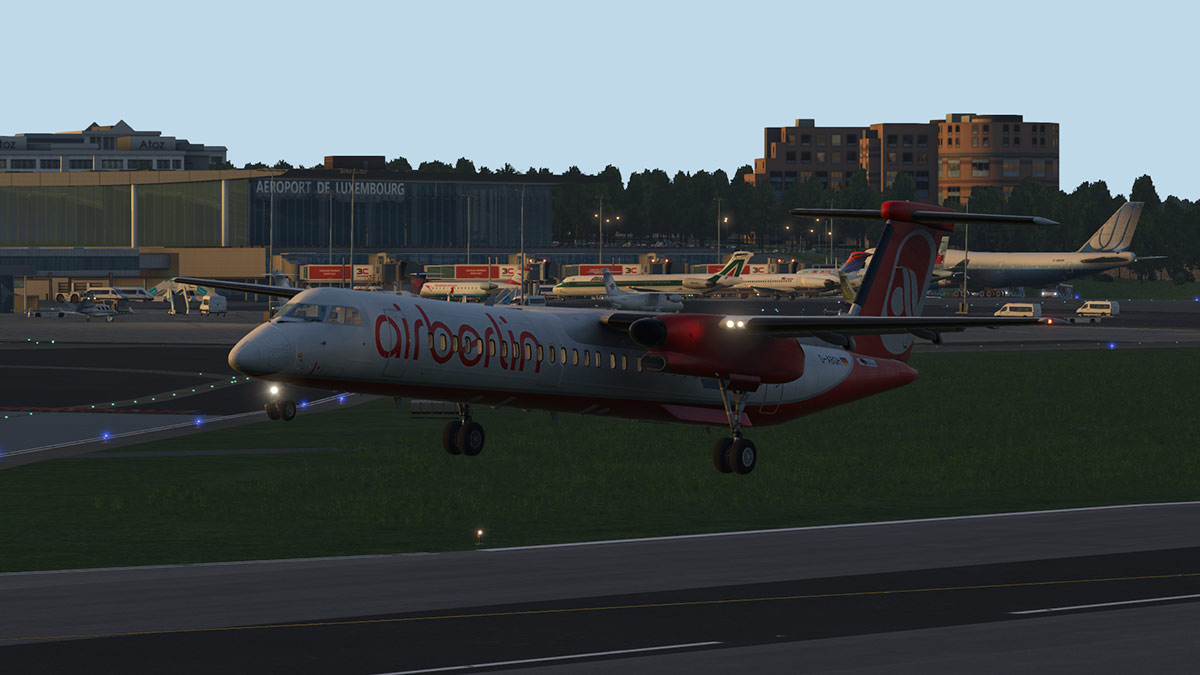
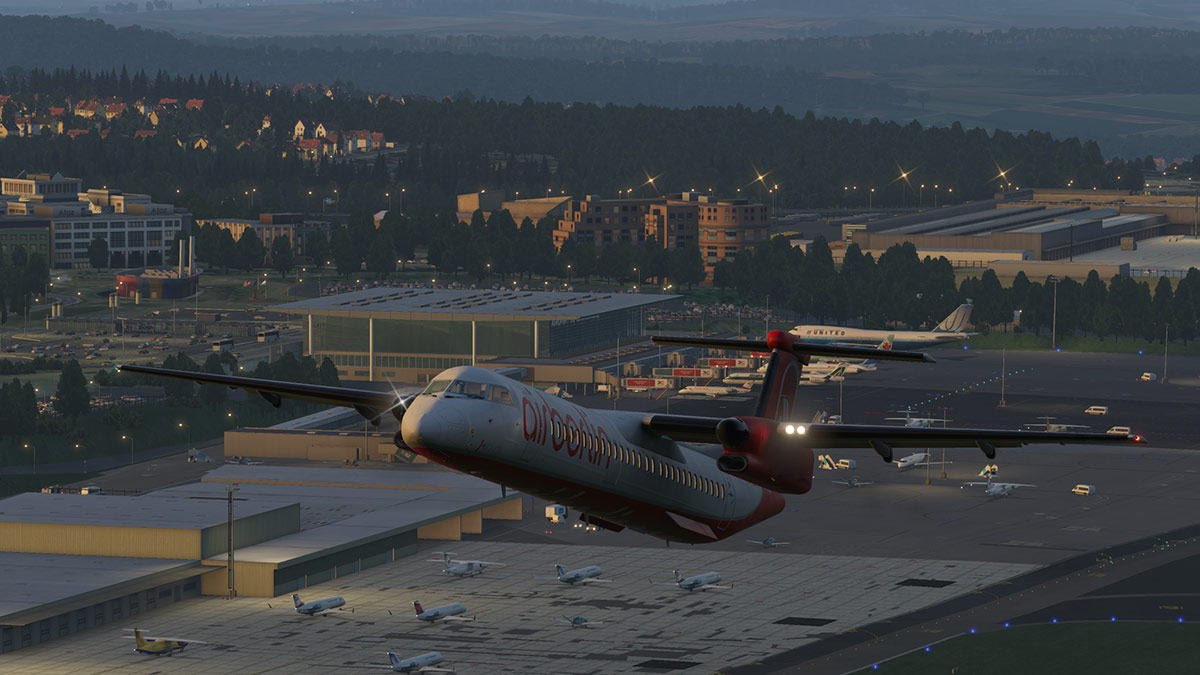
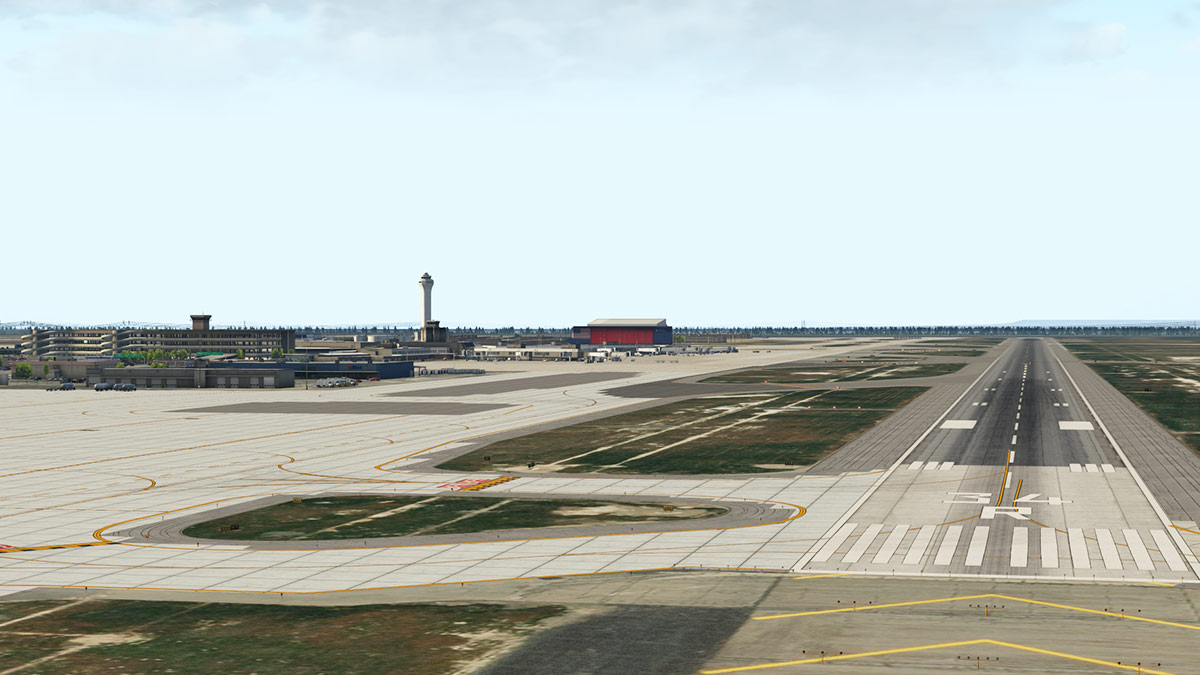
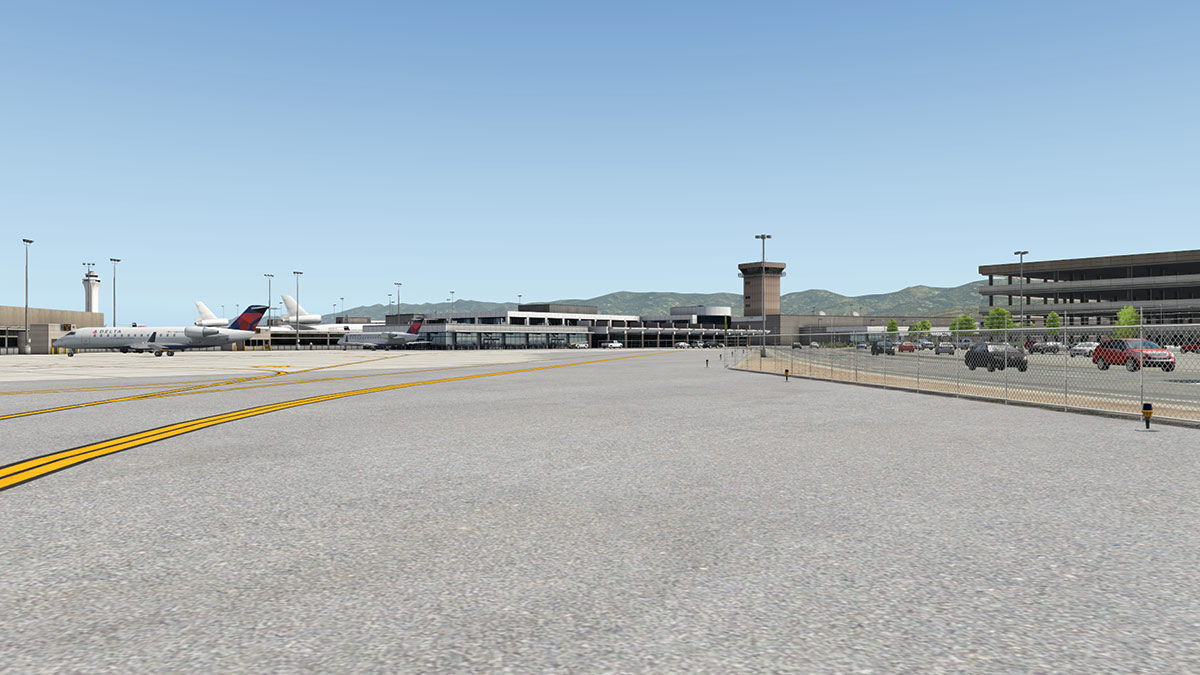
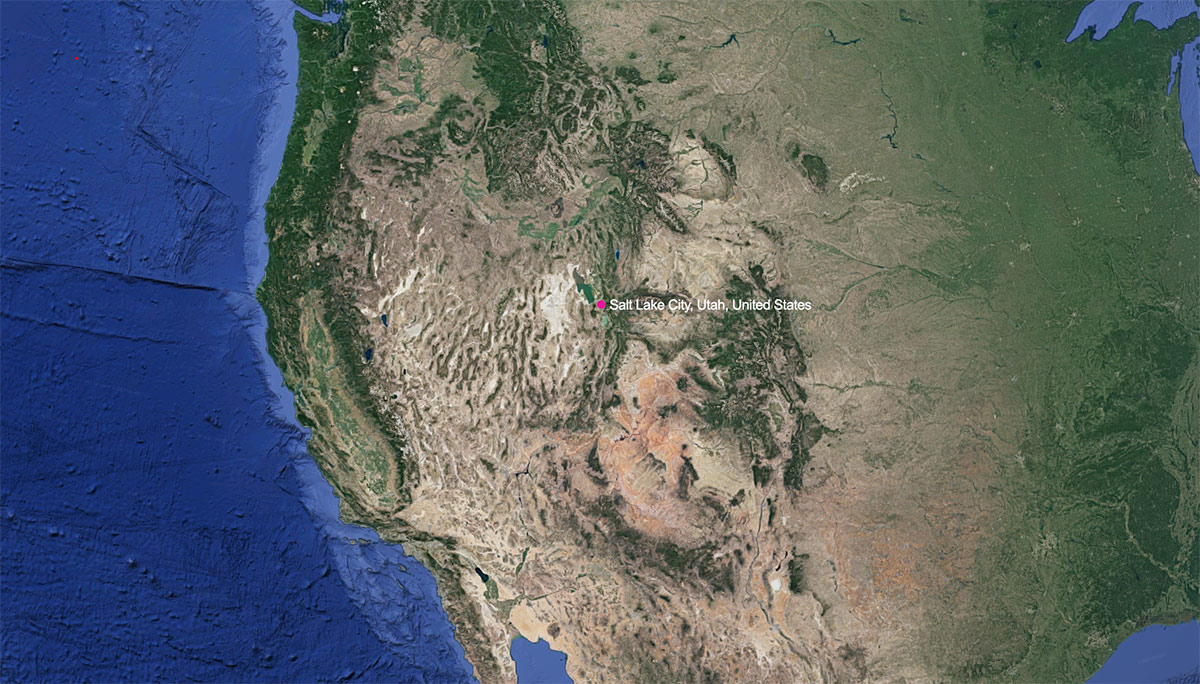
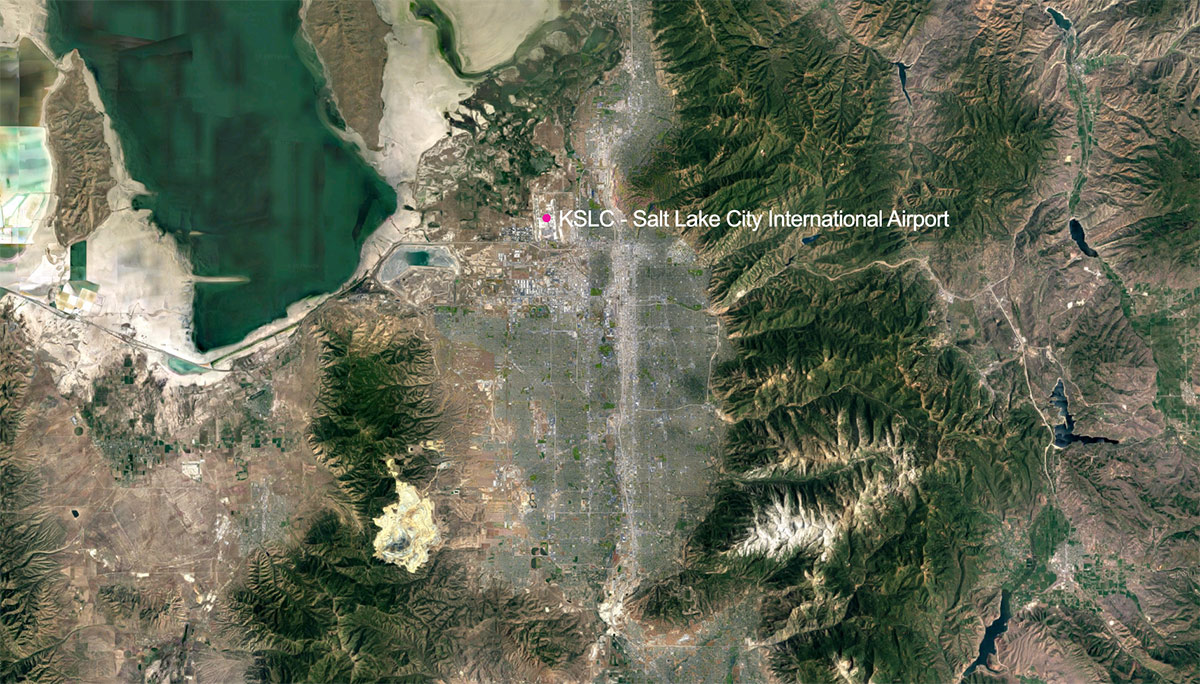
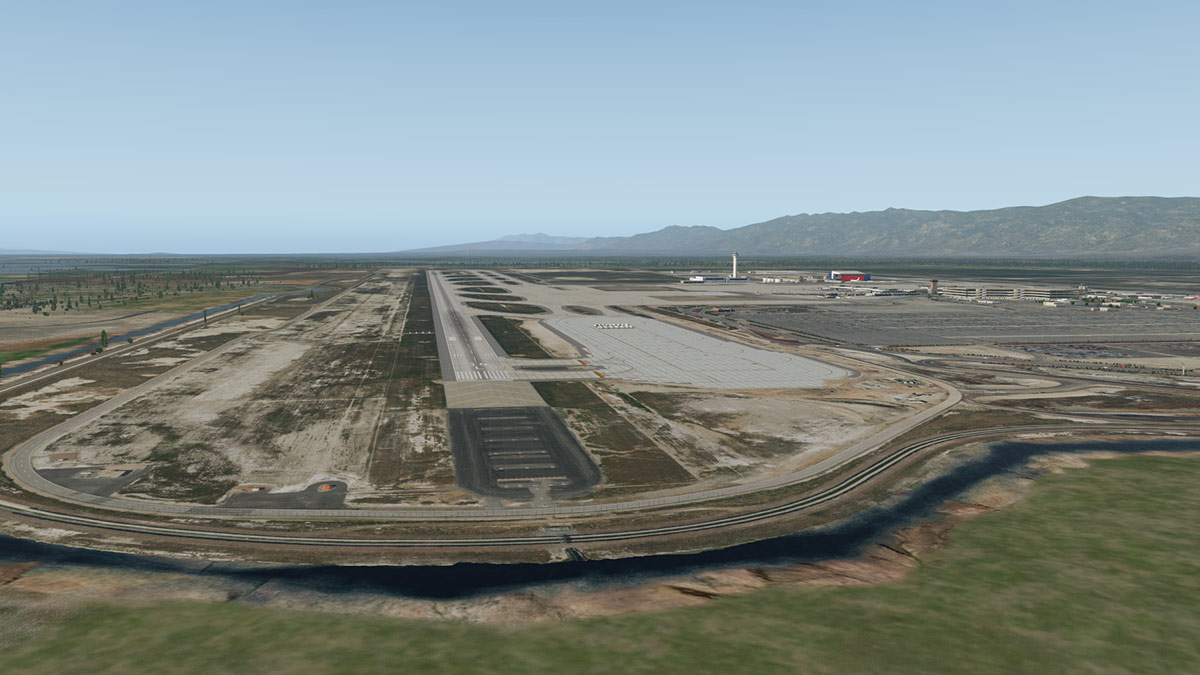
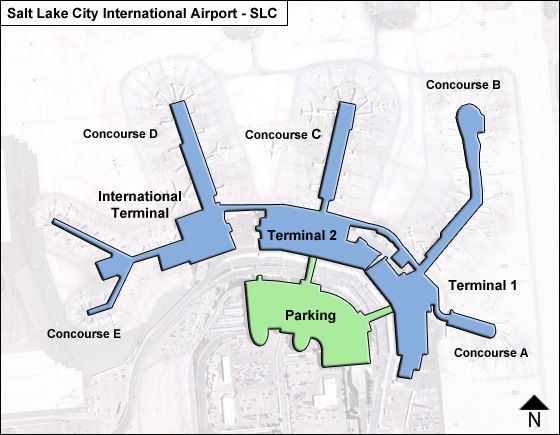
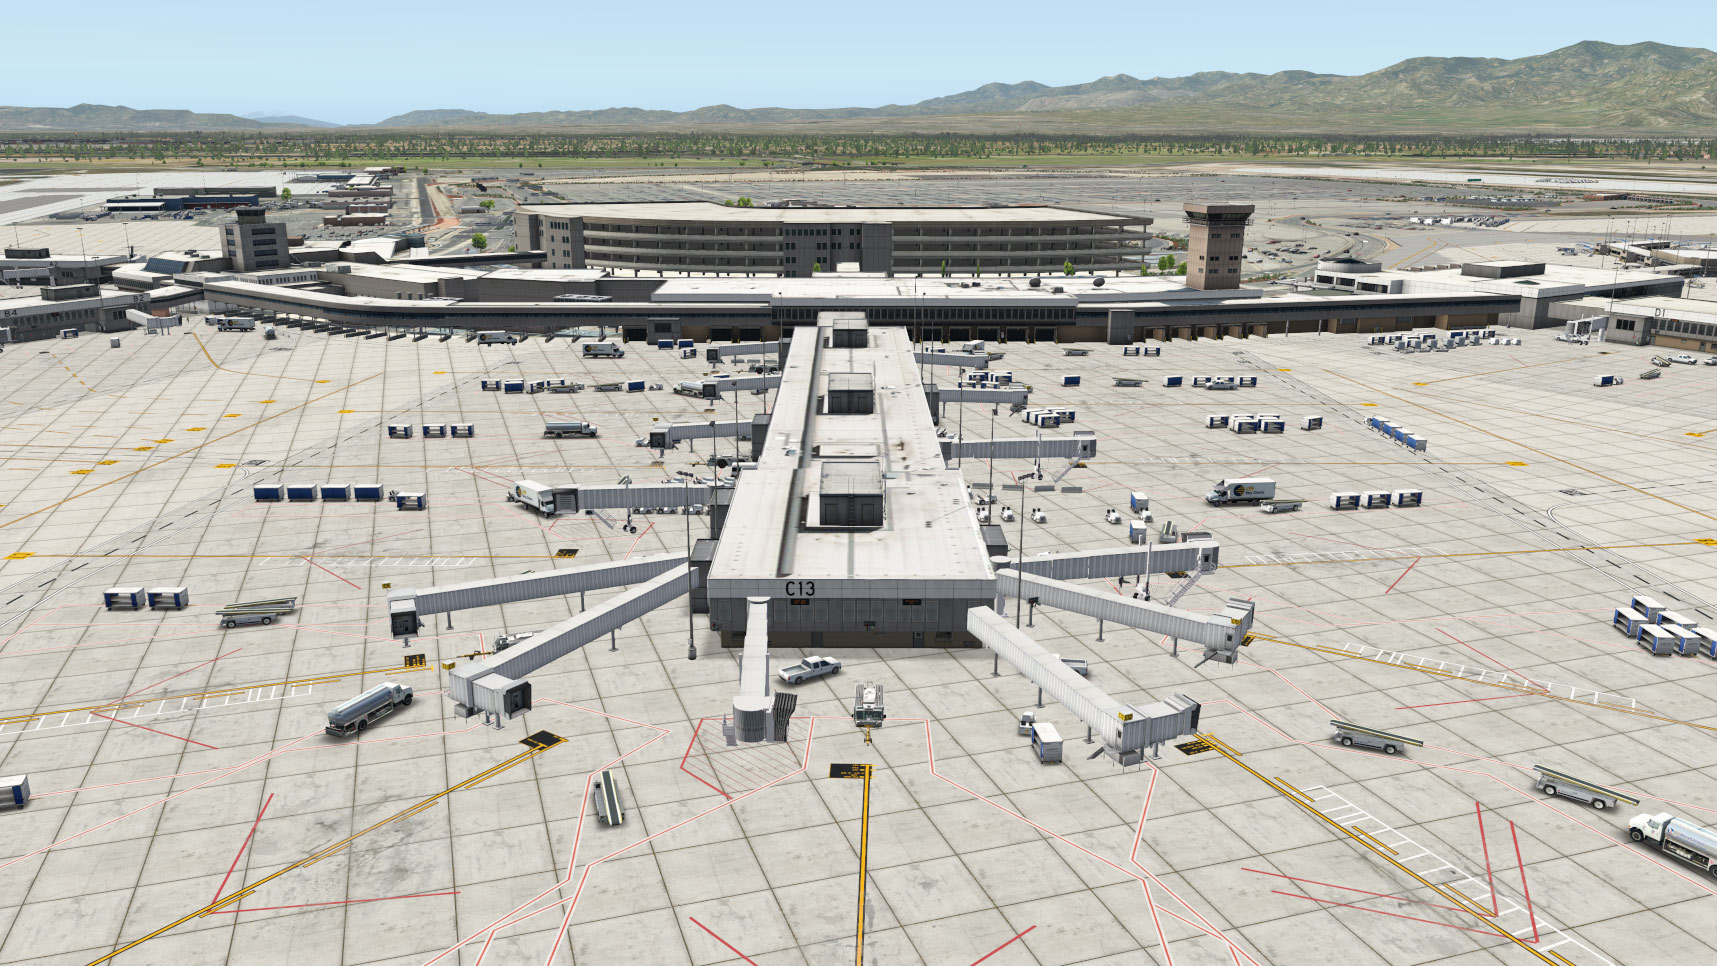
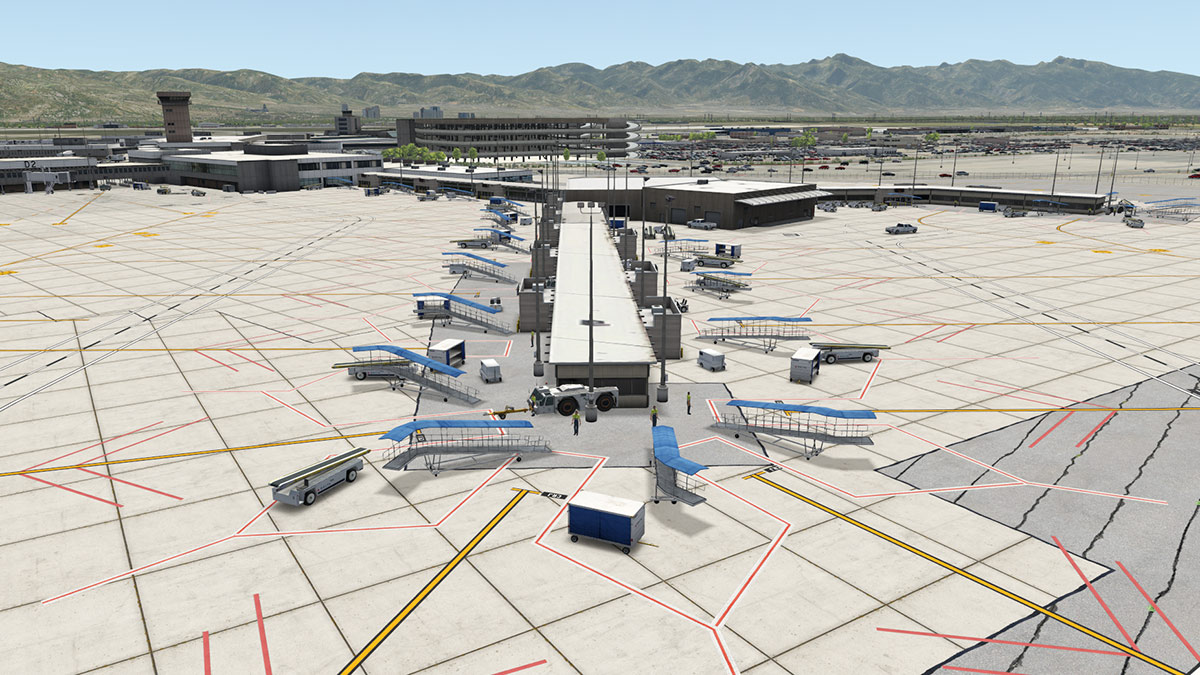
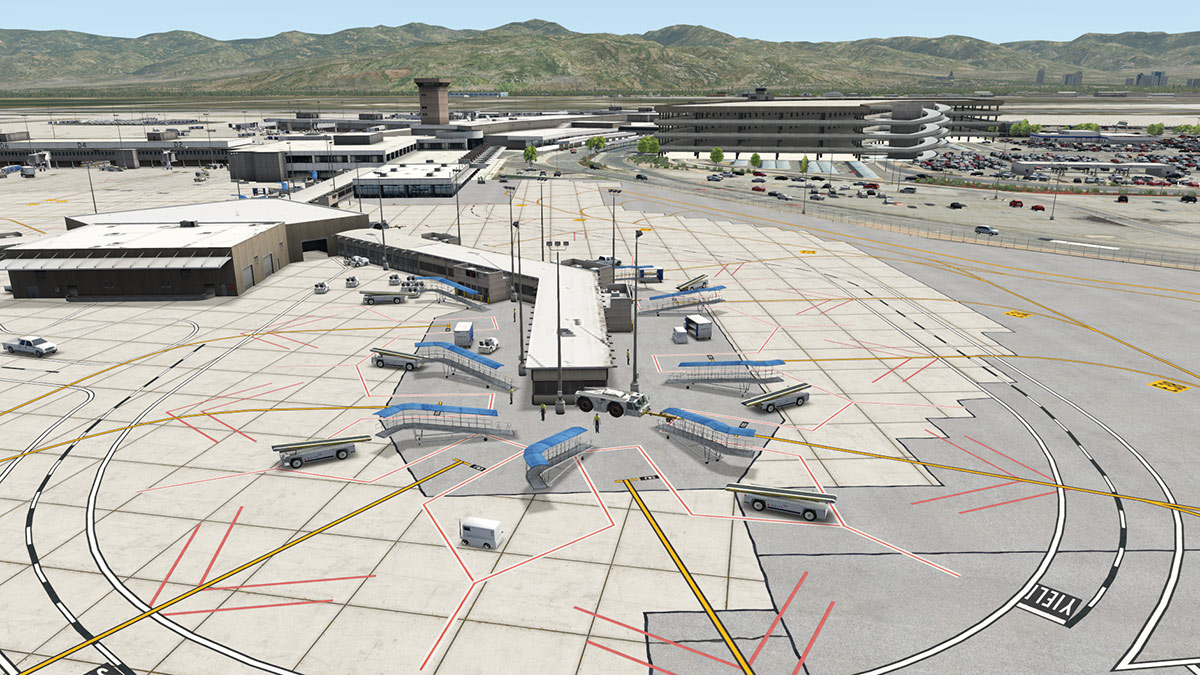
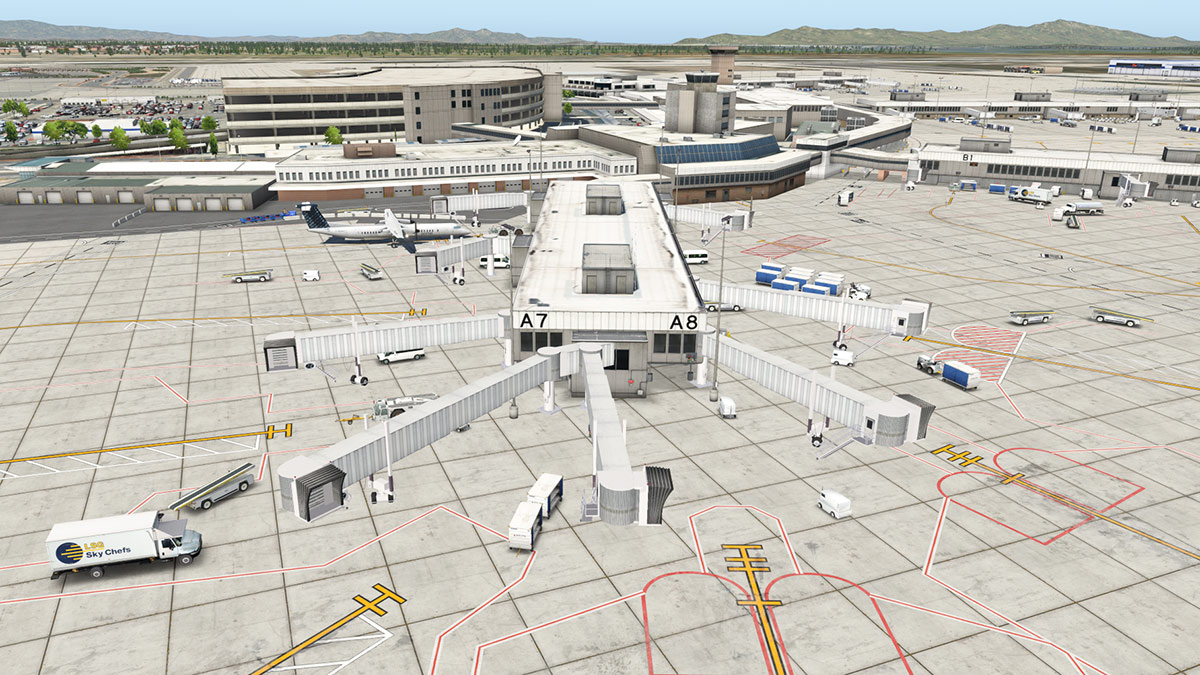
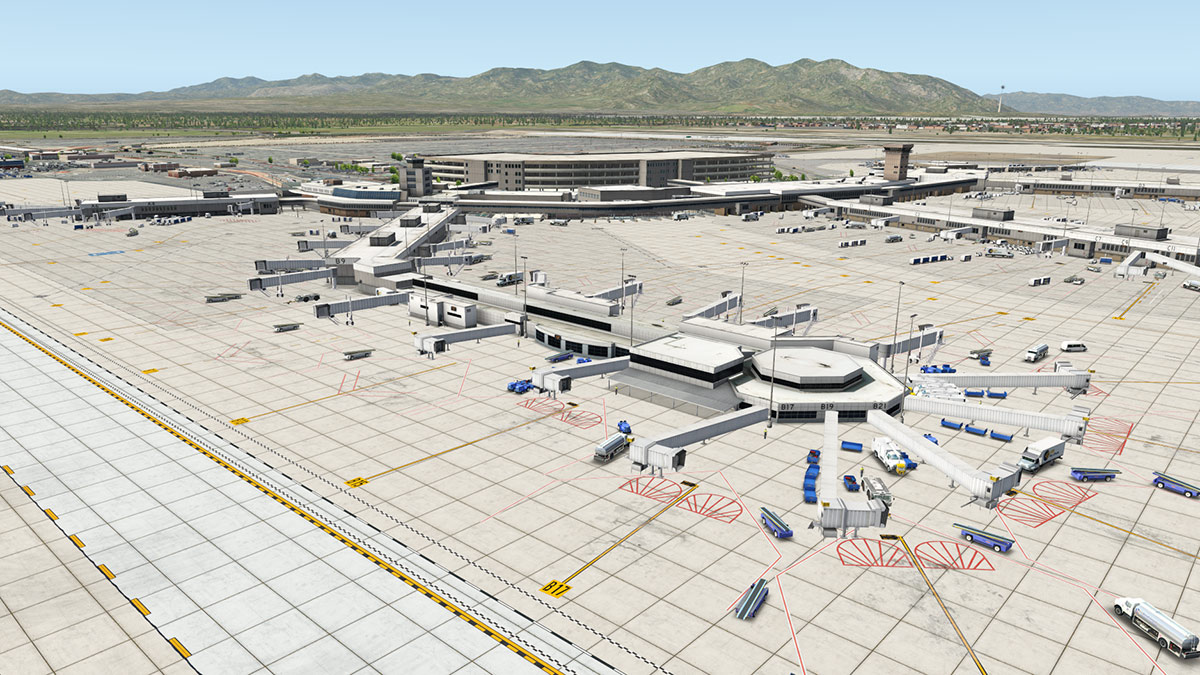
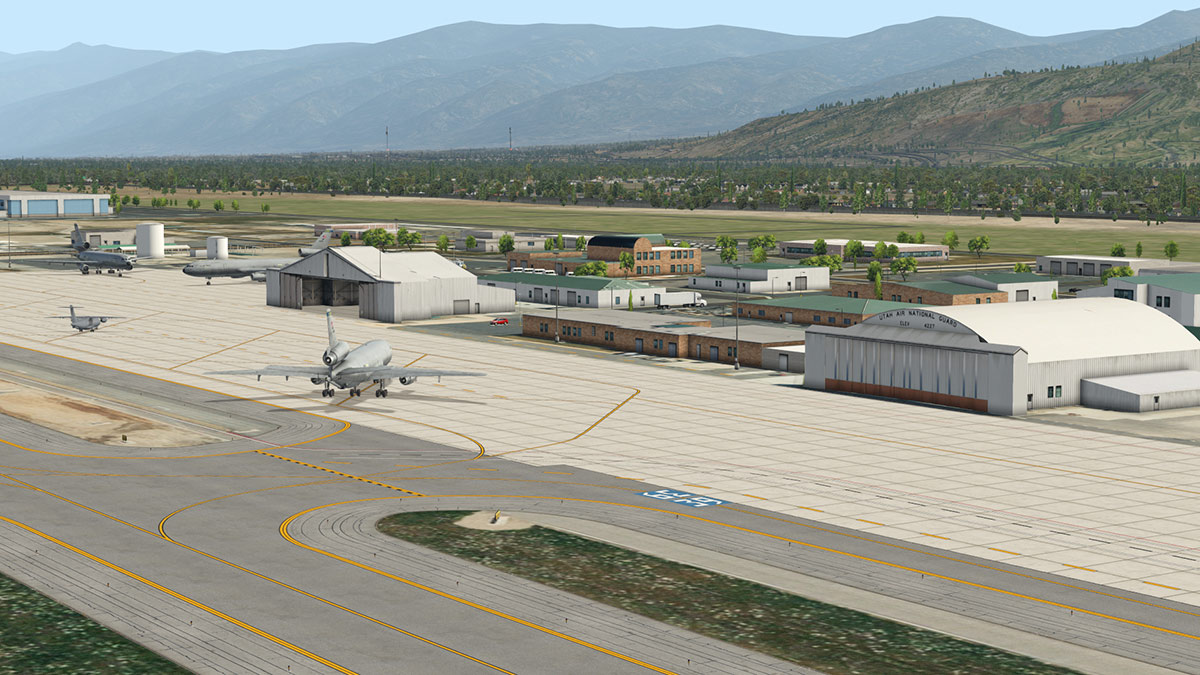
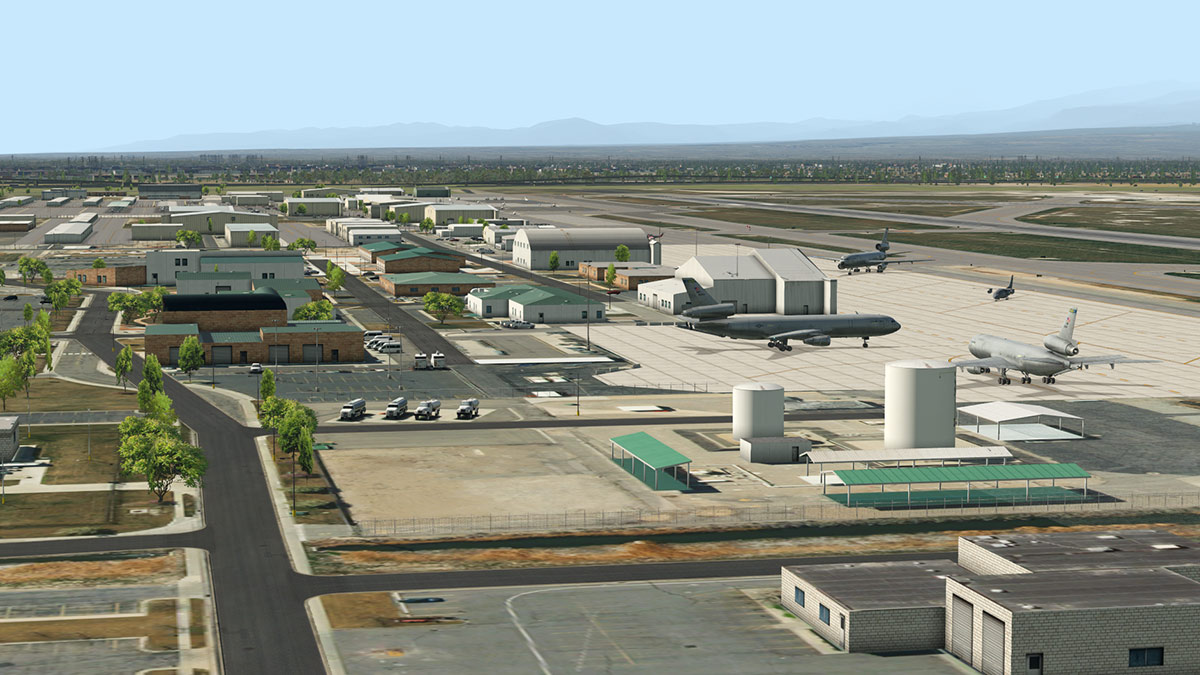
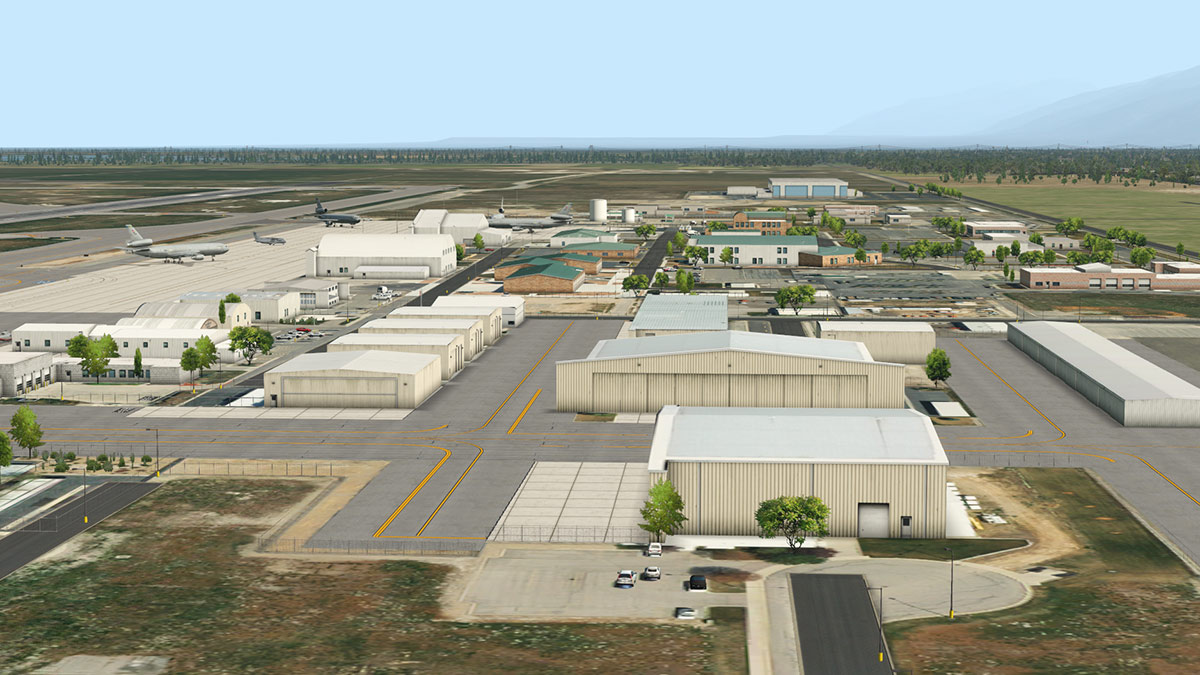
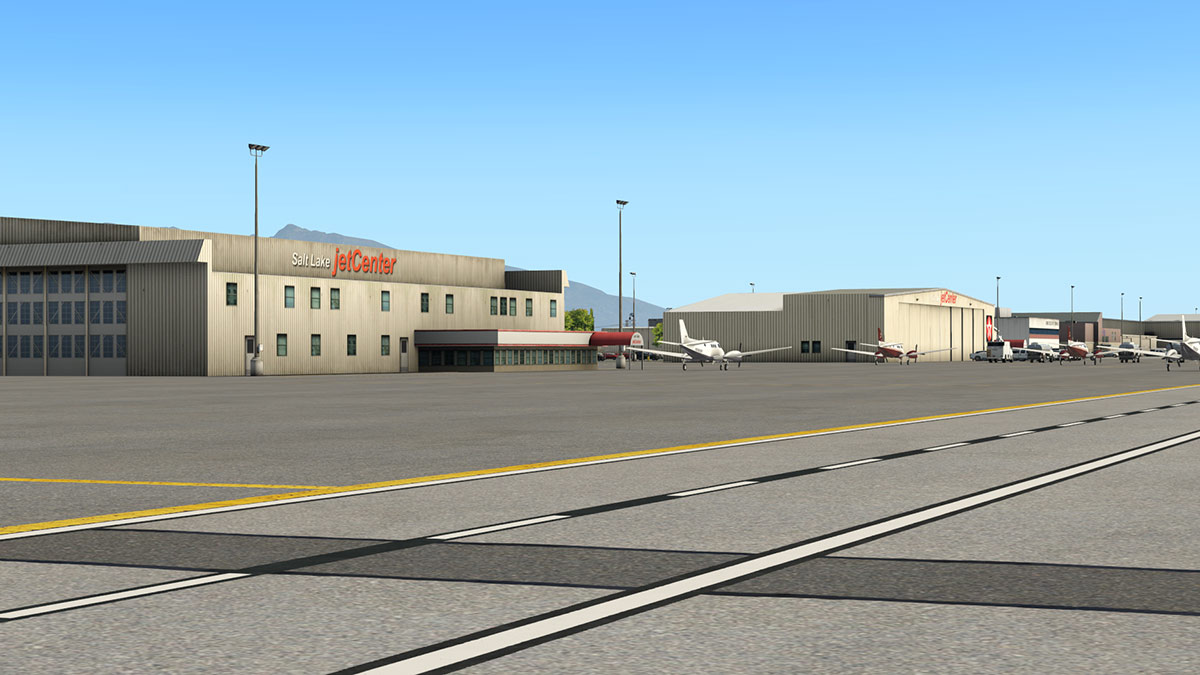
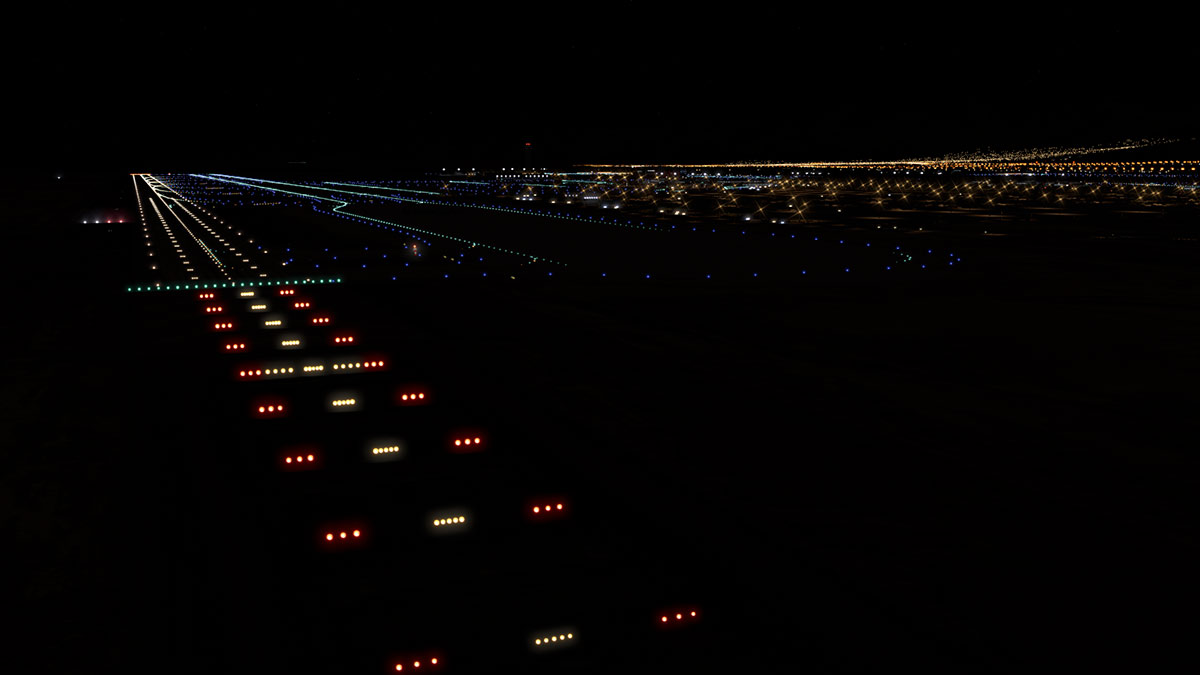
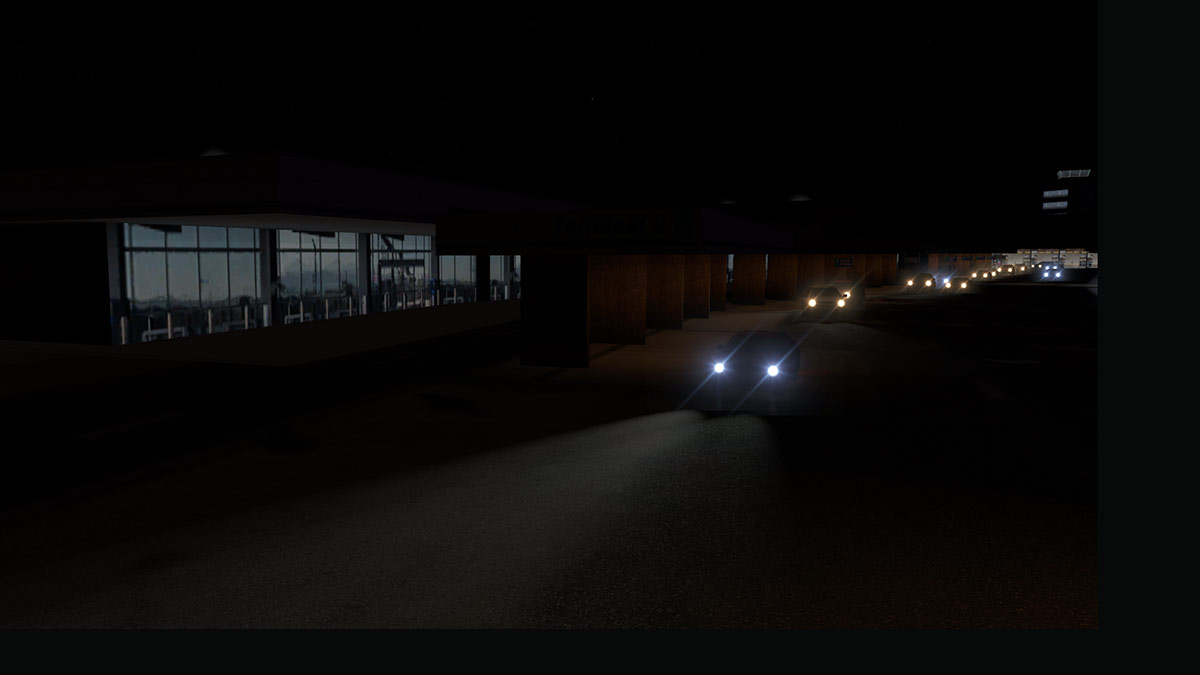
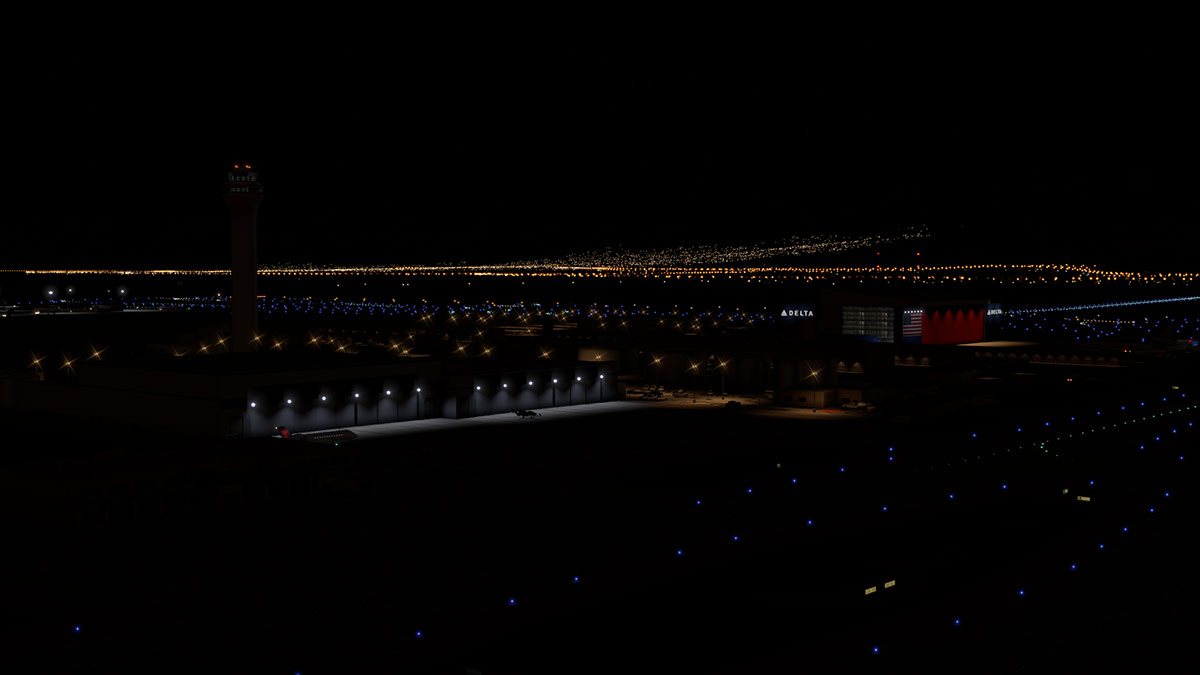
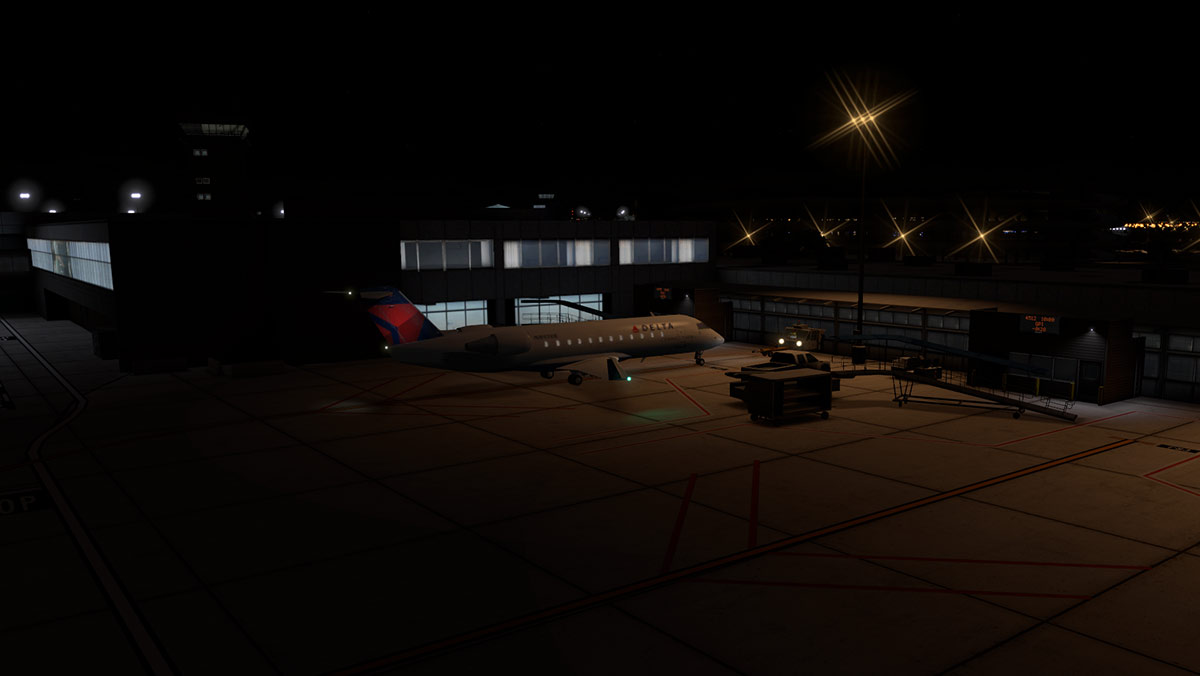
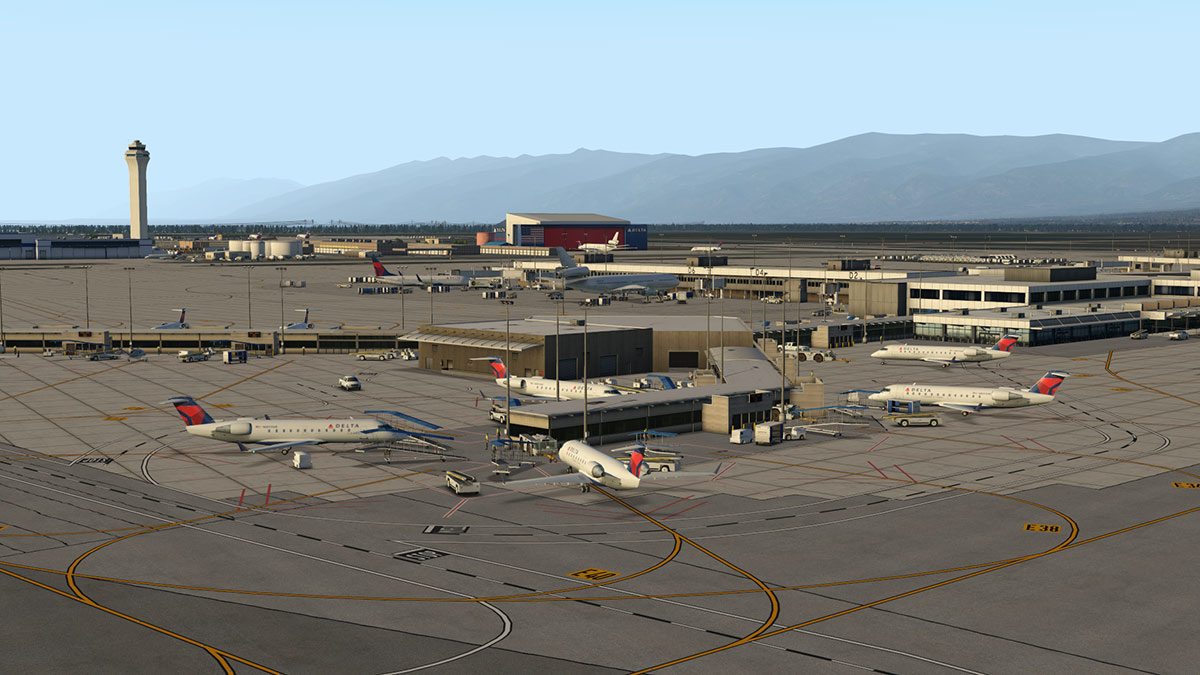
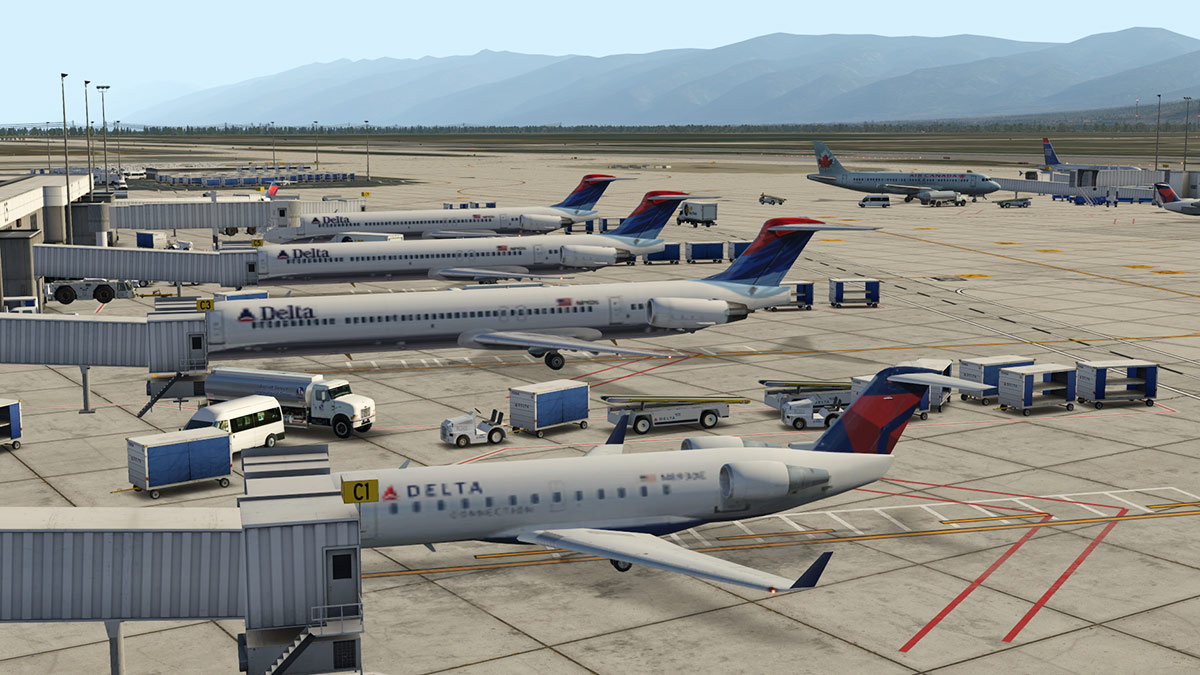
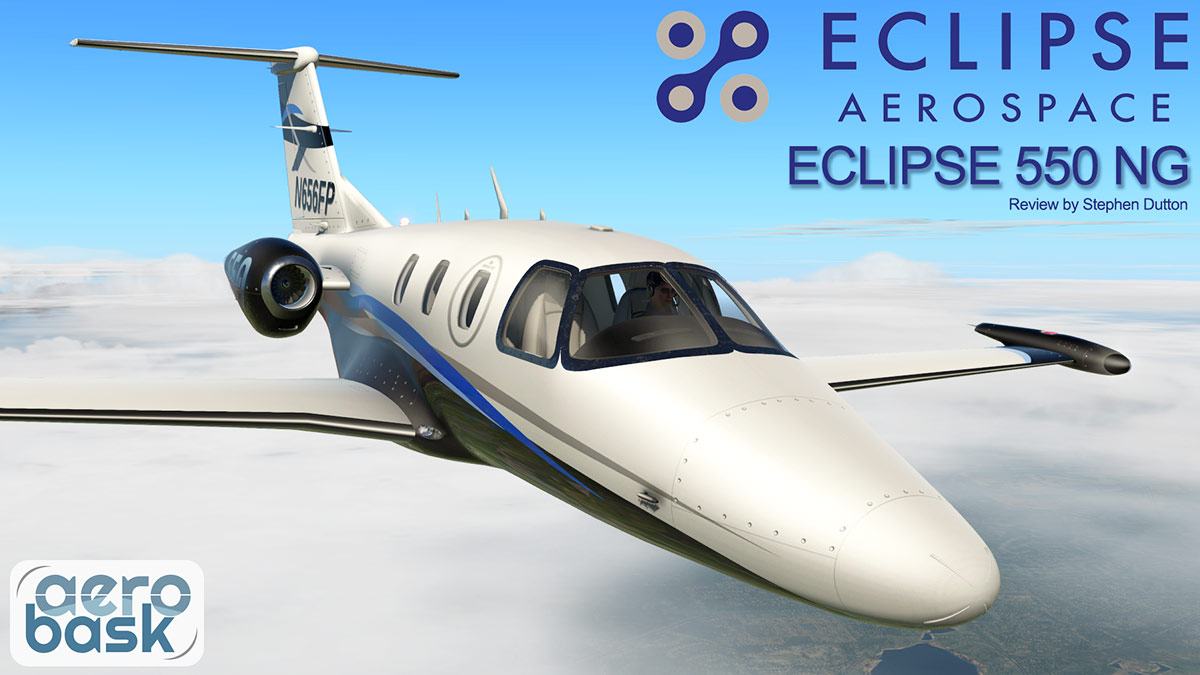
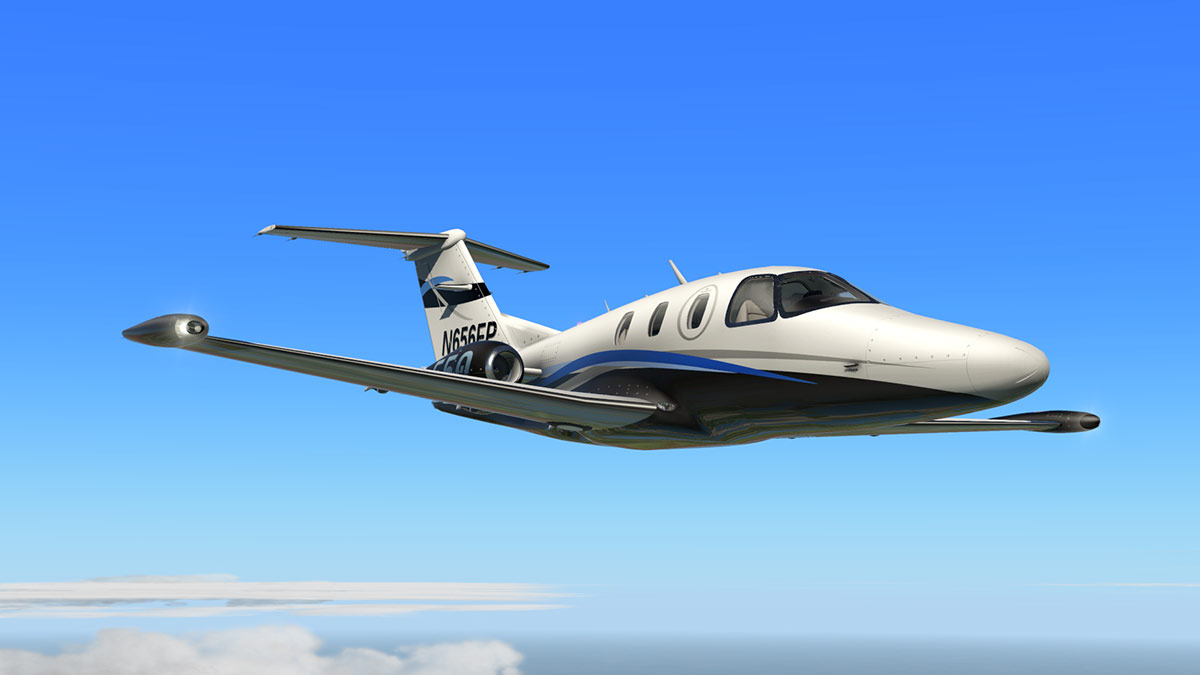
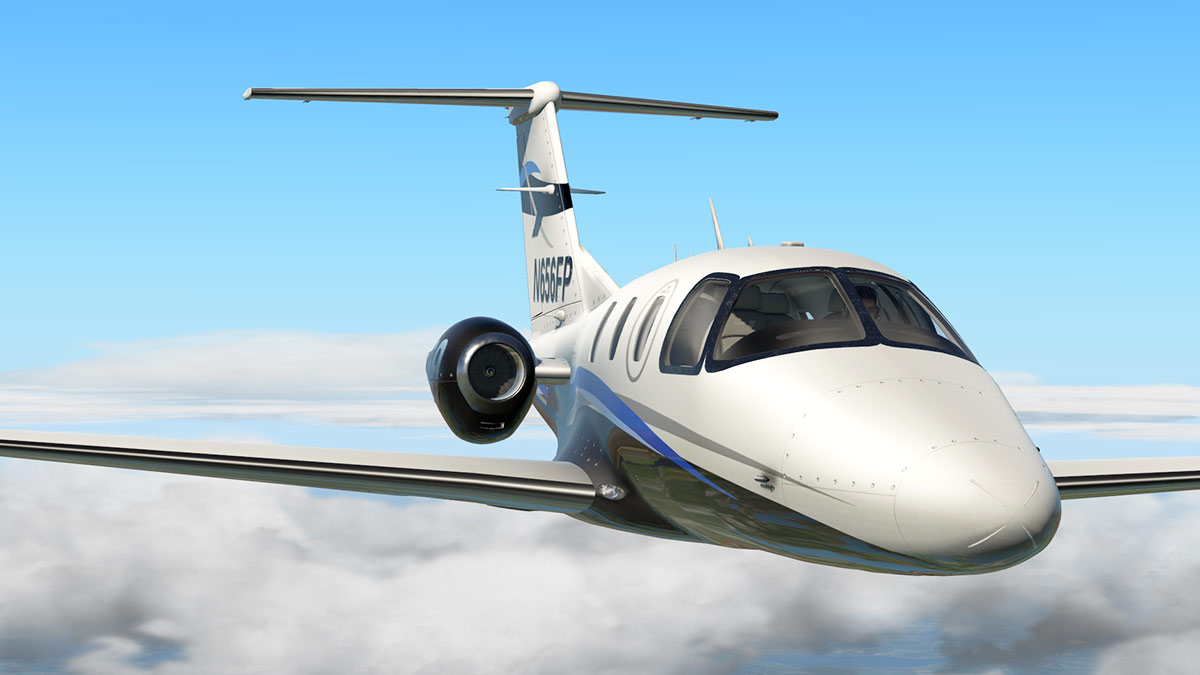
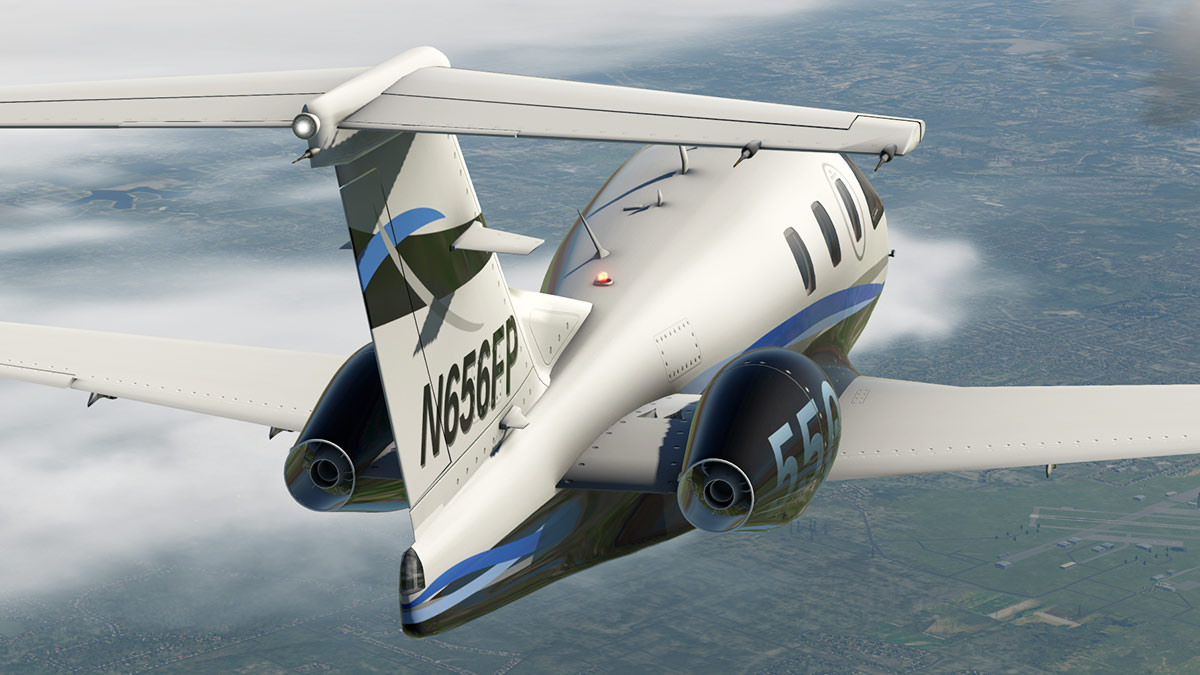
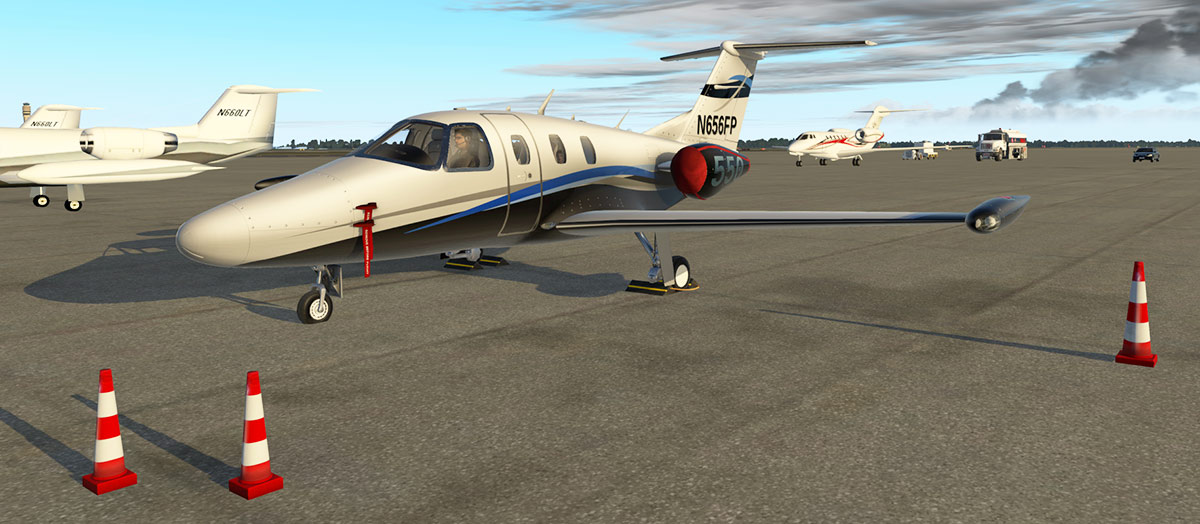
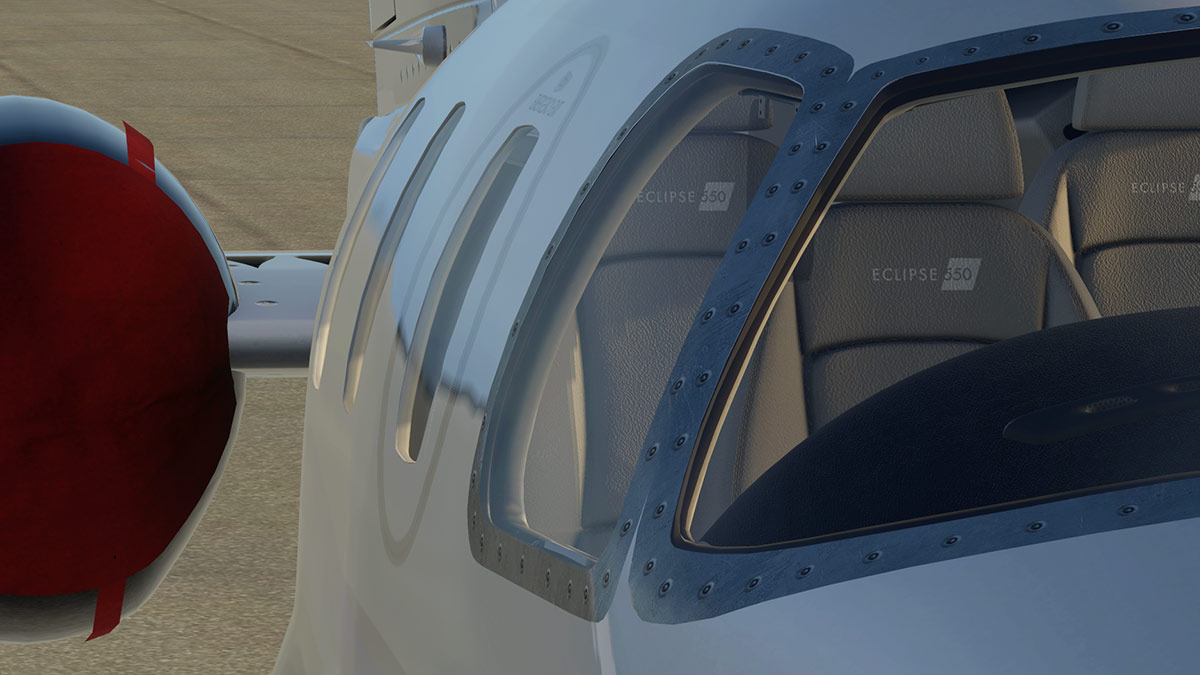
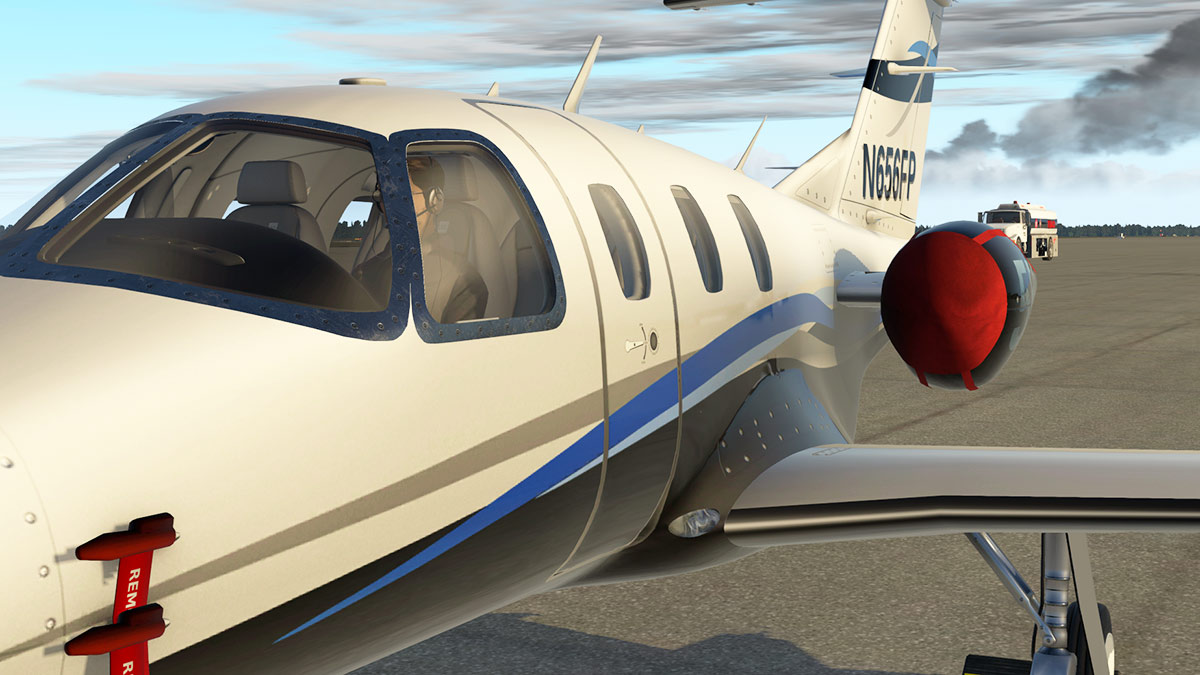
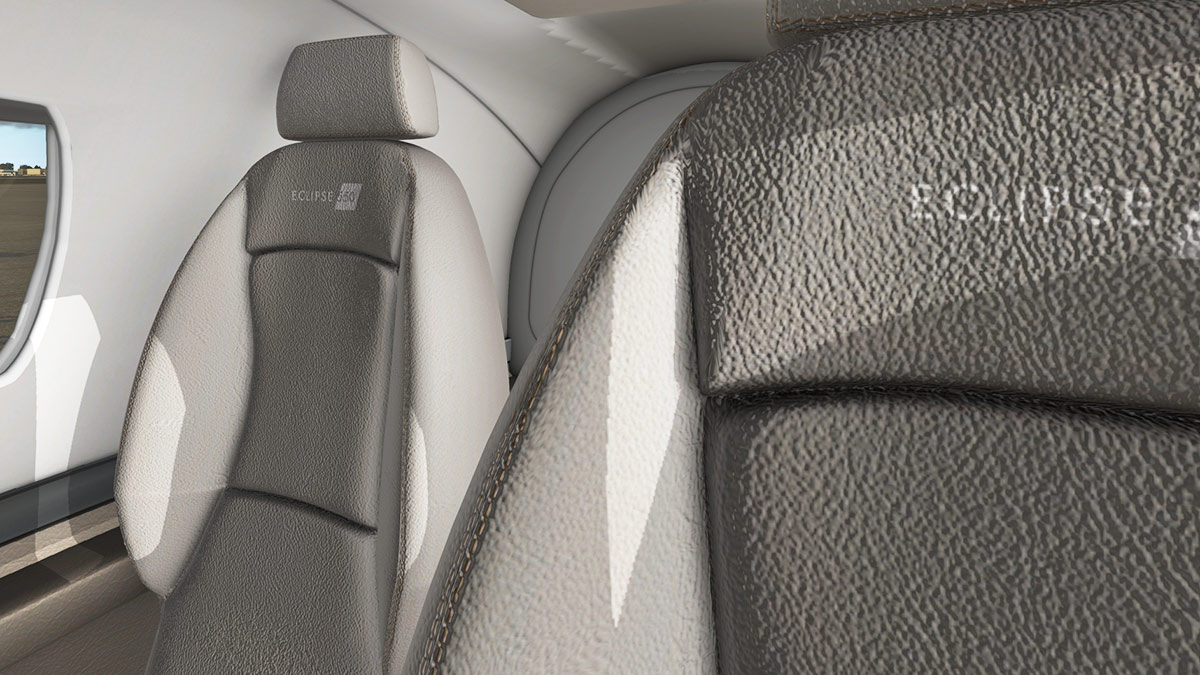
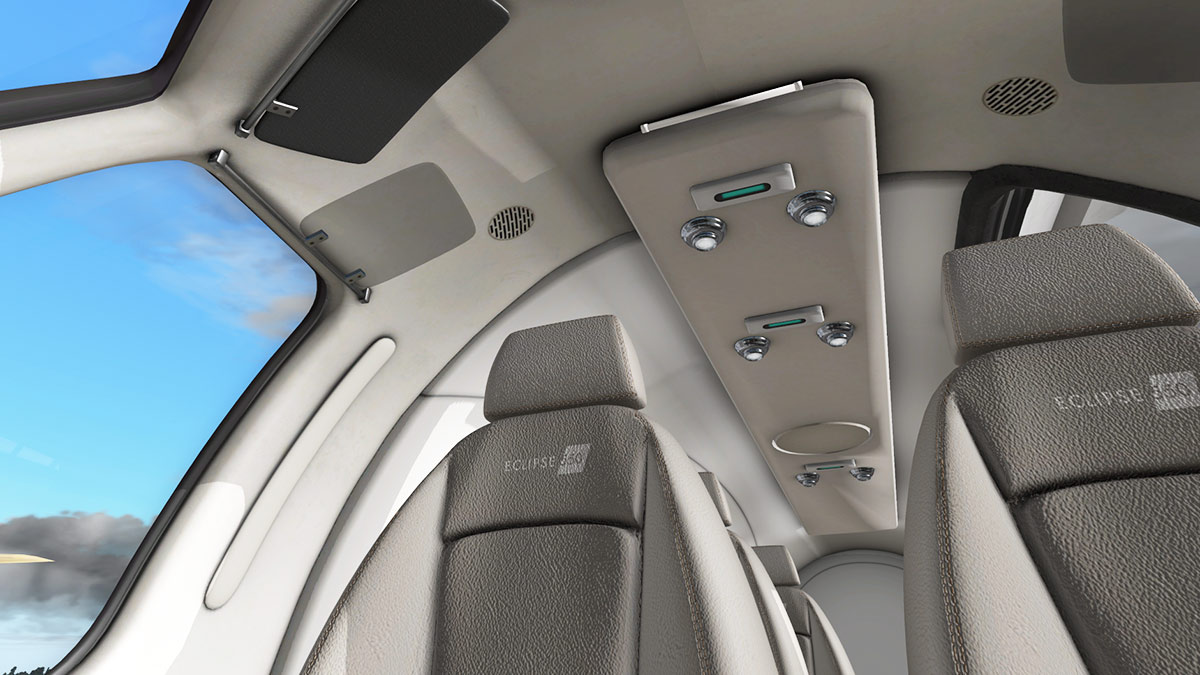
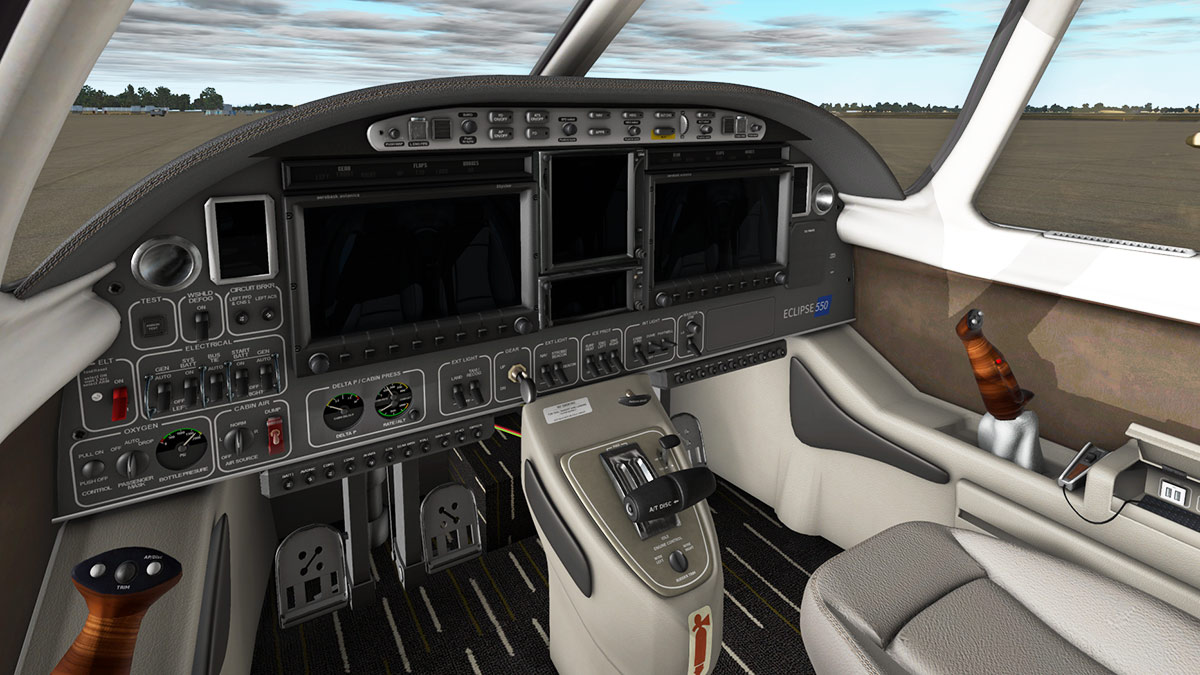
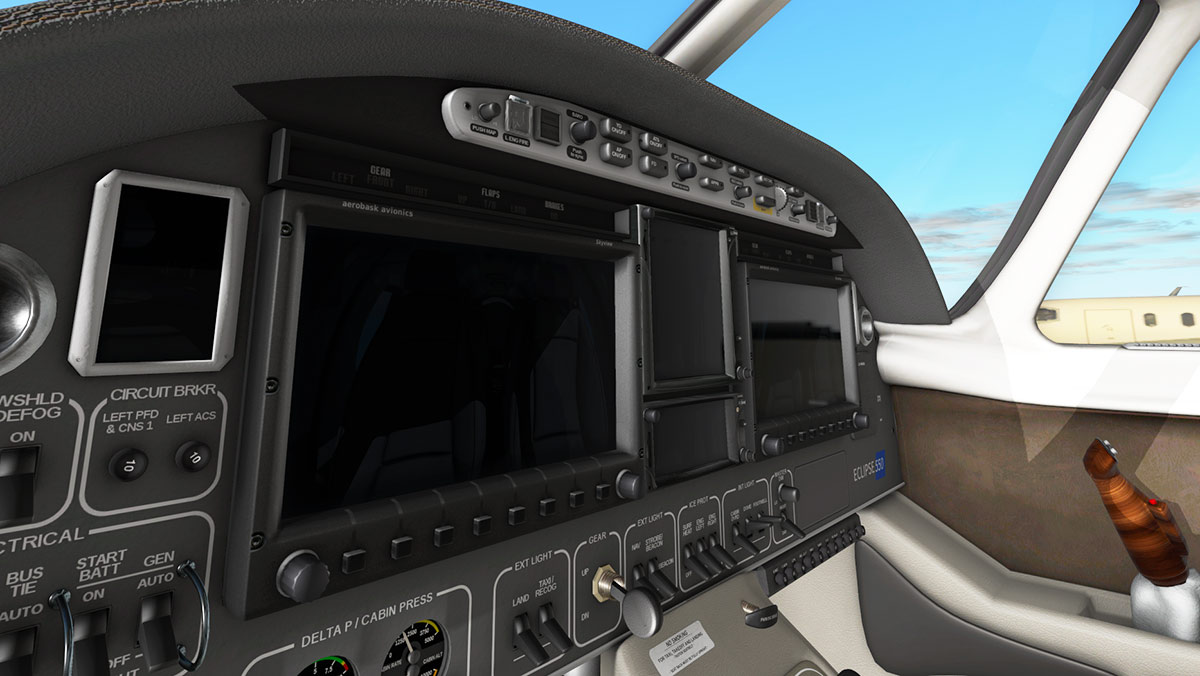
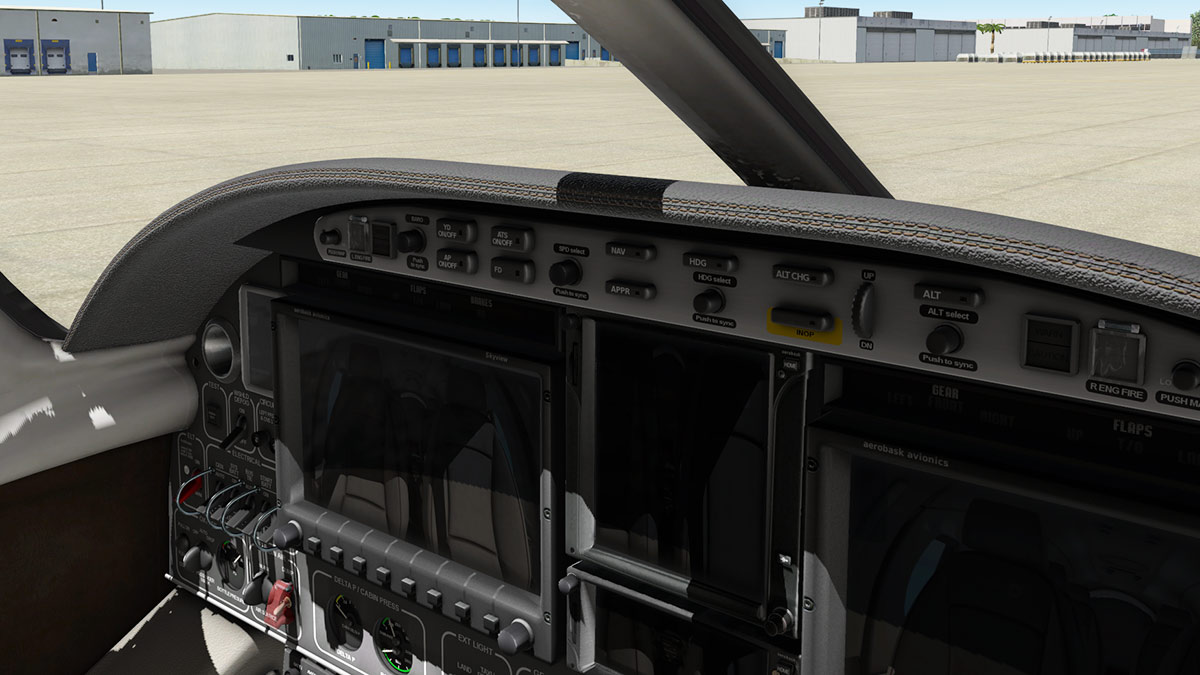
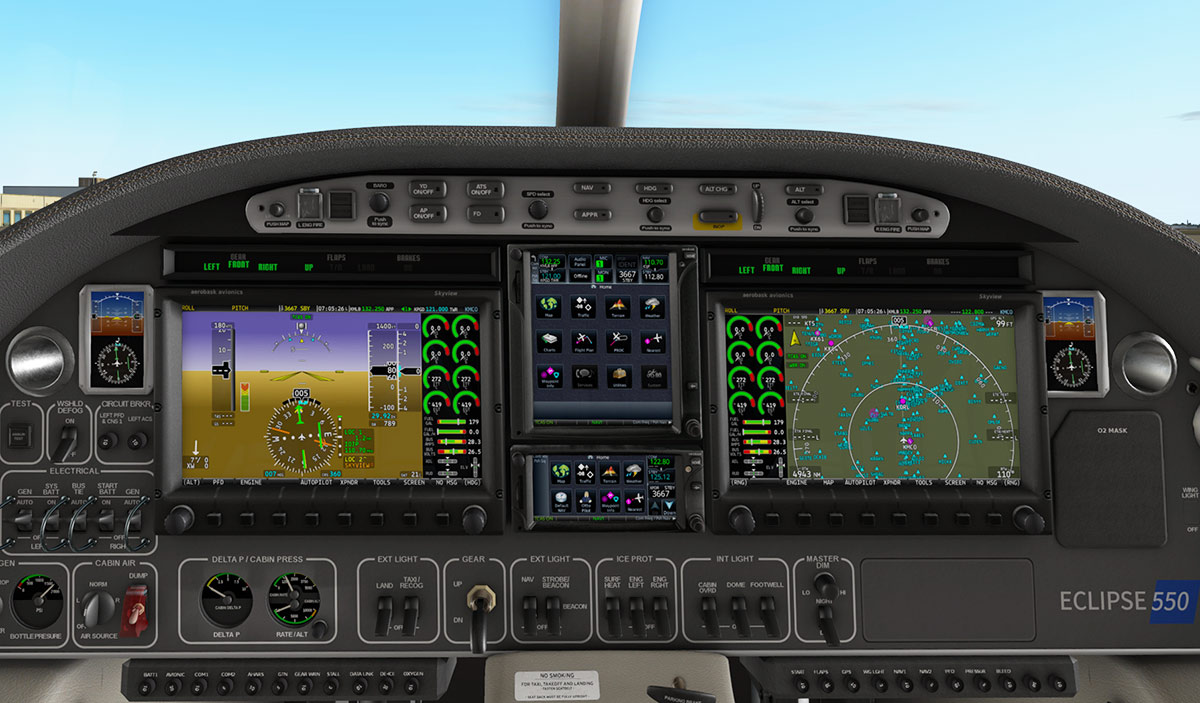
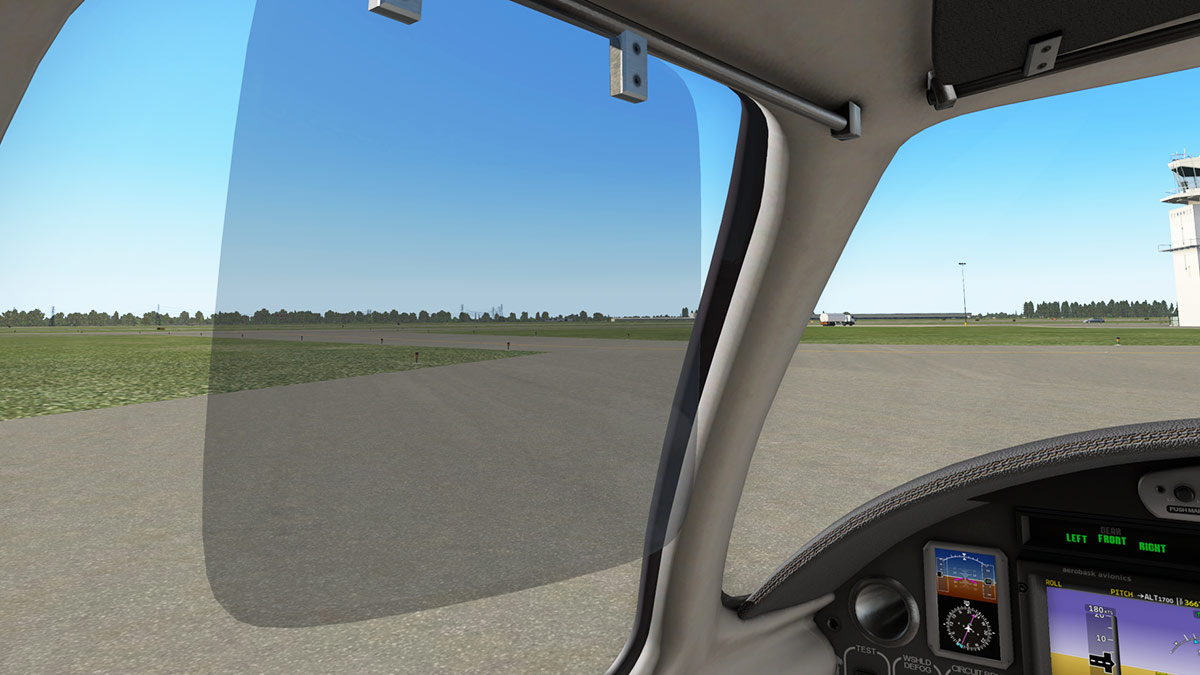
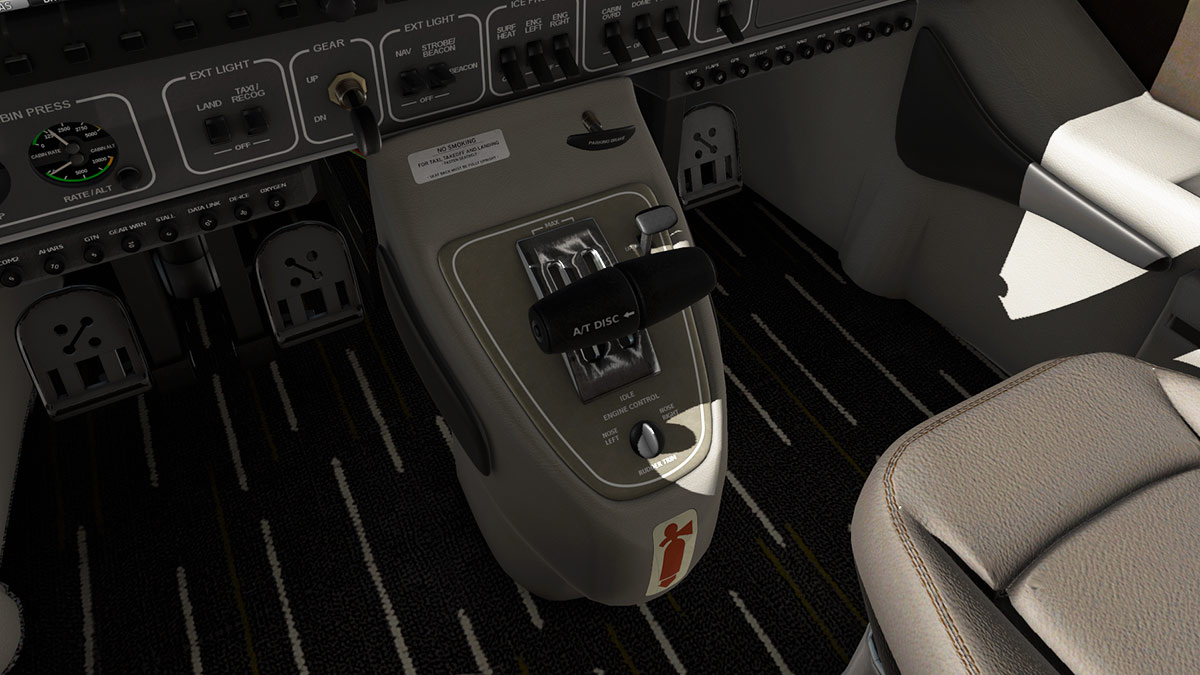
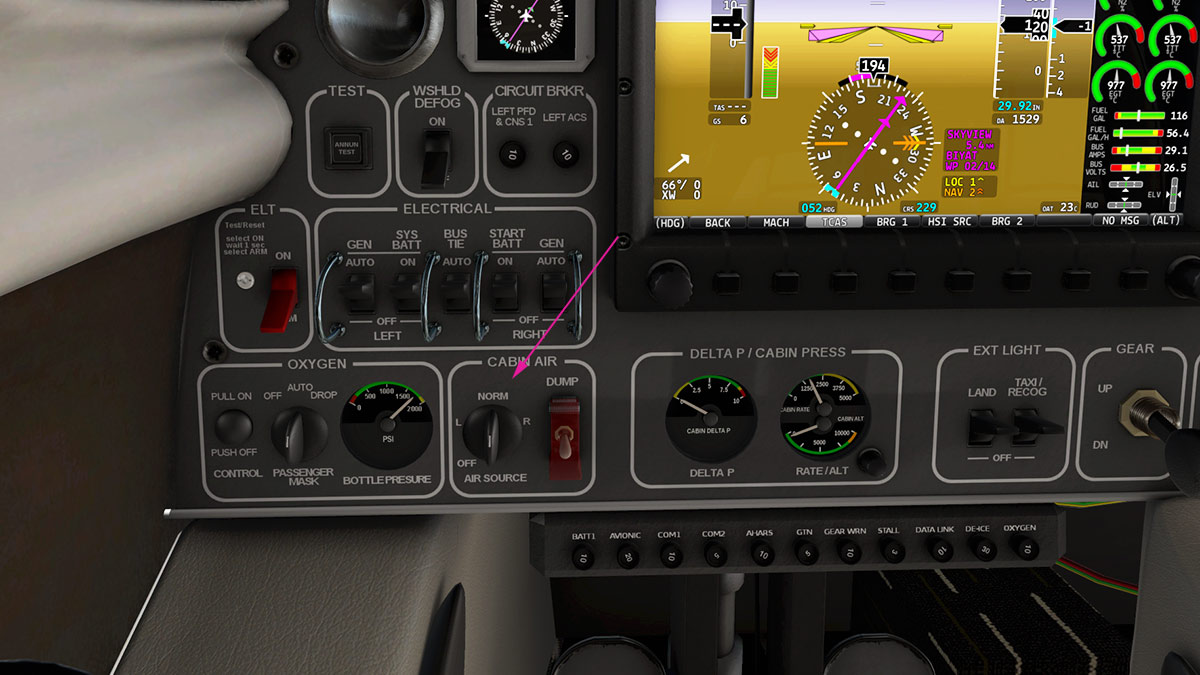
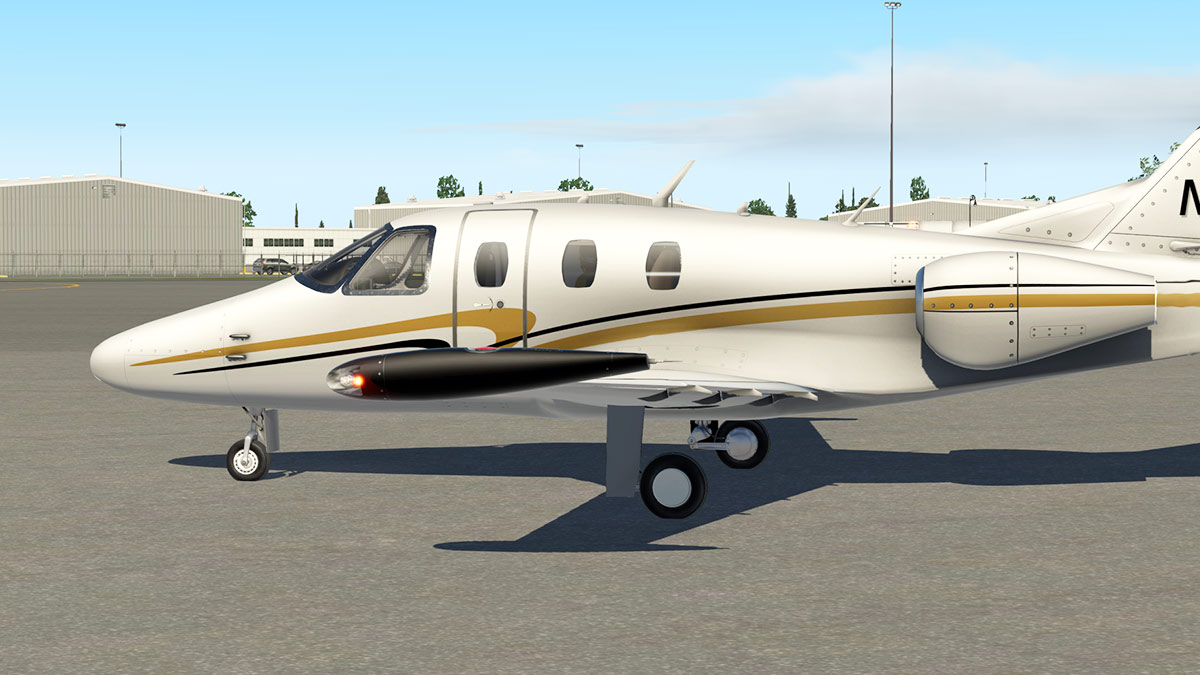
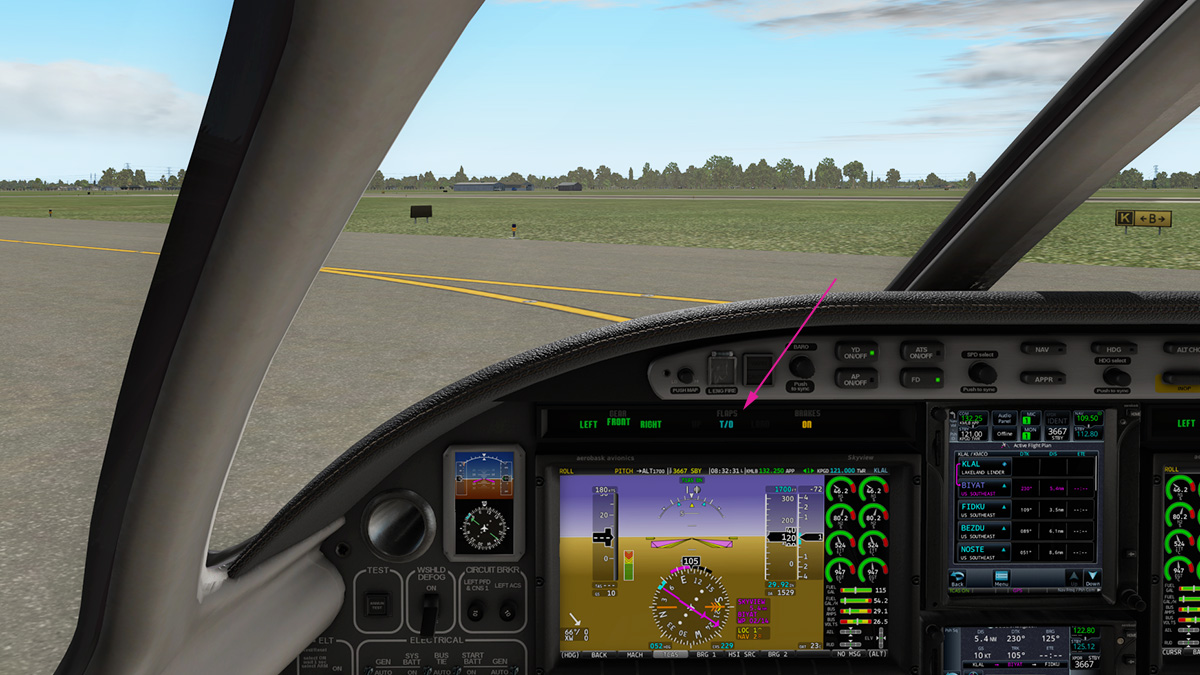
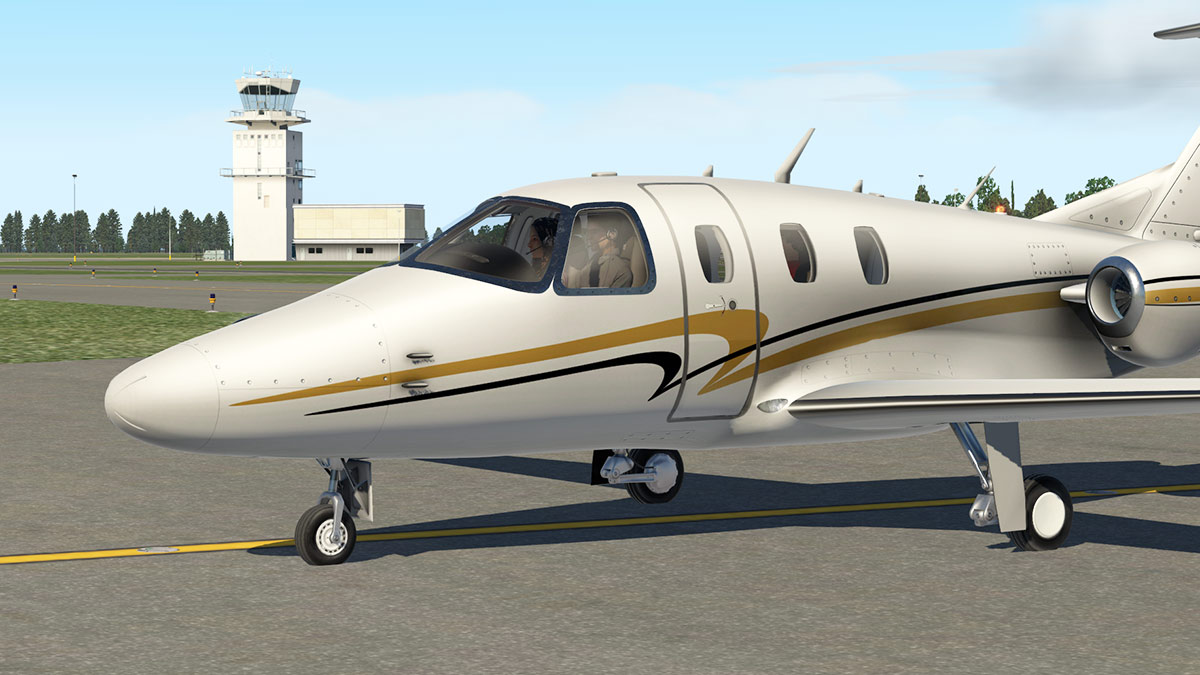
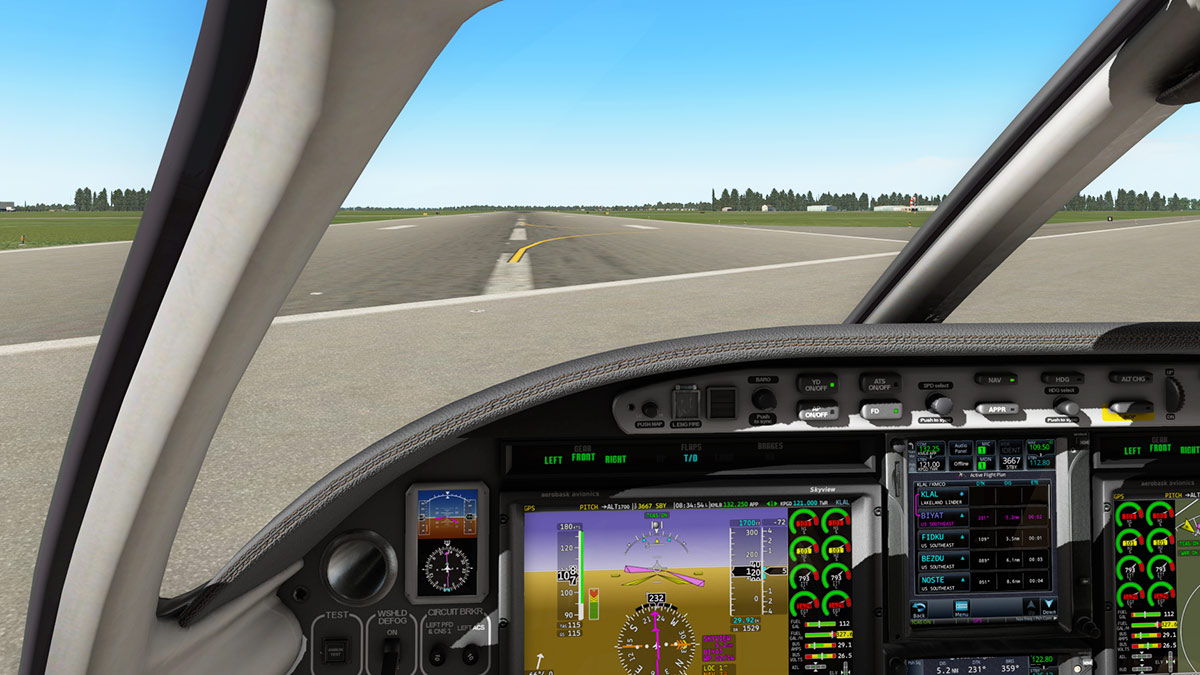
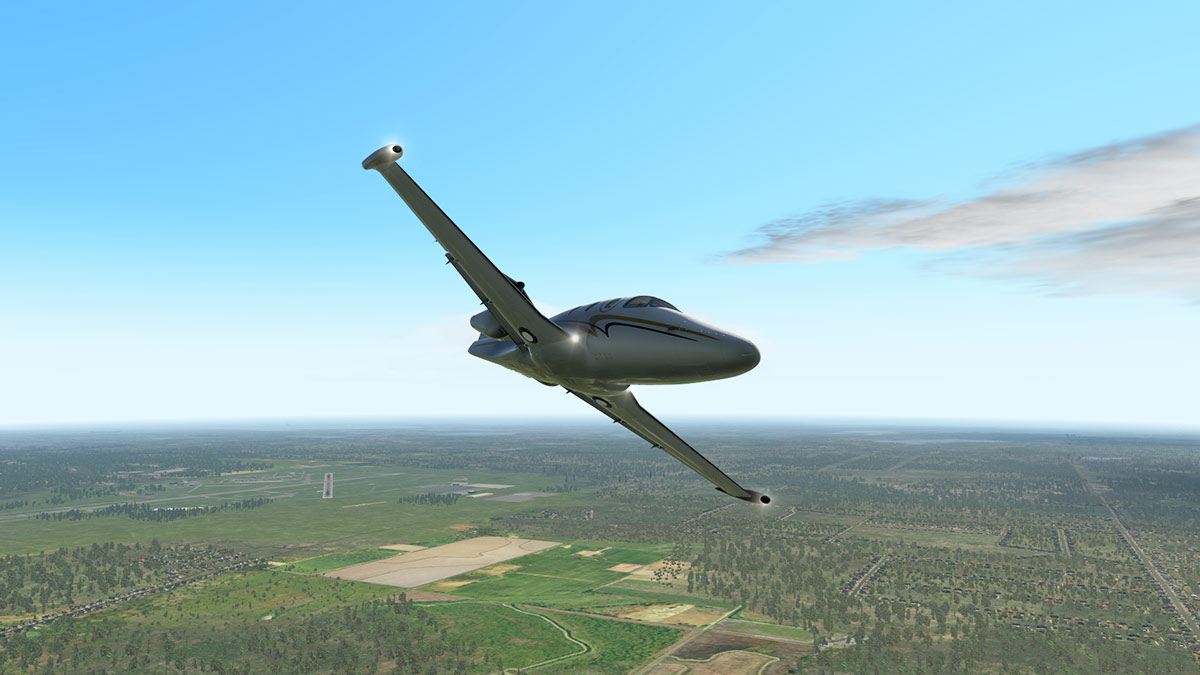
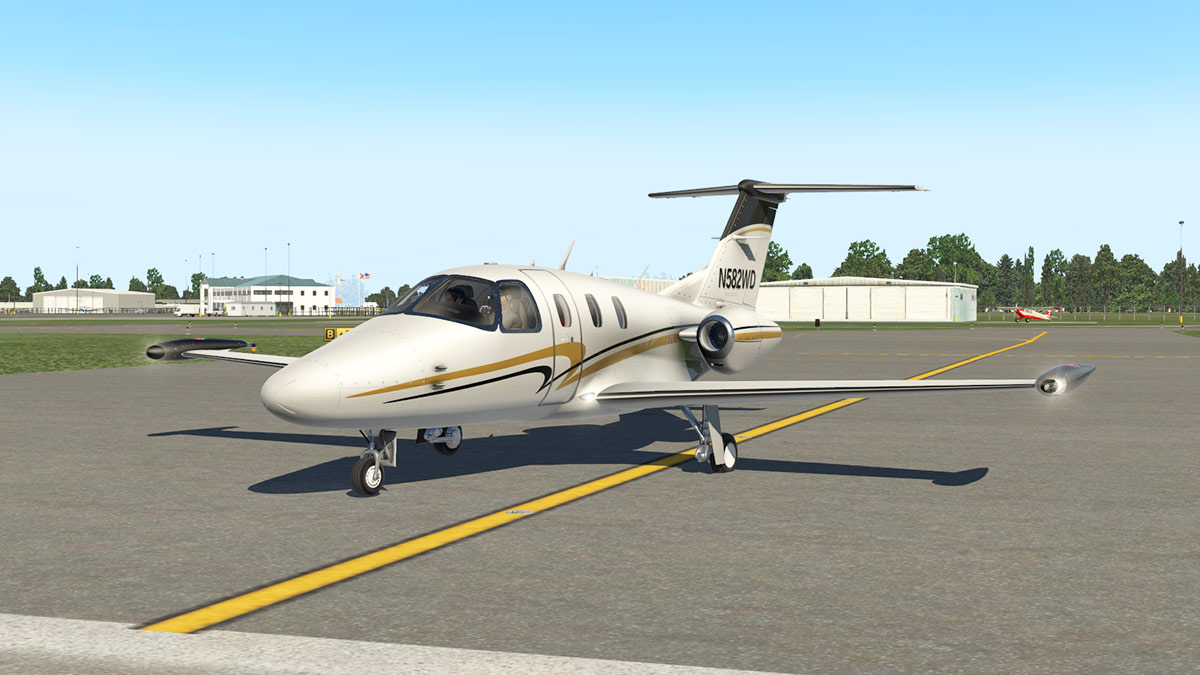
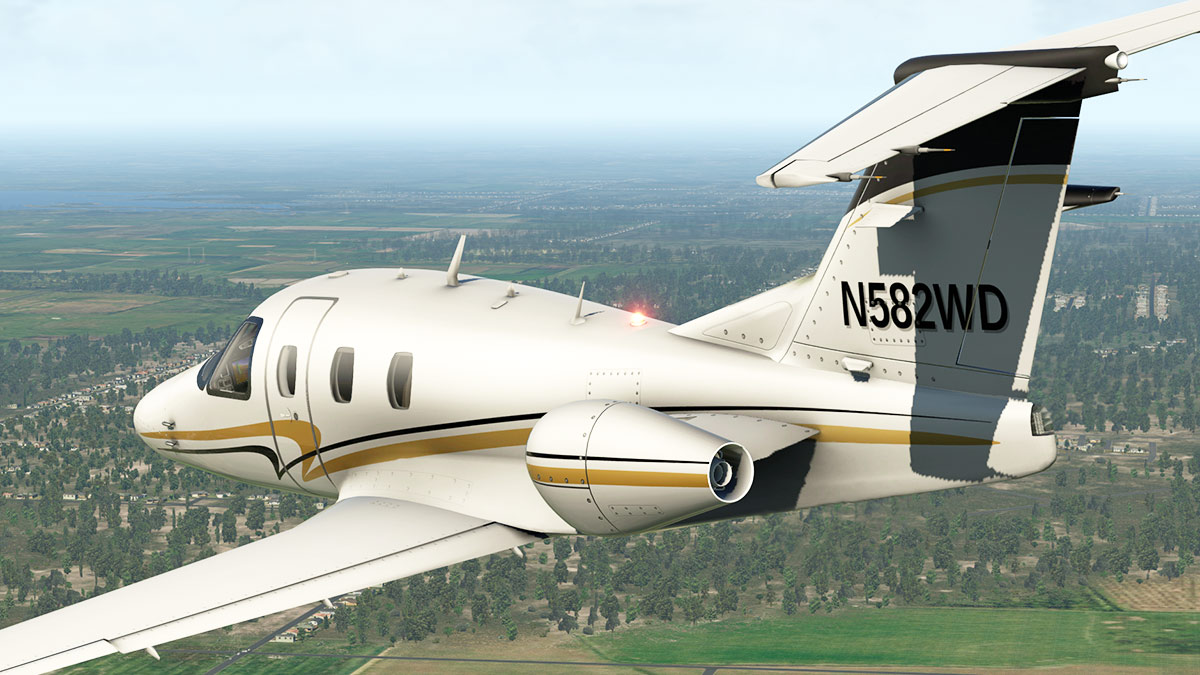
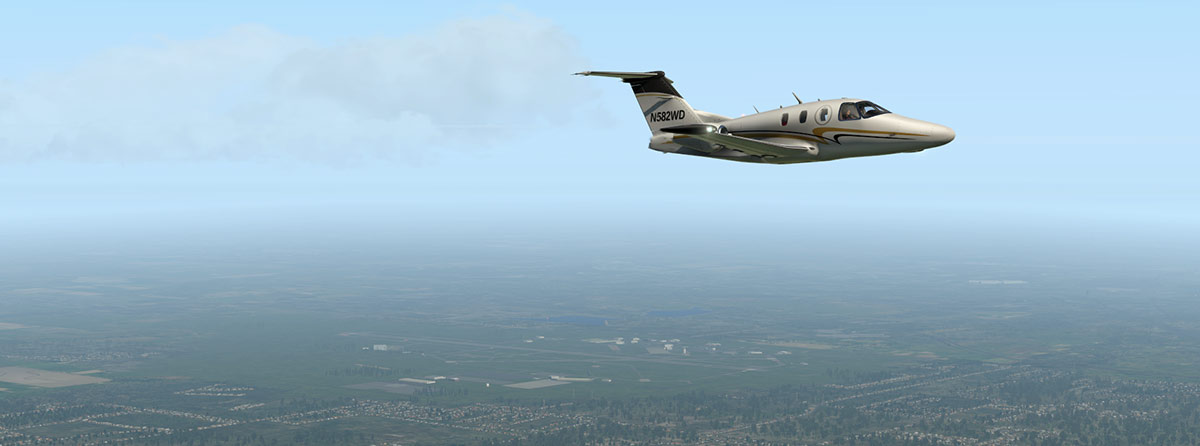
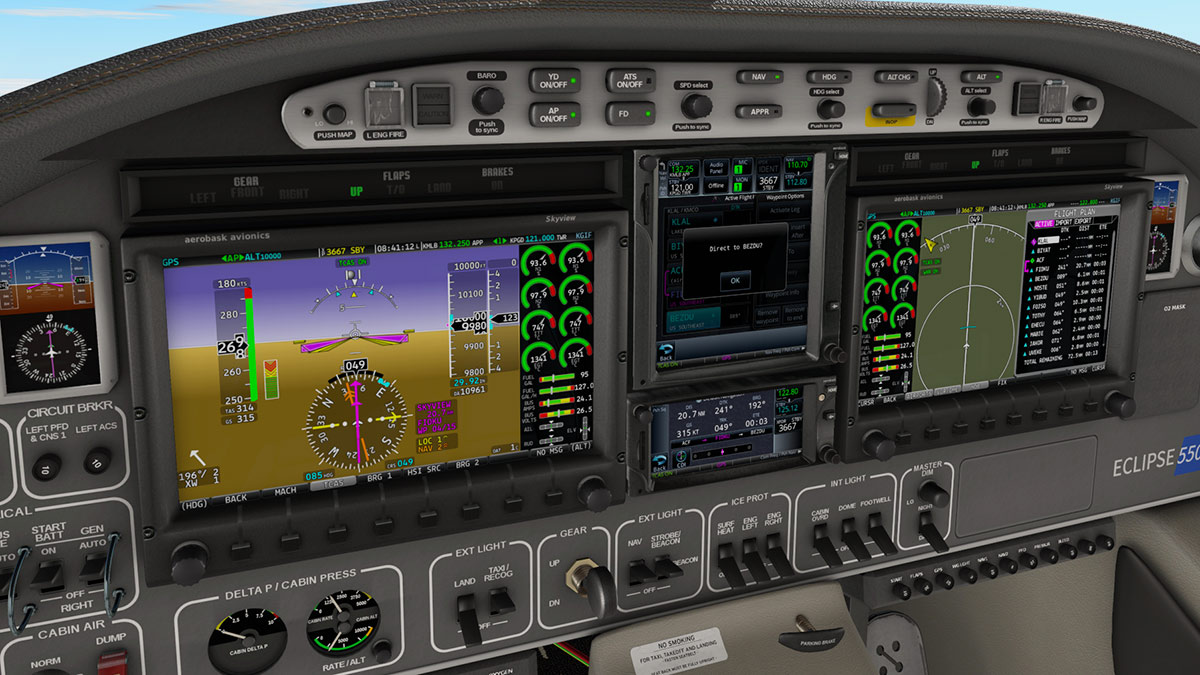
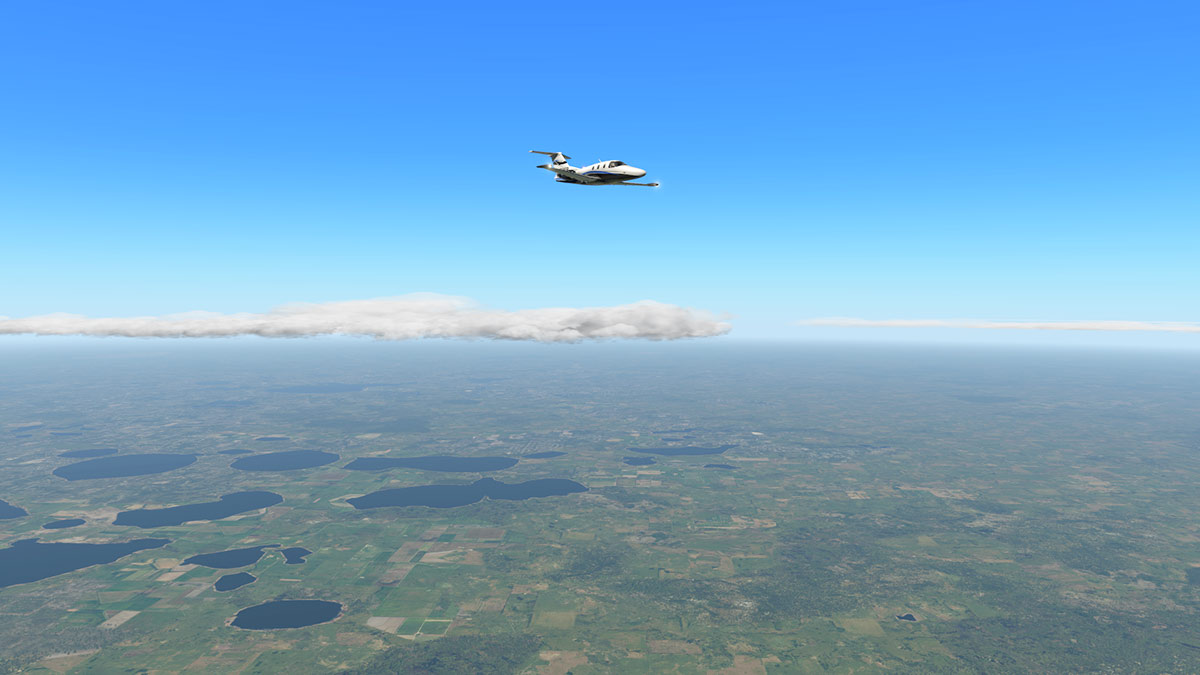
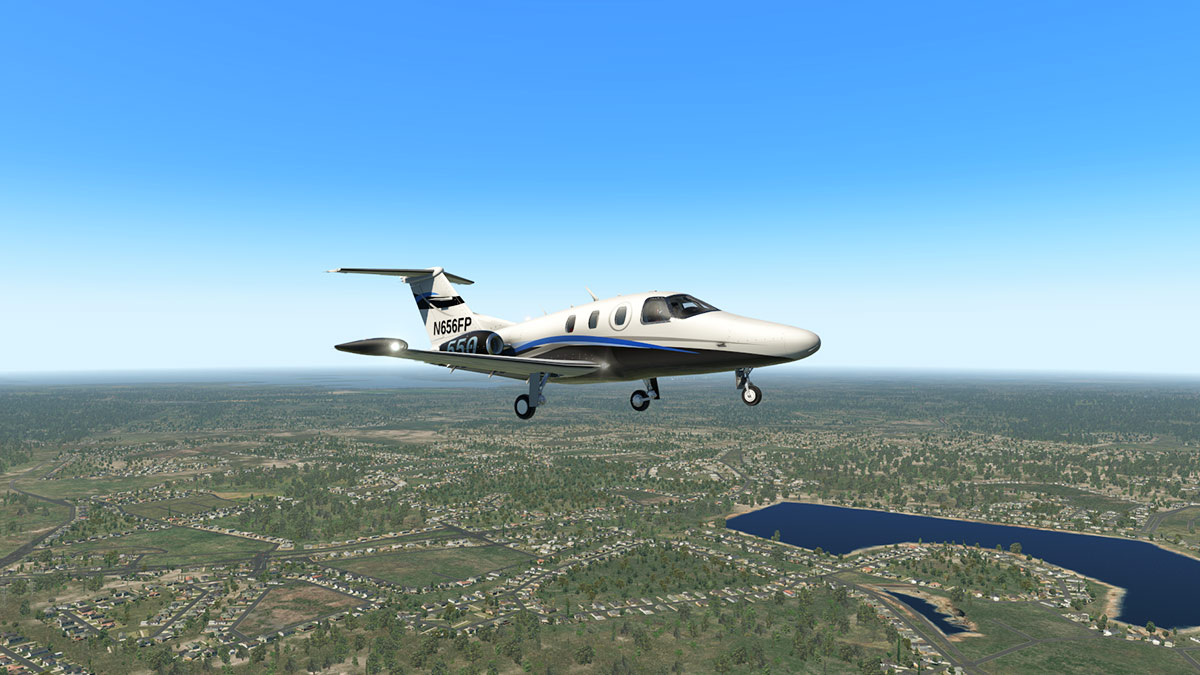
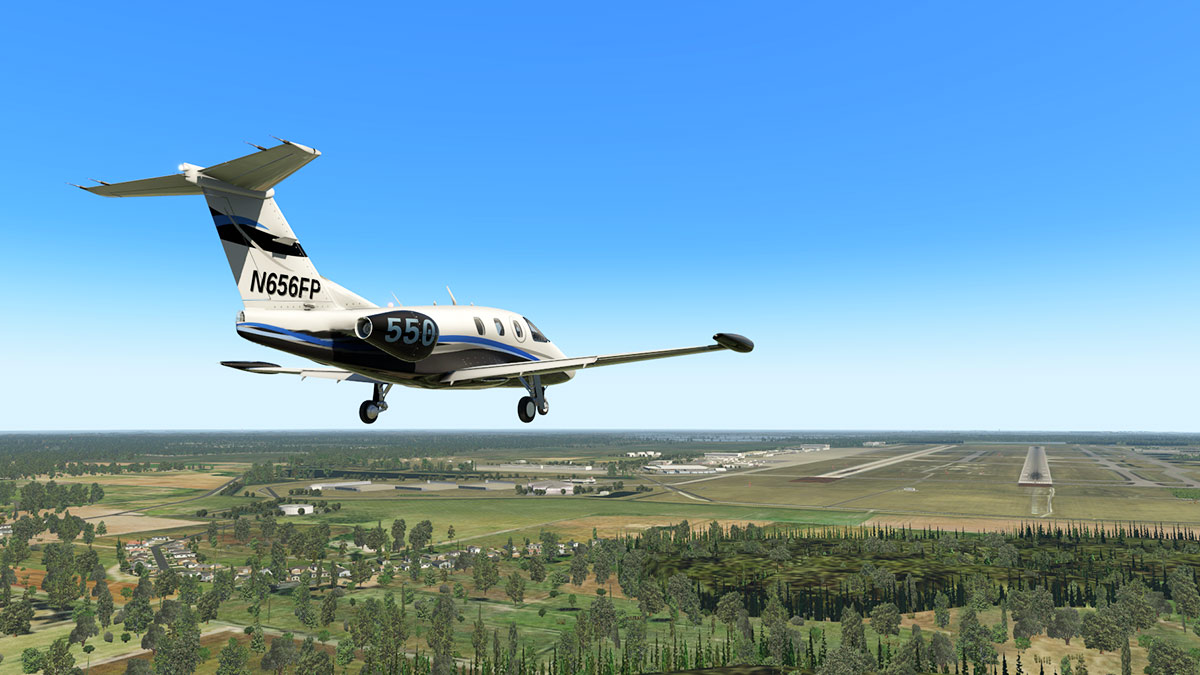
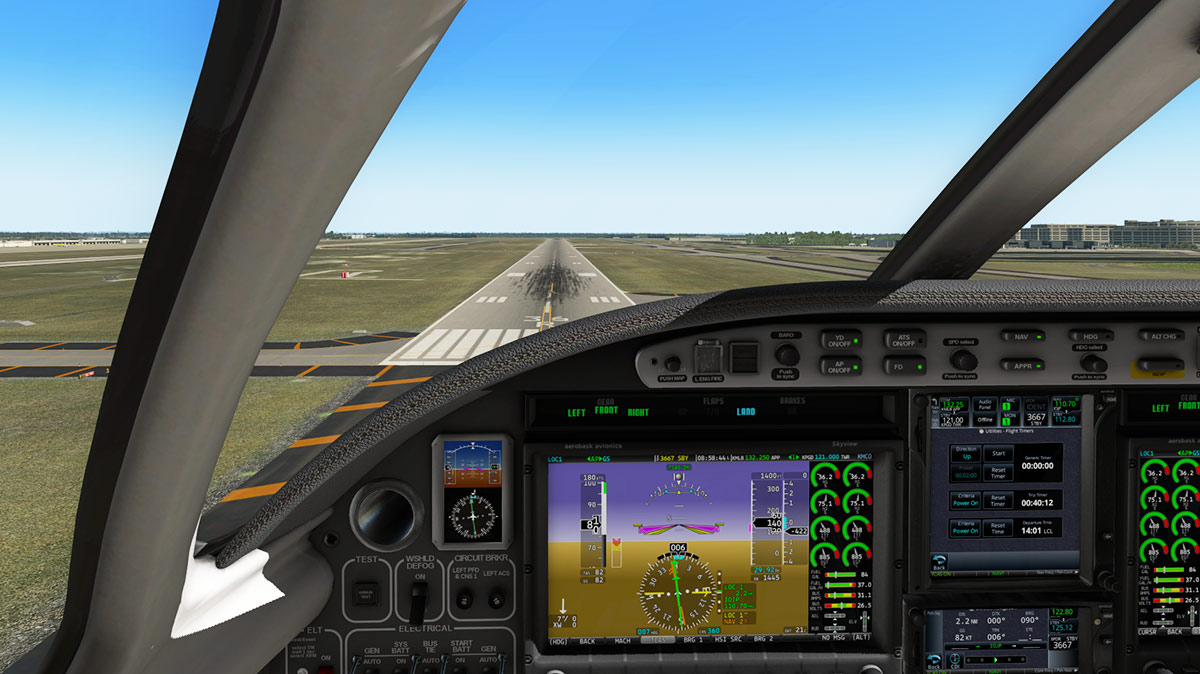
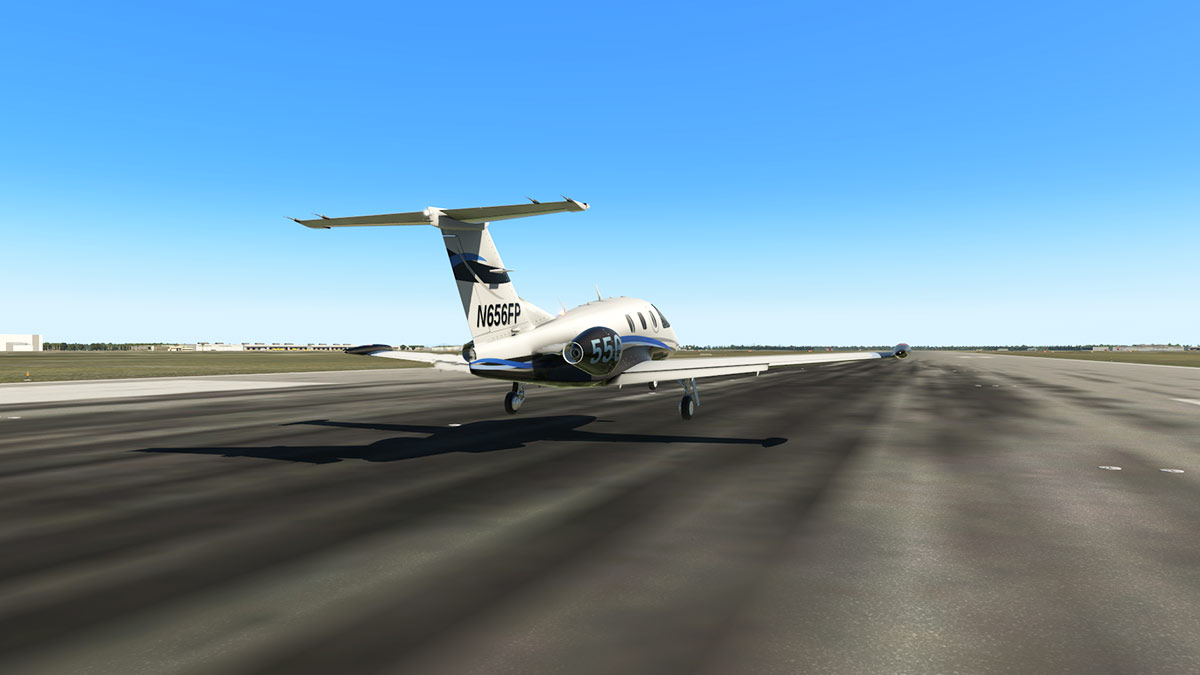
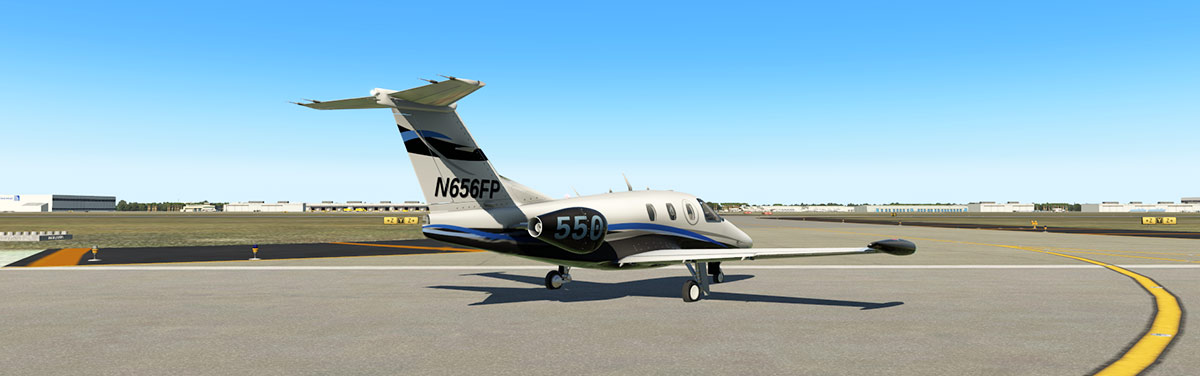
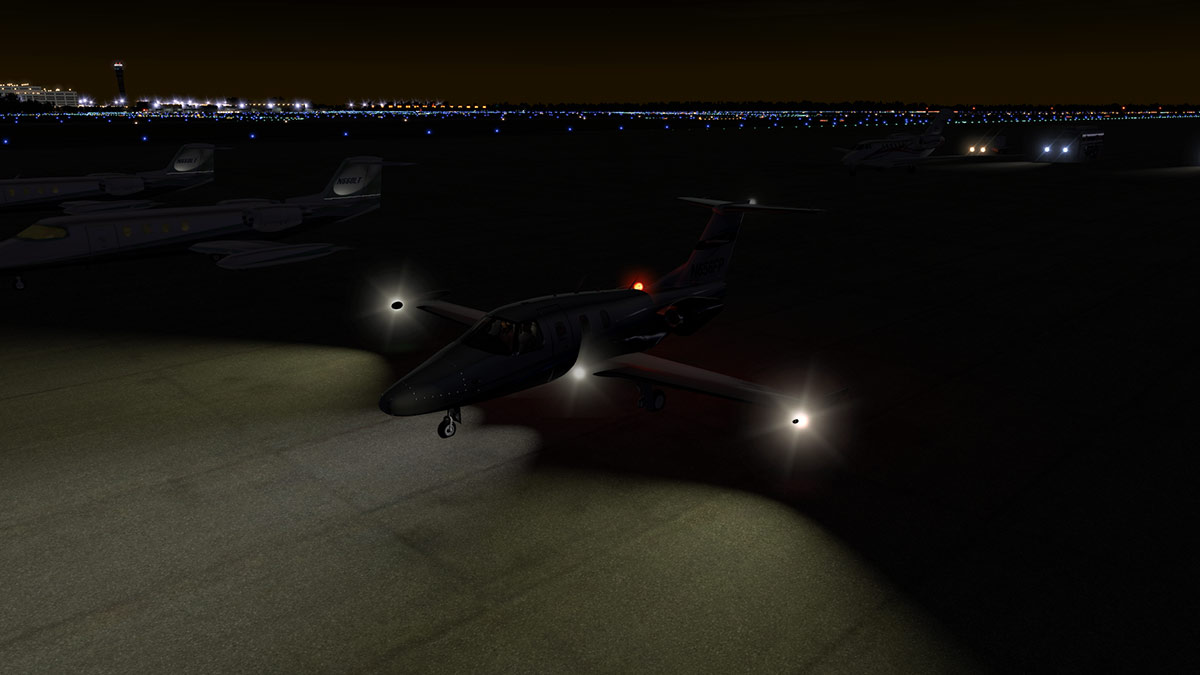
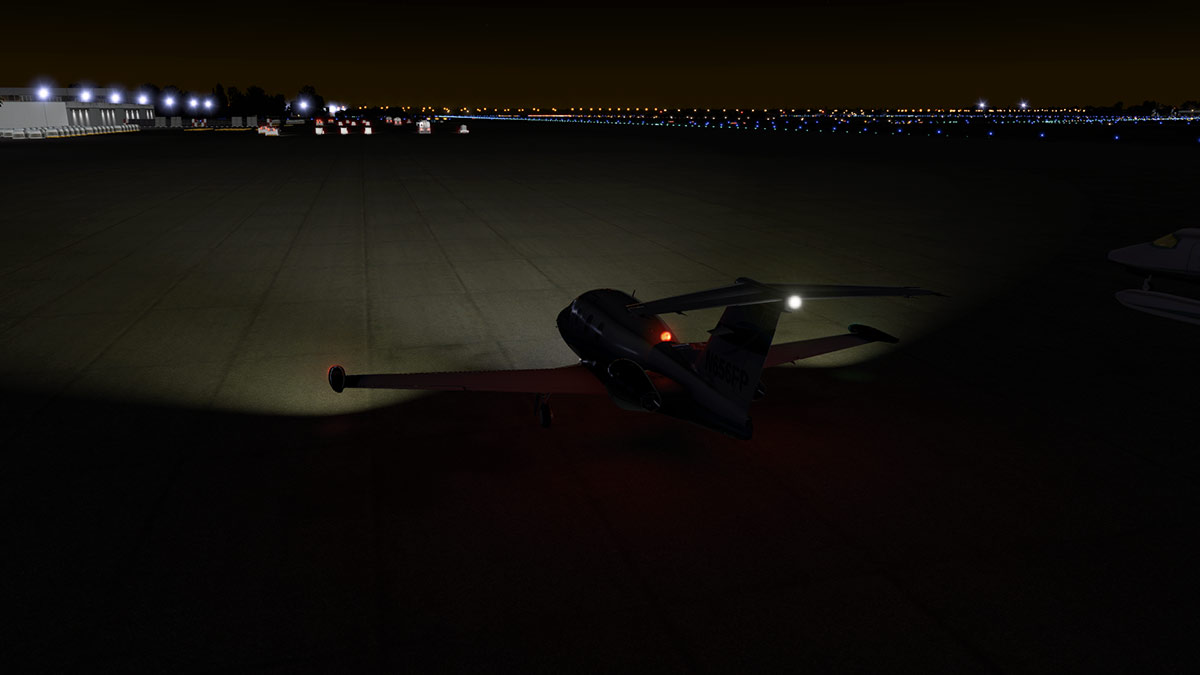
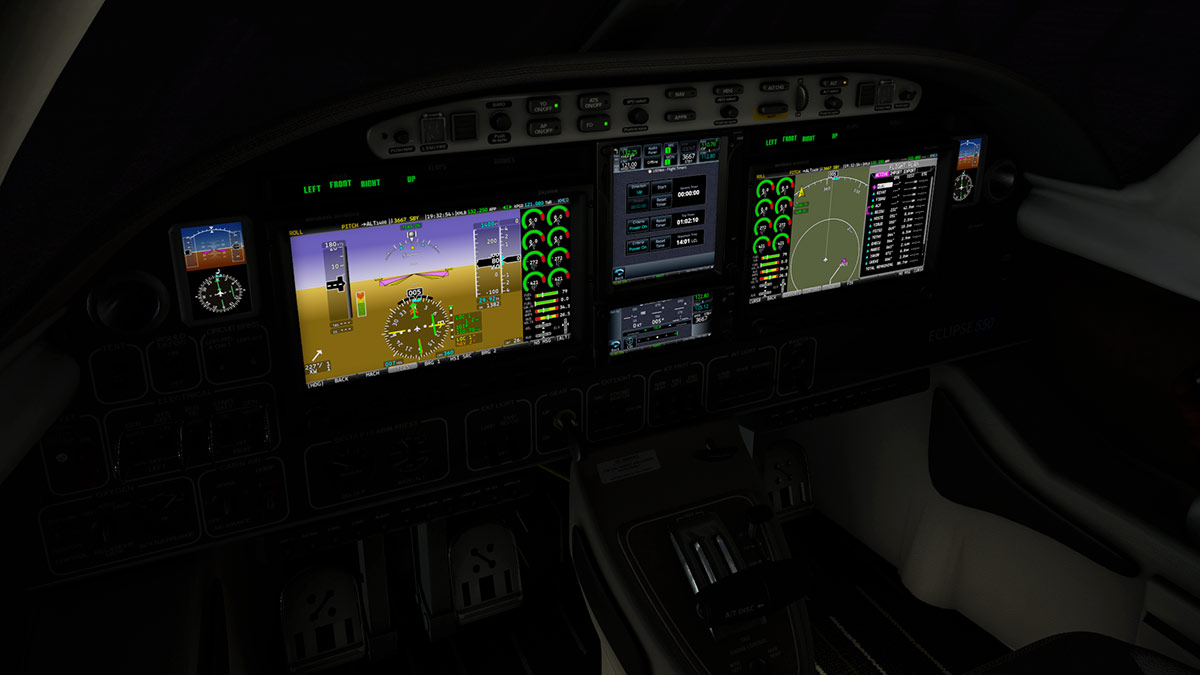
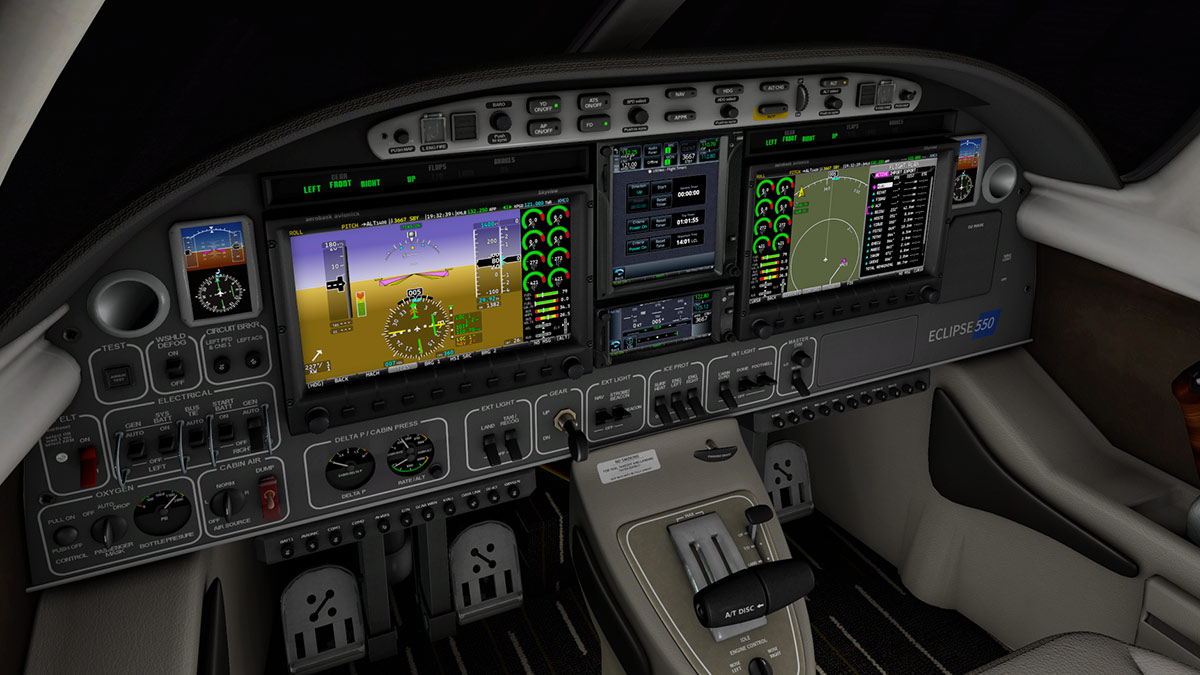
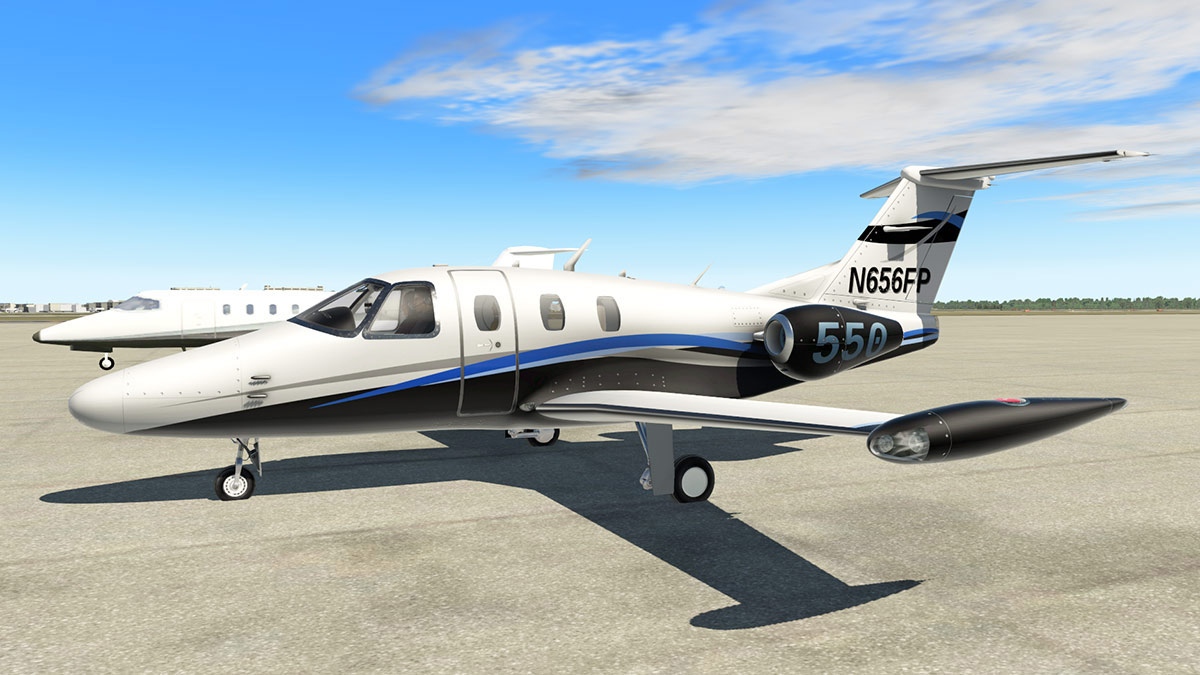
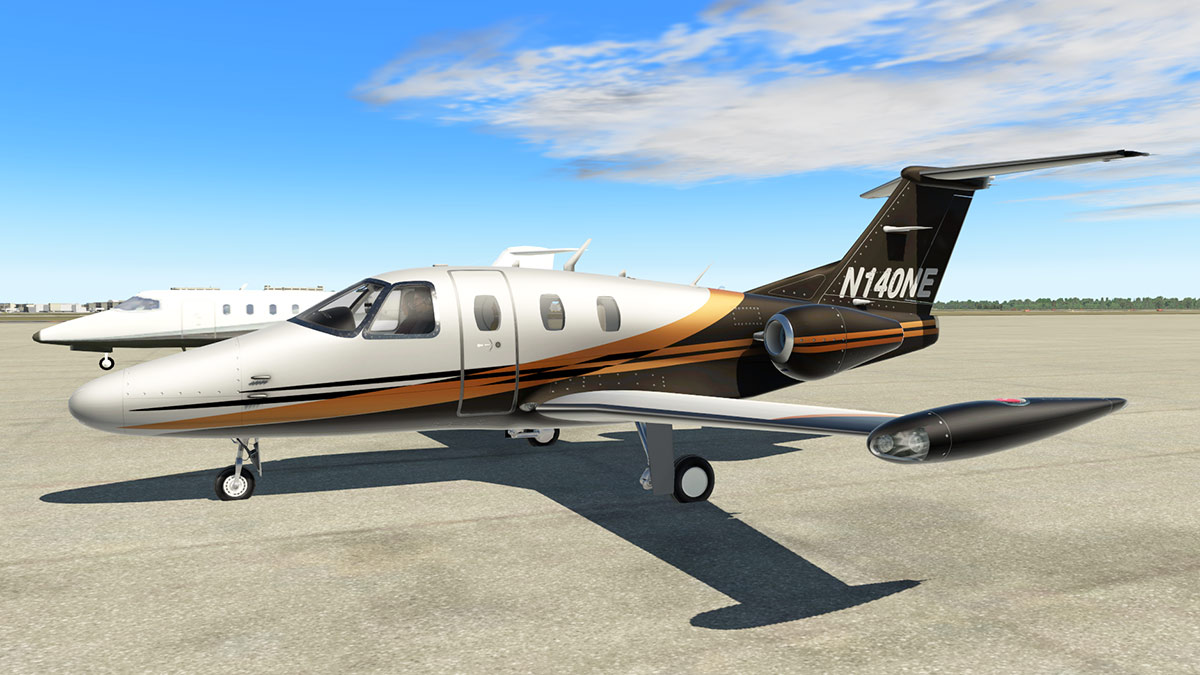
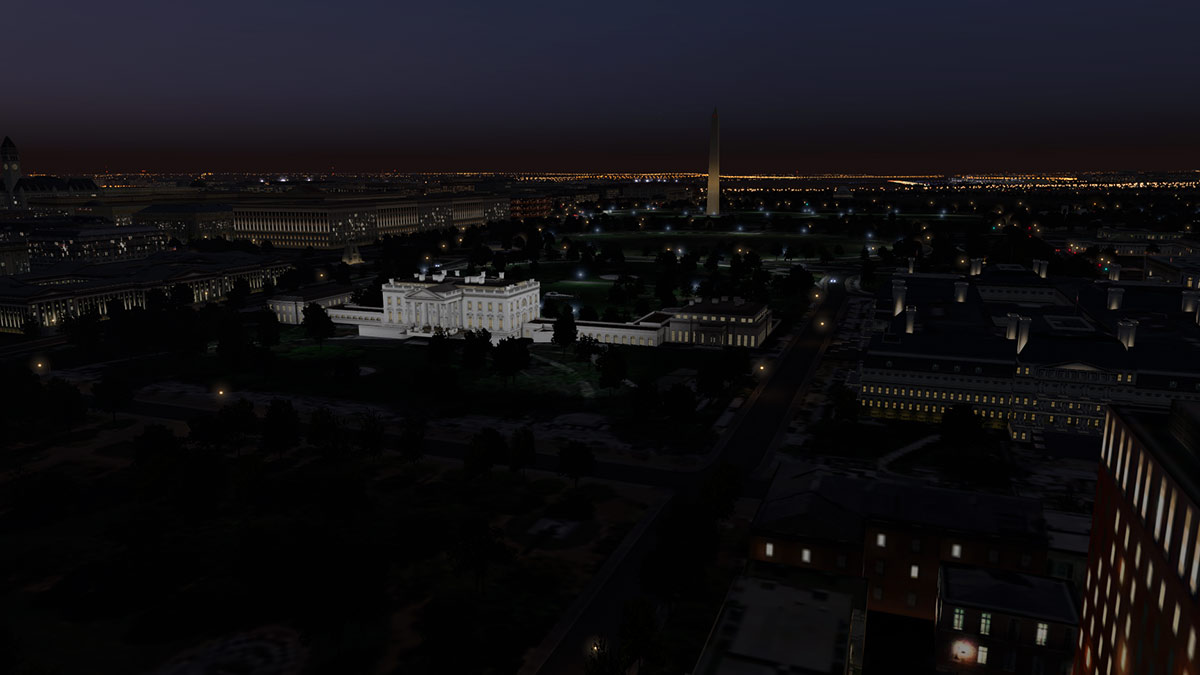
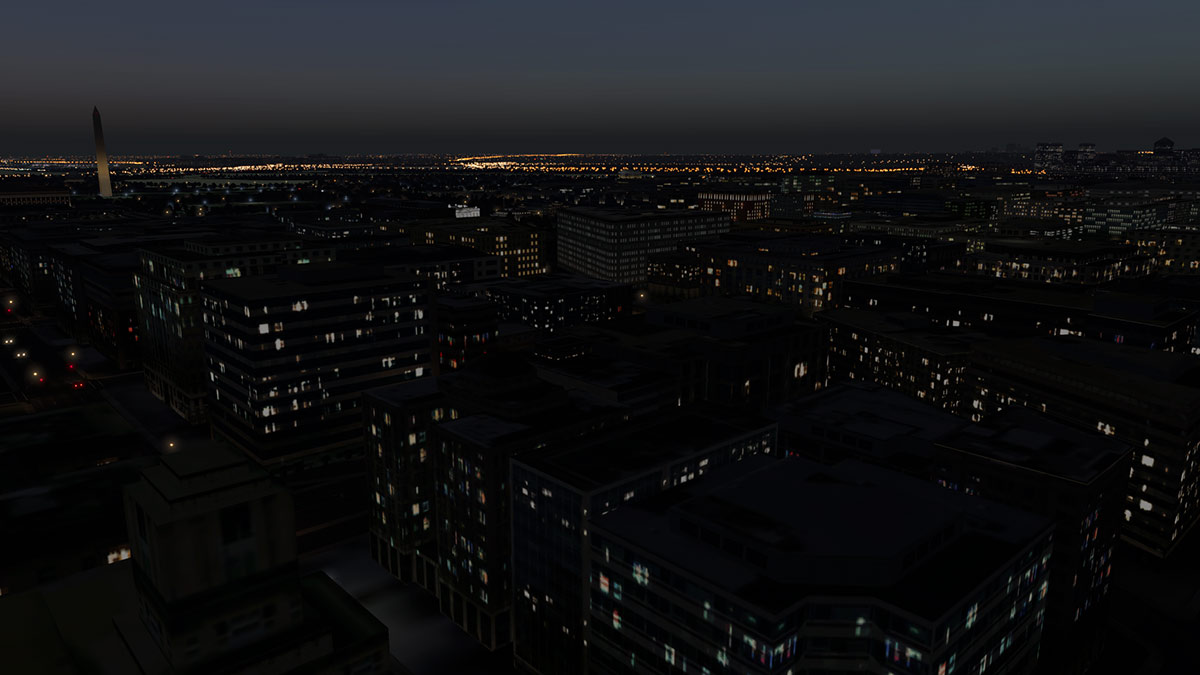
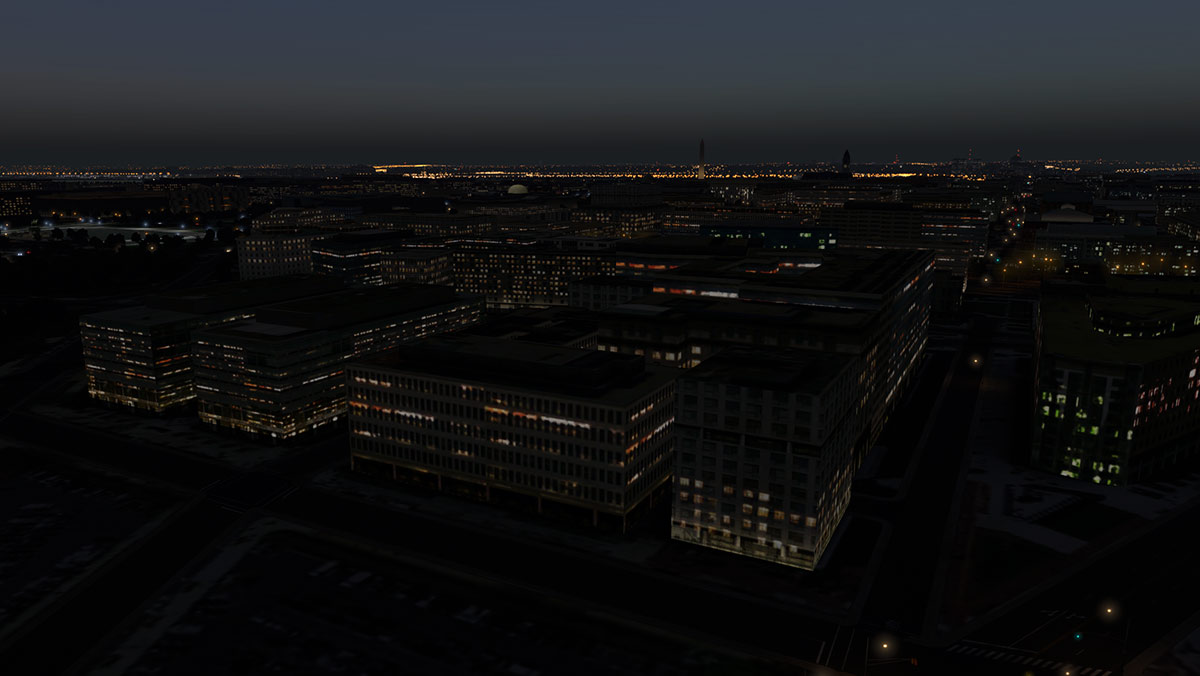
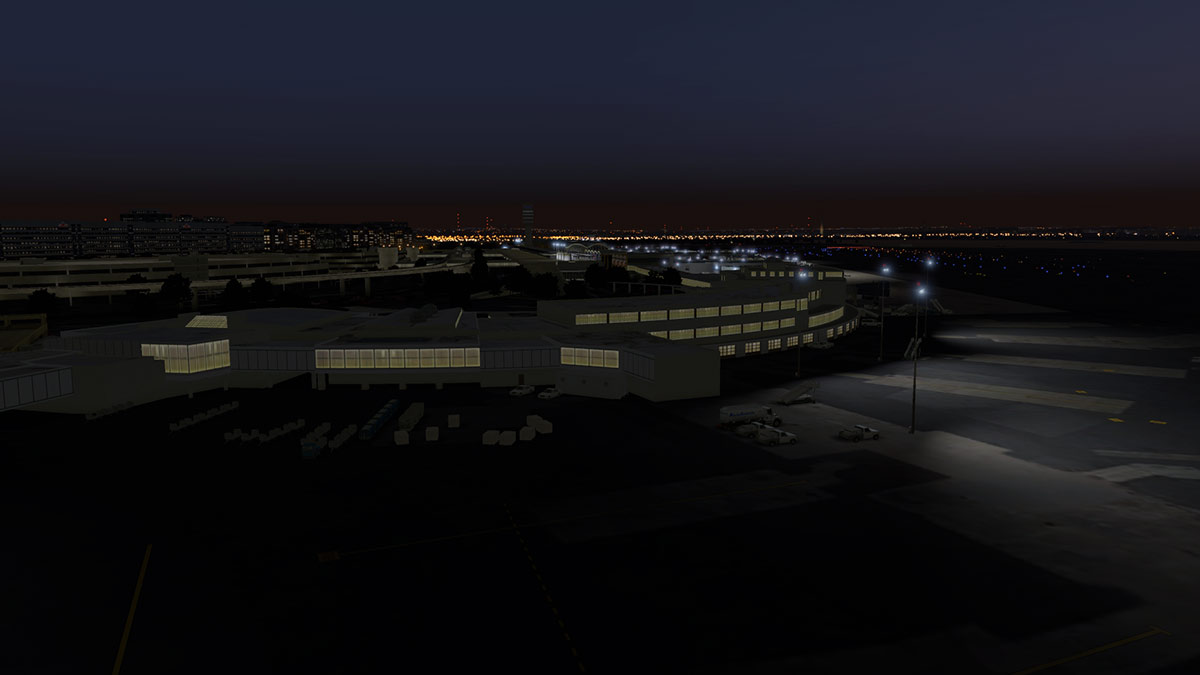
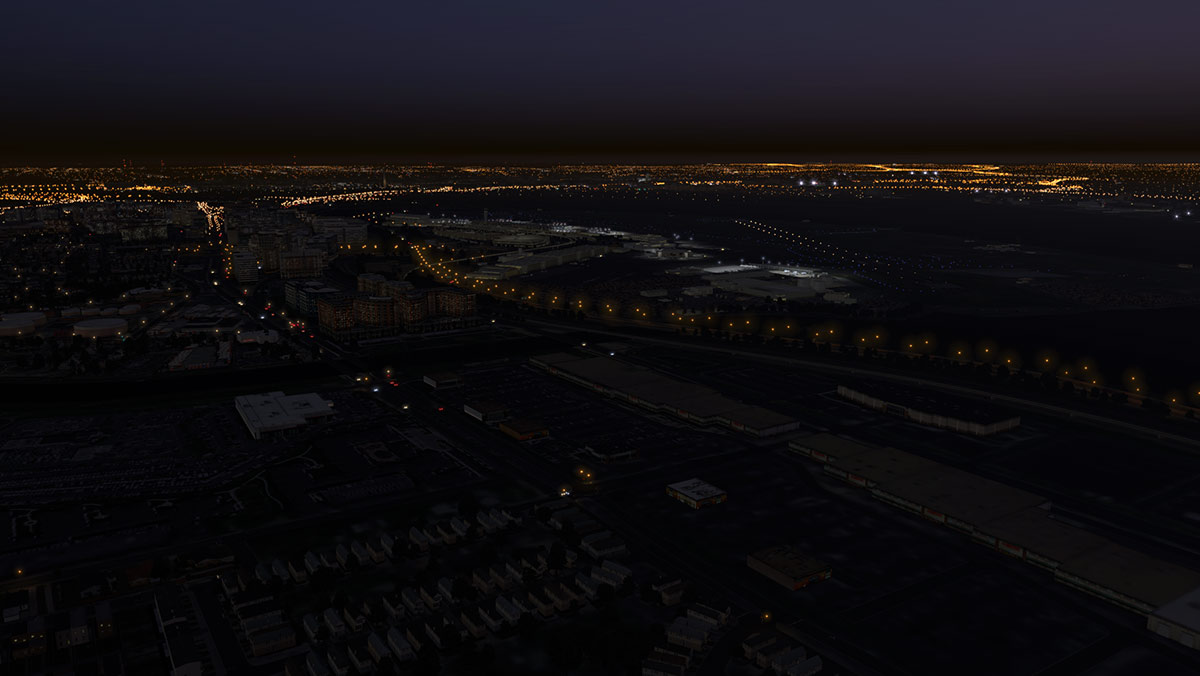
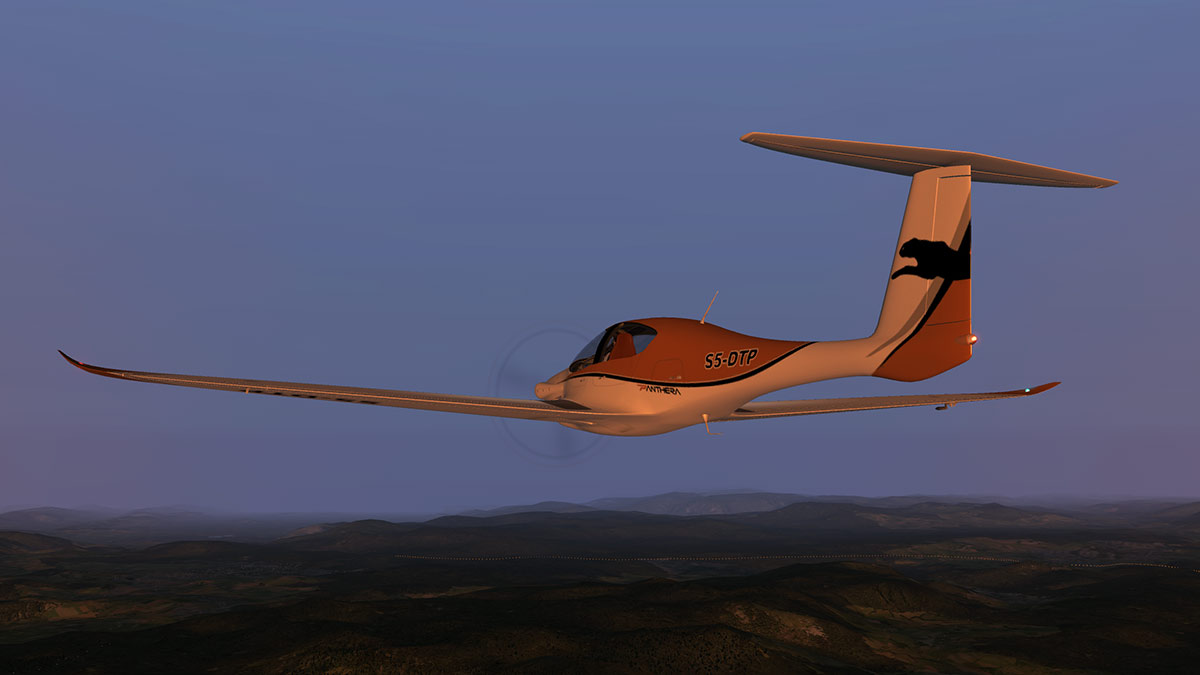
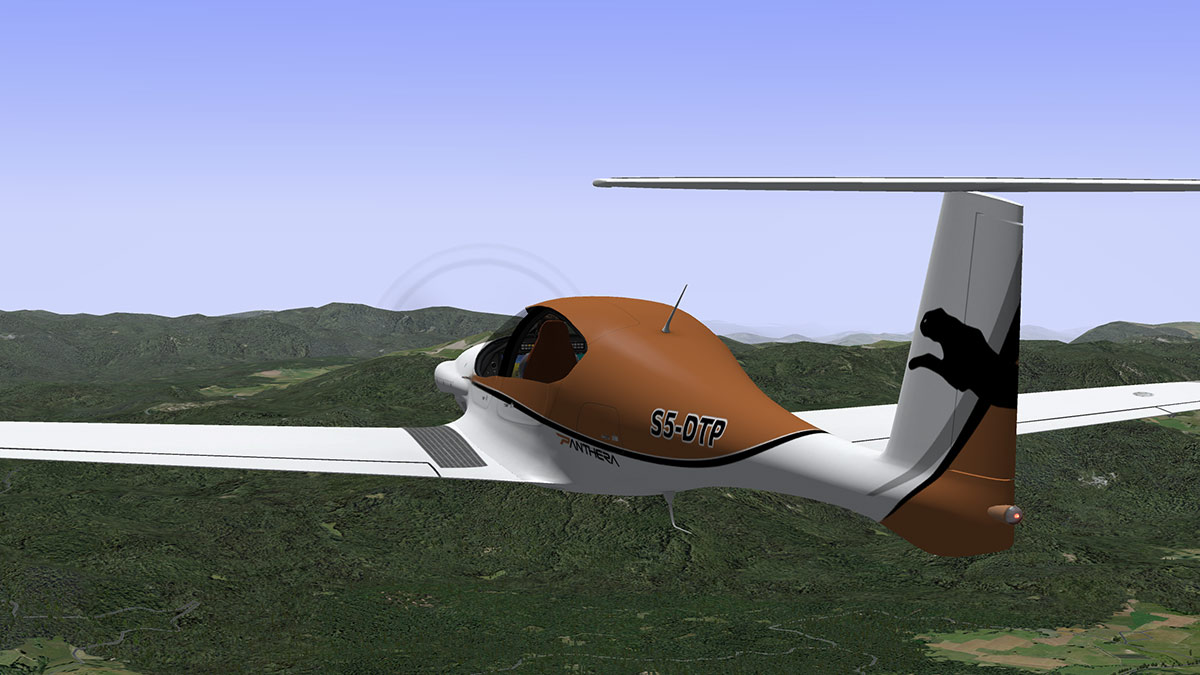
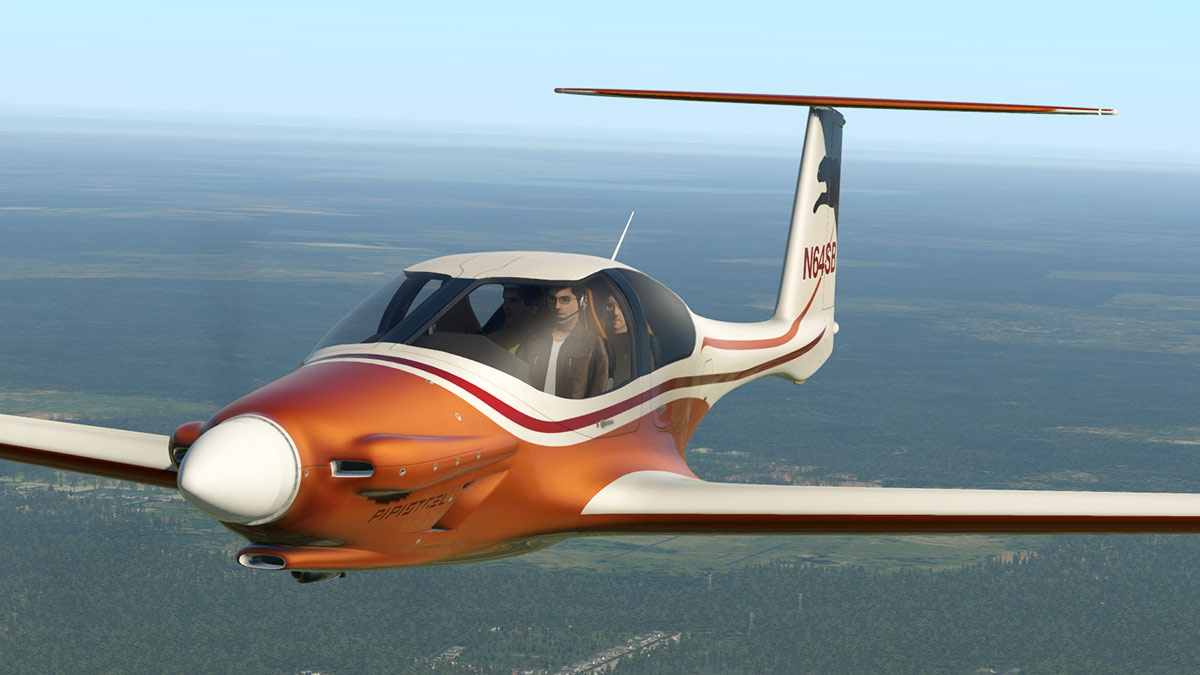
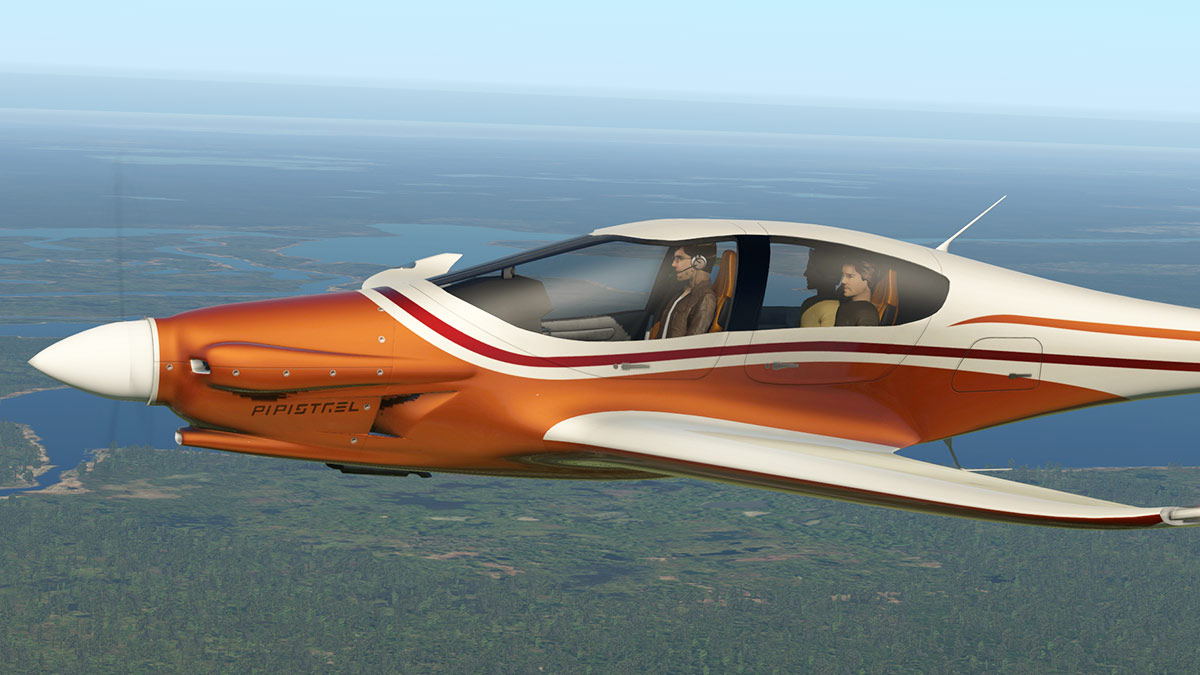
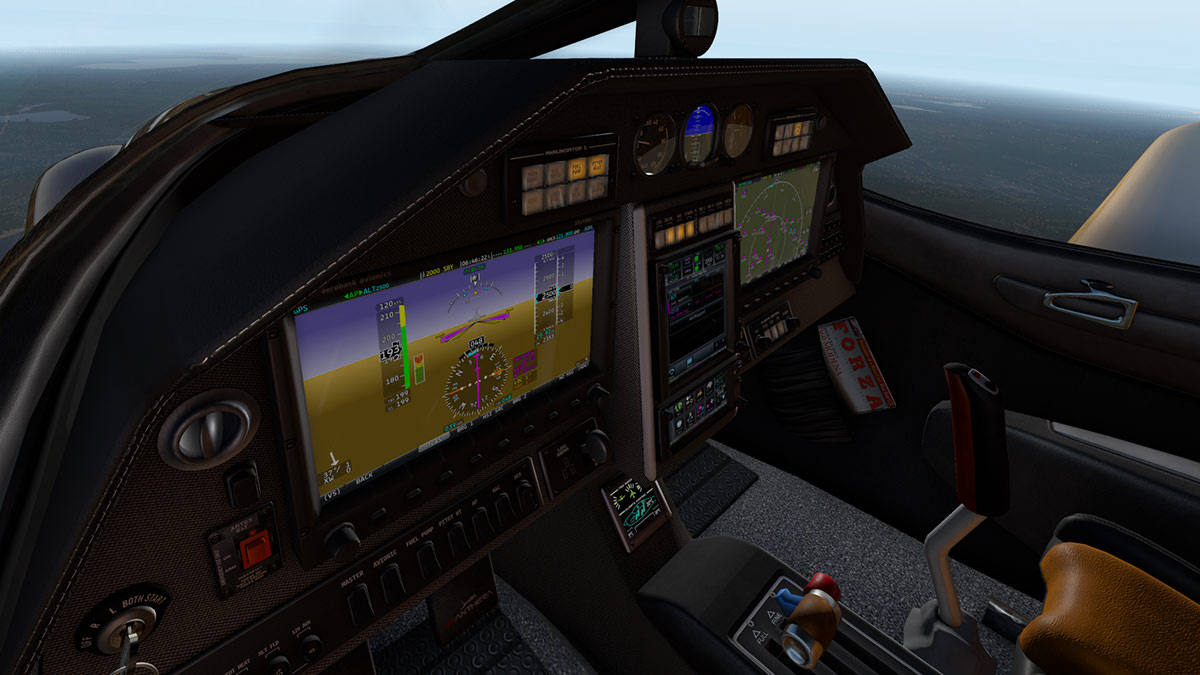
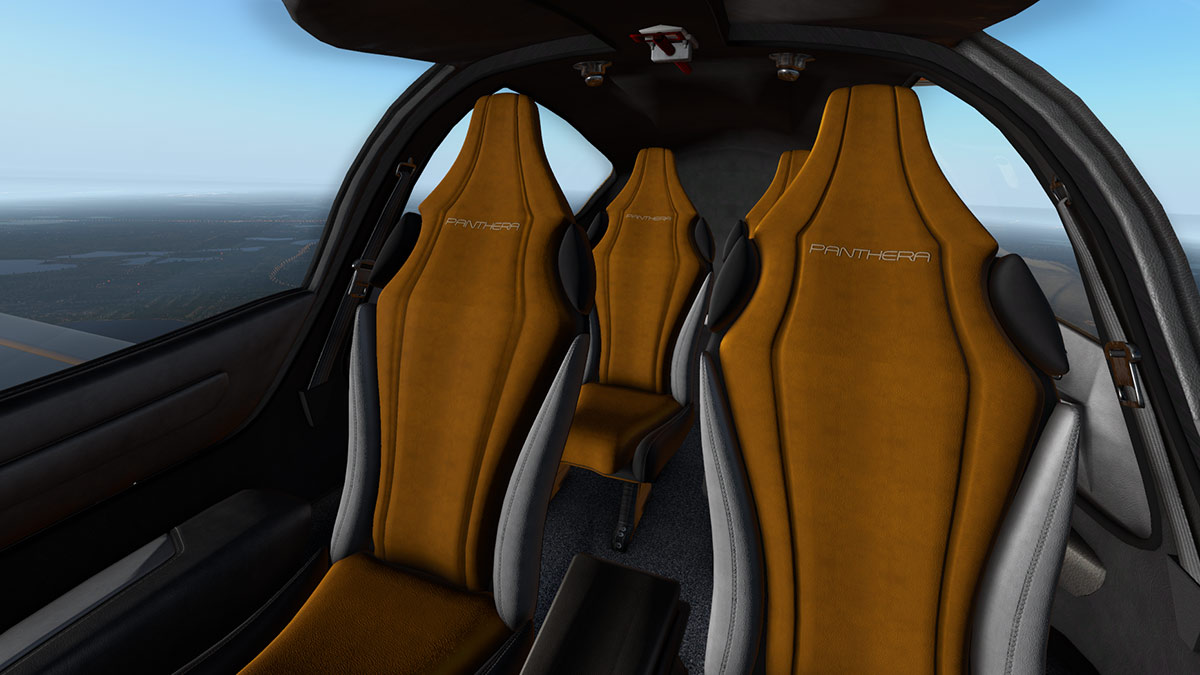
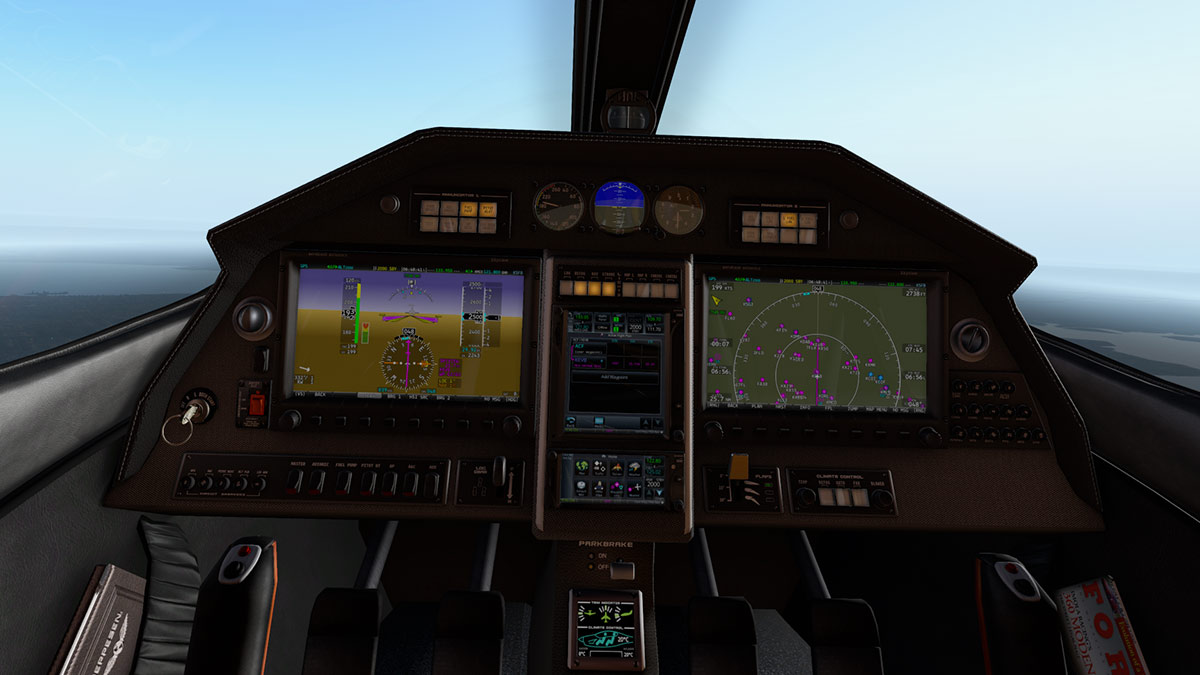
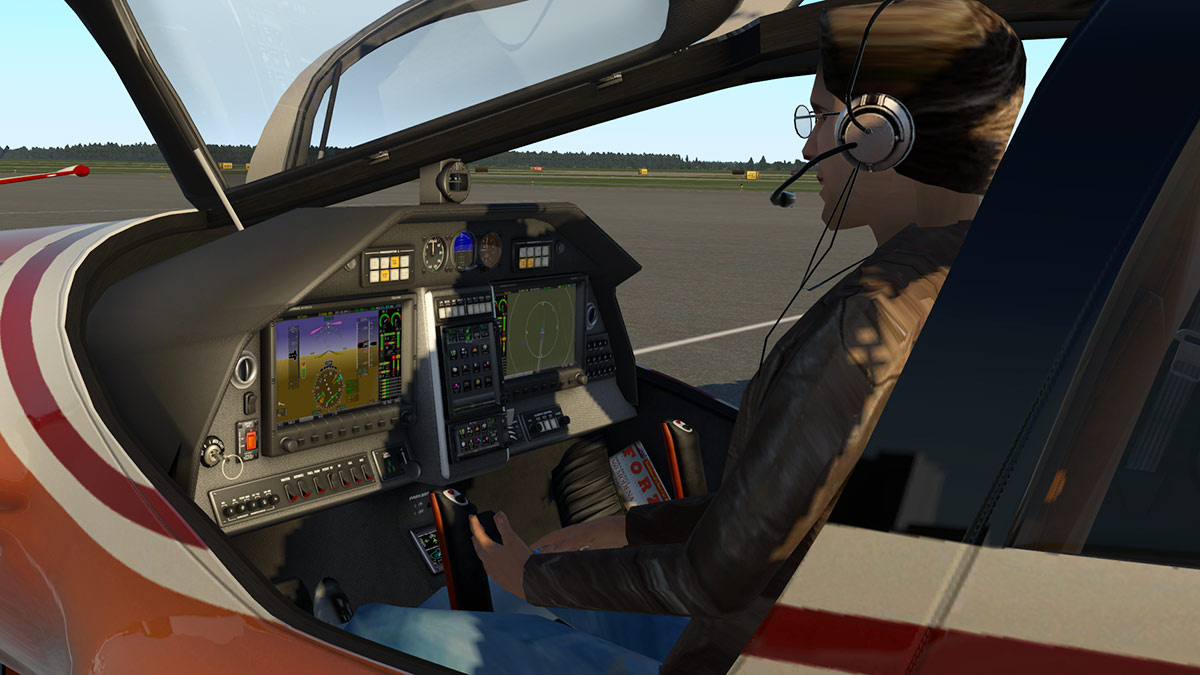
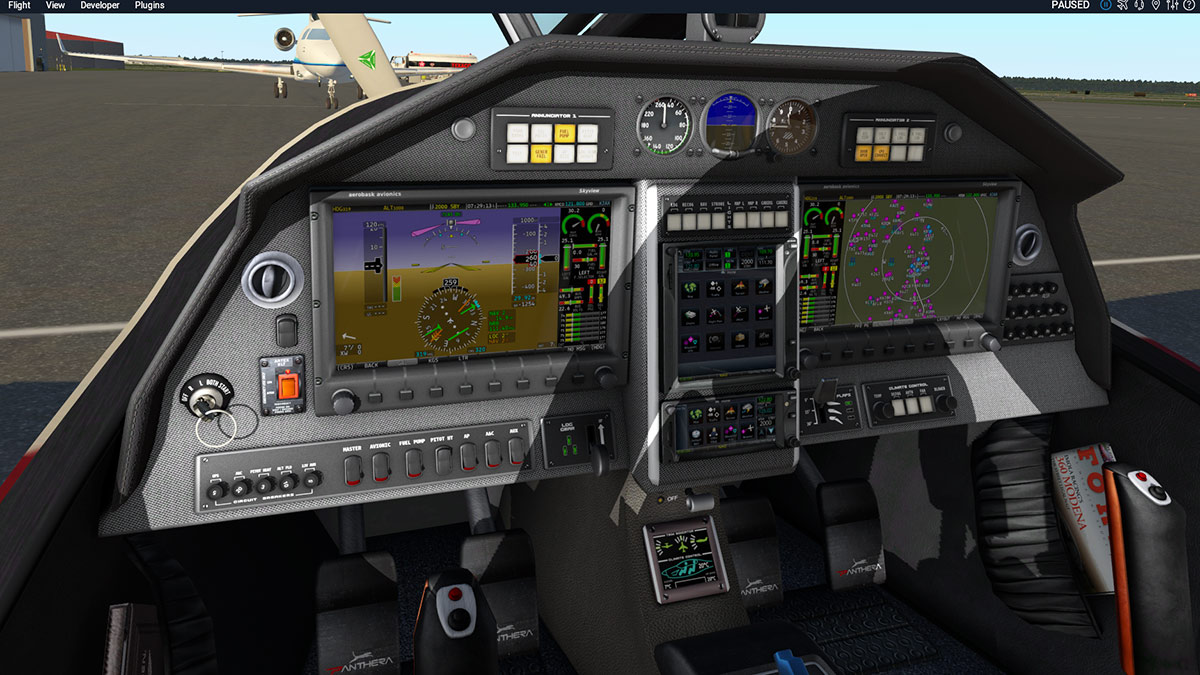
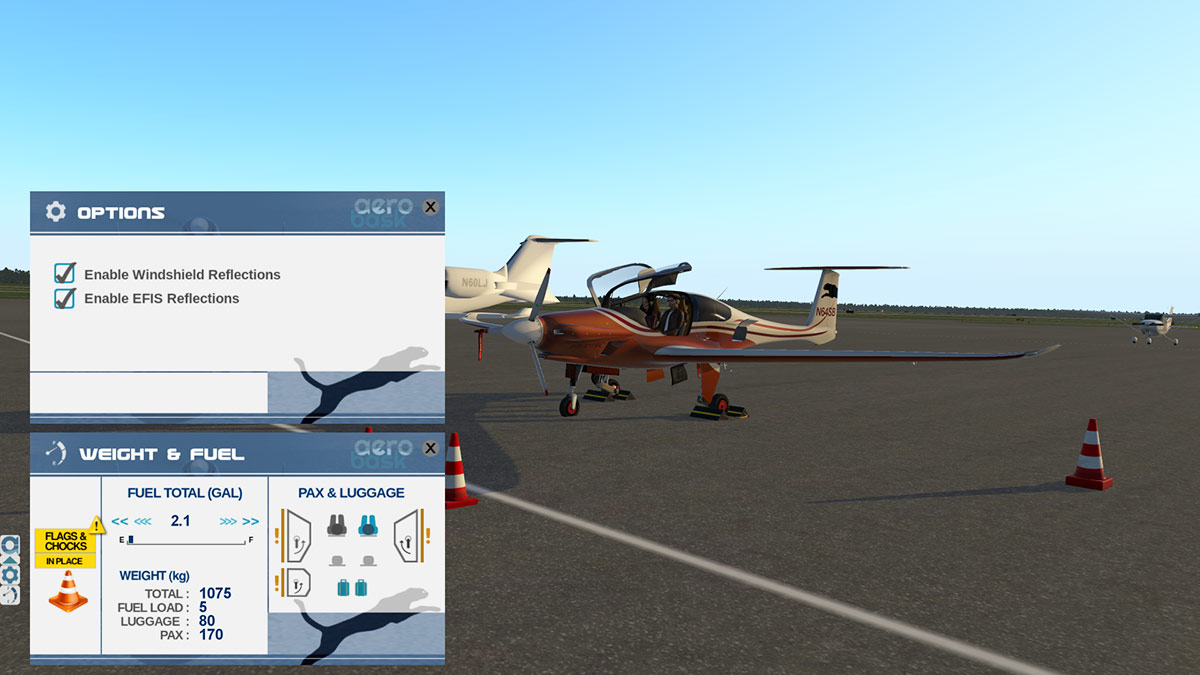
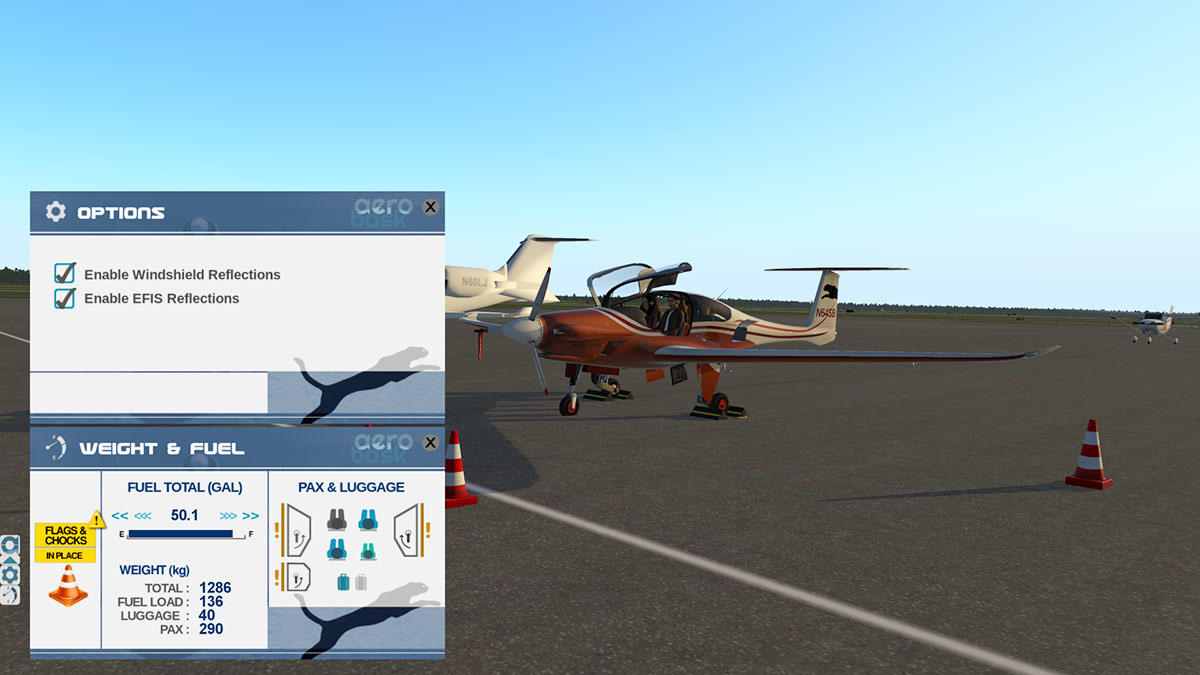
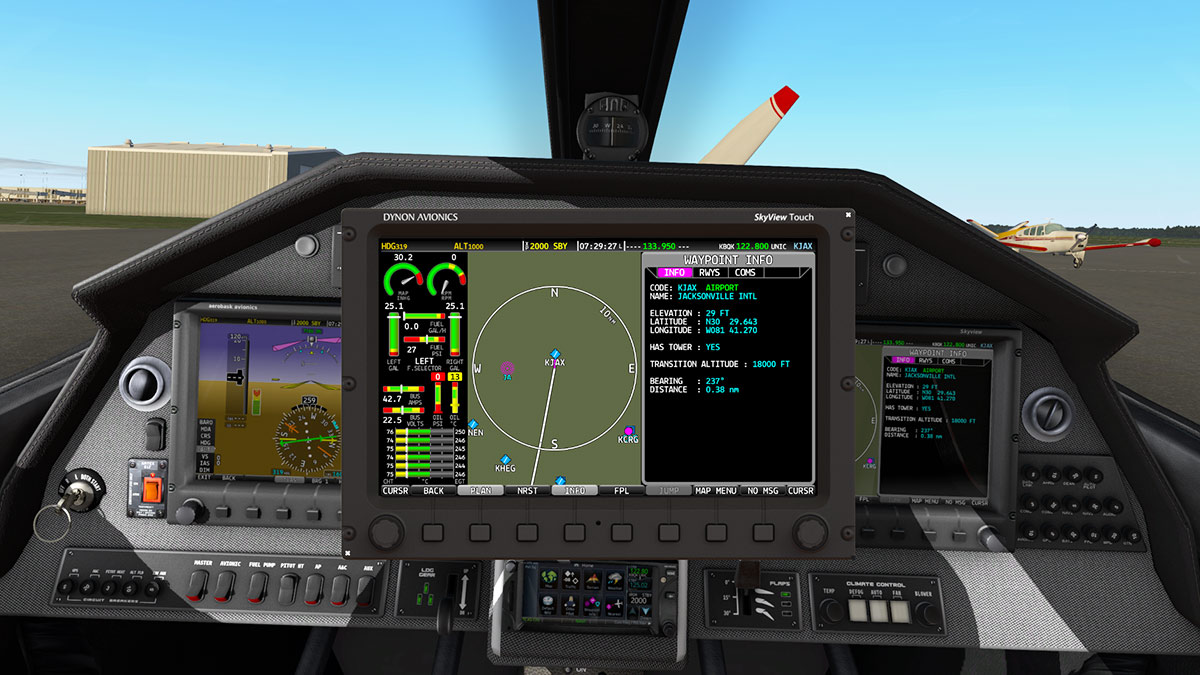
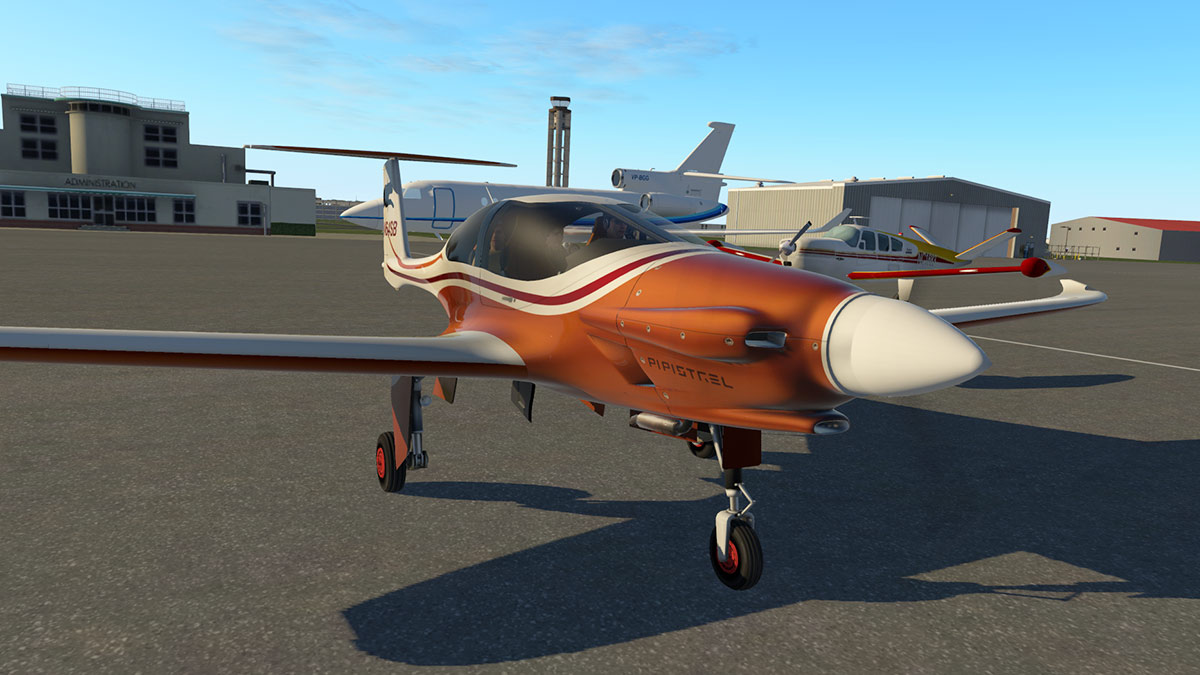
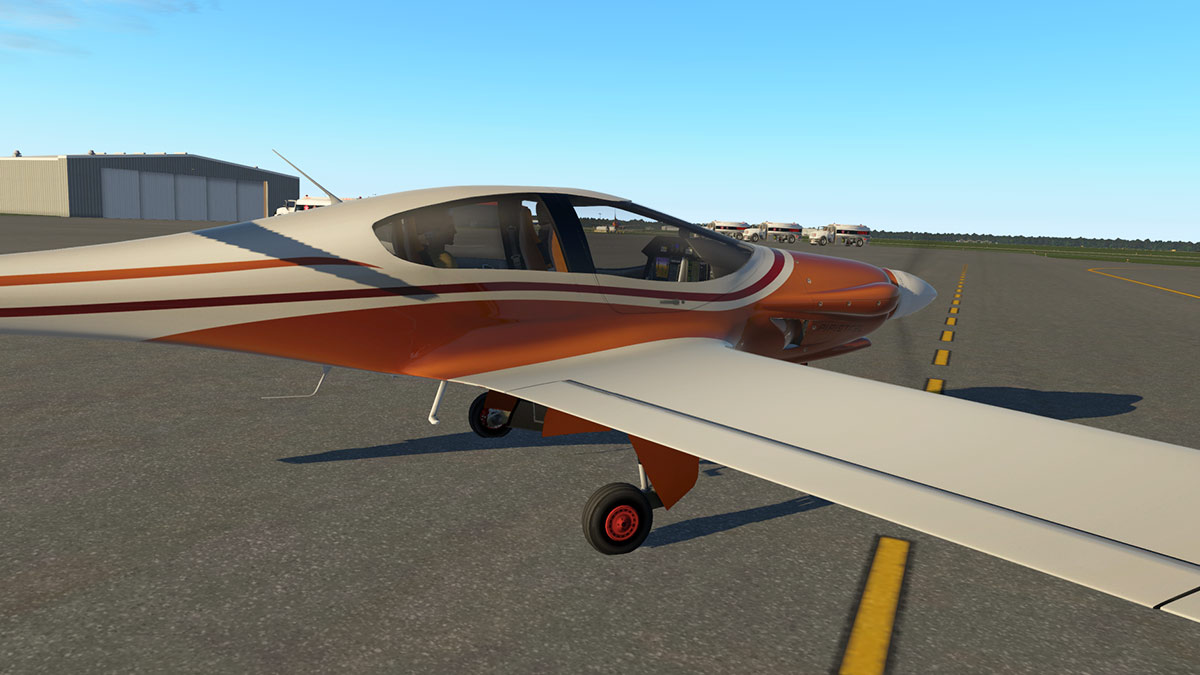
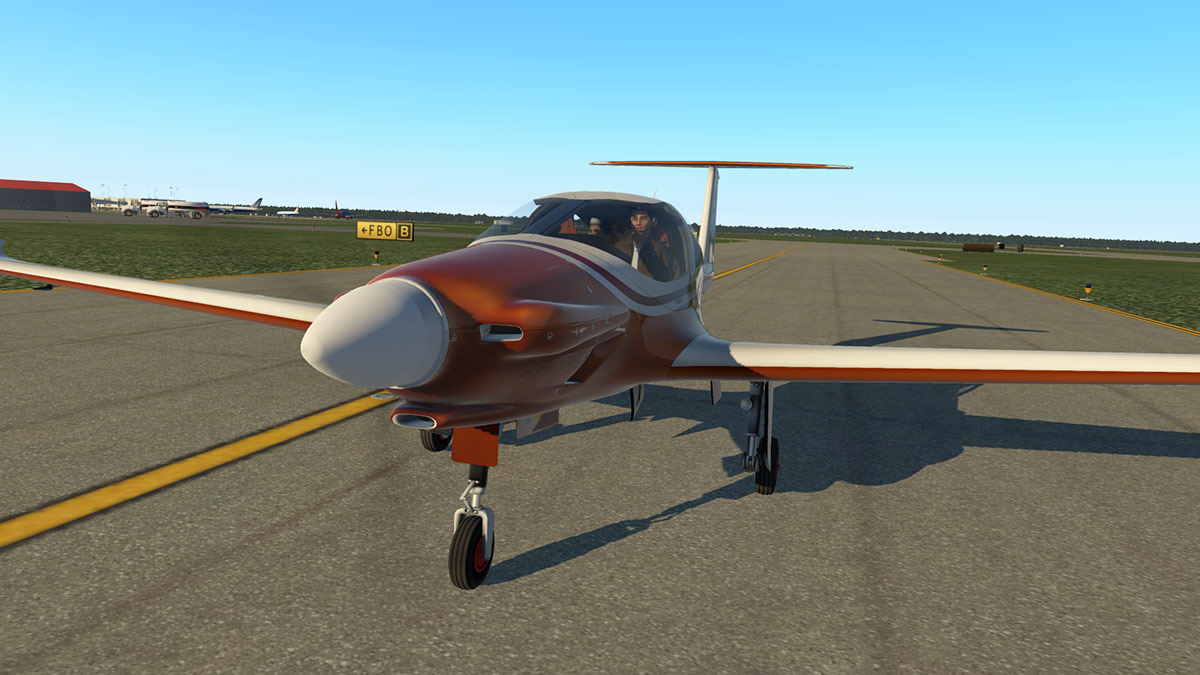
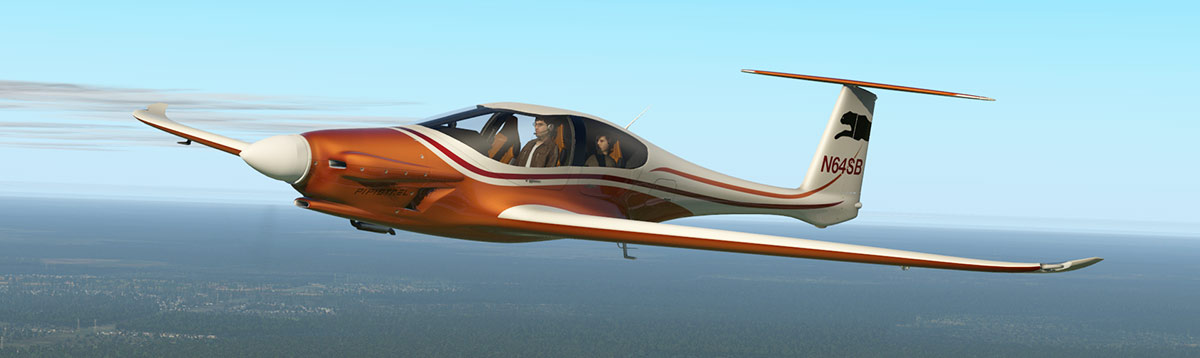
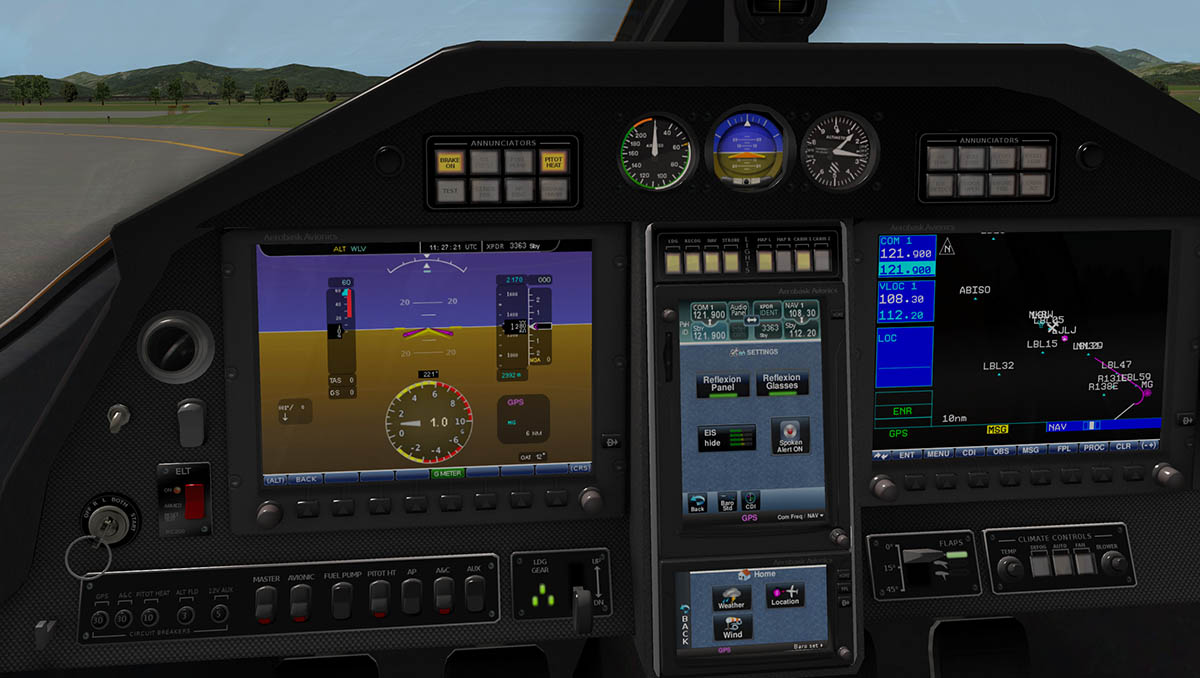
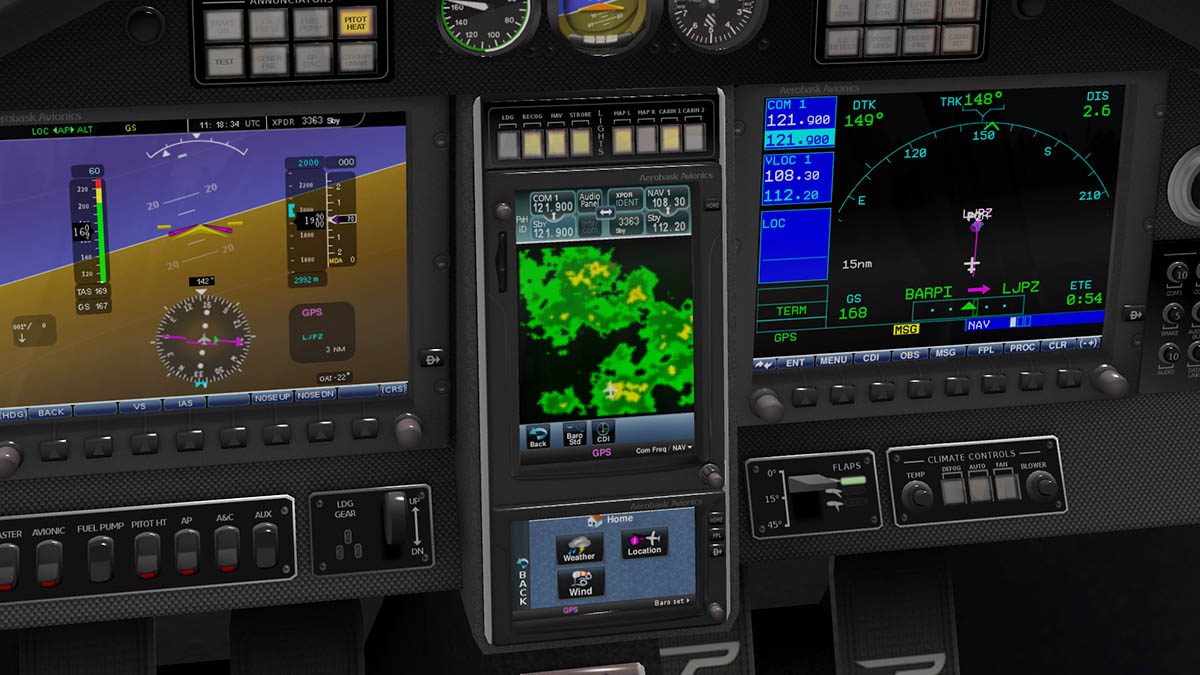
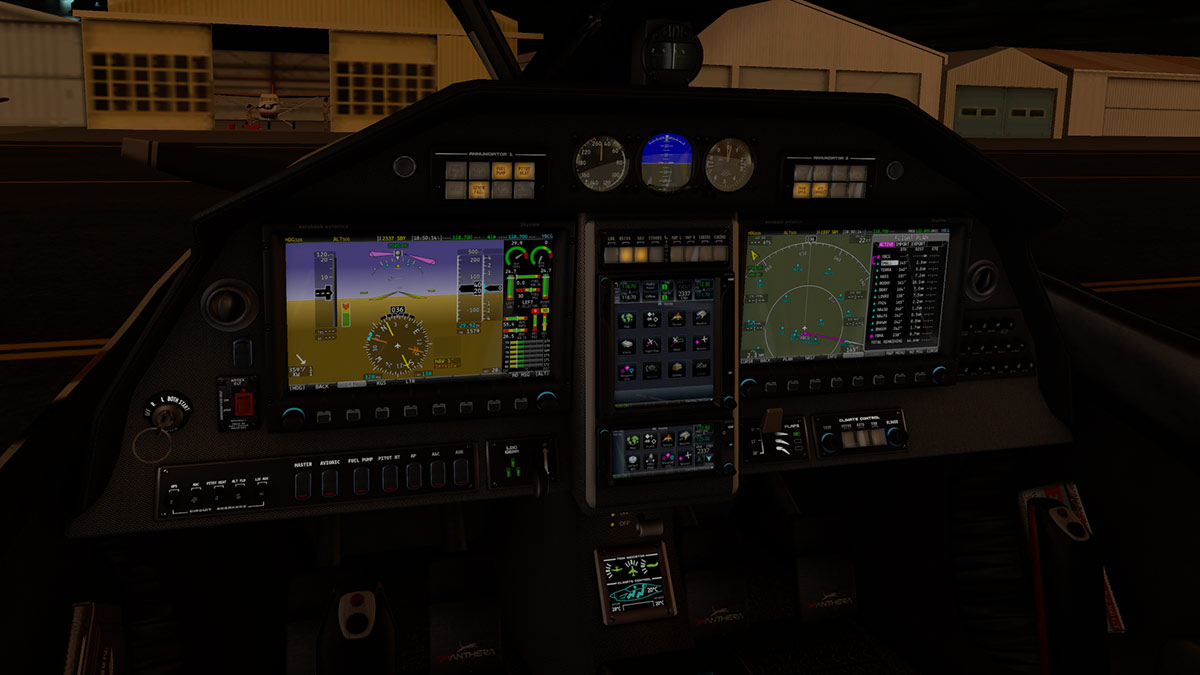
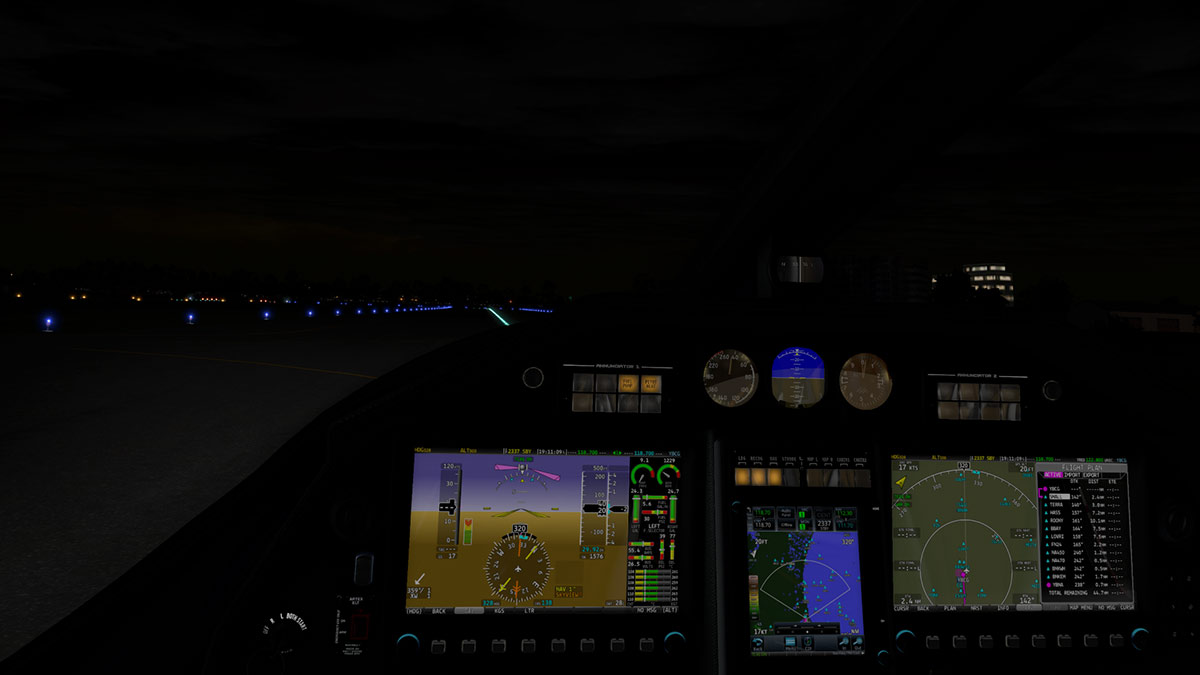
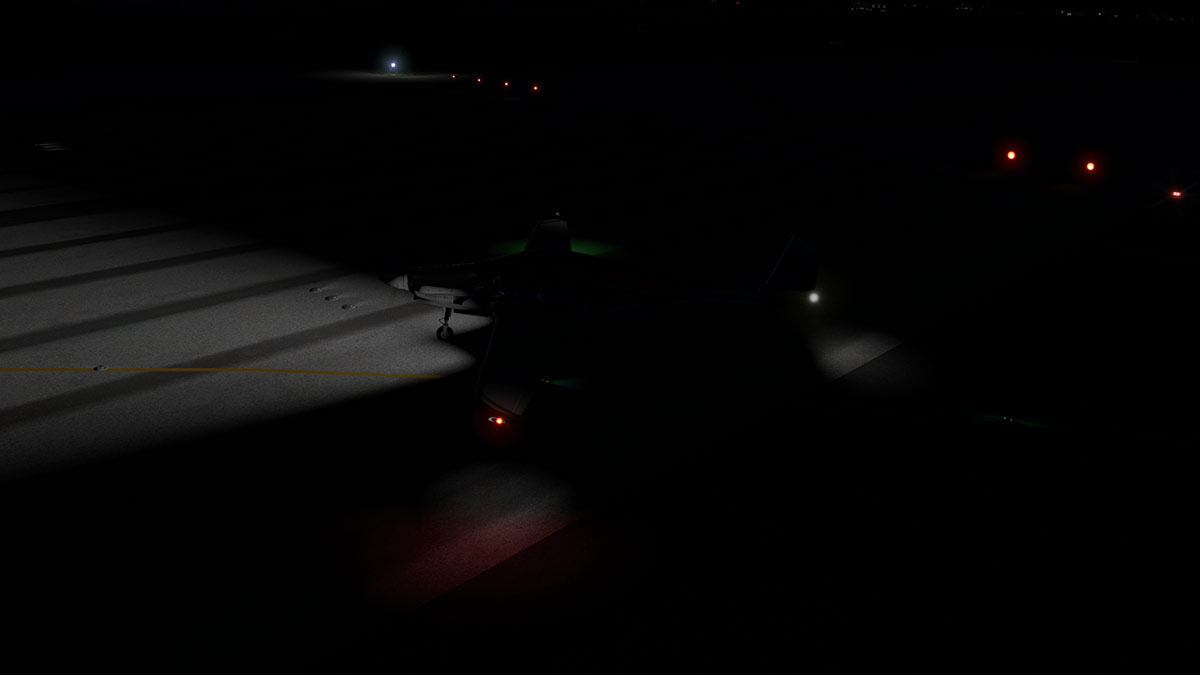
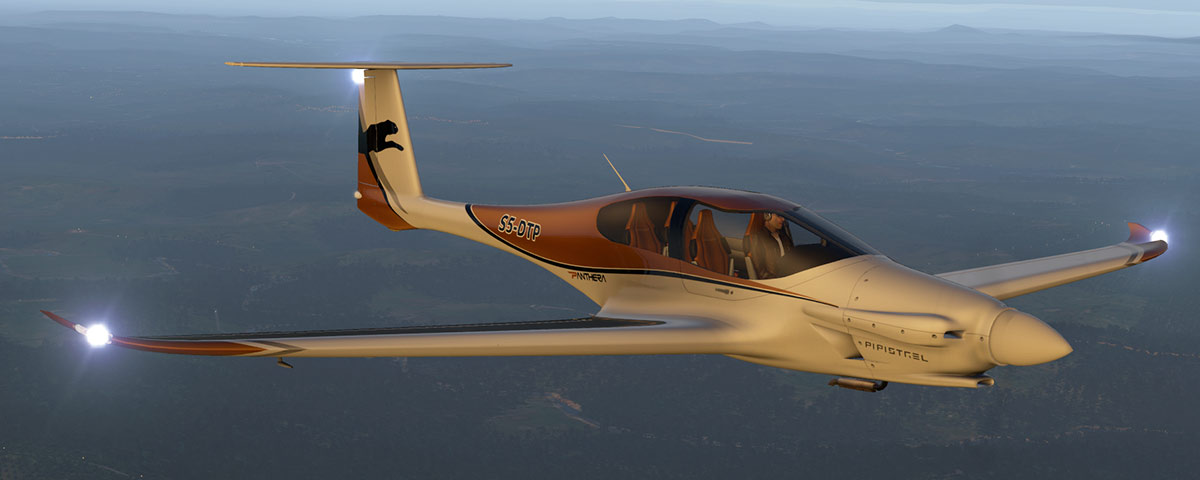
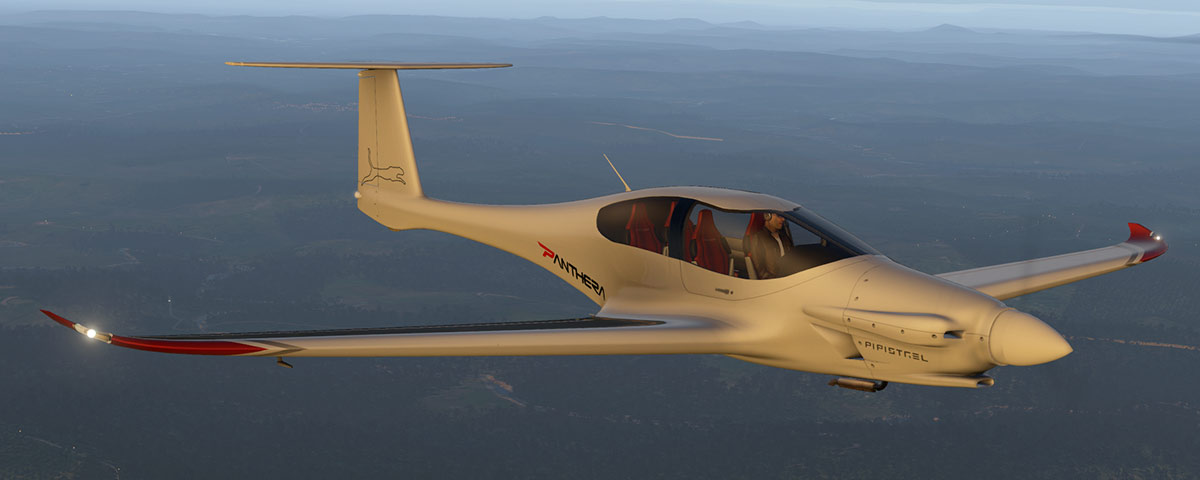
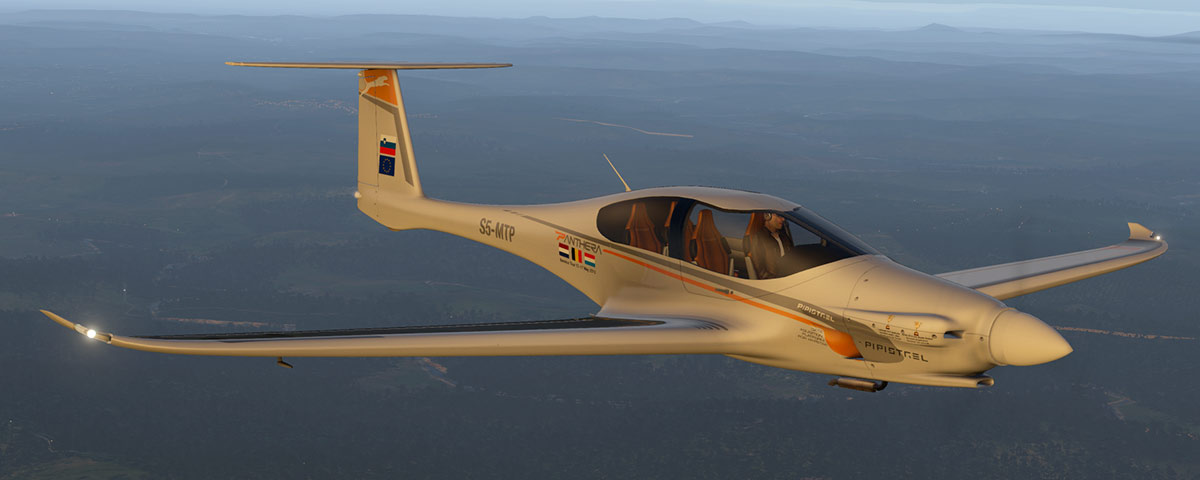
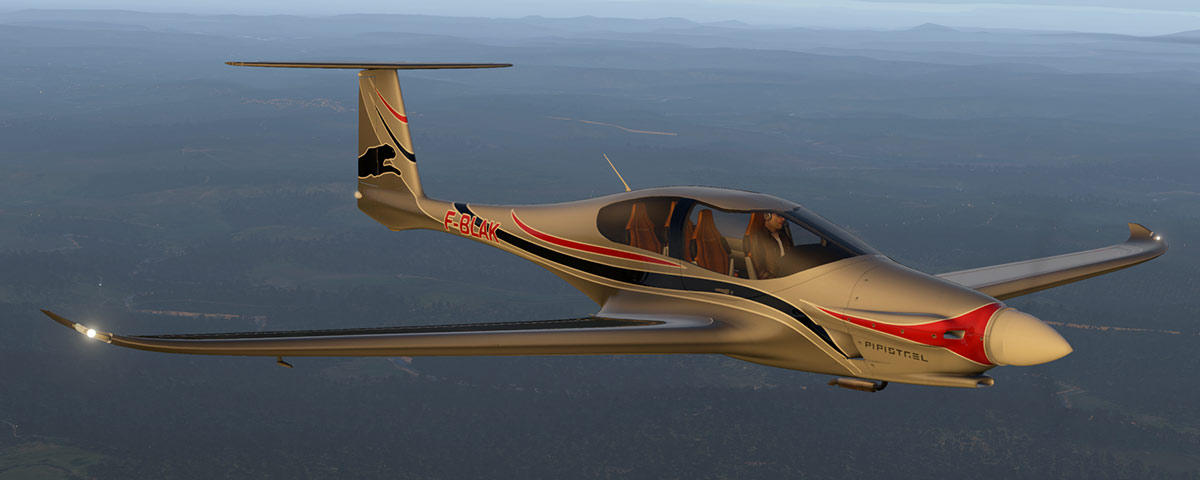
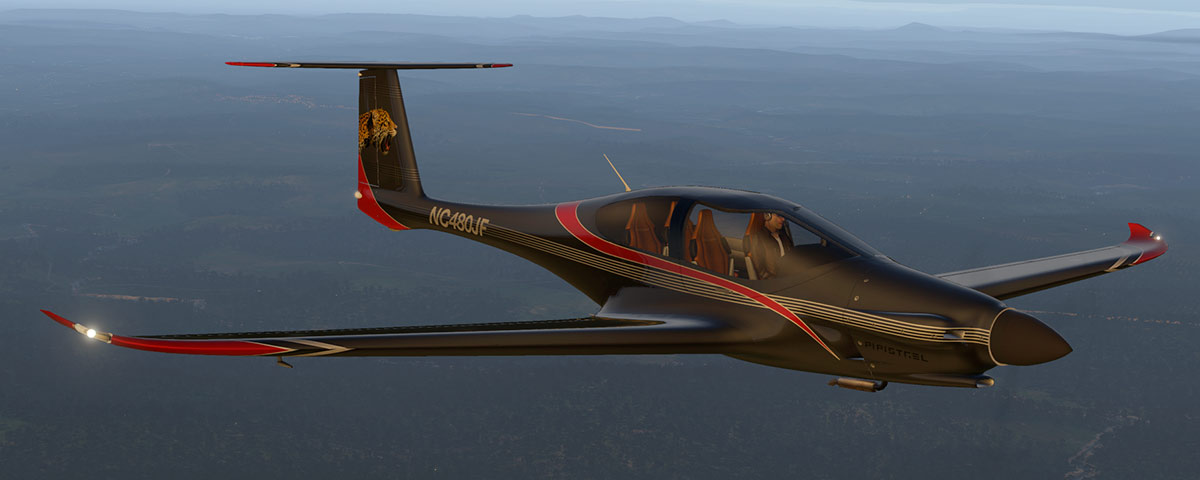
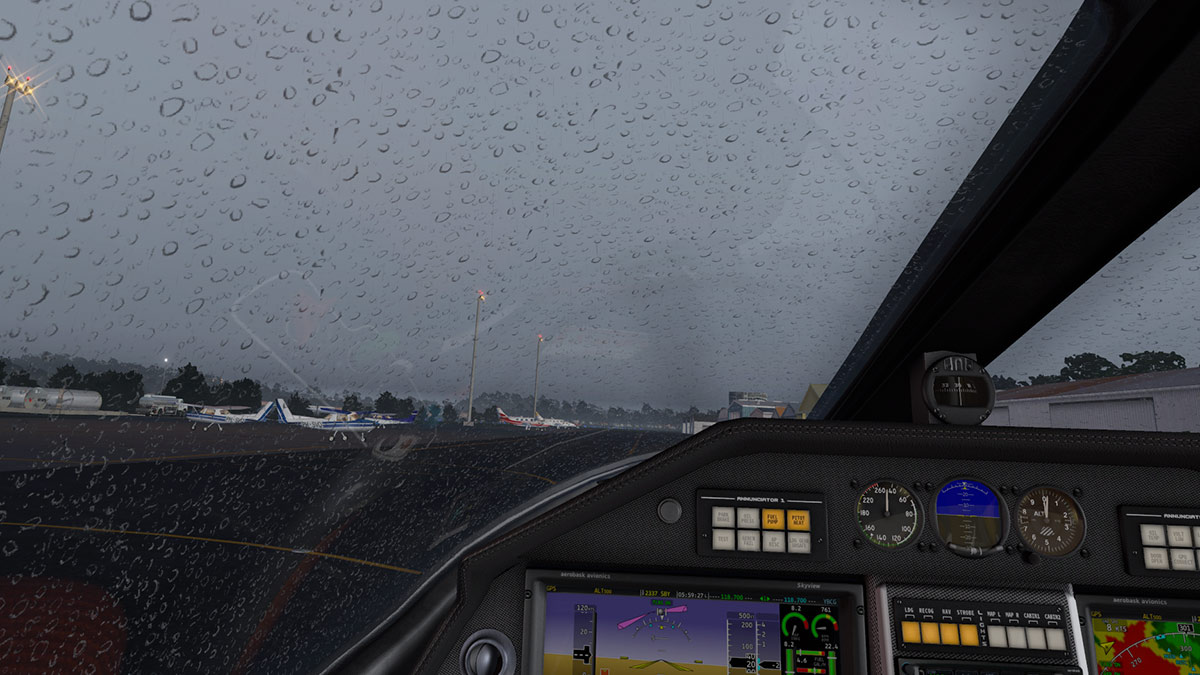
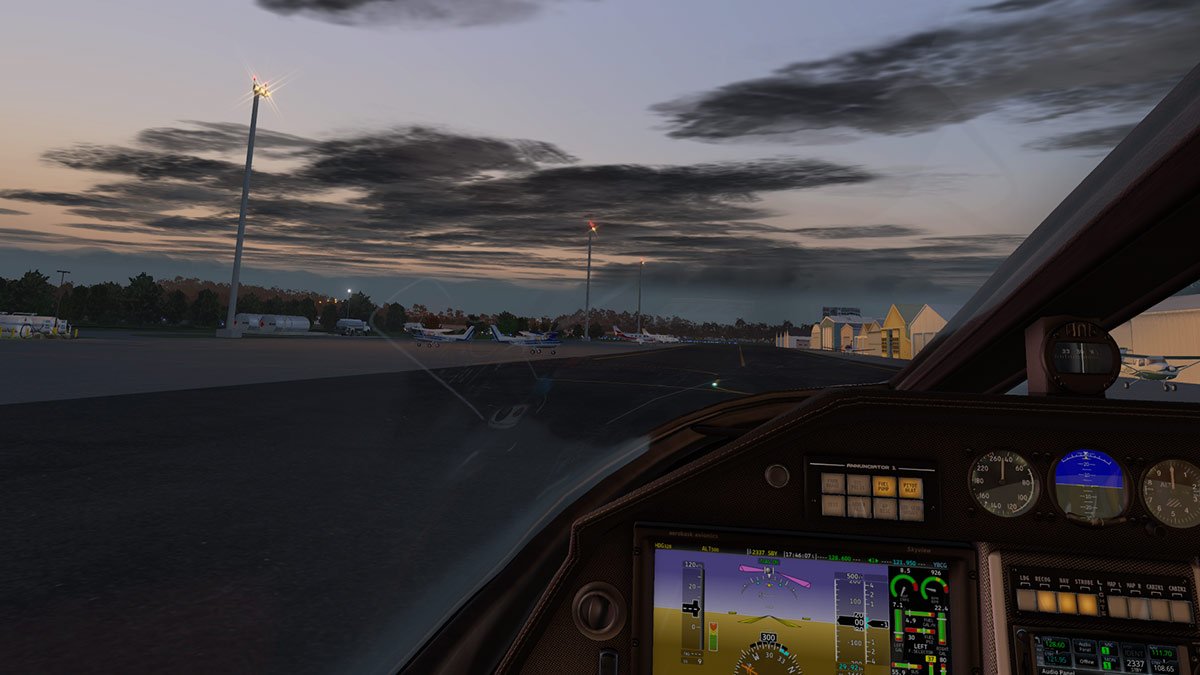
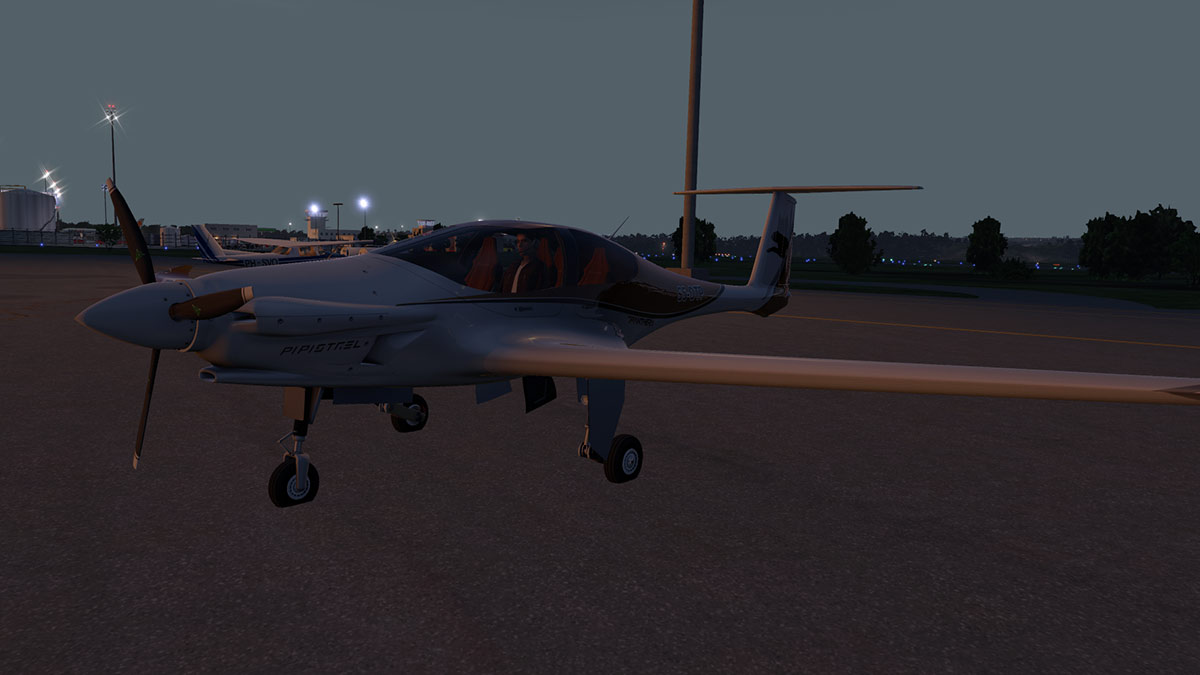
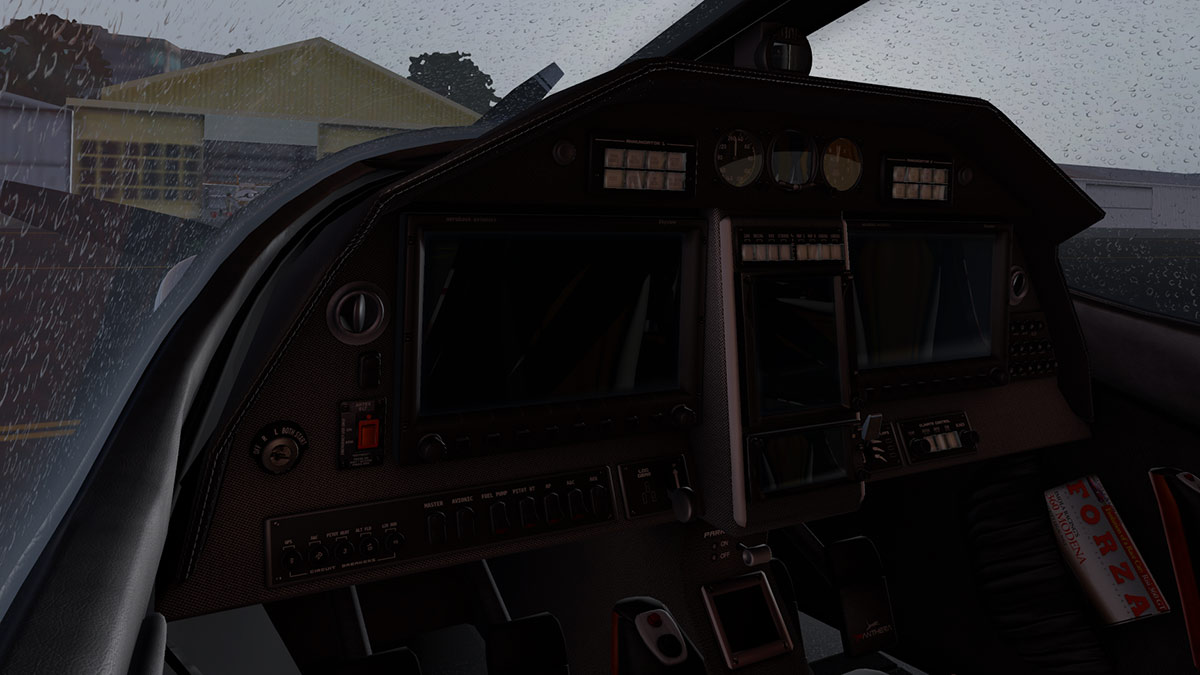
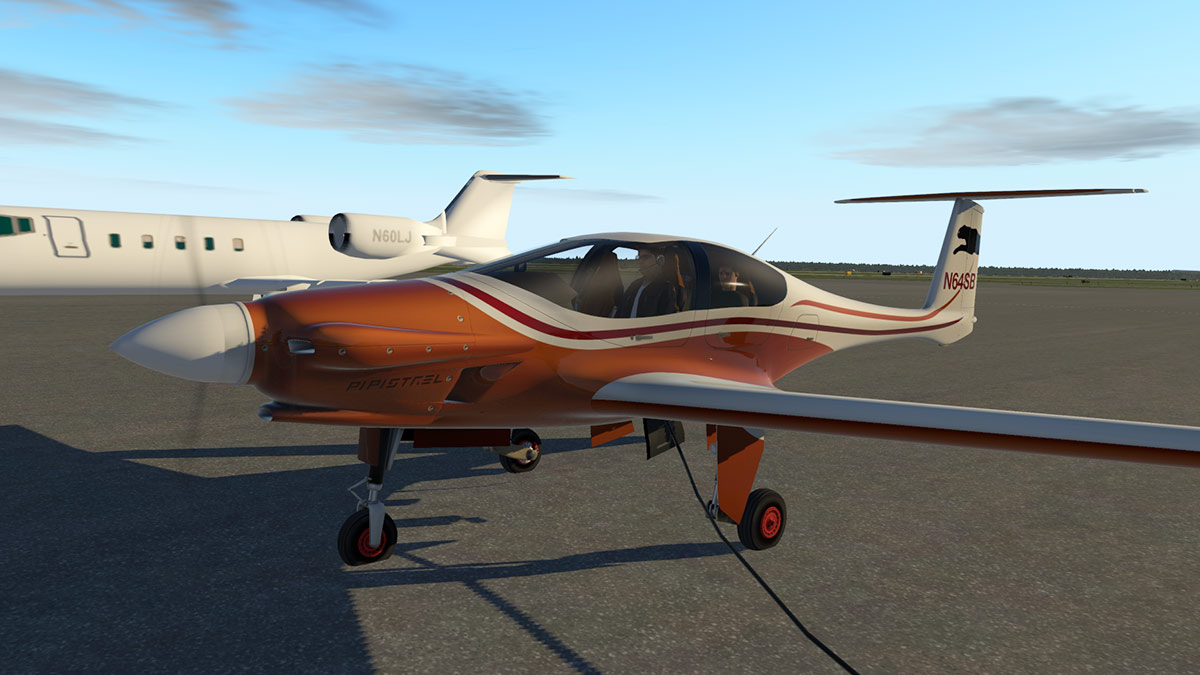
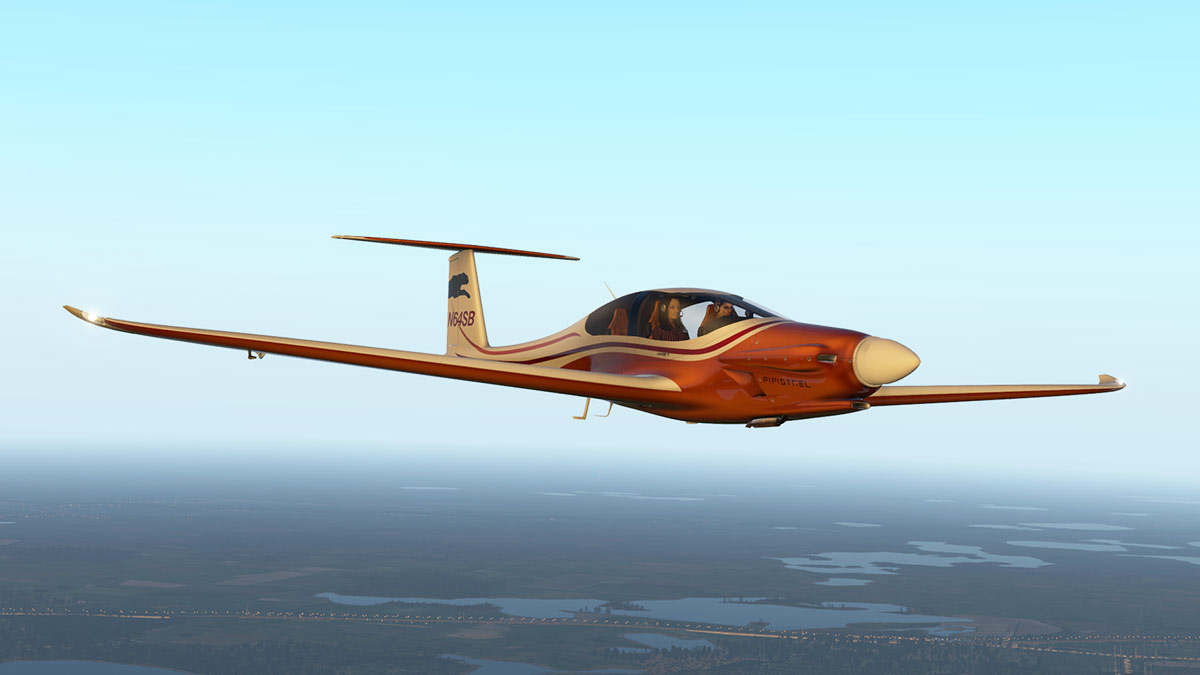
Behind the Screen : April 2017 Although the official Laminar Research X-Plane11 release before Easter was done and completed. I wasn't that endeared to it, as It felt slightly rushed and still of wanting of a few more bugs that needed to be addressed. It ran and ran well, but not to the level you expect from an official release. History has primed me now for these software pre-releases. Back in the day no business would fear to release none or incompleted product. But in the age of the instant download it is then if you screw up then a patch or redownload quickly fixes the issues. Apple was the worse at this and to a point uses its own customers as benign beta testers. But today the sheer complexity of software means that not all the issues are fixed and the details can be lost on release, but in this case the X-Plane11 release was done with a to-do list still on the whiteboard and so is that fair to its customers? In this case the release time-line came first and the product came second. But this is common software and to a point even a hardware standard business practice today. The wait for the first update was a while as well as everyone enjoyed the Easter Break, but the long wait overall was worth it as X-Plane11beta1 was a what the release version should have been in the first place, the release XP11.01rc1 - release candidate 1 was even better and you have to admit the simulator is now beginning to show the brilliance of what X-Plane11 is all about. My only current gripe is the on the thrust reversing action on jet aircraft. On prop aicraft there is a beta zone behind the throttle idle position that turns the propeller thrust in the opposite direction by twisting the propellers into the opposite position... I'm fine with that. But in Jet aircraft there is no beta zone and you activate reverse thrust via a set of levers (for the number of engines you have). In X-Plane10 you used the key command "toggle thrust reversers" to do this lever action and used the throttles normally. But with the XP11 beta zone in that area you get a really confused jet engine and a zone between the forward and reverse thrust segments that is almost impossible to find? Worse in that my new (and excellent Saitek x56 joystick system) is very sensitive with duel throttles in these zones. So even in the final landing phase you are mostly likely in trying find your idle in that barely a few feel above the runway... go totally into reverse, or on the runway go totally into forward thrust. It is not a fun ride either way. You can of course fly around the problem, but that is not the point as it needs to be addressed and quickly. X-Plane11 Brilliance But back to the brilliance. Without doubt two new features in X-Plane11 have changed the game for Laminar Research. One is the new interface which is the more you use it, then the more you absolutely love it. It still needs a few more areas of attention, but the sheer flexibility on accessing not only setting up the simulator but in changing your settings to a new situation (say helicopter collective) is just brilliant. Go back to X-Plane10's menu system and I guarantee you will be frustrated within minutes on how long and how complex it is just to set up something simple, because it is all that waiting and going though all the long winded motions to get there that will drive you bonkers... it is certainly relief to get back to the XP11's interface system and get on with your flying. Second new X-Plane11 feature was PBR (Physical Based Rendering) and yes I have mentioned this effect before, probably countless times. But you must be made aware of how important this feature is to X-Plane. HDR (High-dynamic-range rendering) was of course a step in the right direction, but it is in the minute detail of PBR that is transforming our simulator. In fact over time it will be the PBR factor that will be the biggest attraction to new users wanting the sheer realism it delivers. PBR still totally blows me away on the detail it can visually create. It gets better. As noted by Laminar Research's developer notes there is more fine tuning to come. One area has already had attention in that of night reflections in "Let's get physical at night". In the past night flying was quite average and boring, and yet it should be one of the most exciting times to fly aircraft. But the look of the night in X-Plane visually was quite average. First the actual night sky has had a (finally) makeover and the new moon is simply excellent. However the blinking on and off traffic flows below still needs some attention, but with the new PBR fine tuning as noted in the developers blog, your aircraft now looks excellent flying in the dark inside and out. Come early dawn and dusk and the realism is spellbinding and this makes the simulator far more perfect than ever before, you actually now look forward to flying in the dark and not try to avoid it. Mostly the main areas of X-Plane11 are now set, but the fine-tuning will continue for quite some time yet, so that means there is still more to come, certainly not in the huge jumps of the past, but in small incremental changes that will bring the simulator to a whole. X-Plane11 Aircraft April was dominated by re-releases of aircraft for X-Plane11 so your inventory or hangars were slowly filling up. It was wonderful to experience many old favourites again in their new shiny X-Plane11 clothes and their new misty environment. But it is hard work to note what is updated and what is not as many developers just revised and delivered the new version. But overall it is an exciting time. Of top notch developers then this year then Aerobask certainly have produced two amazing aircraft. The Pipistrel Panthera v3 put X-Plane another level higher in features, but they followed that experience with the Eclipse 550NG only a few weeks later... both are well worth flying and experiencing, but again the main point is that X-Plane has some of the best developers in simulation, we should all be proud of their work. April Sceneries It was scenery in April that overall dominated reviews however. Misterx6 went pro with his excellent KSLC (Salt Lake International) that was above and even bettered his usual high quality and was loaded with features. Butnaru under his Nimbus banner delivered a great KMCO Orlando which was a great follow up from Washington XP by Drzewiecki Design in march. So you finally get the feeling that X-Plane is filling in all the scenery gaps that have been another area that X-Plane was criticised for in the past. But I personally don't see with a current trend on creating new scenery when you have an already good one and payware or freeware at that already available, we already had a NAS KMCO (although the Nimbus one is far better) and another scenery released in KDFW by Aerosoft when we have a Tom Curtis KDFW version? There is another KORD coming as well? Why replace or compete with established scenery? I am all for making scenery better, but overall I think resources are better spent somewhere else that is required.... hello a HECA Cairo would be a really nice addition and don't get me started on Asian airports like WSSS (Changi) and VHHH (Chep-Lok, Hong Kong). But one that did really did surprise me was JustSim's amazing ELLX - Luxembourg. I was only going to do quick overview review and that quickly turned into a full review of this excellent piece of work. Every few months JustSim churn them out and they are all simply top-notch sceneries and for prices you can afford. I was sad to move on from ELLX for another review, but it was a great experience while reviewing it, but I will be back soon as I can. What differentiates JustSim and the really good scenery developers is the full use of X-Plane's and certainly X-Plane11's great features in scenery. You now EXPECT such detail and effects as per normal in all scenery that is payware, but when it is not done you do feel a little shortchanged, the level of quality has gone up, and in a big way. But metalness, glass effects and shiny runways are great visually and add a huge amount to the realism. If you are not using these tools then you should be as the advantages to your work and return sales are worth the extra effort. JustSim are the current masters, so developers learn and take notes. So like every other month in Trump's first 100 days in office, April was a full and varied cosmopolitan month in X-Plane. I doubt the rush will abate anytime soon, but it is a very exciting time to be in the X-Plane simulator world. See you all again June Stephen Dutton 1st May 2017 Copyright©2017: X-Plane Reviews
-
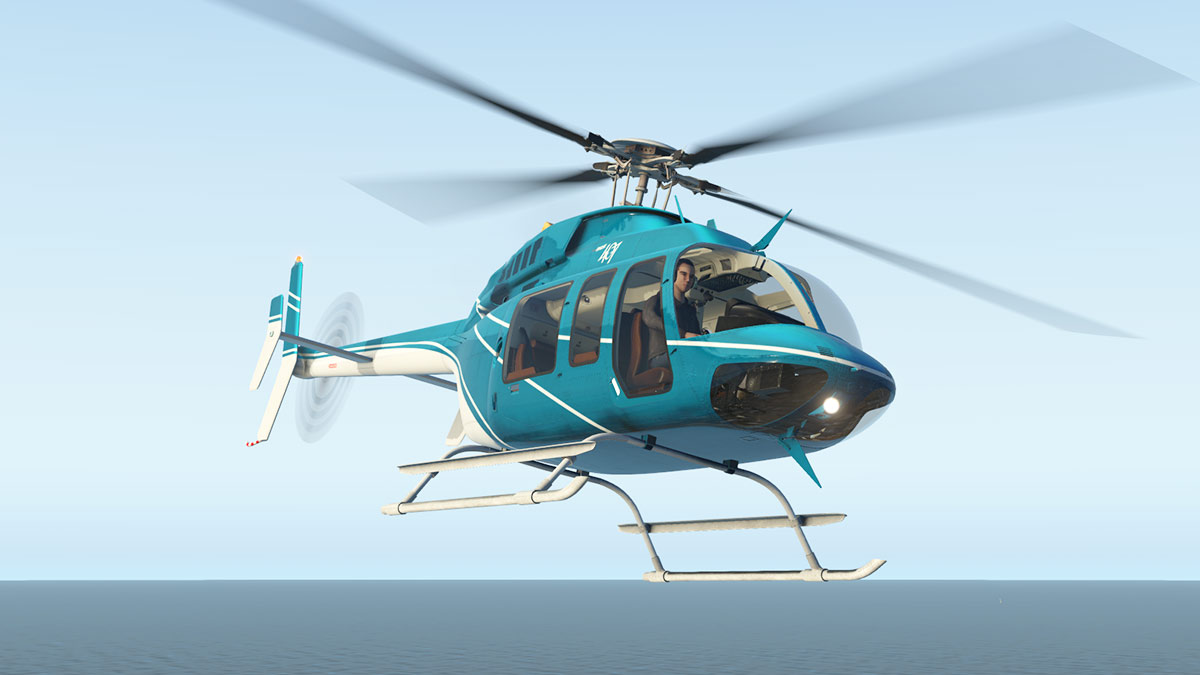
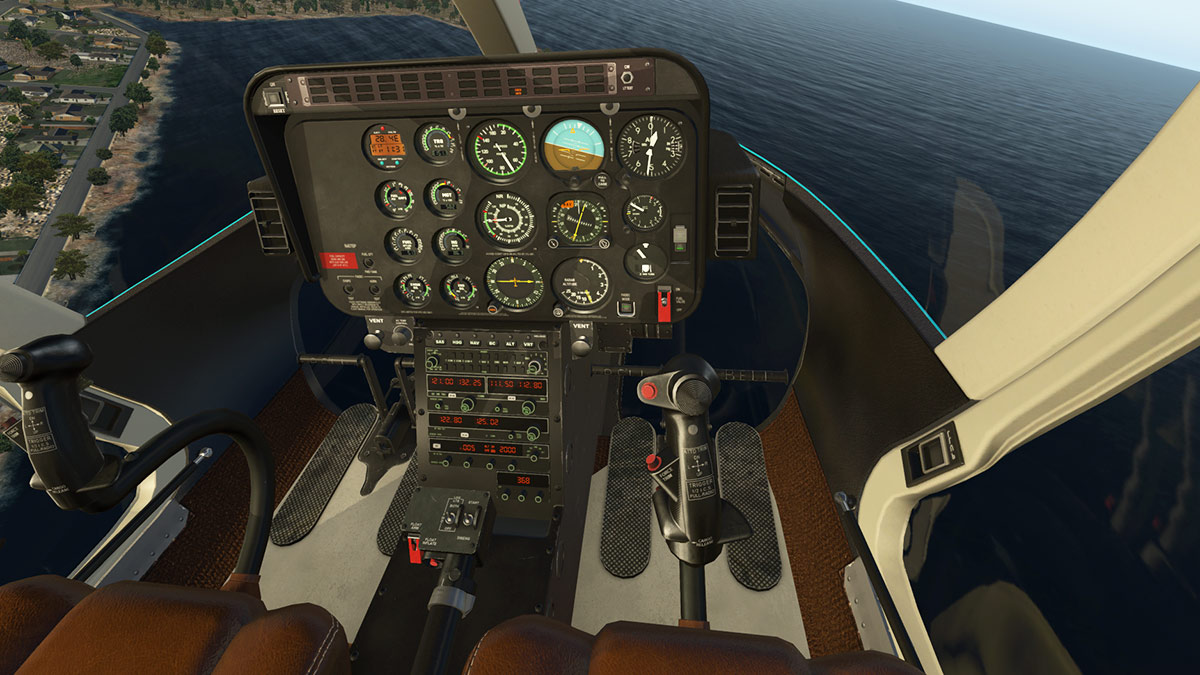
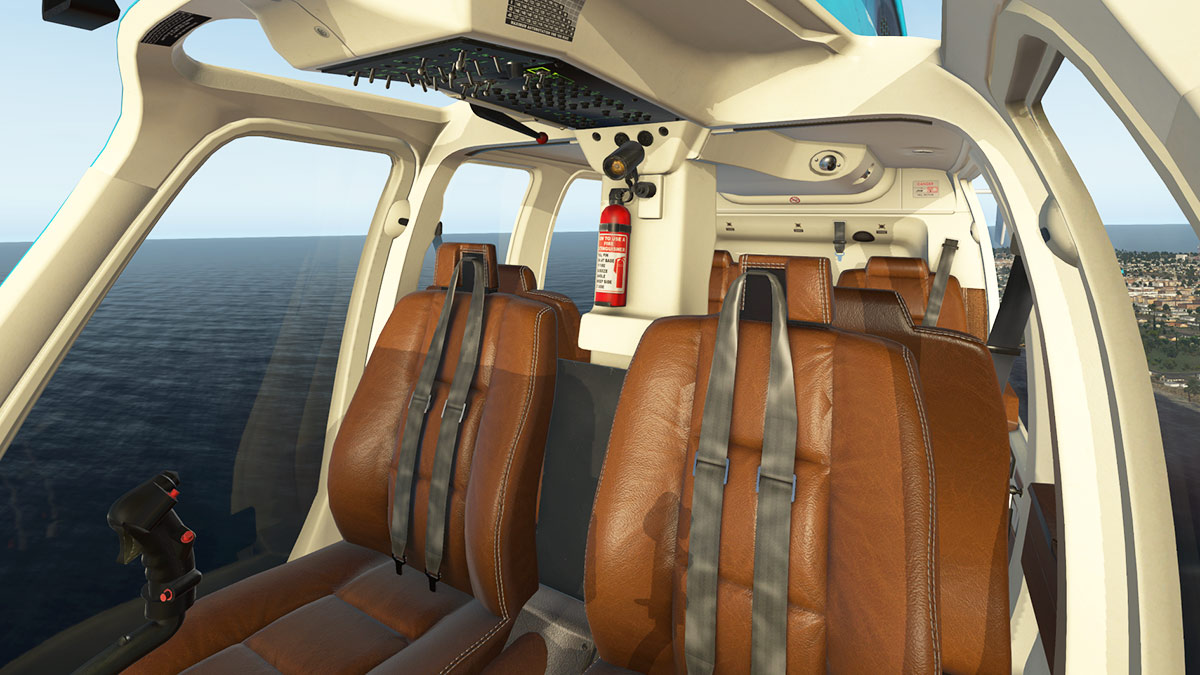
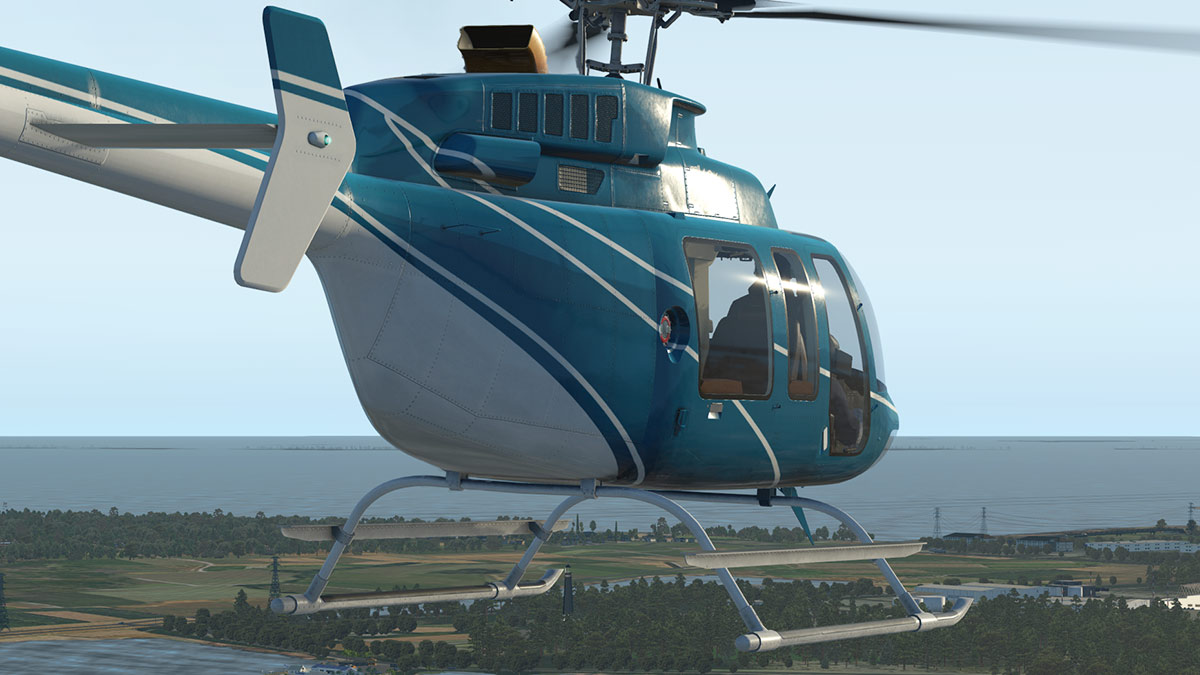
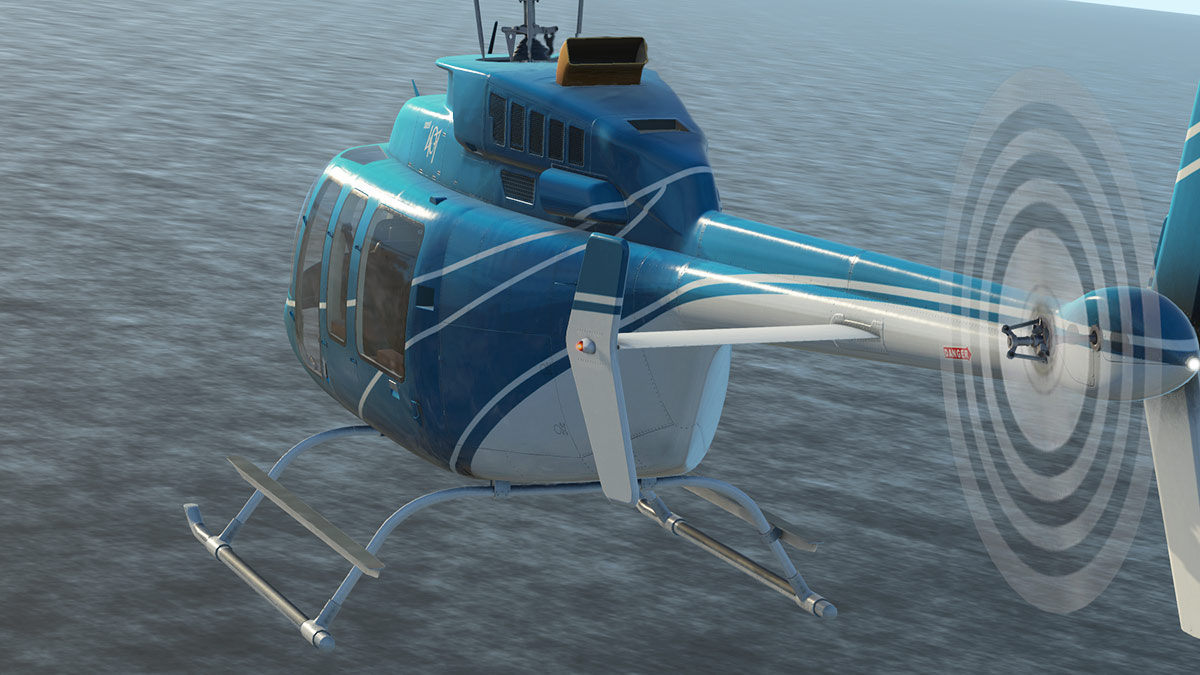
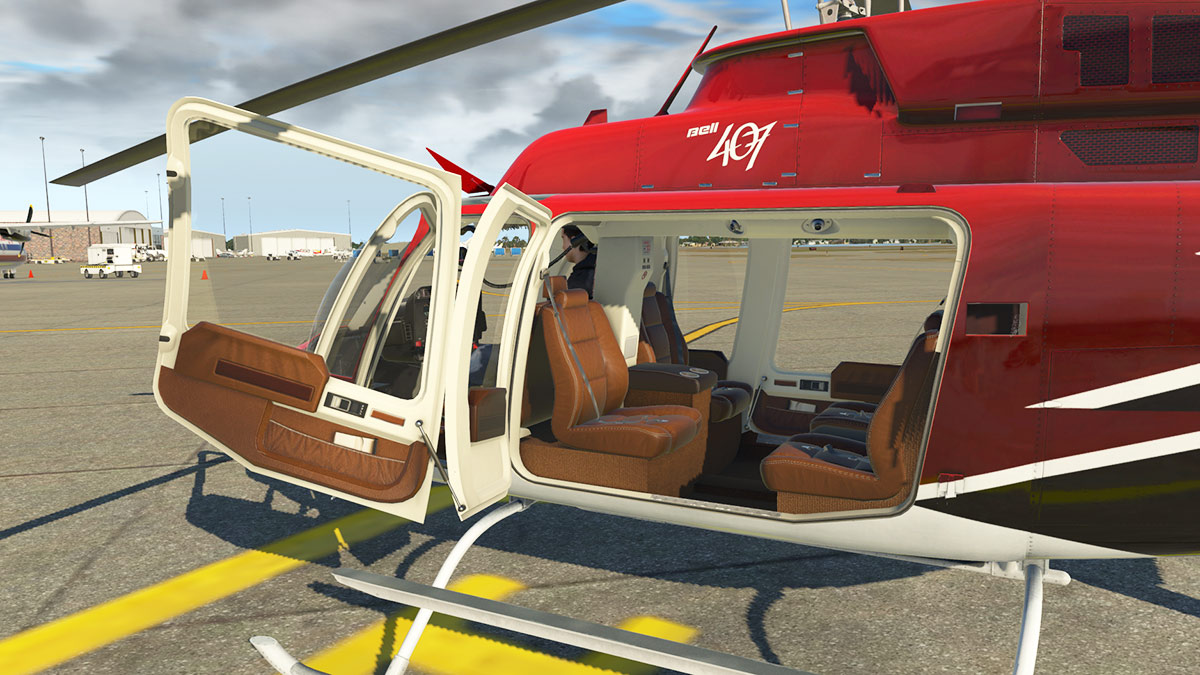
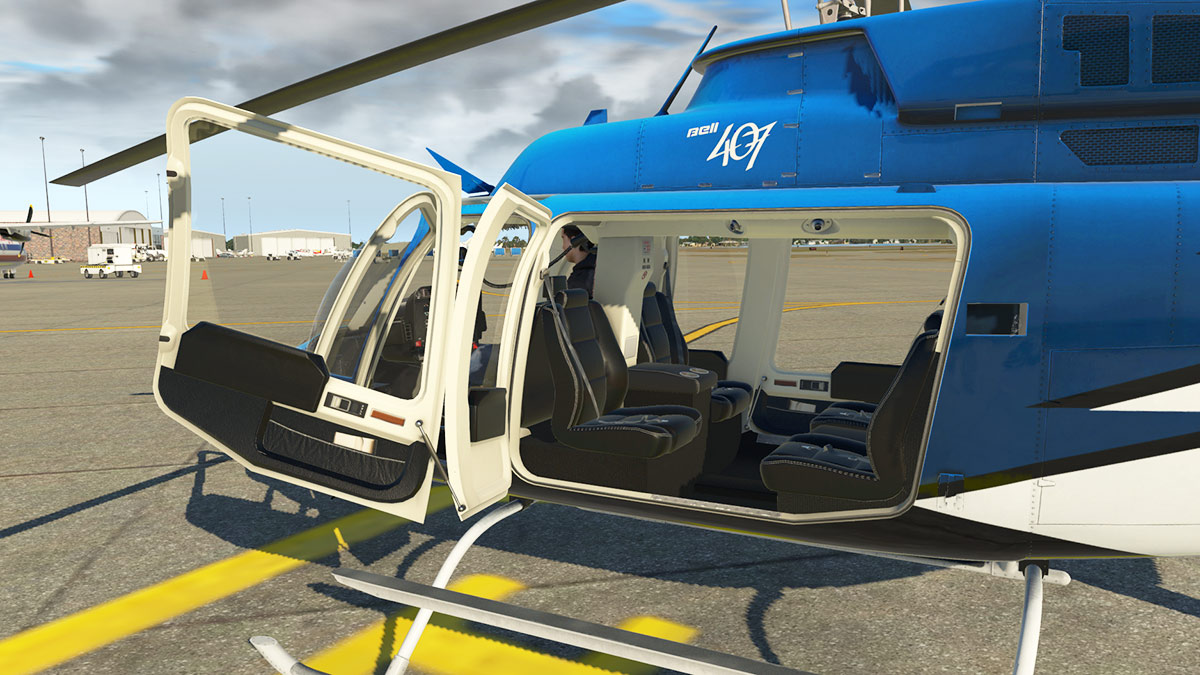
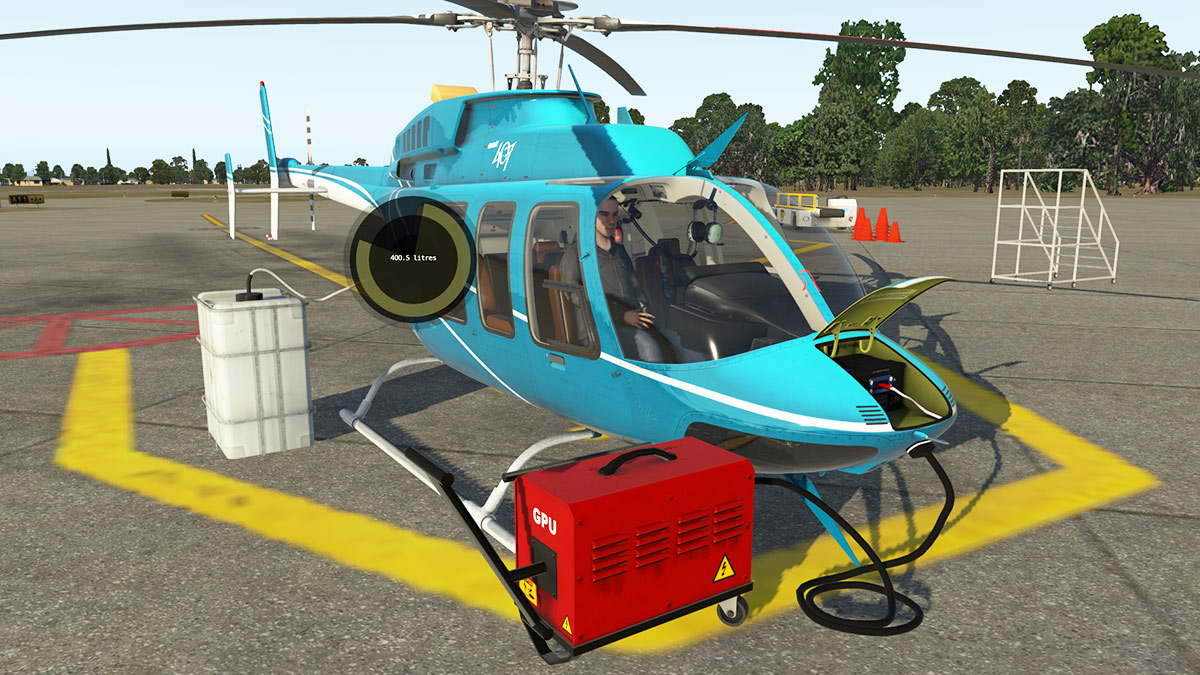
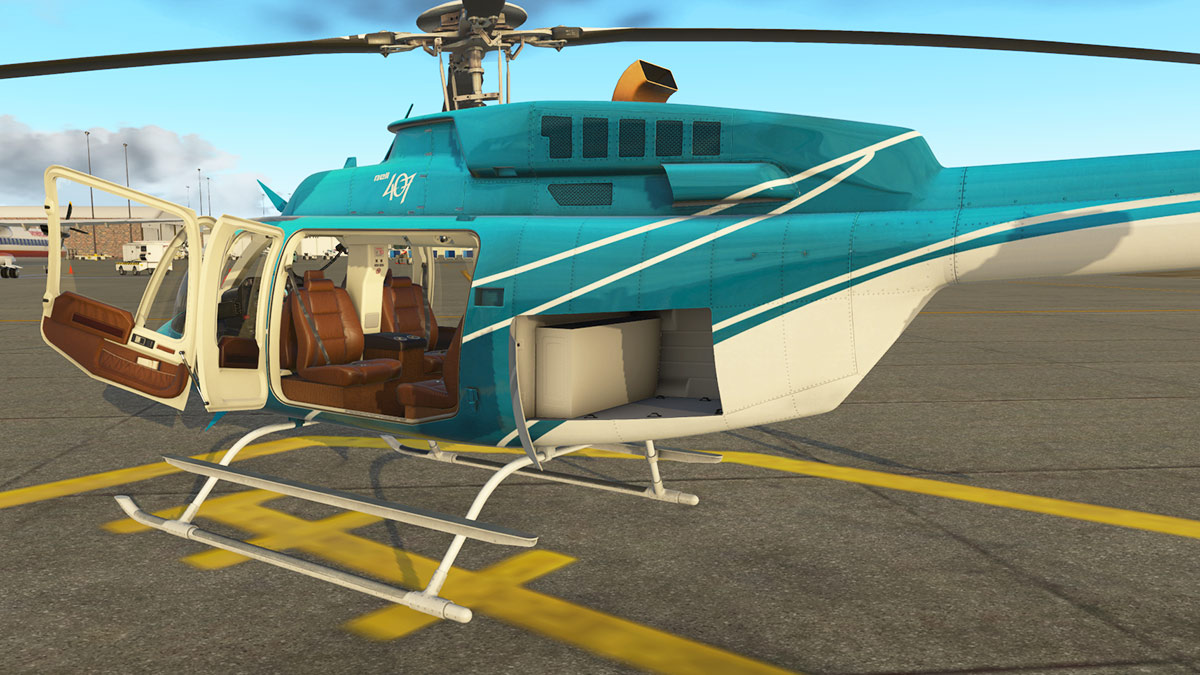
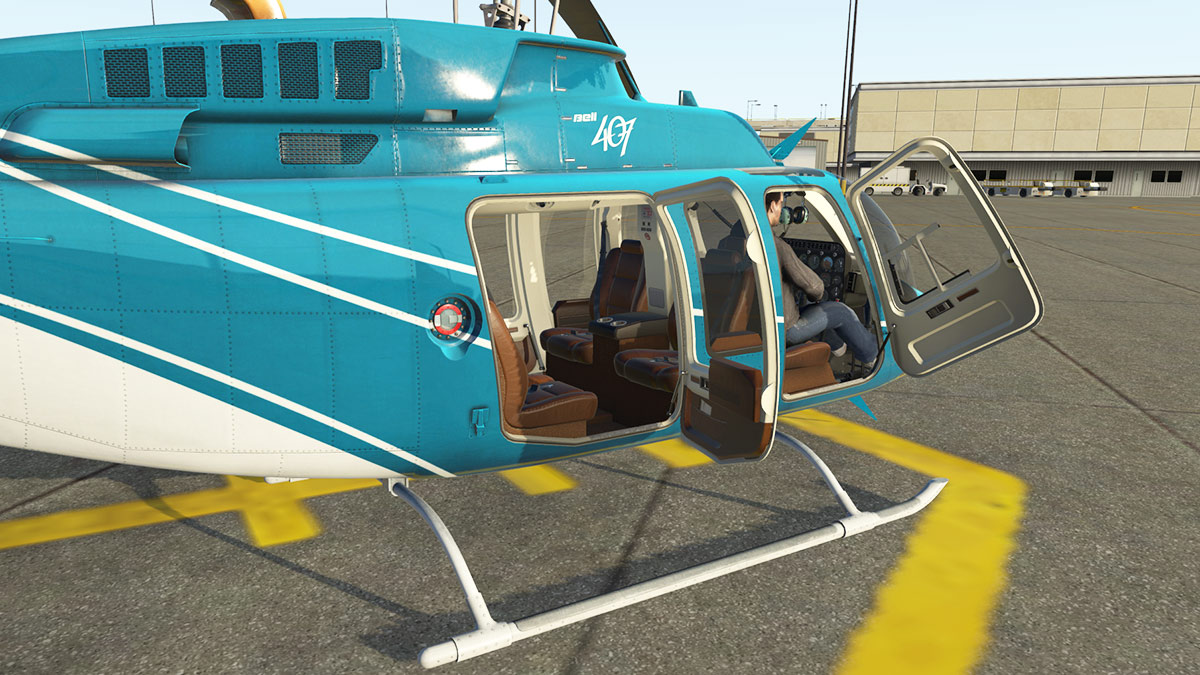
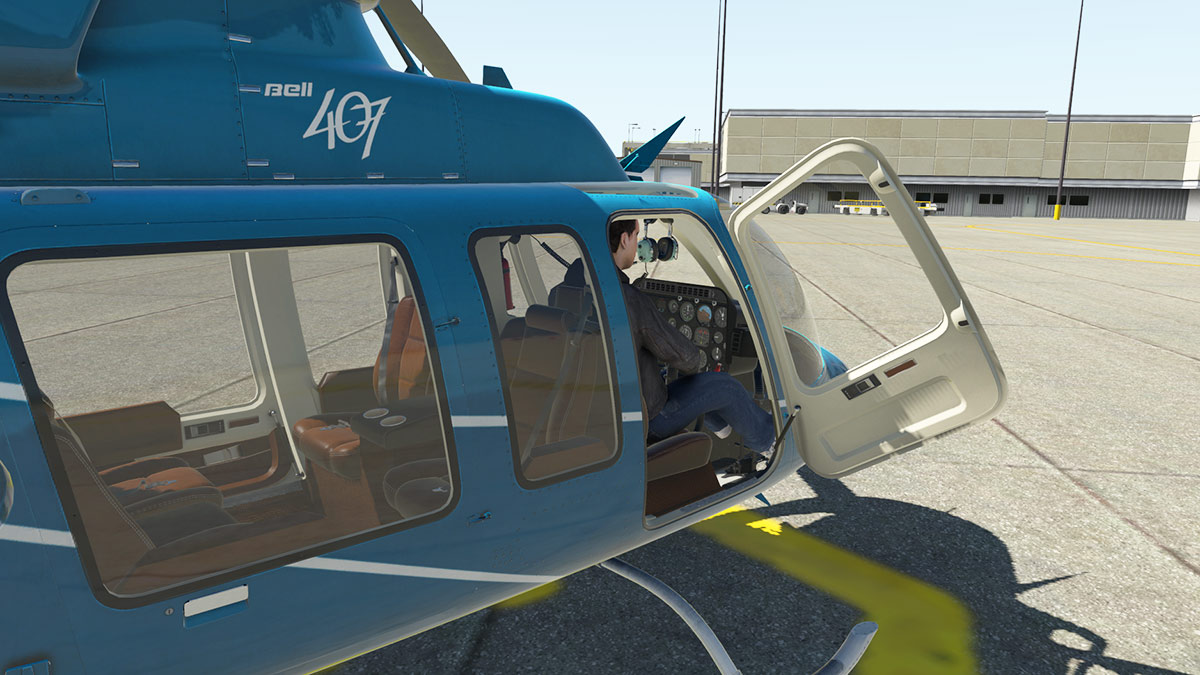
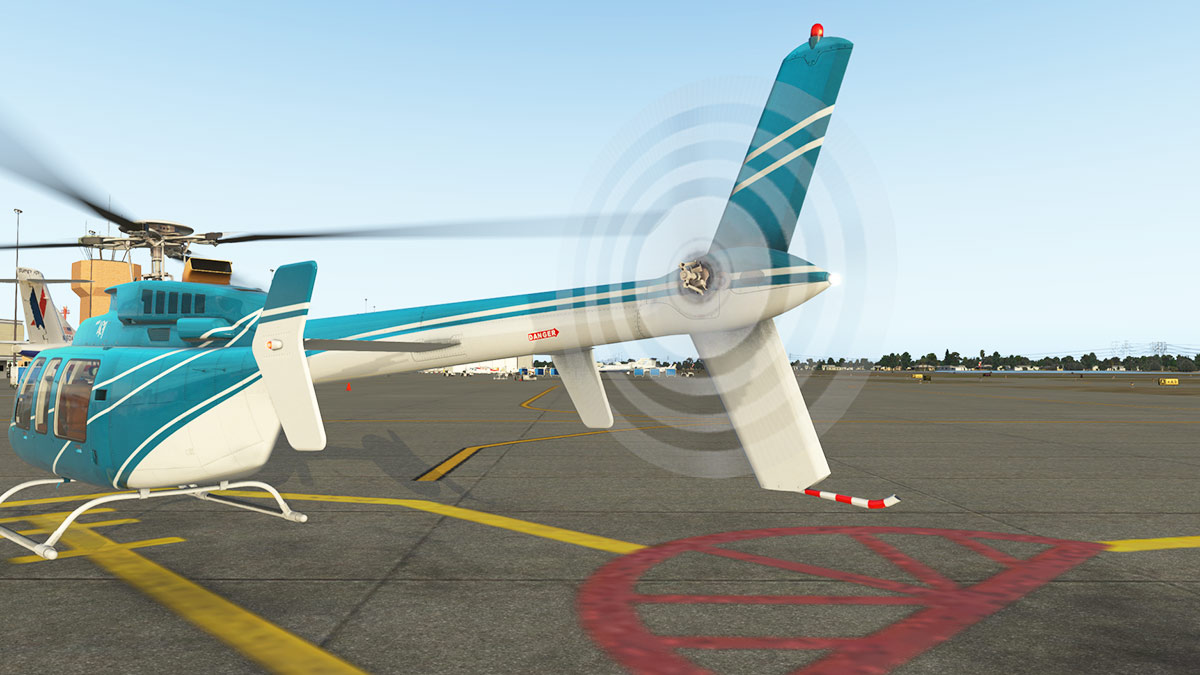
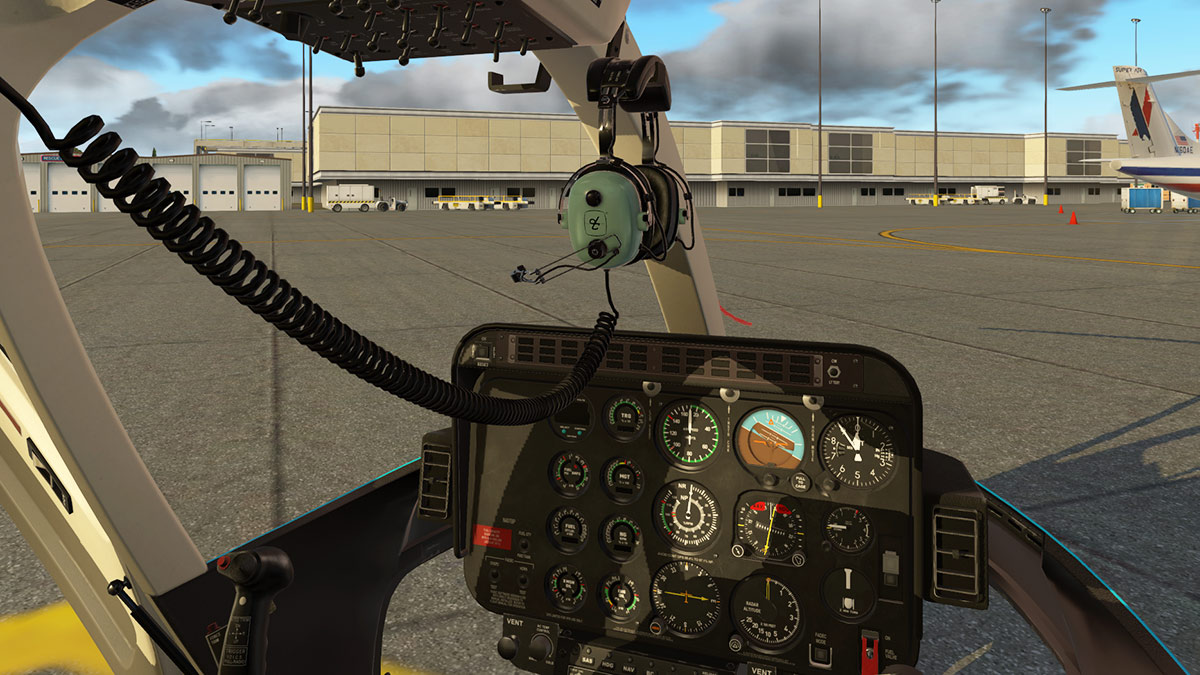
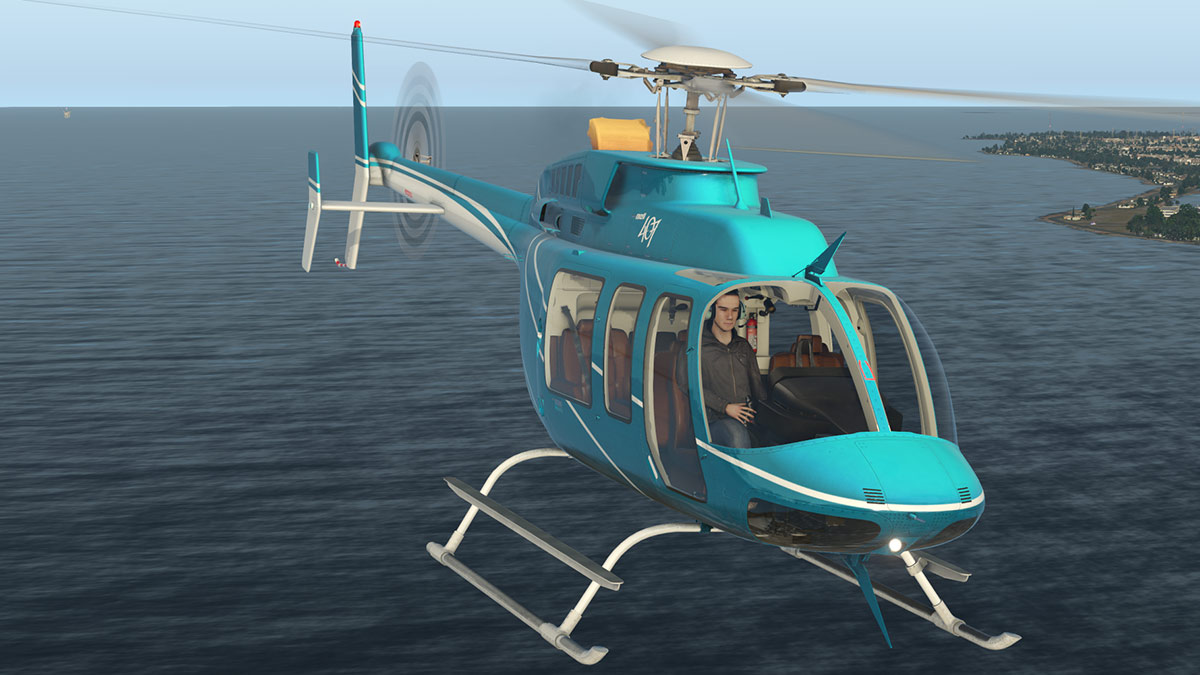
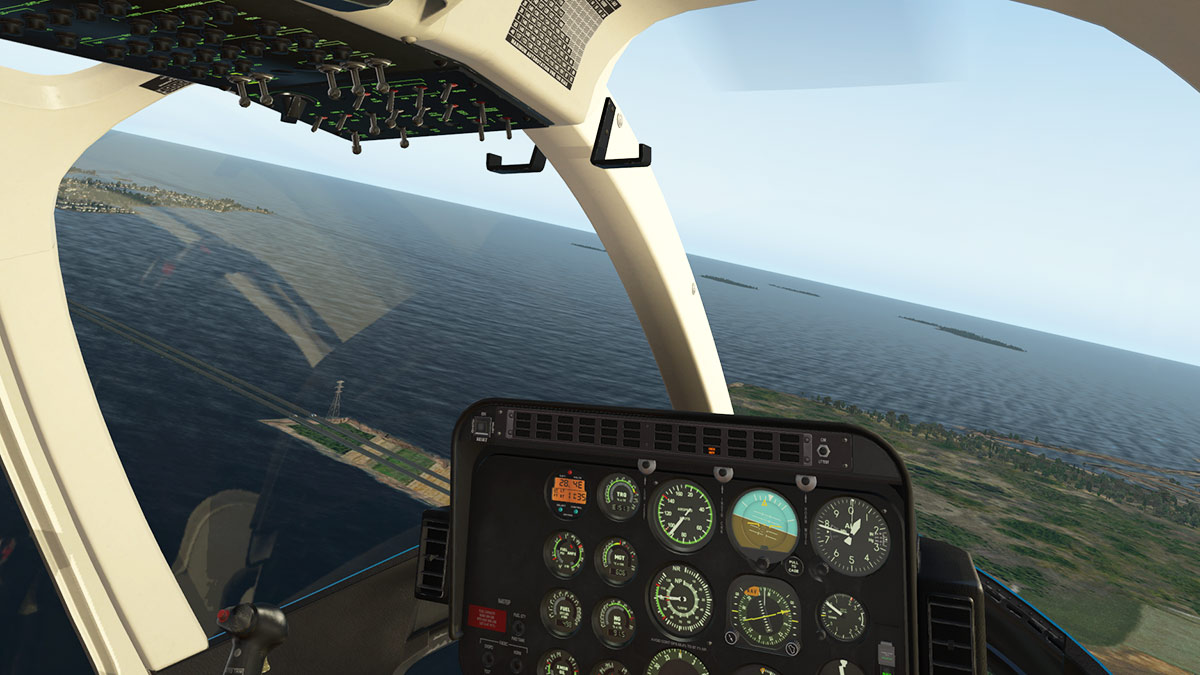
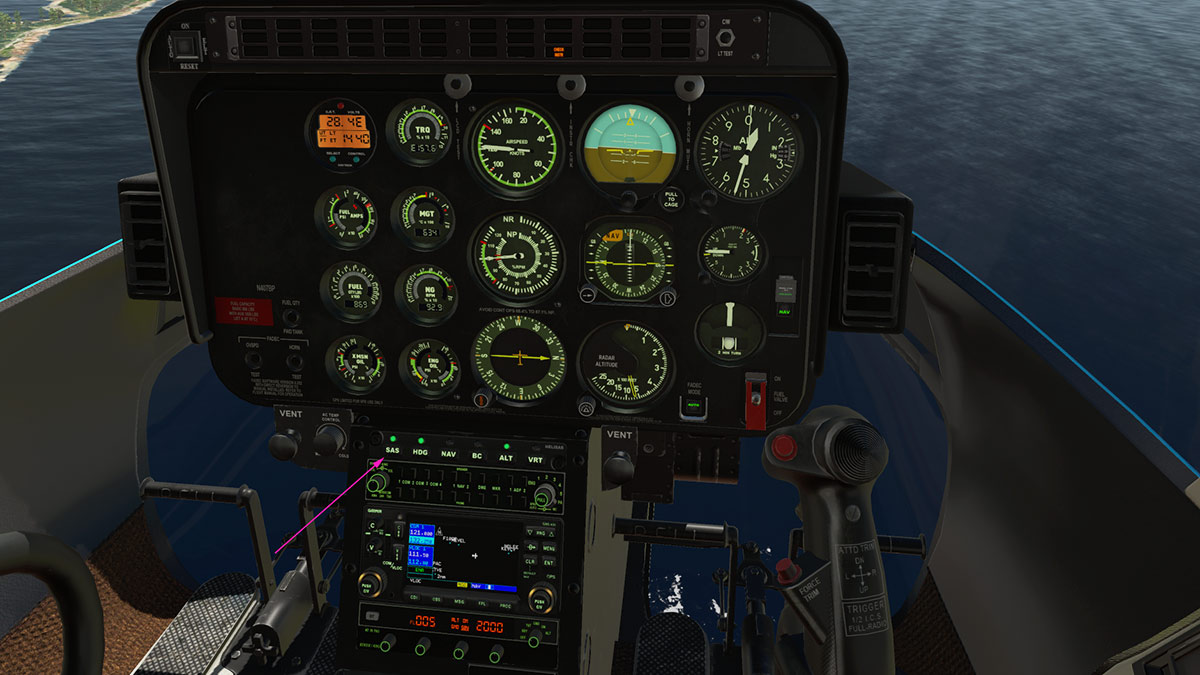
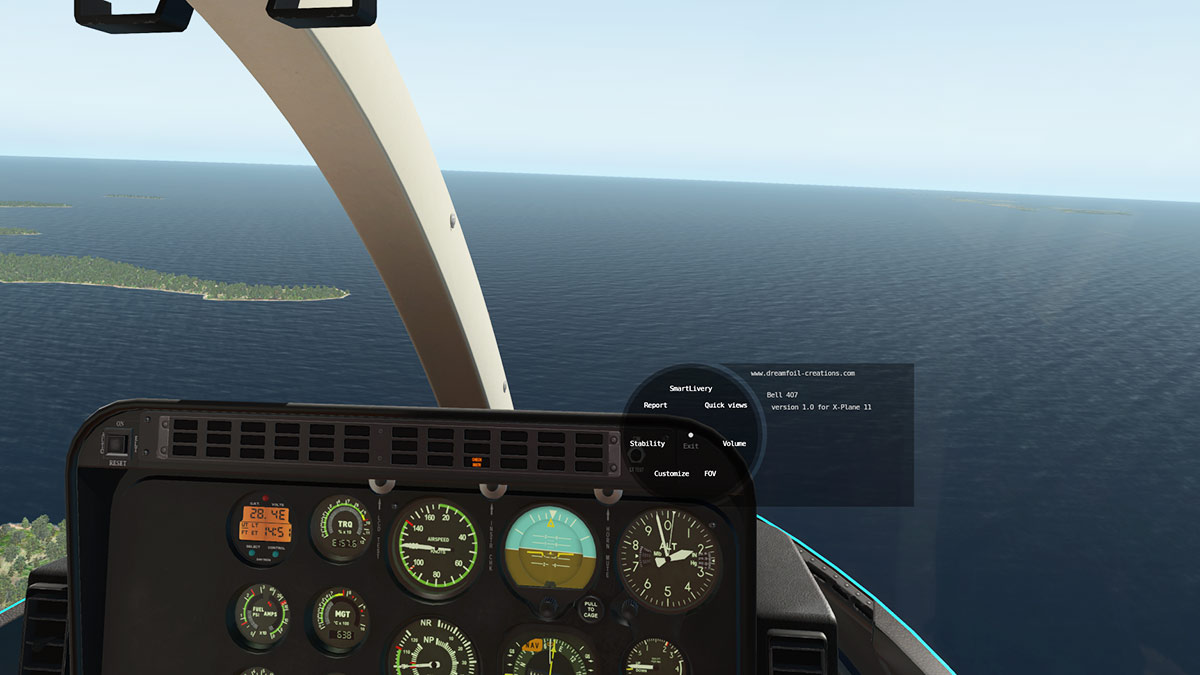
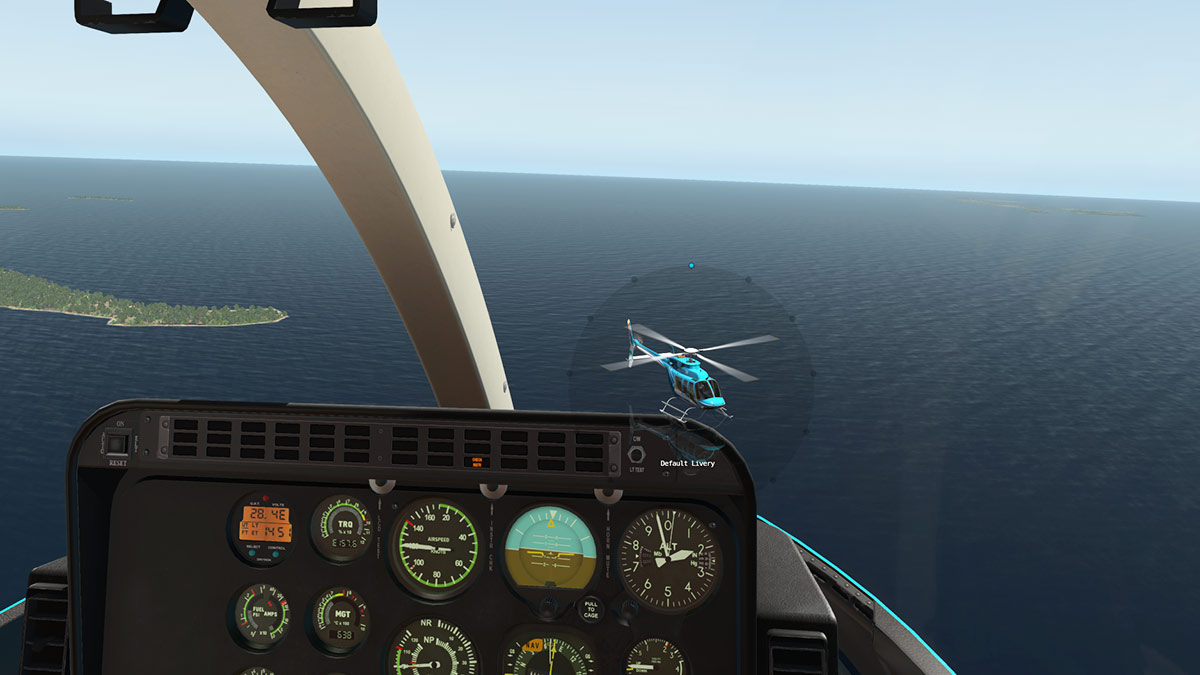
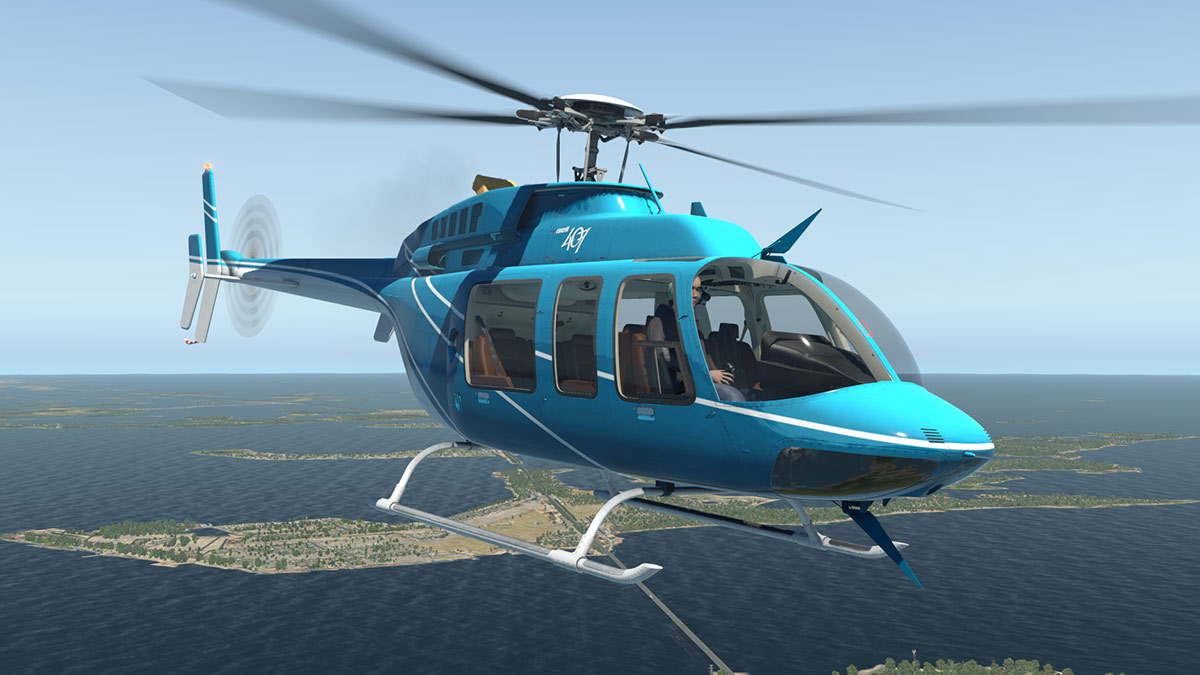
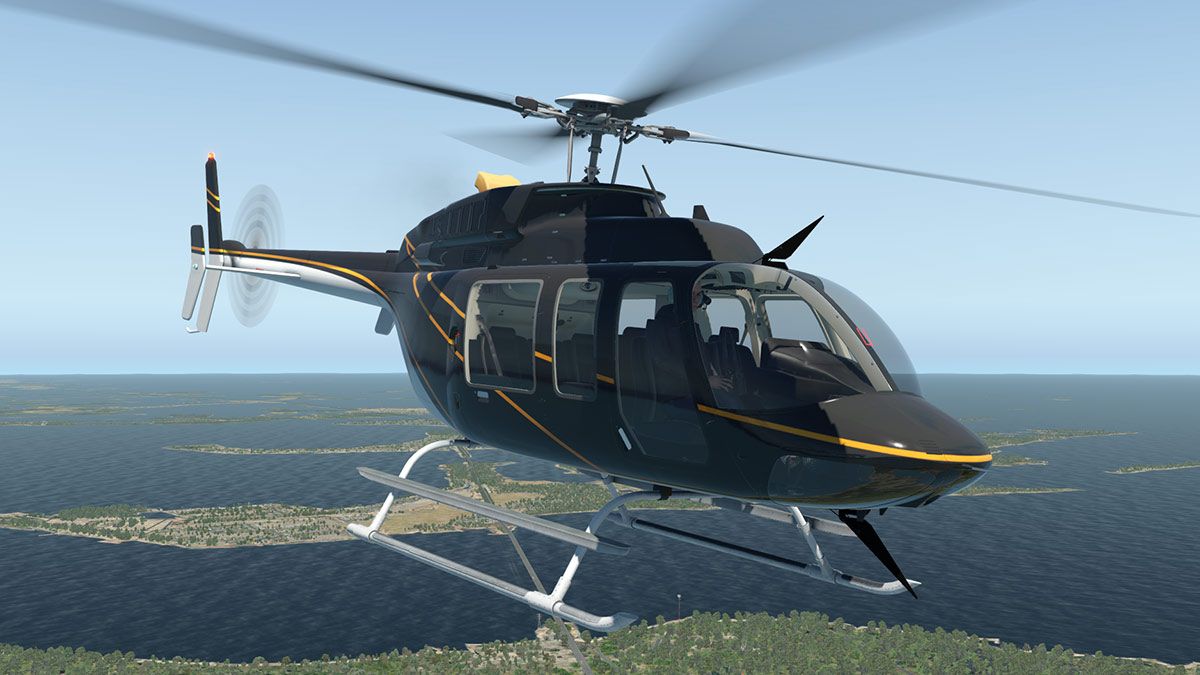
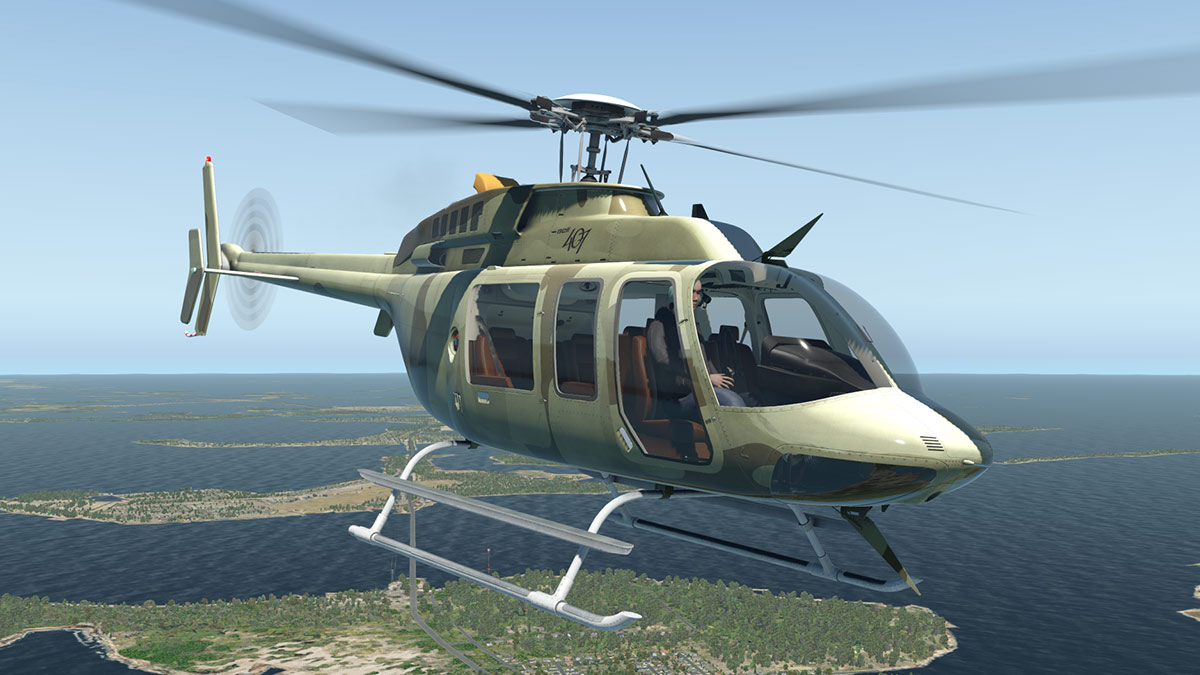
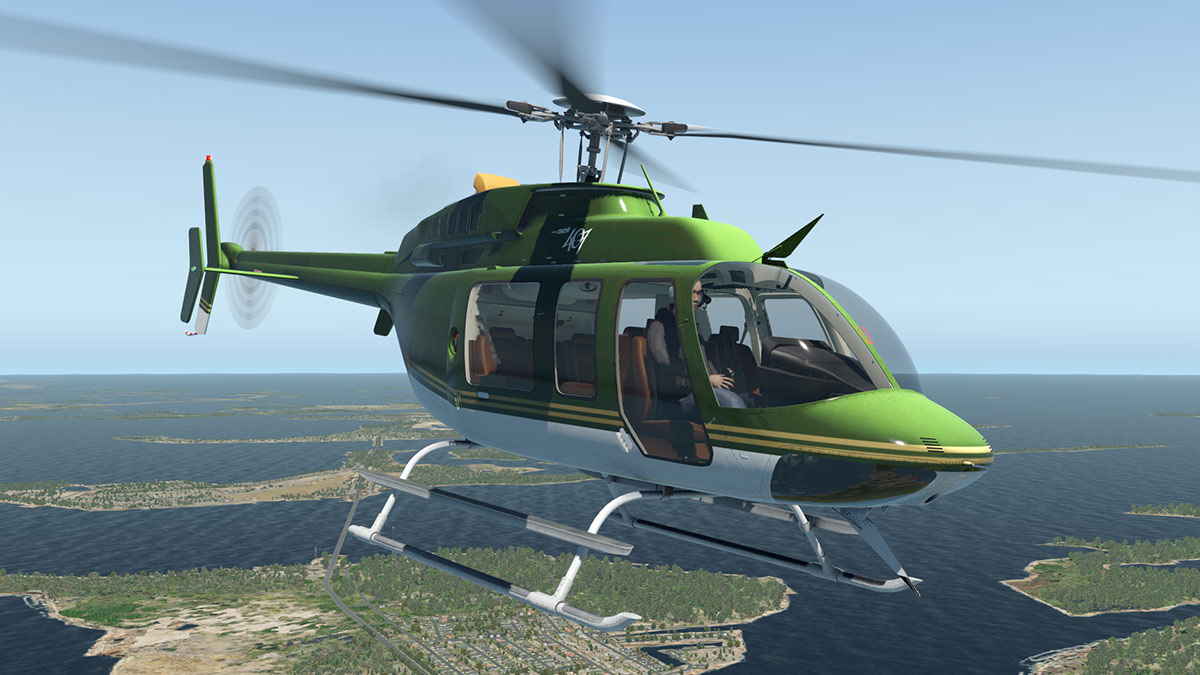
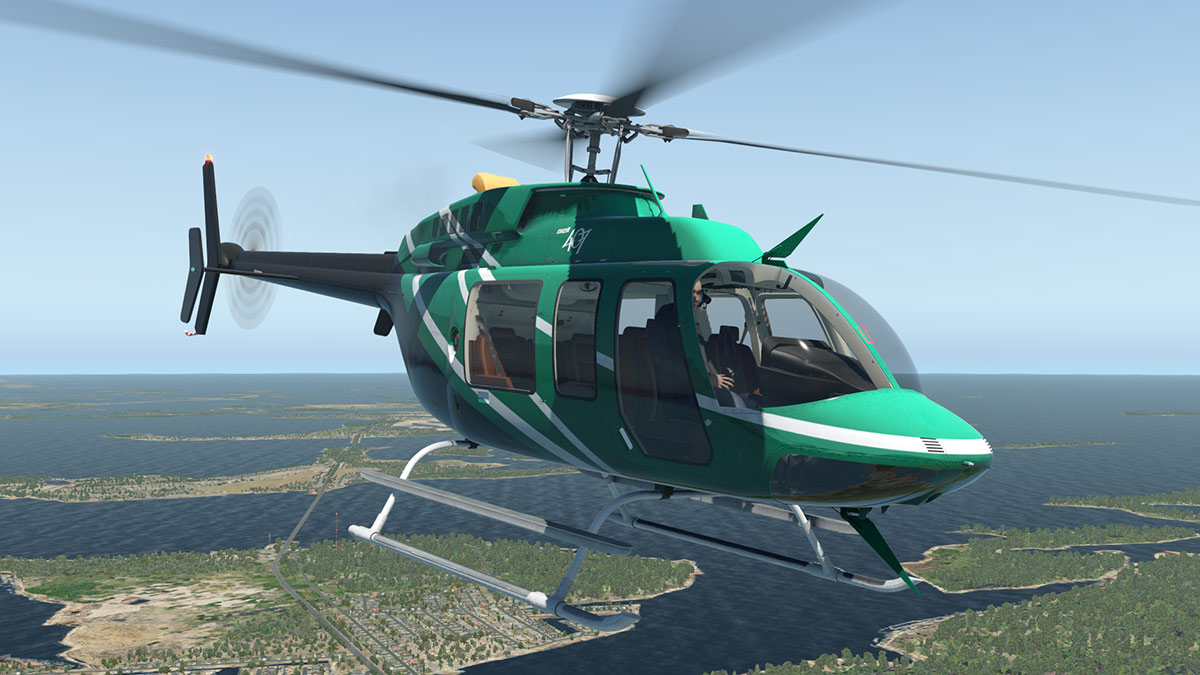
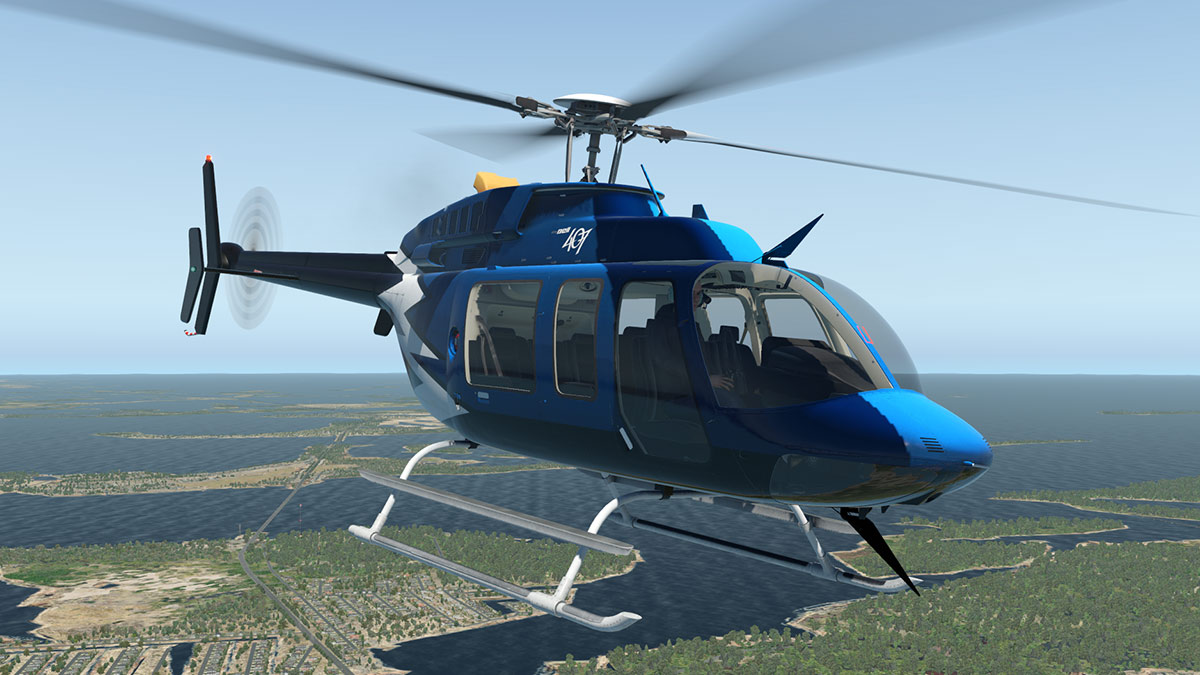
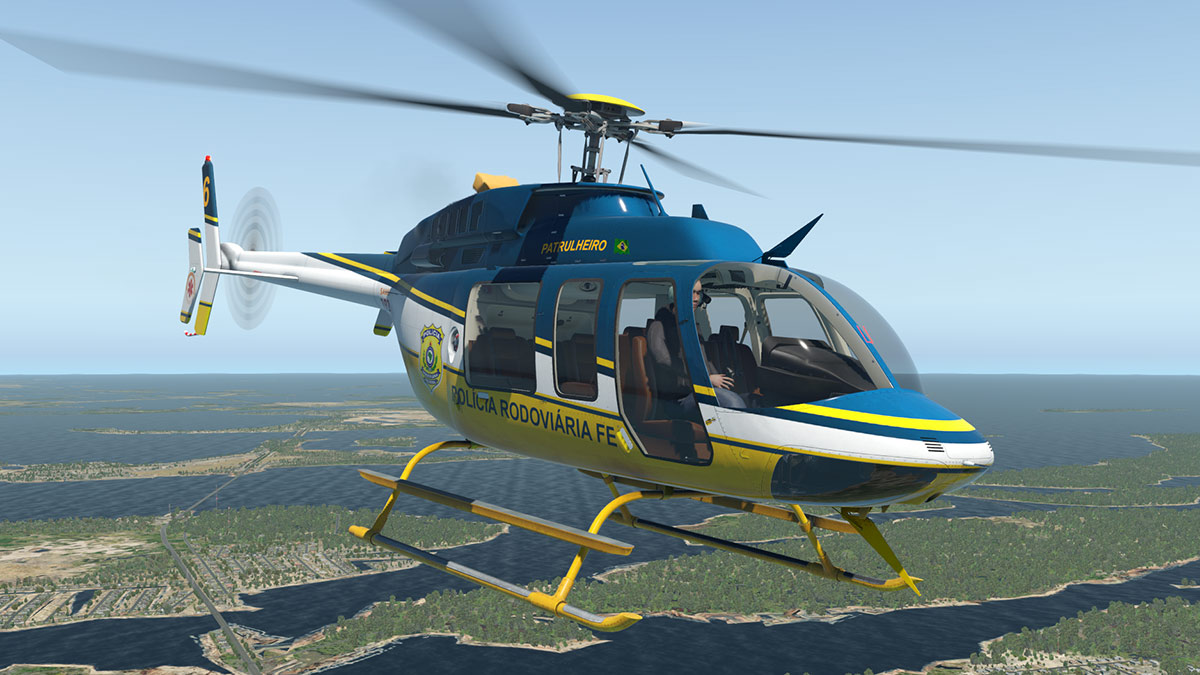
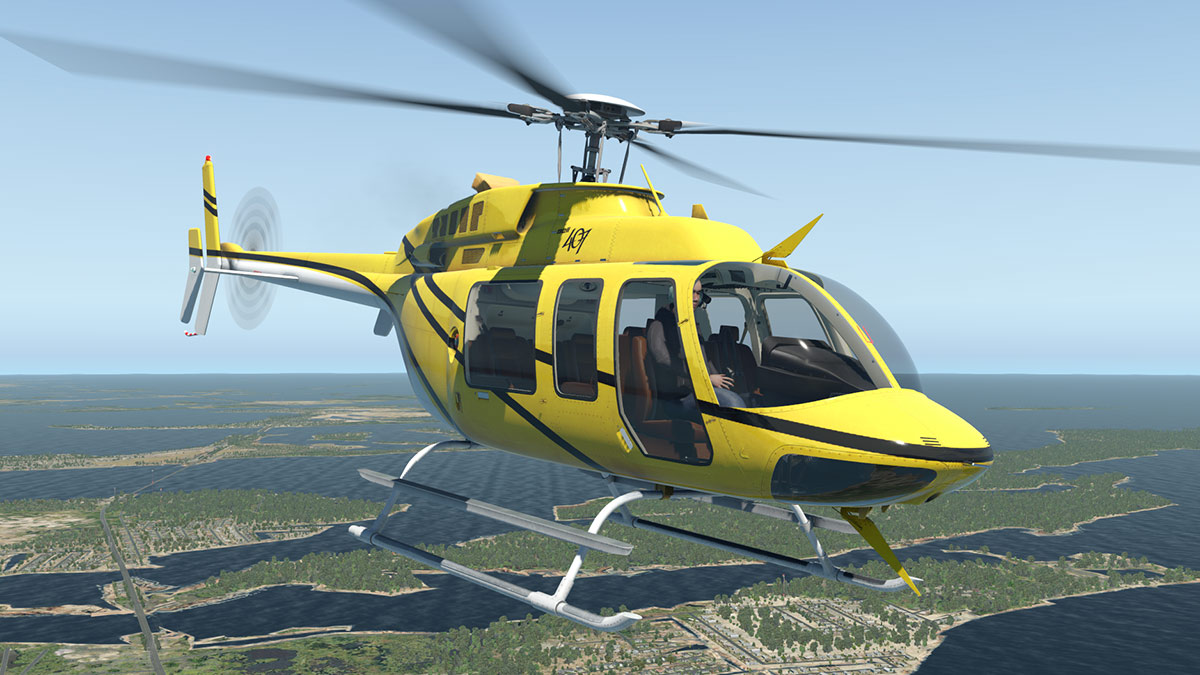
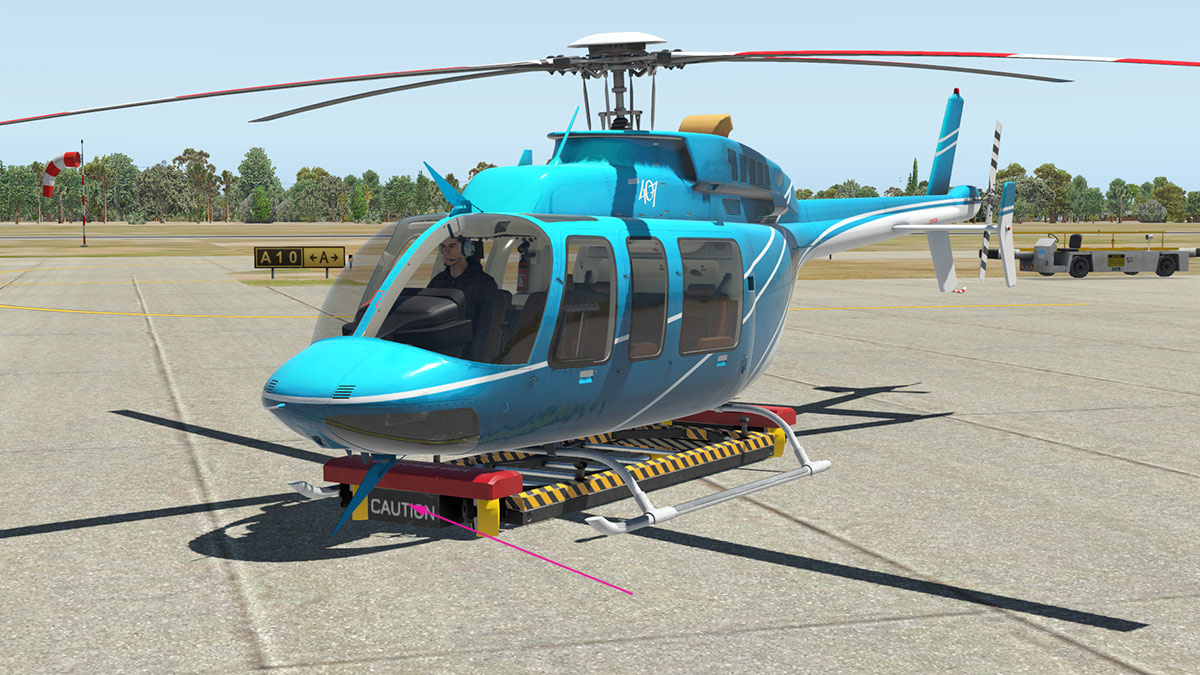
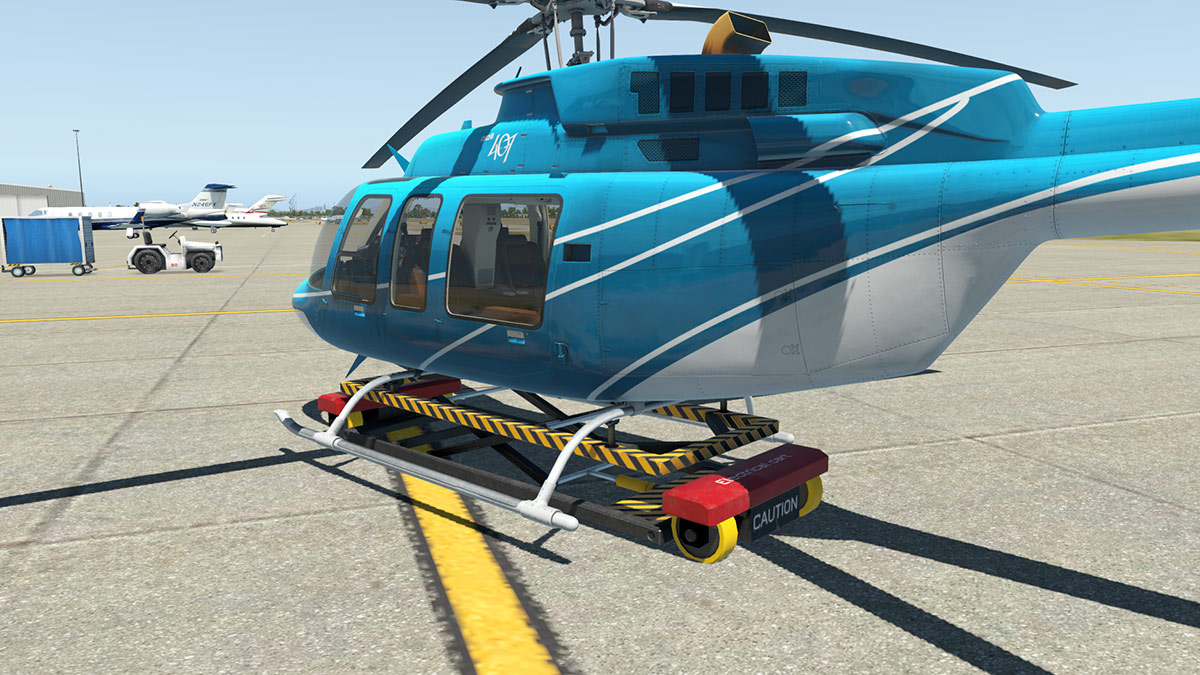
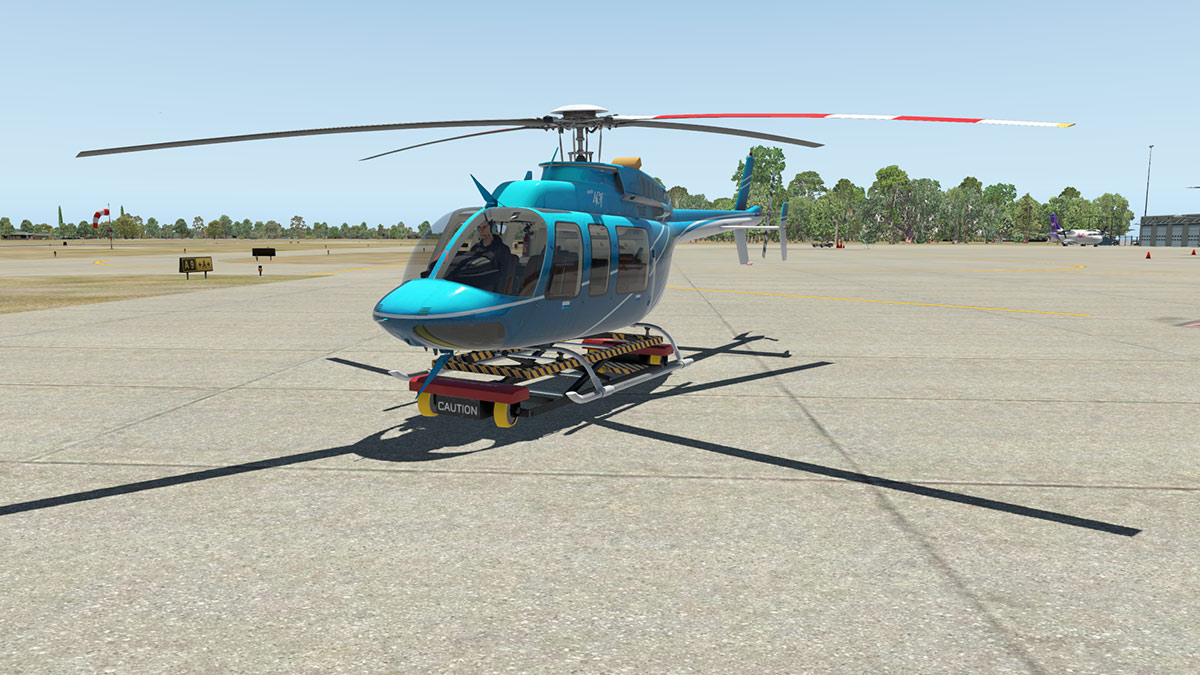
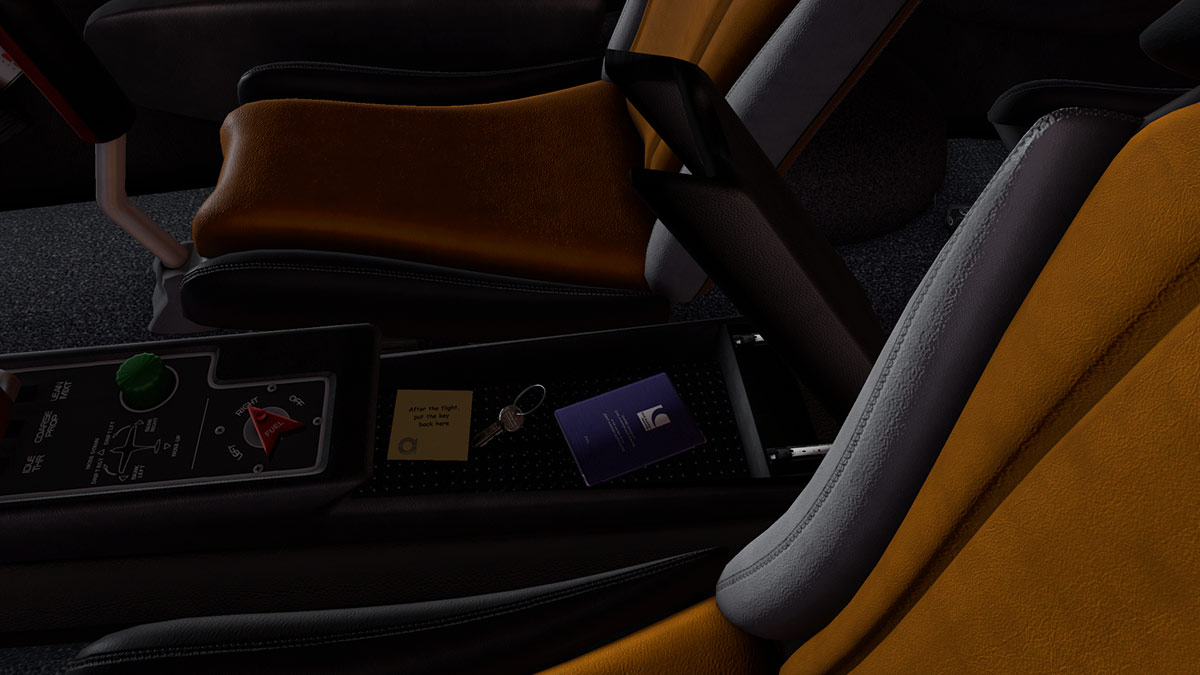
Helicopter Review : Bell 407 XP11 (Pro) by Dreamfoil Creations It is always debatable on what is the best simulation in X-Plane in any category as there is never a clear absolute winner and so it is with helicopters as the field is by other standards small, is very and highly competitive. But without doubt and certainly with all the accolades it has received since it was released three years ago in 2014, then Dreamfoil Creation's amazing Bell 407 is certainly at the very top. With this release the aircraft has been updated to X-Plane11 and is known as the XP11 in the version name, so this is an update on the older version, but also a new release in the fact that is a lot of changes and new features. So that means a new version does require a repurchase for the X-Plane11 version at a 5c increase to US$35.00, but previous X-Plane10 owners can upgrade to this new XP11 version for only $15. The coupon code for the discount can be found in the original Bell 407 invoice at the X-Plane.Orgstore. First you will make the note that in the title above I noted (Pro). This is not an official title as I added it in myself. The reason behind that title is that Dreamfoil has taken away in this XP11 version the "rigid cruise" and "arcade mode" functions, or easy flight aids that helped entry and trainee or the just plain helpless helicopter wannabe pilots in the exchange of a new autopilot feature. This omission does now make the Bell 407 quite perfect in its flight dynamics, but the aircraft also does now require a lot more skill in doing so, the "Pro's" out there will revel in the aircraft, but unfortunately the lower classes will find it harder to fly without any crutches to help you fly around the delicate flight balance. The Dreamfoil Bell 407 was excellent before, but with its new X-Plane11 PBR shiny coat and lighting features, the 407 looks simply outstanding in any light. The PBR lighting highlights the bodywork more and the detailing, glass is also more highly reflective and looks superb on the 407. Internally the PBR really helps as well, making the interior even more plush and dynamic and now has interior normal maps for higher quality. Any developer that crafted high quality external and internal textures really benefit from X-Plane11 PBR features as Dreamfoil does here, the cabin environment was excellent before, but in XP11 the 407's cabin is now simply mindblowing. With this update you now have two versions as well, one with the original brown leather and now the new black leather on the "Black Goldy" and "Lighting Blue" liveries. Of course any smart user could adjust the other liveries to their interior choice in the object files. Realism in the cockpit in X-Plane11 is awe inspiring, even better in the air. All the great features on the original 407 are also all still here. GPU (Ground Power Unit), Fuel Tank and fuel loading, battery access, and four opening doors with baggage compartment, What is new is that the actions on opening up the doors, getting inside the aircraft and other external items have been refined so all the actions can be done externally and with not having to open the menu each time, the menu is available externally as well if you want it by pressing certain areas on the aircraft (a circle). The two door choices with the full (side) and standard glass has now a third option in a smaller frame window, the glass opens as well. Low skid, High skid, baskets, Cineflex camera, sling hook, floats, cable cutter, frahm damper are all still here. There is a great new feature in the aircraft ground moving electric cart. This movable cart is controlled via your joystick. Press the circle on the nose of the cart to raise the aircraft, then control the speed and direction via your joystick... ... and yes it is a huge amount of fun, better yet that it allows you to reposition the aircraft back to where you should have landed in the first place. The rotors have had attention as well. The original rotor design was excellent, but in operation the look of the moving blades has been refined for the main rotor and a complete overhaul of the rear rotor to make it look more authentic and make better the rotor blur/shadow effect. It is also to look better with weather addons, but I found that the xEnviro environmental engine looked the same blurry condition, however this is an xEnviro issue not a Dreamfoil issue as it is the same on all propeller aircraft. So the new moving blade animations do look really good in X-Plane11 when viewed in the default X-Plane simulator. They reflect far better on the aircraft in flight as well, and the shadow effects of the blades rotating from the cockpit perspective is simply excellent and real. Flying the XP11 Bell 407 As noted the flying characteristics have had a lot of refinement for XP11. You need far more skill now to fly the aircraft with finer movements for control manipulation, forces are now slightly different and more finer and even closer to reality (the 407 was good before). Takeoff is quite tricky to get right, and landings are a real test of skill unless you have a lot of experience on these machines, there is now Improved airfoil drag curve, and now helicopter will cruise at a more realistic speed. The NG has been recalibrated to match the correct rpm on various power settings and the MGT temperatures during start and flight should give you a more accurate reading. Fuel flow is more correct and the Frahm Damper now affects the flight model (you can have it on or off). Back on the ground the idle has been fixed and rotor shutdown won't keep on revolving for ever. A new feature is the HeliSAS/Autopilot system. Basically an autopilot for the helicopter to take away the pressure of holding the collective and stick for long periods. It is positioned below the main panel above the radio and is extremely easy to use, it is really just a set the aircraft and then set the HeliSAS to keep those settings. You can turn via changing the heading and the speed via the collective and there is also the VRT mode that works via using the knob to set your vertical speed on the V/S dial and ALT will hold your altitude. It takes a little getting used to, but it is very good. Dreamfoil created the DreamEngine so you expect the sound to be good, and it is and improved great volumetric cabin sound, more tail rotor loudness and the main rotor sound is audible on the tail cam. Speed slap now requires a bit of distance to be heard and is not as vocal as before and you can hear the air ventilation sound coming out of the back outlets. But the overall sound feels far better and very realistic (it needs to be with an autopilot) so the sound is impressive. The clever menu system is still there on the top-right of the instrument panel and the liveries are easy to select. There have been those two extra black interior liveries added to the collection, but otherwise it is same one blank and ten set as before. Summary The Bell 407 from Dreamfoil Creations was exceptional before, but the change to X-Plane11 has took the whole deal far higher again. In every area the aircraft is simply outstanding, flight, features, detailing, quality and I could bore you for hours with my feelings for this machine. Great new features including the HeliSAS/Autopilot, Electric Cart, new interior and so on are great attractions here, but mostly this is a qualified conversion to X-Plane11 than just the additions in the package. I do wonder though to drop the entry tools in the "rigid cruise" and "arcade mode" functions was a good idea. It does take the aircraft out of the bounds of trainees and helicopter learners, you have to be really quite proficient to fly this XP11 version, and even training and transitioning on the older XP10 version and then moving over to the XP11 version is still a large gap. I am not saying the time learning to fly this amazing machine is not worth it as because you are flying now the best of the best, but there is certainly a higher skill required to do so. X-Plane11 delivers and requires a whole new level of immersion in simulation. This is the first helicopter converted specifically for the new medium and it shows, and boy does it show. This is a great step forward from already a very high standard, all you can ask is how much higher can you go... this Bell 407 has to be as good as it gets. ______________________________________________________________________ Yes! the Bell 407 XP11 by Dreamfoil Creations is now available from the new X-Plane.Org Store here : Bell 407 XP11 Price is US$35.00 US$35.00, but previous X-Plane10 owners can upgrade to this new XP11 version for only $15. The coupon code for the discount can be found in the original Bell 407 invoice on your account at the X-Plane.Orgstore. More Bell 407 details can be found on the original 2014 X-PlaneReview Release Review here: Aircraft Review : Bell 407 by Dreamfoil Creations Requirements: X-Plane 11 (not compatible with X-Plane 10) Windows, MAC or Linux - 64 bit Operating System Joystick required for helicopter operations (No, you cannot fly it with a mouse!) 1GB VRAM Minimum - 2GB+ VRAM Recommended Current version: XP11 v1 - Last Updated April 27th 2017 Improvements over the X-Plane10 Version Features: - HeliSAS/Autopilot implemented - Deprecated "rigid cruise" and "arcade mode" functions - Added blade tie system so each blade can be tied to their positions by clicking and dragging their tips - New electrical cart for moving the helicopter on ground Graphics: - Added interior normal maps - Improved gauges bar display visibility - Removed _lit textures for 5 objects on interior - Two variants of seat and interior textures that take advantage of PBR - Cabin lights are now on their real place and using spill lights - Framerate improve with obj optimized by removing ghost animations - New 3D propeller for tail rotor - Fixed rotor blur/shadow issue with clouds - Improved pedal stop light logics - Fixed small fliped quad on left side of headphone - Fixed missing placards - Added instruments glass Sound: - New skin for DreamEngine config window to match XP11 ui - Added DreamEngine volumetric cabin - Improved tail rotor loudness - Main rotor sound might be audible on tail cam - Speed slap now requires a bit of distance to be heard - Added air ventilation sound to back outlets UI: - SmartLivery now uses X-Plane 11 thumb icons - Added mouse scroll to manipulators - Added ability to manually rotate the rotor from outside - Added GPU external manipulator - Added Garmin430 power button manipulator - Added engine inlet/outlet/pitot caps can be manipulated individualy from outside without need to go in menu for adding them - Moved external menu from nose tip to side of nose, this was necessary to add the pitot cap manipulator - Improved SmartMenu icons visibility and interaction radius - Improved battery compartment handling, it's not necessary to go on menu to open/close it anymore - Improved doors external interaction, now it's possible to choose between go inside or just open the door Flight Model: - Improved airfoil drag curve, now helicopter will cruise at a realistic speed - Fixed torque on ground with flight rpm, will display correct value now - Improved landing gear adaptation during plugin start to avoid helicopter "drop" at ground - Recalibrated NG to match the correct rpm on various power settings - Fixed MGT temperature during start and flight should give an more accurate reading - Improved fuel flow - Fixed wrong idle speed - Improved rotor slowdown during shutdown, will not keep spinning forever - Frahm Damper now affects the flight model - Enhanced lateral skid friction by plugin Others: - Clock now displays the Estimated Time from HSI - Added shutdown command for starter switch - SmartMenu commands can now be found on command list - Organized and renamed commands descriptions for better organization - Fixed the air conditioner switchs logics - Fixed starter not disengaging during shutdown Installation : Download file size is 347.90mb to your X-Plane - Helicopter Folder. Installed file size is 792.80mb. ______________________________________________________________________ Review by Stephen Dutton 29th April 2017 Copyright©2017: X-PlaneReviews (Disclaimer. All images and text in this review are the work and property of X-PlaneReviews, no sharing or copy of the content is allowed without consent from the author as per copyright conditions) Review System Specifications: Computer System: Windows - Intel Core i7 6700K CPU 4.00GHz / 64bit - 16 Gb single 1067 Mhz DDR4 2133 - GeForce GTX 980/SSE2 - Samsung Evo 512gb SSD Software: - Windows 10 - X-Plane 11r1 Addons: Saitek x56 Rhino Pro system Joystick and Throttle : Sound - Bose Soundlink Mini Plugins: None Scenery or Aircraft - KEYW Key West International by Fletcherj (KEYW Key West International Airport V1.0 ) - X-Plane.Org - free
-
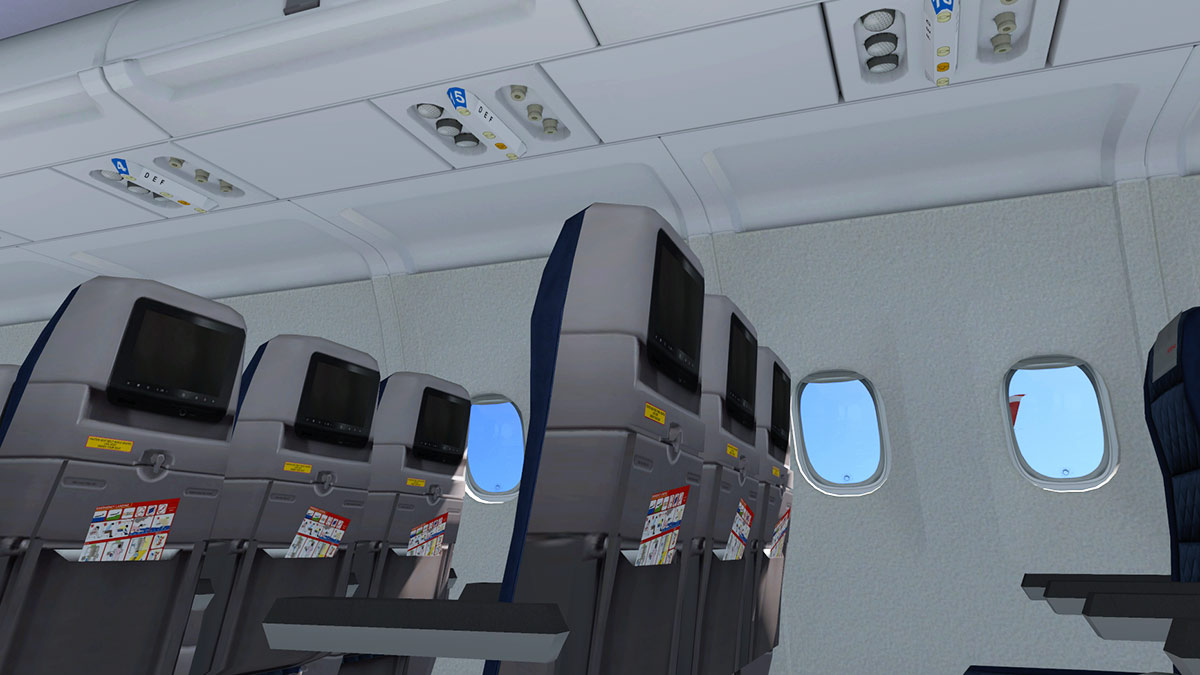
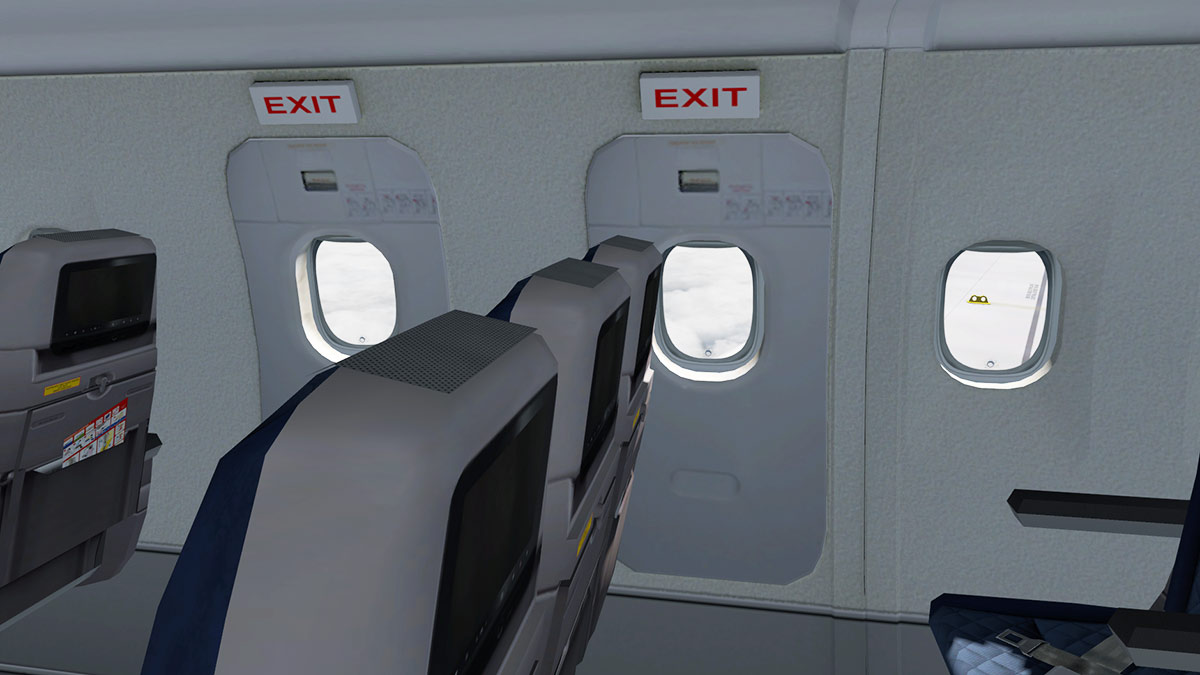
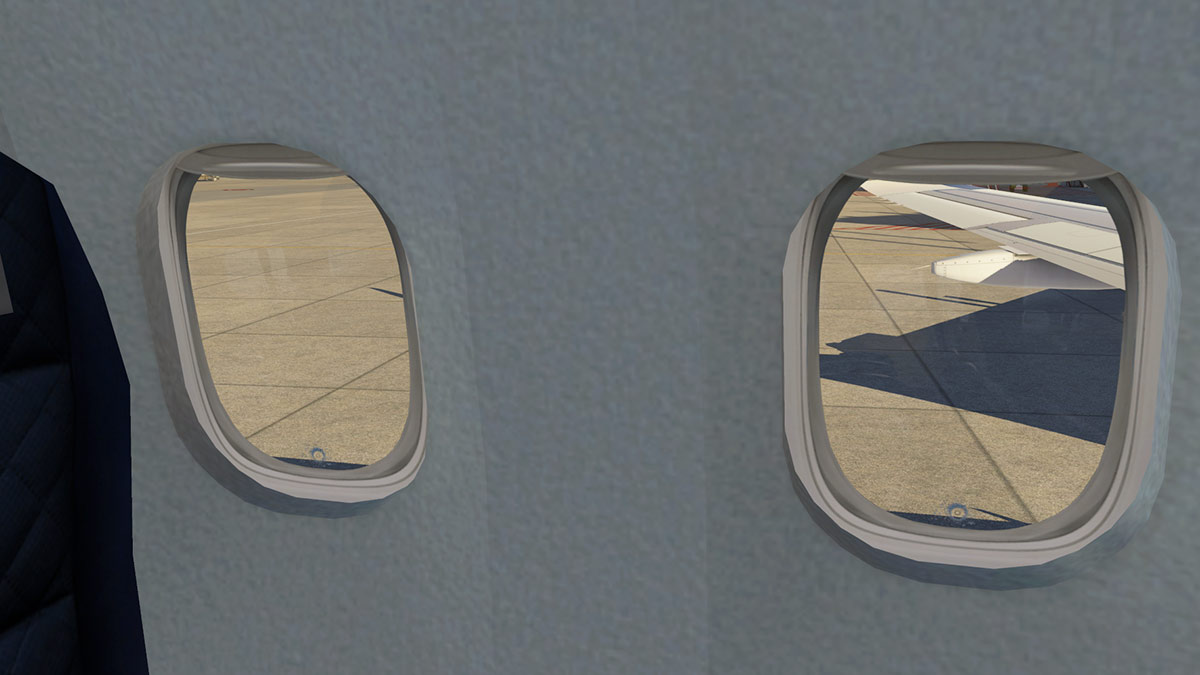
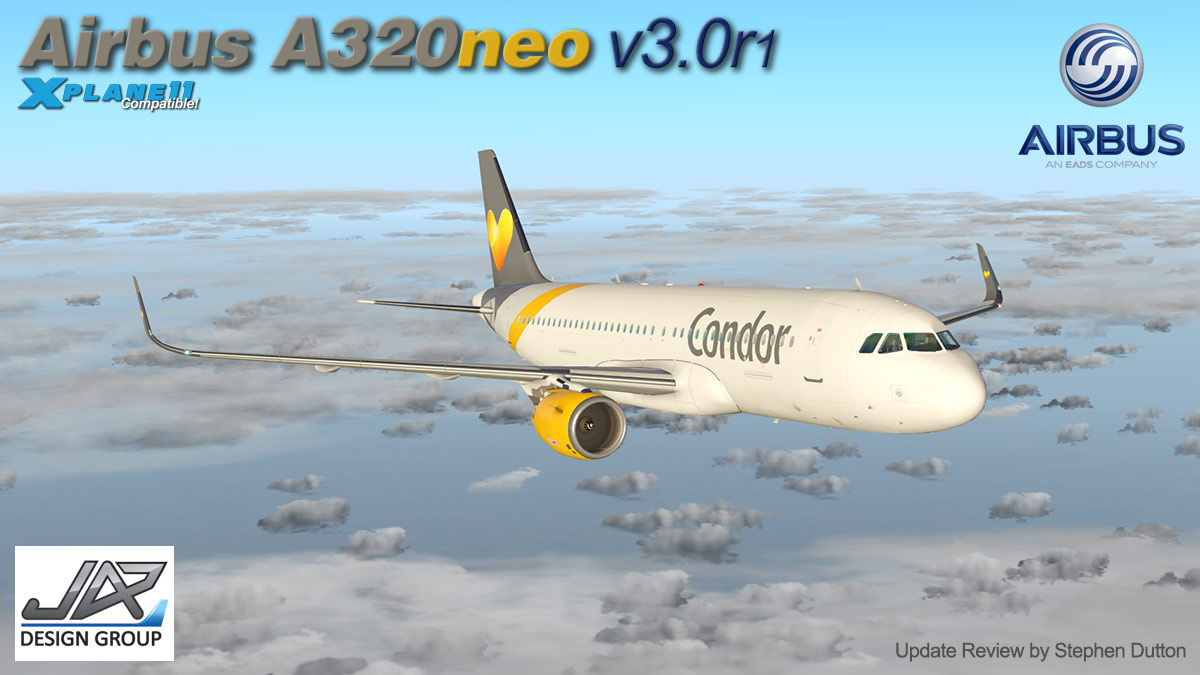
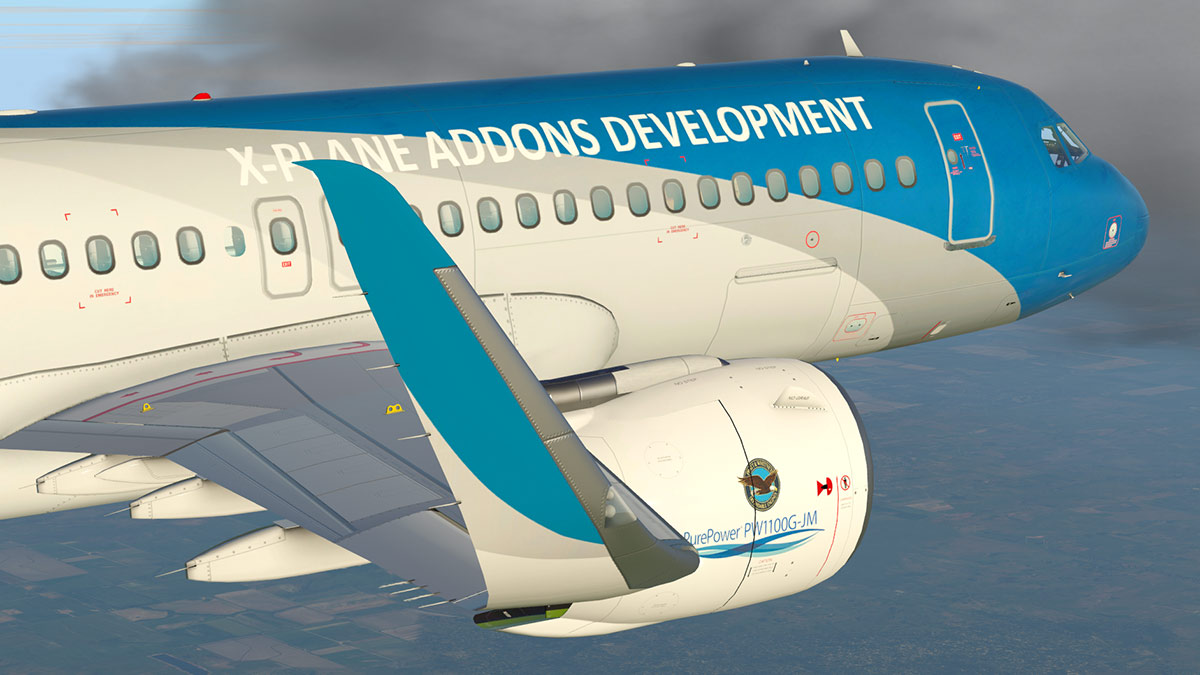
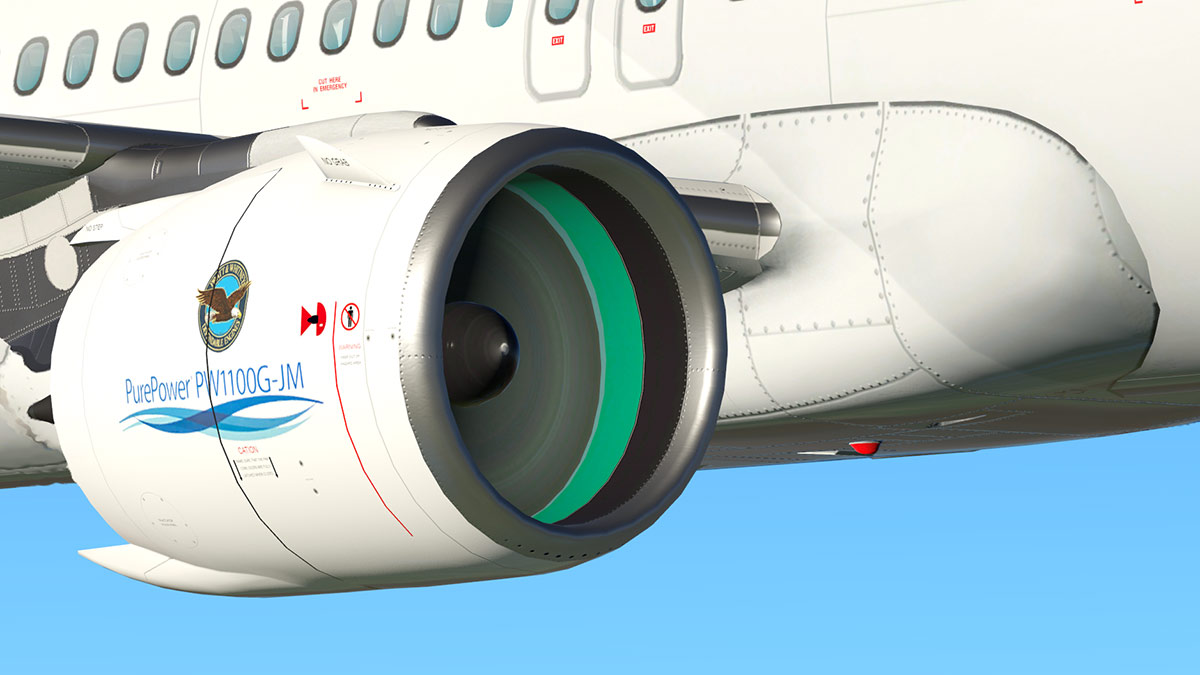
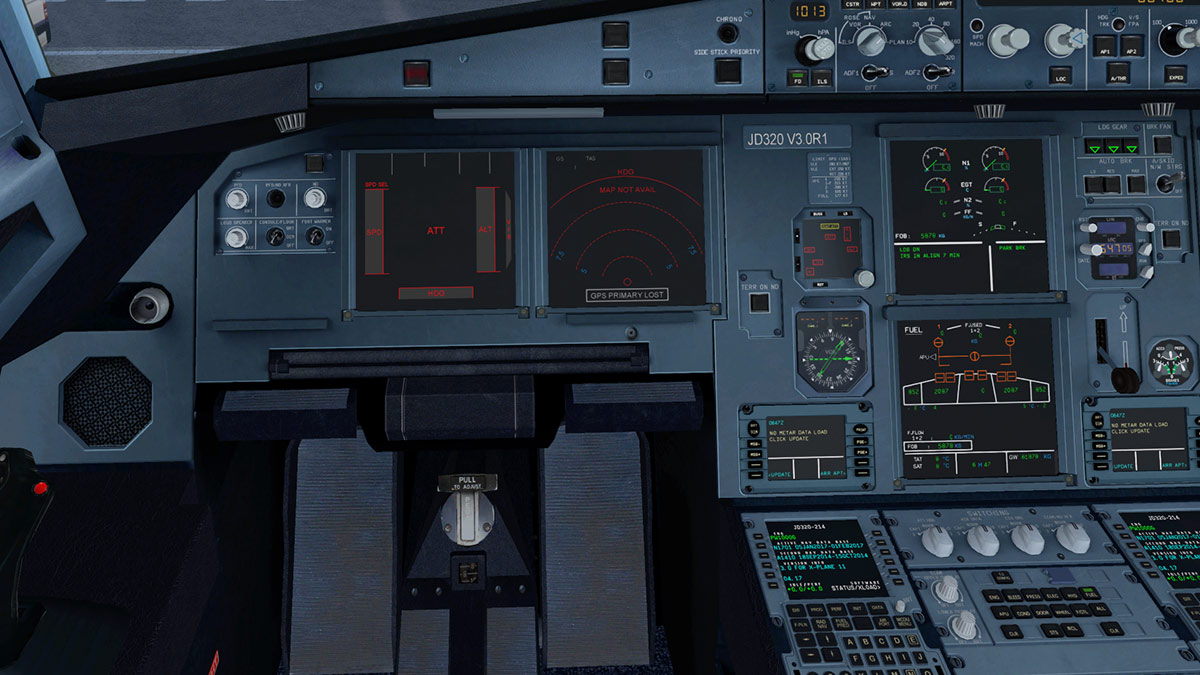
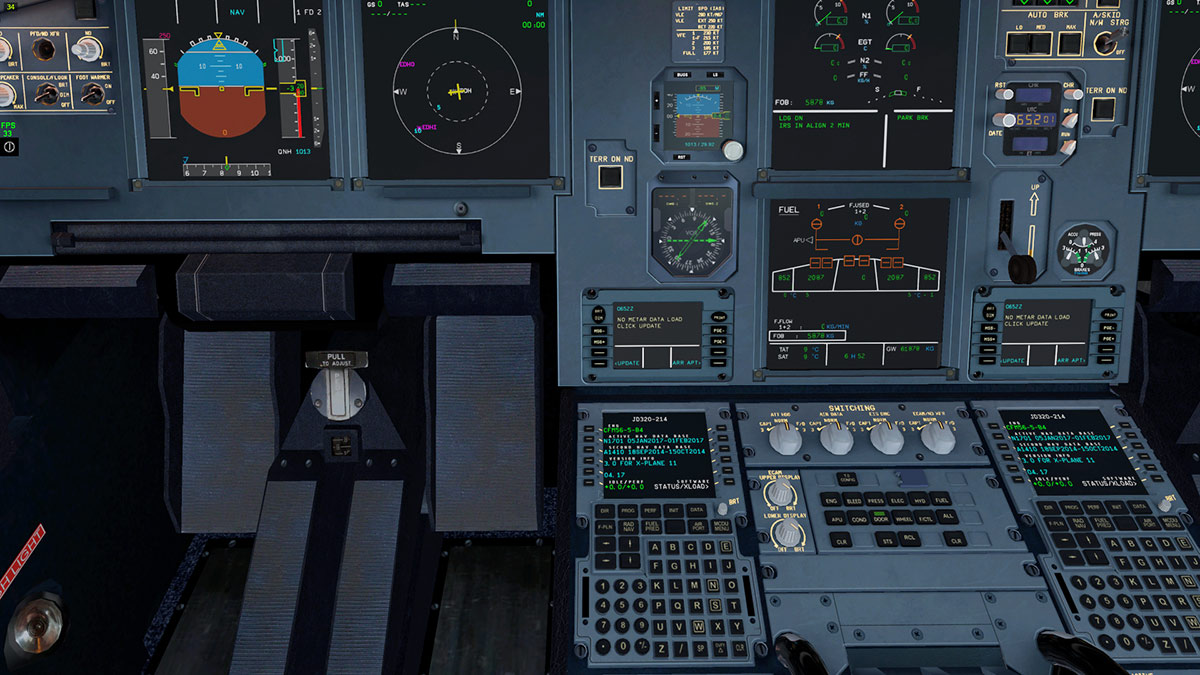
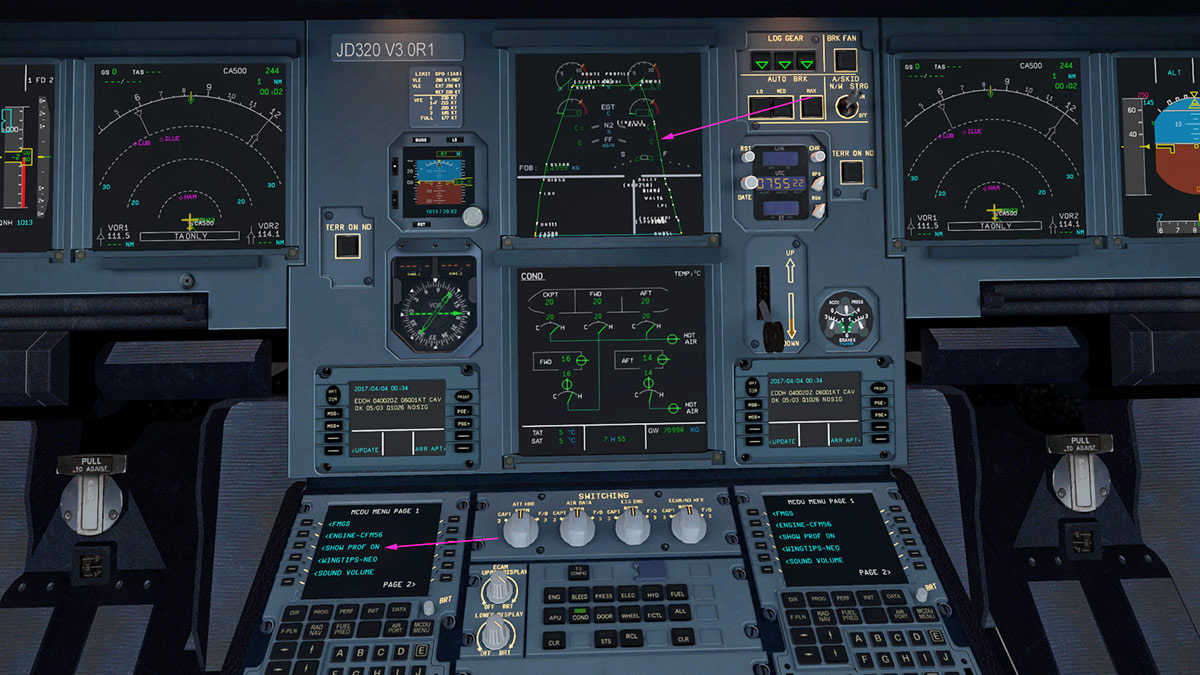
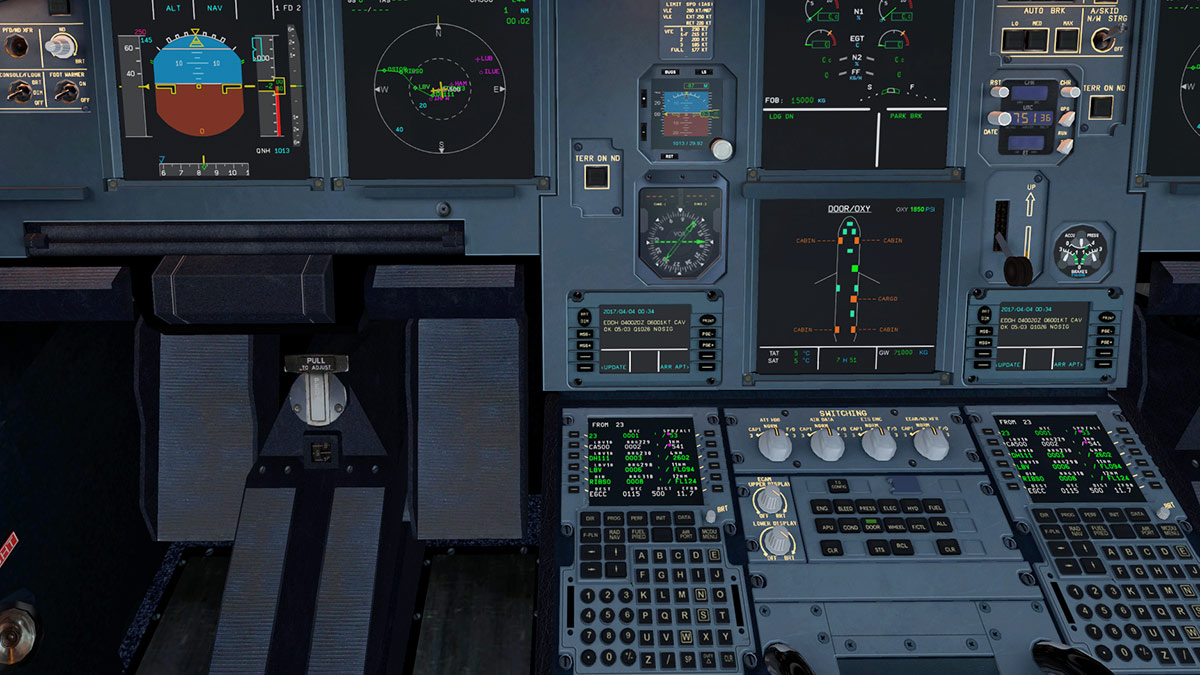
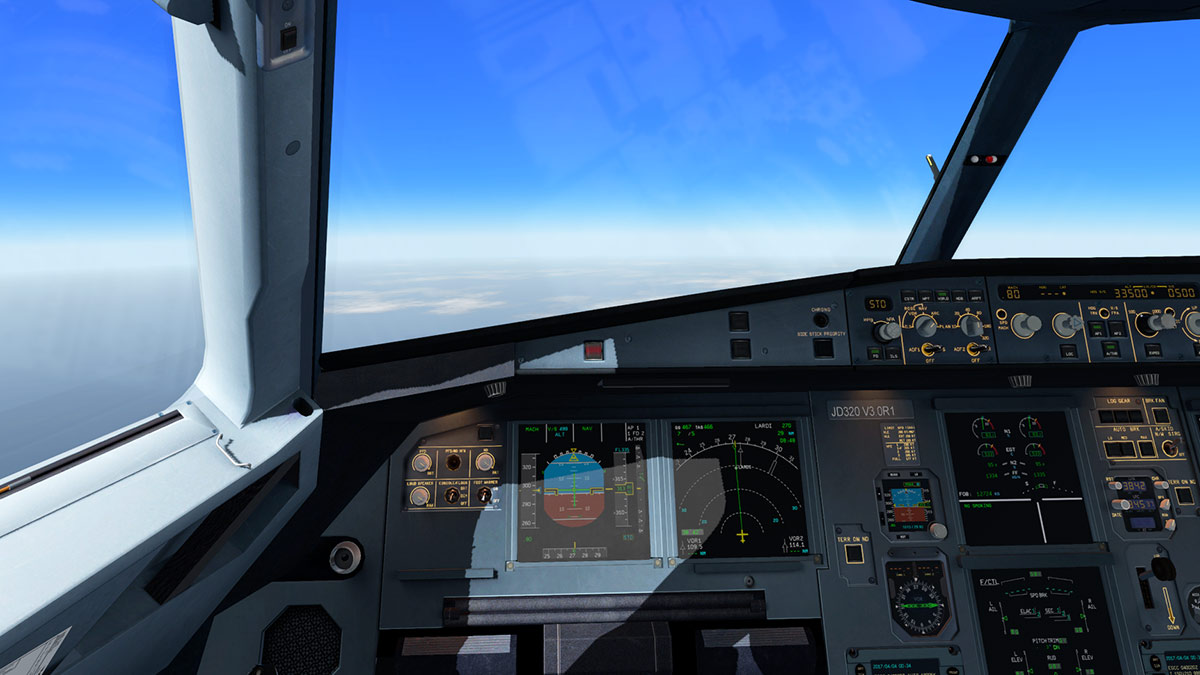
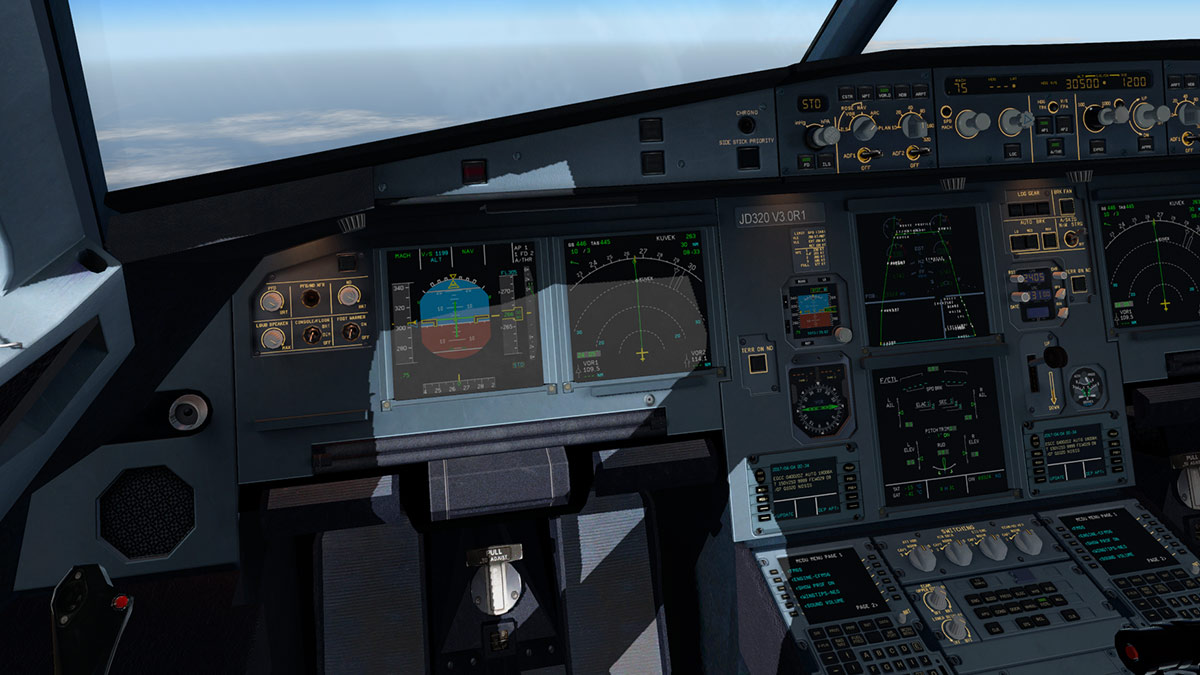
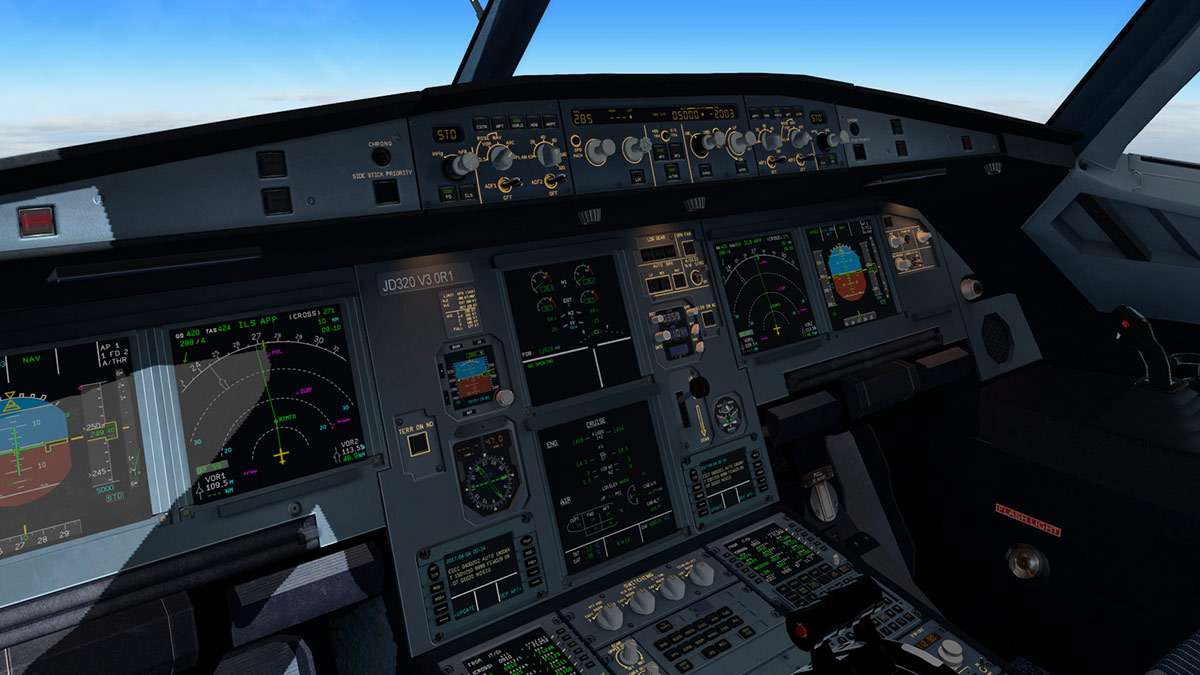
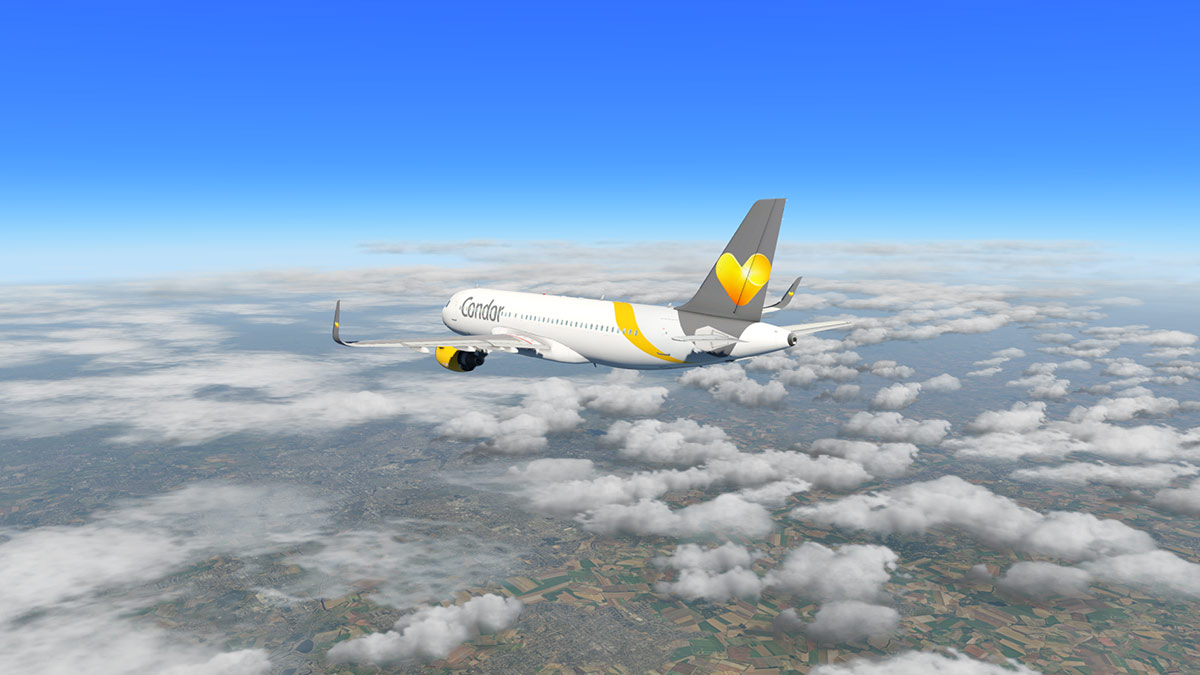
Aircraft Update : Airbus A320neo v3.0r1 by JARDesign
Stephen replied to Stephen's topic in Airliners Reviews
Yes Linux is supported on all JARDesign aircraft -
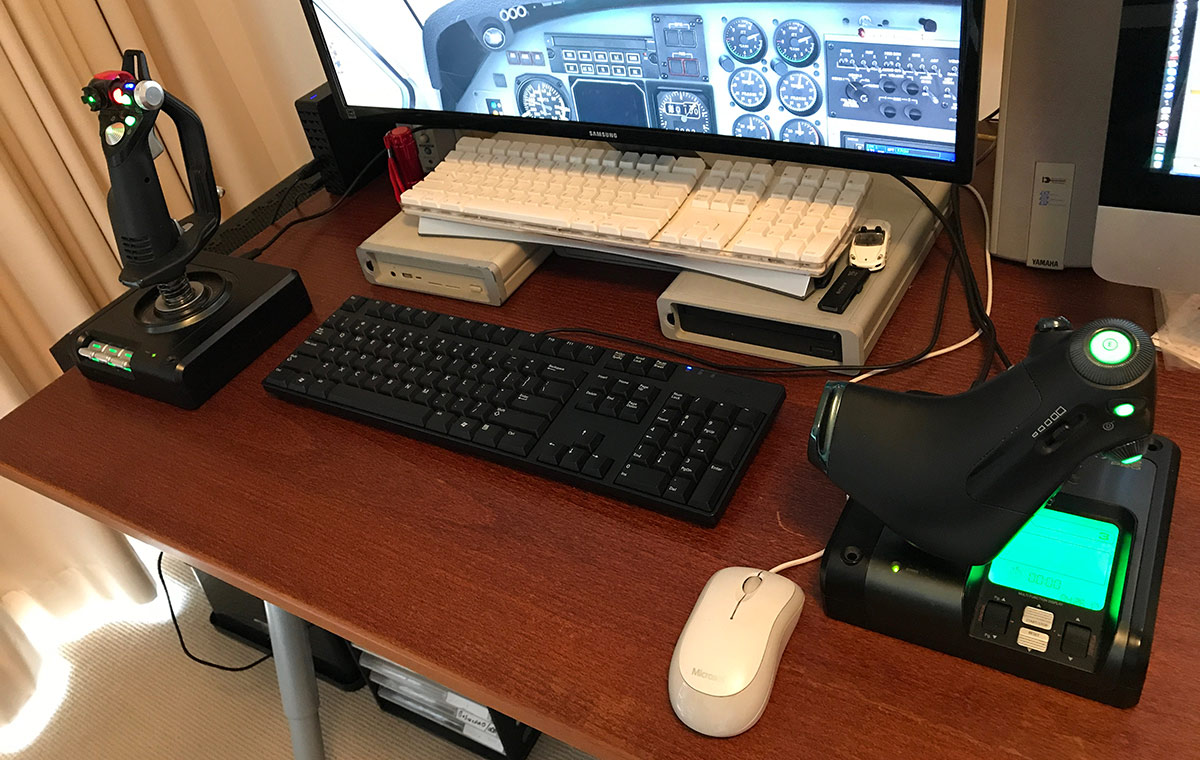
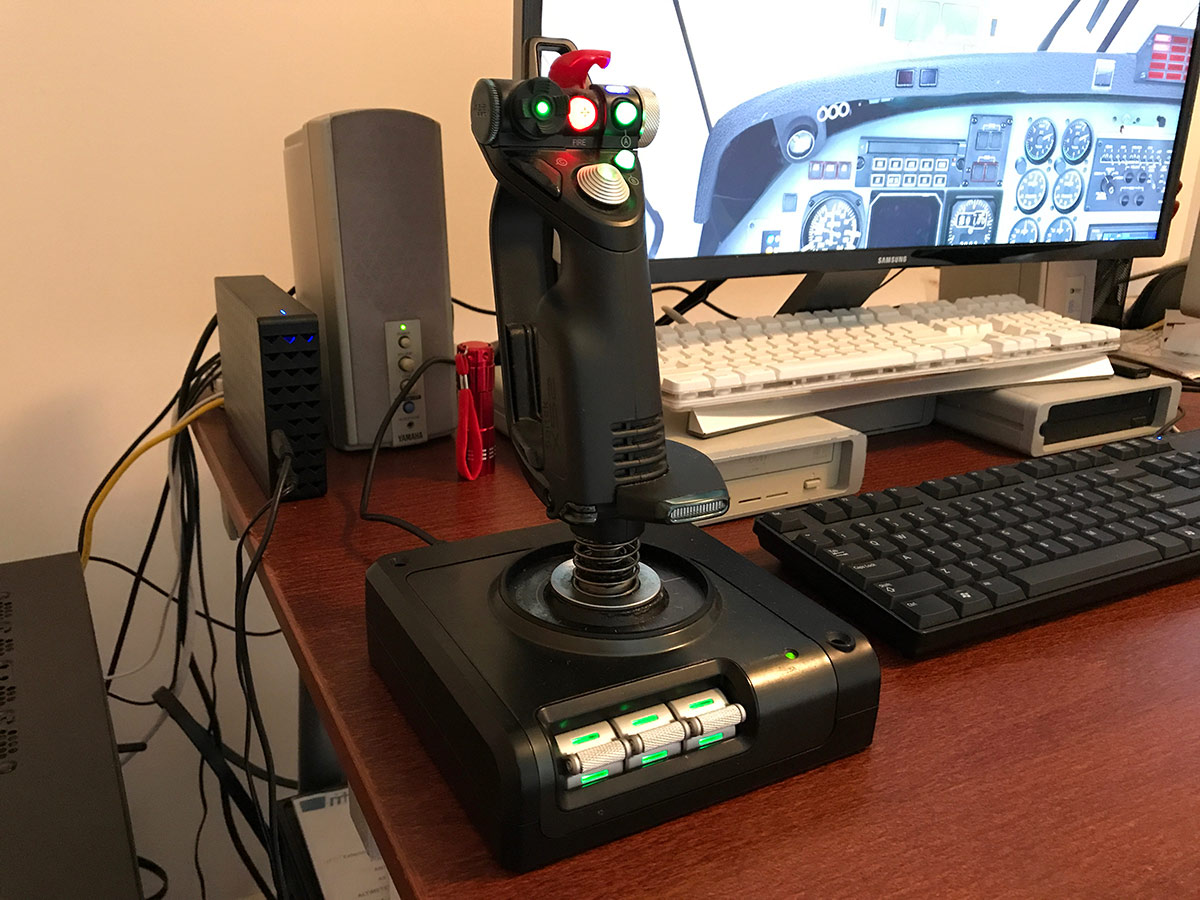
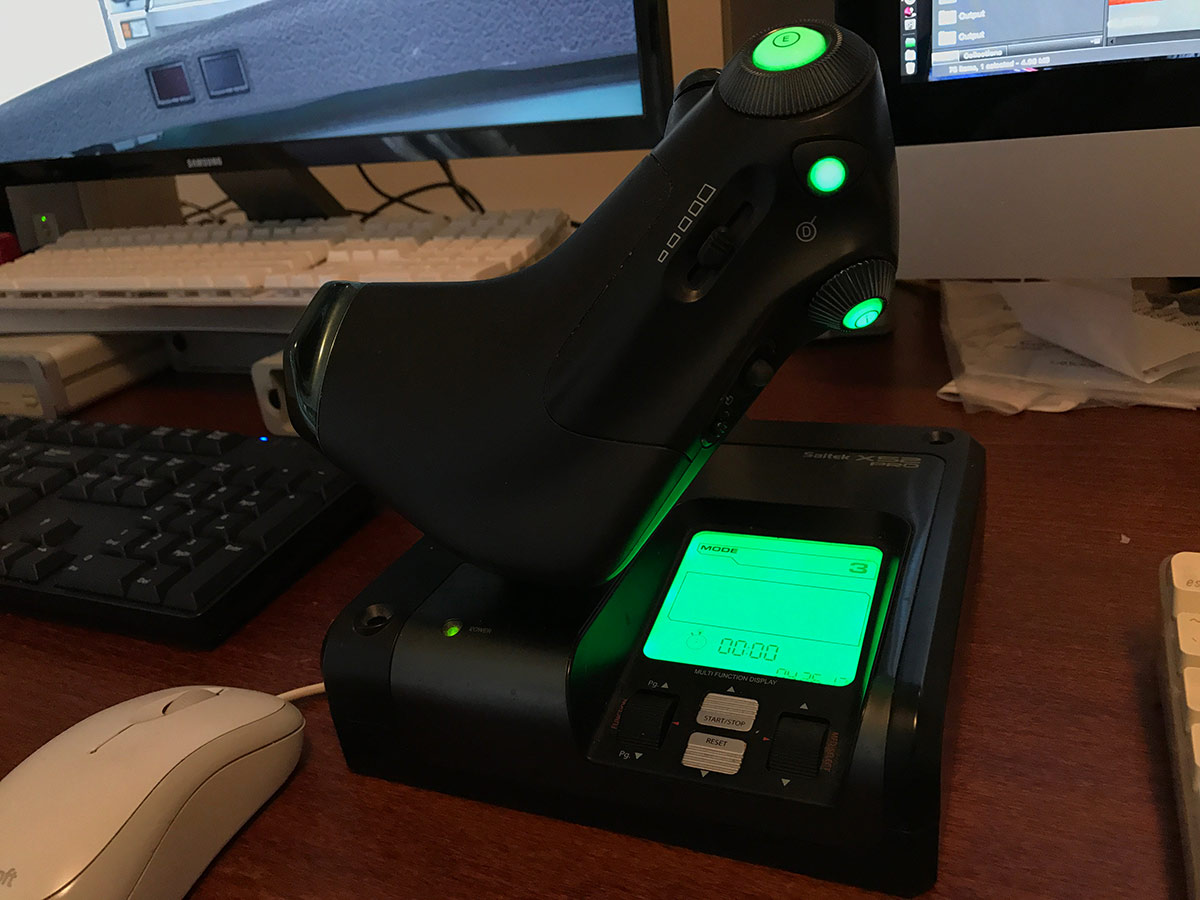
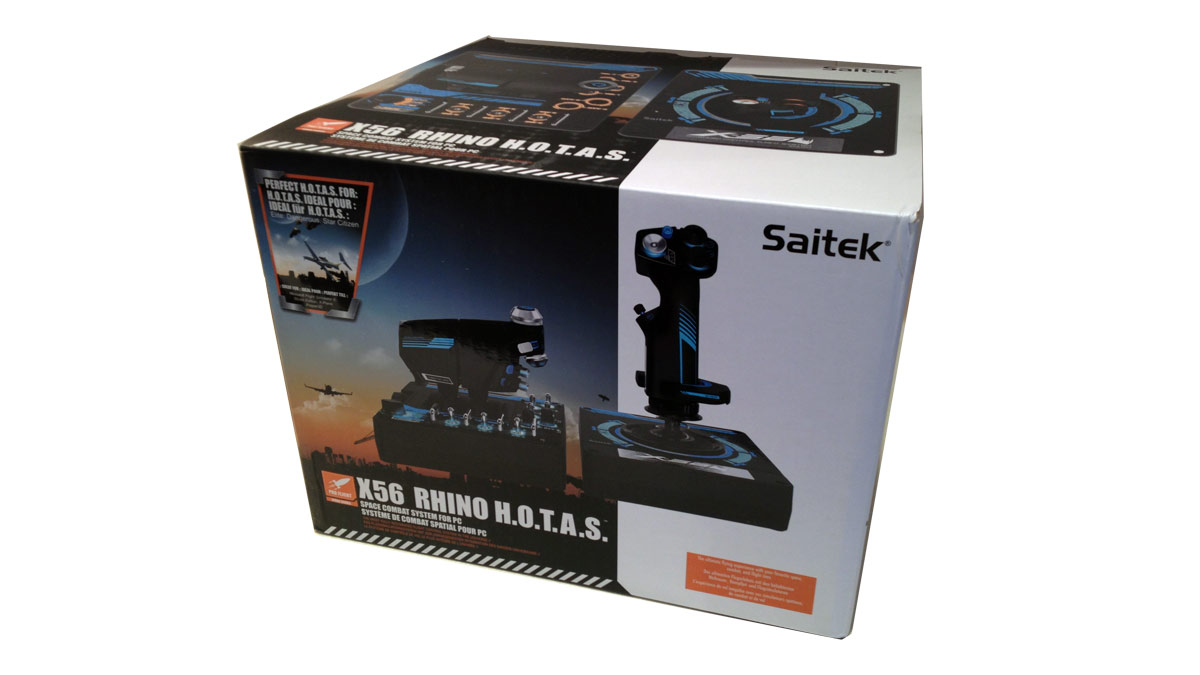
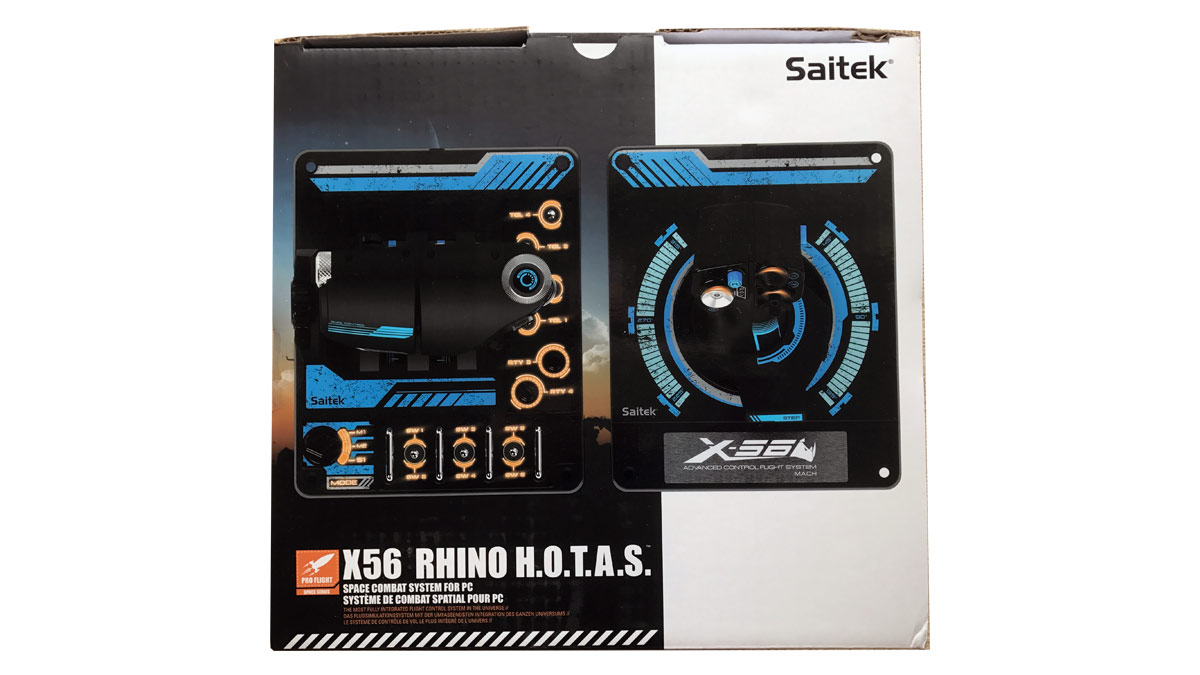
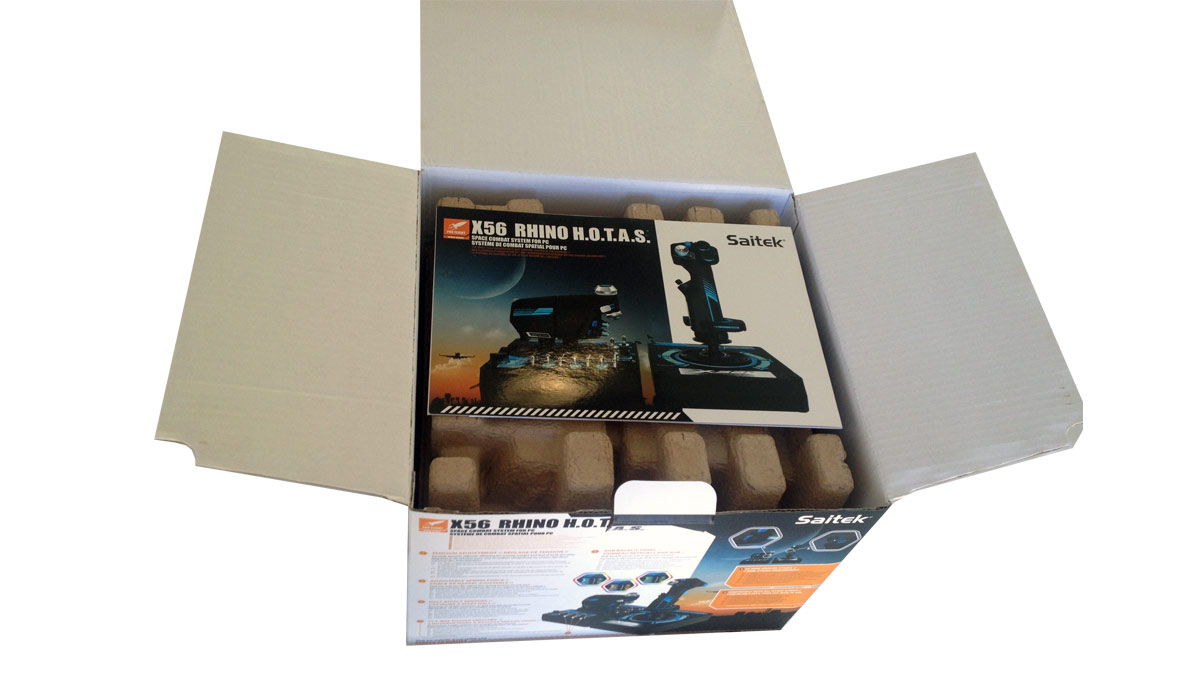
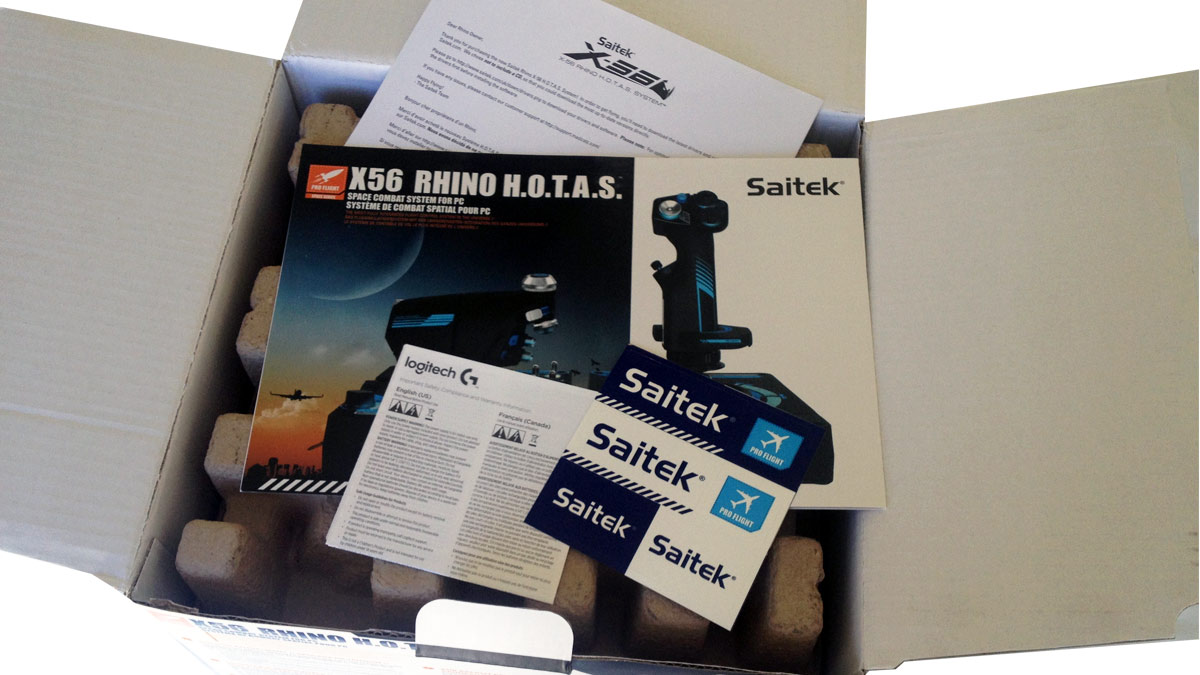
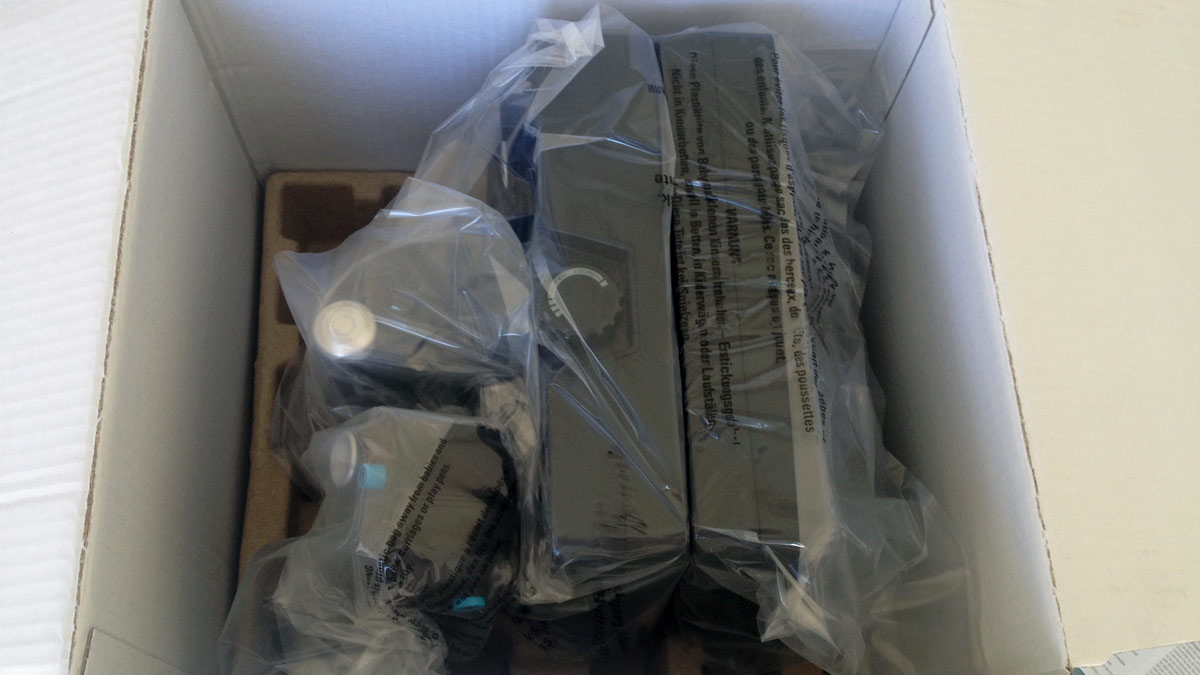
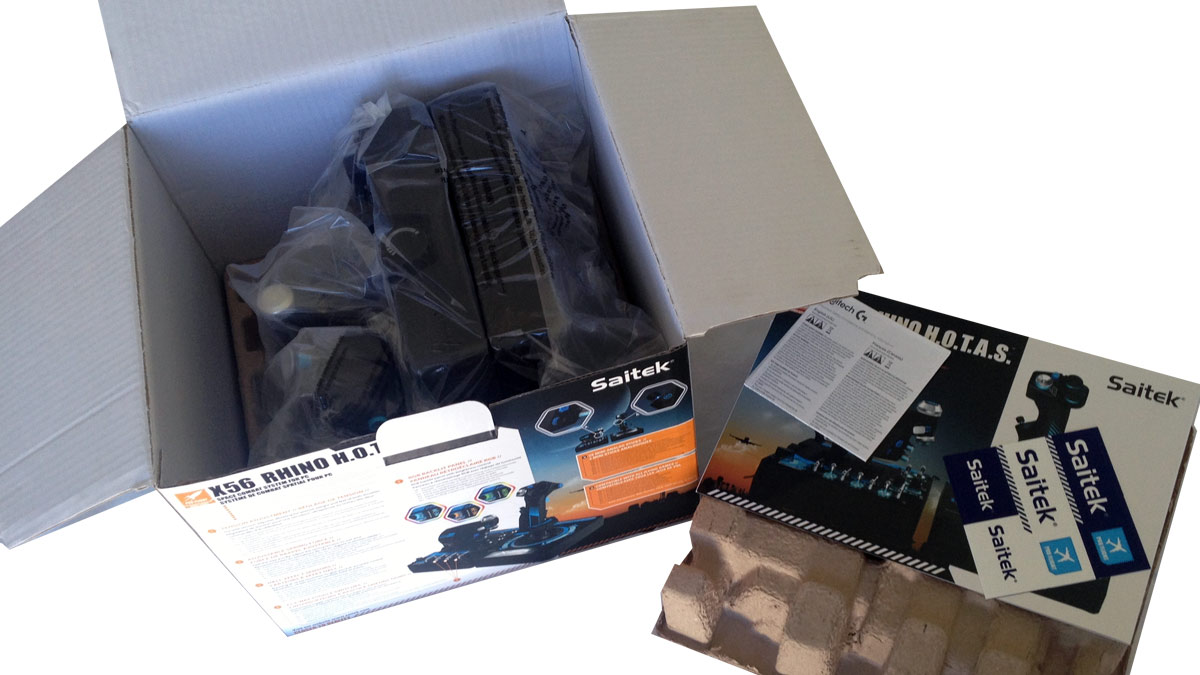
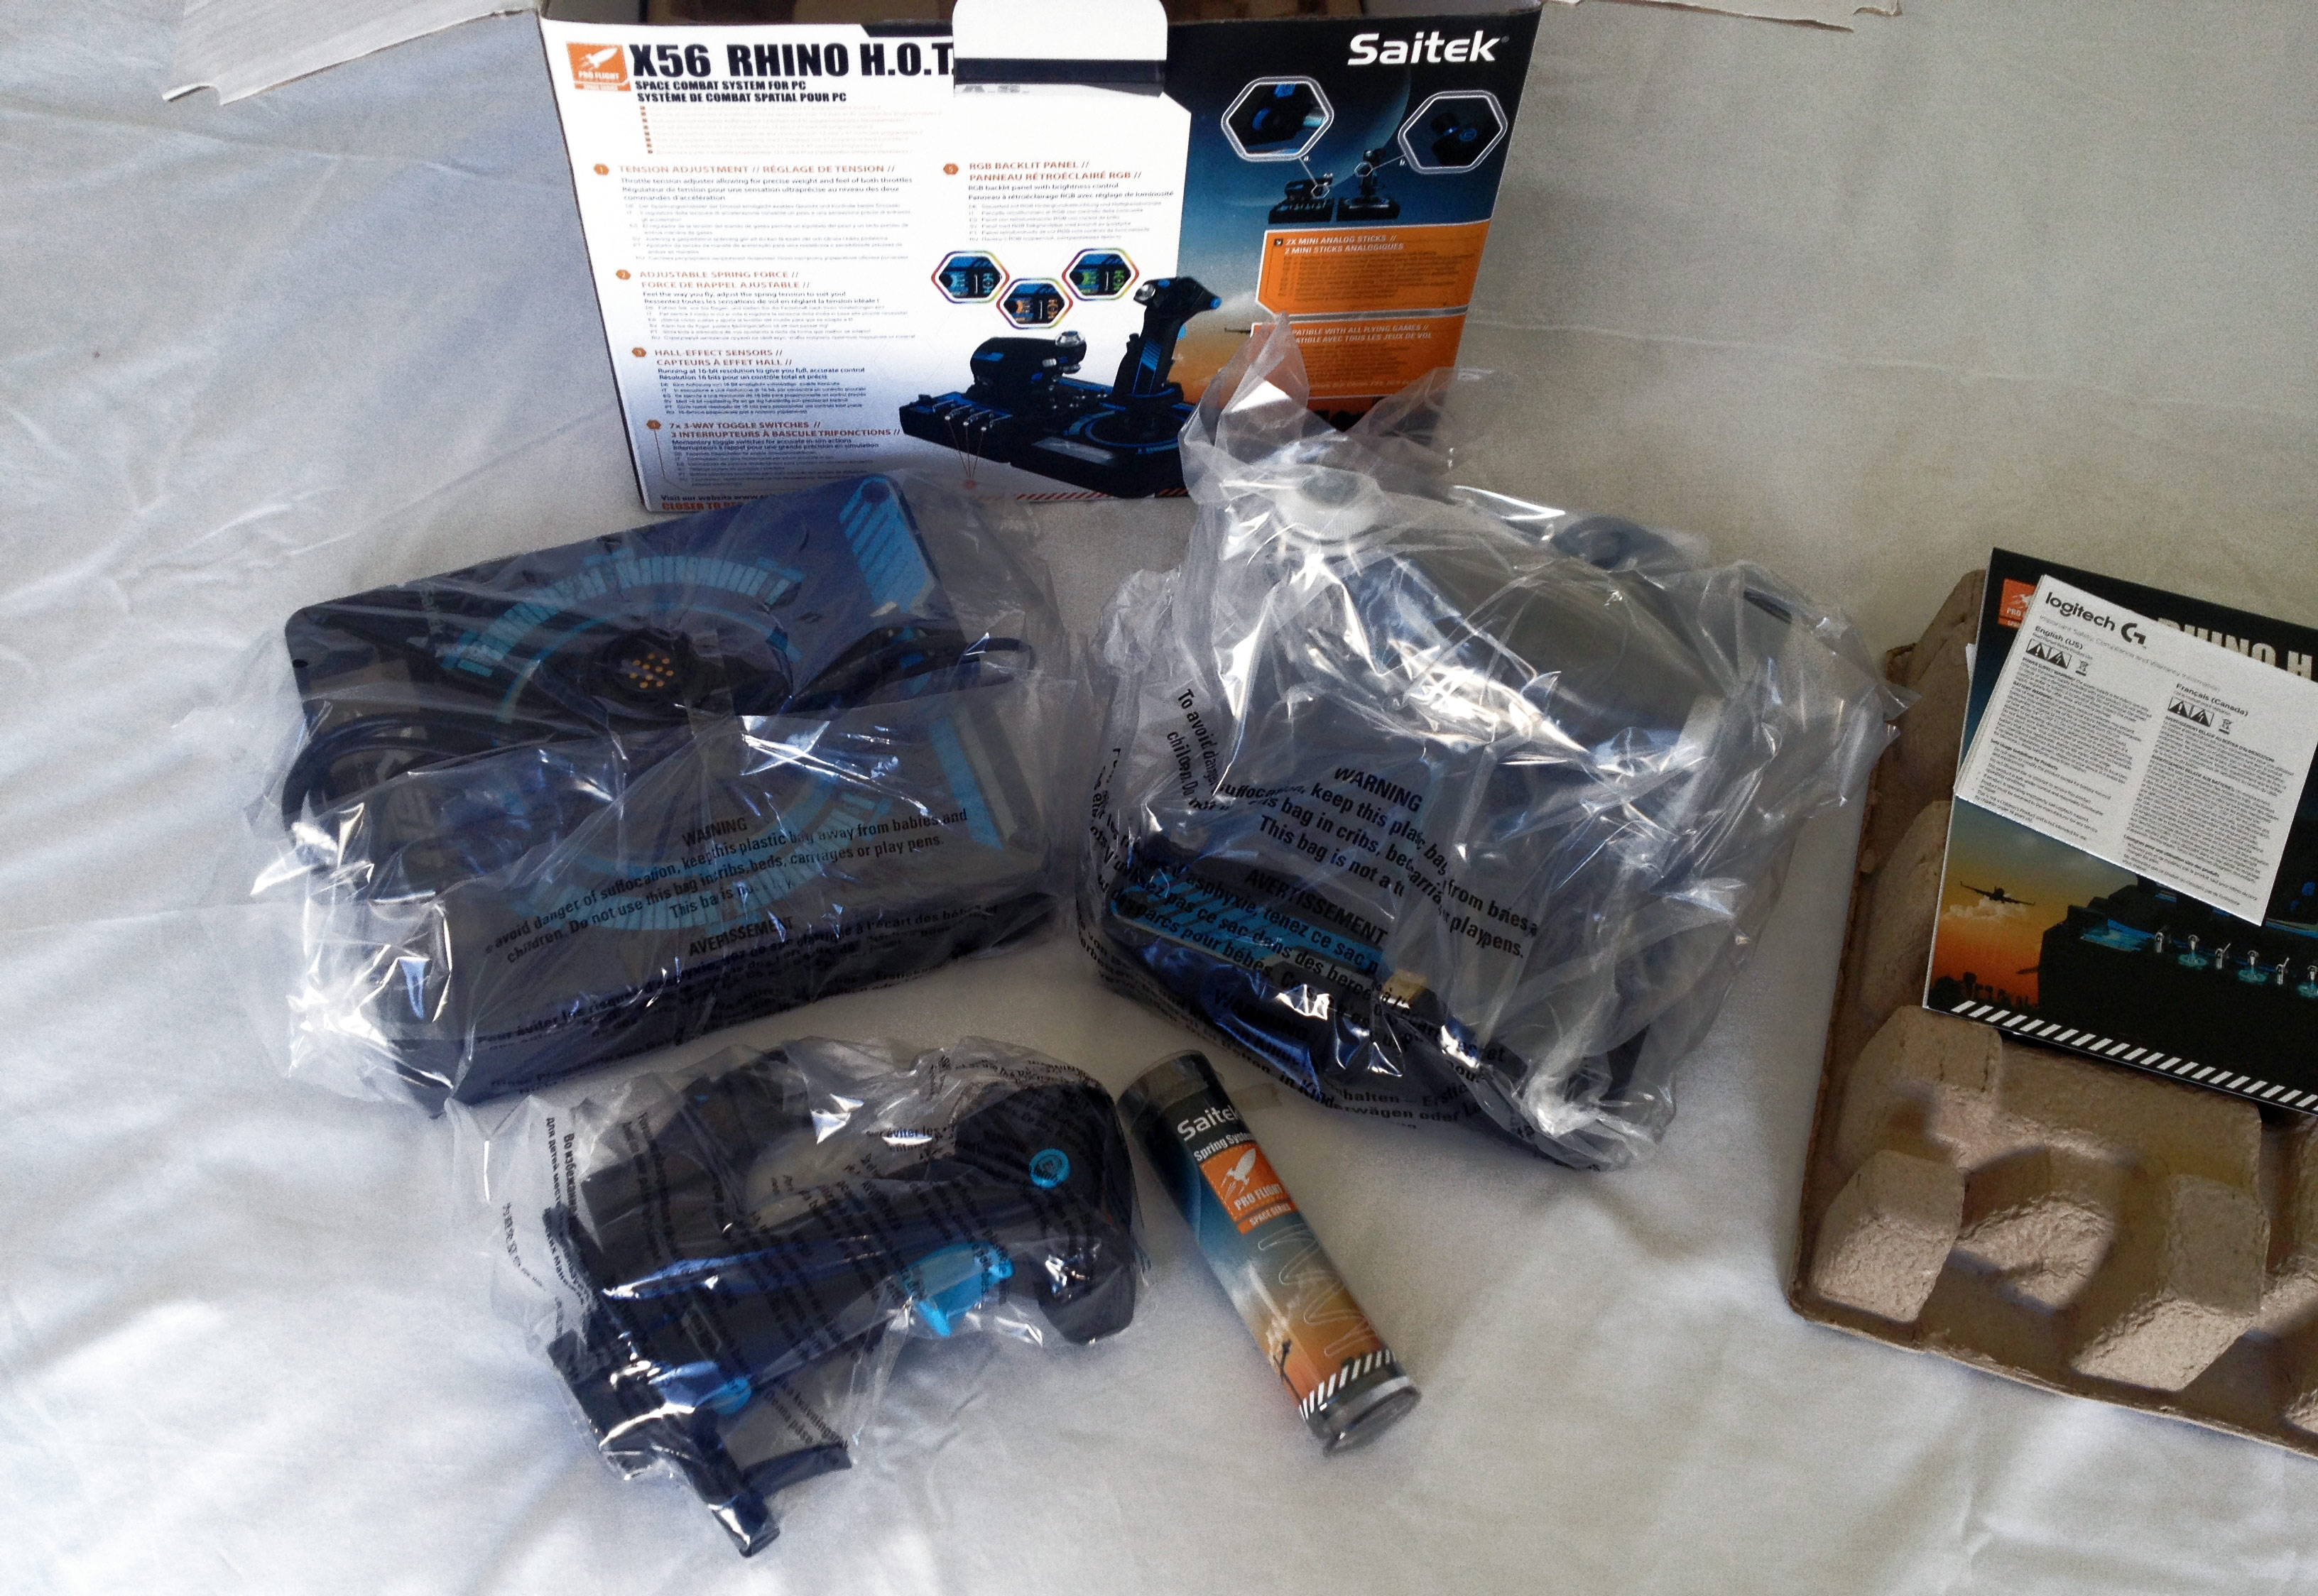
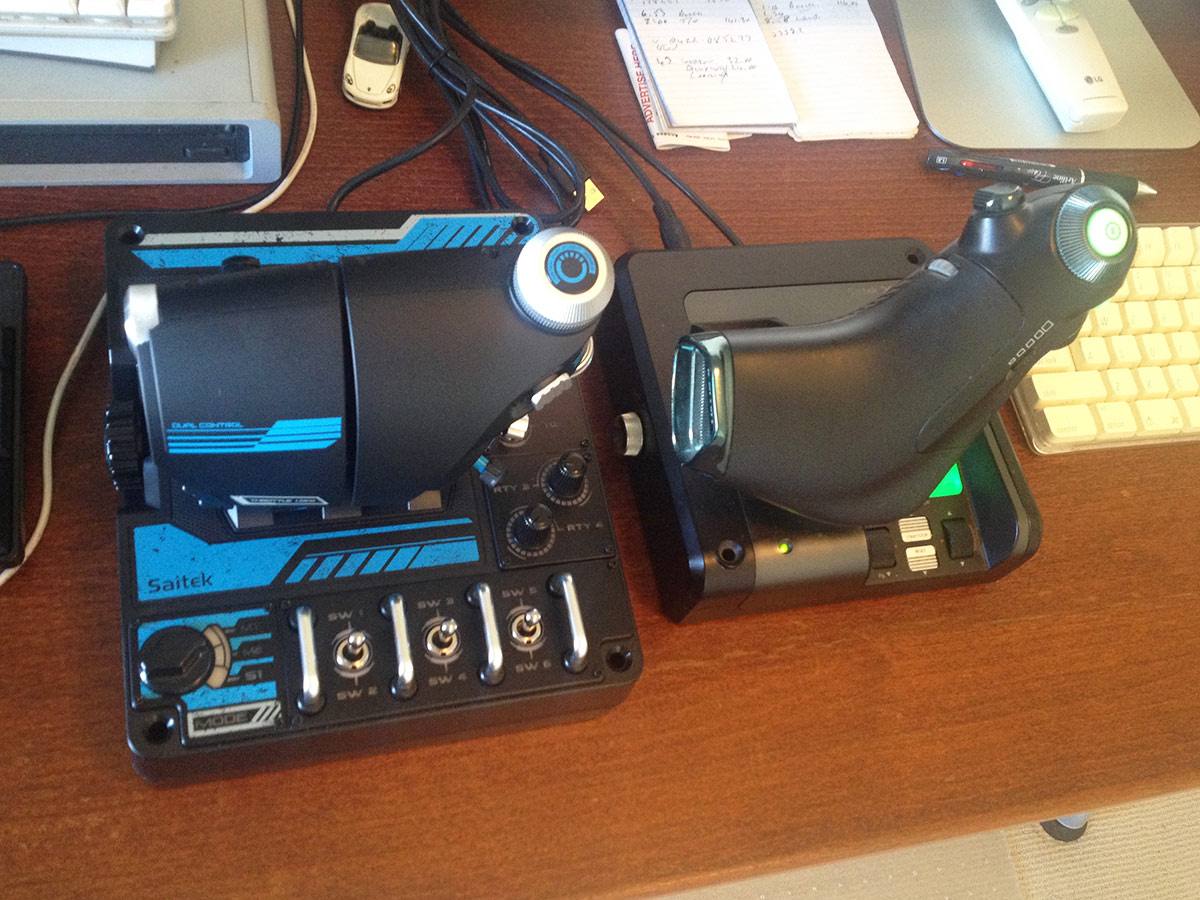
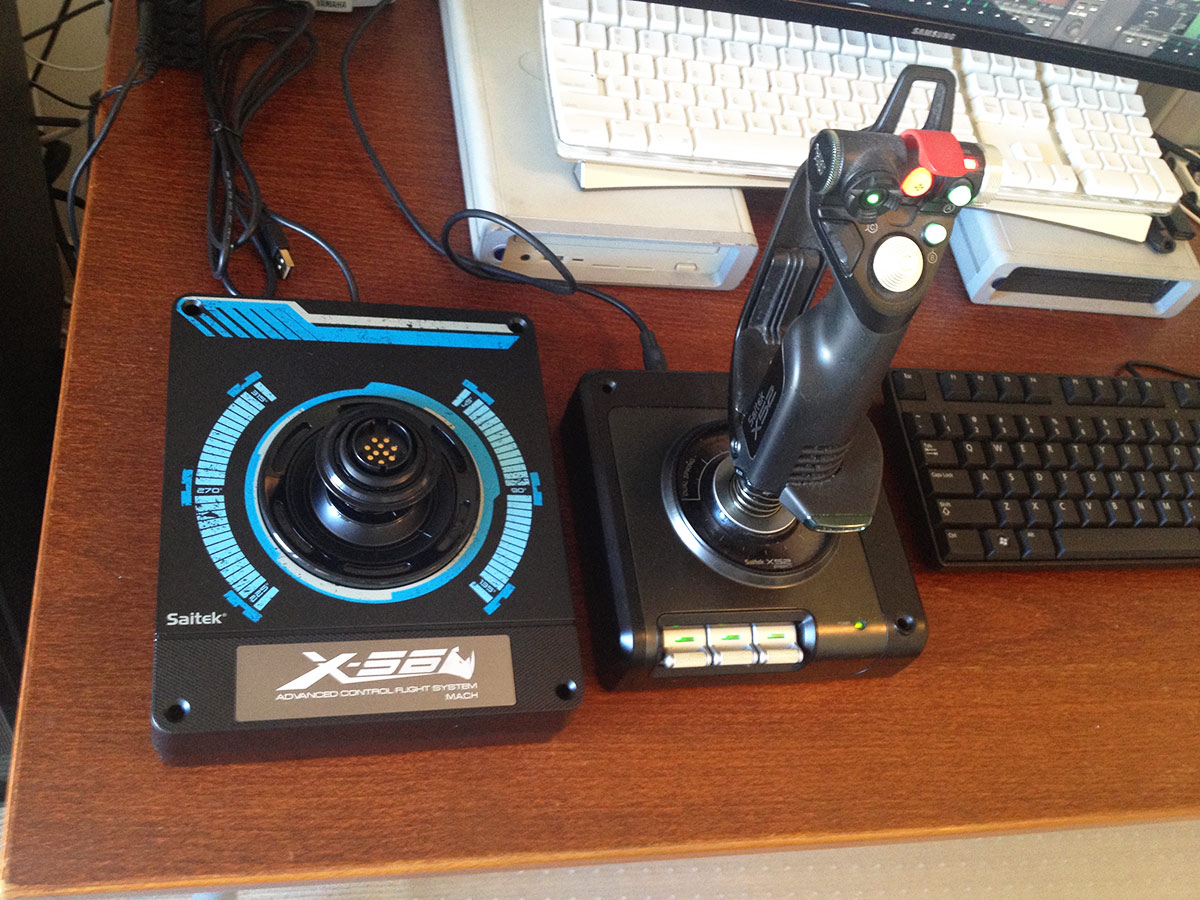
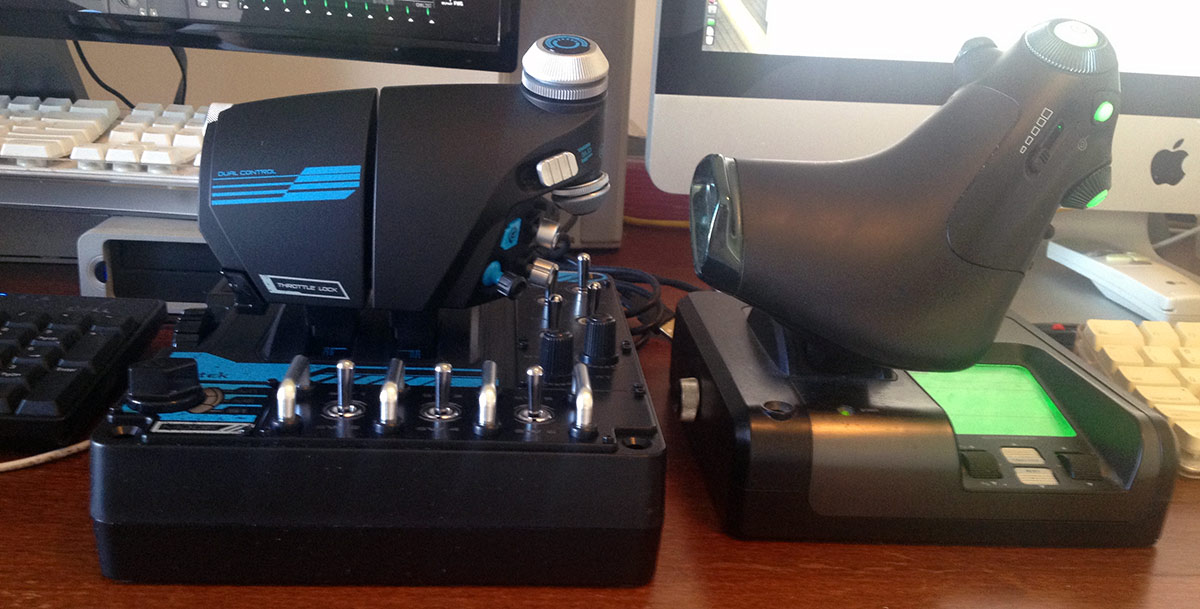
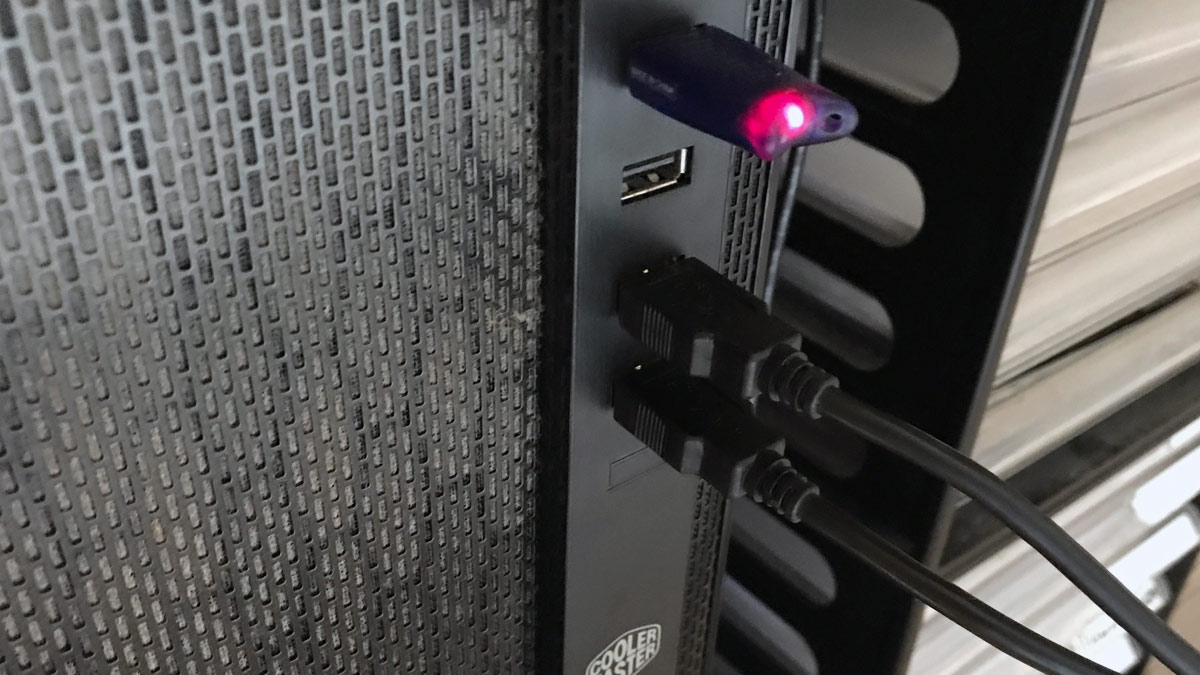
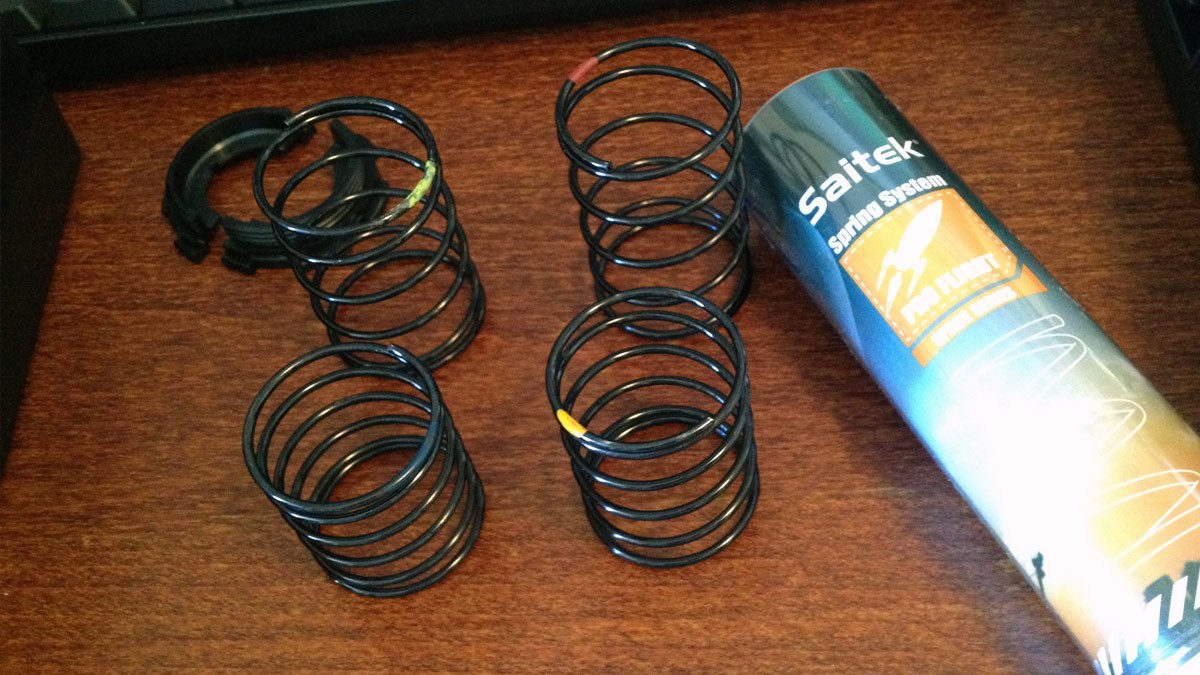
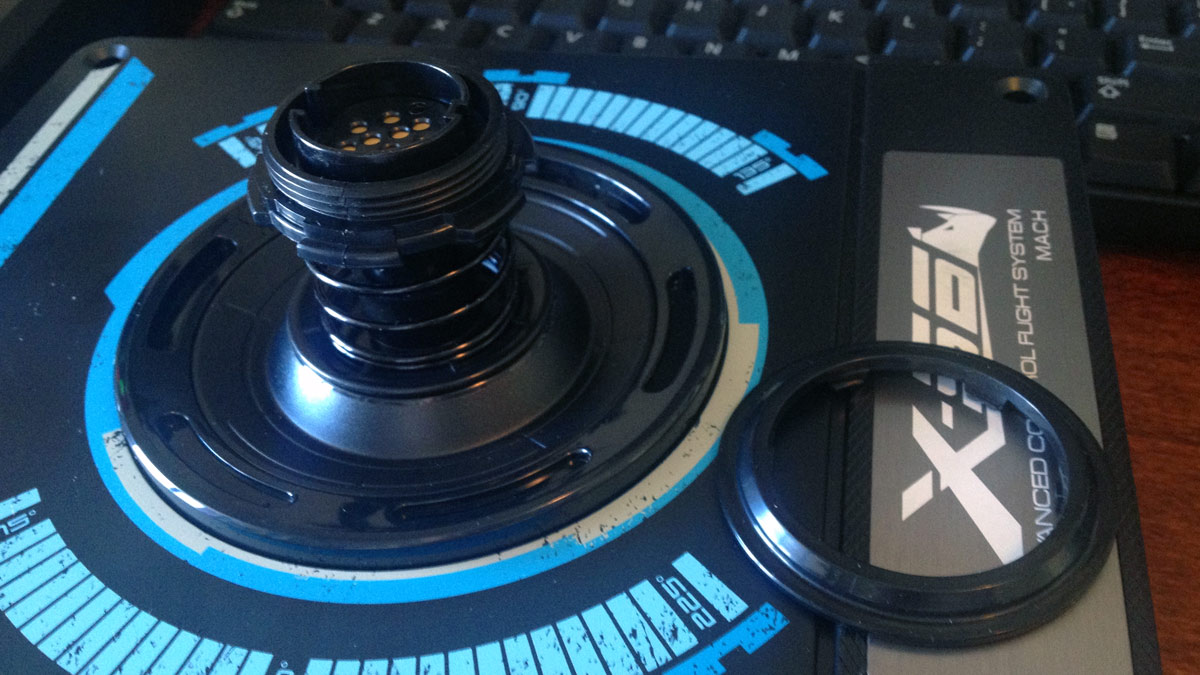
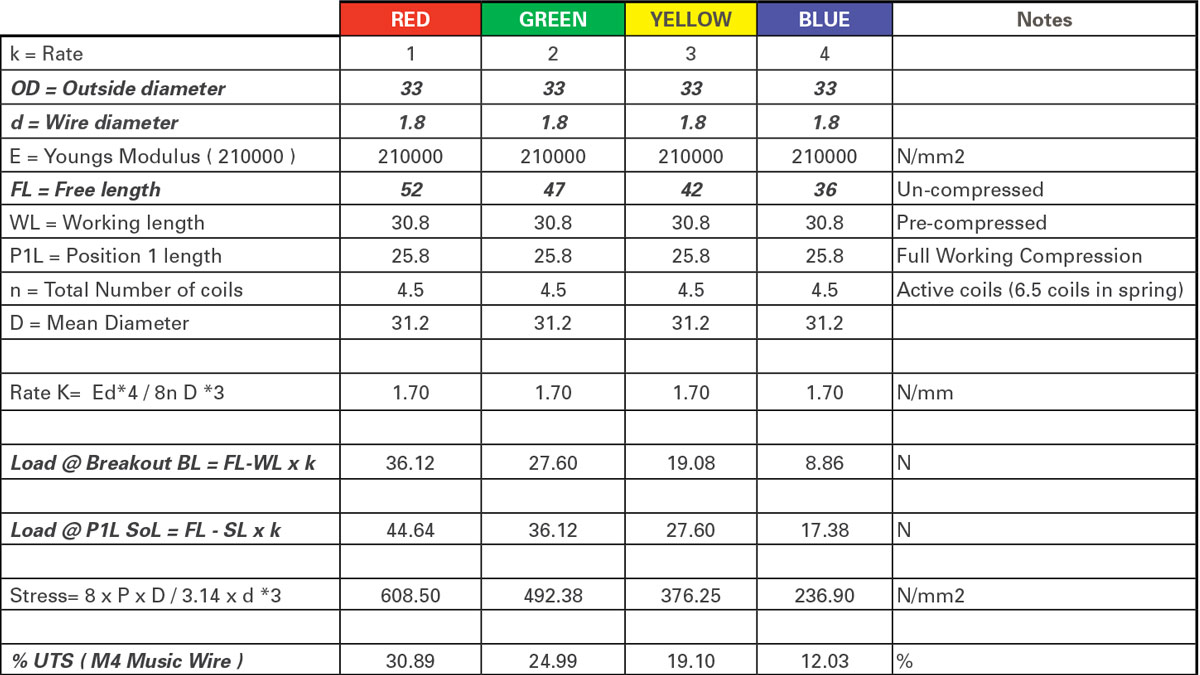
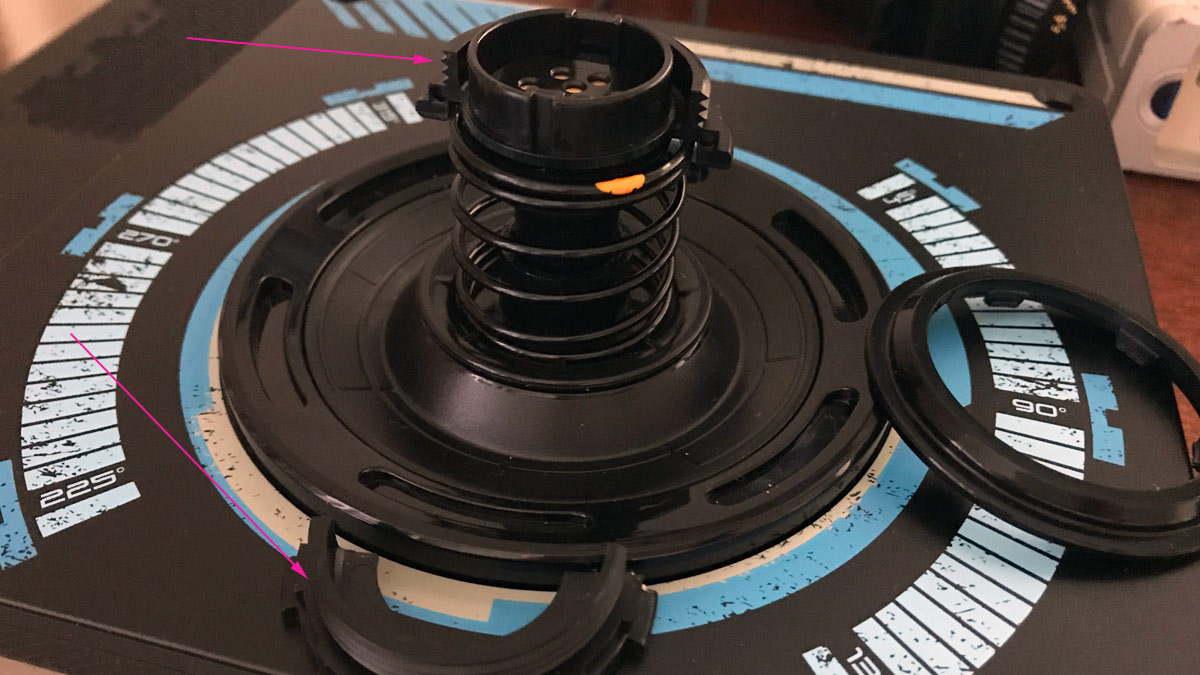
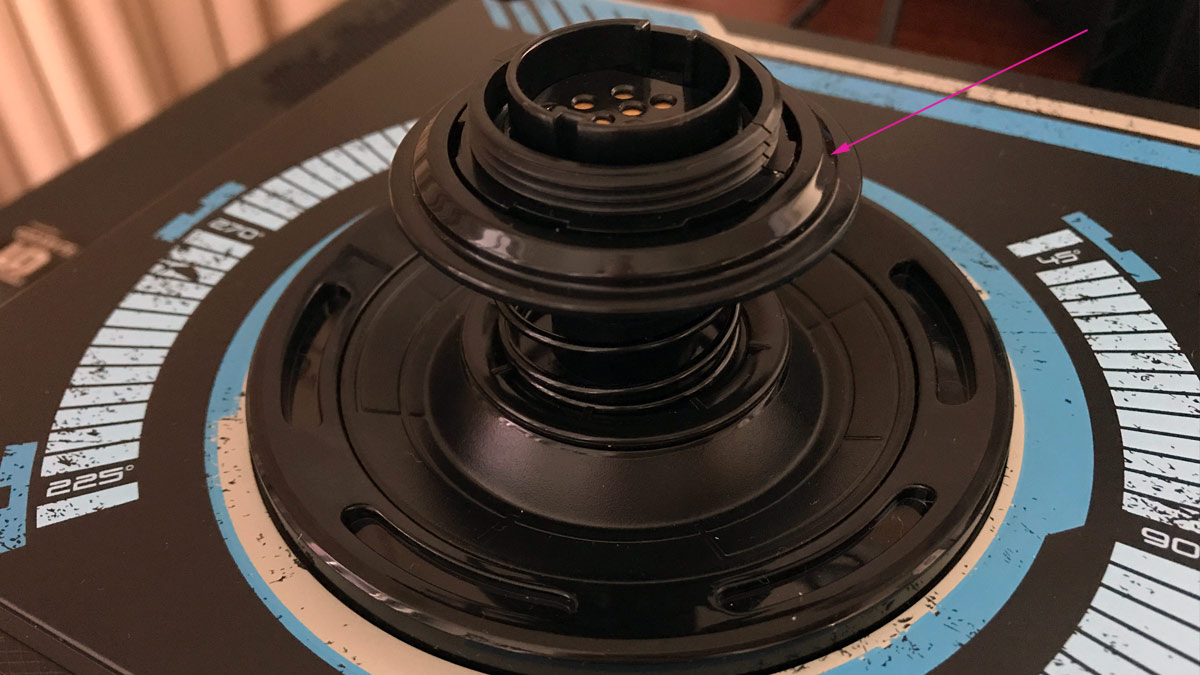
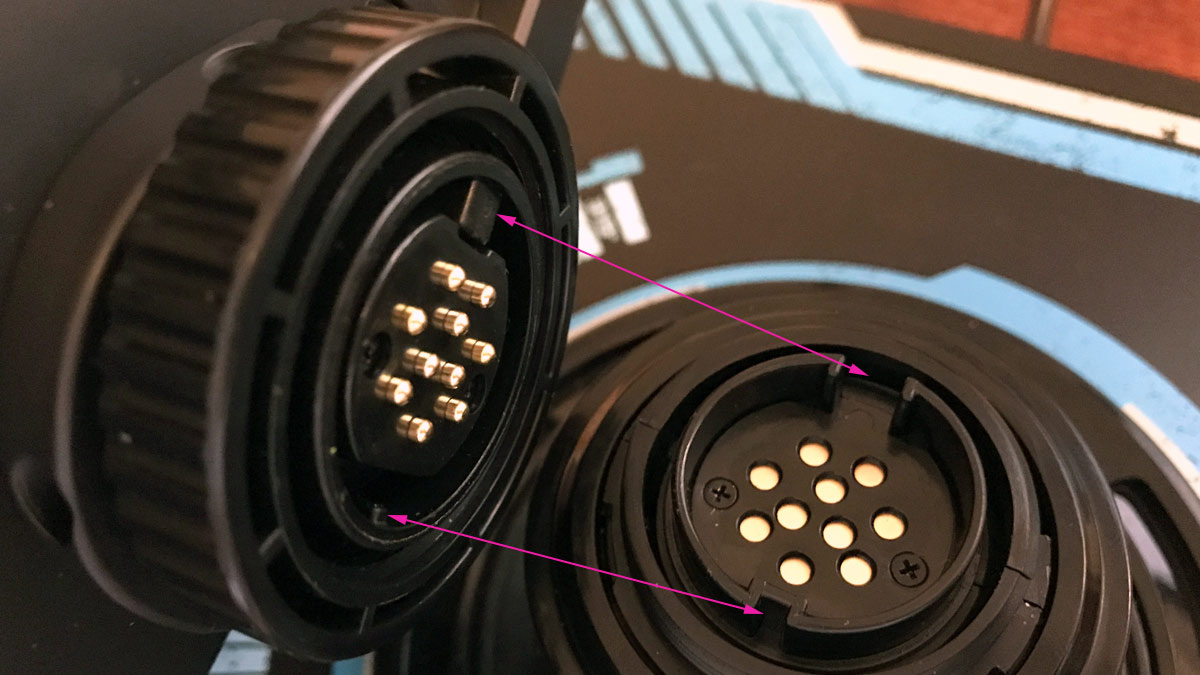
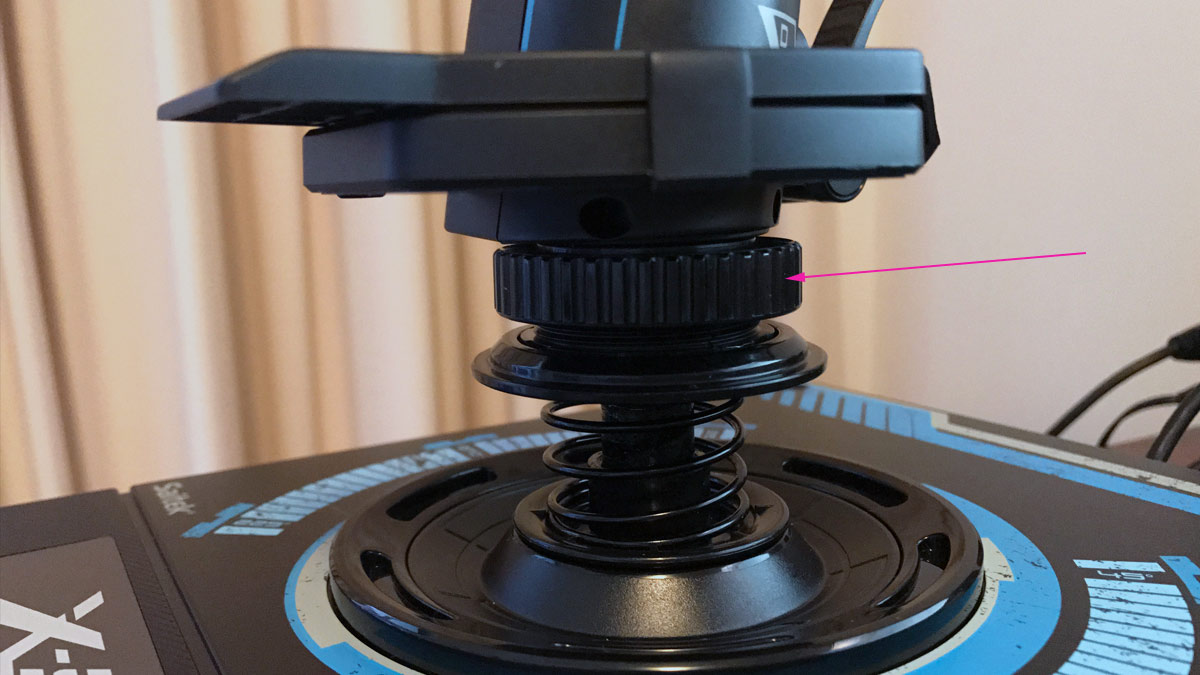
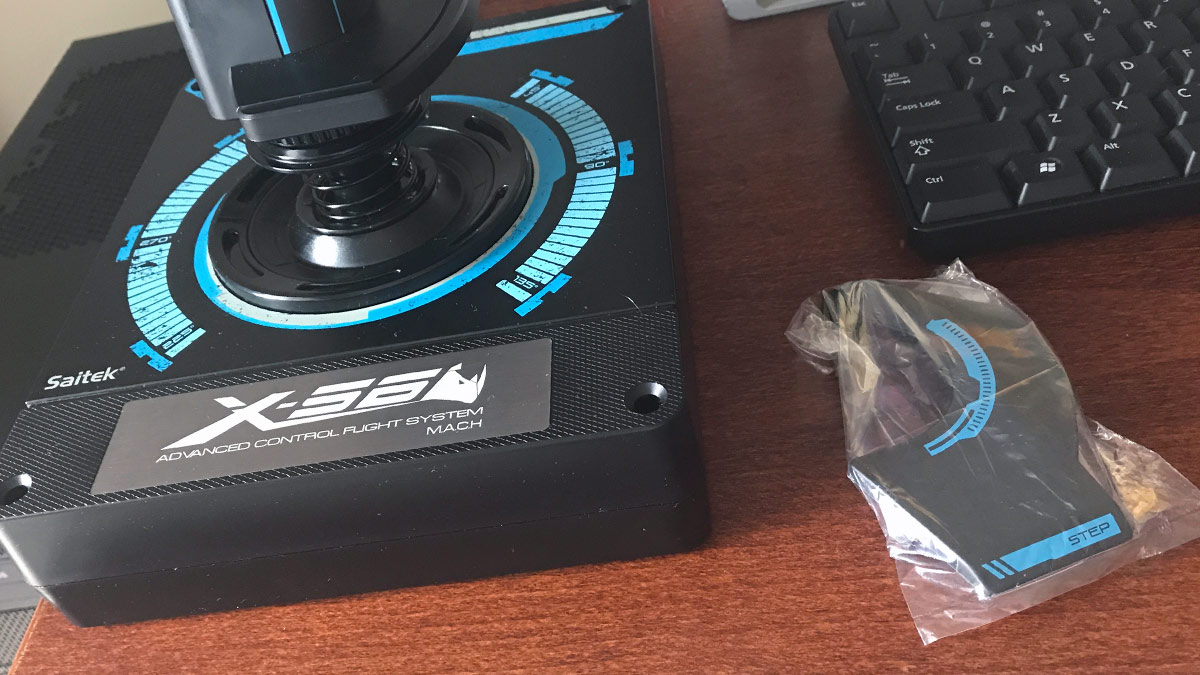
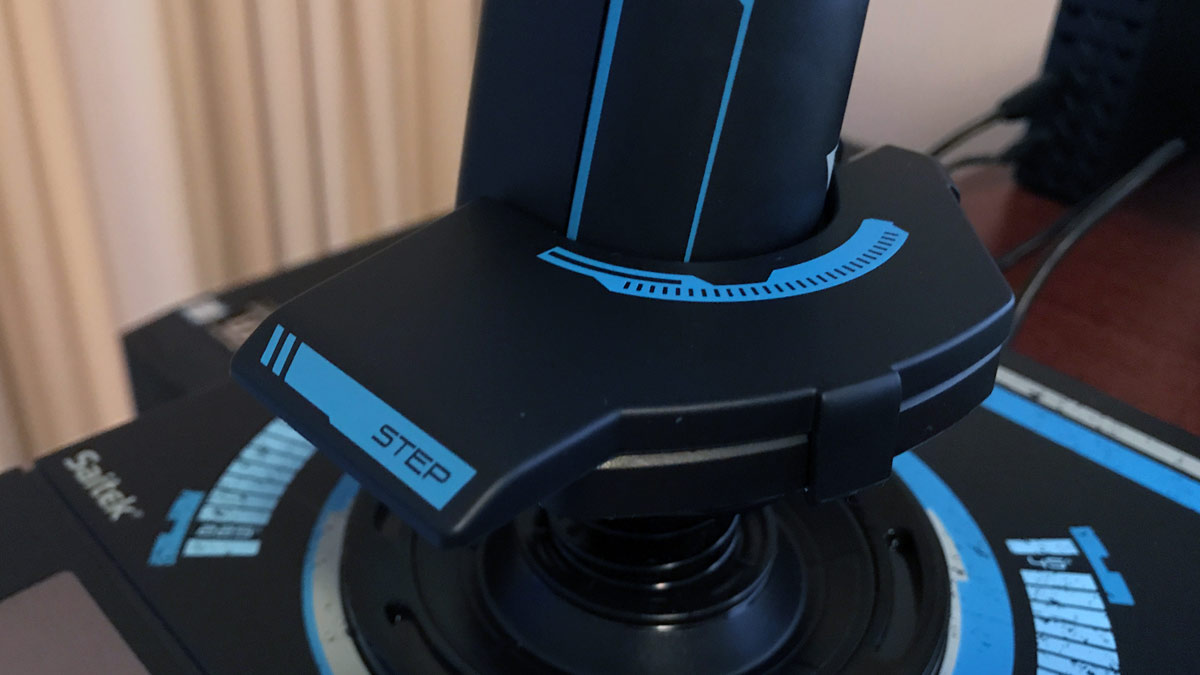
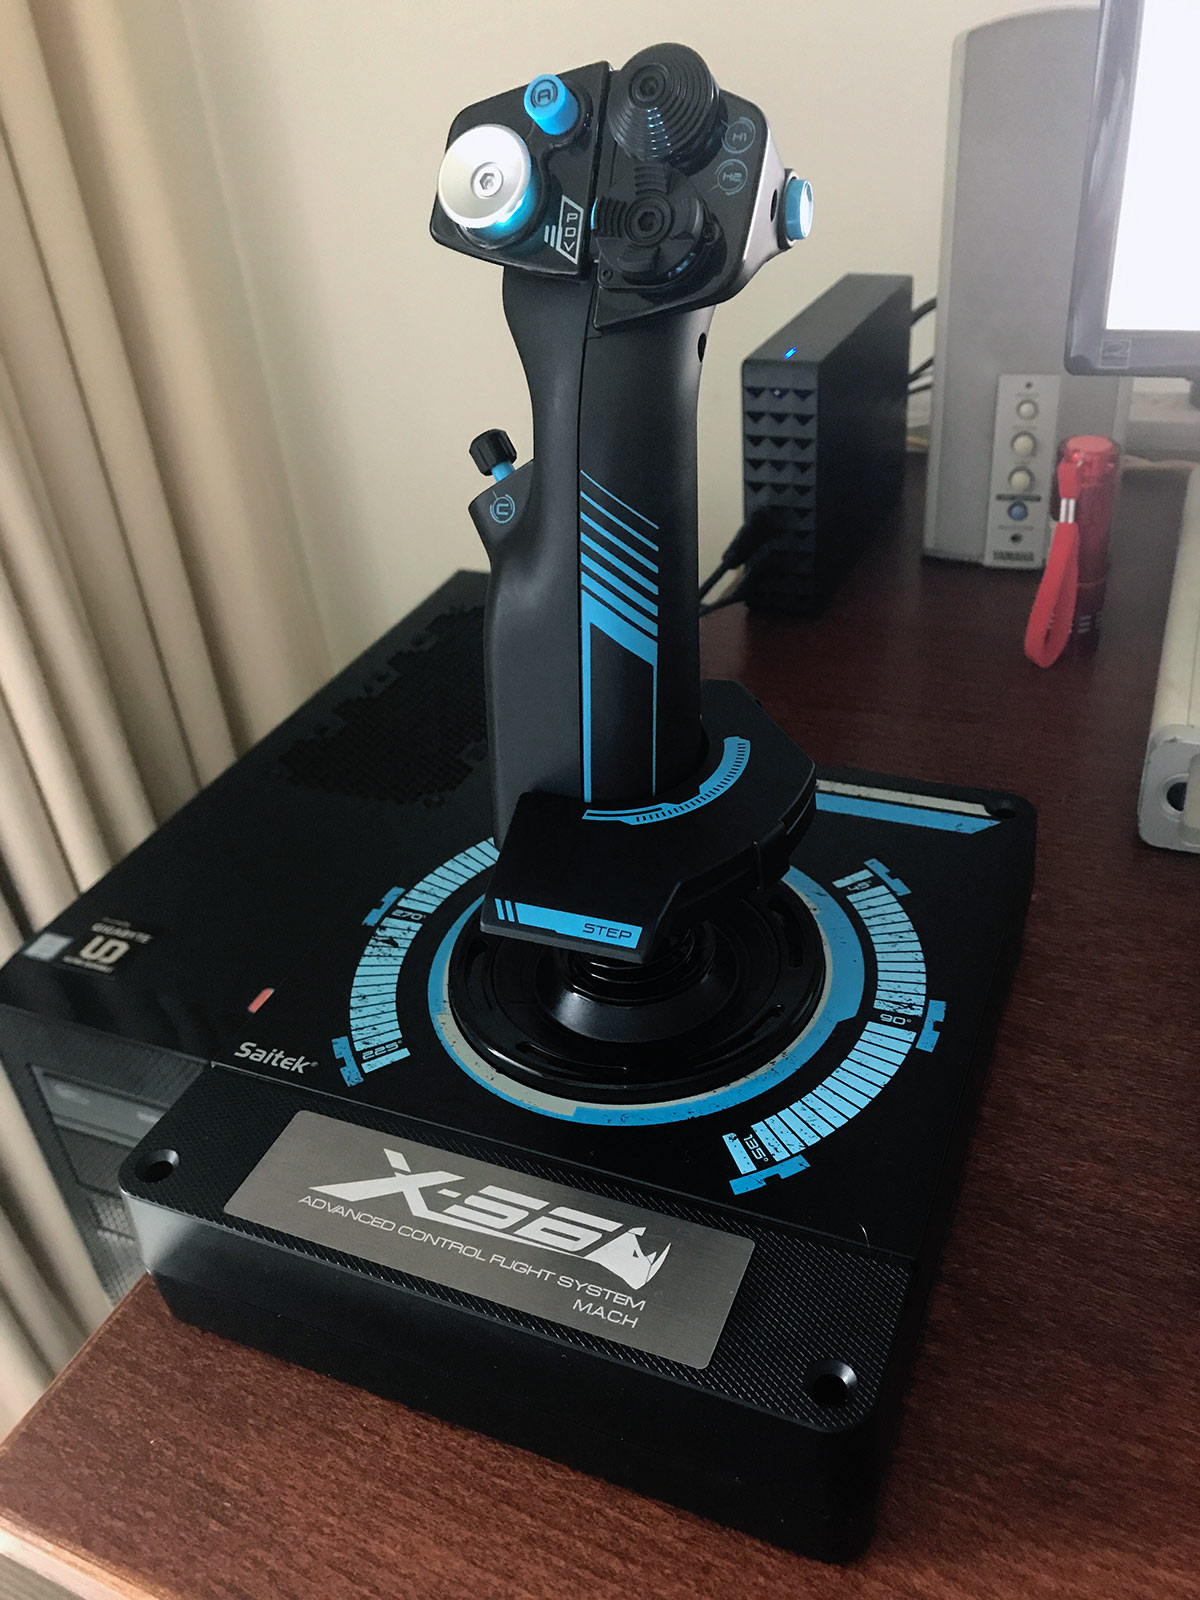
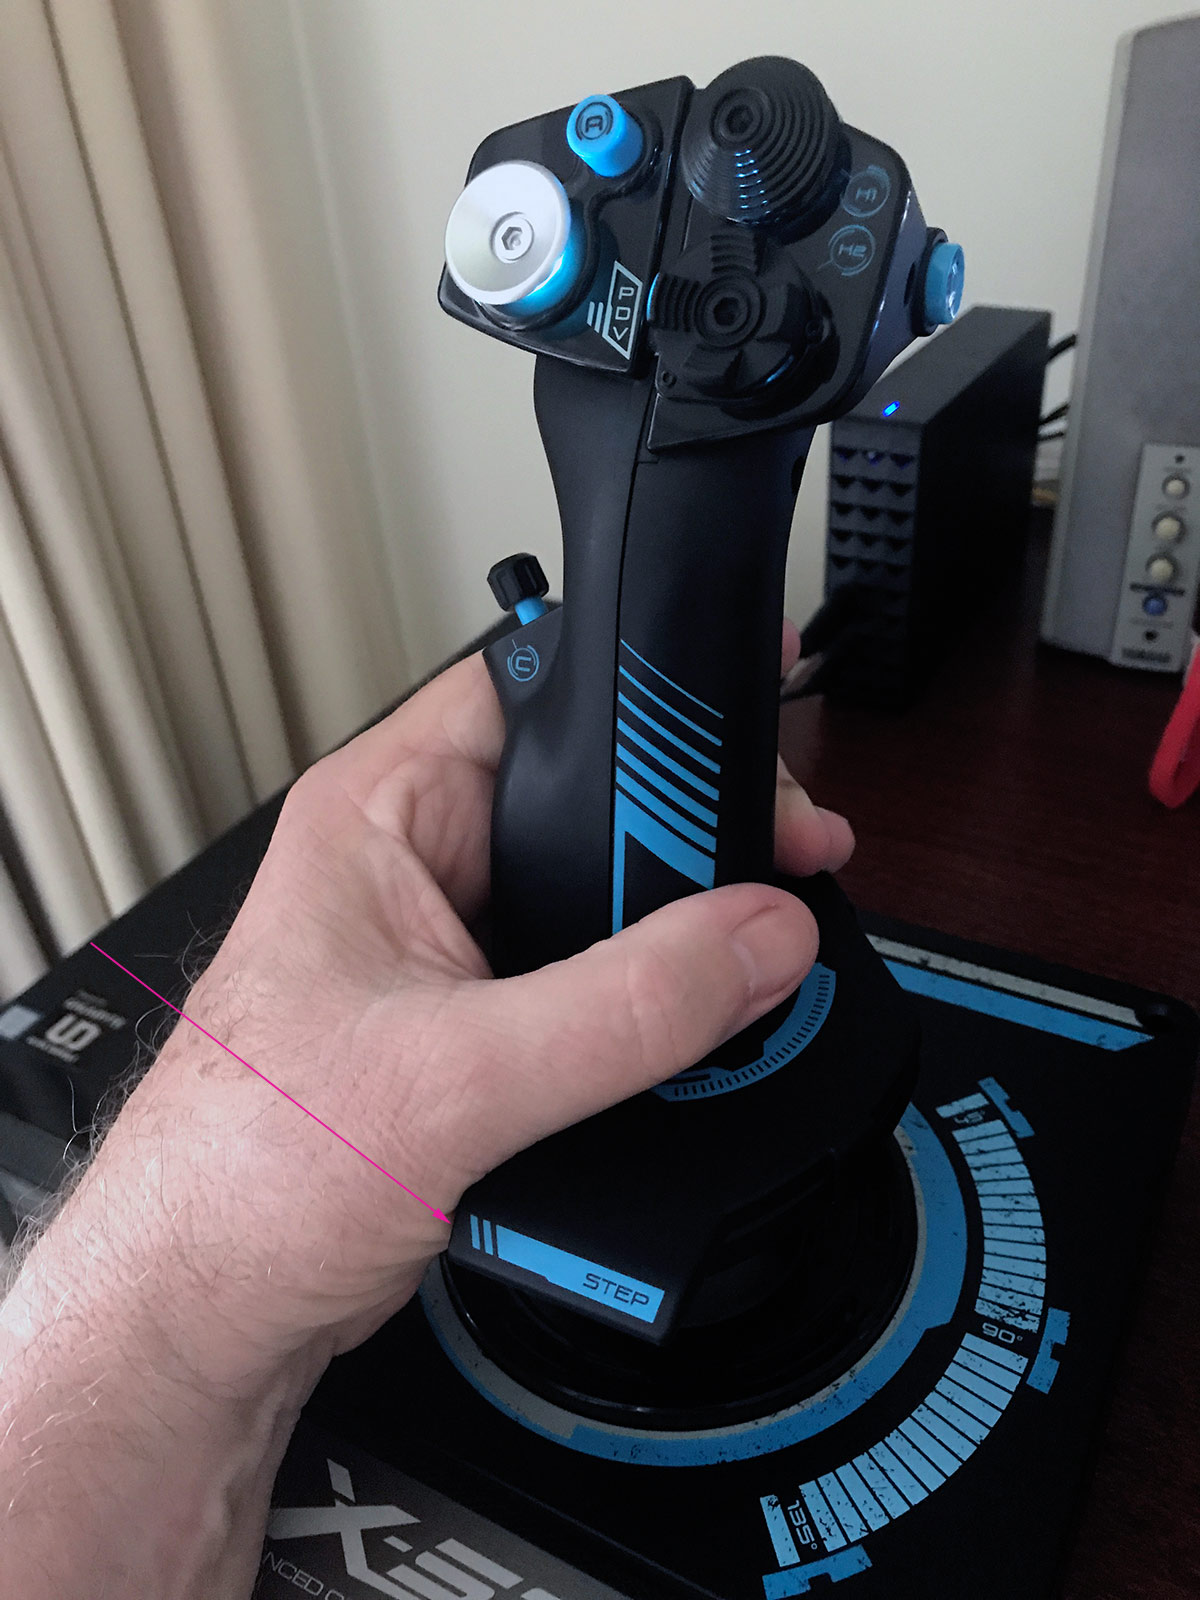
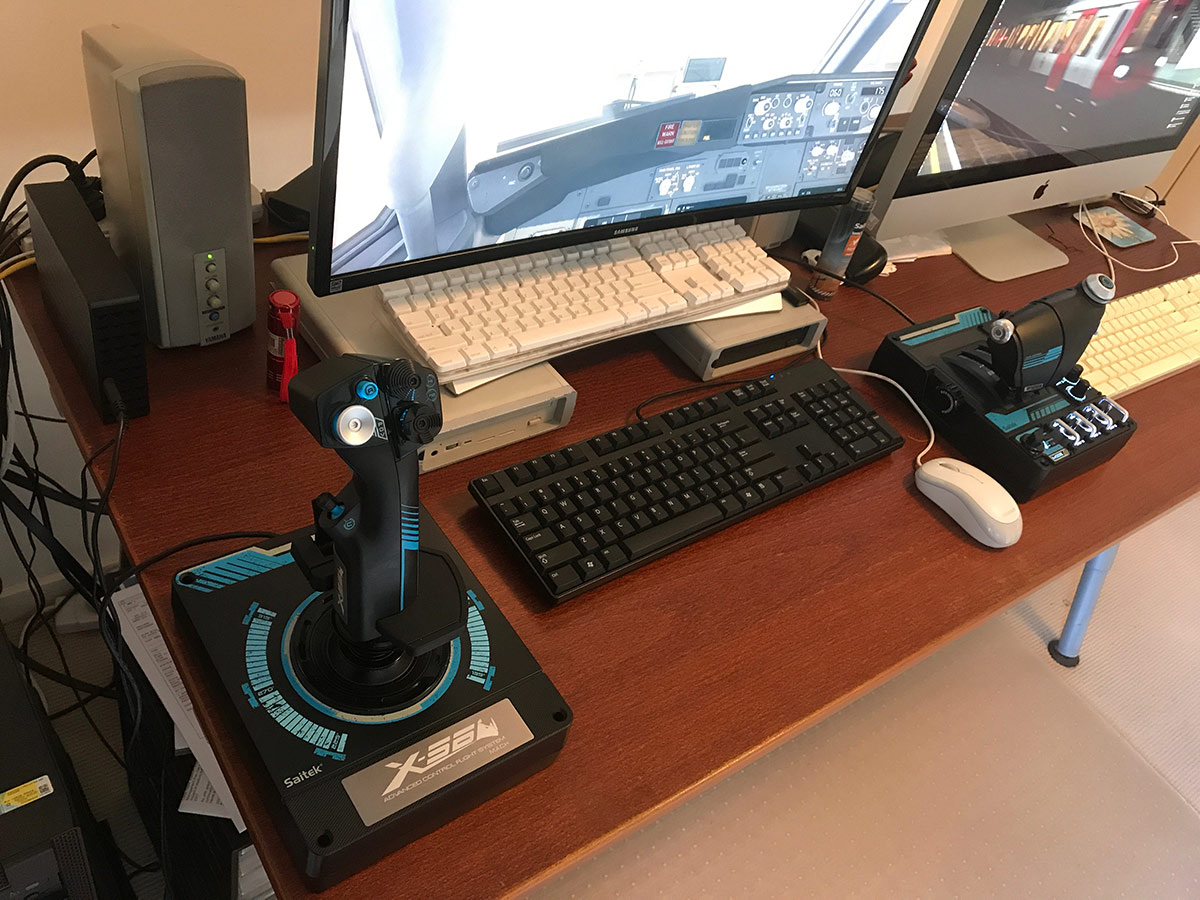
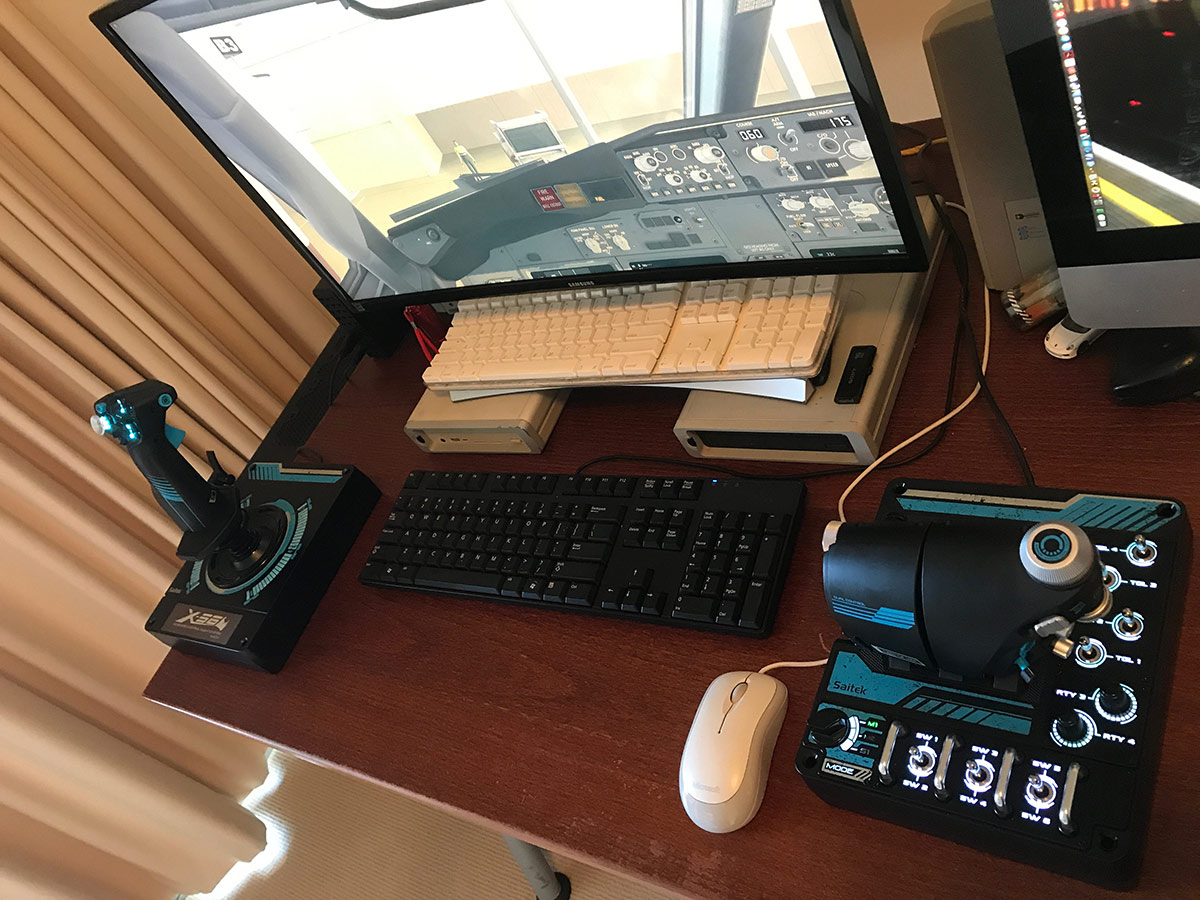
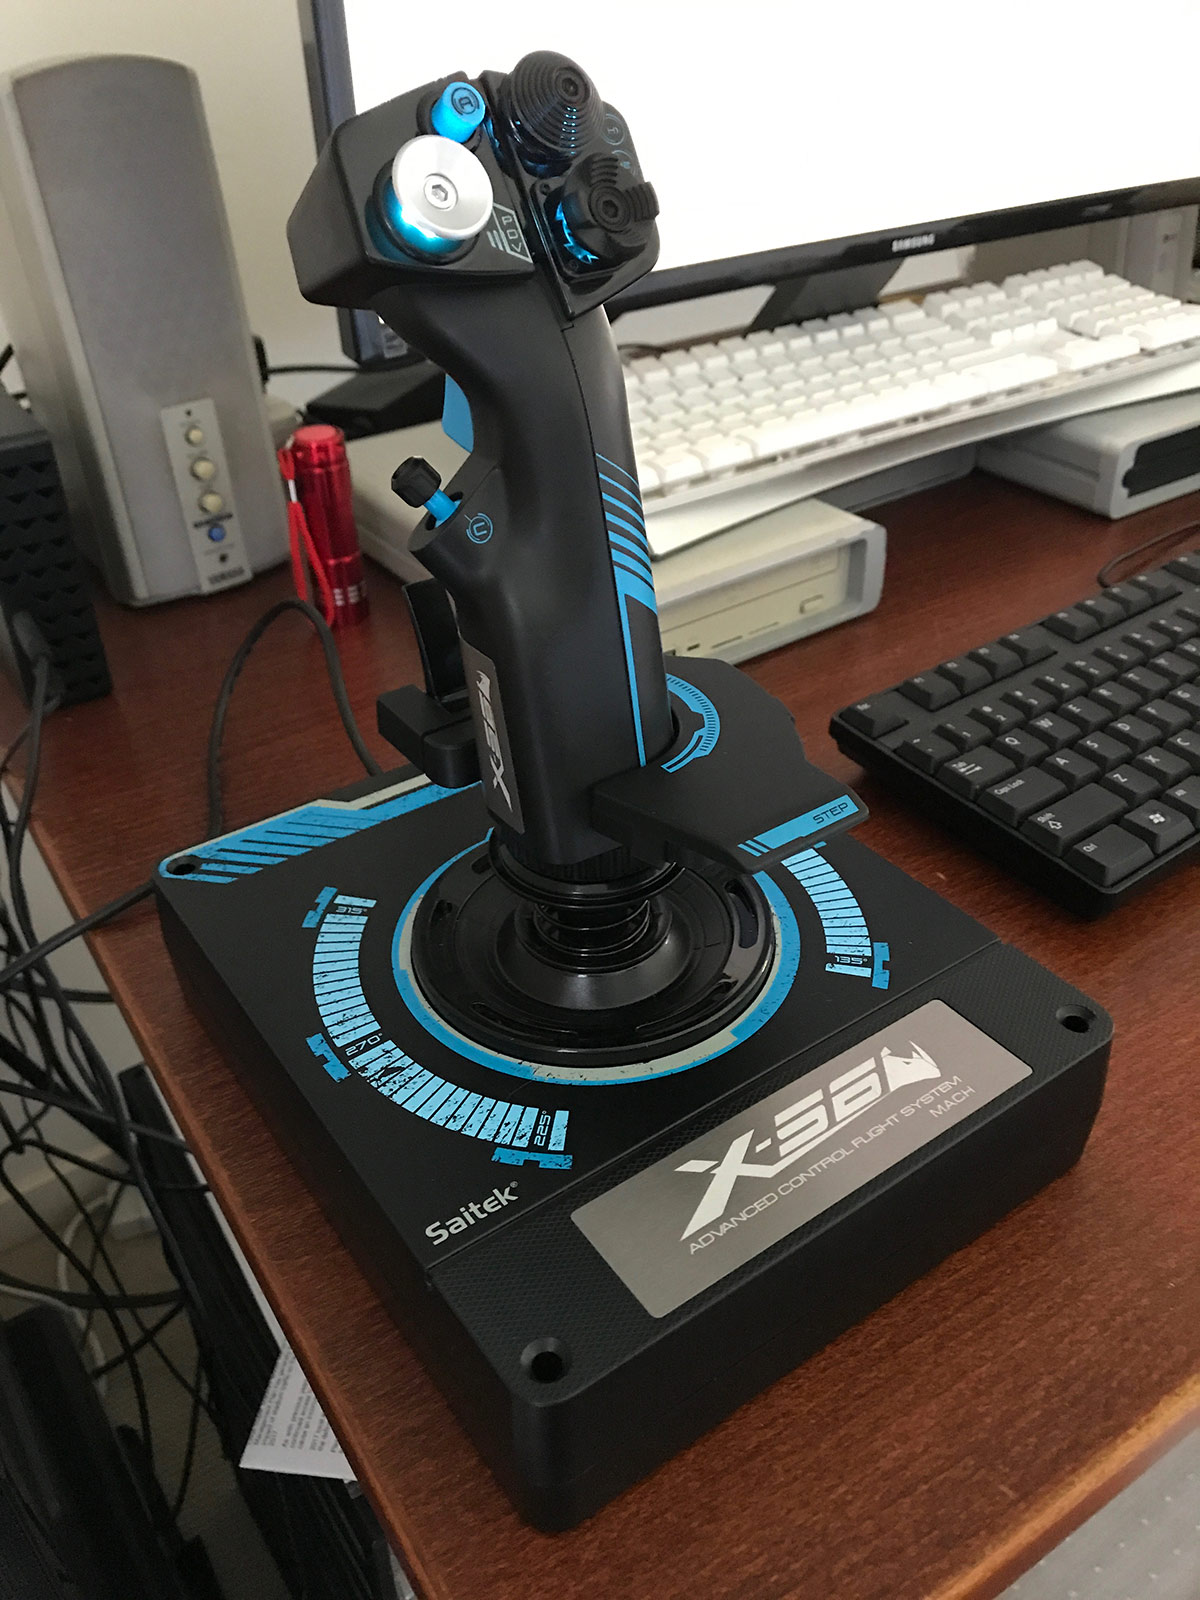
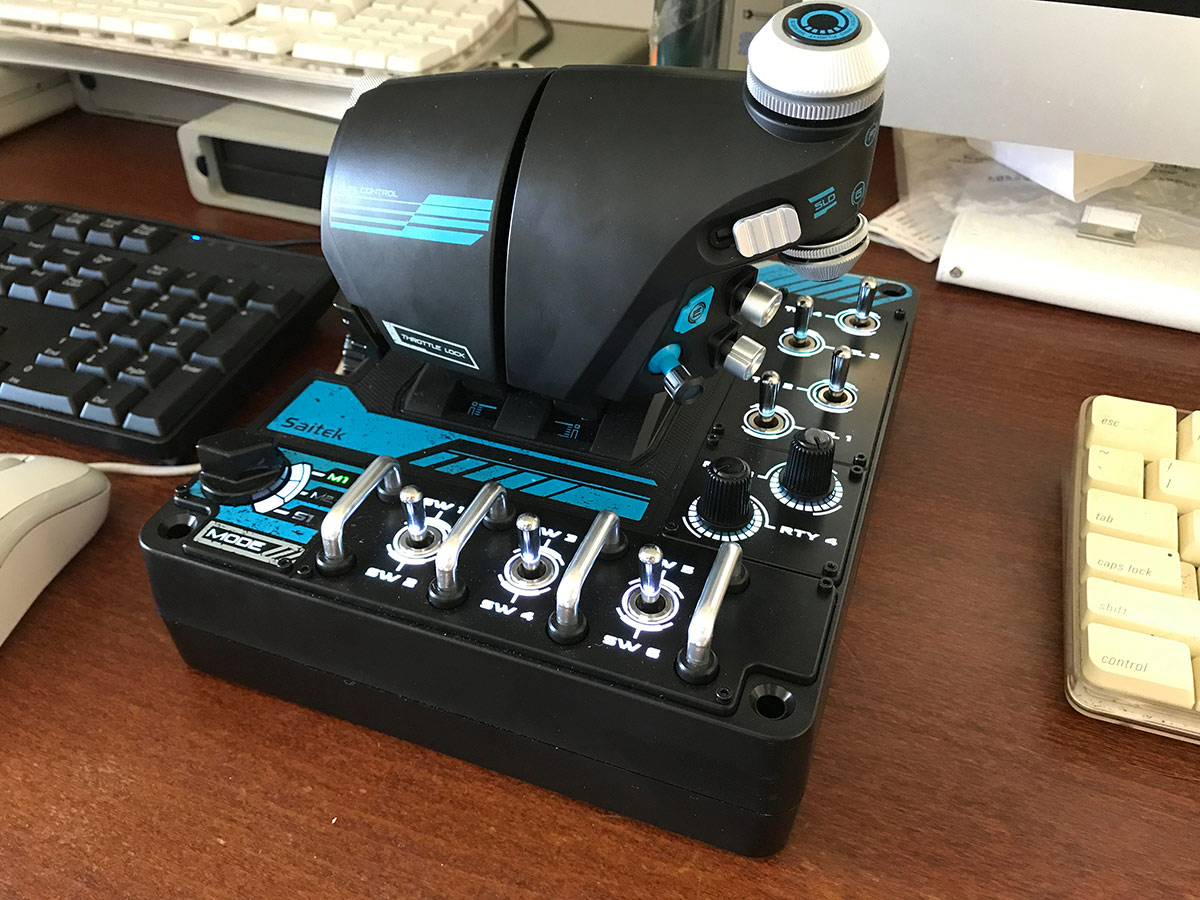
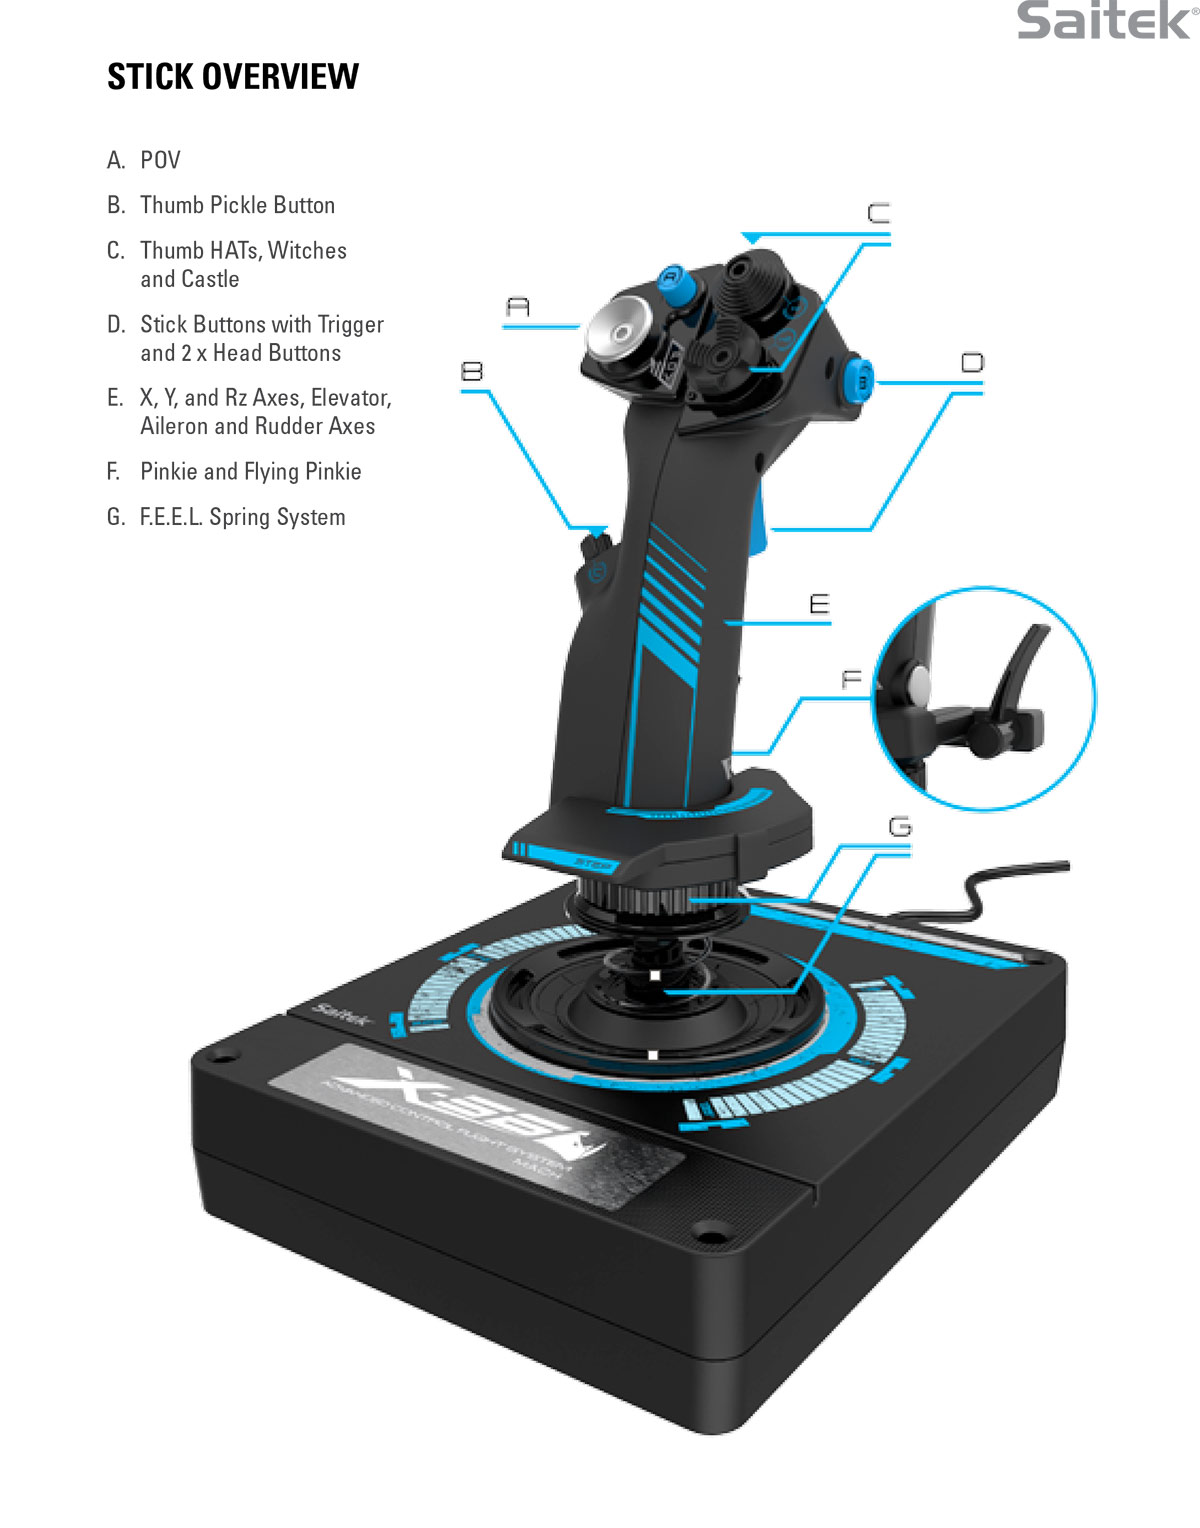
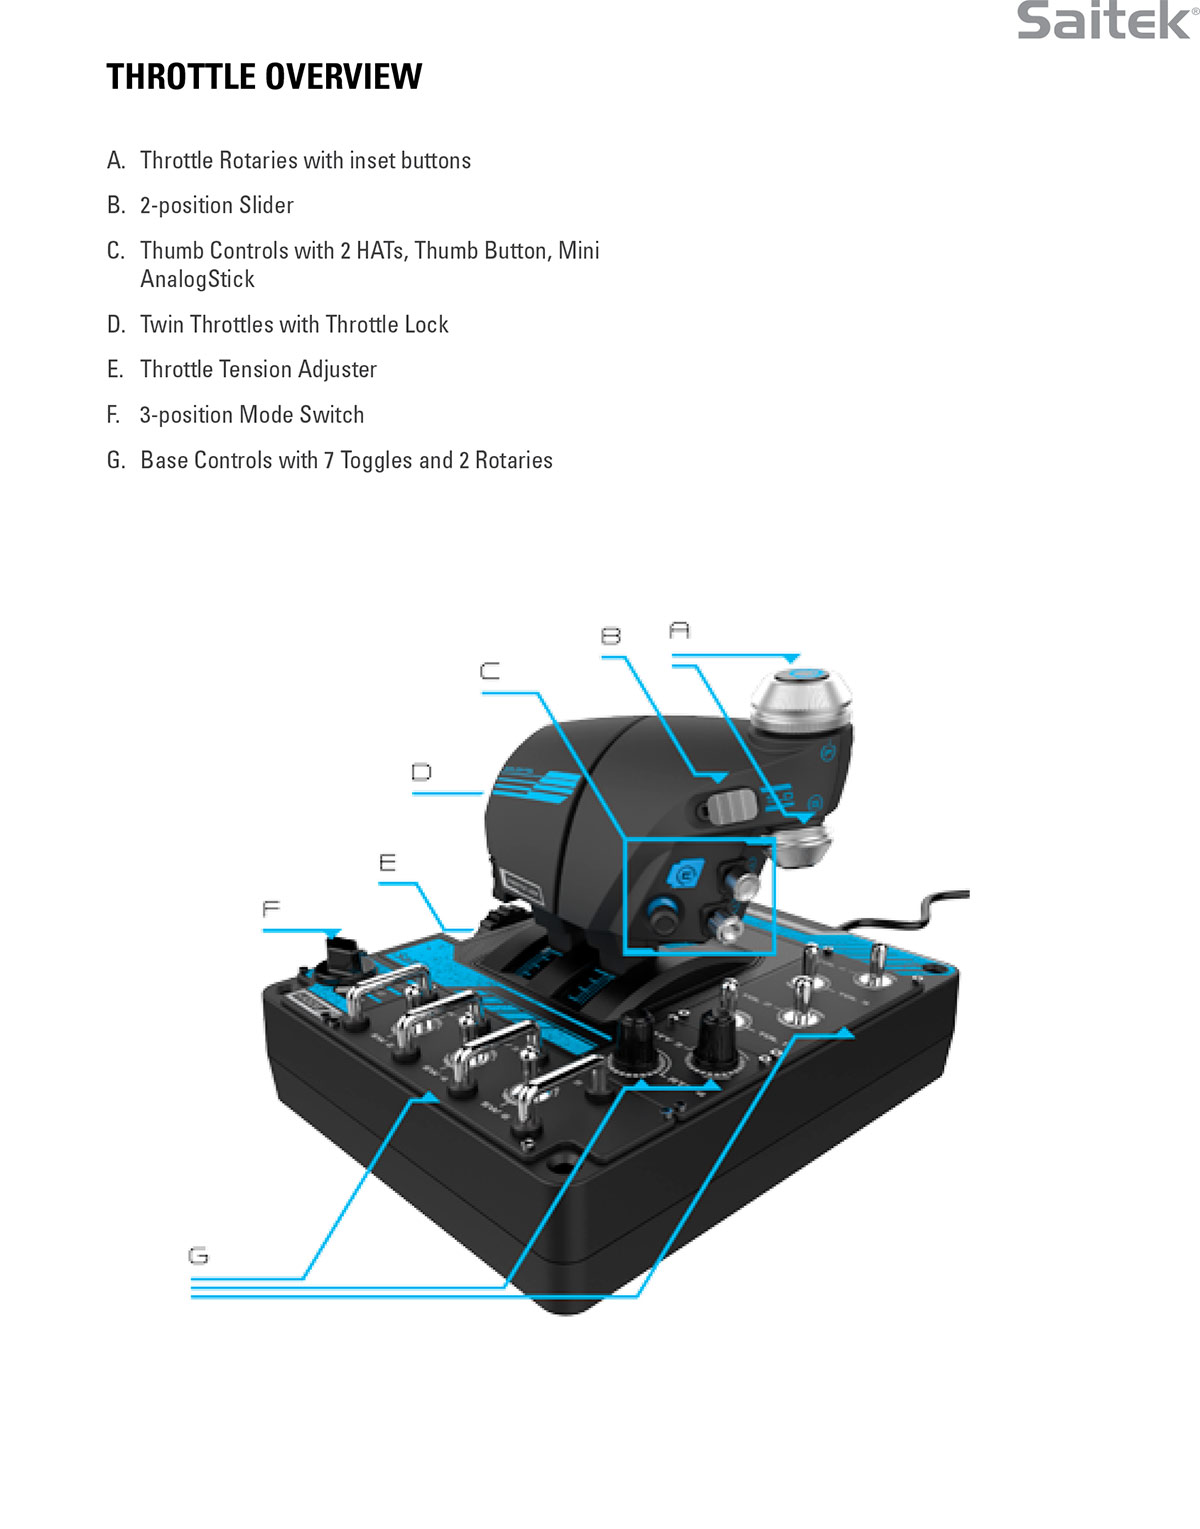
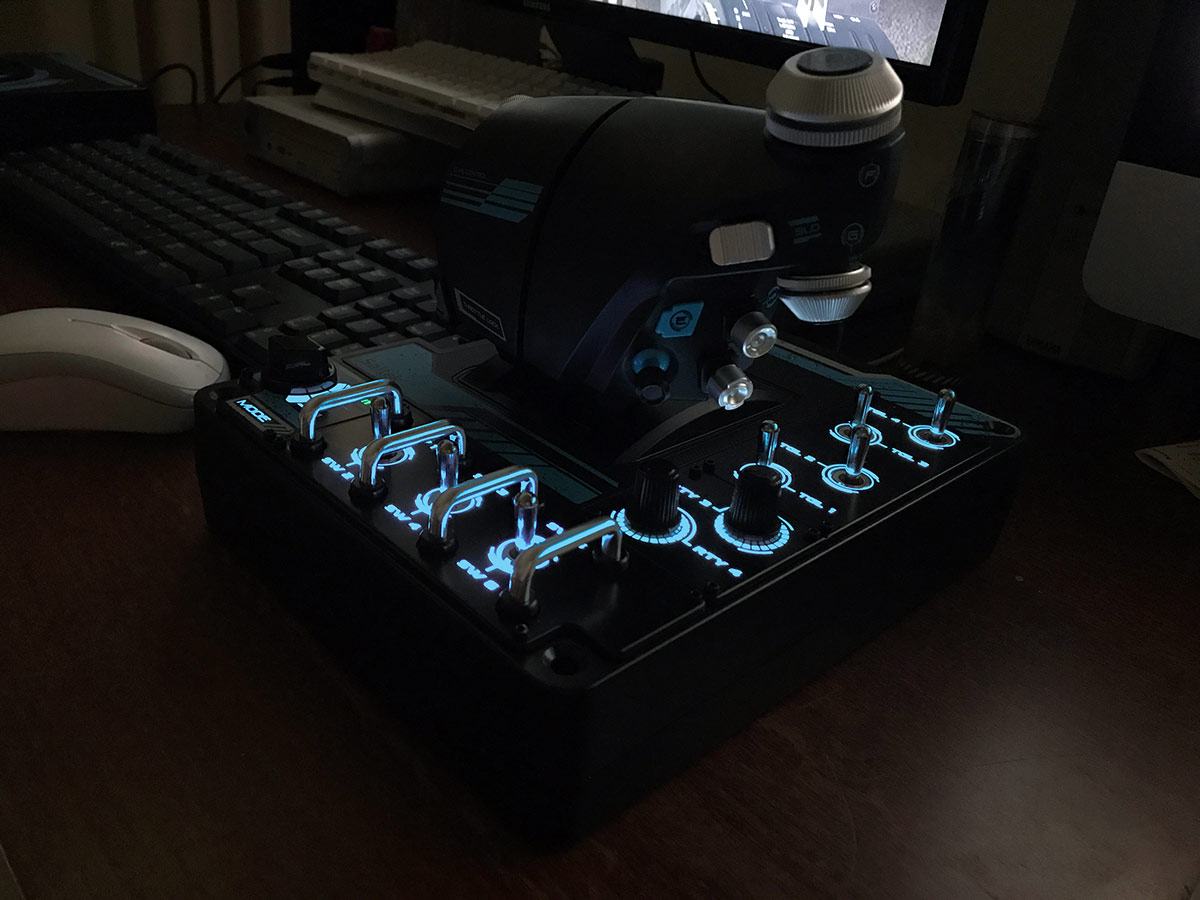
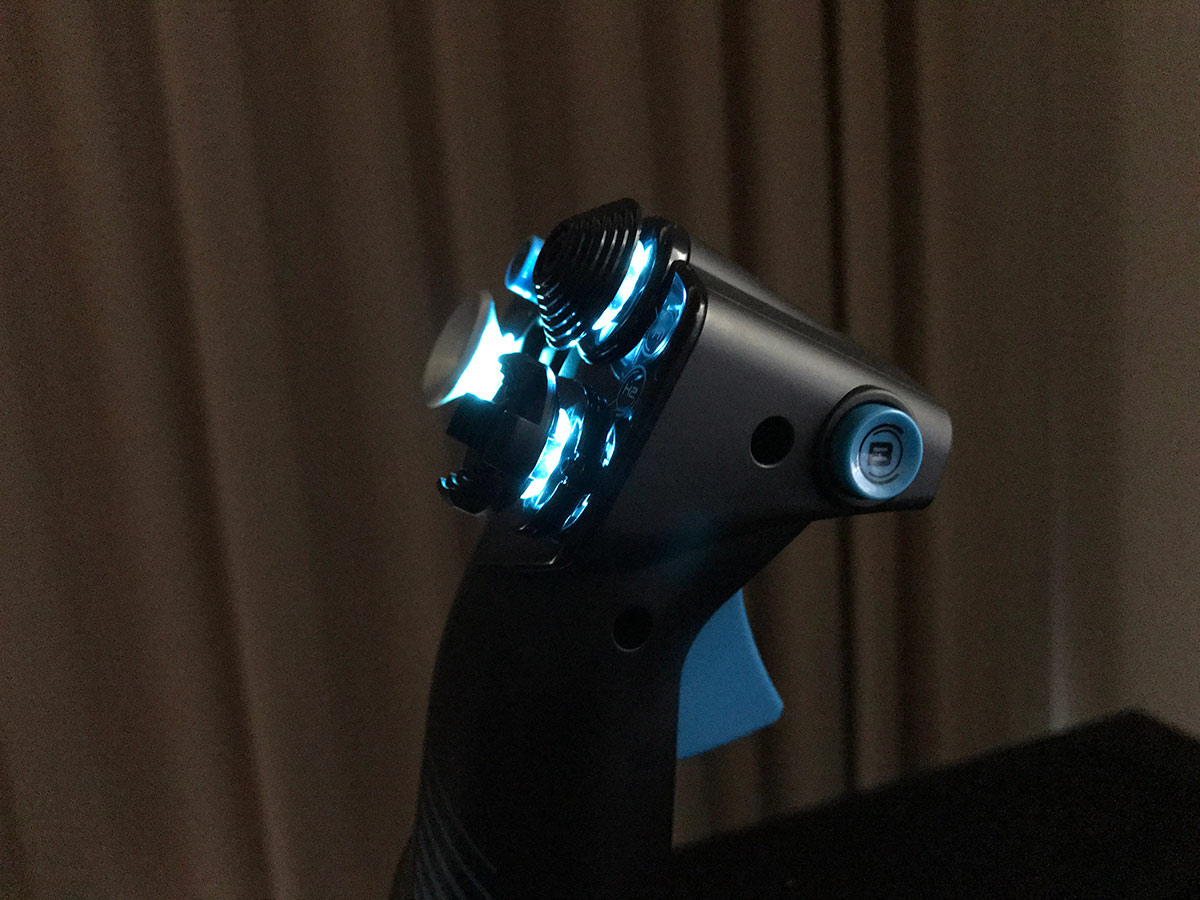
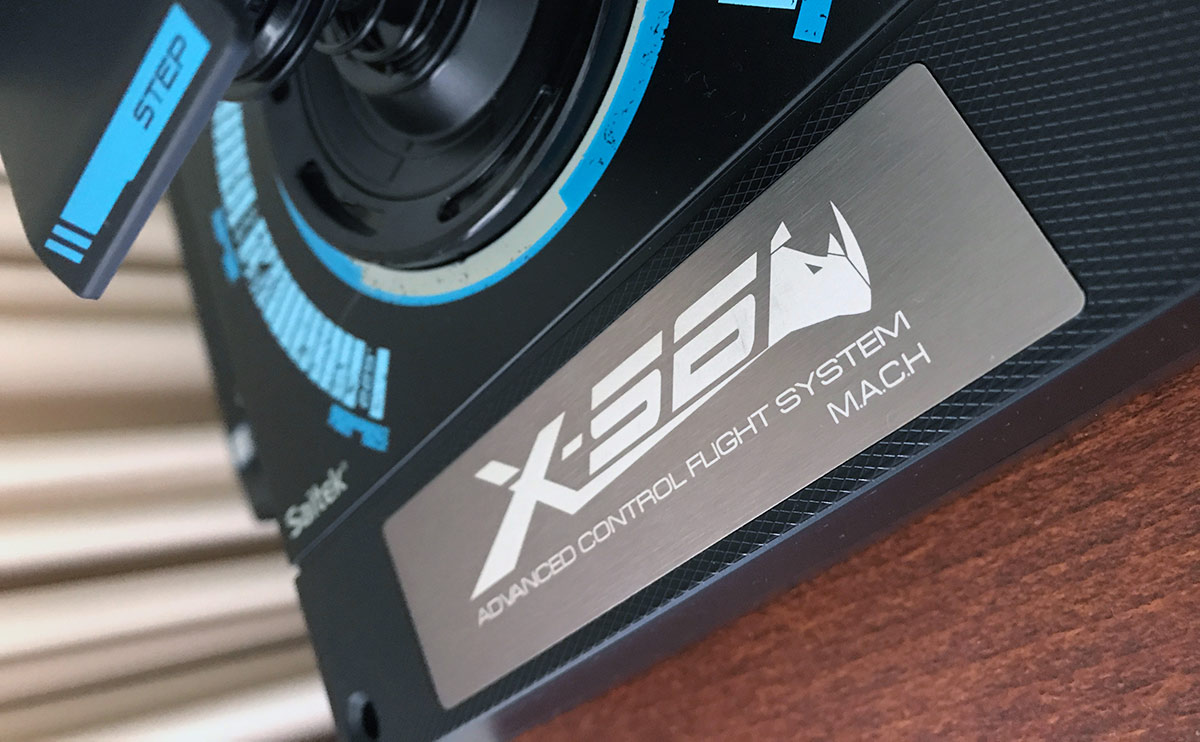
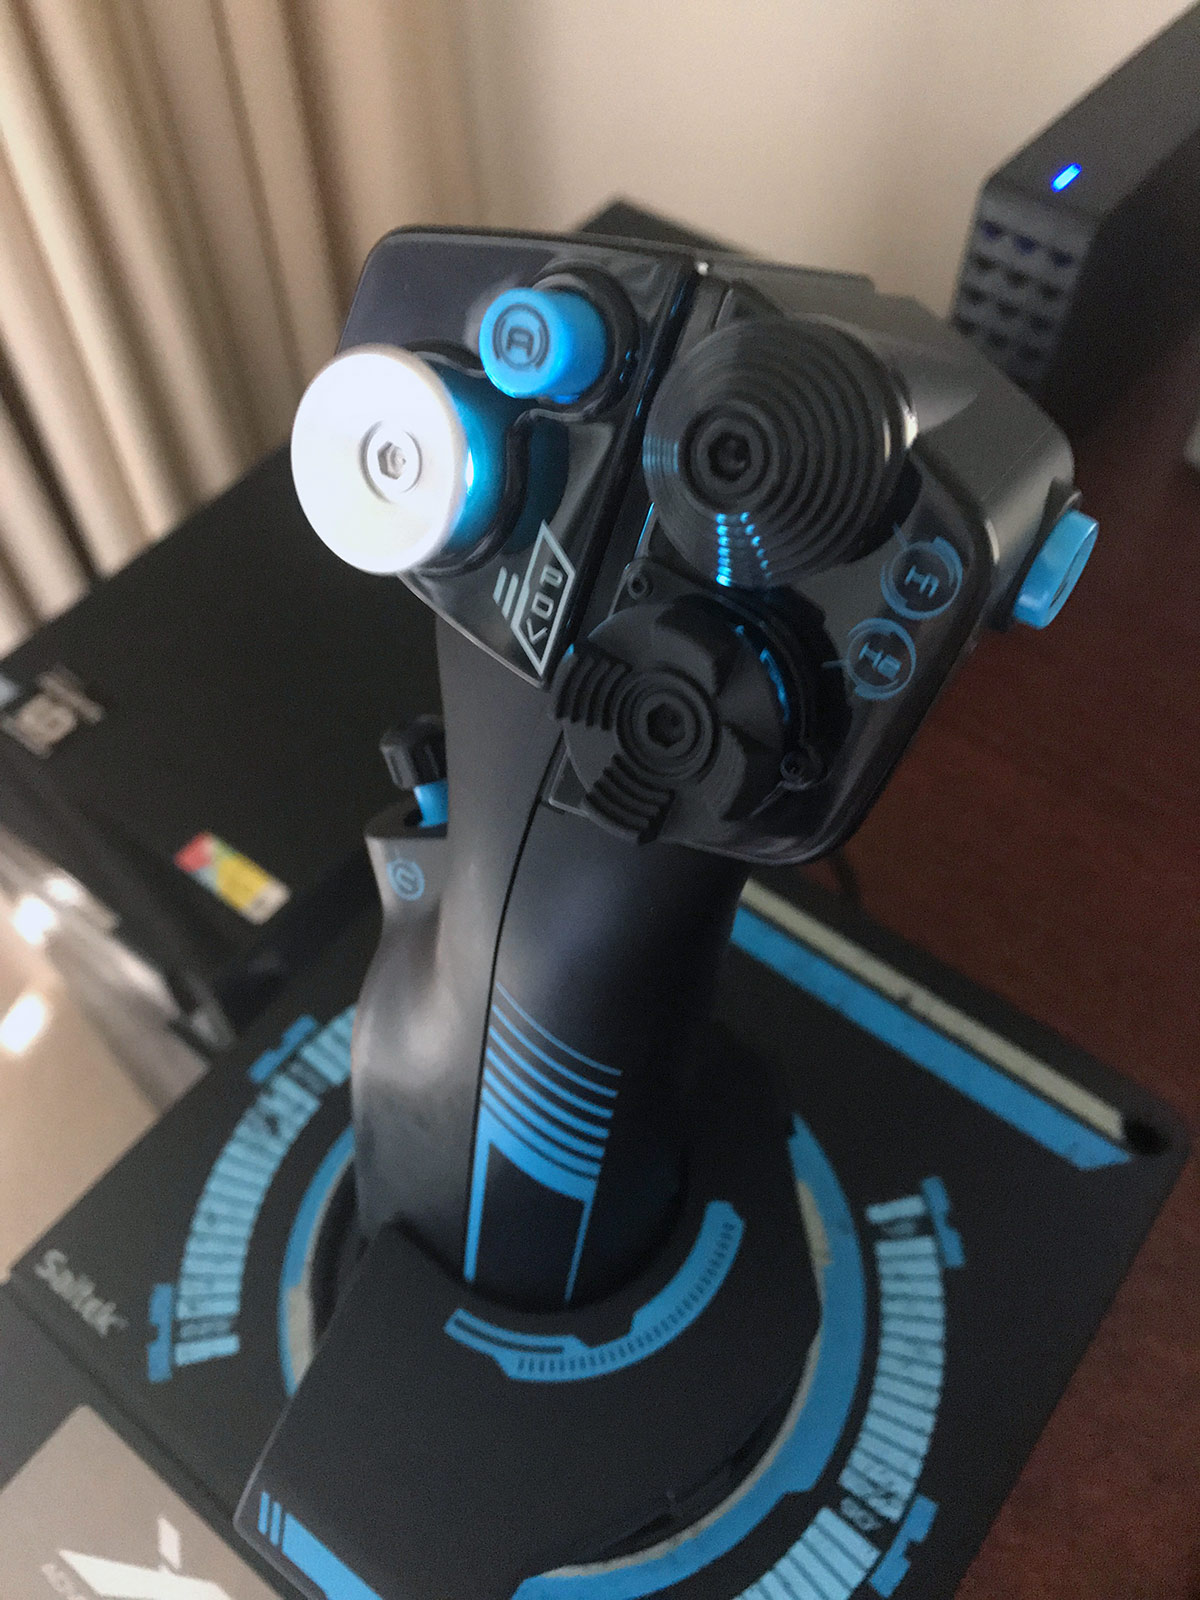
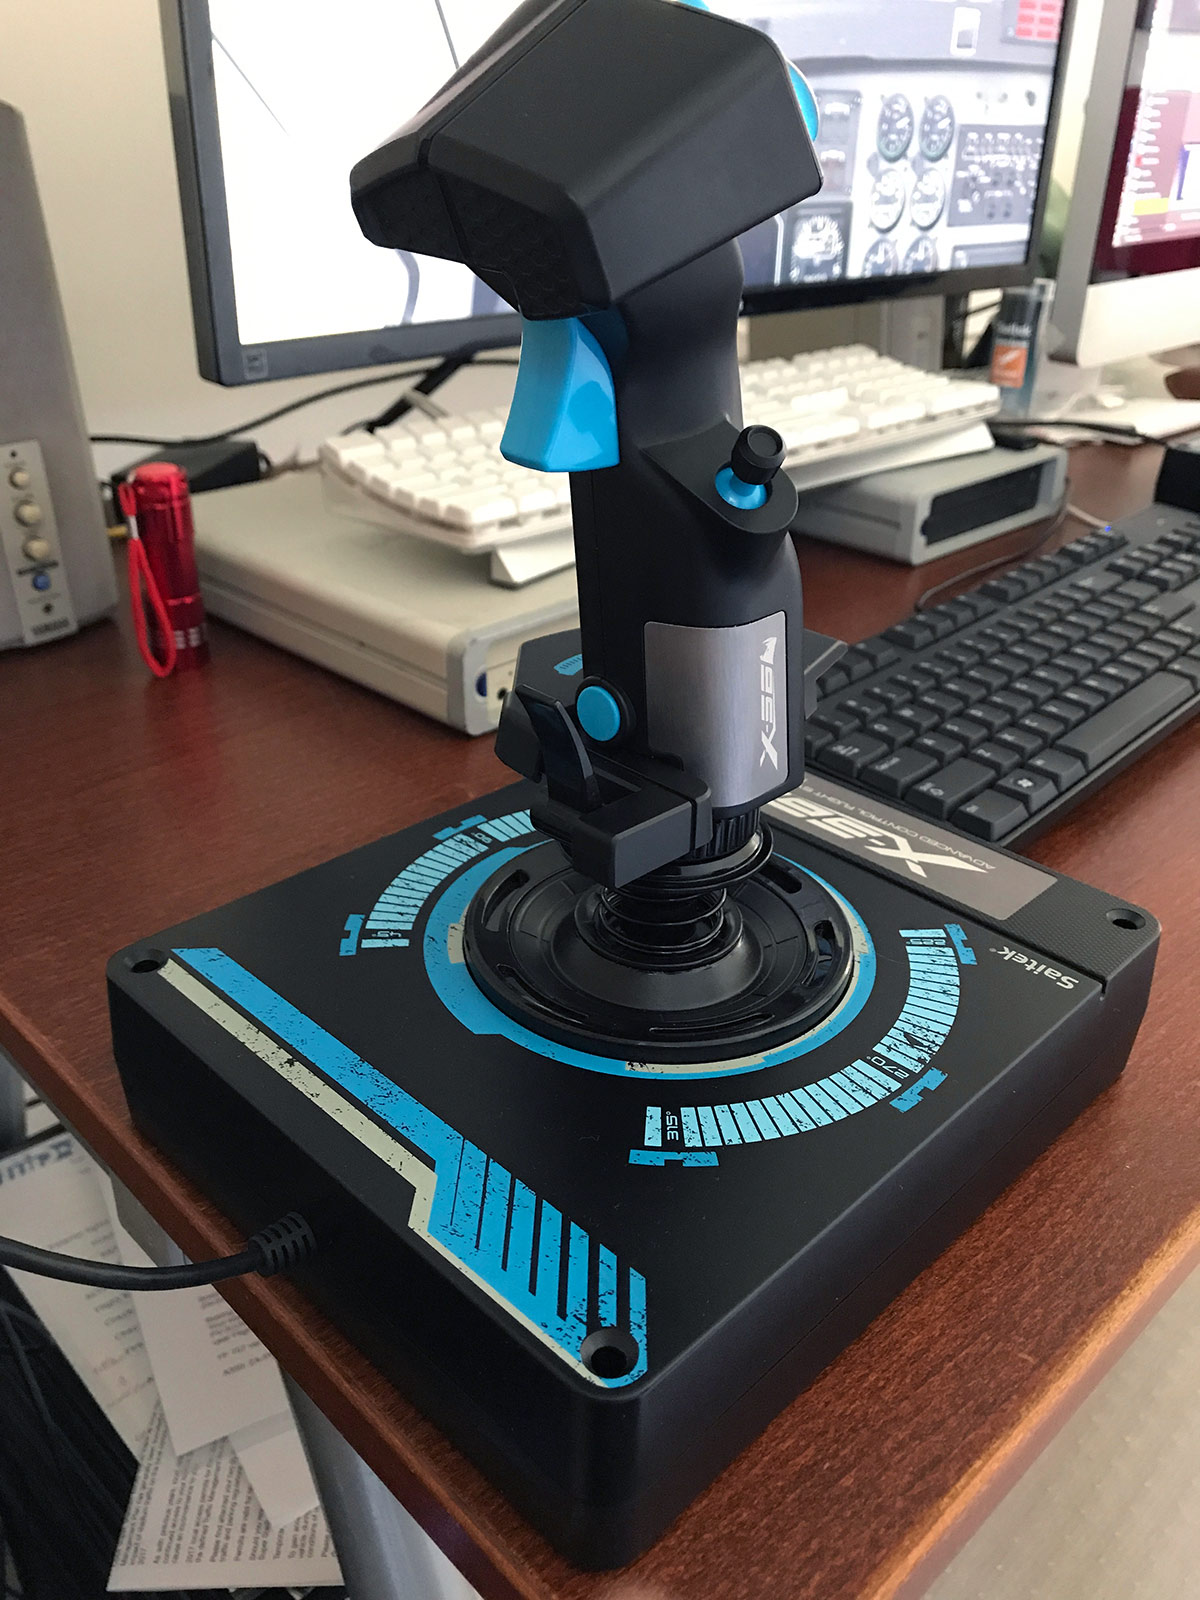
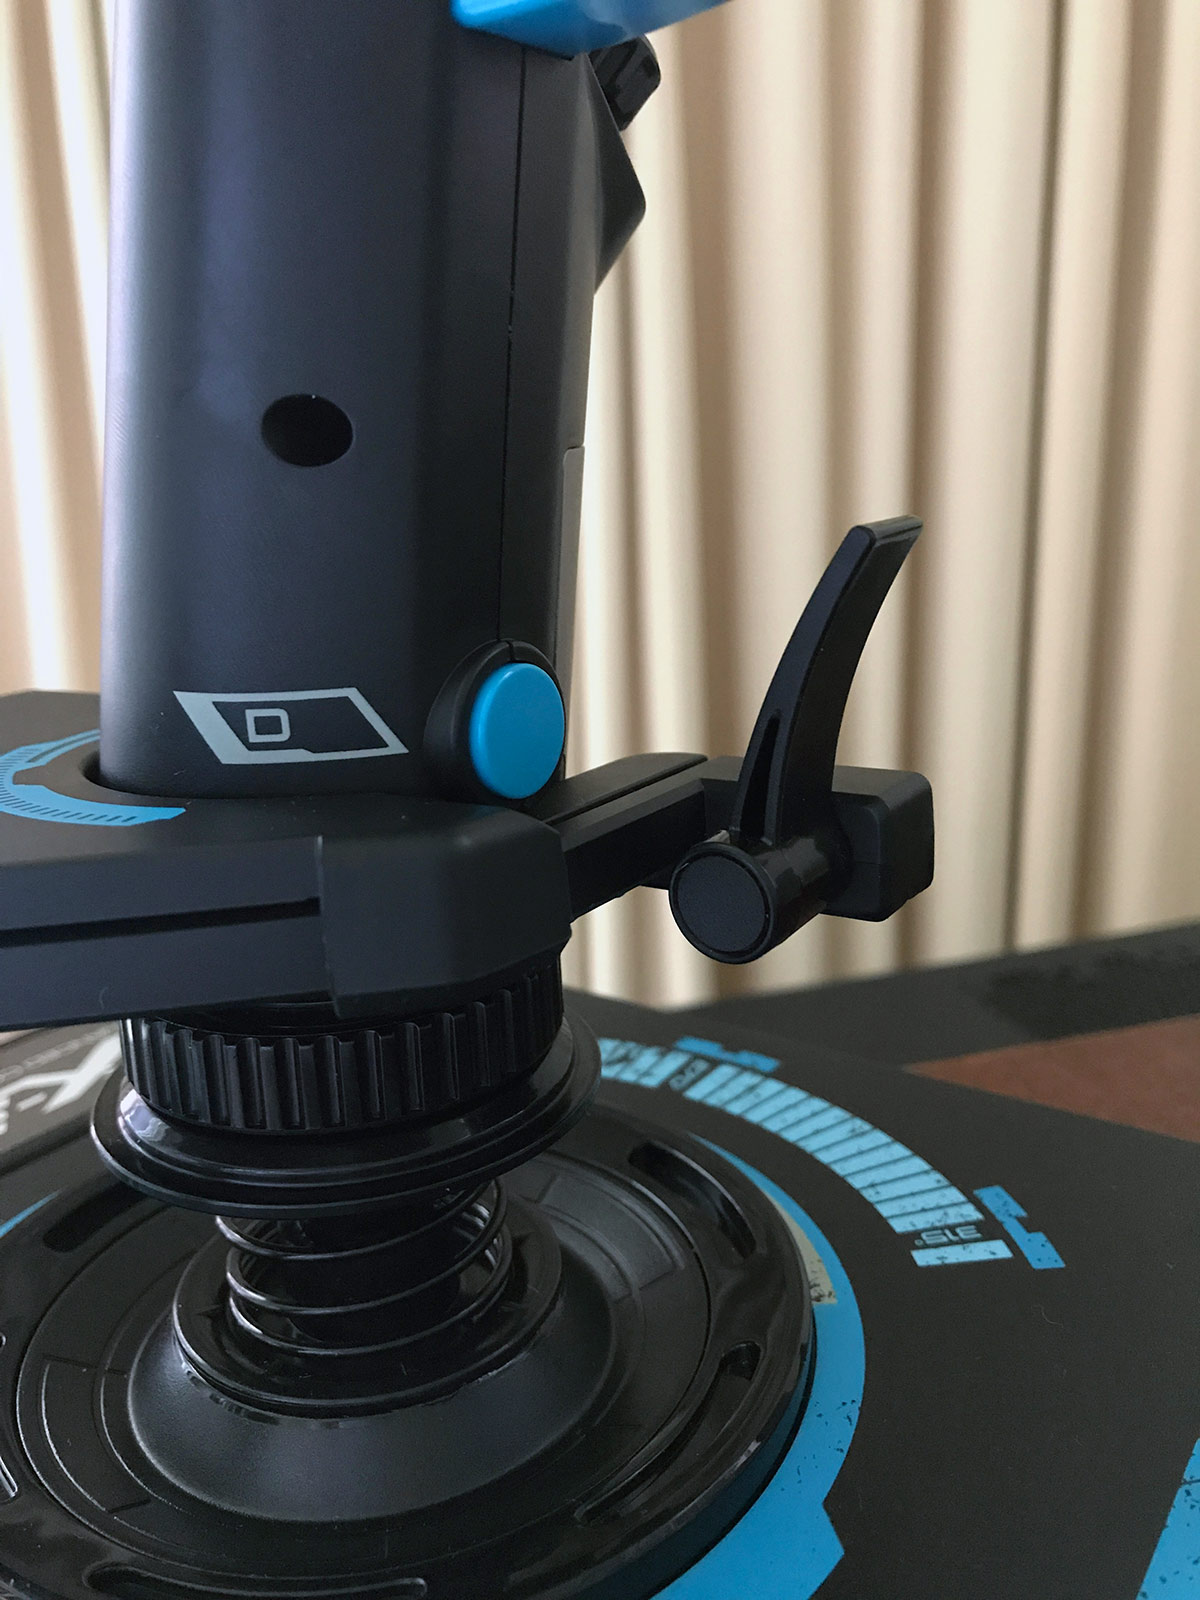
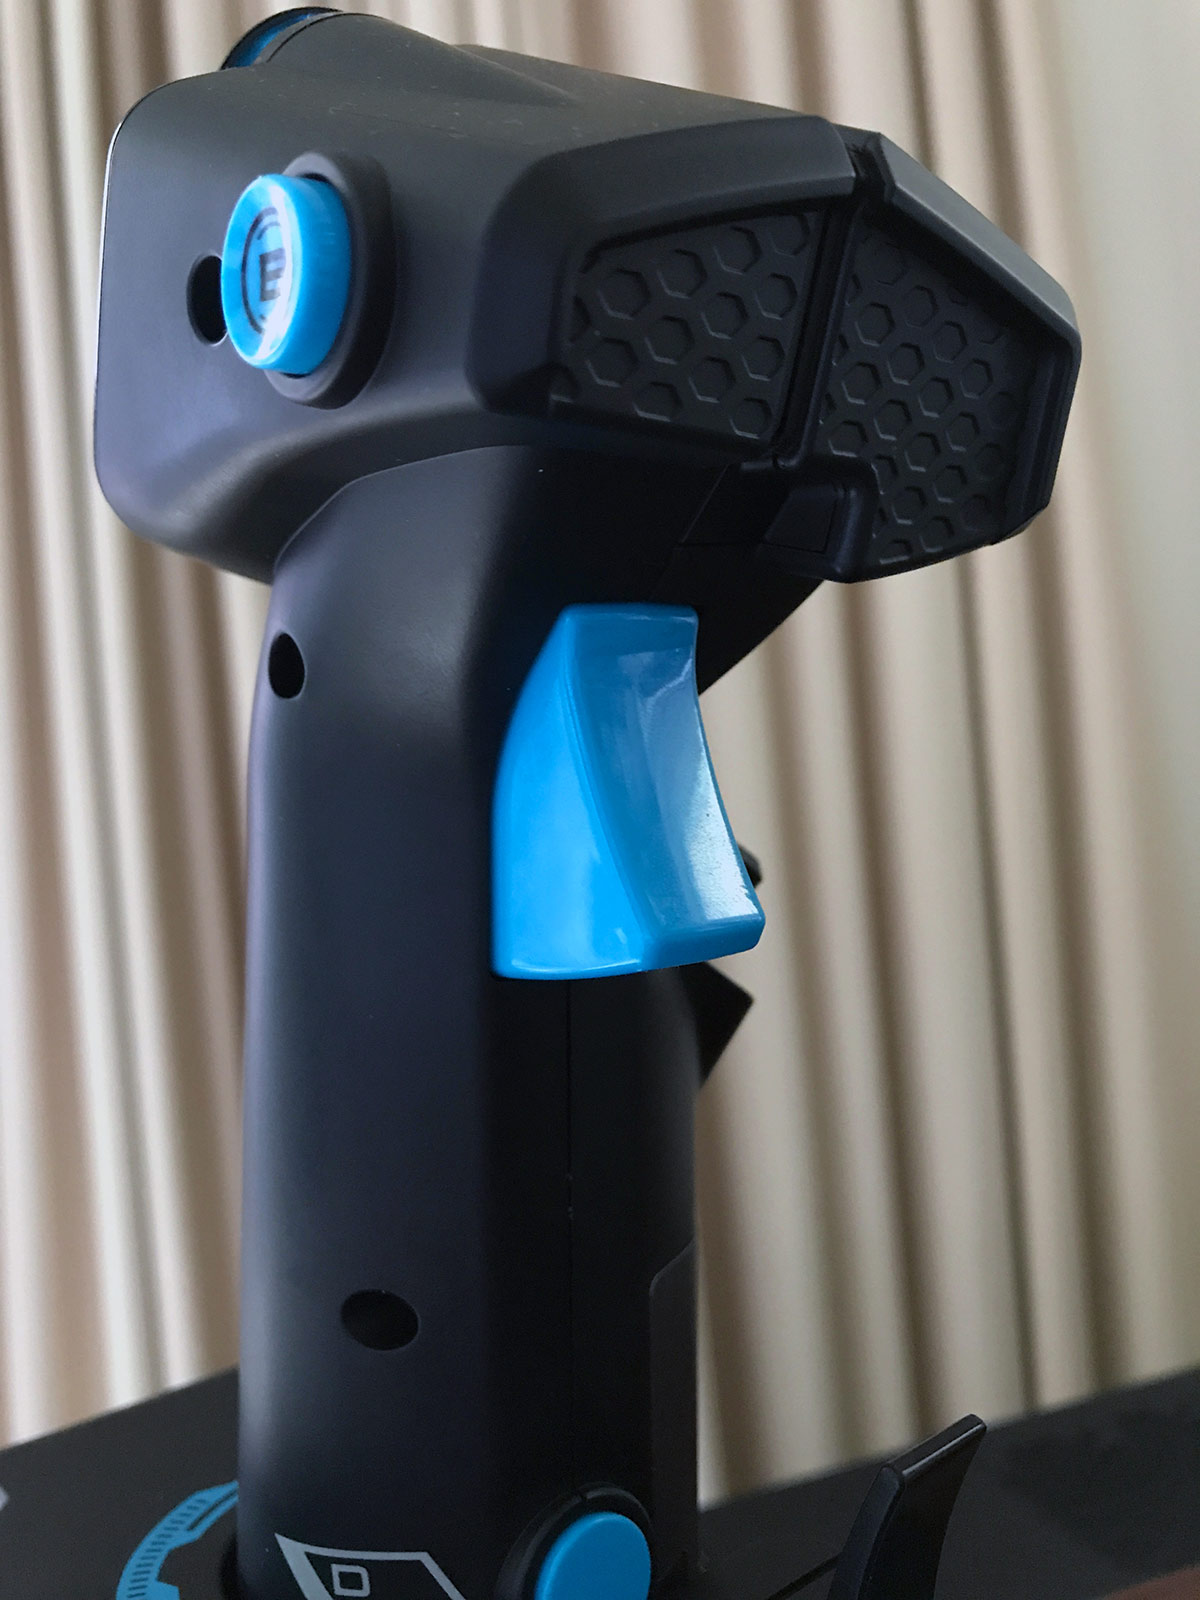
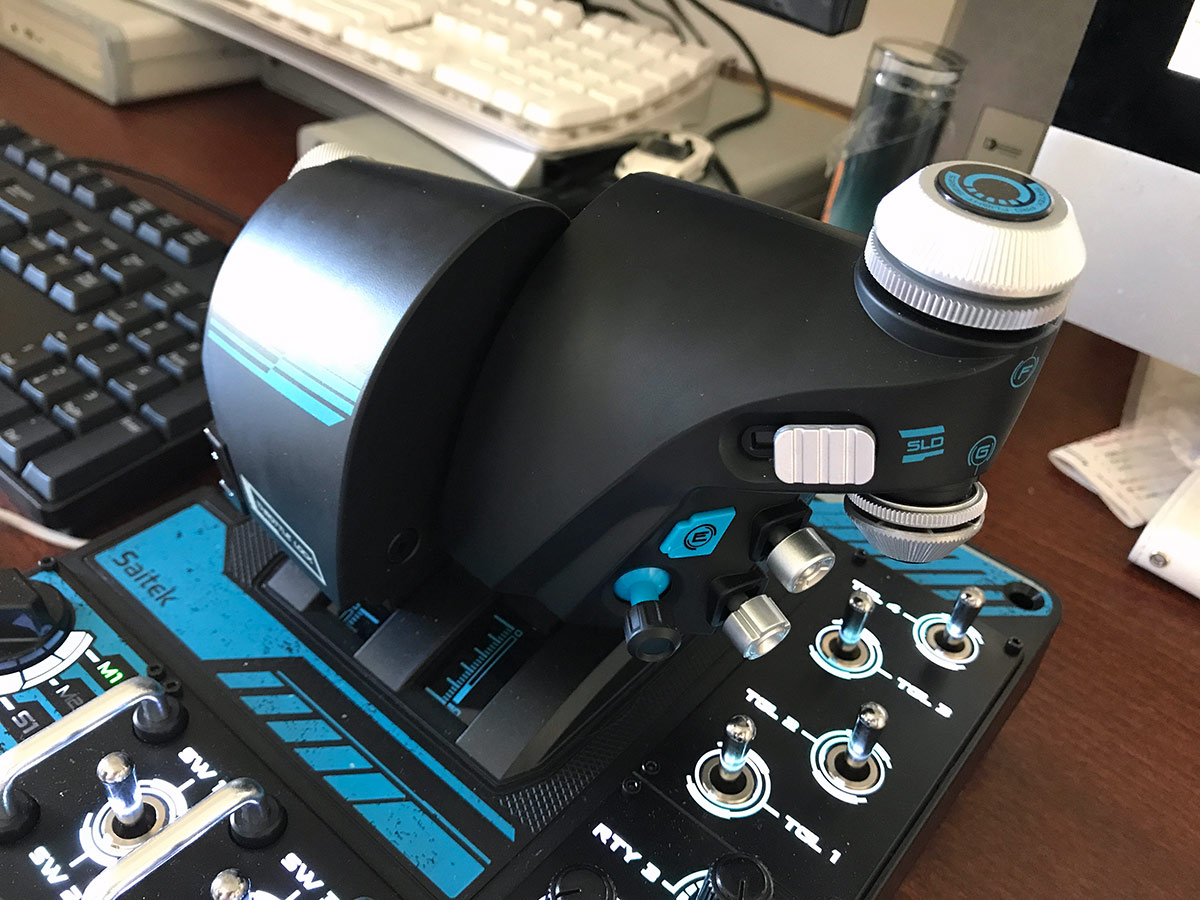
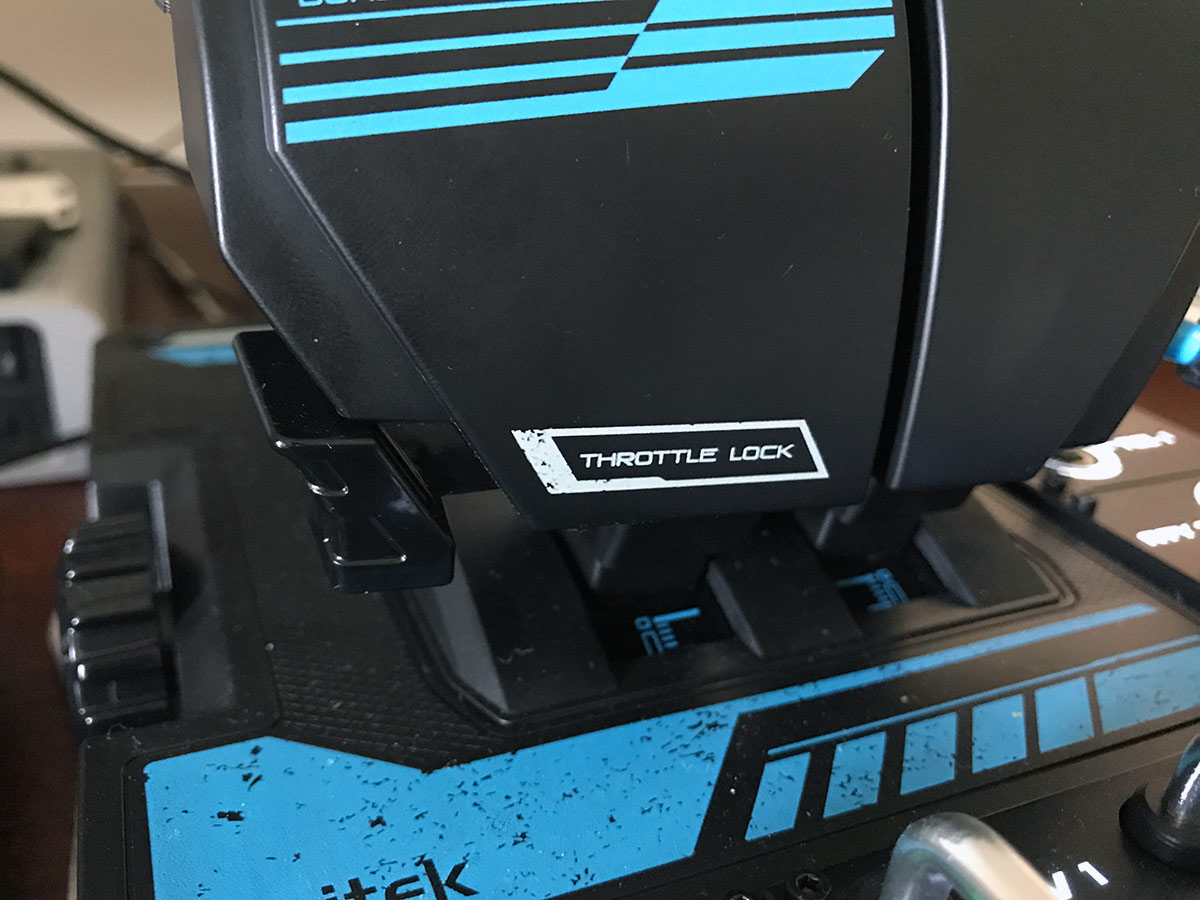
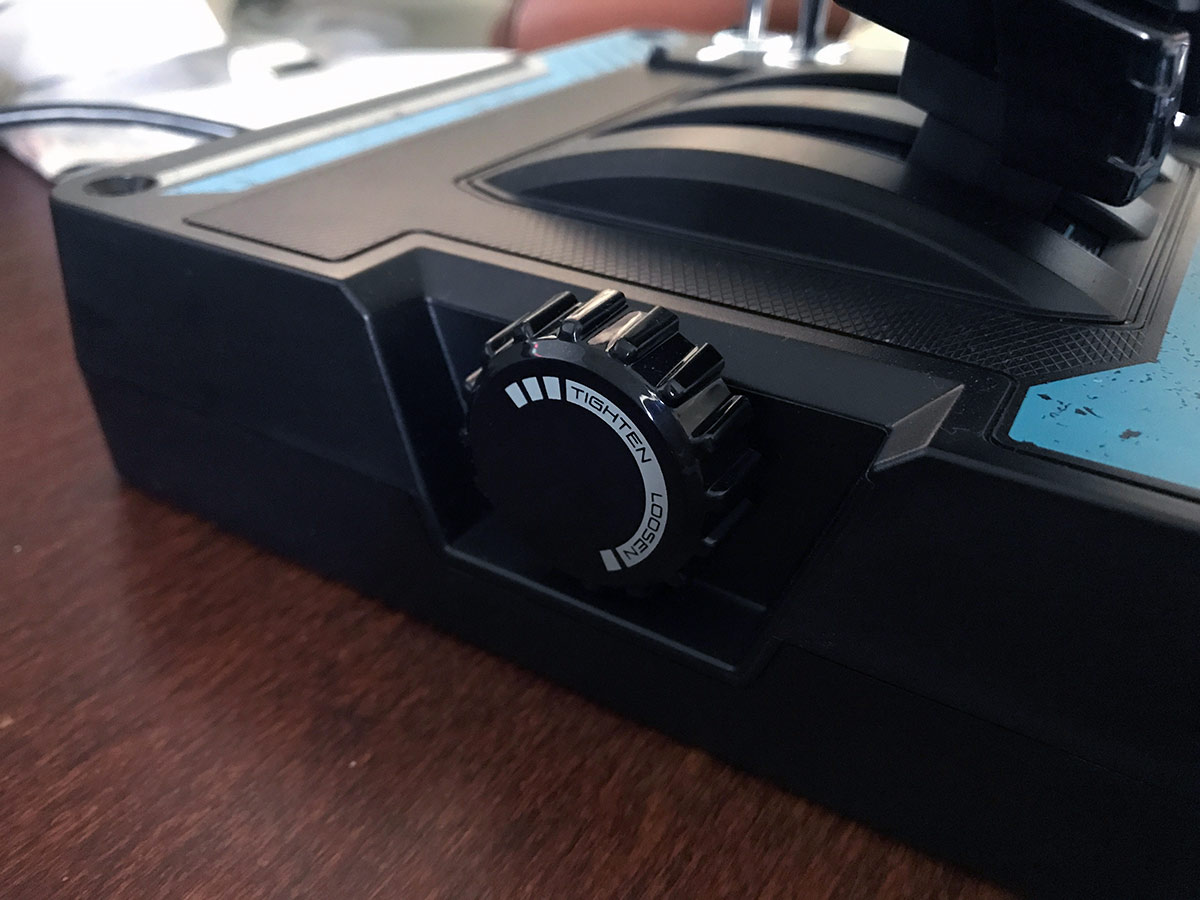
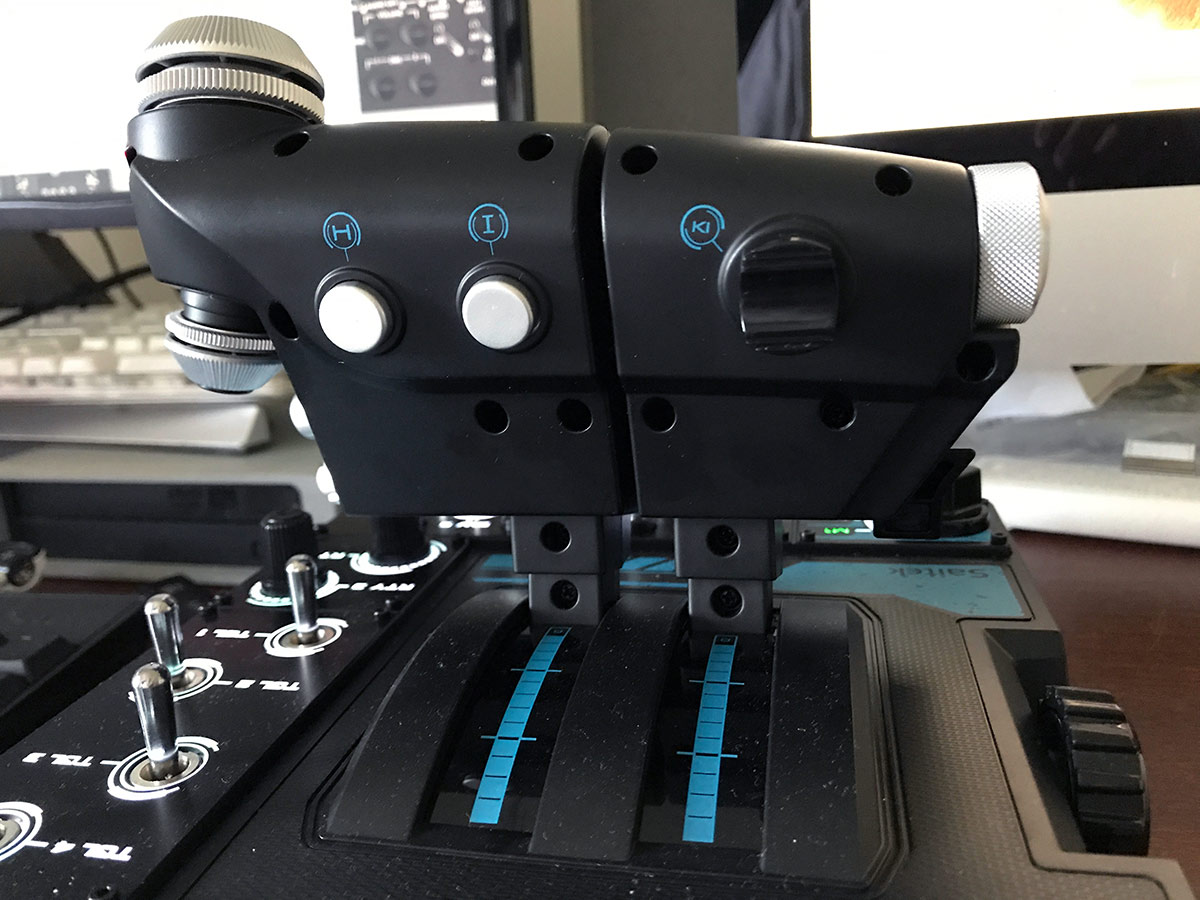
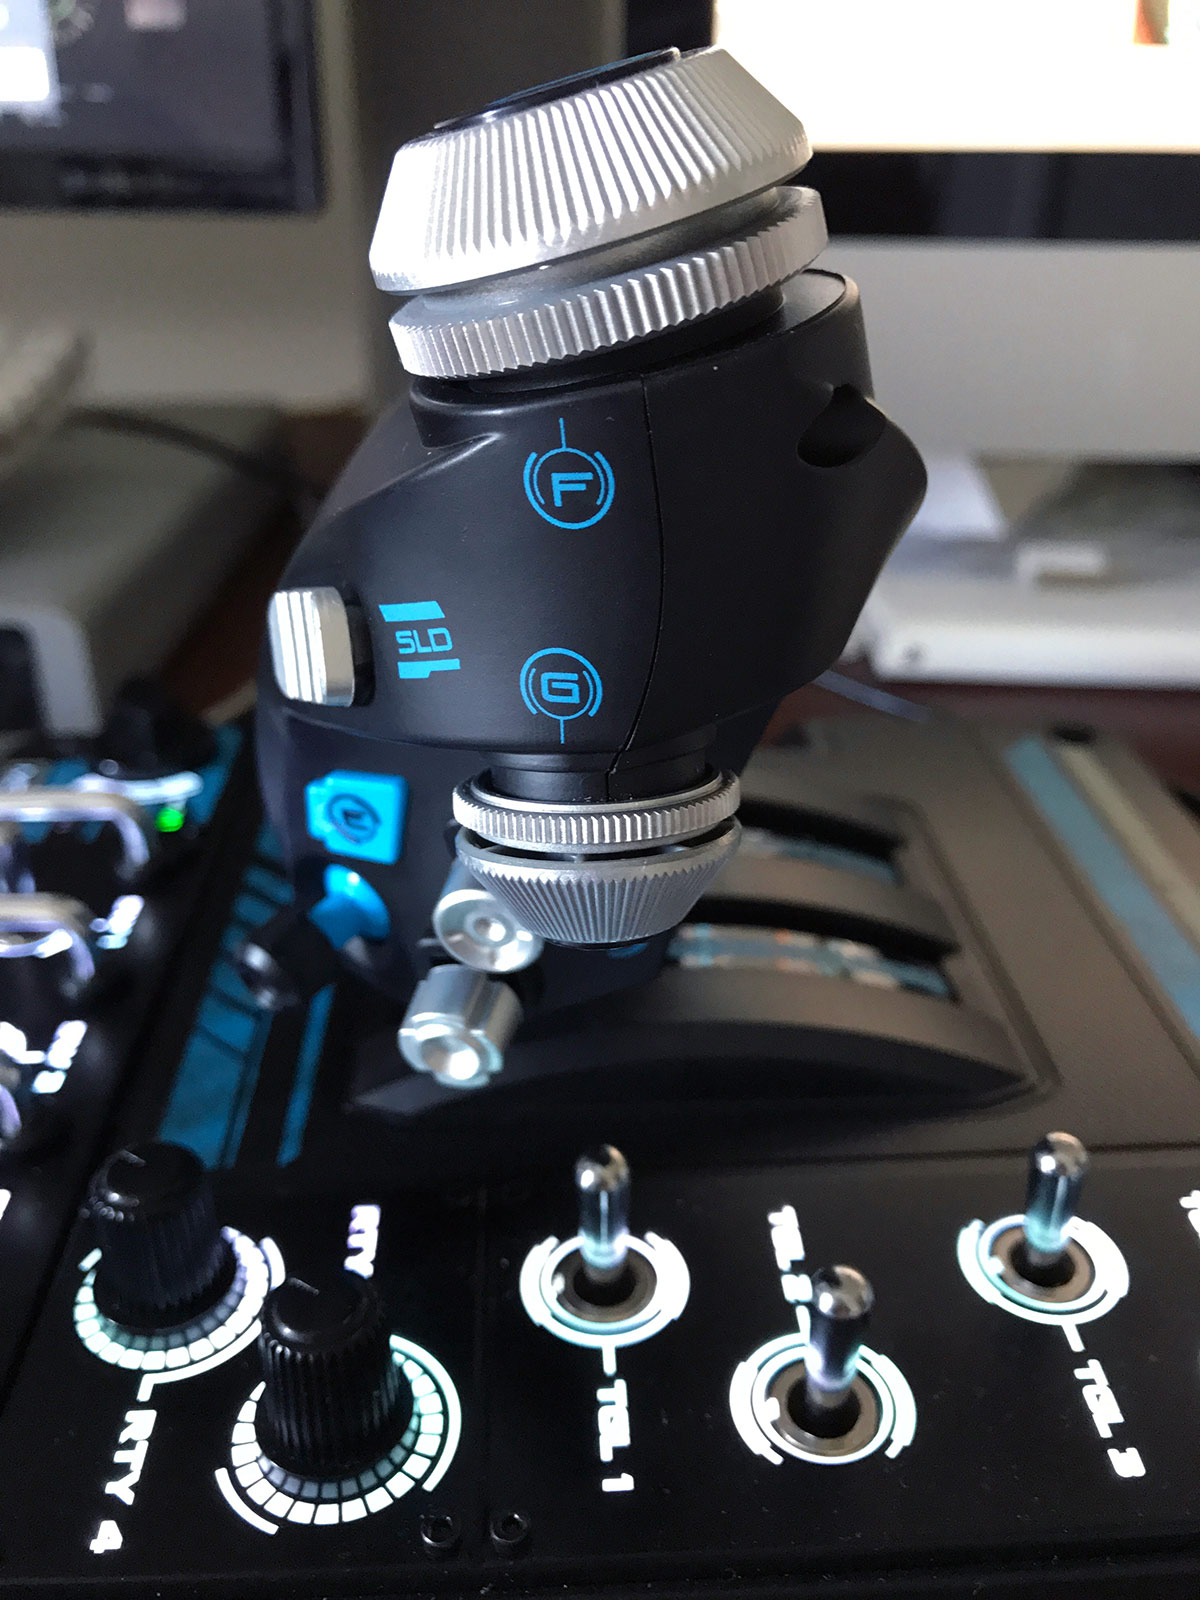
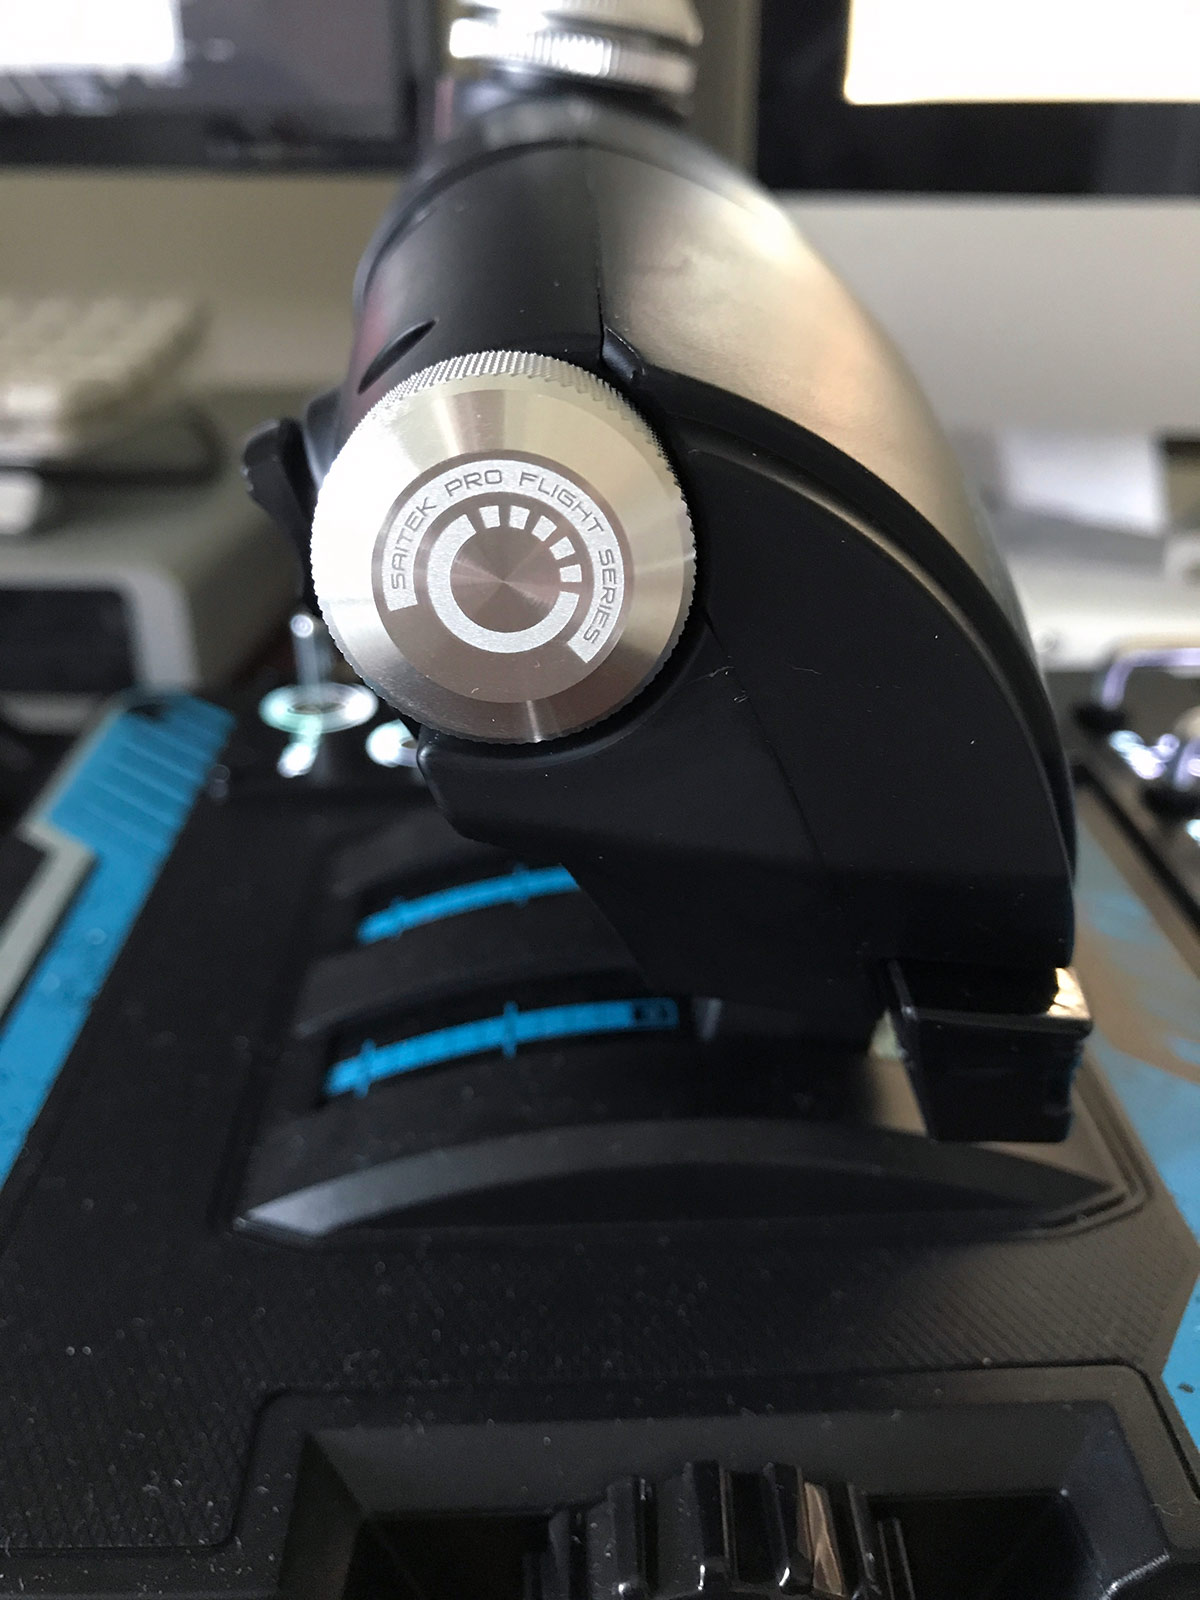
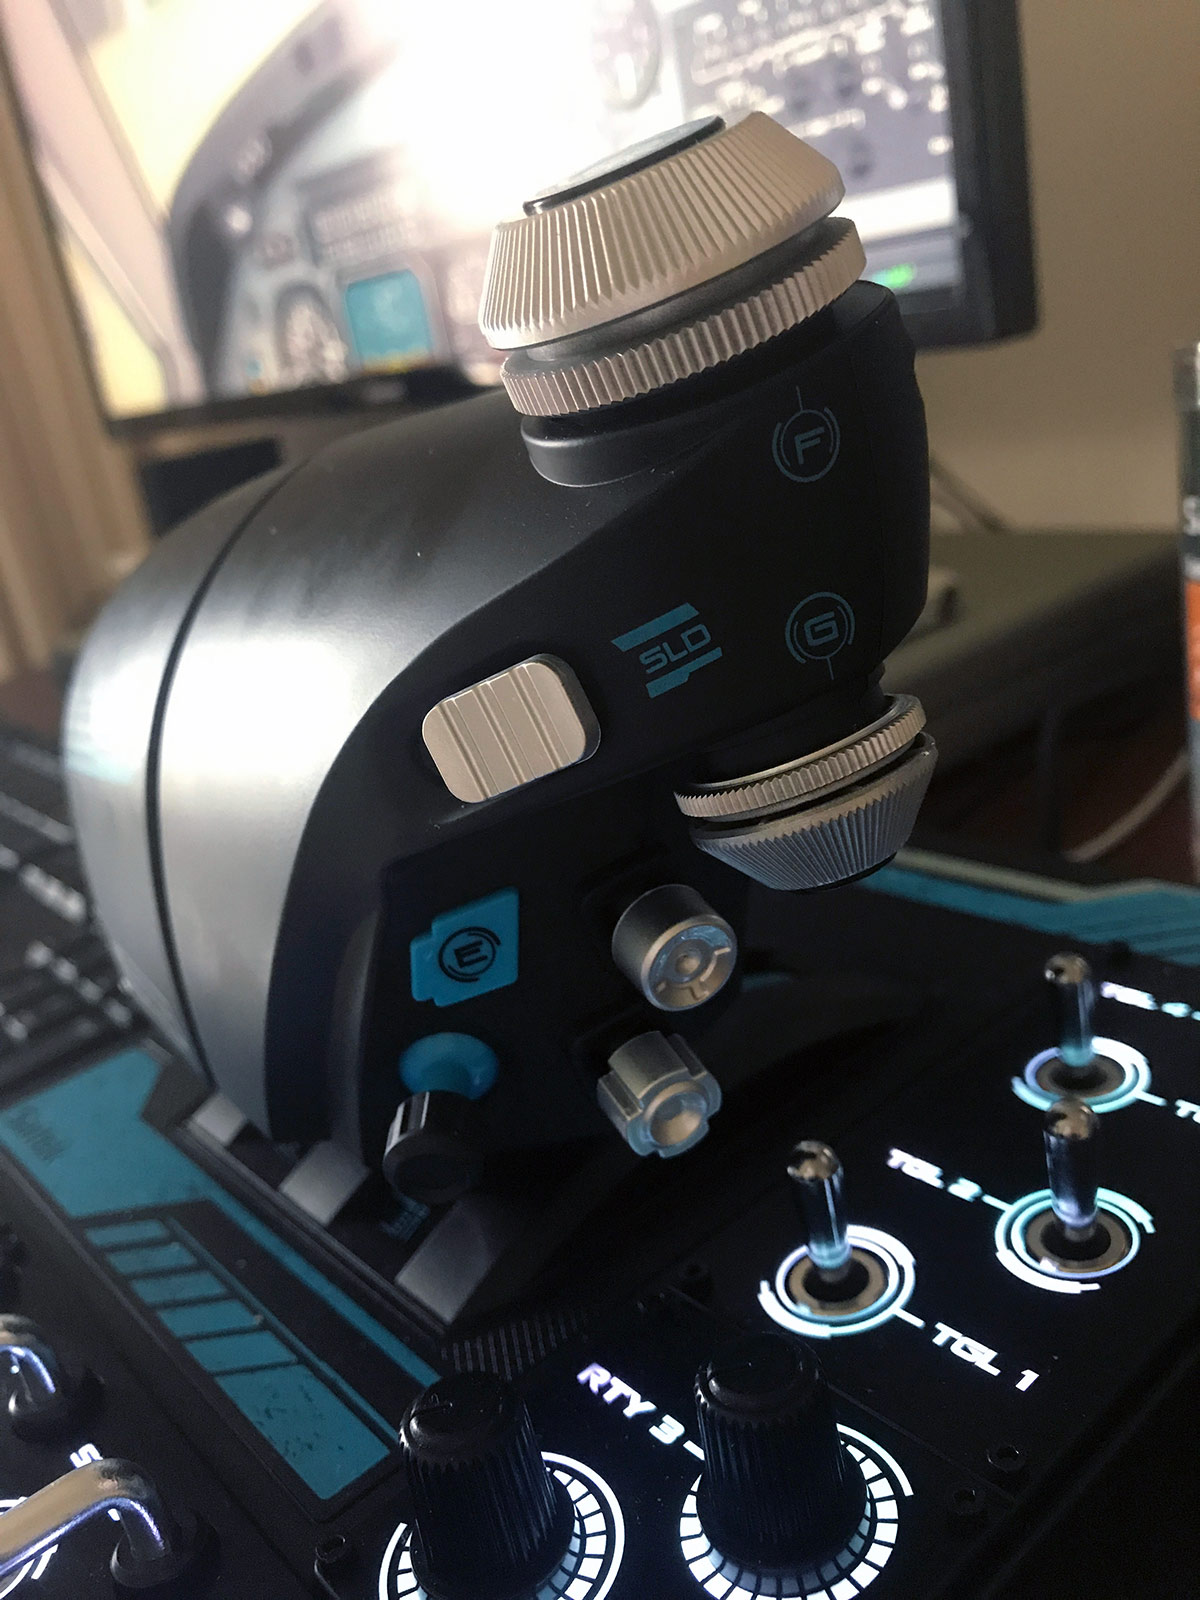
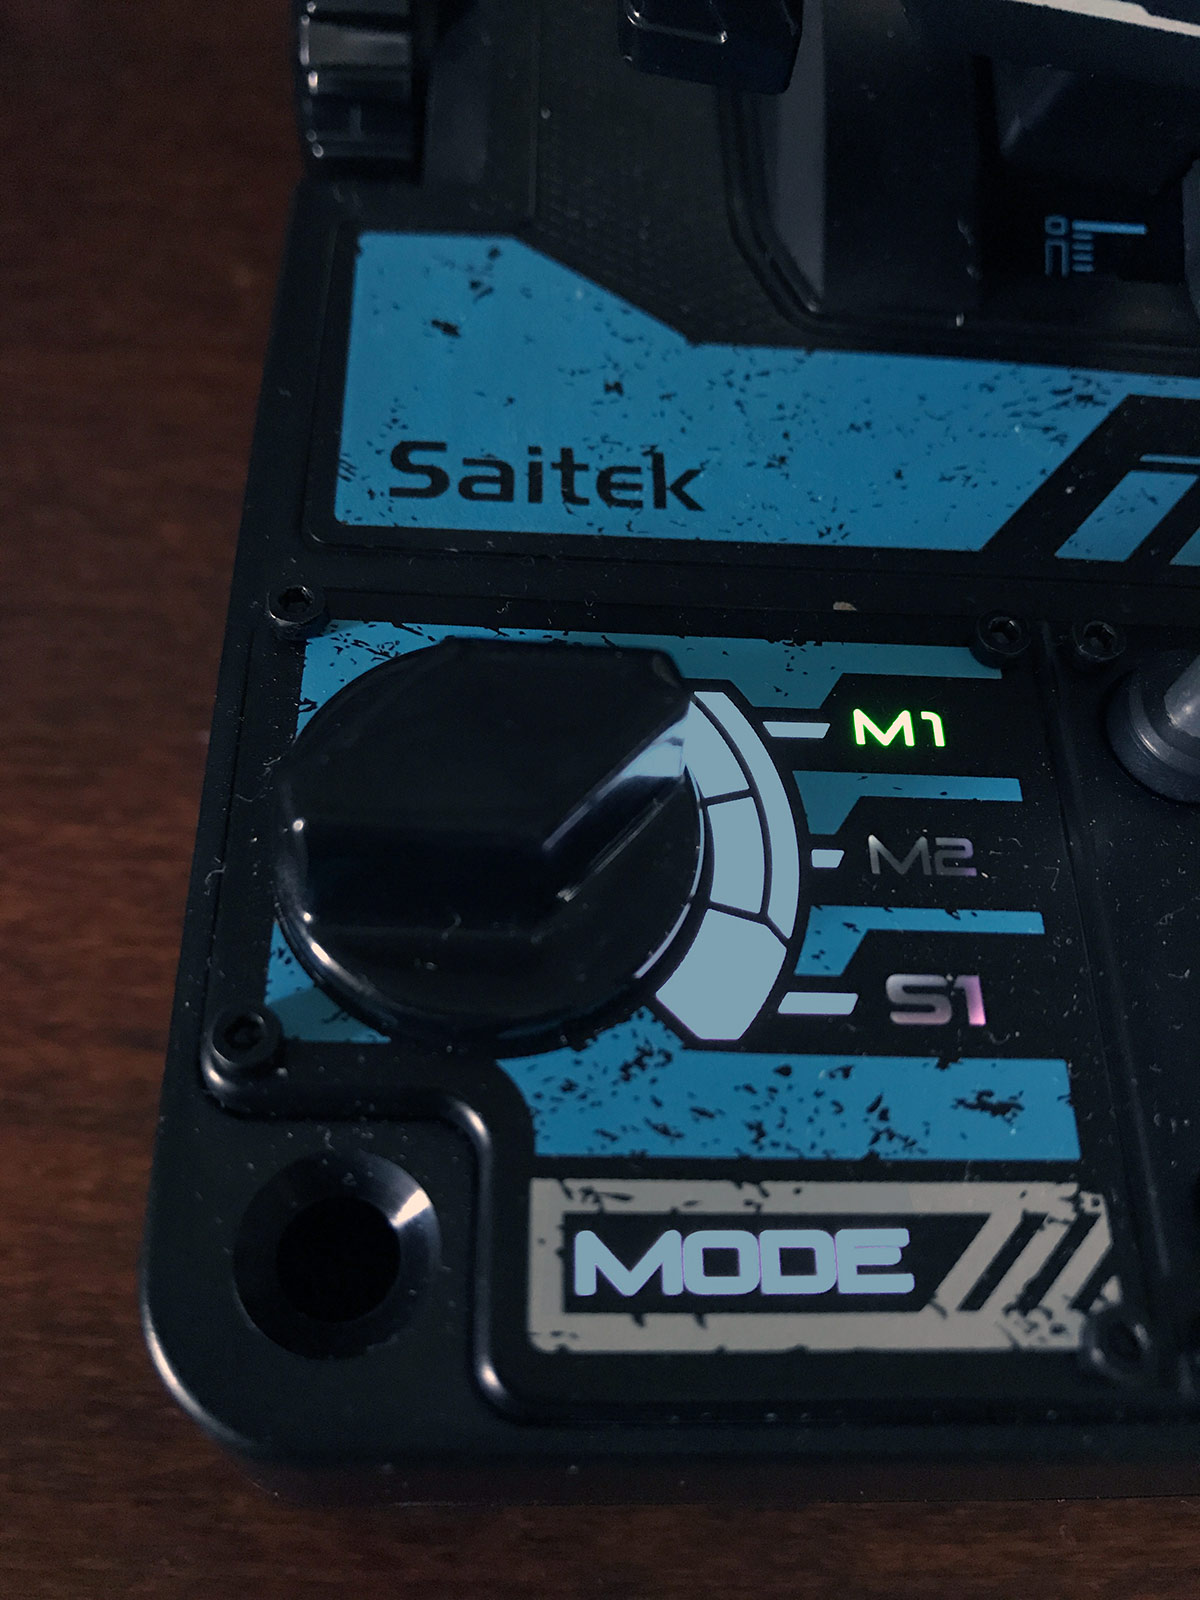
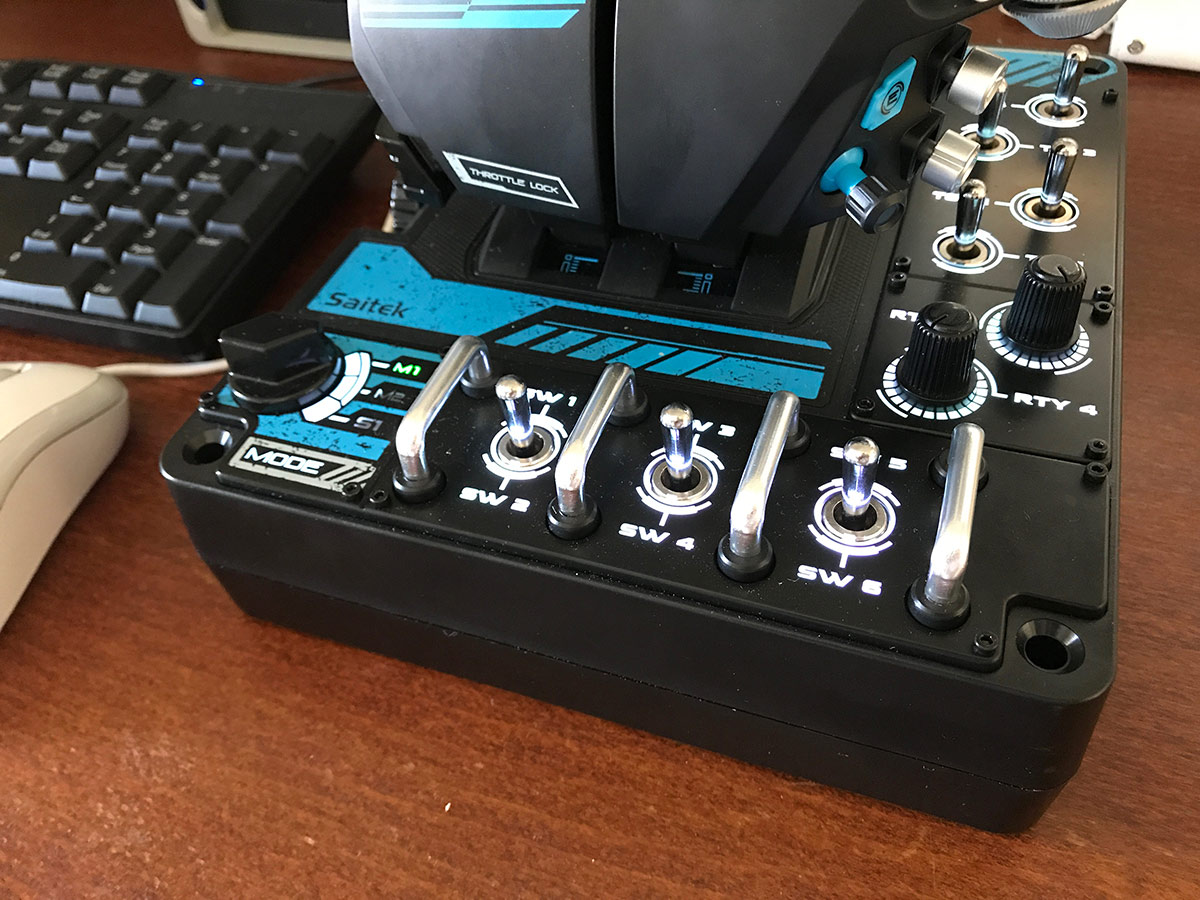
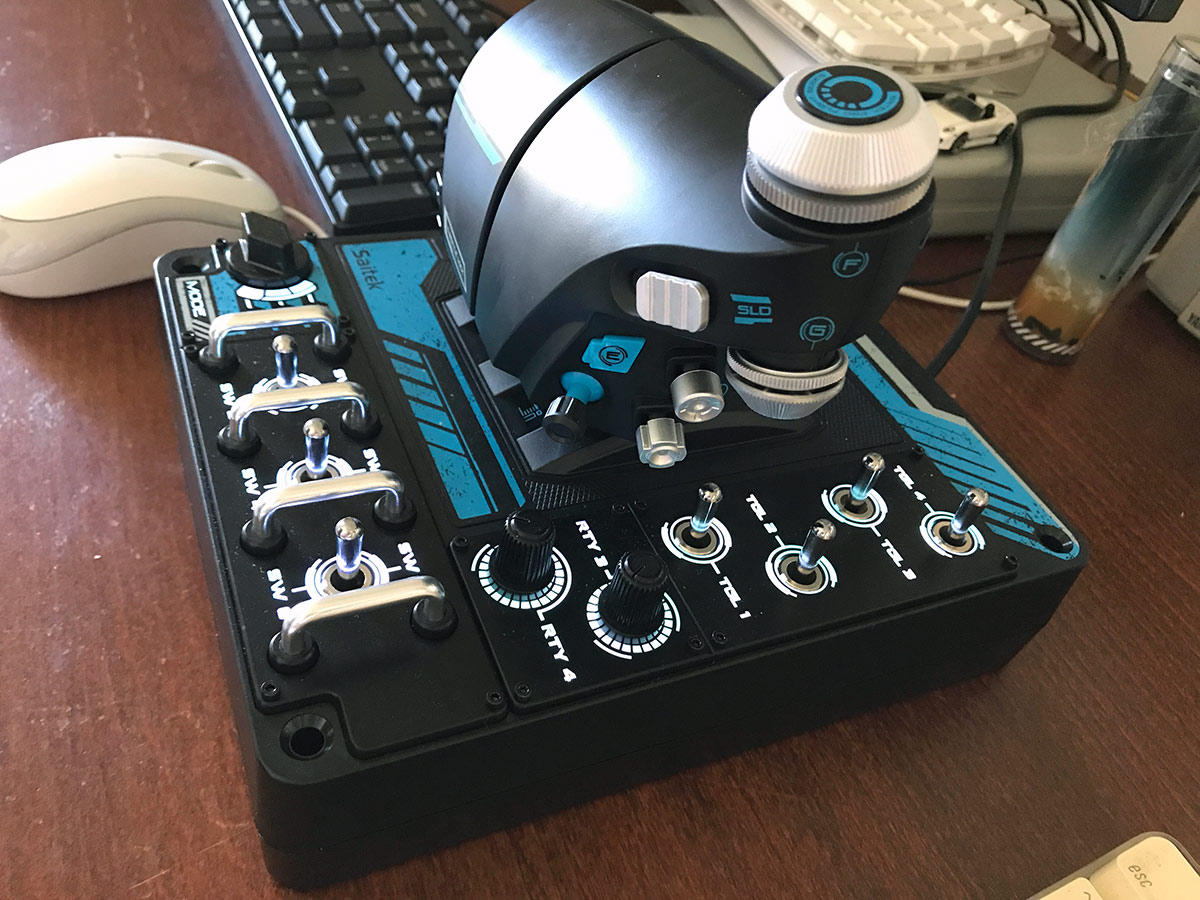
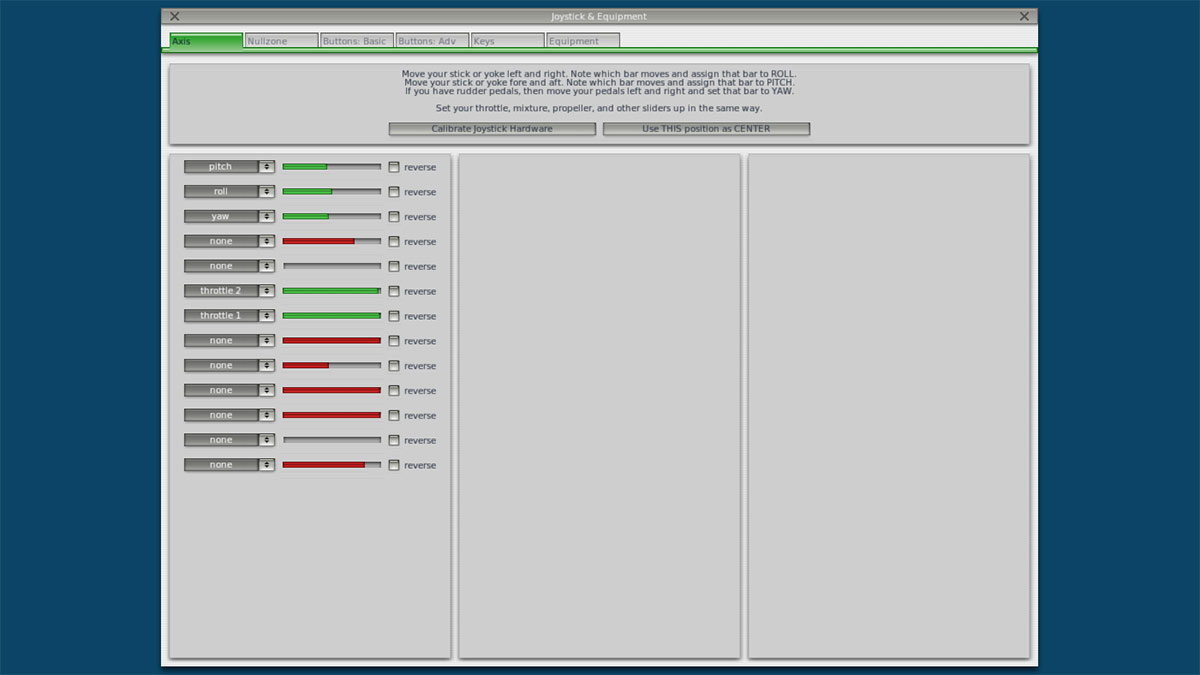
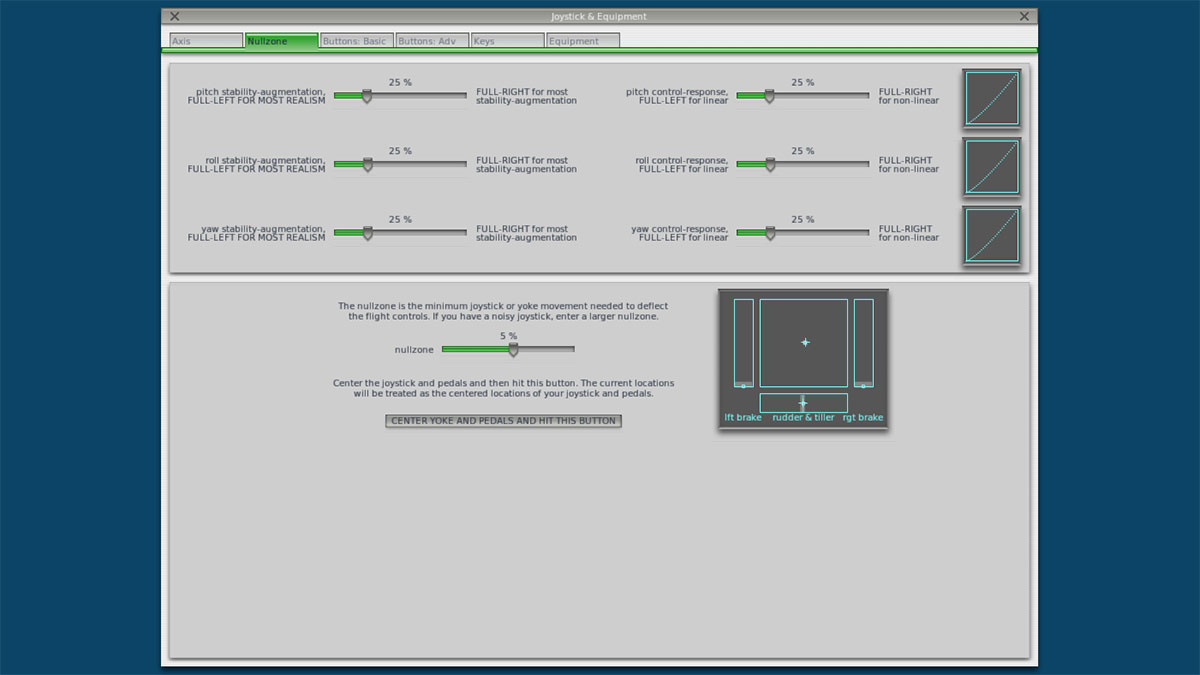
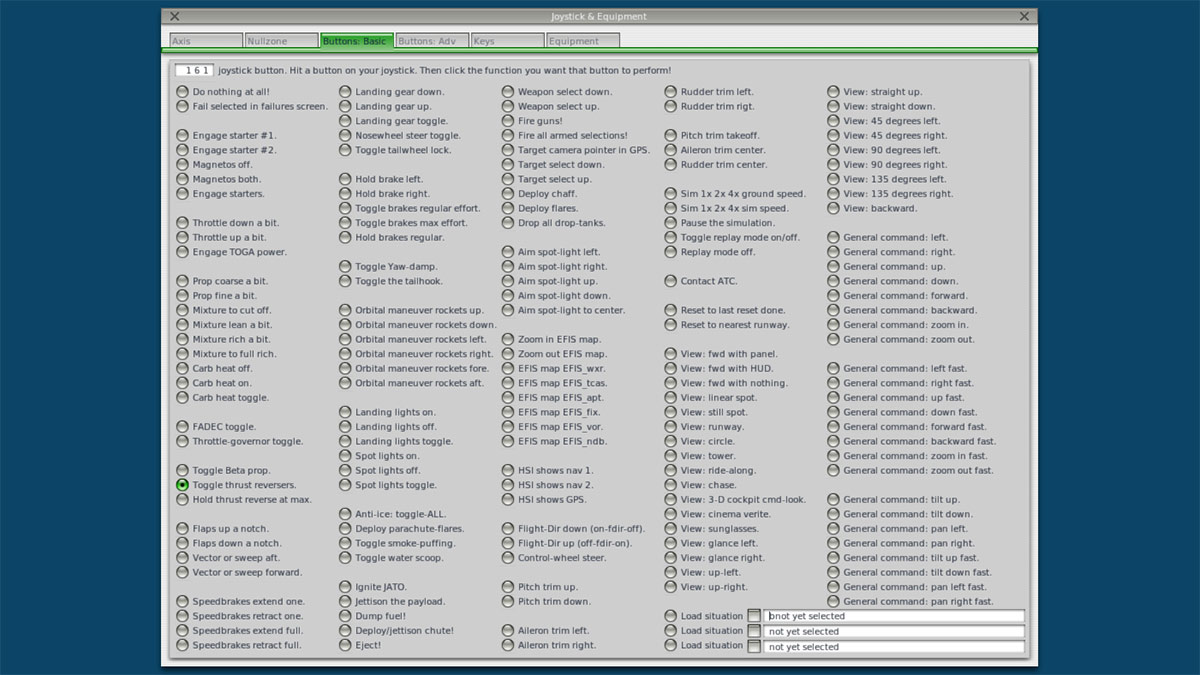
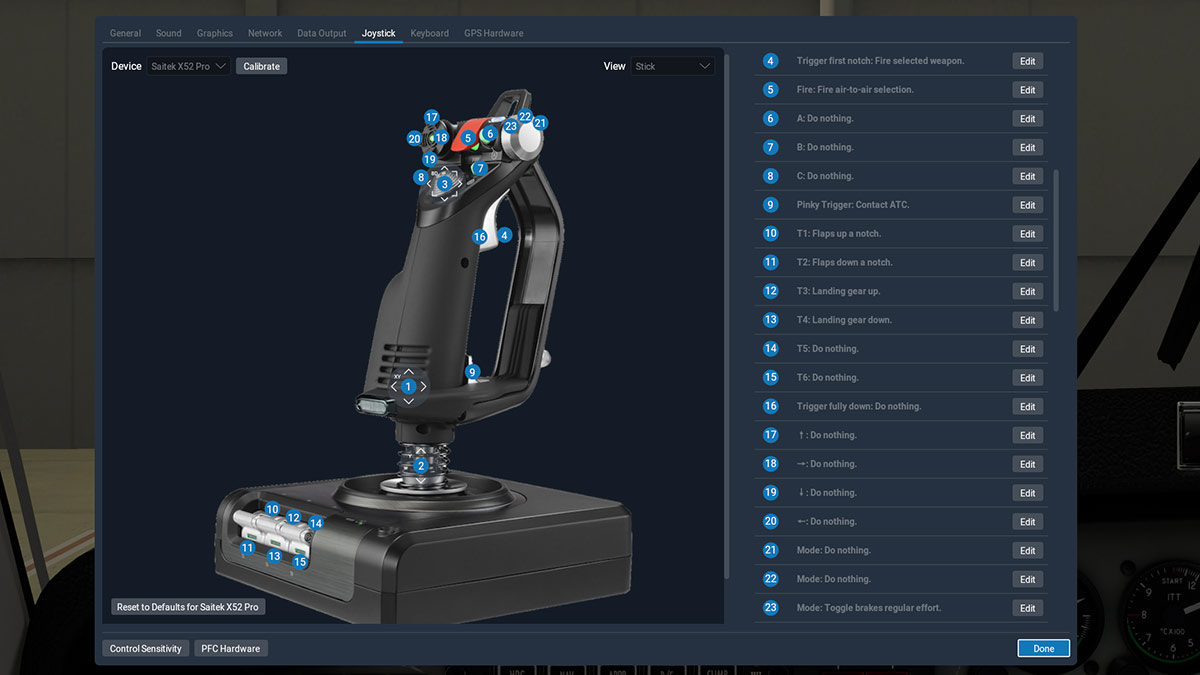
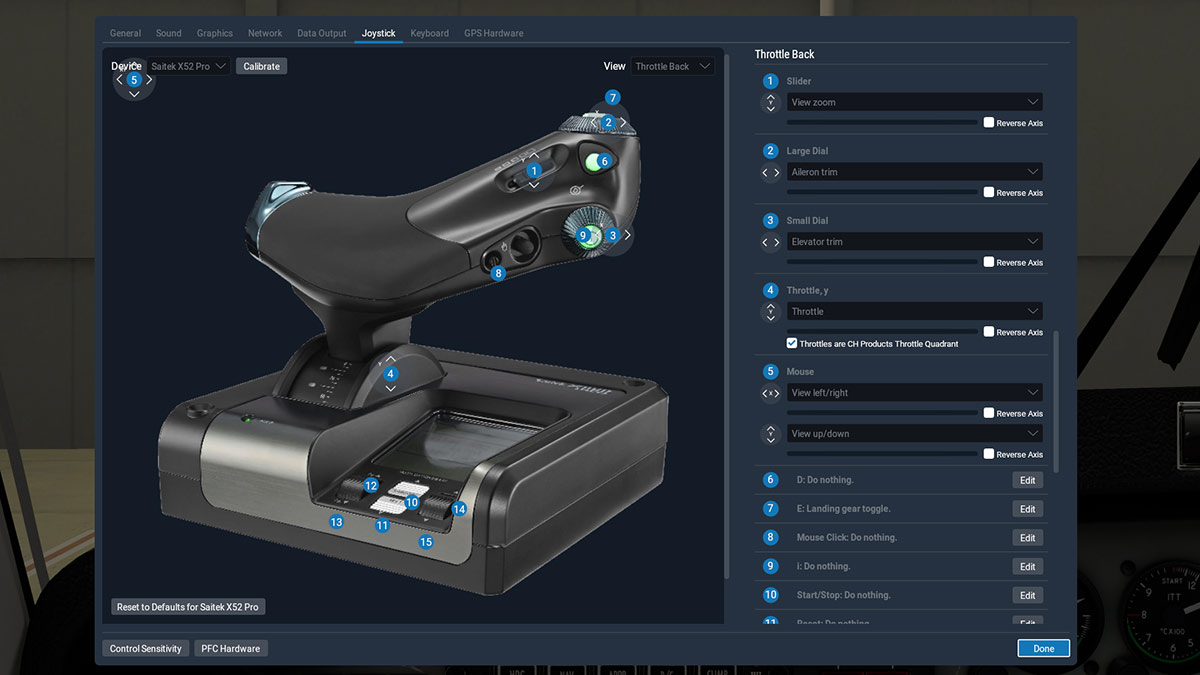
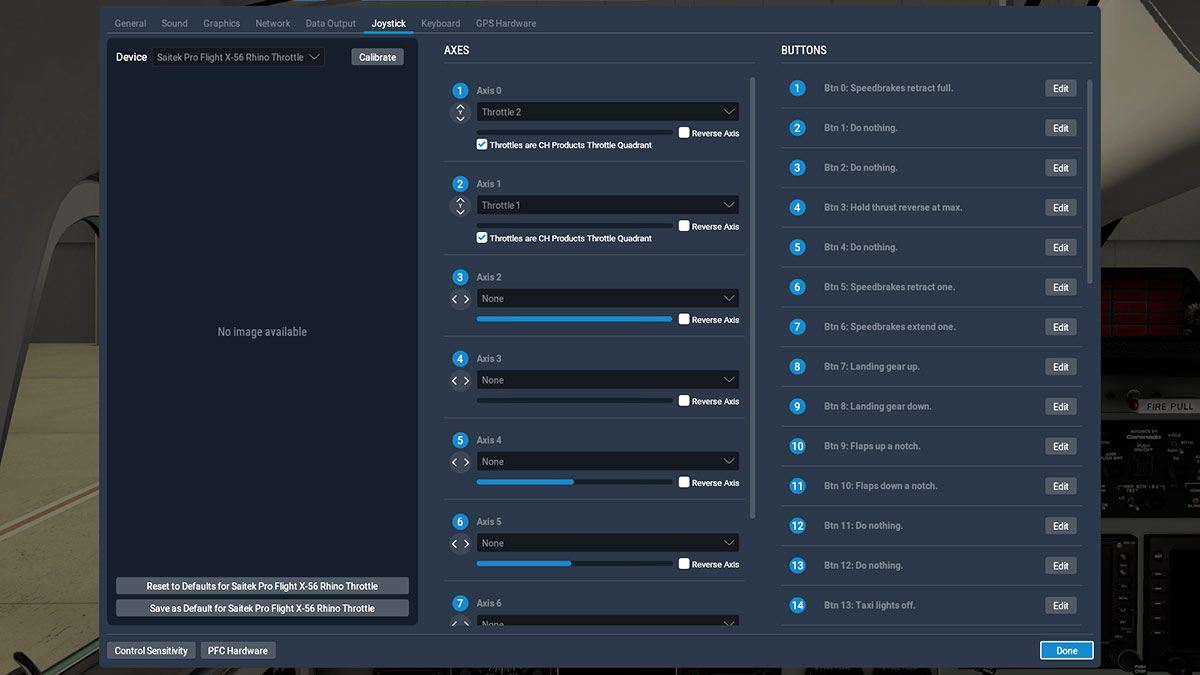
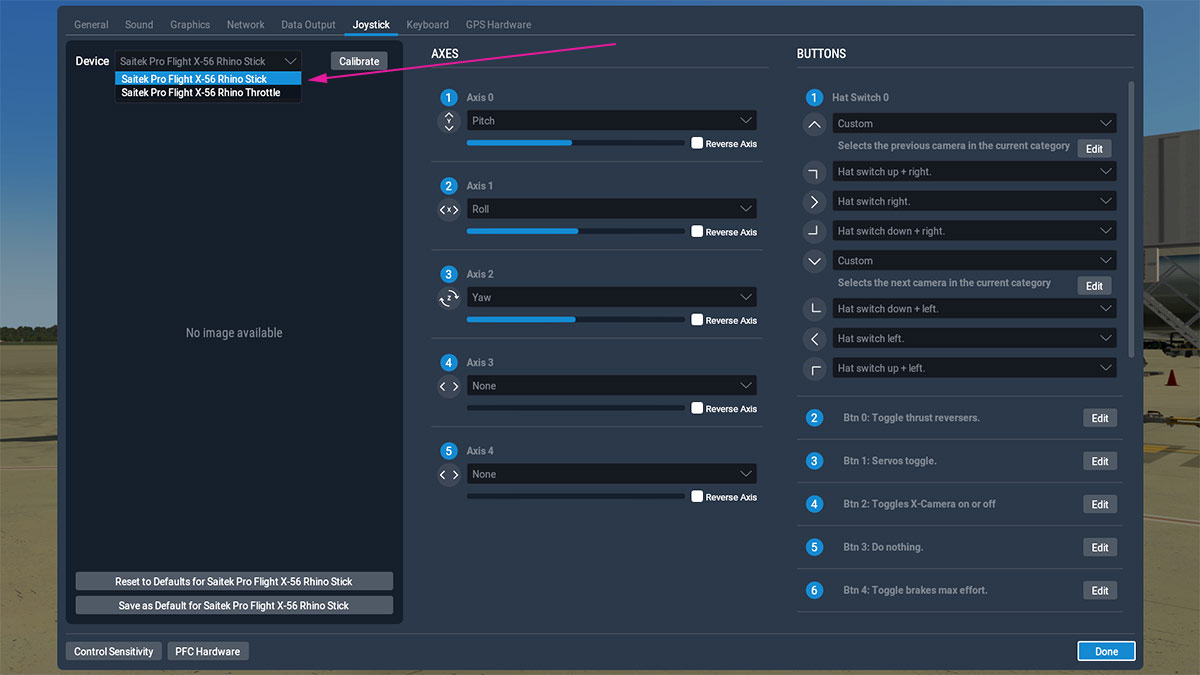
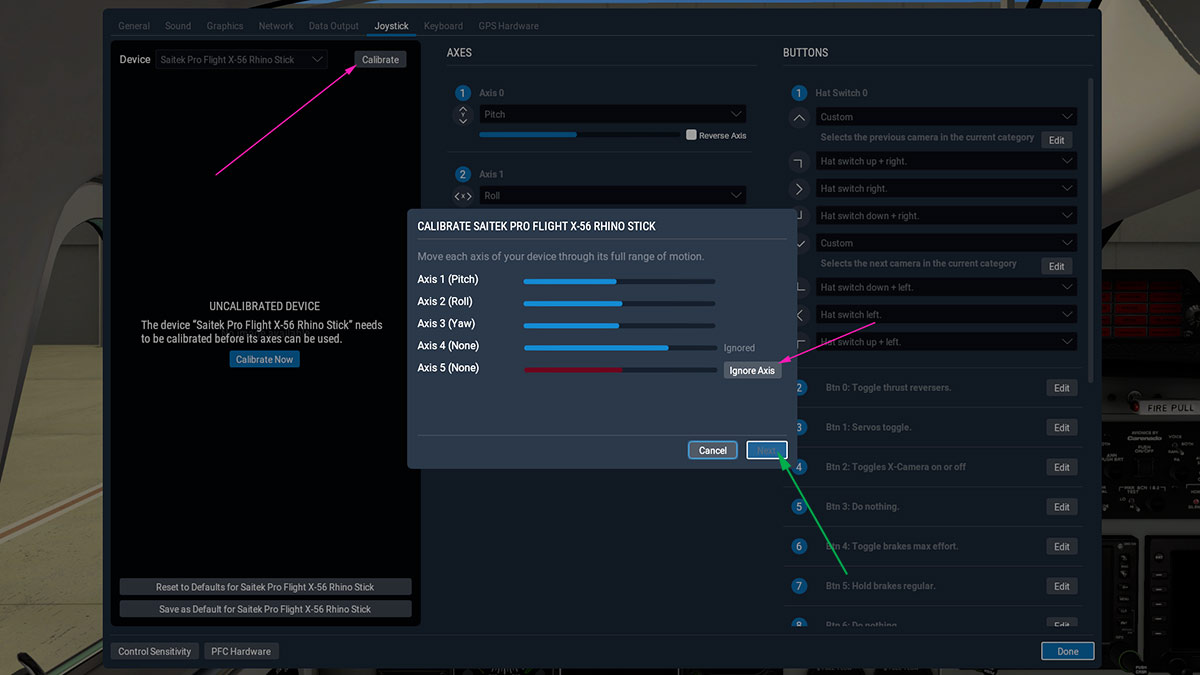
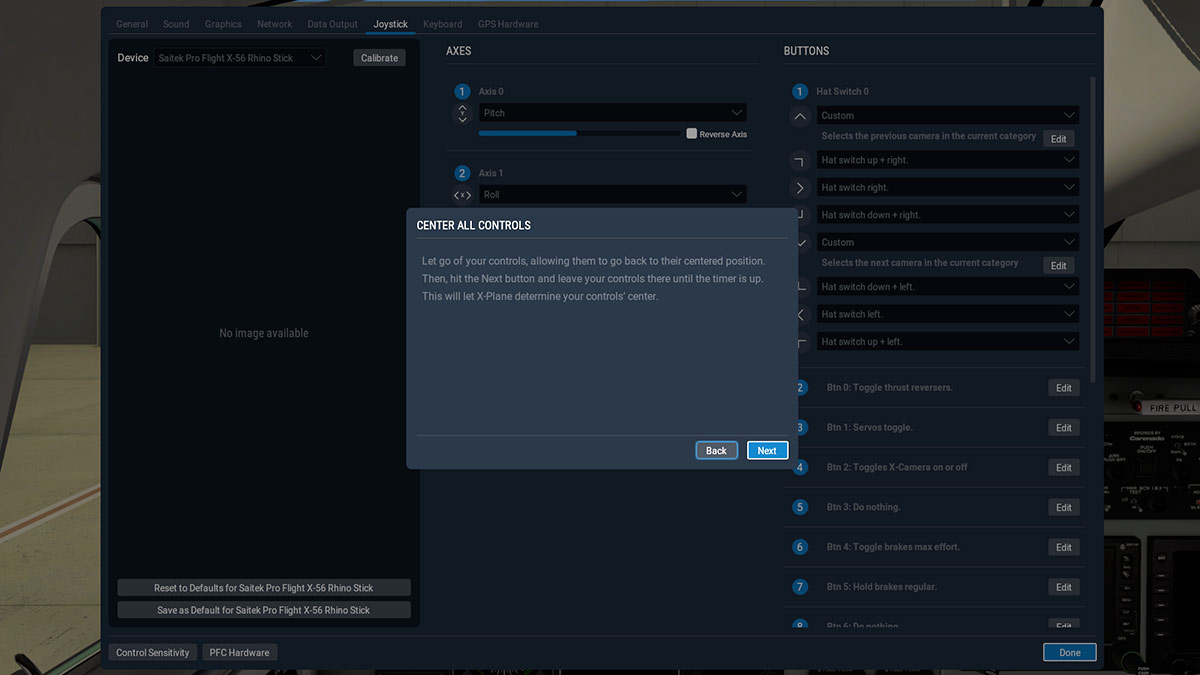
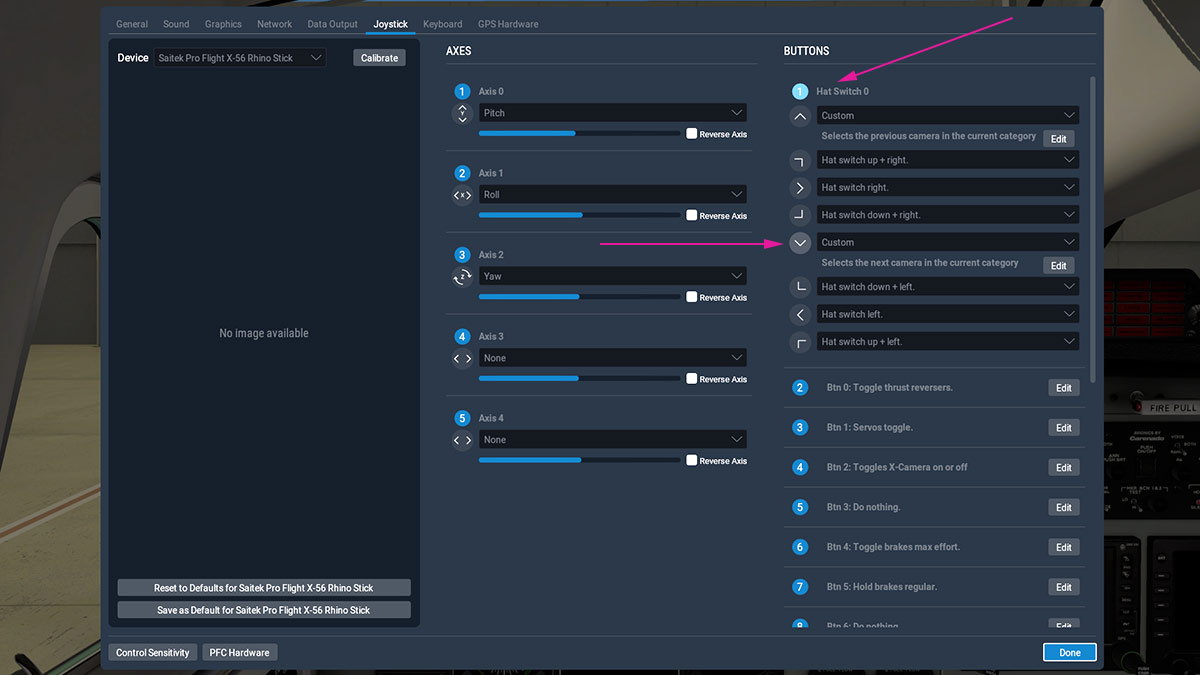
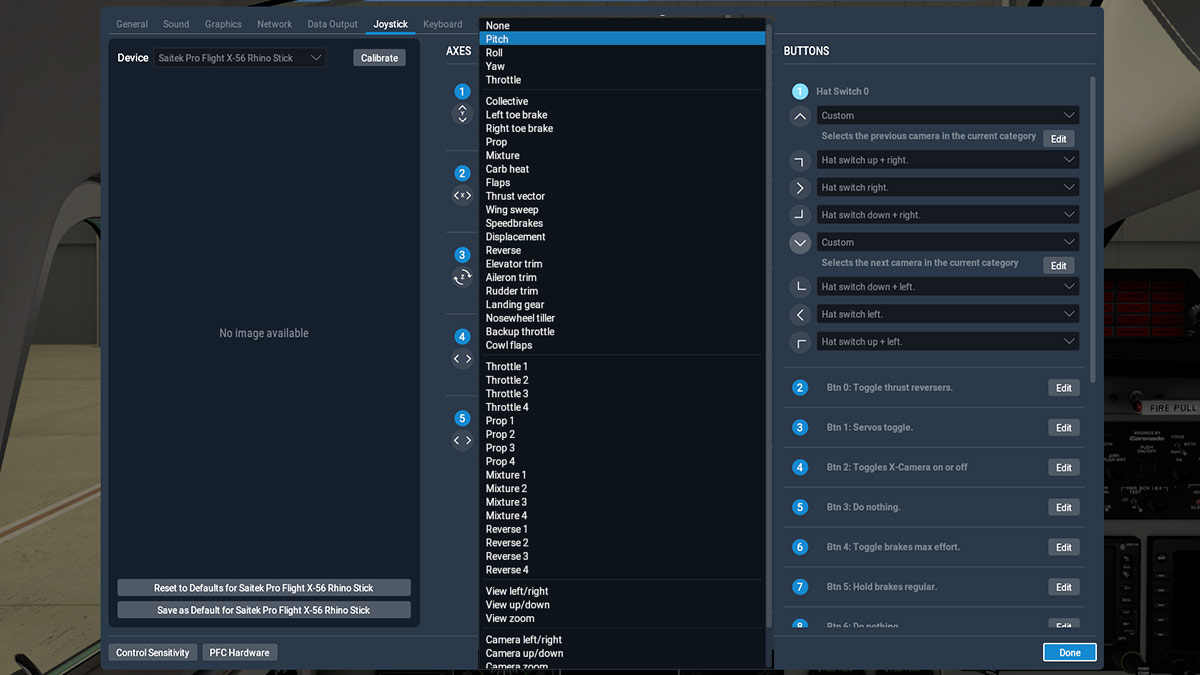
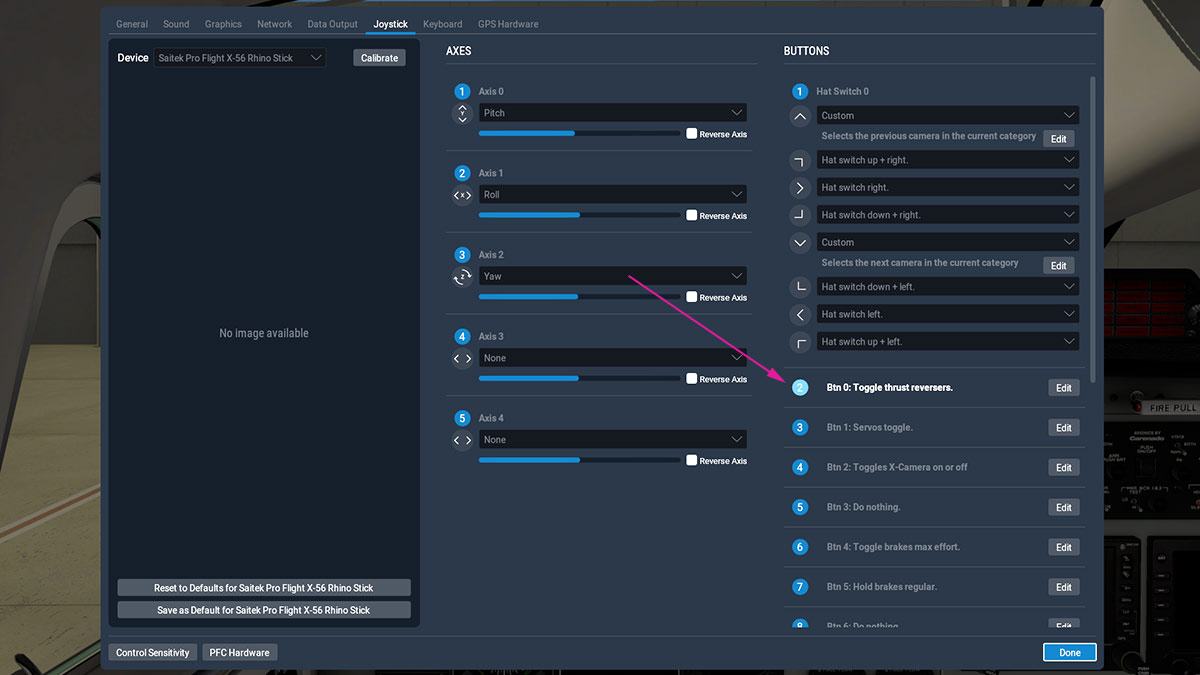
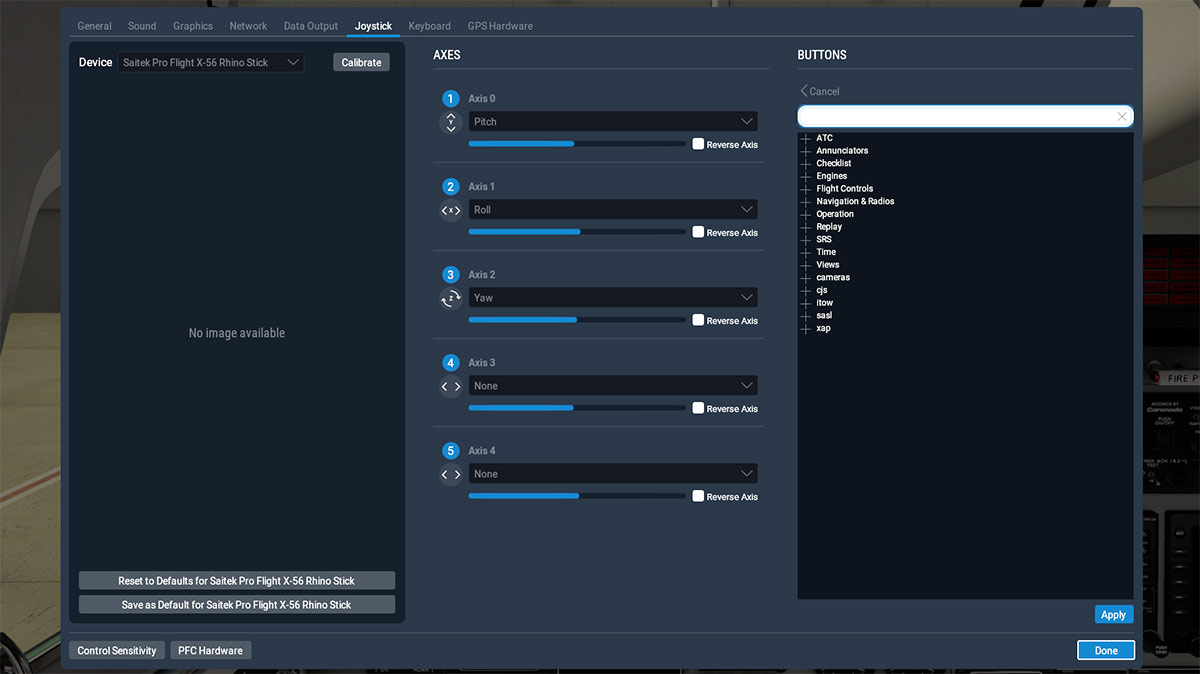
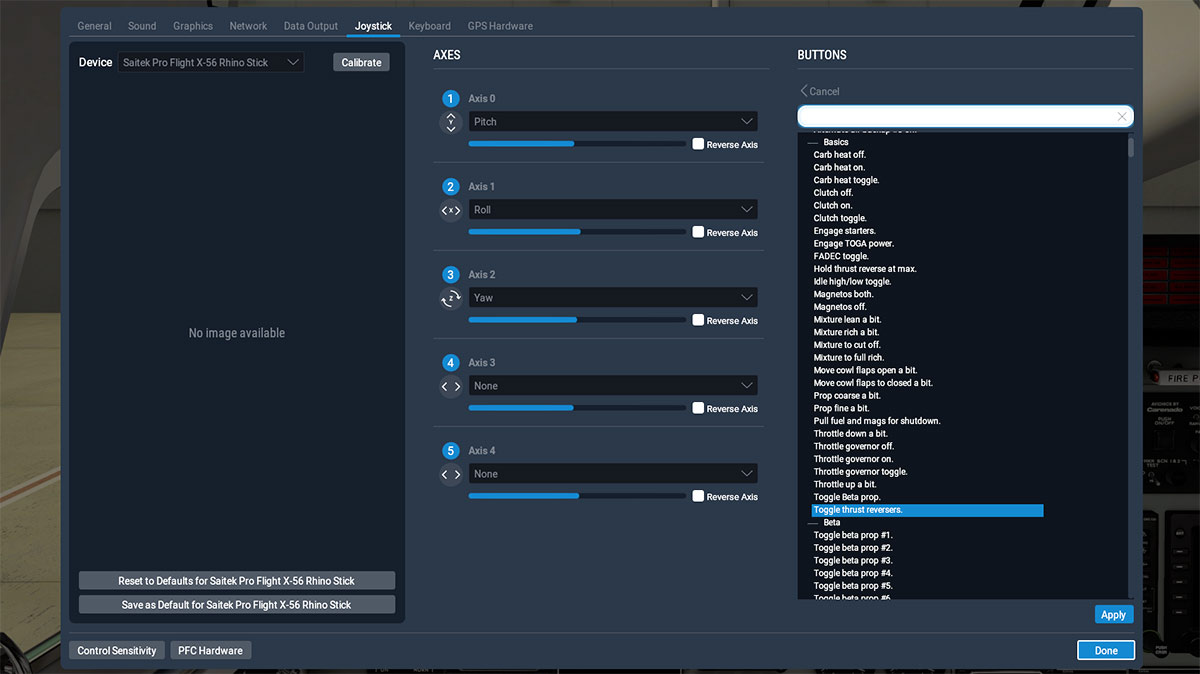
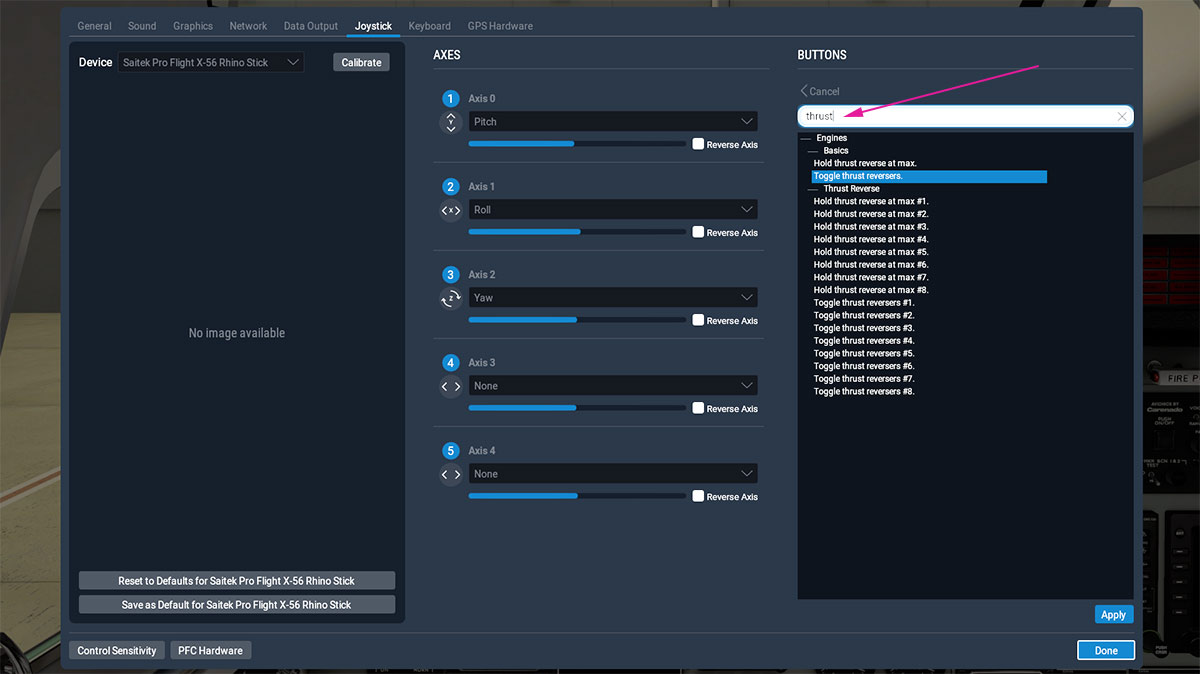
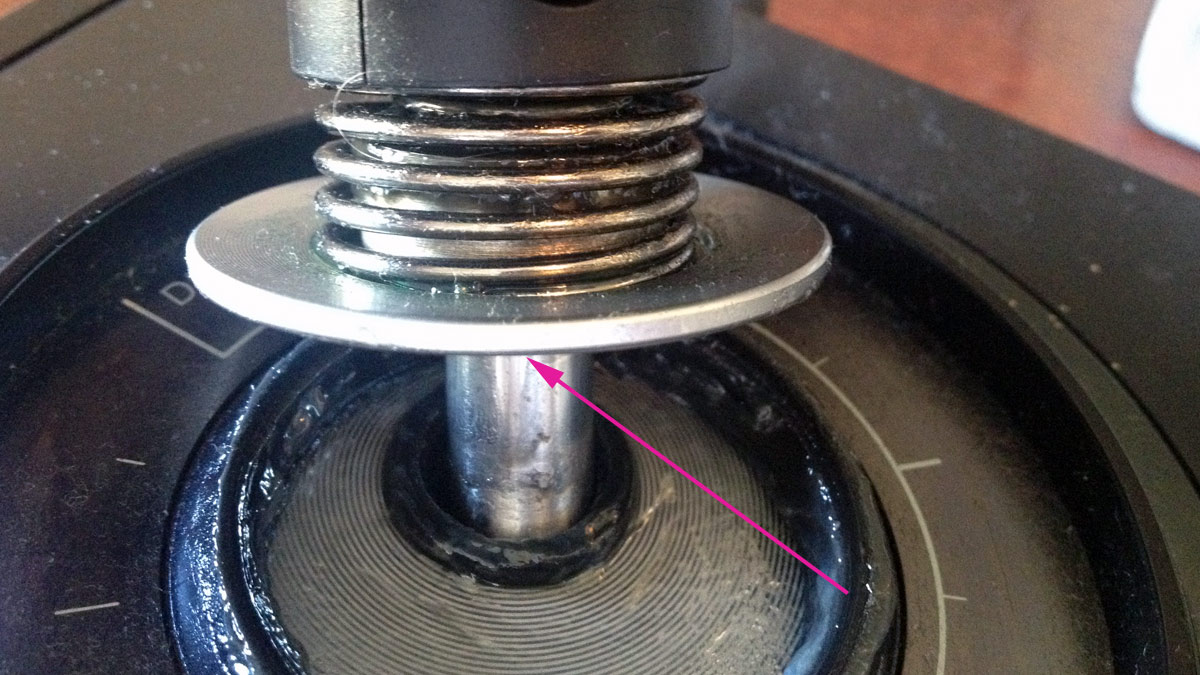
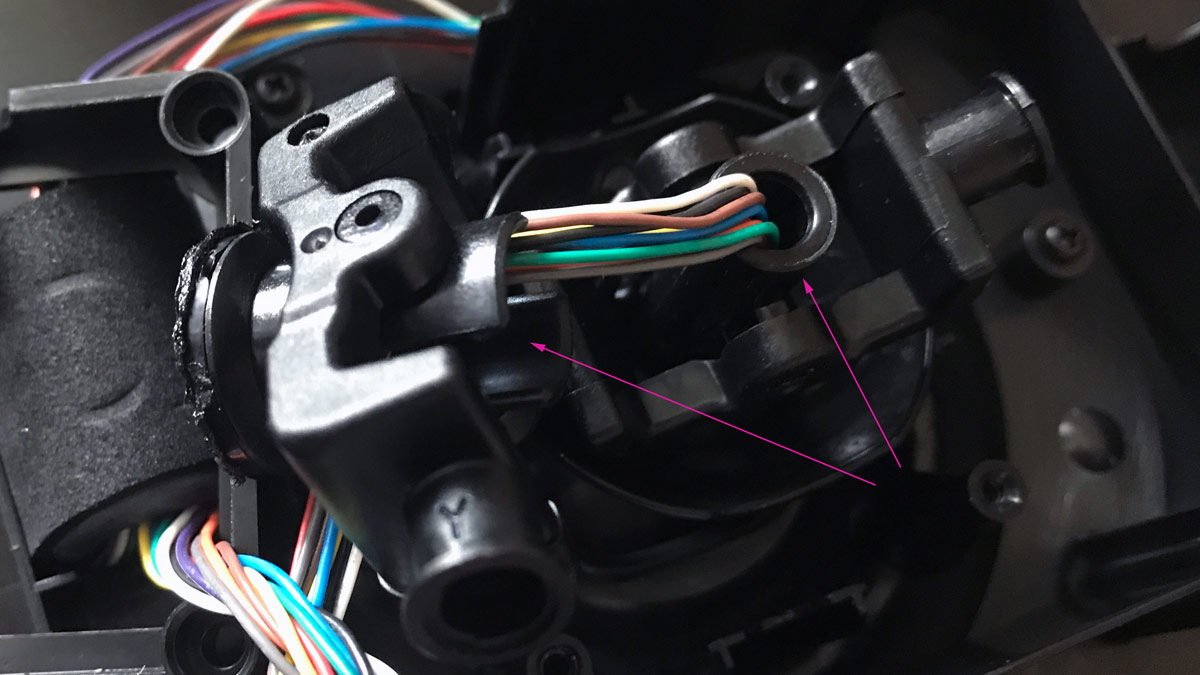
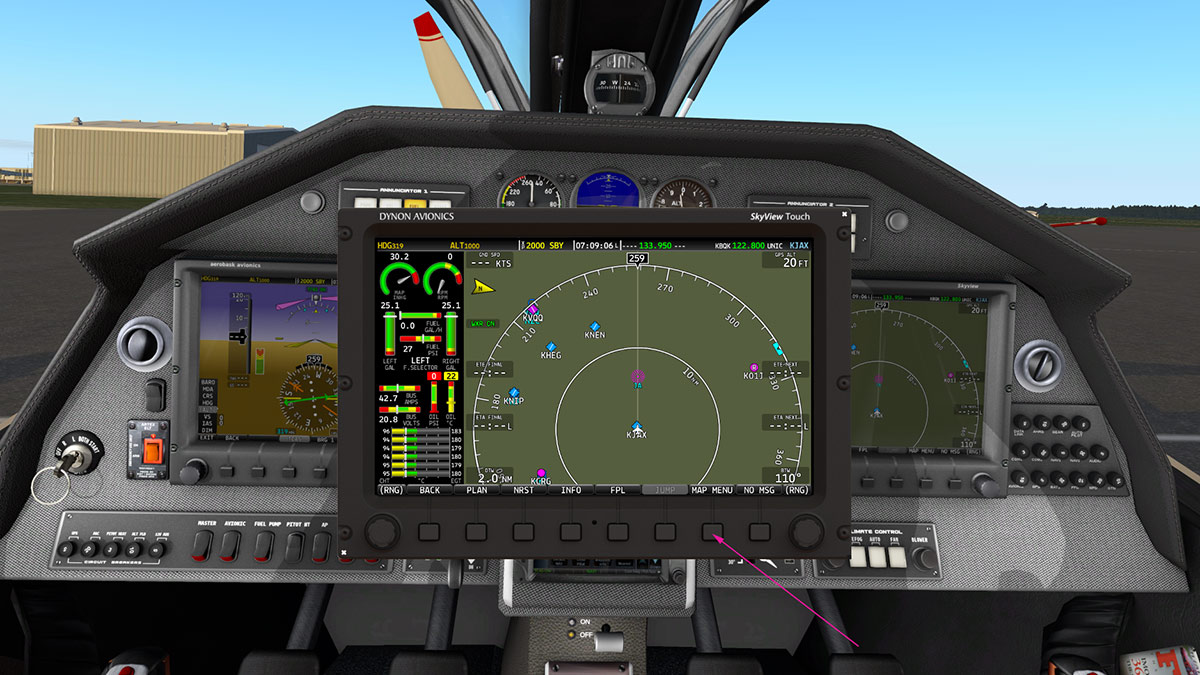
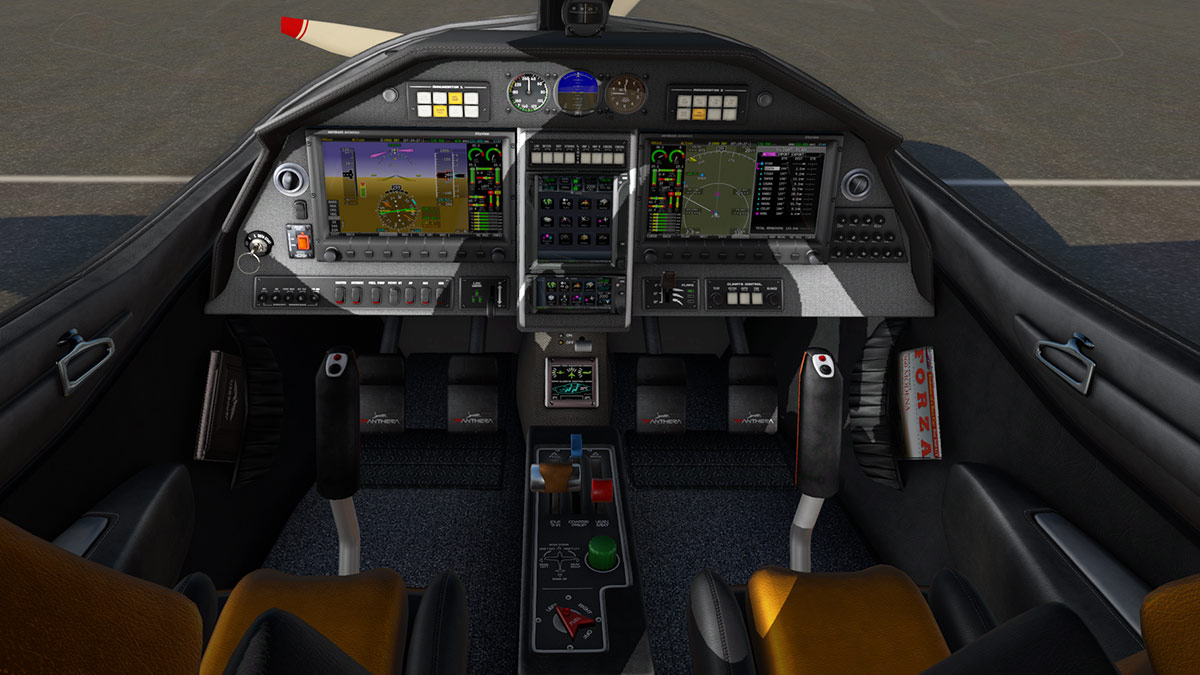
Hardware Addon : Saitek Pro Flight x56 Rhino HOTAS Selecting the right addon hardware for use with your Flight Simulator is very important as to get the very best out of your flying skills. To a point your selection is a very personal choice to fit to your specific needs and taste. One factor is that if you have flown on simulators for a period of time you will of course find a set up that suits your flying tastes, but in most cases you usually want to replicate the same arrangements that are present in the aircraft itself and duplicate what you use on the screen in the actual hardware in your hands. There are three types of basic hardware you can purchase... Standard Joystick, Joystick and Throttle System and a Yoke and Rudder Pedal system. Standard Joystick : Standard Joysticks come with a X (horizontal) and Y (vertical) axis, but no Yaw (Rz axis) so in reality you will need a set of rudder pedals to get the yaw aspect. However clever X-Plane will allow you to fly the aircraft as it will combine the bank and yaw together to do turns (banks). Overall although they are cheap you should avoid two-axis joysticks if you are serious about flying. Joystick and Throttle System : A twin Joystick and Throttle System is the most popular set of addons you can buy. They combine the three-axis (pitch - bank - yaw) joystick with a throttle system. They also come with a lot of switches and knobs that can be set to interact with the simulator to activate your on screen aircraft. Yoke and Rudder Pedal system : A separate Yoke and Rudder system is the ultimate goal but a requisite if you are learning to fly or using X-Plane as a training tool. Cost is usually the barrier to a full Yoke and Rudder layout, but they are also devoid of features as well that come as standard with Joystick and Throttle systems, so in most cases you need even more addons in mostly a throttle system to get the complete setup. Addon Transitions Over the years I have progressed through a few transitions of addon hardware. My first joystick was a Logitech Attack 3 which lasted about 3 days as I found out that with no yaw it was practically useless, but it did have 11 buttons to set. I will note as it is mentioned a lot with these systems is that H.O.T.A.S stands for "Hands On Throttle-And-Stick" Second addon was a Thrustmaster T.Flight HOTAS X which was a big upgrade from the Attack 3. It had actually a nice joystick feel, but the layout was the wrong way around with the throttle on the left and the joystick on the right and they were connected together by the shortest cable that you could wrap around under the throttle. I added a cut up mouse pad to the base of the throttle to gain an extra precious few centimeters between the two items. Overall it was big and bulky on the desktop. Next I went pro... Saitek x52 Pro Flight H.O.T.A.S. System There is only a small differences between the x52 and the Pro version, the colour is different from the silver to the more classy black and the spring is more stronger. The x52 was released in 2005 and the Pro in 2007. These x52's are very well liked and are really the mainstay of simulator flying, mine has been very good, but does have a few niggles that has worn me down over time. These niggles were very much in consideration when I wanted to upgrade to the next system and were very forefront in my choice of my next system. I will cover these points as I review the x56. Saitek As a brand Saitek has been very dominant in simulation although most serious users swear by the HOTAS Warthog Joysticks. But Saitek do cover a broad range of addons for simulation, including Joysticks, Flight Panels, Rudder Pedals, Yoke systems, Throttle Quadrants and Trim Wheels. Saitek was founded in 1979 by Swiss technologist Eric Winkler as a manufacturer of electronic chess games, and grew quickly. In 2007 Saitek was bought out by Mad Catz a company that created accessories such as control pads, memory cards, connection cables, headphones and other human interface devices for the PC and various video game consoles. But in 2016 Mad Catz had a sales failure with the "Rock Band" product that eventually sent them bankrurpt, but the Saitek name, products and brand live on as Logitech acquired Saitek last year for 13 million dollars. But currently the products are still listed under Saitek and not the Logitech brand banner. Saitek when under Mad Catz released the X65F which was a metal based system in 2008, but it did have duel throttles. finally they followed up their x52 range with a new version called X-55 Rhino H.O.T.A.S. System in 2014. Like the x52 range there was a quick follow up with this review version here with the X-56 Rhino H.O.T.A.S. System in 2016. Differences again are small but the x56 has LED lighting and two small analog sticks with one on the stick and the other on the right throttle replacing buttons. Saitek Pro Flight x56 Rhino HOTAS First let us see what you get in the package. The package is quite a big box at 29cm x 29cm x 23cm and weighs around 4.4kg Opening up you the packaging and you have a "Thank You" letter with internet addresses for information and downloads, coloured installation leaflet and Safety, Compliance and Warranty information (Logitech) and also a nice set of "Saitek" Stickers! Lifting out the eggshell protection layer you then have the internal selections of the two bases, joystick head, wrist rest, and tube spring box First Impressions The very first impression is you notice is how much larger the x56's footprint is over the older x52, both units are quite large and take up a fair more space of your desktop real estate. Notice that the Joystick is missing on the x56 but it comes as a complete unit on the x52. The Throttle unit looks far taller, it isn't but actually the same height as the x52 throttle but it is far, far more bulkier. x56 Joystick and Throttle The far larger bases of the Joystick and throttle units is a significant step over the x52 versions. The system is built with a hard heavy durable plastic construction with rubber feet to keep it planted, a welcome relief as both the x52 units tended to move around when not wanted (I gaffer taped them down to the desk), but the heavier bulkier x56 units don't move around and stay firmly planted. Both units have a dazzling array of switches, sliders, buttons, rotary switches, triggers and HATS in both Witches and Castle designs. Like most joysticks the x56 stick is very much focused on the fighter or military aspect of the layout of usability. Trigger buttons and weapon selection is highlighted as is the pinky and flying pinky buttons. In airliner mode in which most simulator users operate they are mostly not required and usually set for other purposes like most high hats are used for POV or Point Of View actions. The Joystick covers all X,Y and Rz (yaw) axis modes. I was attracted to the look and feel of the throttle unit and it's wide selection of switches, rotary dials of which selection here is excellent. The switches have a quite forceful click-clack feel that I like. I also like the military look and feel of the front aspect switch metal separators, they allow you to feel which switch you require without taking your eyes of the screen and they look very purposeful as well. In keeping with the military aspect the design and patterns on the units are very militaristic, but the x56 blue looks better the the same x55 yellow design. The base of the Joystick does not have any switches installed at all now, as it is a clear square base... and for all the better for it. The main three toggle switches have been moved to the Throttle unit as upright switches more than the key switches on the x52. This was one of my biggest reasons for selecting the x56 as you had to crossover arms (right under left arm) to activate the switches (speedbrakes-landing gear-flaps) while taking off or landing... now they feel they are in the correct place. I usually set the switches to replicate the same as on the pedestal in speed brake lever (right) landing gear up/down (center) and flap lever (right). Night lighting of the units is excellent if quite beautiful. The Joystick now only has lighting at the top and it is a subtle blue and all the switchgear lights up blue on the throttle base. You can change this LED lighting to almost any colour you want, but I couldn't make the software work (see below)? Throttle has POV and one each witch and castle selectors. One button facing you and one on the right side and a large trigger button rear. I usually set my servo toggle (autopilot on/off) on the front button and nosewheel toggle select side, the trigger is set at "Toggle thrust reversers". There is a toggle switch halfway down on the left, and around the base a pinky button and flying pinky lever. Now I wasn't sure of the lever gizmo, as I usually set my brake (regular) on this button, but here I was able to use the lever for the regular brake (50%) and the pinky button for the full brake toggle (100%) and I love the setting up, it works really well. On of the big highlights for me was the advantage of dual throttles. They actually take a bit of getting used to as they are quite touchy in adjusting the aircraft's rpm, this is a more a nice to have though than a pain to have. If you wish you can lock the two throttles together as one via a lock shift on the lower left throttle you can, but on three to four engined aircraft you have to reset X-Plane as one whole throttle setting and if not only the 2 and 3 engines adjust. Separately each throttle is quite nice, but push the two together and it is quite stiff to use (still new?). There is an adjuster tightener on the left side, but it doesn't seem to make that much of a difference? Most users say it is too stiff, but I got used to it quite quickly, and if the base slided around with the force of moving the stiff throttles then they it would be an issue but it doesn't. On the rear of the throttles are two buttons on the right handle and a two way selector on the left, I set my "full reverse thrust" (propeller) setting on one of the rear (I) buttons. On the right throttle there are two axis wheels (F) & (G) top and bottom. Most users found them very loose, but mine are not that bad but they could be tighter. Top one I sometimes use as a tiller taxi adjustment. Front side right throttle is the noted "SLO" slider but it only selects button selections. Left throttle side is a vertical wheel but in X-Plane it accesses two buttons. Lower side right throttle is a set of two (H3) & (H4) toggle switches for button select and one toggle switch left for axis selection, above is a single button (E) which I set for "Speedbrakes retract full". On the base of the throttle unit on the left is a great three way switch selector, it is for "Mode" selection but in X-Plane it is just a selection for three separate button selections. I want to make the best use of this switch, but I haven't yet decided what to use, maybe fms1, fms2 and GPS selection. There are three chrome switches front in SW 1-2, SW 3-4, SW 5-6 to which I set as noted the speedbrakes-landing gear-flaps. For speedbrakes it is (lever) up and down one setting, for Landing gear (lever) it is up/down and for flaps (lever) up and down one setting. On the side there are two nice feel rotary knobs RTY 3 & RTY 4 and another four chrome switches. The knobs again can be used with X-Plane's axis (I use one for a separate GA throttle adjustment and one for GA mixture). The four rear switches are TGL 1-4 which I use for aircraft lighting (Landing & Taxi) and livery next and before selection. Overall the selection (total of 231 selections available) and the choice of buttons and switches is excellent on both units, but I really like the way they are grouped on the throttle base as it looks and feels like a real pedestal system (Which I think was the general idea). Installation Hardware Both units come with separate 2m USB cables. Although this does take up more USB sockets the system is far more flexible than the connected together x52 cabling which ran a connecting cable from the Throttle to the Joystick. The connector on the rear of the x52 joystick would sometimes becomes slightly loose in creating a flip on the screen that got worse over time as it aged. Two separate USB cables also gives you more length of cable to the computer as well and eliminates the chance of another disconnecting connecting cable issue. One of the big features introduced on the X55 and continued on the x56 is the choice of spring force on the joystick called the F.E.E.L. Spring System. There are four choices of spring forces from Red - Green - Yellow and Blue Red has the maximum resistance and the Blue the lowest with Green and Yellow set between on a scale, I personally selected the Yellow (I tried all) as the Blue was a bit too weak and the joystick a little too floppy. But I didn't want a high resistance either. Changing the springs is easy. There is an outer collar clip that comes directly off upwards, then there are two side clips that come off sideways that holds the spring in place, but you will need to use a slight pull on the spring downwards to release the force on the clips to pull them out. Replace the new spring and again hold the spring down while you put the two side clips back into place (they will only clip in one way) then release the spring and make sure it is centred correctly. Then replace the collar clip to hold the two side clips in, but make sure the collar clip is correctly down and seated, if it is slightly set on an angle then it is not. It feels very solid when in and you know it is correct via the click it makes as it seats down and feels locked and level. Now you will need to fasten on the Joystick handle to the base. There are large and small guides on each section, so it is easy to match up. Then when correctly seated just turn the knob to secure the handle to the base, you don't have to over tighten because it will be hard to turn off again if you do. Note the outstanding pins to connect to the base section, so no tight movement means no wear. There is step plate you can add to the joystick to raise you hand rest a little. This addon just clips on and just make sure all the clips are connected, if not it will work loose. I do have a strange way of using the joystick, I use the base mostly with my lower palm against the rest. I don't use this position for taking off or landing obviously, but when I want fine adjustment like with taxiing or helicopter flying I find I have a more minute control. That is the Hardware set up completed. Installation Software With the x52 you received a DVD with all the drivers and manual required, but that aspect of delivery is now long gone as everything is now downloaded from the Saitek site. Manuals are here Manuals for Saitek Pro Flight and cover languages of English (EN), French (FR), German (DE), Italian (IT), Spanish (ES), Portuguese (PT) and Swedish (SV) You can download drivers for the x56 system but make sure you select the 64bit versions for X-Plane. There are three drivers you can select for Windows with a x56 Rhino software, x56 Rhino Driver and a X-Plane (64bit) driver. The x56 Rhino software includes HUD software and need to have Microsoft's .Net installed to work. The HUD allows you to set response curves and deadbands. But I found it wouldn't install? It feels however out of date with a Mad Catz logo and notes my computer (Windows10) won't run the software. I was disappointed as the software gives you access to changing the LED lighting and creating Profiles that remember your settings and can be changed or recalled if you use different flight simulator products. In reality for the main response curve settings it is not needed as because X-Plane has it's own response curves settings under the "Joystick" menu tab, Only the Windows driver needs to be installed from the above as nothing is required for X-Plane and Apple Mac computers as will both run X-Plane without any drivers, no drivers for LINUX either so I suppose that LINUX will work as the same as the Mac system (Mac and LINUX do share the same basic root software). Saitek x56 System X-Plane setup X-Plane10 The setup for the Joystick and Throttle in X-Plane10 is quite easy. First go to X-Plane10's Menu and select "Joysticks & Equipment" then the "Axis" tab. If you have connected up x56 correctly with the two USB's then the Joysticks actions though out the all X,Y and Rz (yaw) axis should show on the sliders, red is not set and the green is correct, just move the stick around in every position to set. Then in the side menu selection by each axis you have to set the correct axis to the command like "Pitch" or "Roll" or "Yaw". Same with the throttle selection, but in the side menu you have to select "throttle 1" & "throttle 2" for each throttle. Both Joystick and Throttle rotary settings are also set with the sliders as well the same way. To reset all settings then just press the "Calibrate Joystick Hardware" button. The "Nullzone" tab allows you to set the joystick response curve settings for augmentation and response (0-100%), you can set the joystick's nullzone as well, but if your x56 is new it should be pretty good. When you are happy with the settings then set via pressing "Center Yoke And Hit This Button". Button, switch, trigger and HAT settings are via either the "Buttons: Basic" and "Buttons: Adv" tabs. Just press the button or pull your trigger on either your Joystick or Throttle and it will show on either tab. The button allocation number is shown in the box top left. The Buttons: Basic though is just that a basic selection, so mostly all settings are usually done on the "Buttons: Adv" settings. Again press or pull your trigger or button to see the item you have selected, then select the item area (eg: engines/) and select the option you want on that button from the right column and in this case "toggle thrust reversers". X-Plane11 The setup menus are all changed for X-Plane11, and what a difference it is. The location is on the new "Joystick" tab on the right side menu. There is a totally new visual look to the interface, but this is the x52 (below) and not the x56 to show you what it is like, as the x56 graphics to date have not been done by Laminar Research (the x52 only appeared a few weeks ago). The x56 menu is unlike X-Plane10 in now it is split into two sections for each component in a display page for each both the Joystick (below left) and Throttle (below right). Each display page is selected via the dropdown menu top left under "Devices" Press the "Calibrate" button to set up your axis settings. Again you move your Joysticks actions though out the all X,Y and Rz (yaw) axis and X-Plane will record your movements and you can then set set the correct axis to the command like "Pitch" or "Roll" or "Yaw" from the drop menu on that slider. Note the axis items 3 & 4 is the joystick left hand side toggle switch in a scroll mode. When done you do have to however clear any none usable axis zones by clicking the "Ignore Axis" tabs by each slider and it will show "Ignored" to note the axis zone is deleted, only then will the "Next" button allow you to move on to the next item. Which is the automatic calibration (nullzone) of the joystick (below left). Now your Joystick is calibrated. Now you can set up your HAT and button, switch or trigger choices by pressing the item on the Joystick (or Throttle) you want to choose which is highlighted white. Note the POV HAT uses the top "Hat Switch 0" selections. Press the "Edit" button on the highlighted item to select or change your selection. All the X-Plane selections are listed (below left), plus any addon in plugin or aircraft that have selection choices. The full list (below right) is huge now in X-Plane Thankfully a major new feature in X-Plane11 allows you to use the search box top right to narrow down your selections... brilliant. Throttle page is set up the same way (top right). Except with the calibration selection "throttle 1" & "throttle 2" for each throttle. All button, toggle, switch or slider selections are done the same way as with the Joystick. First User Impressions I noted that I really liked the x52 Pro, but it had a few quirks that I didn't like. First and the biggest one was that on the x52 Pro the disk would drag badly up and down the centre shaft, no matter what you did. I used (a lot) of petroleum jelly or vaseline to keep it lubricated. It worked but most times my takeoff's were mostly still very ragged with the joystick sticking at the worst points... the x56's new spring feature eliminates the problem, I like also you can adjust the pressure to suit. I did put a little vaseline on the centre shaft to help with the movement as you still have a disk on the centre shaft. Overall all the x56's joystick movements are very good, but there is small "click" and movement in the center of the yaw that can hinder a little. This is caused by the top section slightly dragging on the lower section in the left - right movement action. The bottom assembly feels a little rough in parts as it came out of the mould. I don't know if I got an odd unit or they are all like this, but a small file and a little lubricant fixed the clicking and I have no doubt that in time it would wear in perfectly as it is already doing so and the yaw now feels great. I will note that I am very if over sensitive to drags and clicks, but that is a personal taste. But I really like the weight and feel of the x56 Joystick with the correct spring setting and it is very good for those minute movements in taxiing or helicopter flying and altogether there is 6 Degrees of Freedom (6DoF) within the joystick's axis. The change of position of the switches to the throttle base makes me smile as well, with my speedbrakes-landing gear-flaps layout there it feels perfect and real, real also is the flick of switches in turning on/off the aircraft lighting, as all the switches are precise and click-clicky. Some toggles and rotary dials do feel a little plastic but (mostly on the throttle handle) but most hardware is like this today. Twin-throttles are brilliant, yes and loving it more because the detents in the x52 throttle have also been removed. I didn't like them either because the throttle would stick again at the very wrong place. Idle was awful on some aircraft and flying at mac speeds created a choice of m80 or m83, you couldn't have m82 (where you wanted to be because you had a annoying detent there... gone on the x56 and good riddance. Throttle is stiff, but nice to use, singly they will move easier, but not together, but I soon adjusted to the force and it feels better and better the more you use them. The larger x56 bases do take up more deskspace, but are also far more stable, they don't lift now or move if you push the joystick or throttle too far, so yes another great advantage. Two USB cables on the x56 fixed my screen flipping (jumping) and I have a bigger distance available to the computer if I want to take advantage of that as well. So overall I find the x56 layout a big step up from the x52 setup and it eliminated all of my quirks with the older setup without creating new ones with the x56 Rhino. Summary I have listed most of the pros and cons through out the review on why I selected the x56 Rhino to replace my x52 Pro Joystick and Throttle setup. Without doubt the x56 Rhino more than covered all the points that I wanted to be better than the x52 Pro and didn't thankfully add any others to the list. I think it is a far better and certainly a more stable setup than the x52 Pro. More switchgear, more functionality that will take time to set and find the best use of all the huge amount of selections with 231 programmable selections that you can use, and the layout of less on the Joystick and more on the Throttle base in switchgear feels and it is better to use like a real aircraft setup. Only points I will make is the yaw movement (was) a little notchy centre and the downloaded software was out of date for Windows 10 (drivers are fine). As to the look and feel of the x56 Rhino, I love it and even admire it (great in the dark while flying long haul) and for X-Plane connectablity and functionality it is top rate. The proof though is in the flying, no doubt the x52 Rhino will help in my flying in its functionality and use. Is the x56 the best combo Joystick and Throttle system out there, many users have their own personal opinions about that, but I think yes, certainly a great upgrade step from the x52 range but also overall for value, more functionality and features I think it definitely is. _____________________________________________________________________________________ The Saitek Pro Flight x56 Rhino HOTAS is NOW available! from the X-Plane.Org Store here : Pro Flight X-56 Rhino H.O.T.A.S Your Price: US$249.95 If you buy now you get a Free Detailed Scenery package with your purchase - a $25+ Value ! Only at X-Plane.orgStore Product Includes: X-56 Rhino Stick Unit with USB Connector Cable X-56 Rhino Throttle Unit with USB Connector Cable and blue Backlighting Spring System with 4 Springs of Varied Resistance Features : The X-56 Rhino's control surfaces are incredibly accurate, courtesy of a 16-bit aileron and elevator axis, each employing hall-effect sensors. Developed from the ground up, Saitek's 16-bit axis solution enables extremely precise flight. Adjustable Stick Spring Force via Advanced 4-Spring F.E.E.L. System RGB Backlighting Customise lighting to suit your setup H.O.T.A.S. Configuration Software Enables Programmable Controls At least 231 Programmable Controls A ground-breaking, adjustable stick spring system allows pilots to alter the force required to move the stick. Four springs of varying resistance are included to provide a total of five different options. Choose the spring or no spring at all which best accommodates your style of flying. Twin Throttle With Friction Adjuster and Throttle Lock The X-56 Rhino boasts twin throttle and ideal for situations in which your primary engine is disabled and you're down to one and also provides the option to adjust the friction required to move them. And if your aircraft of choice is single-engine, a handy throttle lock effectively converts the twin throttles into a single unit. Requirements X-Plane 10 or X-Plane 11 2x USB Ports Windows or Mac Installation and documents: Full installation is noted within the review All Drivers, Software is downloaded from the Saitek site. Documents: In the box: "Thank You" letter with internet addresses for information Coloured installation leaflet Safety, Compliance and Warranty information (Logitech) "Saitek" Stickers! Downloads: Manuals are downloadable here Manuals for Saitek Pro Flight and cover languages of English (EN), French (FR), German (DE), Italian (IT), Spanish (ES), Portuguese (PT) and Swedish (SV) _____________________________________________________________________________________ Product Review by Stephen Dutton 28th April 2017 Copyright©2017: X-PlaneReviews (Disclaimer. All images and text in this review are the work and property of X-PlaneReviews, no sharing or copy of the content is allowed without consent from the author as per copyright conditions) Review System Specifications: Computer System: Windows - Intel Core i7 6700K CPU 4.00GHz / 64bit - 16 Gb single 1067 Mhz DDR4 2133 - GeForce GTX 980/SSE2 - Samsung Evo 512gb SSD Software: - Windows 10 - X-Plane 11 and also used in X-Plane v10.51 Addons: Saitek x56 Pro system Joystick and Throttle Plugins: None Scenery or Aircraft -none-
-
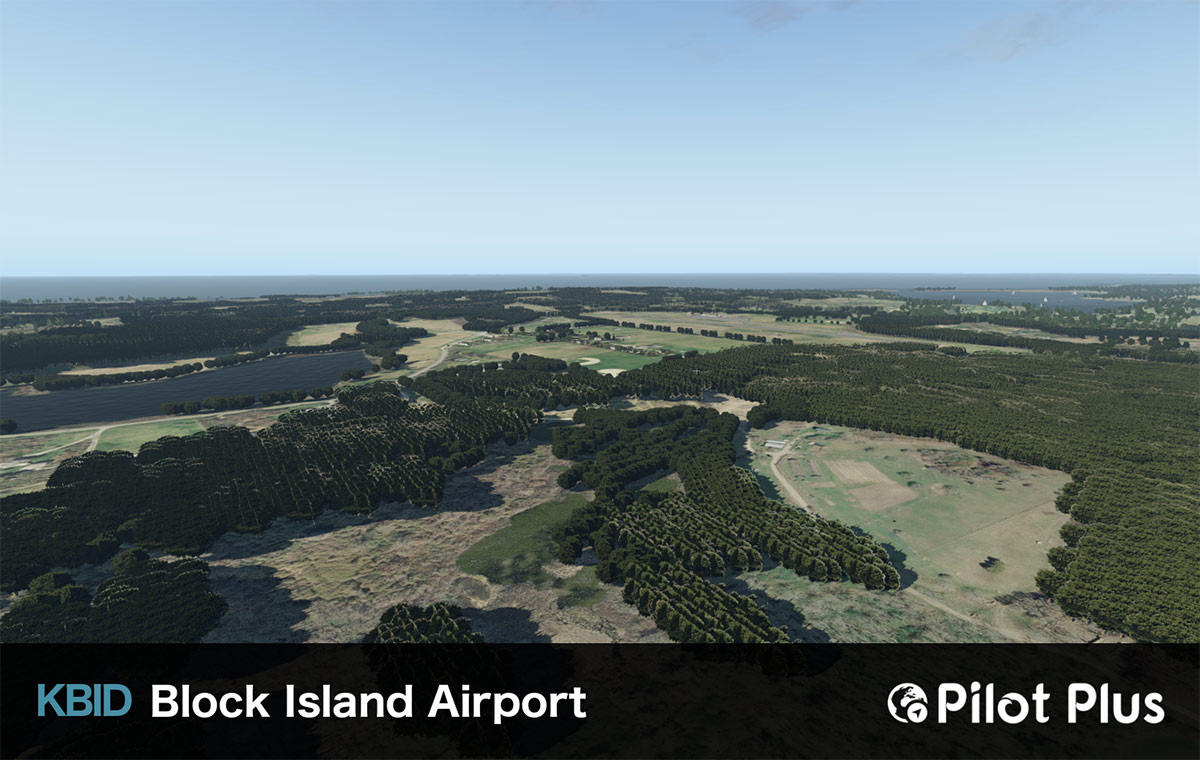
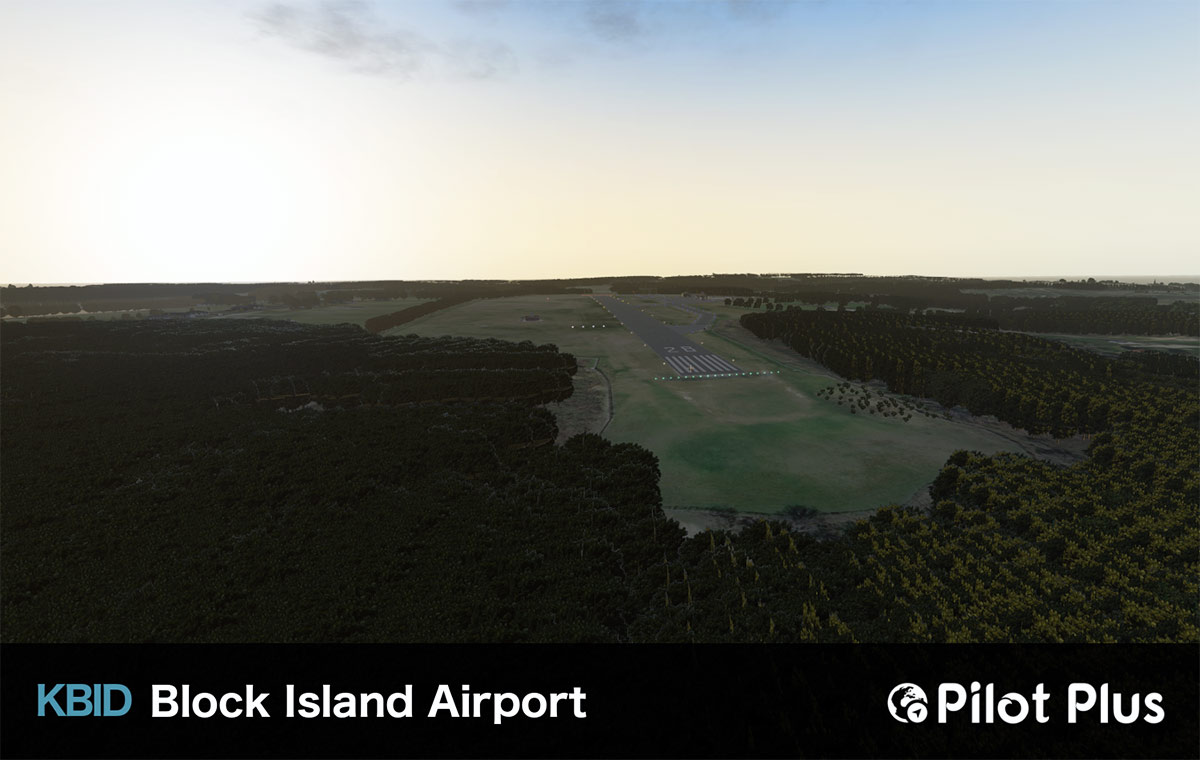
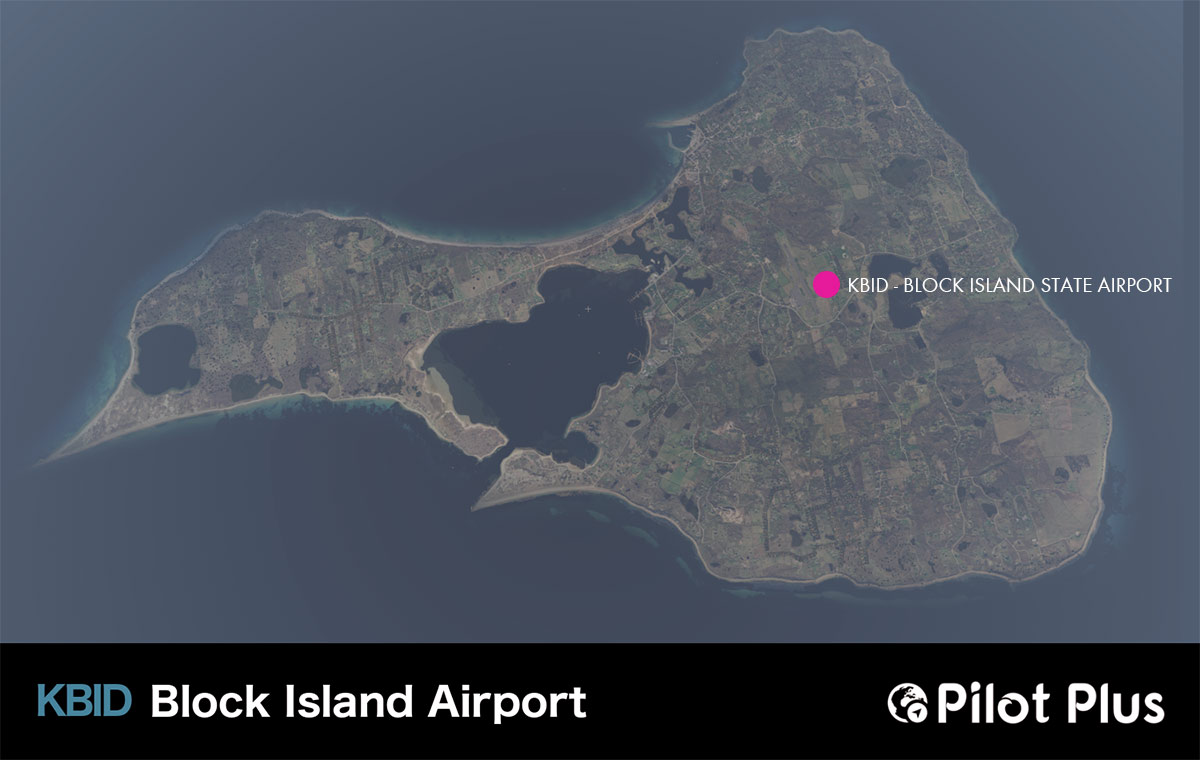
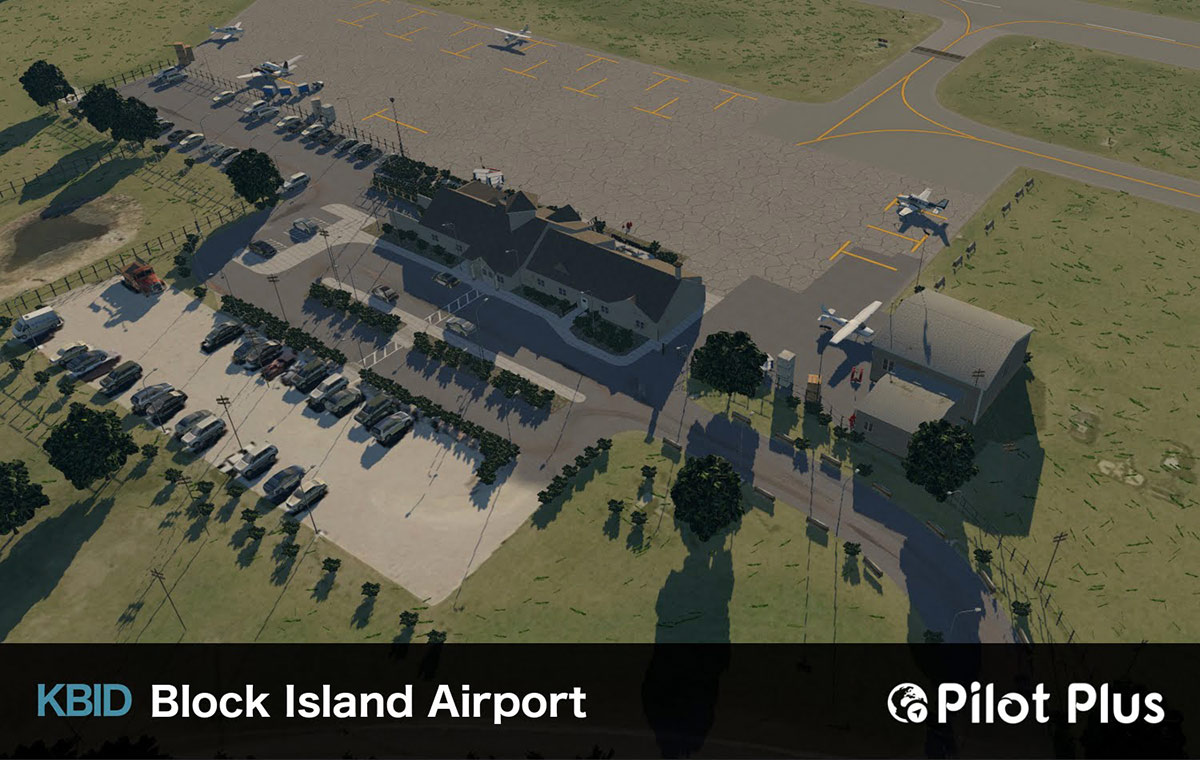
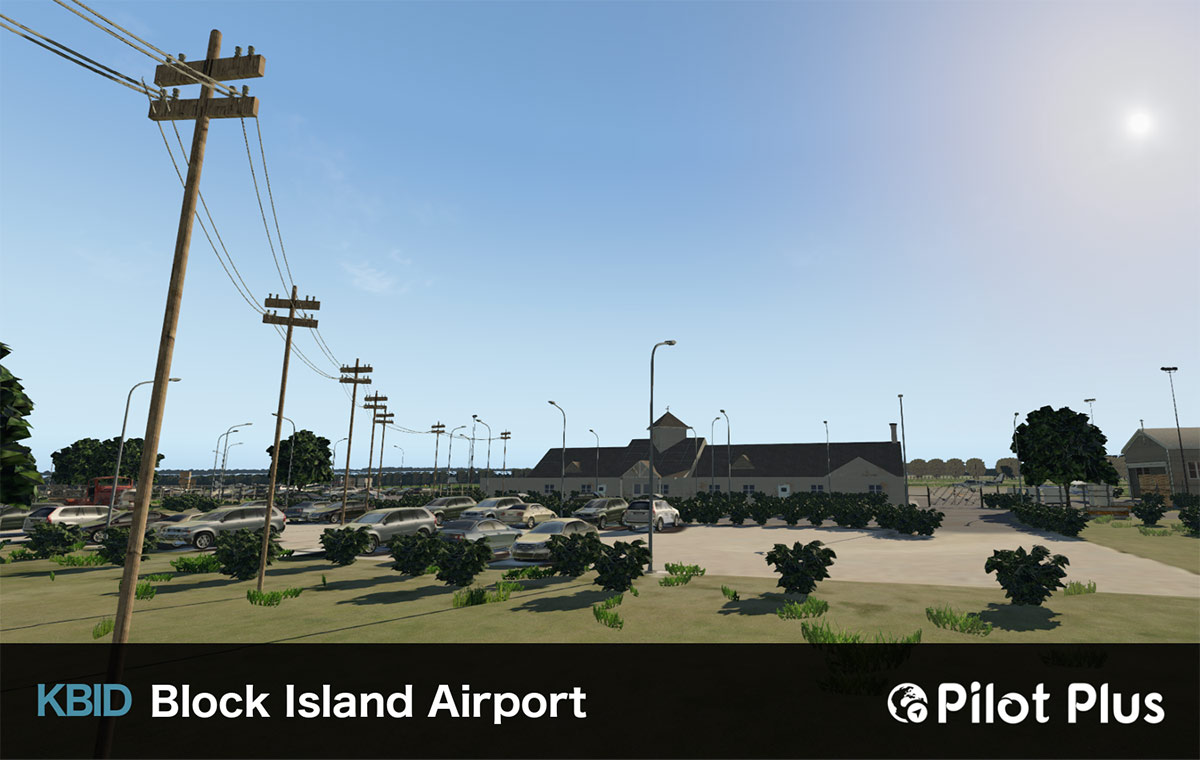
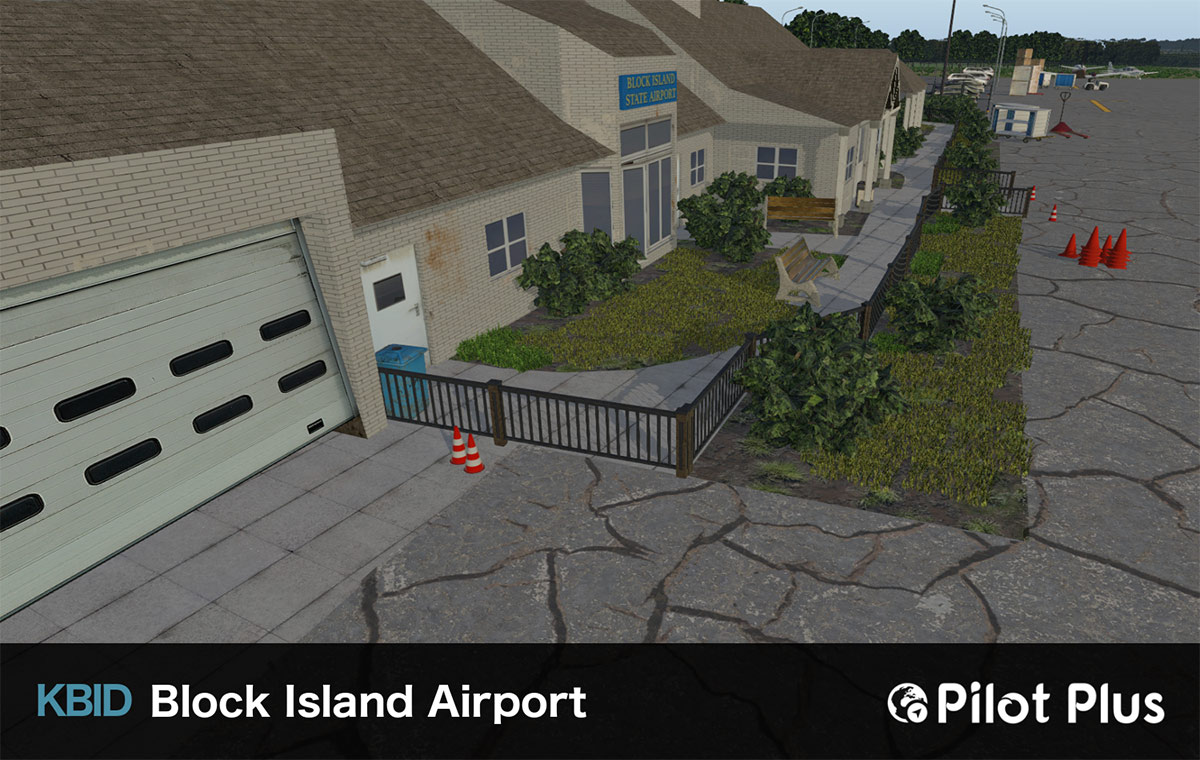
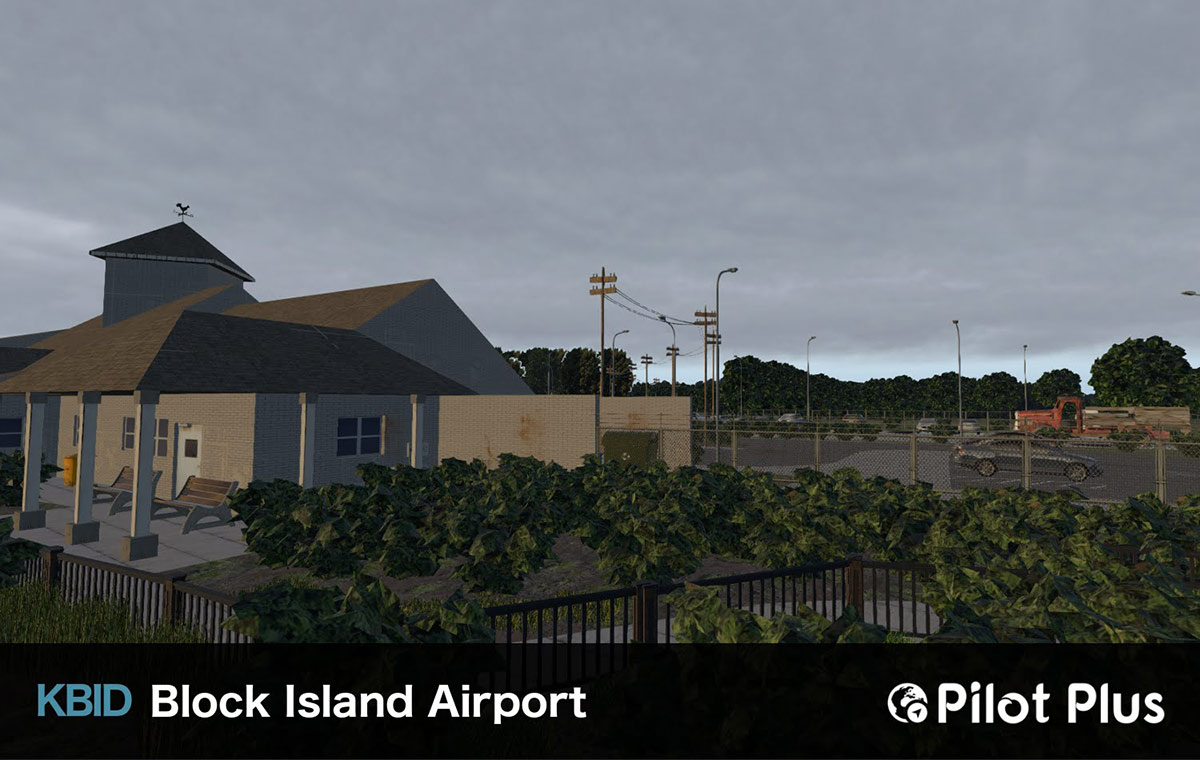
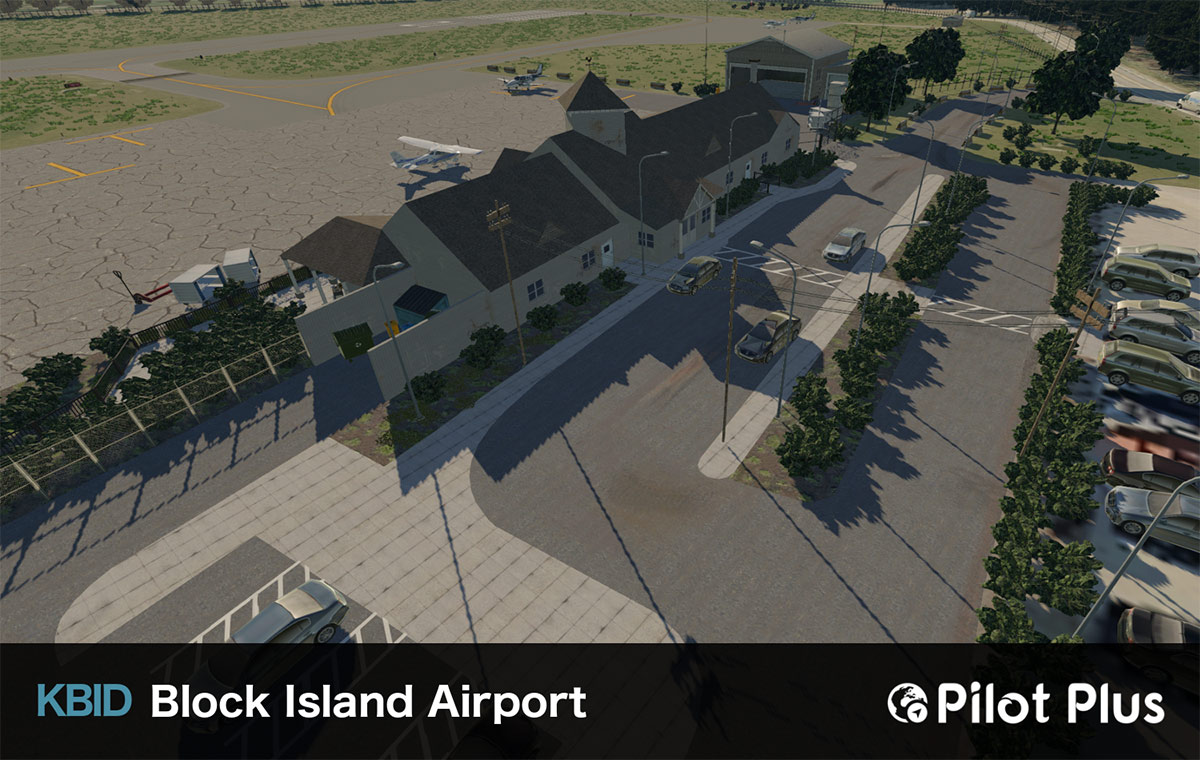
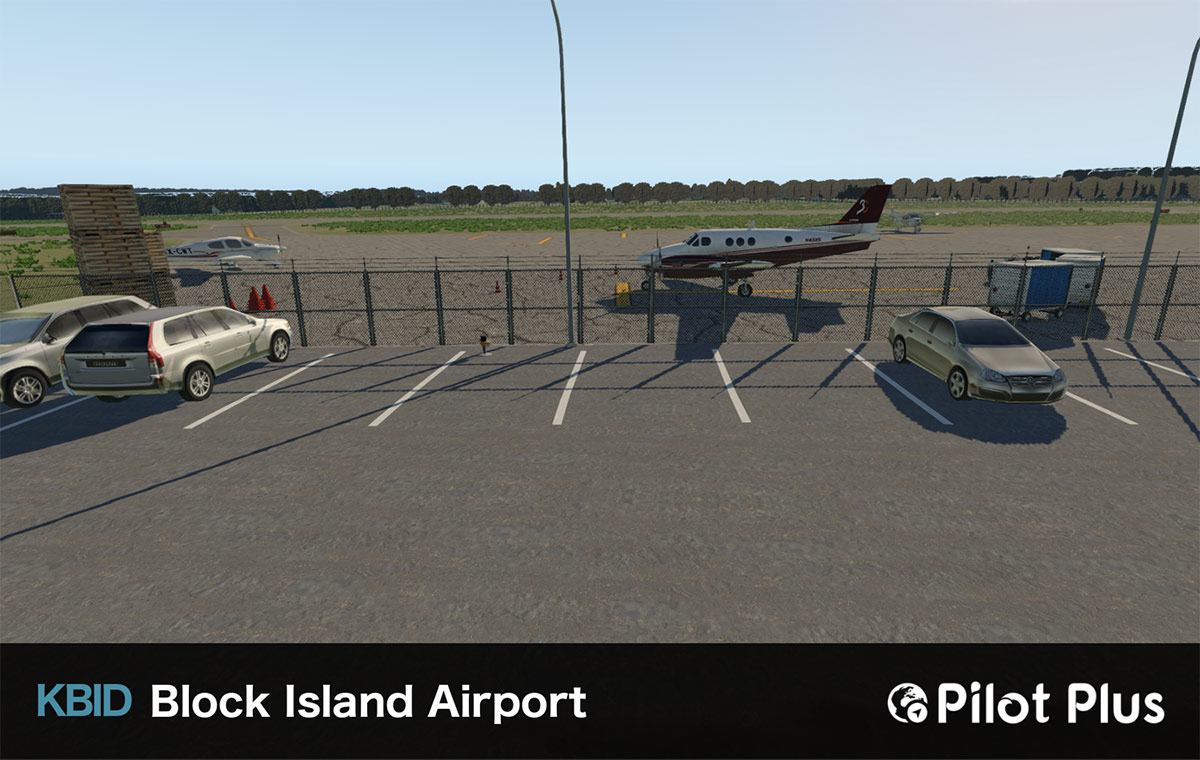
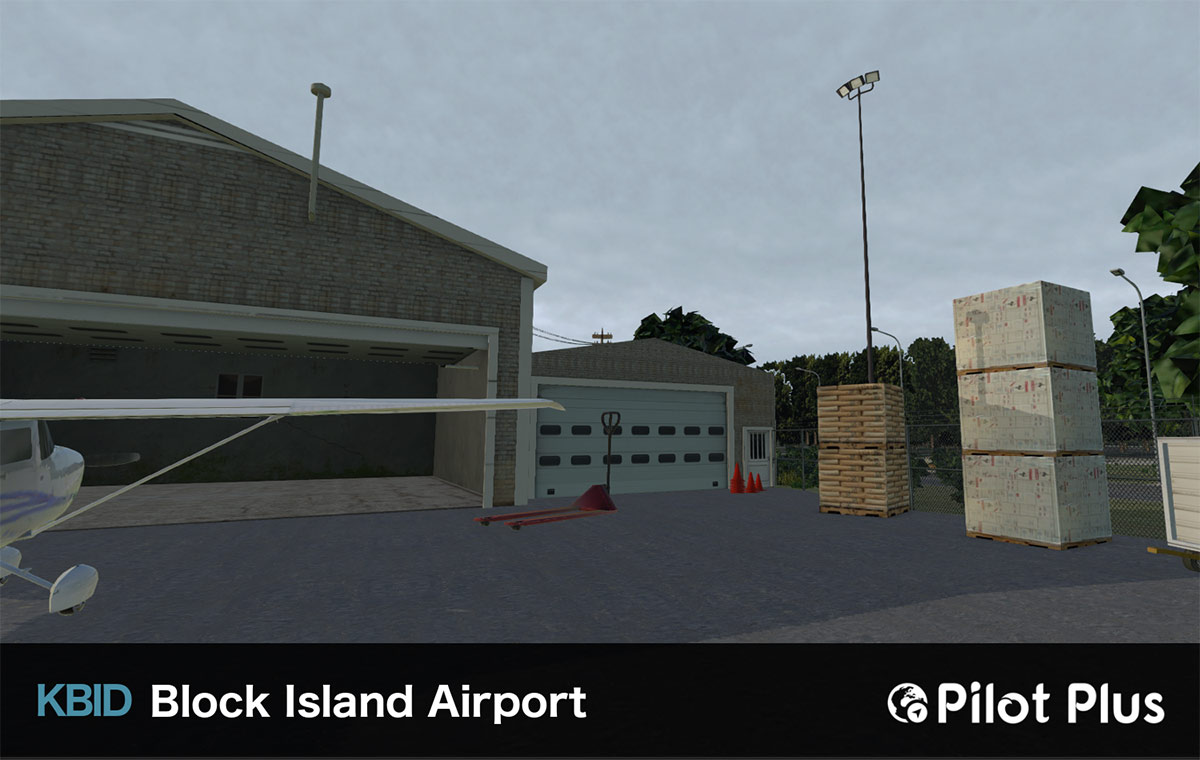
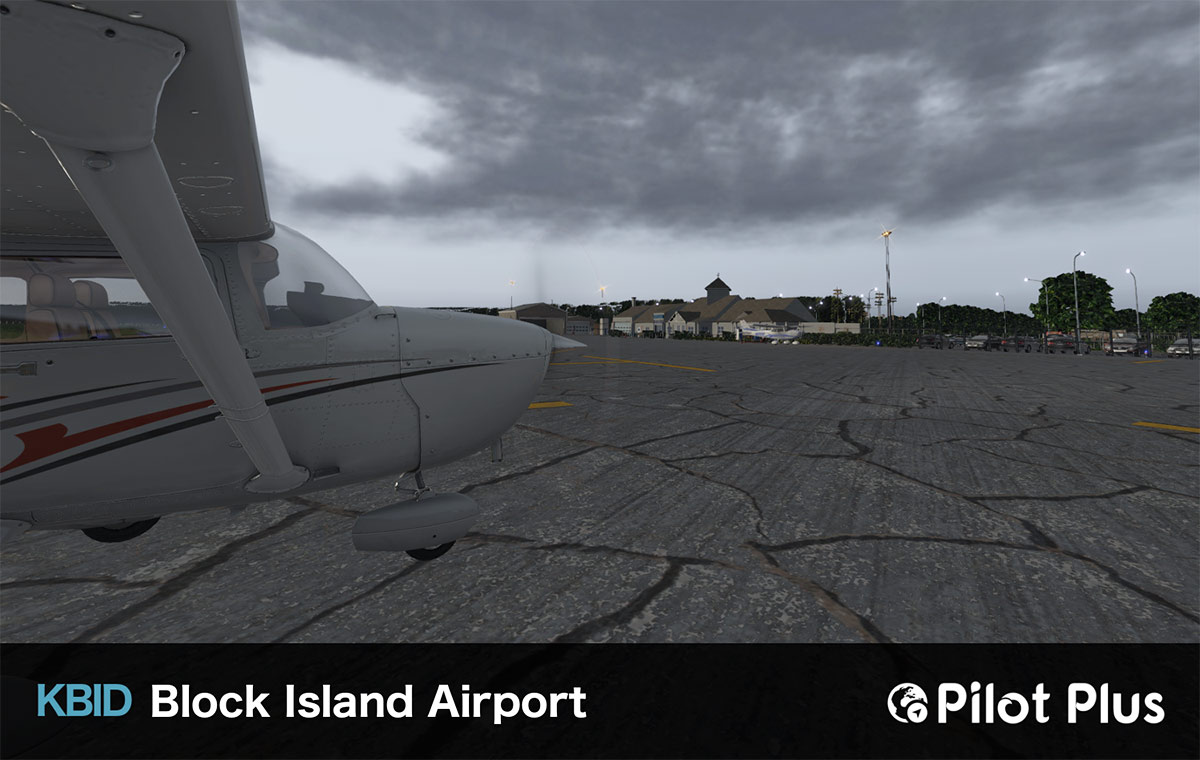
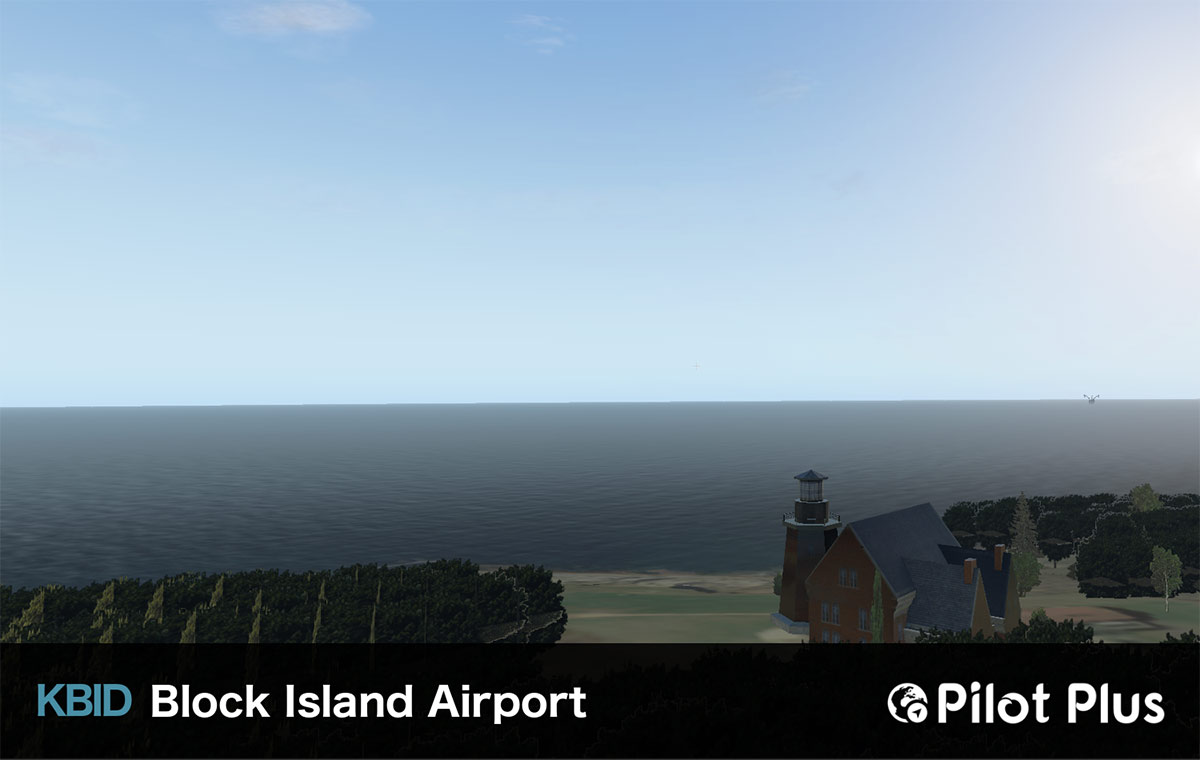
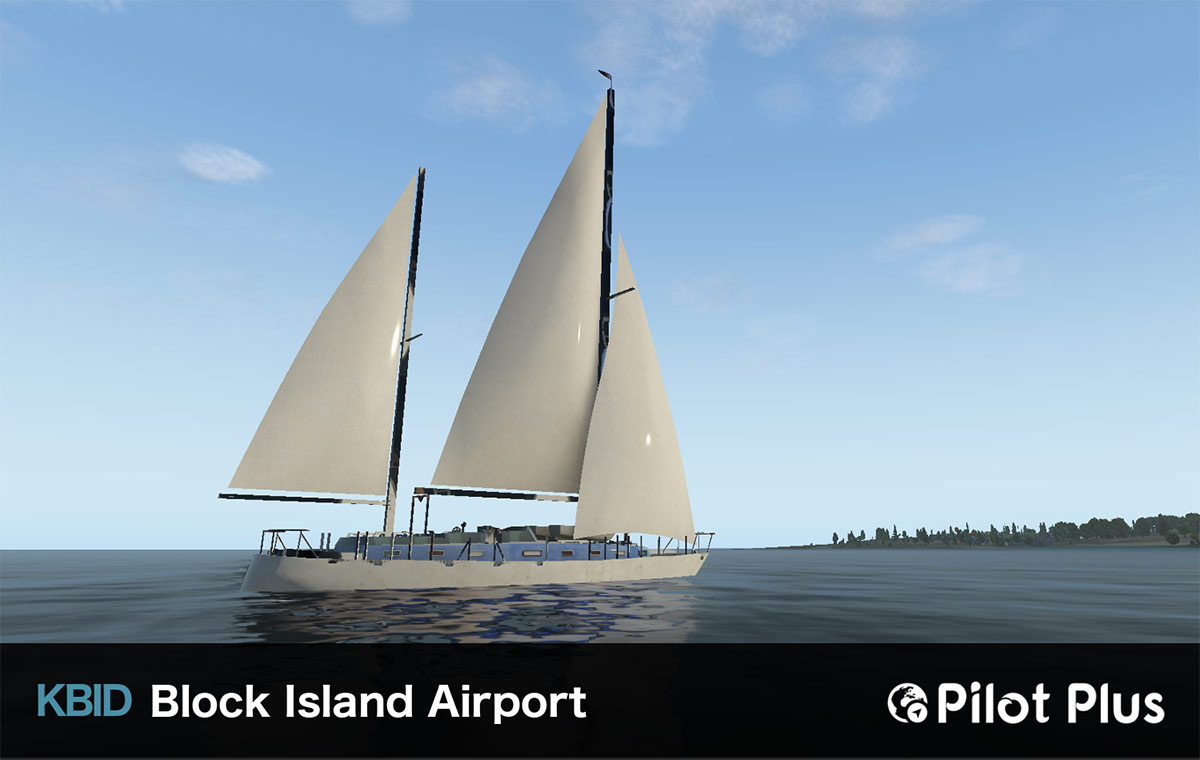
News! - Scenery Released : KBID – Block Island State Airport by Pilot+Plus After a run of larger airports, Pilot+Plus has downsized to a smaller but picturesque island scenery of Block Island State's KBID. Block Island is situated off the coast of Rhode Island, between Long Island to the slight southwest and Marthas Vineyard to the slight northeast. The airport is owned by the State of Rhode Island. The airport was opened in 1950 and it is primarily a general aviation airport. It has one runway, and an average of 45 flights per day mostly consist of general aviation, air taxi services and military. Features Included Whole island Ortho coverage at 30cm/pixel over 25,000 hand placed objects Baked ambient occlusion Dense foliage and forestry Comprehensive building coverage Abundant custom vegetation including grass and bushes Marine Traffic with detailed Yacht model Ground Traffic routes in airfield Custom 3D South Lighthouse New England Airlines is the resident airline based at KBID. Their fleet consists of three Britten-Norman BN-2 Islanders, three Cherokee Sixes and one PA-28 Archer 180. Scenery Requirements X-Plane 11 or X-Plane 10 Windows, Mac or Linux 2GB+ VRAM Video Card Minimum KBID is now available from the X-Plane.OrgStore... price is under US$20 at US$19.95 _____________________________________________________________________________________ The KBID – Block Island State Airport by Pilot+Plus scenery is now available from the X-Plane.Org Store here : KBID – Block Island State Airport And is priced at only US$19.95 All images are provided courtesy of Pilot+Plus ____________________________________________________________________________________ Stephen Dutton 24th April 2017 Copyright©2017: X-Plane Reviews
-
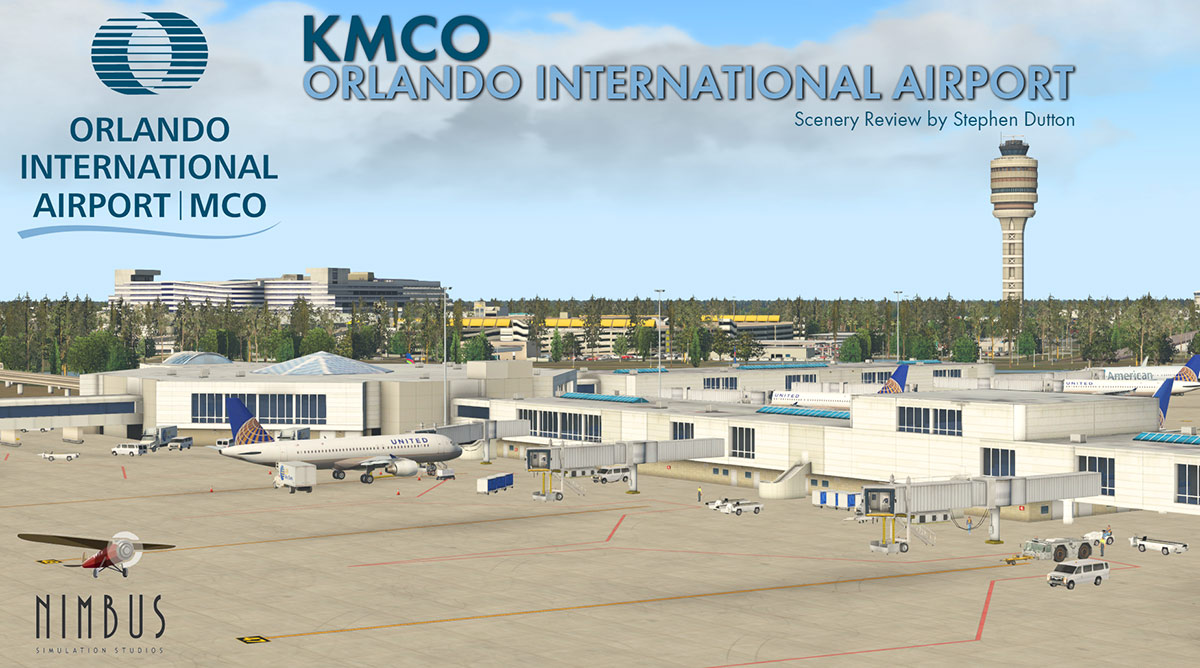
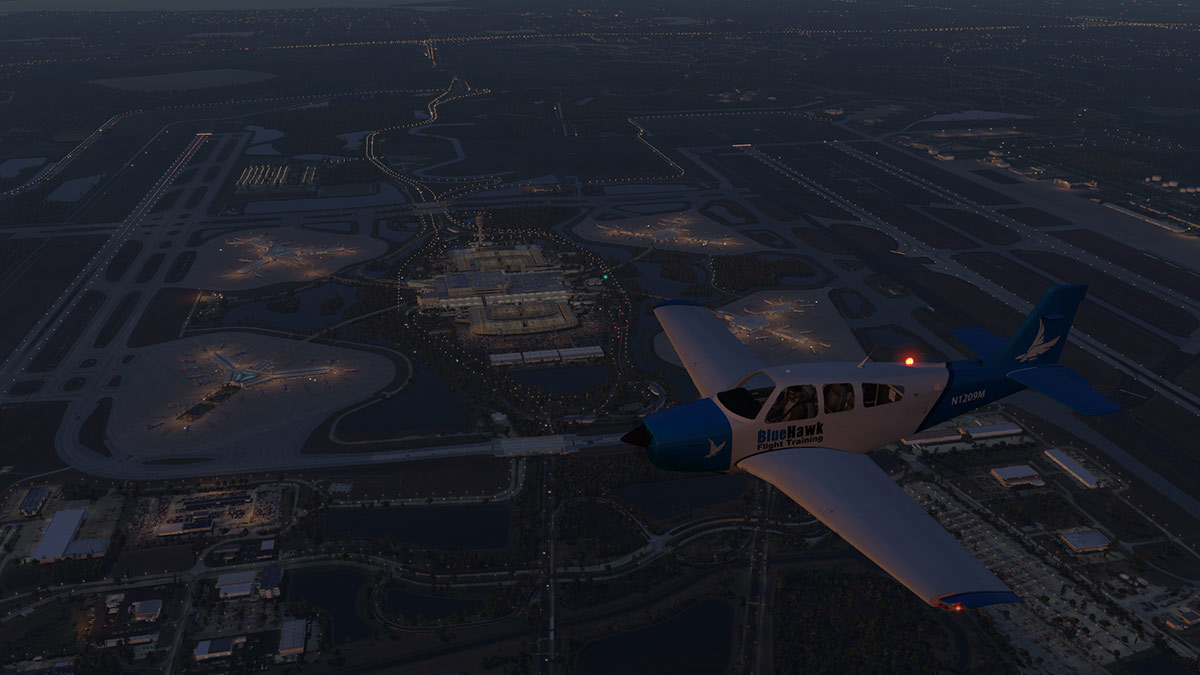
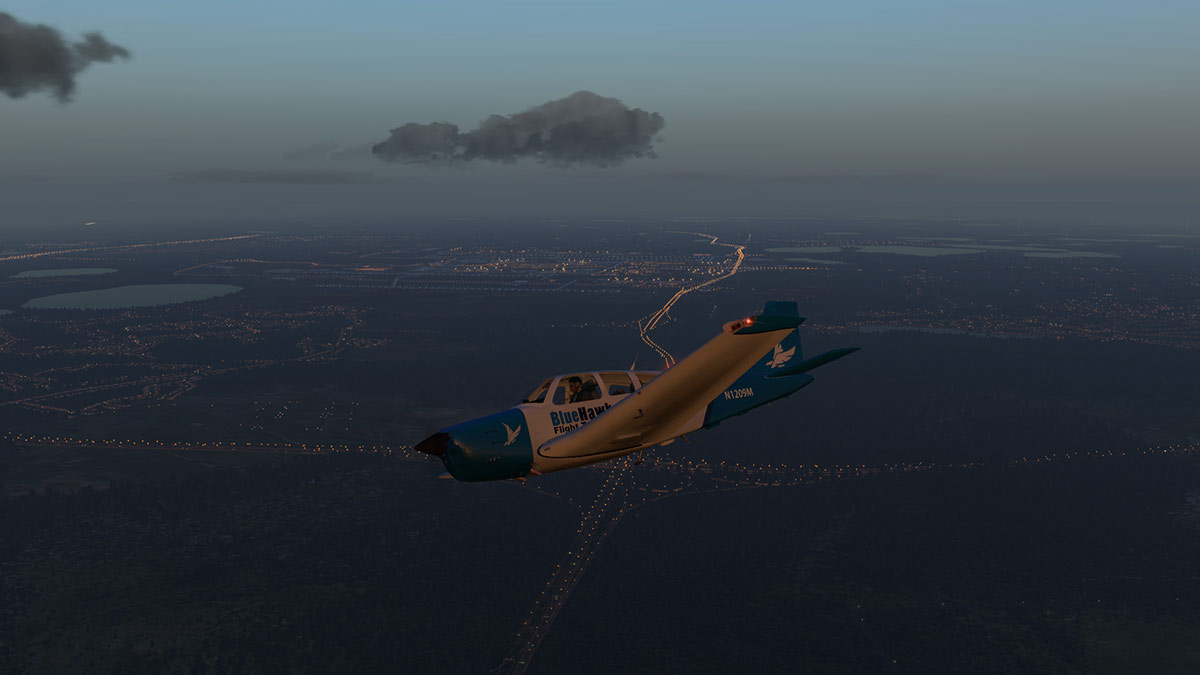
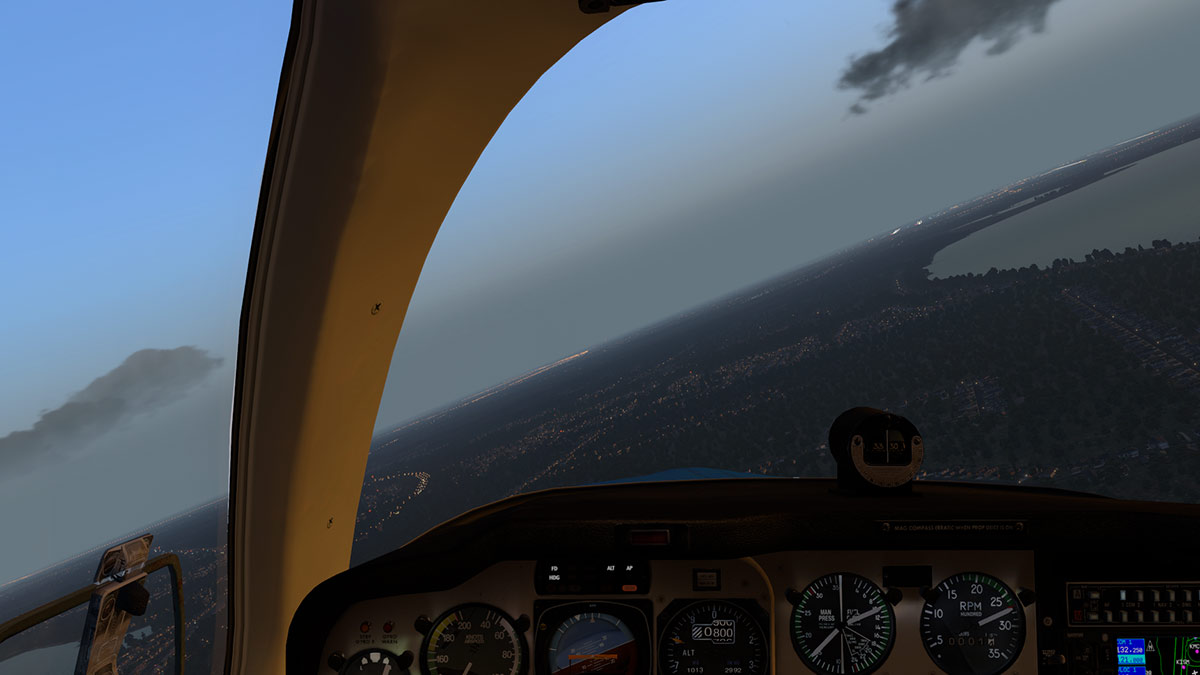
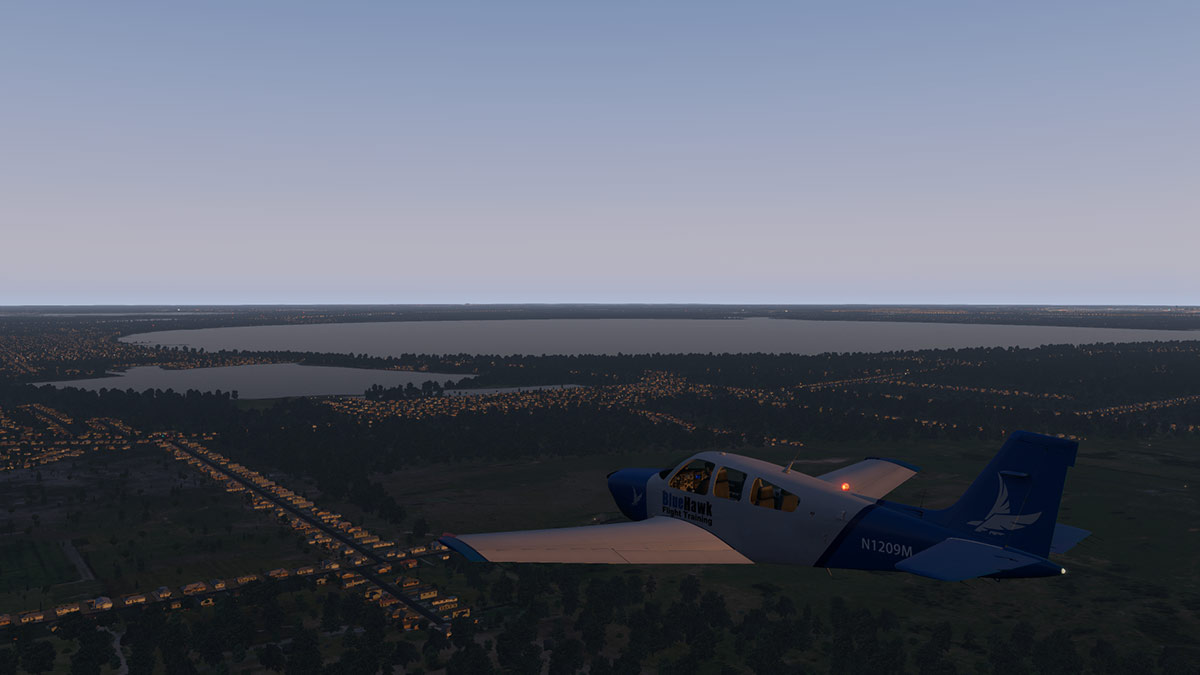
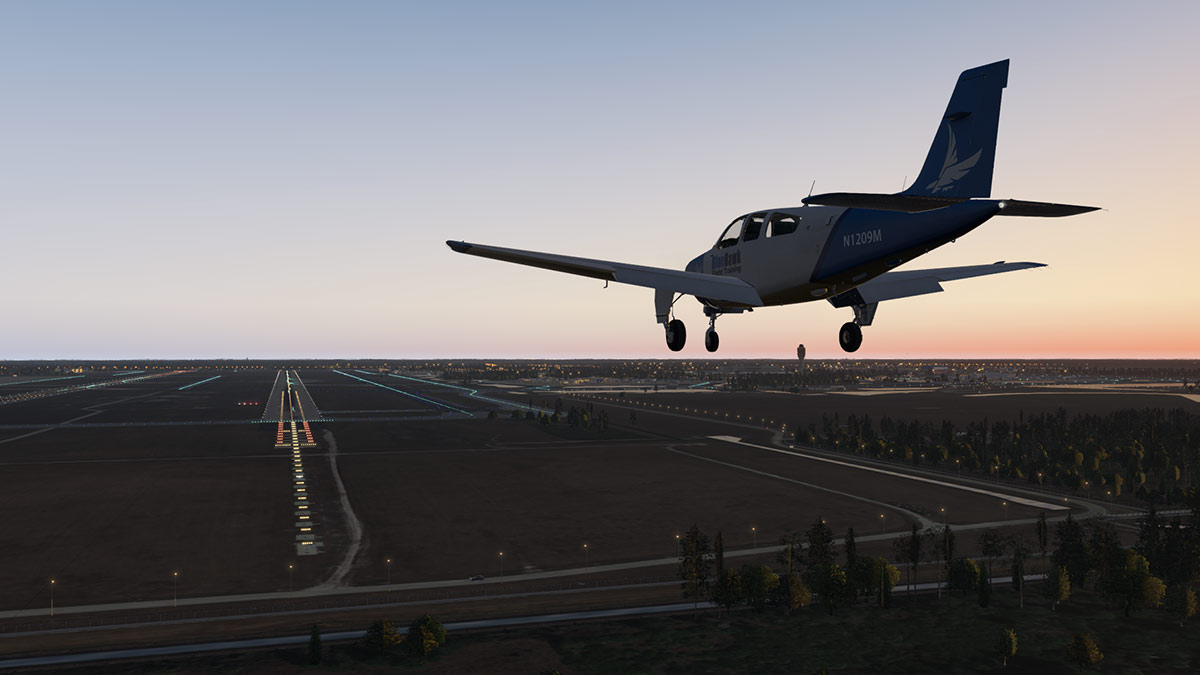
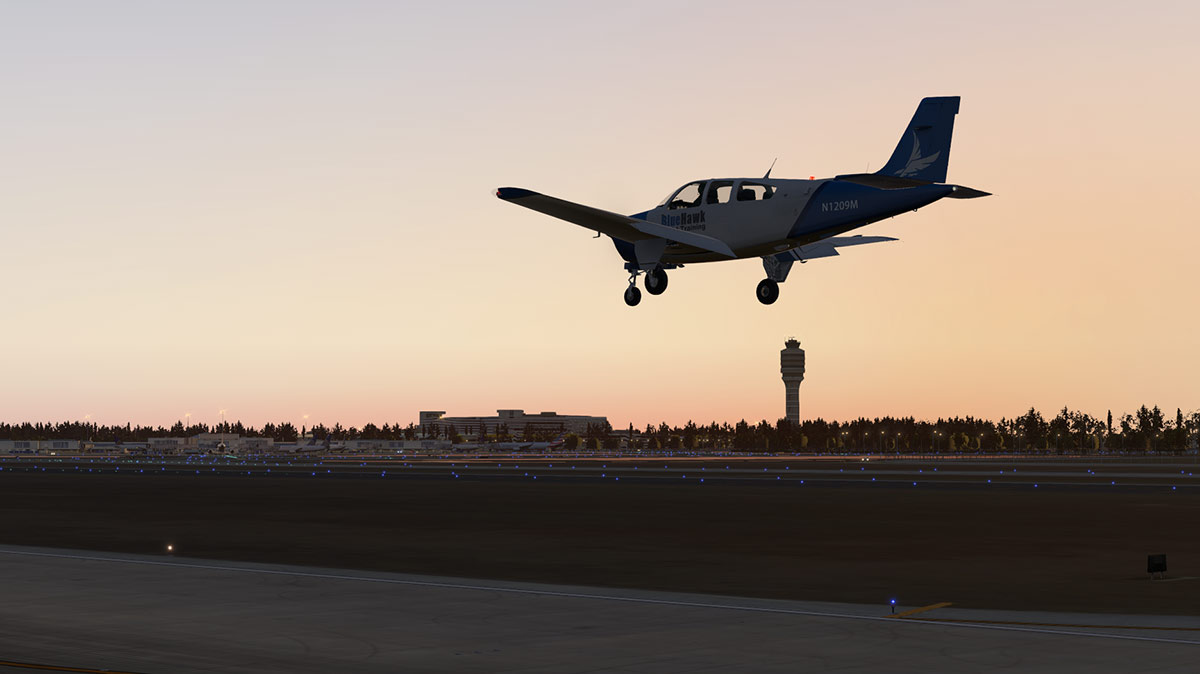
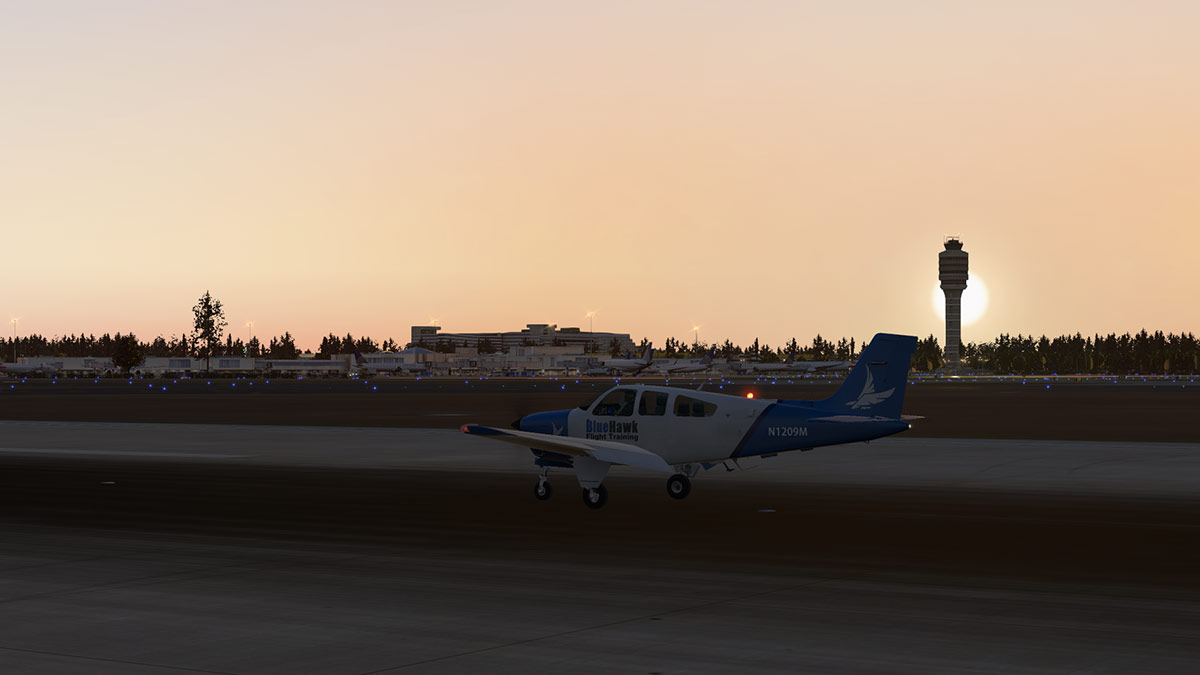
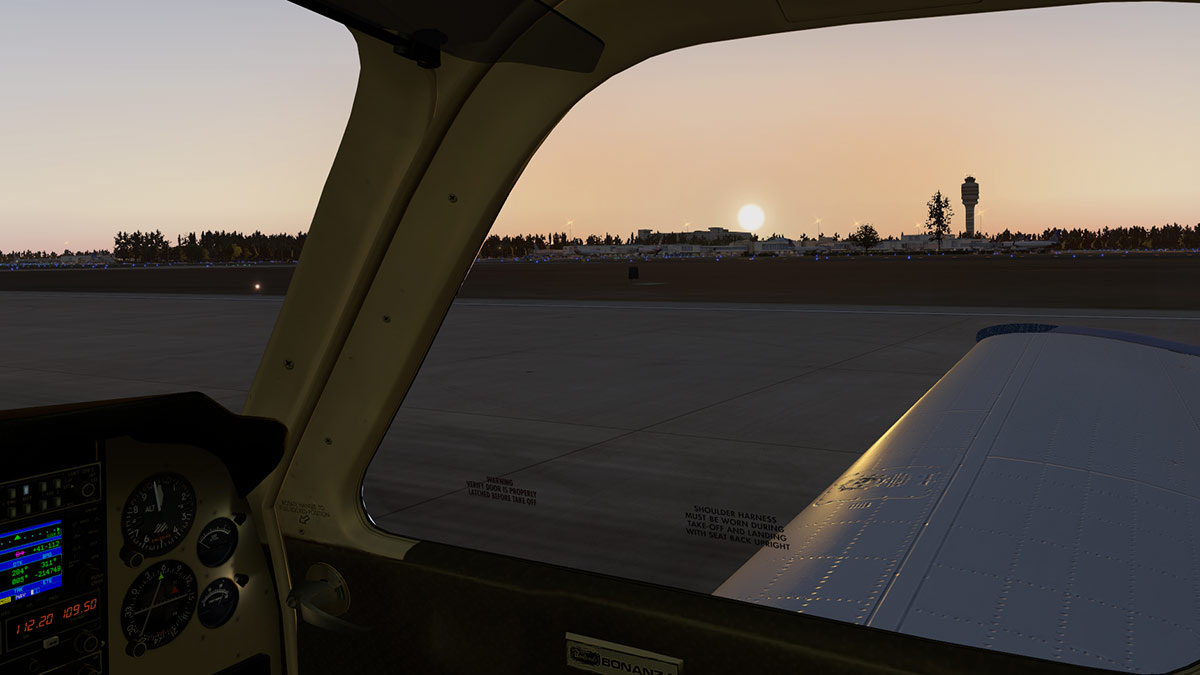
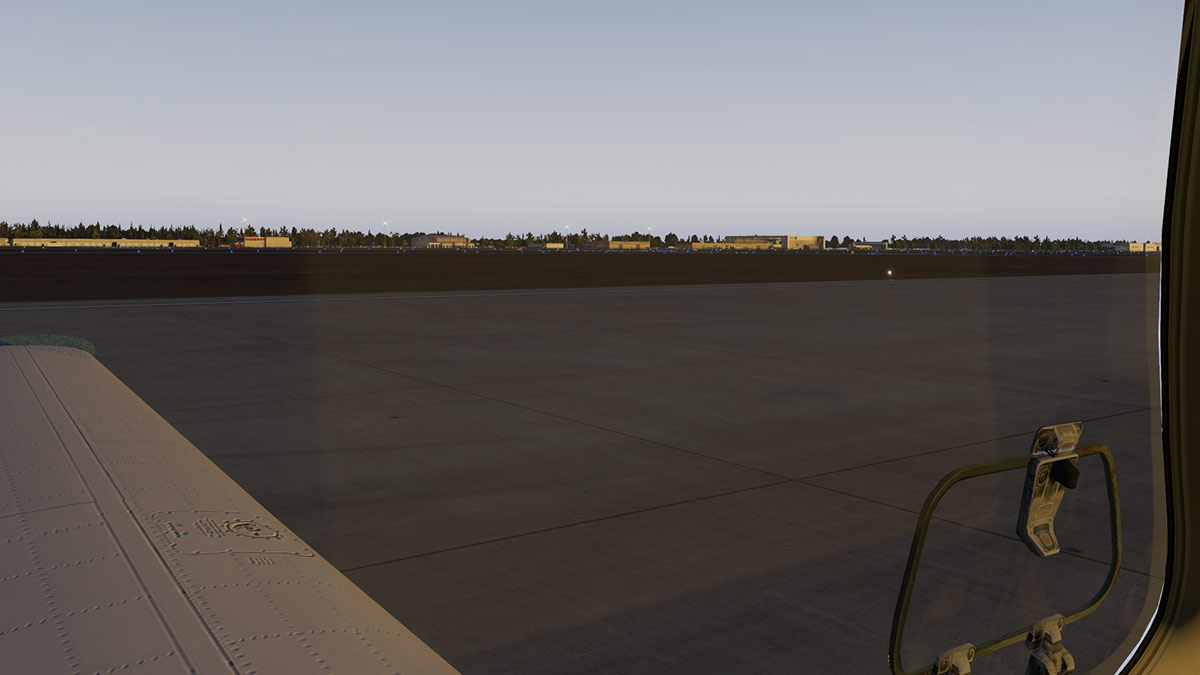
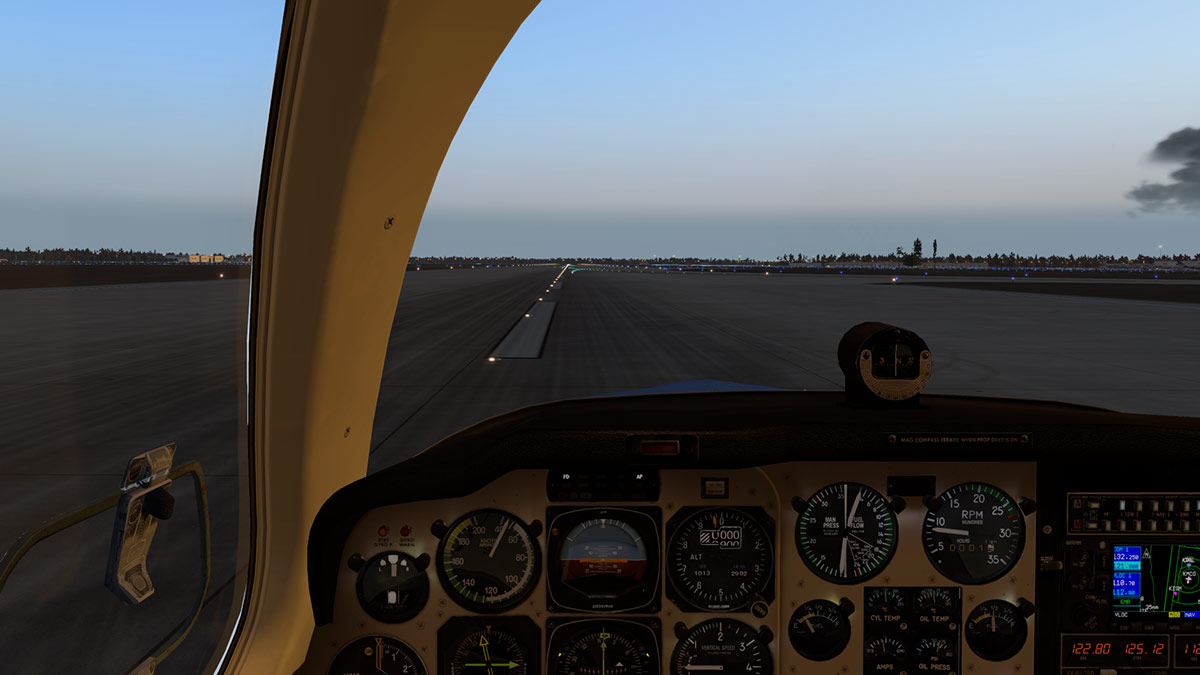
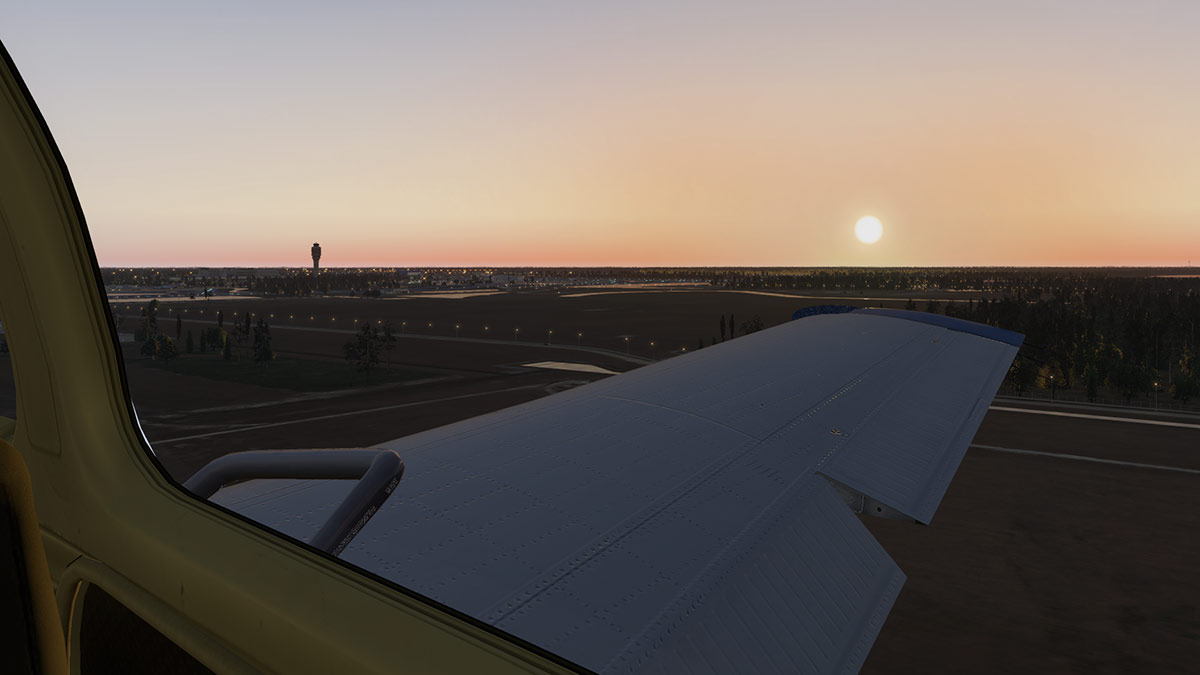
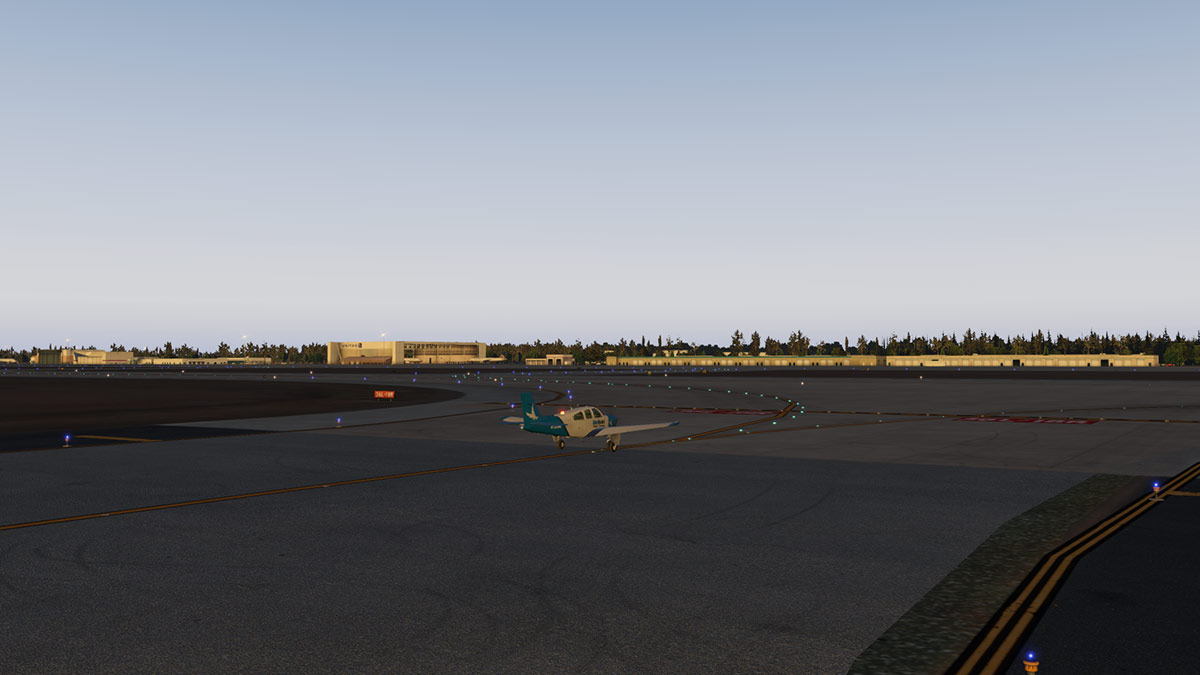
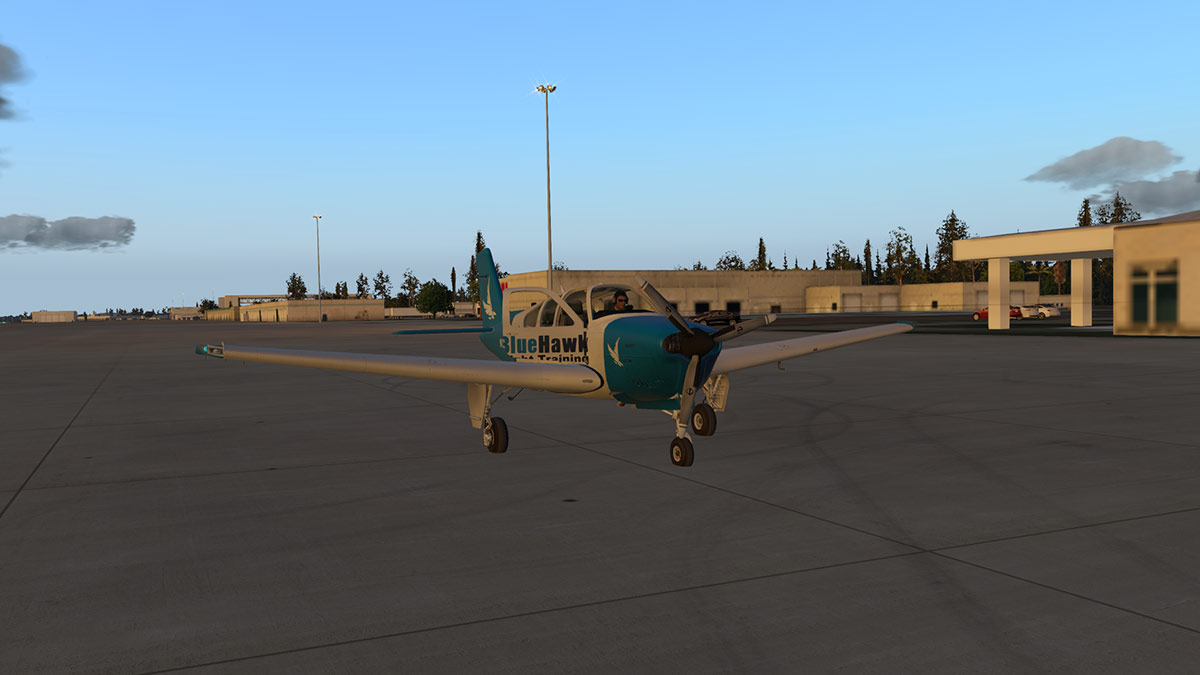
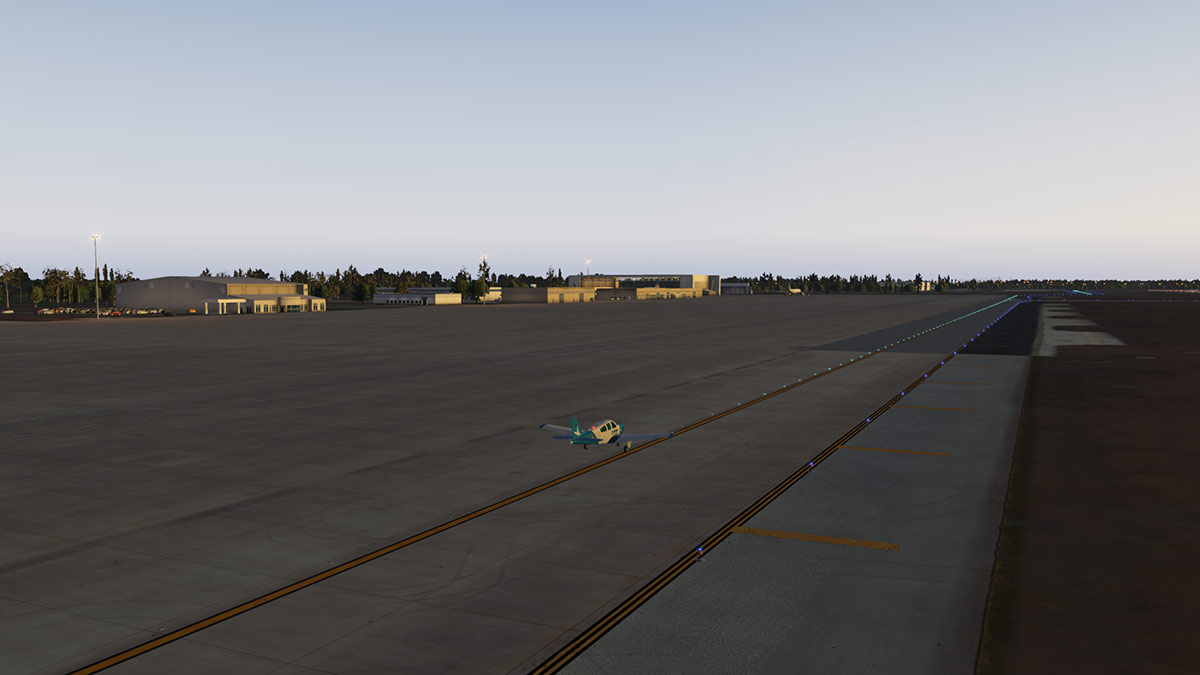
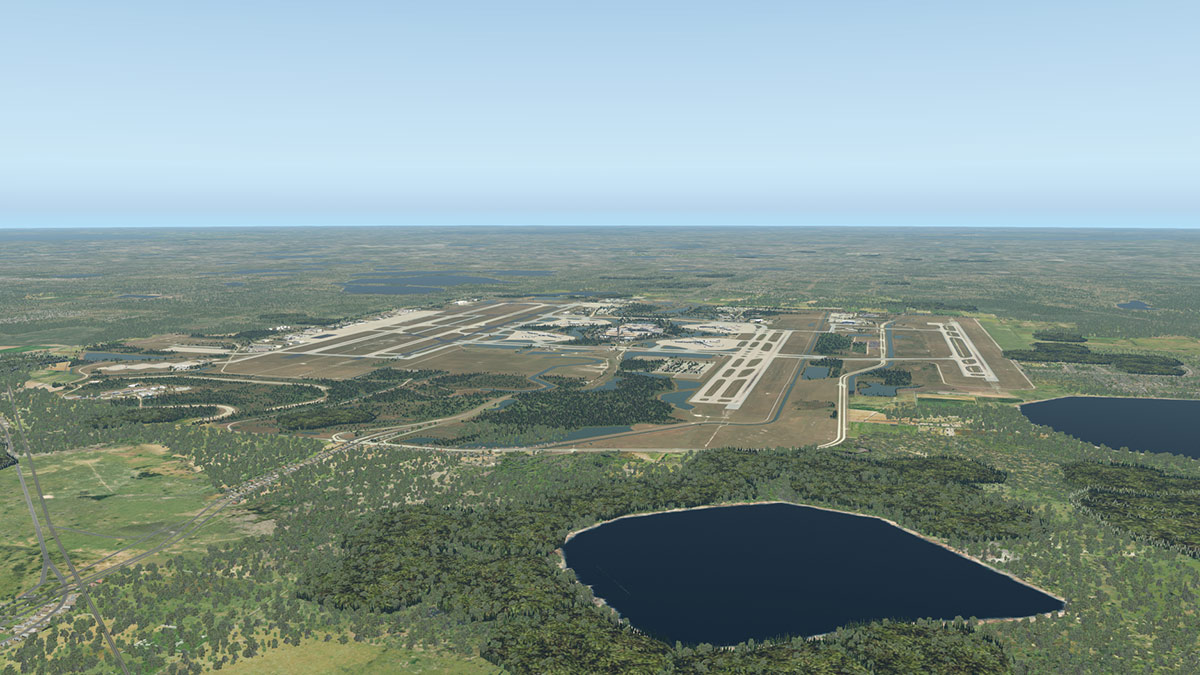
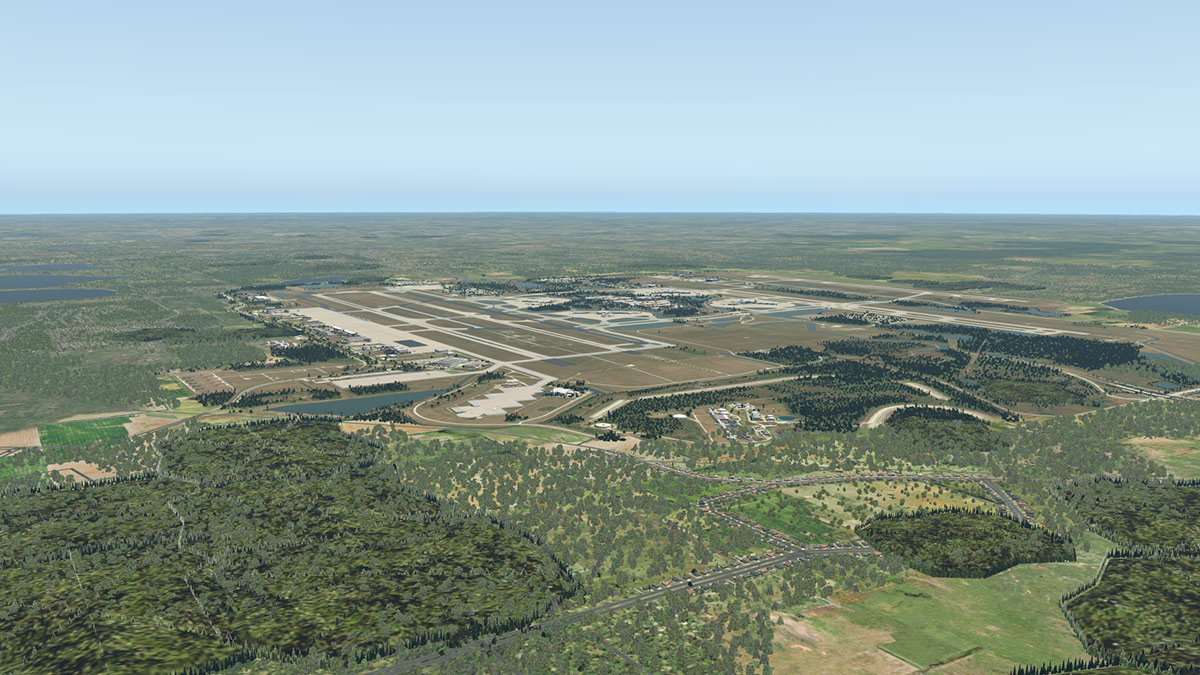
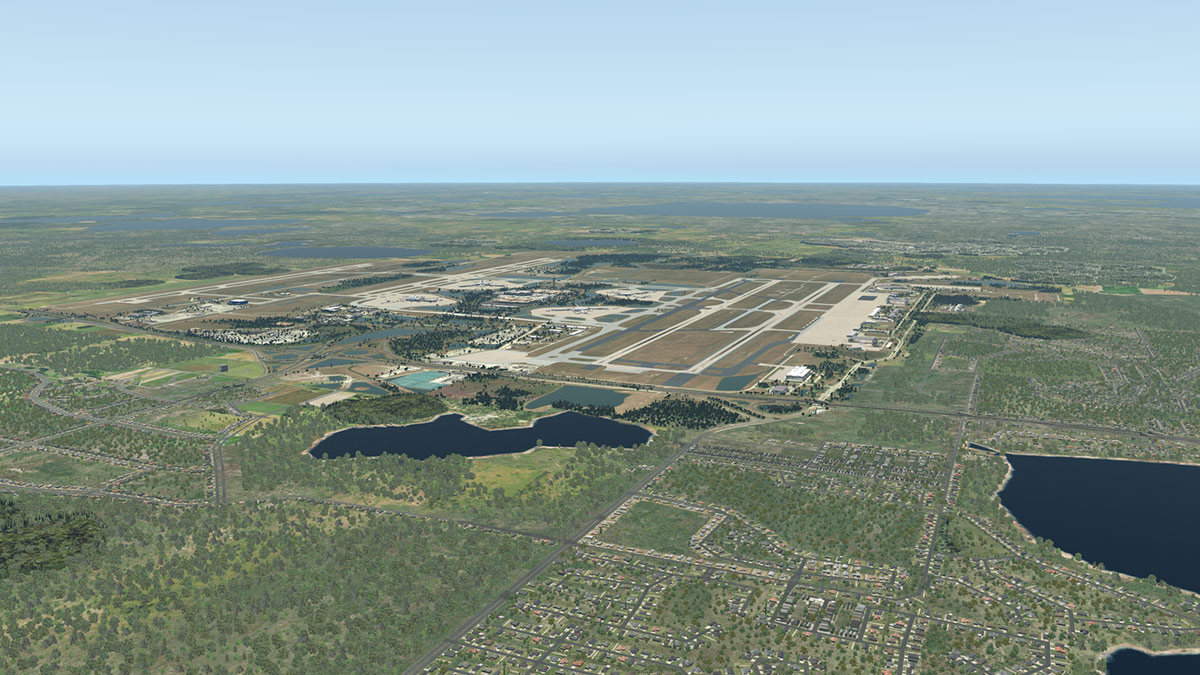
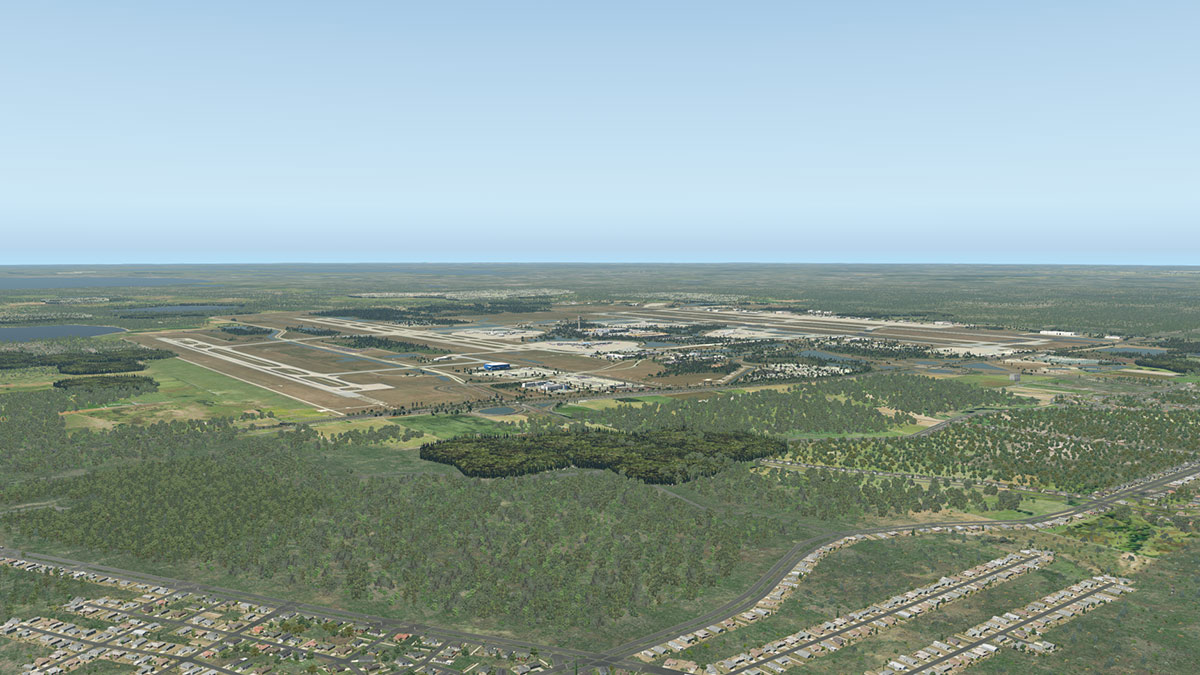
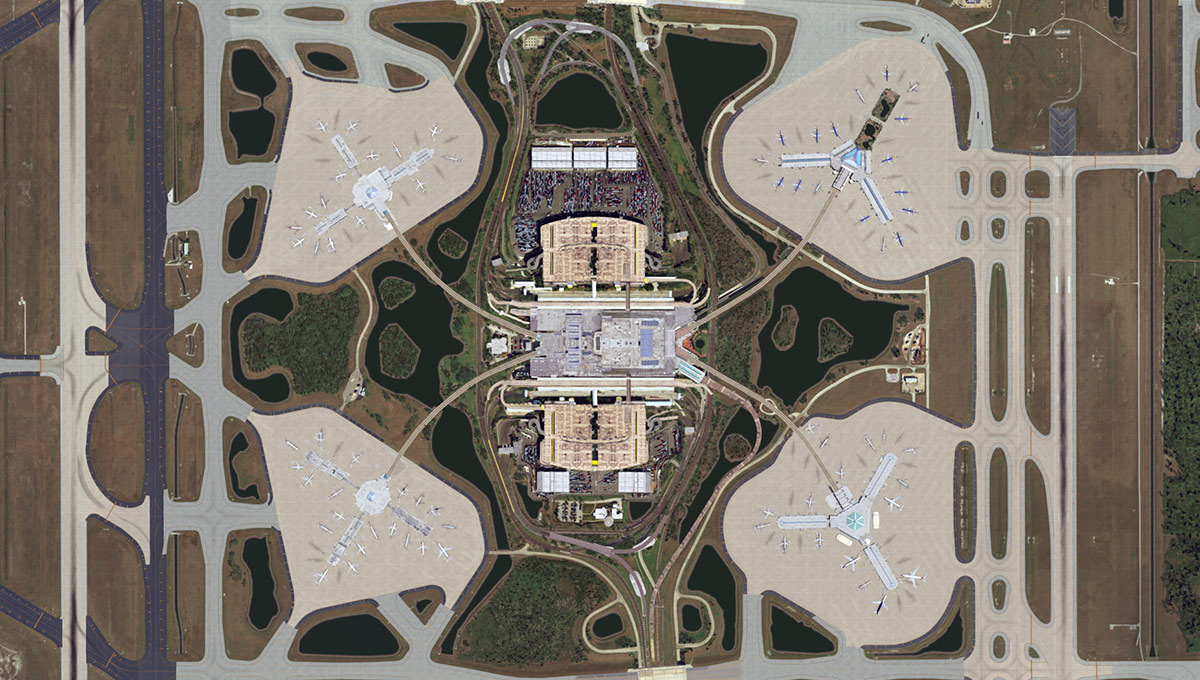
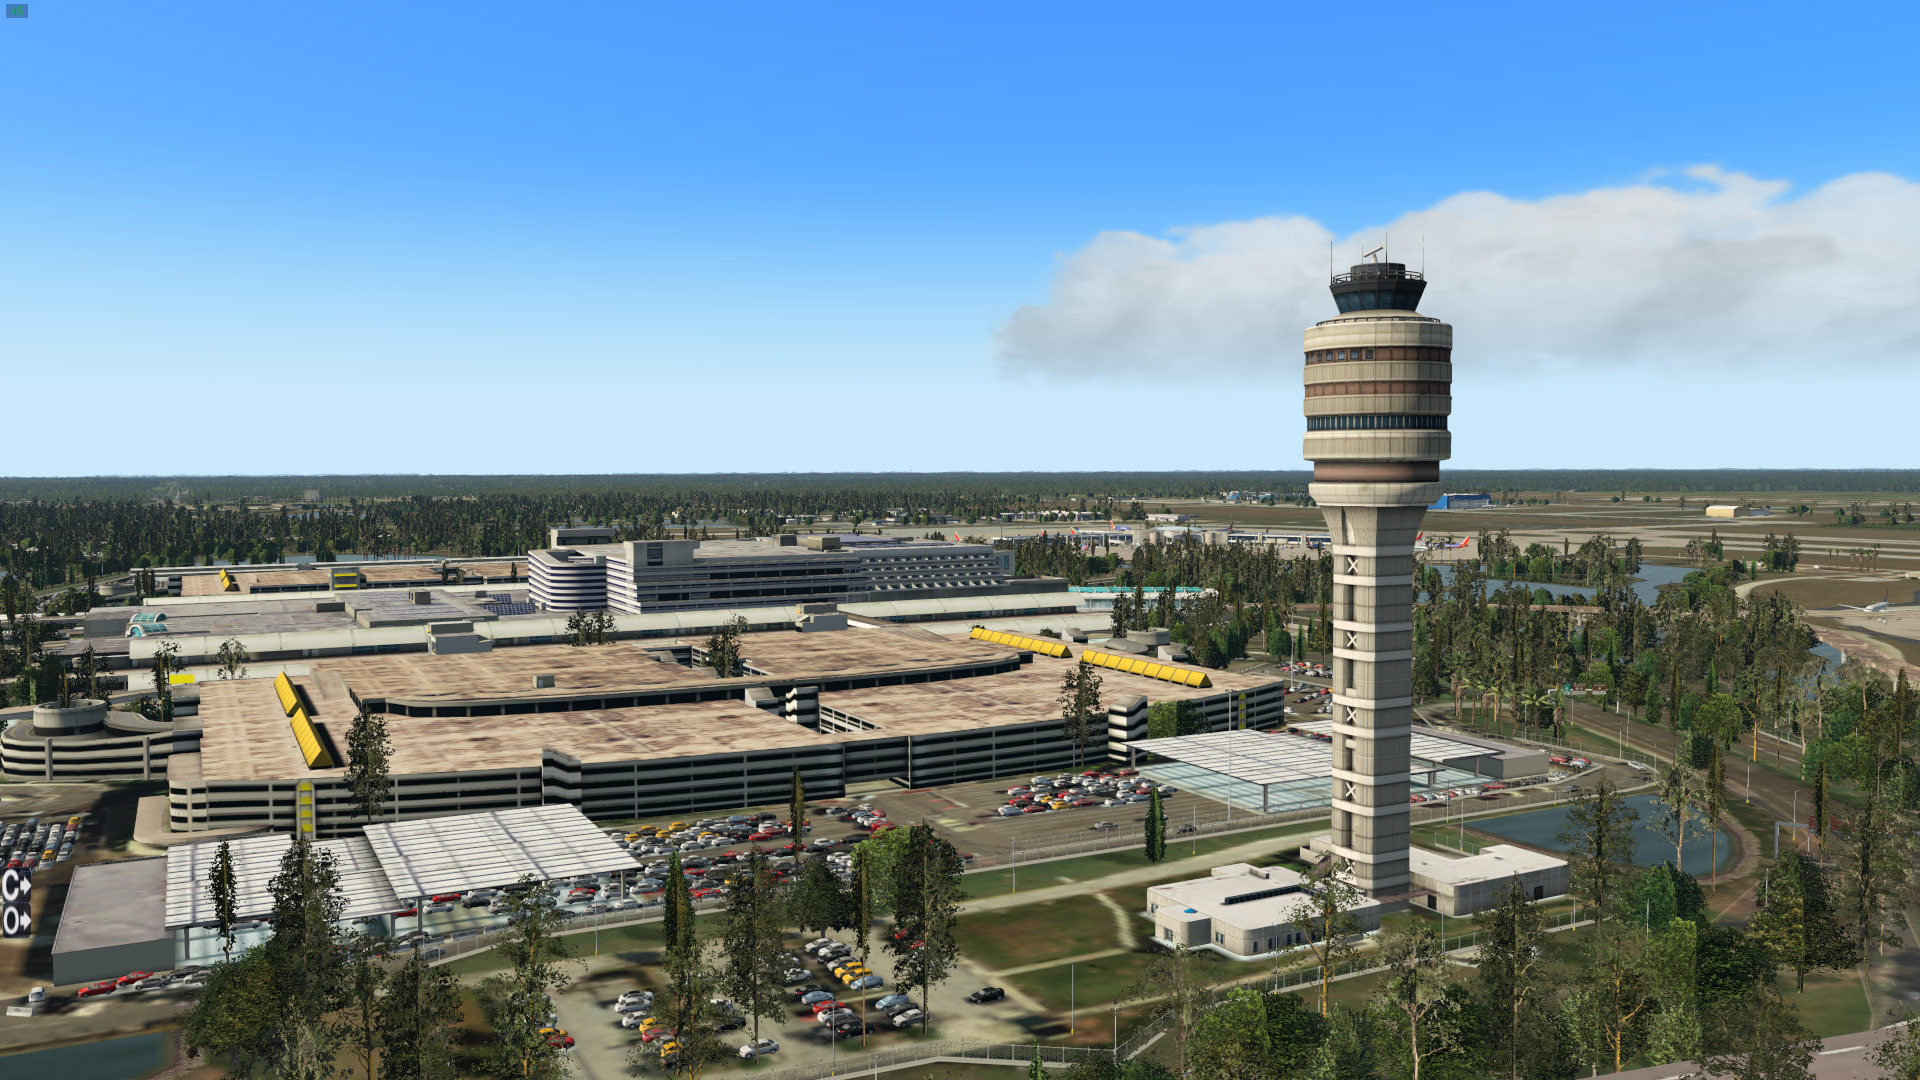
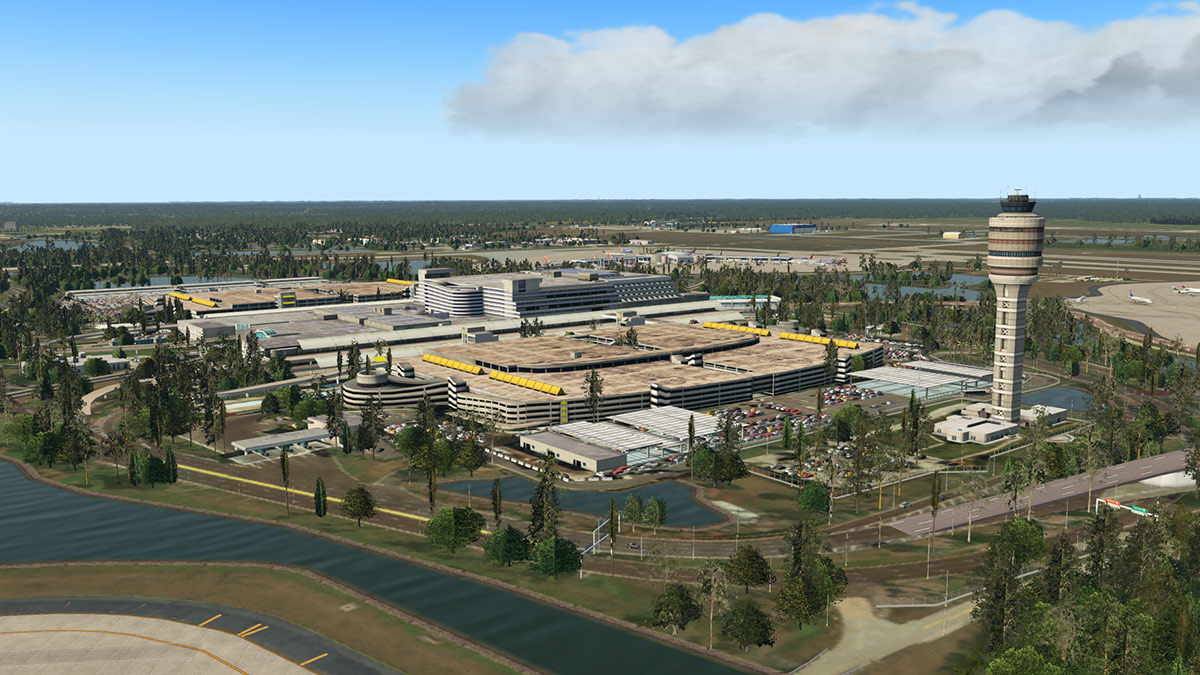
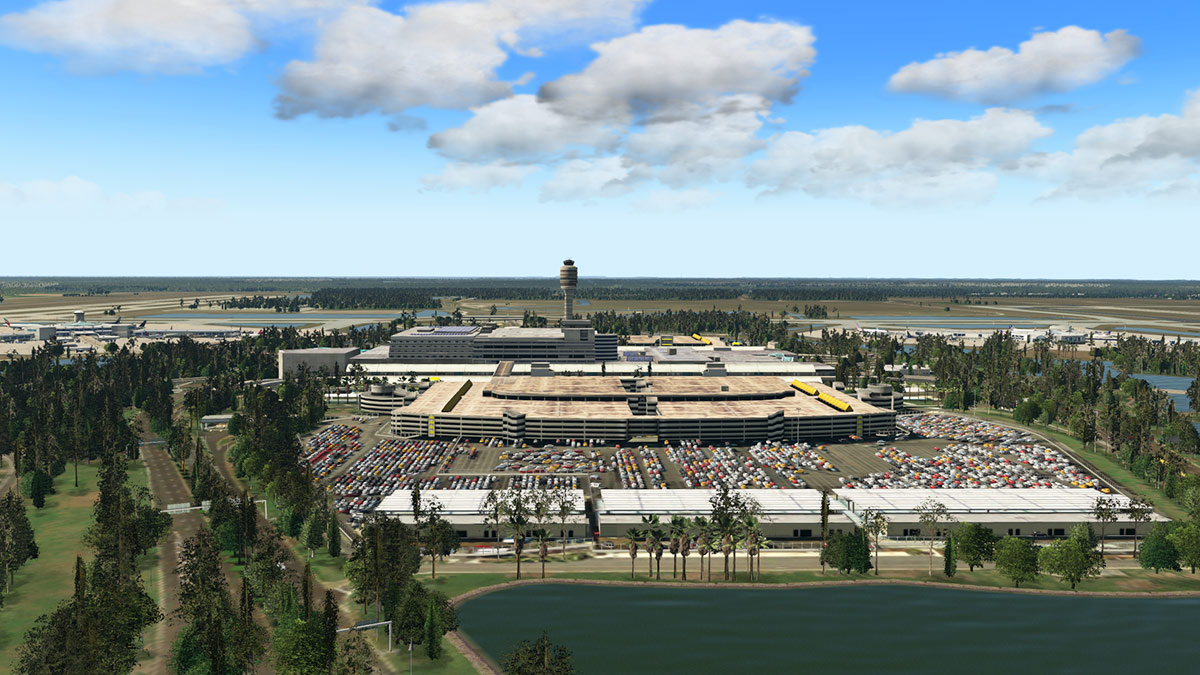
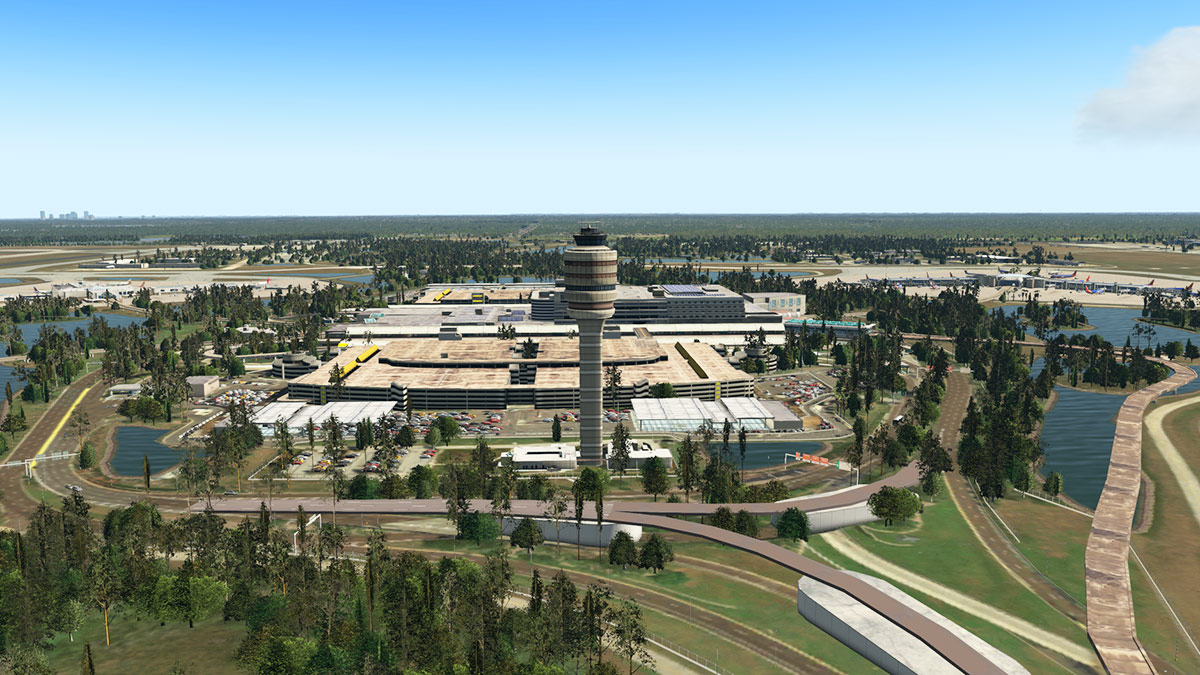
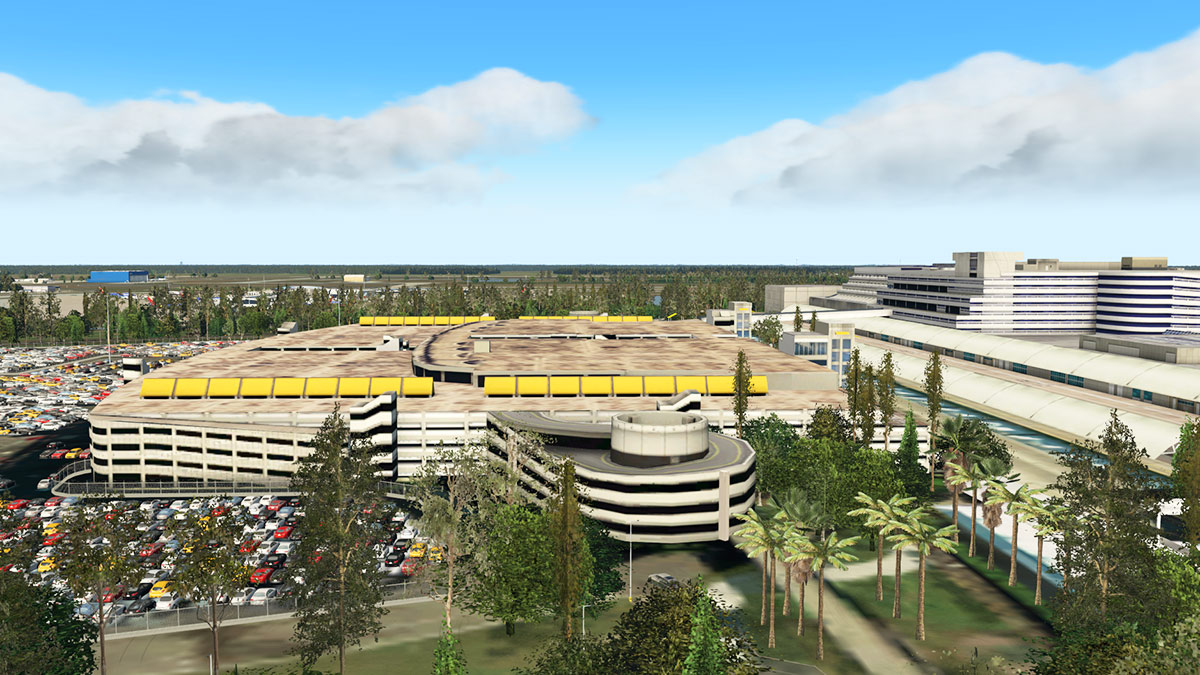
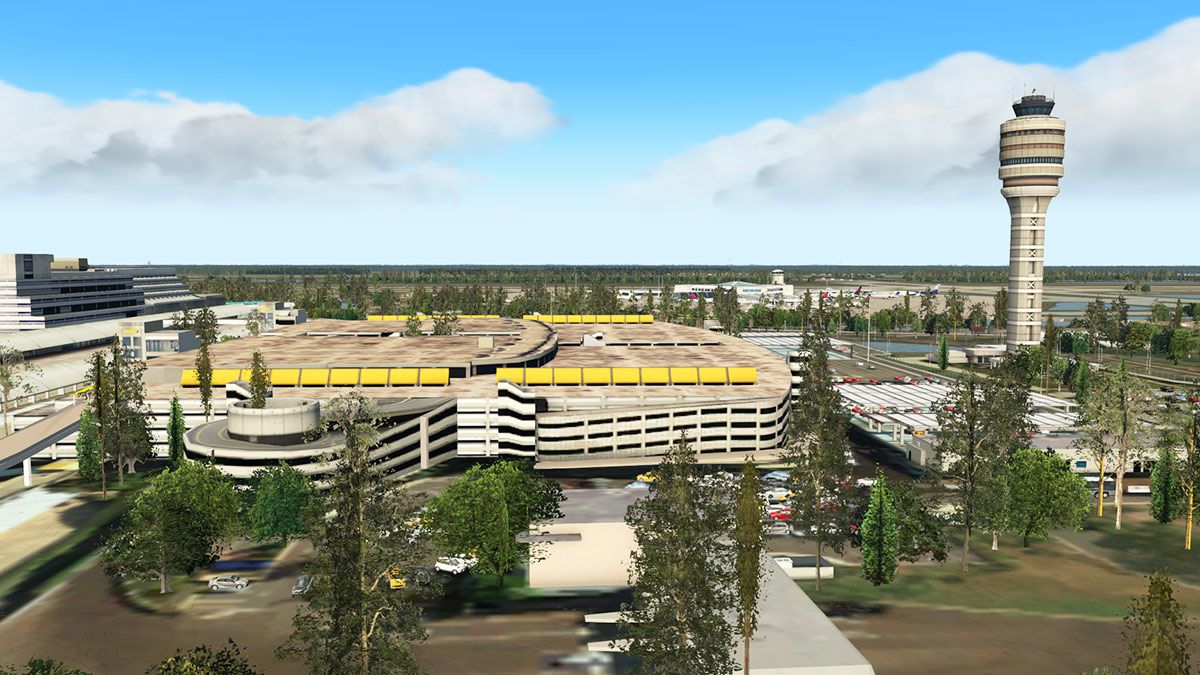
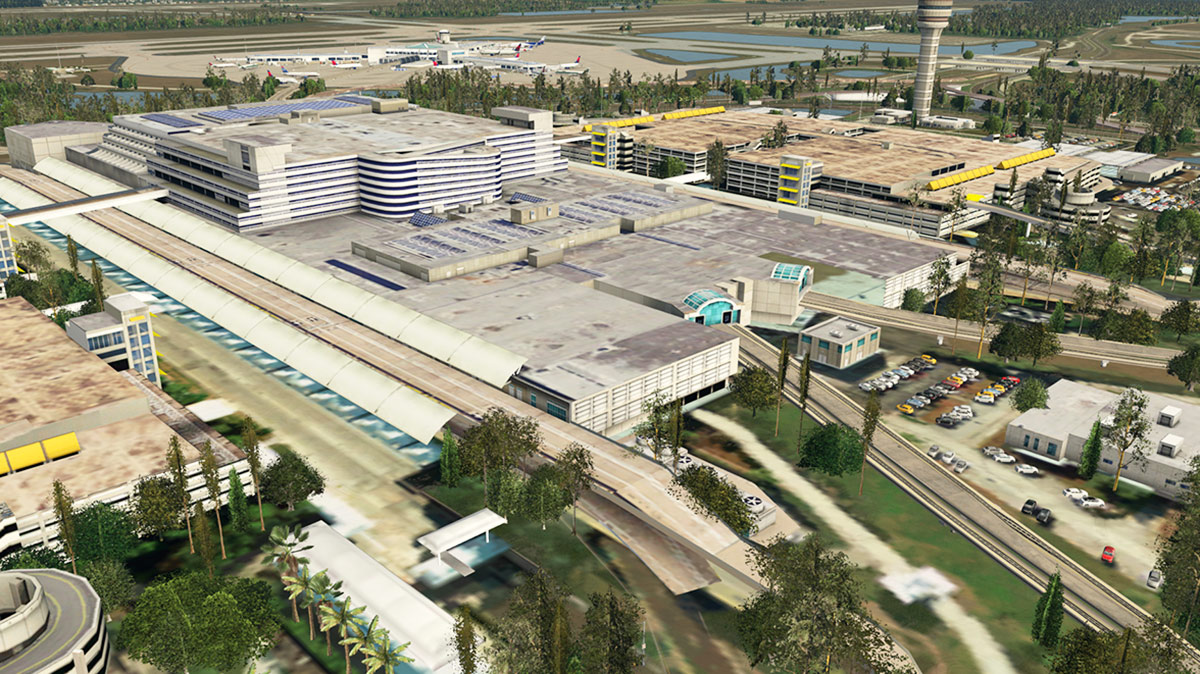
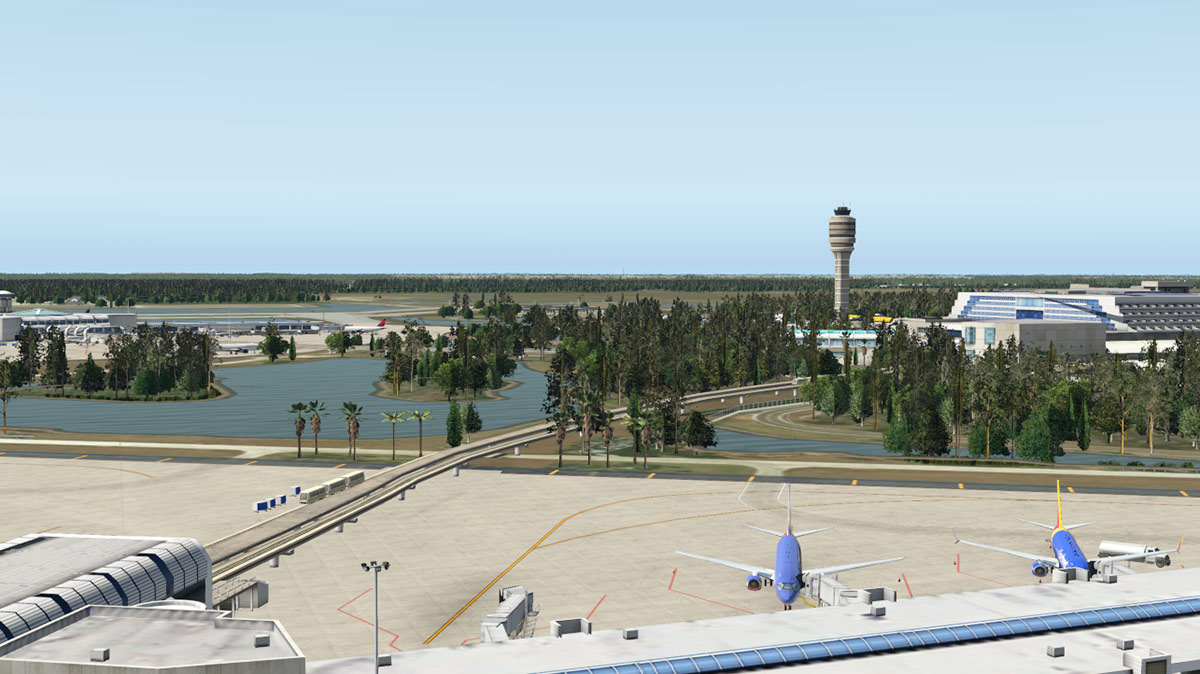
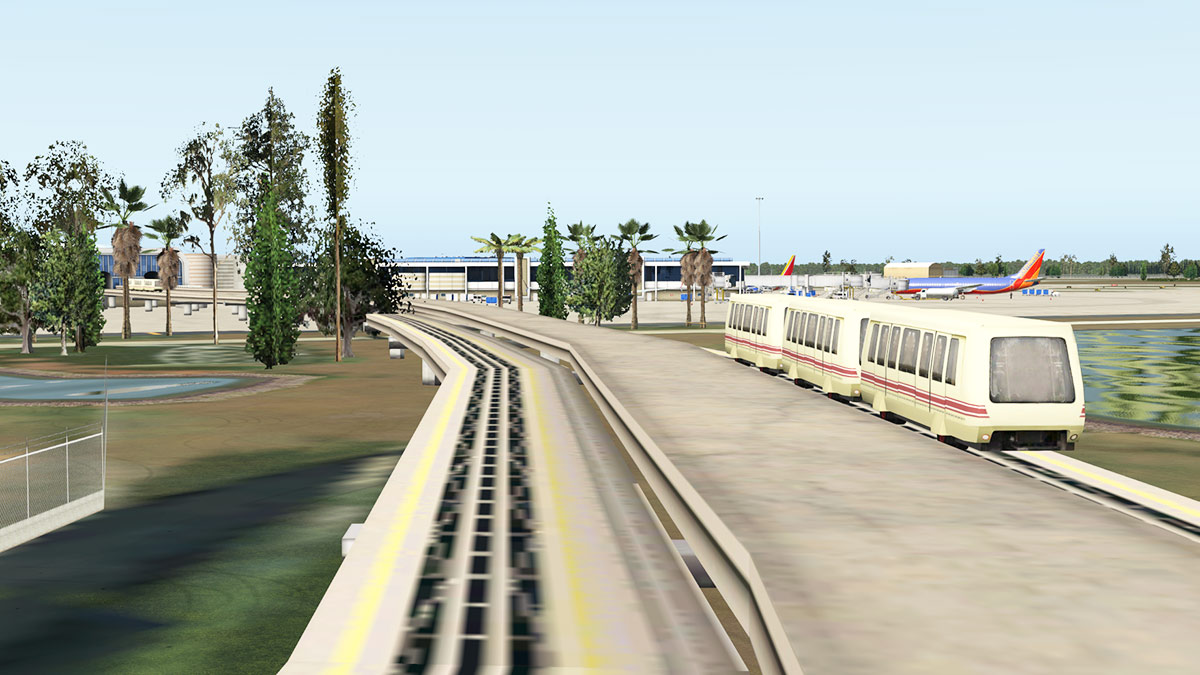
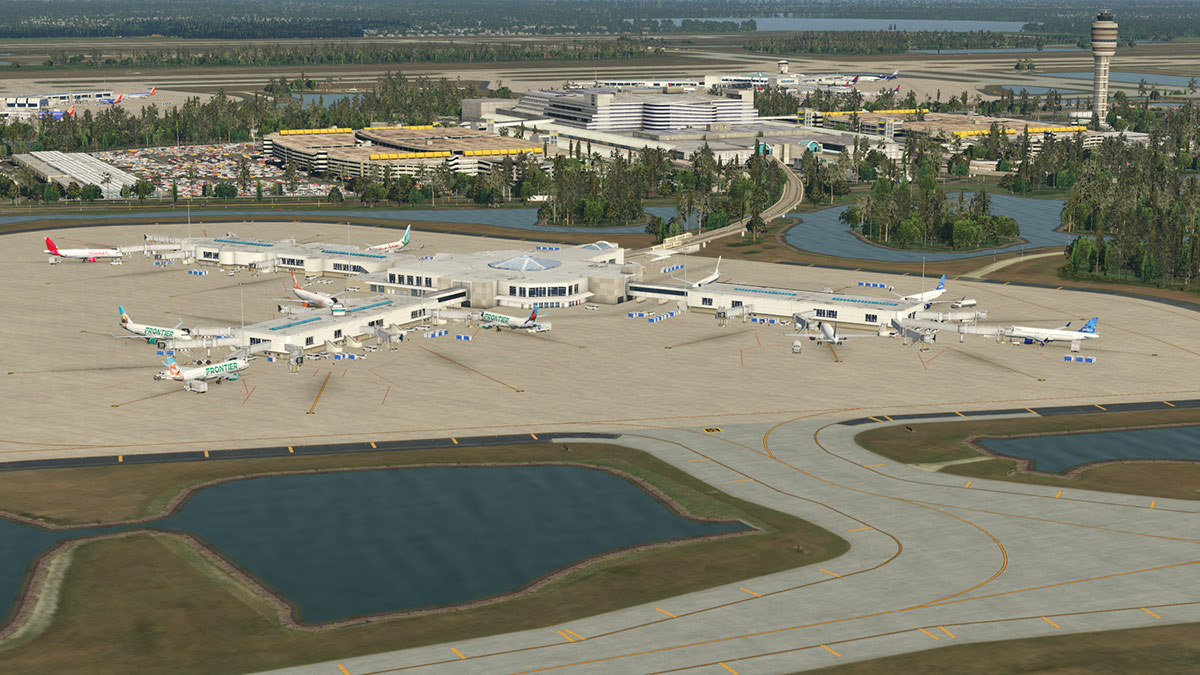
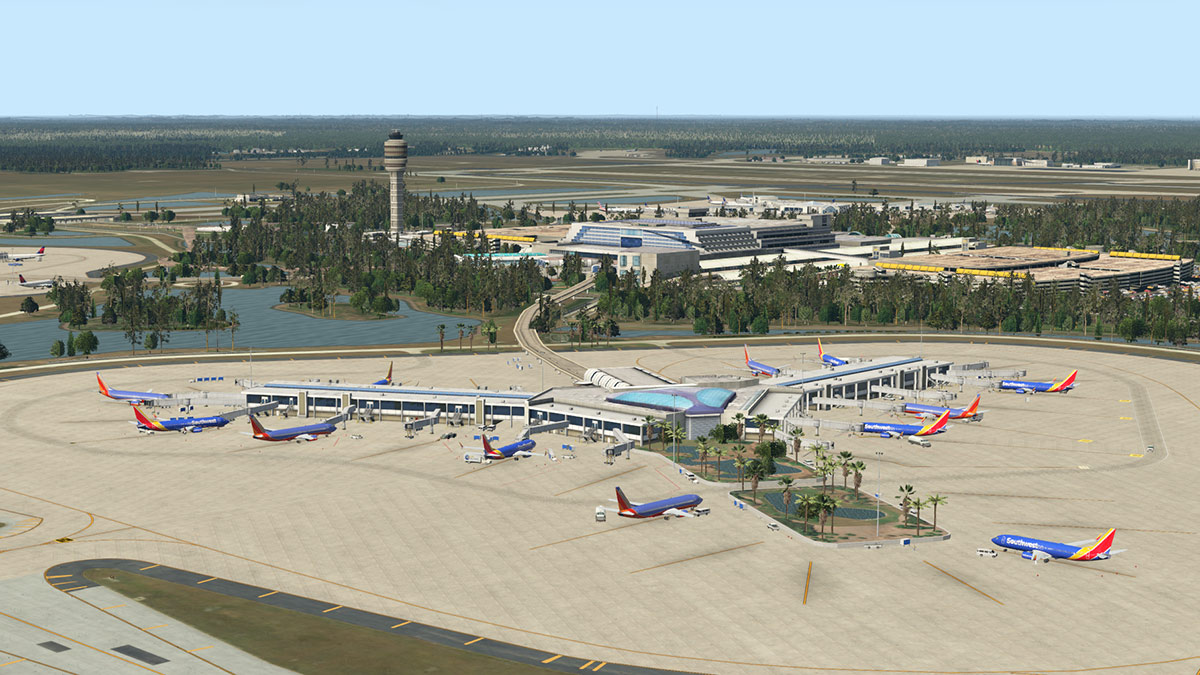
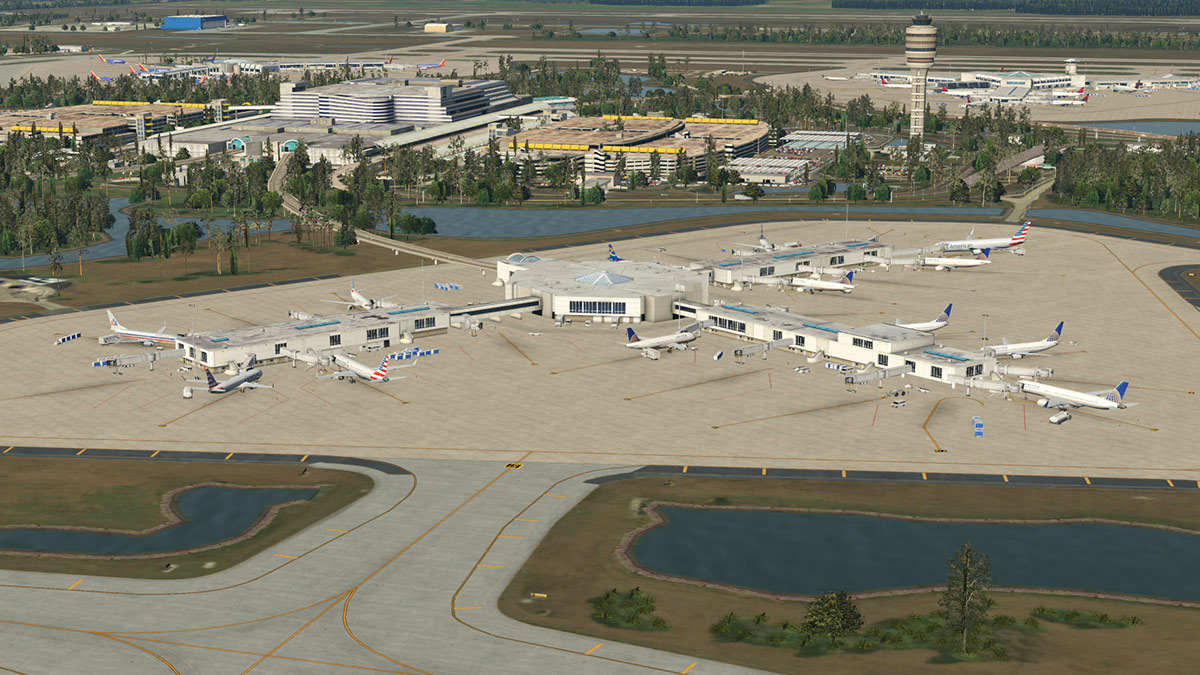
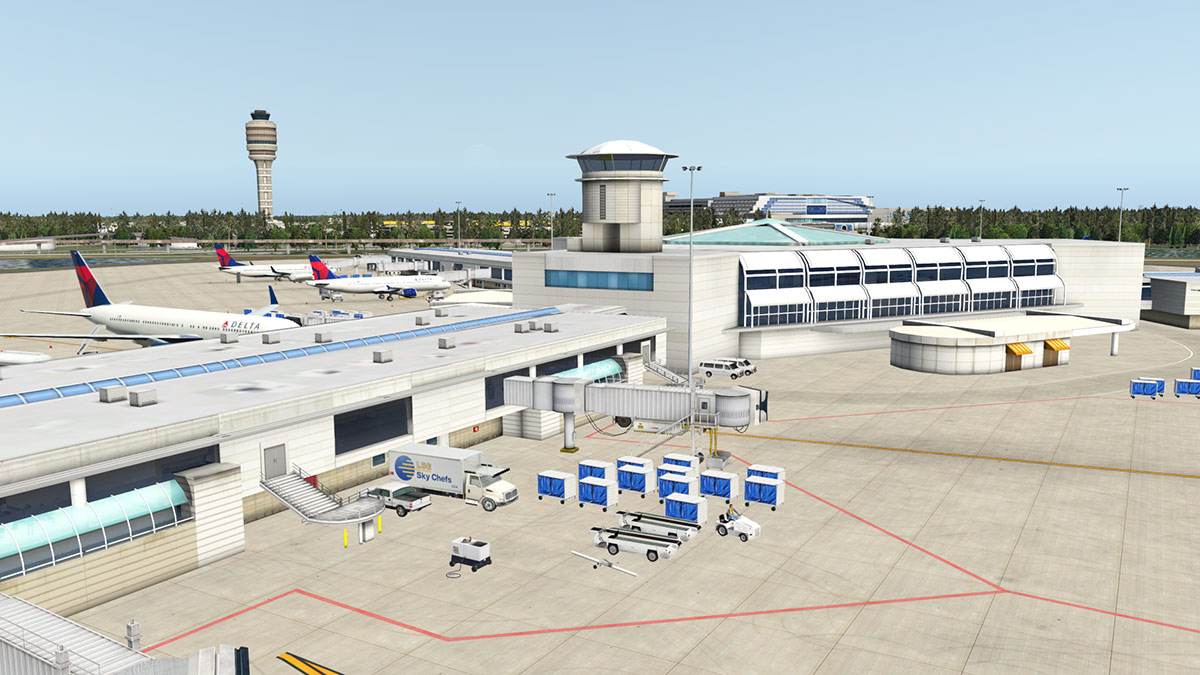
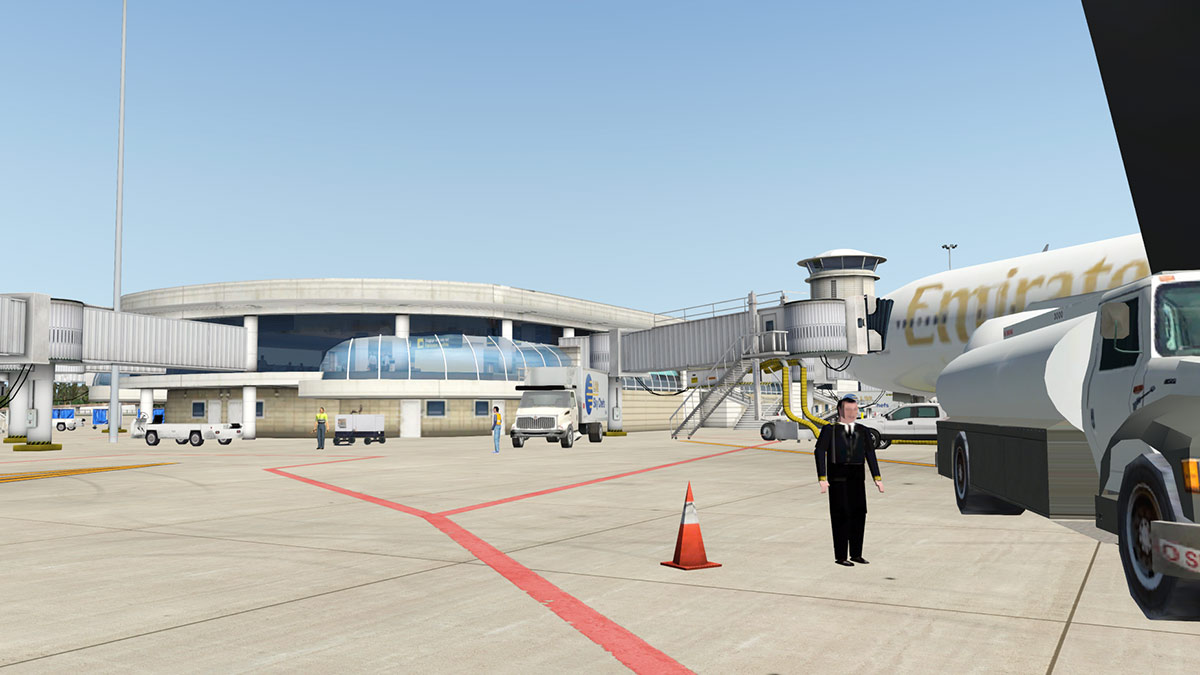
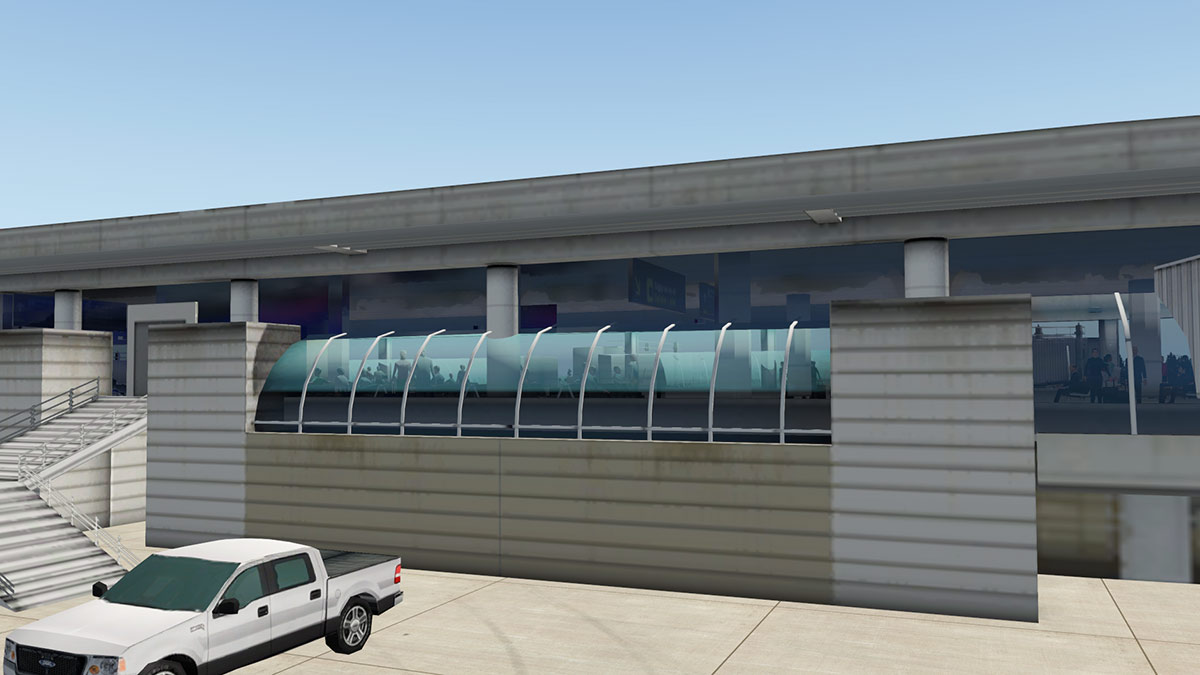
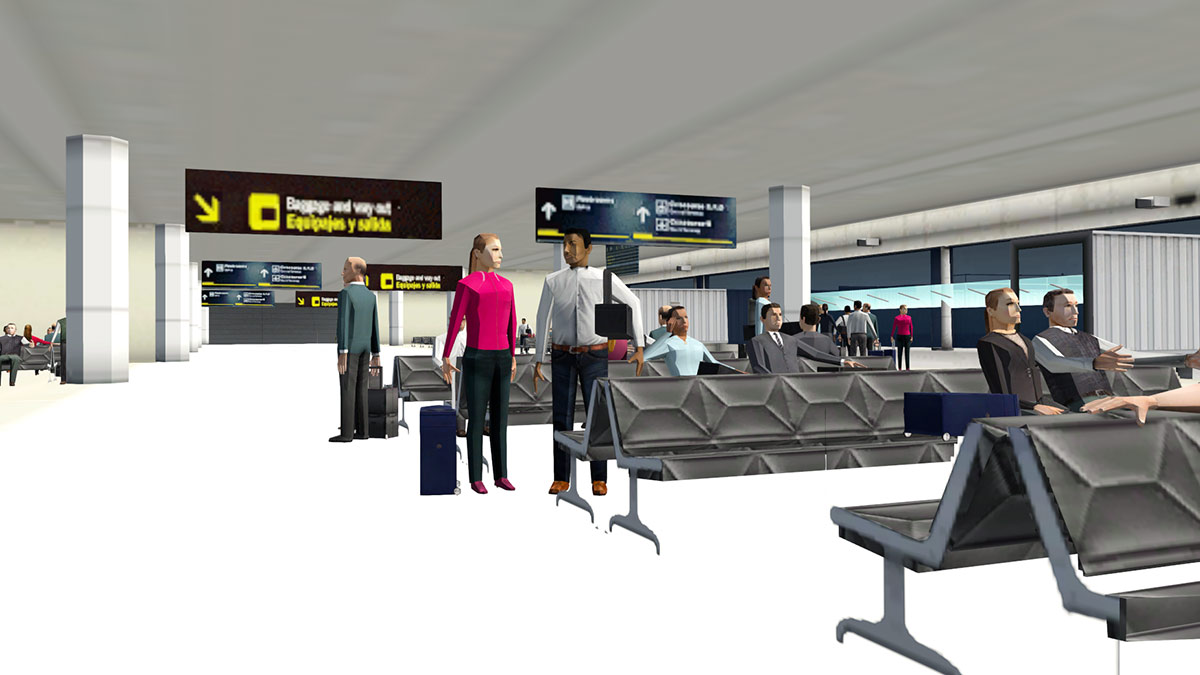
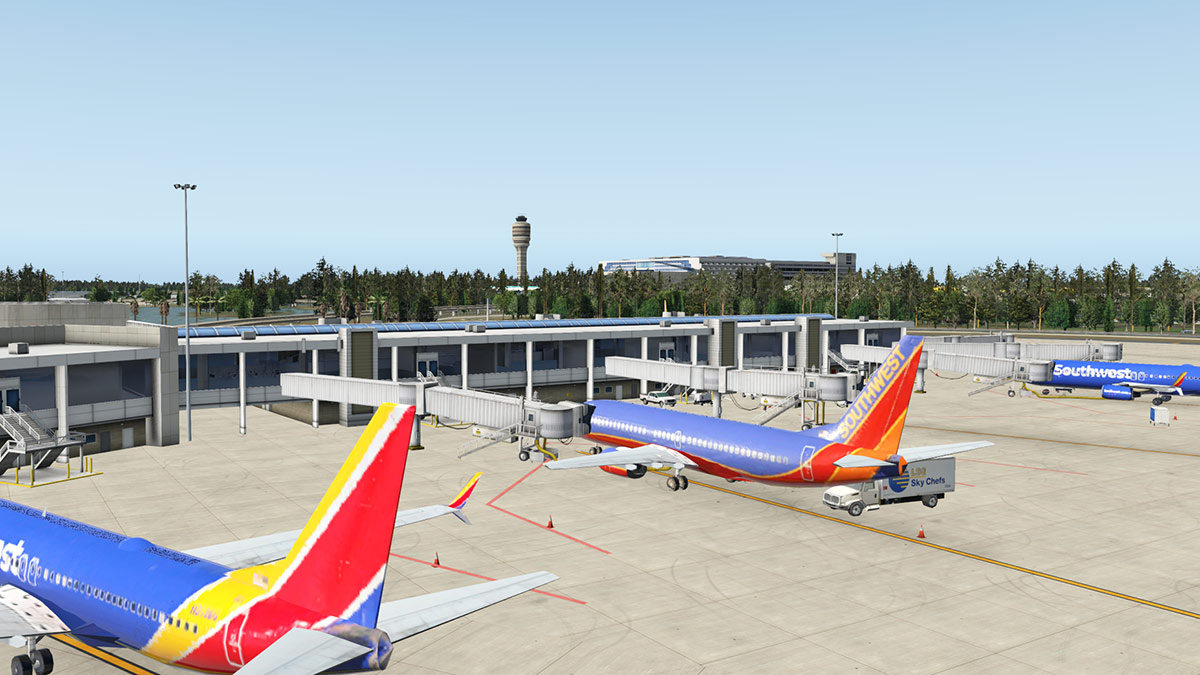
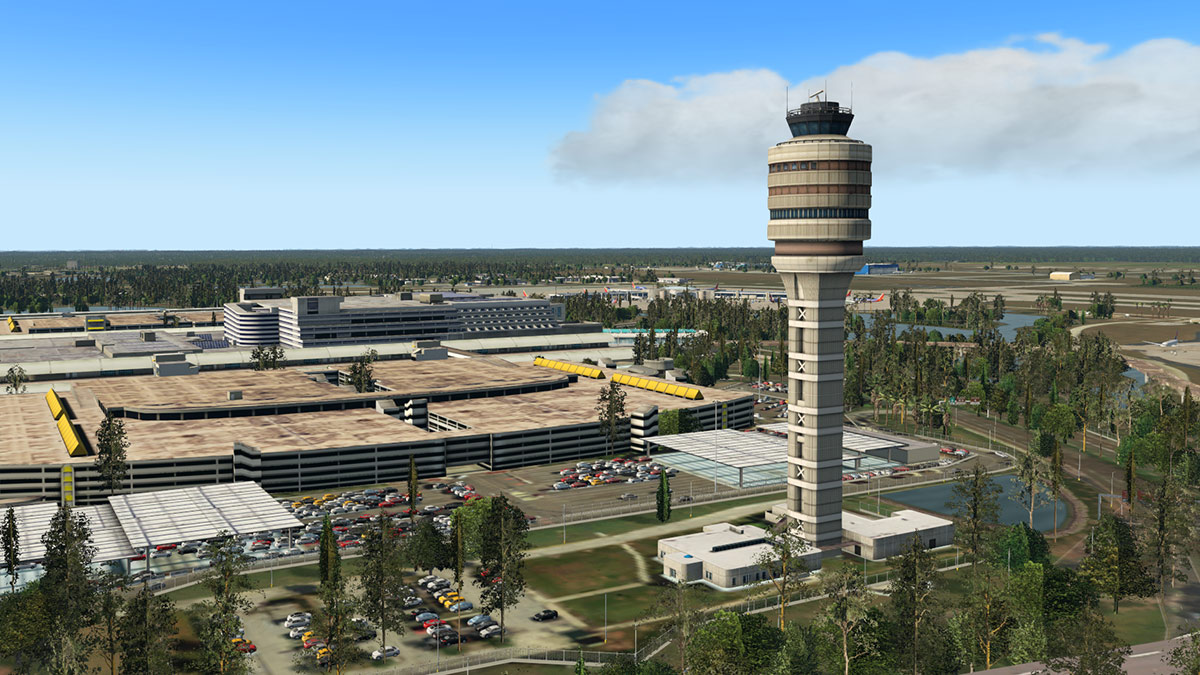
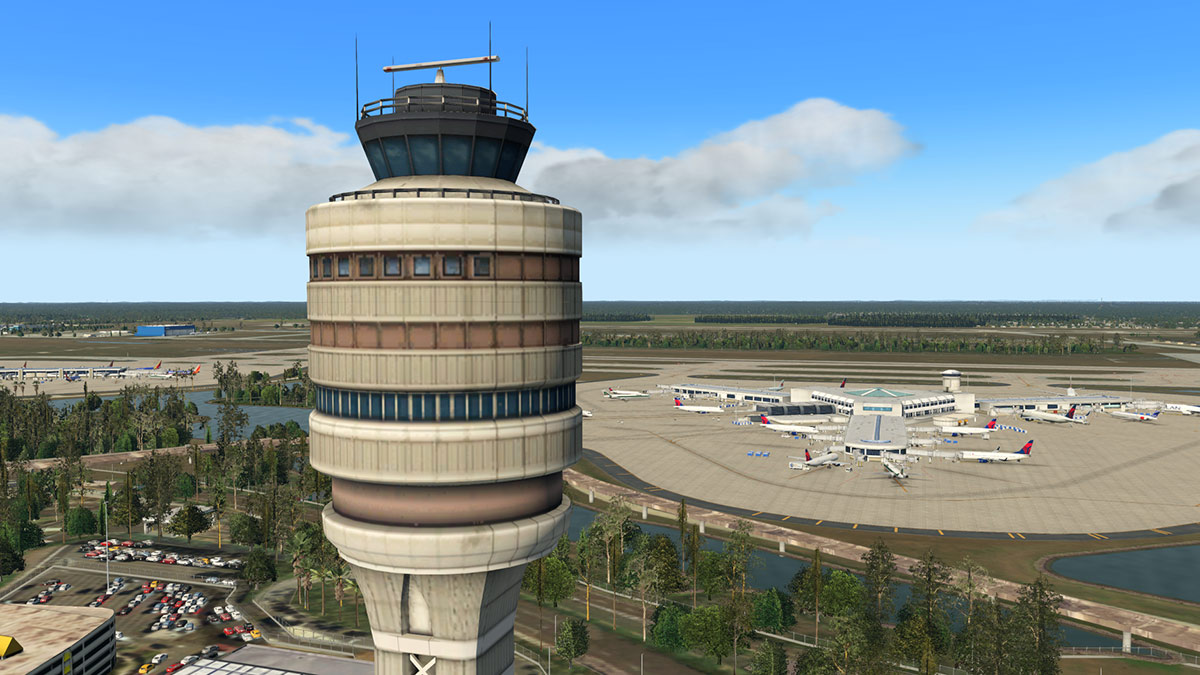
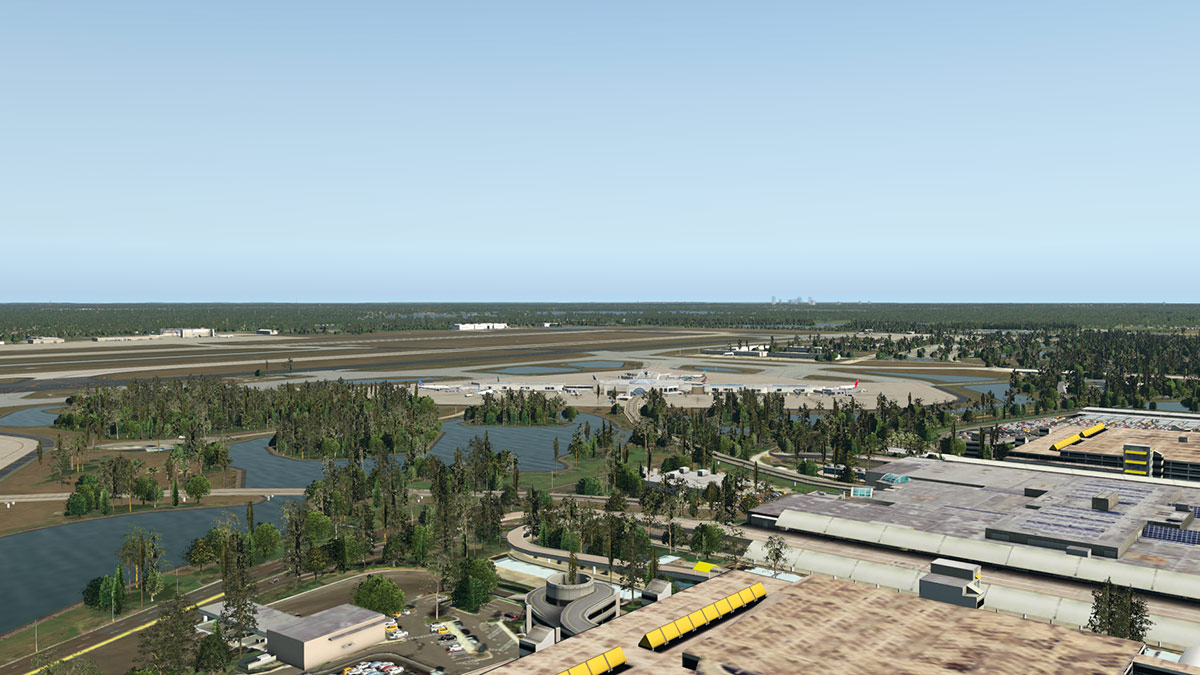
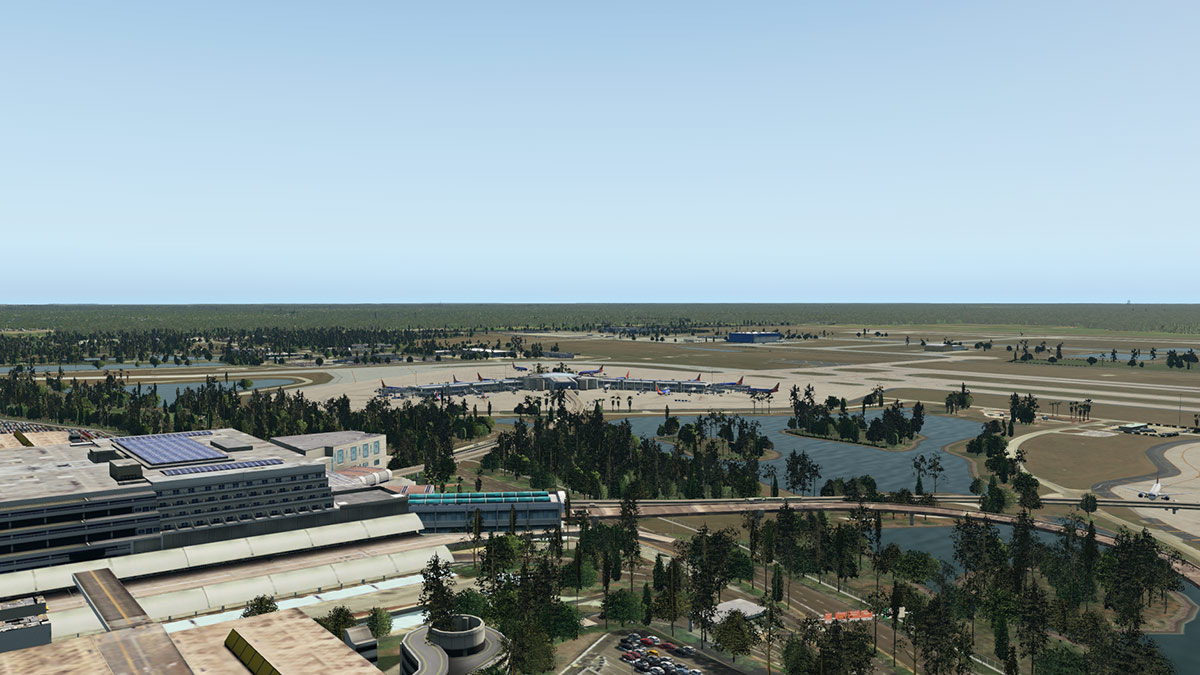
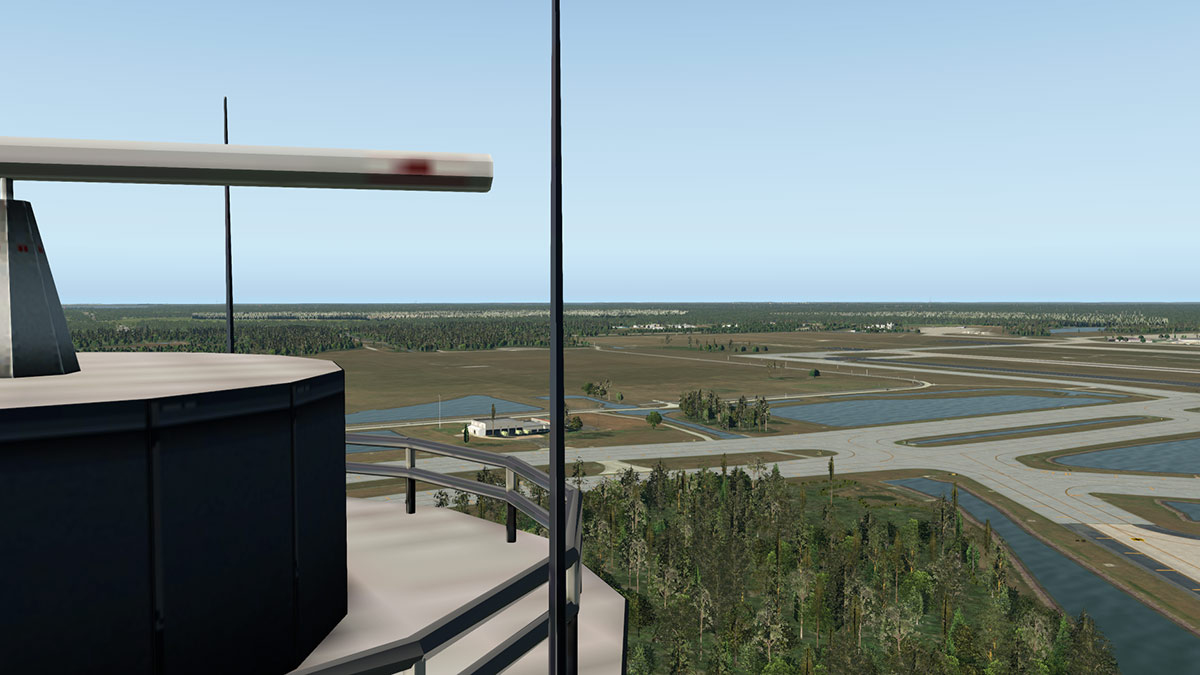
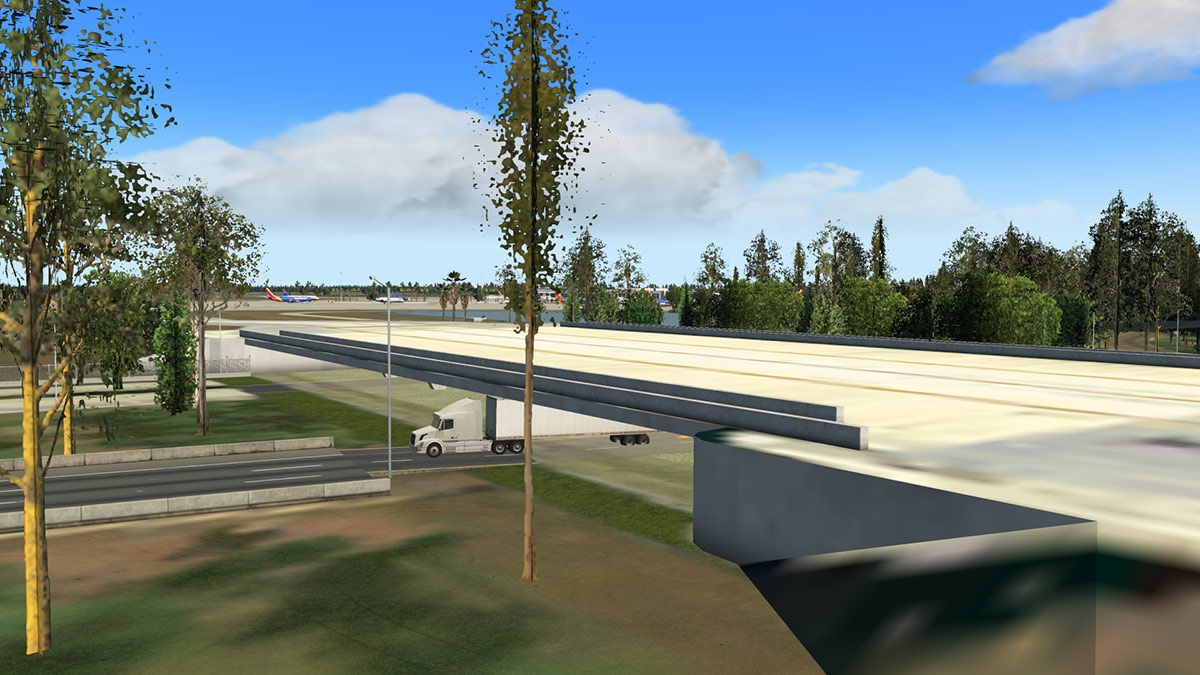
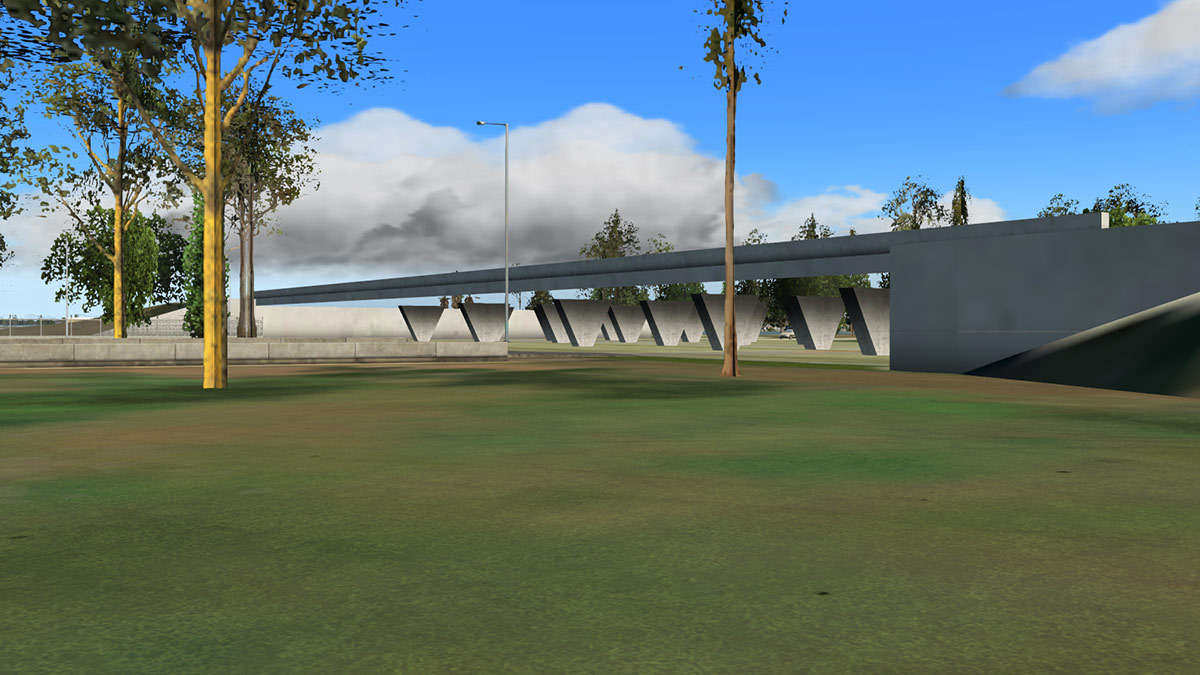
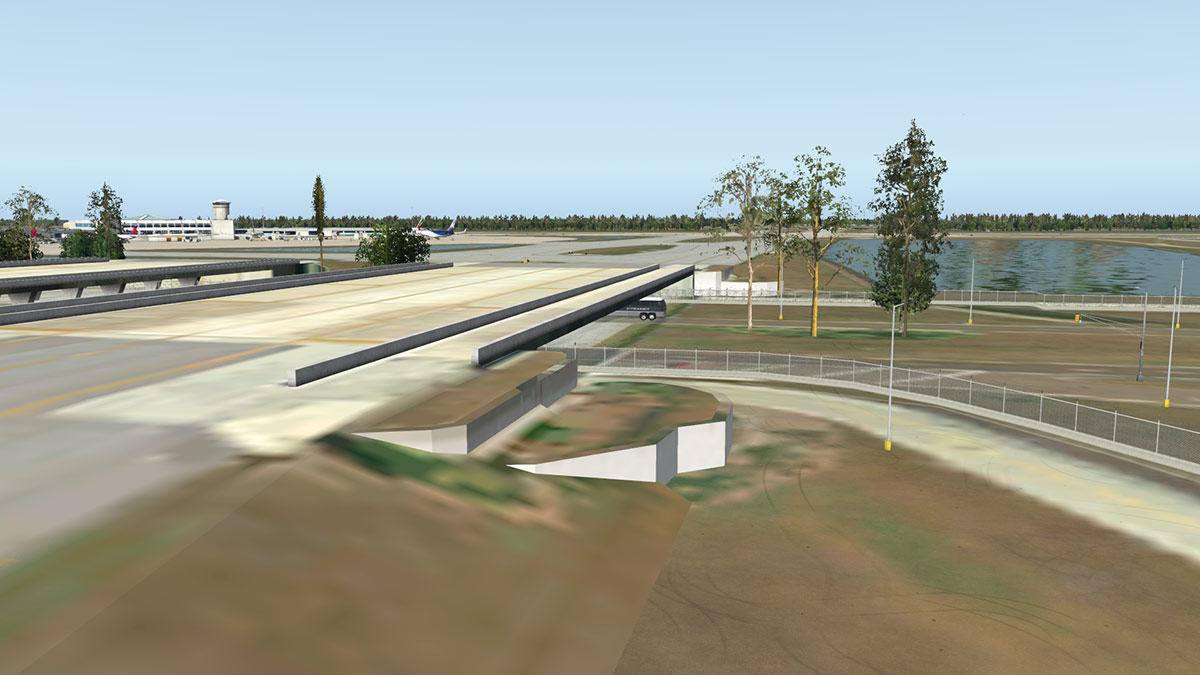
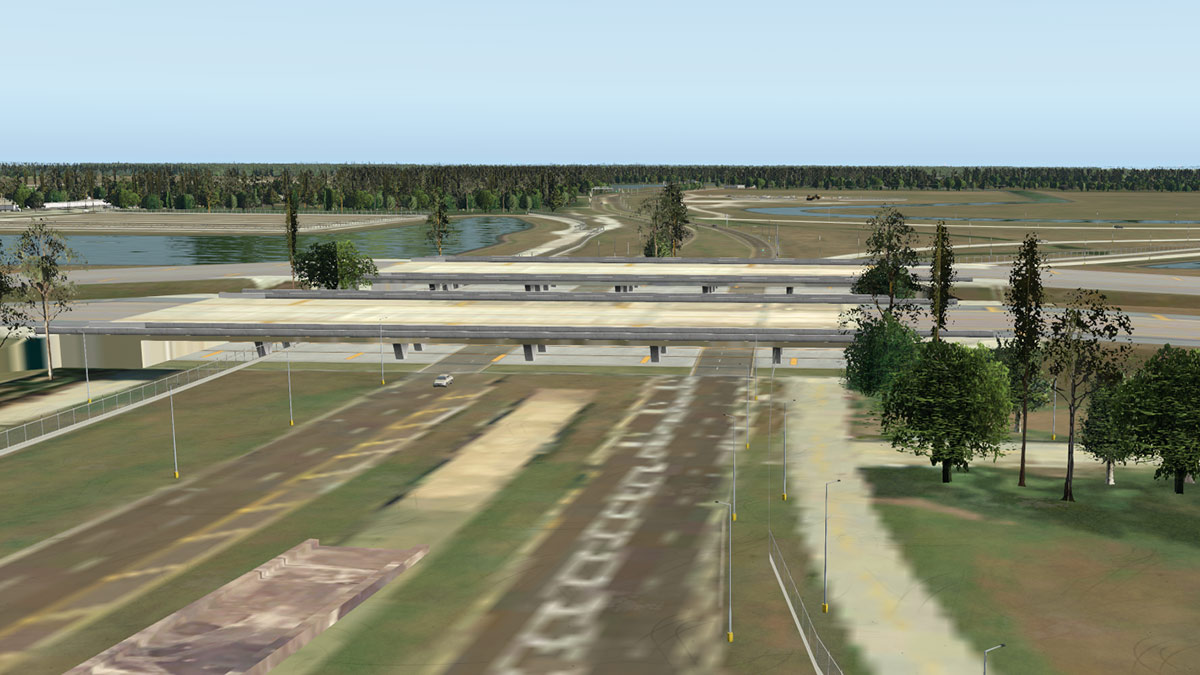
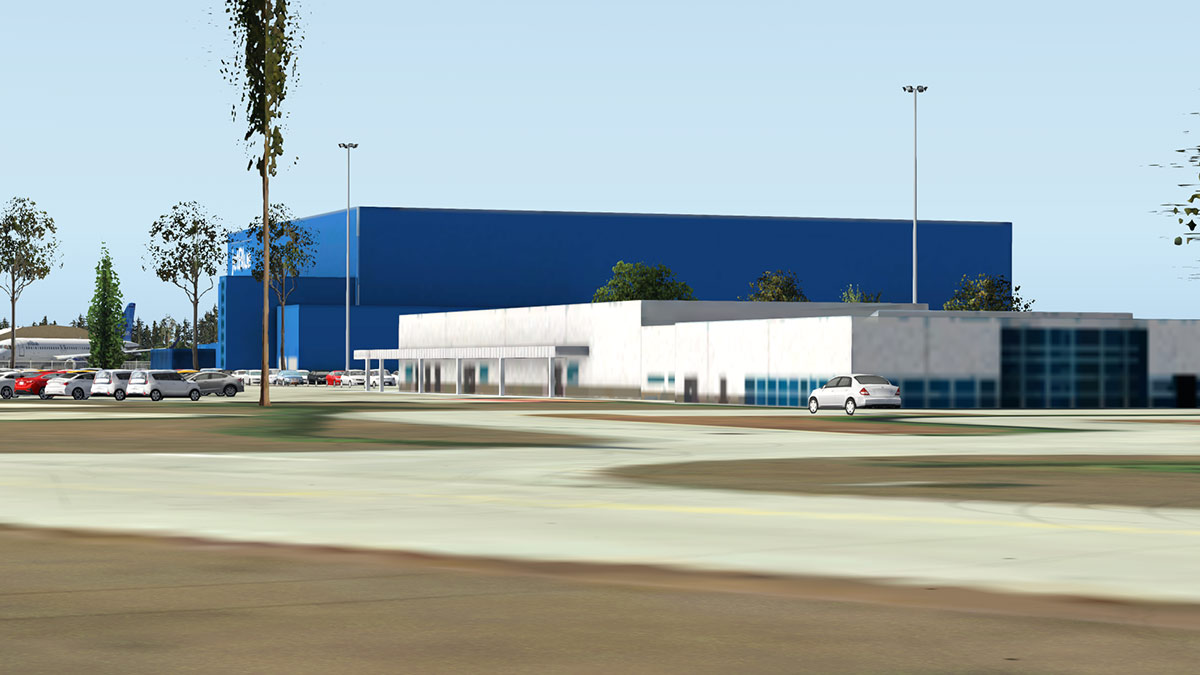
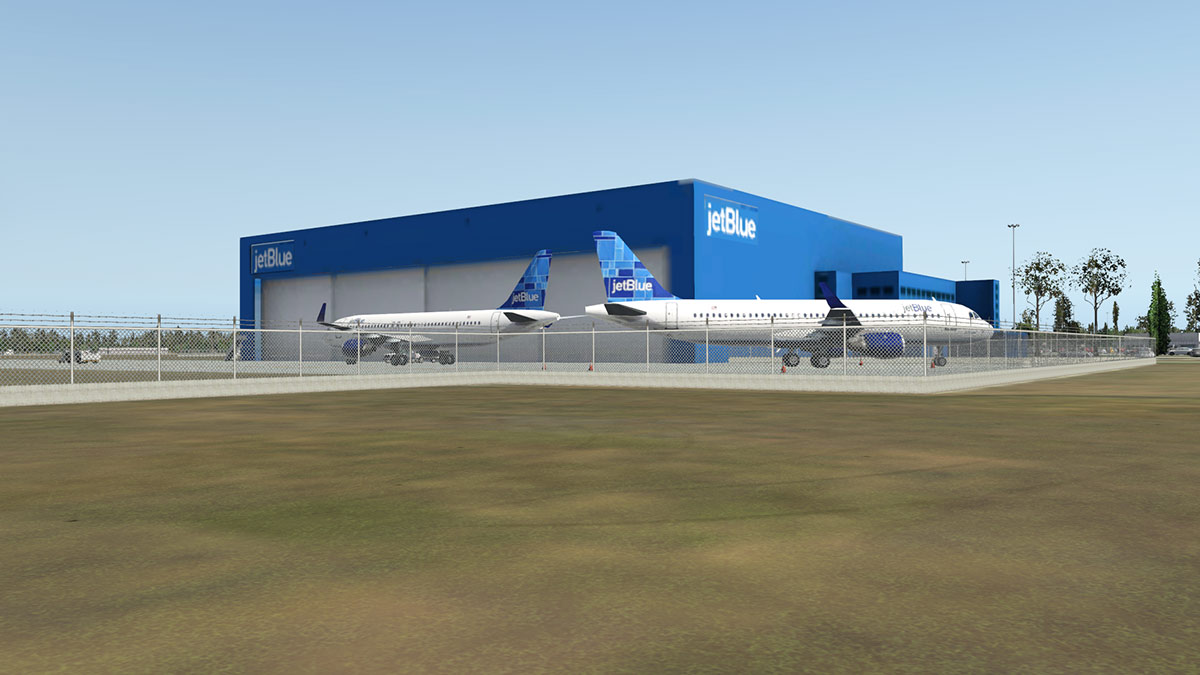
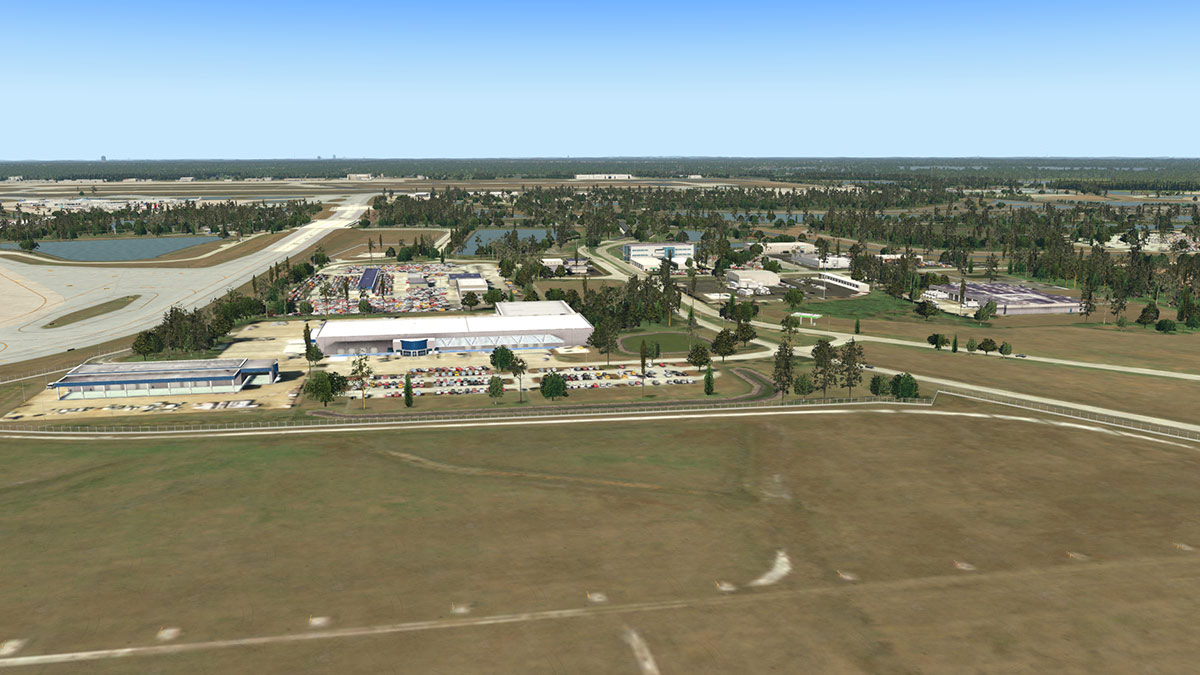
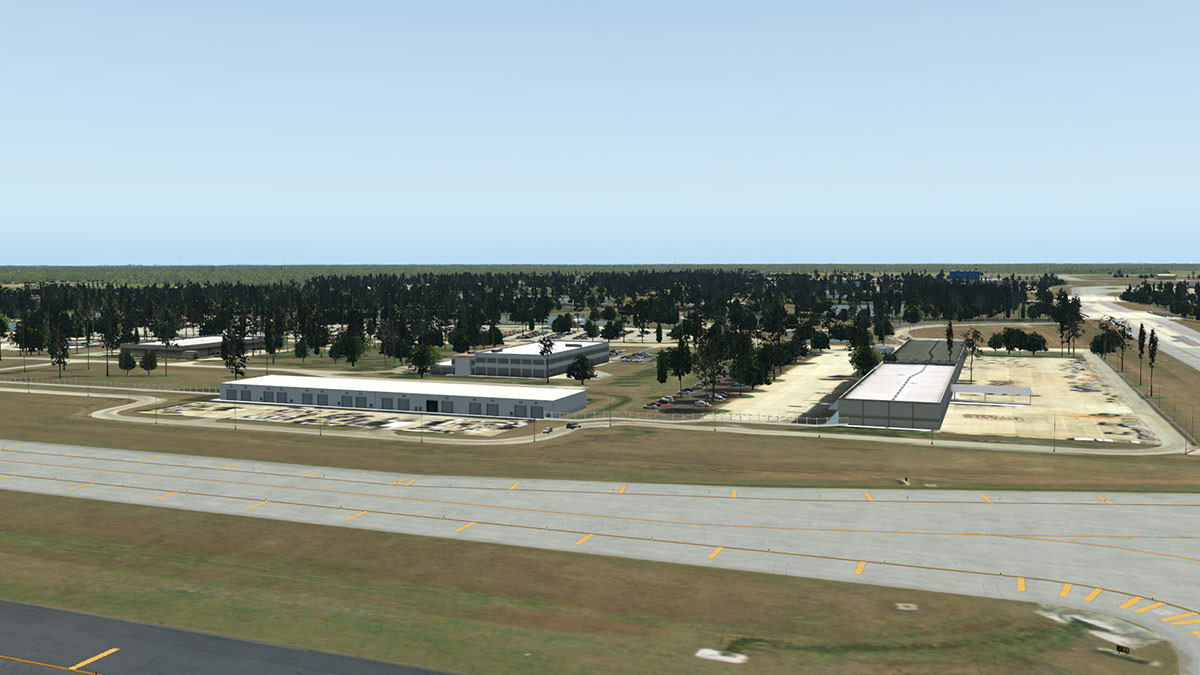
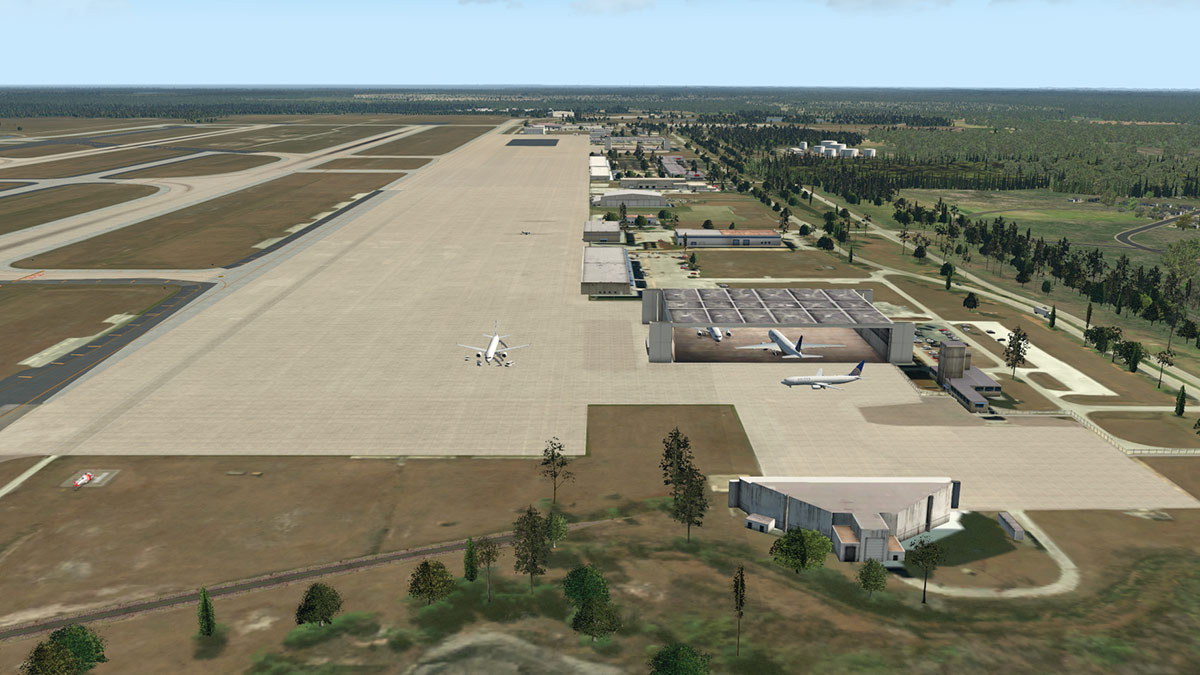
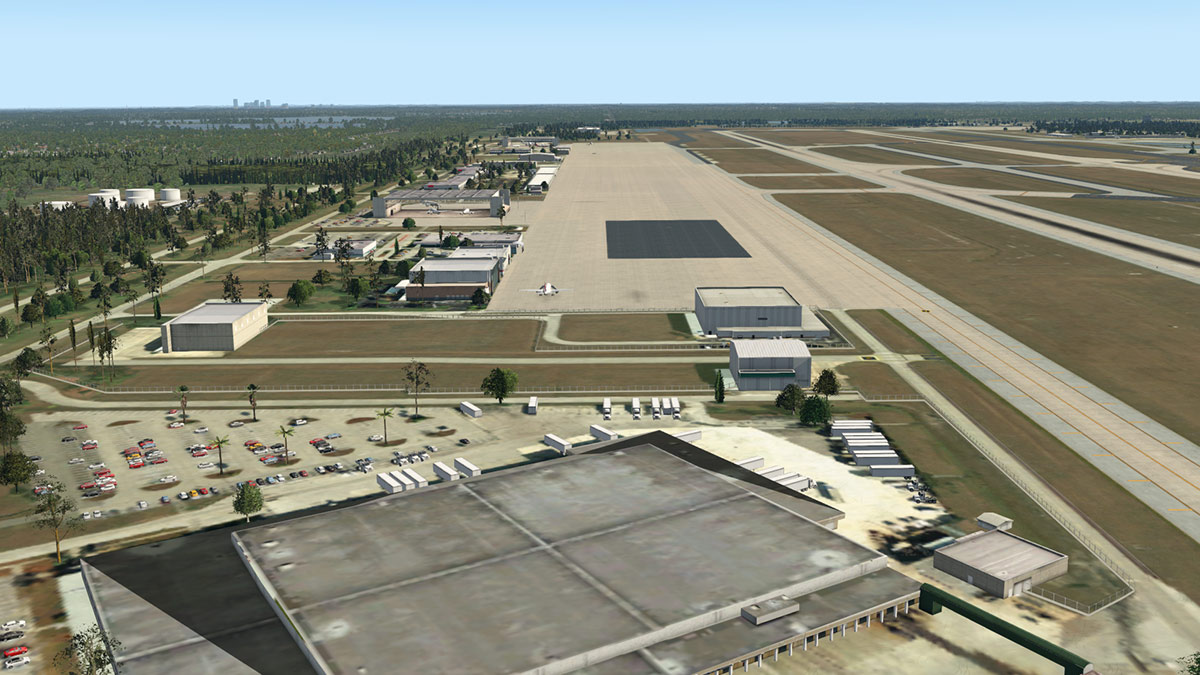
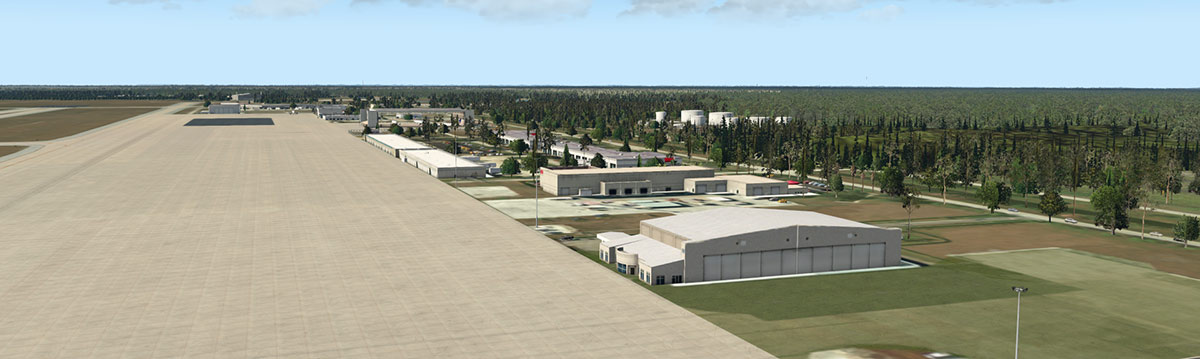
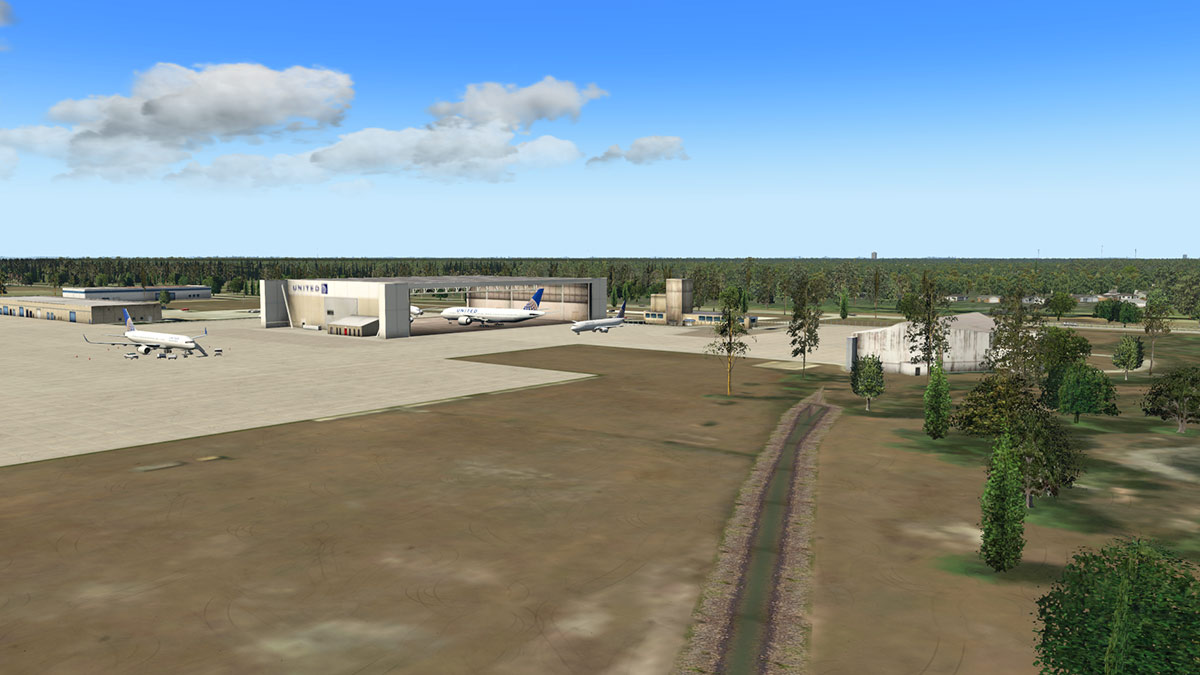
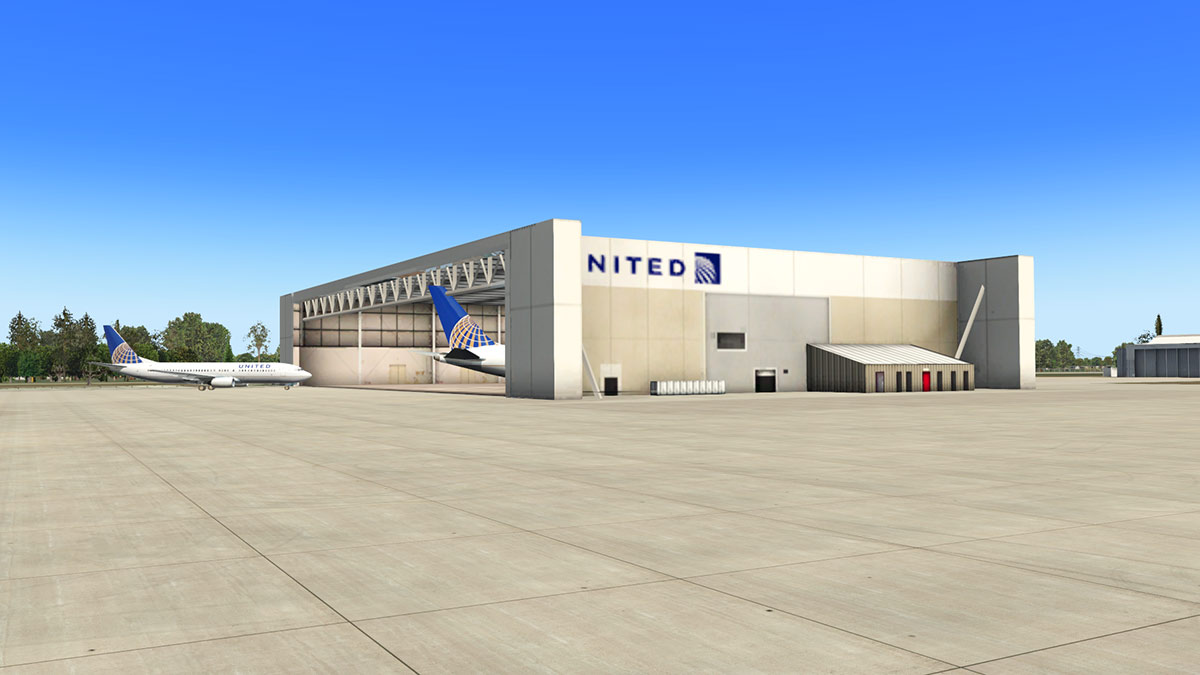
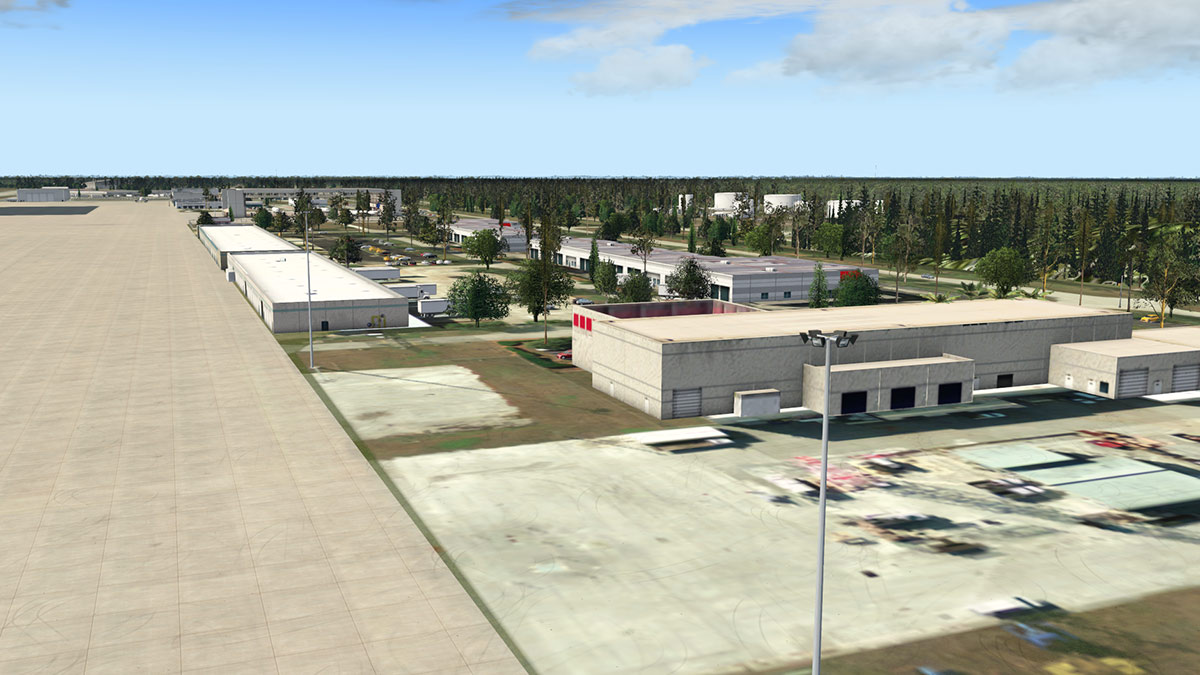
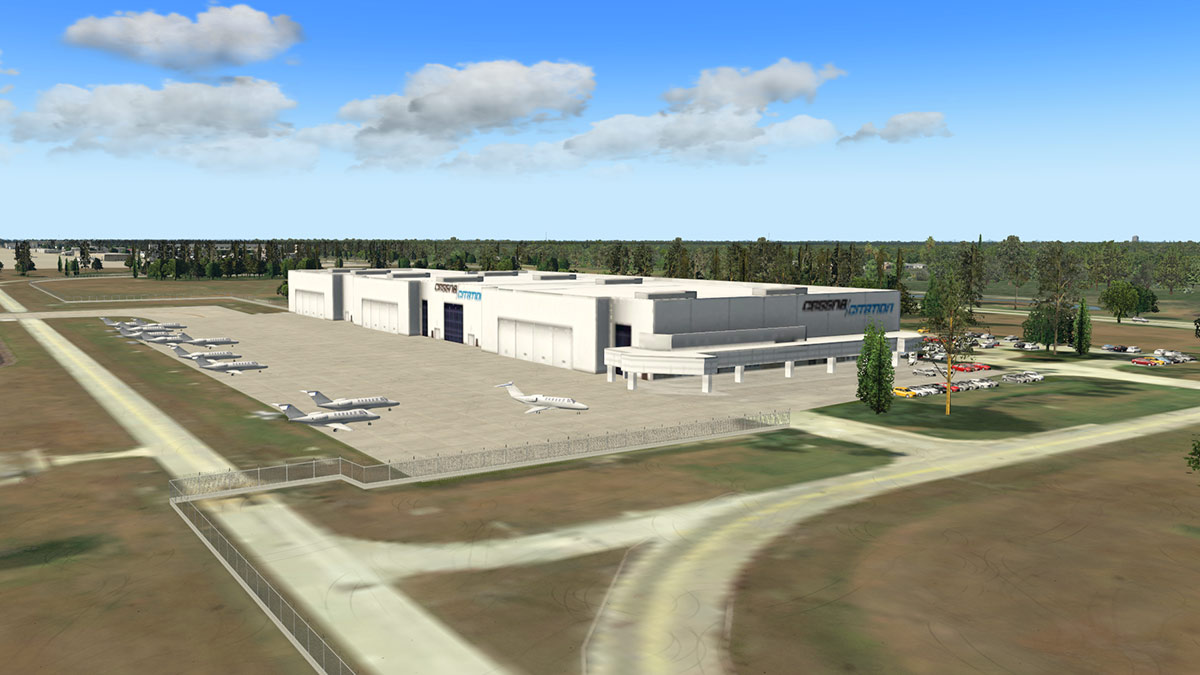
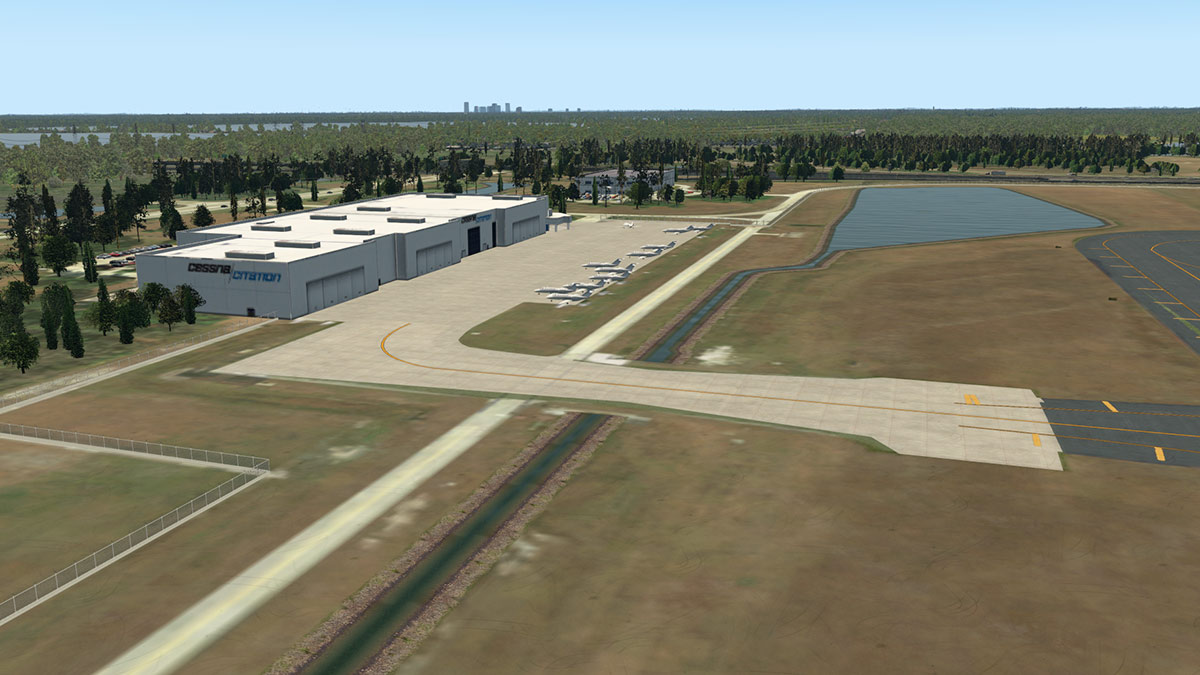
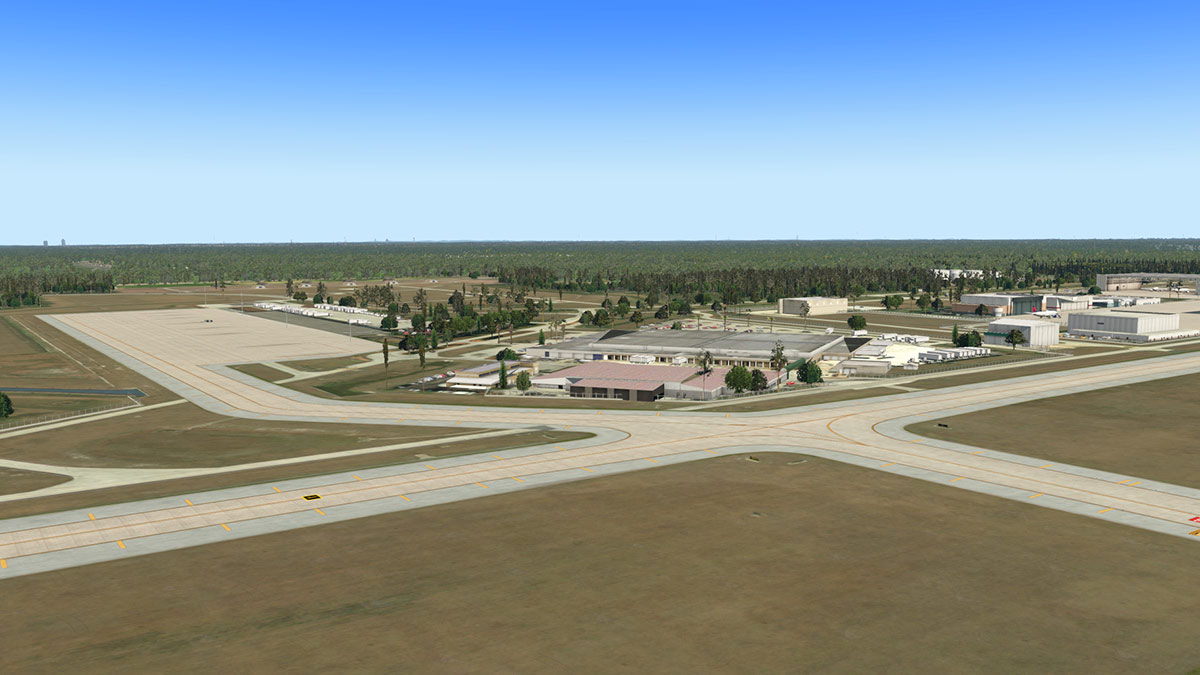
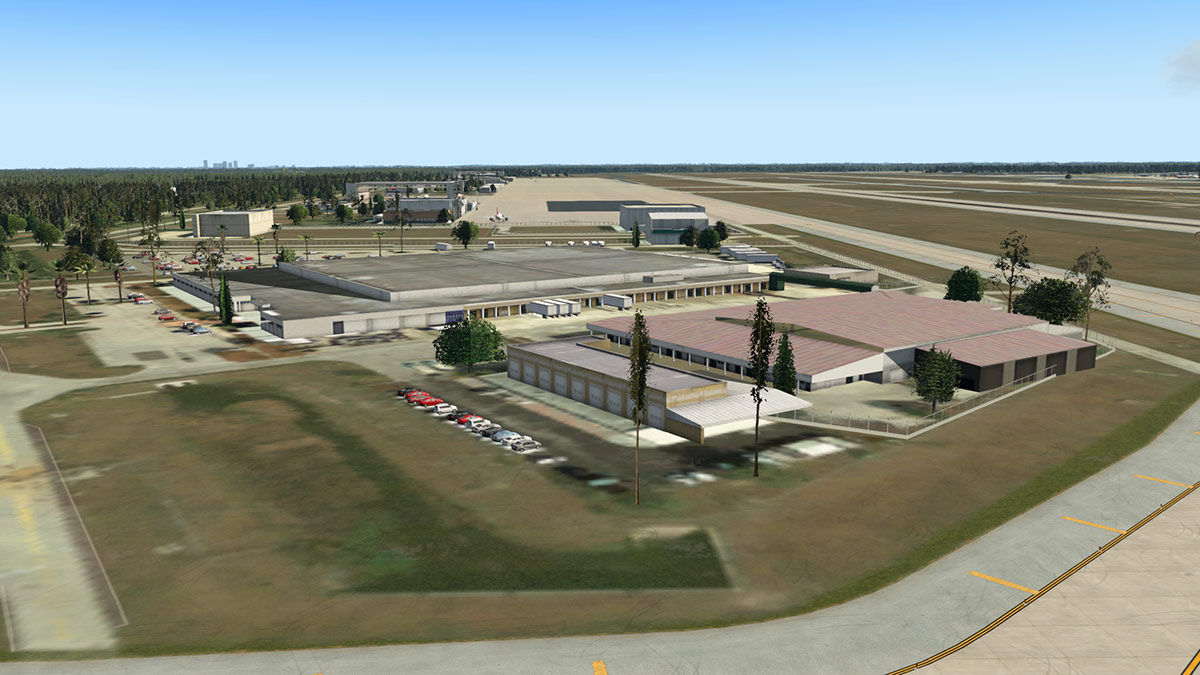
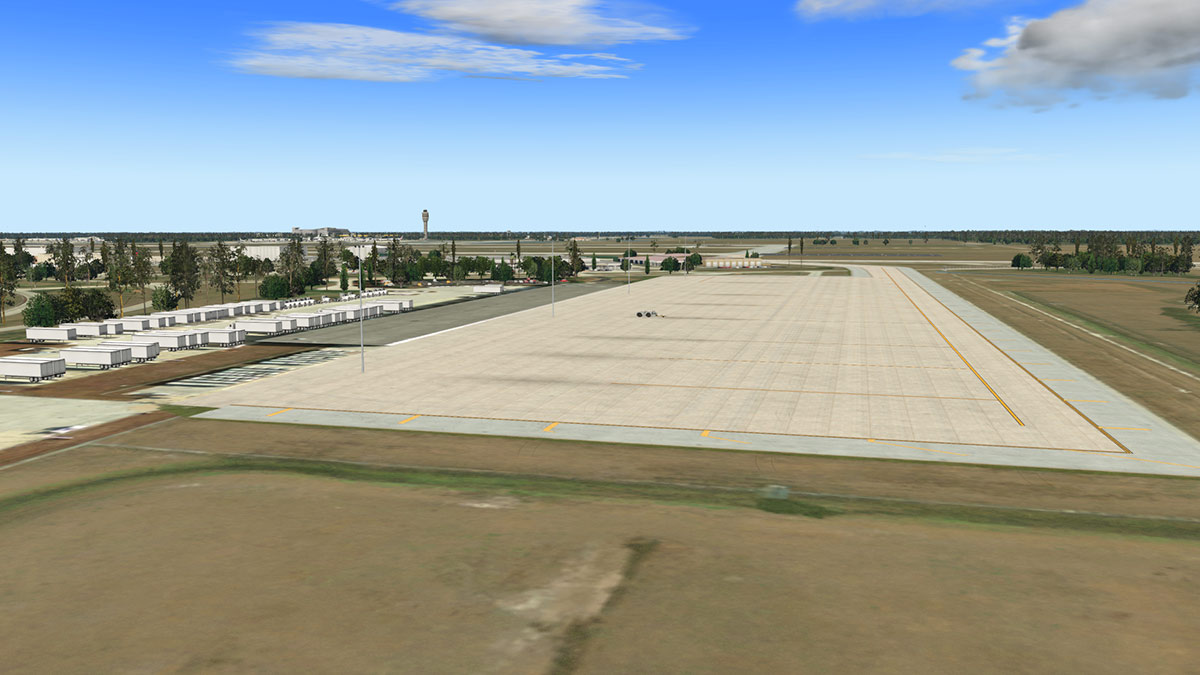
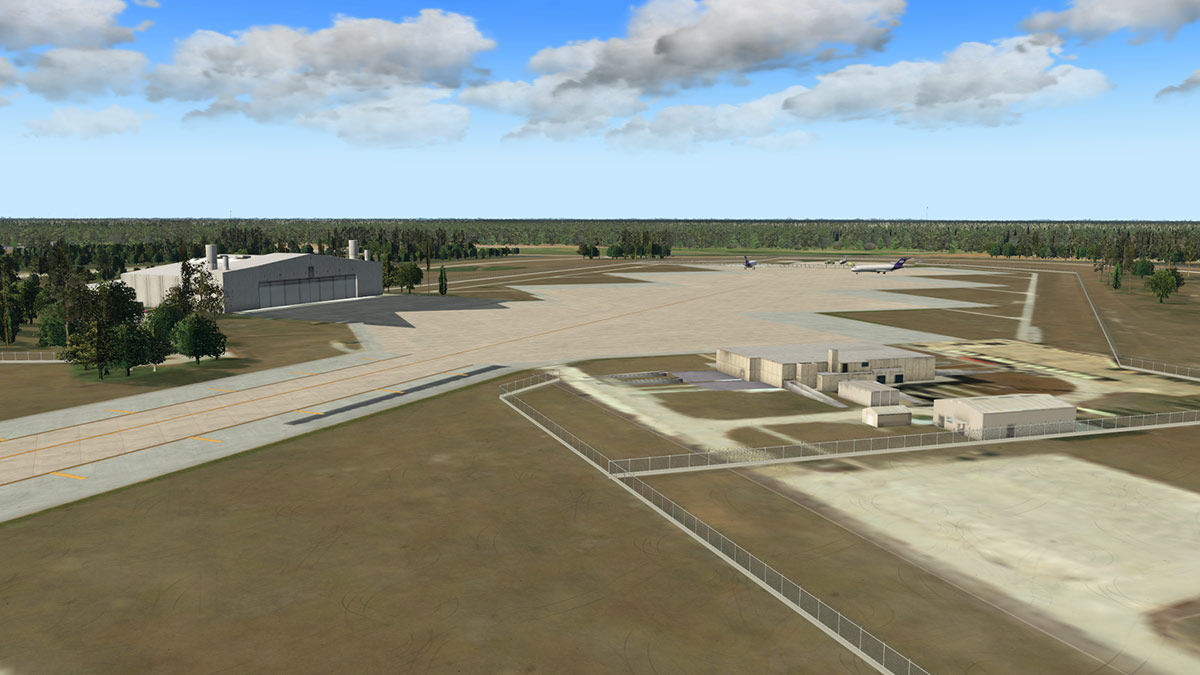
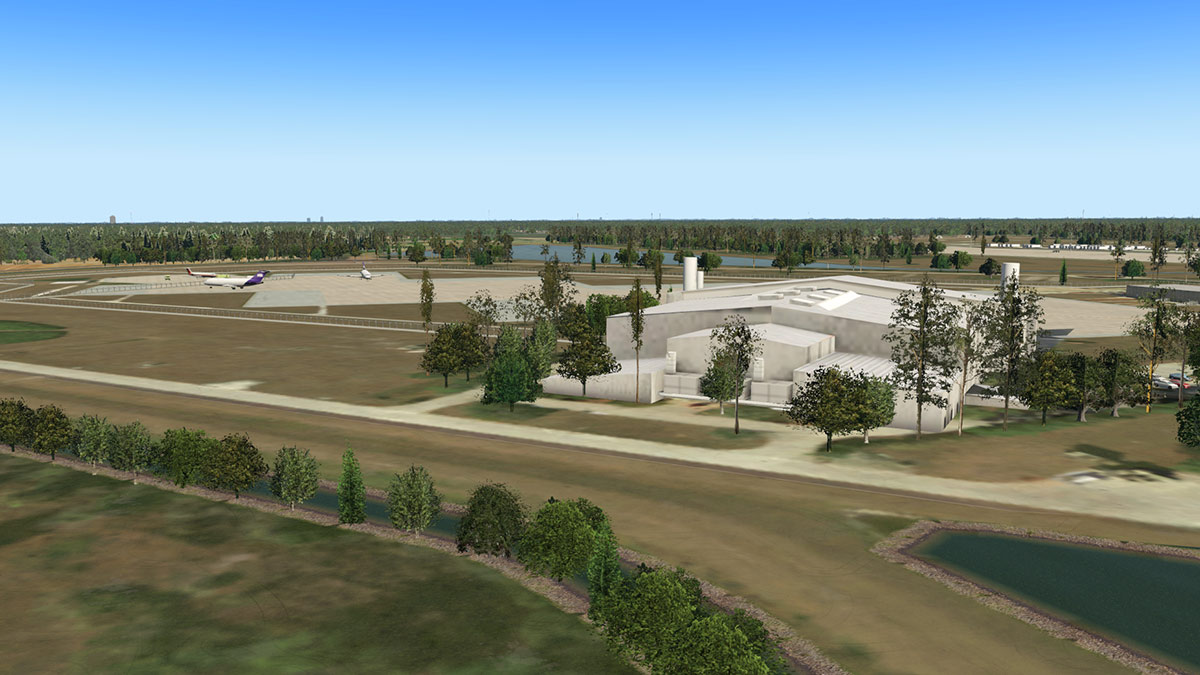
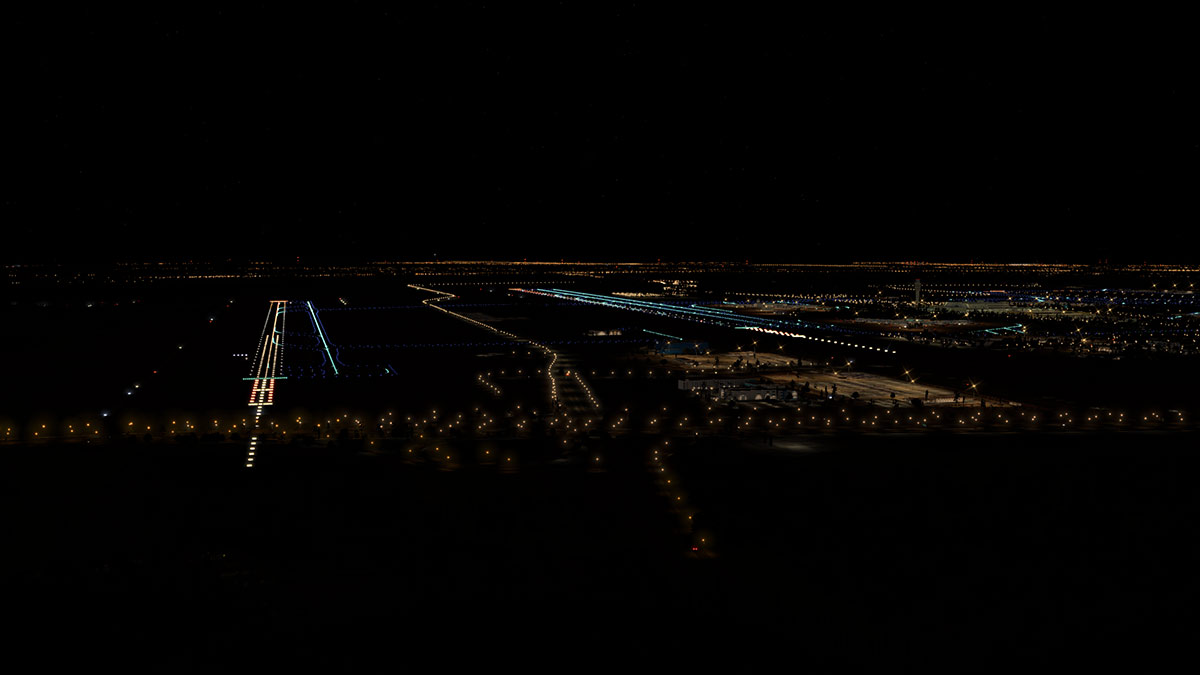
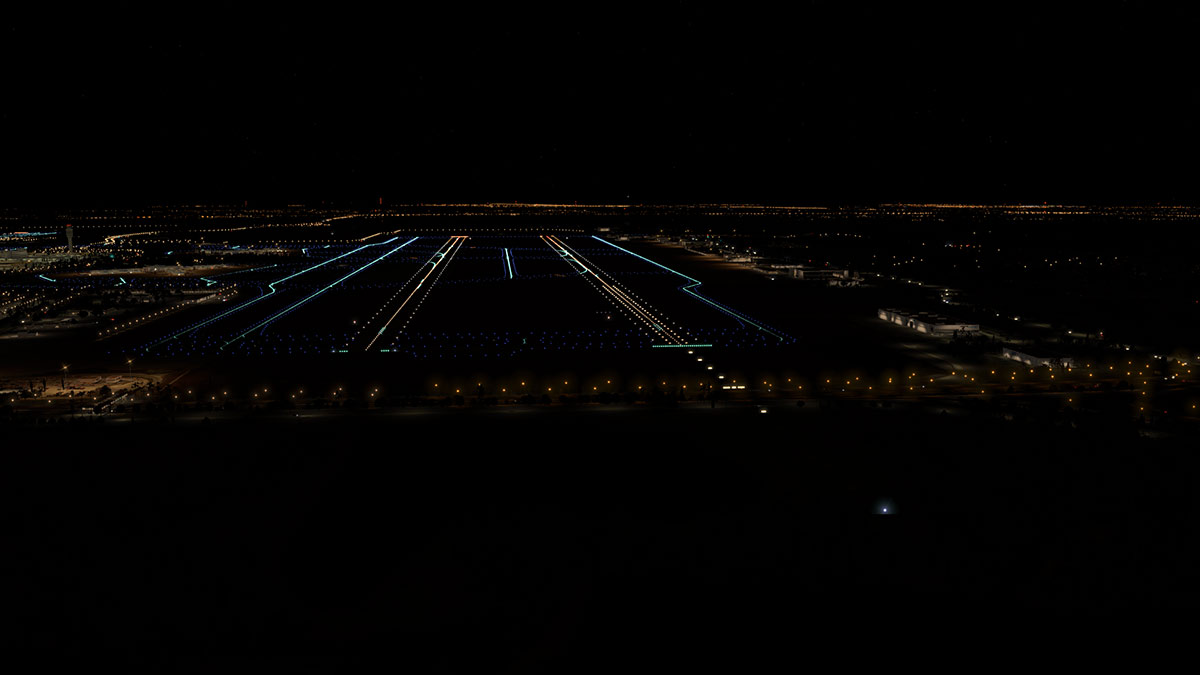
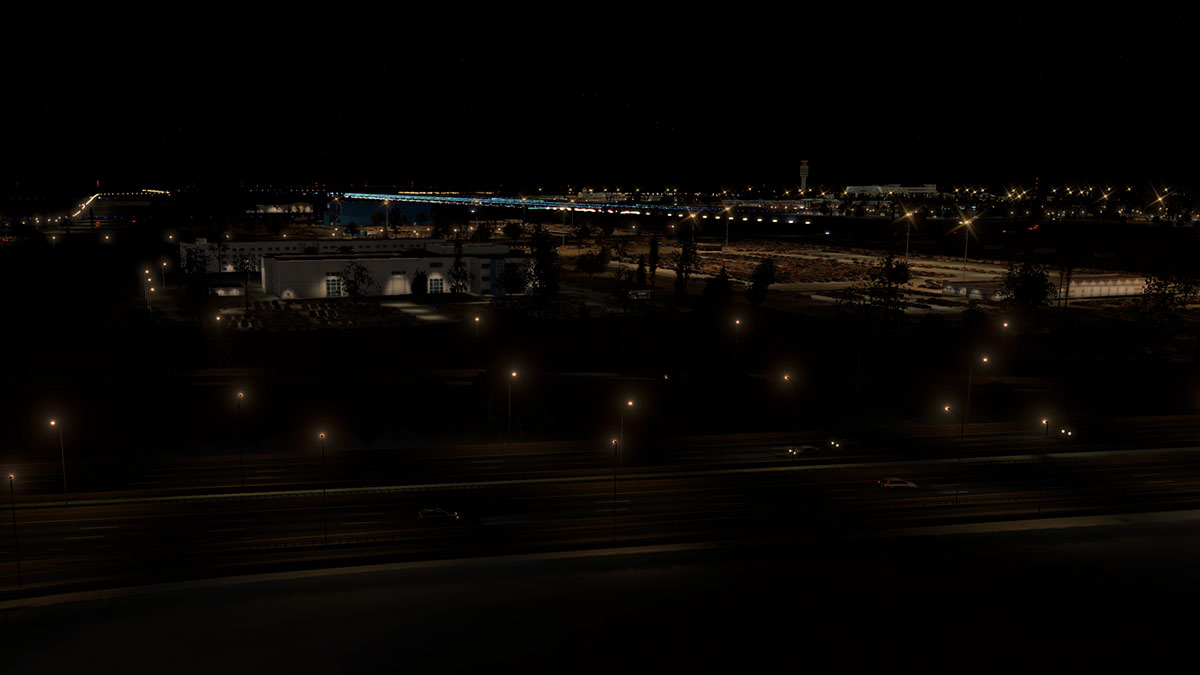
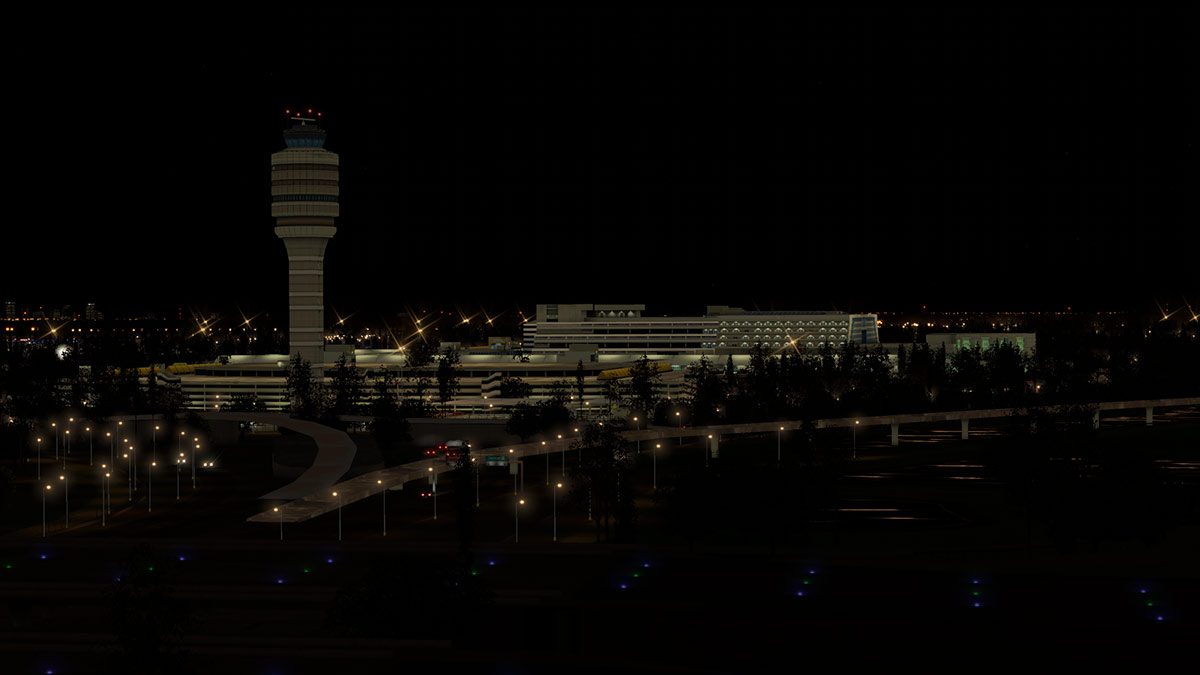
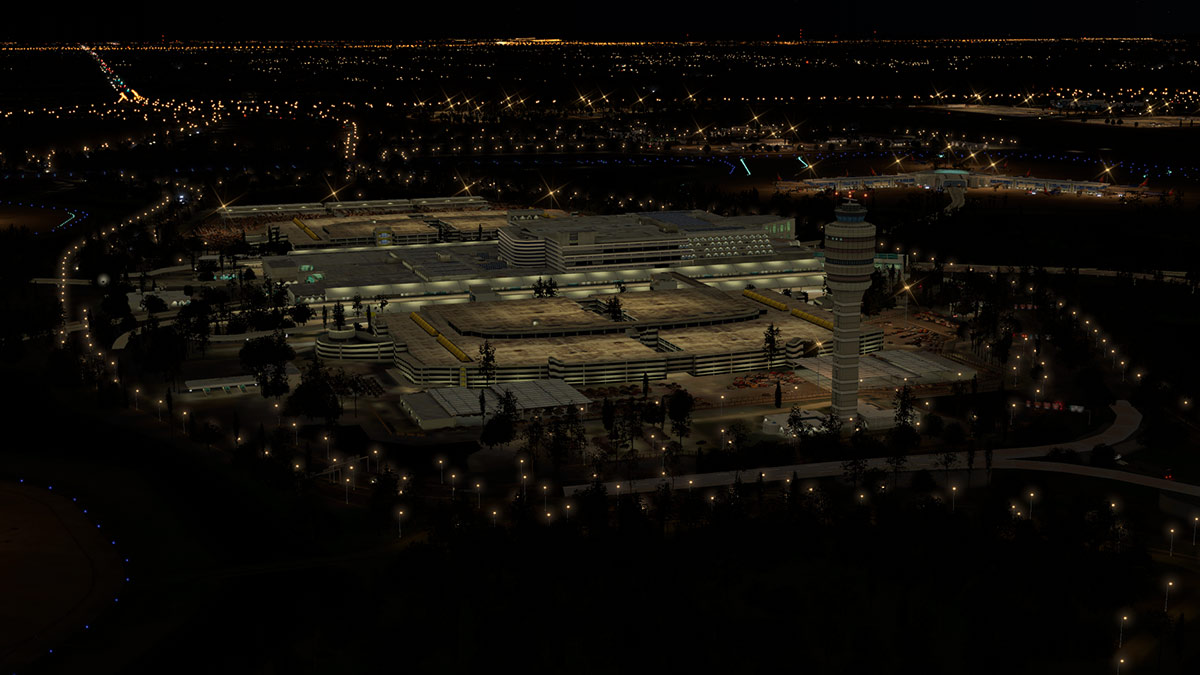
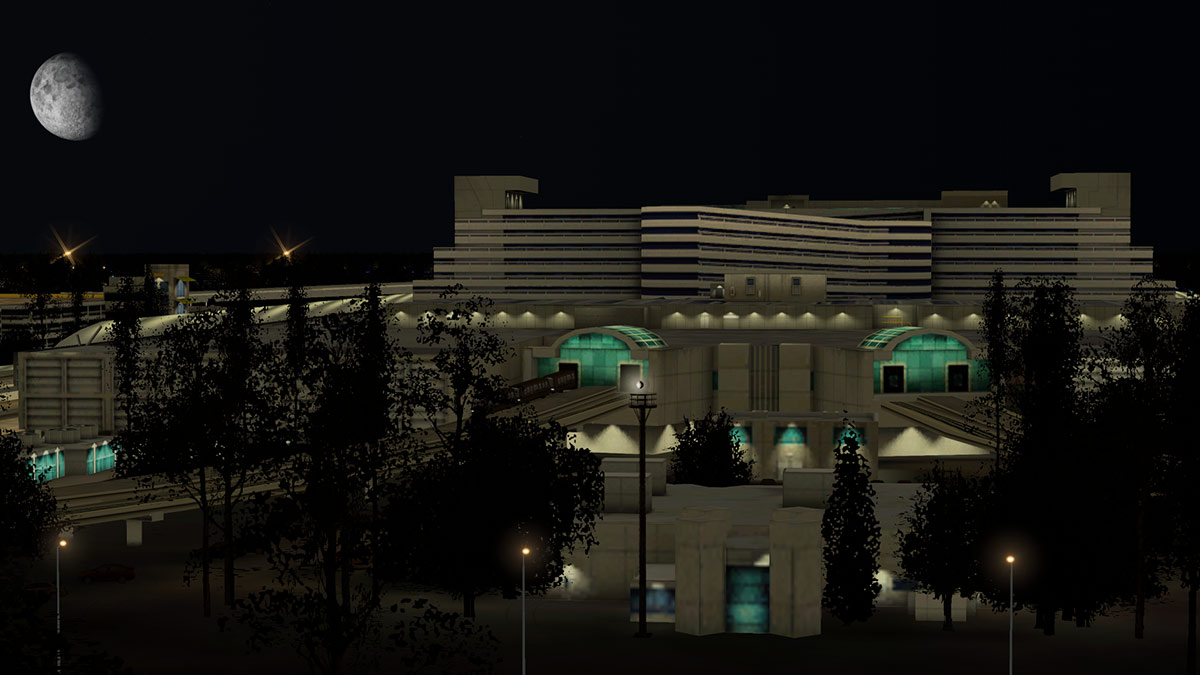
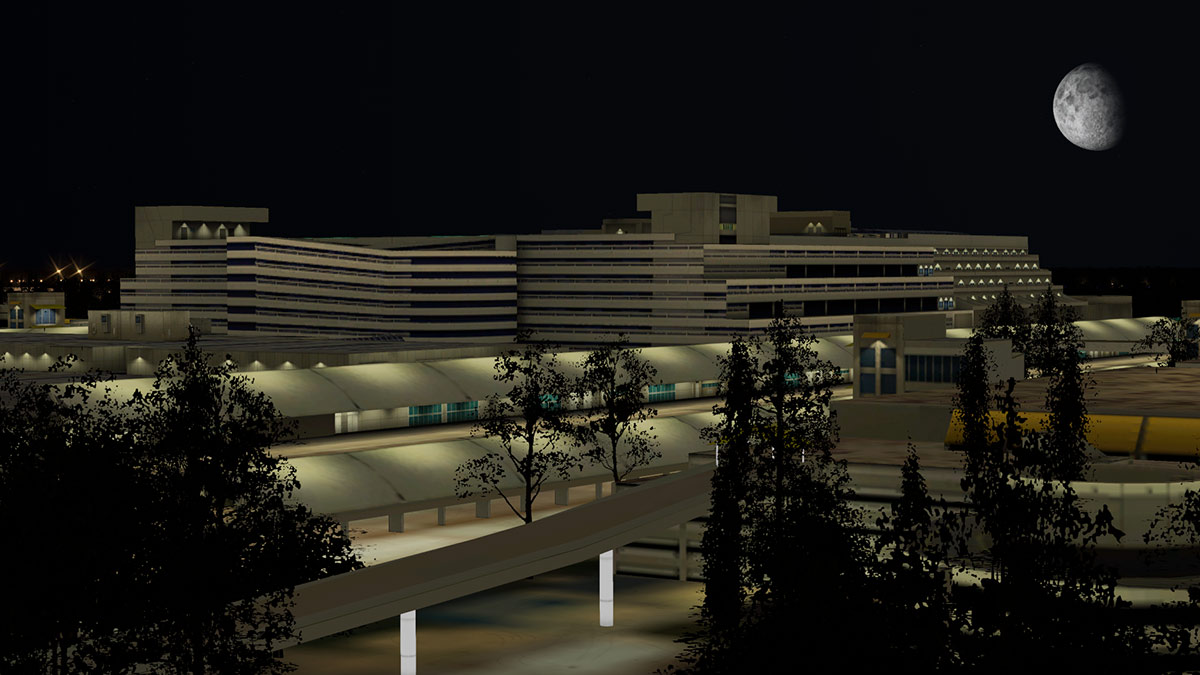
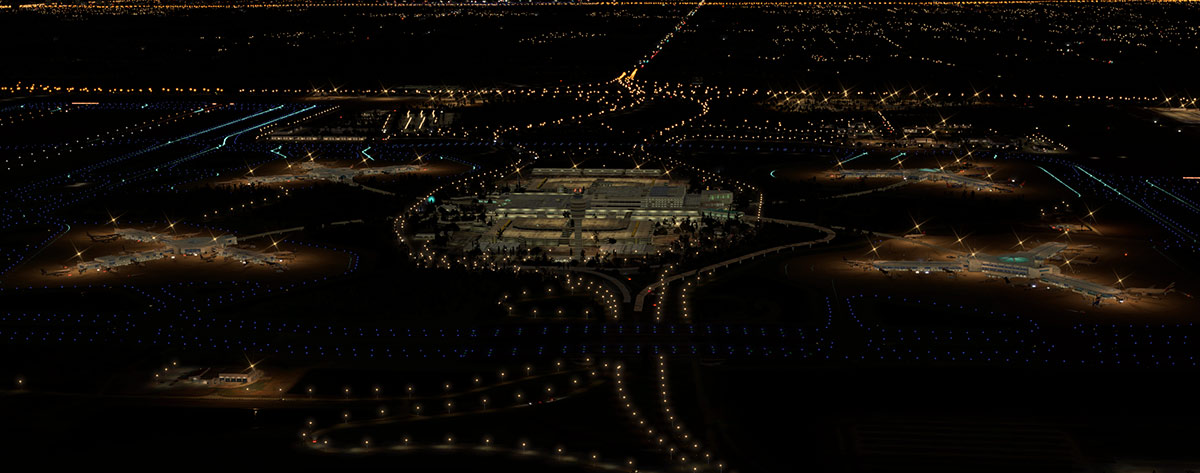
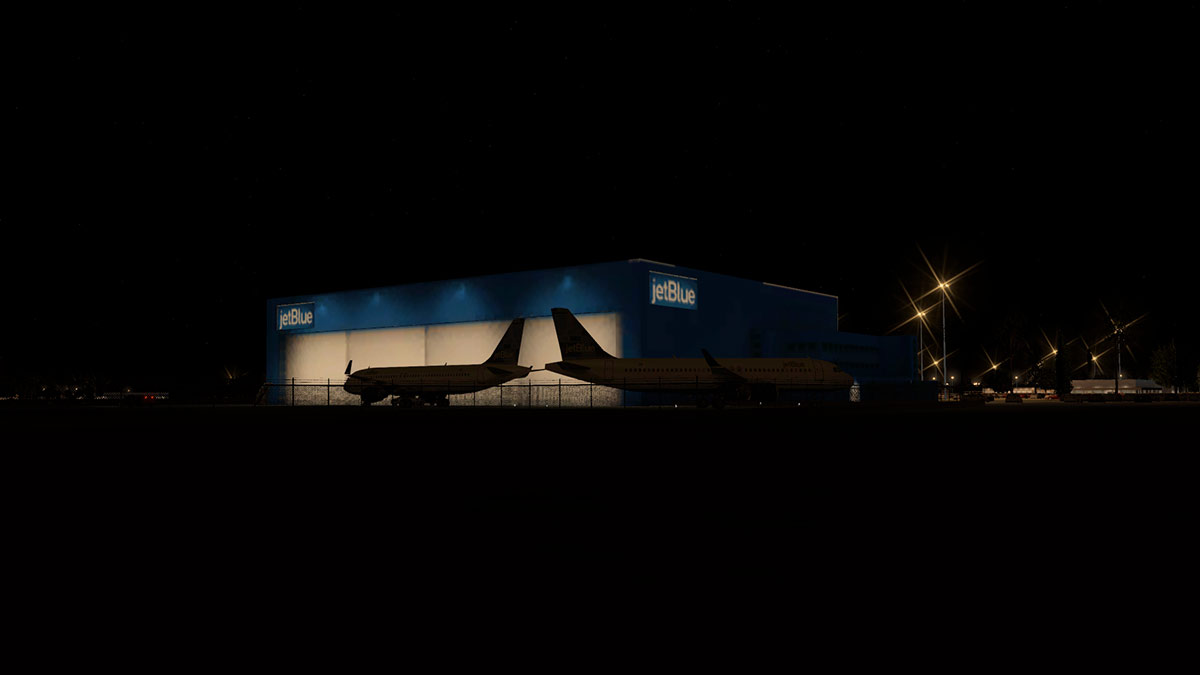
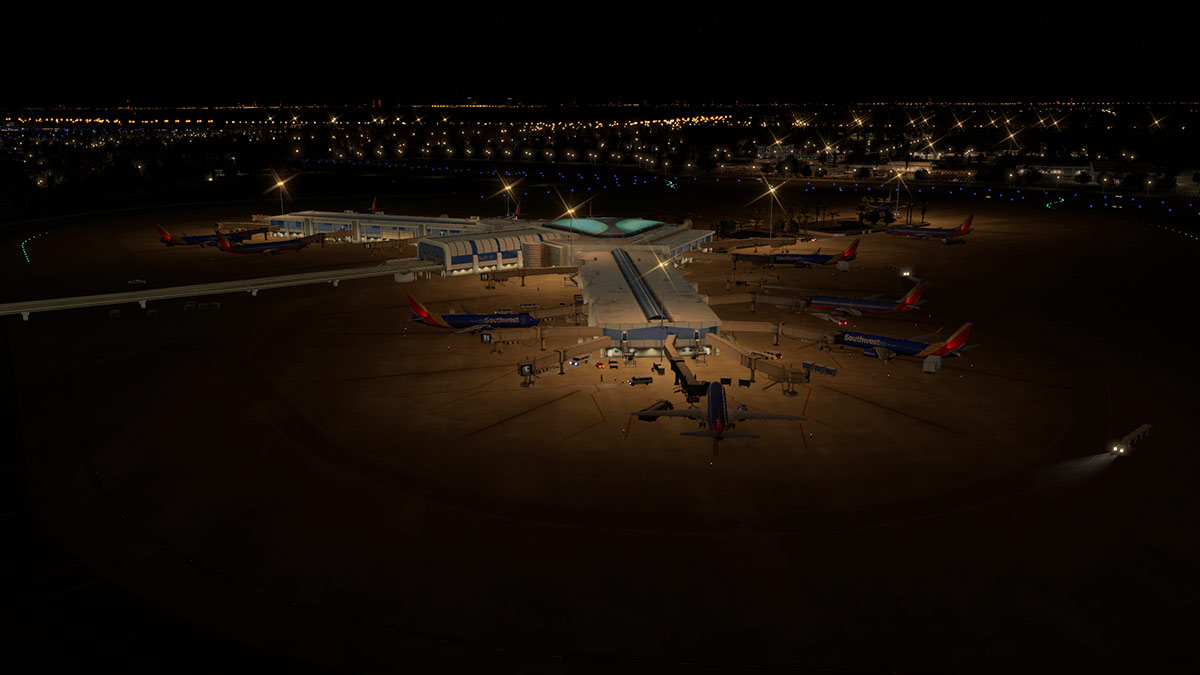
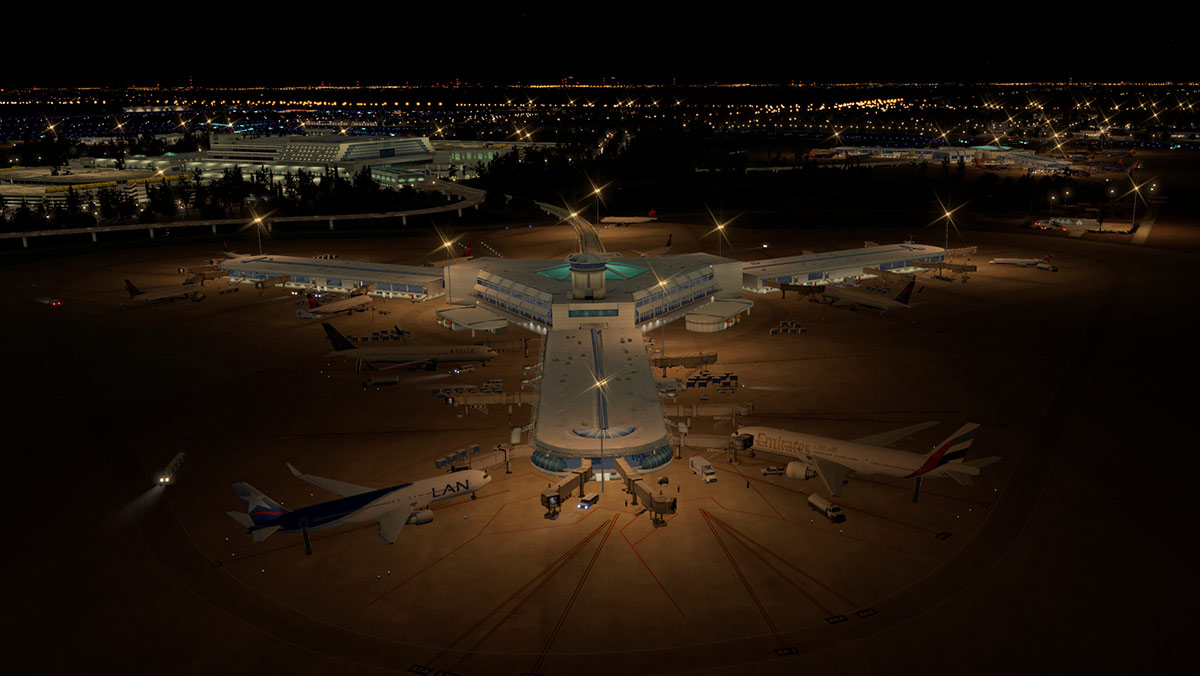
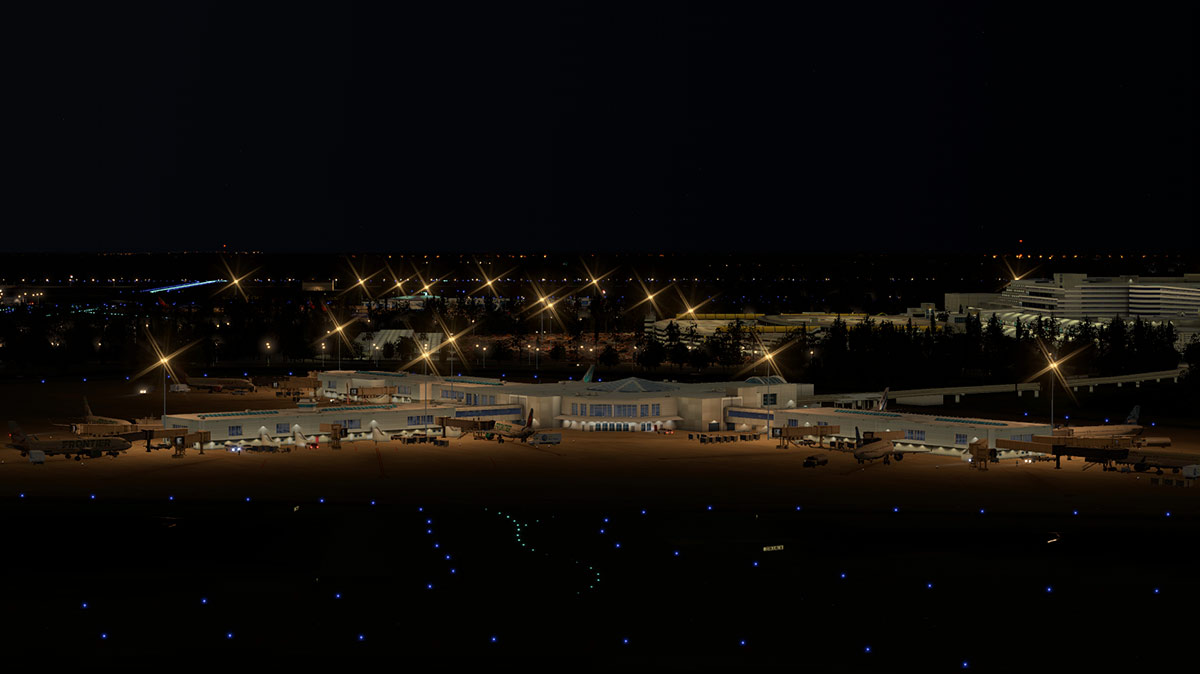
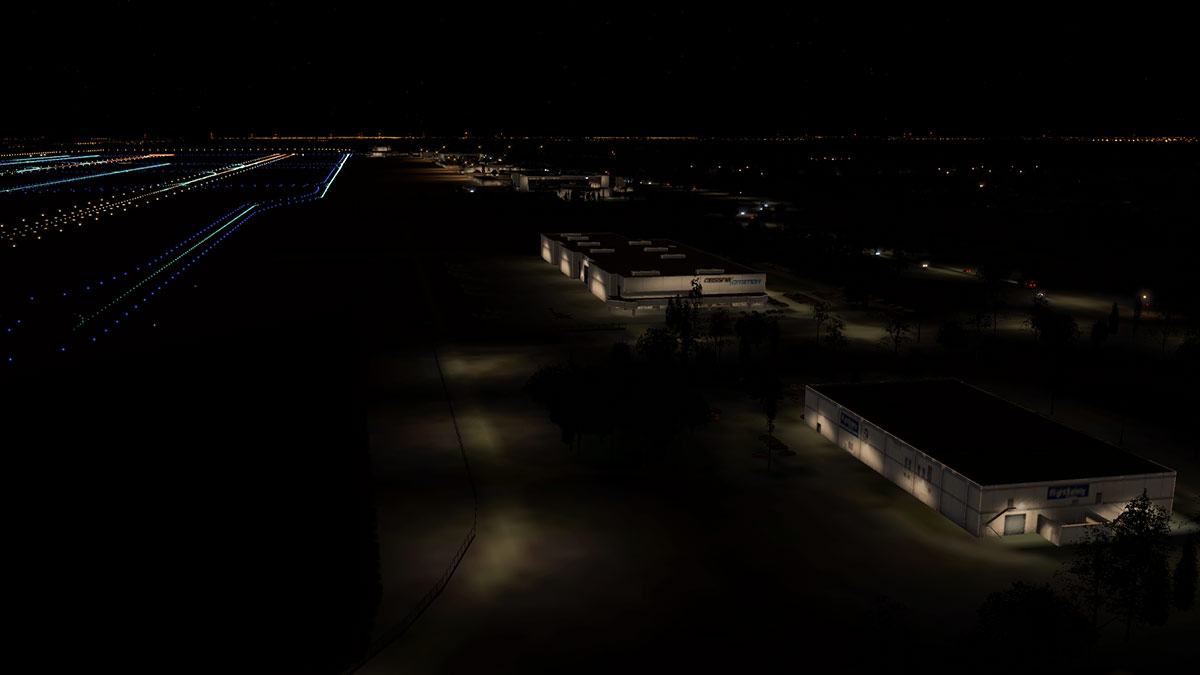
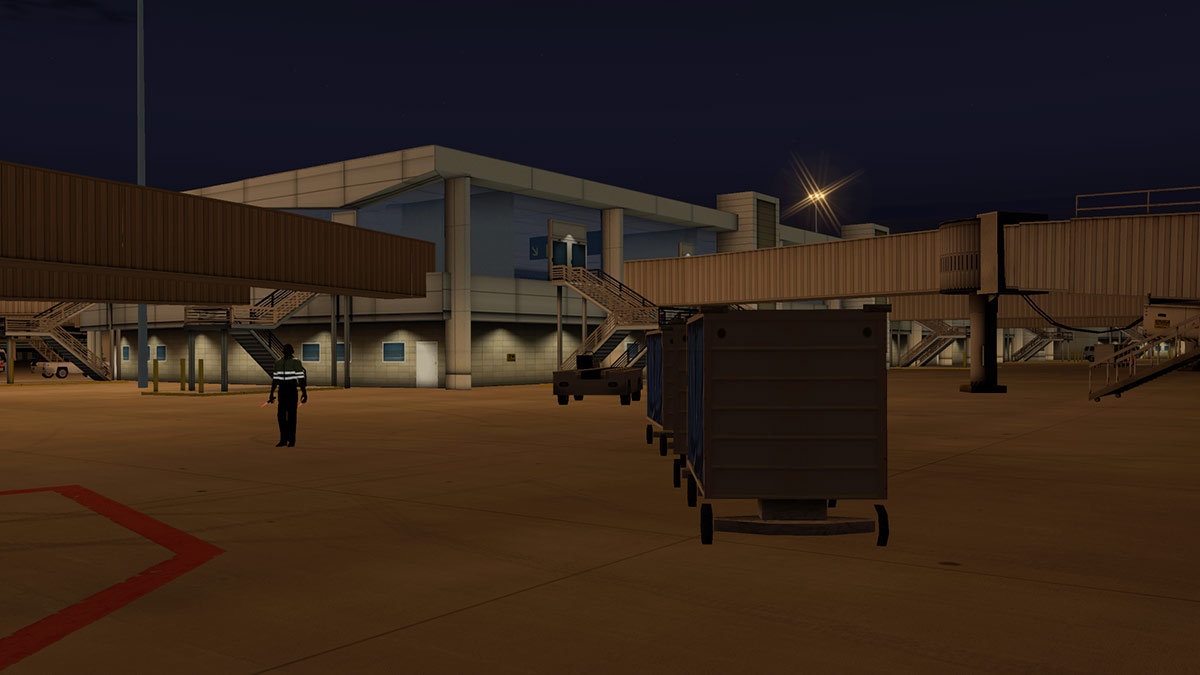
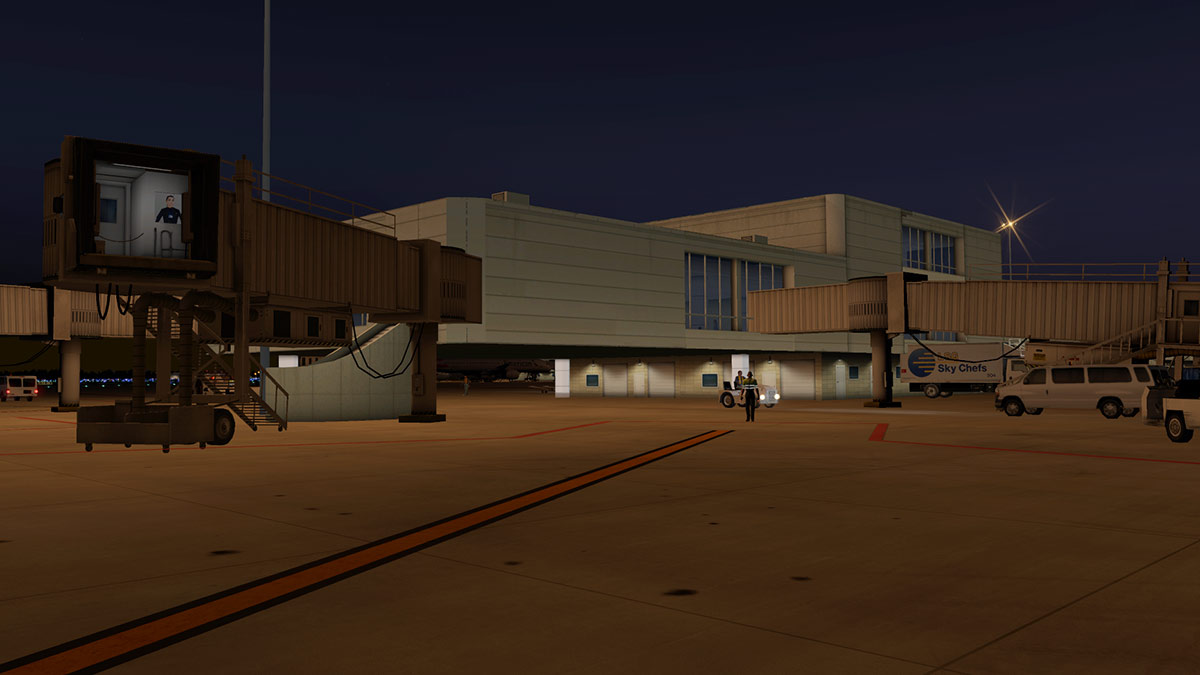
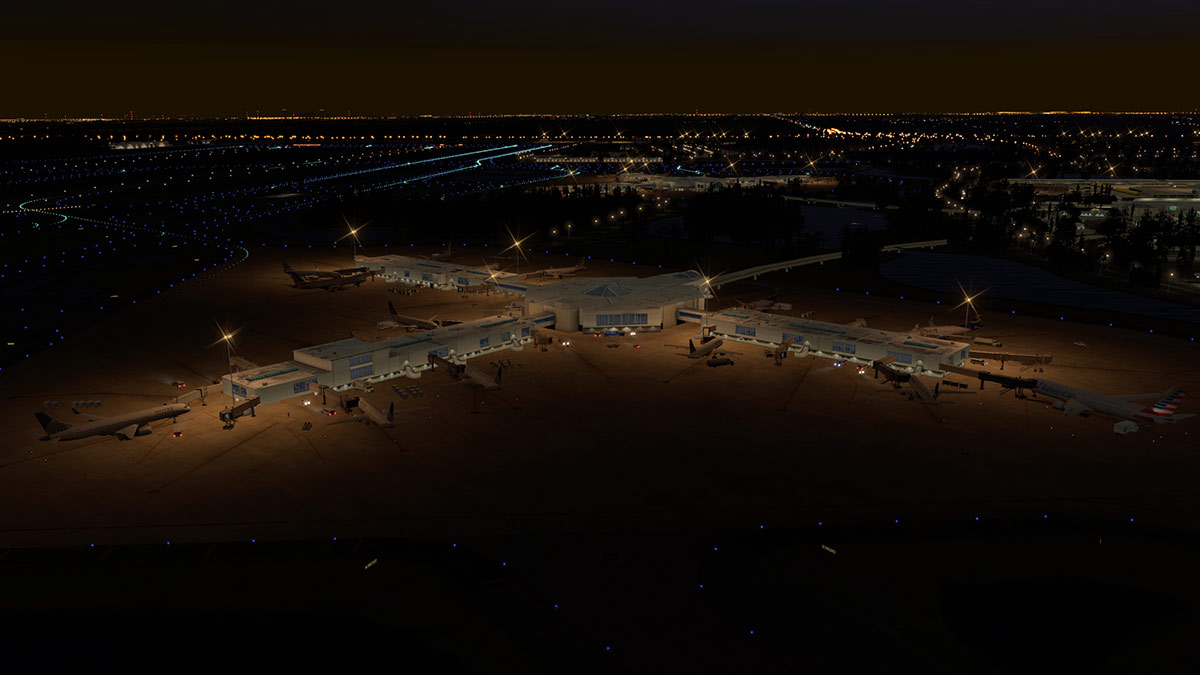
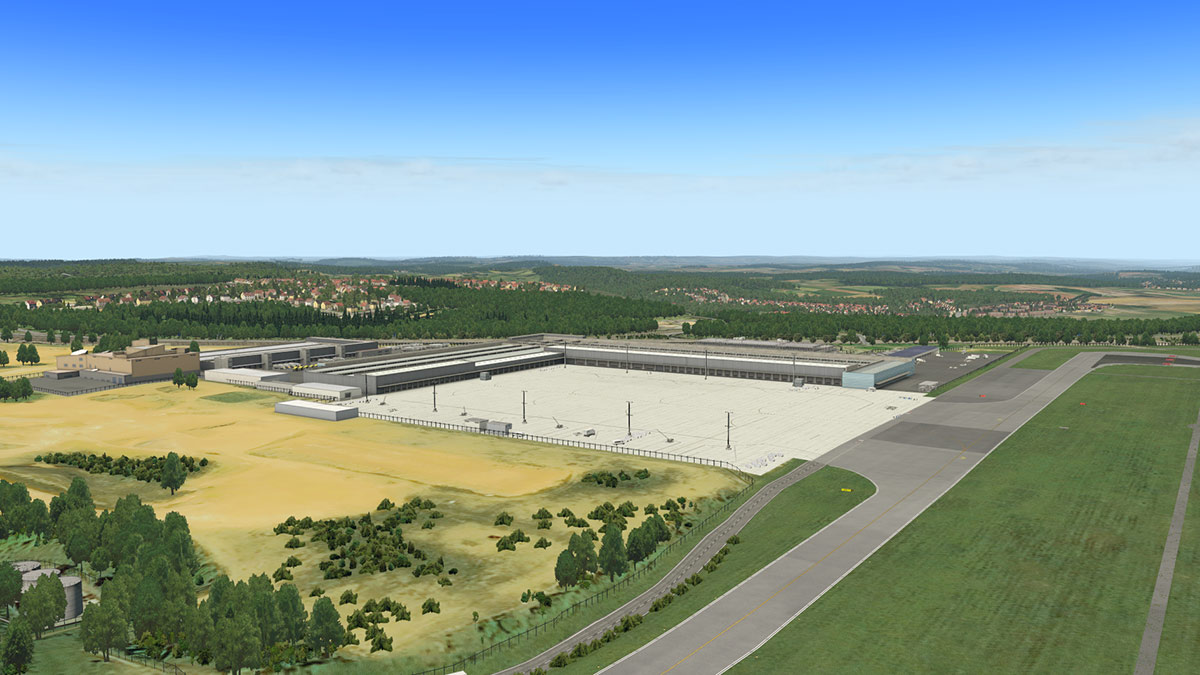
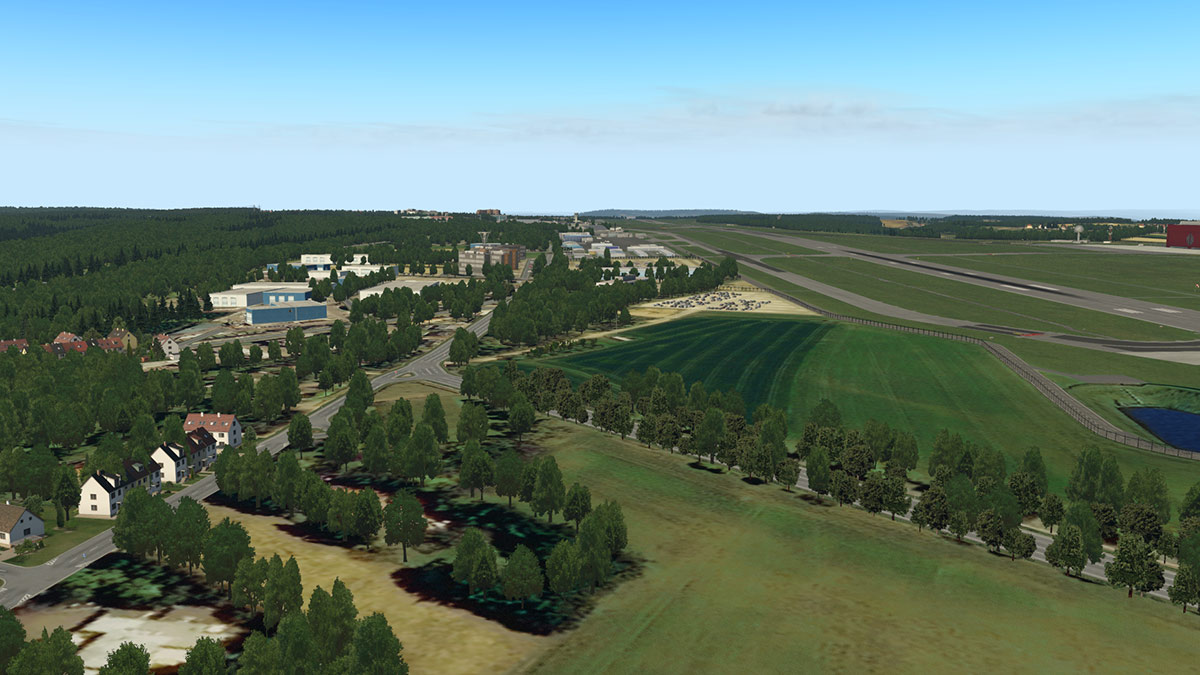
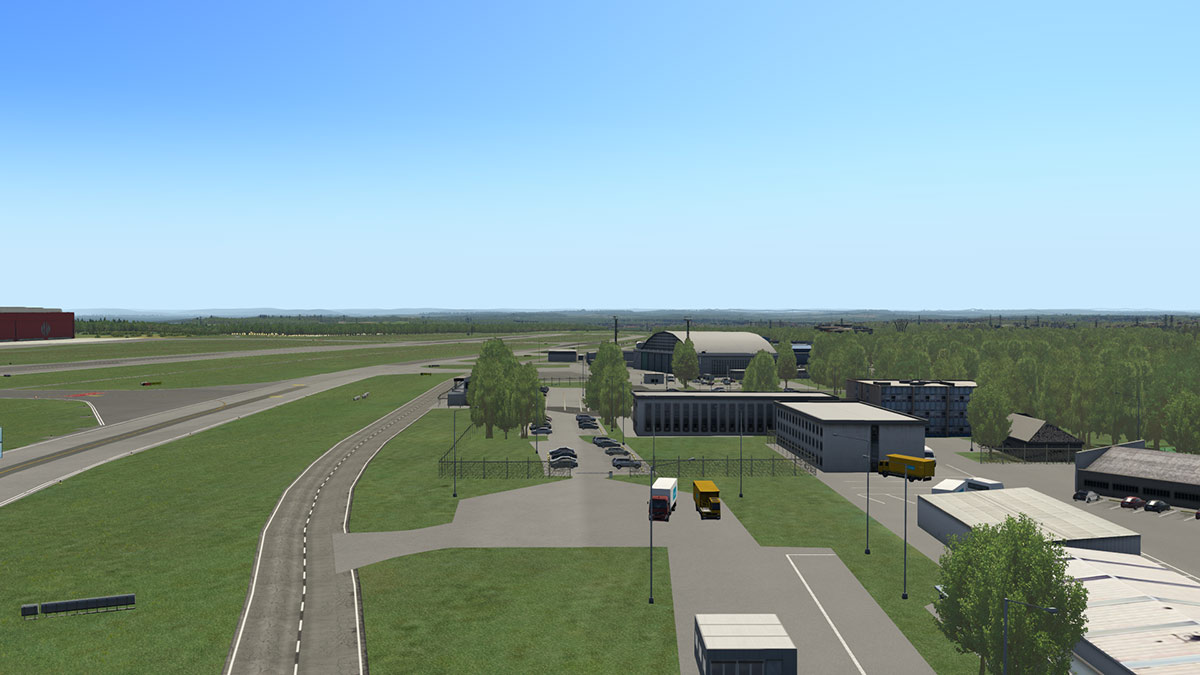
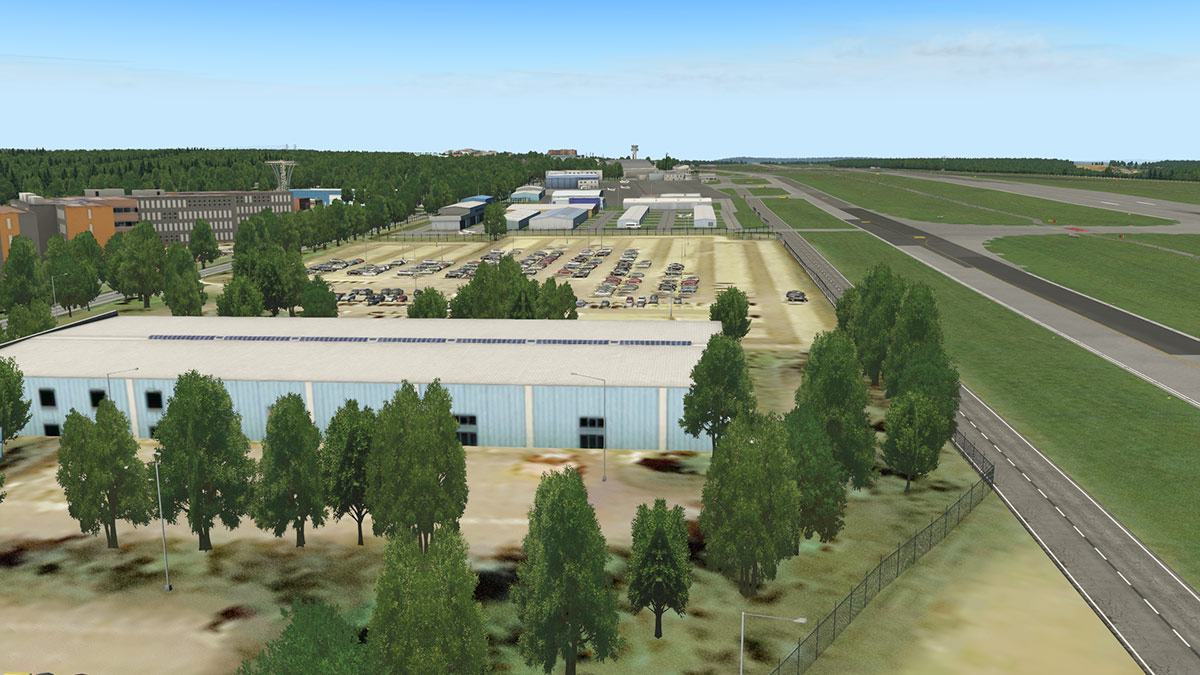
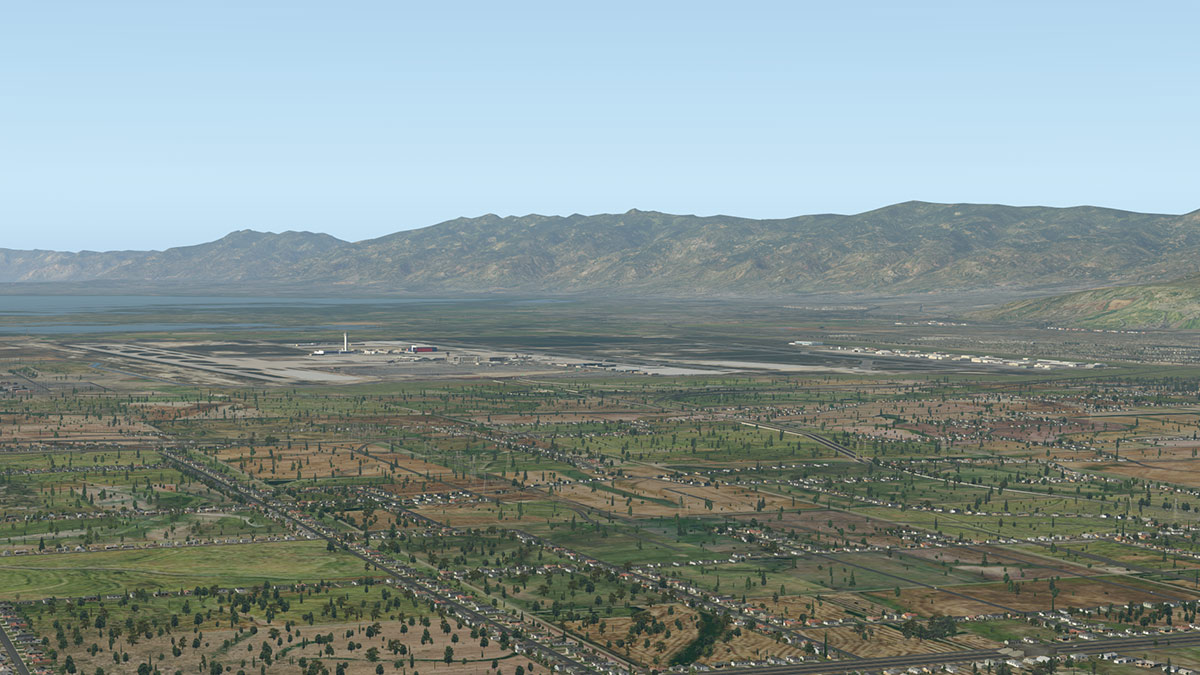
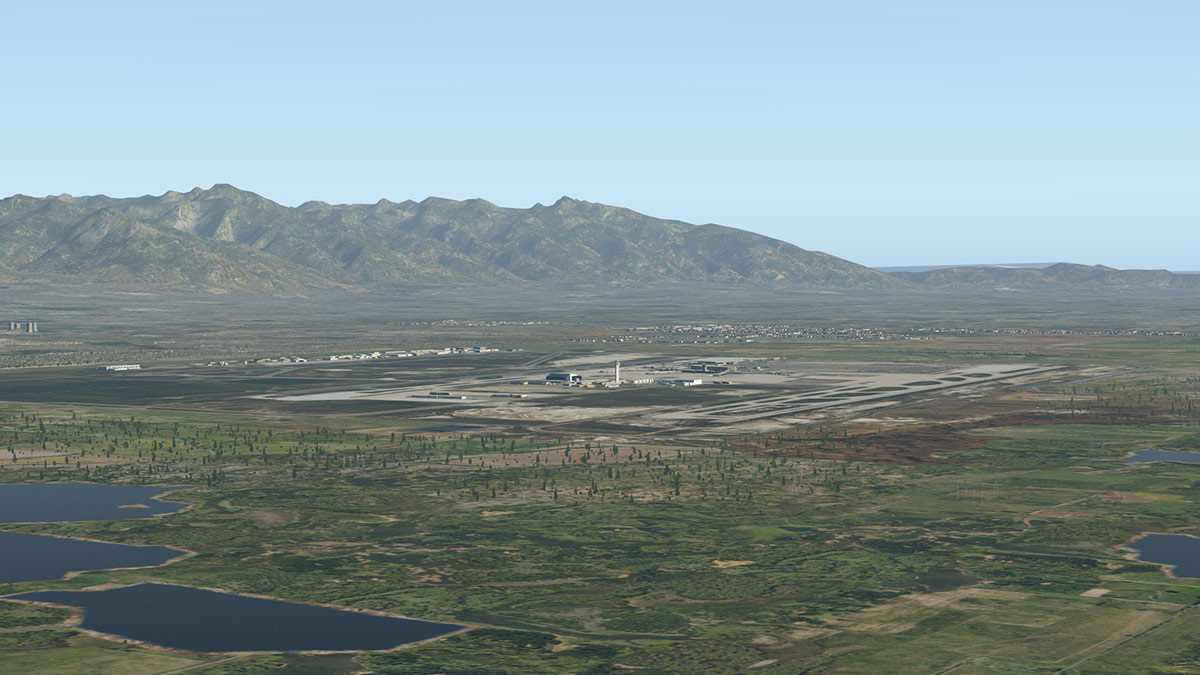
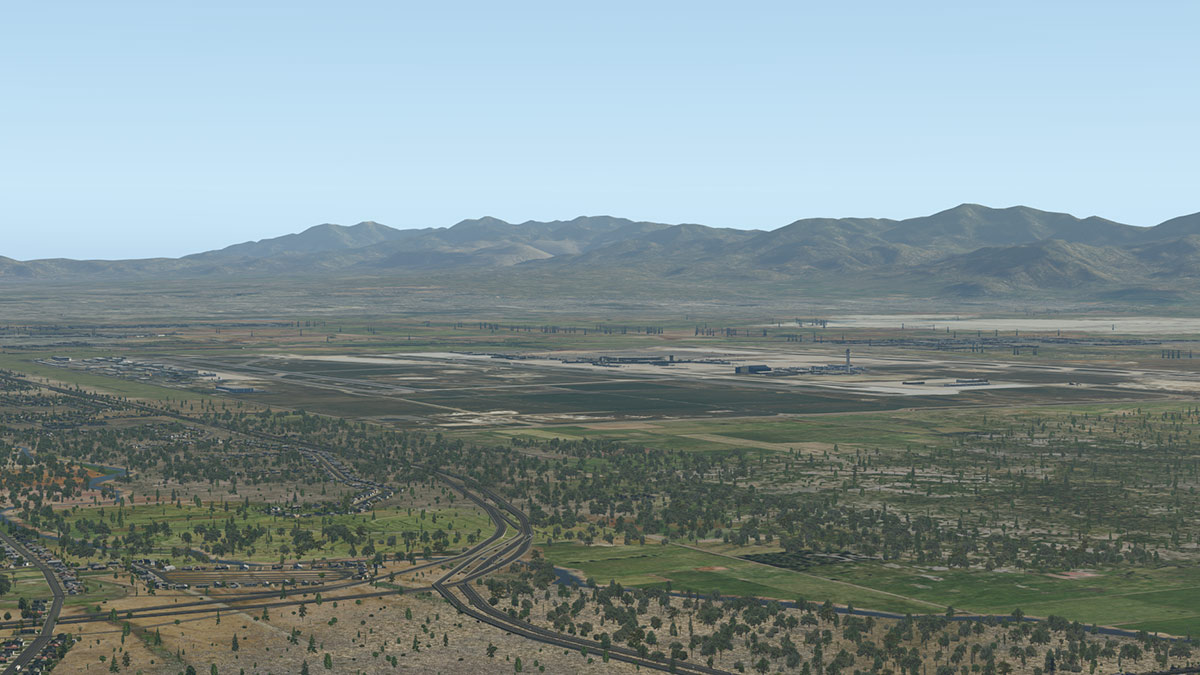
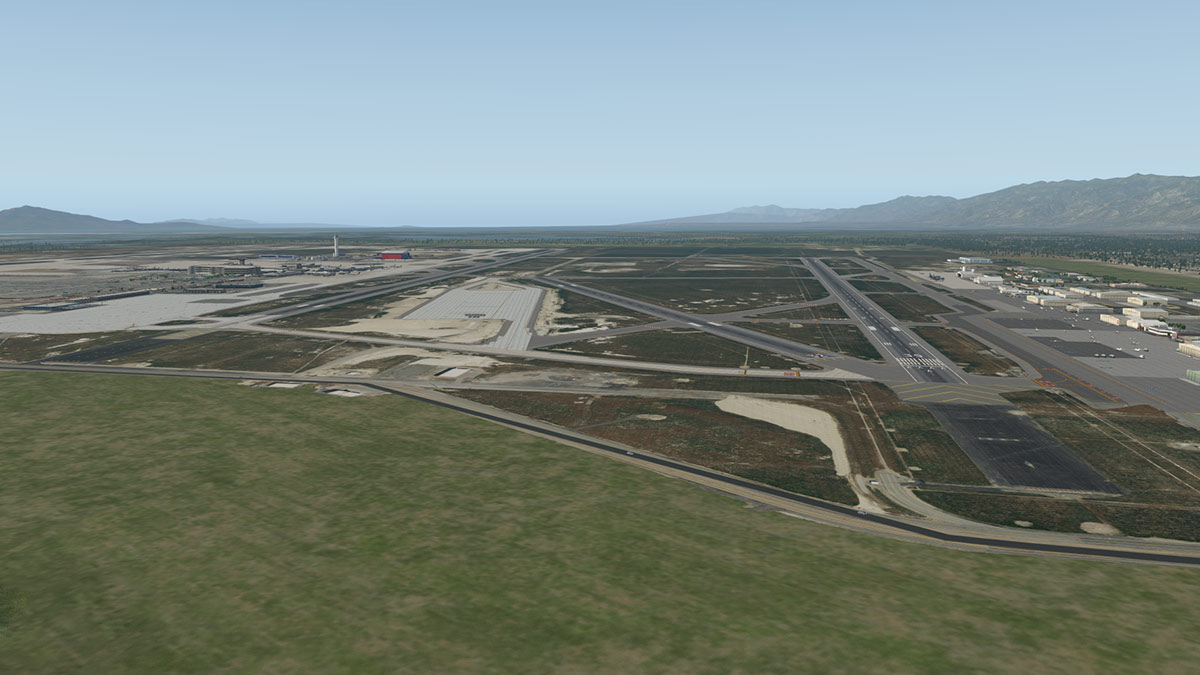
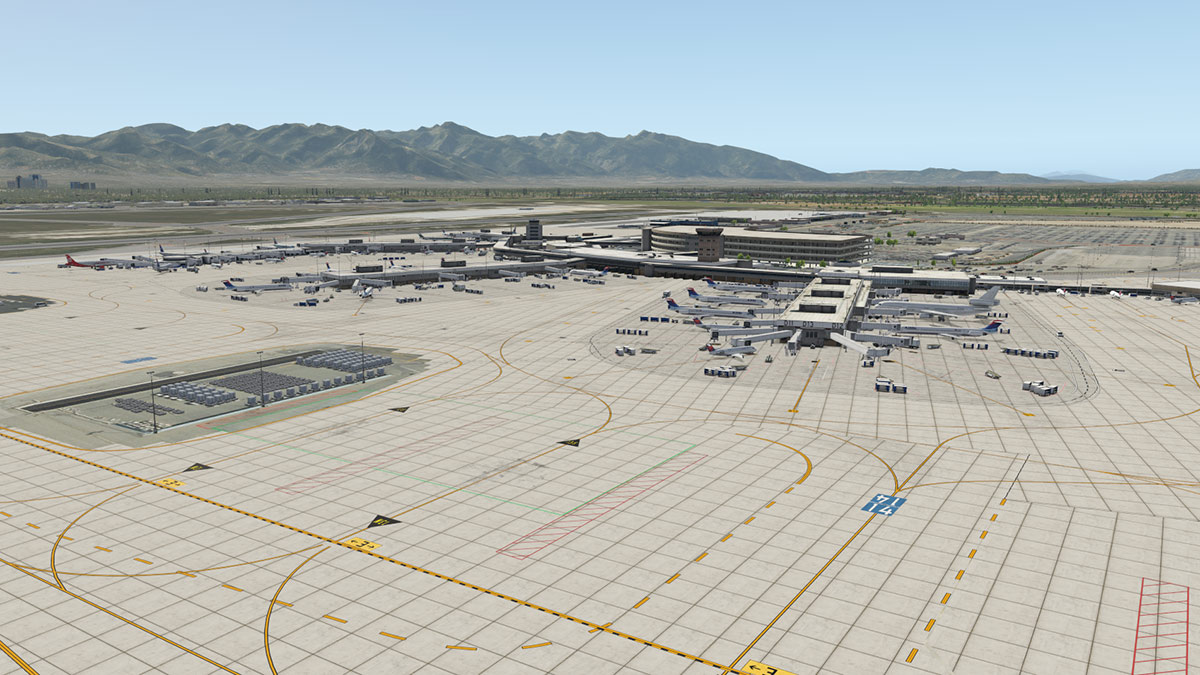
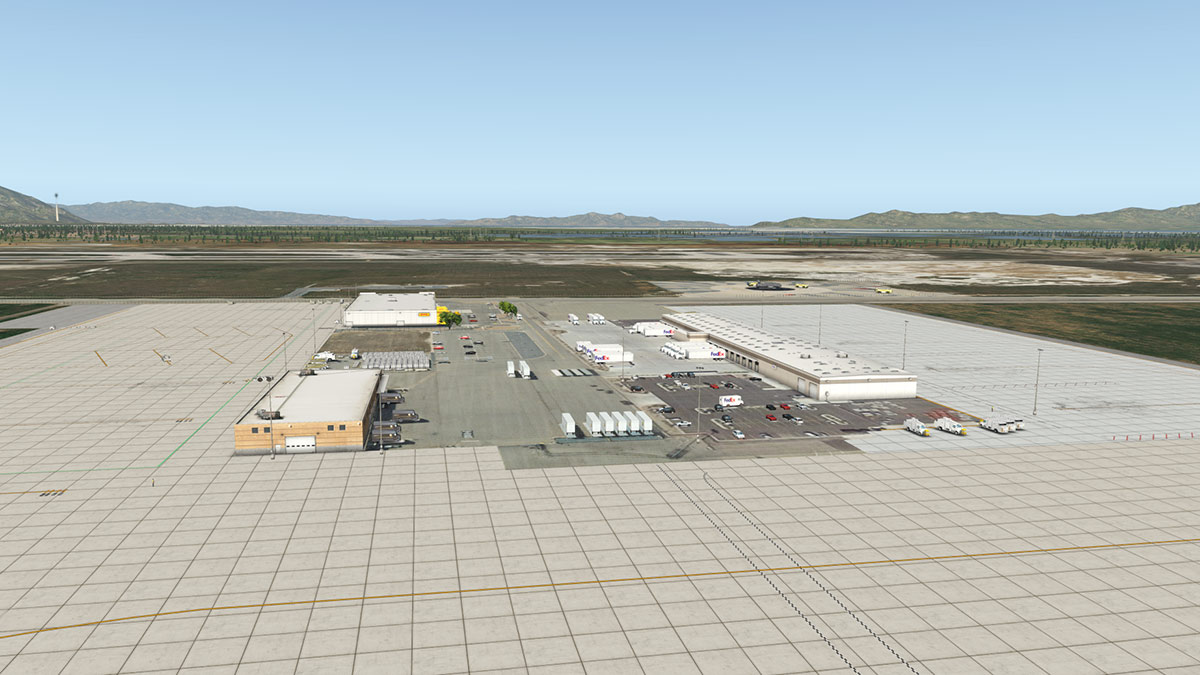
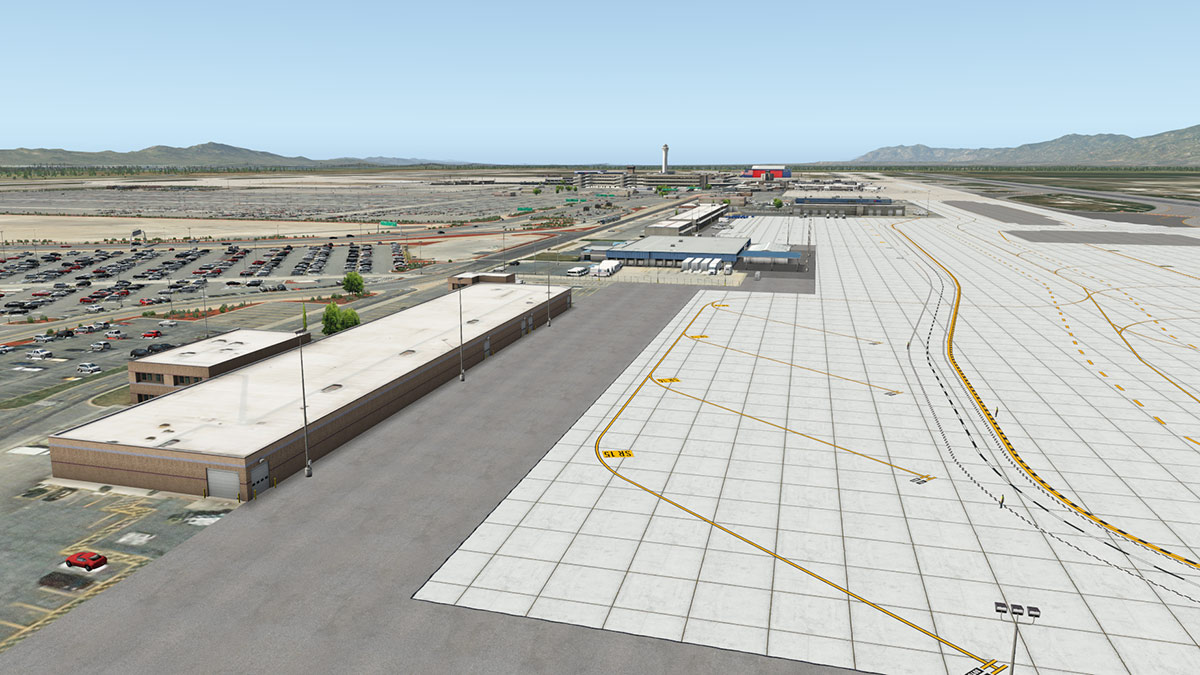
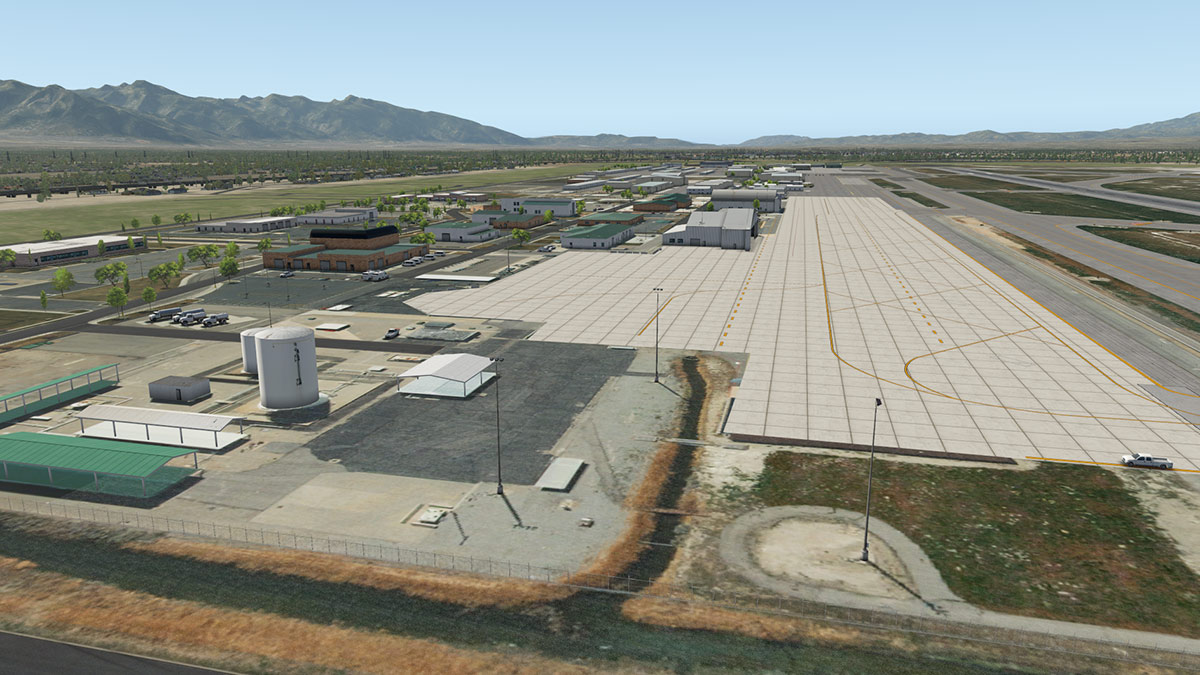
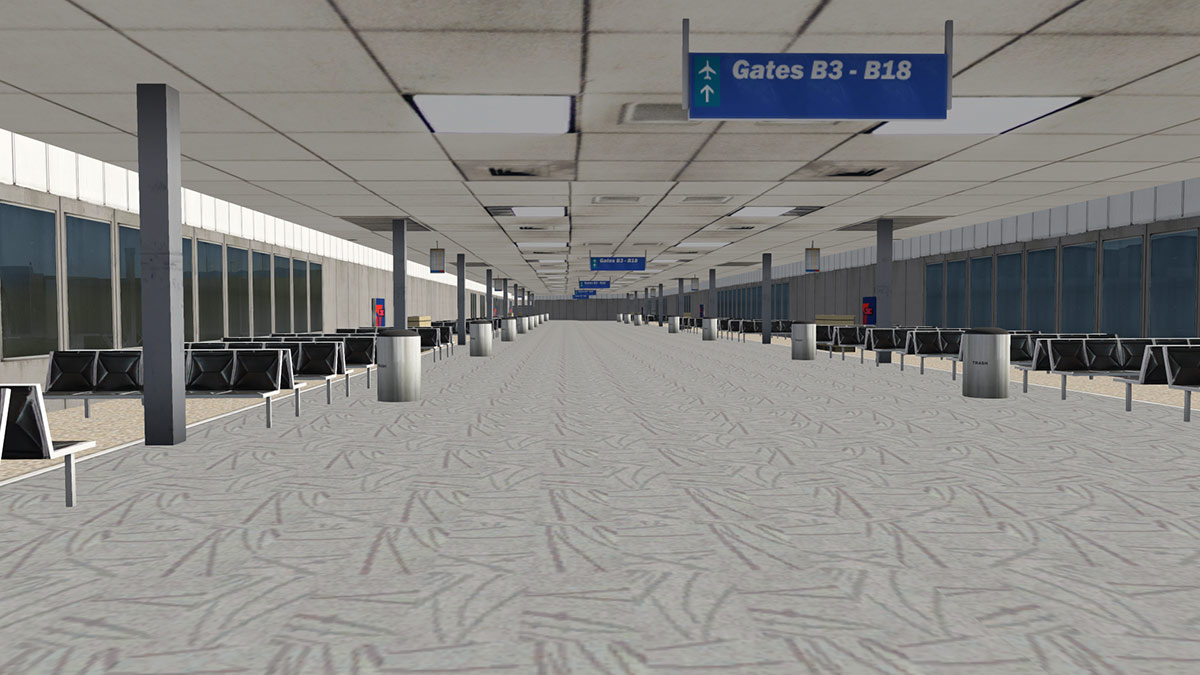
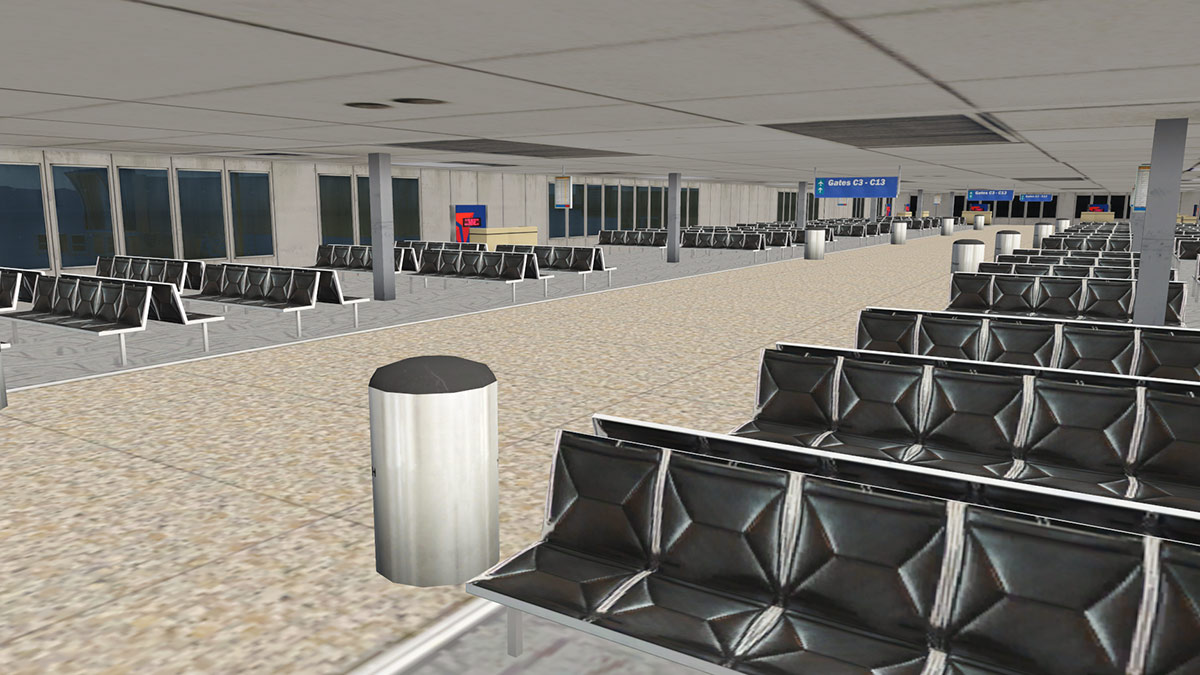
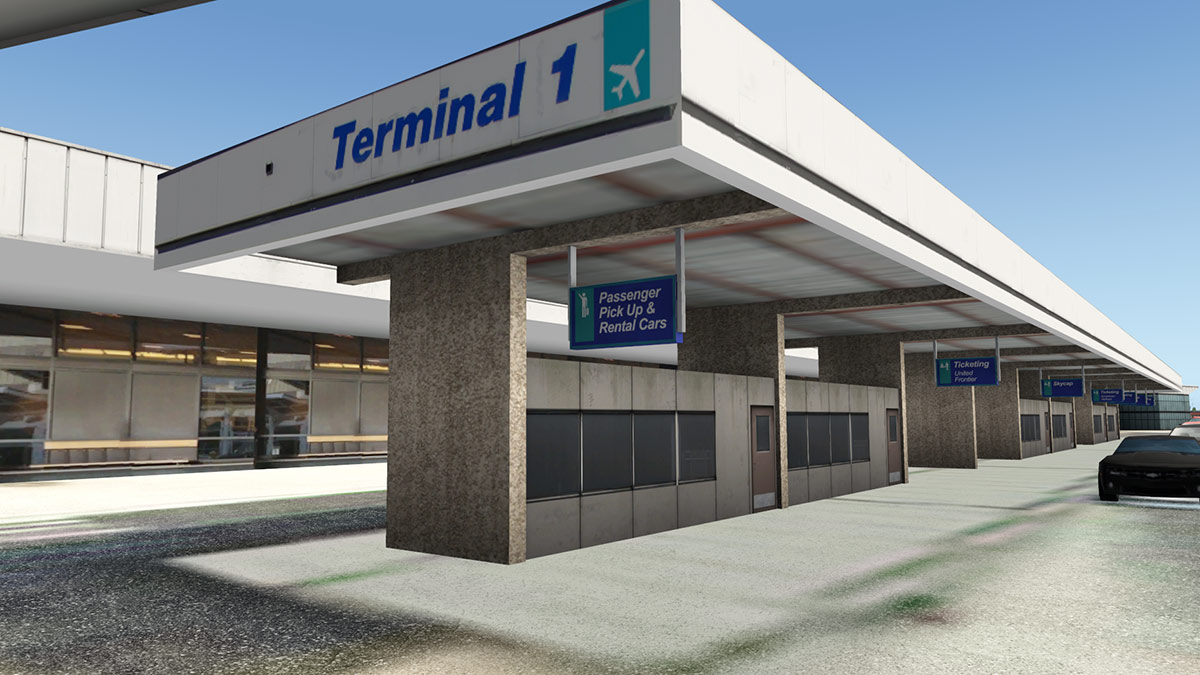
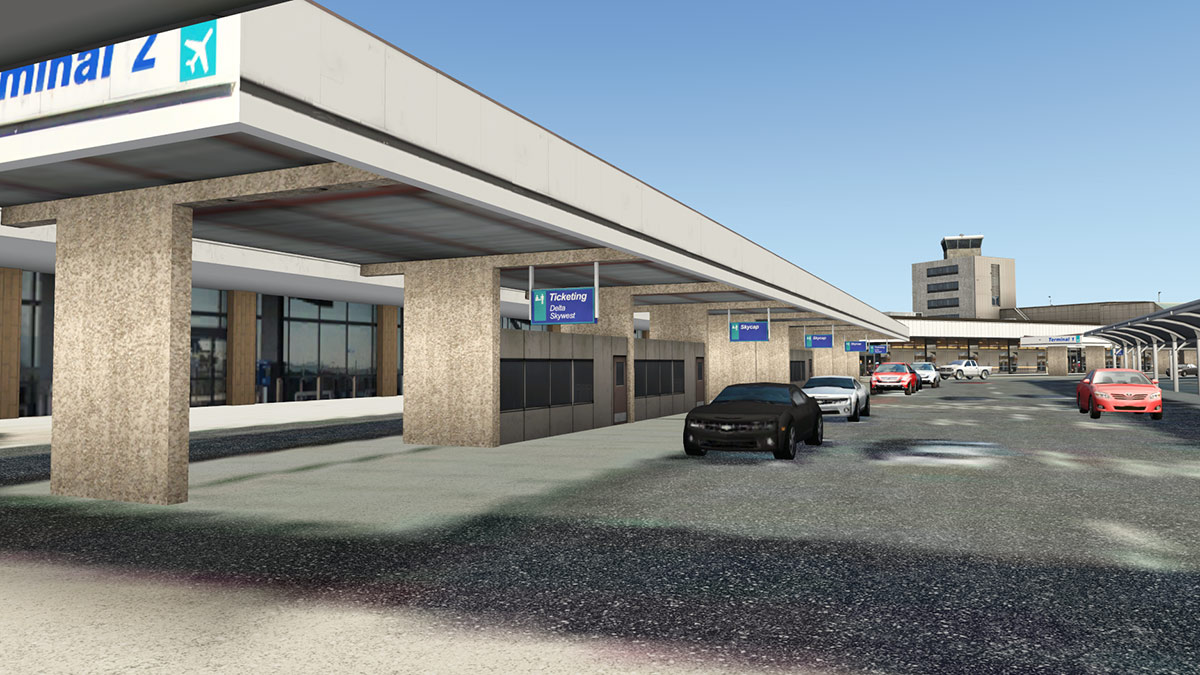
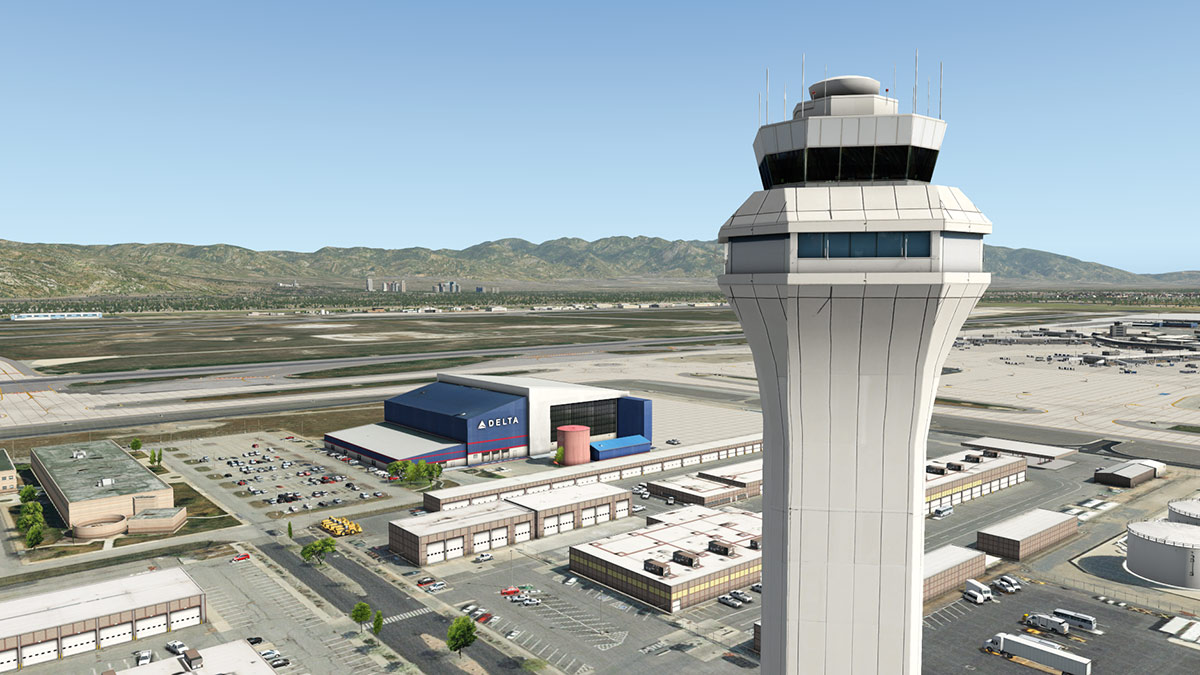
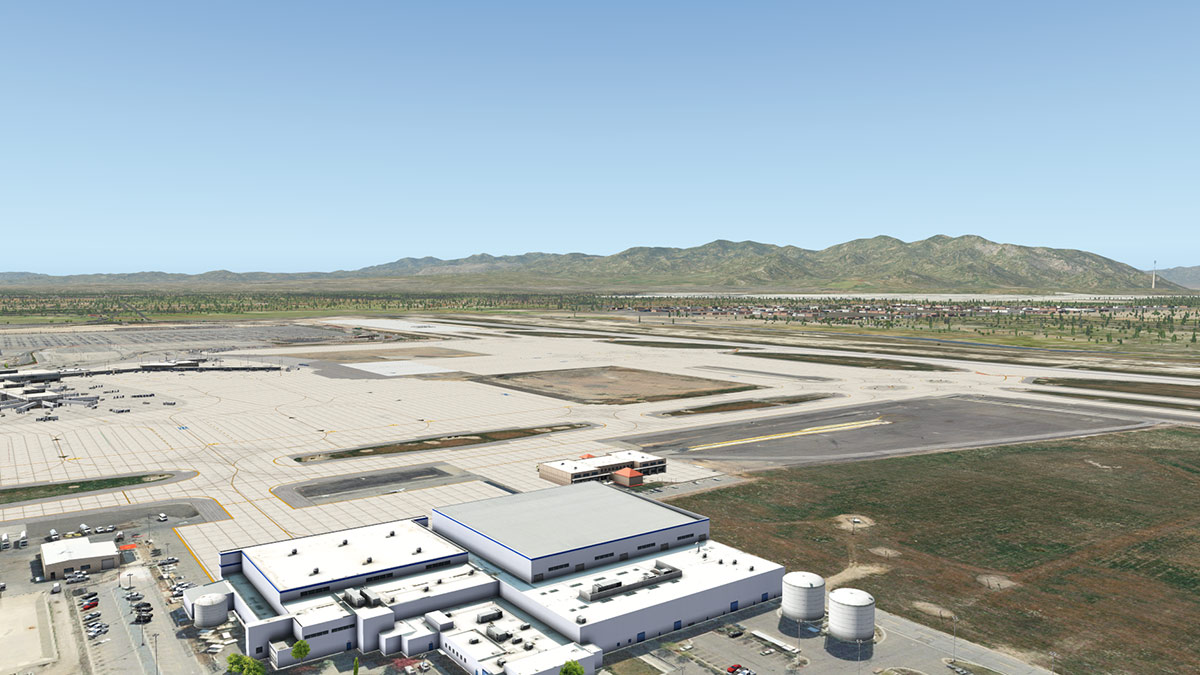
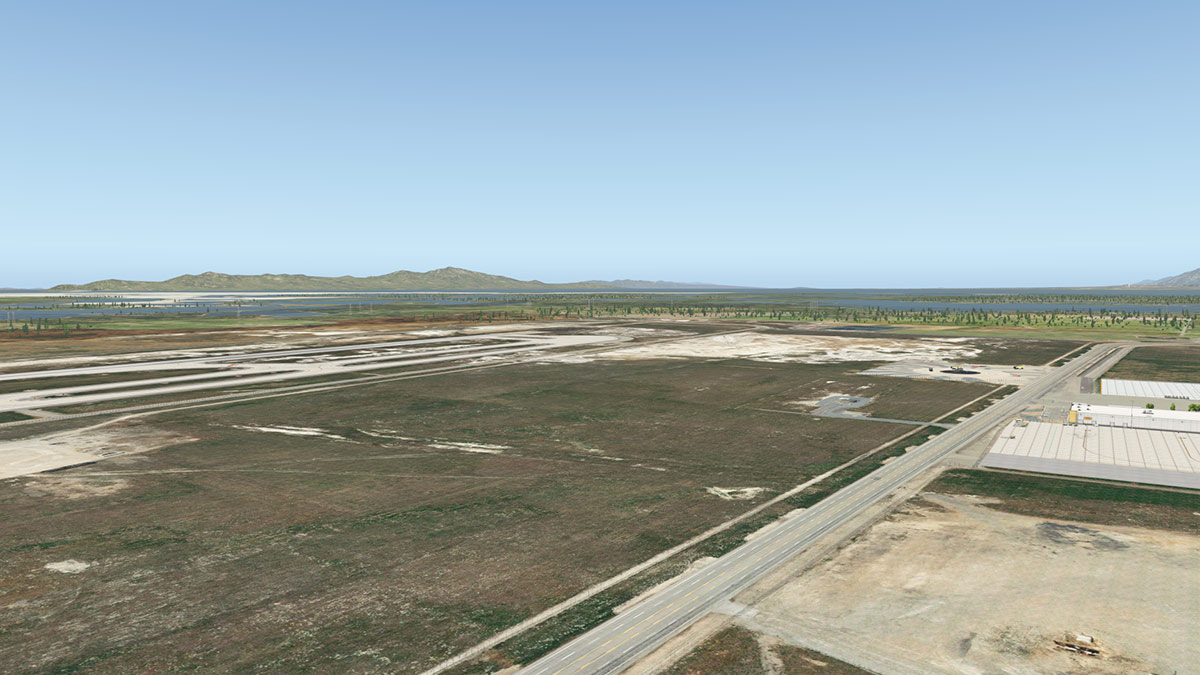
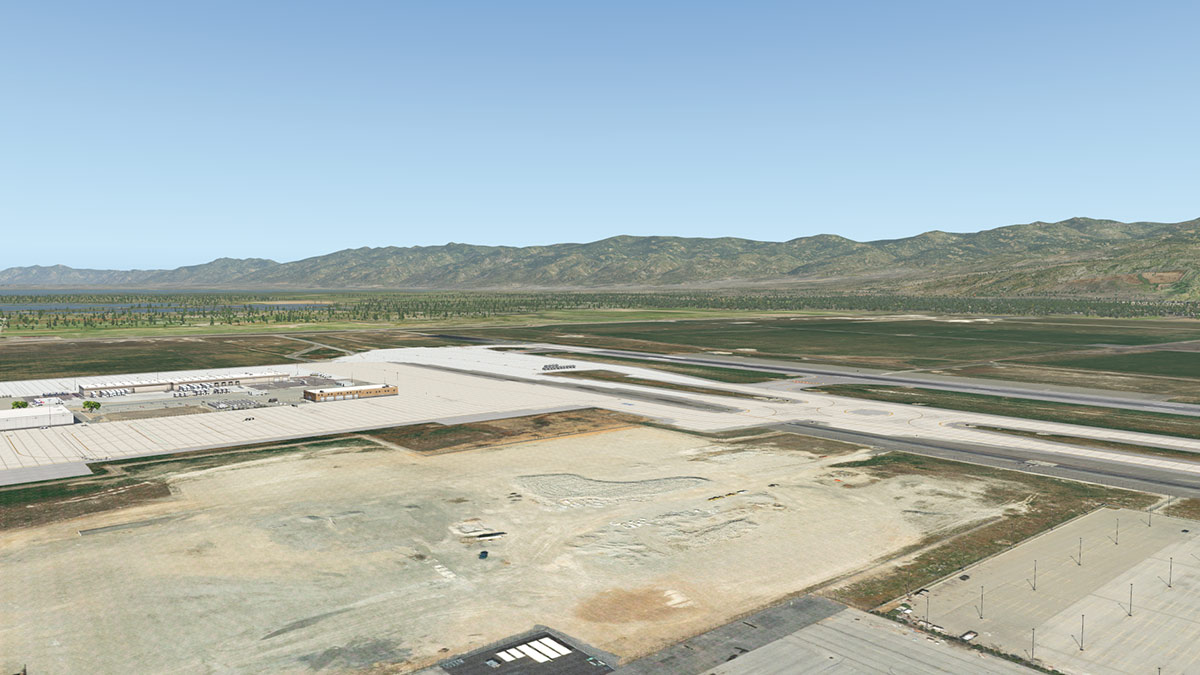
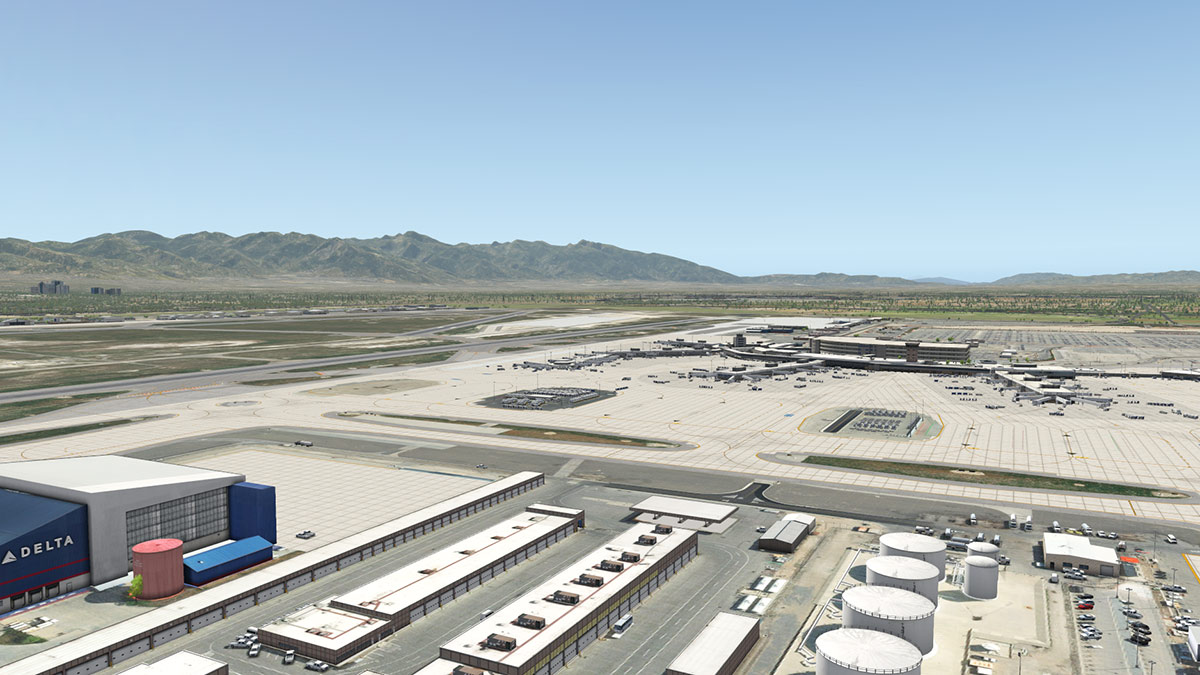
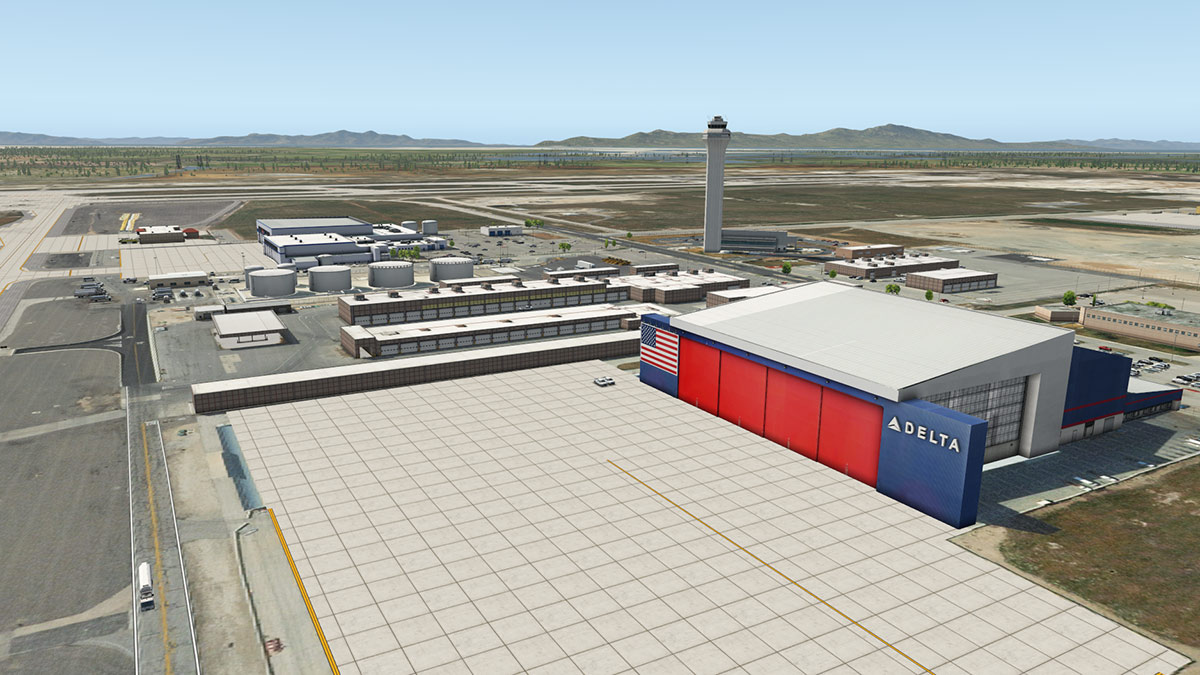
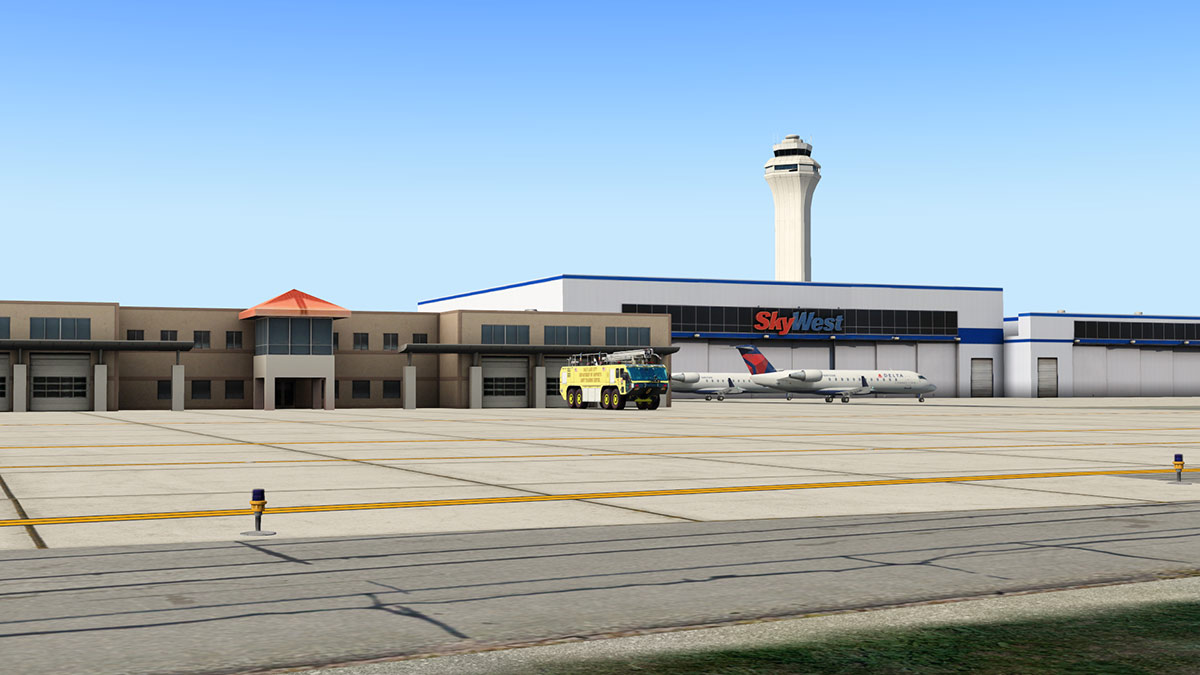
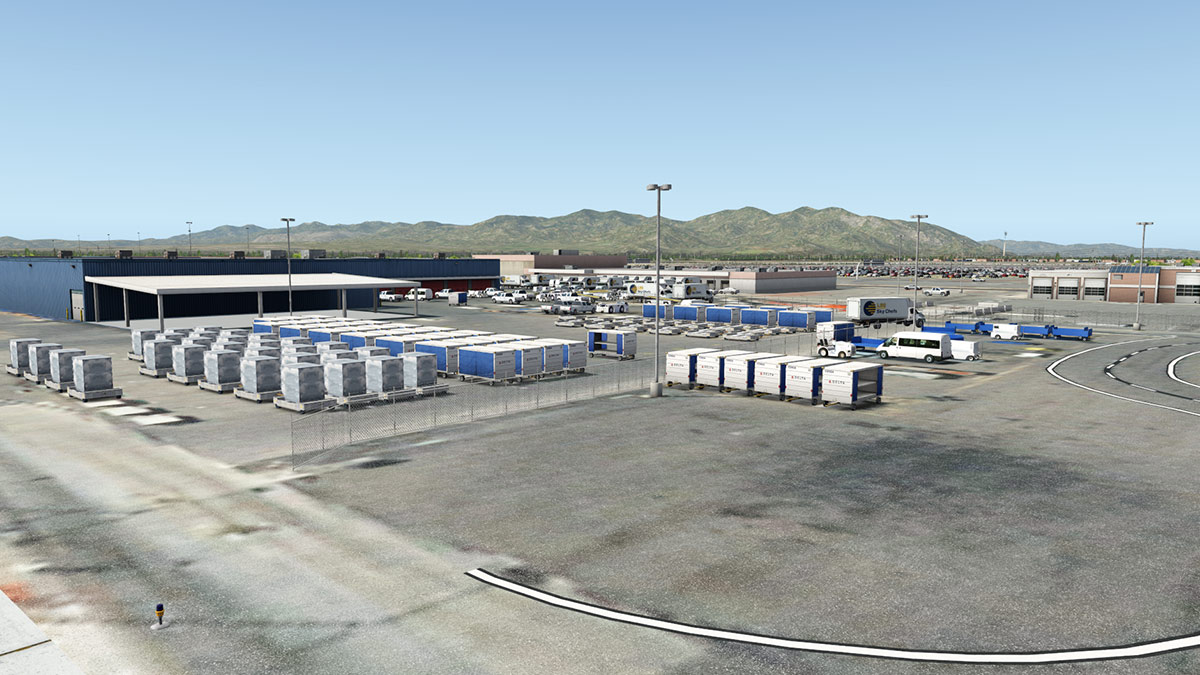
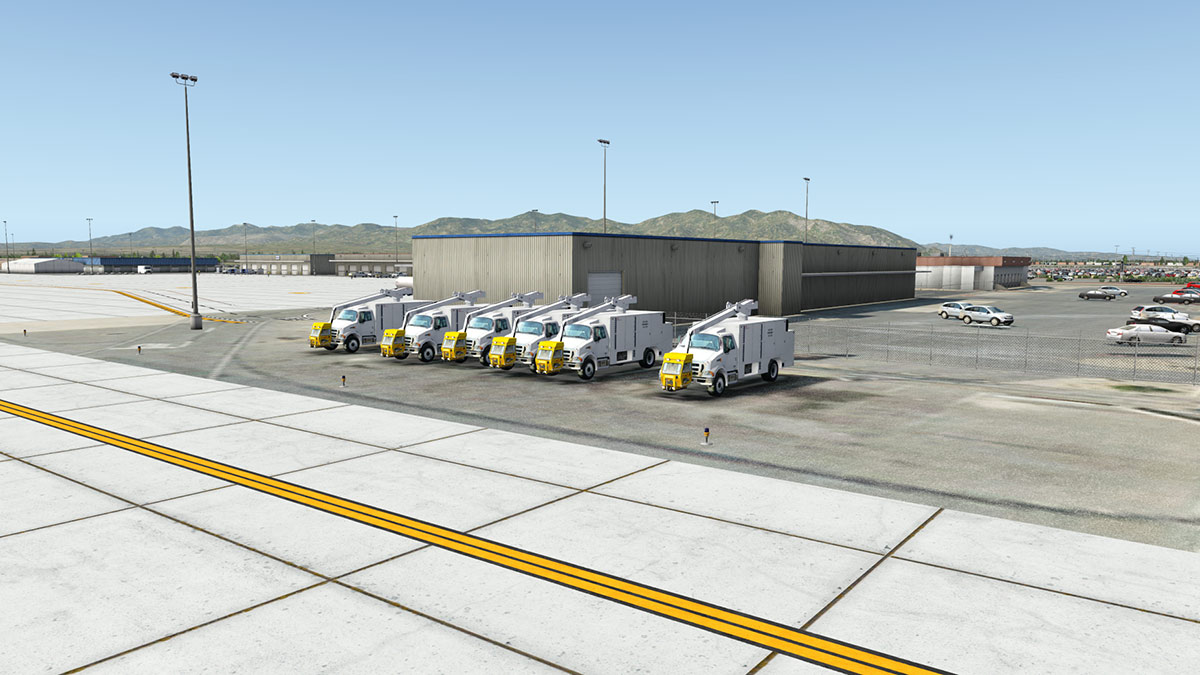
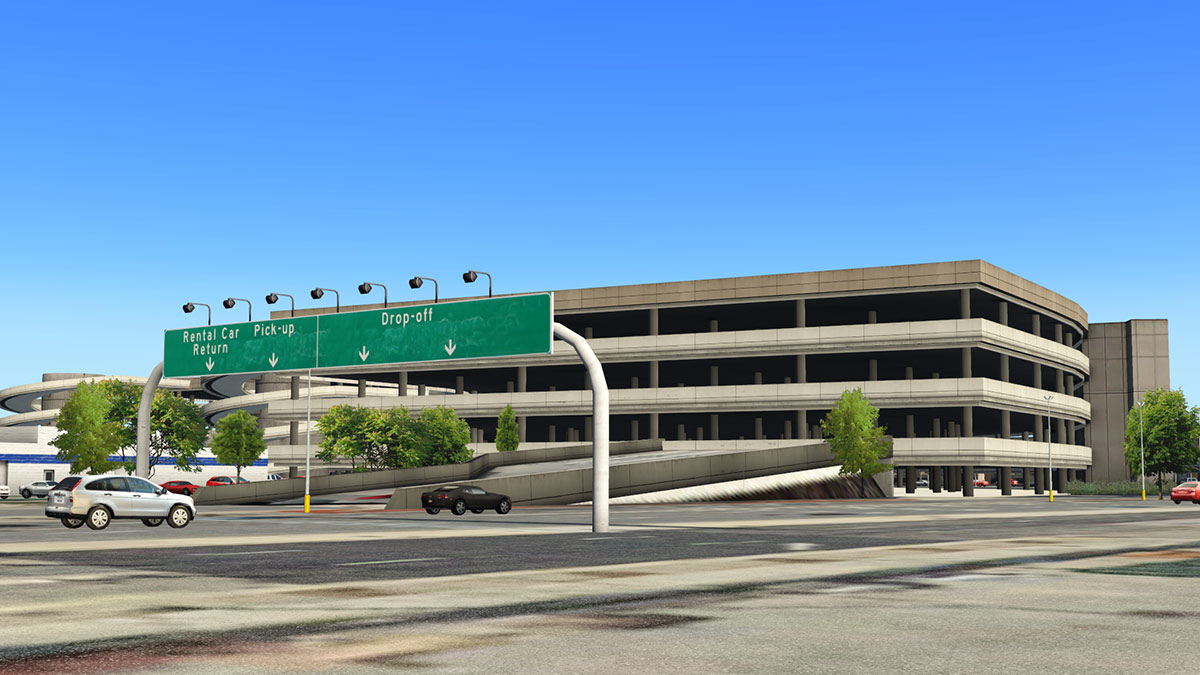
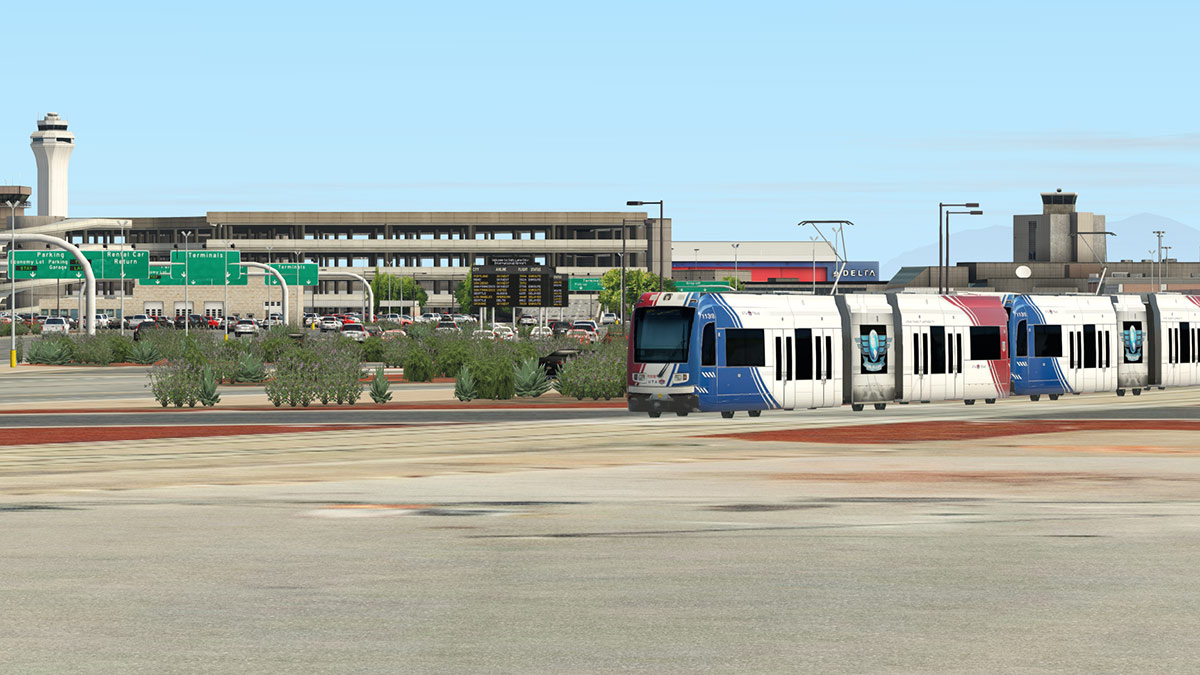
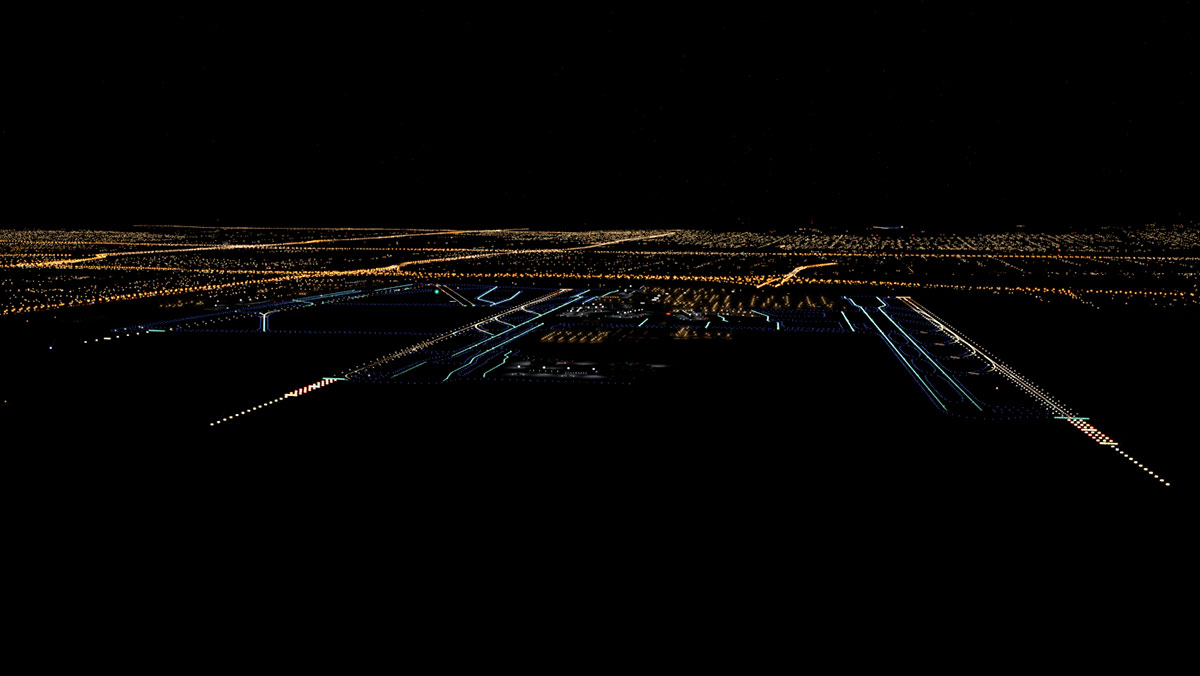
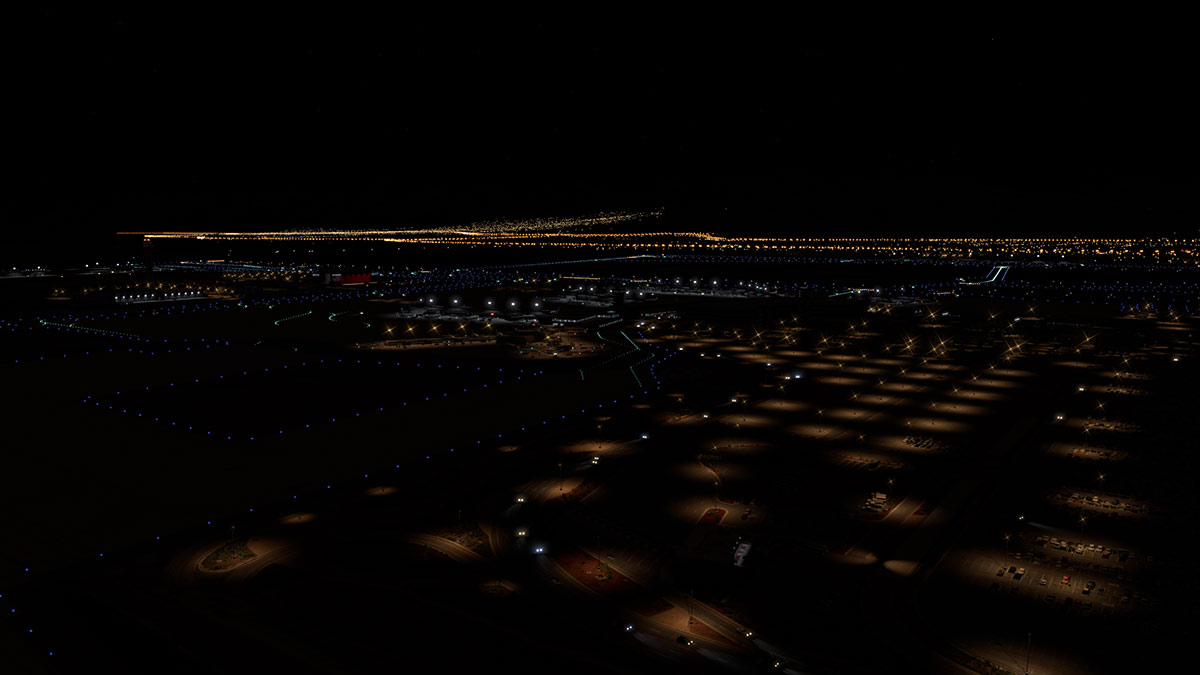
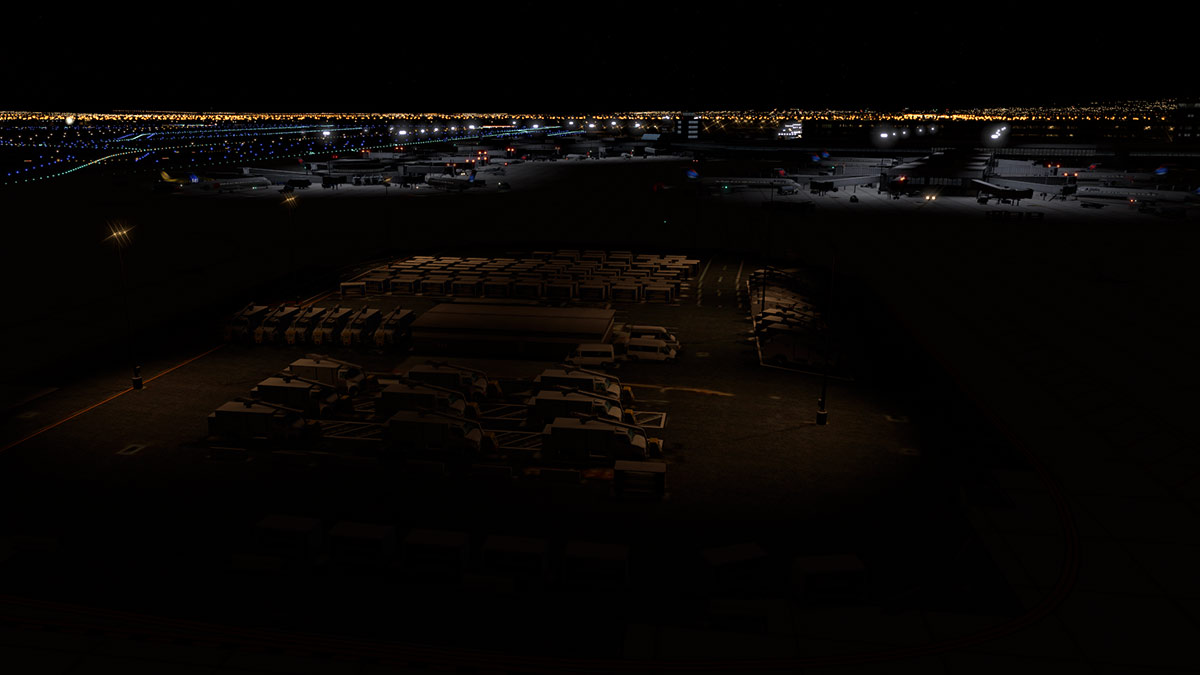
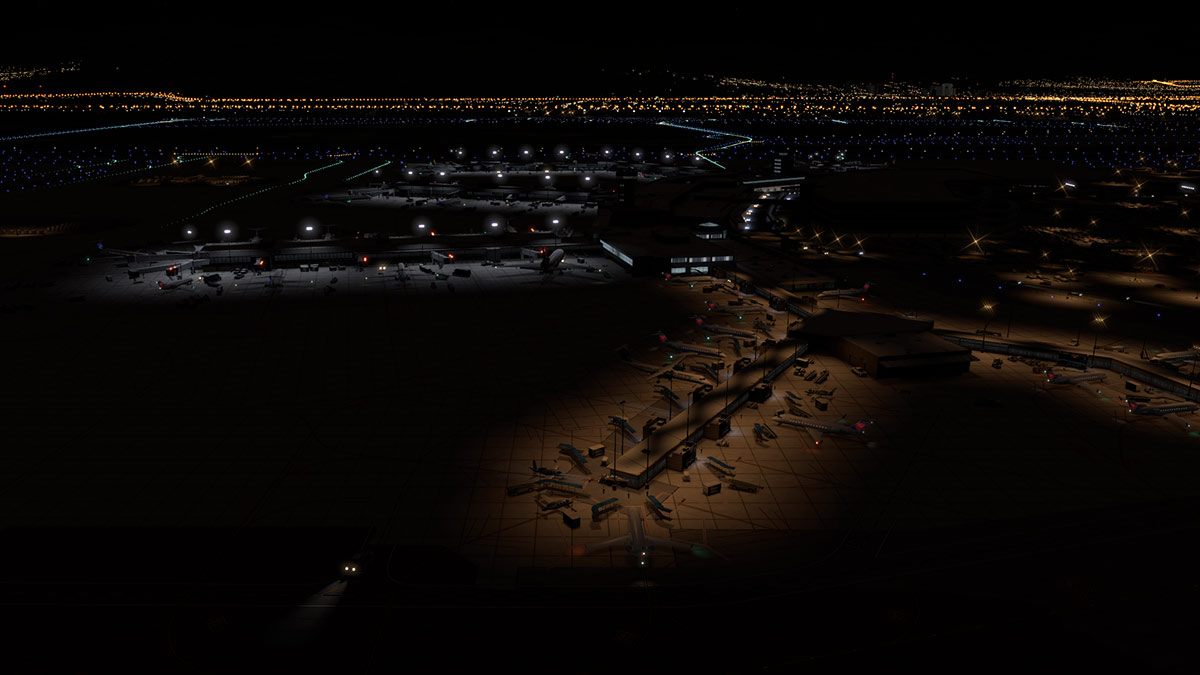
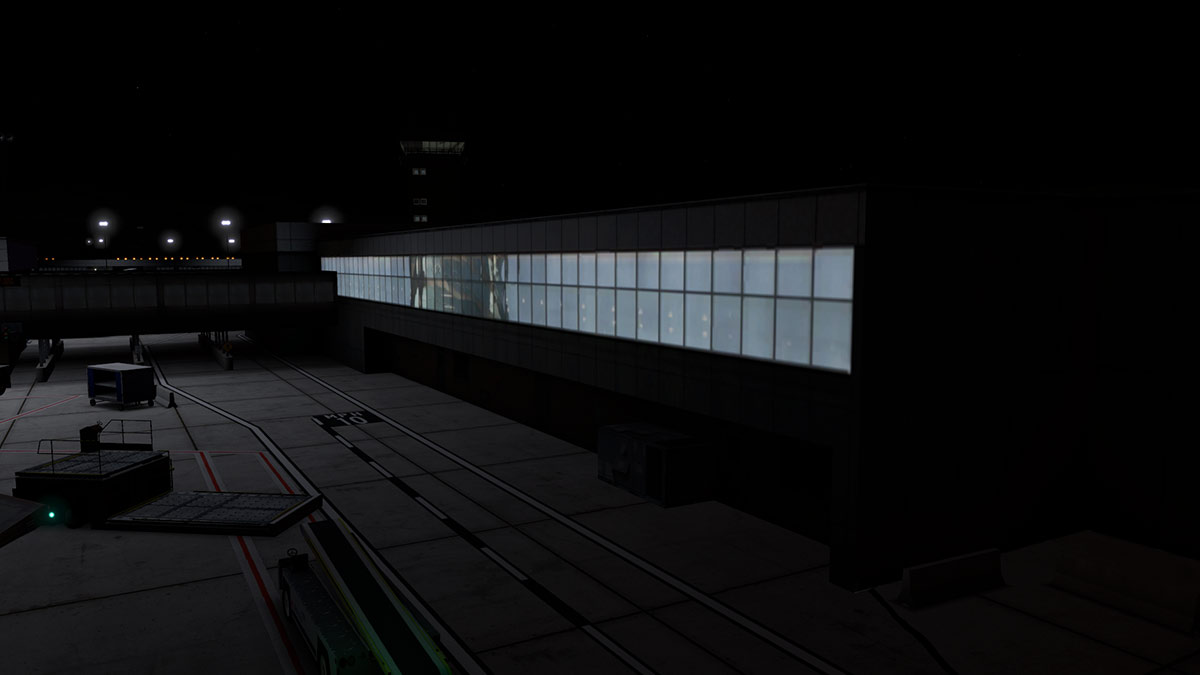
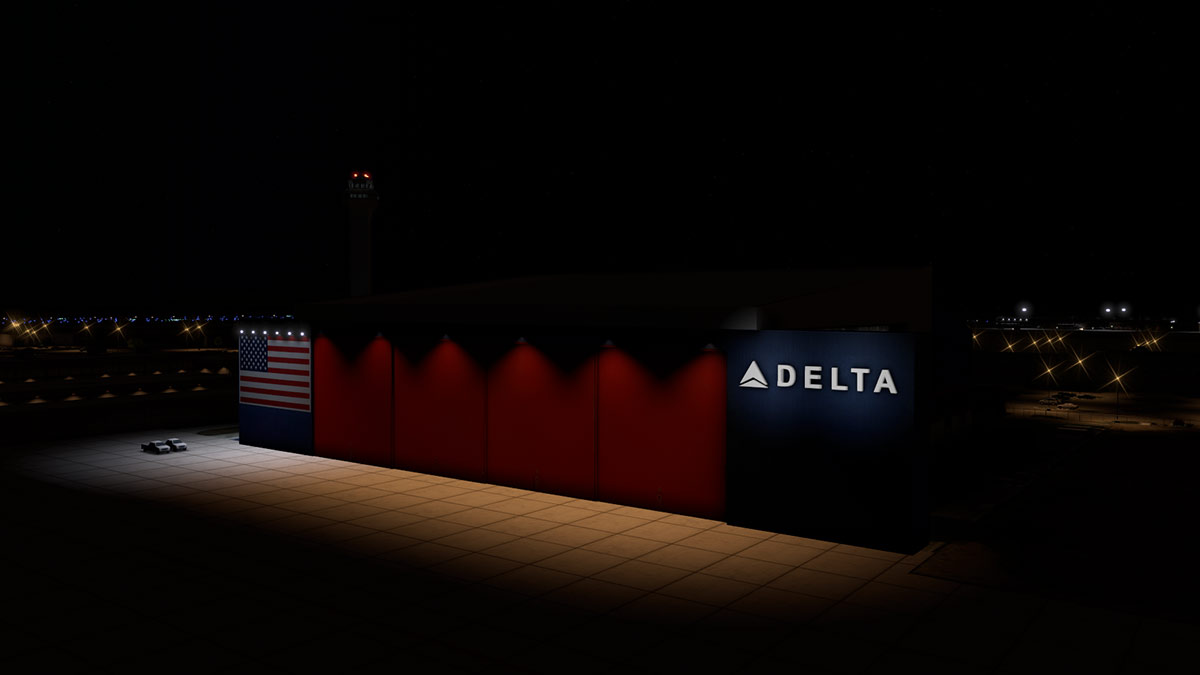
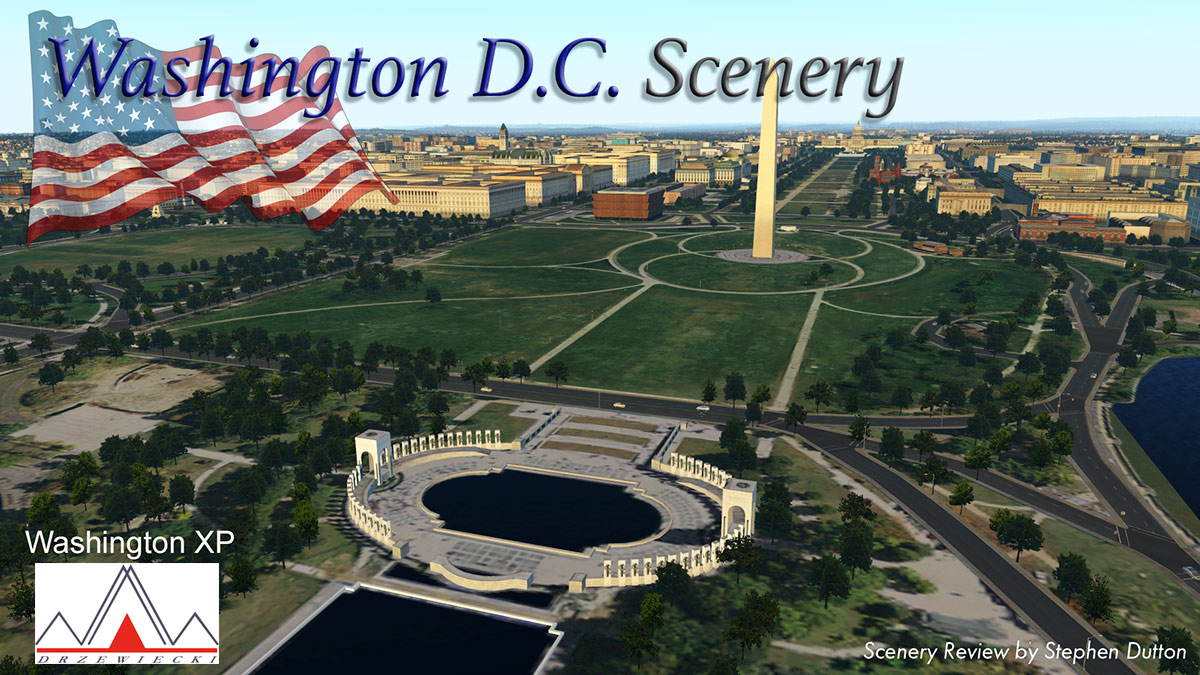
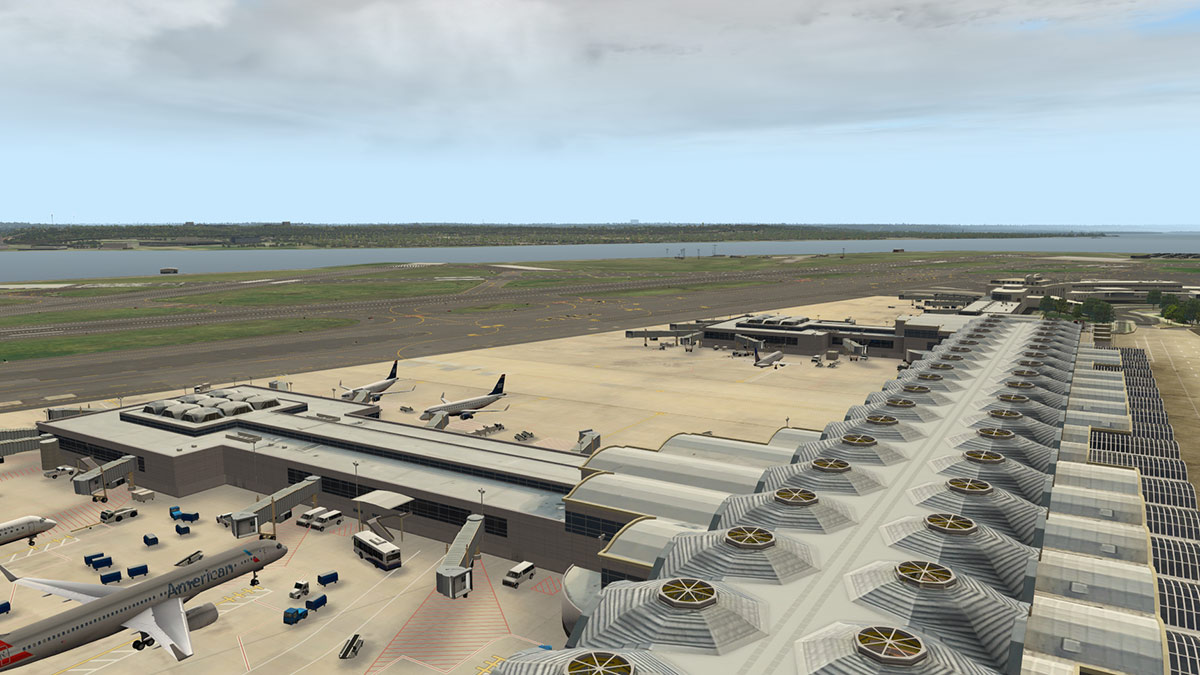
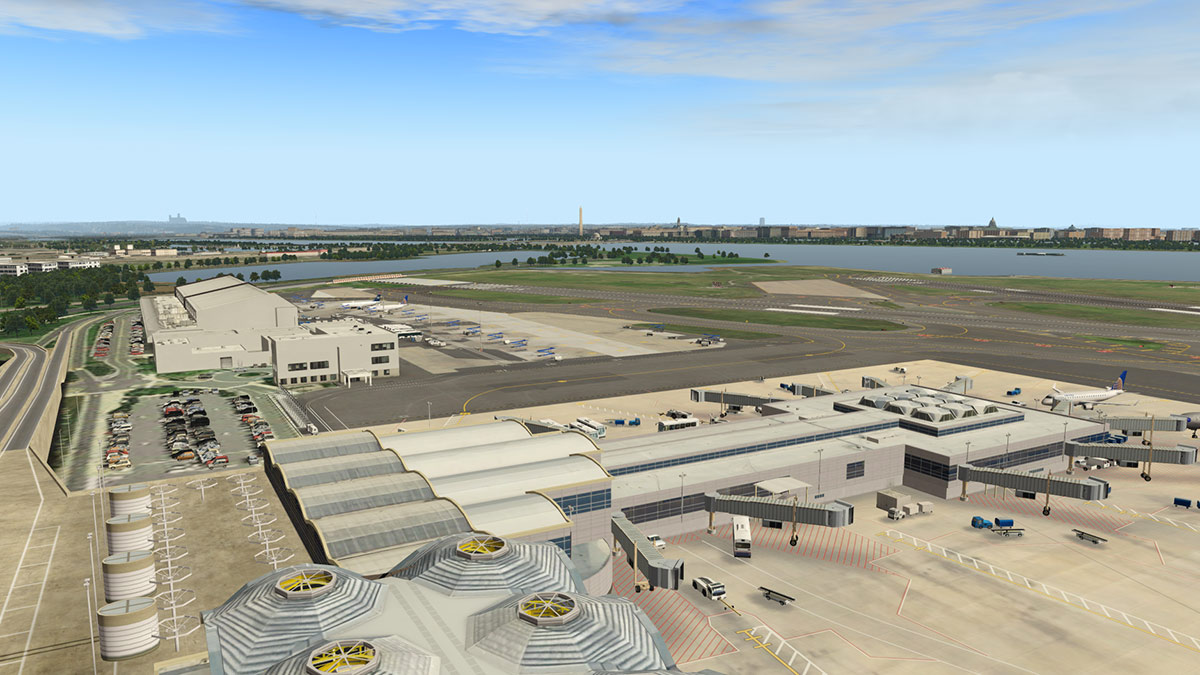
Scenery Review : KMCO - Orlando International by Nimbus Studios I have covered almost every area of Florida in my beloved Carenado F33A Bonanza. From the top of Daytona Beach to the end of the earth location of Key West. Based at KLAL (Lakeland Linder) I have somehow have found an virtual home in this on screen presence and start there mostly for every (GA or Regional) aircraft review to note down the details of the aircraft's effect on the X-Plane simulator, same with any beta or X-Plane upgrade... KLAL is my bench mark on where we actually currently are in the simulator. So Orlando is usually my first stop going east. It is easy to find Orlando from KLAL flying VFR as you only just need to follow the long and bright at night HWY 4 and there it is. You can use the Orlando VOR (ORL - 112.20) if you wish, but I know the area too well now to want to set it. So on my treks back and too across the heart of Florida you can't miss KMCO, or Orlando International Airport as it is a massive airport required to process all the millions of minions of arriving tourists that pilgrimage to the area's renowned theme parks. But in X-Plane KMCO has not been a particularly high on any developers list for attention, so most of my flying around Orlando and then KMCO was mostly Ted's Scenery version, which is mostly a very basic stick and round object piece of scenery. Then NAPS Advanced Sim Scenery did a great version and finally this Nimbus Studio version of KMCO and the area around it came to life. So let us look here at Nimbus Studio's (Butnaru) version and as a full payware version. First Impressions So I was eager to take a look and at my new nearest neighbour of a colossal international airport. Up at dawn I ran the F33A for five minutes to warm the engine and it's fluids up and then went KMCO airport hunting. It is not hard to notice KMCO, even at this early distance it stands out on the right side. As I have the ORL VOR set for my heading and the HWY4 is down to my left side, this route however it won't take you directly to KMCO as the VOR is positioned north of the airport in Orlando itself. So at some point I would have to deviate a little to the right to cover the airport for a closer look. Finally it was time to leave HWY4 behind and there is KMCO... You don't have give away your highway navigation either as if you follow the Arthur Anderson Beachline Expressway it then will then also take you right pass the northern boundary of the mega Orlando International airport. In the dawn light the Nimbus scenery looks very impressive, lighting is excellent and there is a lot of scenery to take in. So, so far so good as I certainly like what I see down there. So once over the airport I fall into a circuit to take me back to land on RWY 36R. KMCO has four major runways in 18R/36L - 18L/36R -17R/36L - 17L/36R. Two in 18R/36L - 18L/36R are to the west of the central area and are parallel to each other and both 7R/36L - 17L/36R are to the east and slightly offset and 17L/36R is the smallest of the four. At the top of the circuit you will find the huge East Lake Tohopekaliga, which is a very good guide if you skim the southern and then the western side it will line you up directly back towards RWY36R. KMCO's approach lighting is very good, some have RAIL guidance. Finals is in straight, Florida is very flat countryside as is the airport, flat and straight. Water treatment plant to the left on finals and the main airport's terminals are to the right of the aircraft... Even in this light you notice the boundary of the scenery as it is a darker (brown) but the boundary is covered by a road which helps, but it is noticeable. The very distinctive control tower is silhouetted perfectly by the rising morning sun There is no General Aviation parking in the central area, GA is on the western boundary and to my left. It is a tricky taxi from 36R to the GA and maintenance area because you have to pass over RWY36L on the way... easy no. Because there is no straight taxiway link directly from 36R to the west ramp area. Get it wrong or don't consult your airport layout chart and you will find yourself taxiing up or down 36L/18R trying to find an exit. Link taxiway J north and E south are direct, but the one you will usually use is taxiway Y of which you need to dogleg left to catch taxiway A2 to reach the west ramp, miss it and you are in nowhere's ville. So a point about KMCO is that there are a lot of complex taxiways and many will take you a fair way away from the central area and so a ground chart is invaluable around here. Once finally on the west ramp, I found it a huge space... and a very empty one as well. There are a lot of buildings on the western boundary but nothing else, no ramp markings, no aircraft parking markings, no static aircraft (okay a few by the maintenance hangars) and no ramp equipment or anything. Overall the first impression was very good at arriving at KMCO, but the empty west ramp was a real downer in you felt quite lonely out there. KMCO Overview Orlando International Airport (IATA: MCO, ICAO: KMCO, FAA LID: MCO) 17L/35R 9,001ft (2,743m) Concrete 17R/35L 10,000ft (3,048m) Concrete 18L/36R 12,005ft (3,659m) Asphalt/Concrete 18R/36L 12,004ft (3,659m) Concrete H1 44ft (13m) Concrete (Heli) Elevation AMSL 96 ft / 29 m Airport layout KMCO's terminal arrangement is quite different from most. It has central large receiving terminal with each side is flanked by two very large carparks called A (north) and B (south). From this central location shuttle trains take out to the four large satellite terminals for arrival or departure. These are called Airside Terminal 1 (Gates 1 -29), Airside Terminal 2 (Gates 100 - 129) which are connected to Terminal A (north), Then Airside Terminal 4 (Gates 60 - 99) and Airside Terminal 3 (Gates 30 - 59) which are connected to Terminal B (south) The Control Tower complex is positioned just south of Carpark B The whole central area is immensely complex, there is a lot of work in here and it looks very authentic in design and layout. Carparks A and B are huge with great intricate design, 3d cars and great foliage cover the area as well. The trees however look fine at a distance, but are very basic if even old fashioned closeup, but are good for framerate. Central receiving terminal is very impressive, I like the worn roof and textures. But dense is the word I would use in this zone, lots of everything in buildings, foliage, 3d cars and great building detailing. The four train tracks are animated and all trains go into each terminal and out towards each airside terminal on both ends. The trains are a faithfully reproduction of the real cars, that are currently undergoing replacement. Airside 1 and 2 Major domestic carriers based in Terminal A to Airside 1 and 2 include Alaska Airlines, JetBlue Airways, Southwest Airlines and Virgin America Major international carriers include Aer Lingus, Aeromexico, Avianca, Azul Brazilian Airlines, Norwegian Long Haul and WestJet. These two satellite terminals were part of the original airport and were opened in 1981. Airside 3 and 4 Major domestic carriers based in Terminal B include American Airlines, Delta Air Lines, Spirit and United Airlines. Major international carriers include Air Canada, Air Canada Rouge, Air Transat, British Airways, Emirates, Icelandair, LATAM Brasil, Lufthansa, Thomas Cook Airlines and Virgin Atlantic which primarily operate out of Airside 4, the airport's main international arrivals concourse. Airside 4 is the biggest satellite terminal and is recognisable by its ramp tower. Terminal detailing is very good, not overly worn or textured, but well done. There is a lot of standard equipment on the ramps and there is the featured Nimbus animated ramp walkers that add a lot of life to the scene. Animated vehicles trundle around the scenery as well, so the ramps are nice to be and buzzy. All the satellite terminals also have built in marshall guided docking and animated jetways (Marginal plugin required). Another Nimbus feature is see-through glass and internal passengers and departure lounges, sign textures are a bit blurry though but overall it is well done. A nice departure terminal is Airside 1, which is mostly run by Southwest Airlines. There is a more Floridian in appeal and feel here as from the others and there is some nice stand parking by the palm trees. Control Tower The Control Tower and base block admin centre is the highlight of the scenery. As control towers go, this is is a very nice one to admire from afar or close up. good detailing and nice textures adorn the structure. Tower view is good if you look to the north... But look to the south and a part of the tower's radar gets into the view, which notes the tower view position is in the wrong place. There is nothing better on departure or arrival than an aircraft taxiway over a busy road. Here at KMCO there are actually two on taxiway J in the north and on taxiways E and F in the south. The north taxiway does have an issue when viewed from below, as the supports don't connect with the taxiway. For this effect to work of course you will need to have the checkbox ticked for the X-Plane item "runways follow terrain contours" (General Menu) to allow for the elevation changes. Northern Boundary Outside of the central terminal area there is also a lot of scenery to add into the full KMCO package. There are mostly in two areas in the northern boundary along the Arthur Anderson Beachline Expressway and down the airport's western boundary... first the northern boundary. Northeast covers one of the huge car hire yards and the very prominent JetBlue maintenance hangar and offices. The JetBlue base is very well done, and in a way a very beautiful looking building, the added two JetBlue A320's certainly adds to the scene. An issue with the whole scenery though is highlighted here. Most of the main textures are not sharp, but a little poor in resolution. My "Graphic" settings are full up in "Texture Quality" and "Antialiasing" but still most textures are not sharp... sharp. You can forgive me for a little nostalgia here. Early in the X-Plane10 release I flew from KLAL to Orlando in the BK-117 helicopter and after a full afternoon's flying I put it down in this spot to have a rest. I spent a few hours, yes hours watching the X-Plane traffic file by until it went dark and I marveled at the greatness of it all. It is still clever stuff and the traffic is still as busy now as it was then... X-Plane however has also moved on as my landing point in the BK-117 is now a rental carpark. Further west along the northern boundary is the Gate Gourmet complex and various MCO authority buildings. More west is more of the same, but this time for Sky Chef. There has been a lot of attention given to this northern boundary area and it looks very complete. There are a lot of carparking and car rental areas and all have been filled with realistic 3d vehicles. Good water effects create the spaces in the areas that give it a very realistic view, the water reflects the lighting colours at night very effectively as well, That feature and more makes this area really well complete. West Ramp The West Ramp is the commercial area of the airport and includes maintenance hangars (United), Cessna support centre, Cargo and Mail facilities. But this wide space is empty and lonely. United maintenance hangars There are two maintenance hangars on the west ramp for United Airlines and separated to the north and central areas, they are known as United Maintenance North and United Maintenance South. Both hangars are the same and are well done, but the textures are a little blurry. Centre ramp is the main cargo facility... but it looks closed or closed down. There is a fuel depot set out behind. A known fact is that Orlando Intl is a U.S. Customs Service Foreign Trade Zone (FTZ) for International shipping. Another fact is that Orlando was a also designated Space Shuttle emergency landing site. The west-side runways, Runway 18L/36R and Runway 18R/36L, were designed for B-52 Stratofortress bombers and due to their proximity to NASA's John F. Kennedy Space Center, were an obvious choice for an emergency landing should an emergency "return to launch site (RTLS) attempt to land at KSC have fallen short. The runway was also an emergency divert site for NASA's Boeing 747 Shuttle Transport Aircraft when relocating orbiters from either west coast modification work or divert recoveries at Edwards AFB, California or the White Sands Missile Range, New Mexico.... so there you go. Cessna have a support base here for their Citation Jet, and this facility is slightly off the airport in the north section on Arthur Anderson Expy. Far south on KMCO is dominated by brand cargo facilities, United State Postal Service have a big depot here and so does FedEx. The United State Postal Service depot is well done (above), but the FedEx receiving warehouse (below) is missing.... too bored to finish it? Orlando Intl was initially an airforce base called McCoy AFB which was closed in the 1970's. But a few remnants remain in the form of which the military still uses such as the 164th Air Defense Artillery Brigade from the Florida Army National Guard in the former McCoy AFB Officers Club complex, an Army Reserve intelligence unit in the former SAC Alert Facility. Far, far south is the water treatment plant we saw on arrival... KMCO Lighting In the area of lighting at KMCO then Nimbus has done an excellent job in covering such a very large area and in using good lighting diversity. Runway approach, taxi and lit signage is excellent, it had to be to land a Shuttle! The whole central area is extremely well lit, and KMCO stands out for miles around. There is a great choice of lighting ideas, using colour to highlight certain aspects of the buidings and a great use of downlighting to highlight certain areas brings the buildings to life. The downlighting is evident all through the scenery, and is used to great effect to fill out even the outer areas of the scenery. The four satellite terminals are just as well covered, all look excellent and the ramps are fully usable once the sun goes down. Again Airside 1 is the best choice. Lighting ideas are very imaginative and that is constantly hard too as the area covered here at KMCO is immense. Building lighting close up is very good, but the same layouts are mostly used on every satellite terminal building. A highlight is again the JetBlue base, the building looks gorgeous at night and you get a brilliant view on the 17R approach at night. West Ramp north is dark, but mid-ramp is fine, again like noted the use downlighting is excellent on the myriad of mulit-use buildings here. _____________________________________________________________________________________ Summary Overall this is excellent scenery and very complex in areas like the central area and surrounding hire car and carparking areas, there is a lot, a lot of objects in incorporated in here and you can see the work that has gone into this scenery. So it is even more dumbfounding in that on the West Ramp it is so empty of static aircraft and ramp debris and the FedEx building is actually missing. So much and so close to perfection, but this area's empty absence is very noticeable in the air and certainly on the ground if you are wanting to use the area for GA or Cargo operations. That is not to say there is no static aircraft as there is, but not where it is most needed on that huge ramp... The under ortho-photographic images are far darker than the surrounding default X-Plane imagery, so the boundary is highly visible, but roads have thankfully been used at the point of the crossover. This does still however make the scenery stand out on arrival. Many of the textures are slightly blurry and so that makes them very highly processed for higher framerate more than their visual appeal, fine at a distance but average close up which daunts the total realism of the scenery. Night operations are to be welcomed at KMCO, as this one great airport to arrive in at night. There is great lighting at work here and the departure and arrival looks brilliant from any angle with runways close to the satellite terminals of which 17R/35L is the top pick. The scenery has great features in animations in walking people, inter-terminal trains and vehicle traffic, great glass and internal terminal detail, full guided aircraft parking and correct ATC routes ready for operations. Orlando demands a good scenery, and here it is... you may have to hit the Overlay Editor to make it absolutely perfect, but overall this KMCO from Nimbus Studios is very, very good! _____________________________________________________________________________________ The KMCO - Orlando International by Nimbus Studios is NOW available! from the X-Plane.Org Store here : KMCO- Orlando International Airport Your Price: US$24.95 There is both an X-Plane10 and X-Plane11 version included in the package. Features Compatible with X-Plane 11 and X-Plane 10 Two separate files included High-Resolution Airport by Nimbus Studio Dynamic terminal glass and water reflection on X-Plane 11 HDR lighting Taxiway bridges Fully customized HD ground textures 3D trees (like you haven't seen before) Static planes Optimized for better frame rates Animated Airport Custom animated jetways (AutoGate plugin by Marginal) Ground traffic with animated vehicles and people (GroundTraffic plugin by Marginal) Animated trains ATC taxi routes Requirements : X-Plane 11 or X-Plane 10 Windows, Mac or Linux - 64bit Operating System Required 2Gb VRAM Minimum - 3Gb+ VRAM Recommended Framerate is excellent for the density of the scenery, but still subject to computer system standards Installation and documents: Download for the KMCO - Orlando International is 537.24mb and the unzipped file is 821mb deposited in "Custom Scenery" Folder You will need to have the checkbox ticked for the X-Plane item "runways follow terrain contours" (General Menu). This NEEDS to be ON. Marginal's Autogate plugin is required for this scenery: AutoGate plugin 1.72 Documents: No Installation notes No charts are provided but these are good : KMCO.pdf _____________________________________________________________________________________ Review by Stephen Dutton 22nd April 2017 Copyright©2017: X-PlaneReviews (Disclaimer. All images and text in this review are the work and property of X-PlaneReviews, no sharing or copy of the content is allowed without consent from the author as per copyright conditions) Review System Specifications: Computer System: Windows - Intel Core i7 6700K CPU 4.00GHz / 64bit - 16 Gb single 1067 Mhz DDR4 2133 - GeForce GTX 980/SSE2 - Samsung Evo 512gb SSD Software: - Windows 10 - X-Plane 11 and also used in X-Plane v10.52 Addons: Saitek x56 Pro system Joystick and Throttle : Sound - Bose Soundlink Mini Plugins: Environment Engine by xEnviro US$69.90 Scenery or Aircraft - Bonanza F33A HD Series by Carenado (X-Plane.OrgStore) - US$26.95 - KLAL - Lakeland Linder Regional Airport 2.01 by Drankum (X-Plane.Org) - Free (note: personal added items in an office (okay demountable building and vehicles)
-
Flyin Scenery Review : ELLX - Luxembourg Findel Airport by JustSim From JustSim to JustSim, or in English JustSim's EDDH (Hamburg) to JustSim's ELLX (Luxembourg). It was only a few months ago (late February) that I reviewed JustSims excellent EDDH - Hamburg scenery, and I was very impressed. Again only after a short time there is now another scenery from JustSim in the form of ELLX Luxembourg (boy do they turn them out!) and so it just felt right to fly from Hamburg to Luxembourg to check out this newer addition to our X-Plane scenery collection, our HAM - LUX service today is provided by FlyJSim's Dash 8 Q400. The Grand Duchy of Luxembourg is crushed in between Germany, Belgium and France in the centre of Western Europe. It is only 2,586 square kilometres (998 sq mi) in size, it is one of the smallest sovereign states in Europe, and is about the same size as the US state of Rhode Island or the English county of Northamptonshire. For a small country it sure hits above the belt in a big economy in first the industrial sector, which was dominated by steel until the 1960s, but has now since diversified its industries to include chemicals, rubber, and other products. During the past decades, growth in the financial sector has more than compensated for the decline in steel production. Services, especially banking and finance, now account for the majority of economic output. Luxembourg is the world's second largest investment fund centre (after the United States), and remember it is also the base of one of the world's biggest cargo haulers in Cargolux. For me the arrival from the northeast towards ELLX's RWY24 feel vaguely familiar... It feels like Aerosoft's EDFH Frankfurt - Hahn of which is only actually 100km to the west, that scenery now feels like it was eons ago in 2013, but one I liked a lot if you recall. It is an interesting approach from the northeast and not an easy one as LUX is buried between hills, valleys and deep rivers and streams and very similar to Hahn's south approach and hence the recollection. But 2013 was early X-Plane10, this ELLX is in the new X-Plane11 and there are two download versions of this scenery for both X-Plane versions (XP10 or XP11) and the big picture view is different in the sheer detail you get now with X-Plane. One of the big features of JustSim's EDDH was the use of (German) default autogen adjusted to be part of the add-on scenery. Here again at ELLX that same technique is used again with a great benefit to the scenery. It is highlighted on both 06/24 approaches. An important note is required before using this scenery... You will "definitely" and "absolutely" need to have the checkbox ticked for the X-Plane item "runways follow terrain contours" (General Menu). The scenery uses multi-level layers to create great recesses in lower and high ground areas. On approach to RWY24 there is a concrete runway extension over the A1 motorway that is excellent when viewed from the aircraft As we will see is that most ground areas surrounding and part of ELLX are multi-level as well, so it is important to have the option on. It does also however make for a slightly bumpy landing as the runway is quite undulated. All trees surrounding the airport are a cross design, but they are well proportioned, this makes the scenery feel very full and realistic. To your right on final is the huge Cargolux facility. All very well modeled and with plenty of trucks and the ramp cargo gear to keep any hauler happy. Luxembourg's single main terminal is next and still on the right but a fair way down Runway 24's 4,000m (13,123ft) length. A prominent large building before the terminal area on a hill is the Luxembourg Investment building. Grass is a great way to break up flat photo-images and create a realistic ground effect. Here it works very well as JustSim are experts at this, with their perfect summer grass in full bloom. Note the huge Cargolux maintenance hangar on the top left The runway textures are really well done, with areas of tarmac that have been resurfaced and don't match the original surface. Control Tower is mid-field... All ground markings and signage is also top notch, all really well done and even down to the continuous water drainage grids along the sides of the taxiways and throughout the ramp areas as their detailing is really exquisite. Like Hamburg's EDDH the taxiways and runways have reflections that go wet in the rain, even in the semi-dry they look very realistic. Ramp textures are roughly detailed as well. Apron P3 is the main parking area offset to the terminal ramps, it is big and can handle even large aircraft, but is used mostly for regional services. Main aprons are P1 and P2, and these are set around the two terminals in the larger one (right) Terminal A and the L shape (left) Terminal B. Terminal 2 is all stands and as I am domestic regional I will park there at stand B6 Behind the terminals is a large elevated carpark. The different ground elevations have been really well done, as they are very (incredibly) hard to do in X-Plane... but here it is built almost seemlessly into the scenery. The view down to the ramps is excellent and highly real world in feel. ELLX Overview Luxembourg Findel Airport IATA: LUX - ICAO: ELLX 06/24 4,000m (13,123ft) Asphalt Elevation AMSL1,234 ft / 376 m ELLX is extremely well intergrated into the background of the standard X-Plane default scenery, almost a perfect fit, no boundaries or if there are then they are well covered with the extensive foliage. There are basically four areas that cover the scenery. Northeast is the Cargolux Cargo hub Southwest is the industrial zone and General Aviation parking and support. This area also has a large older style hangar that dominates the area. Southwest-south over the other side of the runway is the huge distinctively designed Cargolux maintenance hangar and facilities Main aprons and Terminals are centre northwest in the airport Apron P1 is left and regional and Aprons P2 and P3 are right with Terminal B (regional) and Terminal A (International). Terminal A is new as it was only opened in 2012 after the older 1979 building was demolished, the smaller TER B arm was opened in 2004. Main Terminal A The modern Terminal A is extremely impressive. This is scenery work at it's finest. Stunning work and highly detailed in features and ground signage around the airbridges which are animated with Marginal's docking plugin. The terminal's glass is X-Plane11 reflective and very realistic. Landside detailing is as good as Airside and all this with elevation changes as well... very impressive. Terminal B The small arm terminal is just as well done. Again great reflective glass and excellent fine detailing that even includes the metal stairs through the glass at the gates. All working areas have great vehicle animations as well... and they follow the different elevations as they trundle around... all top notch stuff. The northern landside approach to the airport has a lot of commercial buildings that include the prominent Luxembourg Investment building, Allianz Insurance, JP Morgan, ATOZ and the Hotel NH Luxembourg. All buildings have been recreated as is also the Grand Ducal de Luxembourg Golf Club behind but no club house? (it is quite iconic)... Now for the eagle eye flyers out there, do you notice the faint shapes on the horizon? This is the Cattenom Nuclear Power Plant and JetSim have done the nuclear plant's four cooling towers, and associated buildings, but the effect for the scenery with the towers in the distance is a great visual effect and in full view on RWY 24 departures. Ibis Hotel and a strange coloured building that covers some airport plant infrastructure. Control Tower Centre field Control Tower is excellent with great viewable see-through glass. Unusual for JustSim the "Tower View" works here at ELLX... ... but you do get a part of the roof intruding at certain angles, but overall you can see the runway approaches clearly. Luxembourg City is to the southwest of Findel, and so there is a lot of autogen, in both the adjusted autogen and the default OSM autogen. It looks really good, but so much autogen can also tax your processors as well, I found I had to go down a notch in objects to get better running, not in actual framerate (that stayed in the 40's) but for smoother pans around the scenery and for movement on approaches and around the airport. World Traffic and X-Life traffic compatible, and the airport is set up for X-Plane11 static aircraft use as well, which I used here. Lighting The lighting at JustSim's EDDH - Hamburg was a little poor, the scenery looked brilliant in the day, but only average at night... I was expecting the same here at ELLX. The game has certainly been upped here, ELLX's lighting is very good. All areas are very well lit, so the scenery bounds off the screen. There are great textures to the lower parts of the terminals, but the main larger building is to a point like the Hamburg buildings in being quite dark, why can't these huge terminals be lit up at night from the inside? The point is it can be done as with this great lighting here with the large hangar (below left) which looks magnificent at night. This point aside the lighting covers every area completely. Ramps and aprons are great a night as is all the approach, runway and taxiway lights and signage. Cargolux maintenance hangar is also beautifully lit and textured. A big advantage here is that the less important buildings and the smaller scale items also have really good window lit textures and downlighting... ... no cheap FS style coloured blank windows here, and it all looks extremely realistic at night. Services Luxair and Cargolux have bases at ELLX and regular services are used by airlines of Agean, Easyjet, British Airways, Flybe, Hahn Air, HOP!, KLM, LOT, Lufthansa Regional (Cityline), Ryanair, Swiss, TAP Portugal, Turkish Airlines, Volotea and Vueling. Here are some spectacular images of my RW24 departure to Munich that shows you the quality of this scenery and how great X-Plane11 now is... _____________________________________________________________________________________ Summary You do wonder how developers just keep upping the game. No doubt this ELLX - Luxembourg Findel from JustSim is sensational scenery, in every aspect it just simply delivers. JustSim keep on piling these very high quality airports out on an almost bi-monthly basis, and they are all just really great well made scenery, but ELLX - Luxembourg shows that the quality is also in there as there are no shortcuts here. You have also all the X-Plane11 features in here as well, with airbridge and vehicle animations, Glass and Ground reflections with volumetric ground effect textures and everything is shaded and baked to an inch of it's life for great framerate return. Only small nibbles are the inner lighting inside the main terminal which is too dark at night. And the roof showing in parts of the tower view So certainly put with this excellent scenery Luxembourg in as part of your European network, well worth using and you get a quality return. Better is that all this package is under US$20... that is UNDER US$20... at US$19.80. Great scenery, Even better deal... simply a no brainer! Positives: Absolutely everything!, Great Scenery, Well developed and highly detailed, Great features (even better in X-Plane11), Great Price.... on and on Negatives: Not much, More internal Terminal A lighting would lift the building at night, encroaching roof sometimes in tower view, you need a bit of power to cover all the extensive autogen, scenery is very good. _____________________________________________________________________________________ The ELLX - Luxembourg Findel Airport by JustSim is NOW available! from the X-Plane.Org Store here : There are two version of this scenery for both X-Plane10 or X-Plane11... review was done with the X-Plane11 version. ELLX - Luxembourg Findel Airport XP10 ELLX - Luxembourg Findal Airport XP11 Your Price: US$19.80 Features Custom taxiways and airport lights Shading and occlusion (texture baking) effects on terminal and other airport buildings High resolution photo scenery near airport and city High resolution ground textures / Custom runway textures High resolution building textures Runway reflection effect Volumetric ground effect textures Compatible with X-Plane 11 features Animated gates (AutoGate plugin by Marginal) Animated custom ground vehicles (X-Plane 11 only) World Traffic compatible X-Life traffic compatible Optimized for excellent performance Requirements : X-Plane10 Windows, Mac or Linux 2GB VRAM Minimum - 3Gb+ VRAM Recommended X-Plane 11 Windows, Mac or Linux 2GB VRAM Minimum - 3Gb+ VRAM Recommended Framerate is excellent for the density of the scenery, but still subject to computer system standards Installation and documents: Download for the ELLX - Luxembourg Findel Airport is 450.34mb and the two unzipped files are deposited in "Custom Scenery" Folder ELLX_JustSim_1.0 (1.28GB) ELLX_JustSim_Mesh (20.24mb) Files must be set in this order or cut and paste the correct order in your scenery_pack.ini text file (In the Custom Scenery folder) You will need to have the checkbox ticked for the X-Plane item "runways follow terrain contours" (General Menu). This NEEDS to be ON. documents: Installation notes No charts are provided but these are good : JeppView _____________________________________________________________________________________ Review by Stephen Dutton 20th April 2017 Copyright©2017: X-PlaneReviews (Disclaimer. All images and text in this review are the work and property of X-PlaneReviews, no sharing or copy of the content is allowed without consent from the author as per copyright conditions) Review System Specifications: Computer System: Windows - Intel Core i7 6700K CPU 4.00GHz / 64bit - 16 Gb single 1067 Mhz DDR4 2133 - GeForce GTX 980/SSE2 - Samsung Evo 512gb SSD Software: - Windows 10 - X-Plane 11 and also used in X-Plane v10.52 Addons: Saitek x56 Pro system Joystick and Throttle : Sound - Bose Soundlink Mini Plugins: Environment Engine by xEnviro US$69.90 : JARDesign Ground Handling Deluxe GHD plugin Scenery or Aircraft - Bombardier Dash 8 Q400 by FlyJSIm (X-Plane.OrgStore) - US$30.00
-
Hi Dionsol
Thanks for the feedback, and I totally agree with you on your comments on the G1000, yes it is slow, yes it kills framerate and yes I hate that map rotation... Overall again as you mentioned the Eclipse is just that little better at the moment.
But I will note that the G1000 bugs are not correct as well. There seems that something has gone wrong here as more than a problem with the G1000. It was like this when originally released, but Carenado fixed it, but now it is back to that same position it was a year ago? Personally I think it will be fixed pretty quickly and the aircraft will then be fine, I personally would have stuck with it a bit longer, as it would have been very good in the long run.
I looked at your video, and I don't think it was a poor review... believe me there are far, far worse out there. Thanks for the interest... Stephen
-
Hi, If you are ever interested in writing reviews then give me a call... always interested.
Best regards Stephen
-
-
News! - Aircraft Updated to X-Plane11 : Cessna 172SP by AirfoilLabs The plucky little Cessna 172SP from AirfoilLabs has been updated to X-Plane11. In this nice if small update but it does cover extensively the changes to the new X-Plane version, including the new X-Plane11 flying characteristics in the new engine tuning, but also the flight model tuning, fuel and weight calibration and a new propeller animation detail. The XP11 PBR (Physical Based Rendering) feature is covered is covered as well with all the textures reworked and for the metalness feel on related items applied. The DDS textures have also been redone for faster loading and better framerate. Officially this version is known as "Version XP11 1.0" But there is now a separate X-Plane11 aircraft file for X-Plane11 use. The X-Plane10 version is still "Version 1.72" which is still included in the package. Full changelog is : Version XP11 1.0 (April 14th 2017) Separate file for X-Plane 11 All textures reworked and metalness applied DDS textures export Weight and fuel system redesigned for XP11 Engine tuning for XP11 Flight model tuning for XP11 Propeller animation corrections Other small adjustments related to XP11 So a nice update to X-Plane's best General Aviation aircraft, and now flyable in X-Plane11 as well. If you have already purchased the AirfoilLabs C172SP then go to your X-Plane.OrgStore and update to vXP11 1.0 from your account. ______________________________________________________________________ The Cessna 172SP Skyhawk by AirfoilLabs is available from the X-Plane.Org Store here : Cessna 172SP Skyhawk And is priced at only US$34.95 If you have already purchased the AirfoilLabs C172SP then go to your X-Plane.OrgStore and update to vXP11 1.0 from your account. The update to X-Plane11 is free. ______________________________________________________________________ Stephen Dutton 18th April 2017 Copyright©X-Plane Reviews: X-PlaneReviews (Disclaimer. All images and text in this review are the work and property of X-PlaneReviews, no sharing or copy of the content is allowed without consent from the author as per copyright conditions)
-
Aircraft Review : Boeing 707-420 by Wilson's Aircraft In late 2015 Mike Wilson released an update or in Hollywood speak a "Reboot" of an old favorite in his Boeing 707-320. It was in a nutshell the old aircraft with a 3d virtual cockpit installed and a few other tweeks. It was an interesting idea in just not letting the older design fade away, but to bring it back to life and be usable in your current X-Plane environment, and it worked... to a point. Then Mike Wilson did the same reboot to another old favorite in the Douglas DC-8 which was a very successful reimagining of that other famous aircraft from the 50/60's. With the DC-8 series being well received then the attention went back on to the 707 to bring it up to the same level as that aircraft, most notably in the original X-Plane wings, really average engines and the spoilers/flaps being very disconnected from the wing when extended and the engineers station in being only a graphic and not a full 3d panel like the pilots instrument panel. Another focus was in bringing the fuselage up to more modern standards as well, all in all a more modern update overall to the aircraft and to fly in X-Plane11. "It is a classic" and many aviators weep when you mention the golden age of 50/60's Jet airliners, these are totally beautiful aircraft in their element of being the real trendsetters and smashing the long distances and thus creating our global village we all take to easily for granted today. Outward changes - Wings/Engines The old version really required a new wing, and here it is... The new wing is thankfully very good, but the overall effect is muted by using the old (really) old early X-Plane style metal low-res textures. X-Plane11 now has the new metalness effects that bring metal and chrome to life, so the wings look overall flat and dull. The same effect extends to the lower fuselage that is more mottled than with an aluminium feel, there is no X-Plane11 shinyness (glossy) effect overall on the aircraft either. The unique trailing edge "Barn Doors" style flaps are really well done in animation and operation, but there are no outer flap tracks mechanism (links) on the inner extended flaps or the outboard inner flaps?... ... which is highly noticeable on approach, but they are not all as hanging out there as bad as they were on the original versions. The leading edge spoilers are a huge step forward from the loose hanging original version, and there is the well done 707 animated cascade irregular slat inner to outer retraction effect as well. The engines are uprated from the original's JT4A's to the newer lovely RR Conway 508 engines with flared noise suppressors these engine types are the difference for the -430 variant, wings are however the same as the -320 The engine modeling is well done, and with nice internal spinning fans, there is a lovely metalness effect is on the cowls which shows it can be done to great effect. All wings and engine supports have good flex in flight. Missing however is the HF antenna on the right wingtip that was unique to the -420 version. Cockpit The last original version introduced a 3d virtual cockpit for the 707, it still looks amazing and highly realistic. To note there is no passenger cabin and the 2d cockpit has been dropped. The lighting effects of X-Plane11 certainly lift the panel experience and brings the detail to life, so you do have a great 707 cockpit to fly in. Now added to the front of the aircraft in sheer detail, is now the engineer's station set behind. There is no doubt that this engineer's station is were most of the attention for this aircraft has been focused on. It is highly detailed and very well done, but lot of the switchgear and buttons don't work, a la DC-8. This includes voltage, bleed valves, boost pumps and so on. But the startup procedure and fuel transfer panel in that the tanks are coupled to allow transfer between left, right and center tanks are well simulated as is the anti-ice system. The multiple seven tank fuel capacity has also been fully simulated and you can set this via the X-Plane "Weight, Balance, & Fuel" menu. Like the engineer's station the overhead panel has also been totally redone, and very nice it is. Numbers like on the DC-8 are still long and odd, but not as noticeable on the 707 overhead. Like everything else not everything works and is mostly for show, but it well done. The Pedestal is still certainly a highlight, lovely in all that metallic mechanical design, and now more functional as well with speedbrake lever and flaps are actually selectable ( flaps only via arrows and not hand). Fuel valves work now as well to start and to shutdown the engines. Lower radio and trim pedestal is now void of that nasty flat rudder trim graphic and is now a real 3d object, looks great as well. Radio panel is fully workable and the some numbers are still over large, but better... all modeled trim knobs and handles work. Panel As noted the panel is not changed much from the original version, but still very good. Instruments consist of the Standard Six - Artificial Horizon (sometimes known as the attitude indicator) with built in pitch/turn indicator, Heading, Compass, Vertical Speed, Altimeter and Speed (in knots and Mach speed), added centre are the back up instruments of Radio Altitude, Altitude, Clock, Artificial Horizon and Altitude selector. The DME 2 - NAV 2 (distance) is also situated lower down right. The Co-Pilots set of instruments are very similar with just the Standard Six pack. Altitude dial tends to rotate slightly madly back and to on the ground? Centre panel is dominated by the four rows of engine parameters. Pressure Ratio (RPM), N1, EXH (Exhaust) Temp, N2 (RPM) and Fuel flow to each engine. Flap position indicators (two) are to the right of the engine dials. The top glareshield autopilot is basic (X-Plane) but fully functional and easy to use, It does not look as bad as it should do, and it is well intergrated into the cockpit. A great new feature is the inclusion of the CIVA (Delco Carousel IV-A Inertial Navigation System. Nicknamed "CIVA") which is fitted directly into the pedestal of where it looks very good and is an extra addon that costs US$10. If you already own the CIVA plugin (FJS Boeing 727) then just directly cut and paste into the B707 plugin's folder in the aircraft's root folder. The Delco navigation system was the most popular navigation system of this 1960's era and so a welcome addition into this cockpit. Standard X-Plane11 FMS is also installed and the aircraft is X-FMC (provided separately) is usable as well. You have the option of having the crew annoy you or not... A switch on the upper pedestal allows you to have two crew in a first officer and flight engineer, both are actually well done and would be a comfortable fit on a long flight. All three crew are seen outside the aircraft. Lighting Like on the FJS Boeing 727 you have a lot of lighting knobs, but not all work here... You have great instrument lighting and the same on the flight engineer's panel. Two spot lights (map) over each of the pilots and a set of two overhead lights, there are red lighting dials (like on the FJS B727) but in here they doesn't work, which is shame. But in daylight/twilight the cockpit is fine, but when it goes dark... You get these horrible brown reflections on the cockpit windows, makes it all but impossible to land the aircraft in the dark? Overhead lighting looks nice with red light (does not actually work) and old fashioned "exit" sign. Flying notes This Boeing 707 does have the same flying quirk as the DC-8 in that any bank is a full 30º Even at 28,500ft and m.78 your going to turn on a dime, god knows what sort of stress that puts the airframe under? But hey "Boeings are built to almost destruction!" is the boast. All sounds are still the JERA sound system and are recorded from a real 707, and they sound excellent outside (certainly on takeoff) and from inside the cockpit at cruise. The aircraft is just plain "dirty" It punks out crap that you would never believe... 60's style! But you have to admit it looks magnificent on approach... These old birds are hard work on approach, but that is part of the deal, you wouldn't want it any other way... the thrust to drag ratio to keep the aircraft correct on the finals is in all the skills you have acquired. Those Conways throw out a lot of ghastly smoke in reverse, you don't need to look at the levers but out of the window as your world goes black all around you. Landing lights don't have any graphic or modeling, just stuck on the leading edge of the wing. You get three ground support vehicles in a GPU (Ground Power Unit), Stairs and Fuel truck 60's style, but the switch on the lower engineer's station is the wrong way round? Liveries There are six retro liveries in : Pan Am, BOAC, Air France, Varig, Seaboard World & Air India... ... but there was 35 liveries in all before and the selection has been culled to just six, missing is the excellent TWA and Vjet Qantas, ouch! ______________________________________________________________________ Summary Certainly another big step forward from the first Boeing 707 makeover, and so you go to the next level here in detail with the cockpit now far more 3d virtual realistic than just flat pretty images covering the pedestal and engineer's station. But the Boeing 707 update is not as good as the DC-8 aircraft, although basically both are at the same level in detail now, the DC-8 is more involving and still more complete than the B707. There is a big step forward here but the B707 still has to many bits that are not up to the level you expect in that it still feels like it is in development more than completed in the fact that flaps should not still hang in space but actually be connected to the aircraft's structure, the aircraft notes it is X-Plane11 but uses except for the engines and FMS very few of X-Plane11 features, certainly in metalness and textures. Internal lighting is half completed and external lights are blobs on the wings or gear and those night reflection textures poor for night landings. Sounds are however very good. I love these 60's era aircraft because of the challenge and sheer physical effort both mental and hands on to fly them, and this Boeing 707-430 is no different. Great additions for navigation with three choices as with the CIVA, XP11 FMS and X-FMC choices. So in context a very nice upgrade, but not the another step up a level we expected over the DC-8 from Wilson's Aircraft. They are now level in detail, but the DC-8 flies better and has more features, I love the idea of updated old aircraft to be current in X-Plane with 3d virtual cockpits and modern textures and the B707 and DC-8 from Wilson's Aircraft show what can be done, so if you want a good 60's era aircraft and the Boeing 707 was the absolute trendsetter in this area then this is still the best Boeing 707 in X-Plane right now. ______________________________________________________________________ Yes! the Boeing 707-420 by Mike Wilson is still available from the new X-Plane.Org Store here : Boeing 707-420 Price is US$30.00 Features Include: - For X-Plane 11 only - Detailed 3D cockpit including flight engineer panel, with high-res textures. - Night lighting includes separate knobs for instruments, captain & F/O panels and overhead light. - Set of pilot, copilot and flight engineer (you can show/hide copilot & F/E with a button in the cockpit or a custom key; pilot is only viewable from the exterior view) - Yokes can be hidden: just click on it! - 9 view presets included to reach easily flight engineer panel, navigational panels, radio, overhead, etc? Navigation systems include: - new X-Plane 11 standard 3D FMC with 2D pop-up window - 2D X-FMC (provided separately) - 3D CIVA with 2D pop-up window (provided separately), to navigate like the early days before GPS was available - standard VOR-NDB navigation - Fully operable autopilot in the style of the early 707 planes, meaning that the functions are split in two between the pedestal and the front panel - Operable flight engineer panel with many systems available. However plane can be flown without using the flight engineer panel - Functioning radar with TCAS - Anti-ice system - Radio stack with Com 1/2 Nav 1/2 and ADF 1/2 - Fuel panel includes 7 separate tanks - Fuel transfer panel: tanks are coupled to allow transfer between left, right and center tanks - Ground power unit system with highly detailed 60?s style ground support vehicles - Complete checklist provided to replicate a cold and dark starting procedure - Conway engines with flared noise surpressors - Irregular slat retraction and extention modeled as in the real plane - Detailed landing gear and wheel wells - Wing flex including all 4 engines flex - Vortex generators modeled - Flight tested by retired retired 707 captain Charles Raines, retired 707 first officer Alex Stanton. Installation : Download file size is 320.90mb to your X-Plane - Heavy Aircraft Folder. Installed file size is 424.00mb. This review ver ______________________________________________________________________ Review by Stephen Dutton 14th April 2017 Copyright©2017: X-PlaneReviews (Disclaimer. All images and text in this review are the work and property of X-PlaneReviews, no sharing or copy of the content is allowed without consent from the author as per copyright conditions) Review System Specifications: Computer System: Windows - Intel Core i7 6700K CPU 4.00GHz / 64bit - 16 Gb single 1067 Mhz DDR4 2133 - GeForce GTX 980/SSE2 - Samsung Evo 512gb SSD Software: - Windows 10 - X-Plane 11r1 Addons: Saitek x52 Pro system Joystick and Throttle : Sound - Bose Soundlink Mini Plugins: Environment Engine by xEnviro US$69.90 : Headshake by Simcoders : JARDesign Ground Handling Deluxe GHD plugin Scenery or Aircraft - YMML - Melbourne Airport by ISDG (X-Plane.Org) - Free
-
Scenery Review : KSLC - Salt Lake City International by ShortFinal Design I will first give you the bad news with so that you can then absorb this new excellent scenery in its correct context. This scenery is not from a new developer called ShortFinal Design, but from an old and much loved scenery developer called Mister_X6, Yes the same Mister_X6 that created the outstanding KLAX, KSAN, KSFO, KPHX (Phoenix) and the overwhelming KBOS (Boston) and now you will suddenly realise what is coming next... Mister-X6's scenery is not freeware anymore, as it is now going to be payware. And this KSLC is the first payware airport from the former freeware master. To be honest the scenery created by Mister_X6 was payware quality from the start, it was just released as freeware... In other words you just got lucky to get this level of scenery free. But the amount of time and work required to create sceneries of this scale cannot be supported on good fortune alone. The problem is that to continue to produce great scenery something has to give, one either get remuneration for all the time and experience or the other option is in giving the game away. So payware is better than nothing at all from a designer of Mister_X6's caliber, as to depart then everyone loses and so does the X-Plane simulator as well. But going payware does also put the onus on the developer as well, this is not freeware and payware does demand a high quality return for the investment, because that is what high quality payware scenery actually is in an investment. The one thing that the large state of Utah is that it has a lot of space between the large salt flats and mountain ranges. The state is like Colorado in that it has the last vestiges of the southern Rocky Mountain chain. Salt Flats are very flat, so if you want to build an airport then you have the right wide space in to do so. (Google Maps) So KSLC which set in the area to the north of the city is wide and uses a lot of the low flat space that is a part of the Great Salt Lake itself. KSLC Overview Having a very flat salt lake as a base works for the developer and against them. For is very simple in that the orthoimagery used in the scenery which was sourced from the USGS is easy to install as the ground is very flat, but it can really work against you as well as it did with Tom Curtis's Denver in that from the ground level it feels totally and unrealistically flat and bland as well, another point is that you have to make sure the insertion of the your add-on scenery melds in well with the surrounding default X-plane scenery to create the right realistic effect. There is a flatness effect with SFD's scenery but it is not extremely noticeable, but it is there... From the air you can easily see the USGS install from the X-Plane surroundings as the colouring is different, and on the east side a blank area is (very) noticeable... ... However from a distance on a departure or arrival perspective I think SFD gets away with the colouring, the blending is not bad at all. KSLC Layout Salt Lake International Airport IATA: SLC - ICAO: KSLC - FAA LID: SLC 16L/34R 12,002ft, (3,658m) Asphalt 16R/34L12,000ft, (3,658m) Concrete 17/35 9,597ft (2,925m) Asphalt 14/32 4,892ft (1,491m) Asphalt Elevation AMSL 4,227 ft / 1,288 m KSLC As the airport does cover a very large area it is best it be segregated into five defined areas: Terminals, Control Tower & Delta maintenance, Cargo North & South and East General Aviation. Terminals Control Tower & Delta maintenance Cargo North & South East General Aviation & Salt Lake City Air National Guard Base Terminal detail. From a distance it looks like KSLC has only one terminal, but in fact there are three in Terminal 1, Terminal 2 and the International Terminal. (iFly) Concourse A (left) are (gates A1-A9) and Concourse B (right) are (gates B1-B22). Con A and Con B is domestic mixed use but the terminal was built for "Western" which merged with Delta in 1987. But Delta use Terminal 2. Concourse C (left) has (gates C1-C13) is domestic, but Concourse D is mixed with (right) with (gates D1-D13) and Concourse E (below) with (gates E60-E85) is mixed with International, but use only gates D2, D4, and D6 in Concourse D for overseas flights. Concourse E's both finger departure gates are walk on only with no airbridges to the aircraft, but this gives you a great mix for short domestic flights with longer domestic services. All the terminal elements are really well developed by mister_x6, you know his work is already of a high standard and so it is here. A lot of the ground equipment is also highly prevalent as to the point of watching out for your wingtips when parking to avoid strikes. A nice touch is the excellent covered boarding ramps... Images here above are with the X-Plane11 static aircraft switched off, but the scenery is developed with all static aircraft positions (images static aircraft on below) created and all taxi routes are built in (default ATC and X-LIFE). When using the static aircraft feature you will need the required MisterX Library downloaded and installed for a wider variety of static aircraft and items in the scenery (the misterX library is a welcome tool to have anyway for other sceneries) A major feature with this scenery is the specific Docking Guidance System (DGS) at KSLC. The system is a variation of "Marginal's" autogate and docking guidance plugin, but beautifully recreated here. Green is "hello, I know who you are", Yellow is "Slow" and Red is "Stop" and if the lights turn off you have gone past the parking point. Aircraft alignment is via a protruding green bar over the red, if the only the green bar covers the red you are aligned correctly... simples! All auto gates are operational as well, turn off your engines and the airbridge will attach to the aircraft. On the non-airbridge gates (E) you have the marshall to guide you in. There is excellent aircraft gate display boards as well for authenticity, again beautifully done. All building glass has reflections (X-Plane11 only), but they can be odd with what they reflect sometimes if you get close or mess with the angle, but in most circumstances it is a realistic effect. There is detail inside the the concourses as well.... .... but only in the concourses and not the actual terminals, but still very well done. Landside detailing is excellent as well, highly realistic, just the photo roadway markings are a bit low resolution. There is animation of vehicles both Landside and Airside for scenery movement and that buzzy activity effect, both are well done as the vehicles are streaming around the terminals or along in alignment with the roadways in and out of the airport... always an important addition for me for realism... highlight is the animated UTX TRAX trams that weave their way out of the scenery and past the airline situation boards in the carpark, All car rental outlets are covered with the correct buildings and 3d cars in the yards, again a welcome addition for realism. Control Tower & Delta maintenance detail Centre field of KSLC is the control tower, Delta maintenance facility and the airports main fuel depot. KSLC's control tower is very well modeled, with great detail and glass reflections. Tower view is excellent as well, with all corners of the field covered and approaches well visible. In addition to the 328-foot-tall (100 m) Air Traffic Control Tower, TRACON is also located on the airport with the Salt Lake Air Route Traffic Control Center (ARTCC) located adjacent to the airport. The Salt Lake ARTCC covers the largest geographical area in the continental United States and controls airspace as far north as the Canada–US border. The main fuel depot is highlighted here, and there are a lot of airport infrastructure facilities that are also well reproduced, includes Fire Station, Skywest maintenance and fuel refuelling station... ... but the standout building centre field is the huge dominating Delta maintenance facility, the building is the primary maintenance, repair and overhaul arm for Delta TechOps. The hangar itself is certainly well created, but the real highlights here are the side paneled widows with excellent reflections that creates a real realism on the various light angles. North Cargo There are two cargo terminals in North and South Cargo. North Cargo is well north to the rest of the airfield and the larger (newer) of the two facilities. Home to DHL and FedEx it is well recreated. The Fire practise area (well done) is to the west of North Cargo as well. There are in various places around the scenery large ramps for Ice spraying, these are noted by the parked lines of ice protection spray trucks, a small but well thought out addition. South Cargo United States Postal Service dominates South Cargo, but Skywest Cargo, Delta Cargo and the Commissary are here as well. East General Aviation & Salt Lake City Air National Guard Base The northeast of KSLC is the where Utah Air National Guard operates what was previously named the Salt Lake City Air National Guard Base. In November 2014, the installation was renamed the Roland R. Wright Air National Guard Base after Brigadier General Roland R. Wright, USAF (Ret). The base occupies approximately 135 acres as a U.S. Government cantonment area leased from the airport. In addition to flight-line aircraft, the installation comprises 63 buildings: 3 services, 13 administrative, and 47 industrial. There are 255 full-time Air Reserve Technician and Active Guard and Reserve personnel assigned, augmented by 1,343 part-time traditional air national guardsmen. The host wing for the installation is the 151st Air Refueling Wing (151 ARW), an Air Mobility Command (AMC)-gained unit operating the KC-135R Stratotanker. The Utah Air National Guard base has been faithfully reproduced and is excellent. The rest of the eastern boundary is ulitised by private jet operators with mostly the Salt Lake Jet Centre making most of the facilites and areas for general aviation, with a lot of aircraft parking garages (hangars) to the south and rear. Even the most minor buildings get the most detailed attention, almost as perfect is these hangar buildings as the real things. But the eastern area has a boundary tranfer issue to the X-Plane default scenery. In most cases you would dismiss this perplexity as one of those things that could happen in X-Plane. But the default autogen does not match up with the scenery boundary on two sides, so you get a big open boundary area that is highly noticeable from any aerial viewpoint even from a distance, and it doesn't work on the ground either.... ShortFinal Design does also provide with the scenery a few 3d buildings of the Salt Lake City skyline, Including the Utah State Capitol building, Court house, US Bank, Keybank and the Wells Fargo Bank which has a usable helipad on the roof. KSLC Lighting ShortFinal Design's lighting of KSLC is excellent... Approaches to all runways are well done with a few with RAIL lighting. All taxiway guidance (green) lighting is also covered. But you have to get closer in to see the diversity of the lighting with a good spread of different lighting for different areas. You have no problems working around the ramps, but the non-autogate terminals are a little duller than the other concourses. The reflective glass feature doesn't work as well at night, as glass comes out grey. Not too bad, but not totally realistic either. One area that does stand out though is landside and the terminal signs are not lit? It makes it pretty dark around there... There is a lot of down-lighting around all the various hangars and warehouses that is well done and creates a lot of detailing, however the highlight is the Delta maintenance building which is very well done. Services Domestic and Denver wins the most used route and I recommend the flight as it is a great view over the Rockies. Otherwise it is the standard selection of US destinations... Delta, Alaska, American and Southwest dominate but Frontier gets a look in. Denver, Colorado - 789,000 : Delta, Frontier, Southwest, United Los Angeles, California - 650,000 : Alaska, American, Delta, Southwest, United Phoenix–Sky Harbor, Arizona - 610,000 : American, Delta, Frontier, Southwest Atlanta, Georgia - 526,000 : Delta, Frontier Seattle/Tacoma, Washington - 494,000 : Alaska, Delta Las Vegas, Nevada - 492,000 : Alaska, Delta, Frontier, Southwest Dallas/Fort Worth, Texas - 416,000 : American, Delta Portland, Oregon - 346,000 : Alaska, Delta Chicago–O'Hare, Illinois - 333,000 : American, Delta, Frontier, United San Diego, California - 303,000 : Alaska, Delta Except for Paris and Amsterdam, most international routes are to Mexico and Canada and Delta runs the show. Paris (Charles de Gaulle), France - 124,425 : Delta Cancún, México - 80,351: Delta, Frontier Mexico City, México - 74,818 : Delta Amsterdam, Netherlands - 63,185 : Delta Vancouver, Canada - 61,879 : Delta Calgary, Canada - 55,788 : Delta San José del Cabo, México - 32,429 : Delta Puerto Vallarta, México - 24,733 : Delta _______________________________________________________________ Summary The move from Freeware to Payware is a big step. A hard one as well as now your work will have to meet higher expectations and a more critical examination of all the aspects of what the developer is presenting. There is no doubt here with their KSLC scenery is that ShortFinal Design are well aware of this factor, and there is a lot of extra of of everything to meet and even supersede their original scenery presentations. There are few notes to be aired and mostly they are centred around the scenery's intergration with the X-Plane default scenery and autogen. The trick is that if a developer understands the system well, then can turn the disadvantage into an advantage for their work. JustSim scenery is very good at doing this even to the point of using the default tools to create their own autogen to match their add-on scenery. With KSLC ShortFinal Design are lucky in that three boundaries of the scenery don't clash with the default autogen, but with the one that does it is noticeable, if the airport was much lower south in the main Salt Lake City metro area then this scenery would have stuck out like a sore thumb, but they get away with it here, even with the darker USGS photo textures... but just. The point is they not do so next time. A nice additional feature to this scenery would be winter textures, maybe in an update... Otherwise this is sensational scenery and very high quality. You do get a lot of everything for your money. Great buildings and internal as well as external, well conceived layouts, huge and mindless amount of objects and items around the airport including all terminals, hangars and airport infrastructure and great features including great vehicle and tram animations, great glass reflections, great features in the autogate and docking guidance systems, great lighting, everything is great, great, great. Great value as well at under US$25, so this KSLC is a certain addition to your American Mid-West scenery collection... Positives : Great scenery, many great X-Plane features including many animations, specific to airport docking guidance, great internal and external detailed terminals, good lighting, huge amount of objects and detailed buildings and famous X-Plane developer. Negatives: Slightly better intergration into X-Plane default scenery needed, poorly lit signage landside, no charts. _____________________________________________________________________________________ The KSLC - Salt Lake City International by ShortFinal Design is NOW available! from the X-Plane.Org Store here : KSLC-Salt Lake City International Your Price: US$24.95 Scenery Features: Accurate rendition of KSLC Highly accurate scenery for KSLC – Salt Lake City International Airport and parts of Salt Lake City Accurate models for all terminals, hangars, and other buildings Most terminals with 3D interiors High-Resolution Airport Dynamic reflections on buildings (X-Plane 11 only) Baked Ambient Occlusion Custom high resolution ground textures HDR night lighting High resolution photo scenery (15cm/px) Animated and populated Airport Animated airport vehicles (GroundTraffic) Animated jetways and custom Docking Guidance System (DGS) unique to KSLC (using the AutoGate plugin) Randomly placed static aircraft, can be easily toggled off in the X-Plane settings Requirements : X-Plane 11 or X-Plane 10.50 Windows, Mac or Linux 2Gb VRAM Minimum. 3Gb+ VRAM Recommended Download size: 720Mb. 1.2Gb Extracted Framerate is excellent for the density of the scenery, but still subject to computer system standards Installation and documents: MisterX Library can be installed to get a larger selection of static aircraft. AutoGate can be installed to use the included docking guidance system and moving jetways. Download for the KSLC - Salt Lake City International is 732.19mb and the unzipped files are deposited 1.18gb in the "Custom Scenery" Folder Note... scenery must be set in that above order to work correctly, You can rearrange the order in your scenery_packs_ini file. Static aircraft can be switched on or off via your "Graphic Settings" menu in "Draw Parked Aircraft". Documents : Manual but no charts _____________________________________________________________________________________ Review by Stephen Dutton 10th April 2017 Copyright©2017: X-PlaneReviews (Disclaimer. All images and text in this review are the work and property of X-PlaneReviews, no sharing or copy of the content is allowed without consent from the author as per copyright conditions) Review System Specifications: Computer System: Windows - Intel Core i7 6700K CPU 4.00GHz / 64bit - 16 Gb single 1067 Mhz DDR4 2133 - GeForce GTX 980/SSE2 - Samsung Evo 512gb SSD Software: - Windows 10 - X-Plane 11b15 and also used in X-Plane v10.52 Addons: Saitek x52 Pro system Joystick and Throttle : Sound - Bose Soundlink Mini Plugins: Environment Engine by xEnviro US$69.90 : JARDesign Ground Handling Deluxe GHD plugin Scenery or Aircraft - Bombardier Dash 8 Q400 by FlyJSIm (X-Plane.OrgStore) - US$30.00
-
Aircraft Review : Eclipse 550NG by Aerobask Only a week after the release of Aerobask's excellent Pipistrel Panthera v3. Here is another fully featured aircraft in the Eclipse 550NG and a great companion to their Panthera it is. First thoughts are that this aircraft is just a upgraded aircraft, but no it isn't as it is an all new design, the aircraft you were thinking of is probably the Victory also done by Aerobask and it in the same style and type of machine as a VLJ (Very Light Jet). Sadly the Eclipse Aerospace company is now no more as they went bankrupt in 2009, some 260 aircraft were built, and the business is still in (officially) chapter 7 bankruptcy, but you never know. This was another aircraft caught up in the "Air-Taxi" fiasco as Day Jet which had 1400 orders for the aircraft also went bankrupt in 2008, causing a ripple through the "Air'Taxi" concept. The current Eclipse was raised from the ashes by One Aviation (of Cirrus Aircraft fame) and only 10 were built in Albuquerque, New Mexico. In March 2017 the company announced that 550 production would end after four more aircraft are completed, to concentrate production on the new "Canada" model of the aircraft. The Eclipse 550 follows the "Air-Taxi" requirements very closely in four passengers and pilot, Cruise speed around 430 mph (692 km/h; 374 kn), ceiling of 41,000 ft (12,000 m) and a range of 1,295 mi; 2,084 km (1,125 nmi). Which is impressive performance for such a small aircraft. X-Plane11 Install With X-Plane11 going into release all developers are now providing two aircraft files for both X-Plane10 and X-Plane11. My version came with X-Plane10 as default, but you can switch to either X-Plane version of the one you require. You need to first remove the current .acf file, and there are two spare files in "Eclipse_NG.acf.v10" & "Eclipse_NG.acf.v11". You then need to select from either version the one you want by changing the version to just "Eclipse_NG.acf". I chose the X-Plane11 version as noted here, and you still have the X-Plane10 file if you want to switch over later to the older simulator version. You are also required to copy the GNS430 data from X-Plane 10, Navigraph or Aerosoft and to be installed into the X-Plane11 Custom data (root) folder. Eclipse 550NG by Aerobask Aerobask specialise in these light composite aircraft categories, and they do them very well. This aircraft was not released until X-Plane11 went final, so yes it is X-Plane11 compatible and it is also optimised with PBR support. The 550 also has installed the features of Aerobask's latest designs in their Dynon Skyview and GTN avionics. A walkaround reveals another beautiful design from Aerobask. Detailing is superb., and the added reflections and lighting from PBR is simply excellent with 4K textures, ambient occlusion and specular mapping... note the lovely reflections and shine on the curves of the aircraft. Window frames are also well done and authentic. Fine external detailing like the lighting houses and the static wicks is excellent as well and to the level of quality we expect in X-Plane today and from Aerobask. propulsion is provided by two tiny PW610F 900lbf (4.0 kN) podded thrust engines sitting aft. Metalness and chrome is in the new toolset that developers can now use and put to great use here on the Eclipse undercarriage components, the front strut is a beautifully molded support as is the trailing rear wheel gear support. Menu and Features The aircraft comes with a lot of features and a great polished tablet menu system. There is a tab lower left of your screen, or the tablet is positioned by the door for use. On the tablet there are six tabs that include: Options, Ground, Weight, Sound, Lights and Shades. Options includes, TCAS Alerts, Windshield and Instrument (EFIS) reflections. Ground tab includes; Static Elements including chocks, tags, engine covers and cones. GPU (Ground Power Unit) and Door (open/close). Weight is an excellent weight and balances sheet. If the door is closed or the aircraft is in flight you are not allowed to change the items. You can select your passenger load from adults and children (Kid) or have an empty seat and the choice of one or two baggage. Fuel can also be added and the system adds the all up weight... go over and you are red flagged. Passengers and baggage (loaded from a trolley) are loaded onto the aircraft, but are sadly are only viewable from the external view? And the pilot is always in the cockpit even if the aircraft is switched off and disconnected from the power? Two tabs cover the "Sound" and "Lighting" in the aircraft which are very good And you can also open and close six shades on the windows via the arrows on the bottom of the tablet, but only fully open or fully closed. Interior and Cockpit Cabin design and highlighted textures are simply astounding! Very modern design and all is insanely good, you just want to touch! Lovely detailing like with this Comm unit that opens to reveal switch and plug fittings, the units are on both sides of the cockpit. One quirk is the (moveable) side cockpit window shades are both down when you load the aircraft and can get into your line of sight... so you need to put them into their upper tucked away position every time before you fly. Cockpit is also extremely well modeled, but simple in layout as this is an Air-Taxi and not a Boeing. Like with Aerobask's Panthera the panel is breathtaking in X-Plane11. Great panel and switch-gear design and has very heavy reflections for ultimate realism. Panel glareshield has the same nobbled textures and lovely edged stitching, yes again you just want to touch it and run your fingers over the craftmanship of it all. Power on (GPU start up on the ground recommended) and the panels come to life. Both Dynon Skyview panels are each side of the top and bottom GARMIN GTN 750/650 system. The layout is almost exactly the same as the Panthera, with all four panel being able to pop out (Aircraft symbols on the Skyview and right side frames on the GTN), and all panels are scalable (via a small hand) and movable around your screen. A really great setup. Dynon Skyview Like the Panthera the Eclipse comes with the two panel display version of the "Dynon SkyView" system. Pressing the aircraft symbol in the centre of each display will bring up the pop-up version of the panel, the panels are also adjustable for scale via the right hand lower corner. Both screens are independent of each other and all can be configured to suit your preferences. Within each configuration you can select even parts of full screen views to cover the full spectrum. This includes a massive Artificial Horizon with excellent rate of turn indicators, speed and altitude tapes and heading rose (with Course (CRS) - double VOR 1 and 2 and Skyview - FMS pointers) in the lower portion of the screen. An Engine and Aircraft status block known as the EMS which can be positioned left/right or centre of the display and also the MAP/NAV screen. The system is menu driven by the buttons below the screen. This is a great version, but menu driven tree and branch systems can be complex and time consuming to use. But the system does also give you a huge amount of options. Theses huge amount of selections on the Dynon menu driven interface, with which selections are accessed by the lower row of buttons, or my favored setting of two knobs (covering Altitude and Heading adjustment) on the left display and "Range" for map changes on the right. I also like the Airport, VOR/DME, NDB and Fixes tabs viewable for quick screen declutter as the Tree and branch navigation can be complicated to find them quickly in the air. BARO - MDA - CRS (Course) - HDG (Heading) - ALT - VS - IAS - DIM, all use the knob as a selection tool with a centre push of the knob for selection and arrows for changing selections. It works very well but the arrows are a bit small and fiddly sometimes (hard in bumpy weather). Personally I kept it all simple with just the main PFD in front of me with the EMS and the MAP/NAV screen shared with the EMS and the loaded flightplan to the right. Garmin GTN750/650 The aircraft also come like the Panthera with the brand new version of Aerobask's GTN750/760 system... The GTN750 is the larger unit with a 6.9 inch TFT touchscreen display with icons to cover features such as : Map, Traffic, Terrain, Weather, Charts, Flight Plan, PROC, Nearest, Waypoint Info and Utilities with Services and System blanked out. The "Utilities" button covers : DALT/TAS/Winds, Flight Times and Checklists and Clean Screen with Trip Planning, Rain Prediction, Scheduled Messages blanked out. The GTN650 is smaller at 4.9-inch TFT display and has a few different options from the GTN750. Features on the smaller unit available includes : Map, Traffic, Terrain, Weather, Default Nav, Otto Pilot, Waypoint Info and Nearest. Radio unlike GTN750 is situated to the right with the same built-in tuners. The comprehensive system gives you a lot of power here at your fingertips, but the trick is to find the right combinations of all your tools to get the maximum ease of use from your flying. You will find a lot of functions in this cockpit doubled up or even tripled, the idea is find the best set up or layout to cover your workload. To that effect I have the "Flightplan" on the bigger GTN750, and the "CDI" ready on the lower GTN650, I find the flightplan on the GTN750 closer than the Skyview monitor view and better if you need the full map view open, so it is simple, clear information system and it works. Top of the GTN750 unit is the radio section, with easy switching of frequencies, XPDR and COMM, NAV selection. Same radio settings can also be done on the smaller GTN650 as well, large buttons and clear interface works very well. For more information I covered all the Garmin GTN750/650 features and options in the Aerobask Panthera review, as well as the way you can create a flightplan in the Skyview system. Autopilot Panel One big difference from the Panthera is the upper autopilot panel. If you have read the Panthera review you would note I used the GTN650 "Otto" autopilot feature for using the autopilot systems. Not in the Eclipse because you have a larger more easier and versatile panel for autopilot selection and use. It is very nice to use and covers all the standard functions that is required to operate and use the autopilot systems, from ENG FIRE (Engine Fire) (L - left and R - right sides),BARO (Barometer) selection, YD (Yaw Damp) AP (Autopilot activation) ATS, FD (Flight Director), SPD (Speed) select, NAV and APPR (Approach), HDG (Heading) selection, ALT CHG (Altitude Change) V/S (Vertical Speed) and ALT (Altitude) select. Flying the Eclipse 550NG Starting the Eclipse is very easy and totally automatic, there is a sort of engine bleed to start (start switches are on the roof) on "Cabin Air Switch, but it must be returned to normal before altitude, the cabin pressures can be monitored by the two dials in "DELTA P" and "RATE/ALT". You will need a fair bit of throttle travel (nearly half) before the Jet will move forward as the light thrust pushes against the aircraft's weight. It also makes a big difference on how much weight is on the aircraft which is obvious. But as soon as you have momentum then you need to then pull back the throttle to control the taxi speed, the jet just needs that initial push to get it moving, and not a lot of thrust once it is taxiing. The aircraft is totally engineered for ease of use. Flaps are set in three positions as noted on the panel in front of you... UP - T/O (takeoff) - LAND, easy! You are expecting the 550 to be sluggish with the power right up, but it is not. The 550 is no lightweight Boeing, but there is a nice shove once it gets moving and the speed builds quite fast even when fully loaded of which you need around 140knts and 2,500ft or so to get airborne. The 550 will climb solidly as well at a maximum of 2,400 feet per minute, so takeoff performance is very good. Displays are nice, bright and clear, but the switchgear is slightly dark, I couldn't find any other adjustment except for the panel screen brightness levels. All sound is enhanced and scripted 3D sound and that includes the rain effects and those excellent PW610F thrust engines providing the perfect aural feedback to go with the wind effects... Sound is very good, and noticeable throughout the whole range of engine sounds from start up to shut down... GTN functions are very good for flight changes, like a last minute "Direct-To" in the flightplan. One other note is that when the 550 gets to its set altitude (10,000ft) you have to adjust the throttle (slow) to allow it to settle on the height correctly, if not the aircraft will hunt up and below between the set altitude and not settle in at the right point. Fuel efficiency at 41,000 ft is nearly 10 gallons per hour better than at 37,000ft. 430 mph/375 ktas, as the Eclipse can maintain a maximum cruise speed of 430 mph (375 ktas) and that allows rapid travel between airports or even states. So the higher you fly the further you will go. It will however take you time to climb to up to even 35,000 ft (10,688 meters) which is around 22 minutes. The aircraft's professional flight model and handling characteristics has been created by experts and tested by Eclipse pilots and the aircraft does totally feel very complete and in those important areas. X-Plane11 effects look very nice in flight. Chrome is sensational with the window surrounds and engine inlets, note the lovely sheen on the lower wing. You are always wanting to fly in X-Plane11 now, just for the brilliant shadows and cross cockpit feel... My hop from KLAL (Lakeland) to KMCO (Orlando) is short. For descending and landing you don't have any reversers or air-brakes, but one positive characteristic that you can use is the exceptional slow landing speed, stall is around 69 Knts, which is still very low. But there is a slight quirk with that point. If you allow your speed to drop too far to quickly the nose will rise as it should, but worse is the aircraft's horizon bar disappears behind the compass heading indicator and so you lose your perspective on the aircraft's pitch nose angle. You can keep the pitch correct of course, by using your speed (faster) but it does not allow you to lose speed earlier than you would like, so it is a learning curve to get the approach speeds correct and keep the pitch in check. All except the slowest GA and STOL (Short TakeOff and Landing) aircraft does your approach speed feel so slow... 85Knts (note the "Land" flap setting). Approaching the field you feel you could walk there faster... .... slooooow, but you can still go as slow as even 80knts on landing. So once down the speed drops off enough to easily slow on the brakes to taxi speed. Landing distance required is 2,250 feet or 686 Meters. Overall the Eclipse is a lovely aircraft to fly and manoeuvring speed is around 180knts. You really feel this VLJ in your hands and feet and it does have great performance built in as part of the package. Eclipse Lighting Panel lighting is via two modes for Day or Night (that is why the panel does not appear to be lit in the day? The switch is under the panel lighting dim knob... The problem with this set up is that if you want the panel instruments lit during the day, then the main display panels will be dimmed as well with "night" switch on? The tablet allows you to control the brightness of the lighting in three settings, there is also a white and red torch light function. So you have to fiddle a bit to get the lighting feel you want, but mostly it is too dark or too bright. Same with the cabin lighting, and it turns the chrome to grey, however cockpit foot-lighting helps the feel. External lighting is good, but in someplaces it comes out as rings more than lights as the source is set behind an object. Liveries There are ten 4K quality liveries. Mostly US registered, but a couple European and one "Flower Power" design, which is very nice and way cool if Hippydom is your thing... man. _____________________________________________________________________________________ Summary Aerobask are at the top of their game right now, with not only the fabulous Pipistral Panthera but now this excellent jet powered Eclipse 550NG as well, Not only is there simply brilliant design built in here but the aircraft is also packed to the rafters with exceptional avionics with the highlights in the "Skyview" and the brilliant GTN760/650 systems. Certainly I would recommend the X-Plane11 version over the X-Plane10 aircraft as simply the aircraft has also been also refined for that version and looks and feels just that much better with the X-Plane11 effects doing their thing. The Eclipse is quite powerful in range but also very easy to use and fly. That is not to say this is a simplistic simulation because it is not, in fact with all the gear on board and to use, you should be happy for hours flying the aircraft. The point I am making is that the Eclipse is an easy aircraft to fly and use as it's original purpose is for an Air-Taxi role, so load, start, fly, land then unload, then with a new set of passengers you then load, star... you get the idea. The feature list is huge, quality is excellent and on the list goes on and on.... So the Eclipse 550NG is a brilliant addition to X-Plane, and a worthy addition to your flightline... a real gem. Positives : Almost everything, Developers at the top of their game, brilliant Avionic suites with two sets in the Skyview and GTN systems, great 3d sound, great high quality design especially with X-Plane11 effects, loads of features... on and on the list goes. Negatives : Not much, but if you want to be picky then here is another aerobask pilot that want to sleep in the aircraft, no internal passengers and the internal lighting is a bit strange to work out and very black or white. _____________________________________________________________________________________ The Eclipse 550NG by Aerobask is NOW available! from the X-Plane.Org Store here : Eclipse 550NG Your Price: $39.95 Exclusive features Professional flight model from X-Aerodynamics In-house coded GTN 750 and GTN 650 with touchscreen and scroll-wheel support: Exclusive multi-threaded and fps-friendly map and terrain display Map topography display based on actual X-Plane mesh data Terrain awareness display based on actual data Configurable map rendering TCAS with online flying support Airways, SID and STAR support (waypoint-based) Flight plan import/export compatible with stock XP10 fms format Built-in chart viewer - easily import yours COM support for PilotEdge (Connect/disconnect, TX/RX, COM1&2 volume control) COM awareness for IVAO and VATSIM (conneciton status) COM, NAV and XPNDR dialing pad Interactive checklists Resizable pop-ups VIP controller, in cabin and in popup for aircraft management Latest revision of Dynon Skyview with added scroll-wheel support NEW! Scroll-wheel support on lists, map, HDG, CRS, MDA, ALT, VVI, etc... Airways, SID and STAR support (waypoint-based) Weather map display on multiple screens and orientations TCAS with Traffic Advisory and Resolution Advisory Resizable pop-ups Optimized for XP11 with PBR support, compatible with XP10 (separate acf file included). Enhanced and scripted 3D sound Compatible with GoodWay 5.0.1 or higher Features: Ultra-High quality 3D model with: 4K textures ambient occlusion specular map PBR normal mapping (XP11) Pop-up menus for weight & fuel and options Saved fuel and passenger configuration Fully functional virtual 3D cockpit, with livery-dependent interior design. Windshield and EFIS reflections Rain graphic and sound effects Script-driven custom sounds Ground Power Unit Requirements: X-Plane 10.50 or X-Plane 11 Windows, Mac or Linux - Running in 64bit Mode 1Gb VRAM Minimum. 3GB+ VRAM Recommended on X-Plane 11 X-Plane 11: this aircraft requires GNS430 data from X-Plane 10, Navigraph or Aerosoft to be installed into Custom data folder. _____________________________________________________________________________________ Installation and documents: Download for the Eclipse 550NG is 441mb and the unzipped file is deposited in the "General Aviation" X-Plane folder at 595.70mb . Key authorisation and a restart is required. You can use the Navigraph or Aerosoft navigation data with this aircraft or the built in X-Plane GNS430 data installed in your main root folder. Comprehensive set of documents covers all aspects of the (complex) avionics systems and flightplanner _____________________________________________________________________________________ Review by Stephen Dutton 6th April 2017 Copyright©2017: X-PlaneReviews (Disclaimer. All images and text in this review are the work and property of X-PlaneReviews, no sharing or copy of the content is allowed without consent from the author as per copyright conditions) Review System Specifications: Computer System: Windows - Intel Core i7 6700K CPU 4.00GHz / 64bit - 16 Gb single 1067 Mhz DDR4 2133 - GeForce GTX 980/SSE2 - Samsung Evo 512gb SSD Software: - Windows 10 - X-Plane 11b15 and also used in X-Plane v10.52 and checked with current flight route and details Addons: Saitek x52 Pro system Joystick and Throttle : Sound - Bose Soundlink Mini Plugins: Environment Engine by xEnviro US$69.90 Scenery or Aircraft - KLAL - Lakeland Linder Regional Airport 2.01 by Drankum (X-Plane.Org) - Free (note: personal added items in an office (okay demountable building and vehicles) - KMCO - Orlando International Airport by Freddy De Pues, NAPS Advanced Sim Scenery and upload by Nicolas (X-Plane.Org) - Free
-
Aircraft Update : McDonnell Douglas MD-88 Pro v1.30 by Rotate
Stephen replied to Stephen's topic in Airliners Reviews
Thank You very much you are very kind, But just don't tell anybody that I do this just to fly great aircraft in X-Plane! -
Aircraft Update : Airbus A320neo v3.0r1 by JARDesign This new v3.0r1 version of JARDesign's Airbus A320neo is not just a version update, but also a compliant version for X-Plane11. Yes you can now fly the Airbus in X-Plane11 and use all the features of this latest version of X-Plane with one of the most popular aircraft in the simulator. To signify the new X-Plane11 era then JARDesign has added in a new livery to the collection called "Home" by Slava. And very X-Plane11 it does represent as well. The Airbus A320 on the surface my look outwardly exactly the same but v1.30r1 has had a significant 3d modeling overhaul, the external by Felis and the internal by Dron. The Airbus always had a nice shine in X-Plane10, but in X-Plane11 it now looks like it has come straight out of the paint shop and straight to the operator in you. X-Plane11 does also highlight the detailing on the aircraft far more as well, the A320 looks beautiful and glowing in the morning light. Nice improvements also include the metalness and chrome feature in X-Plane11, this looks very nice as well on the engine inlet cowlings and winglets. Both engine configurations that was with the v2.7 update are still here with the older ceo CFM56 or the latest neo PW1100G-JM engine options available. Internal At first glance the excellent A320 cockpit looks exactly all the same. But in v1.30 update all the instrument panels and the panel display glass has had a total makeover to match the new X-Plane11 material effects and the windscreen glass is also updated to use the X-Plane11 reflections better as well... ... and the panels now also fit far better together and to avoid those nasty "marching ants" around the displays, and yes if you look at the older version they were quite bad... you did notice that didn't you? Overall the panel fit is far more precise and is now totally perfect. The Airbus's cabin in v1.30r1 has had a huge upgrade as well. The cabin has been changed from the ceo (older) style cabin to the newer neo LED lighting style of cabin, which is very similar to the Boeing "Sky" interior designs. There is now a well defined business class and economy class. The neon lighting was in the older v3.0 upgrade, but this is a different colour and is better intergrated. The economy style seating is absolutely first rate, with beautifully formed rear panels (the same ones you stare at for hours) and excellent overhead paneling with passenger air vents and lighting controls, this is the A320 cabin you always dreamed of. Over-wing exits are well done, but the minute detailing is everywhere and the highlights are the actual windows with great cabin reflections and even the air hole between the external and internal glass. You now have the best airliner cabin window seat in X-Plane. Note the lovely X-Plane11 PBR lighting across the cabin. Only item to note that the cabin overhead and sidewall lighting is connected to the cockpit overhead lighting, it is also adjustable, but only with both areas lit at the same time, and the No Smoking/Seat belt signs don't glow either and the monitor screens are blank, but you can't have everything. FMGS (Flight Management and Guidance System) First to note that X-PLane11 changed the internal navigation data source that is different from X-Plane10. The A320 has been updated to reflect that change, but the Nav data is a little old, JARDesign recommends to update your data (current cycle 1704) if you have an account with Navigraph or Aerosoft-Nav Data Pro, you can also use the installed X-PLANE 11/Custom Data/GNS430/navdata/ folder data if you wish to as well, just copy and paste the data to the root folder "_navdata" in the A320neo aircraft folder. And you can choose your data source from the "MCDU" status page of which selection has now been improved. The FMGS is also looks outwardly the same unit, and the actual input of data and flightplans is not changed, but the system has had a large amount of attention under the skin. All fuel and performance calculations are now correct for X-Plane11 performance, and the actual FMGS was broken by the new model and that is now also fixed. Vertical profiling performance has been revised to be now better as well, but the upper ECAM (Electronic Centralised Aircraft Monitor) profile display over lies the ECAM engine displays making it hard to read? There was always an issue with the CRZ level setting when you inputted the data, and you always needed that the CRZ level number was reset before you displayed the route data on the FMGS screen. It is still worthy to rechecked this item after all performance data is set, but this quirk has been addressed. Flight Ground Equipment has had a touch up as well with better textures to match X-Plane11. I personally always use the Ground Handling Deluxe plugin and either the built in ground vehicles or GHD can be used. It is important to update to the latest v.240317 version of GHD if you are running X-Plane11 and with this aircraft in that you not get simulator crashes, the older GHD affected xEnviro as well. If you fly this A320neo from JARDesign, then purchase the excellent BSS sound pack. Overwhelmingly brilliant, startup is totally realistic, so turn your sound up for simply great sonic detail. Aircraft looks excellent bathing in the X-Plane11 lighting... The A320 is an aircraft you need to fly regularly, It requires a mastering of its behaviour, certainly in the takeoff phase and the transition too auto pilot flight, if you get through the full process without any autopilot cutoff's you are doing well. Cabin view out is now excellent, great for replays and sitting back and enjoying the scenery... and of course your mastery at the controls! Cockpit panel reflections in PBR are incredible, breathtaking... ... The panel lighting brightness has been increased to give you more chance to see through the cross lighting better to read the instruments and it is thankfully better. Over items covered on the instruments are in the SPEED mode was unstable and now fixed, that annoying LVR CLB mode flash has also been addressed. and the ND (Navigation Display) path drawing (the line) has been redone. Other notes include small items like the baro and clock lighting and baro selector have both been fixed. You now also have two mousewheel selections in "classic" or "comfort" (in the MCDU MENU), but the speed manipulator is annoying in if you try to adjust by moving the manipulator and not using your scrollwheel, it jumps to a very high or lower speed very quickly. Note the annoying vertical profile on the upper ECAM (left image above). Cockpit lighting has had a few changes and adjustments, but the main overhead lighting is still on and can't be toned right down dark for landing and that makes the cockpit brighter than it should be on approaches, also like noted the overhead lighting is also connected to the cabin lighting. Arrival at Manchester and down you go. It is all about hitting the numbers... get the correct speed and height and the Airbus rewards you with a great simulation. You are going along for the ride as you twist into finals... but you get great views of your approach through those nice clear cabin windows. A lot of attention has been given to the ILS and approach phases of the flight with this 1.30r1 update. Covered are items including that the GA - Go Around has been fixed, ILS lock and approach has been fixed with the ILS dots and diamonds being now correct and finally your "Rollout" mode or Autoland has also been improved, and so there is no more hunting or missing the ILS zone area. Manchester's western approach can always slightly confuse you? Runway 05R is far more forward than your runway on 05L, if there is a slight mist or haze (of which there always is at EGCC) then the mist can hide out 05L and all you see is that the runway is not in alignment, but that is of course the more forward right side positioned 05R... It catches you out almost every time? Oh and for the final piece of good news... the engines will now switch off and power down and thankfully no more sitting around at the gate with the engines running like crazy. Summary Any really good update is welcome, but this JARDesign aircraft is one of the most popular in the X-Plane simulator for payware. More importantly it is now X-Plane11 compatible and like any aircraft that is used in the new simulator it brings out the best in the design, but more so here as the aircraft has had a few new renders to take advantage of the new PBR features. Most notably the cockpit panel area and reflections getting a big overhaul. They is also more than a few changes here. Both externally and certainly with that excellent cabin makeover, you do get a highly revised aircraft as well with a lot of small issues being addressed, most notably for the FMGS, flight performance (X-Plane11 compatible) and ILS/landing tweaks. Once savoured in X-Plane11, you will love this aircraft as more than ever before. There is a huge selection of liveries now (134 at last count) at a new website for JARDesign liveries called "Simliveries", so go there and take your pick of many and download for your requirements. A note that if you bought the Airbus A320neo after November 2016 (v2.7) then you only just have to upgrade and get a serial number for both X-Plane10 and X-Plane11 versions. If purchased before Nov 1st 2016 then you will have to pay an upgrade fee of $19.95 for the new versions. So this 1.30r1 update is a very worthy step forward for JARDesign's Airbus A320neo. I spent a lot of time with the aircraft during the X-Plane11 conversion period and enjoyed this aircraft enormously in it's new X-Plane11 environment, and I am very sure you will too. ______________________________________________________________________ Yes! the Airbus A320neo by JARdesign is NOW! Available from the new X-Plane.Org Store here : JARDesign Airbus A320 Neo Price is US$59.95 JARDesign Developer Support : A320neo JARDesign Full details and links for the BBS - Blue Sky Star Simulations sound packs is here: Aircraft Addons : A320neo/A330-243 Sound Packs by Blue Sky Star Simulations ______________________________________________________________________ Full changelog v3.0r1 + External 3D updated by Felis + Internal 3D and Ground stuff updated by Dron + Systems updated by JAR Need details? Well.. + objects and textures was reworked according with new material system of XP11. + redesigned/retextured MCP especially around displays (so you can see all panels layers here) + new textures on spots around + reduced amount of loaded textures (some are gone) + no more any gaps between panels (no flicker on any gaps in cockpit) + new reflections + now all cockpit screens/lcd panels have new glass with reflections + new things in cabin and new cockpit/cabin glasses (inside and outside) + some changes in Sky lights in cabine by yours requests + reflective ground stuff + NavData was removed from XP11 by Laminar Research and this was fixed for a320 (add _navdata with old Aerosoft cycle direct to a320 folder). Fixed. + User can select navData source at MCDU Status page. Improved. + add Diagnostic plugin, what can help if some installation was wrong (red message at screen if problem happen) + Perfomance and fuel calculation was broken in XP11 and fixed for version 3.0 + Navigation system was broken and FMGS was reworked to be compatible with new XP FMS. + Cockpit buttons night lighting was broken. Fixed. + rework ND flightplan path drawing. + vertical profile calculation reworked + NEW CRZ FL option was reworked + Go Around fixed + ILS approach fixed + Impossible engines shutdown fixed + cockpit 3D light fixed + SPEED mode unstable fixed + LVR CLB flash fixed + display brightness improved + flight log improved + horizontal FD during SRS/RWY fixed + "CF" legs drawing improved + Rollout mode (Autoland) unstable fixed + reflection maps for external 3d improved (thanks Rashid) + brake and clock night lighting (front panel) fixed + baro selector work fixed + fcu knobs work improved (mousewheel selection work both for classic/comfort manipulators style) - please use MCDU Menu page 2 to switch style + not-transparent in-cockpit sunglasses fixed + engines start issue fixed + ILS DOTs indication fixed + JARDesign "Home" livery add (Thanks to Slava!) + www.simliveries.com download service add for free a320 liveries _____________________________________________________________________________________ Update Review by Stephen Dutton 4th April 2017 Copyright©2017: X-PlaneReviews (Disclaimer. All images and text in this review are the work and property of X-PlaneReviews, no sharing or copy of the content is allowed without consent from the author as per copyright conditions) Review System Specifications: Computer System: Windows - Intel Core i7 6700K CPU 4.00GHz / 64bit - 16 Gb single 1067 Mhz DDR4 2133 - GeForce GTX 980/SSE2 - Samsung Evo 512gb SSD Software: - Windows 10 - X-Plane 11r1 Addons: Saitek x52 Pro system Joystick and Throttle : Sound - Bose Soundlink Mini Plugins: Environment Engine by xEnviro US$69.90 : Headshake by Simcoders : JARDesign Ground Handling Deluxe GHD plugin Scenery or Aircraft - EDDH - Airport Hamburg by Aerosoft (X-Plane.OrgStore) - US$21.34 - EGCC - Airport Manchester by Aerosoft (X-Plane.OrgStore) - US$22.00
-
Behind the Screen : March 2017 March 2017 was such a turbulent month that you knew it wasn’t going to end passively or easily, and it certainly didn’t disappoint on that account. Already 2017 has been a signature year for a huge amount of change and disruption in that every month that goes by it just goes that level higher. But March took the absolute cake as it ended with not only the sudden of release of X-Plane11 when we were already resigned for a few more weeks of Release Candidate (RC) bug walloping, but no then suddenly there it was… released. The moment of release was not to be forgotten for a long time either as I was also hunkered down waiting for our god on high to try to kill everyone on the east coast of Australia with the most devastating cyclone (Debbie) for a generation. The general feeling lately is not if but when it is your turn on the planet to be walloped hard by the almighty, and if you will actually survive the event. Thankfully I did, you learn to pray a little better for not wanting to go through it all over again. I personally don’t mind beta testing. It is however a bit like being teamed up with a bad dance partner in that it is one step forward, one step back and the two steps… oh, and then one step back… you sort of get the idea. But nobody helps when they start screaming… I “lost frame-rate, this totally sucks” and ‘I paid for…” yes a beta, you paid for a beta not a full finished product. But the shrills became more and more annoying and even louder and more diverting from the business at hand. Here is a point. I never once had bad framerate, not once, yes some betas went wonky but Laminar updated those within 24hrs to fix that, but overall the constant changes was pretty good throughout the whole process. The major issues however was that late in the process Austin Meyer decides to make the fundamental basis of engine performance more realistic, which is a very nice feature to have, and it does work extremely well, clever too. But from an aircraft developers perspective it was a very different situation as it goes to the heart of their very complex thrust ratio algorithms. In other words it buggered it all up, or everything up. It was the same issues as when Laminar Research moved to 64bit, it damn well hurts because it deals with the really deep fundamentals of the simulator, it will take awhile to get everything of this sort of development perfect again and expect a few more updates before the performance data figures are all correct again, but the results are totally worth the pain. No help was the fact that the attraction to fly aircraft in X-Plane11 was simply immense. Once you sampled the sheer delights of PBR (Physical Based Rendering) and the brilliant totally realistic misty focus of the new sim, you wanted those outstanding aircraft to immerse yourself in with all the glories that behold you. So the MD88 from Rotate, any Carenado, JARDesign or Flightfactor was an absolute must and most developers and some reluctantly for the fear that their aircraft were not up the complete full quality and design specifications that their highly regarded reputations are built on. I didn’t help either, sampling the Rotate MD88 as I wanted everyone to fly this aircraft and many more as well. I was (forcefully) told that they (the developers) were not willing to compromise their products, and rightly so. So the answer was “X-Plane10 only” for now, but even for me X-Plane10 is so yesteryear, it’s gone baby… I’m now in the (buggy) new one, but “hey, we can live with all that buggy mess can’t we”. Some if most developers relented in creating “Flyable” or “Usable” aircraft for X-Plane11, mostly because the beta process was looking more and more like a longer phase than any beta run has been in the past. To be fair everything was double-checked in X-Plane10 in any review, but the differences in mostly sound and engine performance and some features were mostly insignificant if you knew where the differences were, in reality X-Plane11 excelled in every area, and god these aircraft are simply outstanding, awe inspiring in their new environment. My latest X-Plane11 review images say it all, some images are extremely photographic, incredibly realistic, welcome to the new age of X-Plane11. But the beta longevity also had other side effects. This has caused a backup of releases, as to release for X-Plane10 and then maybe only a week or so later you then have X-Plane11 coming to release then that is two releases in just a few short weeks, it is all very confusing, so most held their precious wares back and of course that then created a lack of new goodies in coming into the stores. And the confusing side effects of what is actual update version or the currently correct one, it is all very confusing and even to the experts. Now with X-Plane11 going to release the heavens will open on product and a huge (I mean colossal) amount of aircraft will have to be updated, Carenado and Alabeo have around 33 aircraft, I think as I lost count somewhere around 28… and a load of new releases will finally hit the stores. So it is going to be a really, really busy Easter in 2017. Easter 2017 So you are going to be one very happy bunny this Easter. In fact Easter is now fast becoming the new, new period for X-Plane releases. There are several reasons for this. First the classic Christmas season is so crowded out with a huge amount of product, but not for X-Plane, but for your loved ones and you only have so much credit to go around. Then there are now the huge Black Friday sales that causes you to buy loads of great product on the cheap, and to release just before the Christmas Holidays is a death zone, because if that aircraft has a few issues or bugs, it is sayonara for all that until the New Year. Easter is very different. You have time off to actually fly what you buy (and not be bothered by family Christmas outings by either them coming or you going), updates can still come out to keep you in the air, and a thankfully you should have few credit points on the card if you have finally paid off the Christmas outgoings and all the expensive bills in January and February to finally splurge a little love on yourself. This year is even a bigger event as you now have a brand new exciting shiny simulator to fly in as well (funny that Laminar Research releases X-Plane11 just before Easter), but besides the XP11 event then what sweet Easter has most of all is free time… lots of time to fly. You are going to find that Easter will in the future become the bigger event time for important releases as it simply makes more sense for the developers to have the time to get the product just right, instead of rushing it out just to try and catch the Christmas dollar which is in short supply anyway. Diabetes will kill off our Chocolate fetish and we are too old to hold on to our bunnies anymore… but a lovely new aircraft might be right up there in our happiness zone. Bonanza F33A Slowly and thankfully with X-Plane11 now fully standard, your old favorites are coming back and can be flown again. The Carenado F33A is a lovely aircraft that was grounded with the conversion to X-Plane11. The gear doors stuck open and the lighting was wonky. I took it for a few desperate flights but the drag from the gear doors just took away too much of the speed. Worse you couldn't start it again from hot or cold, so if you went somewhere you couldn't fly back home unless you did a full aircraft restart... of which I totally hate to do. But one of the benefits of being a reviewer is that you get options to help out with testing, and Carenado (okay I begged) to help out with testing the X-Plane11 updates (coming very soon) and will be known as v3.4. Changes are remarkably small but essential for correct X-Plane11 flight. There will be a review for Carenado updates soon, but I will note it is a huge difference in the flight model and engine performance. Aircraft are now becoming so incredibly realistic, this one of the huge benefits of X-Plane11 in the future. The little Bonanza was very special before, now it is absolutely amazing with the update in X-Plane11 with it's in your face features. As they say... living the dream. Long Haul in X-Plane11 One still waiting for the complete X-Plane11 makeover is the FlightFactor Boeing 777F series. I will make the point that this note point is a few weeks old and the new updates now available have no bearing on this flight. I like like to run X-Plane long haul. Time being constrained will mean that flying more than three hours means taking the computer off grid for a day or so. But I do like to run with the Formula One season in flying the "Flyaway Races" to all the various racetracks around the world. First race is in Melbourne, Australia 23rd - 25th March. So that means a huge two day set of flights from EGNX - East Midlands to Singapore, then refuel and then on to Melbourne. Nothing new in that, but this was a test for X-Plane11 in long haul and if the new version stood up to a full long two day simulation. Well it failed? It was a beta sim running a beta aircraft, and it showed. I will make it very clear that neither X-Plane11 or Flightfactor are at fault here, as both are still in development but the route was worth the try. In fact I flew as far as the east coast of India (which made it all the worse in the crash) The night sky still had that bad banding in the sky which made 6 hours in the dark painful (now fixed) and fuel performance was terrible (I had former fuel numbers or fuel burn notes), but I reset via the local map and flew on to crash again at Changi WSSS in Singapore. The ILS runway alignment was way out and I had no brakes to stop with once I was on the actual runway after a go around! this is a lot of fun to be had at 2am in the morning when you are dead tired... Flying long haul with X-Plane even when working fine is like looking after young babies. They will happily fly on quietly for hours if you keep an eye on the aircraft, but boy do they quickly get into trouble if you leave them for even a few moments, just leave the screen for five minutes and I can absolutely guarantee an alarm will go off or the aircraft is going off course somewhere in the wrong direction... plane sitting it is, just babying the damn thing all the whole way to the destination. Flying on to YMML Melbourne was not as bad as I did not crash to the desktop this time, but still high winds and another poor runway alignment, caused a very shaky landing, I was ready for the brakes this time by over using the thrust reversers, which worked but failed to retract correctly... not the skill and perfection I usually have but another way of looking at it, as it was a test of my skills to get the damn thing down and on the runway in one piece and god knows what condition the cargo in the back was in. But the whole point of this was to test X-Plane11 to its limits. Long haul is very good for that. It is good for X-Plane as well. To most that point would sound like a folly, but it isn't. Running the simulator over long periods is very good for settling in all the hundreds, even thousands of components that make up your simulator and it is that you are mostly always changing things around, adding in here and updating something there and my system has to withstand the demands of constant reviewing a zillion things in the process. So a long haul is a really great barometer on where you actually are in the process, it shows you what does work well and what does not, but more importantly it refines the simulator within itself. X-Plane will always feel far more fresh and faster after a really long run, or show you where there is issues and where areas need addressing, nothing beats a full long haul flight to get the right perspective on the condition of the status of the X-Plane simulator. Shanghai in China is next on the F1 calendar 7th to 9th April. X-Plane11 is now released and the B777 from flightfactor is updated, so it will be another interesting test flight... But do more long haul, it is very good for your simulator's overall health and condition. So happy April Fools Day and see you all again after Easter in May Stephen Dutton 1st April 2017 Copyright©2017: X-Plane Reviews
-
Version Release : X-Plane11 has been officially released Laminar Research have released RC-1 of X-Plane11 but also noted the full release of X-Plane11. In accordance with Laminar's usual version release schedule the interim beta phase is followed by a RC or "Release Candidate" that is a standardization of all the features and settings for the full version release, but in this case Laminar Research have moved directly to a full release. Steam users should now get a X-Plane11 copy, and the DVD disk package will also be released to stores. There will be a slight delay on the shipping of DVD package versions, as the disks have to be burnt and then shipped to stores. The official release is still noted as an RC and even though the release has been made, so there is still a period that means the testing phase is not completely over as the simulator version is still noted as "Release Candidate 1, but the main items are finally locked in. There could be still more various RC versions until the absolute final release is actually published, but for most it means that finally the main beta work phase is over. Fine tuning will still not happen until the absolute final version release, so don't go looking for speed and framerate changes yet however some tuning may still be evident. To update to Release Candidate 1 then run your X-plane installer, and the simulator will note the version only as X-Plane11 and no beta version variants. Make this no doubt, the new X-Plane11 version is a huge step forward for this simulation platform and the major features include. • A brand new intuitive user interface and control setup • A completely overhauled aircraft fleet with detailed documentation, plus multiple new aircraft • High-resolution exteriors and detailed 3-D cockpits for many aircraft • New global auto-gen scenery with both European and North American details • The latest road placement and global scenery from open street map are included • Now with over 3000 airports with 3-D buildings & airport scenery • Airports are now populated with dynamic, driving service vehicles and static and dynamic aircraft. • New rendering engine for enhanced lighting and water effects • Updated weather and atmospheric effects • Enhanced performance from the modern 64-bit engine But to note that there is huge amount of detail and features already built in to the new version that have not been yet activated or finalised. New FMOD sound, particle effects and better PBR (Physically-based rendering) have yet to be unleashed and they will have a significant impact on the simulator experience. You can try X-Plane11 in the demo or buy it here : X-Plane / Laminar Research But for now, well enjoy... X-Plane11 is here, and it is a great step forward for simulation. ______________________________________________________________________ Stephen Dutton updated 30th March 2017 Copyright©2017 X-Plane Reviews: X-PlaneReviews
-
City Scenery Review : Washington XP by Drzewiecki Design Channel your inner Frank Underwood and build your own "House of Cards'. Go all out to "Own this Town!" as this town is Washington D.C, the powerhouse of political power and runaway egos. And now you can with the release of Drzewiecki Design's "Washington XP" and the XP denotes this scenery is for X-Plane. I was immensely impressed by Drzewiecki Design's "Moscow City XP" scenery, but Moscow isn't exactly close to most of your local routes, unless you are Russian. But Washington is very handy. I am on a bit of a crusade on supporting city sceneries. They are strange creatures in the fact they don't really do anything in an active way like an airport scenery does, they are quite frankly just nice visual aspects to admire and absorb while you fly. But they are in context as much as an important contribution to the simulator as the airports and aircraft themselves than everyone takes for granted. Worse I have seen that this area as one of the real points of neglect in X-Plane and mostly by developers, as there is simply no point in having one of the best sceneries you can buy next to a major city, and no visualization of the city to introduce you to the airport... for me that sense of arrival or the point of departure over a credible landscape is just as important as any other factor of simulation. In this area X-Plane has been very poor, and it is even to barren to far worse in Asia where you land to an open flat lifeless world. Another point is that the actual city scenery has to be good as well, a few nice well positioned tall buildings is not a city built, as each city has it's own very unique character with outlined skyline and that character has to come through in feeling and with a visual statement. For Drzewiecki Design they seem to have taken up the niche of creating credible city sceneries. With New York, Miami, Warsaw, Moscow, and now Washington, so how good is this latest city in Washington in adding to the collection. Installation: There are a few notes on installation and so we will cover that area first. This review is run in X-Plane11 with the object settings most set to the highest positions. So if you can do this then I recommend that. Framerate is actually very good for the insane amount of objects on show here, and newer more denser X-Plane11 autogen is a huge advantage in the visual aspect of the scenery, so I recommend X-Plane11 to get the full visual impact of the scenery, also to note that "runways follow terrain contours" select-box is turned on. There are two types of download with an Installer .exe package for Windows and Folders for Mac and Linux. The folder package has to installed in the right order to work correctly. The Windows installer is very good. First you have to agree to Drzewiecki Design's license agreement. Then select either X-Plane10 or X-Plane11 and then you have a choice to either have static aircraft in the scenery on or off. You can return here later to turn off the static aircraft if you wish to not have them displayed in the future. Another note was that I didn't see the option of where to install the scenery if you have more than one copy of the simulator on the desktop? Installation is DD Washington XP layer1 and DD Washington XP layer2 in that order with the DD Washington XP Documents (Manual) in no really important role on the install, if you want you can remove that folder. Drzewiecki Design does also have an objects library in "000 Drzewiecki DesignLibrary" that I already have installed, but there are no notes if that is required here? Washington XP The scenery package comes with the city scenery of Washington D.C. and its iconic buildings, including the Capitol Building, The White House, Supreme Court, Lincoln and Thomas Jefferson Memorials, Washington Monument, Library of Congress, Smithsonian Castle and for "Get Smart" fans the "International Spy Museum"! and altogether there are 1500 custom-made buildings incl. whole downtown in 3D plus other landmarks, bridges, stadiums, harbors/marinas and other objects. Airports are included as well with: KDCA Washington National Airport (Ronald Regan), KADW Joint Base Andrews, KCGS College Park Airport, KVKX Potomac Airfield and W32 Washington Executive Airport. Helipads included are: White House, KJPN Pentagon Army Heliport, KBOF Joint Base Anacostia–Bolling, Sibley Memorial Hospital. First Impressions My first look at Washington lived up to one of the area's names in "Foggy Bottom"... The city is known for it's murky dealings so it felt actually appropriate. No doubt X-Plane11 can now create a very atmospheric feel to X-Plane. But I suppose you would want in this review a more clearer view of Washington. City Overview Great X-Plane autogen allows for virtually no boundary between the actual scenery and the installed scenery, so the overview of Washington is spectacular. And efficient as well, as I was getting 40 frames with this view. So your first impressions are "wow", yes the Washington scenery is this good. In any scenery of this scale there has to be some sort of realistic expectations. Nobody more than me would like detailed suburbs and local elements recognised and displayed, but that is not simply possible... well not yet anyway. But the underlying OSM (Open Street Maps) maps built into the X-Plane simulator do really help here to define the city in its structure and feel, and here it works for you very well. Most Capitol cities have a defining iconic location and in Washington it is "The Mall". Your city scenery can hinge on just one area to represent the iconic view of the city. If it succeeds then the whole of the scenery succeeds, but get it wrong or create it with poor textures and your scenery is going to fail. In this Washington XP view of the mall the viewpoint is beyond successful and in the right light like above it is very realistic... impressive. The Lincoln Memorial, Washington Monument and Capitol Hill are perfect, as is the Thomas Jefferson Memorial on the approach. A note that Drzewiecki Design has not added in the 14th Street bridge but simply allowed the X-Plane traffic to flow freely on the autogen bridges, I think this is a wise choice here, as it looks more natural in context. All the Mall's buildings are individually detailed and created, including all the Smithsonian Museums and Castle. The Federal Triangle, U.S Navy Buildings, National Archives Building and most Washington downtown buildings have been reproduced. Noted they are not detailed, detailed here but they are very good representations of the buildings. Both Libraries of Congress (John Adams in the foreground) and all the governmental buildings that a capitol requires is included. One building that does standout however is the Washington National Cathedral far in the distance up west of downtown Washington. Capitol Hill Think of Washington and the icon it is most known for is Donald Trump's hair... No not him!... The Capitol building on Capitol Hill. And the reproduction of the Capitol Building is very impressive. There is a lot of work in this building, detailing is excellent, extremely realistic even at close quarters, I love the copper roofing on the Representative and Senate Houses. This is outstanding design. The White House Another Icon is of course the White House. Until as many note Trump ruins it, "The White House" is the most famous building in America, some say Graceland (Elvis Presley) in Memphis is now more famous but the design is the same colonial age anyway. The famous "West Wing" is well produced, and the Navy One is sitting on the North Lawn ready. Overall the same excellent design as the Capitol Building and it is photographically perfect. You can also visit the Oval Office to collect your own "Make American Great Again" cap from POTUS himself. West over the Potomac River is the Pentagon, Pentagon City and Crystal City with the Arlington National Cemetery also shown. The Pentagon is also perfect, and the reproduction of office buildings and apartment complexes behind the complex do a great job of filling out the scenery. A big mistake from most city scenery developers is they do the central Icons which is fine, but without these skyline buildings and towers the scenery can look empty, but that is not the case here as the more mundane areas that mostly make up cites are also addressed as well. So overall the Washington centre is excellent in every area, a flyover is a must. KDCA - Ronald Regan Washington National Airport The main airport included in the package is the central Ronald Regan Washington National Airport. I still call it "National" as that name was originally "Hoover Field" but from 1941 it was always Washington National. Both of my most favorite approaches is north and south into RWYs 01/19, they are exciting and visually very good, they can be challenging as well if the weather is poor, which it is most of the time. Sadly Washington's other major airport in Dulles is not included in this package, but it is available on the X-Plane.Org and details are below. DCA is excellent, but doesn't have a lot of X-Plane special effects like animated airbridges or vehicles. There is however a lot of objects on the ground and that does at least fill in the scenery that could have felt empty and bland. Main DCA terminal has been well recreated in pure 3d modelling, with real see-through glass and a built in walk through interior. The terminal's historic intriguing roof structure is very well done both inside and externally, so it looks realistic. Control Tower is great as well and looks correct. Tower view works... just, only don't look up for the struts showing in your view. But the runway views are fine and that is important here, as the approaches are worth the excellent views over the city of Washington. Overall DCA is very good, and a worthy addition to your collection. Additional Airports Other airports included in the package are: KADW Joint Base Andrews, KCGS College Park Airport, KVKX Potomac Airfield and W32 Washington Executive Airport. Helipads included are: White House, KJPN Pentagon Army Heliport, KBOF Joint Base Anacostia–Bolling, Sibley Memorial Hospital are all positioned over the Potomac in Maryland southeast of the central Washington area. KADW - Joint Base Andrews Andrews AFB is the entry and departure point for not only POTUS (President of the United States) but incoming heads of state or delegates, so the airport hosts and is the base for 89th Airlift Wing with both the Air Force Ones in VC-25A's which are modified 747-200B's (Serial SAM28000 and SAM29000, SAM is Special Air Mission) and the Boeing C32's (Boeing 757) Air Force Two aircraft. It is not just the main governmental aircraft that are based here but all the logistic aircraft also required to transport the higher governmental heads and brass. And chances are that if an alien attack did head for Washington, then no doubt the fight as noted in numerous Hollywood dramas will start and possibly end on this base. Considering the sheer scale of the importance of Andrews AFB, the airport is quite stark. Mostly the scenery consists of a selection of large hangars on both sides of parallel runways 01L/19R 9,300ft (2,835m) and 01R/19L 9,755ft (2,973). Both VC-25A's are noted here, but there very little else in aircraft or equipment. Certainly not a bustling Airforce or Naval base. Note the ajoining Golf Course, Washington GA Airfields All the smaller GA airfields have grass and are fenced in. Small additions to the extra scenery, but with great benefits here. All building/hangar textures are not high quality and have a low resolution, but they are workable for scenery usage. All the fields are quite picturesque and are well worth visiting. KVKX Potomac Airfield and W32 Washington Executive Airport Both airports in KVKX Potomac Airfield and W32 Washington Executive Airport or Hyde Field are parallel and right next to each other. And so it would be very easy in not mixing them up and using the wrong runway? But W32 has the larger runway of the two at RWY 5/23 3,000ft (914m) long were as KVKX is RWY 6/24 2,665ft (812m) long. And both are part of the "Maryland 3" airports located within the Washington area with KCGS Collage Park below. This is the D.C. Flight Restricted Zone (FRZ), in that these airports are subject to the Special Flight Rules Area (SFRA) restrictions imposed by the FAA after the 9/11 Attacks. W32 Washington Executive Airport The biggest GA/Exec airport of the GA fields. Not much here but a few hangars and offices. Also known as Hyde Field it was originally an Army aviation training field, and it still has the older style military buildings, but it is no gleaming executive facility. KVKX Potomac Airfield Potomac Field is only 1.10 nautical miles (1.27 mi) west of W32 and was formally known as "Friendly". Not much here except some storage hangars and parking areas. KCGS College Park Airport College Park Airport has an interesting history. The field was established in August 1909, and civilian aircraft began flying from College Park Airport as early as December 1911, making it the world's oldest continuously operated airport. In 1977 the airport was added to the National Register of Historic Places. The field was also used to develop and test the first radio navigational aids for use in "blind" or bad weather flying. This was the forerunner of the modern Instrument Landing System used today by aircraft. Runway is 15/33 2,607ft (795m) long, but has significant lead in areas on both ends. There is a museum reproduced here on site called the College Park Aviation Museum that first opened to the public in 1981, and houses antique and reproduction aircraft associated with the history of College Park Airport. The museum was updated in September 12, 1998, and includes a 90-seat auditorium, a non-circulating appointment-only library, gift shop, museum offices, and a replica of the original 1909 College Park Airport hangar. There is a spare Naval Seaking on the other side of the field. And rail lines along the boundary gives the field some action. Scenery Lighting Night lighting in most city sceneries are mostly average, and yet this view is important. The Washington XP lighting is between very good to fair and fine if you don't get in to close for detail. Thankfully the main Washington monuments are well lit, so that is a huge benefit to the overall night time view of the city. For the city's buildings it is not bad, but not very imaginative lighting either, so "workable" is the main thing that comes to mind. Overall the city's lighting is slightly dull or dark. Pentagon and Crystal City towers are not bad in being more realistic, but thankfully default traffic lighting does help throughout the whole scenery. KDCA at night is average. The ramp areas are well lit... But the terminal is in... "Terminal Darkness" and not very realistic. Drzewiecki Design's night glass textures have always been bland, as they are again here. Mostly flat and dull and quite unattractive, it is overall at DCA average lighting and not very imaginative or diverse. Summary Looking at the broad-strokes then Washington XP is absolutely excellent, a must have scenery in your collection. You get a lot of area covered for your money as well as the full area covered includes McLean – Newington – Cheltenham - College Park districts, and the main central Washington downtown area. All the iconic buildings are well covered here with important Capitol Hill and The White House as standout sceneries, the Capitol Building itself is a major classic piece of work. Airports are well covered with KDCA, Andrews JBA and smaller W23, KVKX and the famous College Park, but no KIAD - Dulles. The most significant point of city sceneries is just a simple fact... visual. To convey a feeling of place or area, and in this main point the scenery succeeds perfectly. Now on any approach to DCA you will be transfixed by the views around you, This scenery completes and makes Washington now one of the great arrivals in X-Plane. I can't expound a more powerful point in why these sceneries are so important to the simulator, because without them, you have no sense of place or being in the X-Plane world. Flying aircraft is what the simulator is of course all about, but the dimension of real world realism in where and in the moment visually as you fly to has a huge bearing on the full experience of simulation as well. So support city sceneries and your X-Plane world will be far more better place with them than without them. Positives : Excellent City Visuals, All Washington Icons and Monuments are included, Great Frame-rate for the mass of objects included, many important surrounding areas are also included, overall great value. Negatives : DCA not bad, but Andrews is a bit bland, Night lighting at DCA is average and overall the city could be brighter, Smaller airport textures are a more lower resolution, No X-Plane animations in vehicles or airbridges. _____________________________________________________________________________________ The Washington XP by Drzewiecki Design is NOW available! from the X-Plane.Org Store here : Washington XP Your Price: US$30.00 Scenery Features: Washington, D.C. scenery with about 1500 custom-made buildings incl. whole downtown in 3D plus other landmarks, bridges, stadiums, harbors/marinas and other objects, all with night textures Large scenery area (McLean – Newington – Cheltenham - College Park) with night and seasonal textures and a detailed autogen Detailed scenery of KDCA Washington National Airport, with terminal interiors, detailed ground markings, static aircraft, native X-Plane reflections etc. Lite sceneries of KADW Joint Base Andrews, KCGS College Park Airport, KVKX Potomac Airfield and W32 Washington Executive Airport with custom-made all airport buildings and realistic ground poly layer. Many helipads and heliports including White House, KJPN Pentagon Army Heliport, KBOF Joint Base Anacostia–Bolling, Sibley Memorial Hospital and more. Recommended for X-Plane11 for more advanced features. Requirements : X-Plane 10 or X-Plane 11+ Windows, Mac, Linux 1Gb VRAM Video Card - 3Gb+ VRAM highly Recommended Download size: 600Mb Framerate is excellent for the density of the scenery, but still subject to computer system standards Installation and documents: Download for the Washington XP is 555.30mb and the unzipped files are deposited in the "Custom Scenery" X-Plane folder... DD-Washington XP Layer1 (1.75K) DD-Washington XP Layer2 (1.50GB) DD-Washington Documents (Manual) Note... scenery must be set in that above order to work correctly, full Windows .exe installer is included (Install noted above) KIAD - Dulles is available from the X-Plane.Org (Free) here : KIAD - Washington Dulles International Airport 3.3 Static aircraft can be switched on or off via the installer. _____________________________________________________________________________________ Review by Stephen Dutton 30th March 2017 Copyright©2017: X-PlaneReviews (Disclaimer. All images and text in this review are the work and property of X-PlaneReviews, no sharing or copy of the content is allowed without consent from the author as per copyright conditions) Review System Specifications: Computer System: Windows - Intel Core i7 6700K CPU 4.00GHz / 64bit - 16 Gb single 1067 Mhz DDR4 2133 - GeForce GTX 980/SSE2 - Samsung Evo 512gb SSD Software: - Windows 10 - X-Plane 11b15 and also used in X-Plane v10.52 Addons: Saitek x52 Pro system Joystick and Throttle : Sound - Bose Soundlink Mini Plugins: Environment Engine by xEnviro US$69.90
-
News! - Aircraft Released! : E50P Phenom 100 HD Series By Carenado It's out, It's out.... Their first Jet for X-Plane is released by Carenado. Only two weeks ago I noted the Phenom 100 was coming soon, but not this early, but more towards Easter when X-Plane11 became RC or a release final. But here it is... X-Plane users have waited a long time for this aircraft, and in X-Plane11 it will have been worth the wait. The usual Carenado quality will be on show here, but it is also the most expensive Carenado ever released for X-Plane at US$37.95... The aircraft both X-Plane10 and also X-Plane11 compatible (X-Plane11b17 or higher is required for use). Full G1000 Prodigy glass cockpit system is included, with the original Phenom systems and status screens with multiple CAS messages are also installed in the aircraft (Carenado G1000 data is required) and a new feature of Advanced Aural System Simulation (or great sound) is also included. Features Carenado G1000 (PFD and MFD) Terrain Awareness map mode Different declutter levels Advance menus and cursor with scroll wheel, click/hold or /drag Aux- Trip Planning Window Checklist mode Crisp, vector-based water data Pop-up windows can be resized and moved around the screen Pristine scroll wheel support FPS-friendly terrain map Original autopilot installed Dynamic Reflections via plugin in XP10 Makes use of PBR materials for v11 Advanced interior dynamic lighting 2D pop-up windows for instruments and options HD quality textures (4096 x 4096) 3D gauges Original HQ digital stereo sounds recorded directly from the real aircraft Realistic behavior compared to the real jet. Realistic weight and balance. Tested by real pilots. External (above) and Internal (below) detailing is exceptional, this is a Jet to you would want to spend a lot of time in. Included in the package 6 HD liveries. 1 HD Blank livery. E50P Carenado Prodigy G1000 PDF. E50P Emergency Procedures PDF. E50P Normal Procedures PDF. E50P Performance Tables Recommended Settings PDF Technical Requirements Windows Vista - 7 (64 bits) or MAC OS 10.10 (or higher) or Linux X-Plane10.50 - X-Plane 11 64 bits requiered 2.5 GHz processor - 16GB RAM - 1GB VRAM 490MB available hard disk space For WINDOWS users: Please ensure that you have all the Microsoft Visual C++ Redistributables downloaded and installed. The E50P PHENOM 100 HD SERIES is available right now from Carenado... ______________________________________________________________________ The E50P Phenom 100 HD Series By Carenado is NOW available! here : E50P PHENOM 100 HD SERIES Price is US$37.95 Notes: For WINDOWS users: Please ensure that you have all the Microsoft Visual C++ Redistributables downloaded and installed (click here) CARENADO G1000 DATABASE (MUST BE INSTALLED). Images & Text are courtesy of Carenado© Developer site : Carenado.com ______________________________________________________________________ Stephen Dutton 25th March 2017 Copyright©2017 X-Plane Reviews: X-PlaneReviews
-
Ask and you will be served by the Gods on high... Beta16 is now out , but wait for Beta17 for a cleaner beta. Dev blog release notes are here... X-Plane Release notes
-
Moved from wrong forum: With X-Plane 11 I have noticed a surge in power when moving the Throttle, Prop and Mixture controls. I move the controls in a forward motion, not much happens then I get a surge of power. This makes in very hard to control the aircraft. Is this an issue with version 11.00pb15? Is there any way to fix this in any settings? Thanks, Topflyer68 All thrust ratios and engine performance is changed in X-Plane11. If the developers have not adjusted their aircraft to the new parameters then they will be wrong. Beta16 is supposed to be a final lockdown of engine performance so most developers are waiting for those settings to go final... Sd
-
Aircraft Review : Pipistrel Panthera v3 by Aerobask One of the great satisfaction's of being a reviewer is seeing great talent mature. Many new developers come into X-Plane and have a huge amount of natural ability, but from a reviewers position it is in the many new introductions to the simulator that they have great ambitions for their future prospects are then hit with the realities of producing brilliant work. First releases are initially very good, but the novice will always be not totally aware of the smaller minute details of what goes into a fully formed product. So from the reviewers point of view you have to be critical and supportive at the same time, too much either way and the developer will think he really is number one were as in reality there is a long way to go, or the fact that being too harsh could make great talent walk away from a brilliant career and the loss therefore is for not only the future product for users to enjoy but the loss of talent to the simulation platform. But if the developer stagnates after a period of time, then the criticism will hurt, but the reality is that you should know by now on how the deal works, and the minute should have been addressed and absorbed, "picking on this or that" by critics is not the point here, as the point after the initial growth time is over is that is it now at a level that people do expect quality for their money, or the fact that "picking on this or that" means the product can be now that much better to deliver the quality the developer is capable of. Worse is the fact that for just a few extra weeks of fine tuning, it is in fact a "False Economy" in that the product goes out there to an audience that will quickly tell you it is not ready, and once the word gets around that the product is below expectations or just plainly not finished. Once that tag is on your reputation it is a very hard one to shake off, and some developers will never shake off a reputation badly gained just to get the product out there. That last 5% of the 100% of creating a product is the very hardest ground of all to cover, and more so as the aircraft and sceneries are so very complex today, get it right and you go into the upper echelons of being a must buy developer. In other words with every release you will be an automatic sale to the customer. It is called value for money. So what does this comment has to do with this review. Everything in fact as Aerobask is one of the really great talents that didn't fall into any of the above liabilities, and they prove what is required for greatness. Pipistrel Panthera v3 The Pipistrel Panthera is a great example of this. The first aircraft they released were very good, but they were all still a little slightly rough in some small areas. Version two (v2) showed more development and design, but more importantly Aerobask (then Harranssor) not only improved their actual modeling and design but started to explore new areas and developments to bring users another level of usability, functionality and most importantly that sublime quality of smoothness and feel to the ideas. And more importantly would not release an aircraft unless it was actually ready and they did not try to hit a locked in sales date, "it will be released when it is ready" is a good mantra. The major development we are talking about here is Aerobask's version of the built in FMS (Flight Management System) called "Dynon SkyView" and complimentary GTN 750 and GTN 650 systems. This system is not new as it was introduced on the v2, but back then it was a hybrid version with part of the default X-Plane GNS530 used as the navigation display and flightplan editor to supplement the GTN 750 and GTN 650. The Epic Victory from Aerobask introduced a development of the system yet again and a full avionics suite of the "Skyview - GTN 750/650"without the need of using the default GNS530 innards. With the Pipistrel Panthera v3 the system is again moved forward, but more internally than from the visual aspect, we will explain this later, but first let us look at the aircraft. When the original Pipistrel Panthera by then Harranssor was introduced the developer was at a disadvantage. Aerobask is a lover of composite aircraft, modern sleek and of very clean moulded lines. But in computer visuals these aircraft can come across as very bland or even cartoonish in appearance, there is no detail in soft clean shapes unlike the panel and riveting detail on 60's era aircraft. At this time of the review X-Plane11 is still in beta (b15) and the focus of this v3 release is in and only for X-Plane10.52. But the Panthera does fly fine in the beta, no issues for me except for an overuse of fuel. But the biggest benefit for Aerobask is the way that X-Plane11's PBR (Physically Based Rendering) shininess and harder shadows give these composite aircraft finally a feeling of reality, "oh it's so good" stunning and throughout this review you can see the huge benefits of what PBR brings to the simulator. If any aircraft have a huge visual benefit from X-Plane11 it is certainly Aerobask's designs. Earlier versions in X-Plane10 required that I had to use a lot of cheap lighting tricks to get something out of the blandness of the fuselage as shown below. But that is all swept away with X-Plane11... .... and there is better yet still to come! Aerobask have fine tuned the textures for PBR to match and it really shows. As the high quality 3D model has been totally reauthored with UHD 4K textures, Ambient occlusion, Specular mapping and PBR normal mapping (for XP11). For this review I set off from early from KLAL - Lakeland, Florida and headed out to KEVB - New Smyrna Beach Muni, but decided to carry on up to KJAX - Jacksonville along the eastern Floridian coastline. I was enjoying the great feel of the Panthera and the still newish feel of X-Plane11. I was certainly enjoying the aircraft, but I can't fly around up here all day as my fuel load is getting very low and that in X-Plane11 the Panthera does gobble up fuel at an alarming rate. Safer on the ground at KJAX... Let us now look at some "catch your breath images"... The realism is astounding, look at the light on the engine intake curves.. The panel design from the outside of the aircraft is just excellent, very, very realistic. The pilot shakes his head with your stick movement, but not much else and he can't seem to get a grip on the stick? As good as the panel is from the outside a closer inspection is overwhelming In the X-Plane11 PBR lighting it is just simply unbelievably brilliant, as the carbon matrix design is almost feel to touch. Cockpit detailing is excellent. All items are beautifully modeled with perfect textures and you can just feeeel everything is so nice to the touch. Top panel has sixteen in two sets of annunciators either side of the backup instruments of Speed, Artificial Horizon and Altitude. Lower panel has switchgear to the left that covers Power, Avionics, Fuel Pump, Pitot Heat, AP (Autopilot), A&C and AUX (GPU). Flaps and Climate Controls are to the right. Park Brake, Trim Indicator and Climate Control display are lower. All climate controls and systems are simulated also here. Key is used to start, just push the key to turn or use the manipulators. When you do start the engine throws out a lot of exhaust smoke and you have to work to get the idle right, it will churn a lot sometimes and you don't get that clean startup every time, very realistic. Cabin fitting out is exceptional, to note the detail then just look at the perfect chrome handles and seatbelt catches, are just perfect chrome. Dynon Skyview The Panthera comes with the two panel display version of the "Dynon SkyView" system. Pressing the aircraft symbol in the centre of each display will bring up the pop-up version of the panel, the panels are also adjustable for scale via the right hand lower corner. Yes we have seen these displays before, but there is a new efficiency to the activation and movements that shows the system has been upgraded, it is now far more fluid in operation as is Scroll-wheel support on lists, map, HDG, CRS, MDA, ALT, VVI... and more. Both screens are independent of each other and all can be configured to suit your preferences. Within each configuration you can select even parts of full screen views to cover the full spectrum. This includes a HUGE or massive Artificial Horizon with rate of turn indicators, speed and altitude tapes and heading rose (with Course (CRS) - double VOR 1 and 2 and Skyview - FMS pointers) in the lower portion of the screen. An Engine and Aircraft status block known as the EMS which can be positioned left/right or centre of the display and also the MAP/NAV screen. Personally I kept it all simple with just the main PFD in front of me with the EMS and the MAP/NAV screen shared with the EMS again to the right. The system is menu driven by the buttons below the screen. This is a great version, but menu driven tree and branch systems can be complex and time consuming to use. But the system does also give you a huge amount of options. There are a huge amount of selections on the Dynon menu driven interface, which selections are accessed by the lower row of buttons, or the two knobs (covering Altitude and Heading adjustment) on the left display and "Range" on the right. BARO - MDA - CRS (Course) - HDG (Heading) - ALT - VS - IAS - DIM, all use the knob as a selection tool with a centre push of the knob for selection and arrows for changing selections. It works very well but the arrows are a bit small, but overall I prefer the GNS500 version with just a row of buttons that simply do the same job without scrolling up and down in menus for your selection. Tree and branch navigation can be complicated, and so you have to write down the routes to the selections you want. Take for instance the Map Nav-Aid selections. You require four branch selections just to declutter your screen. First MAP then MAP MENU (again) then ITEMS and then your actual selections and do that while trying to fly and navigate as well? I just leave it on the "ITEMS" menu all the time so I don't lose them again in the forest of menu selections. You do wonder if the budget cuts to the FAA are really messing up with their jobs, how did this complex routing really pass cockpit ergonomics for user friendly applications... "god knows". Flightplans Creating and editing flightplans are very (very) easy and quick with this system, you can IMPORT and EXPORT standard .fms flightplans as well. The big in screen map help building flightplans, and editing or adding in extra Nav-Aids (waypoints) on to the plan is as easy as a select and click. Nearest (APT/VOR/DME/NDB/FIX) is excellent as is the search function and any selections can be directly inputted into the flightplan and Airways, SID and STAR (waypoint-based) fixes are supported. Overall very impressive. Menus There are two pop-up menu tabs on the lower left of your screen for "Options" and Weight & Fuel" "Options" covers two items for windshield and EFIS (instrument) reflections. "Weight & Fuel" covers static elements which turns yellow with the tag to add or hide the wheel chocks and the aircraft's parking flags. You have a fuel selector to add or empty the aircraft's fuel tanks (two), which is easy to use. Lower right is a clever system of adding in weight and passengers. click on a seat or bag and you can load either an adult or a child in the seats (any except the pilot's) and with the baggage select a bag from the menu. All the fuel, passenger and baggage weight is then calibrated on a display on the left to show you your actual aircraft weight. And it is all very well done and easy to do. I found that four people up is too much weight with a full load of fuel on board, and I had to leave the second passenger behind to get the two adults and their luggage in the aircraft. Rear left door is outlined, but doesn't open. External GPU (Ground Power Unit) is not on the menus but activated via the button "AUX" on the panel. This GPU is definitely required if you are setting up the aircraft for flight, certainly if programming in a flightplan, as the battery goes flat very quickly if the GPU is not attached. Review Routes : KJAX - Jacksonville to KLAL - Lakeland Then YBCG - Gold Coast to YBNA - Ballina On leaving Jacksonville I got another warning in two "Servo" failures and a dive into the manual and I was none the wiser, so a contact with Aerobask was in order, I couldn't takeoff with broken Elevator and Aileron failures now could I... These were not actual failures as it turned out, but just disconnected servos as the "AP" switch was off?, Switch now on and the warning went away, time to fly. Note the beautiful trailing link undercarriage, all the gear is extremely well made, but the nosewheel can be awkward to use at low turning points, it can stall you easily, and only a lot of thrust will get you moving again? You tend to taxi positioned just to one side as the glareshield is quite big and the view ahead a little bit restricted, it is worse at night looking for the centreline on approach or finding the middle of the taxiways, to which you tend to take a little bit off line. Sounds are all new as well with script-driven custom sounds with rain graphics and noisy sound effects, and yes it all sounds very good. Departure was fast... Is the Panthera "Twitchy", I personally don't really think so as it is more "nimble" or "touchy" then it could be that. But with the very light frame to the power ratio with this version in having the 260HP equipped Lycoming IO-540V, you definitely feel the light composite structure through the controls. So the inputs have to be small, slow and smooth, and those glider like wings are very effective and so this Pipistral is nothing like a C175 or the like. So my advice is just slow down and go smooth through any manoeuvres. Leaving the grip of the runway there is a significant drift to the left to be compensated for as the powerful thrust can take you off line very quickly, so you are very active in those first few moments of flight until you are used to the Panthera's handling and feel. Feel of course is everything here, but this is certainly a "feely, Feely" aircraft, but in a nice way. Landing is very touchy as well, you need to control the speed to descent as the window is small (Those wings?) too slow and they quickly stall and you lose height, so it is a very throttle control on landing... and a few practise landings to get it right. In-flight instrumentation is very good. with on the Navigation display note the good on screen data that covers ETE (Estimated Time Enroute), ETA (Estimated Time Arrival) Final and ETE, ETA Next. Garmin/Aerobask GTN750/650 System Centre panel is the aircraft's pièce de résistance! the GARMIN GTN 750/650 system or Aerobask's version of the system. As with the Dynon the panels both pop-up (press the right perimeter) and this is a nice bit of kit. You may say "I've seen this before?" and you would be right as you have, but not the more completed working version. Back in the day this was the original version. It was quite basic but this is now the full version of the system... To see the best effects of the GTN 750/650 we will head to the Gold Coast for a night flight down to Ballina. The GTN750 is the larger unit with a 6.9 inch TFT touchscreen display with icons to cover features such as : Map, Traffic, Terrain, Weather, Charts, Flight Plan, PROC, Nearest, Waypoint Info and Utilities with Services and System blanked out. The "Utilities" button covers : DALT/TAS/Winds, Flight Times and Checklists and Clean Screen with Trip Planning, Rain Prediction, Scheduled Messages blanked out. Top of the GTN750 unit is the radio section, with easy switching of frequencies, XPDR and COMM, NAV selection. It is very, very impressive and easy to use once you get used to it, but a little time is required to learn all the abundance of functions, mouse scroll is handy as well for volume and frequency changes. The GTN650 is smaller at 4.9-inch TFT display and has a few different options from the GTN750 Feature available include : Map, Traffic, Terrain, Weather, Default Nav, Otto Pilot (from the movie "Flying High" and yes I am that old) Waypoint Info and Nearest. Radio is situated to the right with the same built-in tuners. The system is very, very impressive, but to note that all the functions as listed on the displays have not been covered yet. You have a lot of power here at your fingertips, but the trick is to find the right combinations of all your tools to get the maximum ease of use from your flying. You will find a lot of functions in this cockpit doubled up or even tripled, the idea is find the best set up to cover your workload. To that effect I have the "Map" on the bigger GTN750, and the "Otto Pilot" ready on the lower GTN650 and just the Heading and Altitude adjustment on the left Skyview display, simple and it works. Note the excellent flight plan leg with CDI selection below... Cockpit is nice at night but I can't find any screen brightness adjustment. External lighting is very good with the usual navigation, recognition and two landing lights on the main gear. The strobes are very good, but very bright and so not to be used on the ground. Panel can be completely dark, or you have two note pad lights to light up the instruments. In the rear there are two overhead spot lights. Remember the looking a little offset past the glareshield, here is the view at night... MAP function is impressive. Map choices include Arc or 360º and resolution. Other Layers include Terrain, Nav-Aids, Orientation (North or Heading) and Height. Terrain Terrain function is very detailed, but only when closer to the ground (the radar, not the aircraft)... ... the menu is same as with the Map. One of the most used layouts with the two units I like to use is the flightplan. You can have the usual flightplan on in the right hand side navigation display, but the GTN's are a great addition for excellent detail of you route with the route in the upper 750, and the CDI flight plan leg in the lower 650, it is a great layout for easy route visuals. Nearest and Waypoint Information is comprehensive, easy to use and very visual. There has been a lot of thought put into online support. Both for communication with PilotEdge (Connect/disconnect, TX/RX, COM1&2 volume control) and awareness for IVAO and VATSIM (connection status). TCAS is also supported for online flying with a "Traffic Information Service" (TIS) which is an advisory. There won't be much activity around this area tonight, but there are a few options on the traffic menu. Charts are good, but not very readable at full size, zoom in and they are then usable. PNG. files makes them easy to create and inset into the "Charts" folder in your aircraft folder. Weather and PROC (Proceed). The Weather just shows the levels of weather around you, but it is pretty basic, but the PROC is used like the "DIR-TO" or Direct-To a Nav-Aid or Waypoint, and can be used as a waypoint editor for the flightplan. For a small four-seater aircraft the Panthera has a lot of gear, it feels like there is more than the Space Shuttle used... Liveries Outwardly the liveries look the same as the original versions. But they have been all updated to UHD 4K and the detailing shows compared to the earlier textures. Eight liveries in all and the collection still includes the "Pink Panther" design Special Effects There are some great special effects. One is rain drops (left) that are excellent and look beautiful on the curved canopy doors. Fog (right) is in there as well. You don't know it is fogging up until it clears a little in the front view position, again really well done and I love these effects for their realism under the weather. When you park up, you take the key out and store it in the centre console... ... But the pilot stays in there? Why can't he go home after disconnecting the key... Summary I started this review with the point that to really succeed in X-Plane as a developer there is a continuous growth and upward scale of quality you have to deliver. X-Plane design is now extremely high, the quality in X-Plane11 with PBR is just simply enormous. Aerobask has joined easily that upper echelon of being a must buy developer. This aircraft and the others that will follow are simply overwhelming aircraft in design and features, and yes there is still more to come. The light and design of the aircraft will take your breath away, X-Plane11 is delivering and with aircraft like this you are now going into a higher realm of quality and realism, areas that you only dreamed of a few years ago. That realism while using and flying this aircraft is second to none (in X-Plane11) but the great attraction is that everything in the systems and the complex on board navigation and flight control (Autopilot) is that it has a seemless use and what coders call elegance in the coding in that it doesn't feel like it is a model or even a simulation... it feels real. It is to your best advantage to set up and use the systems to better your flying. Autopilot and Flightplan control is far better and simpler to use than the complex tree and branch menus of the Dynon units. Yes you have loads of functionality, but you can get lost just trying to find your way around all those menu settings. So set everything out for simple selection. Earlier owners of the v1/v2 Panthera from Aerobask can get US$10 off the updated v3 aircraft... see details below. There are no highlights here (well maybe the excellent GTN Units) as everything is good or brilliant, the designs from Aerobask are now trendsetters as much as Carenados are but in a totally different area. And flying the Panthera will challenge you as well... I could go on and on, but why... it is just brilliant. Positives : Almost everything! Beautiful design inside and out, realism in spades and incredible equipment packs. Negatives : Almost nothing, except letting the Pilot go home and learning all the complex systems and using them to your best flying abilities. _____________________________________________________________________________________ The Pipistrel Panthera v3 by Aerobask is NOW available! from the X-Plane.Org Store here : Pipistral Panthera v3 Your Price: $34.95 Features In-house coded GTN 750 and GTN 650 with touchscreen and scrollwheel support: Exclusive multi-threaded and fps-friendly map and terrain display Map topography display based on actual X-Plane mesh data Terrain awareness display based on actual data Configurable map rendering TCAS with online flying support Airways, SID and STAR support (waypoint-based) Flight plan import/export compatible with stock XP10 fms format Built-in chart viewer - easily import yours COM support for PilotEdge (Connect/disconnect, TX/RX, COM1&2 volume control) COM awareness for IVAO and VATSIM (connection status) COM, NAV and XPNDR dialing pad Interactive checklists Resizable pop-ups Latest revision of Dynon Skyview with added scrollwheel support NEW! Scrollwheel support on lists, map, HDG, CRS, MDA, ALT, VVI, etc... Airways, SID and STAR support (waypoint-based) Weather map display on multiple screens and orientations TCAS with Traffic Advisory and Resolution Advisory Resizable pop-ups Dual compatibility XP10 and XP11, with PBR support Volumetric propeller (XP11) Enhanced and scripted 3D sound Compatible with GoodWay 5 Requirements: X-Plane 10.50 or X-Plane 11 Windows, Mac or Linux - Running in 64bit Mode 1Gb VRAM Minimum. 3GB+ VRAM Recommended on X-Plane 11 X-Plane 11: this aircraft requires GNS430 data from X-Plane 10, Navigraph or Aerosoft to be installed into Custom data folder. Previous Panthera Owners: If you own the prior Panthera v1/v2 versioion, you can get the new Panthera v3 for $10 off. The upgrade code can be found in your original Panthera invoice at the store. or you can request it at [email protected] _____________________________________________________________________________________ Installation and documents: Download for the Pipistrel Panthera v3 is 117.10mb and the unzipped file is deposited in the "General Aviation" X-Plane folder at 246.70mb . Key authorisation and a restart is required. You can use the Navigraph or Aerosoft navigation data with this aircraft or the built in X-Plane GNS430 data in your main root folder. Comprehensive set of documents covers all aspects of the (complex) avionics systems and flightplanner _____________________________________________________________________________________ Review by Stephen Dutton 23rd March 2017 Copyright©2017: X-PlaneReviews (Disclaimer. All images and text in this review are the work and property of X-PlaneReviews, no sharing or copy of the content is allowed without consent from the author as per copyright conditions) Review System Specifications: Computer System: Windows - Intel Core i7 6700K CPU 4.00GHz / 64bit - 16 Gb single 1067 Mhz DDR4 2133 - GeForce GTX 980/SSE2 - Samsung Evo 512gb SSD Software: - Windows 10 - X-Plane 11b15 and also used in X-Plane v10.52 and checked with current flight route and details Addons: Saitek x52 Pro system Joystick and Throttle : Sound - Bose Soundlink Mini Plugins: Environment Engine by xEnviro US$69.90 Scenery or Aircraft - KLAL - Lakeland Linder Regional Airport 2.01 by Drankum (X-Plane.Org) - Free (note: personal added items in an office (okay demountable building and vehicles) - KJAX - Jacksonville International Airport 1.01 by ThePrivateer (X-Plane.org) - Free - YBCG : Gold Coast International v1.0 by tdg (X-Plane.Org) - Free - YBNA - Ballina - VOZ Australian Scenery by Barry (Bazza) Roberts (X-Plane.Org) - Free
-
Aircraft Update : McDonnell Douglas MD-88 Pro v1.30 by Rotate
Stephen replied to Stephen's topic in Airliners Reviews
The MD-88 from Rotate is still my preference at this point as the B757 is not up to total X-Plane11 usability. The B757 is a very complex aircraft, it needs the rules to be steady to be adjusted correctly, it flies fine and is perfect in XP10, but X-Plane11 beta is just too flexible at the moment to get the best out of the aircraft in detail.