Stephen
-
Posts
2731 -
Joined
-
Last visited
-
Days Won
354
Content Type
Profiles
Forums
Articles
Everything posted by Stephen
-

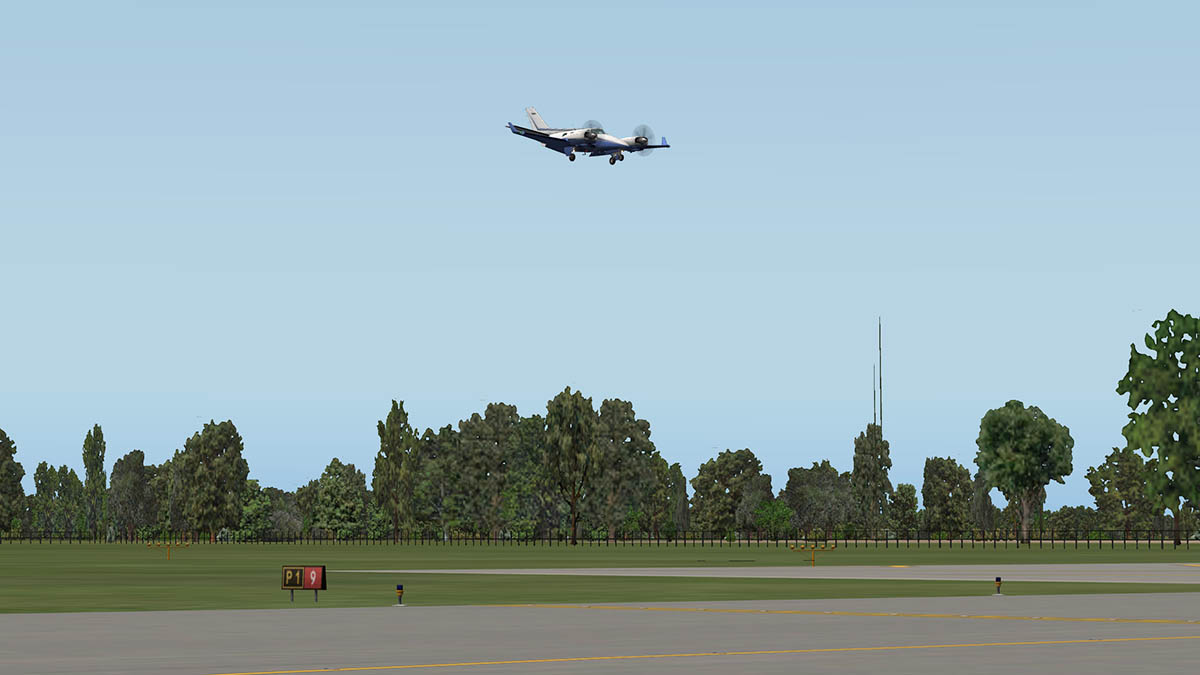
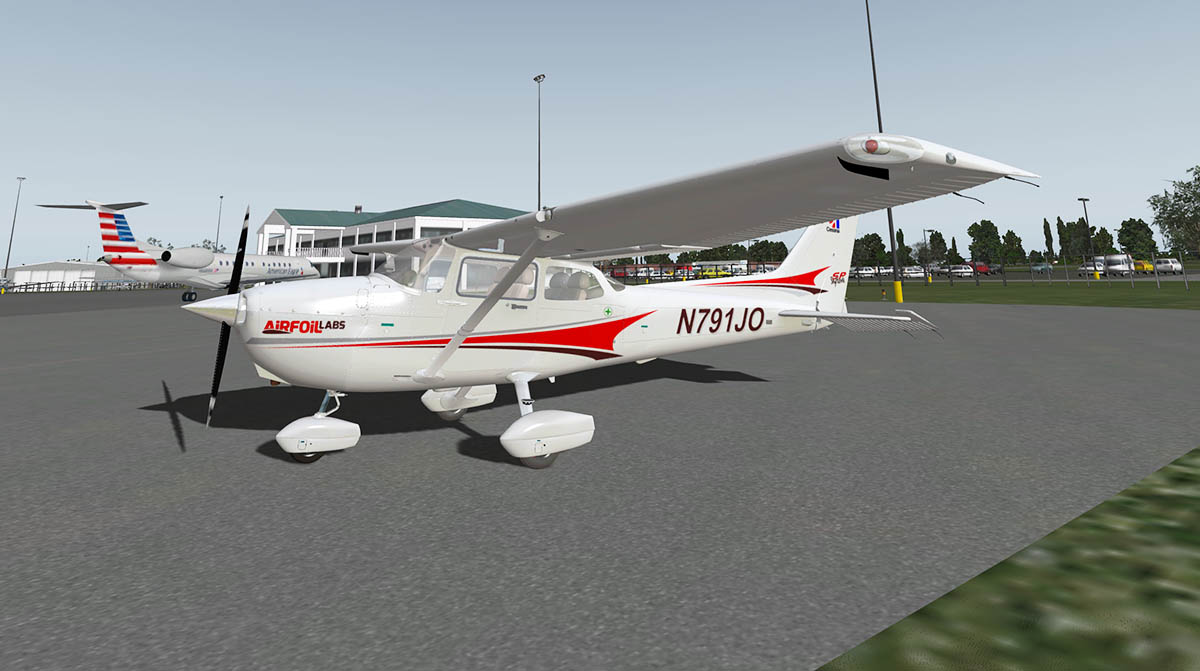
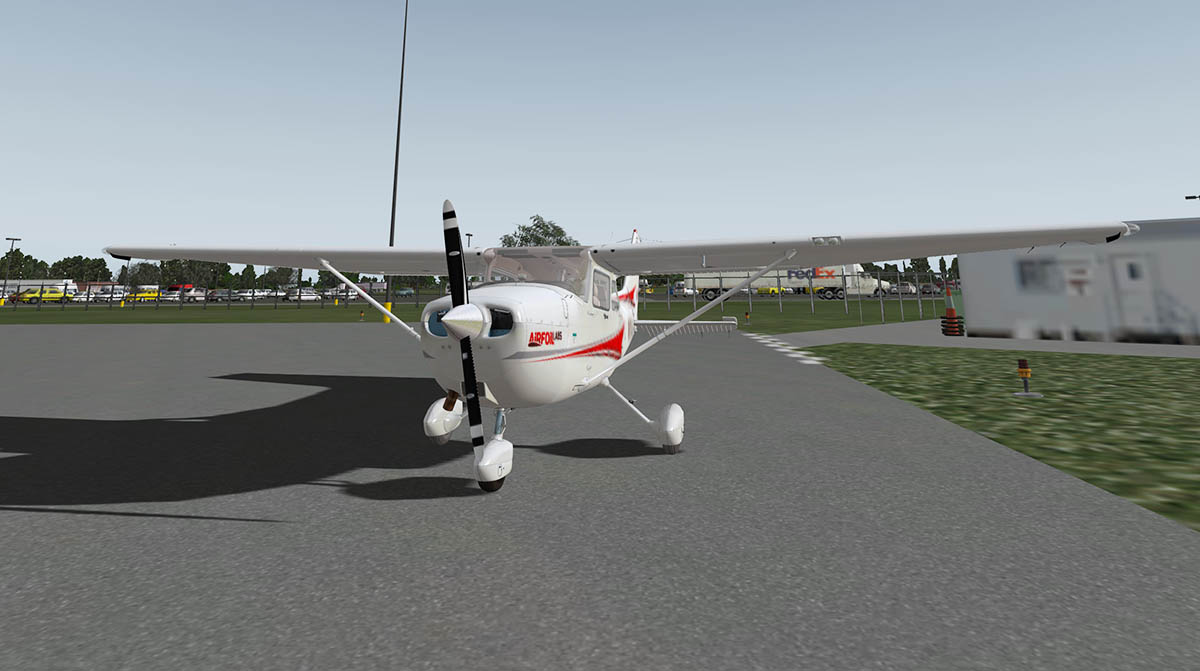
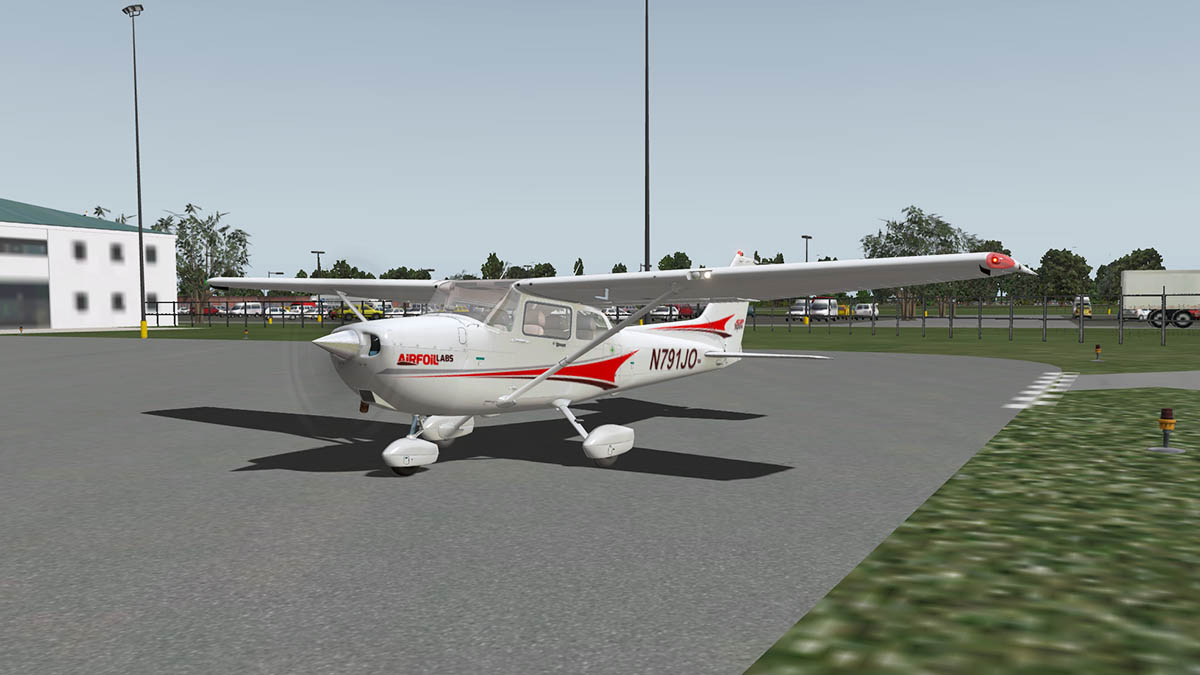
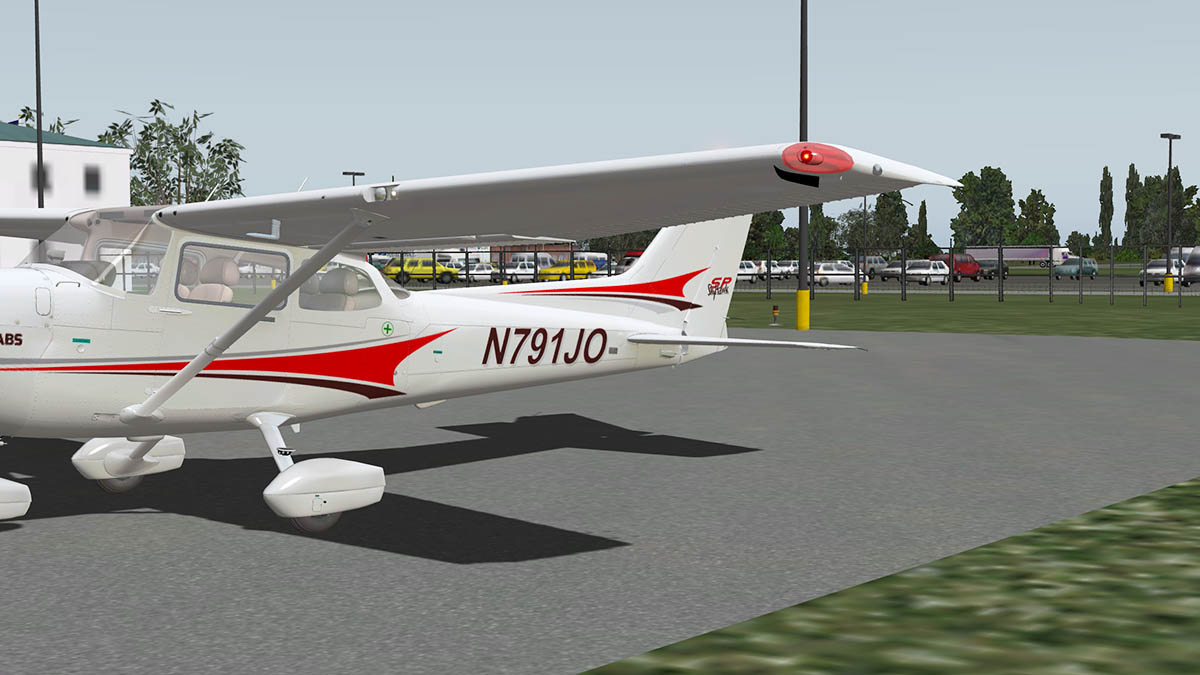
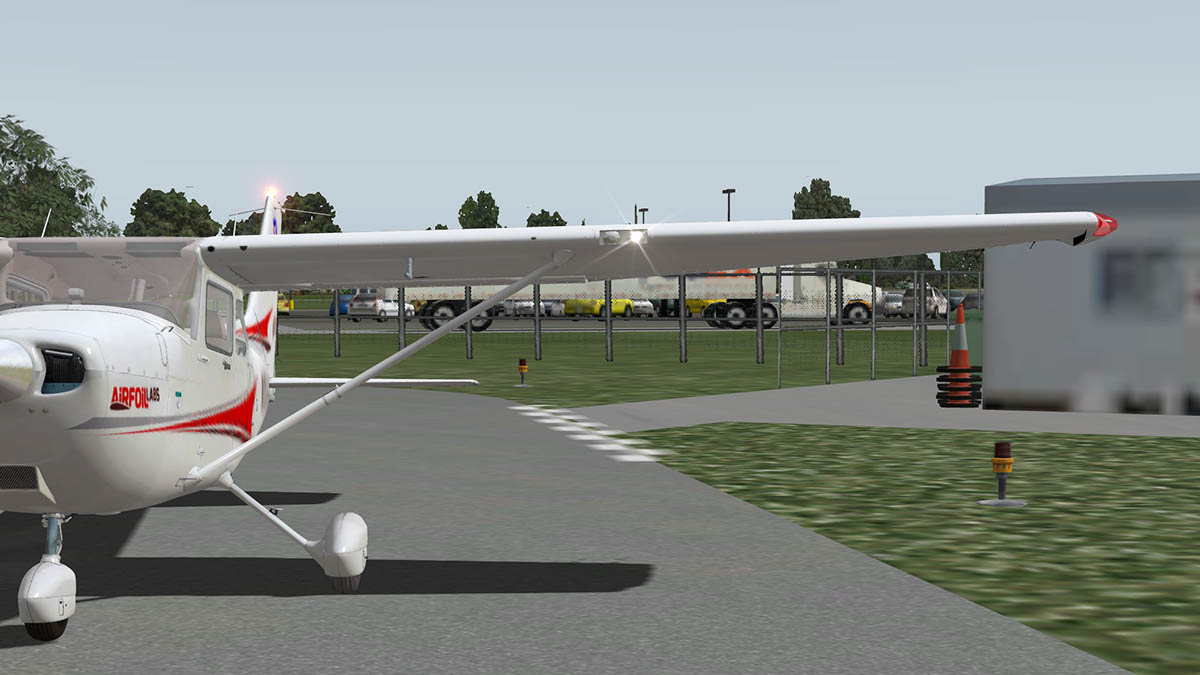
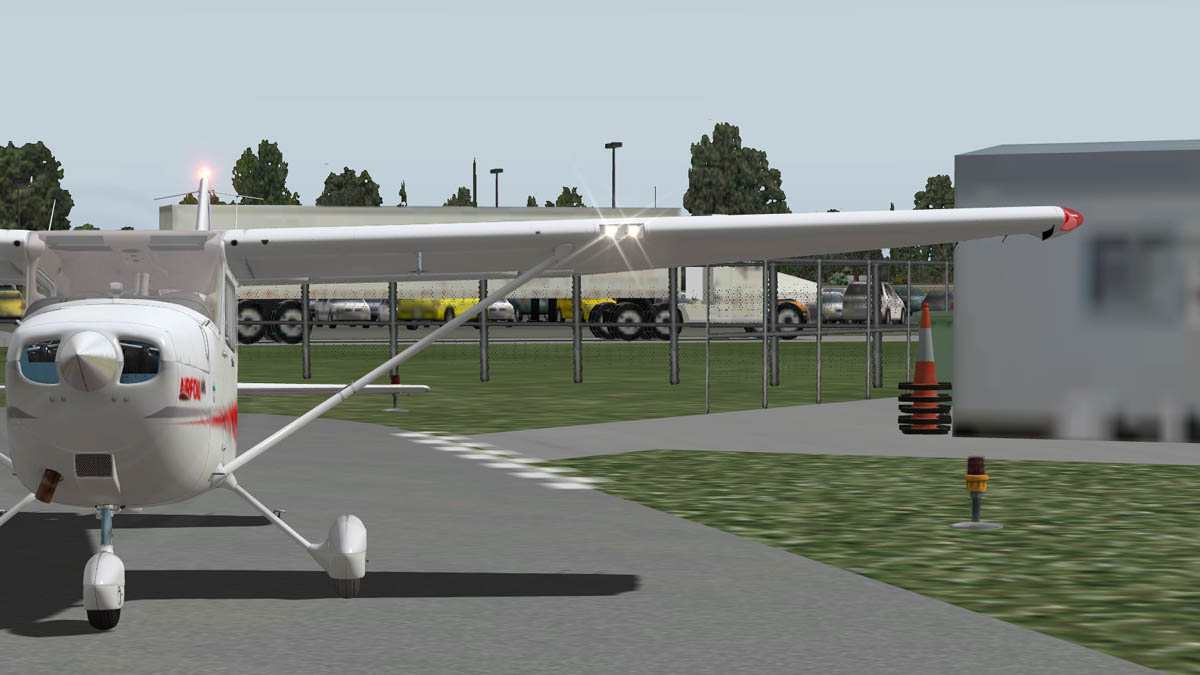
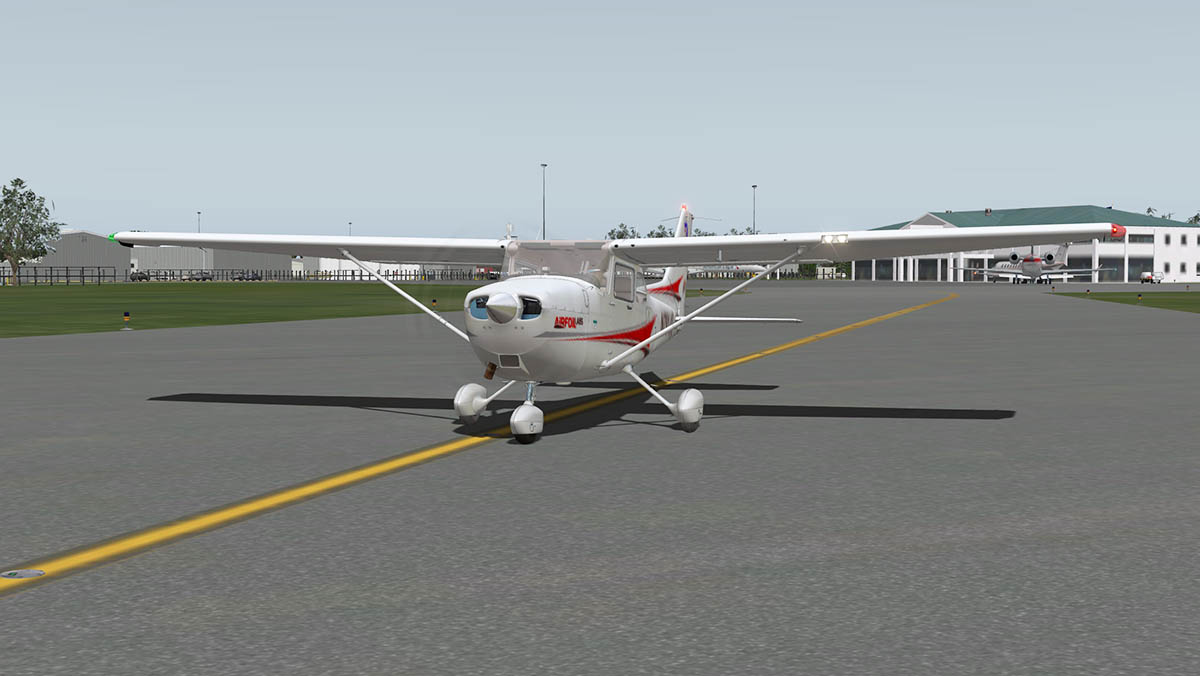
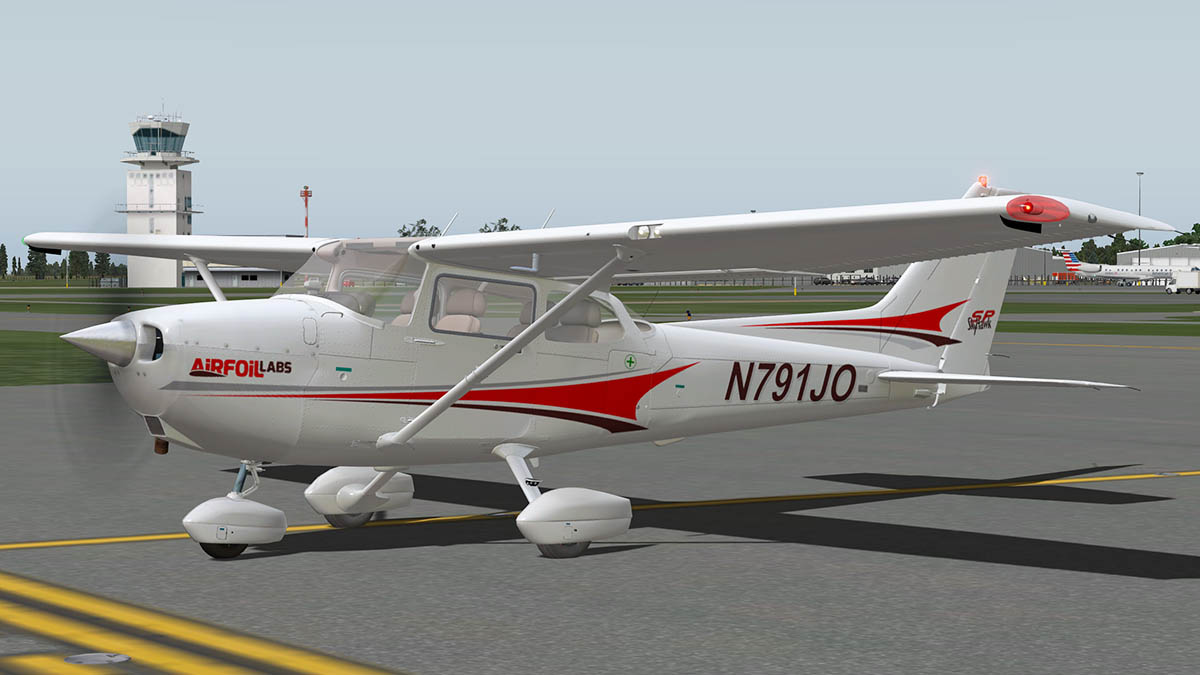
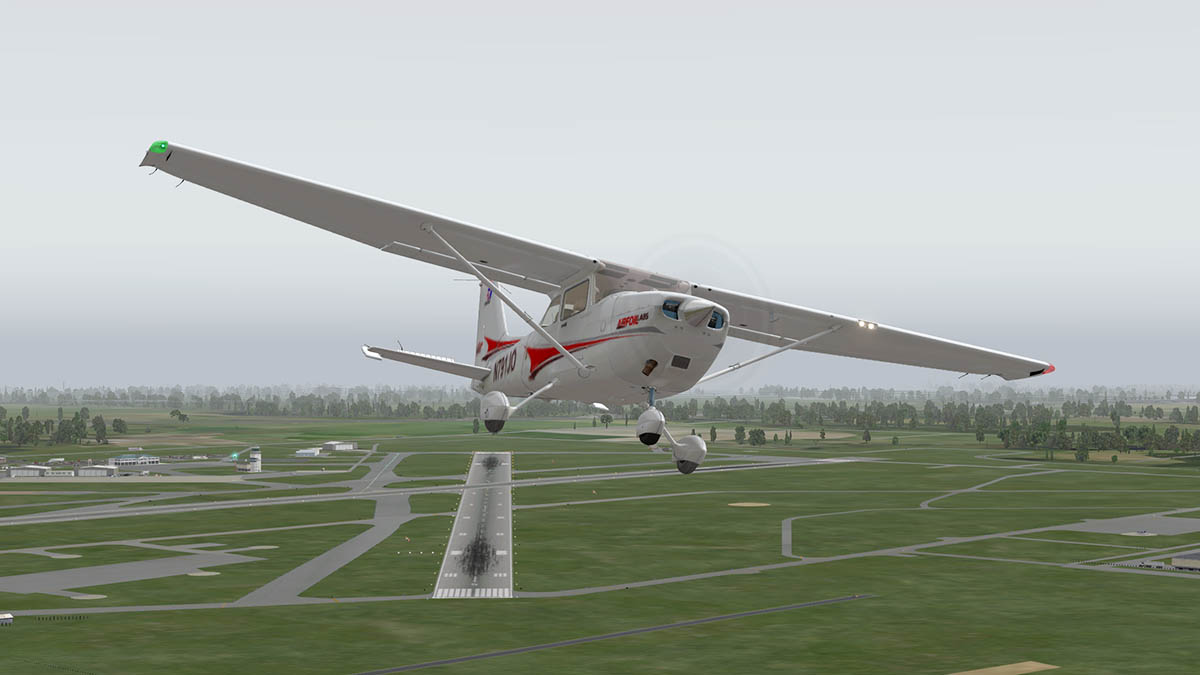
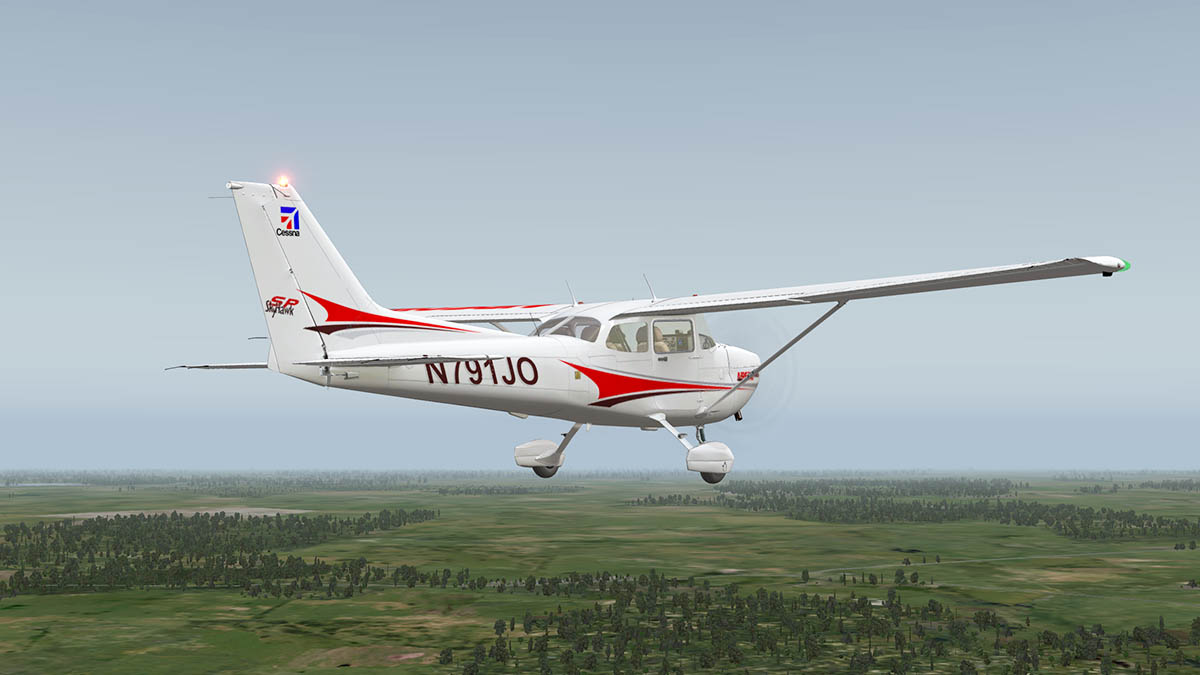
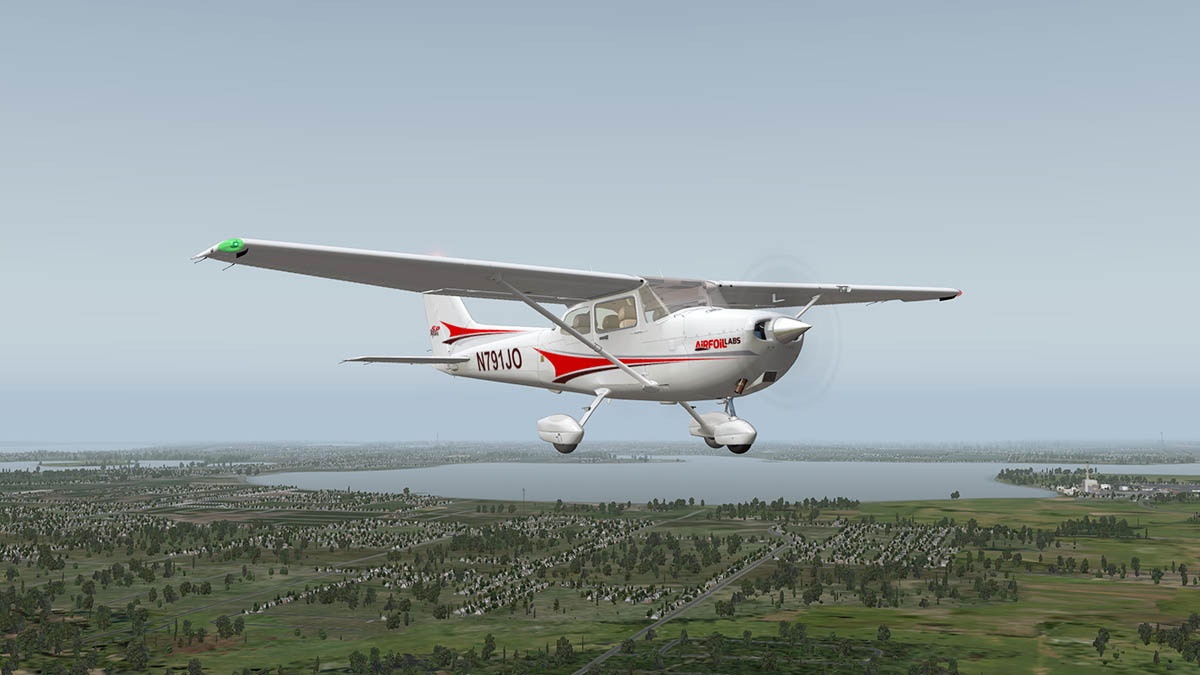
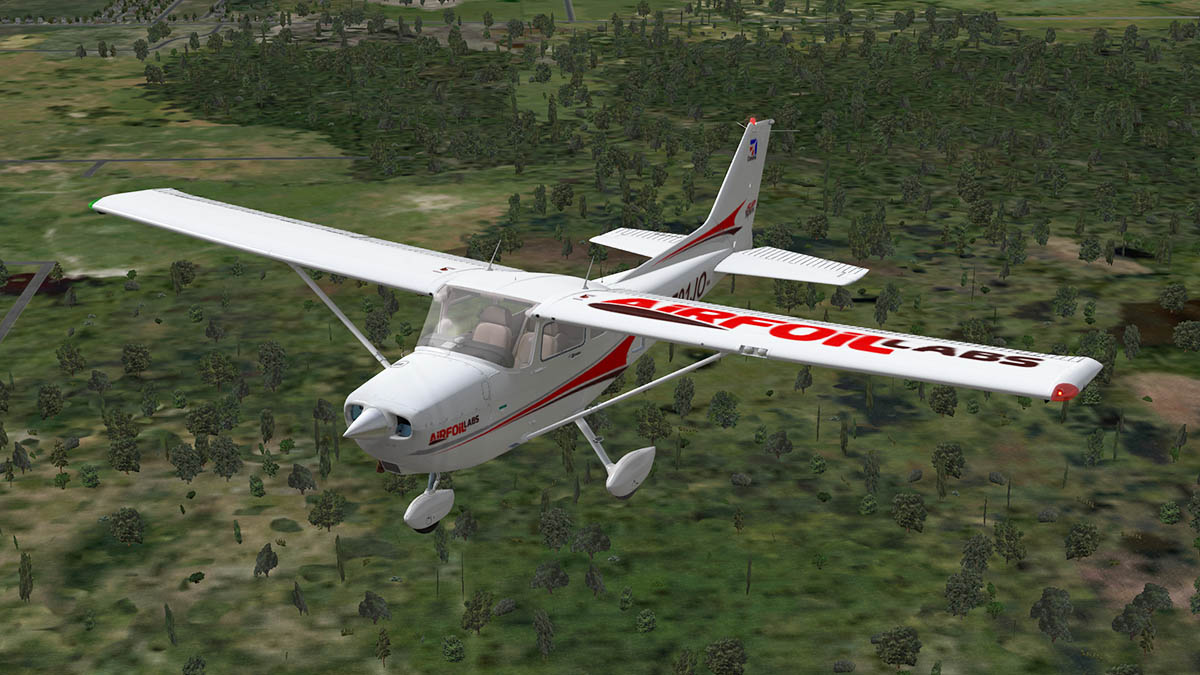
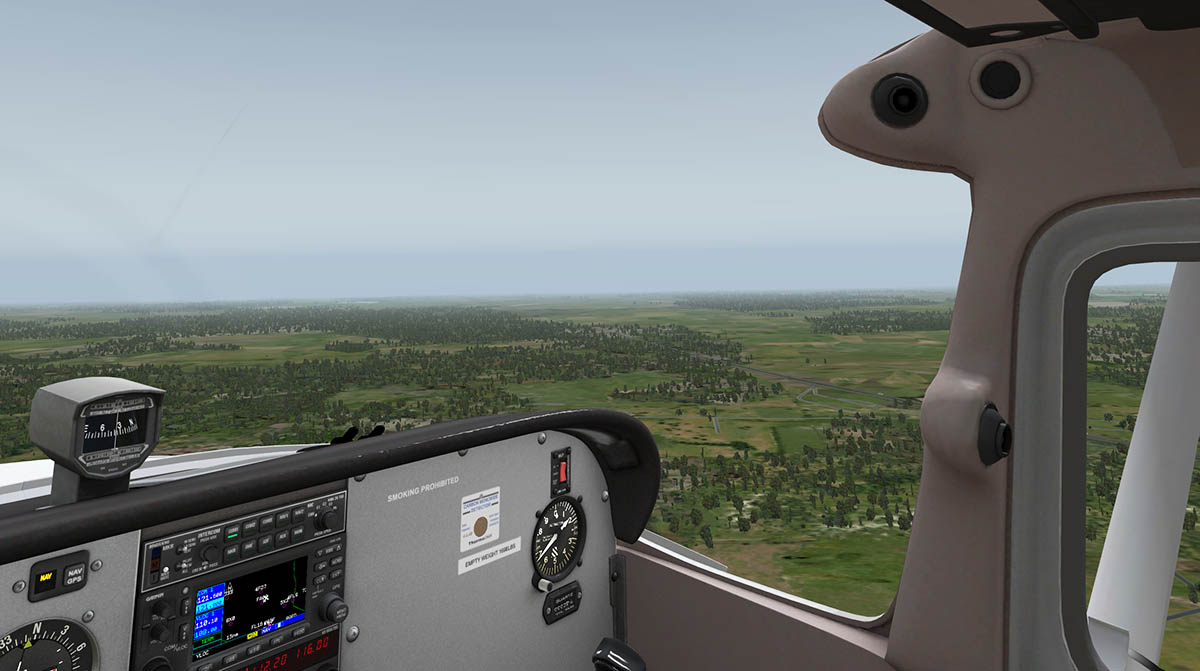
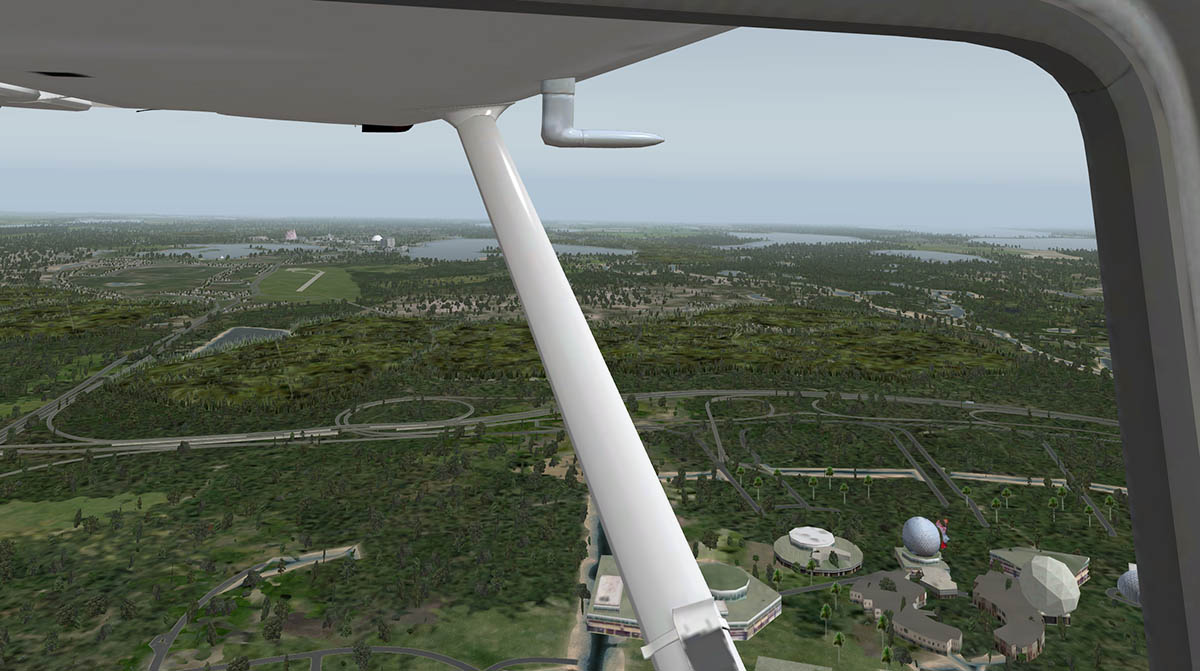
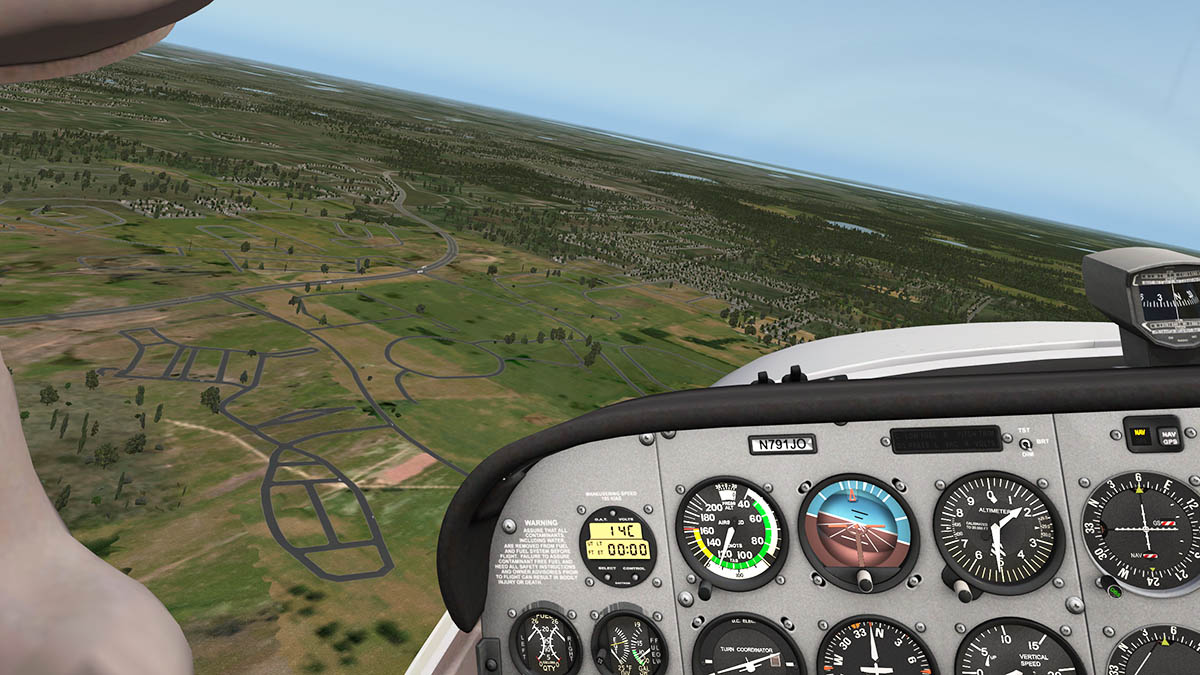
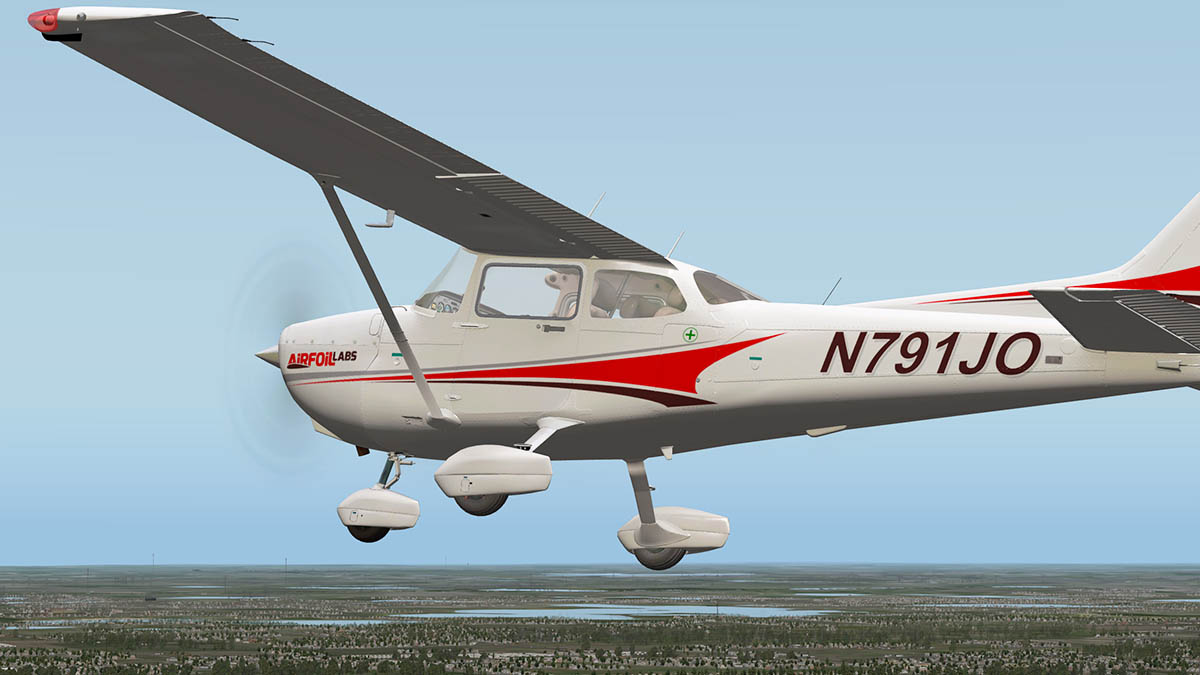
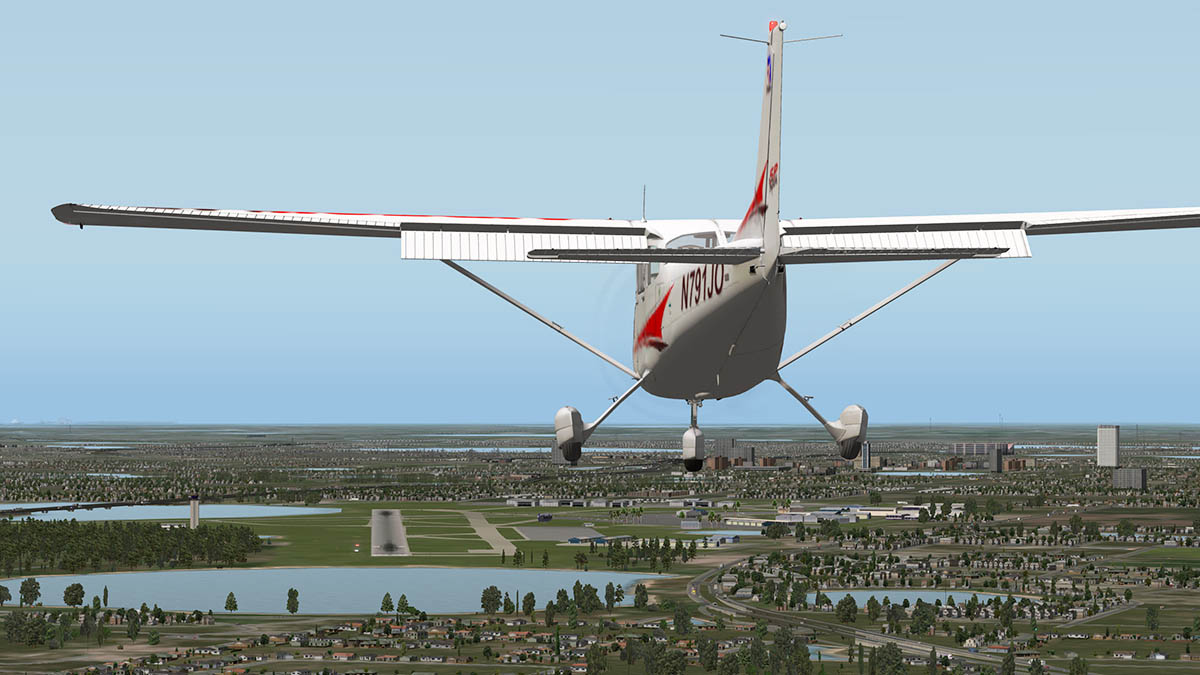
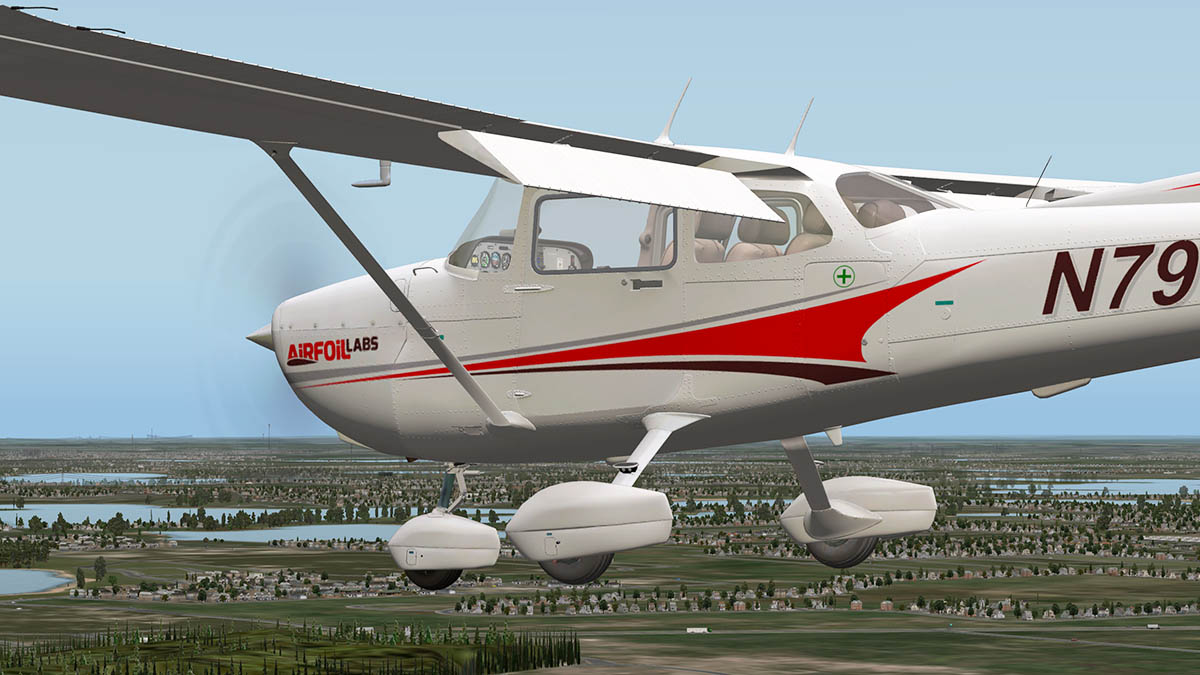
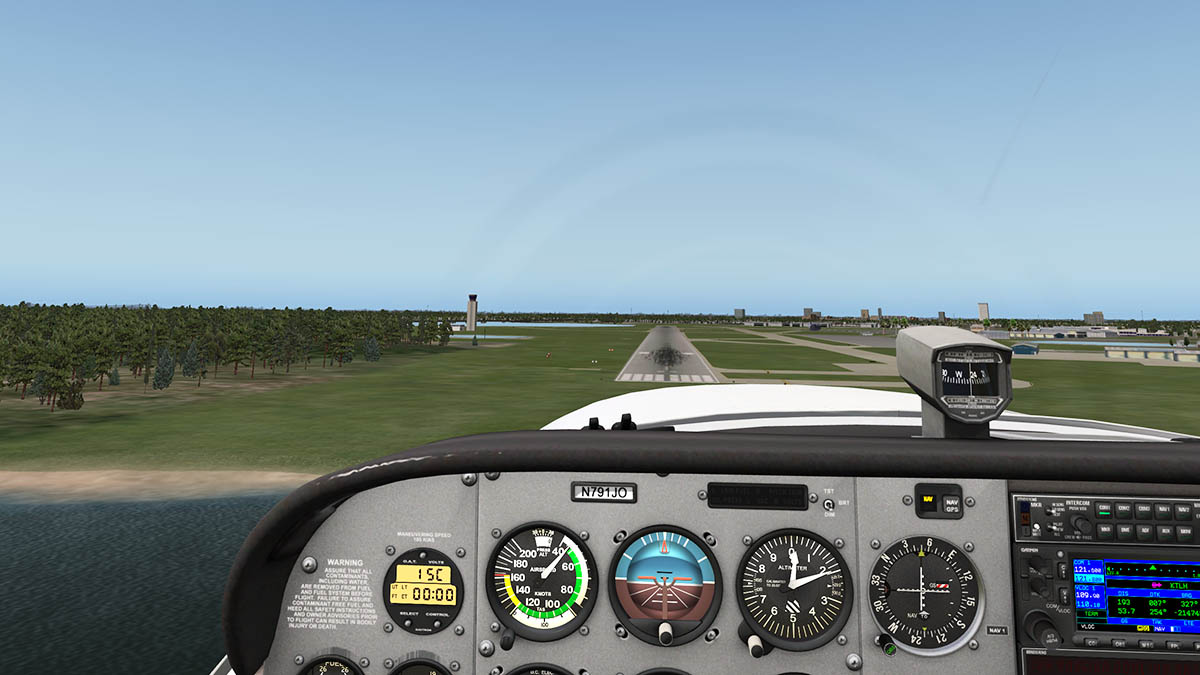
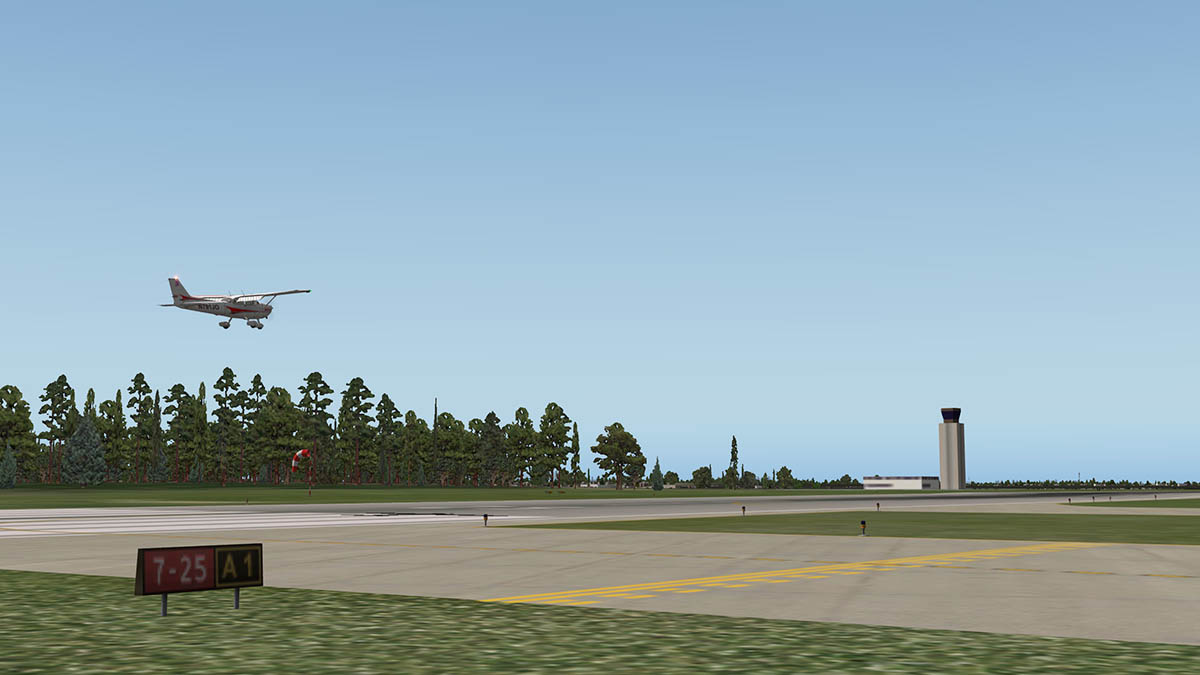
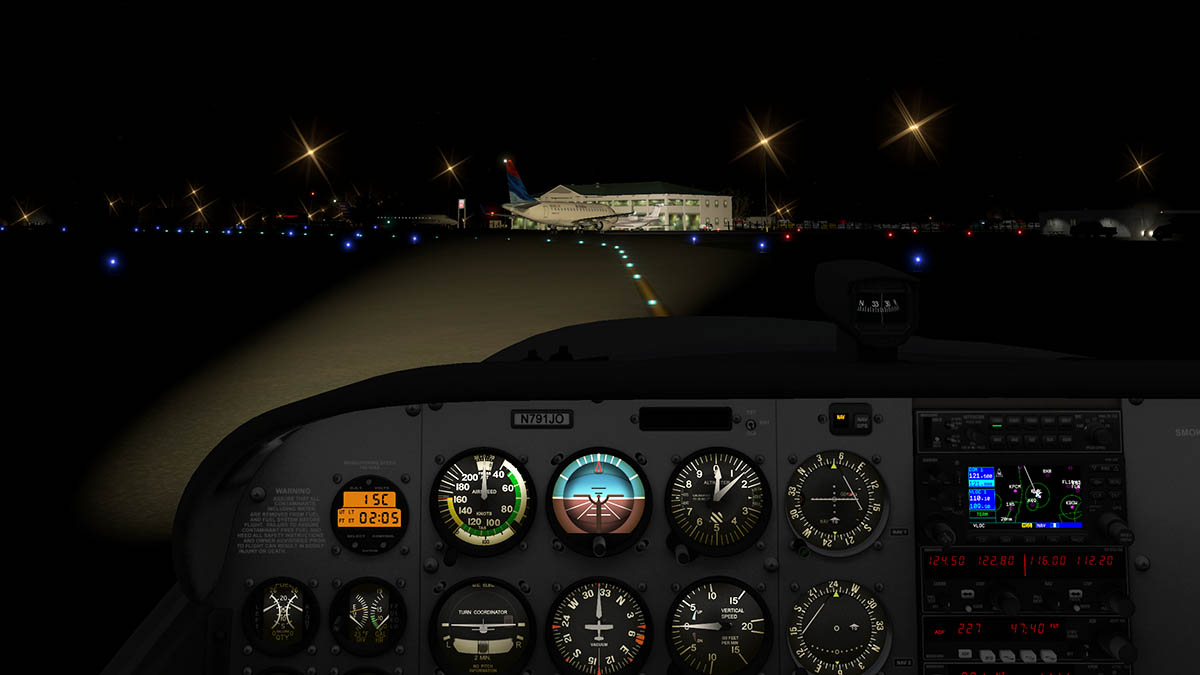
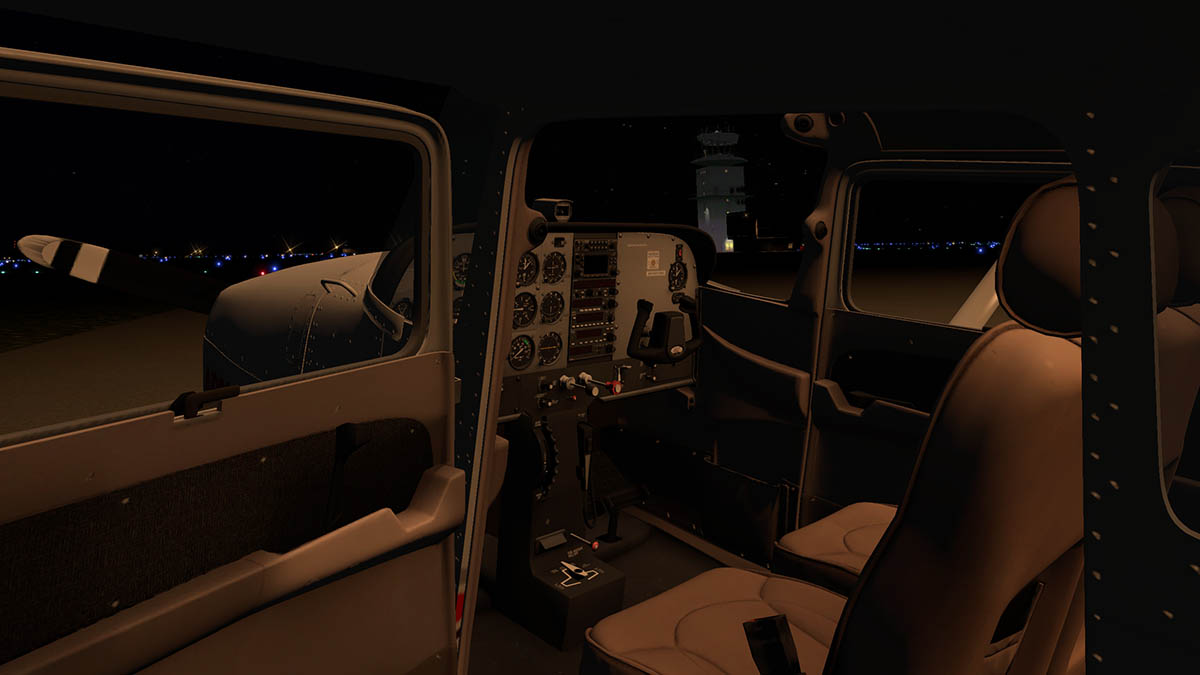
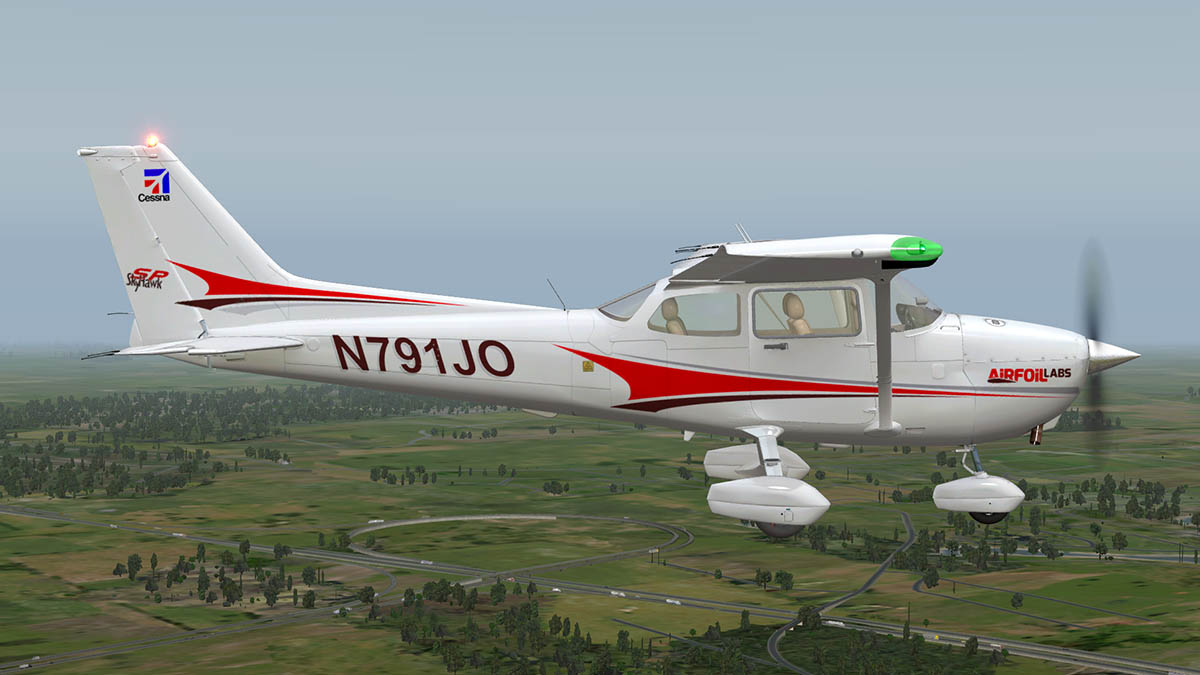
Aircraft Review - Cessna 172SP Skyhawk by AirfoilLabs
Stephen replied to Stephen's topic in General Aviation Aircraft Reviews
Well Dom I was born in the 1950's, the Cold War was my childhood. Czechoslovakia was over there and the only reason they changed it to the Czech Republic was that no one actually could spell it!, mostly it is still actually Czechoslovak, but in now two republic states. -
News! - Released! SBGL- Rio de Janeiro Intl Airport by Richard G Nunes Scenery South America! This lower hemisphere continent is rarely on on X-Plane's radar, but that's all going to change as here now is a great scenery for Rio De Janerio in Galeão–Antonio Carlos Jobim International Airport (IATA: GIG, ICAO: SBGL), or as it is popularly known by its original name Galeão International Airport. This new scenery from Richard G Nunes is feature rich: Orthophoto textures and Occlusion environmentThe Christ the Redeemer statue is included in this scenery packageCustom Runways, ground and taxiways textures3D Grass, based on the lawn type found at Rio AirportAuto Gate ReadyAutoGate Plugin by Marginal (included in the package)Custom Jetways Animated TrafficAnimated objects, vehicles, people and aircraftGround Traffic and aircraft trafficUsing Ground Traffic by MarginalMany extrasModeled Underpass under runways M and N (Bridges)Customized Approach Lights Systems - ALSNight texture and HDR lightingConstruction work on current expansion is includedCharts included A real highlight of the Rio scenery is an excellent "Christ The Redeemer" the famous statue that presides over this famous city. Get this great addition to your X-Plane scenery and be ready for the 2016 Rio Olympic Games! Yes! the SBGL- Rio de Janeiro Intl Airport by Richard G Nunes Scenery is now available from the new X-Plane.Org Store here : SBGL- Rio de Janeiro International Airport Price is US$24.95 Requirements X-Plane 10+ - Windows, Mac or Linux - 1Gb VRAM - 2Gb VRAM recommended Current version: 1.1 (Last updated October 16th 2015) Stephen Dutton Updated 17th October 2015 Copyright©2015: X-PlaneReviews
-
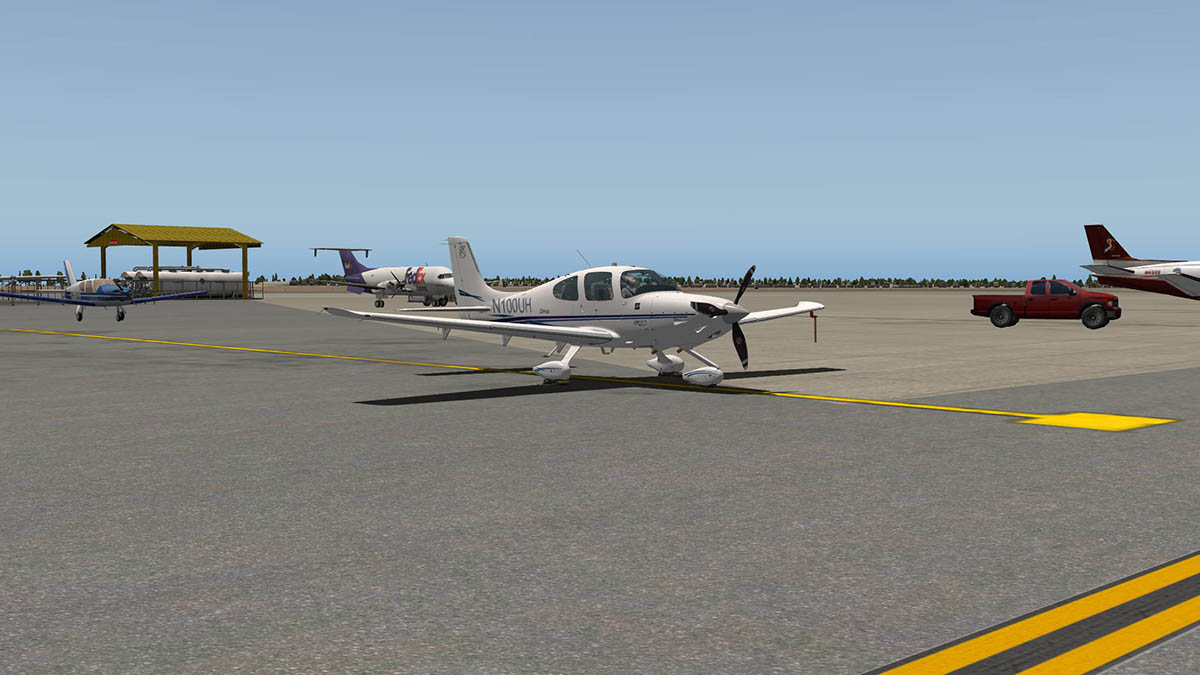
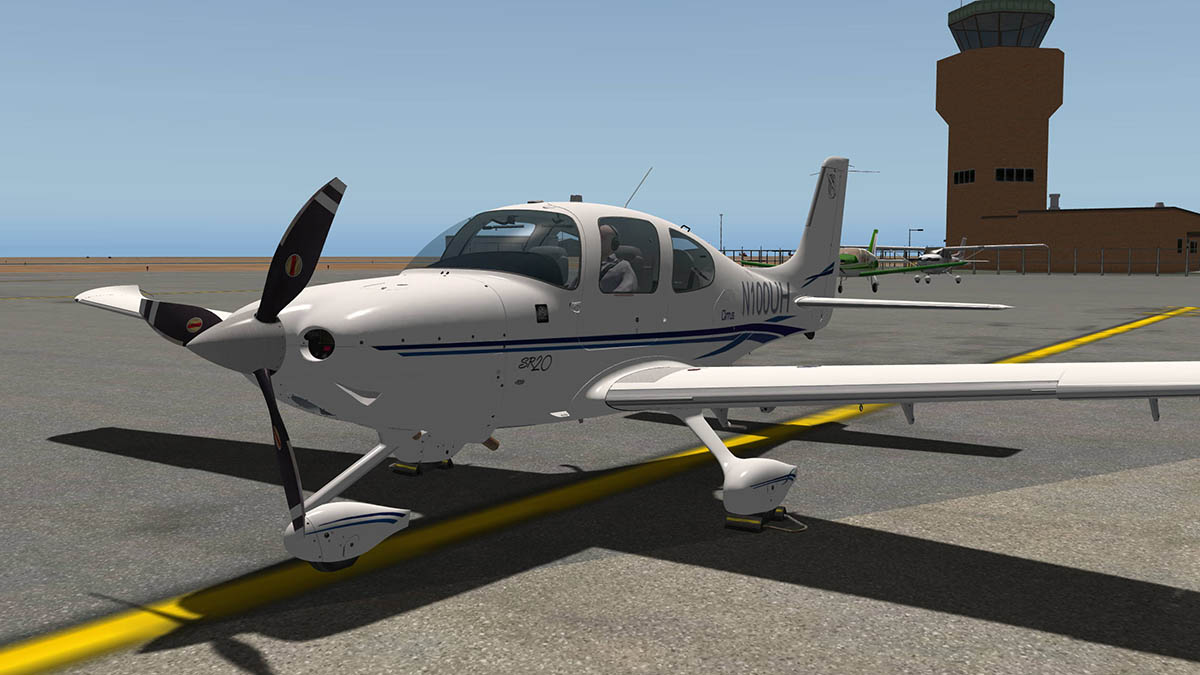
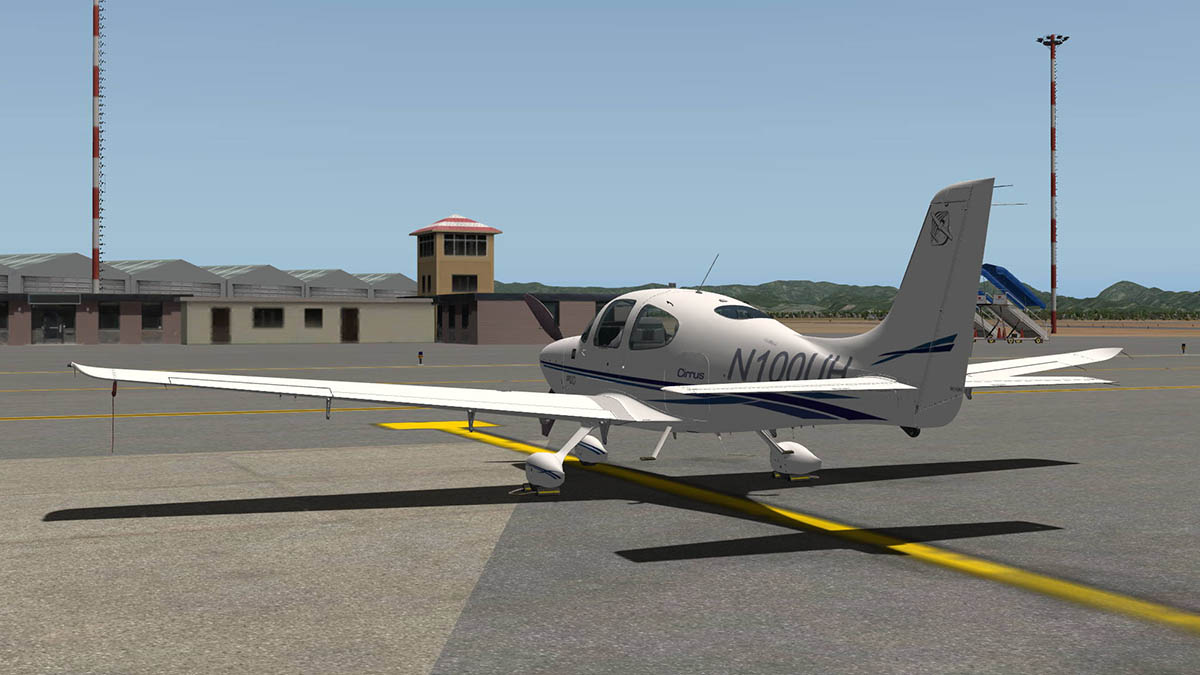
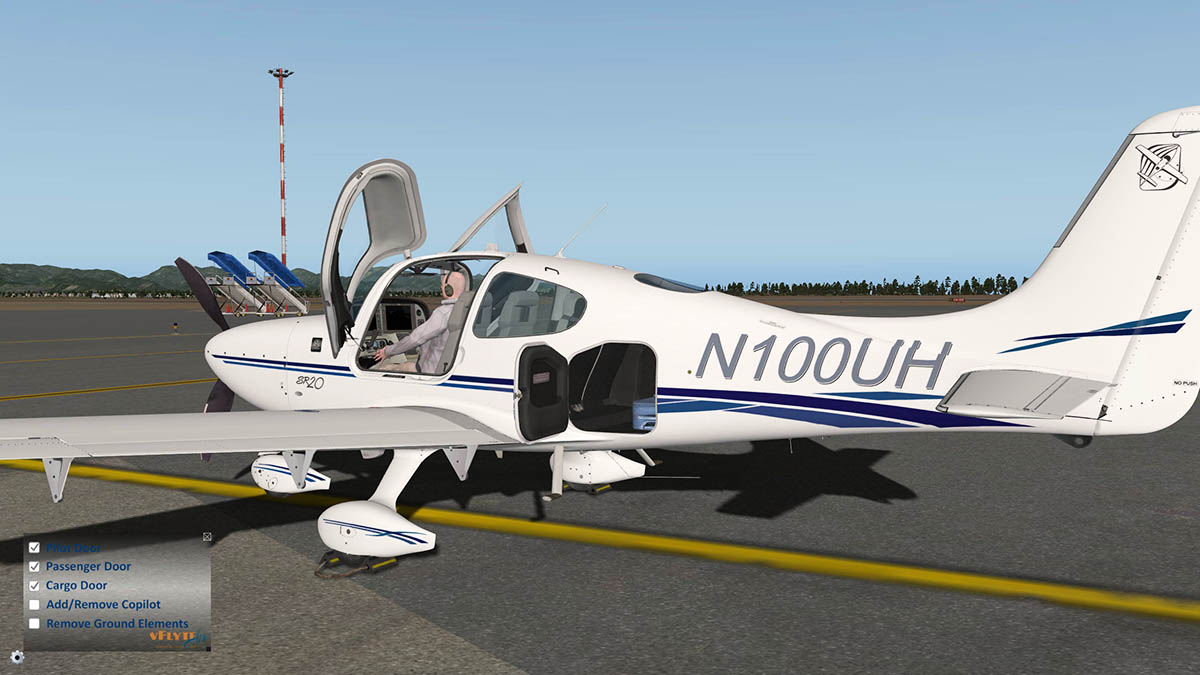
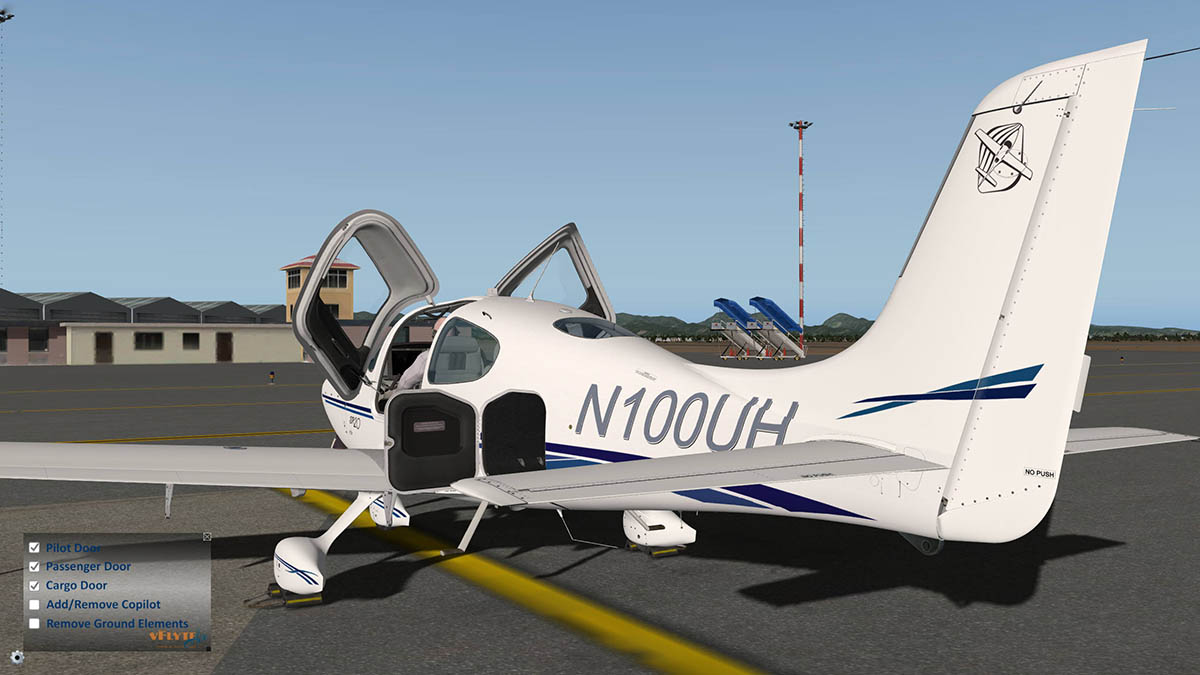
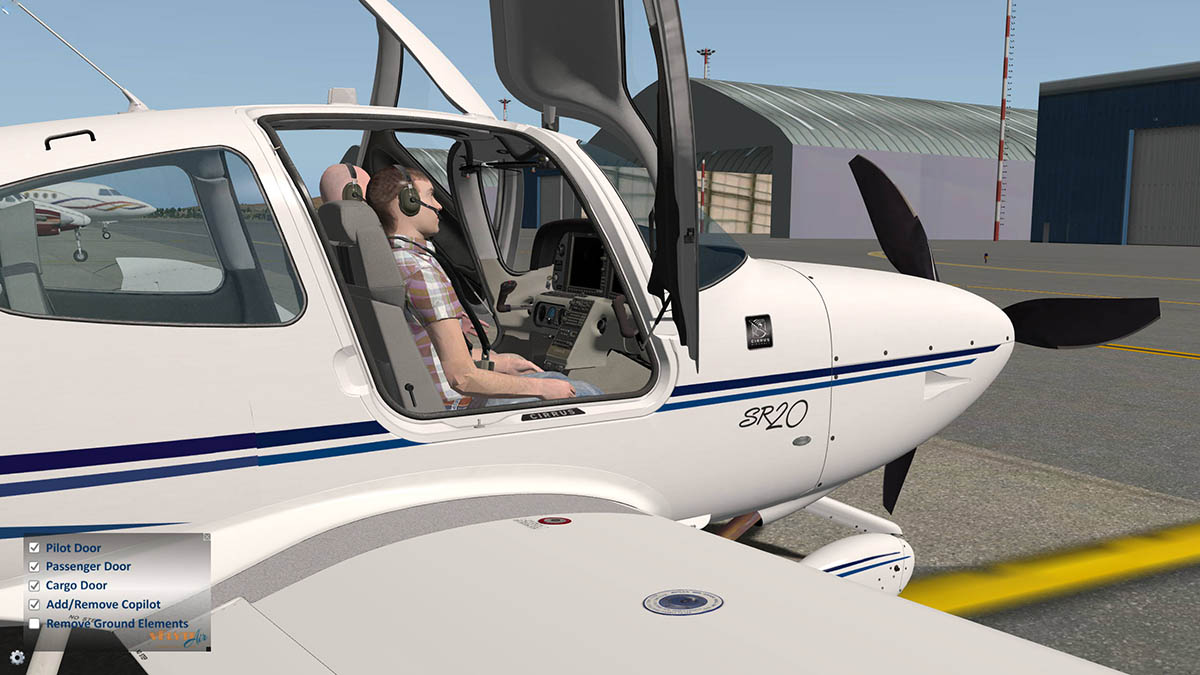
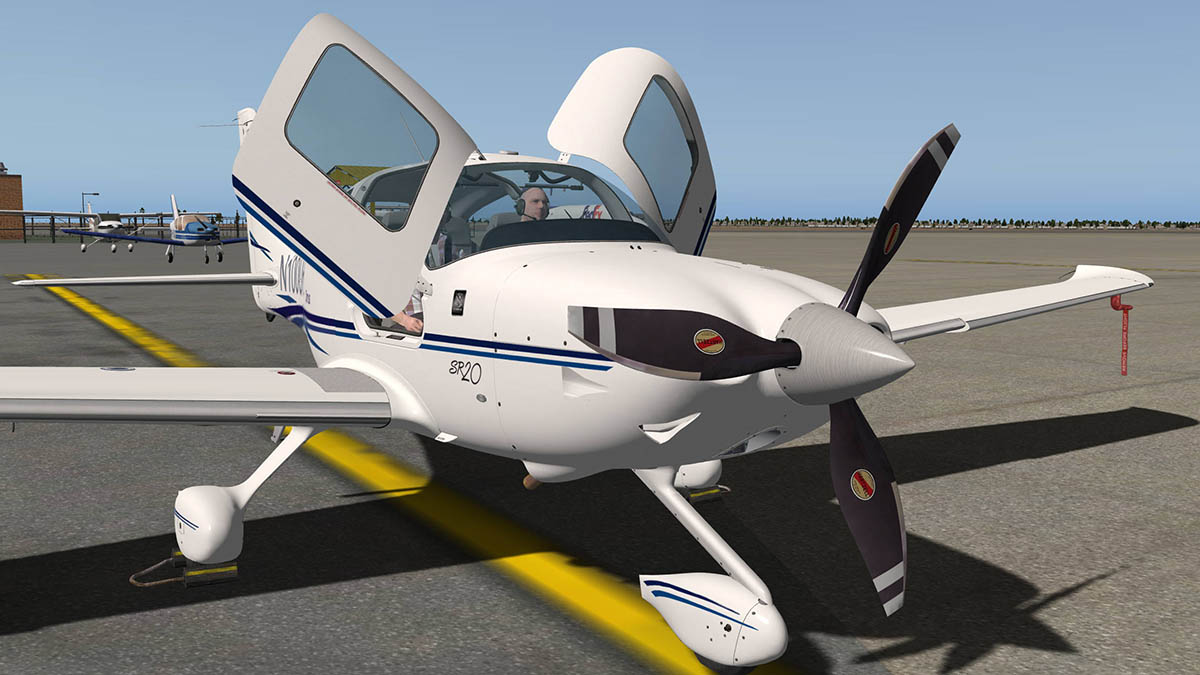
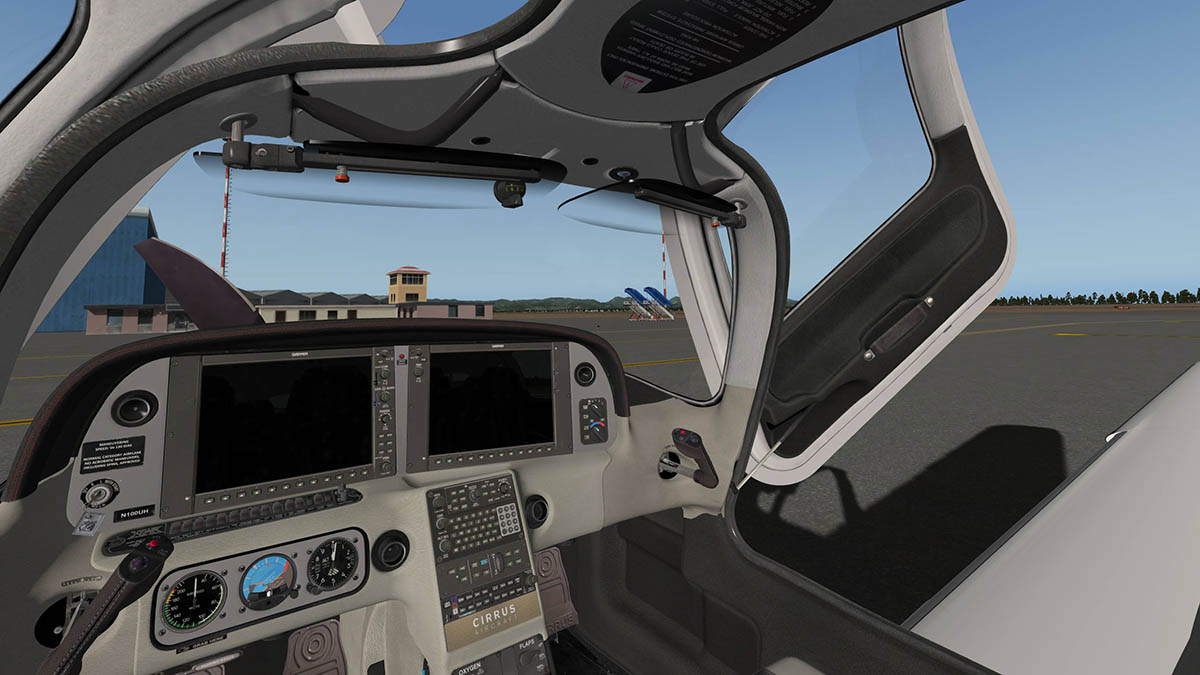
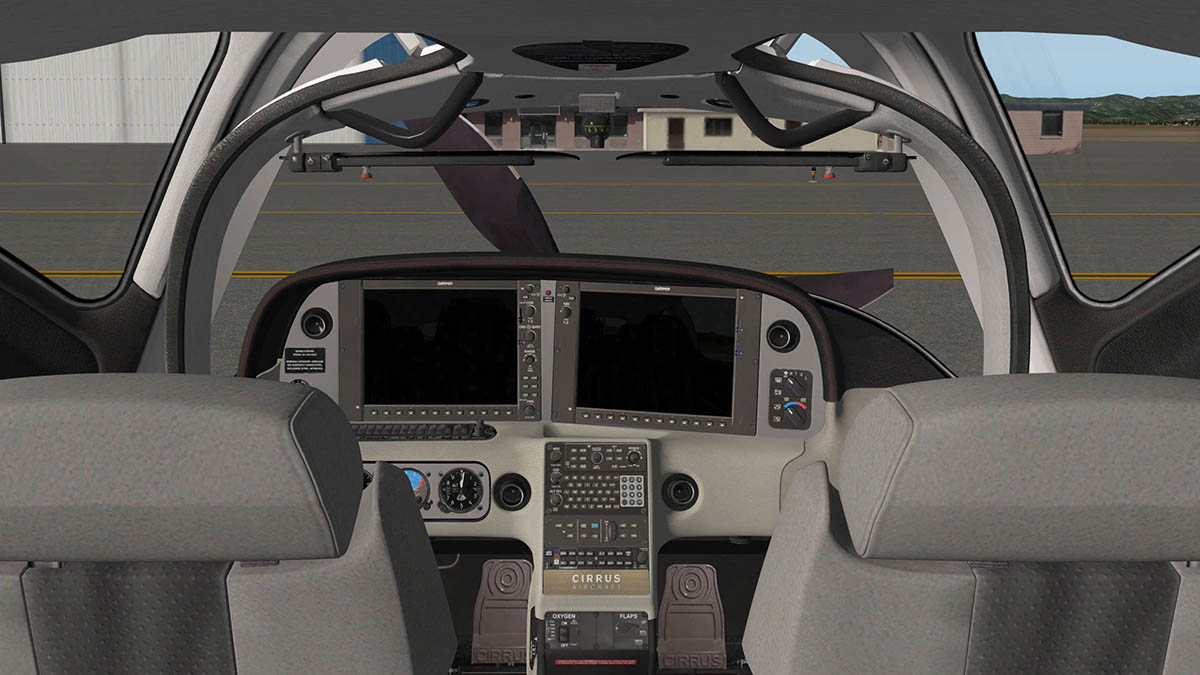
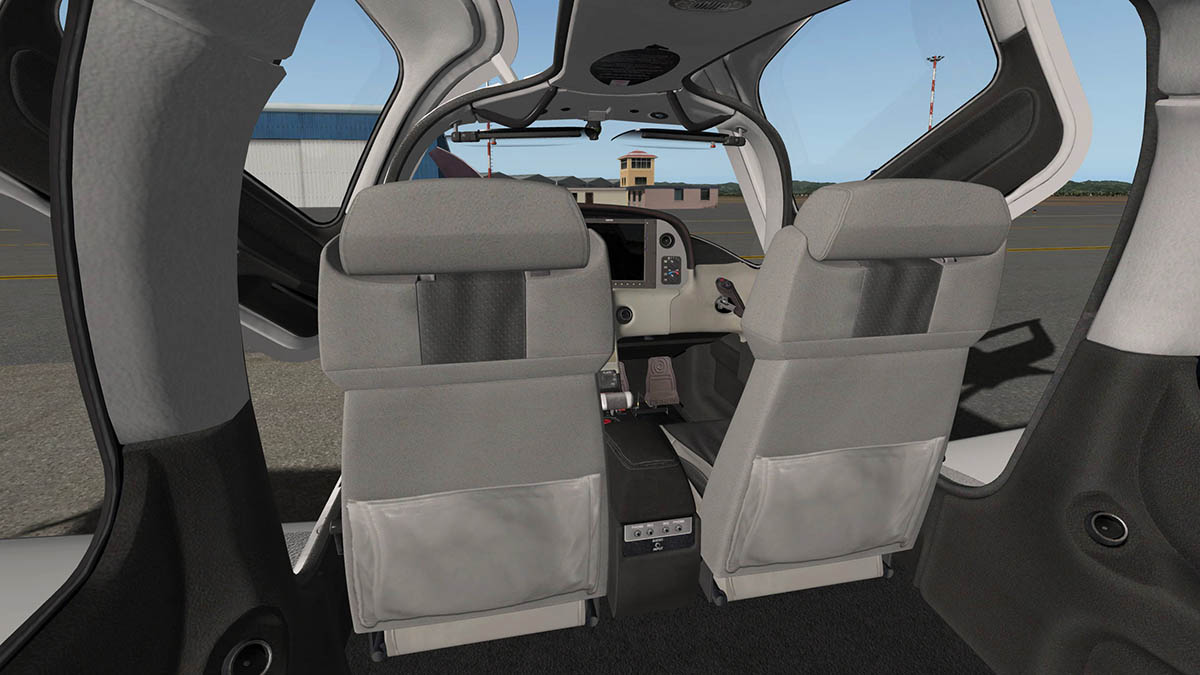
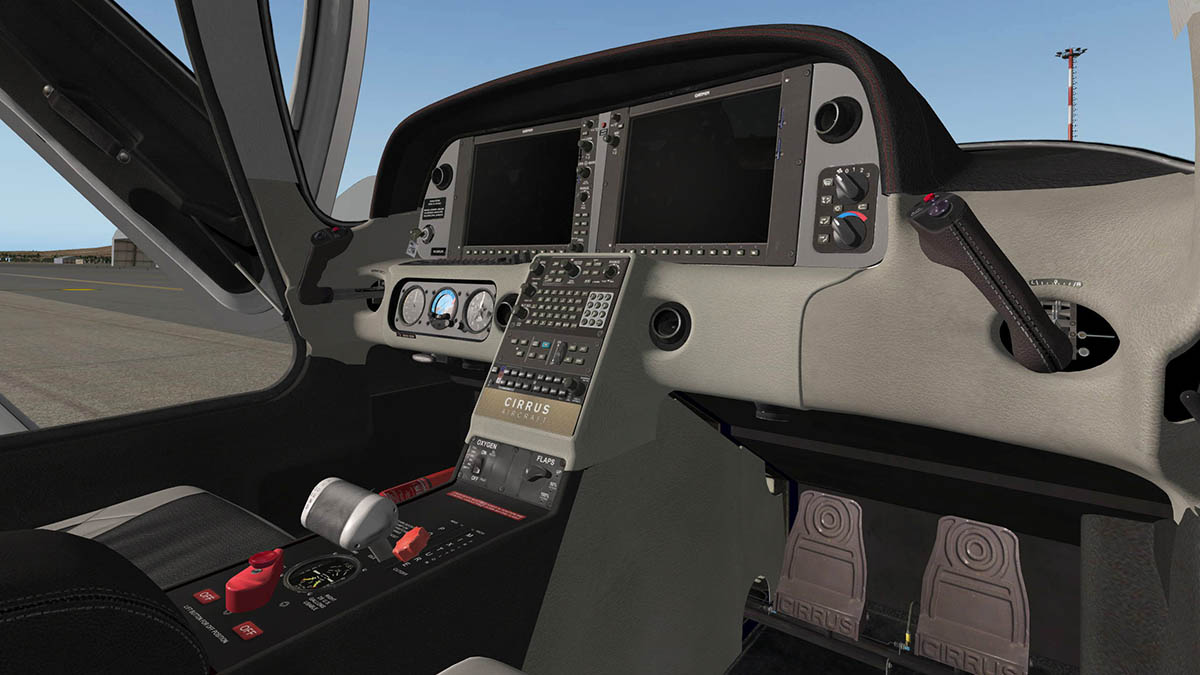
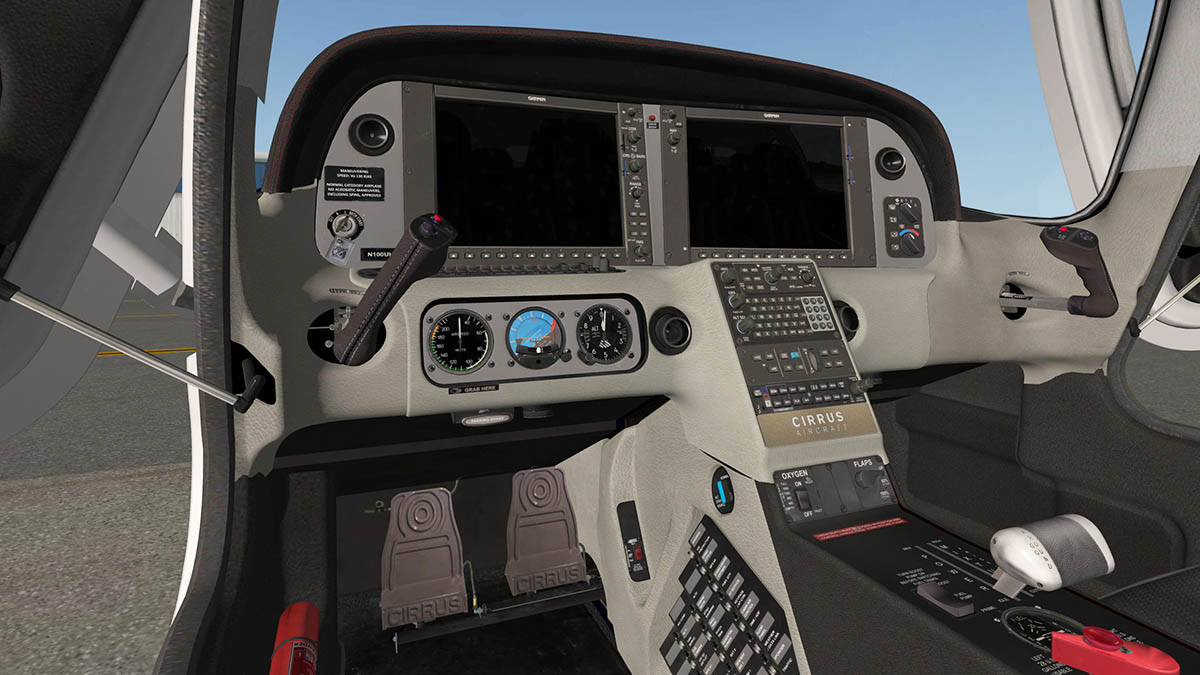
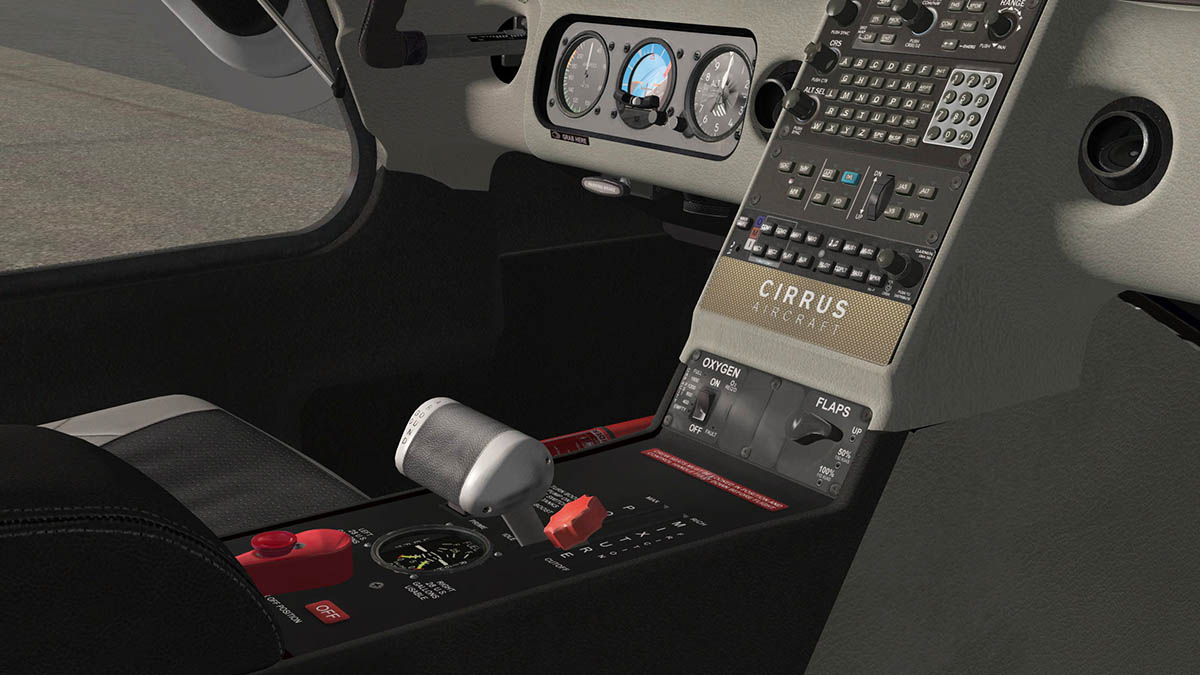
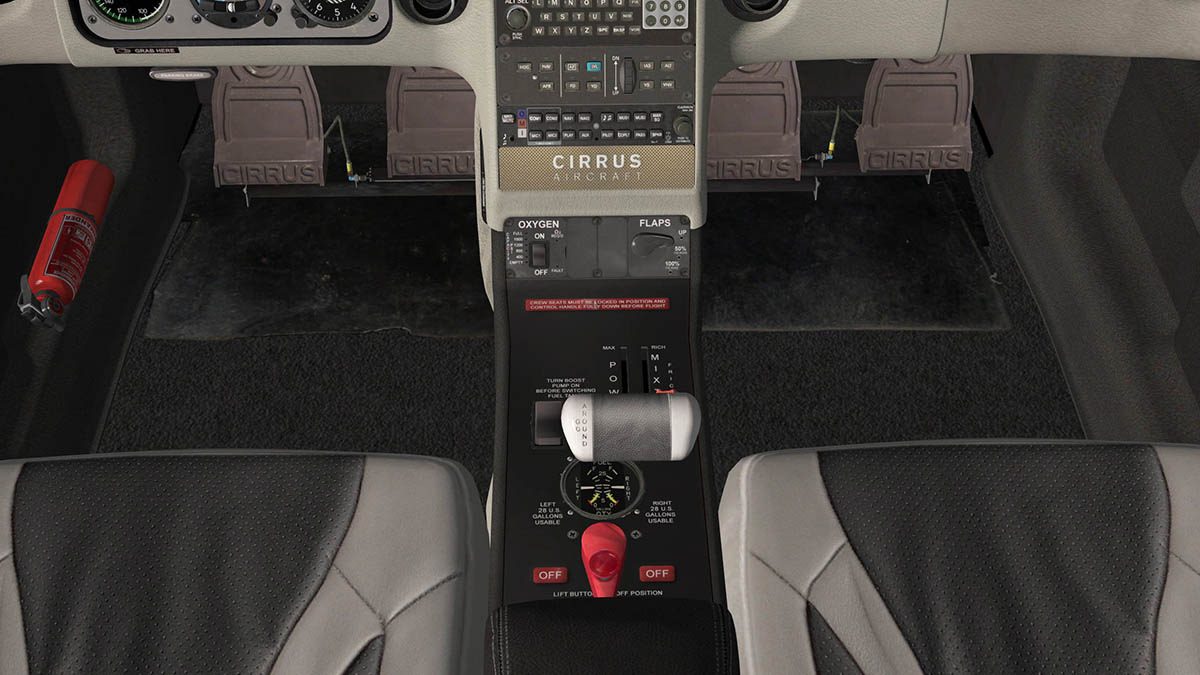
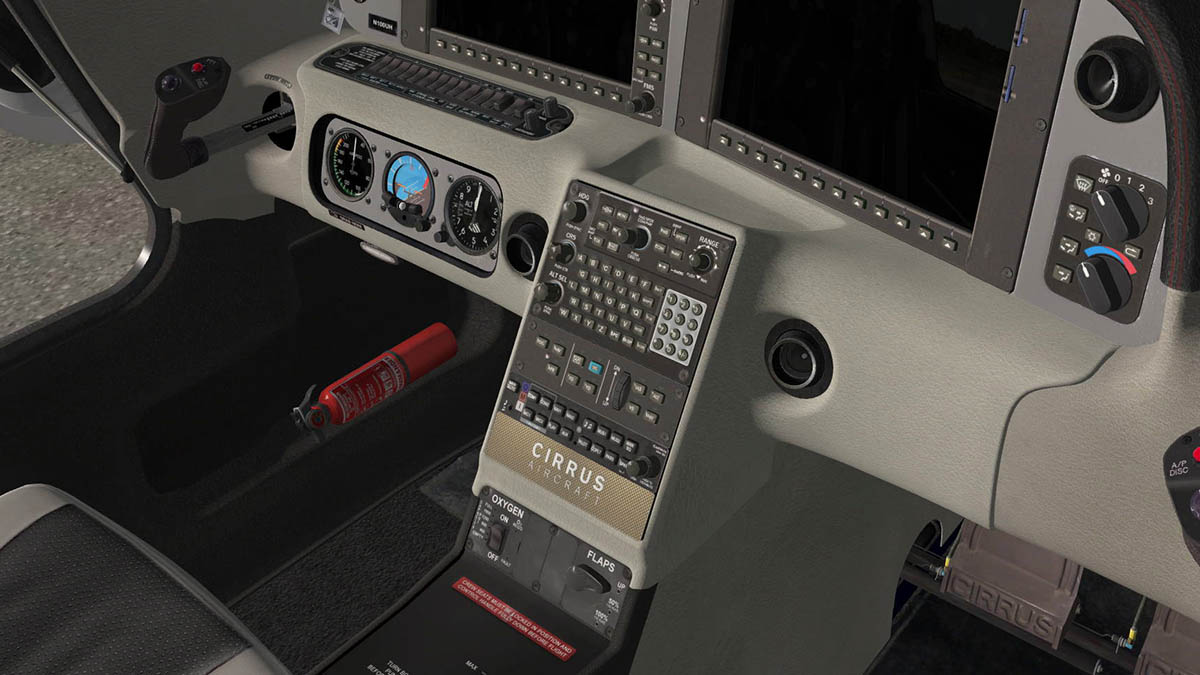
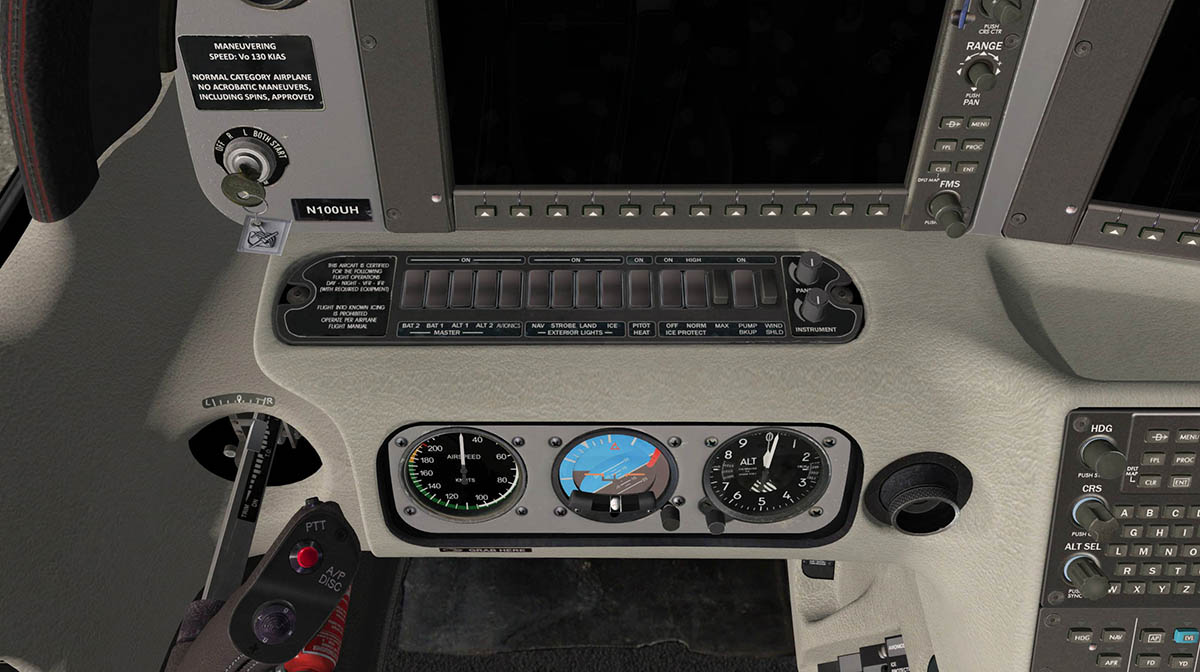
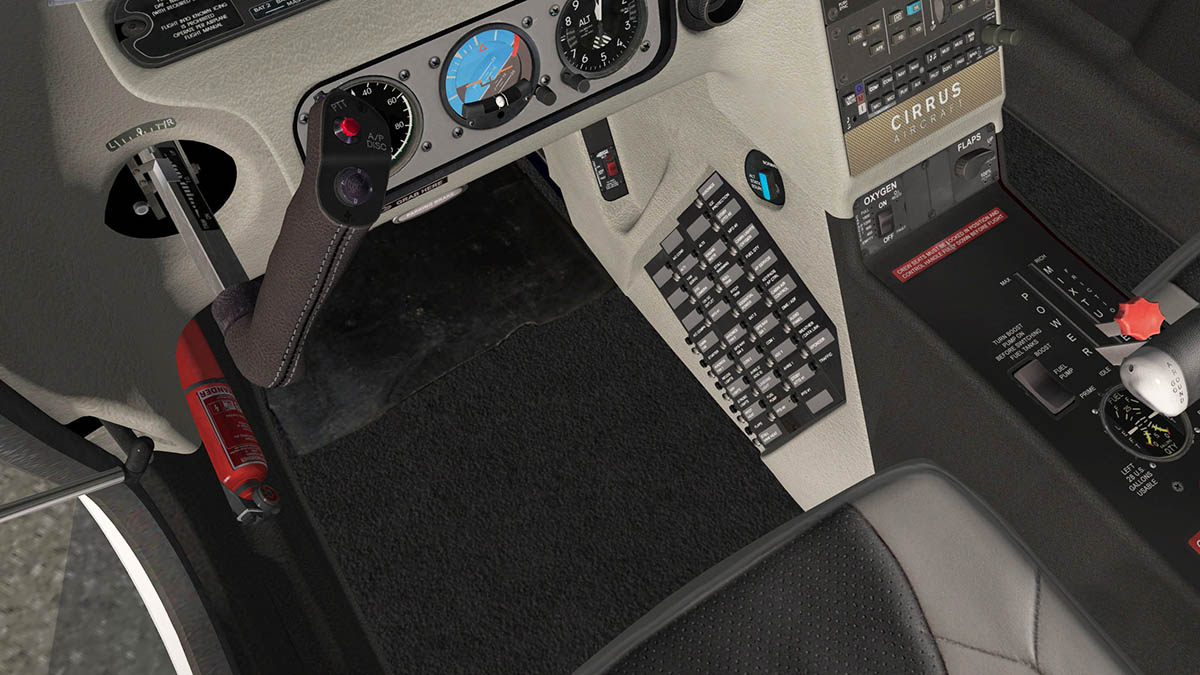
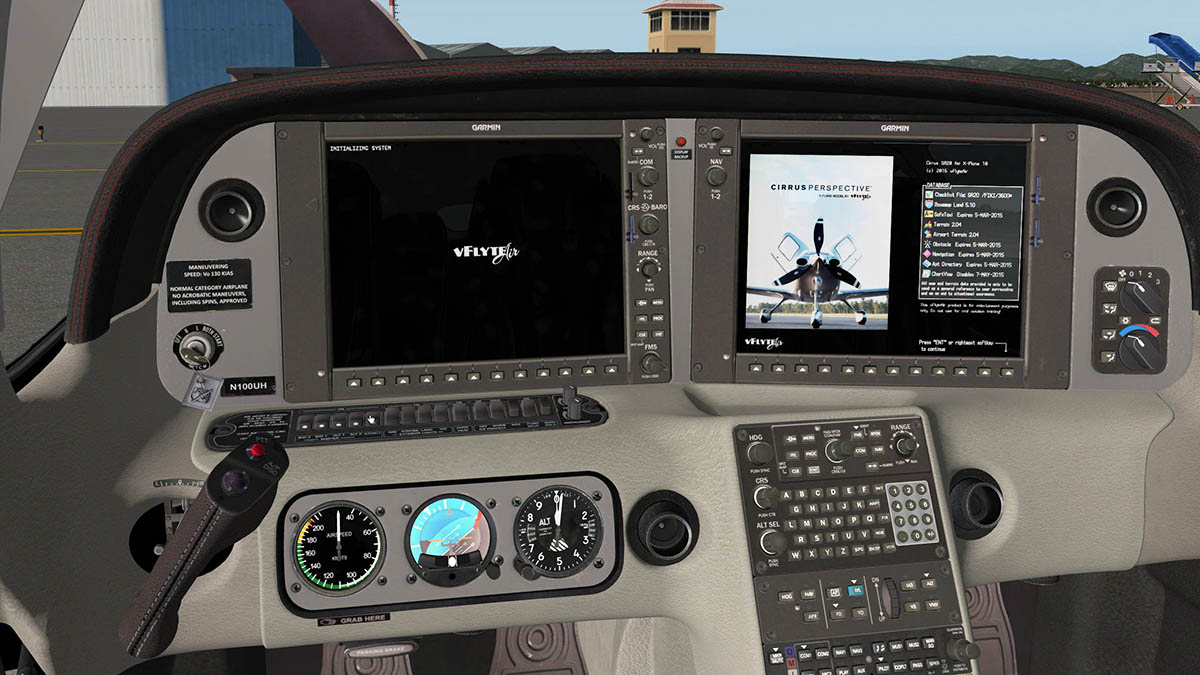
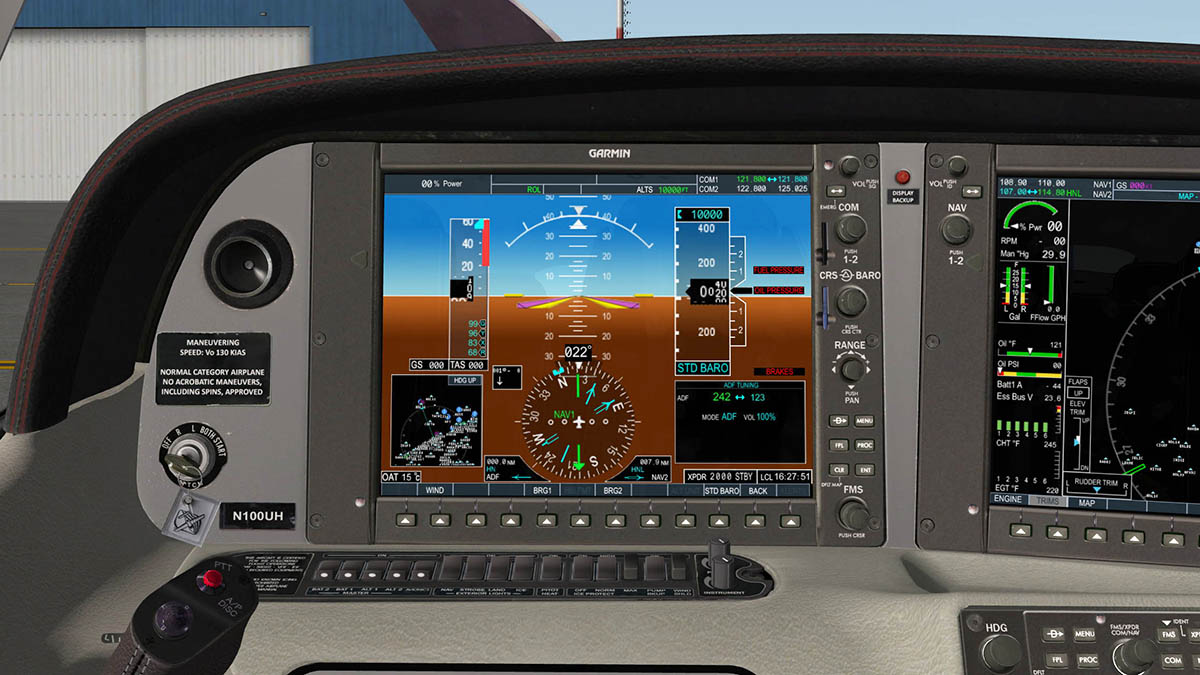
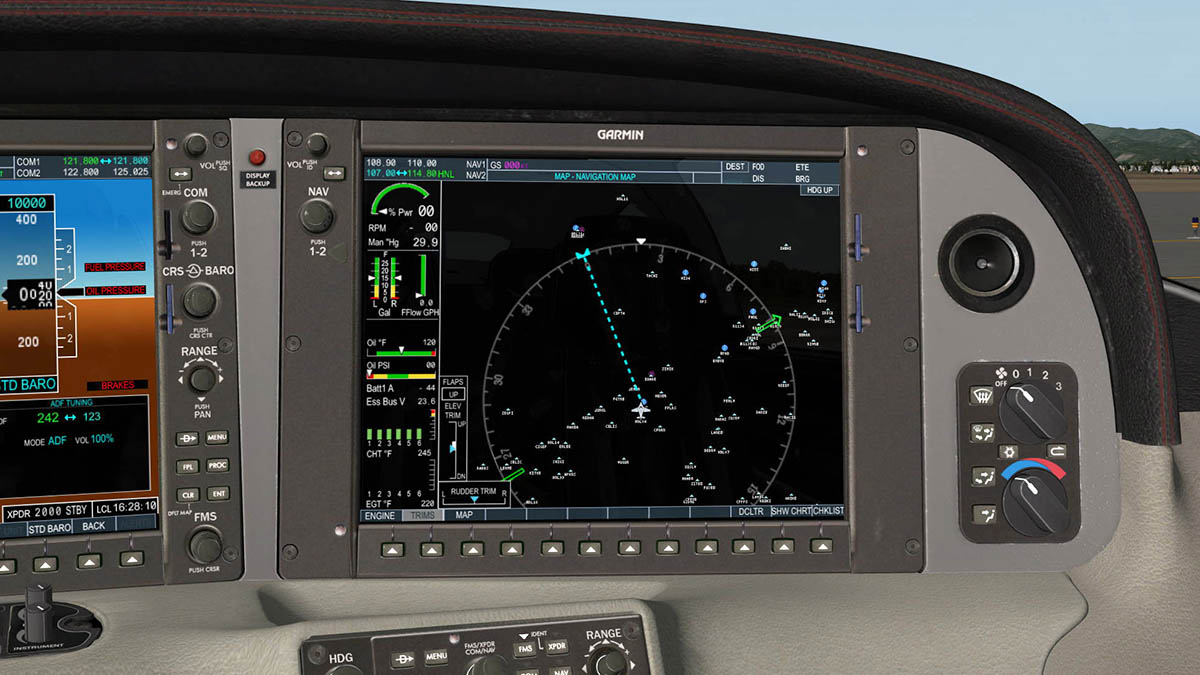
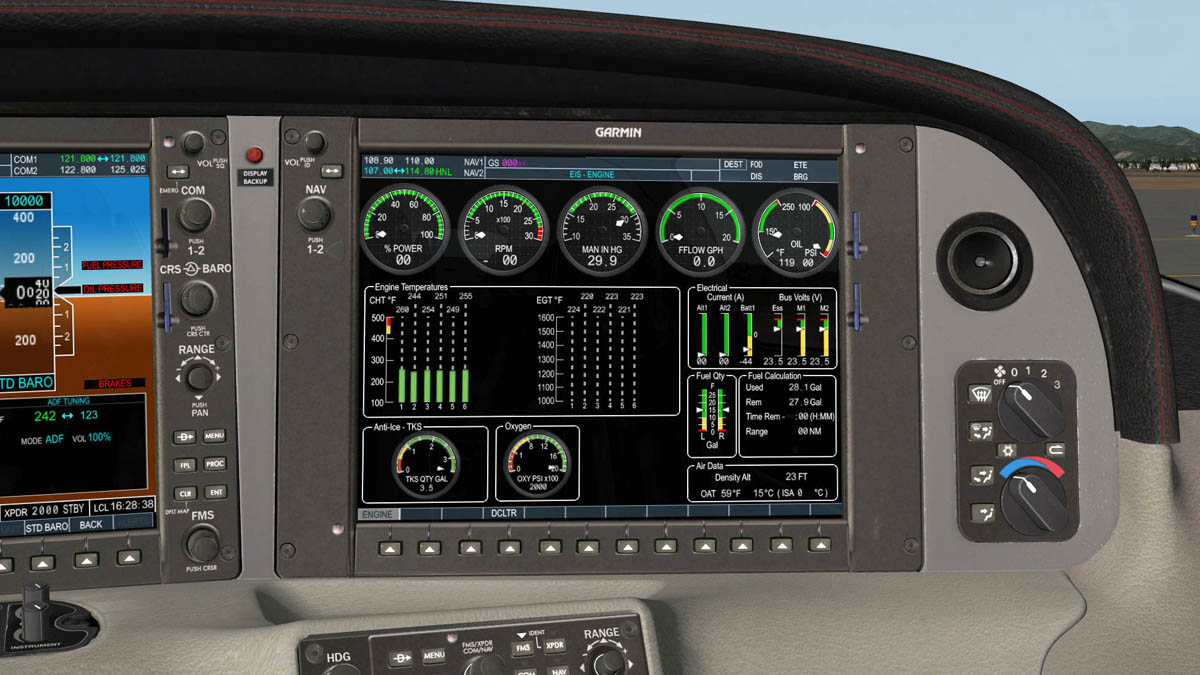
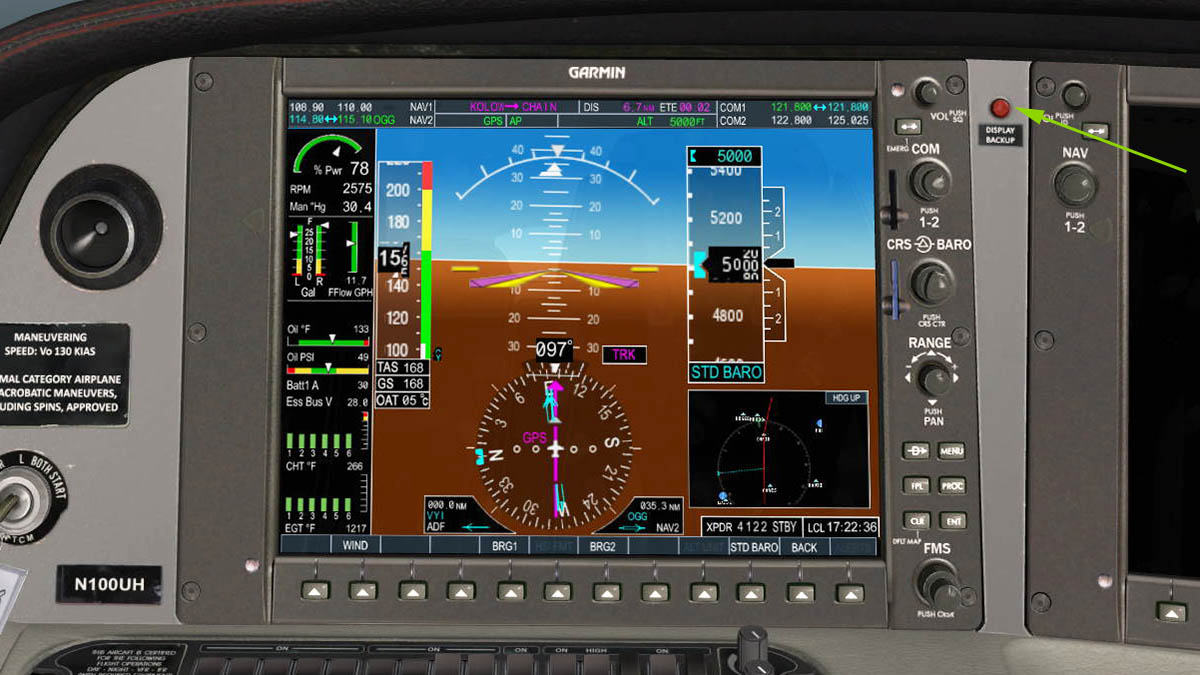
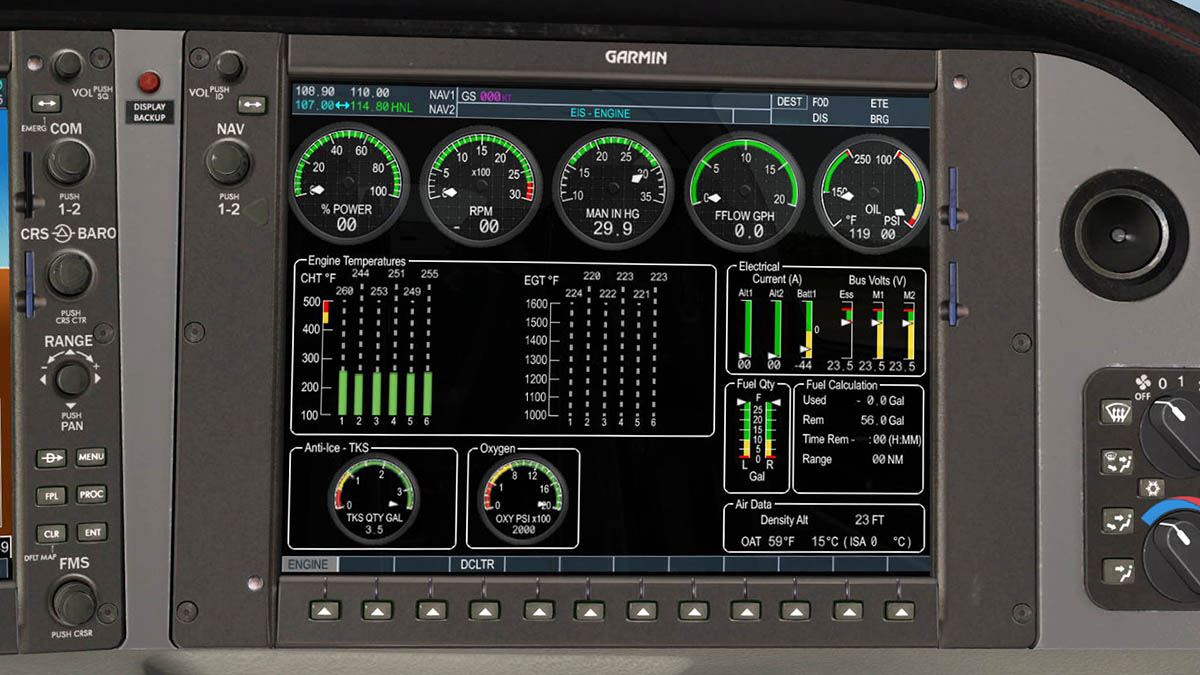
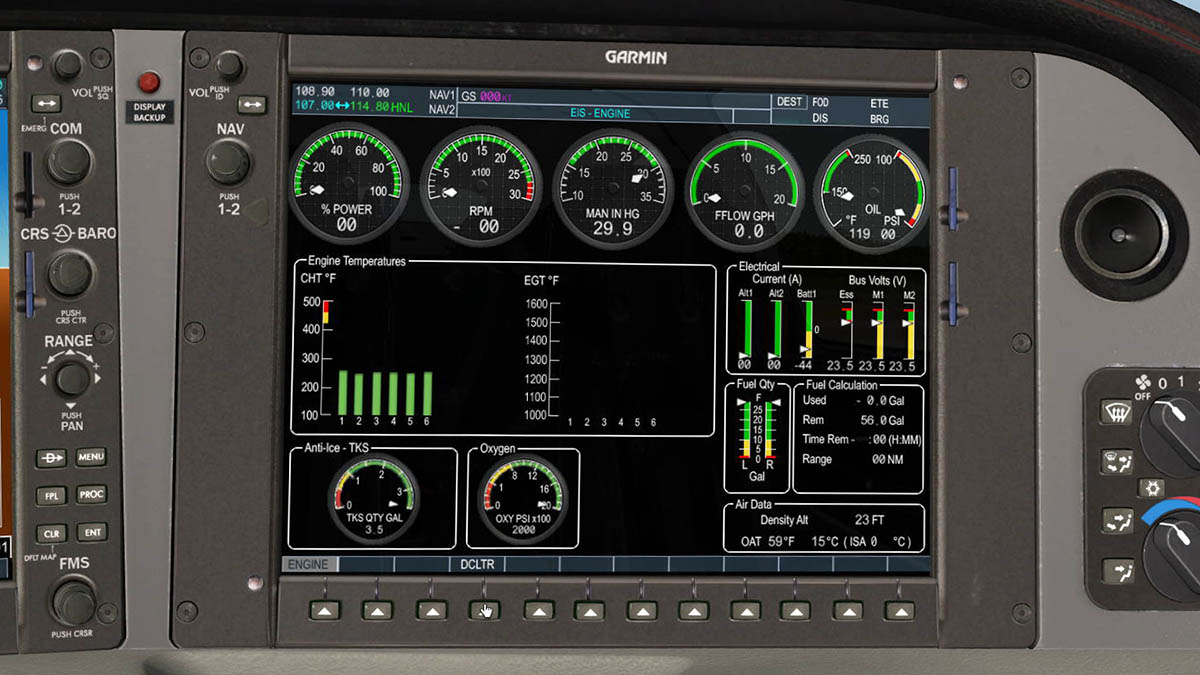
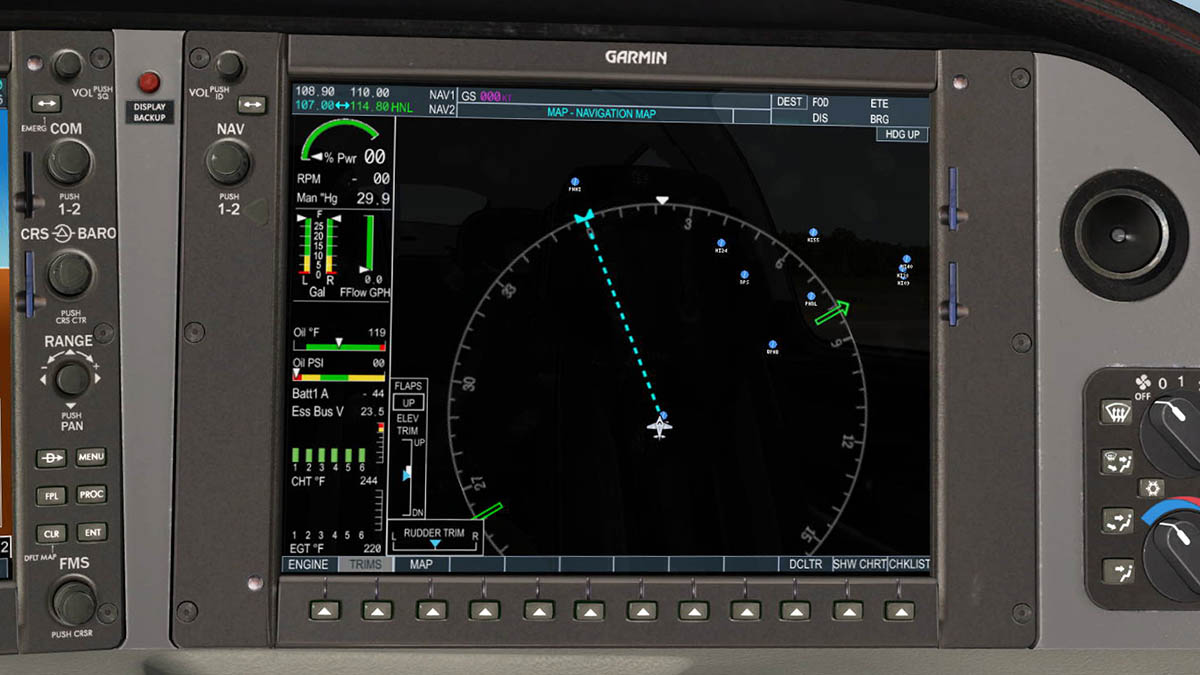
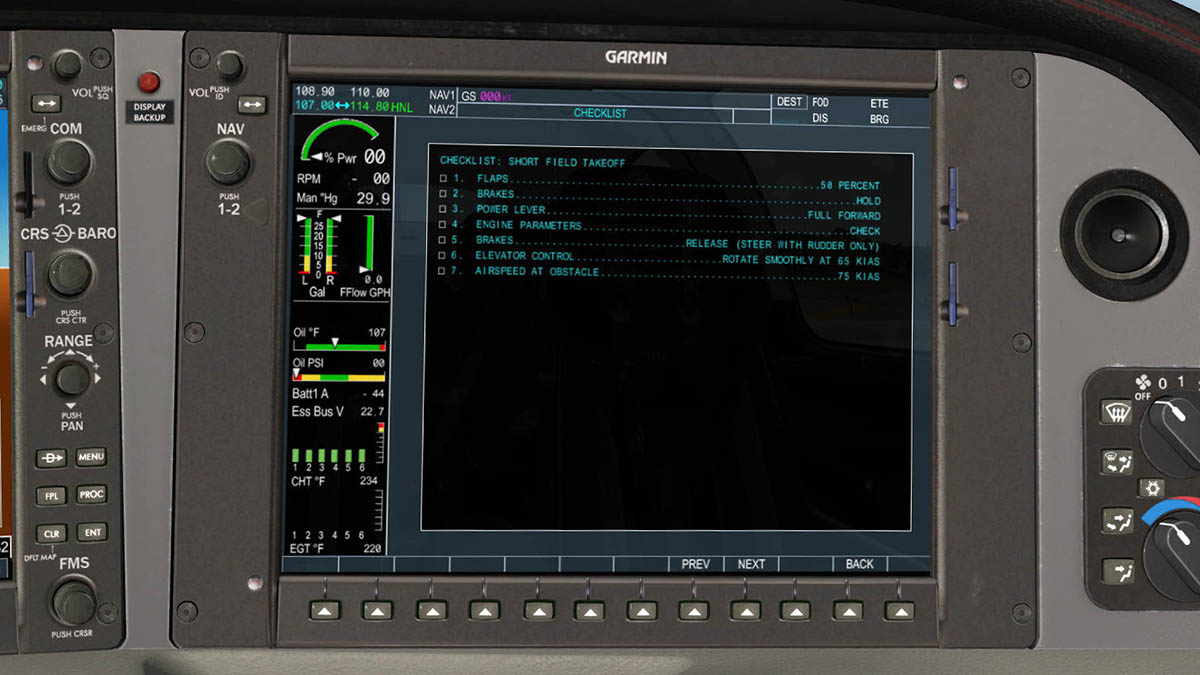
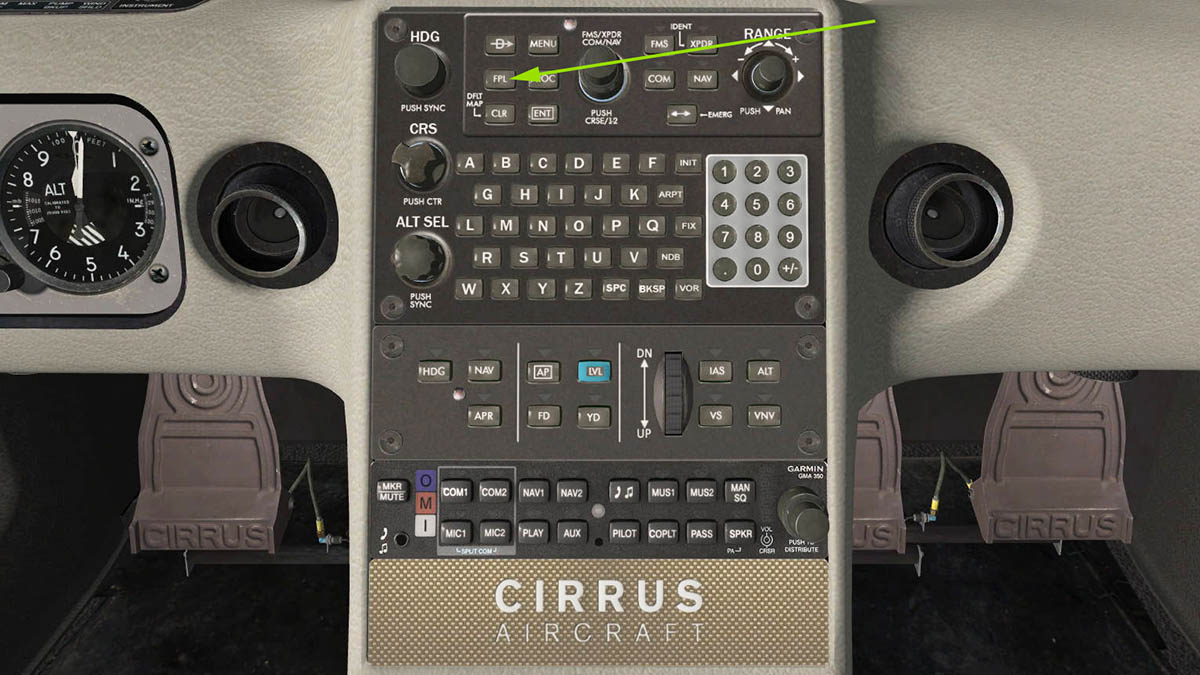
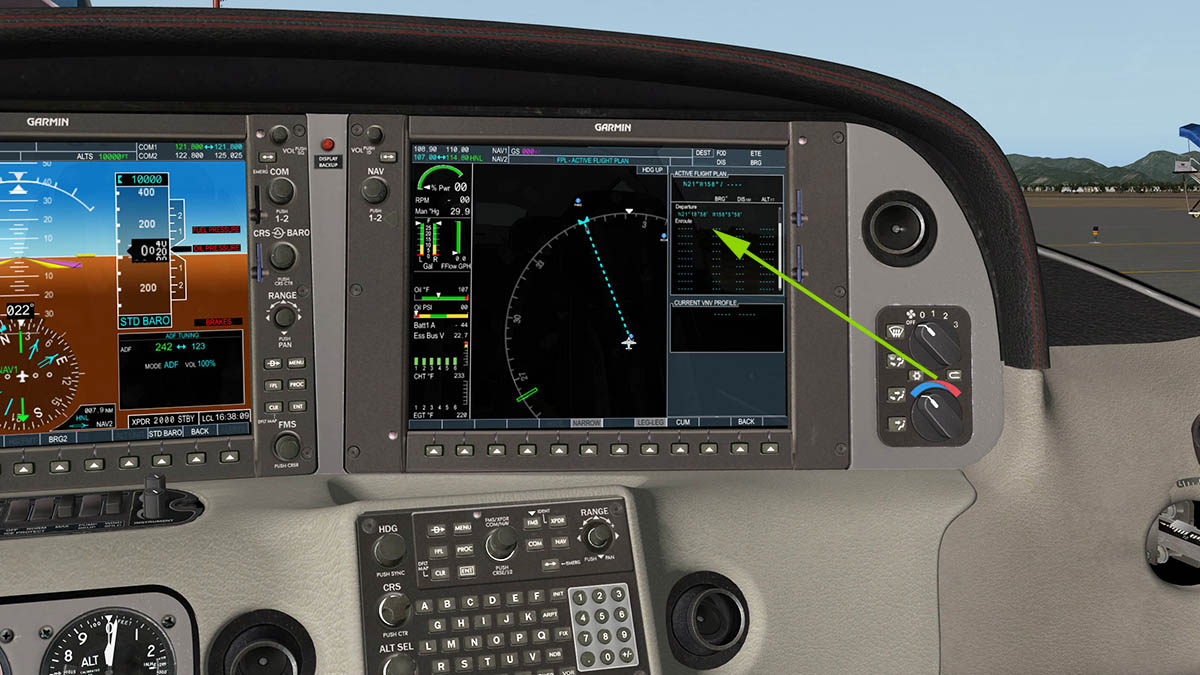
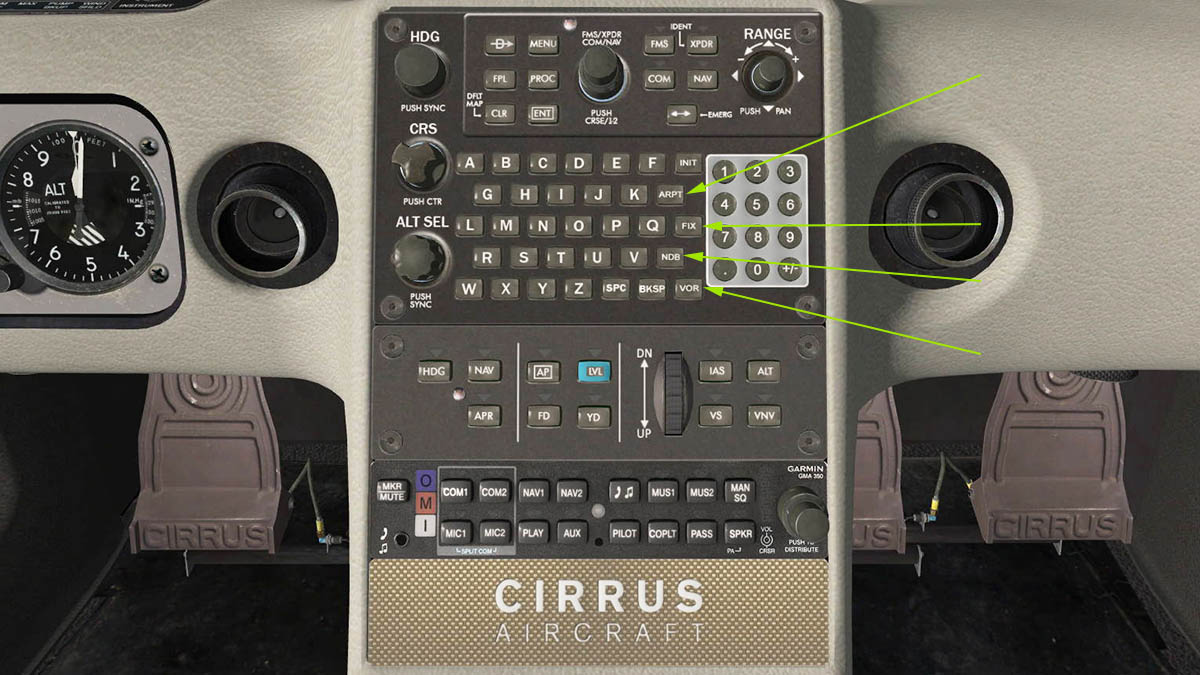
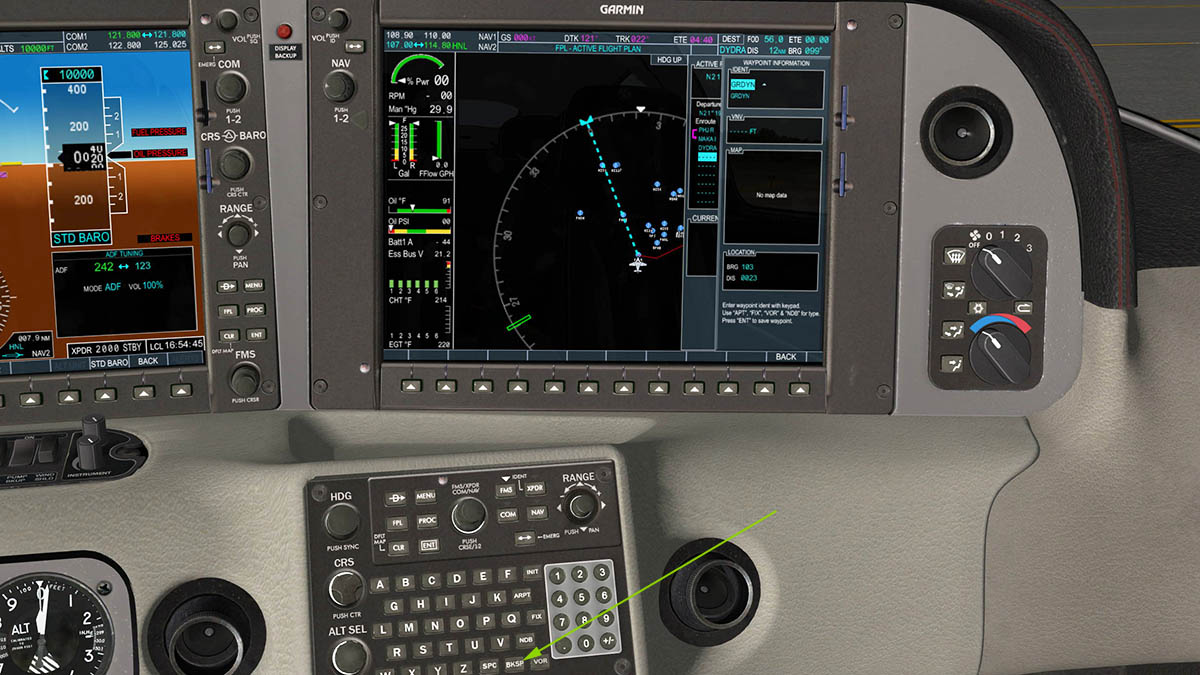
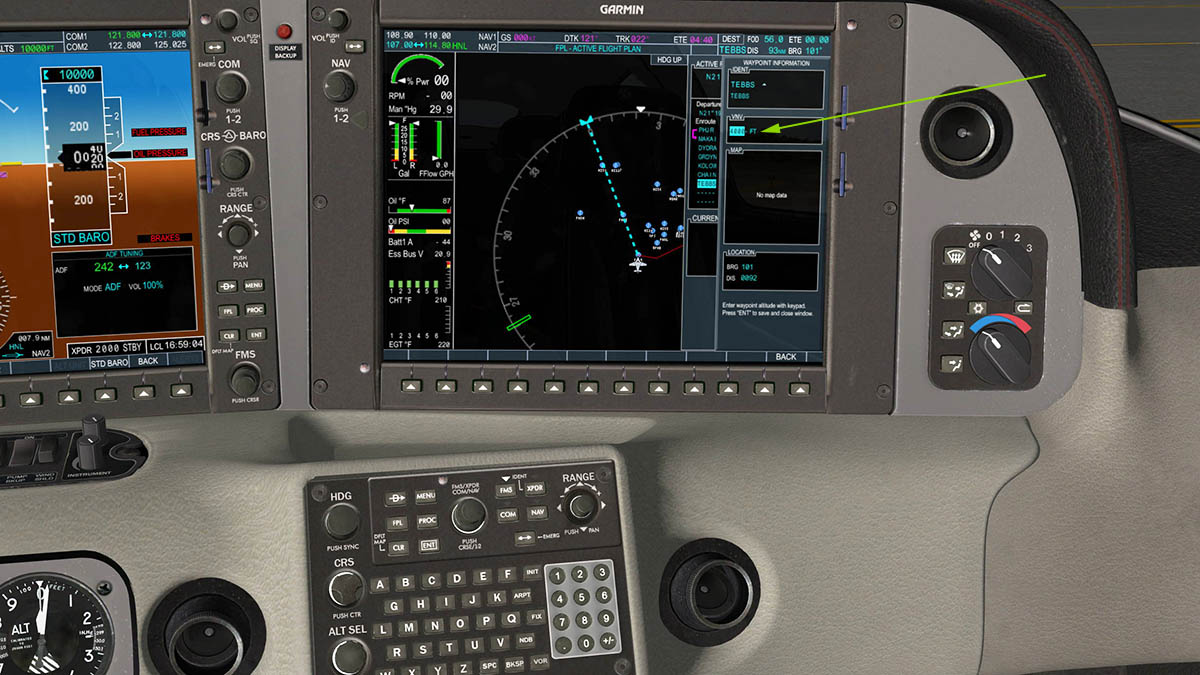
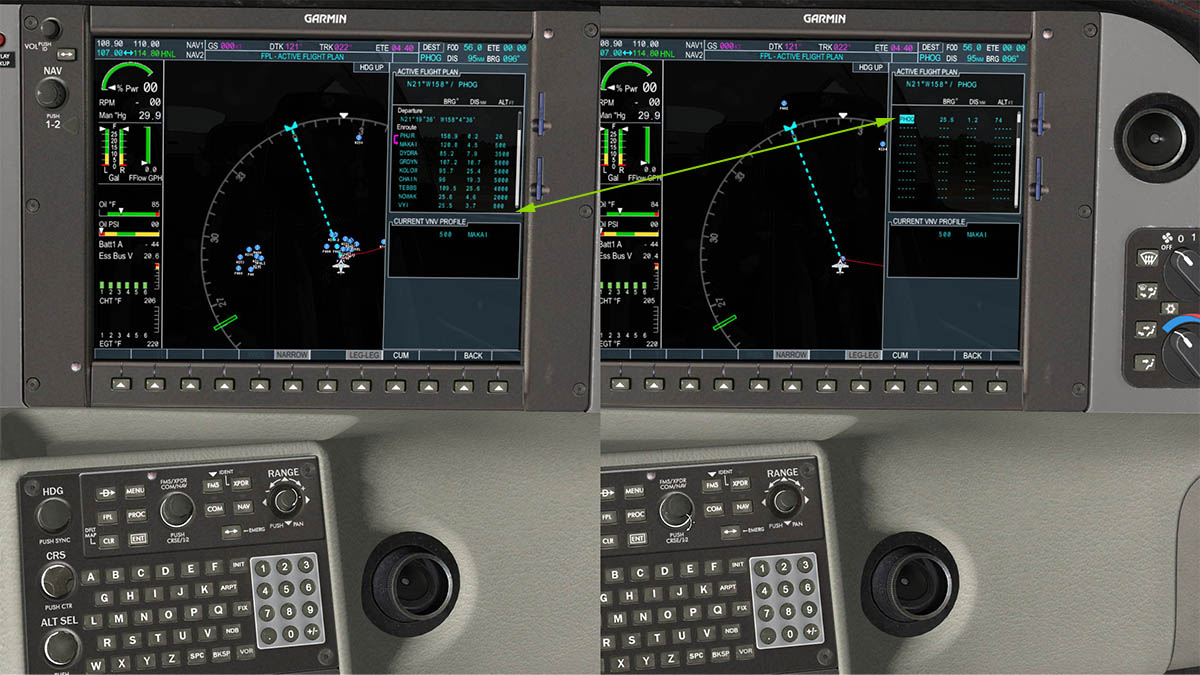
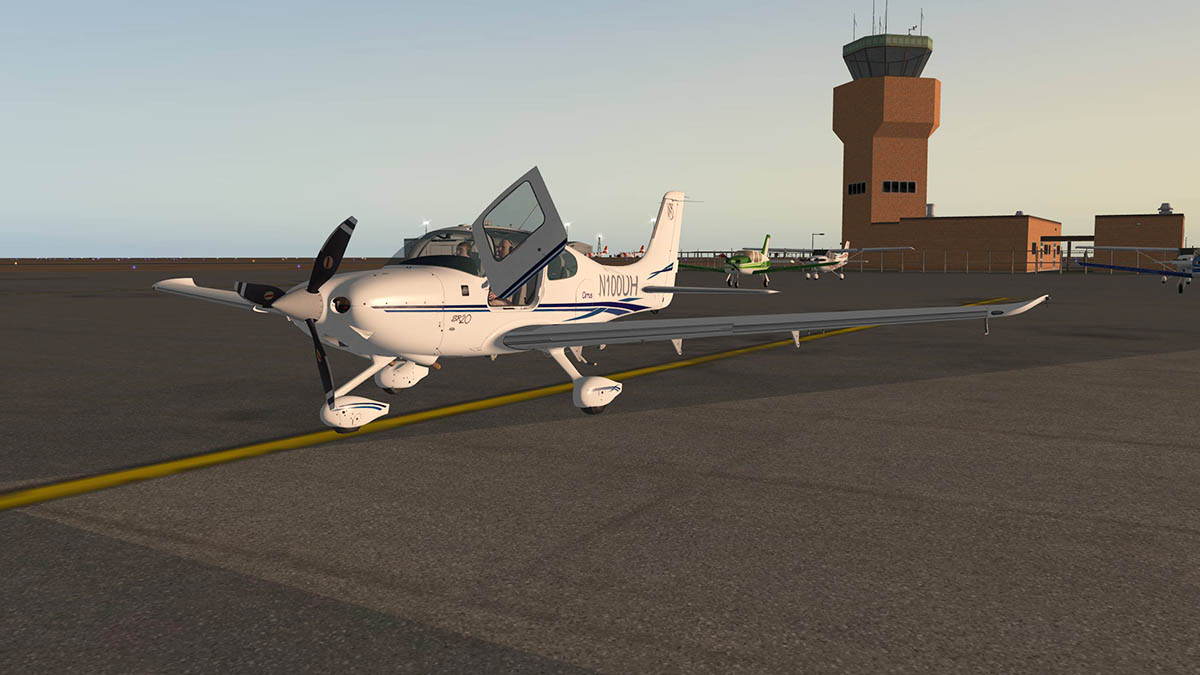
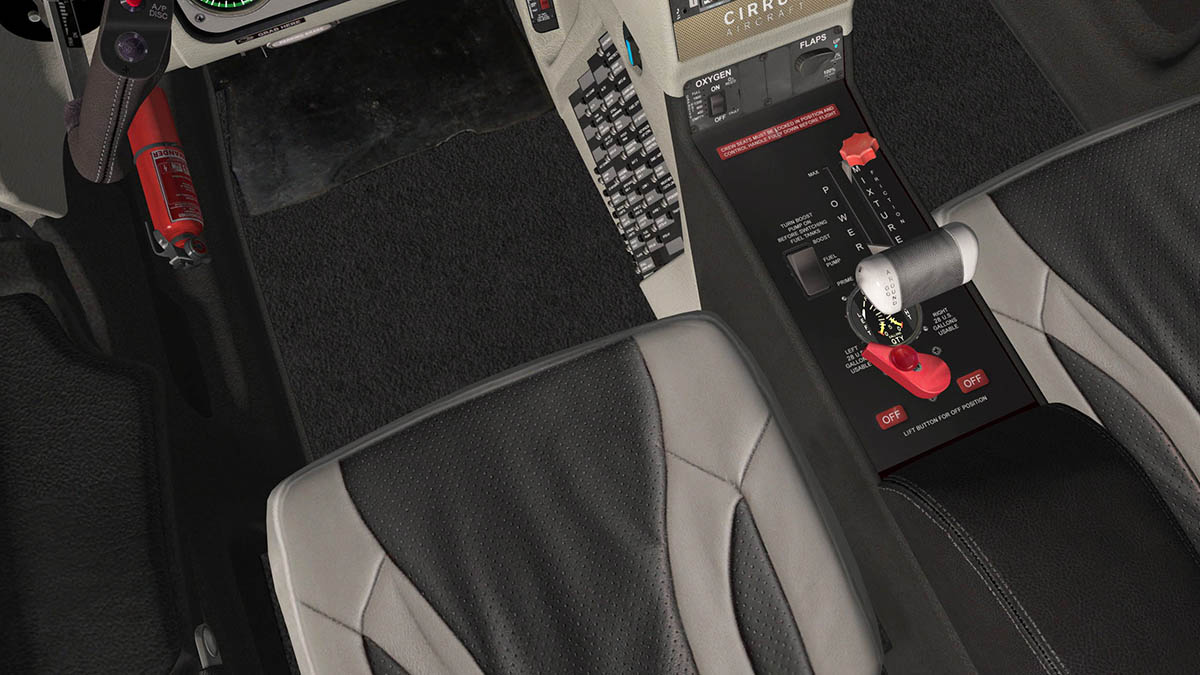
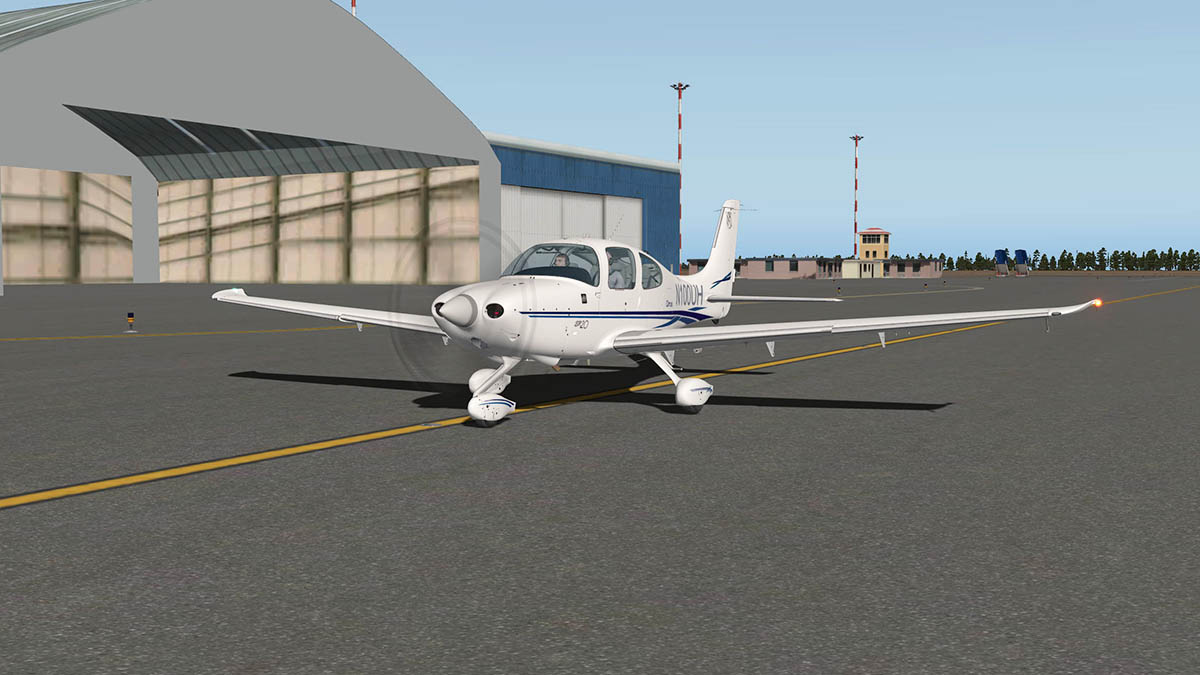
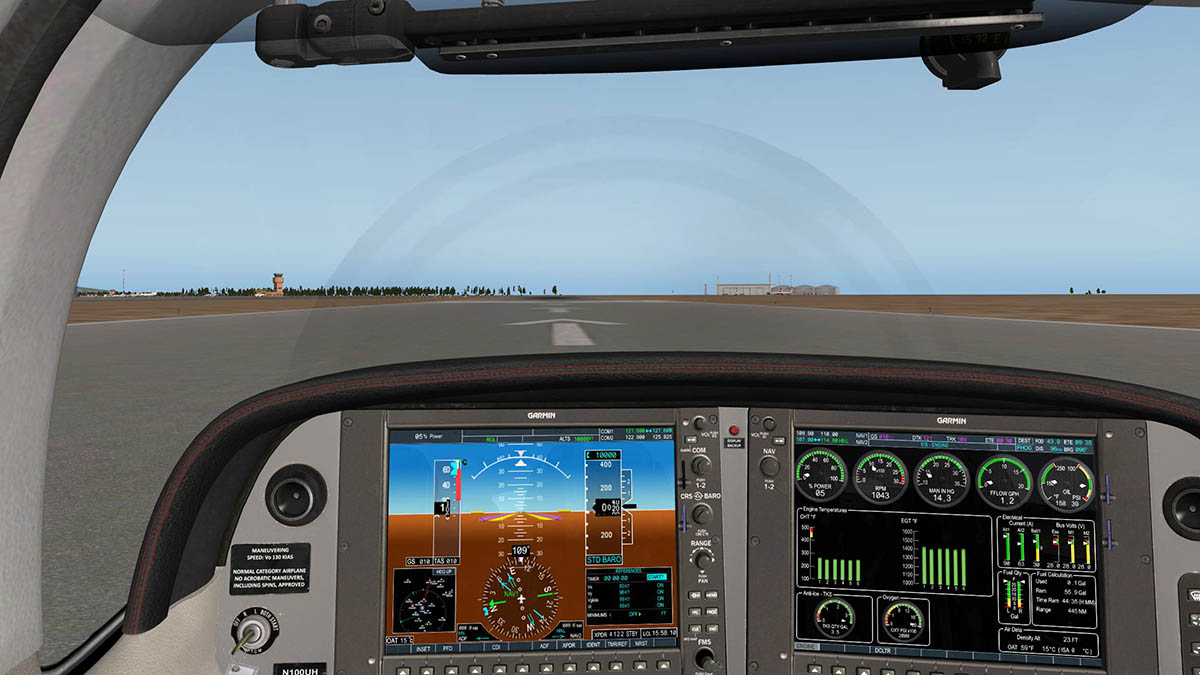
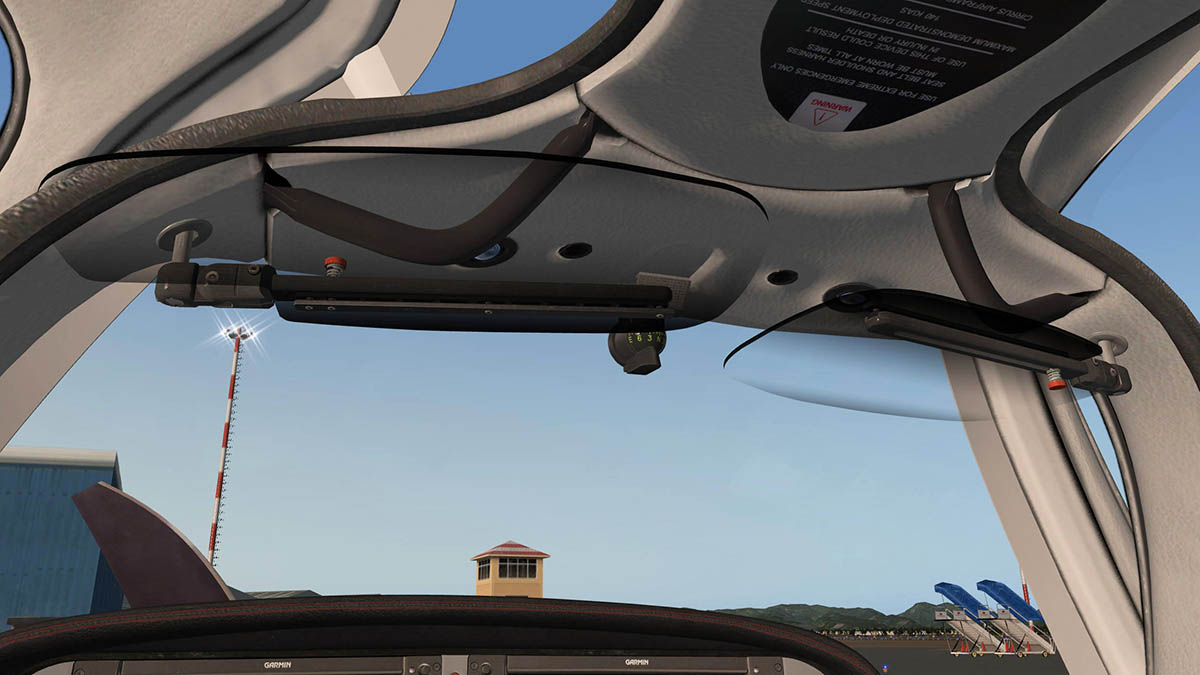
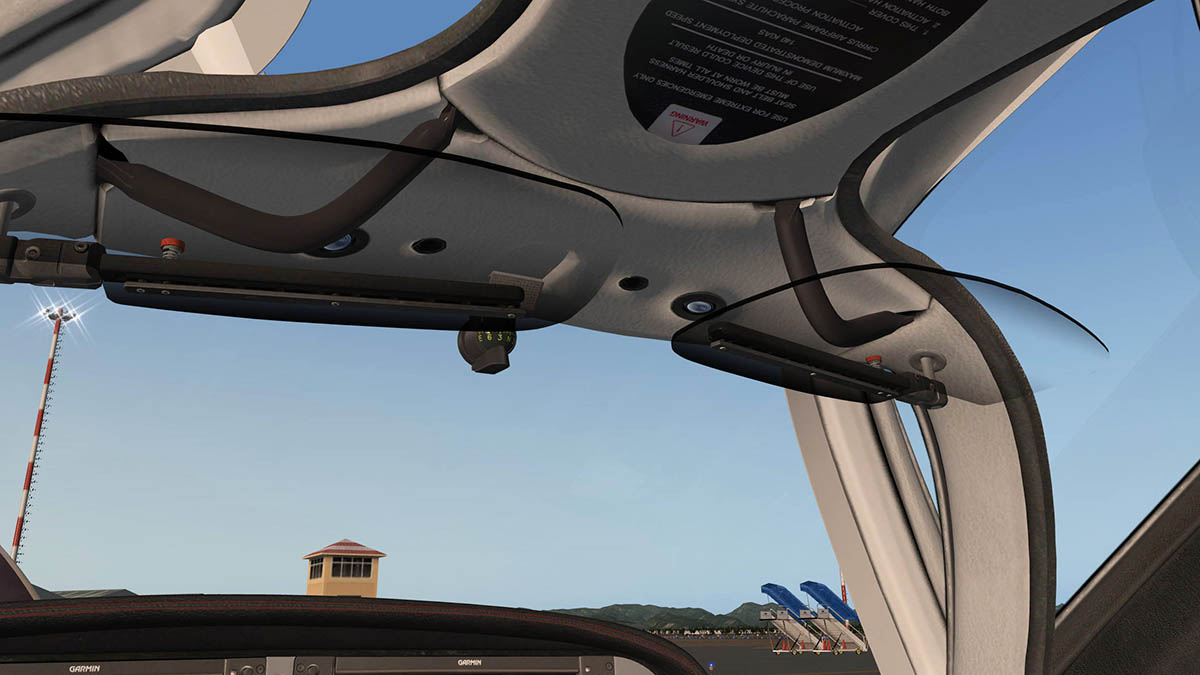
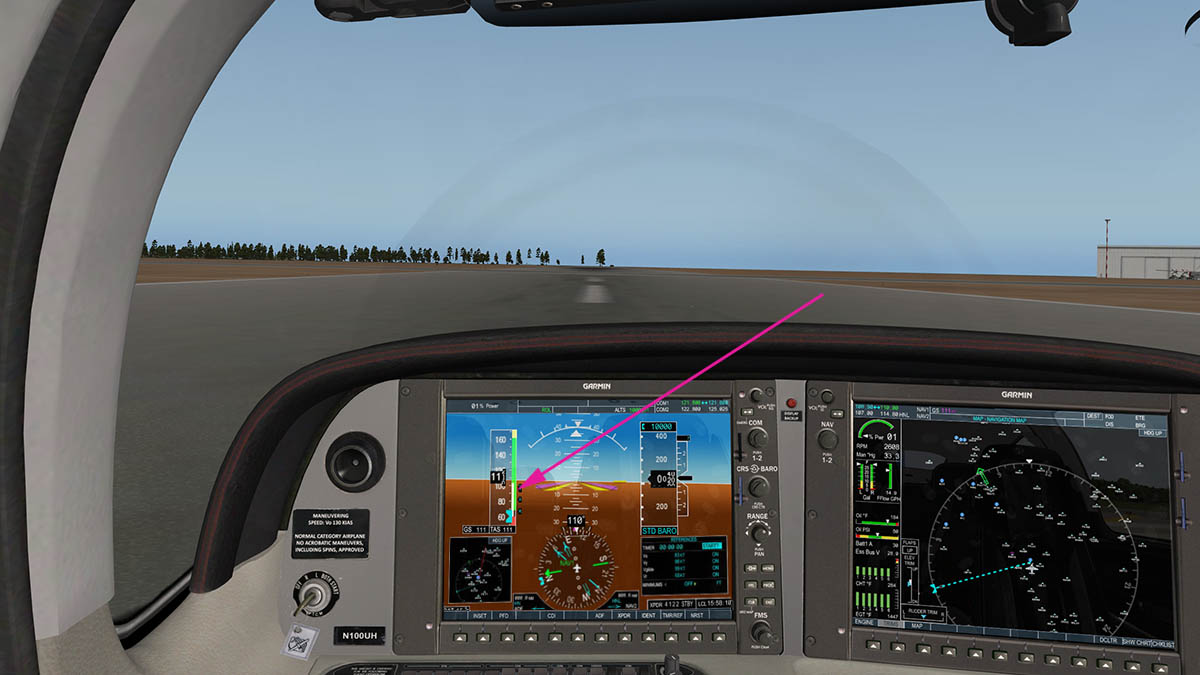
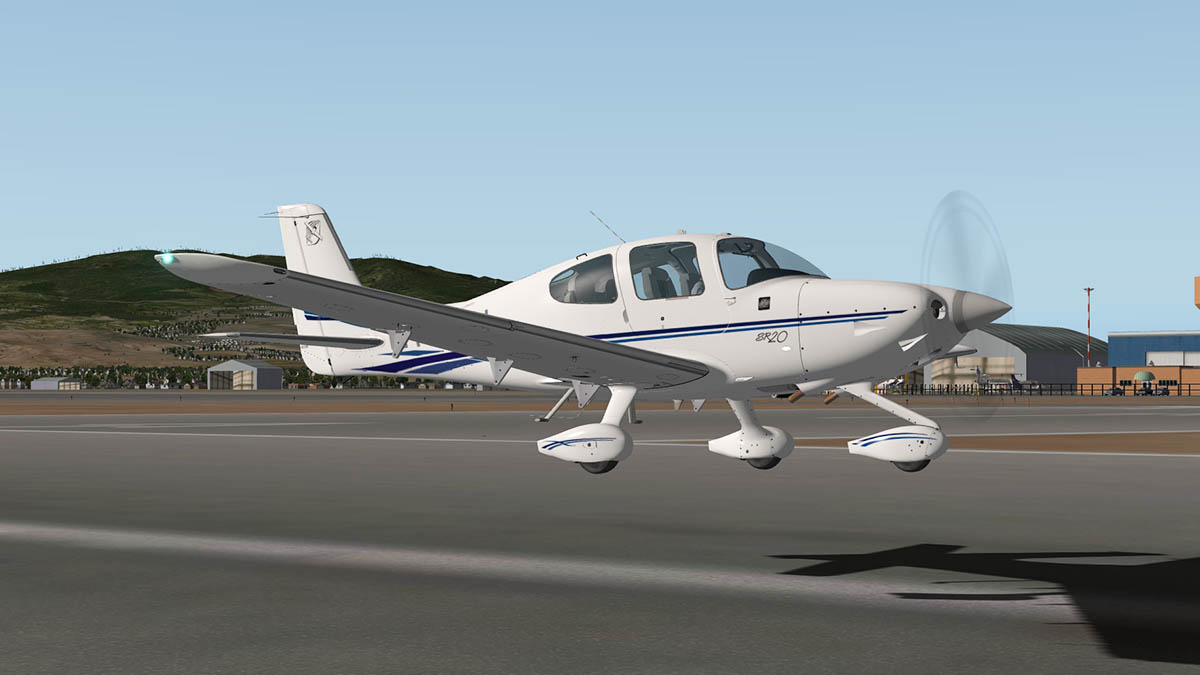
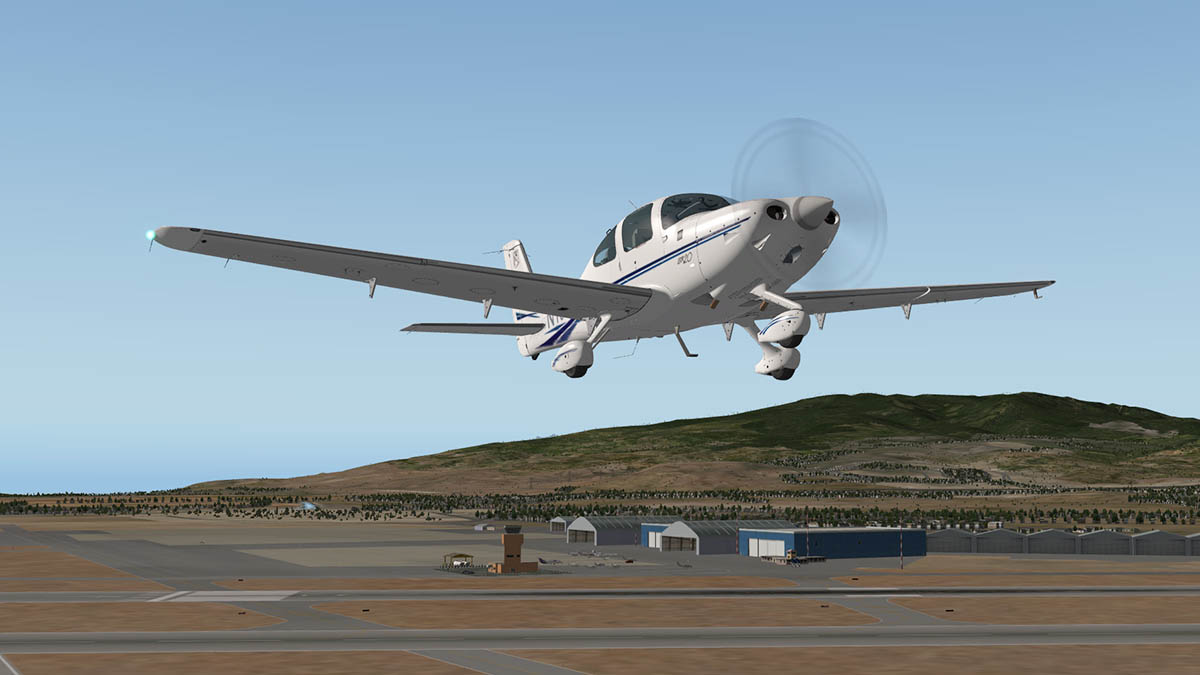
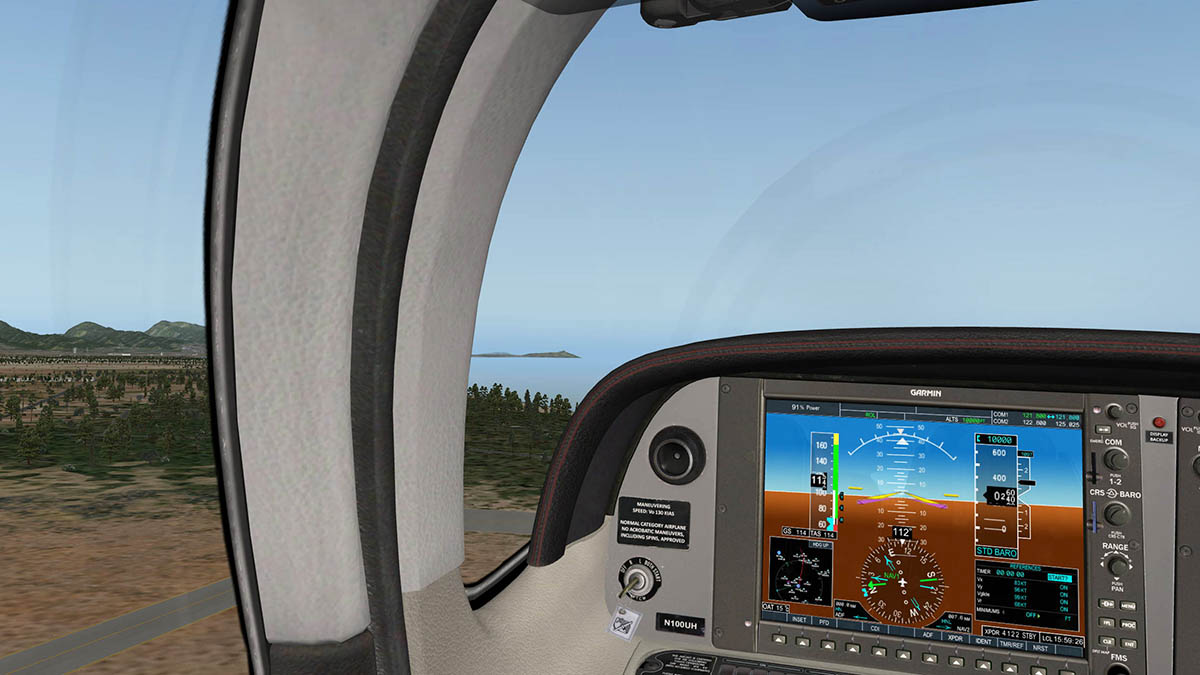
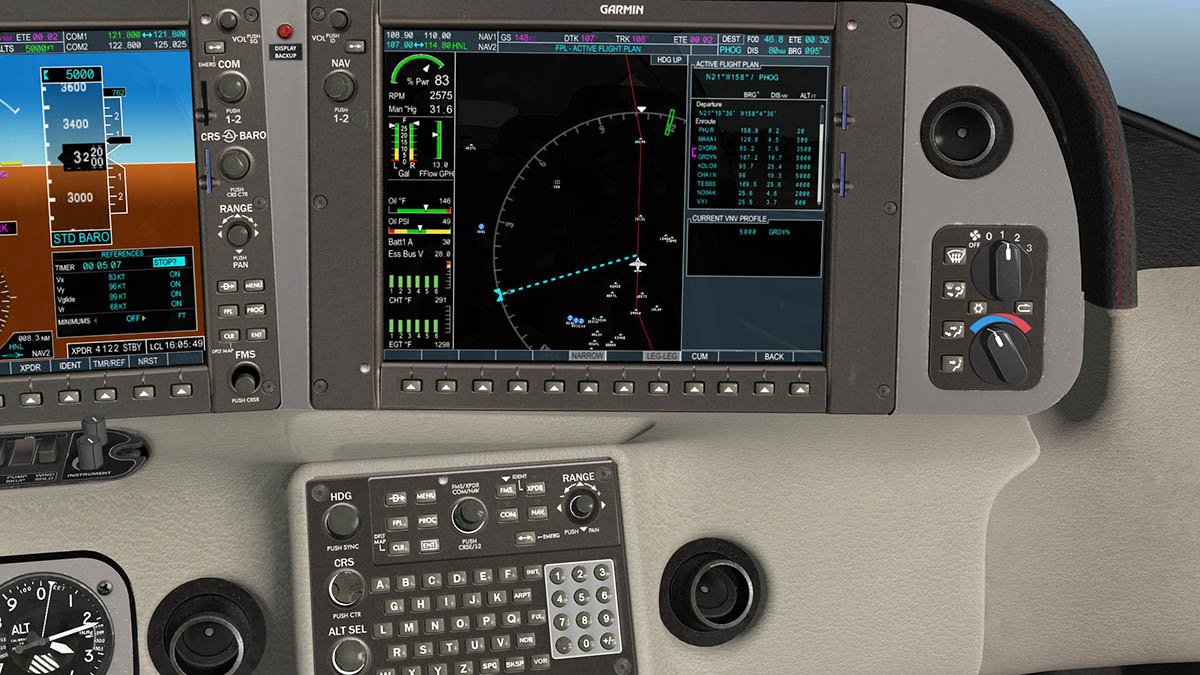
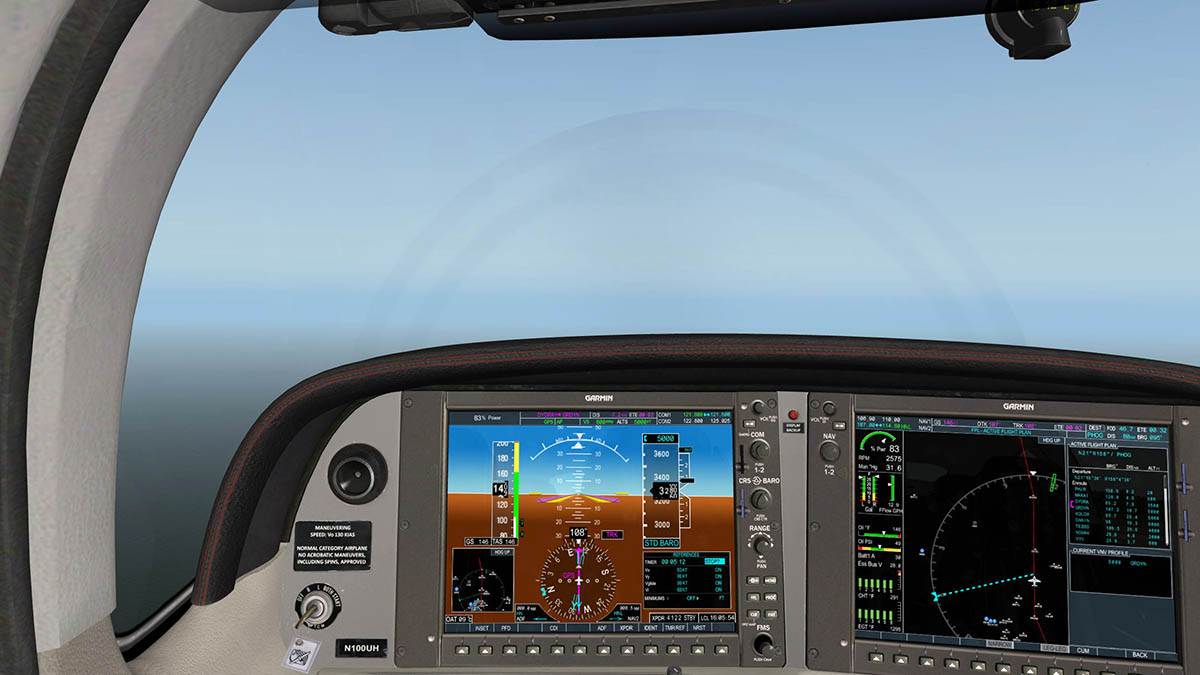
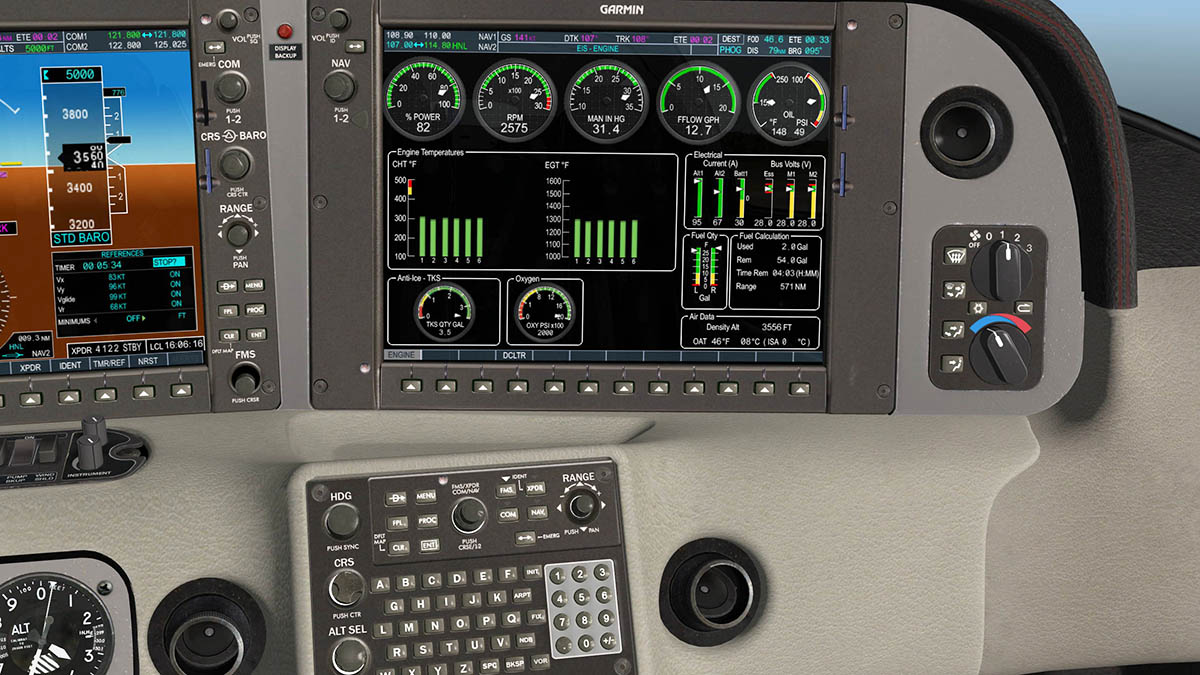
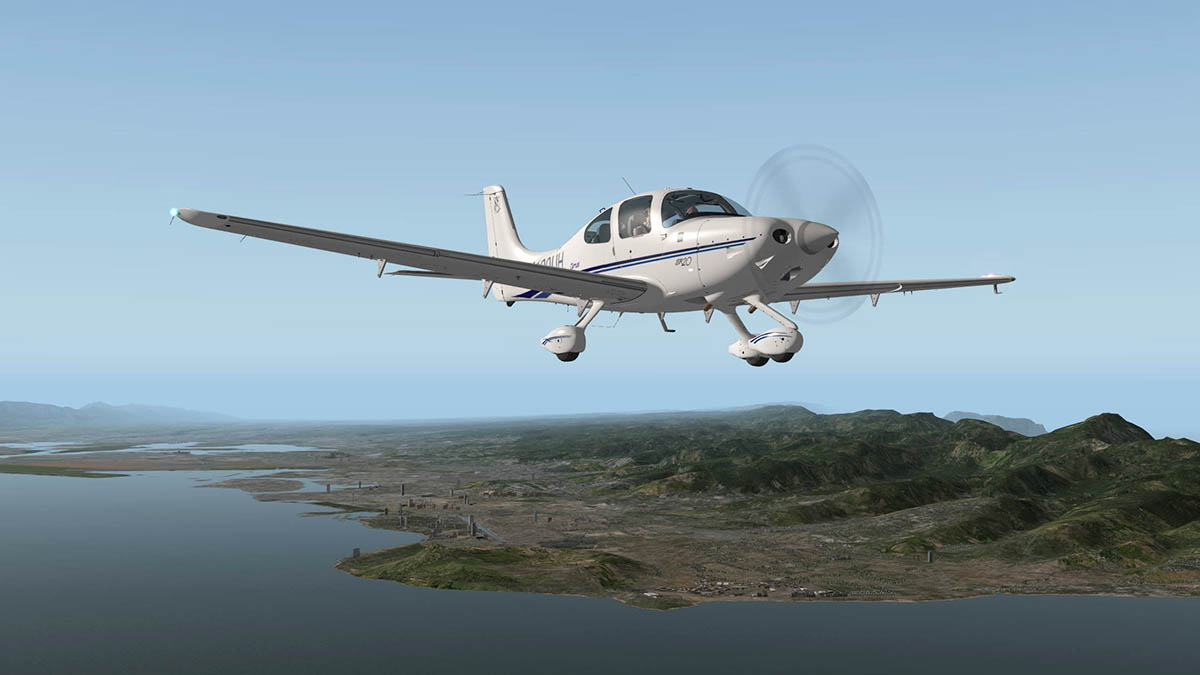
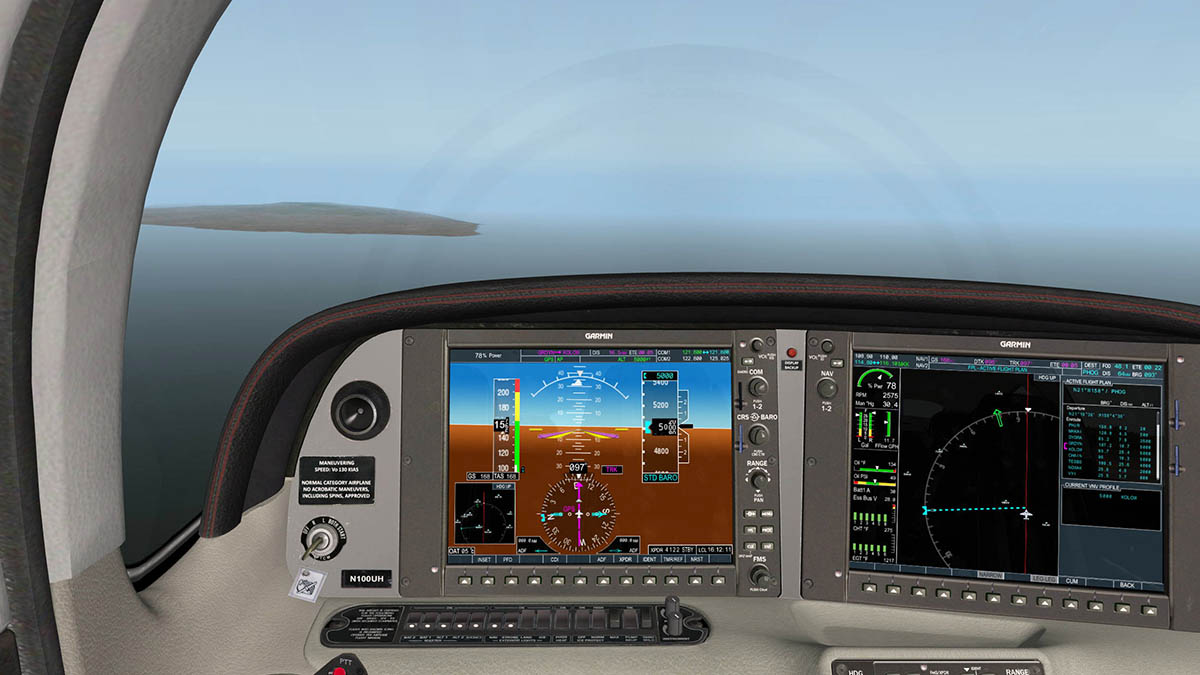
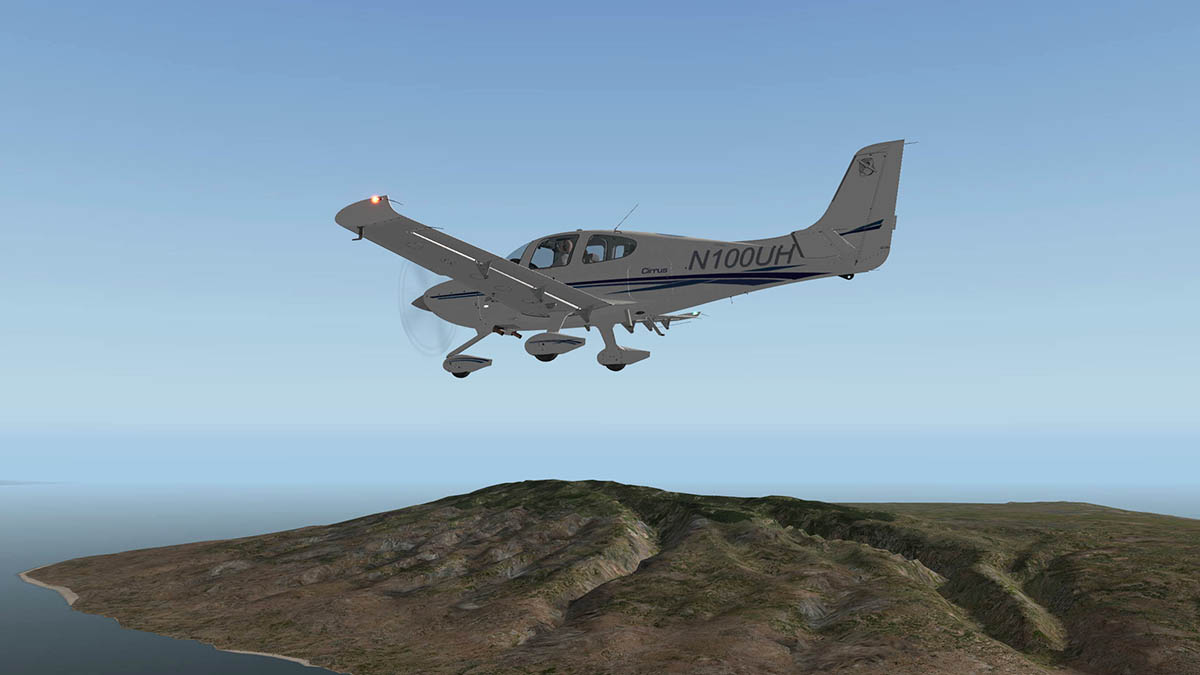
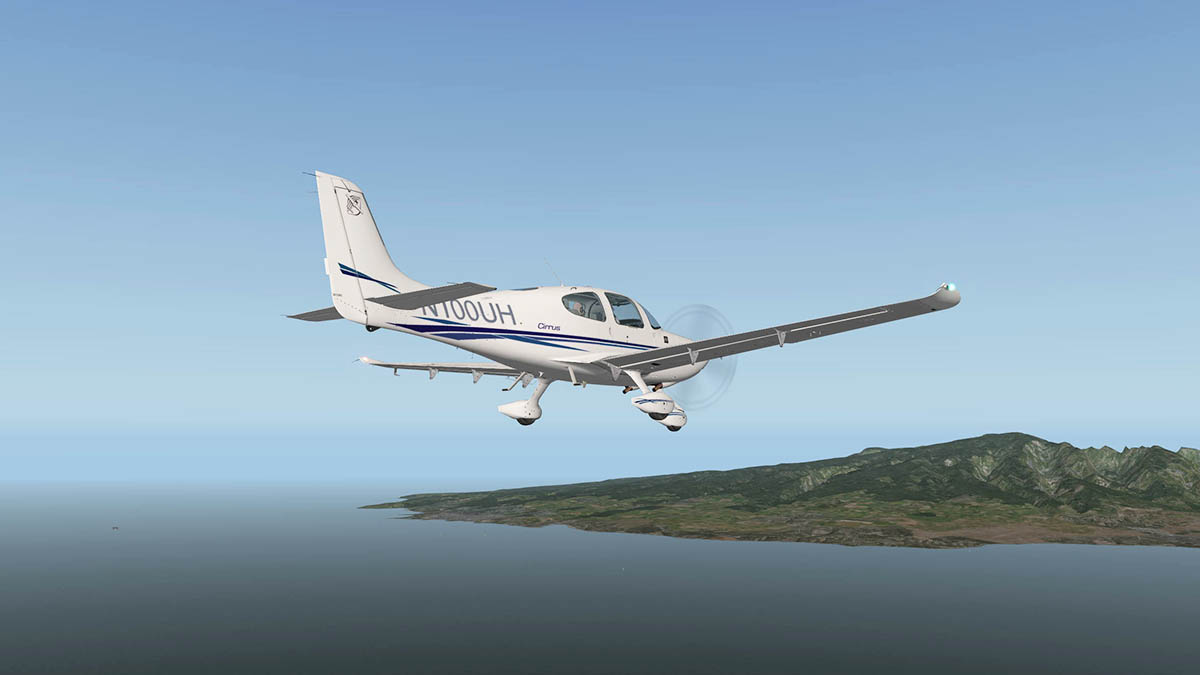
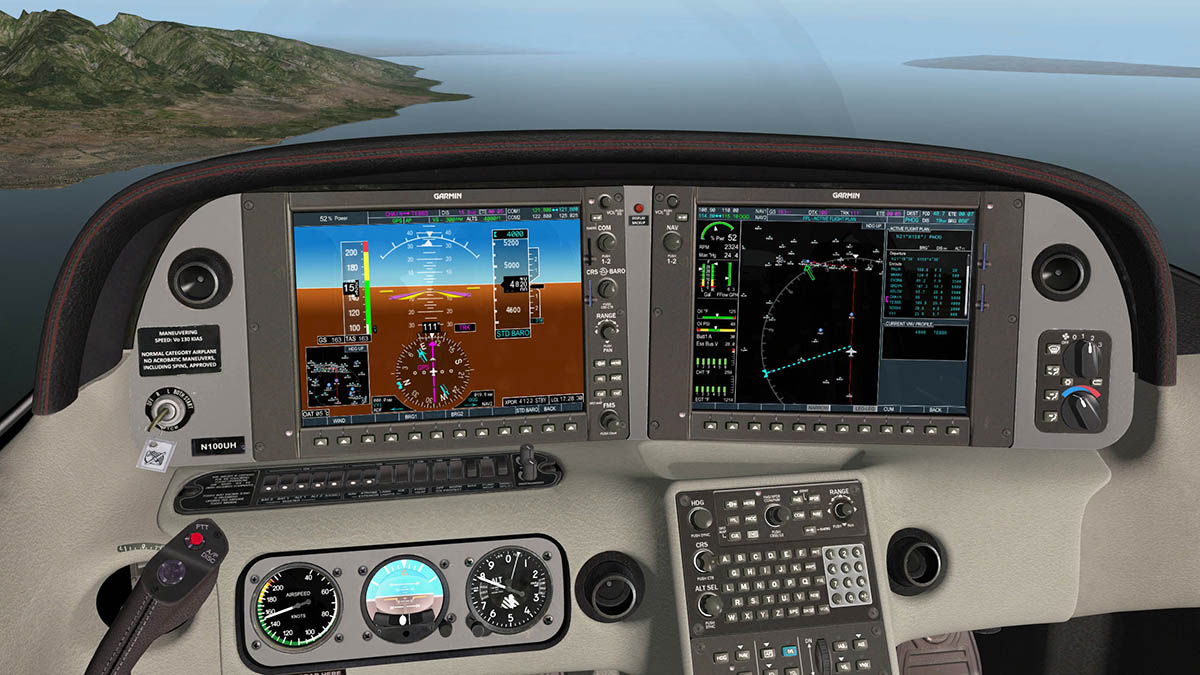
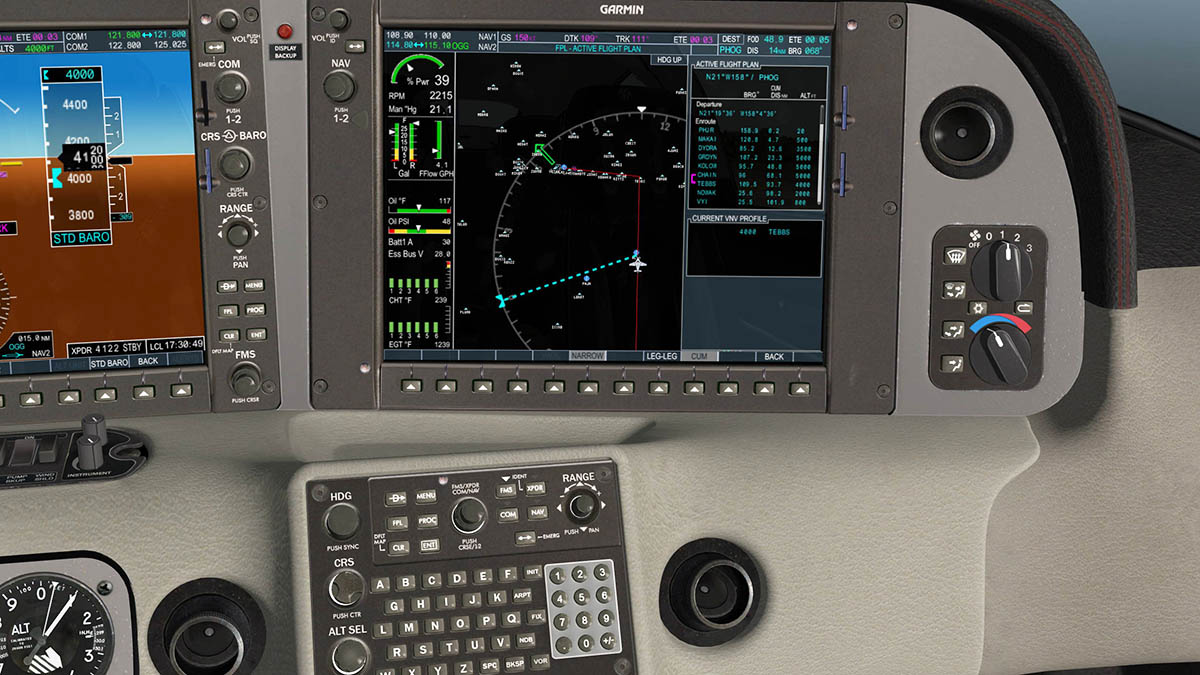
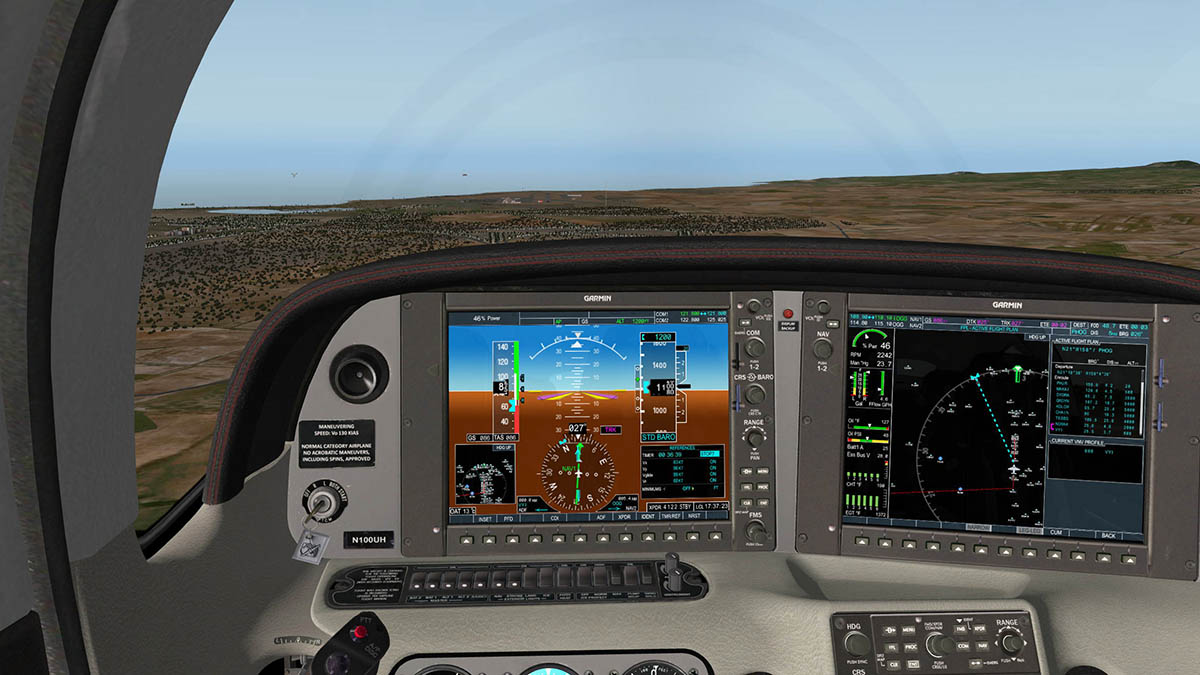
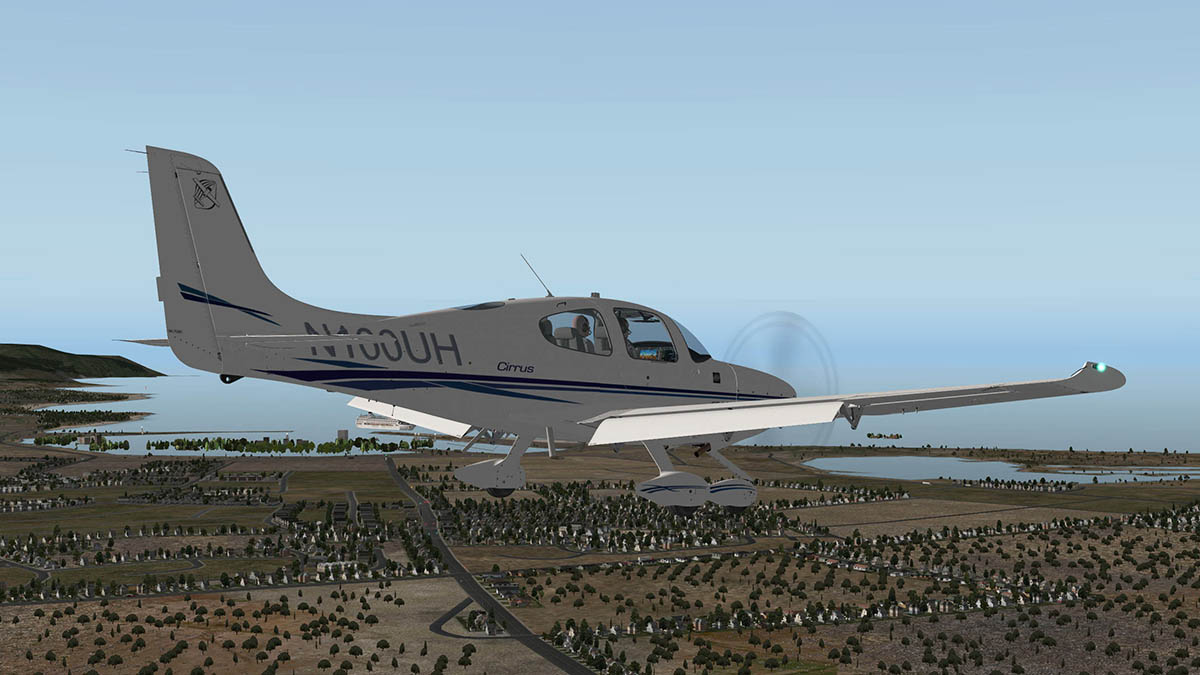
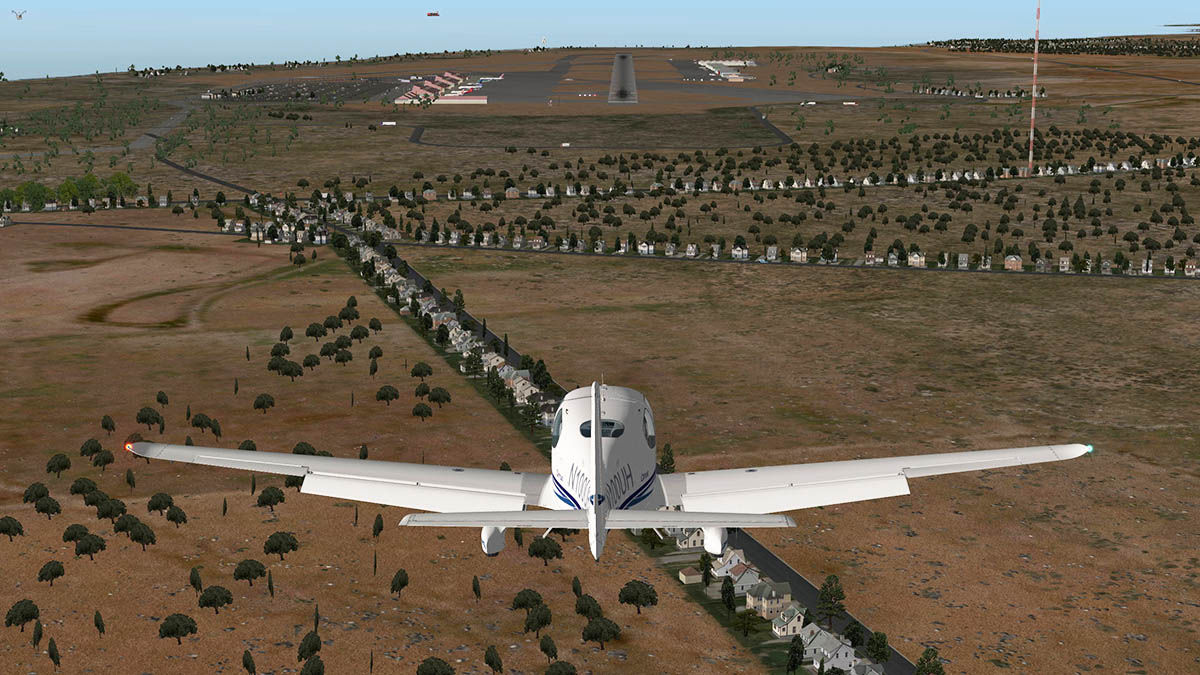
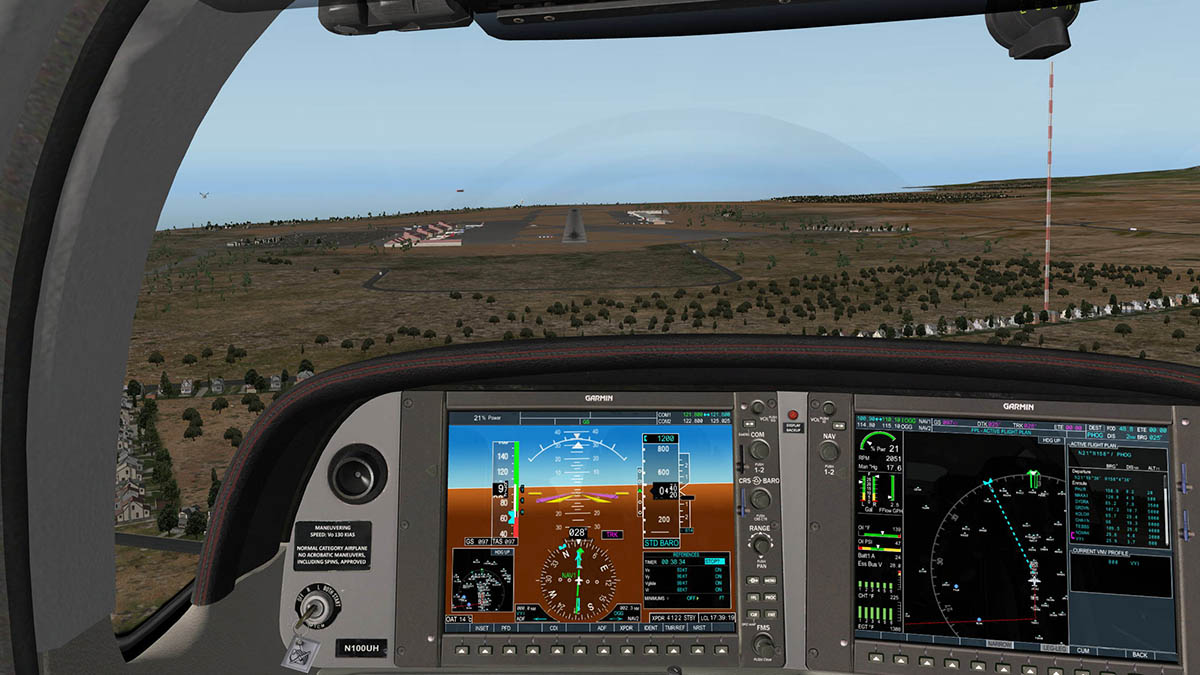
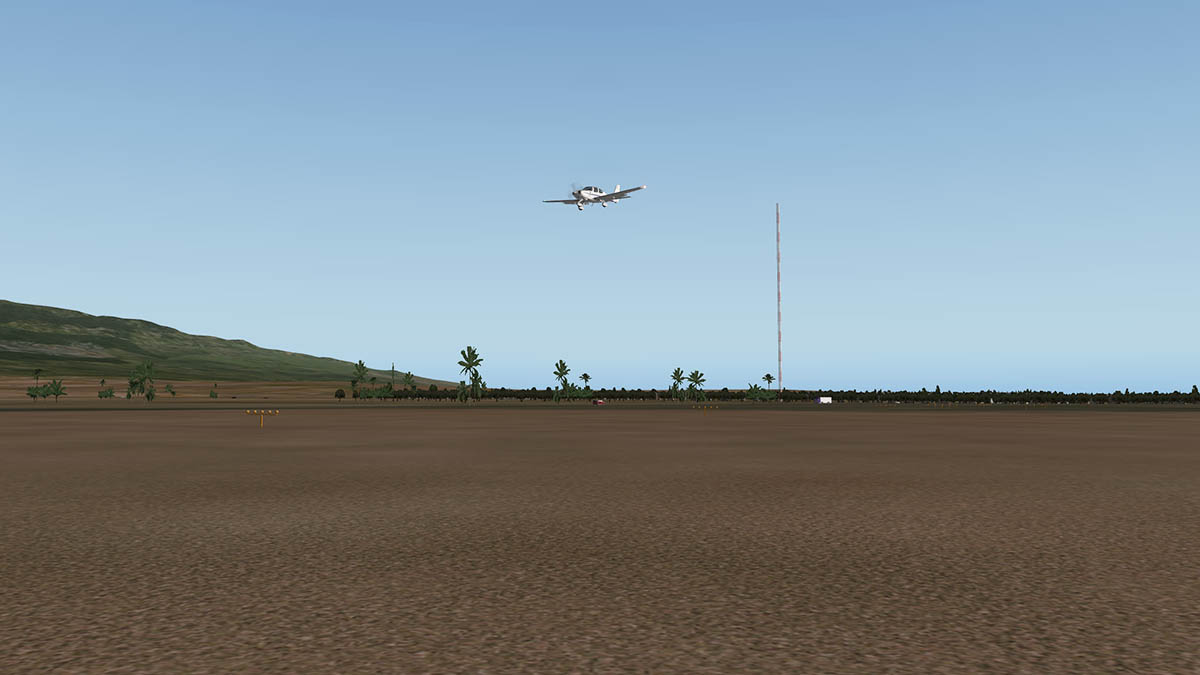
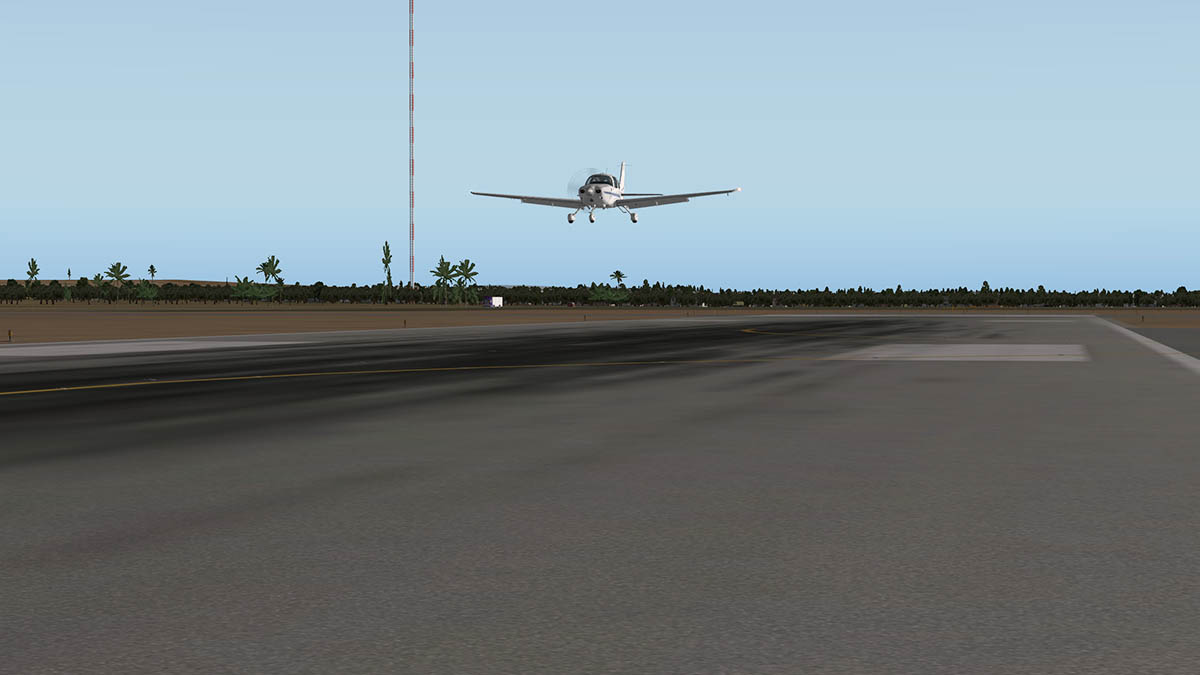
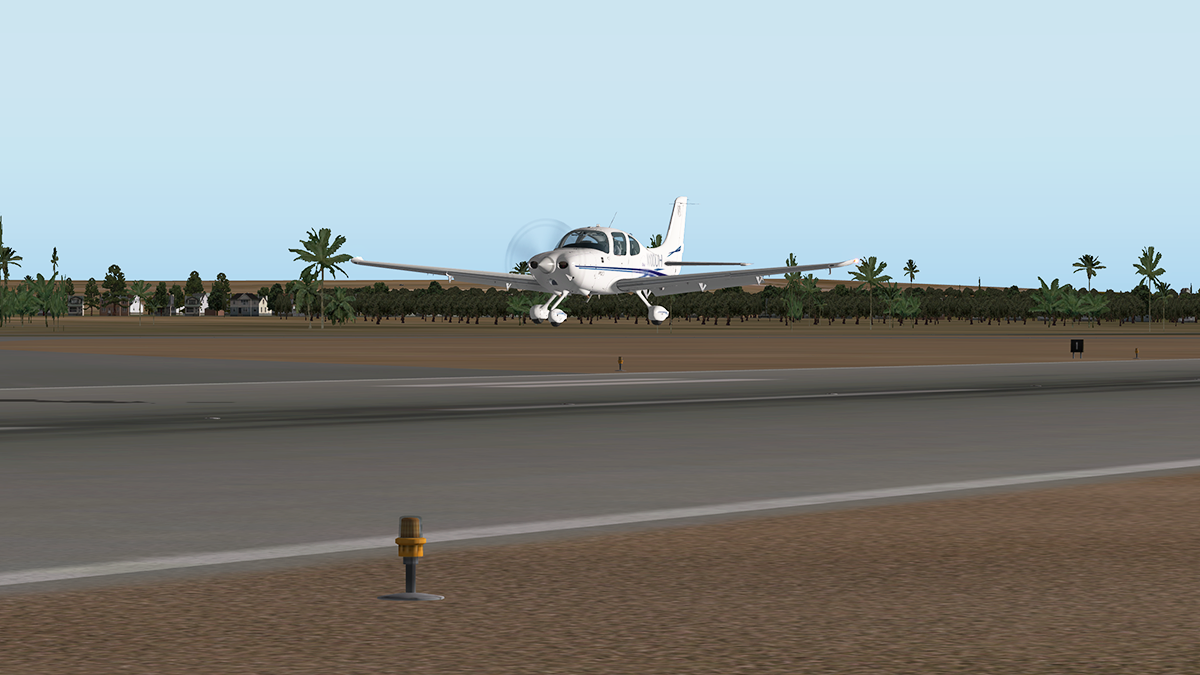
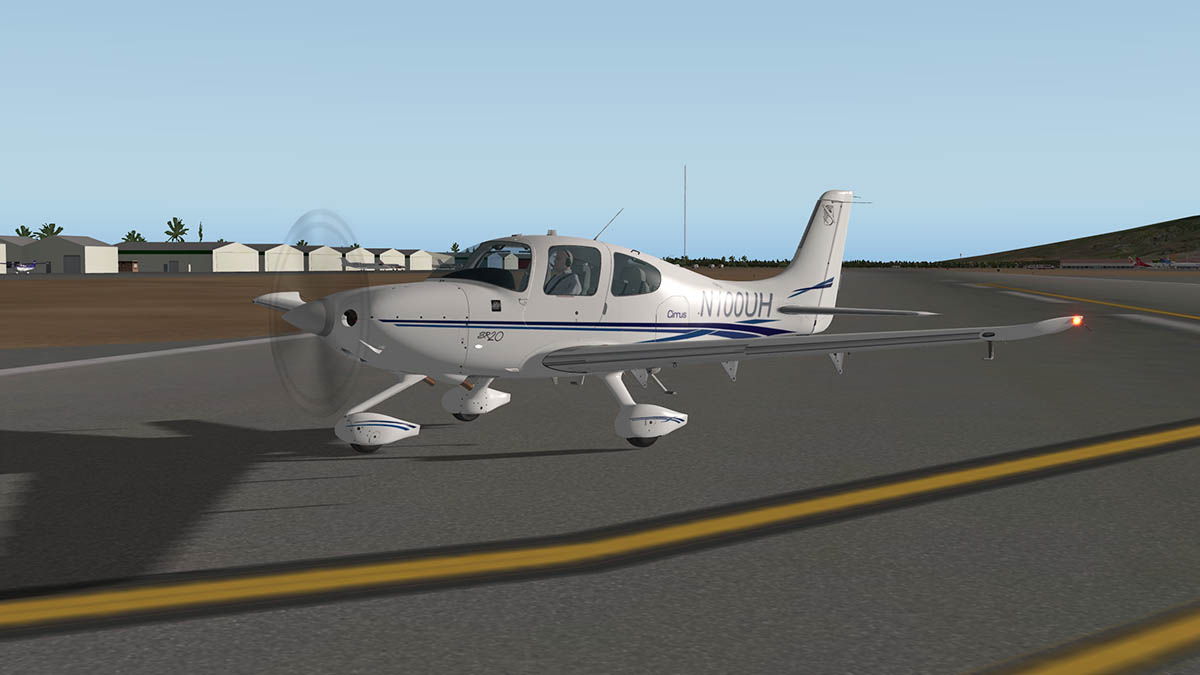
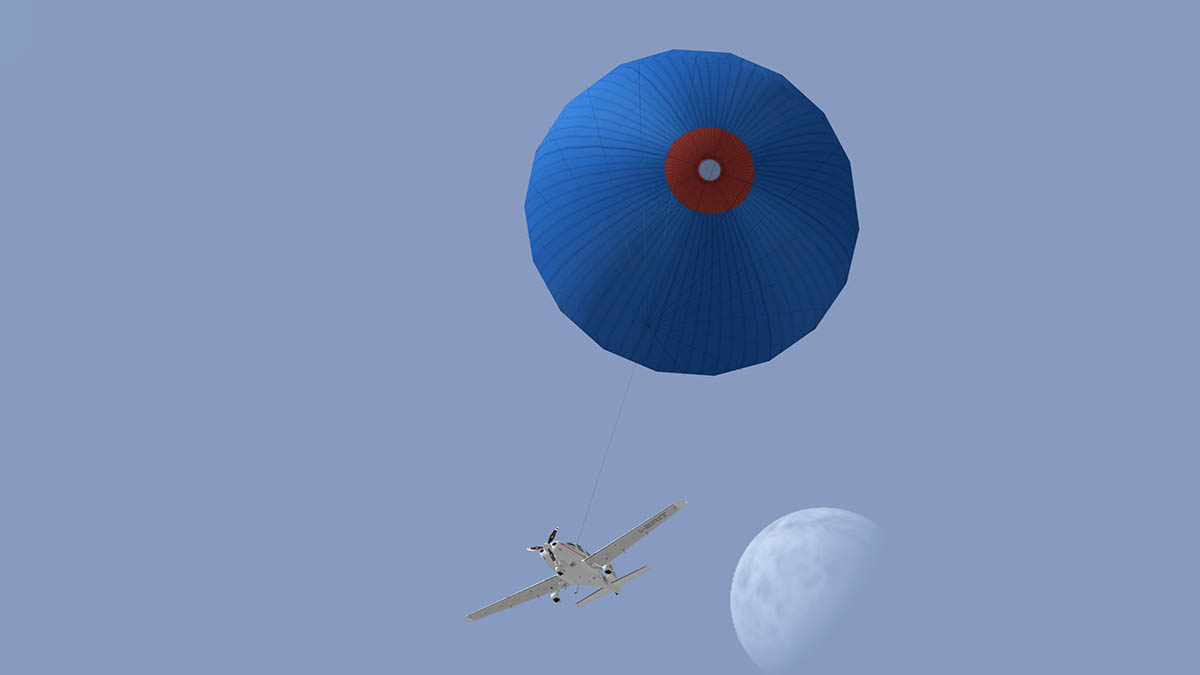
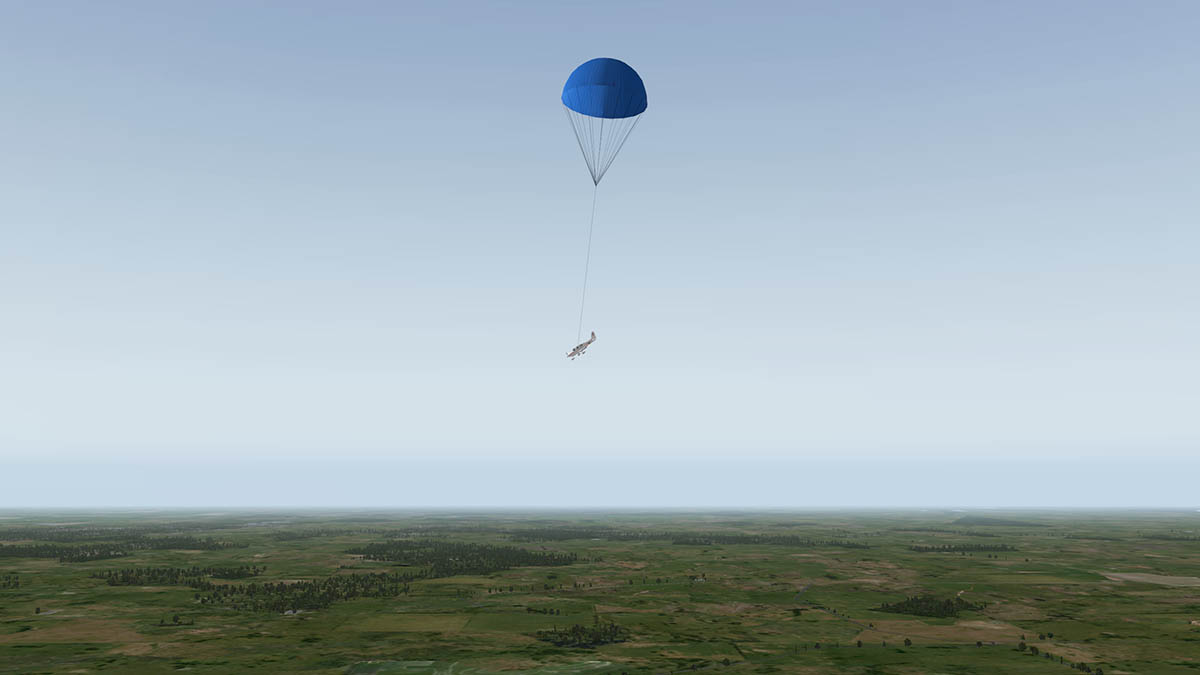
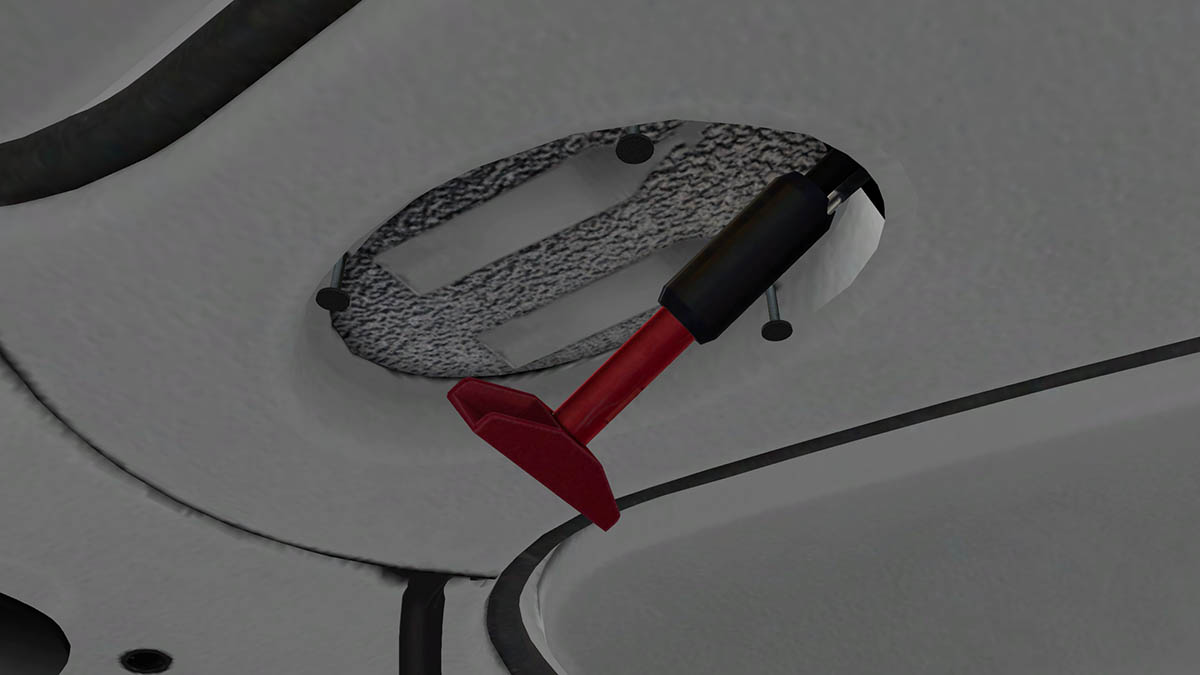
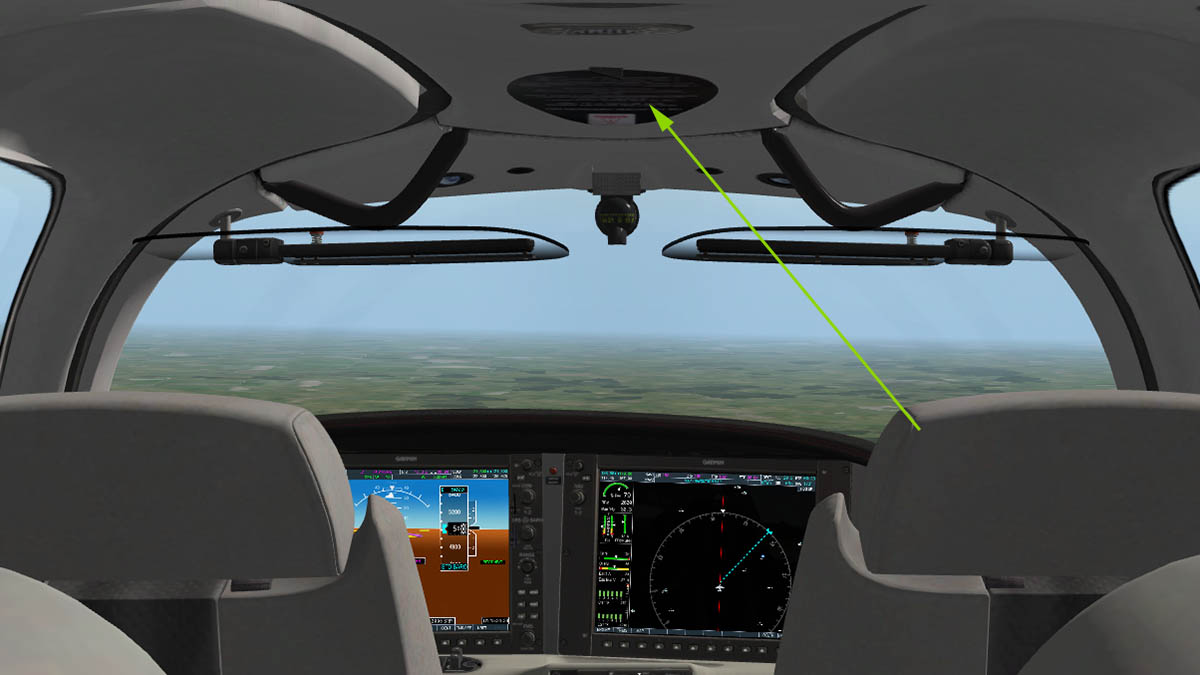
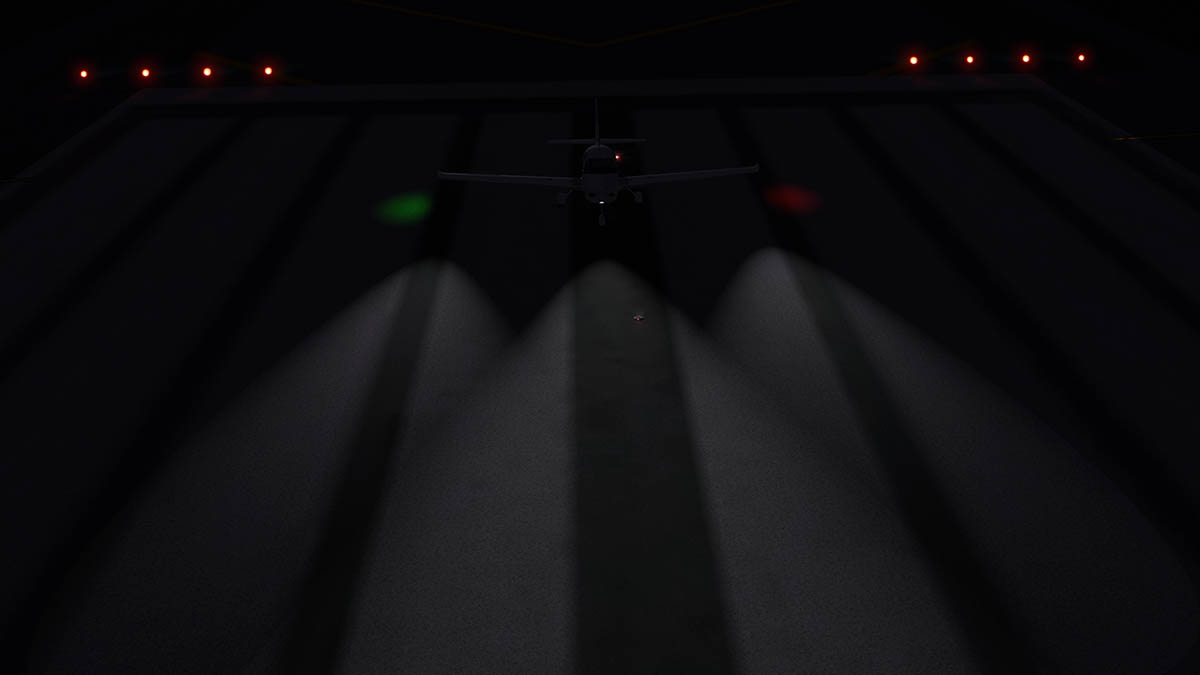
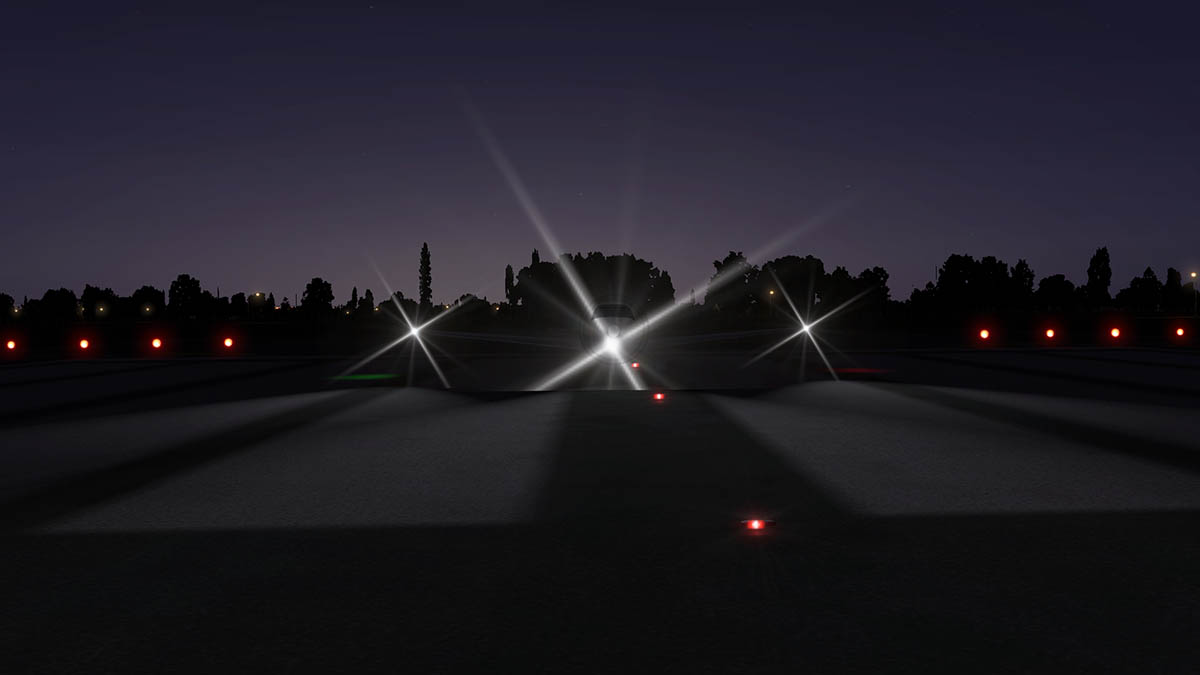
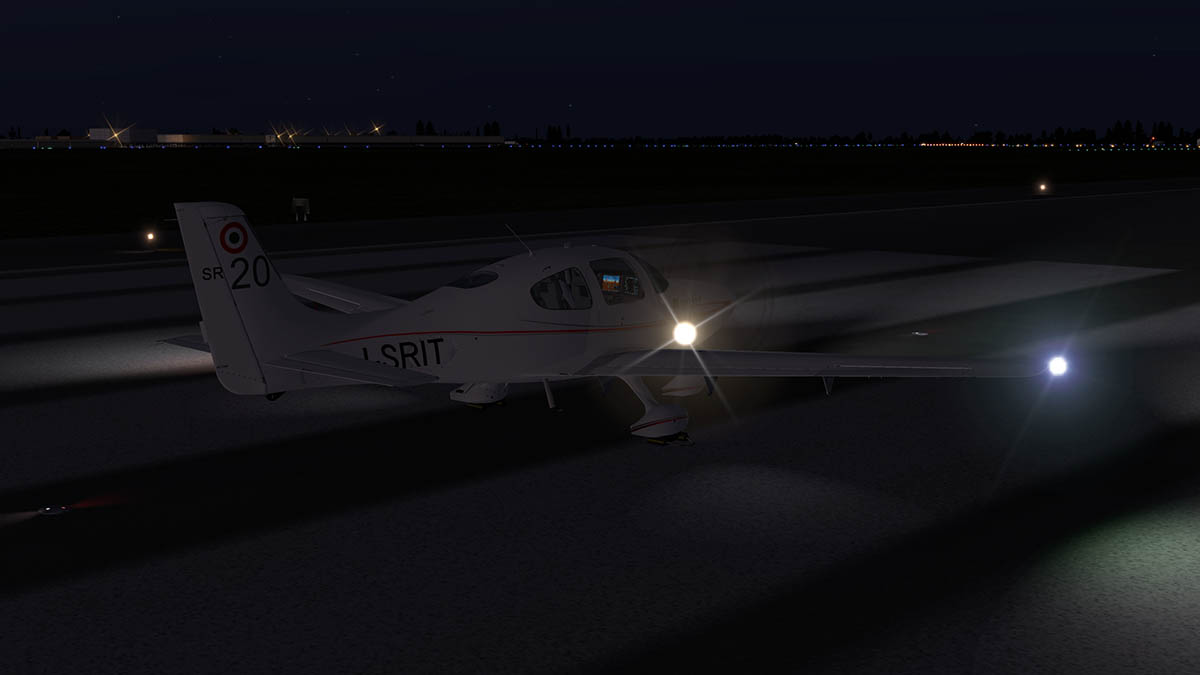
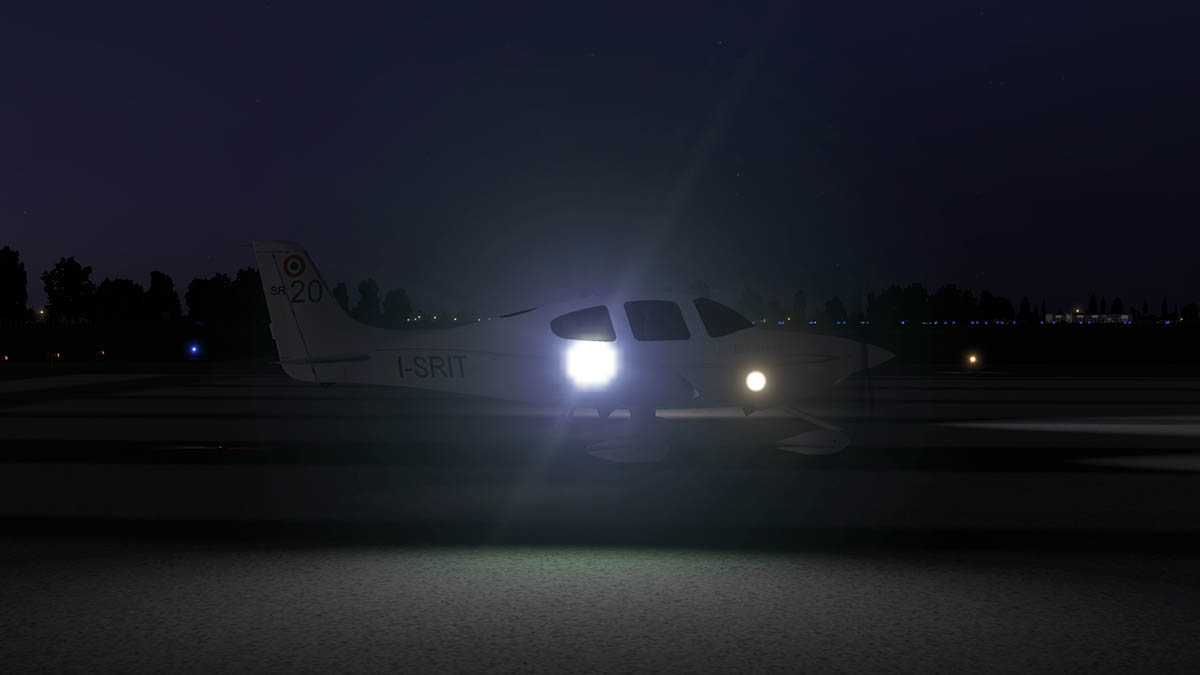
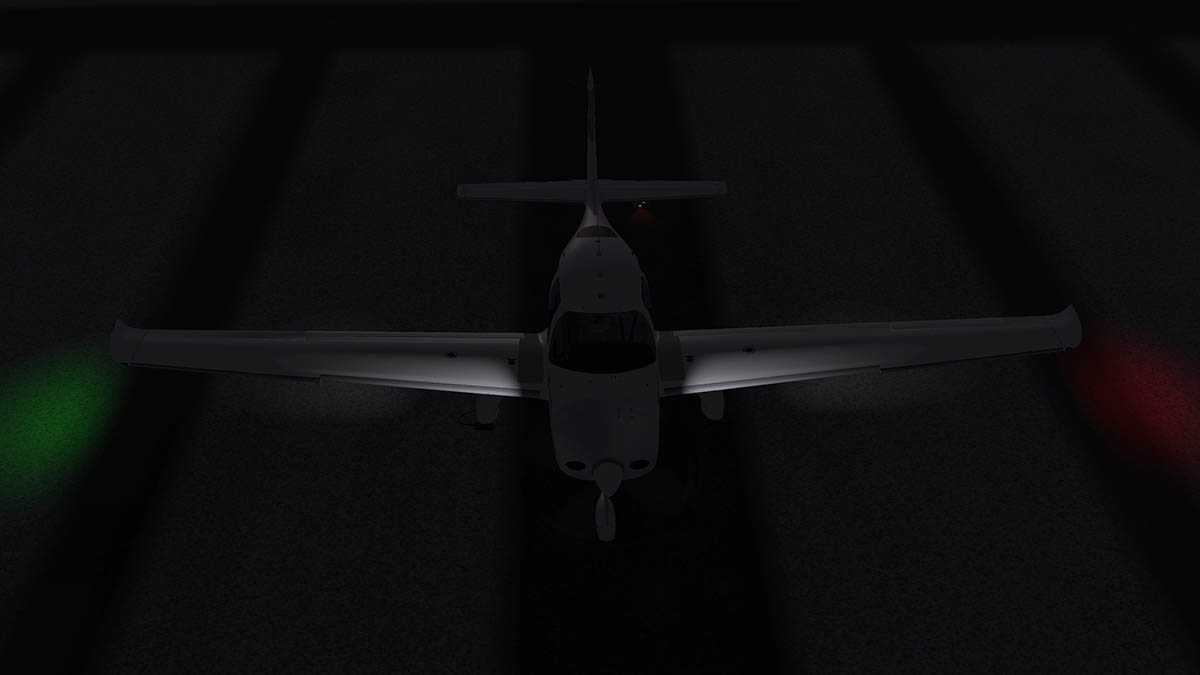
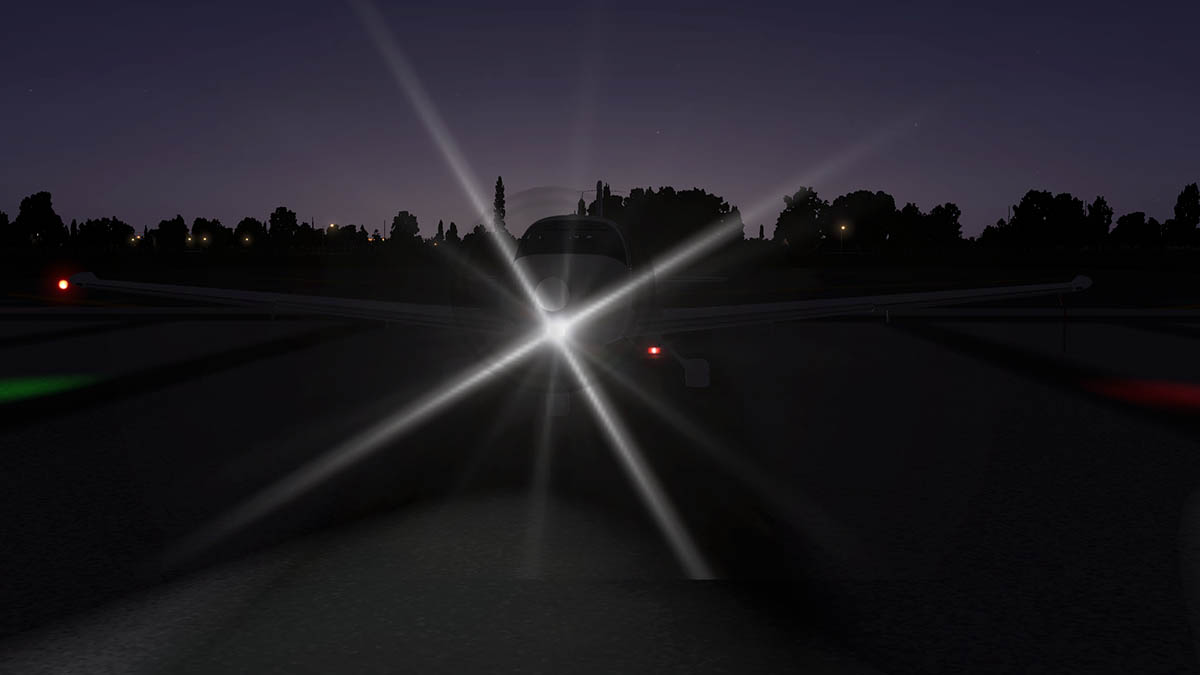
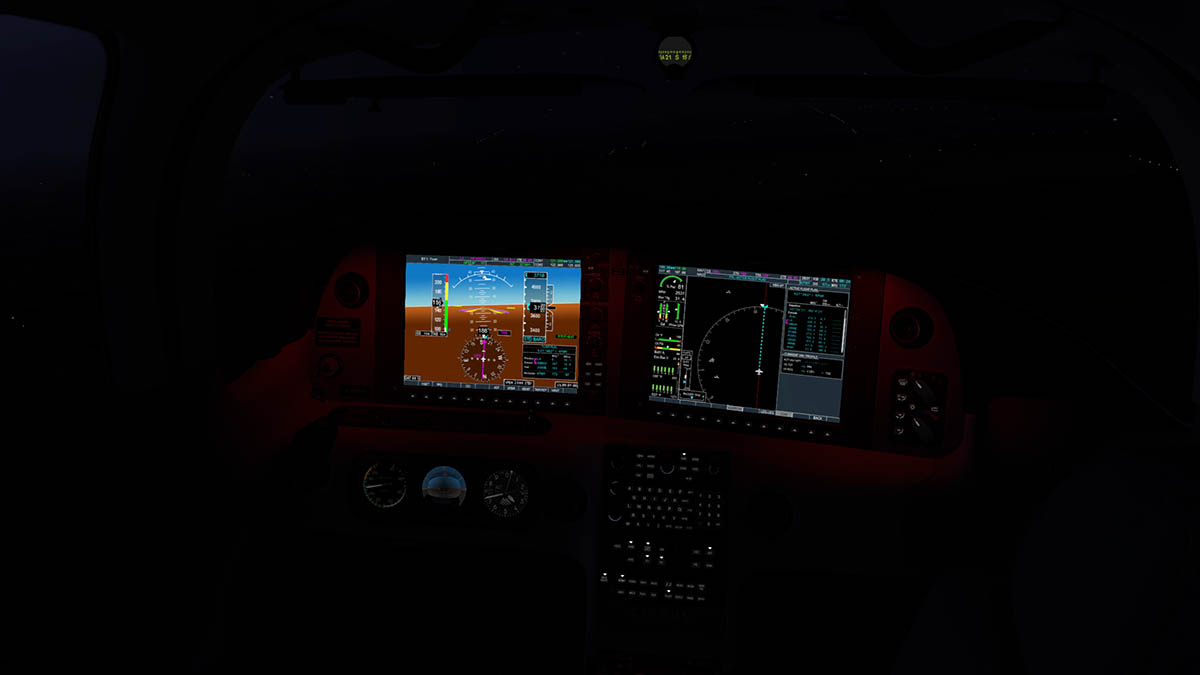
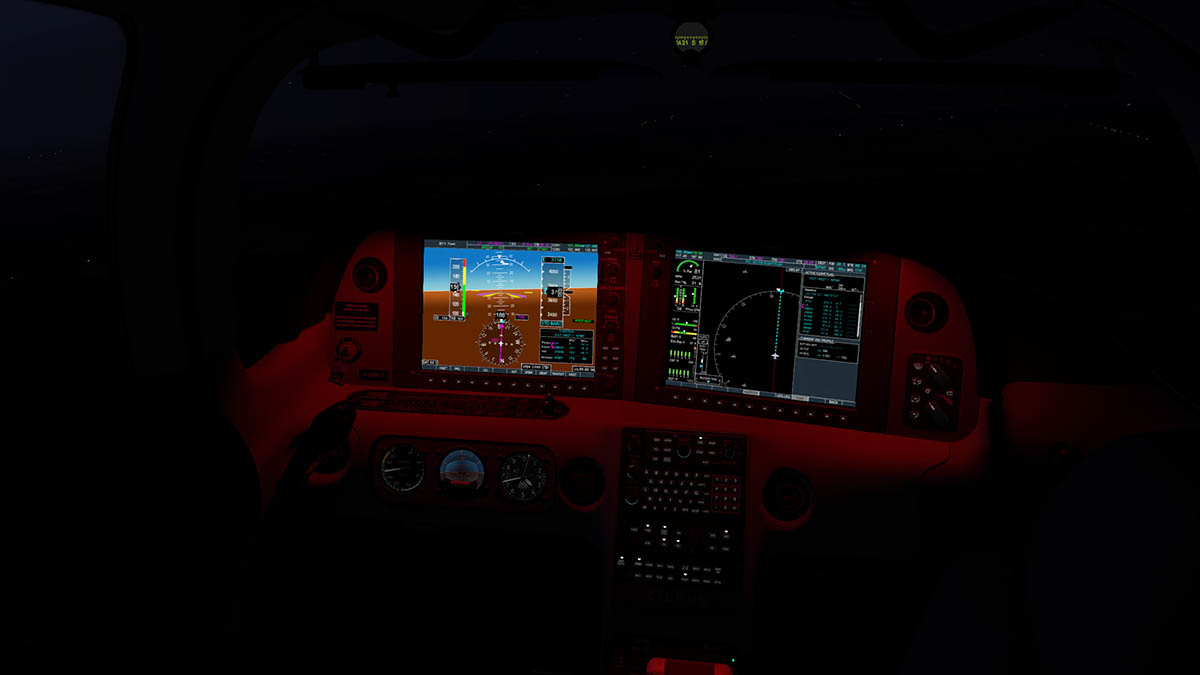
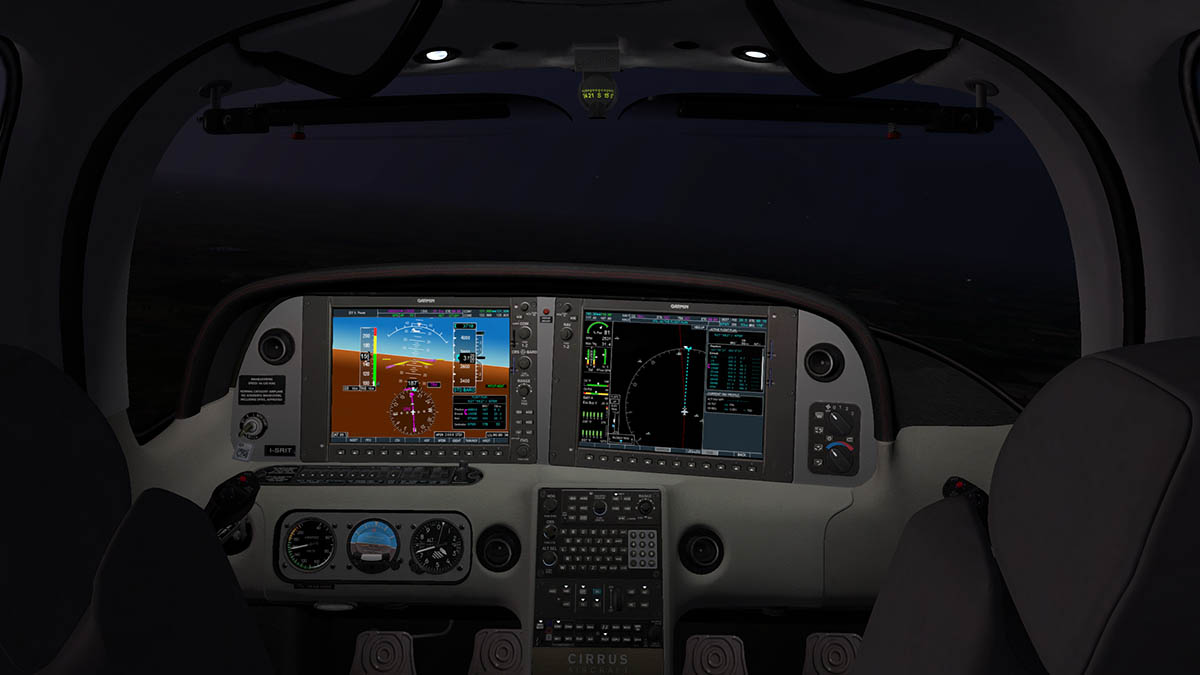
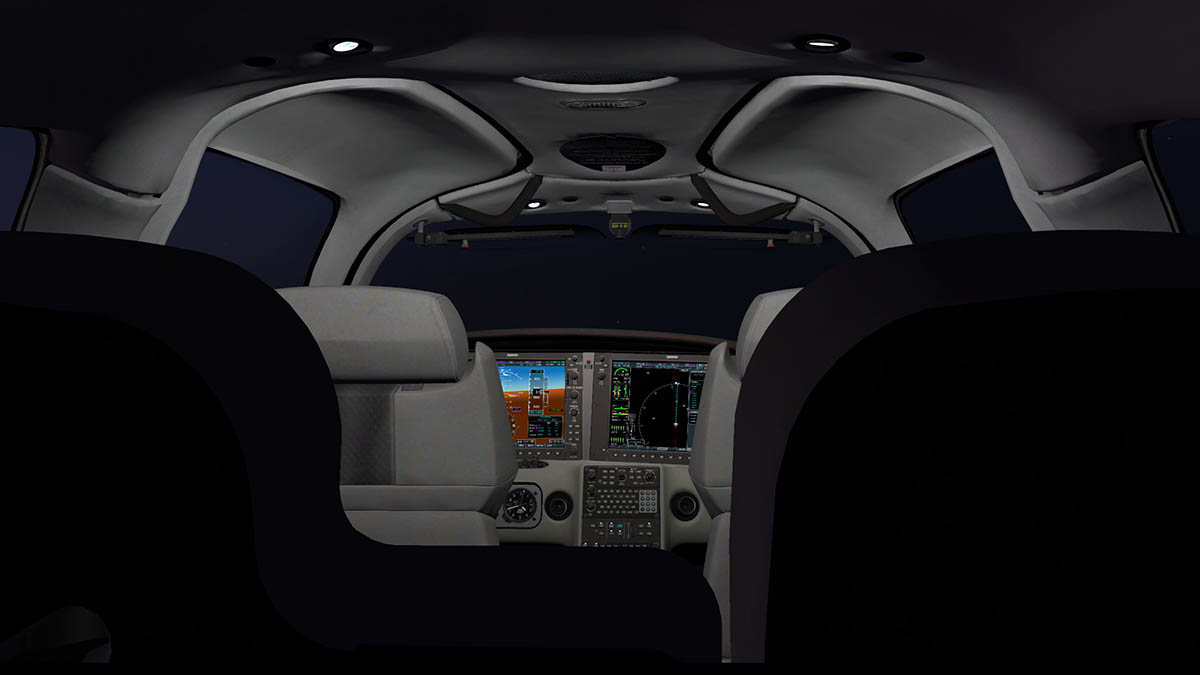
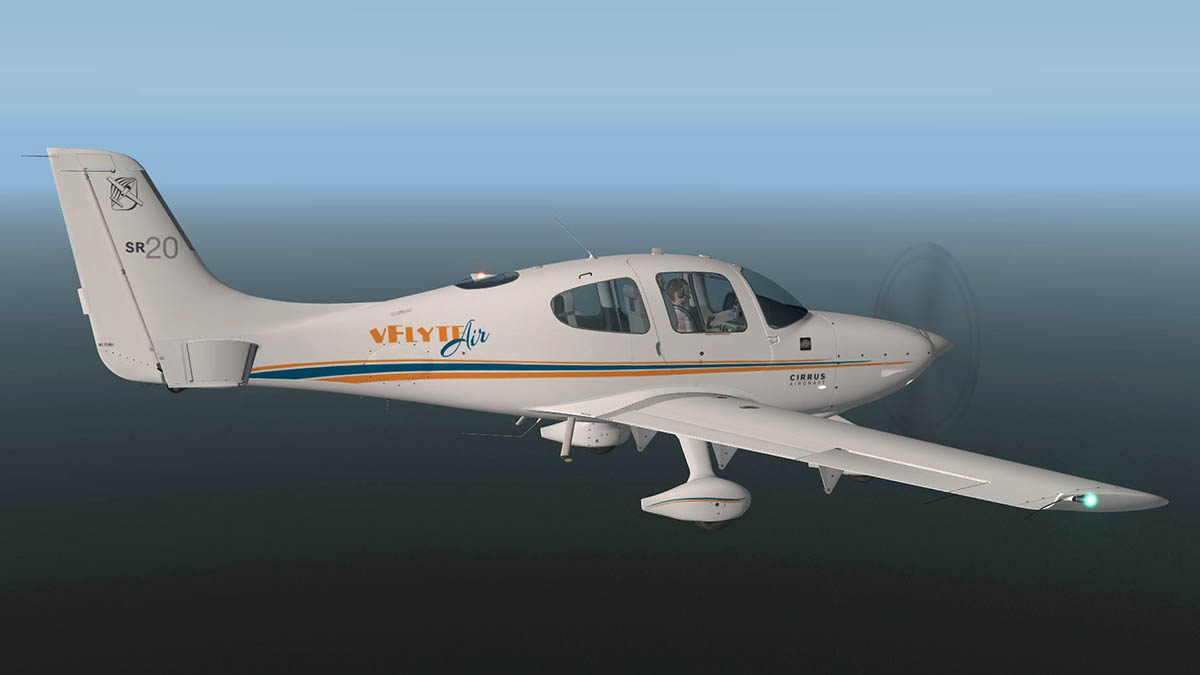
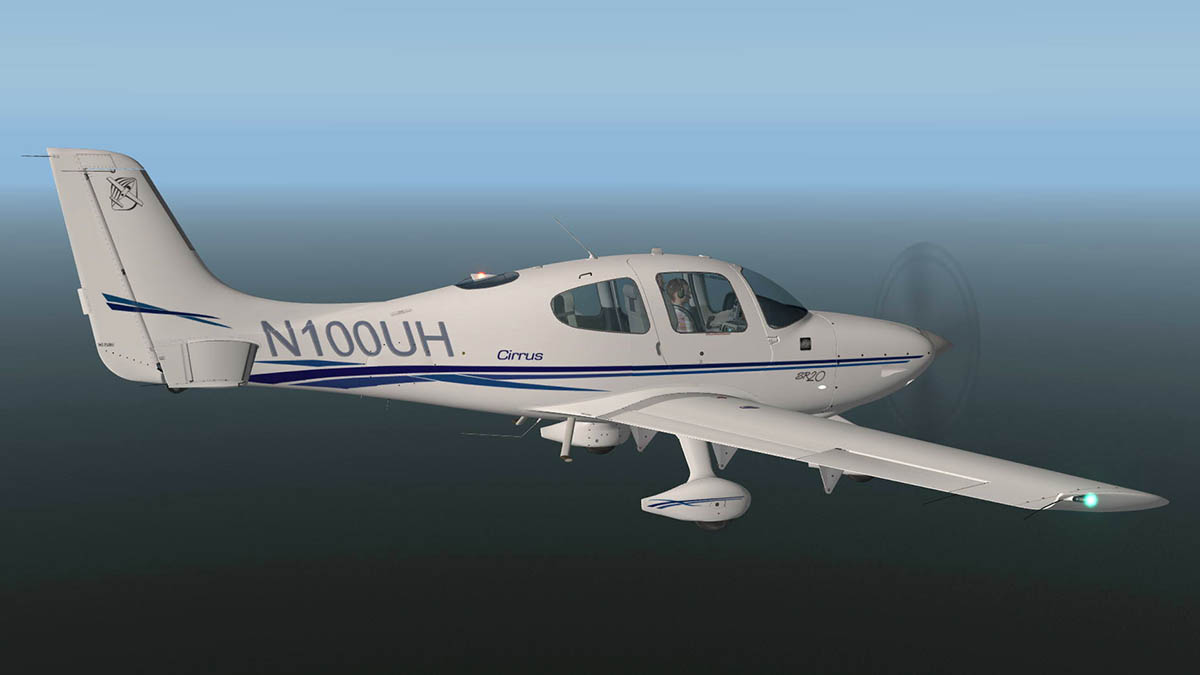
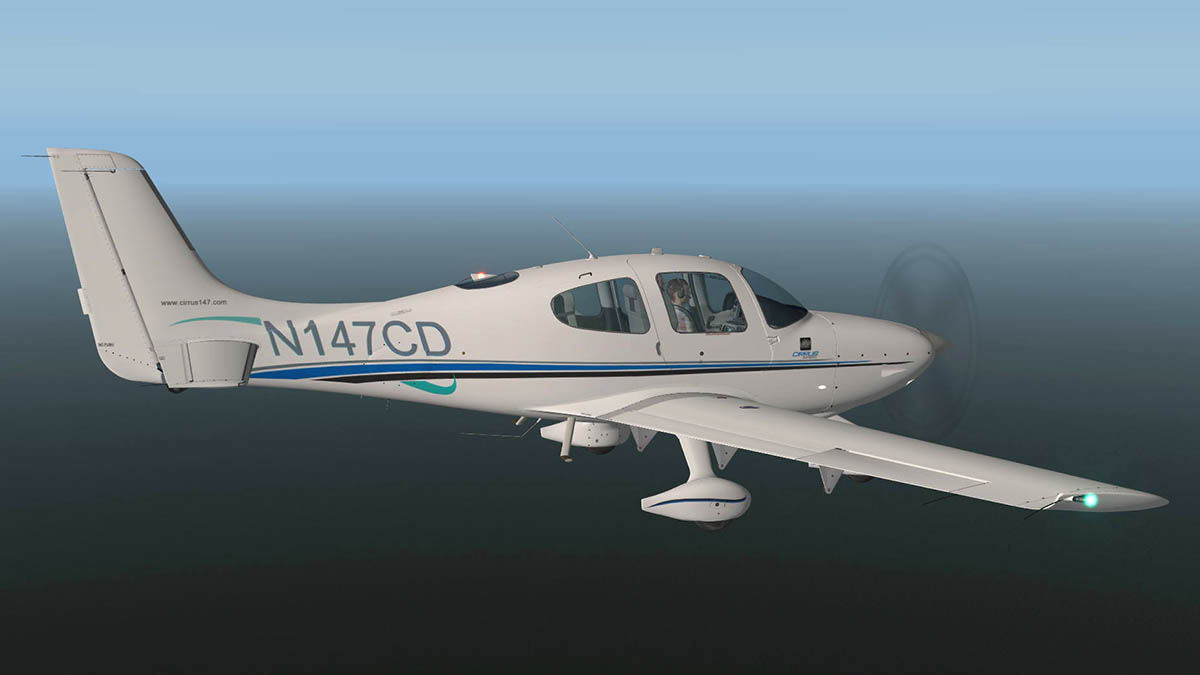
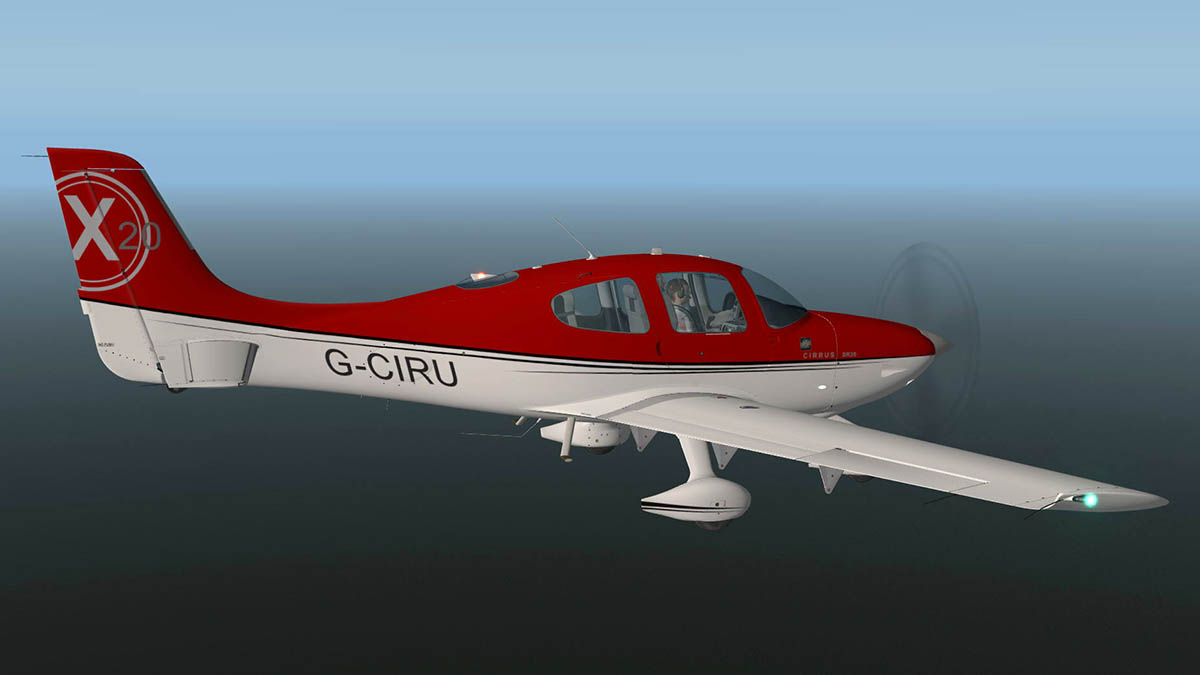
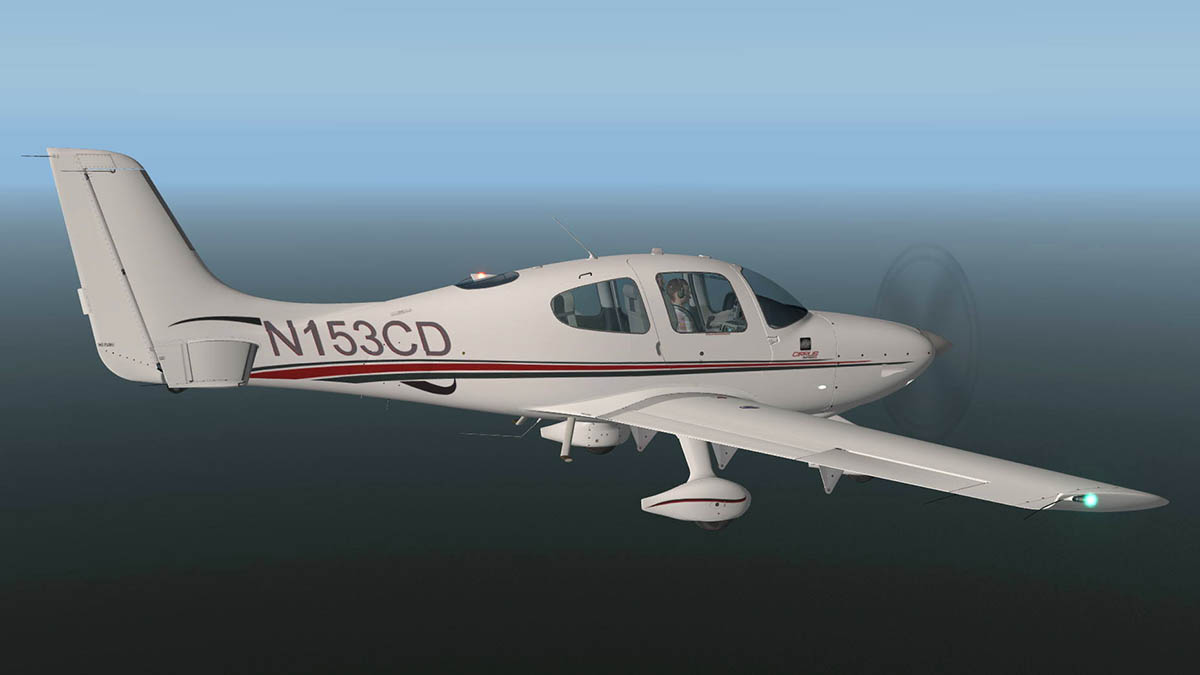
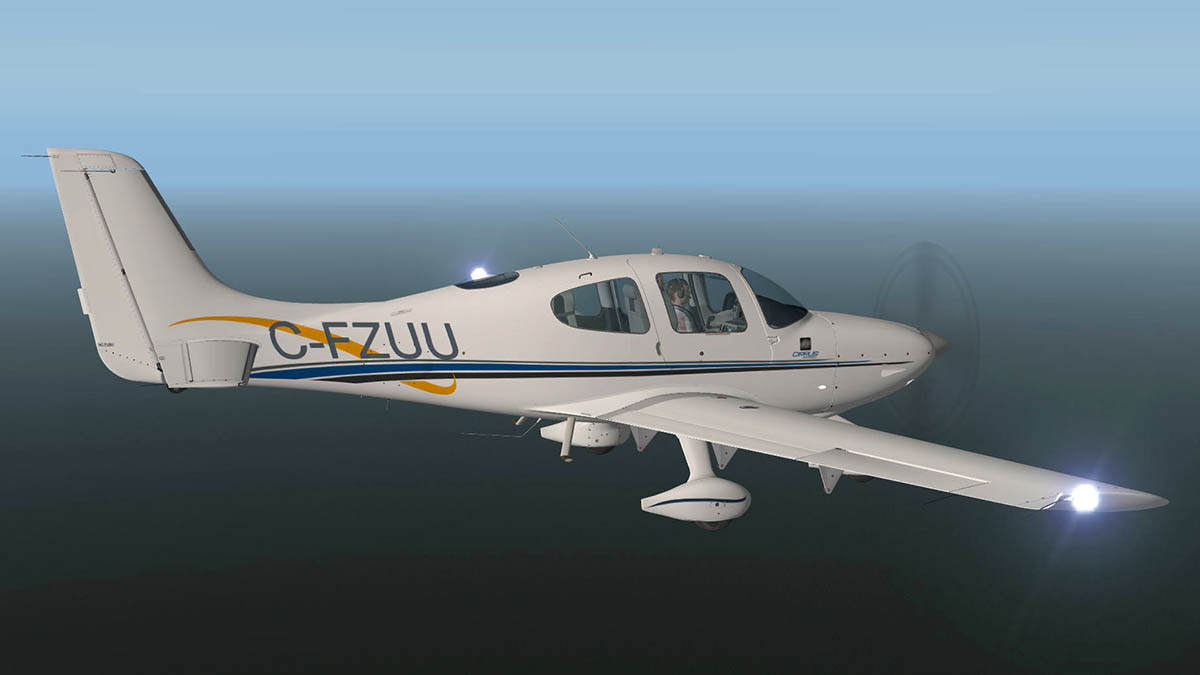
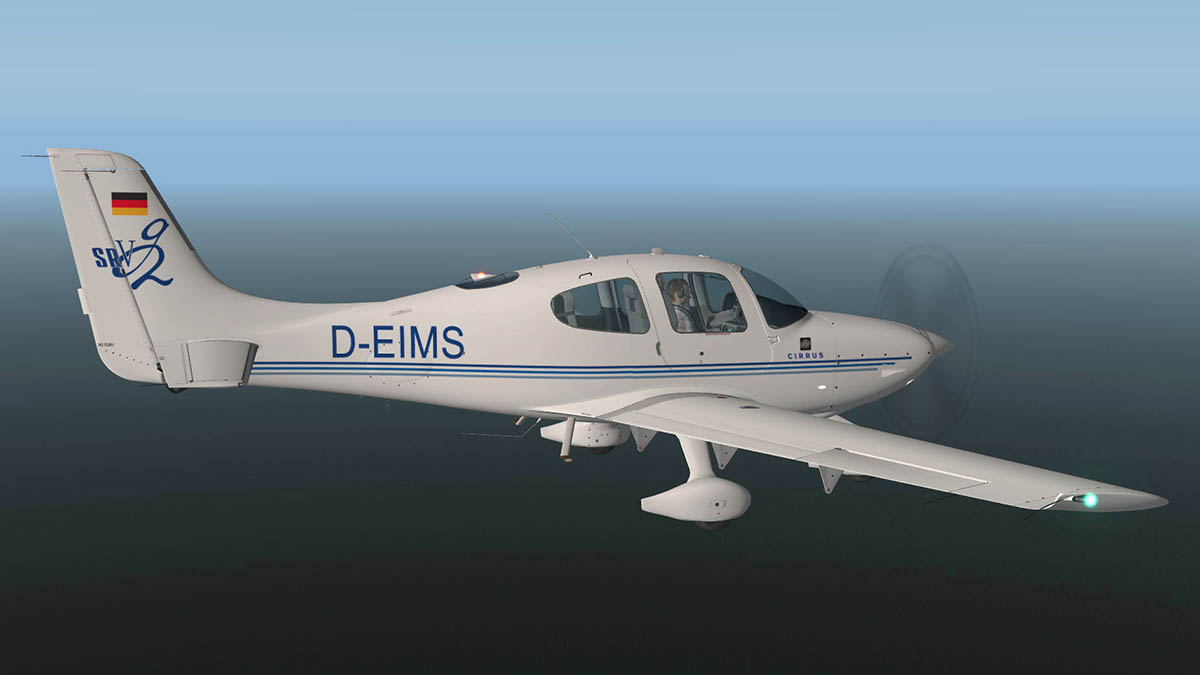
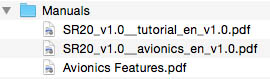
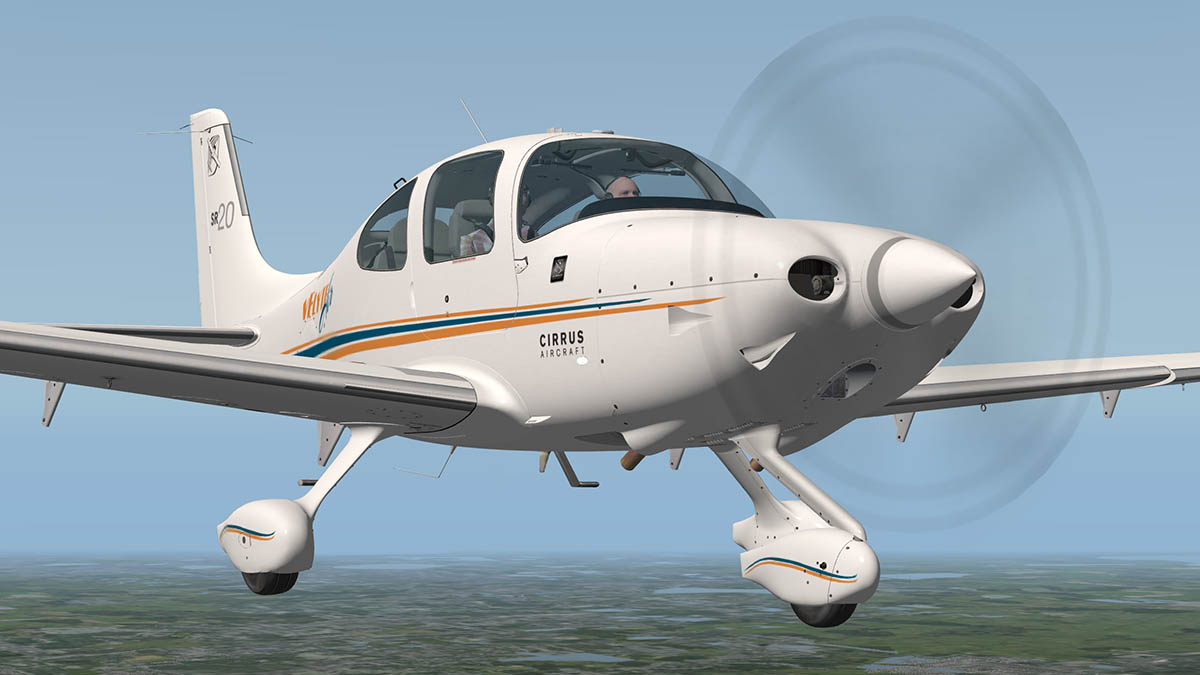
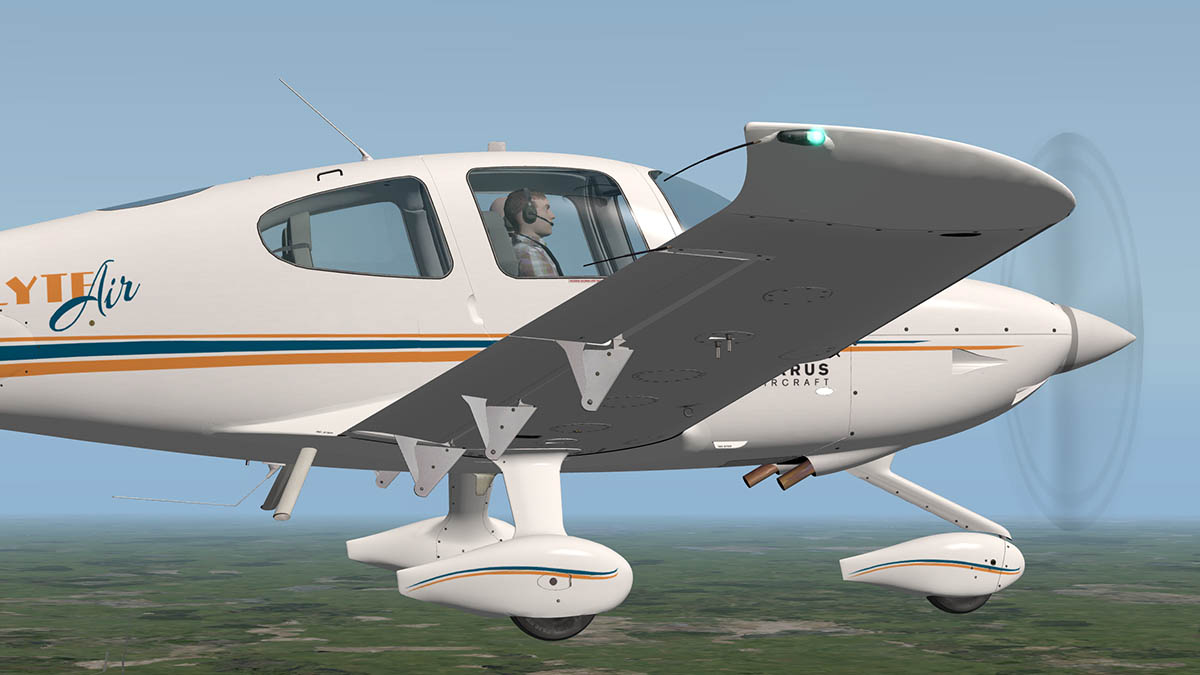
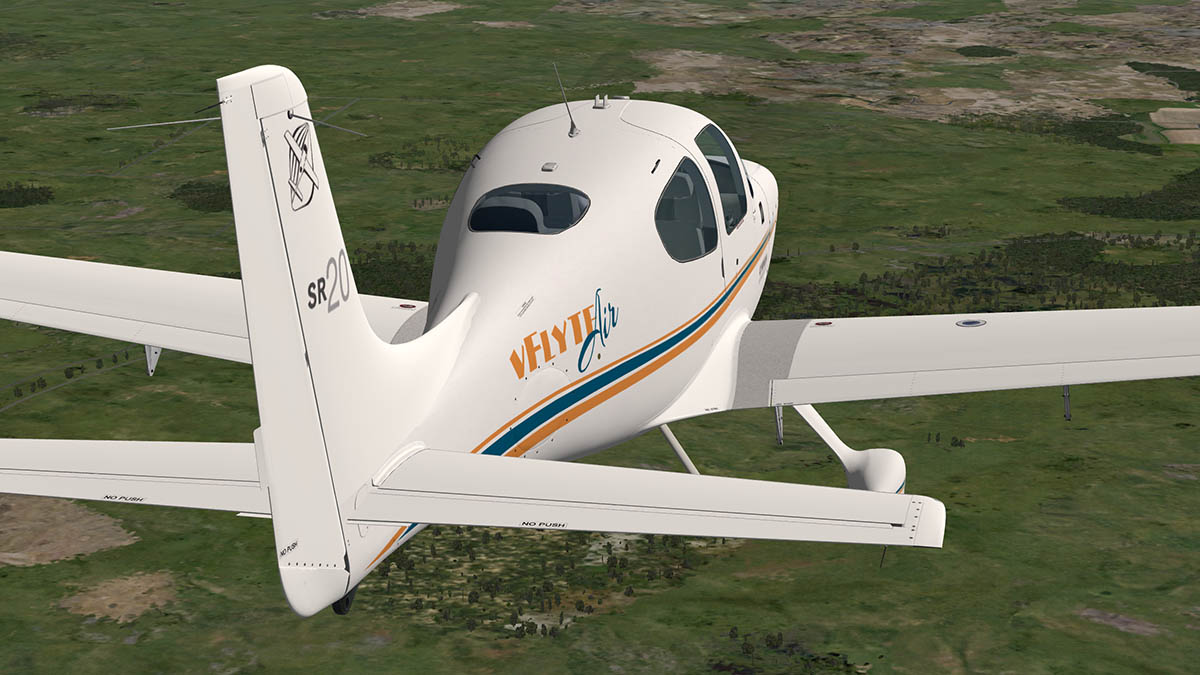
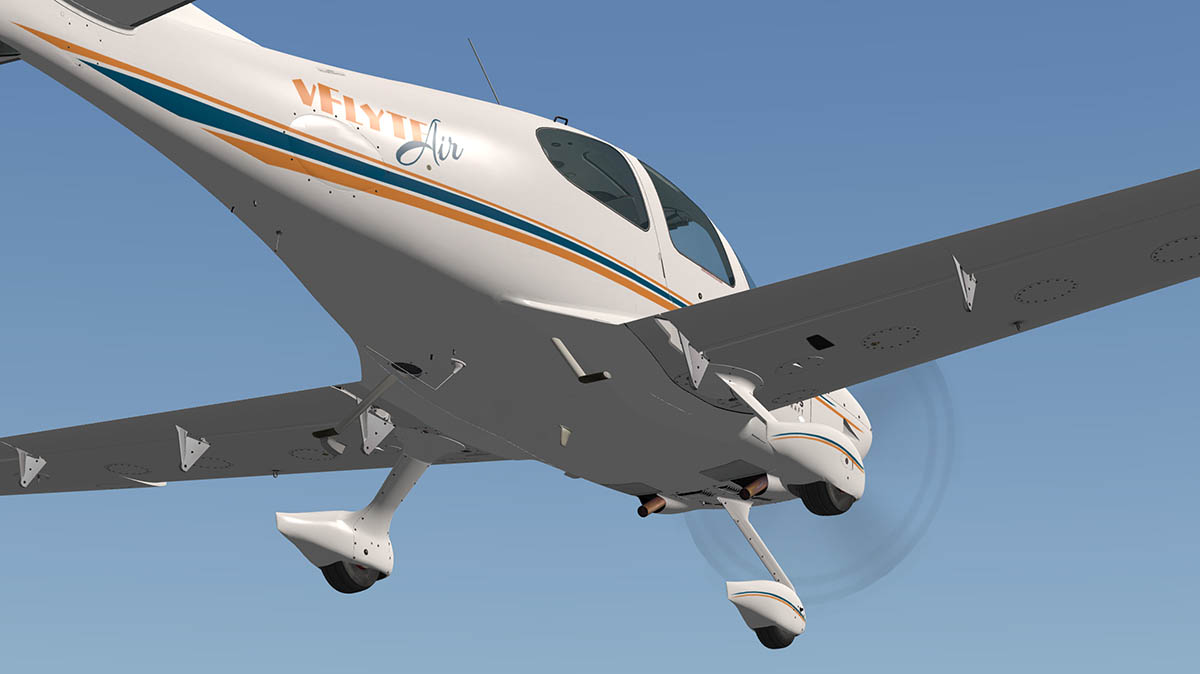
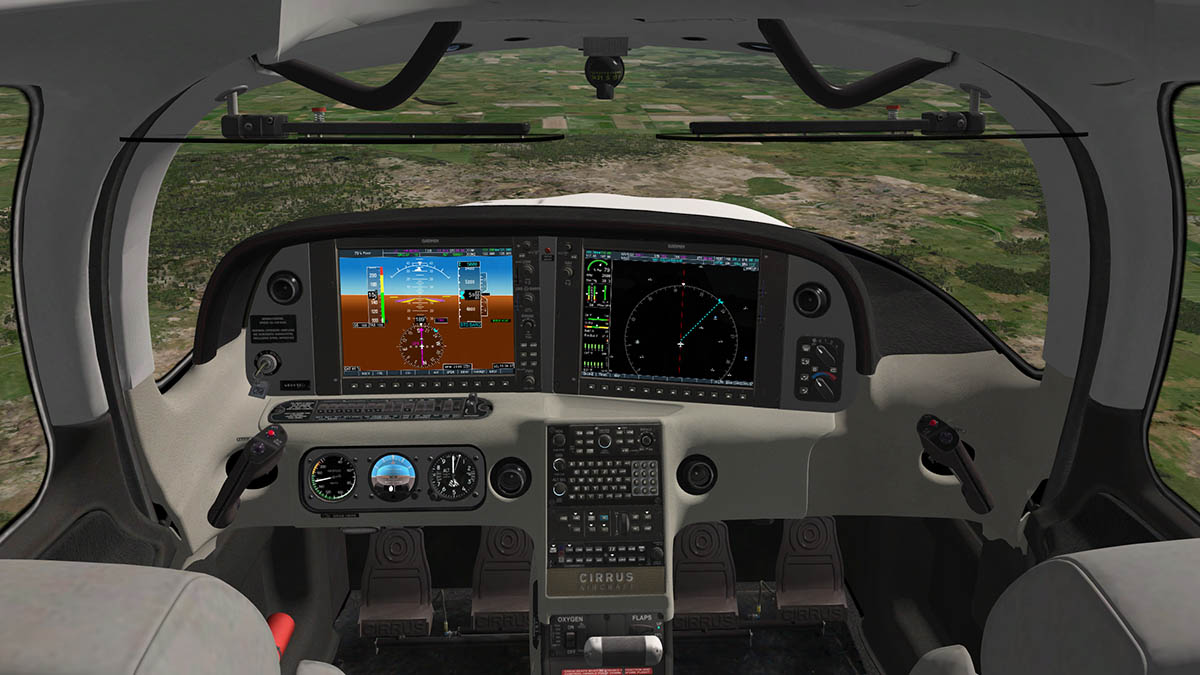
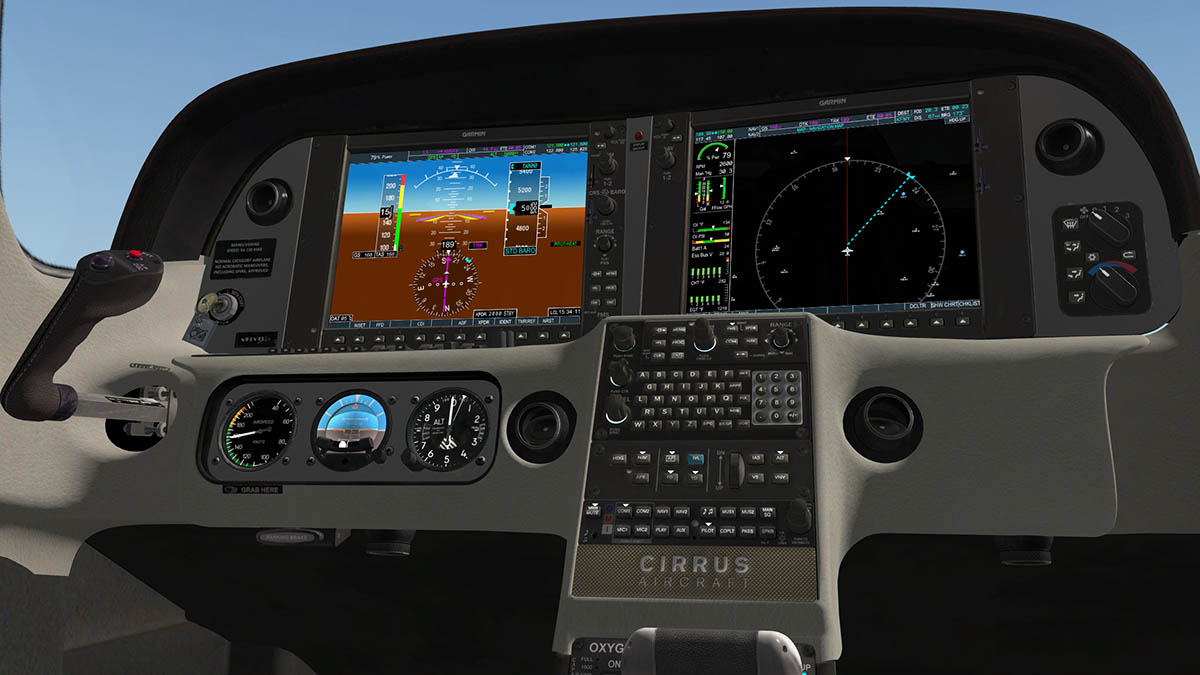
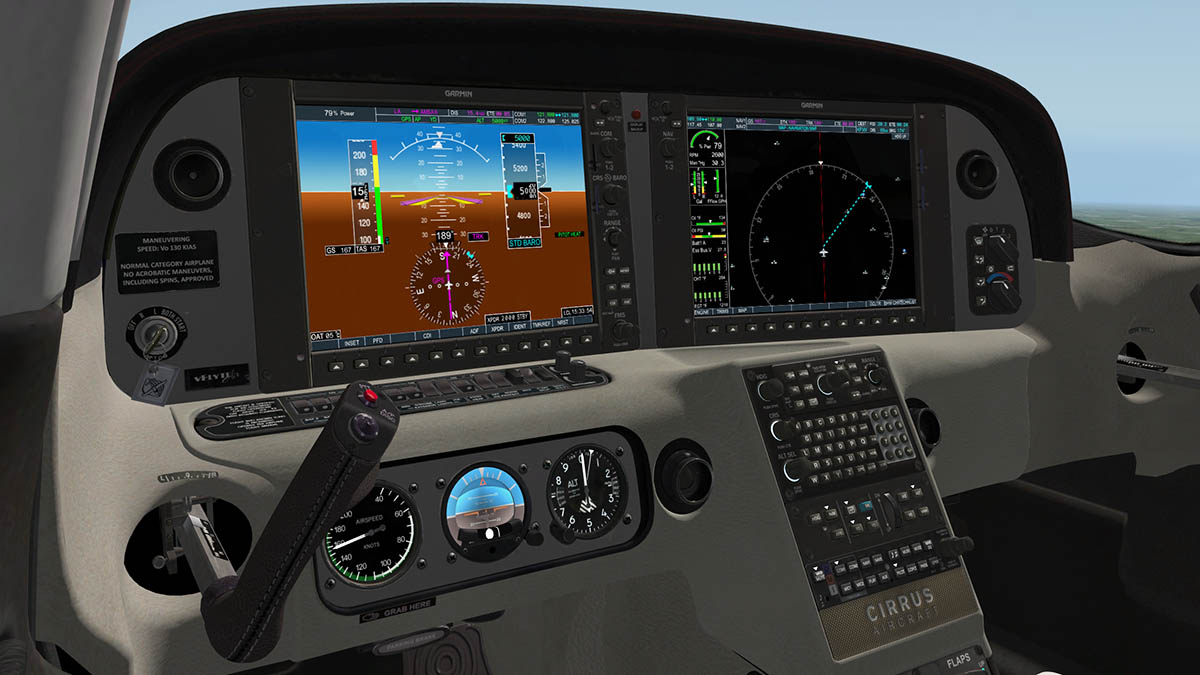
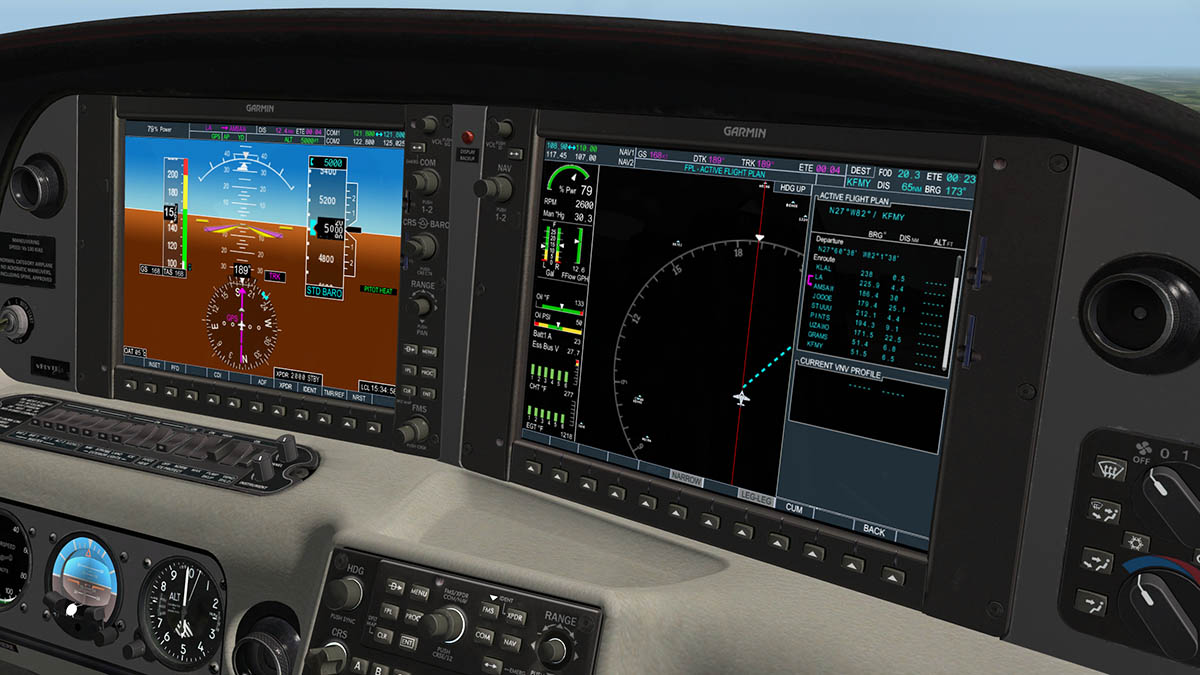
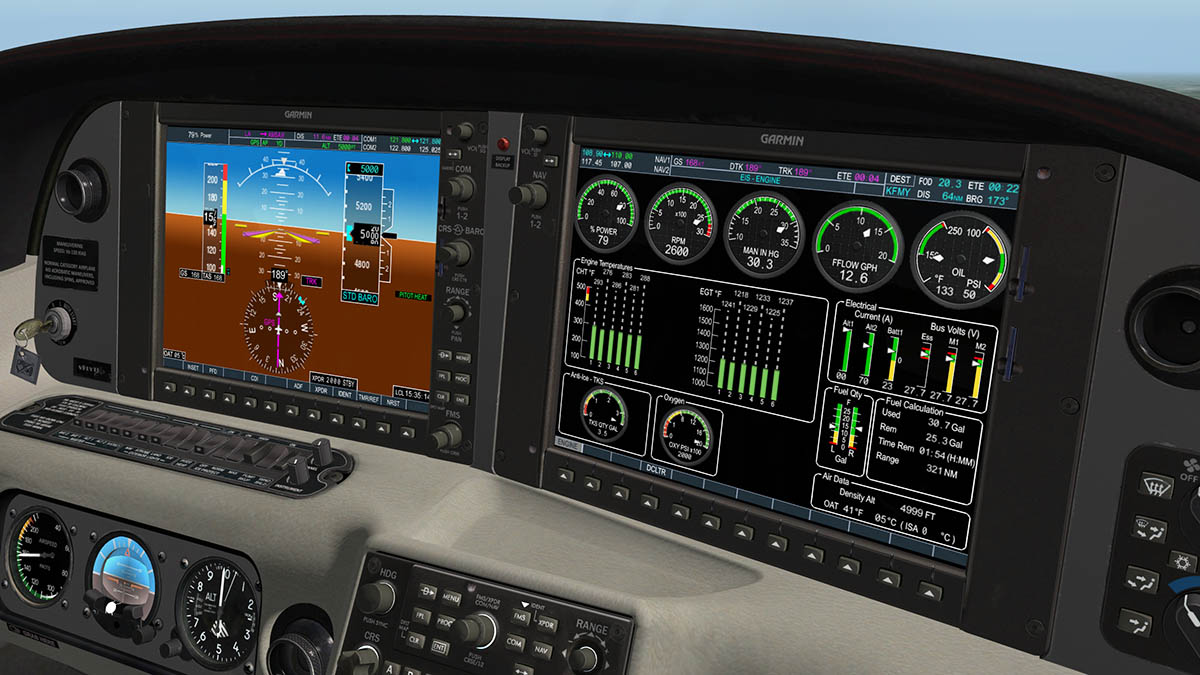
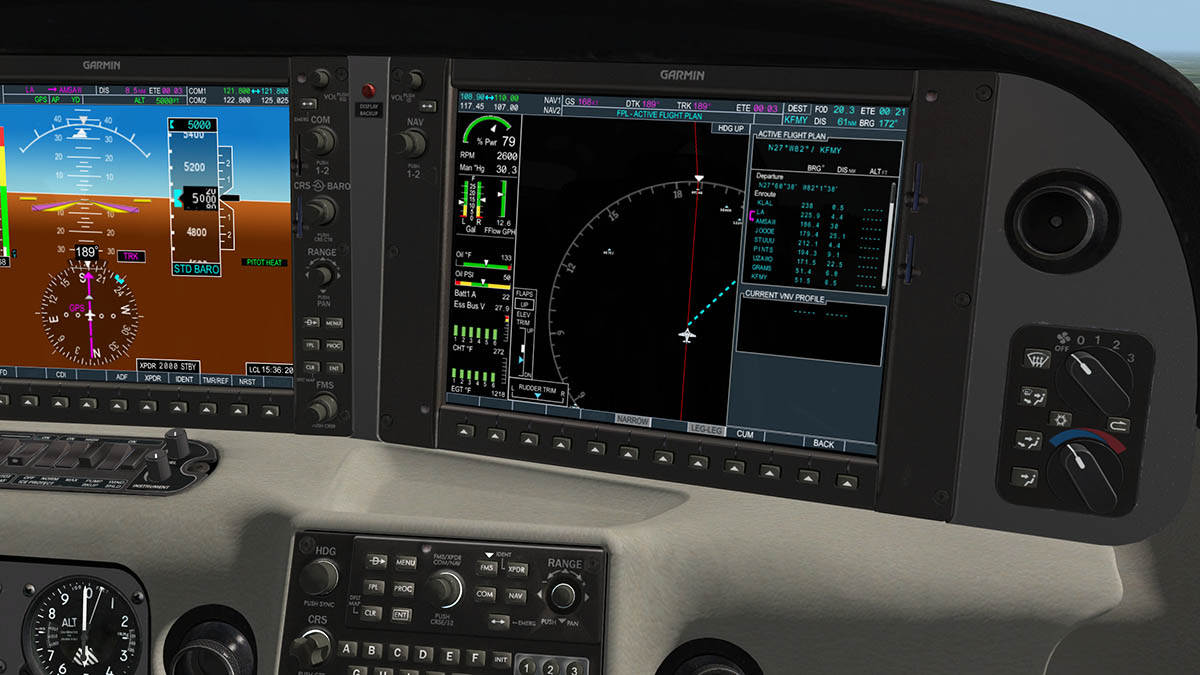
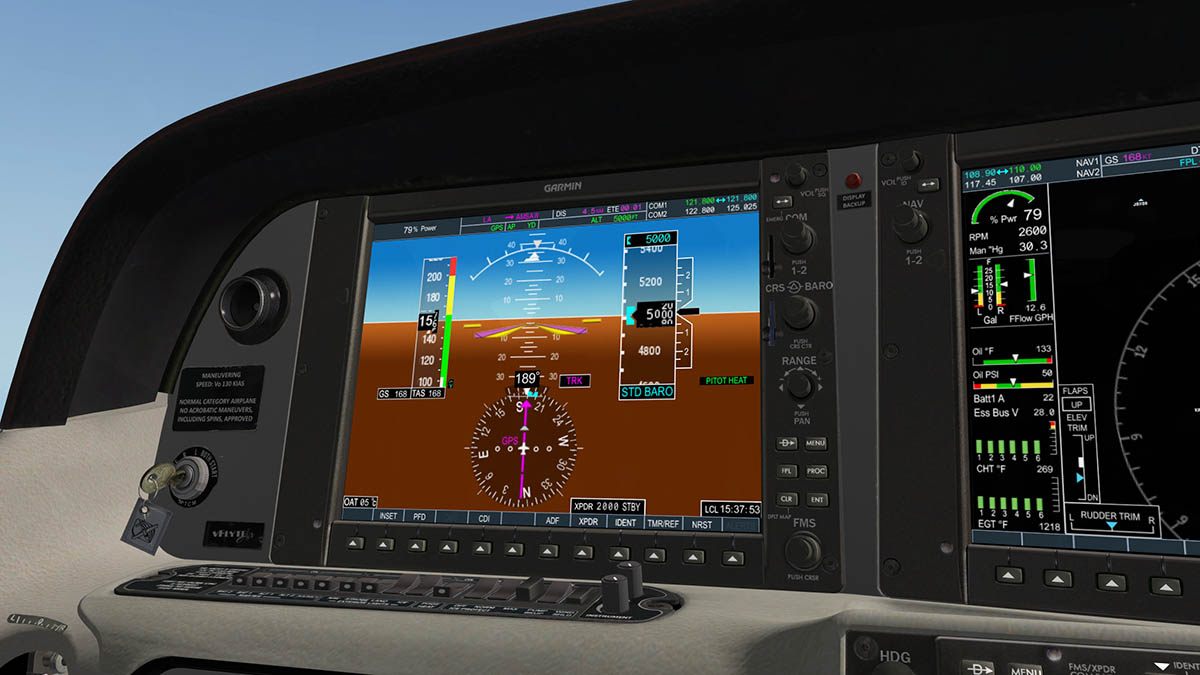
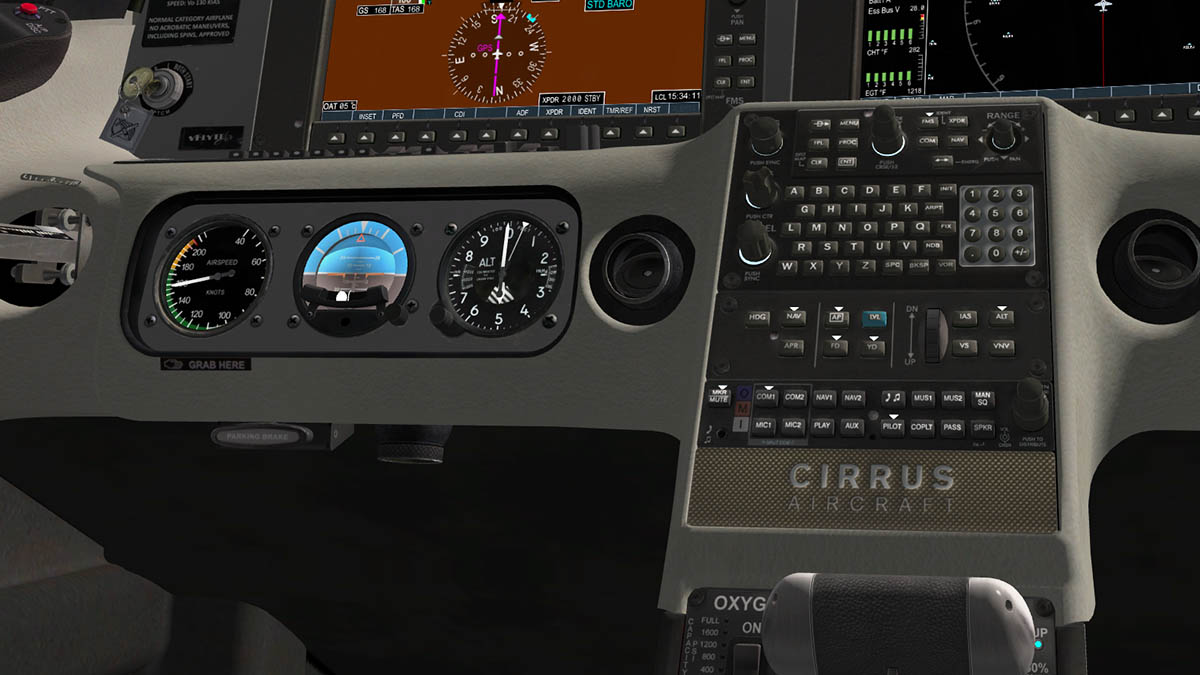
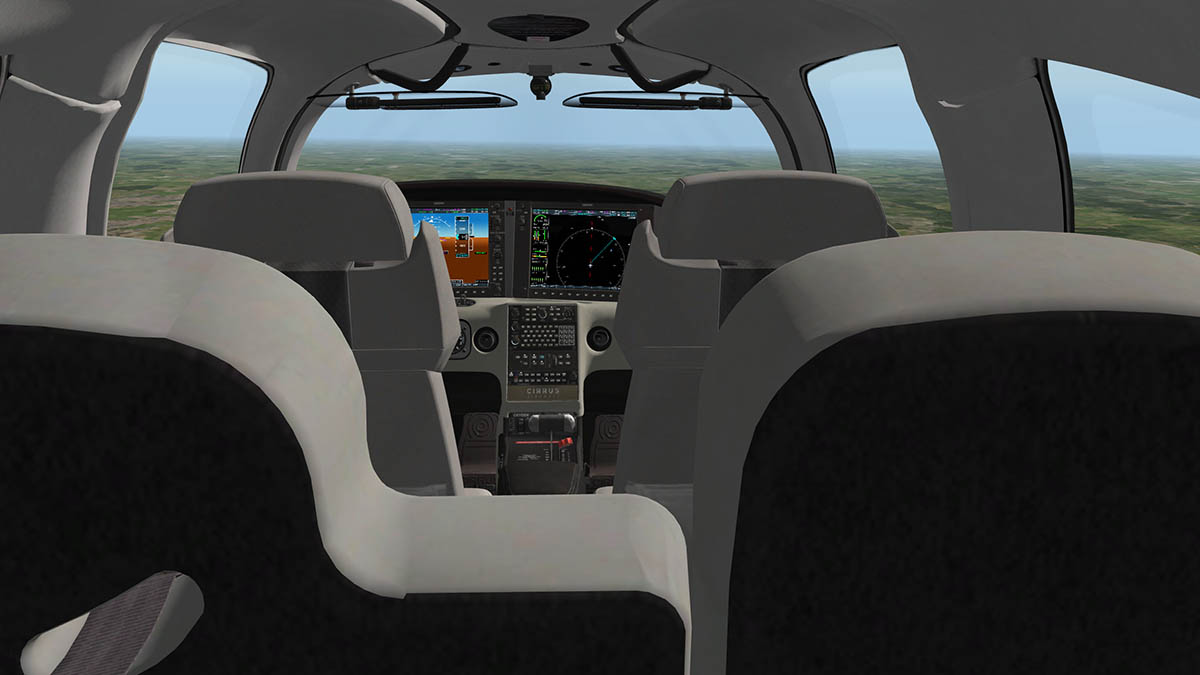
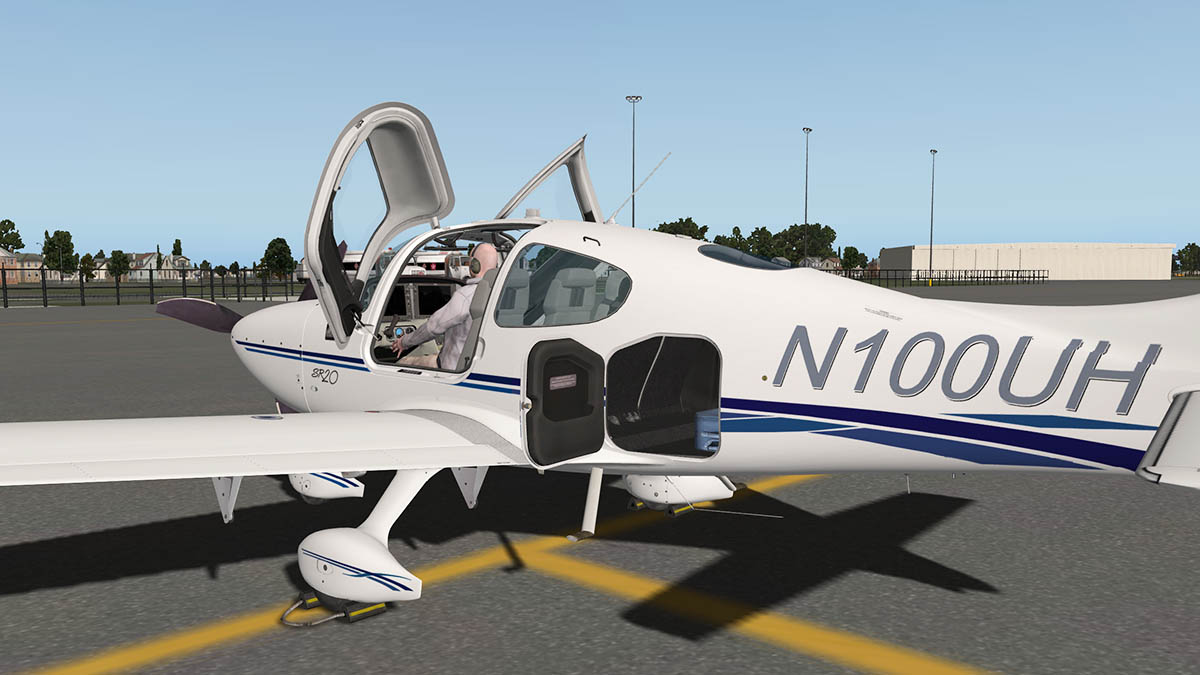
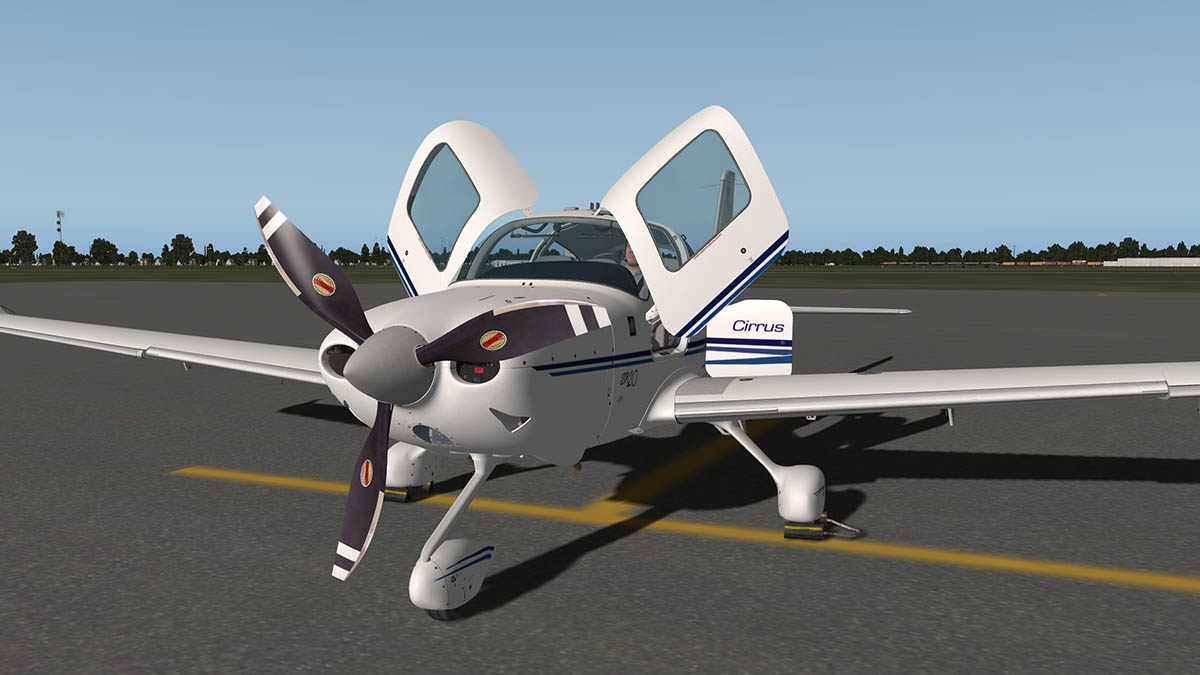
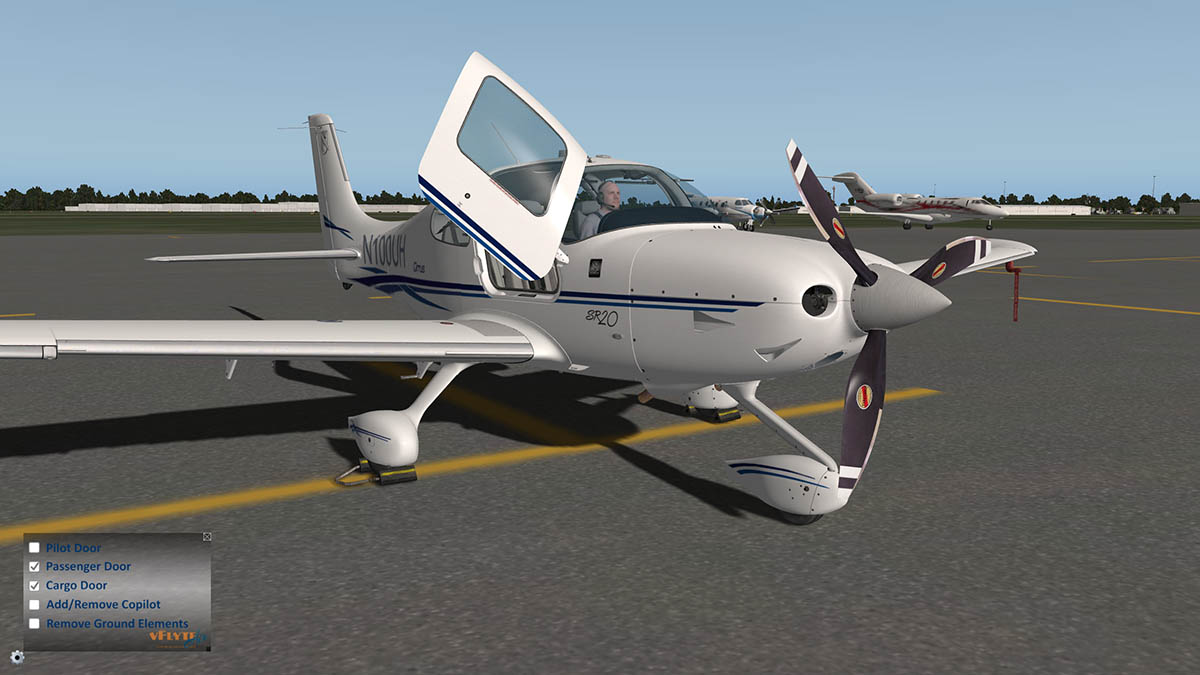
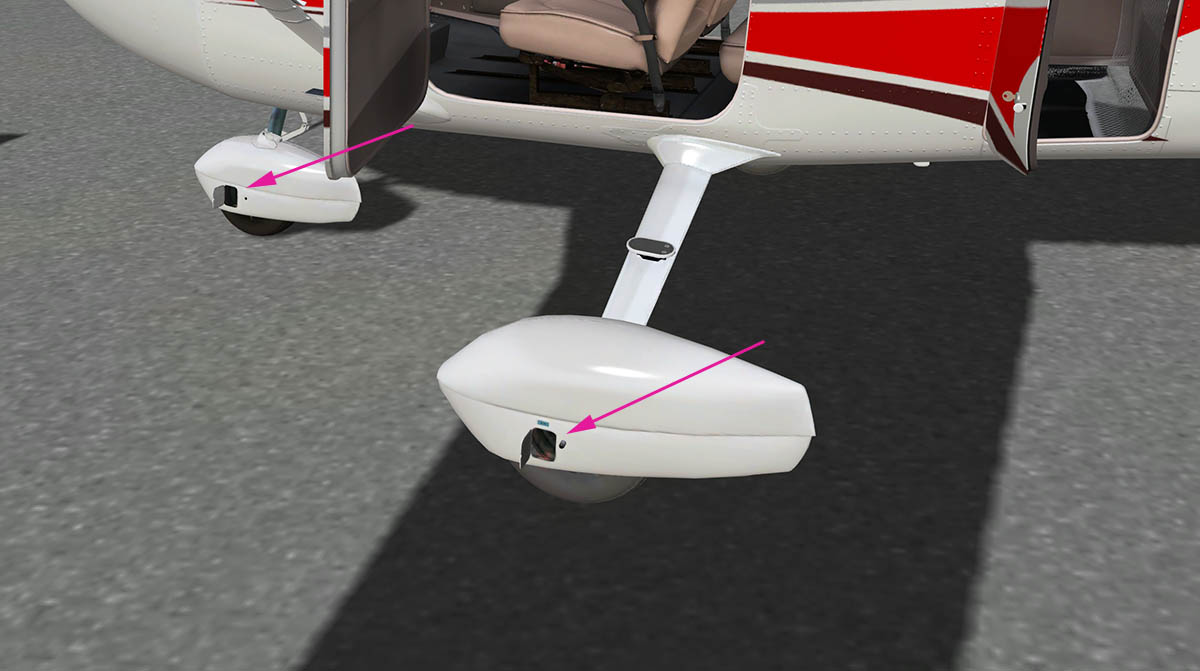
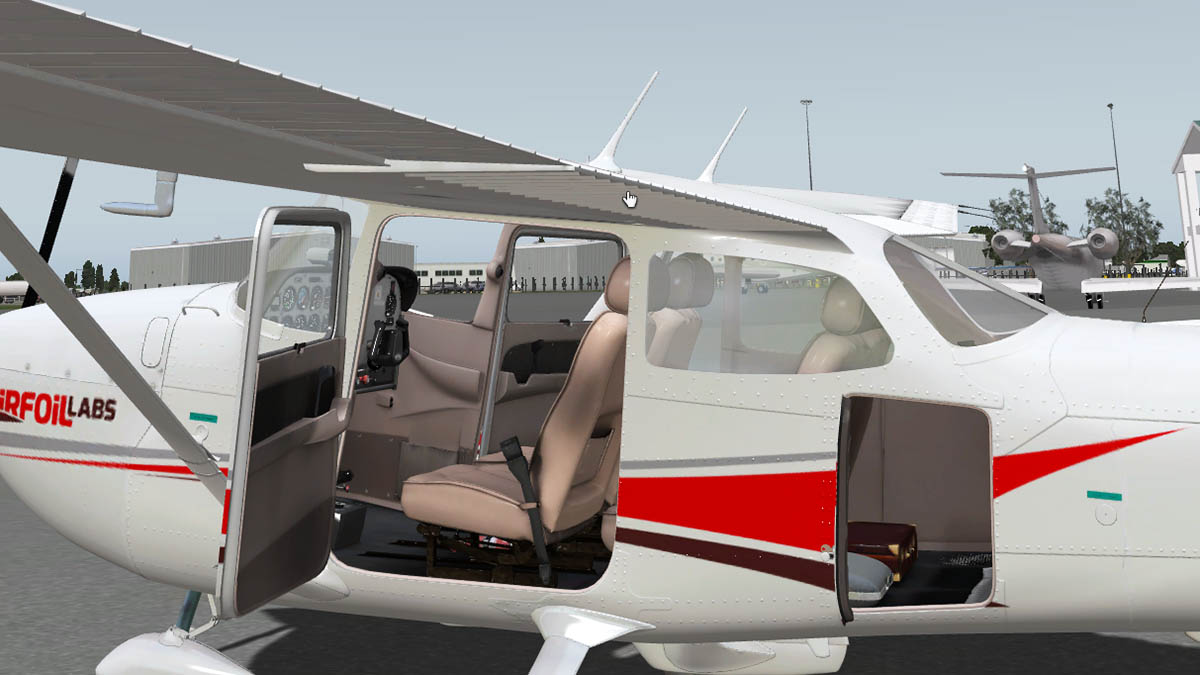
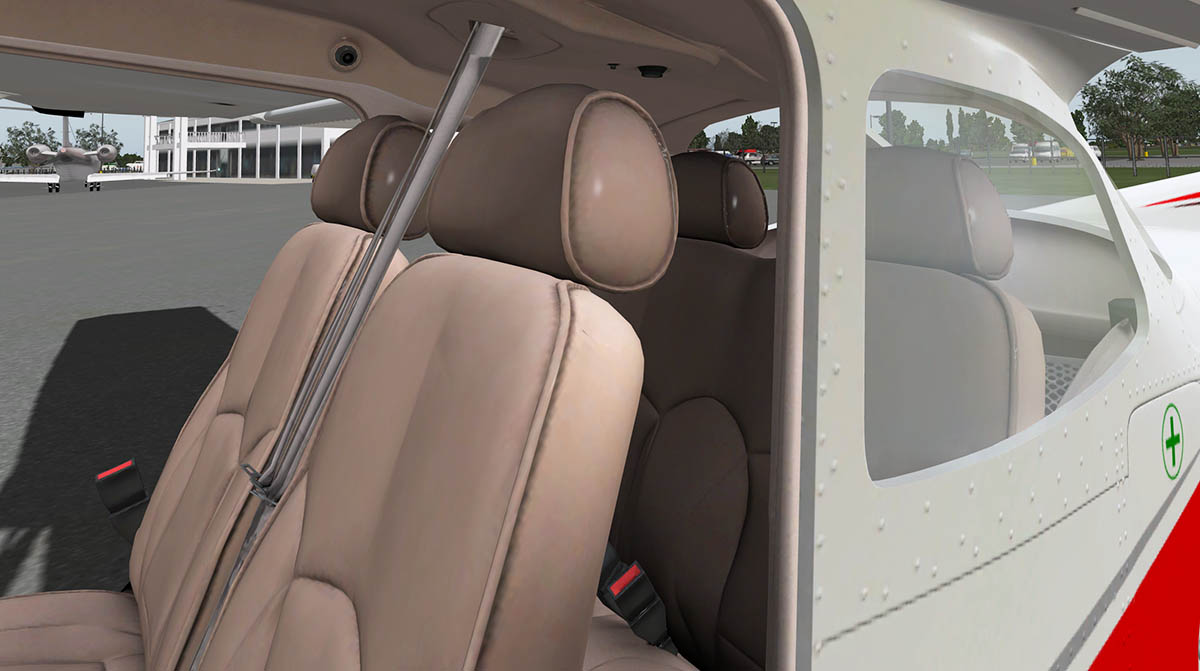
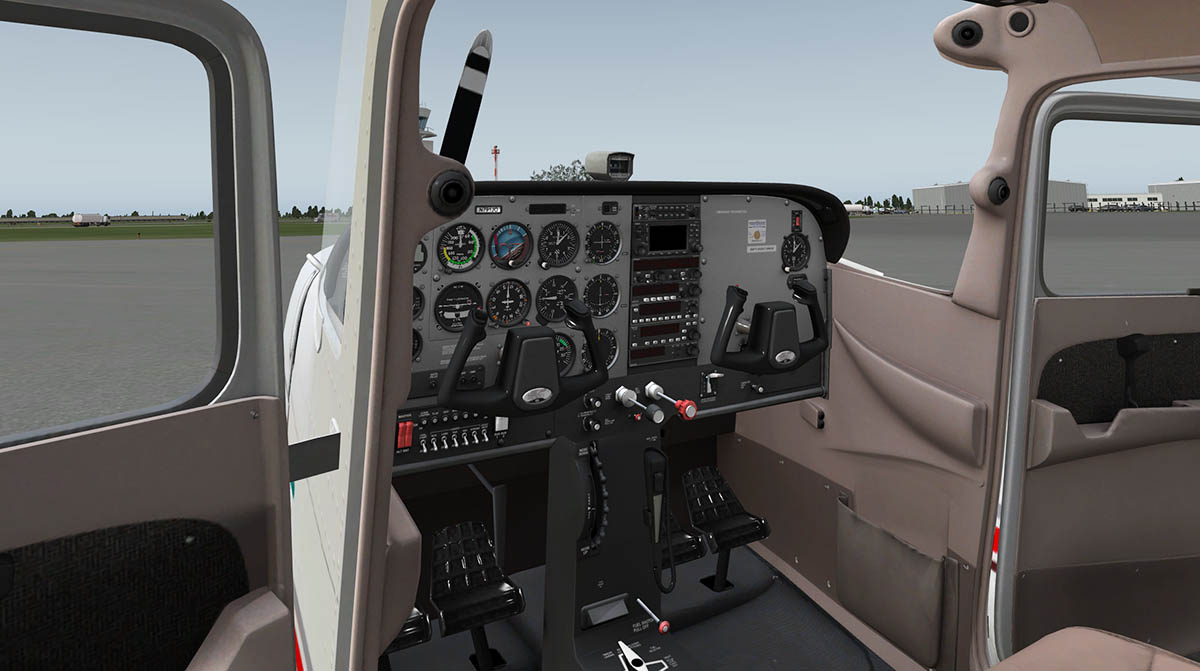
Aircraft Review - Cirrus SR20-G1000 by vFlyteAir Would you fly right around the world in a small 200 hp (149 kW) engined aircraft? Well it can be done, and to be the youngest pilot at 19 years old to do so. Ryan Campbell an Australian did that record breaking attempt in an Cirrus SR22 in September 2013 called "Teen World Flight" (at the time, since beaten by Matt Guthmiller who is only 10 days younger). It took 10 weeks and flying 24,000 nautical miles to complete that journey, it is certainly long way to be cooped up alone in a small cockpit, but it also shows you can fly anywhere if you want to, but if you do get the urge then you would want to try then to keep clear Indonesian airspace... It was a great read of Ryan's book of his world navigation attempt (Born To Fly) and it gives you some background on long distance GA flying, It can be done, but don't kid yourself, it is still highly dangerous even today in our world of GPS flying as the weather is one variable we can never control. But the aircraft was fascinating as well, The Cirrus is a Continental IO-360-ES piston-engined, four-or-five-seat, composite monoplane built by Cirrus Aircraft from Duluth, Minnesota. With a composite airframe. Even though the first flight was in The SR20 was first flown on 21 March 1995 and FAA certification was achieved on 23 October 1998. At the time of the airplane's release, the general aviation industry was badly struggling, and the SR20 was only the first of its kind to earn FAA Part 23 certification in several years. As of June 2015, more than 6,000 Cirrus aircraft had been delivered and for a GA in this era that can be counted as an success story. There are a few reasons for its success, first are the operating costs which are reasonable, a base cost of US$359,900 helps as well, but it is the famous "Cirrus Airframe Parachute System" that can lower your aircraft to the ground that is safety system that has earned the aircraft its plaudits. Feeling the engine go then reduce your speed and pop the parachute and you may live to see another day. It is as clever as the airbags in your car, never needed until you need them. For the record the system has been used 53 times carrying 107 survivors to date. Another Cirrus feature is the Cirrus Perspective avionics suite (by Garmin) with dual 10-inch (250 mm) or 12-inch (300 mm) screens: one primary flight display (PFD) and one multi-function display (MFD). That makes this aircraft a great tourer and excellent for cross country/state flying or if you wish, fly round the world. Performance - Cruise speed: 155 knots (288 km/h) 178.4 mph - Stall speed: 56 knots flaps down (104 km/h) 64 mph - Range: 625 nautical miles (1454 km) 719 miles - Service ceiling: 17,500 ft (5334 m) - Rate of climb: 828 ft/min (4.2 m/s) - Wing loading: 21.0 lb/ft² (101 kg/m²) - Power/mass: 15.25 lb/hp (0.108 kW/kg) vFlyteAir Cirrus SR20 with the G-1000 avionics suite So I was very interested to see what the Cirrus would be like to fly after reading the book. To put myself in Ryan's position and feel that certain aircraft, it a great ride as we shall see but I have no current plans to round the world in it. The design of the Cirrus is a typical composite shape of a low frontal area, bulbous cabin and tapered tail, as per course the aircraft is made up of as few external components as possible with the only extra panels needed for external access to service items. The wings are a lighter wing of greater area than the original SR20, and incorporate a carbon-fiber spar for strength. As a design I like the profile and the vFlyteAir has done the aircraft proud with a seriously quality aircraft with great detailing. Composite aircraft can look bland compared to classic 1960's designs, but that is not the case here. it is excellent. A sprocket located on the lower left of your screen is the "Menu" tab. As menu's go it is quite light in features, but there is a lot to use on there, so you are not wanting. Three selections open doors in the Pilot Door, Passenger Door and side Cargo door. the lovely gull wing style doors are excellent in animation and look, you can open them from the inside as well. The behind the rear seats baggage compartment has a few nice bags in there. You can add a Passenger/Co-Pilot to the right seat and the aircraft's weight will adjust to the extra person for 70 kgs (175 lbs), the other pilot is not removable even when you close down the aircraft, which I always find odd... sitting there in the complete darkness. Final menu feature is wheel chocks and pitot covers and tags. There are no "Views" menu so you will have to use the default X-Plane version. The cabin design, quality is excellent, extremely good. All surfaces have great realistic textures that would want you to run your fingers along. Molded side and roof fittings are very real, highly realistic... so you a really lovely cabin with all the fittings. The focus on this aircraft is certainly going to be the G1000 Garmin Avionics suite as it is front and centre, and it does not disappoint. But the panel instrumentation and switch gear is sublime and very well represented. The layout is quite different from most panels as the G1000 screens are angled toward the main pilot and so is all the switchgear, the co-pilot if he is wanting to fly has only the single-column yoke (stick?) and rudder pedals, and all the instrumentation is on the left hand side, making it hard to fly and certainly on approaches. But I love the layout, it is a beautiful place to be. Incredible detail, highlights are the air-vents. Keystart is on the far left of the panel and Fan, Cool/Heat dials on the right. The centre raised panel is sheer craftmanship in detail. It hold three areas of switchgear and radio selections. The top section is the main programming area for the G1000 system in flightplanning, and HDG (Heading), CRS (Course) and ALT SEL (Altitude Selection) knobs. Middle section is the built in "Autopilot" and the lower section is the Garmin GMA 350 radio set. Set lower on the panel is the Oxygen selection and Flap selection in "up", "50%" and "100%" flap. Left of the centre panel in front of the pilot are lower three standby dial instruments in "Airspeed", "Artificial Horizon" and "Altitude". Above on a shelf are the main rocker switchgear for (L to R) Battery/power (Bat 1 & 2 - Alt 1 & 2 and Avionics), Exterior lighting (Nav - Strobe - Land and Ice), Pitot Heat, Ice Protection (On -Hign) , a MAX Ice setting, Pump and Wind shield heating. Two knobs on the far adjust the panel and interior lighting. You have to love the design of the single-column yoke, it is very well done with moving innards inside the panel. Most of the pop-fuses work, but not all of them. But still very well featured. Centre pedestal has a few items. There is a fuel pump three way switch for "Prime", "Normal" and "Boost" and the twin fuel tank gauge is set out below in "28 USGallons". The fuel tank switch is a red pointer below, with left - right tanks and push for off, and you have to watch the gauges through the flight and keep switching the tanks over to use the fuel up evenly. The throttle lever is lovely, in look and feel. The "Single Lever Throttle Control” automatically adjusts the propeller speed through the use of the throttle lever. There is no separately-controlled propeller lever on the aircraft. To the right is the red knobbed "Mixture" lever with "Rich" to "Lean" adjustment. Garmin G1000 Garmin G1000 avionics suites seem to be popping up everywhere today for X-Plane. This version is certainly very good, but not a completely Garmin system but a variation in the aircraft and noted as a "Perspective system", but close. basically it keeps the X-Plane MAP system in place, which unlike the Carenado 182 G1000 system it simulates which map as well. The X-Plane flightplan system is there as well, which saves time in saving and loading flightplans (fms). You press the "Avionic" rocker switch to power up the system, you first get splash info screens and then they come to life. Primary Flight Display (PFD) There is a huge amount of information on the main Primary Flight Display (PFD), you could note it as confusing at first glance. The G1000 PFD is dominated by the huge artificial horizon that covers the whole display. Built in pitch, Rate of Roll (very nice with built in indicators called "Trend Vectors"), speed and altitude tapes (built in Vertical Speed - or +) and lower Heading, with built in CRS (course) and selectable ADF, Nav 1 & 2 needles. The Course selector is also your Nav 1, Nav 2 and GPS selection and built in CDI (course deviation indicator) for runway ILS alignment. Most items on the screen are accessed by the buttons on the lower panel (Softkeys) that change to the selection required. It can get confusing with the amount of settings and items you can access. Items covered include in "Inset Windows" Map (A smaller version of the main map on the right display), ADF Frequency, Timer/Vr speed References, Nearest Airports, Flightplan and the ADF, NAV 1 and NAV2 settings are displayed on the bottom and left - right of the heading rose, all are switchable to the needles you require. Top of the PFD is an information strip that covers "Engine Power%", Autopilot status, Prev and Current waypoints when the flightplan is activated, Distance to the next waypoint, Est time to next waypoint, COMM 1&2 Frequencies. On the Altitude tape is also top; Altimeter and VVI and bottom Baro pressure. Lower screen information strips covers Outside Air Temperature, Transponder/XPDR, Clock. If you are familiar with the default X-Plane GNS 430/530 GPS system then the knobs and buttons down the right of the display will be a no brainer. Comm 1&2 selector, CRS/Baro adjustment, Map range, (buttons) Direct-to, FPL (flightplan), Clear and Enter (ENT). PFD/FMS inner/outer is at the bottom. If you press the red "Display Backup" button between the displays, it will aggregate the two displays in one left screen. This is called the "reversionary mode" It includes the engine information section (EIS) and activation softkey, the inset map is moved to the right side, the indicators for ground speed (GS) and outside air temperature (OAT) are moved below the speedtape and the “Power” section on the upper bar is replaced by the NAV1/2 frequencies from the MFD upper bar. Multi Function Display (MFD) There are two main modes for display on the right hand Multi Function Display (MFD), in ENG (Engine) and MAP modes. Engine Mode The ENG (Engine) selection is quite comprehensive, it looks absolutely brilliant as well. There are two modes here as with the "DCLTR" softkey allowing you to "declutter" the display by removing a lot of the digital linage. The EIS here is comprehensive, there are two modes for the EIS, the full page mode (above), and the side tab version. Engine parameters covered are "Engine Power%", "Engine RPM", "Man In HG" (Manifold Pressure), "FFlow" (Fuel Flow), "Oil" Pressure and Temp. "Engine Temperatures" are covered in CHT ºF and EGT ºF. Anti-Ice Amount (in GAL) and Oxygen Pressure. Electrical output section covers both Current (A) and Bus Volts (V). The Fuel section displays "Fuel Qty" (in GAL) for both tanks, and fuel calculation data in "Used" - "Rem" (remaining), "Time Rem" and "Range" on the remaining amount of fuel in both tanks. I found the fuel data really helpful in planning and in flight on managing your range and fuel tank selection. Map Mode In MAP mode the EIS moves to its left side tab to give you your main engine and fuel parameters. The rest of the display is the standard X-Plane moving map. A side note that in this display mode you can also activate the inner "Trims" display for Flaps, ELEV and RUDDER Trim. Nice visual pointers are the two large Nav1 & Nav2 arrows on the large rose, which are great for easy directional heading selection. Other display options include, charts (you can insert 20 of your own .png charts in the “Cockpit_3D/generic/Rotary/User” folder) and a comprehensive checklist. G1000 Flightplanning. This Cirrus G1000 system setup is one of the best for creating and entering flightplans. Ease of use is converted to speed in entering the data via buttons, and the flightplan is also saved as a standard .fms file and so can be used in other aircraft or you can insert an already completed flightplan. Pressing the "FFP" key on the centre console (also a softkey on the display), will bring up the flightplan screen on the right hand side of the MAP display. To start to create a new flightplan then press the centre of the "FMS Knob" in the centre of the top part of the main programming panel. This will give you the standard half-moon manipulators in large and small and also note your current GPS position on the display. The large manipulators are used to move down or up a line of your flightplan (segments), the same as your standard GNS GPS. The smaller higher manipulators will open another window to insert the Nav-Aid/Fix (these smaller manipulators have a different action than on the standard GNS GPS). This input is done via the alphabet/numeric keyboard. You have to select an input of ARPT (Airport), FIX, NDB and VOR to tell the flightplan which nav-aid you want to search for, you can do this before or after you input the nav-aid code. ARPT is default. If you make a mistake you can use the BKSP (backspace) to go back one digit, which is a real timesaver over the default GNS GPS in which you have to start again from the first digit. CLR will clear the Nav-Aid/Fix. When done just press ENT (Enter) to enter your Nav-Aid/Fix. Distances can be shown either leg by leg or by cumulative; use the “LEG-LEG” and “CUM” softkeys for changing this option. If the current waypoint has an altitude constraint, the constraint is also shown in the “CURRENT VNV PROFILE” section below the flight plan. Use the small manipulators to go back into the entered waypoint to set the Altitude that is changed by pressing the ENT button and then the curser moves to the VNV box and then you can input the altitude via the numeric keyboard, then press ENT again to enter the Nav-Aid/Fix/Altitude. Sometimes I found you have to go back up a segment with the larger manipulators to re-input the altitude? (but I think it is bug?) You then use the large manipulators to move down or up a line of your flightplan to input or to correct a Nav-Aid/Fix. The flightplan does not scroll up or down, so to see more of the flightplan you have to go to a new page and follow on from the bottom of the last page. Repress the "FMS Knob" to exit. Save the completed flightplan in a clever way as a standard .fms file by clicking on the lower SD card on the side of the display, to load a flightplan then press the upper SD card. It takes longer to explain this flightplan system than to use it. If you have your list of Nav-Aid/Fixes handy, then it takes no time to input the waypoints and quickly create a flightplan. The button input system is a real timesaver compared to the small manipulator input on the X-Plane default GNS/GPS, you will load this aircraft just to create flightplans quickly and then save them... Flying the Cirrus SR20 First thing you notice sitting in the pilot or front passenger seat is the blinds on the roof reduce your visual view forward. Not that bad but they do infringe down into the windscreen view, revolving them up the other way does help (a little). The one thing that you like about the Cirrus is that it is not a complicated aircraft, it is easy to do anything. Mixture up and select a fuel tank from the left or right tanks, boost fuel switch on, lighting on, and turn the key and the Continental IO-360-ES bursts into life. If the front view is slightly restricted by the high glareshield and the low blind then the side view is not, so that helps with turning and taxiing the aircraft. I like the sounds of the Cirrus. Sounds are custom, and they really give a great feel to the aircraft, smooth and not overbearing, so you can travel for a distance and you do not get that whining sound in your head that is tiring. The aircraft is nice to taxi, easy to trek out to a faraway runway. Your vSpeeds are right in front of you, setting you up for the right rotate speed. Yes there is a slight left pull when the power goes on, but that is easily corrected. The aircraft has plenty of power but requires a little longer run than you usually require to get to the Vr 83knt speed. The lower speed zone is marked on the PFD, and so are the vSpeeds, it really can't get easier than that, only a slight pitch is required to go flying. The aircraft does have a tendency to be very tight around the centre of gravity, so you can find yourself easily slightly banked either way, and you have show a lot of balance to keep the aircraft level, but that is not saying the aircraft is nervy, but it is quite the opposite in being a really nice aircraft to fly... you soon feel very comfortable in the design. There is no searching for the Autopilot controls which are grouped on the centre console, so activation and setting the heading is a another easy task, I also like the close by knobs for adjusting the HDG (Heading), CRS (Course) and ALT SEL (Altitude Selection) which saves so much time in quick adjustments because you don't have to travel all over the panel to do each. GPS selection on the CDI softkey, and NAV on the autopilot panel and your flightplan is locked in. You cruise just above the 150knts mark (153knts) and no doubt this is a nice cruiser of an aircraft. Engine performance is visually excellent and as noted the fuel outputs are great for flight management. Flying eastwards along the Hawaiian chain, you feel very confident... fly around the world?, yes you could. Yes there is a lot information on the PFD, but you can choose to declutter the the screen and fly on the basics. For myself, I like all the navigation aids working to my advantage, so the ADF and VOR2 needles give me my aim to the airport on PHOG - Kahului Airport, but to get there I have to do a sharp left turn and fly right down a valley right across the island of Maui. Selecting the altitude and adjusting my vertical speed to reach the correct point of approach to runway 02. A note the V/S adjustment arrows don't appear until you select the V/S button. The power output is also a great tool to select just the right amount of power for any climb, but more useful on descending. Two stage flaps ("50%" and "100%") are just right with nice drag to control your speed without making you climb when deployed, but you still have get the power right to keep the speed liner . Again the aircraft is nice in the final approach but watch the roll and keep it level. Touching down means getting your speed as low as you must. Stall speed is 56 knots, but you have to find anything around just over 60knt so you don't bounce on the runway, the Cirrus will easily skip and bounce if you are not aware of it. Run off the speed and your there. Cirrus Airframe Parachute System The safety parachute system is built into the roof just above the pilots and front seat passengers position. Push the panel to deploy the parachute... But make sure your airspeed is as low as possible, and if not it will... act like a parachute and drag the aircraft almost vertical on its tail. And if you think the aircraft is going to do a slight touch soft landing... then it isn't, it is a crash, so make sure your insurance is still paid up! Aircraft lighting vFlyteAir have modeled the lighting on the Cirrus using X-Plane's parameterized lighting. But externally its horrible. You get large blobs of light at a small distance and it varies from tight to huge at different angles, at night flying it looks like you have a flashing UFO on each wing. In the daytime it is not much better. Really close up it is not too bad and the spread from the landing lights is good, but otherwise I fly with as much external lighting off as I can. Internally in the cabin it is thankfully much better. One adjustment knob sets the instrument brightness although the standby instruments could be a little brighter, and the other knob adjusts a nice red glow. There also two switchable spot lights on the forward roof, the buttons are hard to see as the blinds cover them up, but they are are very effective. There are two more lights middle roof, again very good but the rear seats are in darkness? A slight change of the middle spot light throw rearwards would have done the trick and lit the rear as the front spots cover the front area well. Liveries. There is default vFlyteAir livery and nine authentic liveries based around a single theme, with only one (G-CIRU) a single red upper body colour. All liveries are 4K quality and as noted authentic of real aircraft as Cirrus has a special painting system that covers the painted aircraft for the best slipstream flow efficiency. Summary First impressions always count, some aircraft can deceive in that they can take time to show their excellence, but others have an instant effect and you love them immensely immediately. This vFlyteAir Cirrus SR20 fell easily into the latter category. The quality immediately hits you and you love it, and the cabin and that panel is simply overwhelmingly good. Beautiful textures abound, it is a very, very nice place to fly. The aircraft is nice fly as well, I was completely and easily at home very quickly and enjoying the performance and handling, all round here the Cirrus is a great aircraft. The Garmin G1000 is of course debatable. The purists will note that although 90% of the system is a great G1000 system, there is still that 10% of X-Plane map and flightplan background that is still in there. Without doubt the benefits certainly totally outweigh the negatives, but simulation is about authenticity, in replicating the real world systems. One huge bonus is that this system with the keyboard input is one of the best and certainly fastest way to create GNS GPS flightplans, overall the system is very good. For the quality and features this is a great price for this aircraft at well under US$30, so a great investment. Negatives and only the external lighting spoils what is an exceptional aircraft, otherwise I loved it immensely, a really nice aircraft to fly, be in and enjoy one of the best four seater propeller cruisers in X-Plane... would I fly the Cirrus around the world like Ryan Campbell in this aircraft, certainly that is possible with this avionics suite, and there would be very much worse ways to break flying records... Overall a really nice aircraft. _____________________________________________________________________________________ The Cirrus SR20-G1000 by vFlyteAir is available from the New X-Plane.Org Store here : Cirrus SR20 G1000 And is priced at only US$27.95 _____________________________________________________________________________________ Features Flight Display (PFD) Artificial Horizon with high-resolution attitude indicator, flight director and roll scale Speedtape with custom display of reference speeds Altitude tape with custom vertical velocity indicator and minimums display Enhanced HSI with turn indicator and three fully configurable bearing pointers for GPS, NAV1, NAV2 and ADF Switchable inset windows for timer/references, minimums, wind, ADF, map, nearest airports, and flight plan Cirrus-style top bar with power setting, frequencies and detailed GPS & autopilot information On the Multi Function Display (MFD) Engine information system with switchable trim status Detailed system page with engine parameters, declutter mode, used fuel, remaining fuel, remaining range, remaining time, anti-ice & oxygen gauges, density altitude, temperatures, ISA deviation Custom user interface for creating and editing flight plans (accessing X-Planes navdata and default FMC) “Nearest” page for airports, navaids and related frequencies Cirrus-style top bar with destination window, frequencies and GPS information X-Plane default map with weather radar and traffic warnings with custom icons Interactive checklists and user-definable charts System-wide specifics: X-Plane autopilot with ROL, HDG, NAV, APPR, ALT, V/S, IAS modes and detailed status information Custom calculations for ground speed, true airspeed, fuel & ranges, bearings and distances Reversionary mode with engine information system and system summary (reacts on fuse & MFD failure) Hypoxia is simulated at above 12,500’ cabin altitude. The screen will begin to dim if you are flying above 12,500’ MSL. Use the OXY switch on the lower center console to turn on oxygen supply and avoid hypoxia! Oxygen supply is simulated – you have approximately 3 ½ hours of usable oxygen on board. The oxygen supply will begin to deplete slowly when the OXY switch is ON Anti-Ice fluid is simulated – there are 3.5 gallons of anti-ice fluid available. The supply will deplete when anti-ice switch is ON ICE lights are modeled – use the ICE light switch to inspect the wing leading edges for ice build-up at night The Cirrus BRS® parachute recovery system is modeled – click on the BRS handle on the cabin ceiling to deploy the parachute in case of emergency. NOTE: Engine should be OFF, and airspeed should be below 120 KTS when deploying the parachute! Cirrus “Single Lever Throttle Control” is modeled – the SR20 automatically adjusts propeller speed through the use of the throttle lever. There is no separately-controlled propeller lever. Customized HDR night lights – there are four dome lights inside the cockpit that will provide white flood lighting with HDR on in your rendering settings Custom exterior lighting – all lights on the exterior (landing lights, strobe lights and navigation lights) are modeled using X-Plane parameterized lighting. 10 Factory liveries provided – because Cirrus uses a special heat-resistant paint for their airplanes, the 10 liveries provided are based on Cirrus originals. Custom sounds – try opening the passenger or pilot door while the engine is running! _____________________________________________________________________________________ Installation : Download file size is 420.60mb to your X-Plane - GA Aircraft Folder. Installed file size is 420.50mb Documents : There is excellent documentation with a full tutorial, a avionics tutorial and a third document that covers the features of G1000 avionics system. Requirements : X-Plane 10.40+ (any edition) - Windows, Mac or Linux - 64bit mode -1Gb+ Dedicated VRAM Video Card Current version: 1.0 - Last updated on October 12th 2015 Developer Support Site : Support forum for the SR20 _____________________________________________________________________________________ Review by Stephen Dutton 16th October 2015 Copyright©2015: X-Plane Reviews Review System Specifications: Computer System: - 2.66 Ghz Intel Core i5 iMac 27”- 9 Gb 1067 Mhz DDR3 - ATI Radeon HD 6970M 2048 mb- Seagate 512gb SSD Software: - Mac OS Yosemite 10.10.1 - X-Plane 10 Global ver 10.42 Addons - Saitek x52 Pro system Joystick and Throttle : Sound - Bose Soundlink Mini : WorldTraffic Plugin Music - Lots of Dire Straits - Chris Rea - Eric Clapton Scenery or Aircraft - PHJR - Barbers Point USCG, Hawaii by Fred De Pues (Fred-E-NETS sceneries are currently being updated to the X-Plane-Org) - PHOG - Maui, Hawaii by joyfulsongster (X-Plane.Org) - Free

-
Aircraft Update : Airbus A330-243 v1.2r2 by JARDesign
Stephen replied to Stephen's topic in Airliners Reviews
Hummmm.... This is a scratch the head one? Isn't it supposed to do that? If your diamonds are centre (which means you are aligned correctly on the ILS) and you press APP which is activating the ILS guide approach then it should start to descend the aircraft along the ILS beams... in other words the V/S will align to the usually minus 300fpm to descend down to the runway? But If you get a sudden drop in altitude then your speed is not right? my guess it is too slow... SD -
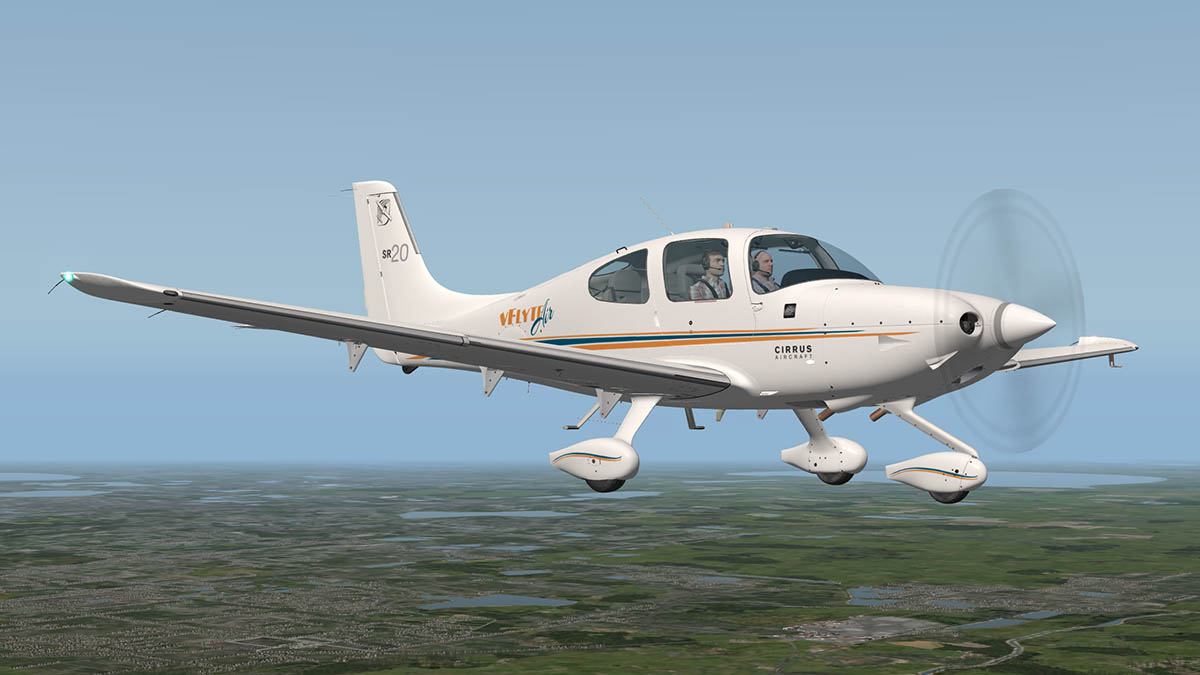
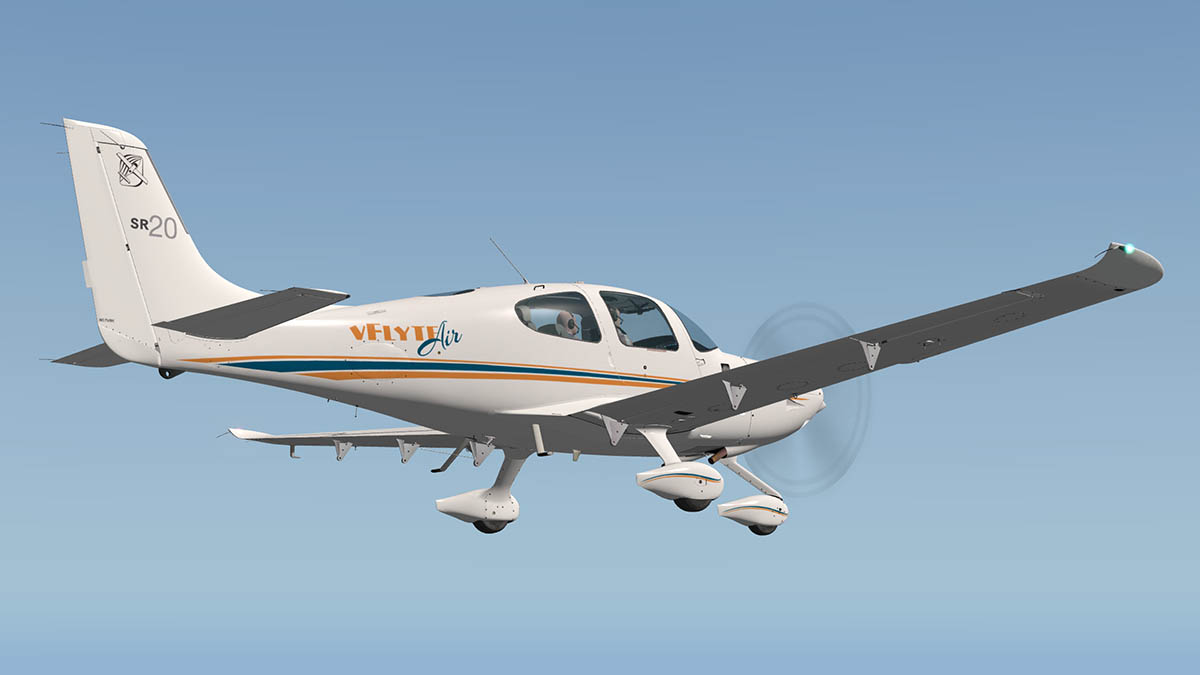
News! - Now Available - Cirrus SR20 by vFlyteAir Now available at X-Plane.OrgStore from vFlyteAir is a very nice modern General Aviation success story in the Cirrus SR20. To date more than 6,000 Cirrus aircraft had been delivered of this excellent four-or-five-seat, composite monoplane built by Cirrus Aircraft of Duluth, Minnesota. The aircraft is powered by a Continental IO-360-ES engine that provides 200 hp (149 kW). X-PlaneReviews has exclusive images of this great new aircraft. Beautiful modeling is coupled with great quality design. The highlight is the inclusion of a full G1000 glass avionics suite. Although based on the X-Plane FMS system, it is very comprehensive and excellent to use and programme. Features Include: Primary Flight Display (PFD): Artificial Horizon with high-resolution attitude indicator, flight director and roll scaleSpeedtape with custom display of reference speedsAltitude tape with custom vertical velocity indicator and minimums displayEnhanced HSI with turn indicator and three fully configurable bearing pointers for GPS, NAV1, NAV2 and ADFSwitchable inset windows for timer/references, minimums, wind, ADF, map, nearest airports, and flight planCirrus-style top bar with power setting, frequencies and detailed GPS & autopilot informationMulti Function Display (MFD): Engine information system with switchable trim statusDetailed system page with engine parameters, declutter mode, used fuel, remaining fuel, remaining range, remaining time, anti-ice & oxygen gauges, density altitude, temperatures, ISA deviationCustom user interface for creating and editing flight plans (accessing X-Planes navdata and default FMC)“Nearest” page for airports, navaids and related frequenciesCirrus-style top bar with destination window, frequencies and GPS informationX-Plane default map with weather radar and traffic warnings with custom iconsInteractive checklists and user-definable charts System-wide PFD and MFD specific features: X-Plane autopilot with ROL, HDG, NAV, APPR, ALT, V/S, IAS modes and detailed status informationCustom calculations for ground speed, true airspeed, fuel & ranges, bearings and distancesReversionary mode with engine information system and system summary (aircraft reacts on fuse & MFD failure) Certainly one of the classiest and well laid out panels I have seen, beautiful place to fly. Package comes with 10 liveries, Tutorial, Avionics Manual and Avionics featuresSimulated CAP® Parachute systemCustom SoundsCustom 3d CockpitFully AnimatedSelectable animated co-pilotFunctional Fuse PanelHi-Resolution GraphicsOther Notable Features: Hypoxia is simulated at above 12,500’ cabin altitude. The screen will begin to dim if you are flying above 12,500’ MSL. Use the OXY switch on the lower center console to turn on oxygen supply and avoid hypoxia!Oxygen supply is simulated – you have approximately 3 ½ hours of usable oxygen on board. The oxygen supply will begin to deplete slowly when the OXY switch is ONAnti-Ice fluid is simulated – there are 3.5 gallons of anti-ice fluid available. The supply will deplete when anti-ice switch is ONICE lights are modeled – use the ICE light switch to inspect the wing leading edges for ice build-up at nightThe Cirrus BRS® parachute recovery system is modeled – click on the BRS handle on the cabin ceiling to deploy the parachute in case of emergency. NOTE: Engine should be OFF, and airspeed should be below 120 KTS when deploying the parachute!Cirrus “Single Lever Throttle Control” is modeled – the SR20 automatically adjusts propeller speed through the use of the throttle lever. There is no separately-controlled propeller lever.Customized HDR night lights – there are four dome lights inside the cockpit that will provide white flood lighting with HDR on in your rendering settingsCustom exterior lighting – all lights on the exterior (landing lights, strobe lights and navigation lights) are modeled using X-Plane parameterized lighting.10 Factory liveries provided – because Cirrus uses a special heat-resistant paint for their airplanes, the 10 liveries provided are based on Cirrus originals.Custom sounds – try opening the passenger or pilot door while the engine is running!Photo-realistic textures by Igor Kirilove – all textures are very hi-res (4K), providing a very realistic lookFully animated model – all the details are in this model. Check out the door hinge mechanisms when you open and close the doors!Super accurate 3D modeling – the model is extremely accurate in scale and dimensions.For more information then visit vFlyteAir Yes! the Cirrus SR20 by vFlyteAir is now available from the new X-Plane.Org Store here : Cirrus SR20 Perspective® G1000 - Price is US$27.95 Requirements X-Plane 10.36+ (any edition) - Windows, Mac or Linux - 64bit mode - 1Gb+ Dedicated VRAM Video Card Stephen Dutton Updated 12th October 2015 Copyright©2015: X-PlaneReviews
-
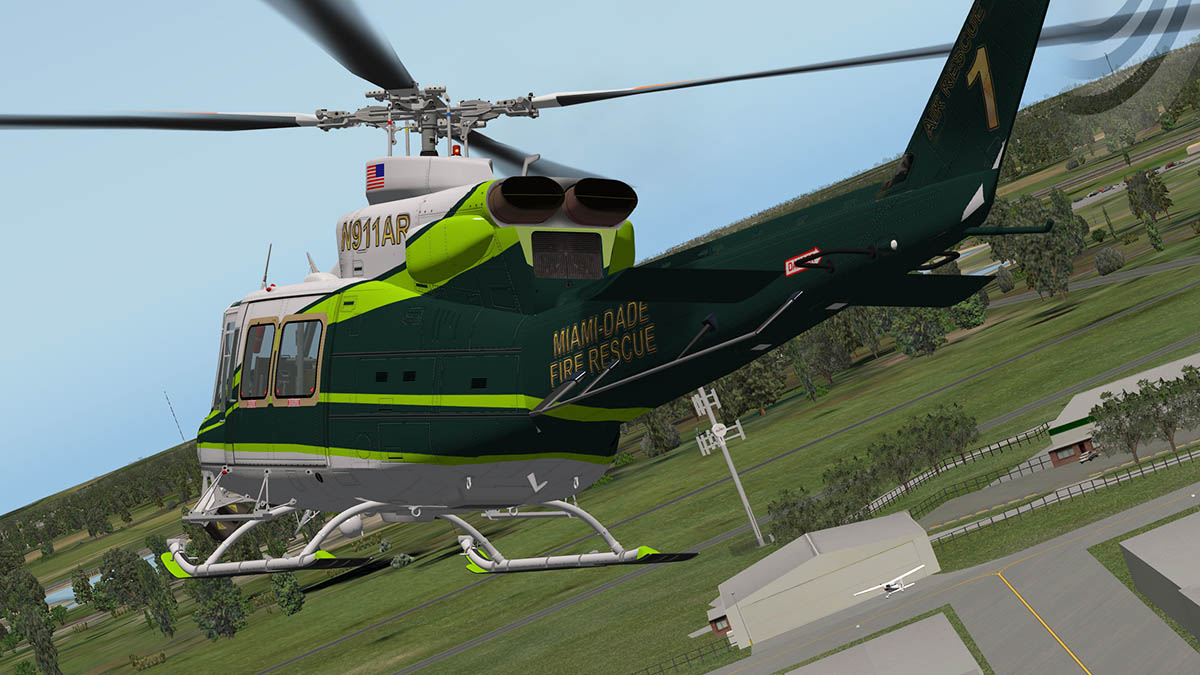
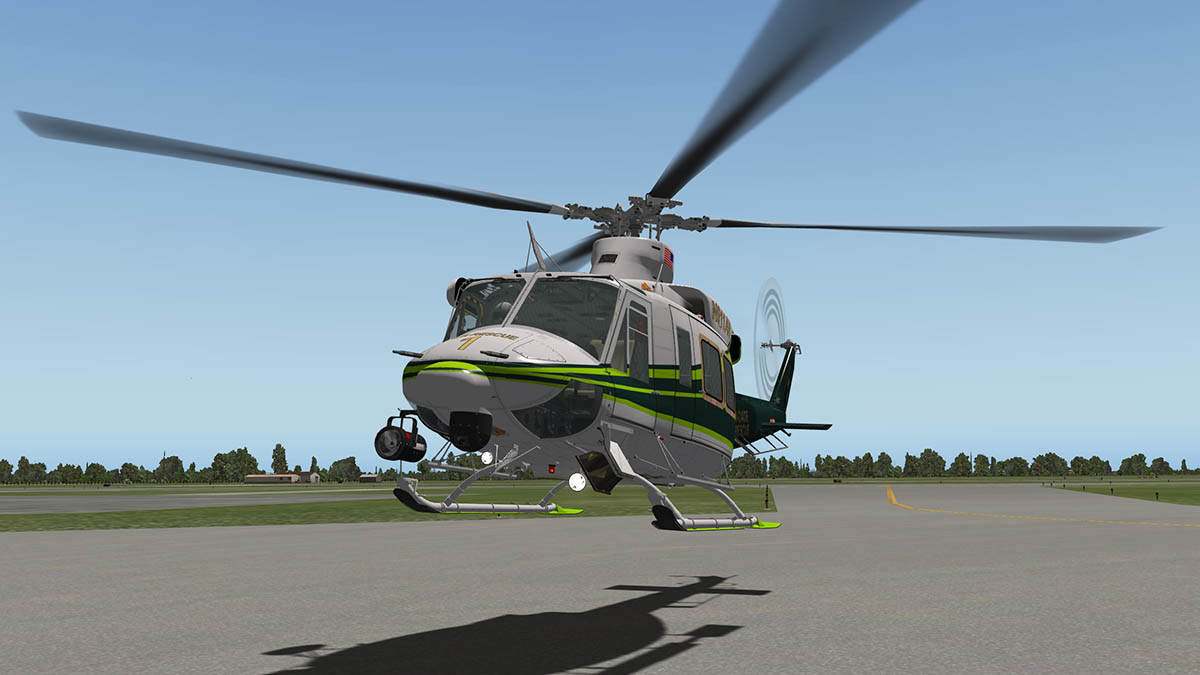
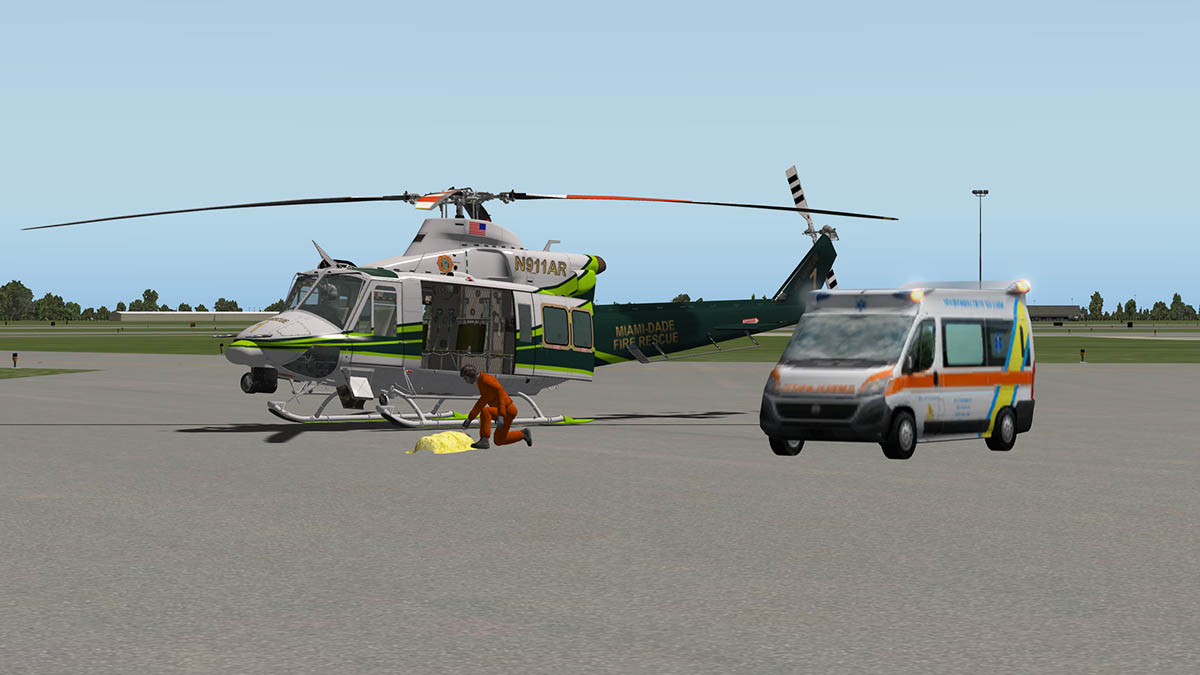
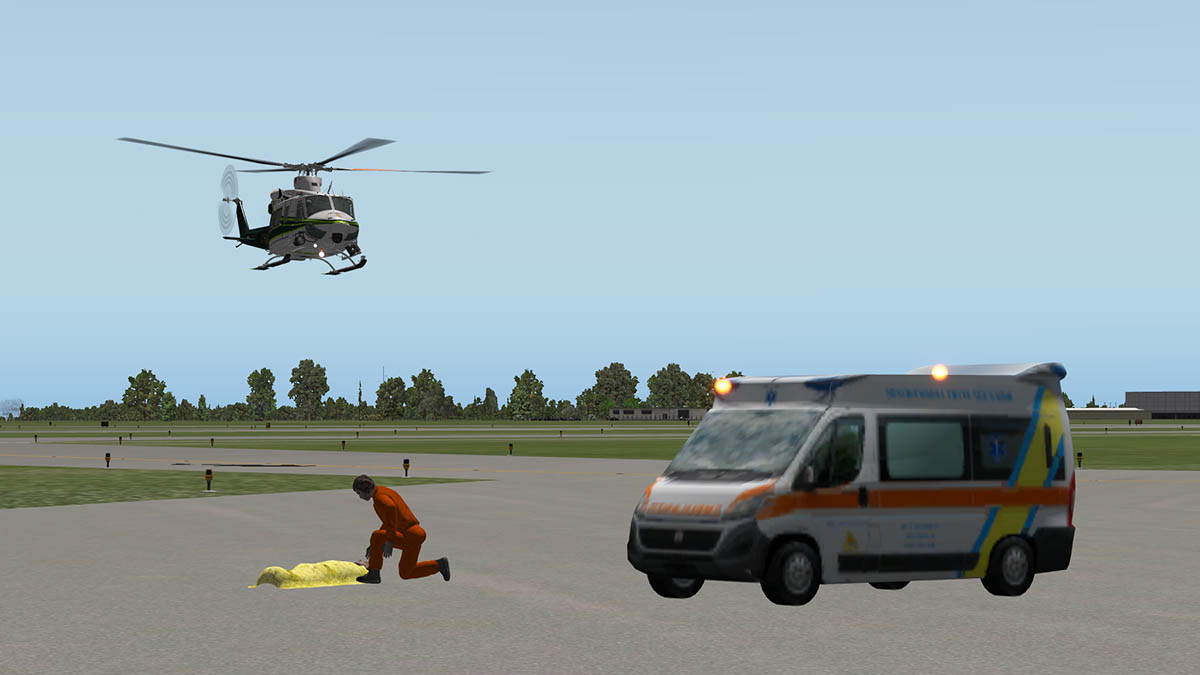
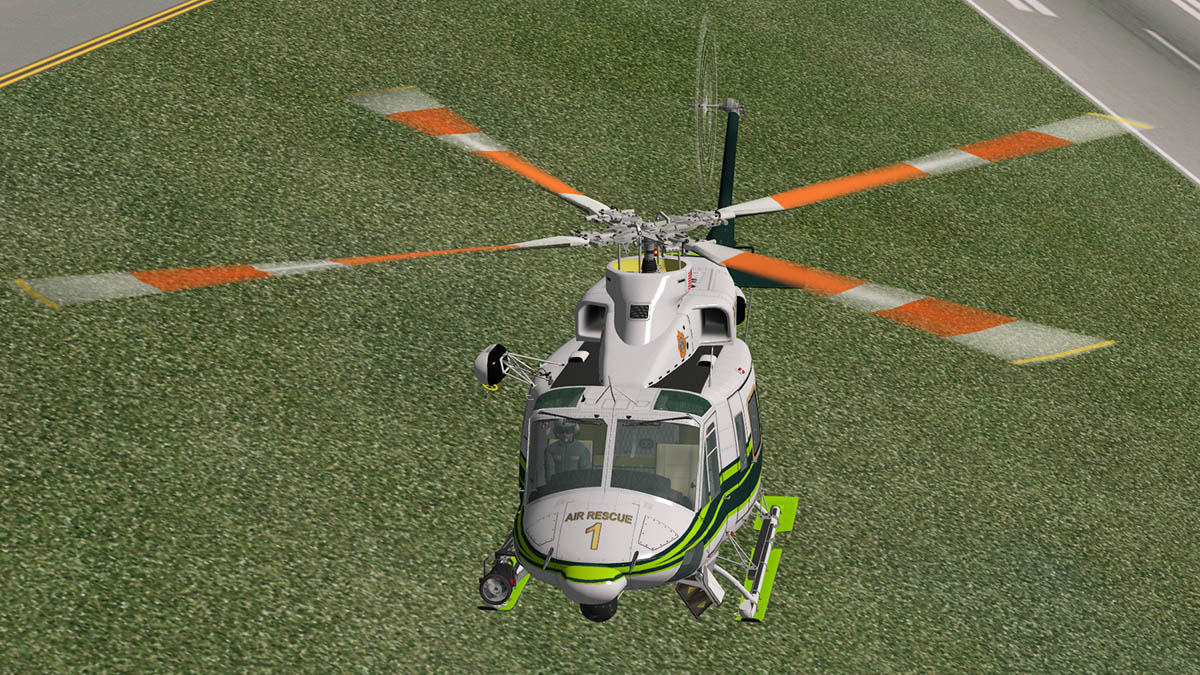
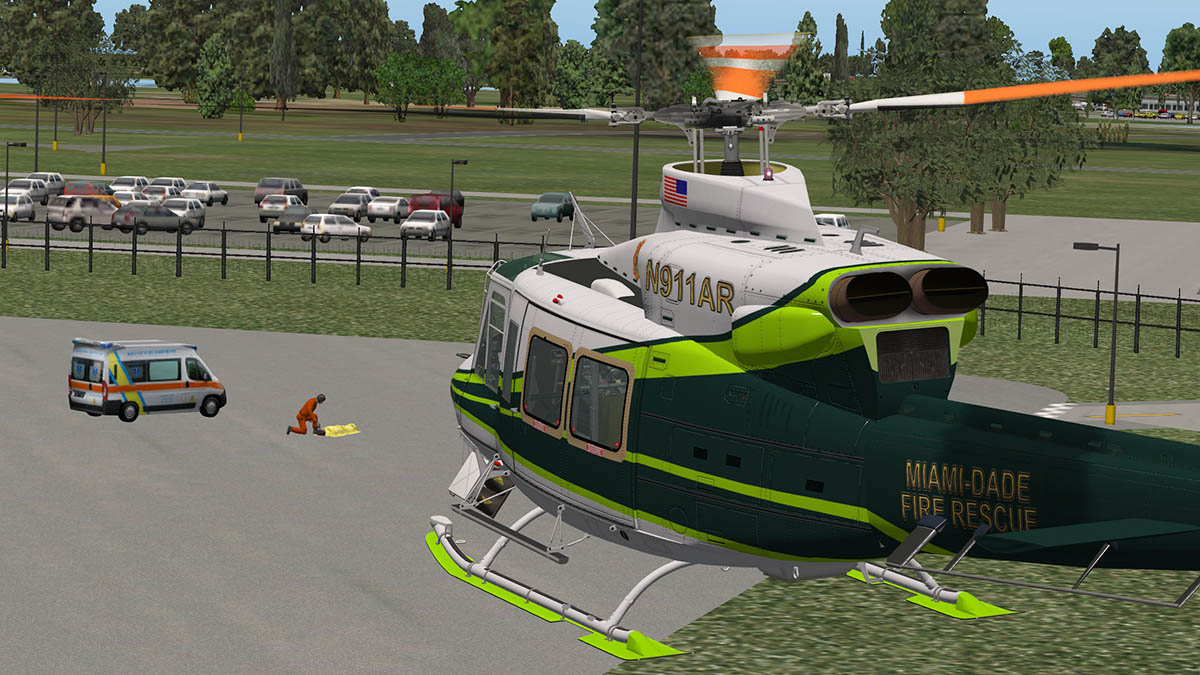
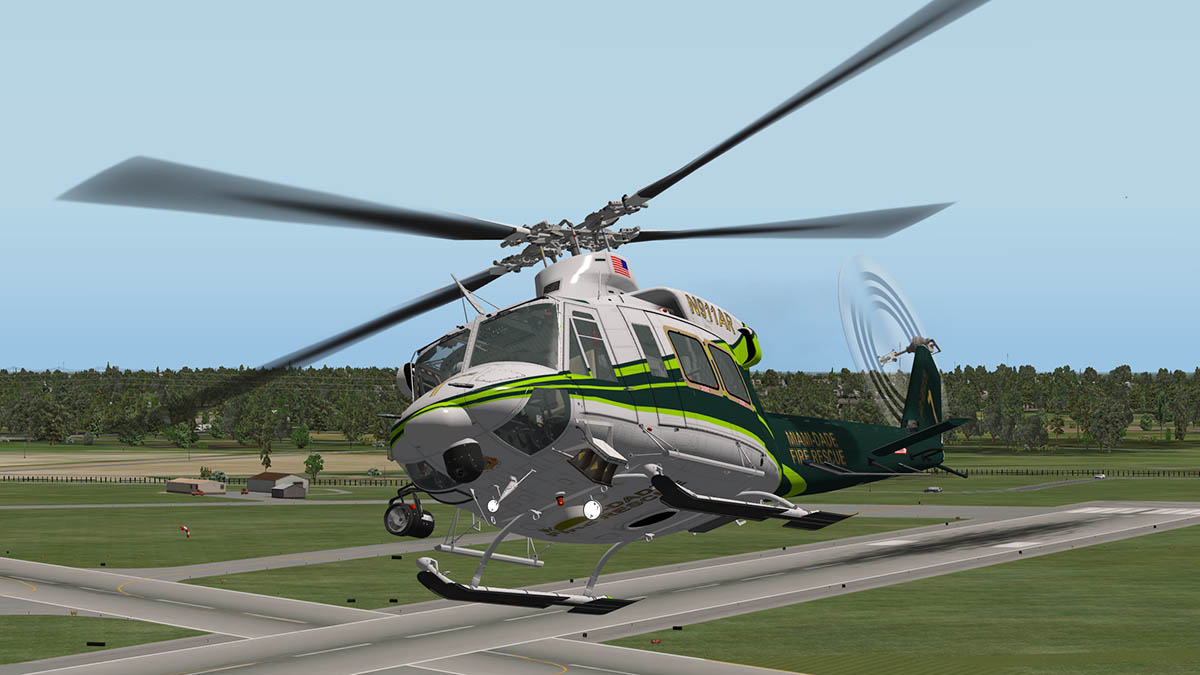
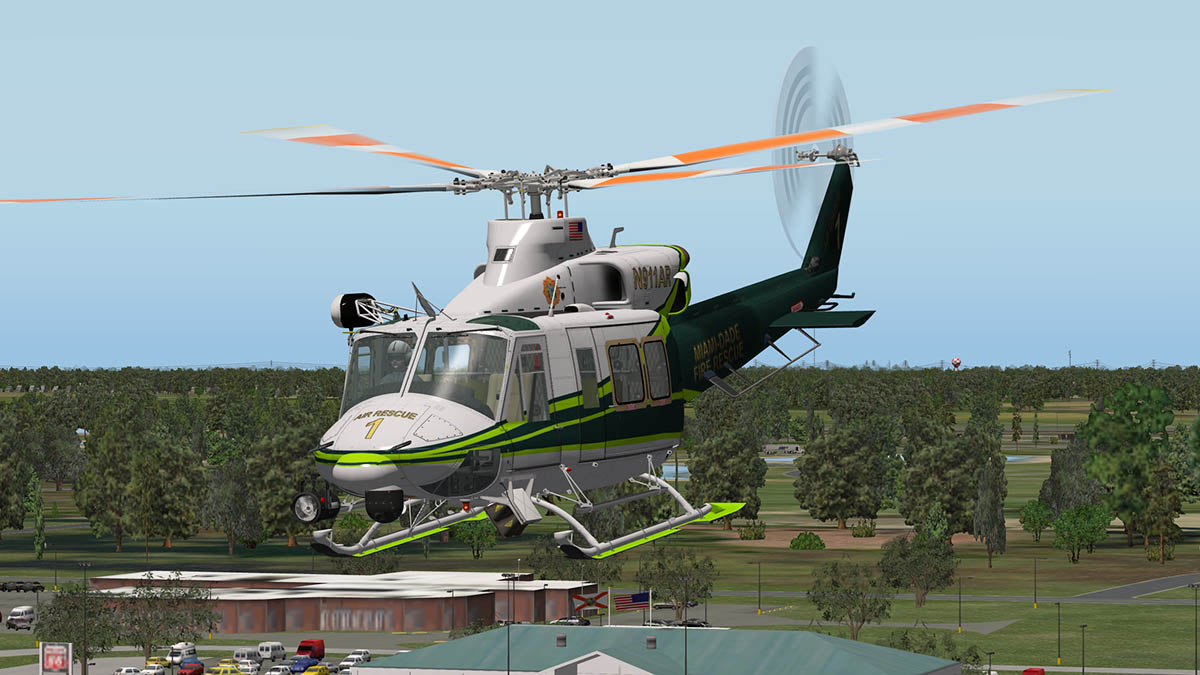
News! - Bell AB412 updated to v1.6 by X-Trident X-Trident have updated the excellent Bell AB412 to v1.6. This is a minute update of: Release notes: -Added sling loads management -Added a bunch of custom commands -Fixed some bugs X-PlaneReviews covered the main update features here: Aircraft Update : Bell AB412 1.5 by X-Trident Yes! the Agusta Bell AB412 from X-Trident is now available from the new X-Plane.Org Store here : Agusta Bell 412 - Price is US$35.95 Current version is v1.6 and if you have already purchased the X-trident Bell AB412 then go to your X-Plane.Org Store account and upgrade now! Requirements X-Plane 10.30+ (any edition) - Mac, Windows, Linux - 1Gb+ dedicated VRAM Video Card Current version: 1.6 (Last updated 5th October 2015) Update by Stephen Dutton 5th October 2015 Copyright©2015: X-PlaneReviews
-
Hummmm.... Peter Hagar's aircraft are very good, the A319 might not have all the bells and whistles of the JARDesign A320, but performance wise it is usually very on the money and it has QPAC's great Flyby wire plugin in there. You don't give any details on why it is a waste of money?, I think you should spend time on the aircraft and not make a sudden snap decision before disclosing it, It is a very good aircraft and a large percentage of a number of users will certainly back that up... SD
-
Aircraft Update : Airbus A330-243 v1.2r2 by JARDesign
Stephen replied to Stephen's topic in Airliners Reviews
It's in the Plugin/sounds "sounds1d", but I don't know which one.... SD -
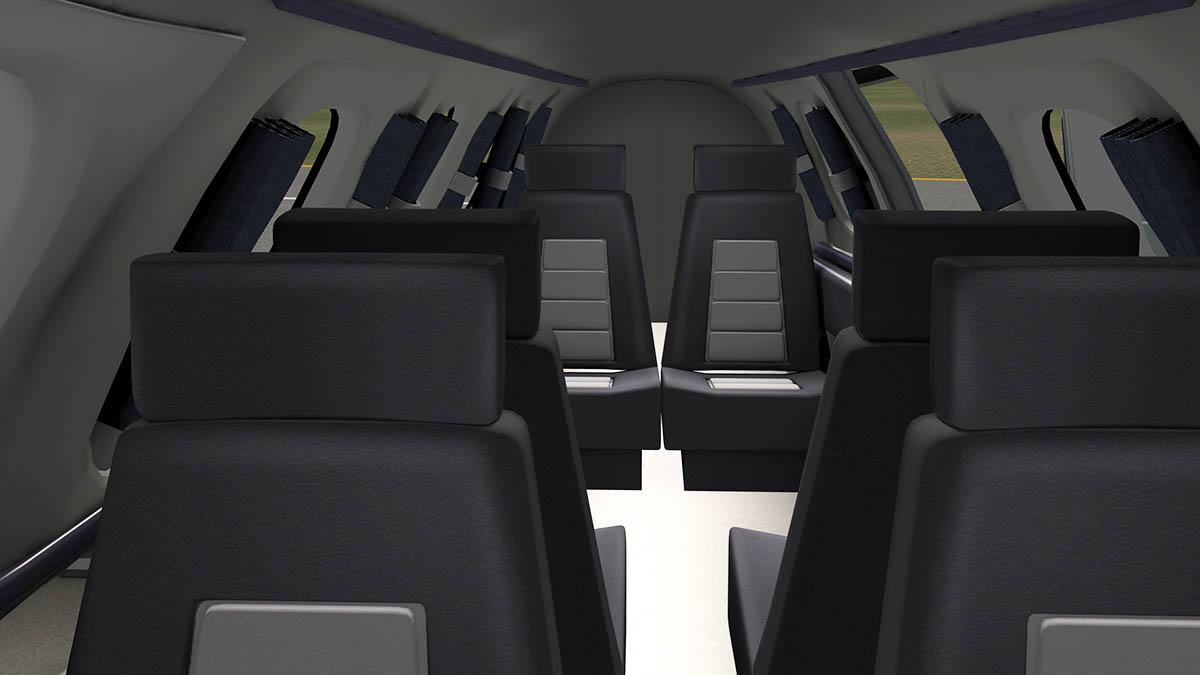
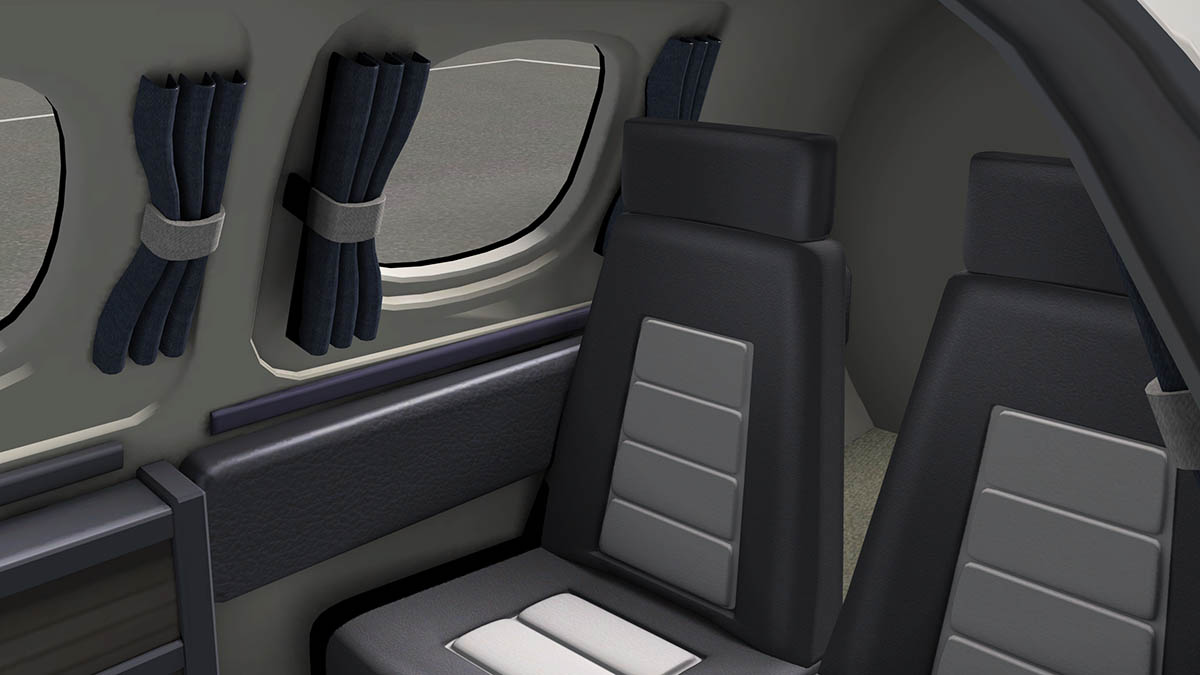
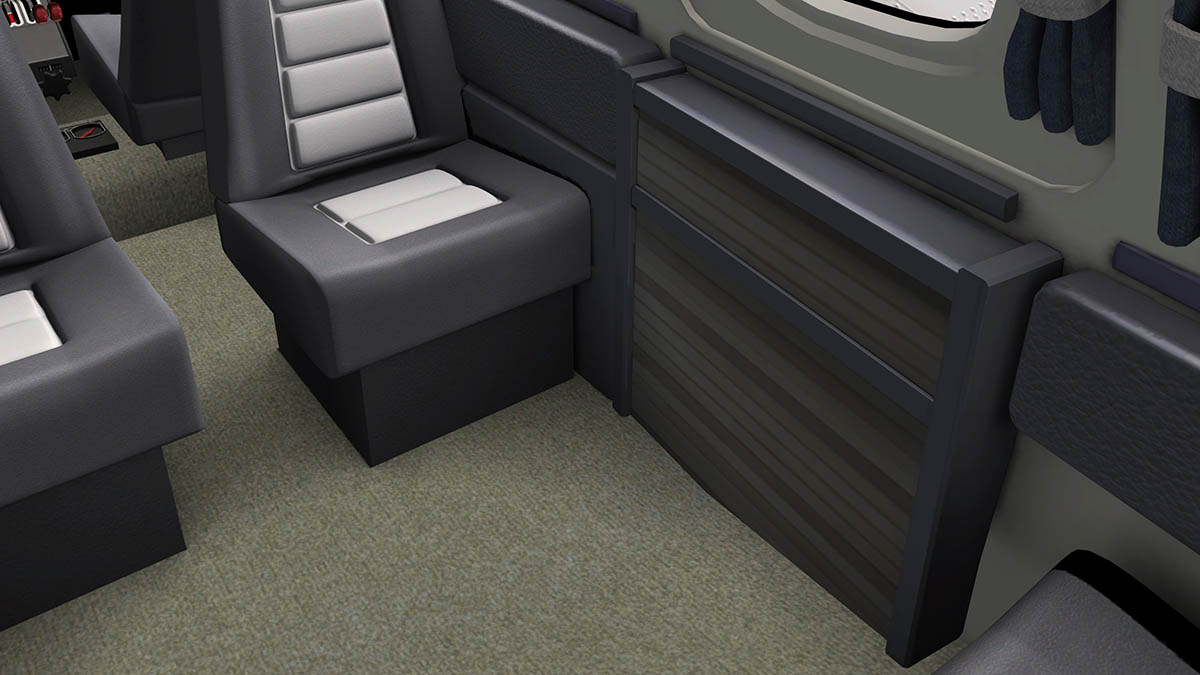
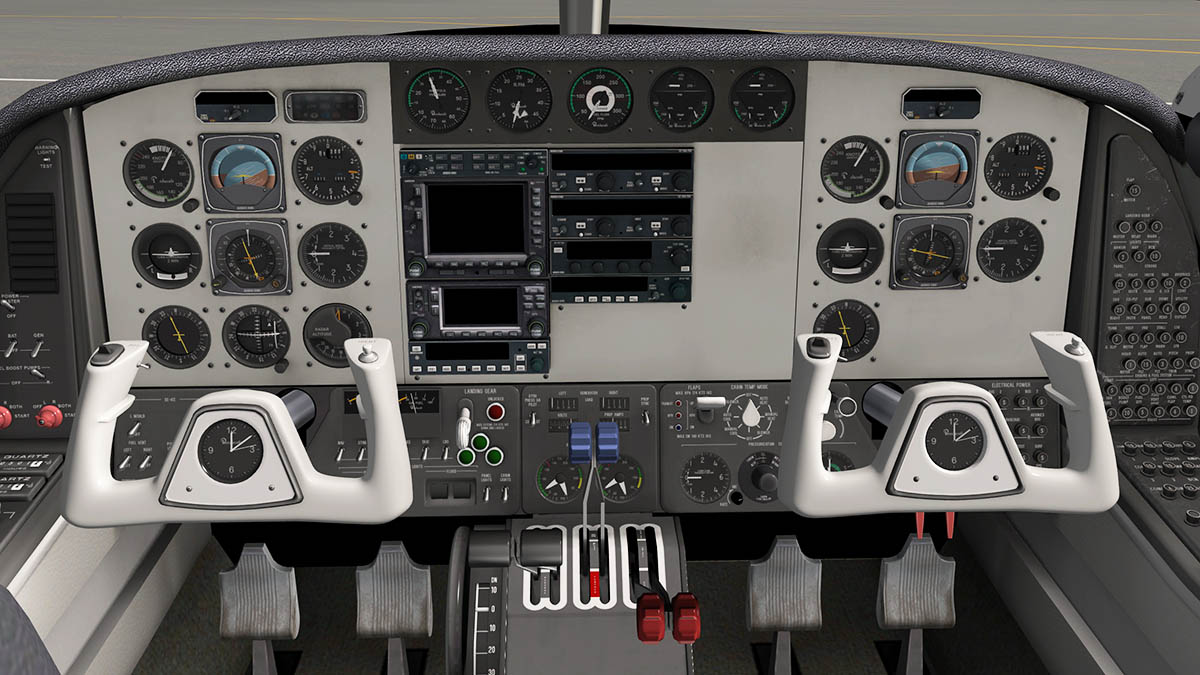
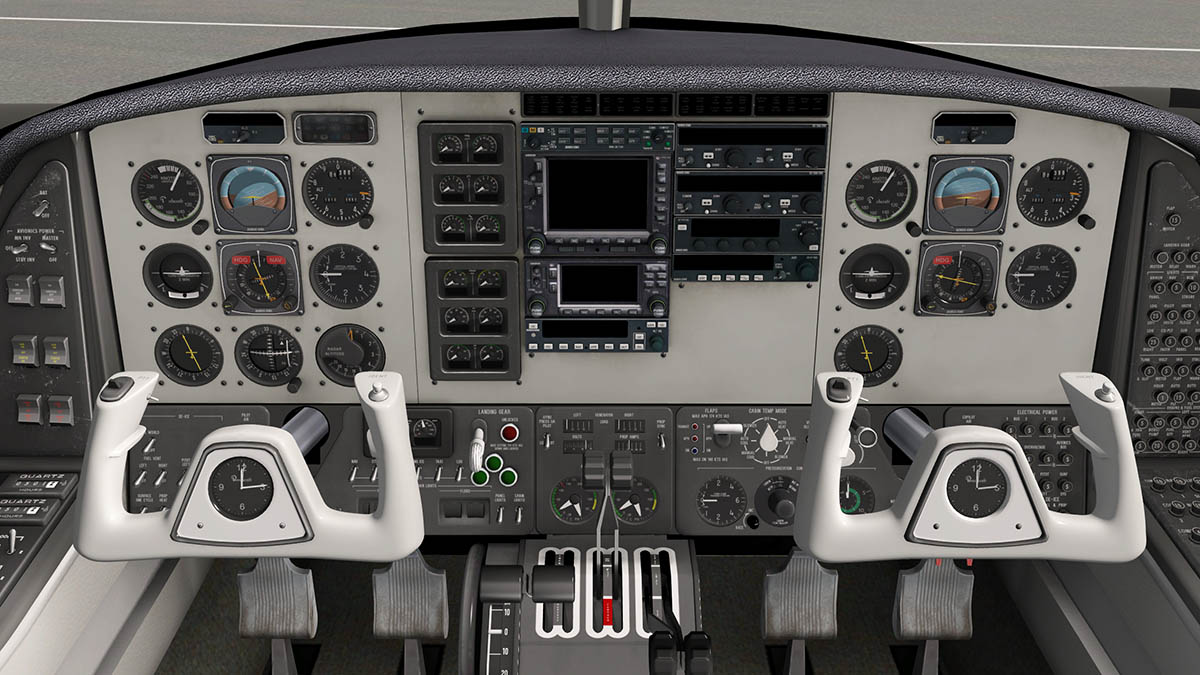
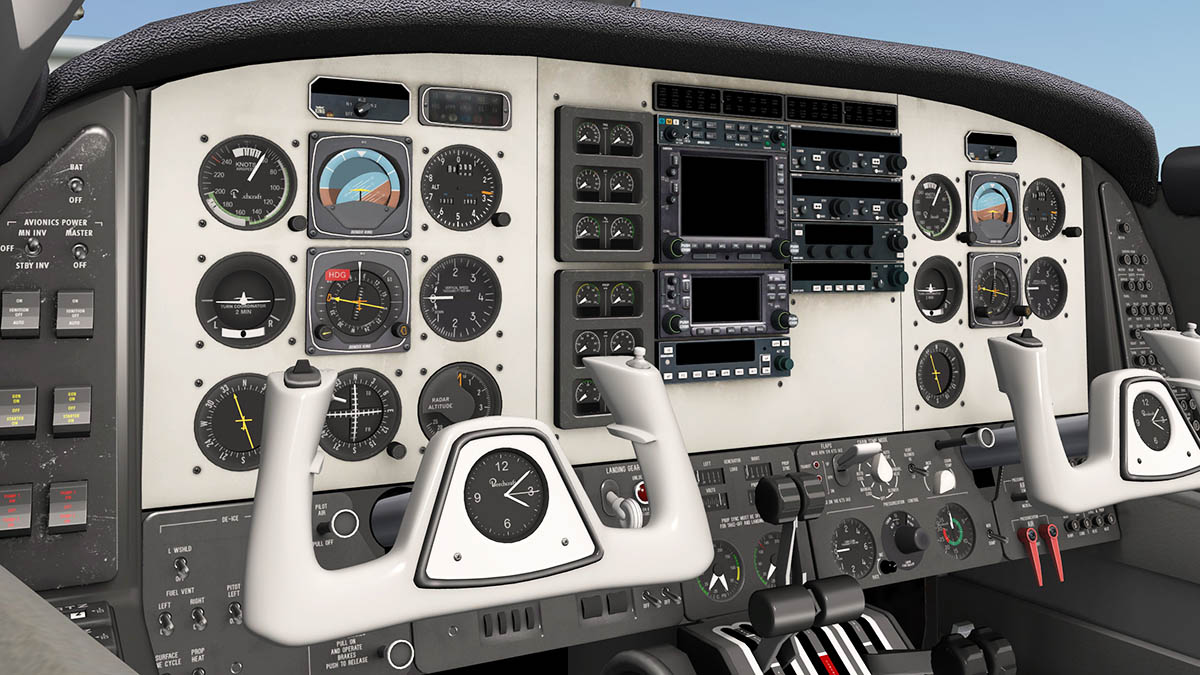
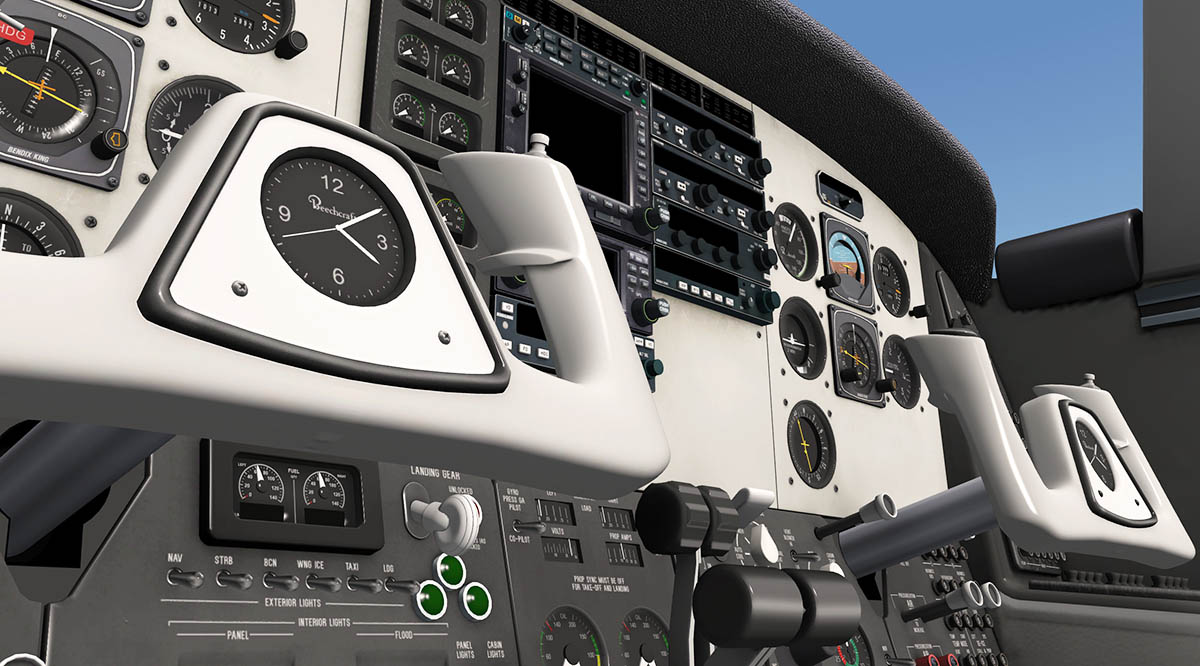
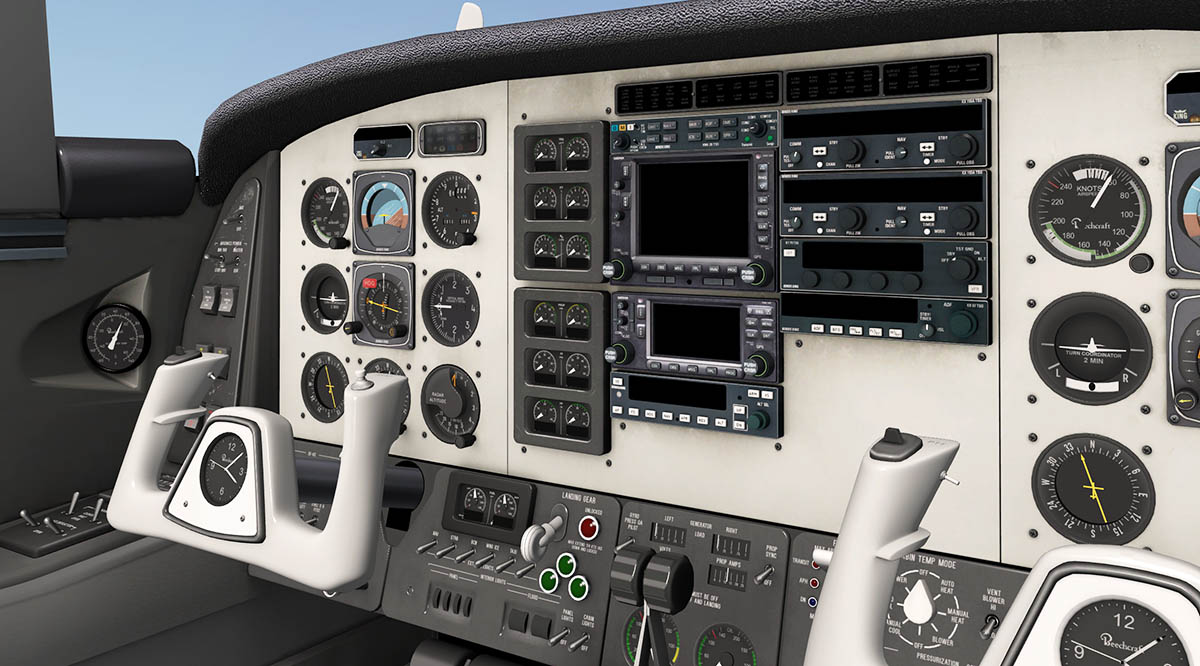
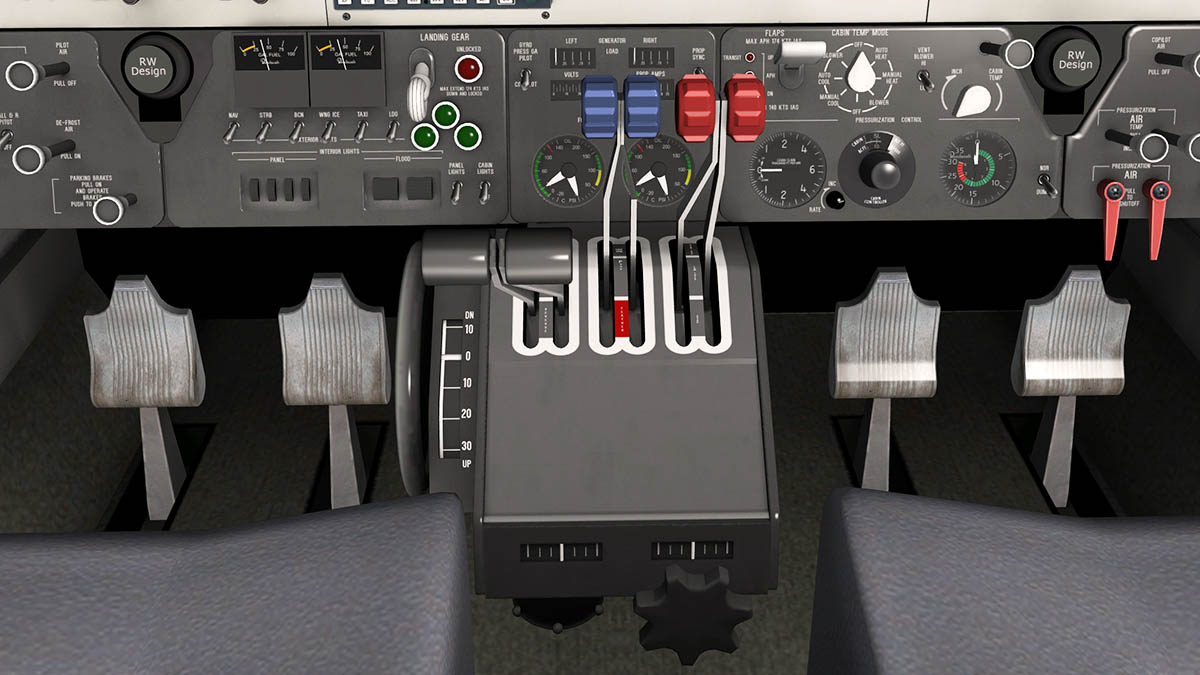
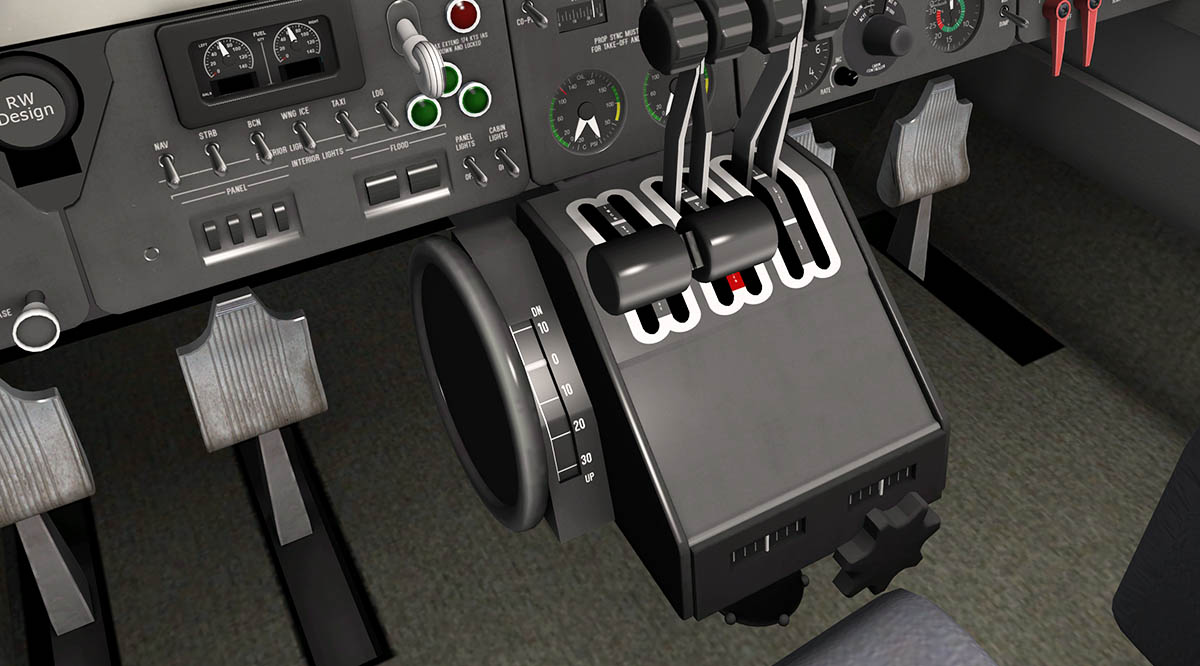
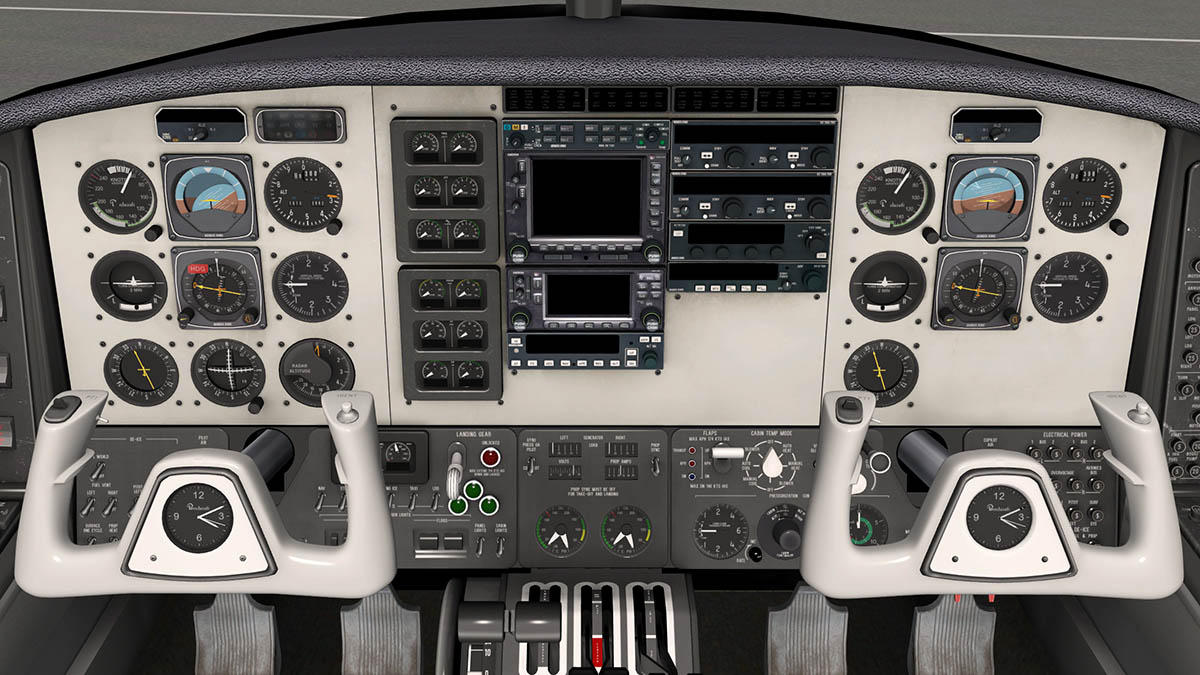
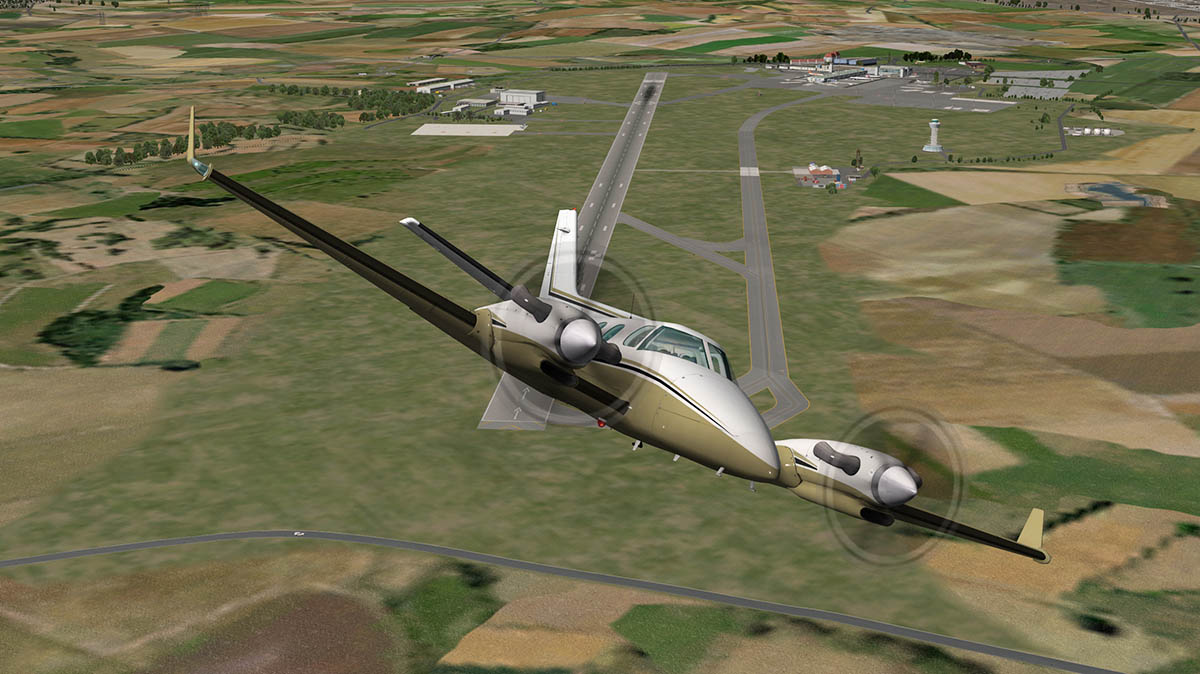
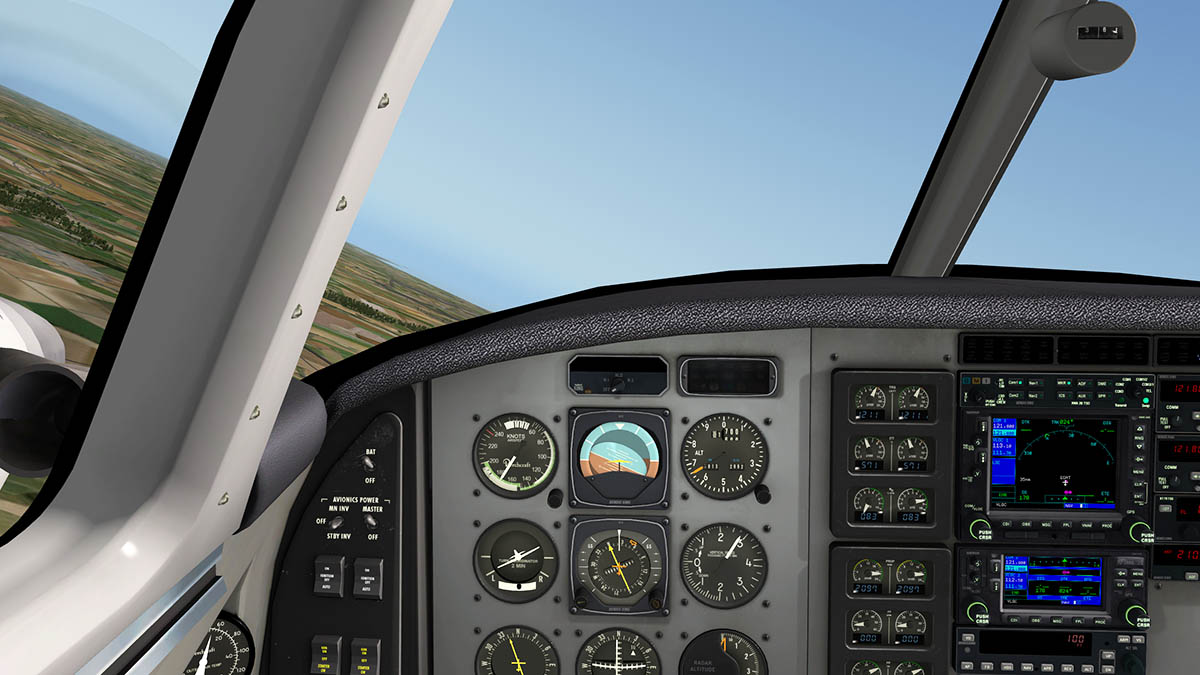
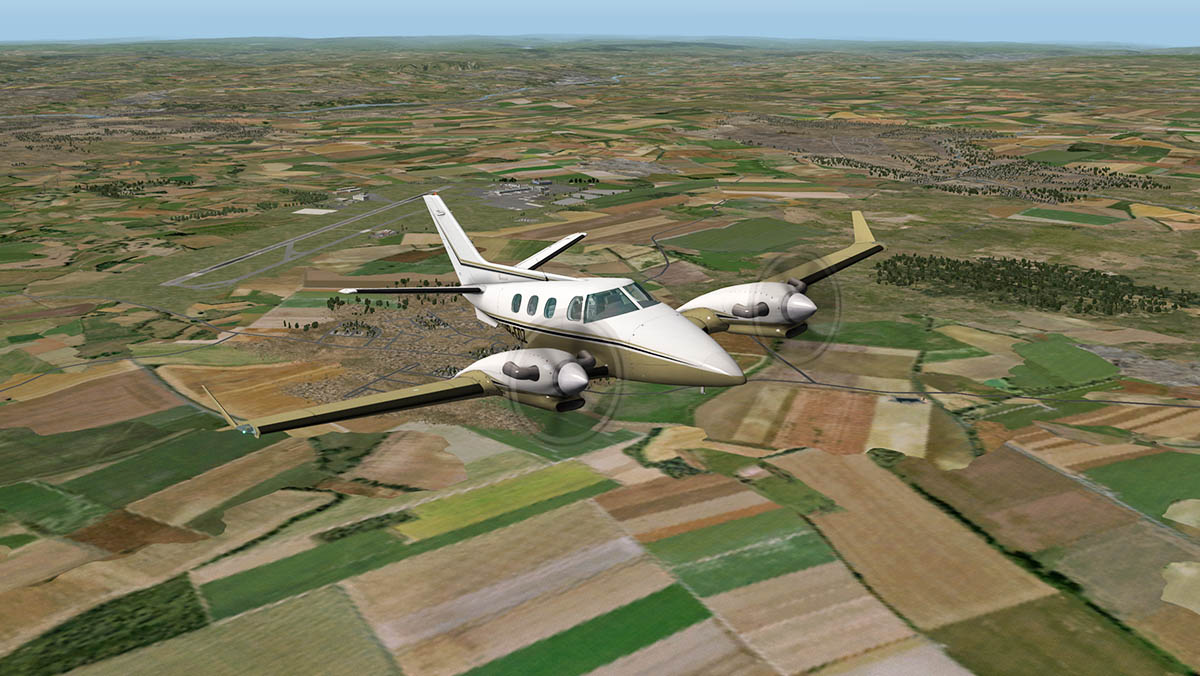
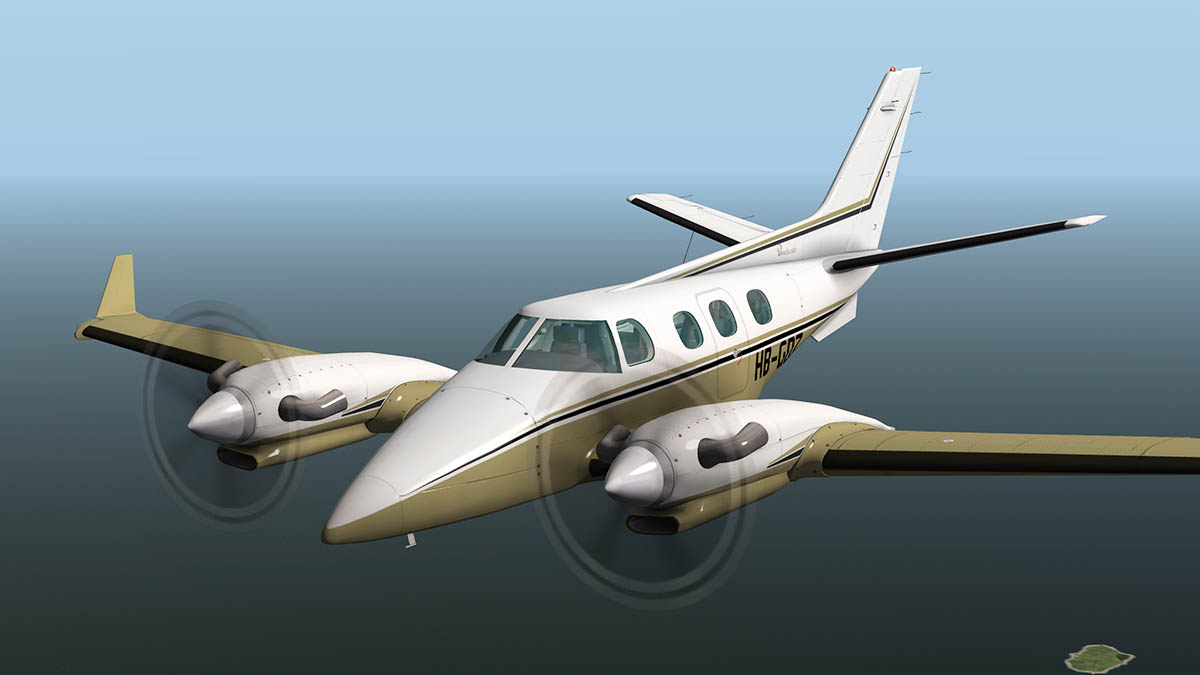
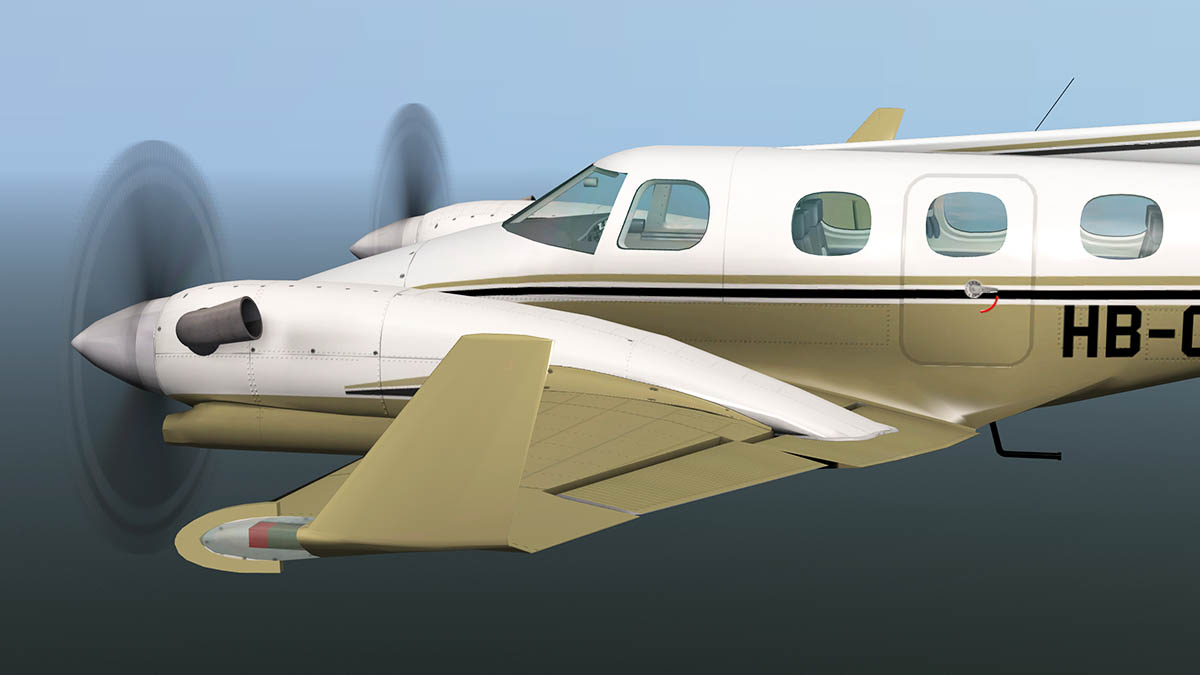
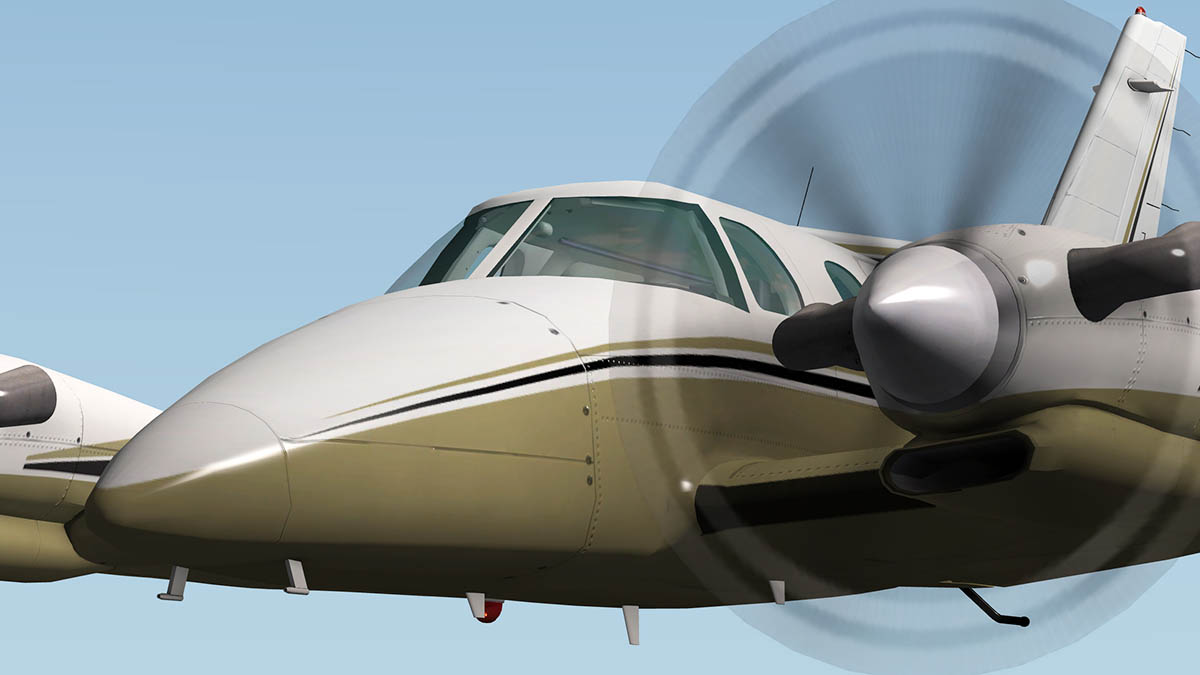
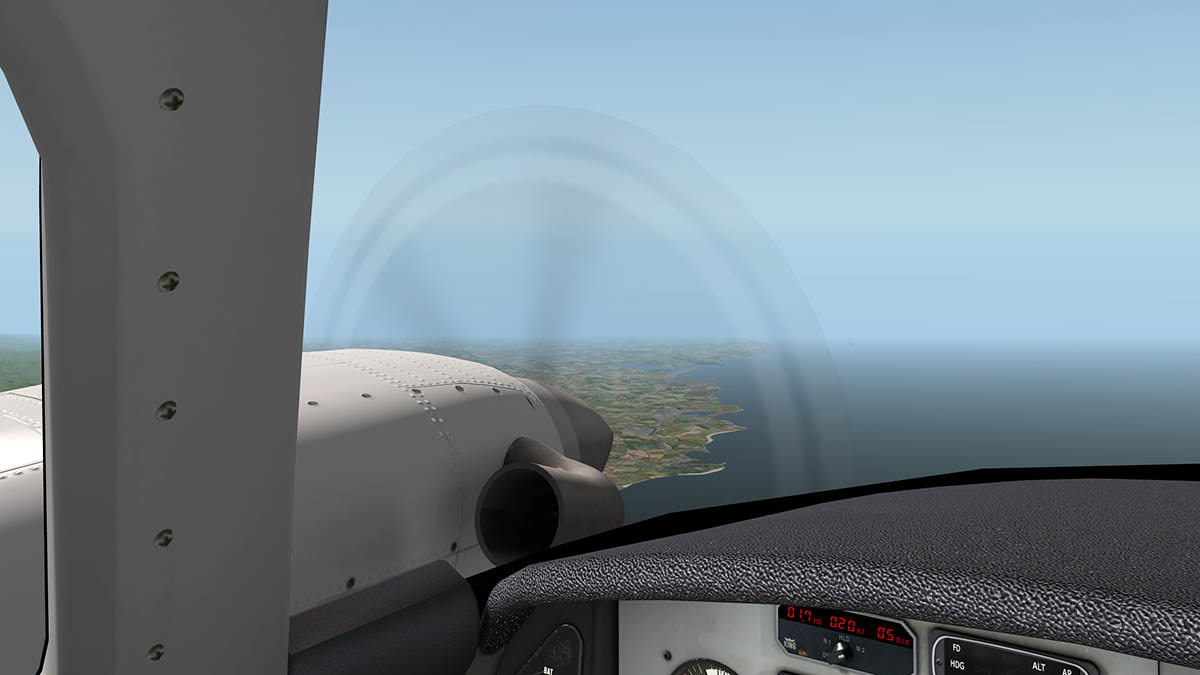
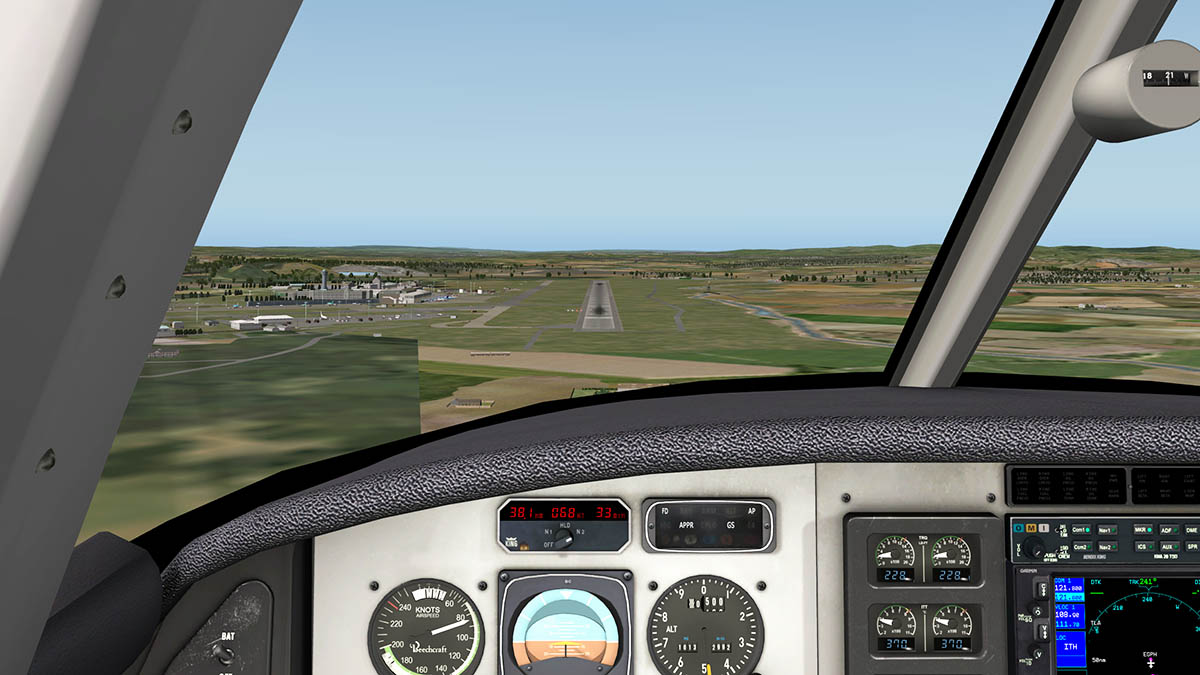
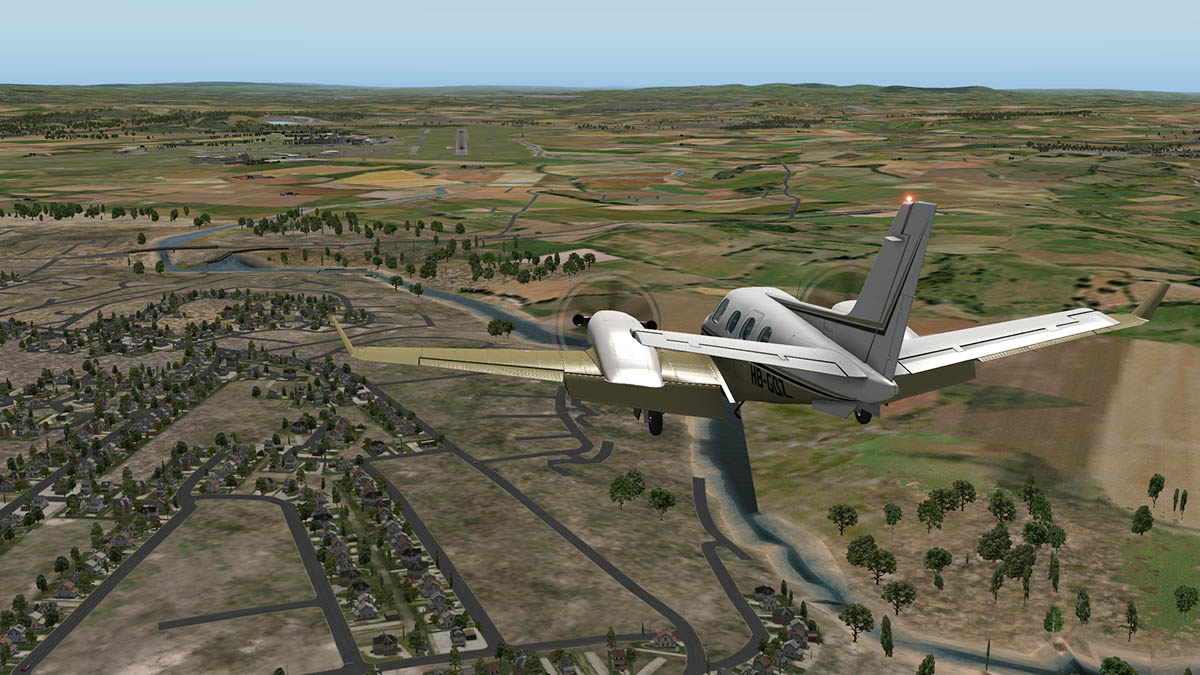
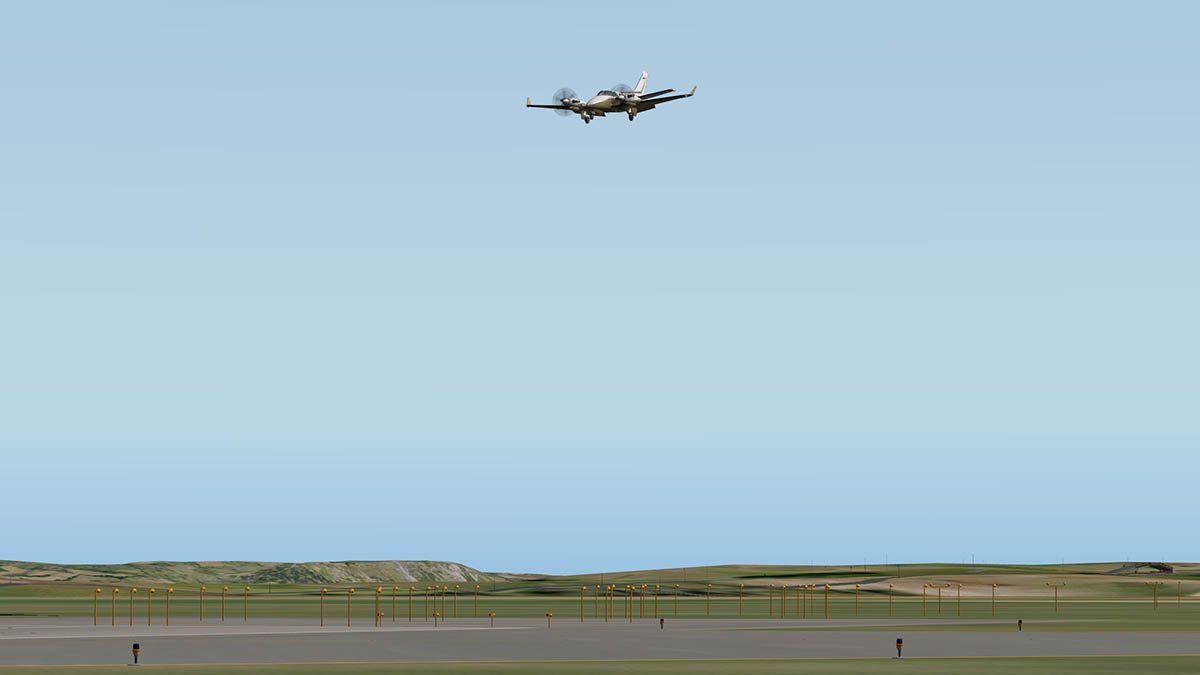
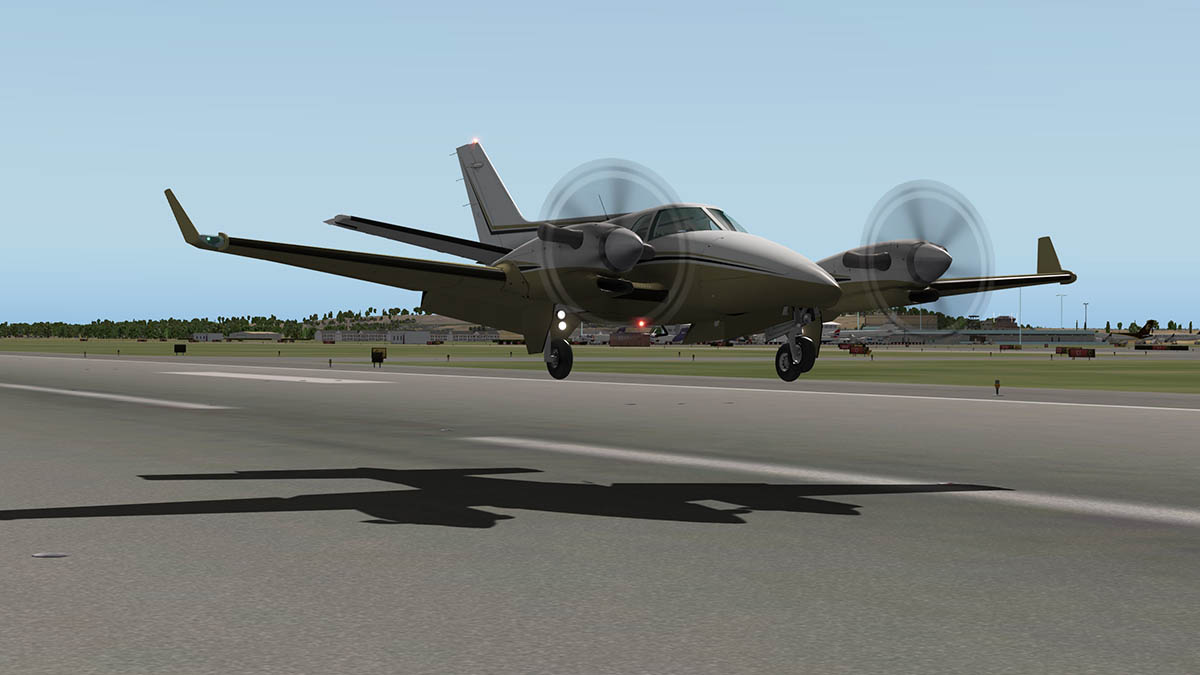
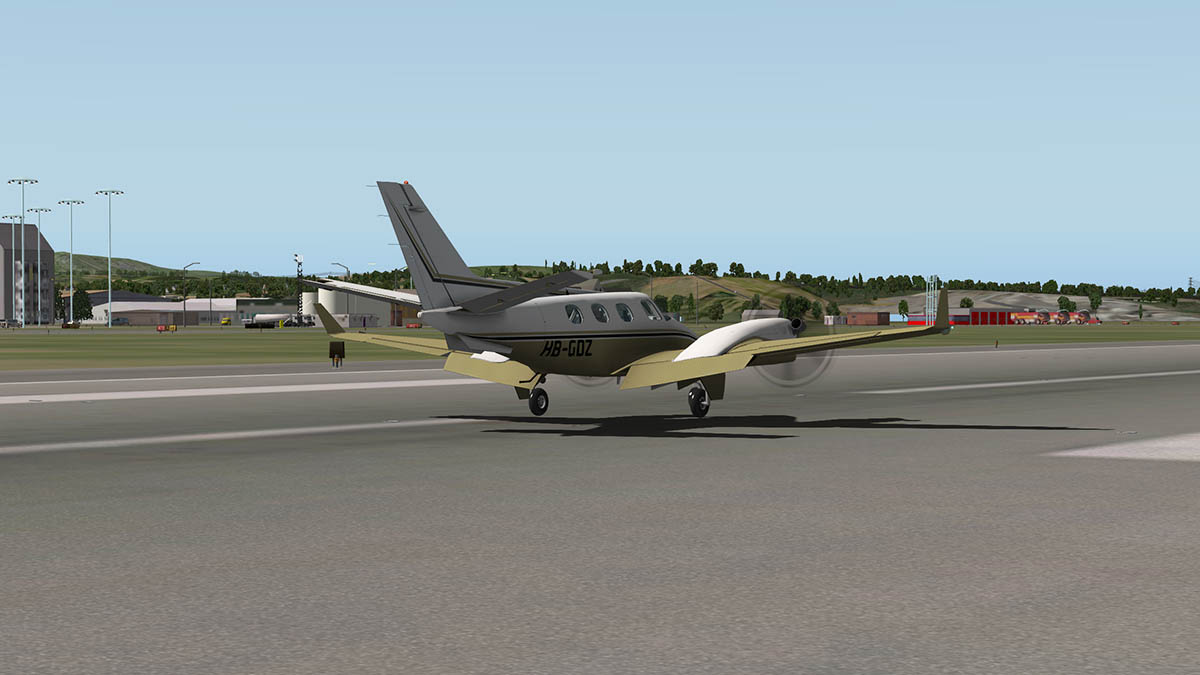
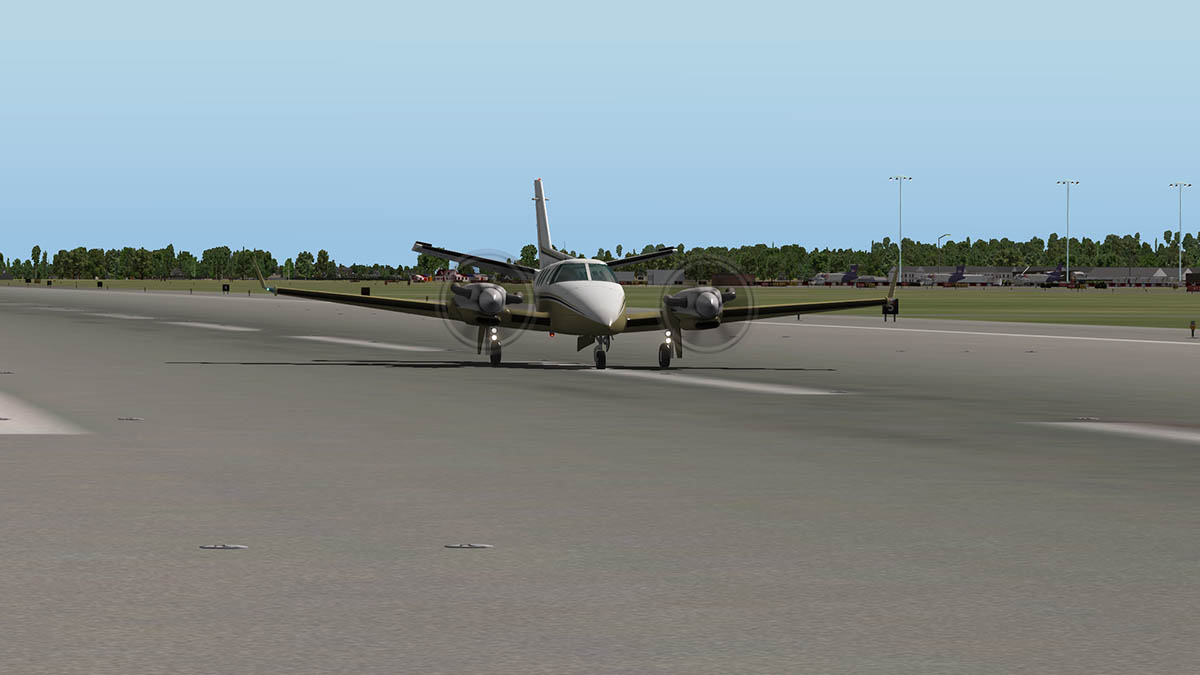
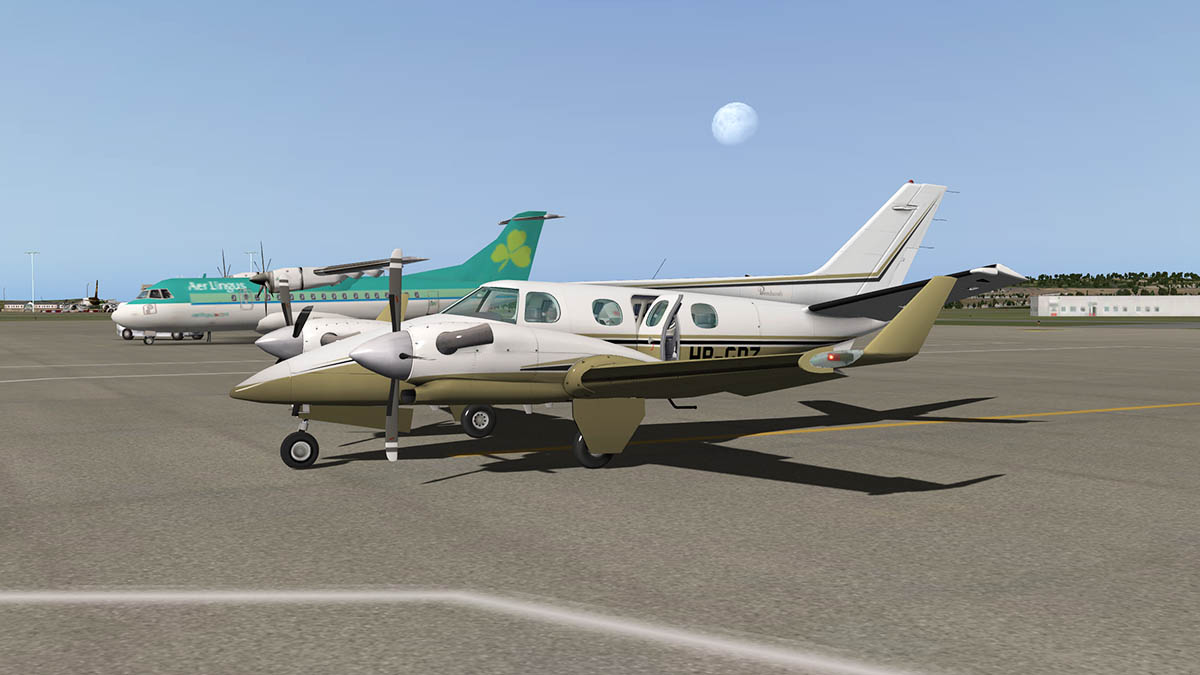
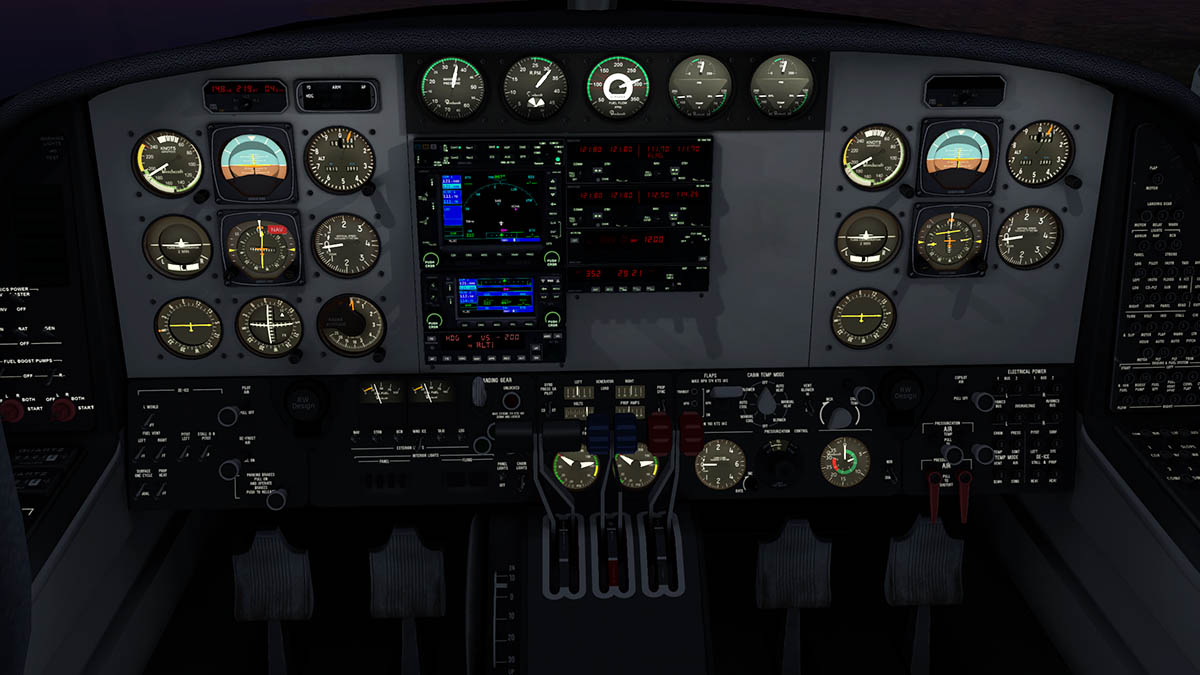
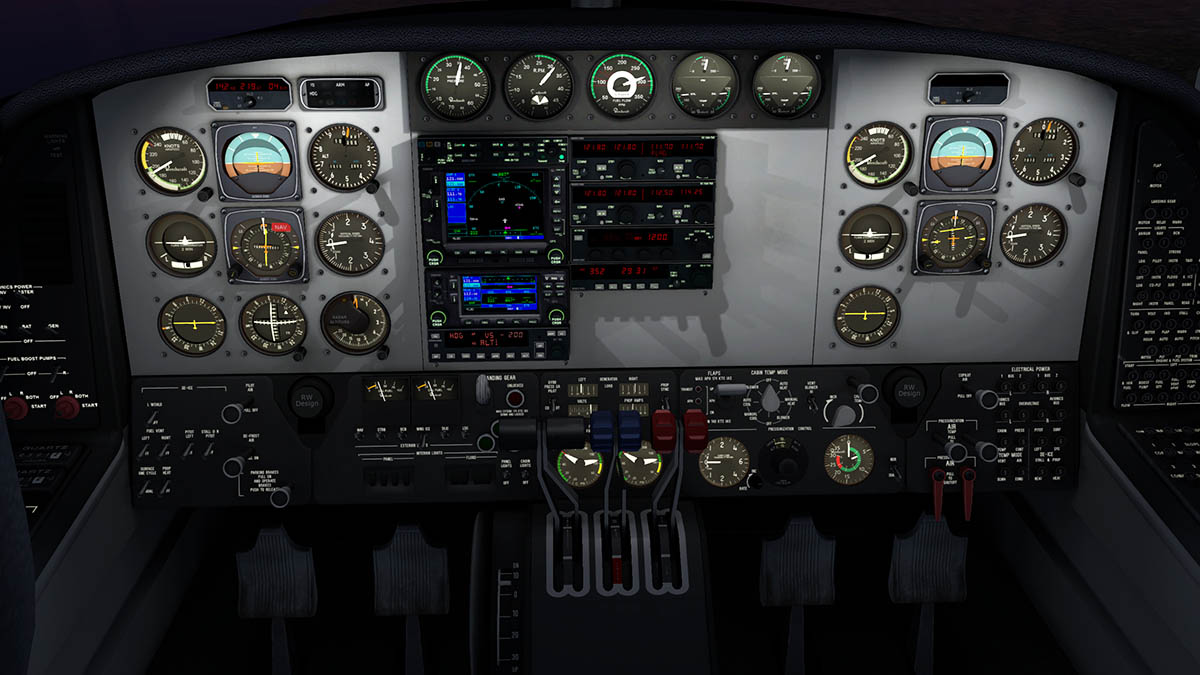
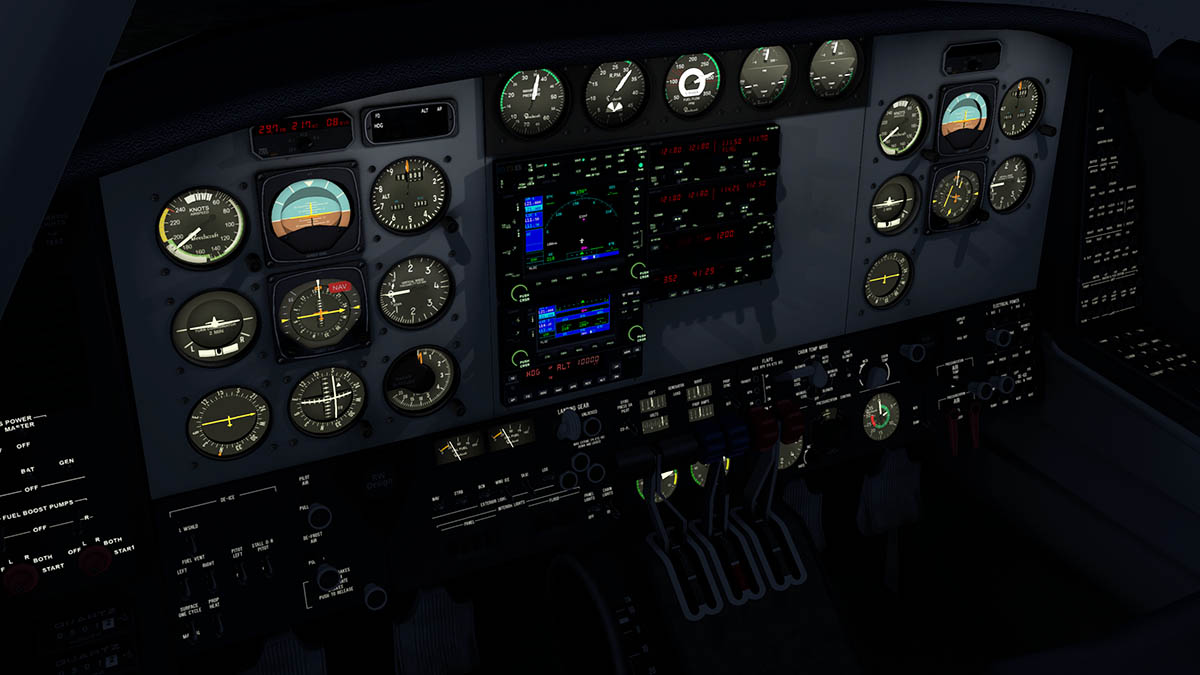
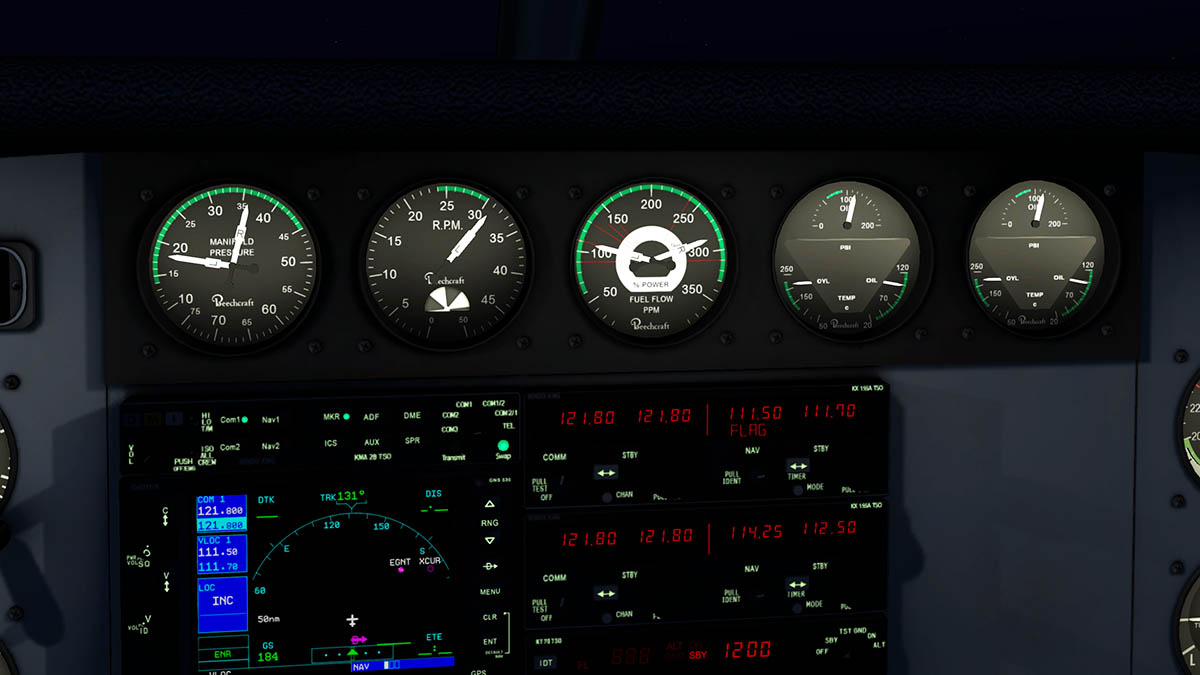
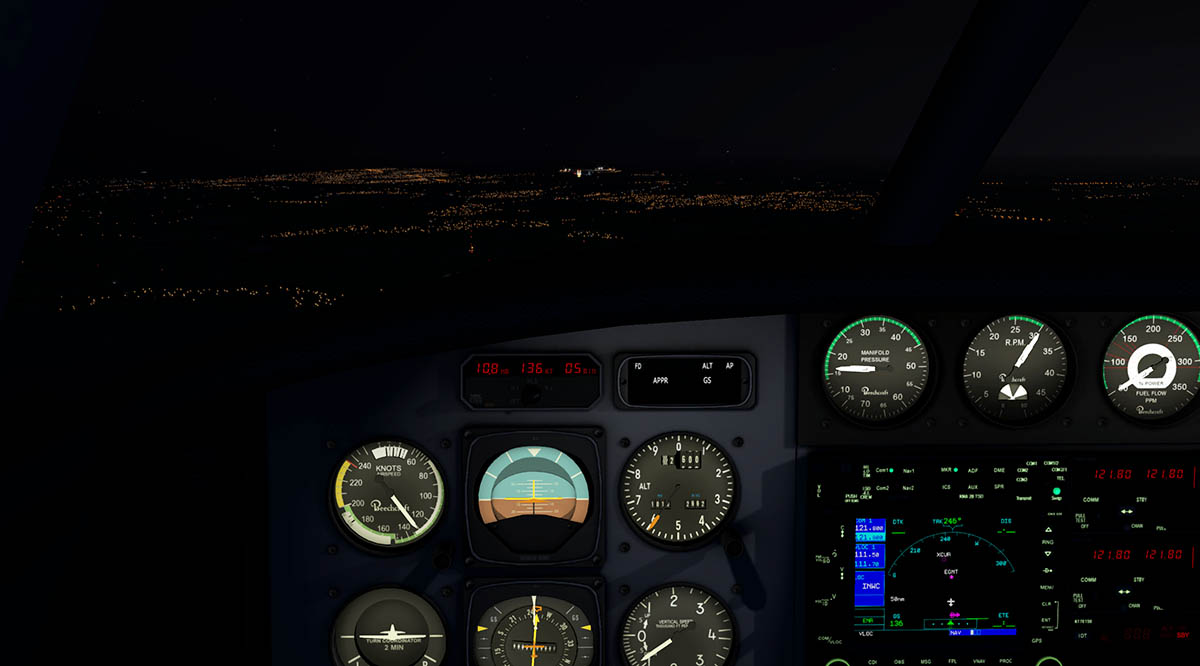
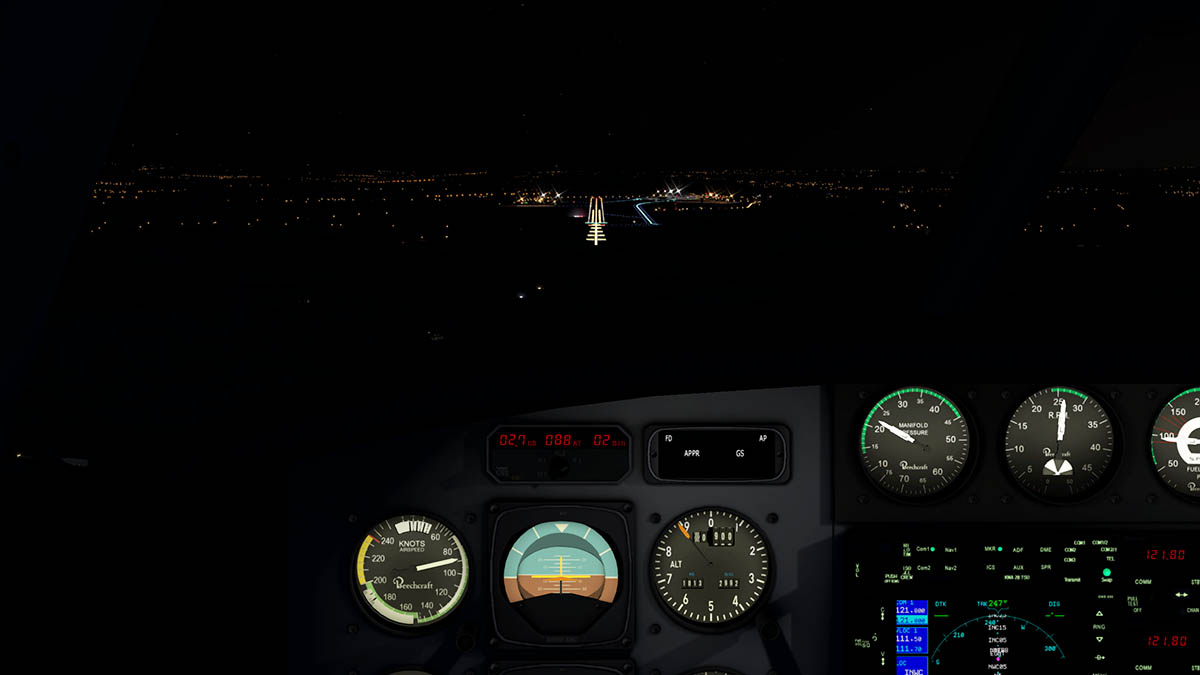
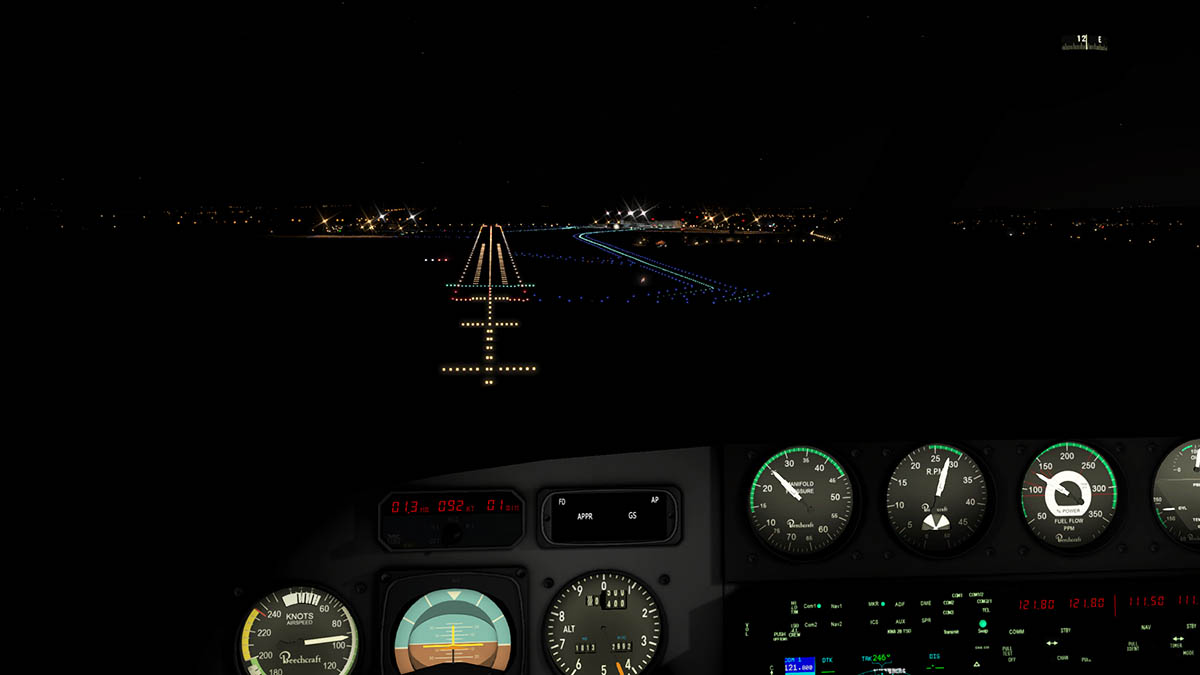
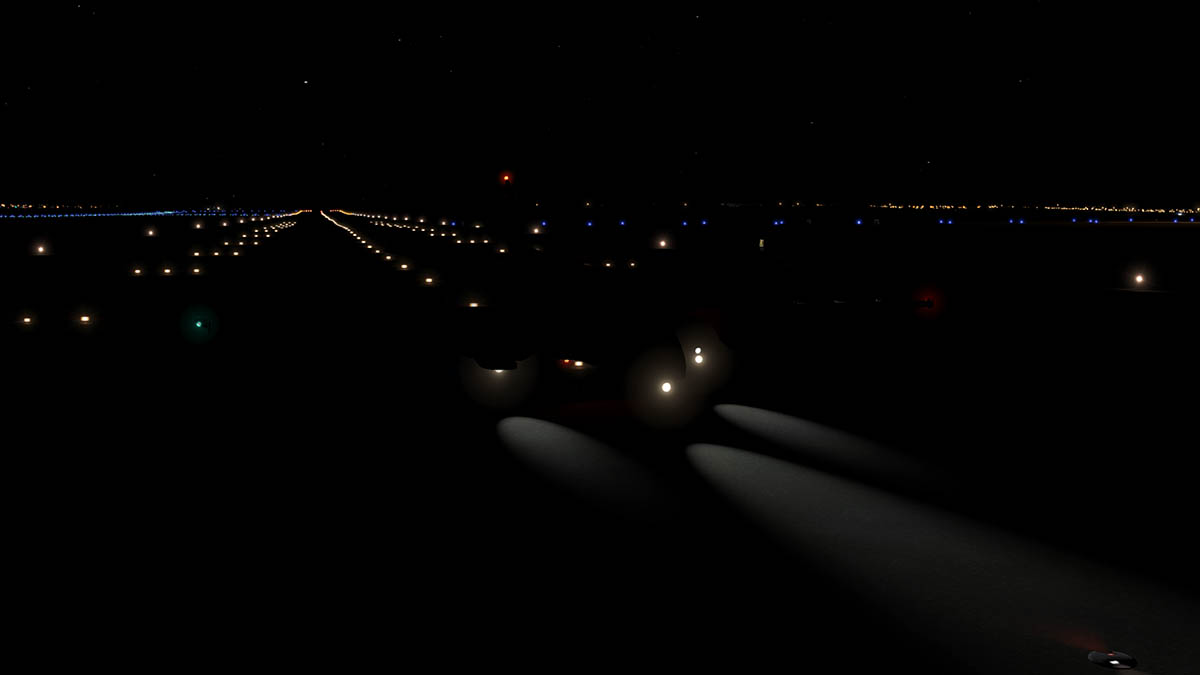
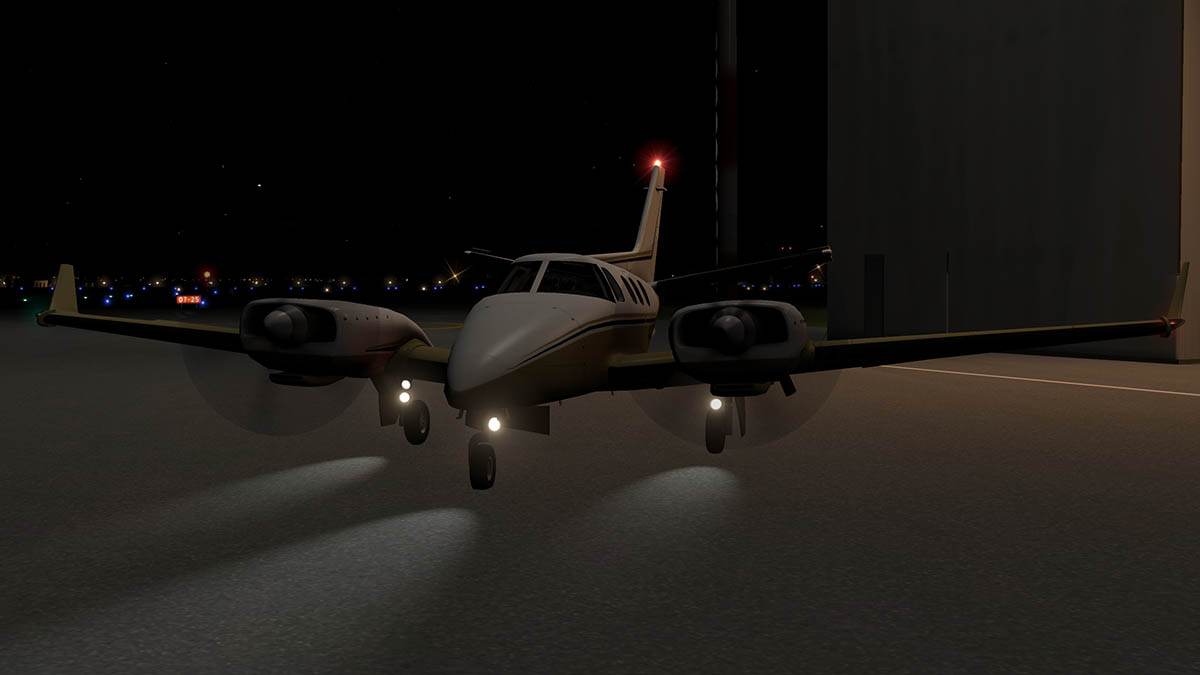
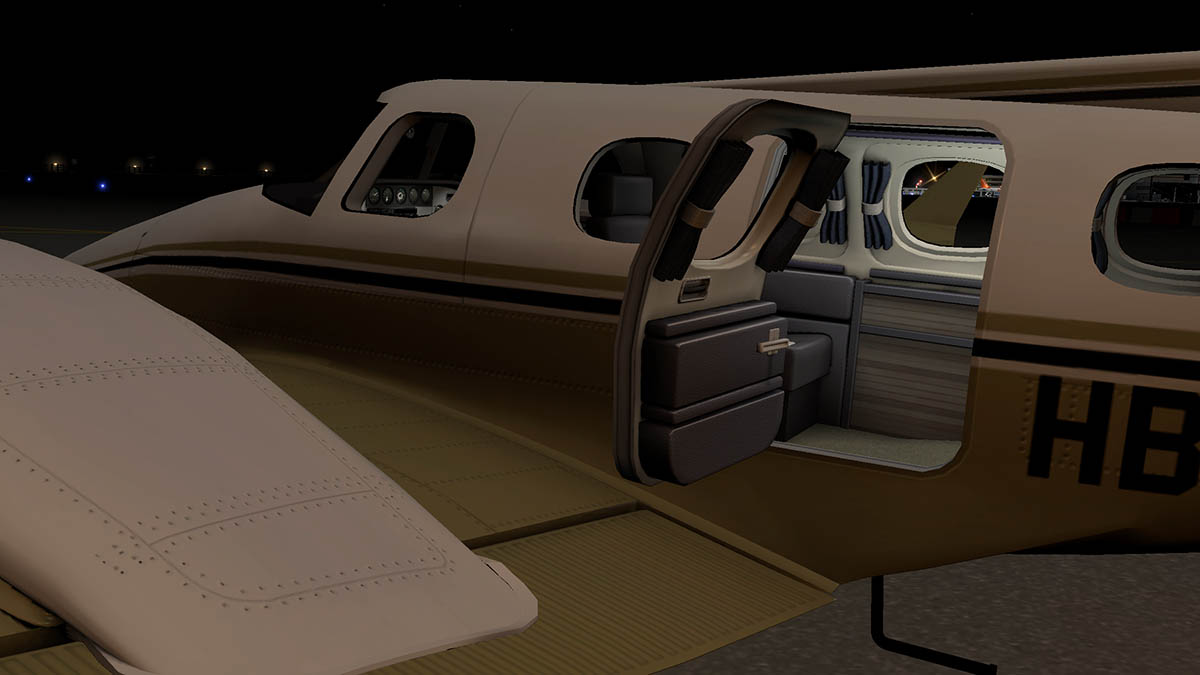
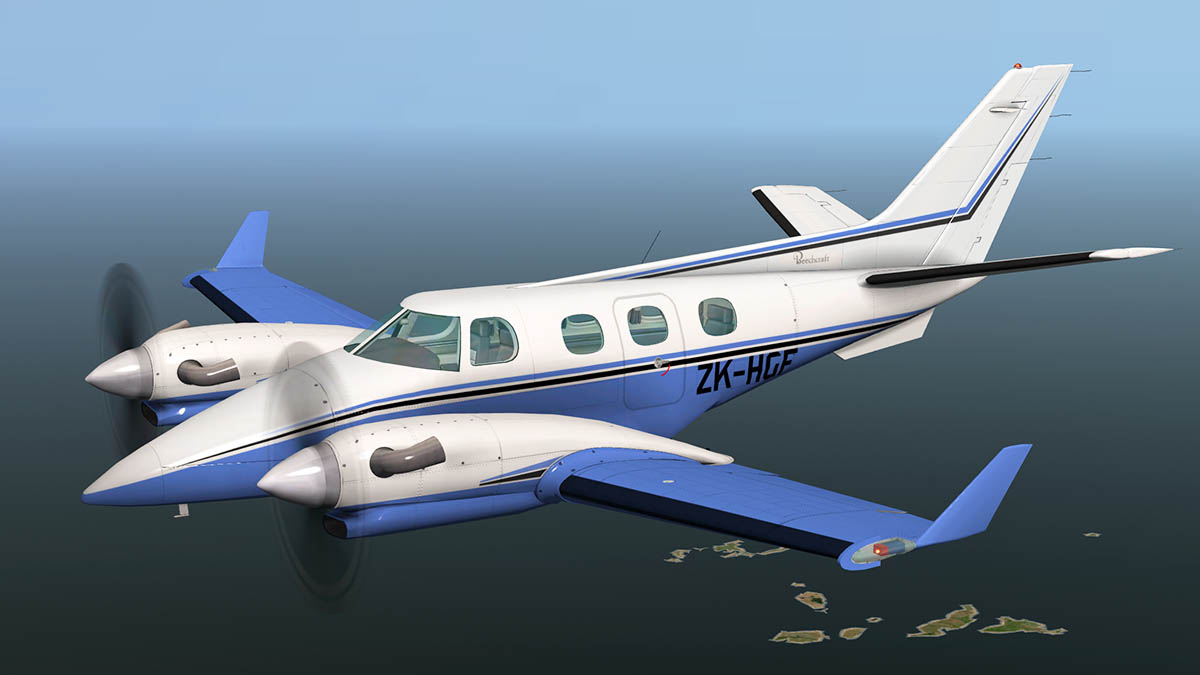
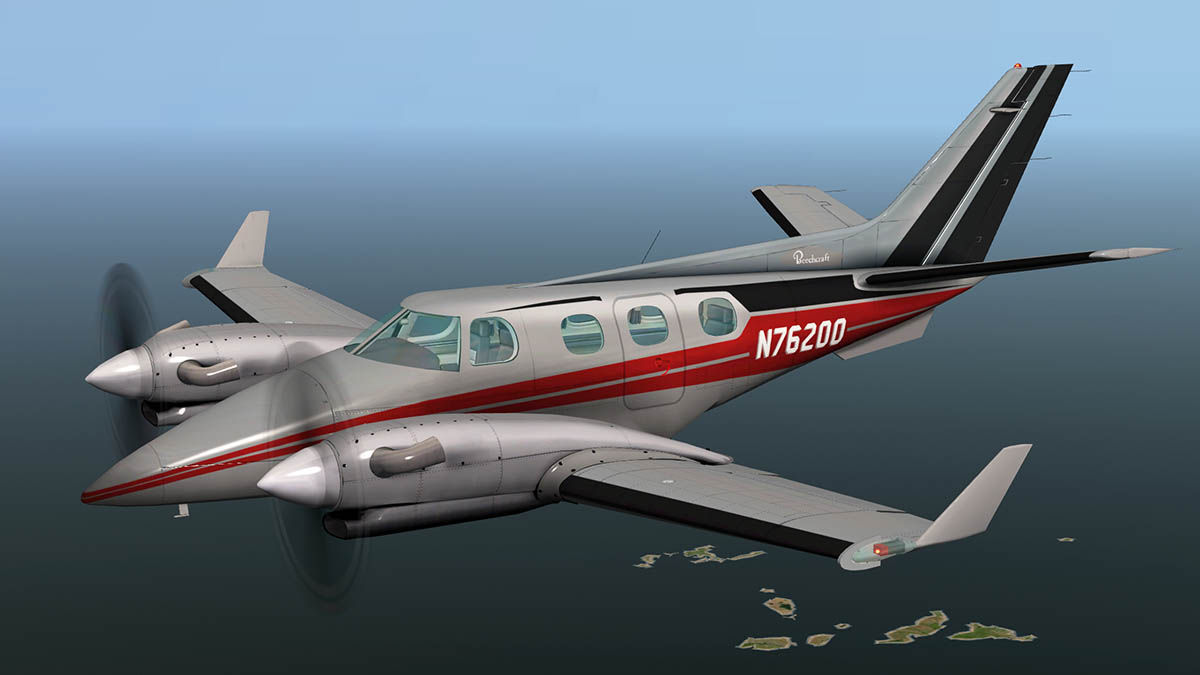
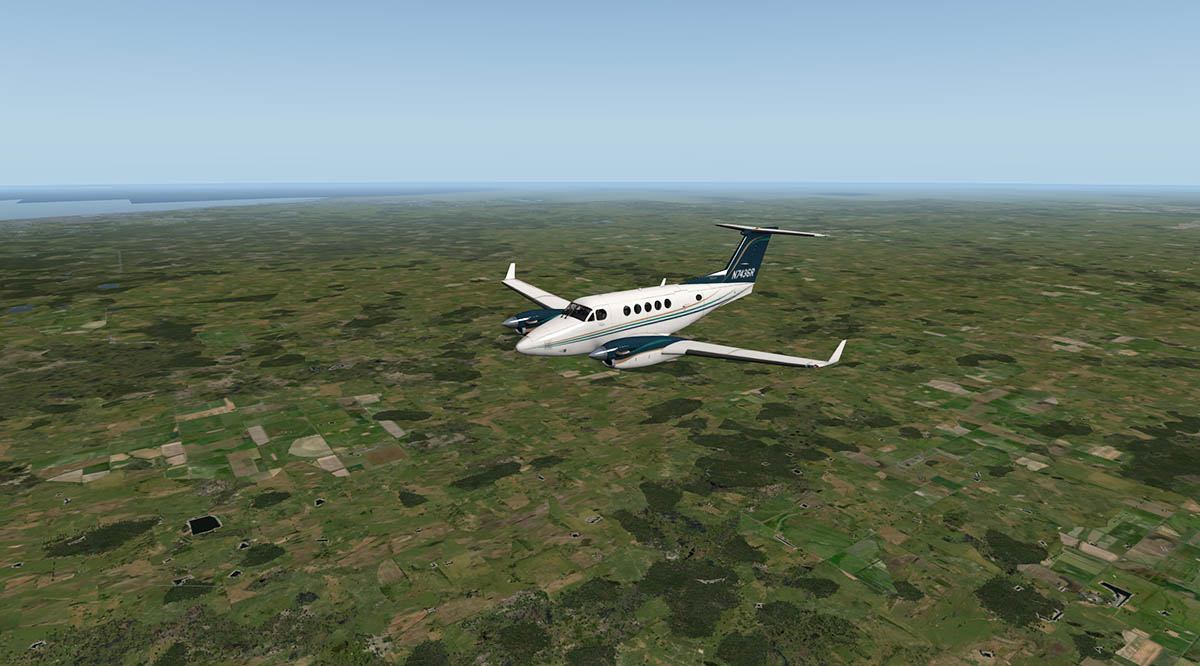
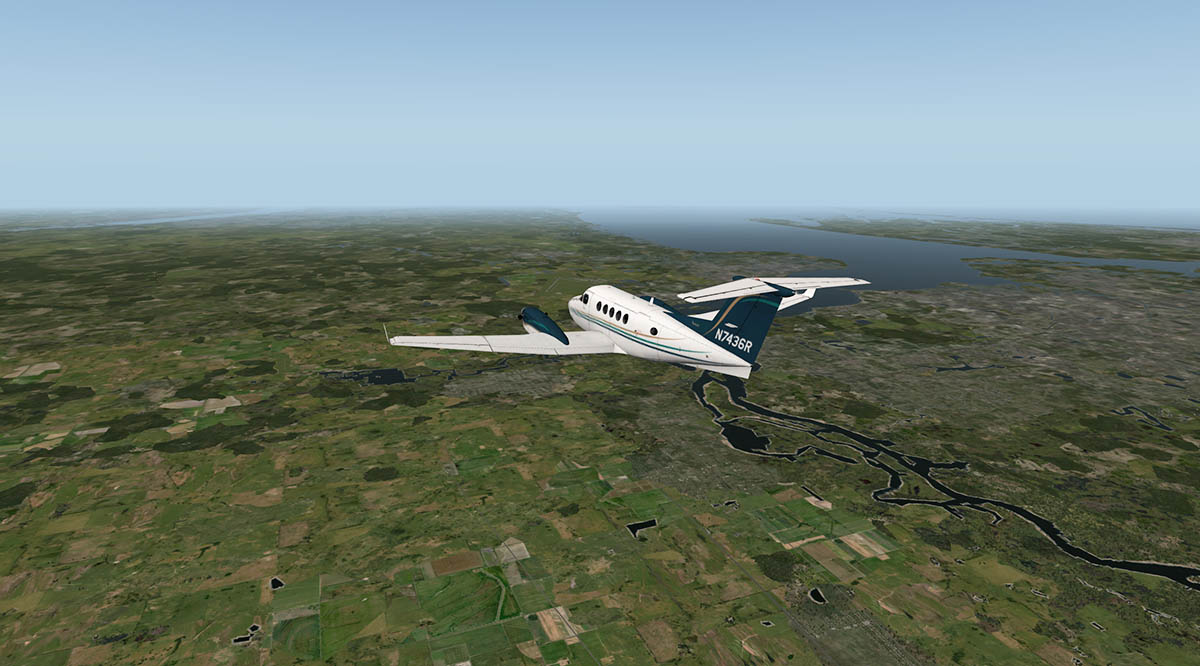
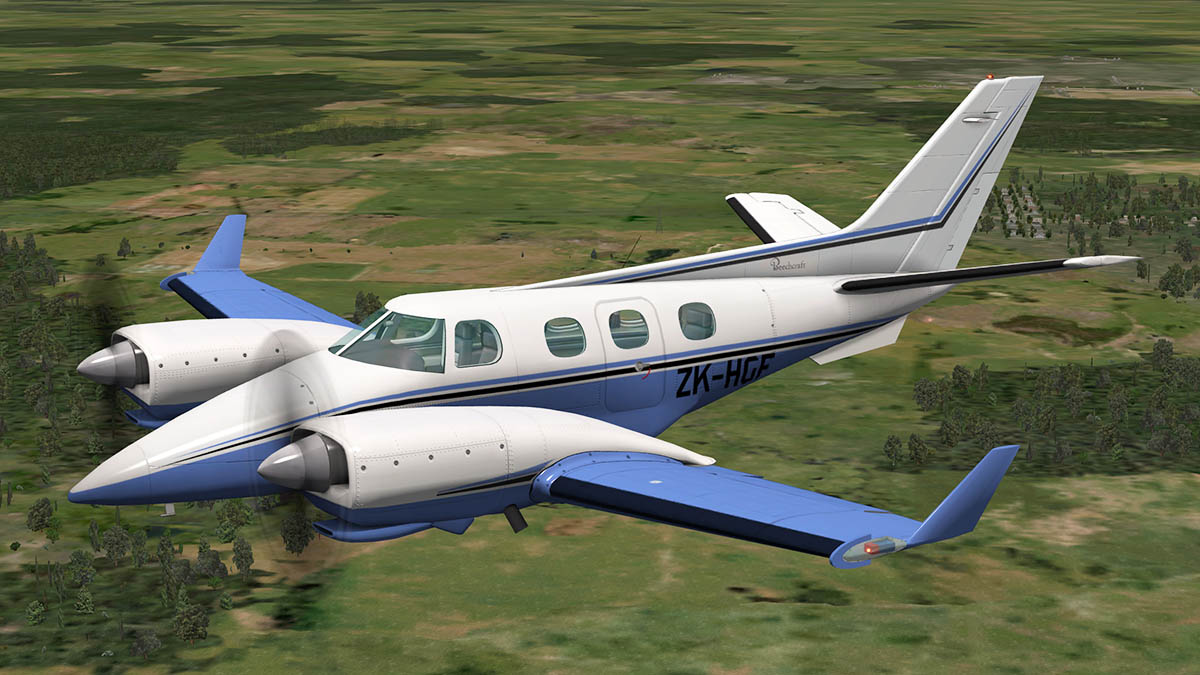
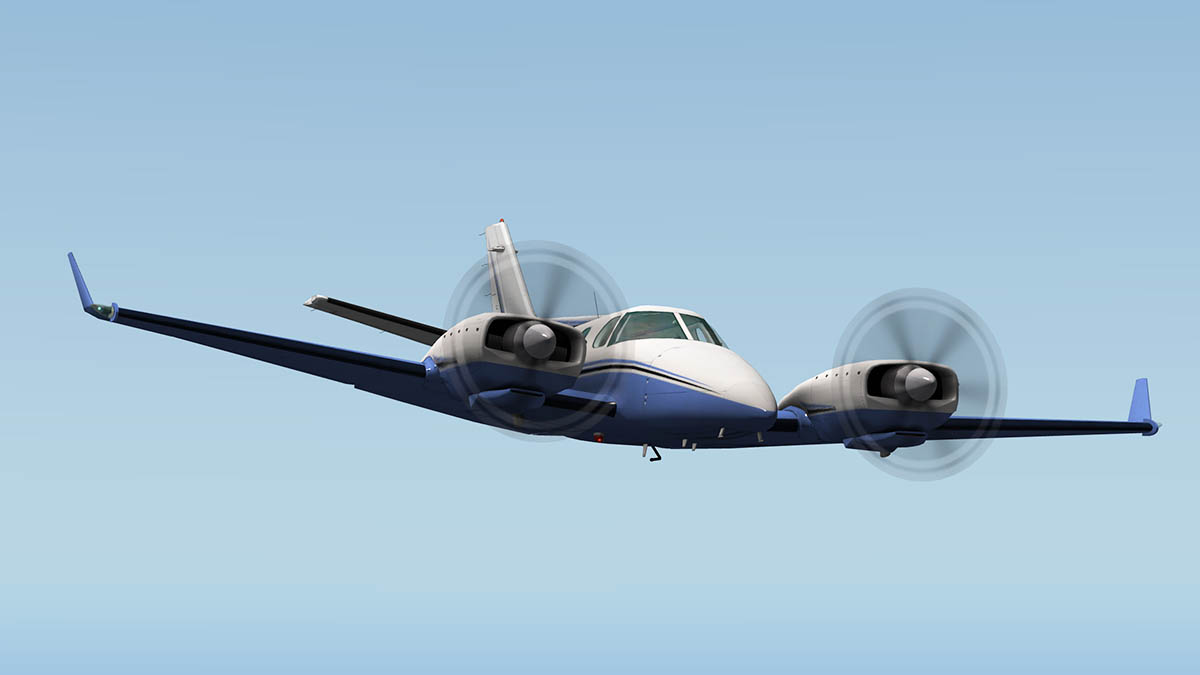
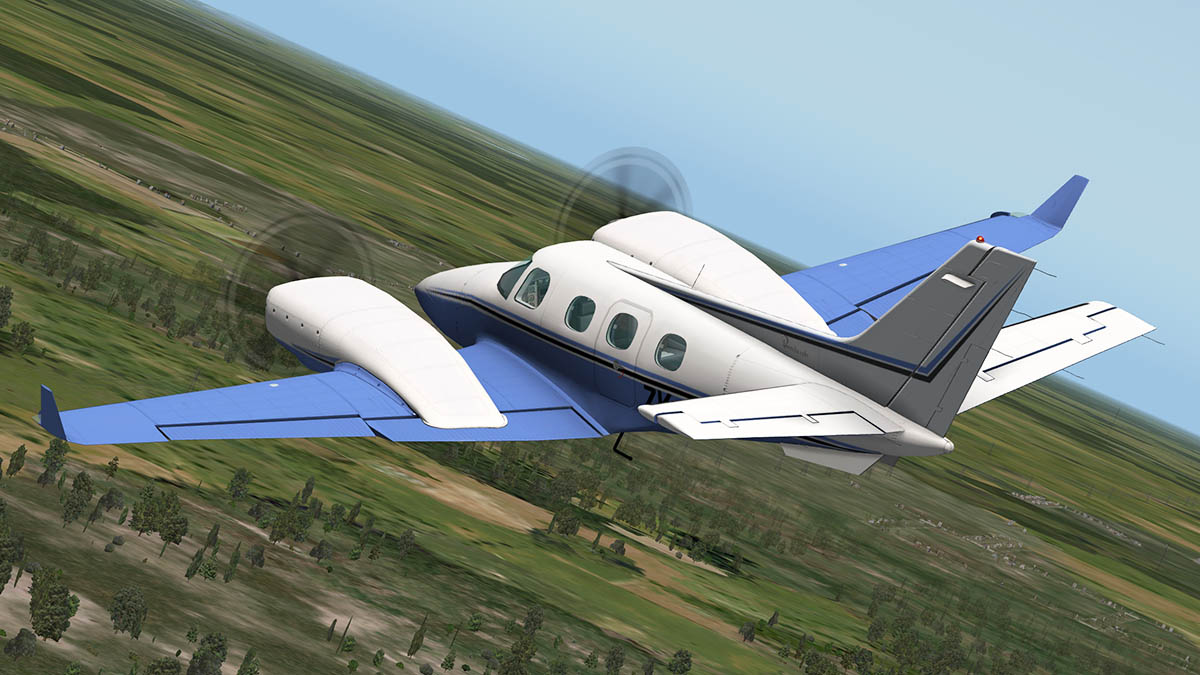
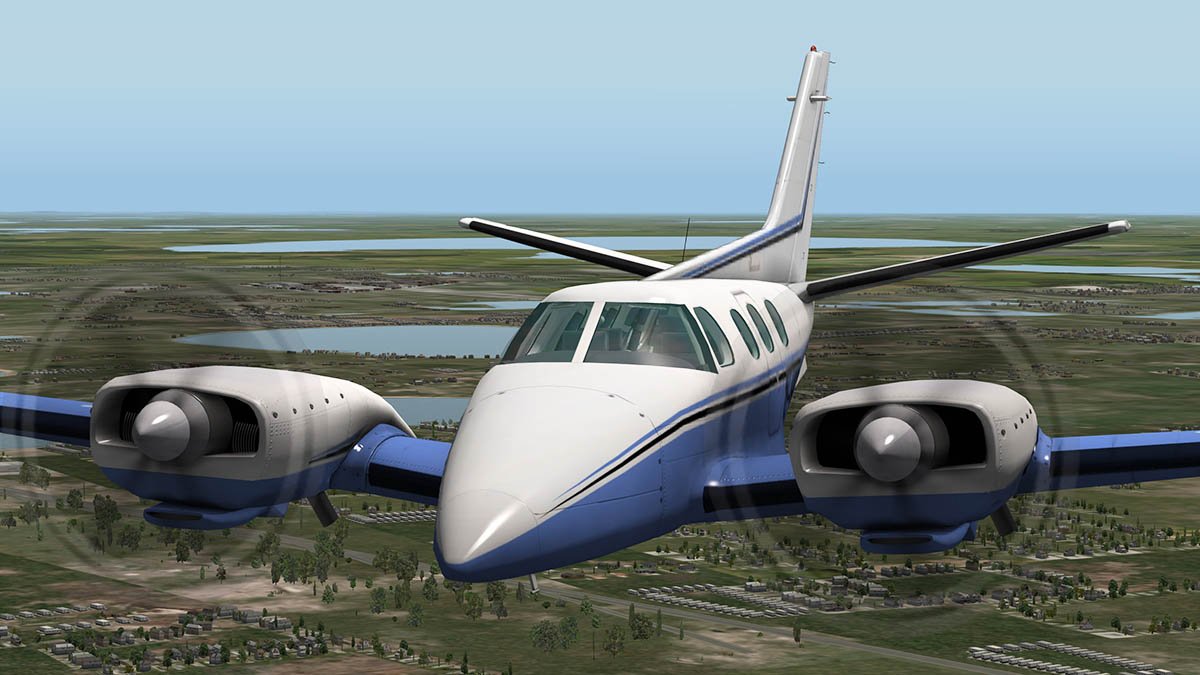
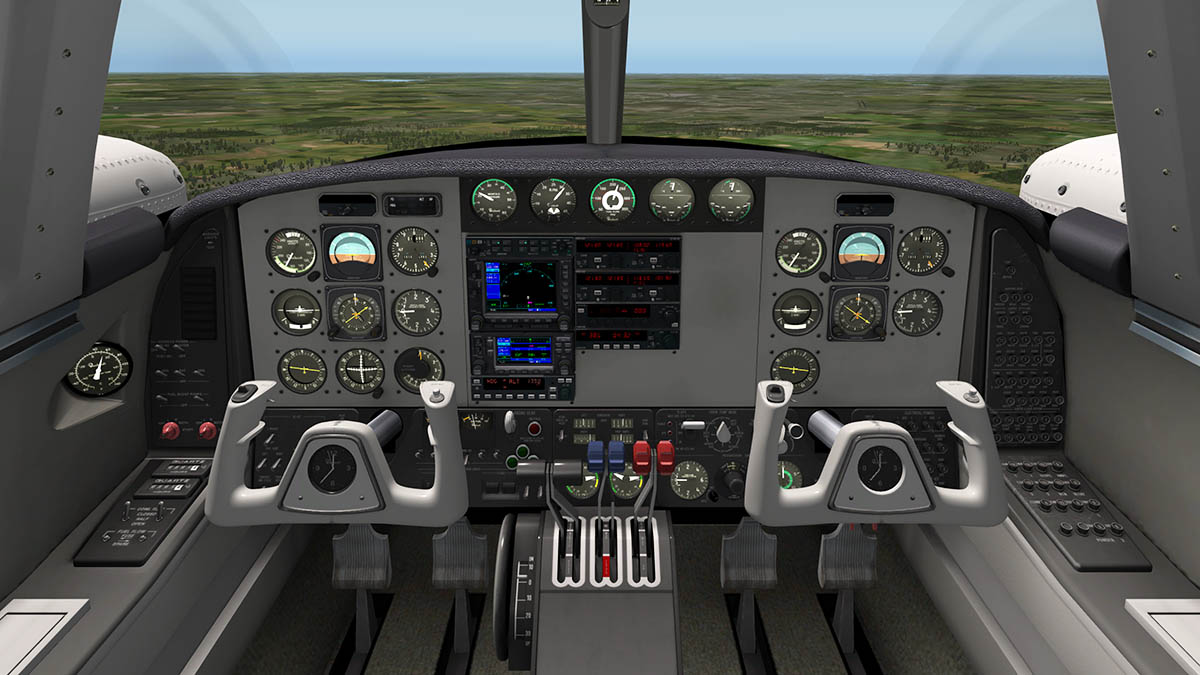
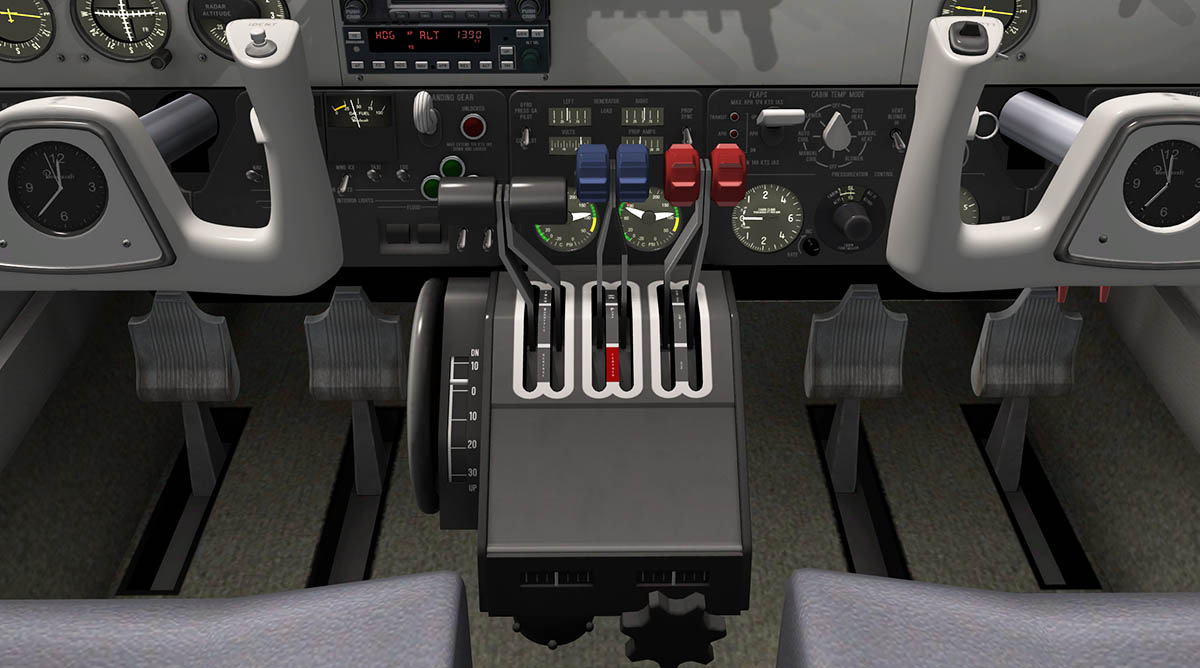
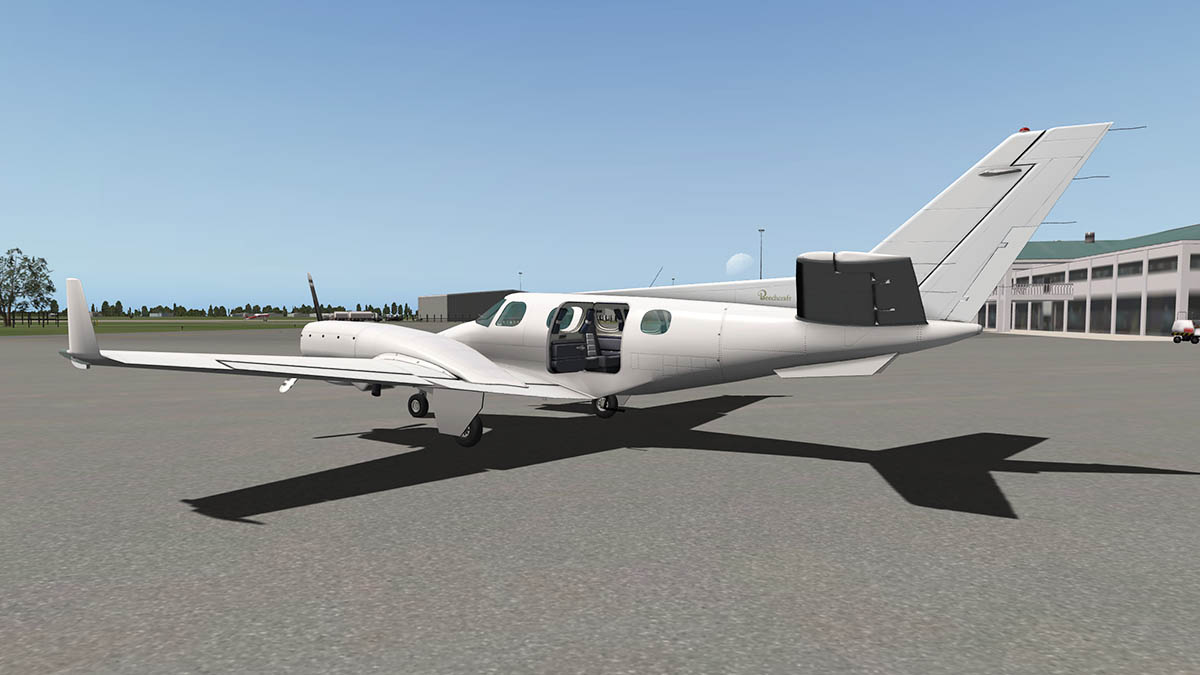
Aircraft Review : Beechcraft 1900D HD Series by Carenado
Stephen replied to Stephen's topic in Airliners Reviews
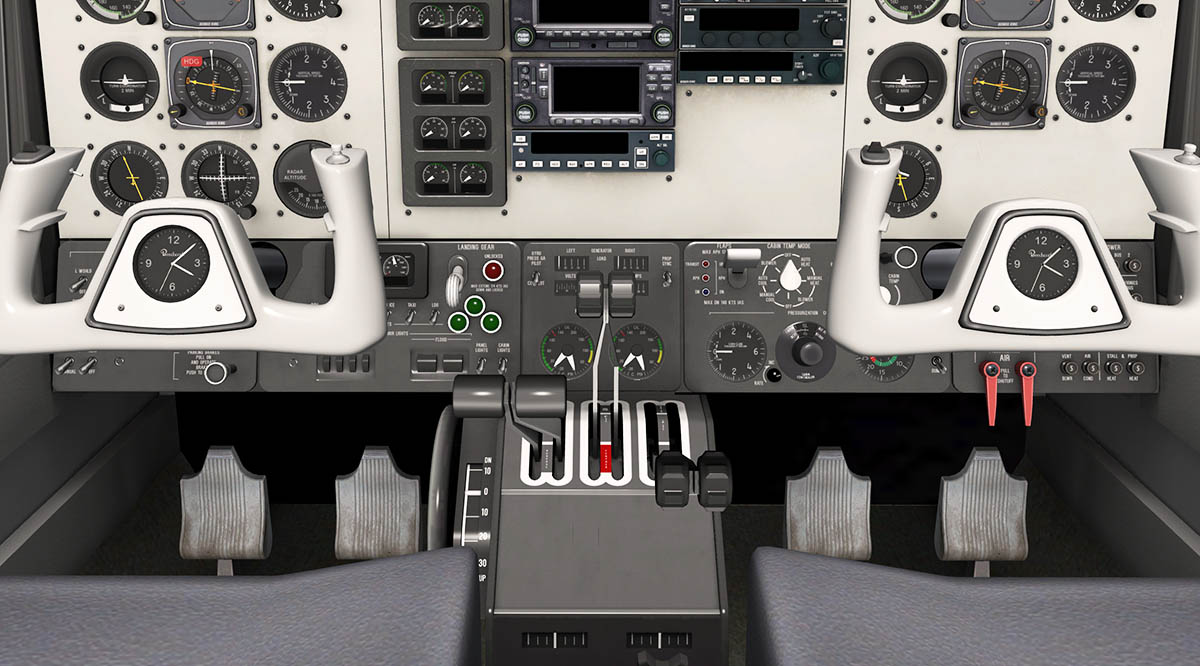
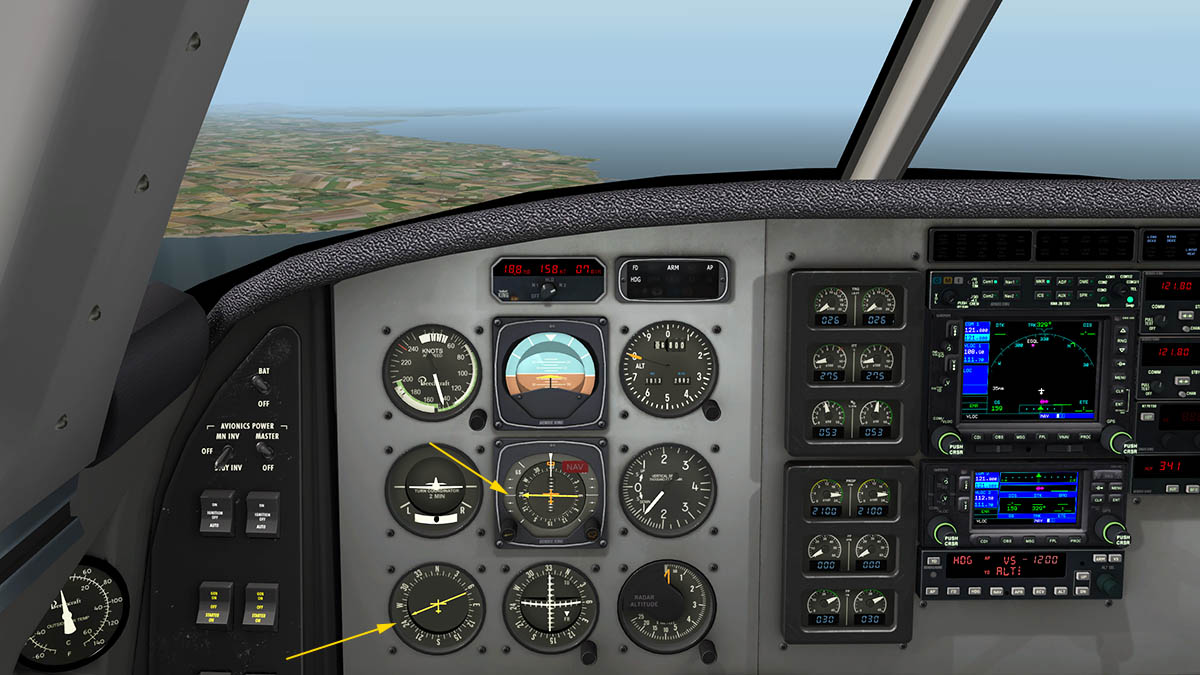
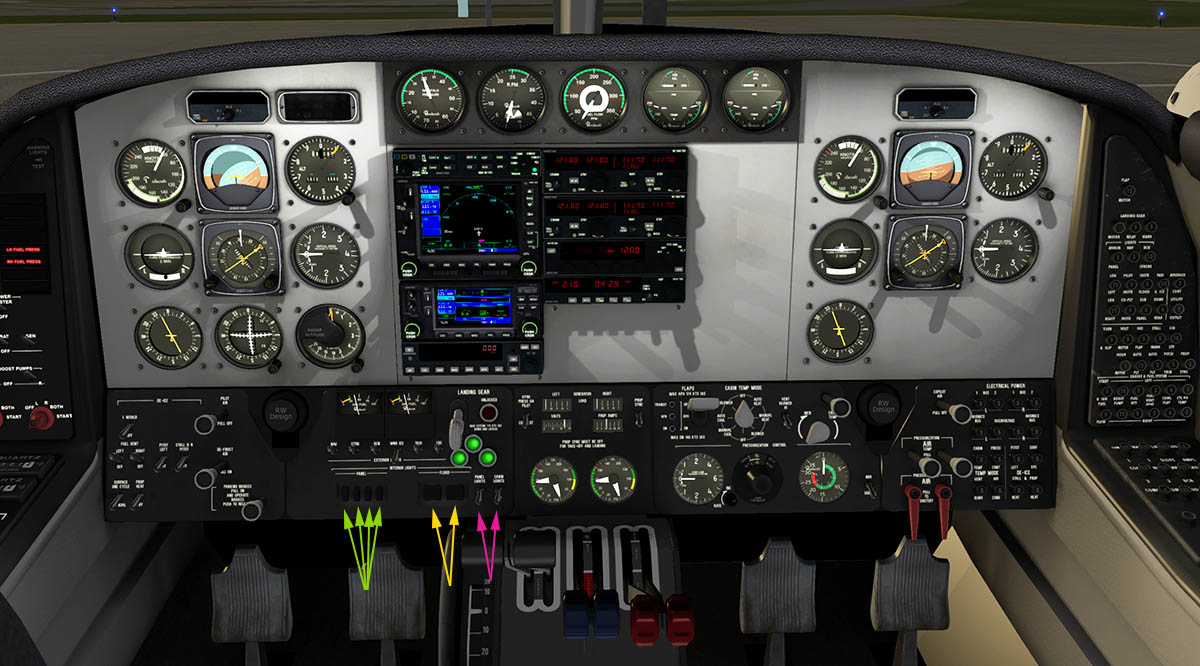
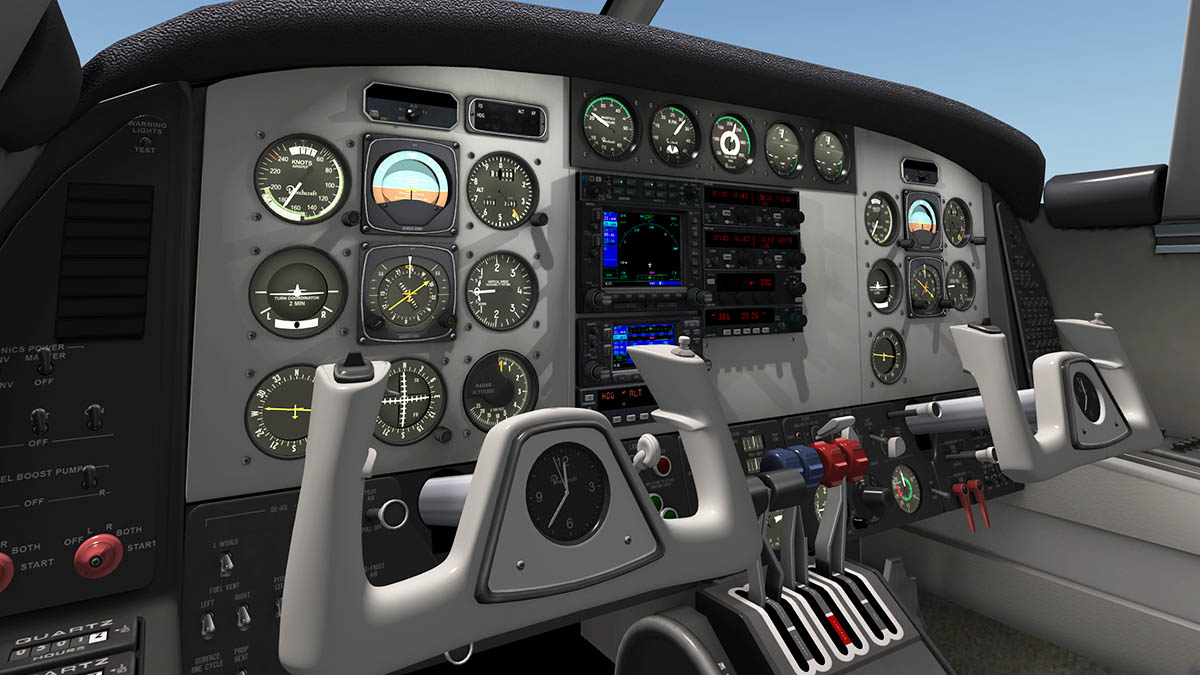
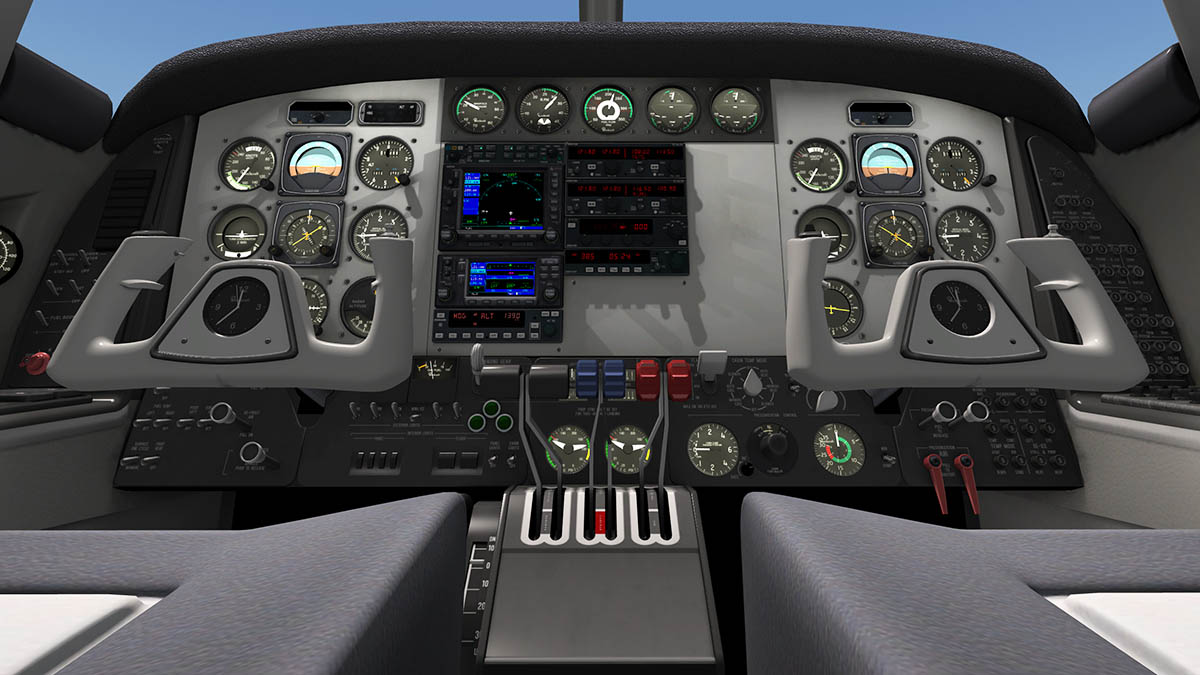
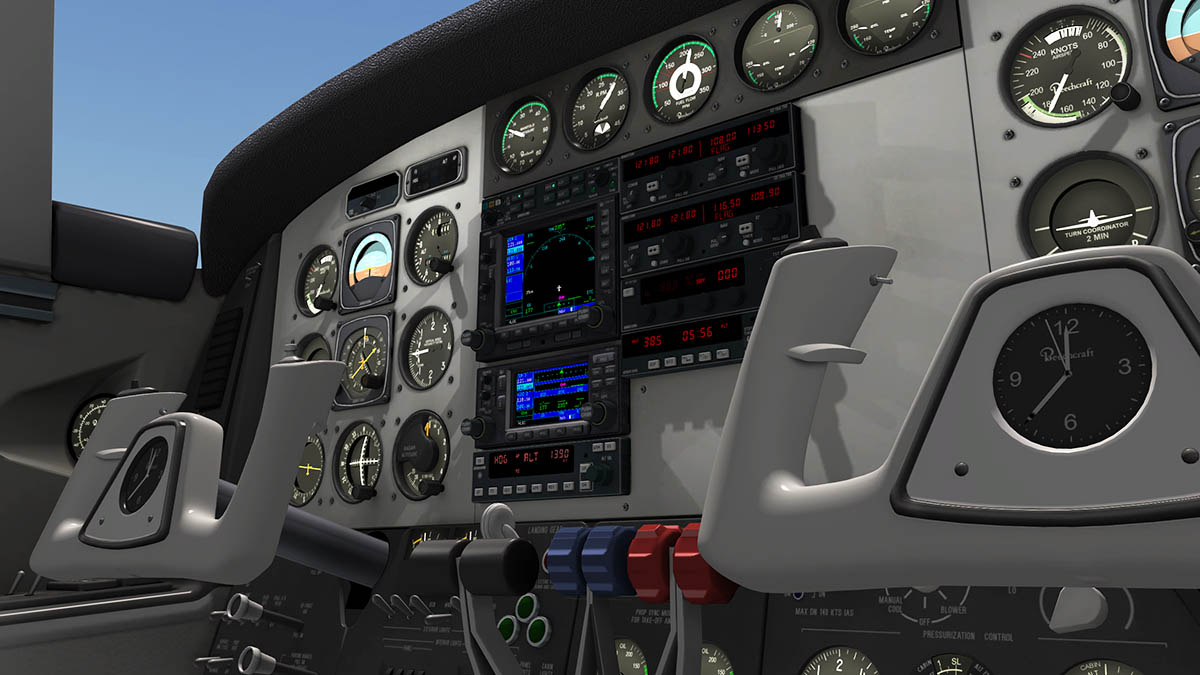
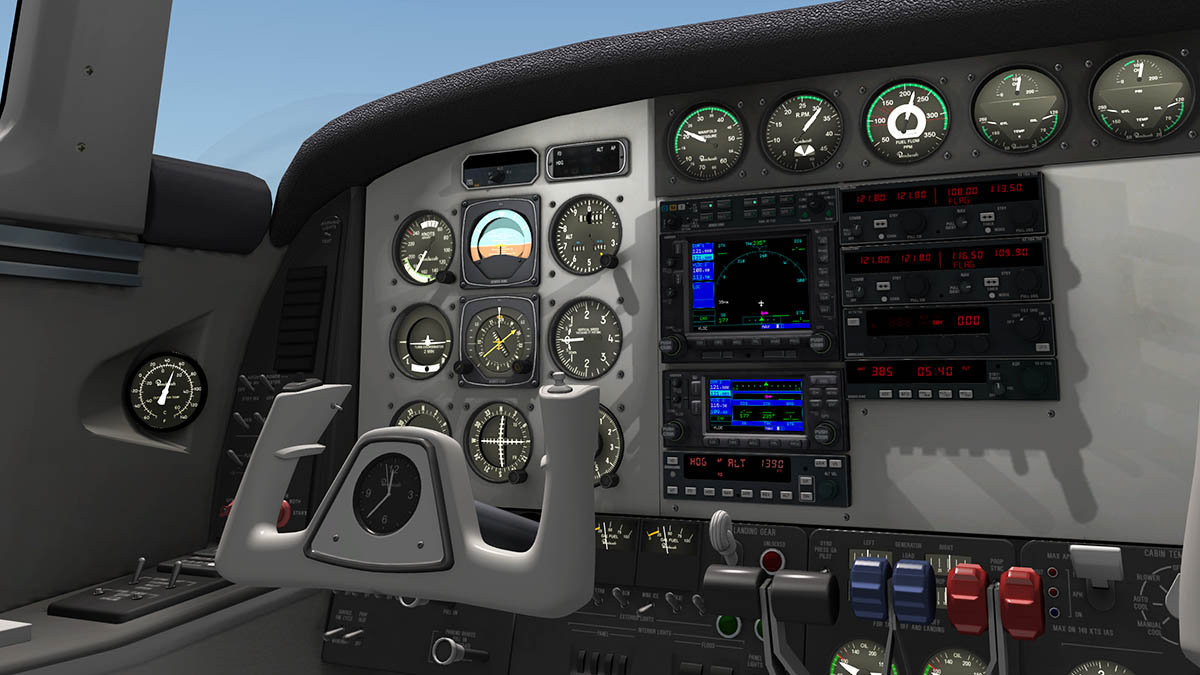
Yes you can dim the facia lighting, It is the "Avionics Panel lighting" knob on the overhead panel. I agree the main cabin lights do not switch off... Yes you can, the hand manipulator will move either of the throttle, Prop or condition levers and the cross will move both levers. If you move the cross manipulator left or right you can also adjust either lever with one action. SD -
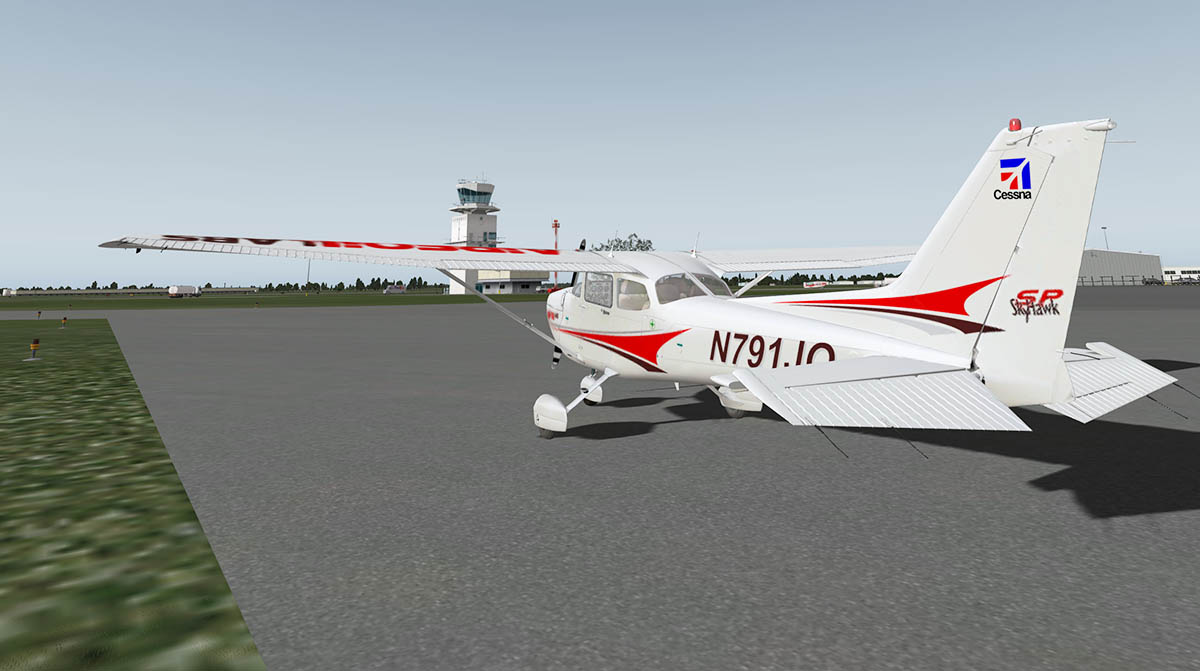
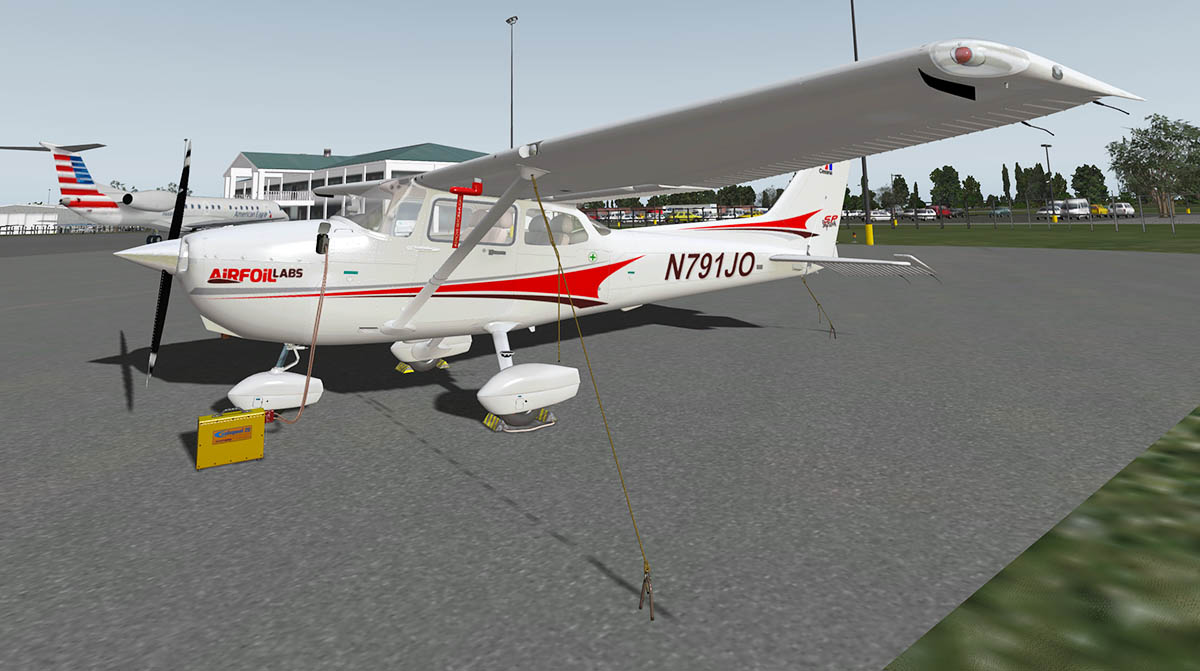
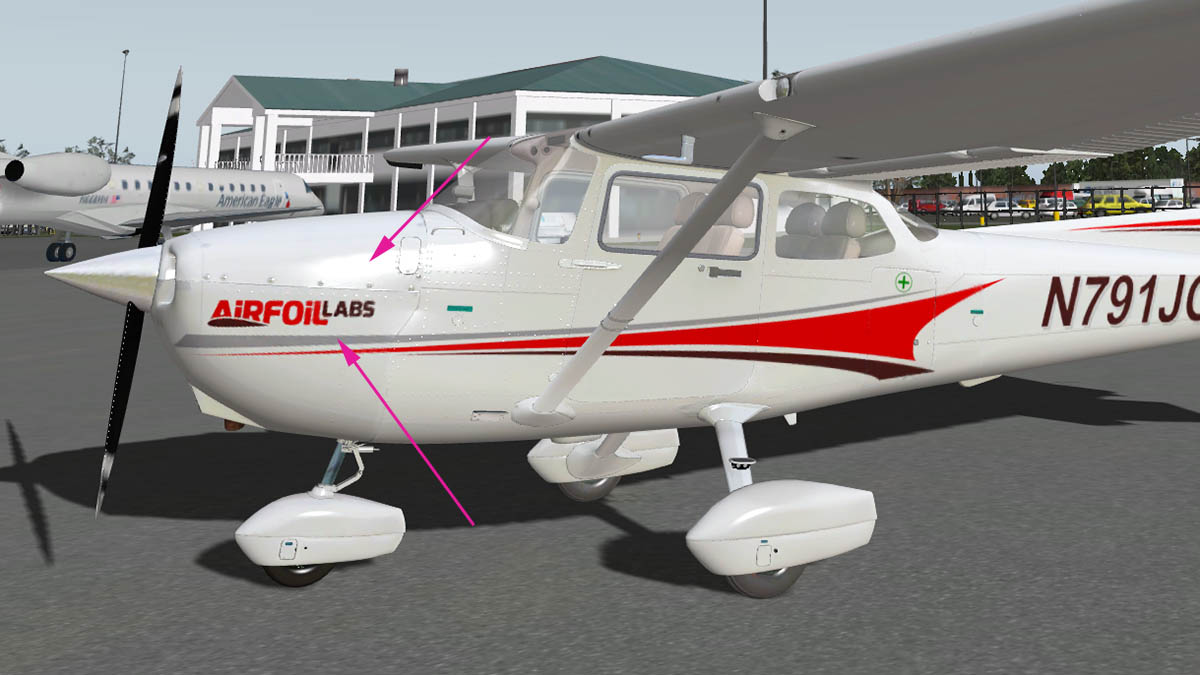
Aircraft Review - Cessna 172SP Skyhawk by AirfoilLabs
Stephen replied to Stephen's topic in General Aviation Aircraft Reviews
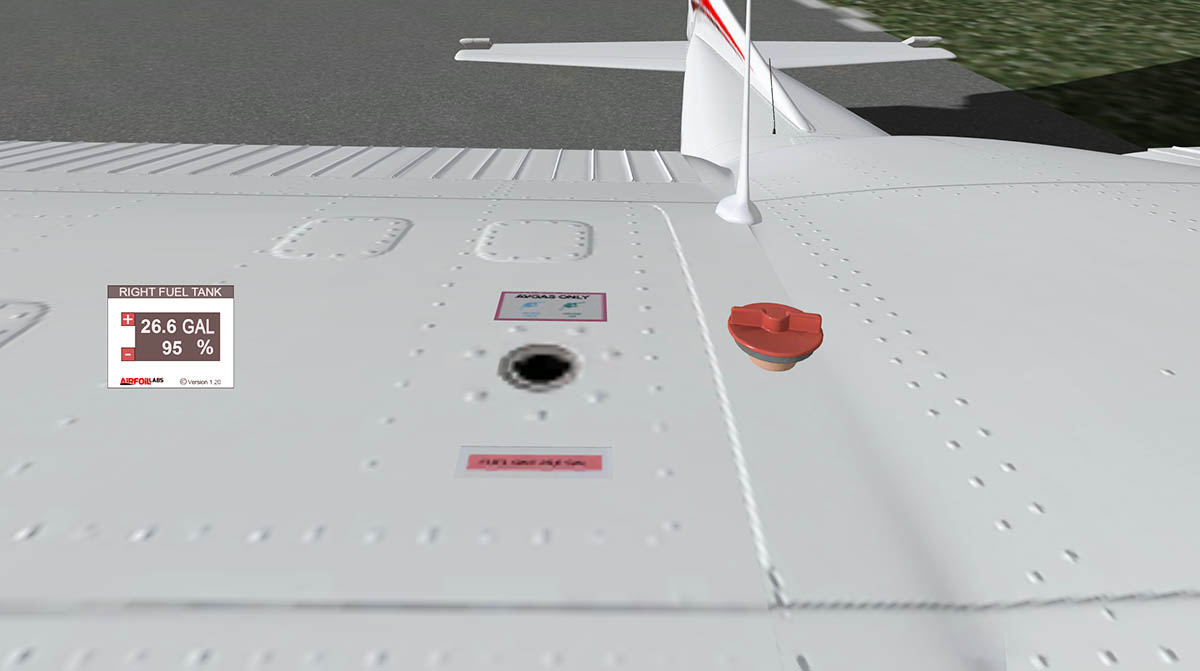
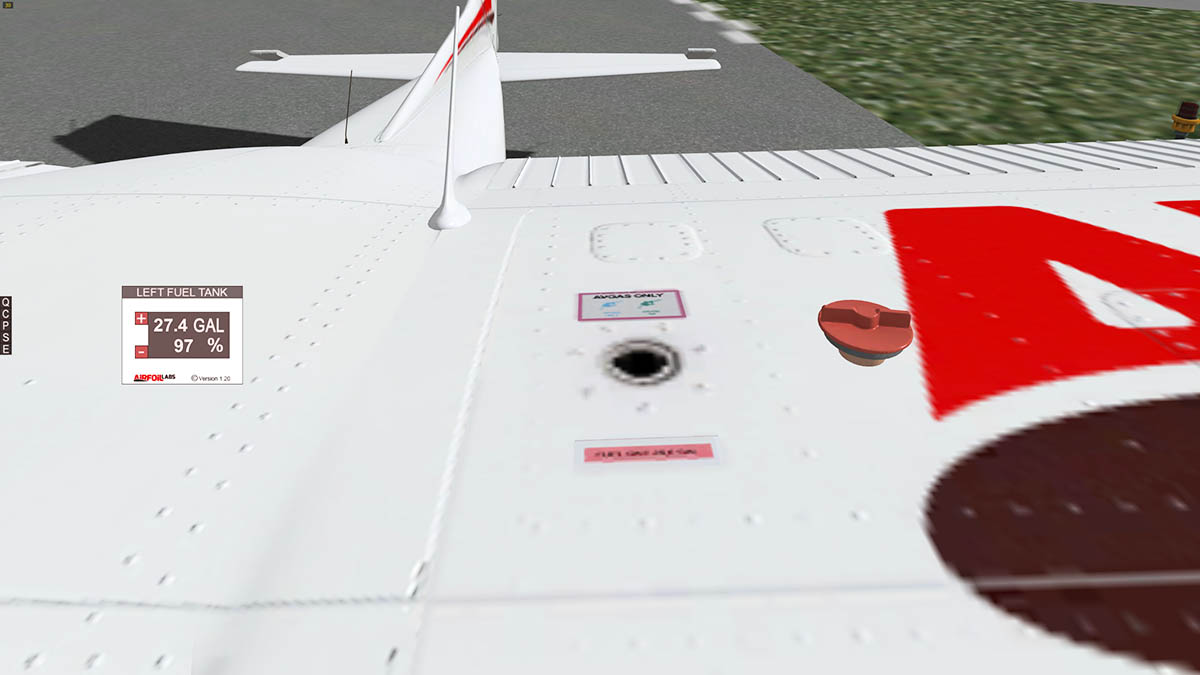
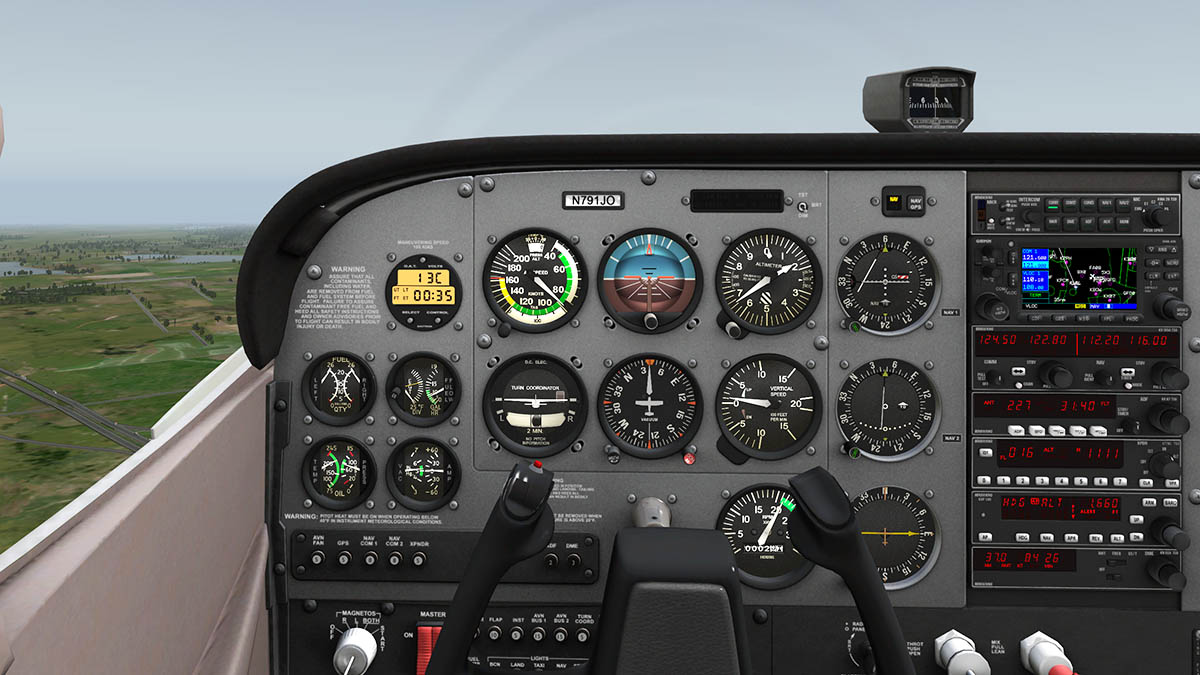
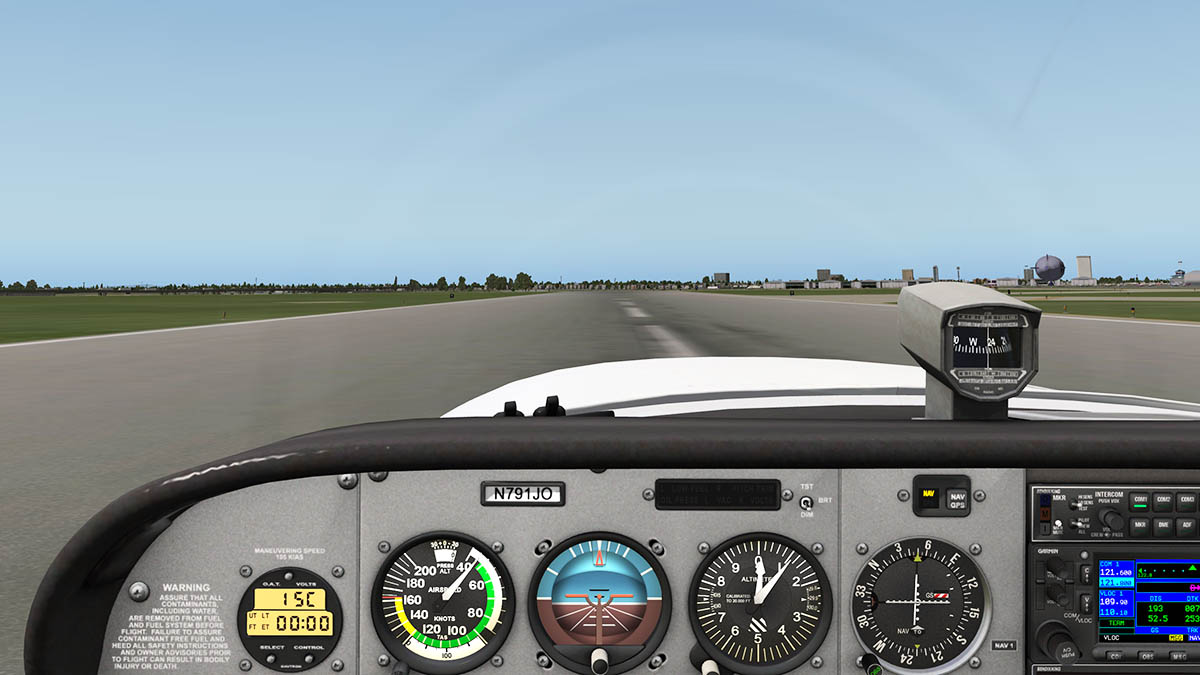
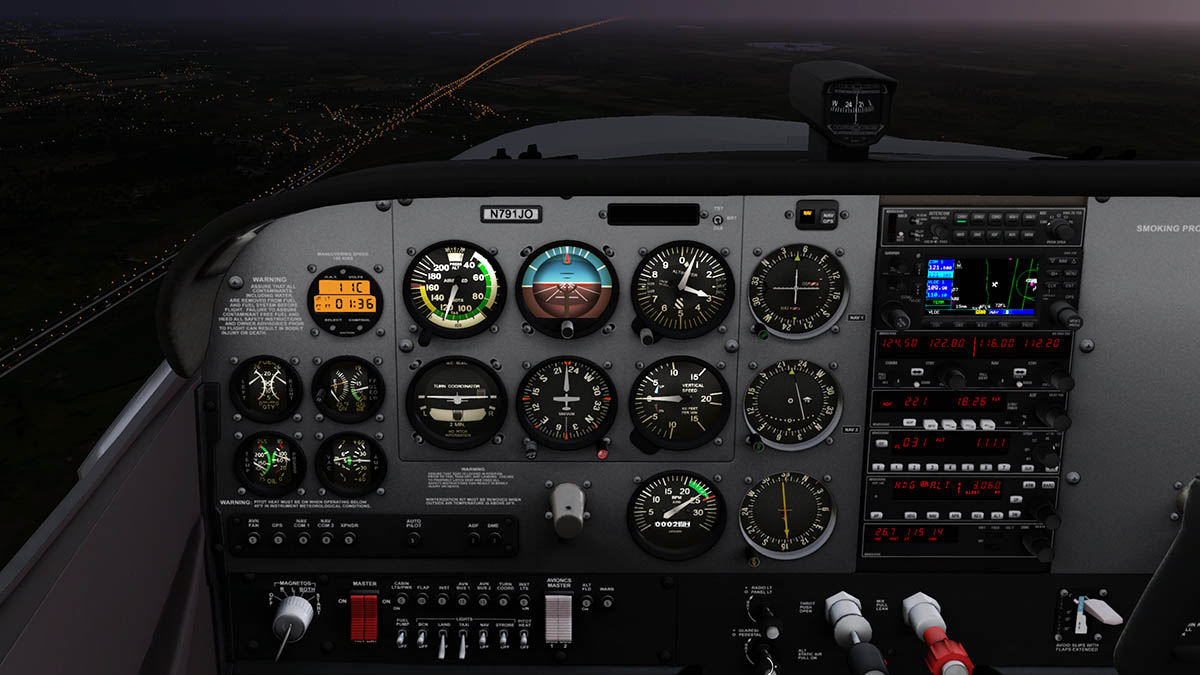
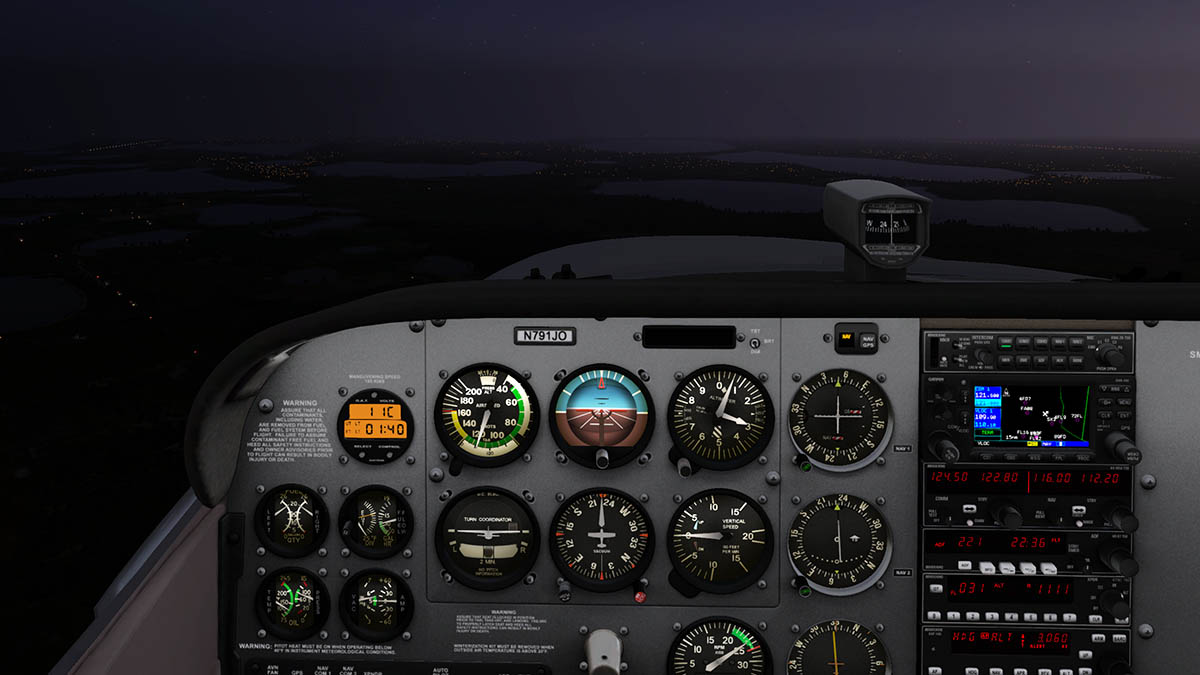
There are a few liveries on the X-Plane.Org, but you have to be careful that you select the right one for the right version in Low-res : Medium-res : High-res, one won't work in another. The only way you can change the call sign is in the actual art; for the record it is "l_panel1.png" and the night version "l_panel_LIT.png". Both have to be changed and the audio rego change is done in Plane-Maker. SD -
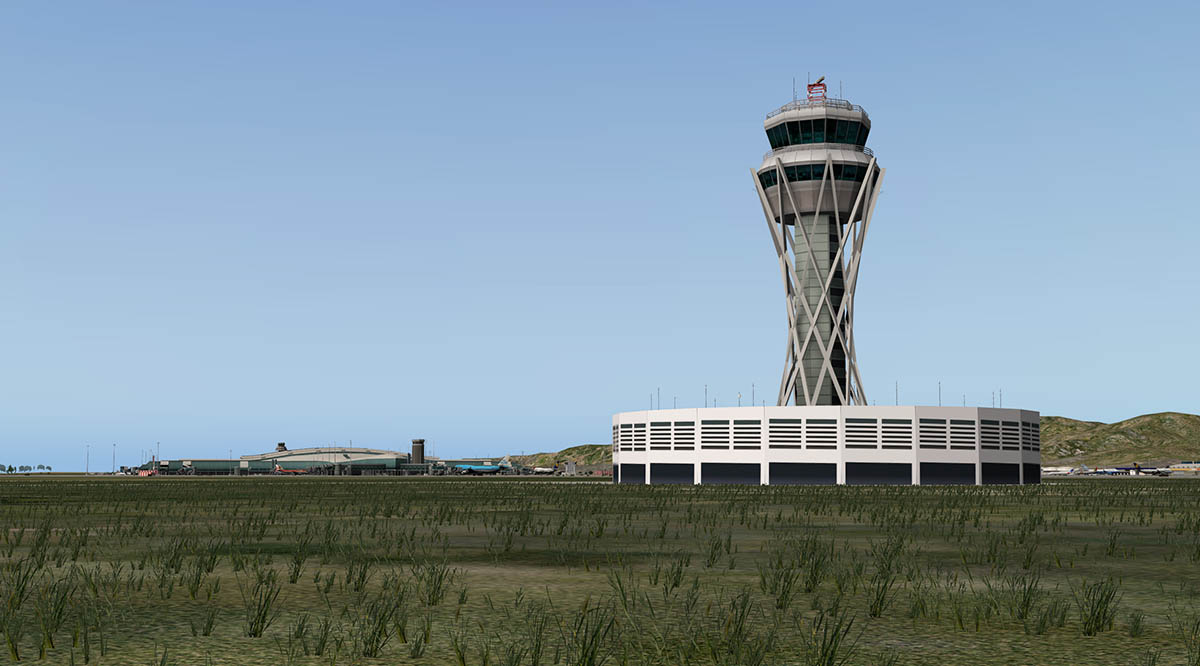
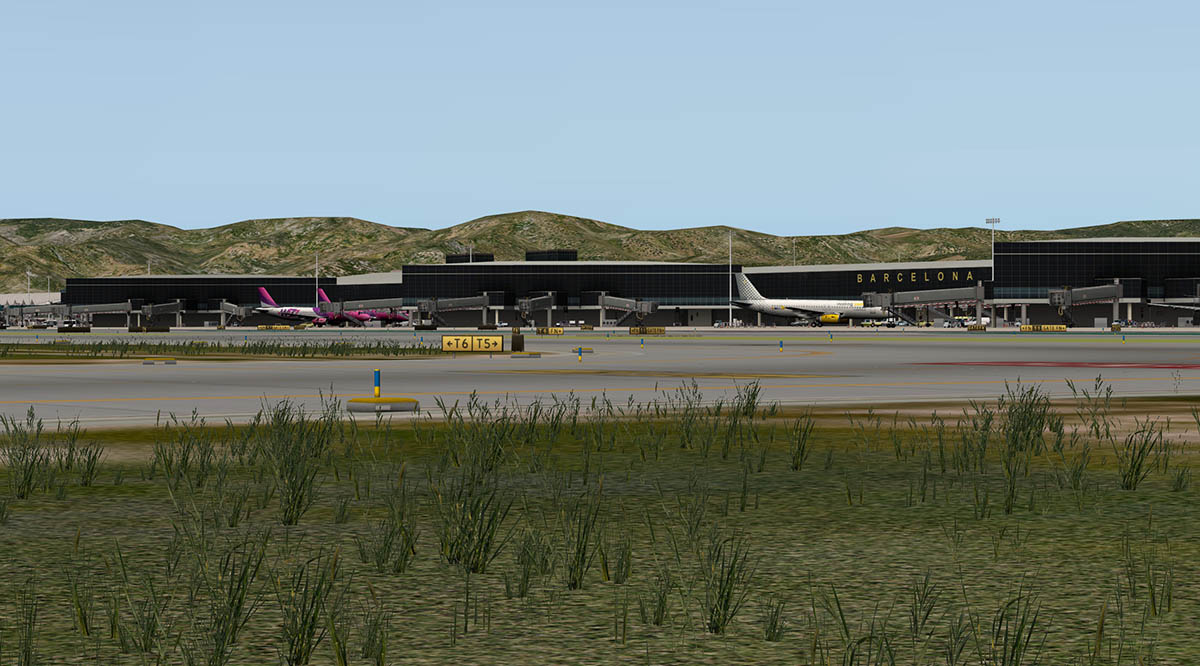
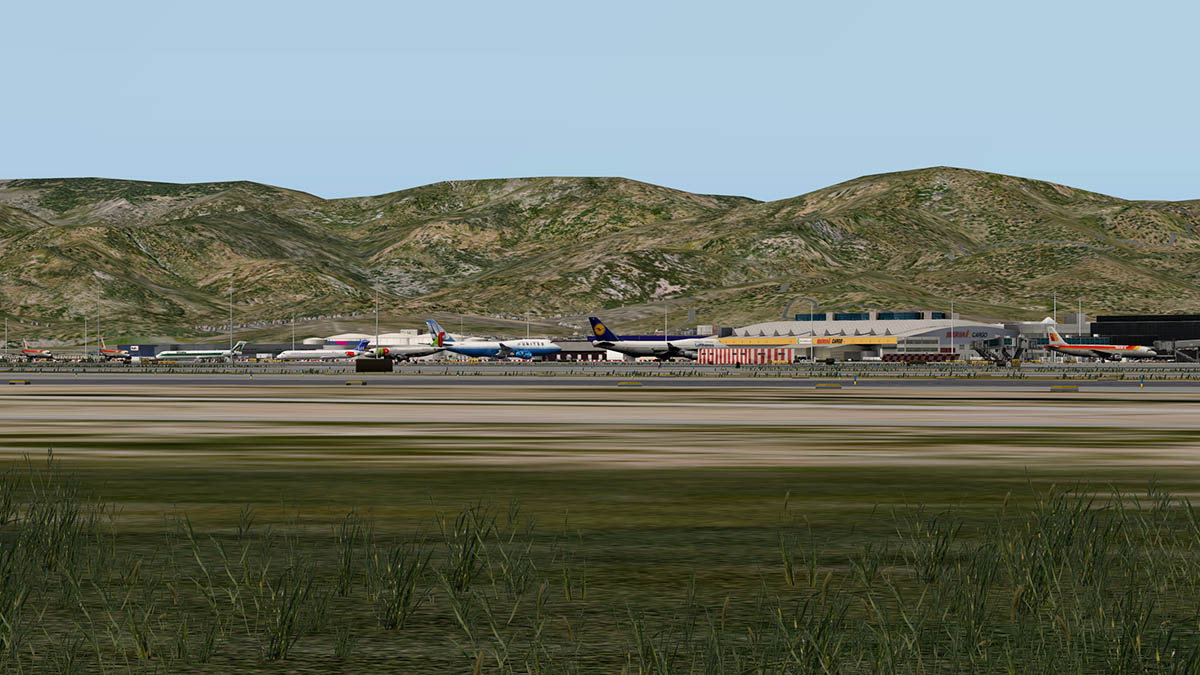
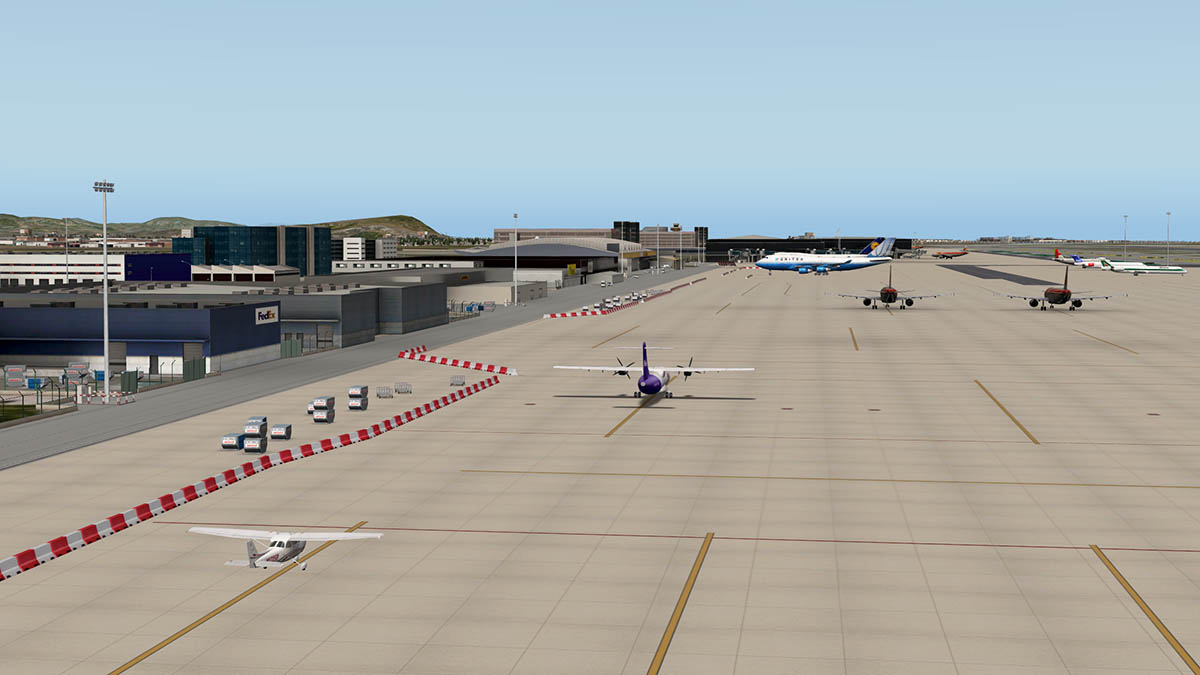
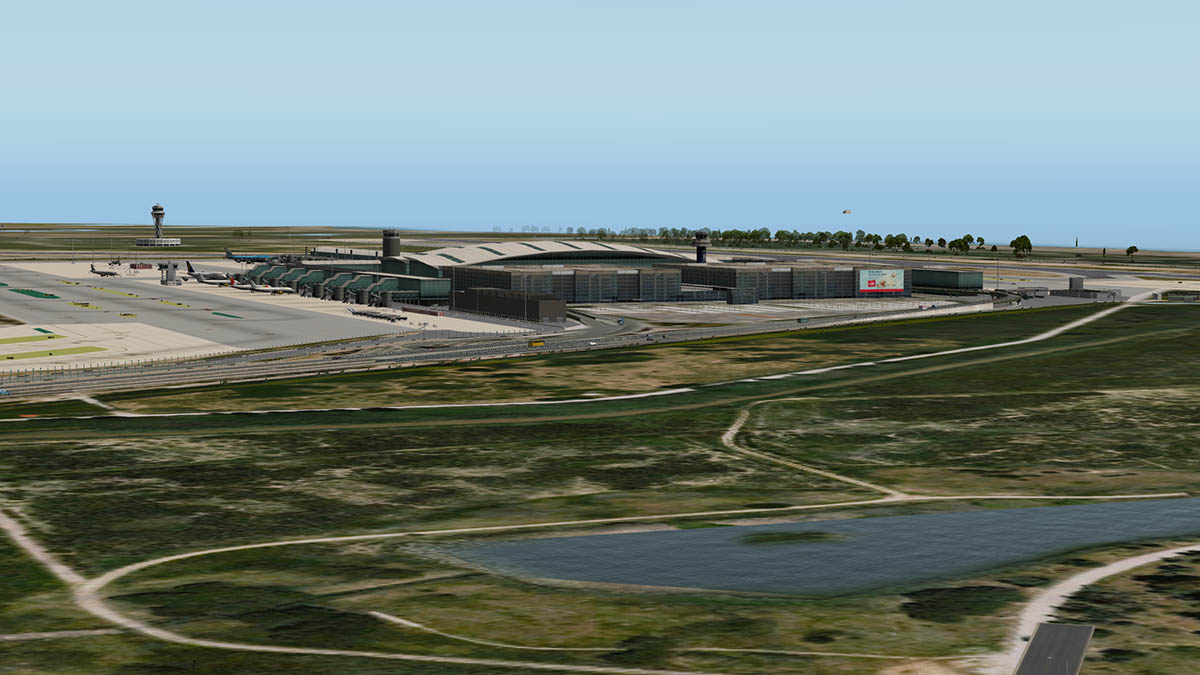
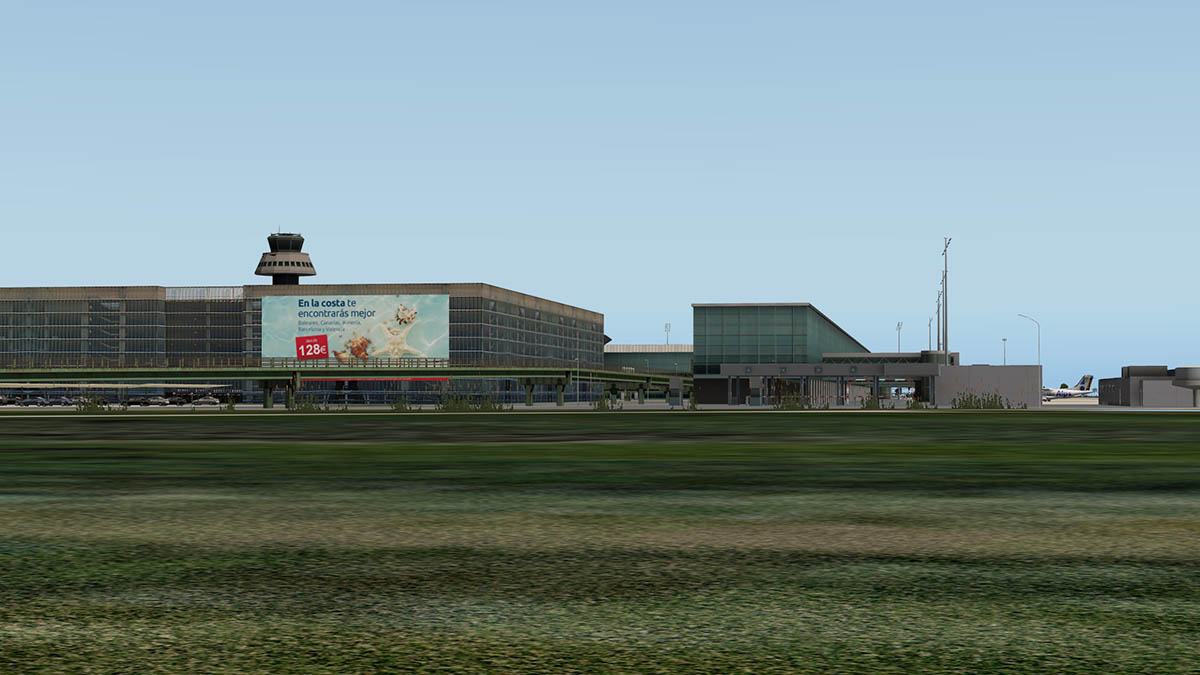
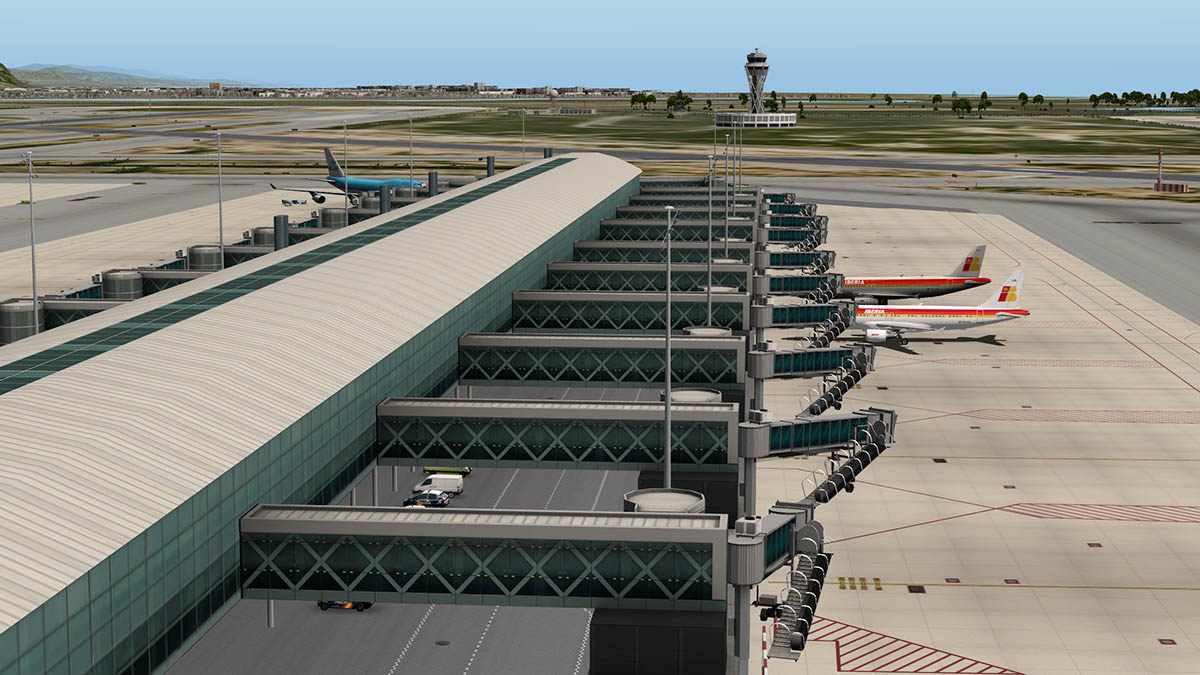
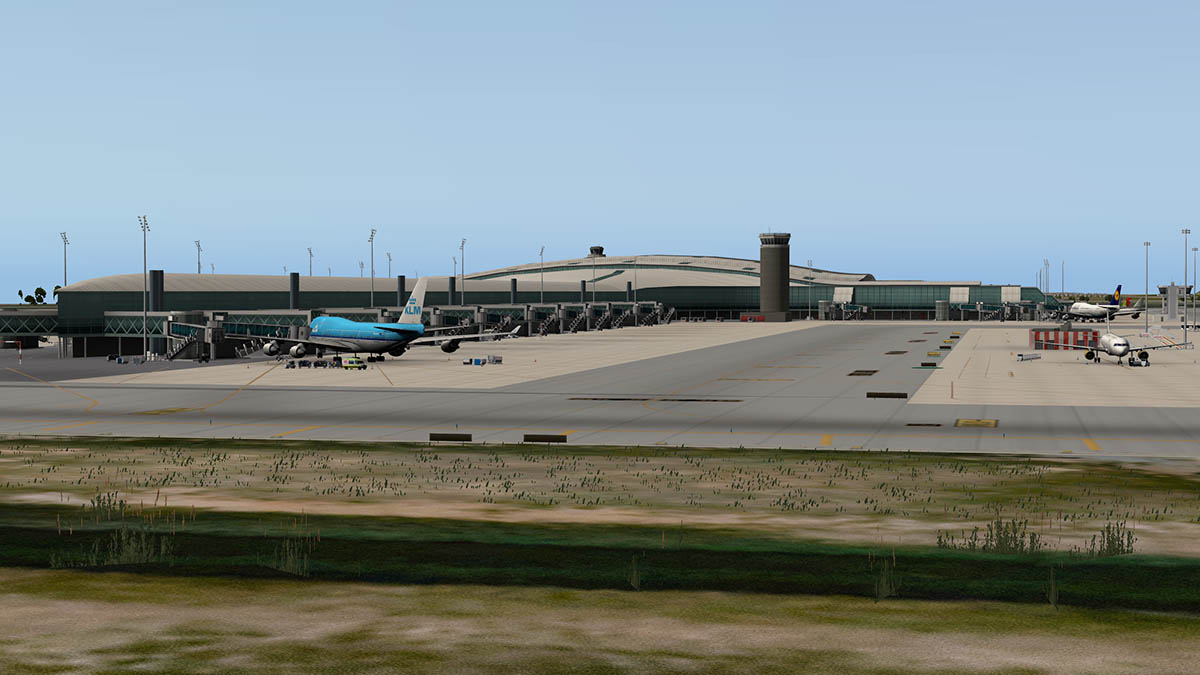
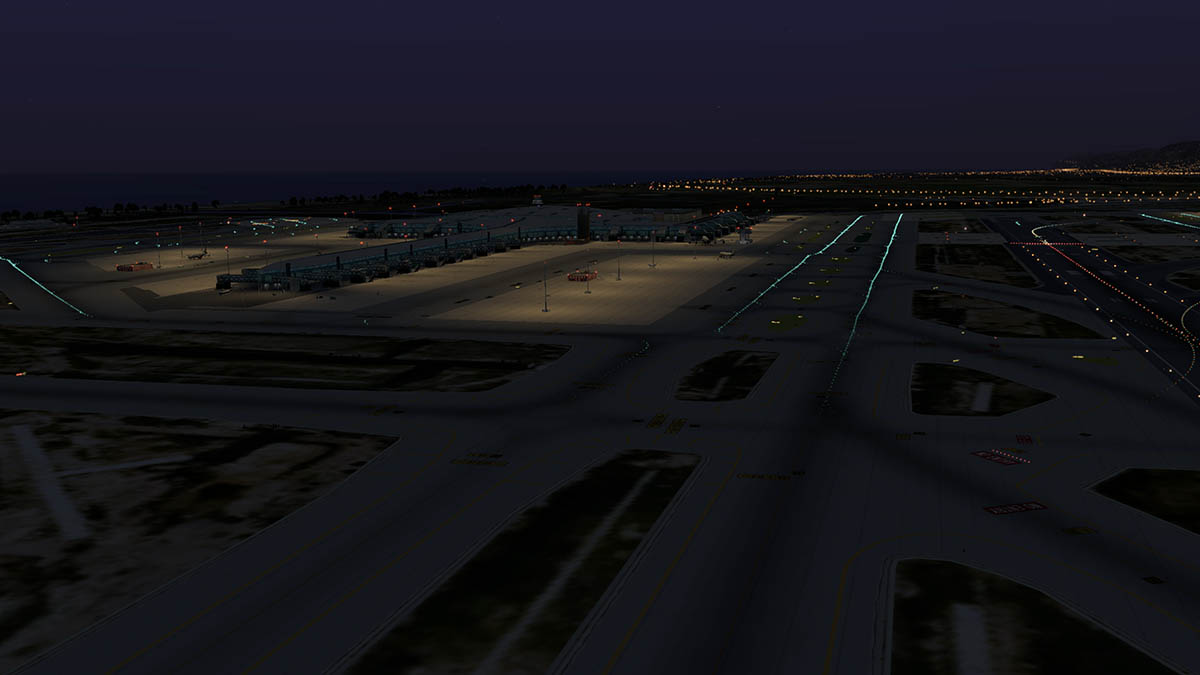
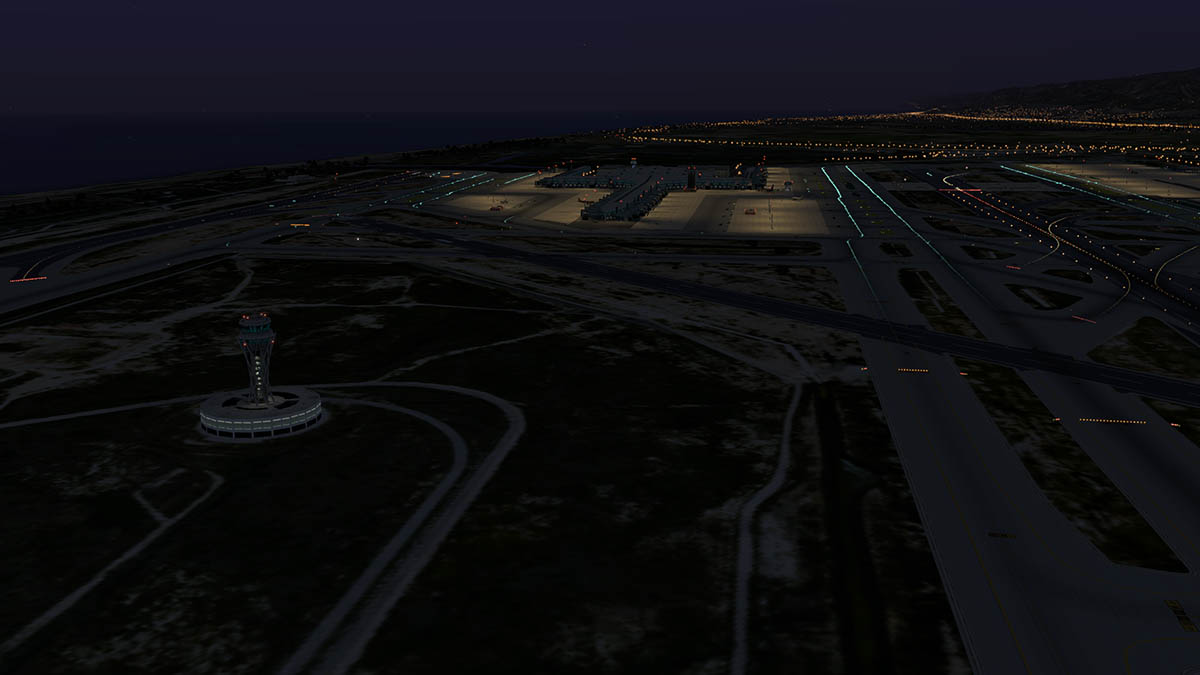
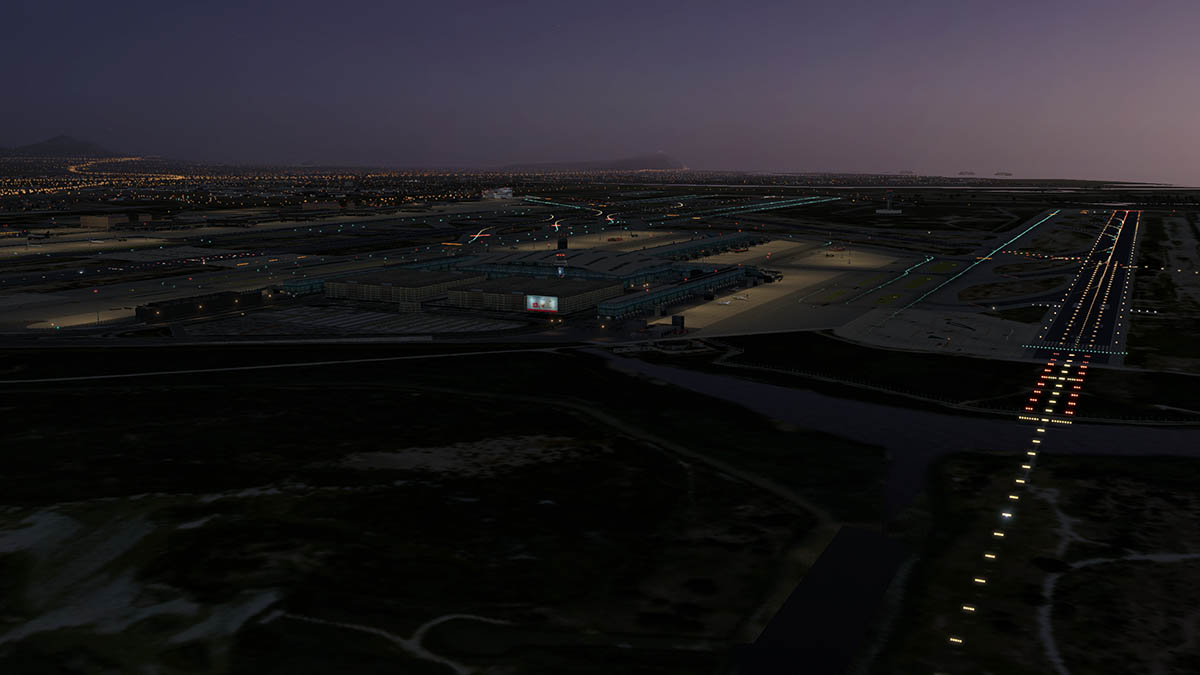
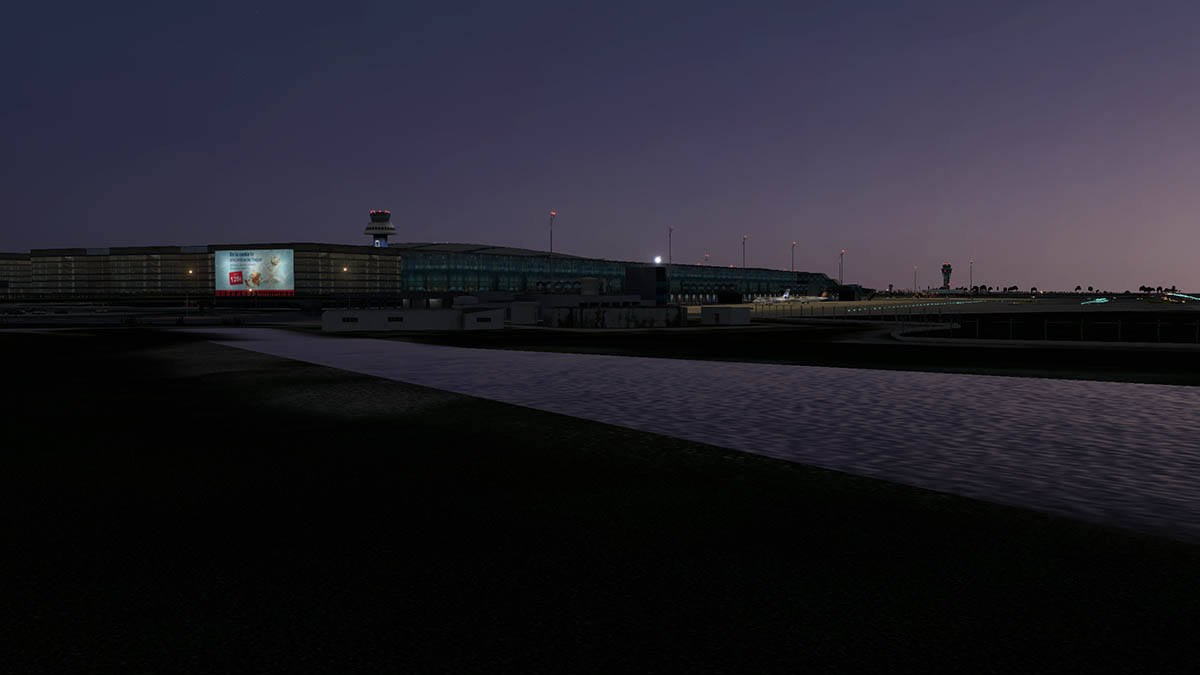
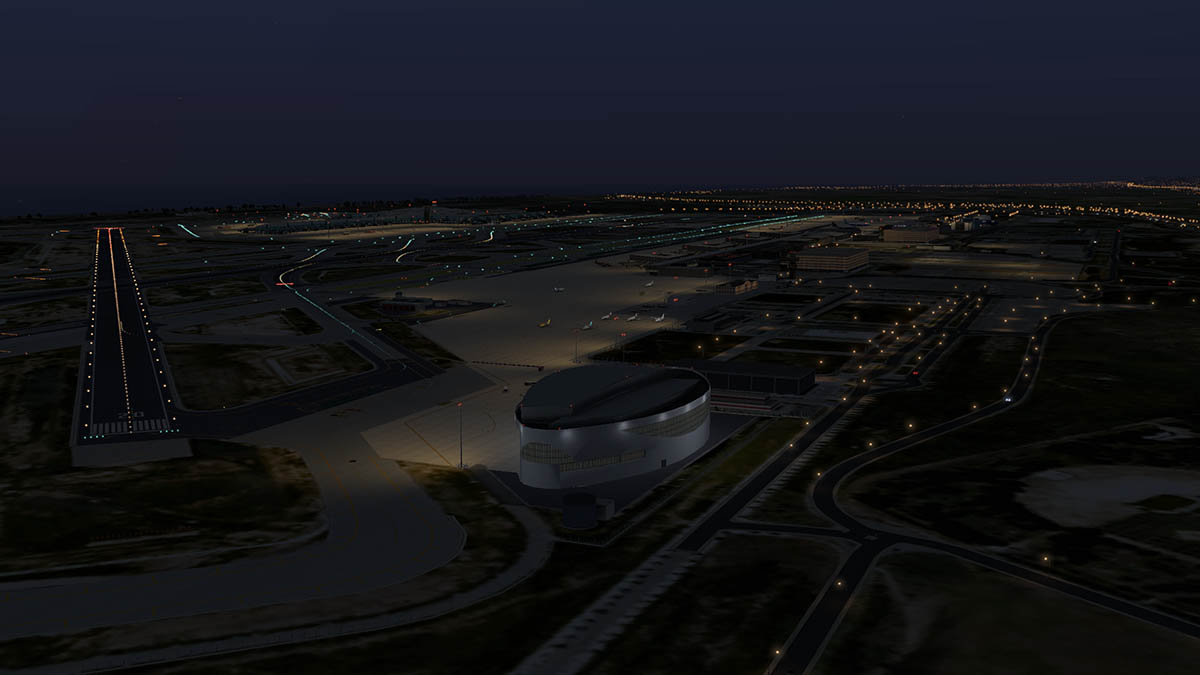
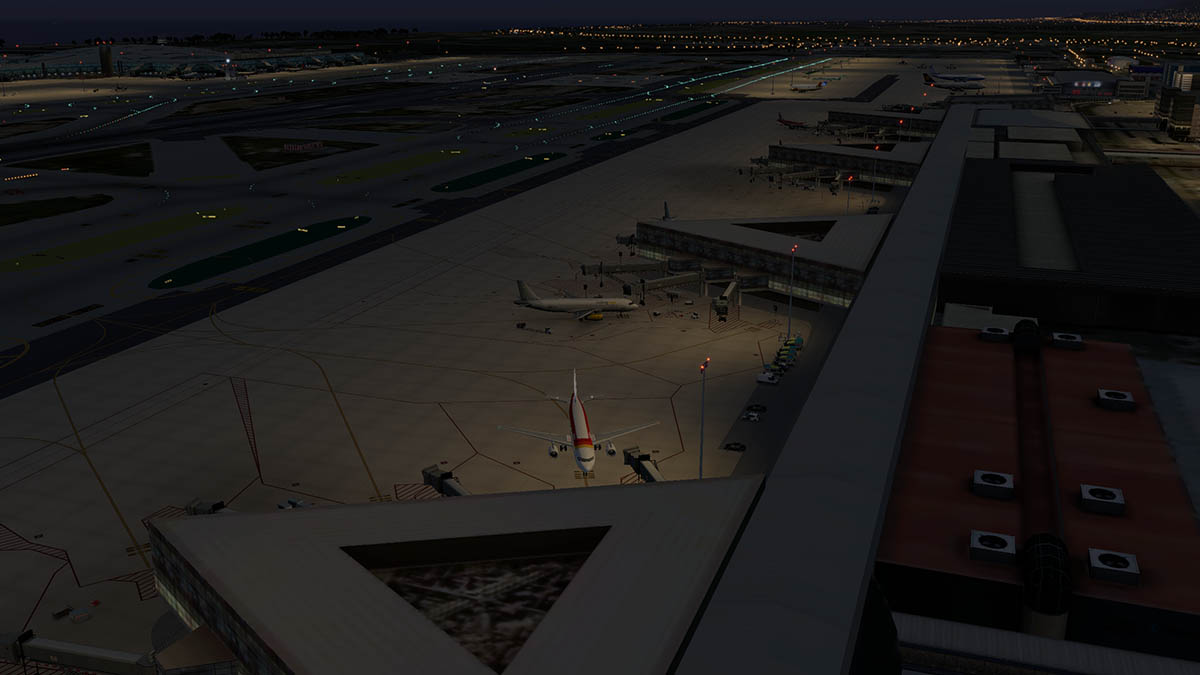
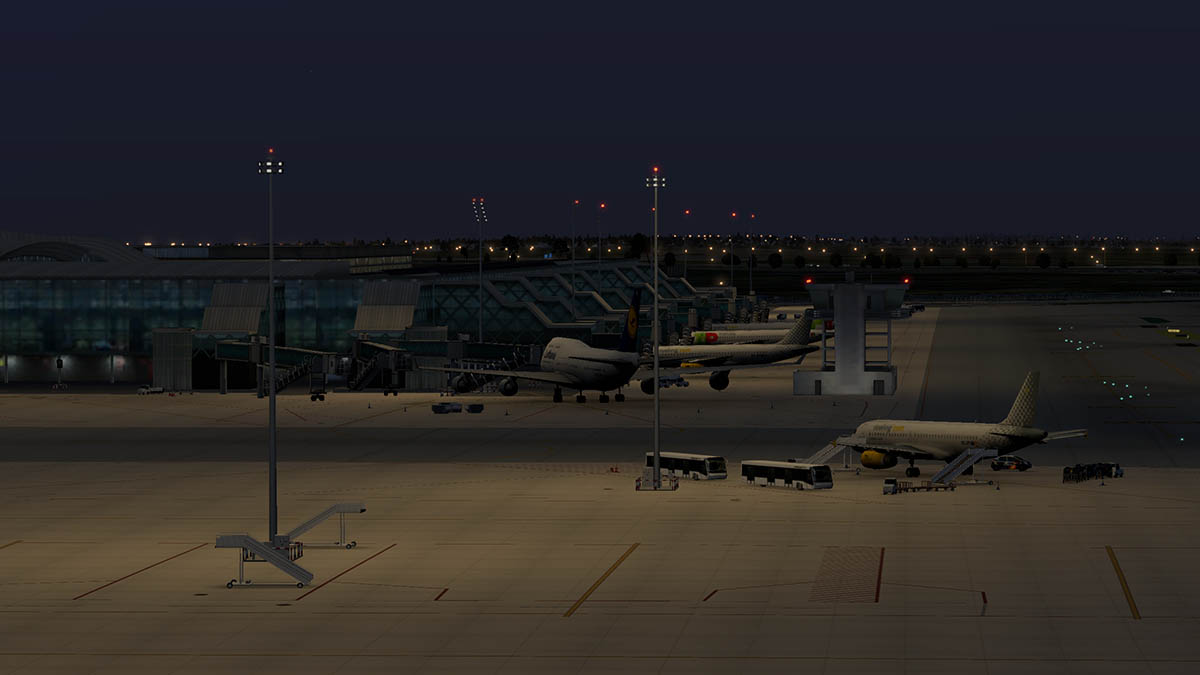
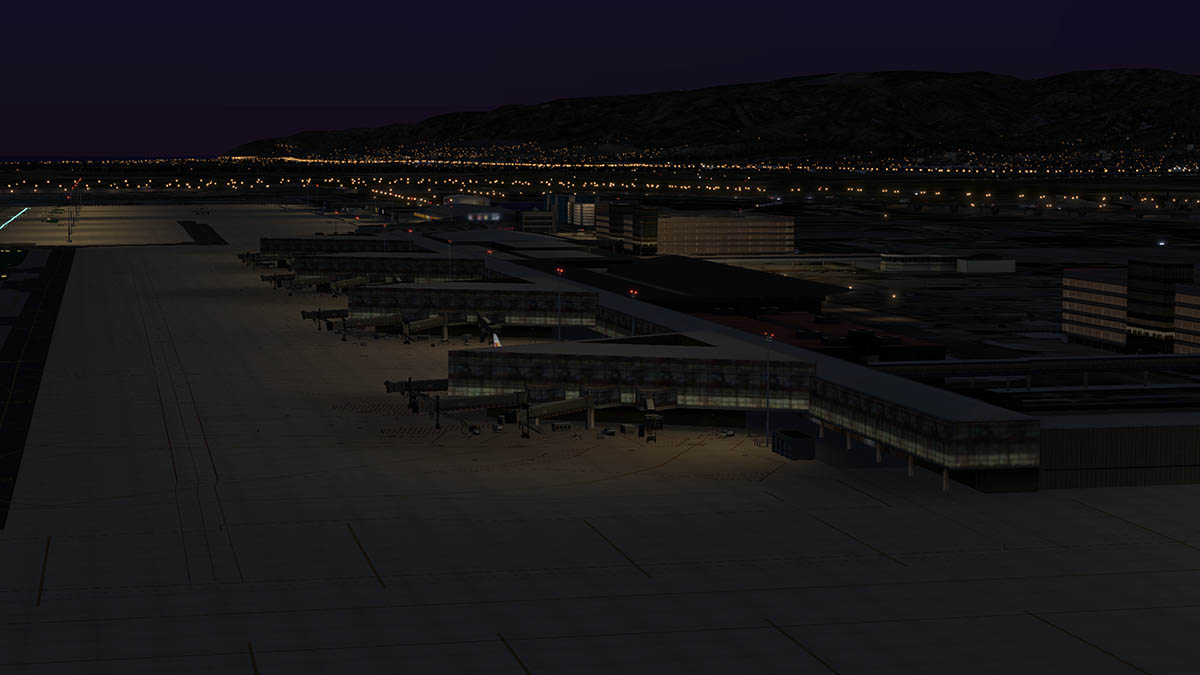
News! - Released LEBL El Prat-Barcelona by Dai-Media After their excellent LEVC - Valencia Manises. Dai-Media have now released their next scenery which is the main gateway to Catalunya, in LEBL El Prat-Barcelona. This is a huge scenery and it has taken a eight full months of intensive work to create another excellent destination for your X-Plane routes. Features include: Layer Orthofoto 20cm/pix2 main terminals and lot of buildings high detailed and textured but optimised (specular maps for windows).All animated local jetways with objects on ramp.3 runways actives customized.Custom navigation objects, all light markings and ground markings.Volumetric 3D grass and local vegetation.Static and dynamic vehicles, e.g. buses, baggage carts, services, firefighters, police, medical, etc.Custom roads with custom traffic in airport roads.Scalable options according your X-Plane configuration.Option static aircraft can be traffic enabled or disabled. Full X-Plane HDR night-lighting All terminals of LEBL, are equipped with their own auto gates jets which are animated and have safe dock guidance. On each ramp you can find different vehicles, from airport and cargo services, all of the X-Plane Barcelona airport roads have a new type of custom roads included and defined with precision with the real LEBL X-Plane Barcelona. All vehicles Policia, Guarida Civil, Firefighters, Follow Me, AENA vehicles, etc. are represented. LEBL El-Prat Barcelona is Available from DAI-MEDIA here : DAI-MEDIA El Prat And is priced at Euro €34.00 Includes: Static aircraft and Airport Layout Charts Requirements X-Plane 10 Airport will work with and without: runways follow contours (on/off) Scaling allowed with X-Plane system preferences. Stephen Dutton 2nd October 2015 Copyright©2015: X-PlaneReviews
-
News! - X-Plane 10.40 goes Final!
Stephen posted a topic in News! The latest developments in X-Plane
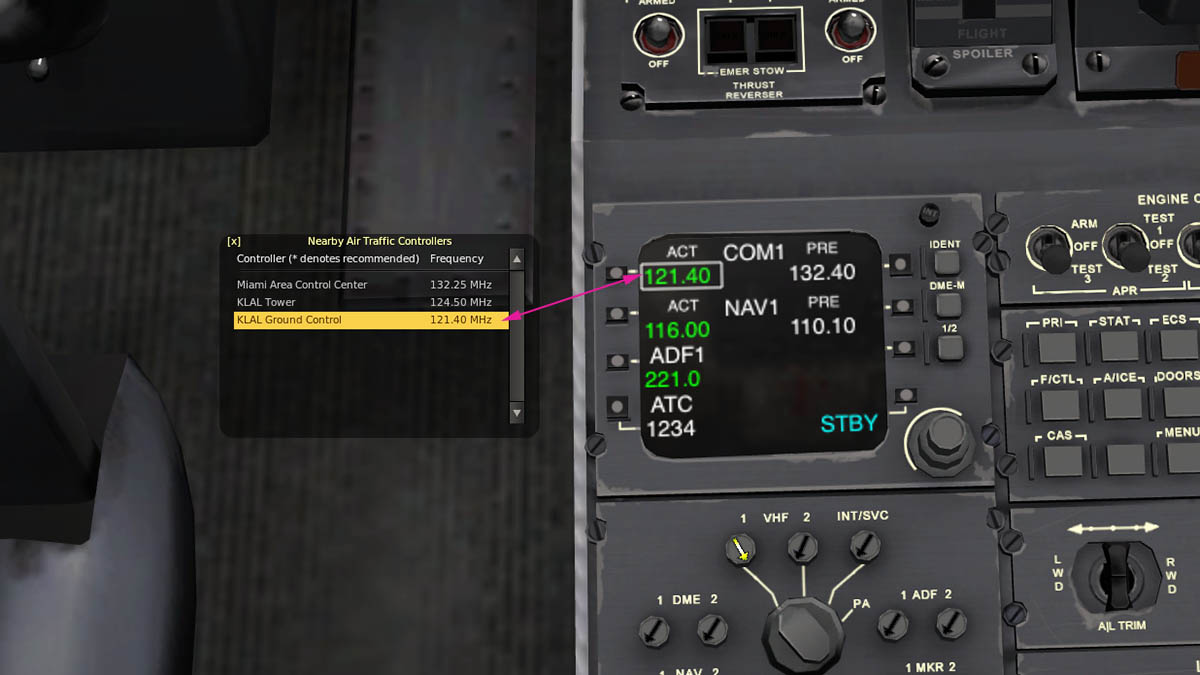
News! - X-Plane 10.40 goes Final! Yes Girls and Boys X-Plane is now up another version to 10.40 Final. Laminar Research has also released a Control Pad app with the release as noted here by Ben Supnik. X-Plane 10.40 and Control Pad now available"The latest update for X-Plane 10 is now available for all users. X-Plane 10.40 is a major release that includes a new DSF loader, ATC functionality, digital download, and multiple performance enhancements. Scenery updates to almost 500 airports, including major locales such as London Heathrow, Hong Kong, and Atlanta, are also included. Visit the briefing page for more information on the major features in X-Plane 10.40. Instructions for UpdatingTo update your copy of X-Plane, simply start the simulator and choose to update. It will automatically download and launch the latest installer. Free for X-Plane 10.40 Users: X-Plane Control PadIn addition, the new Control Pad app is now available as a free download in the Apple App Store. Control Pad allows you to control X-Plane dynamically without pausing or interrupting flight. You can change weather, position, and more with the app, or even use it as a portable instruction station to throw emergency situations into the mix." X-PlaneReviews have done a full review of the 10.40 version that breaks the version down and explains the details... Here: X-Plane Version 10.40 : What is New For the full minute details on the release then go here to the X-Plane Developers notes: X-Plane 10.40 Release Notes Details of the release of the Control Pad App are here: News! - Control Pad App Stephen Dutton 1st October 2015 Copyright©2015:X-PlaneReviews -
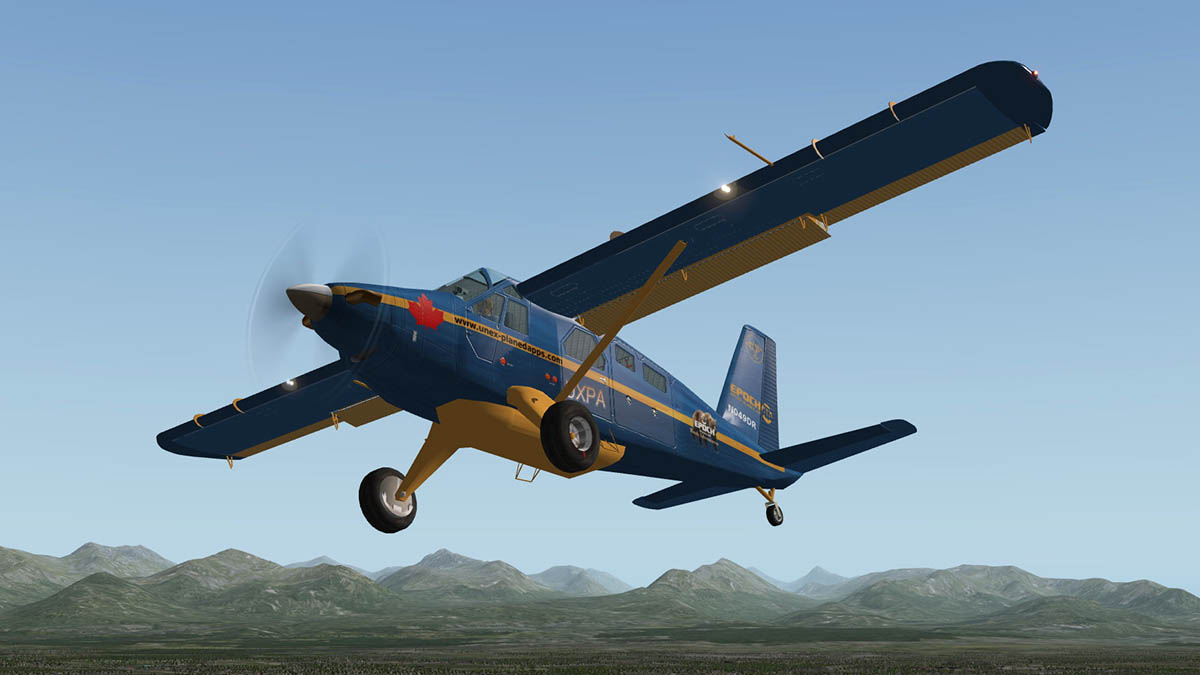
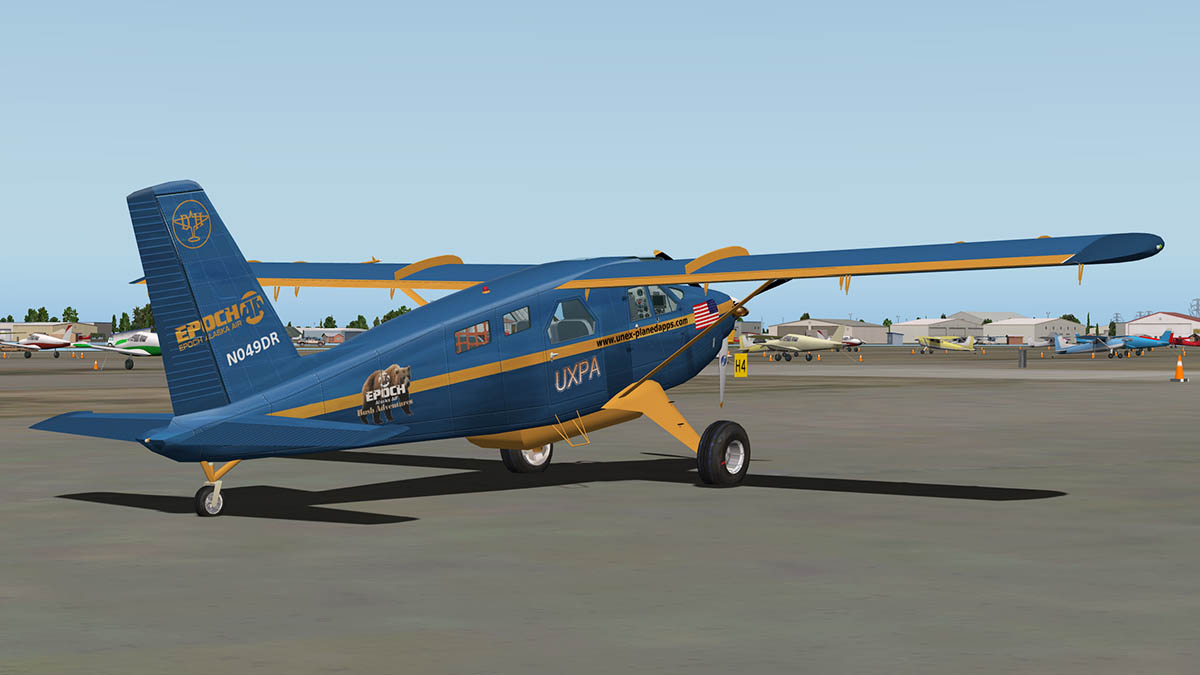
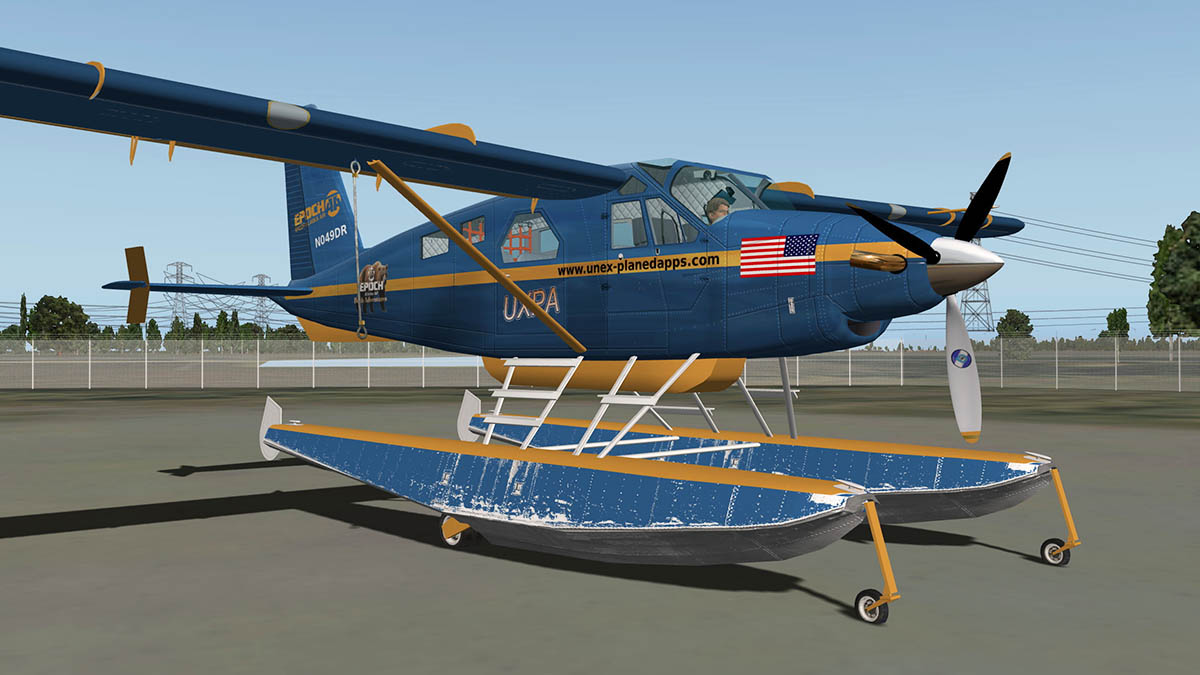
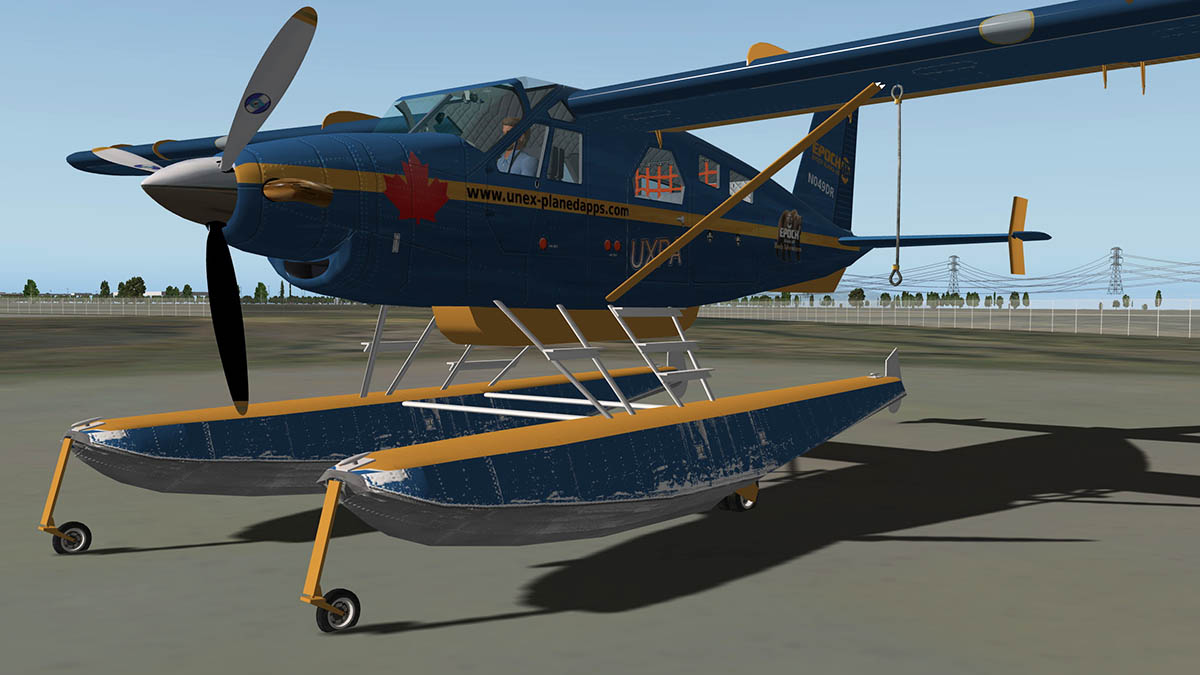
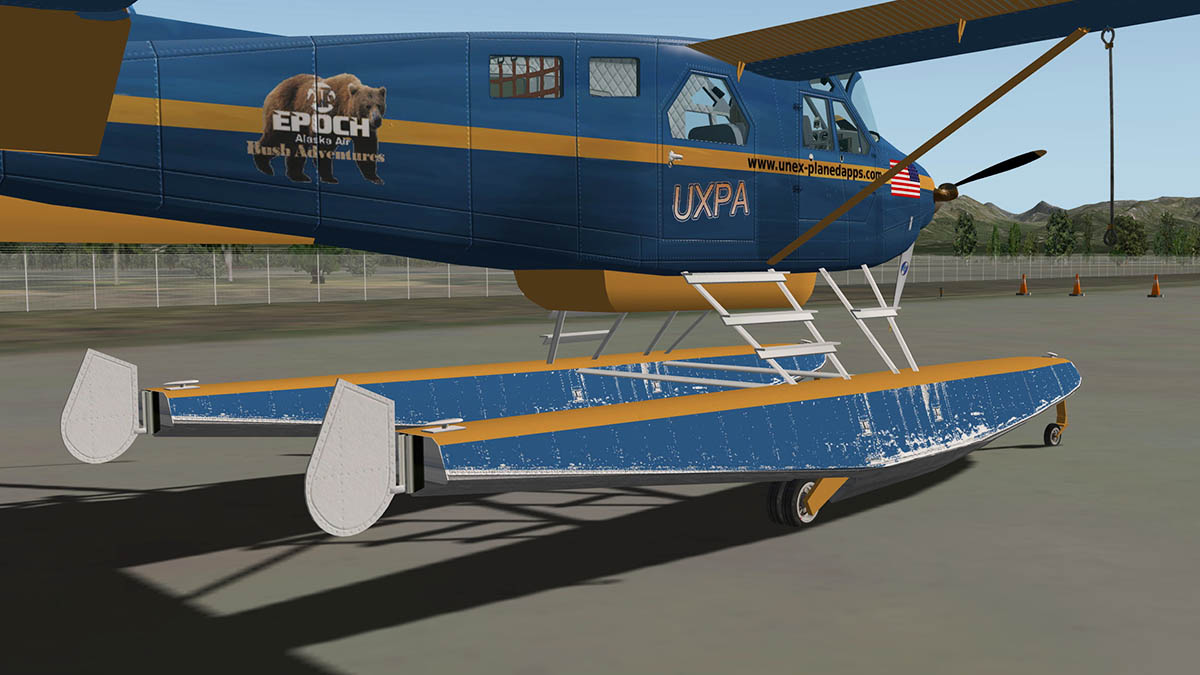
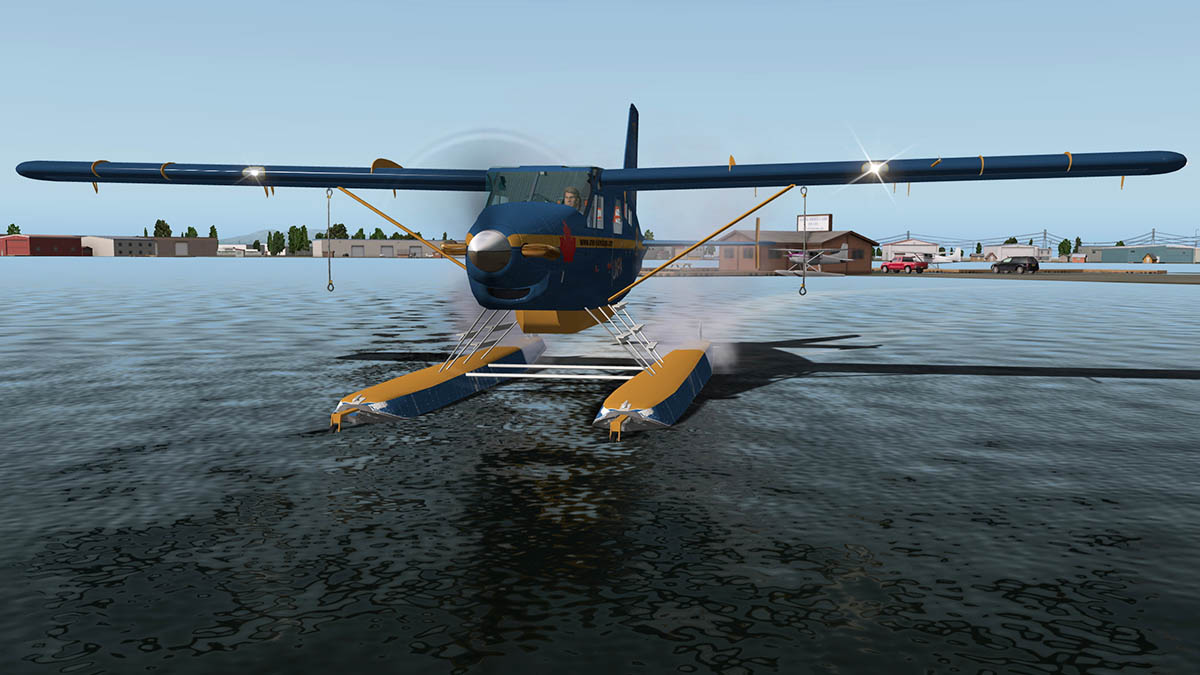
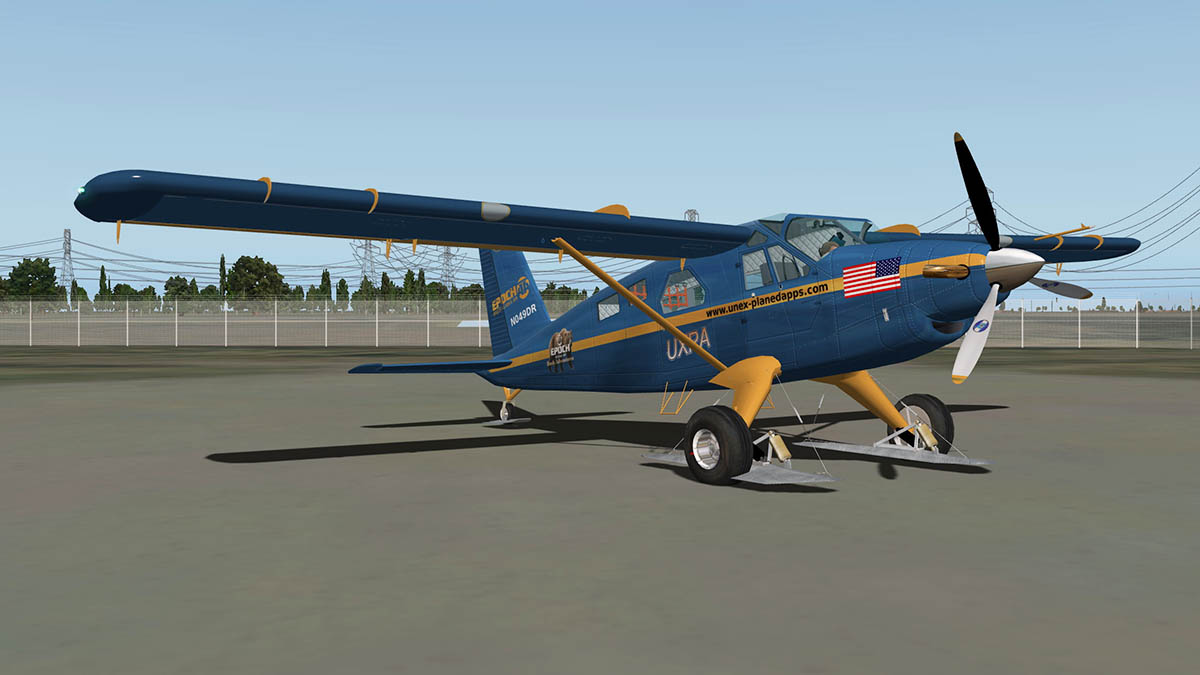
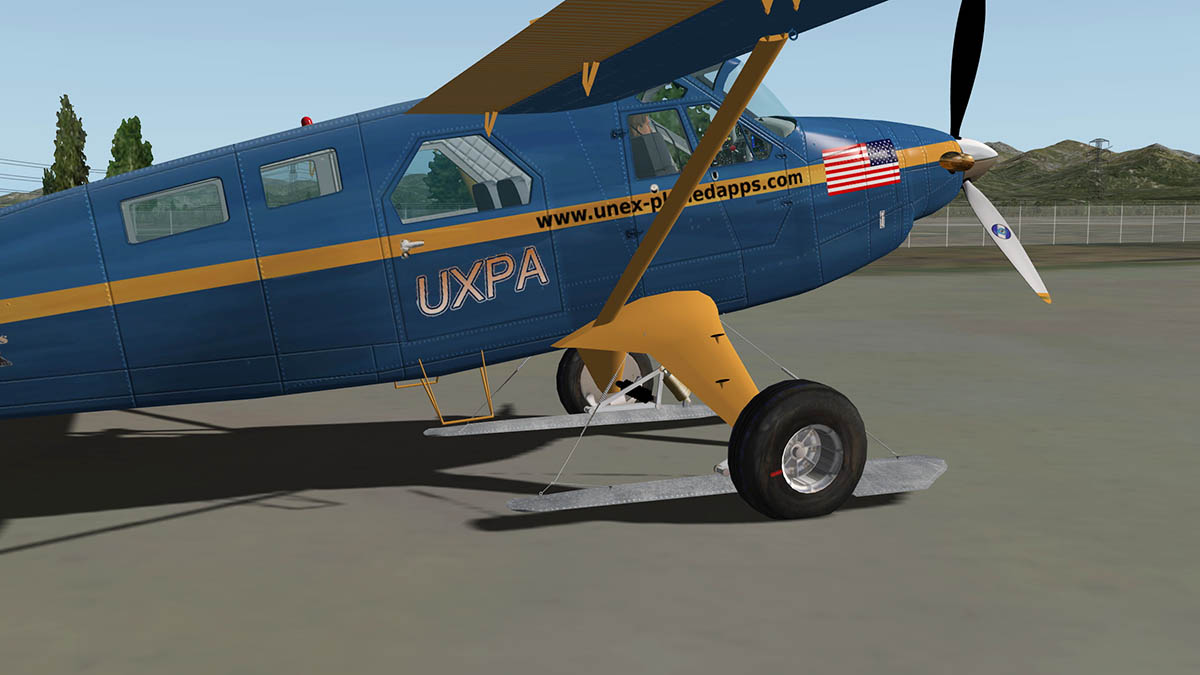
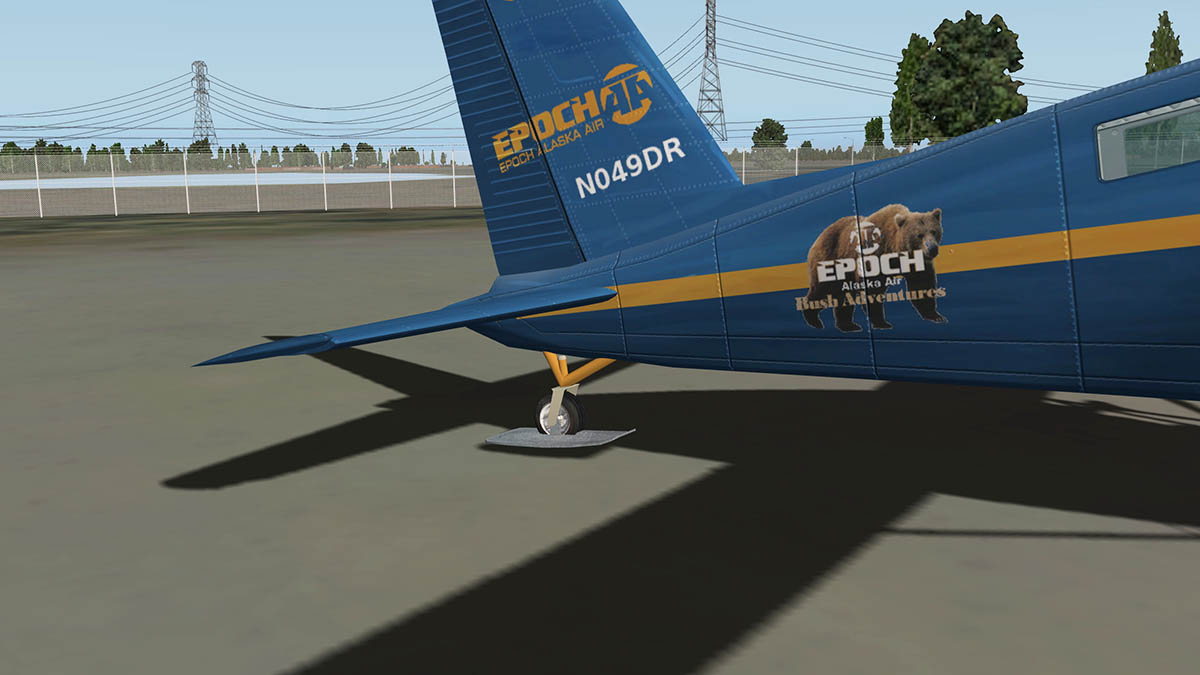
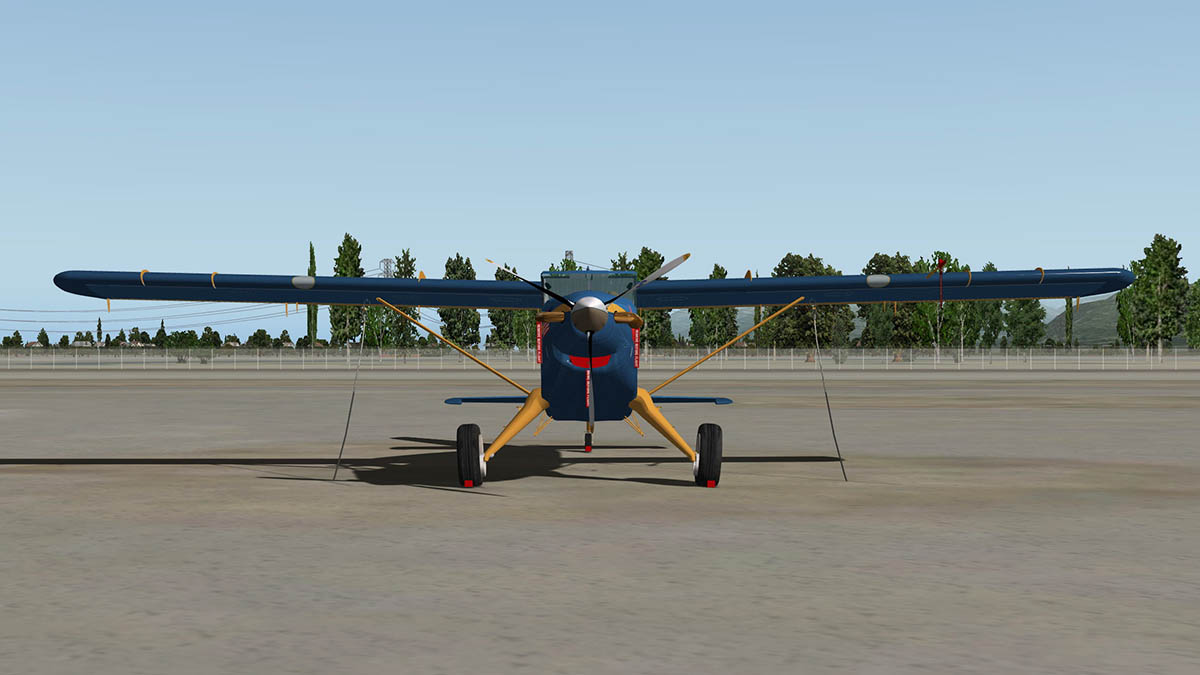
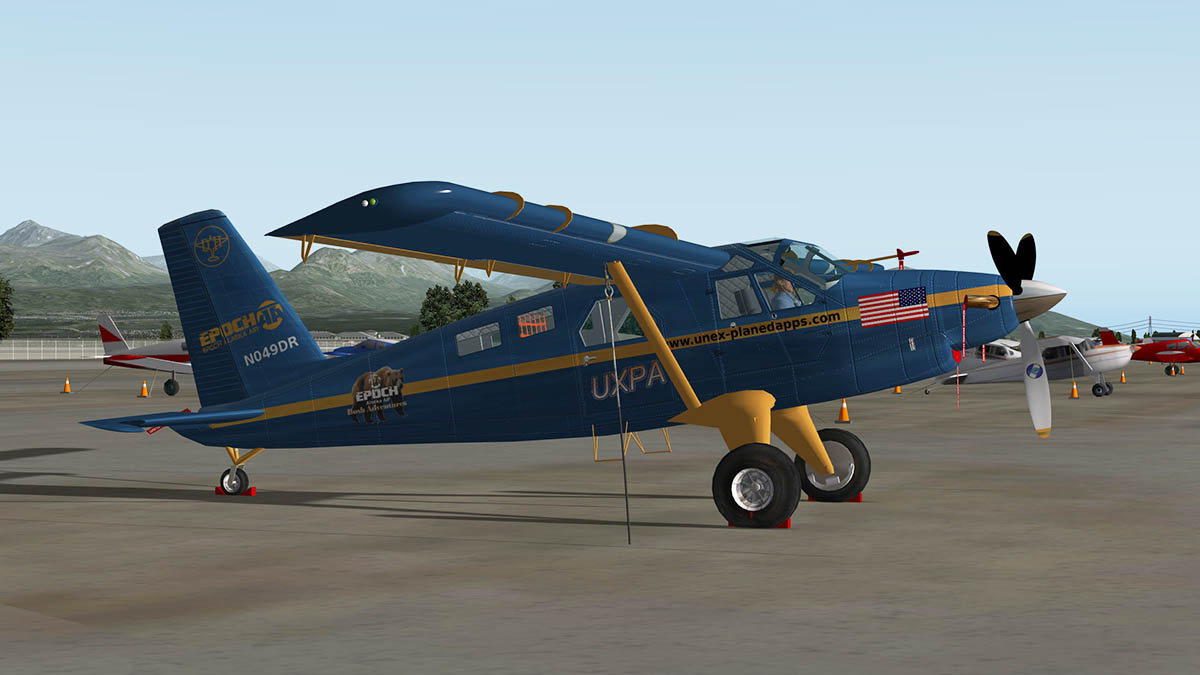
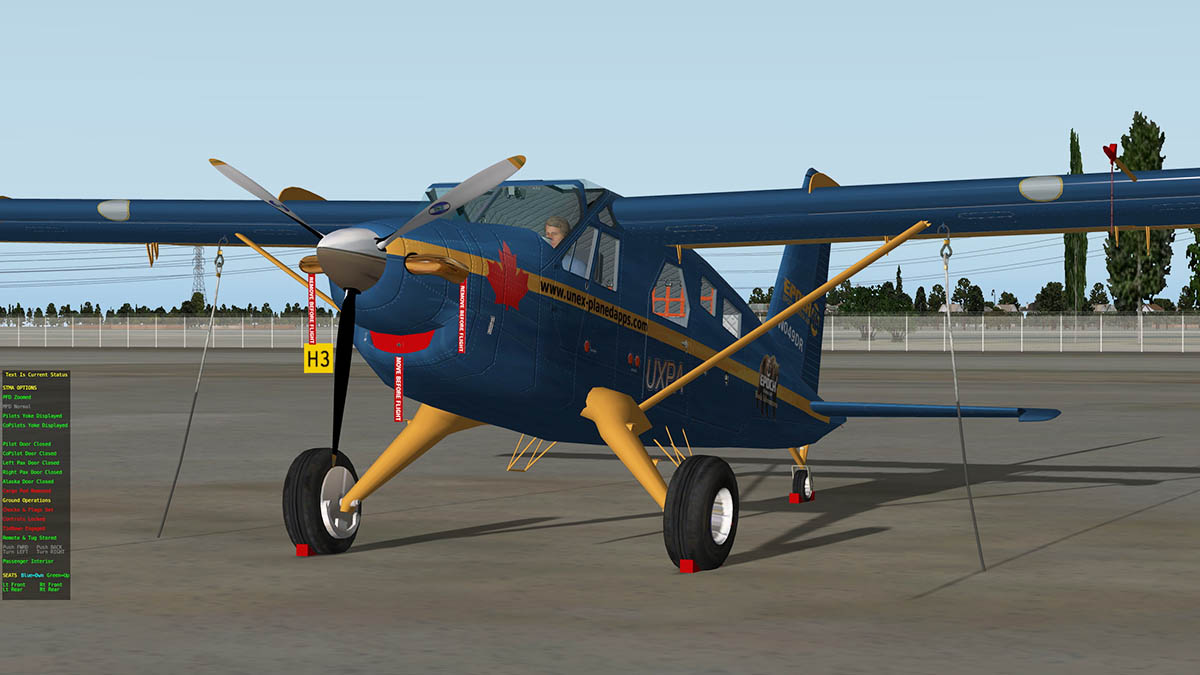
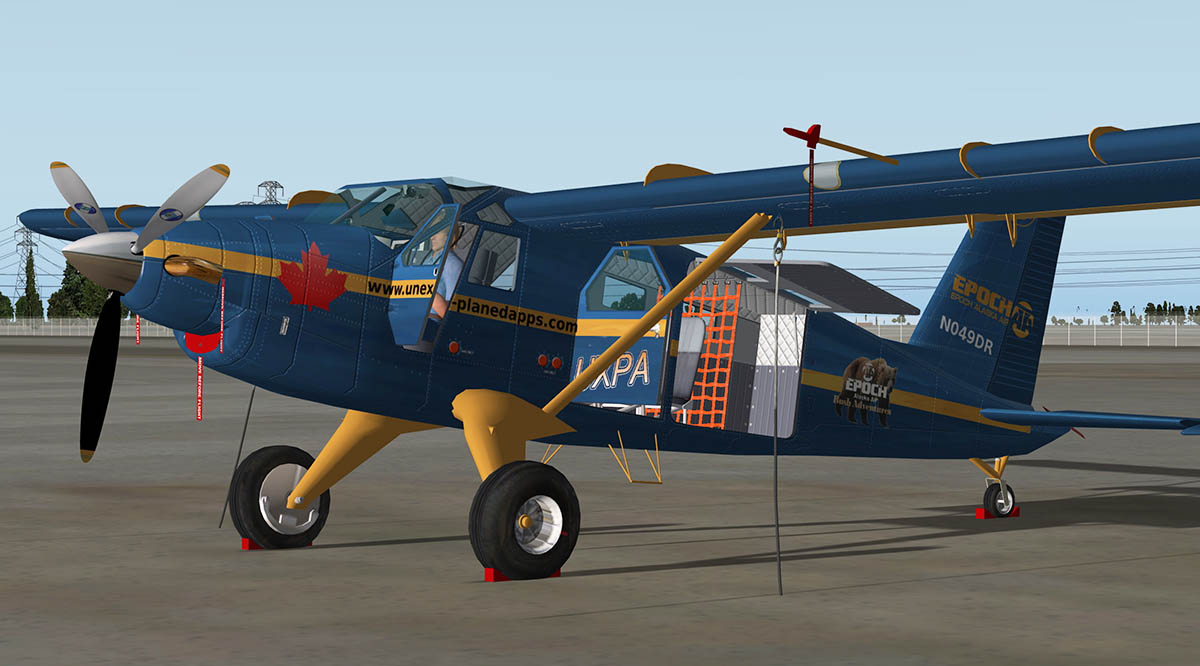
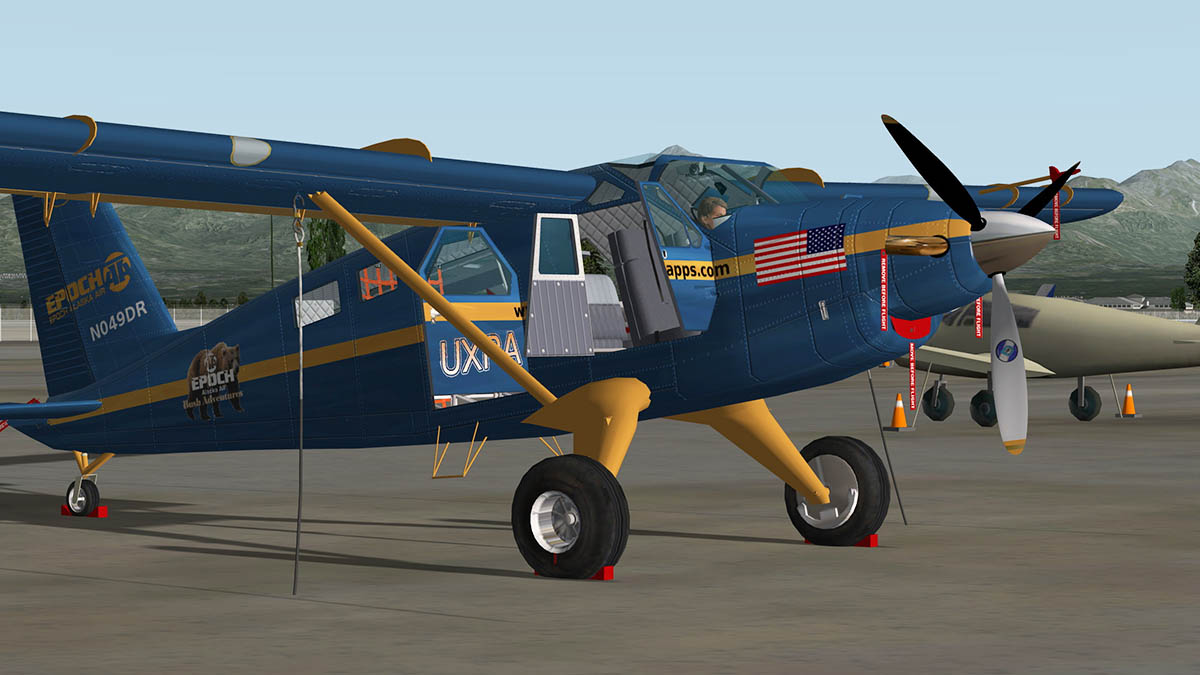
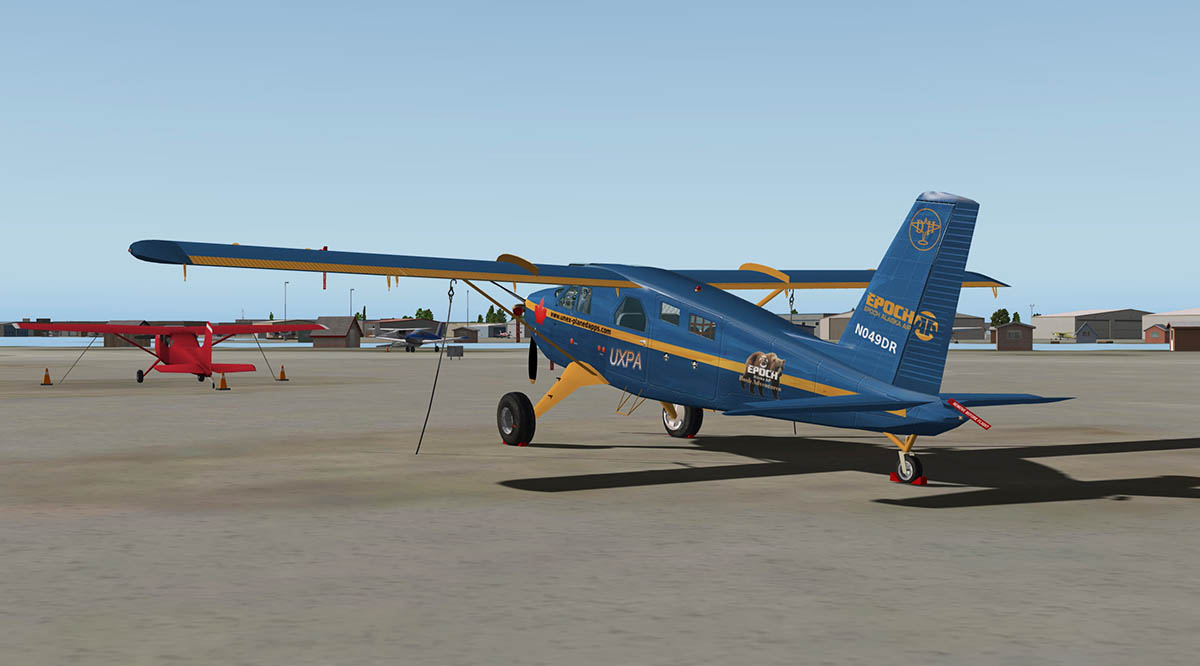
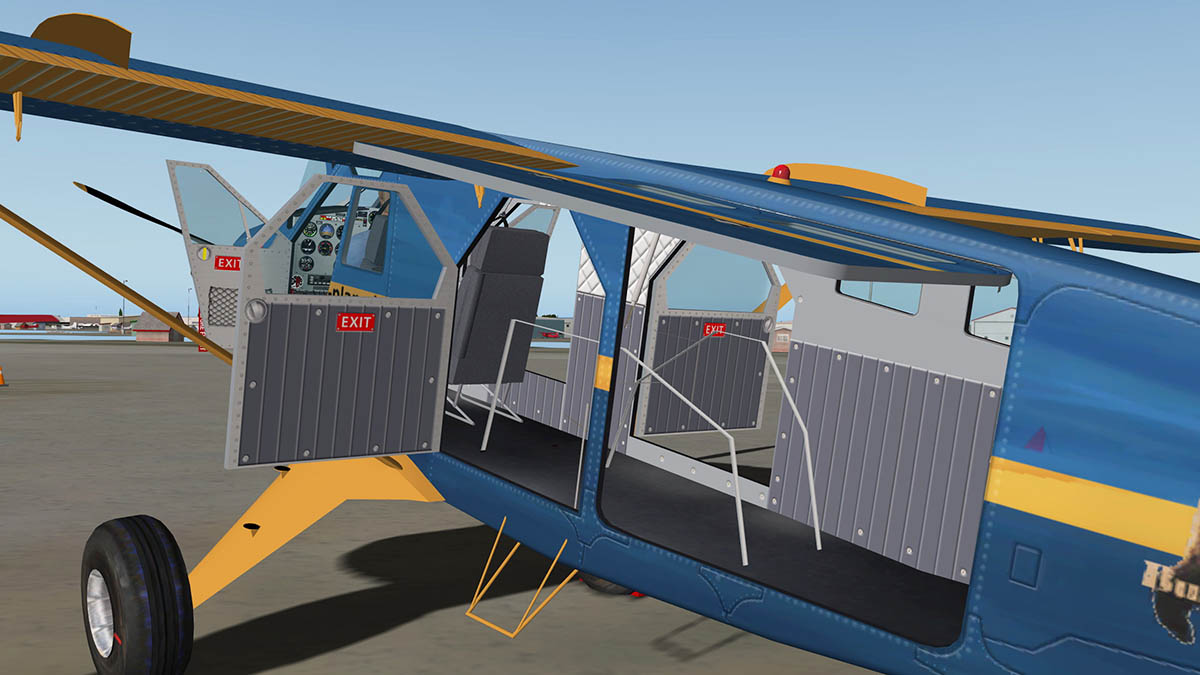
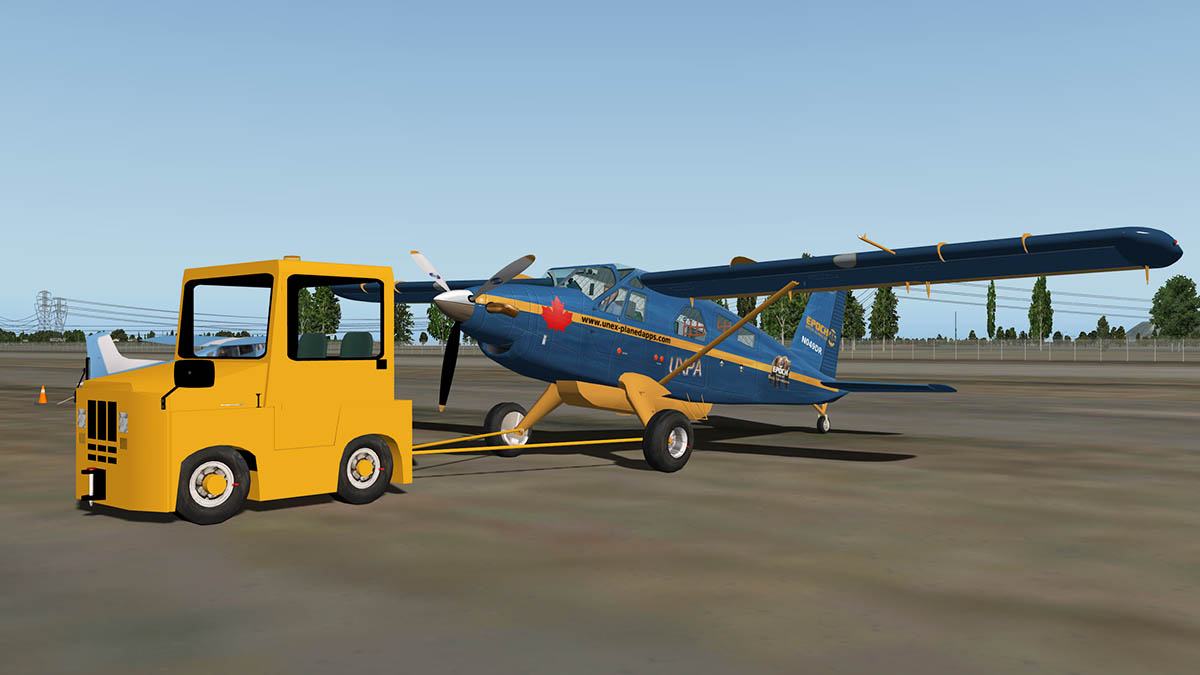
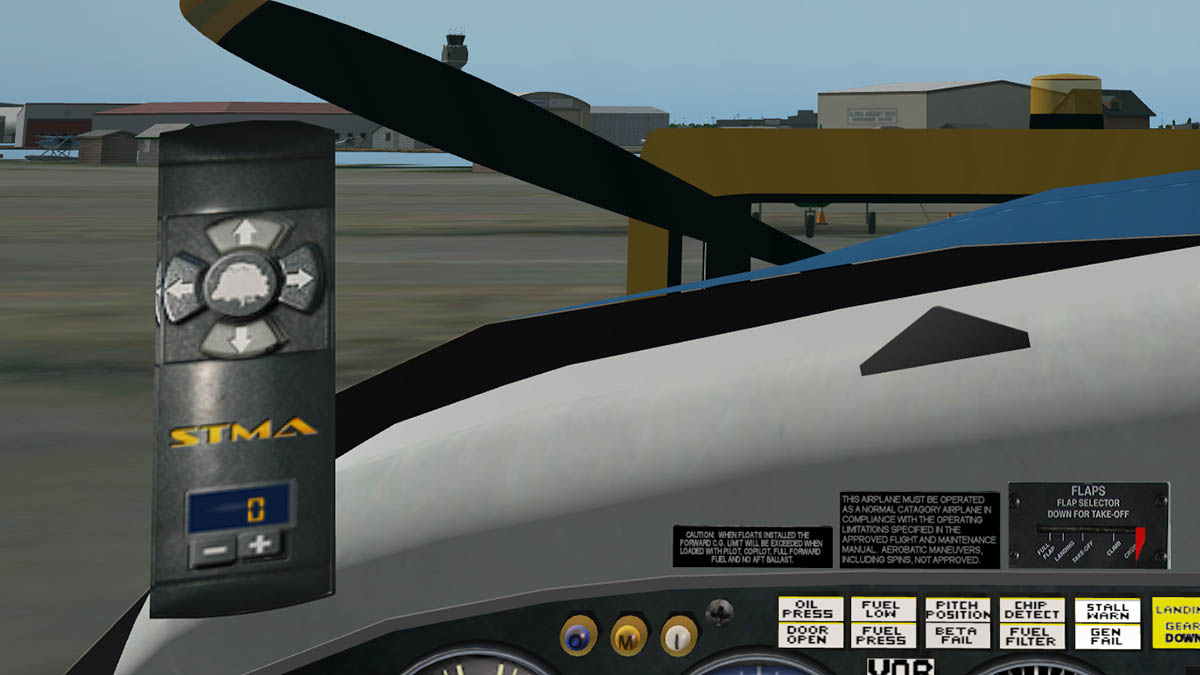
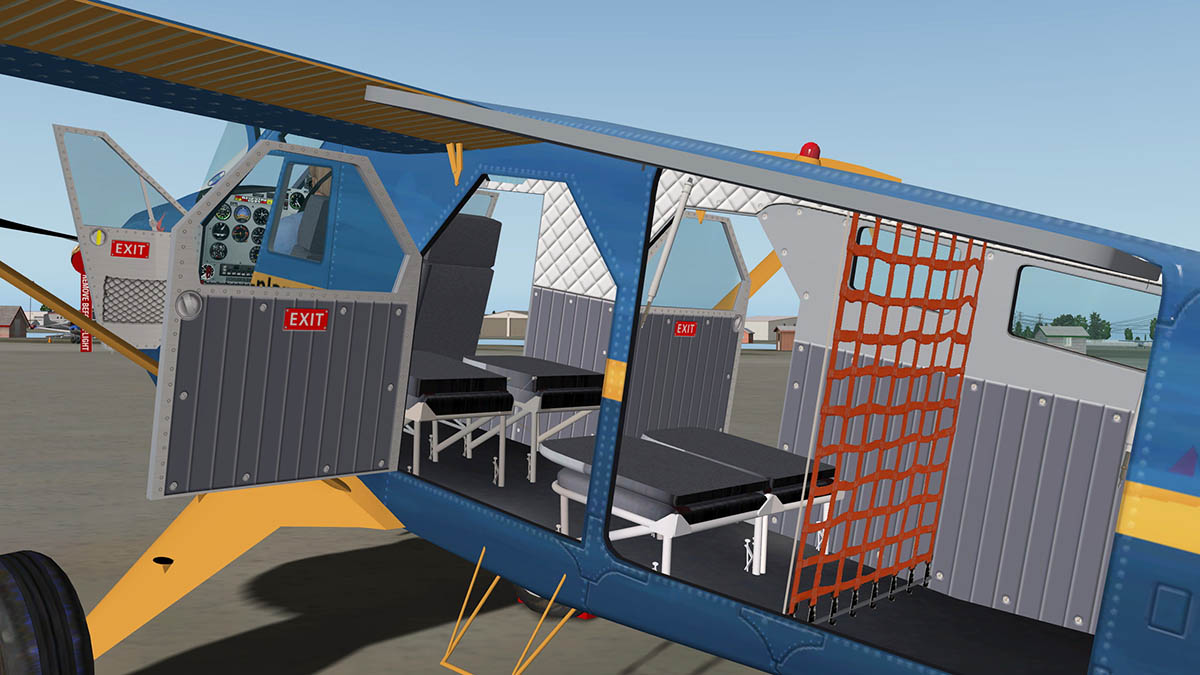
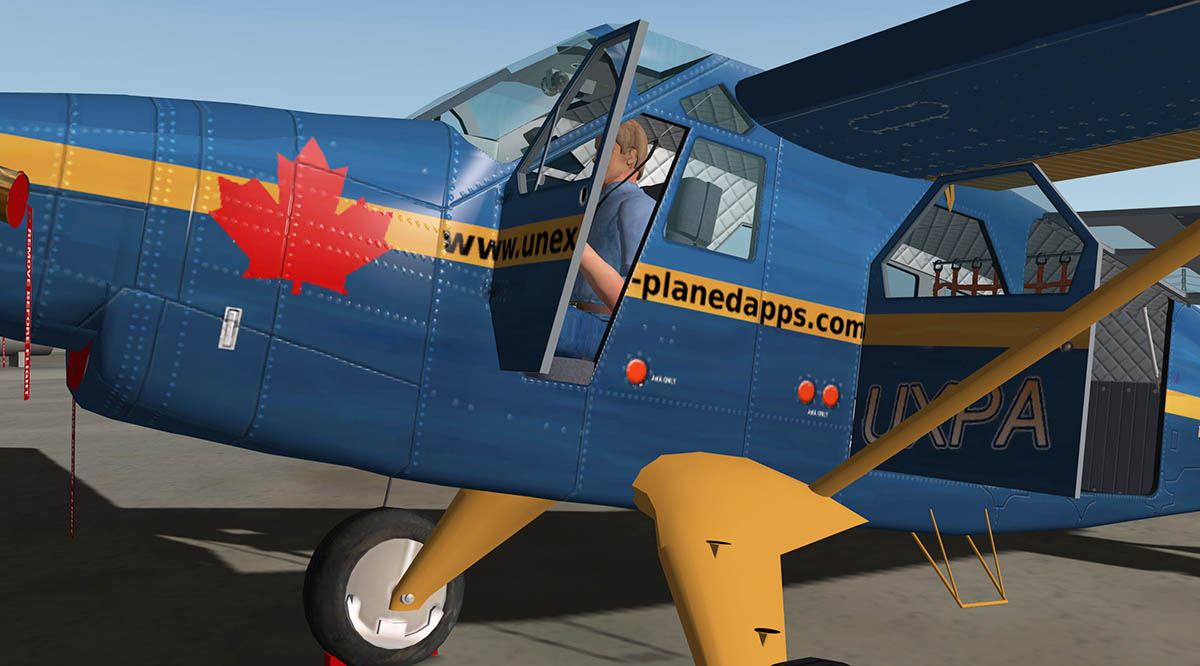
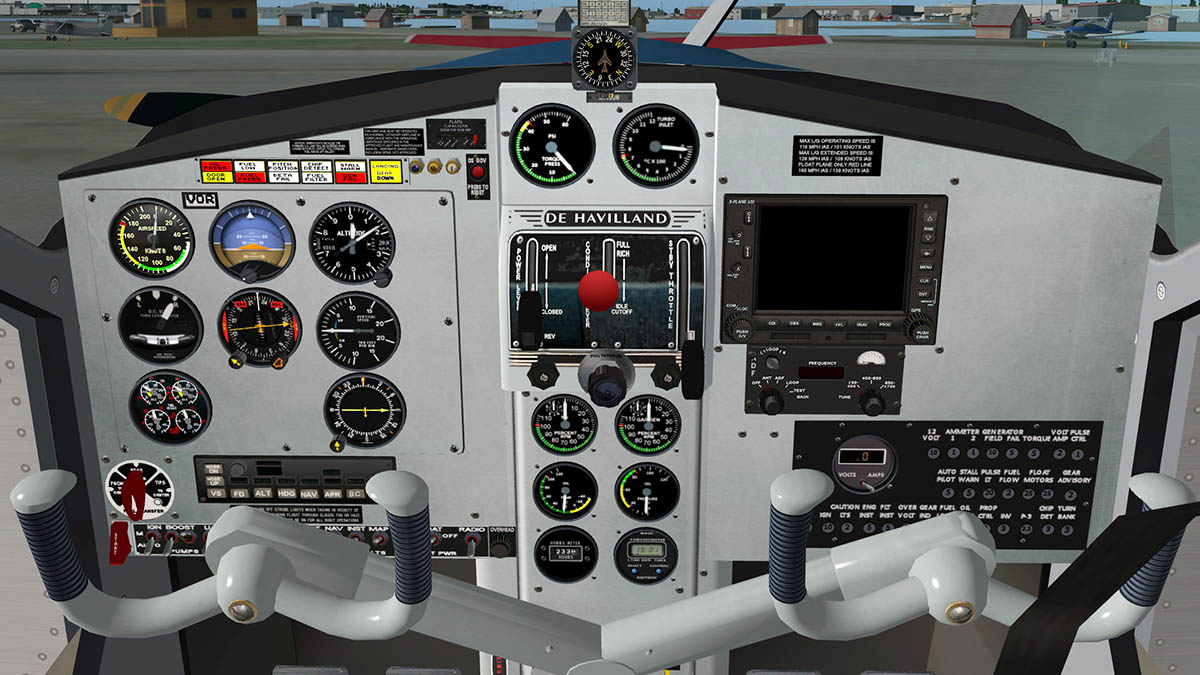
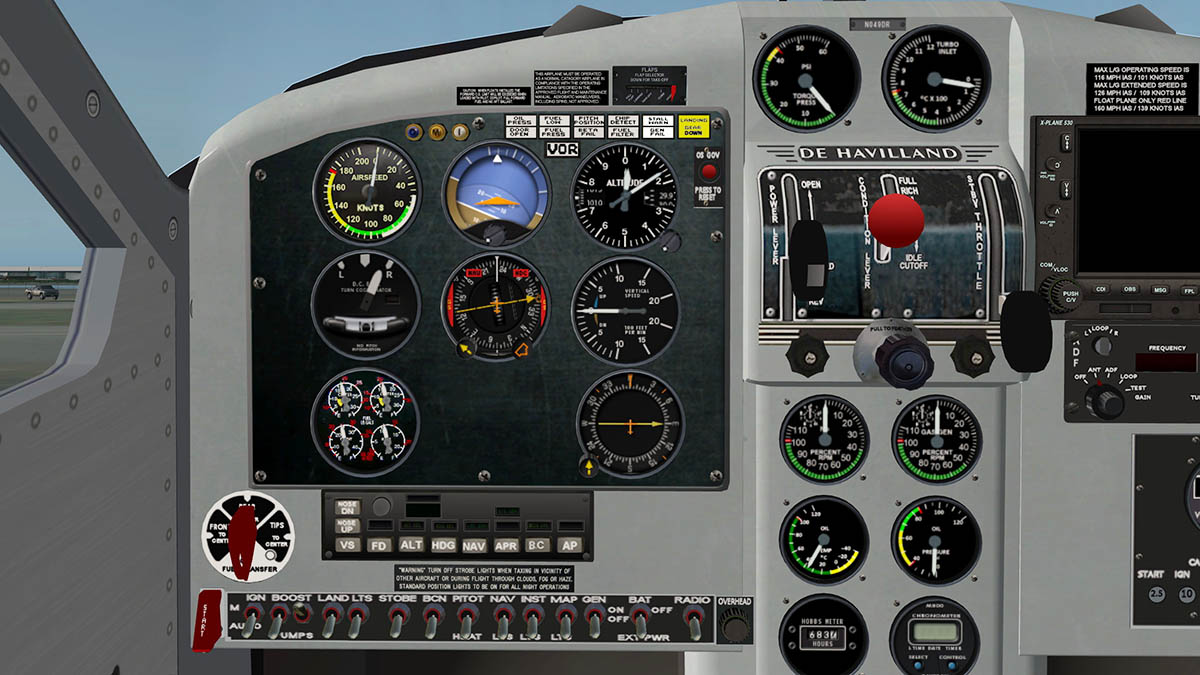
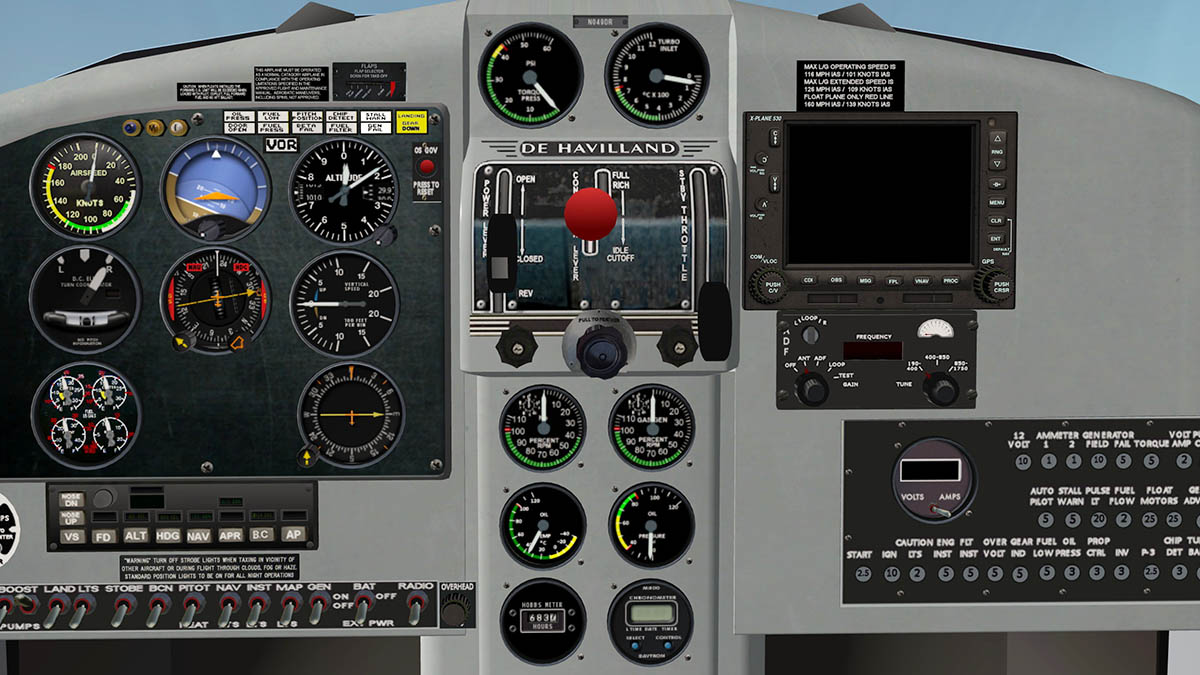
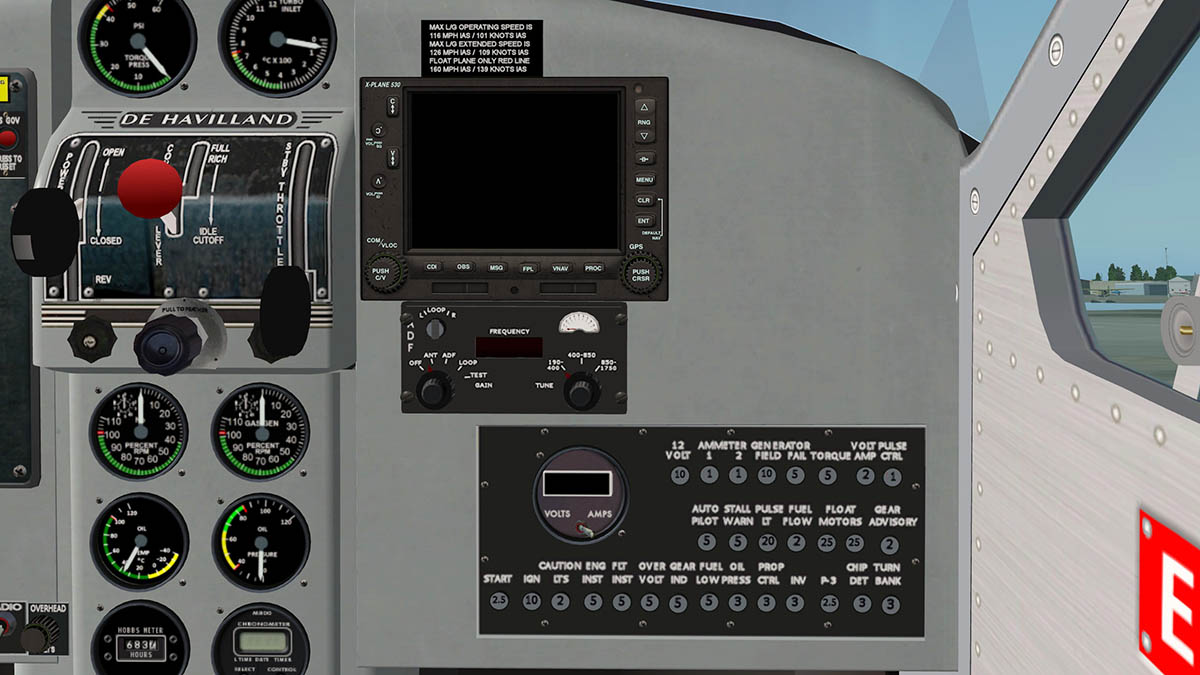
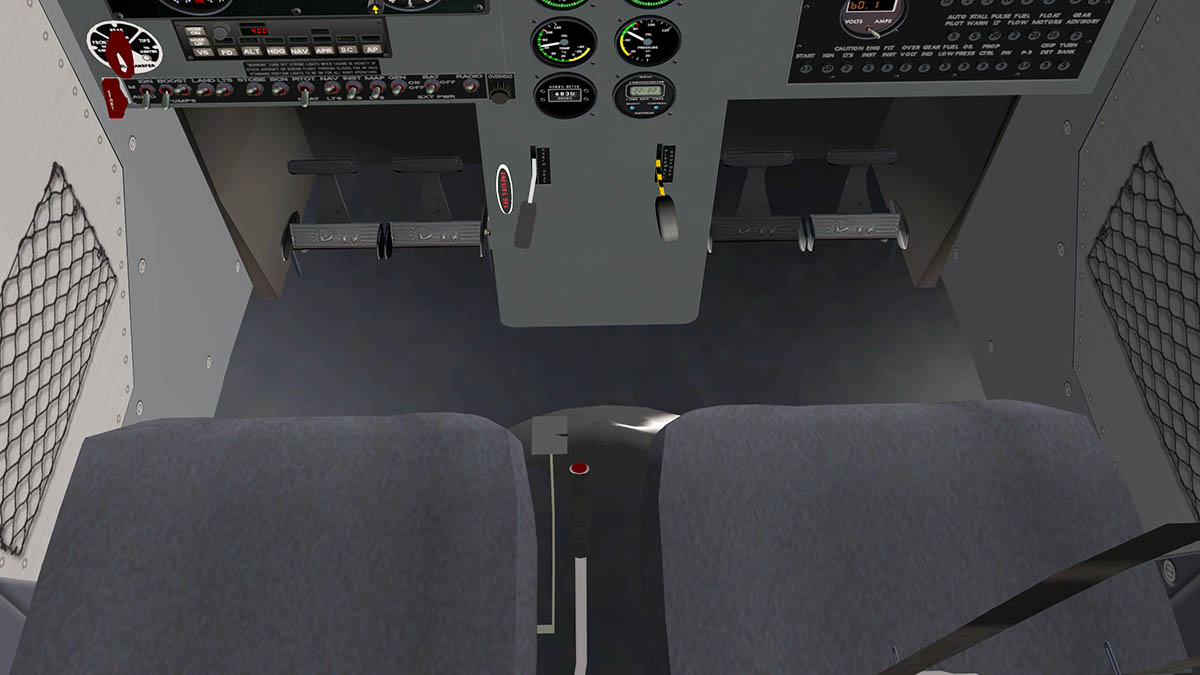
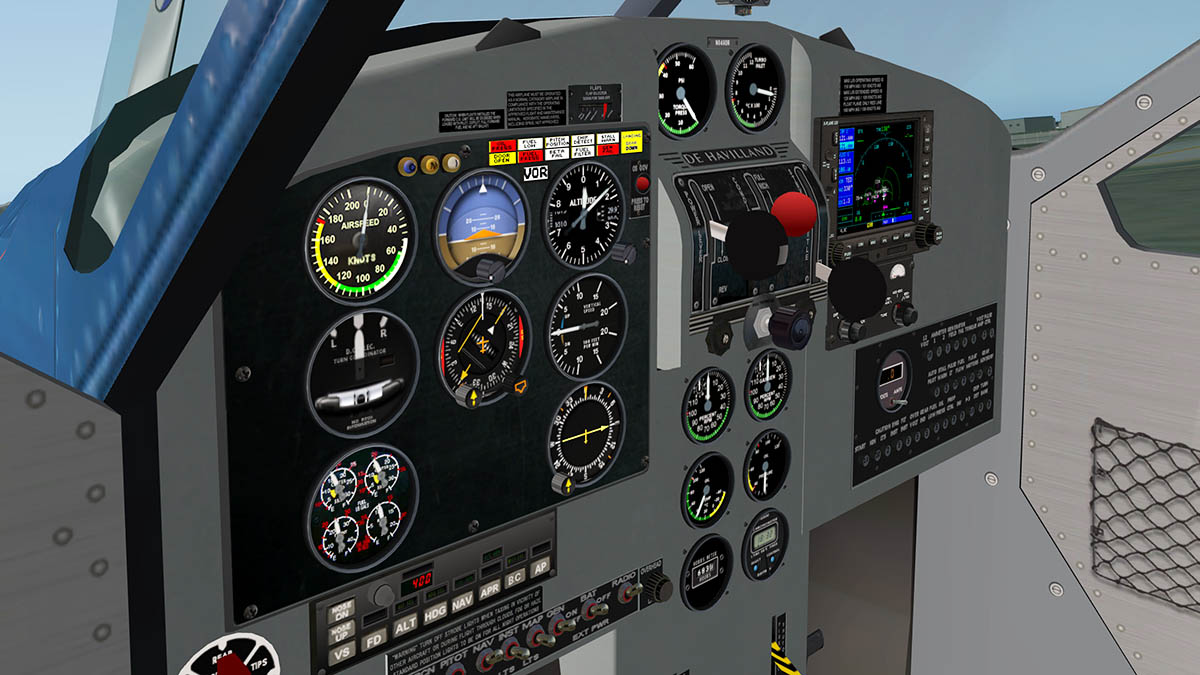
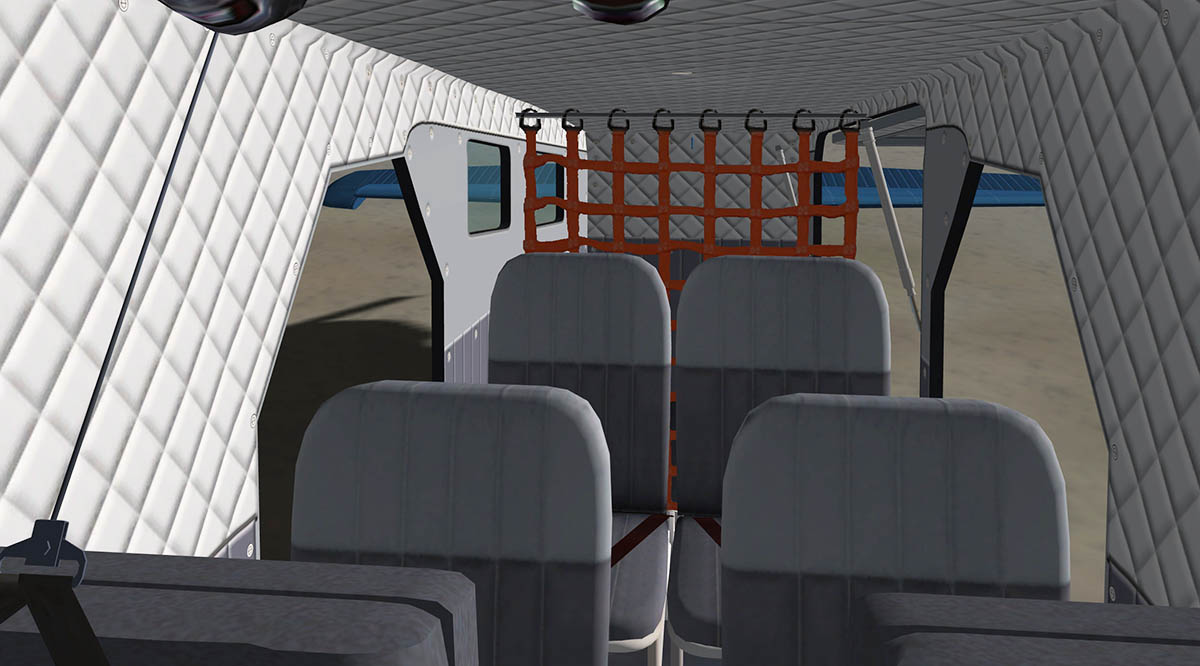
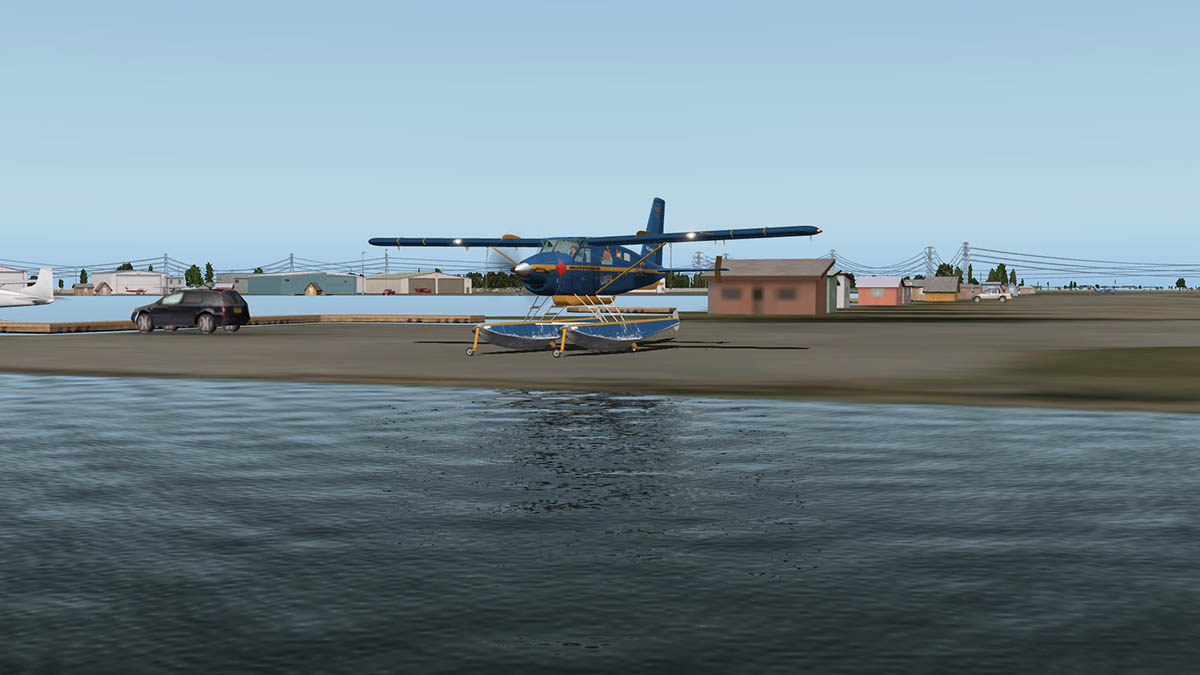
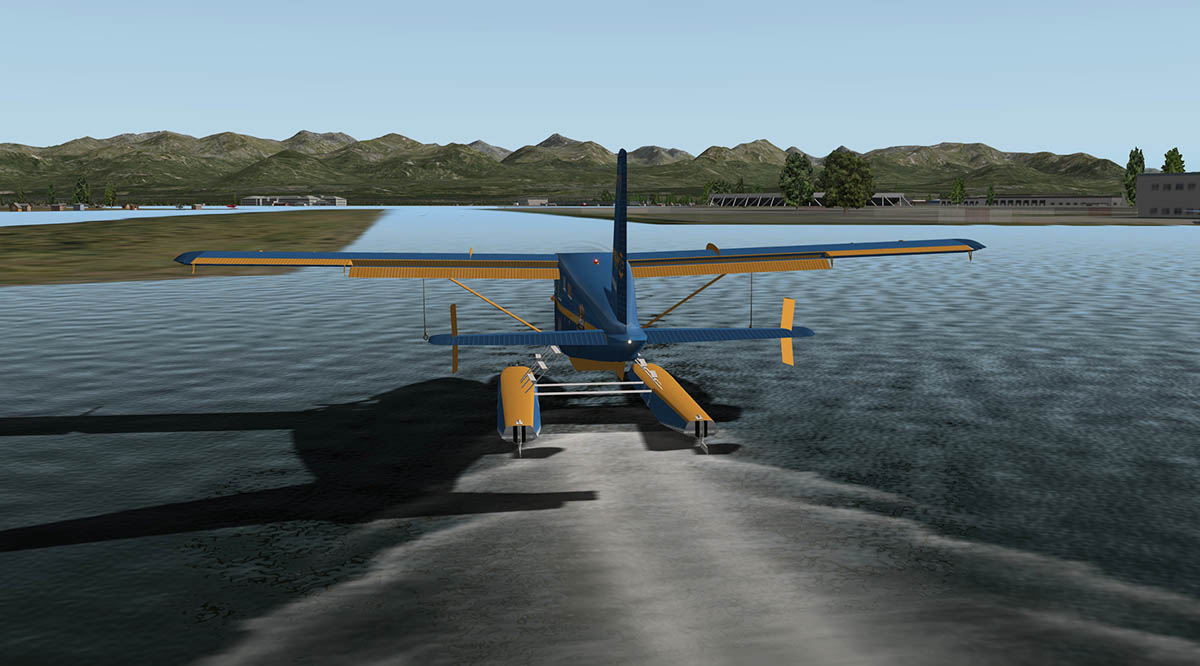
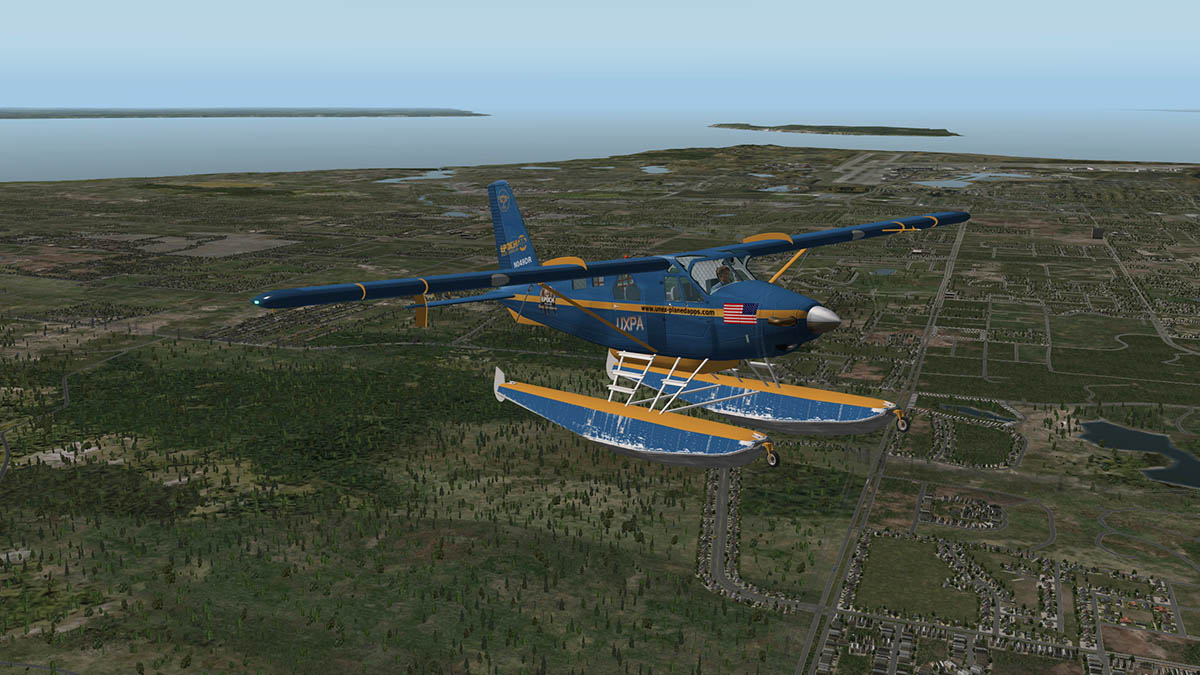
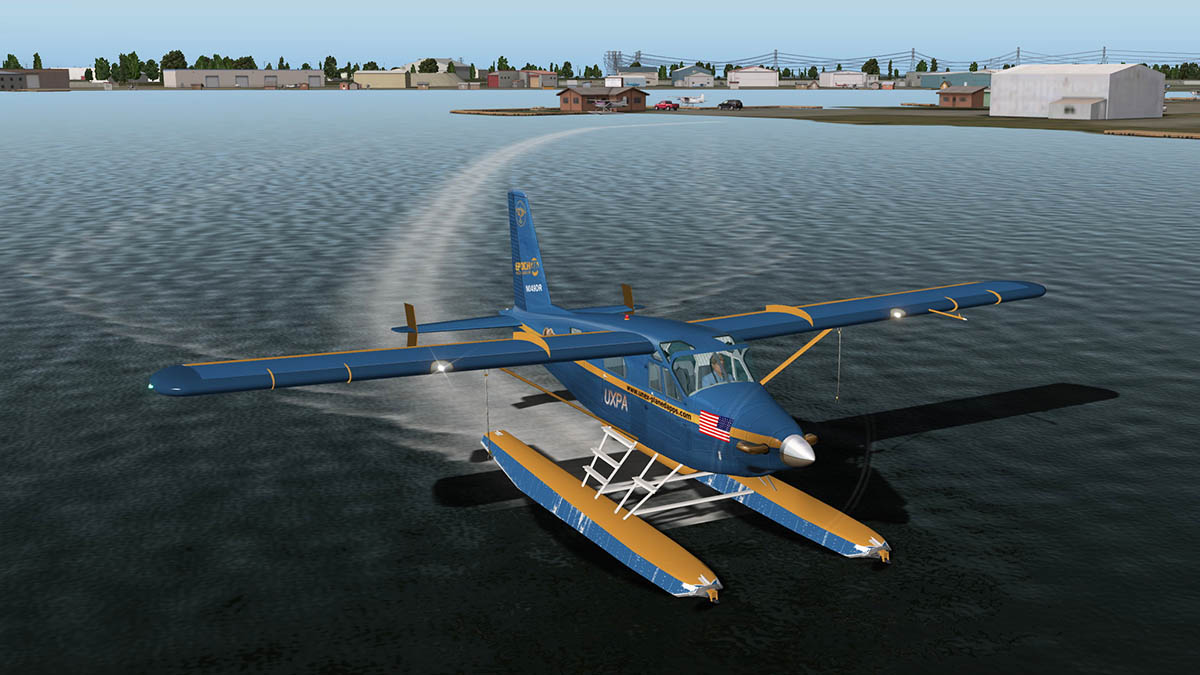
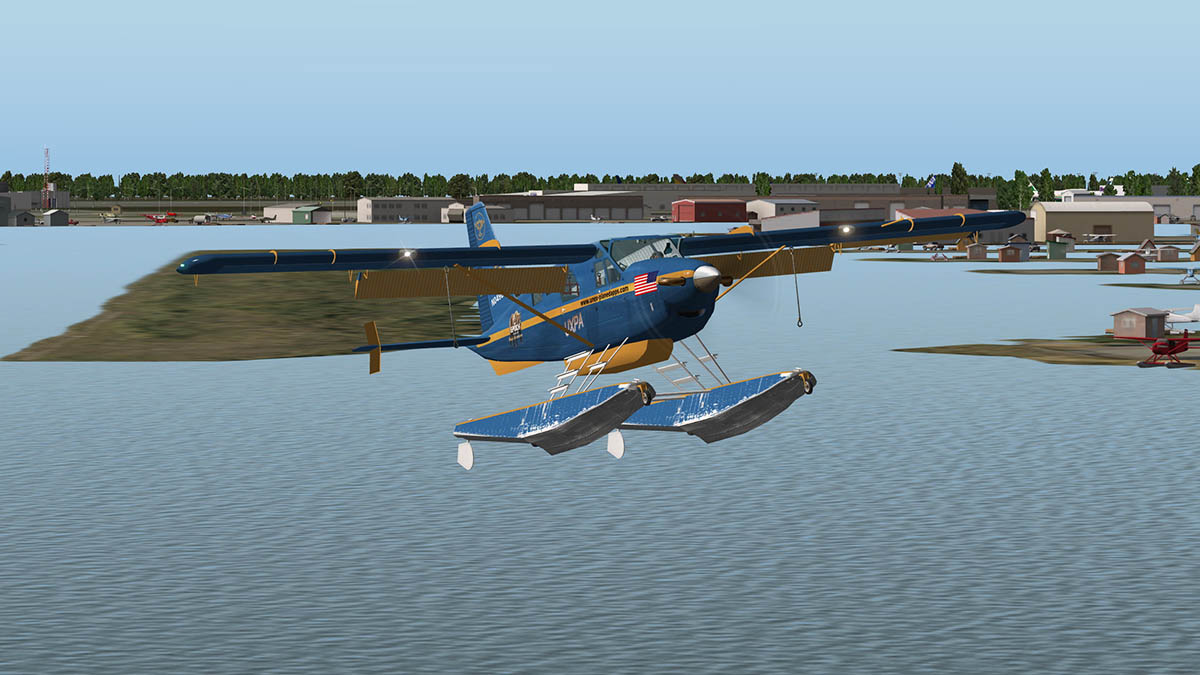
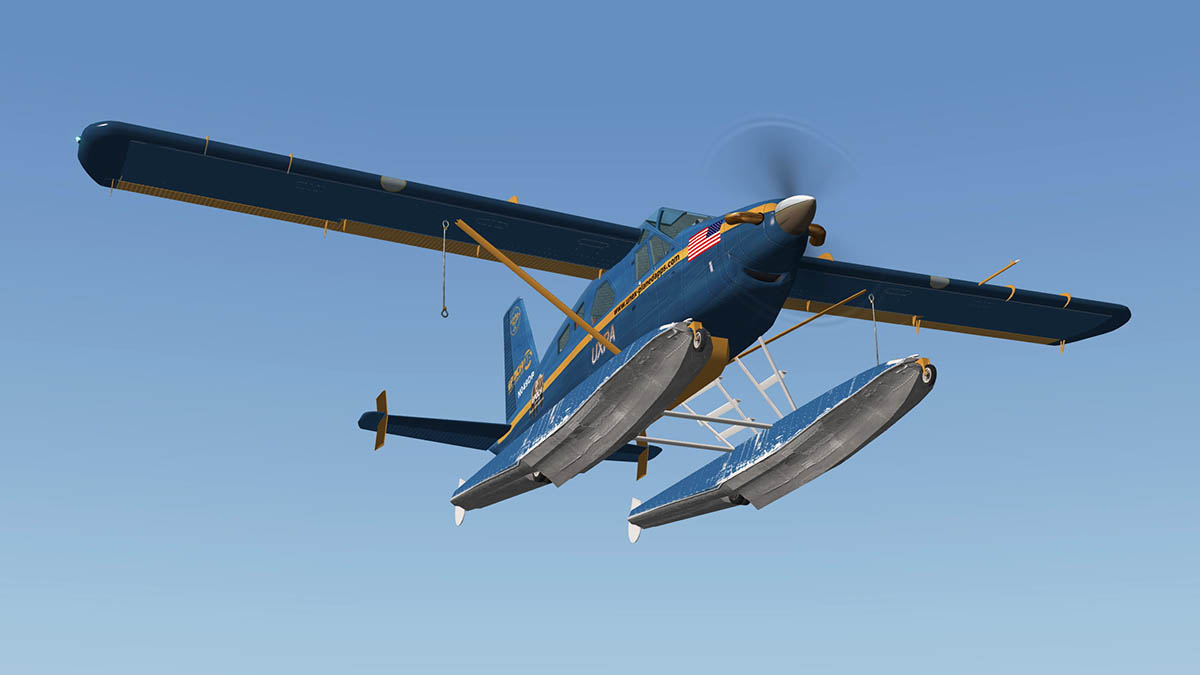
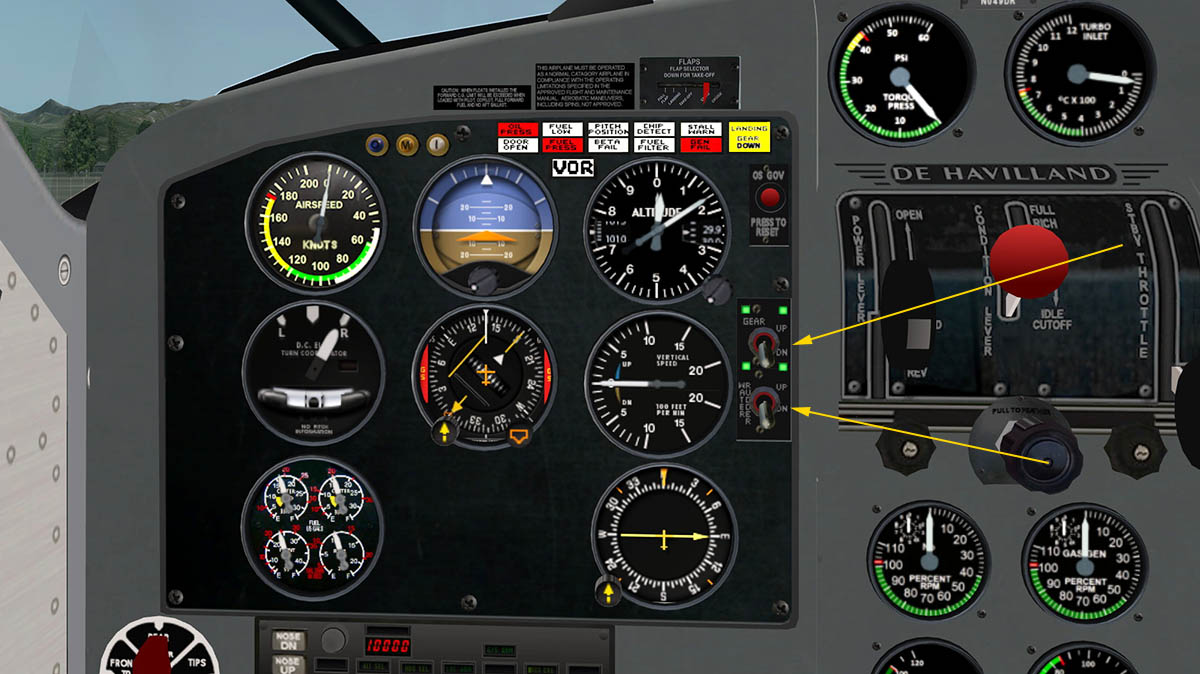
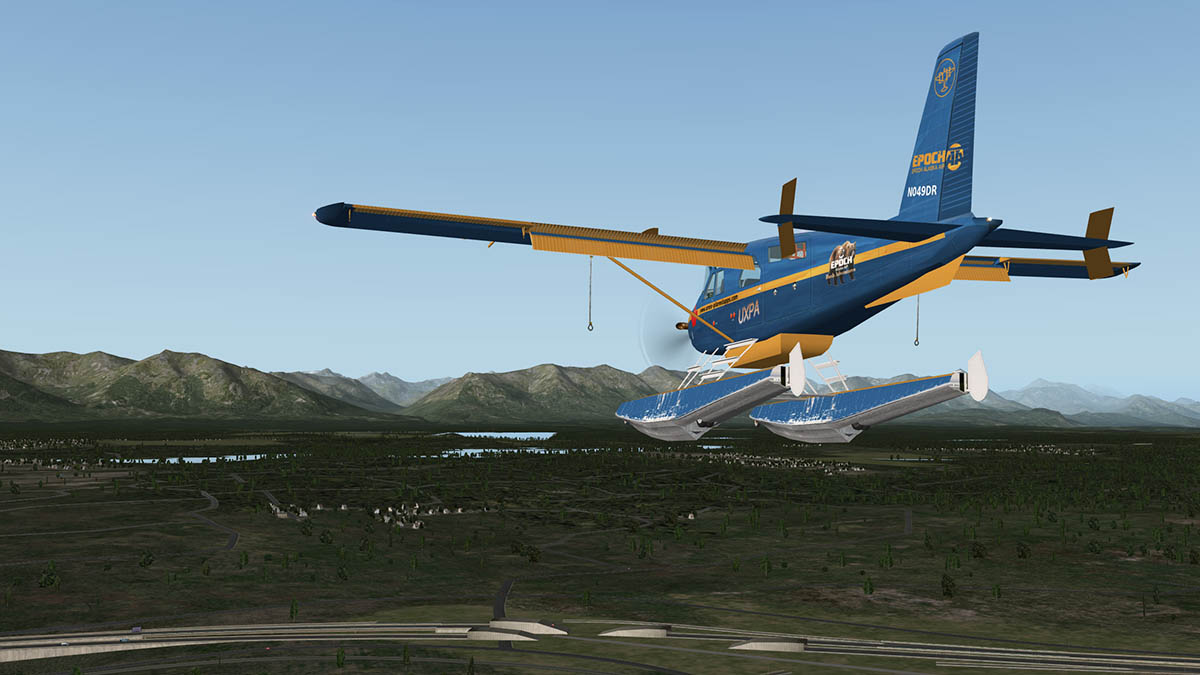
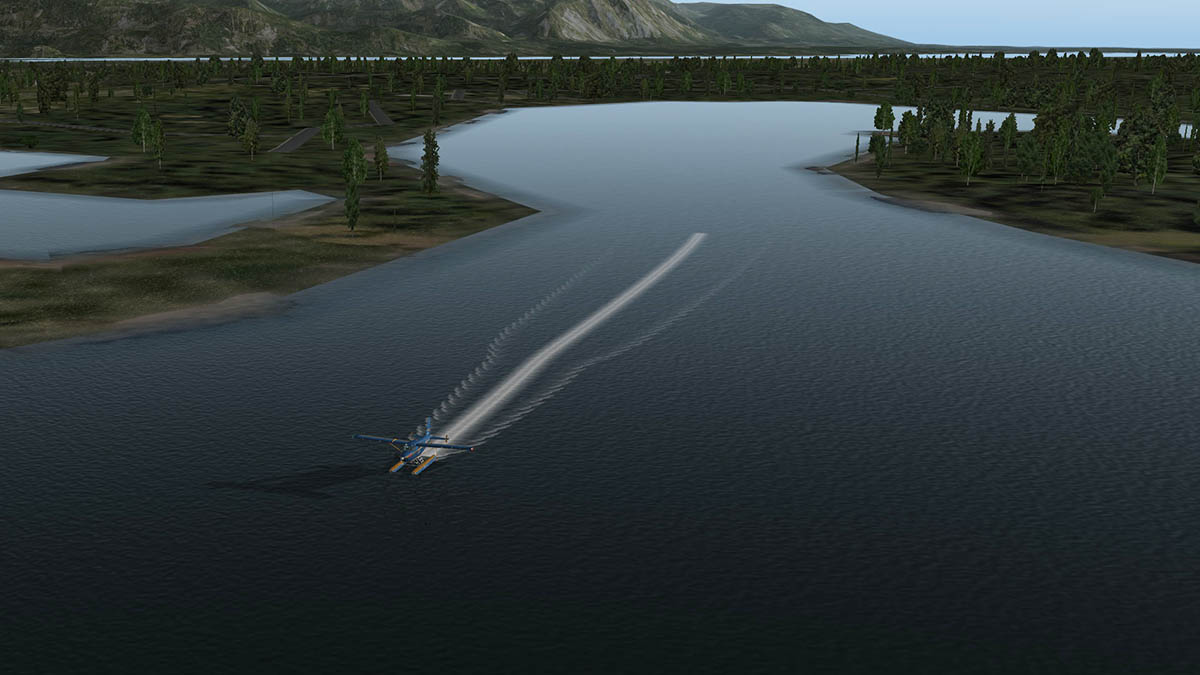
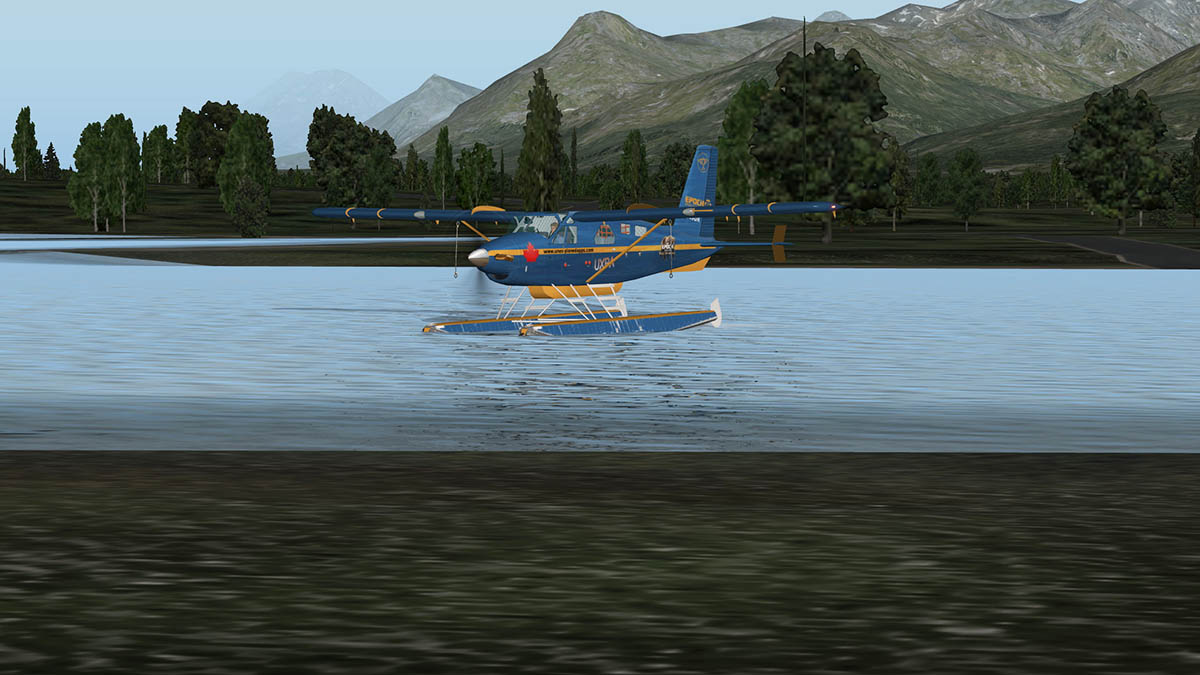
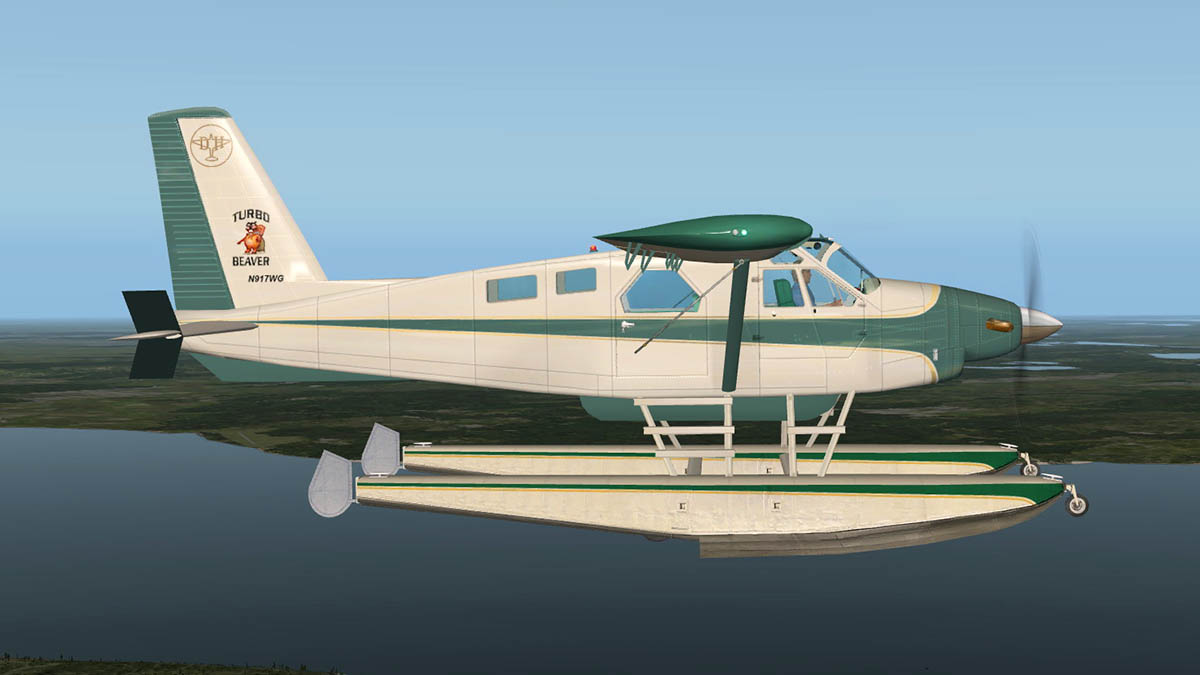
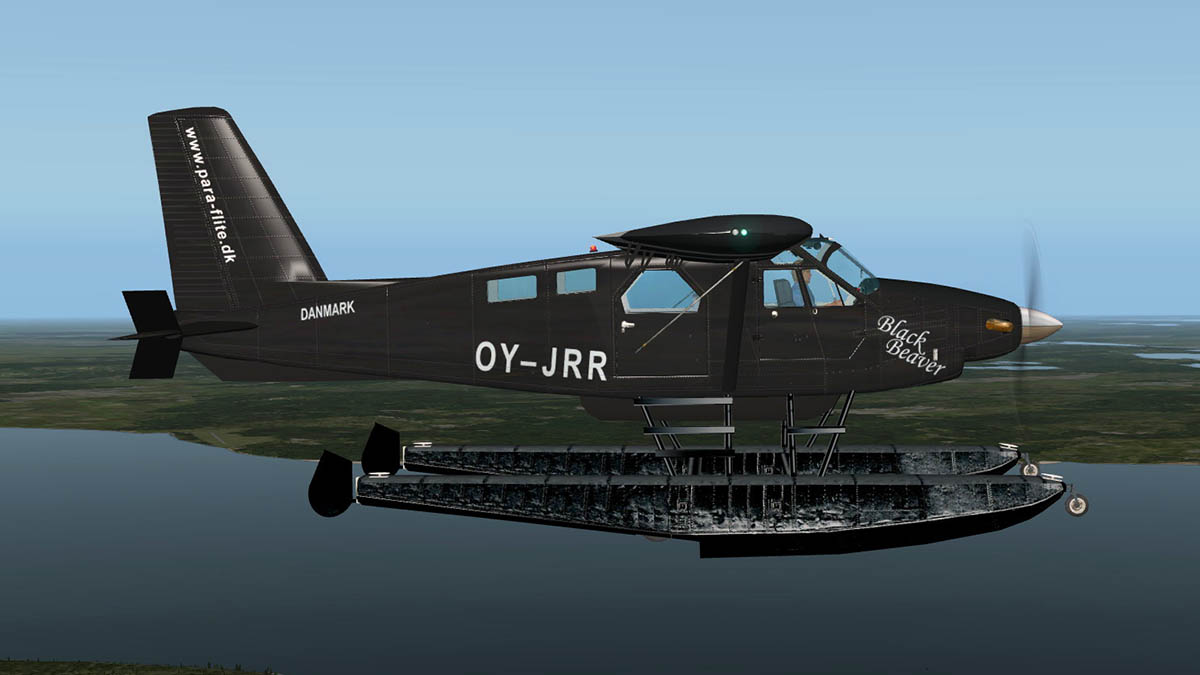
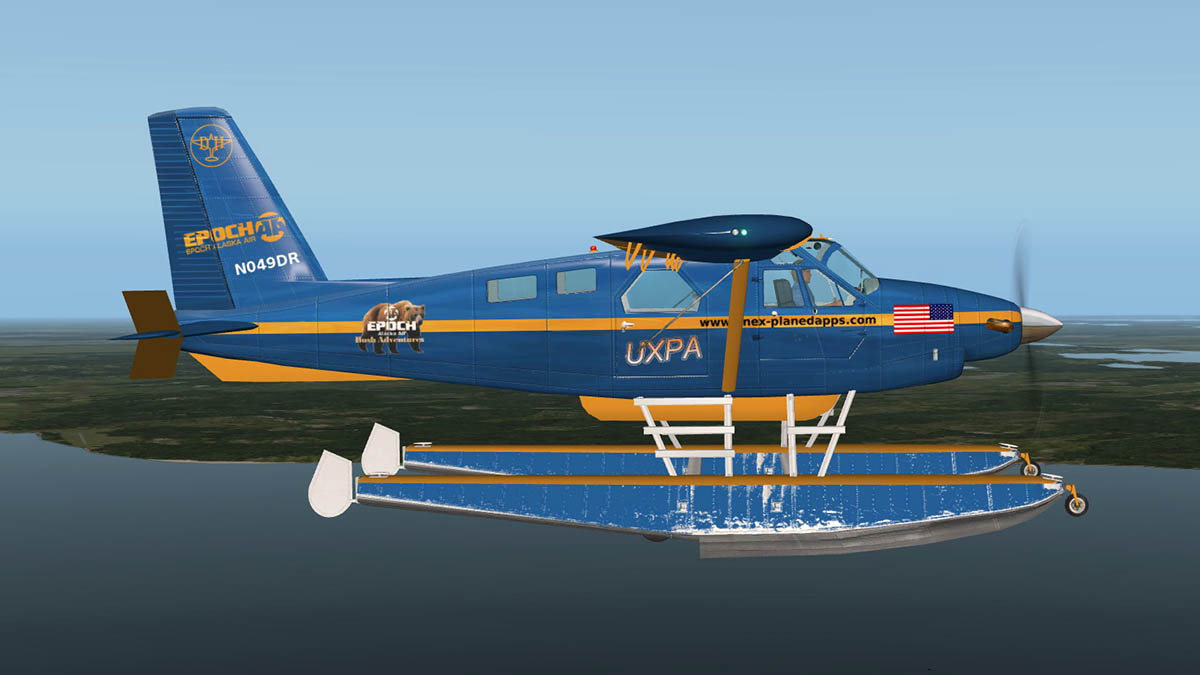
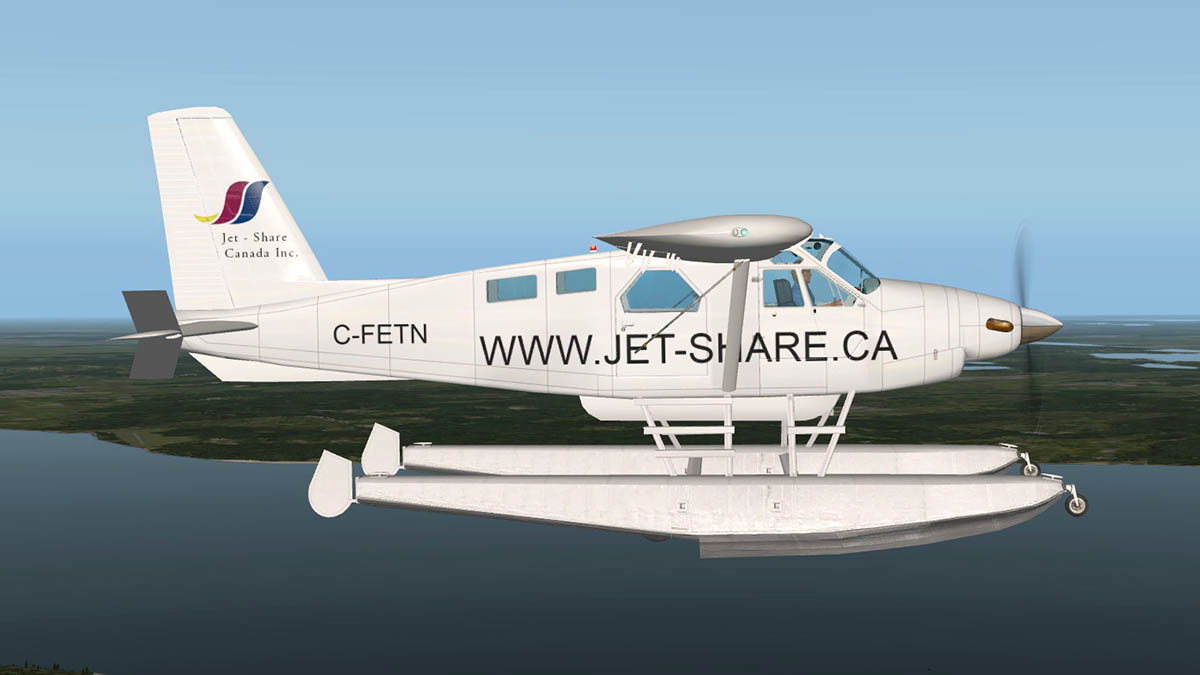
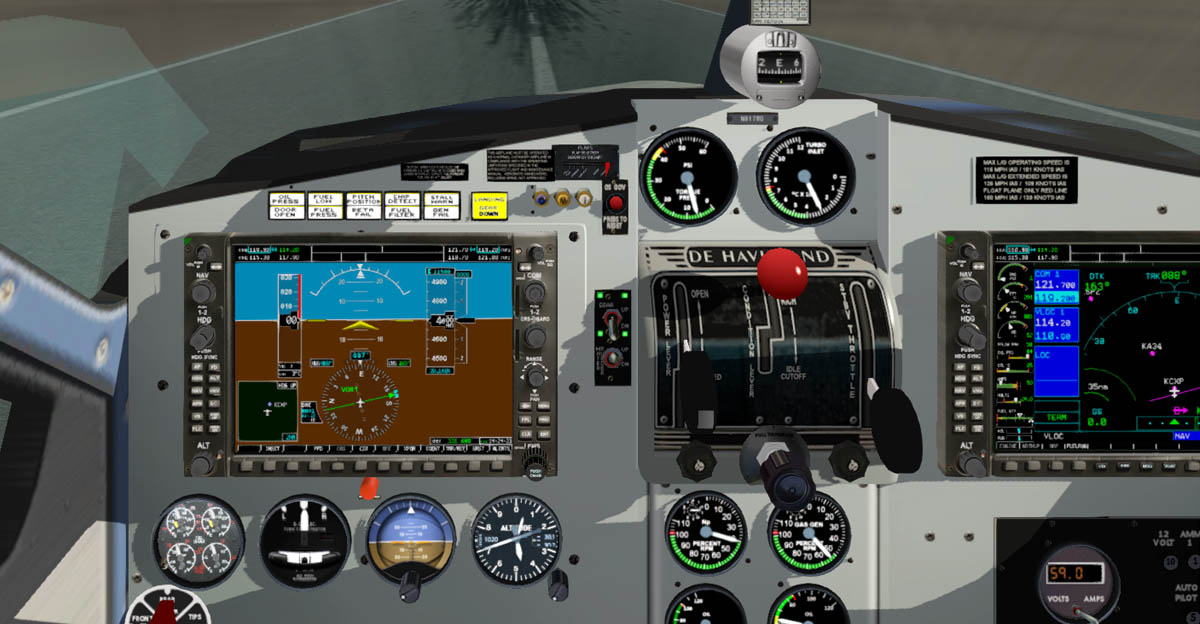
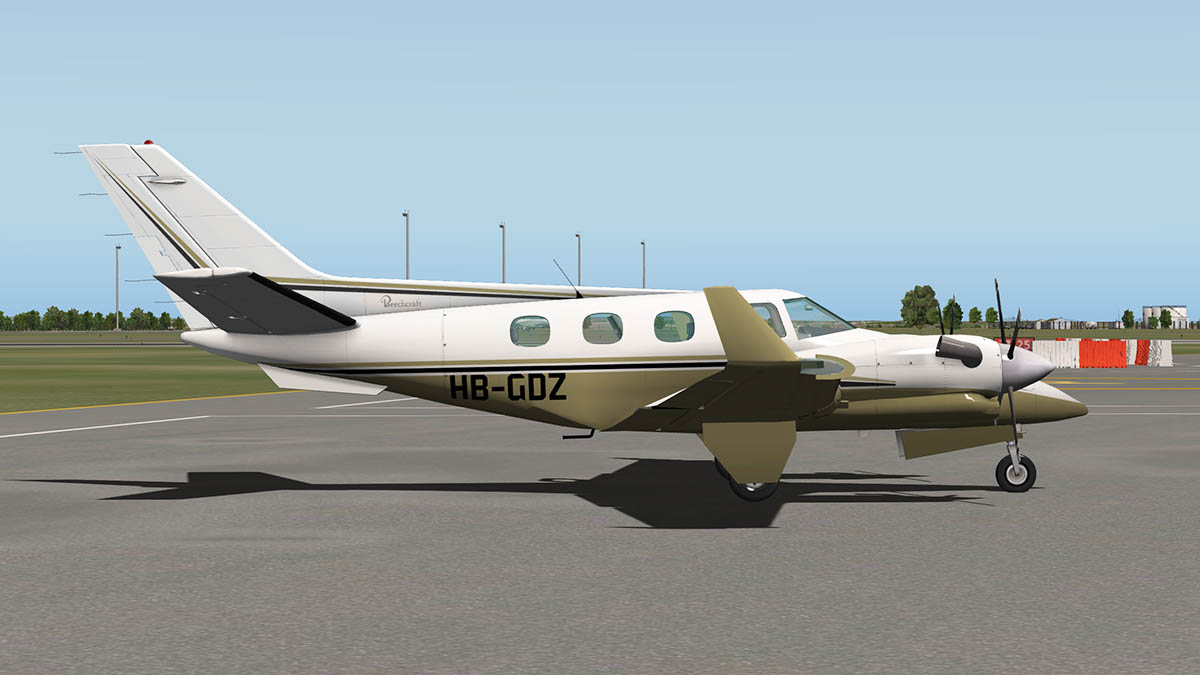
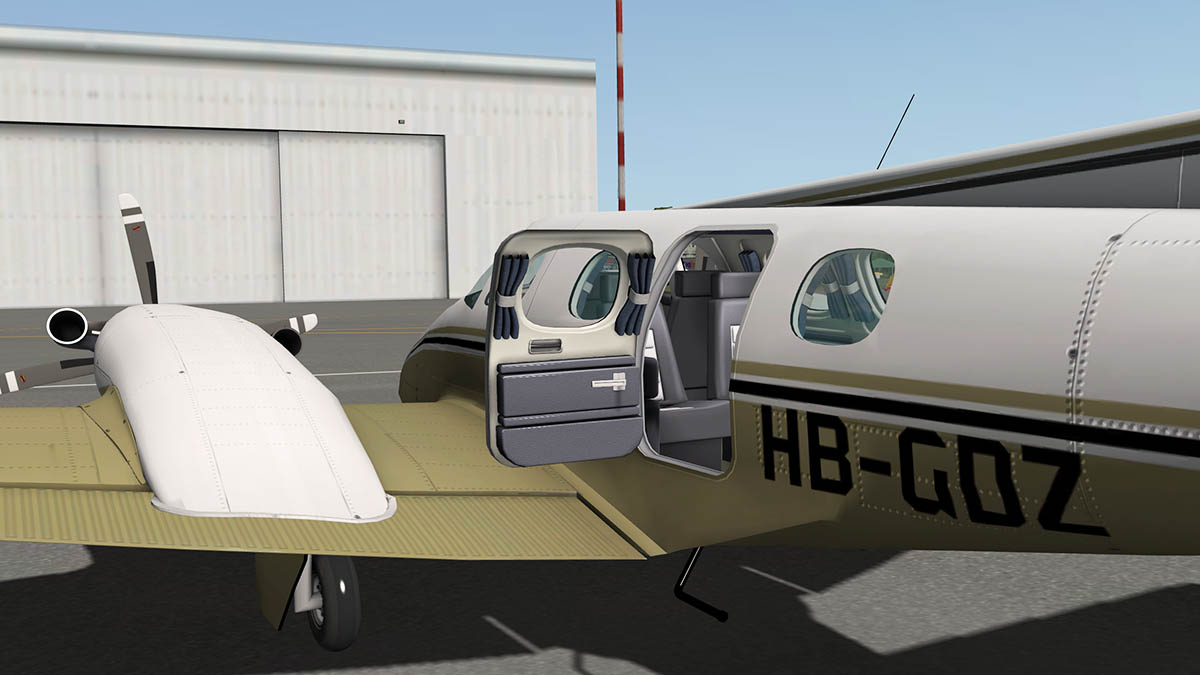
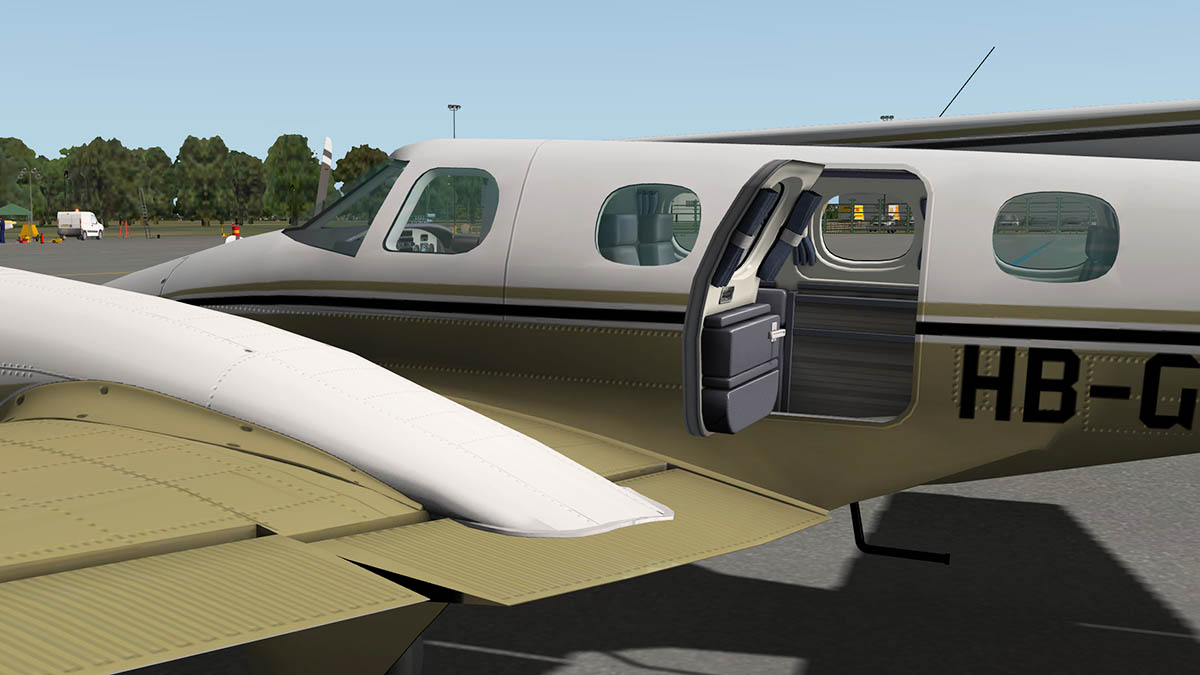
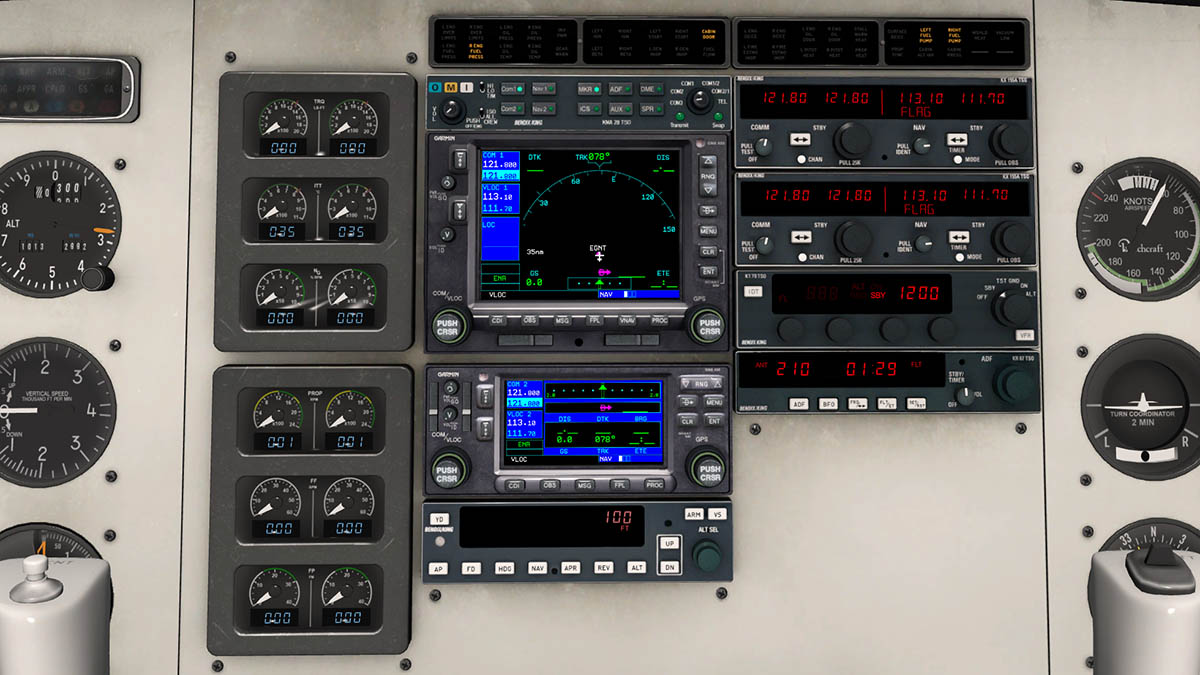
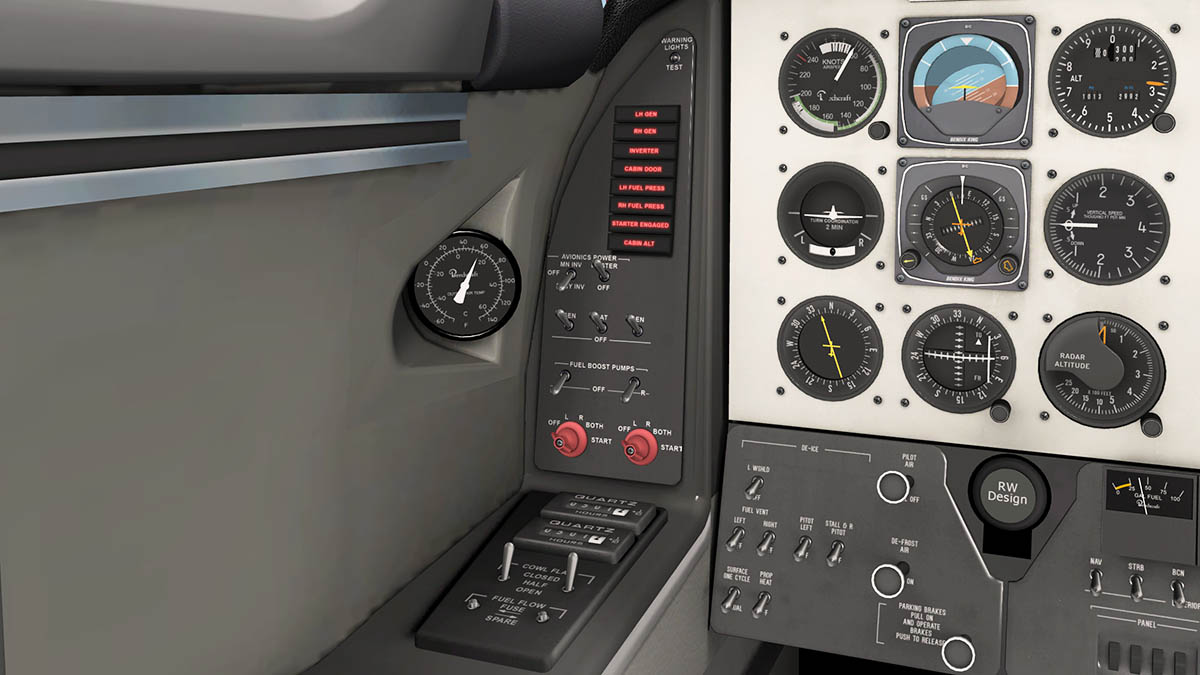
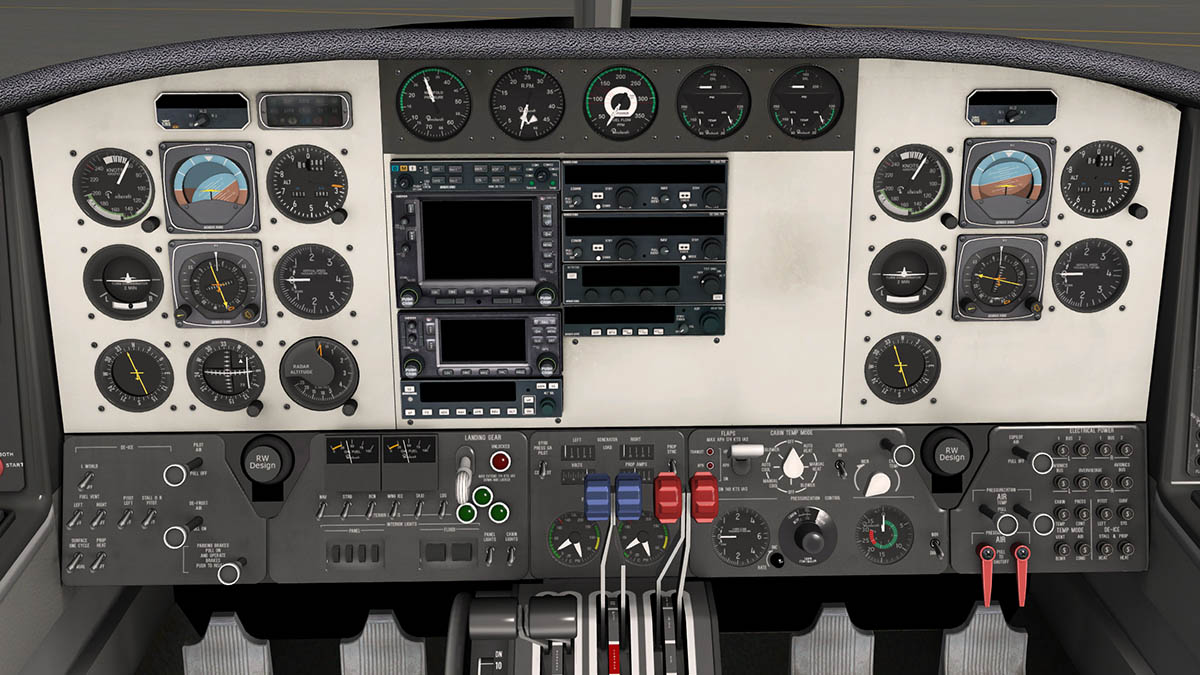
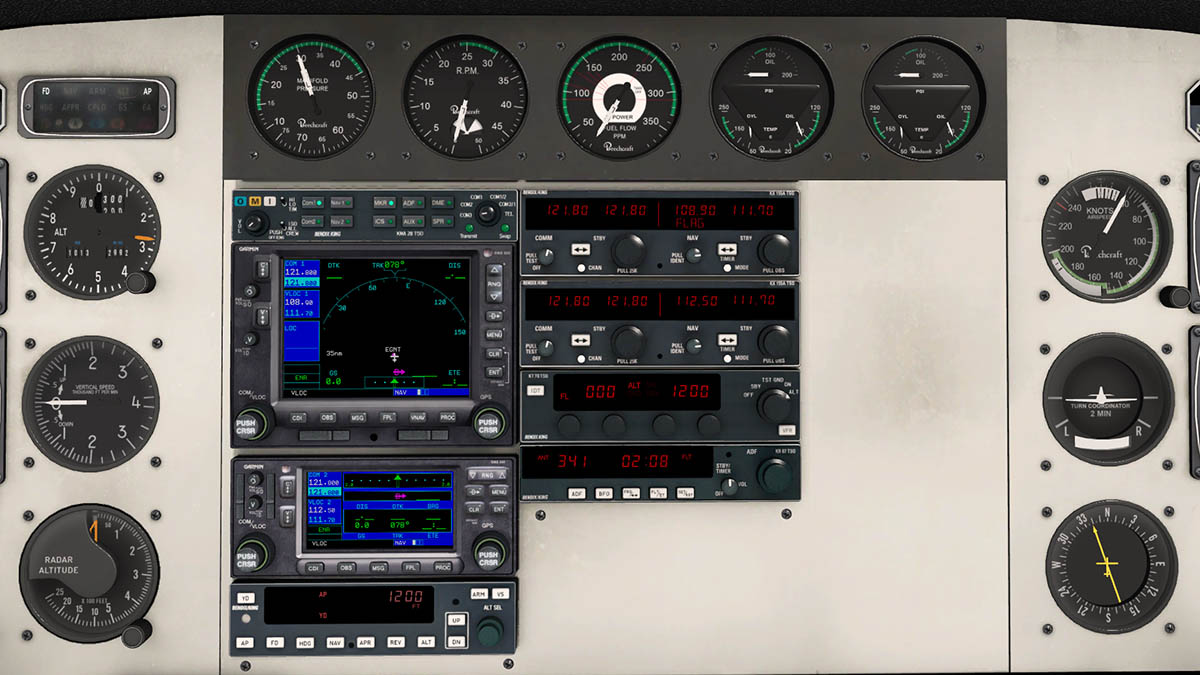
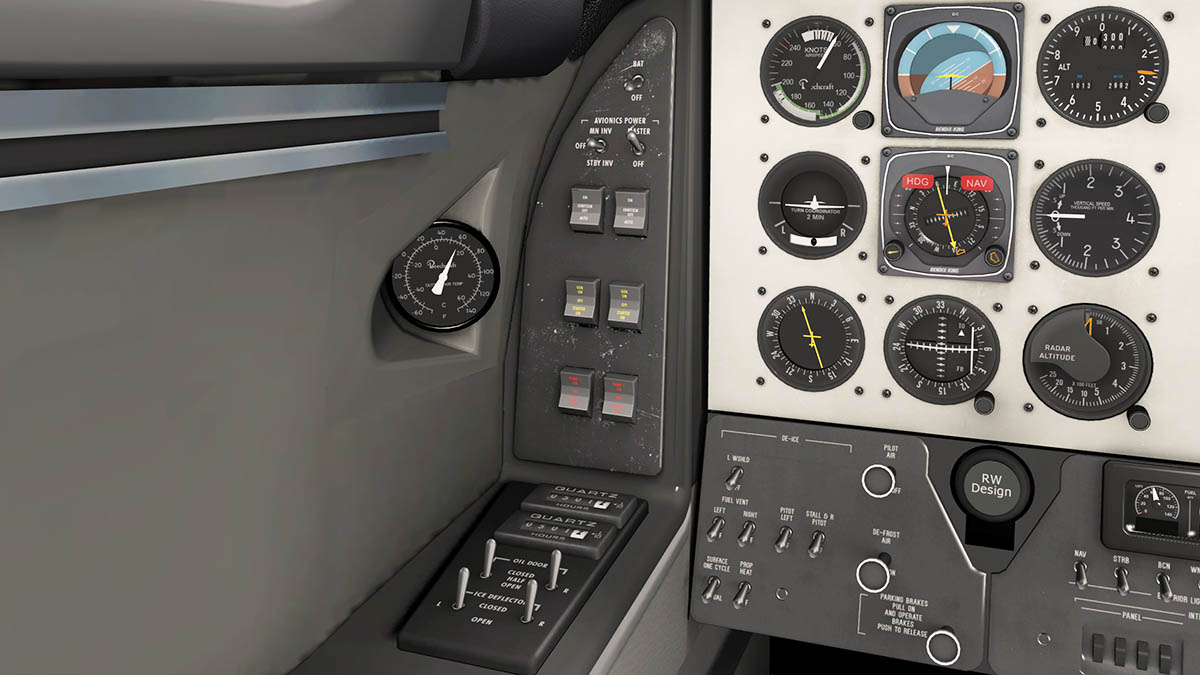
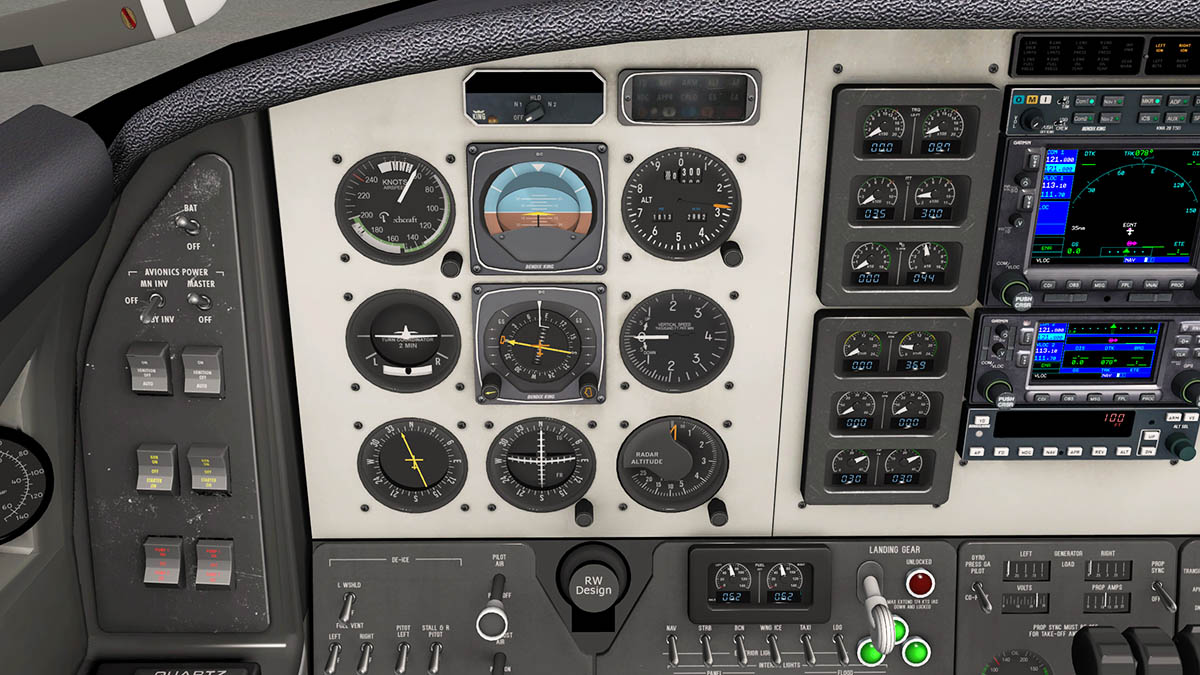
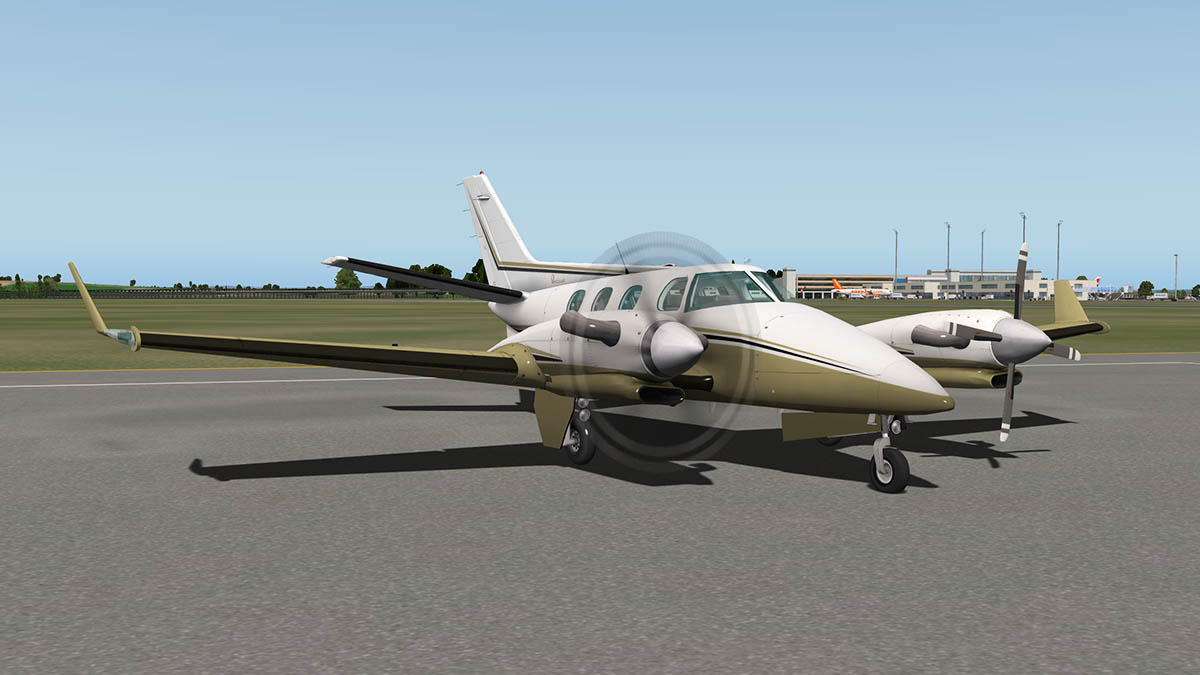
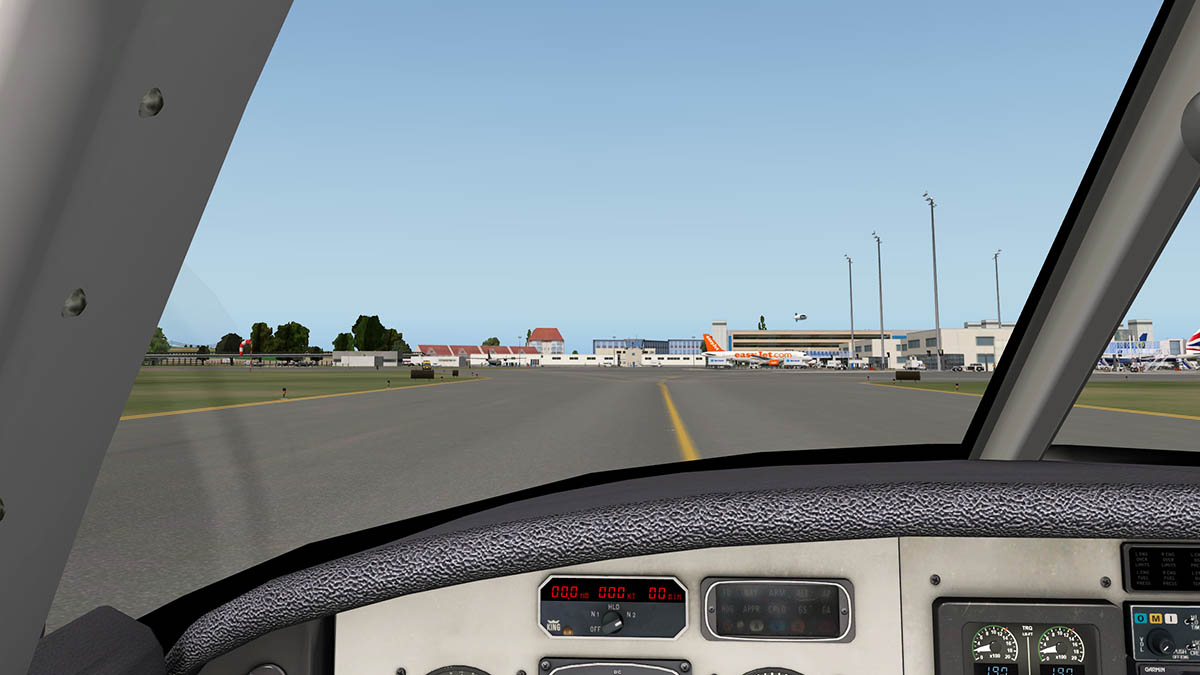
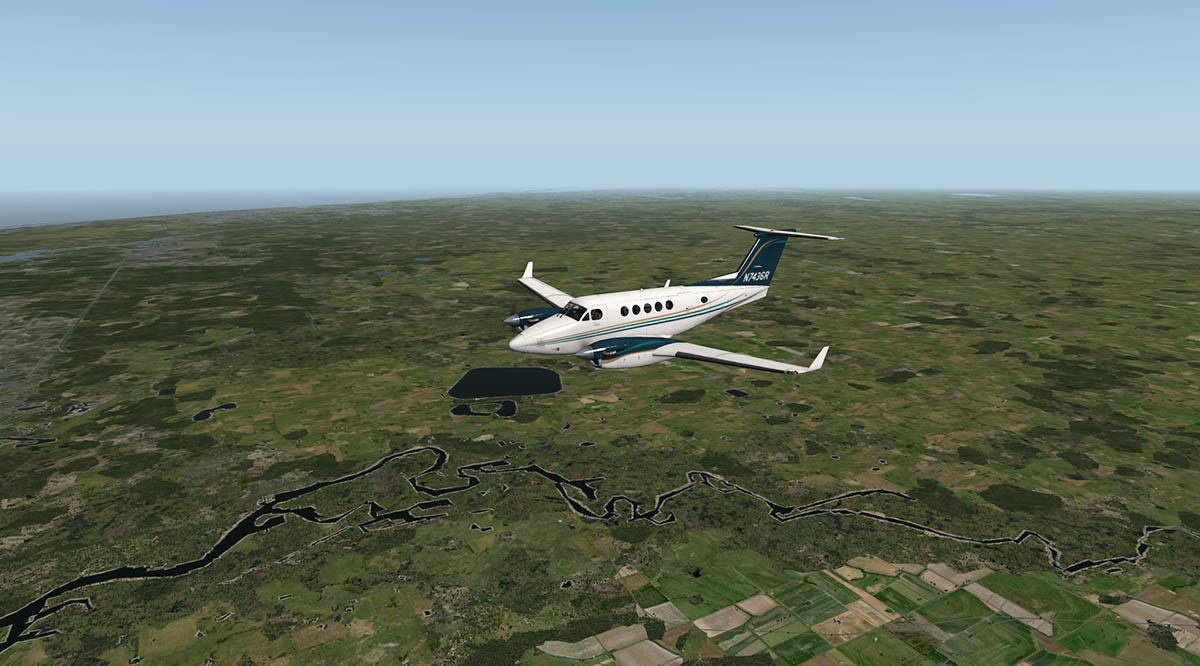
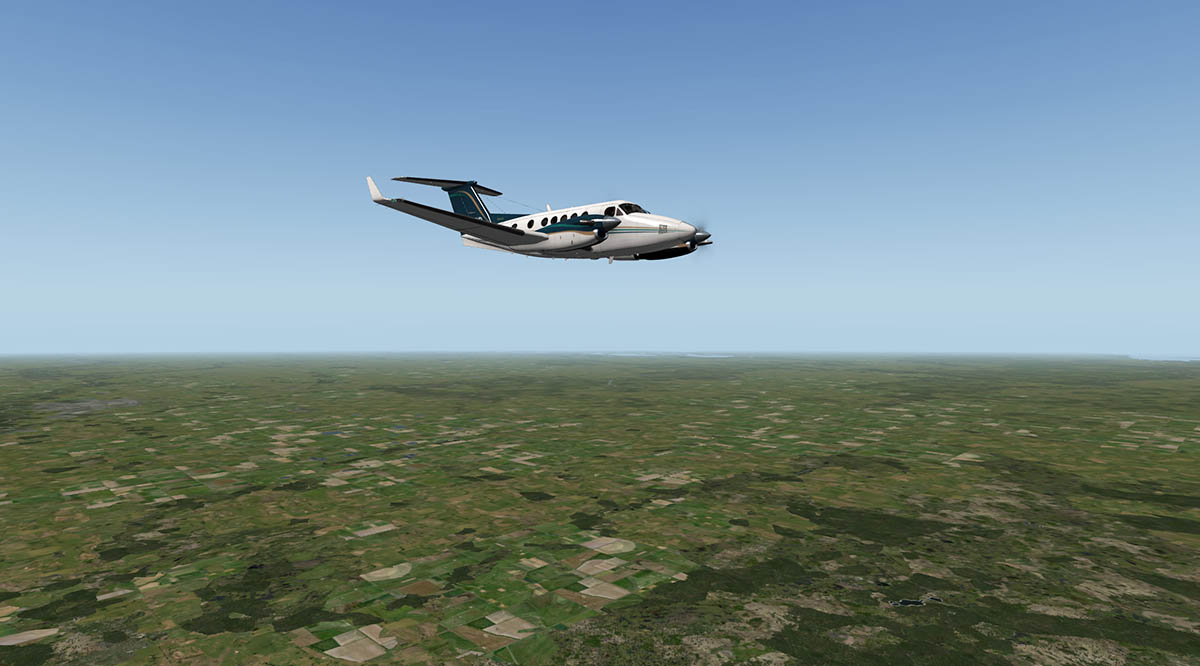
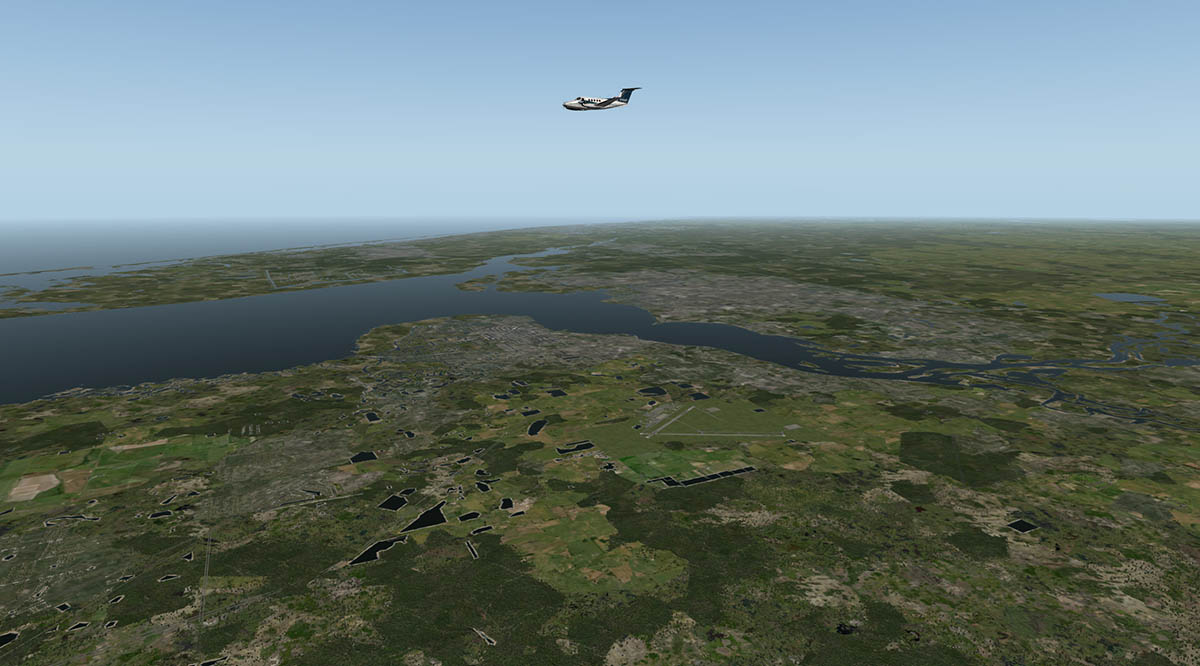
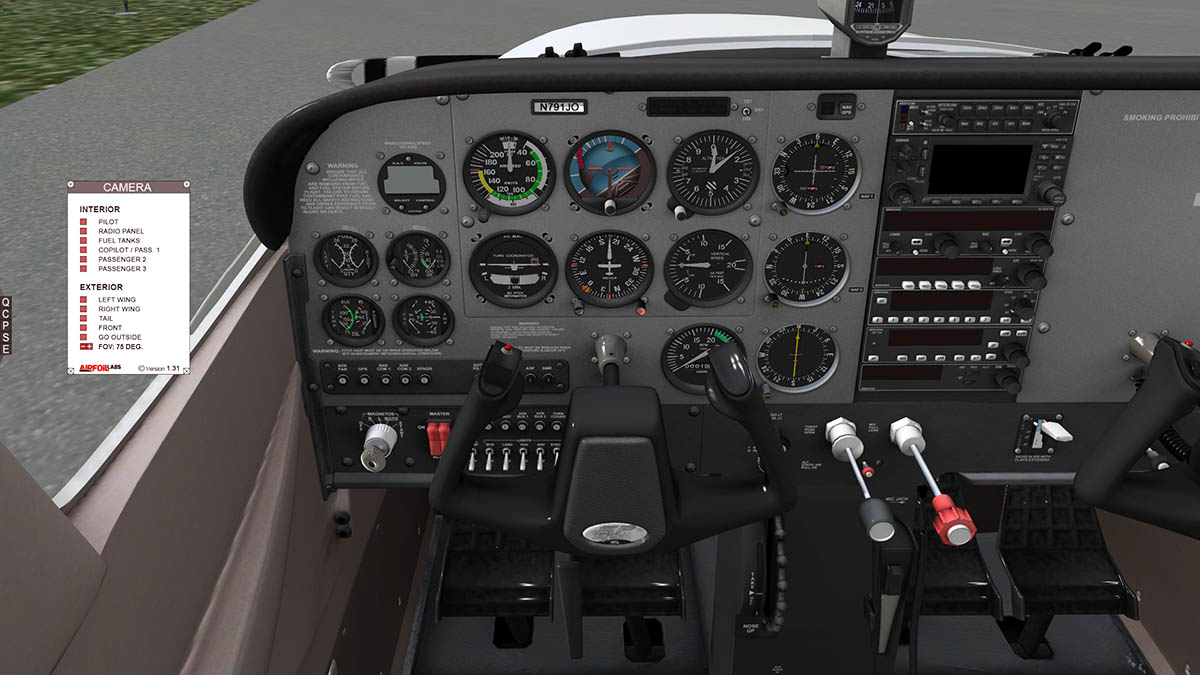
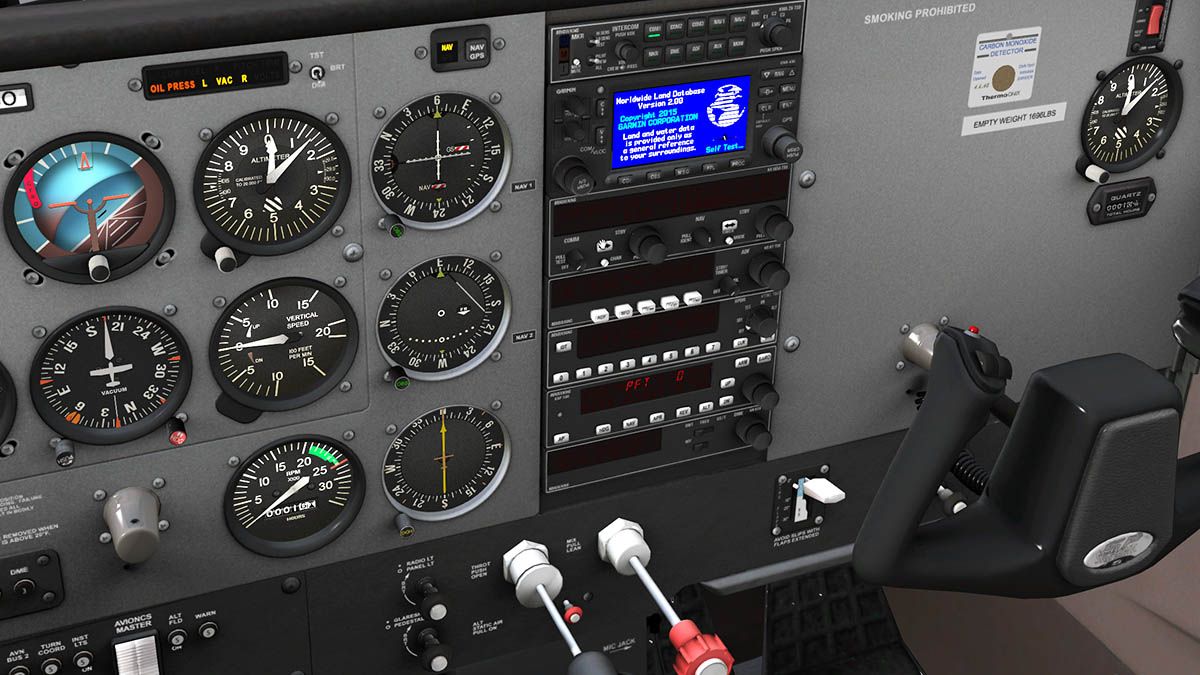
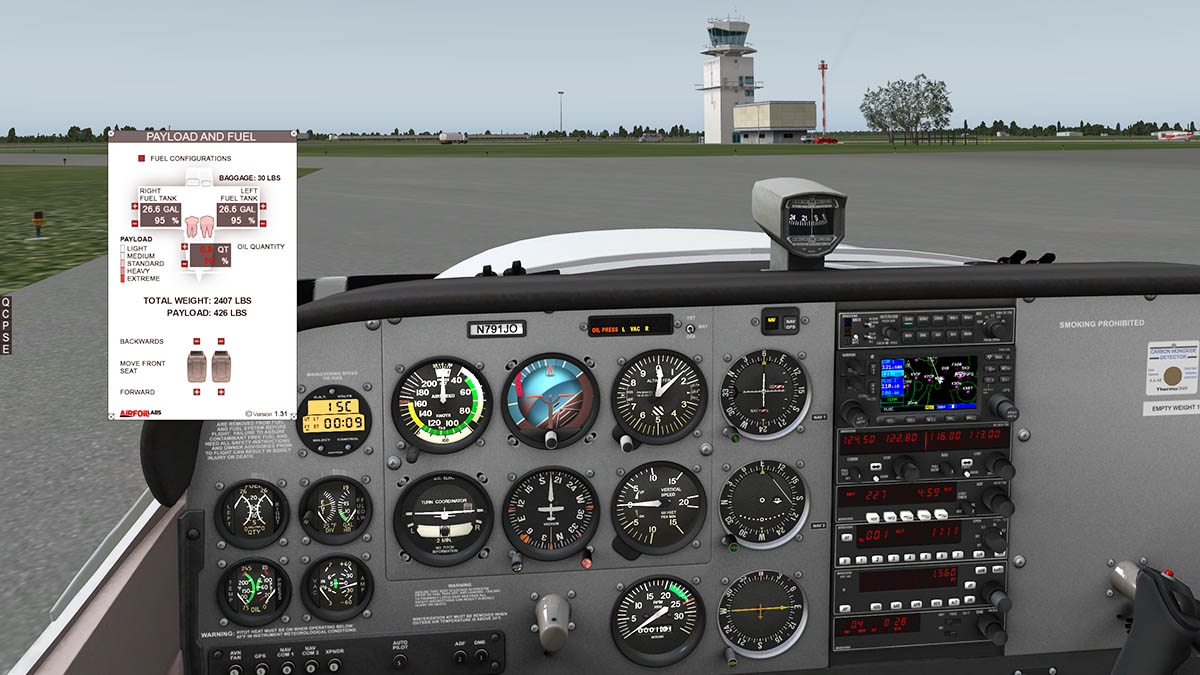
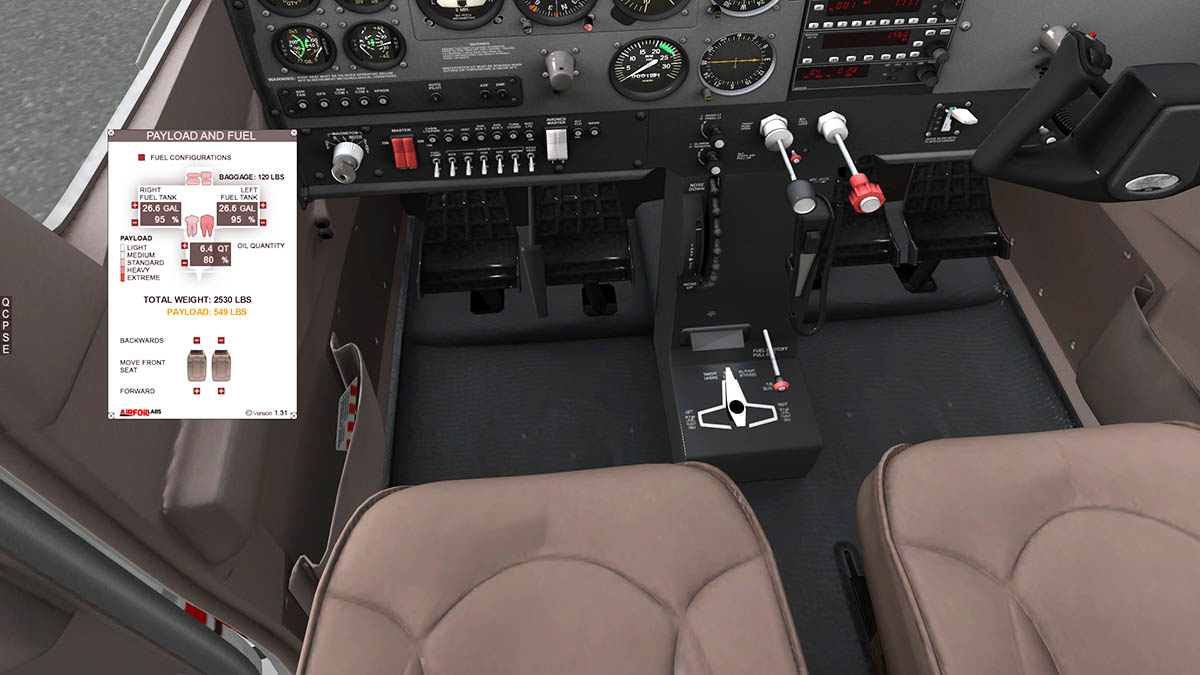
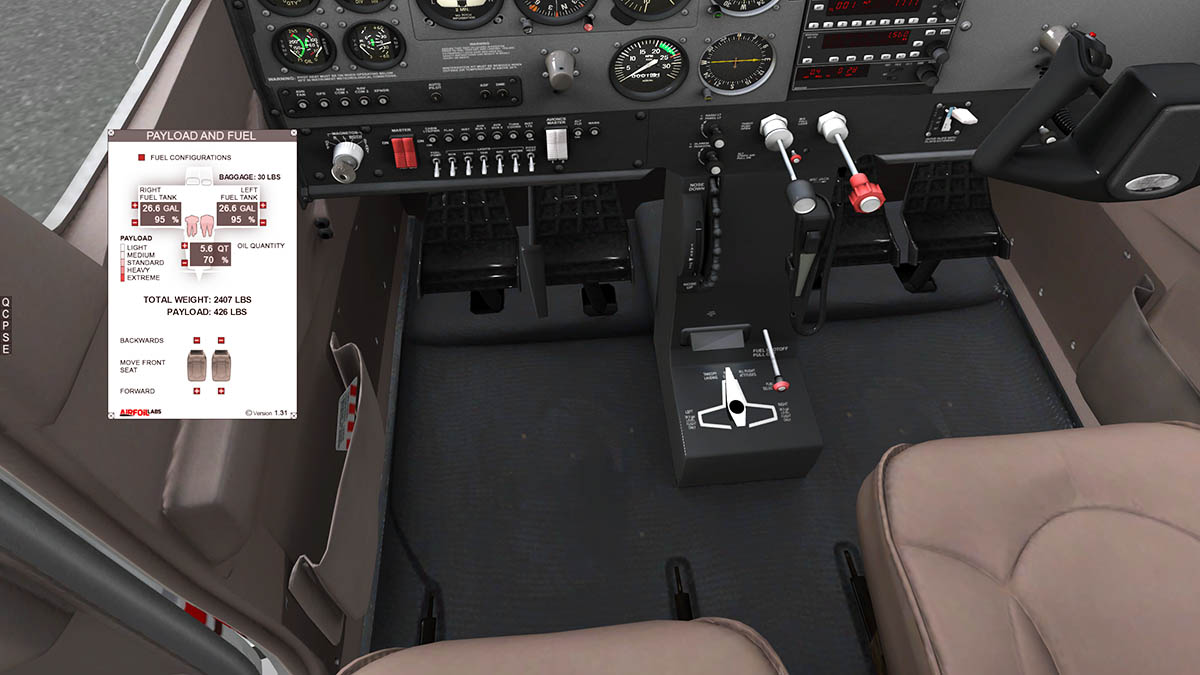
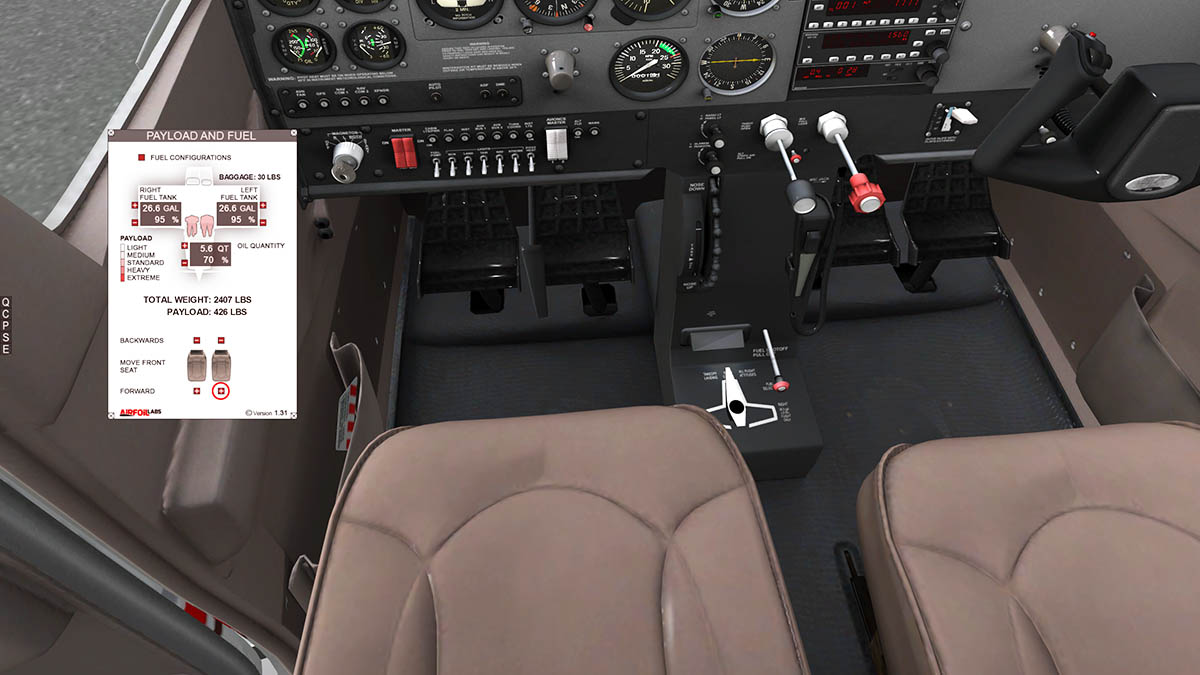
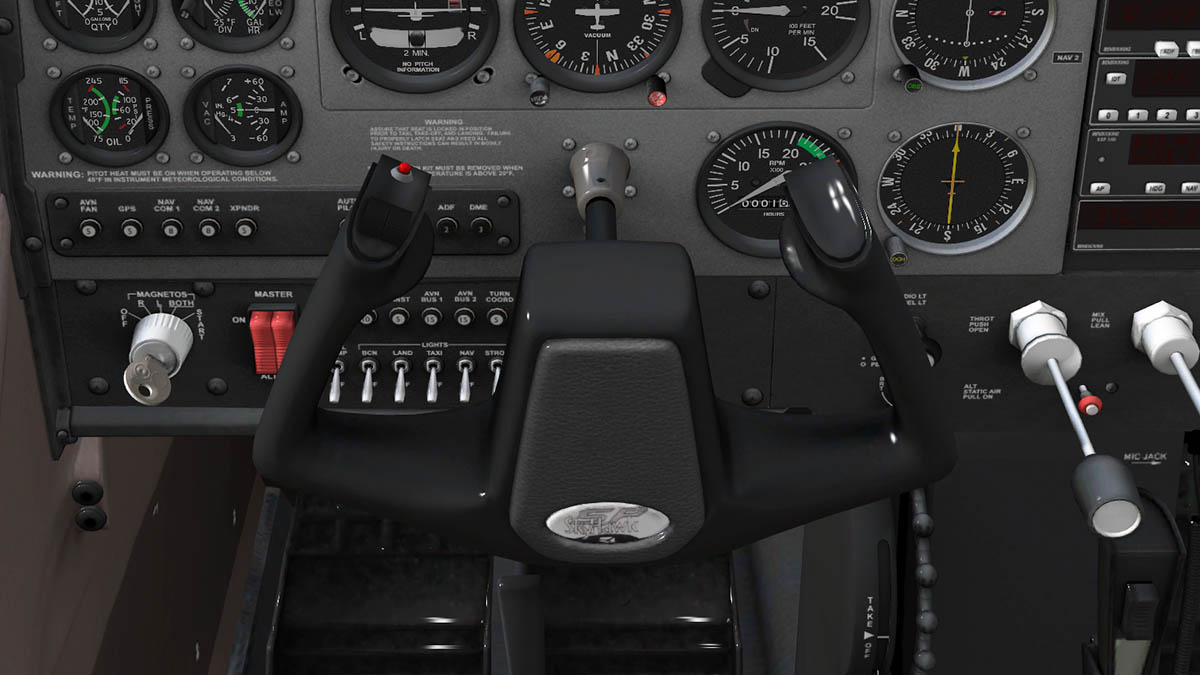
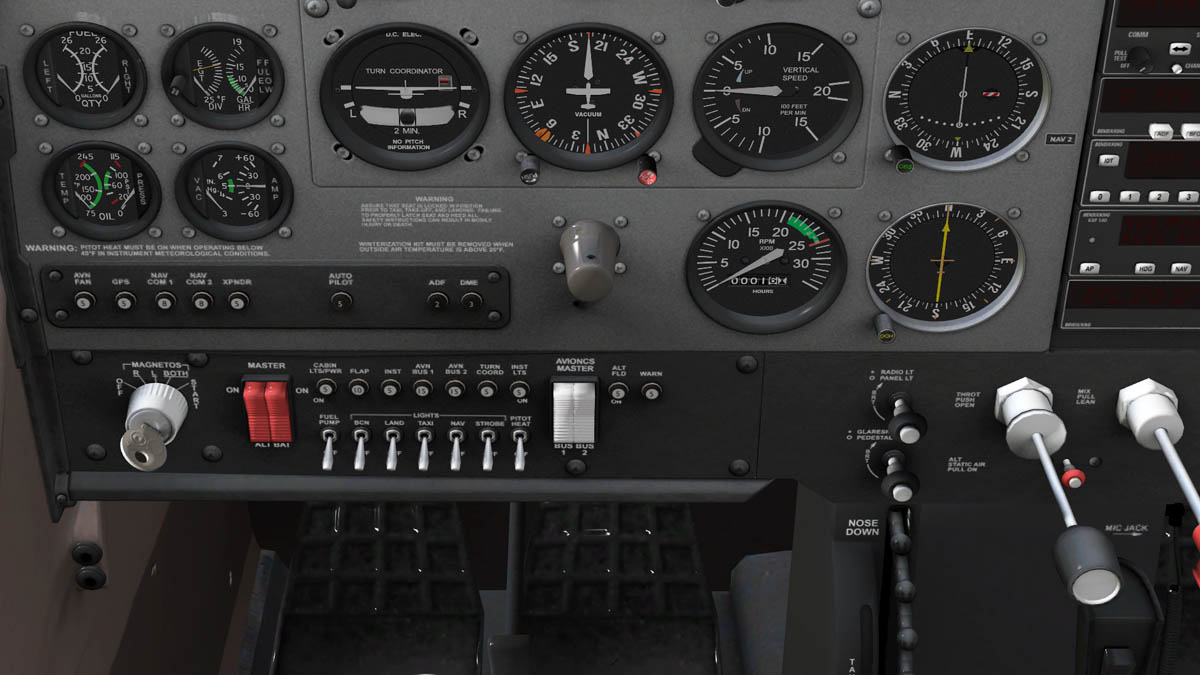
Classic Aircraft Review - DHC-2T Beaver Turbo by Shade Tree Micro Aviation The classic DHC-2 Beaver is seemingly everywhere, but its claim to fame is as the "workhorse of the north", Alaska north that is. But when production stopped in 1967 when the original line was shut down, there had only been 1657 aircraft built. But as the Beaver's reputation grew the de Havilland aircraft company of Canada had no choice but to put the aircraft back into production. It is one of those aircraft that should have been long out of production since its first flight August 16, 1947. But the DHC-2 solders on in not only are there hundreds still flying, but many have been totally upgraded and converted to modern powerplants from the original Pratt & Whitney R-985 Wasp Jr. radial engine, with 450 hp (336 kW) to this modified version created by Viking Air of the versatile Pratt & Whitney PT6A-27 680 hp (507 kW) turboprop engine. Viking became the exclusive manufacturer and distributor of de Havilland spare parts for the DHC-2 Beaver in 1983 when they acquired all the original jigs, drawings and Type Certificate (STC) for the aircraft from de Havilland Canada. Performance : Cruise speed (km/h) 250 - Maximum speed (km/h) 280 - Range with max payload (km) 960 - Maximum operating altitude 15,0260ft (4580m) - Rate of Climb: 1,425fpm (feet per minute) Shade Tree Micro Aviation A motley crew of six talented individuals (Jim McNeill, Kerry Cross, Bob Feaver, Mark Roberts, Todd Denning and Benjamin Whitehead) make up Shade Tree Micro Aviation (STMA) and between them they have being creating great X-Plane aircraft since the early days. Mostly STMA design mostly small rugged bush aircraft like the Beaver Turbo here, but also the original Beaver and Sherpa K650T Turbine Bush Plane (Review - Sherpa K650T) and the Pilatus PC-12/47G (Review - Pilatus PC-12/47G), good solid flyable aircraft, and this Beaver Turbo is right there in the same context and design. DHC-2T Beaver Turbo The aircraft comes in various versions and variants, in this package you have three choices for different roles. Bush Tundra The "Tundra" is the wheeled version of the aircraft. "Tundra" is a noted reference to those huge balloon tyres that are created to land on subsoil that is permafrost, or permanently frozen soil which is abundant in these northern climes. There is no standard wheeled version. Float The float variant comes with a set of Wipaire 6100 Amphib Floats, worn and extremely well done. The wheels are retractable and so are the rudders which can be lifted out of the water to lessen the drag for takeoff. Ski The Ski variant has two large plates on the front undercarriage struts and and a smaller plate on the tail wheel. They can be raised or lowered above or below the wheels. DHC-2T Beaver Turbo Exterior A bush plane is a workhorse, nothing more and nothing less, So these rugged aircraft have big job to do and their appearance can sometimes mask their abilities. STMA have done a great job in creating an authentic workhorse in design, and in someways the longer turbo nose of the aircraft is quite different from the original stubby faced Beaver that we all know and love. You are not short of options here. There is a menu panel that slips out of the lower left of your screen that covers a lot of good options when setting up the aircraft to the way you want to fly it. There is a coloured code to check what is active and what is not in Yellow just text, Red not active and Green for selected. First four options are for in the cockpit in: PFD (Primary Flight Display) Zoomed or MFD (Main Flight Display) Normal. You can also choose if to hide or show both or either of the Pilot's and co-pilot's yokes. There are five doors on the aircraft: pilot's, co-pilot's, rear passenger door left, rear passenger door right and an Alaska door or large cargo door. All can be opened and closed on the menu. And there is a large cargo pod on the bottom of the aircraft that can be installed or removed. Other menu features include wheel chocks and flags, controls (yoke) locked and aircraft tie-downs. Noted is that for the some menu items to work you have to install a plugin (HangarOps) in your Resources/Plugins folder this does include the "tiedown" feature. The "HangarOps" plugin is also required for the "Tug", a hug block like vehicle to move the aircraft around. You can control (steer) the tug either from the tab menu or the remote control inside the aircraft. It is straight forward in either: front, back or left and right, but it goes too fast in forward/reverse modes to look realistic. You can have the choice of two interiors in: "passenger interior" and "Cargo Interior", you get four seats and a cargo net with the "passenger" version and what looks like metal bars to strap cargo too in the "Cargo" version, but I think that actual cargo (boxes or crates) would have been more pleasing). The last menu item actions you can do is to lower the rear seat backs, blue colour notes down position and green notes up. The aircraft panels are engraved on the fuselage, which gives the aircraft its shape, but the rivet's are flat (painted) and not raised making the panels slightly flat in appearance, but overall the external design is good and well made, highlighted by the corrugations on the flaps and rudder. DHC-2T Beaver Turbo Internal There is another variant choice in the cockpit... You can select the "Retro" version which is based on the original Beaver panel or the... "Tundra" version which is to represent the more modern (Viking) style of a flat squared off panel. Both panels are fitted with add-on instruments and GPS navigation units, which reflects the approach that most Beavers flying around today are mostly in this guise. Personally I prefer the older "Retro" version and mostly because the black panel breaks up the bright blank facia look of the "Tundra" it looks the more interesting of the two. There is another Panel variation in the works from STMA is a GLASS feature "PILOT FLIGHT DISPLAY (PFD) AND MULTIFUNCTION DISPLAY (MFD): This variant is equipped with STMA's version of a EFIS (electronic flight information system) consisting of a PFD which is the primary flight and avionics (radios, transponder, and autopilot, etc.) display, and a MFD which has an identical set of bezel mounted controls but primarily is used to display the moving map navigation display and engine controls. This will be part of the package when released which is currently noted as "soon". So the combination of different variants you can choose to make up your ideal Turbo Beaver are quite numerous in "Retro" or "Tundra", "Tundra (Tyres)", "Floats" or "Ski" and finally "passenger" or "Cargo". All can be mixed to get the actual variant that you want. In the panel instrument layout and switch gear they are identical, so we will follow the design of the "Retro" version. The Beaver even in this guise is still a very basic aircraft, The standard six instruments (Airspeed Indicator, Attitude Indicator or Artificial Horizon, Altimeter, Turn Coordinator (old style) and Vertical Speed Indicator) are front and centre, but only on the pilot's side. Added to the standard six package is a fuel tank four set of indicators for left/right and two centre tanks and ADF pointer dial. Below is a an "Autopilot" that is easy to use, and then at the bottom of the panel a full row of switches to cover: Ing (Ignition), Fuel boost (two), Landing lights, Strobe, BCN (Beacon), Pitot (heat), NAV (Navigation Lights), INST (Instrument lights), MAP, Gen (Generator) BAT (power - battery) and Radio. A overhead light knob is on the right of the panel. On the far left is a fuel tank transfer/switch. There are a set of crude annunciators above the Standard six instruments and the flap setting position indicator noted as: Cruise, Climb, Take-off, Landing and Full-Flap. Right panel has the X-Plane large Garmin GNS 530 GPS unit (with pop-out panel), a great vintage ADF tuner and large Volts selection and fuse popper panel. The centre panel is dominated by large dials and the two main levers for Throttle and Conditioner (there is a third back-up Throttle lever), Below the levers is a twist knob for propeller feathering called here the Propeller Vernier Control. Above the levers are the two engine dials for Torque Pressure and Turbo Inlet Pressure and with a mid- screen mounted compass. Mid-Panel are two gauges for RPM and lower two gauges that cover (left) Oil Temperature Indicator and Oil Pressure Indicator (right). Lower panel is a working Hobbs Meter and Chronometer. On the roof is an outside Temperature gauge and great trim wheels, but they move quickly and with not much finesse. The rudder pedals are well done and there is the flap lever and a pump lever down on the floor by the pilot's seat, the flap lever is a pump/stroke affair to lower the flaps. Two levers on the lower part of the panel covers Shutoff (firewall) and a Cabin Heat. The park-brake is a push-pull action. Overall the instruments are large and the Standard Six are good, but instruments and mostly on the centre section don't have great resolution, this review was conducted in the texture resolution setting of "very high" and yet still some dials are still low-res and buzzy to look at. In the rear you can feel the space of the Beaver's square shape, but the textures are a bit plain and not very hard working dirty or worn. Flying the Turbo Beaver Of all the variants you can have with the STMA Turbo Beaver the one I liked the most is the Retro-Float version, especially for flying around Anchorage or the inside passage areas of lower Alaska. Here I am flying from Lake Hood, central of PANC (Anchorage International Airport) to Finger Lake which is slightly north-east of the city. I have become quite good at flipping float fitted aircraft in and out of X-Plane water, so this was a smooth transition from terra-firma to a liquid runway. On the float version there is an extra panel for the operation of the float undercarriage and to lower or lift the rudders out of the water (yes up for takeoff for less drag). One thing is noticeable is that the aircraft is very manoeuvrable on the water and far more than most float aircraft have been in the past, that makes it easier to set yourself up for takeoff even with a slight wind from the south. The turbine and power of this aircraft overcomes most of the Beaver's oldest liability... power. You very easily overcome the drag and sheer long hesitant runs to struggle to get airborne like you do in the standard radial Beaver, It just flies to state a cliche. Top speed Vne is around 139kts with floats attached and the 152knts Vne is 13kts faster than the standard Beaver in wheeled trim. But it is that torque that you have that is more usable, and the engine is more smoother and flexible. Overall you cruise at around 145kts, so no Beaver is going to break the sound barrier is it. Climb rate is better as well with only 1,000fpm maximum for the standard Beaver and 1,400ft fpm available here, so can very easily climb to 5,000 - 7,000ft and quickly, even with a full load on board. If one thing that stands out is that STMA are very good at getting the flight model and performance really good. You love to fly the aircraft because it responds very well to that stick and rudder person in you, it gives the meaning "flying by the seat of your pants" a whole new meaning, because you do love flying the Beaver... even if the aircraft's low speeds does take you some time to actually get there. I feel so comfortable with the Beaver that I can choose to land on the smaller cross section of Finger Lake, reducing the speed to around a stately 70knts with full flap and the aircraft is quite docile there in that speed range, and it is quite easy to pitch directly to the point of just popping it quietly on the water. Even a then little reverse thrust (beta) will stop you almost dead. Lower the rudders and you can easily steer to your mooring point, flexibility is one of the Beaver's strengths. Carry anything anywhere is great fun and a lot of different scenerios with this aircraft can easily be created. No doubt the power of the Turbo-Turbine version is the aircraft's advantage, you miss the noise and rattle of the radial, but this a smoother ride with more versatility, it is the way you want your Beaver that counts here, and this is the best for the longer faster routes. Liveries The "Olivia" C-GODH is the default livery with RCMP Services, A great TurboBeaver, Epoch Air, Black Beaver and white Jet Share All liveries are available with each Tundra, Ski and Float variant. Summary Shade Tree Micro Aviation have a huge reputation in X-Plane and they rarely fail to deliver interesting and highly flyable aircraft. No doubt the Turbo Beaver is in that same category, it delivers what you expect, huge features, lots of ideas and many different aircraft fit-outs and variants, so anybody who has purchased STMA before knows what they will get and they will be more than happy with the aircraft here. They will also overlook the low-resolution panel and instruments and interior design, they are not bad of course, but X-Plane is now getting down to very high-resolution in quality in this area, realism is very much in vogue and those annunciators are just really average today, and worse they are right in your sight line. These few items distract the aircraft from being very good to being really excellent as everything else is very good. Overall the Turbo Beaver is great value, a great aircraft and certainly a great addition to your "bush Pilot" experience. Fly around to your heart's content and enjoy the scenery and that is the Beaver life. __________________________________________________________________ The DHC-2T Beaver Turbo by Shade Tree Micro Aviation is available from the X-Plane.Org Store here : DHC-2T Beaver Turbo Package by Shade Tree Micro Aviation And is priced at only US$25.95 _____________________________________________________________________________________ Features: X-Plane's new GNS 530 approach-capable GPS with fully functional bezel in both the default panel mount view and when popped up (this is an intermediate size between the panel mount and the X-Plane pop-up). A Horizontal Situation Indicator (HSI) A new 2 Axis Autopilot with GPSS (GPS Steering) A full-functioning ADF, which receives all 3 HF frequency bands, and includes NDB loop homing, a feature which virtually all ADF have but is unique to our ADF in X-Plane. A fully animated 3D cockpit with manipulator controls. We strongly recommend our ChaseViewDeluxe (CVD) and TrackerXP (TXP) head tracking plugins to maximize viewing both in the cockpit and in exterior views. TXP requires only an inexpensive webcam to provide the same look-around viewing offered by other head trackers at a fraction of the cost. Shade Tree Micro Aviation's Dock which provides control over functions such as the popped up GPS, opening and closing doors, and raising and lowering passenger seat backs to increase light cargo storage. Both passenger and cargo interiors. Detachable cargo pod. Tiedown ropes. Airplane will not move with Tiedown engaged. Tiedown works on land or water. Storable remove-before-flight flags, inlet covers, pitot tube covers, and wheel chocks. Our new airport tug which uses Dock commands or our STMA Remote to maneuver the airplane into and out of our STMA Hangars or into and out of parking spots on the ramp. Installation : Download file size is 301.30mb to your X-Plane - GA Aircraft Folder. Installed file size is 389mb Notes: You have to install the "HangarOps" folder in your Resources/Plugins folder, and this operates the tie-down straps, Push-Back Truck and the Hangar door animation feature. There are also enclosed textures to create hangars to be placed in your X-Plane scenery (via the OverlayEditor) and when used with the aircraft you can open close the doors at your command. There is also a "deHavilland DHC2T Turbo Beaver X-Adventure" coming as part of the package. Documents : There are three sets of Checklists for main, Emergency and Abbreviated. Great original De Havilland performance charts and a History document of the "Beaver" and there is POH (Pilots Operational Handbook) but it is not in the "Documents" folder but in the aircraft folder under "DHC2T_Owners_Manual" Requirements : X-Plane 10.30+ - Windows , Mac or Linux - 1Gb VRAM Video card Developer Support Site : DHC-2 Turbo _____________________________________________________________________________________ Review by Stephen Dutton 30th September 2015 Copyright©2015: X-Plane Reviews Review System Specifications: Computer System: - 2.66 Ghz Intel Core i5 iMac 27”- 9 Gb 1067 Mhz DDR3 - ATI Radeon HD 6970M 2048 mb- Seagate 512gb SSD Software: - Mac OS Yosemite 10.10.1 - X-Plane 10 Global ver 10.40 Addons - Saitek x52 Pro system Joystick and Throttle : Sound - Bose Soundlink Mini : WorldTraffic Plugin Scenery or Aircraft - PANC - Anchorage International Airport by Aerosoft (X-Plane.Store) - US$29.95
-
X-Plane Version 10.40: What is new
Stephen replied to Stephen's topic in X-Plane Version and Beta Releases
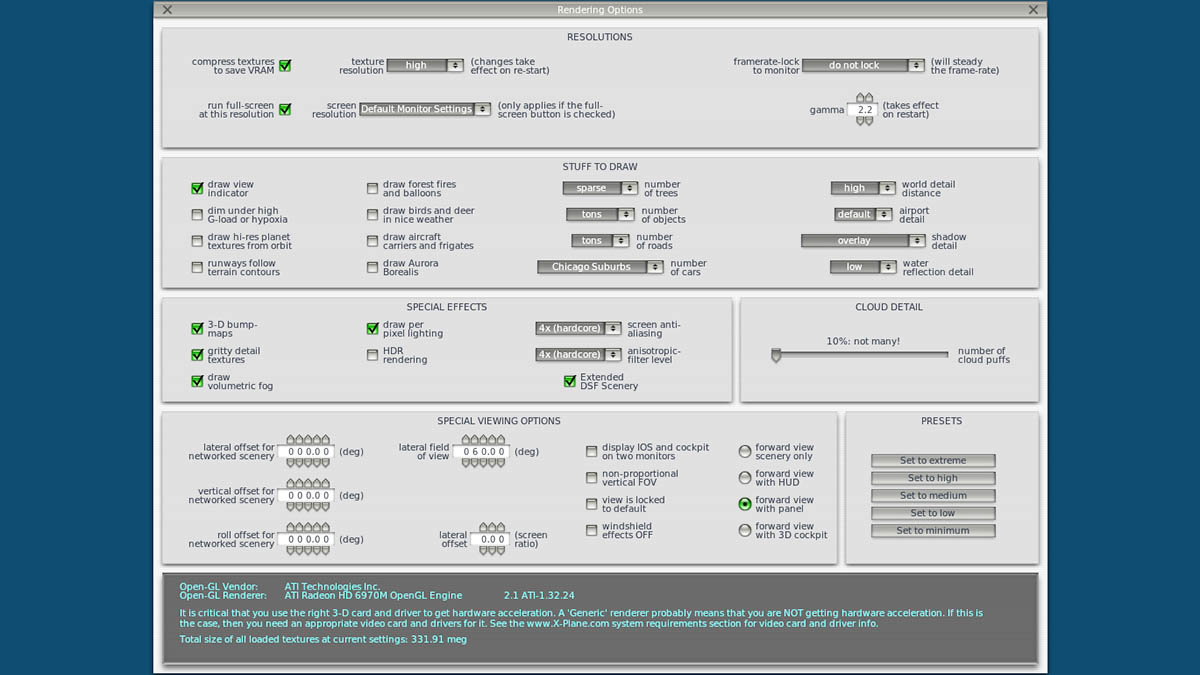
Yes basic X-Plane default scenery is only used and no HD scenery is in the numbers here. In this update the autogen was not a priority unlike v10.30 but Laminar Research will have to refocus again on that. the visual element has come a huge way in X-Plane 10 but still has a way to go as well, it is in the small elements now that are needed, churches, carparks, football stadiums and that sort of thing, and of course regional elements. Both X-Plane and world2Xplane use the same OSM data, the difference is that world2Xplane uses the data to create shapes of buildings to more match the shape of the building in the real world, in other words the Pentagon in Washington will be a building shaped liked the real Pentagon, where as X-Plane default scenery will just put in a shape building to match. So overall the world2Xplane world is more realistic, but that also comes with a big (huge in my case) framerate penalty, as the world2Xplane buildings are not as efficient as the default autogen. SD -
News! - X-Plane 10.40 now on Steam Laminar Research have announced that the latest X-Plane version 10.40 is now available for update on Steam. This is ver RC3 of 10.40, but note it is not Final, but in reality it is a given that RC3 or RC4 will be the "Final" release version. Steam users: to try the release candidate, you’ll need to go to the “properties” of X-Plane (in the steam client) and opt in to betas. A note to Steam users is that if you buy the "Full" X-Plane10 package you can participate in beta development... You can buy the "Full" version here at the X-Plane.Org Store here : X-Plane 10 X-Plane 10 + Global Scenery Price:US$59.99 Stephen Dutton 23rd September 2015 Copyright©2015: X-PlaneReviews
-
Aircraft Review - Beechcraft Duke B60 by RW Designs The Beechcraft Duke was originally created as a gap filler in between the Beechcraft Baron and the Beechcraft QueenAir in the Beechcraft Twin-Engine sales lineup, but the aircraft never became a big sales hit (only 598 Aircraft were produced), and many commentators noted that overall Beechcraft didn't want to take sales away from their highly successful (and profitable) KingAir lineups, so the aircraft became really just a small niche aircraft in Beechcraft's history. That is not taking away that the aircraft was not popular, because it was. As many are still flying and is still very popular amongst the owners who treat the aircraft as others treat their classic car collections. That is mainly because the aircraft was very advanced in its time, with Electro-mechanical systems when the aircraft was introduced, but the aircraft does has its downsides in that it has a very poor drag factor, and crash one and they were impossible (meaning very expensive) to repair. Two factors however kept the aircraft flying with an update that included an improved pressurized cabin that utilised a advanced bonded honeycomb construction, lighter and more efficient turbochargers and improved elevators over the Baron it competed with, this was the B60 as represented here and this aircraft was powered by the Lycoming TIO541-B4 engines that develop 380 hp each, and a second development, Rocket Engineering of Spokane, Washington, replaced the Lycoming reciprocating engines with Pratt & Whitney Canada PT6A-21 or -35 turbine engines that gave the aircraft the sort of performance it should have had in the first place. As noted the Turbine upgrades the take-off length required by over 1,500 feet to only 1,000 feet and the landing distance is reduced by over 2,000 feet to only 900. The maximum rate of climb is increased from 1,600 feet per minute to whopping 4,000 feet per minute, reducing the time to climb to 25,000 feet from 25 minutes to 9 minutes. The cruise speed is increased to 290 knots at 29,000 feet. The modification does have some disadvantages as it increases fuel burn from 56 gallons per hour to 66 and lowers the certified ceiling from 30,000 feet to 28,000. The Duke first flew on 29th December 1966 when the prototype made its first flight. On 1st February 1968 the FAA issued the type certificate for the aircraft. Performance B60 version: Never exceed speed: 235 knots (434.5 km/h, 270 mph) (IAS) - Maximum speed: 248 kts (460 km/h, 286 mph) at 23,000 ft (7,010 m) - Cruise speed: 178 knots (330 km/h, 205 mph) 45% power, 20,000 ft (6,100 m) - Stall speed: 73 knots (135 km/h, 84 mph (IAS) - Range: 1,227 nmi (2,274 km, 1,413 mi) 45% power at 20,000 ft (6,100 m), 45 min reserves - Service ceiling: 30,000 ft (9,145 m) - Rate of climb: 1,601 ft/min (8.1 m/s). RW Designs - Beechcraft B60 Duke You have to give some credit to RW Designs that they are not if anything give you a lot variety in their choice of aircraft. First it was the Airbus A330-300 (updated to Version 2) and then the workhorse DHC-6 Twin Otter -300, and now here is a general aviation aircraft in the Beechcraft Duke B60. The B60 is without doubt a striking looking aircraft, mostly because of that tall sharkfin tail and long snouty nose, but it is roomy aircraft as well for its size. You could call it a big twin aircraft, but a medium twin would be closer to the mark. So the aircraft has a real presence sitting on the parking area. The external detailing is very good of the Duke. lines and panels are really well done, with all the riveting in place to conform the panels. That distinctive tail is excellent, with main and trim rudders. Most designs today really have to live up to even a basic high standard that users now expect, certainly the Duke delivers in that area. And the minor detailing is well done in aerials, static-dischargers, undercarriage assemblies and the glass transparency is also first rate. DW Designs does not here give you any special features. So there are no Menus (tabs), static elements, Ground Power Units (GPU) or weight, fuel or aircraft load sheets. In that area it is a basic aircraft... so it is WYSISWYG. The aircraft has only one door on the left rear, it opens via the inside latch to give access to the cabin. The aircraft is set out in a four seat club arrangement and two more forward seats for the pilot/co-pilot, so six seats in all. There is a built in table but it doesn't flip up (or out). There is a sense of space in the cabin and the seat design and textures are very good, but the cabin looks very new and there is not a lot of wear or tear, so it looks a little plain compared to some of the grotty worn Carenado's we are used to. There is a baggage area behind the rear seats but no luggage. Cockpit and Duke Versions. The RW Designs Duke comes with the choice of two variants The variant is selected by choosing a different aircraft in either the: Original : Lycoming TIO541-B4 Royal Turbine : Pratt & Whitney Canada PT6A-21 ... versions, so you really get two very different aircraft in the one package. Outwardly and externally the aircraft are identical except for the different propellers, as on the Lycoming it is a standard 3-bladed propeller and on the Turbine it a newer 4-bladed Hartzell propeller (reversible), but in the cockpit and certainly in performance they are quite different. Basically it is analogue for the Lycoming (left) and digital for the Turbine (right) in the context of engine displays, the Turbine also has a few rows of annunciator indicator or warning lights under the centre glareshield. I am flying the Turbine version, but will note the analogue version differences as we go along. Pilot and Co-Pilot instrument panels are quite basic in both having the main standard instruments. The standard six instruments (Airspeed Indicator, Attitude Indicator or Artificial Horizon, Altimeter, Turn Coordinator and Vertical Speed Indicator) are central large and clear on both sides. I like the idea of putting the navigation instruments on the below the standard six, but this arrangement can also hide them behind the excellent yoke and you need navigation dials clear and easy to glance at. The Navigation instruments are the ADF pointer (both sides), CDI (course deviation indicator) for VOR OBS (Nav2) and Radar Altitude. Above the standard six is the VOR1/VOR2 distance/speed/time (both sides) and Autopilot annunciators (pilot side only). Most of the main switch gear and dials are on the lower panel. It is quite a crowded set of panels, but well laid out. On the far left are the main "De-Ice" switchgear including pitot heating. Middle-left is the Fuel gauges, which are dials and digital on the Turbine and analogue gauges on the Lycoming. Below are the main lighting switchgear with two lighting adjustment scroll panels below. Undercarriage position lights are under the lever. In the centre panel are the gauges and dials for electrical loads, Volts and Prop-Amps.and two large dials for Oil Pressure. On the right side lower panel are flaps (3 stage - UP- APH (Approach) - DN) and the rest of the panel is for your controls and dials for the aircraft's pressurization system, shutoff valves and cabin temperatures. The rest of the right side of the panel and the far right is your sets of electrical fuse poppers. A small and compact centre pedestal has your Throttle, Propeller and Mixture (Rich/Lean) levers, noted is they are all dark grey in the Turbine, but the Lycoming uses the Blue (Propeller) and Red (Mixture) standard colored knobs, which are more attractive. Great trim wheels with the main large pitch on the left side and the main and fine trim wheels on the rear. Fuel Tank selection is between the front seats on the floor. Engine Instrumentation and Equipment Stacks As noted there are differences between the Turbine and Lycoming variants on the left of the pilot panel and the main central panel. Turbine Variant There is an aftermarket fit-out of dials and digital readouts for engine performance in TRQ (Torque), ITT (Interstage Turbine Temperature), Ng (compressor speed), RPM, FF (Fuel Flow), FP (Fuel Pressure) for each engine. A full set of annunciators are set across the top of the panel under the glareshield. Bendix King equipment Stacks consist (left stack) of the standard KMA 28 TSO Audio set with both a Garmin 530 and Garmin 430 GPS units (X-Plane standard), below is a KFC 225 autopilot unit that covers the actions of HDG, NAV, APR, ALT, VS, ARM (altitude) and Yaw Damper. Right stack has two KX 155A TSO Radios top with one for COM1/NAV1, and the lower one covers COM2/NAV2 settings. Then the KT 70 TSO Transponder and the lower ADF - KR 87 TSO with built in flight timer (FLT) and elapsed timer (ET). The Turbine side panel has switches for "Bat" (Battery) Avionics "Master" and a standby inverter as well as a primary inverter. The GPS Units (Both GNS 430 and GNS 530) are controlled by a Master Avionics Switch. All other Radio’s are connected by directly to the battery by switches Bat - Gen (1,2) finally their are two fuel boost switches. To start you just hold the lower part of each rocker switch down for an engine and then when the engines are running push the rocker up to activate the generators. Below there are two Hobb's meters and cowl flap switches which I don't think work. Above is a lovely large "outside temp gauge". Lycoming Variant The Lycoming panel is dominated on the top by a large set of five analogue dials and gauges, that cover left to right: Manifold Pressure, Prop RPM, Fuel Flow and one gauge for each engine for CHT (cylinder head temperature), Oil Temp, Oil PSI. A note on the dials is that there are two needles per dial for each engine. If both are running together in the same performance then they are together as one indicator, but slow one engine down and you will see them separate to show both engine parameters. The Equipment Stacks are set out exactly the same as on Turbine, but with the add-on digital dials removed the whole set up is moved over to the left of the central panel area. The main annunciators are moved to the side panel on the Lycoming. with the "Avionics" standby inverter as well as a primary inverter switches top and then the "Gen" - "Bat" - "Gen" switches below. Then the two fuel boost switches and starters are a (nice) red twist knob for each engine. Below two Hobb's meters and cowl flap switches are the same as the Turbine. Flying the Duke, or should I say Duke's! I decided to fly the Turbine version up the coast from EGNT - Newcastle to EGPH - Edinburgh and then back again in the Lycoming to get the feel of each variant. Power up and with the VOR2 set to "ST ABBS" VOR (112.50) and the prop/mixture levers full up, a push of each rocker switch starts the turbine whine of each P&W PT6A-35 turbocharged engine that pushes out 580 hp. I like the blue glow of the digital readouts, it makes the cockpit look more modern and efficient. Plenty of power to move the aircraft but it is hard to find that sweet spot between moving too fast and the aircraft rolling to stop in the taxi, I found it but the range is very narrow. The windscreen is very tall for a GA, so the view forward is quite good, but the glareshield is high as well, so you sort of peek over it. With over 1100 hp the aircraft easily moves forward and you are very quickly at rotate speed of 130knts, the aircraft tracks centered as well and you feel the air and control the vertical speed of 1800fpm with no effort at all. Speed will still build quickly if you level out early so you need to pull back the power to keep the best V/S and the climb rate. The Duke looks nice in the air "Stately" like its name is a good statement. The huge engines set far forward out of the wing can really block the view from the pilot's perspective. You have to crane forward and look through the main window to see features or navigation landmarks. Because the aircraft is pressurized, you can climb easily to the high 20's (30,000ft is the ceiling) and the noted "1,227 nmi (2,274 km, 1,413 mi) 45% power at 20,000 ft (6,100 m), 45 min reserves". So it is no doubt this is an aircraft for extended cruising and distance covering, but I would recommend the Turbine version for the extra power in covering distances. The panel lighting is good but it took me awhile to get the right combination of roller adjustment to get the one I liked, not too dark or too bright. The ADF needle is on a set compass so it can look odd against the other navigation instruments and looks out of alignment, but you soon use it the way it is supposed to be used and it worked well with my set course needle to align up EGPH RWY24. The aircraft does not like tight turns at speed, I'm surmising that the airframe has now engines of too much power in the turbines that it was not designed for. Banking on the autopilot and you get a very pronounced - or + vertical speed fluctuation, back off the power a little and it does quell the bouncing a little, but you have to give the yoke a bit of forward and back adjustment to soften out the fluctuations, you get used to it and are prepared when you need a turn, but it can get wild if you are not on your game. The excellent John MD River Forth Crossings (Bridges) shows you the approach to EGPH. With the flaps down you can easily stay around the 100knt approach speed. The drag is there, but to more in your favor than having to push the power to the wall to get through the drag, so it is a usable approach in that the turbine power can allow you to finely adjust your approach speed. The stall speed is noted at 73knts, which is quite, low, but around 85knts is ideal on final's, and the aircraft is quite stable. You get reverse prop on the Turbine, but not a "beta" setup, and on contact with the runway you can easily run off the speed, and taxi to the GA ramp. EGPH to EGNT, Lyncoming and lighting There is a lot of panel and cabin lighting adjustments, 4 small scroller's, two larger scroll wheels and two switches. Here it is set to the overhead lighting so I can set up the aircraft, it looks good and the area is workable. Starting is via the two red knob switches but otherwise there is not much difference between the two variants. But pull away and it is very evident that the power is now not there. You are a full 200hp down on each engine (380hp) and your throttle is now traveling a lot more up its gate to get the aircraft moving, its slightly sluggish as well and even more trickier to taxi power wise. Takeoff is also going to need more nerve as your takeoff run to the 130kts rotate speed, only it now takes forever to build up the speed, you use a lot more runway to do exactly the same thing, a bonus however is once airborne the aircraft is more docile with less power and slight better feel in the yoke and rudder pedals, banking and a slower rate of climbing is smoother and less frantic than the over powered Turbine. You are not going to climb fast either, you have 1800fpm at your disposal, but if you are going to climb to the high 20's then it is going to be a long afternoon as 1200fpm to a maximum of 1500fpm is going to be your best effort. Lighting A bit more fiddling and you can get the panel to look really good in the right balance of feel and look, and very attractive it is. It is debatable if the Turbine digital look is better than the glowing analogue dials, but I feel the analogue version is better at night. Note the separate needles for each engine performance on the dials. Rear cabin is well lit and looks nice, but there is no actual light fitting, so the lighting seems to glow out of the ceiling. External lighting is good. Beacons, Nav and Strobe look good in the dark, there is wing light switch (Ice) but I couldn't see and lighting on any wing. Cockpit has a nice feel at night and you get good visuals out of that tall windscreen. Outside the landing and taxi lighting only works when the wheels are down, they look good, but are hopeless in operation. Runway approach is dark, so it is hard to gauge the depth to the tarmac. Once down and there is no reverse thrust in the Lycoming Duke and you bleed off speed far slower on a dark runway. That done and you then have to taxi around with no lighting either. They are three beams out there but they are not seen from the cockpit. More grunt is needed to keep the flow right to taxi to the GA area, but I have found myself more familiar now with getting the aircraft around the traps. Shut down the piston version of the Duke and you are thinking of how you like the aircraft. Sounds are well improved and now Sasl plugin driven and better than the older standard X-Plane sounds. There is a slighter higher whine to the Turbine but my Carenado Caravan sounds more turbine than the Duke. Liveries There is one blank white and four design liveries, and all liveries work on both aircraft types. All are good and 4K resolution but the range is small for an aircraft of this design. There is a paintkit included. Summary Overall the Beechcraft Duke B60/Royal Turbine is very good. There is a slight basic feel to the aircraft, no nitty gritty details or visual realism in depth, but then again those aircraft are in another higher price range. No special features here either like menus or static elements and animations that you can play around with to enhance the fun factor. But the Duke is an interesting aircraft to fly and for the investment you get really two quite different aircraft for the price of one, so it is good value. In design the aircraft is well done, and the different panel versions add in a change of scenery without changing aircraft. And it is wholly debatable of which version you will like the most, with the Lycoming more challenging to fly with less power but the Royal Turbine having the legs and thrust to fly higher and faster further. I'll let you decide on that, as overall the Beechcraft Duke is a very interesting aircraft to put in your hangar, and by history a niche design to wonder if it should have been more successful than it was. The Beechcraft Duke B60 by RW Designs is available from the New X-Plane.Org Store here : Beechcraft B60 Duke And is priced at only US$26.95 _____________________________________________________________________________________ Features: 2 versions of the engine Beechcraft Duke: Lycoming TIO-541-E1C4: 380 hp variantRoyal Turbine PT6A-21: 580 hp variantHighly detailed Model High-Resolution 3D ModelEach variant has its own true to life cockpitUltra-High Resolution 4K texturesFull 3D exterior modelNight lightingOptimised for both HDR and non-HDRLiveries 5 paint schemes in 4KThe Paintkit is included so you can paint your own liveriesInterchangable liveries between engine variantsCustom Systems Programmed RadiosCustomized Garmin 430 and Garmin 530Custom flightmodel using SASL for ultra realism.SASL powered sound authentic to the engine variantsInstallation : Download file size is 186.90mb to your X-Plane - GA Aircraft Folder. Installed file size is 266.40mb Notes: None Documents : Two sets of Checklists for both variants (Lycoming and Turbine) and POH (Pilots Operational Handbook) for the B60 and supplemental for the Royal Turbine. Requirements : X-Plane 10.30+. Windows, Mac Linux - 4Gb RAM. 1Gb+VRAM Video card Current version: 1.02 (Last updated September 17th 2015)Developer Support Site : (RW Designs X-Plane.Org Support) _____________________________________________________________________________________ Review by Stephen Dutton 24th September 2015 Copyright©2015: X-Plane Reviews Review System Specifications: Computer System: - 2.66 Ghz Intel Core i5 iMac 27”- 9 Gb 1067 Mhz DDR3 - ATI Radeon HD 6970M 2048 mb- Seagate 512gb SSD Software: - Mac OS Yosemite 10.10.1 - X-Plane 10 Global ver 10.40 ( RC3 is close enough to final) Addons - Saitek x52 Pro system Joystick and Throttle : Sound - Bose Soundlink Mini Scenery or Aircraft - EGNT - Newcastle Airport 2.0 by tdg (X-Plane.Org) - Free - EGPH - Edinburgh, Scotland by Joyfulsongster ((X-Plane.Org) - Free - Forth River Crossings by John MD (X-Plane.Org) - Free
-
Aircraft Review : Embraer ERJ 195 LR by X-Crafts
Stephen replied to Stephen's topic in Airliners Reviews
To remove the static elements then open the tab on the right of your screen and the tick box is in there... Mine works fine, so just make sure you have the latest version or check out the X-Craft support on the X-Plane.Org
-
Butnaru did note he was updating all his sceneries, when he will get around to KFLL I don't know, but notes on the changes have been taken, so there is a good chance they will be done. SD
-
X-Plane Version 10.40 X-Plane has passed another milestone in the release of X-Plane Version 10.40 from Laminar Research. In this article we are going to explore what was part of the release and the changes that are relevant to the simulator. First Impressions As with any new X-Plane Version release, there are usually a swirl of rumors and favorite items that users aspire to be incorporated in the simulator and v10.40 was of no exception. So first impressions are not to be the start and end all of the items that made the list. Nothing is concrete till the final version is actually released, but in v10.40's case it was a little more on the actual surface but a lot was actually done deeper down, so in that case with v10.40 the so called "Banner" items were quite small and noted as "just a few". But didn't mean that v10.40 was just an average upgrade because it isn't, as it is quite significant and certainly has made a decent change to X-Plane. We may get with current version releases the less dramatic in your face changes and features, but that does come with an actual upside of the fact that the version releases are more polished and have had more backroom testing and fine tuning than the past releases of putting it out there and sailing into usually a storm of bugs, user torment and computer crashes. If v10.40 was noteworthy it was in the fact it is very well refined (v10.30 was very smooth as well) and certainly in its most biggest change in the introduction of extended visual viewpoints. No matter what changes where completed or mostly the ones that were not actively incorporated into this version, my general reasoning is that they were simply not good enough or refined enough to make the cut, and there is still more work needed to refine them to the expected quality we expect, these items will also need to be addressed before X-Plane10 has done its run and before X-Plane11 will see any light of day. In other words the features noted on the X-Plane10 release will all have to be completed to the standard required before there is any chance of a new X-Plane version serial change and that will still have to include the ATC and Weather (clouds) that are still in need of more development to achieve the original set goals of X-Plane10. So a few more Beta X-Plane versions are still going to be required to meet those goals, but I always noted that X-Plane10 will be a long development phase anyway, so I still doubt any new serial version before at least 2017. Banner Changes. The headline acts in v10.40 are: Digital Download; Now you can purchase a key from Laminar Research to do a digital download "X-Plane 10 Global" of the simulator which is the same price (currently US59.95) as is the still continued boxed DVD set. The release price covers the current v10.XX run. The digital download sounds like a better deal, but in reality it can come out a bit more expensive and time consuming than the current DVD installing system. That depends on your internet connection and download speeds, because if you want the full scenery install it means you will have to do a download cost of the 60GB+ in scenery mesh over your modem, you however don't have to download all the scenery in one go, but on an as need to install basis. But you will need to download a basic starter set of scenery to fly in X-Plane. But that is still a heavy download unless you have a cheap, fast and wide broadband pipe. Certainly this is the future of X-Plane in how you access the simulator and so boards well for updates including scenery mesh as that was in the past only accessible via the DVD disk loading system that was then restricted to only serial X-Plane version changes. Extended DSF; This is the most visual change to X-Plane in that X-Plane can now load more 4x3 DSF (distribution scenery format) tiles than before. It is known as "Extended DSF Scenery" and you can select the feature by selecting the tickbox in your "Render Options" menu panel. The visual line in scenery was around 12,500ft, and under that altitude you could be within the older DSF tile visual range (with the horizon haze switched on), go higher and it was not very nice if quite average and certainly from altitudes of 35,000ft it became down right ugly. 12,500ft Non-Extended Scenery haze off (original) 12,500ft Non-Extended Scenery haze on (original) 35,000ft Non-Extended Scenery haze off (original) 35,000ft Non-Extended Scenery haze on (original) The boundary line between the high-resolution texture mesh tiles and the more weaker Earth Orbit Textures were highly noticeable, jaggy and the haze had to cover a significant area to cover the joins, in other words it wasn't very pretty. The tile size of the area is now expanded out significantly from the original loading and here it is expanded to such an extent, it easily now covers the whole width of the Florida peninsula. From the air it looks significantly different. At 12,500ft with the haze off you cannot see the boundary line (only just if you want to really be really picky) Put the haze selection on and the difference is small, so the feature has little work or any to blur the textures to the sky. In other words for General Aviation flying the "extended Scenery" feature, is absolutely perfect, with horizon to horizon high-resolution textures. At 35,000ft with the haze off (left image) you can still see the boundary join, but it is much further away in the distance, not quite perfect. But with the haze switched on, then it is at least very much more acceptable a view for this altitude, and remember this is in totally clear conditions and any slight cloud cover will make the view authentic, and also the fog line on the horizon has also had a little refining and that is noticeable. You can't really stretch the high-resolution mesh tiles any more than this without getting a significant hit on your frame-rate. So any more enhancements on this area would have to come from the Orbital Textures. So what did this enhancement cost to your frame-rate, personally to my system it was very little and with only 9gb of memory I use an average of 5gb of memory in normal conditions with no Hi-Res textures loaded. So turning off the "extended Scenery" does not not give me a significant boost in performance like I expected it would and my frame-rate numbers are not that much different than my original 10.36 settings. So that shows how much time and effort has gone into this feature to make it perform extremely well across the board. One change to help in this efficiency is that the loading of the tile mesh in your computer is now "multicore". No doubt different machines will interpret the feature (and on how many cores you have available) in slightly different ways, but overall the "extended Scenery" is a huge step forward for the simulator and in my mind one of the very real turnoffs for new users was X-Plane in not delivering quality viewpoints from the aircraft, and certainly for the long route-high flyers they will finally have the quality vista scenery well worth looking at from behind the controls. Video; Video is back! Yes you can again record all your bad flying habits again. Quicktime is out and that has been replaced by a AVI system. As a mac user I don't like avi but the windows users will accept it better than me, personally I don't care if only it is far more efficient than the old system and any video is nice to have... I missed it badly, but it is also 32 or 64-bit and multi-core which sounds promising. Sound is still missing though so a third party application is needed for that. You can set the seconds per frame, a time lapse, resolution of the video in pixels and quality. There is also a choice to select background recording. Laminar Research note that if you have a slow computer or are near (or under) the frame-rate threshold. Then the best way to record clean video is via the replay option, in this way when you record from the replay the actual playback is in the correct frame-rate speed and the video capture will be much better and have no or very little effect on recording a clean video (note the playback bar and controls will not show in the recorded video replay). The video and screenshot creations have been moved over to the "Output" folder and out of the mainstream X-Plane (root) folder. As I can create 250 or more images a review, it is great to see the images not overwhelming out the main X-Plane folder, and then finding it hard to look for even the basic X-Plane folders and applications. Preset Rendering options; You now have new five preset rendering options on the Rendering Options menu, replacing the old "Set all rendering options for maximum speed!" Settings include - Set to Extreme, High, Medium, Low and Minimum. Certainly aimed at new users and for a quick change in settings... But it is really totally useless for everyone else. I checked them all and they don't come even close to my most efficient settings? I would have personally liked a saver preference system were you can save certain snapshot render settings for certain circumstances for a quick change, wasted opportunity really. Startup changes; If you crash to the desktop (CTD), you will not now get that alert box that asks you if you want to reset your rendering settings (you can hold down the "Shift" key if you want the Alert box back) so the safe mode is now an option. It certainly speeds up getting back up to speed after a crash. In reality this change is because the safe mode is out of date now, and not really required. Because "multicore" mesh loading now starts from early startup, the loading times are quicker (but not by a noticeable amount for the full load procedure) but it is still quicker. The startup menu has been speeded up, so loading and selection is faster. And the ICAO list is not pre-typed into the airport list in the selection box which gives you a large list of airport selection available. The lettering on the definition of the position of the aircraft's state on startup has changed from "start each flight with engines running" to "start each flight cold and dark" just a name change really, but I asked for this option on the "Startup Menu" but it was declined. Another item has also been changed to the "Startup" page is the rewording of your "saving" of preferences, from the simple "Save Preferences" to "discard changes to preferences". Isn't that the same thing... but the other way round?. But the idea is that if have your perfect settings and X-Plane is running like a humming bird, you don't want it changed and to keep those settings every time you start up. With saving your preferences there is always the chance you could overwrite your perfect settings just for the sake of it. Of course any changes you make are not recorded. It would be a nice option that you can have a choice in what Preferences you can save like the "X-Plane Keys" or "X-Plane Screen Res" without overwriting the well set main "X-Plane.prf". ATC; We were expecting a total overhaul of the ATC in X-Plane in 10.40, but that didn't come out in this version. But there has been a few good if certainly positive refinements. There is a new ATC controllers pop-up window which is located in the "X-Plane/Special Menu. It shows you your nearest Air Traffic Controllers and their Com frequency, if you click on the frequency it will be auto-tuned into the aircraft, which is extremely handy when juggling frequencies when being prompted by the controller. The significance of this is not the actual pop-up window or what it does, but in the new X-Plane interface which is very different from the usual panels of X-Plane past. It looks a little out of place at this point, but it points to a newer more modern style of XP interface in the future and as announced at FSConn this (northern summer) a totally new Menu system is noted as "top priority" by Laminar Research. You can now turn off those taxiway guide arrows if you don't want them in the settings menu panel. I didn't mind them actually, but it was when they didn't work that drove me crazy... One major change that can significantly make the ATC more user friendly is the "reply" mode in which you can now just double click (the return key) to reply to the ATC instruction. This before was a major distraction when you had to manoeuvre your mouse over the reply to activate it, once is fine, but over many replies it became a logistical problem (and a bad distraction) when flying the aircraft. Fixed, and a welcome relief. If you use your arrow keys in the ATC window no they will now no longer move camera (view). The "you are still off course" is still in there to still drive you to mental distraction, but I found it less unforgiving and more relaxing than in the past, but certainly the ATC in v10.40 is far more user-friendly than it was in the past Windshear - Winds Aloft!; X-Plane METAR downloads will now read winds aloft data for high altitude wind data... but only if you are flying over the United States, it doesn't work anywhere else. But I found this actually worked high over Australia at 35,000ft and I suddenly had 80knt headwinds that stood the A330 almost to a stop in a moment, unnerving. You can now regenerate the weather from a "keyboard/Joystick" command, and the “sim/operation/regen_weather” action is now available to re-generate all weather. Windshear can give pilot's shivers, and that function is now also available. METAR now sets clear layers lower when the weather is all-clear, and this improves your upper level visibility when using real weather. The "Winds-Aloft" has been added to the main startup window. Throttle Beta; The PT-6 Beta throttle idle function is now activated and has created some strange results around the different aircraft, It works in the actions of pull back from idle (prop pitch decreasing, engine still at idle) then pull back again to another selection to get into the REVERSE mode (prop pitch decreasing more, engine power increasing) for reverse thrust. This system can and does mess up the "Reverse Thrust" and "Full Reverse Thrust' actions. If the developer has taken the beta idle function into account it works very well, and that notch on your add-on throttle now has the correct function, but the throttle up area is reduced. But in many cases I found myself toggling between the "Reverse Thrust" and "Full Reverse Thrust' selections to find one that works correctly if the aircraft has not been updated or adjusted, in the FlyJSim Q400 there is no action at all or reverse thrust. The backup manual throttle control does also now not over-ride the governor. X-Plane usage information; X-Plane can now collect anonymous X-Plane usage information. There is a new checkbox in Operations & Warnings window to allow Laminar Research to collect anonymous usage data on your system configuration and X-Plane usage patterns. You can opt out of course, but collectively it may be interesting to see how and why we use the simulator. Rescan; There is now a new button the "Aircraft" selection menu, that will rescan an aircraft file. This function allows you to modify an aircraft while the simulator is running and reset the aircraft to restart the updated file. A great function, and handy for developers. It would be nice to have the same function for scenery, so if you drop in a new scenery into the custom scenery folder you don't have to shutdown to the desktop and restart the simulator again to access it... Global Airports; The global Airport folder is still growing at a massive rate. In 10.40 another 776 total more airports are available as default, that comes to a total of 1730 new batches of scenery (well done everyone) overall. As noted X-Plane is now getting a solid user base of scenery. But I have found that I am pulling the "Global Airports" out of the custom scenery folder more and more as they interfere with the heavier payware and larger freeware airports. If I am going from point to point between two large payware airports then I want to arrive at the quality airport and not one with double airbridges and two control towers. Although Laminar Research note it is the responsibility of the Payware/Freeware developer to make sure it does not happen, but I have found more and more lately it is not doing so, and so devaluing the idea in v10.40. Swapping art assets; A small but again significant change in v10.40 is that Library art assets can now be swapped based on datarefs. This can be used to make seasonal texture add-ons change in the sim. In other words you can now have winter textures change to summer textures without actually going into the resources folders and changing them physically over. The results from this change is not noticeable yet, but the code to do so is now in the simulator for third party developers to use... it will be very interesting of where it will go. GPS Improvements; There has been a few more refinements with the GNS 430/530 innards. GNS 430/530 now allows disabling the automatic ILS CDI switching and now by default, the CDI will blend in the ILS signal smoothly beginning 2nm downwind of the final approach fix when the cross track error is 1.2nm or less. When the ILS signal gain is maximal, the CDI indication will change to VLOC and the changeover can now always be over-ridden by manually selecting the CDI to VLOC. There is an automated changeover that can be configured off for training operations in the NAV menu, along with the map options and the settings are remembered in the per-airplane settings file, like the map settings. Aircraft Improvements and changes; Overall there has not been a huge amount of changes in aircraft systems in this v10.40. Mostly they have been over forgotten items (some even over a decade!) and mostly the items are refinements. Items include the bus voltages that now ignite properly at flight start, This will keep systems from reporting a no-volt for the first frame. Hobbs time is now tracked with an aircraft that has a working Hobbs meter that notes the total hours flown. Most Hobbs meters shown in X-Plane are usually fake, now they will work. In Plane-Maker If the type of file (airfoil, aircraft, etc) is the same as the last time you did a file-open, the path and folder to that file is left in place. This means that if you are selecting 50 afl files for your airplane, you do not have to navigate right through UI every time down to the same folder, which is real time saver. And Plane Maker no longer crashes if you zero-out wing chord multipliers. A new feature is that 2-d windshield effects can be disabled in the rendering options screen, checking this box causes all 2-d window effects, like rain and bird-strikes can now be bypassed. For people with projector screens, collumated displays or any displays for which the 2-d effects are annoying, they can now be turned off. Thermometer and fuel indicator failure now functional! These failures were initially designed for the g1000 only, but now I have them working for all instruments And better compressor-stall modeling. This is based on observation of compressor stall dynamics in a level-D sim. The new “automagic” rudder code was tried but then removed. This code tried to manage the rudder for you if (and only if) you don’t have a rudder axis installed. Instead Laminar Research tightened up the ground steering. Glider tow; The glider-tow feature has had a few changes in being re-organized internally, Were as the glider tow had a bug in it where the forces for the first frame of the glider tow were wrong, due to the towplane location not being ready. The tow cable is now black instead of grey to make it easier to see, and for hoist users, the slung load code also had a bug in it where any cable length less than 1 meter did not compute the loads properly, due to a /0 protection… It has been lowered now to a 1-centimeter minimum cable length. And not forgetting the feature that we all wanted in.... there is now the "animated" feet to the birds! Frame-Rate and simulator rendering efficiency; With every new X-Plane version the main focus is always on how the changes will effect your computer and its frame-rate processing. There has actually been a lot of refinements in v10.40 and considering the amount of changes the overall efficiency compared to v10.36 is very good. As noted the extended mesh scenery did not cause any major drop in frame-rate, which was forecasted to be quite hard on your memory and processing power, but that turned out to be only a whimper and not a loud bang of pain. The first beta's were amazingly good and fast in efficiency, but it all went a little sad and rough around beta 4. and continued like that till it all came back to greatness around beta 11, which shows you have to wait until the beta run is completed before making your strong assumptions. Although the actual default/autogen scenery has not had any attention in v10.40, the way they are laid out has certainly been refined. The "Rendering Options" panel settings for "Texture Resolutions", "Stuff to draw" positions have been moved significantly upwards, in that a lesser setting will now draw more out on your screen. But I found my usual default settings moved in reverse in the in v10.36. There I could run out a lot of "Stuff to Draw" but very little of the expanded "World detail distance". Now I have a reverse situation in that I can set my "World detail distance" to almost maximum (very nice) but the "Stuff to Draw" to no more than "a lot", and in good conditions maybe one more setting upwards. My antialiasing setting is now halved from x8 to x4 with the same quality. 10.36 settings are on the left and 10.40 settings are on the right, but my frame-rate is very close at 22frames each... and that is with the extended scenery switched on, so that is a good refined performance from the new version. There is no doubt with these changes that the difference in between HDR (High Dynamic Range) mode on and HDR off is now significantly narrowed in using up your frame-rate quota. HDR on is now highly usable even with an average processing computer, but it comes with a bit of a hidden bite. In the HDR settings, then "none" is now quite jaggy on the antialiasing, but that should be its real setting anyway. In FXAA mode, you still get a lot of jaggies, however still it is quite an average antialiasing resolution... the next is 2 x SSAA+FAAA and that is perfect basic antialiasing, but the gap between FXAA and 2 x SSAA+FAAA is wider than the Grand Canyon and that cancels out any benefits you have gained, so in reality "None" and FXAA are too low and poor visually and the 2 x SSAA+FAAA and lower settings are all too high to be of a real visual benefit? So the only gain is that you can have your HDR on with better frame-rate, but only at night or have poor visuals. If a better HDR mode setting was set between FXAA and 2 x SSAA+FAAA or one or the other of the settings were refined better to fill in the gap then you could have your HDR rendering and eat it as well with a better visual antialiasing. A side note on the HDR is that the lighting (aircraft lights, airfield lighting) have been made brighter and larger in v10.40. Earlier beta versions were horrible glops of light, but in the final beta's the lighting was much better and refined. Overall though the simulator rendering efficiency is improved and refined in v10.40, and only area that can create a significant frame-rate pull down is still the weather and the clouds, dark clouds can still be a real frame-rate killer, for anything but for users that have powerful computers to over-ride the sheer number crunching required. One area in clouds that was however refined in v10.40 was the grey out transparency, in that in the lighter shades the grey out is more realistic and viewable. I do highly recommend to do a bit of housekeeping and clean out your preferences and start v10.40 clean and reset, it can make a difference to your frame-rate and to the overall smoother running of your simulator. Steam users will be able to update to v10.40 via Steam (Steam users can not participate in X-Plane beta development) You can't cover every single aspect of a serial X-Plane version release as the changes and bug fixing are far too many to list. So you can only cover the highlights and the changes. For the full complete list of the beta run then go to the X-Plane 10.40 Release Notes provided by Laminar Research. To keep up to date on any developments of the X-Plane Simulator then go to Laminar Research's "X-Plane Development" blog that can usually explain significant areas and future changes to the X-Plane Simulator. Stephen Dutton 18th September 2015 Copyright©2015:X-PlaneReviews
-
Aircraft Update : Bell AB412 1.5 by X-Trident X-Trident have done another small update to the Bell AB416. In reality this update is just another bit of fine-tuning with the only new items being for the SAR scenarios (ground operator, life boat, optional ambulance, random positioning, improved animation). Now you get a paramedic by the patient in the hard ground position, and the co-ordination system allows you to place them where you want them. An Ambulance can also be standing by, but the ambulance texture quality was not great at my settings. Out on the water and the ground position turns the patient into a floating lifeboat with a strobe light that can be seen from a far distance. This is now certainly the best SAR rescue set in X-Plane, great ideas and great animation... The AB412 is not too bad either!. For more complete information on how the SAR system works then read X-PlaneReviews AB 412 v1.4 update review. Yes! the Agusta Bell AB412 from X-Trident is now available from the new X-Plane.Org Store here : Agusta Bell 412 - Price is US$35.95 Current version is v1.5 and if you have already purchased the X-trident Bell AB412 then go to your X-Plane.Org Store account and upgrade now! Features: Pre-release versions tested by actual customers since August 2014 Highly detailed 3d model and 3d cockpit. Most switches operable Detailed rotor kinematic modeling Detailed lights Close to real fuel, hydraulic and electrical systems; start-up sequence follows the real checklist almost line by line Custom failures Working custom auxiliary tank and water drop system Working dolly pad for precision landing Custom warning panel Custom governor Custom artificial stability Custom 4 channels autopilot with over 10 modes Flight model approved and tweaked by real pilots Hyper detailed rotor with all its levers moving ud and down, Custom GPU Custom Remove Before Flight with dangling flags (with FOD) ADF with bank error Working doors with changing sound volume effect Many liveries plus a paint kit; smart configuration of optional objects attached to each livery Plugin for Windows, Mac and Linux (32 and 64 bit) – detailed custom menu Tested with FS Economy, Smart Copilot and Saitek panels Includes a licensed version of Dreamfoil's Geforce plugin Garmin 530 GPS V1.3 New Features: Working NIGHTSUN Spotlight Working FLIR Camera V1.4 New Features: Custom Winch and SAR operations V1.5 New Features: Improved shadows (now high-res as they should be) Improved click regions for the Garmin 530 Improved SAR scenarios (ground operator, life boat, optional ambulance, random positioning, improved animation) Added custom commands for FLIR and spot light _____________________________________________________________________________________ Requirements X-Plane 10.30+ (any edition) - Mac, Windows, Linux - 1Gb+ dedicated VRAM Video Card Current version: 1.5 (Last updated September 14th 2015) Update by Stephen Dutton 17th September 2015 Copyright©2015: X-PlaneReviews
-
Oh yes... Fixed. Thanks
-
News! - Released - Beechcraft Duke by RW Designs The RW Designs Beeechcraft Duke (designer of the DHC-6 and A330-300) is now available from the X-Plane.OrgStore. And the aircraft comes in two versions... Lycoming TIO-541-E1C4: 380 hp variantRoyal Turbine PT6A-21: 580 hp variant The Beechcraft Duke by RW Designs is available from the New X-Plane.Org Store here : Beechcraft Duke And is priced at only US$26.95 Features include: Highly detailed Model High-Resolution 3D ModelEach variant has its own true to life cockpitUltra-High Resolution 4K texturesFull 3D exterior modelNight lightingOptimised for both HDR and non-HDR Custom Systems Programmed RadiosCustomized Garmin 430 and Garmin 530Custom flightmodel using SASL for ultra realism.SASL powered sound authentic to the engine variants Requirements: X-Plane 10.30+. Windows, Mac Linux- 4Gb RAM. 1Gb+ VRAM Video card Current version: 1.0 (Last updated September 12th 2015) Stephen Dutton 13th September 2015 Copyright©2015: X-PlaneReviews
-
Checkout the update for v2 Aircraft Review - Airbus A330-300 v2 by RW Designs.. And go to your X-Plane.OrgStore account and login to download.
-
Aircraft Review : Airbus A350 XWB Advanced by FlightFactor
Stephen replied to Stephen's topic in Airliners Reviews
Not without seeing the files? and how it is installed, your missing the textures files? SD -
Aircraft Review - Cessna 172SP Skyhawk by AirfoilLabs That first flying lesson and the moment you are free to do your first solo, are two moments in your aviation career that will always be burnt hard deep into your memory. Just you and the machine and the freedom from the earth, you are flying and you now have no bounds to the earthly core below you. There are more chances than not that both of these great moments in your life will be behind the controls of this aircraft... The Cessna 172SP. It is the trainers, trainer aircraft, the workhorse of most flying clubs around the world, first flown in 1955 (nearly 60 years ago) and there are 43,000 172's scattered around the airfields of the world. They are the backbone of the General Aviation world, the Volkswagon Beetle of the plane world, the everyman's aircraft... In other words there is a lot of them and they are all part of the aviation scenery all around you. Things you did erase however out of your gilded memories are that the 172SP is morbidly slow and shockingly noisy, but lets not damage the cloud high dream. The venerable Cessna 172 started life as a tricycle landing gear variant of the taildragger Cessna 170, that had a basic level of standard equipment. In January 1955, Cessna flew an improved variant of the Cessna 170, a Continental O-300-A-powered Cessna 170C with larger elevators and a more angular tailfin. And although the variant was tested and certified, Cessna decided to modify it with a tricycle landing gear, and the modified Cessna 170C flew again on 12 June 1955. To reduce the time and cost of certification, the type was added to the Cessna 170 type certificate that then became known as the Model 172. Later, the 172 was given its own type certificate, 3A12. The 172 became an overnight sales success, and over 1,400 were built in 1956, in its first full year of production. Early 172s were similar in appearance to the 170s, with the same straight aft fuselage and tall landing gear legs, although the 172 had a straight tailfin while the 170 had a rounded fin and rudder. Then later 172 versions incorporated revised landing gear and the swept-back tailfin, which is still in use today. The final aesthetic development incorporated in the mid-1960s, was a lowered rear deck allowing an aft window. Cessna advertised this added rear visibility as the "Omni-Vision.", and Cessna has not changed the airframe configuration since then, except for updates in avionics and engines, including the Garmin G1000 glass cockpit in 2005. Production halted in the mid-1980s, but resumed in 1996 with the 160 hp (120 kW) Cessna 172R Skyhawk. Cessna supplemented this in 1998 with the 180 hp (135 kW) Cessna 172S Skyhawk SP. AirfoilLabs This C172SP is the first design from Czech studio AirfoilLabs. And being a new design from a new direction it is quite a different feel from most X-Plane standard aircraft. No doubt the starting brief was to create the most outstanding C172SP in X-Plane, and the aircraft is nothing but highly ambitious in creating that standard and refinement. But even at this point the skill and quality is there and there is no doubt about that and certainly AirfoilLabs are another welcome addition to the X-Plane world. Cessna 172SP X-Plane comes with a default Cessna 172SP and it has already a 3d cabin and controls, It is very good and of course free if you have purchased the simulator. For many this aircraft is their first introduction to the simulator, but most new users will usually fly the huge default Boeing 747 which is a really silly thing to do as the aircraft requires a little experience with all that weight and heavy aircraft flying characteristics, and I am as guilty as everyone there. The aircraft comes in three versions: Low-res : Medium-res : High-res Which is the weight of the textures in low/med/high in quality. The first thing you notice is that the aircraft is heavy, not only in the download but in the simulator and that is the penalty that comes with quality. No doubt that AirfoilLabs are aware of that and so hence the three choices, and the "Low" is well too low, in blurry texture writing on the panel and liveries, and the high is for only people that have computers that are run directly off nuclear power stations. So the "Medium" is the best compromise and that is what we are flying here. First impressions are of a highly detailed design and the forementioned quality, no doubt this is an excellent 172SP. Detailing is deep and significant, with ribs, great paneling, riveting and the whole lot of screws and bolts holding the aircraft together. Glass is first rate and the whole machine has a real authentic look from the start. For a first time effort it is a very good design. The aircraft is fuselage full of features, there is a lot on the aircraft. But we will start with the menus. The five "Menu" tabs are situated left centre of your screen. They represent (Q) Quickstart - (C) Camera - (P) Payload and Fuel - (S) Settings and (E) Engine Service Panel We will start with the (C) Camera because it is important to understand the view system. In X-Plane you use a view system that is mostly set by using your keyboard to represent a certain view and your position inside and outside of the aircraft. The AirfoilLabs view system mostly over rules that feature by taking control of your views and giving you certain actions within that view field. That can cause some conflict between the two systems as we will see. But the way you should approach the views is to say be inside the AirfoilLabs views or out of them. The idea is to give you a full view and control of the aircraft, it is very clever but has some restrictions. On the (C) Camera menu you press the "Go Outside" box to go into the system and that is noted by the notice at the bottom of your screen " Manipulation Mode Active" you can still use you left- right and forward - back movement keys to move around but they are slower (even with the -Shift double speed pressed down). But you can then also access the many active zones all over the aircraft that are represented by the hand, press the zone areas on the forward upper and lower engine cowling panels, and there is a whirr of bolts coming off and the panel then split and rest on the ground in front of the aircraft and reveals the internal uprated Lycoming IO-360-L2A (200hp - 149kW). The beautifully constructed but fragile looking Lycoming is very well detailed and a great feature. These active zones are positioned all over the aircraft. To check your fuel, you press on the step on either the side of the aircraft, and you are lifted onto the wing and the fuel tank cap rotates off. You can then adjust the fuel load of each tank via the menu. Pressing on the flap on the cowling will show you the oil stick. You can pull (manoeuvre) the aircraft by pressing on the front strut and pulling the handle and there are check items on the wheel covers. All static items like tie-downs (wings/rear) wheel chocks, pitot cover can be individually attached or hidden. (note: when starting the aircraft and giving the aircraft throttle you may wonder why? It doesn't actually move?, it is usually the wheel chocks are still in place, but to remove them you have shutdown the engine again and move outside to do so, move again back inside and then restart the engine) Doors (Pilot's and Co-Pilot) can be opened by pressing on the latch and so can the baggage door to the rear. All move-able surfaces can be checked on the walk-around, by placing the hand on the surface, items that can be checked (they move for you) are the flaps, ailerons, rear elevators and rudder. A lot of the items noted will only work if you are close to them, any distance and they don't work... the oil stick is quite hard to animate. From the menu you can connect an external GPU (Ground Power Unit) but only if the cowling is on the aircraft, again you press the small hatch (left high) to connect. Get close to the door and the internal cabin is extremely well done, only the rudder pedals are a bit too shiny and not worn for my liking. The seating is well done and the internal fittings are first rate, the aircraft is however not grubby and tired like you find in an Carenado, but still very good. The panel is very authentic and well done, highly realistic. To get into the aircraft you press the centre of the seat and with that you are in the pilots seat. To get out again you press the step on the wheel support. Both actions are on the view "menu" and Pilot will put you in the drivers seat and Go Outside will put you on the ground again. You realize sorta quickly that you are a little restricted? you can rotate and angle up or down but not move actually left-right or up-down like you can with the X-Plane keys. To move you have to use the view menu and go to that position. You do get used to it... in time, but you feel restricted overall. A fellow user that tried the system hated it, and if it gets confused with the X-Plane system you get a bad shudder and no more movement is possible. An escape from the shudder is press your X-Plane "Cinema Verite" key or (view) menu option, it is the only one that works? In the rear it is nice and cosy back there. And the door can be closed by touching the catch, the window opens on both doors as well and the external sounds go up or down with them open or closed. A nice touch is when the engine is running the doors and windows if opened will vibrate in the slipstream and can't be fully opened, but will thankfully close. The (C)-Camera (views) menu covers a lot of options internally (including the various equipment views) and externally. The POV (Point of View) can be adjusted to get the best position and that is usually a required adjustment as it is too far back. Panel and Instruments This being a trainer then the panel is set out in a basic configuration, just the main flight instruments front and centre. But the aircraft and instruments are not basic, basic... there is a bit of power in there to do more than circuits. The standard six instruments ( Airspeed Indicator, Attitude Indicator or Artificial Horizon, Altimeter, Turn Coordinator and Vertical Speed Indicator) are large and clear as they should be. Below is the engine RPM dial. To left are the four clear engine instruments in Fuel (both left and right tanks), EGT (exhaust gas temperature) and fuel flow, Oil pressure and Temperature and VAC (Vacuum) and AMP (amperage). In a bit of modernity there is up at the top a digital display for Temp, Volt and timer. Right of the Standard Six are two CDI (course deviation indicator) for VOR OBS (Nav2) and NDB direction, a third (top) is a ILS alignment vertical and Horizontal) dial (Nav1). Top of the panel is the NAV/GPS switch. And on the Co-Pilots side you get just a large clock. Lower panel is the main key start switch, Power switches (master) and Avionics power switches. Set out between are the seven switches for lights, pitot heating and fuel pump. All the relevant push/pull fuses work, so don't mess around with them. Lower centre is your panel lighting, throttle and mixture push/pull knobs, (note the small "lean" knob between the throttle and mixture knobs) flap lever is to the right in four positions 0º... 10º, 20º, 30º. A large lovely trim wheel is beautifully done and nice to use On the floor is a fuel tank selector (all or left/right tanks) and fuel cut off push/pull knob. The central equipment stack is quite comprehensive for a small trainer (and making the aircraft more powerful and versatile). So as we turn on the power and avionic power then the Eq Stack starts up. It is becoming common now in X-Plane to switch on individually the separate radio sets and you do so here as well. It is a full Benedix/King suite with the standard X-Plane Garmin GNS430 GPS. Top to bottom is the standard COMM KMA 26 TSO, then the Garmin GPS which is also your COMM 1 and VOR 1 settings. The KX165A radio is your COMM 2 and VOR 2 set that works in conjunction with the very bottom KN62A for VOR distance, speed and time to the set waypoint. Then your KR87 is the ADF and flight time unit and the XPDR (Transponder) is a KT76C. The autopilot is a comprehensive KAP 140 which we will come back to later, but all the equipment radio sets are excellent to use and are very authentic. A nice detailed compass sits mid central pillar. On the (P) Payload and Fuel menu there are a few options in setting up the aircraft for flight. If you don't want to go scrabbling over the wings to put fuel in the aircraft then you can do so here, and adjust the oil quantity. You can add or takeout baggage in the small compartment behind the cabin and choose not only if you want a passenger but also very cleverly both the pilots and co-pilots weight in five settings, and the full payload and gross weight of the aircraft is shown. You can adjust both front seats front and back which is a nice touch and gives you a set up your right position feeling. Yoke is beautiful, certainly it is an added bonus if you have a Yoke and Rudder pedal set up, you can hide both yokes if you want more of a panel view, but they are nice to have in view. Flying the AirfoilLabs Cessna 172SP Two more menu pages help with the start up and settings while flying. The first is (Q) - Quick Start, that gives you options on either the aircraft is quick start (auto) or cold when starting up (cold and dark is the default), "Secure aircraft" will shut the aircraft down and add in the static elements in one click. "Prepare for Start" will have the aircraft ready to the point of turning the key. The option to connect the GPU and flashlight. The other menu is the (S) - Settings menu. This page is more for the special effects (Smart Camera) and sound. You can select to start with the engine running, pilot in the seat on startup (never saw any pilot?) and a footer menu at the bottom of the screen for flight data. There is a final menu tab for (E) Engine Service Panel but that system is not yet implemented, but looks very interesting. A lot of thought has gone into making sure the 172SP is totally authentic with the real Cessna. That is apparent in the way you start the aircraft. Make sure the fuel shutoff is in on the lower pedestal (fuel pump is on), and so is the lean knob... mixture knob is too the dash and turn the key to start the engine. The propeller will turn but stutter? Try again... no it still won't start? Give the aircraft a little throttle, another key turn and... the Lycoming IO-360-L2A will burst into life! Let the engine warm up and then settle it back into idle. Love it. As the engine crackles your vision is slightly moving with the vibration. This is the G-Effect feature, and it is to give you an authentic movement as you fly the aircraft. Before departing I try out the lighting. The Navigation lights are beautiful and well done, and so is the tail beacon. There is a taxi and landing light in the left wing, but looking closer the actual light is a bit like a rough diamond than a smooth surface, but the light itself is good. Park brake off with a loud thunk and we are moving. Touch the brake to check the forward speed and Whoa! You get this severe forward movement that your head is about to go through the windscreen? Don't like that? It is not the idea doesn't work it is the severity of it. X-Plane has two brake modes "regular" in 50% brake action and "Park" for 100% brake. Here you get 100% every time you even lightly touch the brakes, so you don't actually taxi but hop and bounce your way to the runway, so you try every angle not to "touch that damn brake", on landing it is a real pain in freezing the wheels and catapulting you out of your seat and into the glass, just for trying to slow down the aircraft. It is just too violent and at 50% would have been far better and softer, I didn't like it at all, and I doubt the real aircraft is as severe (I hope). The visual G-Effect movement is quite odd as well but you soon get used to it. Sounds are exceptional, there no doubt that AirfoilLabs has got the rough aircooled four-stroke clatter down right. On the hold the aircraft sounded perfectly authentic and real, throttle up and you get that roar and wind you know well. The aircraft has the excellent DreamEngine Sound plugin with 140 different sounds and range with Doppler Effect and Atmospheric Attenuation... So okay it is very good. Throttle in and you are moving with the featured visual movement backwards, the thrust will send you slightly off line to the right but that is normal and needed to be corrected. At 65knts and the aircraft wants to fly and a slight pull of the yoke and your easily airborne. The aircraft is jittery when you first get all the axis loose together and you will find yourself looking for the aircraft's balance, certainly experience with the aircraft will smooth this out, but this is a first impression. Once found it is great to balance and fly, this a basic trainer after all. It will however if you are not smooth then give you a very moving and visual disorientation, that can be again a bit too severe, and too the point here that I couldn't fly the aircraft and had switch it off as my pitch was sending me into the ground even as I was trying to keep the aircraft level, It is distortional to what is natural if you are trying to fly the aircraft. The basics are correct but it is just too disorientating for my tastes. All these movements are certainly great, but too violent and disorientating if you don't keep the aircraft very, very smooth, but even a bank turn can make you think you are on LSD! Trimming the aircraft is essential, and it takes a little practise to get the balance right. but you can feel the changes and the feel of this C172SP is very good so that helps. But trimming the Cessna perfectly has another reason to get it right... The KAP 140 Autopilot is a real sensitive bugger unless that trim is absolutely, perfectly, annoyingly, frustratingly on the button in being absolutely minutely perfect to lock on. If not you get a beep, beep... and no activation. You actually think it is broken, but it is not... It just hates you! Once (finally and ten NM off course) activated it is thankfully very good. You will love the Yoke action that follows the autopilots commands, but if you pull on the Yoke it will also disconnect for manual flying. You are not going to go very fast anywhere in the C172SP, this little aircraft goes slower at 122knt cruising speed than most aircraft go on final approach, some even on the runway in reverse thrust... So you have tons of time to take in the very slow moving scenery, Vertical speed is not riveting either at a top of 700 fpm or usually 500fpm and wanting to test out the aircraft's ceiling altitude 13,500 ft (4,100 m) is going to take an afternoon, going down thankfully is a little faster. Once you get over the embarrassment of the laughing birds as they overtake you, it is a lot of fun up here. The aircraft just trundles along and you enjoy watching people spend their hard earned cash at Walt Disney World Florida below you. The aircraft comes with fully working systems (temperatures, electrics) and perfect performance data. Weight & balances replicated from an original aircraft with perfect lateral and longitudinal loads placement. Finally you turn to approach KORL or Orlando Executive Airport RWY25. There is a noted gap in the green speed zone between 85knts and 90kts and it is ideal to drop the flaps 10º, C172SP pilot's note the flaps come down like barn-doors and create lift, but I found it not so savage in this zone and you can easily adjust the flap setting to revolutions of the engine to maintain a good speed to lowering the altitude feeling, in other words you have plenty of control. Keep the speed in the green zone and around 50knts and the aircraft will fly there all day, but it is perfect on approach, again the aircraft has good balance when trimmed correctly. Sliding under the 50knt zone will allow you to bleed off height and the slow speed can rest as low as 40knts when kissing the runway. You feel totally in control, and just don't spoil it by smashing your head against the windscreen by touching the brakes. I couldn't sit on the ground at KORL very long as it was getting darker by the minute, and I had a long slow flight back to KLAL Lakeland-Linder. So once the passengers and their baggage was deposited I headed straight for the runway. Lighting Panel lighting is gorgeous and similar to the Carenado CT206H Turbo Stationair, in you have that strip lighting under the glareshield. The dials are clear and bright and very nice to fly by in the dark. There are two switchable spot lights over the front seats, but the rear cabin spot light does not work. A nice touch is the light over the lower fuel tank switch. External lighting is good as well in the dark. The Navigation lights look great as does the tail beacon, the taxi and landing lights are as noted before well don. In the cabin the strobe can be seen and you get this slight light flash as you crawl along. Earlier flying in the dark in X-Plane was a fraught dark affair, but with the improvements and the better HDR it is now quite exciting to do. KLAL slips by on my left as I fall into a circuit to land on RWY 05, I used WIREY (227) NDB as a pointer to the lineup. With the slow approach speed of the C195SP, you have the one thing you never have on an approach and that is time. Time to get the centre line correct and the time to get speed exactly right. Coming in over the threshold and the single landing light starts to work, the instrumentation lighting is simply excellent as you can adjust it to stop glare but have good visual readings off the dials. As you come closer to the runway, the more the offset lighting beam becomes more focused and you can see the offset spill just from the one wing distinctively. It looks very realistic and I loved the effect it gave in front of the aircraft. Back at the office I shut the C172SP down and set out the static elements and a day's job was done. No doubt this is a great aircraft in this General Aviation category. Liveries are few in - One blank white and two designs, but I sure many will soon grace the download files as every one creates their personal or private favorite. Summary For a first time release as a designer then AirfoilLabs have done a sensational job. Their aim to create the best C172SP in X-Plane is certainly a very highly ambitious, but they have certainly had a very good stab at it and to a point succeeded in that aim. The basics are very good, and there is no doubt about that. but it does not feel X-Planey in that context, but pilots that own or have flown the C172SP say that the aircraft is very true to the original and so that is the whole point. Updates and feedback from users has created a quick succession of revisions (and another to come in 1.40), but I would stress that the original release was very good anyway, this is just refining around the edges and tightening up, again AirfoilLabs are responding to the multitude of variables that can't be foreseen in the development stage, but their quick response shows skill and the ability to make this a top quality aircraft. Certainly I really liked the aircraft, but found the views system a bit tight (but you get quickly used to it). The G-Effect feature is very good, but too dramatic in that you can even get disoriented in the aircraft and those brakes are so sharp and neck twisting... ... the aircraft is very clean, nice but needs a little more realism, like the huge amount of exhaust smoke (that looks really authentic) would certainly leave a trail of soot on your pristine paintwork, so a bit of airflow dirt or worn items and marked seats would build the aircraft to a more world weary state that Carenado do so well. It can be done as the propeller wear shows off that effect well. But no doubt the list of features (and more to come) is long so you get a lot of aircraft for your investment. But that does come at a small cost with heavy textures in framerate. The Carenado C208B Caravan is 8frames lighter in the same context and X-Plane settings. That does not sound a lot, but it is the difference between dropping too low and having a smooth simulation and the AirfoilLabs C172SP did struggle in areas. Certainly AirfoilLabs are aware of this as to provide three settings (low-med-high) but really "med" is the only usable setting for most, unless you have a power computer. But you feel the frameweight. But this is nitpicking on a very good aircraft, and details around the quality that you expect at this level. For feature wise and design/detailing it is exceptional and certainly anyone going for their PPL (or have one) this C172SP is a perfect training tool, and to a point that is the aim of the real aircraft's role, I would however as a complete novice start on X-Plane's basic C172 before graduating into this AirfoilLabs version, as it is more advanced and the features can be confusing if you can't fly the aircraft on the very basic level. Ambitious, clever and fun, words you would never use for a basic aircraft trainer, but that is what the excellent Cessna 172SP Skyhawk is from AirfoilLabs, It is slightly different in feel as well but to the benefit... Yes a great aircraft and another new standard in X-Plane in General Aviation. _____________________________________________________________________________________ The Cessna 172SP Skyhawk by AirfoilLabs is available from the New X-Plane.Org Store here : Cessna 172SP Skyhawk And is priced at only US$34.95 _____________________________________________________________________________________ Fully featured and including: FLIGHT MODEL Very accurate Flight Model. Tested and approved by real world Cessna 172 SP pilots and flight instructor Realistic weight and balance - lateral and longitudinal loads placement Custom made flight characteristics derived from the real aircraft flight recordings and based on real flight manual performance data Calculation of real KIAS based on KCAS according to flight manual Realistic stall characteristics Climb performance according to flight manual performance data Cruise performance data precise match (PRESS ALT, TEMP, POWER, KTAS, GPH) Electrical system derived from the real ELECTRICAL SCHEMATIC Functional Circuit Breakers logic HIGH QUALITY 3D MODEL, TEXTURES AND ANIMATIONS High resolution 4K textures Easy to read, high-resolution panel All switches, buttons and knobs animated Volumetric side view prop effect Realistic 3D night lights effects. Dynamic loading/unloading of 3D parts and plugin logic for FPS optimization _____________________________________________________________________________________ Installation : Download file size is 585.20mb to your X-Plane - GA Aircraft Folder. Installed file size is 914.90mb Notes: None Documents : You get a Manual that at this point is still a bit of work in progress. Requirements : X-Plane 10.36+ - Windows, Mac or Linux - 64bit version- 8Gb RAM - 2.5Ghz CPU - 1Gb+ Dedicated VRAM Video Card Current version: 1.31 - Last updated on August 15th 2015 Developer Support Site : (AirfoilLabs X-Plane.Org Support) _____________________________________________________________________________________ Review by Stephen Dutton 10th September 2015 Copyright©2015: X-Plane Reviews Review System Specifications: Computer System: - 2.66 Ghz Intel Core i5 iMac 27”- 9 Gb 1067 Mhz DDR3 - ATI Radeon HD 6970M 2048 mb- Seagate 512gb SSD Software: - Mac OS Yosemite 10.10.1 - X-Plane 10 Global ver 10.35 (final) Addons - Saitek x52 Pro system Joystick and Throttle : Sound - Bose Soundlink Mini : WorldTraffic v2 Scenery or Aircraft - KLAL - Lakeland Linder Regional Airport 2.01 by Drankum (X-Plane.Org) - Free (note: personal added items in an office (okay demountable building and vehicles) - KORL - Orlando Executive Airport/Destination Florida v8 by Tom Curtis (updated to Destination Florida 8 WED Edition 105 by Rocketman X-Plane.Org) - Free