Stephen
-
Posts
2733 -
Joined
-
Last visited
-
Days Won
354
Content Type
Profiles
Forums
Articles
Everything posted by Stephen
-
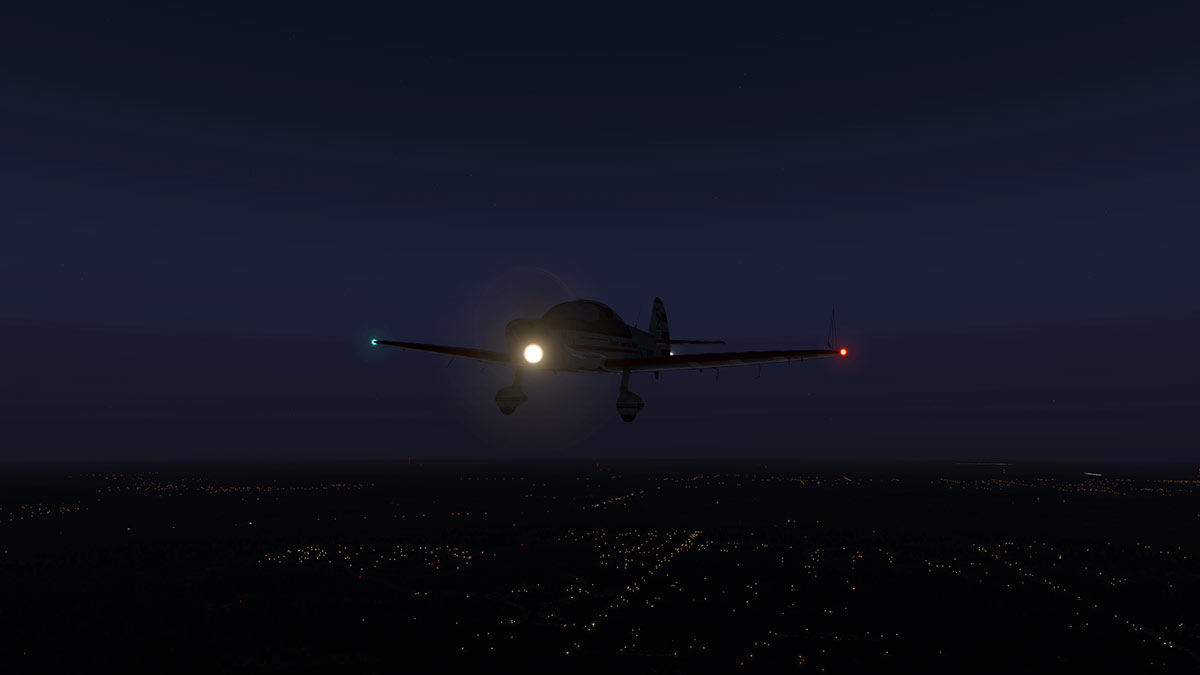
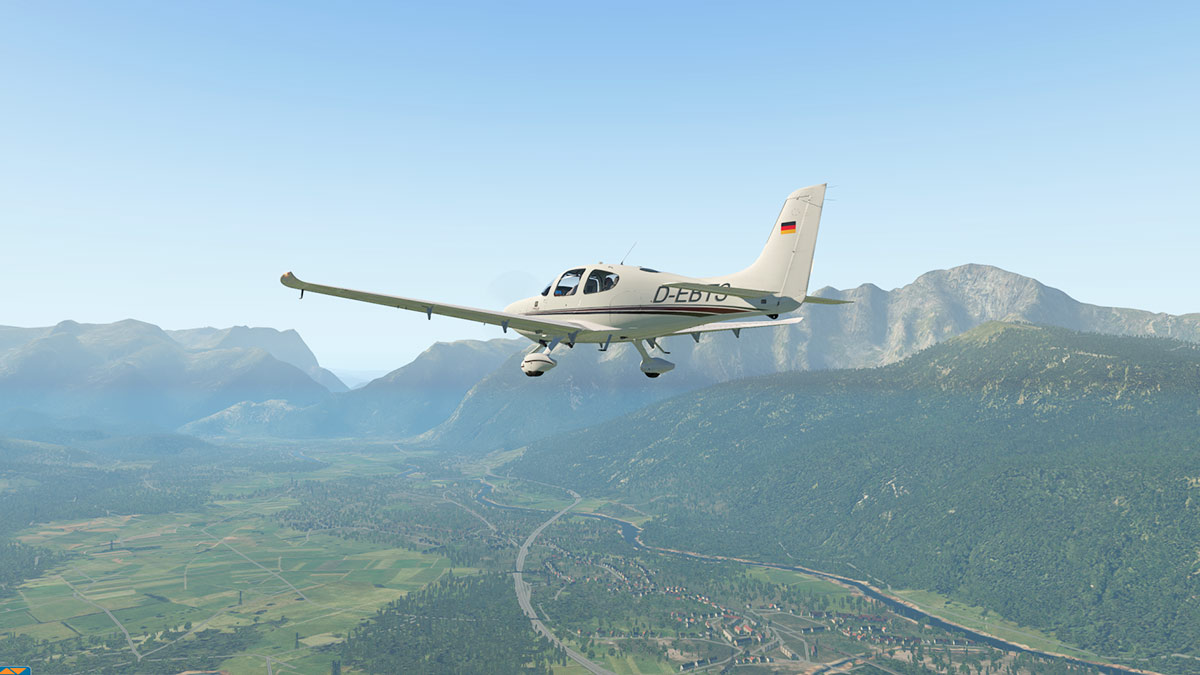
I haven't seen any updates on the Pitts? But they are done along side of the Carenado updates and my guess the focus is on them for XP11, however these early releases are not very complicated or deep, so expect a few done together.. SD
-
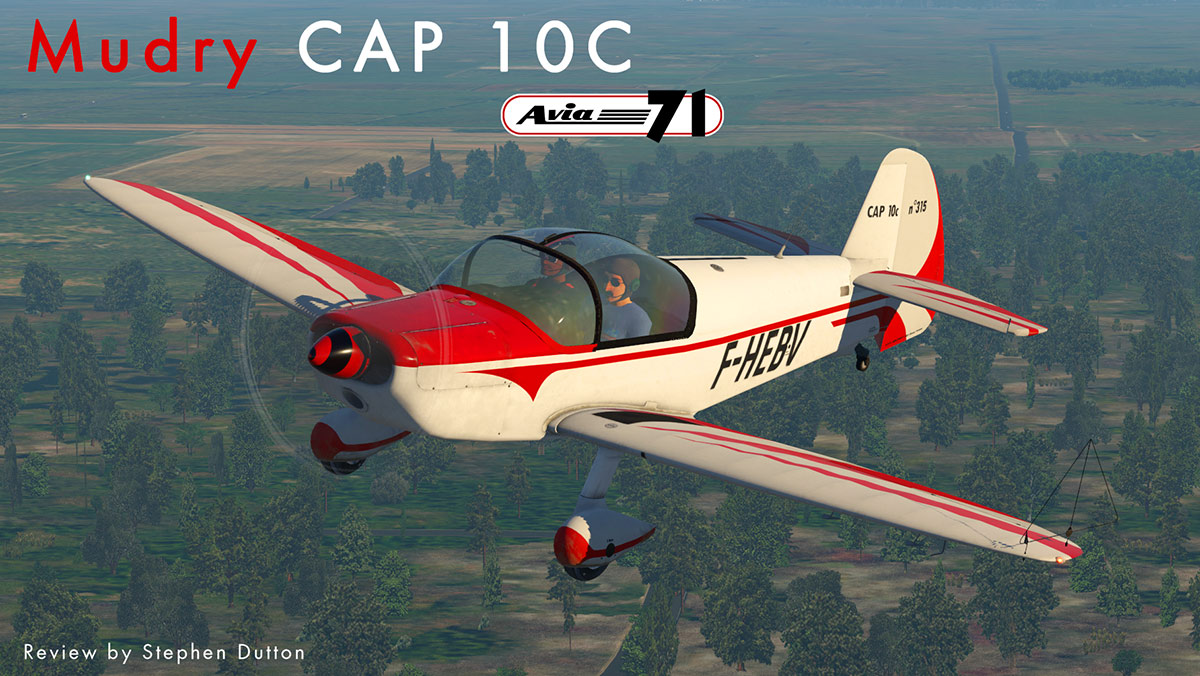
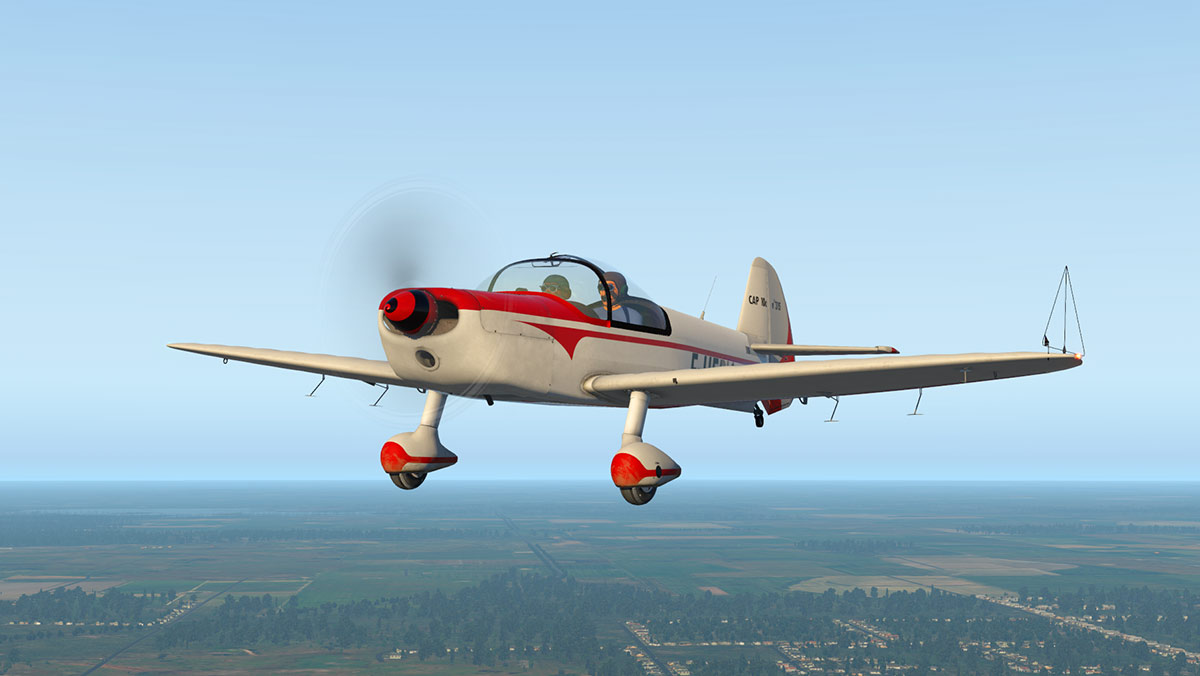
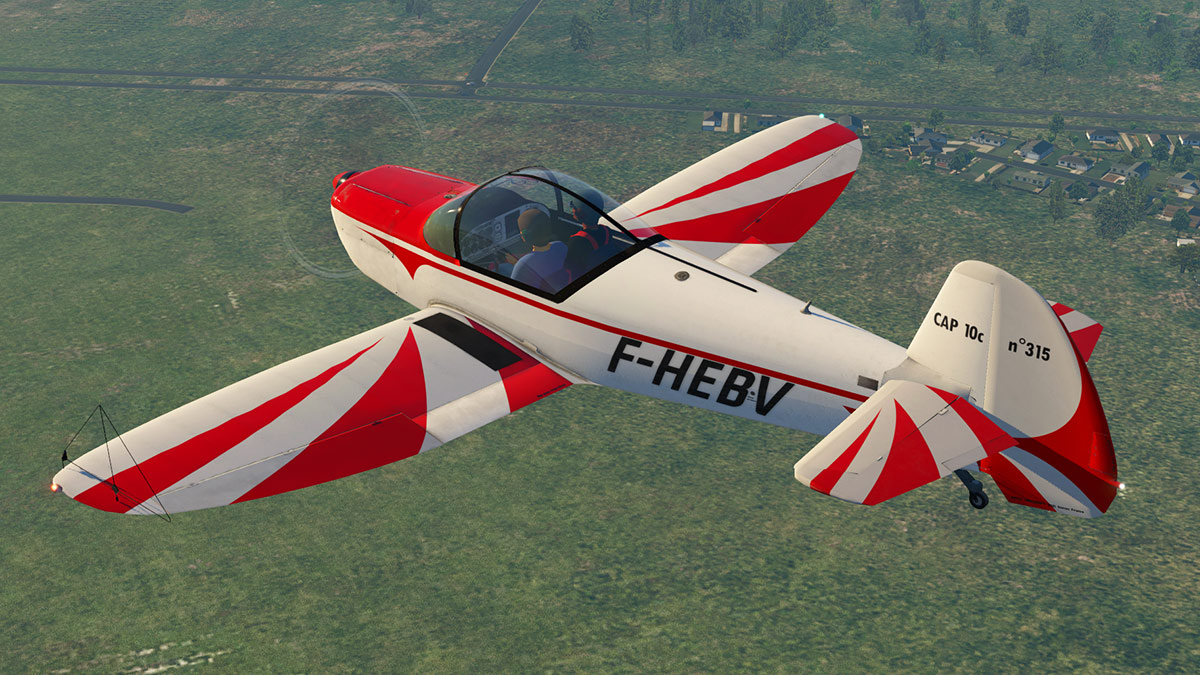
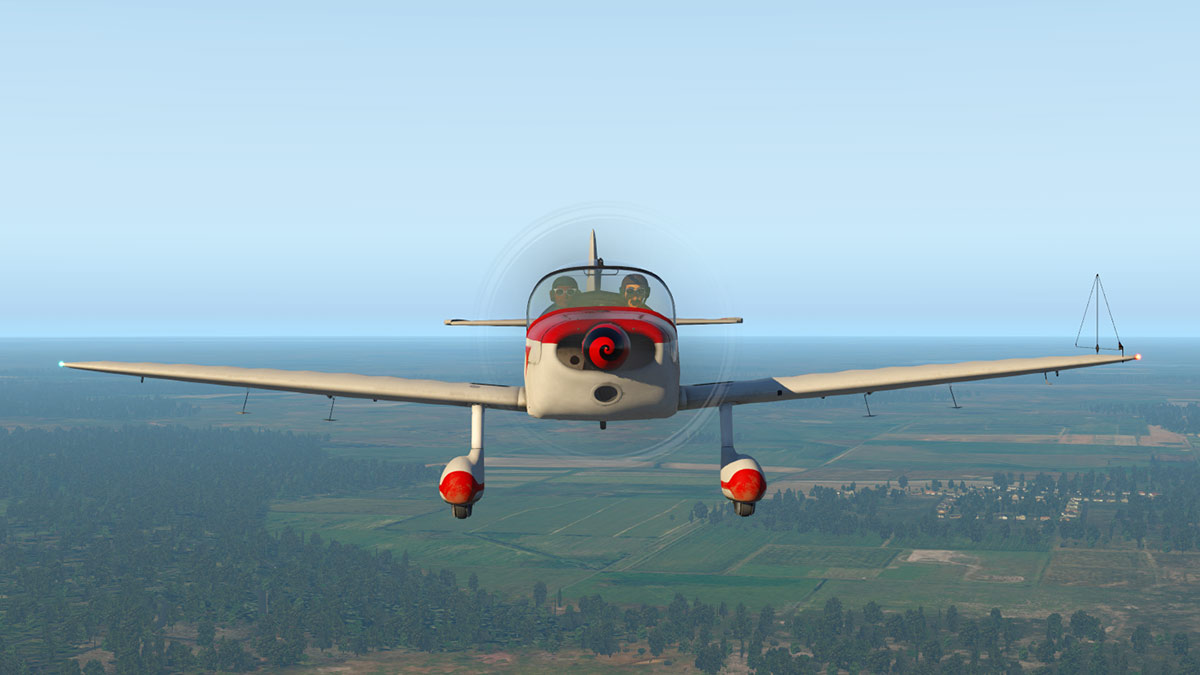
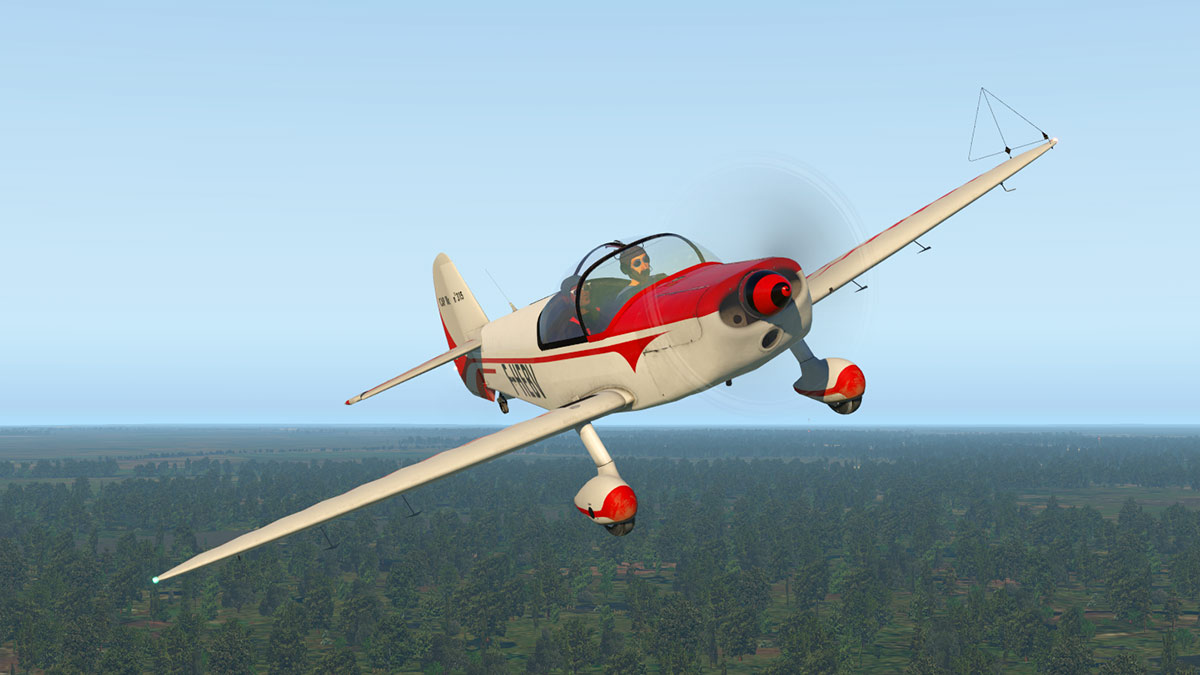
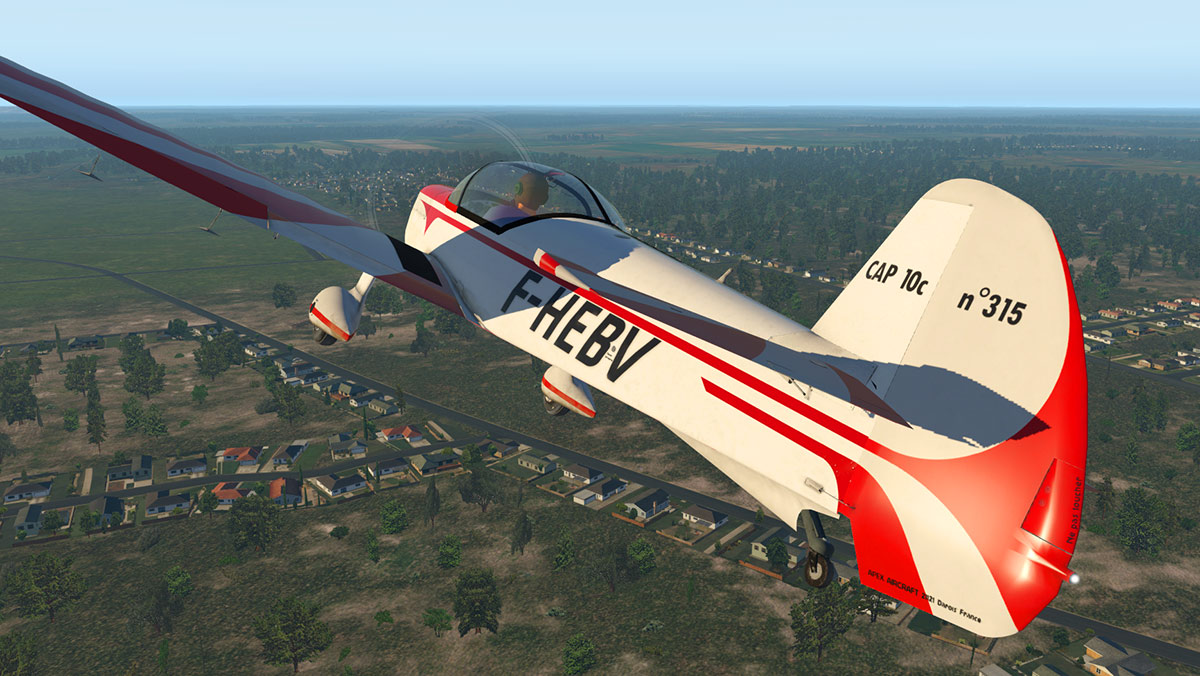
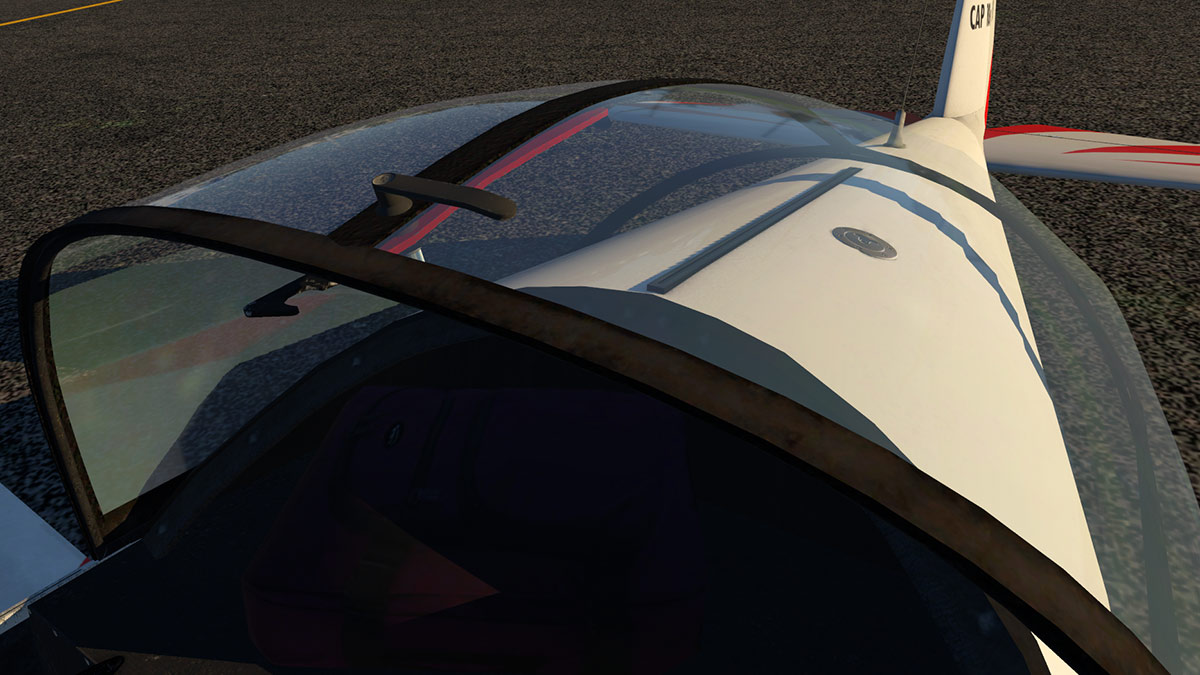
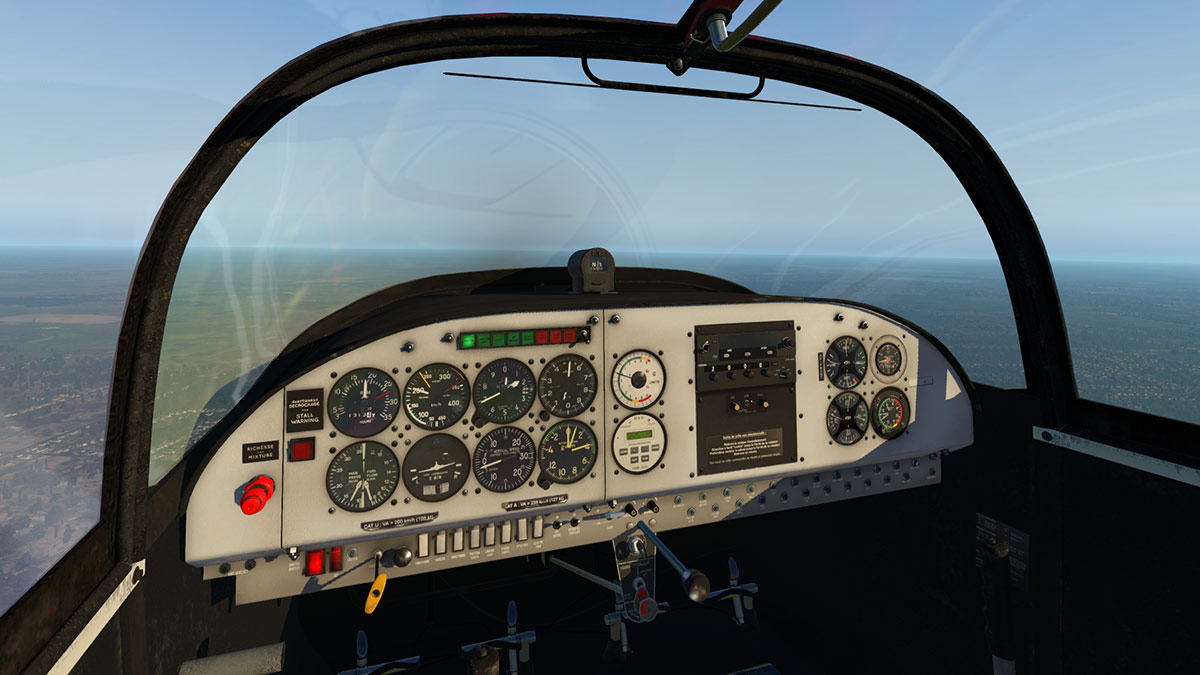
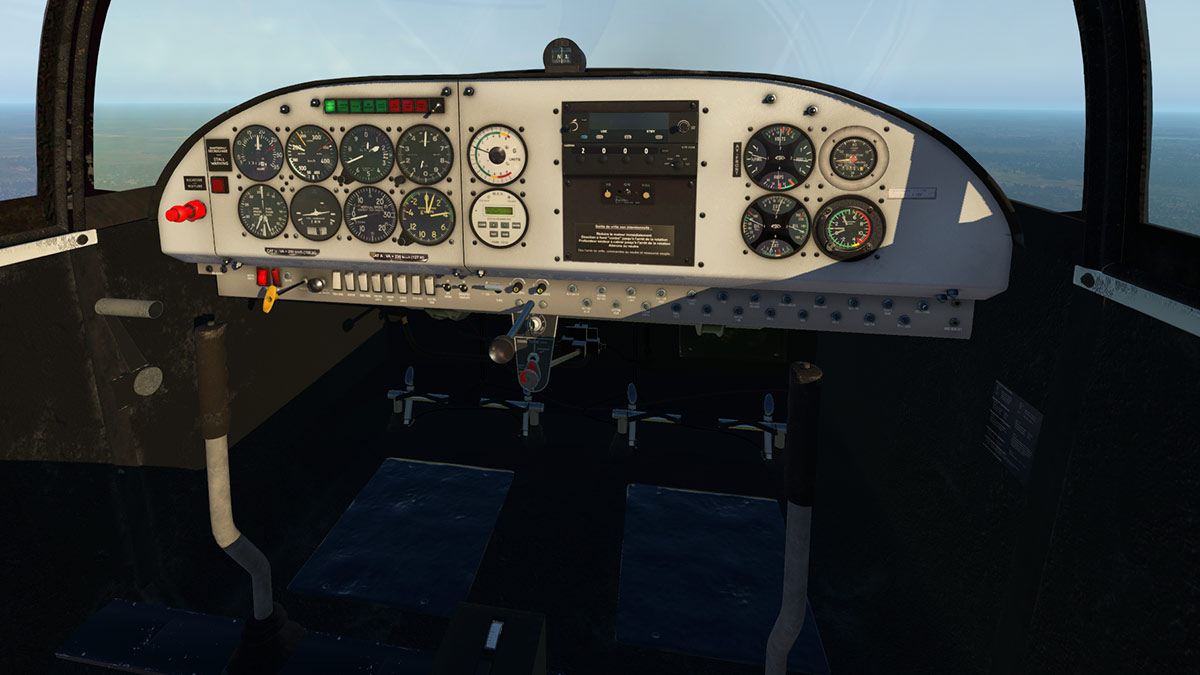
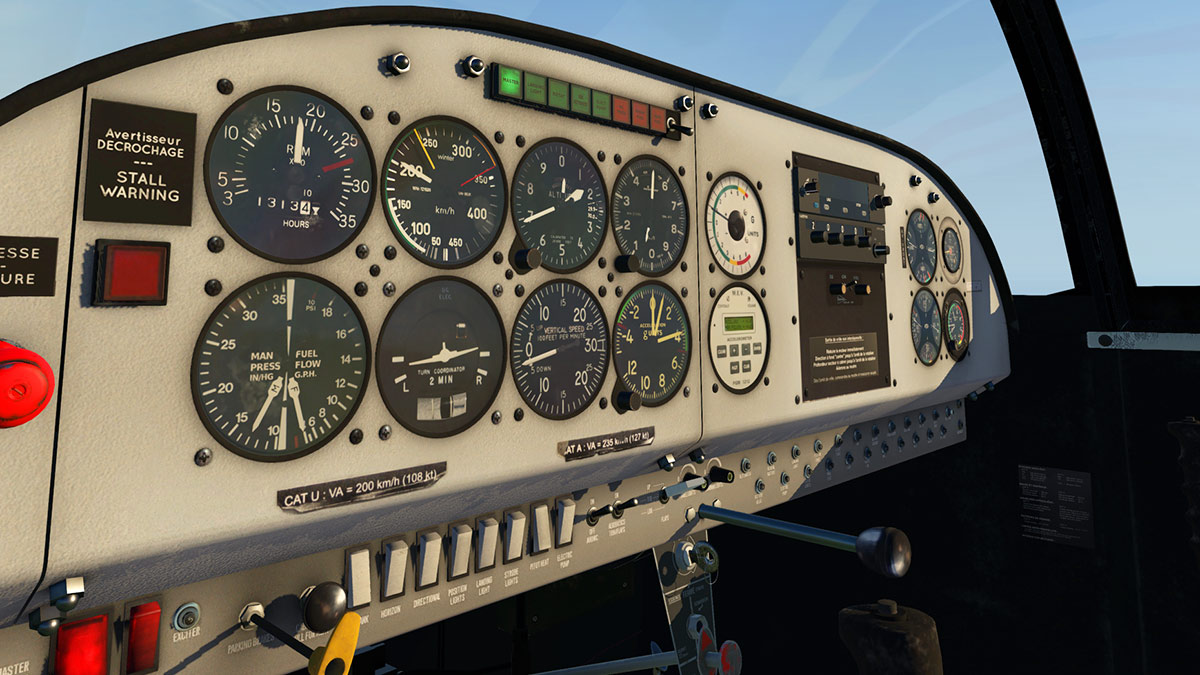
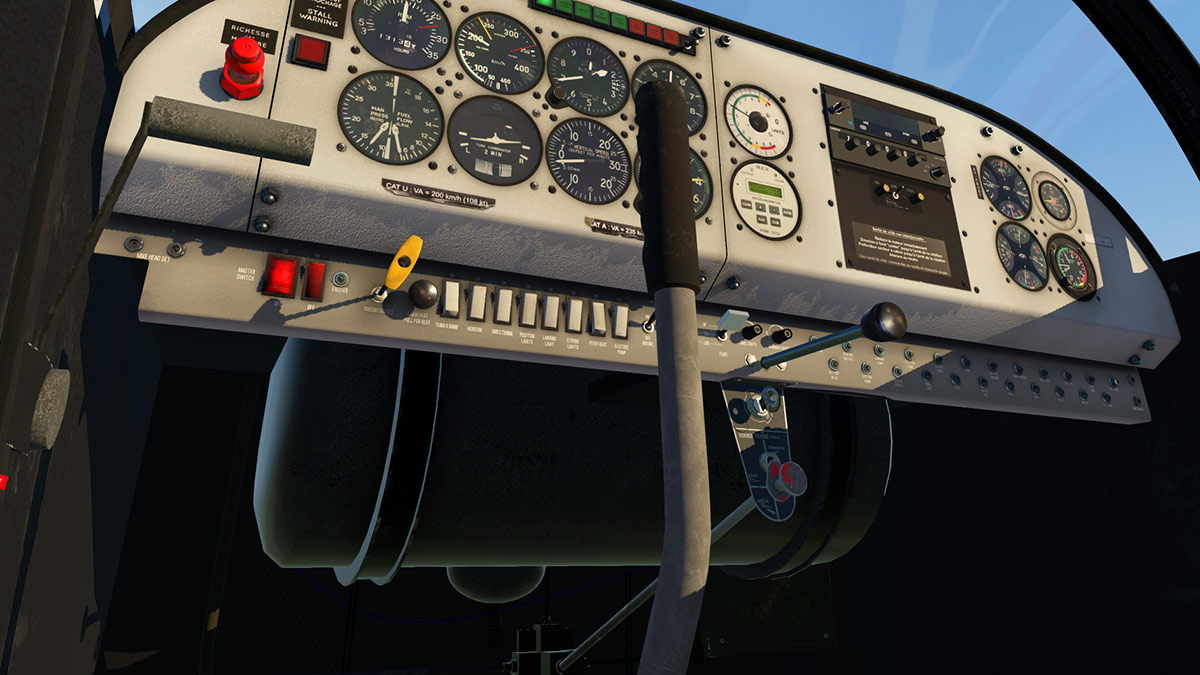
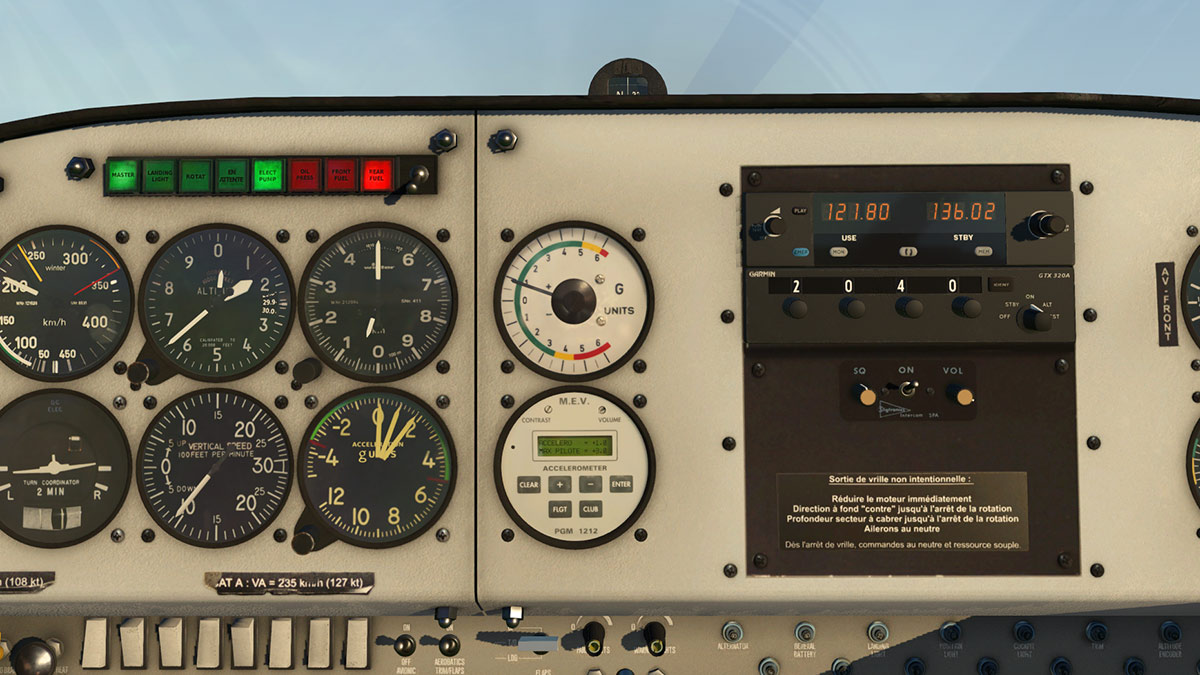
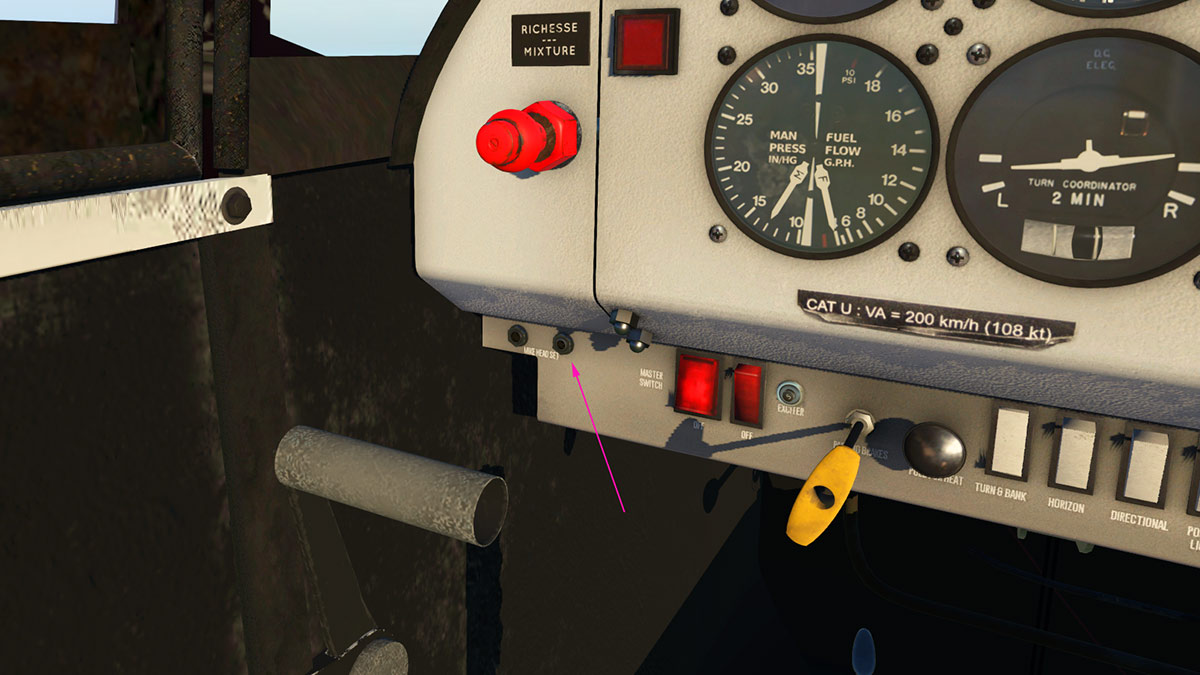
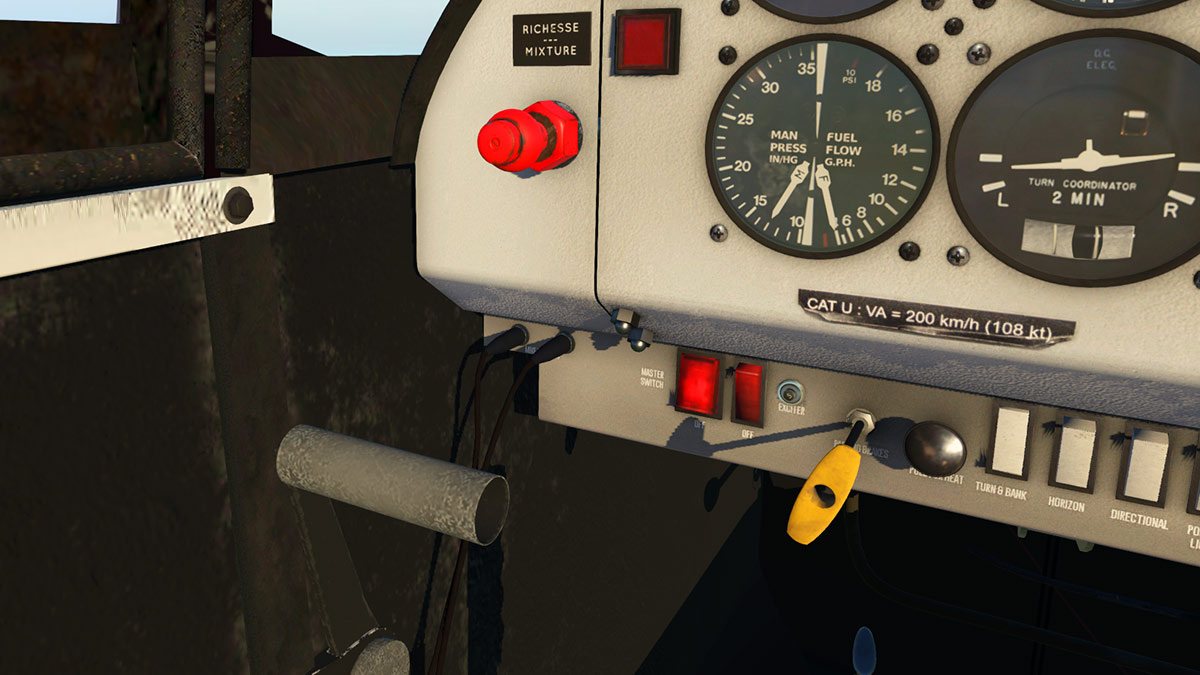
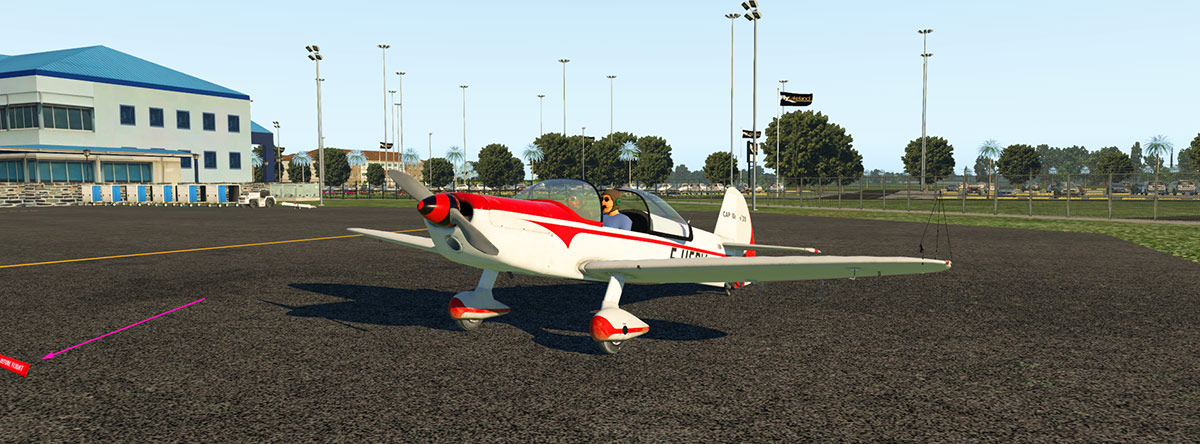
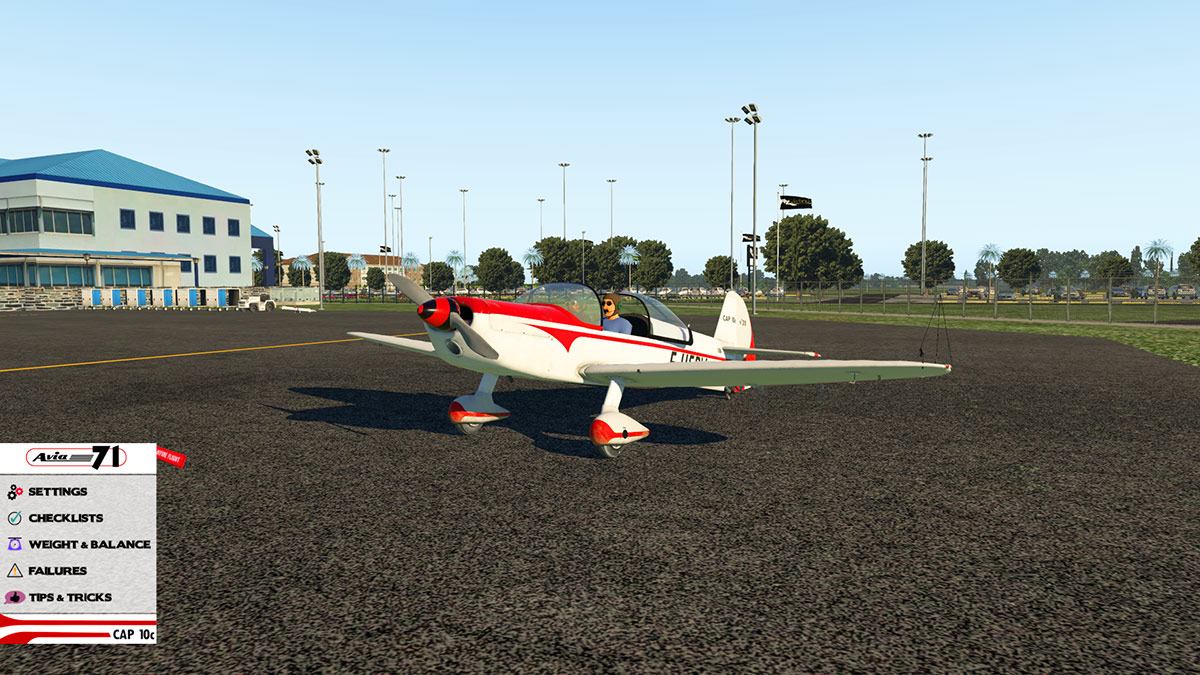
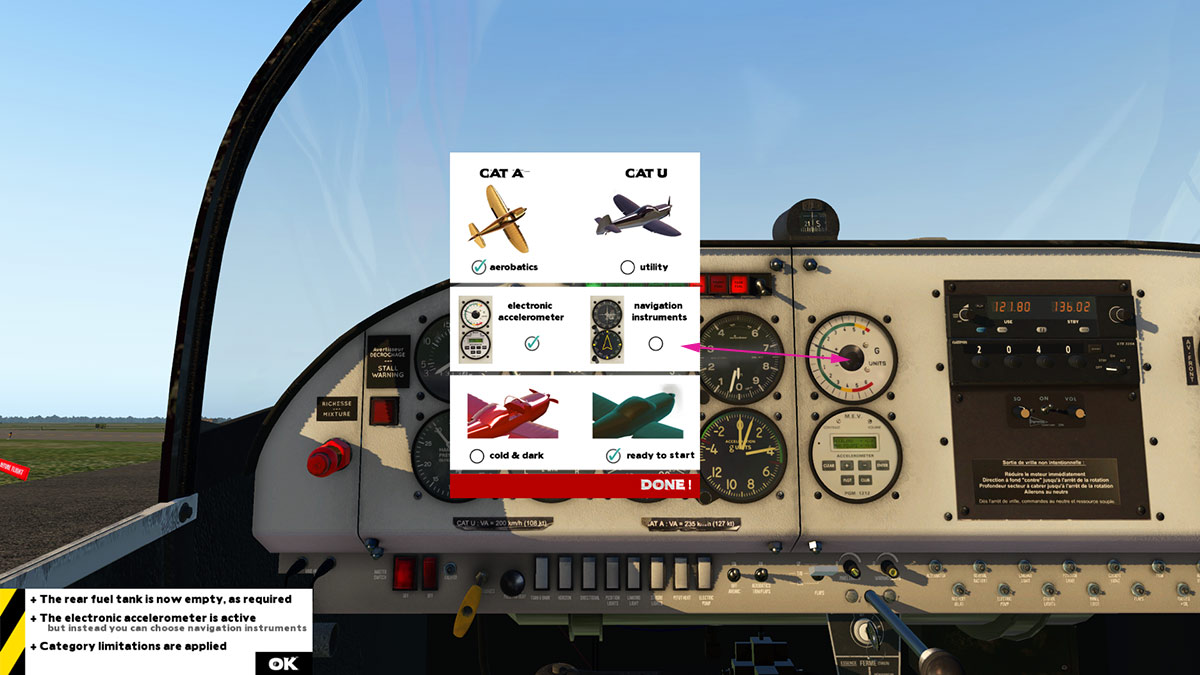
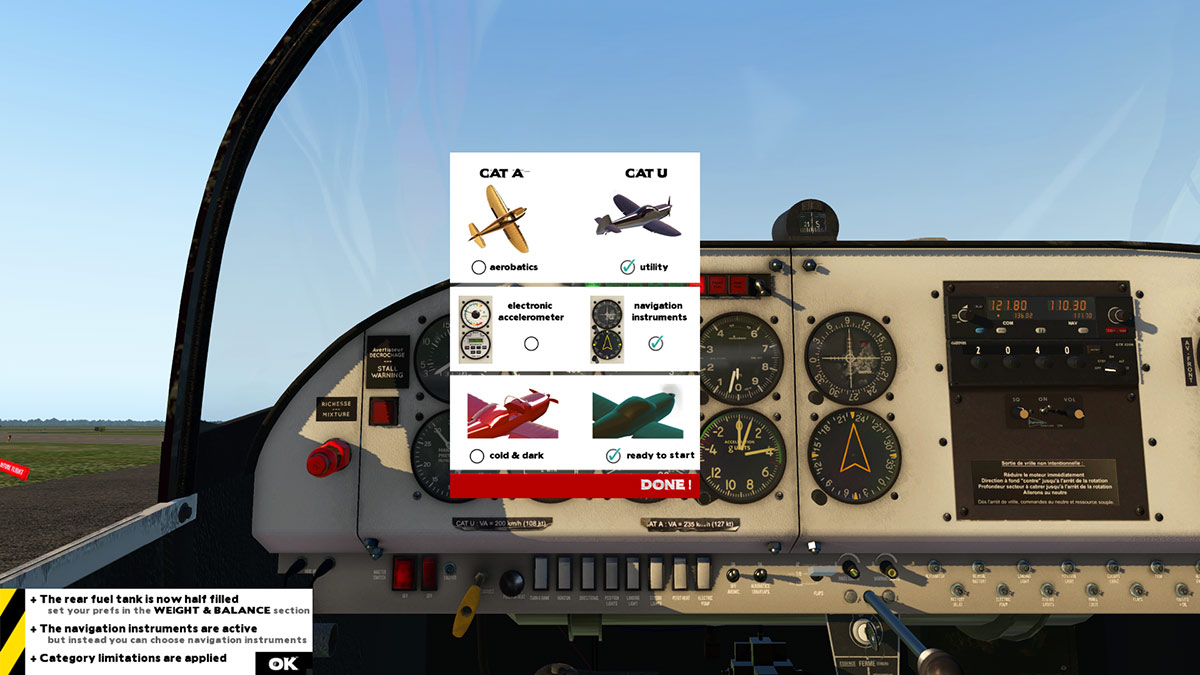
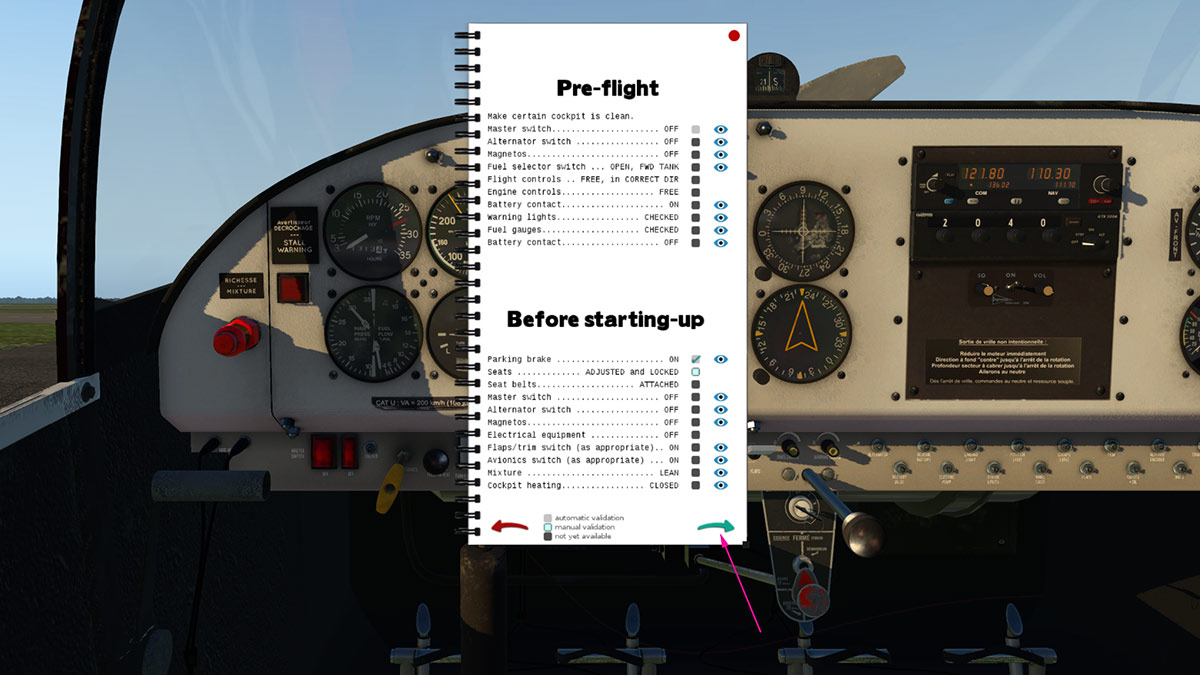
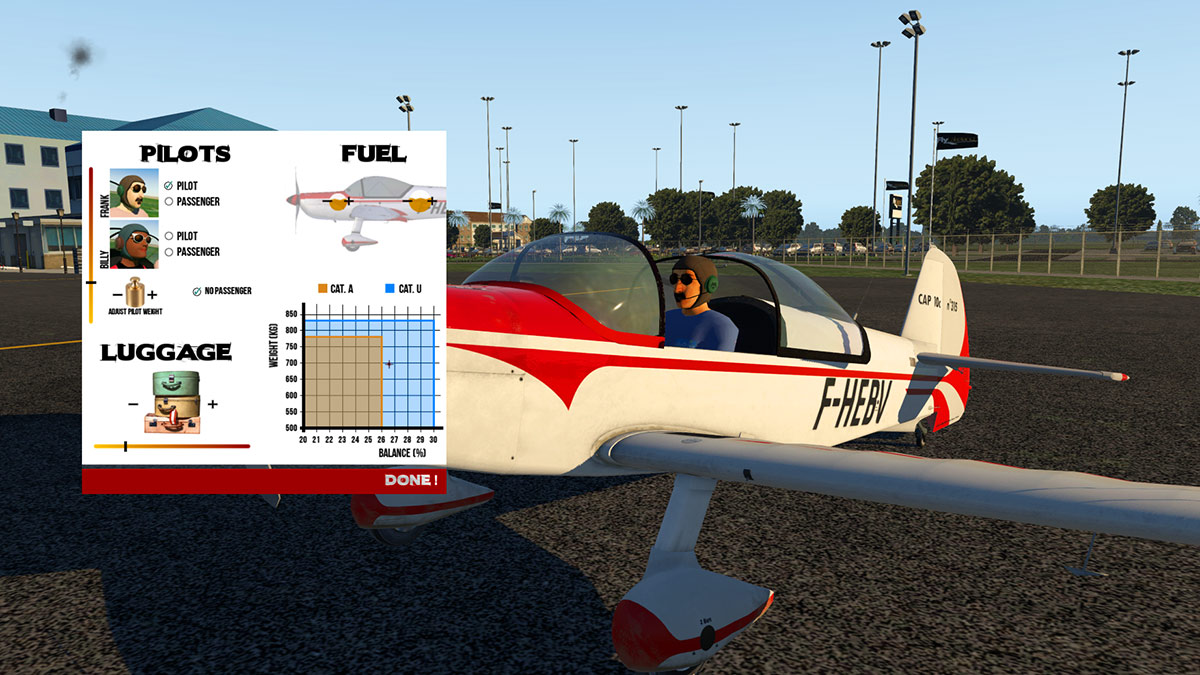
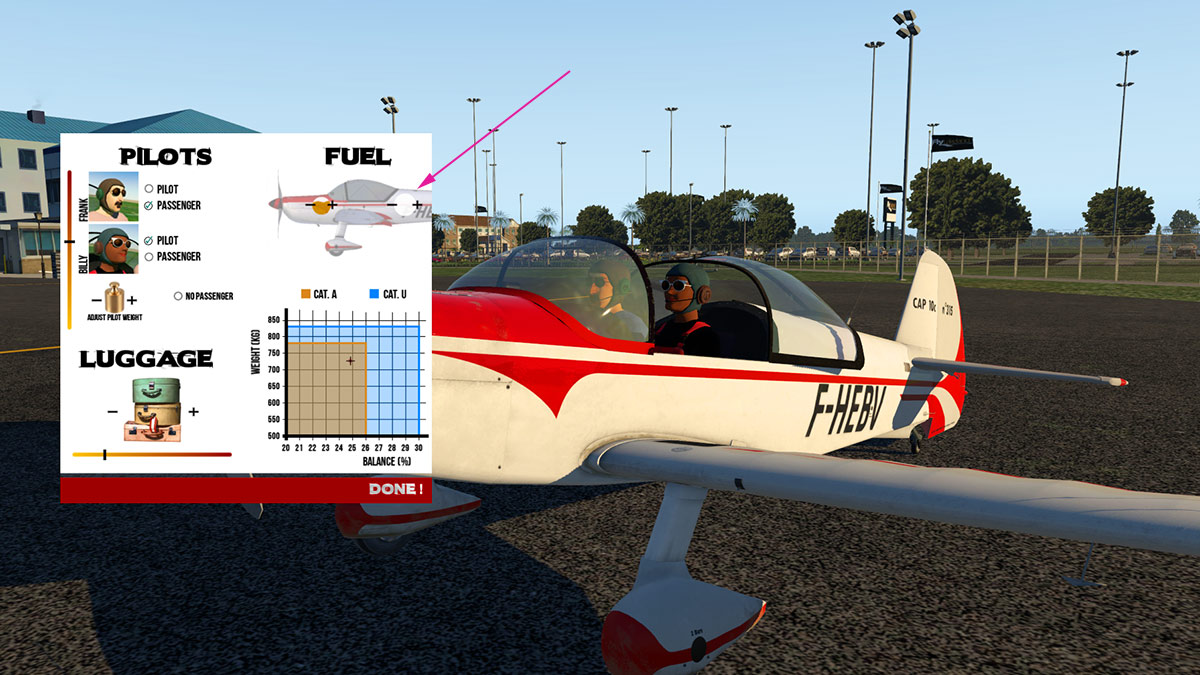
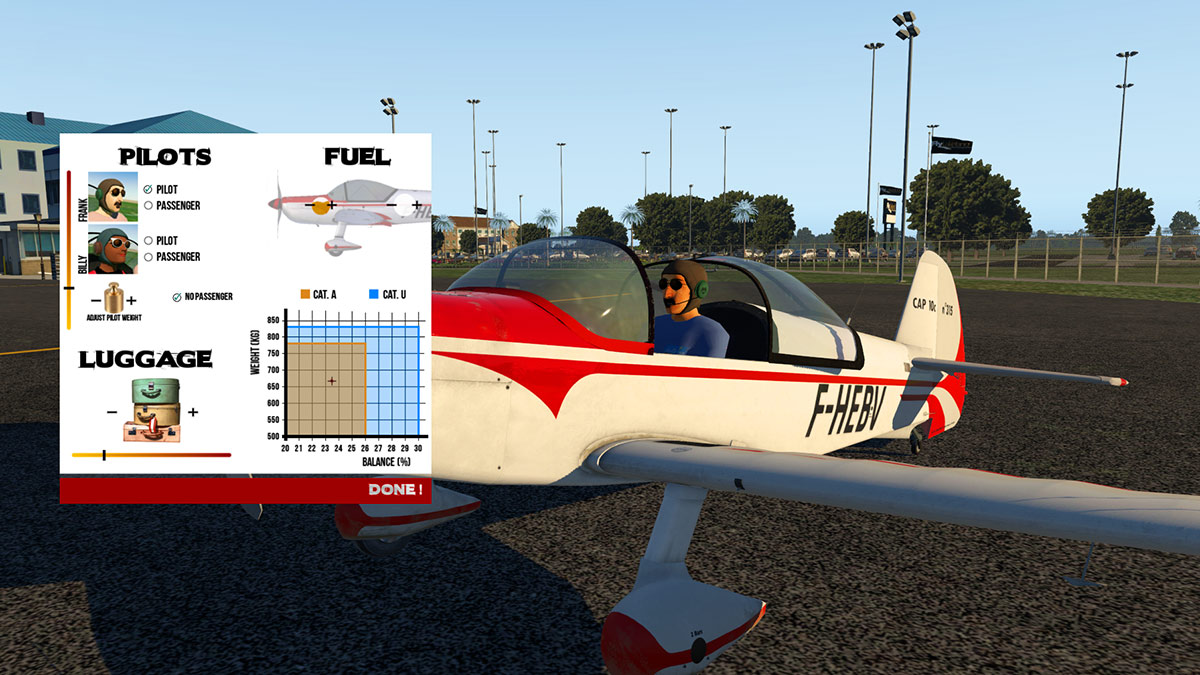
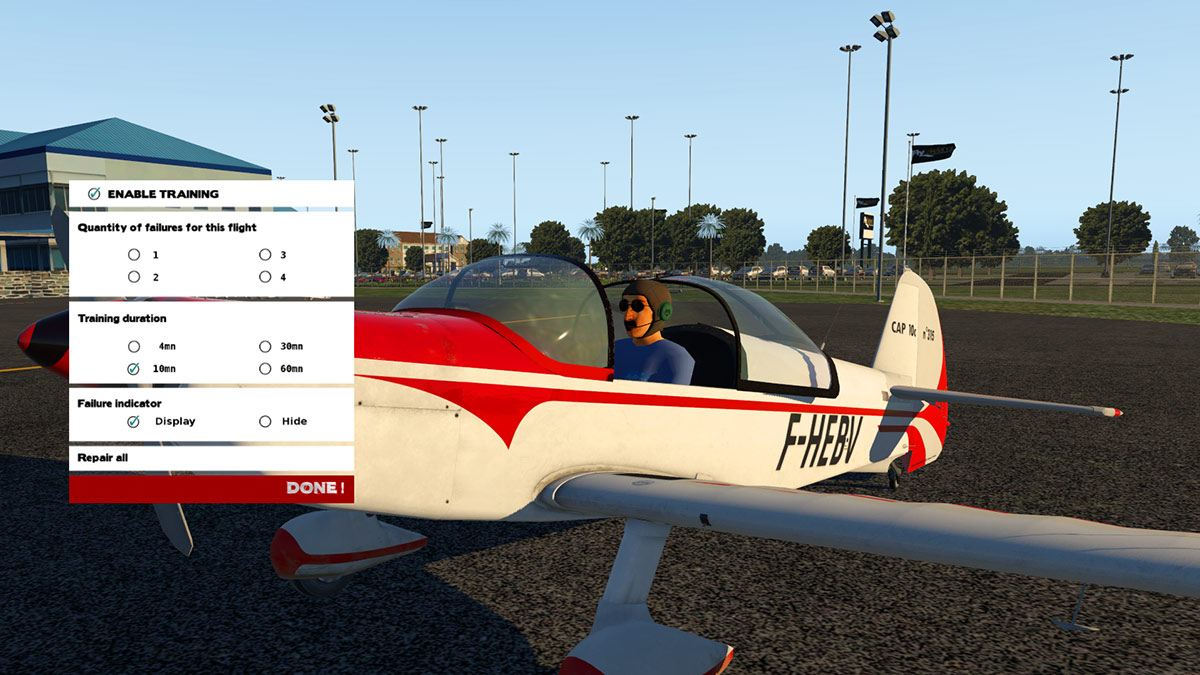
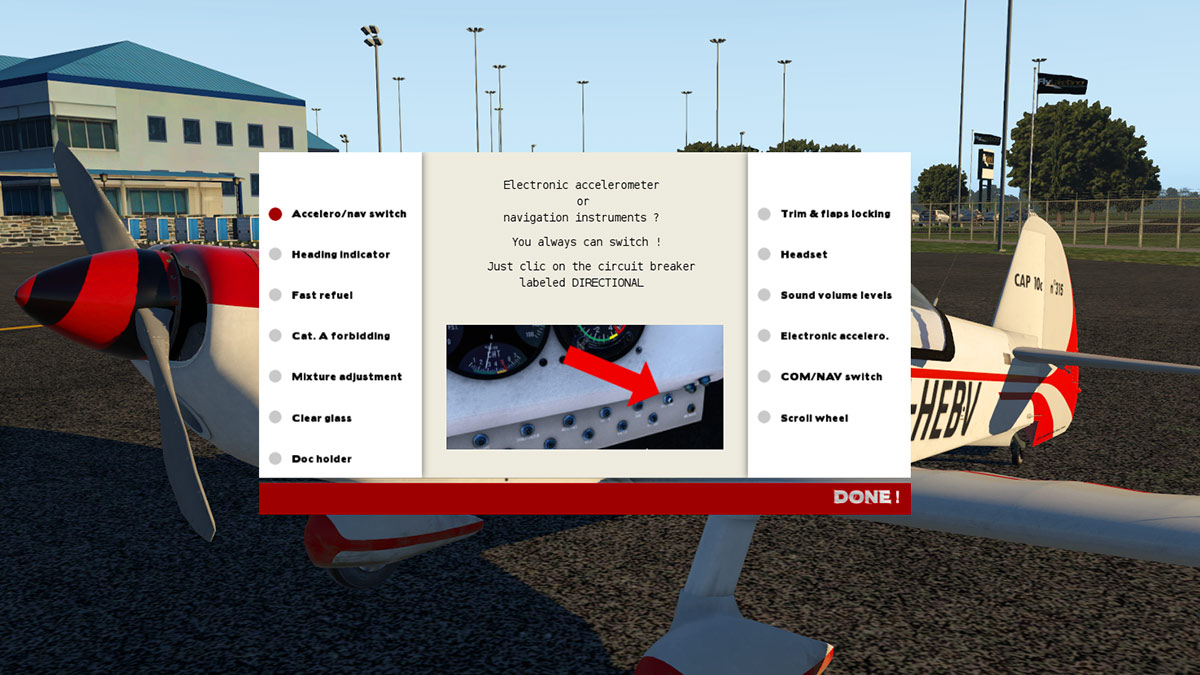
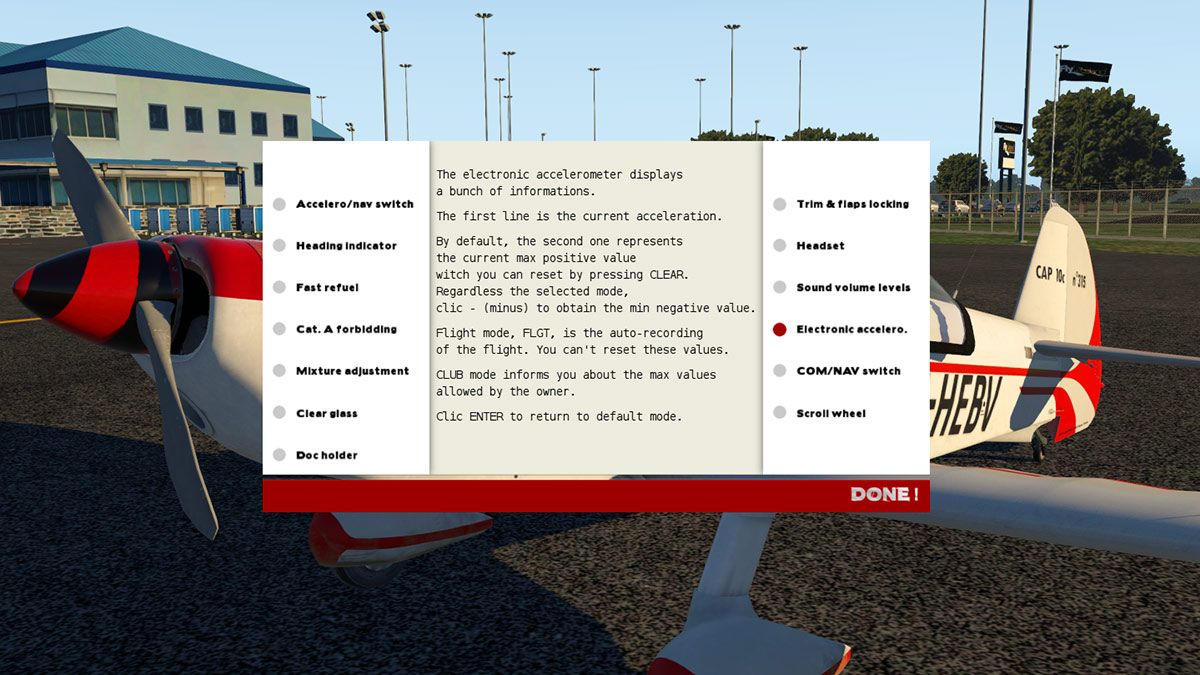
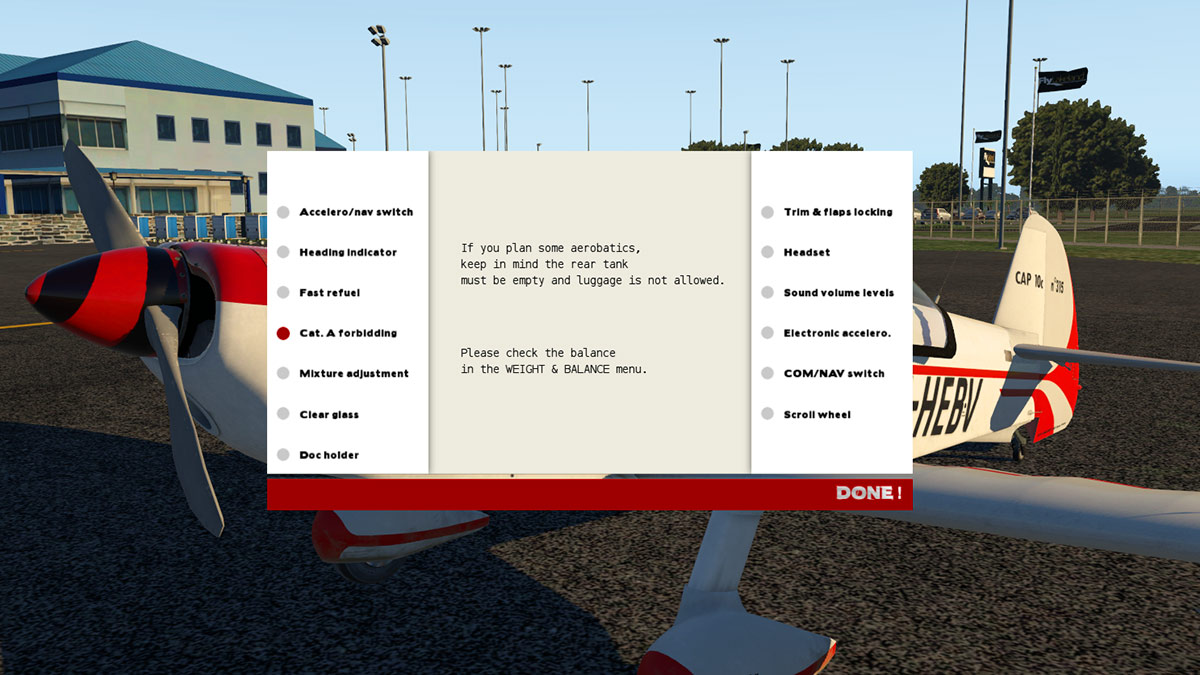
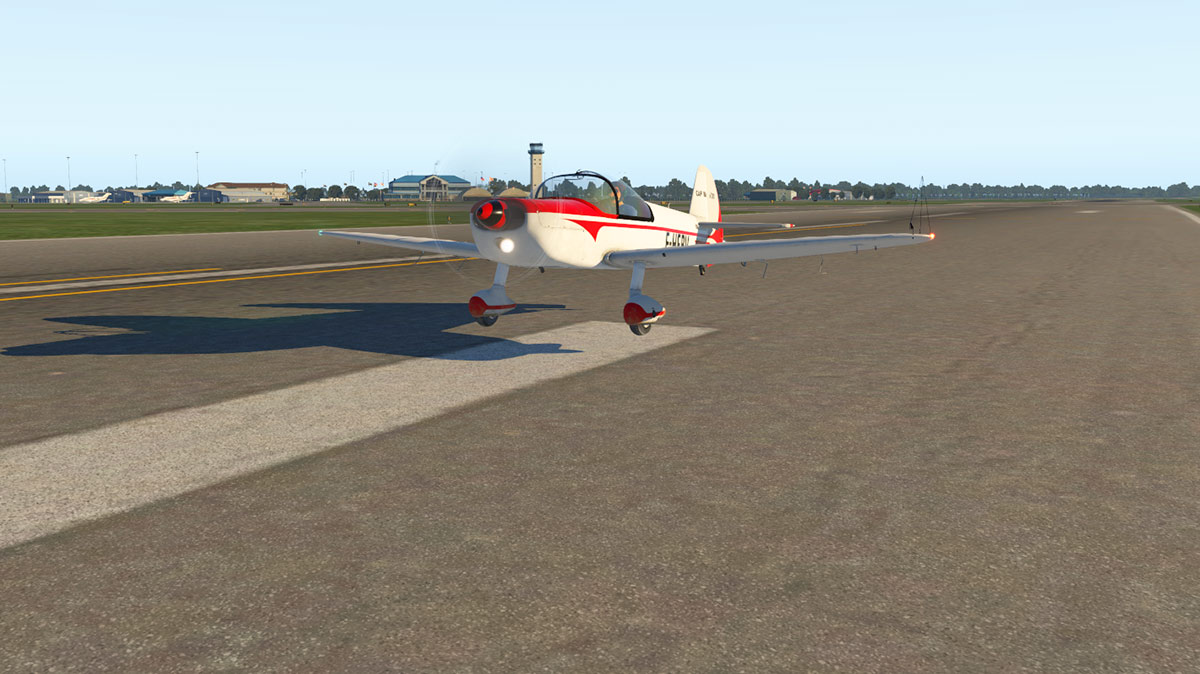
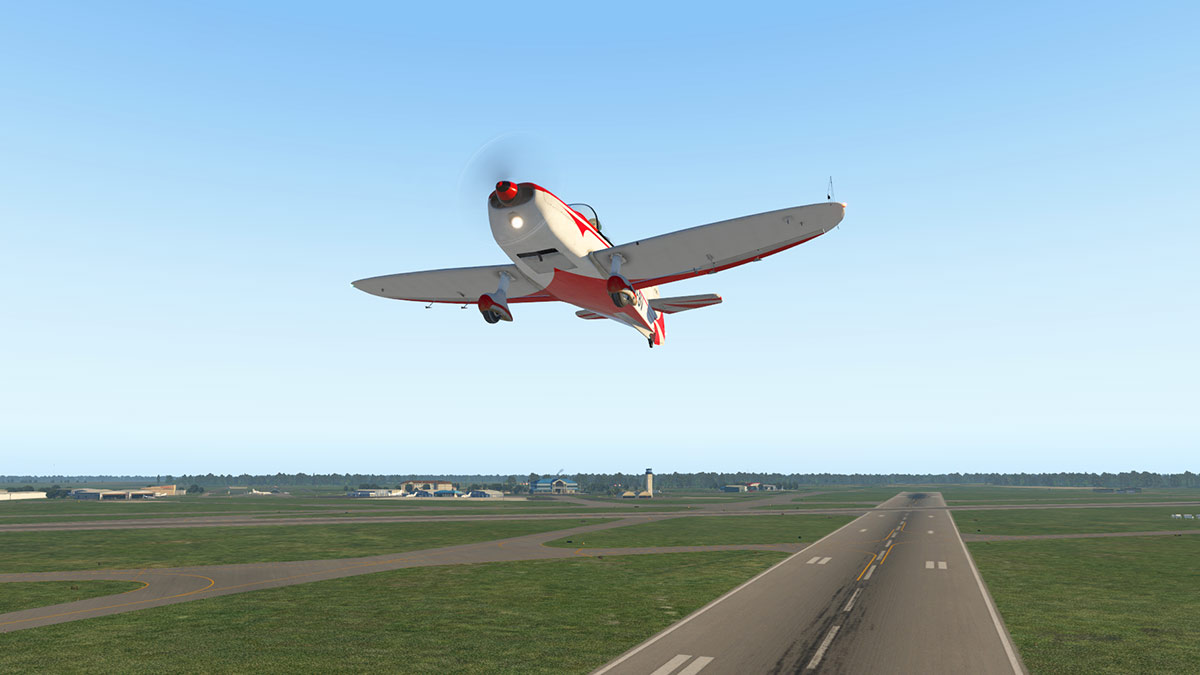
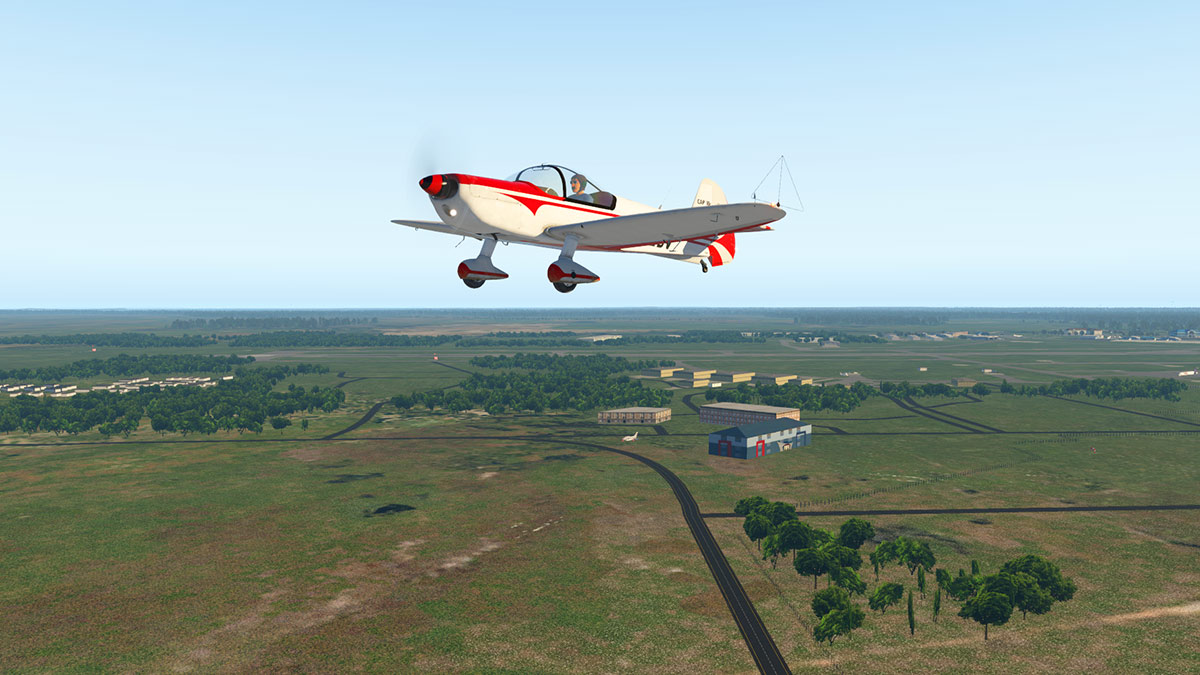
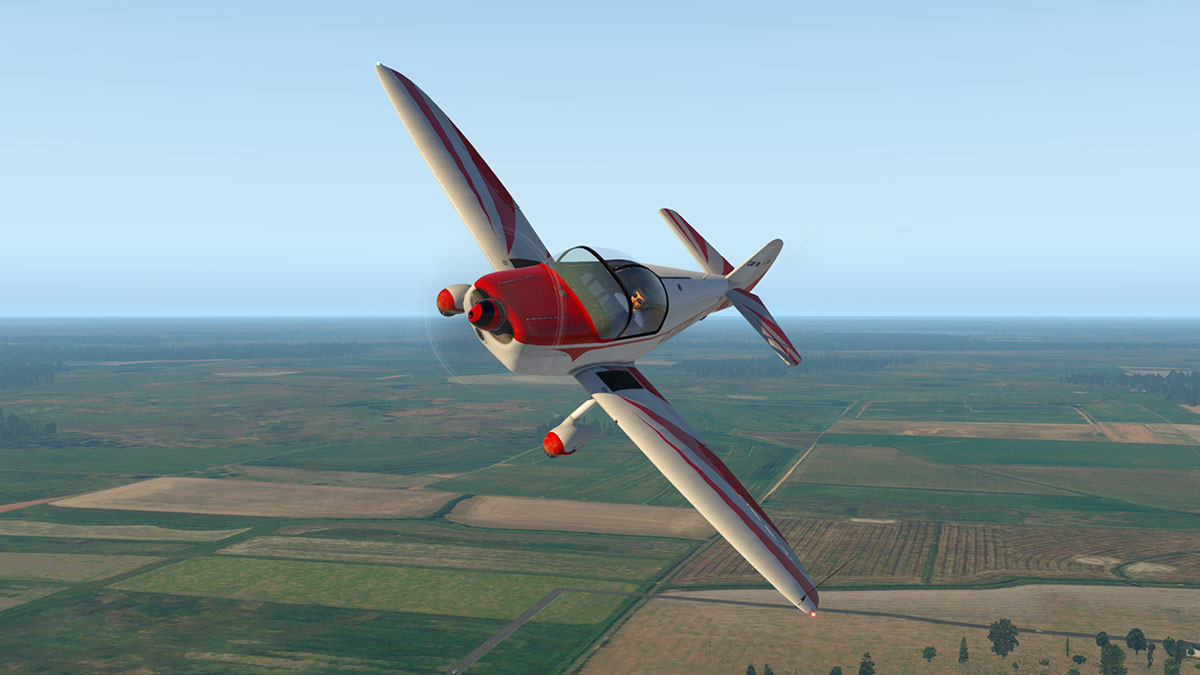
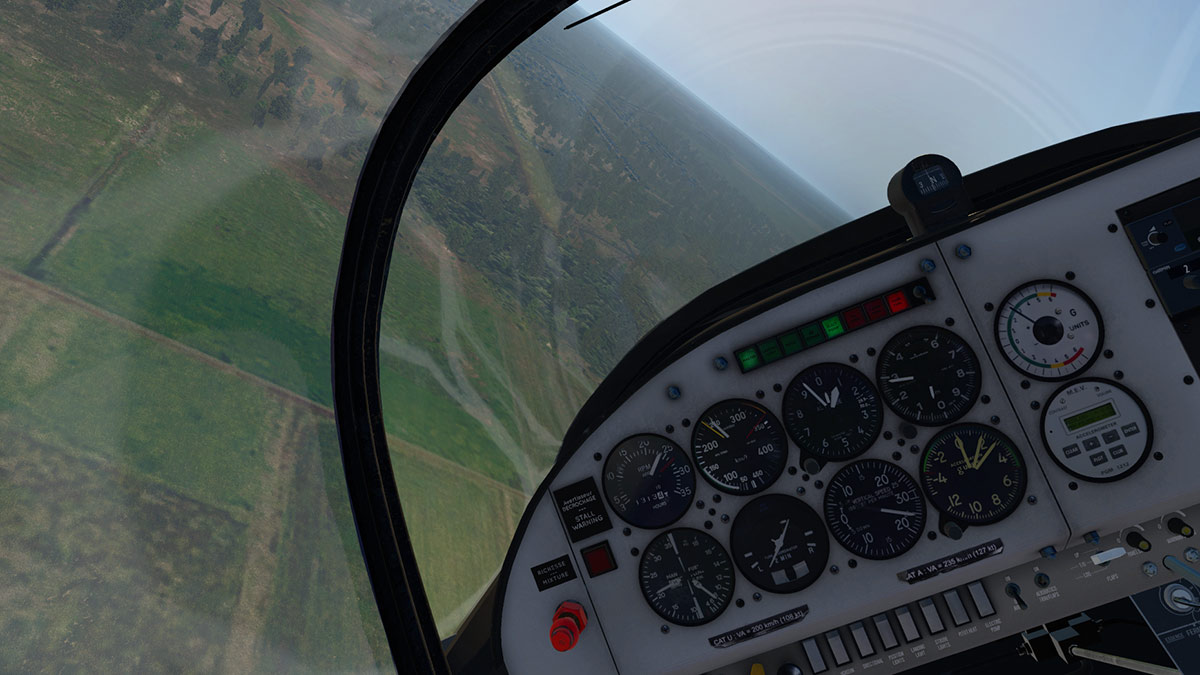
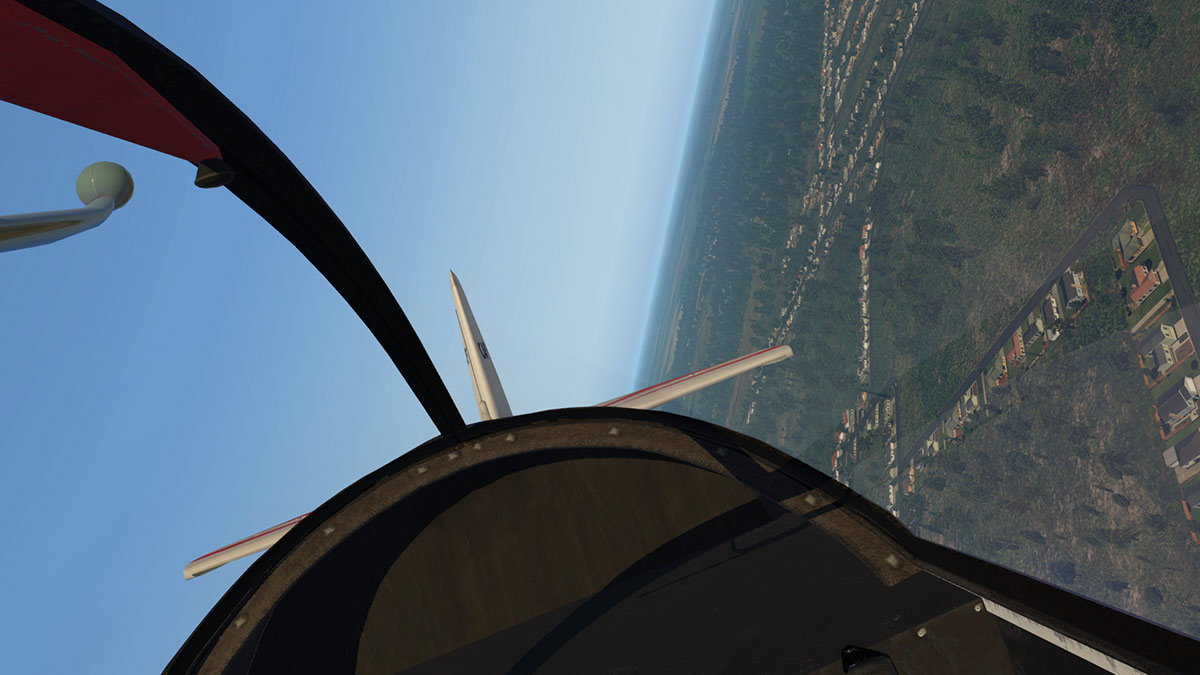
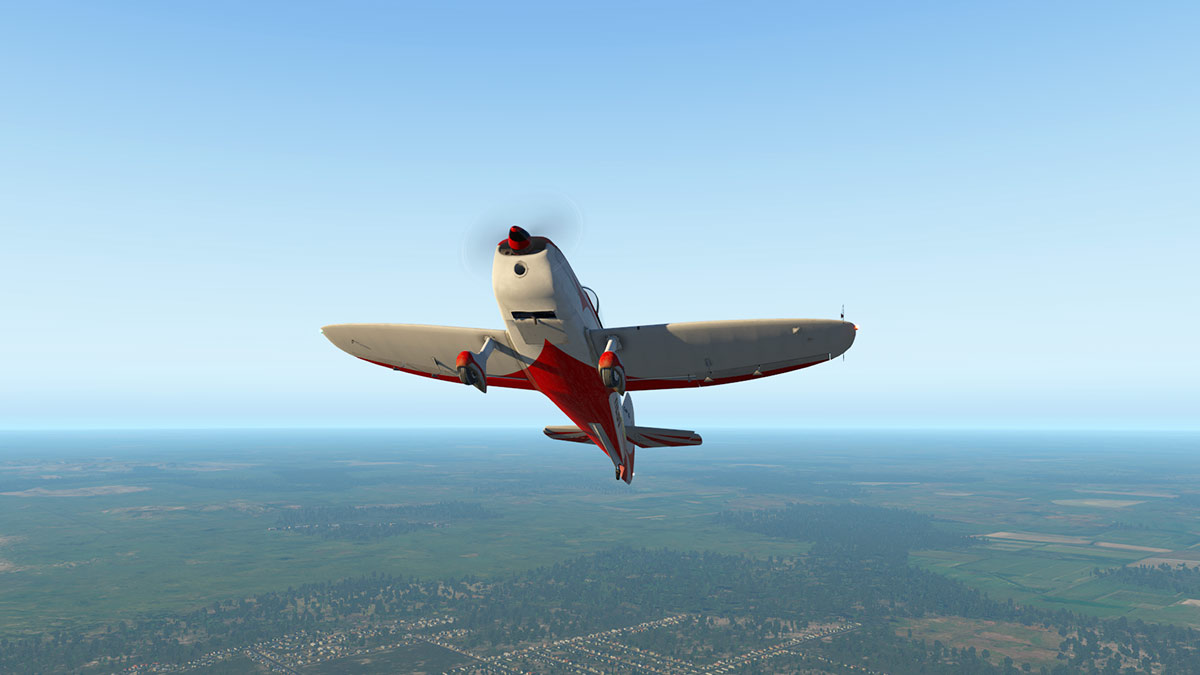
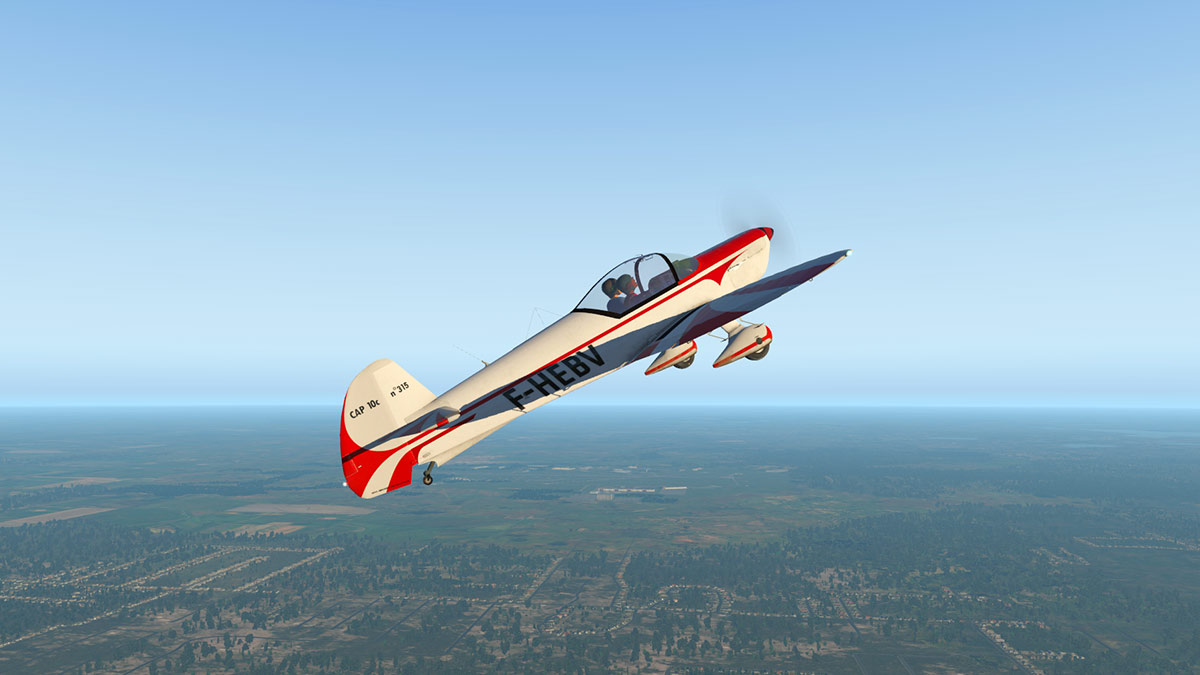
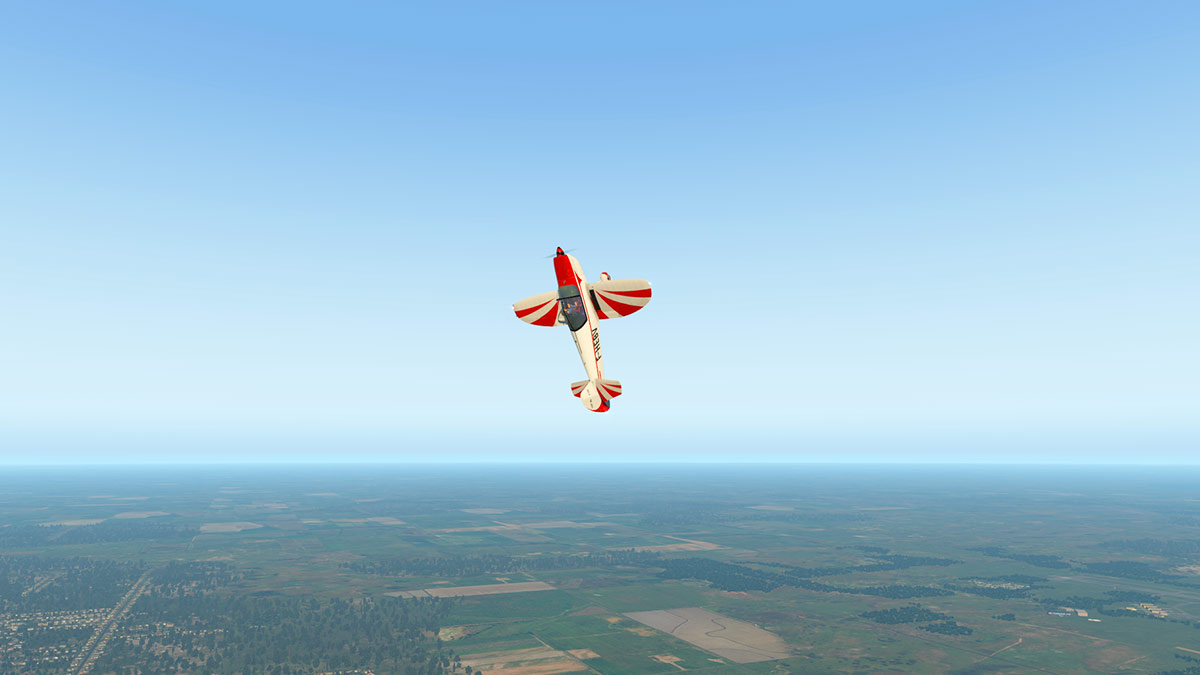
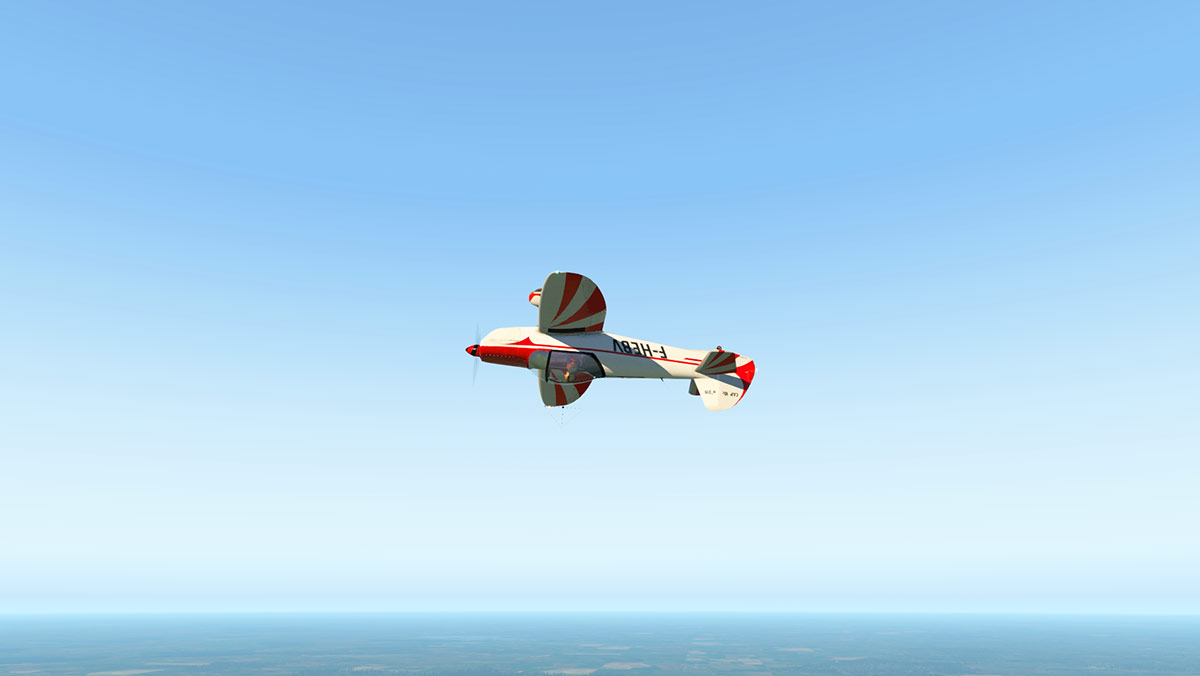
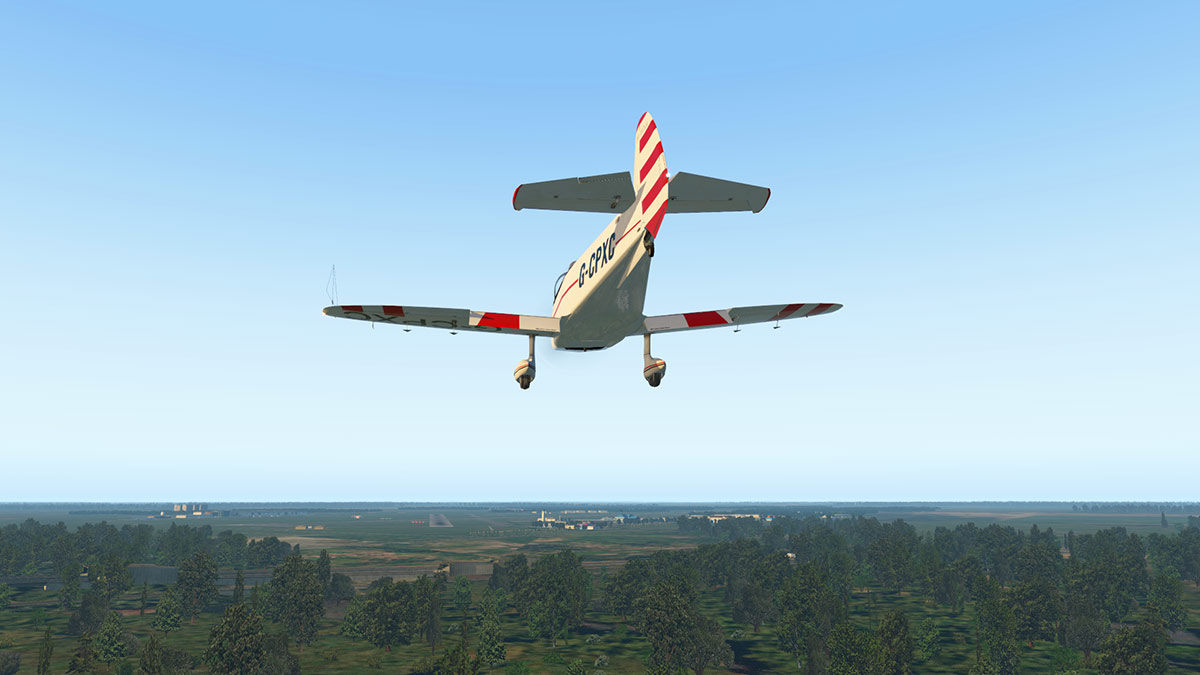
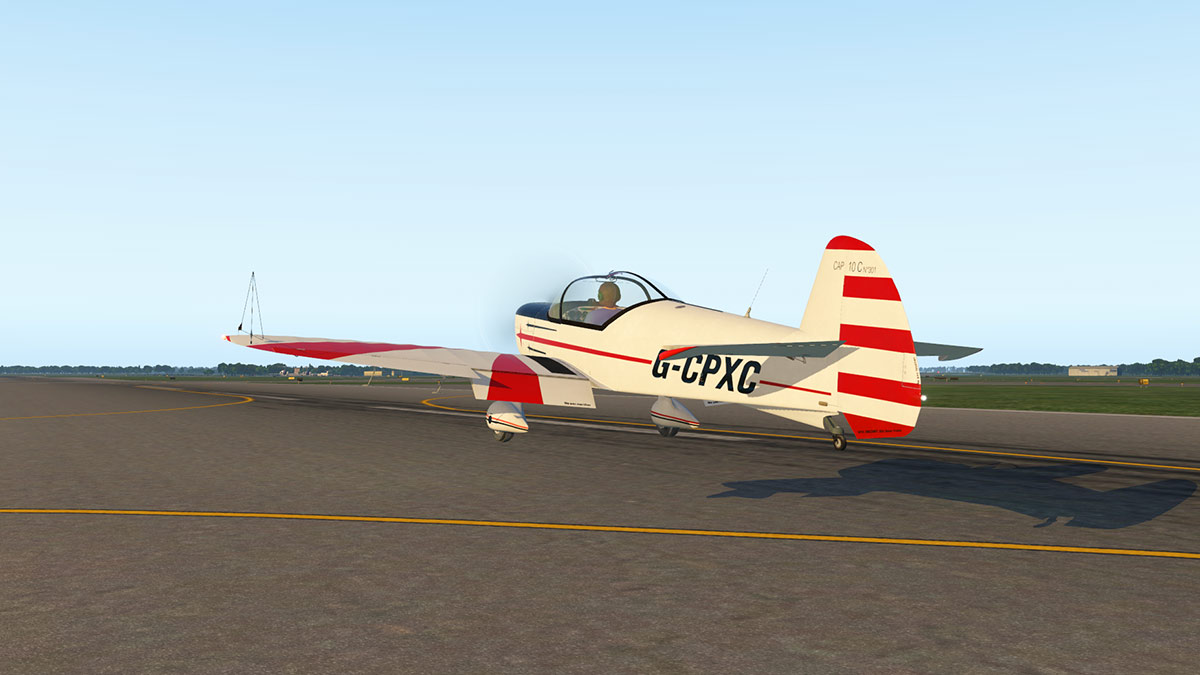
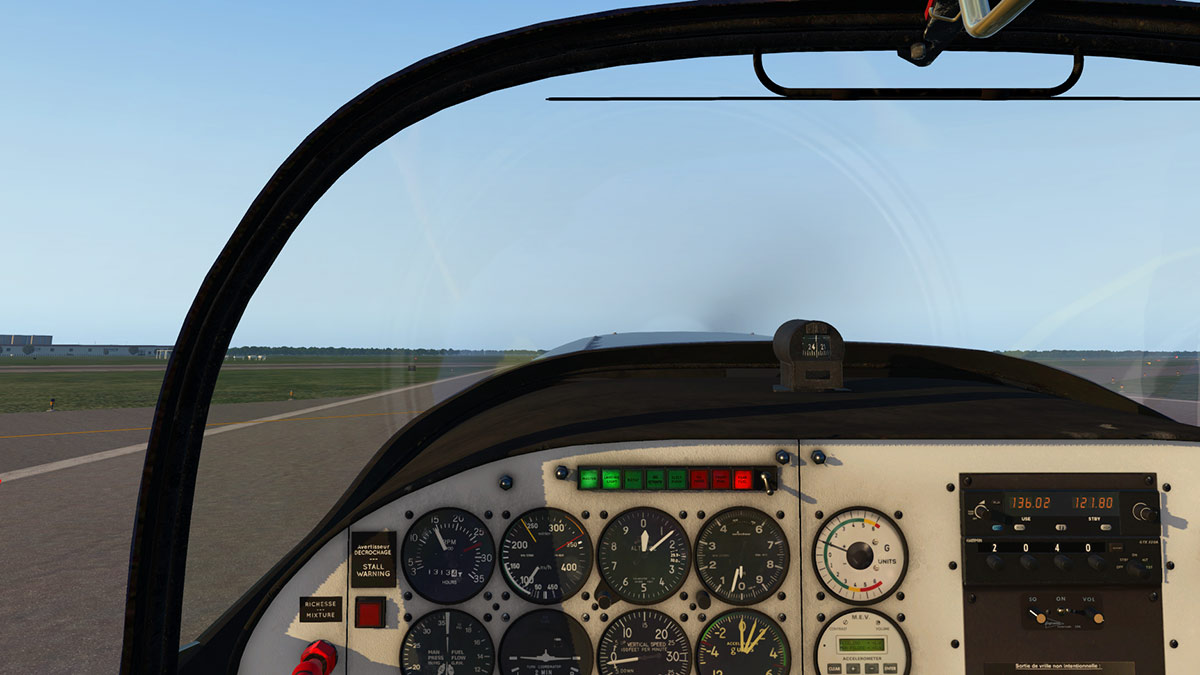
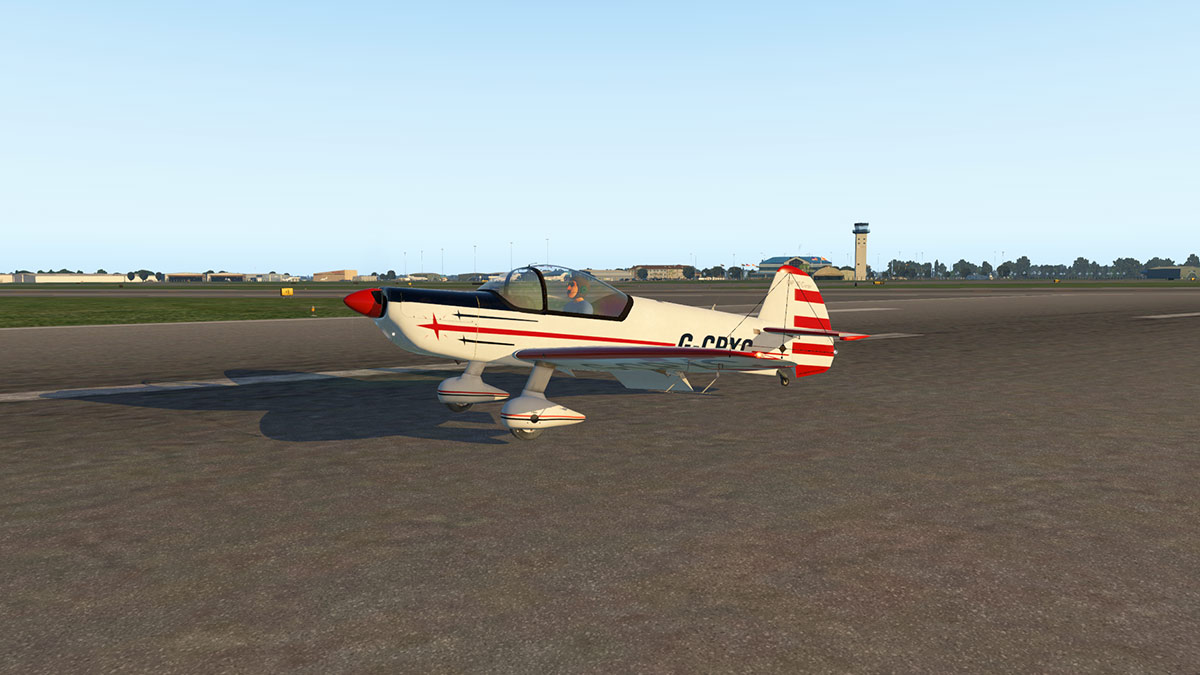
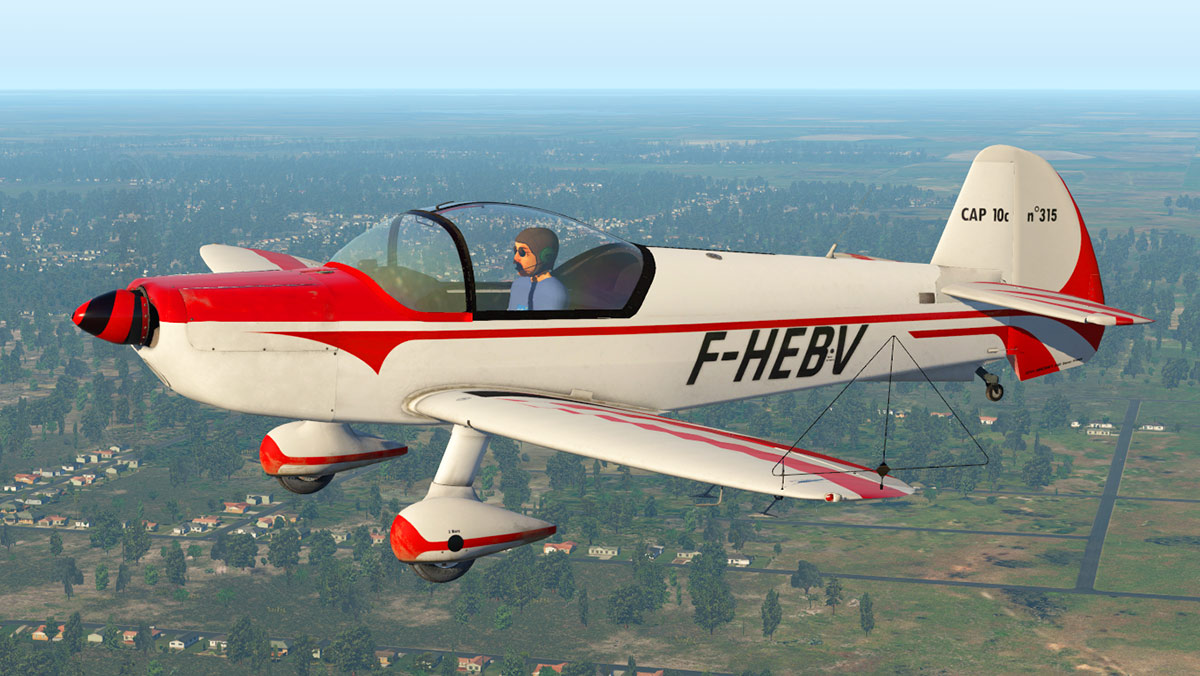
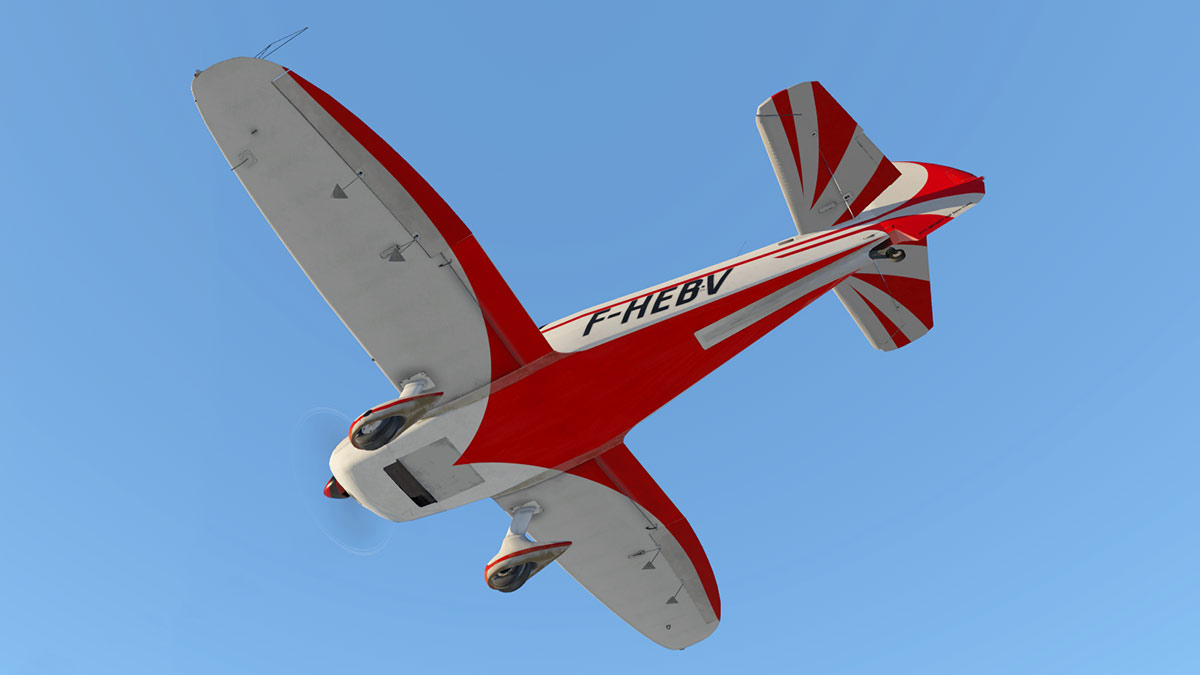
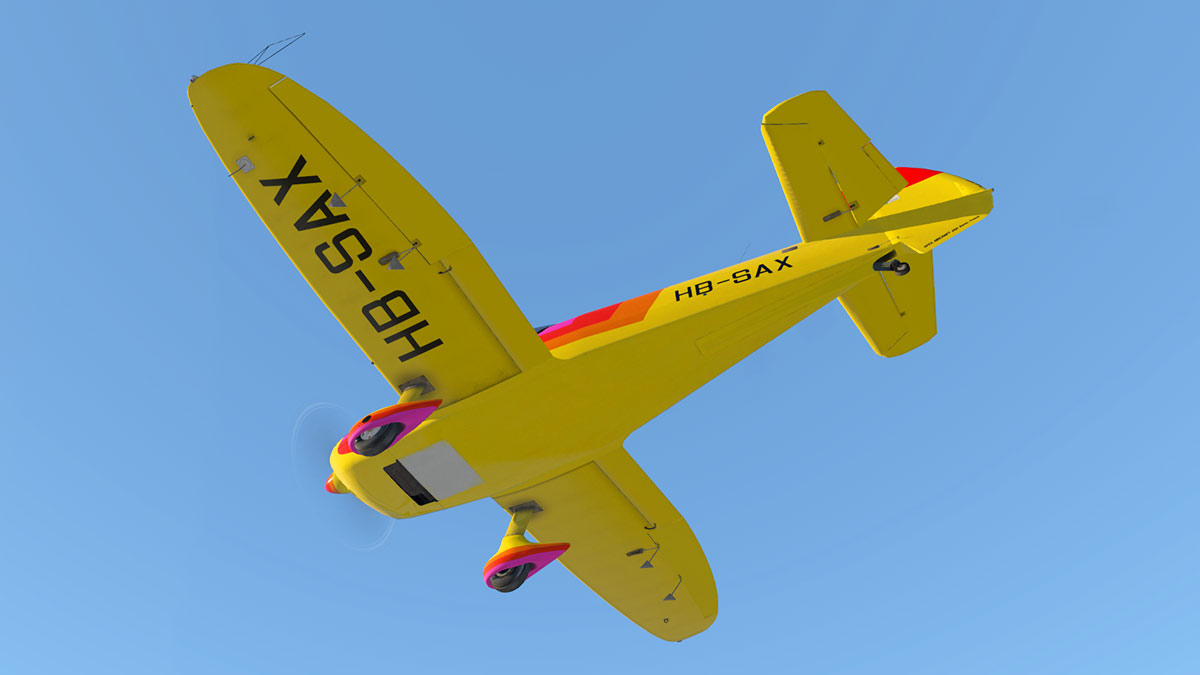
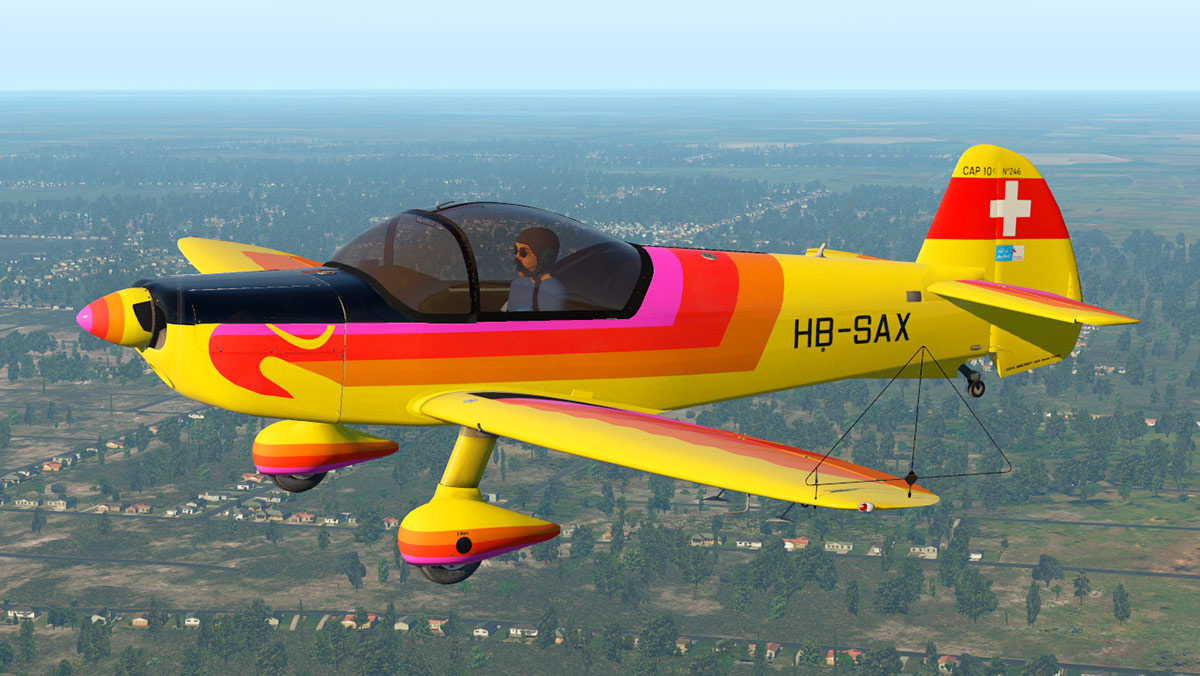
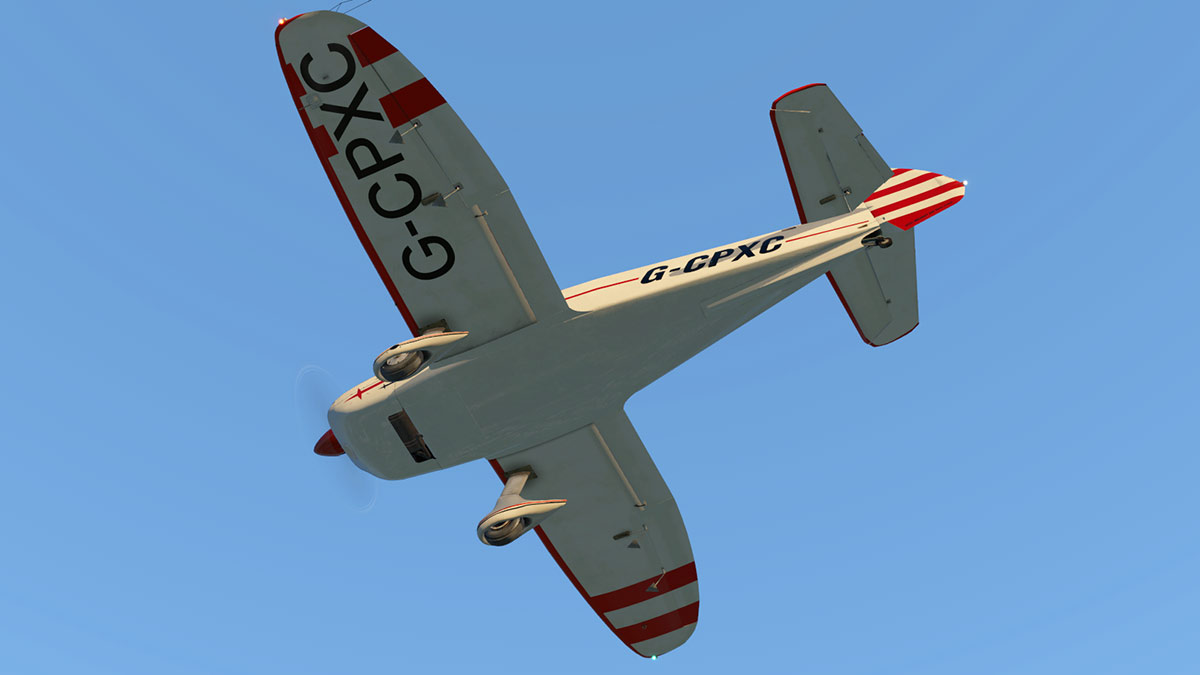
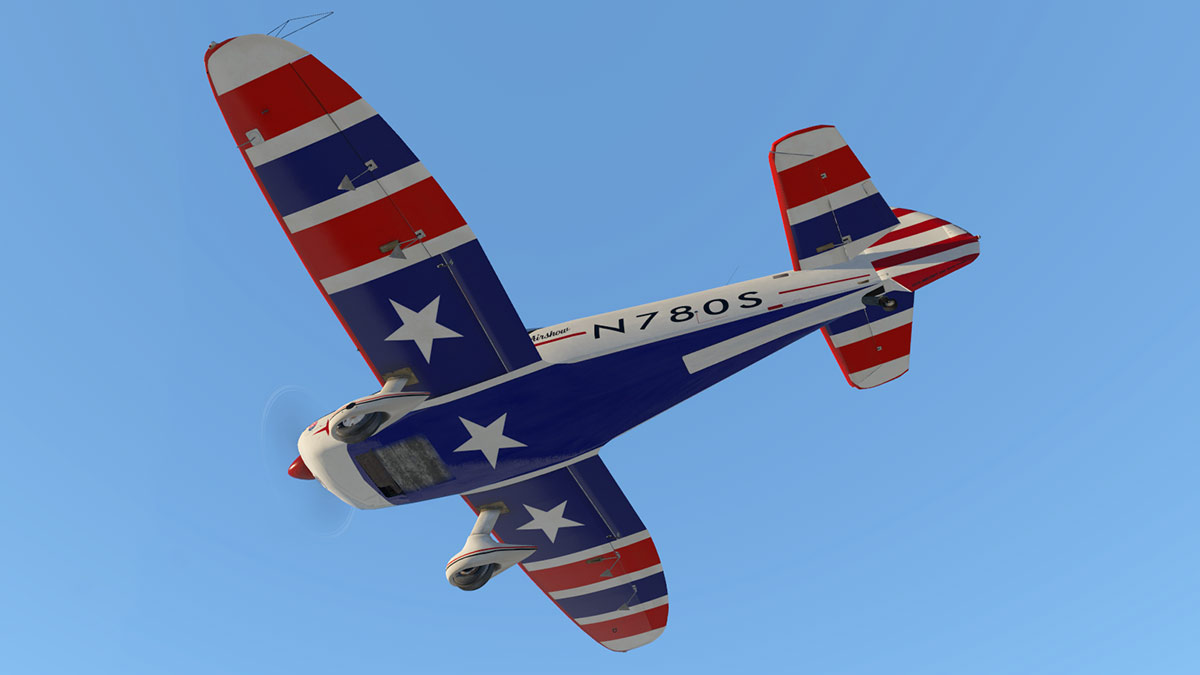
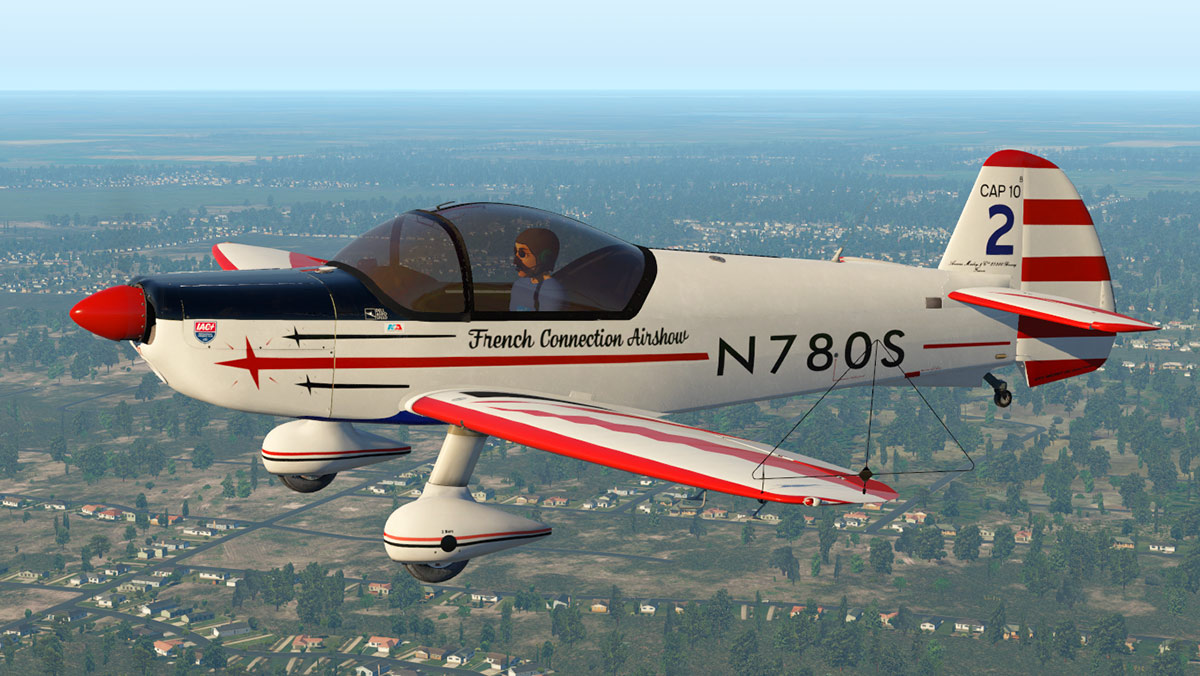
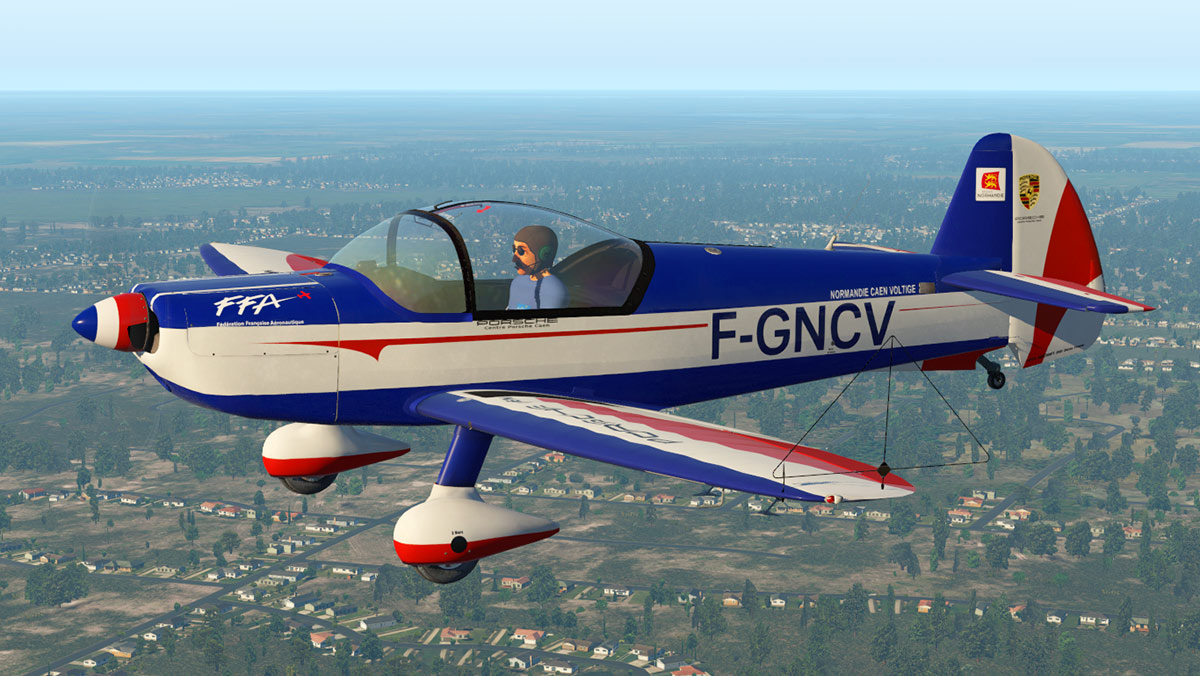
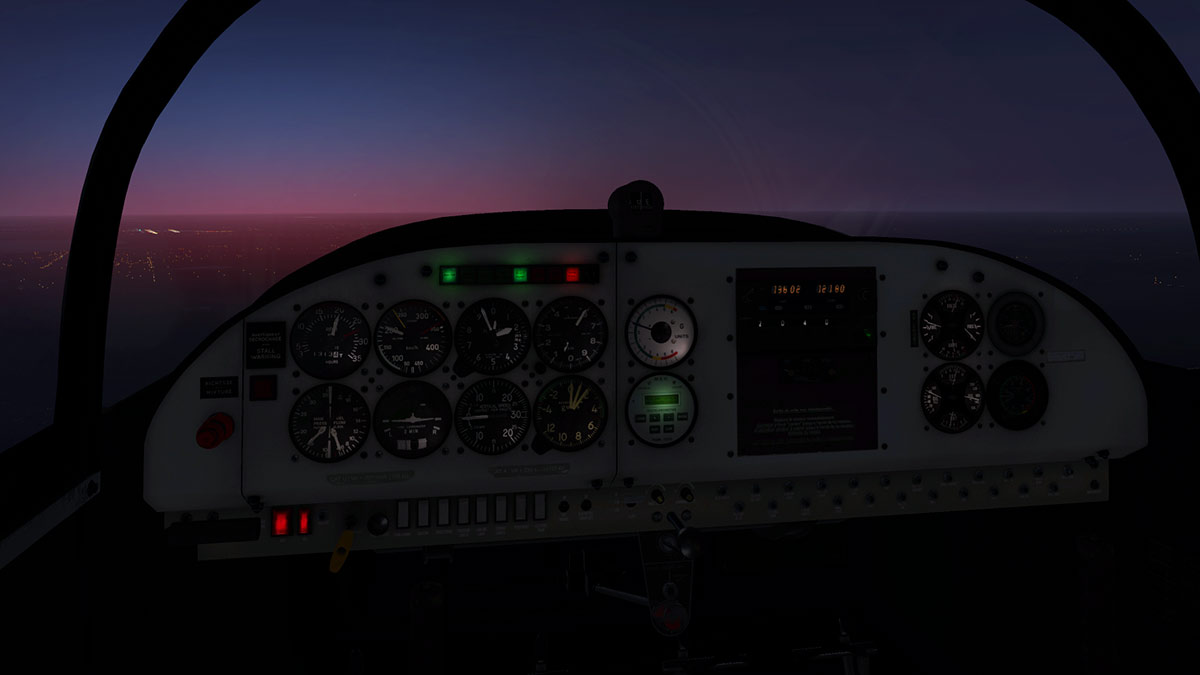
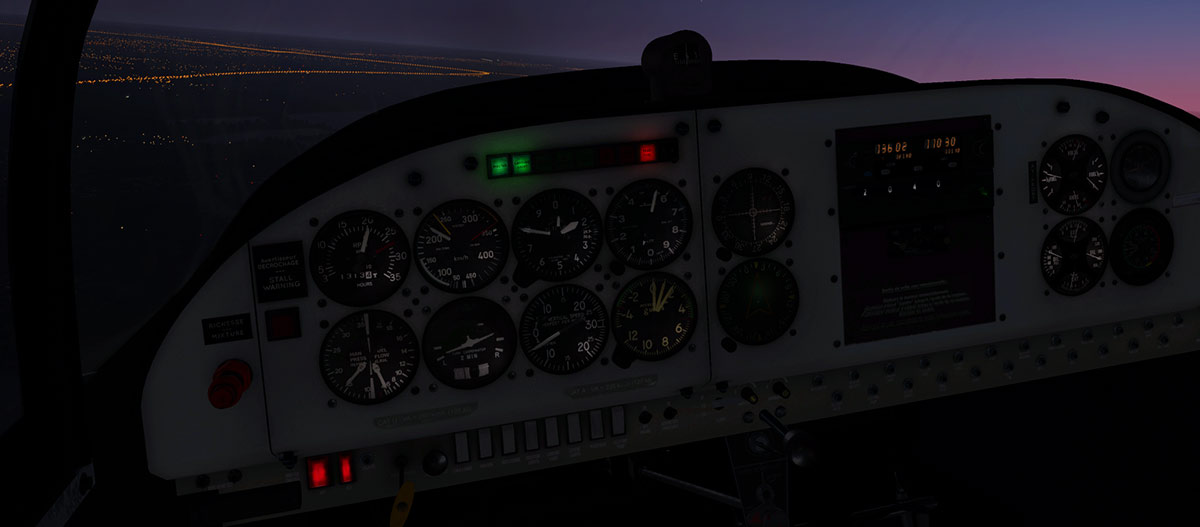
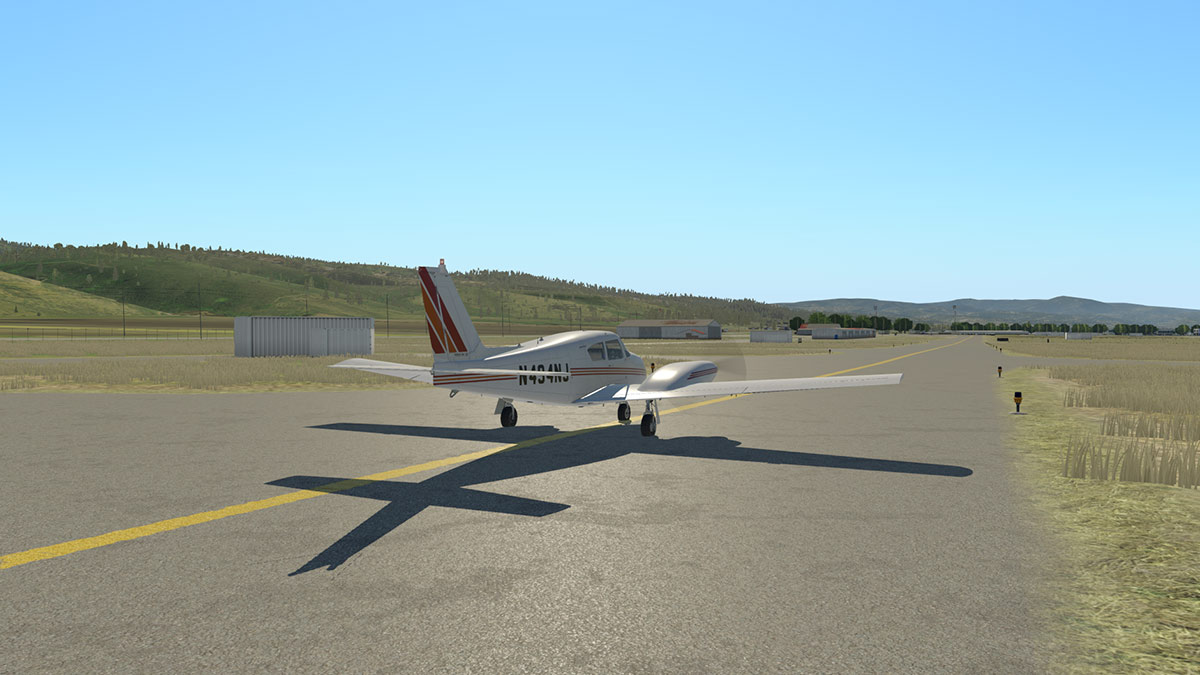
 Aircraft Review : Mudry CAP 10C by Avia71 The Mudry CAP (Constructions Aéronautiques Parisiennes) 10C is a two-seater training aerobatic aircraft that was first built in 1970 and was still in production as late as 2007 under the Apex banner. It is a very renowned aerobatic aircraft that has had many numerous and well known European champions that have started aerobatic careers on a Cap 10. This 10C version had the updated and improved structure with a carbon-fibre wing spar within its wooden construction to give the aircraft less weight but with more strength to the airframe. Avia71 (Laurent) has already delighted us with his lovely Fournier RF 5B Glider and the Extra 300, both in the same genre of small glider or aerobatic aircraft and continues his same pattern here with this CAP 10C. The same is said that with the CAP 10C it is like his last developed aircraft in that he has a personal connection to the actual aircraft that is reproduced here with the French registered F-HEBV owned by the aero club of Bernay France, but his two collaborators also have had close associations with CAP 10c's in the several championship winner Thomas with the F-GNVC registered aircraft and Joshua with an G-CPXC example of the two hundred current CAP 10c's built. Most aerobatic aircraft are mostly single-seaters, but the CAP here is a trainer or two-seater stick and rudder aircraft to learn the basic skills of aerobatic manoeuvres in a safe environment, but with two pilots on board that also adds in weight and changes of aircraft's balance. As with any reproduction of a real aircraft this 10C is very good. A lot of effort has gone into the minute detail as you would expect. It is not the complete extreme detail you get sometimes now but it is overall very good, and remember wooden construction is very hard to replicate compared to metal or composites. The 10C is a tail-dragger and so you will need all of those tail-dragger skills To highlight details there is a lot of great worn wear looking areas in panel fit and joins to add in to the authenticity. The aircraft build plate is very well done and adds in that personal aircraft feel. There is a very good aerobatic sight on the left wing and they are there to allow you to watch the angle of the horizon while watching this outside reference point. The glass canopy shows you how far X-Plane's glass and reflections have come in the last few years. Beautifully done and highly realistic, more on these reflections later. Instrument Panel The instrument panel is very 70's basic, but modern as well. It is set up for aerobatic flight and all mostly focused on the flying pilot. Detailing is excellent as the Instruments are all large and easy to read and all have lovely reflections. This is a serious stick and rudder aircraft and that aspect is highlighted here, and note the detail is not restricted on what you can see, as behind the panel there is some excellent work as well... good work is all in the detail. Instrument layout is slightly different from the normal standard six arrangement, it is a mixture of flying instruments and engine output dials. Top row from L to R gives you a RPM dial and then next right is the Speed dial in Km/h, then the Altitude dial and finally another Altitude/Air pressure dial. Lower row L to R is the Manifold Pressure/Fuel Flow gauges, Turn coordinator, Vertical Speed and acceleration dial in G's... note the missing Artificial Horizon instrument as it is part of the turn coordinator instrument. Centre panel is another G metre in units and a MEV Acceleometer. Left centre panel is in a basic Communications radio top with a Garmin GTX 320A transponder below... lower is the intercom (headset) controls which also controls your external and internal sound volumes. Far right are four dials that includes top left, Volts, Amps and both fuel tank gauges - Top right, Hour(Hobbs) meter - Bottom left, Engine EGT, CHT and Oil Pressure and temperature - Bottom right, co-pilot G-acceleration dial. Lower panel is switch gear left and fuses right. The panel can be set up two ways with the aerobatic G-Meters (left) or two navigation instruments in a VOR finder top and heading bottom (right). Another neat trick is you can have "headset" mode which gives you the roar of sound or the muted headset sounds, This is done by pressing (or plugging in the headset) on the bottom left and right sides of the instrument panel. Menus The menu tab is the "Remove before flight" red tag on the centre left of your screen... This opens up the menu dialog box with five tabs. These include: Settings - Checklists - Weights &Balances - Failures - Tips & Tricks Overall there isn't a huge amount of options, but for what there is it is all set out very well. Settings There are two major settings with doing aerobatics with "Cat A" (Aerobatics) and "Cat U" (Utility). These selections allow you to quickly set up the aircraft for either their Aerobatic or Utility roles in one selection. There is a very comprehensive set of documents including a "Aerobatic Basic's" manual that teaches you how to fly the aircraft well in the aerobatics mode. The manual is very good as well in this area with aircraft data and procedures, but I would have liked more information on the instruments as they are quite different from the standard panel fittings and many of the instruments installed here are related to aerobatic flying? Selecting the different configuration for either the aerobatic or utility roles then changes also the fuel selection or Centre of Gravity (CoG) in the aircraft by closing off the rear tank, changing the centre instruments and setting category limitations. You can either start the aircraft in cold&dark mode or ready to start. Checklist The checklist menu is very good and comprehensive, it covers all aspects of the routines from cold to shutdown. You navigate via the arrows on the bottom of the page or via the main front menu on the cover. Weights&Balances The Weights&Balances menu is also very good but a little basic . The important note here is the two centre of gravity zones that cover the different settings for Aerobatics Cat A (brown) and Utility Cat U (blue). You have to set the aircraft up withing the brown zone for aerobatics and that includes empyting out the rear fuel tank and the careful selections of pilot(s) and luggage weights. You can have one pilot, or two pilots (trainee) and even swap them around in the various seats and adjust all their weights, I do recommend only one pilot for serious aerobatics as the weights are too high with both bodies in there and you feel the differences of weights when throwing the aircraft around the sky. Failures and Tips&Tricks The "Failure" menu has to be switched on by being in the Cat A setup. This is for trainee purposes in that the aircraft will introduce failures in how many (quantity), Training duration (in distance not time) and to note on screen of any of the failures. Finally there is a "Tips&Tricks" menu that shows you various tricks and where certain things are situated on the aircraft, and it is quite good in finding those extra switches hidden behind such things like fuses. Flying the CAP 10C The CAP 10C is a tail-dragger, so that means it can be quite a handful on the ground... visibility is very restricted in this aircraft when taxiing as well. You can't lock off the tail-wheel, so taxiing is very authentic, but quite hard to get right in that you need speed or air over the rudder to turn, so a run forward to turn is constantly required and even then your turns are quite wide. The look left and down does work, but it is still hard to follow a hidden yellow centre line, so even lining up on the runway is a bit of a guessing game. The 10C is damn tricky to get airborne. There is a single flap setting to help lift (three settings in UP - T/O - LDG), but the tail refuses to lift until you hit 60Km/h, even a slight push forward of the stick to help it and it still refuses to budge. Tracking is hard as well and you need to counter a lot of different forces in the lightness of aircraft, airstream over the rudder, asymmetrical power and that poor view forwards... ... and I will put the view forward that there has been a lot of changes to the X-Plane performance in this area in X-Plane11 (more so in the latest 11.10 beta) on runway ground effects and the "wobbles" and I think there is some cause of effect with this aircraft in this role as it is soooo light and nervy. So it is tricky to get right the first time, even the second... and the third. Once in the air and trimmed (electric between the seats) everything resumes to complete normality as the controls are quite sweet and active under your hands and feet.. The only small annoyance is the wheels keep on rotating unless you hit the brakes to stop them. As you would expect this is a throw around in the air aircraft, the 10C sorts of grows smaller around you as you focus more on the flying and it just feels tighter and tighter with the stick and rudder movements with your ongoing flying. I have been trying out a few VR (Virtual Reality) headsets lately, and make no doubt that one aircraft that is just built for VR flying is this CAP 10C, it would be just brilliant and the VR would be highlighted more by the excellent reflections of the canopy around you. Your aircraft setup balance is of course very important and it totally absolutely affects the way you fly the aircraft... There is a great popup in the middle of the panel to show you the best aerobatic manoeuvres or a set of official manoeuvres for you to follow... ... the throttle is clever as well with the normal centre push/pull knob style, but also a left pilot's grab handle style throttle as well. The sticks are very high (or long) for full minute control. Sounds are all FMOD and all taken from the real aircraft on the ground and in flight for full authenticity, and they do sound pretty perfect and close to as real as you are going to get. Get the settings wrong and you can look a bit like a dork in that the aircraft won't respond to your aerobatic whim's... ... but study a bit and get the settings right and the CAP10C comes alive and you can then start to get the precision and manoeuvres you are aiming for. Down the nose a bit to gather a bit of speed and then up and and into the loop... you feel the freefall at the top and then down the other side and recover... do that a few times and your head swells a bit to the fact that buzzing the tower on KLAL field feels like a good idea. The headiness will go away quickly once you decide to land... as it is the same as taking off in keeping your speed low in the low 70's Km/h range... ... you tend to keep the nose high and almost at stall point, which doesn't help in the vision ahead on placing the aircraft correctly down on the runway. You can place the 10C down and almost on the three wheels at the same time, but then it is hard to run off the speed and then slow down even from the low 60Km/h tochdown speed. Get it wrong and you with lose the aircraft as it starts to weave badly and even dig in a wingtip into the tarmac, and it took a few practise landings to get it all right and taxi back to the stand area in one piece... it is really tricky to do and not for the faint-hearted as it is all too very easy to get it all too very wrong. Liveries There are five aerobatic themed liveries and all are well done, two are very similar side on but with different layouts on the underside. Lighting This CAP is not really a night flying machine and so the lighting is quite basic. The instrument panel however is really nice at night with some really nice effects and feel, the lovely annunciator panel is testable and looks great in the daytime or darkness. Only difficulty though is the lighting manipulators centre panel. They are created for scrolling of the knobs and that works fine, but try to manipulate them manually and they are very hard to turn, and with a different manipulator for each knob... tricky. External lighting is very basic with one really large landing light that seems to be not adjusted. Summary For a great aerobatic aircraft you can't go past this gem of a CAP 10C. It comes with a lot of information from real aerobatic pilots to allow you to get the very best out of the aircraft in it's aerobatic roles, but it has a simple cross country role as well if you just want to fly point to point and not wanting to get yourself twisting around all over the sky. Setting the aircraft up correctly for aerobatics is important, but you get a lot of help from everyone involved and the set up can be versatile as well, with one or two (a trainee?) pilots set in the aircraft. It is a very tricky aircraft to takeoff or land at slow speeds and in this area you will need a lot of skill, it is focused on and for a very capable pilot anyway. If you do have high aerobatic skills then you will get the very best out of the aircraft as it is focused on that aspect and tuned out for that area as well. Modeling overall is very good and that lovely canopy is totally worthy of a VR headset alone, a few quirks are noticeable in still turning wheels, tricky manipulators and that oversized landing light are not really negatives. Avia71 is a focused designer on these sort of aerobatic aircraft and again delivers a gem of a machine for that particular genre. There is a lot of professional input and testing to know you are getting the very best in that aerobatic delivery as well in realism, and that is what you are paying for in the end... in the end only one thing sits mostly in my mind after reviewing this CAP 10C, and that is in god that you really want that Virtual Reality aspect for aircraft like this... it would be absolutely mind blowing. ______________________________________________________________________ Yes! the Mudry CAP 10C by Avia71 is NOW available from the new X-Plane.Org Store here : Mudry CAP 10C Price is US$24.95 Features Switch between aerobatics and utility mode (no reload needed) Exclusive electronic G meter/recorder/audio warning Choose at any time your favorite instrumentation (no reload needed) Retractable document holder on panel Load your own aerobatics diagram Sounds volume adjustments on panel Switch windshield and instruments reflection on panel Interactive checklist Weight and balance interface with calculator Internal failure system Complete circuit breakers management Flaps & trim locker for aerobatics Mixture fine adjustment Aerobatics manual by Thomas in English and French and a bunch of tips and tricks Other features Hgh-fidelity flight model Accurate 3D modeling Extremely detailed 4K textures Physical Based Rendering Ambient occlusion FMOD sounds recorded on the real model 5 liveries fps friendly Requirements: X-Plane 11 (not compatible with XP10) Windows, Linux or Mac 2Gb VRAM Video Card Minimum - 4GB+ VRAM Recommended Installation Download of the Mudry CAP 10C is 236.40mb and it is installed in your General Aviation Folder as a 247mb folder. Support forum for the Avia71 CAP10 Documents Provided documentation relating to aerobatics is excellent with not only aircraft General, limitations and procedures provided. But also Aerobatic Basics in English and French. There is no instrument descriptions and panel layout information, and on this aircraft it would have been or should have been indispensable to have the information available considering the unique instruments fitted. _____________________________________________________________________________________ Review by Stephen Dutton 24th October 2017 Copyright©2017: X-PlaneReviews (Disclaimer. All images and text in this review are the work and property of X-PlaneReviews, no sharing or copy of the content is allowed without consent from the author as per copyright conditions) Review System Specifications: Computer System: Windows - Intel Core i7 6700K CPU 4.00GHz / 64bit - 16 Gb single 1067 Mhz DDR4 2133 - GeForce GTX 980/SSE2 - Samsung Evo 512gb SSD Software: - Windows 10 - X-Plane 11.05 Addons: Saitek x56 Rhino Pro system Joystick and Throttle : Sound - Bose Soundlink Mini Plugins: Environment Engine by xEnviro v1.07 US$69.90 : WorldTraffic 3.0 Plugin - US$29.95 : XPRealistic Pro v1.0.9 effects US$19.95 Scenery or Aircraft - KLAL - Lakeland Linder Regional Airport 1.0 by NAPS (uploaded by Nicolas) (X-Plane.org) - Free
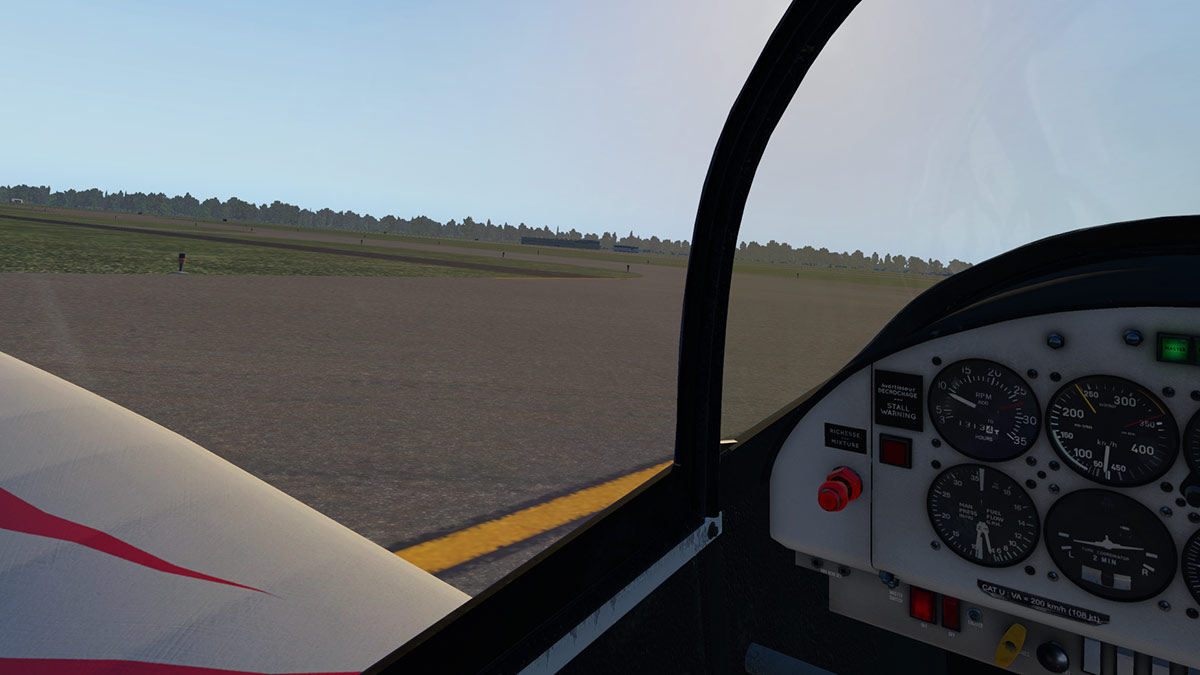
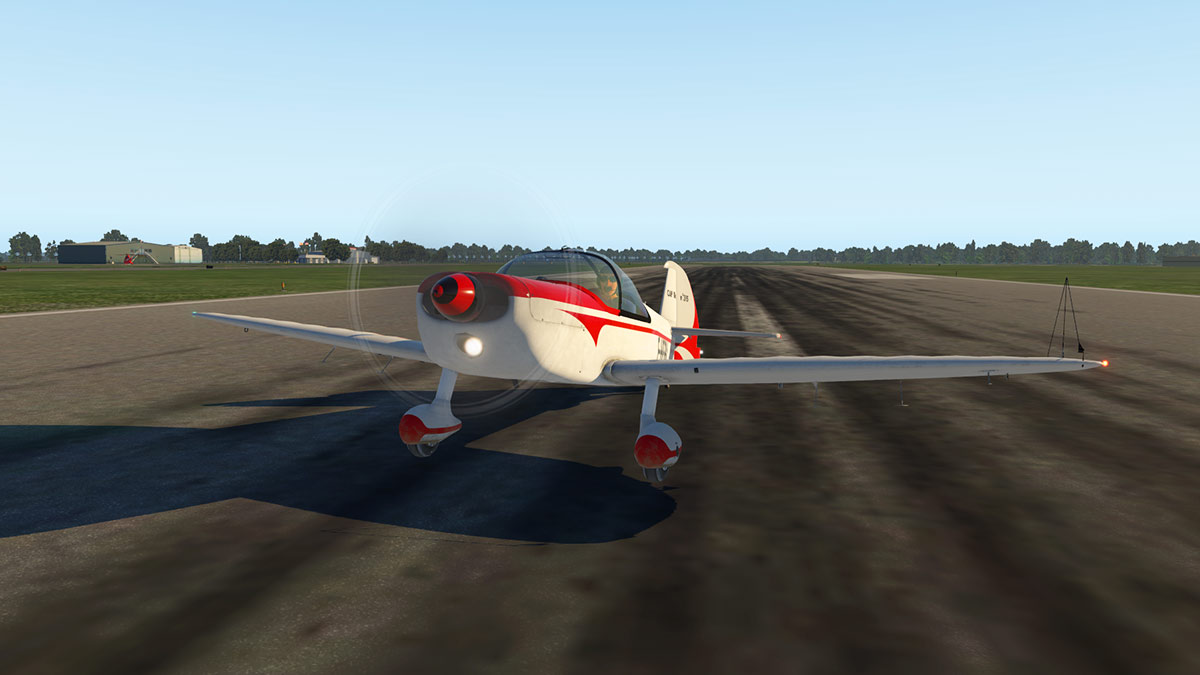
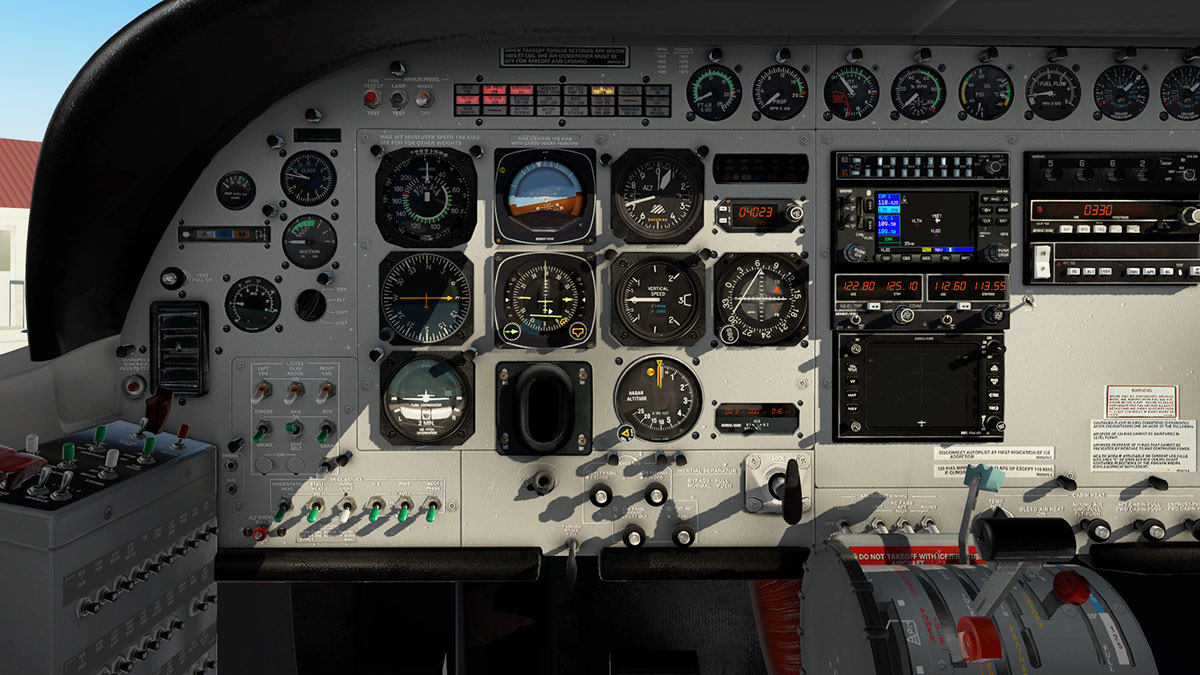
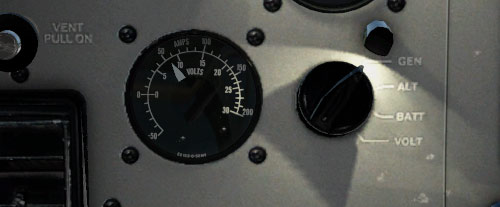
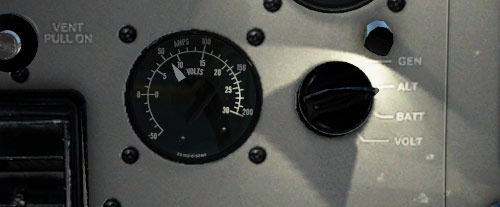
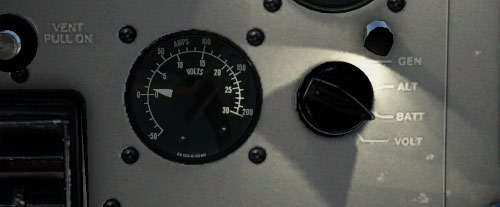
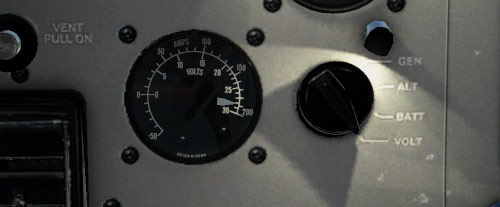
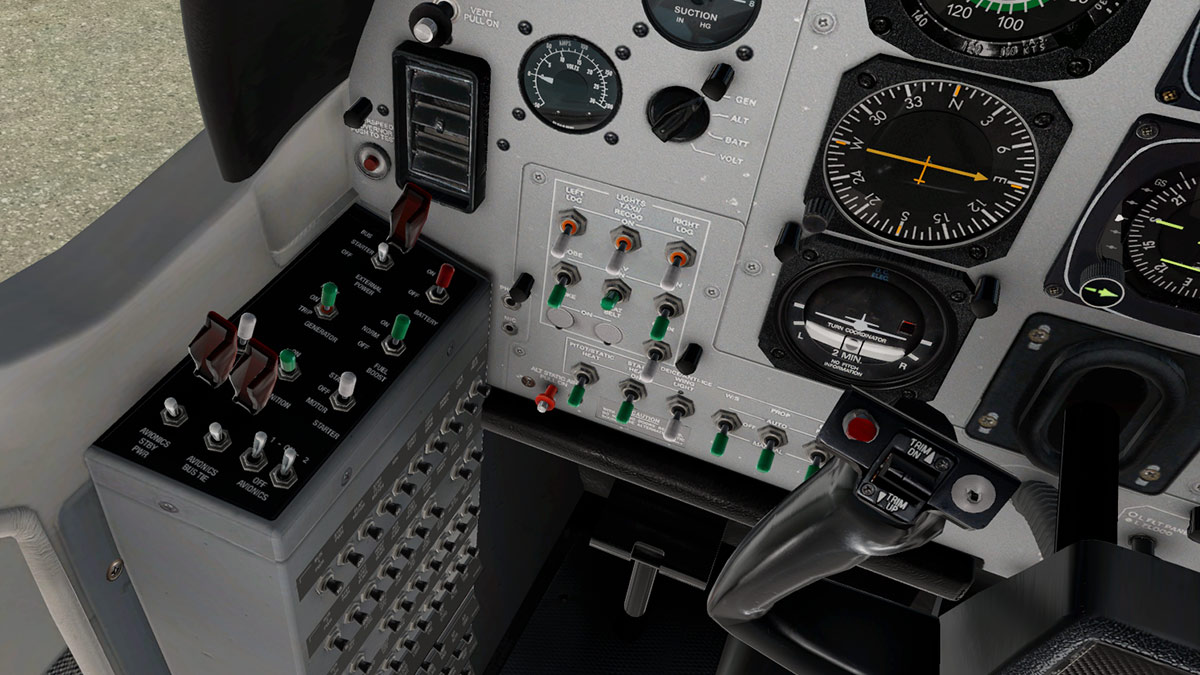
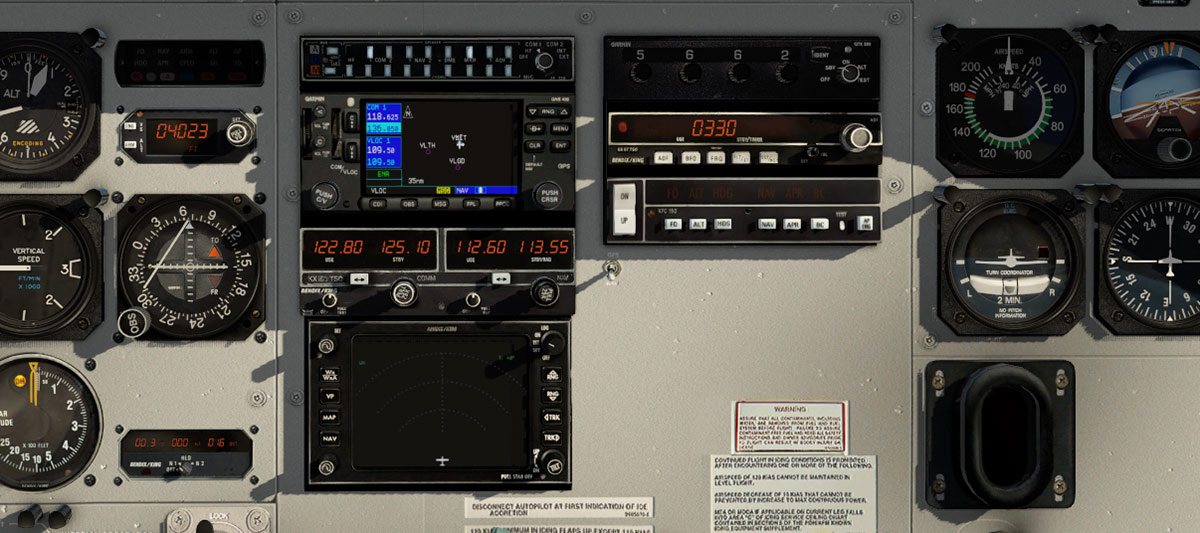
-
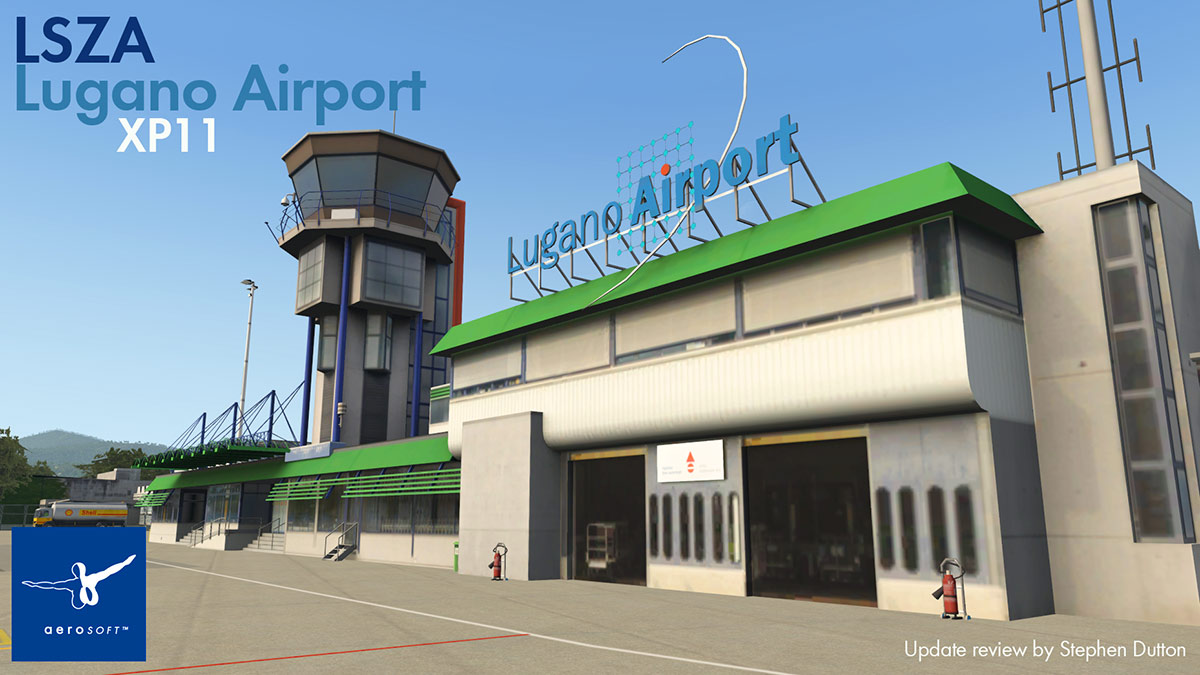
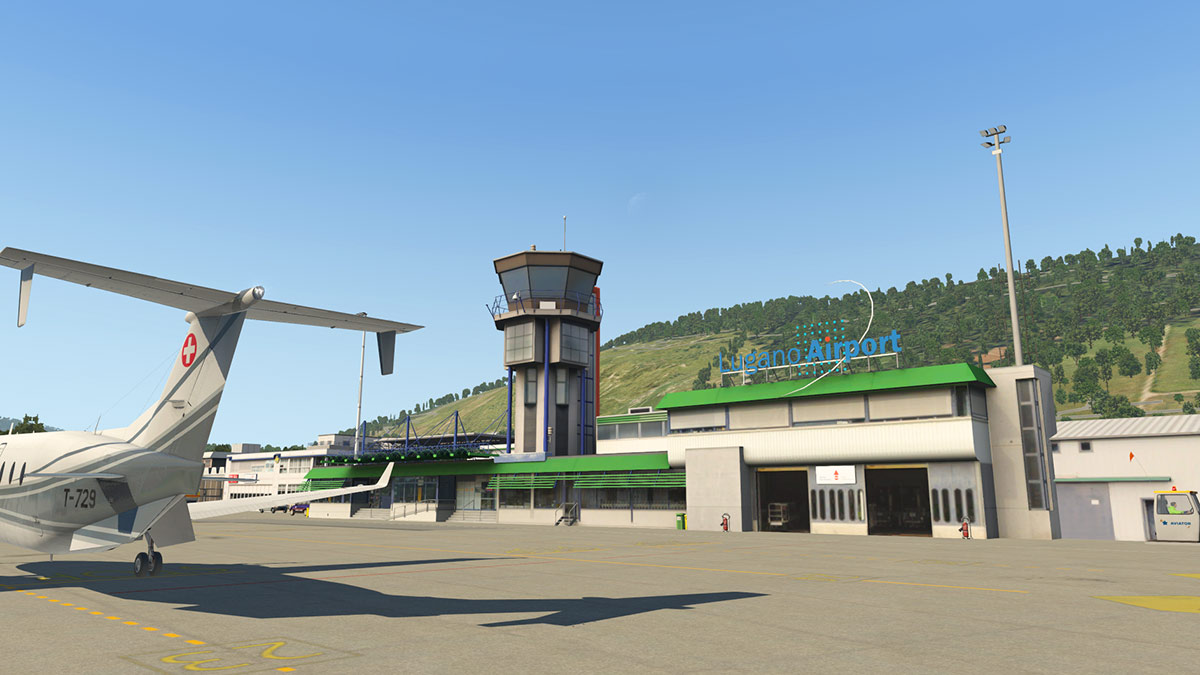
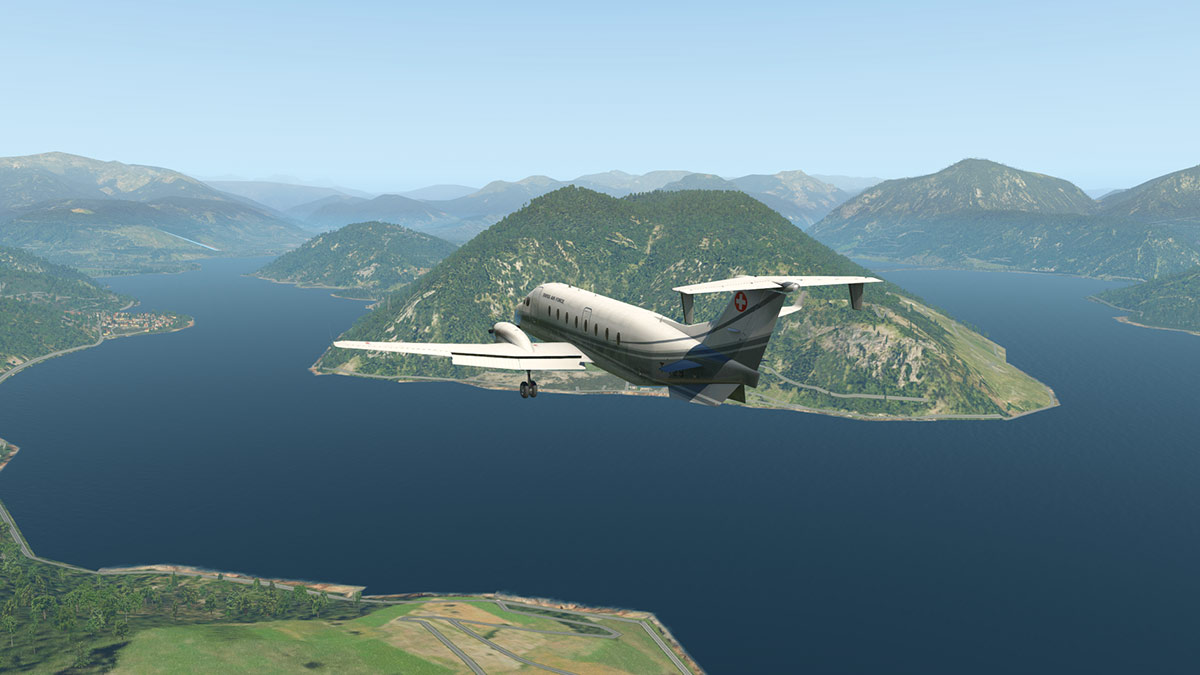
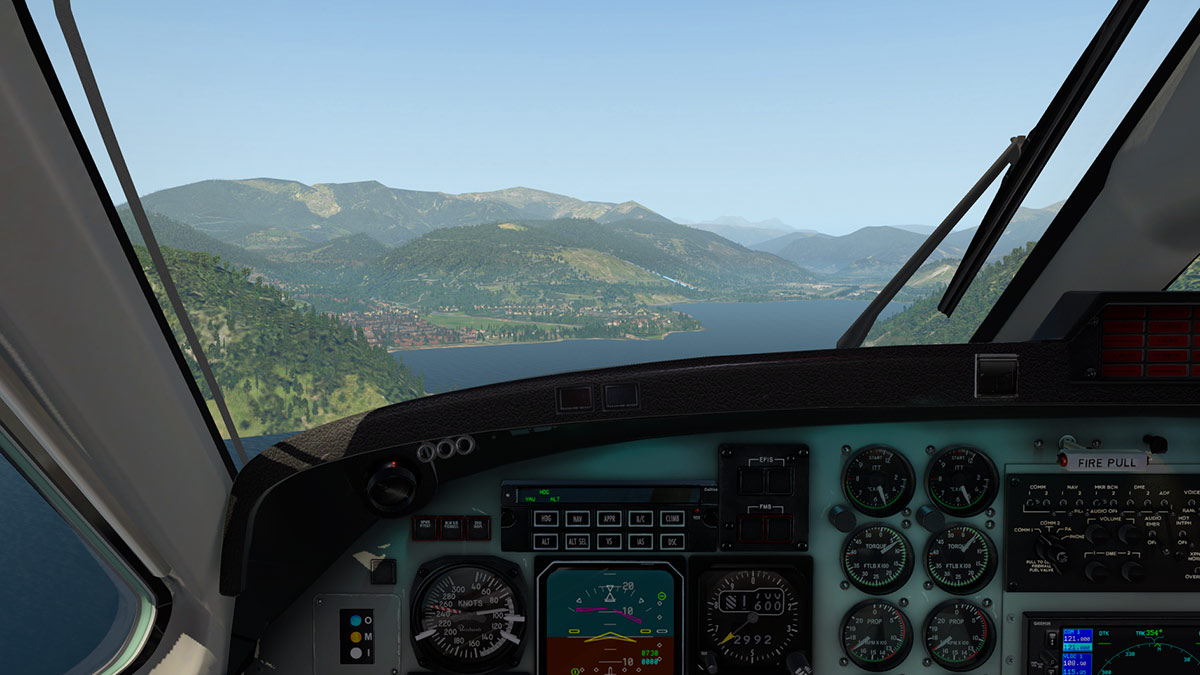
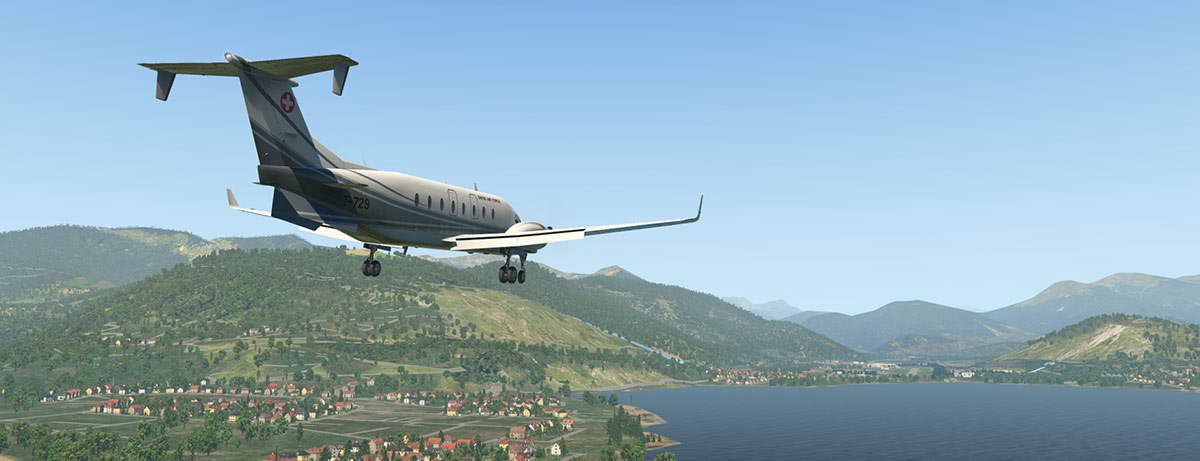
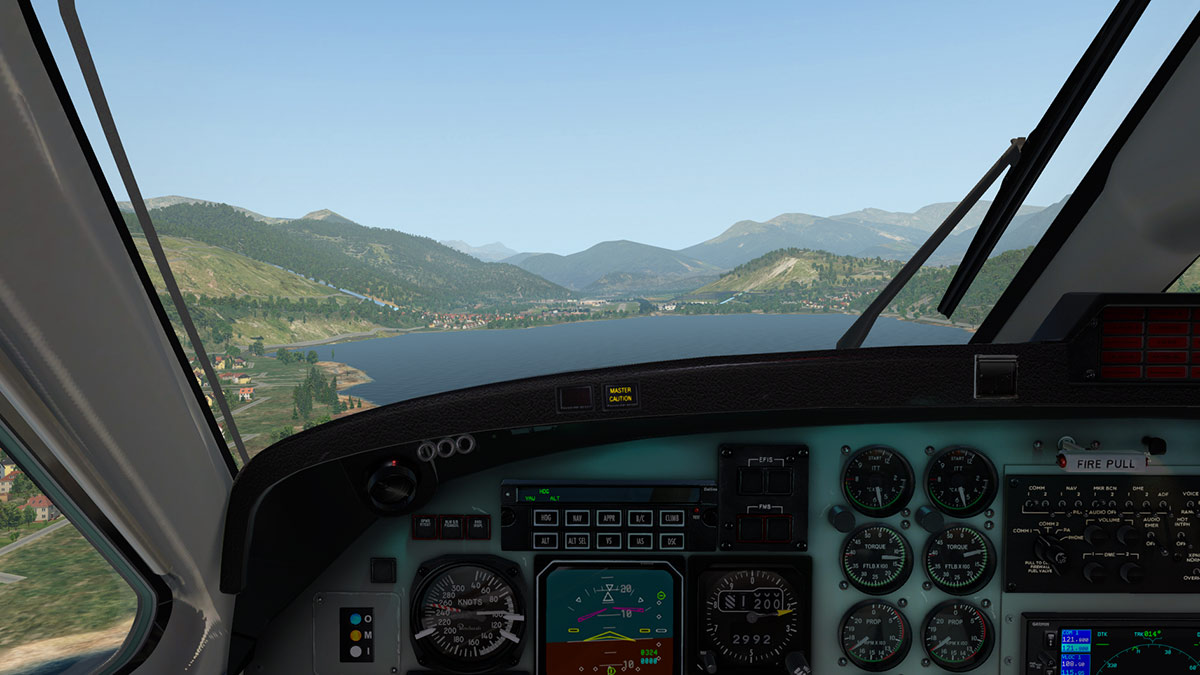
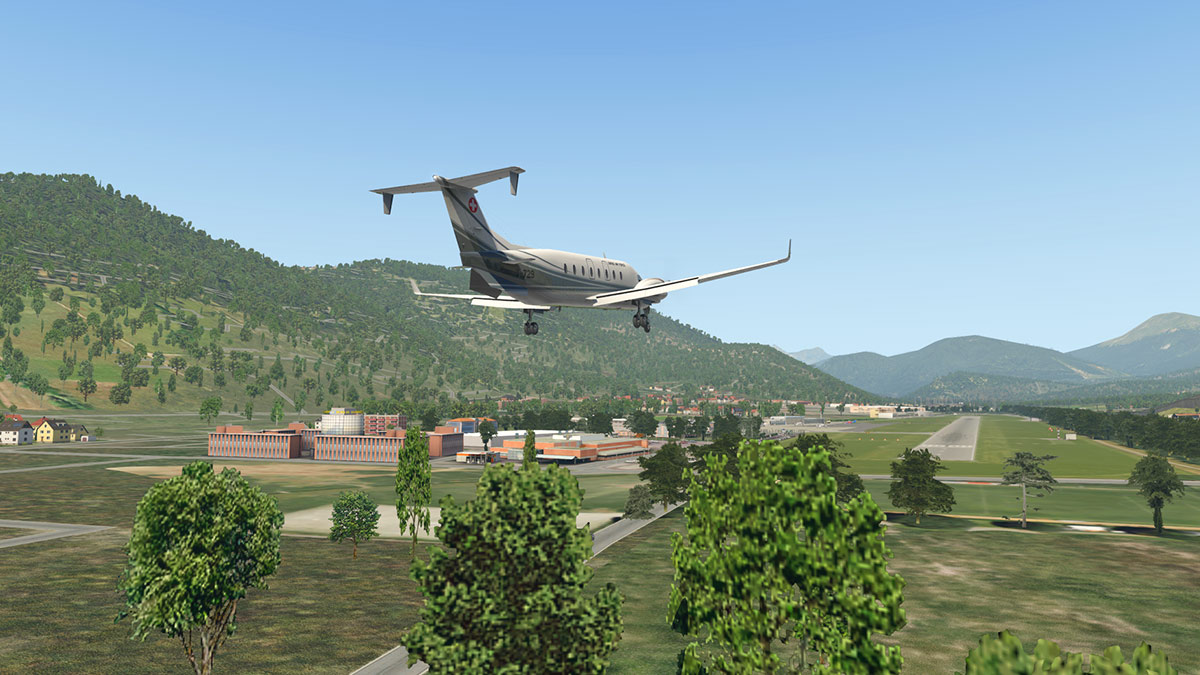
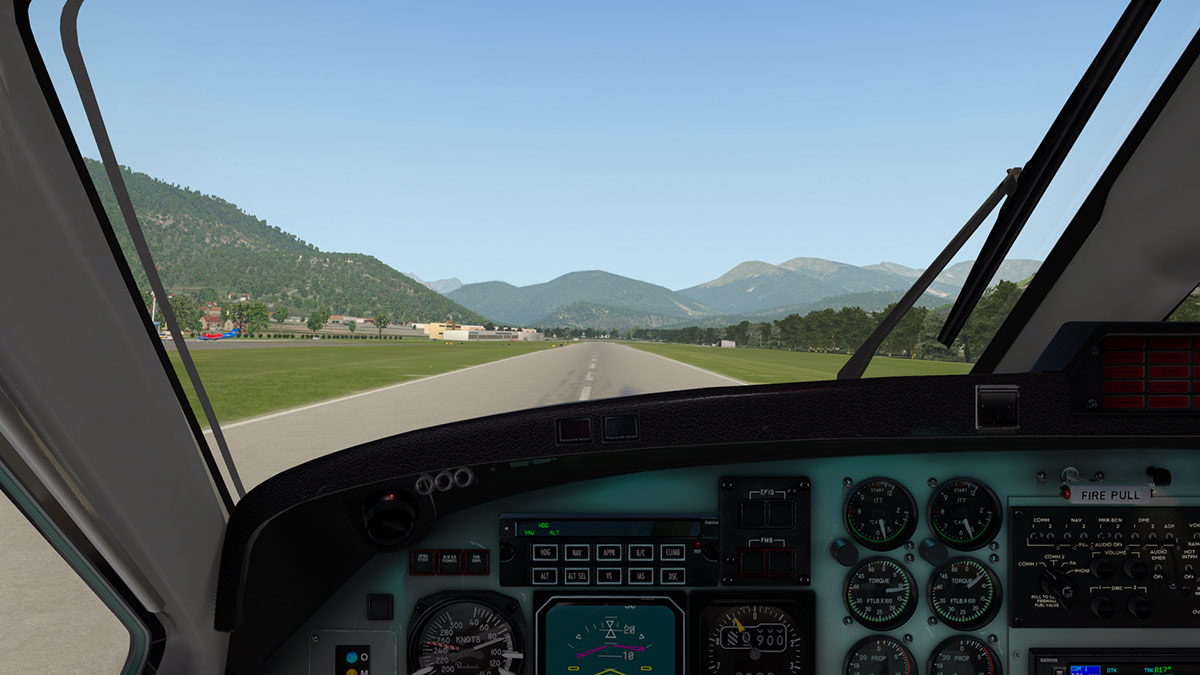
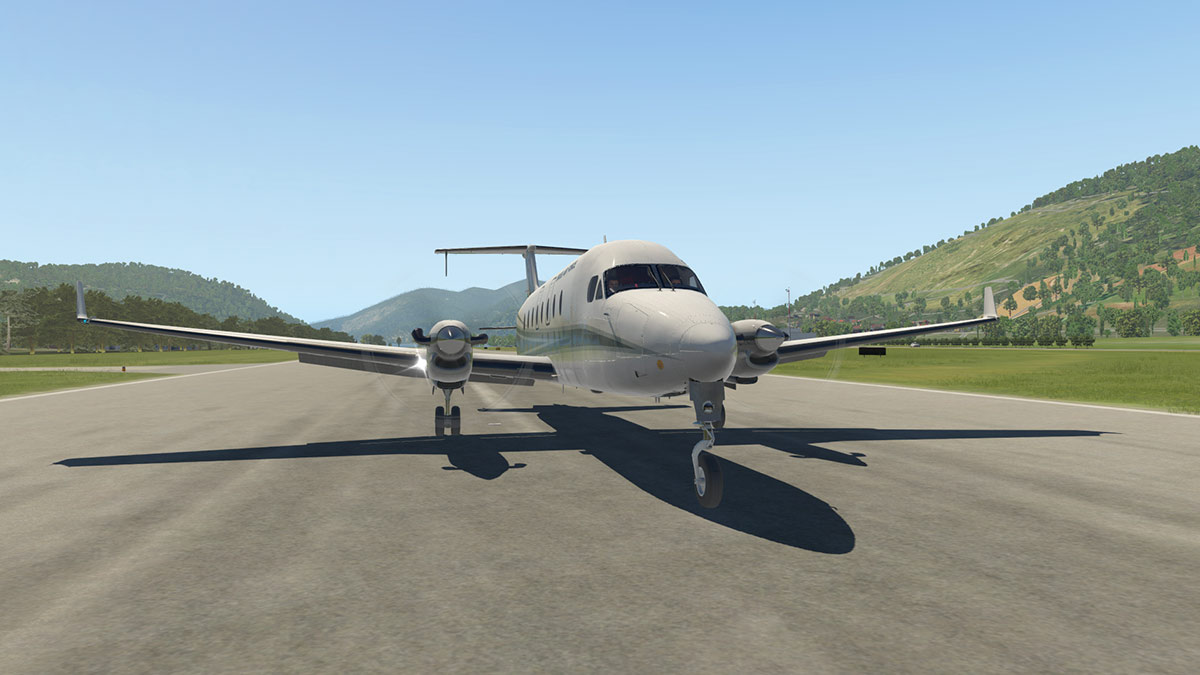
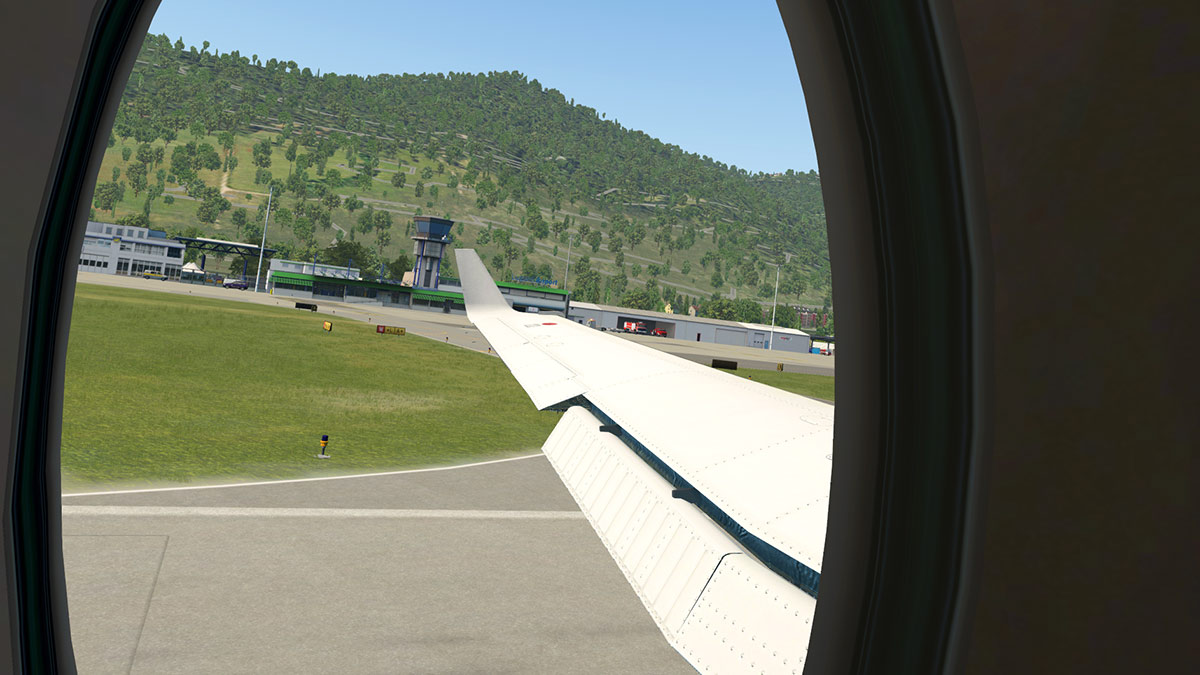
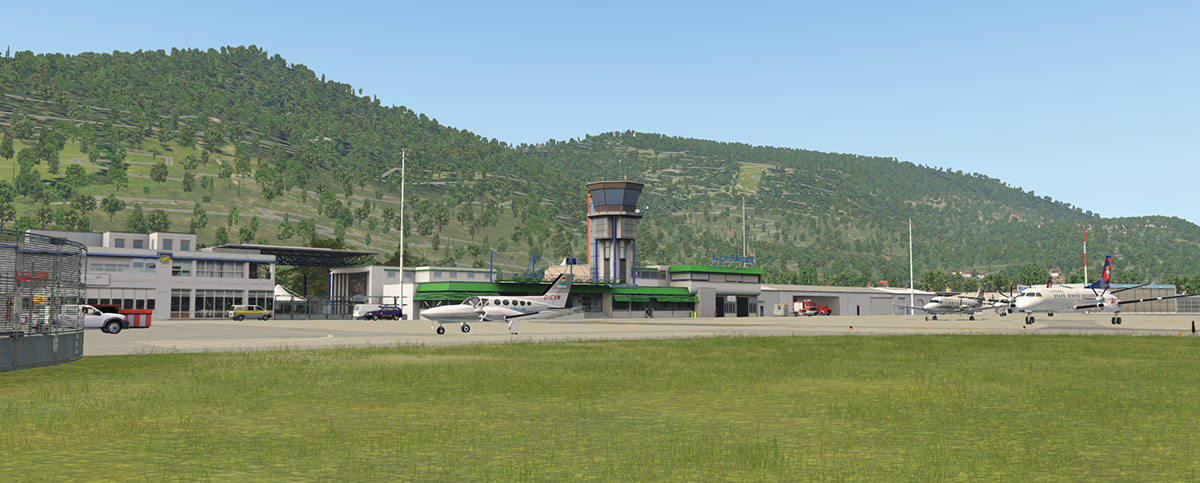
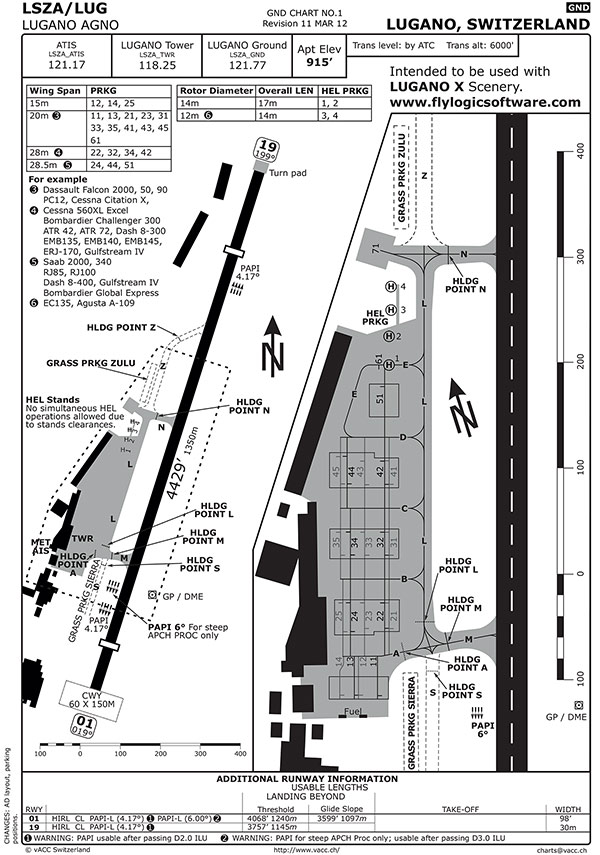
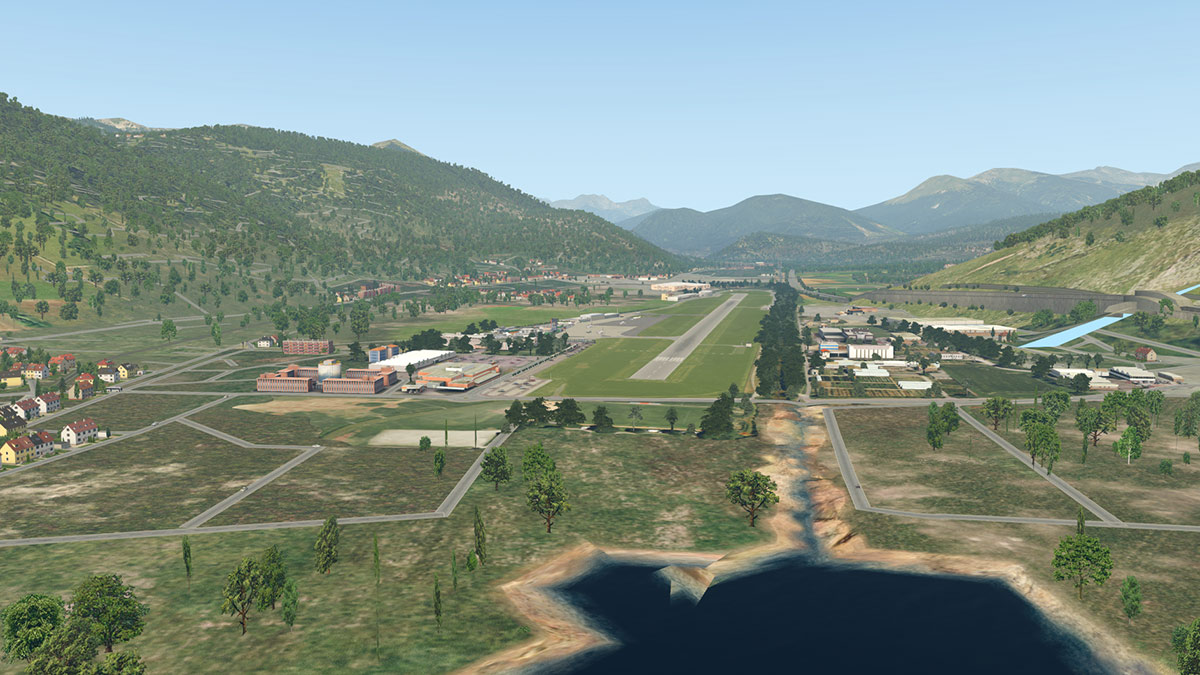
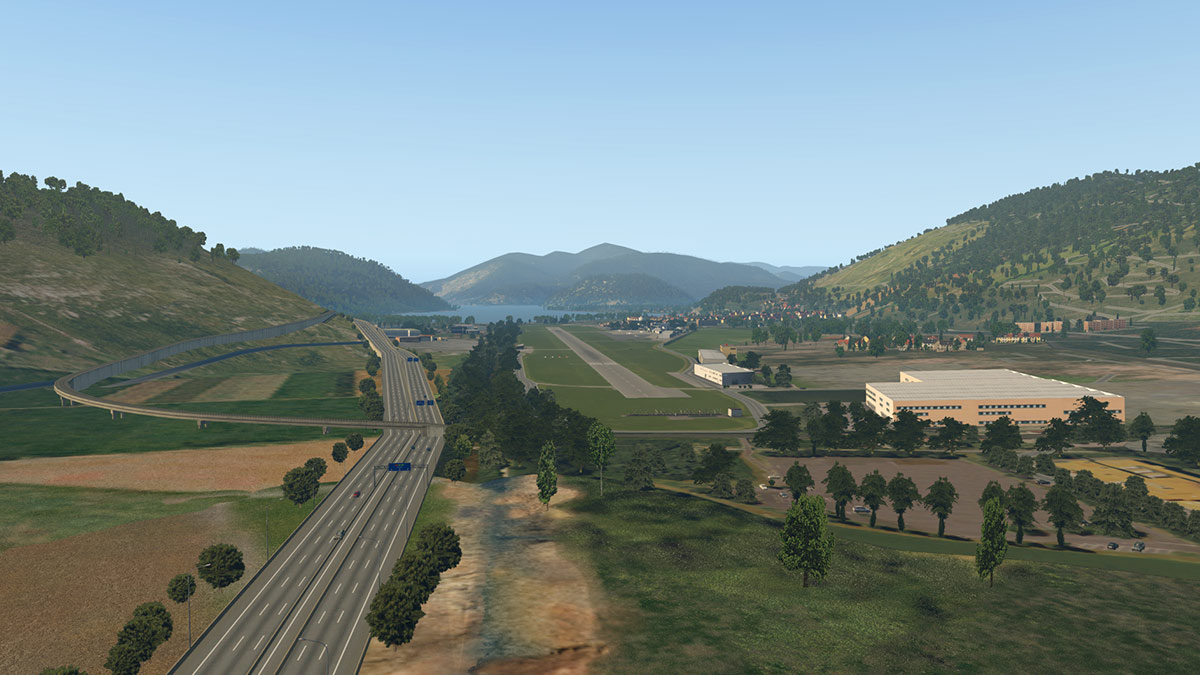
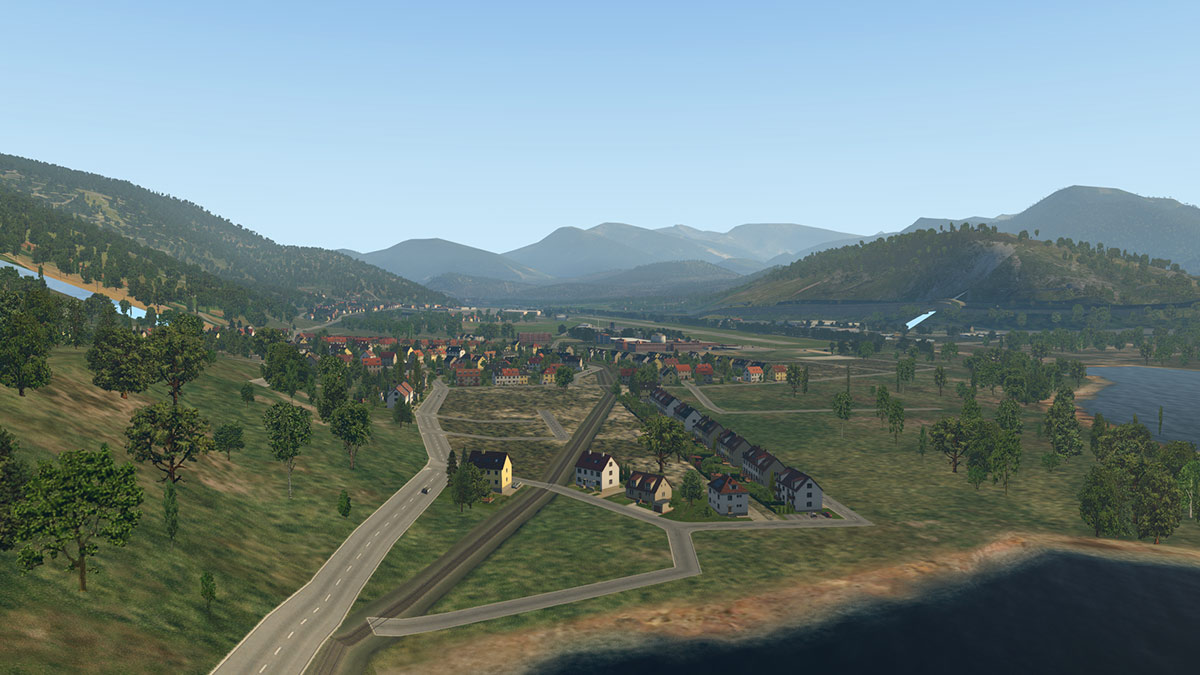
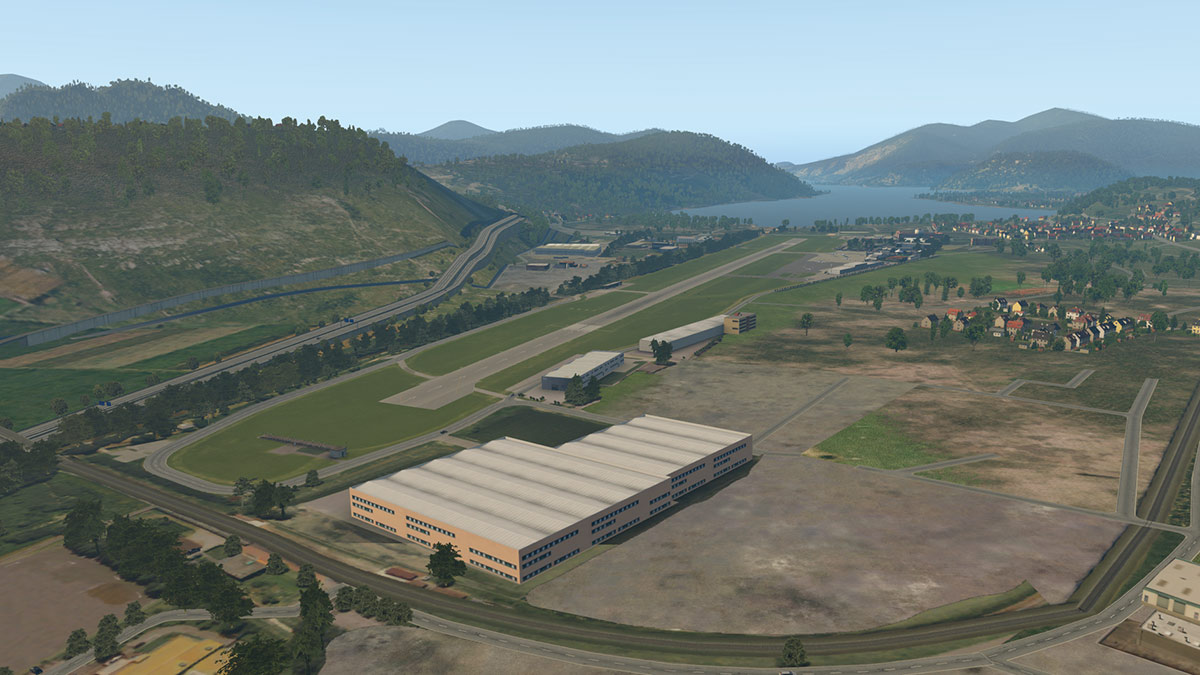
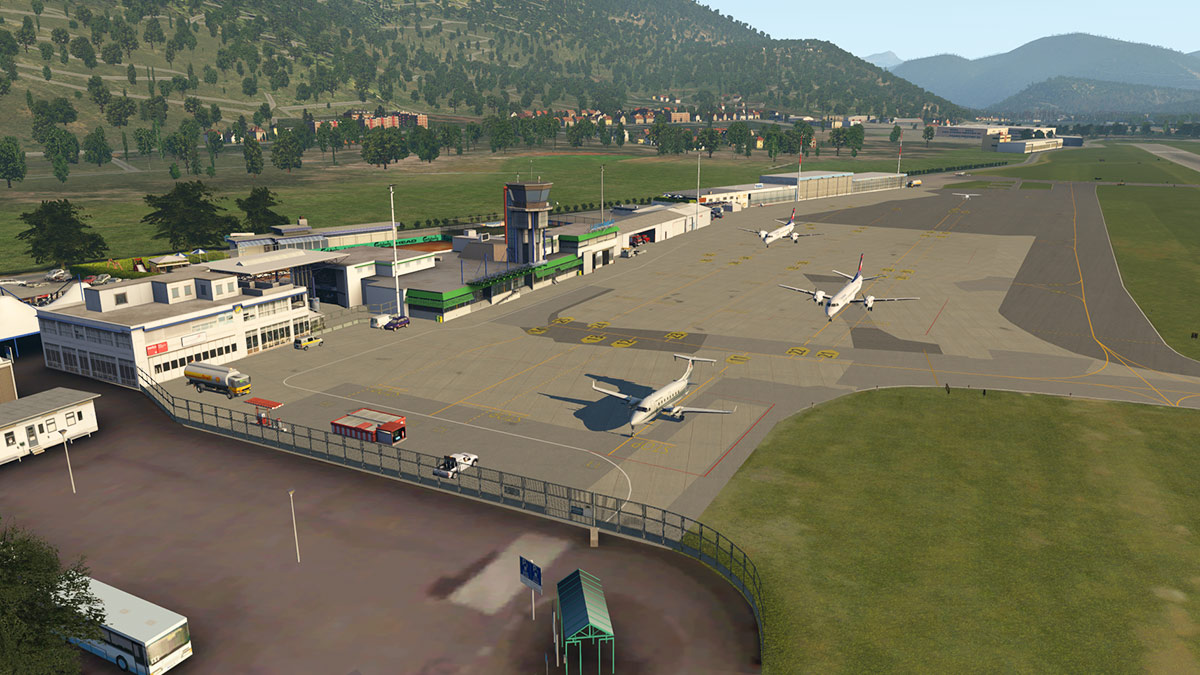
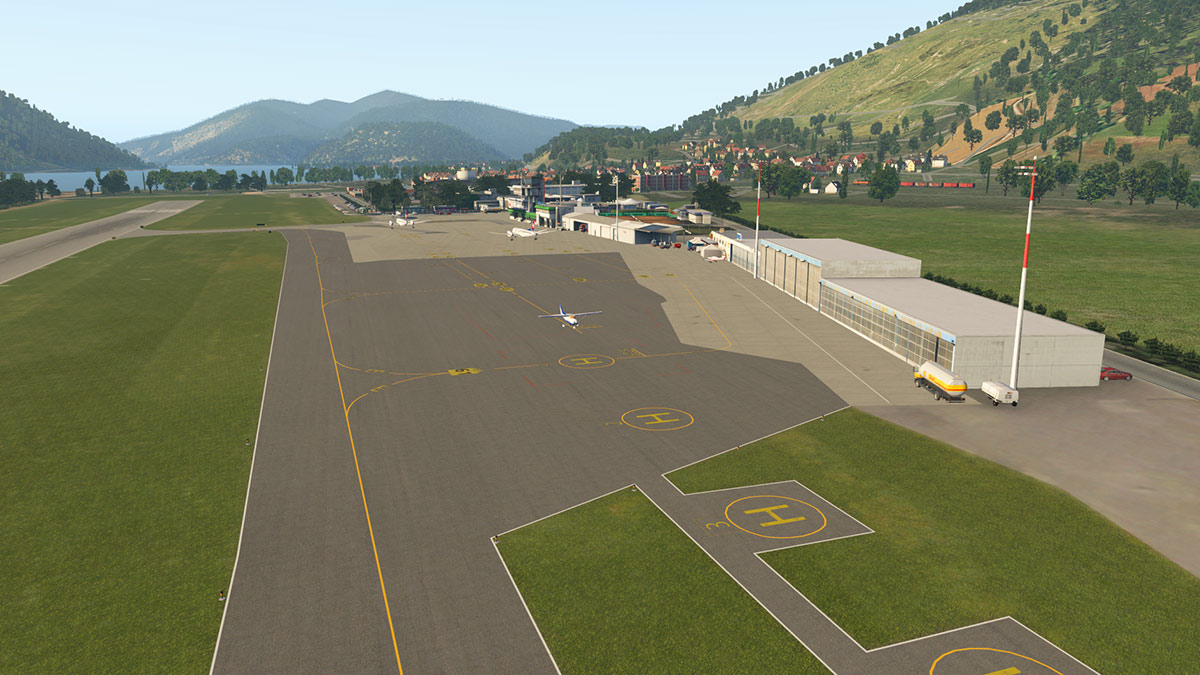
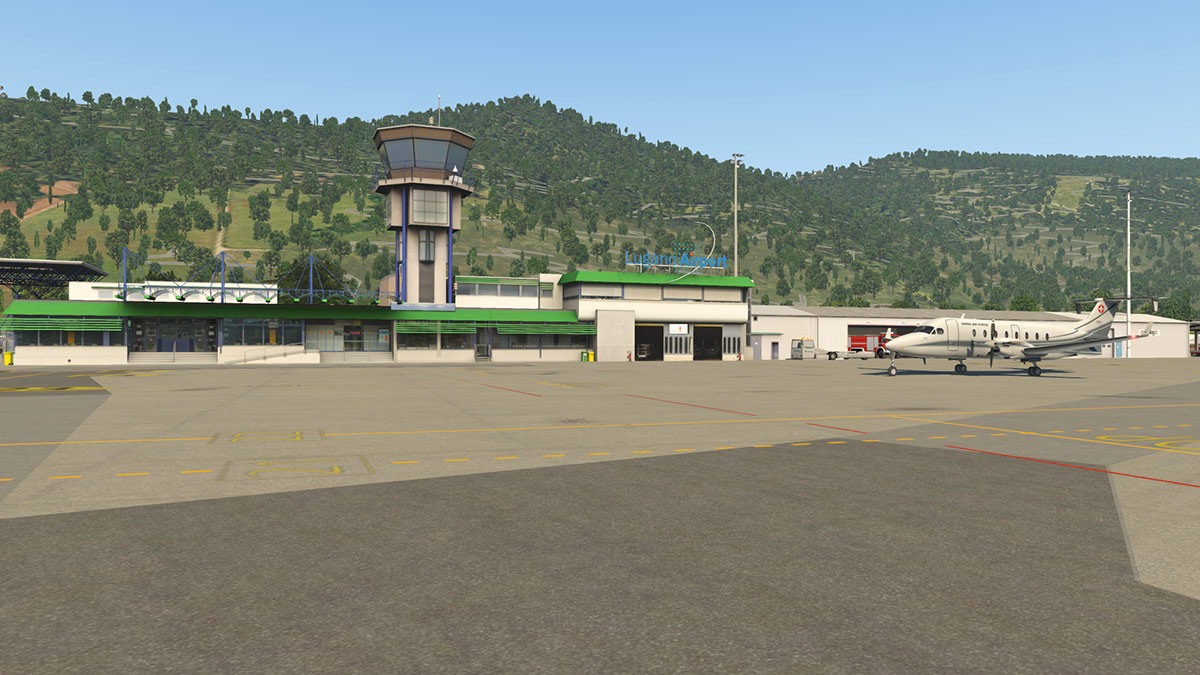
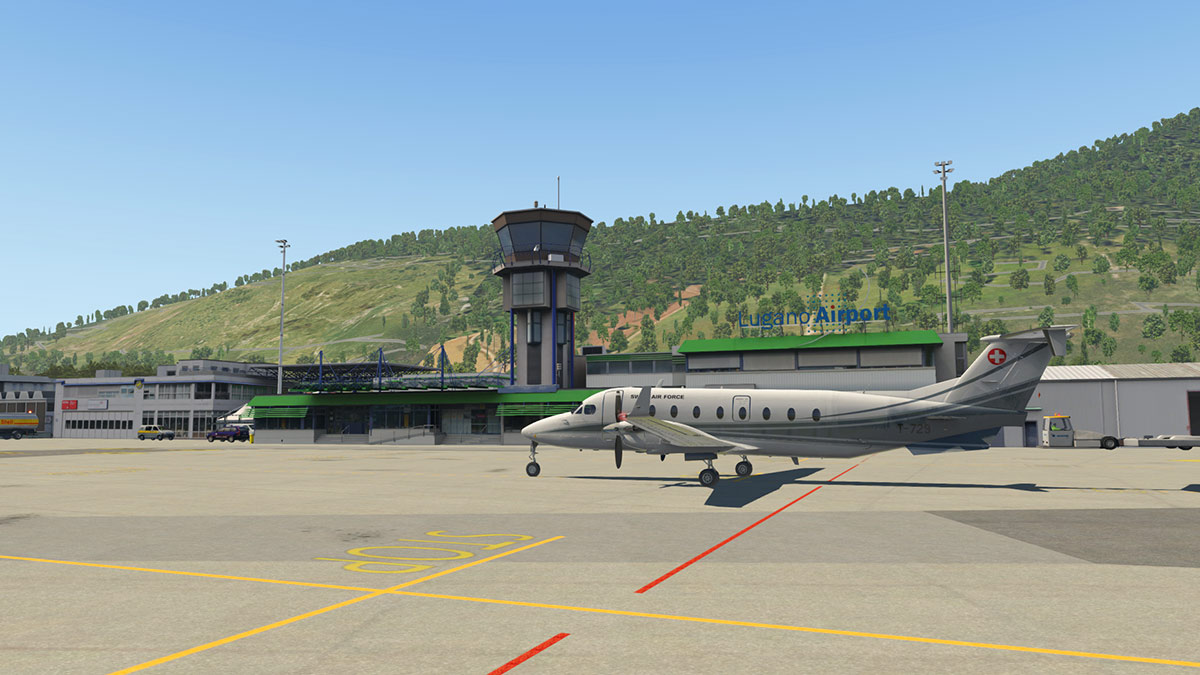
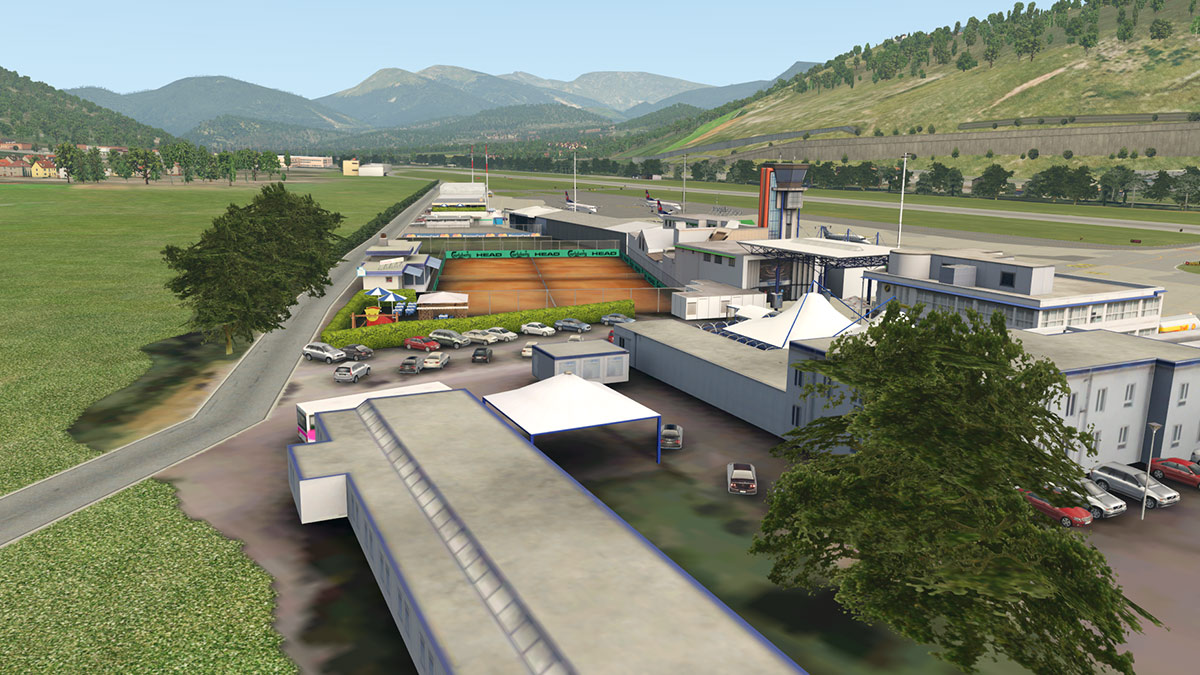
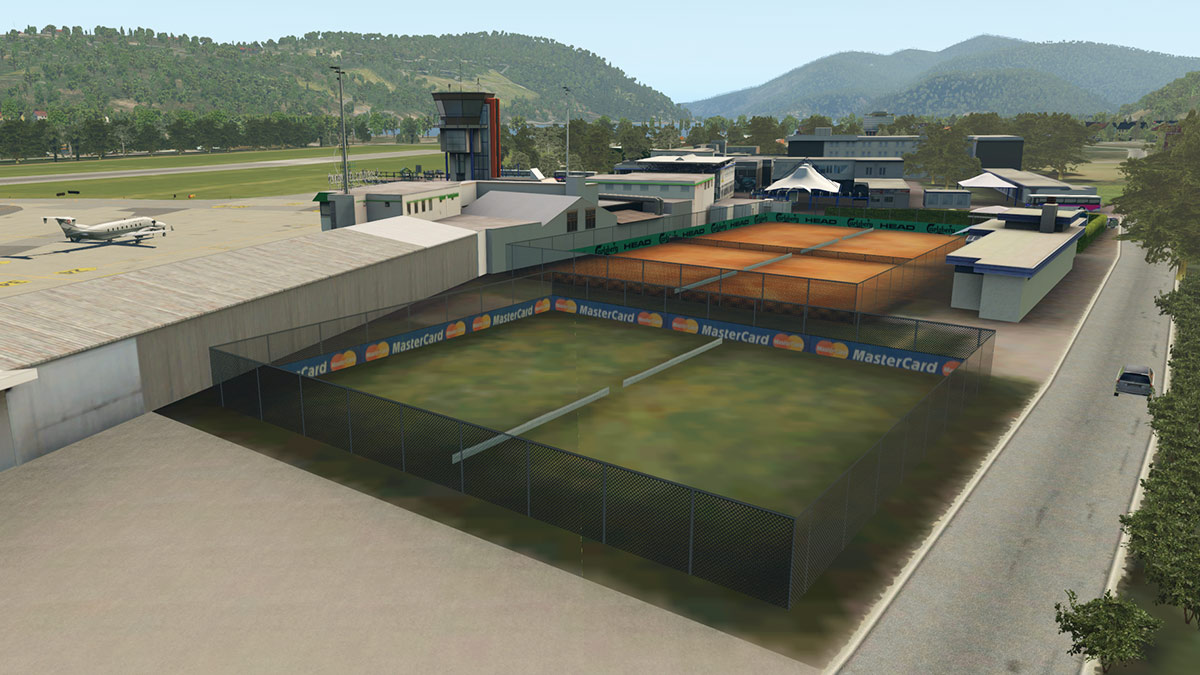
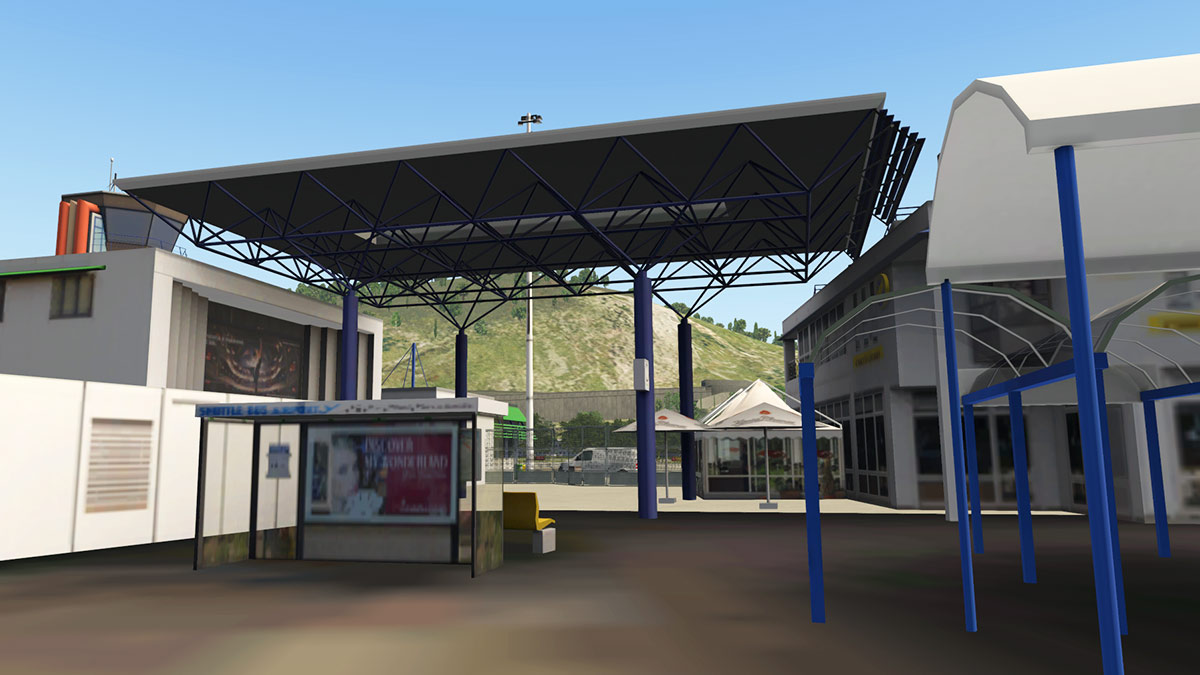
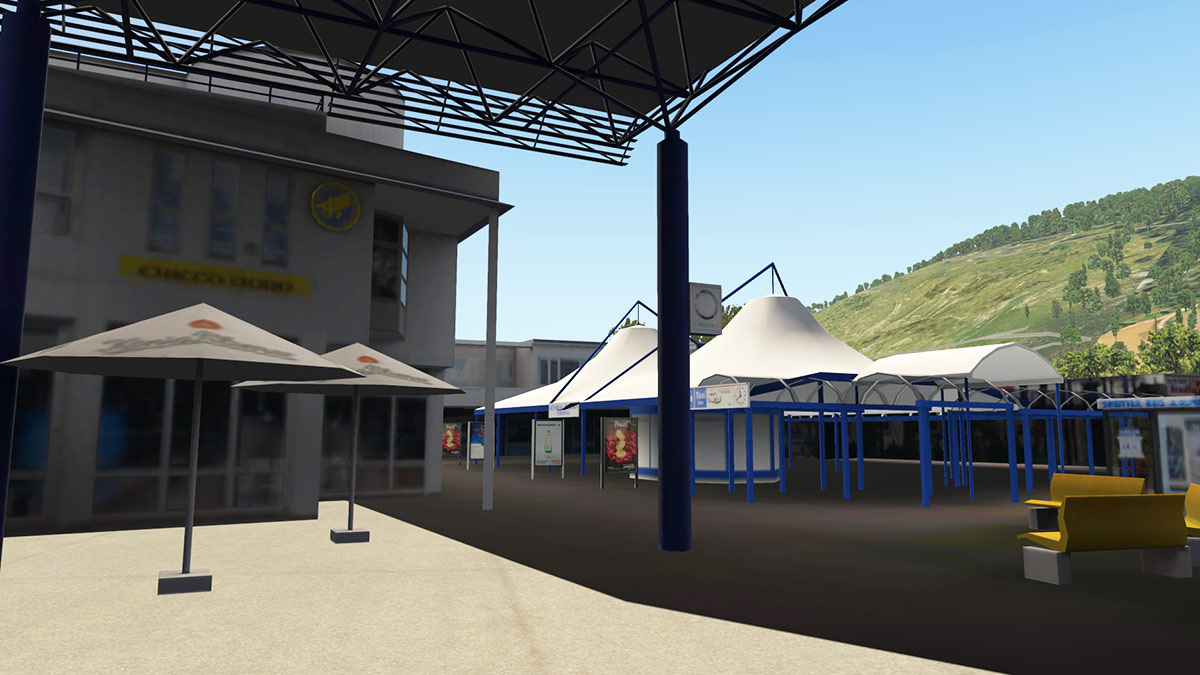
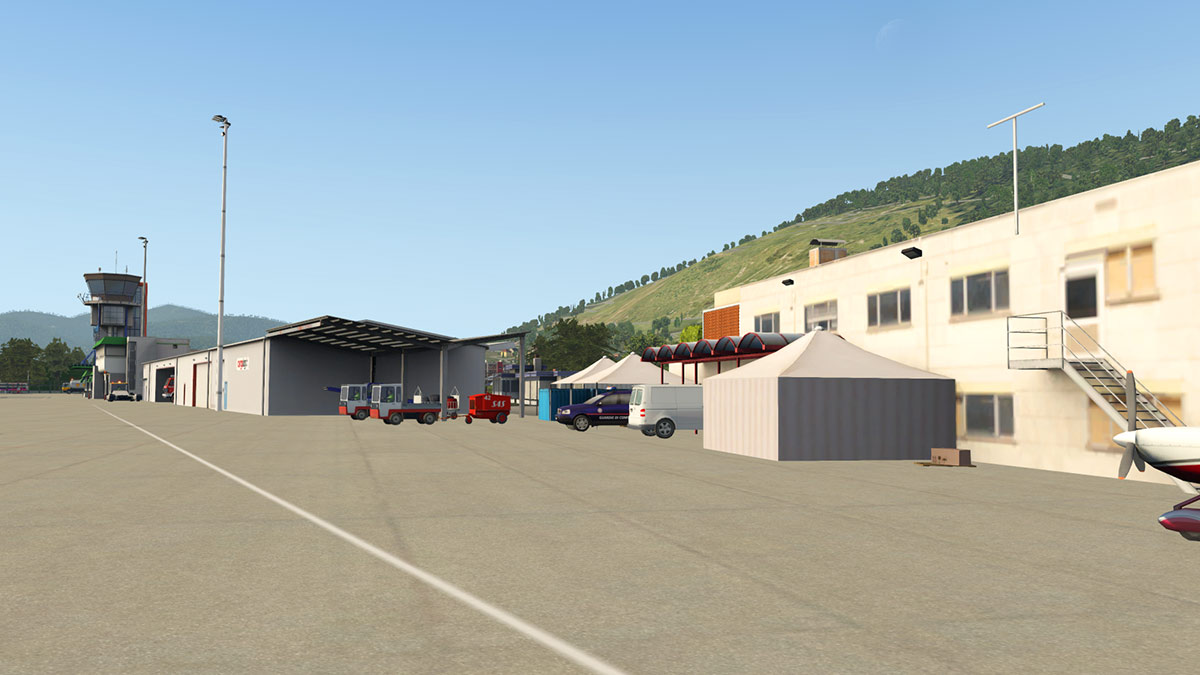
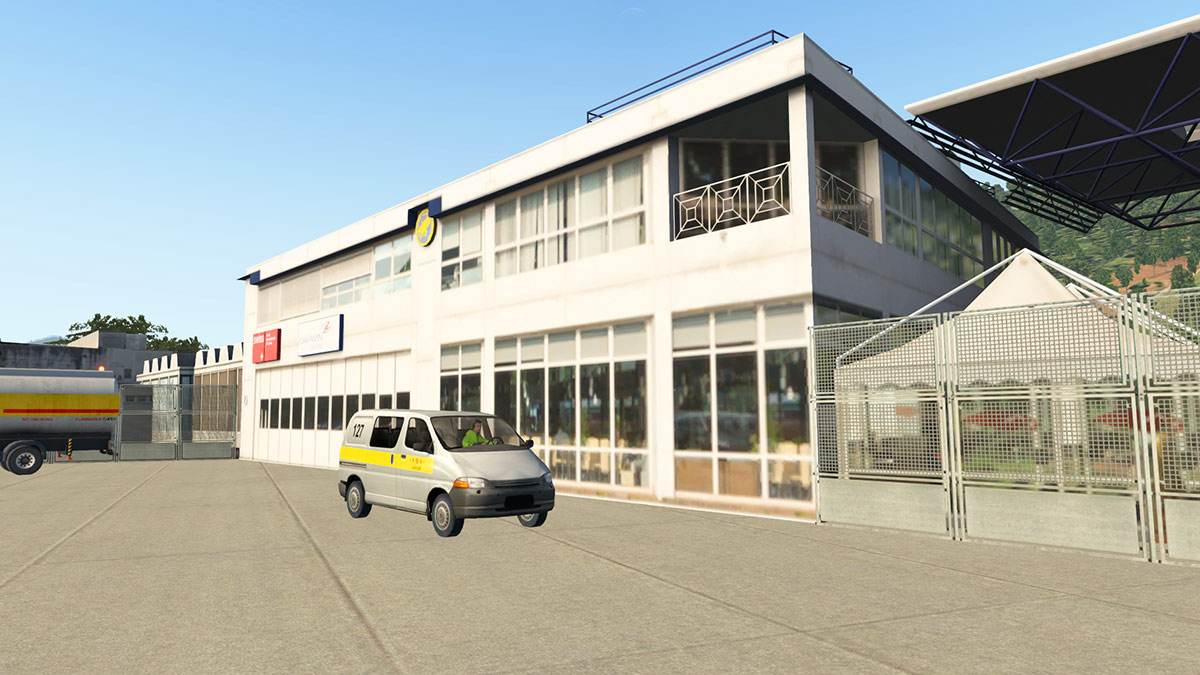
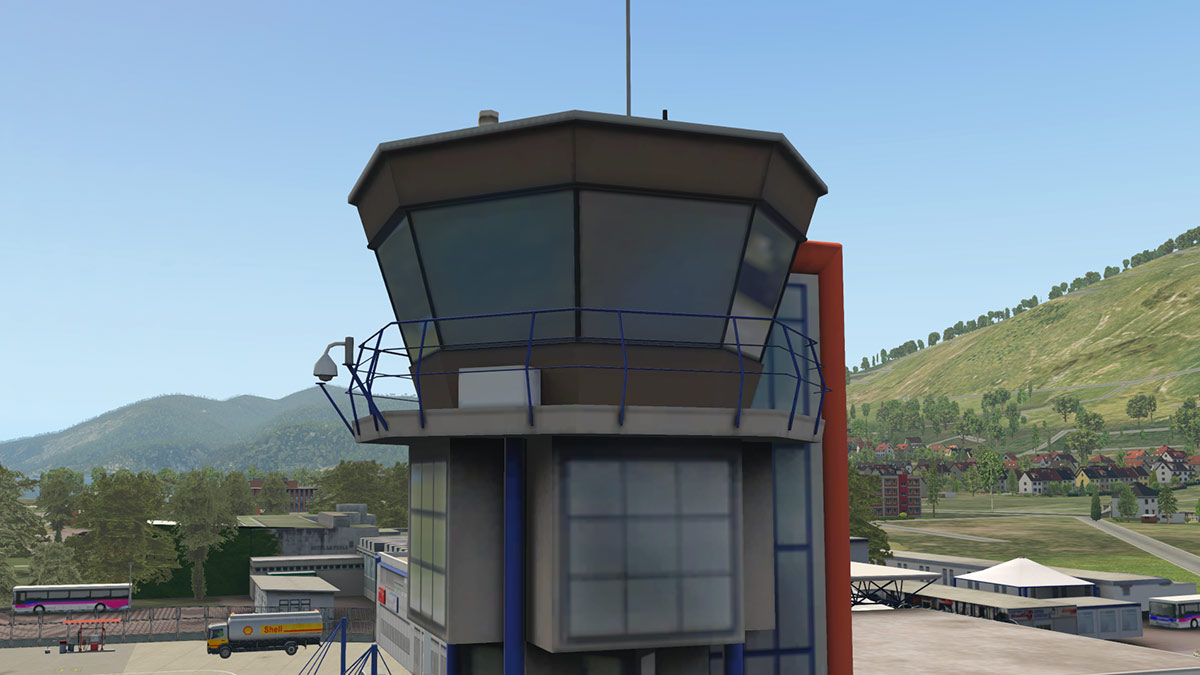
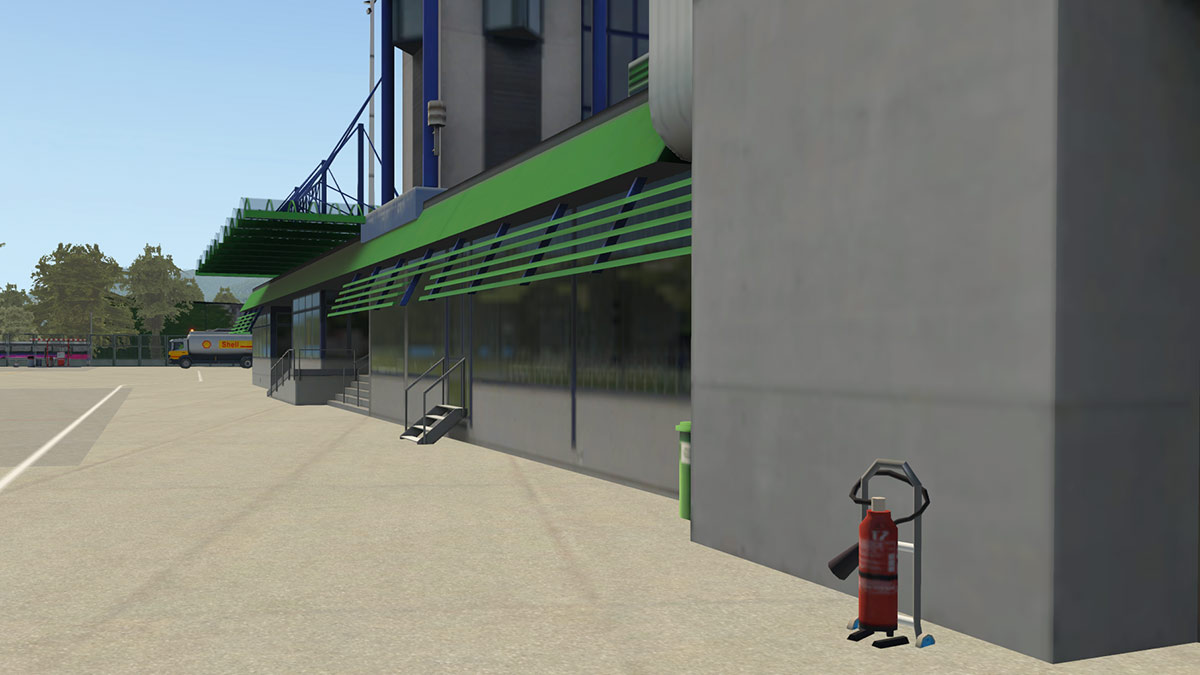
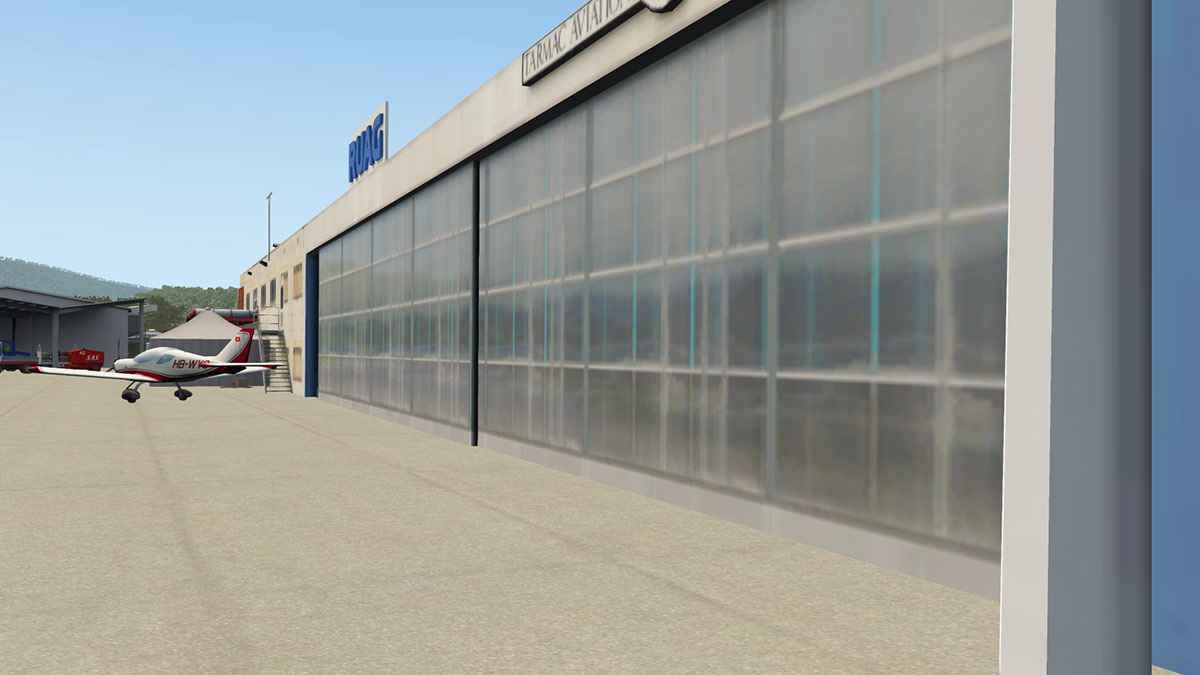
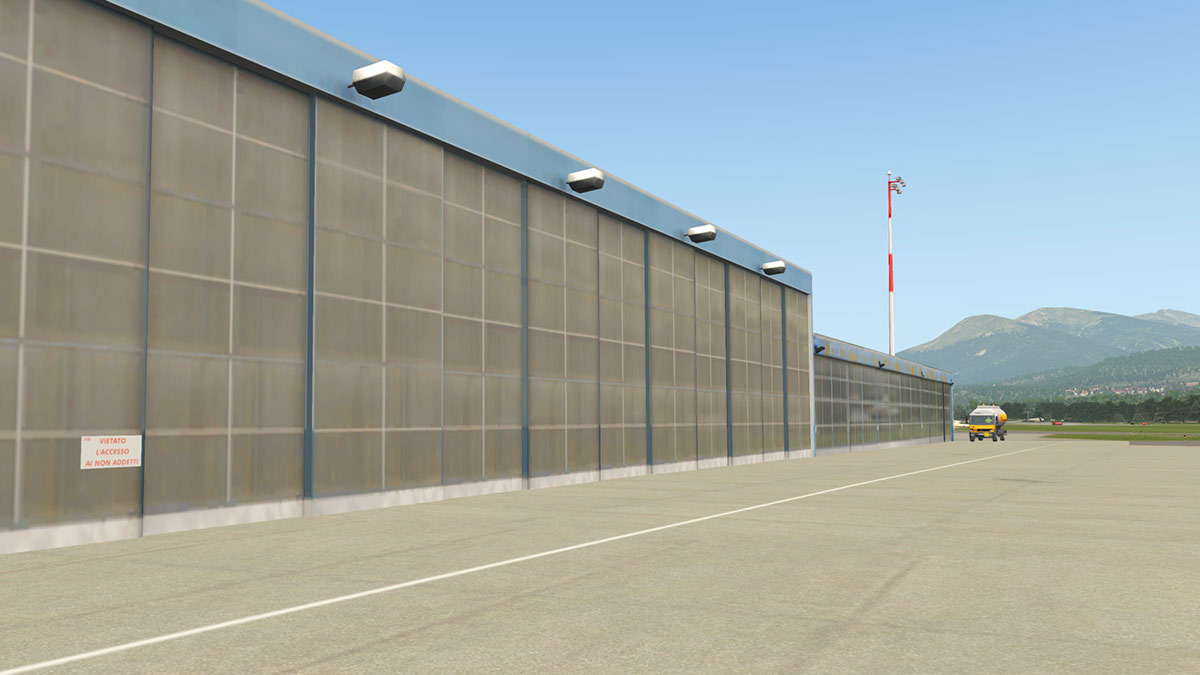
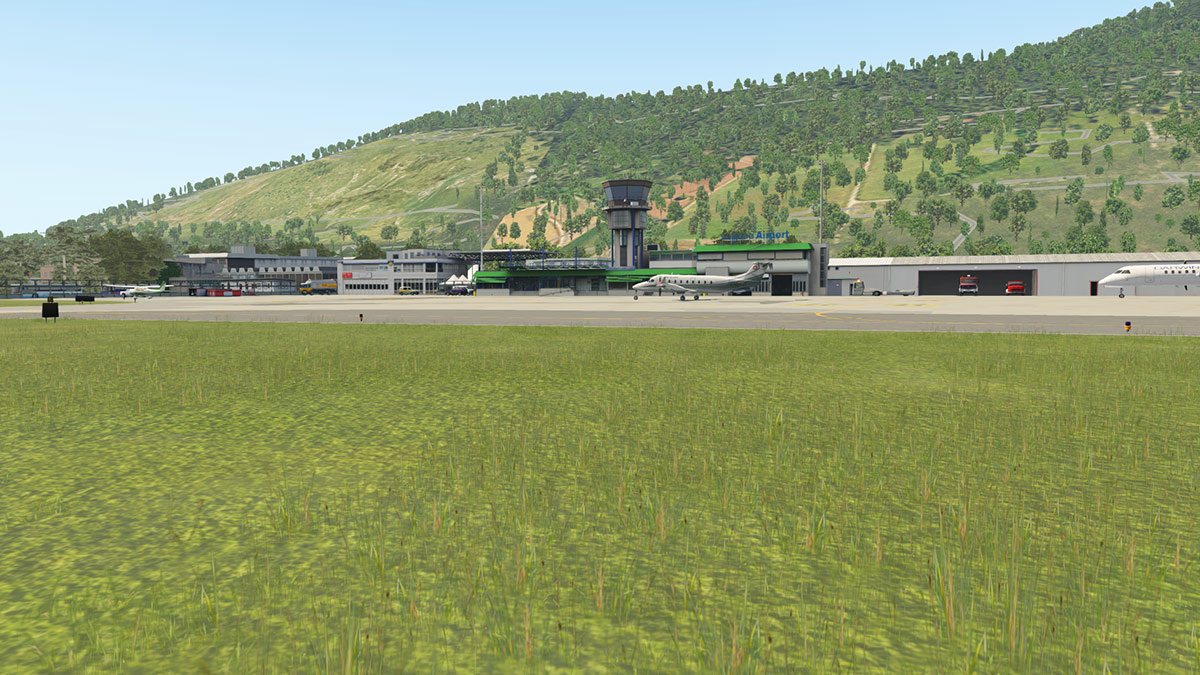
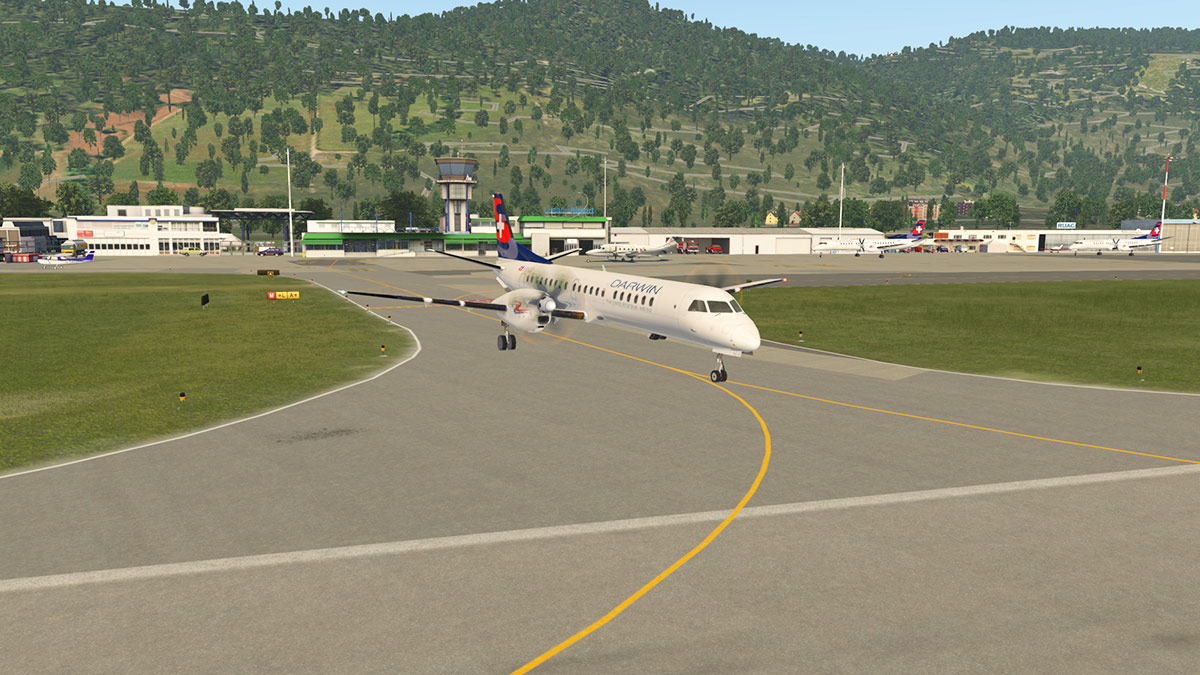
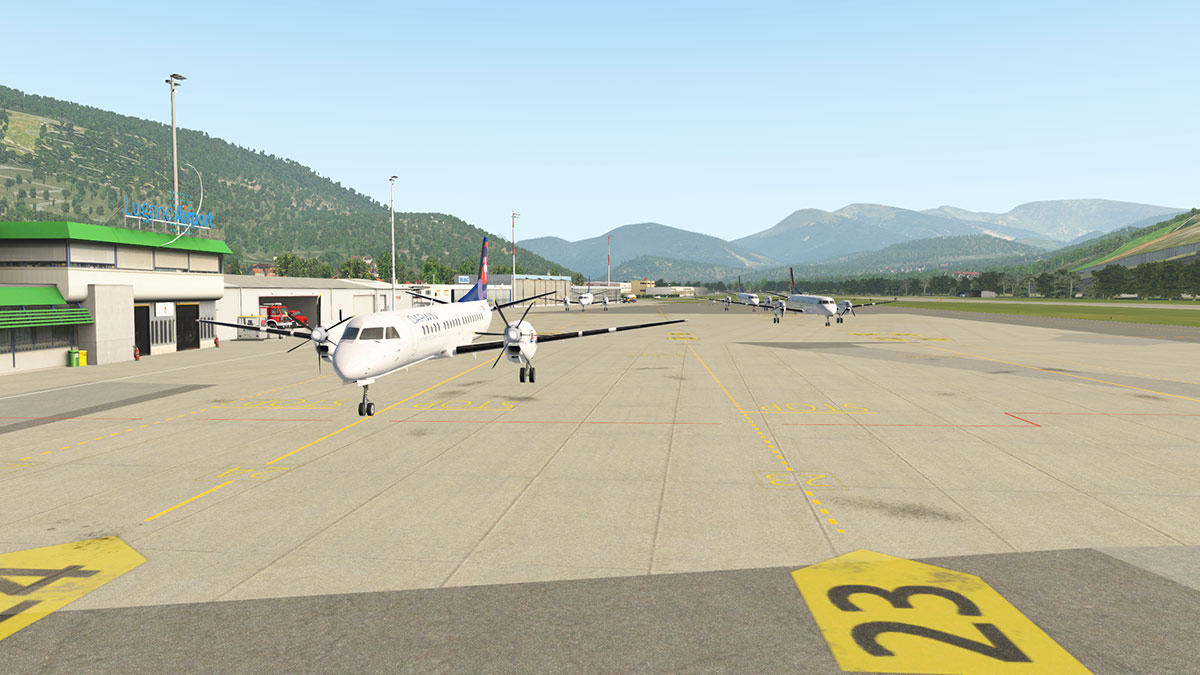
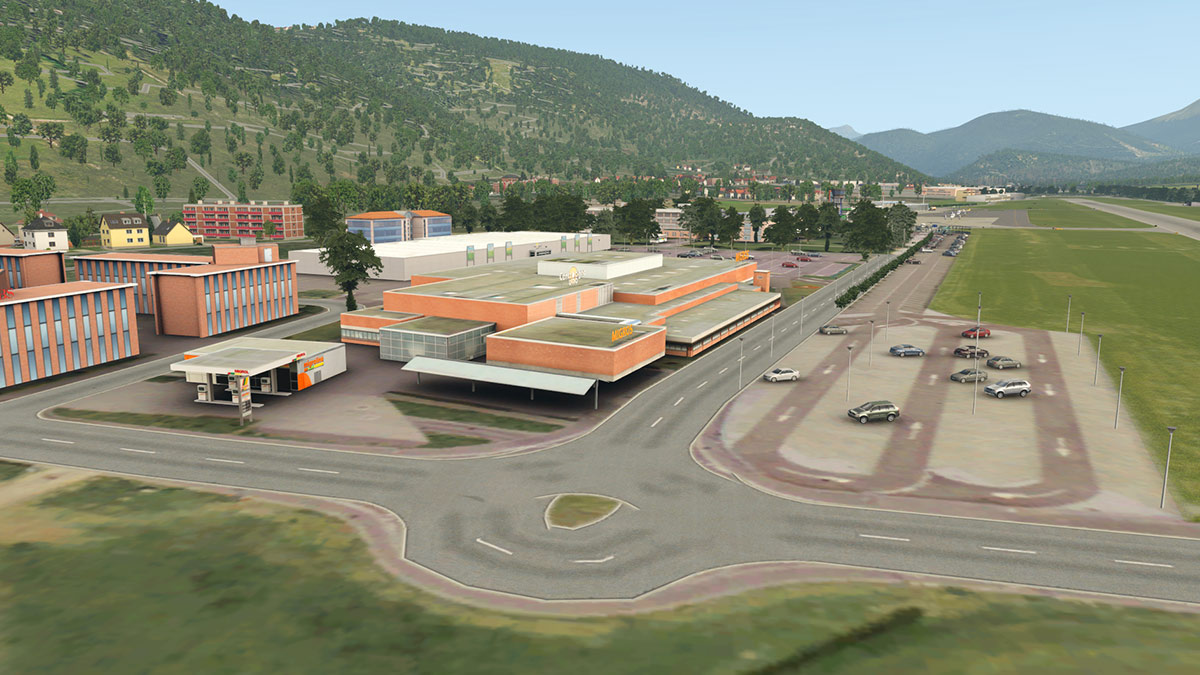
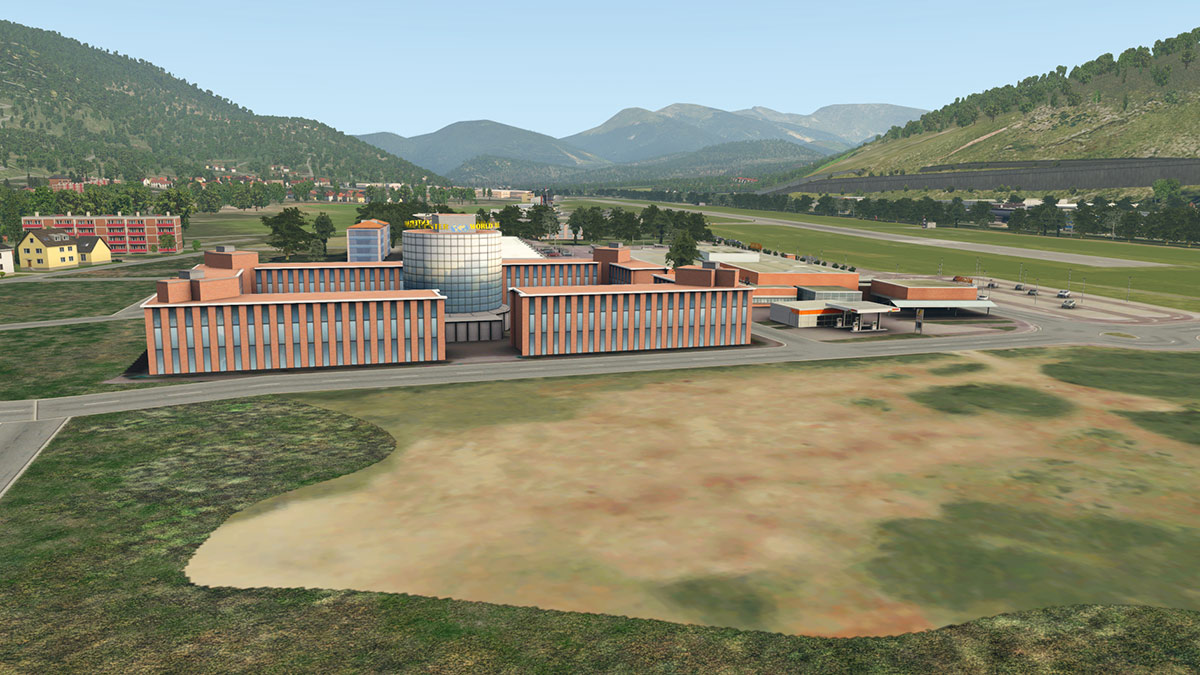
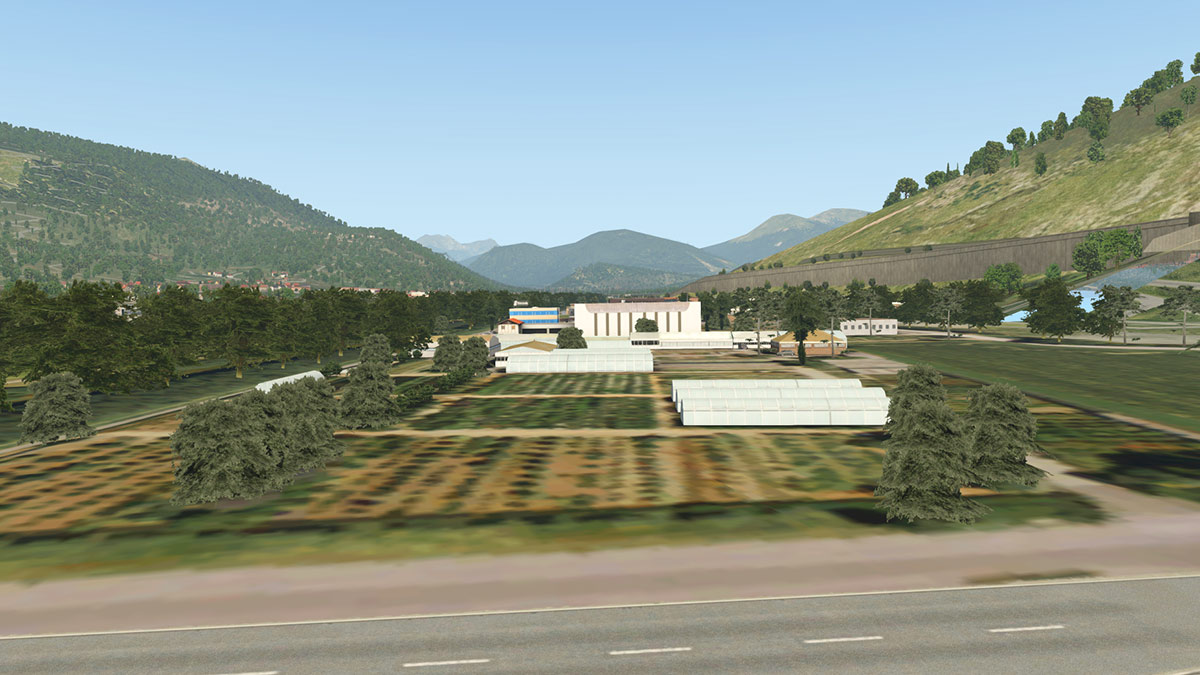
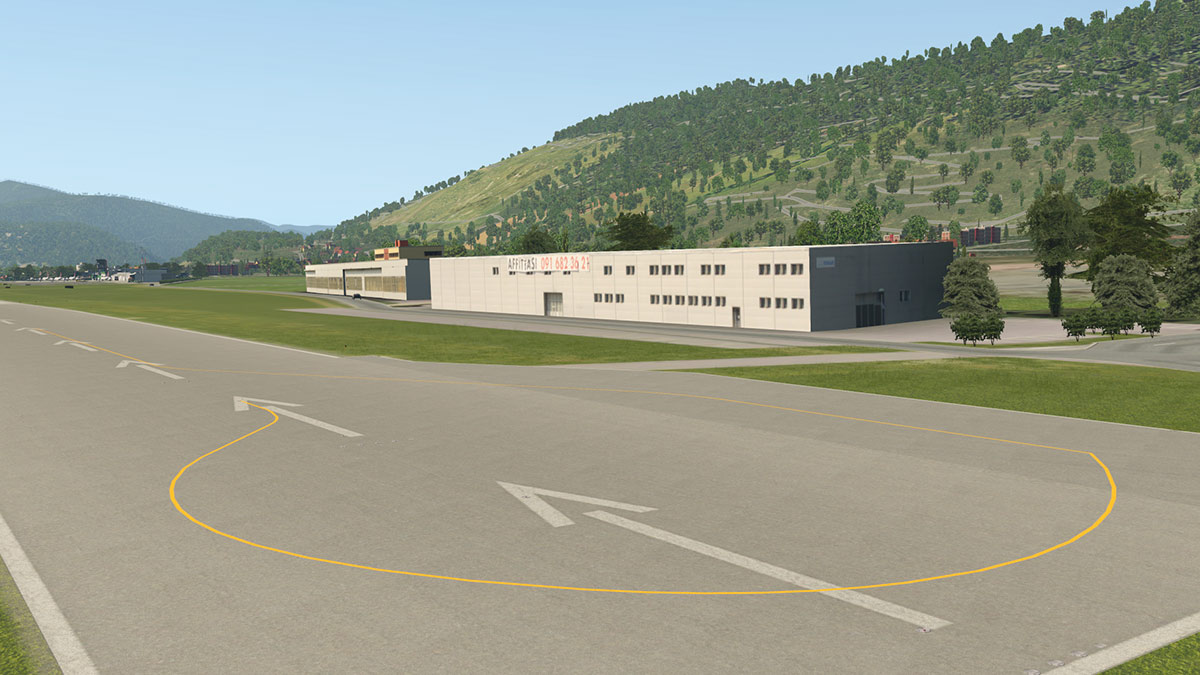
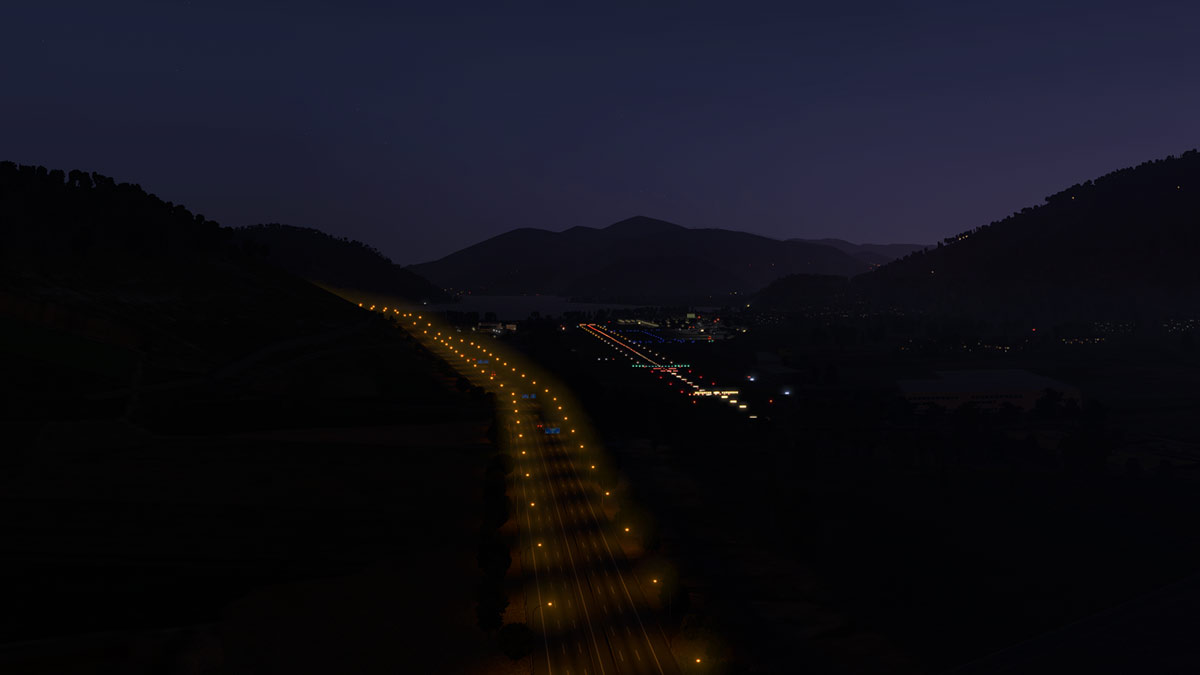
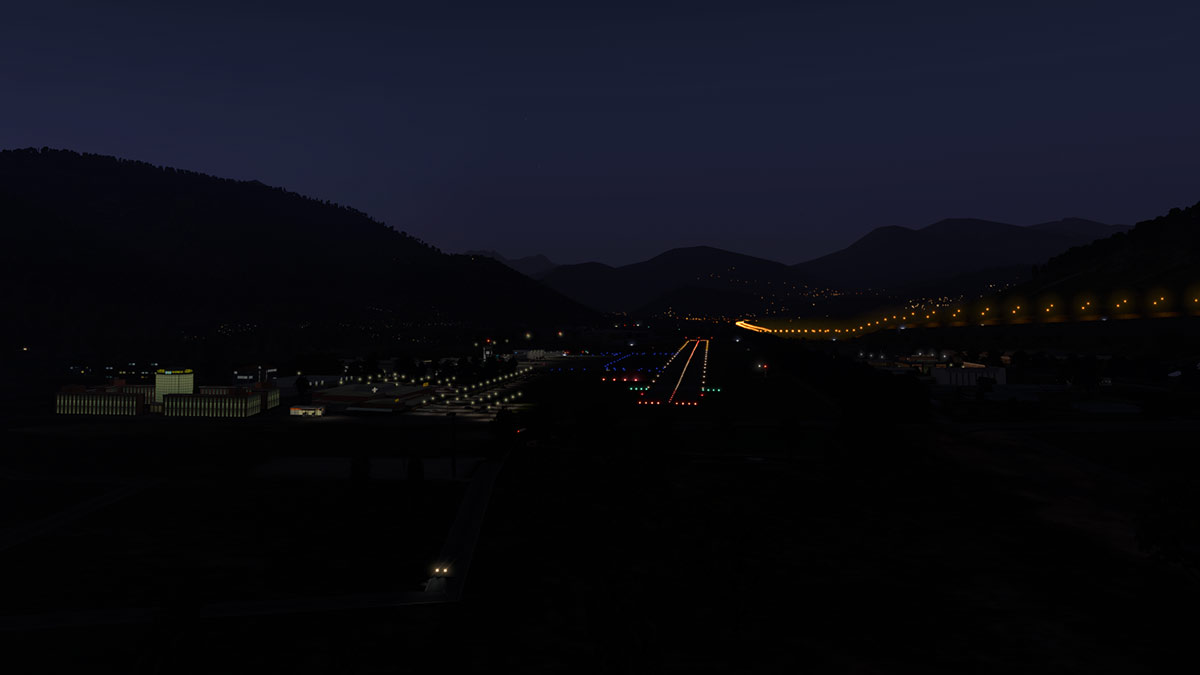
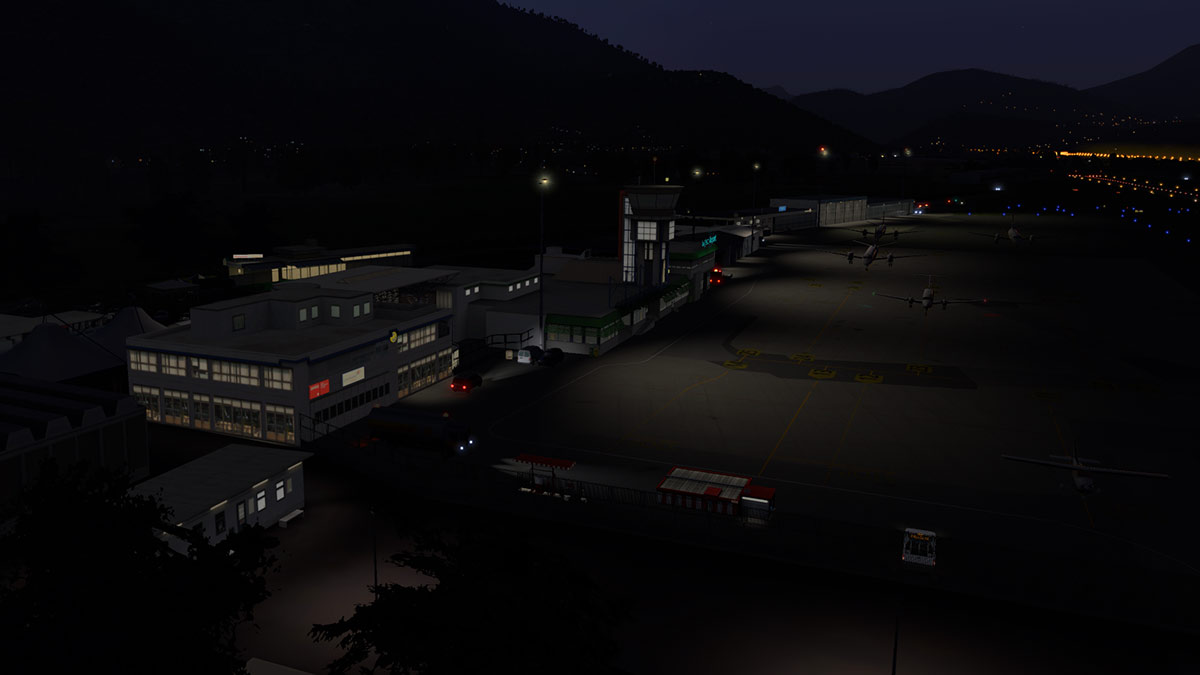
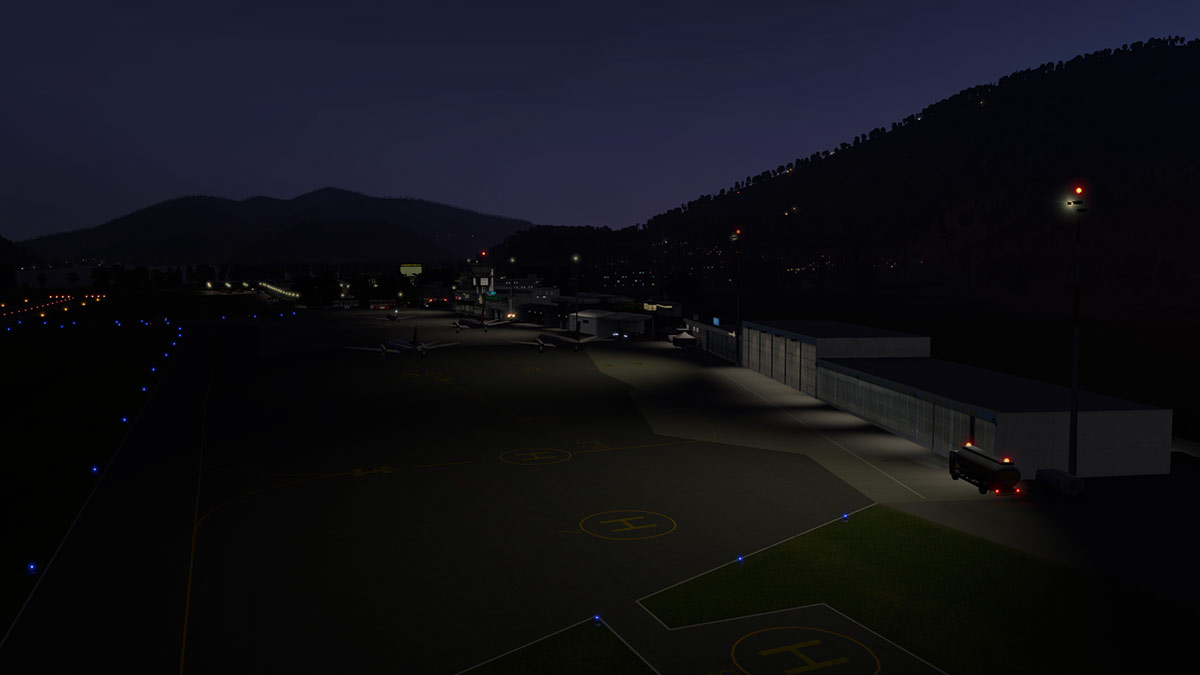
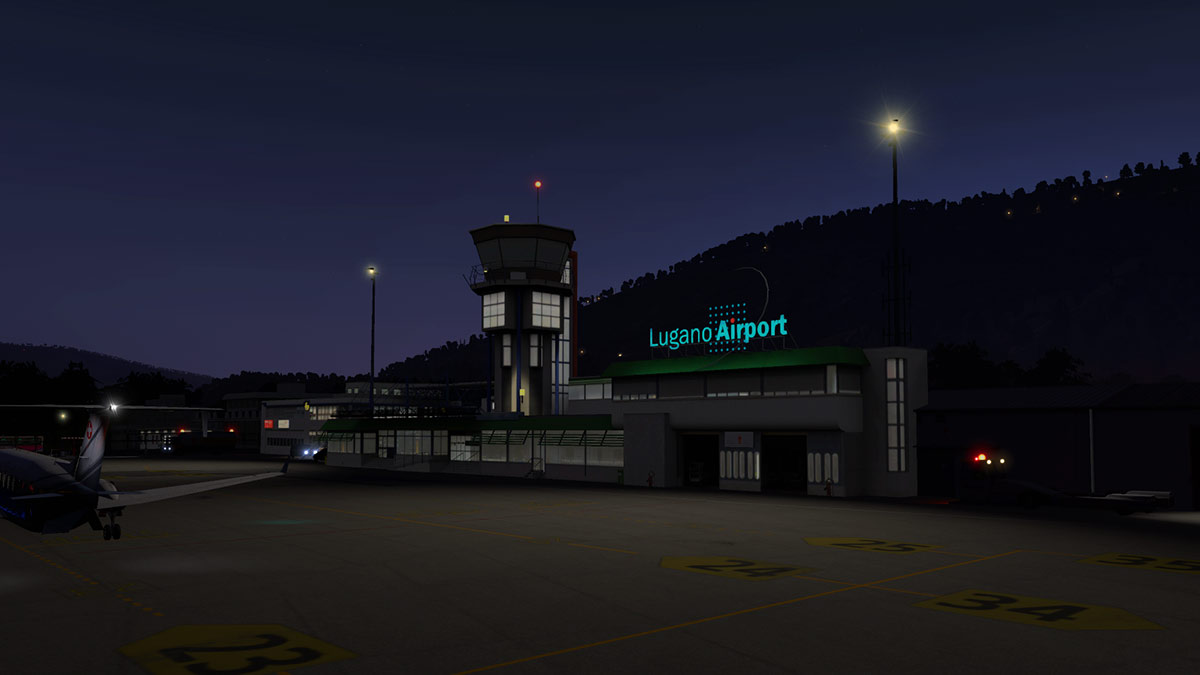
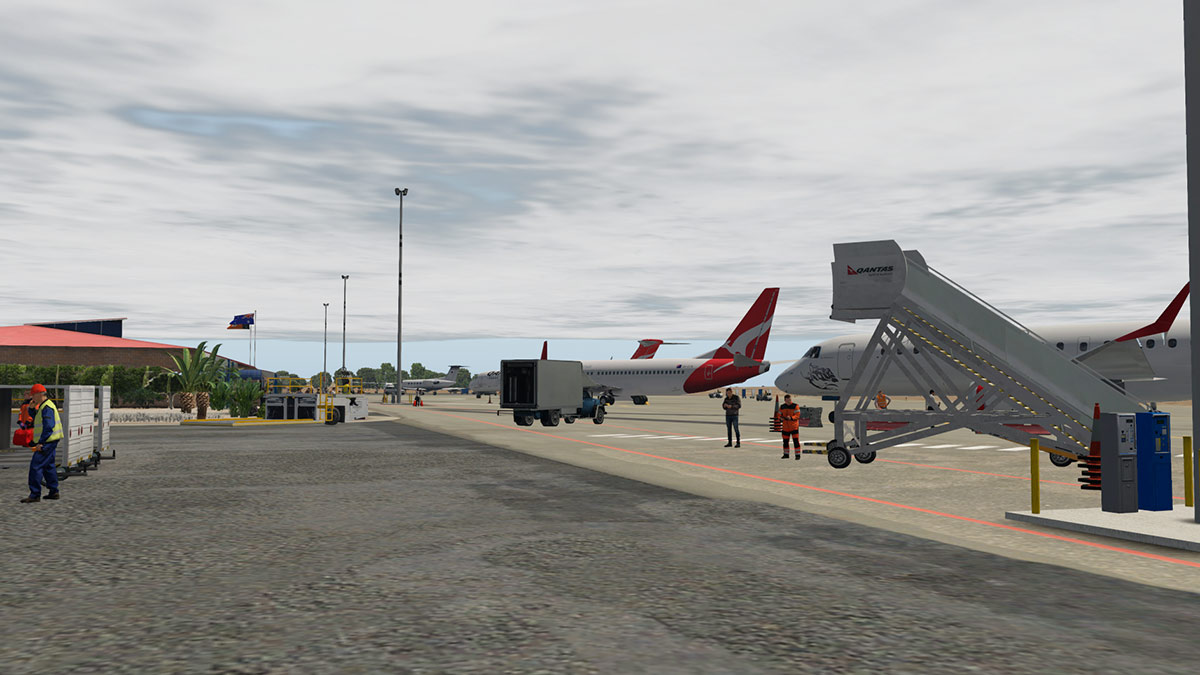
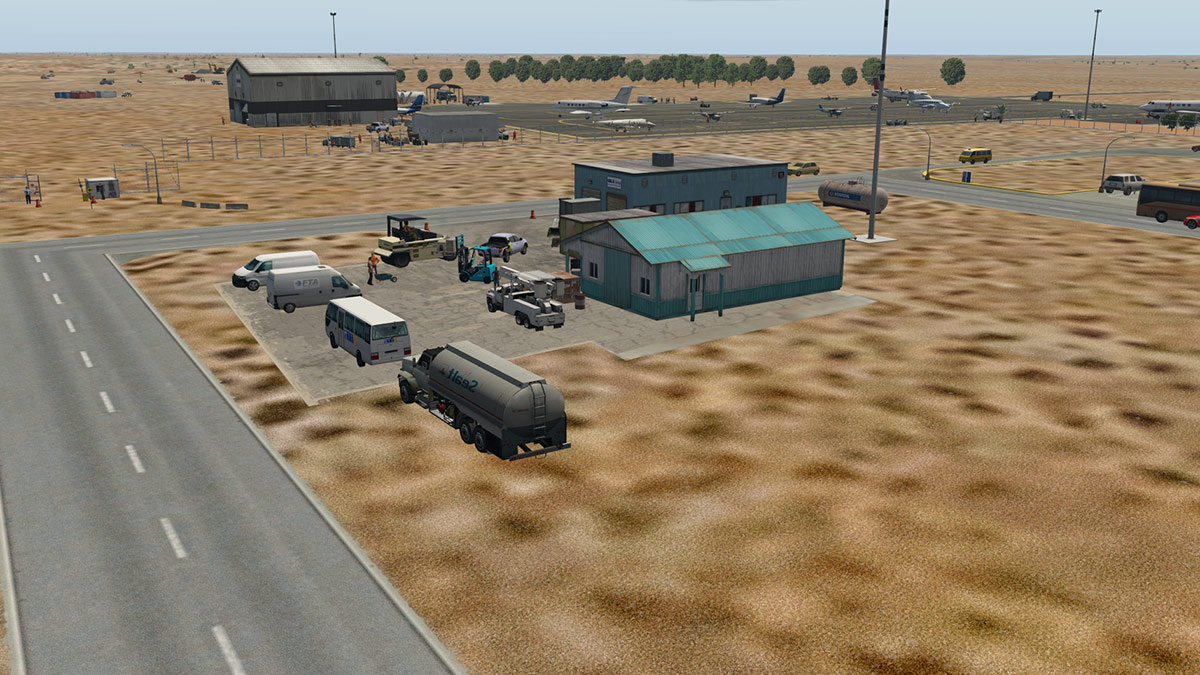
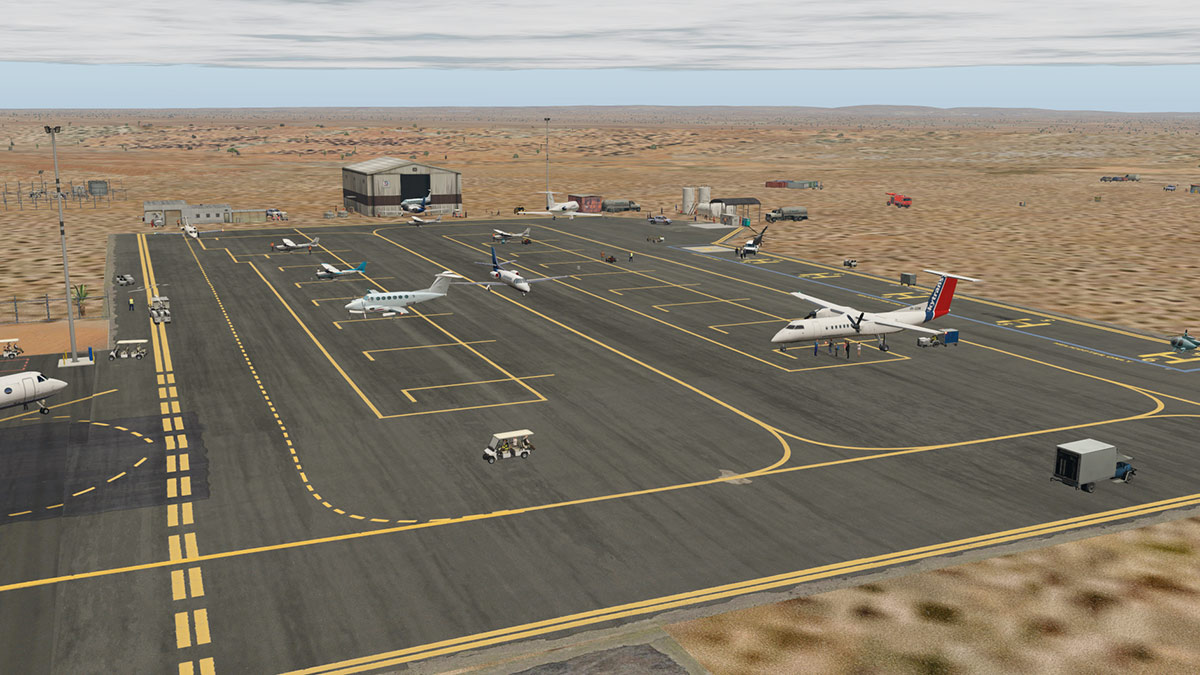
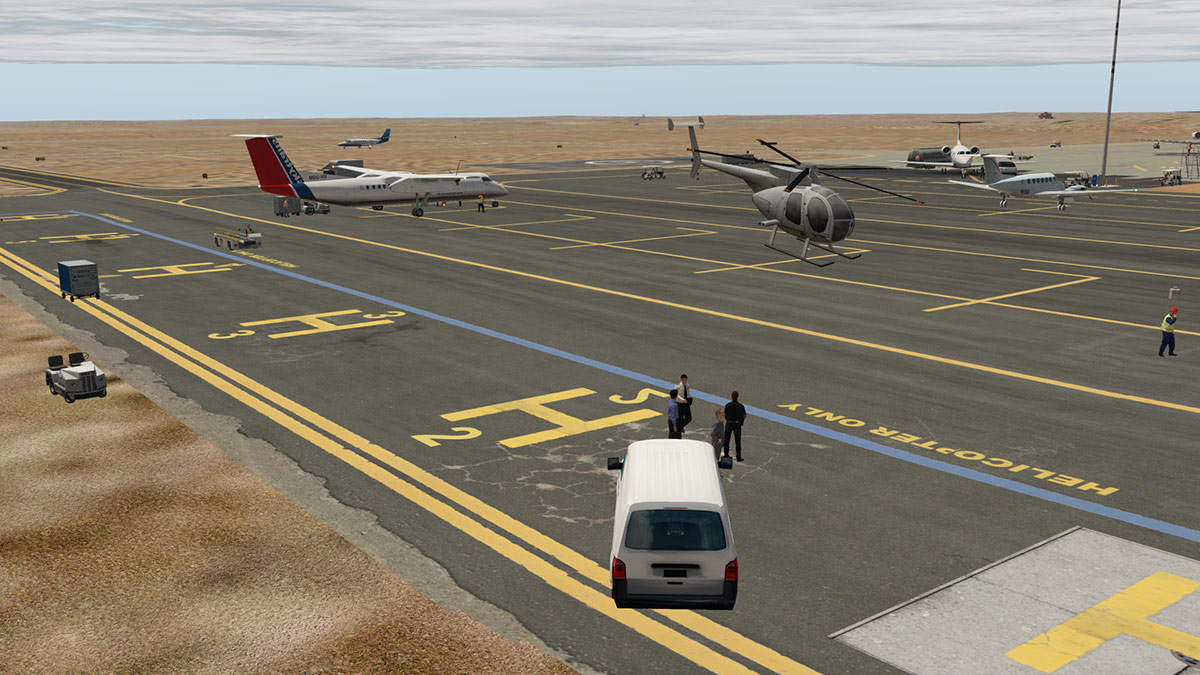
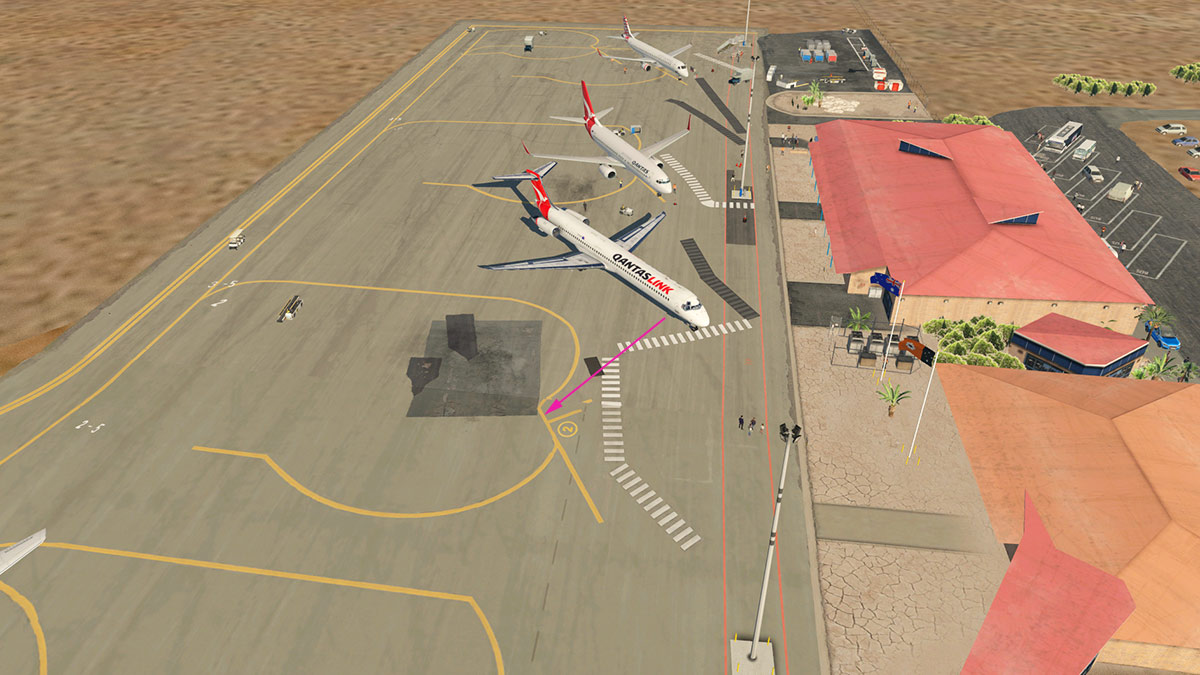
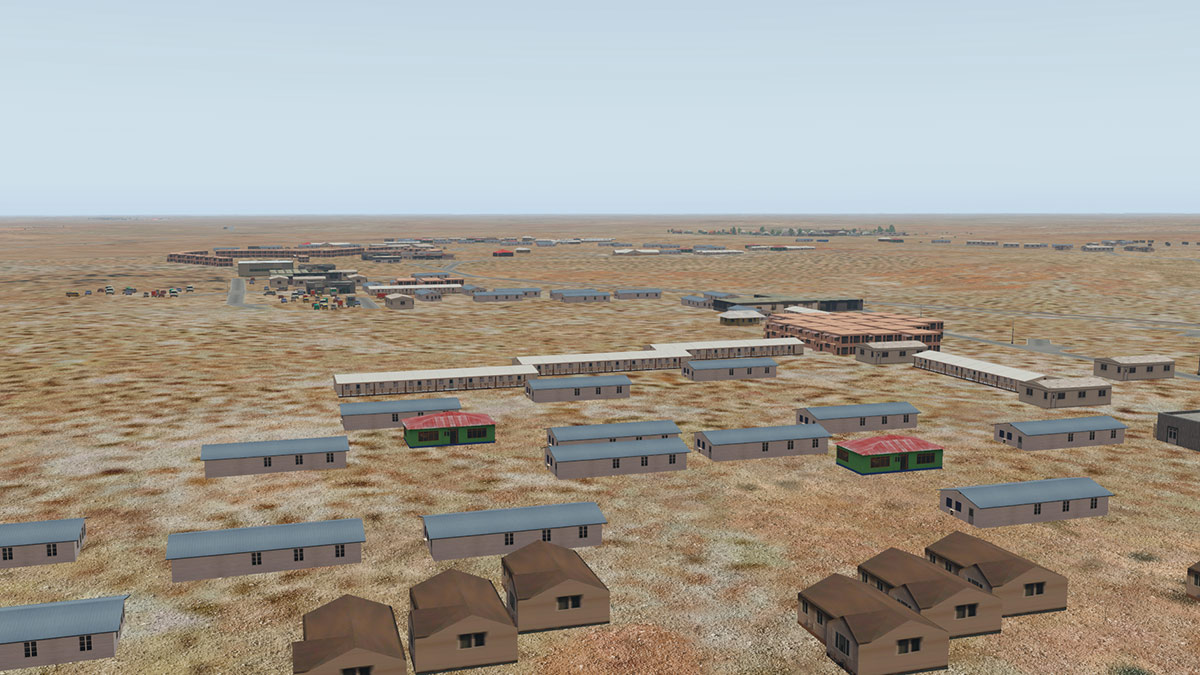
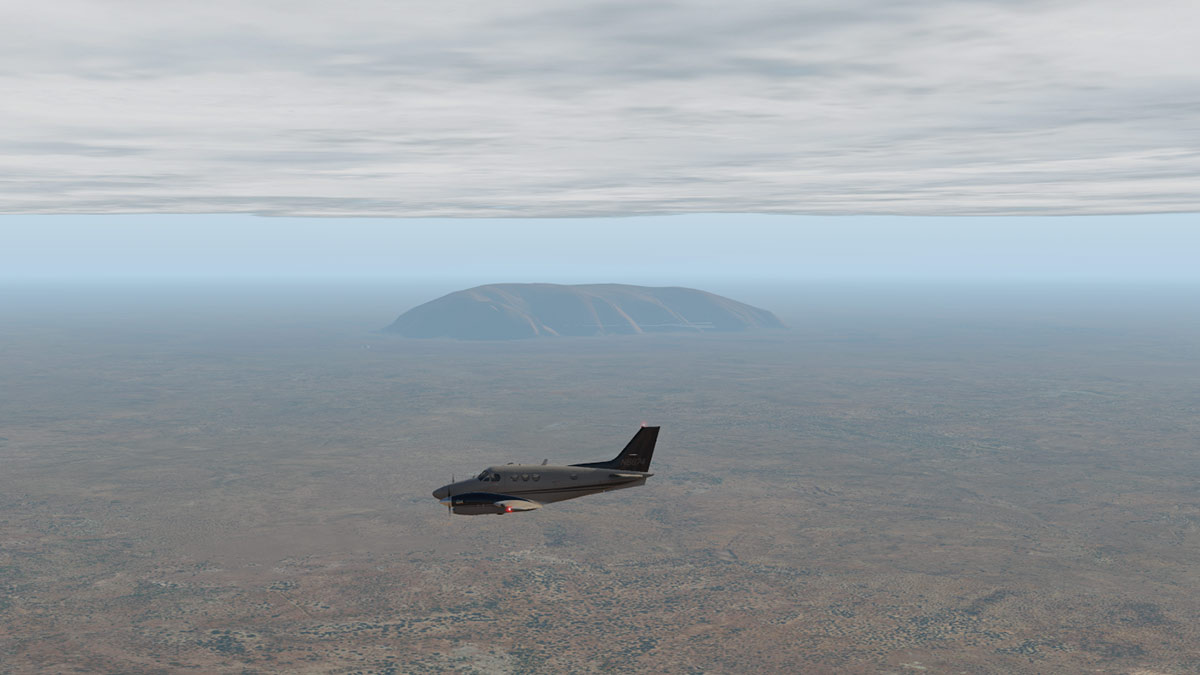
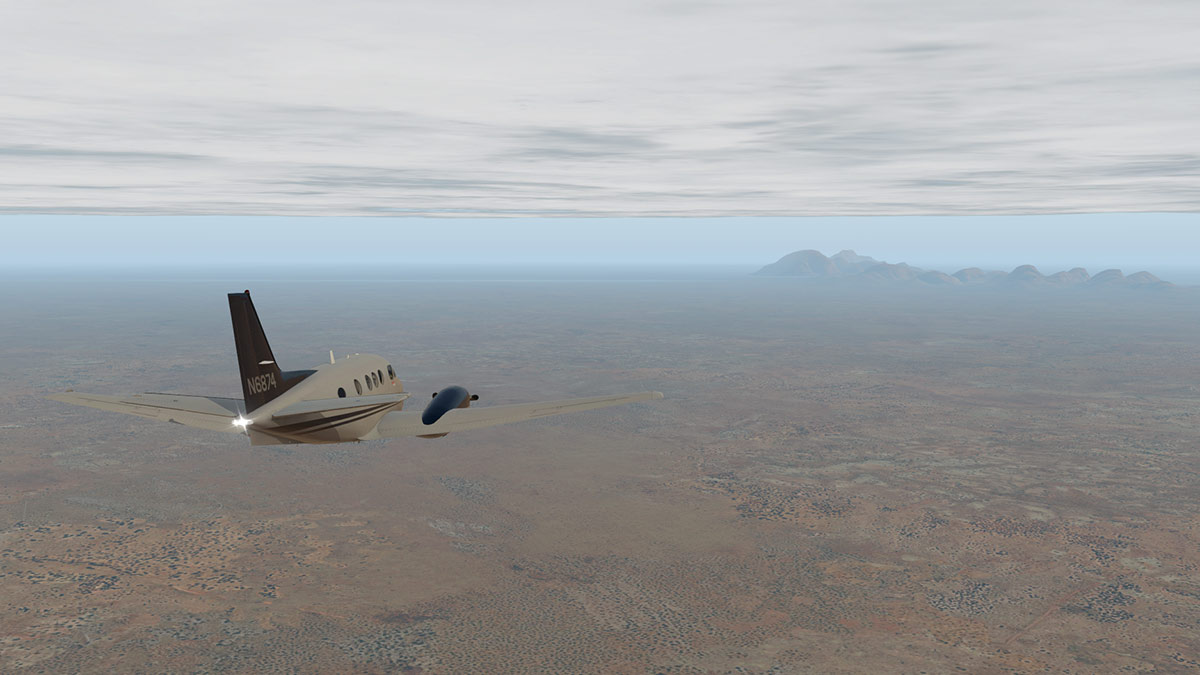
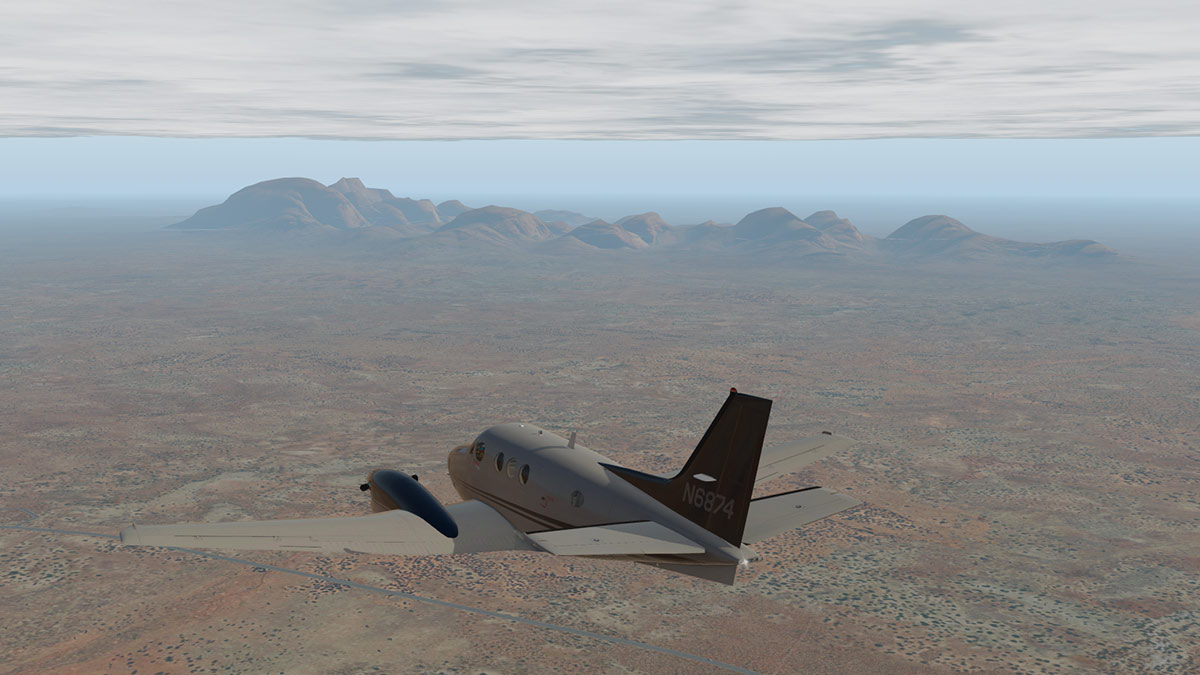
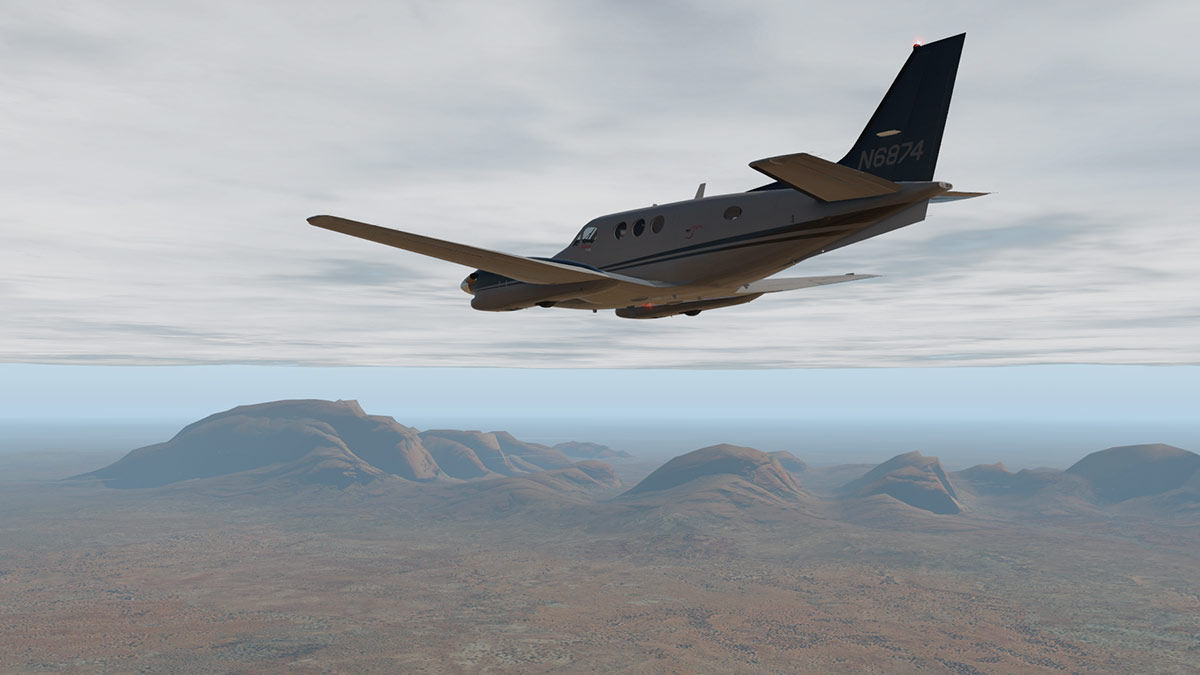
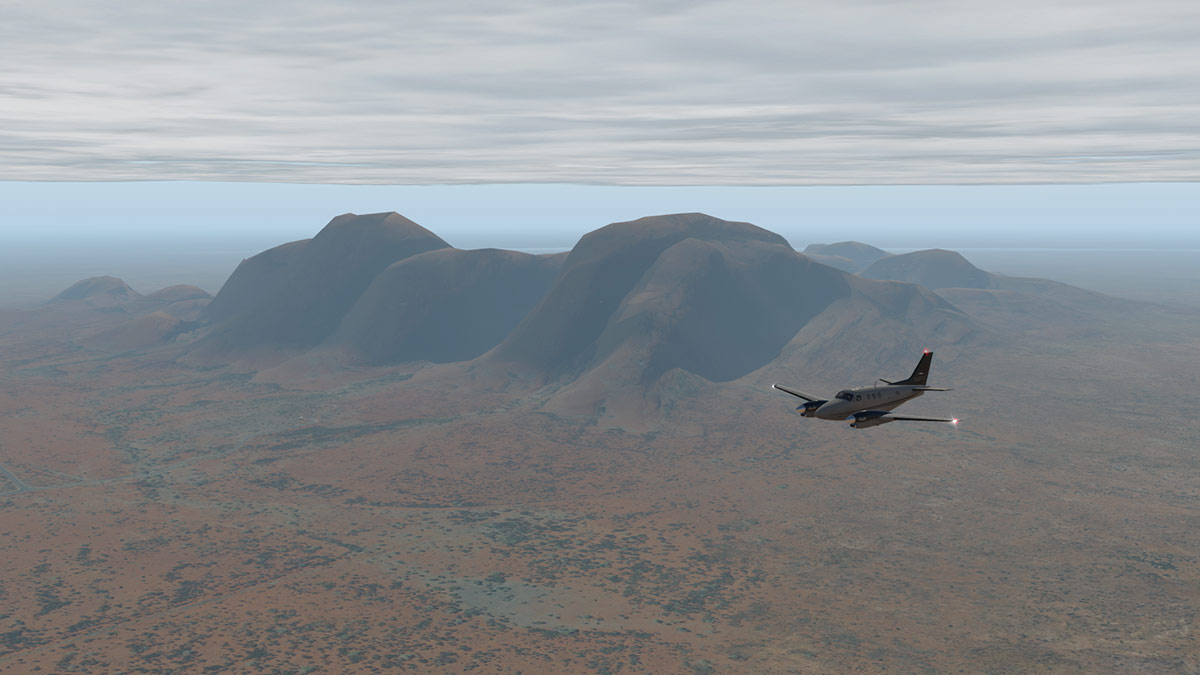
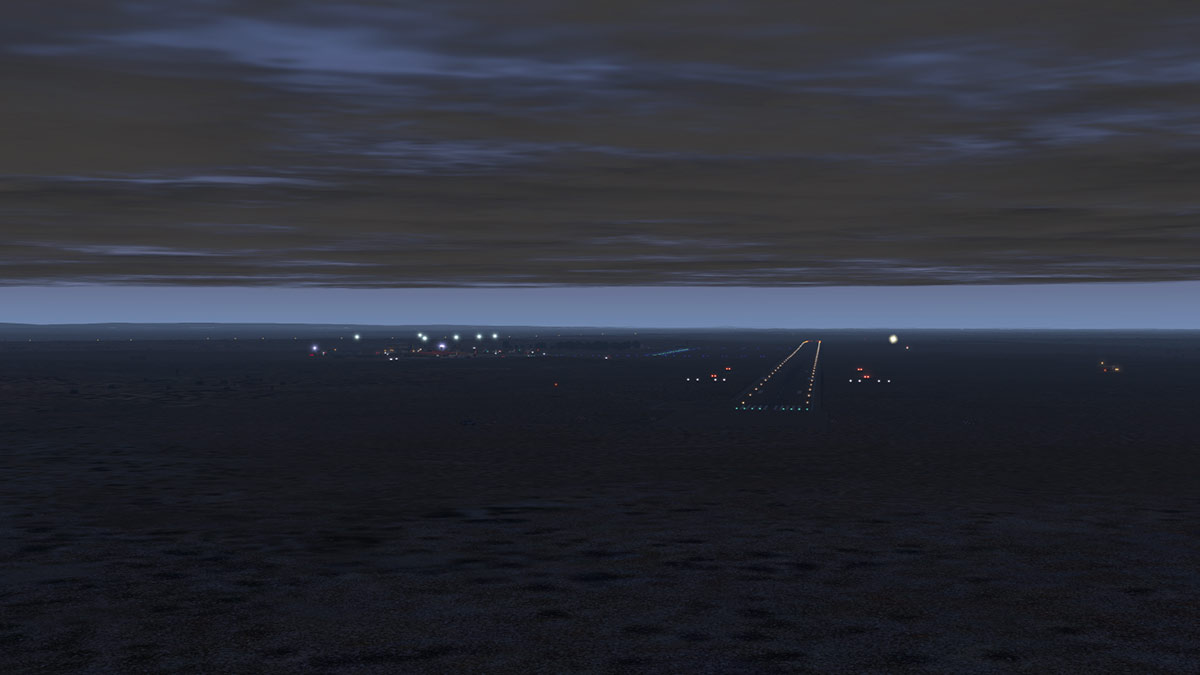
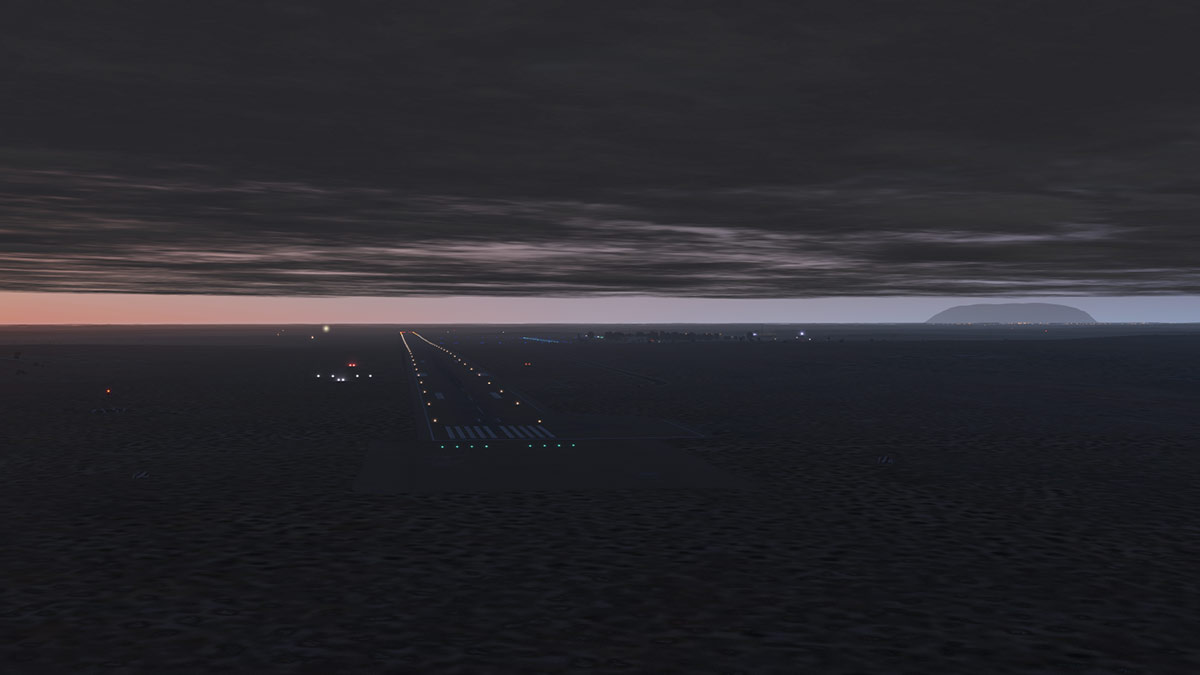
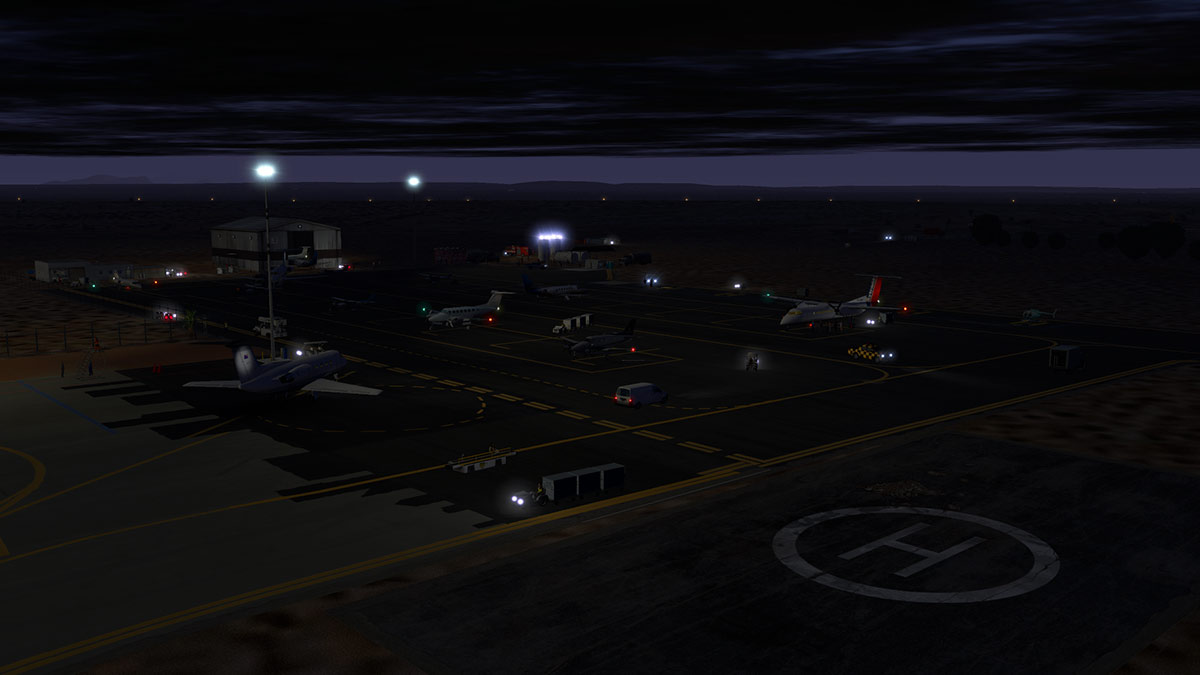
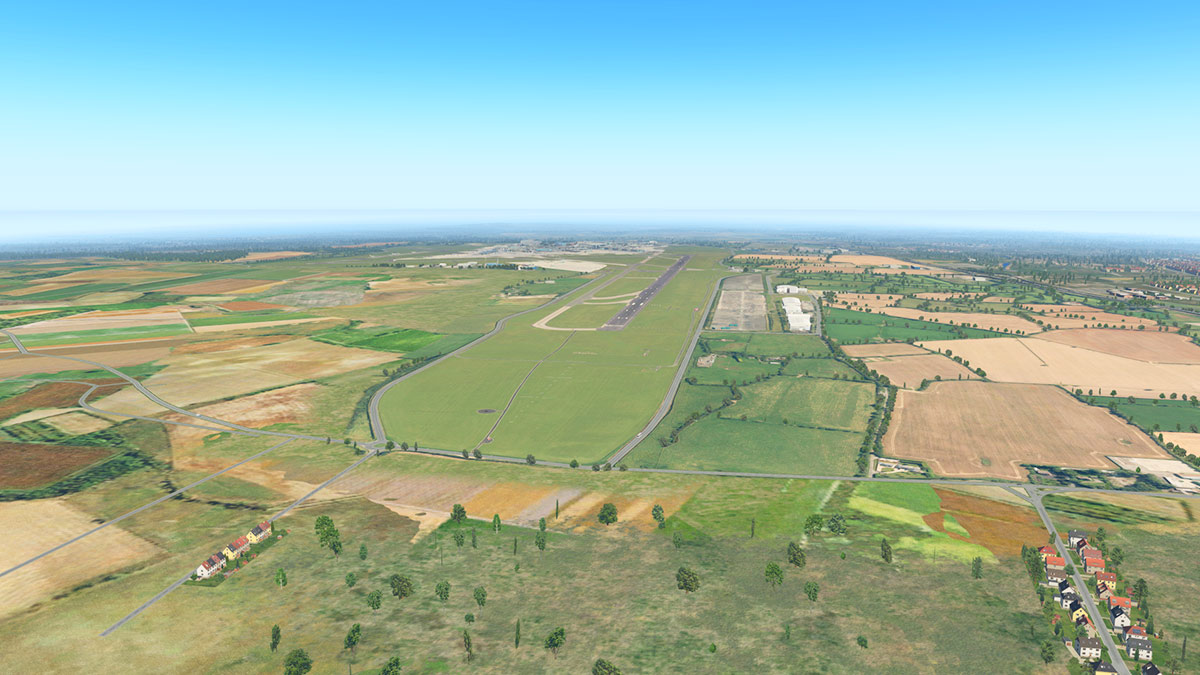
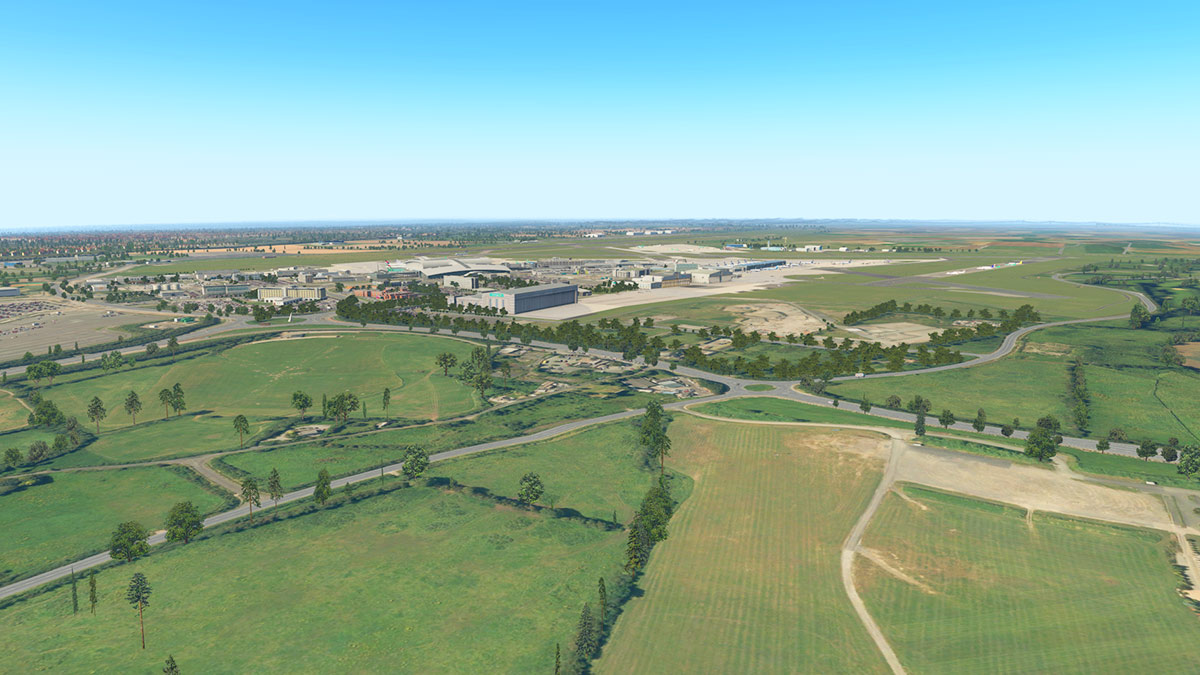
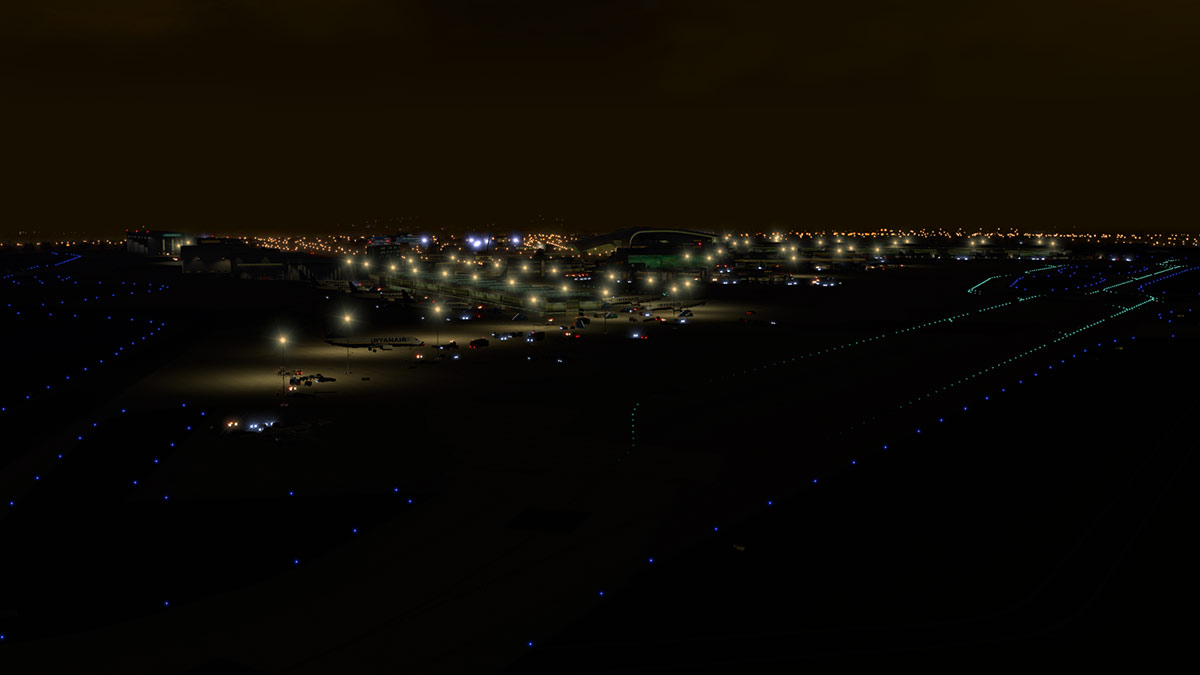
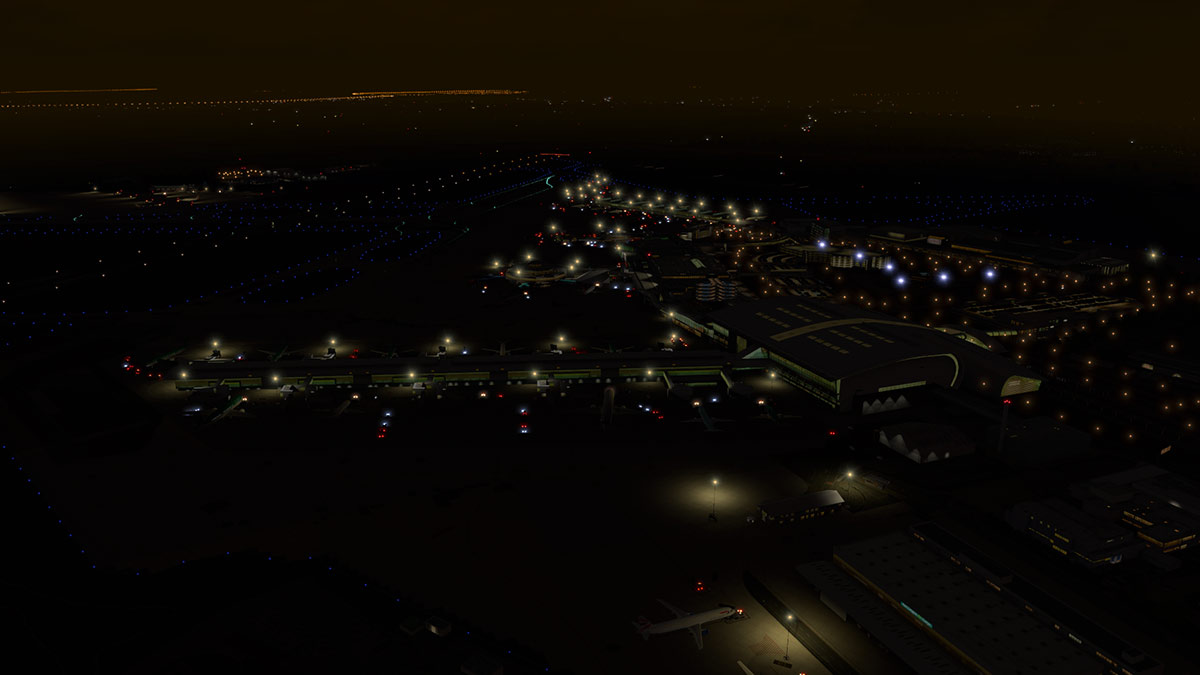
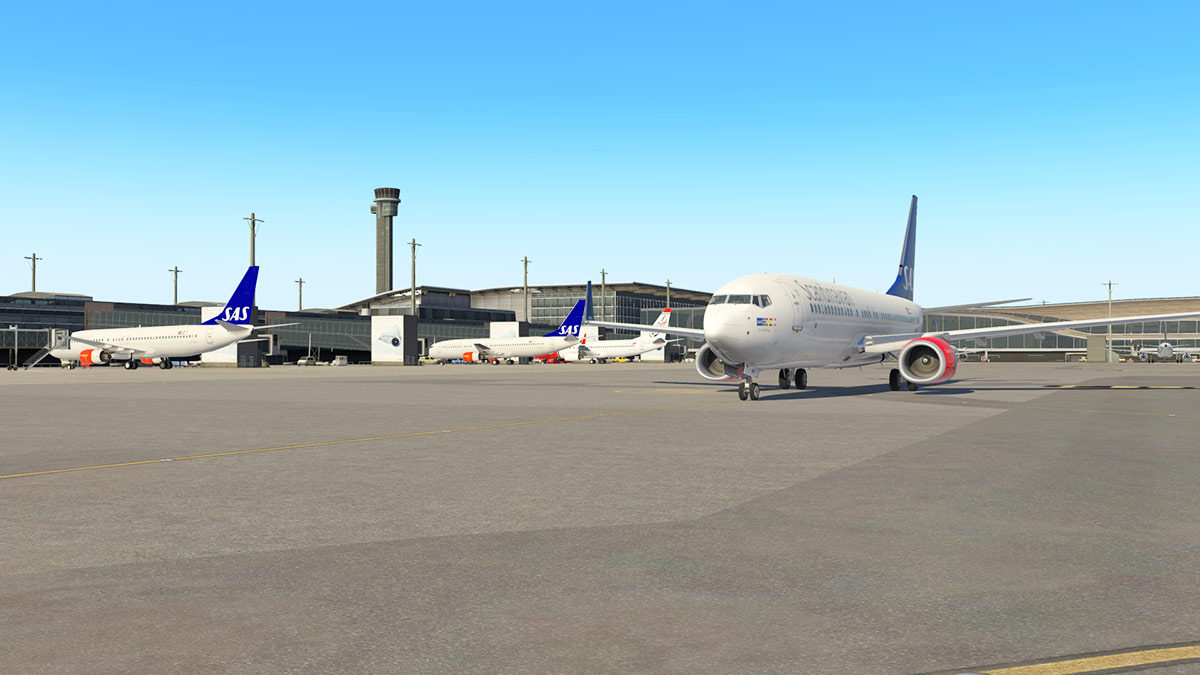
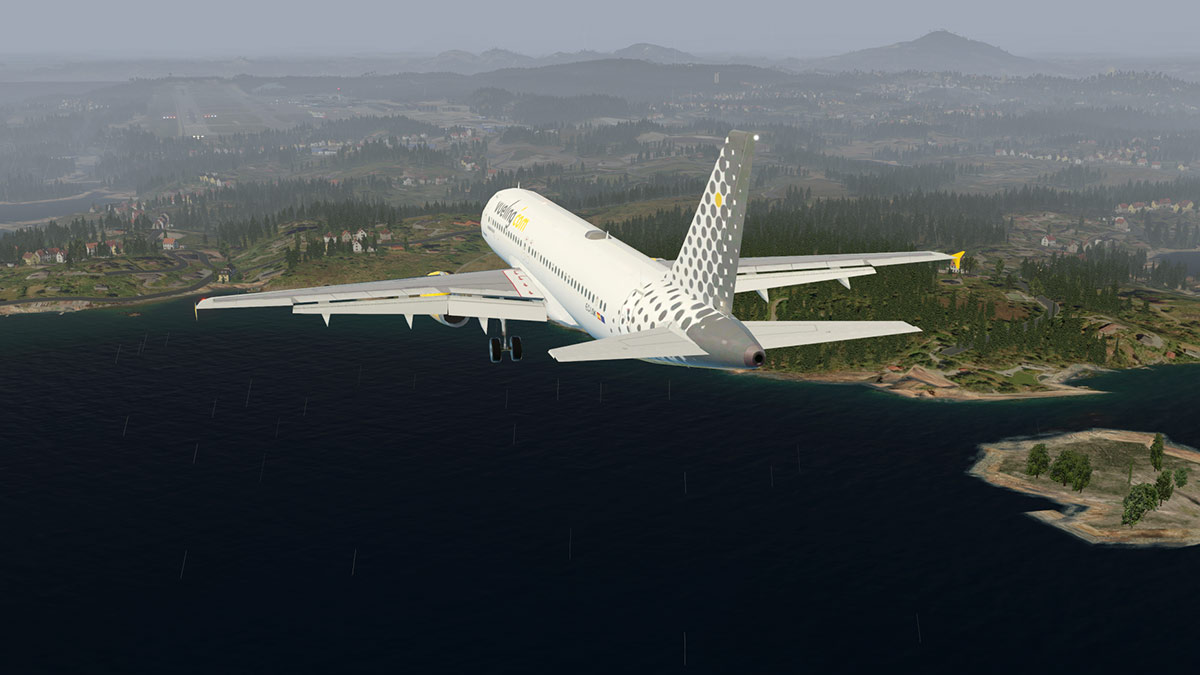
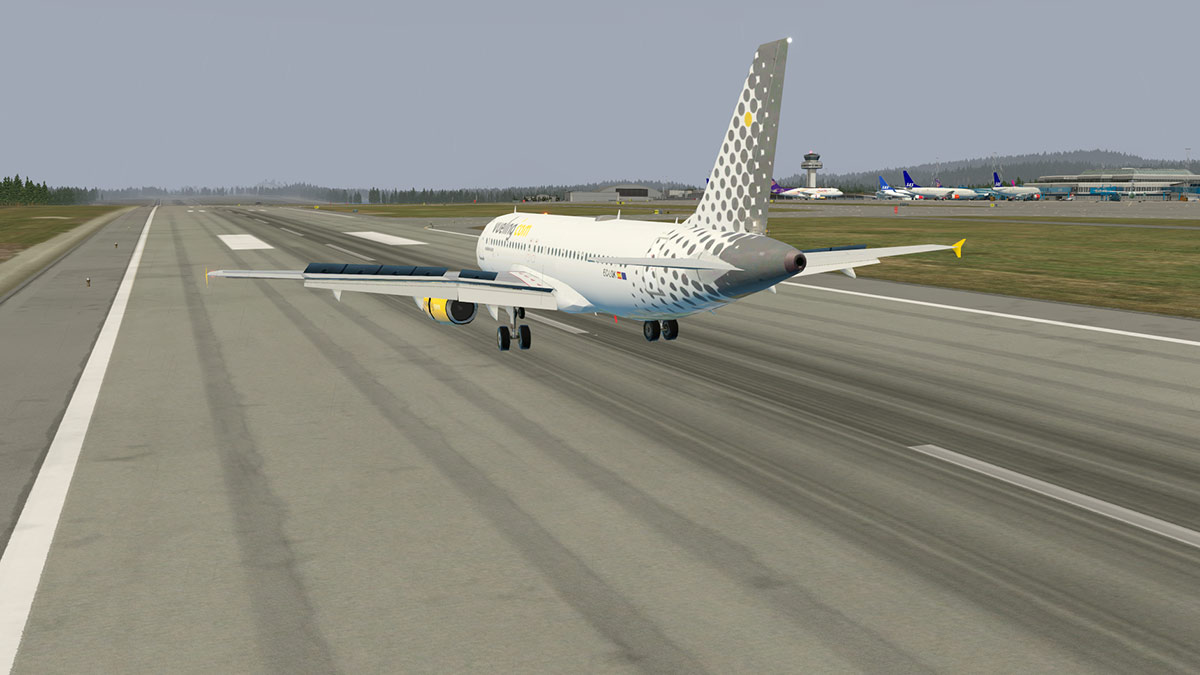
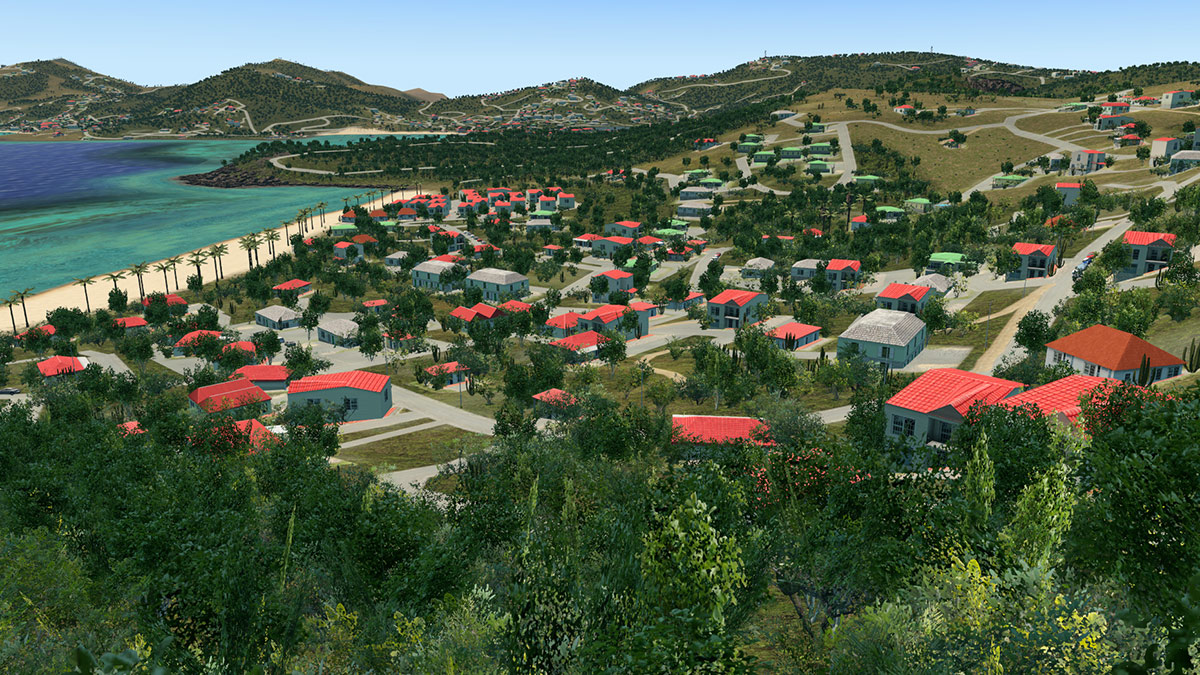
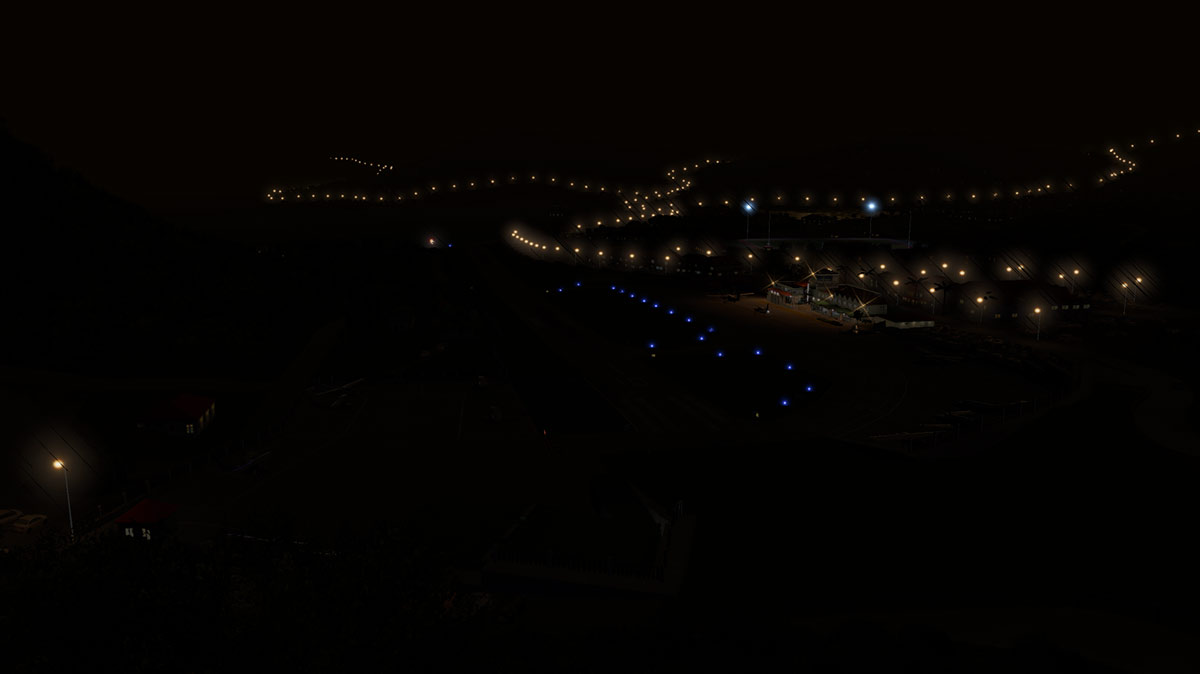
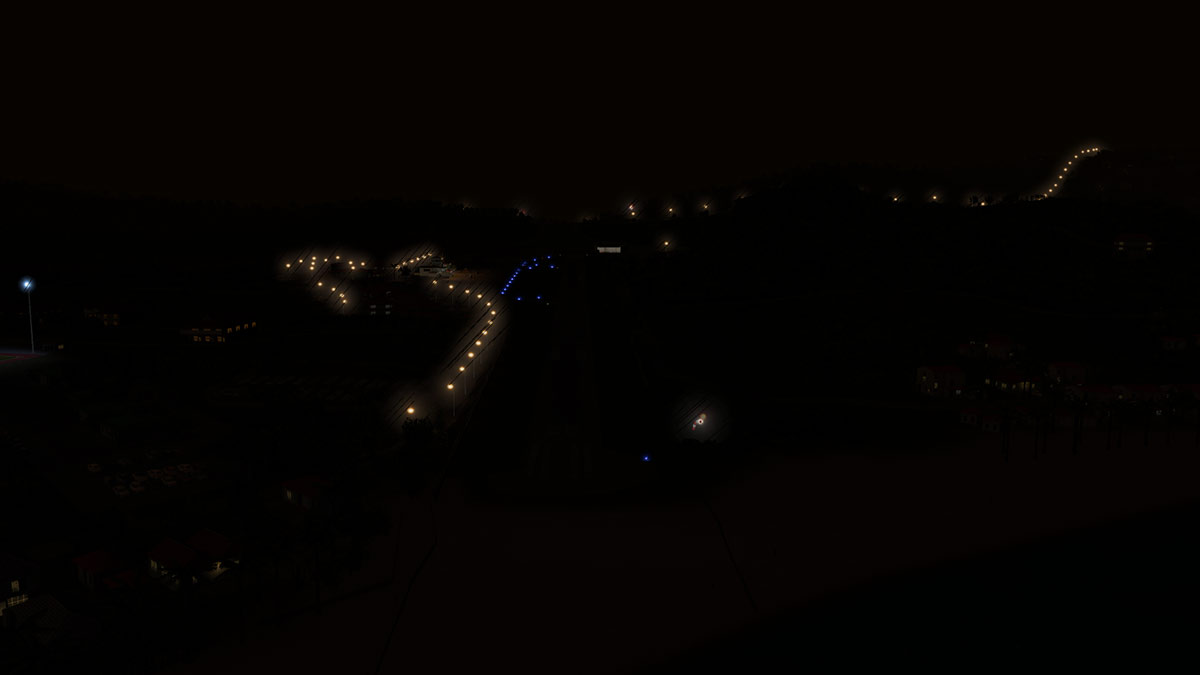
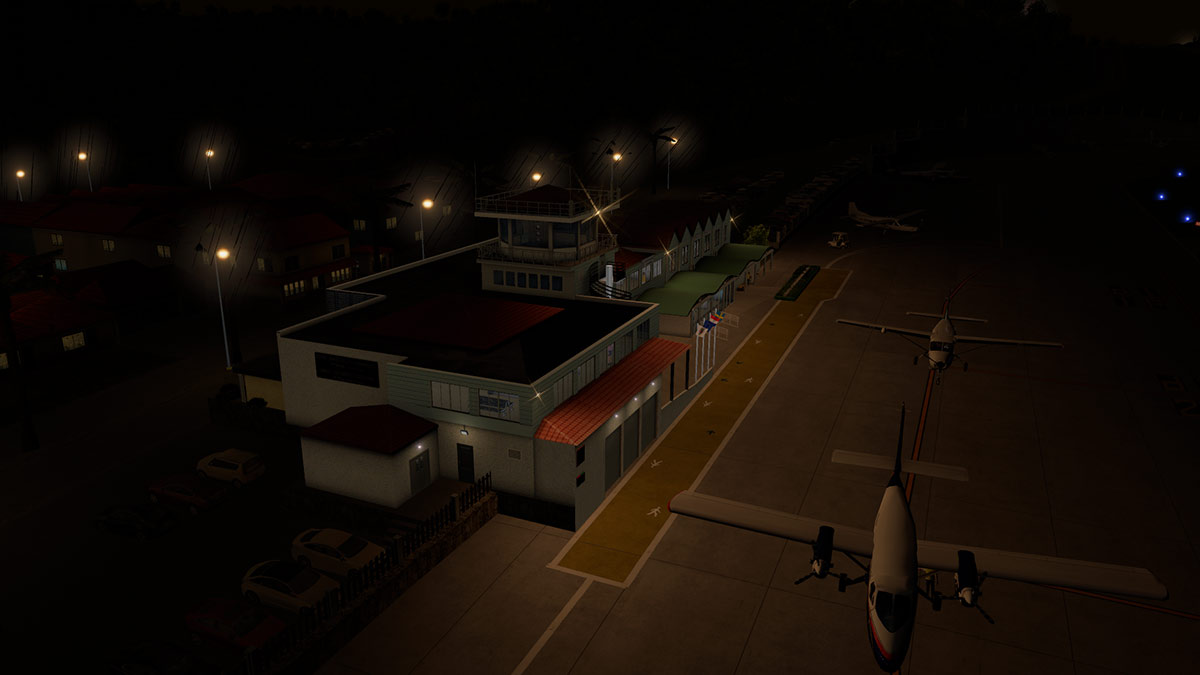
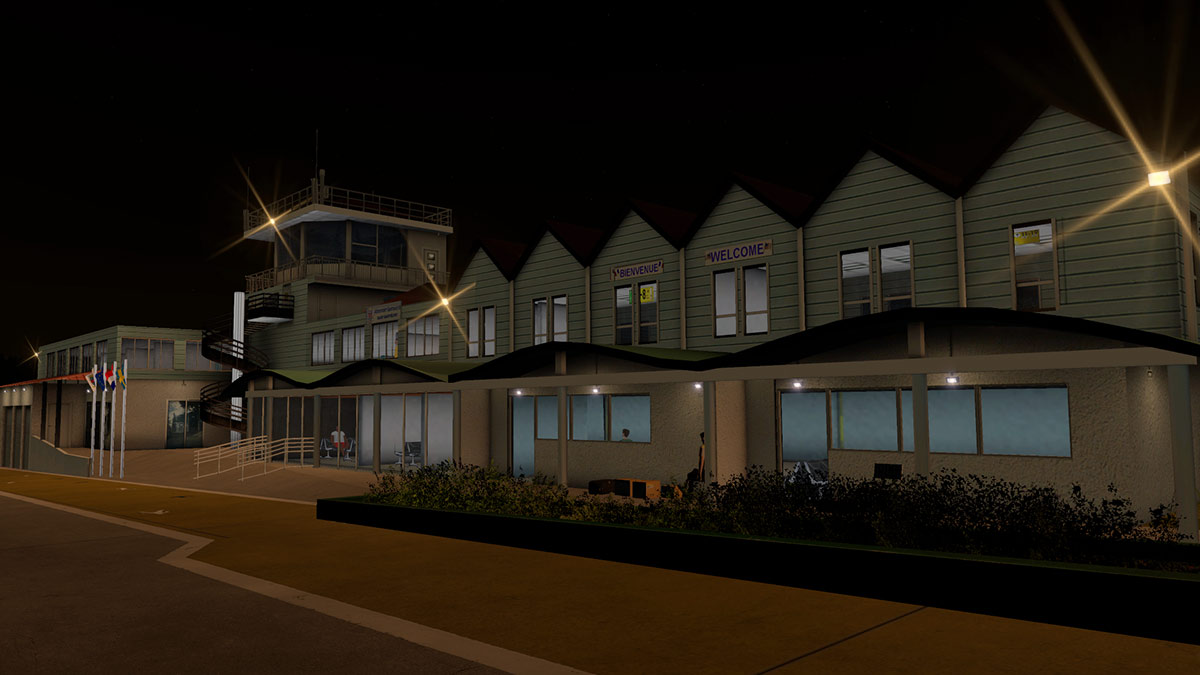
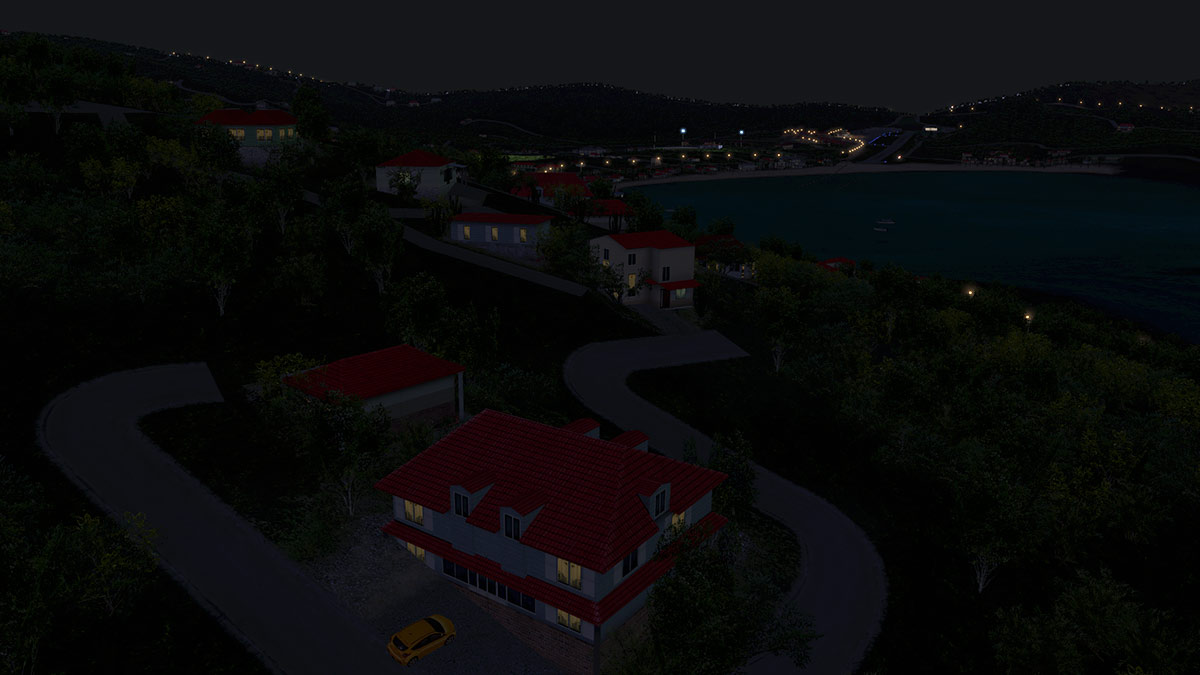
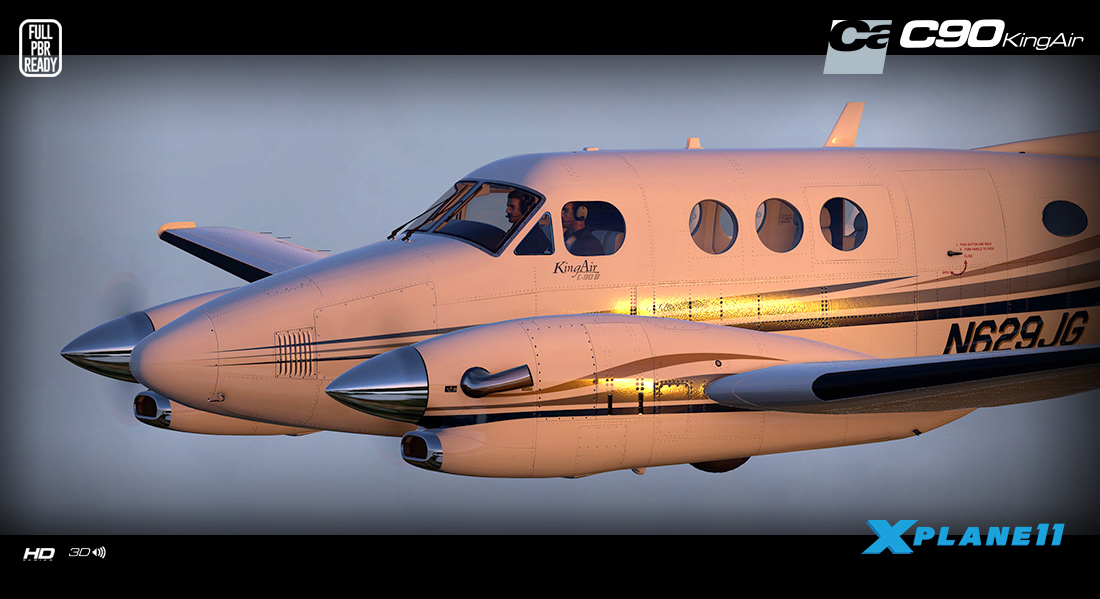
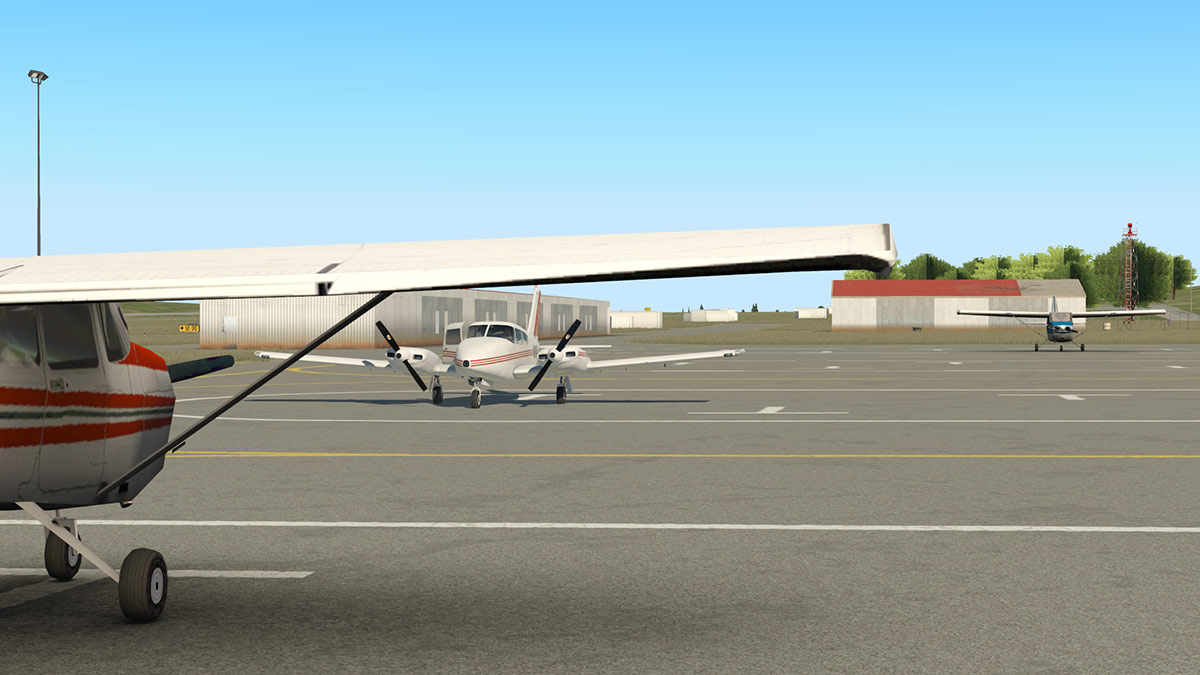
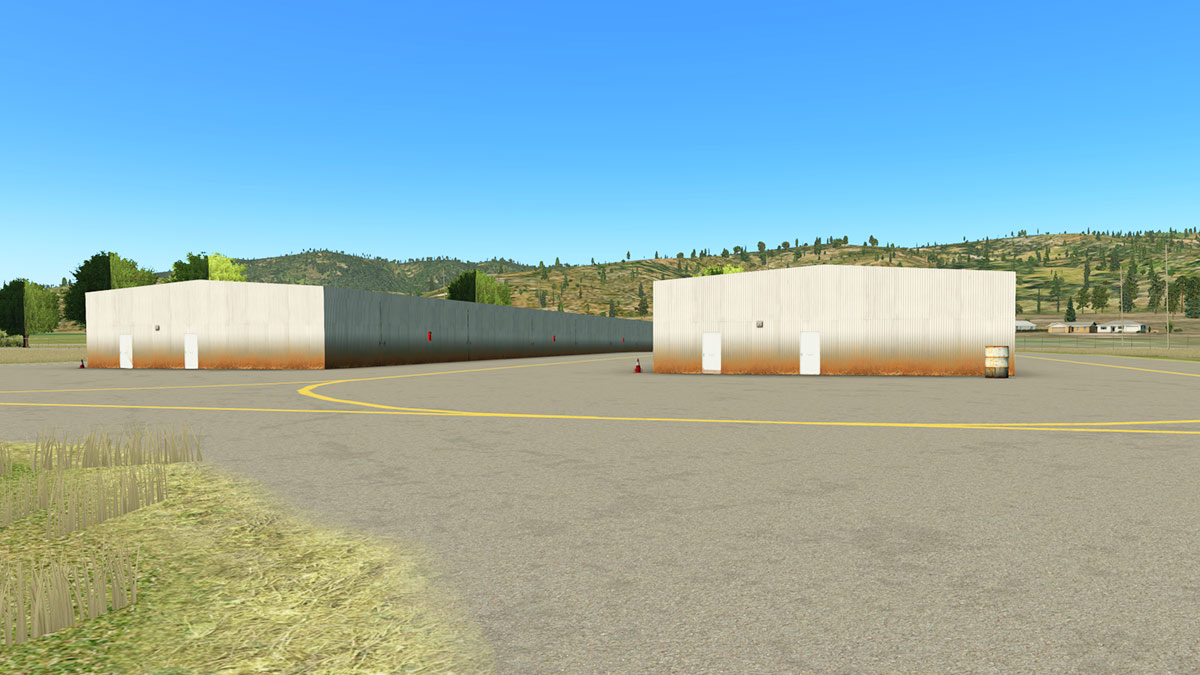
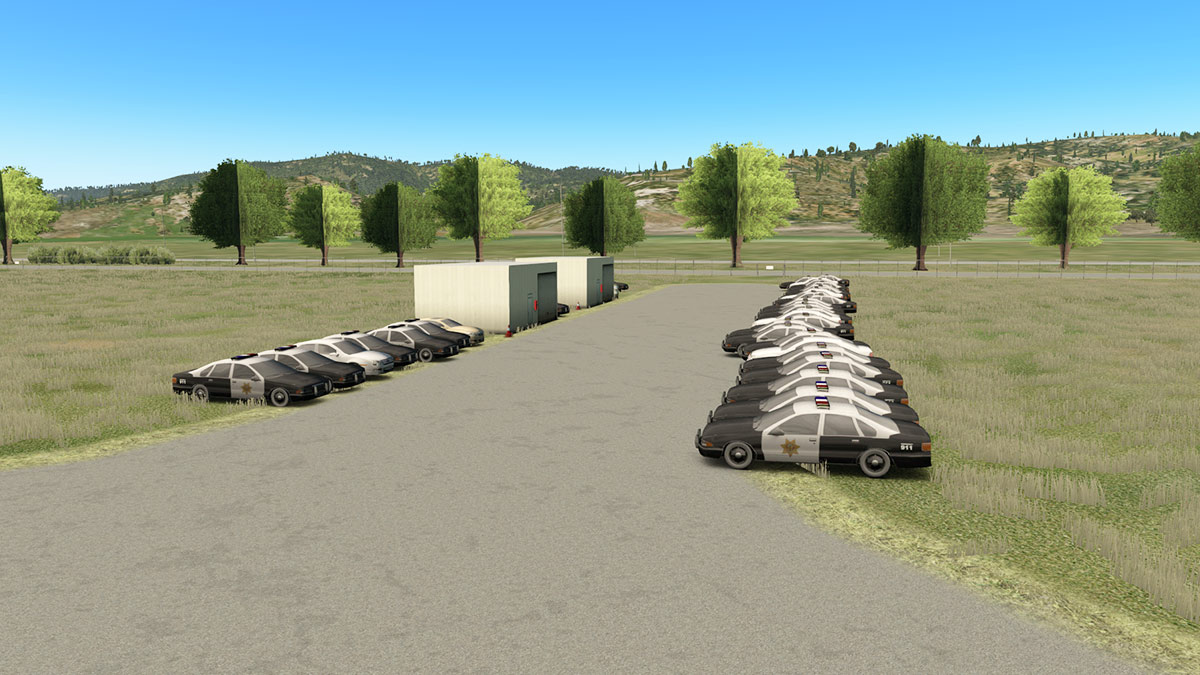
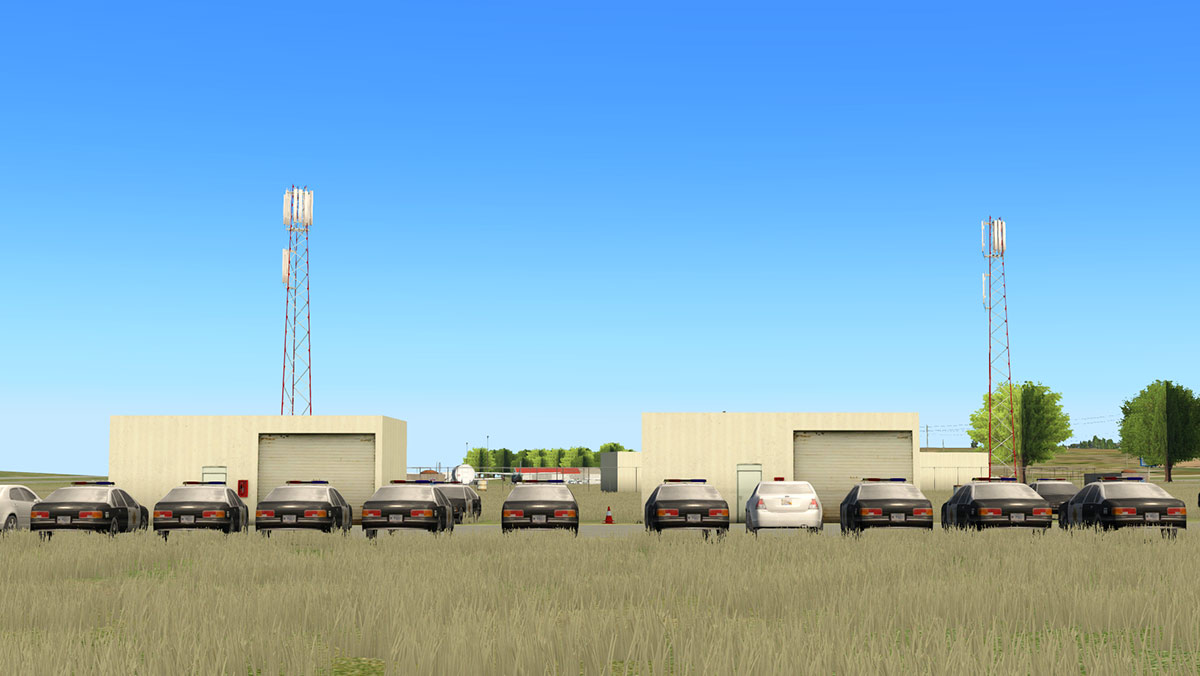
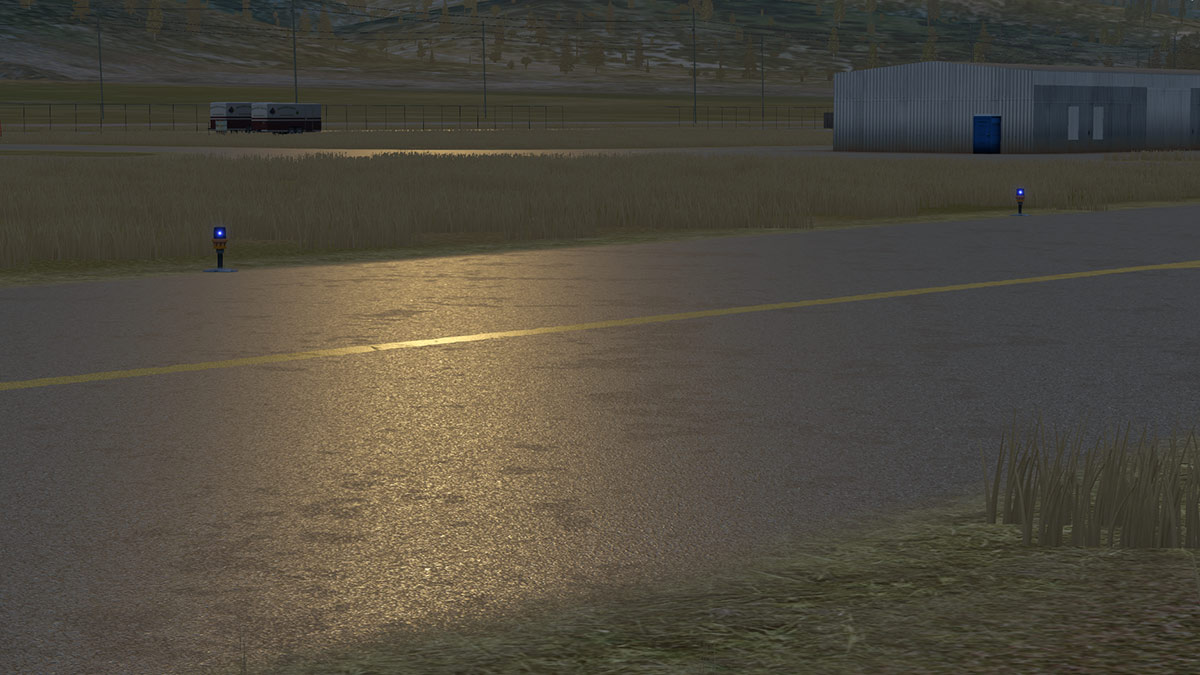
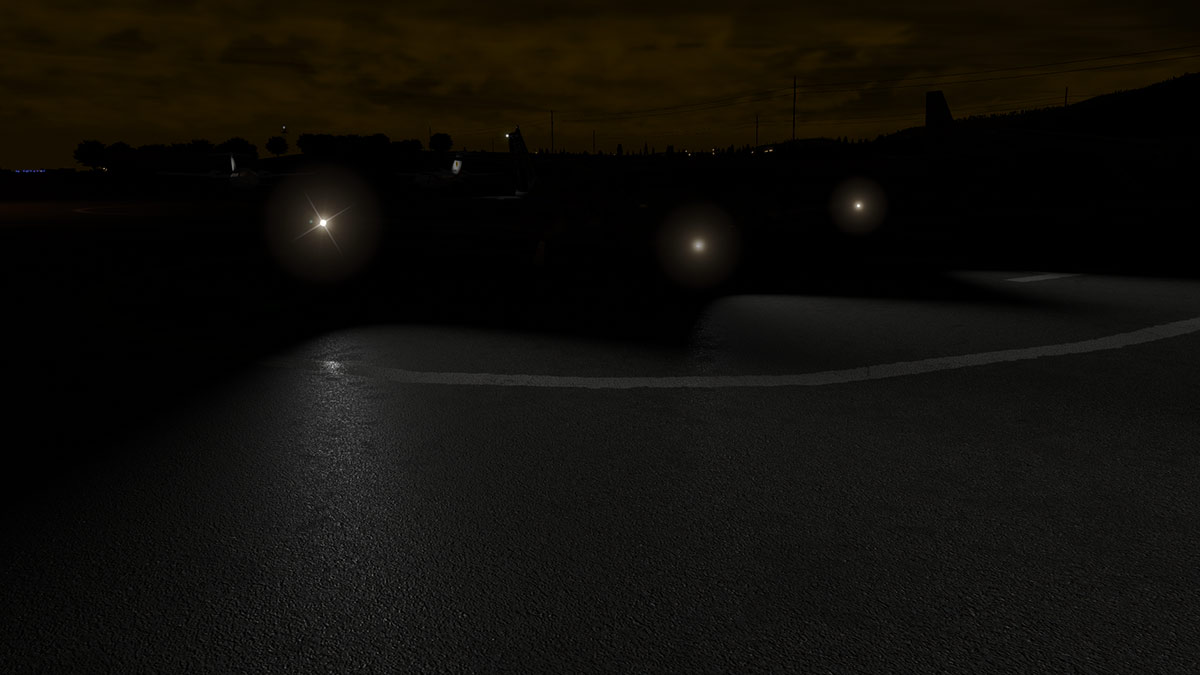
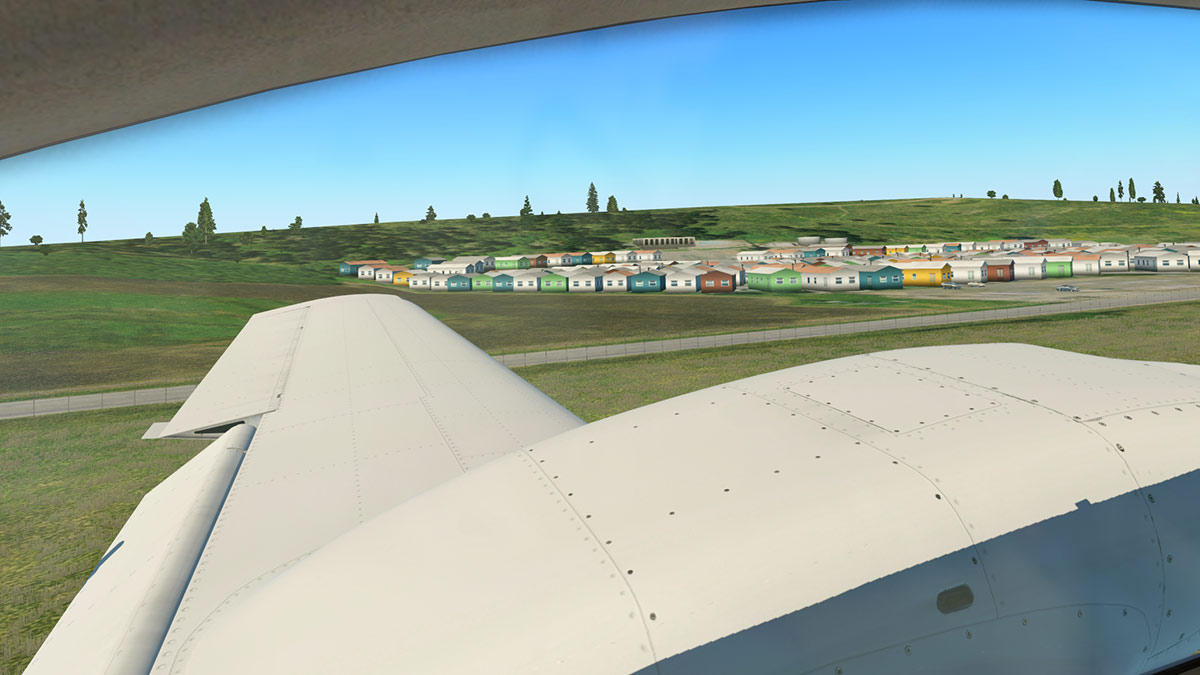
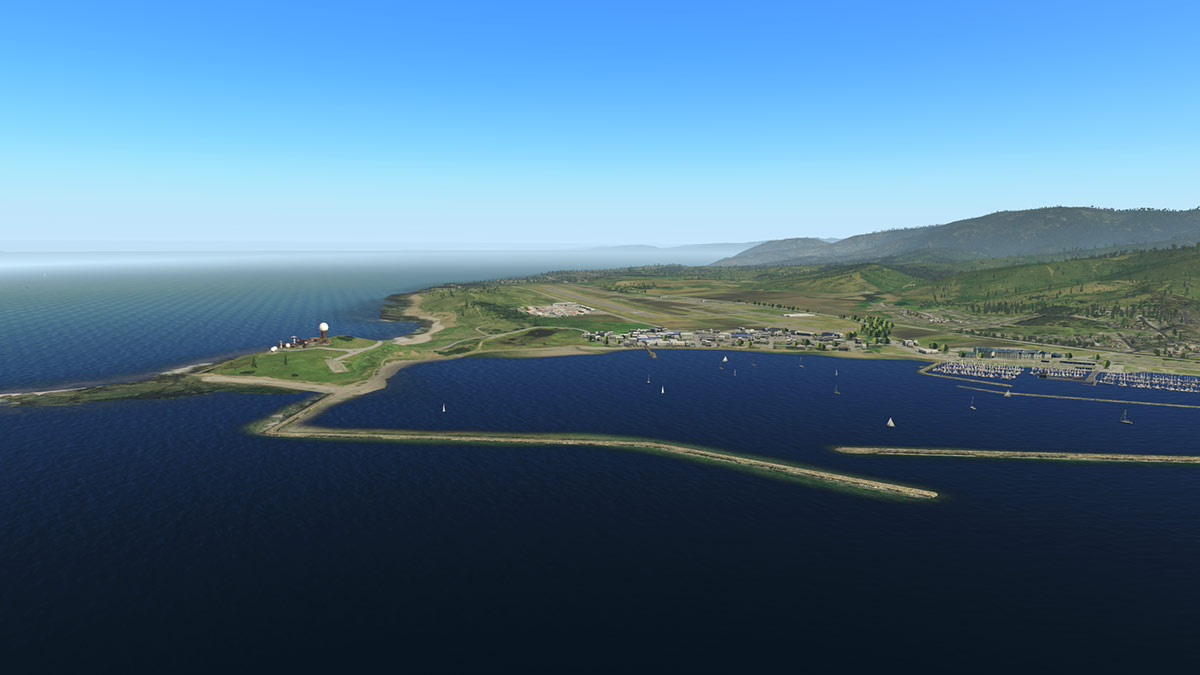
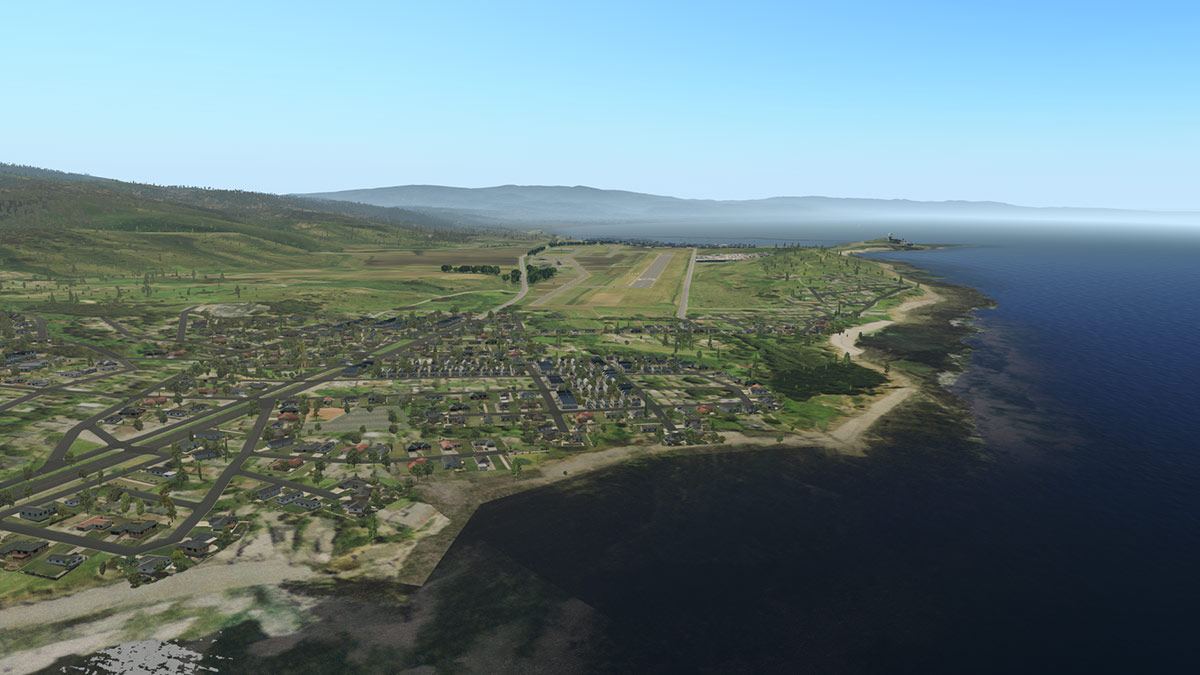
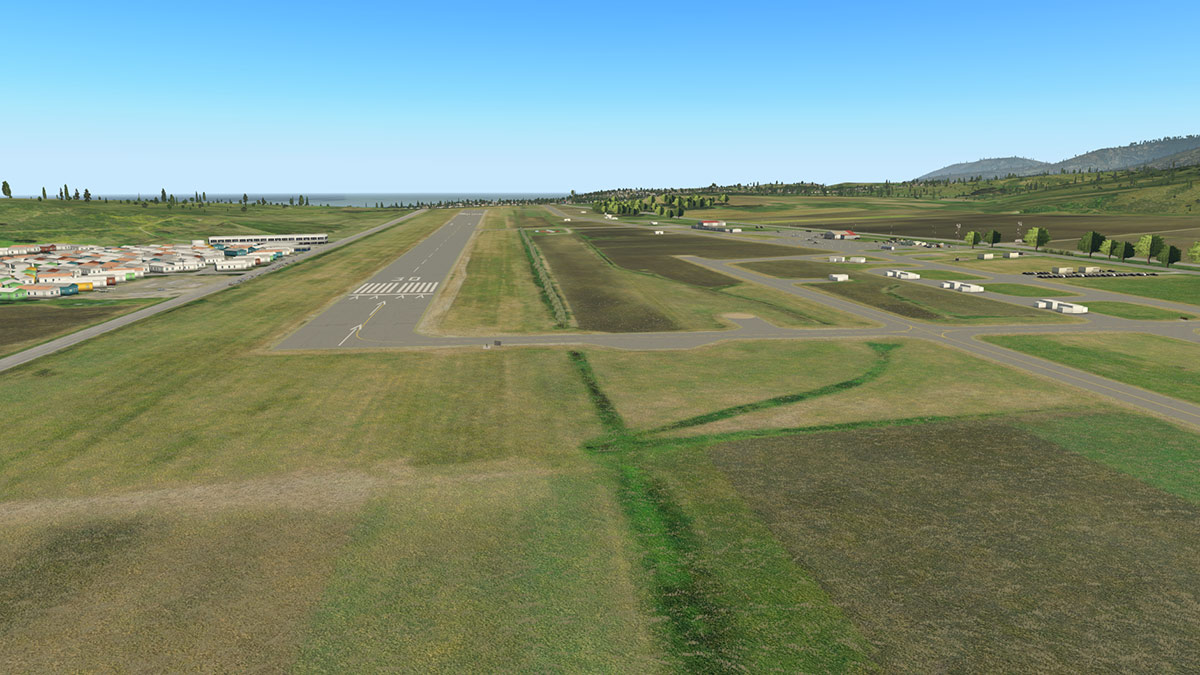
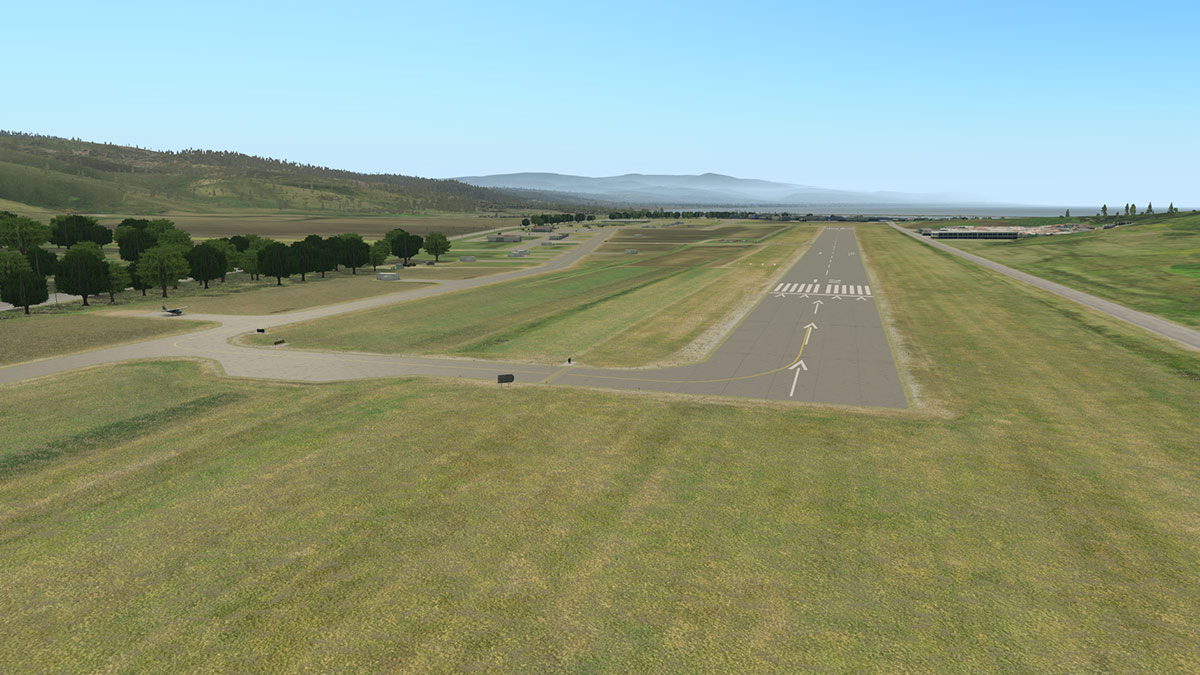
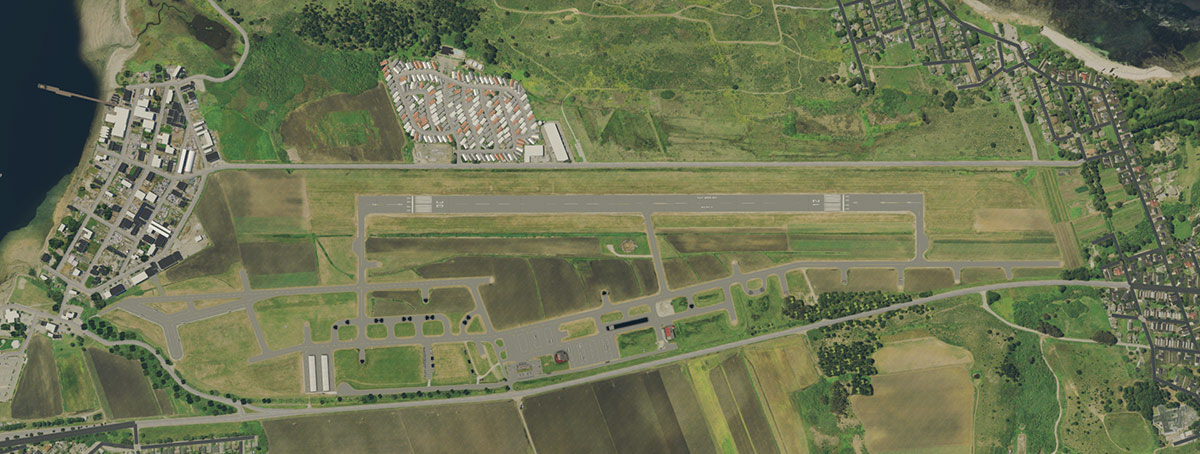
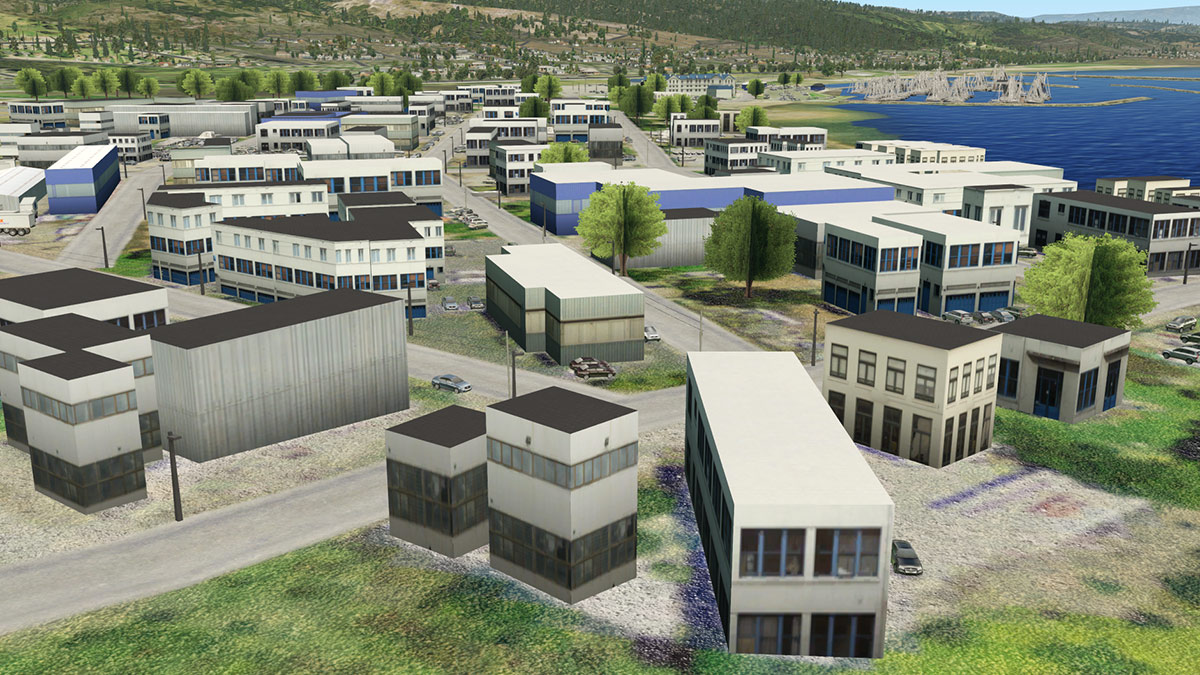
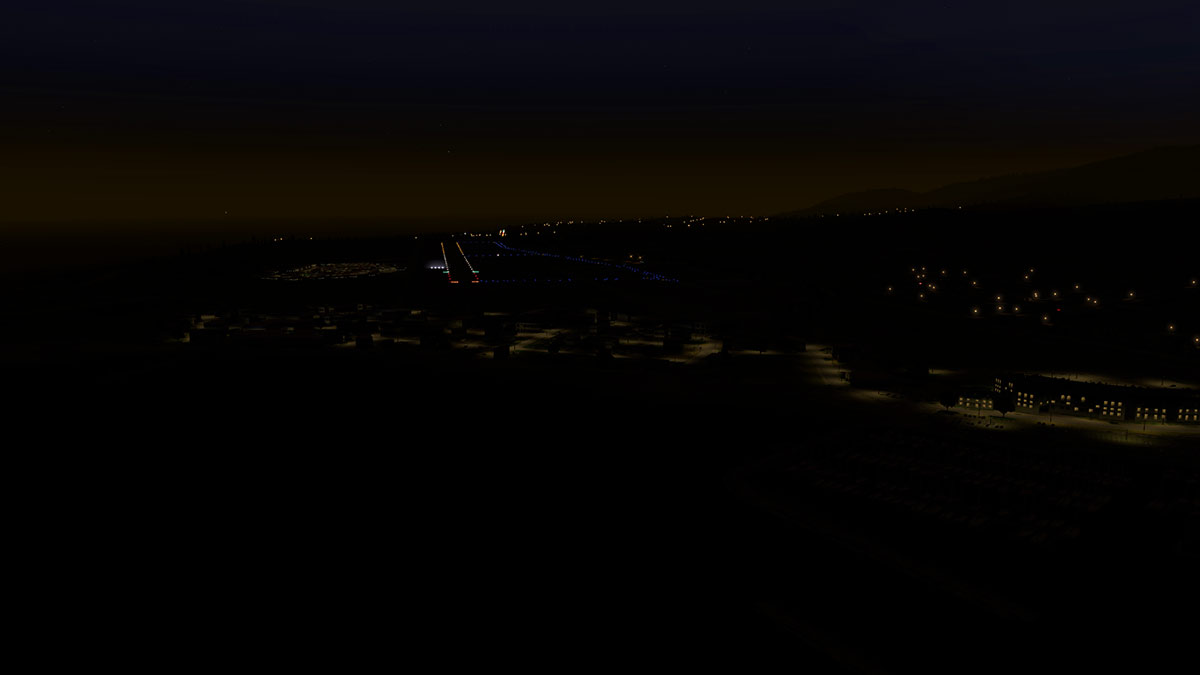
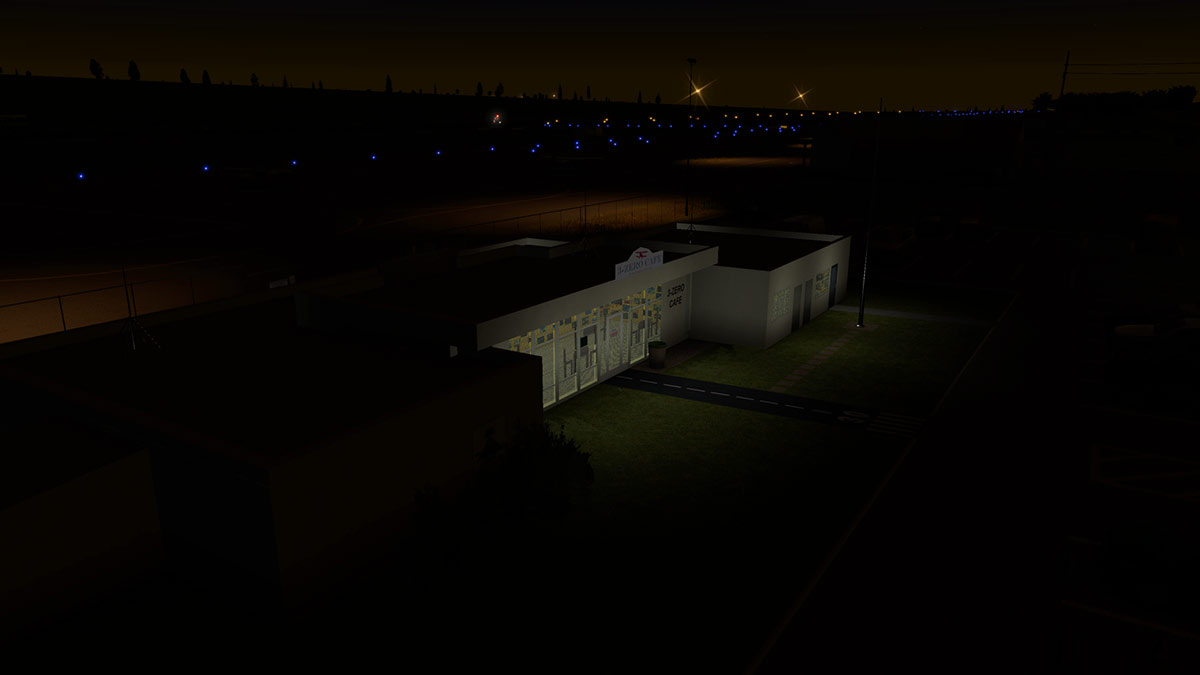
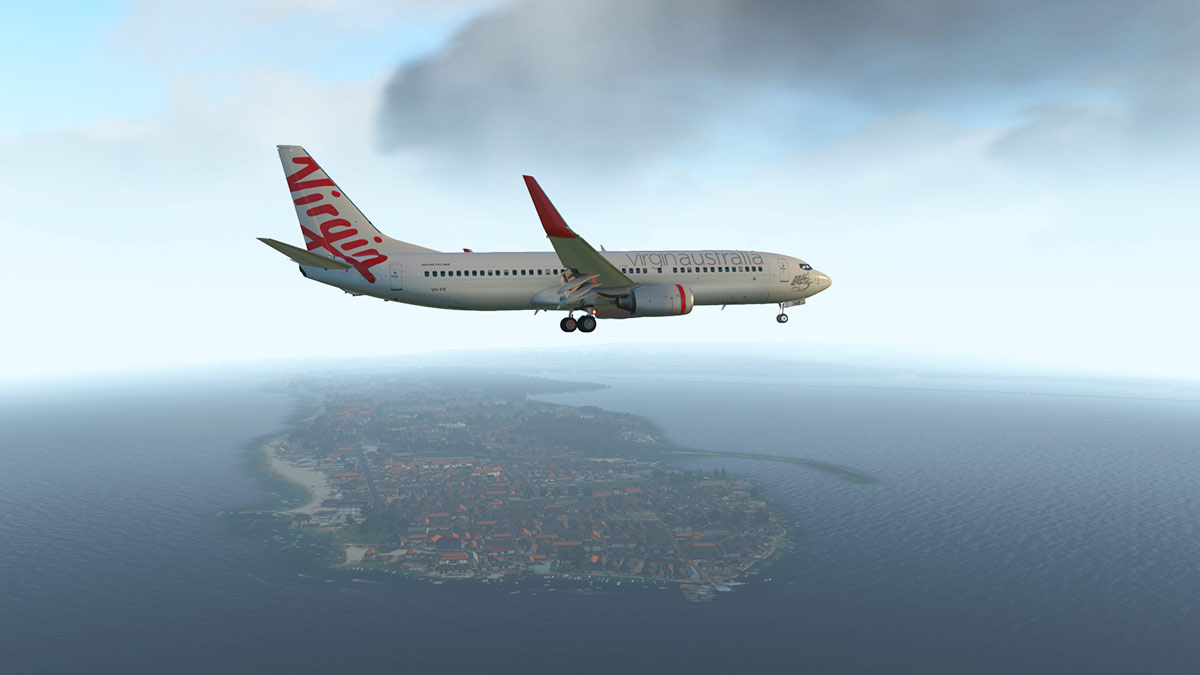
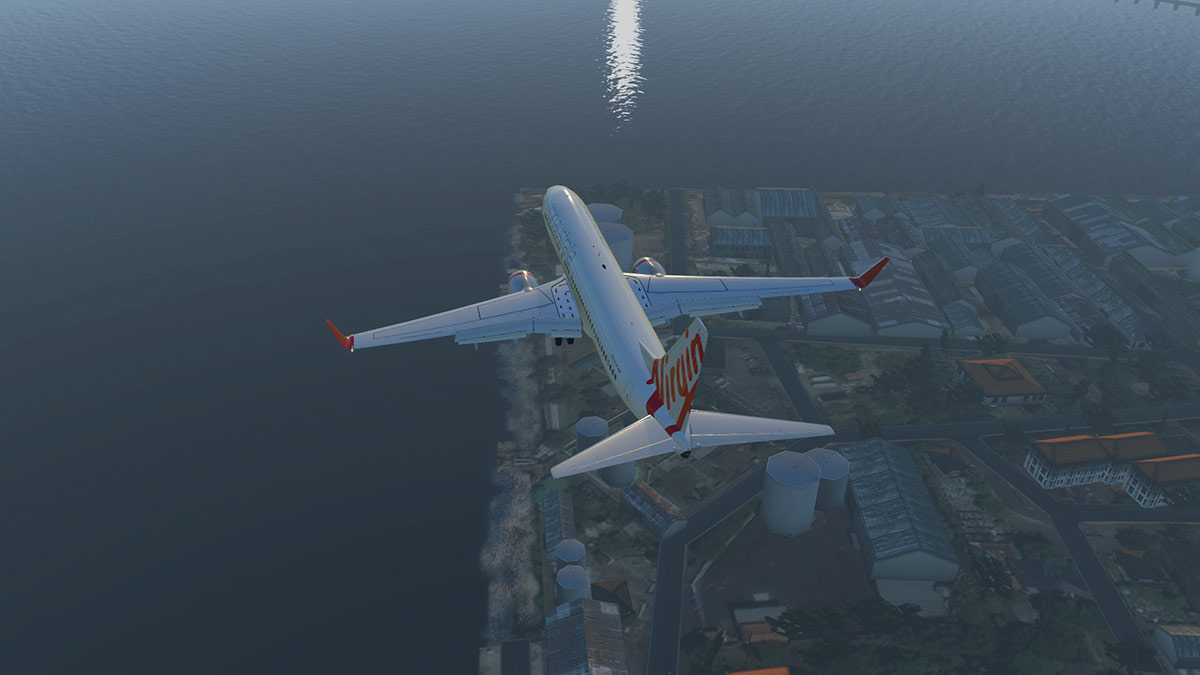
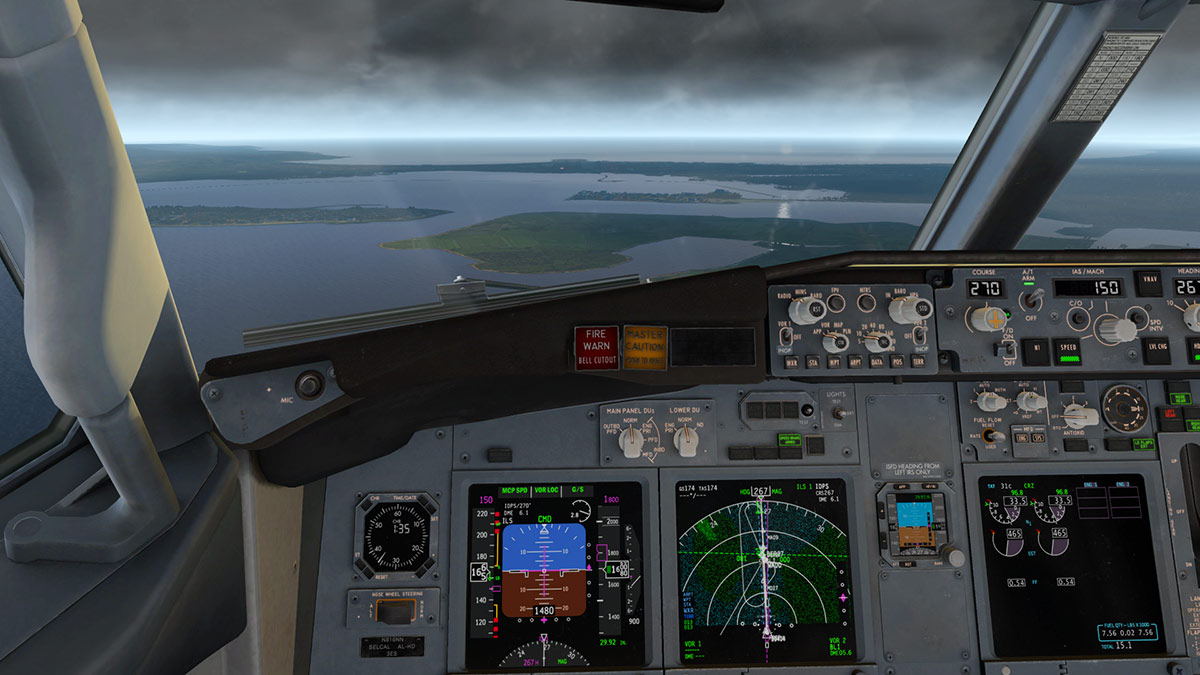
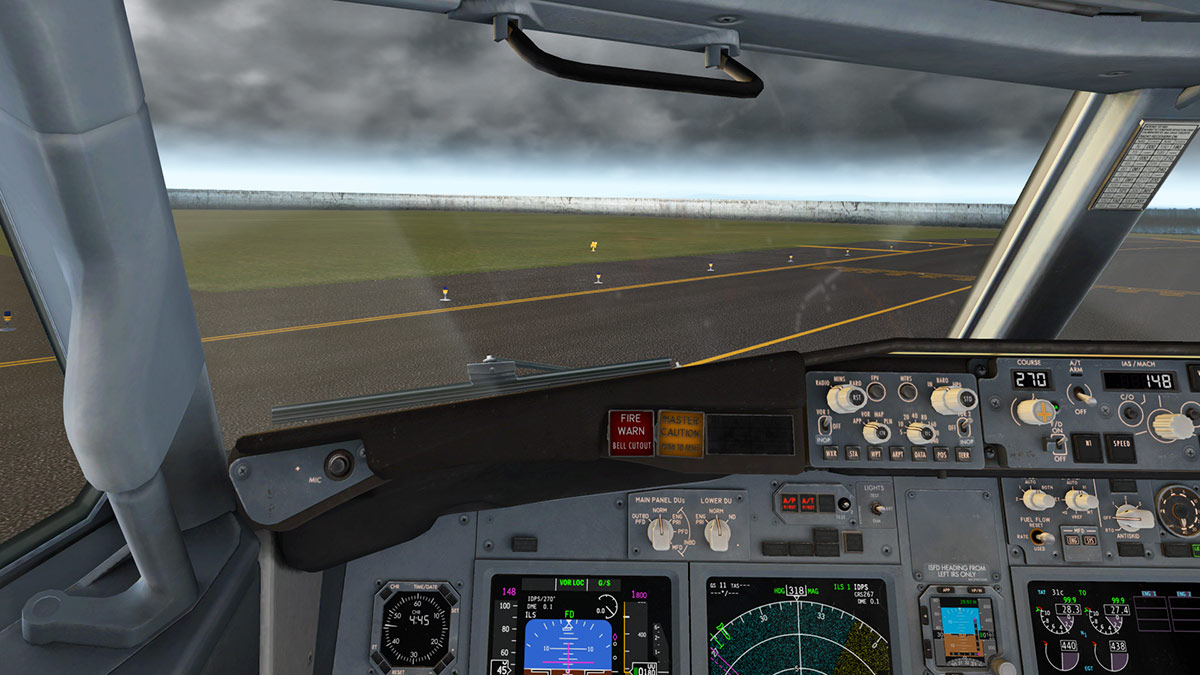
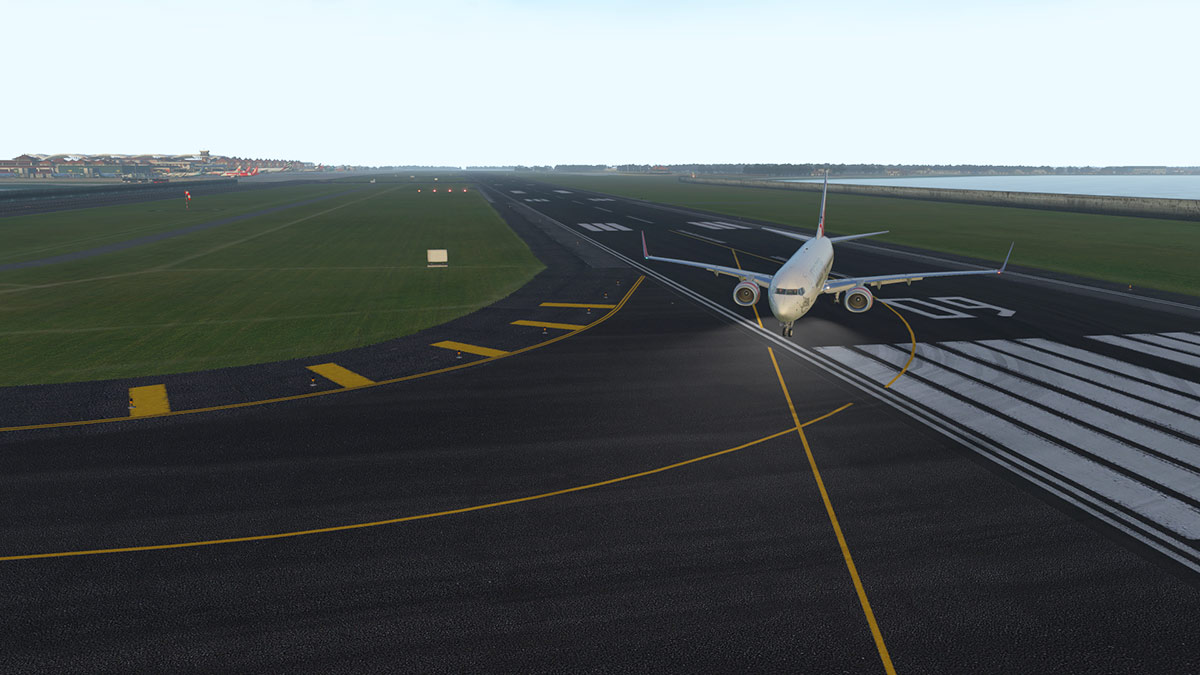
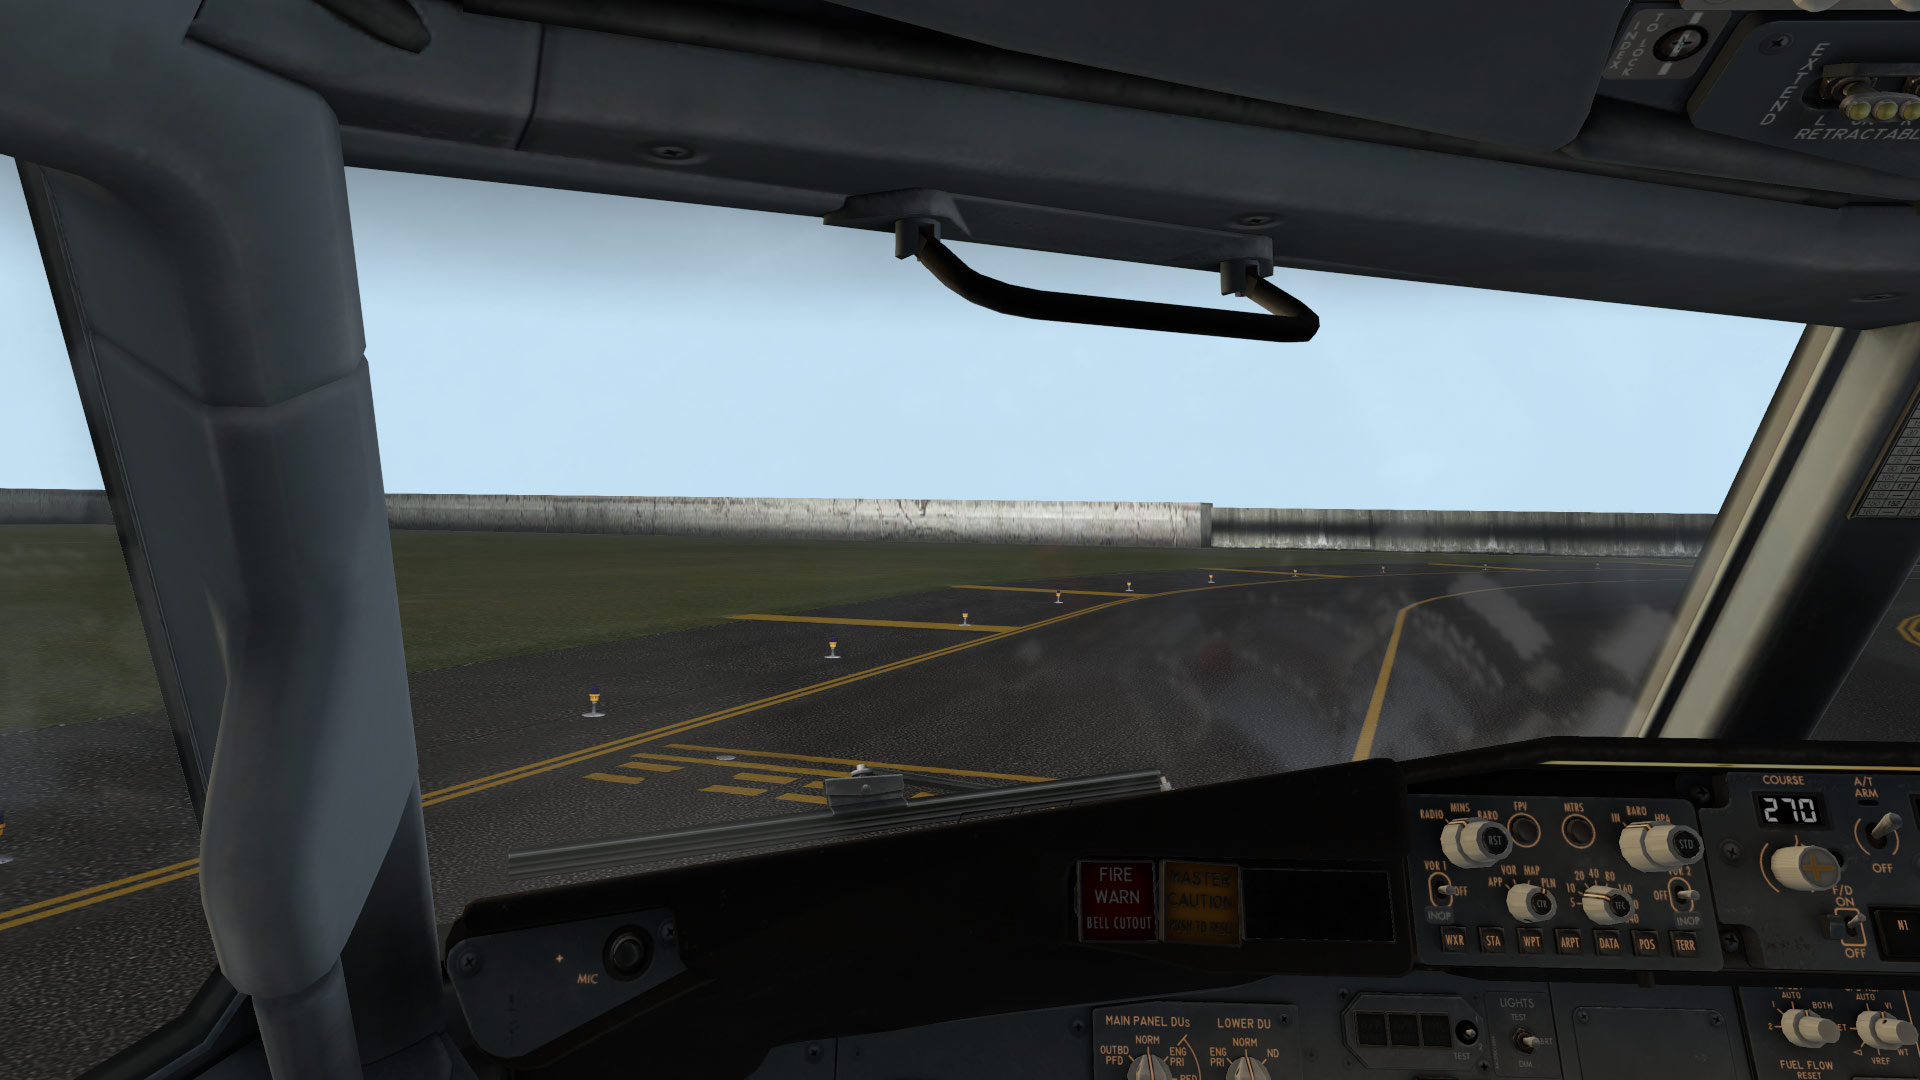
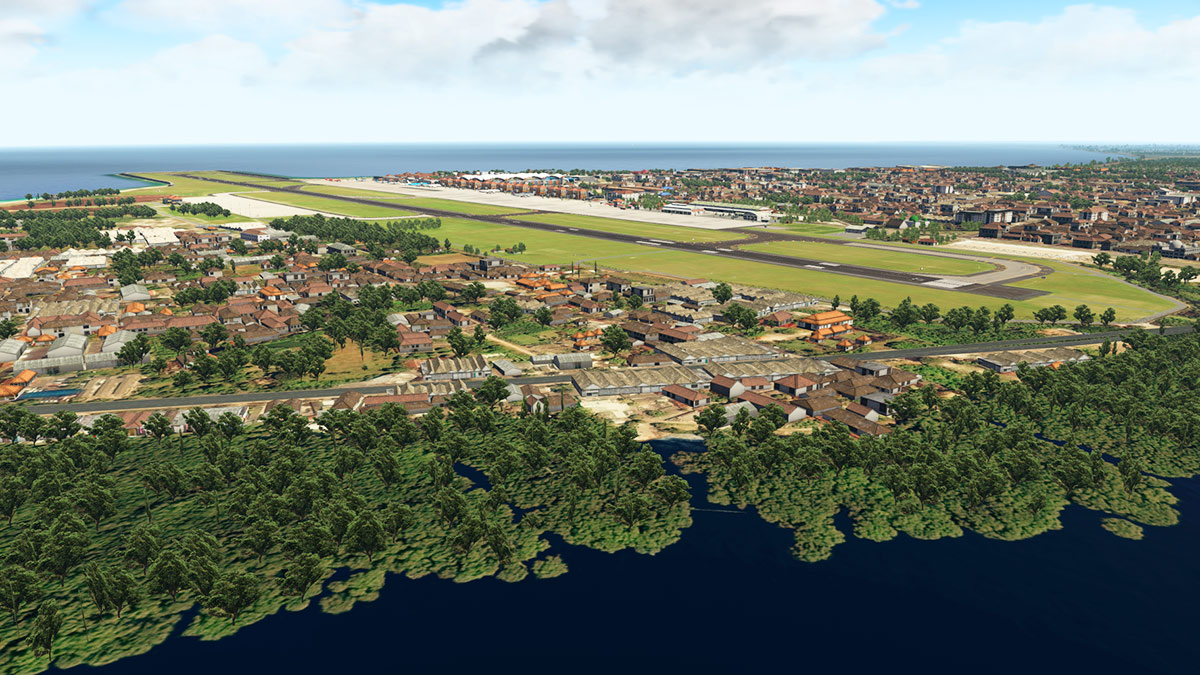
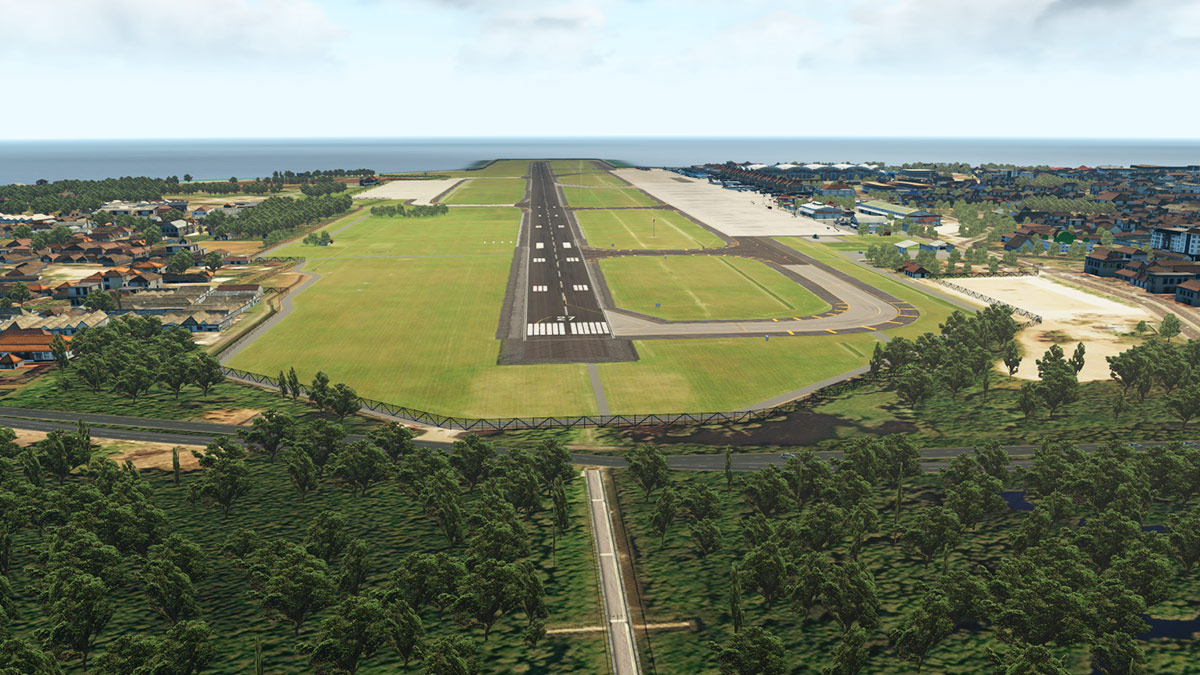
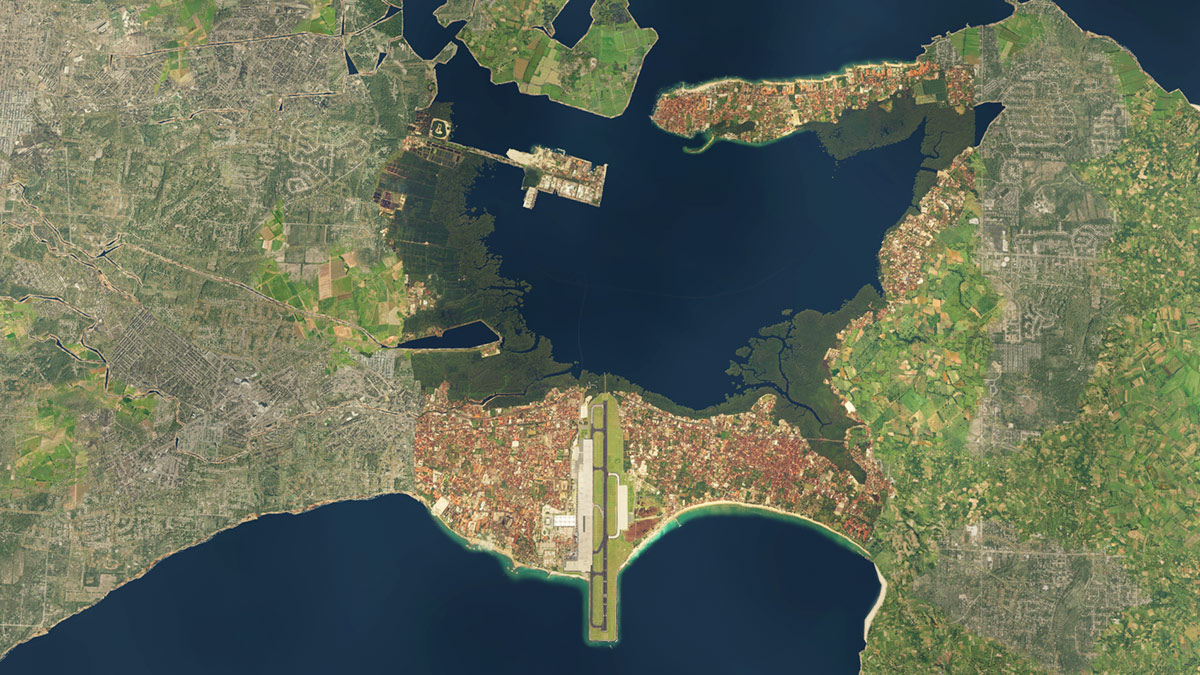
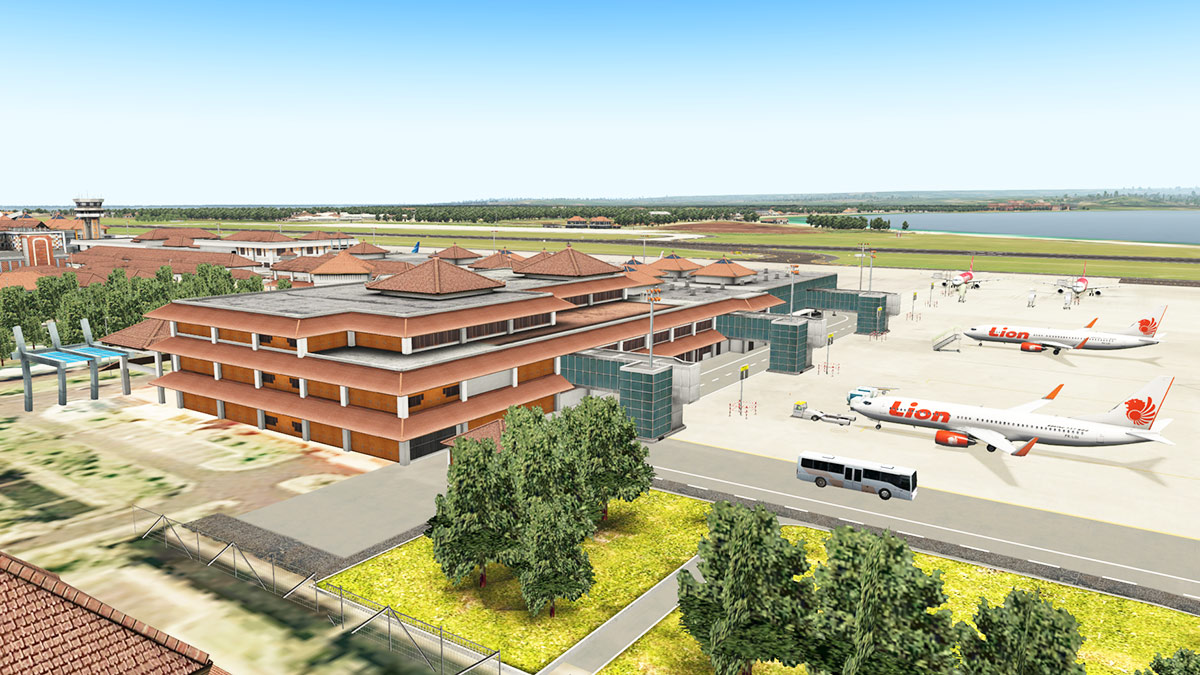
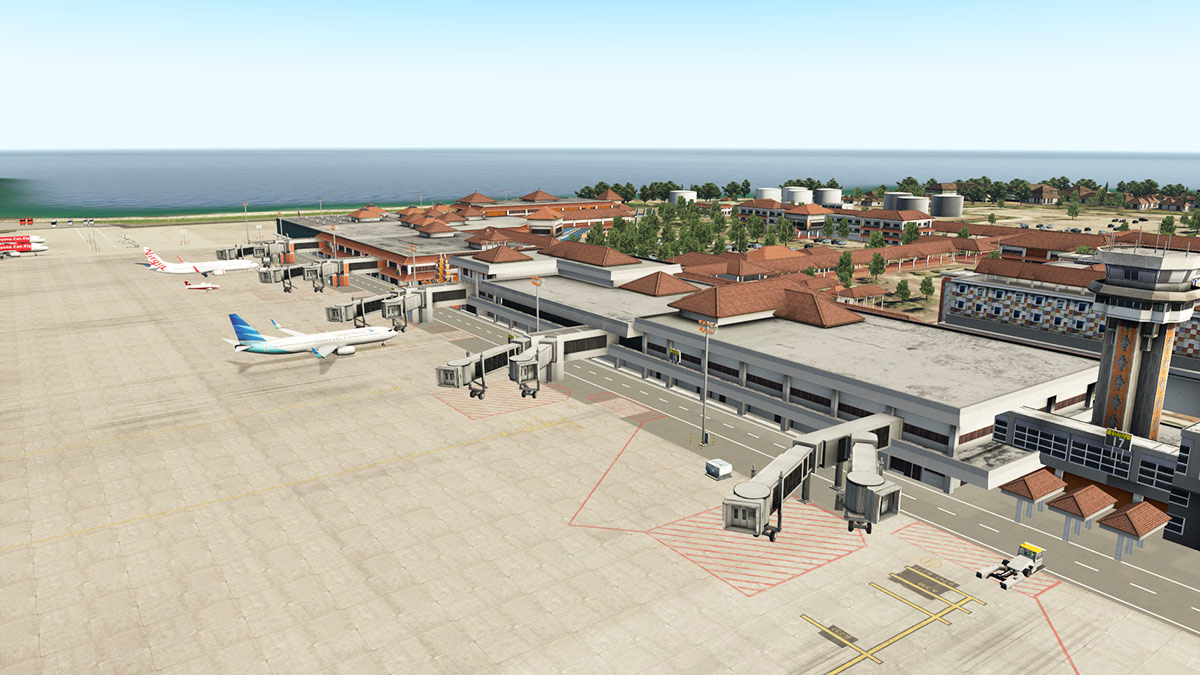
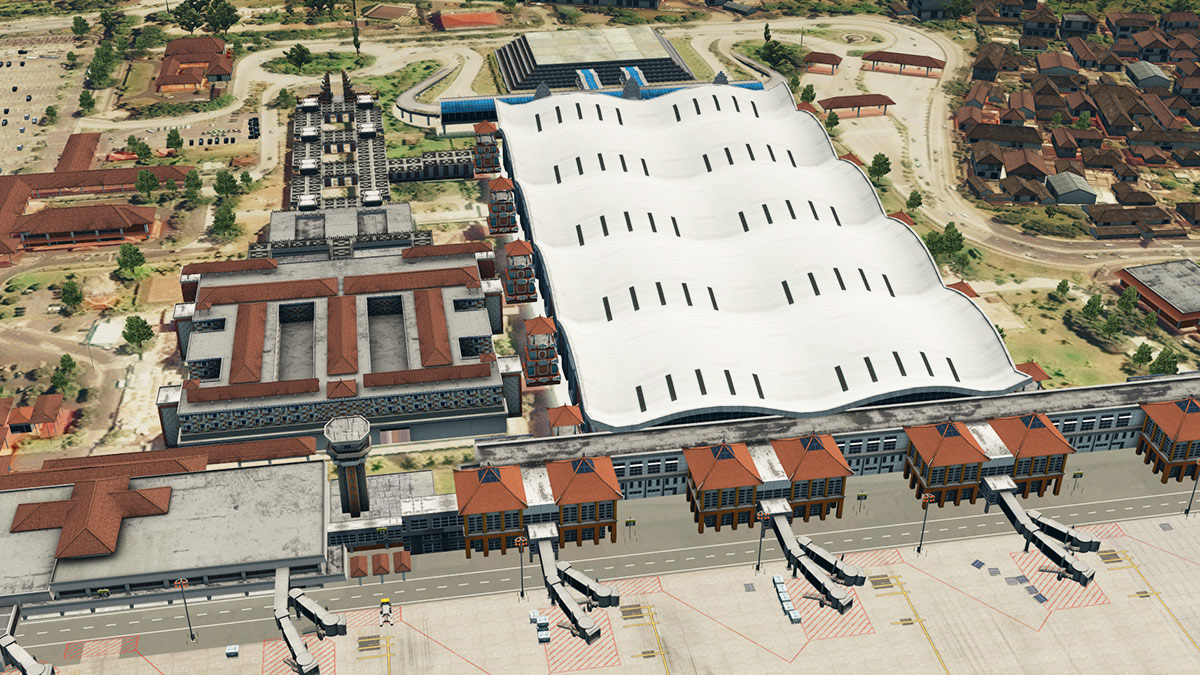
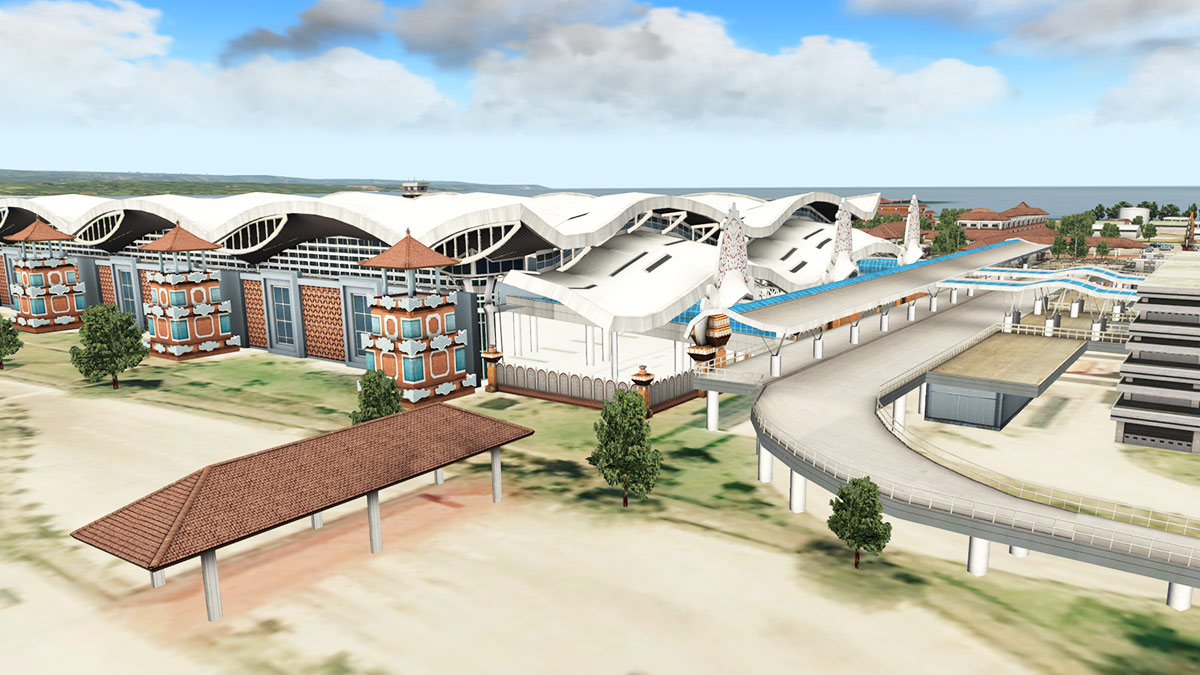
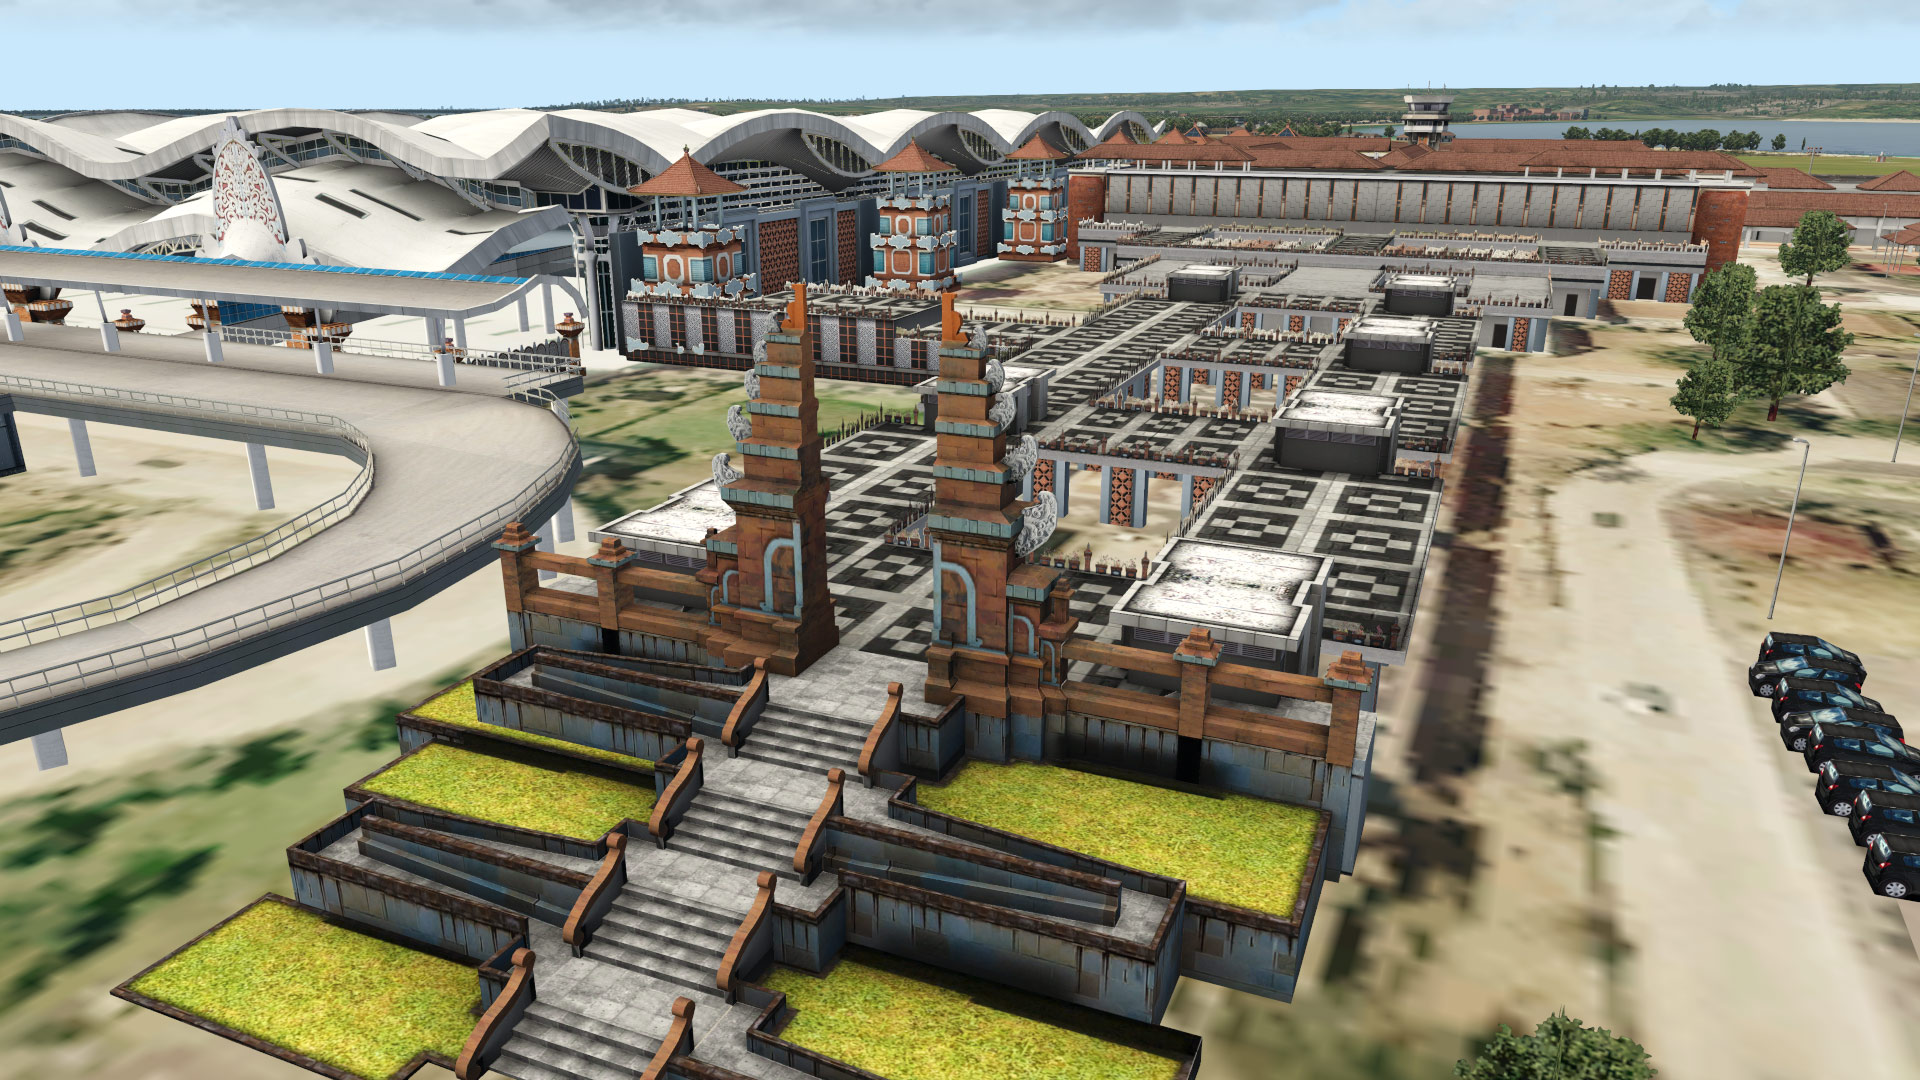
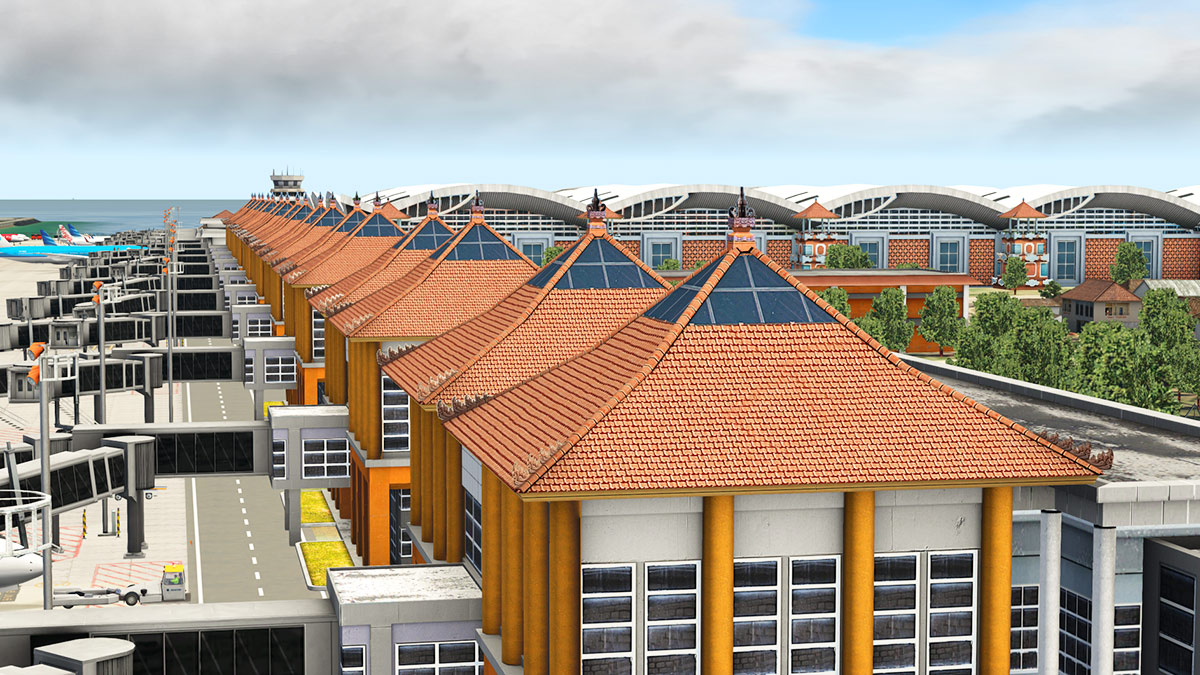
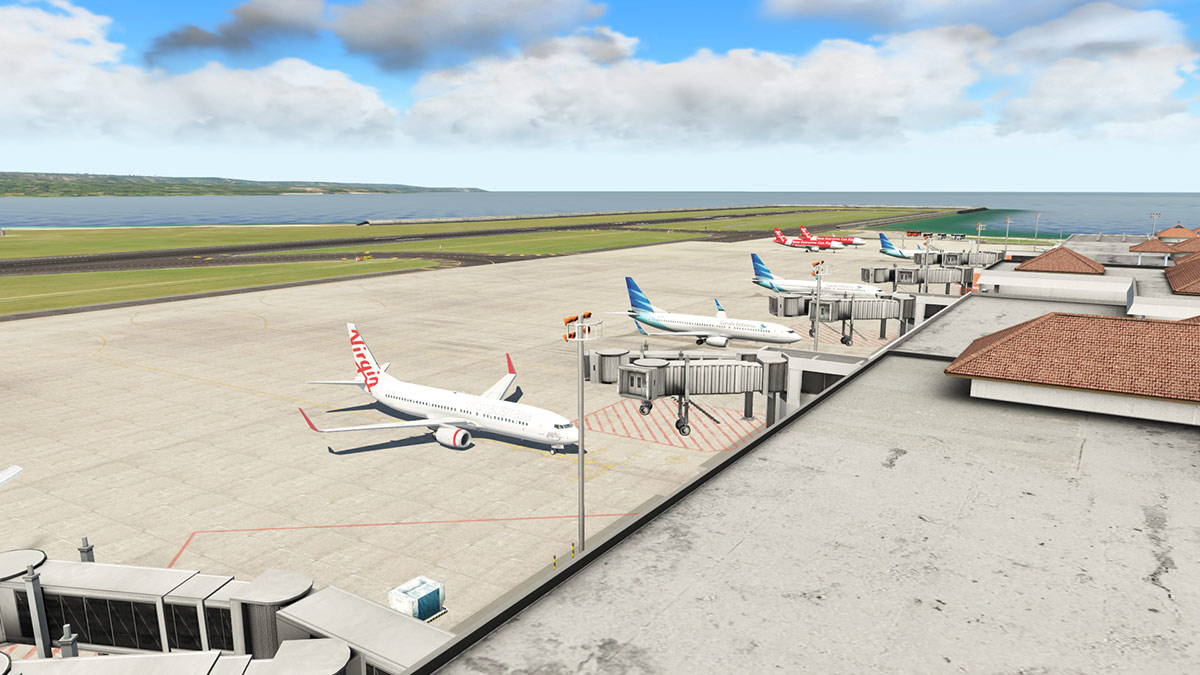
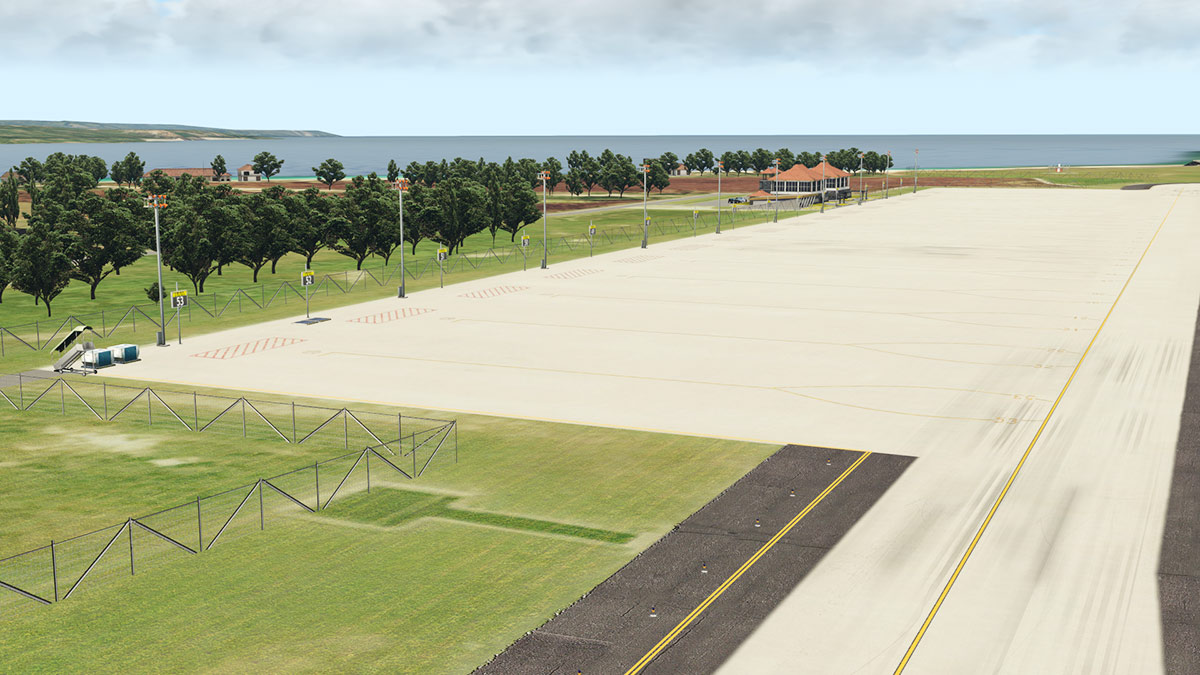
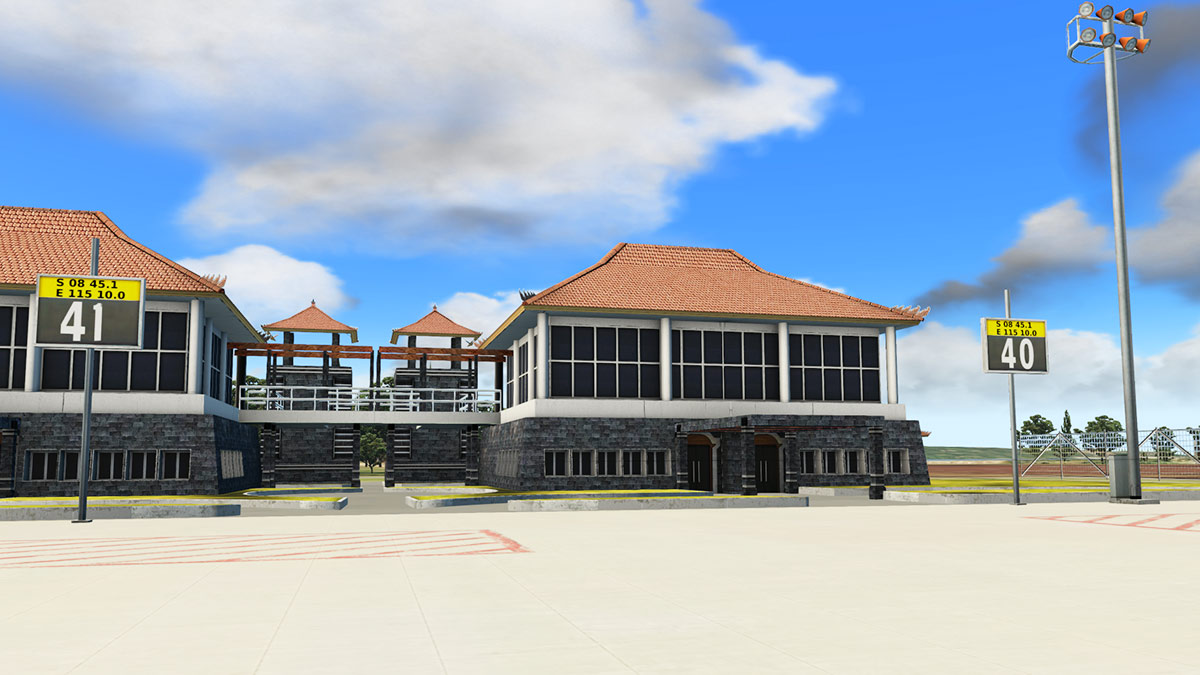
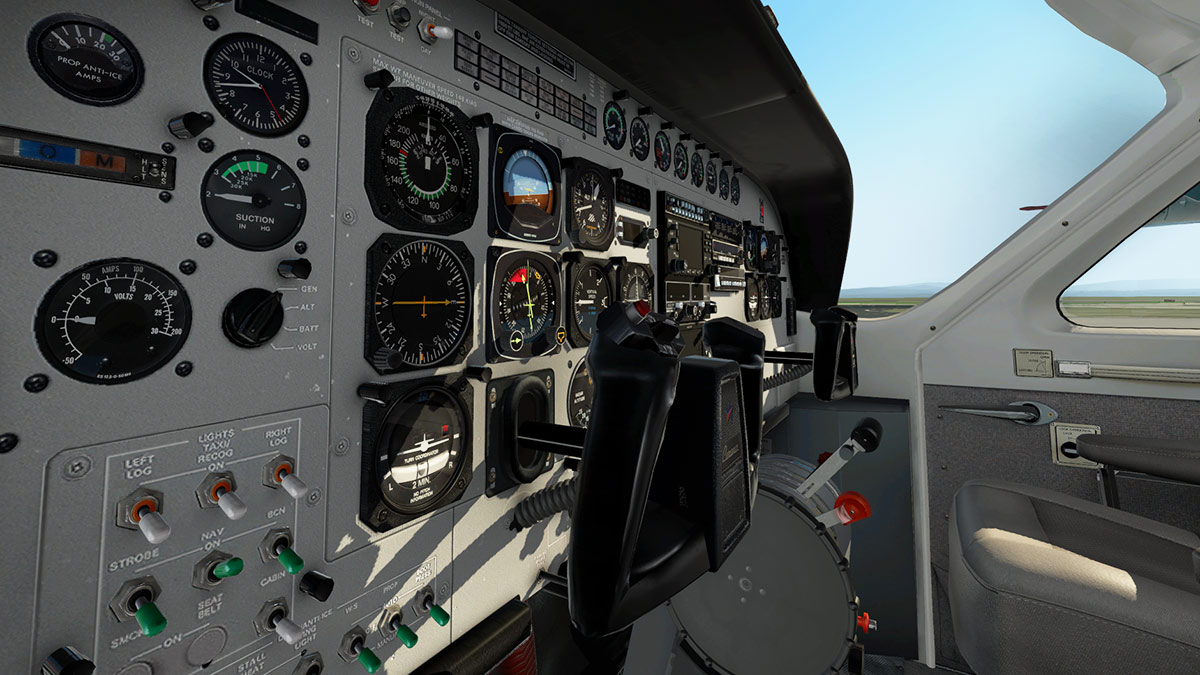
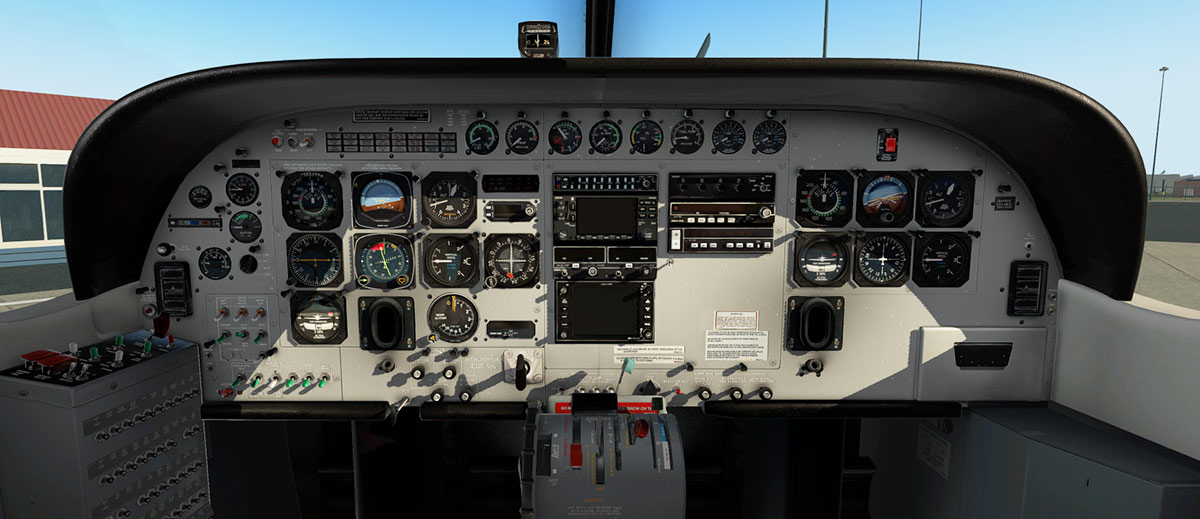
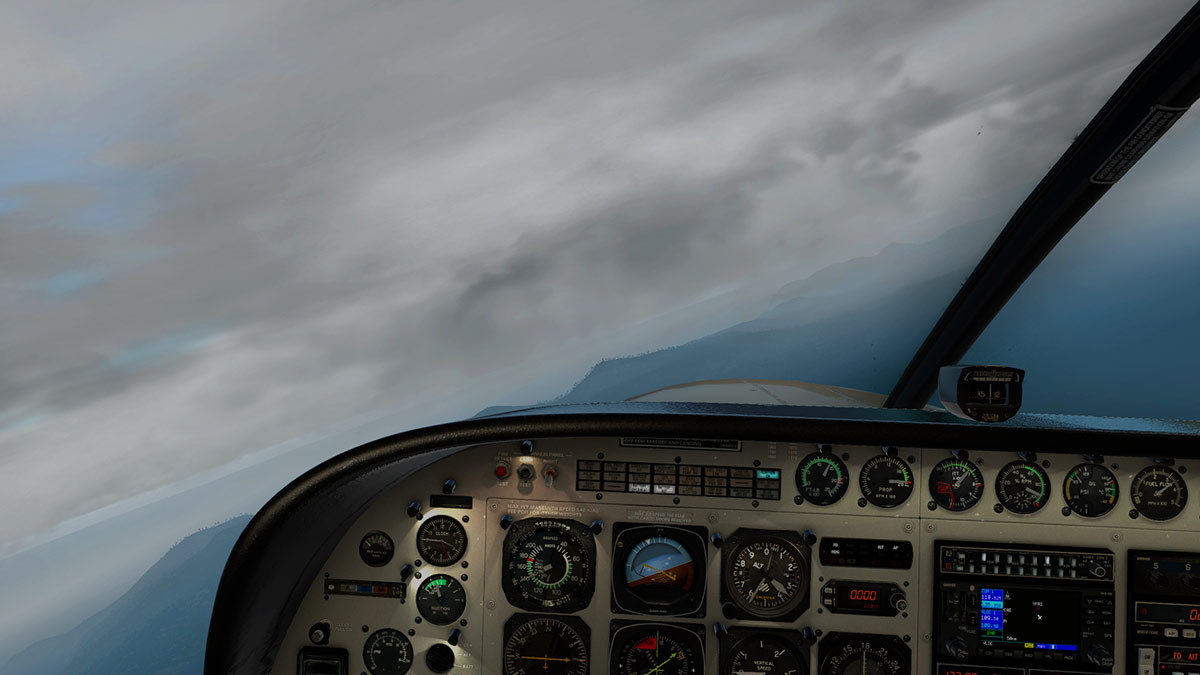
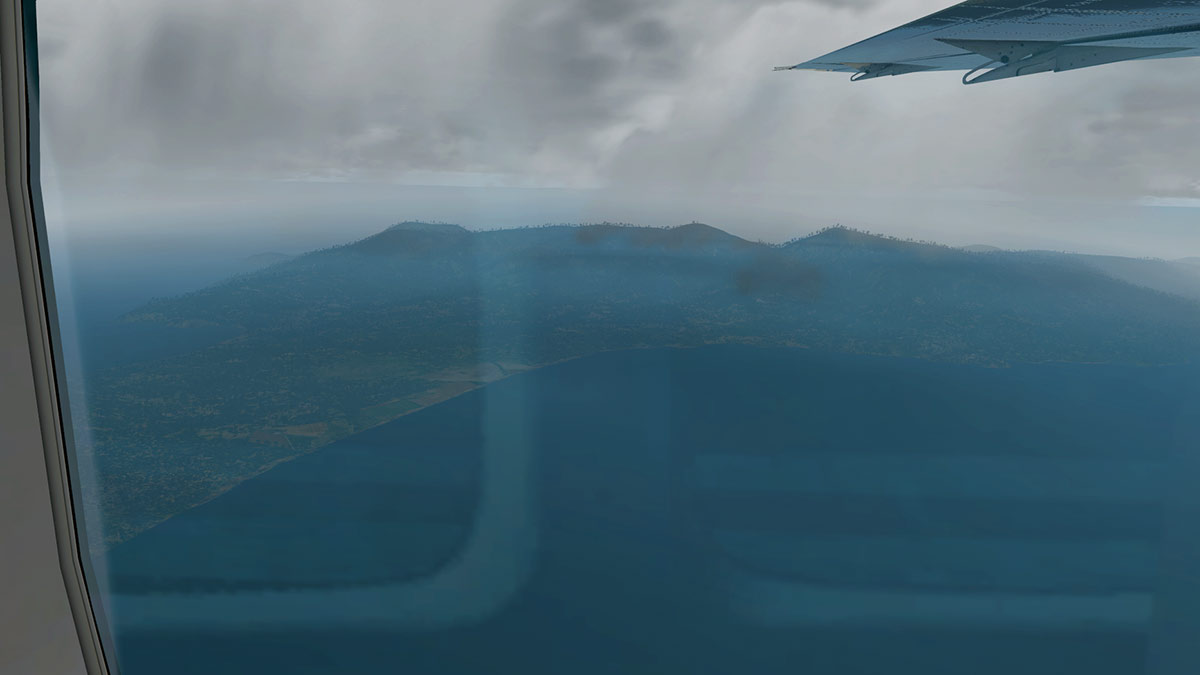
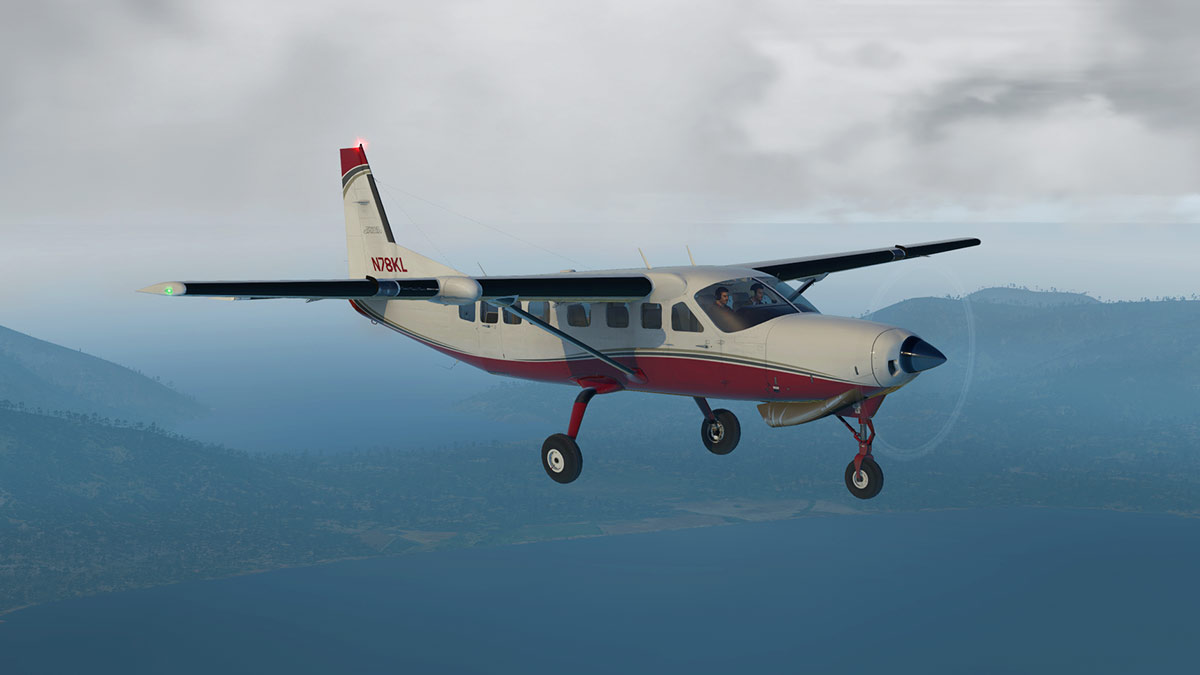
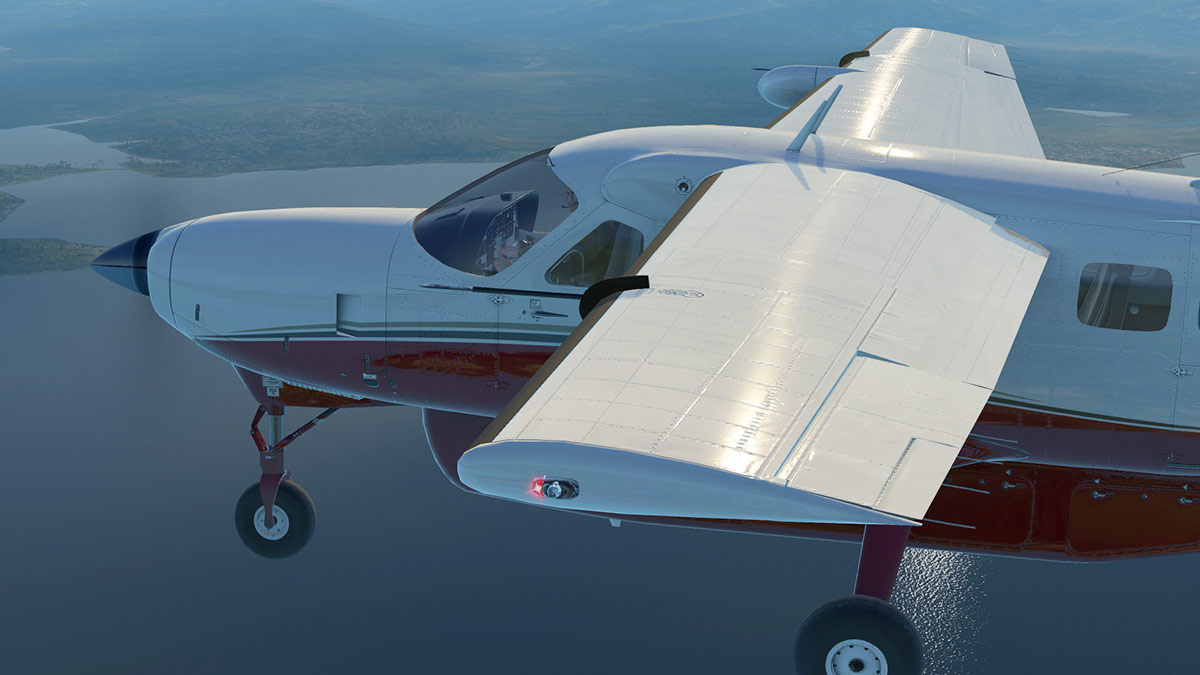
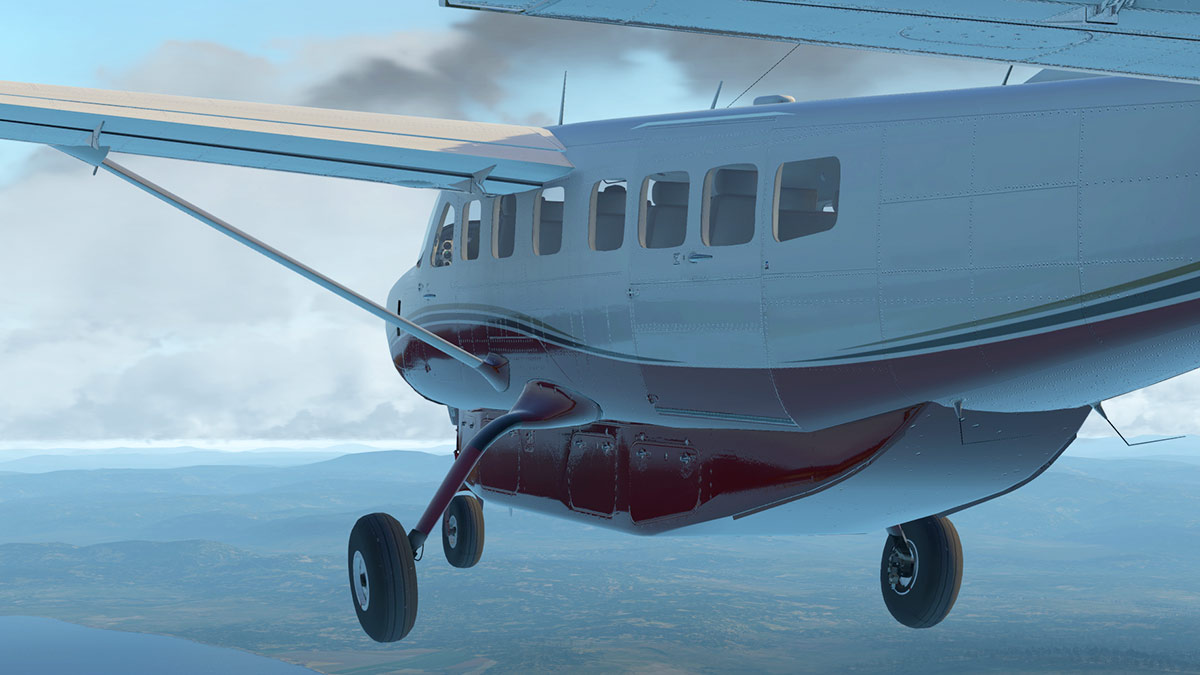
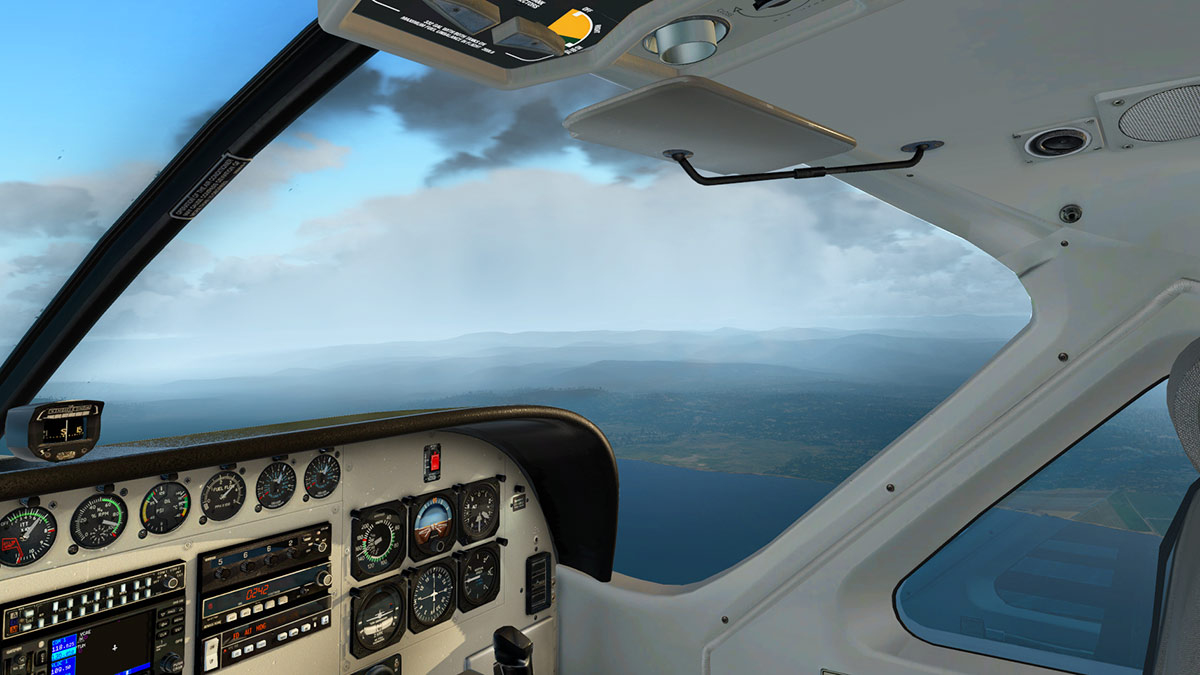
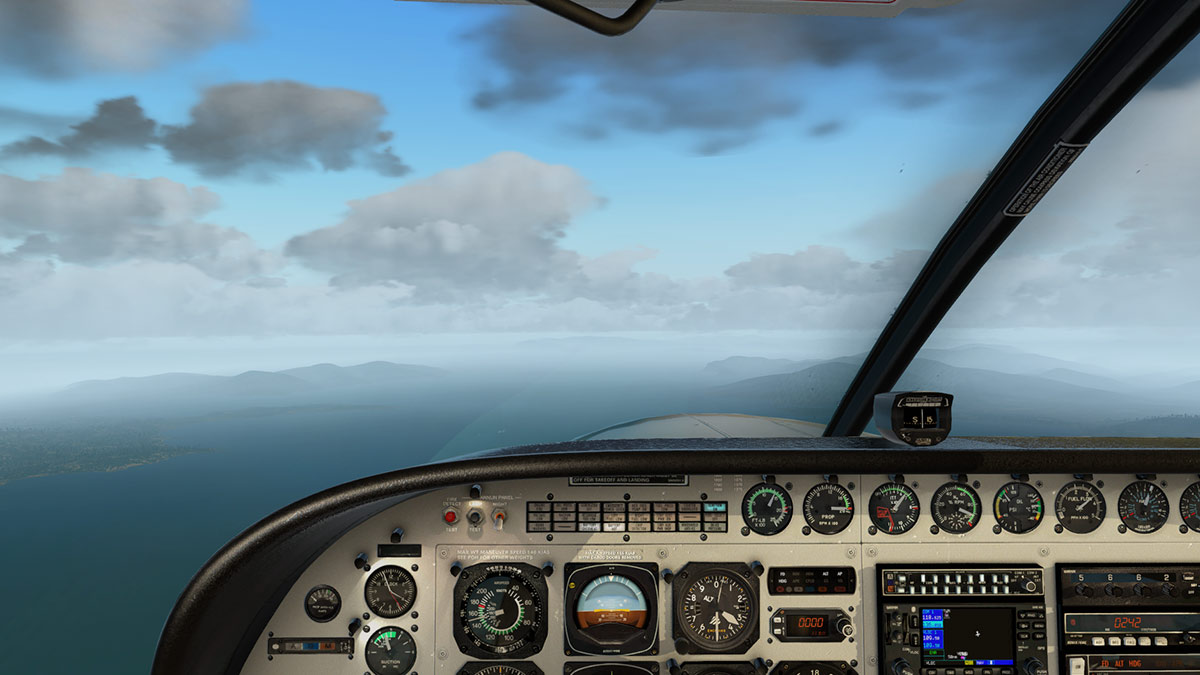
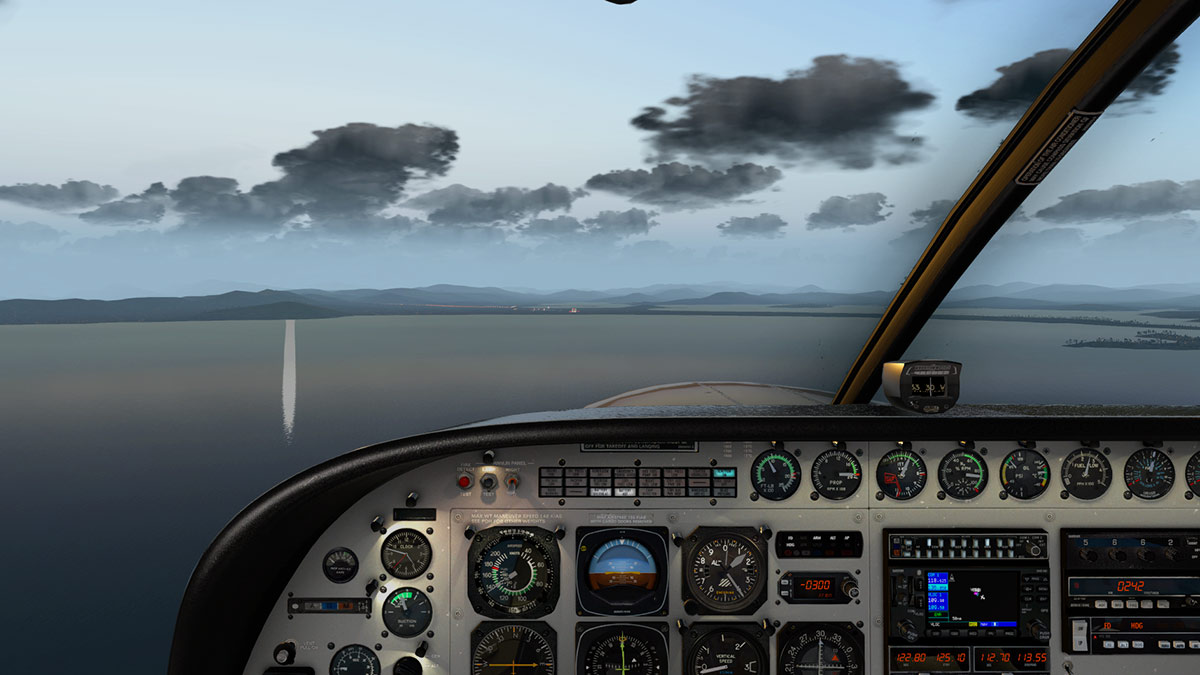
Scenery Update : LSZA Lugano XP11 by Aerosoft It was one of those weird moments. I have wanted to checkout LSZA - Lugano scenery by Aerosoft for simply ages and it was just to see how it looked now in X-Plane11. Lugano is special in a way to me, because it was the very first payware scenery I had professionally reviewed. That then is noted on how long ago LSZA Lugano has been actually released (2011) and it was also one of the first (actually the second released) scenery that Aerosoft did release for X-Plane as well. It felt like a very long time ago and in X-Plane years I suppose it is. So flying into the original Lugano Airport (from Zurich LSZH) I found it was actually showing it's age in X-Plane11, it felt old and and also a little tired, but the great features and the details that I remembered are all still there, it was then as it is now still a great scenery. LSZA Lugano XP11 by Aerosoft And so just a few weeks after my catchup encounter with LSZA - Lugano, Aerosoft then released the updated version for X-Plane11. Aerosoft has been extremely busy lately with updating a lot of their original sceneries and converting them for X-Plane11. Although and as we will see with this Lugano scenery, is that most of the basic scenery is still original. These newer converted sceneries are however very much more X-Plane friendly and use all of X-Plane's features to a better degree than any of the earlier releases which are really just straight out converted sceneries from the Flight Simulator versions. To a point that was the issue with most earlier Aerosoft sceneries in that they had no idea on how X-Plane actually works and they all had very limited X-Plane involvement and interaction, it still happens as with their recent release for Bali. But with most of these newer conversions they are now done by a gifted X-Plane developer called Omar Masroor, and that makes a significant difference and why they are now far better to use as X-Plane dedicated scenery and have far better active features. Lugano Approach Flying into LSZA is challenging. The airport is situated at the head of Lake Lugano and deep into the foothills of the European Alps. So the approach is not anything but straight on directly to the airport, but there is a sort of S curve course into RWY01. RWY19 is even harder as the descent is very steep so most approaches are usually over water into RWY01. There is a ILS approach (111.50 ILU) for RWY01 but this is a difficult steep 6oooft at a 6.65º glideslope and as required the slow approach speed here is critical because of the short 4429ft (1350m) 01/19 runway at the end of the slope, and with a steep approach like that you are really hard pressed to hold on to a 60knt speed. So you sorta "peek-a-boo" your way in around the headland to the hidden LSZA airport (arrowed). This is not the official way in but the easiest. Speed and height are critical and 80knts down to you dare 60knts stall zone with 1000ft required right on the money as you line up with 01. The small outcrop on your left gives you a perfect lineup to the centreline if you hit correctly the boundary on where the land bump hits the lake you will align up nicely to RWY01. From then on it is all nerves and a steady focused hands on the controls to watch out for sudden wind shifts from around the mountains to keep your path straight. As with most approaches like these in real life you need a special rated certificate to land at Lugano and I can see why. Throttle control is vital to get the landing point just right over the end of the runway trees, and you have to hit that runway start line on the money or it is a "go-around and try again" situation. I know the approach very well but it still worked me hard to hit that line.... but I did. Once down on the hard stuff it was then fingers crossed to rub off the speed. You are restricted on what you can land at LSZA, Jets are usually out, but small to medium prop regional's are usually okay. The B1900D is perfect. There is a turn point at the end of RWY01, but none at the end of RWY19 and even then the turning area is tight. But that is the attraction of LSZA, it is a great challenge to get it totally right and fly into the airport. LSZA Lugano Overview Lugano Airport Aeroporto di Lugano IATA: LUG - ICAO: LSZA 01/19 4,658ft (1,420m) Asphalt Elevation AMSL 915 ft / 279 m There is a major mesh issue at Lugano. This is created at a join of two tiles in the X-Plane mesh that don't quite join up with the same elevation data. So what you get are holes in the mesh. It is to be noted it is not the Aerosoft scenery that is the issue here, the scenery is correct and tested. There is no doubt on the origin of this LSZA scenery as it is crossed over from Flight Simulator scenery. That is a good thing and an adverse thing for the scenery in X-Plane. As noted LSZA is old by X-Plane standards but older still again by it's FS design. In areas it looks it's age, but in most areas it is still a very high quality scenery... in fact its design is actually quite endearing but you will need a fairly high setting of your texture quality to bring out detail, anything less will give give you a slight blur on all your buildings and objects. Lugano Airport was one of my first walk around airports. This is in the fact that the scenery is so detailed you look around the airport from real eye level and explore the airport from that viewpoint. At the time in 2011 it was and had the total "wow" factor, it still does give you that realistic feeling, but scenery has also come a very long way in the intervening years, as this was then early X-Plane10 and you didn't then have a lot of extremely high quality scenery to compare scenery against scenery with. It was this older texture aspect that made it feel old when checking out the original scenery out a few weeks ago. There no doubt about the great 3d modeling, but the textures are still old as well even if they are very good. Not much has changed there in the XP11 version as the textures have had no attention, but it is X-Plane11's features have added in another aspect that saves the buildings from that original outdated feel. The X-Plane11 reflection feature brings the glass areas to life, and helps a lot in the overall feel of the buildings. The expansive glass hangar doors on the RUAG maintenance hangars benefit the most from the reflections as the areas covered in reflections are large. Another bonus is that you now also have the 3d grass feature. All the grass areas now have great grass and if you wish you can disable it for framerate savings, but I found out that to switch is very negligible and the effect of the grass on is excellent. The ATC ground routes and ramp starts have all been completely revised up to current standards for X-Plane's A.I., X-Life and World Traffic3. Originally Lugano Airport came with a separate static aircraft package, but with the new ATC ground route layouts you don't need it any more, but to remind yourself to pull it out of your custom folder if you are updating from the older version. But Lugano creates major difficulties for these traffic systems even if the ground networks are perfect of which they are here. Problem number one is that LSZA is situated in a deep valley and all the approaches require very significant descents or climbs from a high position to allow a landing. Secondly is the fact that Lugano as an airport in frequency is not an overwhelmingly a busy place. So put the two together and LSZA is not going to generate a lot of action. Running World Traffic3 creates a lot of aircraft flying overhead as they couldn't master the complex approach. Occasionally one does actually work it out and lands, but not very often. So you do get this gradual departure loss as aircraft depart and don't return to fill in ramp spaces. Settings for the ramp is to be worked out as well, because above the 50% percentage of the parked aircraft ratio, it fills LSZA out full to the brink of aircraft? A great bonus of WT3 is that it does select the correct aircraft and operator (Darwin) with Saab 2000's for Lugano and so it does look authentic. The "Migros" supermarket, petrol station and "UBS World Trade Centre" buildings are still untouched, but the areas around them have been cleaned up and all the cars updated to the current X-Plane default 3d versions and look significantly better. All buildings are quite basic and are still the older FS designs, but they still do the job of filling in the scenery very well. The small industrial area/farm to the east and the hangar with the still for lease factory at the end of RWY19 are still also all the same original quality. The ground textures (orthphotos) are noted as being refined, but they look exactly the same as the earlier versions to me. Lighting The lighting has been upgraded to X-Plane as well, with all the areas now using the X-Plane effects for better light coverage on the ramps and building areas. Approach lighting is really good, but who wants to fly around Lugano in the dark? The building texture lits are a mixed bag. From the good terminal building photo textures to the really average older FS style flat colour textures on certain buildings. The scenery gets away with it, but only just, with no X-Plane ramp lighting it would have been now a quite average scenery at night overall. Again you have to have your fairly high settings of your texture quality set to the maximum to get it anywhere near passable... and then just. Summary LSZA - Lugano will always have a place in my heart as scenery. It is where it is positioned with that challenging arrival and also the feeling of being here. It was a complete revelation on its release, but remember even then it was an adapted Flight Simulator scenery and still in areas like buildings and lighting it still shows. The biggest change here in the XP11 version is mostly from the the X-Plane Simulator itself and its great active features. Lighting, reflective glass, ground routes, 3d vehicles and parking areas with better vegetation in grass and foliage are all added, but most of the work by a designated official X-Plane developer who has used his skills and has cleaned the whole scenery up of its foibles and odd items that were present in the original release, in other words it has been cleaned up and refined to X-Plane's current standards, and that is not overall a bad thing. If you already have he original version of Aerosoft's LSZA - Lugano Airport then there is a still lot that is similar including the buzzy textures, but the changes with this update does do the scenery a great service and make it a more modern and current scenery and even far better version than the release version and at a cheaper price as well... So this XP11 version gives Lugano Airport a new life and a better place in our current simulator for it's uses and now it has more in its better activity and dynamic features and that can't be a bad thing... ____________________________________________________ Yes! the Scenery Update for LSZA Lugano XP11 by Aerosoft Is now Available from the X-Plane.OrgStore! : Airport Lugano XP11 Price is US$19.95 This is a new initial upgrade product for XP11, so there are no deals or upgrade vouchers from the earlier version. It is only a new full purchase. Features: Highly detailed airport scenery of Lugano High resolution photo textures for the 3-D models Glass reflections of glass surfaces on buildings XPlane 11 ground vehicles with appropriate lanes added X-Life compatibility Revised taxi routes for better compatibility with X-Live and X-Plane's own AI traffic Revised ramp starts for a correct placement of the aircraft. The ramp starts now support the "Show parking aircraft" feature Stratification of roads added for X-Plane road traffic Old cars in the parking lots replaced by the better X-Plane-own vehicles Some parking vehicles and floodlights are added Duplicate X-Plane's own Navaid objects removed Unnecessary files were removed Revised objects for 3D grass Possibility of switching off the 3D grass for optimum performance All airport buildings as they are in real life New vegetation details with approx 20.000 grass polygons Night lighting in real time Sloped runway Manual and charts Requirements: X-Plane 11 Windows, Mac or Linux 2GB VRAM Minimum - 4GB+ VRAM Recommended Download Size: 45Mb (yes only 45mb!) WT3 : Traffic layouts are fine and the app will generate the correct WT3 ground routes. The airport however is difficult for its bottom of a valley position and irregular traffic patterns, so you don't get a lot of activity. ______________________________________________________________________ Upgrade Review by Stephen Dutton 17th October 2017 Copyright©2017: X-Plane Reviews (Disclaimer. All images and text in this review are the work and property of X-PlaneReviews, no sharing or copy of the content is allowed without consent from the author as per copyright conditions) Review System Specifications: Computer System: Windows - Intel Core i7 6700K CPU 4.00GHz / 64bit - 16 Gb single 1067 Mhz DDR4 2133 - GeForce GTX 980/SSE2 - Samsung Evo 512gb SSD Software: - Windows 10 - X-Plane 11.05 Addons: Saitek x52 Pro system Joystick and Throttle : Sound - Bose Soundlink Mini Plugins: Environment Engine by xEnviro v1.7 US$69.90 : JARDesign Ground Handling Deluxe plugin - US$14.95 : WorldTraffic 3.0 Plugin - US$29.95 Scenery or Aircraft - Beechcraft B1900D HD Series XP11 by Carenado (X-Plane.OrgStore) - US$34.95
-
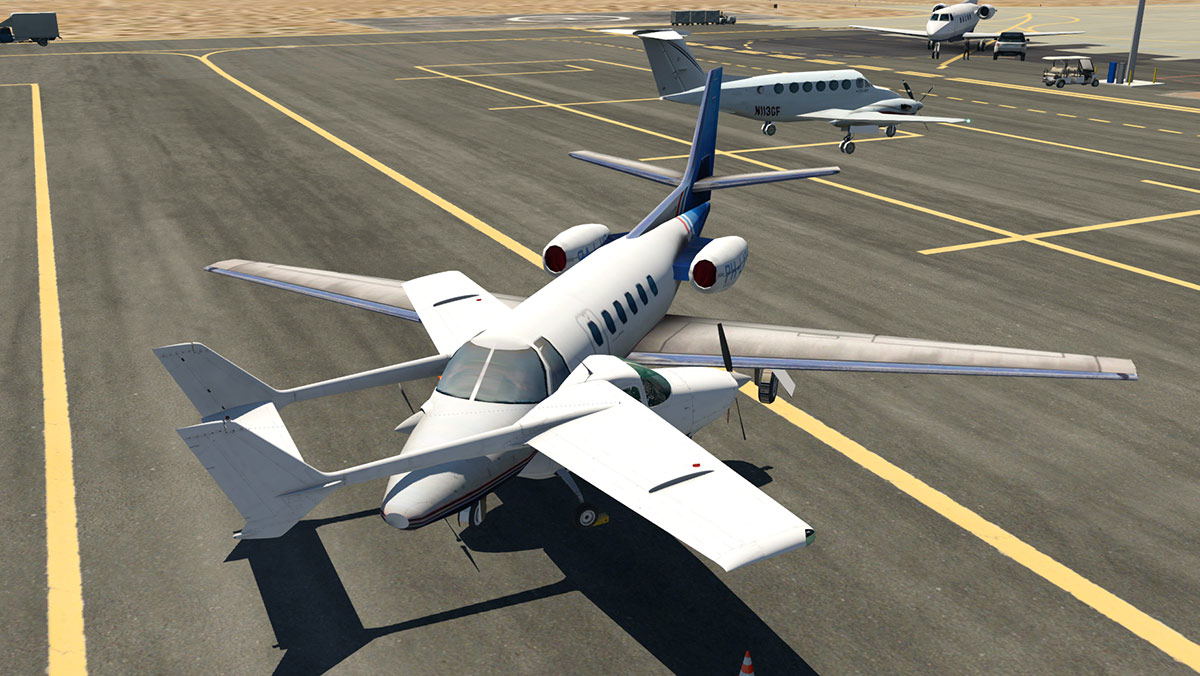
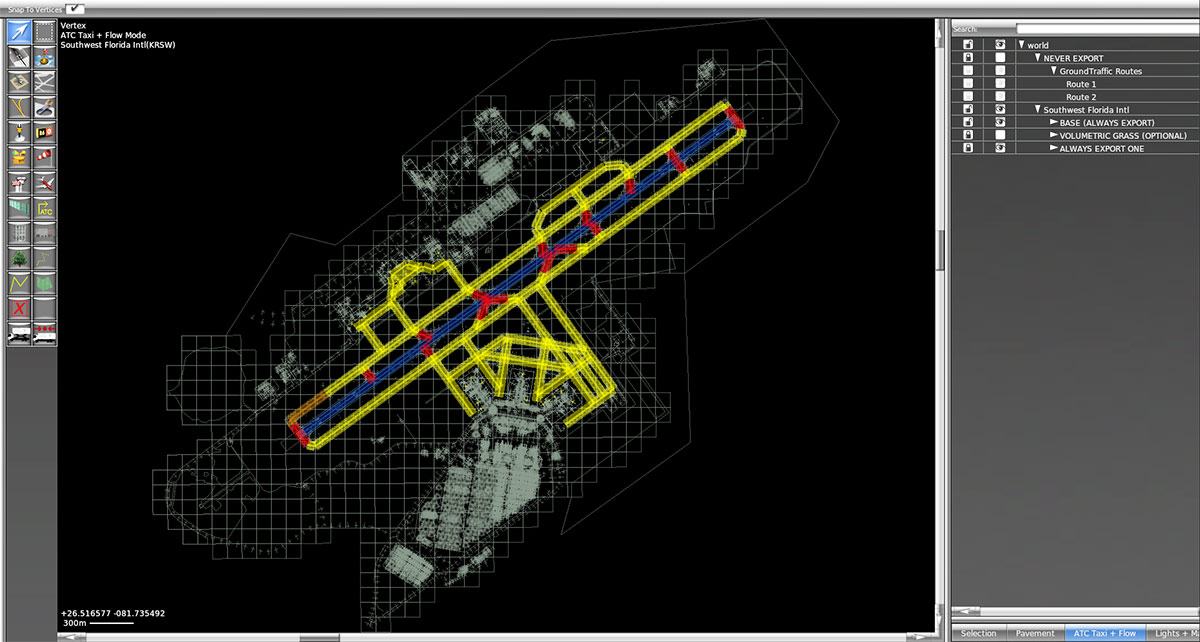
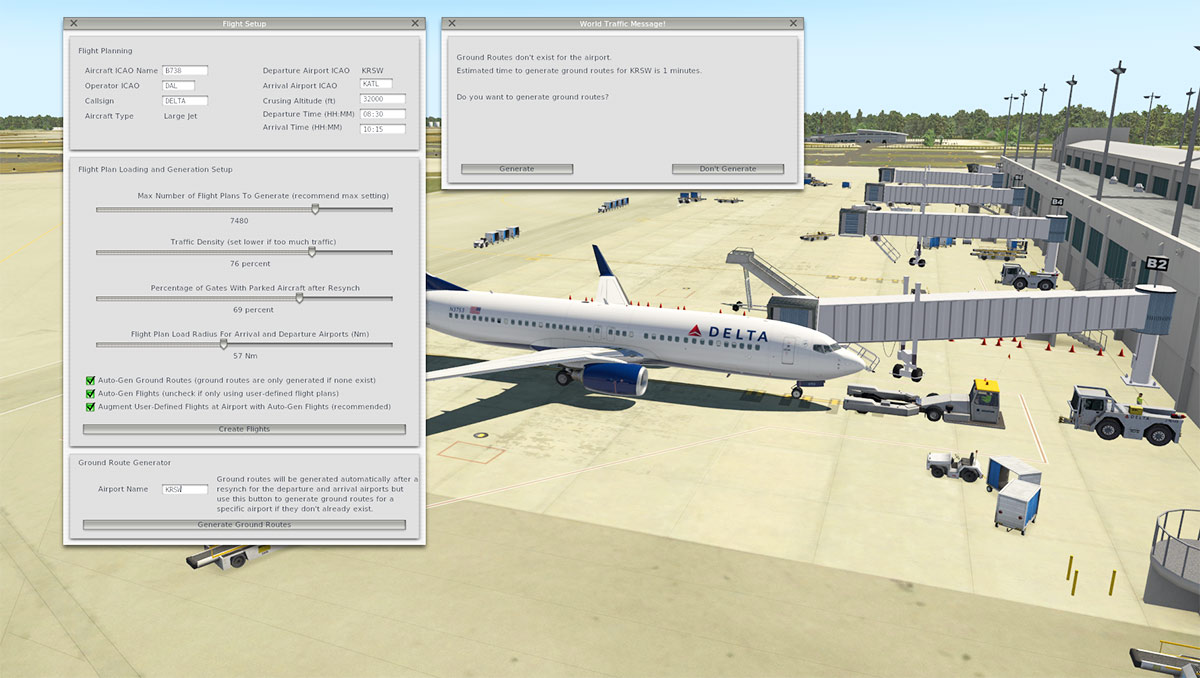
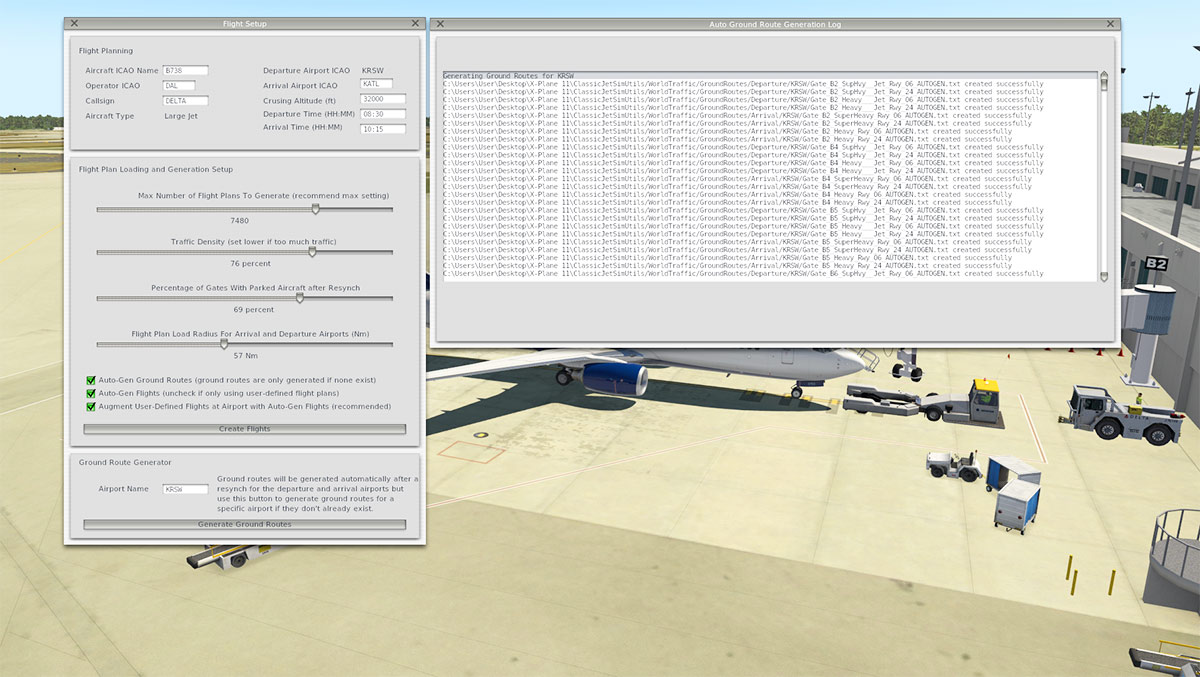
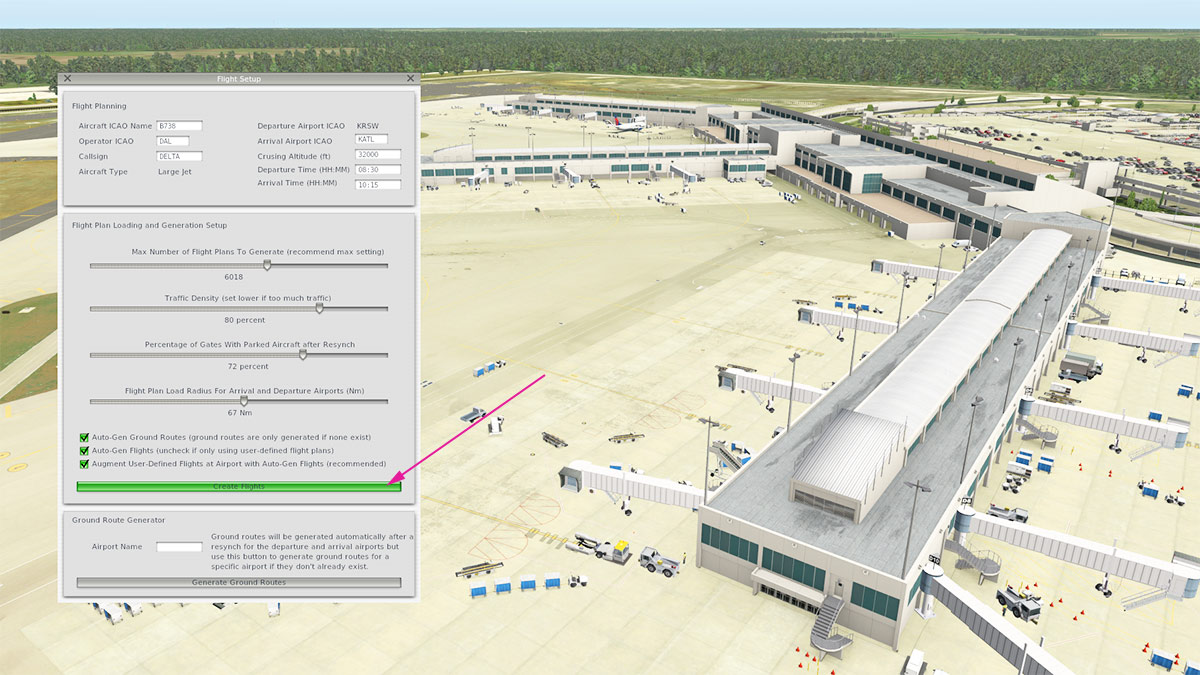
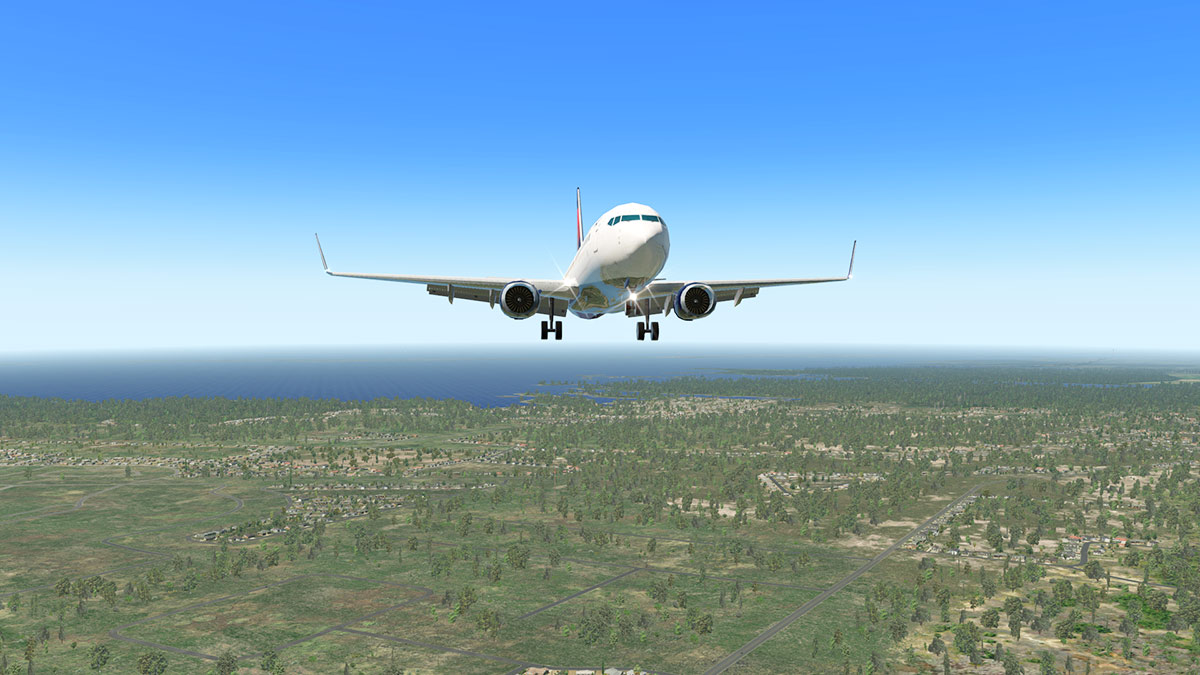
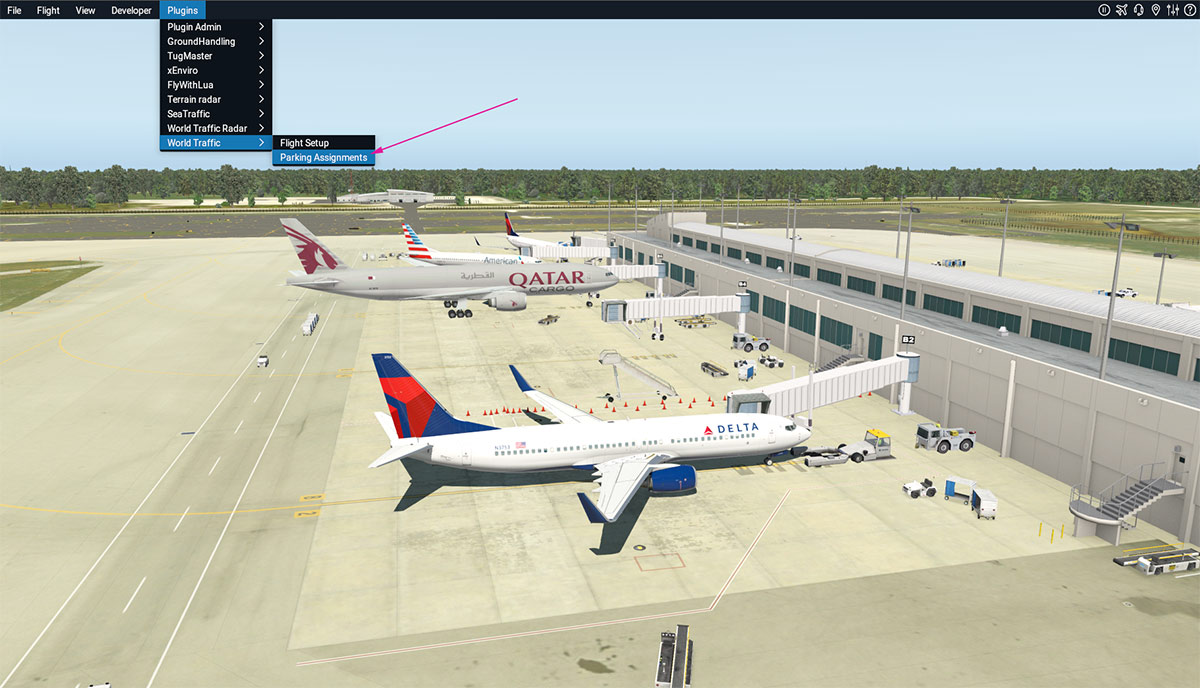
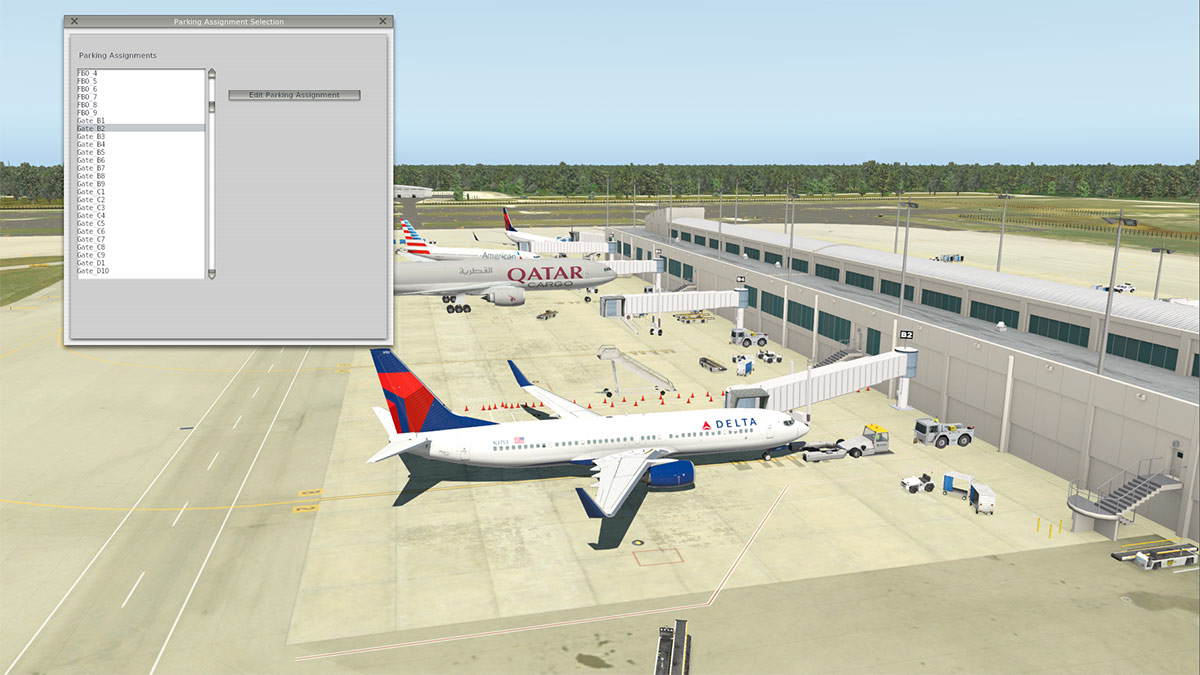
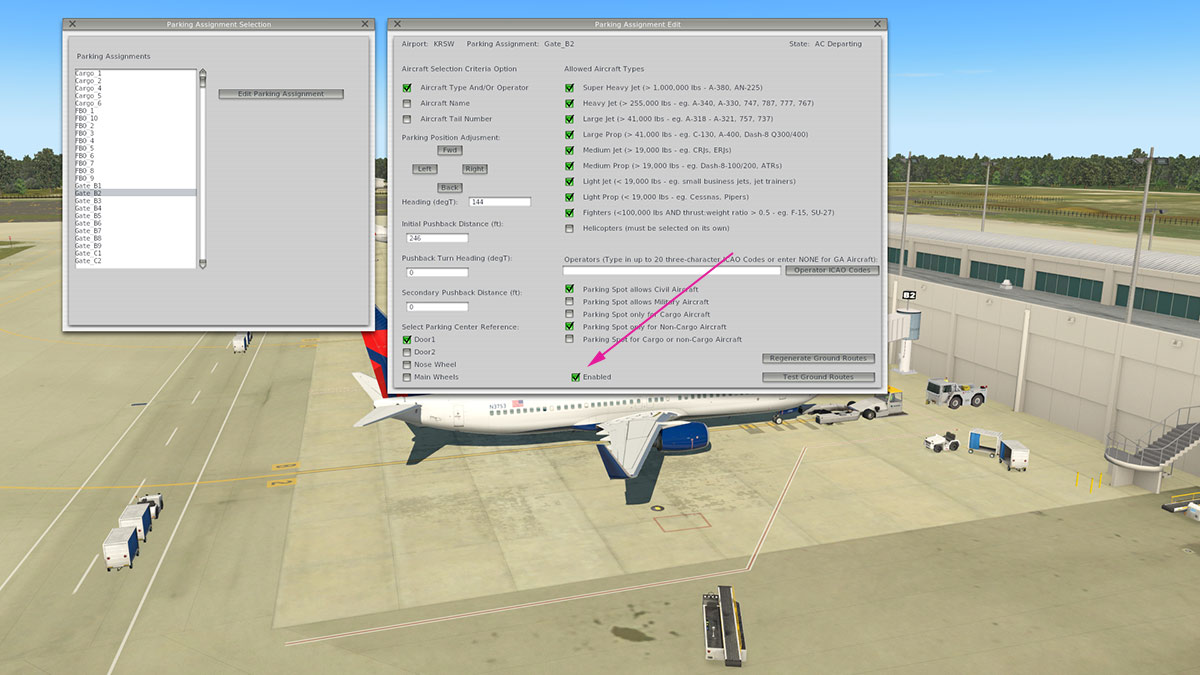
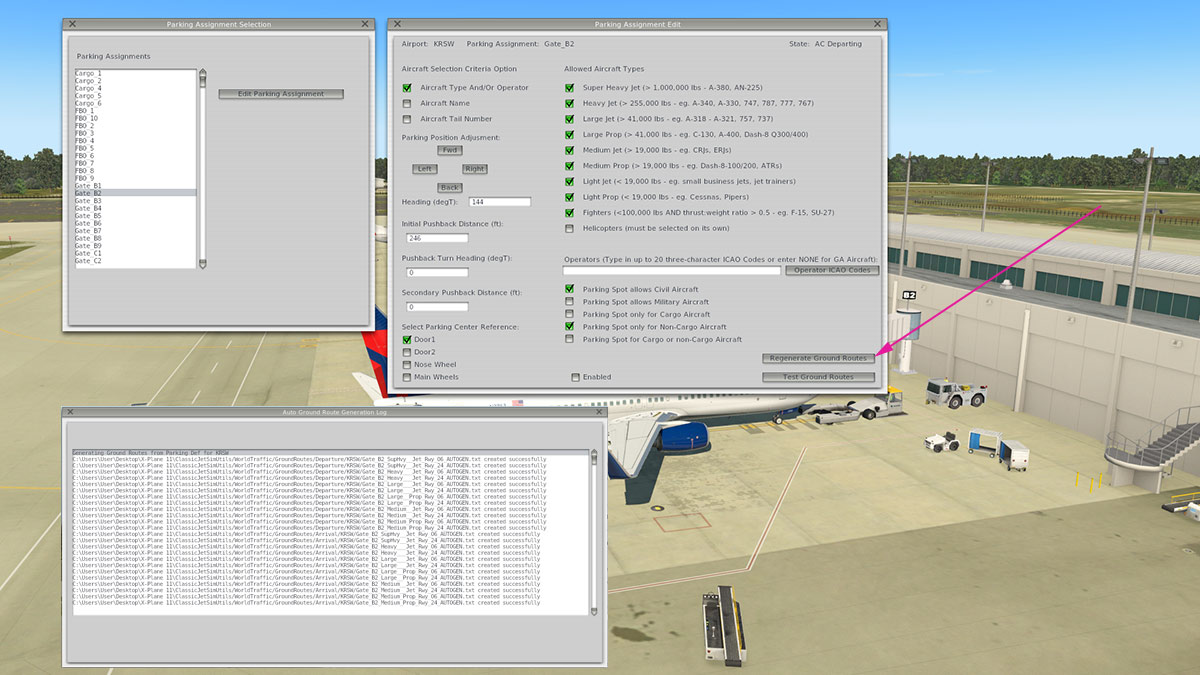
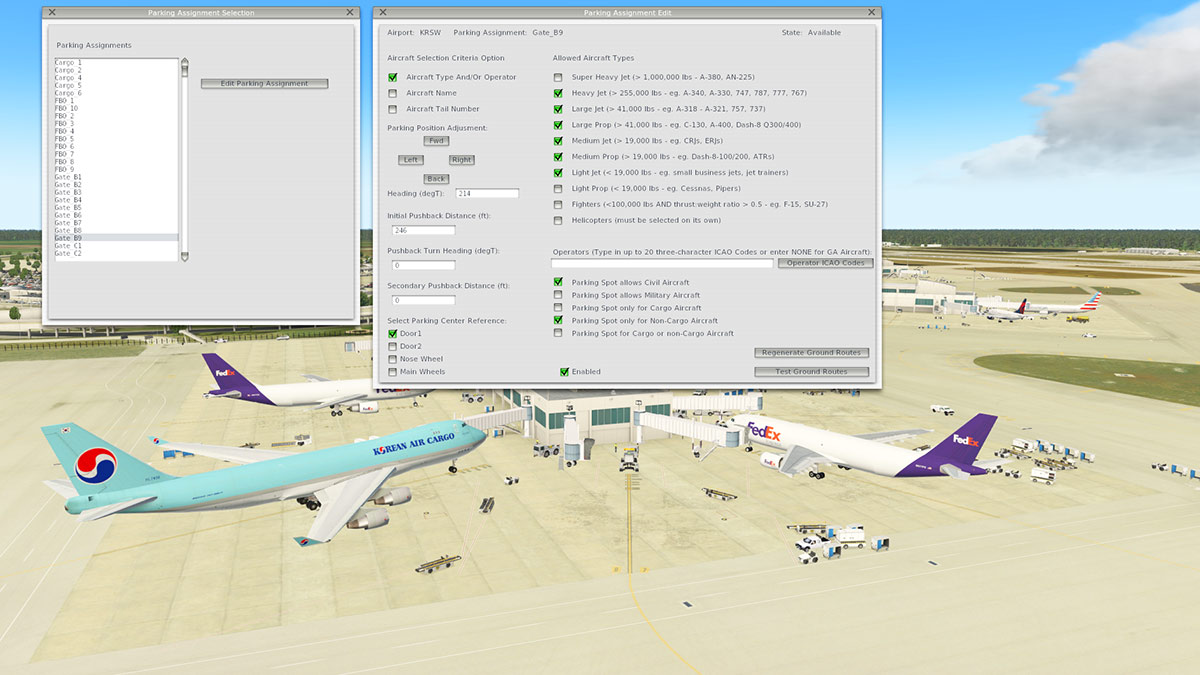
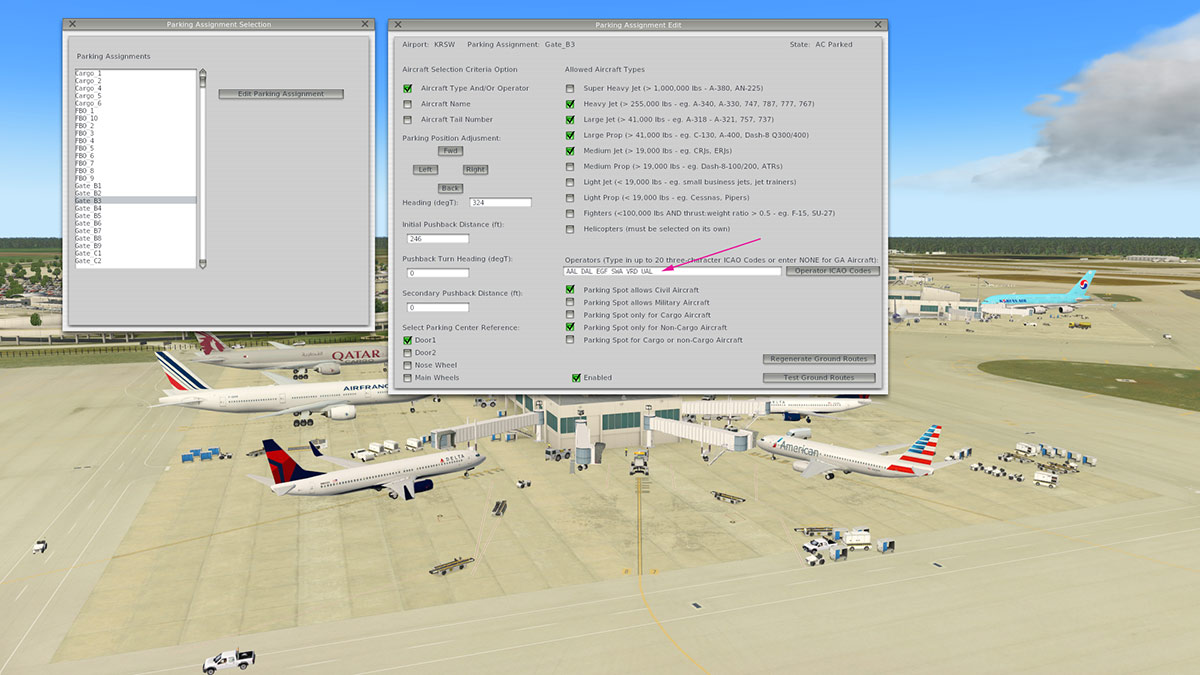
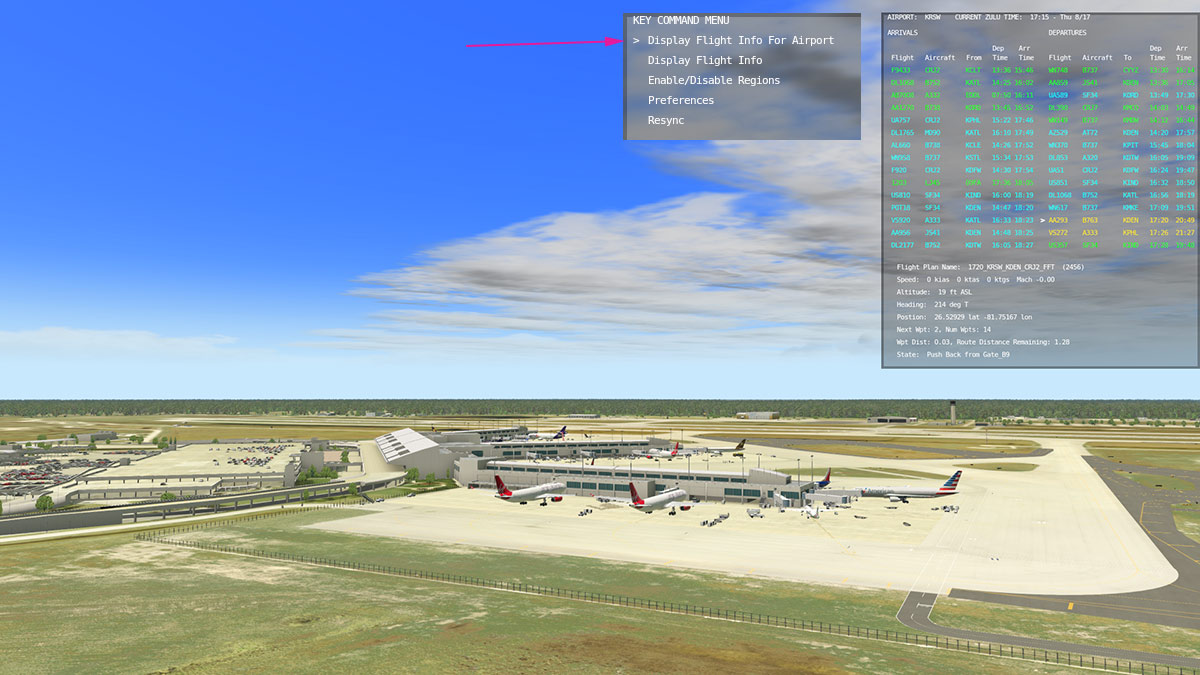
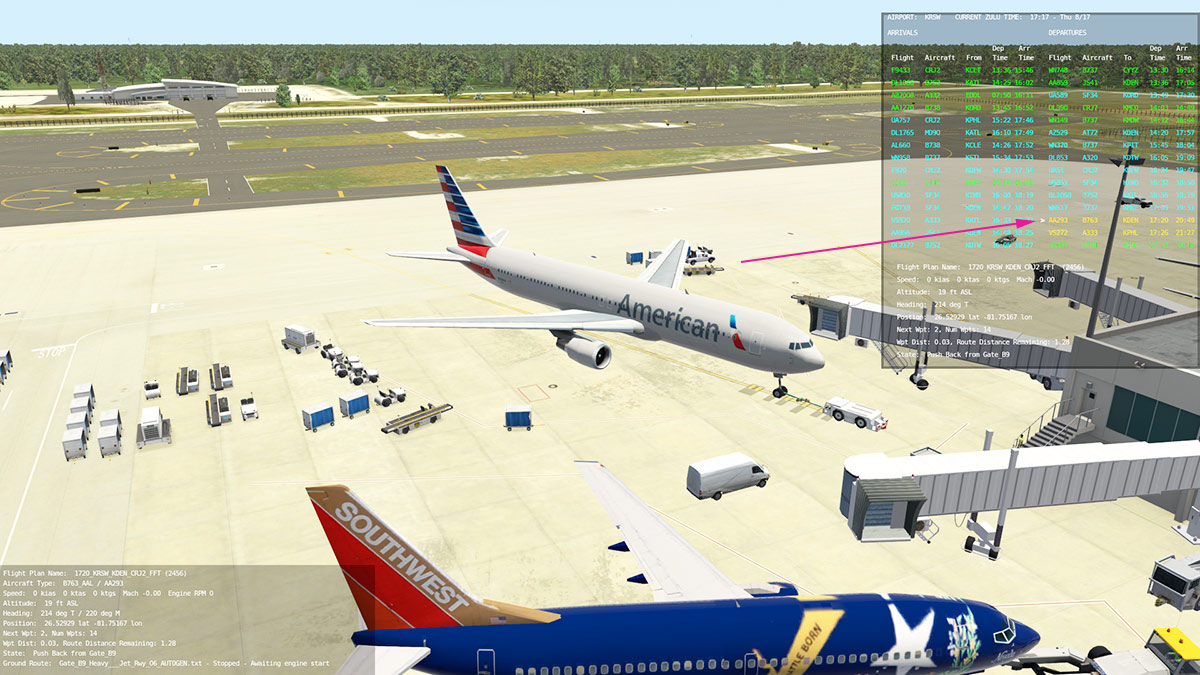
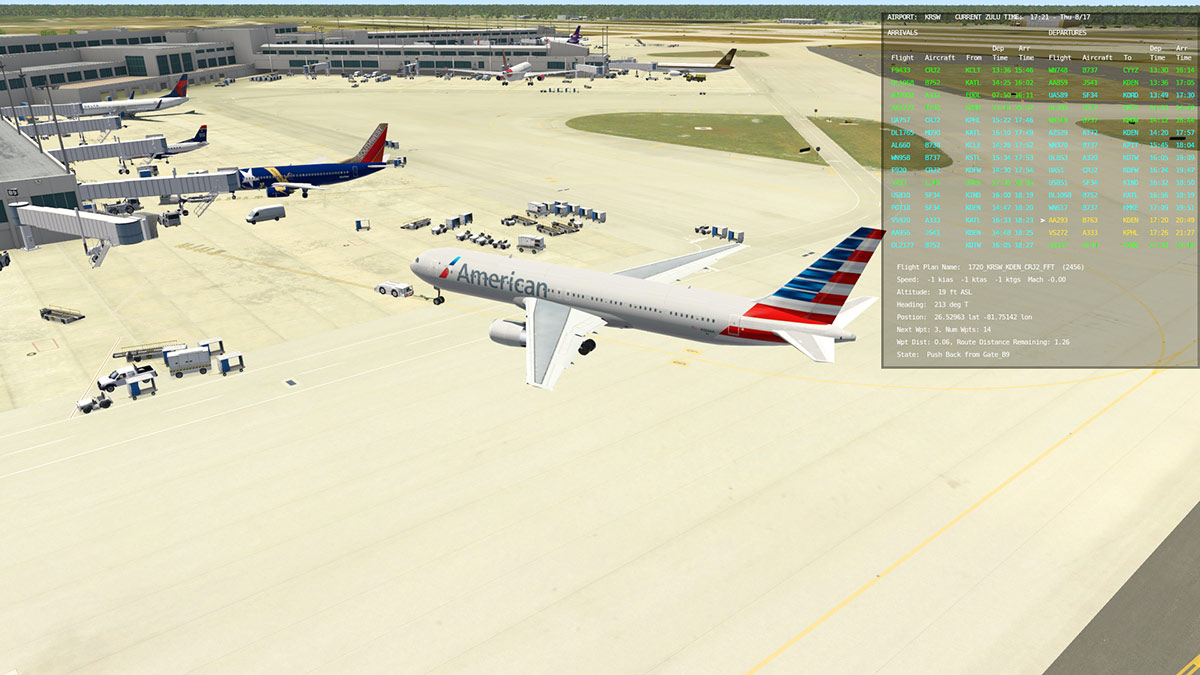
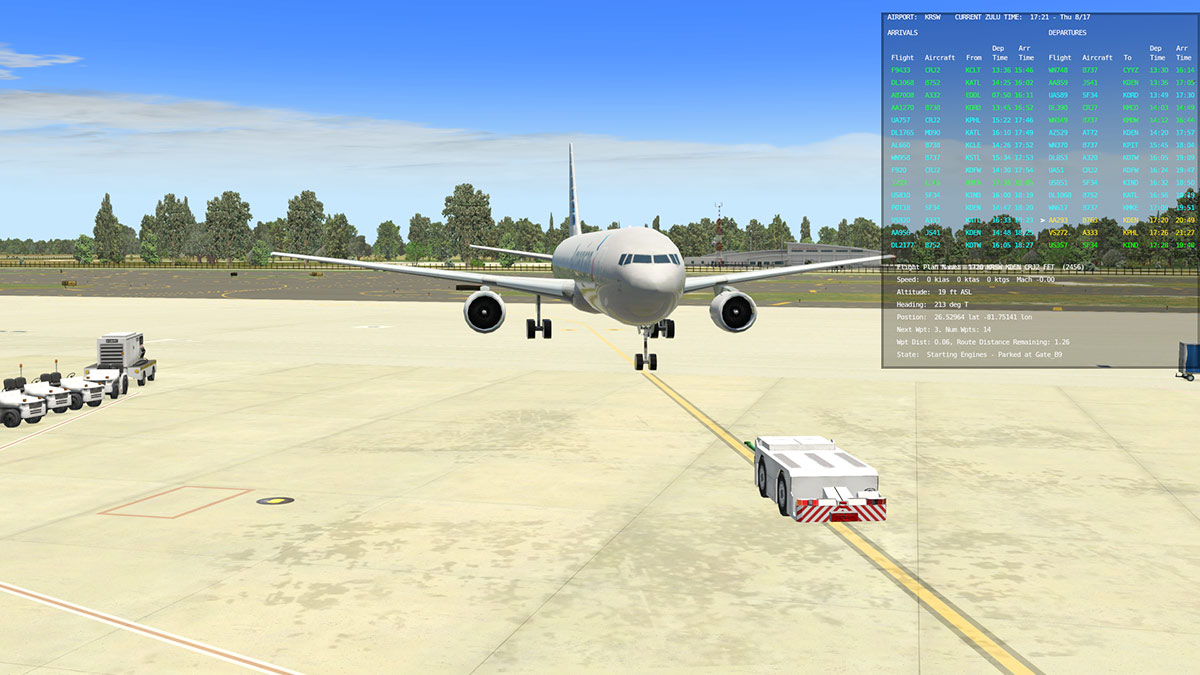
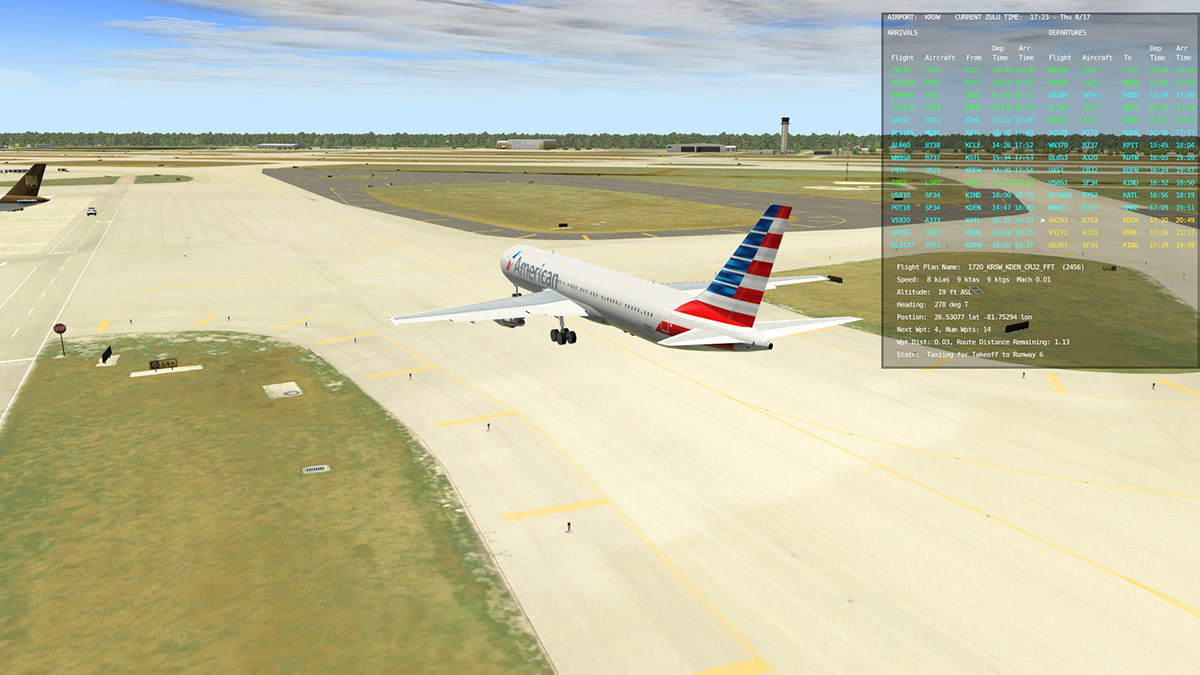
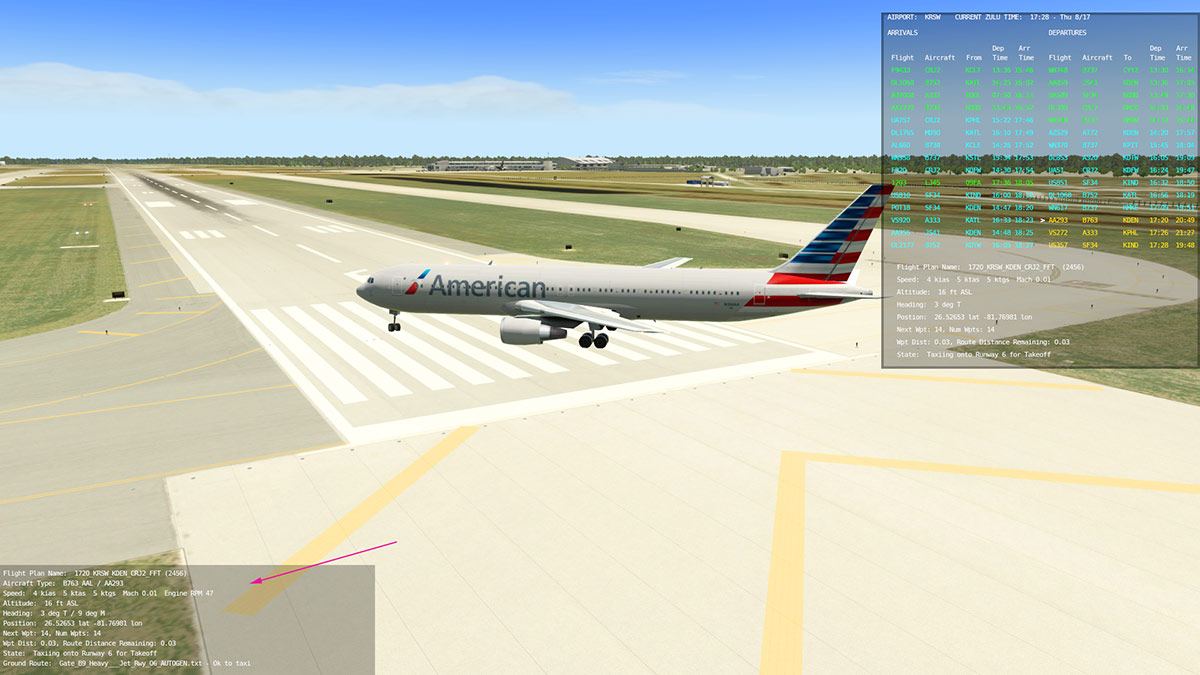
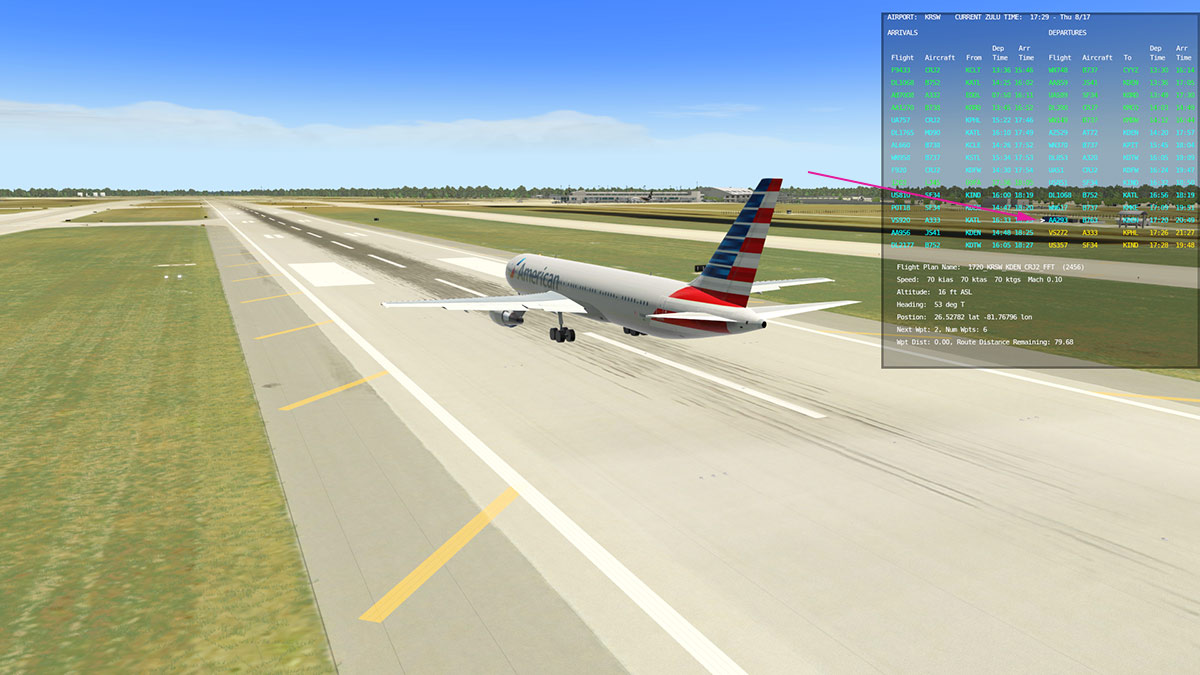
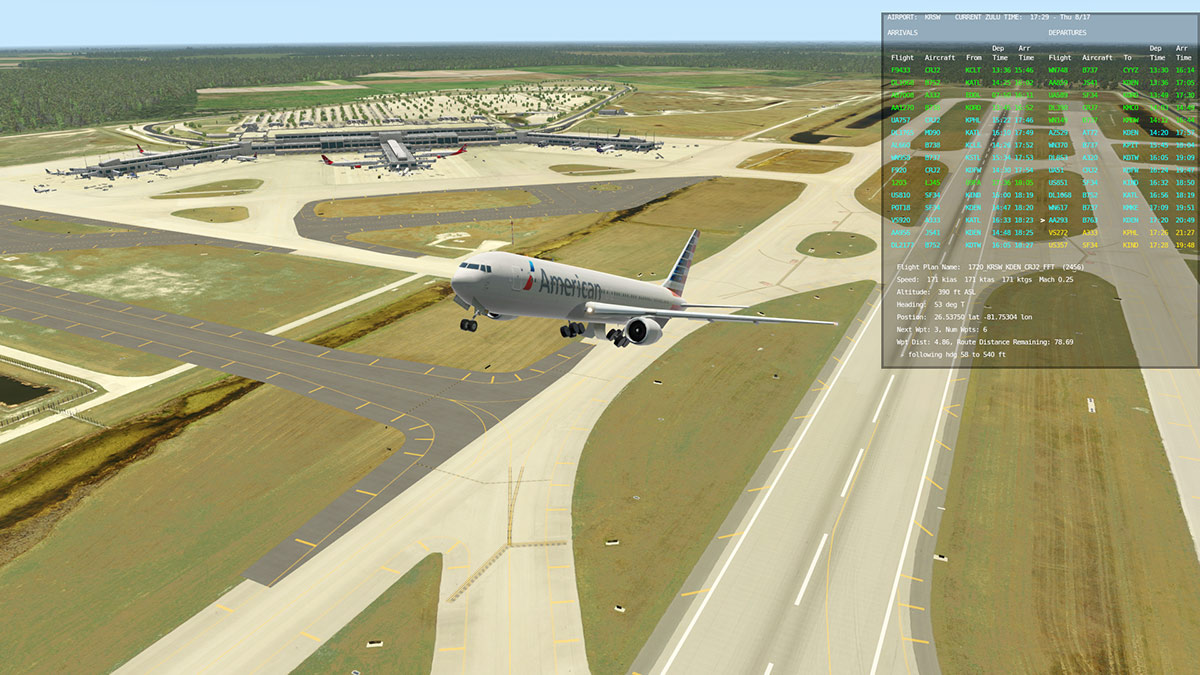
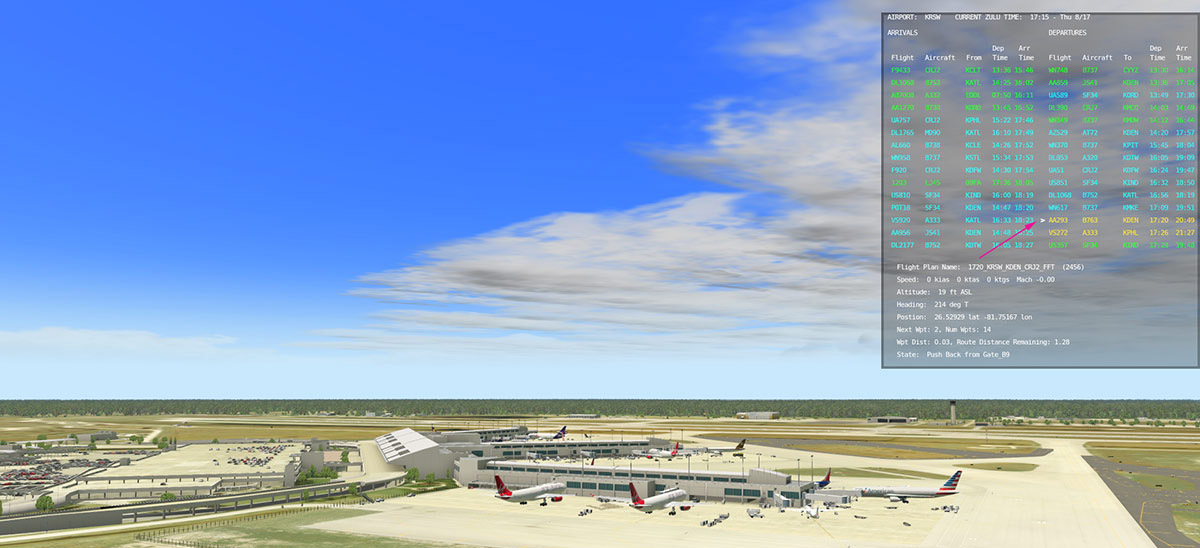
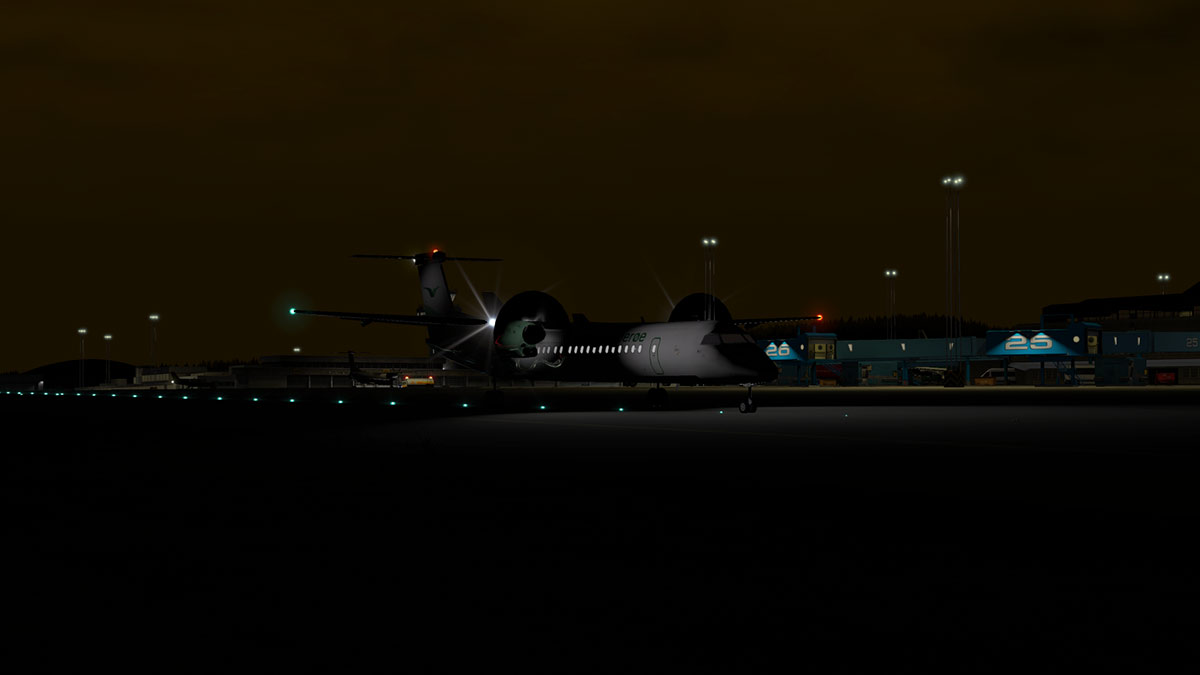
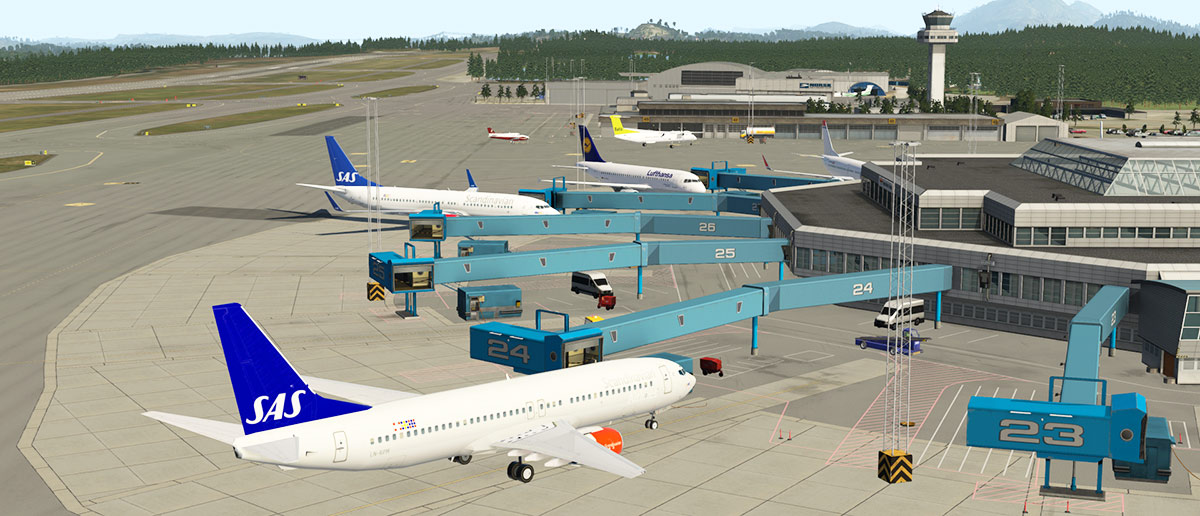
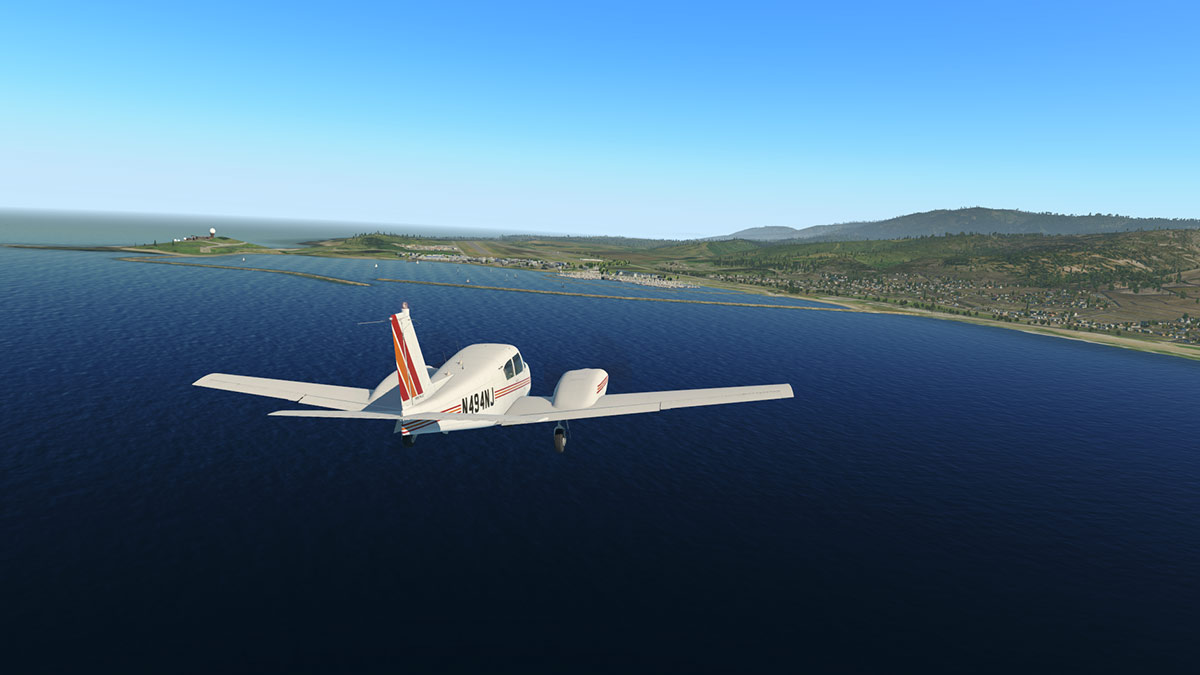
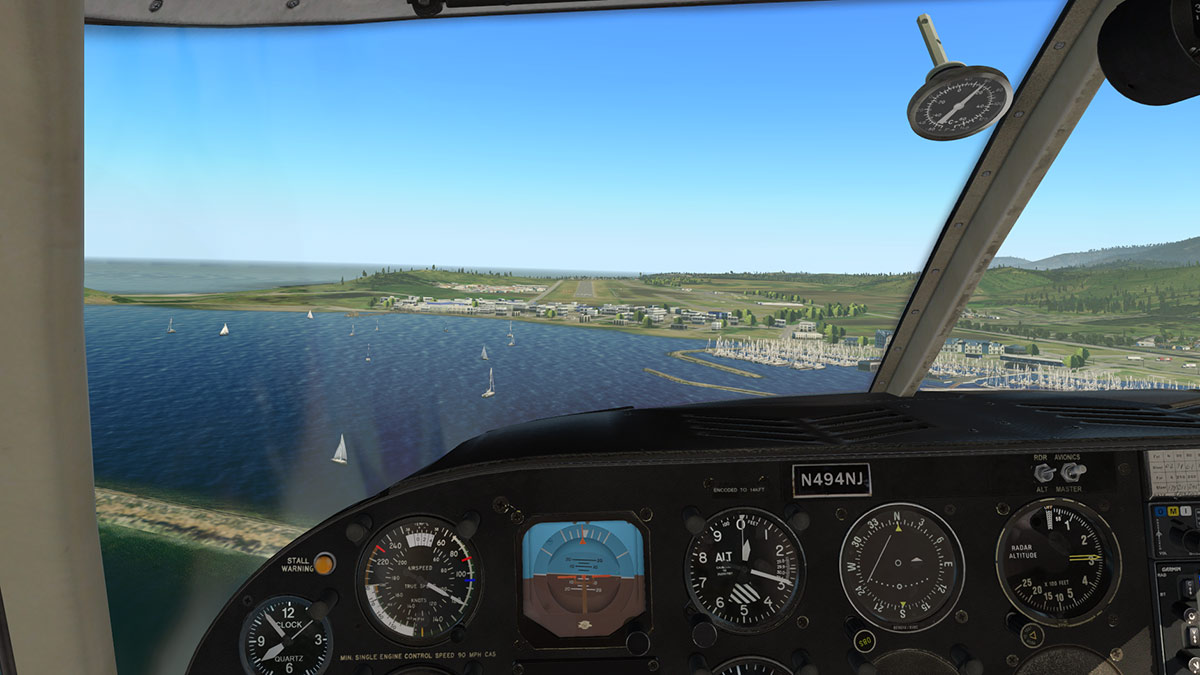
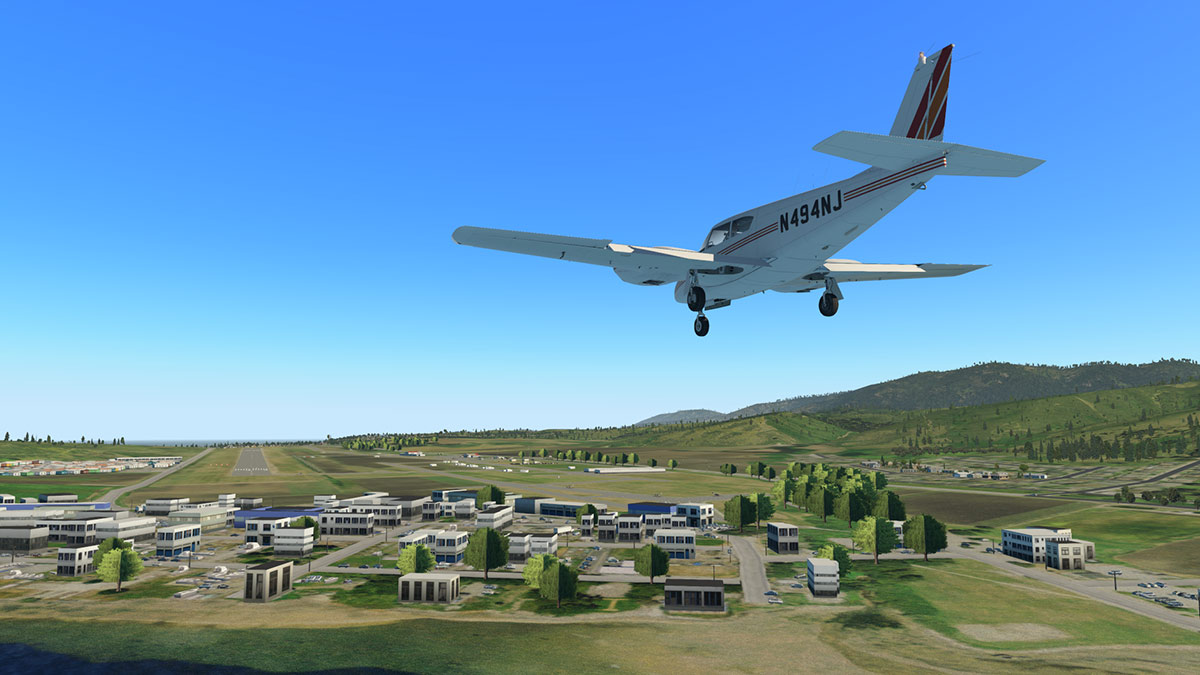
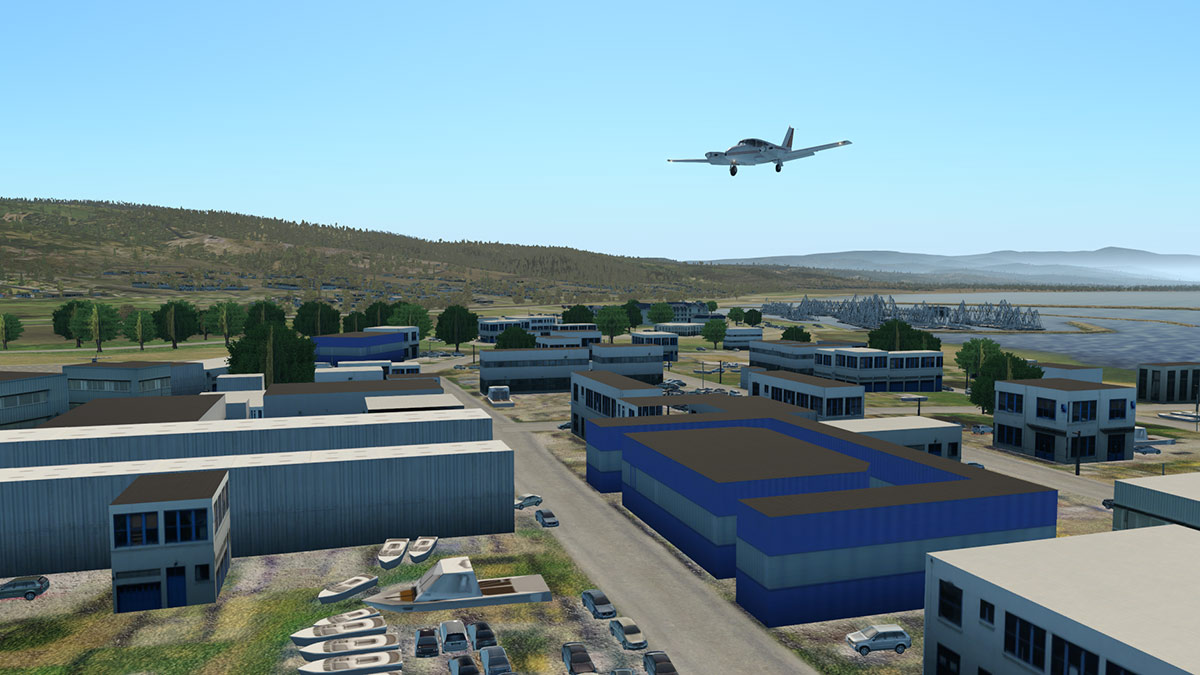
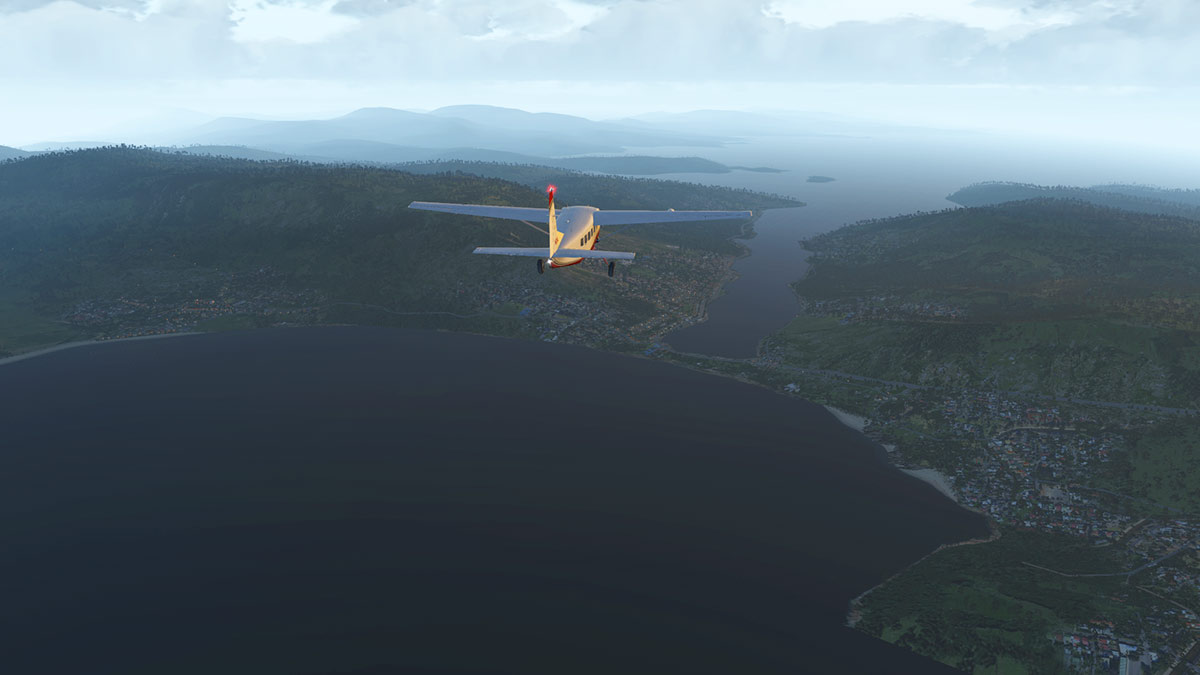
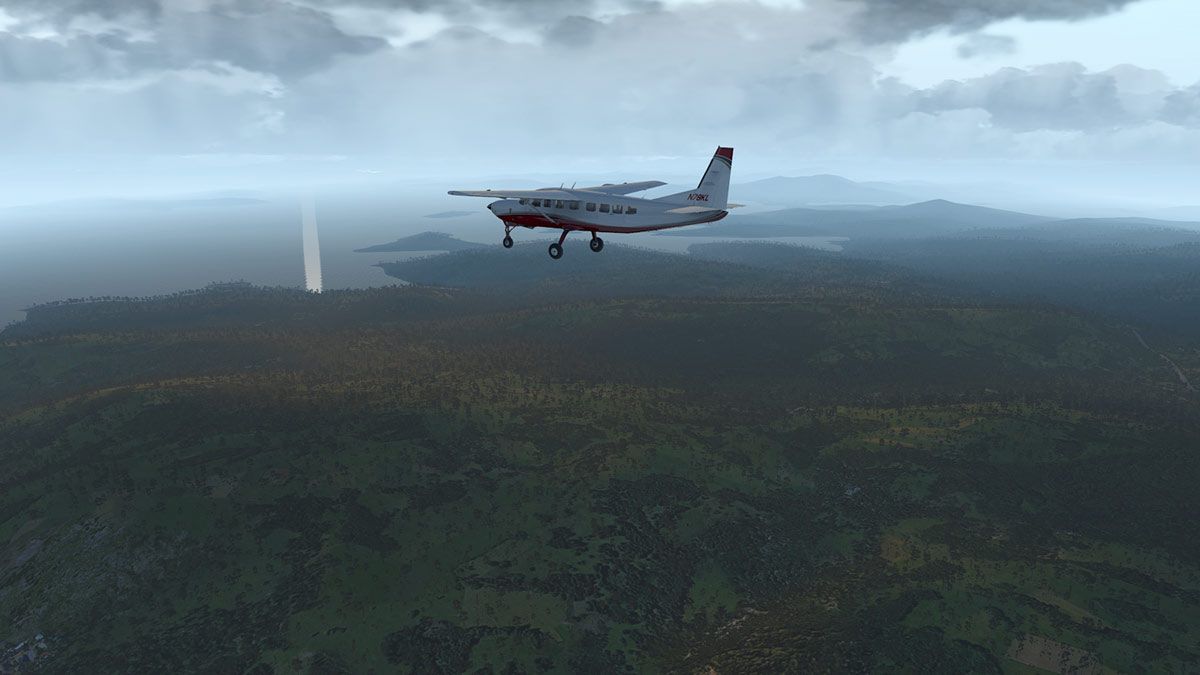
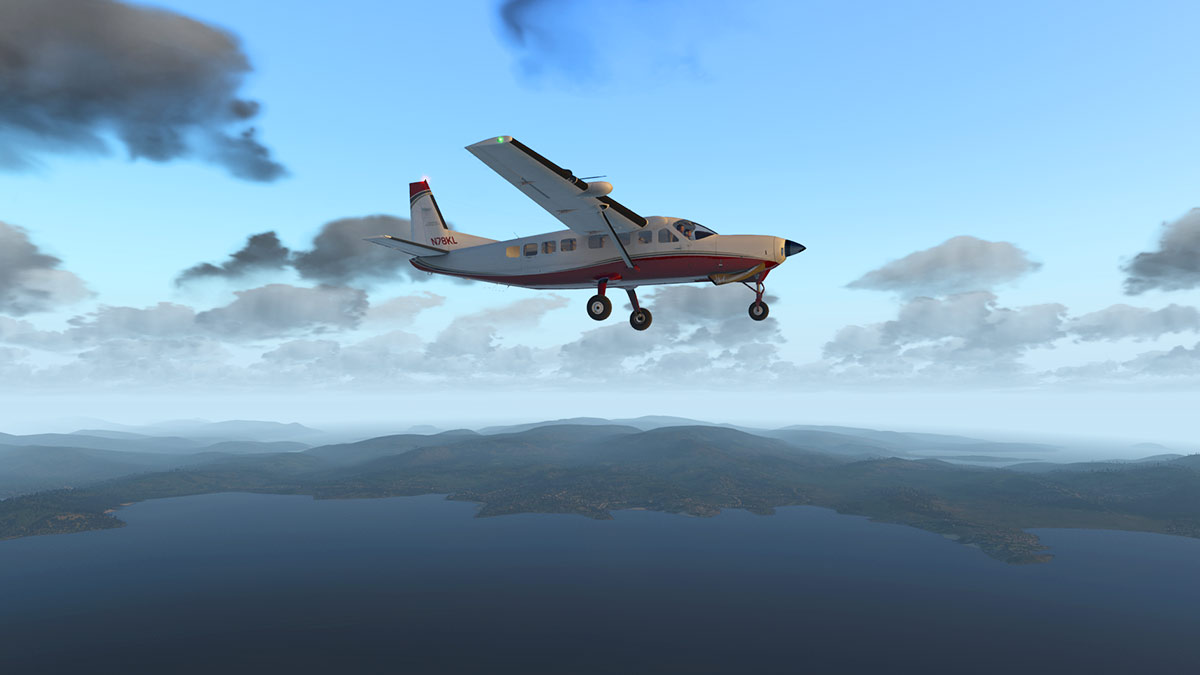
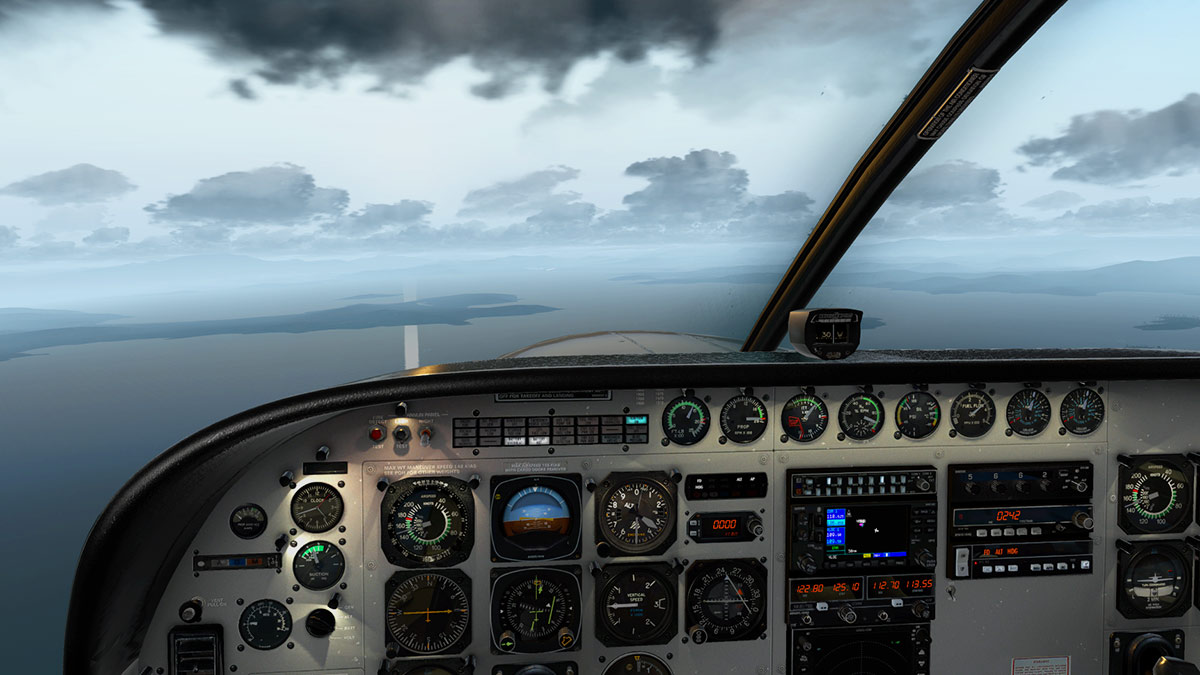
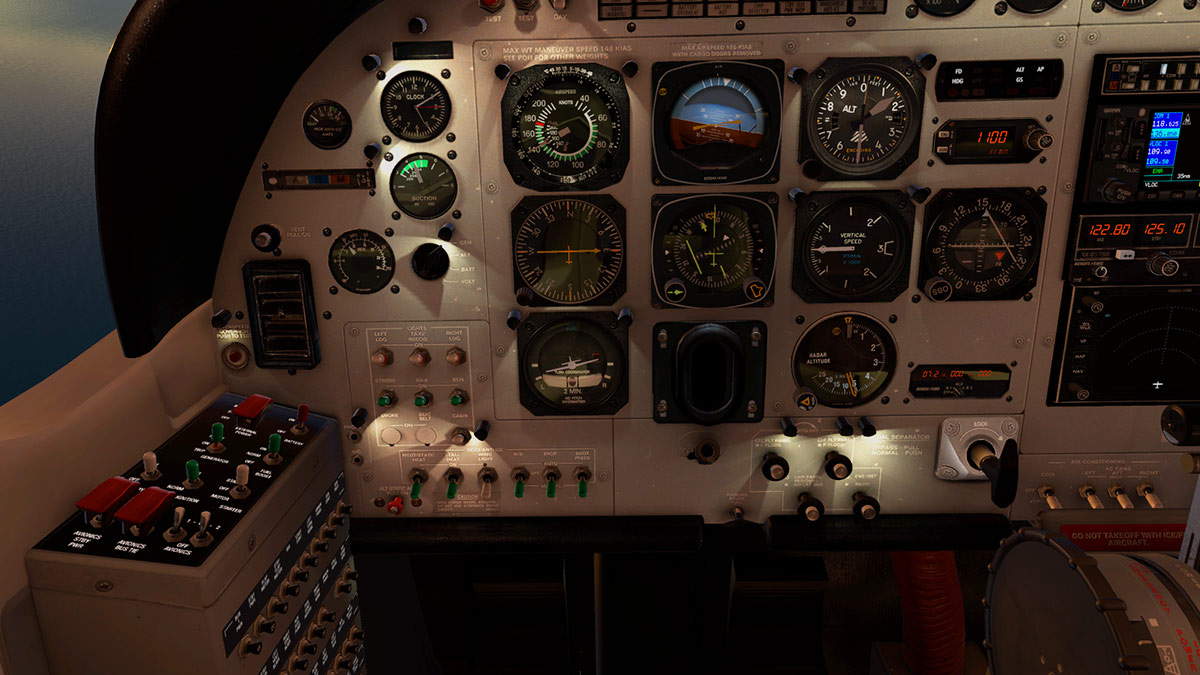
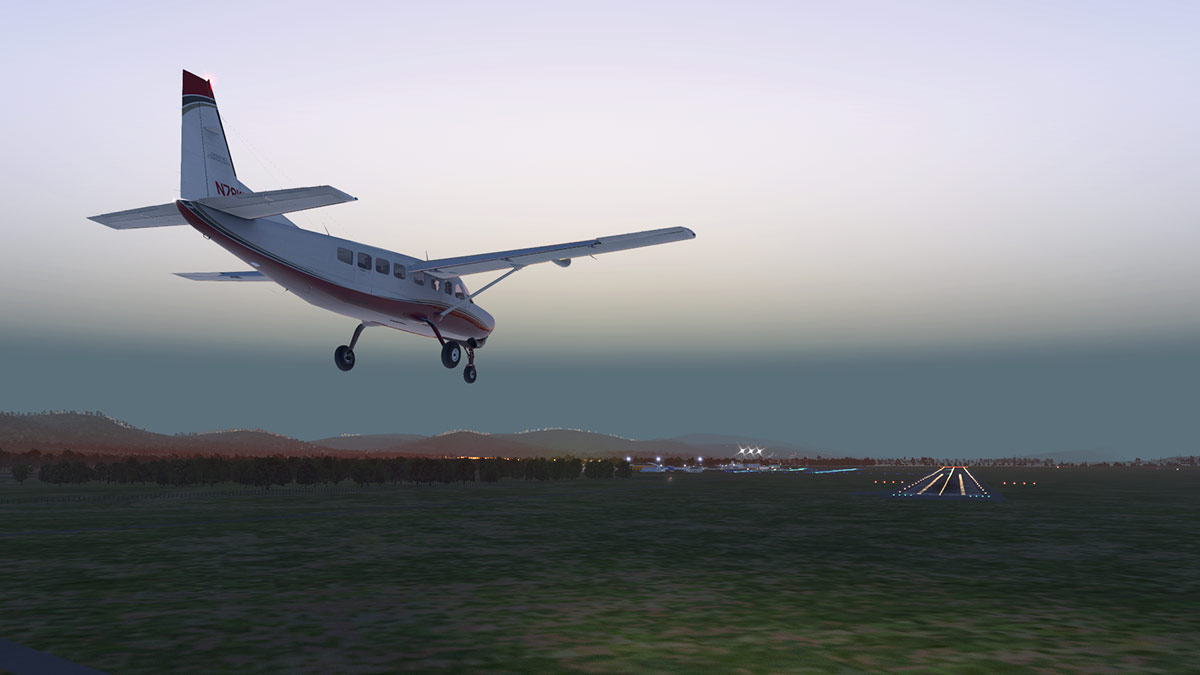
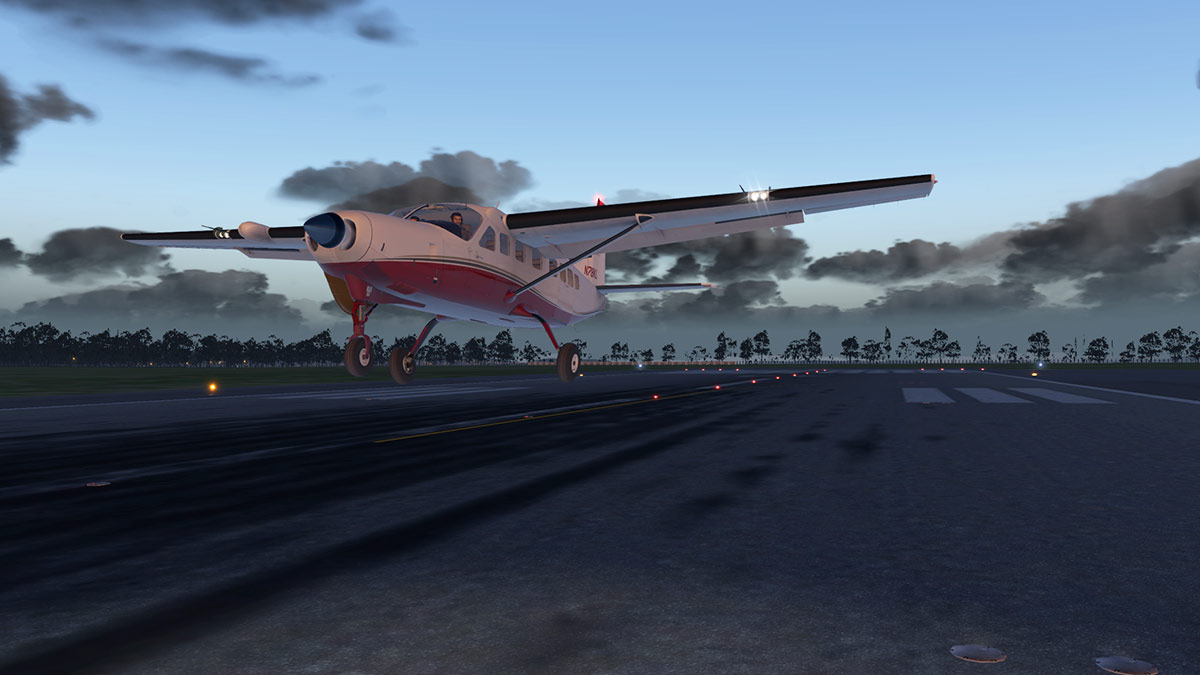
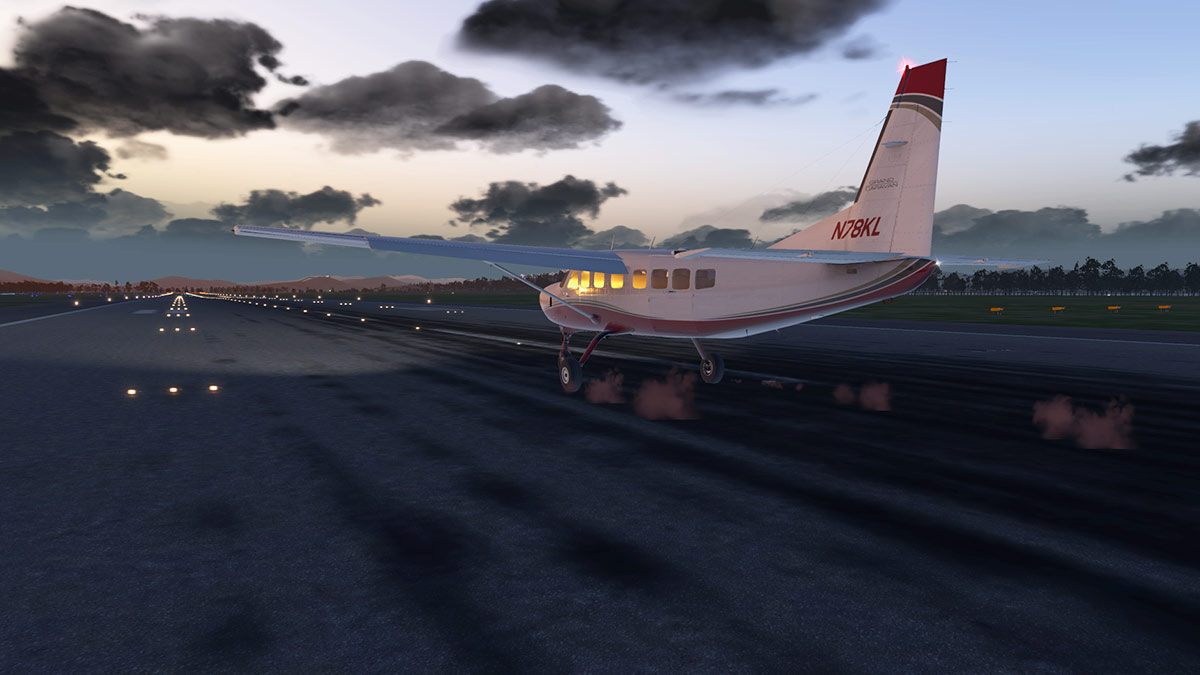
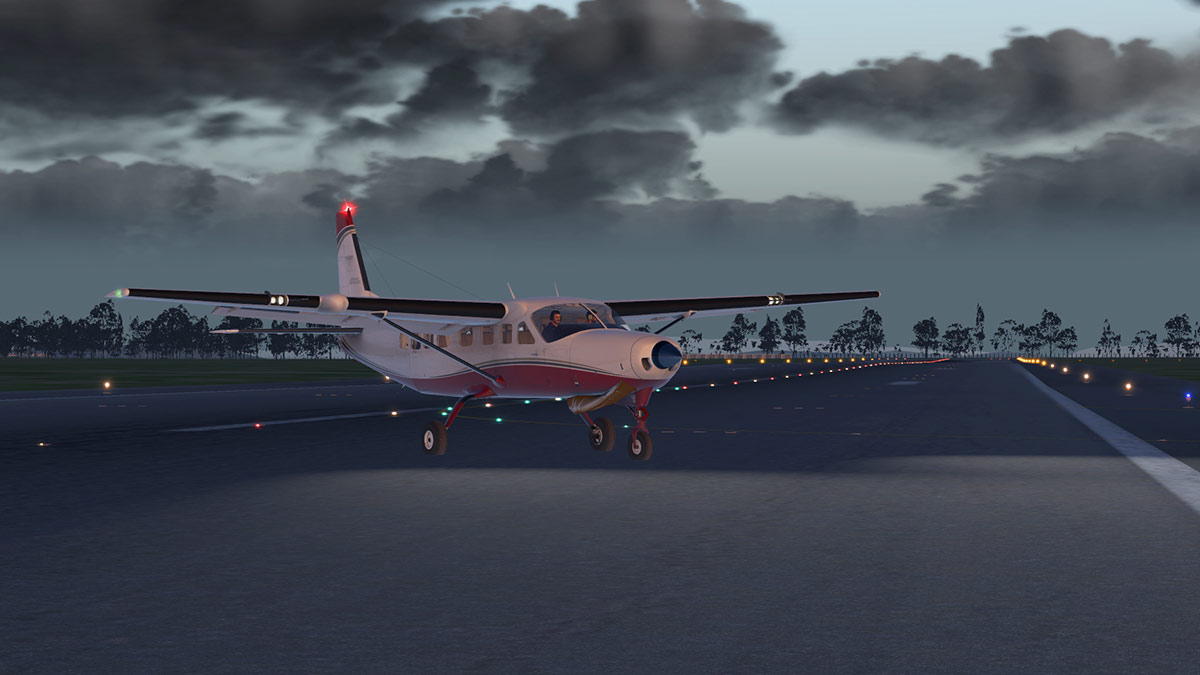
Update Review : Evektor EV-55 Outback v1.2 by Auctusdelineations An ever quick improving developer will always get an audience, but also the respect that purchasers of their products can be reassured that the purchase they invest in will be improved and developed to a finer and better degree. This is certainly a more important factor if it is the developers first or early designs to build up confidence on both sides of the same equation. And so it is with Auctusdelineations first aircraft for X-Plane in the Evektor EV-55 Outback. After the initial release only a few months ago here is an already significant update in v1.2. You can read X-PlaneReviews original release review here: Aircraft Review : Evektor EV-55 Outback by Auctusdelineations My early comments were that the EV-55 was a great and nicely developed aircraft, certainly in the modeling quality as the aircraft does look very nice in any light with that PBR reflective metal and transparent glass feature. But it was a little rough around some edges and hence the lower-introduction price of US$14.95. The EV-55 was also very favourably received and users liked it a lot and there is no reason to see why not, but there was a few areas that could have been improved, and in this v1.2 most of those points have been addressed. The first point to make is that the Evektor is still a prototype developmental aircraft by Evektor-Aerotechnikand from the Czech Republic, and Auctusdelineations first initial release reflected that design, with an empty rear cabin with just the exposed prototype airframe for comfort. So there is no reference on what the EV-55 would actually look like inside with a developed passenger or cargo version. This original layout is still included in the package as a separate aircraft noted as the "Prototype". But there is now a new version as well called under the older name of "Outback" and this version in v1.2 comes with both a passenger and cargo layout. All versions also now have opening rear doors as well to enhance the overall dynamics of the cabin area of the aircraft. And very impressive the passenger cabin it is as well. There is lovely blue molded seating which is modern in design and looks very well laid out in two single files of four seats on the left and a row of five seats on the right for a nine seater aircraft. Set out behind is a baggage area held in by netting and the bags are literally thrown in on top of each other, but it is all very well done. The Cargo version is just as good. There is a wrapped pallet of goods centre and a palleted box, drum and smaller boxes set out in the rear by the opening doors, in the real back baggage area there is more stored boxes of various sizes and the three sets of netting separates all the various areas. It is all really well done but the cargo is not weight dependent on you setting the aircraft weights, in other words you get the full cargo load at any aircraft's set weight. Doors The front pilot(s) doors opened on the original release aircraft but they were only a last minute addition with no time for the rears. In v1.2 that has been fixed with the rear doors being in two sections and now opened out for one a two up and down passenger entry and a second door to open up the entry space wider to load in the cargo. These doors have been added into the "prototype" version as well, and I really like the modern material used on the internal areas. There are two new opening nose baggage compartments as well, that adds in even more baggage storage and they are filled out with light bags and a briefcase. The door(s) animation can be activated three ways. One by touching the door handles inside, but this way is quite tricky in closing them again. Second is slider settings from slider 1# to slider 6#. A third way to access the animation is via a pop-up menu that is disguised as a "Log Book". It took me a fair while to find the Log Book as it is positioned on the left of your instrument panel and not in the door pockets were I thought it would be sited. Once pressed it hangs in mid-air for access and the door animations are located in the lower framed area. The passenger and cargo configuration change can be done via the right side checkbox and to close the pop-up again you press the "Dismiss" box lower right. It is actually really well done and looks authentic, but you can't use it as a real log book... but it does leave it open to any other animated or static ideas later. Instrument Panel The instrument panel has had attention as well. Those weird yokes are still with us? but the rest of the panel is now looking pretty good. The panel's layout has been changed around a bit to accommodate the larger GNS530 and a right positioned GNS430, where as before there was a stacked two GNS430s together centre panel... ... far right now also includes in the co-pilot's instruments a VOR dial, I would always prefer the VOR pointer version, but it looks good. Two other items to be noted is first the "Altitude" setting knob for the S-Tec Fifty-FiveX autopilot has been added mid-panel... ... which many users asked for, and the mid-screen compass has been completely remodeled with a 3d internal dial and it looks far better than the original version. A few of the instruments were a little blurry and this has also had attention in this v1.2 update. They do all look far better and more sharper and thankfully more readable, but the Artificial Horizon is still a little bit more blurry than the rest up closer, in the normal eye position it is fine, but it does stand out now as the only instrument that does now noticeably stands out than the others. The Heading Dial/HSI instrument Bendix King Ki825 instrument is still very small but very good and has been made more distinct. You do however have to still work out your heading before you adjust the dial if you are doing 90º turns as the heading pointer goes off the display, a trick is to set your course pointer and use the pointer and dotted cross as a reference at each 90º angle to the runway. The course and heading adjustment knobs are also now the right way around. The built in ILS alignment is very good as well if only a little on the tiny side. Although there is an external power source (switch), you don't get any GPU (Ground Power Unit) yet. FMOD Sounds Like most of all recent updates the Evektor also now gets the FMOD 3D sound engine. Although the application of directional sound is certainly better. The sounds are not great or better. In cruise there is an annoying high hum that hurts your ears and the speakers had to be turned right down so it doesn't hurt your drums with all its thrumming. Change the throttle position and in the lower speeds the sounds change not gradually but in a significant jump, same with throttle application and you go from idle to full sounds in a blink. So instead of a range of sounds they are quite stepped in certain parts of their range, mostly in the lower. I think they could be good overall, but they need more tuning to the FMOD engine. It is the same with the flight model. It is a great aircraft to fly but it has a few quirks that you need to adjust to. I did find however the more you fly the EV-55, then the more you tune into it, certainly in its throttle ranges and power positions. You also have to set the VOR2 directly and not in the local map and the autopilot has to be double-checked to make sure it is not on for takeoff and after landing or at any point you need manual control, and that means everything lit on the display has to be off including heading and altitude or any set positions. Liveries. The original EV-55 had two liveries and are both faithful to the two original prototypes. The four choices consisted of both white or chrome spinners (white is better) Three new liveries have now been added to the package with: Forward (wavy lines), Camouflage (Very nice) and "The Raven" which is quite arty striking. Summary This is a significant update for the EV-55. It fills in a lot of missing spaces (mostly in the rear) with passenger and cargo versions, and puts in the required animated doors in the rear and bonus front baggage compartments... all items have been really well executed and certainly rounds out the package to far better degree. Lots of nice updates that certainly means the developer is listening to their customers in a better GNS530/430 arrangement, altitude setting for the S-Tec Fifty-FiveX autopilot. Instruments have had attention to make them more clearer and less blurry but the Artificial Horizon still is a little on the blurry side closer up. The new FMOD sounds are however a mixed bag and needs more fine tuning as does the flight model in a few areas (the Flight Model has however come a very long way since its first release, it is just a little bit more of that fine tuning is needed) but to note that definitely the ground handing which has been addressed in this update is now far better. But as users note, the more you fly the EV-55 the more you tune yourself into it. The Evektor EV-55 started off as a quirky aircraft that didn't really fit into any category. It is aimed at the Caravan, Twin-Otter and Brittan Norman Islander markets and it is a great evolution of that small regional feeder aircraft. It does seriously grow on you the more you use and fly the EV-55. And in this more active v1.2 role it is now than just being a prototype aircraft and you do find yourself with a very capable aircraft and one you really can get a lot of great flying in and with a lot of fun thrown into with the bargain. Yes there is slight price increase, but you get a far more rounded aircraft for your money and also three versions in Passenger, cargo and prototype as well with three new excellent liveries. In a short time the EV-55 has come a very long way, it is a great fun aircraft and worth the investment, it is different... but in a great and nice way. _____________________________________________________________________________________ The Evektor EV-55 Outback v1.2 by Auctusdelineations is NOW available! from the X-Plane.Org Store here : Evektor EV-55 Outback Your Price: $19.95 Features: New 3D Sounds using FMOD Technology (X-Plane 11 only) Accurate flight model Detailed, animated 3D model inside and out High quality textures Animated pilot Fully functioning cockpit Cabin doors open/close Wreckage model PBR reflective metal and transparent glass Start-up sheet and control map included 5 liveries Requirements X-Plane 11 or X-Plane 10 Windows, Mac or Linux 2GB+ VRAM Video card Current version: 1.2 (last updated October 13th 2017) Installation and documents: Download for the Evektor EV-55 Outback is 274 mb and the unzipped file is deposited in the "General Aviation" X-Plane folder at 366.90mb in size. Documents provided are: EV-55 CONTROL MAP (panel diagram) EV-55 spec sheet EV-55 Startup Procedure (checklist) Startup checklist EV-55 painkit (gimp) Changelog v1.2 Added customized 3D sound via FMOD Improved the interior of the aircraft, adding lots of details and enhancements Now includes 2 variants, passenger and cargo. Cargo and passenger interiors are both included in the main .ACF file, switchable dynamically Also including an empty interior version true to the initial prototype's avionics. It's a separate .ACF file called "EV 55 Prototype." Animated the rear passenger door, cargo door, and baggage doors in the nose. Doors are mapped to Door #1 - Door#6 All doors have manipulators, and when open allow the cockpit-camera to move outside the aircraft to manipulate doors from the outside if desired Added a "log-book" object that when clicked brings up a menu that can be used to open/shut all the doors and switch between cargo and passenger variants Added three new liveries Avionics: Added a Garmin 530. Added a altitude preselect for the autopilot Added a 2nd VOR display, on the copilot side Magnetic compass totally remodeled and animated in 3D Fixes: Fixed the DME off switch. Removed glare from some screens Fixed some intruments getting blurry at lower texture settings Improved readablity of the HSI Added green glow to Garmin dials Reversed the HSI controls and displays to better match the real instrument Improved the accuacy of the COG, especially along the vertical axis Fixed a typo that made the horizontal stabilizer less effective Improved the accuracy of the hydraulics Adjusted the flightmodel to imroved handling at low speeds and during the landing phase Adjusted fuel consumption to make it more accurate, especially in the X-Plane 10 version _____________________________________________________________________________________ Review by Stephen Dutton 16th October 2017 Copyright©2017: X-PlaneReviews (Disclaimer. All images and text in this review are the work and property of X-PlaneReviews, no sharing or copy of the content is allowed without consent from the author as per copyright conditions) Review System Specifications: Computer System: Windows - Intel Core i7 6700K CPU 4.00GHz / 64bit - 16 Gb single 1067 Mhz DDR4 2133 - GeForce GTX 980/SSE2 - Samsung Evo 512gb SSD Software: - Windows 10 - X-Plane 11.05 Addons: Saitek x56 Rhino Pro system Joystick and Throttle : Sound - Bose Soundlink Mini Plugins: Environment Engine by xEnviro 1.7 US$69.90 : WorldTraffic 3.0 Plugin - US$29.95 : XPRealistic Pro v1.0.9 effects US$19.95 Scenery or Aircraft - KRSW - Southwest Florida International Airport by Aerosoft (X-Plane.OrgStore) US$24.99
-
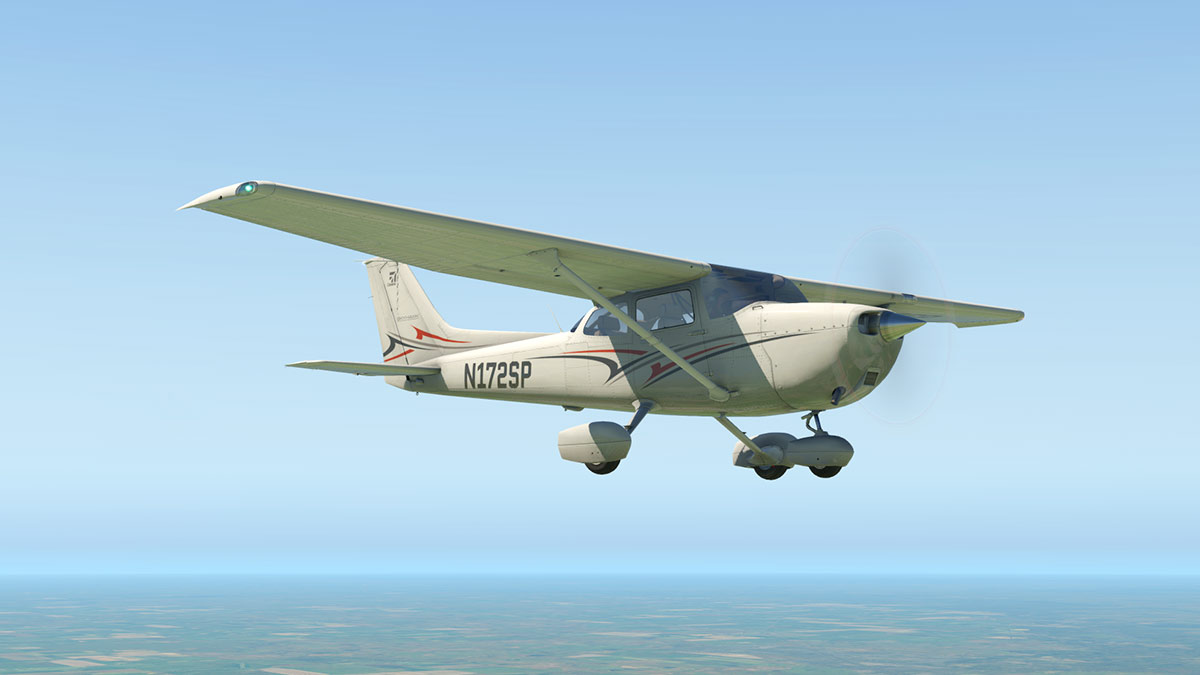
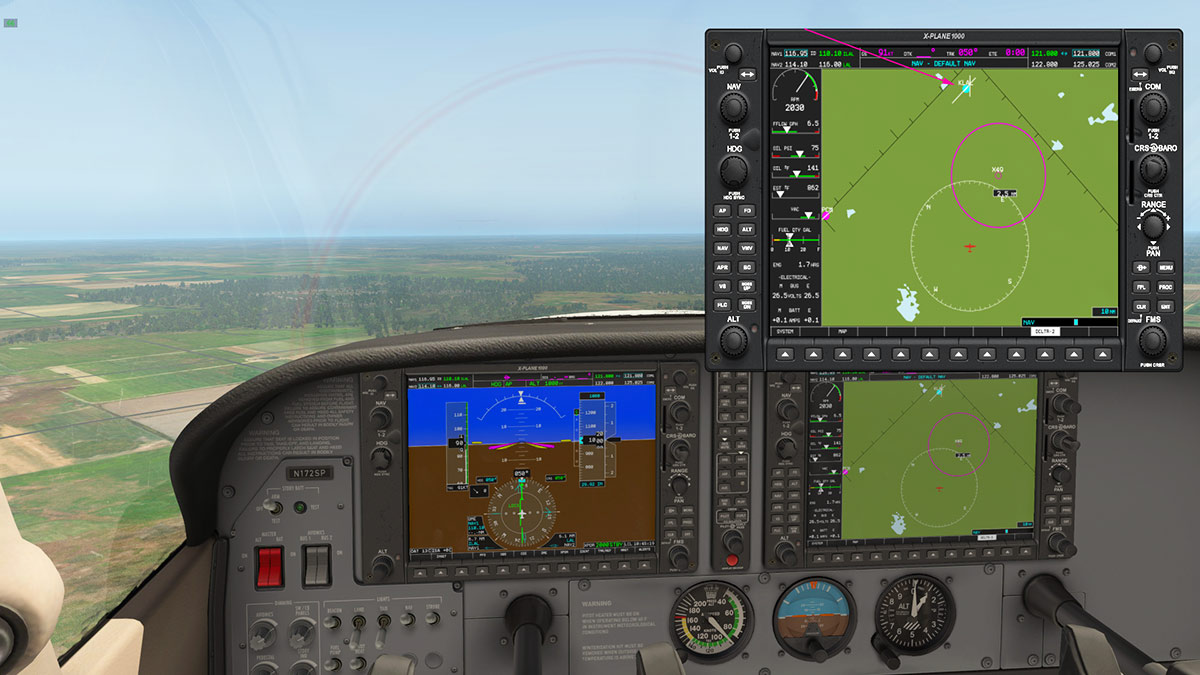
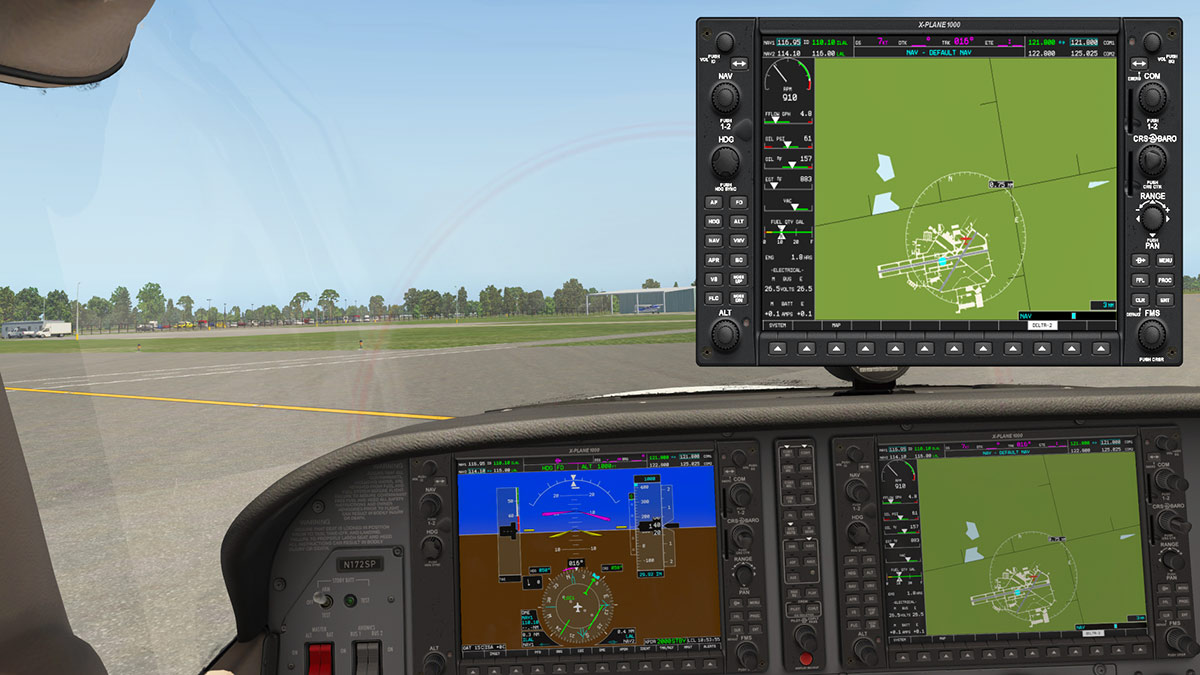
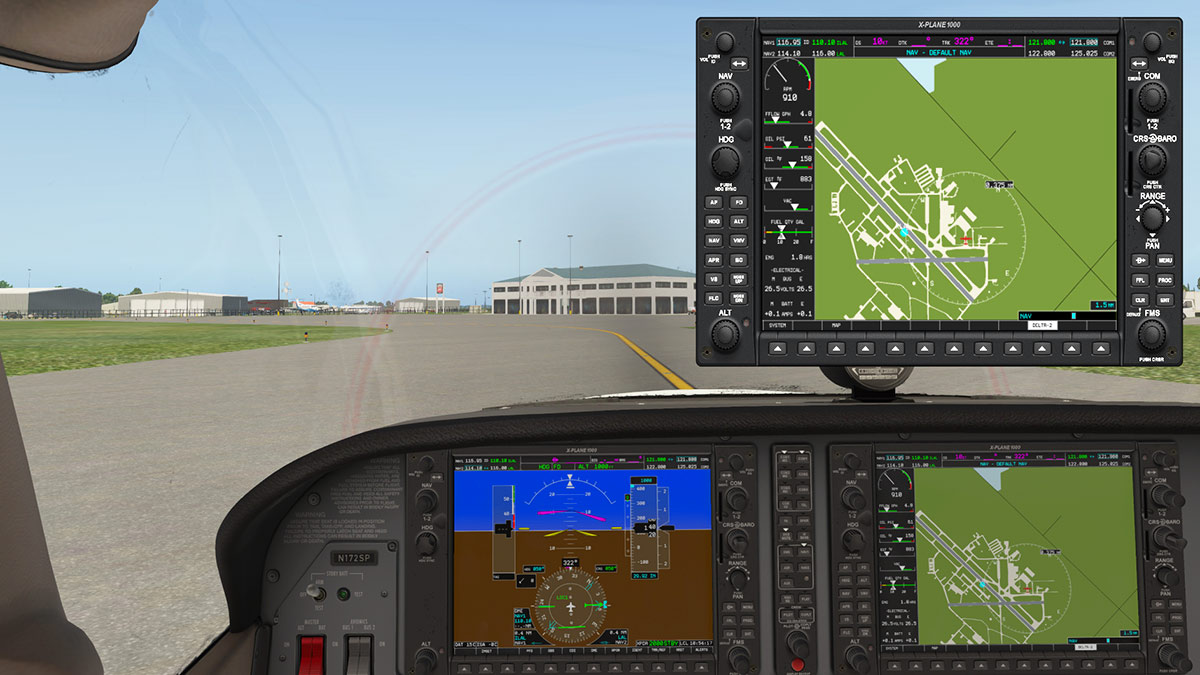
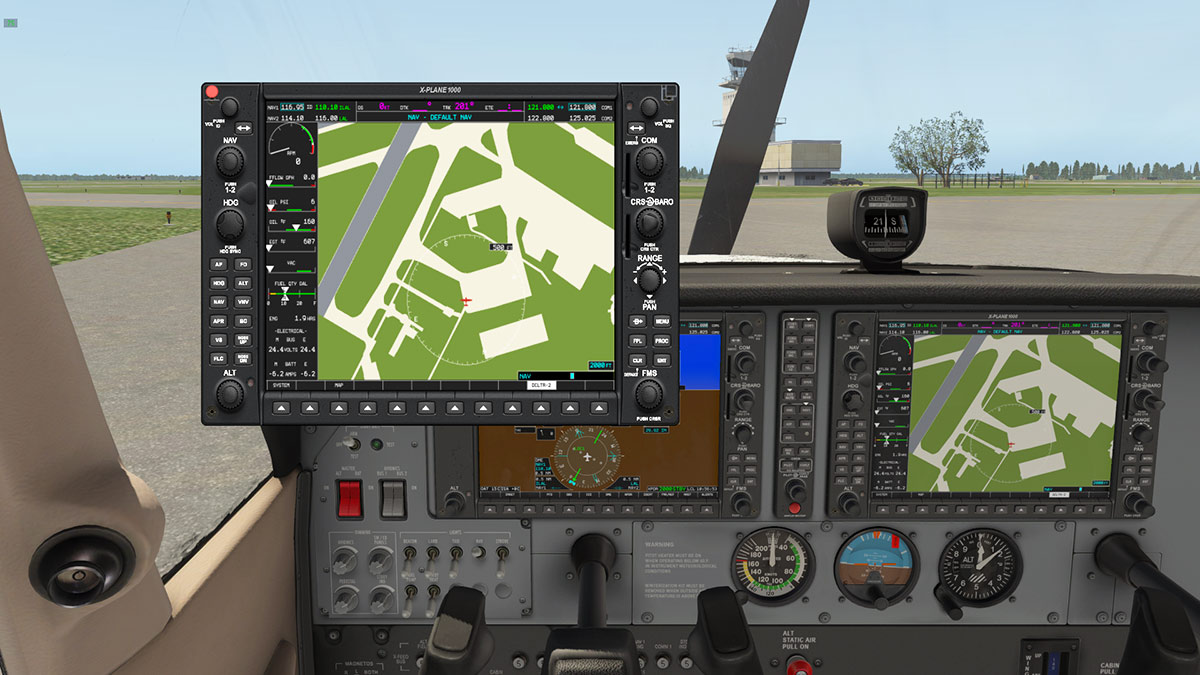
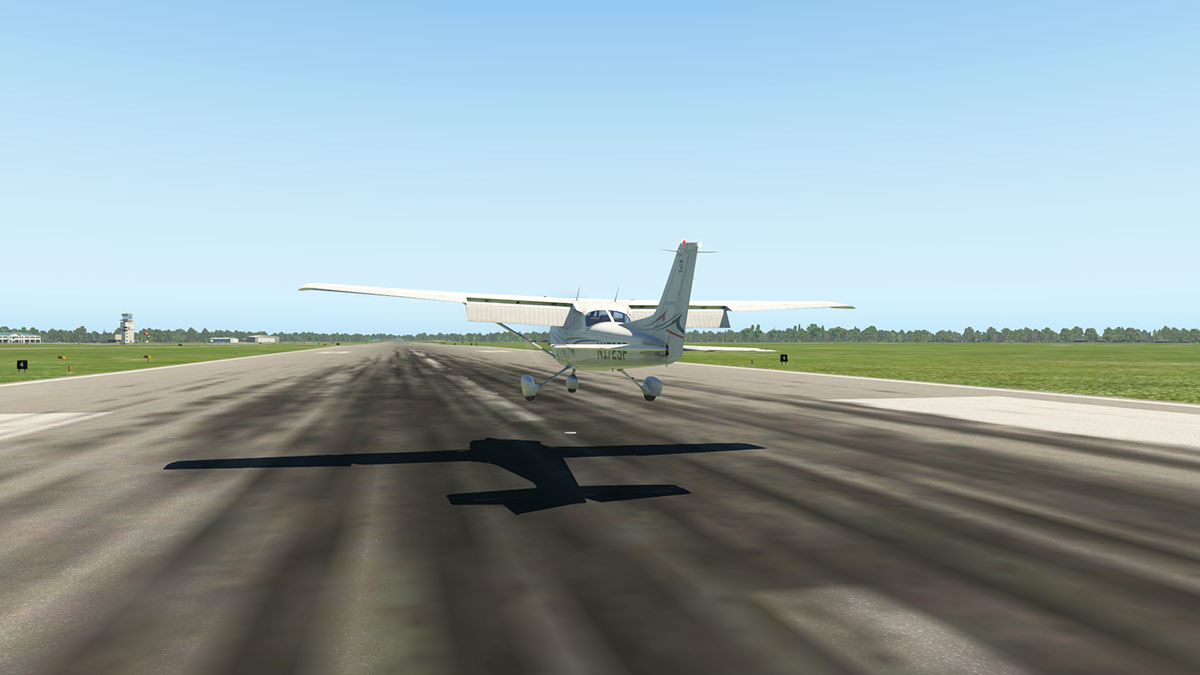
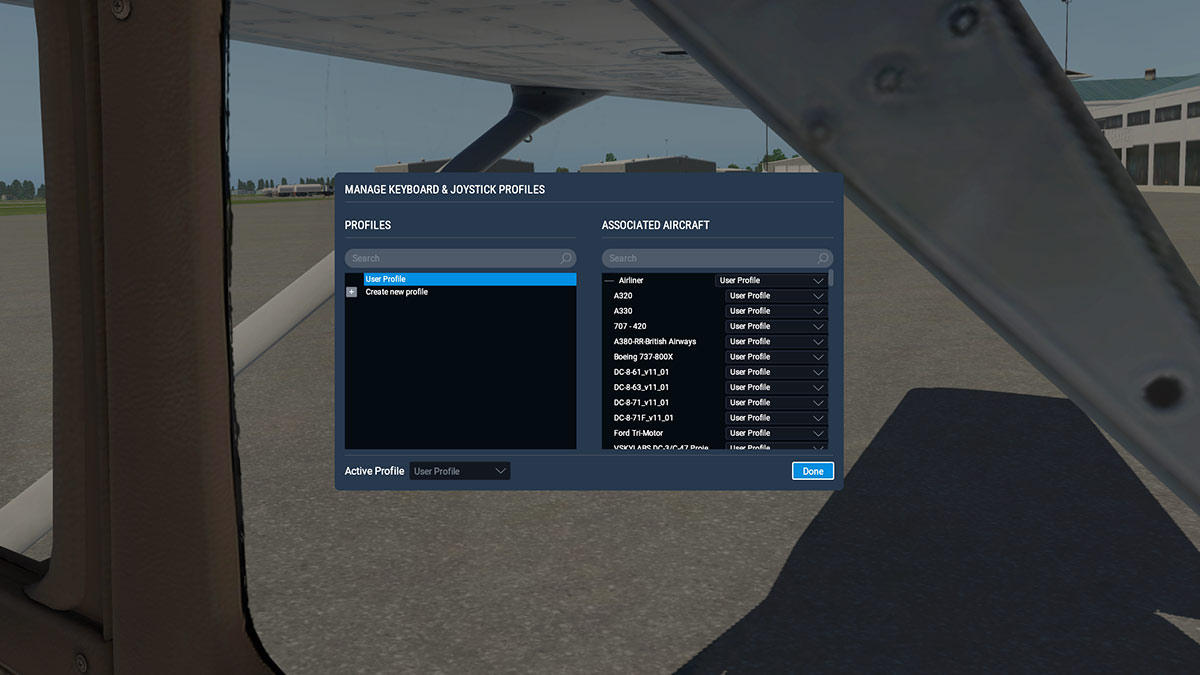
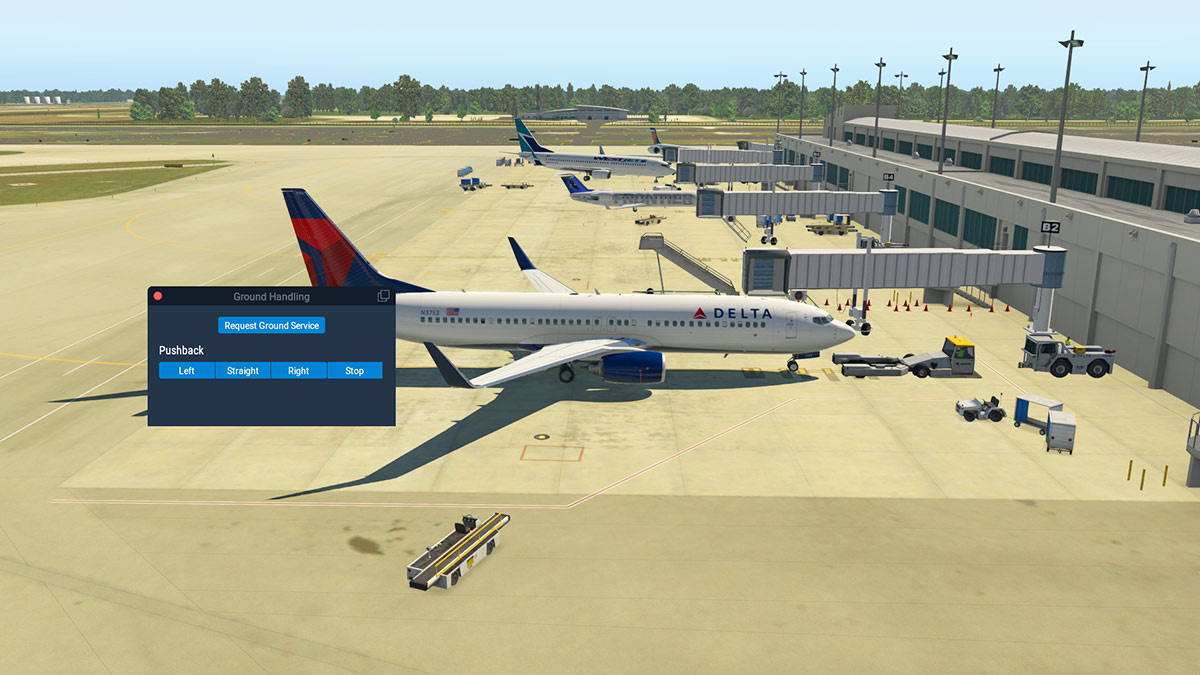
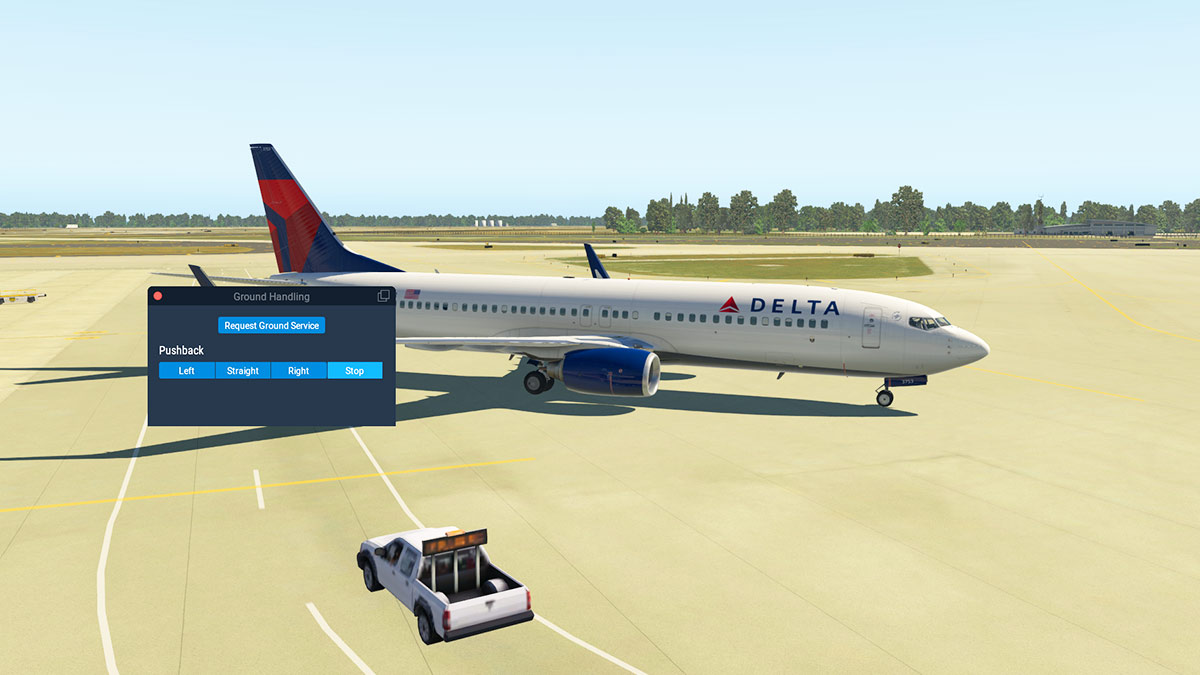
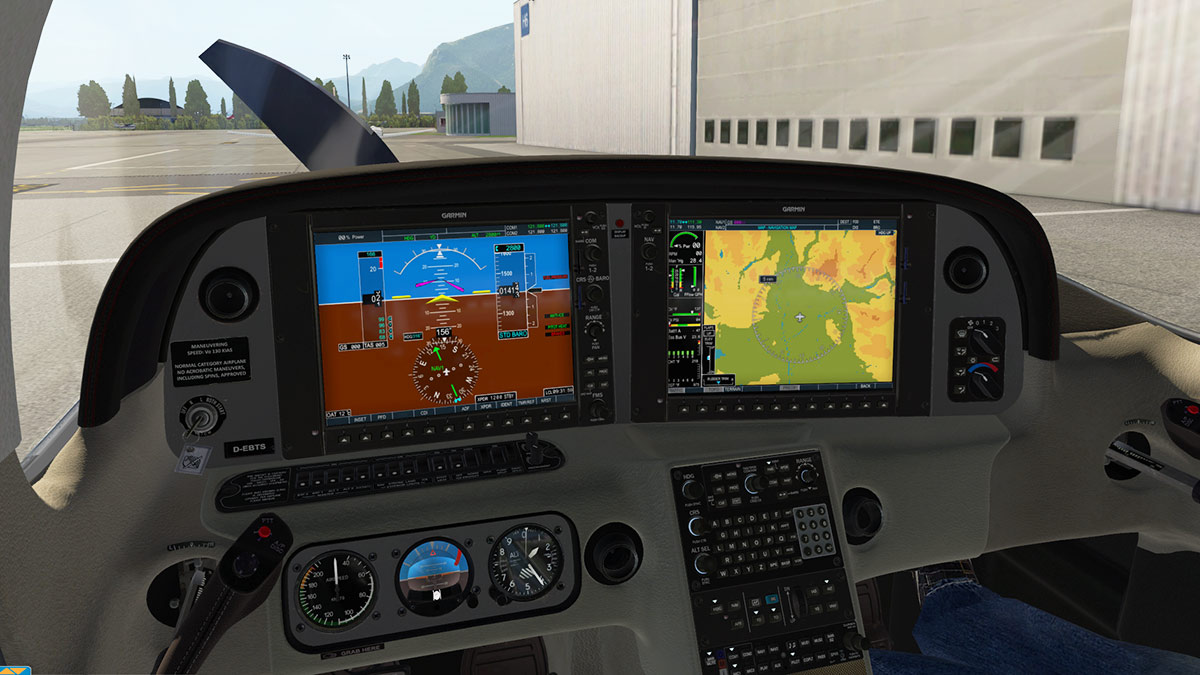
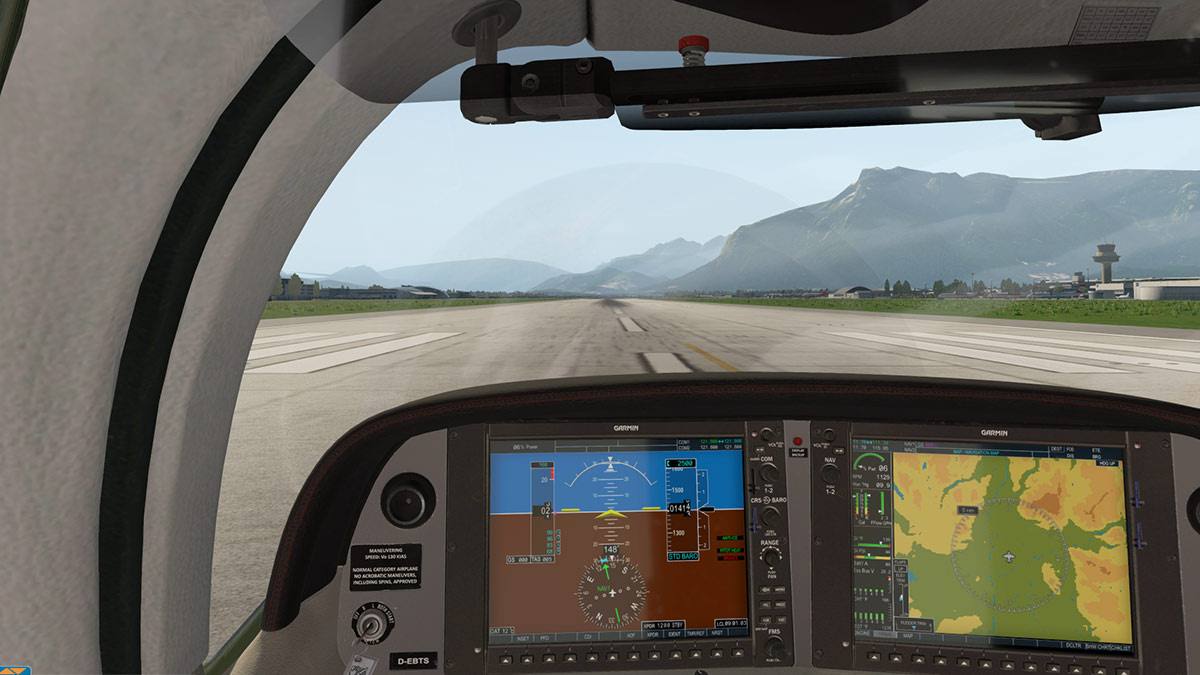
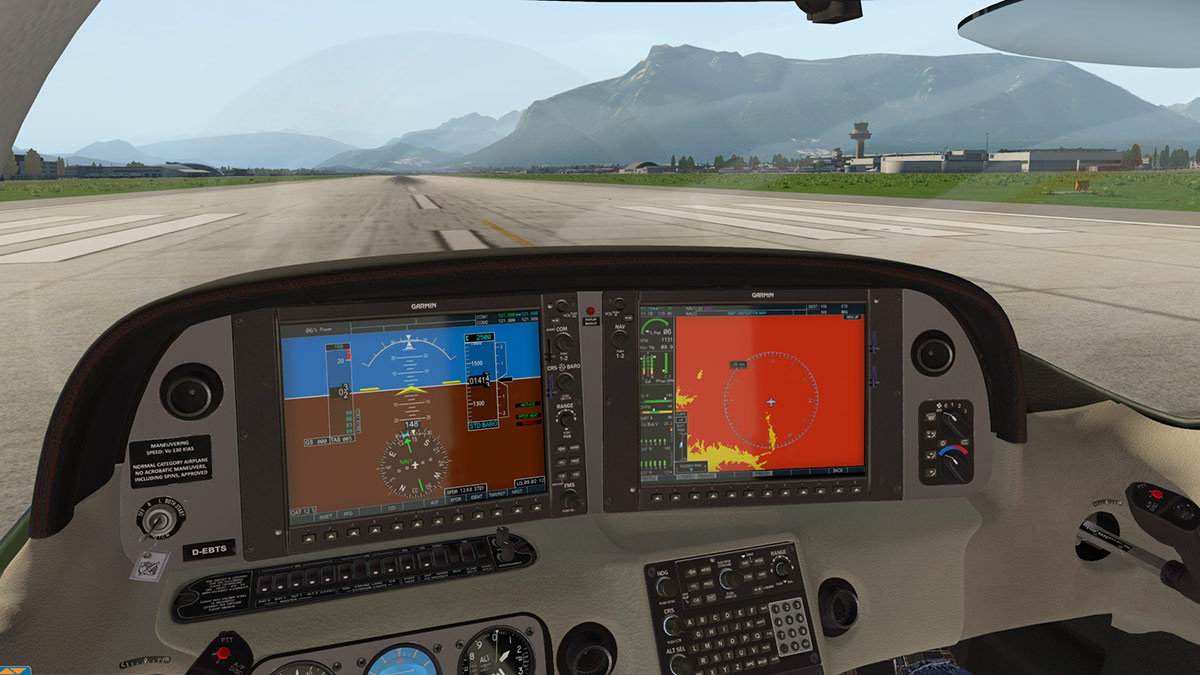
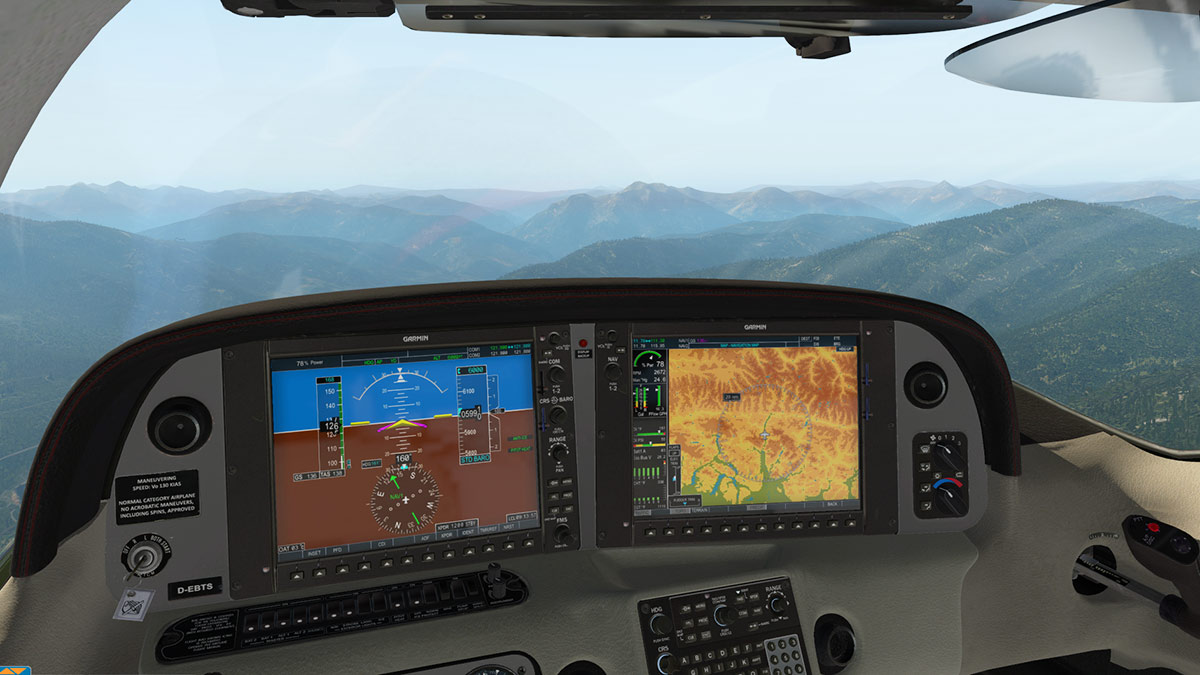
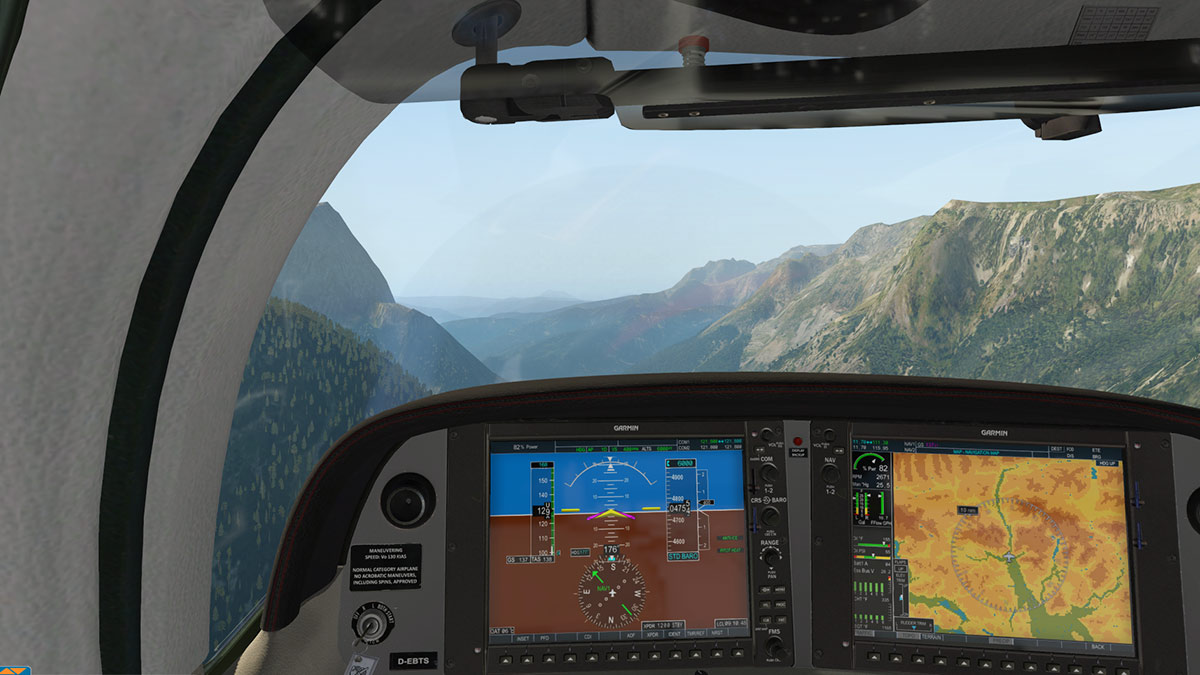
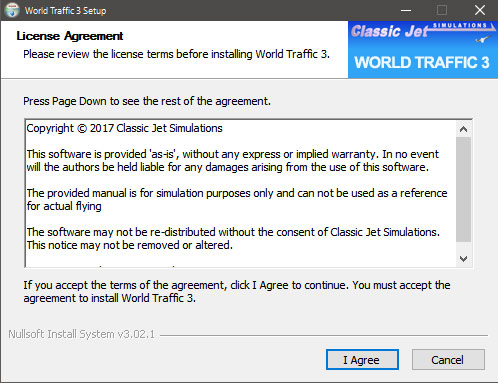
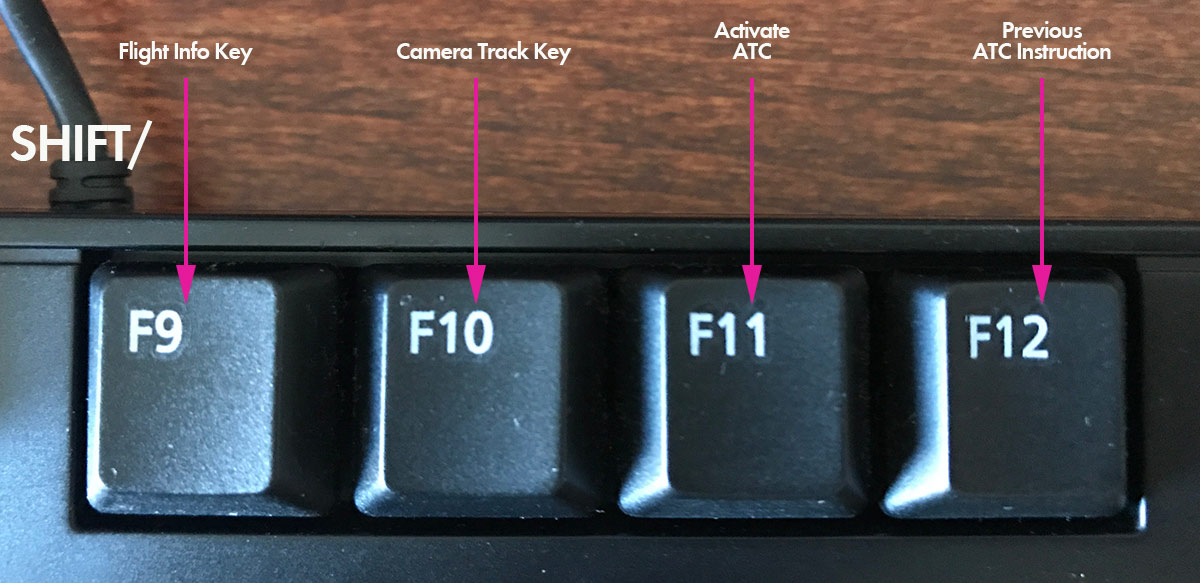
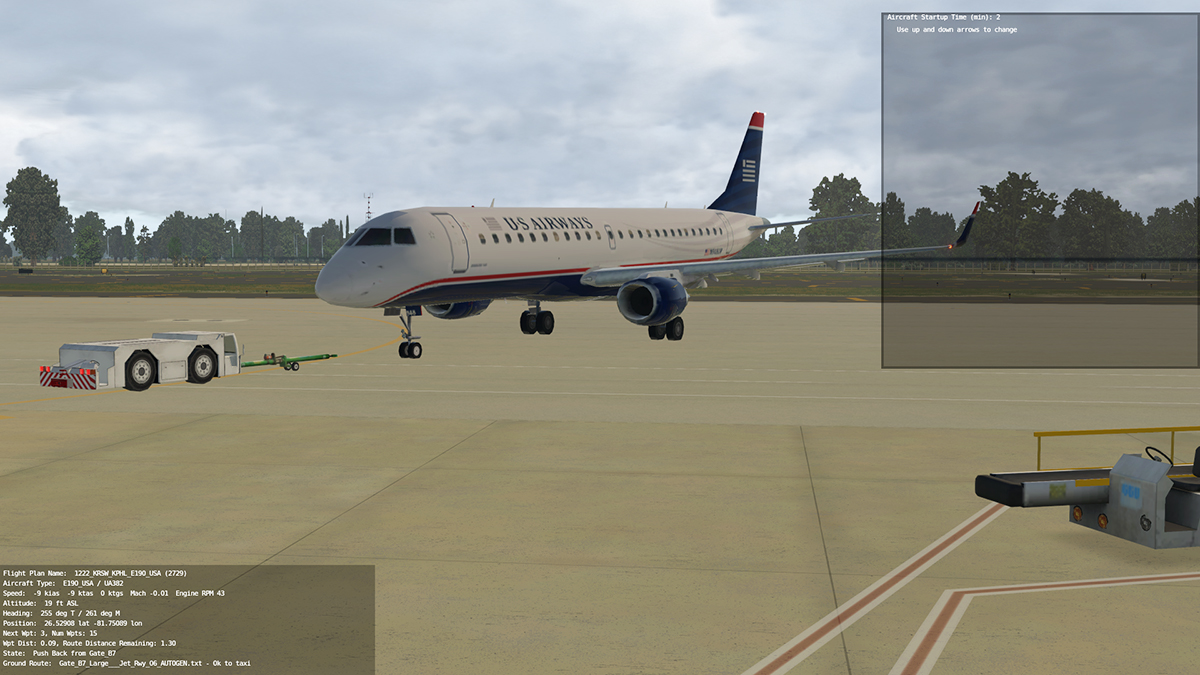
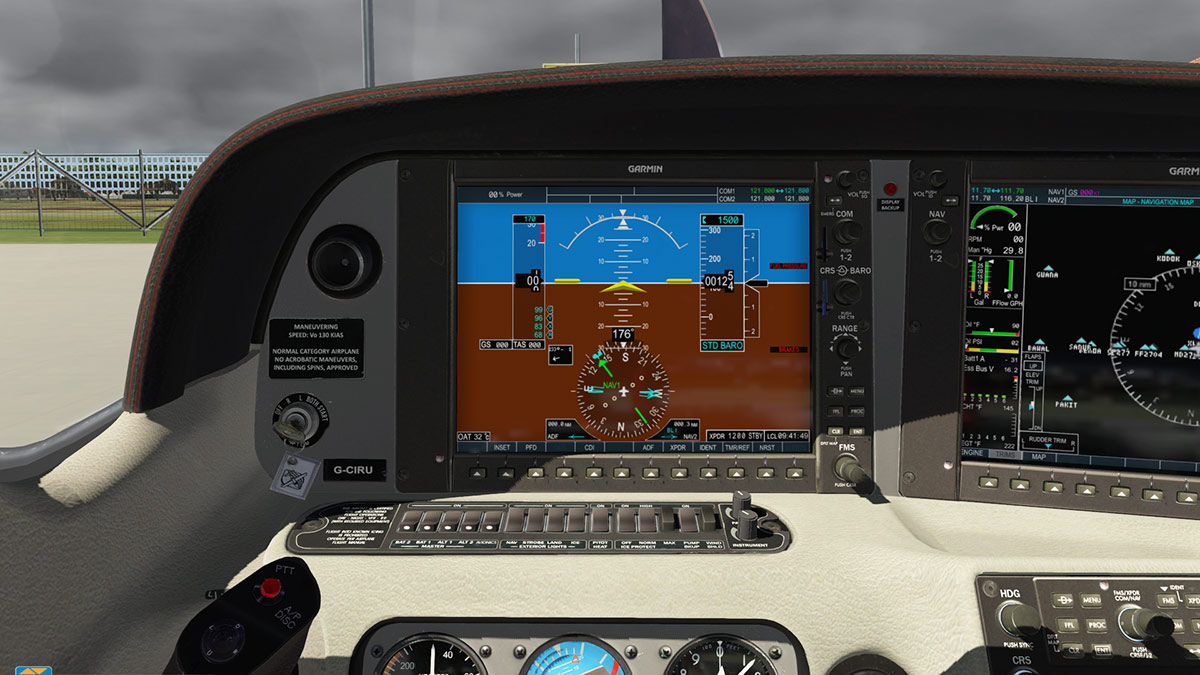
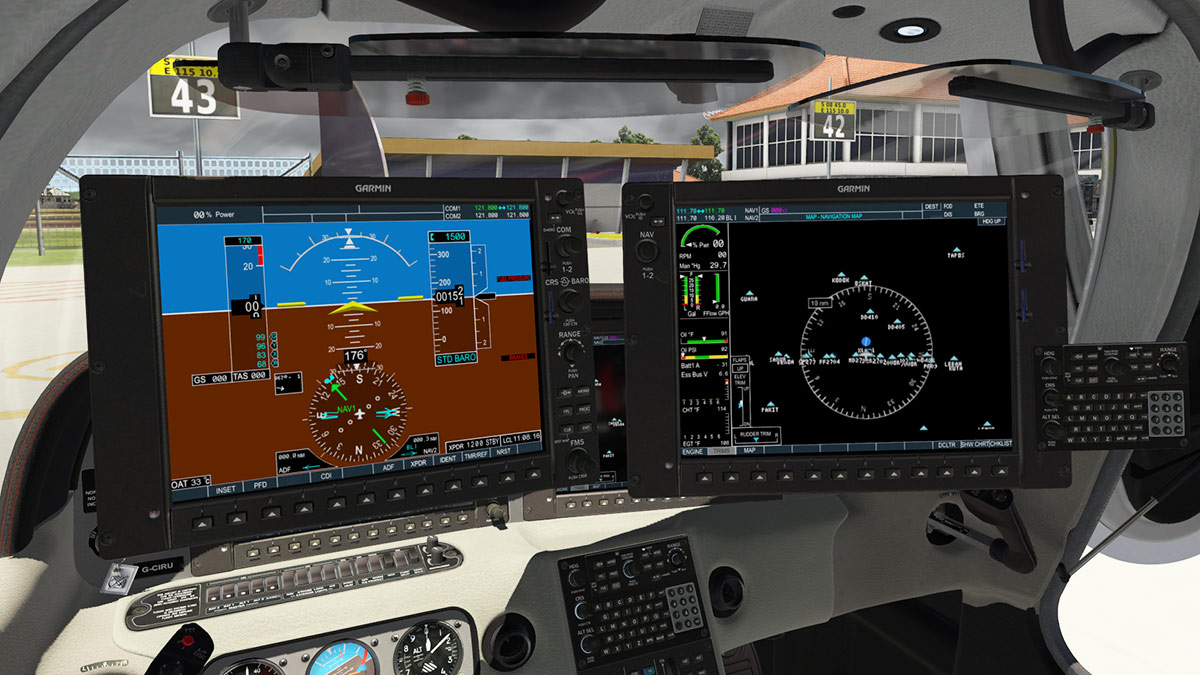
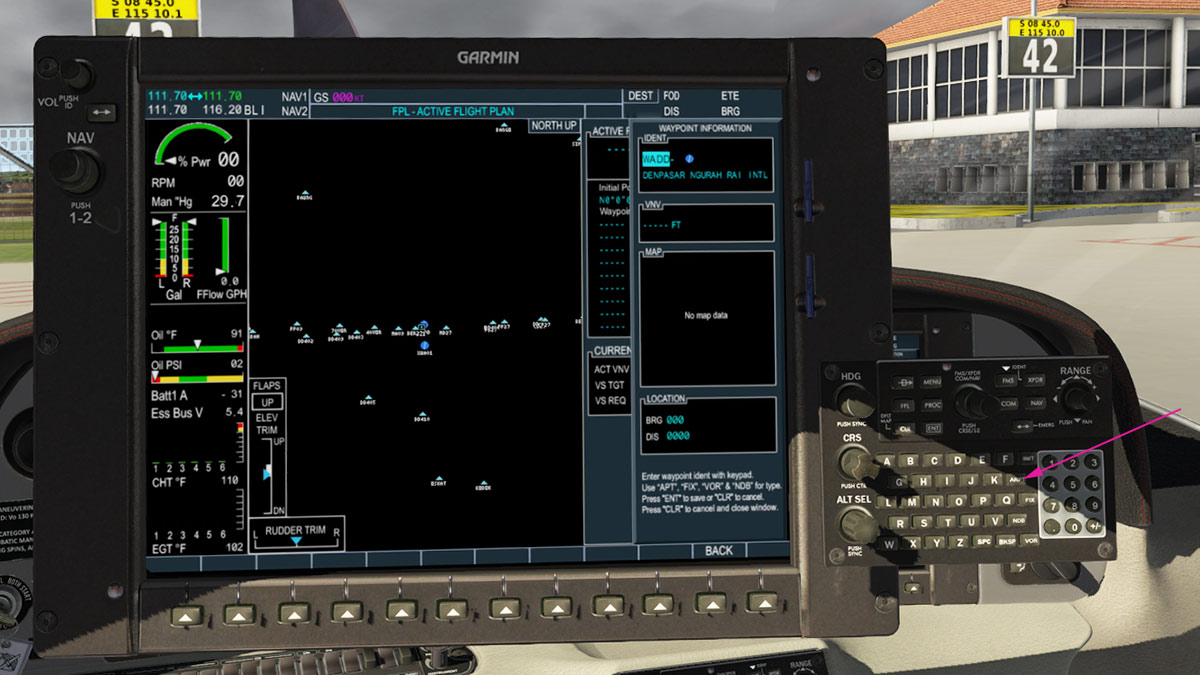
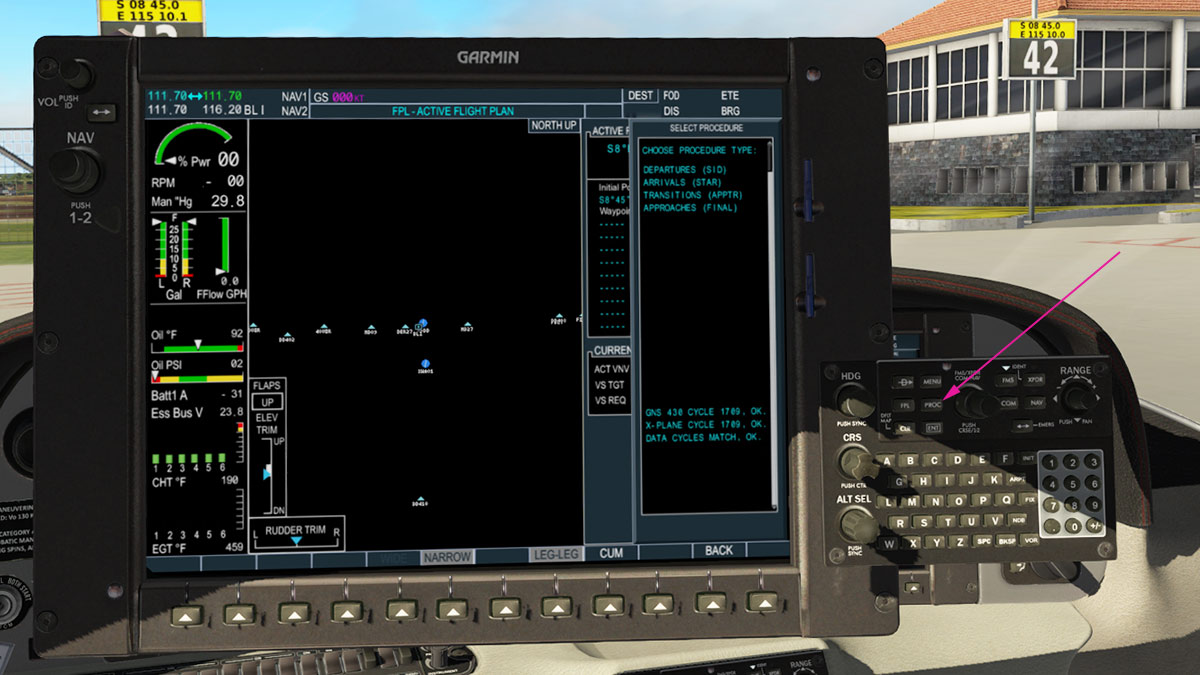
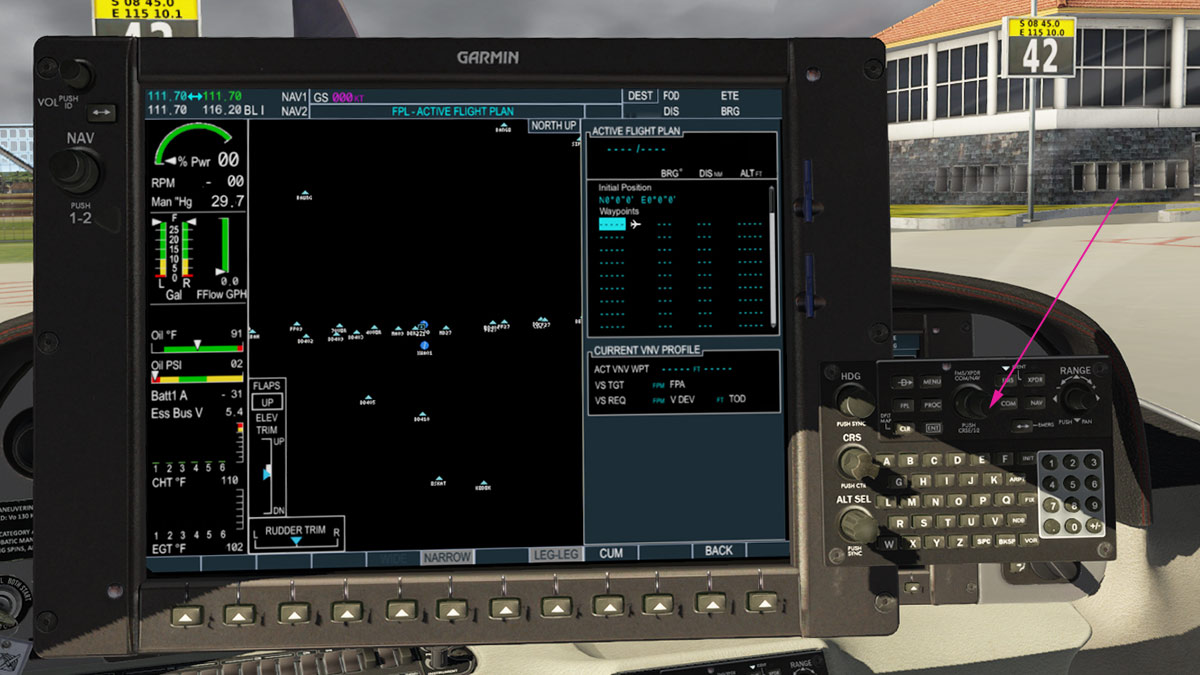
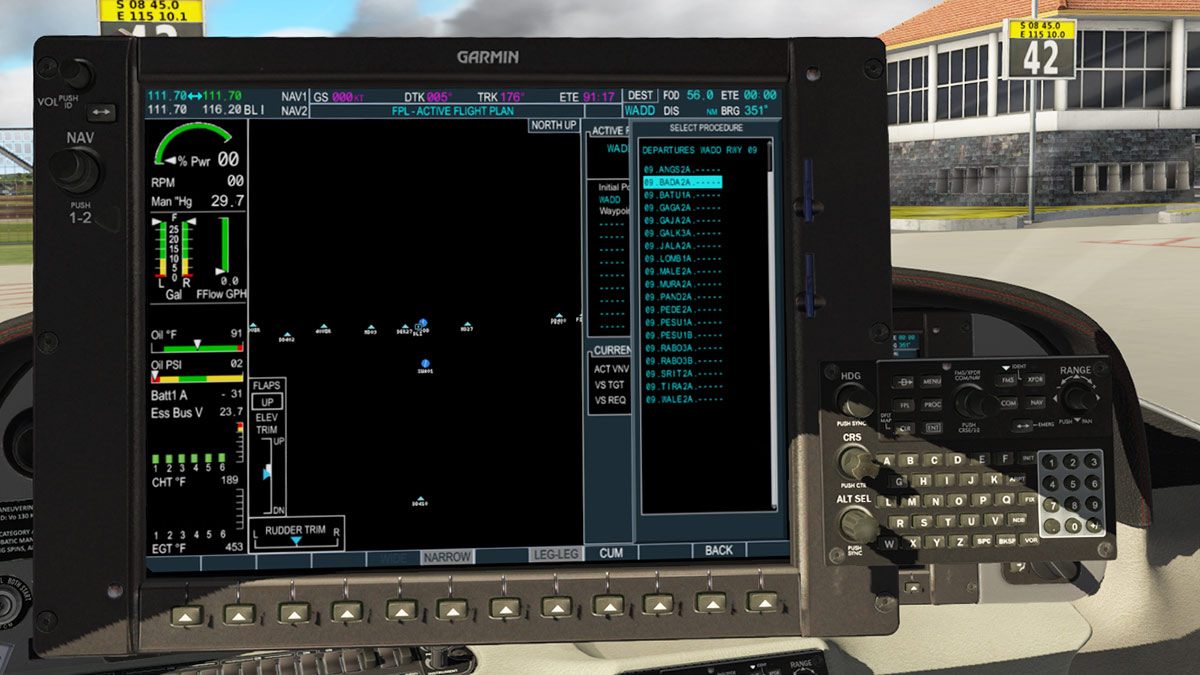
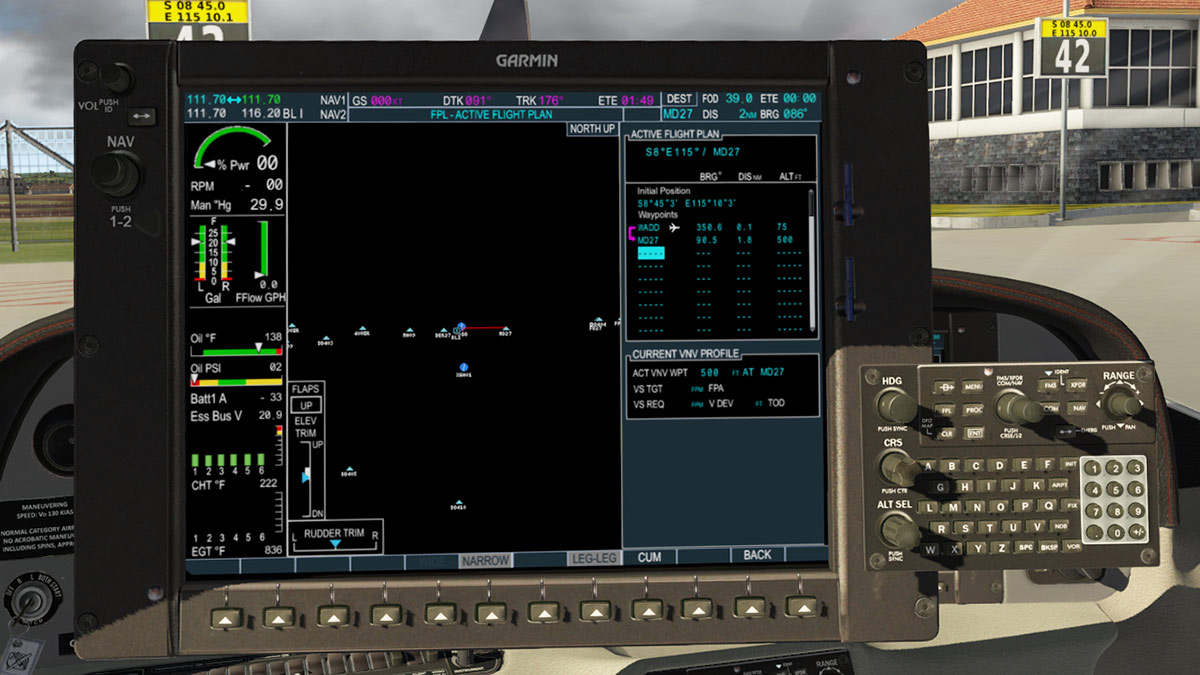
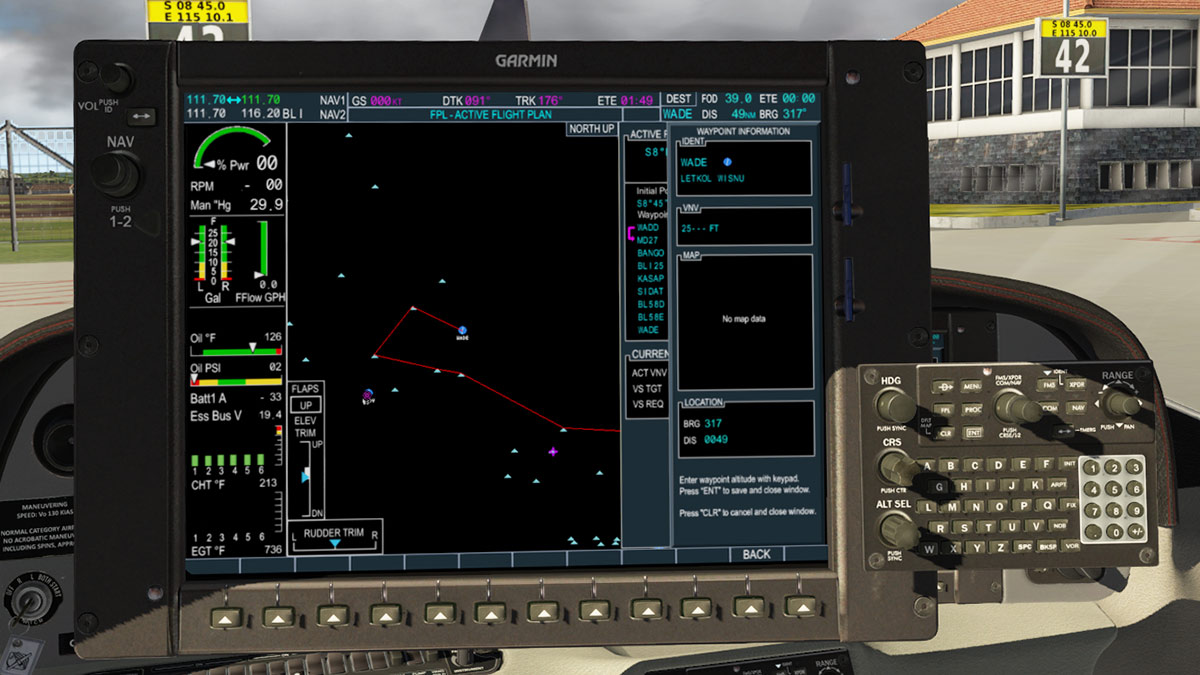
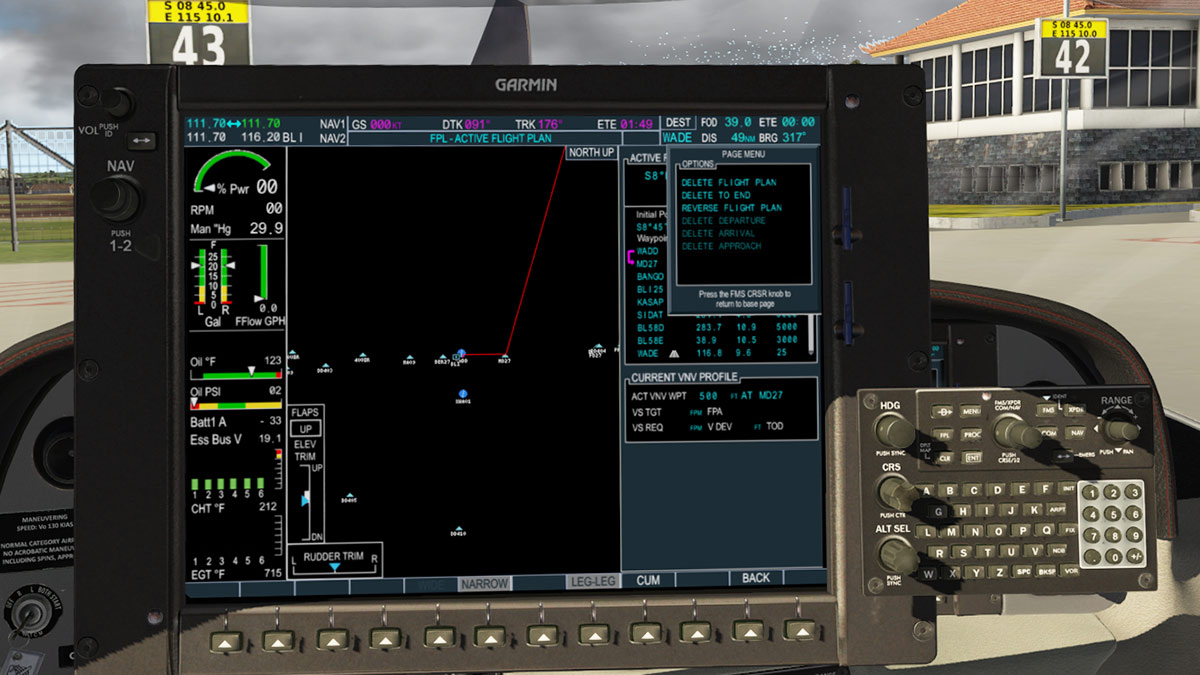
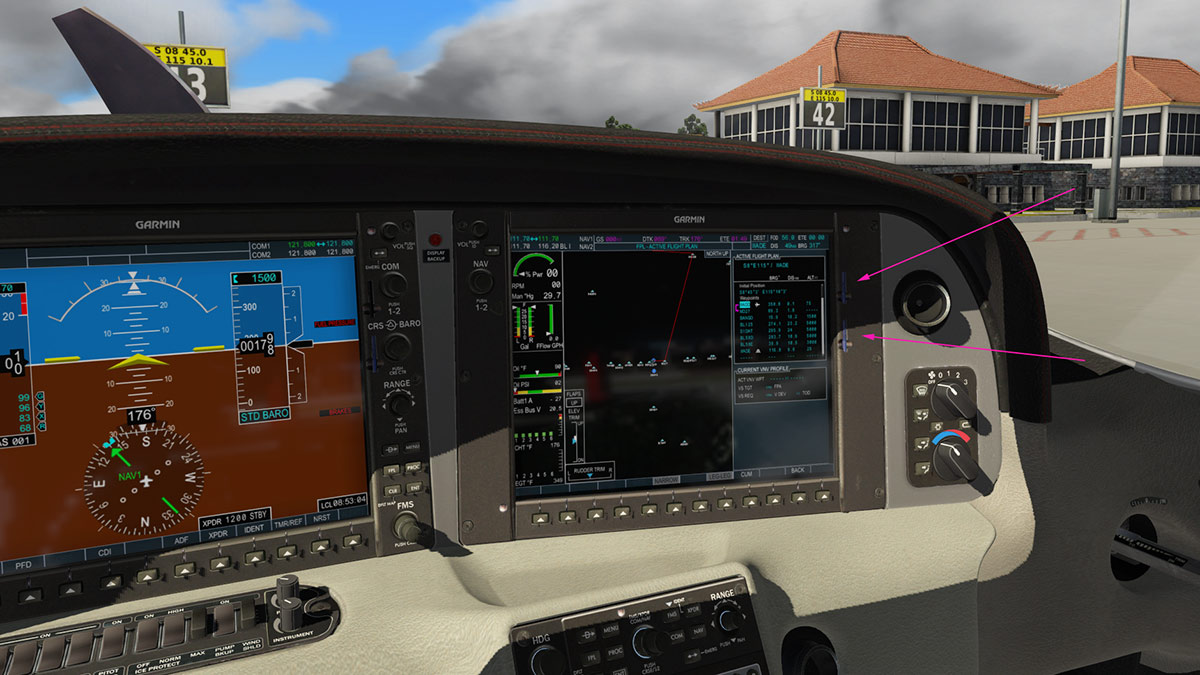
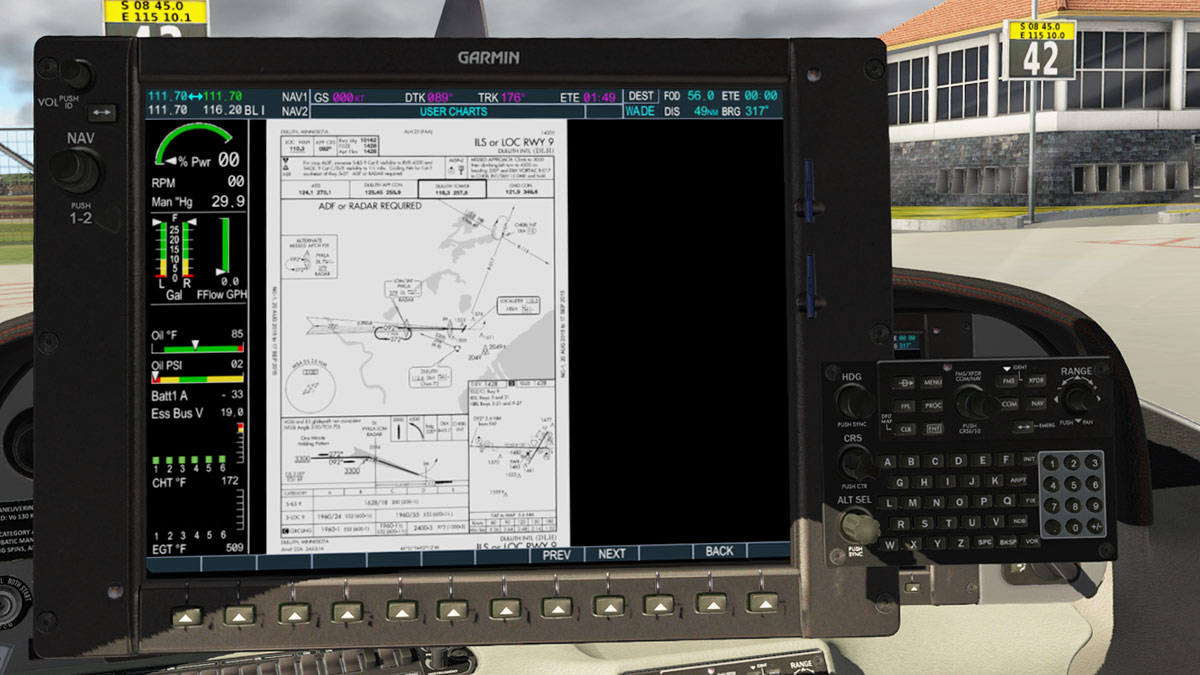
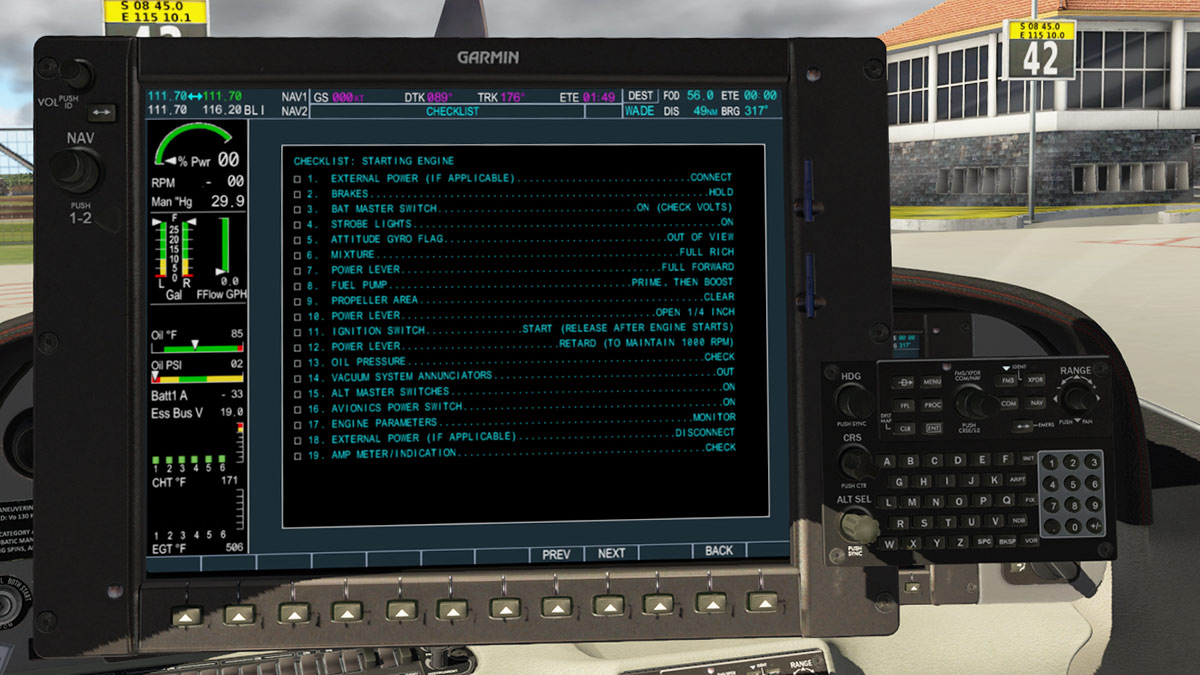
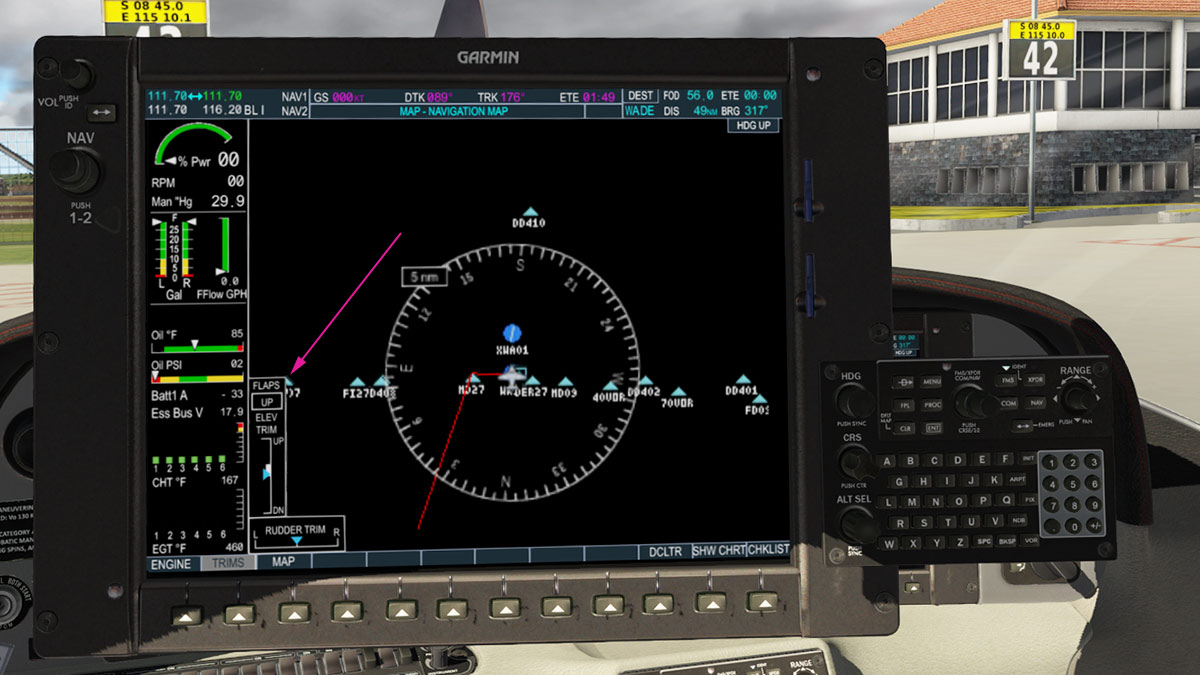
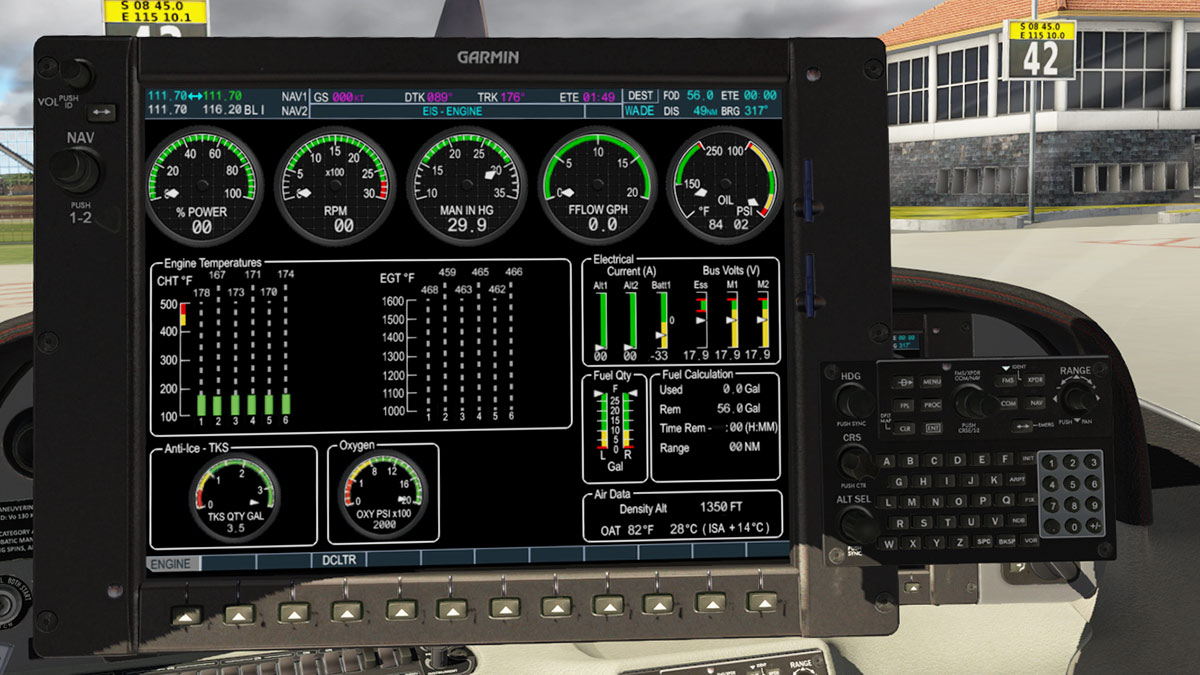
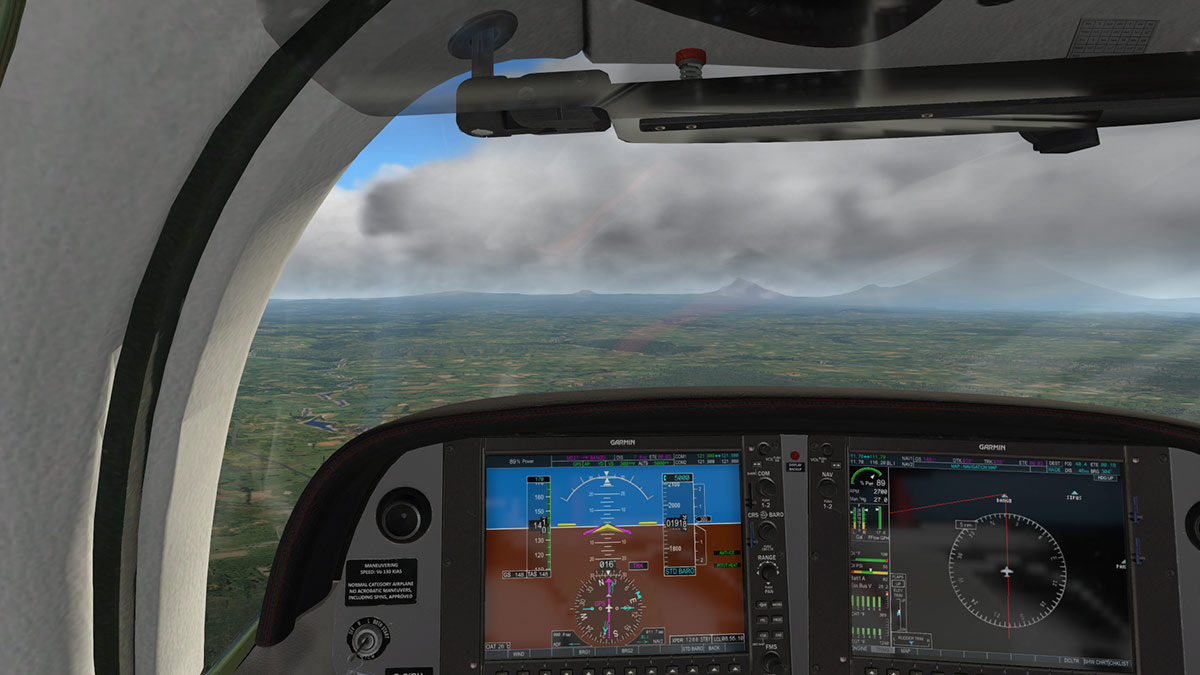
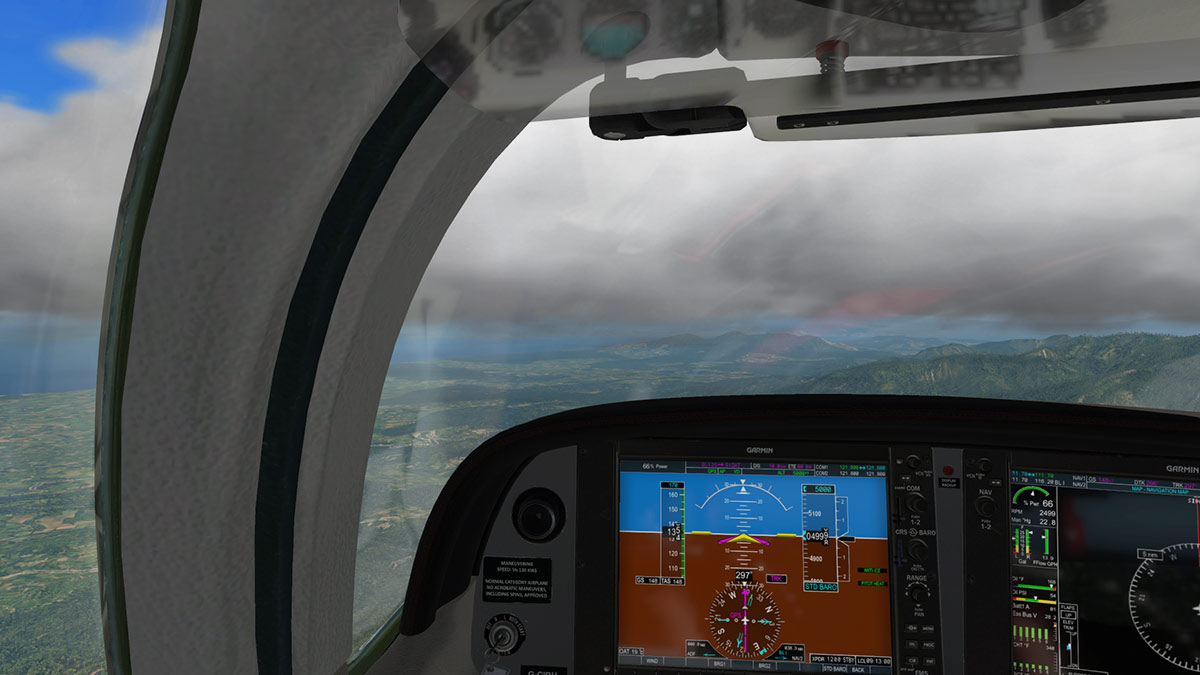
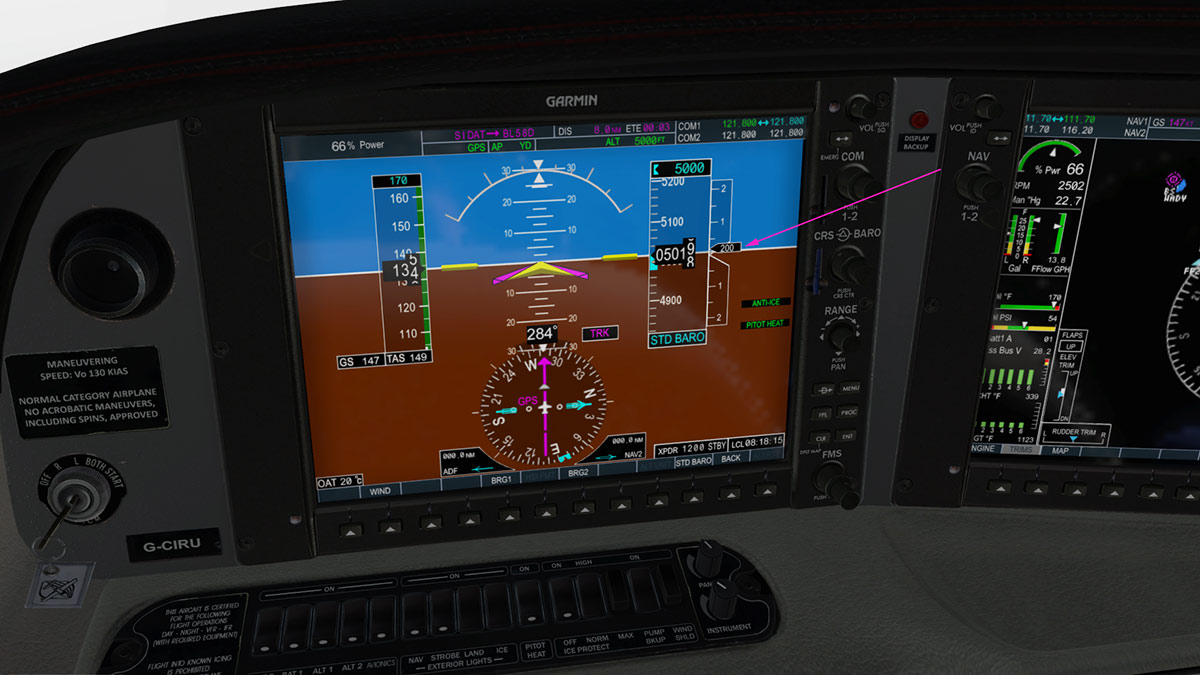
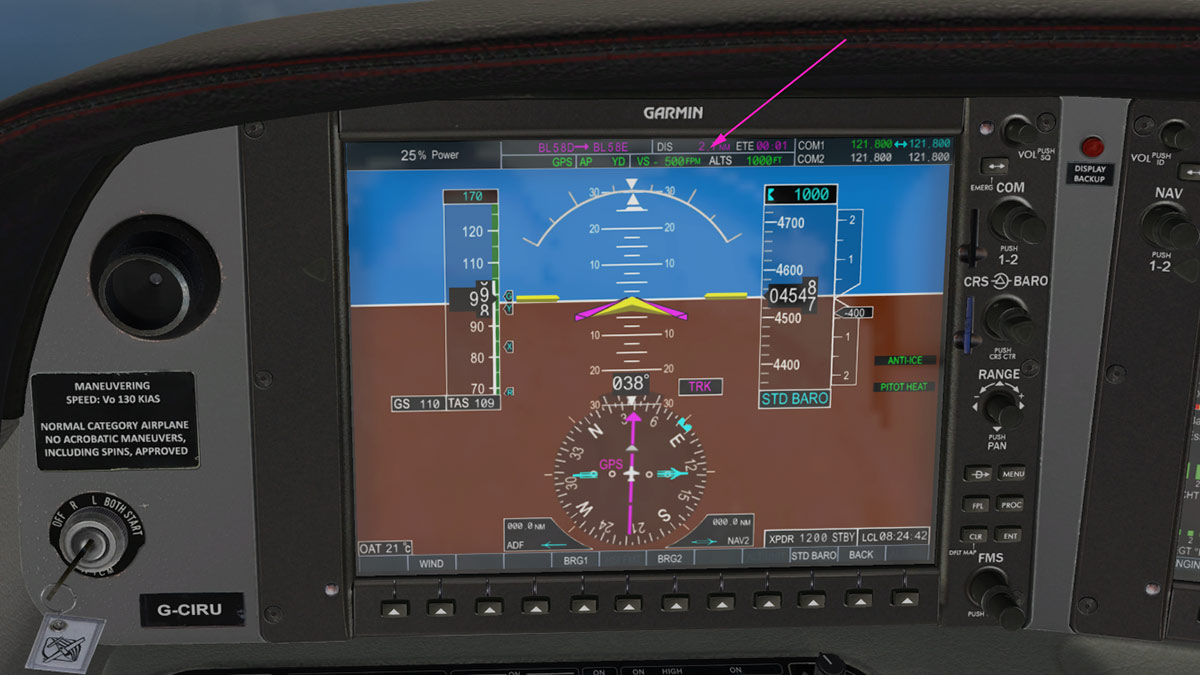
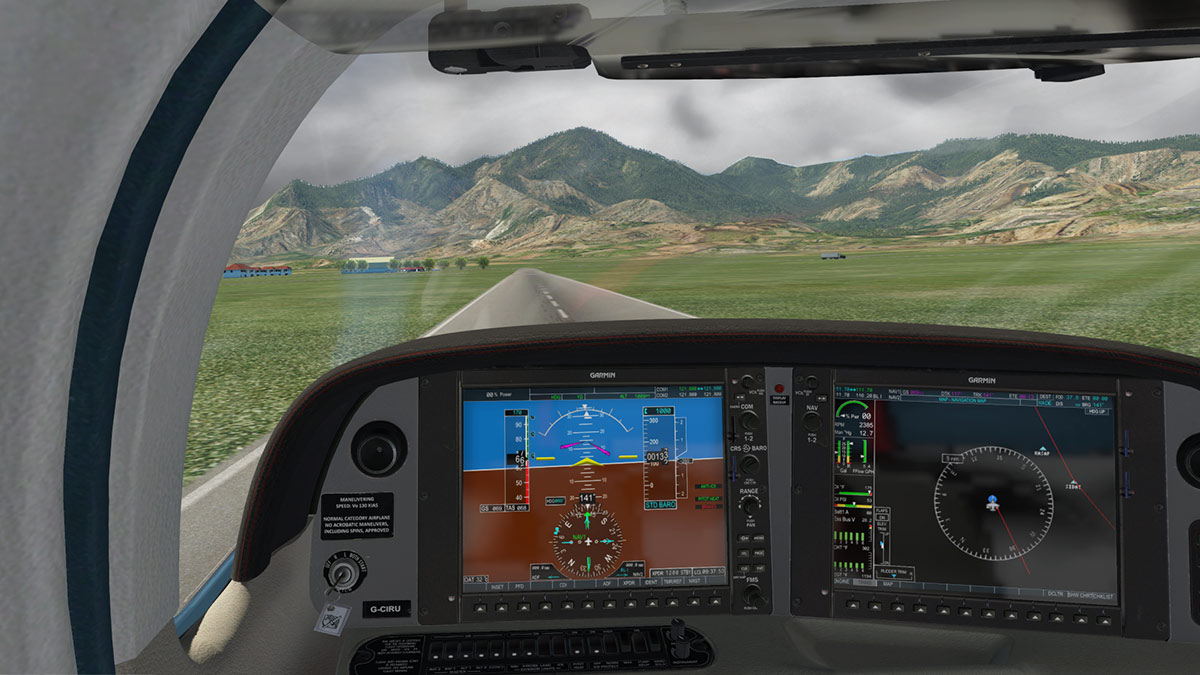
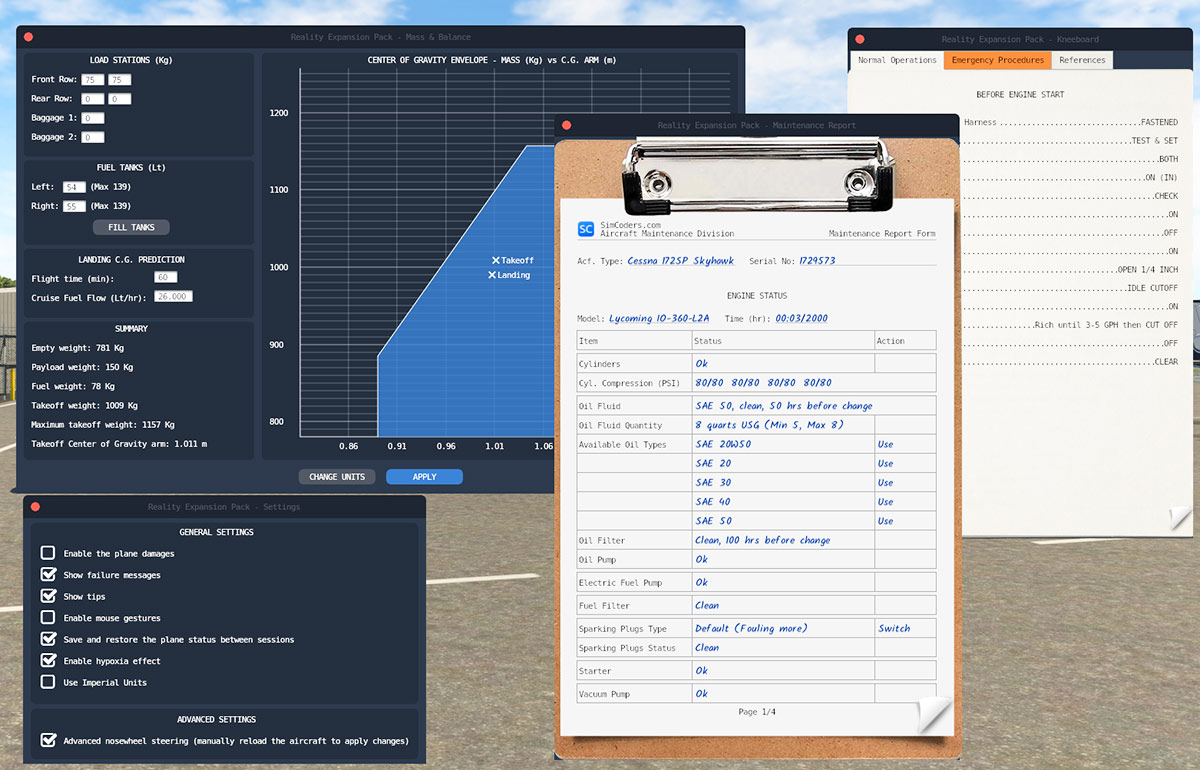
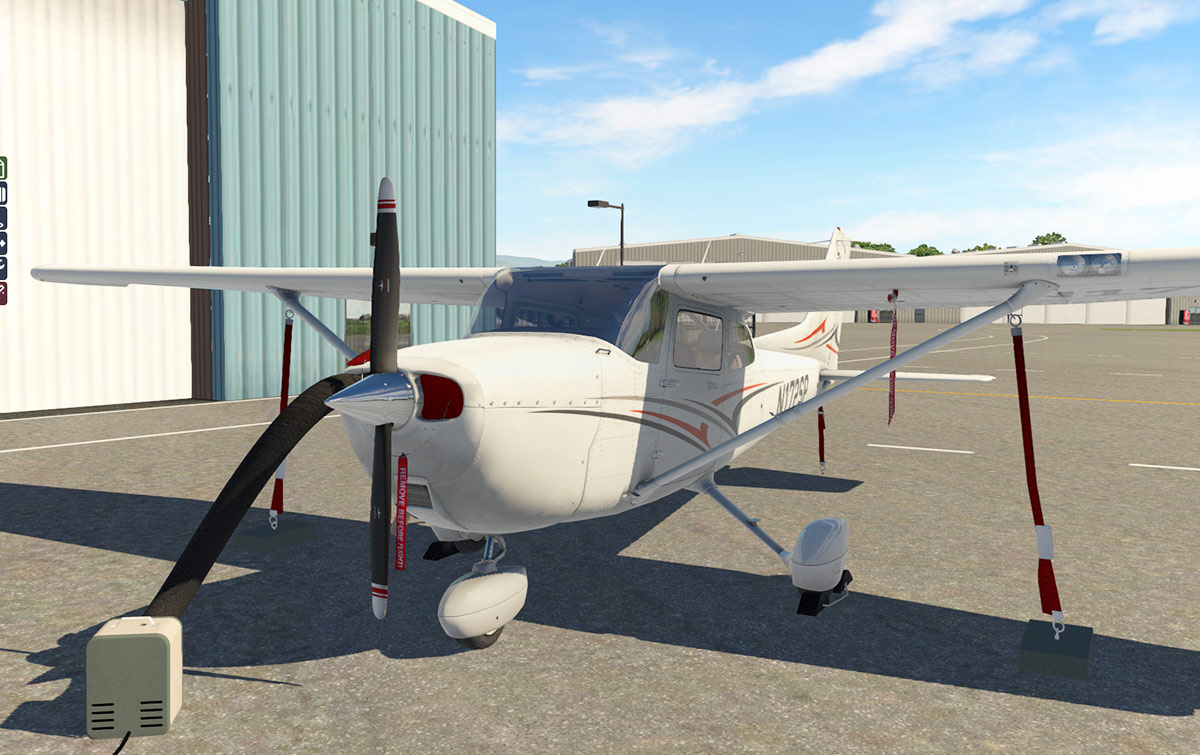
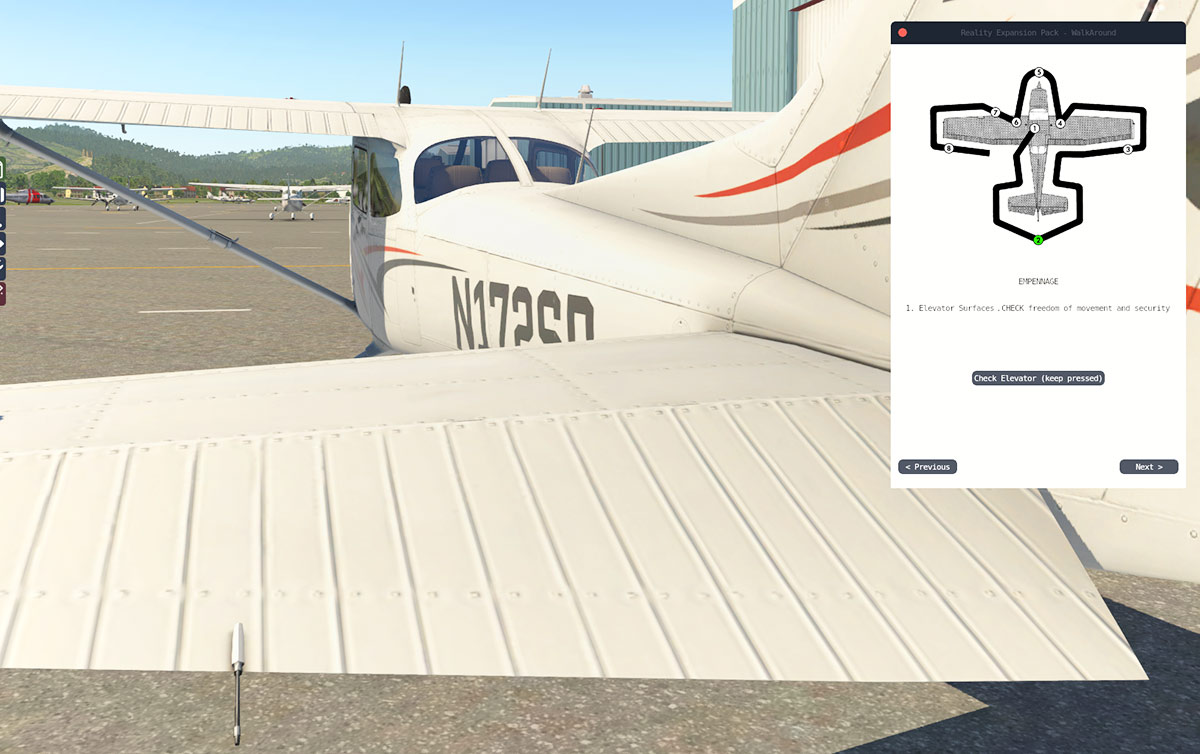
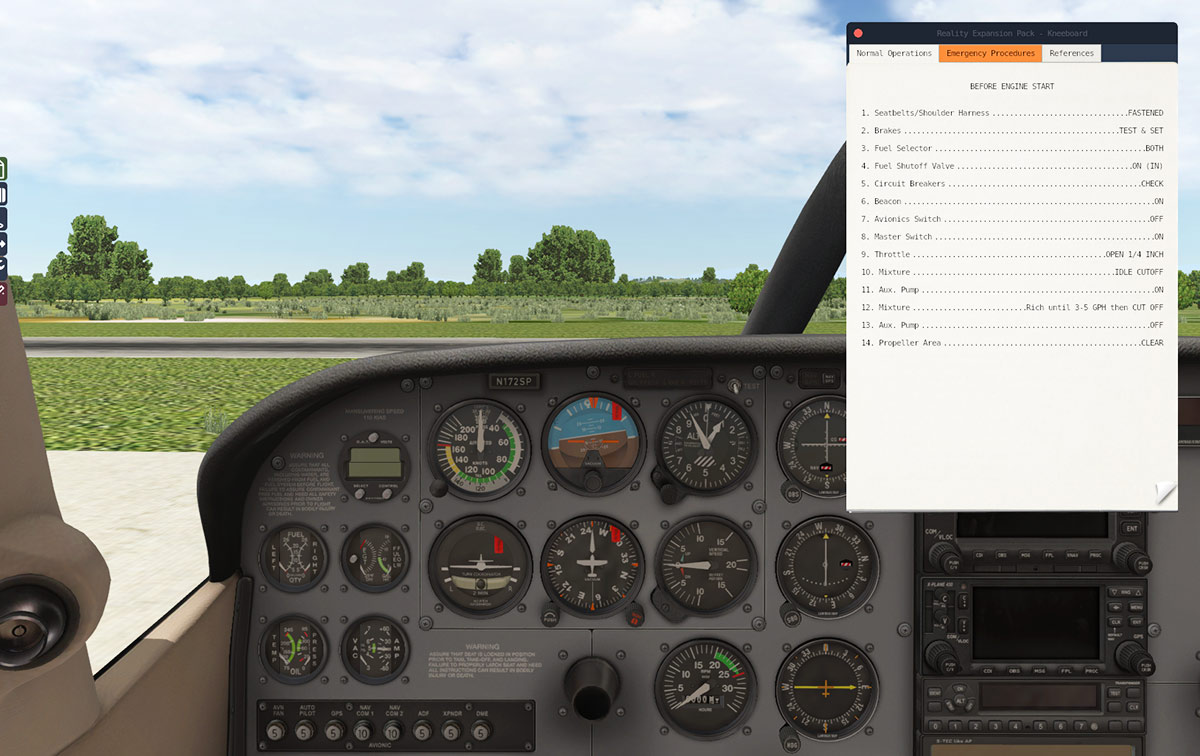
X-Plane Version Release! : X-Plane11.10 beta by Laminar Research Laminar research have released the first step upgrade beta (1 and now 2) for X-Plane11 in v11.10. As a note beta versions are buggy, that is why they are called betas and not a full release. That said my first viewing was extremely positive in that framerate (the devil's work) is certainly improved and by my numbers by around 10% to 15%... for a beta this is one very smooth running simulator. Impressed, yes very impressed... v11.10 is a very significant upgrade, the first after the initial release of X-Plane11, so a lot of what should have been part of the formal release that required a bit more work or just didn't make the earlier cut to be in X-Plane11 is going to be in here. So the best way to look at this release is that it is the follow up and refined version of X-Plane11 which will be completed when this beta run has run its course. Any newer beta versions after this one will focus more on new features and mainly on the VR (Virtual Reality) aspect. Besides the banner features in here, there is I notice a few really nice little touches and positive changes (from my point of view in flying). Garmin G1000 GPS The biggie of course is Philipp Münzel's (strangely now he is also noted as Phillipp Ringlar?) as Garmin's G1000 dual screen GPS system. One thing you can say about Phillipp is that that he is a brilliant programmer and this G1000 was always going to be very good, and it is. But do note that X-Plane default GPS systems always side on the point of being a little basic, but highly efficient and fast... and so that is case here. On the primary or left display it has all the main G1000 layouts correct with the artificial horizon dominating the screen with the heading rose/course with built in DME VOR 1& 2 pointers and the two Speed and Altitude tapes with bank and pitch displays top with the radio settings. there are no deep G1000 features (mostly usually buried in the menus) here as you would expect, but it is very functional and easy to use and nice on the eyes. The second Map/Nav display is however really good. There is the standard engine performance strip to the left of the right hand screen, but the rest of the display is taken up with the map and navigation layout. It is a copy of the local map inserted into the G1000, but that is more a huge advantage than a drawback. You can DCLTR (De-Clutter) to clear out the layered items and set the map to either Standard or Topo. Map Tracking or North UP is available via the menu and both are good, but the Map Tracking were as the map rotates as you turn the aircraft's heading is simply beautiful and smooth, and a long way from the usual draggy stop - start rotation you usually get, it doesn't go off map either, so you don't get those nasty white out box spaces that marks out the currently loaded scenery tile. But it is in the map's zoom resolution that it is... well a revolution! Under 15nm range you get the runway layout defined (above left), under 3nm you then get the airport's layout defined (above right)... but it doesn't end there... ... under 1.5nm you can easily navigate around the taxiways or find your runway... and still at 2000ft you can easily navigate around the map! Spectacular it is and how long before it is duplicated in other aircraft is going to be not very long. The default Cirrus SF-50 also has the G1000 installed. Aircraft Dynamics The C172SP has had a lot of development for X-Plane11 with FMOD sounds as part of the release version. But there has been a huge amount of dynamic work done to the aircraft's (and all aircraft, but mostly with GA's) flight model. Austin Meyer has been hitting the numbers in many areas that including a completely asymmetrical new airfoil format for Reynolds numbers to save foil data for the right Reynolds data numbers and then attach them to the “Lo Re” and “Hi Re” slots for prop or wing areas. There is also better propwash direction, which is important for propeller-powered VTOLs that tilt their thrust vectors around, and helicopters that might cast downwash onto their horizontal stabs. There is more tuning of the propwash (and thus hover power requirement) and vortex rings state and effective translational lift based on momentum conservation and actual helicopter performance data. In other words it makes helicopter downwash more realistic and have easier to control in those very critical areas when you are close to the ground. Also new is the flap and leading-edge flap and slat extend and retract times, all of which can be different, and also the flap speed ratio when retracted, so the flaps can move slower near the smaller deployment angles, and faster at the larger angles, as real flap systems realistically do. Rudder, elevator, and aileron trim now only moves the control surface when you have some airspeed over the control surface to really move it. Flight dynamics have also new vector and not trig based geometry for all the lift and drag vectors. To see this in action then pull major G in an wing-flex aircraft at high speeds and now… the lift vectors will now all bend around with the wing. Also refined is the down-wash model off wings in the ground effect mode. One area that has drove us simply bonkers is the poor ground traction on either takeoff or landing... in other words you simply weave badly down the runway in taking off or in the hardest area of landing in a just simple straight line without toppling from one set of wheels to the other. And I can confirm this now works and very well... .... you still have to account for natural forces like asymmetrical thrust and wind, but otherwise stability and tracking is thankfully a huge improvement. The full effects of all this development on the C172SP is that it is now a very different aircraft than it was even a few years ago. Overall it is still a basic design and focused on mostly new pilots to the simulator, but you feel the better dynamics and the huge improvements the aircraft has been through. Certainly all these dynamics are flowing through to mostly all of the aircraft in X-Plane and that will certainly keep the simulator at the edge of what it was designed for in the first place with brilliant dynamics to allow replicated real world flying in a simulator. New 3.0 SDK (XPLM) v11.10 also comes with a new Version 3.0 of the X-Plane SDK (XPLM). This allows for improving plugin drawing performance, Aircraft-specific menus, Menu items that show keyboard shortcuts, More joystick axes & buttons, to match X-Plane 11.10's support for 20 USB devices, new features for plugin-created UI (User Interface), Support for "popping out" windows and automatic UI scaling of all drawing in your window. In other words it provides a load of new features and is far faster and more efficient than the older API's. Older plugins (SDK's) will continue to function of course but they will quickly be bypassed by this newer and more efficient version now available. One instance on this new SDK is the now separate aircraft "Manage Keyboard & Joystick Profiles" feature. You can now set and and change a specific aircraft's settings in keyboard and joystick profiles. This allows you to have a specific setup that will change to the specific aircraft you select. So if say you have a dual throttle set for twin-engine functions, but select the Boeing 747-400 with four throttles, you can now have that specific setting already set ready when you load in the B744 without going to the joystick menu and resetting the throttle settings to cover all four throttles and not just the left side two engines. There is loads of great new features and changes in here, but sometimes it is the smaller items that cause you the most headaches... One was the default pushback tool. It is very good in it's basic sort of way... but it drove me simply sparse sometimes in that you couldn't stop it reversing? Now you can! There has been a "Stop" button added to the ground handling window. Thank you! More... Quick-look views, In there used to be 10 pre-saved viewing locations but now we have 20 settings and enough for plenty of cockpit and exterior presets. There is Improved AI & ATC with complete logging of the diagnostics with the ATC system and far fewer repeated instructions. A new command line option for "accurate_runways" which will, when loading procedures for an airport, perform runway renames and even location fixes in-memory on the X-Plane scenery and then reloads the region. This function is with the changes that X-Plane will now automatically reset runway headings with magnetic variation changes. So if the runway's angle changes due to magnetic changes, then X-Plane will reset the correct angle for you but still note what it has done. New "Global" scenery is 75 airports and 620 sceneries have been revised. Laminar have also pulled a few of those earlier Aerosoft sceneries if there is a better version available. There has been more custom landmarks scenery packs with London getting the honours, I checked but there wasn't much to look at, I think that the UK autogen art has also been included. My X-Plane11.10 beta came in at a huge 1.5gb, but it was compressed to 548mb, it loaded however in 20min which I thought was very efficient, but you will need that space and more to update to X-Plane11.10. Summary This is just a very quick overview of the highlights of X-Plane beta 11.10. Certainly there is tons more and it is in the small minute details that usually makes or gives us the biggest changes to our simulator. The highlight here is the new Garmin G1000, it has been promised and has been worked on for a fair while now, but the results are well worth the wait, and no doubt it will be fitted into countless aircraft to become an X-Plane standard like the already great GNS 430/530 combo. Everyone will note that the VR (Virtual Reality) aspect is not included in v11.10, but Laminar Research did note earlier in the year it was a more ongoing feature and would be inserted in a more custom manner than with this update, but a few things have been placed (manipulators) and set with this download but not actually activated at this point. First impressions are very impressive, that framerate improvement is excellent for a beta, but a few users have had issues with a few plugins (Gizmo) and a few other with addons, but overall I had no issues. So here is a great start to X-Plane11.10, hopefully the beta run won't be a long one, but you never know do you... Full Developer v11.10beta release notes are here: X-Plane 11.10 Release Notes ____________________________________________________________________________________ News analysis by Stephen Dutton 13th October 2017 Copyright©2017: X-PlaneReviews (Disclaimer. All images and text in this review are the work and property of X-PlaneReviews, no sharing or copy of the content is allowed without consent from the author as per copyright conditions)
-
Aircraft Update : X-Crafts Embraer E175/E195 v2.2 Here is another if small upgrade to X-Crafts Embraer E175/E195 regional airliner to version 2.2, and so this is just a one percentage point change not a complete version change. The last update to X-Crafts Embraer E175/E195 v2.1 was only at the start of June earlier this year and in that version was the X-Plane11 compatibility change over and it was quite a comprehensive update as well. Embraer E175/E195 v2.2 One area that developers are focusing on lately in upgrades is in sounds from the older X-Plane generic sound base to the newer FMOD sound engine built into X-Plane11, and this update is mostly focused on that aural aspect and hence the .1 to .2 change. FMOD is a big game changer in X-Plane11 in creating great 360º directional sound and sounds for different areas and points around the aircraft (like different cockpit and cabin sounds). It is absolutely very good and a huge step forward for X-Plane sound, but not to the extent of custom packaged sounds like from Blue Sky Star which are very comprehensive in the amount of different and varied sounds they produce. But for developers that don't have access to such high and those very varied versions of sound then FMOD is an excellent tool to deliver directional sound and deliver a more authentic experience in this important aspect and without the use of a dedicated plugin. And very good is this FMOD package, not perfect as you don't get that low GE CF3410E turbofan whine and in a few areas the sounds are slightly misplaced as in if you go close to the instrument panel the sounds change and go higher (I think it goes over to the external sounds) and this can be slightly annoying if you are moving constantly towards and away from the panel as in setting up the FMS. But the directional zones and the differences between areas like the cockpit and cabin is very good, and so overall the FMOD package here is simply a huge difference from the standard ones installed in the earlier versions. To note both the E-175 and the E-195 are totally the same here with no differences with this update and so here we will only show the E-195 version. Overall the sounds are real as they based on real ERJ sounds recorded from a real Embraer ERJ by a ground support expert in Todd Fleck. There are no changes to the modeling, which was always very good from X-Crafts, with a very high quality aircraft that looks excellent in any light or season. It is also a very long way now from the original E-195 version released way back in 2014 and although externally the aircraft is very similar, in reality the differences are huge in every aspect from that initial original design to the huge amount of features now included. FMS Tekton With every release there is always a new feature or change from Steve Wilson for his Tekton FMS, and here in v2.2 he doesn't disappoint. In reality again it is just a few small changes but a welcome ones. There is a new page accessed through the PERF (Performance) pages as there are now three pages and the new one is for the TRS or Thrust Rating Selection. Key select five right (RSK5) will now bring up the engine rating page... ... depending on circumstances such as load, runway length and weather, an E-Jet pilot will likely select a de-rated thrust value from the TRS page. This will created a de-rated thrust value which is intended to provide fuel economy and reduced wear on the engines. I have selected the TOGA (Go-Around) not to go to its full 100% thrust but to limit it to 97.38% thrust so it doesn't push the full throttle to it's maximum. These thrust rating settings are especially useful when using FLCH to control altitude changes, to get the correct power to do the correct action. FMS detailing is now very extensive with a lot of information displayed about your current performance and position... ... and all the information is updated in flight for your convenience. But in setting up the Tekton FMS you have to though and a bit procedural. The SID-Route-STAR arrangement is still in there and you do get quite proficient in setting it up. But you have to also be very aware to cross your T's and dot your i's because if you miss anything when generating the flightplan (on the Progress page) then you are stuck with it, as too try to fix it will only mess it up or not get another flightplan activation... in this case I missed the TOC (Top of Climb) and TOD (Top of Descent) altitude settings and I was stuck with it? SID and STAR set up is great for Departure (SID) but still slightly messy for STAR's (Arrivals). My Manchester EGCC arrival via MIRSI to runway 23L sent me actually to REXAM via WAL (Wallasey) which is great for a southwest approach to either RWY's 05L/05R but I was re-routed 180º back to the MIRSI VOR for a northeast RWY 23L approach, point was I was already at MIRSI? (below left) so I had to do a complete loop around back to my original position before heading correctly around to RWY23L . In the end I just changed my approach to RWY 05L as I was at WAL anyway (below right). You can edit these STAR's of course but you will need your own notes (which I do have for EGCC 05L/23R) via MIRSI, but don't rely on them until you have checked them and they are correct. I always found it was best to edit before, to make sure I get the approach procedure I wanted. There is a few adjustments to the 3d model (which as noted was very good anyway) and a bit more work on the flight model tuning is about it for this update 2.2. A routine flight from ENGM (Oslo) to EGCC (Manchester) confirmed that this E-195 is a nice aircraft, a great starter regional aircraft as it has enough deep immersion for the serious simmer, but it is also still simple enough for the uninitiated flyer out there. It is very light on your computer as well as I got great framerate numbers, but for the full effect I would recommend X-Plane11 for its features and it is also required for the new sound feature as a preference. The E-195 does certainly sound a lot better with FMOD and is a huge improvement over the older version. In the air I was quite contented and really enjoyed the flight. Summary Here is a nice little update to an already nice aircraft. Not a big one by any means but great sounds are important to the overall experience and this FMOD feature now provides that aspect. The sounds are real and recorded from the real aircraft by an engineer but they are not the total in depth sounds that come from a specialist developer. A few new mods also comes to the FMS by the way of the new selectable thrust rating values in the TRS, again a nice addition and finally there has been a few nips and tucks to keep the aircraft very current. Recommended more for X-Plane11 than X-Plane10 because to a point the aircraft requires this version to run these new additions, but overall the E-Jets in both E-175 and E-195 versions are both great aircraft for X-Plane... and this update just makes them even more current and more relevant than ever before. ______________________________________________________________________ Yes! the Embraer E175/E195 v2.2 by X-Crafts is NOW available from the new X-Plane.Org Store here : Embraer E-175 v2.2 Price is US$39.95 Embraer E-195 v2.2 Price is US$39.95 Twin Embraer E-175 and E-195 v2.2 Set is also available for US$59.95 Embraer E-175 and E-195 Package If you have either the Embraer E-175 or E-195 in its earlier form before version 2.0, there is is an upgrade deal from X-Craft's for only US$5.00, Please email [email protected] to get your discount code and include your original order number. If you own any later 2.0 or 2.1 version, then this upgrade to v2.2 is free and just go to the X-Plane.OrgStore and log into your account for the free upgrade. X-Crafts E-175 v2 review is here: Aircraft Review : Embraer E-175 v2.0 by X-Crafts The E-175 v2 review does have a comprehensive look at the TEKTON FMS© and it is not that much different to this aircraft's E-195 version. FEATURES NEW: Fully integrated 3D sound system! Accurate dimensions based on drawings and documentation provided by Embraer © Windows, Mac and Linux compatible Custom TEKTON FMS© by Steve Wilson An awesome Reflections plugin that makes the airplane look amazing in both X-Plane 10 and X-Plane 11 (disabled by default, please read the instructions for installation) Custom improved pushback plugin with animated tug. A white silhouette will show the final position after the pushback! On-screen checklist plugin NEW Plugin menu for door control, ground objects or GPU Suitable for beginners - Just load and fly within seconds! Great for advanced users - Enjoy the complexity of the Custom FMS! Mouse scroll wheel support This add-on comes with the NavDataPro dataset by Aerosoft Requirements: X-Plane 11 or X-Plane 10.50 + Package is X-Plane 11 only Windows, MAC or Linux - 64 bit Operating System required 8Gb RAM - 2Gb VRAM Minimum. 3Gb+ VRAM Recommended Current version: 2.2 (last updated October 5th 2017) X-Crafts Support Forum : Support forum for the E-195 ______________________________________________________________________ Version notes: Version 2.2 (October 5th 2017) Completely new 3D Sound System introduced using FMOD - based on real ERJ sounds recorded from a real Embraer ERJ, inside and out, on a flight line by our professional ground support expert, Todd Fleck. Added New Tekton FMS functionality: Thrust Rating Selection (TRS). This will give pilots the ability to hold a fixed N1 percentage provided that the thrust levers have been sufficiently advanced. This is especially useful when using FLCH to control altitude changes. De-rating thrust is a normal part of airline operations to provide fuel economy and reduce wear on engines. (More information on the proper use of TRS will be provided in our support forum). Replaces LBS/KG units selection on PERF 1. Moved LBS/KG units selection to PERF 3. Updated SASL to version 2.5.0. This will preclude any further need to install Microsoft Visual C Redistributables in order to use the menu system to control X-Crafts provided ground support equipment, pushback capability and in-flight checklist functions. Adjusted the keyframing of the N1 indicators to correctly display N1 values - matching the dataref value accurately. Several minor fixes to the 3D model ______________________________________________________________________ Release notes by Stephen Dutton 11th October 2017 Copyright©2017: X-Plane Reviews (Disclaimer. All images and text in this review are the work and property of X-PlaneReviews, no sharing or copy of the content is allowed without consent from the author as per copyright conditions)
-
Plugin Review : TerrainRadar by DrGluck In the last few months if you are a bit on the eagle-eyed side, you will notice that the Navigation/Map panel in our reviews on the default Boeing 738 is a little bit different? It is running a plugin called "TerrainRadar" by DrGluck and very good it is as well. Most early adopters used it in the Zibo Mod (Modifications) of the default X-Plane Boeing 738, but it is far more powerful plugin than that and so that requires a closer look at the this great new addition to X-Plane by Denis Antontsev (aka DrGluck) and Sergey Popovichev (aka Vanger) If you have also flown FlightFactor's brilliant Boeing 767, or the later version of their Boeing 757. They both came with a great new feature of the terrain display on their Navigation/Map panels. It was and still is very good and the best terrain feature in X-Plane bar non, but for other aircraft to have this feature as it wasn't an option till this plugin became available and the great thing about it is that it can be adopted to almost any aircraft in X-Plane with either the built in Navigation/Map display or without with a popup window. Terrain radars give you elevation detail of the surrounding landscape on your aircraft's Navigation/Map display. The display will note the elevations in different colours to note the heights of the surrounding mountainous areas. This allows you to navigate or be aware of dangerous high ground and is especially useful in low visual or fog conditions where you can't see or find the areas surrounding you that are masked by this low visibility. Terrain of more than 1,000 feet below the aircraft is coded black. Terrain less than 1,000 feet but more than 100 feet below the aircraft is coded yellow. Terrain less than 100 feet below the aircraft is coded red. Man-made obstacles (e.g., radio towers, power lines, buildings) generally do not appear in a topographical database. Installation TerrainRadar is free, or Freeware and is available from the X-Plane.Org site : Terrain radar + Vertical Situation Display 1.7 There is a donation button on the download page so please support the developers for their excellent efforts!. Installing is easy, as you just deposit the plugin into your X-Plane/resources/plugins folder. (download is a frisky quick 241kb) Currently the plugin supports internally: Boeing 737-800 by Zibo (XP11) -left ND (will be fixed later!) - TERR button turns the radar on or off - CTR switch in VOR or APP modes: expanded -> center -> expanded -> center with VSD (later Zibo will add MAP CTR mode!) Boeing 737-800 default (XP11) - both ND, TERR buttons supported Boeing 747-400 default (XP11) - both ND, TERR buttons supported Bell 429 by timber61 (X-Plane 10 and X-Plane 11, version 1.0+) - all displays, look at the screenshot to find the TERR button FlightFactor Boeing 777-200LR/200F/200ER/300ER (radar ON/OFF in radar menu or by hot key) JARDesign Airbus A330 (radar ON/OFF in radar menu or by hot key). Note: radar is turned off if the aircraft's standard radar is displayed! Virtavia C-17 Globemaster III (radar ON/OFF in radar menu or by hot key) Gulfstream G-IV SP V11 by ghansen - both ND (radar ON/OFF in radar menu or by hot key) Cirrus SR20 G1000 by vFlyteAir (TerrainRadar Plugin Compatibility Patch is needed!) Bombardier Challenger 300 by ddenn Tu-240/214 by Pilot-Sanya (only for test purposes, because plane is under development) But I am sure that many other developers will quickly install the feature on their aircraft as it is a great addition and the plugin is very easily adopted to most aircraft. Menus The TerrainRadar menu is accessed via your plugin menu for "Terrain radar" And it has four accessible menus in - Color Scheme Scanning Speed Brightness Options Show radar window, window size and radar range are currently greyed out for non-use. If your aircraft does not have the intergrated display, then it will be shown in "Windowed Mode" and then the radar window, window size and radar range options are then active. You can set the window (popup) on a key set to hide/show the window, change the range (below) and show the EGPWS alerts. A very nice extra feature is the built in aircraft elevation position indicator at the bottom of the window, but the so called large and small sizes of the window doesn't seem to have any change... the choice to either have the elevation position indicator on or off would be a better option. Color Scheme There are three options for the color schemes in - Solid Colors - Grain Colors (Boeing style) - Regular Tiles (Airbus Style) Clockwise is Solid, Grain and Regular... and all three can be set without the blue which represents water which is the last image lower left. The next two menus cover first the "Scanning speed" with both 1x and 2x scans available... ... and secondly the display brightness from 30% to 100%. I found 90% was the best level, but the brightness does have a habit of resetting itself back to the default 50% and needs to be checked every time you start or reuse the feature on a new flight. Options There are four options in the option menu, with - Show Water - Peaks Mode - EGPWS Alerts - Range Arcs Options Show Water This option is very handy in showing any water under the aircraft, mostly it is very good in defining a coastline and the line between the land and the sea. The display however is limited to the size of the currently loaded X-Plane tile, push the range out high and you will see the tile's straight line square boundaries. But I really like this option, mostly for what I just noted in leaving one coastline and then arriving at another coastline after the over water flying, it is so good, you can actually define the area of the coastline you will be flying over as you arrive. Peaks Mode As you go higher to your cruise altitude you will lose the effects of the terrain below, so the "Peaks Mode" will still show the terrain elevation even when you fly at altitude. EGPWS Alerts This setting will tell you if you are too low or are in danger of flying into a rising slope or simply a bigger monster of a mountain. Range Arcs Options This will show/hide the Range Arcs on your Nav/Map display. Different aircraft displays with TerrainRadar The default X-Plane Navigation/Map display is actually quite still a basic layout even in X-Plane11, in fact you wouldn't see much change from earlier (or very earlier) X-Plane versions and all the way back to X-Plane9®. vFlyteAir Cirrus SR20 So it is a great advantage to give the display a real different look and certainly the TerrainRadar plugin does a great job in doing that. We will look at the more standard aircraft in a moment but first to see the bigger advantage you can get with this plugin that is set up correctly is with the updated vFlyteAir SR20 which I reviewed quite recently here: Cirrus SR20 G1000 v2.5 by VFlyteAir You do have to download a compatibility patch from vFlyteAir and it is a little complicated to install as you have to replace certain files in a few folders (make sure you backup the aircraft first) but when all completed with the install the results are well worth the effort. The Cirrus has a hybrid version of the G1000 system called the "CirrusPerspective system" and those screens are large. The TerrainRadar does a really great job with the resolution on such a very large display, but close, close up it is a little out of focus, but that is in the screen display popout mode or if you really want to get picky. But here at Salzberg, Austria, it is very effective. You have the red terrain mode as well, but it is not as detailed. Takeoff and fly into the Alps and you can easily pick your way through the peaks to get out of or through the valleys... ... it is very impressive, and map rotation is slightly laggard because of the big display, but still far better than most pro screens doing the same complex movement. Zoom out the range and you can see the full network of the Alps... ... so overall it is excellent. The biggest impact is on just how much the TerrainRadar changes the whole perspective of the SR20 panel's display, it makes it far more, in fact much more a complete G1000 system feel and gives you a completely different viewpoint than the original's display set up, so it is a very worthy addition or feature to add into the vFlyteAir Cirrus SR20 at absolutely no extra cost. Boeing 747-800 X-Plane's Boeing 747-800 is another aircraft like the default Boeing 737-800 that the plugin will work in. The B744 is a bit older and more dated in it's layouts and so the plugin is shown on a far more smaller display than in the B738, it is far darker as well and that required the brightness of the plugin to be quite bright. I descended the heavy huge Boeing very low and in real life would have lost my licence by flying big Boeing's this low, but if you don't tell the authorities then it was all in a good cause... Again the this excellent plugin was highly impressive, and still again you are impressed by the way it changes the display's feel and viewpoint from your flying perspective. Bombardier Challenger 300 Ddenn's Challenger 300 gets the internal upgrade treatment as well. Again the TerrainRadar is a very nice addition in here as well. But the smaller tighter and very cluttered display does make it complex to see everything (or anything). So unless you really need them, then the fixes (waypoints) triangles (left image) need to be removed from the display to give you a better and far clearer terrain perspective (right image). The "Grain" setting is always the best with these tight displays as both Solid or Regular don't give you as much or any real definition of the surrounding terrain. Boeing 737-800 It was the Zibo's Mod of the Boeing 737-800 that highlighted the TerrainRadar's dynamics and potential. The plugin's developers note that it only works on one screen the pilot's in the B738, but I found it works on both the pilot's and co-pilot's displays by pressing the "TERR" button. It is fine on the standard X-Plane version of the B738 as well, so you don't need the Mod in there to use it on that aircraft as well. As with the original features on FlightFactor's Boeing 757 and 767 twin, it is a significant addition to any cockpit display, but there are more adjustments and features like radar range and angle that on those aircraft and it is far more sophisticated in its design. However the TerrainRadar is created to be a far more generalistic tool across more aircraft than the featured FlightFactor design. One thing that is very apparent here with this plugin. If that any developer does intergrate the terrain plugin with a custom fitting into their aircraft the benefits to them and the aircraft is very high. So I would be extremely surprised that the plugin will not start to be quickly intergrated into more aircraft in the future and that list of intergrated displays will soon be quite long and commonplace. Summary Simple and brilliant... This Freeware tool brings any cockpit map and navigation display alive and dynamic at the same time. Super easy to install and even use and already it is being used in a far range of aircraft in their displays. No intergration in the actual aircraft? No problems as you also have a popup window to still use the plugin with the added on aircraft elevation position indicator. It is also very good, but nothing really beats the plugin set up on the navigation display. As noted there will be no doubt we will be seeing this TerrainRadar display tool in many aircraft as it will easily (or should) become a default plugin standard... But remember to support the developers in making a nice donation, as this is a very worthy addition to X-Plane. Overall a must have and you will smile every time you look at your aircraft displays on how a big difference it makes to the cockpit... Just brilliant. ____________________________________________________ Yes! the TerrainRadar Plugin by DrGluck is Available now from the X-Plane.Org here : Terrain radar + Vertical Situation Display 1.7 Price is : FREE! There is a donation button on the download page or set below so please support the developers for their efforts Donation link: https://www.paypal.me/drgluck Requirements X-Plane 10 64-bit (XP10 32 will be added in the future) X-Plane 11 64-bit OS version: Windows, Linux and MacOS Installation : Download file size is a whopping 241kb (yes kilobytes). With installation of the plugin into your X-Plane Resources/plugins folder. ______________________________________________________________________ Plugin Review by Stephen Dutton 6th October 2017 Copyright©2017: X-Plane Reviews (Disclaimer. All images and text in this review are the work and property of X-PlaneReviews, no sharing or copy of the content is allowed without consent from the author as per copyright conditions) Review System Specifications: Computer System: Windows - Intel Core i7 6700K CPU 4.00GHz / 64bit - 16 Gb single 1067 Mhz DDR4 2133 - GeForce GTX 980/SSE2 - Samsung Evo 512gb SSD Software: - Windows 10 - X-Plane 11.05 Addons: Saitek x52 Pro system Joystick and Throttle : Sound - Bose Soundlink Mini Plugins: WorldTraffic 3 US$29.95 : XPRealistic Pro v1.0.9 effects US$19.95 Scenery or Aircraft - Boeing 737-800 X-Plane default aircraft with and without ZIBO MOD installed - Boeing 747-400 X-Plane default aircraft - Cirrus SR20 G1000 by vFlyteAir (X-Plane.OrgStore) US$29.95 - Challenger 300 by Dden (X-Plane.OrgStore) US$29.95
-
Behind the Screen : September 2017 You get great months and then you get those really hard draggy months and guess which category September 17 fell into, yes the second one. Part of the issues is that there is a lot of betas flowing around and September became the update and rerelease month par excellence. The two biggies came out with xEnviro finally coming out with their v1.07 and finally is the word here. And then there was WorldTraffic3 in release as well. Secondary was that a lot of airports scenery (mostly Aerosoft) was also updated to X-Plane11 and so much was updated X-PlaneReviews found it all a bit overwhelming, but as they say when it rains it... All these plugin releases also created a bit of a issue on the system side that has severely slowed the site down over the last few weeks. Plugin conflict is one of the worst things to fix, and far worse when you can't see the actual cause? I actually don't have a lot of plugins running, but three I think are essential in using X-Plane11. One is xEnviro, Two is WorldTraffic3 and last but not least is XPRealistic the excellent motion and effect plugin... I just can't run X-Plane11 with any of those excellent addons running alongside me in there. But here is the sudden issue in that none of the plugins above suddenly like each other, even if they have all been very good friends all year. Every time I run two or more of the plugins together now I lose my mouse pointer and screen input, menu bar works fine, but not in my main screen, and this issue has caused havoc for weeks now? Your point of view is that why bother and just do the reviews? That is all and good, but that will give you less of the full experience and and very visually with xEnviro and WT3, but underlying is the fact that you need to find the cause and because if it happens to me then it is not going to be before too long before you start being mouseless as well. You expect plugin issues while there is a beta program running and I was running a few side by side, but not with releases? So it is all very confusing. WorldTraffic3 I have been a big part of the development of WorldTraffic3 from the start. But don't get me wrong this is all Greg Hofer's work and not mine, I can only help or encourage where possible and add in ideas on how to make it all work as best as possible. First to note is that the plugin is totally and absolutely horribly complex, that it works at all is simply up to Mr Hofer's genius, but it does work and extremely well, but there are a few comments that have to be laid out to understand that the release of WorldTraffic3 does not mean it is a completed project and that point is actually very far from reality. Mr Hofer can only do so much in making the plugin as efficient and durable as possible, but overwhelmingly WT3 does totally rely on outside layouts being correct and set to being totally effective. If you have any issues with WT3 then look inward at X-Plane11 far more than the actual plugin itself, yes there will be bug fixes and more refinements to come and quickly, but 90% of WT3's issues are not residing in the actual plugin itself but in the X-Plane11 framework that it now uses. Even though the tools to create a really good ATC and ground route structure at airports with WED (WorldEDitor) has been available for awhile, and even if the released airports and mostly with the default Global Airports that reside in your custom scenery folder it doesn't mean that these ATC structures are all created equal. In fact of the many I checked, they were all really quite average with most missing parking position lines and traffic flow lines that are not completed or simply missing. And then WT3 has to interpret this poor layouts and try to make your airports look busy and exciting. When you have a correctly set up ground route structure and I use Aerosoft's ENGM - Oslo scenery as a benchmark, then WT3 is simply astounding in it's operations, but in most cases the layout even if it says on the packaging that the scenery is ATC- Traffic flow is WED compatible is that they usually are not, and this is the biggest hurdle that WT3 and to a point X-Plane itself has to climb over, and not just for WT3 either as these ground routes are becoming more and more important to the effectiveness and general everyday use of the simulator. Then there is the factor of many sceneries and mostly freeware that don't have any ground route layouts at all, and yes I am poking an stick at tdg here as although he makes simply excellent scenery and does astounding work, this one little oversight will cause for most of his work to be totally unusable in the WT3 universe and I am quite angry about that because to insert ground routes for someone as talented as he is at WED is just simply astounding as well. So the point is for WT3 to be a major and important part of your X-Plane experience is that a very significant focus will have to go on and be made on the WED ground route layouts... then and only then will WT3 deliver the incredible return on the investment you require, in other words don't blame WT3 but fix the fundamental basic issues of WED first and make the whole system work together. I have also noticed that some users are generating auto ground routes and posting them up on the X-Plane.Org. This is really a waste of time and actually a big diversion in the fact these ground routes can for one be very easily generated within WT3 quickly and easily anyway, but worse are they actually "Corrected" or refined ground routes with the sorted correct parking assignments completed and in most cases the answer is no. Again you want fully well defined or completed ground routes and not just quick and nasty setups that users will take for the real thing and only they make your airport sceneries totally functional with the WT3 plugin, this is an IMPORTANT point to understand, in that the layouts required by WT3 need to be the best we can distribute and fully setup for instant use and be secure in that they will deliver the required standard that we require to make X-Plane the excellent simulator it is. Over the last few months in checking most sceneries we do fall very short or if anywhere near the mark to make WT3 effective at this point. But what I love about X-Plane is that as a collective clever set of tinkerers and changers we do have the skills and talent to fix this ATC WED layouts for the better and quickly, and then distribute the changes for everyone else to benefit from, that is the promise of not only X-Plane as a simulator but for WT3 as well. From this point forward this WT3 icon will tell you in a review of the WT3 layouts and notable points on what does or doesn't work, or if that scenery even does not have the required layouts to generate ground routes. To a point I found most good payware scenery released recently are doing very effective ground routes or at least acknowledge that well set up WED ground routes are now as big a major feature or is a major feature on selling their product. I would like to thank everyone who participated in our fourth anniversary competition in August, of course X-PlaneReviews would like to pick many winners but we have to settle for just five, it was very hard in the end but the final choices were the worthy winners. See you all next month Stephen Dutton 1st October 2017 Copyright©2017: X-Plane Reviews
-
Scenery Review : YAYE - Ayres Rock - Connellan Airport by RIM&Co If you get a large map of Australia and pretty well draw two lines to crosshair the centre of the continent then you would find two unique rock formations called Uluru and Kata Tjuṯa or by their English names of Ayers Rock and the Olgas. They are not as expected to be the usual volcanic leftovers, but are actually basically cemented sandstone, but they are extremely unique in their prominence in such a very flat landscape. But anything this different and unusual will always attract people to see something out of the ordinary and even if they are positioned in what is essentially the middle of absolutely nowhere. In fact just over 300,000 tourists are attracted to coming out here to these far reaches each year, and so if you have that many people coming to a place a very remote place that is that far away from pretty well basically anything, then you will need an airport. This is that airport in YAYE - Ayers Rock or Connellan Airport after Edward Connellan, who started Connellan Airways in 1942 and provided passenger transport, chartered Royal Flying Doctor Service flights and mail runs this far out into the Australian outback. As with any major tourism attraction the people loving it quickly were damaging the environment and so it was decided in the early 1970s to remove all accommodation-related tourist facilities near the base of Uluru and re-establish them outside the park. In 1975, a reservation of 104 km2 (40 sq mi) of land beyond the park's northern boundary, 15 km (9.3 mi) from Uluru, was approved for the development of a tourist facility, and came to be known as Yulara, along with a new airport. The new facilities at YAYE became fully operational in late 1984. First Impressions Most services operate out of Sydney and Melbourne with Jetstar and Virgin Australia to YAYE, but Qantas now uses Qantaslink which is a regional carrier subsidiary of Qantas, but the aircraft which are mostly B717s are mostly operated by Cobham under the Qantaslink banner from Alice Springs and Cairns which are major tourism routes. In any route you are still 1000nm from any connecting airport except Alice Springs which is still only 500nm away, and that makes any flight to YAYE a long one no matter your starting point, and a minimum of three to four hours flying time, so short hops are out of the question out here. My flight is using Rotate's MD88 (as close as a B717 I think your going to get) in Qantaslink colours is from YBBN - Brisbane and it is a four hour 1220nm flight. Fuel load was as close to 16,000lbs and all I could get into the MD88, I needed the range. Departure was via RWY 01 and WOODY SID and then you just head straight west over Queensland and into the Northern Territory and just follow the sun. You can debate it as much as you want to, but the Qantaslink colours on Rotate's lovely aircraft in the bright Queensland sunshine looks brilliant. In the manual (in all ENG, DE, CN, IN and Russian) it gives you some great charts (five including a scenic chart) which are very welcome. YAYE has one runway 13/31 2,599 (8,527ft) and most approaches are via RWY31, but I am going for RWY13 because the light wind is in that direction. So the RNAV approach is via AYEWI but I am going out a little further to AYEWE to get a better feel of the approach. As I came into the circuit then out on the horizon loomed up these great spectacles of nature. You can start to get as low as 4000ft out here as there isn't much but a flat landscape to fly into. This is my first flight into YAYE, as I have flown into Alice Springs a few times, but never way out to here at Ayres Rock Airport. There is only one nav-aid in a NDB (AYE) 233 khz and nothing else. I couldn't rely on the aircraft's ARR STAR on the FMC as it went weird between waypoints AYEWE and AYEWI in drawing a complete circle on the FMS? and nothing in editing any of the FMC legs could eliminate it? It only gave me an approx to the run into RW13 but not a definite line to the threshold... In other words I was completely on my own. I was correctly lined up for RWY13 and flying by the set course and NDB pointer... But where was YAYE? My nose was right up against the windshield (the computer monitor) and I simply couldn't see any.... runway, then suddenly I was over YAYE as it then passed straight by it on my below left? I really (really) hate go-arounds but this one had completely fluxed me? Did you see any runway... well I didn't see actually anything? I did get however a real eyeful of Uluru and it looks very good in the X-Plane11's lighting, extremely realistic... I did a reset for RWY31 (thank god for light winds) and started the second approach... This time I did see the runway lighting, but the problem is you get seriously disoriented because you have no darker runway silhouette to focus on to get your runway angle correct, all you have is two sets of lights in the gloom. I noted on the replay that I missed the RWY13 approach lighting by being just a little to the north, not a lot but enough to hide the approach lighting, but the problem is there is absolutely nothing around you either as a marker, pointer or any landmark towards the runway... it is just like a flat wasteland of nothing. You do actually have an aid here that I was unaware of, It is called the T (Tee)- Visual Approach or T-VASIS. This is a set of four white lights with a set back twin set of red lights that creates an inverted T on each side of the runway to give you a guide line for the angle of the runway. But T-VASIS is still hard to see, even if you know what to expect next time , my guess each landing becomes easier each arrival the more you are aware of the ground system, but on a first run, it was just..... .... I was still out, and a little to the left, but "boy" I was a happy person when those wheels touched terra firma... out here you just can't go and divert to another airport as it is 500km away at Alice Springs, it is simply a do or die moment, or a "get it down... get it ...... .... down" situation. There are turn arounds at both ends of the runway and they are quite tight for the larger MD88. You have to study the airport layout chart, because the taxiways are a little confusing. A few in B, C and D are not usable for aircraft over 12,566lbs (5700kgs) and you have to pick out taxiways A and E as the only route to the apron, it is a tight turn as well (look out for the ex-Ansett B737 by the Fire Station). Another note is that taxiway A cannot be used after dark and is available in daylight hours only for aircraft below the 5700kg weight. The biggest aircraft you can land here is a Airbus A320, anything larger and you would be in trouble manoeuvring around these tight corners and tarmac strips. There is great runway and taxiway detail in cracks and hot asphalt, as obviously the hot dry sun out here can take its toll. General Aviation apron is large and resurfaced and is to the northwest of the main ramps. There are five main parking stands and two are filled with a QF B738 and a VA E180 on stands 3 and 4. I am used to tight Australian ramps, but this one is tight.. "tight", the MD88 feels like an A380 manoeuvring around on here, but if not anything else I am good at parking aircraft and used to this circular Aussie style ramp parking to park up at stand 2. Engine shutdown and I am totally exhausted... That was one tough arrival! I needed a really strong coffee and walk after that one. And it doesn't end there either? Chart note's include east crosswinds with sand on approach to RWY13, Windshear is also known in the area and dust-devils are also very common throughout the year? a really fun place to fly into isn't it, is this airport at YAYE. ________________________________________ YAYE - Ayers Rock Airport/Connellan Airport Ayers Rock/Connellan Airport IATA: AYQ - ICAO: YAYE 13/31 - 2,599m (8,527ft) Asphalt Elevation AMSL1,626 ft / 496 m Rim&Co YAYE - Ayers Rock Airport This is Rim&Co's first payware scenery, the idea for the scenery was when the developer passed through YAYE a few years ago and thought that "This would be a great scenery for X-Plane" and so here it is. Something is to be noted this early in the overall view of this scenery. The scenery comes with downloadable and comprehensive 25000kmx2 photo scenery at 15, 30 and 60 cm/pixel resolution. Which is very nice. But at 6gb just for the local airport mesh and a huge whopping 16gb for the expanded mesh, that is just too high a number to download. If I think right I don't think I have ever downloaded more that 3gb for expanded scenery mesh, and as good as it well maybe, and I A_ don't have the hours and hours to download it, and B_ is not going to use half of my monthly download data allocation in doing so? It just seems to be just all too far over the top? So this scenery is regrettably presented without the extra texture mesh, which I do think would certainly make a great addition to the scenery, but those numbers are just simply too high in every area and including filling out what is left of my hard SDD storage (I only have 512gb of SSD storage). YAYE Overview The overview of YAYE highlights the significant camouflage that you are confronted with as the airport is very hard to distinguish out from its desert surroundings, even with the closeup of the runways they are still very hard until quite close to mark out, but it is also very faithful to the real life conditions as well. YAYE - Central area As an airport layout then YAYE is quite simple. A heavy RPT apron for five A320/B737 size aircraft (seven are noted but only five are usable with this layout) and a large GA/Heli apron to the northwest. Lineage is a bit odd with gates 4 and 5? but it is correct to the real layout, but the the static VA E160 is slightly parked wrong to highlight it more odd than it should be. YAYE Terminal First a note in that if you use the Australian VOZ scenery by Barry Roberts then you need to either A_ then take it out of your Custom Scenery folder or B_ open VOZ up in the overlay editor, select YAYE and delete all the objects for that area, if not you will get a bad conflict of the two sceneries (Darwin airport anyone?). The main terminal building is excellent, very Australian in feel, design and look with great brick and terracotta walls and roofing, and so RimCo have got this absolutely right. There is huge amount of vehicles and 3d people milling around and they make this terminal a very busy place, but I still am trying work out is what a snowboarder is doing here right in the middle of an hot Australian desert? Small detailing is also excellent, names, flags and signage is really good and there is a lot of observation from the developers included here to make it very authentic. Glass textures are also first rate and very authentic as is all the stone paving work and markings. Overall this is top rate work, but a few trees don't have the correct transparency and they show up in a blue halo spoiling the effect. Ramp equipment detailing is also excellent, with equipment holding areas and branded aircraft stairs. There is a huge amount of static vehicles and almost everything in earthmoving and engineering equipment, but a many of the items like the fuel tankers are more eastern European than Australian. As noted I don't know the difference the photo ground textures would have been? but I think the ground aspect would have worked far better if they had been more easily available. Certainly in the context of the great Australian outback style workshops on the site. General Aviation / Helicopter Operations There is a huge newly resurfaced GA and Heli area to the northwest of the terminal area. The GA/Heli area is very well laid out with animated Helicopter (It circles around and lands) and lots of animated aircraft taxiing. There is again a huge amount of objects from people to vehicles and loads of ramp equipment. At the far end of the apron there is a large outback (rough shed style) maintenance hangar that has a dirt floor inside without the proper ground textures. As you will know I love a lot of activity and populated airports, but here at YAYE is a bit too much of everything, and not much of what you really need? Vehicles and taxiing aircraft clog up the taxiways, and so you can't easily taxi around the apron without moving directly through them in either static or animated objects which is a big no no for me... worse is the badly set parking positions? Only one in the GA area? and in the wrong place... where it clashes badly with a animated aircraft (below left)? So although the GA area is excellent, it is not actually accessible or workable? Main ramp parking positions are really bad as well? all are set wrong and all the available placements sets you down in the wrong places? Although you have annoying animated aircraft the scenery does not have any ATC ground routes set up either? so A.I. aircraft or X-Life and WorldTraffic users are out of luck, and that is simply crazy here? Out on the horizon is also a animated elevated cradle truck... and god knows why? Fire Station Fronting taxiway E is the fire station with a clapped out Ansett Boeing 737 classic in front (not really there in reality) There is far into the background a practise fire iron horse, but the Fire Station is quite modern and well reproduced here with a tiny control tower built in on the roof. ________________________________________ Uluru and The Olgas Nothing can prepare you for Uluru, certainly at the sunrise or sunset spectacular panoramas, it is a must see and you are in a world far different than than you could ever imagine, and it is a bit like being on Mars with the flies, and there are a lot of flies out here. So this scenery depends on the effect of Uluru and the Olgas to make it very realistic. To check them out I flew the XP11 Carenado C90 on a short sightseeing visit to both of them. Uluru is about 25knm from the airport, but before you get there, there is Yulara the tourism hub for the area. Originally there was three resorts at Yulara, but they were all brought together under the Yulara Development Company which leases the land to Voyages Hotels & Resorts that operates the largest facility out at Yulara as the "Sails in the Desert" five star resort. Overall in this RimCo scenery is that Yulara is pretty basic, with not even the distinctive sails of the Voyages Hotel being modeled here, mostly it is just basic buildings placed on the desert floor... but it does give you something which is better than nothing at all... The small township of Mutitjulu that is closer to the "Rock" is more realistic as it uses the X-Plane default autogen which works far better. The "Rock" itself is excellent, the monolith is supremely created as it blends in very perfectly well with the default X-Plane landscape... ... It would have been just far to easy to just plonk a 3d mountain object down in the desert, but the base of the rock is really well intergrated into the surrounding textures and the X-Plane11 lighting effects really finish off the amazing vision of Uluru. You do get the most amazing different light shades as you fly around the monolith, it changes with different light sources just like the real version. Fantastic stuff and the recreated Olgas are just as good... ... again highly realistic and certainly the best version you are going to get of the area, I was very impressed with the realism of it all. Lighting Outback airports in Australia are not known for their expansive lighting. One bonus is that it is a lot easier to find the 13/31 runway in the dark than in the daytime because of the runway lighting. On the terminal and GA aprons it is pretty low key, but workable after dark. The terminal lighting is not bad, but those excellent glass textures have not been refined for night lighting so they are very dark? which really makes the terminal quite darker and duller than it should be... a really wasted opportunity there. The lighting tries to use the external lighting to do the work instead, but it can't do that of course as the internal effect has to come from the actual textures. The main ramp lighting is a bit weird as well as the lighting directions is only one way? and not filling the whole ramp areas. Landside lighting is not very full of profusion either with no overhead lighting and so the area is quite dark, and Yulara has as expected very basic lighting. ________________________________________ Summary In many ways this YAYE - Ayres Rock scenery is a contradiction. In many and even most areas it is totally excellent, but in other areas it is a bit odd and over done, but there is nothing here a little editing can fix. So lets us look at the quirks first... One thing first comes to mind is "edit, edit and edit". It is great to have a lot of objects and I am the first to complain if a developer has not done enough to fill out their scenery... but here at YAYE it is just simply too much of too much. If you can't taxi around or park on a ramp or apron because their are just too many or moving obstacles then you have a problem? I accept that the main apron is tight, and it is, but a more parking places would help. But I couldn't taxi anywhere here without bumping into something? Worse is the none X-Plane built in features with no correctly set parking placements and too few and only one on the GA ramp, ditto the odd lineage on stands 4 and 5. Tower view is ground level mid-terminal (there is a small control tower here situated on top of the Fire Station). Lighting is passable and also limited, but better glass LIT textures would have made a huge difference in the terminal and no ATC ground routes is a major and significant omission. (note in that good ground routes can create good animated aircraft that work with you, rather than get in your way). There is a huge missing loss with the additional photomesh textures and their huge and if suffocating download sizes and even the small airport area mesh is 6gb in size is surely going to be a bit too overweight for your framerate no matter how good they are, but the sizes alone put me off and there has to be a refinement in that area? The good is however very good. The airport has been very well reproduced with some very fine detailing, and is very Australian authentic in feel and use. The important Uluru and Olgas rock formations are extremely good and very well intergrated into the surrounding scenery and look simply spectacular from every direction as in the air (on arrival and departure) and close up in a scenic view, and the lighting effects are very effective here as well. Ground textures like aprons, runways, taxiways and pavings with all their signage and markings is excellent as well with a worn extreme heat feel to the tarmac around most areas for realism. And finally is the shear physical work you have to do to fly into YAYE, you have to be on you best game to navigate and land on such a illusionary runway with only an NDB for directional help, and it is far harder to do in a heavy jet and in poor weather conditions that pushes your flying skills to the limit with limited visibility... and god help you if you have a low fuel load. But then that is the why we fly in X-Plane. So overall even with its quirks then YAYE is very good to fly into and use, the basics are excellent and it is an authentic Australian scenery that is up there with the best of them, and overall I really love the scenery and it will certainly be part of my Australian network of very good solid scenery to use and fly into and with the added bonus to give my outback flying skills a real workout. _________________ Yes! the YAYE - Ayres Rock - Connellan Airport by RIM&Co is Available now from the X-Plane.Org Store here : Ayers Rock - The Heart of Australia Your Price is US$19.95 Features A very faithful rendition of Ayers Rock Conellan Airport, featuring it´s surroundings as the neighbouring holiday village of Yulara and many other landmarks… A prodigiously comprehensive 25000km2 photo scenery at 15, 30 and 60 cm/pixel resolution available extra free of charge... Spectacular natural sites as the Ayers Rock or the Kata Jutja Stone massive (also known as the “Olgas”) which invite you to amazing VFR-Flights… Meticulously built ground textures at 1, 2 and 5 cm/pixel resolution based on thorough research… More than 200 sublimely handcrafted replicas of airport buildings, vehicles and clutter objects equipped with 2K & 4K-Textures, giving highest attention to details, featuring many animations and authentic Night textures… 9 superb static planes unique to the location of Ayers Rock Airport. Putting emphasis on a vivid setting: A total of 70 Ground Traffic animations evoke an as-real-as-it-gets atmosphere… Being one of the first X-Plane scenery to feature animated ground staff personnel, as there are more than 20 animated ramp agents, marshaller, crew members and 50 static passengers (XP10) Several airport “scenes” like an animated business jet arrival with follow me car deployment… Requirements X-Plane 11 or X-Plane 10 Windows, Mac or Linux 2GB+ VRAM Video Car 5-20GB HD Space (if you decide to use free Orthophotos ) Installation : Download scenery file size is 675.60mb. With the full installation at 949.70mb in your custom scenery folder. Downloadable extra photographic textures are available with: -26+131.zip (about 16 GB) and -26+130 Airport.zip (about 6 GB) Which are installed in your custom scenery folder but in order that below the main YAYE Airport scenery but above the Global Airport scenery folder Libraries required are Cami de Bellis and OpensceneryX Manuals supplied for English, Chinese, Russian, German and Indian (IN) WT3 : WorldTraffic3 conversion is zero, because there is no ATC ground routes built into the scenery... very poor for a payware scenery? ______________________________________________________________________ Review by Stephen Dutton 2nd October 2017 Copyright©2017: X-Plane Reviews (Disclaimer. All images and text in this review are the work and property of X-PlaneReviews, no sharing or copy of the content is allowed without consent from the author as per copyright conditions) Review System Specifications: Computer System: Windows - Intel Core i7 6700K CPU 4.00GHz / 64bit - 16 Gb single 1067 Mhz DDR4 2133 - GeForce GTX 980/SSE2 - Samsung Evo 512gb SSD Software: - Windows 10 - X-Plane 11.05 Addons: Saitek x52 Pro system Joystick and Throttle : Sound - Bose Soundlink Mini Plugins: Environment Engine by xEnviro US$69.90 : XPRealistic Pro v1.0.9 effects US$19.95 Scenery or Aircraft - McDonnell Douglas MD-80 by Rotate ((Rotate MD-88 - X-Plane.OrgStore) - US$59.95 - Beechcraft C90B KingAir XP11 by Carenado (Carenado - X-Plane.OrgStore) - US$34.95
-
Press X...
-
Scenery Update : EIDW - Dublin v2.0 by Aerosoft Solid reliable scenery is important to get the best out of your simulation flying. To land at good scenery gives you another level of immersion and realism that can make your flying immensely satisfying. My cornerstones of scenery in the UK are actually all Aerosoft sceneries, in EGCC - Manchester, EGLL - Heathrow and EIDW - Dublin, all are extremely good but EGLL - Heathrow is very framerate heavy, not so much in the actual scenery, but the sheer amount of surrounding autogen,that can even easily bring any strong computer down to it's knees. EIDW - Dublin from Aerosoft was a great scenery from the start as I noted in the release review here: Scenery Review : EIDW - Dublin by Aerosoft That v1.0 Dublin release was way back in September 2014, and here is the update to v2.0 and it is now X-Plane11 compatible as well. Outwardly it looks the same as the original, and that is not a bad thing as the original release of the scenery was very good quality scenery in the first place. But early Aerosoft sceneries although very good in the visual sense, where not very good the using the X-Plane features and effects, that is the overall focus here with this updated scenery and with even the newer X-Plane11 features thrown in for good measure. In the overview it looks like the exact same EIDW I have flown into for years... but the textures have been upgraded to eliminate and refine the older blurry textures and you certainly notice the difference on approach. .... but on closer inspection you now also have that "Volumetric Grass" feature that Aerosoft are famous for. You can turn the feature on/off as well if you have a poor or weak processor. I have found that grass has never had much impact on framerate and I doubt it here as well because there isn't that much of a volume to talk of anyway, but it nice to have it from a visual point of view. X-Plane Animations Another new feature to EIDW is that all the (marginal) airbridges now work as well! Your guidance marshall is set to one side, but the alignment is correct and all the animated airbridges work very well on the airbridged piers in three and four. A note in that most parking here at EIDW is mostly stands than gates as this is Ryanair's base after all? but you do have a really great cross section of gates, stands and remote stands to choose from. Another point is that there is now a lot of ground service vehicles than there was before, now there is huge amount of them and to the point of clogging each other up on the ramps, and yes the default ground service vehicle feature (to the aircraft) now also works here as well. The animated ground service traffic here at Dublin is HUGE in a lot of a lot of vehicles scurrying all around the ramps and it makes the once very empty and static scenery now very active place, and yes I love that. Most original Aerosoft scenery was in part conversions from their Flight Simulator products and they mostly left their scenery barren for add-ons like ultimate traffic and Traffic X. But in X-Plane that then just gave you a really empty airport. There was a static aircraft filler option and there still is, but you now use the "Aerosoft - Static Aircrafts" (library) folder for all Aerosoft static aircraft and not the individual packages for each airport, again you can switch them on/off. But more importantly is that EIDW - Dublin has had all its ground routes redefined for use in X-Plane for the default ATC/A.I. system, but also for use with X-Life the AI traffic plugin by JARDesign. But the redefined ground routes they are also usable for WorldTraffic3 operations as well, and they are shown in operation in all the images here as I prefer WT3 to the other A.I. traffic options. There are still more animations as the landside road network now also has cars and vehicles running through the airport. You can't adjust the volume of vehicles anymore in XP11 (well you can with FlyWithLua but not officially) so the volume is quite low, but at least it is done and now working. Aerosoft have also gone to a lot of trouble to replace all the 3d static vehicles in the scenery (mostly in carparks) with the default versions for increased framerate and more vehicle coverage and it shows and it does overall make a significant visual difference. Again you can turn this static car feature on/off to save framerate. One small note is that the main airport boundary does not seem to have any fencing? You can walk straight over to the runway from any roadway? Reflective Glass For X-Plane11 users there is the reflective glass feature. Here at EIDW it is really well done, but you have to have the right lighting conditions to take in the full advantage of the feature. As there are great and different glass areas at Dublin, with old and new buildings giving you different perspectives and it all works in really well together. Lighting The original Aerosoft EIDW had really average lighting? The lighting was a conversion of or practices of Flight Simulator lighting and this being X-Plane it just didn't work... The result was a bad box or a frame of light around the source, so I was not surprised and very thankful that Aerosoft have found their inner X-Plane and redone all the lighting with the X-Plane lighting system. Lighting and sources are now quite comprehensive, there is now a variety of lighting and from a distance perspective the airport looks really great. Airside and landside lighting is (slightly) different, but mostly it is the small standard spot lighting. Ramp lighting is very good, but the throw is not very far and that in a few cases creates dark working areas, but overall you won't have any problems working down on the ramp. The original building night textures were very good, if a little dullish, but the combination of the new overhead and the old building textures does work very well here and it feels very realistic close up (note the nice drop lighting on the side of the building). So compared with the first Aerosoft Dublin the lighting is really night and day, and with no pun intended. I do love the merger of the old and the new at Dublin, the older legacy carriers also interacting with huge amount of LCC traffic, it is a great place to visit and use as scenery. Summary Aerosoft's early scenery was and is very good, but they never really understood X-Plane in the way it is a very more default built in active simulator, with its animations and lighting. Their approach was always the add-on Flight Simulator angle and so most early scenery released was good but very soulless. You need X-Plane developers to do X-Plane scenery, even in a conversion as noted with Aerosoft's Bali scenery which is brilliant scenery but let down by no X-Plane interaction. This EIDW - Dublin was like that. Great amazing scenery, but missing the X-Plane features and activity, but this excellent v2.0 update fixes almost everything about that aspect, you get a lot if not everything X-Plane thrown in here, with in areas like ground service vehicles to even the total maximum effect. There are now 3d grass and cars, reflective glass, animated airbridges, vehicle traffic and excellent ground routes and finally great (X-Plane) lighting that totally brings EIDW totally alive and more and that is because Aerosoft (finally) used an X-Plane developer to convert an X-Plane scenery and the difference is highly noticeable. A great deal also allow you to upgrade from the original v1 version to this v2 Dublin for only US$5, see details below and get the discount code from the X-Plane.OrgStore. As noted I use EIDW as a cornerstone of my flying in Europe and the one of the main triangles of routes between EGCC (Manchester) and EGLL (Heathrow) for most of my UK flying, and so to a point a really good EIDW is very important to my X-Plane flying, but now the overall experience is far more highly elevated with the newer X-Plane features now besides the already great scenery that was originally in place, so overall this is a five star scenery, a must have if you fly comprehensively in Europe and the UK... so simply it is now major requirement have for your collection and for its greatly enhanced X-Plane11 use. ____________________________________________________ Yes! the "EIDW - Dublin Airport" scenery by Aerosoft Is now Available from the X-Plane.OrgStore! : Airport Dublin v2 Price is US$24.95 Features: All buildings and installations at and around the airport High quality models and photo real textures High resolution runways and taxiways Highly realistic night time effects High resolution textures New in version 2.0: Entirely X-Plane 11 compatible Uses advanced X-Plane features such as 3D spill lights and glass reflections Complete taxiway network for use by ATC and AI aircraft Animated service vehicles Volumetric grass Animated road traffic Animated jetways and marshallers (AutoGate plugin required) Compatible with X-Life Added 249 road segments for X-Plane’s road traffic Added 1,198 new HDR lights Replaced all 7,176 old parked cars with better X-Plane default cars Added 9,834 additional parked cars and 136 semi-trailers Added 30 missing buildings Fixed blurry ortho textures Requirements: X-Plane 11 Windows, Mac or Linux 2Gb VRAM Minimum. 4GB VRAM Recommended Current version : 2.0 (last updated September 7th 2017) Download size: 500Mb Previous owners of 'Airport Dublin' (v1) can buy this new v2 version for only $5: Check your original Dublin invoice at the store. the discount code will be listed there. WT3 : WorldTraffic3 conversion was overall excellent, there is however a strange ground route interaction around the V section of intersecting runways 28 and 34? In most cases the aircraft will route through correctly, but in a few cases they will get confused... ______________________________________________________________________ Upgrade Review by Stephen Dutton 27th September 2017 Copyright©2017: X-Plane Reviews (Disclaimer. All images and text in this review are the work and property of X-PlaneReviews, no sharing or copy of the content is allowed without consent from the author as per copyright conditions) Review System Specifications: Computer System: Windows - Intel Core i7 6700K CPU 4.00GHz / 64bit - 16 Gb single 1067 Mhz DDR4 2133 - GeForce GTX 980/SSE2 - Samsung Evo 512gb SSD Software: - Windows 10 - X-Plane 11.05 Addons: Saitek x52 Pro system Joystick and Throttle : Sound - Bose Soundlink Mini Plugins: Environment Engine by xEnviro US$69.90 : JARDesign Ground Handling Deluxe plugin - US$14.95 : WorldTraffic 3.0 Plugin - US$29.95 Scenery or Aircraft - Boeing 737-800 X-Plane default aircraft with ZIBO MOD installed
-
Plugin Review : World Traffic 3 by Classic Jet Simulations World Traffic by Classic Jet Simulations is one of the most significant plugins you can use in X-Plane. I will put my hand on my heart and say that I am a devoted follower of the plugin from its early days and here it is in it's latest and greatest manifestation as World Traffic 3 (WT3). World Traffic So what is World Traffic. Basically it is a plugin to create a dynamic world around your flying aircraft, this is in the form of other aircraft in which you can interact with and create a visually dynamic environment that fills up airports and its gates and has real form routes that the aircraft will fly between with built in ATC (Air Traffic Control). It all sounds quite simple but the machinations of creating this environment are extremely complex on top of an already complex simulator. The original World Traffic (WT) plugin was released in early 2013, by Greg Hofer of Classic Jet Simulations and is a concept by Francesco Missarino of Aircraft3D. X-Plane does come with it's own built so called A.I. (Artificial Intelligence) dynamic world, but it is very basic and mostly restricted to the areas around yourself, if mostly concentrated on to your current airport. The A.I. has made significant strides over the last few years, but basically as everyone will tell you it is still plainly average, restricted to 20 aircraft and in most cases I personally have never used it. One of the benefits of World Traffic is that it does not use or is connected to the base X-Plane simulator, it is in reality set a layer above. This allows it to be very frame-rate positive and better still give you a lot of control of the plugin. But this interactivity also created a barrier or complication that if we be honest created a time consuming and limited application of the idea. A few diehards doggedly soldiered on and created the networks and ground routes to make World Traffic at least plausible and workable, and don't get me wrong as when World Traffic did run and smoothly it was was simply overwhelmingly excellent, and so overall WT was certainly well worth persevering with. My way was to create small WT networks. Tight hubs of working ground routes and airline routes that interacted with each other, and to a point it worked very successfully, but the problem was that if I added in a new airport into the network there was a lot of work in doing so, it was not just a point and click and you could fly, but usually an afternoon of work was required to create the details of making it just work. So this was the biggest impediment to World Traffic in being wildly acceptable was in its just plain inaccessibility. World Traffic 3 The inaccessibility of the original World Traffic concept has required a total rethink of the way World Traffic works. For current WT users a lot does and and still is the same, but the interaction with the plug is actually totally changed. The biggest concept of older users to WT3 is letting go of their old ways and embracing the new, once done then you will see how totally changed the plugin is. Once converted, you will then revel in the new, new. I will in this review and semi-tutorial note the changes between the old and the new, most of the old WT files you will actually throw away and after all that hard work that is a hard thing to do. But the benefits are certainly worth all the changes. World Traffic is made up of three components. The main X-Plane root folder called "ClassicJetSimUtils", the actual plugin "World Traffic" in your resources/plugins folder and the "WorldTrafficRadar" plugin also in your resources/plugins folder. Installer World Traffic 3 now comes with a installer. The Installer will do a full install of World Traffic, or if WT3 is already installed then any updates. It will also convert World Traffic from versions 1-2 to the new 3 so you don't have to go through your folders. Older WorldTraffic (1&2) user will however need to remove these folders... • X-Plane\ClassicJetSimUtils\WorldTraffic\AircraftTypes • X-Plane\ClassicJetSimUtils\WorldTraffic\AircraftObjects • X-Plane\Resources\plugins\WorldTrafficRTG You should also delete the Random Flight Plan Generator plugin folder from here on as it is now obsolete First a License Agreement to agree to, then the root file of your X-Plane folder to install the plugin (note you don't need to stipulate the resources/plugins folder just the main root folder) The plugin requires Navigation Data. If you have a Navigraph or Aerosoft NavDataPro account then you can dismiss this data install, if not then it installs the Navigation Data for you. Then the installer will install World Traffic 3 and when "Completed" will show you what has been installed. If you have to set up WorldTraffic3 without the installer or when it is installed by the installer it should look like this... First column is the plugins folder with both the WorldTraffic and WorldTrafficRadar plugins installed... note the installer and running txt files (arrowed) Second column is in your X-Plane main root folder with the ClassicJetSimUtils file inserted here. Inside the ClassicJetSimUtils folder column three (top) are three items in: CustomAirportRouting Data Navigraph Data WorldTraffic The only folder you need to interact with is the final one in the "WorldTraffic" folder in column three (bottom section). AircraftObjects The aircraft for World Traffic are highly modified by Bluebell for X-Plane and they are actually freeware and are not part of the package. You can download the aircraft here WORLD TRAFFIC UPDATES with Airbus 1-4, Boeing 1-4, Regional 1-2 and GA - Military and both png and object files are to be inserted into your "ClassicJetSimUtils" World Traffic/AircraftObjects folder and all txt files go into the "X-Plane\ClassicJetSimUtils\WorldTraffic\AircraftTypes" folder. It is important to note to remove ALL your old aircraft if you are converting over from WT 1-2 before installing the new aircraft as they are all significantly different, as a mix of the two object types will mess up the new version. It is highly recommended to update the "WT Alternative PushBackTruck" as well and insert it into the same AircraftObjects folder. AircraftTypes All the specific data to run the aircraft objects is held in txt files in the "AircraftTypes" folder AirportOperations All the specific data to run the services from airports is held in txt files in the "AirportOperations" folder Airports All the specific data to run the services (airlines and routes) from airports is held in txt files in the "Airports" folder GroundRoutes All the specific data to run the ground routes from within the airports is held in txt files in the "GroundRoutes" folder. Folders are split between DEP (Departure) and ARR (Arrival) folders ICAO Operators List of ICAO operator (airlines) codes for use in WT OpenFlight Route, airline and airport data which is used to create routes is stored here. ParkingDefs Stand and gate parking information data RouteFiles This was in WT 1 and 2 the route file folder, this is now disabled, but two files are still stored here in the "AFRE_Real_Traffic" and "Cargo_Tabular" with information on real airline schedules (AFRE) and cargo routes that are separate from the main routeing data. both items must be activated for both Scheduled and Cargo routes to run in the plugin. Sounds Aircraft and airport sounds are stored here. In most cases once the Aircraft object files are installed, you rarely need to interact with the above folders, it is mostly all background information and data for the plugins use, were as before you would install routes and ground routes for the plugins use, this interactivity is now not required in WT3. _____________________________ Setting up World Traffic It is important to get the (easy) access and the setup correct to use WorldTraffic3, to do this you need to set up your key input in the main X-Plane11 menu "KEYBOARD" under... Keyboard/cjs.... I use just four main F Keys in: F9 - F10 - F11 - F12 Main Keys are: F9 - Radar Toggle / F10 - ReSync / F11 - Go To Previous Menu (backwards) / F12 - Activate Key Command Menu (forwards) Under the SHIFT/ key are: F9 - Flight Info Key / F10 - Camera Track Key / F11 - Activate ATC / F12 - Previous ATC Instruction Two extra keys in SHIFT + and SHIFT - are used for the aircraft zoom (in and out) There are more key inputs available, but the above key commands will cover 90% of all your basic operations and the simple ease of WT3 use. Using World Traffic 3 To use WT3 you have two items in the X-Plane plugin menu with "WORLD TRAFFIC RADAR and WORLD TRAFFIC. World Traffic Radar is just really the same toggle switch as you have set via the key input (F9) to show the radar popup image. World Traffic has two menus with... Flight Setup Parking Assignments Flight Setup This is your main interface in setting up World Traffic 3. When you select "Flight Setup" a window will appear for you to setup your flight details. Top panel is for ATC communication, but also to identify your aircraft in the route files and on the radar screen. You fill in the Aircraft's ICAO name and operator ICAO with the airlines Callsign. Right side requires your Arrival airport ICAO, Cruise Altitude and your departure and arrival time (approximately). In most cases if you use the same aircraft then just change your arrival airport and you are p[retty good to go, but it does require changing if you change your aircraft. Flight Plan Generator The heart of WorldTraffic3 is this panel in the "Flight Plan Generator" In the earlier versions of World Traffic you had the "WorldTrafficRTG" or World Traffic Route Generator. That plugin is now thankfully gone. Instead of creating your own routes , the whole route system is now automatic and all those thousands of route files you created are now quite obsolete! (and yes you have to throw them all away...) ... and I do admit the RTG did allow you to set up very, very specific aircraft flying under selected airlines at certain flying periods, the RTG was however quite slow to set up and laborious to fill out (certainly with all the airlines and their route frequencies). Four sliders are now the go in: Max Number of Flight Plans to Generate slider Traffic Density slider Percentage of Gates with Parked Aircraft slider Flight Plan Load Radius for Arrival and Departure Airports slider First instinct would be to MAX out all the sliders, which is just going to cause you to overload the system, so a bit of restraint will give you better results and better flowing system, the above settings are about right for most uses. Max Number of Flight Plans to Generate slider The first slider will generate your flight plans up to the max setting. Flight plans are now auto-generated to be approximately close to the correct routes with the correct equipment. This means that US airports will have mostly US carriers and international arrivals. In say Norway at Oslo (ENGM) you will get mostly SAS and Norwegian Air Shuttle, but the system at this point is not totally perfect in that you may get say Qantas Boeing 738's instead of Qantas Boeing 747's at airports that Qantas do fly to but with the wrong equipment in mostly long-haul services, in time these fine tuning points will be tuned out, but overall the system works very well in tabulating the correct aircraft to the correct airport on the correct routing. The routing data will also be in continuous development with AFRE_Real_Traffic and Cargo_Tabular regional data becoming more and more reliable, so for the really excessive pedantic users that list every known departure time and routing and expect WT3 to follow suit exactly, then it will come but not straight away as the routing data from AFRE is more and constantly refined in the future. Traffic Density slider The second slider is the traffic density adjustment. This will set the density of the aircraft flying around you and takes the percentage from the amount of flight plans generated, again it is very easy to overload the system if your density is too high. A note in that at large multi-runway airports you can pull the density below half if your system is struggling with too many services and the opposite with say a light regional airport that can benefit with more services in light traffic periods. Percentage of Gates with Parked Aircraft slider This slider can adjust the amount of aircraft parked at gates in either making the airport full or give you a few spaces and gates to park at, this parking area has another adjustment we will address later. Flight Plan Load Radius for Arrival and Departure Airports slider This slider will adjust the radius that local airports surrounding your departure airport has active routes from, I found 50nm was enough, but if you wish you can close it down to few nautical miles to get the best framerate, this will eliminate most local traffic in GA and prop regional aircraft, but if you want more of this sort of local activity then move the slider up, which is good for local point to point GA flying. Three checkboxes in the lower part of the panel cover: Auto-Gen Ground Routes checkbox Auto-Gen Flights checkbox Augment User-defined Flights at Airport with Auto-Gen Flights Auto-Gen Ground Routes checkbox If ground routes are not available then with this checkbox checked then WorldTraffic will generate the required ground routes automatically. Auto-Gen Flights checkbox World Traffic can either auto-generate flights or you can load flights from the AFRE_Real_Traffic and Cargo_Tabular regions data. If this checkbox is off you will use the real world data... but you will find the arrivals and departures will be far slower than the auto-generated routes. Augment User-defined Flights at Airport with Auto-Gen Flights If you use the above AFRE routing data then it won't contain data for local GA (General Aviation) or military traffic and so you need this checkbox on to fill those routes in with auto-generated routes. If you want active airports and lots of activity then use the auto-generated routes, they may not be perfectly specific in the airports activities but I found they were very close to the airports operations and gets you there amongst the activity straight away. A final bottom bar will then "Create Flights" and activate WorldTraffic3 _____________________________ Ground Route Generator Another area to be totally refined and changed is the generation of WT ground routes. If any area that created the most frustration it was in the creation of the ground routes specific to the requirements of WorldTraffic. Earlier ground routes were a complicated and slow process with a few editors like the AGRE ground route editor by Chopinet to trying to help out in making it a more simplistic way of a very complex way of creating the many ground routes from one end or start of the ground route and then multiplying that factor by the amount of gates and runways that was in that particular airport, it was a very slow and painstaking process... a few users created an auto-gen system but in most cases it just made the situation worse in refinement and in the sheer amount of gates the ground routes totally overwhelmed (I counted nearly 1400 ground routes once for LEBL?). So a lateral think had to done to make ground routes a more flexible, easier and most importantly a more exact art in making WorldTraffic a more accessible plugin. The solution is to use the built in X-Plane ground route system, or the ATC ground routes and Taxi Flow created by the WED (WorldEDItor)... and it works extremely well. But here is a major point to be highlighted. WorldTraffic3 ground routes and traffic flows are only as good as the built in WED ground routes and traffic flows! So if a current airport either payware or Freeware does not have any built in WED ground routes then the generator will not work and generate new ground routes? The better setup the WED ground routes and taxi flows are then the better WT3 will run. As a note all your older specific created ground routes will still work fine, but if they are old then a regeneration of the routes will certainly help in creating a more modern flow around your airport if your scenery has now the currently correctly built in WED ground routes. Biggest problem is for airports that don't have any built in ground routes? Most notable here is tdg's amazing sceneries and there are now 300 of them... But not a single one has any built in WED ATC ground routes? And tdg has given no indication of even wanting to rectify the situation, so in effect all of tdg's sceneries are not usable in WT3? that does create a BIG PROBLEM? So if your favorite airport local or otherwise does not have any built in WED ground routes and taxi-flows then your only option is to create the WED ground routes yourself or I hope than users will share their new WED ground routes to cover the in blank airports, again the standard generated WT3 ground routes are all that needs to be uploaded to the X-Plane.Org WorldTraffic section as you don't need to actually share the WED ground routes themselves. As a note most WED built "Global Airports" are required to have the correct routes and flows built in before they allowed to be up loaded. Ground Route Generator If your current airport or arrival airport does not have any built in WT3 ground routes then WT3 will tell you and offer to generate the ground routes for you (If the WED data is available). If you wish and you have just say loaded in a new scenery in either payware or otherwise, the you can enter in the scenery ICAO code and generate the ground routes ready to use with WT3, just hit the "Generate Ground Routes" bar to generate the routes. First the Generator will tell you if the ground routes exist or not, and the time it will take to Generate the WT3 ground routes. Depending on the size of the scenery in runways and gates it may be quick or take a few minutes to generate all the required ground routes, and insert them in the ClassicJetSimUtils/World Traffic/GroundRoutes folder as Departure (DEP) and Arrival (ARR) routes. When the Generation is complete it will show you a complete list of all the ground routes generated and the ones that failed and why. A trick or tip... is if your favorite airport scenery does not have the built in ground routes and a Global Airport version does, then swap them over and generate the WT3 Ground Routes and then swap the sceneries back again to use them... The ground routes may not be absolutely totally perfect but at least you can use the scenery in WT3 and I have done this a few times with a very good success rate. Activating or running World Traffic3 To start running WorldTraffic3, all you have to do is press the large bar "Create Flights" This action will generate the flightplans, load in the correct airport ground routes and select the correct SID and STAR vectors for the current airport. Then finally it will place all the correct aircraft at the gates ready to fly... It does take a few seconds and depending on the size of the airport to do these actions but the results are well worth the short wait, now WorldTraffic3 is active. If you want a refresh of World Traffic or change to the AFRE routes via the checkbox (Auto-Gen Flights checkbox) then just press the "ReSync" key (F10) or on the WT menu. The simplicity of WT3 is just when you startup X-Plane, in then just running the Flight Setup and setting up your flight details and just hitting the "Create Flights" bar is soon to become second nature, but in most cases you just open the window hit the bar and away you go and WT3 is quickly running... this is a far cry from the original WT setup... it is now just so easy? Depending on the current airport's activity, aircraft will now start up, taxi and depart and via the correct SID (Standard Instrument Departures) patterns, concurrently aircraft assigned to arrive at the airport in this case South Florida KRSW will now also be active and following its route to the airport and via the correct STAR (Standard Terminal Arrival Routes). This is Delta flight DL853 from KDTW - Wayne County Airport, Detroit. All relevant information is located on a lower left "Flight Info" panel that can be toggled on and off the screen via our key setup Shift/F9. Detailed is Flightplan Name, Aircraft Type, Altitude, Heading, Position Lat-Lon, Next Waypoint, Waypoint distance and current aircraft state and in this case "Following STAR SHFTY2.06" WorldTraffic Radar So how do you check out which aircraft you want to see? There are several ways as a more options will be shown later, but the easiest way is to use the World Traffic Radar plugin, that is located in your plugins menu... As noted earlier that to set up the Radar pop-up via a key toggle input (F9) and that saves you going to the menus all the time and is a wise choice. You have to input the airport "KRSW" that you want to see and click on the "Select Airport ICAO" button to centre the radar on the airport. You can have four distances from the airport in 10nm - 20nm - 40nm - 80nm and I use mostly the 40nm setting. You can then select any aircraft on the radar screen to see it... this is the aircraft in red. After selecting the aircraft then press the upper right button "Track Camera" to go to that aircraft, the aircraft viewpoint is simply adjusted via your mouse position, if you want to get in closer to the aircraft or zoom out then use your Shift + or - keys as you set up earlier. (you can also scroll though all the active aircraft visually via the SHIFT key: F9 - Flight Info Key) To get back to your normal viewpoint then just hit any other X-Plane view key and you are back in your own aircraft. Checking out the Radar is great for arrival information, because you can see the patterns on how the aircraft are landing at your arrival airport and what STAR's the aircraft are using and what runways are active. Aircraft can also go into holds before landing and they are noted as circled lines but in time they will form into straighter lines and line correctly up to land. The information you inserted on the Flight Planning section will show you your aircraft on the radar screen as we will see more below. Arrival aircraft will follow the correct STAR then line up correctly to land on the assigned runway. World Traffic aircraft are awesomely good, in fact the quality is as good as your own aircraft and the only real giveaway are only the more slightly square wheels. The aircraft have been highly modified for WT3, there are a lot of new and better animations in engine fans, flaps, airbrakes, aileron and rudder movement and aircraft lighting... aircraft sounds are also highly realistic. WT aircraft performance mostly matches the published performances aircraft data and they are also affected by wind and turbulence. The planes will respond to crosswind takeoffs and landings. published performances aircraft data is also used to determine suitable runways for aircraft when looking for takeoff runways. Fuel weights are calculated based on the max fuel weight and the aircraft range as defined in the aircraft definition file. Watching these aircraft on approach is excellent as they adjust and readjust to wind and alignment, did I say addictive, yes it is very addictive to watch. Aircraft behaviour is excellent with runway alignment and even for wind adjustments on the approach. If a heavy is flying across the ocean it's calculated starting fuel weight will be quite high so it will use a lot more runway than if it's on a shorter flight. More runway is also required too at airports with higher field elevations with lower air density and lower indicated airspeeds. On landing planes will use higher braking levels for short runways and they will touch down closer to the runway thresholds and they will leave their engine reversers on longer. Then the aircraft will taxi to their assigned gate, the taxiway and gate details are all shown on the info panel... You can follow the aircraft all the way to its assigned gate, and then you still get the full shutdown procedure, no just a quick cut off here as there is a full gate to gate experience from start up to shutdown. _____________________________ Parking Assignments One of the annoyances of earlier WorldTraffic versions was that if you landed at an airport you would find every single gate was full of traffic, and there is nowhere for you to actually park? Another visual issue was that if there was a static aircraft as part of the scenery at that gate you then also had a doubled up aircraft then also sitting in the same position which was not visually pleasing? Now I like to always park at Gate B2 at KRSW so I would like that gate free anytime I arrive at the airport? Now in WT3 you can do that... From the plugin menu and World Traffic then select "Parking Assignments" A popup will allow you to select an airport (above right) and then the gate or bay you want to adjust (below left).... Again it very important to emphasize that the Parking Assignments selection is only as good as the WED data that it has to interpret. So if the WED gate numbering is poor and there are few airports out there with no numbering completed then you won't find or be able to edit your gate selection, so it important for WED developers to make sure the gate data is correct for the scenery. The "Parking Assignment Edit" panel allows you to adjust and edit that gate, stand or bay situations. It covers the Type/Operator Aircraft name and tail number specifically for that gate (if you want it there). Parking position... this allows you to fine tune any gate position so the aircraft is sitting there correctly and the correct pushback distance and also the correct aircraft door and wheel alignment. If you wish to disable that gate completely for either your own use or if there is a static aircraft sitting at that gate then you need to uncheck the checkbox "Enabled" at the bottom of the edit panel... ... to save the changes then press the "Regenerate Ground Routes" Bar lower right and you will get a panel showing the changed ground route details, and then do a Resync. Gate information is stored in the ClassicJetSimUtils/World Traffic/ParkingDefs folder. You can also select in Parking Assignments on what aircraft and aircraft type you require at a a certain gate or stand. Biggest standout will be cargo aircraft sitting at passenger gates? Selecting the gate (or gates) you can select the aircraft type (or size) that you want to use that gate, and lower even the actual airlines (arrowed below left) via their ICAO code and you have twenty choices allowed. Lower is the definition of either civil, military, cargo only, non-cargo or both cargo and non-cargo aircraft via tickboxes, a regenerate will save your all your gate preferences and a Resync will produce the required results. The parking gate assignments will allow you clean up your airports to your own tastes, but more importantly put cargo aircraft at cargo stands and adjust the gates to the correct type of aircraft or even airlines to specific areas (or concourses), this will be a continuous action with any scenery added to X-Plane, but it does make your airports highly realistic. Ground Route Testing You can test any ground route by using the "Test Ground Routes" button lower right bottom. On that gate or stand selected you have the option of seeing all the available Arrival and Departure ground routes and running a test. When you select the departure and aircraft type and run the test you get four border poles (black and green) and the aircraft park position pole which is a white and red stripe pole, white and blue stripe poles note the ground route path... ... the white and blue stripe poles note turning and hold points and the test poles continue to the main runway hold point. The arrival ground route points are also available with the aircraft appearing directly on the immediate approach. Any ground route editing is now done with WED, that makes it easier to set out ground routes and do any adjustments with the new "test" system able to recheck or track your changes. _____________________________ WorldTraffic Menu To most older World Traffic users the menu is mostly still the same. Accessed through your key input with F12 to bring up the menu panel, F11 is your back track key, and so if you go one step into the menu you can then step backwards and even out of the menu by using the F11 key... easy. There are five menu items listed including: Display Flight Info for Airport Display Flight Info Enable/Disable Regions Preferences Resync Most interesting is the new "Flight Info board" which is selected via the first line. This board lists all the current flight plans for the airport listed at the top of the flight info board. Green lines note non-active flight plans and blue denotes active flight plans (or aircraft that are flying around in WT3). They are listed as ARRIVALS and DEPARTURES with the current ZULU time and date. A third line denotes flights in Yellow Lines are which are departing aircraft, they activate about ten minutes before departure (Zulu) and at that point a pushback truck appears on the departing aircraft. When arriving aircraft could be accessed via the radar screen, you access the departing aircraft via this menu screen in selecting the departing flight you require. Once departure time arrives (Zulu) and then the pushback commences... ... engine start is once the pushback truck disconnects, but you can adjust the engine start time or wait time at this point via a menu preference. You always have access to the lower left flight info panel set up via the Shift-F9 key. Once the aircraft commences its takeoff the flight departure line will change from Yellow to Blue to denote it is now an active flightplan. As with the arriving aircraft following their STAR patterns, then the departing aircraft will follow the correct SID as well. Once the aircraft has become an active flightplan it is now available on the radar screen in red, and you can access the aircraft later if you wish as it leaves the area. The Flight Airport Info board is quite new to WT3 or really a last minute addition, so it is a bit raw in this release version. It works and it works well, but it will also get more attention in future updates as it is a really great addition to WT3 Other menu items are also covered with first the "Display Flight Info"... ... Display Flight Info covers all the flightplans generated, and there can be thousands (and thousands) of them. Any flightplan selected (as long as it is active in blue or yellow) can give you the same aircraft view as the radar. There are sometimes a few duds in red, but ignore them and all the green routes are just parked up aircraft at the various airports. Second Menu option is the "Enable/Disable Regions" This is the old WorldTraffic option of selecting regions to save overloading the plugin and keeping the active aircraft with flightplans within a certain area or airport... this has been discontinued, but the AFRE and Cargo flight data is now stored here (and more data will probably come) and you need to have both data sources switched on to use (in Green). Third Menu option is the "Preferences" The preferences are just simple commands that can change your - Max Track camera distance, AI aircraft volume, Plugin control of X-Plane Aircraft (usually ON), Ground Routes Required for arrival runways (Always ON), Start on runway if there is no ground routes (usually in close by airports to start flightplans), Ground Collision Avoidance (required so aircraft keep separation), Ground Collision timeout, (If a collision does occur then the aircraft won't freeze or stay opposite of each other), Aircraft Startup time in minutes, Navigraph approaches ON/OFF and Radar (Filter) options. _____________________________ Interacting with World Traffic 3 So what is X-Plane like with WorldTraffic3, brilliant... is the first thought. Your empty airport looks bleak, but after the "Create Flights" process has finished (ReSync does the same process) then your airport comes alive with aircraft, this is Aerosoft's ENGM - Oslo. One thing to note is that you won't get activity instantly. WT3 takes a short while to get things running, but check out the radar screen and there are already aircraft heading your way or flying past to other destinations... ... and it doesn't take long before the pushbacks get started, my guess is around ten minutes before the airport is crawling with active aircraft depending on the time of the day and size of the airport, usually around 8.30am is the best for full departure activity. ATC My flight today is with the Zibo B738 from ENGM - Oslo to ENBR - Bergen as SAS - SCANDI. I have cut and pasted in my flight details (below right). Access to the ATC is via Key SHIFT - F11 and the information is shown upper screen (no audio), this will give you a runway selection available, but note if you select a runway not active (or wrong wind direction) then WT3 will totally ReSync to match that, and that does sort of spoil the departure theme, so a check of the radar will usually give you the current working active runways. Then ATC will give you taxiway and runway departure information with the SID you are going to use for departure and bring up the X-Plane communications panel for the airport frequencies. At any point you can go back to any previous ATC instruction via your SHIFT - F12 key input. You have to be very aware of activity around you, as the airports can get seriously busy with aircraft traffic. All around the airport there is activity... aircraft do taxi at correct speeds and slow for corners or tight turns, aircraft separation is excellent, both on taxiways, waiting their turn to takeoff and in sequence in landings. Earlier WorldTraffic versions had poor landing separations that caused a lot (too many) aborted landings, but WT3 is far better in separation, not perfect as you still get some aborted landings and this area is still under more refinement, but overall in WT3 the separations are now pretty good. Your awareness must be not just the local traffic around you, but there are aircraft turning to finals above you as well, it makes it a busy time in the cockpit... ... you also have to form a queue. Yes I have sat in line for long periods before getting my place to depart, a look at the radar showing lots of stacked arrivals can make you wonder "how long will I be stuck here?" when all you want to do is fly, but that is WorldTraffic's realism as well, in most cases you love the aspect of just waiting your turn and checking out the paperwork. Note that is you (below left) at the hold point from the WT3 aircraft perspective! Then ATC as gives you the clear, you have to on the ball and move as there is traffic coming at you, but other times it will allow you to line up on the runway as an arriving aircraft departs on to a taxiway a long way down the runway, here I get a lineup until the Lufthansa has cleared the runway Then the ATC gives you the all clear to go with heading vectors and speed constraints. Once airborne you will get vectors to follow the SID (ATLA8B) and it will set up you up in going into the right direction. If you have a running SID flightplan then ATC will ignore you. You are noted on the radar screen (as long as you have filled in your "Flight Planning" details), again if you are not sure of your last instruction then press your for your previous ATC instruction via your SHIFT - F12 key input, added details include your current status. ATC arrival is the same as departure with you following the assigned STAR procedure, but again you might be put in a hold before being assigned a runway. The WT3 aircraft will navigate around you and you have to follow the ATC instructions to the letter on the STAR's and with aircraft separation, again your radar screen is your best friend. There is a Baltic Dash 8 to my north-west (red) and so I keep an eye on it and fall into a landing pattern behind it for ENBR RWY35 (arrowed above). It is great to land at an airport with plenty of activity, and ENBR is busy... A point to make is that a feature I would like is to be able to change my arrival airport enroute? You can't do this at the moment, but I think that would help, it helps in another way if you have to ReSync to make a dull airport active. These areas are still in refinement and overall it works fine, but a few times you may have to Resync an airport to reset it after you have landed. "Oh, where did he come from?" The Baltic Dash 8 suddenly reappears as he is far slower and took a longer route before turning off the runway, now he is suddenly in my ten o'clock... So I let him pass and fall in behind. One of the great features is that aircraft will go to their correct parking areas in gates or stands, so the Baltic DHC8 goes off to the stands while I head for the gate (27). Even when parked the activity doesn't stop as we here (above right, arrowed) have a departure, a Norwiegan shuttle B738 taxiing in and a Widerhoe DHC8 also arrived and heading to the stands... did I say this WT3 can lose you hours and hours of your life just watching airport activity? no... well it does and it is very, very addictive! Did I also note that night operations are also very highly addictive? "No", well they are also with all aircraft having great lighting with full landing and taxi lighting (that turn on/off as required), logo lights and the usual strobe and navigation lights. There is a huge range of liveries with retro and promotional painted aircraft as well... Aircraft types and airlines are very varied, even to some very obscure ones and every continent is covered around the world and not just focused only on the US and Europe. _____________________________ Summary A few of the World Traffic purists will go "What the!" But what happened is that World Traffic in its third version is that suddenly it went very accessible and easy to use. The total benefits of the original innovations originally on offer here with WorldTraffic are now available to everyone. In reality now it is a click and almost instant airport activity, not just from the actual aircraft taxiing, departing and arriving, but in the way you can also easily set up any airport with the correct WED ATC traffic data in just a few minutes, no more hours and hours on the ground route editors any more, it is now just a click and go setup. And that is the whole theme around Worldraffic3, in making it totally accessible and easy to use in every area. Everything else has also had attention. The aircraft are far more animated and the quality is excellent, some GA's are a little average in textures but in the main you will be hard to be not taken in by the quality of the aircraft, they are very varied now as well, with everything from light GA Cessna 172's, twin-props, regionals in both props and jet, light B737/A320 and heavy jets up to even the modern Dreamliners and A350's and of course the super heavies in B744's, A380's and Cargo aircraft and their schedules and routes are also covered. Airline liveries also cover all bases with specialised liveries also presented, in fact it is all very expansive in all areas compared to the original WT versions as is the real world route and schedule information, SID and STAR departures and approaches are also now part of the new WT3 system. One thing to note with the release of WT3 is there is still a bit of ground to cover in complete coverage, is some areas it is still a bit early on release. There is a lot of airports and their distinctive layouts to be fine tuned, ground routes to be generated and it will take time to get full coverage. I have found that setting up new airports (mostly payware) is a breeze, as most new releases do have that important WED routes completed, but many older sceneries don't have such built in WED data... here is looking here at you tdg? But X-Plane users are an industrious lot and we love nothing than challenges like this, and to a point that is also part of the fun... Older ground routes do work, but many could also be outdated, so if they can be updated and regenerated then it is worth the effort, but older ground routes are still valuable on airports that don't have built in WED ATC routes and have been carefully crafted for certain airports. ATC is still quite basic, but to a point that was not the focus of this current new version and that will be part of the feature list in the future, and a lot more features are certainly coming. For most of this year and throughout all the early WT3 betas we have used WorldTraffic and it has been very highly visible within our reviews, The plugin adds in a totally new dimension to the way we use our simulator and it is a huge bonus to any one that uses the features provided, empty airports suddenly become bustling hubs of activity and the plugin adds in great visual and interactivity into our flying. For current users versions WT1 and WT2, there is an upgrade fee to WT3 of US$10 (if purchased since 1st Mar 17 the update is free), Originally WT3 was just going to be an update, but the development aspect took a more major turn that then turned into a total 3000hr redesign and the basic philosophy change to make the plugin far more accessible which has certainly been delivered in this comprehensive upgrade. For anybody else then this is a plugin you need or should have as part of your X-Plane system... I am a true believer in WorldTraffic so I will state my case here honestly, but I not going to blind to the fact that WT3 is a significant step for X-Plane and is very if highly addictive... once used it is now never forgotten, it is that great and WT3 for X-Plane activity, interaction and the sheer visual spectacle it is just highly addictive and simply brilliant. _____________________________________________________________________________________ The World Traffic 3 by Classic Jet Simulations is NOW available! from the X-Plane.Org Store here : World Traffic 3.0 Your Price: $29.95 For past users before 1st March 2017 there is an upgrade fee of US$10.00, go to your X-PlaneStore account to get the discount. If purchased since 1st March 2017 this version upgrade is free. Version 3 new features: Automated Installers Flight Setup Window Auto Ground Route Generation Auto Flight Plan Generation Airport Operations File has expanded functionality Parking Assignments Window Flight Information Window Updated Aircraft Definition Improved Traffic Separation SID/STAR/Approach improved see the full list of all new features here Requirements X-Plane 10 (any edition) or X-Plane 11 - running in 64 bit mode Windows, Mac, Linux in 64 bit mode Installation and documents: World Traffic has three components. The main X-Plane root folder called "ClassicJetSimUtils", the actual plugin "World Traffic" in your resources/plugins folder and the "WorldTrafficRadar" plugin also in your resources/plugins folder. There is a full installer and details on how to install WT3 into X-Plane. Aircraft packages are downloaded separately and inserted into the "ClassicJetSimUtils" World Traffic/AircraftObjects folder. A QuickStartGuide and a full Technical Manual manual is also provided... WorldTraffic3 and all aircraft download links can be found here: World Traffic 3 Update Page A key number is required and it is placed within the "World Traffic" plugin folder to activate the plugin World Traffic development forum is here: World Traffic - X-Plane.Org Forums A note of thanks to both Chopinet for his skills in creating a lot of WT3 detailing and editors, Bluebell for aircraft conversions, and without them then WT3 would just not simply exist in its current form. _____________________________________________________________________________________ Review and tutorial by Stephen Dutton 26th September 2017 Copyright©2017: X-PlaneReviews (Disclaimer. All images and text in this review are the work and property of X-PlaneReviews, no sharing or copy of the content is allowed without consent from the author as per copyright conditions) Review System Specifications: Computer System: Windows - Intel Core i7 6700K CPU 4.00GHz / 64bit - 16 Gb single 1067 Mhz DDR4 2133 - GeForce GTX 980/SSE2 - Samsung Evo 512gb SSD Software: - Windows 10 - X-Plane 11.02 Addons: Saitek x52 Pro system Joystick and Throttle : Sound - Bose Soundlink Mini Plugins: Environment Engine by xEnviro US$69.90 : XPRealistic Pro v1.0.9 effects US$19.95 Scenery or Aircraft - KRSW - Southwest Florida International by Aerosoft (X-Plane.OrgStore) US$24.95 - ENGM - Oslo Gardermoen by Aerosoft (X-Plane.OrgStore) US$24.95 - ENBR - Bergen Airport by Aerosoft (X-Plane.OrgStore) US$21.59 - Zibo Mod Boeing 737-800 - Default X-Plane11 aircraft by Laminar Research
-
Plugin Update : xEnviro Environment Engine v1.07 by xEnviro We all love something that fundamentally changes everything about the way you fly and interact with your simulator, in the last year since the end of November 2016 there was not just a simple fundamental change, but a complete cosmic wholesale change of the X-Plane simulator, in first the release of X-Plane11, the update of WorldTraffic to version 3 (coming real soon now) and the release of the xEnviro Environment Engine or weather engine. My very first impression of xEnviro was that it wasn't something that much very different, but a then I found it was simply extraordinary in the way it totally transformed your environment as you flew, it was and still is expensive. But I am a total convert in the way xEnviro gives you a complete and different feel to your flying. The release review is here: Plugin Review - xEnviro - X-Plane10 and 11 Environment Engine But xEnviro wasn't without it's if minor faults. Some clouds were very noticeable in the (cloud) images went the wrong direction, a black line on the horizon is hard to ignore and the worse issue is that it crashed to desktop in if the xEnviro server was off line or you couldn't connect to it, and in the process X-Plane11 went final as well, so there was no update to X-Plane11 in its final release form which created build up framerate issues now and again. These issues actually were not totally overriding as a major issue and to the day to day running and in fact all could have been rectified quite easily with a just simple update.... but after nine months that update never came, until now with this release of v1.07 The developers had committed to totally reinventing the main engine from just a slideshow image effect, which did actually work very well except for one issue as noted above, to the more modern voxel 3d mapping or a voxel grid, that uses each pixel with a given colour value in a frame. The idea is to give an item and in this case a cloud to be rendered as a volume in 3d. Clever and a much more modern way of reproducing clouds and common now in game development but it took a long time to create and test for the X-Plane simulator. xEnviro v1.07 First up there is a new start up panel, with a blacked out space to highlight the version number. The slight build up of your weather is still there as xEnviro slowly builds up your current local weather picture... Menus Main dropdown menus is still the same with just one extra new feature in the added "Weather Briefing"... ... the "Weather Briefing" gives you the current 20 local (close by) airport METAR conditions, you can refresh the data anytime to see the current conditions. The "Settings" layout is changed as well from the X-Plane10 (below left) old style to the new X-Plane11 (below right) style which looks far more modern, but the layout is basically the same but there are a few important changes to note. In the first column "Weather Settings" there is a new slider setting to cover "Maximum Surface Wind Speed", which is good because the surface wind speeds were a bit nasty and mostly too strong in v1.06, so you will mostly keep this low and I set it at 5kts. Second column is "Cloud(s) Settings". The actual slider settings themselves have not changed. but the values have in "Shadow Range", "Clouds Brightness" and a slightly more (cloud) crossfade is required to a full 200%. First the brightness. I found there was far more wider set of values in the cloud brightness and so it needed to go up a few %. Second item is more important. Cloud "Shadow Range' is much more touchy and in fact it has a far less range than before, so in heavy low cloud conditions with break though light or in say twilight and dusk conditions it gives you a heavier darker cover... the change from great lighting (below left) to full darkness is very, very small and you are on the far lower end of the scale at 4 here, and few selections up and you are suddenly in complete darkness (below right). There is a great need to get the "Shadow Range' right, because the effect is very good (below) when it is in it's full effect mode, with excellent light, shadows and colours on the landscape, but overall I feel the "Shadow Range' adjustment is in need of a more wider range to be more accurate. Third Column in "Atmosphere Settings" has he most changes on the settings panel. Atmosphere has been split into two sliders now with "Upper Atmosphere" and "Lower Atmosphere" and gone is the selections for Rain and Snow effects. Lightning effect is also gone and all are now set automatically in the system. 3d clouds passing effect tickbox has been moved up with the new "Remove Scenery Shadows under overcast" selection, and 2d rain drops and 3d landing light effects are now listed together. X-Plane related "Post Processing" and "Light Scattering" is not changed on the settings menu, but the underlying engine has been completely revised. xEnviro v1.07 has been totally reworked to intergrate more with the X-Plane weather engine far better than in v1.06, in fact they didn't work together very well at all in the past. So I always had the "Post Processing" switched off, but now I have to have it on to get the same effect, same for light scattering, you will note a lot of the X-Plane11 misty look is not as strong with v1.07 but xEnviro compensates for that in its own engine, but at far distances it is now more noticeable as X-Plane builds up the scenery... Here you can see the differences with the new scattering changes... ... with the "Light Scattering" slider down in 0% (above left) where I mostly had it positioned before, now you need it in the opposite position (above right) at 100% to clean up the horizon, and so in v1.07 all the Atmosphere Settings need to be readjusting to your liking and not left or set as in v1.06. Fourth column are the sound settings and nothing has changed in there at all. _________________________ First Impressions xEnviro v1.07 First off it is important to note that it is very hard to get a full overview in a short time of any environmental engine or plugin. atmospheric and weather conditions cover a huge range and it took me a fair period to really appreciate xEnviro and what it could really do. I have a huge backlog of memories and images that are simply outstanding in the way the plugin recreates your total environment, once used xEnviro is very hard to not be part of your X-Plane world, yes I am a huge fan, but I was also won over only in a period of time and not completely at first sight. xEnviro is live. The environmental plugin shows you current METAR data as it is right now or your current time. If you are at your home airport or close by then X-Plane via xEnviro can dispaly what the weather conditions are right now. It can be spookily accurate as I have found by just looking out of my window or watching the conditions locally as they happen. Not perfect but pretty close. Note in v1.07 the conditions can now recreate such weather events like the Hurricanes off Florida U.S. lately and obviously many users jumped at the chance to check it out... I myself checked out a local cyclone in February earlier this year and it was quite realistic. But currently and still in v1.07 you can you only have the live version? A "History" version is still in the feature list and not part of the current line up, which will not allow you to recreate certain weather conditions, it should be on the now todo list not a long way down a feature list... ... another feature on the todo list is the MAC version? in fact it is at the bottom of the todo list which is just plain stupid, who came up with this business plan? as not only are the developers neglecting a large percentage of X-Plane users but their significant income as well? That is just plain crazy business or just dumb stupid! One item that has had attention was the issue that if the xEnviro server went into meltdown or you went offline from the server it caused an X-Plane simulator crash and usually in mid-flight. This was a nasty bug and was caused by the "Wininet exception handling code" and it has been addressed so we will see if it doesn't ruin another flight... One of the fears of moving to the voxel 3d mapping was the effect on framerate. Laminar's "small puffs" but their heavy framerate load rears its ugly fears, but the voxel 3d mapping is a very different concept and framerate thankfully is very good, in fact I think it is improved and I checked it out in very heavy cloud conditions and it ran without any major framerate drops, but that is not to say a weak computer or extreme weather conditions can change the deal, but overall I was very impressed by the running of xEnviro in v1.07. So let us look at some pretty pictures... I took two flights with one around KRSW in South Florida and one flight from ENGM - Oslo to ENBR - Bergen in Norway, first KRSW. xEnviro does do towering cumulus clouds really well and they do feel that they have more volume and thickness... ... but I didn't like the shelf like cloud formation that looked too wafer thin (arrowed below), I have seen these low thin stratus clouds before, but not this wafer thin, thin. It looks very effective though from above angles (below right), but not close up or head on. Translucent effects are very good. One of the thing that really impresses in xEnviro is the great translucent feel between you and the ground and it still gives off a great realism look and feel. The effects are very good with darker clouds and conditions, but in certain conditions it changes... ... in the darker areas as the aircraft become a little fluorescent and glow, it is highlighted sometimes if the lighting is very shadowy, I didn't see that in v1.06? But the aircraft here at Oslo standout far too bright and are far lighter in contrast against the darker airport. Another point, is there is far more lines in the clouds and again noticeable only under certain cloud conditions... ... I'm not going to say these lines are a negative as I expect them to be fixed quickly in the next update, but they are more pronounced than in v1.06 of which there was a few even in there, but not this many? In the positive the lighting can be sublimely beautiful, the lighting effects when full on are simply overwhelming. Note the excellent cloud shadows on the ground. Flying from Oslo to Bergen and the more you fly in xEnviro the more you love it, and just enjoy those excellent formations. But I do feel the clouds do pop-up or pop! into view more suddenly than they just faded into view in the v1.06 past, that is very and even more like X-Plane weather than xEnviro there. But overall v1.07 was highly impressive all along the route and the formation changes nicely from full overcast to scattered low cloud as I approached Bergen. Mist, fog and rain was always really good in xEnviro and that has not changed in v1.07. Rain conditions are well done, but to highlight then look at the rain falling at the other end of RWY35 but clear on the threshold (above right)... ... in time the rain moves north and turns into light mist, giving you a very realistic feel around the airport and far into the mountains. Summary xEnviro Environment Engine is an exceptional addon to X-Plane to create a totally different feel and weather aspect to your flying. And overall this new v1.07 is excellent. But there is a few raw notes that should have been easily cleared up at the beta stage, and should have not been passed over to the release version. v1.06 of xEnviro was on the whole a fully rounded product, but here there should have been a few more cleanups here before release. There are too many lines in the clouds and the clouds pop up and disappear far to often in full view. Atmosphere Settings need more range and the darker effects send the aircraft fluorescent. Mostly I call all these items just fine tuning, but with a product this expensive they should have been refined earlier, I hope we don't have to wait long for a fix? Overall this v1.07 is not a feature packed update, those items will however come sooner now the new voxel 3d mapping structure has been administered, that was a basic but fundamental core change, and all the benefits of that change will in time be more apparent. xEnviro is a cornerstone of X-Plane that every user should have running, I admit it is not cheap, but ask any user that have laid down the cash if they think it was not worth the investment? Not any, and neither would any user that has once used xEnviro would go back to the default X-Plane weather engine because it is really night and day in the sheer difference the plugin creates when flying in X-Plane. I did note it took me a short while to see the benefits, but more so now than ever after ten months of use I couldn't or even won't run X-Plane without it running in the background, it is as important as that or with the sheer visual appeal and even the sheer enjoyment the plugin provides makes it simply a major requirement for X-Plane simulation flying... it is that great or even brilliant. ______________________________________________________________________ Yes! the xEnviro Environment Engine by Commercial Simulation Systems LLC is Available from the X-Plane.Org Store here : xEnviro Price is US$69.90 Sorry this plugin is Windows only at this point, But Mac is coming! Features xEnviro was created for X-Plane 10/X-Plane 11 as a result of multi-year effort from high-level engineers and programmers of Commercial Simulation Systems® LLC. xEnviro replaces the default X-Plane environment, making it more realistic. X-Environ Features: Load real-time meteorological data with download interval from 5 up to 60 minutes taking into account following factors: Wind direction and speed on ground and aloft, temperature, turbulence areas, icing areas and dangerous phenomena (thunderstorm& windshear) Simulate visual effects of different types of precipitations and phenomena: rain showers, snow, fog; Simulate visual raindrops effects on windshields both in 2D and 3D cockpits (if it's loaded in aircraft model); Simulate in-cloud visual effects; Simulate visual effects of shades and aircraft lightning in clouds (Strobe lights, beacon lights, navigation lights, landing lights) Simulate landing lights screen effect during in-cloud and foggy flight; Volumetric lights effect; Simulate lightning on clouds surface from cities lights; High-detailed cloud shades; Custom cloud density and range; Simulate realistic breaking action effect; Display saturation, color gamma and cloud density, depending on weather conditions and time of day with real-time changing (automatically) or manually. Requirements Minimum X-Plane 10.45+ or X-Plane 11 + Stable Internet Connection with data Speed no less than 512Kps Windows 7/Vista/ 8/8.1/ 10 - Not Mac compatible at this time 1Gb VRAM Recommended X-Plane 10.45+ or X-Plane 11 + Stable Internet Connection with data Speed no less than 51 Mbps Windows 7/Vista/ 8/8.1/ 10 - Not Mac compatible at this time 2Gb+ VRAM Current version: 1.07 (last updated September 16th 2017) Software Compatibility with other plugins xEnviro® software is incompatible with 3rd party software is used for weather loading, visual effects and other products that modify environmental or graphical components. Correct operation of xEnviro® software is incompatible with the following products: SkyMaxx Pro RealWX Pro MaxxFx Real Weather Connector SoundMaxx FS GLOBAL REAL WEATHER xNoaaWather FlyWithLua RTH script VenturaSky Blu_fx Any other scripts simulating weather conditions Prior to install xEnviro® software it is recommended to deactivate these applications in Plugins menu in simulator or delete them (up to X-Plane user). Change log : Version 1.07 (September 16th 2017) Added - Weather Briefing window added. Displays METAR for 20 nearby stations. - General status dataref. - Dataref for the weather radar data (precipitation echo). Changed - Maximum wind speed now set in Knots. - Wind distribution has been changed to improve ATC reliability. - Blending adjusted to remove visible line of the ground mesh edge. - Internal representation of the weather is now based on voxel arrays. - Atmosphere colors adjusted to match X-Plane 11 light model. - Rain color and blending adjusted to match X-Plane 11 light model. Removed - X-Plane implemented ball mark for the selected menu entry. Temporary * removed. - X-Plane fog cutoff slider removed. Fixed - Water reflection for haze added. - Wininet exception handling code has been corrected. No more crashes hopefully. - Surface friction procedures amended to avoid spontaneous aircraft sliding. _____________________________________________________________________________________ Update Review by Stephen Dutton 19th September 2017 Copyright©2017: X-PlaneReviews (Disclaimer. All images and text in this review are the work and property of X-PlaneReviews, no sharing or copy of the content is allowed without consent from the author as per copyright conditions) Review System Specifications: Computer System: Windows - Intel Core i7 6700K CPU 4.00GHz / 64bit - 16 Gb single 1067 Mhz DDR4 2133 - GeForce GTX 980/SSE2 - Samsung Evo 512gb SSD Software: - Windows 10 - X-Plane 11.02 Addons: Saitek x52 Pro system Joystick and Throttle : Sound - Bose Soundlink Mini Plugins: WorldTraffic 3.0 Plugin - US$29.95 : XPRealistic Pro v1.0.9 effects US$19.95 Scenery or Aircraft - ENGM - Oslo Gardermoen by Aerosoft (X-Plane.OrgStore) US$24.95 - ENBR - Bergen Airport by Aerosoft (X-Plane.OrgStore) US$21.59 - Zibo Mod Boeing 737-800 - Default X-Plane11 aircraft by Laminar Research
-
You should be able to go to your X-Plane.OrgStore account and download the XP11 version, because it should be on there? Just make sure you don't have a double wrapper in that the scenery is in a folder within a folder before inserting it into the custom folder, it is an easy mistake... But I think the cause is that X-Plane uses LOWI as a default airport? Check your custom folder for "LOWI Demo Area" and either pull it out or make sure it is below your Payware scenery in the ini order, it could be nulling it out.... SD
-
News! - Now Released - Velocity V-Twin by Aerobask "And now for something completely different!" Here is a preview of Aerobask's Velocity V-Twin, twin-pusher and canard aircraft. You have to admit... "its different" Listed features with the Velocity include: Realistic simulation of the Dynon SkyView and Garmin 750/650 – no default instruments used. A master piece of art, full custom-coded. Very usable with Touch Screen Operation and full mouse scroll wheel support. Flight model maked by X-Aerodynamics, according to the public data. High quality 3D model with high resolution textures (4K), ambient occlusion, specular and normal mapping. Dedicated X-Plane 11 PBR rendering. FMOD Enhanced 3D system sounds. Accurate simulation of dual OPT-1 gauge. Simulated oxygen system. Fully functional virtual 3D cockpit, with a different interior design based on the selected livery. Windshield with reflections & rain effect. Configurable pilots, passengers and luggage. Volumetric propeller. Aerosbask have already delivered two amazing and high quality aircraft this year with the Pipistrel Panthera v3 and the Eclipse 550NG and now the amazing Velocity V-Twin is going to join the fleet. The excellent Dynon SkyView and built in Garmin 750/650 is included in the Velocity... As is the excellent quality cabin... Options include ground elements including GPU (Ground Power Unit) opening doors, luggage locker, flags, chocks and a weights and fuel set up menu. Note this aircraft is available for X-Plane11 only Released.... The Aerobask Velocity V-Twin is now available on the X-Plane.OrgStore... see details below _____________________________________________________________________________________ The Velocity V-Twin by Aerobask is NOW available! from the X-Plane.Org Store here : Velocity V-Twin XP11 Your Price: US$34.95 Requirements X-Plane 11 Windows, Mac or Linux 2Gb VRAM Minimum. 4Gb+ VRAM Recommended Full list of features! The Velocity V-Twin is a four-seat, retractable tricycle landing gear, composite construction aircraft with a twin-engined pusher configuration and a canard layout. --> First High-Quality 'Canard' Aircraft for X-Plane --> Super High Detailed Aircraft in and out (Stunning visuals and comprehensive systems) --> Complete Dynamic Sound system using FMOD Advanced Aeroback Avionics Suite Realistic simulation of the Dynon SkyView Garmin 750/650 Completely custom-coded, no default instruments used Very usable with Touch Screen Operation and full mouse scroll wheel support FMOD Enhanced 3D system sounds dedicated to X-Plane 11. Designed by Daniela RC Inside acoustic isolation, responds to open doors. Engines: interior/exterior recordings of Lycomings IO-360, starter, shutdown, distance attenuation, cone angle response) Engines: prop angle effects and distance flange/doppler effect, no phasing effect between engines Equipment: armrest, battery, gyroscope, fuel pump, doors, gear motor, GPU start/stop, oxygen mask, all switches and buttons Environment: airflow, ground roll on hard and noisy surfaces, tire skid and impact, airframe shaking and stressing) Ambiance: exterior ambiance, rain interior/exterior with several degrees of intensity Alerts: gear up, minimums, fire bell, autopilot disconnect, stall warning All sounds recorded at 44Khz 16bit stereo, correctly positioned in 3D, optimized to save space. Pop-Up menu options, fuel & weight, ground thingies. Configurable passengers and luggage. High quality model High Resolution 3D Modeling High resolution textures (4K), ambient occlusion, specular, and dedicated PBR normal mapping for X-Plane 11. Accurate flight model according the public data maked by X-Aerodynamics. Fully functional virtual 3D cockpit, with a different interior design based on the selected livery. Simulated oxygen system - Windshield with reflections and rain effect - Volumetric propeller. Accurate simulation of dual OPT-1 gauge. Complete Avionics In-house coded GTN 750 and GTN 650 with touchscreen and scroll-wheel support: Exclusive multi-threaded and fps-friendly map and terrain display Map topography display based on actual X-Plane mesh data Terrain awareness display based on actual data Configurable map rendering TCAS with online flying support Airways, SID and STAR support (waypoint-based) Flight plan import/export compatible with stock XP10 fms format Built-in chart viewer - easily import yours COM support for PilotEdge (Connect/disconnect, TX/RX, COM1&2 volume control) COM awareness for IVAO and VATSIM (conneciton status) COM, NAV and XPNDR dialing pad Interactive checklists Resizable pop-ups VIP controller, in cabin and in popup for aircraft management Latest revision of Dynon Skyview with added scroll-wheel support NEW! Scroll-wheel support on lists, map, HDG, CRS, MDA, ALT, VVI, etc... Airways, SID and STAR support (waypoint-based) Weather map display on multiple screens and orientations TCAS with Traffic Advisory and Resolution Advisory Resizable pop-ups 7 High Resolution liveries (+ 1 low res) Flight Manual + Dynon Skyview Manual + GTN manual and several documents included ____________________________________________________________________________________ News Announcement by Stephen Dutton 16th September 2017 Copyright©2017: X-PlaneReviews (Disclaimer. All images and text in this review are the work and property of X-PlaneReviews, no sharing or copy of the content is allowed without consent from the author as per copyright conditions)
-
Scenery Review : TFFJ - Saint Barthélemy Airport by Nimbus Simulation Studios On the far edge of the West Indies chain in the Lesser Antilles is the Leeward Islands. In time the colonial European powers divided up the territories and some became English, some French and some Dutch with the Danish selling out their share to the United States that later became the American Virgin Islands. The past colonial period of the sugar industries are now long gone, most of these wide scattered territories now rely on the rich and so called famous and the influx of tourism to survive. Today Saint Barthélemy is French even though all the names are in Swedish? As the French did a trade deal and the island became Swedish territory but then they sold it back to the French again, but the names still stuck with Gustavia the main town and Gustaf lll the name of the airport. In English it is better known as "St Barts" or "St Barths" in French, but in the aviation world it is "that" runway, the famous one that is included in the top ten "Most Extreme Airport's of the World" and it is listed at number three on every aviators death list. Part of the same archipelago is Saint Martin or St Maarten and another aviation bluff's dream destination, with yes another "that" airport in the Princess Juliana International Airport and "that" beach were you can both sunbath and watch the bellies of "heavies" fly over you to land on RWY10, sadly the B747 flying days are now over as KLM has rerouted the route from Amsterdam, but you can still get a lot of jollies with most heavy aircraft still doing the daily low flying show. The distance from each island is however a simple hop at just 31.66 km or 17.08 nautical miles. And that is where we will start... First Impressions You can't get a large aircraft into TFFJ. A STOL is preferred but the majority are 208B Caravans, Britten-Norman BN-2 Islanders, and the favorite in a De-Havilland DHC-6 Twin Otter. A Dash 7 is certified, but it is a bit large. My pick is the Carenado C208B Caravan. Departure is via RWY10 at TNCM and you track directly 130º towards Saint Barthélemy. I selected 6,000ft, but only made 5,000ft to keep the view correct. The punters in the rear wanted to see the whole island from the air and that suited me fine as I have never been here before and I wanted to get my bearings on the airport. The whole island has custom mesh as part of the package including the tropical water surrounding the inlets, so the islands look very authentic from a distance, to get a closer look I descended to 1,500ft and got a quick side glance at Gustaf lll Airport and from up here it didn't look that hard. The Saint Barthélemy island is dotted with a lot of colourful custom made buildings including the main township of Gustavia, but the roads tend to stand out a little stronger than they should do, they don't blend in well enough into the landscape to make them look really totally realistic. So to the choice, the easy over the water approach to RWY28 or the horror over the hill RWY10 with its 150ft drop and 17º slope? Hard choice, but this is my first time here and RWY10 looks and feels a little too hard without some practise runs (it was a wise decision). Butnaru (Nimbus Simulation Studios) supplies approach points and images for all approaches (I found out later!) that are good guides on how to make each approach in Left and Right into RWY28 and a diagram for RWY10 and how to do a all runways in a missed approach. I was doing the right hand approach and the Eden Rock hotel (arrowed below left) is your guide in and decision point to go or abort the landing. You basically follow tightly the eastern shore line of the Baie de St Jean at around 600ft and on the turn to finals keep your height at 400ft, it is far tighter than it looks... ... speed is totally crucial, I was just a smidge over the 60knt stall at full flap, and it was still too fast. Note the water... there is real depth to the shallow water which is an X-Plane feature first and it is highly effective for realism on the approach. There is a slight 5º bank in the final turn and your aim here is for the two sets of marker buoys giving you a lead straight into the runway, they help if you can get close in to and on to then centre-line them. The scenery provides a lot of 3d people and animated vehicles and so there is a lot of items to take in. The runway more or less rises up to you more than you lowering the aircraft downwards as the actual airport is still 48ft/15m above the ground. Over the beach and the runway is glaring or daring straight at you. Pushing the stall point you aim for the end of RWY28, but be careful not to land too early as it is very easy to do, just be a bit more brave and make sure your on the hard stuff. The actual runway is 650m or 2,133ft long so it is quite short, but this approach also gives you the slope upwards to help in the running off the speed, in the opposite direction you really have to judge it more carefully to have the room to stop without going long into the Baie de St Jean! There are two ramp areas at the top of RWY28, to the right a small parking area and a hangar and to the the left the main terminal area, the aircraft needs a little throttle to get over the rise, but then none as you fall quickly downwards onto the main ramp. For a first blind attempt I was pretty happy with that landing. There are four in line parking points in front of the main terminal, so you unload and then park or depart... there is no hogging up the apron at TFFJ. The approach was harder than it looked from the air, but I am doing this blind for the first time and I think a few trips and I should get it on the money, runway 10 is another whole deal again, but as a first impression it was certainly heart in the mouth impressive. From this point of view the scenery is very good with excellent gradient changes which is very hard to do in X-Plane and make it look realistic, note your "Runways Follow Terrain Contours" checkbox has to be on for it to all work correctly. TFFJ - Saint Barthélemy Airport by Nimbus Simulation Studios Gustaf III Airport Saint Barthélemy Airport St. Jean Airport Aérodrome de St Jean IATA: SBH - ICAO: TFFJ 10/28 650m (2,133ft) Concrete Elevation AMSL 48ft/15m TFFJ - Gustaf III Airport is buried in the neck of the island of Saint Barthélemy. As noted the elevation changes are significant here and the scenery works very well in countering the issues with such tough terrain logistics surrounding the airport. All buildings including the terminal is really well done and notably there has been a lot of research to get the area within the airport boundary and beyond including the small township of St Jean just right. In these sceneries it is the small stuff that is important, like signage and fencing and lighting. In this case it is about perfect with a full complete fill in of the area. Static aircraft are dotted around the aprons and parking areas, all are very good and with people and baggage and even golf carts which is perfect for these sort of rich playgrounds. The 3d cars are excellent as well, but a few of the animated vehicles are incomplete? Terminal construction is great with concrete and wooden planking structures which all well realised as is the glass. Roofing is a lovely terracotta tile. 3d passengers and internal construction are a Butnaru feature and it works very well here. Four welcome flags outside are a bit of a disappointment, flat and although animated are a bit weak, a wasted opportunity. The signage is a little low resolution really closeup, but mostly fine at a small distance. Overall the terminal is first rate. Control Tower and Tower View The tiny control tower sits atop the main terminal building. Tower view is very good with both approaches visible, but obviously RWY10's approach is mostly hidden by the elevation constraints or the hill is "In the way". When in the tower view you are positioned in front of the tower (above right) rather than above it, but it works fine. Other airport environs Top of the hill at the RWY10 threshold there is parking to the left and a small hangar and general aviation parking to the right, again there is great static aircraft to fill in the parking areas. Note the really nice fencing and shrubbery. Tropical Palms are important and the feel is just right in the placement and fill of all the areas of the island... did I say Tropical Paradise! Runway northside is very complete as well. There are two verandaed houses and the rocky outcrop behind dominates the scenery. This aspect is important to give the scenery a full view feel and could have been easily looked over so, big bounty points for that for Butnaru. Runway textures are really good and the X-Plane11 reflective shine is there in the right conditions... Mid-field grass is 3d but a bit thin in that you hardly notice it. The end approach end of RWY28 is well done with realistic sand, but it is that translucent water that is the really very clever and really eye catching detail, but if you crash into it you don't sink or bob around but sort of skate over the top of the surface like on ice! (Yes I checked!) but it is very well done and a major highlight of the scenery. Note the boat shadows in the water. St Jean and Gustavia By the side of the runway is the local cemetery, which is warning in not to end up in it!. St Jean township is the area the airport is located in and the local environs are very well done even if a few of the buildings are just repeated. Eden Rock hotel is the biggest building in St Jean and there is plenty of activity on the beaches besides the cool waters. Football and Tennis Clubs are well represented in the back end of town. Gustavia is positioned on the west coast of the island and is again well reproduced with expensive rich toys in yachts filling in the translucent harbour, note the great radio masts on the top hill of the island, a small but important detail. Coastline rocky features are excellent and great for VFR visual flying, but as noted the roads feel far too large all over the island and dwarf the cars and landscape. Nightlighting Gustaf III Airport does not have any night operations, but I was still surprised that there is no runway lighting either? The terminal area however is nicely lit. Some nice aspects of lighting adorn the building, with ramp lighting and a lot of spot lighting. GA parking hangar is nicely lit at night if you want to do some overnight repair work, but otherwise the island at night is a sleepy township with everyone tucked up in bed... Flying conditions TFFJ does require a lot of conditions to fly into there. VFR rules, rule of course, but to fly into TFFJ you have to be passed by an instructor before being given clearance, so not everyone can just drop in (unlike in X-Plane) there. You can only use RWY10 to takeoff as RWY28 with that slope is voided and as noted night operations don't exist. There is a lot of information out there, but a good guide is this "VFR in the Dutch Caribbean" document. To watch how the pros do it then watch this video, and take notes of the breezy wind conditions at the top of the hill before descending... Services There are a lot of local services but as to be expected no major carriers, this is all small operator inter-island services. Air Antilles Express - Pointe-à-Pitre Anguilla Air Services Charter - Anguilla Coastal AirCharter - Saint Croix FlyMontserratCharter - Montserrat St Barth Commuter - Antigua, Sint Maarten, Saint Martin - Charter: Antigua, Baillif, Barbados, Barbuda, Canouan, Dominica, Dominica-Canefield, Fort-de-France, La Romana, Mustique, Nevis, Pointe-à-Pitre, Providenciales, Puerto Plata, Punta Cana, Saint Croix, Saint-François, Saint Kitts, Saint Lucia-George F. L. Charles, Saint Lucia-Hewanorra, Saint Martin, Saint Thomas, Saint Vincent, San Juan, Santo Domingo-Las Américas, Sint Eustatius, Sint Maarten Tradewind Aviation - Antigua, Saint Thomas, San Juan - Charter: Antigua, San Juan, St. Thomas Winair - Sint Maarten, Saba Cargo DHL Aviation - Anguilla, Antigua, Dominica, Fort-de-France, Grenada, Nevis, Pointe-à-Pitre, Saint Croix, Saint Kitts, Saint Lucia, Saint Thomas, Saint Vincent, San Juan, Sint Maarten, Tortola, Trinidad Summary We all love small commuter services and inter-island hopping can be one of the really great flying experiences you can have in X-Plane. So with Saint Barthélemy so centered in the West Indies, you really can have a smorgasbord of great flying you that can do around here. And add in the factor of one of the most challenging approaches and departures in the world and you also get cake and eat it here as well. Certainly great scenery can heighten the effect even more and overall this scenery from Nimbus Simulation Studios certainly fills out the visual and challenging aspects of Gustaf III Airport. Negatives, not much but the roads are far too wide and three car wide in some places on an island that would have single lane blacktop at the most, and this aspect is highly (too highly) noticeable from the air. Some signage is a bit low-res and a few animated vehicles are incomplete. Positives are many and the highlight is certainly that highly effective and beautiful 3d translucent water, flying in over it is an experience. Island coastline and rocky features are all excellent and great for around island VFR flying as is the excellent elevation detail in merging the overlays with the X-Plane ground basics. Buildings and certainly the terminal are very well recreated with the tropical paradise feel very evident all around you and ramp and runway textures are excellent, lots of 3d people and activity gives you the feel of landing right in the middle of a busy tourist season rush. Overall excellent well created scenery with the challenging approach and departure aspects should keep the island hopping punter happy for years... If you have a Caravan or Twin-Otter sitting in your hangar then can you really resist this scenery, no probably not, but check out that lovely water as you sweat your way in! ______________________________________________________________________ Yes! the TFFJ - Saint Barthélemy Airport by Nimbus Simulation Studios is Available now from the X-Plane.Org Store here : TFFJ - St Barts Your Price is US$22.95 Features: Full representation of St. Barts island and airport Thousands of custom hand placed 3D objects Custom vegetation 3D people and animals 3D sea near runways 10 and 28 (Exclusive feature) GroundTraffic plugin (By Marginal) New techniques used to show great details to the ground textures Normal maps in many objects and ground textures (PBR) Custom mesh Lots of details Compatible with X-Plane 11 and 10 Requirements X-Plane 11 or X-Plane 10 Windows, Mac or Linux 2Gb VRAM Minimum - 4Gb+ VRAM Recommended Download size: 405Mb Installation : Download scenery file size is 405mb. With Nimbus Simulations TFFJ - St Barts (450.70mb) Nimbus Simulations -Z- St Barts Mesh (3.82mb) In being inserted into your X-Plane "Custom Scenery" Folder Note the "Nimbus Simulations -Z- St Barts Mesh " must be listed in the .INI situated UNDER the "TFFJ - St Barts" file to work. "Runways Follow Terrain Contours" checkbox has to be on for it to all work correctly. Documents Provided document is a full detailed manual and much included with more information and history: Approach_Manual - with photo details on how to use the approach details effectively Read Me - Installation details ______________________________________________________________________ Review by Stephen Dutton 8th September 2017 Copyright©2017: X-Plane Reviews (Disclaimer. All images and text in this review are the work and property of X-PlaneReviews, no sharing or copy of the content is allowed without consent from the author as per copyright conditions) Review System Specifications: Computer System: Windows - Intel Core i7 6700K CPU 4.00GHz / 64bit - 16 Gb single 1067 Mhz DDR4 2133 - GeForce GTX 980/SSE2 - Samsung Evo 512gb SSD Software: - Windows 10 - X-Plane 11.02 Addons: Saitek x52 Pro system Joystick and Throttle : Sound - Bose Soundlink Mini Plugins: Environment Engine by xEnviro US$69.90 : XPRealistic Pro v1.0.9 effects US$19.95 Scenery or Aircraft - Cessna Caravan 208B XP11 by Carenado (X-Plane.OrgStore) - US$34.95 - Review here: C208B Grand Caravan HD Series XP11 by Carenado
-
Aircraft Update Review - DC-3/C47 v2.1 by VSkyLabs Flying Lab Project . Only weeks ago, 22nd July 2017 actually I did a full new release review of VSkyLabs Flying Lab Project's DC3/C47. At X-PlaneReviews we do have a lot of new releases and with this year's new X-Plane11 revolution there is a full roll-out of aircraft and scenery that is being updated to the new format as well, so it has all been very busy. In reviews we do the review and unless there is a significant update and then we move on to the next release. I really loved VSkyLabs project of the DC3/C47, and noted so in the review. But there was at the time a few reservations of the current status of the project. It was really, really great, but and then there was that... but. In a few areas there was a feeling that it could have better in its release form, I thought about this for some time as the hardest points in any new release is the objectivity of a reviewer, over harsh and the developer can lose sales, but too lenient and the punter who is putting down the cash will not be impressed... so it is a very fine line. You do as a reviewer have more background evidence and your extensive knowledge to make the right call. The case for the VSkyLabs DC3 was correct for the time as was a cheaper entry price of US$19.95, which was the right price at the time as well. But two things unusually happened with this aircraft. One, I found myself in my spare time flying the DC3 extensively, even getting lost over the North Sea and nearly running out of fuel... I will come back to that one later. Two, was VSkyLabs hammered out updates like chickens pops out eggs. The result was this very quick update to v2.1 and for one of the most already wanted and in demand, loved aircraft in X-Plane this year. VSkyLabs Douglas DC3/C47 v2.1 My very first initial view of the release VSkyLabs DC3 was actually a groan... This is 2017 and the aircraft looked like it was from the X-Plane9 dark ages. Normal mapping creates that raised surfaces or 3d look on the aircraft's surfaces and here there was none. So the very first priority was to fix the aircraft's maps. This was done by Oleg Tronov who has also created an official paint kit for the DC3. The results are well... spectacular! Rivet... Rivet... Rivet, you feel like a beaver creating bodywork going at it full thrust, but just look at all those amazing rivets, panel lines and saw edges... you have gotta love it. Now that is a 2017 X-Plane11 looking DC3. The other poor performance on the release version was the liveries, but that has also changed now big buckets as well and mostly thanks to Arcticpilot and his great work... (Metallic VskyLab's is now the new default livery) The older "Flightgear Liveries" don't work anymore with the new metallic base and mapping, but I have persevered with the lovely Air Atlantique livery as it looks excellent and it is a more modern livery, but sorry I don't have permission to distribute it and it is still a work in progress, but you can have a go on the original if you want to from flightgear. FMOD Sounds Sounds originally included were not actually not that bad, but that has all been swept away with the intergration of the FMOD sound engine, and all round the sounds are now excellent. New 3d directional sounds include: Engines and Props with multiple layers for various rpm and distance from the engines. Engine startup and post startup low rpm sounds. Switches and knobs. Gyro instruments, Booster pumps. Gears, Flaps. Ambiance (wind) and turbulence during normal flight. Ground roll, tire screech. Vocal Annunciation for mixture control (auto rich, auto lean). Vocal Annunciation for tail wheel (locked, unlocked). Vocal Annunciation for autopilot (engaged/disengaged). Overhead Electric fans. Good? no brilliant, it shows with just the addition of 3d sounds on how quickly you can elevate an aircraft to excellent from just the very good. More sounds are promised but a few areas are counteracted by the XPRealistic plugin I am running here (Highly recommended for this aircraft). Cockpit In the cockpit there has been a lot of changes. The basics in the instrument panel though are all the same, but there are a lot of very nice new additions and fixes. The pop up GNS GPS unit has been upgraded to the GNS530 up from the GNS 430 for a bigger screen to use, the popup is still activated by pressing the centre of the VOR pointer dial. The centre mounted magnetic compass has also been mounted on rubber-wires, it does also move around and looks excellent, but the idea is not finished yet as the way the animation works is that the connection ends move as well? But VskyLab's have noted this will be worked on more to get a better result. Added animated fans are a welcome relief from the hot cockpit, they can be a bit distracting when the going gets tough, but a desk mounted fan is certainly advisable if you want the full wind in your face effect. Wipers are now correct in sweeping to the centre and not left-right, and FMOD wiper sounds heighten the effect for more realism. Wipers feel very realistic when battling low visibility on Norway's west coast! Emergency Escape hatch has been added to the cockpit roof, it is noted that in the future it will be functional, if you want to bail out? Speakers have been added into the roof on each side, which is another nice touch. The patterned wall cladding has been updated to a better quality feel as well, looks and feels far more realistic than the original cladding. Other fine tuning notes in the cockpit are the Seat, Yokes and Pedals have been fine-tune to fix minor alignment issues, added in a co-pilot comm box for right seat operations (I bet you didn't notice it was missing?) and the added in two radio-microphones. Cabin Another area that was average in the release aircraft was the silly stilted thin cabin passenger seats. Again there are now more detailed and thankfully wider seats for the passengers, I still think they could be a little wider, but they are certainly a big if huge step forward. You can expect a few nice variations of the cabin as already ArcticPilot has put out a very nice Icelandair version for his Icelandair livery. I myself has adjusted the cabin for my Air Atlantique livery, with a blue seat cover from ArcticPilots version (Thanks), instead of the odd coloured Buffalo Airways coverings. VskyLab's has already noted there is more to come yet in the cabin in the next version. The doors however still don't open, but the fuselage has been cut, ready so expect them sometime in the future. A full and more modern FMS is promised as well, but I really love the Sperry Type A-3A autopilot already installed so I am personally not too fussed. Flying the updated v2.1 DC3/C47 I have become a little addicted to this aircraft, as you should with any great aircraft in X-Plane. In my mind if you are always going to say "I'll give give that aircraft a go" then there is something special going on and the return of the experience from the simulation then fill's in the rest. So many things contribute to a great simulation, but aircraft feedback and the challenge of flying the machine is part of the fulfilment factor. The original release did feel a little unfinished, but then this is an ongoing project. This version is certainly more like what the release version should have been, and it feels far, far more complete. One area to note is the fuel tanks. On the original you emptied the main tanks and then the Aux would then empty, but not by switching them over? In a quirk in X-Plane you can't do this so you drain the main and then automatically switch to the backup tanks. This caught me out while flying from ENBR - Bergen to EGCC - Manchester as I almost emptied the main tanks but just thought I could switch over to the Aux as you do... My position was that well over the North Sea I was suddenly running out of fuel? Switching them over ran an engine dry? so I had to divert to EFPH - Edinburgh on what I thought was the last drips of fuel, but landed still with my Aux tanks brimming full. The tanks have been changed in v2.1 to drain ALL tanks at the same time, which personally I still wish we could have done a real tank to tank switch, but there you go... Manchester thankfully will certainly be in range now. Tank switches are on the top of the pedestal and the tank fuel gauge can be switched on the panel lower co-pilot's side, it is a shame you can't use them. The old bird is tricky to fly, first this old badger is a taildragger, but the aircraft is heavy as well. Plenty of power just gets it moving and then it is going too fast once you are, so you have to find that throttle balance, instruments are old, so they can be hard to interpret sometimes and at critical times in poor weather you can lose where you are in the balance. But poor weather condition brings the aircraft alive as well, so that is the challenge and why the DC3 is so renowned in getting in there and getting out again into areas that normal aircraft just can't fly around. The aircraft's wing lights in v2.1 have been adjusted and are far brighter now and more workable, they were pretty feeble in the original version. Approach speeds are tricky, you need a little speed, but flap use is restricted to below 115mph, so you are losing, losing speed all the time in trying to get the speed lower to get that flap lift of the use of the lower speed of 80mph. You work it out, but you work for it as well... who said flying was easy? Crosswinds cause you havoc, if you are not using a lot of full rudder then you will not fly a DC3 correctly, trimming the tail straight before dropping down on to the tail-wheel is an art form you have to master. So flying this bird is going to test your skills, but that is the idea right, fly hard and get the job done. You can sit for hours just looking at it... Summary The obvious question comes up here in that was this DC3/C47 by VskyLabs released before it should have been. It is a fair point and in a way the answer is yes as my original review reflected, an ongoing project is still an an ongoing project, but this is 2017 and the entry standard into X-Plane lately is now high. Certainly the special early release price of US$19.95 is going to have a lot of the early punters smiling with this significant update. The aircraft was saved overall because the earlier basics are so good, but now you are still getting a real absolute bargain even at the new US$24.95 price so five dollars here and there is only a decent cup of coffee. But that $5 is getting you a far, far better and more rounded aircraft. The changes here with that excellent normal mapping, far better quality liveries and better cabin seating are well worth the extra admission price alone.... and we are not finished yet here either, as VskyLabs has a list as long as your arm in coming features and detailing and the announced Freight/Cargo version. Another significant point is the response time in getting the aircraft to v2.1. The sign of a good if great developer is to listen to feedback and delivers, and here VskyLabs certainly delivered and quickly and you can't fault that, you certainly can't expect the rollout and changes to keep coming at this pace either because that is not realistic, but you can be confident that this DC3/C47 is already going to be one of the really must haves in X-Plane, it is an exciting project that continues... but for now with this excellent v2.1 update of the aircraft is already right now a great aircraft to totally enjoy in flying one of the really great classic airlines of aviation history.... a must have! _____________________________________________________________________________________ The DC-3/C47 by VSkyLabs Flying Lab Project is NOW available! from the X-Plane.Org Store here : VSKYLABS DC-3/C-47 Flying Lab Project Your Price: $24.95 Features: Two packages included: X-Plane 11 + X-Plane 10.51 Highly Realistic Flight Performance DC-3/C-47 Simulation: Highly accurate performance and handling simulation of the DC-3/C-47. Aircraft performance and handling qualities were designed and tested in a "Research level" approach and went through a validation process of more than 200 hours of flight testing and evaluation, made by real world C-47 pilot and aircraft performance expert. This model is stretching X-Plane to its limits in terms of delivering the authentic flying characteristics of the DC-3/C-47 Fully equipped with Radio and Navigation aids: along with a full set of traditional/old school navigation and autopilot systems, it is also equipped with a pop-up G430 Workhorse for practicing DC-3/C-47 pilot skills: Experience authentic flight performance and handling practices (takeoff, landing, single engine operations, flight planning, long range flights and old school navigation). It is a perfect platform to recreate and fly historic routes using authentic performance simulation Unique look and feel: The VSKYLABS DC-3/C-47 is a mixture of a simplified yet very engaging design and “feel” of the DC-3/C-47 Systems - easy to operate by beginners: All relevant systems are simulated but with the focus on getting the “Flying Lab” airborne without the need to go through a long “ground school” FPS friendly Designed to utilize the “out of the box” features of X-Plane Additional Features: Highly responsive support system/forum. The VSKYLABS DC-3/C-47 Flying Lab is a project under constant development. All updates are free. Requirements Minimum System Specifications: CPU: Intel Core i3, i5, or i7 CPU with 2 or more cores, or AMD equivalent. Memory: 8 GB RAM Video Card: a DirectX 11-capable video card from NVIDIA, AMD or Intel with at least 1 GB VRAM Recommended Hardware Requirements: CPU: Intel Core i5 6600K at 3.5 ghz or faster Memory: 16-24 GB RAM or more Video Card: a DirectX 12-capable video card from NVIDIA, AMD or Intel with at least 4 GB VRAM (GeForce GTX 1070 or better or similar from AMD). Current version: v001.1 (Last updated July 24th 2017) Installation and documents: Download for the DC-3/C47 by VSkyLabs Flying Lab Project is 180.40mg and the unzipped file is deposited in the "Heavy Metal" X-Plane folder with two version for both X-Plane10 and X-Plane11 V10.51 VSL DC-3 C-47 Flying Lab v002.1 (253.40mb) V11 VSL DC-3 C-47 Flying Lab v002.1 (253.40mb) _____________________________________________________________________________________ Update Review by Stephen Dutton 5th September 2017 Copyright©2017: X-PlaneReviews (Disclaimer. All images and text in this review are the work and property of X-PlaneReviews, no sharing or copy of the content is allowed without consent from the author as per copyright conditions) Review System Specifications: Computer System: Windows - Intel Core i7 6700K CPU 4.00GHz / 64bit - 16 Gb single 1067 Mhz DDR4 2133 - GeForce GTX 980/SSE2 - Samsung Evo 512gb SSD Software: - Windows 10 - X-Plane 11.02 Addons: Saitek x52 Pro system Joystick and Throttle : Sound - Bose Soundlink Mini Plugins: Environment Engine by xEnviro US$69.90 : WorldTraffic 2.0 Plugin - US$29.95 : XPRealistic Pro v1.0.9 effects US$19.95 Scenery or Aircraft - ENGM - Oslo Gardermoen by Aerosoft (X-Plane.OrgStore) US$24.95 - ENBR - Bergen Airport by Aerosoft (X-Plane.OrgStore) US$21.59
-
News! - Aircraft Upgraded to XP11 : C90 King Air HD Series by Carenado As Carenado updates their KingAirs it is the C90 now released in X-Plane11 compliance. With the already released B200, 1900D the C90 this is the last of the X-Plane Kingairs to be updated, so now you will have the full trio to use. Overall the update is the same as the others with the full X-Plane11 features including... Special Features Only for X-Plane 11 Full PBR (Superb material shines and reflections). Features Specially designed engine dynamics for XP11. Flight physics designed for XP11 standards. Engine Cowlings open, revealing detailed 3D engine model. Ground handling adapted for XP11 ground physics. Physically Based Rendering materials and textures. PBR materials authored with industry-standard software used by the film and gaming industries. X-Plane GNS430 (FPS friendly) Ice and rain effects VR compatible click spots. Goodway Compatible. Realistic behavior compared to the real airplane. Realistic weight and balance. Tested by several pilots for maximum accuracy. Dynamic loading/unloading of 3D parts and plugin logic for FPS optimization. In many ways the C90 is the truest to the original KingAir, so if you want to fly the basic design of the aircraft called the Model 87, then this is the one to punt for. Carenado are now using high-end professional software to create the very best textures for PBR (Physical Based Rendering) that is the cornerstone of X-Plane11 features. Included in the package 6 HD liveries. 1 HD Blank livery. C90 EFIS PDF. C90 Emergency Checklist PDF. C90 Normal Checklist PDF. C90 Performance Tables PDF. C90 Quick Reference PDF C90 Terrain Awareness Annunciator Control Unit PDF. Recommended Settings XPlane 11 PDF. Recommended System Requirements Windows XP - Vista - 7 -10 or MAC OS 10.10 (or higher) or Linux X-Plane 11 CPU: Intel Core i5 6600K at 3.5 ghz or faster. Memory: 16-24 GB RAM or more. Video Card: a DirectX 12-capable video card from NVIDIA, AMD or Intel with at least 4 GB VRAM (GeForce GTX 1070 or better or similar from AMD) 452MB available hard disk space Note: This upgraded aircraft is new to X-Plane11 and is not an update of the original C90 King-Air for X-Plane. So a full purchase cost is required to acquire this version. The XP11 version is however valid for any updates thoughout the X-Plane11version run. ______________________________________________________________________ The C90 King Air HD Series by Carenado is NOW available! here : C90 KING AIR HD SERIES Price is US$34.95 Notes: For WINDOWS users: Please ensure that you have all the Microsoft Visual C++ Redistributables downloaded and installed (click here) Images & Text are courtesy of Carenado© Developer site : Carenado.com ______________________________________________________________________ Stephen Dutton 4th September 2017 Copyright©2017 X-Plane Reviews: X-PlaneReviews
-
Behind the Screen : August 2017 Thanks to everyone that entered our 4th Anniversary Competition. You may think we do these competitions to give ourselves a bit of a pat on the back when in reality that is very far from the truth. It is actually to gather feedback on what users love and use in X-Plane. There is no bigger waste of time than reviewing or focusing on items that users basically have no interest in, we want to give you information of what affects you as a user so you know and can use your aircraft, airports, plugins to the best in X-Plane. So two aircraft stood out. The JARDesign Airbuses and VskyLab's DC3/C47. The JARDesign Airbus will soon be joined with the release of FlightFactor's A320 and so that will be a significant observation between the most popular Airbus in X-Plane with the newcomer, no actual release date is forthcoming but soon would pass the developers lips at this moment. My flying month of August was dominated by two aircraft, one the above mentioned VskyLab's DC3/C47 and the second the Zibo MOD Boeing 737-800. First the DC3. There is an update review coming for the just released v2.1 of the DC3, but everything has been on hold for the week because "yes" I have had another (four this year!) flu bout this last week and that has absolutely ruined all the plans. So sorry the site has been slow. So back to the gut buster. VskyLabs released their DC3/C47 around late July 2017, in fact only weeks ago. First impressions were impressive, but in areas it was a little bland and hence the low price. Biggest visual negative point as there was no mapping or that raised riveting and lines set out on the bodywork. Personally at that point in the review I thought that X-Plane users deserved a little better than this and with this iconic aircraft at that, but I liked it, so don't get me wrong here. We will note the Leading Edge DC3 version, but that is a very old version now, and again X-Plane users deserve better. In most cases after a release the developer will disappear for about six months and then pop up again with an update unless there is something urgent to correct with the release version, but that is not what happened with the VskyLabs DC3, in only weeks there has been a significant upgrade to the aircraft in version v2.1 including the noted mapping, so full and absolute credit to the developer, and I will cover those updates in the review. But the aircraft was also very significant. I did the review and moved on to another release, but in my spare time had a few flights including getting lost over the North Sea (It was a long story) but I flew from Aerosoft's ENBR - Bergen but ended up in EGPH - Edinburgh (I said it was a long story), but along the way I totally fell in love with the old bird. The aircraft brought back the reason we all do this flying thing, sheer fun and delight. To get the full effect you do need rk Apps XPRealistic Pro excellent realism shaker and a lot of time as the DC3 is not the fastest aircraft on the runway, but that is the whole point as well. You don't fly in the DC3 but trundle, shake and grin a lot. I can see why the aircraft is so beloved by everyone. So yes I am addicted to the DC3 like it seems is now everyone else, an amazing aircraft and the current version is simply outstanding, not perfect as it is still a project in progress, If you don't have it then you are outside the class and you need to get with everyone who has, it is becoming an amazing aircraft. Zibo MOD Boeing 737-800 Another aircraft that has dominated my flying time has been the Zibo MOD Boeing 738 which is based on the X-Plane Laminar Research default Boeing 738. This is an interesting development in X-Plane as most X-Plane default aircraft are mostly off limits to changes, but this ZIBO version may change that area significantly. In most cases the developer is the owner of the copyright, so unless with permission outsiders can't mess with it, and in reality you shouldn't because it will mess up the basic fundamentals of their systems and settings. It is fine to do liveries or an external modification (MOD) but on the aircraft stuff then that is a no, no. But there are a few items that do need attention in this area. Some aircraft are allowed transfer copyright wise as they are leaving the game or in most cases usually have sadly passed off our mortal coil. But what of developers just leaving us all in the lurch like Virtavia and Dawson Designs and their C-17 and SeaKing aircraft? Mostly they just need a few touchups to keep them X-Plane11 happy, but there is nothing we can do? I totally love the Seaking but the glass doesn't work in X-Plane11 as it is blacked/blanked out and Virtavia is saying nothing, is that good enough... no not really. But the default Boeing 738 is a very different deal. Laminar Research commissions developers to create aircraft (and scenery) for the simulator. Mostly they are externally very good, but system wise very basic. They usually only have updates only when absolutely required like with a new feature or version of X-Plane, noted is the fact they are really quite good with X-Plane11, but overall they are still basic. So along comes the Zibo MOD Boeing 738, which takes this basic model (with permission I would think) and changes most of the systems and adds in a lot a great features, and this project has become THE really big attention-getter in X-Plane this year. Modifications (MOD) can be one of the great areas of X-Plane, but it can send you down dead end paths that experienced developers do avoid. I mostly stay away from MOD's unless there is an outcome worth noting, so yes my involvement with the Zibo MOD B738 has been fleeting, but I have kept an eye on it if only from a distance. But there was also the time I needed to see where it really was in development and see what all the fuss is about. So I deep dived and loaded in all the elements noted like the base MOD, Terrain Radar (works with other aircraft as well!), AUDIOBIRD sounds and mashed them altogether to create a B738 that is quite frankly amazing, but not perfect. A test flight from YBBN - Brisbane to WADD - Bali shows that the Terrain Radar and the sound pack are excellent, and the basic flight systems are very good as well, but the FMC is still very buggy with SID - STAR insertion and editing not very good at all, but then again it is another project in progression and FMC's are the hardest areas to develop as even the best have struggled with making them efficient. When the project is more polished I will of course do a review or cover the aircraft because of its significance to X-Plane, I just don't think is is still quite there yet. But it is a significant project and an interesting one? So do Laminar take all the mods on board and add them into the default version? That is an interesting question because it would quickly elevate the X-Plane default aircraft from good to very good , my personal take is that if the original developer says yes (or authorises) the changes then all I see a big beneficial to the simulator as a whole, but problem is the MODs are out of the developers designs so what if he want to update and update, you can see how it gets complicated? A bigger question is will the same MODs be done for the default B747-400 that is dire need of attention, just think of the same changes to that long haul bird and I am sure a big smile will come to many of your faces, wishing is one thing, but maybe pushing that agenda forward would be a great idea... Certainly in time most default aircraft will get the same MOD treatment and for that then everyone benefits. But it is feeling like there is change around with this MOD business and the success of the Zibo MOD B738. Don't get me wrong we don't need a load of conflicting MOD's on the same aircraft, but it is a very interesting development this year. FMOD Sound Another huge area now also emerging is the new FMOD sound engine built into X-Plane11. Now as the developers have started to get their heads around it, very quickly the updates to FMOD sounds are now coming thick and fast, again an easy and very brilliant advance to an area neglected for far to long in great sound. And like with the above Zibo MOD B738 the sound package from Audiobird was to just an add on FMOD pack that you just dropped in to the aircraft file and that quickly and totally changed the aural aspect, can it be just that easy? Well yes and it works, so you are going to see a lot more of that in the future, brilliant sounds at just a click and drop. xEnviro and WorldTraffic3 September is shaping up as a brilliant month as two projects that have been in extended development has been xEnviro and WorldTraffic3 (WT3) which are both finally coming into their end games. xEnviro weather engine in v1.07 has had a few issues along the way, but finally the developers have noted that it is now in beta. There are a ton of new features and the dreaded disconnect server issue has also been addressed, if history (recording and using past weather history) is not going to in there and there has been no mention of a Mac version either, which I think is a major issue and should be a priority and not a new feature. From an income angle alone it doesn't make sense, but then a lot of what these guys have done over the last few months doesn't make much sense either. WorldTraffic3 is also in the last throes of beta testing. I have noted before that WT3 was coming soon, but this is one complicated plugin, and it is amazing how something has to be so complicated to make the user interface far more easier and accessible to use. Clean out the old desk and usher in the new... WT3 will blow you away with its ease of use and the sheer dynamics it will bring to your simulation flying, plus it is the very best animated computer screensaver and timewaster ever! As noted earlier the FlightFactor A320 is still in development, but there is as noted is a bigger sniff in the air that it could be coming in September as well, if not then early October, but this is one project you don't bet on as the development period has been long and detailed. So September is going to be an interesting month and we will see how it all rolls out. Certainly 2017 has already been a huge year for X-Plane, but my guess it is all going to end with a lot of great developments and brilliant releases rather than whimper out, its been a great ride till now, but as they say "You haven't seen anything yet"... see you all next month. Stephen Dutton 1st September 2017 Copyright©2017: X-Plane Reviews
-
Scenery Review : KHAF - Half Moon Bay by Rising Dawn Studios Passion, it gets things done. Passion gets things completed even if you can't face another minute of it, overall Passion drives X-Plane. If it is not an aircraft you particularly want to bring to life or a place that is important to you then Passion will get it done. Well KHAF or Half Moon Bay is certainly important to Peter Suranyi of Rising Dawn Studios as he had certainly a lot of passion of the place to bring it to your desktop. KHAF - Eddie Andreini Sr. Airfield is on the coast just over the peninsula and 18 miles (30 km) south from downtown San Francisco which is a public airport in San Mateo County, six miles (9 km) northwest of Half Moon Bay, California. The airport was renamed to Eddie Andreini Sr. Airfield in December, 2015, to commemorate his contributions to the community - he had learnt to fly at Half Moon Bay in 1953, and became an airshow pilot. Sadly, his love for flying eventually became his fate: he died in an airshow crash in 2014, at the age of 77. So lets get straight into a first impression First Impressions I flew in from the south and you could easily pick out the scenery by the prominent Pillar Point Air Force Station. The air station provides radar coverage for Vandenberg AFB space launches and naval operations, there is a museum located there as well. The Pillar Point AFS is part of this KHAF scenery. Once past I did 180º turnback and reduced speed and height to 500ft to get a closer lower flyby look at the airport. From a distance it looks a little barren, but there is in reality not a lot out there as the airport itself is situated on a slight outcrop of land. KHAF is only a small GA airport that does do an air/car show twice a year called Pacific Coast Dream Machines and provides a variety of emergency service and response functions including: Air ambulance and Medevac flights; law enforcement and homeland security patrols and Coast Guard sea-rescue operations. The Pillar Ridge Trailer park is also highly noticeable on the west side as is Princeton by the sea township itself in the background. The airport has only one runway in 12/30 5,000ft (1,524m) long (alt 66ft or 20m) The Pillar Point AFS is always going to be your focus in landing from the north as you can always keep a focus on your current position and line up turn points anywhere in the bay by its prominently positioned radar globes. You can go slightly inland to align directly into RWY30, but the sweet curve of Half Moon Bay also gives you a very perfect slight left down wing trajectory straight into the runway, it is there so why not use it. Princeton by the sea itself is now your focus, there is a harbour with Pillar Point Harbor's huge marina and the town is directly at the end of RWY30. It is a very open space directly on the Pacific Ocean, so it is to be aware of sudden winds that can come out of nowhere as you get closer to the land. Princeton by the sea has a lot of modeling with marine and boating suppliers highly visible as is with on the coast side is the Pillar Ridge Trailer park but the trailers are very close together and colourful. Runway is super wide at 150 ft (46m) so you have plenty of space to adjust to those crosswinds. Runway textures are first rate, great markings and a great realism feel to the ground. There is great 3d grass as well for added realism, but you have to be almost on the ground to see it, but it is very good. The trees are interesting so we will get to them in a moment. Signage is excellent, in fact this pilot information for noise abatement sign at the end of RWY30 is a great marker of where to turn off to the taxiway... ... there are also a lot of container style aircraft hangars or boxes? littered all over the airfield. And I love the way the yellow taxi guidance lines are not actually perfectly straight but have been painted by someone by hand as it weaves around here and there in places. All runway and taxiway textures are ambient-occlusion refined and they look very realistic and worn. You have to be very aware of having the "Draw Parked Aircraft" tickbox on. If it is you get loads on Piaggio pusher aircraft and Cessna Caravans, the scenery comes with static aircraft that you can either show or not, it feels more realistic with the checkbox off as in reality there is not a lot of parked aircraft sitting at the airport, and was well certainly not very full when the google car drove past taking images. This is a pure and simple General Aviation airport, even a small jet feels big here and the stands are too small for one as well. A quick tour past the excellent "Frank Sylvestri Terminal Building" or shack with refreshments provided by 3-Zero Cafe. Once parked I went over my arrival and overall it is a really great scenery to fly into, very interesting with a lot of great features, but there are a couple of odd notes we will get to. KHAF - Half Moon Bay Airport Overview Eddie Andreini Sr. Airfield Half Moon Bay Airport IATA: HAF - ICAO: KHAF - FAA LID: HAF 12/30 5,000ft (1,524m) long ( Alt AMSL 66ft or (20m) On the outset you feel there is not a lot in the scenery, but there is a lot of really nice intimate details when you walk around the place. There are lovely old rusted hangars, and the detailing is quite good. The highlight was always going to be the terminal cum cafe which is very well represented here. My adage is that if you walk around a scenery and it feels like you are actually there then the scenery works from a realism point of view, and that is certainly the point here as I liked walking around KHAF a lot and taking in all the details. A nice little feature is that when the cafe is closed then the blinds come down and open/closed sign on the cafe door changes as well, I like that. Finer small details are well done with a fruit stand across the road and a great worn and rusted fuel depot. Most of the scenery consists of aircraft storage with both modern in container style and older more of the worn style hangaring. They may be not the most visually interesting buildings but it is faithful to the airport, so it works very well. One hangar in 58-9 is for your own use. This hangar is fitted out for you to use and even customise to your own specifications, which is a great feature. There is a lot of options you can do with your hangar including changing the poster on the wall and 10 are provided including B17, Cropduster, F35, Jumbo, Mustang, RD Logo (default), Trainer, US Flag, Yee Haw or you can insert your own image as 1024x512 in dimensions and as a .png file. Other options include seven different metal beam colours, two types of lighting in strip or old fashioned bulbs and a clean or dirty hangar. There is full details on how to change all the different options in the manual, but you do have to overwrite the main scenery files, but RD Designs do make that easy by a folder set up. I used a different way than recommended by using the MOD (JSGME) tool to switch over the files, this way I didn't touch the original files and I could switch them back and to as I wished. You can place your aircraft inside the hangar, but it is quite small. The Bonanza F33 just nicely fitted, but the Phenom... well it just didn't. Other areas to see is a SFPD Police car storage and maintenance area with nice well done mobile cell towers set behind. Surface features All runway and taxiway surfaces are excellent, but more than that they are also reflective, and beautifully so if there is a little rain around. They are quite lovely in the right lighting conditions. Animated Trees and Powerlines One feature that is new to X-Plane is animated trees and powerlines... The 3d trees move in accordance with the current wind speed and close up it is very effective as they swish in the wind, as do the powerlines which you can set at three speeds, none, light and full movement positions. But even if this is a really great feature, I certainly don't like the look of the trees... (boo hiss). It may be the X-Plane11 lighting effects but they don't look not very realistic at all, in that the heavy cross form of the trees that is heavily highlighted and quite badly. I loaded in the extra provided standard 2d trees (above right) and they didn't look much better either? great idea though, but it basically doesn't do what it is supposed to do and that is to look and make the scenery be realistic. The grass is as noted very good when close or on the ground, and fills out the large areas of the scenery. You also have the choice of different grass volumes in density if you are short on performance. Pillar Point and Princeton by the sea The Pillar Point AFS is a big focal point in the scenery, but so also is the Princeton township not to be confused with the Princeton in Colusa County. The great othrophoto ground textures really bring out the Pillar Point landscape with a great fusion of detail as it moves into the sea, the coast line around the scenery is first rate and no doubt the AirForce Station is a real landmark in this scenery. Princeton by the sea is well recreated, but the ground textures are not overly minute, so you get a slightly spotted ground in some areas instead of detail, but it is overall very good. The Pillar Point Marina and Oceano Hotel and Spa is the centre point of the township (manual notes it as the Pacifico Hotel?). Marina is very well done with a lot of detail and static and animated yachts piling the harbour. The Oceano Hotel is really well done and stands out on any RWY30 arrival. The townships buildings themselves are a bit generic, they however show flats and units were as Princeton it is far more industrial and filled with large sheds and shops (boating and marine is big here). Pillar Ridge Trailer park is well represented and detailed. Lighting The lighting effects are a real mixed bag... on the one hand they are really brilliant, but in some areas they are quite basic. This is a daylight hours operational airport and so the lighting at night is always going to be low key. I am sure the lighting is correct, but RWY30 approach is well done, but the RWY12 approach has no end of the runway marker lighting? Airport buildings and field lighting is very good... ... no qualms about that area at all, and the Chevrol Fuel area is a highlight. The scenery also comes with the great feature of the field signage is reflective with the ground, which is excellent. But Princeton by the sea is a bit average? Oceano Hotel lighting is quite bland, and except for some street lighting the township is quite dark, no housing lights or lit signage to bring it alive? Trailer park is far better, but overall the township is quite dull at night. Summary There is no doubt there is a lot of passion felt in this scenery as the developer has had a personal investment and direct involvement with this airport... and it shows via the excellent detail and all the love that has been lavished here. You also have to take into account that this is Rising Dawn's first scenery release and overall it is a really good one with a lot of optional features like the dynamic hangar you can tailor to your own tastes, choices of trees and performance options. Great clever features like animated trees and powerlines, brilliant modern X-Plane11 features for excellent surfaces and lighting and in many areas it is outstanding. But in a few areas it is a little basic. Those trees are certainly great in action, but look very old fashioned in overall context, more X-Plane8 than 11 in distance viewing, which is a shame as they are a focal point and major feature of the scenery. The township is a little a) rushed to finished or not quite b ) thought through. If you look at Beti-x townships like you would then know why? buildings that match the area and are correctly lit with signage, it feels a little rushed or unfinished, the Oceano Hotel and Spa and Marina however are excellent. Overall the KHAF - Half Moon Bay scenery is outstanding if you like these small drop in and fly out scenic airports, the excellent orthophotograpic images are excellent from the air and that makes this scenery a very worthwhile destination. Yes I loved KHAF - Half Moon Bay, great general Aviation scenery with a lot of great clever features, a worthwhile addition to your collection. ______________________________________________________________________ Yes! the KHAF - Half Moon Bay by Rising Dawn Studios is Available now from the X-Plane.Org Store here : KHAF - Half Moon Bay Your Price is US$19.90 Features: Highly detailed rendition of Half Moon Bay Airport Photo scenery coverage of the airport and nearby areas with 0.3-0.6 cm's per pixel High resolution day and night textures Animated 3D trees which sway according to wind strength Ultra detailed pavement and runway markings, with reflections Baked in ambient-occlusion effects Realistic grass, with customizable density Animated powerlines A special night mode on the terminal building Requirements : X-Plane 11 or X-Plane 10.5 Windows, Mac and Linux A video card with at least 2GB of dedicated VRAM - 4GB+ VRAM Recommended on X-Plane 11 Current version: 1.2 (Last updated August 25th 2017) Note: X-Plane11 features only work in X-Plane11 Installation : Download scenery file size is 310.90mb. With RD_KHAF_Airport (327.10mb) RD_KHAF_Ortho (170.95mb) In being inserted into your X-Plane "Custom Scenery" Folder Note the "RD_KHAF_Ortho " must be listed in the .INI situated UNDER the "Airport" file to work. I found a (major) conflict with ground textures (Ortho) with Tom Curtis's "Golden Gate+South Bay" scenery, so you can't run both sceneries at the same time... sad. select via the X-Plane "Graphics" menu for "Draw parked aircraft" tickbox off for realism. Extras including hangar customization and performance are created by replacing the original items with the extensively supplied versions. They are supplied in a folder sequence to overwrite the current scenery files (very clever), but I found the JSGME Mod Enabler MOD tool more helpful and quicker. Documents Provided document is a full detailed manual and much included with more information and history: RD_KHAF_Manual ______________________________________________________________________ Review by Stephen Dutton 27th August 2017 Copyright©2017: X-Plane Reviews (Disclaimer. All images and text in this review are the work and property of X-PlaneReviews, no sharing or copy of the content is allowed without consent from the author as per copyright conditions) Review System Specifications: Computer System: Windows - Intel Core i7 6700K CPU 4.00GHz / 64bit - 16 Gb single 1067 Mhz DDR4 2133 - GeForce GTX 980/SSE2 - Samsung Evo 512gb SSD Software: - Windows 10 - X-Plane 11.02 Addons: Saitek x52 Pro system Joystick and Throttle : Sound - Bose Soundlink Mini Plugins: Environment Engine by xEnviro US$69.90 : JARDesign Ground Handling Deluxe plugin - US$14.95 Scenery or Aircraft - Piper PA30 Twin Comanche by vFlyteAir (X-Plane.OrgStore) - US$29.95 - Review here: Piper PA30 Twin Comanche
-
Aircraft Review Update to X-Plane11 : Cirrus SR20 G1000 v2.5 by VFlyteAir With the introduction of X-Plane11 there has been a huge amount of upgrades from developers in meeting the requirements of the new simulator version. That is to be expected as you will want, and sometimes quickly need to fly your favorite aircraft in X-Plane11. The amount of changes to meet the X-Plane11 requirement though has been a broad spectrum, from the very basic requirements to a full makeover of the aircraft. So here is the Cirrus SR20 from vFlyteAir getting its own makeover to meet the new X-Plane11 requirements, and it is quite a significant makeover at that. I really liked the vFlyteAir version of the Cirrus SR20 (Carenado has a SR22 GTSX version), and in my SR20 review I came away seriously impressed. vFlyteAir if you have been following my reviews has also under gone a serious change as developers over the last few years since that SR20 release, not only is there more developers now contributing internally to their aircraft, but their quality and features have been seriously upgraded into one of the now top level and these extremely talented X-Plane developers, So with that in mind then let us get straight into what this new version has to offer. The original modeling was fantastic anyway, but the X-Plane11 shine has added in another extra level of quality as soon as you look over the SR20. The wing surface areas and their sizes however are slightly adjusted to match the real world versions and the wing airfoils are custom created from Roncz Laminar Flow airfoils to give a more realistic feel and handling and remember that is matched up to the different X-Plane11 performance modeling, so the aircraft will and does have a more natural feel under your control. First noticeable difference is the old menus are gone and have been replaced with vFlyteAir's current new menu system of a "Pre-Flight" popup menu and a "Weight & Balance" popup menu. The menu tabs are bottom left of your screen. Beautiful and extensive, they are very different and far more functional than the originals. "Pre-Flight" Pre-Flight covers mostly your ground elements in both opening the forward up swinging doors and the baggage door with wheel chocks and pitot covers. Options include, On-Screen notifications, Glass Reflections (on/off), nose gear steers and hide passengers in interior view. There is also indicators of the fuel tank loads for the left and right tanks. "Weight & Balance" The second popup menu is the excellent visual Weight & Balance menu. Fuel weights in both tanks is to 28 Gal per tank, you can also set the weights of each of the pilots and passengers on the aircraft, moving the sliders will set the weights and also make the pilots and passengers appear in the aircraft, this is great as you can have as few or as many passengers in the aircraft as you require, and even the pilot disappears if you want an empty aircraft. Luggage weight is also available and the bags appear in the baggage compartment as you adjust the slider. There is a very good adjusting CoG chart to get all the settings right and find the correct balance of the aircraft or if it is out of its flying limits. The full gross weight of the aircraft is also noted in lbs and kgs. Cabin The cabin was nice and light before. But PBR and X-Plane11 now gives all the materials a nice quality lift. The darker shadows take away a lot of the flatness and gives the space more realistic look and the realism is highlighted even more. It is an unusual cabin that is dominated by those huge two panel displays and the different single-column yokes (handles?). It is exactly the same cabin, but you know you are sitting in something completely different. Note the lovely seat materials that highlights these PBR effects. Reflections are highlighted even more. There is great panel and window reflections for great realism and so "keep your dirty fingers off my clean screens!". Note the excellent molded facia. CirrusPerspective system vFlyteAir has done its own variation but not a completely authentic Garmin system but a variation in the aircraft and noted as a "Perspective System", It is close. but basically it still keeps the standard X-Plane MAP system in place PFD (Primary Flight Display): Improvements to the PFD: Both the attitude indicator the speed tape, the altitude tape and the VVI are now custom-made, for a more realistic look and better readability, plus there are Improvements to the electrical system with the electrical load of individual systems adjusted and the PFD and MFD which are now on separate electrical buses. I prefer the older original PFD artificial horizon with the faded lighter elements (below right) than the complete harder colours of the new version (below left). The faded older version is actually the correct one. But the newer PFD is far more cleaner and far sharper after a full quality redesign, and lots of popup insets that include (pilot's) MAP, ADF choices, TIMER, NEARST AIRPORTS and FLIGHTPLAN. It is still however a very good PFD, nice to use without being to over complicated with menu trees. MFD (Multi Functional Display): To a point the MAP display still does rely a lot still on X-Plane basics, so there is no terrain or coloured map that is the usual with a G1000 system, it will be interesting how the coming Laminar Research default G1000 system will affect aircraft and in my guess that is certainly going to be in here in the future. But what you lose in map complexity you gain in speed and efficiency. Most G1000's in X-Plane at the moment (except Aerobask's) are very slow and sluggish so it may be a better system at this point. Both the PFD and MFD will pop out, but it is a strange 3d system that you can only move the screens in the left-right movement and not around the screen or resize them, but it does make working on them easier, but you have to move to centre the screen than they move to you... Flightplanning I really did like the vFlyteAir flightplan system of this SR20. It did allow you to very easily create X-Plane fms flightplans very quickly and so quickly it was actually easier to load up this aircraft, do up a flightplan in moments to save and then use in another aircraft, it is that good. That aspect has not changed here. You can use either the main facia input panel or the pop-out panel and both work about the same. My route is from WADD (Bali) to WADE on the northern side of Java. Press FMS to select the flightplan mode. And to start a clean flightplan you INIT the system and then press the centre of the FMS knob to enter the first waypoint. Obviously you are going to start the flightplan at your current airport position, so you will select the ARPT key, for other entries you can select FIX, NDB and VOR depending on the nav-aid. Then just type in your waypoint in this case WADD. An airport and the start of the flightplan will give you an aircraft leaving logo and the same aircraft arriving logo to finish the plan. If you wish you can add in the altitude to fly at as well. In v2.5 you can now also use more deeper segments including SID, STAR and Transitions and Approach procedures. This is activated by pressing the PROC button on the facia. But to access these procedures you have to set up your X-Plane navigation data perfectly. You will need your X-Plane11 GNS430 data up to date with the latest AIRAC navigation data from either Navigraph or Aerosoft's NavDataPro, plus you have to make sure the navigation data is also stored or inserted by the above purchased suppliers as CIFP data (folder) and both are present in your X-Plane11 Custom Data folder. Another important point is that both AIRAC cycles are the same and match, I had a v1701 and a v1709 cycle and until they were both updated to v1709 cycle the system won't work, that data cycle match is noted on the procedure page at the bottom. In my case for this flightplan it was a case of over reach as my selected SID "RAB3A" (RABOL) put me somewhere way over East Java and far past my destination, but it does show that the SID - STAR feature does work very well. Another point to note here is you can also centre your map on the waypoint you have selected, so you can easily check your full flightplan waypoints and range, route and they are all correctly inserted. Inserting intermediate waypoints is simple and very easy as, "bam, bam" or FIX, NDB and VOR then insert code and press ENT (Enter), then altitude (ENT again) and you are on to the next waypoint... and so the route is built up very quickly. CLR (Clear) if you make a mistake. The choice of either facia or popup keyboard makes it very easy to input waypoints as well, it is all in all just brilliant. PAGE menu popup allows you to DELETE, DELETE to END and a great feature in being able to simply REVERSE the flightplan. One thing you expect but missing from the PAGE popup is the SAVE and OPEN of flightplans to your FMS flightplan folder (Output). They are actually on the on the side of the display as a SD card, and SAVE is lower SD and OPEN is the higher SD card, note they only work on the instrument panel version and not the popup version. Checklists and Charts can also be accessed via the MFD and the charts can be inserted manually and you can load up to 20 charts in png files. Both engine output panels are still there with the side panel version and the full MFD version which is very impressive. Trims (arrowed) are also switchable on screen as well. Flying the Cirrus SR20 X-Plane11 It may look the same but the Hartzell Scimitar composite three bladed propeller is all new with custom airfoils that are refined to recreate the correct propeller control at high and low altitude. The SR20 is different in that you don't have a "Propeller" lever or adjustment in the aircraft, it is an automatic combined throttle and propeller control that allows the aircraft to maintain a 2500RPM cruise regardless of the power setting from 50% power up to 85% (depending on density altitude). The aircraft is quite tricky to turn from a standstill, so you have to have space to build up a bit of forward momentum before being able to turn the aircraft and get it wrong and the aircraft will fight you and stall any forward movement. So you have to be careful where you park the aircraft so you don't box yourself in. I'm not comfortable with this aspect as it is creeping in more to X-Plane lately and it makes GA's harder to turn. You can turn off the nose wheel steering, but it just makes it worse. So only a lot of throttle and too much speed when you are pointing in the right direction doesn't feel right. No arguments with vFlyteAir here, I think this is a particular Laminar/X-Plane annoyance. Once you are moving then the taxiing is fine, but it is really small in here... ... you do feel you are in a very claustrophobic tight aircraft and the high instrument cowling and intruding low hanging shade doesn't help either. You need a firm hand on the tiller to keep the aircraft tight to the centre line and the usual slow revs to higher power is crucial in keeping it straight, it is your choice in using flaps, but a long, long run down the runway to build up speed is still preferable to the sudden loss of lift you get if you retract the flaps and the drag at not building up the speed quicker with them extended in the air. Unusually you can keep that throttle full up against the top of the guide as the system will protect you from any overspeeds. Climb rate is 880fpm, but heavy at 2916lbs (3050lbs Max) then that can only be done in short bursts, 300fpm is the best to 5000ft in not losing too much speed in the long climb. Max altitude is a credible 17,500ft and range is with full tanks 625 nautical miles (1454 km) 719 miles. Did I tell you it is tight in here... The Cirrus does also bounce around a lot... even in light winds you feel the fragile nature of this small aircraft. I do have XPRealisticPro movements running on low settings, but even if I turn it off then it still bounces and bobs around as you hold on. But I like the feel, as you feel you are actual going somewhere and in something more than just a desktop simulation. Sounds are all now FMOD, nice and every switch or click is now very noticeable. External and internal sounds are excellent, but these smaller aircraft can be sort of buzzboxes, this Cirrus is not that bad, but you get the idea... overall sounds are now great. vFlyteAir's external work is excellent, top notch. Great detailing and modeling to almost perfection. X-Plane11 does bring out that shape and shine to the uttermost degree as all reflective surfaces with the bodywork and glass is faultless. It is also easy to confuse the rate of climb indicator with the vertical speed (V/S). On many aircraft this indicator does note the V/S, but here it is just the change in altitude that sometimes can be as much as 500fpm, which is alarming, but you get used to it. So you make sure the V/S is correct (right below) and get that right and the rate of climb will follow you later, but confuse them and try to control or follow the rate of climb indicator and you will get into trouble. You also have to watch when changing altitude with the knob, if you are bouncing around it is very easy to hit the reset to your current height as you try to adjust for a low (or higher) altitude, I once did it infuriatingly three times in one go. I found that using the flaps as an airbrake is very useful, the limits are quite high at 150 knts at 50% flap and 110 knts at 100% flap (full) so you have plenty of space to get them down to reduce your speed, but you have to control your throttle (a lot) to counteract the high drag, but it does give you far more control on the approach. vFlyteAir has worked very hard on the SR20's performance to match the real aircraft and it does show in X-Plane11, you work hard in here with this slippery little lightweight aircraft and certainly on final approach. Around 80knts is your goal at first and then 65knts -70knts at full flap as stall is around 56knts, it is easier said than done... Placing the aircraft down can be slightly tricky and I have a full load in this configuration, in winds and just you flying then it can be quite a handful. Ditto holding that centreline as the speed runs off, tricky but still doable. The point is you become a little addicted to this SR20, you want to try that, or this and get the pleasure of the reward when you conquer or master the machine, real flying, real life. Lighting The lighting on the original release was very average so it has had a lot of attention in this upgrade. Externally you get a centre taxi light (slightly weak) and two wing end lights, the navigation and strobe are excellent. Tiny side fuselage ice wing lights are very effective looking from the outside or from within. Internal lighting is a mixed package. Nice overhead lighting with a red area over the throttle which is lovely. Displays are adjustable and again very good at night. There are four overhead switchable spotlights, but they are not very effective? Spots are supposed to highlight, but especially in the rear they are not very effective. Liveries There was ten excellent liveries in the original release plus the default vFlyteAir livery. Now you get an extra six new liveries to add into the package. Two are excellent, but four are very high visibility bright in colouring, it is too your own taste really. Summary This was not just an update package to X-Plane11 for the Cirrus SR20 from vFlyteAir. It is in reality a full extensive upgrade to the aircraft that has a long list of new features and quality. This upgrade has certainly brought this already nice little aircraft up to vFlyteAir's higher newer standards, including new menus, FMOD sounds, PBR quality textures and the excellent performance enhancements. There is a debate with this really good Perspective G1000 system. On the one hand it is an excellent, fast and easy system to use and smash out flightplans in minutes, very, very good. But the map interface is quite old, in fact not only to the X-Plane 10.50 new GNS430 level but the old red line level. Certainly there has been improvements to the display (in fact for both PFD and the MFD) but it still feels oldish. All G1000 panels are now full colour and have terrain features, so you can see and undrstand the emptiness here. Laminar Research are releasing a full default G1000 very soon, so I will go and note that there is a good chance that aspect will be very quickly remedied with in a short time of that features release and that should give you the very best of both worlds in this aircraft, but not to forget this navigation system already does use the AIRAC navigation data and that data can be updated if you have an AIRAC cycle account. The Cirrus SR20 is an interesting little aircraft to fly. You have to be impressed by the Weight & Balance setup and sheer flexibility on how you load the aircraft, I love that aspect. And that loading certainly affects the way you fly the aircraft and its speeds, altitudes and range as it should do. But it can be tricky to fly really well, that is the stimulation of the simulation and why we test ourselves to fly anything and master the machine, so pilot's will love it, but learner pilots will take a little longer to understand its flying complexities, overall it is addictive and challenging... did I say fun, yes fun as well. Another great bonus here is that the upgrade to X-Plane11 is free, yes it costs nothing to upgrade from X-Plane10 to the X-Plane11 version and you get all those enhancements as well in the deal... you can't top that, great deal and with a great little aircraft from one of the master developers of X-Plane... all round a winner deal. _____________________________________________________________________________________ The Cirrus SR20-G1000 XP11 by vFlyteAir is available from the X-Plane.Org Store here : Cirrus SR20 G1000 And is priced at only US$29.95 Features Superb Model by vFlyteAir Photo-realistic textures by Igor Kirilove – all textures are very hi-res (4K), providing a very realistic look Fully animated model – all the details are in this model. Check out the door hinge mechanisms when you open and close the doors! Super accurate 3D modeling – the model is extremely accurate in scale and dimensions Great flight model by Alan Shafto / AeroSimGaming The following features are available on the Primary Flight Display (PFD): Artificial Horizon with high-resolution attitude indicator, flight director and roll scale Speedtape with custom display of reference speeds Altitude tape with custom vertical velocity indicator and minimums display Enhanced HSI with turn indicator and three fully configurable bearing pointers for GPS, NAV1, NAV2 and ADF Switchable inset windows for timer/references, minimums, wind, ADF, map, nearest airports, and flight plan Cirrus-style top bar with power setting, frequencies and detailed GPS & autopilot information On the Multi Function Display (MFD), the following features are available: Engine information system with switchable trim status Detailed system page with engine parameters, declutter mode, used fuel, remaining fuel, remaining range, remaining time, anti-ice & oxygen gauges, density altitude, temperatures, ISA deviation Basic support for SIDs, STARs and Approaches Custom user interface for creating and editing flight plans (accessing X-Planes navdata and default FMC) “Nearest” page for airports, navaids and related frequencies Cirrus-style top bar with destination window, frequencies and GPS information X-Plane default map with weather radar and traffic warnings with custom icons Interactive checklists and user-definable charts Other Notable Features: Hypoxia is simulated at above 12,500’ cabin altitude. The screen will begin to dim if you are flying above 12,500’ MSL. Use the OXY switch on the lower center console to turn on oxygen supply and avoid hypoxia! Oxygen supply is simulated – you have approximately 3 ½ hours of usable oxygen on board. The oxygen supply will begin to deplete slowly when the OXY switch is ON Anti-Ice fluid is simulated – there are 3.5 gallons of anti-ice fluid available. The supply will deplete when anti-ice switch is ON ICE lights are modeled – use the ICE light switch to inspect the wing leading edges for ice build-up at night The Cirrus BRS® parachute recovery system is modeled – click on the BRS handle on the cabin ceiling to deploy the parachute in case of emergency. NOTE: Engine should be OFF, and airspeed should be below 120 KTS when deploying the parachute! Cirrus “Single Lever Throttle Control” is modeled – the SR20 automatically adjusts propeller speed through the use of the throttle lever. There is no separately-controlled propeller lever. Customized HDR night lights – there are four dome lights inside the cockpit that will provide white flood lighting with HDR on in your rendering settings Custom exterior lighting – all lights on the exterior (landing lights, strobe lights and navigation lights) are modeled using X-Plane parameterized lighting. 10 Factory liveries provided – because Cirrus uses a special heat-resistant paint for their airplanes, the 10 liveries provided are based on Cirrus originals. Custom sounds – try opening the passenger or pilot door while the engine is running! Requirements X-Plane 11 (not compatible with X-Plane 10) Windows, Mac or Linux 2Gb VRAM Minimum - 4GB+ VRAM Recommended SIDs, STARs, and approaches require installation of additional navigation data, see user manual for details Current version: 2.50 - Last updated July 2nd 2017 _____________________________________________________________________________________ Installation : Download file size is 953.90mb to your X-Plane - GA Aircraft Folder. Installed file size is 911.00mb Documents : There is excellent documentation with a full tutorial, a avionics tutorial and a third document that covers the features of G1000 avionics system. Developer Support Site : Support forum for the SR20 _____________________________________________________________________________________ Review by Stephen Dutton 24th August 2017 Copyright©2017: X-PlaneReviews (Disclaimer. All images and text in this review are the work and property of X-PlaneReviews, no sharing or copy of the content is allowed without consent from the author as per copyright conditions) Review System Specifications: Computer System: Windows - Intel Core i7 6700K CPU 4.00GHz / 64bit - 16 Gb single 1067 Mhz DDR4 2133 - GeForce GTX 980/SSE2 - Samsung Evo 512gb SSD Software: - Windows 10 - X-Plane 11.02 Addons: Saitek x56 Rhino Pro system Joystick and Throttle : Sound - Bose Soundlink Mini Plugins: Environment Engine by xEnviro US$69.90 : XPRealistic Pro v1.0.9 effects US$19.95 Scenery or Aircraft - WADD - Bali XP by Aerosoft (X-Plane.OrgStore) - US$24.95 - WADE - X-Plane Gateway (X-Plane) - Free
-
Scenery Review : WADD Ngurah Rai International Airport Bali by Aerosoft For most Australians in traveling to Bali in Indonesia it is a rite of passage, a ritual like a Muslim on a pilgrimage to Mecca, a sacrament to the cause of being an Australian. It is not if but when you went to Bali, if you haven't been there then you are not one of our tribe as you haven't been through the ceremony and indoctrination of the Balinese culture while being totally paralytic and legless. It is the same rite of passage that the English make by going to Ibiza or Americans to Mexico. Bali is now a total tourist mecca, long gone now is the earlier sleepy island of lost grassed over monuments, and misty rice fields, the soft green Javanese volcanic hills and burning incense. The only soft green you see now is cultivated 5 star resorts lawns and lots of poor imitation branded goods to be sold at high prices, the selfie snapping hoards now easily outnumber the locals, but it puts food on their table and allows the Balinese to go the Thailand for a break, that is modern day tourism in all its glory. By definition Bali is actually not far from the mainland of Australia, but by a quirk of that most Australians live on the east coast of the continent it does take a 6hr 20m flight or more to get there.... and back. 14.8 million of these selfie hoards passed through the main gates of Bali at Denpasar and Ngurah Rai International Airport last year that is on a small strip of land called Tuban between Kuta and Jimbaran and is situated close to the tourist locations of southern Bali. The airport is named after I Gusti Ngurah Rai, a Balinese hero who died on 20 November 1946 in a puputan (fight to the death) against the Dutch at Marga in Tabanan, where the Dutch defeated his company with air support, killing Ngurah Rai and 95 others during the Indonesian Revolution in 1946. The Pelabuhan Udara Tuban, or Tuban airfield, was established in 1931 at the narrowest point on the southern coast of Bali. The airport was originally built as a simple 700 m long airstrip by the Dutch Colonial administration's Voor Verkeer en Waterstaats public works office. When first established the site only had a few huts and a short grass runway. The current airport has an east–west aligned runway and associated taxiway, with over 1,000 m of that runway's length projecting westward into the sea. In 1942 the airstrip was in use to stage fighter and bomber operations and received bombing damage from Japanese forces. It was repaired using PSP pierced steel planking. In 1949 a Terminal building and other aviation facilities were constructed and a simple wooden flight control tower was erected. In 1959 president Sukarno sought to further develop the airstrip. The new facilities were built as part of a $13 million (Rp 35 billion in 1959) renovation project. To allow jet aircraft such as the Douglas DC8 and the Boeing 707 to operate from Bali, it was necessary to extend the runway westward into the sea as any potential eastern extension of the runway was by now blocked by the expansion of the local fishing village. The International Airport Tuban was developed with the decision by the Indonesia government to further develop and rebuild the terminal building and extend the existing airport runway westward by 1,200 m to a length of 2,700 m with two 100 m overruns. The project, which lasted from 1963 to 1969 was named Project Tuban Airport and was for preparation of Tuban Airport for international operations. Land reclamation to project the runway and the two overruns by 1,500 m was achieved by taking material from the limestone rocks at Ungasan and sand from the river Antosari–Tabanan. With the completion of the temporary terminal and runway project at the Tuban Airport, the government inaugurated international air service on 10 August 1966. To meet the ever increasing number of passengers the terminal buildings were extended with construction of an International Terminal building undertaken from 1965 to 1969. This added international facilities to the existing domestic passenger terminal. The new Ngurah Rai International Airport was inaugurated the on 1 August 1968 by the then Indonesian President Suharto as Pelabuhan Udara Internasional Ngurah Rai, or Ngurah Rai International Airport. (edited Wikipedia) Aerosoft This Bali scenery is a conversion for Aerosoft by Caipirinha Games to X-Plane11 from the Bali X series by A-Flight Scenery, the word to note here is "conversion". First Impressions As I live in Australia it was always going to be the best way to introduce myself to Ngurah Rai International Airport is by flying from an Australian port. And as YBBN (Brisbane) is my nearest major port and that seems a great place to start. The ZIBO MOD Boeing 737-800 in VA Virgin colours also seemed to be the best equipment for the route as well, but a B738 is a little slower than a A330 which is also popular on this route, but the same as the A320 at 6h 20m flying time. This is not the first time for me to WADD, as there was a great but old WADD scenery around X-Plane for years and it wasn't bad, but I expect a far only a better experience with an Aerosoft scenery. Departure was around 13.30 (pm) for the 2512.36nm flying. One thing about flying around Australia is that there is not much out there, and mostly it is really just vast areas of nothingness, then more nothingness as you head out over the Timor Sea. My arrival via BENOA will mean a landing on RWY27 (3000m), this is the only ILS (110.30) approach to WADD as if you need to use 09 then that is a only a RNAV approach. Aerosoft do provide a great selection of both SID, STAR and RNAV charts and the full airport layout with excellent gate charts with the package (29 charts). If you fly a lot in the far east you will become accustomed to the hot mist in the tropics, and so with such a late of the day arrival the xEnviro created a lovely if perfect soup for our arrival. You may say, "come now Mr Reviewer!, I want to see something I am buying!". But that is not the point of first impressions in the fact that the idea is to give you a representation of what the scenery is like in a mood and feel way as well as the standard detailed overview of the scenery, this viewpoint may not give you absolutely clear images, but it does deliver an authentic feel of arriving in Bali. Approaching from the east via BENOA you arrive over Nusa Penida then WADD is straight direct west in front of you. From this direction the airport is just beyond a large lagoon with the two enclosing outcrops of Tanjungbenoa and Serangan. My pass over the outcrops gave me a great feel for the area as both are full of very authentic Balinese habitation, not X-Plane default scenery, but 3d created Balinese scenery... very impressive. My eyes then took in the over water Bali Mandara expressway system. At first I thought this was an X-Plane OSM (Open Street Map) mess up? but no the expressway is real and authentic. But then a sudden feel took to my bones... "something was not right?" my cross diamonds were correct on the ILS PFD (Primary Flight Display) but my eyes through the gloom told me something else? RWY27 ILS is not aligned? Two options, abort or go for the runway, I go for the runway as I feel I can adjust it enough over to the centreline... "That was a bit breezy!" but I managed not to screw up the landing, all those hours practising certainly paid off here. Once the speed had died down (and my heart rate was lower as well) I could again look out of the window at Ngurah Rai, and I really liked what I saw. It was all very different from the usual US and European style of design and it all had a very far eastern traditional feel, you were certainly somewhere different that was for sure. I was very impressed with the ground textures, the runway asphalt was good with concrete outer areas looked very realistic, lineage was excellent as well, but there was none of that famous Aerosoft grass that they do so well, but the actual grass colouring was very good. You can't allow yourself to get the landing wrong on RWY27, because at the end of it is a hard stone wall... this seawall (Dam wall) is well done and carries on and around the end of N7 and side P7 taxiways. Taxiway P7 leads you into the main apron area called " Northern Apron", it is very big, and there is a lot of gates to choose from, so it is best to pick the correct one you require before you arrive from the ground chart, the gates are mixed up as well in the fact "that what is the domestic or international gates", if you know it is not hard, but the layout can be confusing at first if you are not prepared. I really loved the airport's Balinese architecture, but there was some modern elements thrown in there as well. It was a really heavy dramatic arrival at WADD, not withstanding the ILS non-alignment, overall though with my first impressions I was seriously impressed. Aerosoft Ngurah Rai International Airport, Bali I Gusti Ngurah Rai International Airport IATA: DPS - ICAO: WADD formerly WRRR 09/27 9,842ft (3,000m) Asphalt Elevation AMSL14 ft / 4 m To understand extent of the full scenery package provided by Aerosoft is to look at the scenery from directly above... All around the lagoon in red with the airport to the bottom is the extended area of 3d modeling provided, it is a lot of buildings and and associated infrastructure that surround the airport, this does give you a great visual aspect in every respect to the departure and arrival and while on the ground. And you have to be seriously impressed by the object count and the 3d feel to it all. Everything is covered from the basic Balinese abodes to temples, hotel resorts, shopping centres, unit accommodation and warehouses. Not many developers have found the right transition from add-on scenery beaches to the outer X-Plane water, but Aerosoft have done that here... ... you have to be impressed by it. And this all comes with a 0.40m/pixel aerial imagery underlay, it looks and is all very, very good. WADD Airport There are two aprons in "North" and "South" The north is the main apron as the south is just mostly parking stands, private jet and General Aviation arrivals. The North apron has two terminals in Domestic and the newer larger International Terminal. The Domestic terminal is on the west end is the old original Bali terminal with its famous Balinese greeting gate. The new huge International terminal is mid-apron and it is impressive, and it has a long finger apron faced gate concourse with unique Balinese gate houses. Domestic Terminal These segments of adjoining L shaped buildings was the original Bali airport international terminal built in 1968. But with the newer and more modern International building being completed then the buildings were reconfigured with a merger of older and newly built areas to be a separated Indonesian domestic terminal which opened on 17 September 2014 with an area of 65,800 square meters, eight departure and seven arrival gates, 1 -16 with five passenger boarding bridges, as well as a number of counters — 62 for check-in, 4 for transit and 19 for ticketing. Note the exposed baggage carousels under the newest part of the Domestic terminal. Thankfully the famous "Bali Welcome Gate" has not been demolished out of existence with the changes and is still there and visible from the apron. International Terminal and Festival Plaza. International terminal has a similar but a more modern Balinese architectural theme and has separate departure and arrival halls was opened in Novemer 2013. Its capacity is up to 4,938,840 passengers a year. The departure area has 62 check-in counters. There are ten air-bridge gates 17-27 with one (27) usable for the A380. There is a well done strikingly well modeled roof on the International terminal, and it is highly decorated with Balinese style towers, arrival and departure roadways are set, but there is no animated traffic. The rear main carpark feels more Aztec than Balinese but then the cultures may be the same in some areas. Next to the International terminal is another and far larger and more impressive traditional Balinese gate and explore/rest area... ... that is connected with the Festival Plaza complex that separates the two terminals. ... and you have to be impressed by then how much the Balinese have gone to represent their culture at the airport, visitors note it is a very different arrival here at Ngurah Rai because of this cultural significance. Concourse gate detail is unique to say the least... ... In close up it is extremely well done with a huge amount of Balinese traditional architecture and elements, however there is a little transparency (blue) around the finer details that looks very early FS (Flight Simulator). There is a lot of ground equipment and ground support items, but not overwhelmingly so and the gates are well done but the gates are static and set too high for any boarding door connection. Cargo Area Far east on the north apron is the cargo area. These buildings were the old domestic terminal and they still look like more warehouse than terminal. The Fire Station is situated here as well, as is the excellent Aerofood ACS building which was the old domestic terminal reinvented. The cargo ramp space is good but tight for large (B747) sized freighters, there are ten stands 28 - 37 available with two helicopter pads at end of the far east apron. Control Tower The Control Tower is positioned mid-apron between the Domestic and International Terminals. The tower is highly decorated and feels small and old as it was part of the 1968 redevelopment. Tower view is excellent with both runway field views clear for any approaches or departures. However turn 180º and you will be fronted by the tower itself as the tower view is set too low? South Apron The south apron is just mostly empty parking stands for aircraft storage, private jet and general aviation arrivals and a few buildings to cater for those patrons. Here there is 16 stands 38 -53 and three helicopter pads on the west side. Like the rest of the modeling the buildings are well done, but there not much else down here. The textures for the concrete stands and areas is very realistic and looks and feels real. Two more areas worth noting is a Fuel Depot behind the Domestic Terminal and the almost same layout replicated on a outcrop of land into the Lagoon as you arrive on RWY27. Static Aircraft Aerosoft gives you the option of having local static aircraft showing or not. This is selected via the X-Plane "Graphics" menu for "Draw parked aircraft" tickbox off/on. You have to also download the Aerosoft static aircraft package (319.70mb) from a link that comes with the airport package. WADD in X-Plane11 Up to this point in the review you must be thinking "This is absolutely sensational scenery" and to a point it is. But I mentioned at the start of the review that this scenery is a converted scenery from Aerosoft's Bali X. As an X-Plane dynamic scenery it is however quite poor. There is no animated traffic, no animated gates (marginal), poor non-reflective glass or textures and the default ground routes and traffic flows are incomplete? This then leads into the lighting... Lighting Overall the Aerosoft Bali scenery is very poor on the lighting, basically you only have the X-Plane apron lighting and that is about it? In fact if that apron lighting was not visible then you would be hard pressed to see the airport at all at night? There is a little runway and taxiway edge light lighting and a RAIL on the lead into RWY27, but otherwise not much else. No centreline lighting or taxiway guidance lights, it is pretty dark around WADD at night. Thankfully the ramps are filled out, but there is only a few spot lights otherwise. Terminal building lighting textures are not much better and are a consistent bland old style FS light brown... ... lighting landside is non-existent, the main International Terminal is mostly in darkness as are all areas including the road networks with only the Fuel Depot and surrounding with a few spot lights spoiling the darkness. There is certainly a wasted opportunity or simply just no creativity in what could have been achieved here because the extensive well modeled Balinese buildings do have great lighting textures, but mostly their effects are just lost in the gloom. Services Most if not all Asian major carriers service Ngurah Rai. Other carriers like Emirates, Singapore Airlines, Air New Zealand and even KLM with their historic Dutch Colonial connections to the area still has services. Qantas is not a major carrier here with only Sydney services and so that leaves much of the selfie hoards to Jetstar, Virgin Australia and Tigerair, but in strange note Tigerair was denied access over an Indonesian diplomatic incident lately and has had to pull out of the route (for now). Domestic is covered by Garuda the Indonesian major carrier, but mostly now Indonesia is now full of cheap Low Cost Carriers (LCC). Lion Air leads the charge, with Sriwijaya Air, Batik Air, NAM Air and Explore and Explore Jet. Indonesia AirAsia has muscled in a lot, but in reality it is Malay airline and not Indonesian. Cargo operators are small with just Cargo Garuda Indonesia doing the honors. Summary There is not a lot of Asian scenery released in X-Plane, in fact this is the first significant Asian payware scenery I think that has been actually released, and after years in X-Plane and as I live in Australia then that aspect is a travesty? Asia is an exciting destination and there is a lot of this area of the world to explore. Bali is certainly a brilliant area to explore. There is some really great spectacular landscapes around Bali and close by East Java has some of the most exciting volcanic areas in the world, I know that because I fly over it all the time heading between Australia and Singapore. So yes this Bali scenery for X-Plane from Aerosoft is a significant release, and overall it is totally a very good scenery. The aspects of what you get in the not just Ngurah Rai Airport itself, with the extensive Indonesian layout surrounding the central focus aviation interest is spectacular and for that alone the scenery is a very worthy purchase. But from an X-Plane perspective the dynamic aspects are very poor, certainly the conversion was done by a none or not interested party in any aspect of X-Plane's features in fact there is very little of it, in fact I don't even know why it is called Airport Bali XP because there is so little X-Plane in it. The blame here rests on Aerosoft to make sure its branded products live up to its reputation, but it looks like that aspect also took a holiday here. The nightlighting in perspective is mostly X-Plane9, as are non-dynamic animations and not even the ILS is aligned? Basic stuff... But overall WADD Ngurah Rai International Airport Bali is well worth putting in to your X-Plane scenery collection as it is certainly a worthy destination to fly to and use extensively, just don't rely on that RWY27 ILS in poor or minimum visibility conditions. ______________________________________________________________________ Yes! the WADD Ngurah Rai International Airport Bali by Aerosoft is Available from the X-Plane.Org Store here : Airport Bali XP Your Price is US$24.95 Features: 0.40m/pixel aerial imagery for the airport and immediate surroundings High detailed custom ground polygons High detailed airport buildings with high resolution textures Custom modeled surrounding area of the airport for a true Bali look and feel Requirements : X-Plane 11 Windows, Mac or Linux 2GB VRAM Minimum - 4GB + VRAM Recommended Download size: 860MB Installation : Download scenery file size is 538mb. "AS_AIRPORT-BALI_XPLANE11" in being inserted into your X-Plane "Custom Scenery" Folder as a single "Aerosoft - WADD Bali" 718.30mb scenery file. You can also download the Aerosoft static aircraft package (319.70mb) from a link that comes with the airport package. This is selected via the X-Plane "Graphics" menu for "Draw parked aircraft" tickbox off/on Documents Provided are two documents in: Manual_Airport_Bali (English and German) Charts_Airport_Bali (29 Charts) ______________________________________________________________________ Review by Stephen Dutton 20th August 2017 Copyright©2017: X-Plane Reviews (Disclaimer. All images and text in this review are the work and property of X-PlaneReviews, no sharing or copy of the content is allowed without consent from the author as per copyright conditions) Review System Specifications: Computer System: Windows - Intel Core i7 6700K CPU 4.00GHz / 64bit - 16 Gb single 1067 Mhz DDR4 2133 - GeForce GTX 980/SSE2 - Samsung Evo 512gb SSD Software: - Windows 10 - X-Plane 11.02 Addons: Saitek x52 Pro system Joystick and Throttle : Sound - Bose Soundlink Mini Plugins: Environment Engine by xEnviro US$69.90 : JARDesign Ground Handling Deluxe plugin - US$14.95 : WorldTraffic 2.0 Plugin - US$29.95 Scenery or Aircraft - Boeing 737-800 X-Plane default aircraft with ZIBO MOD installed
-
News! - Reality Expansion Pack for Laminar Cessna 172SP by Simcoders Simcoders have released one of their Reality Expansion Packs (REP) for the default Laminar Research Cessna 172SP. Extensions of Laminar Research's default aircraft are becoming the rage lately, and that is not a bad idea either in just ask anyone about ZIBO's work on the default Boeing 738. If you are not familiar with Simcoder's Reality Expansion Packs then they are a plugin that adds in functionality into an aircraft that covers areas like: Realistic stall speeds & behavior Realistic climb speeds Realistic cruise speeds Realistic Weight & Balance Realistic taxi behavior Dynamic ground roll sounds The plugin changes the complete behaviour of the donated aircraft, and goes far beyond the basic set of systems in adding more features like: Complex Damages System Triggered by the pilot actions Based on real world data Target every system in the aircraft Meant to teach you how to correctly manage an airplane Full engine management and interaction! Realistic IO-360-L2A Engine Simulation Realistic propeller animations as never seen before on X-Plane Correct fuel consumption Oil System Realistic oil viscosity Interchangeable oil type Oil pump failures Realistic oil filter Injection Fuel System Realistic fuel pump behavior Realistic fuel filter Interchangeable spark plugs: default or fine-wire Spark plugs fouling Realistic Lean of Peak and Rich of Peak operations Starter Realistic startup procedure Realistic engine temperatures Fuel Flooding simulation The engine parts are damaged if not managed correctly Electrical & Avionics System Realistic Battery The avionics are damaged if on when the engine starts/shuts down Learn with the non invasive in-flight tips A tip about the conduct of the flight is shown when you are not flying the airplane properly A tip about how to fix the problem is shown when you damage the plane Interactive Walkaround Cockpit checks Aileron, rudder, elevator and flaps check Tire check and choks removal Tie-down removal Pitot tube check Engine cowl check Fuel quantity check Oil quantity and quality check Interactive towing Push, pull and steer using the joystick Towbar simulation Weight & Balance Tool Load the airplane and check the C.G. and weight limits at takeoff and landing The airplane behavior changes when the C.G. moves Popup Kneeboard Complete normal operations checklist Complete emergency operations checklist Complete reference tables (speed, fuel consumption etc.) May be shown/hidden with mouse gestures Simulation state saving Every single switch and lever position is restored when you reload the aircraft The battery may discharge if you leave it on and then close X-Plane As X-Plane is launched, the engine temps are restored basing on the elapsed time Maintenance Hangar Engine maintenance tab Electrical systems maintenance tab Landing gear, brakes & tires tab And! Stunning sounds Realistic engine clicks and stutters Dynamic ground roll sounds Real starter sound Fuselage wind sound Landing gear wind Independent touch down sounds Real avionics sound This is a complete package to totally enhance the standard C172 up to a payware standard aircraft, highly recommended... You do require X-Plane 11 to use this package, and it is available for all platforms in Windows, Mac or Linux Current version: 3.10 (August 17th 2017) _____________________________________________________________________________________ The Reality Expansion Pack for Laminar Cessna 172SP by Simcoders is NOW available! from the X-Plane.Org Store here : Reality Expansion Pack for Laminar Cessna 172SP Your Price: US$19.99 The Cessna 172SP comes free with X-Plane11 ____________________________________________________________________________________ News Announcement by Stephen Dutton 18th August 2017 Copyright©2017: X-PlaneReviews (Disclaimer. All images and text in this review are the work and property of X-PlaneReviews, no sharing or copy of the content is allowed without consent from the author as per copyright conditions) Images supplied courtesy of Simcoders
-
Aircraft Review : C208B Grand Caravan HD Series XP11 by Carenado The single Turbo-Prop Cessna 208B Grand Caravan was one of the earliest X-Plane aircraft releases back then in mid-year 2012, that is five years ago now to date. The first Carenado releases were really average to good, basically test pieces for X-Plane. Both the Mooney and the PA 32 Satatoga felt old before their release, but then in May we got some release images of the Caravan and then in June 2012 the aircraft was released in X-Plane. Finally X-Plane users got the glimpse and a taste of why in Flight Sim Land of all the reverence and praise that was lavished on Carenado. It was back then and to a point still now a great aircraft, but we also saw Carenado for what they really were and more importantly they were also taking X-Plane as a simulation platform seriously. That gamble paid off massively for Carenado as they now dominate most General Aviation releases in X-Plane, although I will admit a few other developers like vFlyteAir and Aerobask are now pushing them harder in quality in what was once only a Carenado domain. There is no doubt that the C208B Caravan has been a huge seller if not their best seller year in and year out for Carenado, and it is not hard to see why. It is an amazing aircraft but versatile as well. The aircraft is basically a workhorse, a short hop regional gap filler for two pilots and eleven passengers, or a single pilot and twelve passengers, and it's speciality is island hopping. Carenado also then broadened the C208B's already great attraction by an add-on and an extra in the form of a cargo version called the "Super CargoMaster", so now not only could you move your passengers point to point, but also cargo was now also the go. The great suddenly became the brilliant. I am not going to hide the fact that in the last five years I have done a huge amount of flying of both the passenger and cargo versions in this brilliant aircraft, the hours spent in the C208B's left seat are simply to large to count, but it must be a lot. So of the many aircraft I have spent flying in X-Plane then the Caravan must be at the top of my list and it is in my all time list as it came in at number 3. But I will admit with the transition to X-Plane11 the old bird was starting to feel a little worn around the edges, and that is despite a few nice upgrades (v2/v3) in the X-Plane10 run. So here is the X-Plane11 upgrade. And now this C208B aircraft is now X-Plane11 compatible. You will have repurchase the aircraft in full as well, but the cost covers all updates throughout the X-Plane11 run or about four to five years and Carenado have noted that there will be some great new features coming to the Caravan but not until the other listed aircraft have been upgraded as well, and don't forget that there is still the G1000 Executive version still waiting in the wings. C208B Grand Caravan HD Series XP11 This is both a light overall review and an upgrade review in one, because the original X-PlaneReviews Caravan review is now quite old from 2013 and so I think it requires an update and refresh on the aircraft. The first most significant detail is that the original add-on "Super CargoMaster" package is now part of the overall package. In other words you don't have to purchase a separate package and merge it with the main Carenado C208B Grand Caravan purchase to get both versions, and you can also change to both versions from within the one aircraft and not have two separate aircraft to switch between or reload. The standard three Carenado left lower screen tab menus are still here with C for the Views, Field of View and Sound adjustment which the same as usual for Carenado. D covers "Doors" in the Pilots and Co-Pilots door(s) (with a great swing down ladder) and a double (upper and swing lower) main Cargo door and on the passenger version a passenger door on the right rear side of the aircraft. The Caravan comes with a detachable lower cargo pod with opening doors, but the selection of opening the pod doors is a separate selection on the cargo, however the pod doors can then only be opened with the right side passenger door on the passenger version which is slightly odd. You can also switch to each the passenger or the cargo version here on this menu tab as well, via the lower left tickbox. (if you change the livery to either a passenger or a cargo version the type will also change automatically). Livery selection can also be done from this menu in selecting left or right to go through the options, personally I use the XP11 menu as it was quicker. O covers the "Options" on the lower third tab. First selection is the optional cargo pod and the then the static elements of Chocks, Tow Tractor, Pivot Cover, Engine and Prop covers. Lower selection allows you to have tinted or clear windows. This options menu also allows you on the passenger version to select the rear seating arrangements with either single seating for eight or single/double seating for eleven. I usually use the eleven seater. The option menu on the cargo version is the same except that there is no seating but cargo options. “Load Configuration 1” is with the parcels loaded and that adds “1607” Pounds to the aircraft’s weight. “Load Configuration 2” is with the parcels removed and no penalty of weight. The cargo area is very well presented with the webbing hanging with the space empty and everything tied down tightly with the load on board and when not used the hand aircraft puller is strapped to the rear bulkhead, there is a nice touch to the cockpit rear with a net over the the entrance to keep the cargo in place. External Detail I usually fly with the pod off, my flying in the Caravan is mostly passenger sightseeing or point to point airport connection services. The Caravan style is between a pure utility aircraft, but still has a miniature airliner feel as well with all those side windows (seven). For the job it is about perfect and in the real world it is extremely popular and would be a very hard aircraft to replace and most operators usually don't but with another Caravan. Since its first flight on December 9, 1982 and into service in 1983 there has now over 2,500 Caravans built and flying at a cost of US$1.95 million each (2017 costing). External detailing is phenomenal. Every rivet is counted for, all latches, hinges and handles are perfect, (ice) lighting surrounds, lovely flap tracks, vents, animated static wicks and antennas. Glass is superb with great reflections and a very slight convex look. In reality the earlier detailing on the Caravan is not much different here, but it has been totally enhanced with X-Plane11 features and of course with PBR or Physical Based Rendering (material shines and reflections) and the textures are all 4K and have been reprocessed for the best quality to FPS (framerate) optimization. So the most noticeable factor from the earlier Caravans to this version is the sheer gloss on the aircraft and the highlighting of the aircraft's construction. This is mostly highly noticeable with the wing construction and detailing, it is beautiful work, almost perfection. But in certain lighting conditions you get a frazzled feel, it can be a little over shiny for the eye, a slightly more wear and tear feel would be more authentic, but don't get me wrong this is the best of the best in detailing. The spinner is now chrome, real chome. Carenado always did do great chrome fittings but the extra shinyness now adds to the effect (X-Plane11 metalness effects). This shinyness is highlighted by the lovely curves of the lower fuselage and the air cooling vents. The Caravan has a powerful Pratt & Whitney PT6A-114A engine connected to that lovely crafted Hartzell 3-Blade Metal, Constant Speed - full feathering propeller... great stuff. Note that huge if slightly ugly right sided exhaust, but it does give off a great whine sound. The aircraft undercarriage support is also superb, there is a lot of animated flexibility and dynamic loading/unloading of the gear that adds amazing authenticity to the simulation. Minor detailing on the internal construction of all the wheels and braking systems are pinch perfect. Open the doors and the extreme detailing is even more evident. Looking into the cockpit you are immediately reminded on why the Caravan was such a big deal back when Carenado first released the Caravan. It was a modern cockpit (mid-80's compared to the other far older Mooney and the PA 32 Satatoga cockpits). Internal Detail That light on dark panel was and still is amazing as is the whole of the Caravan's cockpit. The panel is now even more dynamic with the X-Plane11 dynamic lighting effects, more realism and even more of a great place to be. All instrument and glass is reflective, instruments are all of the highest quality Checking around the panel there hasn't been much changed or added except that those tree style manipulators have been replaced by the standard half-moon style manipulators, this is for another reason as well as for just easier manipulation as they are required for the coming VR interaction. Those lovely hide away yokes do also have a working elevator trim, which is very usable. And above your head is still the standard tank switches and oxygen switch and dial readout. Your workplace seating still looks very comfortable and the quality is mindblowing, again the dynamic lighting brings something new to this already very familiar cockpit. Instrument Panel In reality this is not a really over complicated instrument panel and I think that is the overall sweetness on flying and using the Caravan. The row of engine status dials on the top row are (left to right) Torque, RPM Prop, ITT (Interstage Turbine Temperature), Gas Generator RPM, Oil Pressure PSI & Oil ºc Temperatures, Fuel Flow and both L&R fuel tank gauges dominates the panel, the lovely set of excellent annunciators that can be set for day and night visual brightness or test mode. Full Standard Six instruments for the flying pilot and the co-pilot with the Airspeed Indicator, Artificial Horizon and the Attitude Indicator on the top row and the ADF dial, Heading Dial/HSI and Vertical Speed Indicators set out directly below. Pilot has added Turn/Slip indicator below and Radar altitude (x100) meter. Left of SS is a VOR OBS pointer and Bendix King VOR data panel below. Far left is Prop Anti-Ice dial, Clock, and Engine Suction dial and approach marker lights. A nice working feature is the Voltage dial that has four switchable selections with Gen (Generator), Alt (Alternator), BATT (Battery) and Volt lower left is the external lighting switches and lower panel is six switches that covers the aircraft's Anti-Ice protection. There are also four rotary knobs for the instrument lighting which is in-direct and not back lighting, also here is the bottom brake pull and the Inertial Separator T handle that blocks debris coming into the main engine inlet. Air-conditioning and cabin heat switches and knobs are lower panel as well. There is a stand alone electrical and fuse raised box structure to the pilot's left... ... switches cover top - External Bus (GPU), Main Battery, Generator and fuel boost. Lower panel - Standby Power, Ignition, Engine Starter, Avionics Standby, Avionics Bus Tie and Avionics 1&2 OFF/ON. By today's standards the avionic package here is quite basic for a working aircraft. Top is a Bendix King KMA 24 radio set, with below a default X-Plane GNS 430 (COMM 1 and NAV1) settings. Mid-panel is a Bendix King KX 165 COMM 2 and NAV 2 (VOR) radio and a Bendix King RDR 2000 weather radar with the X-Plane radar overlaid below. Right stack has top a Garmin GTX 320 transponder then below a Bendix King KR87 ADF radio with finally the Bendix King KFC 150 autopilot. The autopilot has a indication panel and altitude adjustment, vertical speed adjust panel on the pilot's side top right. Throttle Pedestal Mid lower panel is a nice throttle pedestal. Left to right there is a power lever to be used only in emergencies, then a single main "Throttle" lever with a "beta" reverse gate. The "Prop" lever is for MAX and MIN RPM and gated lower is the feather adjustment. Then there is the "Condition" lever again gated with High and Low idle and the lower gate is the shutoff. Far right is the "Flap" setting in Up - 10º (150knts) - 20º Full (125 knts). Left pedestal is the elevator trim wheel and front panel is the aileron trim knob and rudder trim wheel. There is the main fuel shutoff pull knob as well. Flying the C208B Grand Caravan I have done this YMLT (Launceston) to YMHB (Hobart) route about twenty times so I know it backwards, with a few heading notes I don't even have to put into the GNS430 a flightplan. It is my usual passenger transfer with a little bit of sightseeing thrown in to the deal. I tank up per tank of 765lbs or 1531lbs total with a full weight of 7840lbs, a fair bit of fuel, but then I wanted to return to YMLT directly without refueling at Hobart. A glance around and all the seven passengers are in and the baggage is loaded. I have asked (nicely) for Carenado to put their excellent animated pilot and co-pilot as passengers for years, but still we have to pretend that there people in the rear. Starting up of the Caravan is still one of the great aircraft engine starts in X-Plane. You don't get FMOD sounds here (yet), but Carenado's 3D 180º controlled sounds are just as good if not better for all the different sound ranges and bass depth. Put the ignition switch on and set the starter... you get nothing for a short while and then that familiar faint whine grows from somewhere deep in the front of the aircraft, still the whine grows louder until finally the propeller starts to turn in to action. The start sequence is full automation, hit the switch and just wait. Even after years of flying the Caravan I still question if the External (GPU) actually works? I have pressed the switch (arrowed) but there seems to be no action and the battery has a habit of quickly discharging, so my guess is no. Once the engine temps are good I pull the condition lever back to idle and a RPM of around 650RPM. The original Caravan was a little bit faster in the idle, but it looks the new X-Plane11 performance settings have settled it down a little, for taxiing you don't have to fight it as much as you did in the past with far too much power. In fact the 208B feels quite perfect now. Power up and the whine builds, but so does also the deeper turbo grind, so familiar but still neckline hair raising fantastic, this is the Caravan we totally love. As noted the 208B is far easier to taxi without fighting the too powerful thrust now in the condition low idle setting, a big nice change... but don't forget to put the condition lever into the "High Idle" position before takeoff... or you won't, well takeoff. The asymmetric thrust will still pull you really hard to the left with all that very powerful 675shp Pratt & Whitney pushing you forward. So you have to be aware right from the point you let the brakes go to give only a little thrust until you can lock the nose-wheel in straight and then give it full power after a certain speed and usually around 45knts. It works but still with a little deft right rudder. The C208B will however still try to wander and you are working hard with the yoke and the rudder to keep it sweet on the centreline I’m also very heavy here ( 7840lbs) so that slightly helps, but the speed climbs quickly to a rotate at around 95knts. Climbing out and into a turn to the due southwest (210º) I settle in at a 1000fpm (feet Per Minute) climb as 1,234 ft/min (6.27 m/s) is the maximum. But even with this weight the Caravan takes the tight turn and climb all in it's stride. As I am so familiar with the Caravan I know its limits, I know how far to push the aircraft before it will fail me, and the 208B has a fair bit of slack in that area, it is a very sturdy aircraft, sweet to fly and manoeuvre but you need a firm straight hand on the yoke and rudder. One thing I do notice more on this XP11 version is the green window tint is quite strong in the glass reflections, it is highly noticeable if not slightly distracting. There is the short straight route to YMHB, or the scenic route which is going straight southeast out from Launceston and hitting the coast around the spectacular Freycinet National Park and the famous Wineglass Beach, clients don't mind the extra cost or time as the Tasmanian east coast views are worth the detour. But first you have to climb high to clear the Ben Lomond National Park, and so I set the altitude to 7500 AMSL. My passengers were also not getting a lot of views for their cash either as the cloud cover was pretty extensive... The Caravan has a Cruise speed of around 197 mph (171 kn; 317 km/h) and a Range of 1,240 mi (1,078 nmi; 1,996 km) with max fuel and reserves. Your ceiling is an amazing 25,000ft as you have oxygen on board, but I have never really flown over 15,000ft. The Bendix King KFC 150 autopilot is a treat to use, quite simple but effective. Vertical speed can be a simple up or down, or you can set the separate digital display in the rate of climb and then ARM the altitude you want to hold. I found that you can't have the manual trim set (via your joystick or in my case x56 throttle twist knobs) as it interferes with the aircraft's trim systems, so I had to disconnect the x56 controls. As I neared the east coast I could descend down through the thick cloud to see if the views would be better and more effective. But I would still have to be careful as there is still a fair bit if land elevation around the Wineglass Bay area, in other words it is hilly. Note the blue ignition on warning light? I have lived with this one for years, in the fact that if you start the Caravan with the engine running then the ignition light stays off, but start the 208B from cold it stays on even if the ignition switch is now off, it is more annoying than you think. Coming out of the lower 4000ft cloud base I got a real "whoa" moment. It wasn't dangerous in a sense of the word, but it still needed a hard turn south so it wouldn't become an issue, my altitude was set at 3500ft for the sightseeing. My passengers only got a quick glimpse of Wineglass Bay, the weather is nothing I can control, and thankfully the further south I flew the brighter the weather became. You get a great view out of the Caravan's cabin windows, that is why these aircraft are great in the sightseeing role, but in some lighting conditions the the glass reflections can be very strong. In the new strong light you can see the excellent X-Plane11 PBR lighting effects and how beautiful they are on the Caravan, it certainly is glossy and the light is fantastic (I popped the pod back on for the full dynamic effect) but I will admit to debating (with myself) if the Caravan is too glossy in this form, sometimes it feels like there is to much gloss and other times it is just right, so I am in neither camp. I have spent countless hours over the years looking over this view out of the Caravan, I still totally love it and you still admire how great an aircraft it is. The Caravan is one of Carenado's greatest successful aircraft even after all these years, that actually comes with no great surprise, and now in X-Plane11 form it certainly goes up a notch again. Time is getting on and the light is starting to fade. I usually go further south and around the peninsula and give the patrons a view of the Port Arthur Convict site as part of the deal, but today I am taking a short cut over Blackman Bay and directly to Dunalley Bay which leads into Frederick Henry Bay. The views are still spectacular, and once over the passage I see YMBH's lights far to the west of Frederick Henry Bay . I drop the altitude another 1500ft to 2000ft and start the approach phase as the light faded more... The Caravan's amazing instrument panel in-direct lighting (the main Standard Six dials are also backlit) is still spectacular, it is adjustable as well. Overhead lighting is provided by a single roof mounted light that gives the cockpit area and the panel a more workable light, the adjustments knobs though even with the new manipulators can still be hard work, you have to grab and pull hard to make the knobs turn, there is also plenty of spaces for extra lighting switches on the lighting panel. But the lighting overall is disappointing. Carenado pioneered great lighting effects that allows spot lighting to be adjustable, fade in and out and manoeuvrable in aircraft cabins. But here it is just plain dark back there, and the external Ice/Wing light doesn't work either? Externally you have taxi and landing lights on both outer front wing edges, and the standard beacon and great strobe effects. It may or may not be correct per the performance of the C208B but I always put the condition lever to the "low Idle" position before landing, yes you lose a slight bit of performance... but rather that than the huge fight to control the speed after landing with the thrust level too high to stop you cleanly and without wavering all over the runway and then losing direction in trying to bring "that damn lever back" to control the aircraft, I find I still have enough power and more control with it set even in the "low idle" position. I am learning that the performance of aircraft in X-Plane11 is quite different than before in X-Plane10. Certainly in the final landing phase. In the Caravan that sense is heightened. The area in question is throttle management, the ratio of speed to power. The stall point of the Caravan is 70knts, but let the airspeed drop below 100knts here on approach and you suddenly lose height, this is becoming a common theme if you have been reading other reviews since X-Plane11's release. The control is there and luckily the flap limits are quite high on the Caravan with 150knts for 10º and full (20º) at 125kts, so you drop 10º then adjust your speed then later the full 20º to 75knts on final approach. But by controlling the throttle (which you do a lot) can gain you either more height with more power or with less throttle to lose height, pure aircraft control. Certainly this effect was there before in older X-Plane versions, but the effect in X-Plane11 is certainly more finer and more noticeable now in the feel factor. I find it quite exciting and I feel I am having more control over the aircraft in flight, a fine tuning area but a very important one and the Caravan really brings that effect out more than other aircraft I have flown lately in the past. In other words you are flying far more by you throttle inputs as much as your hand and feet input. Get it right and you will boast about your landing for days, but it does take a fair bit of practise to be perfect. One highly noticeable change in the XP11 version is the "beta" or reverse thrust position that gives you full reverse thrust after landing. It still works as usual by the gauge (arrowed) on the Prop dial, but you don't get that "roar" of sound you used to have? It is now more of a whimper? (I checked both high and low idle positions). Passengers note the trip as "exciting" and "amazing" but I have flown the route in better conditions, but there is overall a more intimate feel with this X-Plane11 version than I can remember in the past with the older X-Plane versions of the Caravan, and that is a really great thing. Liveries The sets of liveries for both the Passenger and Cargo versions are the same as in the past, and any older liveries that you have collected don't work either. Included is for the Passenger version the: standard blank, Camo (camouflage), Exec 1, Exec 2 and that excellent GoTropical. There are three Super CargoMaster liveries with the: Civil, FedEx and DHL. You get the Civil Cargo livery with the package and the two other liveries in the FedEx and DHL can be downloaded here.: Carenado FreeLiveries Summary This Cessna 208B Grand Caravan and optional Super CargoMaster has been one of the most successful Carenado aircraft in X-Plane to date, and it is really not hard to see why. I have loved the Caravan and more than most aircraft in X-Plane over the last four years because it is so versatile and just really a great aircraft to fly. The release of the Caravan in X-Plane11 bring certainly all the great features of the new platform including PBR (Physical Based Rendering) and the performance enhancements that are really noticeable in the pilots seat. The added feature of both the passenger and super cargomaster versions together in one package also adds hugely into the appeal. A lot of work has gone into the quality of the detailing for X-Plane11 and quality is what Careando are known for. But in another point of view, if you know the Caravan really well you won't really notice anything new or different in new features, from the pilot's seat you have the same position as you always have had but just only now in X-Plane11 with its excellent features, that is a positive but also a slight negative. The lighting feels old, because internally it is compared to most later Carenado releases and the no Ice/wing light is highly noticeable, no new liveries over four years is not going to be fun either and since now the older custom ones now don't work either. (I lost fifteen liveries, gulp) Carenado have noted though that FMOD audio, full VR support, SASL 3.0 upgrade, re-vamped pop-up windows and more are coming along in the update path, so my advice is to enjoy now and that more changes and features will come along as part of the overall package. This is as noted a new purchase of the aircraft in full as well, but the cost does cover all updates throughout the X-Plane11 run or for about four to five years and any new features that Carenado have promised to add in to the overall package and I think that is overall a very good deal. So here is one of the greats, and the Grand Caravan now comes in X-Plane11 clothes and performance. If you have read this full review, then you would know how important this aircraft is to my X-Plane flying, now in X-Plane11 the flying can now go on (and on) and I know I will absolutely love every moment of it, as a validation of a great aircraft this Grand Caravan is then one of the very best and you simply can't go any higher than that... _____________________________________________________________________________________ The C208B Grand Caravan HD Series XP11 by Carenado is NOW available! at the X-Plane.OrgStore 208 Grand Caravan HD Series Price is US$34.95 Notes: For WINDOWS users: Please ensure that you have all the Microsoft Visual C++ Redistributables downloaded and installed (click here) Features: Specially designed engine dynamics for XP11. Flight physics designed for XP11 standards. Ground handling adapted for XP11 ground physics. Physically Based Rendering materials and textures. PBR materials authored with industry-standard software used by the film and gaming industries. X-Plane GNS430 (FPS friendly) Ice and rain effects VR compatible click spots. Goodway Compatible. Realistic behavior compared to the real airplane. Realistic weight and balance. Tested by several pilots for maximum accuracy. Dynamic loading/unloading of 3D parts and plugin logic for FPS optimization. Requirements: Windows XP - Vista - 7 -10 or MAC OS 10.10 (or higher) or Linux X-Plane 11 CPU: Intel Core i5 6600K at 3.5 ghz or faster. Memory: 16-24 GB RAM or more. Video Card: a DirectX 12-capable video card from NVIDIA, AMD or Intel with at least 4 GB VRAM (GeForce GTX 1070 or better or similar from AMD) 570MB available hard disk space Installation and documents: Download for the C208B Grand Caravan HD Series is 498.40mg and the unzipped 589.20mb file is deposited in the "General Aviation" X-Plane folder with this aircraft version X-Plane11 only. Documents C208B GC Normal and Emergency Procedures PDF C208B SC Normal and Emergency Procedures PDF C208B GC Reference document PDF C208B SC Reference document PDF KFC150 Autopilot PDF Recommended Settings XP11 PDF _____________________________________________________________________________________ Review by Stephen Dutton 16th August 2017 Copyright©2017: X-PlaneReviews (Disclaimer. All images and text in this review are the work and property of X-PlaneReviews, no sharing or copy of the content is allowed without consent from the author as per copyright conditions) Review System Specifications: Computer System: Windows - Intel Core i7 6700K CPU 4.00GHz / 64bit - 16 Gb single 1067 Mhz DDR4 2133 - GeForce GTX 980/SSE2 - Samsung Evo 512gb SSD Software: - Windows 10 - X-Plane 11.02 Addons: Saitek x56 Rhino Pro system Joystick and Throttle : Sound - Bose Soundlink Mini Plugins: Environment Engine by xEnviro US$69.90 : XPRealistic Pro v1.0.9 effects US$19.95 Scenery or Aircraft - YMLT - Launceston, Australia 1.2.0 by CDG (X-Plane.Org) - Free - YMHB - Hobart International Airport & YCBG Cambridge Aerodrome 1.0 by tdg (X-Plane.Org) - Free - AustraliaPro 2.03 Beta by Chris K (X-Plane.Org) - Free (recommended for any Australian flying!)
-
X-PlaneReviews : 4th Anniversary Competition!
Stephen replied to Stephen's topic in Comments and Announcements
tinmug said: The story of the twin, the sweaty palms and the forgotten hamburger. She has been described as perfect, beyond compare. She can only be replaced by another which, no doubt, will want to take you a little left. Or perhaps right. Every one has her own way. This is as much about the twin as it is about the shapely perfection in between. About marking territory, then going off to find new horizons. It's about the incredible DC-3. And more specifically, the VSkyLabs DC-3, as so thoroughly outlined in the xplanereviews write-up right here. Pilots are like quite simply like this. Seduce the practical J3 today, want the racy P51 tomorrow and yearn for the twin the day thereafter. It's in our blood. We want more. We want it all. But this particular twin makes us sweat. Sweat and work at it like no other. Makes us focus on the task, eyes never straying from the intimate details. The mind is always trying to keep abreast with the twin's zesty streaks. A sense of fun, adventure, accomplishment all rolled into one noisy yet utterly memorable affair. Why this twin? Perfection is why. Like no other you are implicitly aware that you are kept aloft by those five shapely foils. The lightest touch provides a response, and not always what you had hoped for ... feisty. Never entirely predictable. Always striking, enthralling and bewitching. Satisfy her needs and you walk away with a wry smile. And you'll be back, wanting more. To go further. A little better this time, more balance, more anticipation. The twin knows about the J3 and the P51, and she doesn't care because she knows you will have to be back. Why this twin, an not the other? The sweaty palms, her response to your touch, the aural sensation and perhaps the fact that when you first had your way with her every other gal was a hemisphere away. Whole days – weeks! – spent with her perfecting your touch, the never-ending endeavour to please her and enjoy the journey even more than the destination. Because she is unsurpassed. And all that for the price of a hamburger.