Stephen
-
Posts
2787 -
Joined
-
Last visited
-
Days Won
391
Content Type
Profiles
Forums
Articles
Everything posted by Stephen
-

Aircraft Review : FlightFactor Boeing 757RR-200
Stephen replied to Stephen's topic in Airliners Reviews
The B757 is a bit more deeper than the B777, If you are struggling with the bigger Boeing you will find it slightly harder with the B757... However the checklist system on the B757 is very good, If you learn through that then you could then go back to B777 with the same information... You don't say in what area you are having problems? -
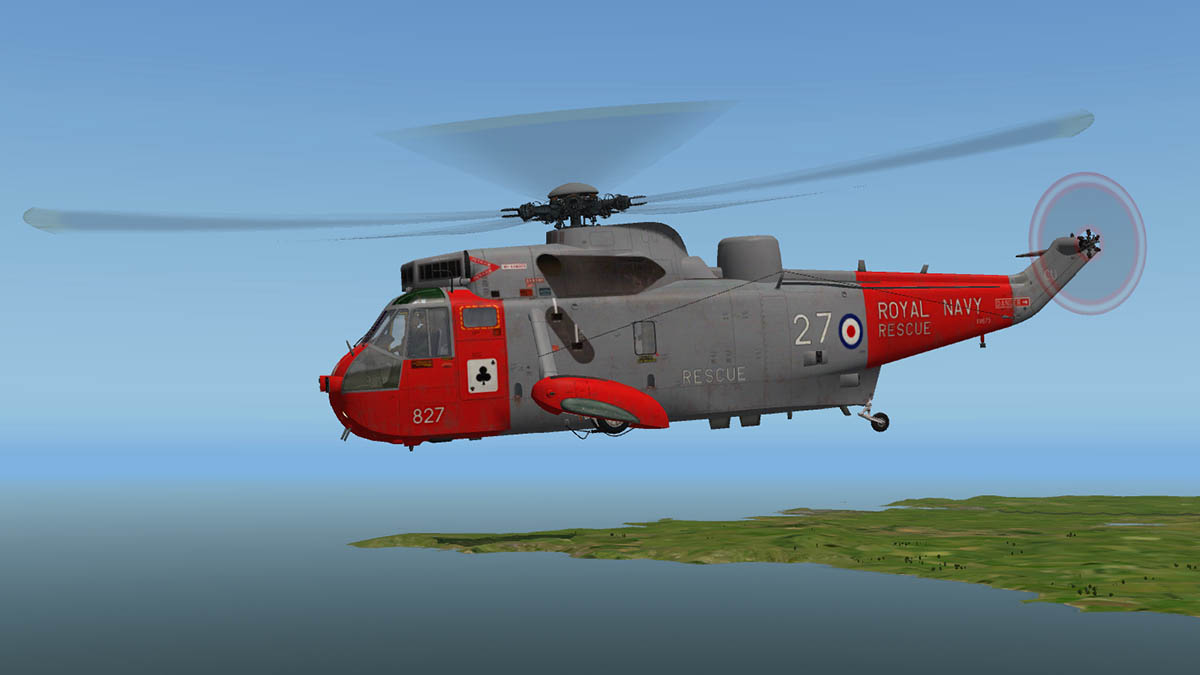
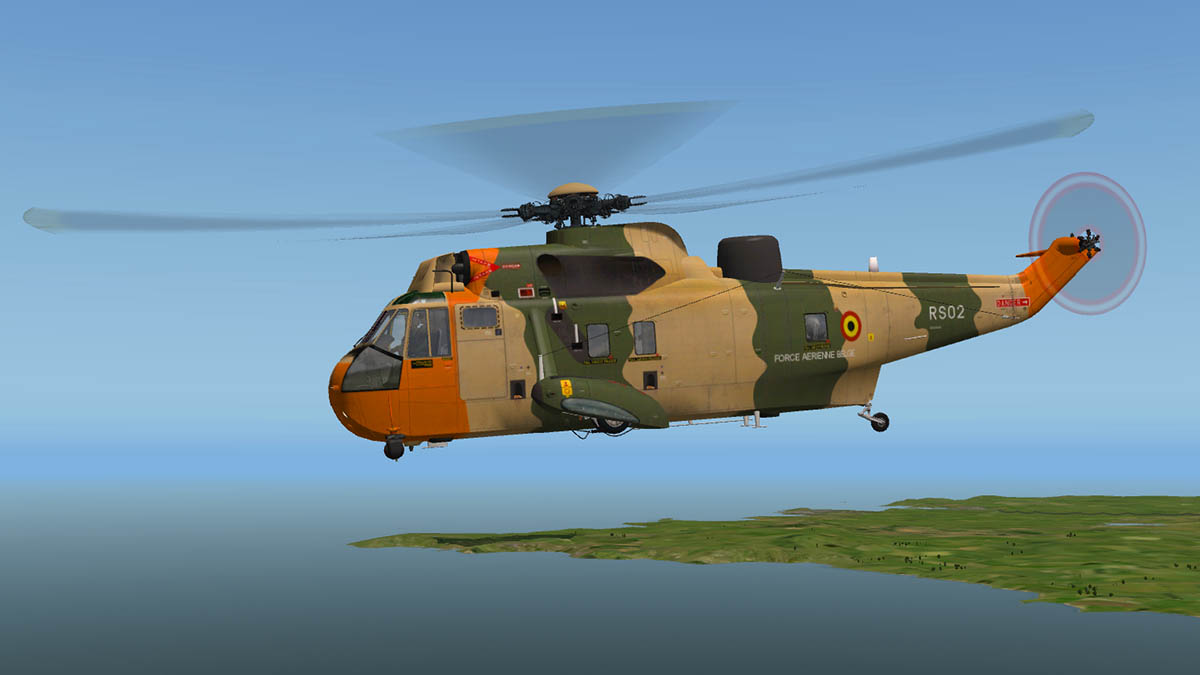
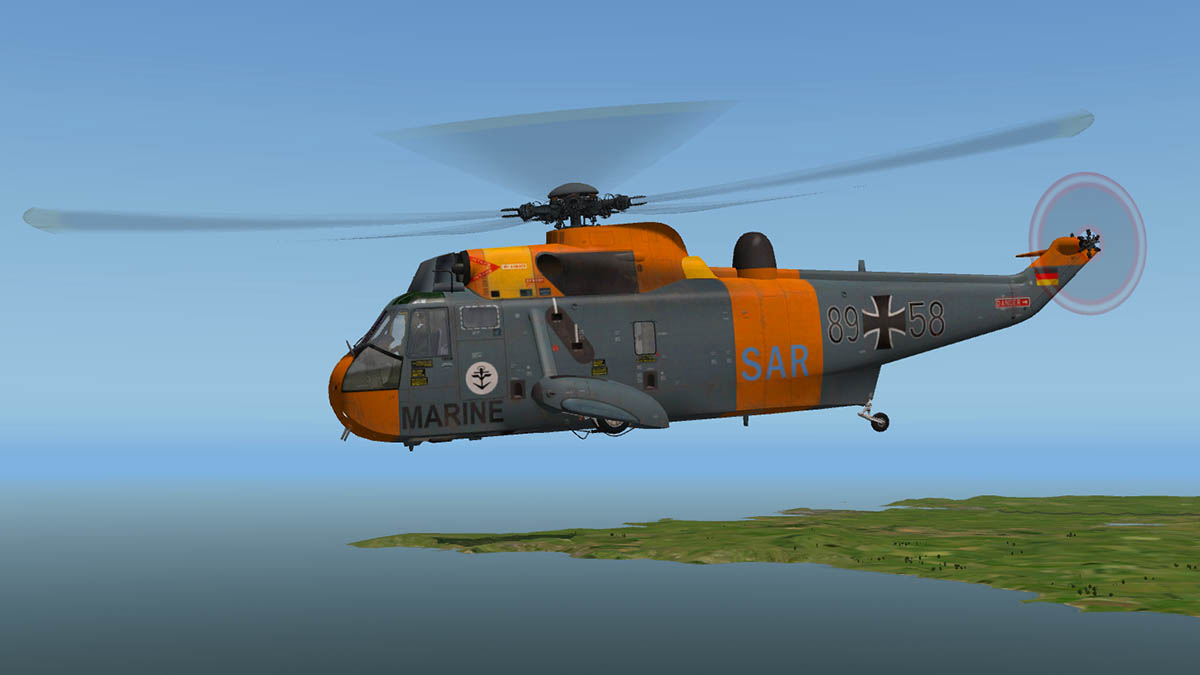
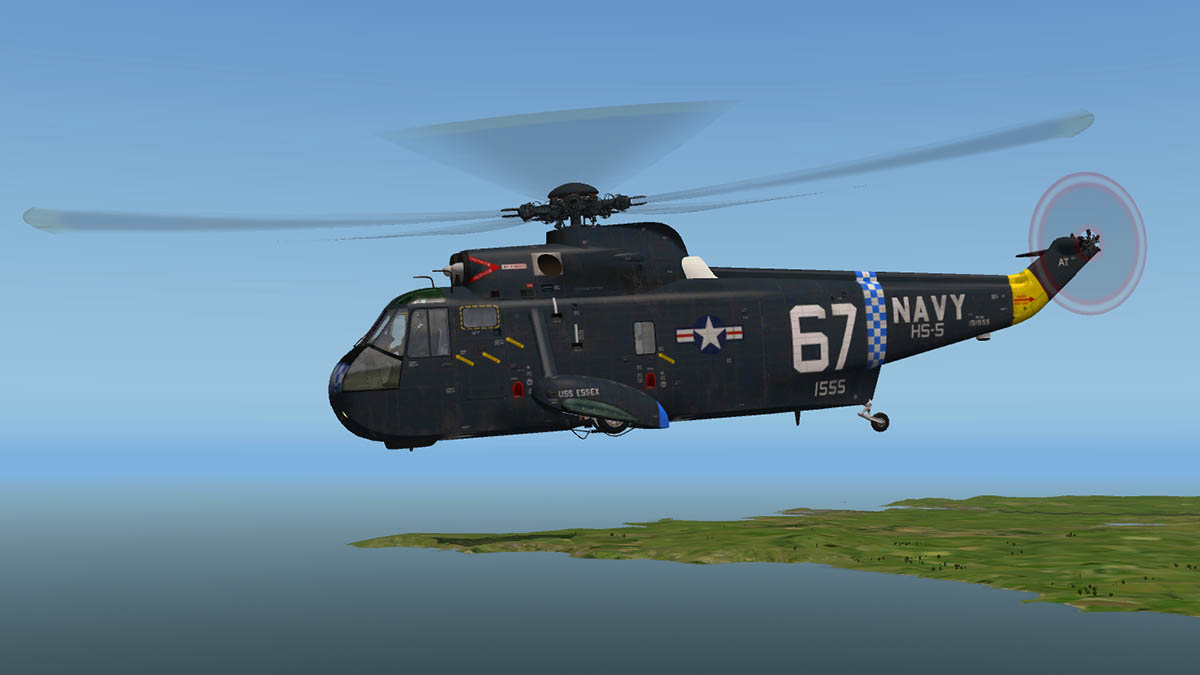
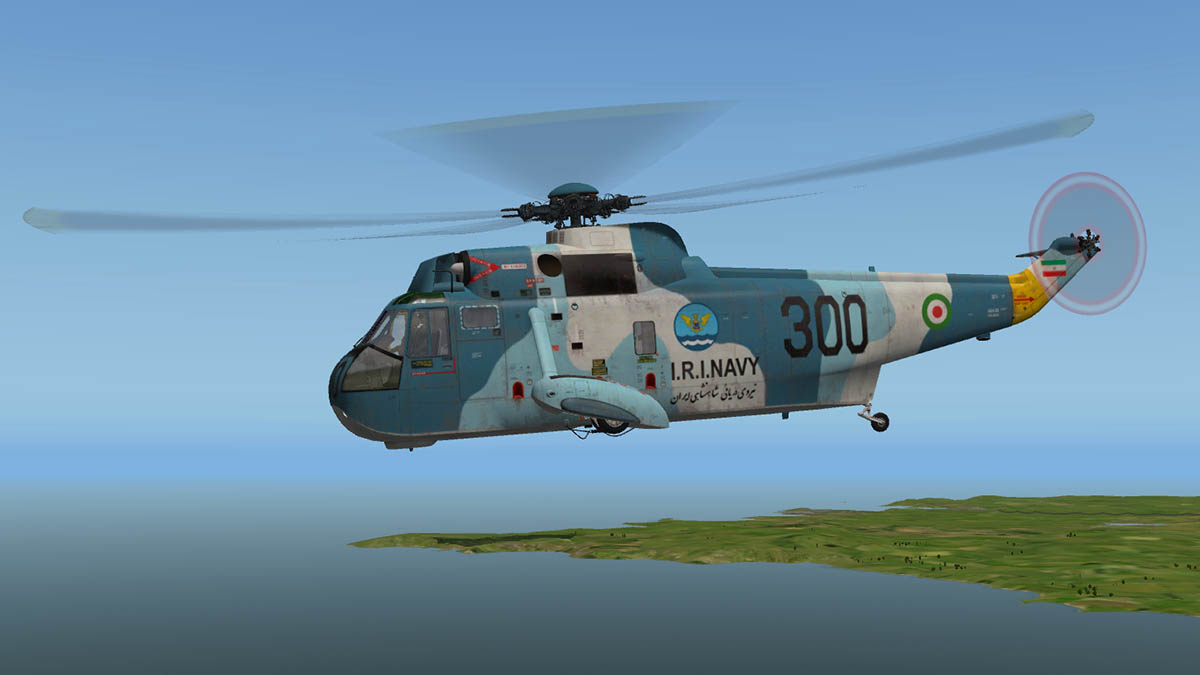
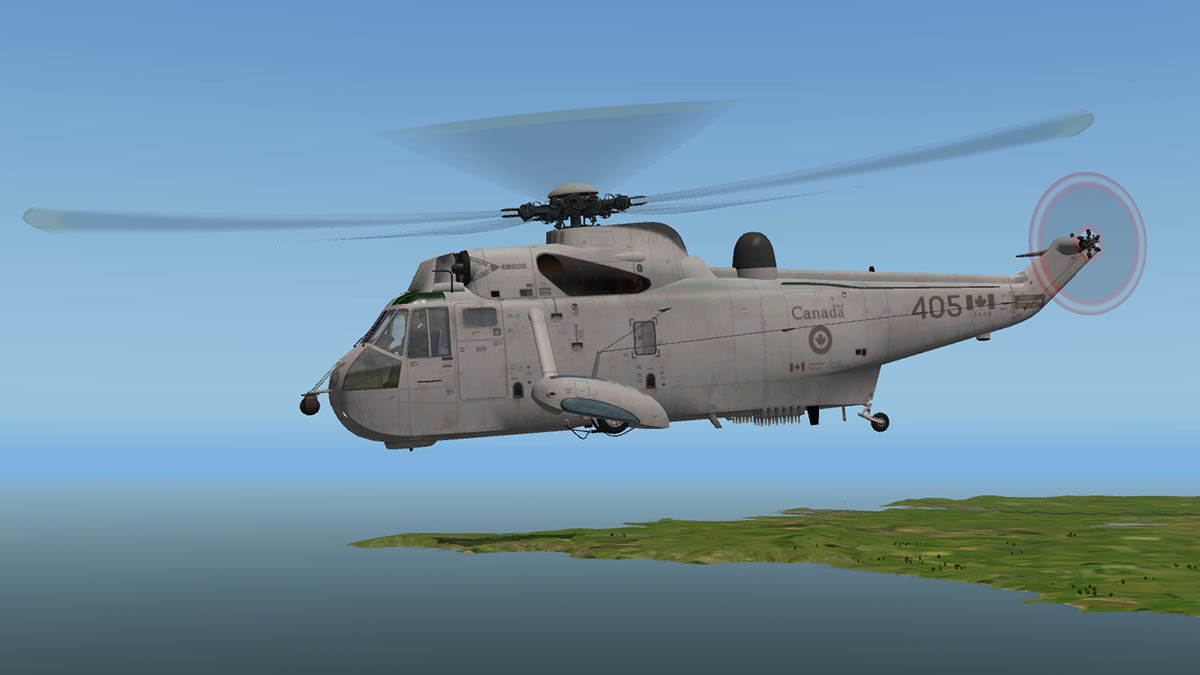
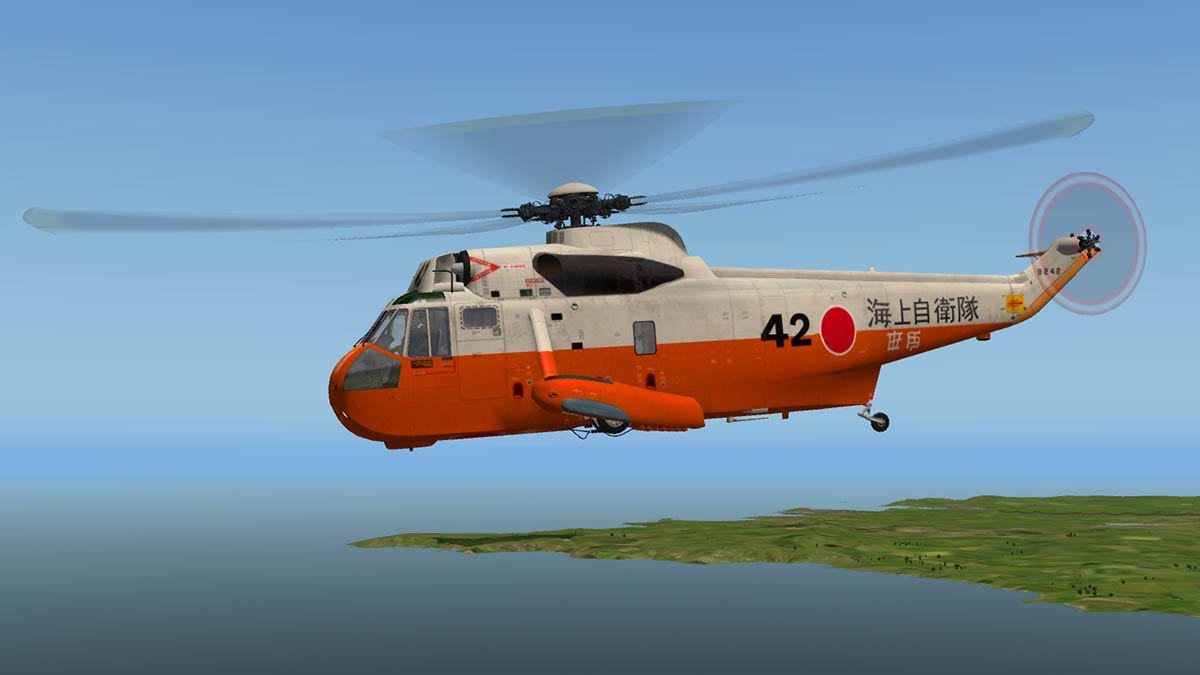
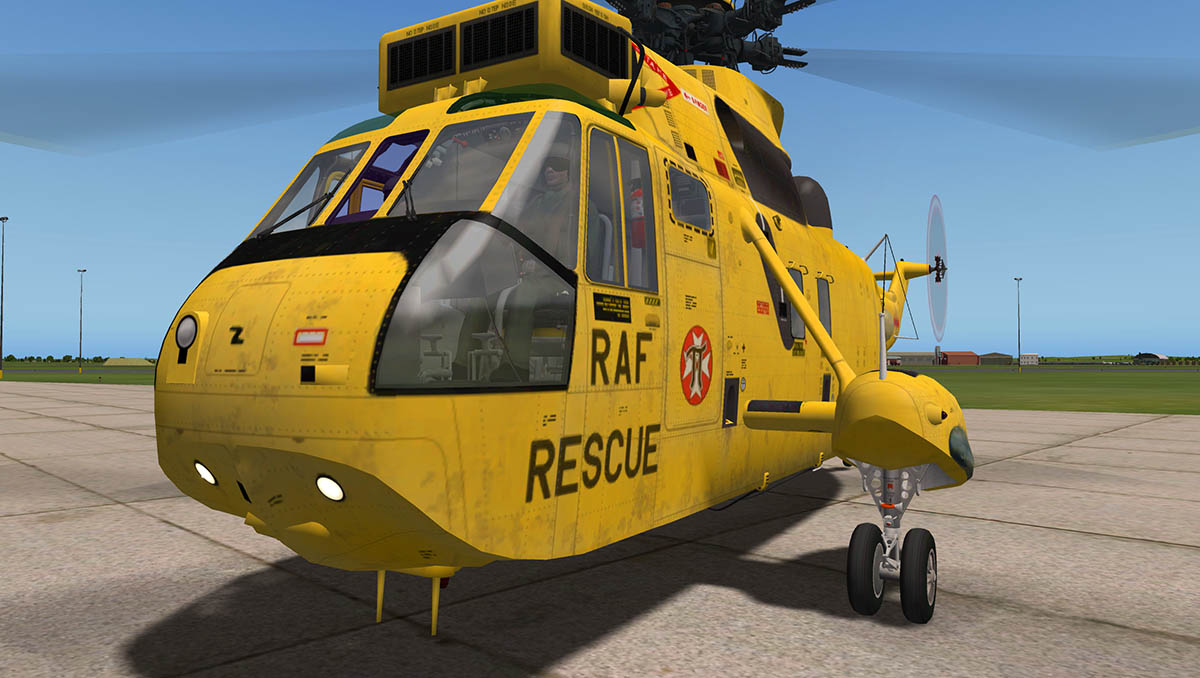
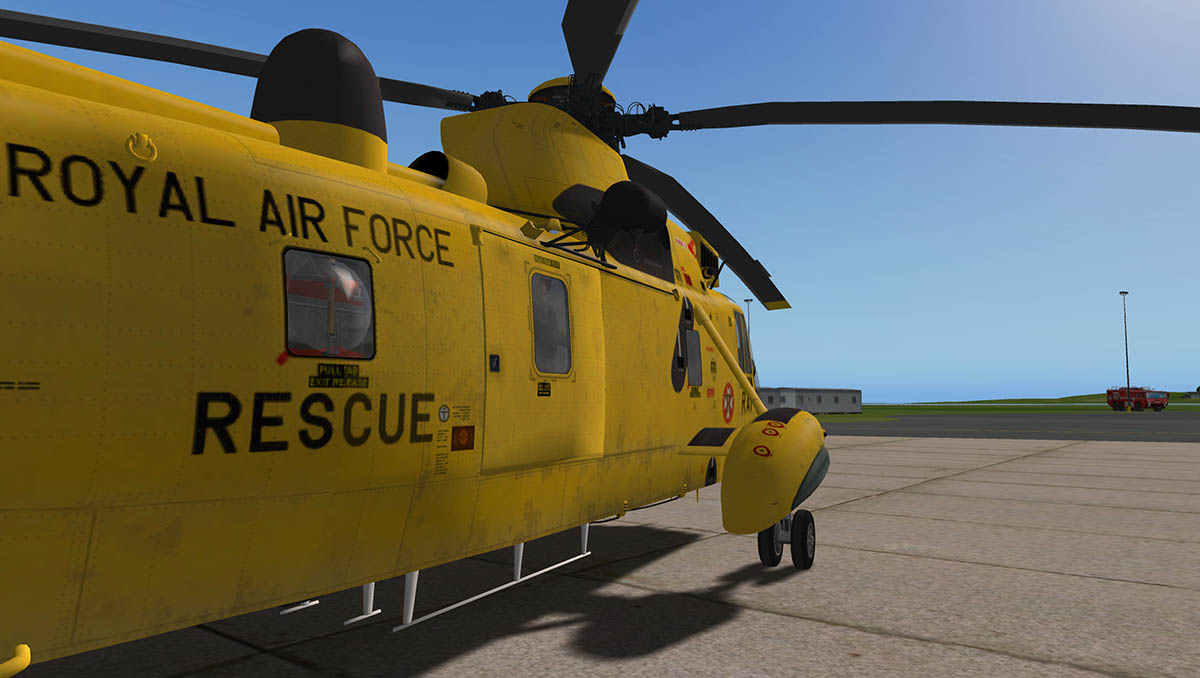
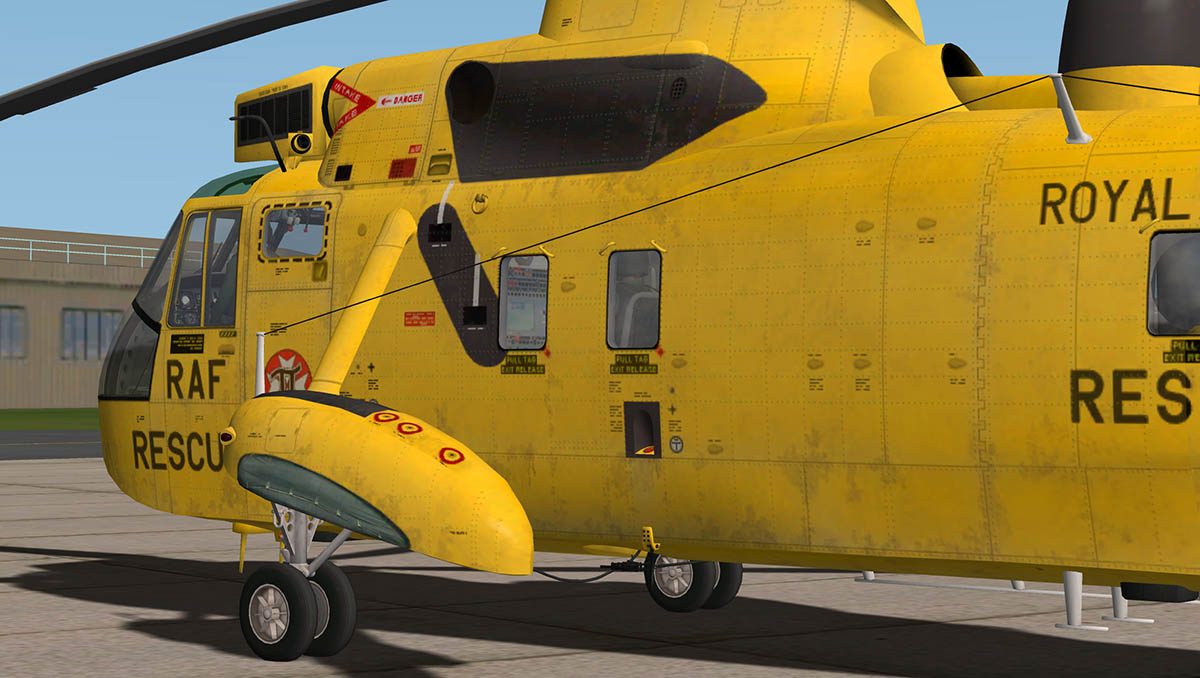
I Simply love it, your right RC The Sea King is so easy to fly.... must be the weight!
-
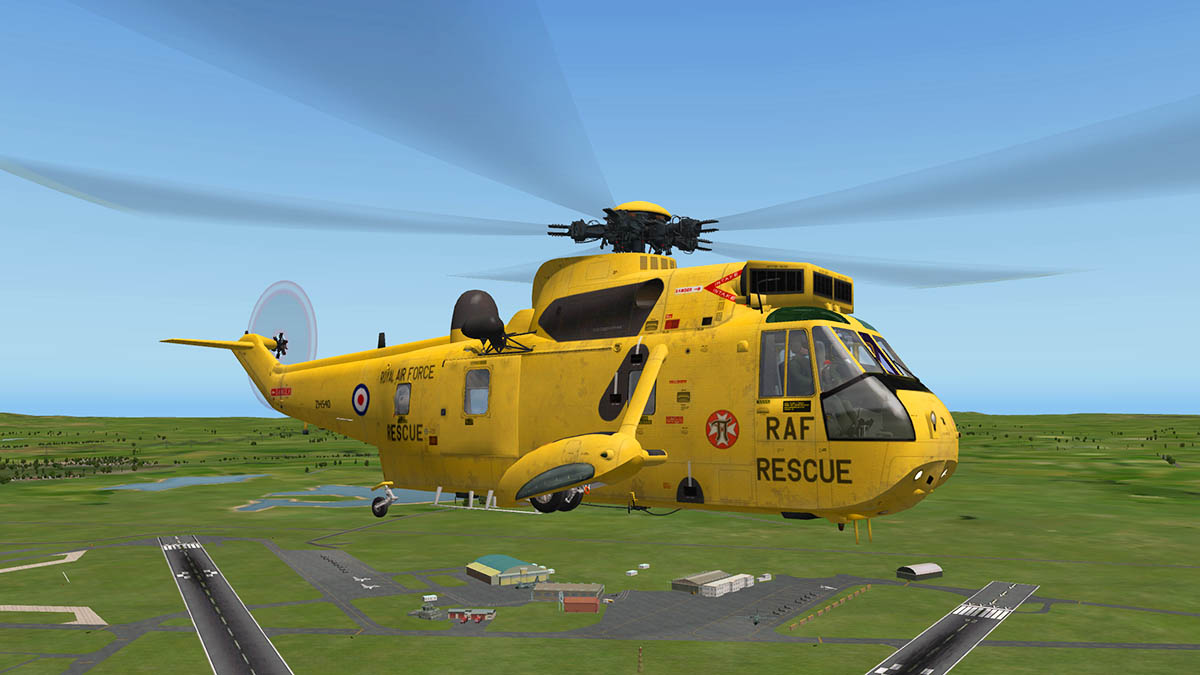
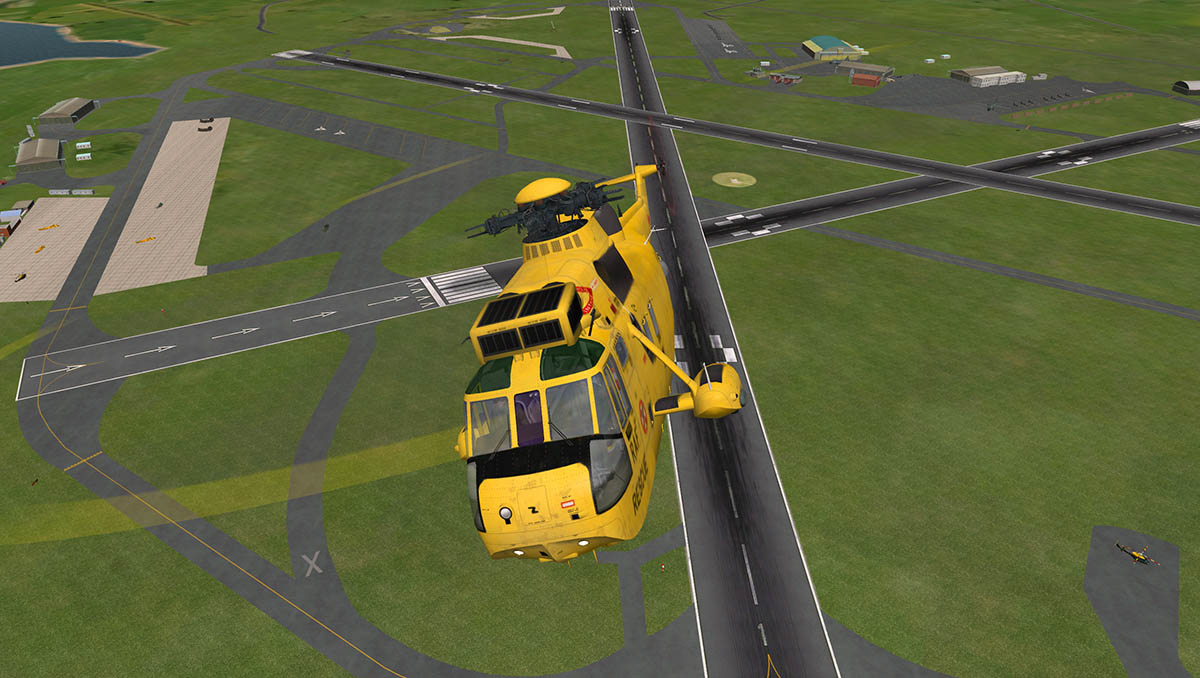
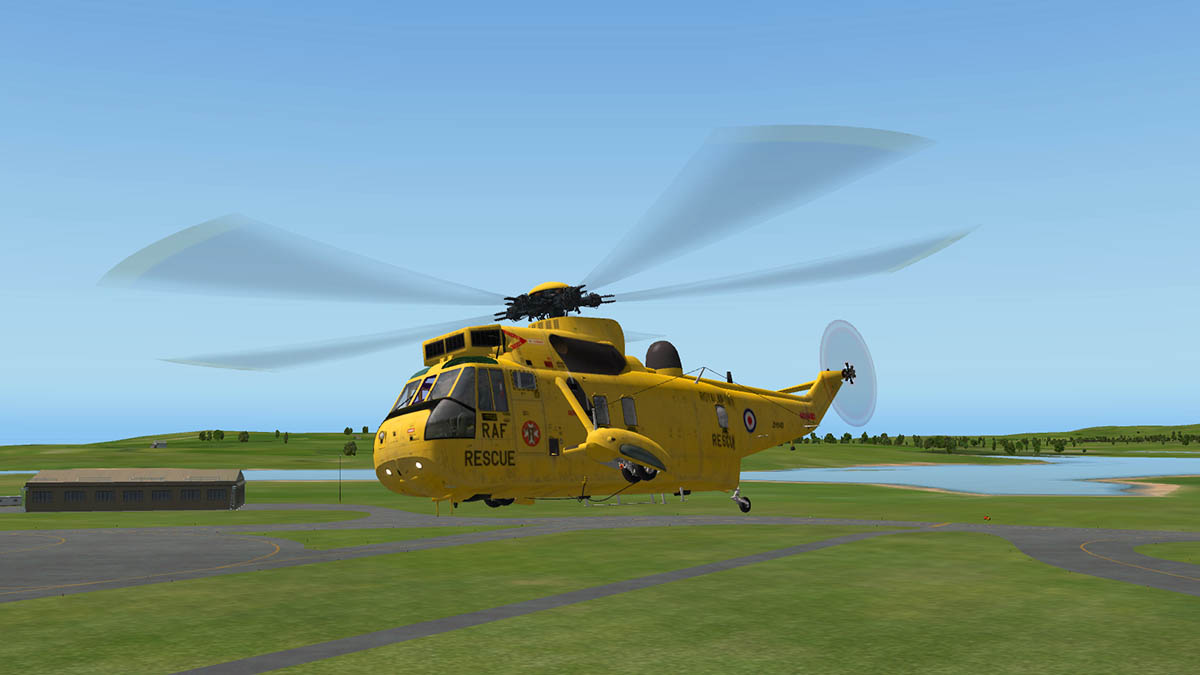
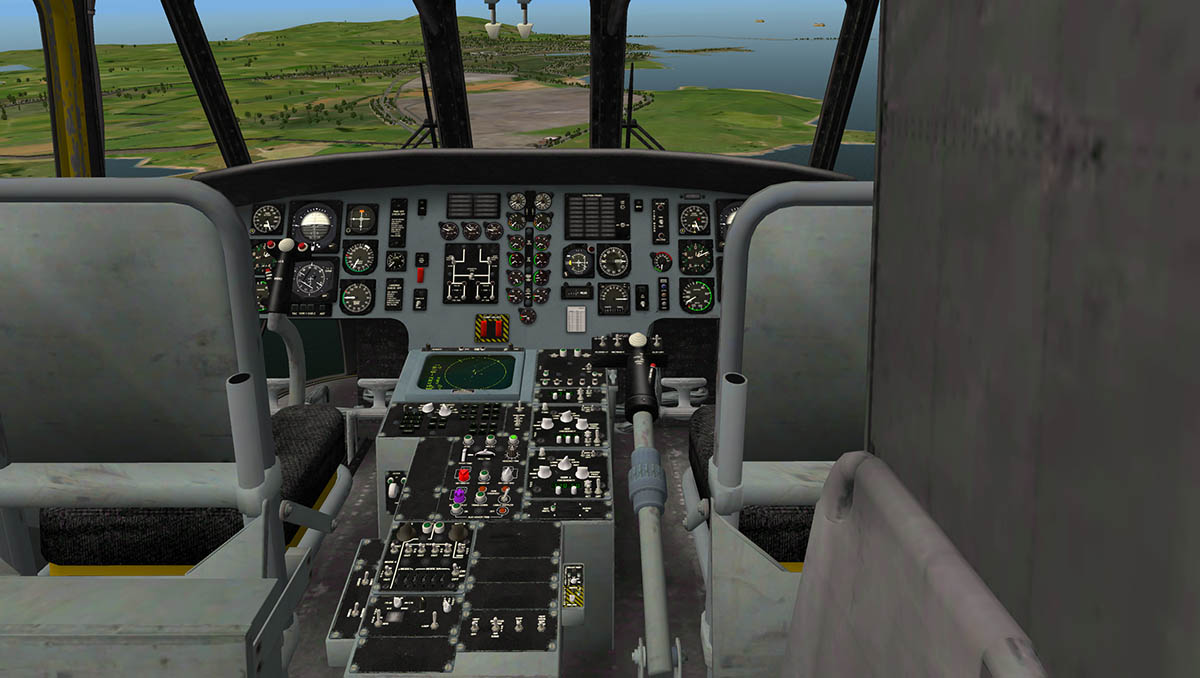
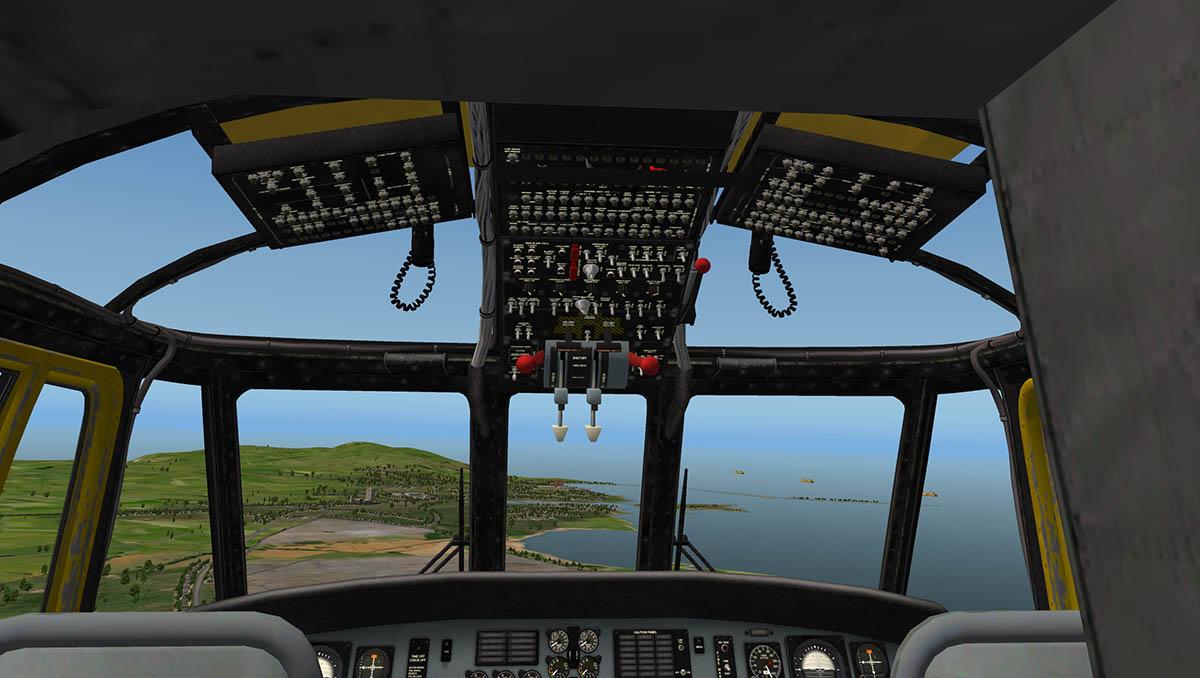
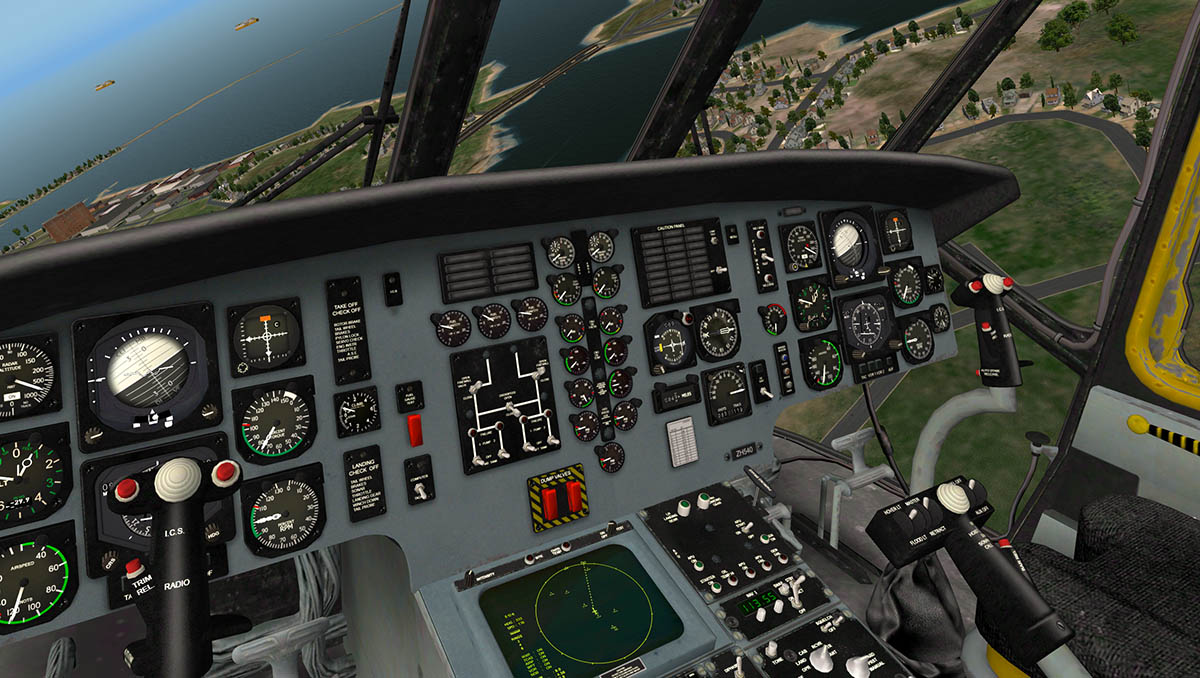
Dawson Designs and Virtavia have released for X-Plane the Sikorsky SH-3 Sea King. One of the most iconic Helicopters ever produced is now available in a kaleidoscope of detail, versions and liveries. Comes as the "Regular" version and also a "Commando" version. Features include: The cockpit is modeled in ultra-realistic detail and features full night lighting textures & effects. High quality 3D cockpit with many custom gauges and much greater functionality over FSX. Included are 20 beautifully detailed liveries each with customized external features that change automatically depending on your livery selection High quality 3D model complete with realistic spec, shine, and custom bump mapping to bring every rivet and surface to life. Many custom features have been simulated using SASL plugin, giving much greater functionality than is available through X-Plane alone. Custom startup system AFCS - Automatic Flight Control System Animated doors and ASAC radome 3D exterior lighting designed to make full use of HDR mode Full independent night lighting Instrument reflections Custom built Hover indicator gauge Detailed User Manual and Pilots Checklist Sling load compatible with custom sling loading gauge Extra cargo crate included for sling load action! Cockpit is highly detailed and fully functional. Other great features are: Smart Menu Technology Smart Livery Quick access to doors - GPU Views - FOV - Sound volume Stability control Liveries and versions include: 'Regular' Sea King with 17 paints and 9 variants 'Commando' version with 3 paints and 1 variant Highly detailed the Sea King has amazing array of features and quality. The Dawson Design and Virtavia : Sikorsky SH-3 Sea King is now available from the X-Plane.Orgshop: Sikorsky SH-3 Sea King Price is US$35.00 Technical Requirements: Windows XP , Vista, 7 or 8 (32 or 64 bits) or MAC OS 10.3.9 (or higher) or Linux X-Plane 10.20+. 32 or 64 bit. (X-Plane 9 is not supported) 4GB RAM- 512Mb + VRAM Recommended. Current version: 1.0 (last updated November 13th 2013) Developer Sites : Dawson Designs and Virtavia Support forum : Sea King Support forum X-Plane Reviews will be reviewing the SH-3 Sea King and the review will be available soon. Stephen Dutton 14th November 2013 ©X-Plane-Reviews 2013

-
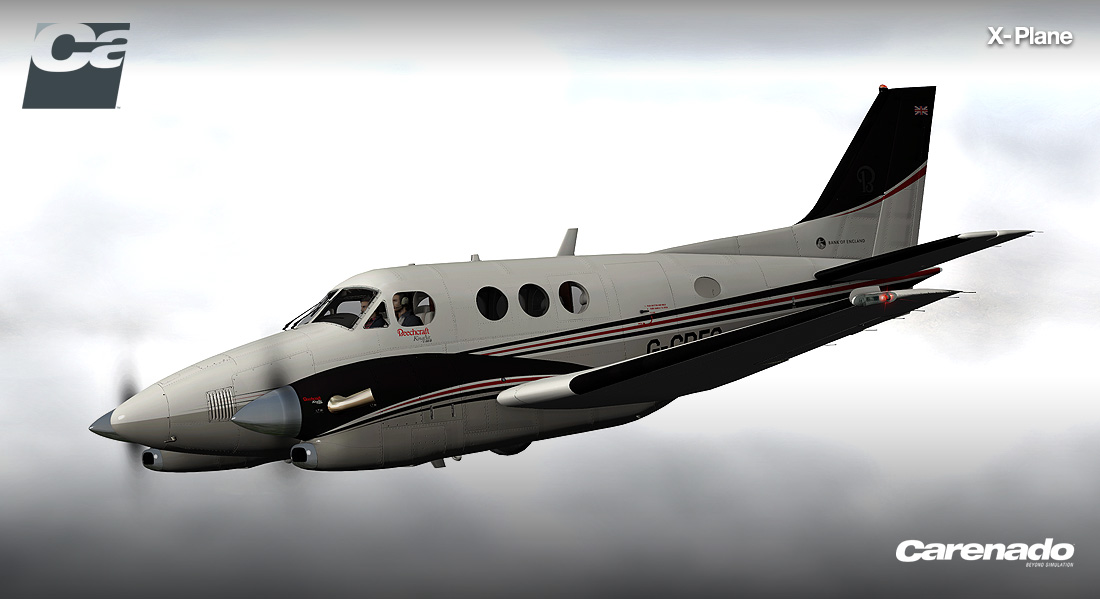
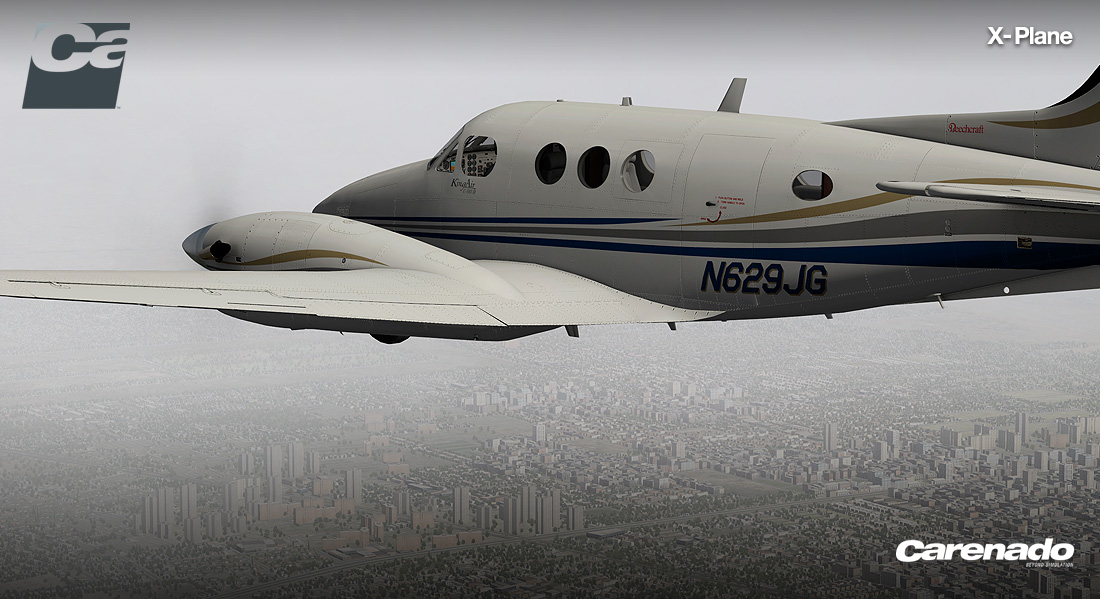
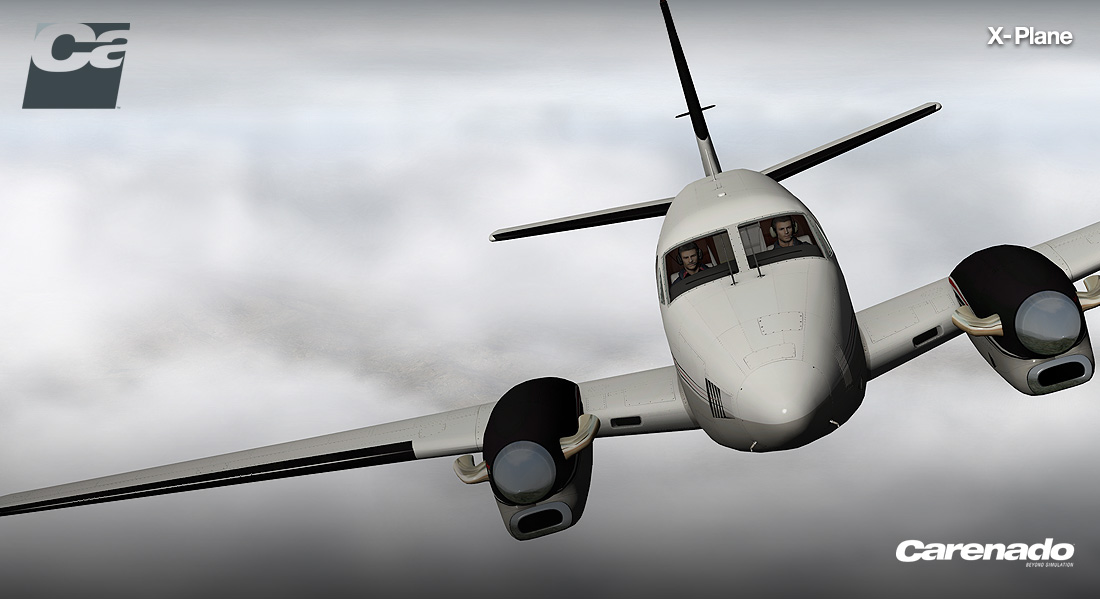
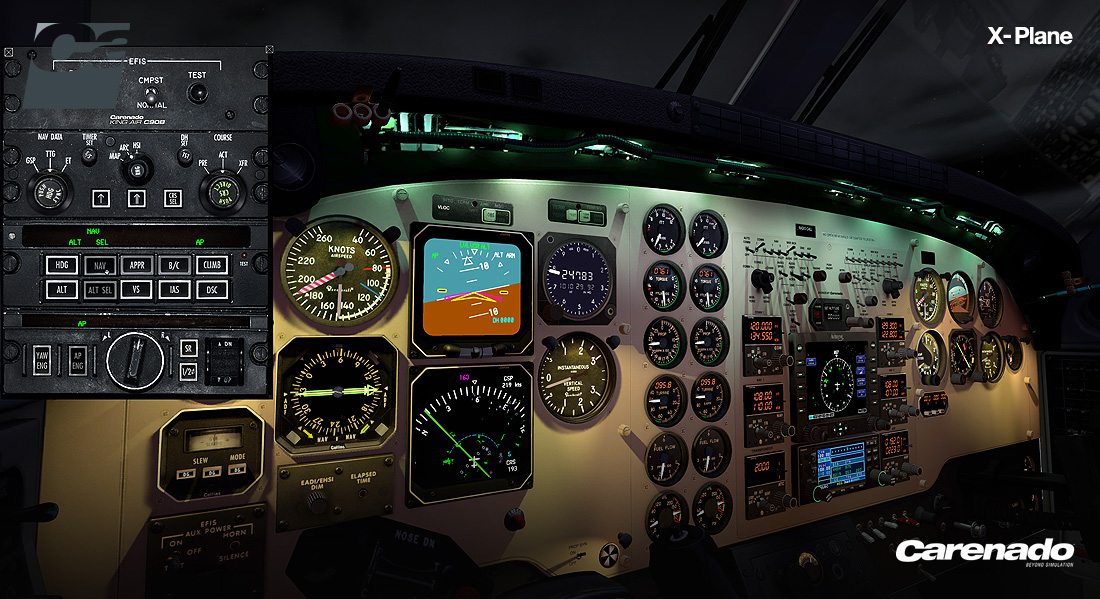
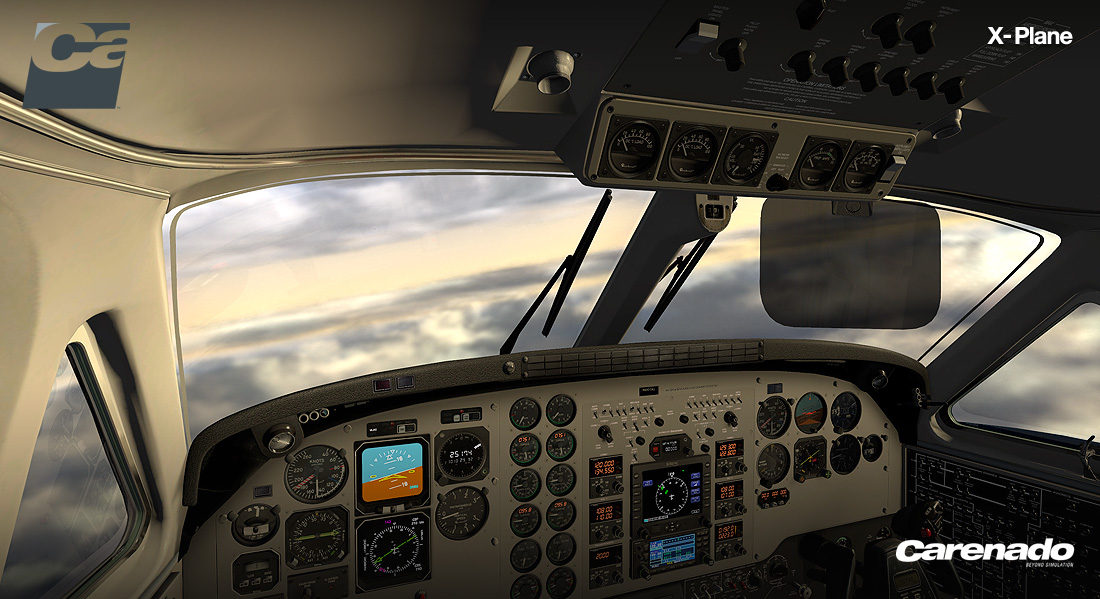
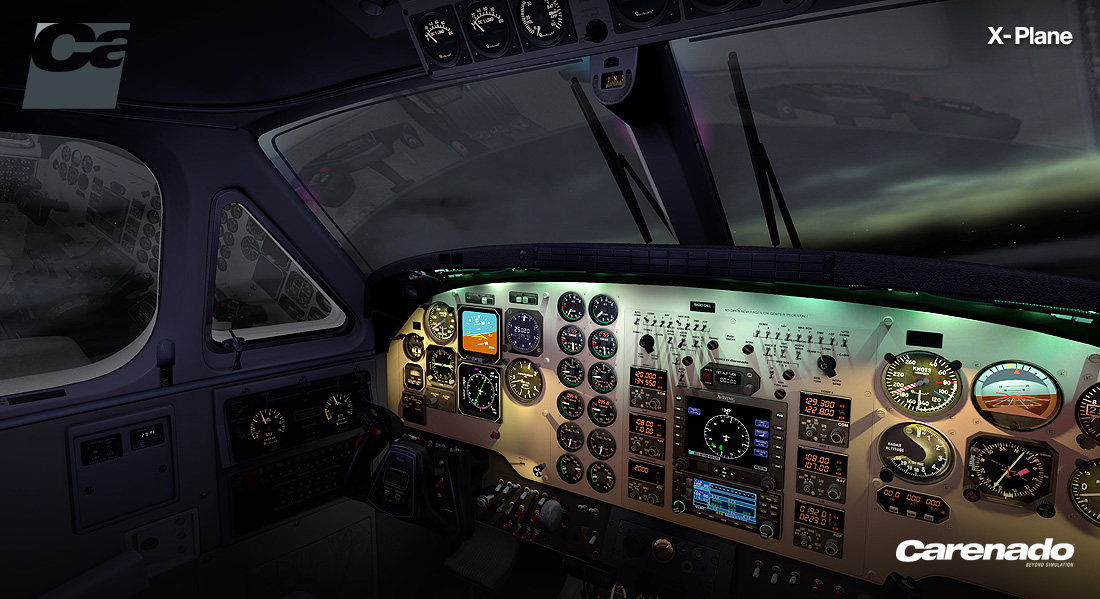
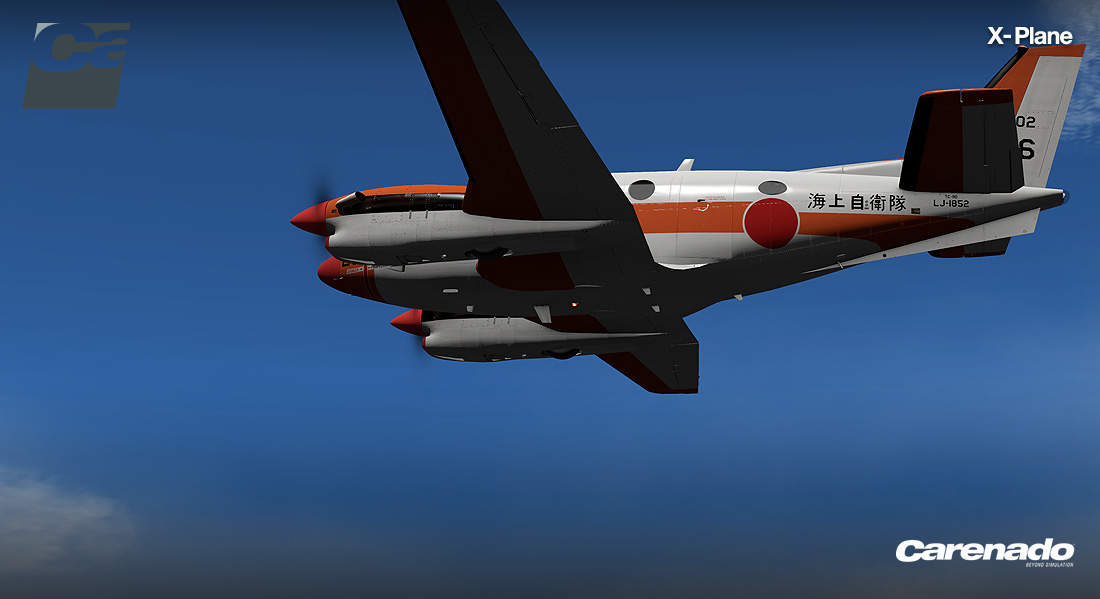
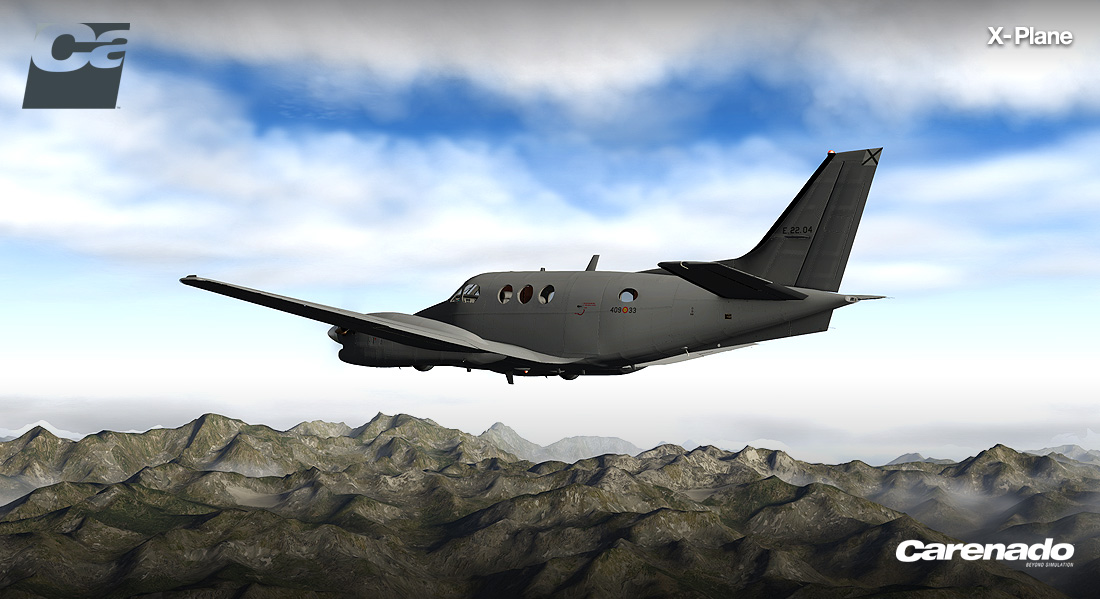
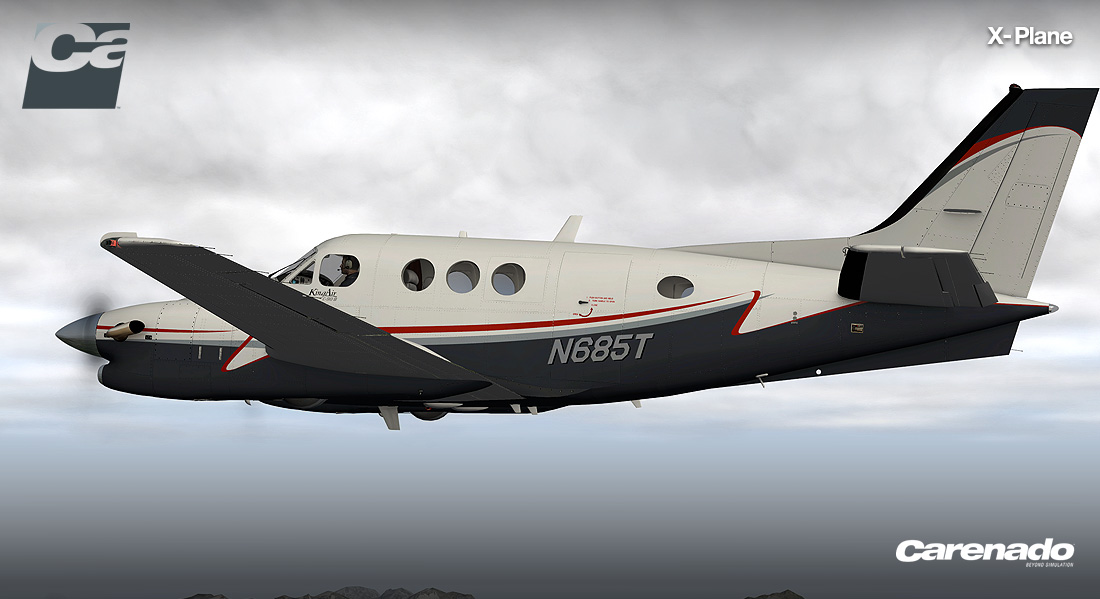
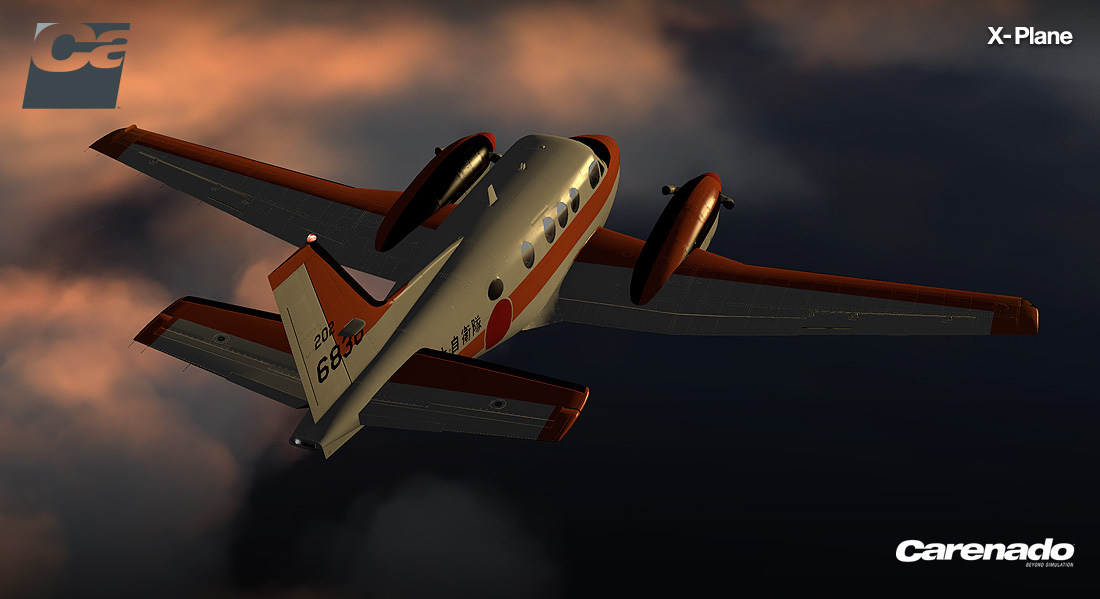
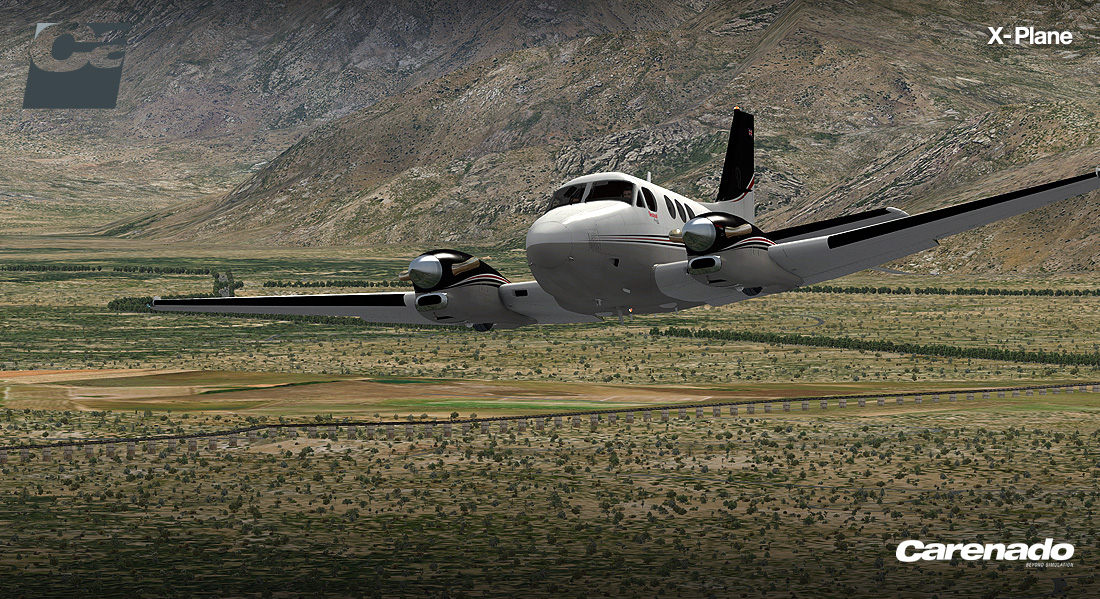
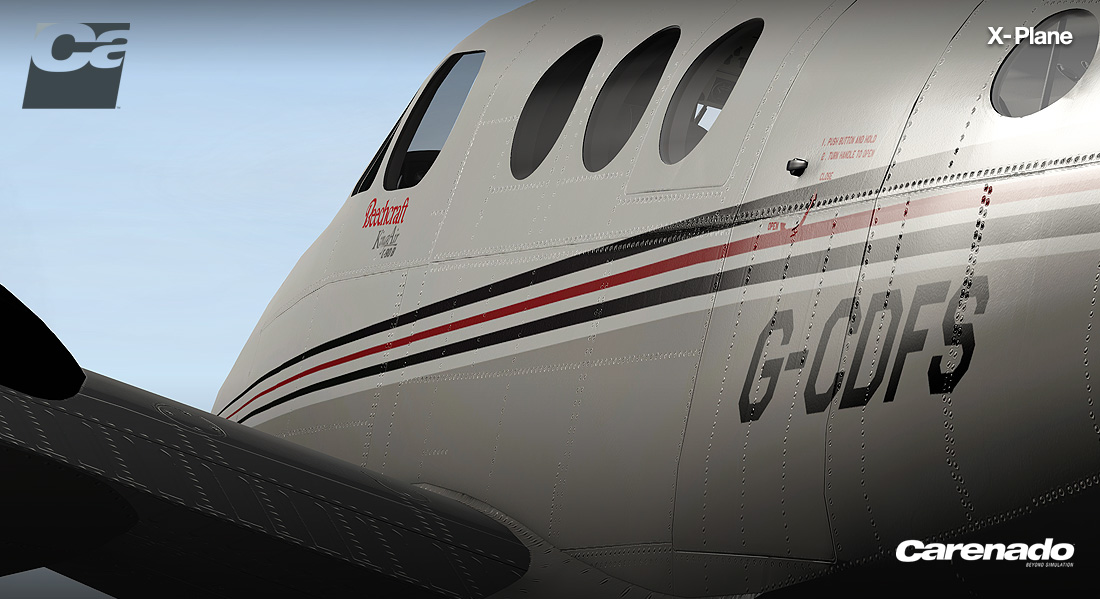
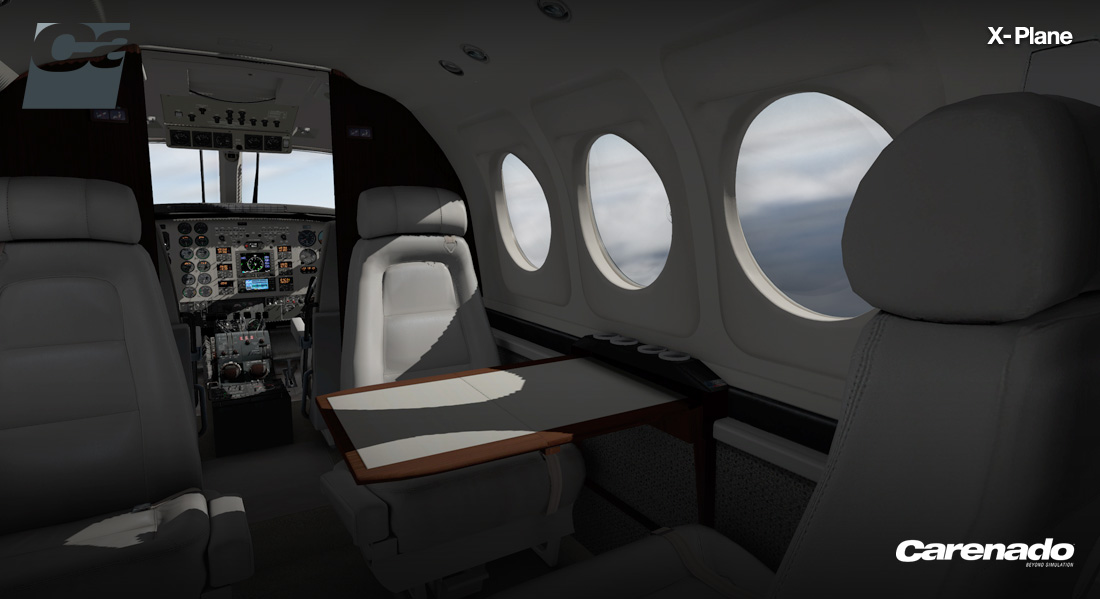
Carenado have release the C90B King Air HD Series aircraft. In every release the Carenado aircraft seem to get a size larger. The Beechcraft C90B is their biggest yet and with more features than ever. Special Features: For X-Plane 9.6/9.7 and X-Plane 10.21 or higher. X-Plane 64 bits compatible. Original EFIS (EADI and EHSI) installed. Windshield rain and ice effects. Rain effects on a Carenado!... bring it on! More features include: Original EFIS (EADI and EHSI) installed. HD quality textures (2048 x 2048). Accurately reproduced C90 systems. Original HQ digital stereo sounds recorded directly from a real PT6A (Pratt and Whitney Canada) engine. 2D windows: Cameras (for setting different cameras and field of view) and Options (for opening doors, hiding window reflections and static elements). Autopilot (for convenient control of the EHSI and autopilot). Accurately reproduced flight characteristics. Real weight and balance. Tested by real pilots. Realistic night lighting and other visual effects on panel and in cockpit. Windshield rain and ice effects. Full moving parts: Ailerons, elevators, rudders, flaps, rolling wheels and trim tab Animated sections such as: propeller, doors, windows, sun visors, smooth switch action, click-and-drag manipiulators, etc. Interactive virtual cockpit. Toggle yoke Included in the package: 6 HD liveries. 1 HD Blank livery. C90B EFIS PDF. C90B Emergency Checklist PDF. C90B Normal Checklist PDF. C90B Performance Tables PDF. C90B Reference PDF. C90B Terrain Awareness Annunciator Control Unit PDF. Recommended Settings X-Plane 9 and 10 PDF Recommended Technical Requirements: Windows XP - Vista - 7 (32 or 64 bits) or MAC OS 10.6 (or higher) or Linux X-Plane 9.7 - X-Plane10.21 (or higher) 2.5 GHz processor - 4GB RAM - 1GB VRAM 395MB available hard disk space Price is US$34.95 Developer Site : Carenado Stephen Dutton 13th November 2013 X-Plane Reviews will review the Beechcraft C90B, so watch this space! All images courtesy of Carenado
-
Aircraft Review : FlightFactor Boeing 757RR-200
Stephen replied to Stephen's topic in Airliners Reviews
Errr... You can fly ivao and vatsim actually? -
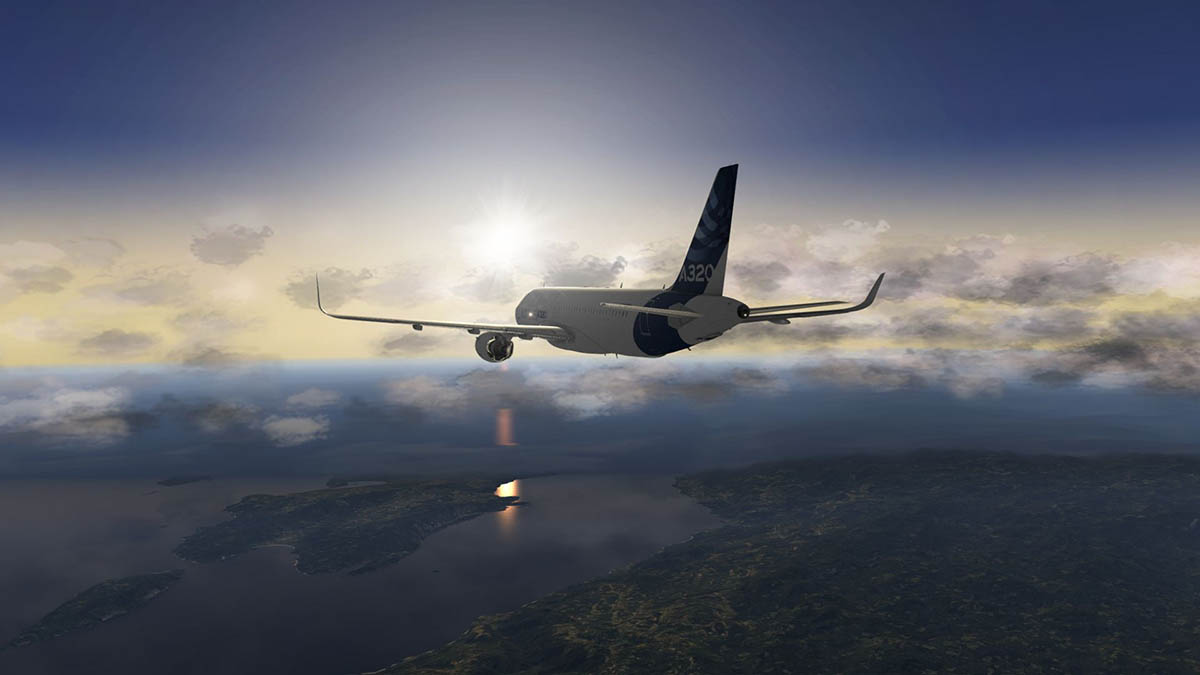
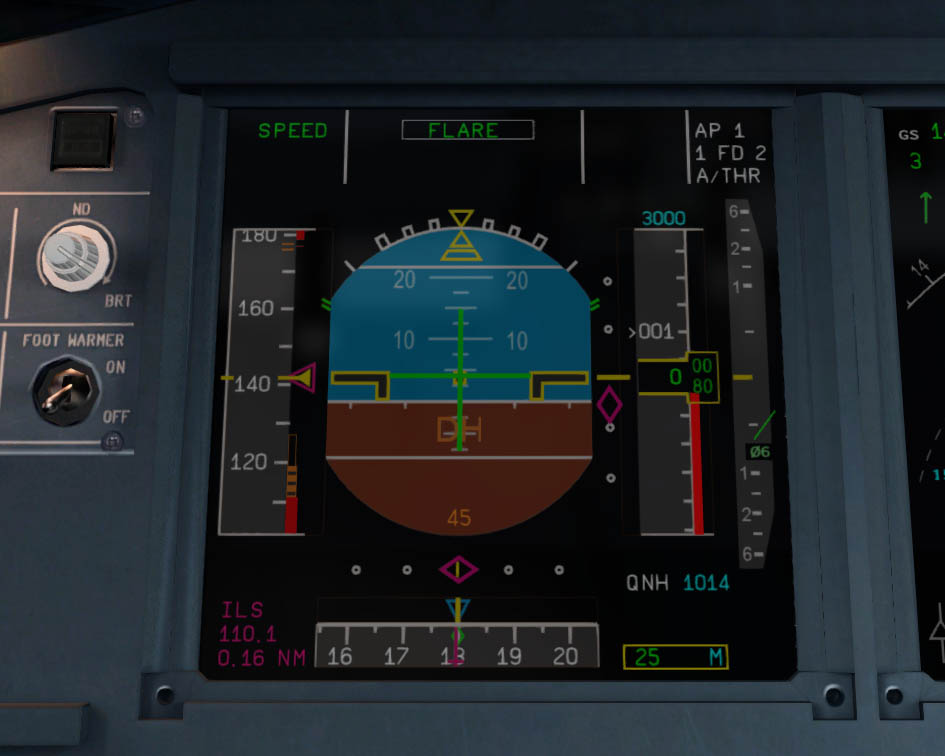
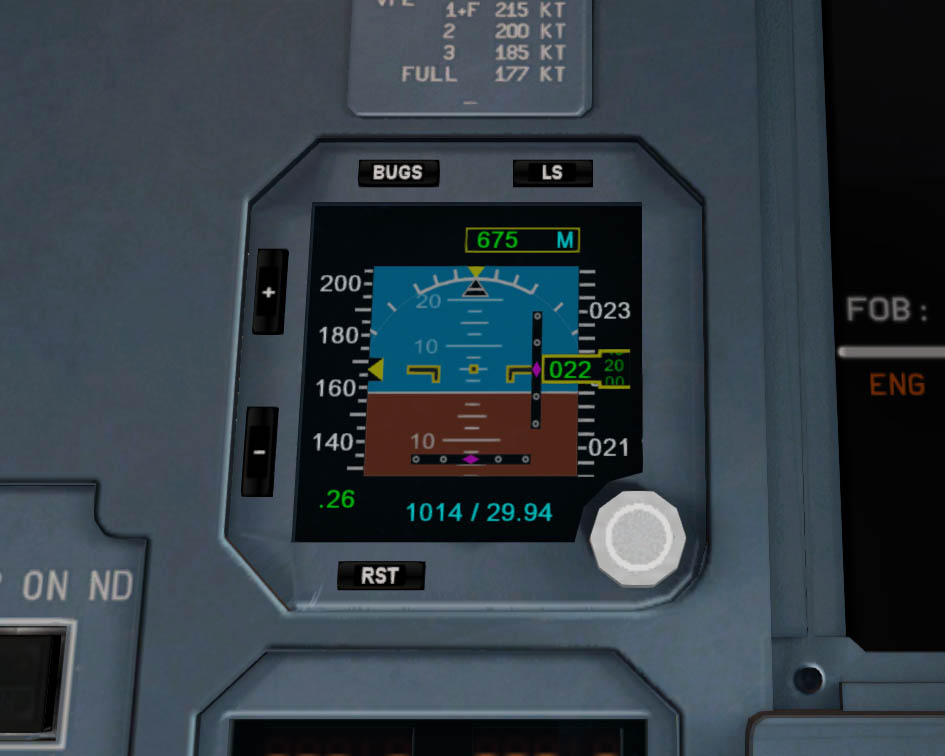
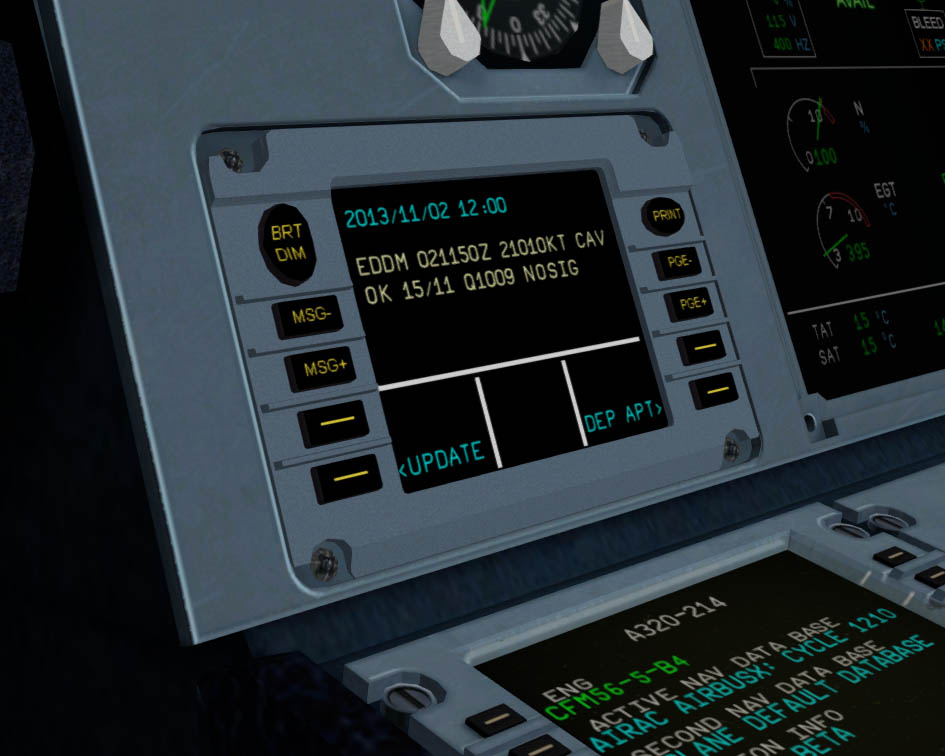
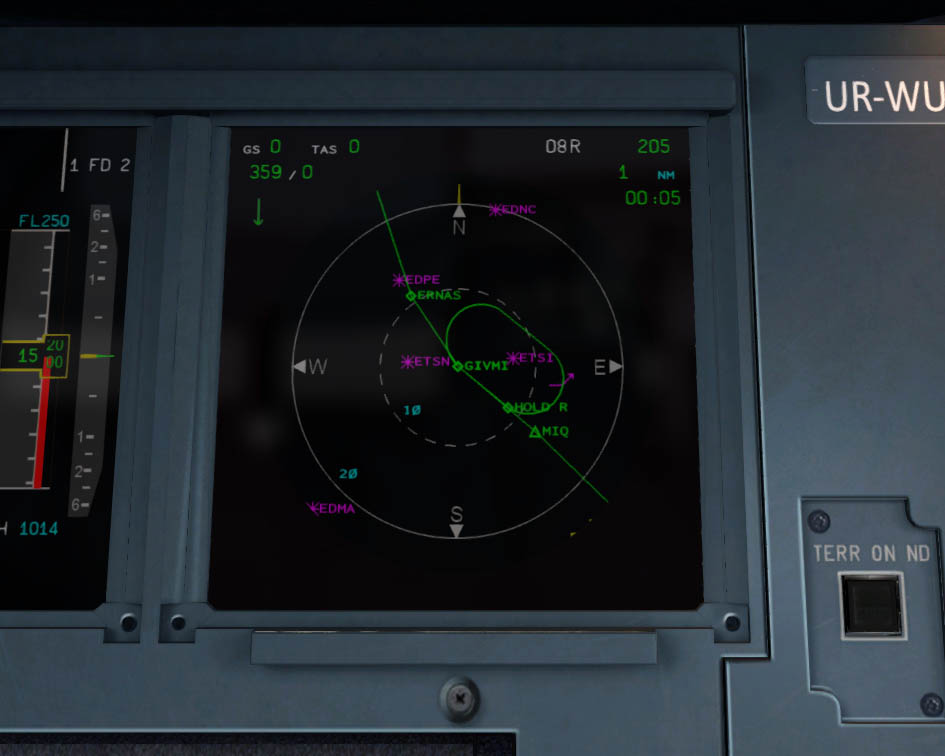
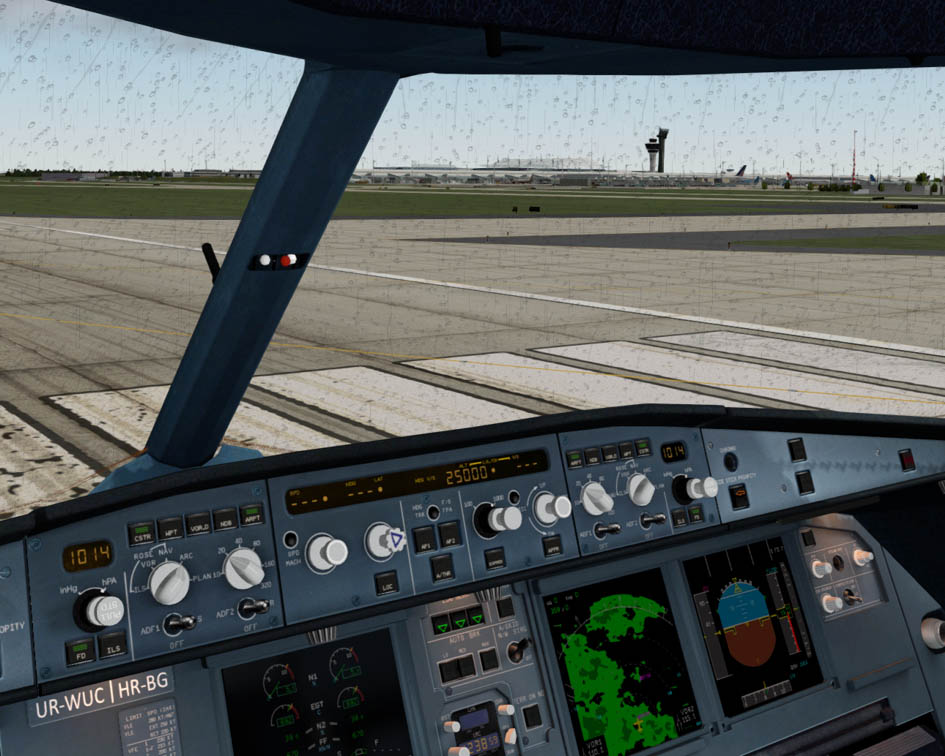
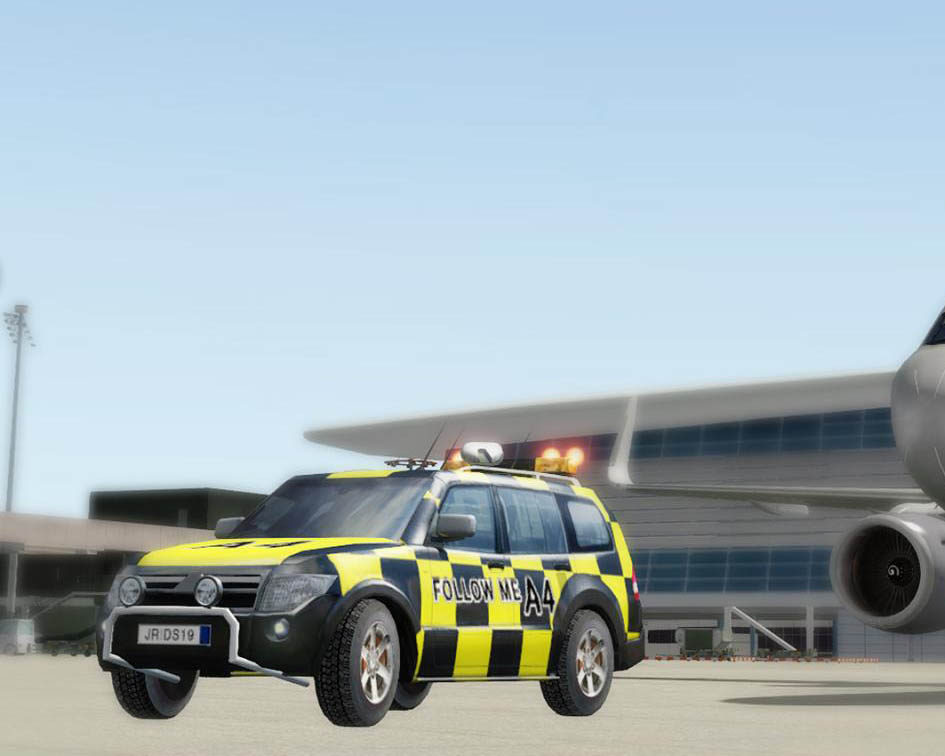
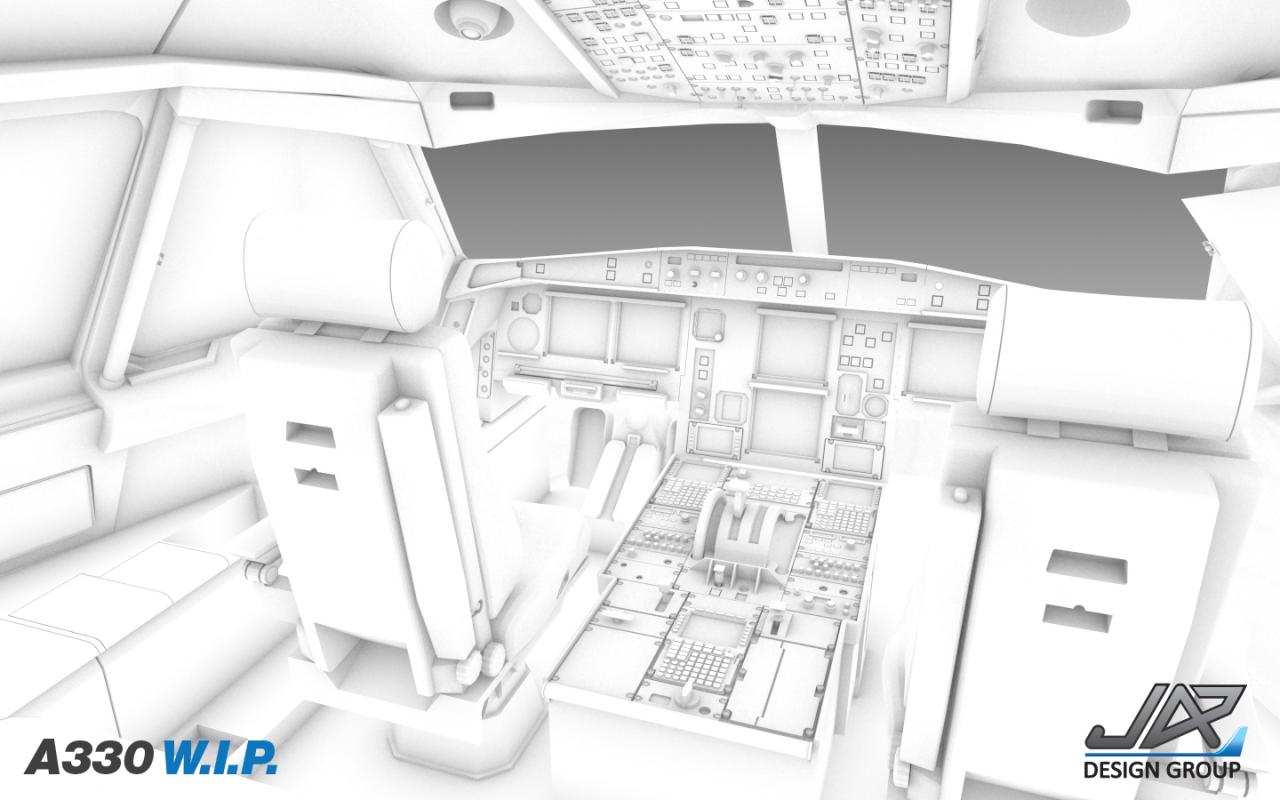
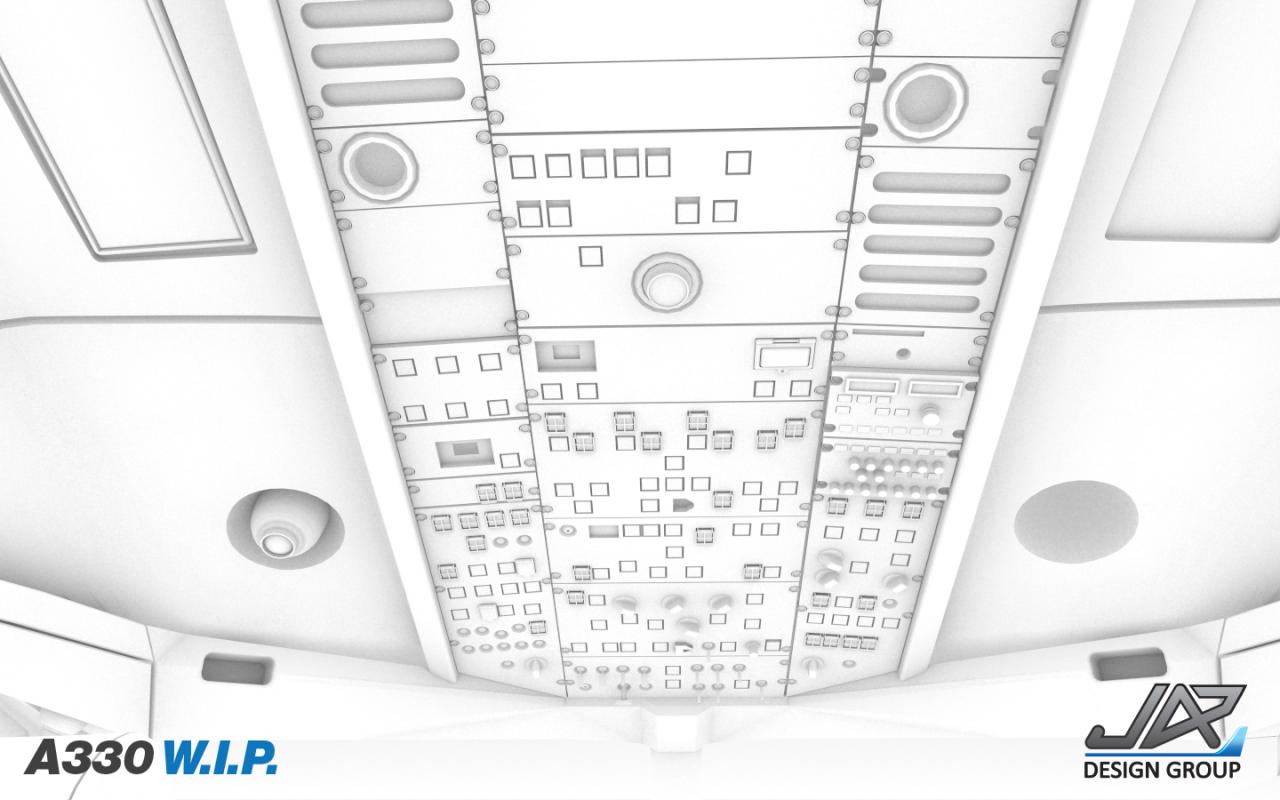
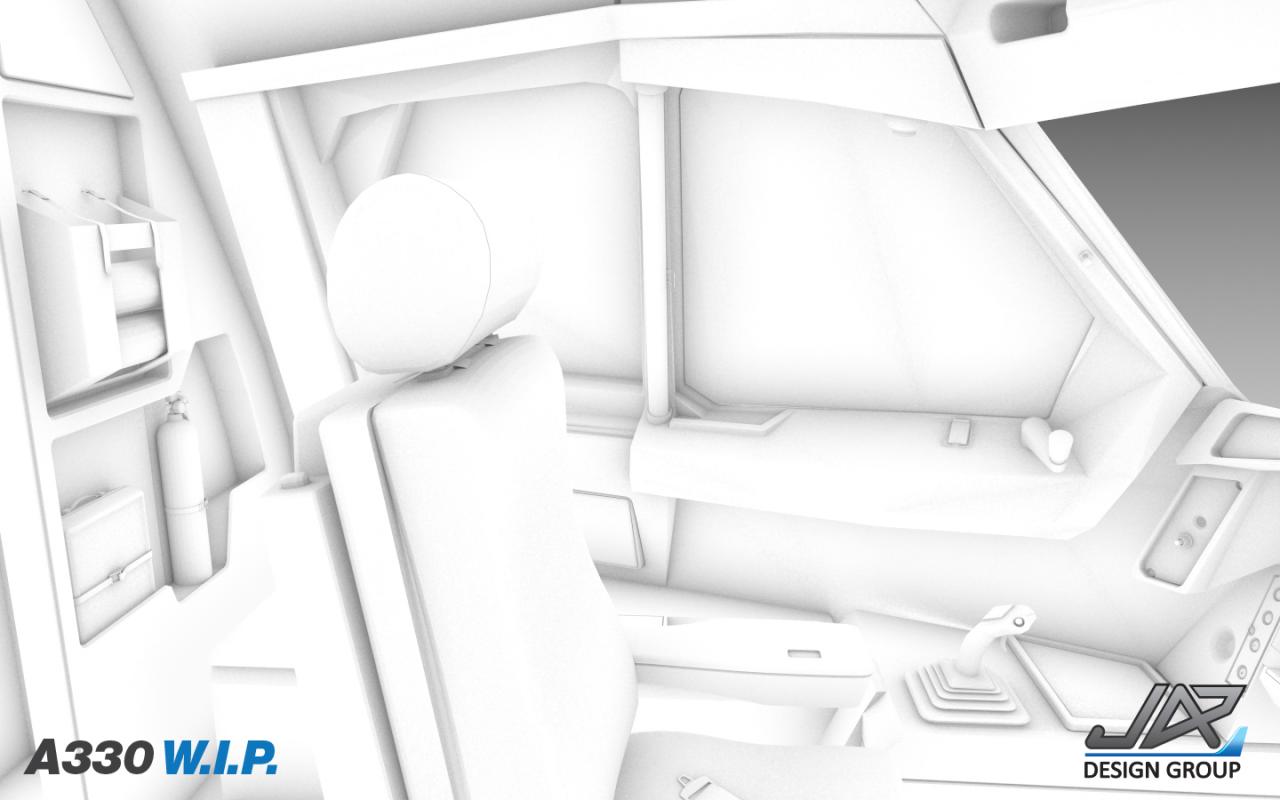
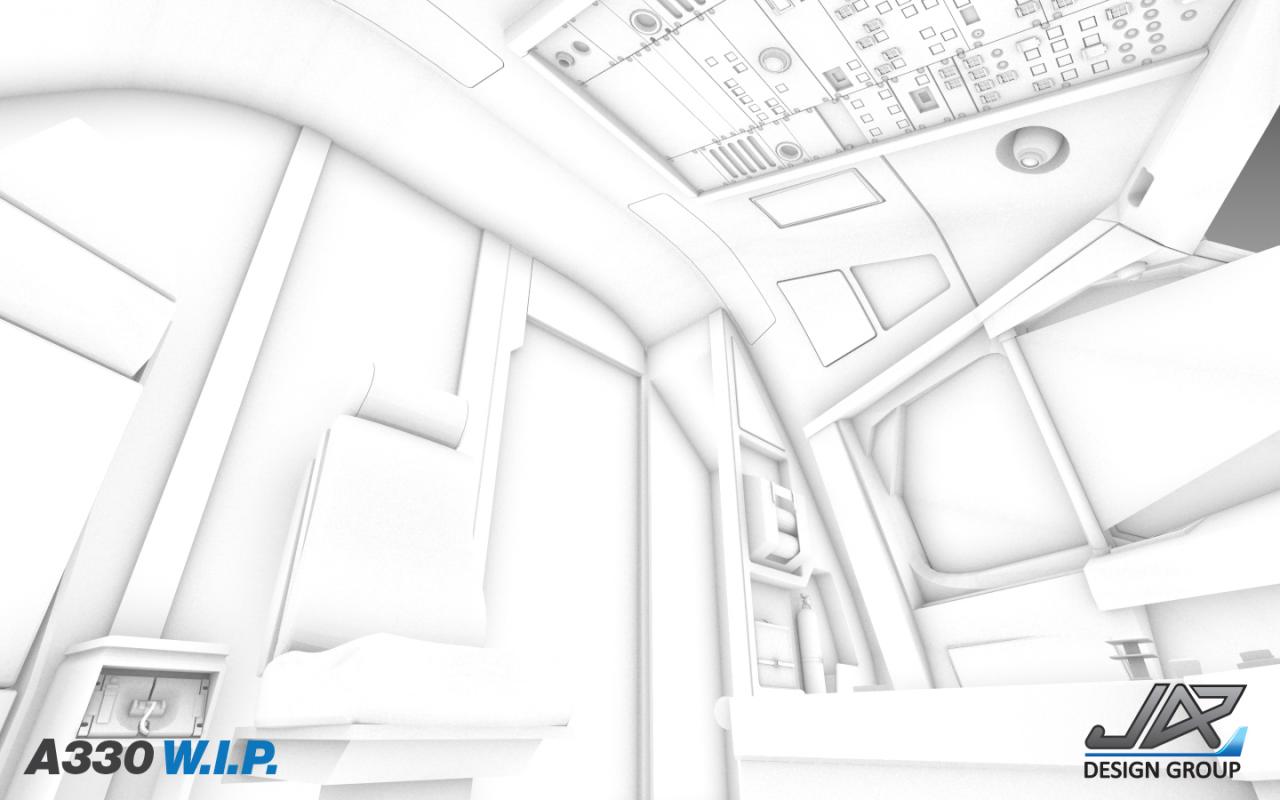
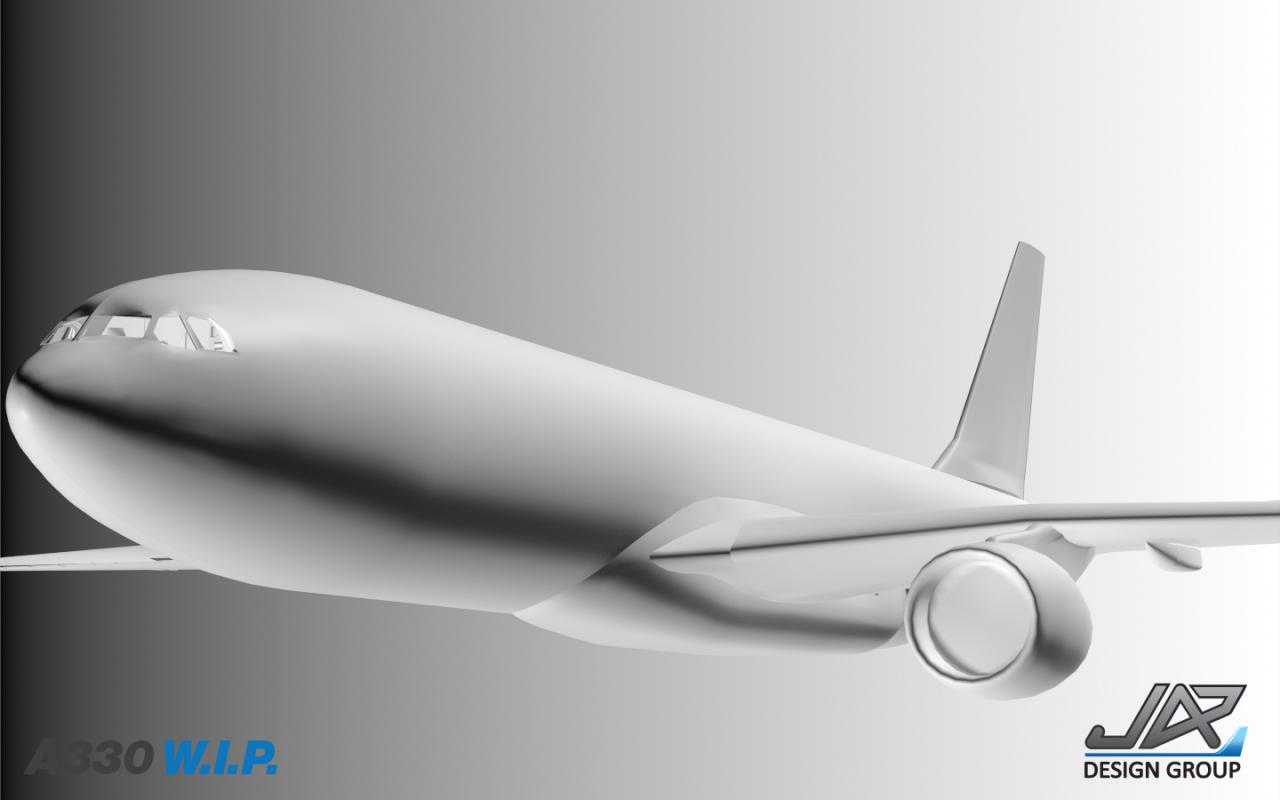
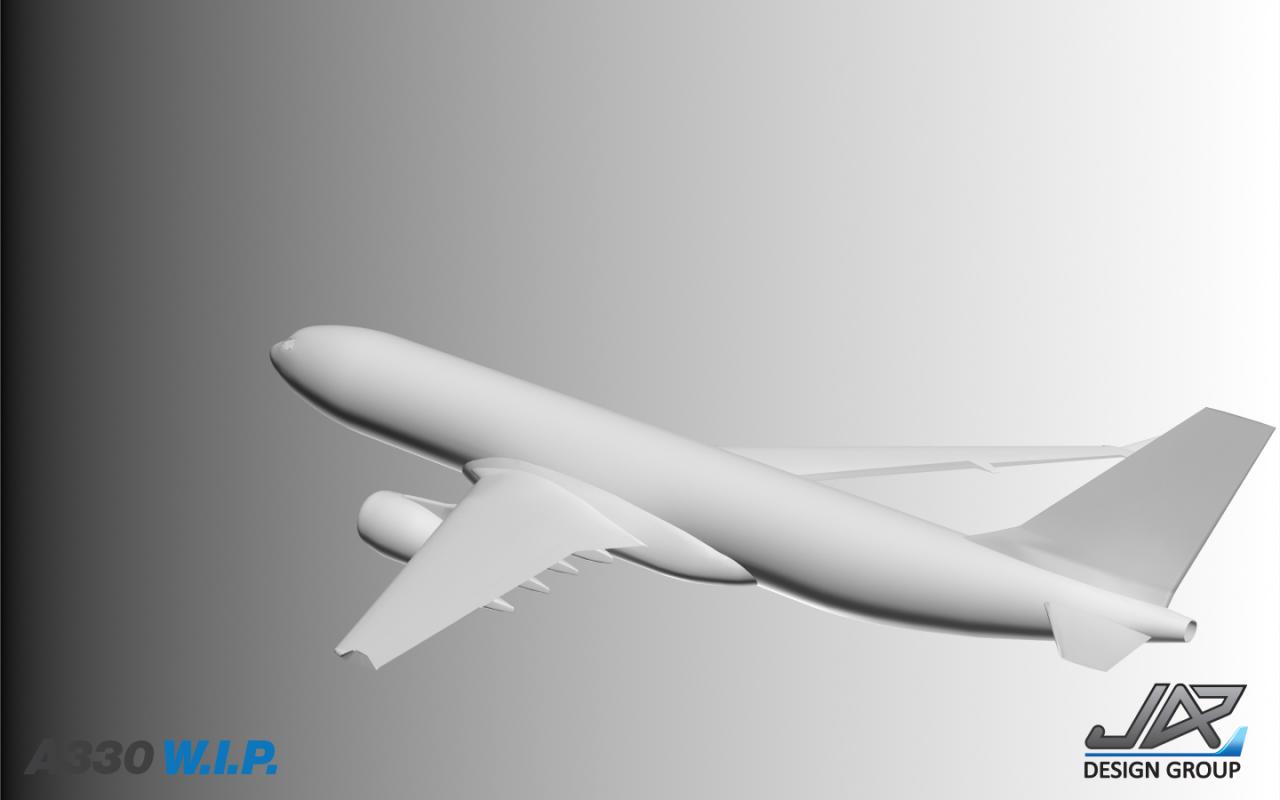
When the A320neo was released in December 2012 it was a revelational, but a slightly incomplete release. Revelational because the package was so complete with not only an excellent 3d cockpit, but also the great features of ground support and a huge list of liveries (60+) to chose from. But on the flight model it was a little bland. A difficult one to fix because the Airbus fly-by-wire system is very complex, and although implementation of the systems in the aircraft was very good, it was in the actual flying model the A320neo came up short. If any developer has given more updates to the A320neo than JARDesign then I would like to meet them, usually in one or two months another update would always be available. I have exchanged more version numbers on the JARDesign A320neo than any other aircraft released in X-Plane. Is that a bad thing?... No not really, because in fact it has created in the opposite effect in that with all the changes to the A320 it has not only been developed into one of the very best aircraft available in X-Plane and fully featured, It is now certainly positioned clearly in the top ten and also now notably in the top five of one of the best value aircraft for your money (around US$40) that in reality it is now also sitting in the US$50-$60 price category with the amount of quality and features it now delivers. But JARDesign is not stopping here. Due soon is v2 (version 2) with even more added features and enhancements. As noted the earlier A320neo was not the most perfect model of Airbus systems flying. However now with the many updates it is very good to excellent with still more enhancements to come. v2 will now have a full custom PDF (Primary Flight Display). And an authentic ISIS (Integrated Standby Instruments System) A fully customisable Autopilot and the DCDU (Datalink Control and Display Unit) will show the Departing and Arrival Weather (metar) information. And a racetrack "Hold" function will be added to the FMGS (Flight Management and Guidance Computer). Other features coming are "Dynamic" Rain and Camera Shake effects. And the Followme car will now be part of the package and not as now an option. Release of v2 will be (hopefully) before Christmas or certainly very early in 2014. The Airbus A320neo is now available from the X-Plane.Org Store: Airbus A320 Neo - There will be a free upgrade to v2 when available for users that already have bought the A320neo or will purchase the aircraft before the upgrade. Price is US$39.00 Announcement of JARDesign's next project : Airbus A330 I was excited on the news of the Airbus A320 v2 upgrade, but I was simply overwhelmed on the announcement by Eugeny Romanov of JARDesign in their next project : An Airbus A330. The Work-in-Progress pictures are excellent in how the aircraft was conceived. But even more interesting is the work that is now progressing past that stage. Most developers do and come close in completing the external design first, then set about the really difficult process of inserting the 3d cockpit into the design. Here the design is to complete the 3d cockpit first into a basic external design. Already the 3d cockpit is showing its form and the effect is going to be overwhelmingly good. Excited. Absolutely! Certainly the choice of the A330 to follow their A320 is a masterstoke in that as the A320neo approaches maturity. Then the experience and skill will be passed directly into the A330 and making it in a shorter time frame an aircraft that is as good as if not better than the smaller Airbus in this family of aircraft. For us pilots the A330 will open up many medium-long routes in the 7,400 km (4,000 nmi) - 13,400 km (7,200 nmi) range. No notes on what version is planned but my guess it is the -200 version. For me the announcement of the coming A330 already sets up 2014 as another big exciting year for X-Plane in aircraft releases. The A330 will fill out a niche of designs that will keep us wanting even more in the future. Stephen Dutton 11th November 2013
-
Xsquawkbox 64bit is released
Stephen replied to Wycliffe's topic in X-Plane Plugins and Simulator Addons
Brilliant, as that ann :)uncement will make many people very happy! -
Aircraft Review : FlightFactor Boeing 757RR-200
Stephen replied to Stephen's topic in Airliners Reviews
Yes I saw that one as well?... I reset the menu of failures and it went away. However you have to understand there is underlying fault system of failures that is programmed into the B757 to replicate the real world's imperfection of machines, It is as real as it gets. -
Aircraft Review : FlightFactor Boeing 757RR-200
Stephen replied to Stephen's topic in Airliners Reviews
The usual load was around 350mb which is well under the 512mb, but you have to be aware of the limitations of my system in running high settings and HDR on the render panel. Otherwise I had no problems. The scenery I used was Manchester EGCC, which pushes the frame-rate very hard on other aircraft of this level and usually runs most below the cutoff 19frames. In this case the B757 performed very well if in the low 20's, but that is very good considering the overall performance. At BIKF in Keflavik the B757 running in the mid-thirties in frame-rate which is excellent. The general consensus in the beta testing is that the aircraft is very good in the flightmodel and no problems surfaced at set weights and pitch attitude at landing, It must be noted that the B757 is complex and with a lot of settings that it would take time to get down to the very precise settings that can only come in time (over the many excel sheets of data that I use) and flights. It is very hands on and tightly variable in the flare between the speed and your landing (In other words a slight change in the speed and weight and wind direction can change the way the aircraft lands). So to be honest at this point it is an area to be explored and calculated to see where the affected changes are noted, but that is also why we do simulation and to find out these interesting variations in the areas of flying and landing aircraft. (The real ones are too expensive!) -
Aircraft Development and Announcement : SSG Boeing 748i
Stephen replied to Stephen's topic in Comments and Announcements
I will tell you soon in the B748i review! -
Aircraft Release : FlightFactor Boeing 757 - Series
Stephen replied to Stephen's topic in Comments and Announcements
Australia!.. The downunder wonder, While you sleep we play! -
Aircraft Release : FlightFactor Boeing 757 - Series
Stephen replied to Stephen's topic in Comments and Announcements
There is a difference between a developer and a development house (Studio). Studios are a business and not just a private project. -
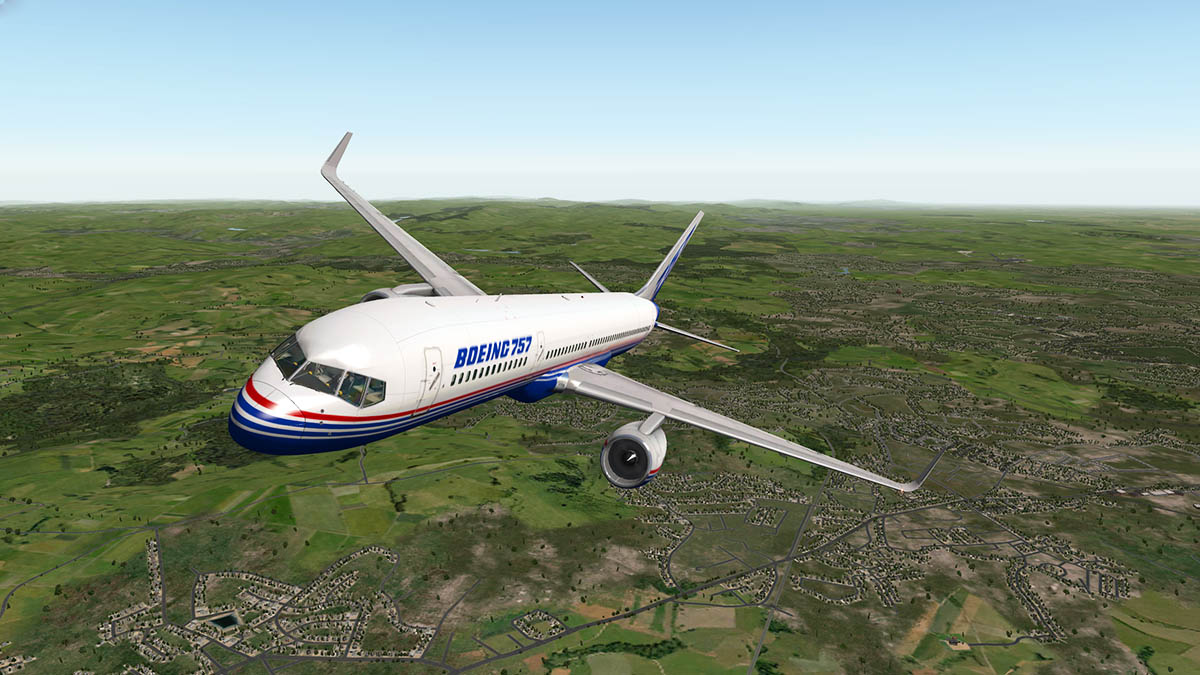
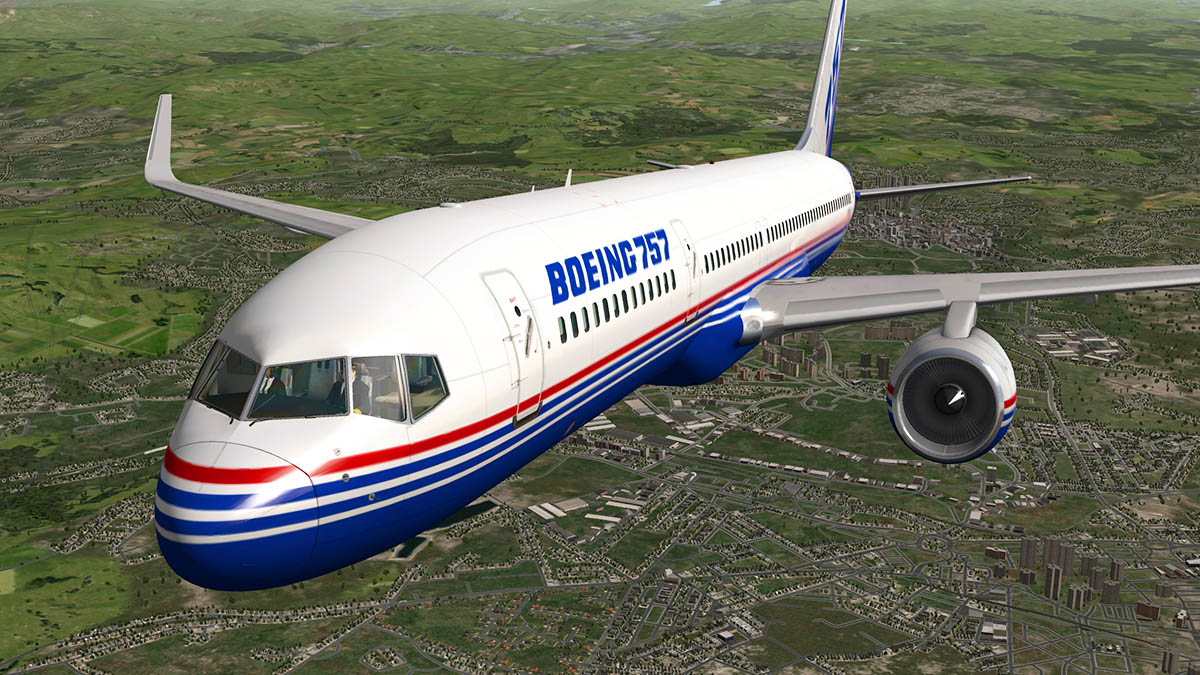
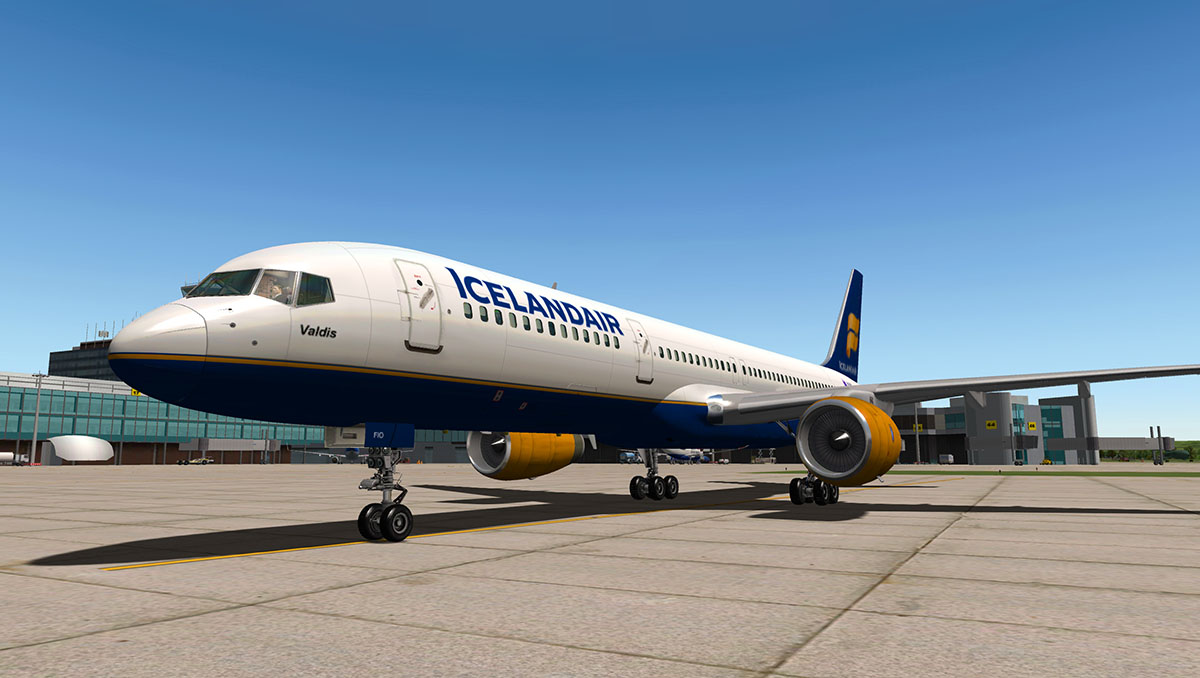
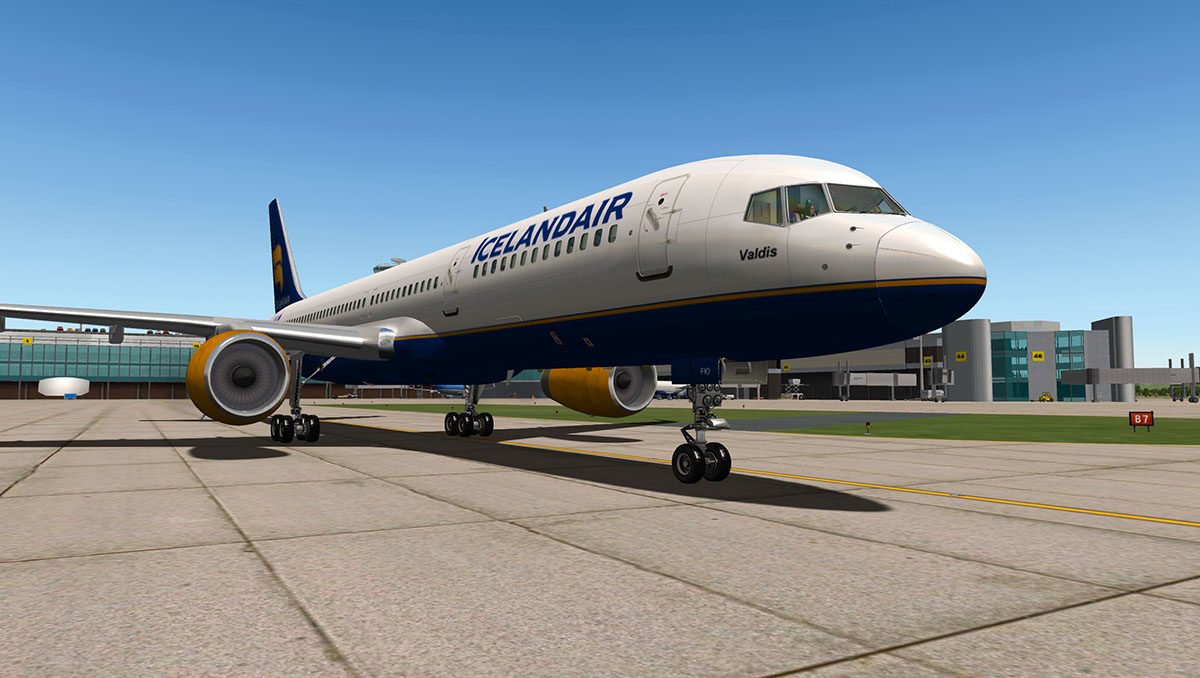
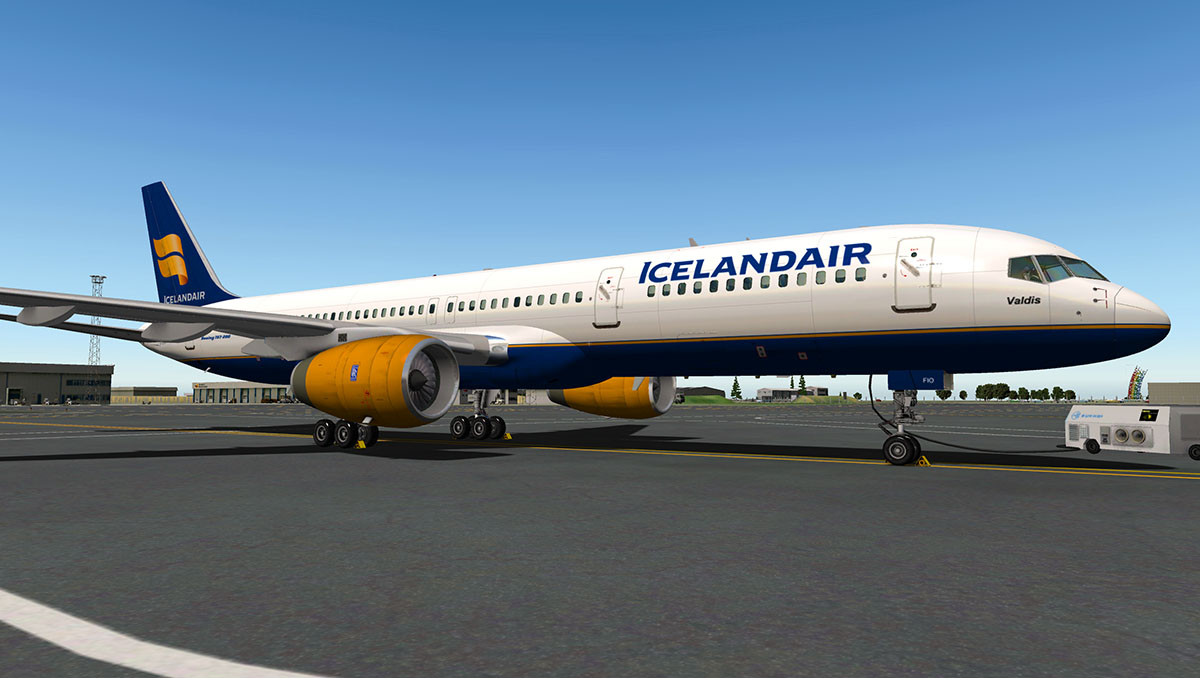
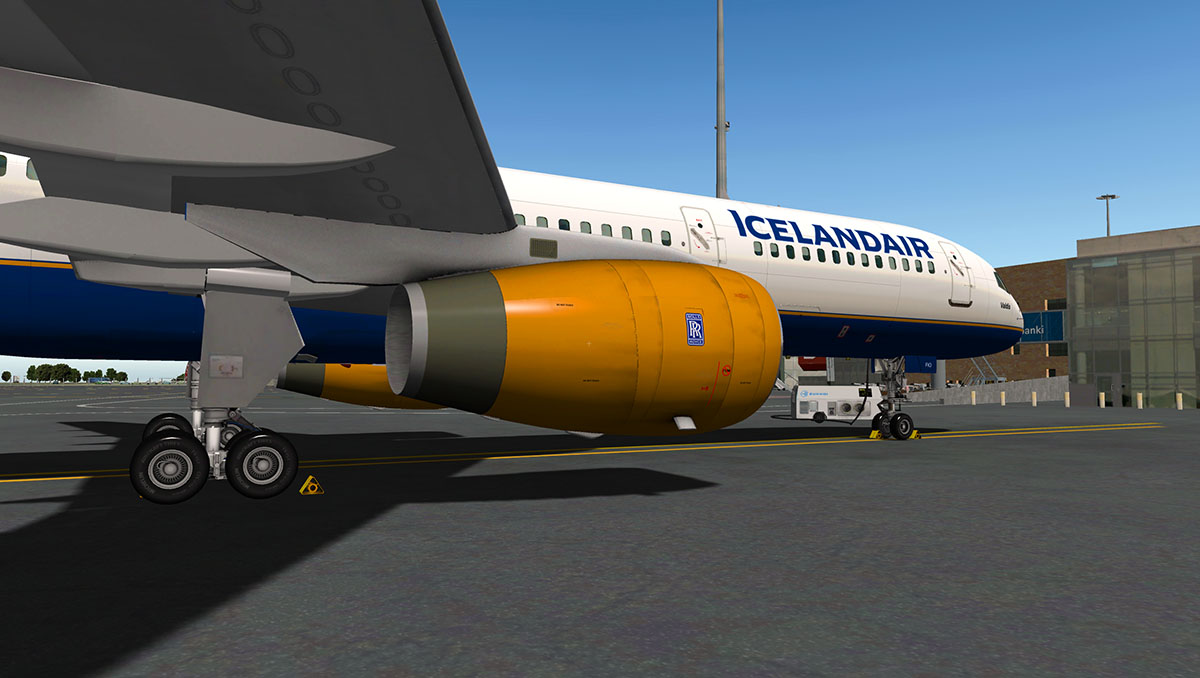
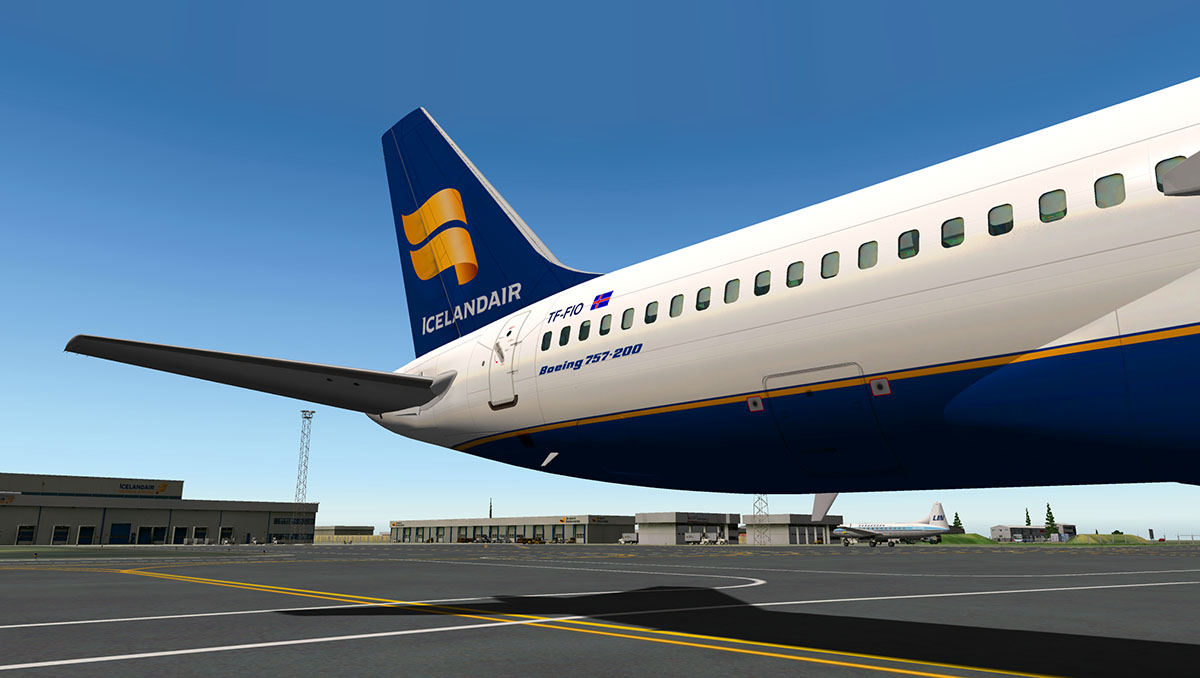
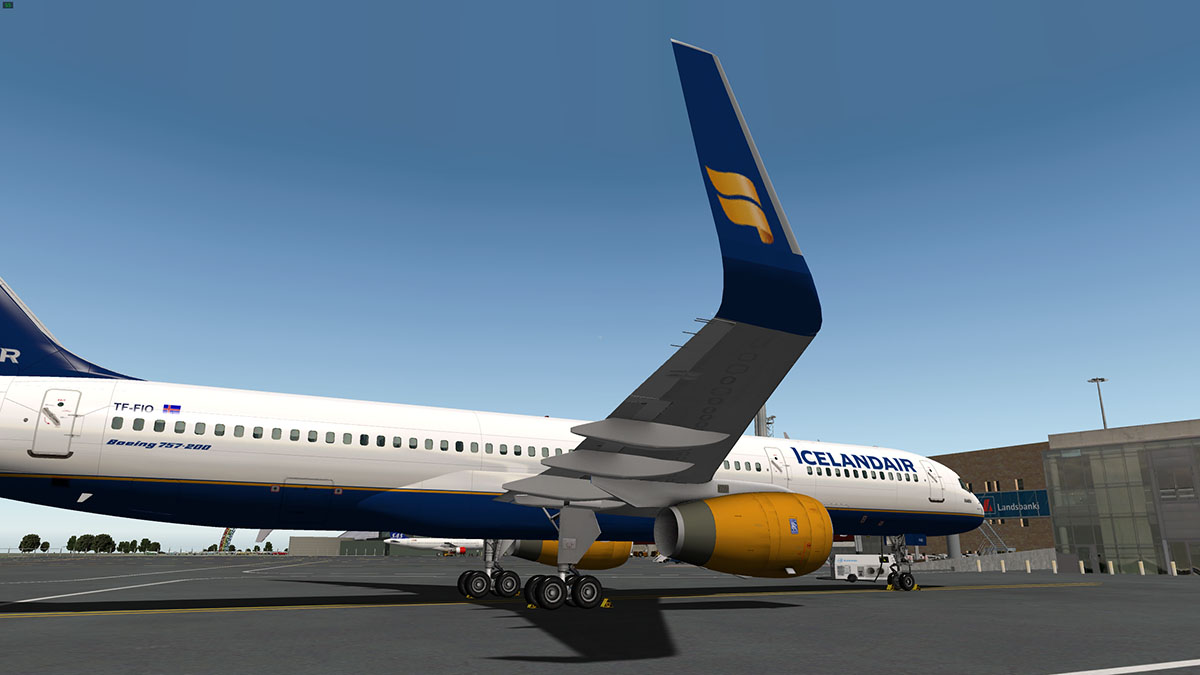
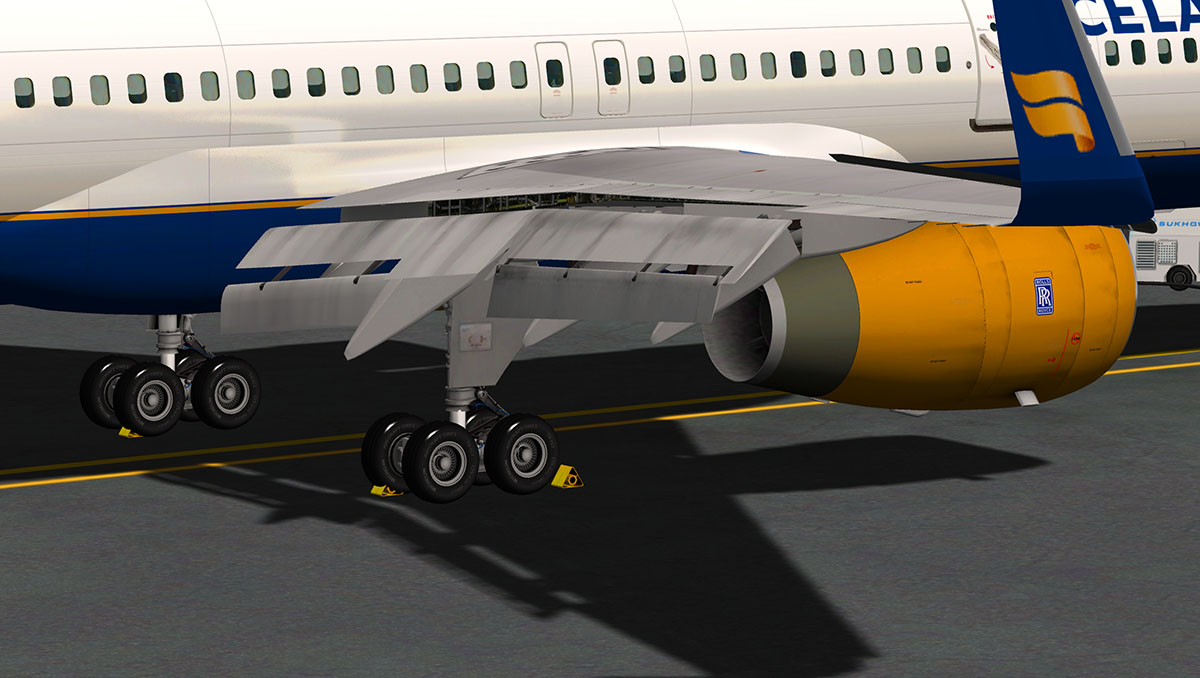
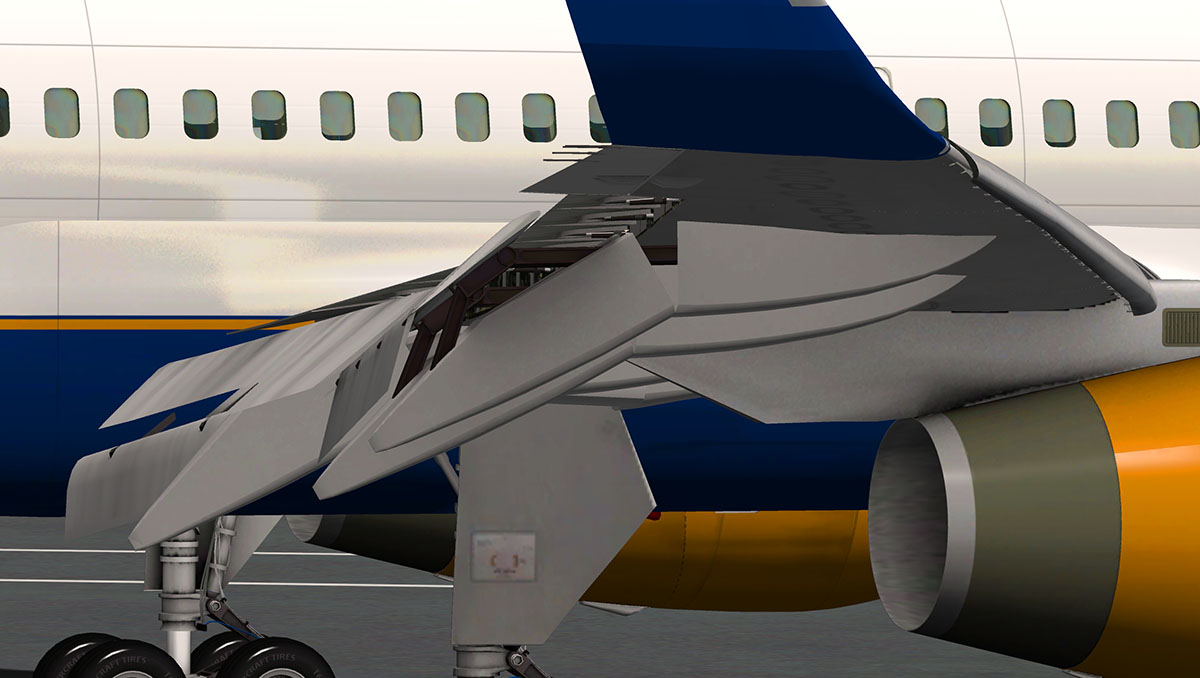
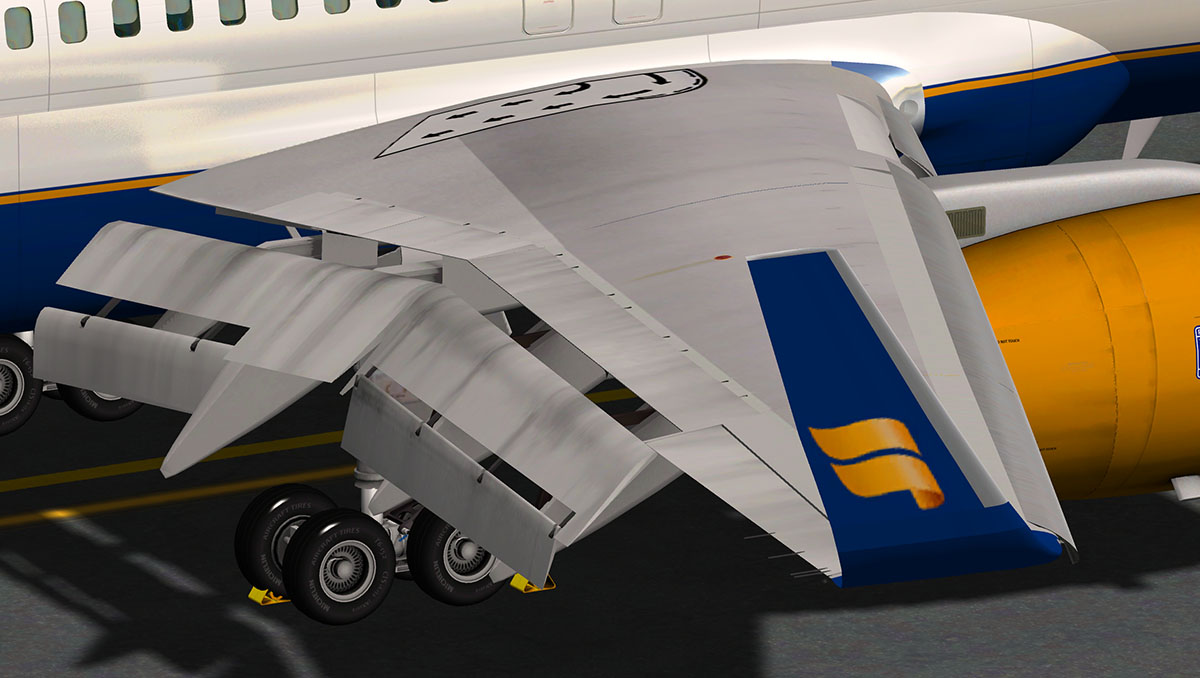
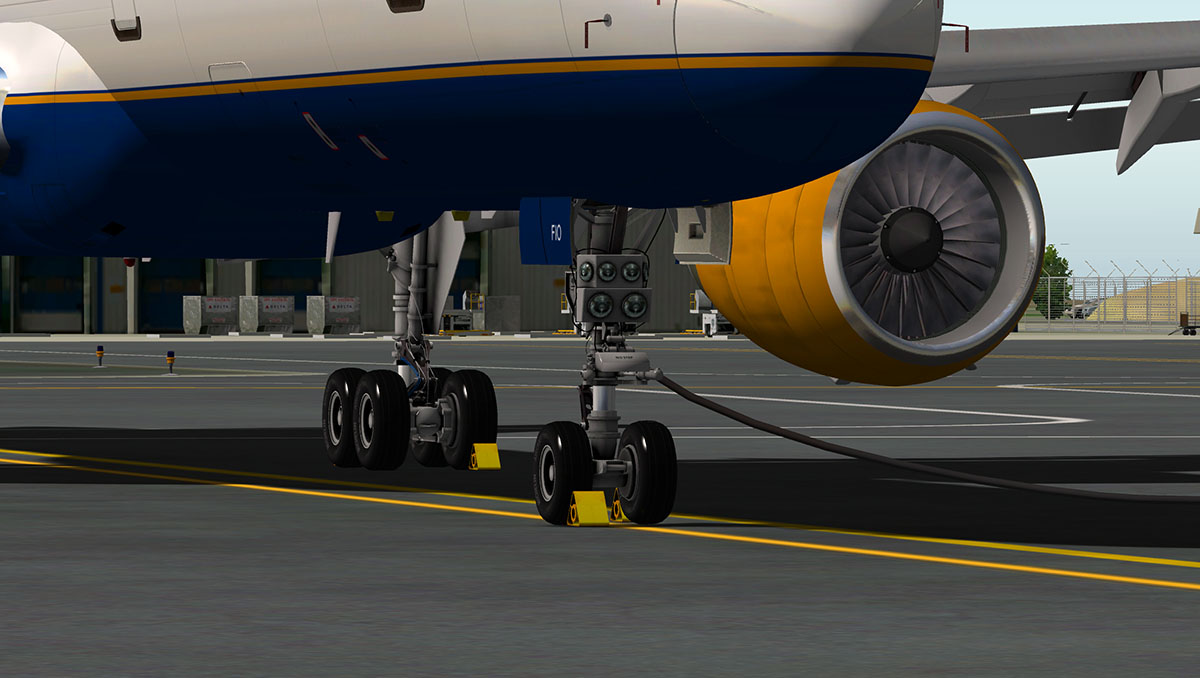
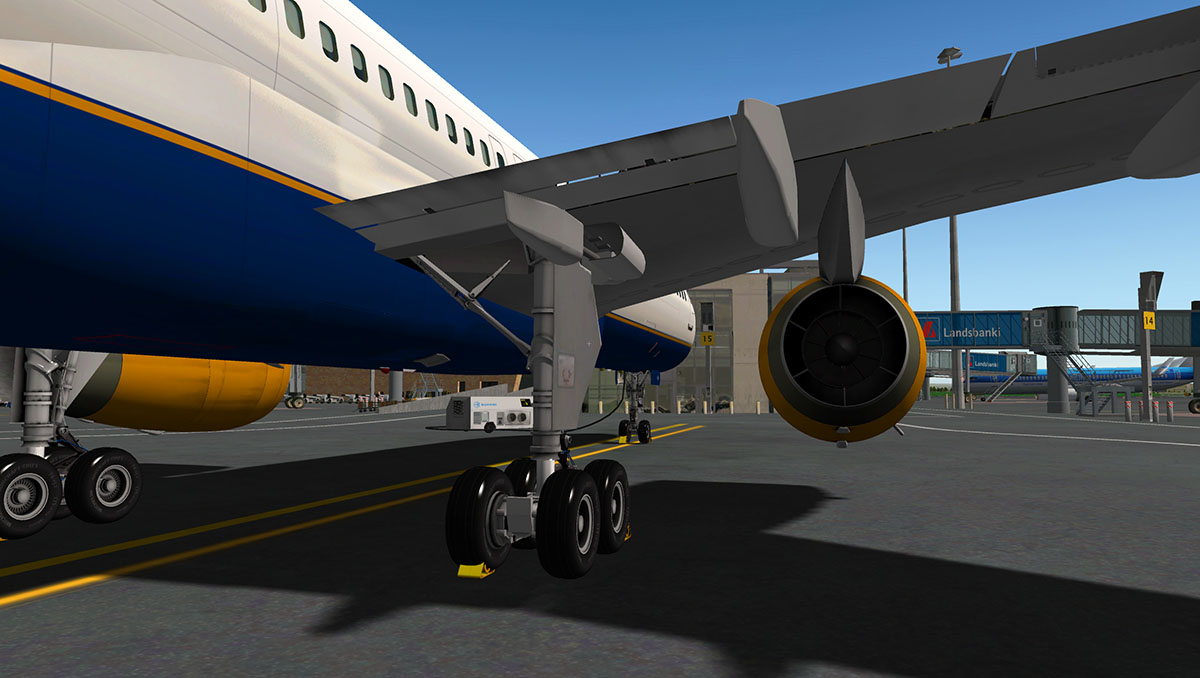
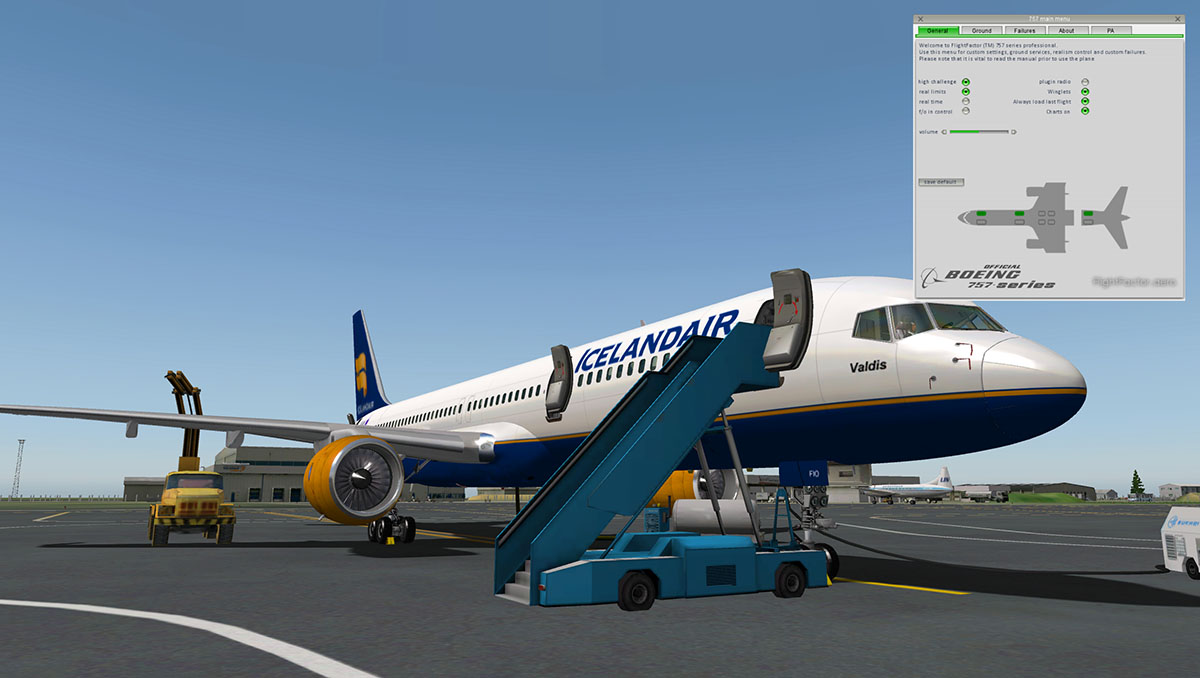
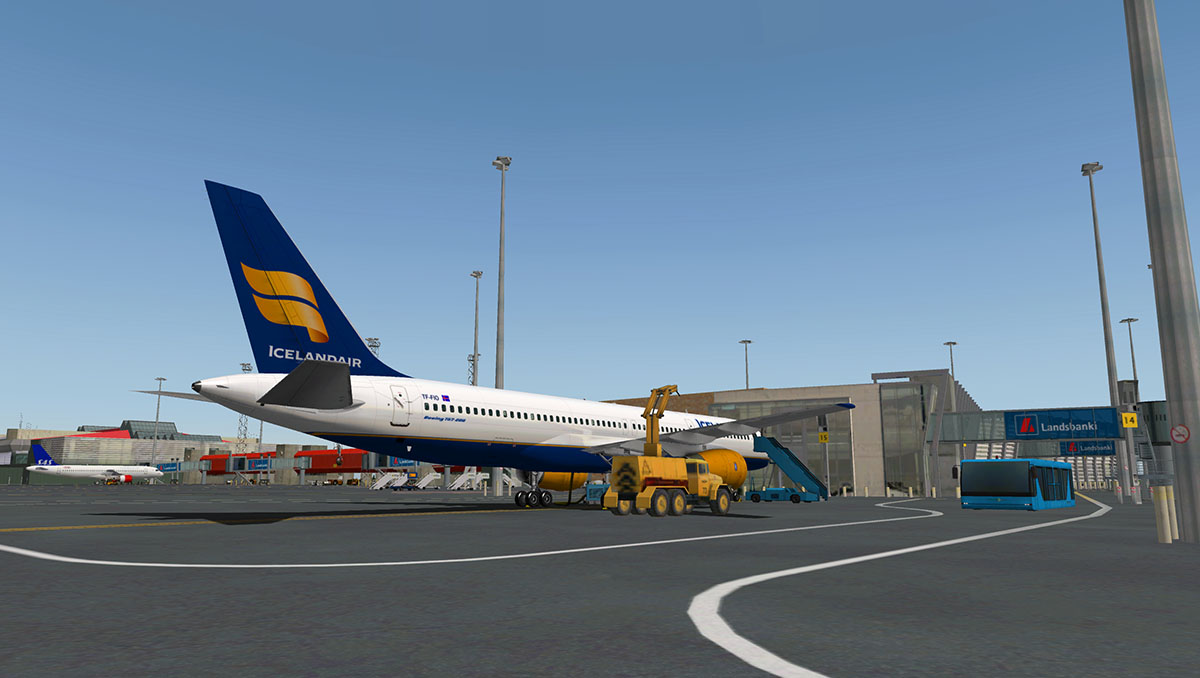
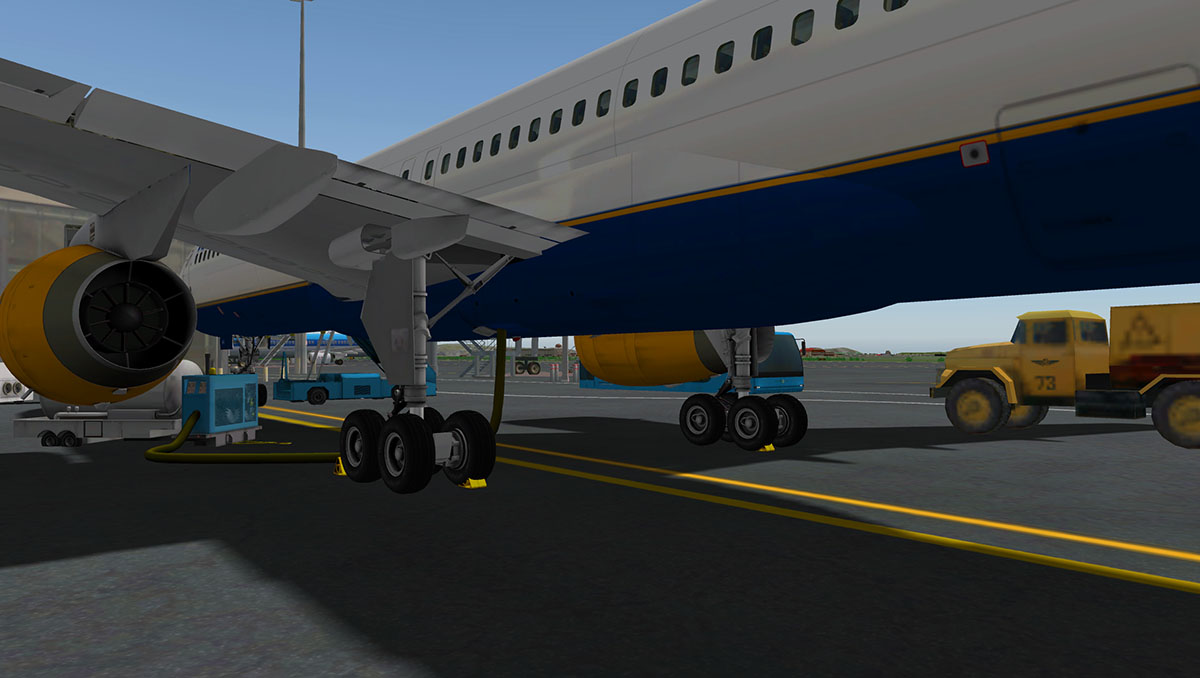
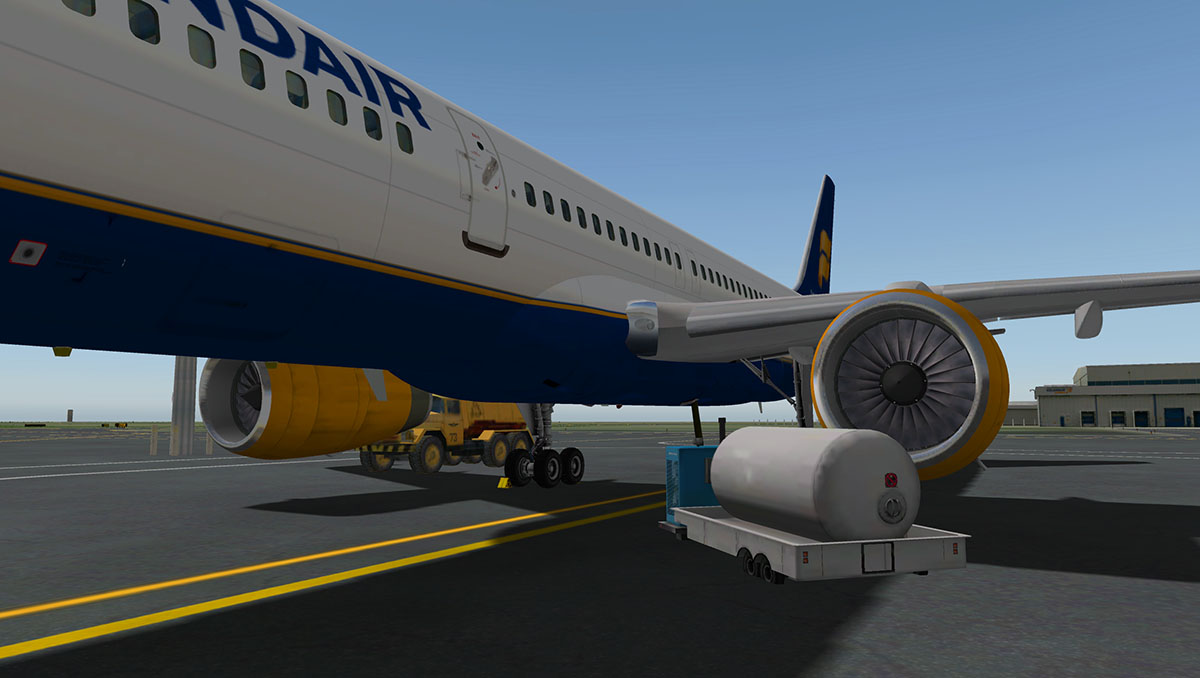
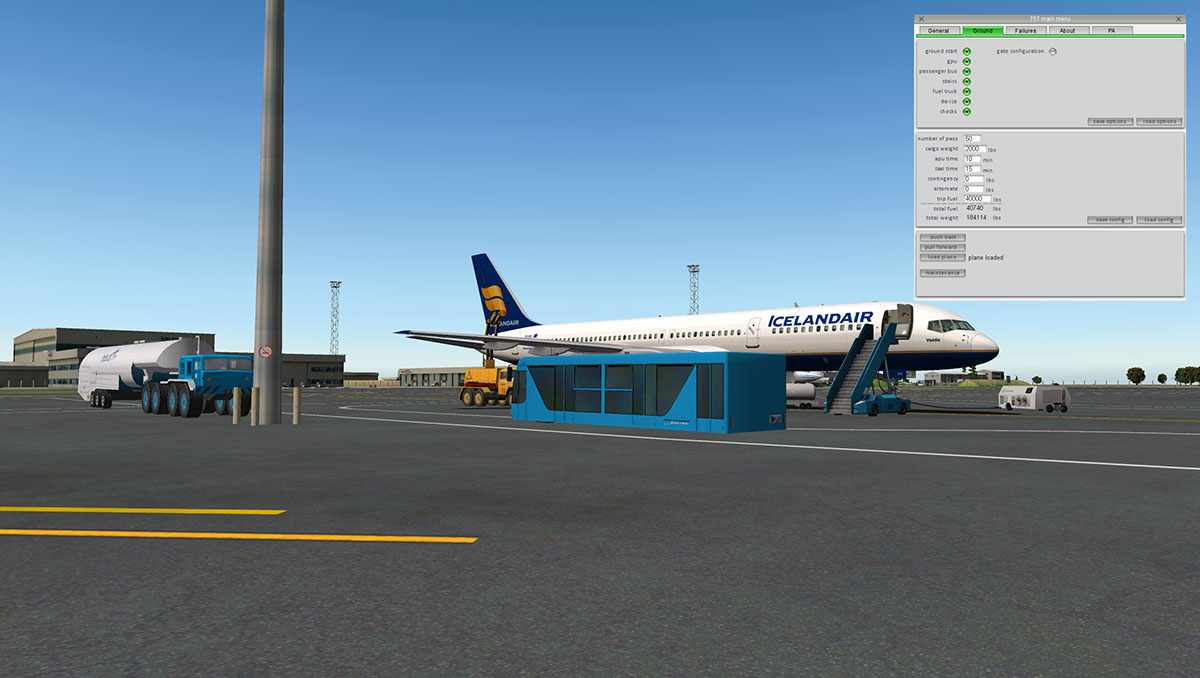
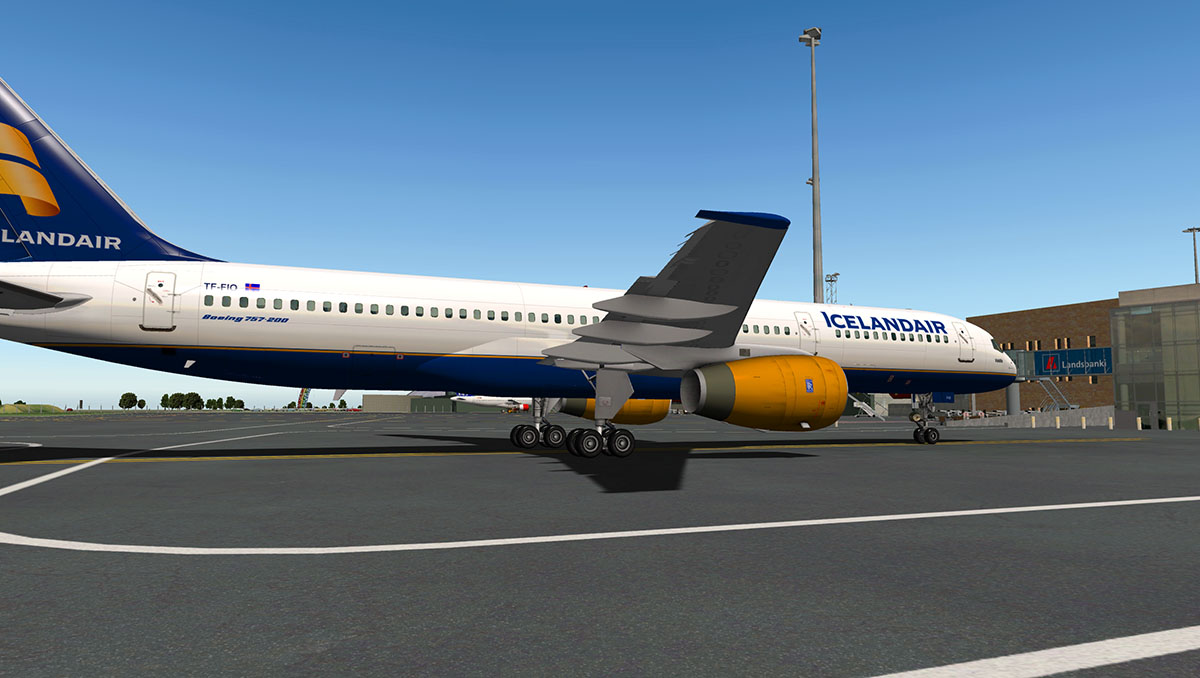
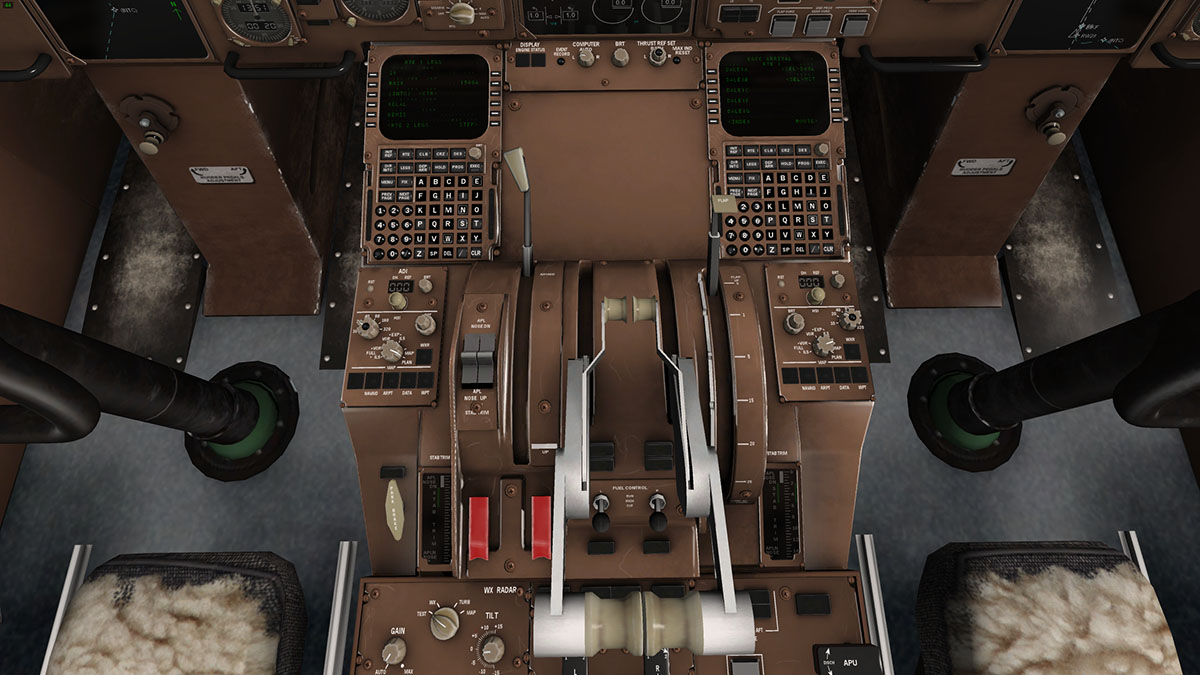
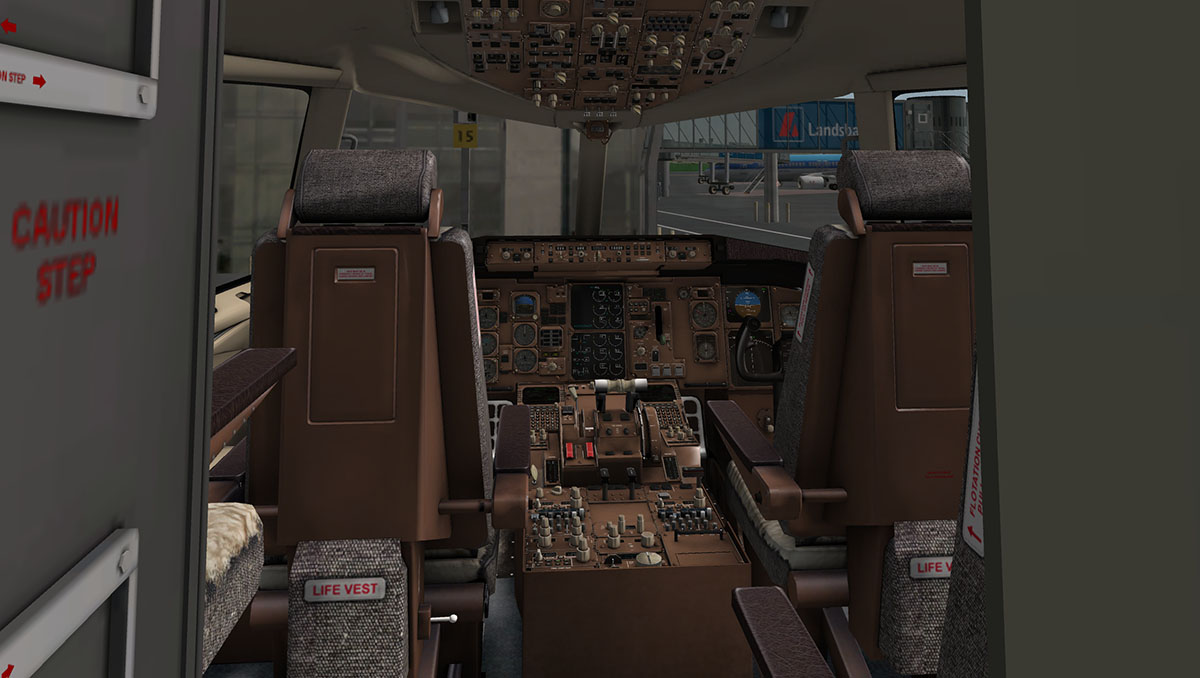
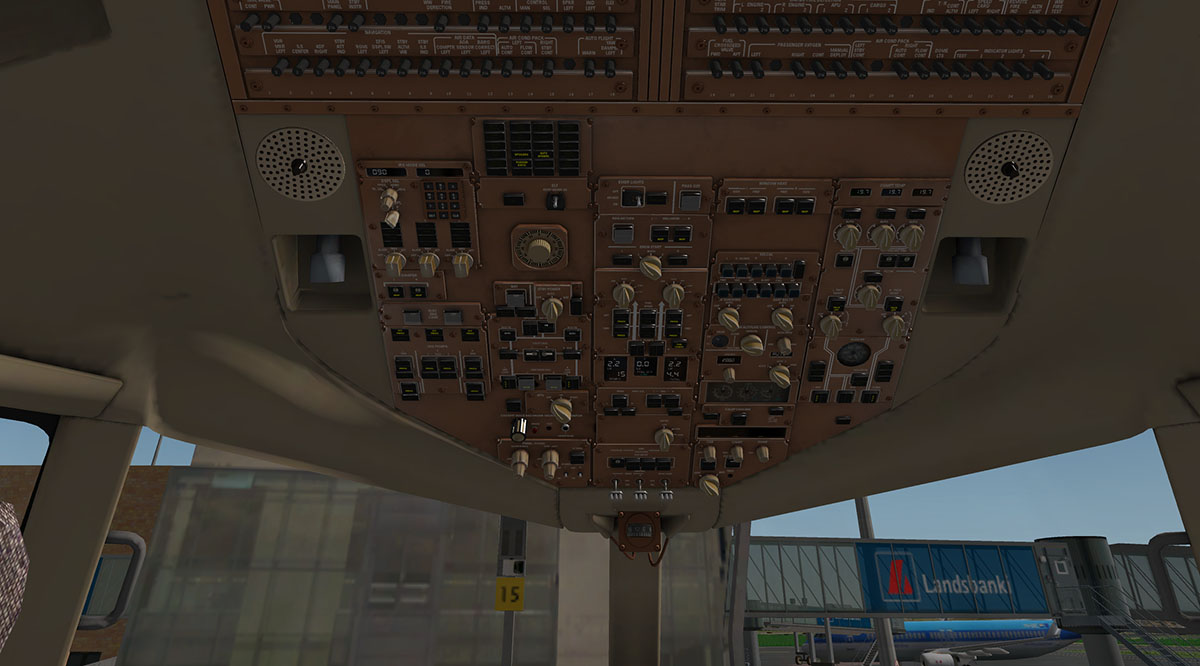
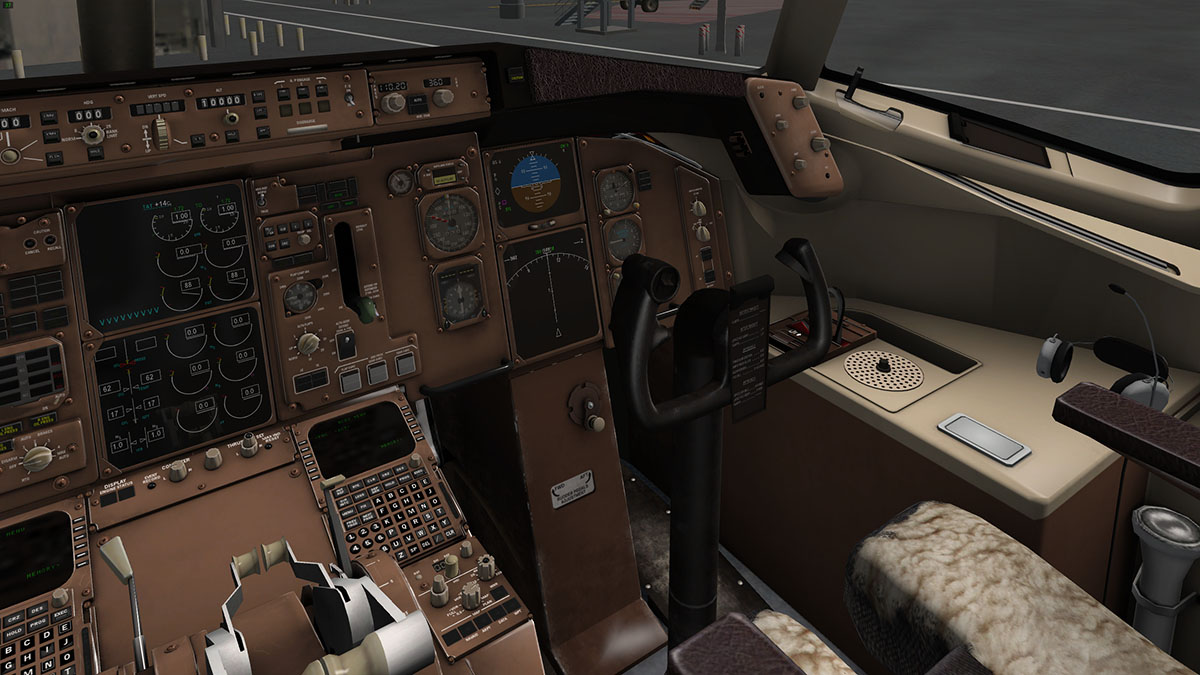
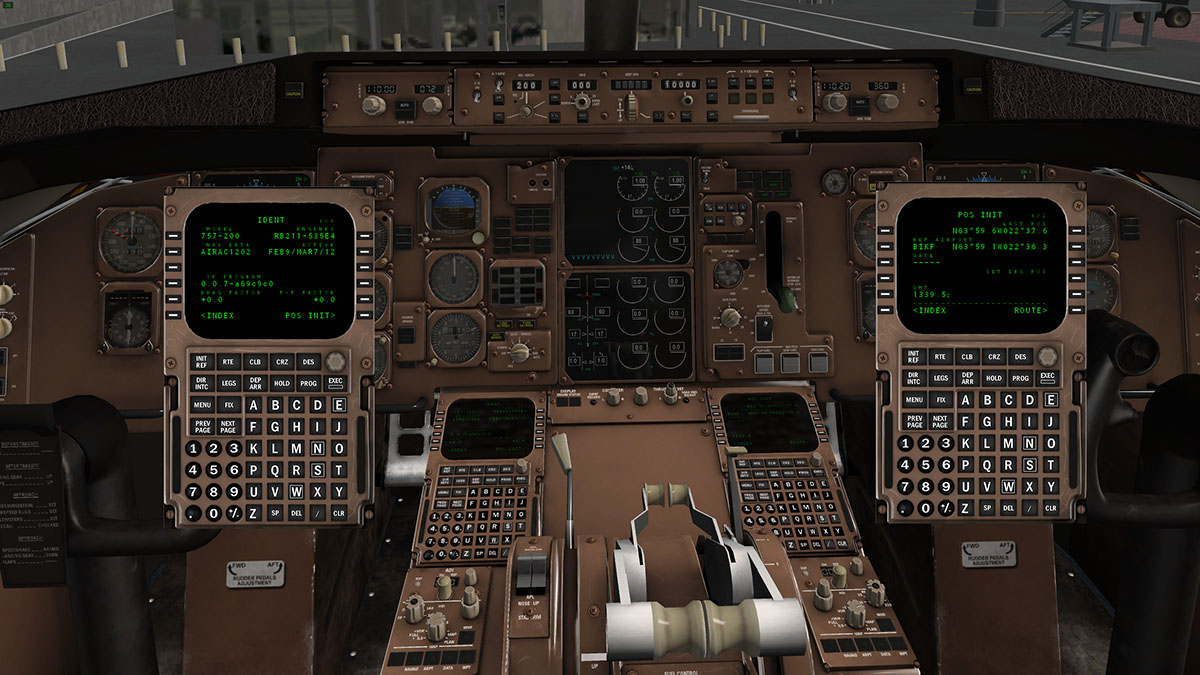
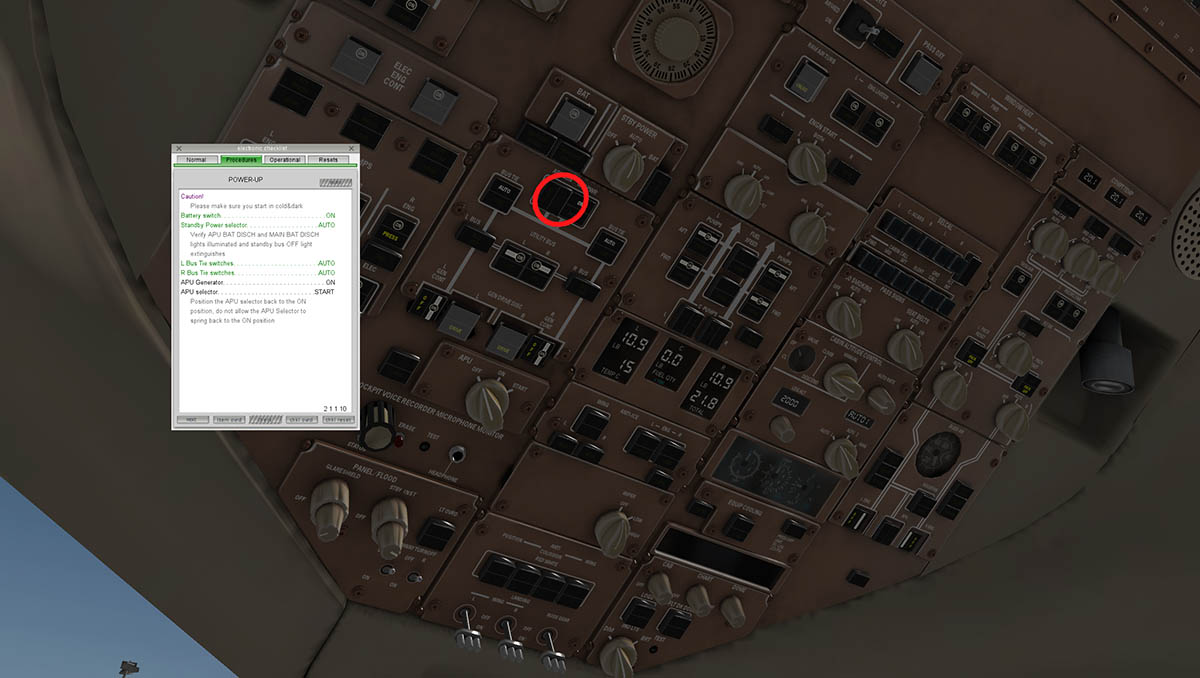
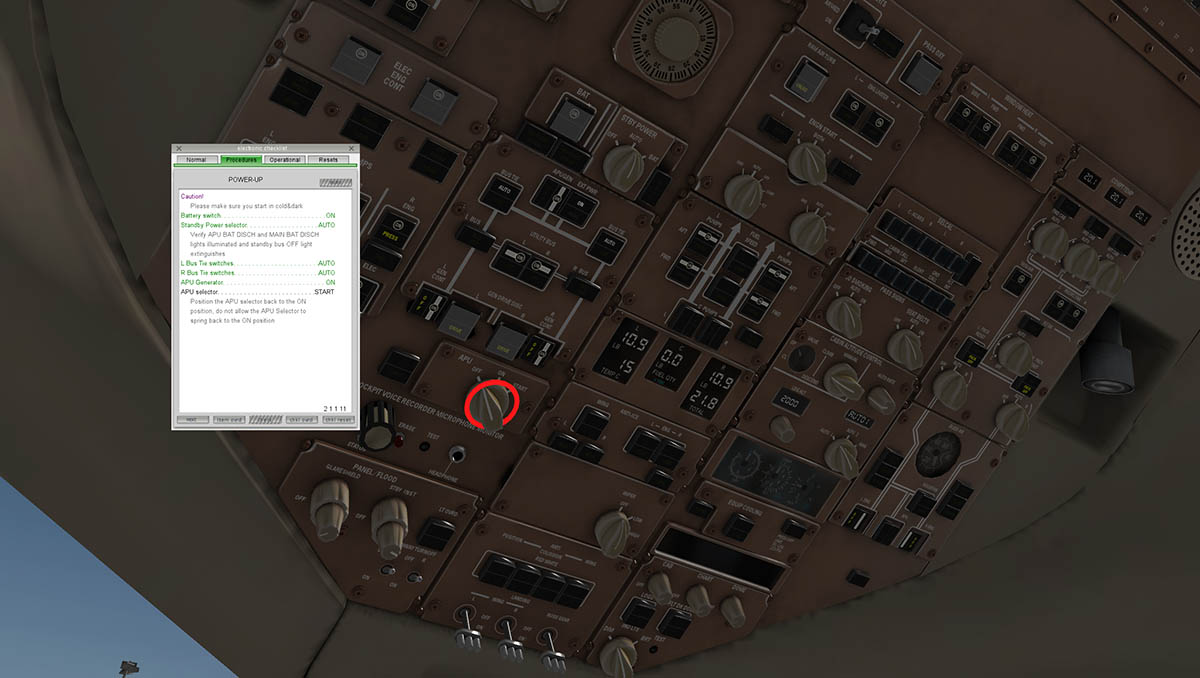
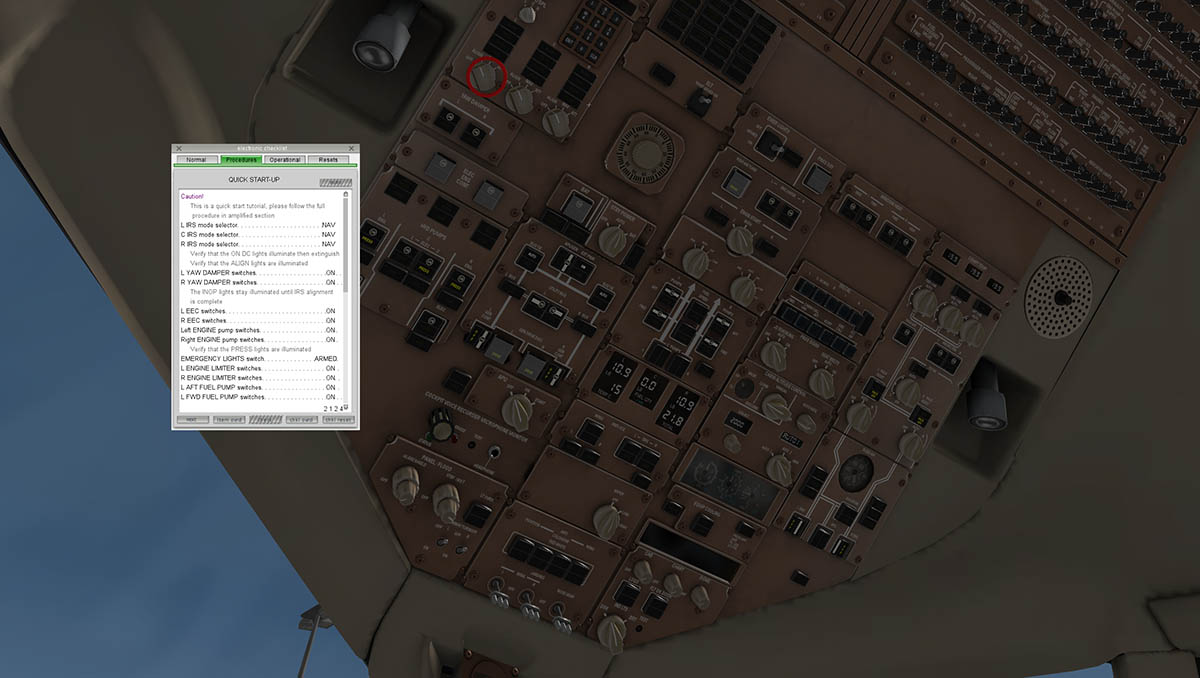
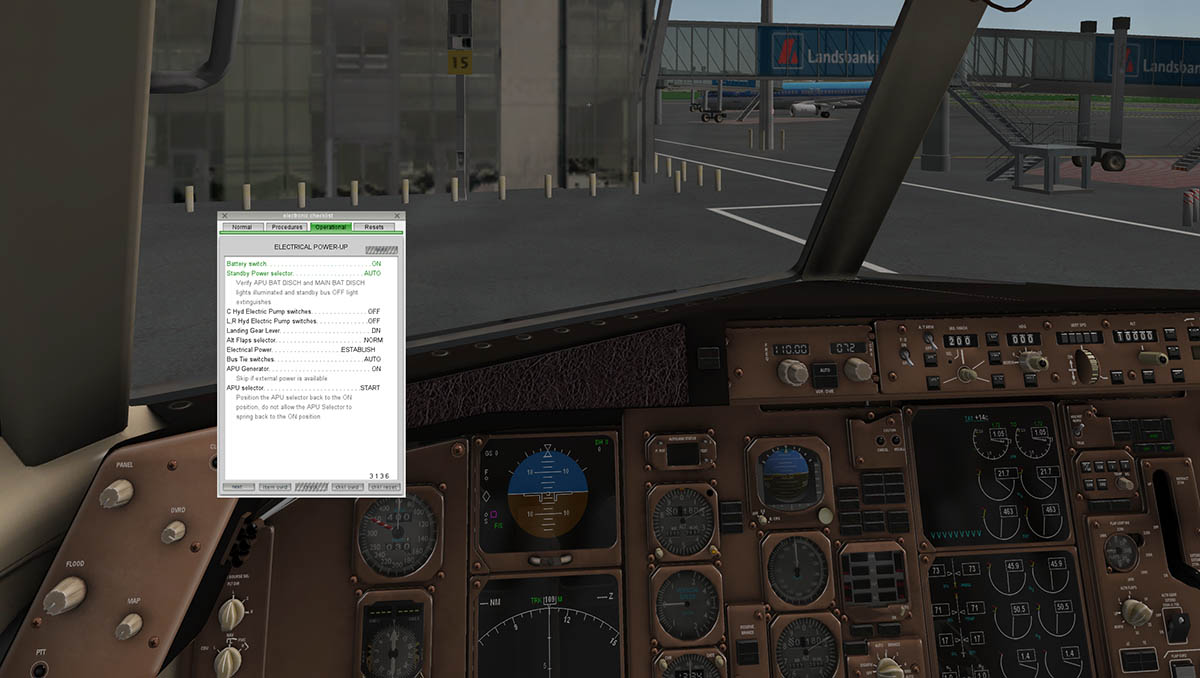
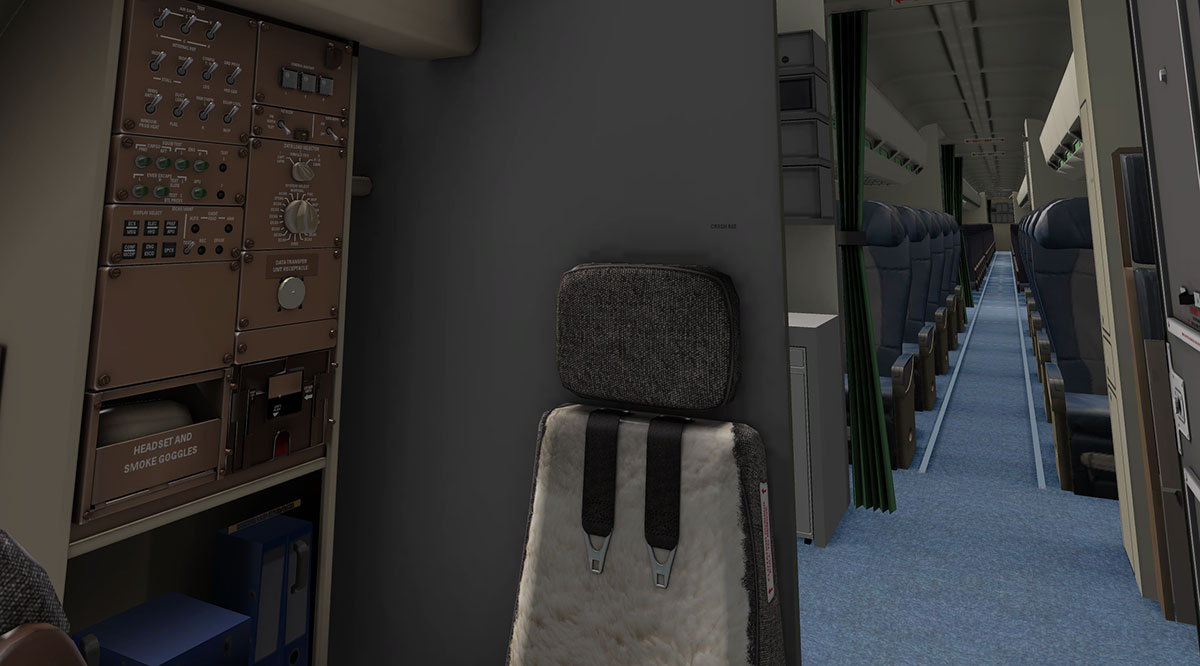
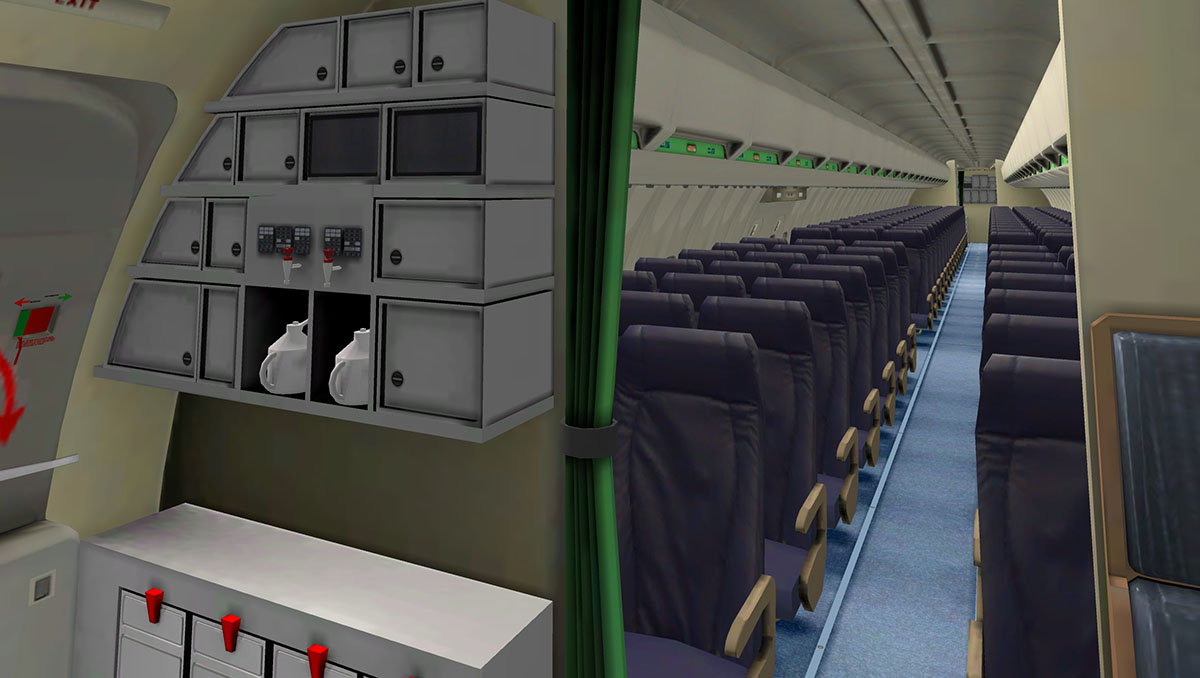
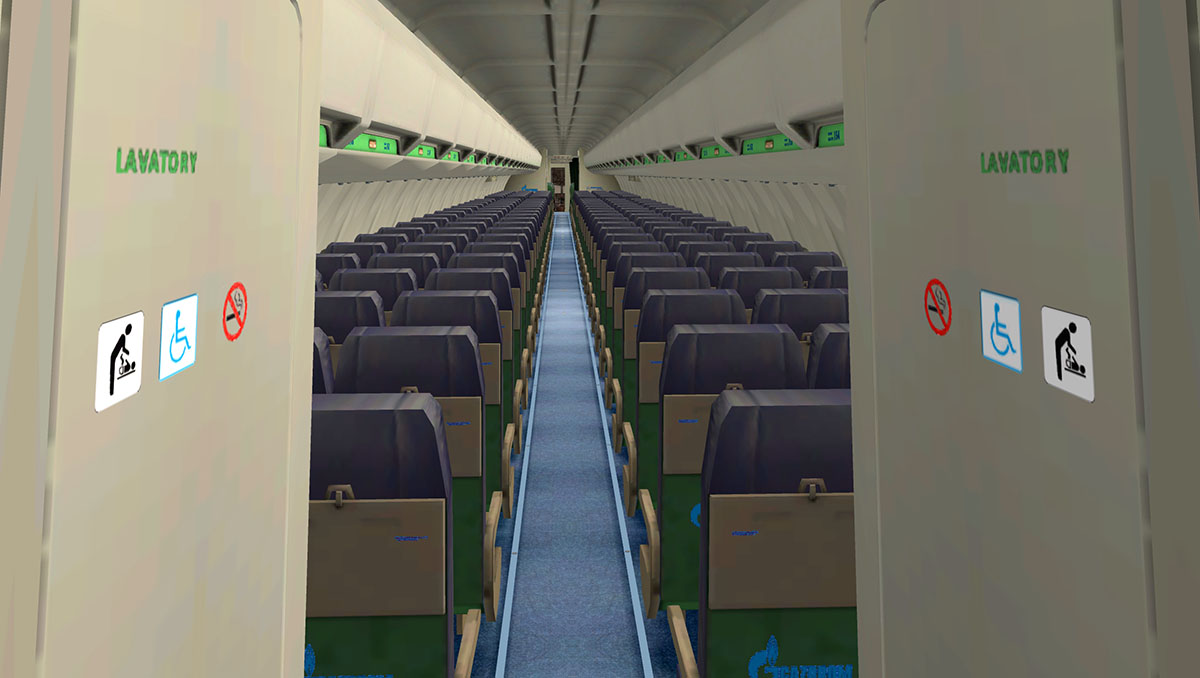
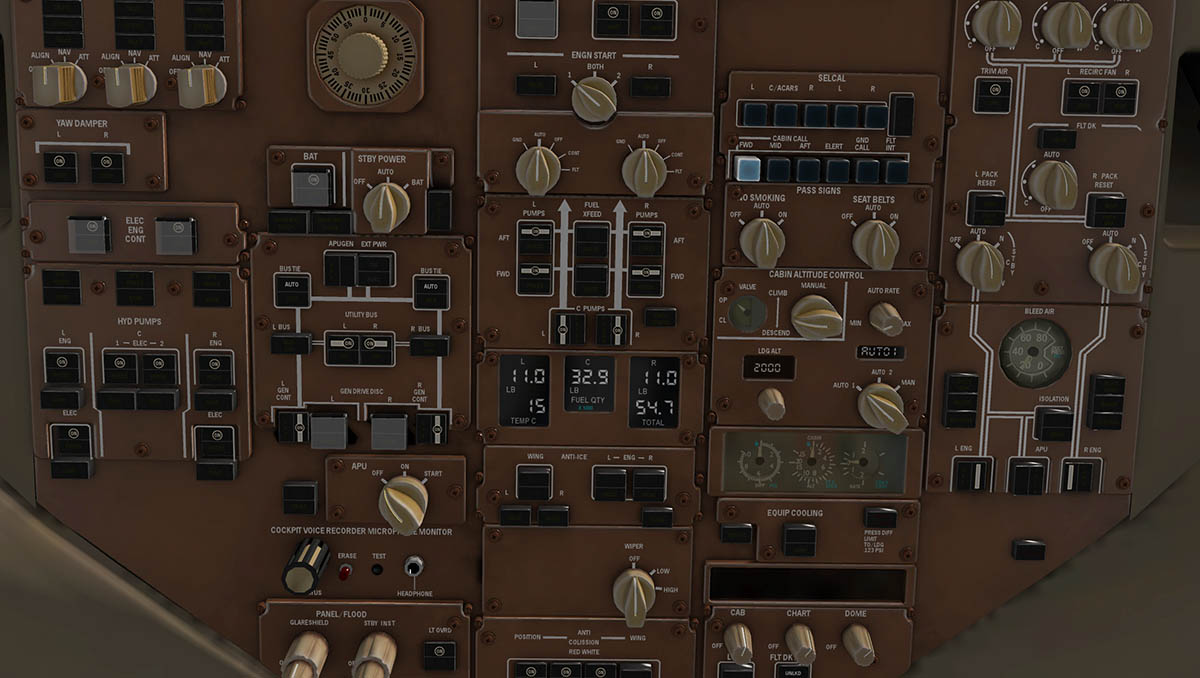
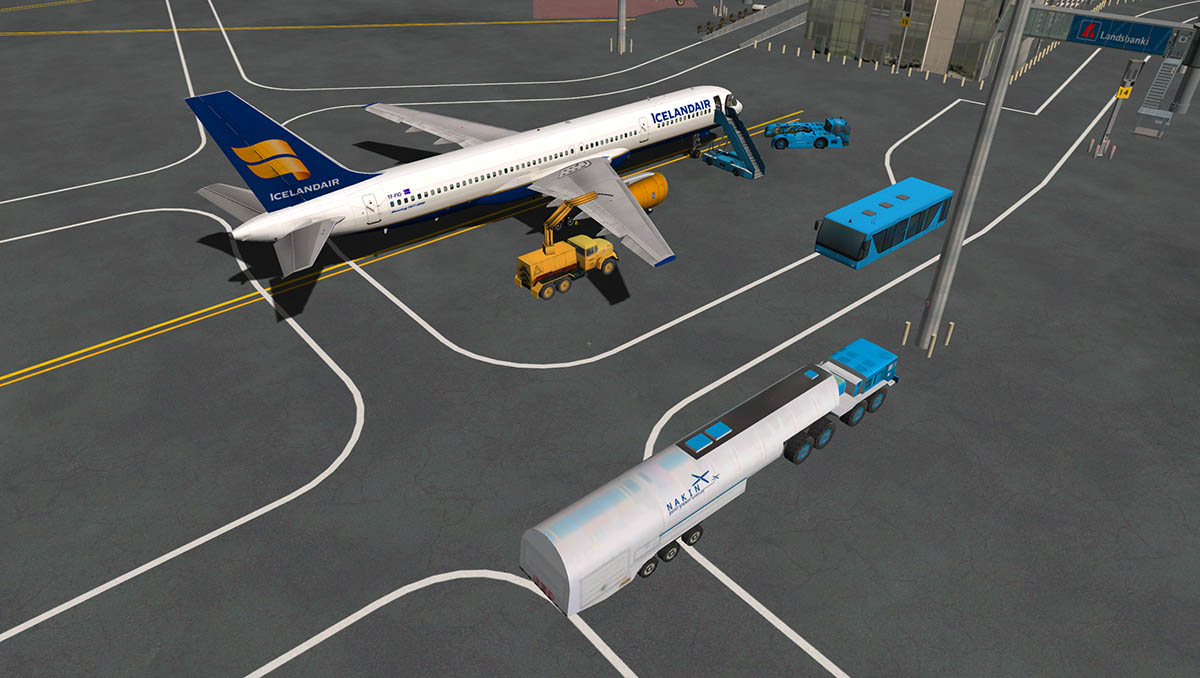
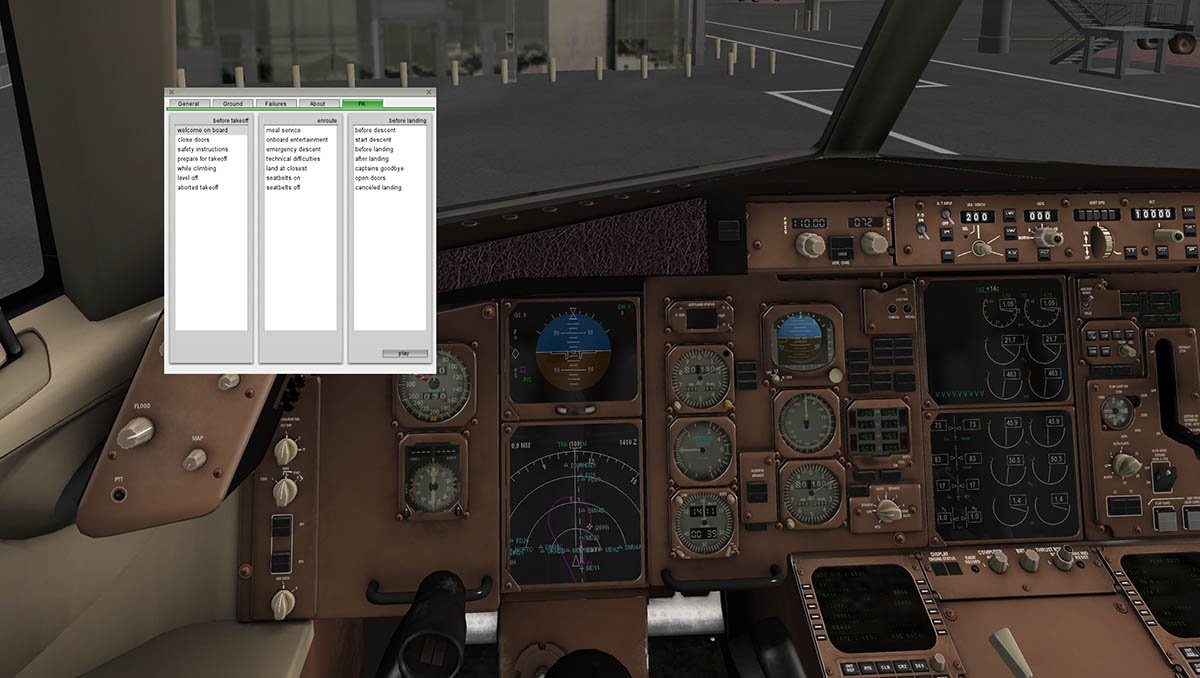
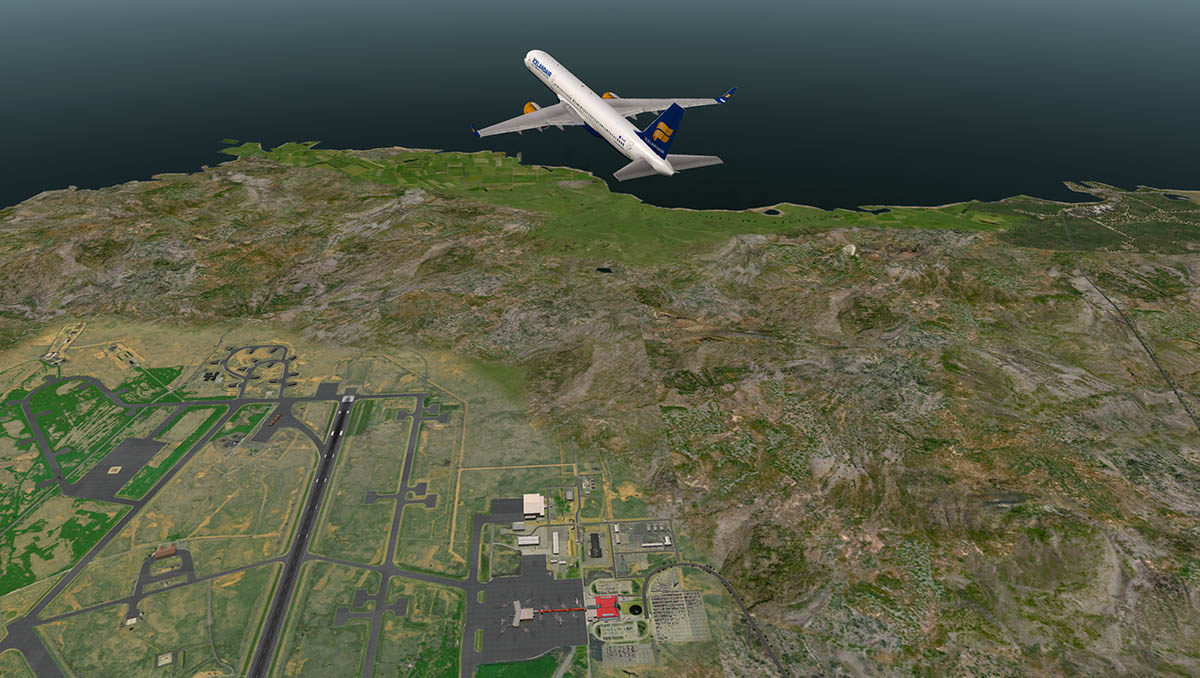
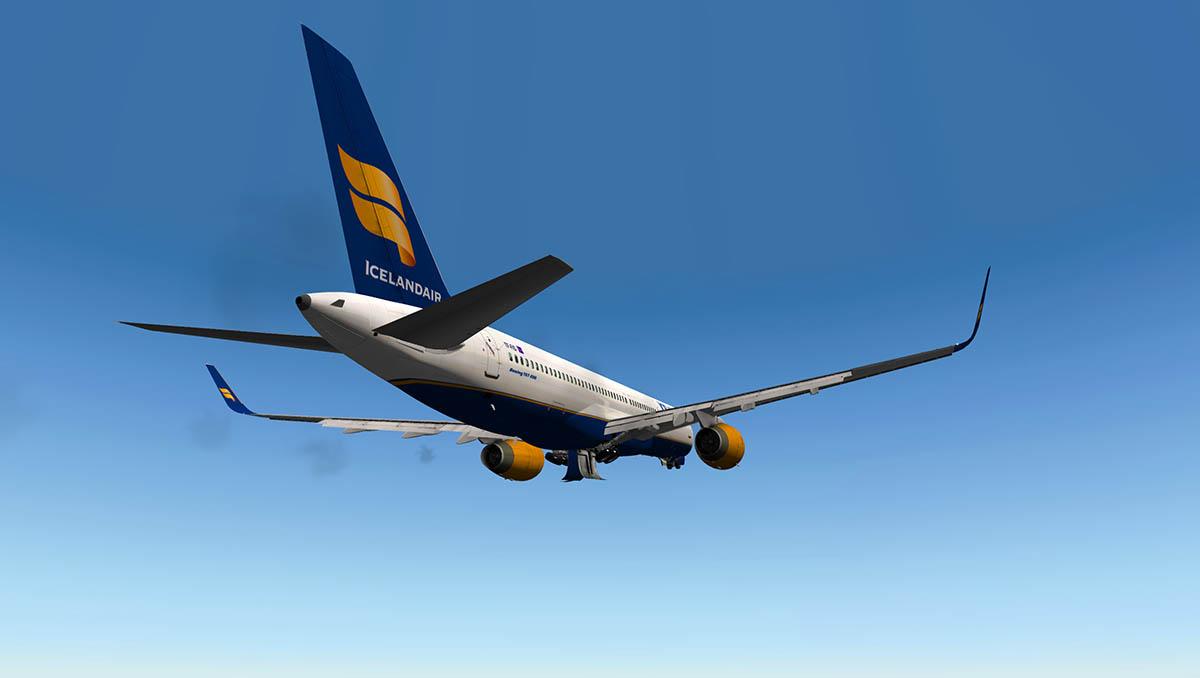
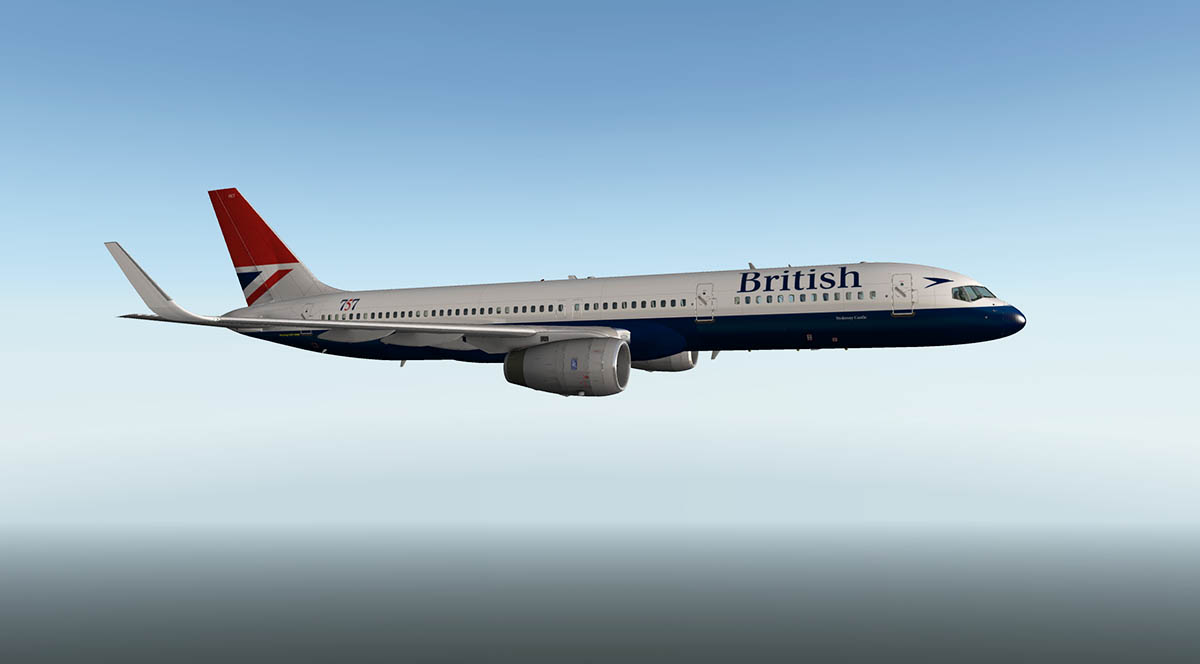
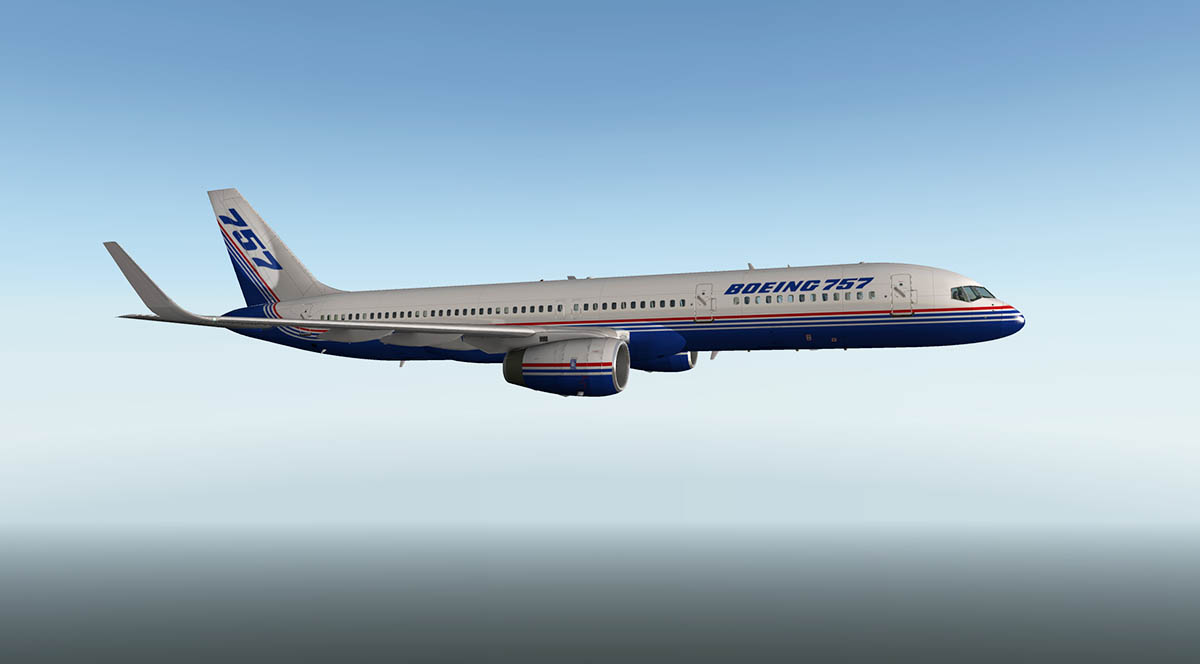
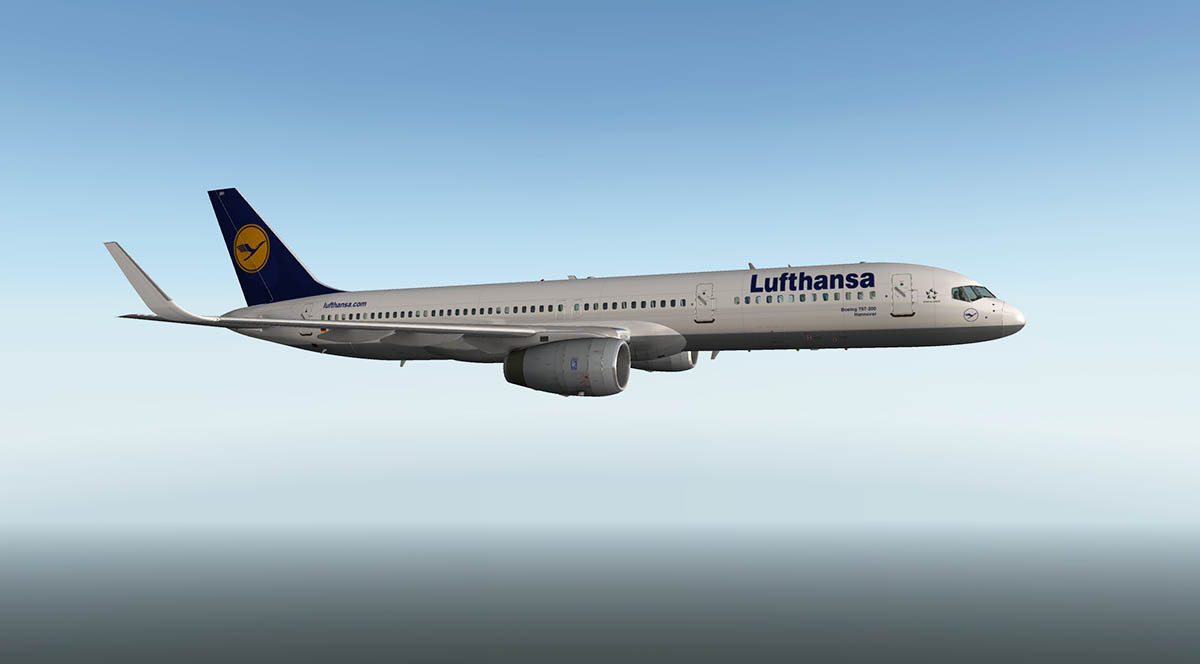
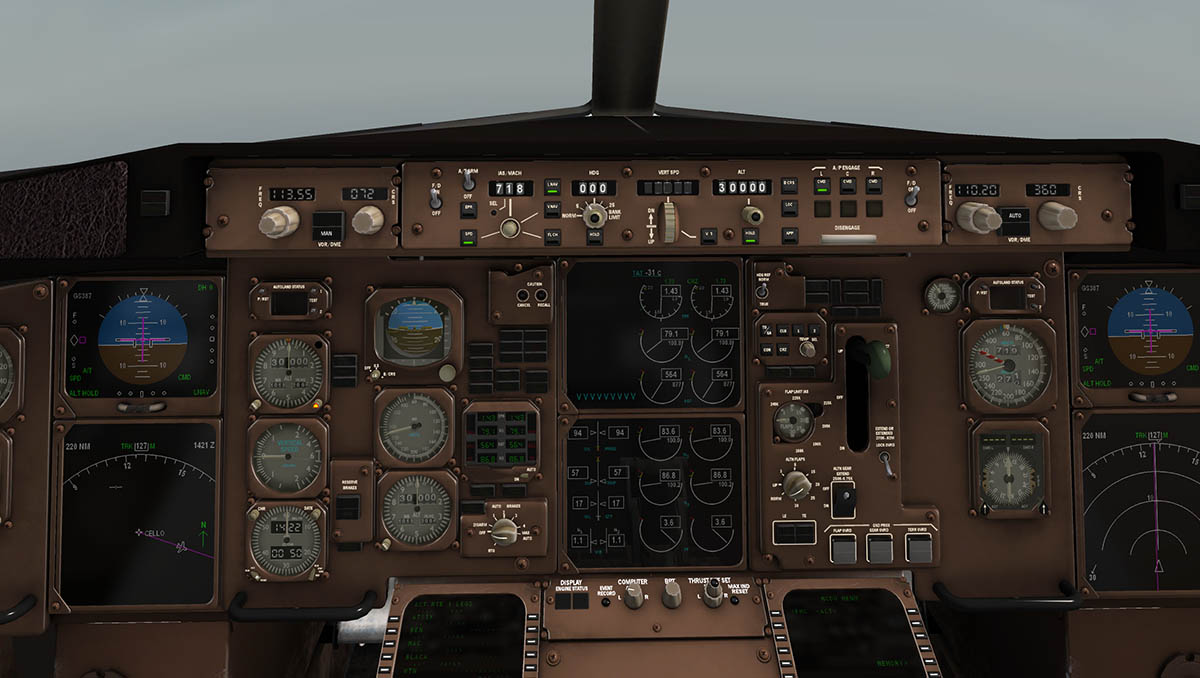
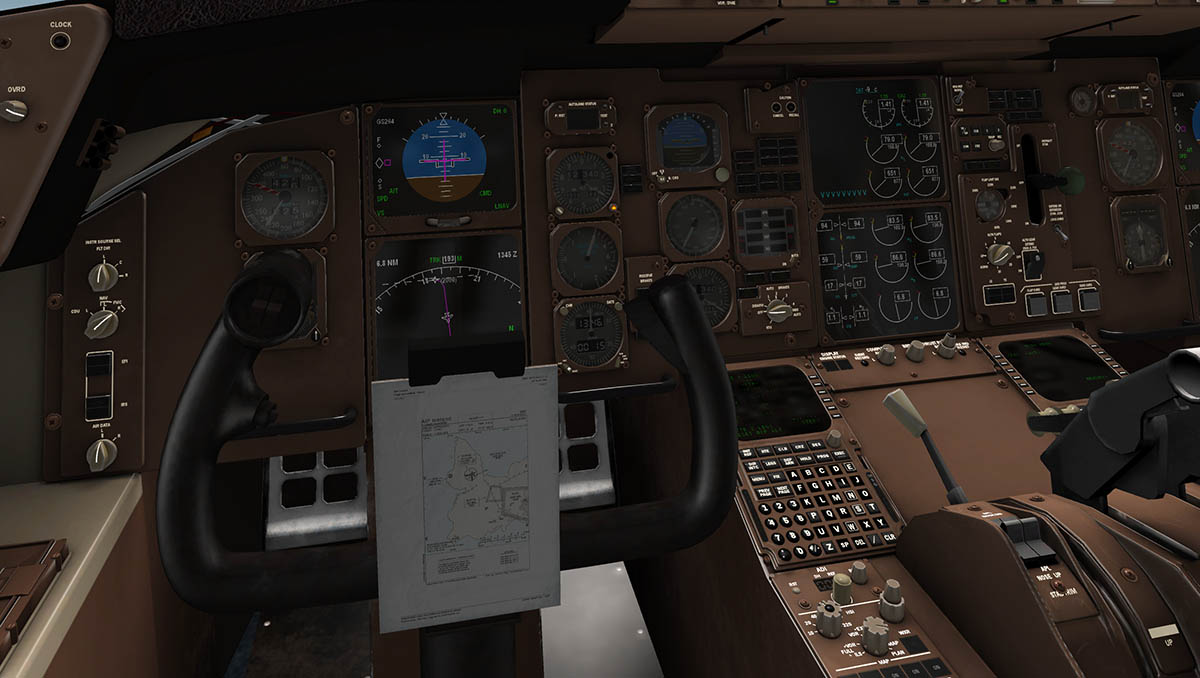
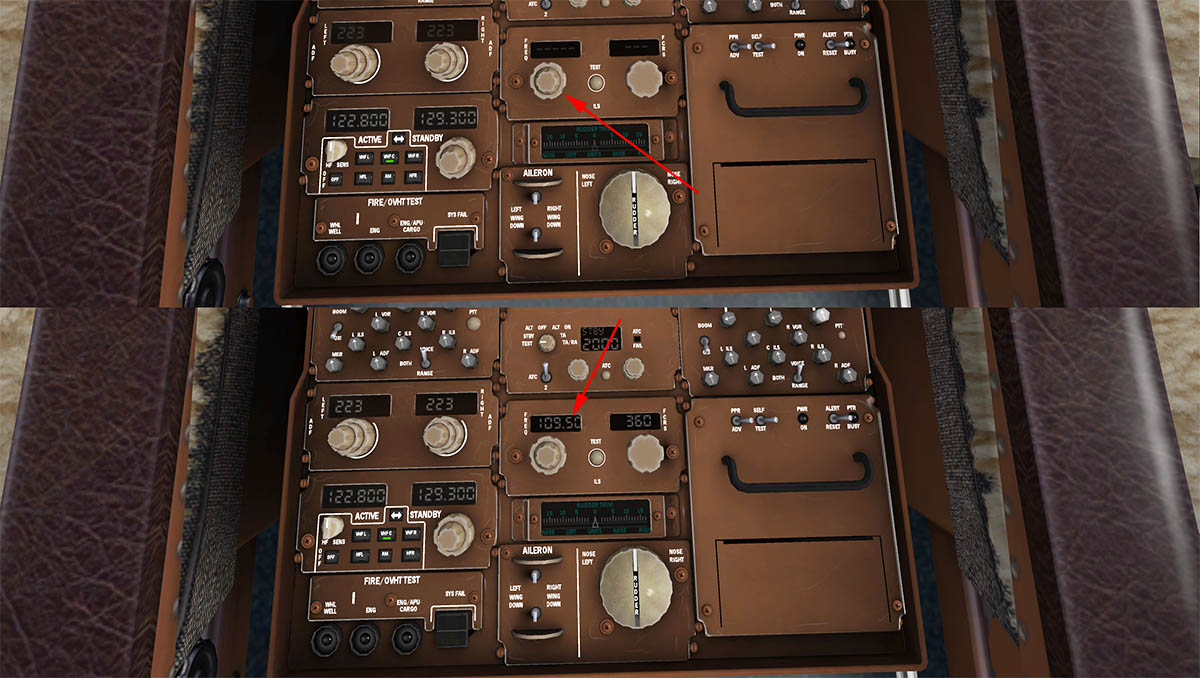
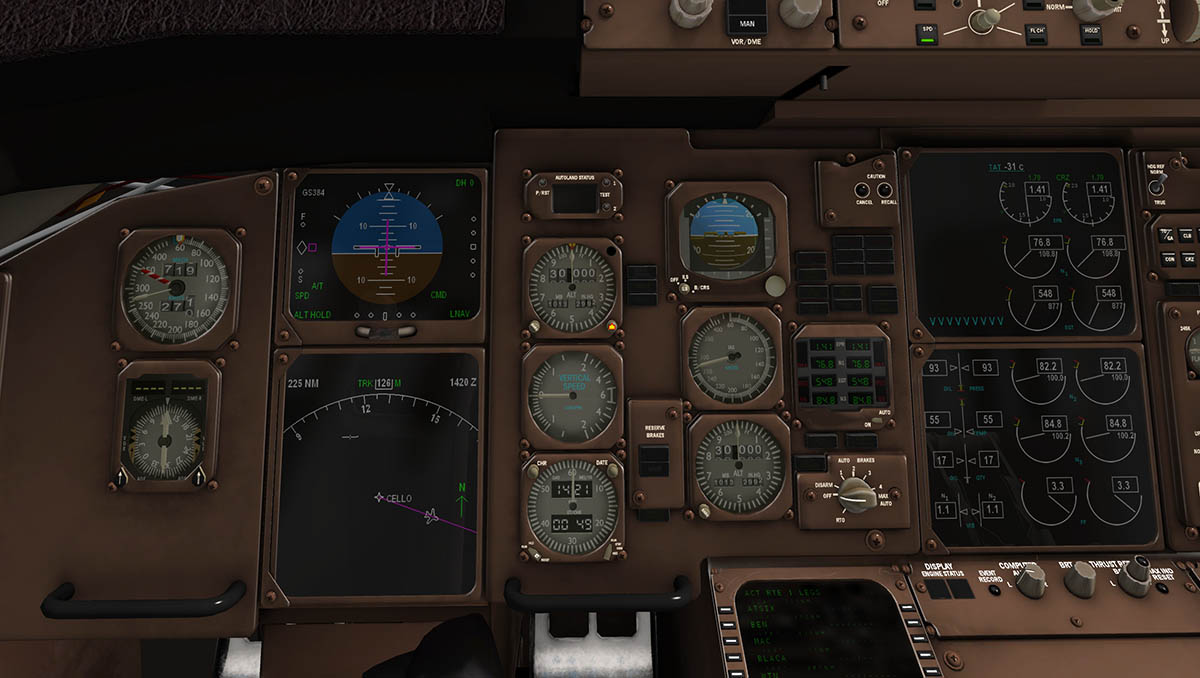
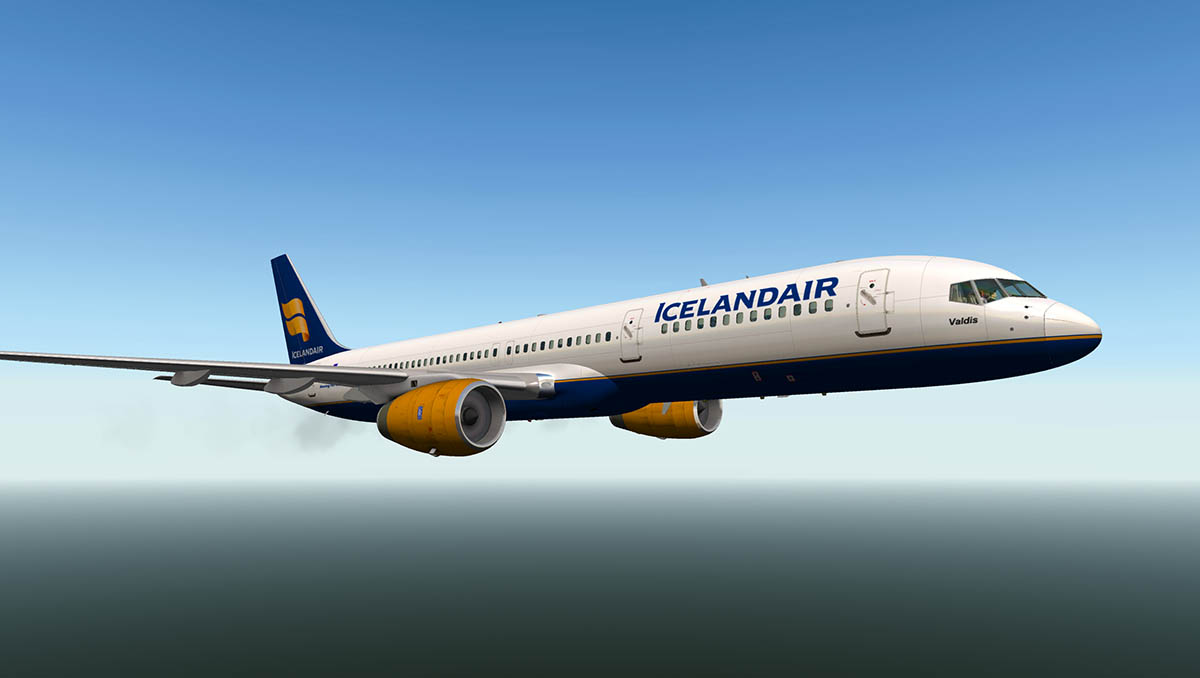
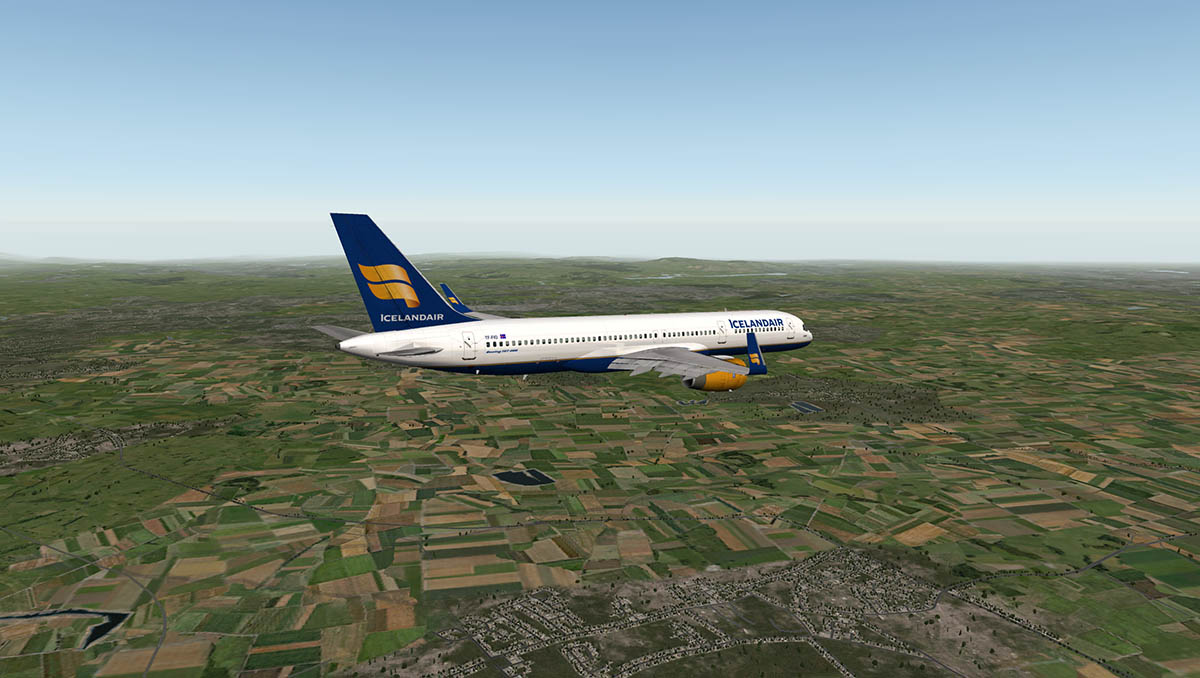
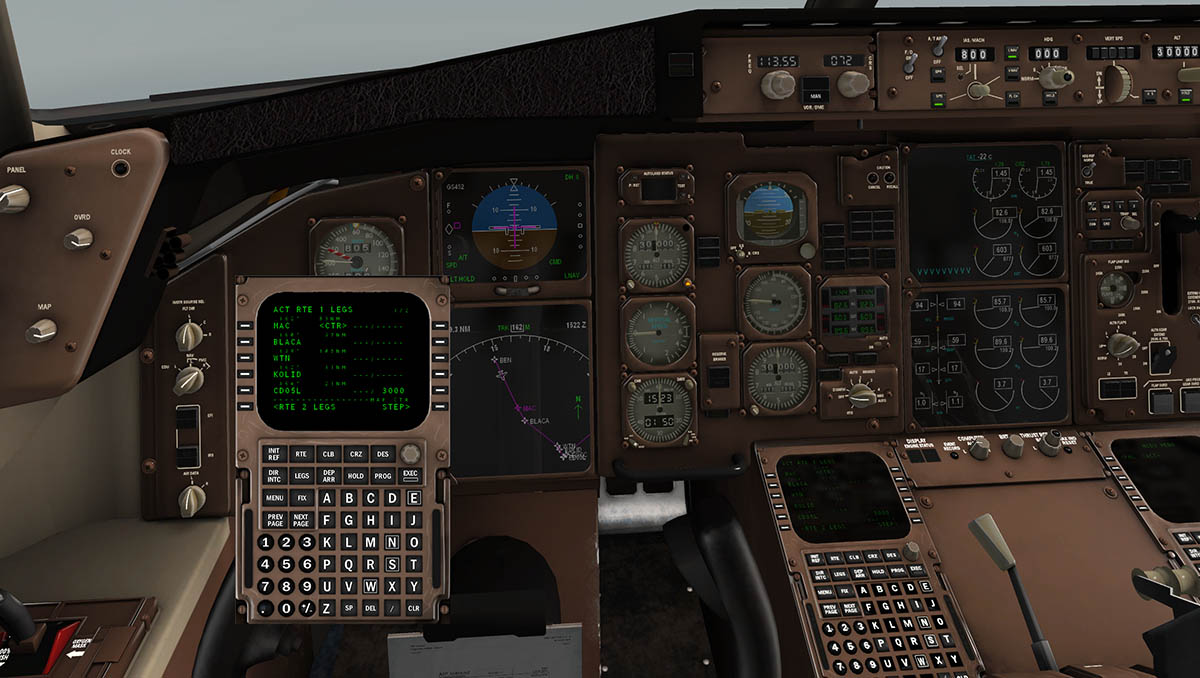
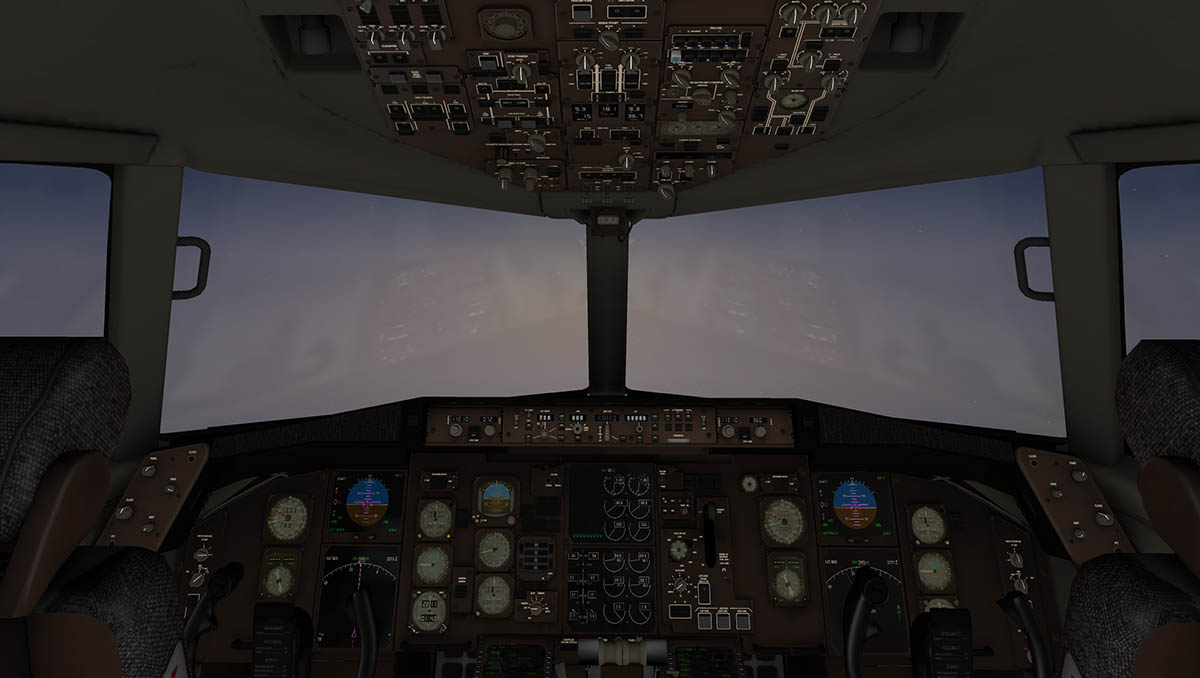
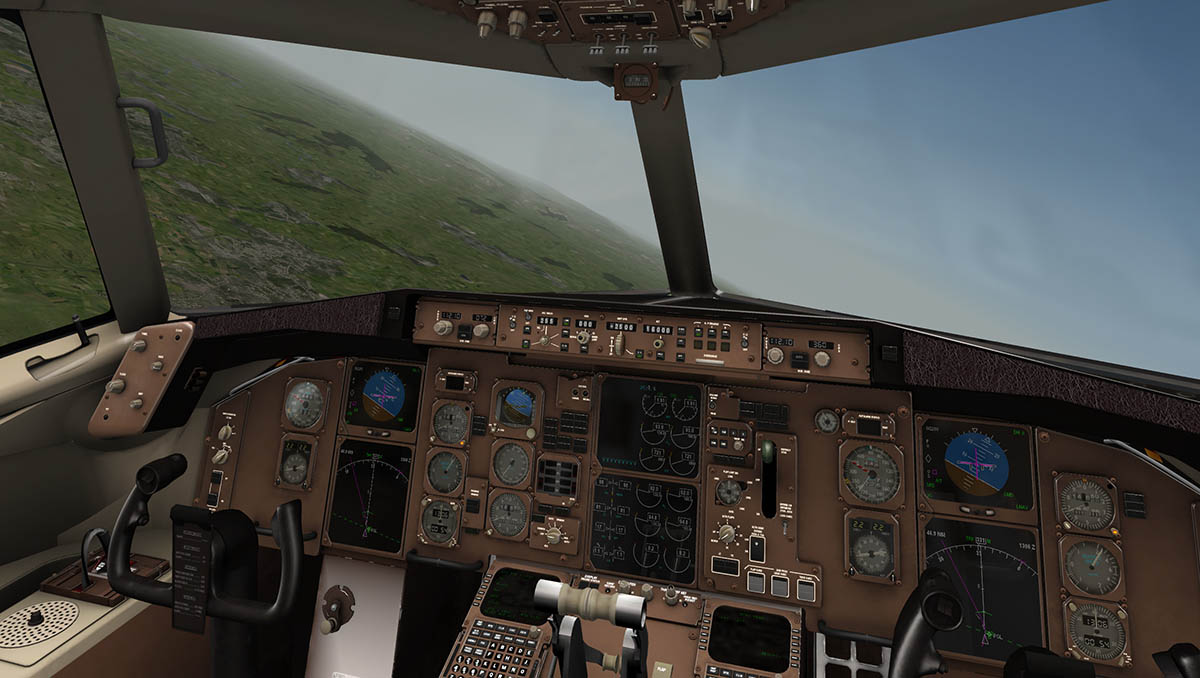
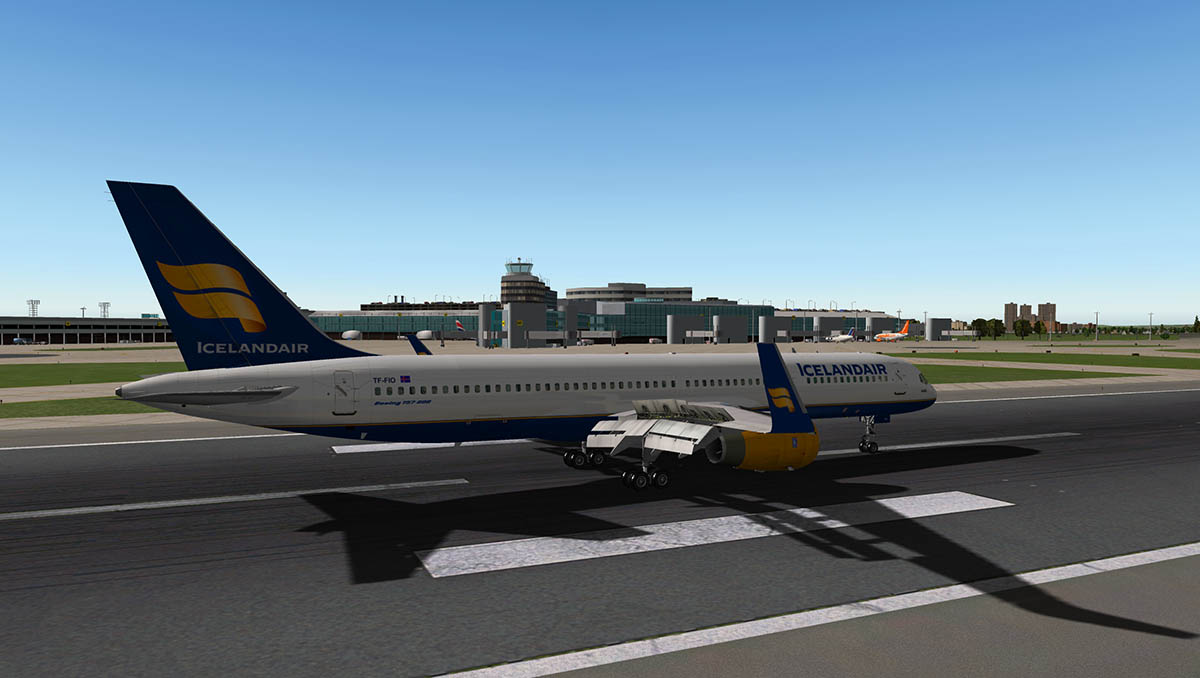
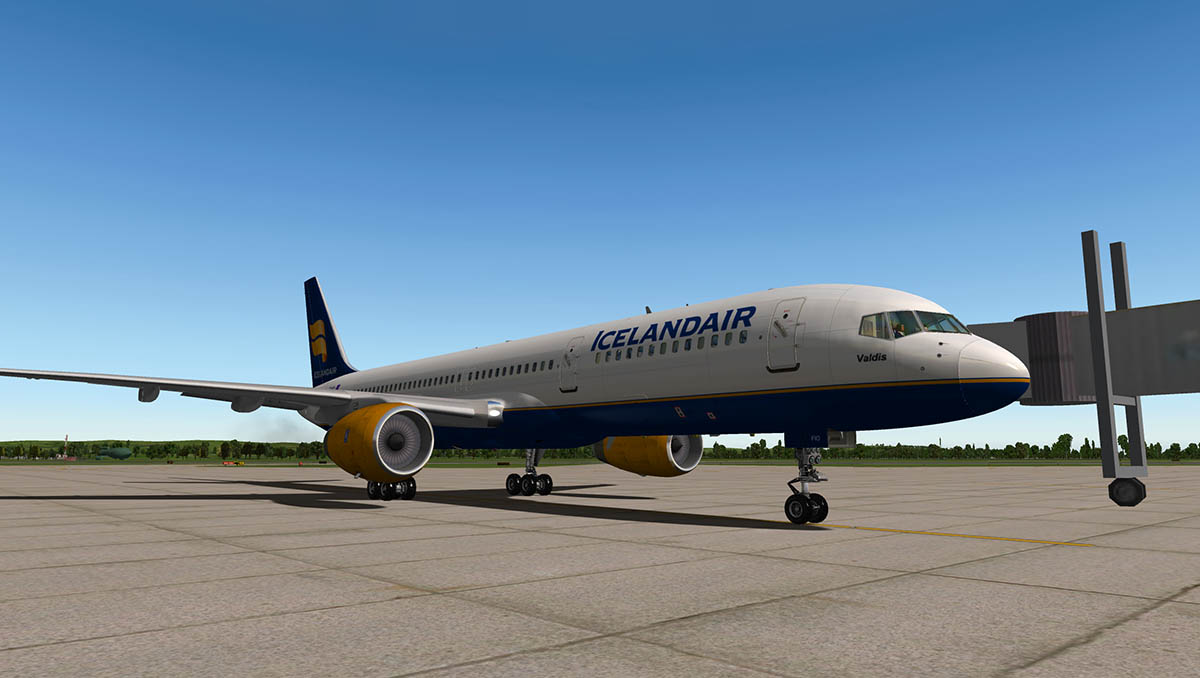
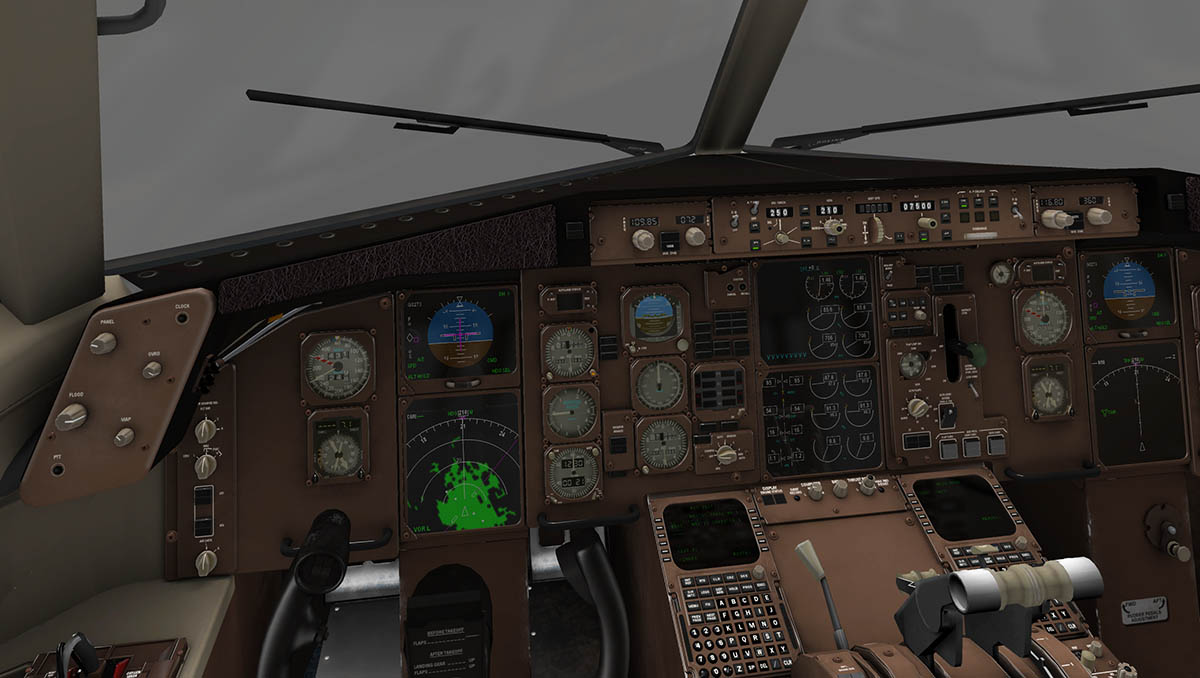
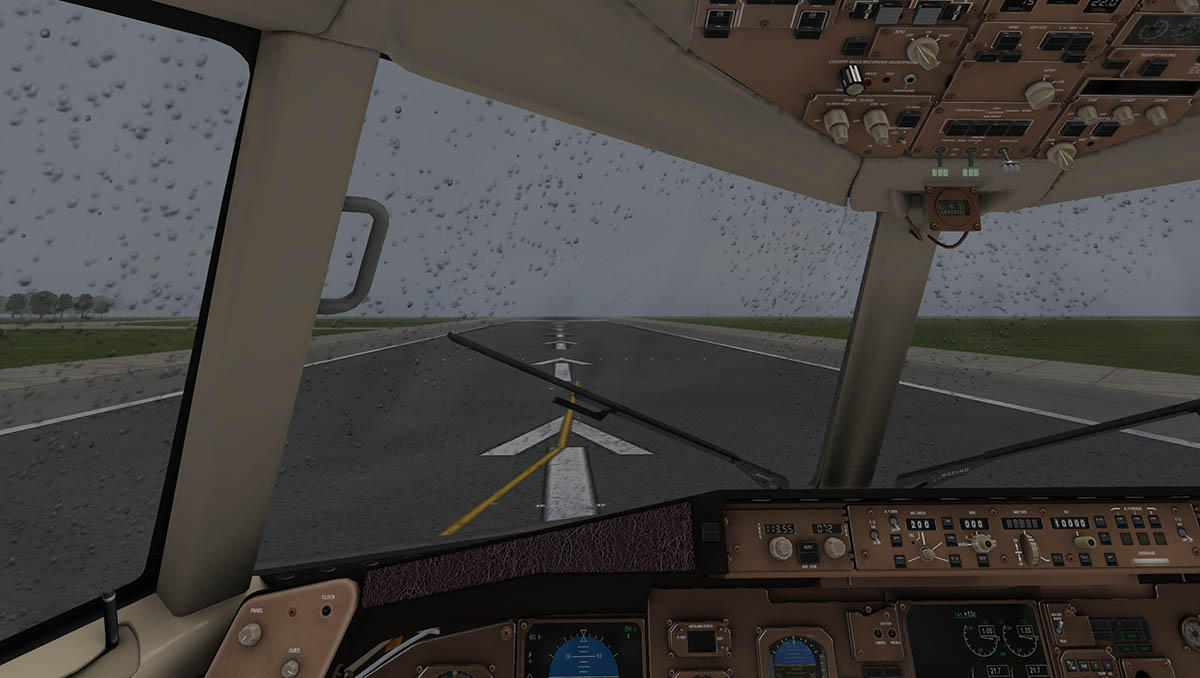
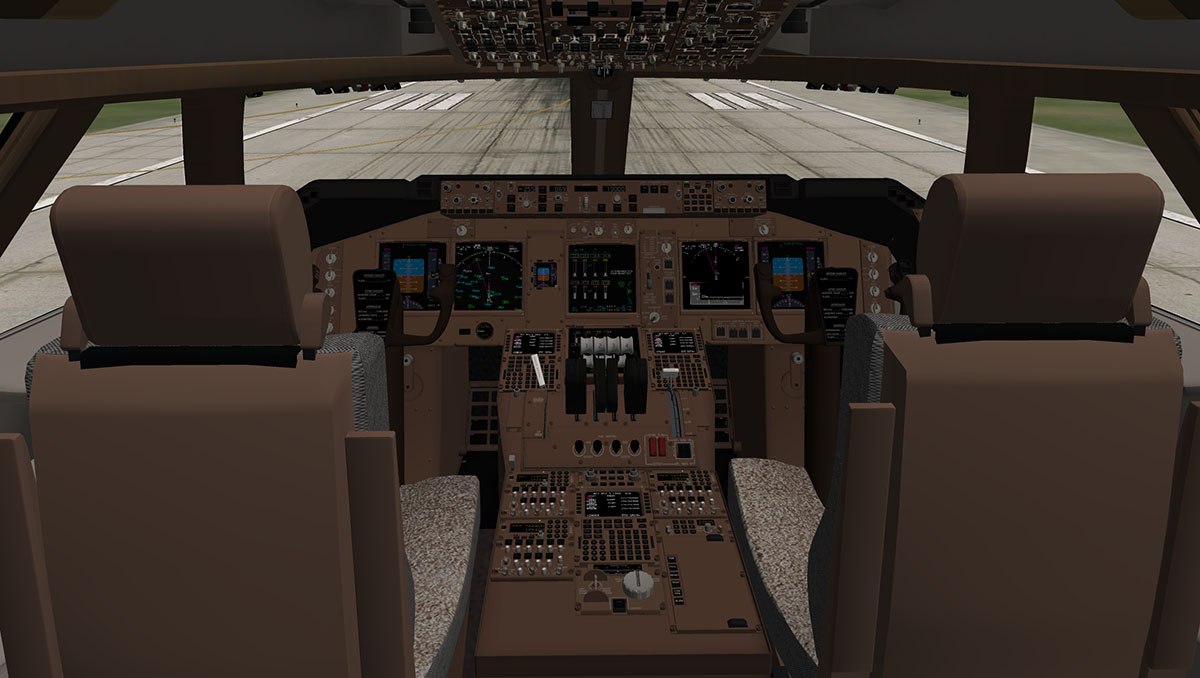
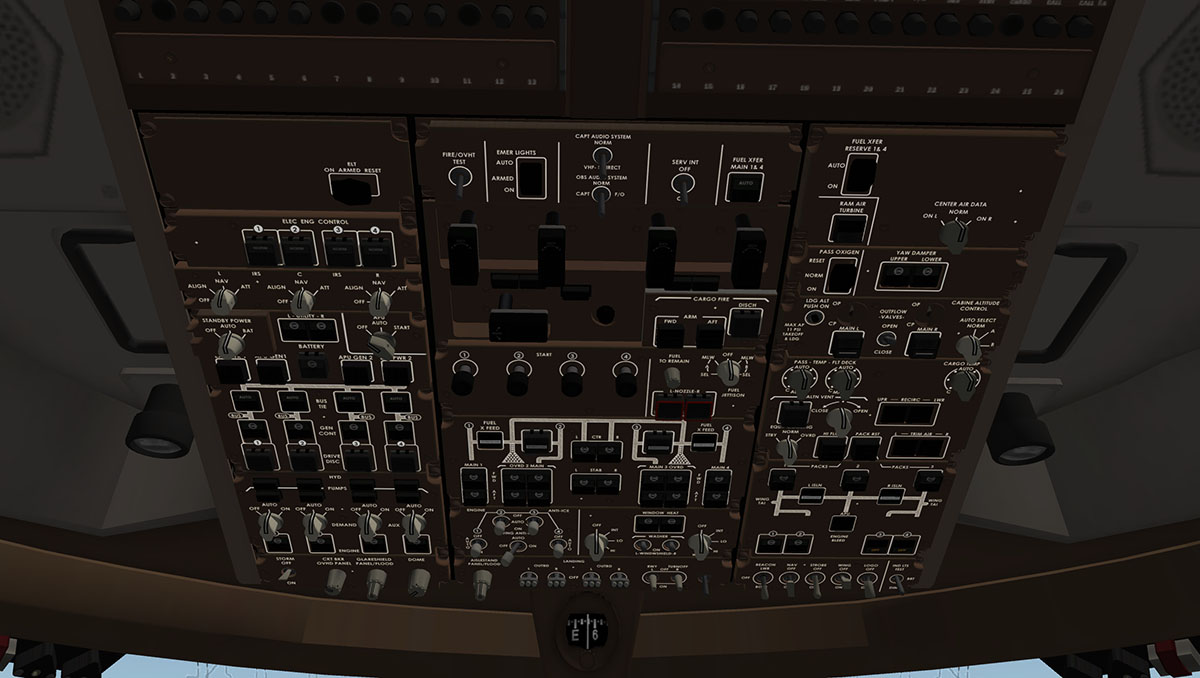
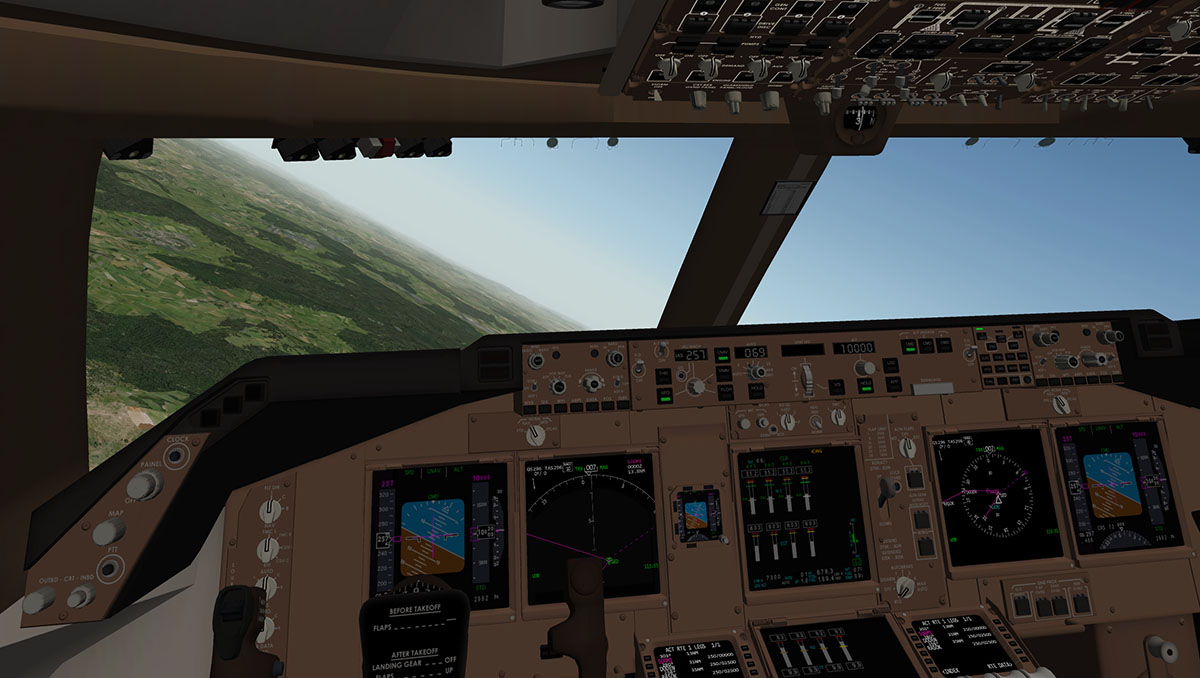
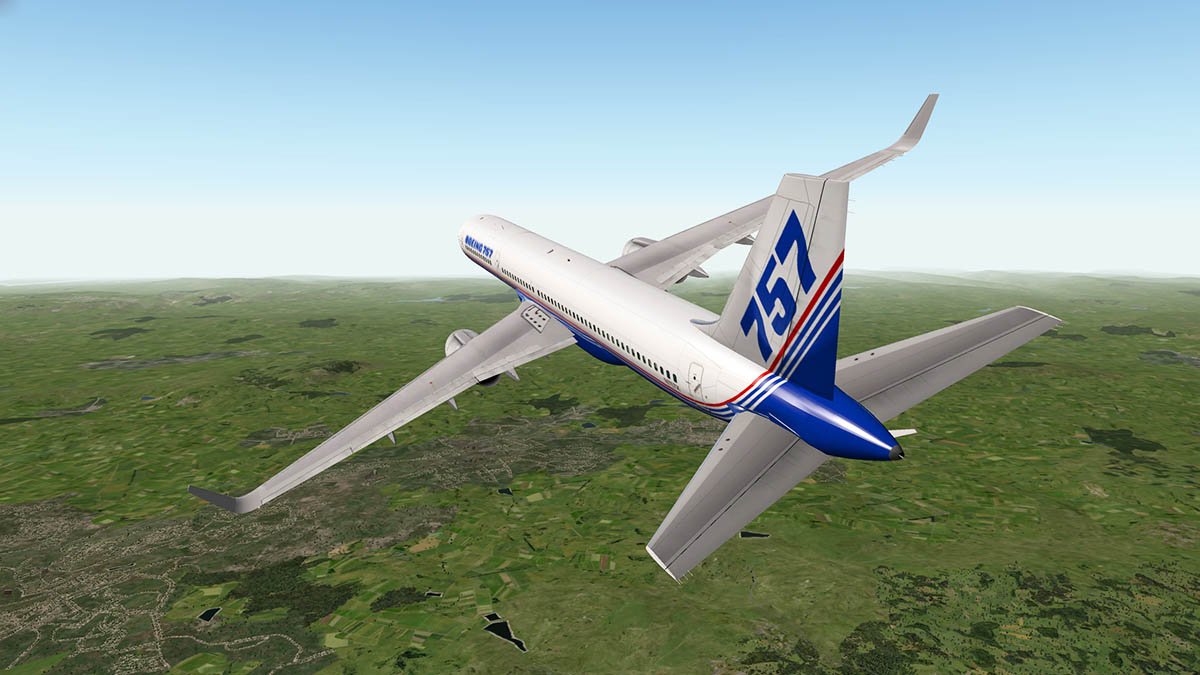
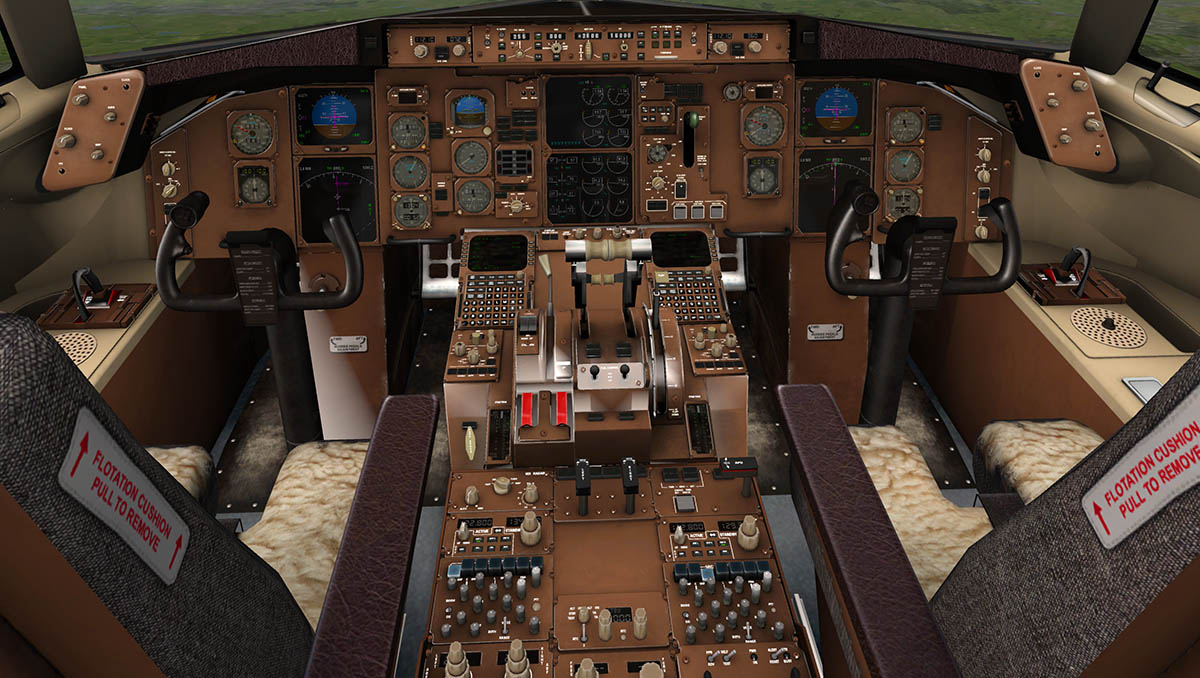
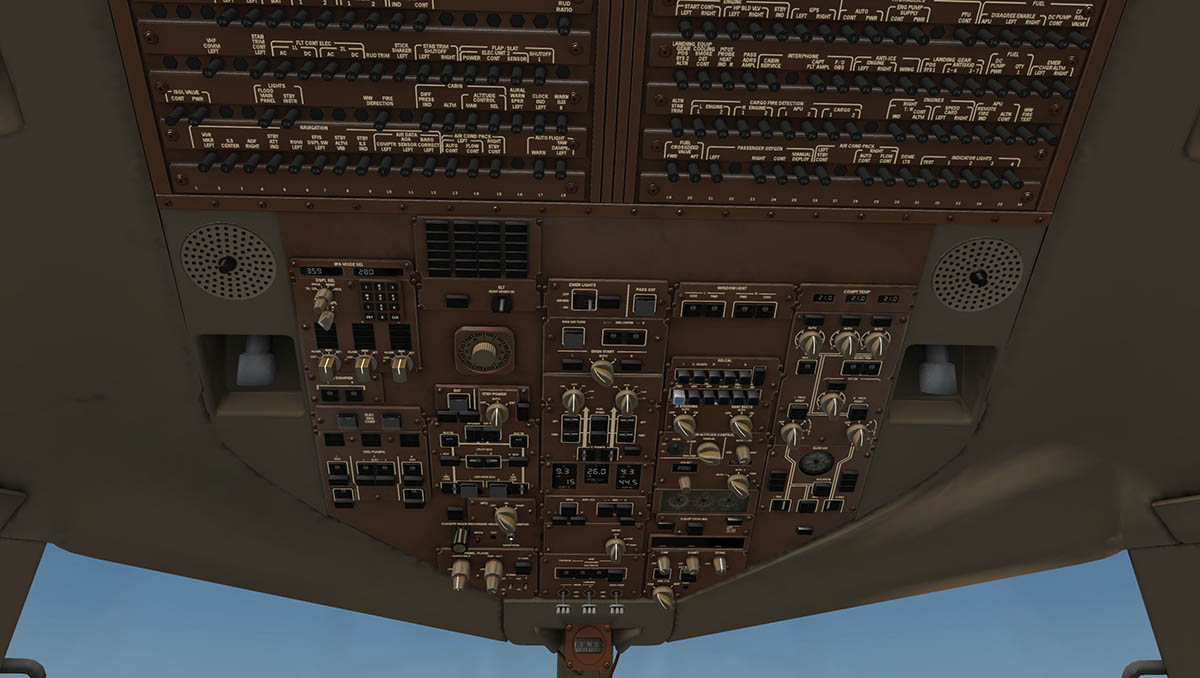
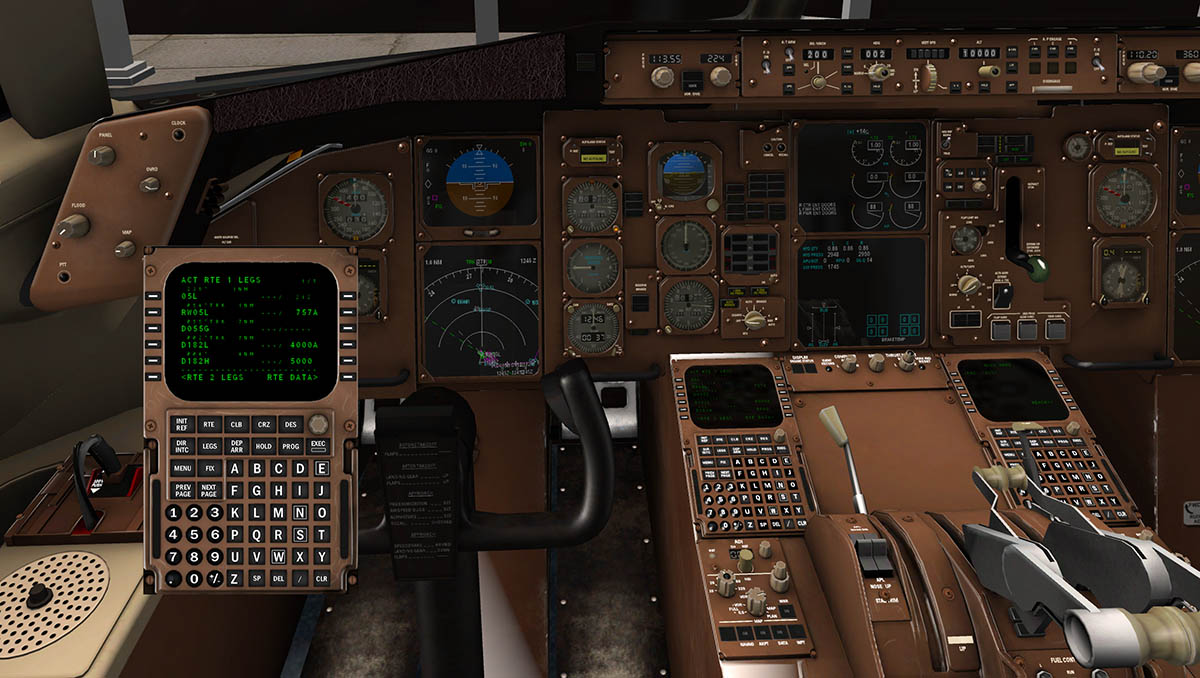
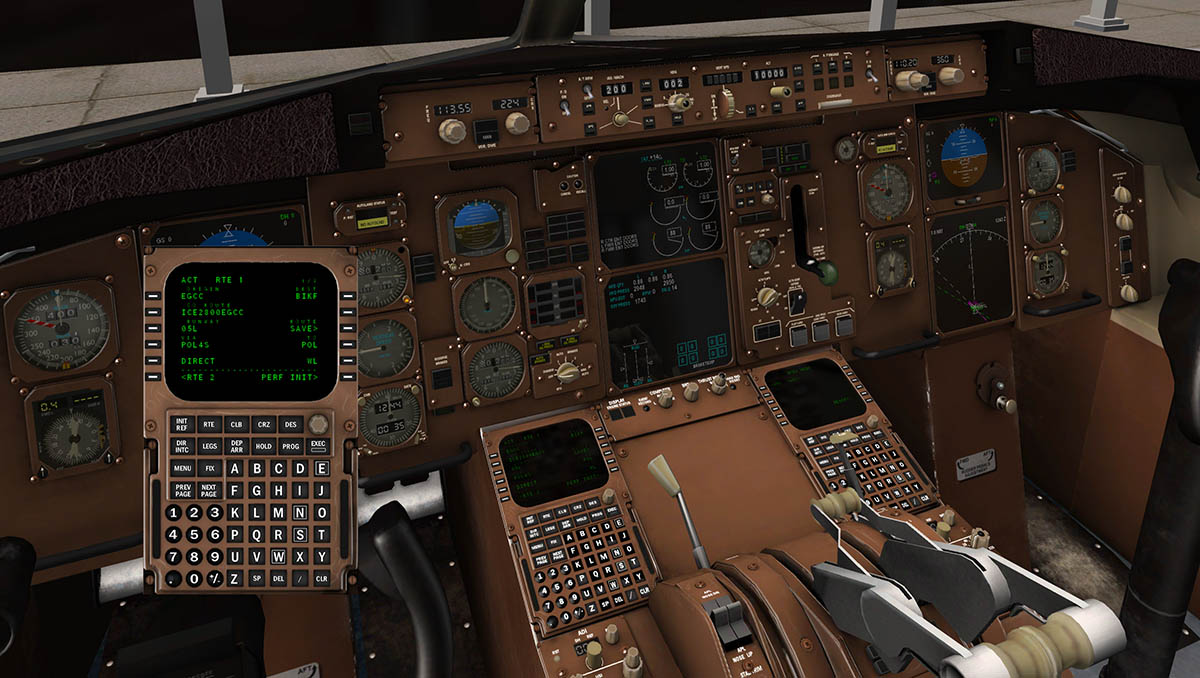
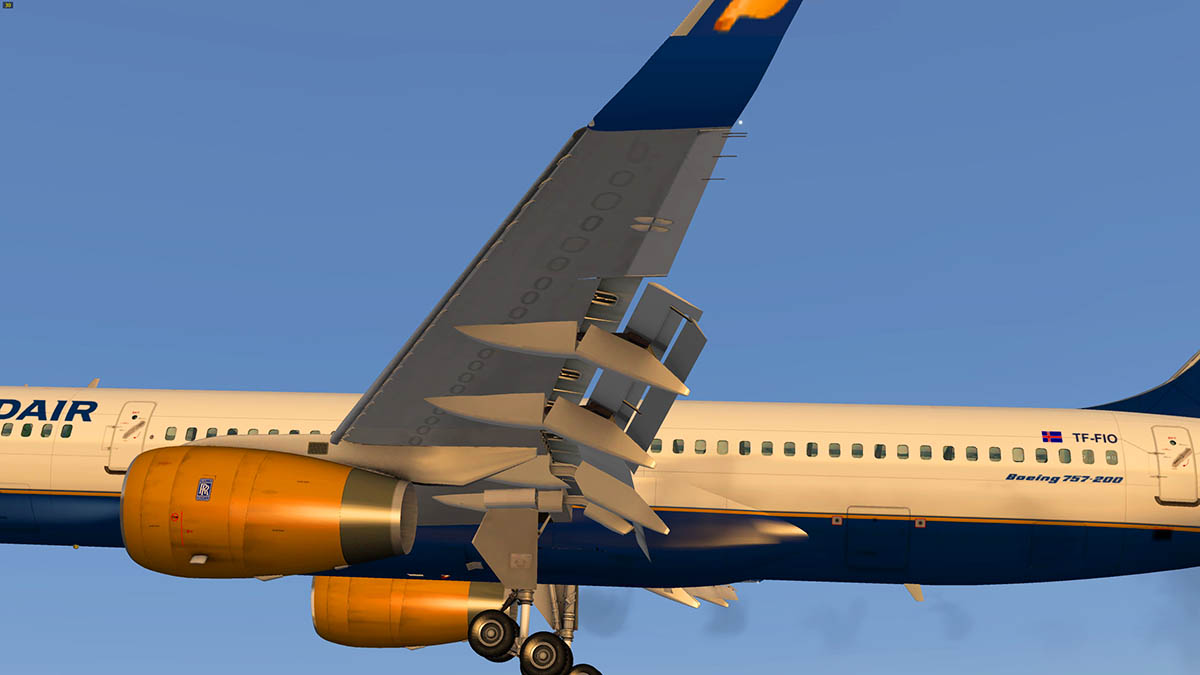
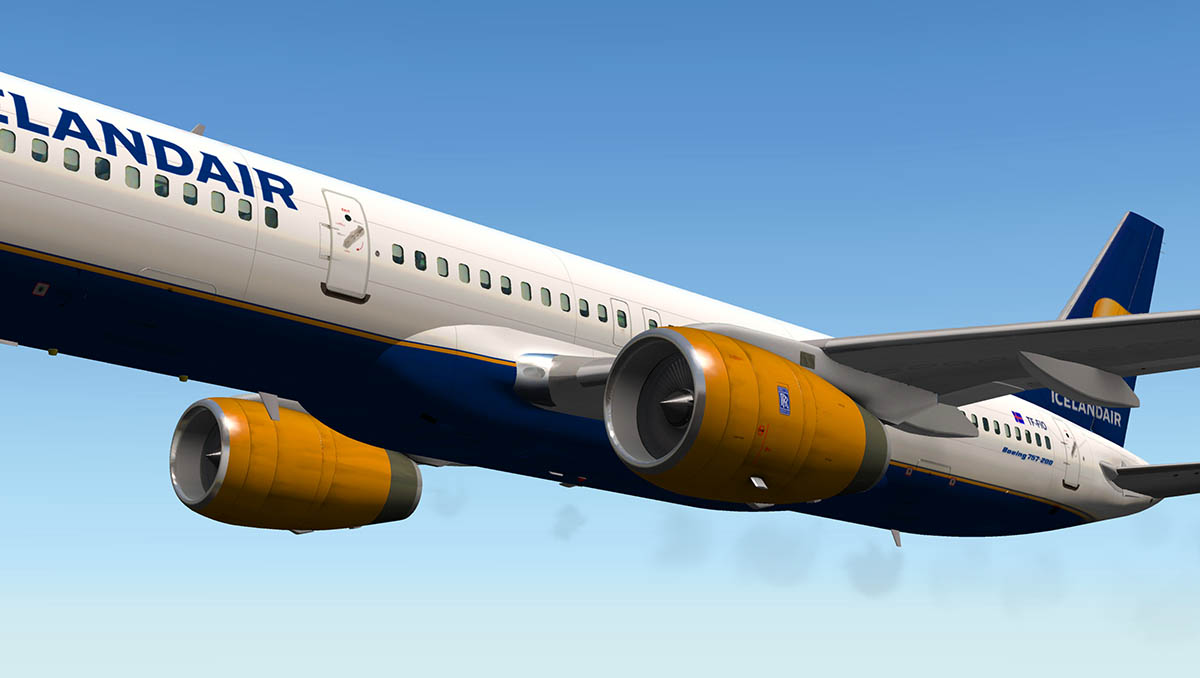
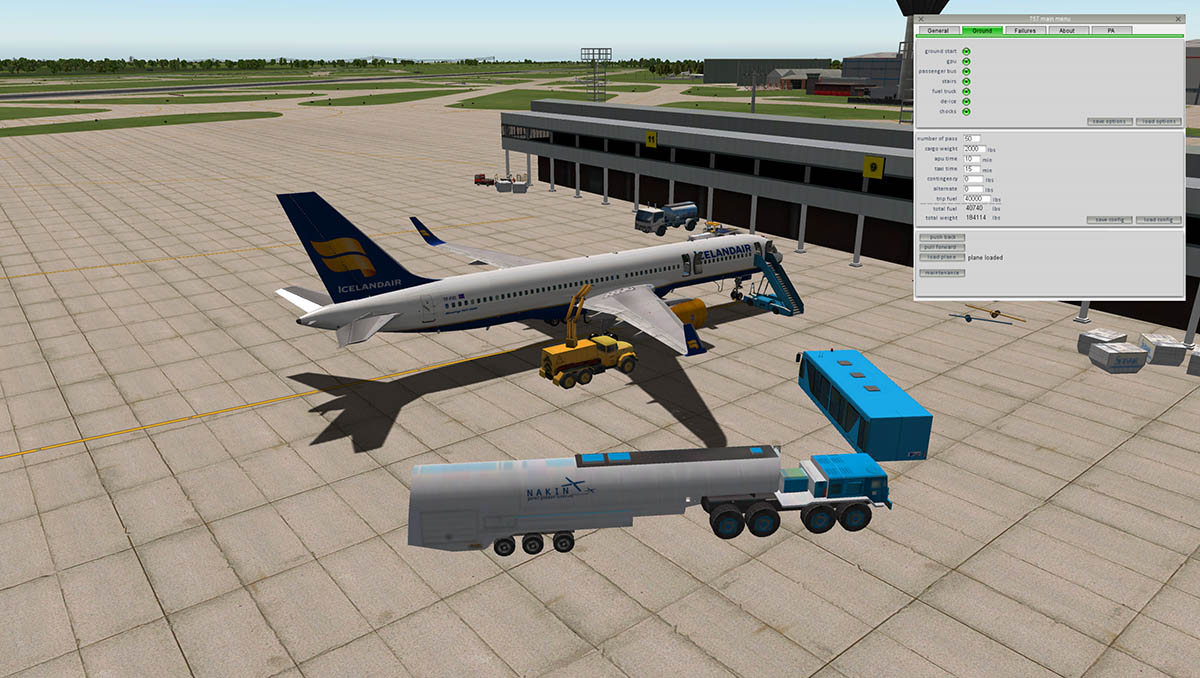
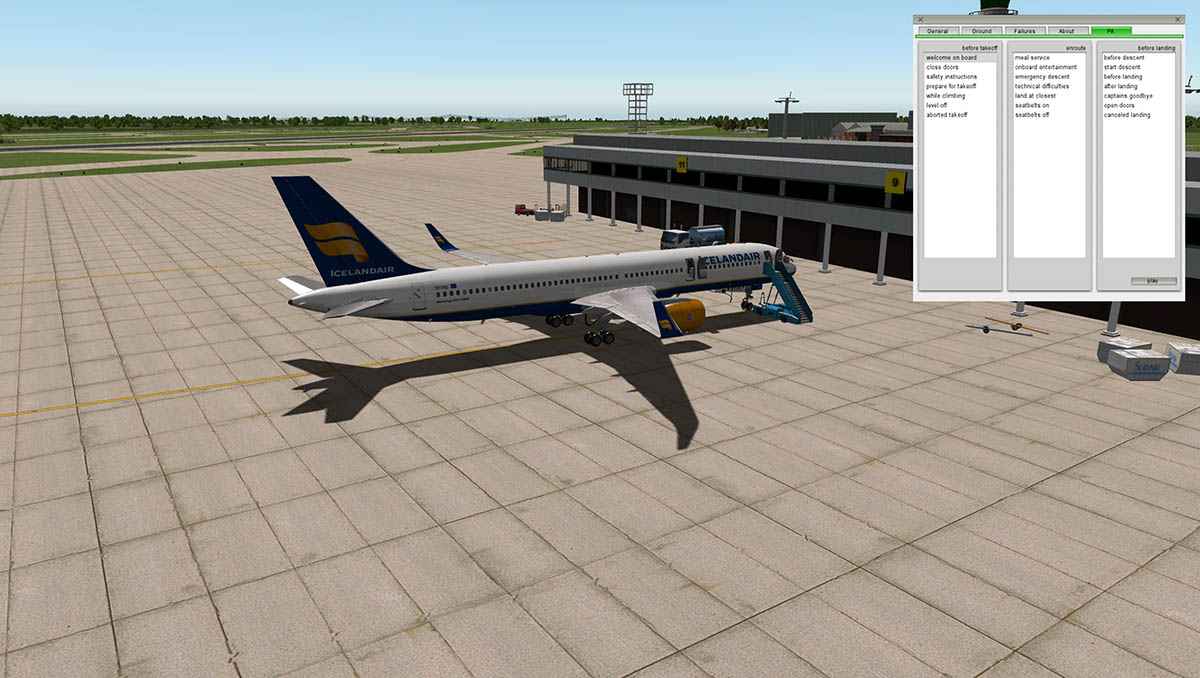
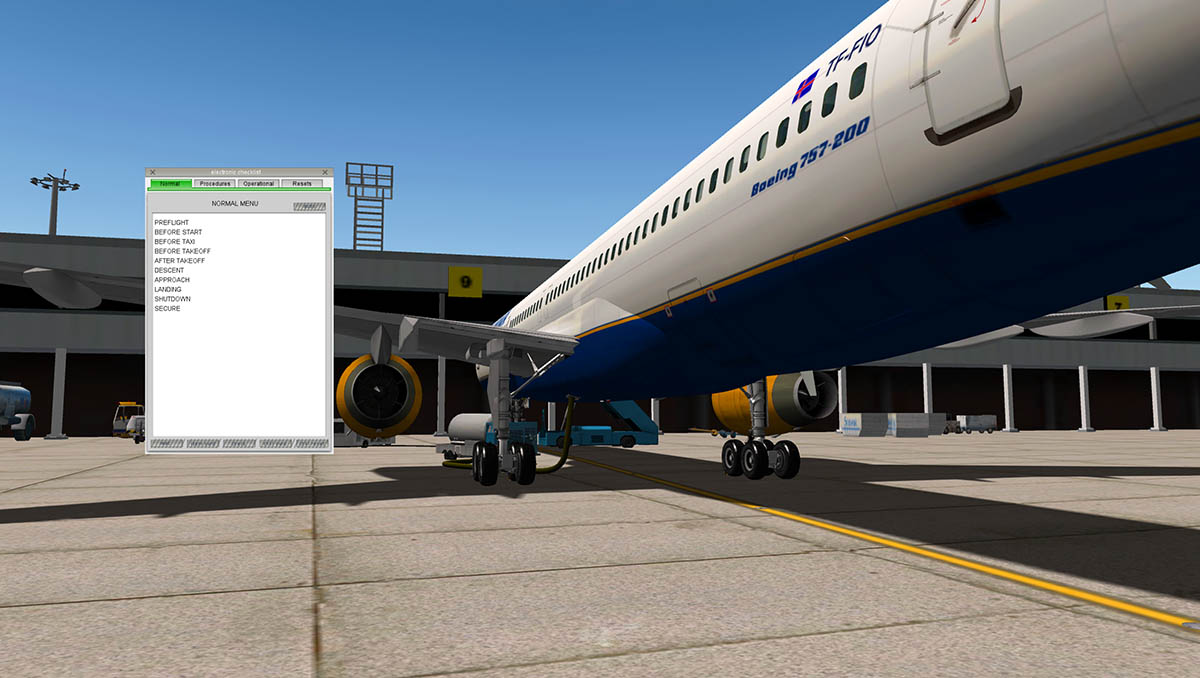
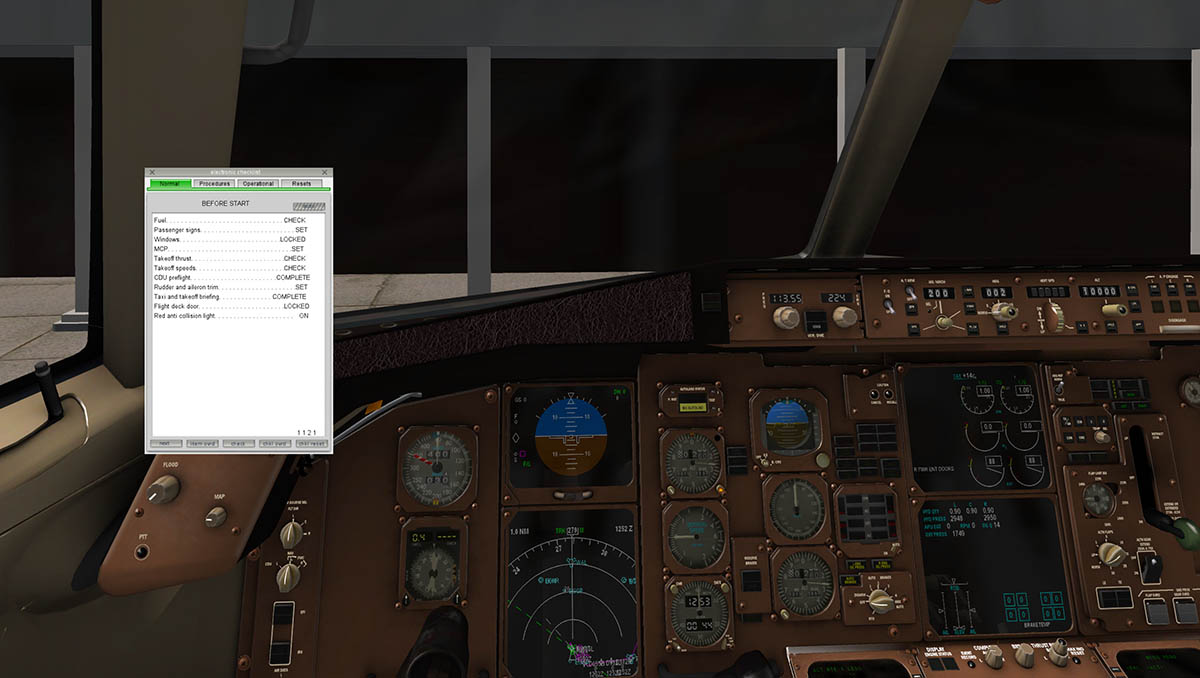
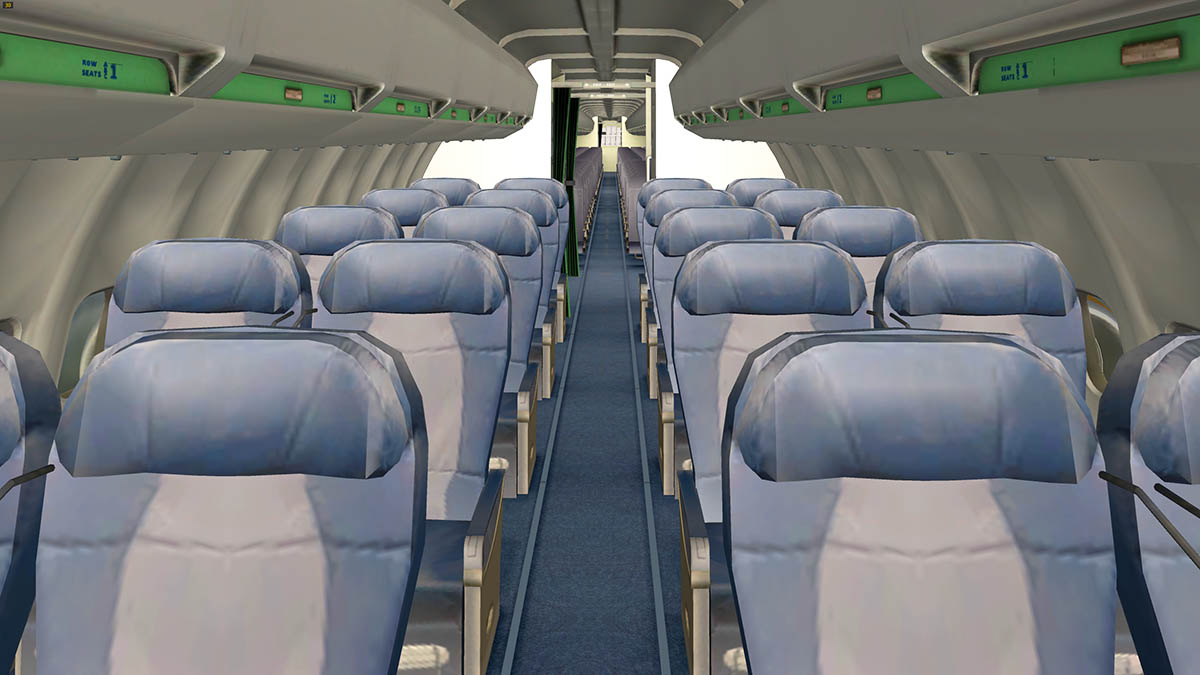
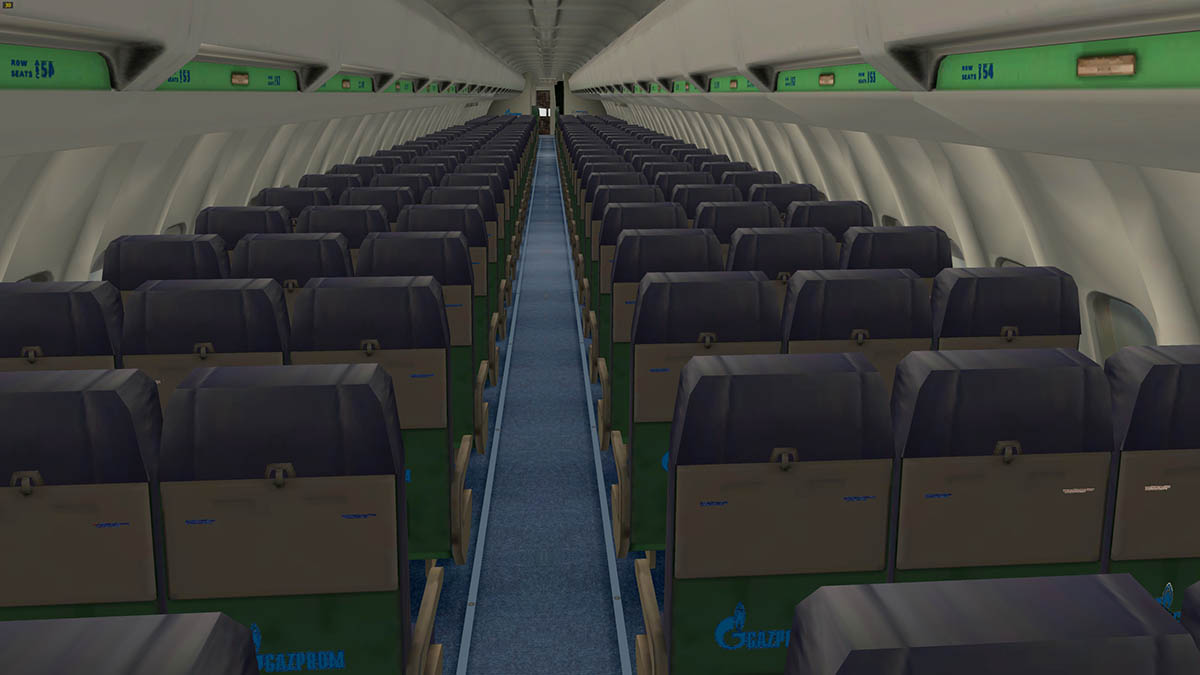
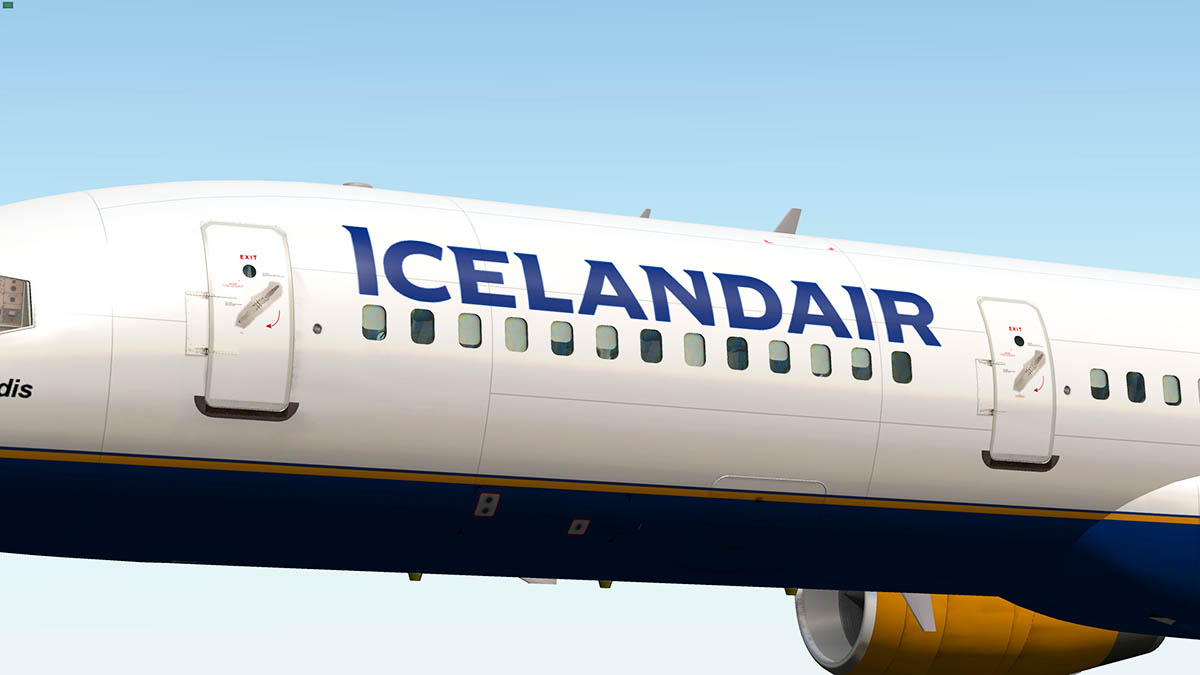
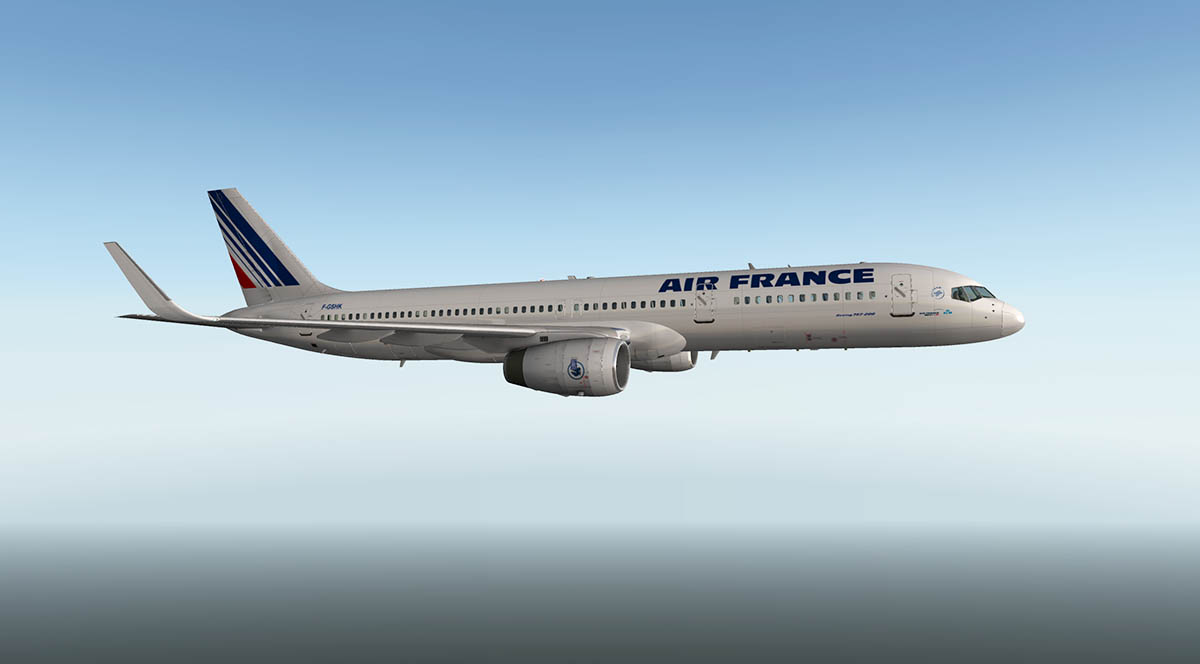
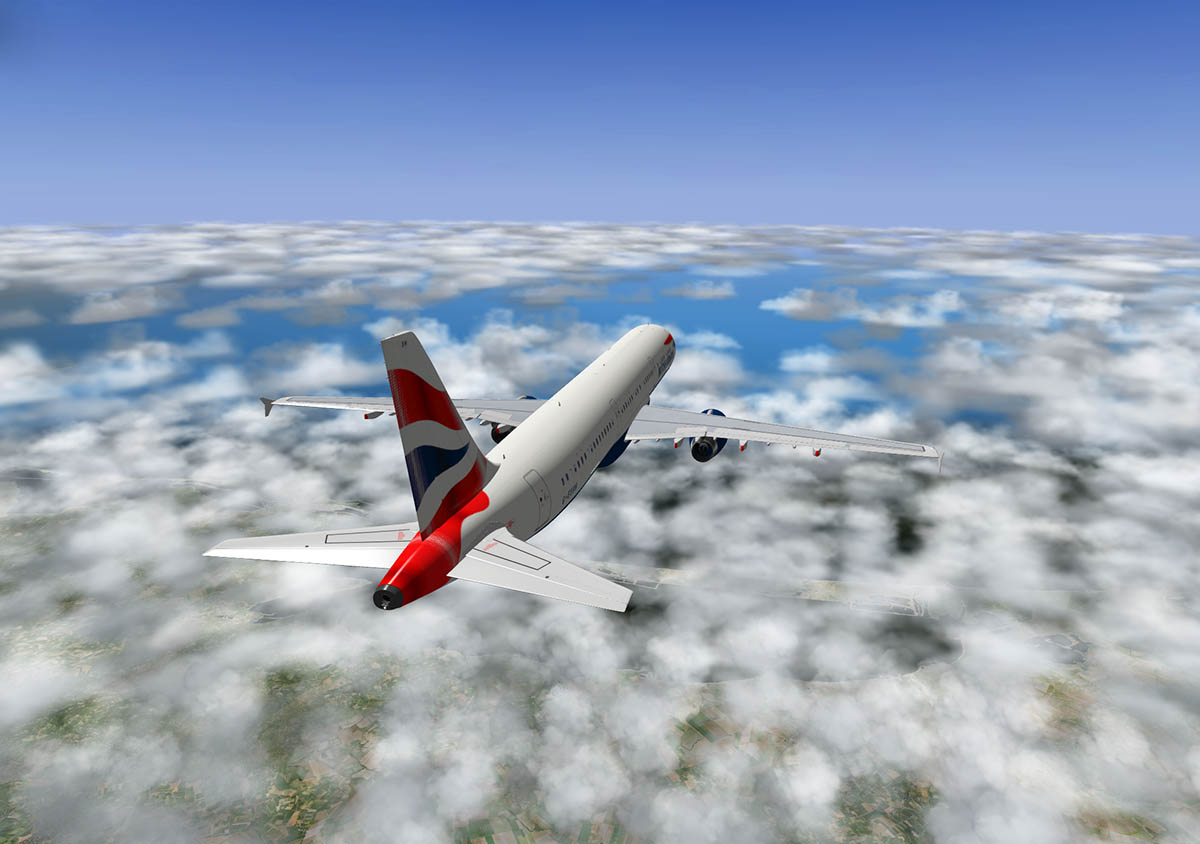
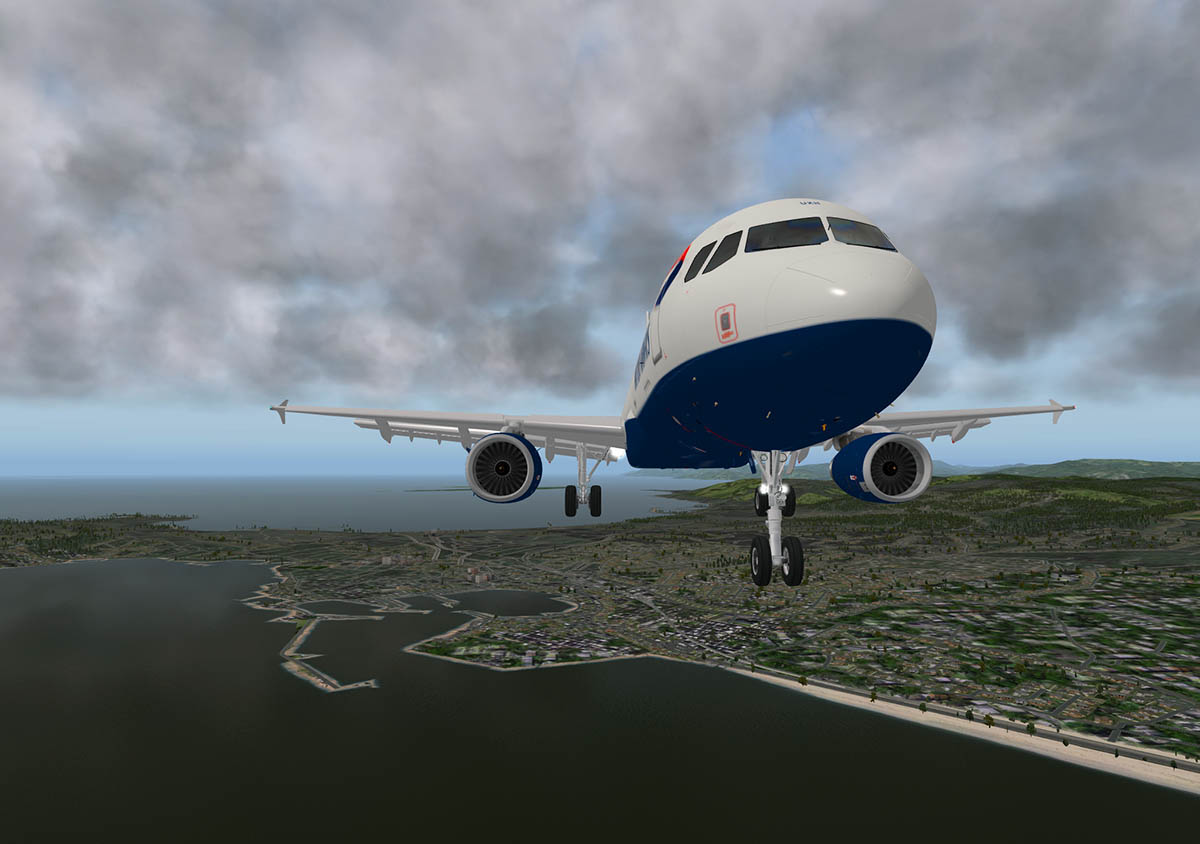
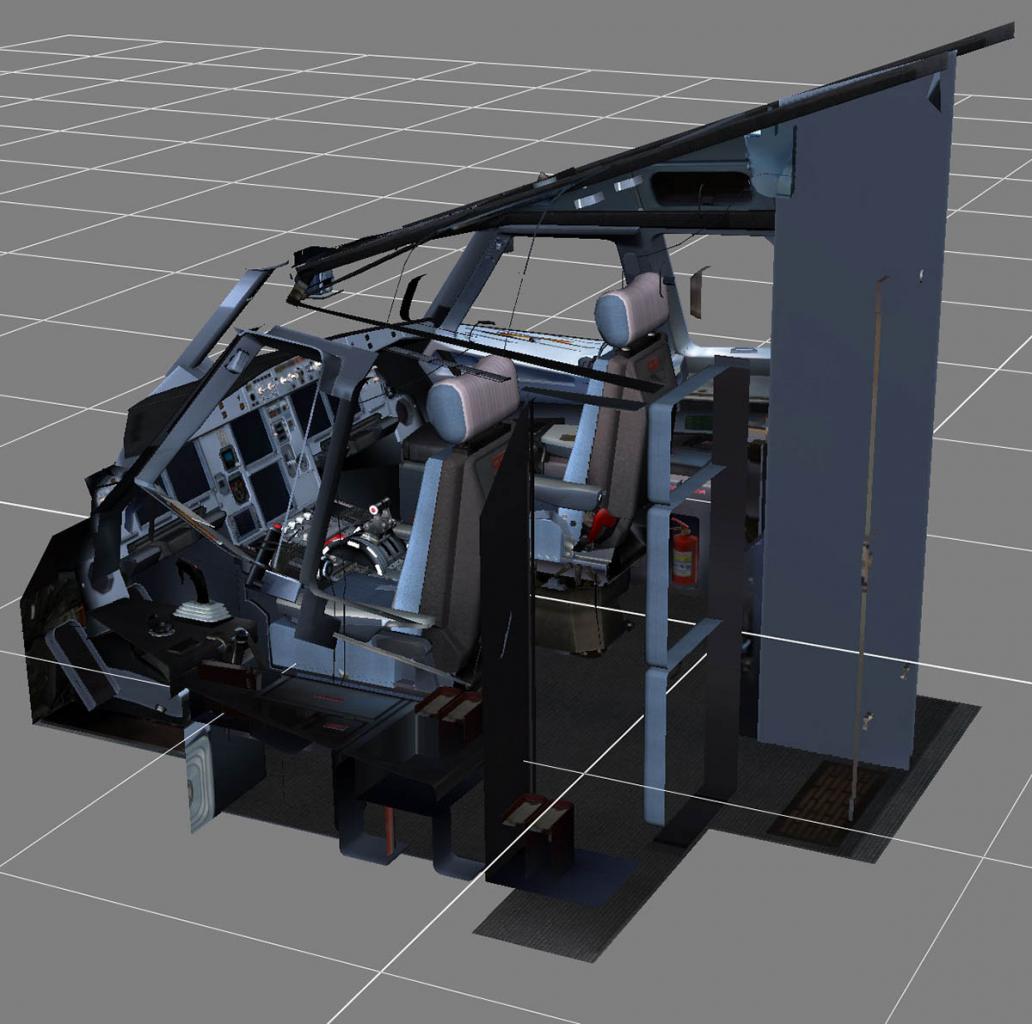
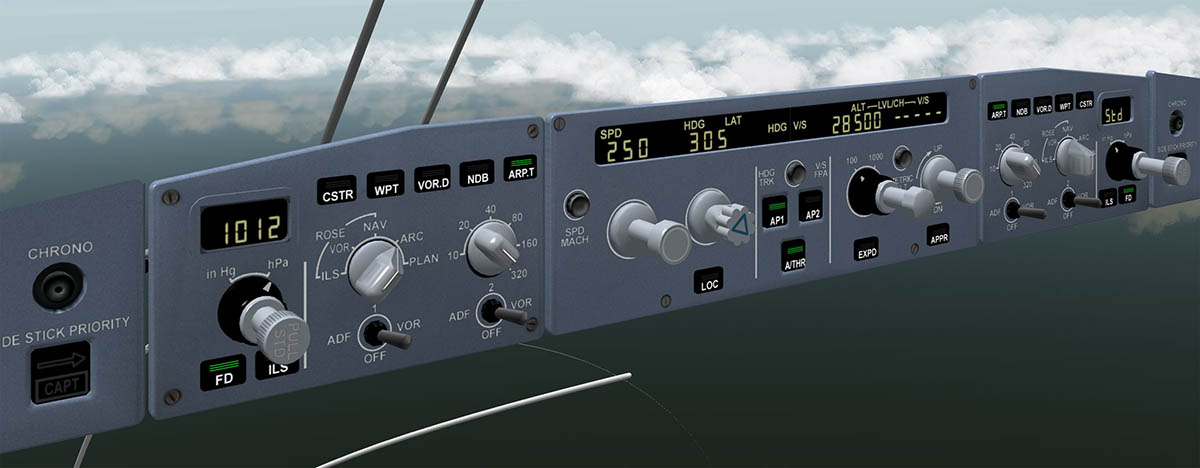
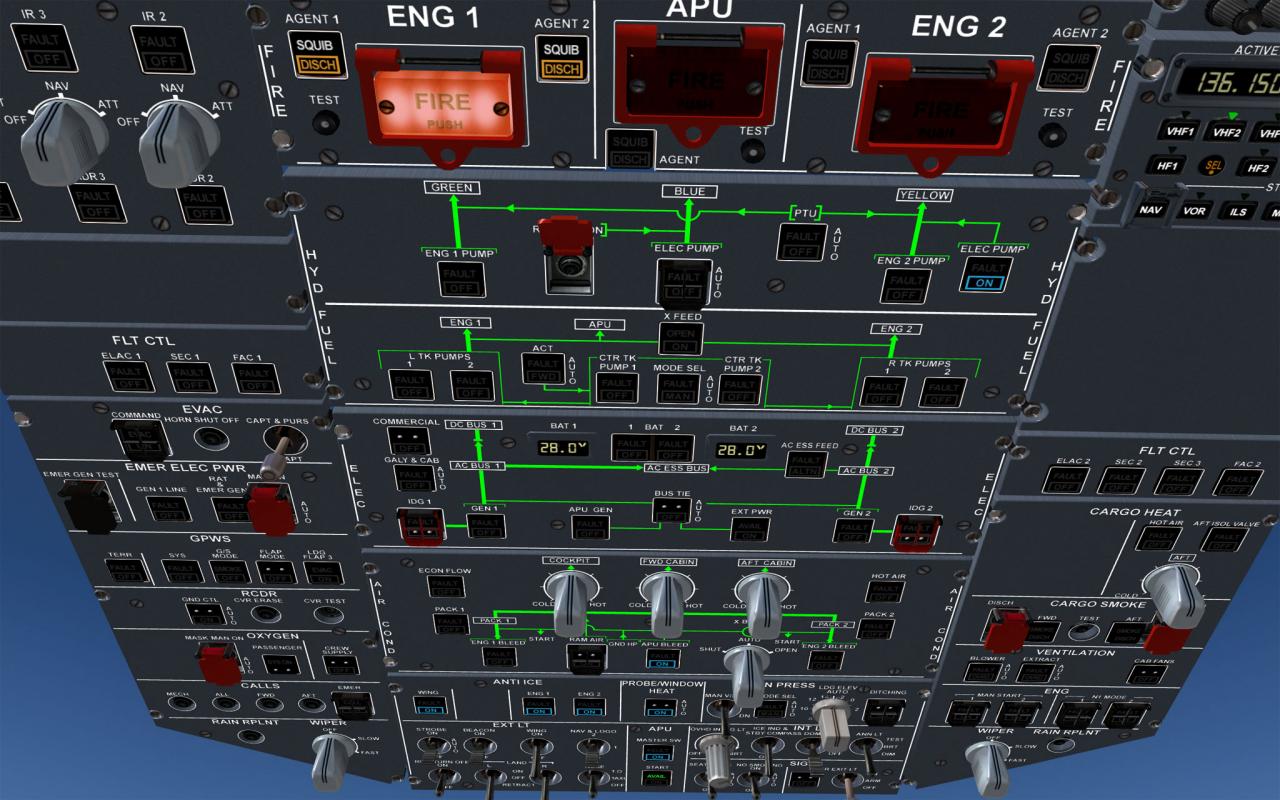
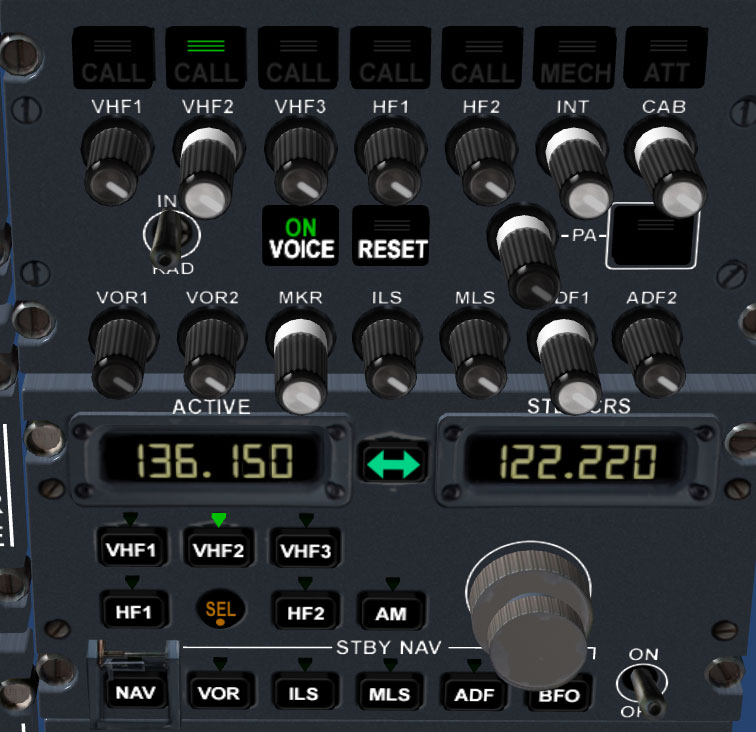
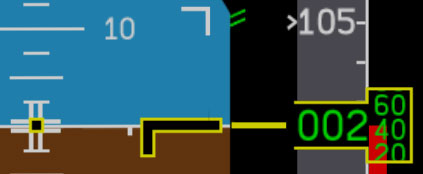
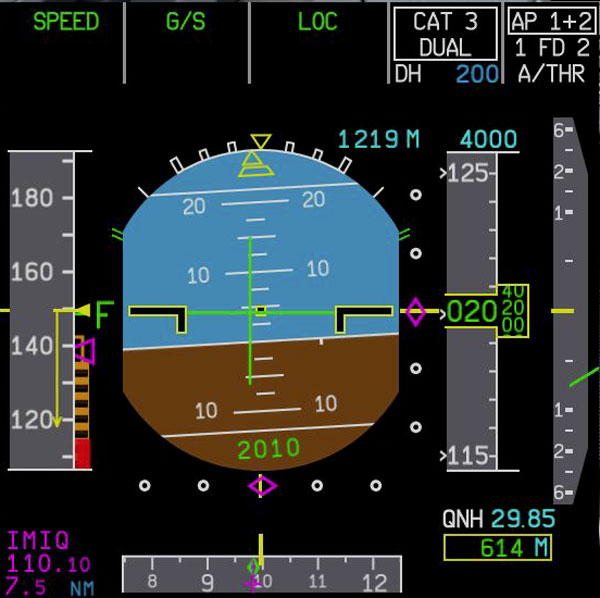
Aircraft Review : FlightFactor Boeing 757RR-200 Route : BIKF (Keflavik) to EGCC (Manchester UK) In August 2012. FlightFactor with VMAX released their first X-Plane aircraft in the Boeing 777-200ER Worldliner and later the add-on variants (Extended) of the Longer -300 and Cargo version. The response was overwhelming in the simulation world of the standard that the aircraft represented in the way of quality, but more so in the depth of the systems and the excellent FMC (Flight Management Computer). The release created another upward step in the evolution of simulation standards towards realism and replication of real world aircraft operations. The announcement of the Boeing 757 series as the next release aircraft would certainly create a ready made market for the aircraft. However the B777 Worldliner was a very high standard to reach. The question is that "could the Boeing 757-Series be as good or even better than the acclaimed Boeing 777-Series"? I'll let you relax early and note that it is, and in many areas better. But it is also a very different aircraft than the B777 Worldliner in the fact it is a generation older than its bigger Boeing brother. It is a more manual hands-on aircraft and its systems are in that magnificent tween period of the transition from the standard dial and gauge cockpit to the all glass (display) cockpits of the modern era. This is one of the great attractions of the Boeing 757 as it can keep both the older and more modern pilots happy and fulfilled... The B757 also creates a bigger workload in the cockpit - so you have been warned. Boeing 757 After the success of the original Boeing series of aircraft in the 707/727/737/747. It came to the point in time where Boeing was faced with replacing its most successful aircraft (at that time) - The Boeing 727 that operated on the most important short and medium routes. Boeing knew that most airlines wanted a larger twin-aisle aircraft, but there was also significant demand for a single-aisle version as well. The result was two airframes that covered both markets in the B757/B767 Series as both had the commonality of cockpit layouts and the exchange of many parts and systems on both aircraft. The Boeing 767 became the twin-aisle version and the Boeing 757 was the single-aisle aircraft. It was a mid-size, narrow-body twin-engine aircraft that can carry 200 to 289 passengers for a maximum of 3,150 to 4,100 nautical miles (5,830 to 7,600 km), depending on variant. And it was Boeing's the manufacturer largest single-aisle passenger aircraft and was produced from 1981 to 2004. Production of the 757 ended on October 28, 2004, after 1,050 had been built for 54 customers. The 757-200 was by far the most popular model, with 913 built. The prototype 757 was rolled out of the Renton factory on January 13, 1982. The aircraft, equipped with RB211-535C engines and completed its maiden flight one week ahead of schedule on February 19th,1982. The maiden flight however was not without complications, as the RB211 was affected by an engine stall, following indications of low oil pressure. After checking system diagnostics, Boeing company test pilot John Armstrong and co-pilot Lew Wallick were able to restart the affected engine, and the flight proceeded normally to landing. Eastern Air Lines operated the first commercial 757 flight on January 1st,1983, on the Atlanta-to-Tampa route. and on February 9th,1983, British Airways began using the aircraft for London-to-Belfast shuttle services as the first overseas airline to use the aircraft of where it replaced the retiring Hawker Siddeley Trident 3B trijets. The first 757 with PW2037 engines rolled out about one year later, and was delivered to Delta Air Lines on November 5, 1984. The 757 is a low-wing cantilever monoplane with a conventional tail unit featuring a single fin and rudder. Each wing features a supercritical cross-section and is equipped with five-panel leading edge slats, single- and double-slotted flaps, an outboard aileron, and six spoilers. The wings are largely identical across all 757 variants, swept at 25 degrees, and optimized for a cruising speed of Mach 0.8 (533 mph or 858 km/h). The reduced wing sweep eliminates the need for inboard ailerons, yet incurs little drag penalty on short and medium length routes, during which most of the flight is spent climbing or descending. The airframe further incorporates carbon-fiber reinforced plastic wing surfaces, Kevlar fairings and access panels, plus improved aluminum alloys, which together reduce overall weight by 2,100 pounds (950 kg). Details noted here are noted for the -200 version. Cruise Speed : Mach 0.80 (530 mph, 458 knots, 850 km/h at cruise altitude of 35,000 ft or 10.66 km) Range : 3,900 nmi (7,222 km) (4,100 nmi (7,600 km) with winglets) Service Ceiling : 42,000 ft (12,800 m) FlightFactor The developer house behind the Boeing 777 and the Boeing 757 is FlightFactor. FlightFactor was formed by Roman Berezin (Ramzzess Aviation Design) and Philipp Münzel Avionics and are the main developer behind both series of aircraft and it is produced by VMAX, Roman is more on the modeling and general programming side while Philipp is centered more on the systems and avionics. But it take a lot people behind the scenes today to create these complex machines. Other highly regarded developers have also been involved who include: Andrey Germayer – in aeronautical engineering, Jack Skieczius – aeronautical engineering, Hartmut Krüger – paintkit and graphics, Bruno Gregorie – cockpit texturing, Marius Hoppmann – sound engineer, Pierre Lavaux – sound engineer. It takes a lot of talent to produce these aircraft and the days of the single developer are slow vanishing into the past. First Impressions The Boeing 757 is quite odd to look at compared to most modern airliners in the fact it is tall and skinny. The tall is that the undercarriage is higher (taller) than most aircraft, because Boeing wanted to have room under the aircraft for different variants and larger engines, Skinny is because it is a single-aisle aircraft based on a twin-aisle concept. Both these features however worked in the aircraft's favor because of its lighter weight, slender fuselage, huge power-to-weight ratio and big engines - It goes and climbs like ...... and is known as "the pocket rocket". FlightFactor's detailing is extraordinary good. And considering the detail it is very light on your frame-rate. Here the textures are set in "very high", but "high" is fine with only a slight buzzyness around some graphics at a very close range, most of the images here are set only in "high" and you would be pressed to notice the difference. The Icelandair livery is astoundingly good, It will be part of the add-on livery collections - but well worth the investment. You have the option of having Aviation Partners Incorporated winglets on or off. I like them on and they give you a longer range as well. They are well crafted into the wings with the lighting set perfectly into the leading edge. Flap construction and animation is first rate, the detailing is excellent. Not just for show but also the mechanism and detailing within the wing. The single and double-slotted flaps, outboard aileron and all six spoilers are represented. When the hydraulics are off the ailerons droop in realism. Tyres and undercarriage assemblies are again first rate, full detailing of links and hydraulic systems are almost perfect. I like the texturing of the supports and general worn dirtyness with out overdoing the effect. Perfect realism. Menu System The Boeing 757 menu system is different from FlightFactor's B777 menu... That one sits on the side of your computer screen like a blue blob, I don't care for menus that I can see, although as handy as they are. I find them distracting. Here the 757 menu is part of the X-Plane top menu under "Plugins". It means a double-click to access the menu, but it is a far more neater solution. (just be careful not to disable it) Here we require only the first two "General" and "Ground" menu pages. These pages are for setting up the aircraft and using features of the aircraft on the ground. General The "General" Menu allows you to set certain conditions on the aircraft. First is "High Challenge", "Real Limits" and "Real Time" all are effective depending on your level of skill, to start I recommend to keep them off until you are familiar with the aircraft, then introduce them to feel the effects. "Real Time" does not have as a major effect on the aircraft as the other two. You can select "F/O" First Officer to be in control to fly from the right side of the cockpit. You can plug-in a radio, select your winglet choice and load your last flight including fuel loads. "Charts" can be on/off and we will see them in the cockpit. Volume adjustment and you can save all the above as defaults. The lower section is your 6 main doors and 4 overwing (escape) doors operation (open/Close), No cargo doors though which is a shame? Ground The "Ground" Menu allows you to set up items on the ground around the aircraft. You have a large selection of vehicles and ground equipment to choose from. First you have two GPU's to use, One a general power supply, and the second a start supply that sits by the left engine. A passenger bus, Stairs on the right first door? great for servicing but you miss the door on the first left side for passenger plane/deplane... It feels odd and you miss it, a choice or better still both choices would be nice. A fuel truck that will load in your fuel load, a De-Ice Truck that is great but only De-Ices the right wing?. And chocks on the wheels. There is a "Gate" configuration button that turns off the Bus and Stairs which is fairly useless. The mid-section is for setting up the aircraft configuration for flight. This includes No.Pass, Cargo Weight, APU (fuel) time, Taxi (fuel) time, contingency (fuel), alternate (fuel) and trip fuel, total fuel and weight is shown and you can save and load in the configurations. Finally on the "Ground" menu there is a very good (Steer and power by throttle) pushback truck that is the same on the B777. very good it is as well. Cockpit First impressions of the cockpit are of the complexity and quality of the design. Looking into the cockpit, It does feel quite more darker than a B757 cockpit would look like, it helps with the detail but it does need to be a little more lighter to be more authentic. Detailing is astounding. almost every knob and switch is active and perfect in design. As noted this 757 is a generation of aircraft that transcended the era between the dials and glass cockpits. Sitting behind the beautifully rendered throttles (reverse thrust) levers is the main attraction. The FMS. It is almost the same design as the one on the FlightFactors Boeing 777, but it is the best FMC in X-Plane right now. Fully programmable with flight data (performance, Depart, Cruise, Arrival) routes x 2, Legs, SIDS & STARS, DEP/ARR airports, it is fully functional and both the FMS's of the pilot and the Co-Pilot's pop-outs and are completely and separately programmable, you can start setting up the data on the pilots side and finish on the Co-Pilots FMC or do both at the same time and can input on different modes (you still have to follow the basic input rules).... Just simply brilliant. If you look closely you will find a mode missing? Radio was not on the FMC at this stage (unlike the B777) and so you have to input your frequencies manually. One Item worth noting is that you can save a route (yah!). But to retrieve the route from file you have to input the exact letters and numbers into the FMC. You can check in the Plugin/757Avionics/Routes folder if you forget or simply write them down. The systems on the 757 aircraft are highly complex with full Electrical, hydraulic, De-Ice, Fuel (pumps and tank transfer) most of which is situated on the overhead panel (OHP). There is a multistage custom failure system with in-browser instructor’s console and you have the ability to fix failure by following the proper procedures. And between flights any failures and maintenance will carry over to the next flight that gives you the realism of a not so perfect aircraft. (you can turn this all off via the menu). Starting the engines is as complex as you would expect from a cold start-up, it requires long procedures of button pushing and systems activation. On power up the engine power comes in gradually and then they get noisy outside, they are dirty as well as the black plumes of carbon fill the air behind the engine exhausts. As it is very complex machine, you do have thankfully an excellent checklist and tutorial built into the menu. A full checklist for every portion of the flight is available. First there is a "Normal" checklist that just lists the procedures, This includes the standard aircraft walkaround. "Procedures" takes the situations a level higher. First with a highly detailed instruction of each procedure and then as a very clever tutorial that goes through all the procedures. As you click each procedure it will show you in what order and where each item is to be activated. As you click the items off the checklist it goes onto the next item. For new and even experienced users like me, it makes the systems more easily absorbed and you learn quite fast. Many times you know what to press but can't find the right function on the panel... or do the sequence in the wrong order. Here a few runs through and you are pretty well ready just to use the standard checklists. There is the "Operational" Checklists that is also highly detailed and every one of these checklists can be used in Auto mode when the aircraft will do it for you. The final item "RE-SET" on the menu will reset any of the Checklists in the lists. It looks daunting at first but the checklist menus are simply so good you will soon understand the aircraft. Interior The interior cabin is just as detailed as every other item on the aircraft, Opening the locked cabin door will find you with a "I can't do that look on your face", You can, as the (FLT DK Door) button is on the OHP and that shows the amount of detail you have. Inside the seats are beautifully rippled, and the cabin fittings, Lavatories, working galleys and all the interior lighting lighting is excellent. Flying the Boeing 757 Once the aircraft is configured with fuel (menu), FMS flight route (data) and engine start you are ready for pushback. Flaps were set at 10º. and brakes away. Taxiing is easy as the throttle response is excellent, you feel the weight and it takes a push for thrust to get the 757 moving, then you settle it back to a 10knt taxi speed. You can do cabin announcements via a great announcement menu page. There is a full list of excellent standard announcements that will bring a smile to your face, There is also the option for charts on the yoke, these are pdf's that are stored in the "CHARTS" folder in the main file folder. They have to be listed (.png's) and configured for use, but it is worthwhile for their usability and as an excellent feature. Push throttles forward and the engines spool up to full power in their own time, this takes a moment and then the push comes in. Totally realistic in the moment is that the power is just there on other aircraft, but it is simply not here on the 757 until it comes in with a growing gradient of power. The feeling is fabulous in its effect of reality... amazing programming must be required to get this just right. At rotate you just let it climb without pulling back to hard, Gear up is a two stage click upwards on the lever, It climbs like you expect, very quickly. And on the turn back towards the coast over BIRK I was already at 8000ft and climbing easily at 2000ftpm. Turn to the sun and the active shades feature will cover the windows, turn away and they go up again. Both Pilot and Co-Pilot NAV/MAP displays are independent, Usually placed on the glareshield, here they are on the pedestal. it makes adjustment tricky - but they are very authentic in operation. Glareshield Autopilot is excellent, It has full separate functions for the the Pilot and Co-Pilot, VOR 2 frequency settings are at both sides, which can be set to Manual or Automatic. Pilots side instruments shows the duel mixture of dials and glass screens with digital readouts from that era. Setting the ILS Frequency (VOR1) is a slightly more nerve racking affair if you don't know how? or where it is? It is situated at the rear of the pedestal, but the first the actual frequencies don't show unless you adjust the lighting - it is just dark or blank. When it does show it only displays dotted lines? A casual look around the cockpit became a frantic search for the badly needed ILS setting. The trick is to touch the knob on the frequency selector and the frequencies finally show a selectable freq number. Another feature is the oxygen mask, press the compartment to the pilots left hand and activate the mask, it moves as you wear it and not just where you look, but also on how you breath! Enroute and you have a lot of tools at your disposal. The FMC gives you your route while the Co-Pilot does the flying with the standard MAP mode. Engine performance and power is shown on the displays. At arrival you can easily set the correct distance to your turn fix for the correct height. Cabin and glass reflections are first class. the windows all give great reflections and they are worse at night with the lighting from the instruments.. Flying today is in good weather, But if it turns wet or stormy then the aircraft has a good weather radar (adjustible!) and great rain effects on the windows, now in X-Plane in aircraft of this category rain is mostly de-rigueur, but FlightFactor do it very well. Arrival is down to 5000ft and m62. But watch the aircraft as it will fall quite quickly if you don't control the descent, on finals as you turn but you have to watch the drag from those long drooping flaps, in fact your speed has to be quite slow at around 140knts on approach, because if you don't control the speed and you are not slow enough in the flare you will get a bang of a landing. (or a reset!) That last few feet from the ILS cutoff is going to test your skill to the limit. But get it right and you will smile for days after. The reverse thrust is very effective and blows out a lot of black dirt in front of the engines. Then don't forget to let the passengers know they have arrived... Sounds The Boeing 757 has over 200 Mb of custom sounds, in 3d of course. The cockpit has many of these and can be heard while pressing various functions. In flight the "Ding-Dong" goes off all the time as passengers call the attendants.... very realistic. There are also 3D stereo sound for the engines and they sound great with from some angle a real burring turbine sound that is excellent. Liveries There are four liveries with the aircraft package: Boeing House, British Airways (retro), Air France and Lufthansa. And eight livery packs available for US$10 per pack - Includes: Asia Pacific Livery Pack for 757 - Europe Livery Pack #1 for 757 - Europe Livery Pack #2 for 757 - Europe Livery Pack #3 for 757- Middle East/ Africa Pack for 757 North American Livery Pack#1 for 757 - North American Livery Pack#2 for 757 - Russian Livery Pack for 757 Conclusions The Boeing-200 from FlightFactor is a huge aircraft full of brilliant features. The modeling and design are first rate if not the best in X-Plane at this current period. It is a large investment, but you are getting the very best as well. If you have acquired the Boeing 777Series then you know why the Boeing 757 is also going to be great value. It has the same quality and design as the B777. But still the B757 is very different in its own way. The main feature is again the programmable FMC as it is simply the best in X-Plane, but the shear systems depth is also another real attraction. For a large file it is amazingly light on your frame-rate and the texture quality does not suffer either. The 3d sounds are another aspect as they are very good as well. The only items that I would have liked is cargo doors and the option of the stairs on the left (front) door, but both are for my own service requirements. For a novice flyer the B757 is a complex and daunting machine, the brilliant checklist system helps, but it will take time to fully understand the aircraft not only in operation but also in the air. No review could cover all the systems on this aircraft, as they are to large and complex but with this investment you will get in return of many and even hundreds of hours of simulation at the highest level. for value there can be no other greater reward. _____________________________________________________________ Yes! the Boeing 757 Professional is now Available from the X-Plane.OrgShop : Designed by FlightFactor (Philipp and Ramzzess) and produced by VMAX Price is US$59.95 : Boeing 757 Professional Developer Site: facebook Dev Thread : X-Plane.org Review By Stephen Dutton 7th November 2013 Technical Requirements: 64bit X-Plane 10 and OS are required to run the 757. Windows Vista/7/8 64bit or Mac OSX 10.7/10.8/10.9 or Linux Ubuntu 12.04LTS or compatible (older versions are not supported) X-Plane 10 fully updated. 64 bit mode. (X-Plane 9 not supported. x-plane 10 32 bit not supported) 8GB RAM/1GBVRAM (2GB VRAM Recommended)- 512b available hard disk space (download size:375Mb - Custom Folder size (expanded) is 577.50mb) Current version : 1.01 (last updated November 7th, 2013) Review System Specifications: Computer System: - 2.66 Ghz Intel Core i5 iMac 27” - 6 Gb 1067 Mhz DDR3 - ATI Radeon HD 4850 512mb Software: - Mac OS Mavericks 10.9 - X-Plane 10 Global ver 10.22 (final) Addons - Saitek x52 Pro system Joystick and Throttle Scenery - BIKF (Keflavik) - Aerosoft (X-Plane.OrgShop US$19.95) - EGCC (Manchester UK) - Captain Dij (X-Plane.Org)
-
Aircraft Release : FlightFactor Boeing 757 - Series
Stephen replied to Stephen's topic in Comments and Announcements
You can switch off "draw per pixel lighting" in your render settings and that will reduce most highlighted lines and grooves - I actually prefer it switched off. -
Aircraft Release : FlightFactor Boeing 757 - Series
Stephen replied to Stephen's topic in Comments and Announcements
Days... -
Aircraft Release : FlightFactor Boeing 757 - Series
Stephen replied to Stephen's topic in Comments and Announcements
No not yet - but very, very close. -
Aircraft Release : FlightFactor Boeing 757 - Series
Stephen replied to Stephen's topic in Comments and Announcements
No this is the real deal Kevin!... Sometimes we are in the hands of the developers, They announce the release then find extra issues to deal with when it goes out into beta testing, This is one very complex aircraft. Considering everything it has gone very well through the testing stage. Even Boeing has their own release problems! -
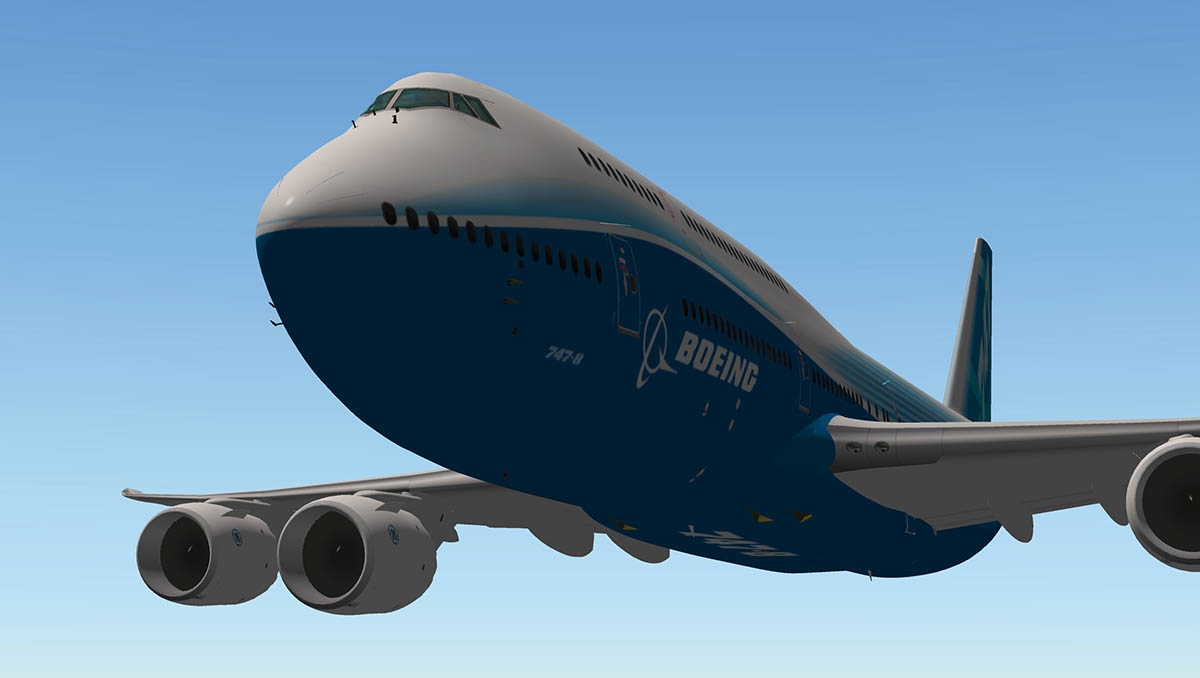
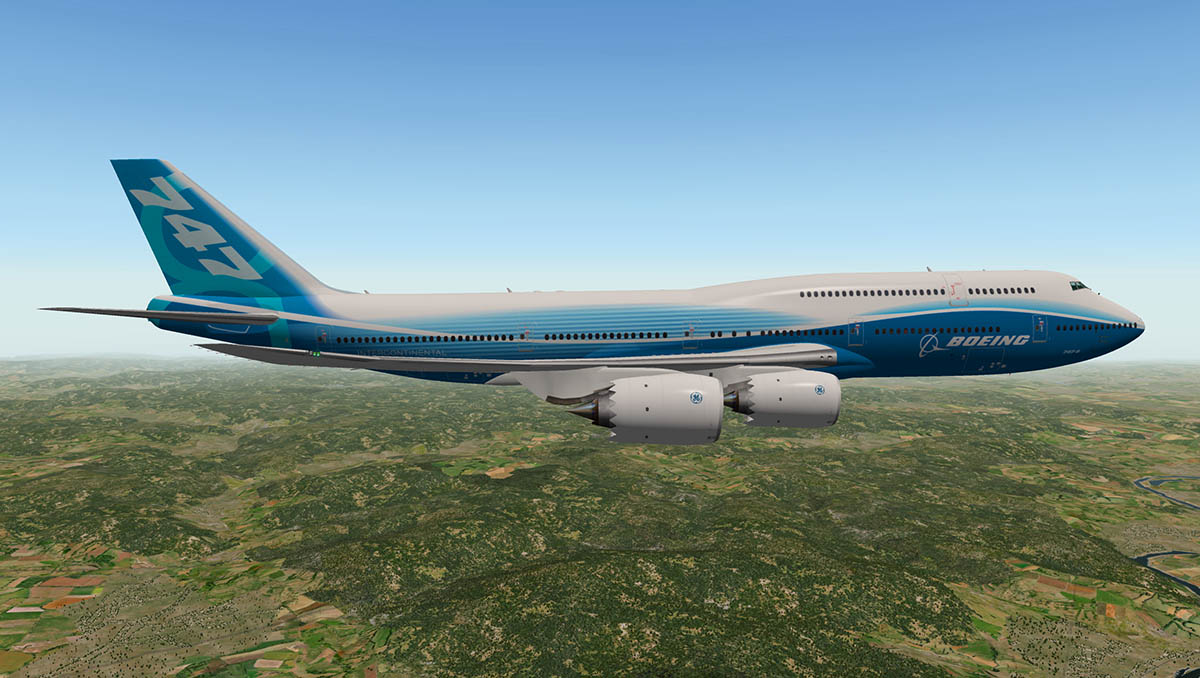
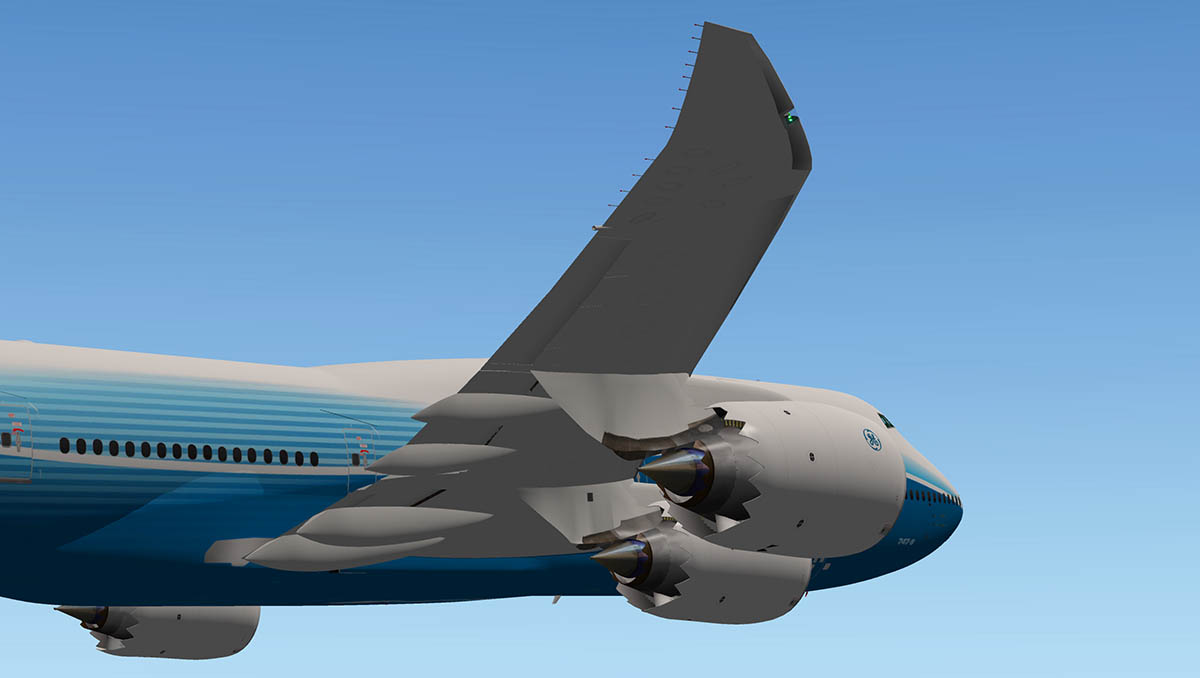
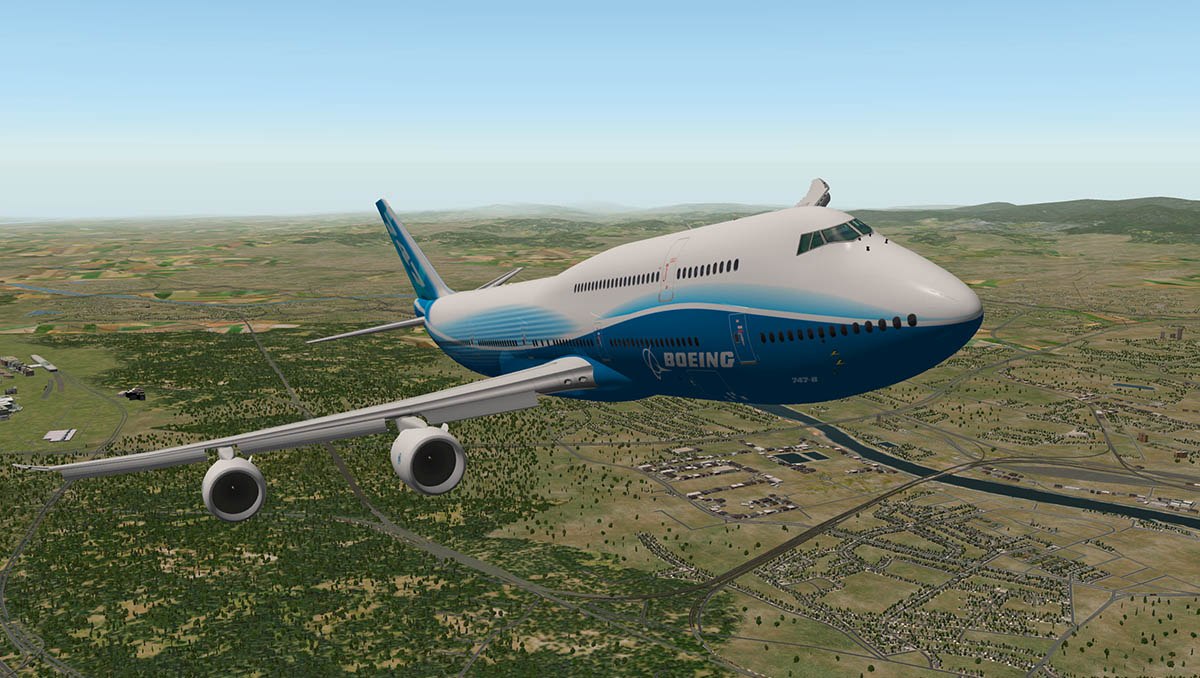
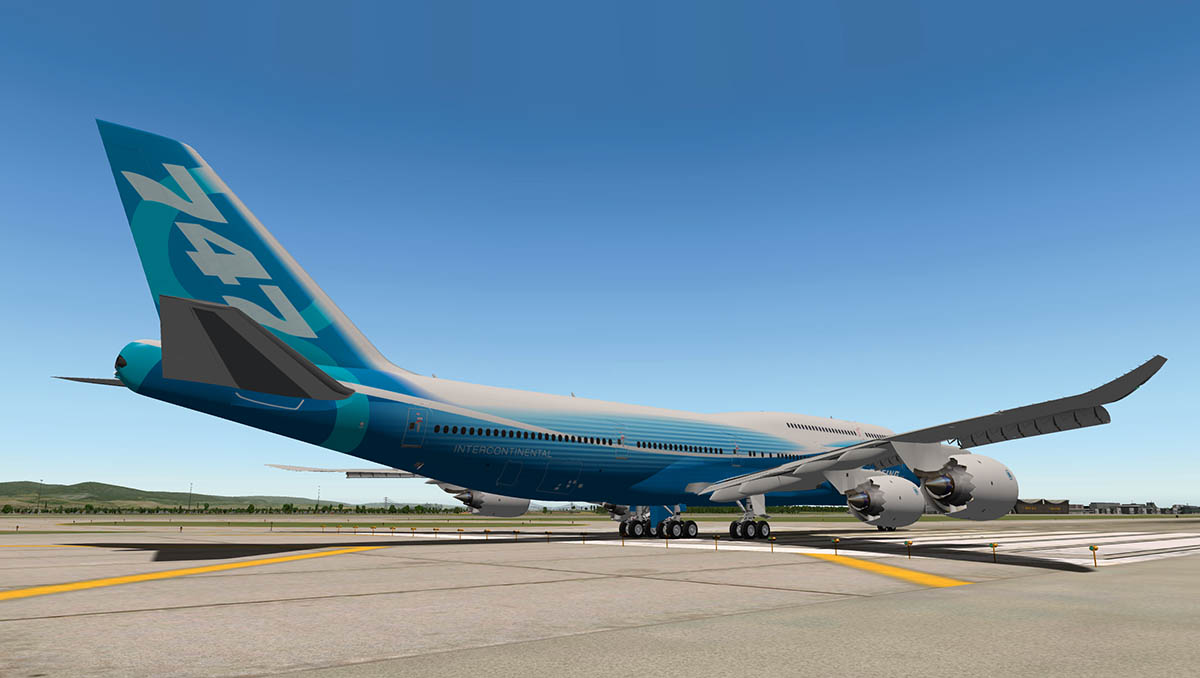
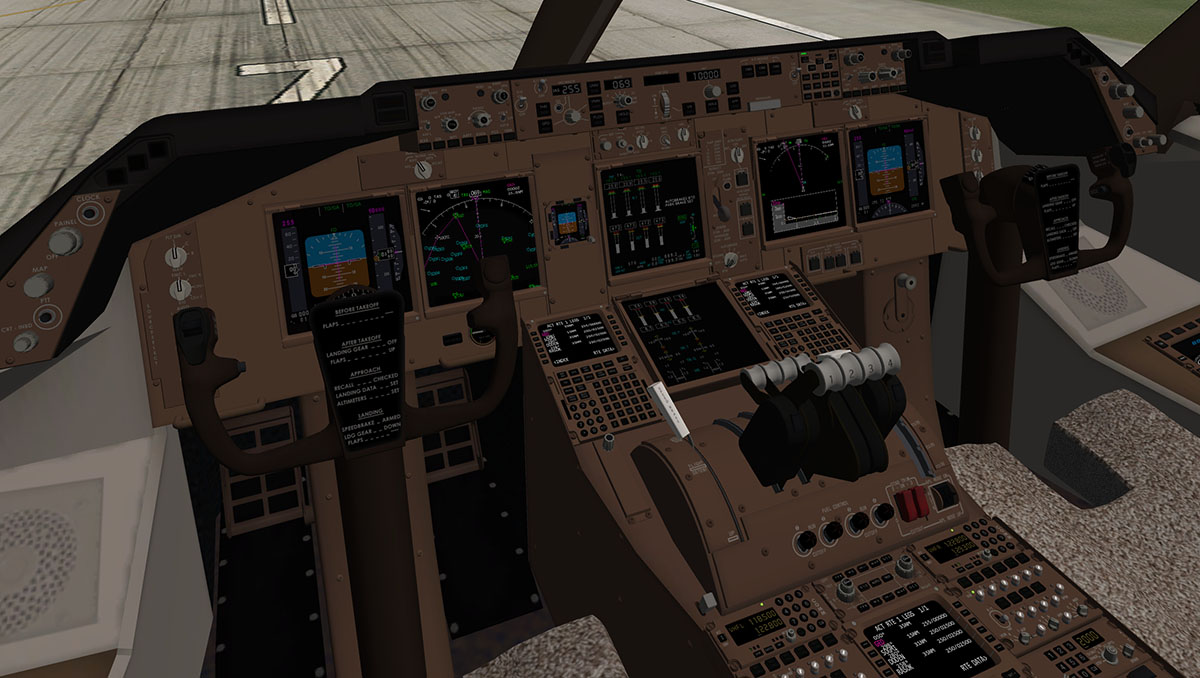
Aircraft Development and Announcement : SSG Boeing 748i Supercritical Simulations Group (SSG) has announced that their Boeing 748i will be released on the 15th November 2013. If you like your aircraft big? Then they don't come any bigger than the Boeing 748I. This is one huge aircraft. The Cockpit is very comprehensive with a full complete FMC with SID and STAR routing. SSG has issued these features as part of this aircraft release. Accurate 3D external model based on datas provided by Boeing with all animations and hi-res detailed paints and textures Real look and feel for 3D cockpit with very high resolution, in all render settings. Electrical segregation (all sources: GPU, APU, ENG, GEN, BATT.) Hydraulic pumps segregation Fire extinguisher bottles for engines works like a true one Fuel management, complete, tanks, valves, automatic electrical end gravity feed. Fuel crossfeed, auto and manual Fuel dumping, with quantity control, automatically to MLW and manual. Engine start system, relight, shut down Anti-ice system External lights and strobes Pneumatic system, bleed air, air driven Very complex PFD, ND, EICAS, and synoptics, EICAS display management Vertical Situation Display (first for X-Plane) Custom radio consoles, audio Console, and transponder. Autobrakes with anti-skid system that really works. EICAS messages based on the real aircraft’s with lists for multiple pages Custom Caution ,warning , master caution functions Complete autopilot functioning the same as the real one. Complete FMC, with more then 100 interactions with the flight model, including SIDs, STARs, and flare and rollout modes. A Complete Custom FJCC FMC with AeroSoft Data pro navigation database compatibility All V-speeds calculated with PFD indicators Aircraft meets most of the true aircraft’s performance data for consumption, AOA, speeds, flight dynamics, etc. Accurate flight controls in all stage of flight True wing flex Engine reverse protection logic Accurate APU fuel consumption Realistic TCAS system Simplified Electronic Flight Bag with option menu All development was followed by real B 747 -400 and -8 Pilots Advisors Real Engine sounds, INN/OUT Real wind sounds Buttons , handle, switches with sounds Custom aural sounds for almost systems. Comprehensive manual The Boeing 748i will be available for MAC, Windows and will be 32/64 Bit (Sorry no linux at his stage) Stephen Dutton 6th November 2013
-
Aircraft Release : FlightFactor Boeing 757 - Series
Stephen replied to Stephen's topic in Comments and Announcements
Yes I love the Icelandair livery, It has great detail. You could change the name in Photoshop or another graphic program? Yes it is a complete FMS, however the radio frequencies are not in the system but are separate as the aircraft is dated before that feature. -
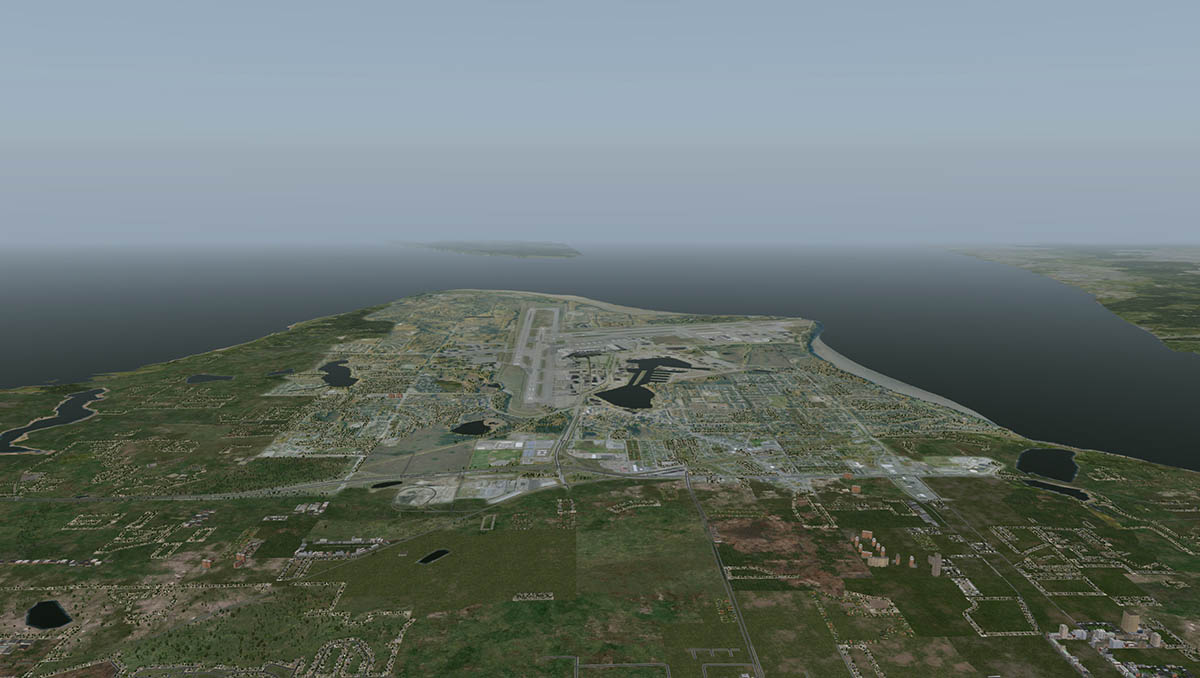
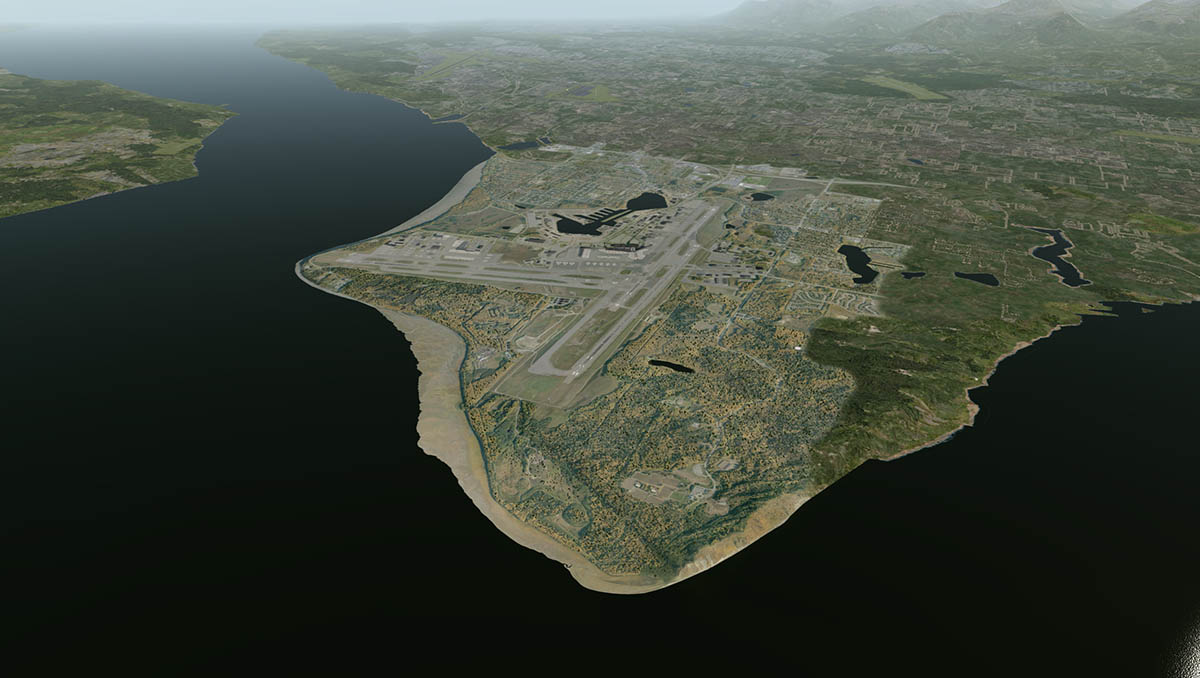
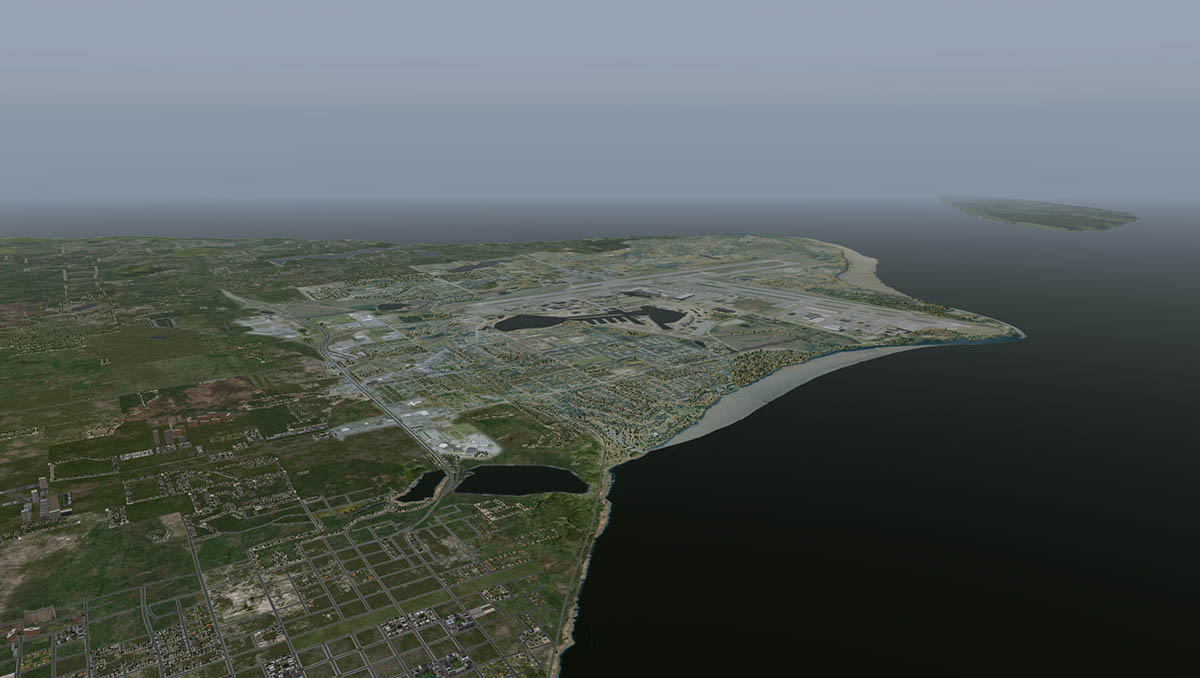
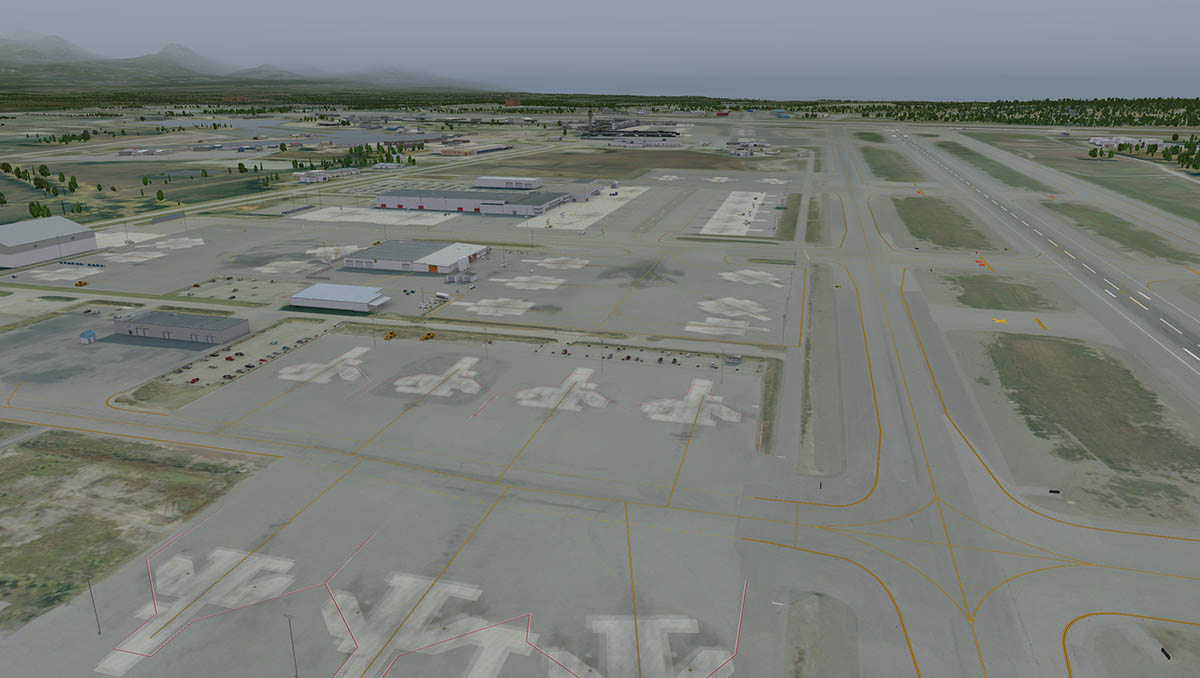
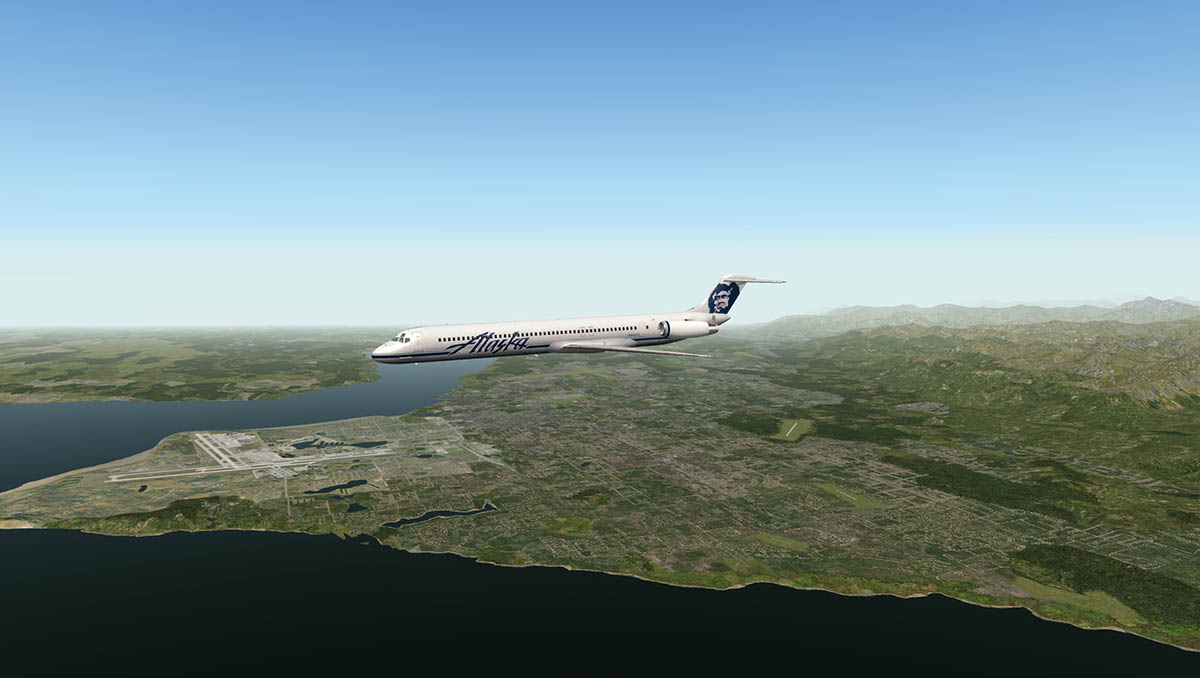
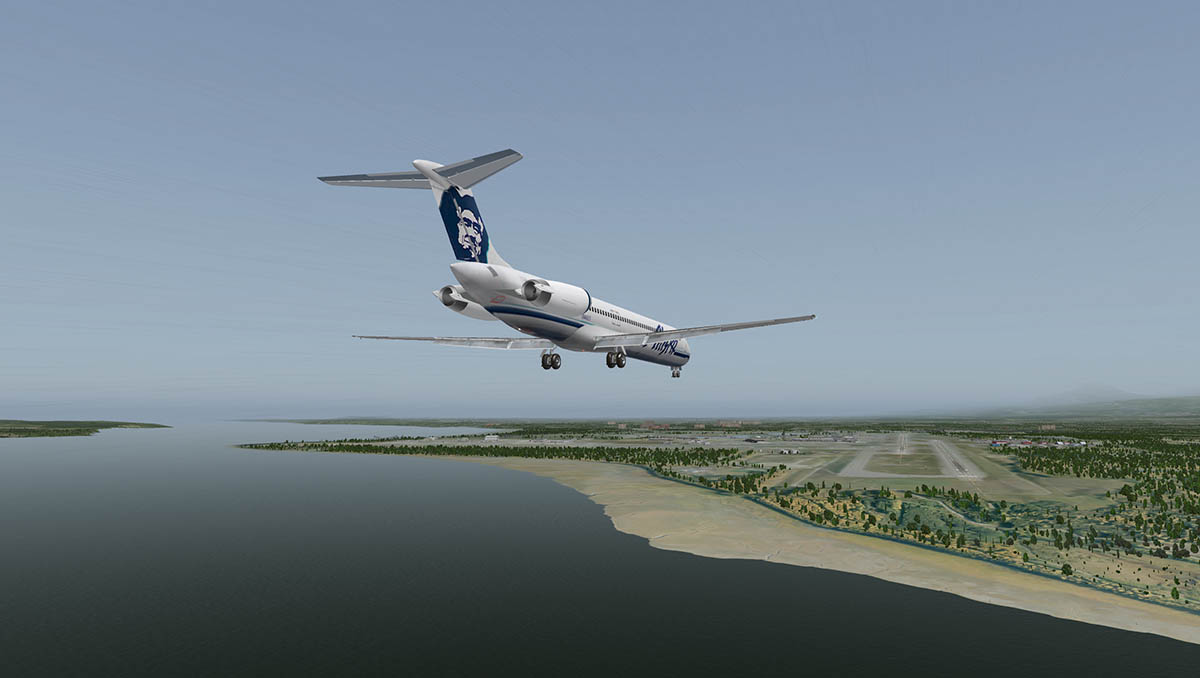
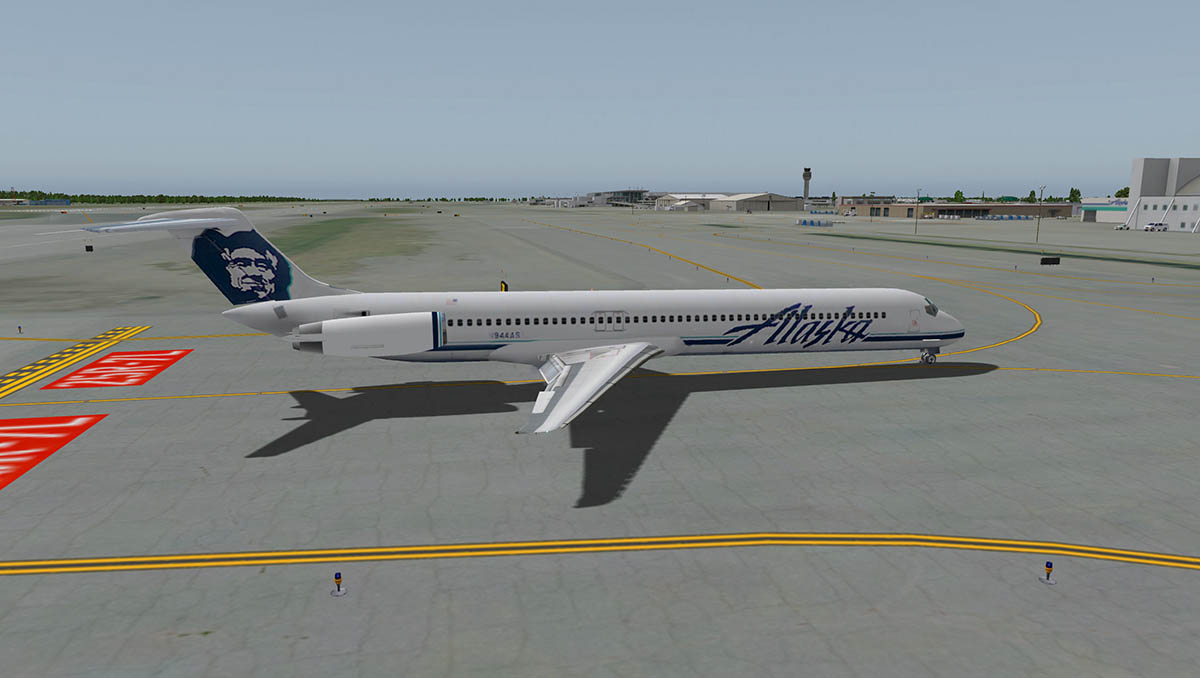
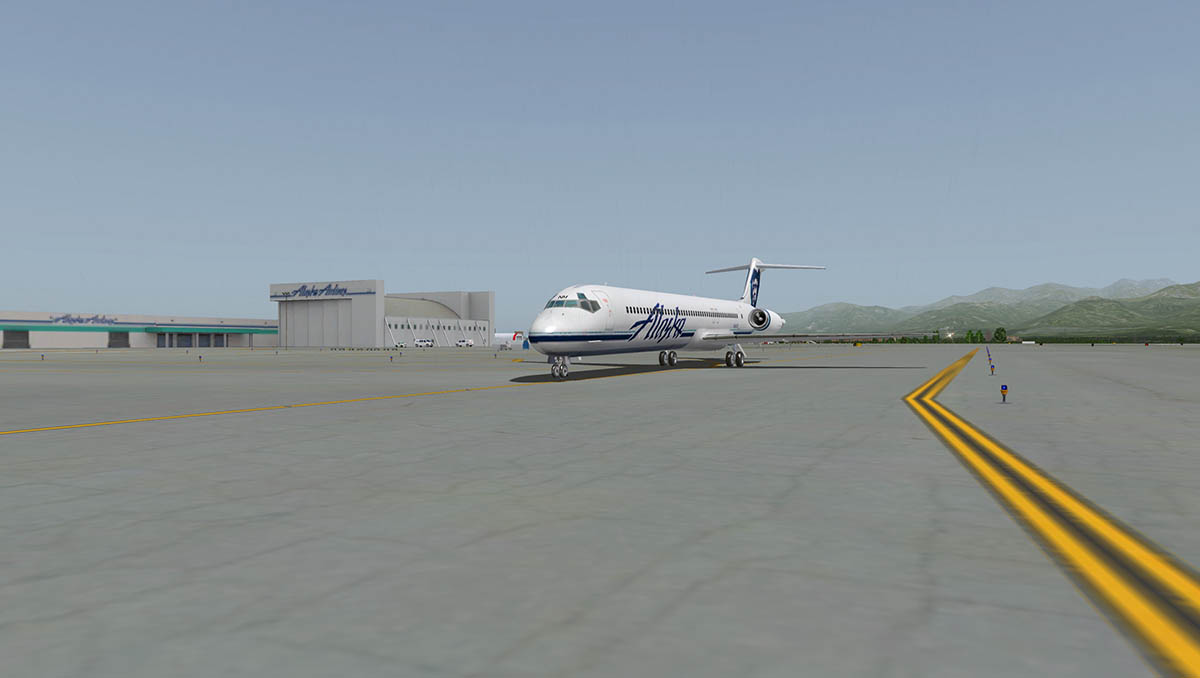
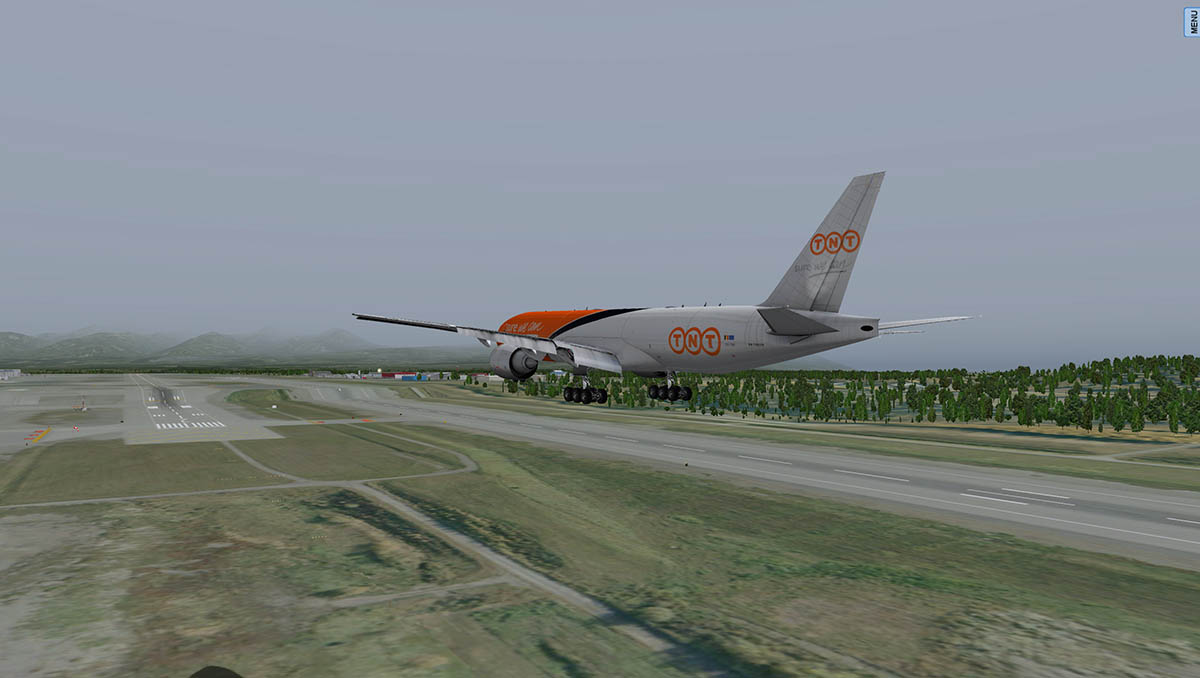
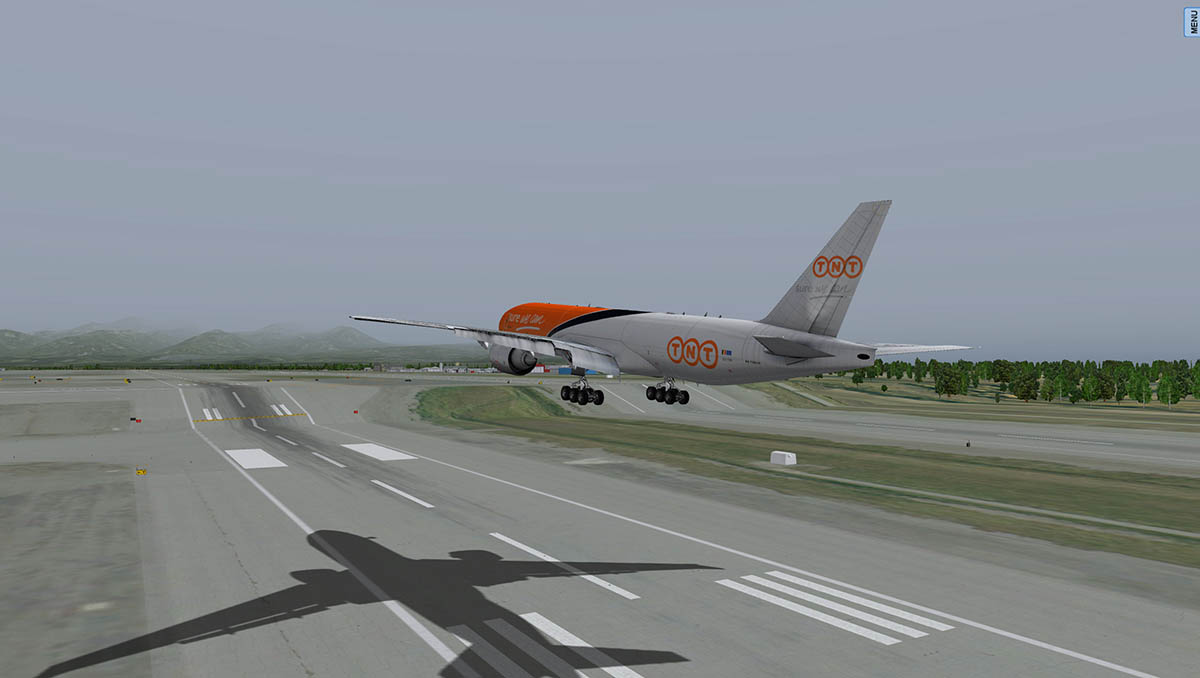
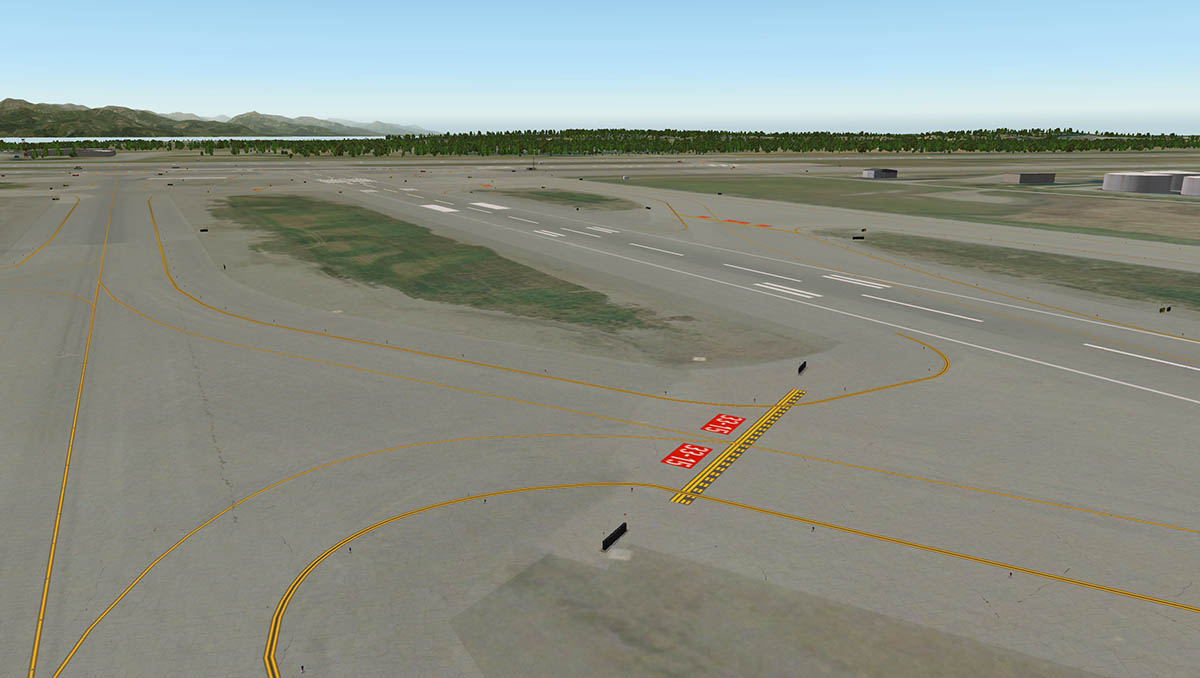
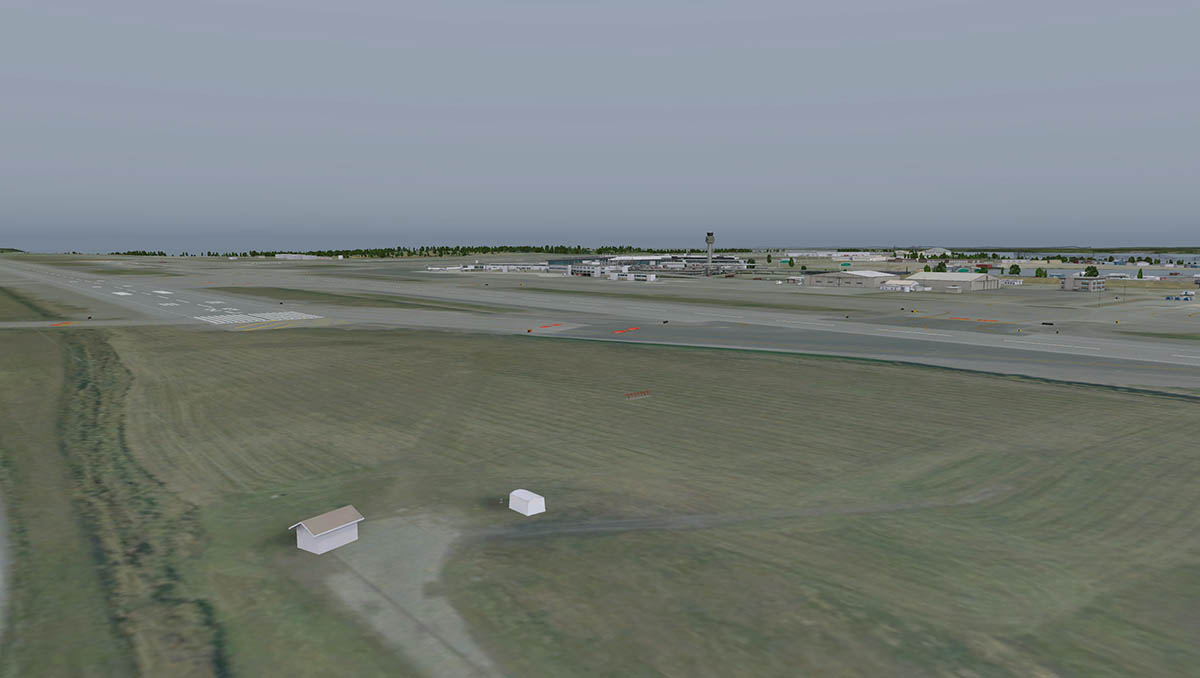
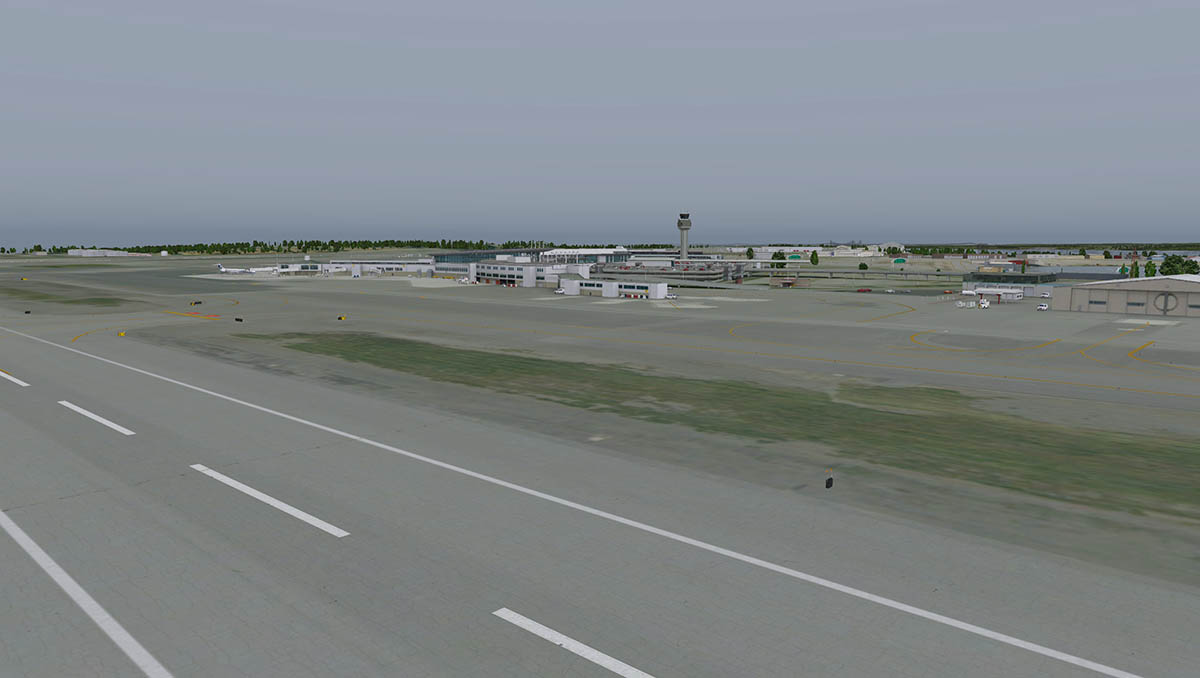
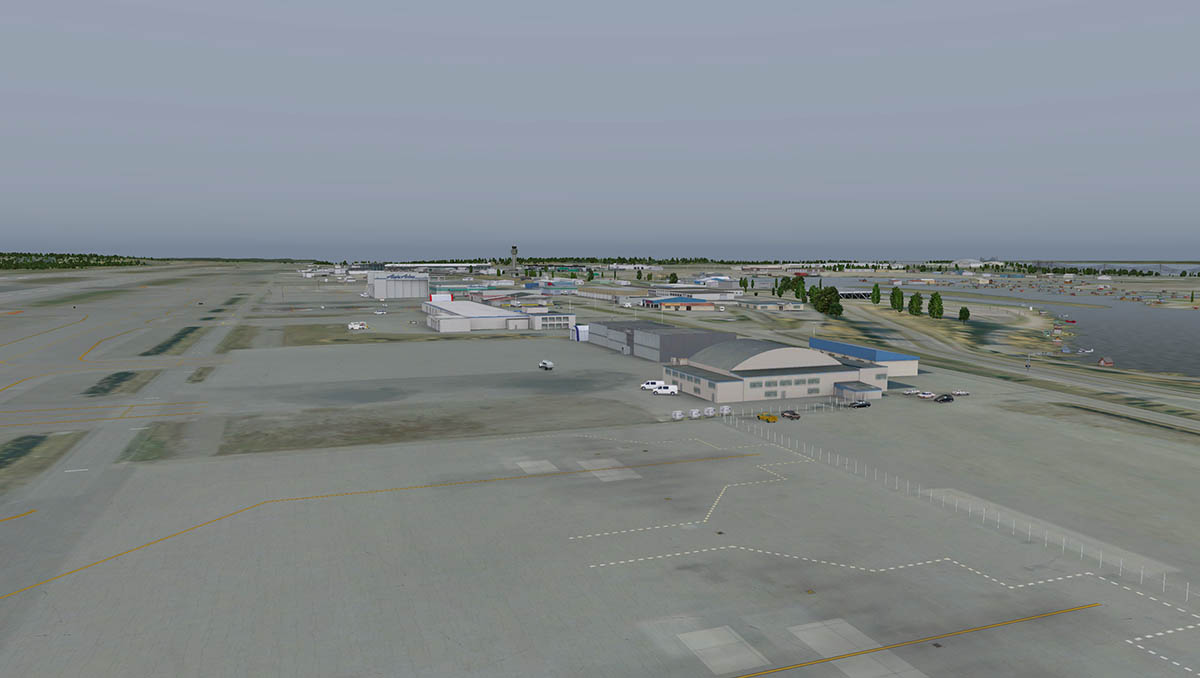
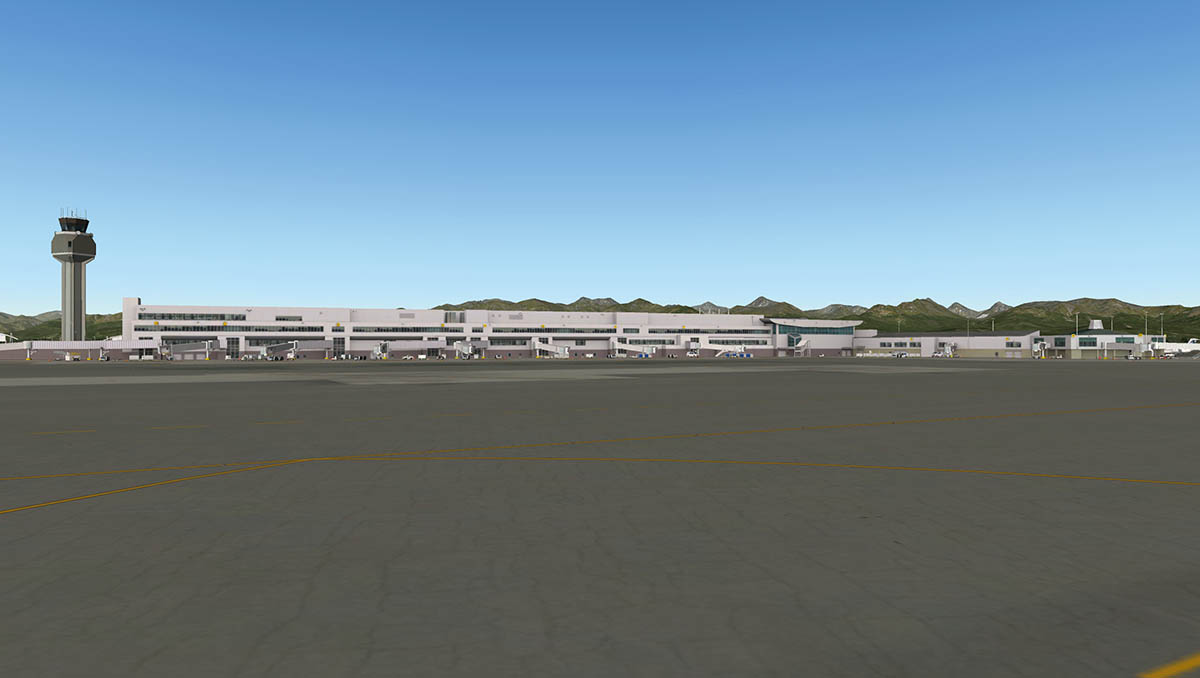
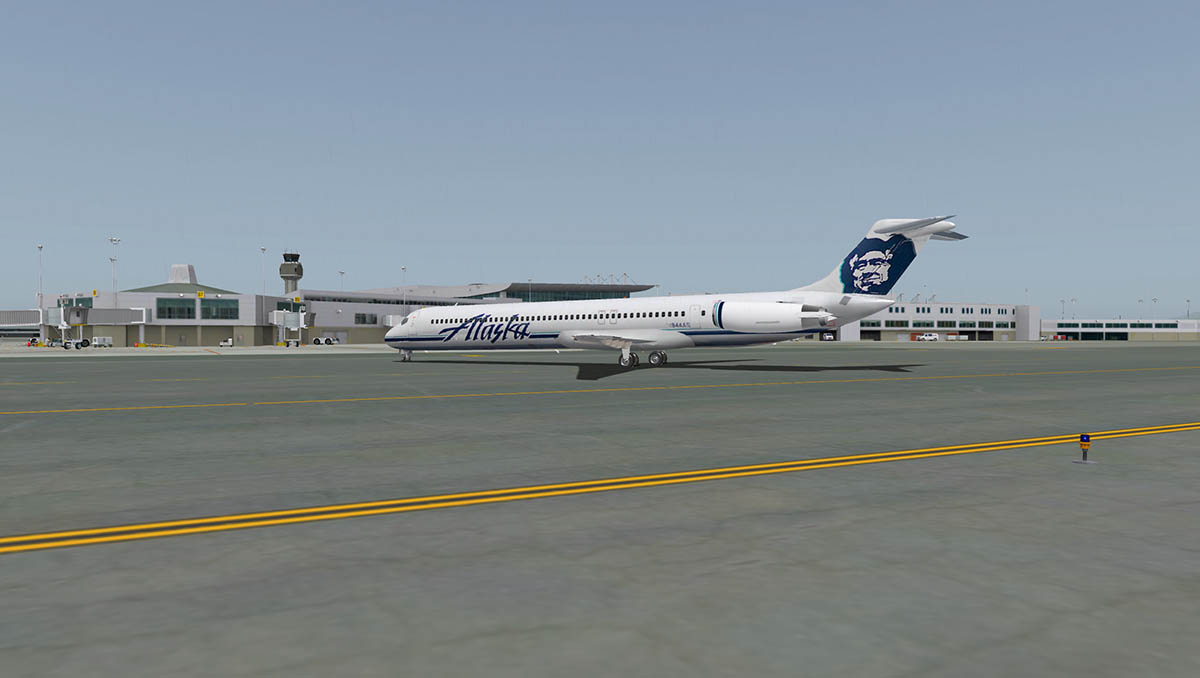
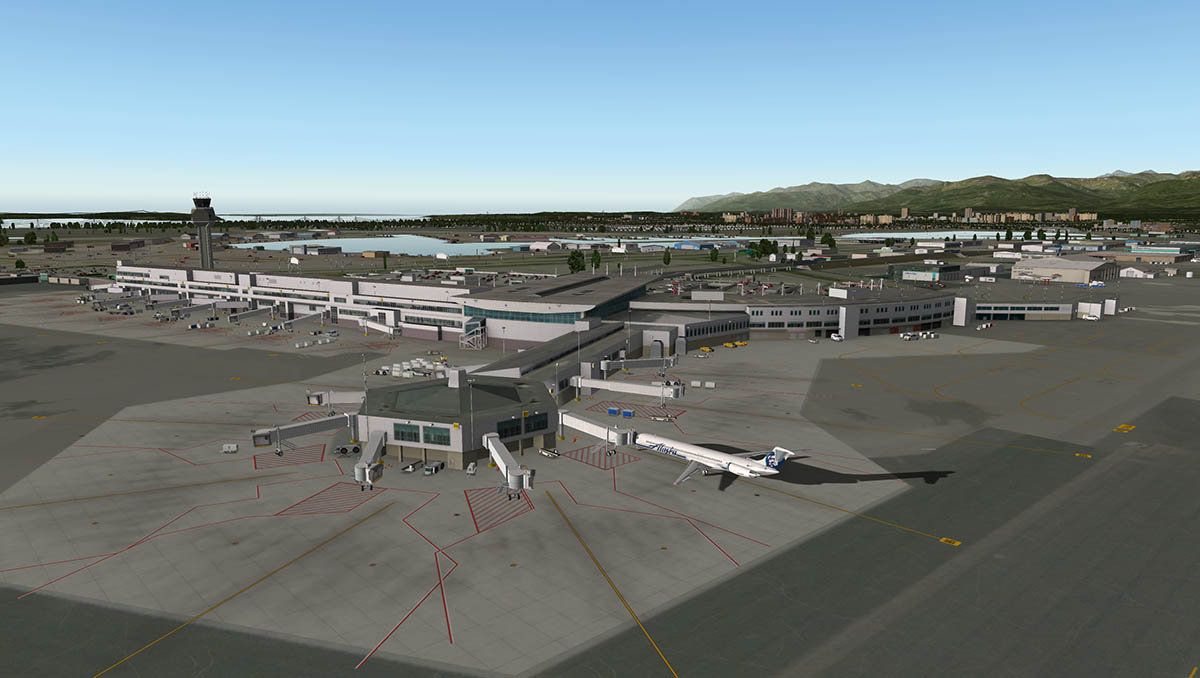
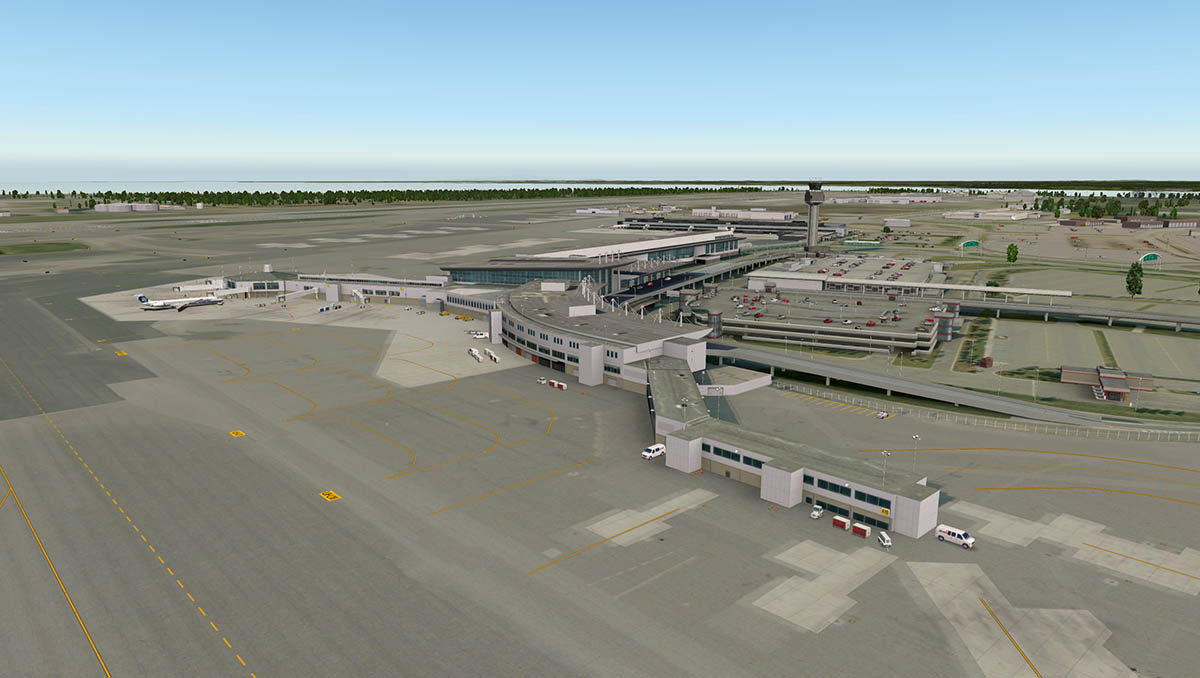
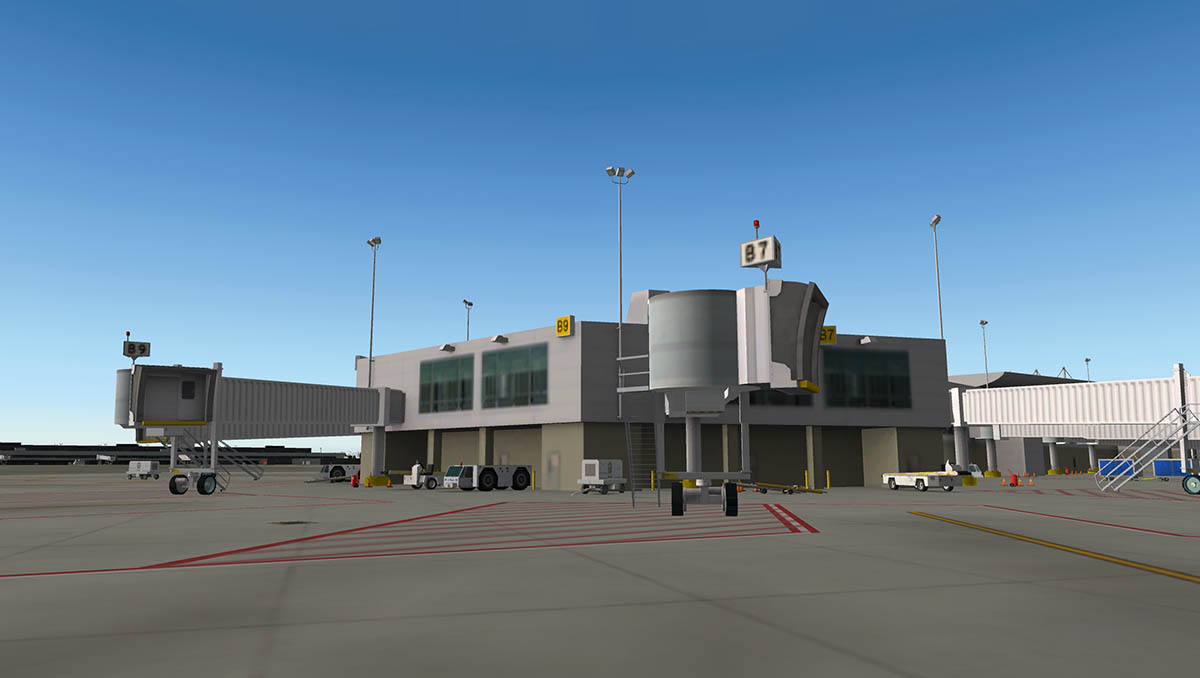
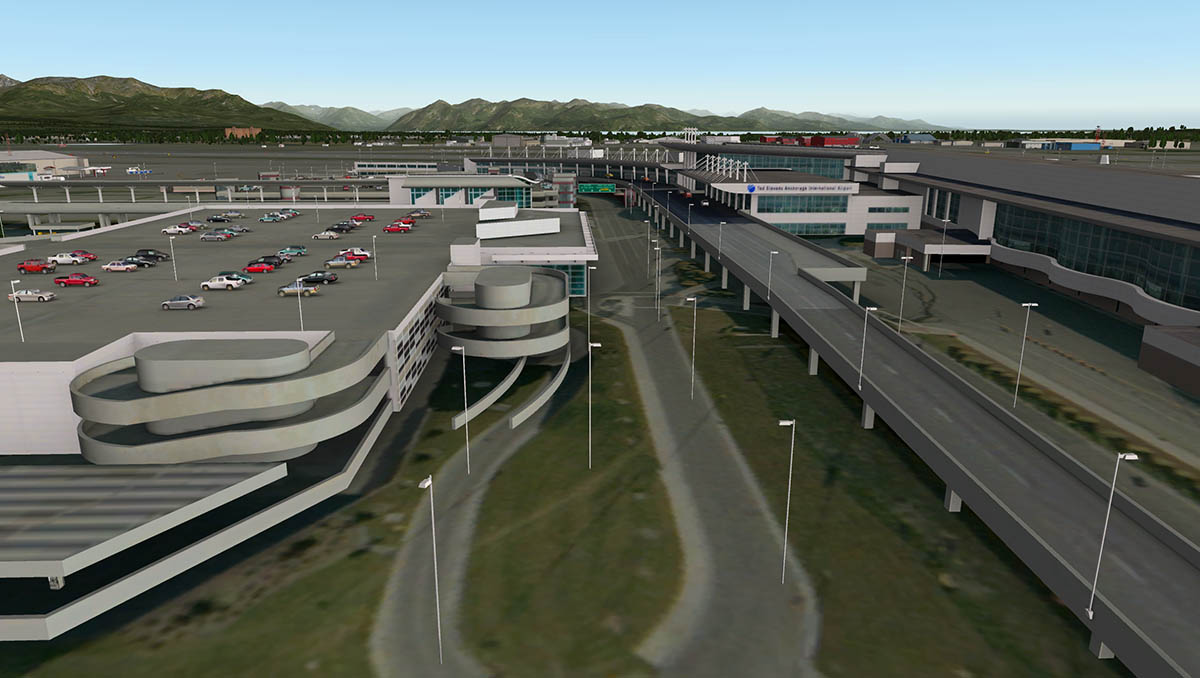
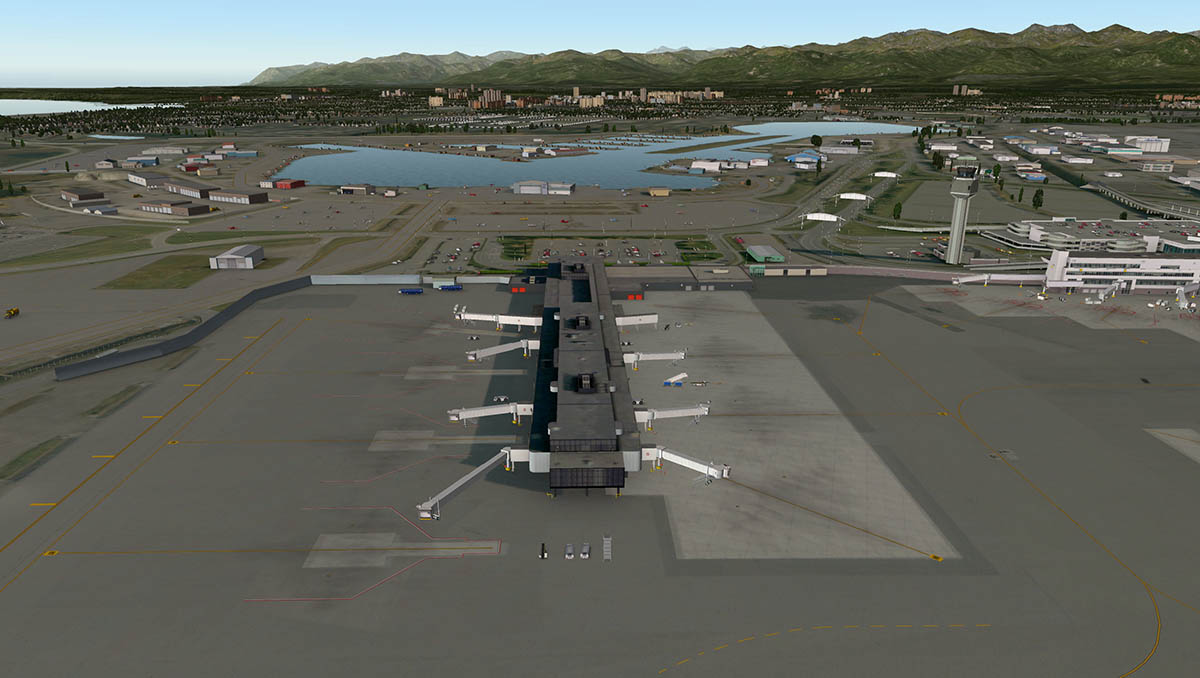
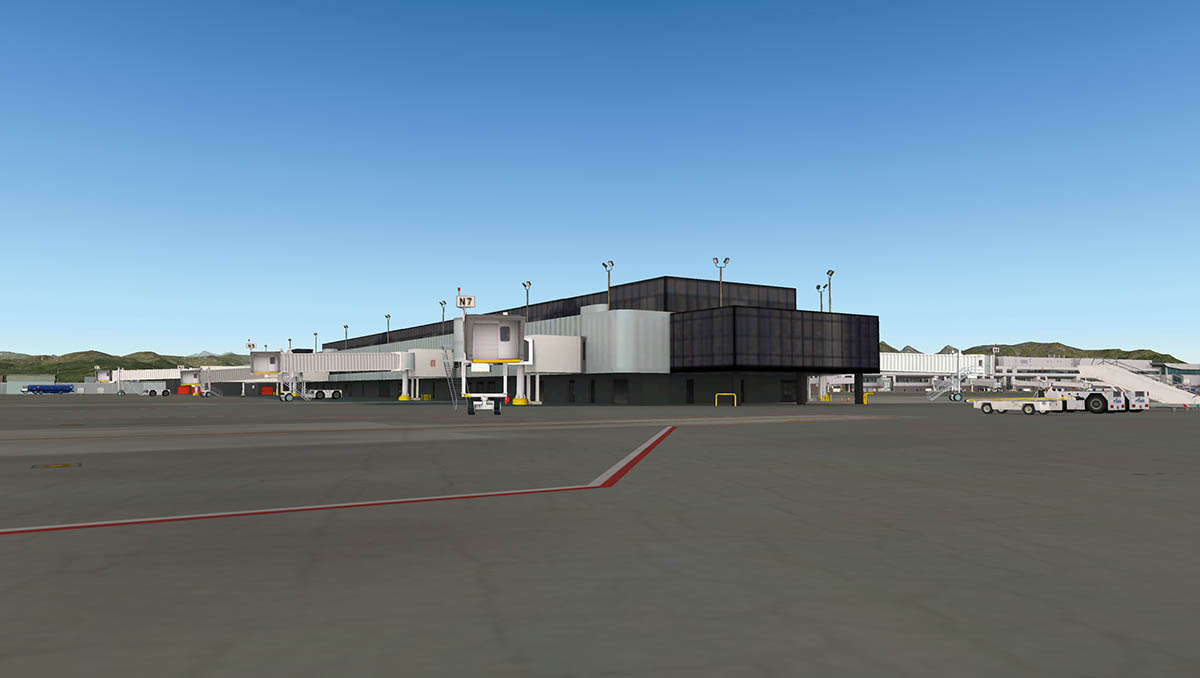
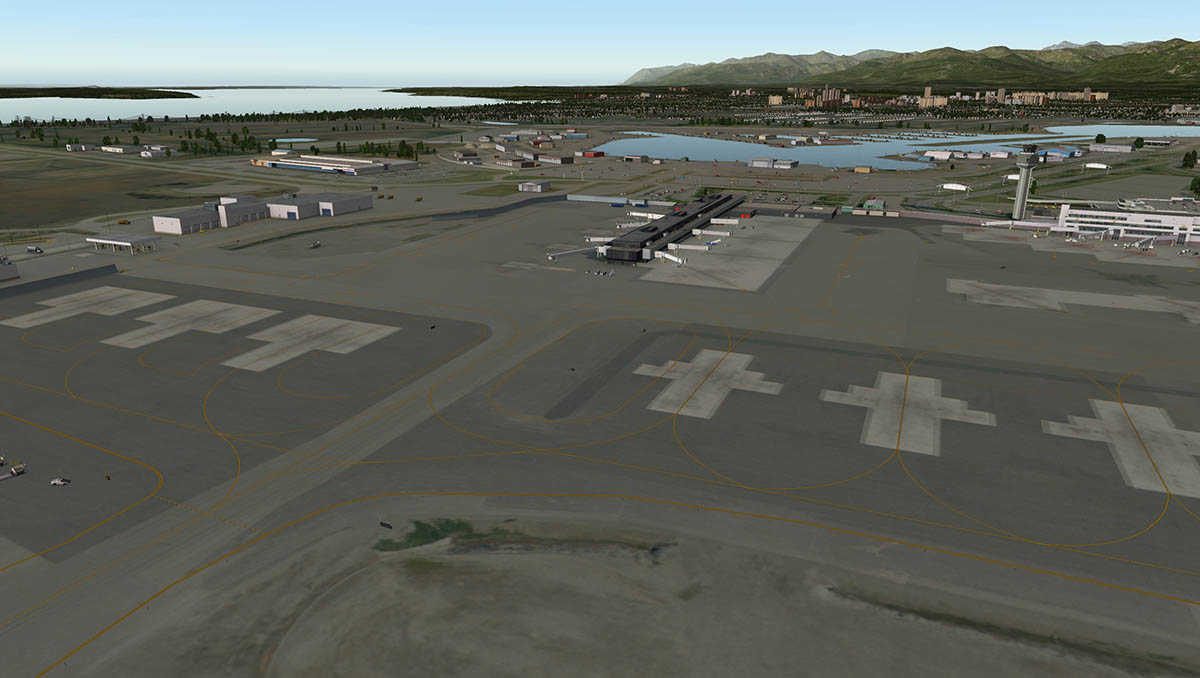
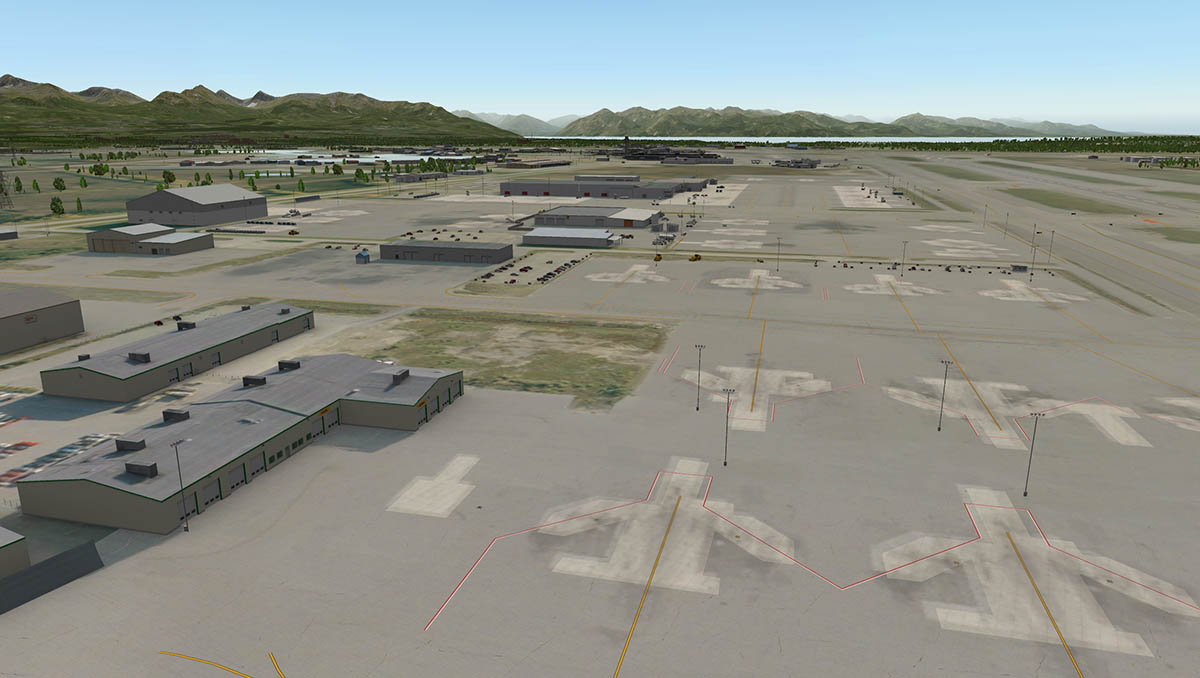
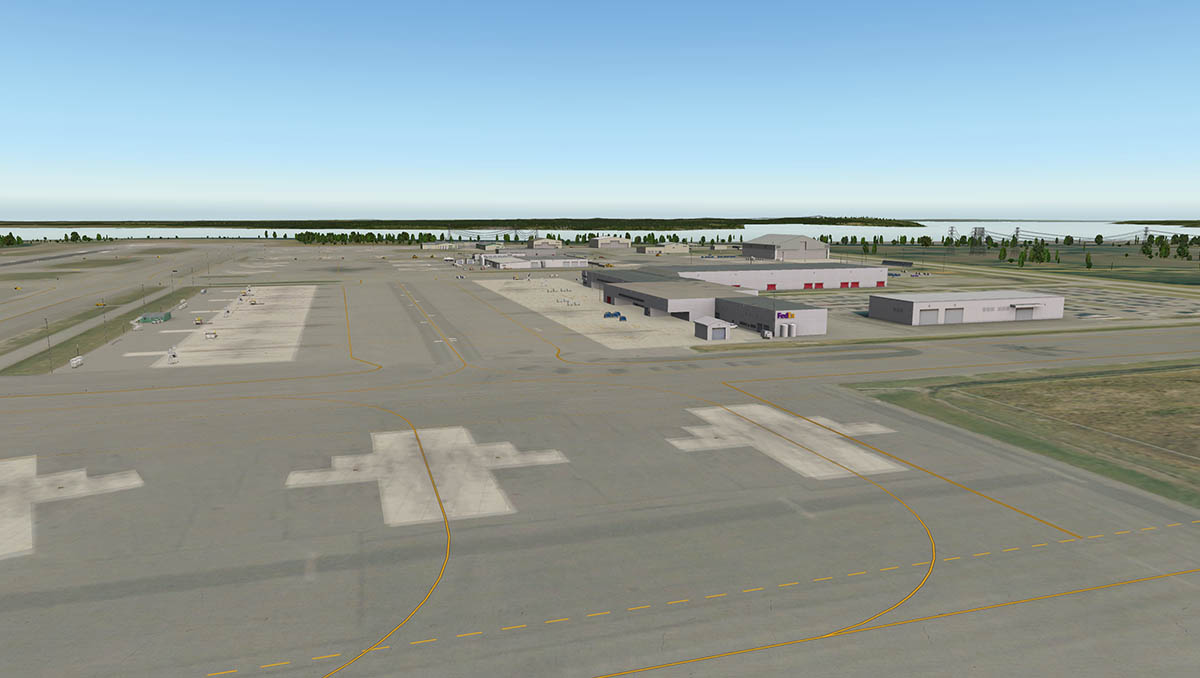
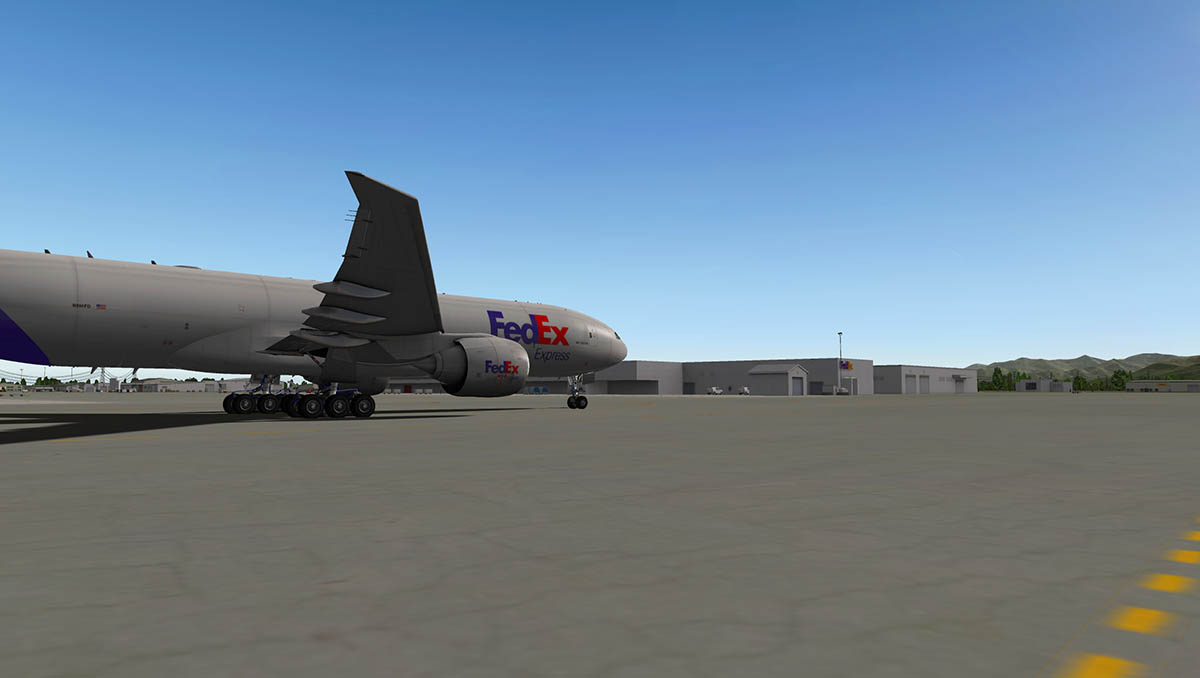
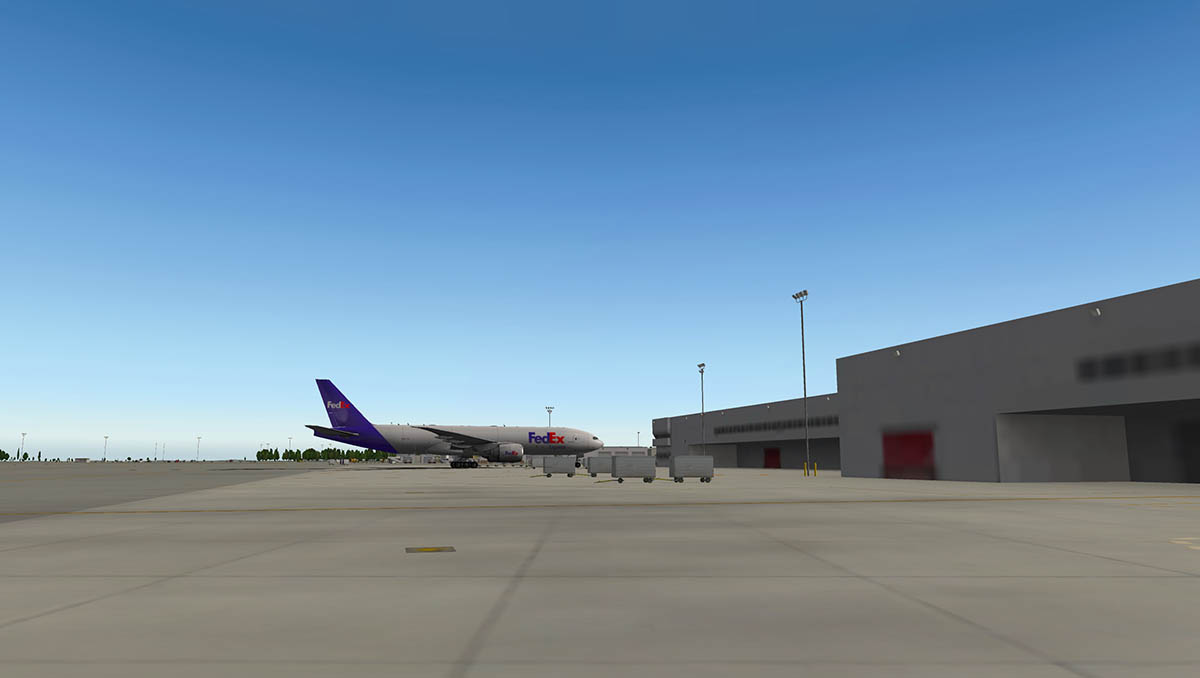
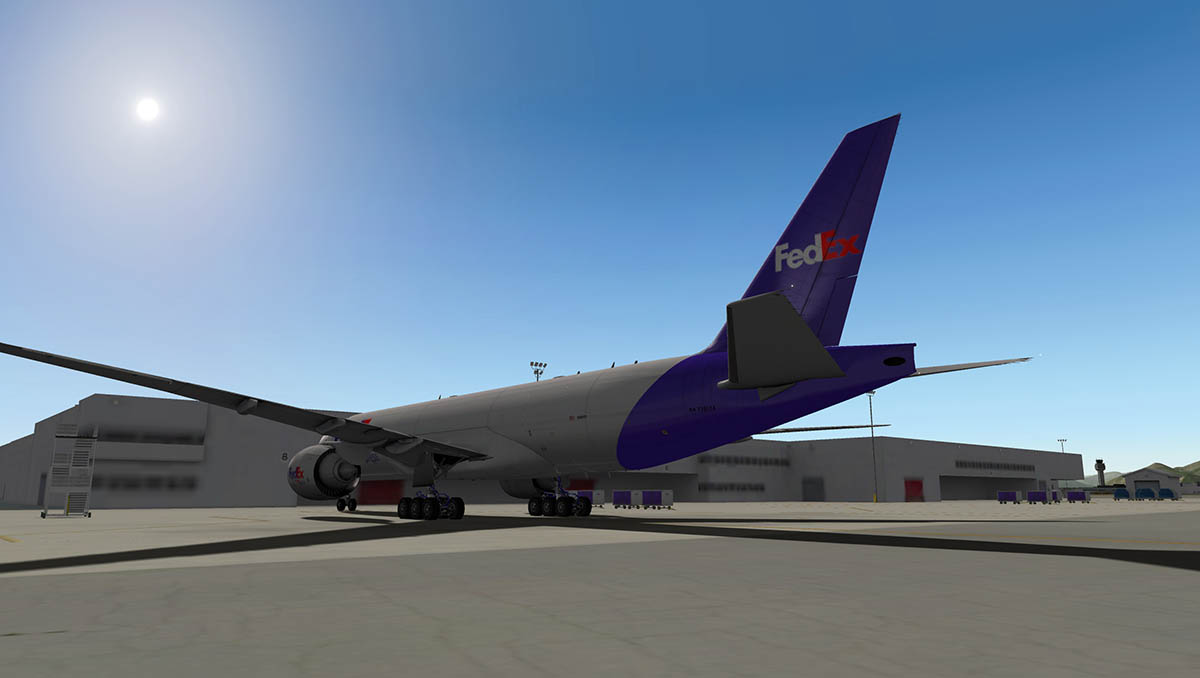
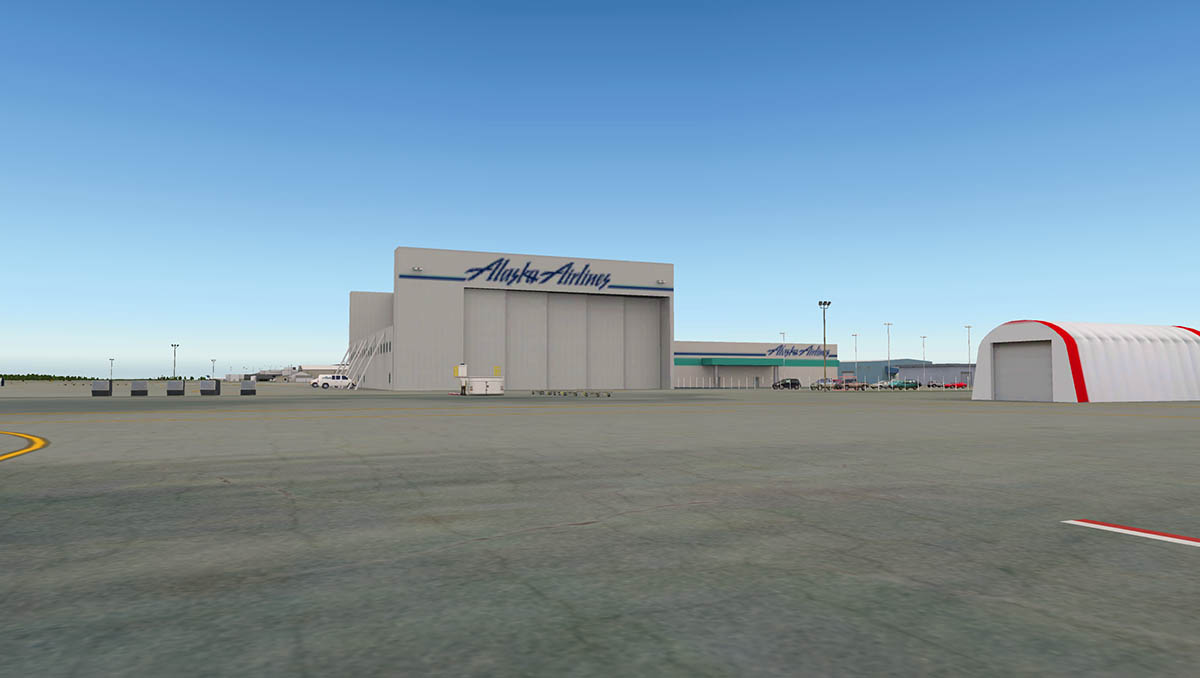
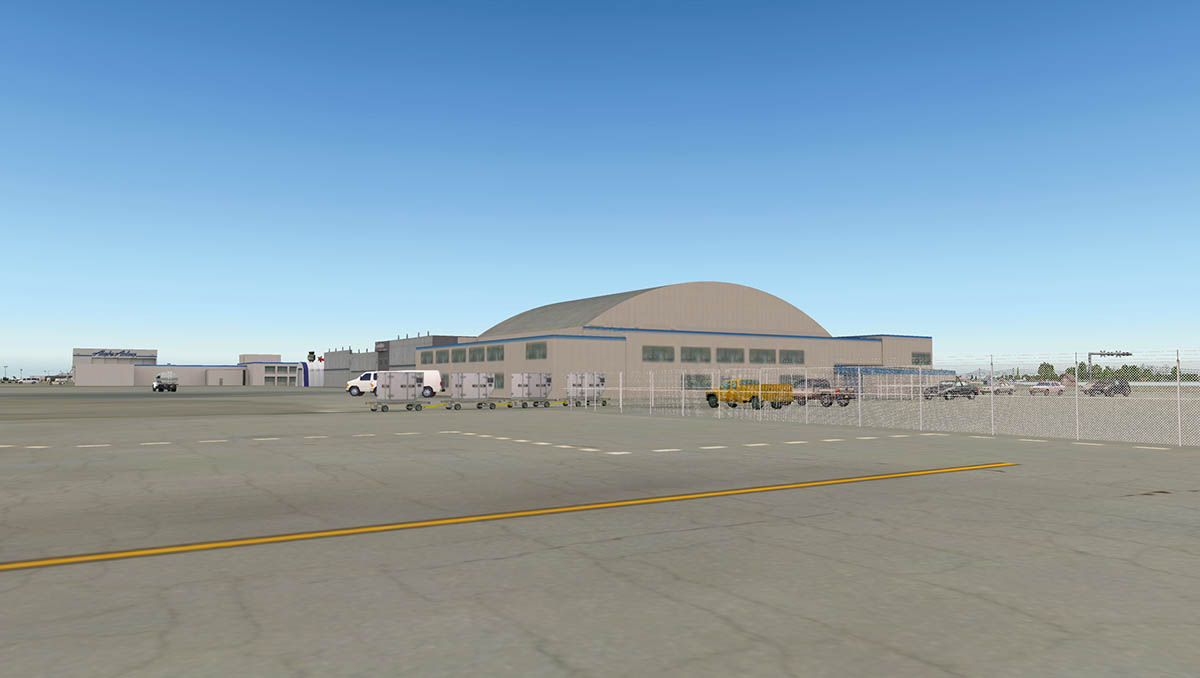
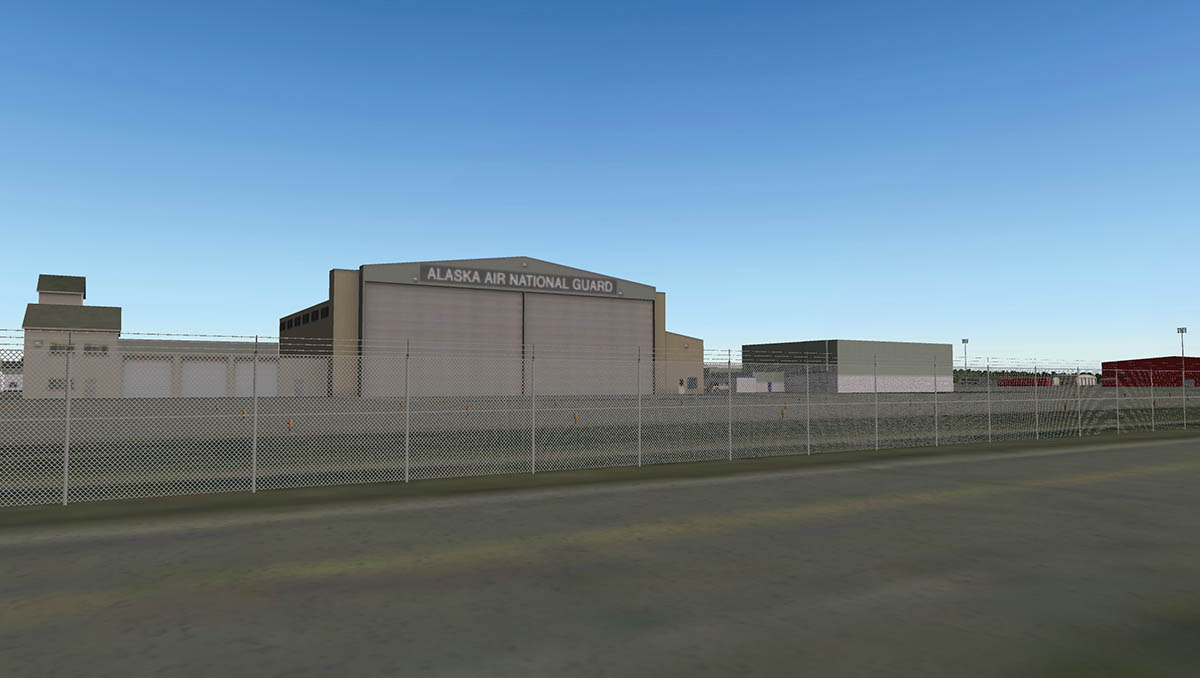
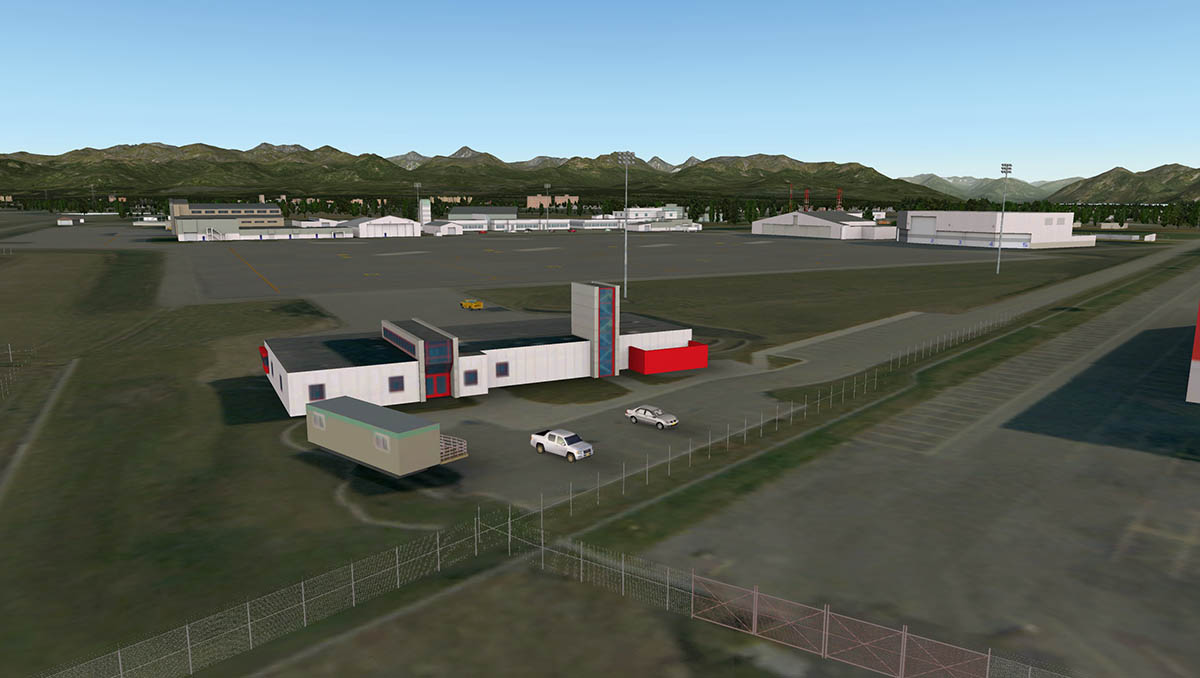
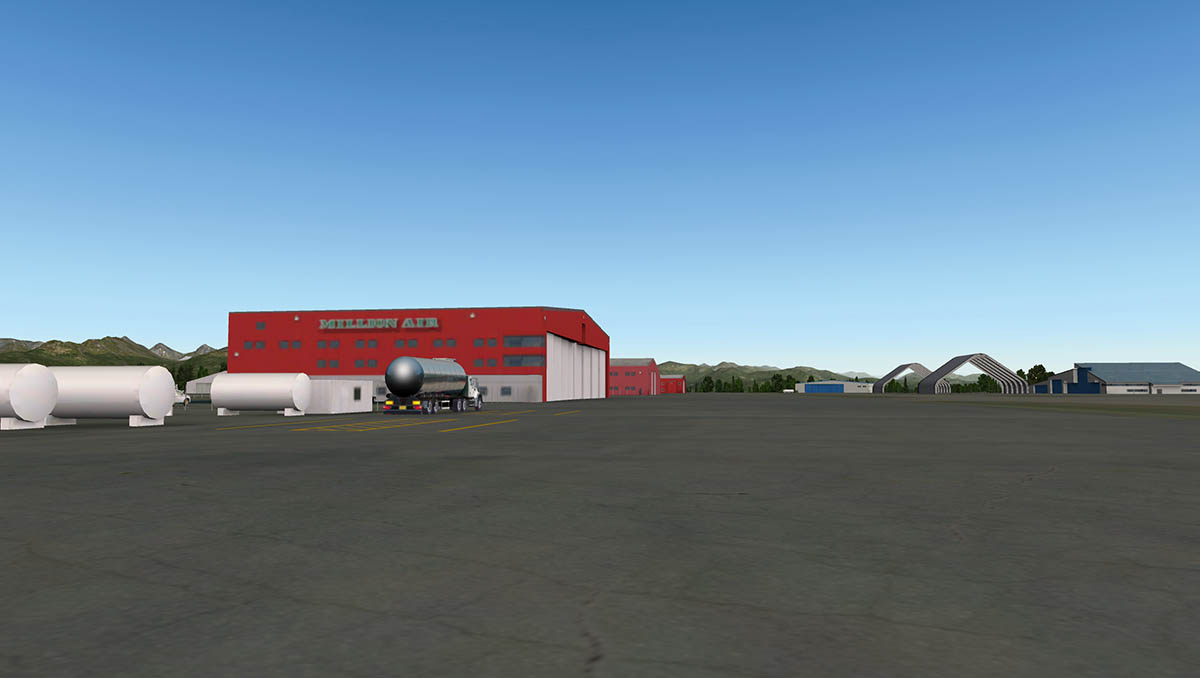
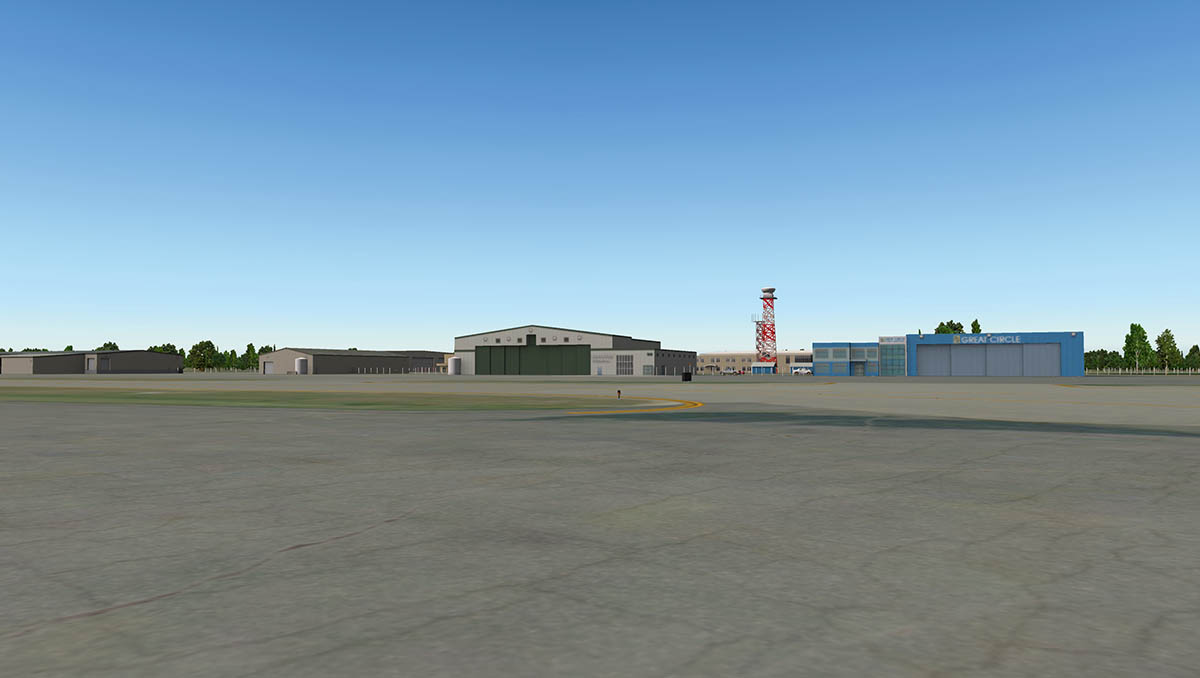
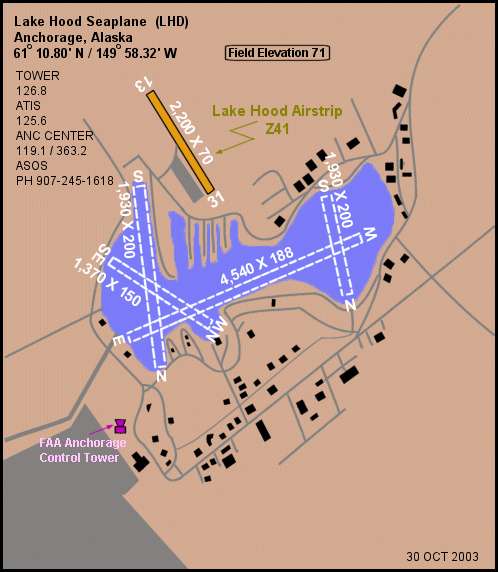
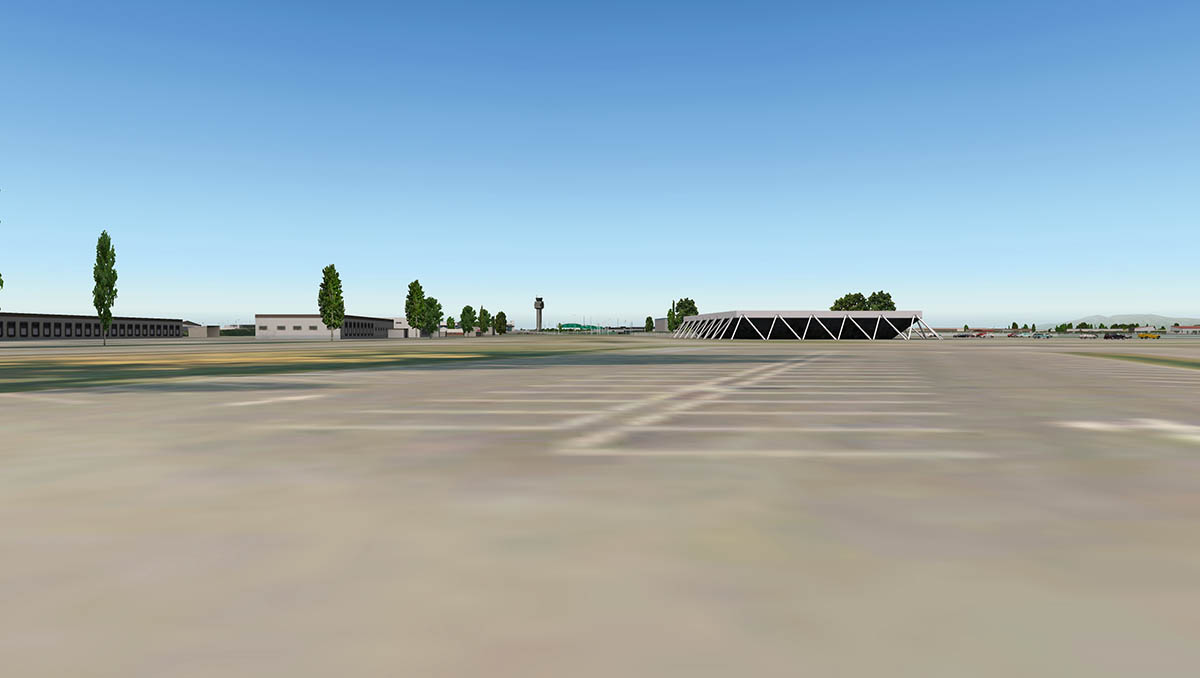
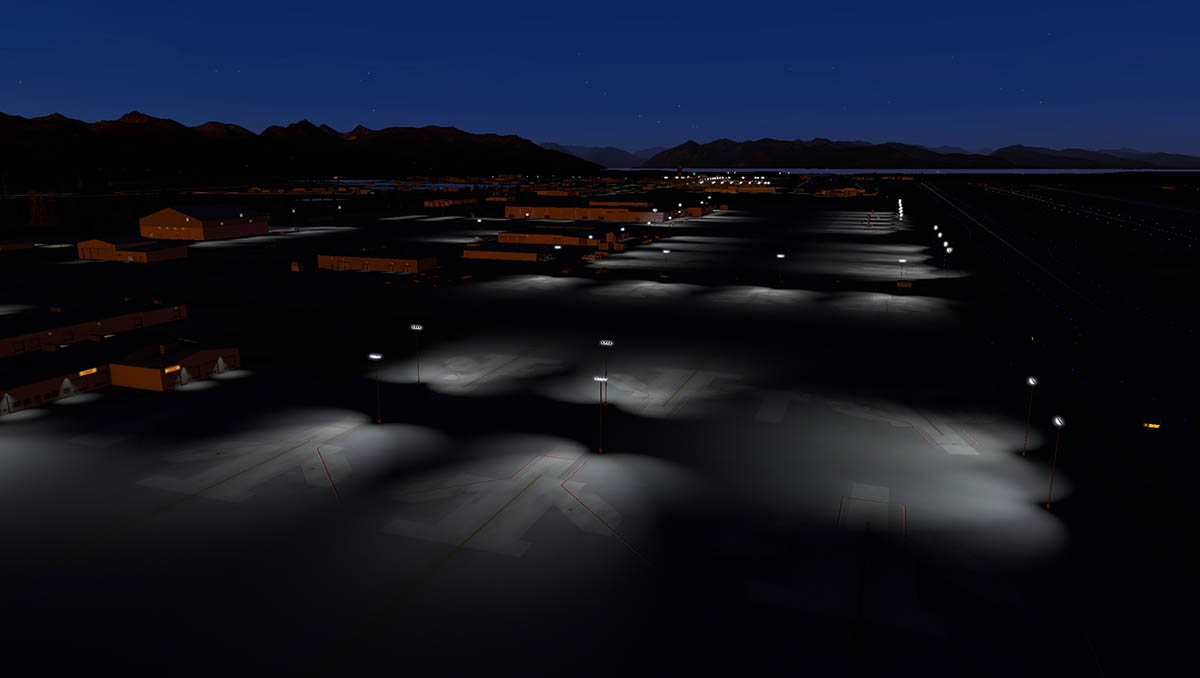
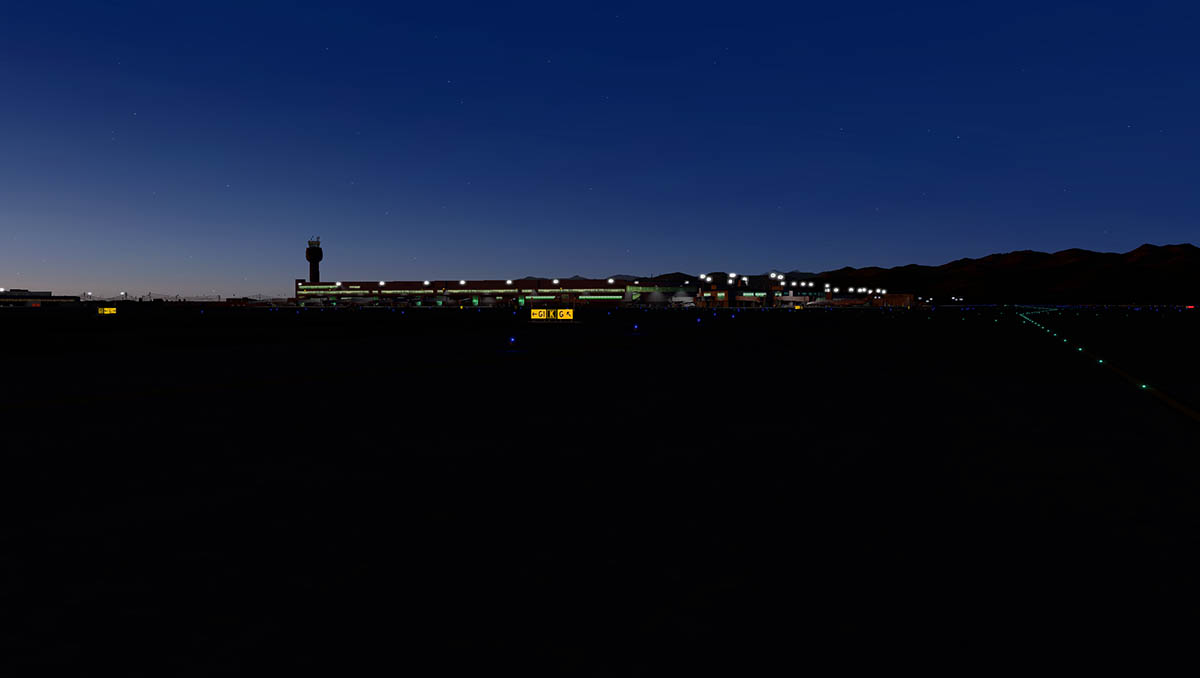
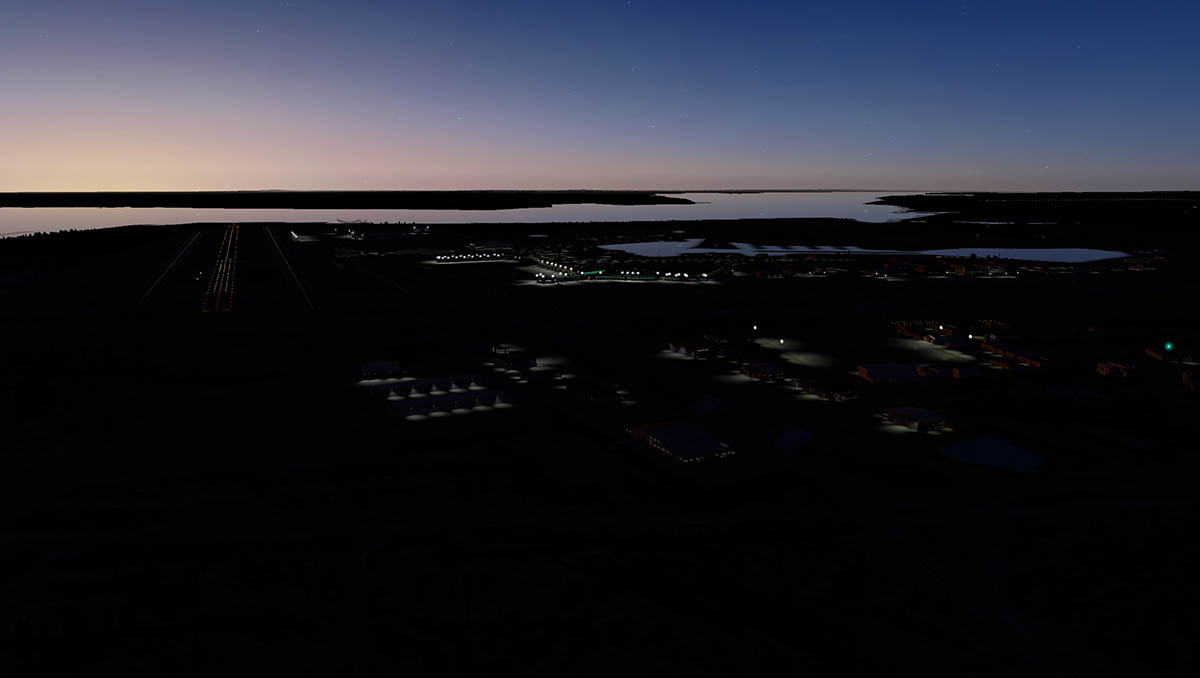
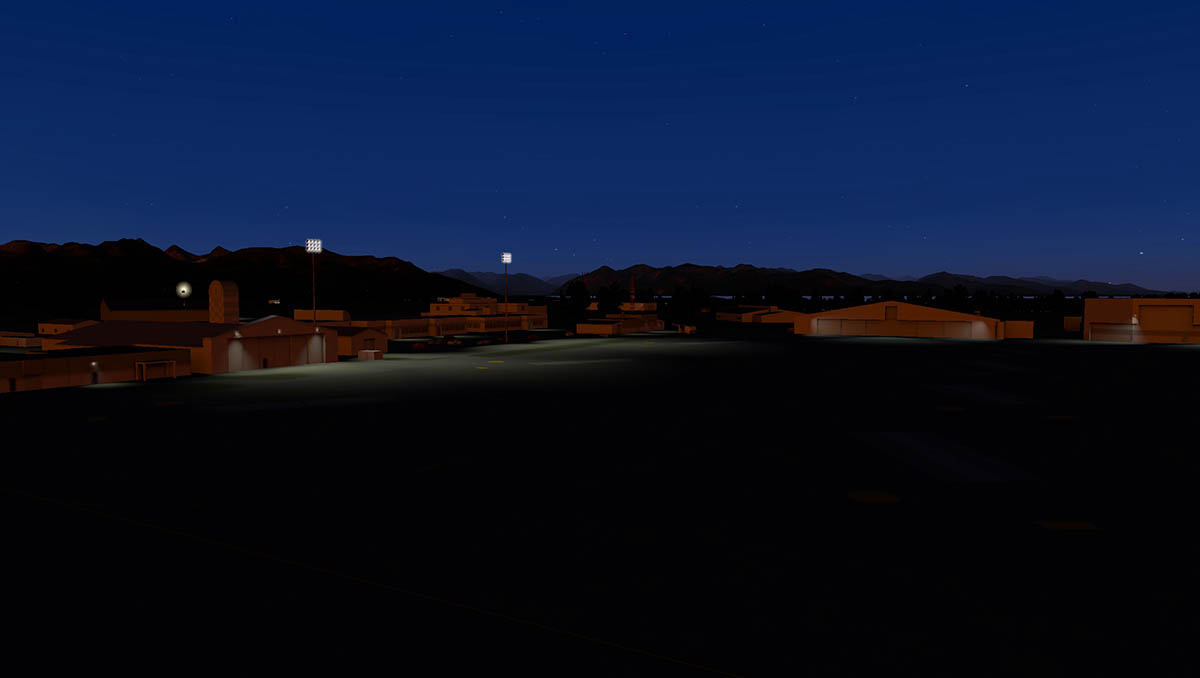
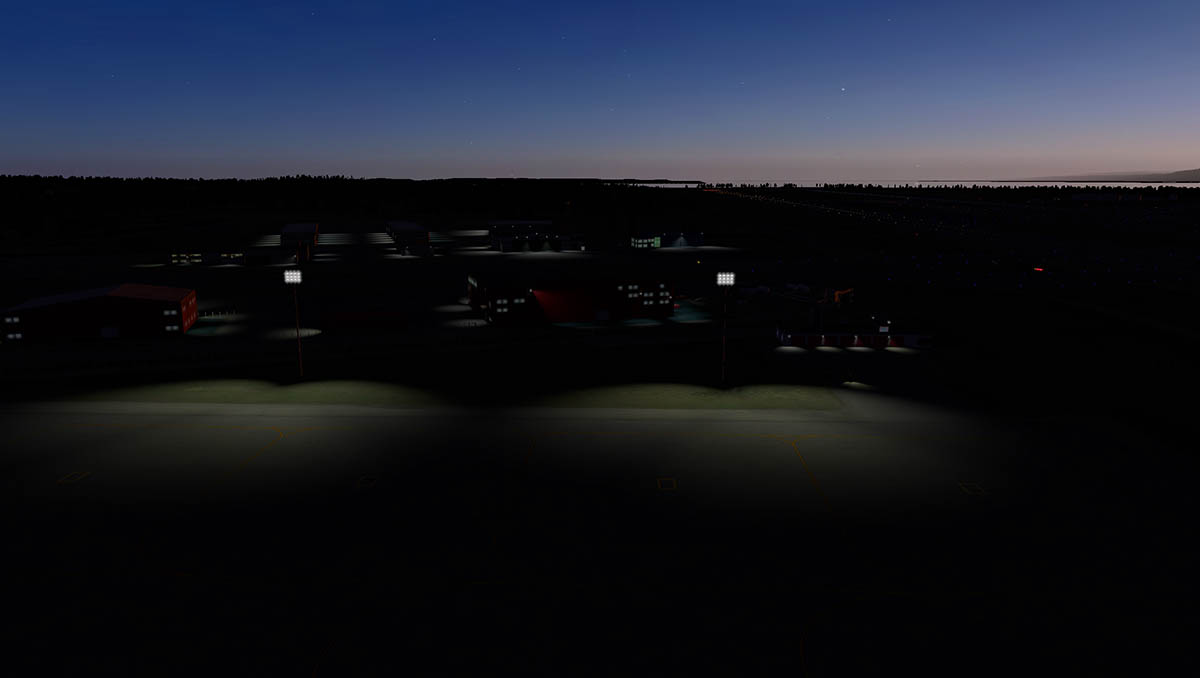
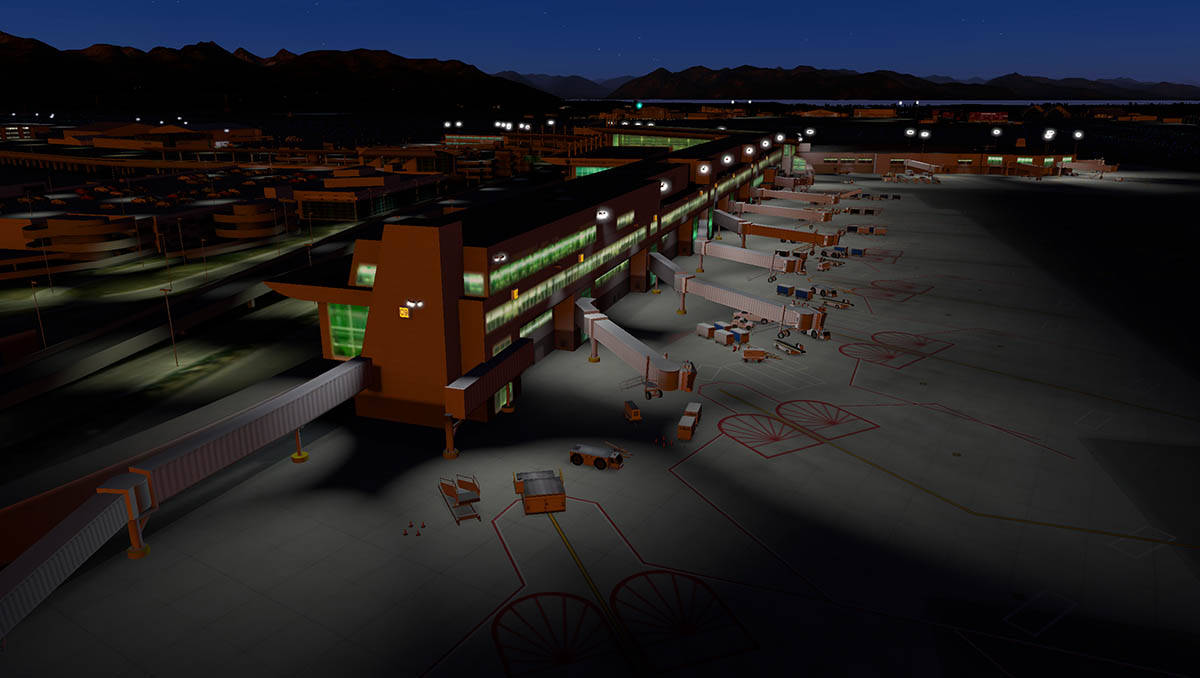
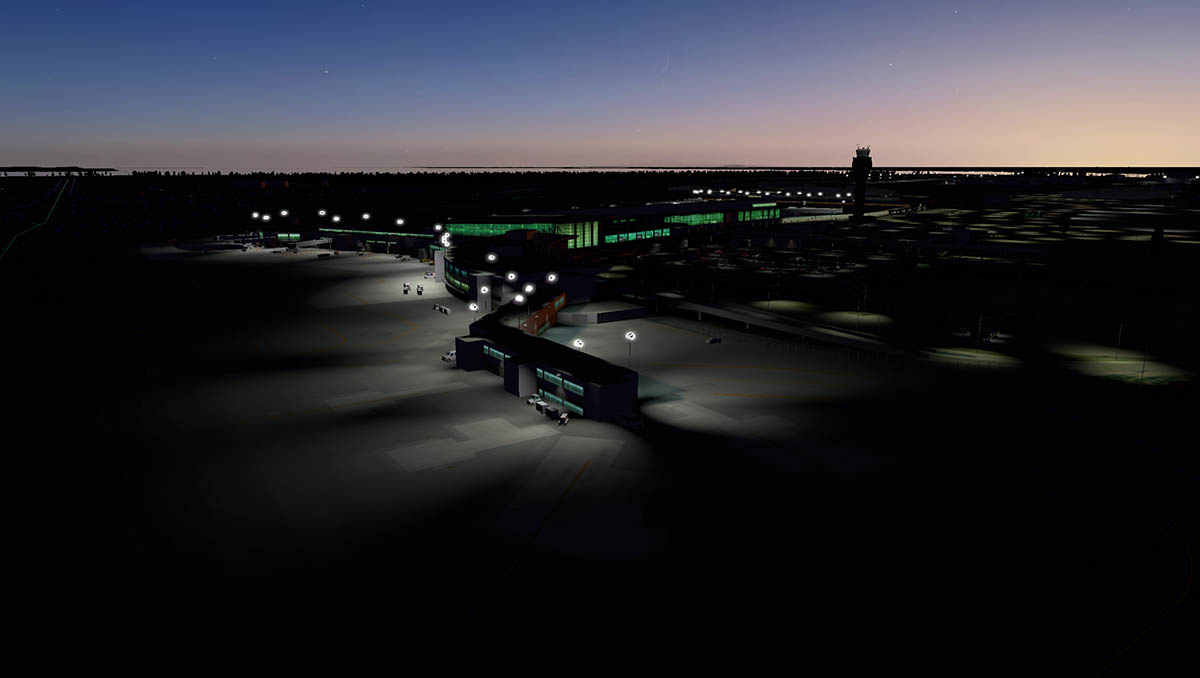
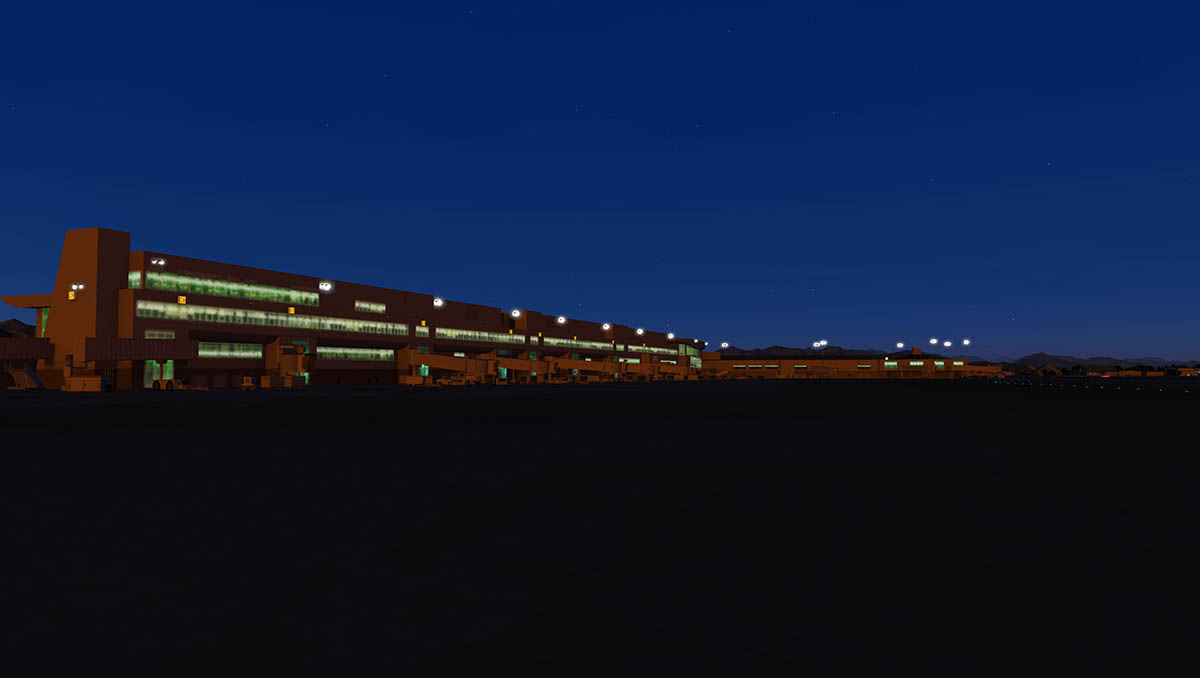
Scenery Review : Aerosoft - PANC Ted Stevens Intl, Anchorage, Alaska Route : PAJN Juneau to PANC Ted Stevens Intl Ted Stevens Anchorage International Airport (IATA: ANC, ICAO: PANC) is known as the "Crossroads of the World". If any airport's location signifies its importance it is certainly PANC which is located in Anchorage, Alaska. The airport was not built however with international air travel in mind. It was defence and Anchorage's proximity to Russia that created the building of first airports in the area. First with Merrill Field (IATA: MRI, ICAO: PAMR) in the 1930's and then the construction of "Anchorage International Airport" in 1951. Range became Anchorage's friend, To cross the Pacific from the USA (mostly to Japan) as when Northwest Orient became the first airline to operate scheduled transpacific flights after WWII, there was the requirement of airports for refueling stopovers. But it was the Polar routes from Europe that Scandinavian Airlines (SAS) began with the transpolar flight from Copenhagen to Tokyo via Anchorage in 1957, that really opened up the north to services that then also opened up the United States West coast to Europe and Asia. That Russia and China were No-Fly zones during the 50's and 60's helped the cause no end. Most scheduled passenger services from Anchorage to Europe and Asia ceased in the late 1980's and early 1990's following the end of the Cold War and with aircraft with finally equipped to handle significantly longer ranges. Korean Air continued to serve Anchorage on a scheduled basis until the early 2000s. China Airlines was the last Asian carrier to serve Anchorage on a regular basis and used Anchorage as an intermediate stop on its Taipei-New York route until 2011, when itthen rerouted these flights to stop in Osaka. Today it is just a few charter passenger aircraft that still stop at Anchorage on flights between Asia and the eastern United States. To counter the lost traffic, PANC reinvented itself as a major cargo hub. As of 2010, it was ranked as the fifth busiest airport in the world by cargo traffic after Hong Kong, Memphis, Shanghai and Seoul. FedEx Express and UPS Airlines operate major hubs at Anchorage International for cargo heading to and from the Far East. NWA Cargo used to operate a major hub at the airport until December 28, 2009 when it closed all operations for Northwest Cargo at all airports. FedEx Express is the airport's largest cargo facility and it can handle as many as 13,400 packages per hour and employing more than 1,200 people and providing a full customs clearance system. United Parcel Service's hub handles about 5,000 parcels per hour. Both companies forecast a large growth in traffic over the next several years as trade with China and other Far East countries increases and plan to expand their Anchorage facilities comparatively. The United States Postal Service also operates a large sectional center facility. Today PANC is a seriously busy airport. In the 12-month period ending December 14, 2006, the airport had 289,472 aircraft operations which is an average of 793 movements per day. Total operations for the year 2011 it was 261,375. By the year 2030 this number is expected to rise to 334,279 or 918.882 operations per day. PANC or Anchorage International Airport was renamed "Ted Stevens Anchorage International" in 2000 in the honor of Ted Stevens, the U.S. Senator from Alaska whom served from 1968 to 2009. 7L/25R 10,600ft (3,231m) Asphalt 7R/25L 12,400ft (3,780m) Asphalt 15/33 11,584ft (3,531m) Asphalt Elevation (AMSL) 152 ft / 46 m Aerosoft/Sim-Wings In June 2013 Aerosoft - Sim-Wings released "Aerosoft - Airport Anchorage". It is the first from Aerosoft for the USA/Pacific region. The package is a huge 1.70gb download (expanded to 3.53gb in the Custom Scenery Folder). The scenery of "Anchorage Ted Stevens Airport" includes all facilities and buildings (International Terminal, National Terminal, cargo areas, maintenance areas, Kulis Air National Guard Base, South Airpark,...) and features. Photorealistic ground textures based on aerial imagery (15cm/pixel) Detailed rendition of Lake Hood (LHD), the world’s largest seaplane base including lots of static aircraft Landing strip Z41 Complete taxiway and runway signs Stunning X-Plane 10 night effects Optimized for good frame rate Comprehensive manual in German and English LIDO charts Scenery Installation As noted the PANC scenery download is 1.7gb. So that is going to take some time depending on your internet connection. (I usually download overnight to save computer downtime). Installation is via Aerosoft's (copyright) and install popup panel (or dialog box). You only have to select your X-Plane10 main folder and the installer does the rest. (this scenery will only run on X-Plane10 and 64bit mode is recommended with the size of the scenery). Two Documents (pdf) come with the Scenery: 1) Manual (12 pages) only in German? 2) Charts (35 Pages) which are excellent. First Impressions I flew the route PAJN Juneau to PANC Ted Stevens Intl and selected Runway 07L as my approach runway. From the air you can see the orthophoto underlay that makes up the whole of the scenery, It is also the cause of the use 3.31gb of your scenery memory. And that has to be held in hand as in the way you use Airport Anchorage. Orthophotos can be a blessing and a curse. Here at Anchorage they are not to bad. Besides the large memory consumption, they create areas of flat ground from the lower perspective. Here the photo colouring is also off from the X-Plane default scenery and so the colours are slightly odd in yellowish areas and with oddly coloured blues. I have seen far worse, but they seem to feel more suited to FSX than X-Plane. My first attempt of using the scenery failed for two reasons. One is that first I flew the Boeing 777 (Flightfactor) into the Anchorage and hit the frame-rate penalty?... The MD-82 shown is a far less lighter aircraft file and worked fine. But I was able to use the B777 later by reigning in my (Render Options) "World Distance Detail". You lose a lot of the Anchorage city default objects. But at least you can use the scenery with a heavy aircraft file. The second was a "oh S***" moment in that Anchorage is always going to be a low cloud base destination. On arrival I dropped out of the low cloud and found Runway 07L (and 07R) had not formed correctly ? The scenery step was right on the touch-down point, and required a power float to try to get over the step, unfortunately by the time I got the wheels on the ground on 07L , the B777 was then far too short to stop and a go-around was to slow to activate (spool-up). The step was unusual in that the "runways follows contours" setting was switched off?.... I turned the setting on then off again and the scenery is now correct? (It may be noted in the manual which is the correct setting but I can't read German?) The arrival by the Alaskan MD-82 was more benign and as this is "Alaska Airlines" home base the MD-82 fitted in perfectly with the Alaska Airline Maintenance hangars and offices set out perfectly in the background. Taxiway and runway lineage, signage and lighting is excellent and up to the usual Aerosoft standards. Terminals Ted Stevens International has two terminals. Alaska Airlines uses the main (Domestic - with continental USA) South Terminal. With Air Canada, Alaska Airlines, American Airlines, Condor (Departures), Delta Air Lines, Frontier Airlines, JetBlue, Sun Country, United Airlines, US Airways and Virgin America. All regional intrastate carriers also use the South Terminal. South South Terminal is L shaped around the corner opposite Runways 07L/25R and 15/33 with a single pier. The terminal contains 3 concourses: Concourse A, Concourse B, and Concourse C. Concourse C was completely rebuilt in 2004 while Concourses A and B were built in 1985 and 1969 respectively and both renovated in 2009. Detailing is absolutely excellent with great ramp areas and a gates, Building design is also very good with excellent glass areas. There is good ramp equipment, but pure to Aerosoft standards there are no static aircraft sited at the stands? This makes the scenery sterile and the airport look abandoned. The moment I finished this review I went straight to on to X-Plane's WED (World EDitor) and filled the place up with activity. (but you shouldn't have to do that now - should you!) The Control Tower is situated to the north of the South Terminal and is slightly set back from the terminal itself. Perfectly realised, The tower and lower administration buildings are a fine reproduction of the original. The South Terminal is well created with exceptional attention to detail, the glass is excellent and all the required facilities in carparks and associated vehicle ramps with lighting are very well done. The carparks however are deserted of any car, buses or any other form of passenger transport? North Terminal is slightly to the north of the South Terminal and is known as the International Terminal. It is a simple single pier or concourse building. The north terminal is well created with its distinctive black glass, gates and the passenger boarding jetways are excellent. The North Terminal is used by airlines: Condor (Arrivals), Icelandair, Yakutia Airlines (Russian), and many international seasonal charter flights. In addition to these airlines, a few cargo airlines use the north side of the terminal for parking. This terminal was built in 1982. 1) Alaska Airlines 2,780,000 - 64.11% 2) Era Aviation 380,000 - 8.77% 3) Delta Air Lines 378,000 - 8.71% 4) United Airlines 337,000 -7.76% Alaska Airlines pretty well run the house here in passenger traffic. In destinations then Seattle easily gets top billing. 1) Seattle, WA 721,000 - Alaska, Delta, JetBlue, United 2 ) Fairbanks, AK 193,000 - Alaska, Era Alaska 3 ) Minneapolis, MN 140,000 - Delta, Sun Country 4 ) Portland, OR 107,000 - Alaska 5) Kenai, AK 93,000 - Era Alaska, Grant Aviation 6) Juneau, AK 71,000 - Alaska Cargo Once you turn to cargo the picture changes significantly. Air China Cargo - Beijing-Capital, Chicago-O’Hare, Dallas/Fort Worth, Shanghai-Pudong Alaska Air Cargo - Juneau, Seattle Alaska Central Express - Aniak, Bethel, Cold Bay, Cordova, Dillingham, Dutch Harbor/Unalaska, Iliamna, Juneau, King Salmon, Kodiak, Port Heiden, Saint Paul, Saint George, Sand Point, Sitka Asiana Cargo - Atlanta, Los Angeles, Miami, New York-JFK, Seoul-Incheon Cargolux - Hong Kong, Los Angeles Cathay Pacific Cargo - Atlanta, Boston, Chicago-O’Hare, Dallas/Fort Worth, Guadalajara, Hong Kong, Houston-Intercontinental, Los Angeles, Miami, New York-JFK, San Francisco, Toronto-Pearson, Vancouver China Airlines Cargo - Atlanta, Boston, Chicago-O’Hare, Dallas/Fort Worth, Houston-Intercontinental, Los Angeles, Miami, New York-JFK, San Francisco, Taipei-Taoyuan China Cargo Airlines - Chicago-O’Hare, Shanghai-Pudong China Southern Airlines - Shanghai-Pudong, Zhengzhou Empire Airlines - Fairbanks, Homer, Juneau, Kenai, Kodiak, Sitka Era Alaska -Fairbanks, Homer, Kenai, Kodiak, Valdez EVA Air Cargo - Atlanta, Boston, Chicago-O’Hare, Dallas/Fort Worth, Los Angeles, New York-JFK, Osaka-Kansai, San Francisco, Seattle/Tacoma, Taipei-Taoyuan, Vancouver Everts Air Cargo - King Salmon, Bethel, Dillingham FedEx Express - Guam, Guangzhou, Hong Kong, Indianapolis, Memphis, Newark, Oakland, Osaka-Kansai, Taipei-Taoyuan, Tokyo-Narita Kalitta Air - Cincinnati, Hong Kong, Khabarovsk Novy Korean Air Cargo - Seoul-Incheon, Toronto-Pearson Lynden Air Cargo Nippon Cargo Airlines - Dallas/Fort Worth, New York-JFK, Tokyo-Narita Northern Air Cargo - Bethel Polar Air Cargo - Cincinnati, Hong Kong, Los Angeles, Seoul-Incheon, Tokyo All the major Cargo (and Airline Cargo) haulers are well represented as the cargo area runs long northwards adjacent of RWY 15/33. So your main usage for the scenery will be for cargo, as PANC will be mostly used as a cargo transfer or refueling point. All freight buildings and warehouses are represented with associated equipment. Ramp areas are excellent but again with no static aircraft to fill them? Running East along RWY 07L and east of the South (main) Terminal is the Alaska Airline Maintenance hangars and offices and associated airline servicing areas. The main Alaska Airline Maintenance hangar is a significant landmark that stands out and is expertly created and signed. On the whole the area is excellent with addition hangars with vehicles and airline staff carparks dotted with cars. South of both 07L/25R - 07R/25L main runways is the South Air Park and the now empty Alaska National Guard Base. Which was a National Guard facility in Anchorage, Alaska. The 127-acre (51ha) facility was in the past home of the 176th Wing of the Alaska Air National Guard until the unit moved to the Joint Base Elmendorf-Richardson (in an area now known colloquially as Camp Kulis) in February 2011. In time private operators will take over the abandoned base facilities, but for now there are hangars for Million Air, Great Circle and a Executive Terminal. To shield your expensive private jet you could use the old open sided fighter hangars? All elements here are well laid out and are highly usable for GA and Private Jet use. Aerosoft have again done a comprehensive job in recreating all these facilities. PANC is really the embodiment of twin airport facilities in one. Situated behind the western placed terminals and cargo areas is the Lake Hood Seaplane Base (ICAO: PALH, FAA LID: LHD) situated on Lake Hood and Lake Spenard. Lake Hood is the world's busiest seaplane base with a handling of an average of 190 flights per day. E/W 4,540 (1,384m) Water N/S 1,930 (588m) Water NW/SE 1,370 (418m) Water There is a noted side runway “Z41” designated 14/32 with a gravel surface measuring 2,200 by 75 feet (671 x 23 m). This runway is mostly used for aircraft with Tundra style landing gear for rural (meaning rough) flying applications. Evidence of the value of the seaplane base can also be traced to operations around the aerodrome, with 53 businesses operating on the lake's edge. The largest operators at Lake Hood are K2 and Rust's (Flying Service). Each company operates Turbo Twin Otters, DeHavilland Beavers and Cessna 208s for flight sightseeing, fishing and hunting. there are 500 float slips that cost $105 per month for those who are lucky enough to have one. The 500 tie-downs at the gravel strip and parking areas are $50 a month. The slips are so valuable that many aircraft owners and some of those have been waiting a decade or more have lied and cheated to get a spot. noted by one owner "You can kick my dog, mess around with my wife, but don't ever screw with my float slip at Lake Hood". Aerosoft have recreated Lake Hood and the Seaplane base with all the huts and slips. A nice touch is the assortment of aircraft situated around the area with some in the water and others on slips. This is certainly a great area to fly to or from while flying deep into the Alaskan wilderness or just to have a local short flight around the Anchorage area. Detailing is very good with all buildings represented and also the Alaska Aviation Museum which is located on the south shore of Lake Hood. Lighting Both the main terminals in lighting is excellent with great effects on the glass, and there is excellent ramp lighting coverage for both the Terminal and Cargo ramp areas Lighting sources however are slightly blobby and not very realistic close up (or at a distance either) and again very FSX in viewing style. Away from the main central areas the lighting is quite poor and only sporadic in placement. Only a few drop-downs lights are on the hangars and the other outlying buildings and these are mostly situated on the South side of the airport. Conclusions PANC - Ted Stevens International Airport is a significant airport for anyone flying in simulation. It's position which is literally on the top of the world gives it a unique status for flying either East - West or with Polar operations. As noted this position is more rife today for cargo operations than passenger. But there is also a lot of passenger route scope for domestic Alaska and to Northern Canada and the Northern American state capitals. Lake Hood provides another significant dimension for all local waterborne aircraft including our beloved Beavers and Twin Otters and Tundra wheeled equipped aircraft on using runway “Z41”. Aerosoft have created a comprehensive package and excellent scenery with the "Airport Anchorage". The massive (If overwhelming) orthophoto base can give you problems if your computer is average in power or scale, It is frame-rate heavy (certainly in HDR mode) but render tricks can make the scenery work as the central objects are quite light in scale. If you have a machine that is very good with this sort of heavy tasking scenery then you will totally love it. The slight orthophoto colouring can spoil the view and certainly from a distance. On the ground you don't however notice the difference. The main annoyance is the complete desertion of static aircraft. It makes this very busy working hub feel completely empty. You can fix that thankfully with an hour or so in WED (World EDitor) and maybe even do a better job than if Aerosoft had done so in the first place, because their static aircraft in other scenery packages are very poor with their texture performance (in other words - badly fuzzy). On the modeling side and building textures "Airport Anchorage" is excellent if not the best that Aerosoft have released (except for Keflavik which is also excellent), the actual building lighting is also very good, but on the whole the lighting is average. For X-Plane. Airports like "Airport Anchorage" are important to build up an excellent network to get the best out of the simulator as a departure or arrival scenery. As scenery it is excellent and well worth your investment. You will receive a very high return and use from this scenery, I personally wanted this scenery from the moment it was released. And it is now an important connection with my simulation flying and I was not disappointed once I sorted out the render settings and fixed the static aircraft placement. For value it is excellent scenery in the detail and comprehensive layout.... final words would be "It is an excellent investment". Aerosoft - Airport Anchorage is available now from the X-Plane.org Store : PANC - Anchorage International Airport Price is US$29.95 The scenery is available for only X-Plane10 (64bit is recommended) Note: the download is very large for this scenery at 1.7gb and install disk space required is 3.31gb System requirements: X-Plane 10 Windows XP(SP3)/Vista/7/8, Mac, Linux 2,6 GHz Dual Core 2 Processor 2 GB RAM Graphics card with at least 512 MB (1024 MB recommended) Download-Size: 1.7 GB (Windows-Version) / 1.75 GB (Mac-Version) / 1.6 GB (Linux-Version) Installation-Size: 3.31 GB Developers Site: Aerosoft (X-Plane) Review By Stephen Dutton 4th November 2013 Review System Specifications: Computer System: - 2.66 Ghz Intel Core i5 iMac 27” - 6 Gb 1067 Mhz DDR3 - ATI Radeon HD 4850 512mb Software: - Mac OS Mavericks 10.9 - X-Plane 10 Global ver 10.22 (final) Addons - Saitek x52 Pro system Joystick and Throttle
-
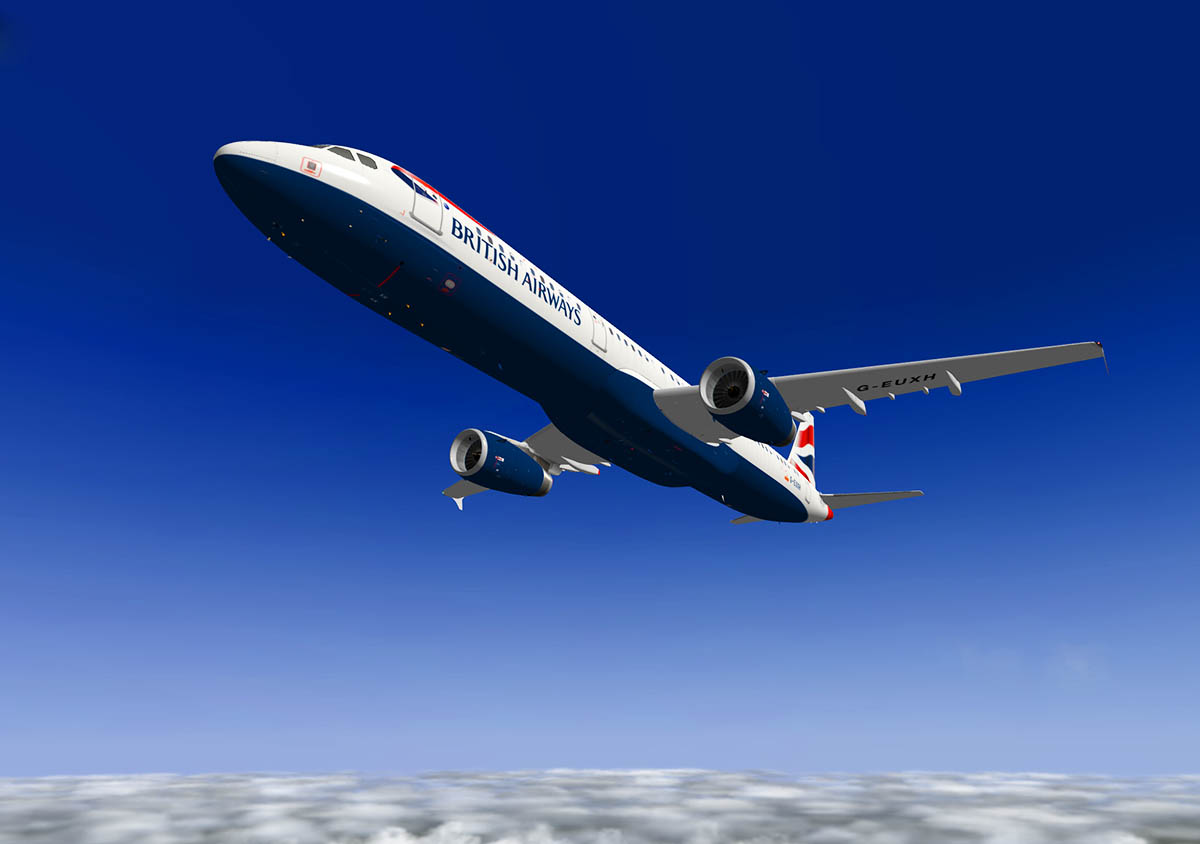
Ramzzess Aircraft and Phillipp Munzel have announced the imminent release of the Boeing 757-Series. Their Boeing 777-Series was the aircraft of the year in 2012/2013, So will the Boeing 757-Series be the same for 2013 and 2014? There is no doubt that the B757 is one of the most anticipated aircraft in X-Plane at the moment. If you already have the Boeing 777, then you would already know what to expect in detail and depth of systems... Officially licensed By the Boeing © Corporation Accurate dimensions based on 2D and 3D drawings supplied by Boeing © For X-Plane 10 64bit- Mac, Windows and Linux The Cockpit is comprehensive and highly detailed in systems and functionality. With a fully integrated FMC that is separated for use on the Pilot or Co-Pliot stations. The menu and Checklist system is also comprehensive and excellent in detail. Highlights are - Easy settings for aircraft functions - Full compliment of ground vehicles including Pushback Truck) - Custom failures - Brilliant cabin announcements (PA) - Opening Cabin Doors - virtual cockpit with crisp details - Dynamic reflections - Custom 3D sounds. The comprehensive checklist has the feature of leading you through the correct procedure of switches... Is just brilliant. Detailing (below) is also highly visible and outstanding in quality. Special Effects include - Aircraft Fire and Rain (Window) effects - Active window blinds and a fully detailed cabin. Price will be US$59.95 for the standard RB211-535E4 Release Version. Liveries will be US$1 per livery in packs of 10. Four liveries with the release version are British Airways (classic), Air France, Lufthansa and the Boeing House. There is no doubt this is an outstanding aircraft and once released X-Plane Reviews will give you a thorough detailed review of the aircraft and its systems. Some features: Detailed and functional FMS - Works like the real 757 FMS Advanced auto-pilot Super high resolution 3D cockpit with every switch functional Multilayer dynamic reflections on all glass objects Spatial rain simulation with high detail Very detailed passenger cabin graphics (kitchen and toilets) Inn-cockpit custom sounds 3D stereo sound system for the engines In flight announcements Interactive communication with the crew (fault reporting) Ground vehicles and push back track – all operational Very detailed exterior modeling with extensive use of normal maps Blue-out and other visual and auditory reactions to the situation Additional eye-candy features: real working oxygen masks both in cockpit and cabin, dynamic window shatters that react to sunlight etc.. Use of particles to generate smoke, fire, sparks…. Detailed and deep simulation of almost every system in the real aircraft A multistage custom failure system with in-browser instructor’s console Ability to fix failure by following proper procedure Interflight failure and maintenance system – something will spill over to the next flight Custom menus for loading/unloading fuel and passengers, calling for pushback… Ability to customize the plane with winglets and set other options to be saved or default A fully interactive electronic checklist with all procedures programmed in Auto mode for the checklist where the AI automatically preforms the procedures and the pilot only watches and checks Tutorial mode where the pilot follows the AI’s instructions and visual aids Stephen Dutton 2nd November 2013
-
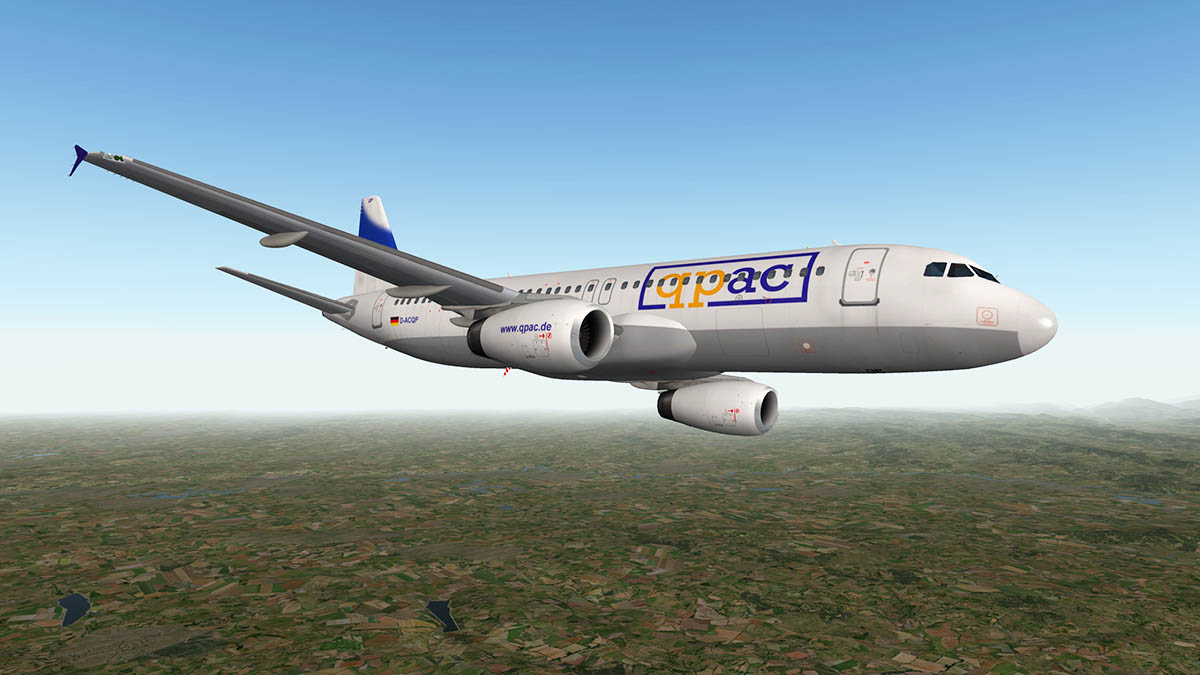
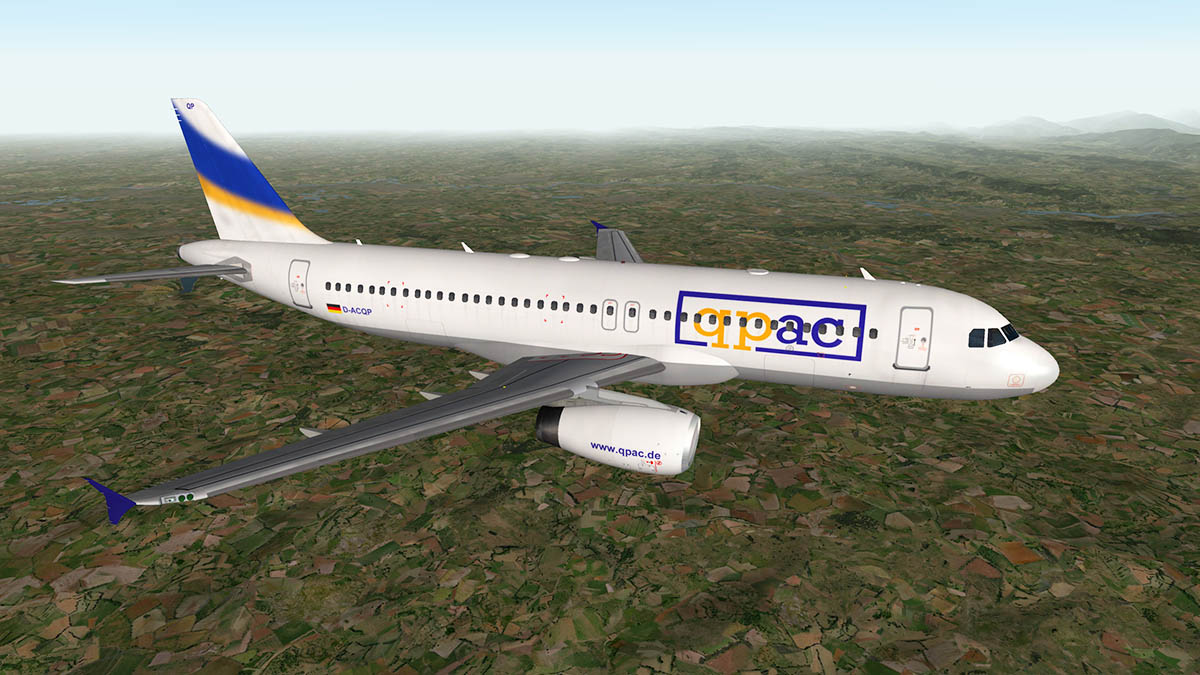
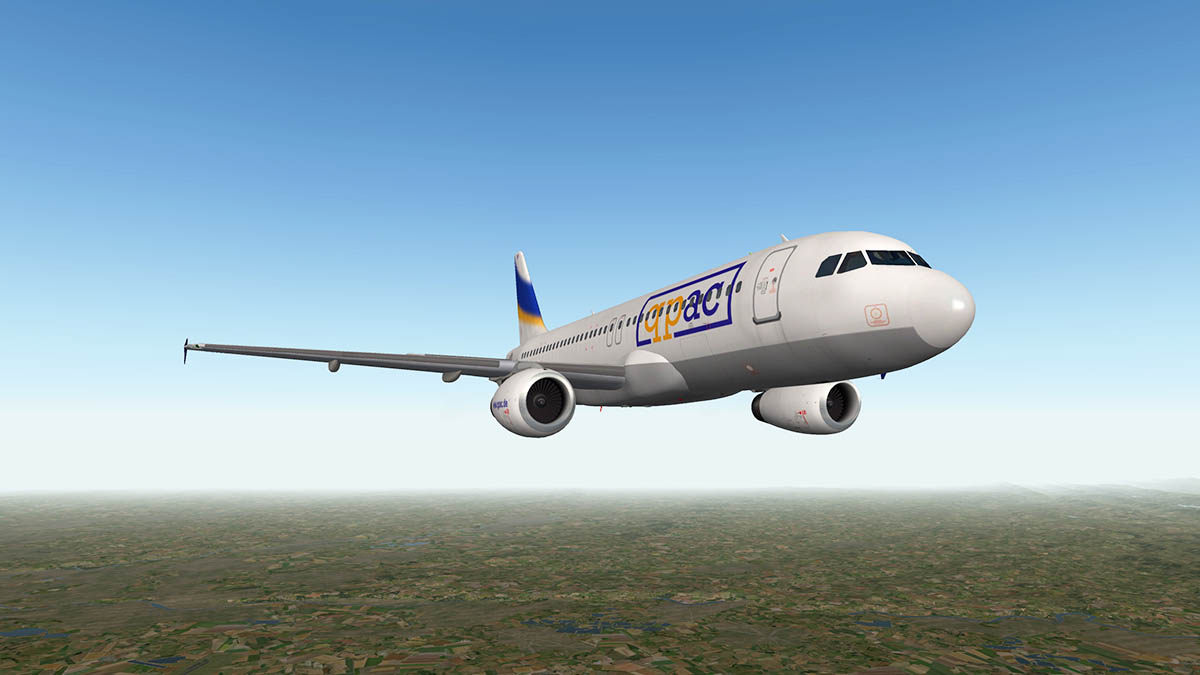
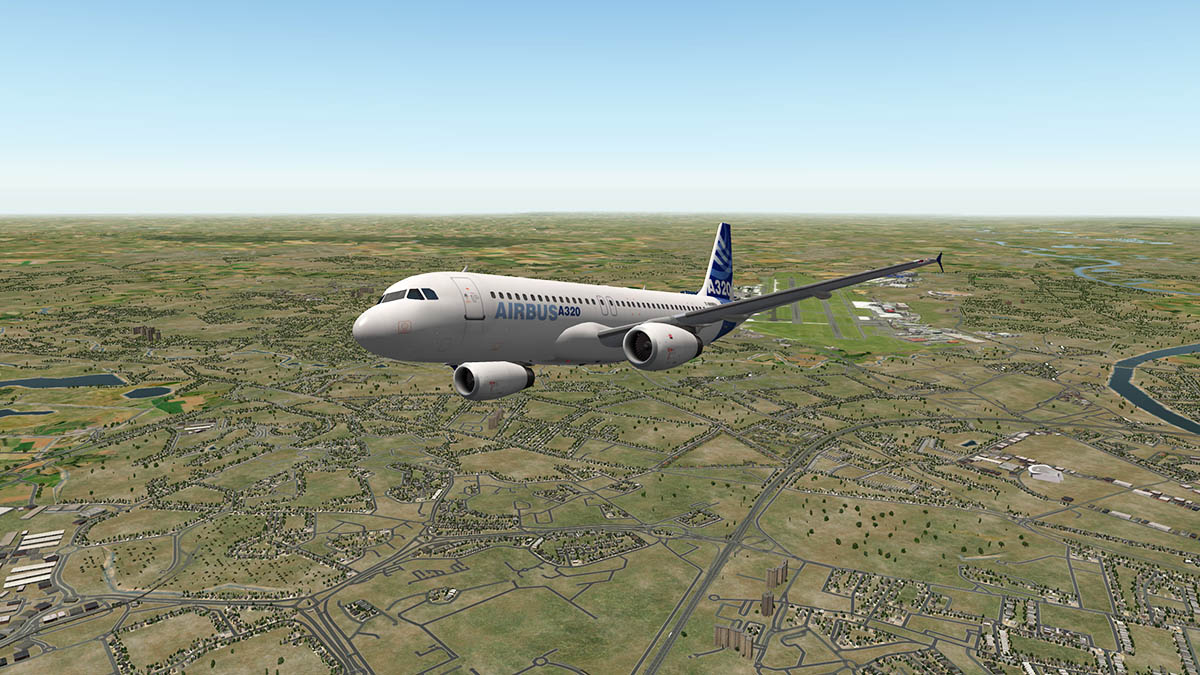
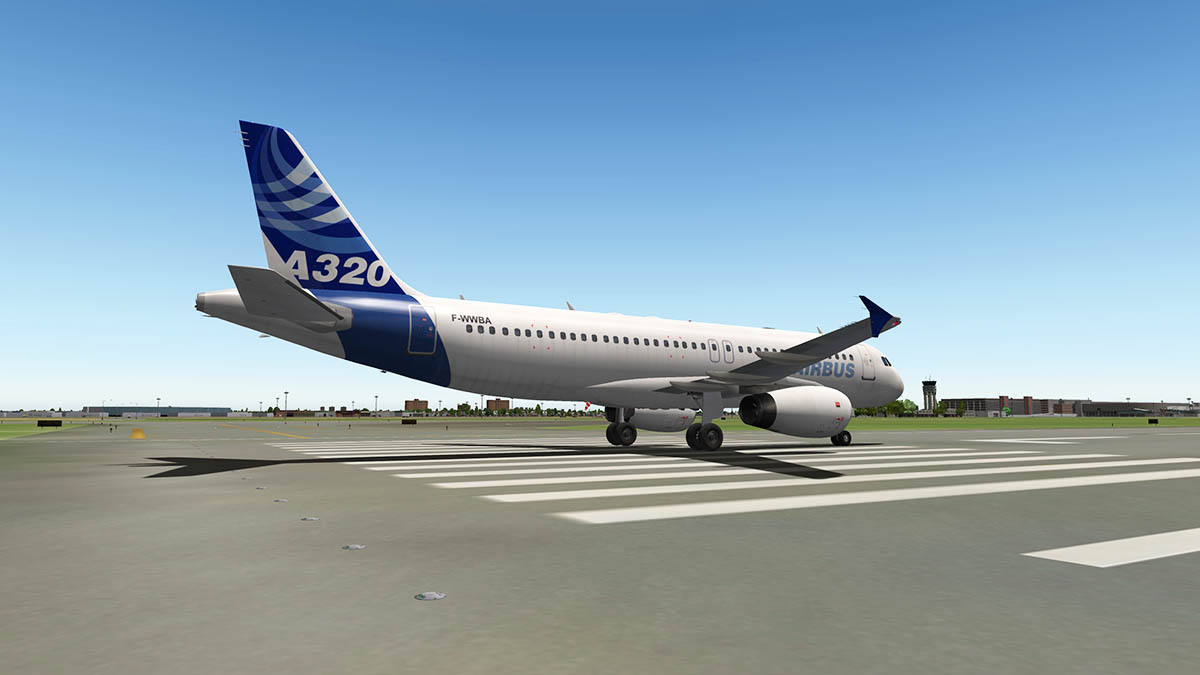
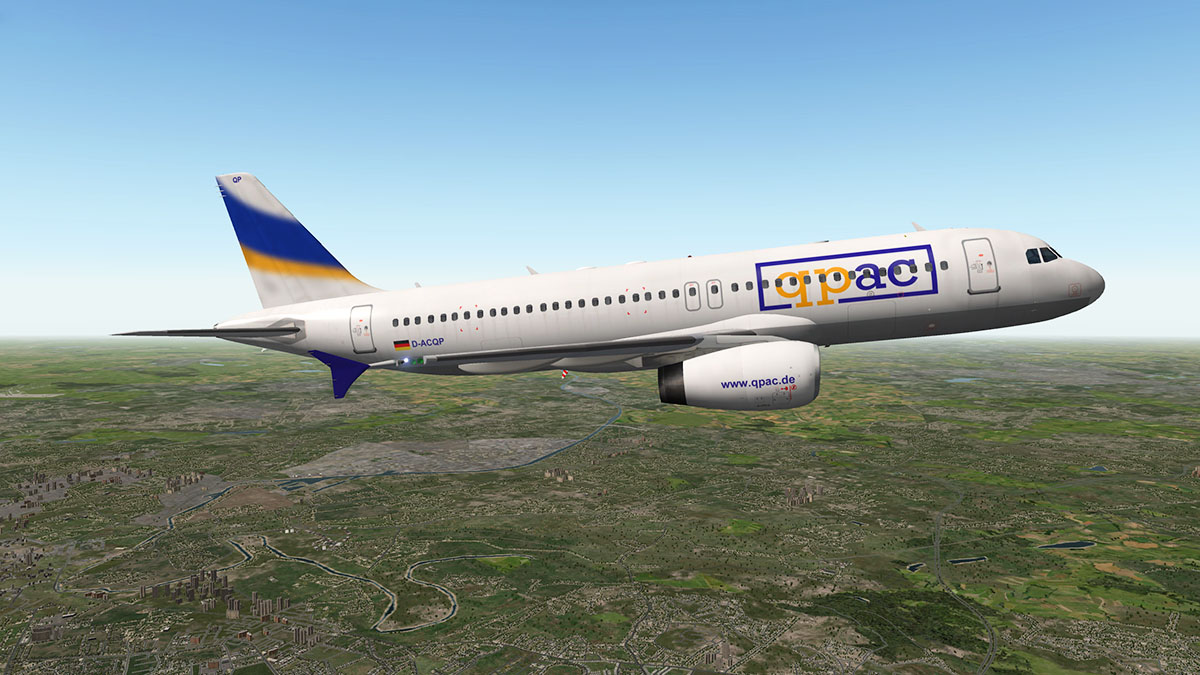
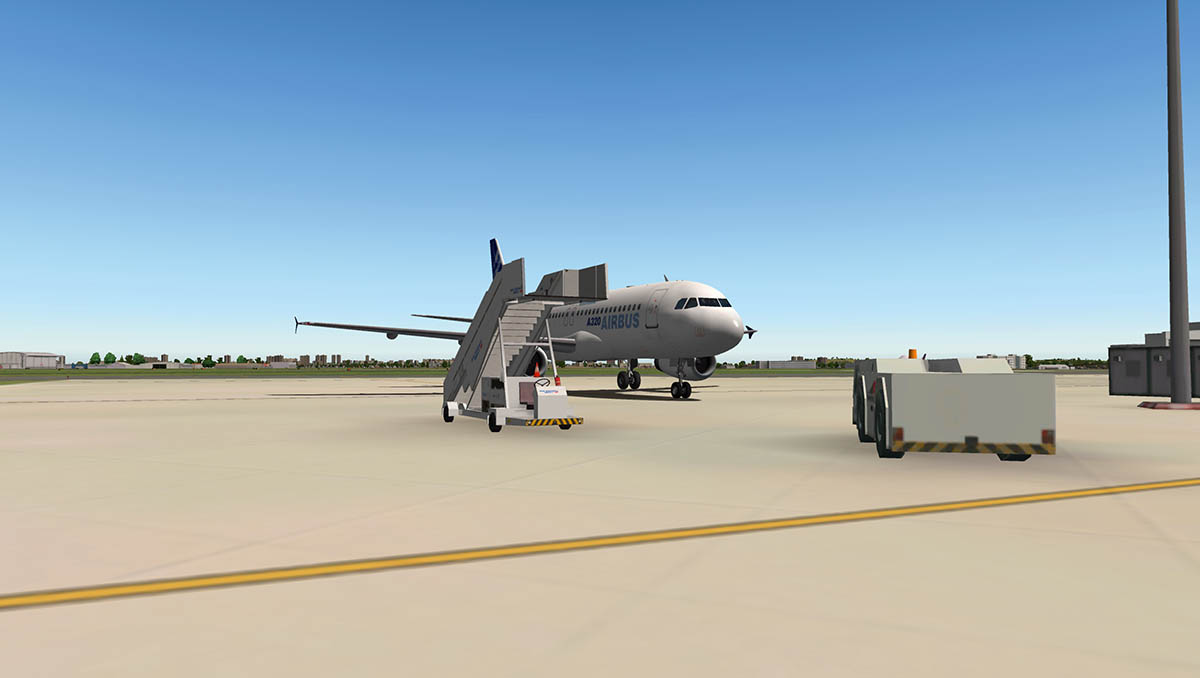
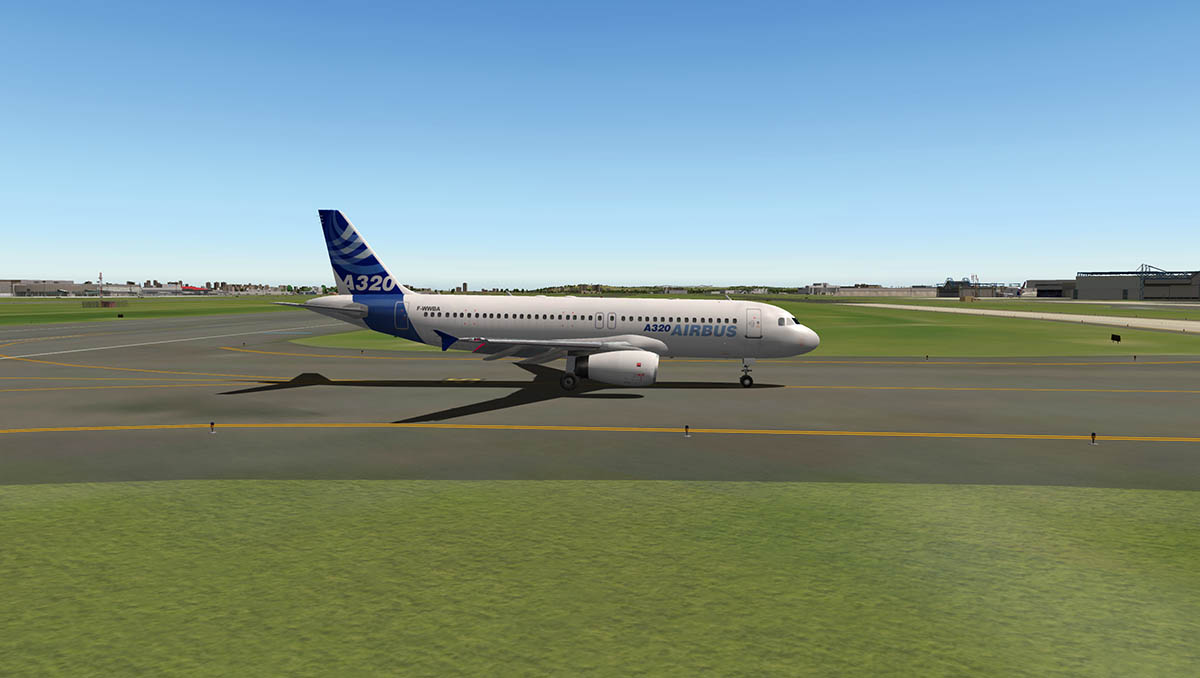
Aircraft Release : QPAC Airbus A320-232 QPAC (QualityPark AviationCenter) has released Version-2 (v2) of the Airbus A320-232. The v2 release is based on the freeware (v1), but it has been extensively revised and it is to be noted that this first release "basic" version is focused on systems, and that systems and features will be added with more extensive procedures as the series progresses. The current rollout is noted as such: v2 will be available in three categories (releases noted here are forecasted and are not set definite dates): - Basic (Now Available) - US$25.00 - Shop.OrgStore : QPAC Airbus A320 - Plus (available May 2014) - US$40.00 - Premium (available December 2014) - US$70.00 The v1.1 version will still be freeware for X-Plane 9 and X-Plane 10 - 32bit. Currently the cockpit is 2d and there will be a 3d cockpit and wing-flex will also be available in (late) 2014 at a noted additional cost. All payware versions will be 32bit-64bit but the premium version will not be available for X-Plane9. Features Include: General Features Plugin in written in plain C to avoid conflicts - XP 10 performance and user interface tuning QPAC’s ILS auto-align feature Large choice of startup configurations Improved PFD and ND synoptic - Large pop-up PFD and ND in 2D panel mode 3D model Standard model with 2D panel 3D Cockpit will be available via an upgrade (small fee) in early 2014 Fly-by-wire implementation Highly realistic implementation of the Airbus “normal law” Additional FBW fine-tuning based on real-life pilot feedback Flight management implementation Basic flight planning (based on X-plane FMS) - Compatible with UFMC and XFMC “What you see is what you fly” flight path indication on ND 2 fully independent MCDUs with pages INIT, FPLN (main page), DIR, and PERF. Also pages MCDU Menu, RADNAV and DATA Autopilot implementation Implementation of all Airbus AP modes (except non-precision approach and LOC backcourse) Choice between HDG-VS and TRK-FPA (includes FPV indication on PFD, if TRK-FPA selected) Fully independent AP1 and AP2 Other aircraft systems Complete ADIRU model Ability to simultaneously tune 1 ILS and 2 VOR Complete fuel system model, including gravity feed, fuel transfer and center tank pump logic Complete hydraulic system model, including electrical pump, PTU engagement and RAT deployment logics Complete electrical system model, including all bus reconfigurations upon failure. Basic air-conditioning model, including custom cabin pressure and temperature regulation FBW flight control computer simulation - Basic electrical interdependency package For a full description of these features then read X-Plane Reviews Aircraft Development article : QPAC Overview and release notes are here : QPAC Airbus A320-232 V2 Overview X-Plane.Org Support: QPAC A320 Support forum The Freeware QPAC A320-232 (v1.1) is available here : QPAC A320 X-Plane Freeware Feature and Plans pdf download : QPAC A320-232 features and plans.pdf Technical Requirements: Windows , Mac or Linux X-Plane 10 fully updated. 32 or 64 bit. X-Plane 9.70 4GB RAM/512 MB VRAM - Current version : 2.01 (last updated October 31st, 2013) Stephen Dutton 1st November 2013
-
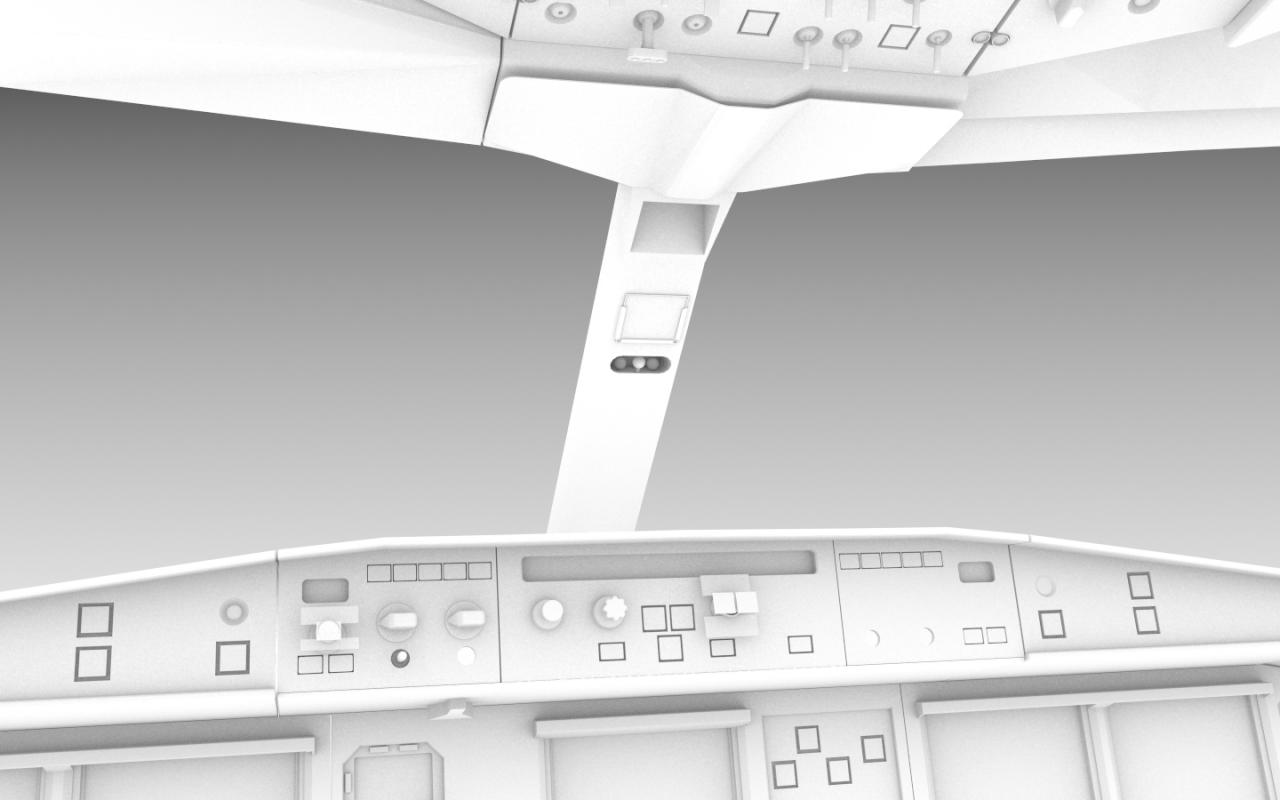
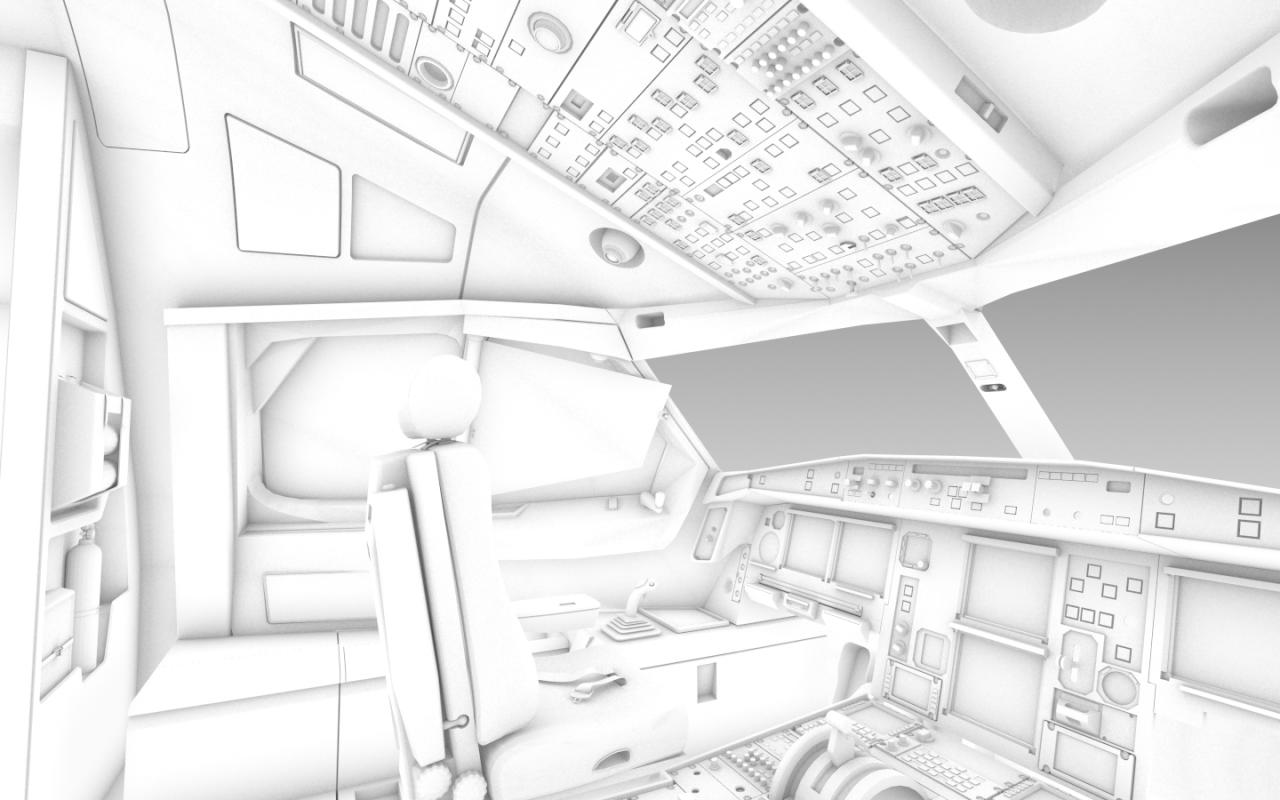
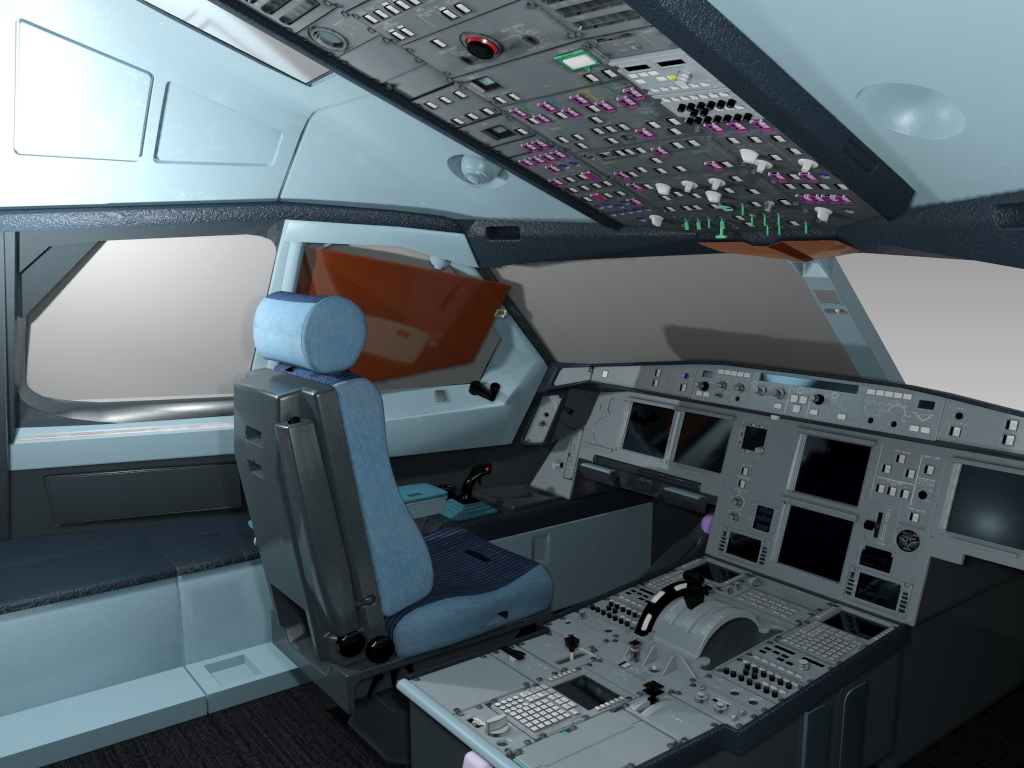
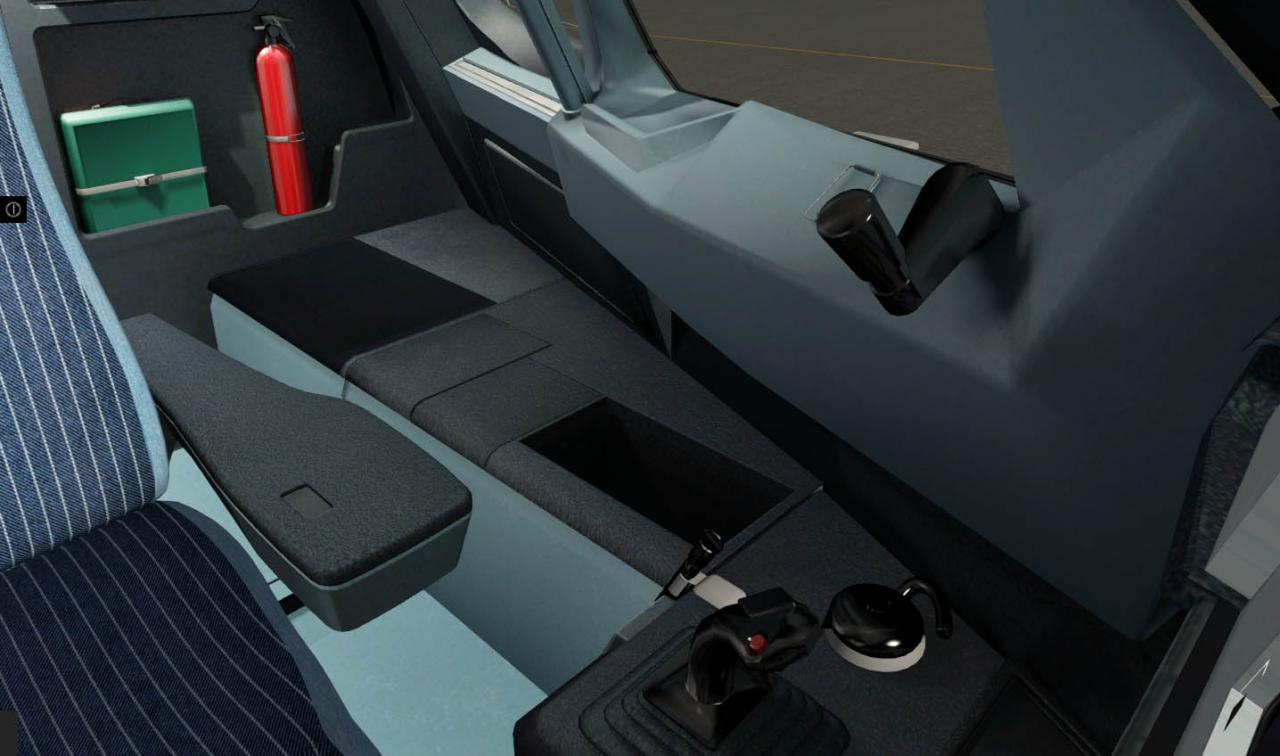
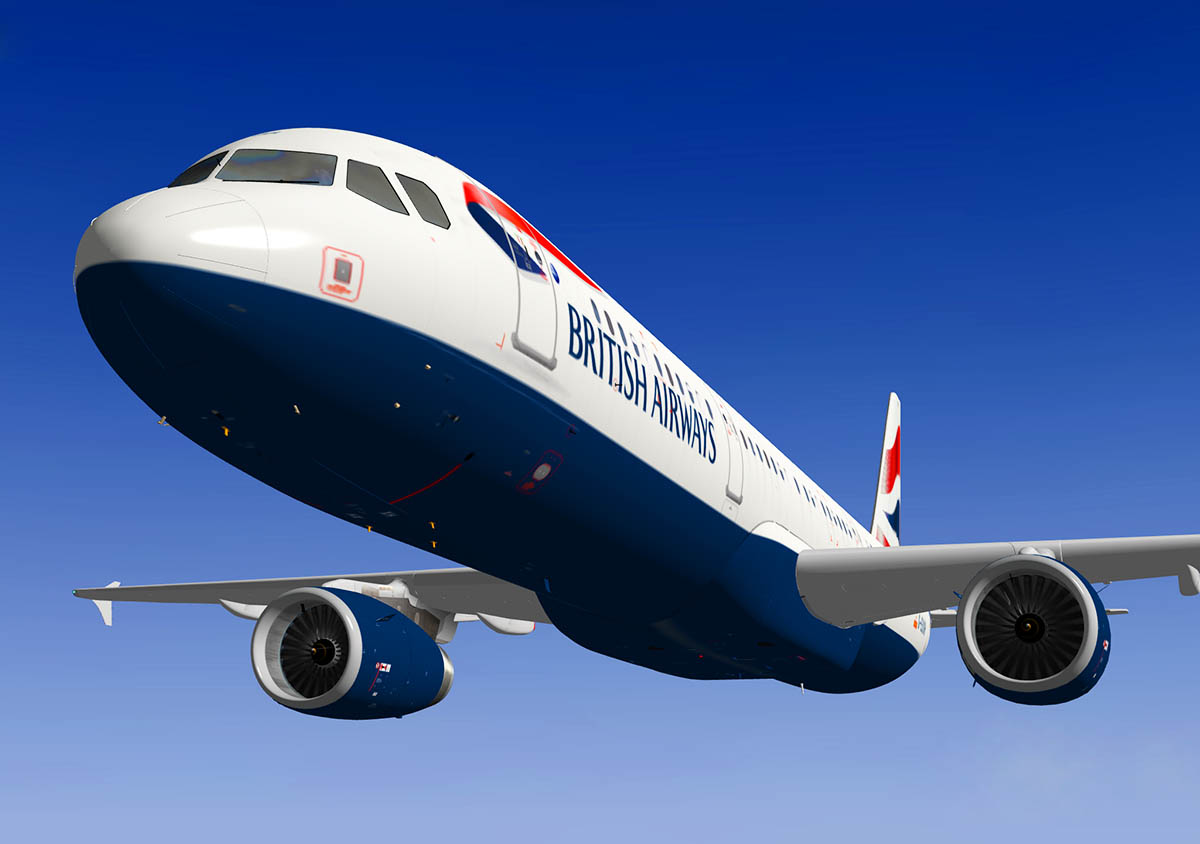
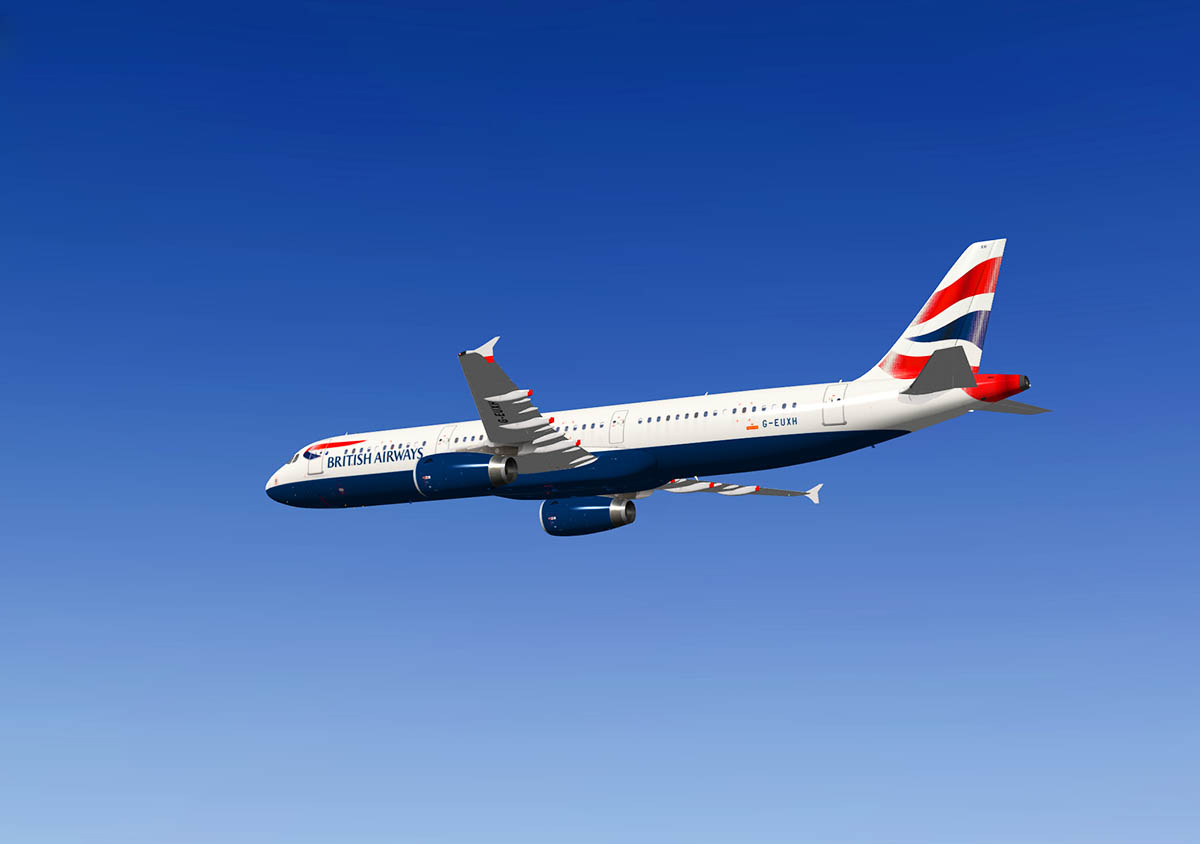
Peter's Aircraft : A320/A321 3D Cockpit Preview If you have purchased any one or all of Peter Hager's A380 series, and added the 3D cockpit option. Then you would be excited by these pre-release pictures of the 3D option for Peter's A320/A321 series. Without doubt the addition of 3D cockpit in the A380 gave the aircraft a dimension to the simulation that is breathtaking. Now the same option is coming to the A320/A321 series and you can see the coming quality and design is as though and as good as the A380 option. The 3D design is by Roman Berezin of Flightfactor (as was the A380 design). But you have a different dimension in the way that Peter Hager programmes his designs into the 3D cockpit that creates the differences and with highly integrated aircraft references that makes his machines so lifelike and the perfect simulation. These references are there in the 2d Cockpit now. But somehow the 3D cockpit makes them more accessible. Having the full visual experience (certainly on the A380) just lifts the simulation to another level that compliments Peter Hager's already fine detail and systems management. The Autopilot systems will be comprehensive and in 3D now with hand manipulation, although I admit the tolerances on the A380 are very tight and can make the aircraft a handful when you have to make quick adjustments. Peter Hager notes that "Graphics of all display units (DU) are new designs in very high resolution." And that is certainly noticiable. And very important, and more so on Airbus displays. To a point you can get away with average markings on a 2d display. But with the zoom factor on the 3D versions that is not acceptable. The PFD (Primary Flight Display) is very dense with information. So clarity is very important. Peter Hager has noted he would like the 3D option delivered by Christmas, But the release might slip into 2014. Whatever the time of the release it will well worth the wait. 30th October 2013 Developers Site : Peter's Aircraft 3D and panel design images courtesy of Peter Hager.
-
Aircraft Development and Announcement : QPAC A320-232 v2
Stephen replied to Stephen's topic in Comments and Announcements
Strangely it does not compare with either... Yes the QPAC version is more related to Peter's version. But the angle here is in the systems. The investment is to learn as the versions are released in steps, which is important because the lot of systems inserted in one go would be overwhelming... The basic will be just that as a starting point, but my feeling is when you will get to the final full "premium" pack with the 3d cockpit in there it will be very comprehensive and up there in to B777 - B757 territory. SD -
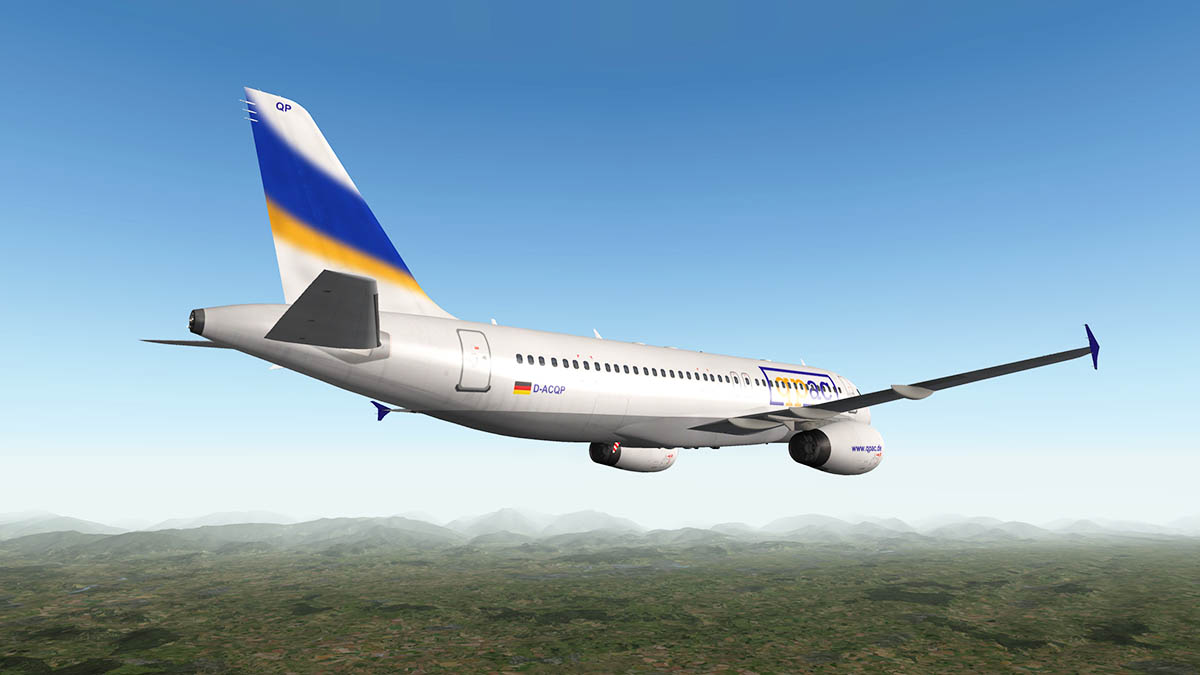
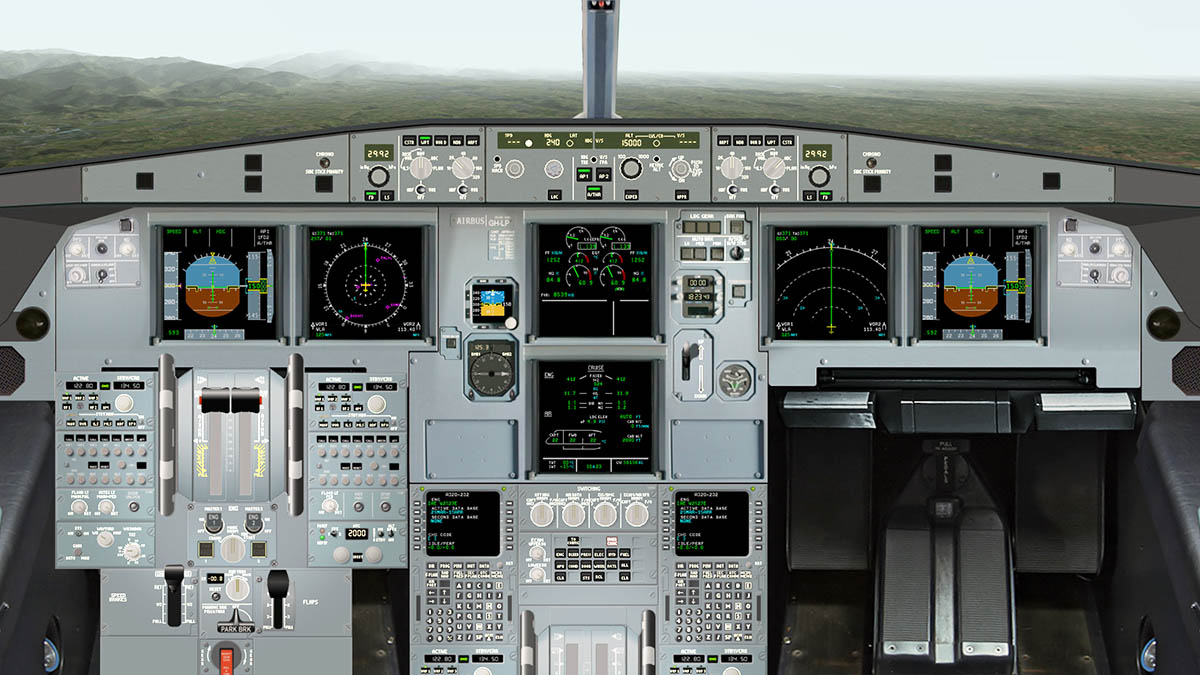
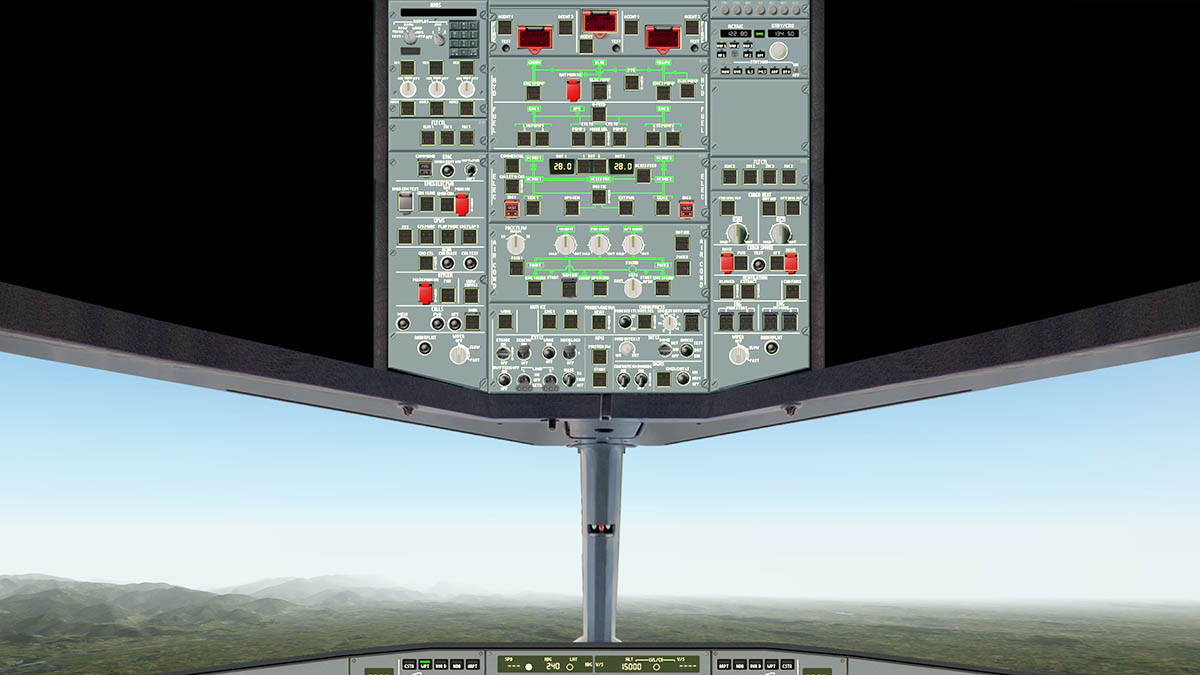
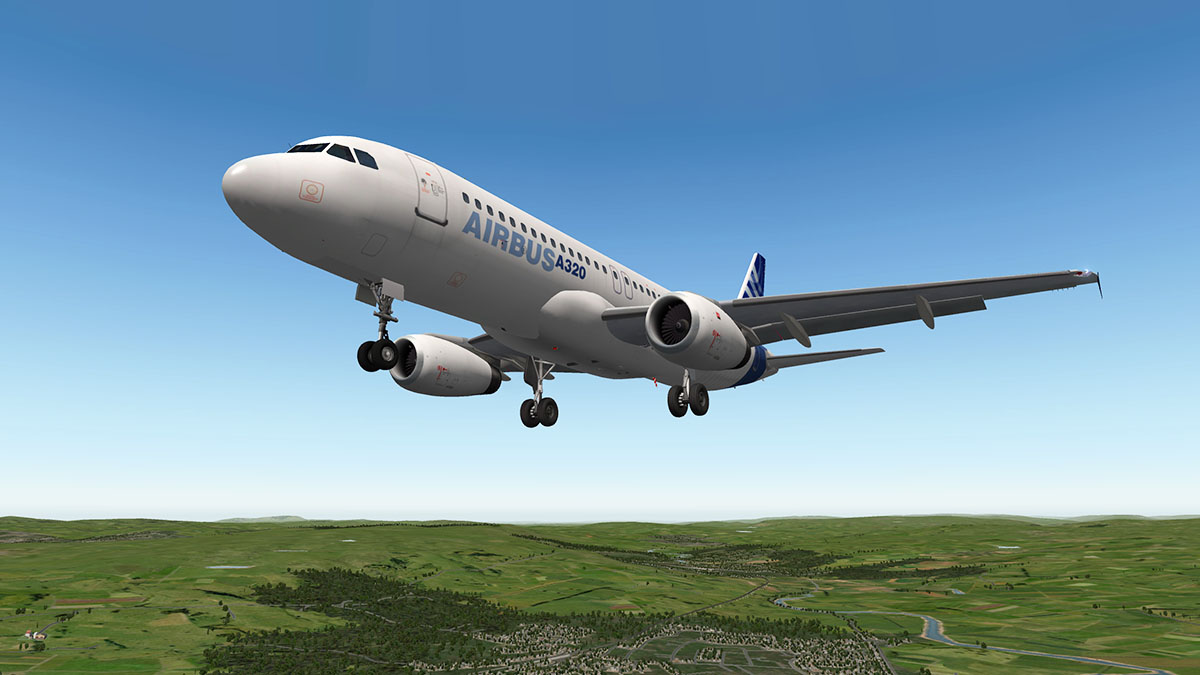
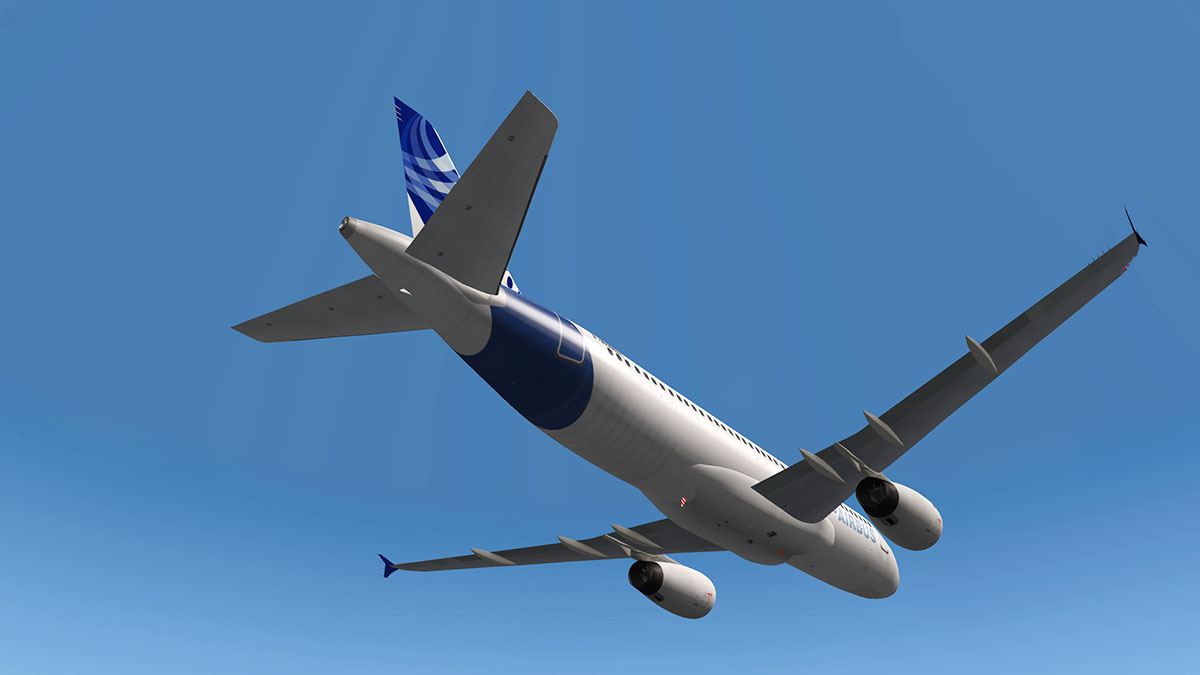
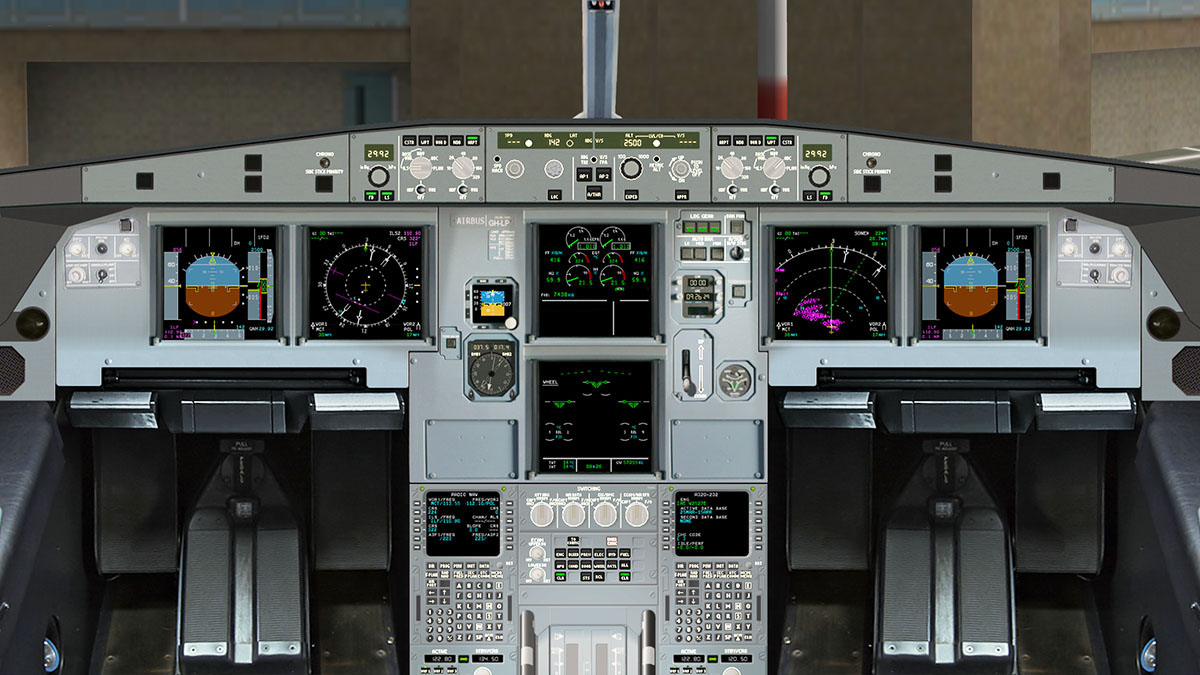
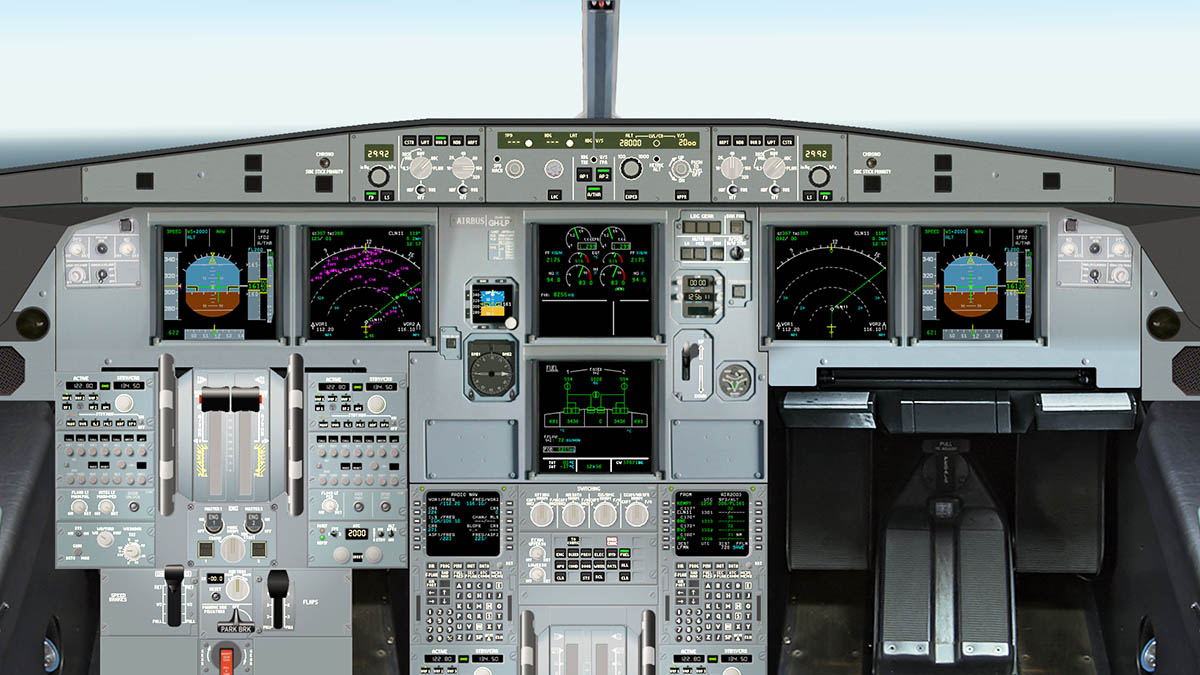
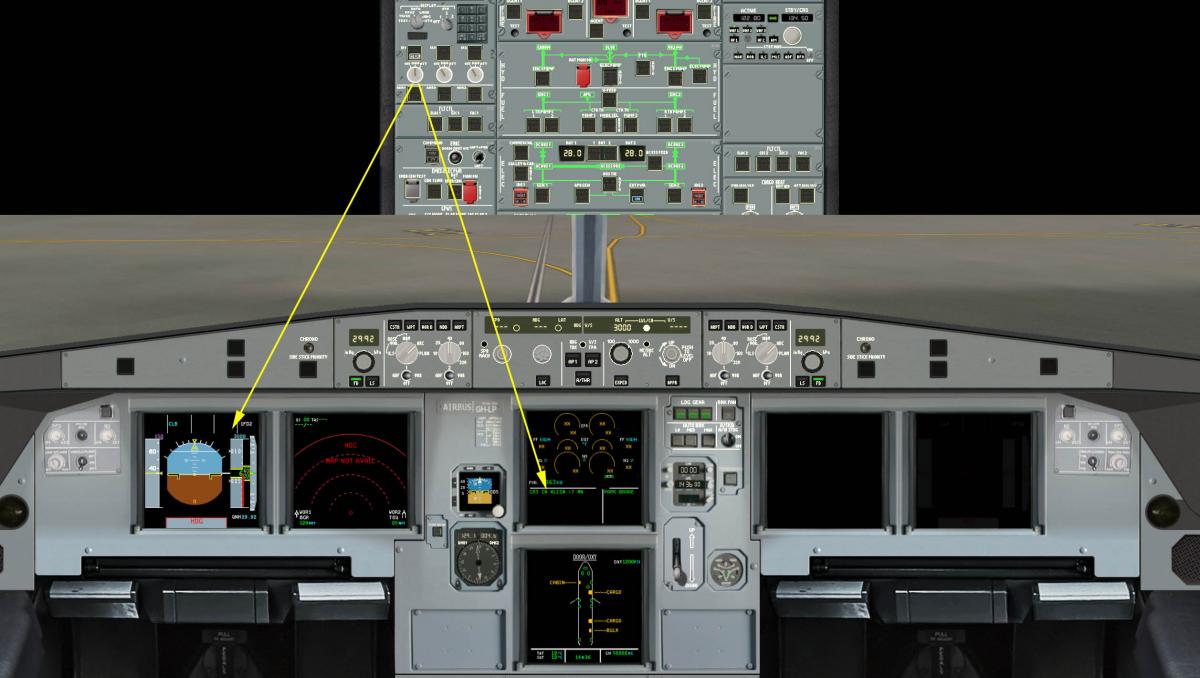
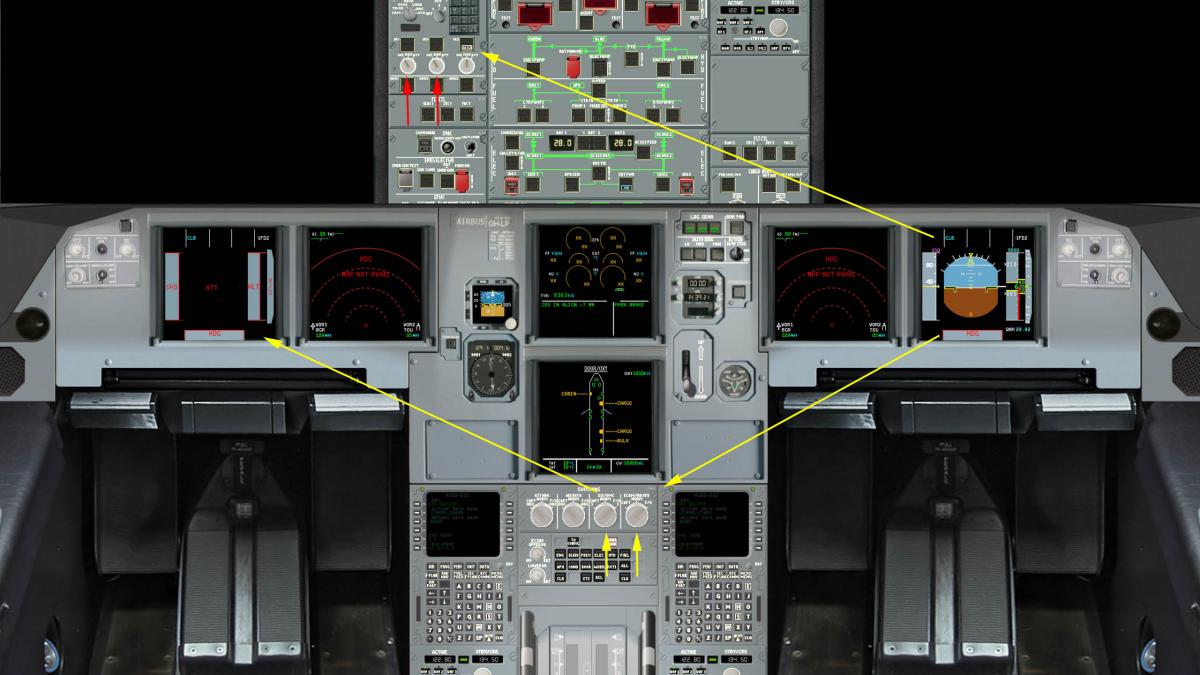
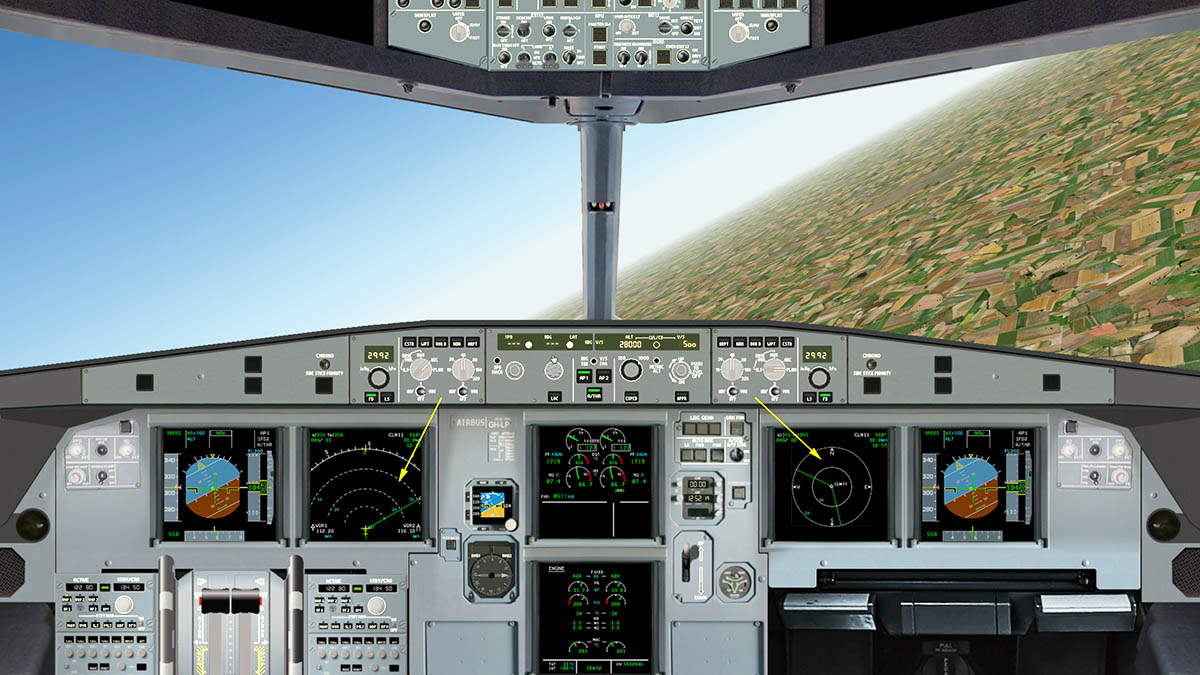
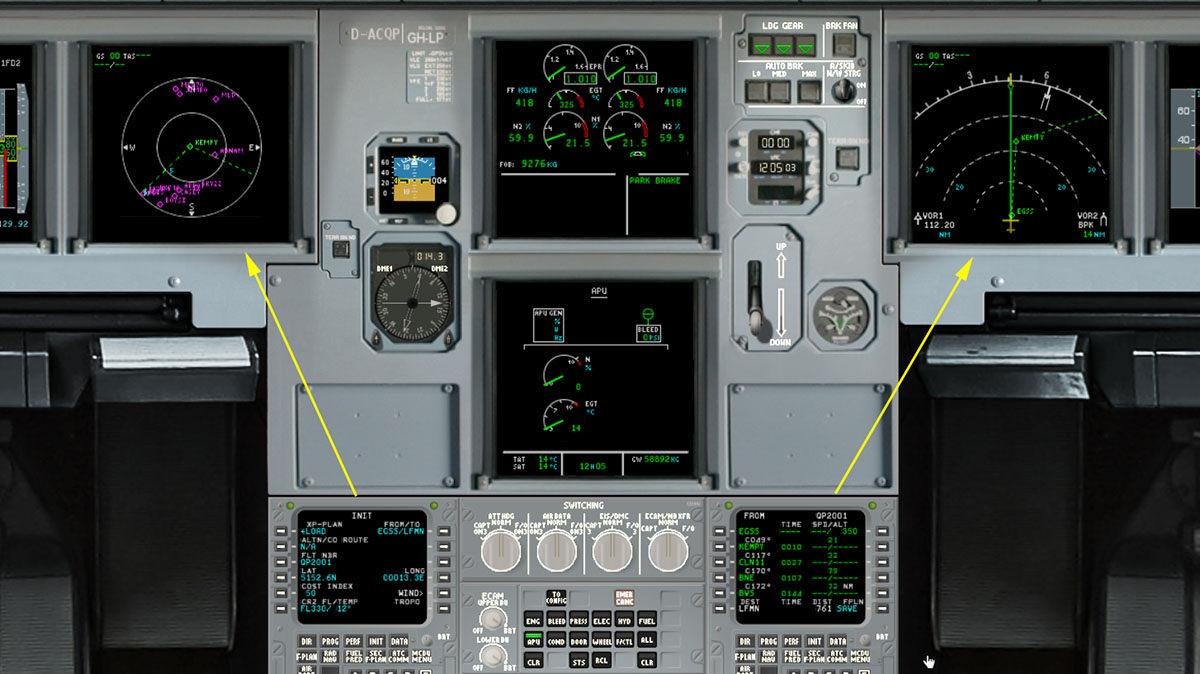
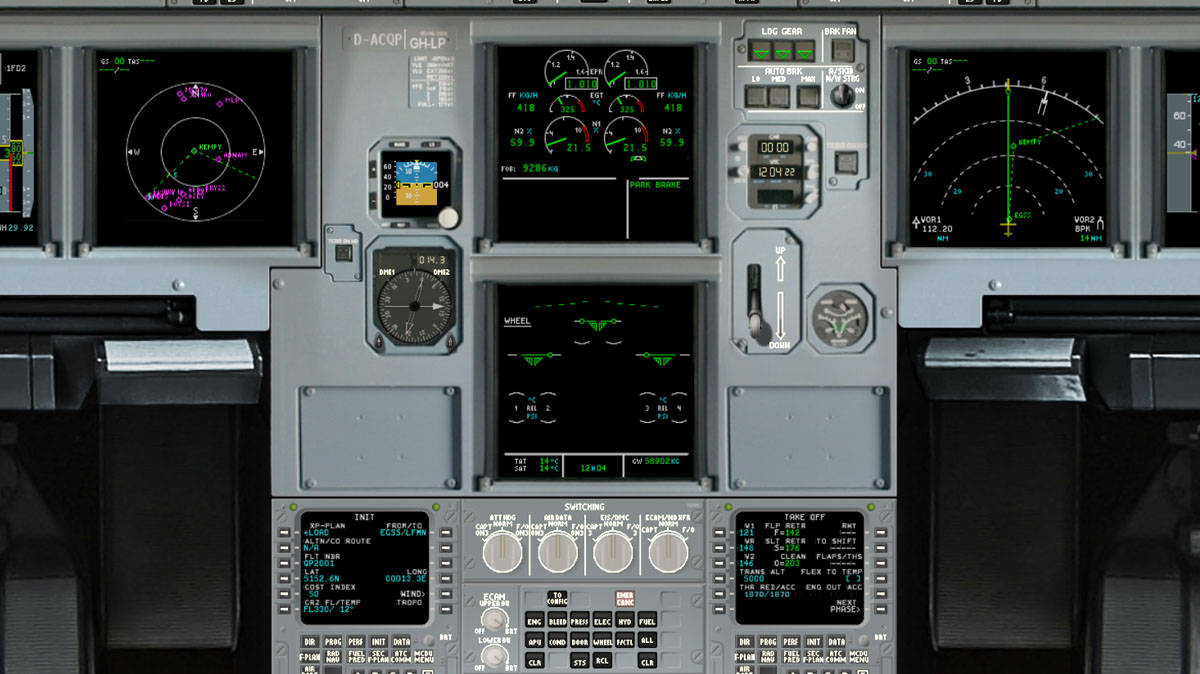
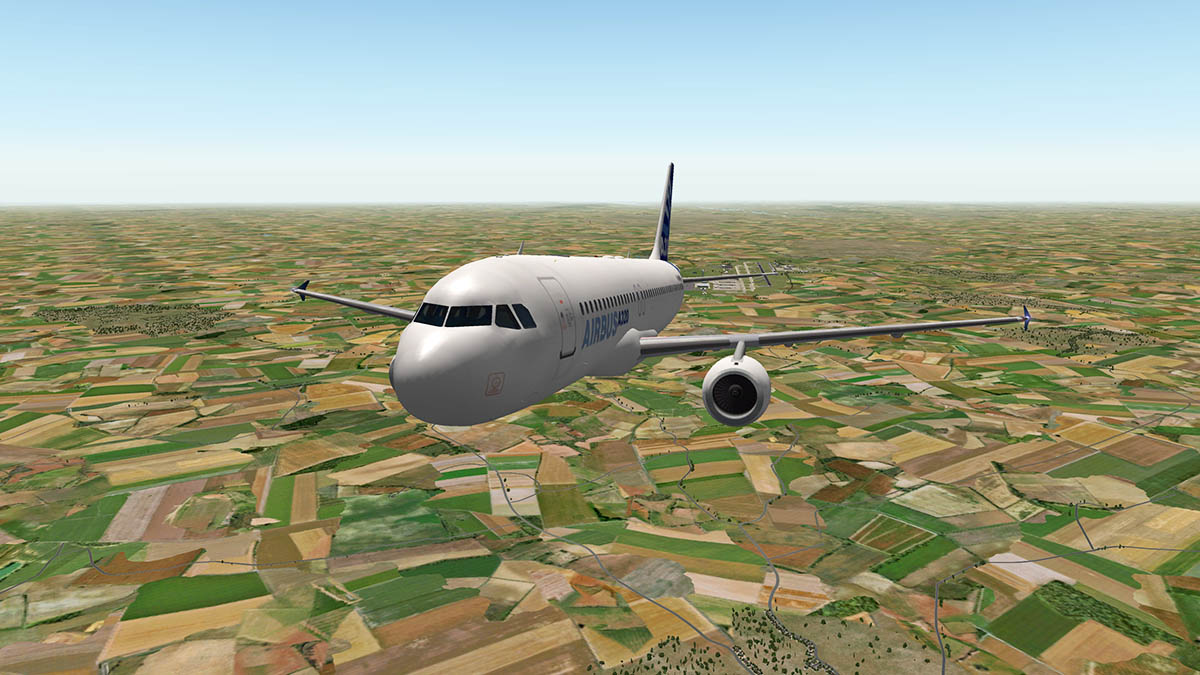
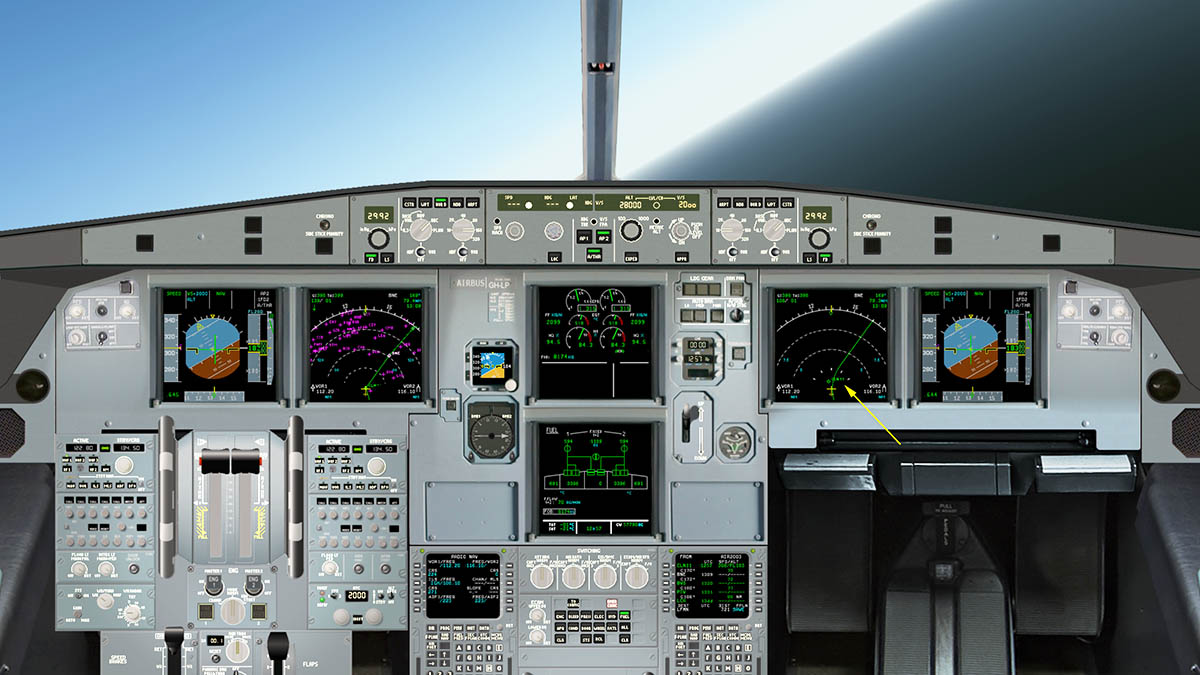
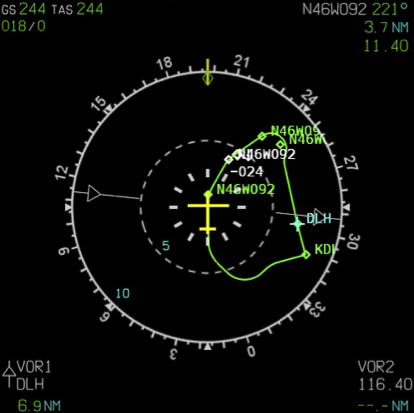
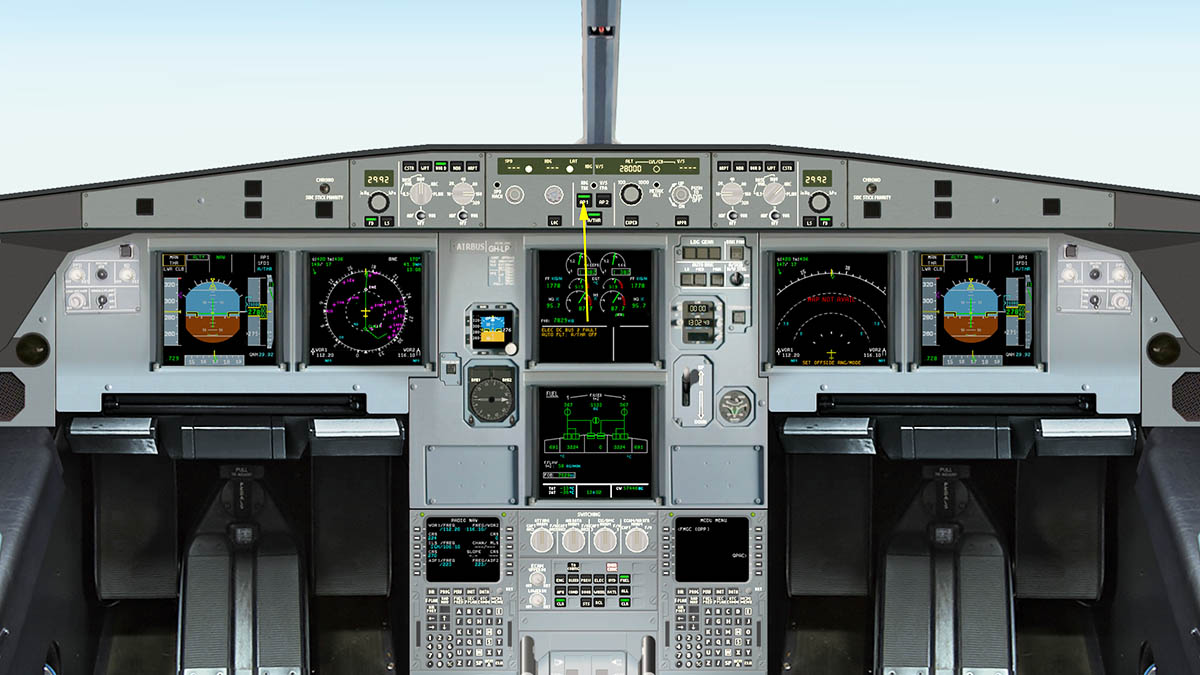
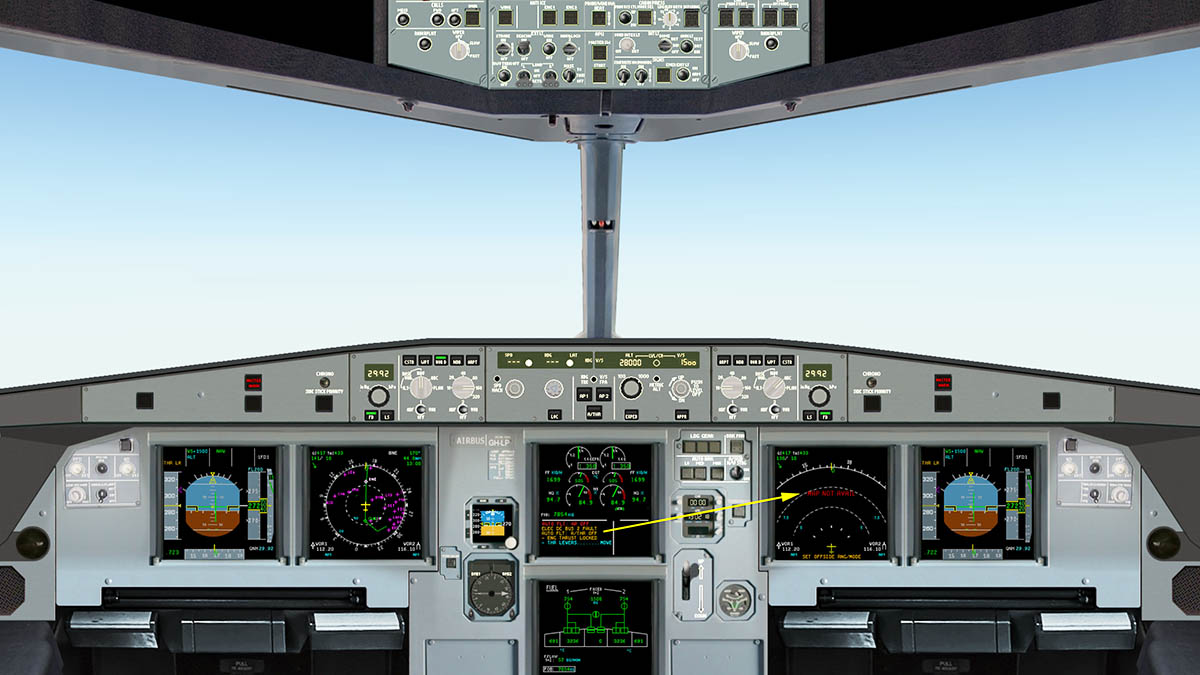
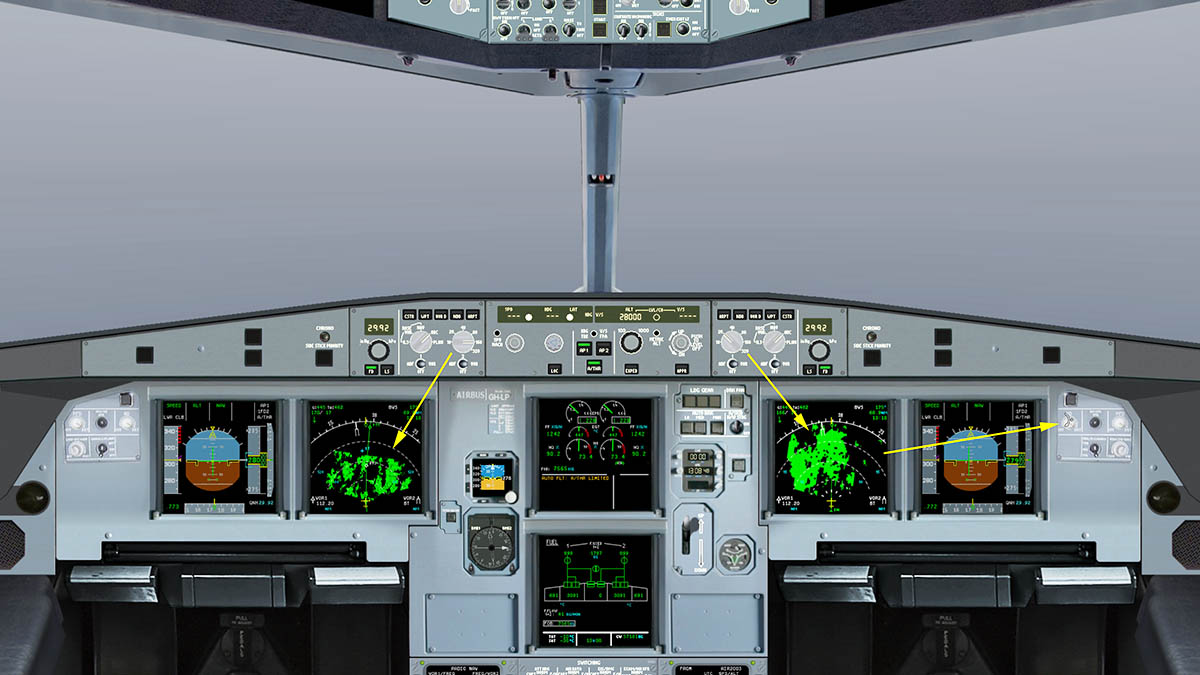
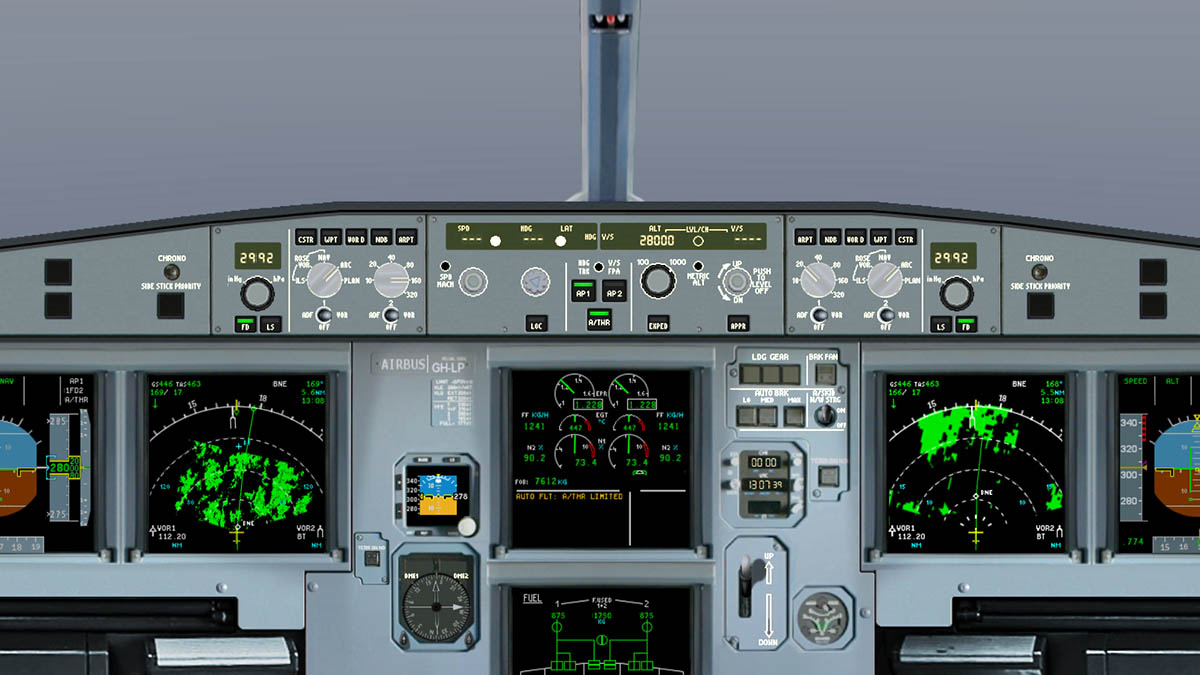
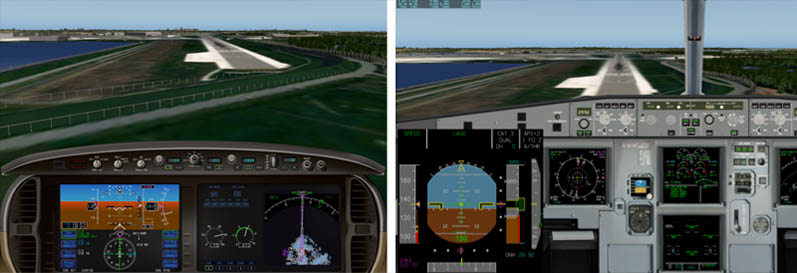
Aircraft Development and Announcement : QPAC A320-232 v2 Route - EGSS (Stansted) to LFBO (Toulouse) In 2009 QPAC (QualityPark AviationCenter) announced that they were going to commission a clever code writer named Torsten Liesk who had already created his own version of the A320 to write the first full FBW (Fly-By Wire) with hydro-mechanical systems and simulation in X-Plane to be used for Research & Development. The brief included: A detailed simulation of the Airbus flight controls and auto-flight functions, including: - Flight Check - Fly-by-wire normal law giving a realistic aircraft response to control inputs including flight envelope protection - Auto Pilot Flight Control Unit (FCU) - Features of the real FCU are to be realistically simulated - Auto flight system in accordance to Airbus logic, including ILS-Autoland and automatic roll-out X-Plane was chosen for this task because it has very realistic aircraft simulation by Austin Meyer’s “blade element theory”, and with that X-Plane users were lucky to see and use the development of the these modern realistic aircraft systems. It was always noted that the first A320-232 version (v1) was going to be freeware, but when the system development was going to continue into the next more in-depth stage in that it would then become payware in v2. v1 went final in March 2012 (version 1.1) and v2 will be released as payware at the end of October 2013. With this level of realism achieved by v1, it made aerospace companies like Flight Data Services Ltd or Universities like the Dresden University of Technology to choose the QPAC A320 with its fly-by-wire technology as the backbone for some of their projects. Flight data services Ltd uses a modified version of the QPAC A320 for X-Plane to replay Flight Data Recorder data from in-service aircraft to analyze and rate in-flight occurrences. At the Dresden University of Technology, the QPAC A320 is used as backbone for a research simulator at the Institute of Logistics and Aviation. In fact, a lot of the development done for the Dresden University of Technology has flowed back down into the QPAC Airbus A320 V2; therefore, and now private users can directly profit from the cooperation. The first thing to note is that although the QPAC A320-232 now a noted payware aircraft, the development is ongoing and will be available through several different levels of depth of systems and features. v2 will be available in three categories (releases noted here are forecasted and are not set definite dates): - Basic (available October 2013) - cost is noted as US$25.00 - Plus (available May 2014) - US$40.00 - Premium (available December 2014) - US$70.00 The v1.1 version will still be freeware for X-Plane 9 and X-Plane 10 - 32bit. It must be noted that the QPAC Airbus A320-232 is about systems and logic system depth. It is not about features and add-ons or special effects. There will be a 3d cockpit and wing-flex will also be available in (late) 2014 at a noted additional cost. All payware versions will be 32bit-64bit but the premium version will not be available for X-Plane9. The “Basic” version is what we will cover here. So attached below is a .pdf download of all the future “List of Features” for all the packages as that is to complex to list here. QPAC Airbus A320-232 v2 (Basic) At first glance the 2d cockpit looks exactly like the standard 1.1 freeware version. But remember that in time the 3d cockpit will change this focus significantly. First to note is the standard rear pedestal which is located on the pilot’s side is now clickable to be removed (or disappear). This leaves you with a cleaner panel although the viewpoint is still central and not aligned to the left of the Pilots eyeline. (You can remove the centre pillar) ADIRU (air data inertial reference unit) All 3 ADIRU units are independent. From a cold and dark set-up each unit can be set up differently as each unit has its own sensor noise model. This can make for realism as that there is a slightly different measurement errors between the Pilot’s and Co-Pilots PFD’s (Primary Flight Display). You can activate each ADIRU (1,2 and 3) Interdependently and noted above is that on the left picture (above) one ADIRU (IR1) will work only on the pilot’s PFD and noted is the IRS alignment. Each of the ADIRU’s are also switchable to either the Pilot’s PFD or the Co-Pilot’s display. Here in the right picture the (IR3) is activated on the co-pilot’s PFD but the ADIRU data can be switched over to the Pilot’s display via the switches (Switching - two right switches) below the Situation display. Now you are starting to get the ideas behind the direction of the QPAC version of the A320. It is a deep system involvement in the way you fly the aircraft. MCDU - FMGS The MCDU (Multipurpose Control & Display Unit) - FMGS (Flight Management Guidance and (Envelope) Systems) are the systems that run the aircraft. The Airbus A320 uses the (Smiths) “Thales” system and in the QPAC version the MCDU’s are completely separate and independent between the Pilot and the Co-Pilot positions. One thing that bugged me was that when you switched in one view, say on the pilots side, then the displays on the Co-Pilots view would do the same. But here not only are the main PFD and MAP displays completely switchable into every mode. The MCDU is also switchable to input from the position of the either the point of view of the pilot or the co-pilot’s position. And it is highly realistic. With 2 fully independent MCDUs with pages INIT, FPLN (main page), DIR, and PERF. Also pages MCDU Menu, RADNAV and DATA. The “Basic” version comes with the welcome feature that will load a standard X-Plane FMS (route) that is compatible with UFMC and XFMC and then transforms it into a FMS route that looks like the programmed route of the directly entered data. This is a transition FMGS that will change to be almost 90% compatible FMGS that will be available in the “premium” version and will still be a fully functional FMGS in the “Plus” version. In the “basic” version operation it is highly effective as the route is organized around the fixes (waypoints) as the curves (arrowed) create the correct flight passage. You can have one display on one section (long) of the route and the other display on a shorter distance or closer to the turn point. As everything in the displays are independent, you can have a large selection of views of your route and information. As noted for when the other (plus & Premium) versions are released the system will go more towards standard installation of the FMGS in the A320 aircraft. That will then include the extra MCDU pages : FPLN subpages (Lat Revision, Vert Revision, Arrival, Departure), PROG. There is “Improved flight plan editing” which comprises of representation of 5 flight plan points in the Airbus MCDU style with the possibility to insert waypoints without overwriting them. Additionally, the possibility to enter Place/Distance/Bearing waypoints is added to facilitate flying circles at a constant radius are a VOR, for example. (Above) Approximation of the constant distance arc around a VOR/DME at KDLH, using the possibility to enter Place/Distance/Bearing waypoints in the MCDU. In flight you can see the split between the pilots and co-pilots separate autopilot and FMGC systems by inducing a failure in the “electrical bus”. This will cause the co-pilots displays and also his MCDU to malfunction. You can transfer the data to the pilots systems and fly on the AP1 as the AP2 function is now non-operational. Full warnings and hints on how to fly the aircraft will be then displayed on the centre display. Weather Radar The weather radar is also highly effective. Each Nav display shows the radar sweep (well done), and you can independently adjust the display to the range. There is also the adjustment to change the intensity of the weather data. ILS auto-align An algorithm developed by QPAC detects an offset between the ILS localizer data and the runway data of the airport. (This frequently occurs at airports with custom scenery installed.) The algorithm corrects this offset to bring the aircraft in over the centerline of the runway. The algorithm maintains potential heading offsets between runway and localizer. Features Other features include “Oxygen Mask” that is operated from the Pilot or Co-Pilot side panels and compatibility with: - Marginal’s Autogate plugin - Ground Services - Pushback, Refueling alpha-5 Supported Startup-configurations: The user can choose between four different startup configuration via the QPAC menu in the MCDU: Cold & Dark, Ground Power, APU and ADIRU running, Engines running. The last chosen setting is remembered next time the airplane is loaded. Also, the user can do inflight startups, e.g. to practice ILS approaches. (With inflight startup, give the FBW 5-10 seconds to adapt to the current configuration.) “Improved PFD and ND (Navigation Display) synoptic” include: - Full custom ND to achieve Airbus’ “heading up” mode rather than the XP-default “track-up” mode. All ND synoptic have been reworked to be as close to the Airbus synoptic as possible. - Custom artificial horizon in the PFD, including a moving heading tick band, selected heading bug, radio altitude information moving with the aircraft bank angle, side stick position indicator on the ground and more. - Custom altitude and VS band to get as close to the real thing as possible. The Airbus A320-232 has had some modeling changes in a new nose and an upgrade to high-quality 3D model, including 3D cockpit and wing flex and XP10 HDR lighting will be available for all 3 payware packages. Your current livery collection for the v1.1 will work fine as well with the v2 version. Release of the QPAC v2 (basic) is noted as 31st October 2013. QPAC The effect of the QPAC’s involvement with X-Plane is significant. And this new phase will see the development go to new levels of this sort of modern computerised aircraft technology. The early releases of (v1) tested our skills and there is no doubt the future developments of this series will give you a very technical, but very in-depth simulation of Airbus systems. If you fly Peter’s Aircraft Airbus A380 then you will understand how these systems translate beyond the QPAC version and in development of this new series it will be interesting how the newer features will translate more into our flying in the X-Plane simulator. Stephen Dutton 23rd October 2013 Developer site: QualityPark AviationCenter (QPAC) Note: the technical details here are supplied by QPAC. disclaimer: Legal note: While QPAC is of course interested in providing an as enjoyable experience as possible to its customers, the release of any version of the QPAC Airbus A320 V2 does not lead to legal liability of QPAC to publish any of the currently planned subsequent versions or to provide continued support of the released version. QPAC ; Features and Plans (pdf) QPAC A320-232 features and plans.pdf