Leaderboard
Popular Content
Showing content with the highest reputation on 02/24/24 in all areas
-

Scenery Review: LICD- Lampedusa Airport and Linosa Island XP 12 by Cami De Bellis
Dominic Smith and one other reacted to Kiwiflyer for a topic
Through your enchanting scenery Cami, I feel the warmth of this sun-kissed location, like stepping off a flight, taking breath, then, meandering through town, down to the glistening water's edge, across castor sugar sands, and finding that perfect, family run Ristorante, seated outside, with a cool breeze, sipping a life-giving granita, savouring the freshest local cuisine, all while watching the sun set lazily across shimmering tranquil seas. Am I dreaming? Not anymore. Thanks to you Cami, for transporting this Kiwi to distant shores and your stunning atmospheric render, and to you Dom for your beguiling review. I feel like I've just had a holiday. In-fact, now I can, anytime! Now... where's my suitcase?lol Nigel2 points -
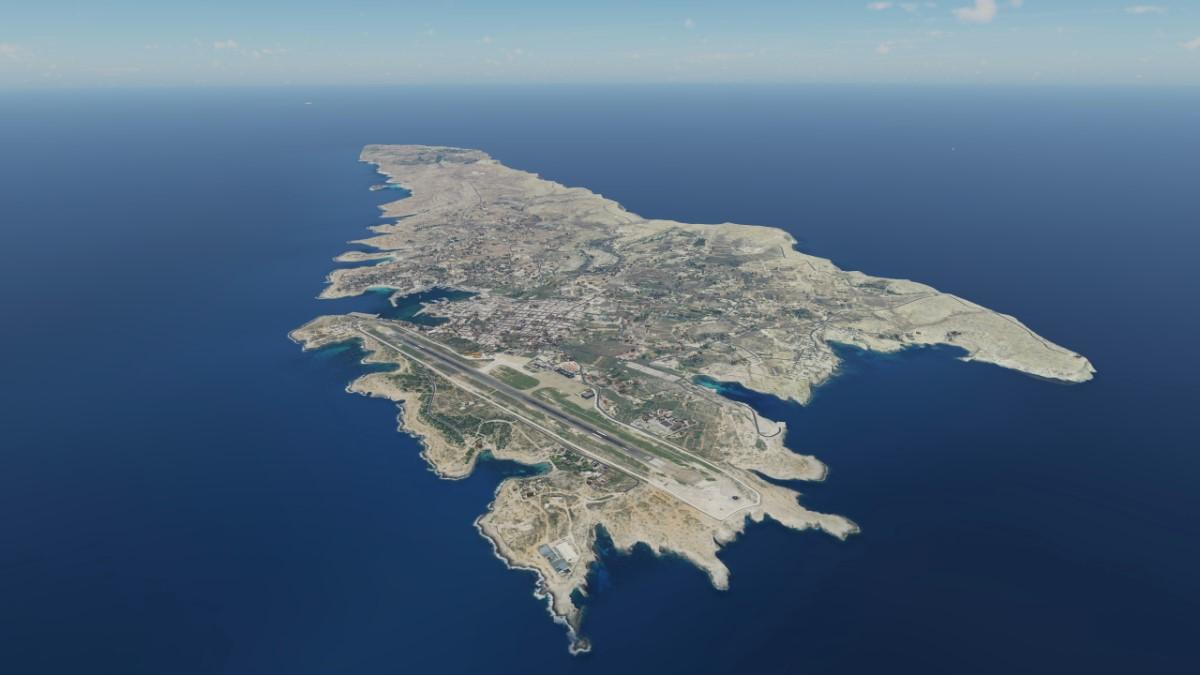
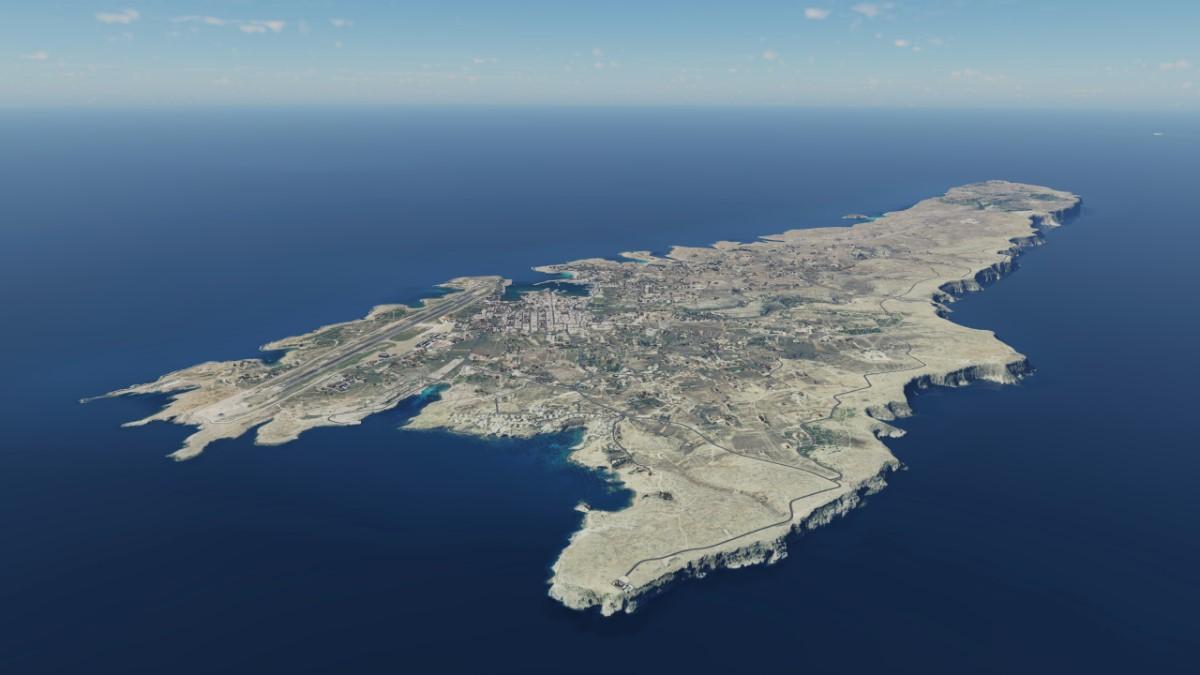
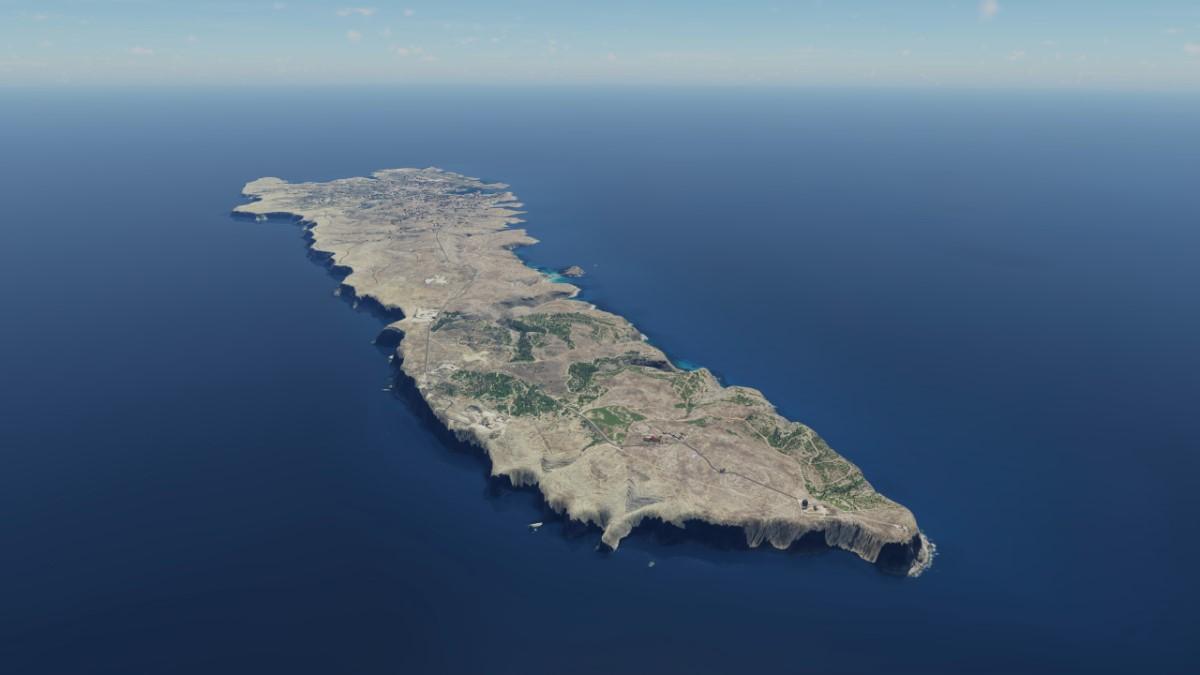
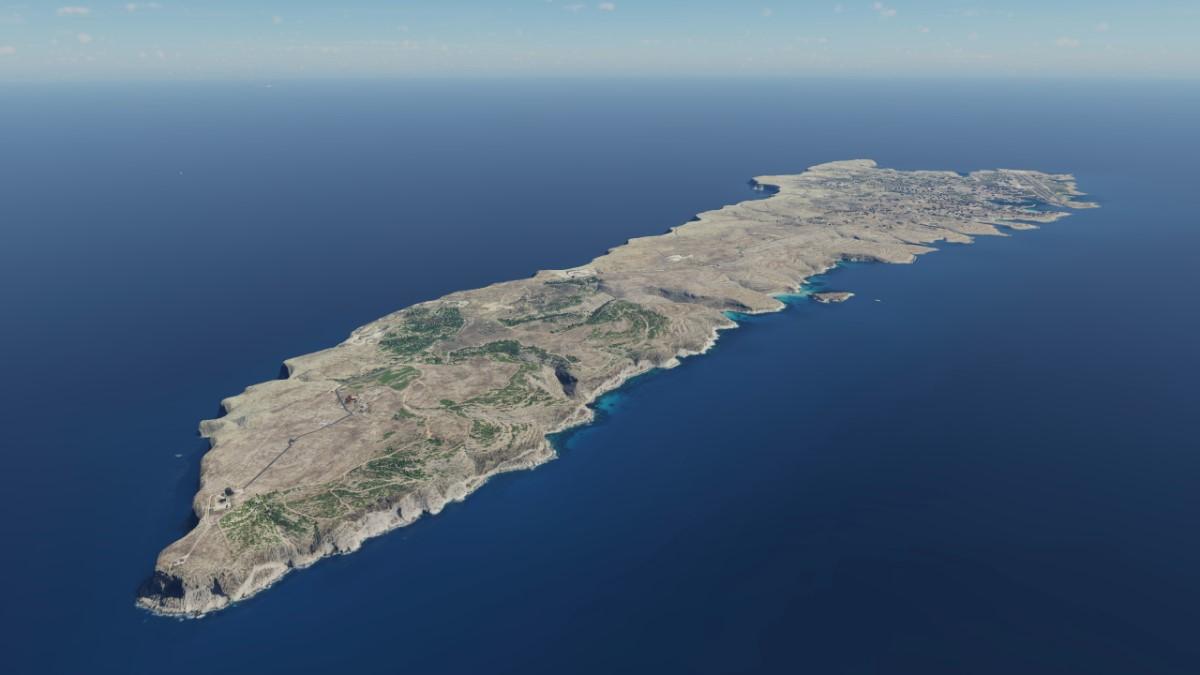
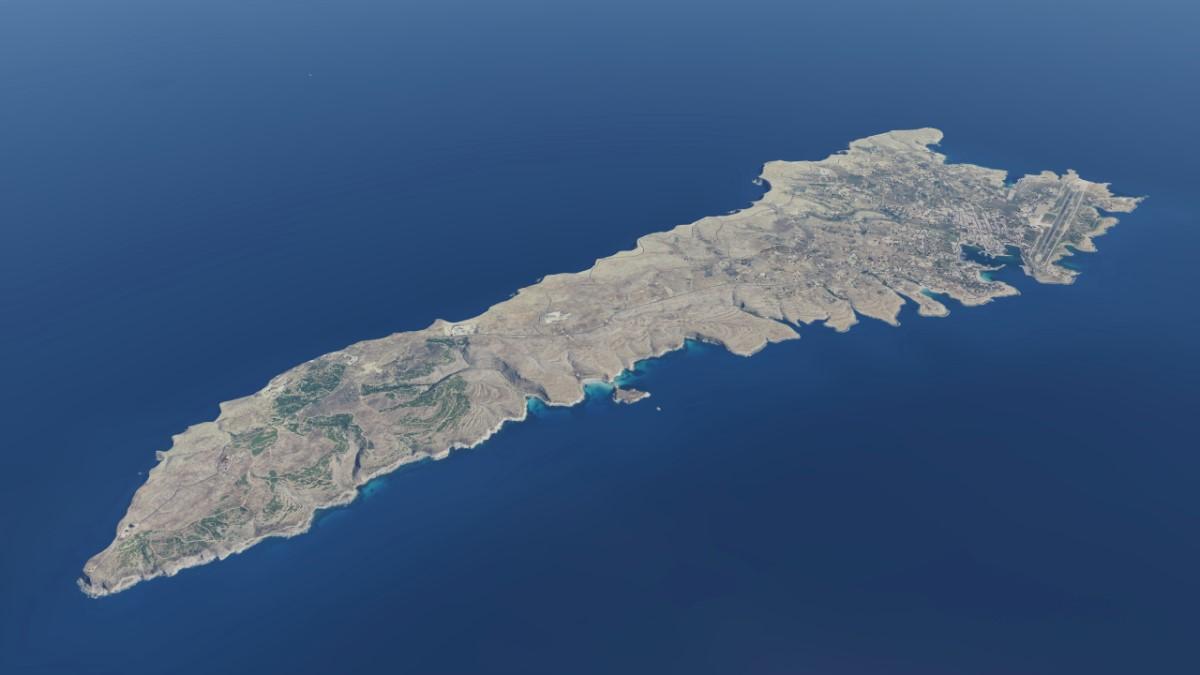
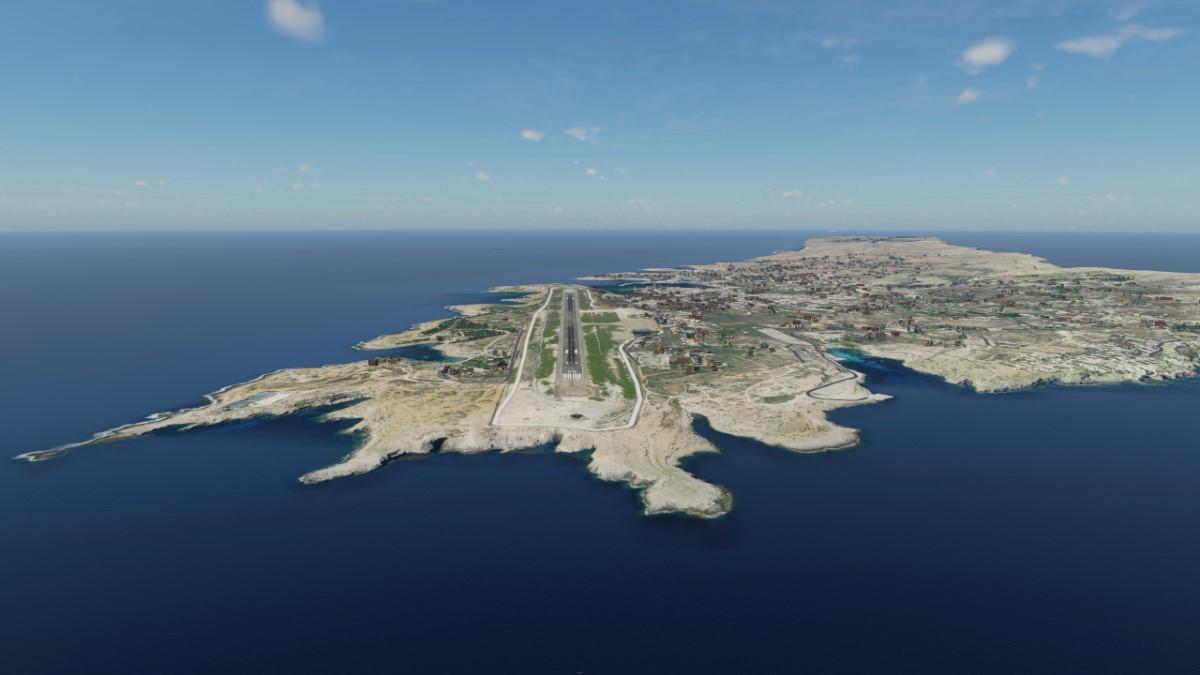
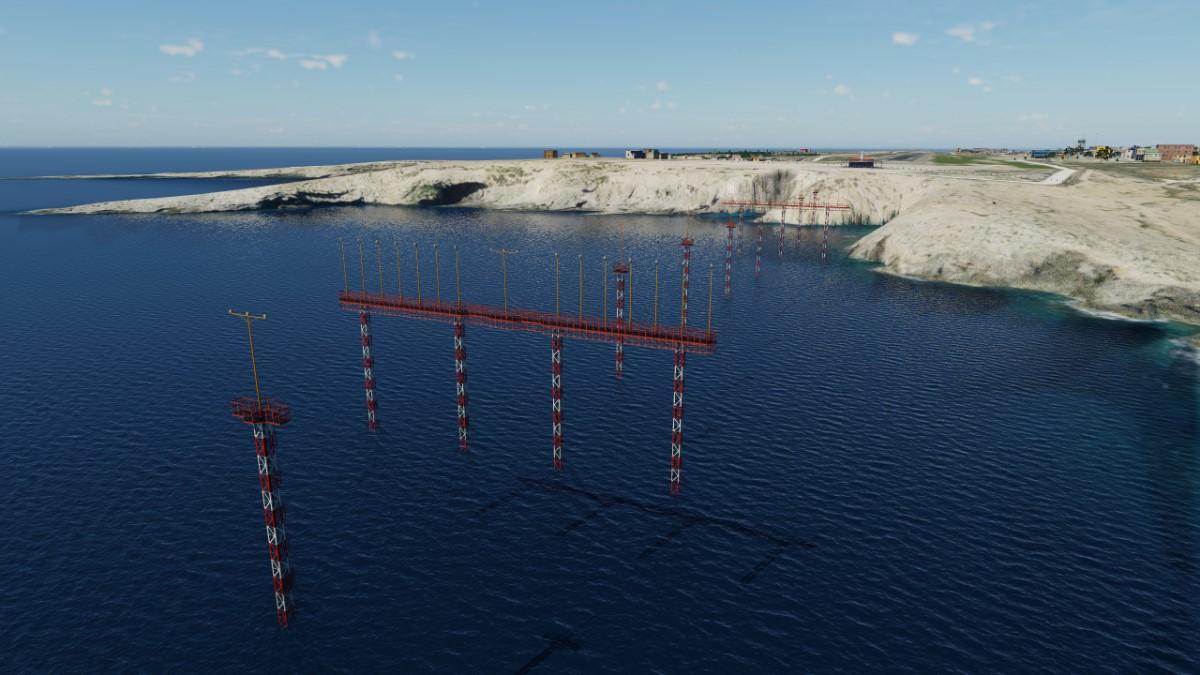
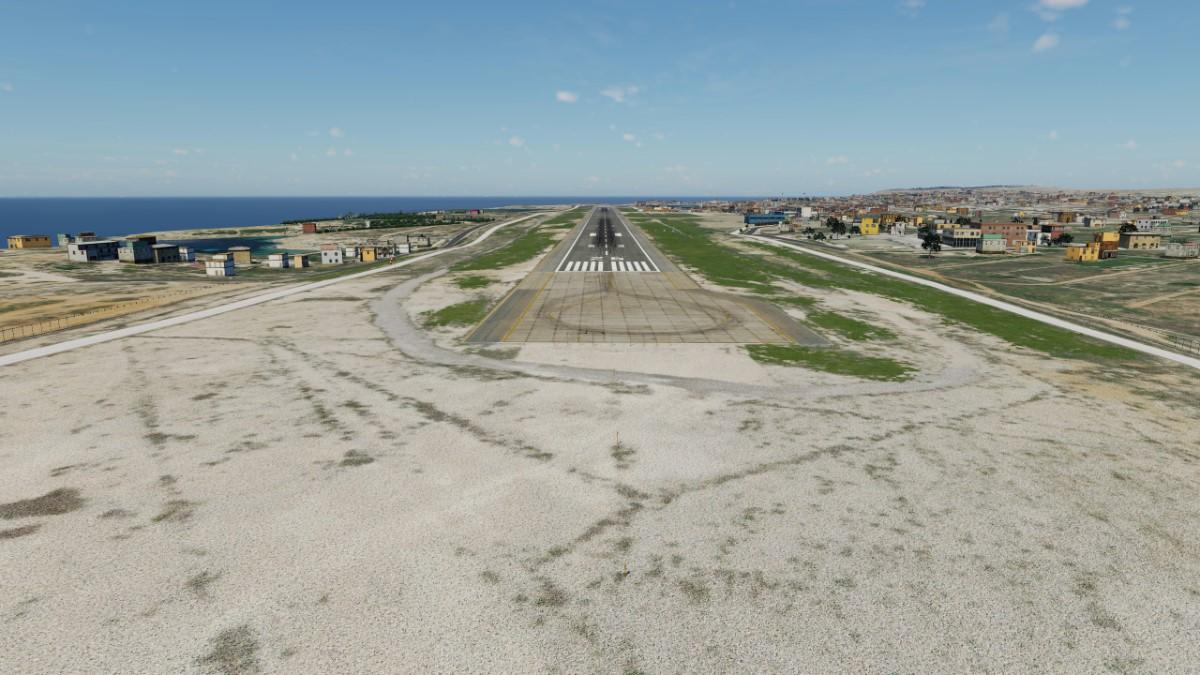
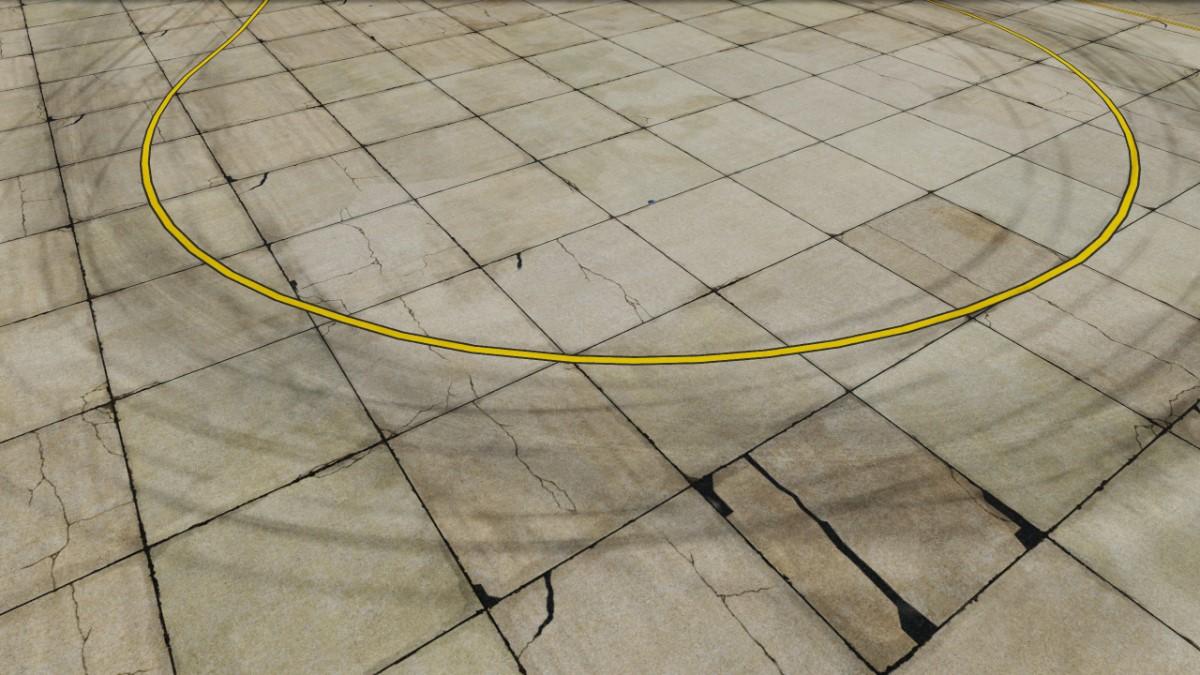
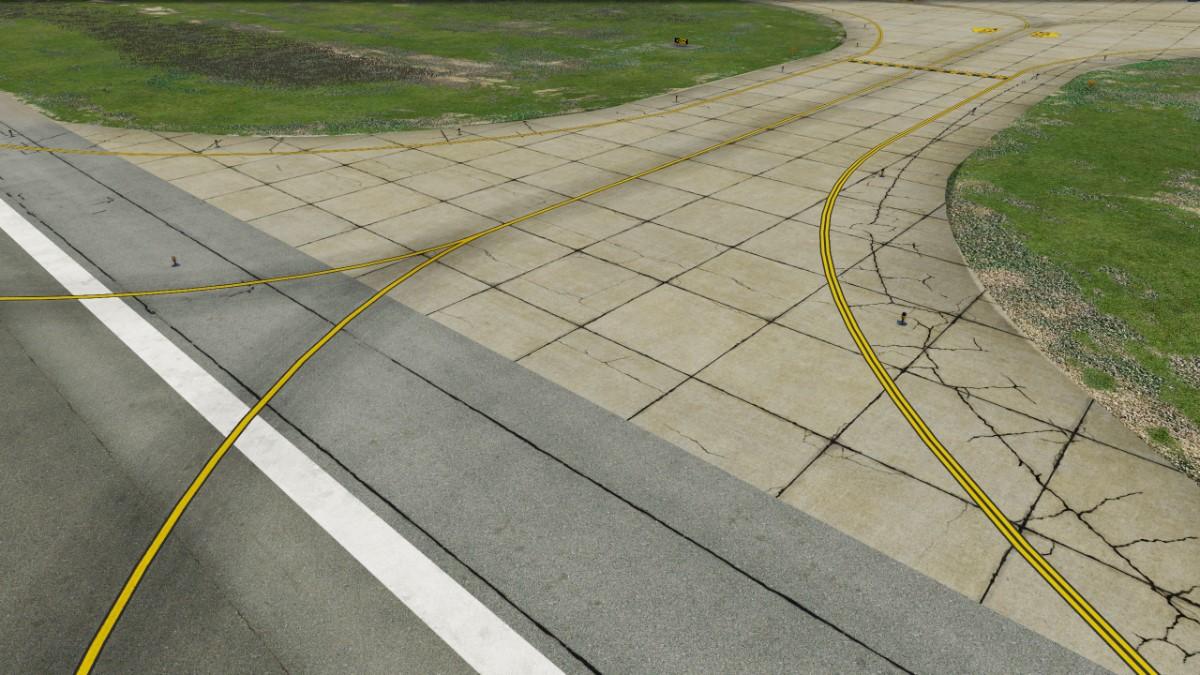
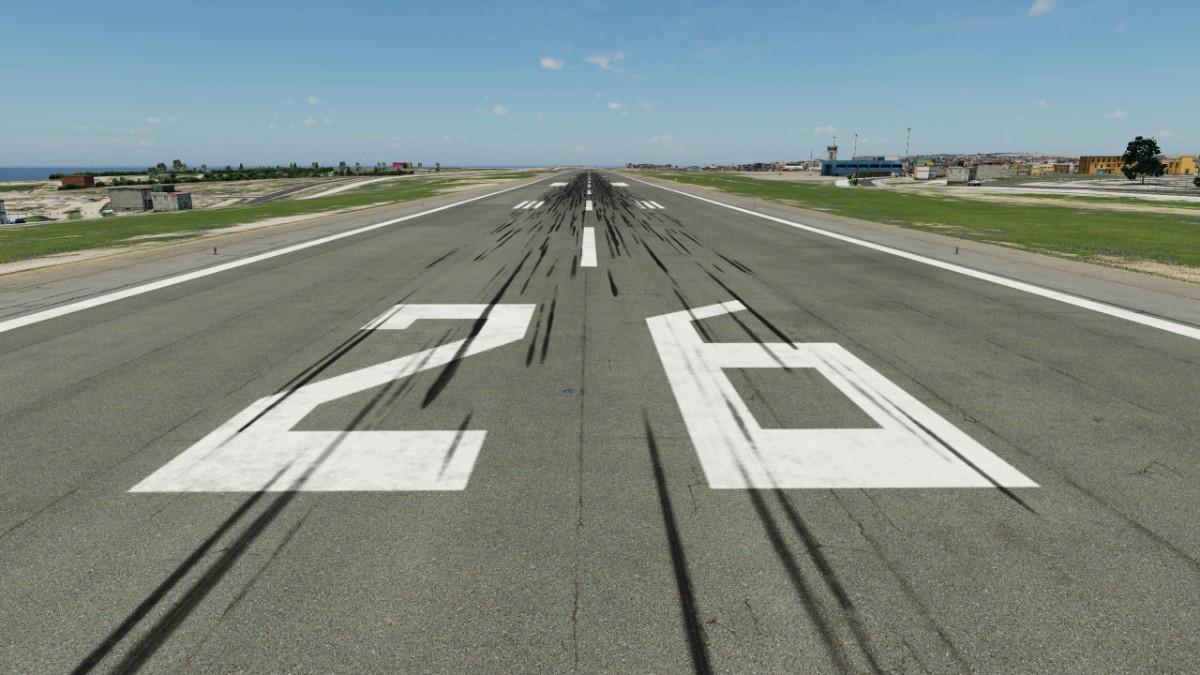
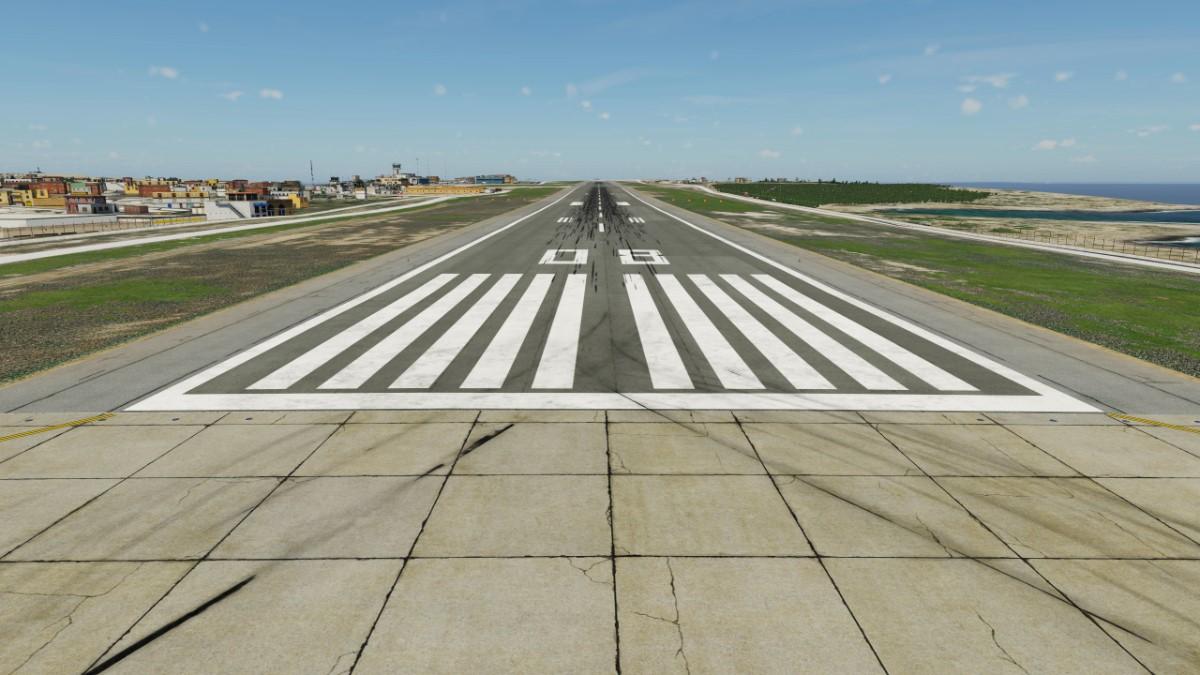
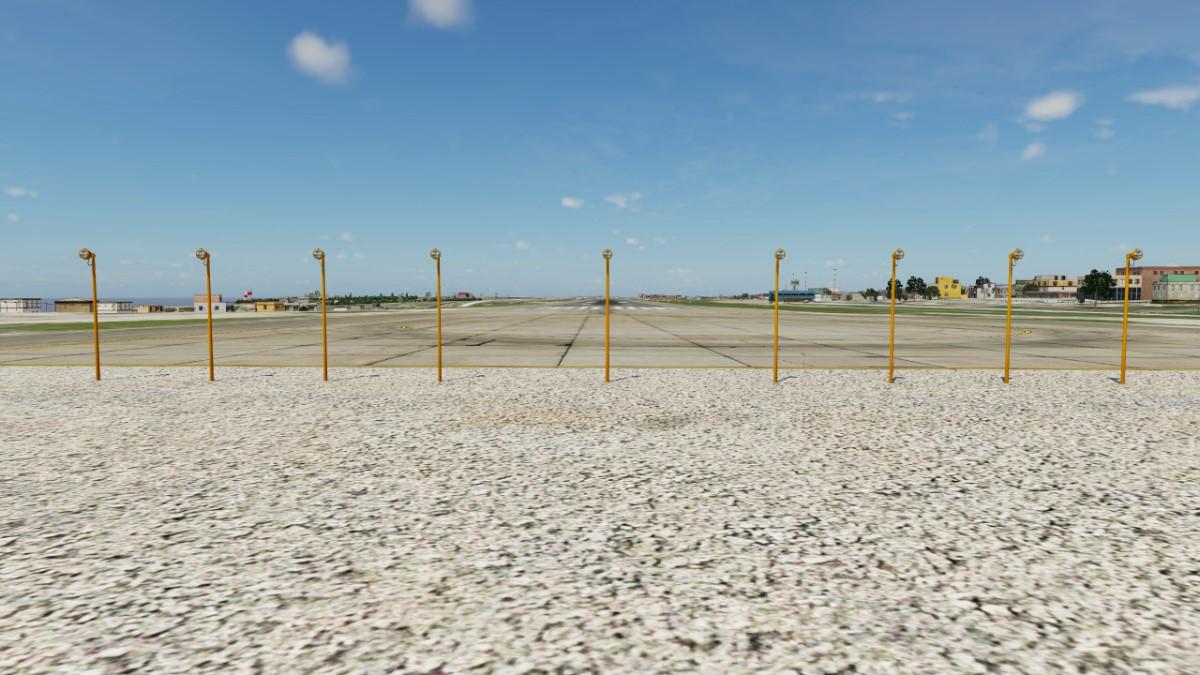
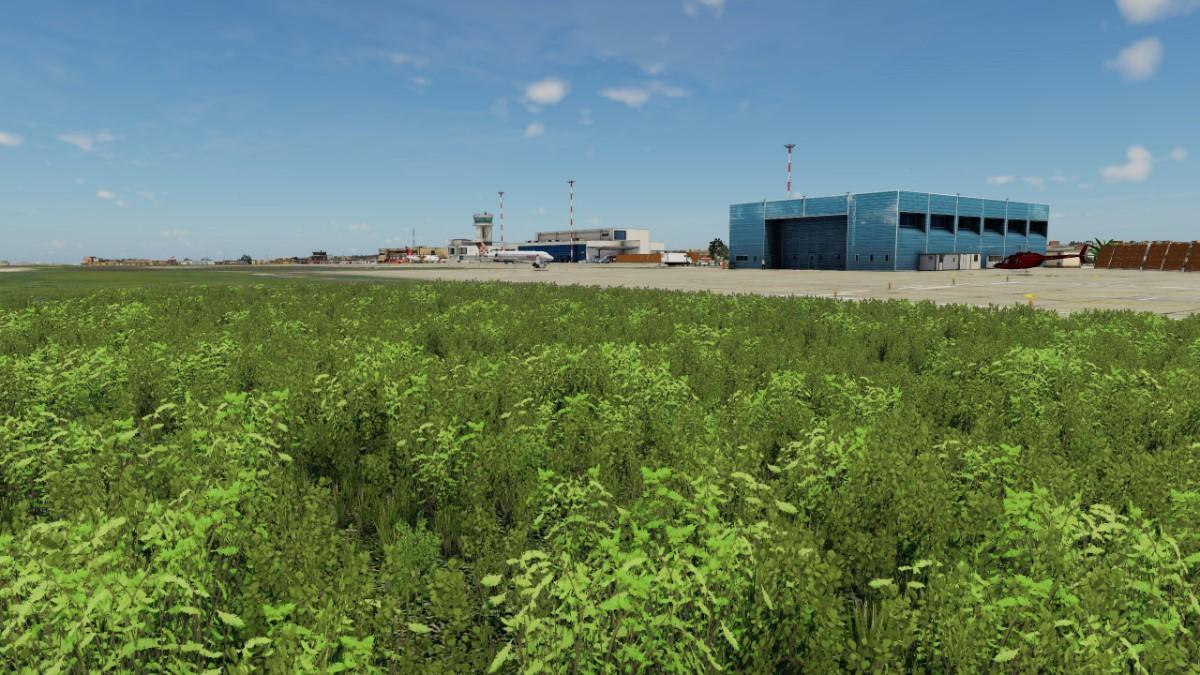
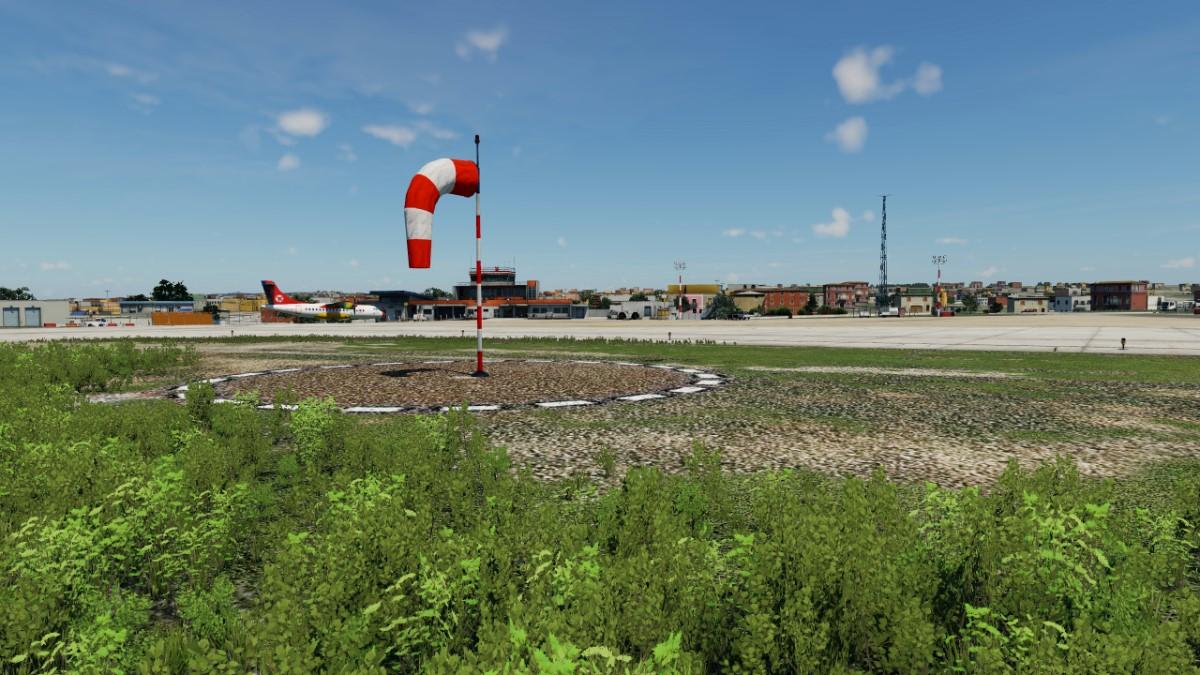
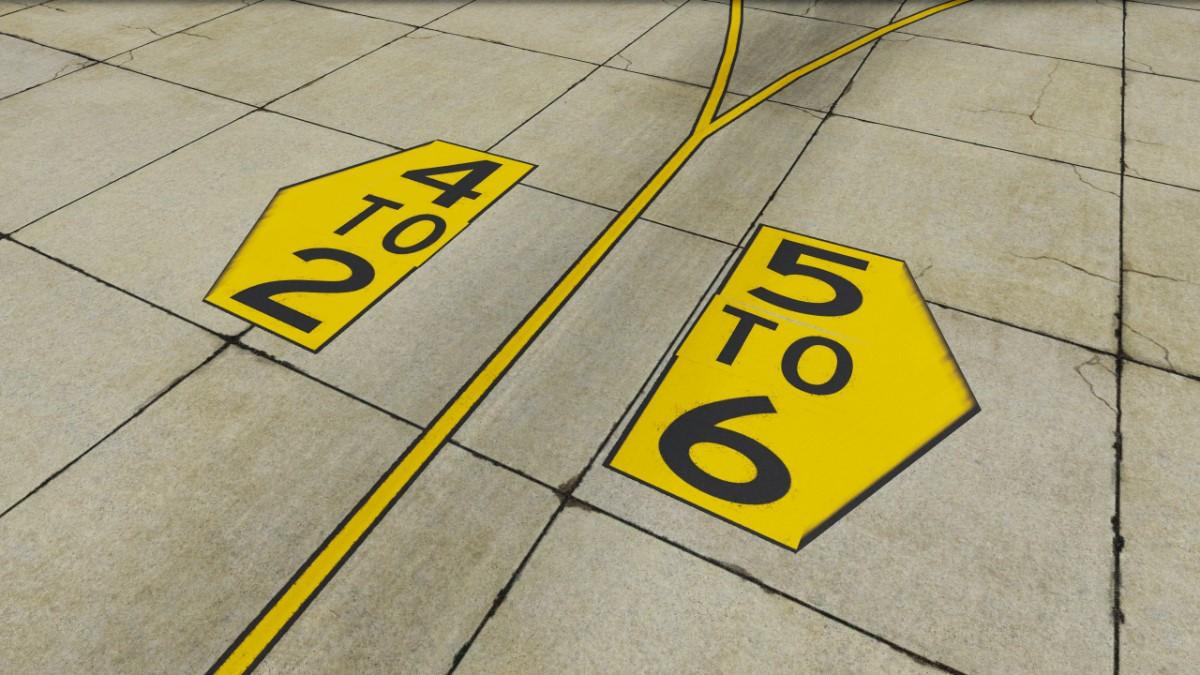
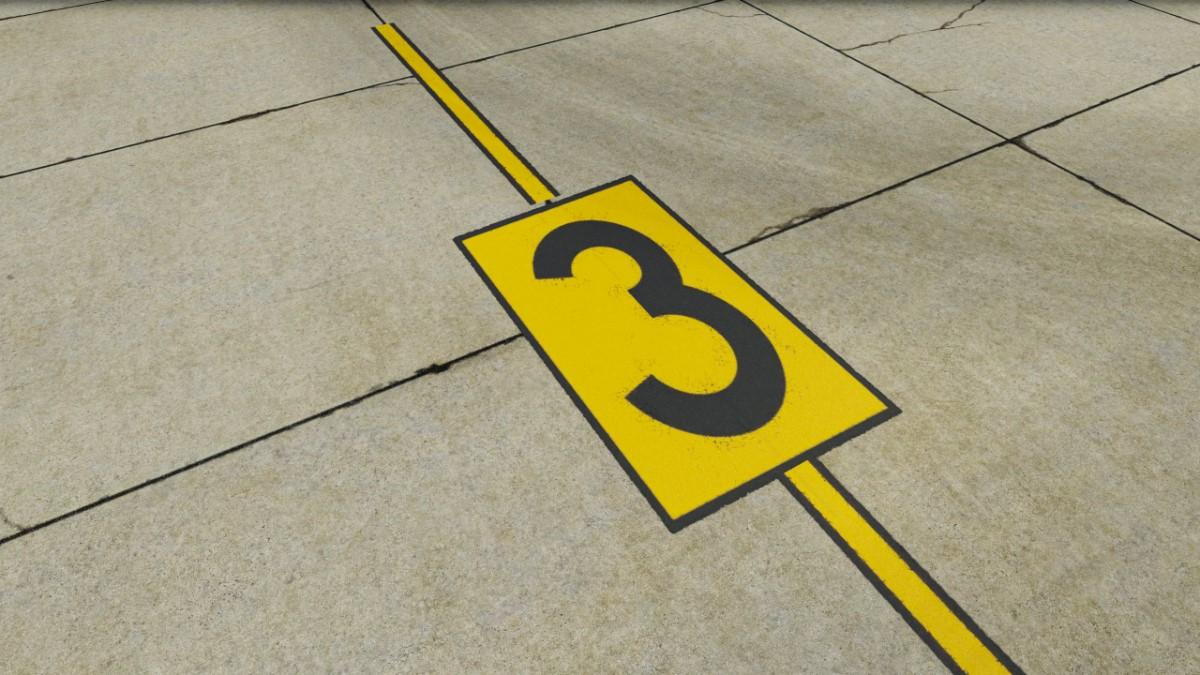
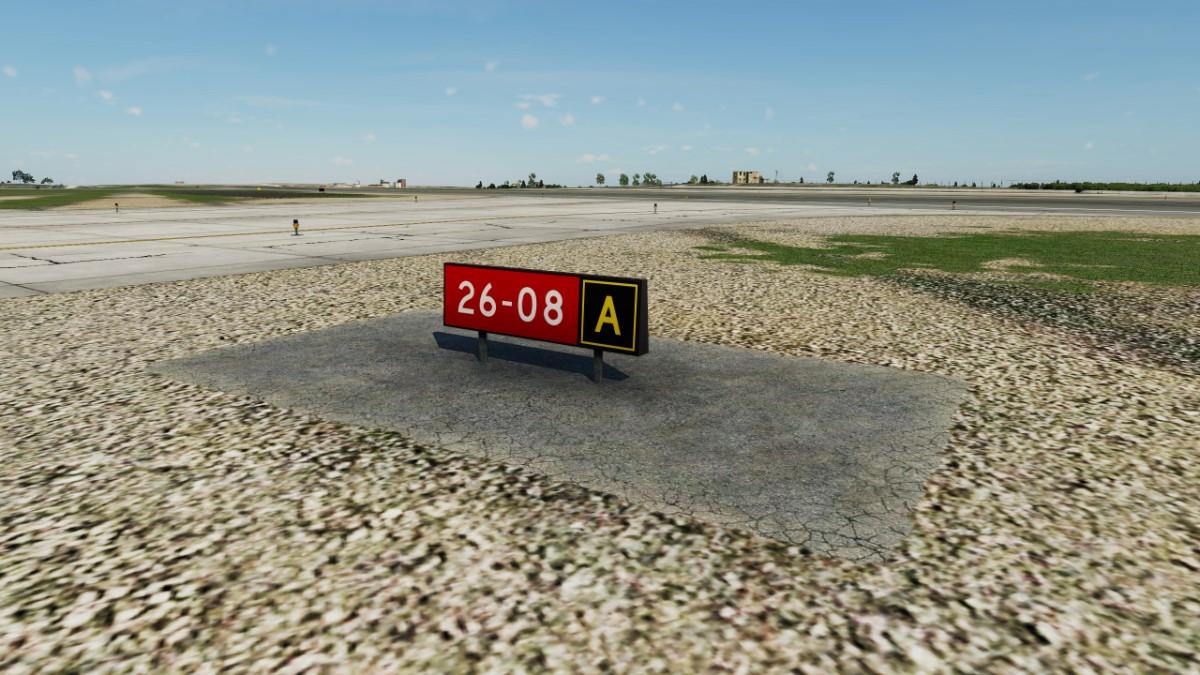
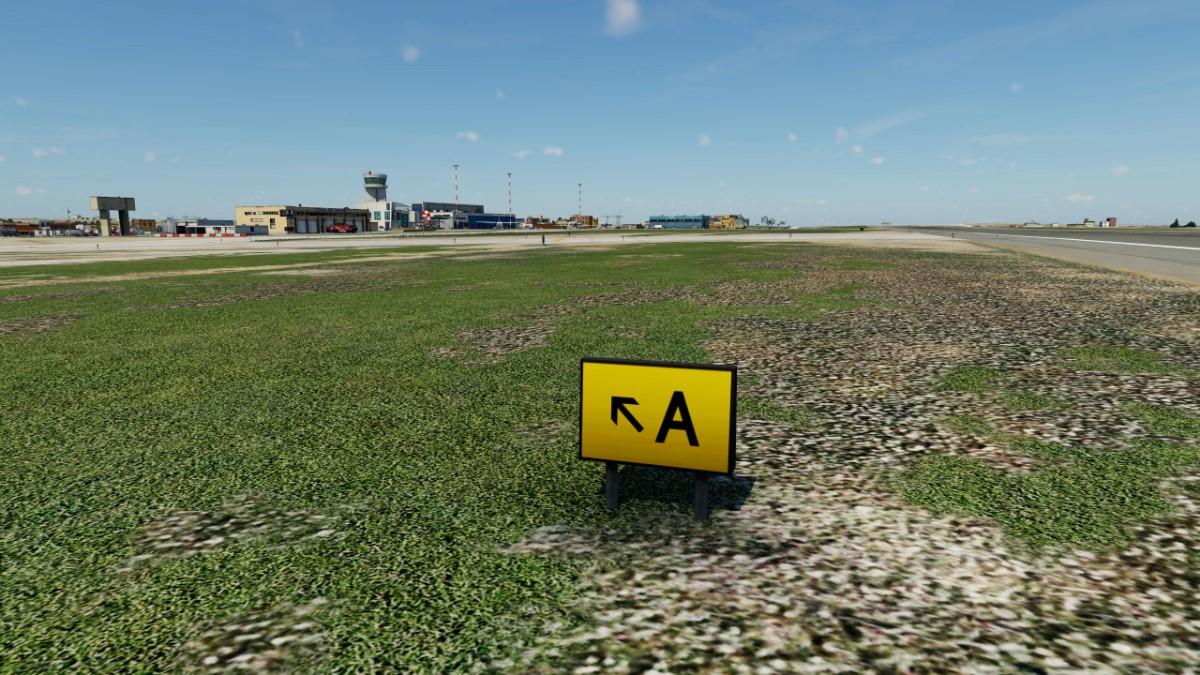
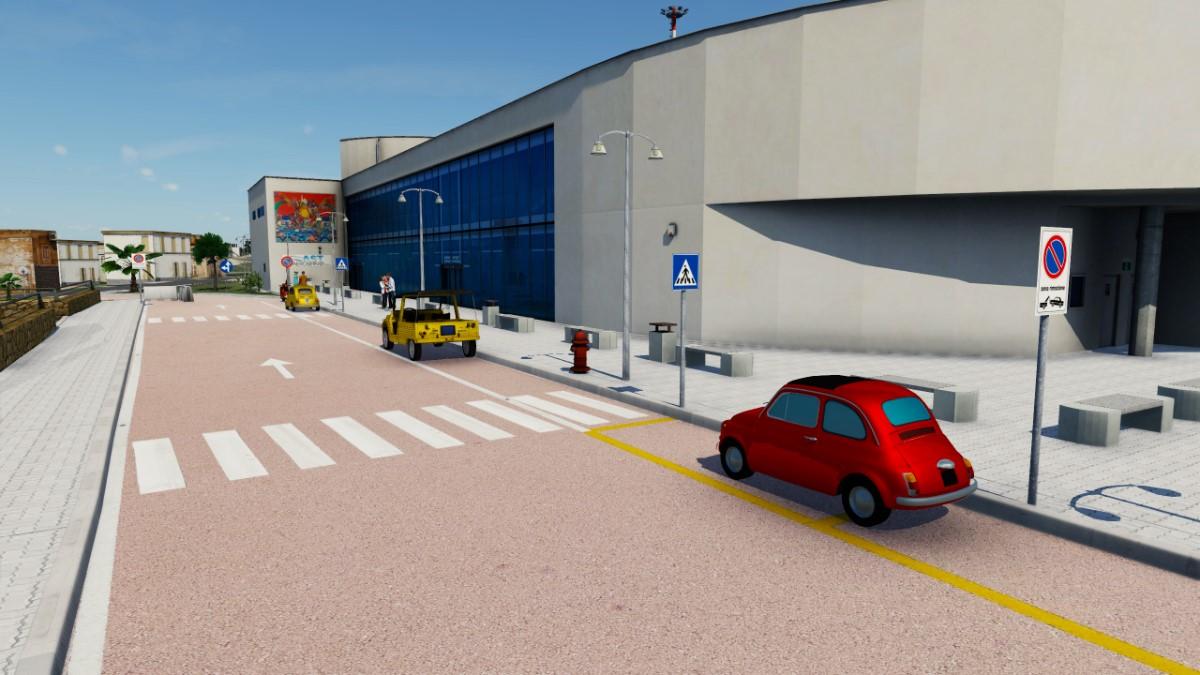
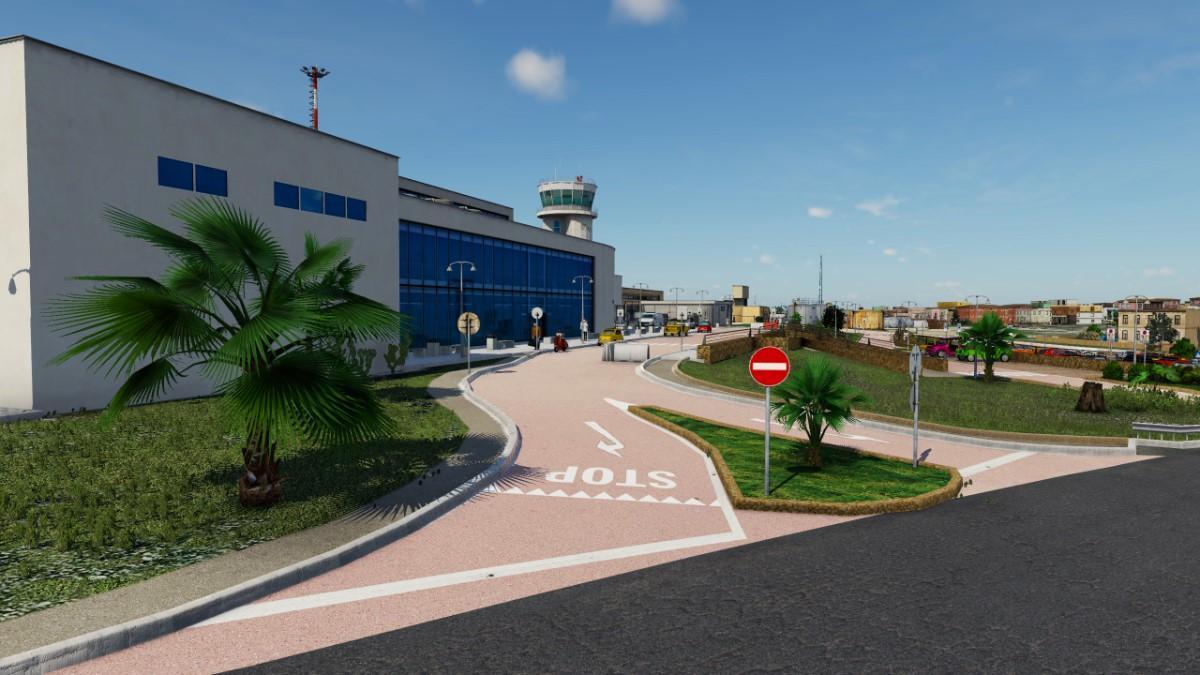
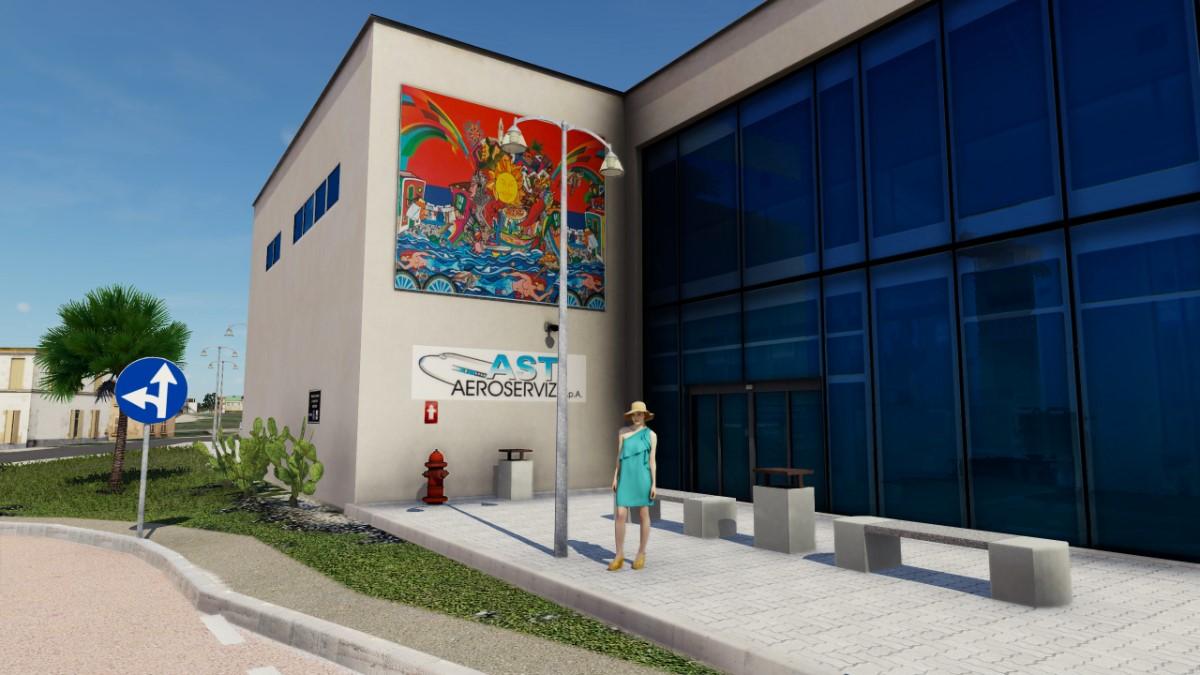
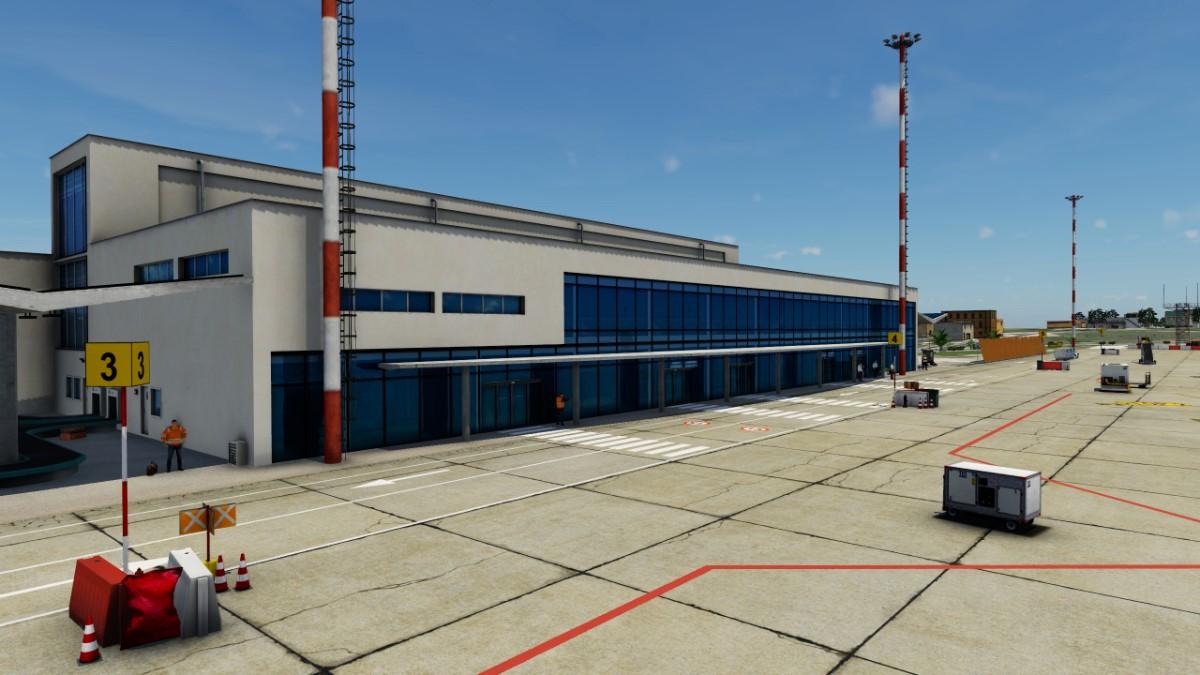
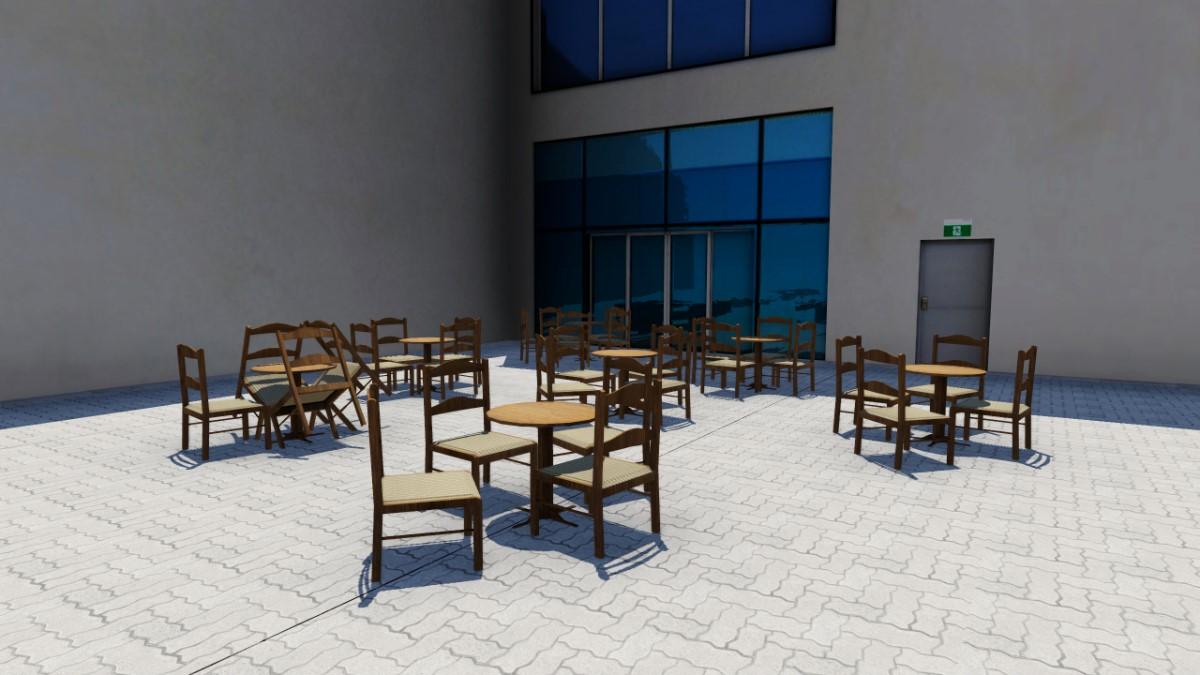
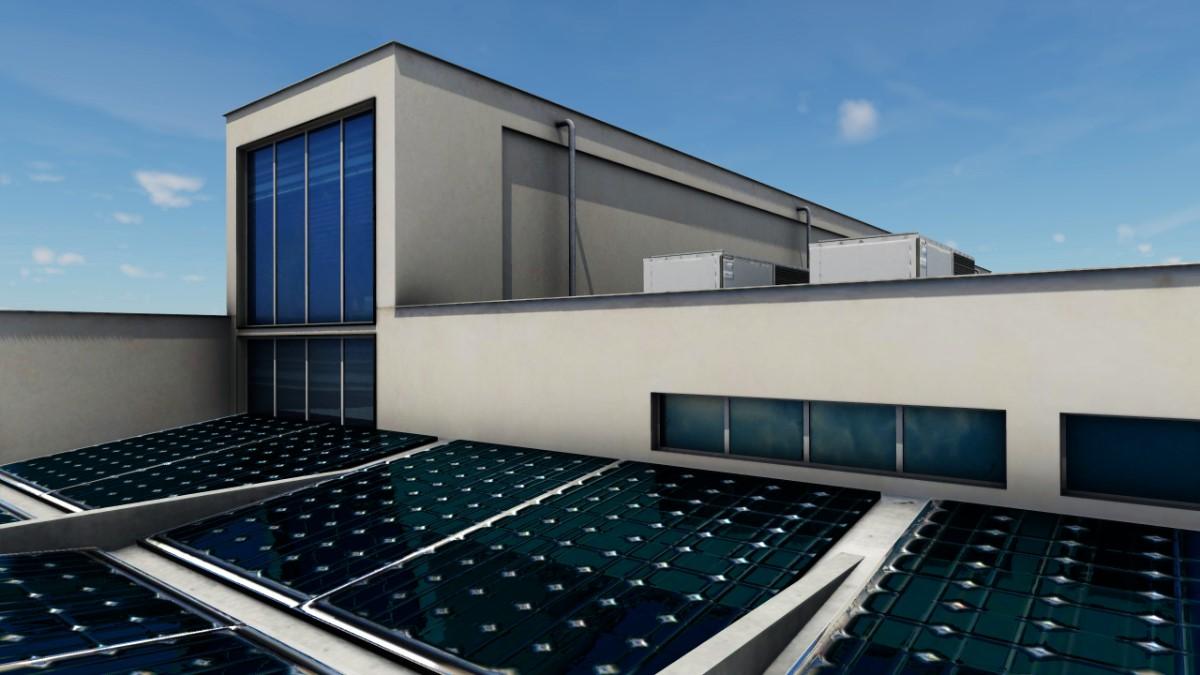
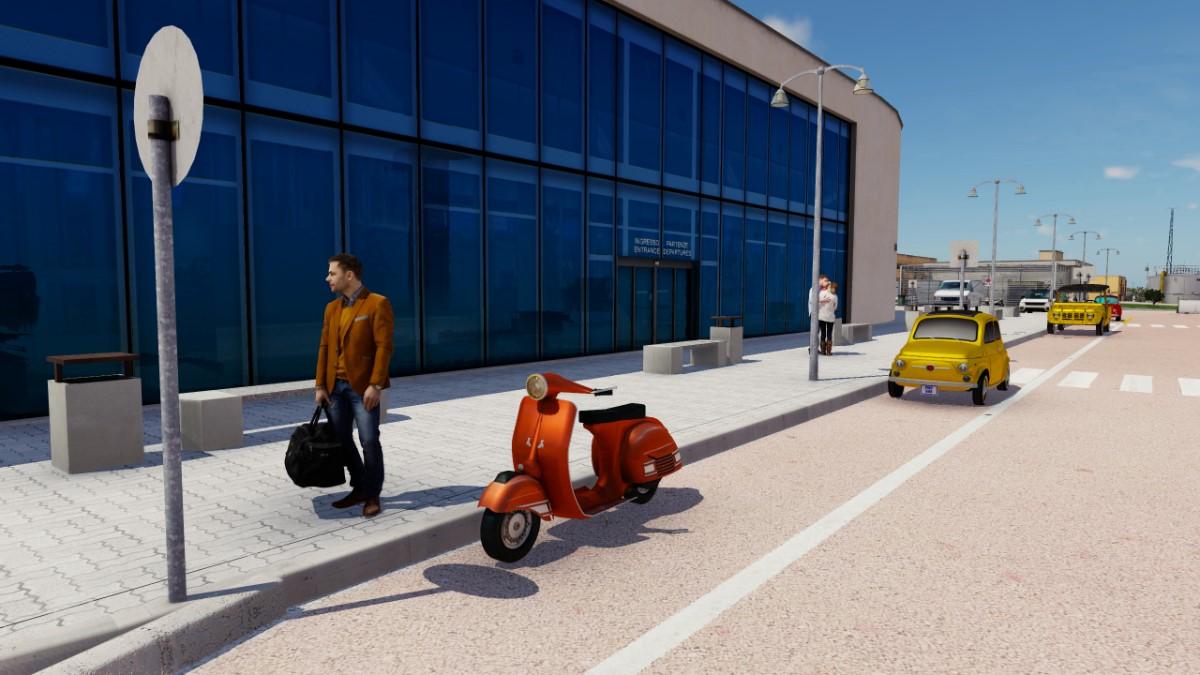
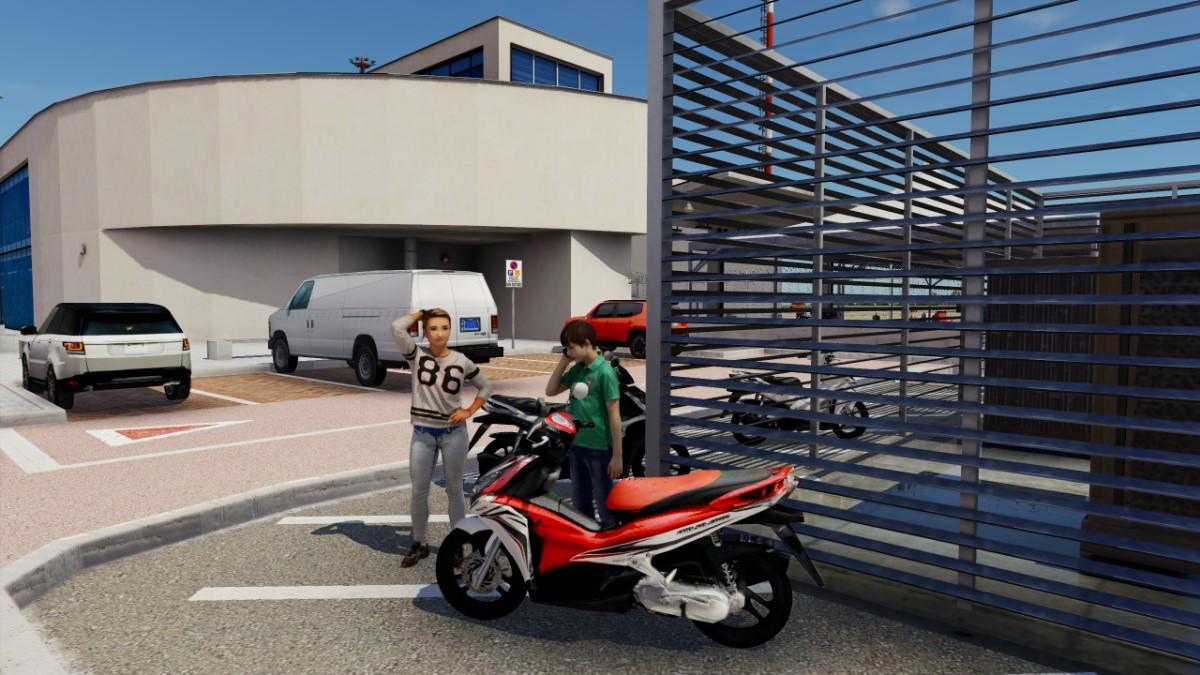
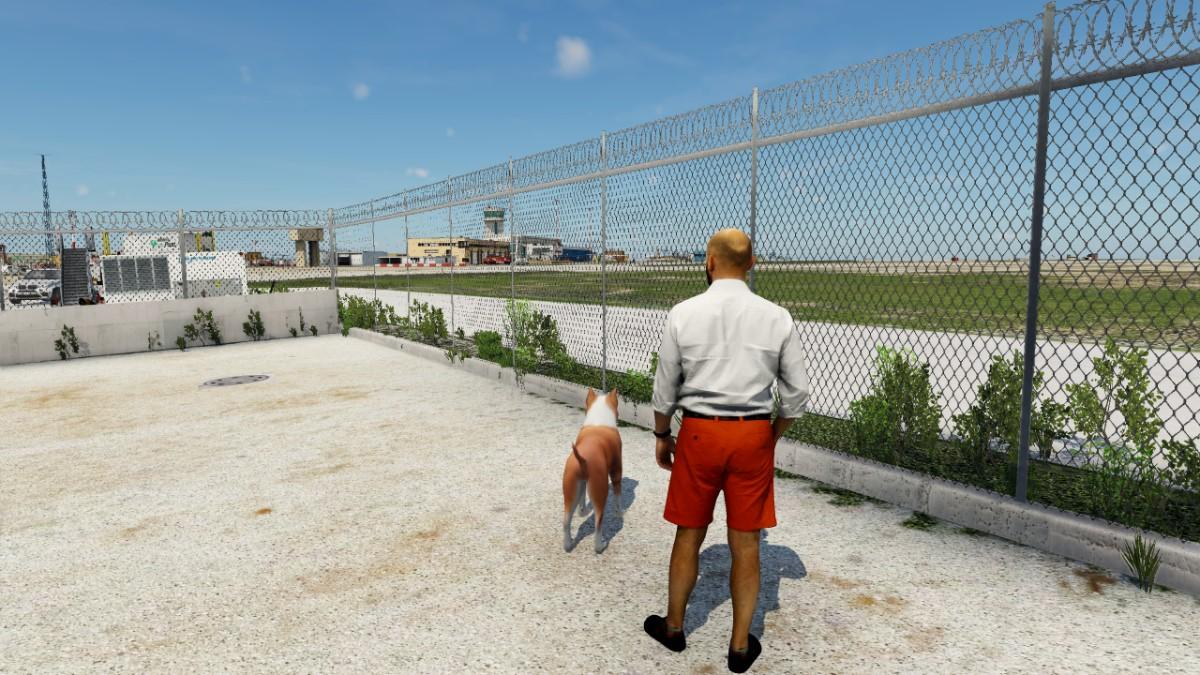
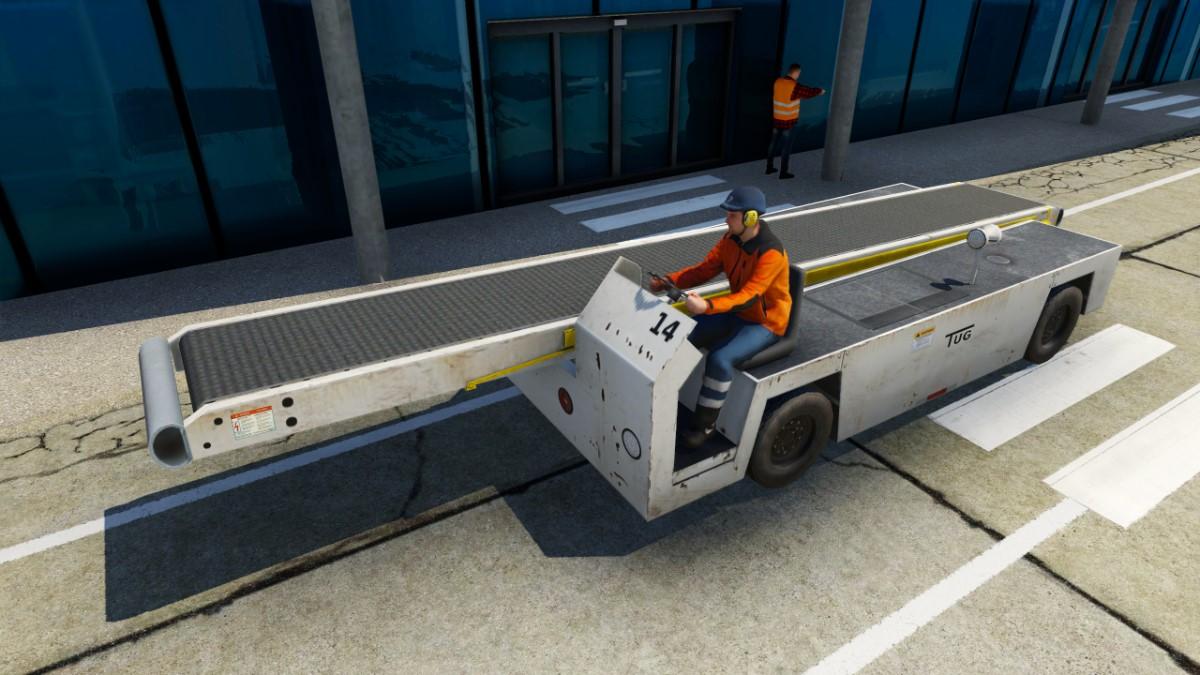
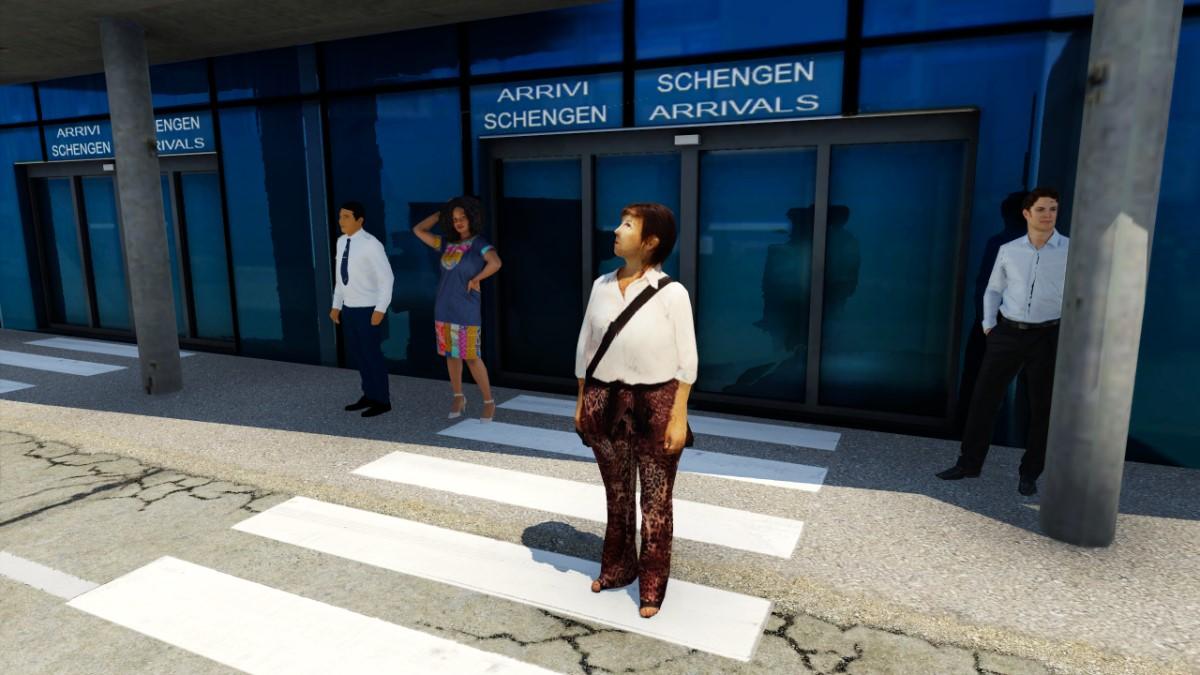
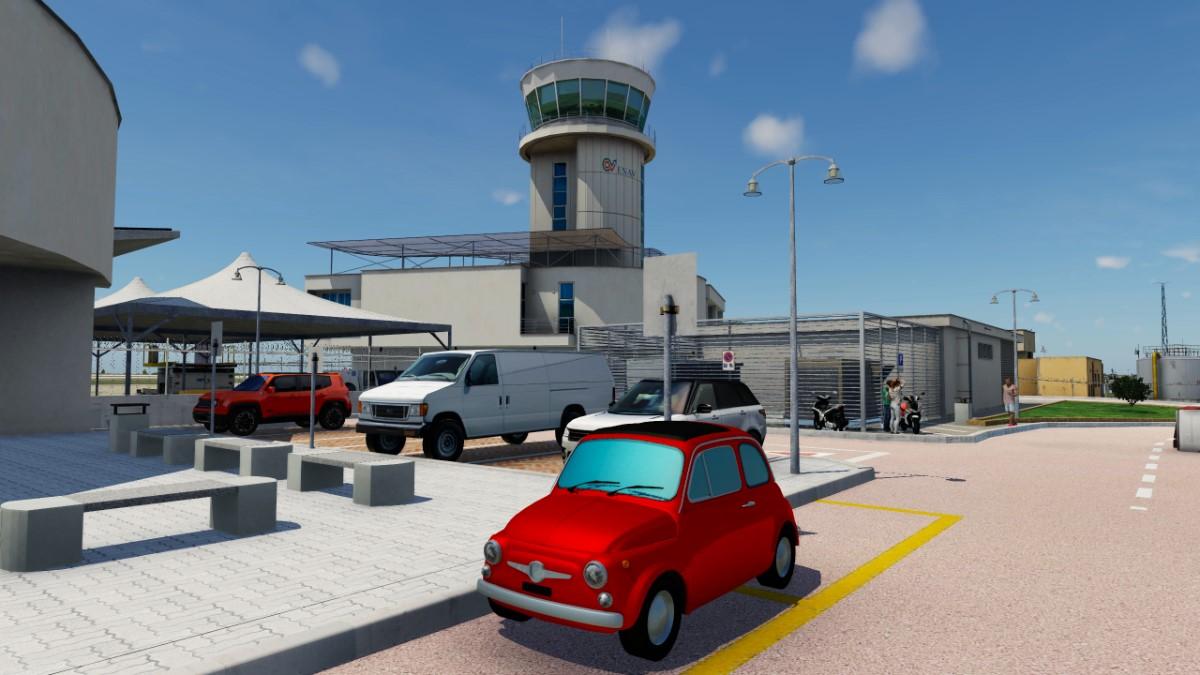
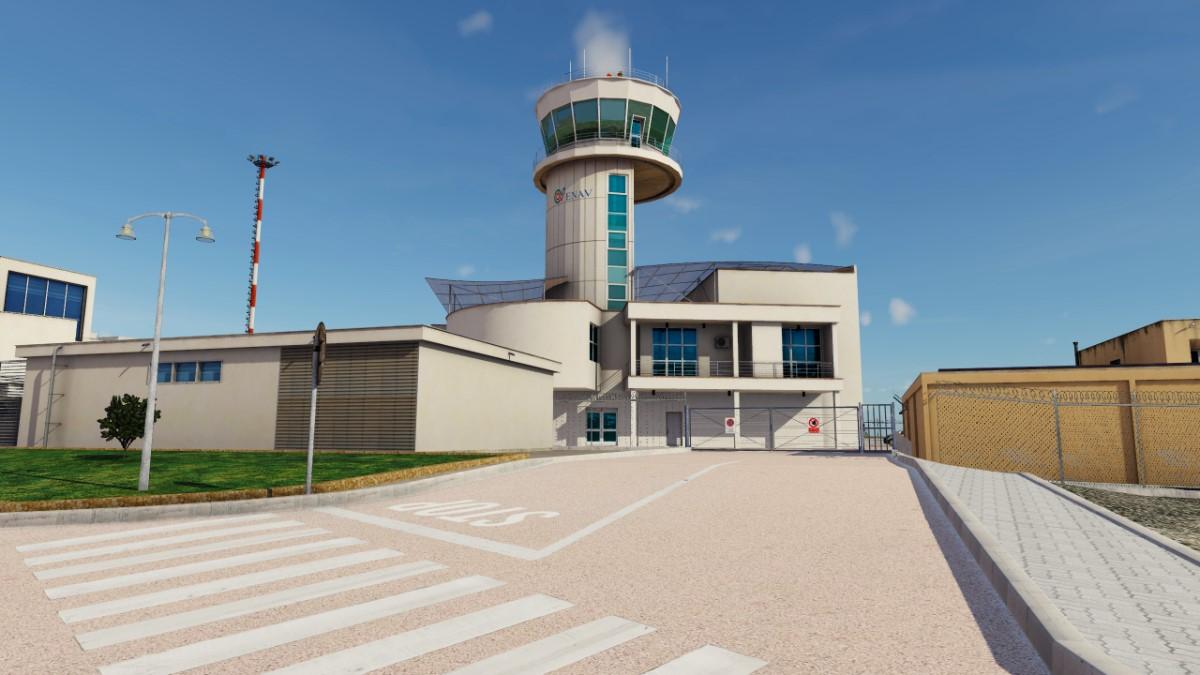
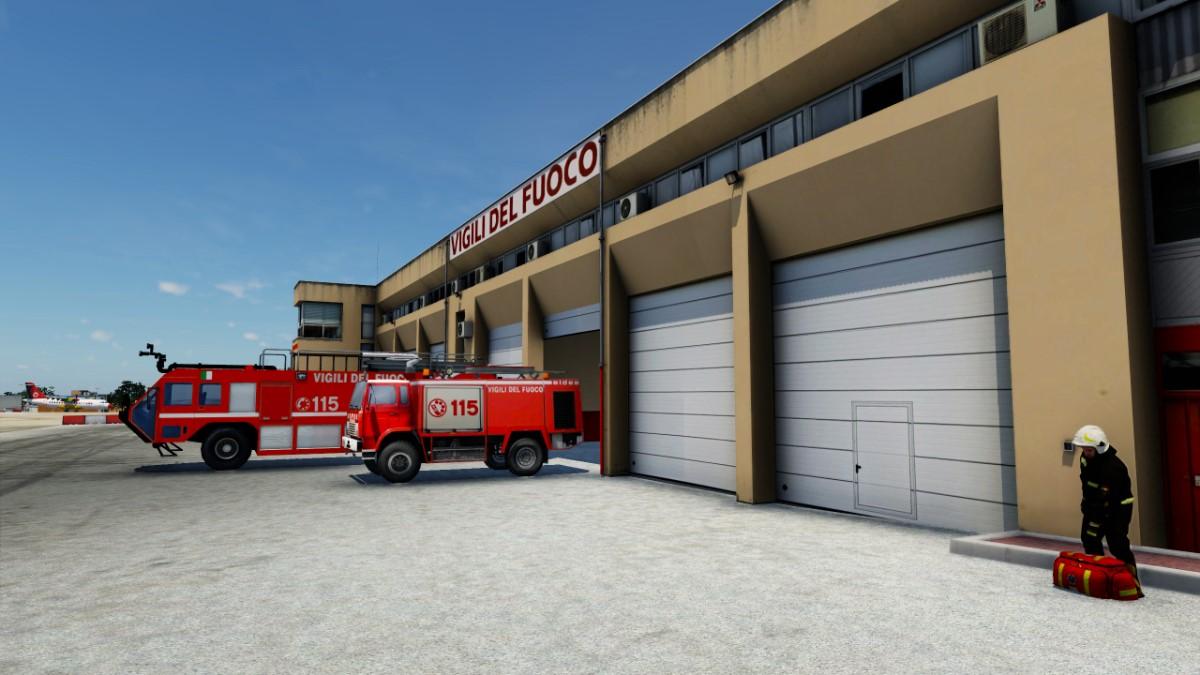
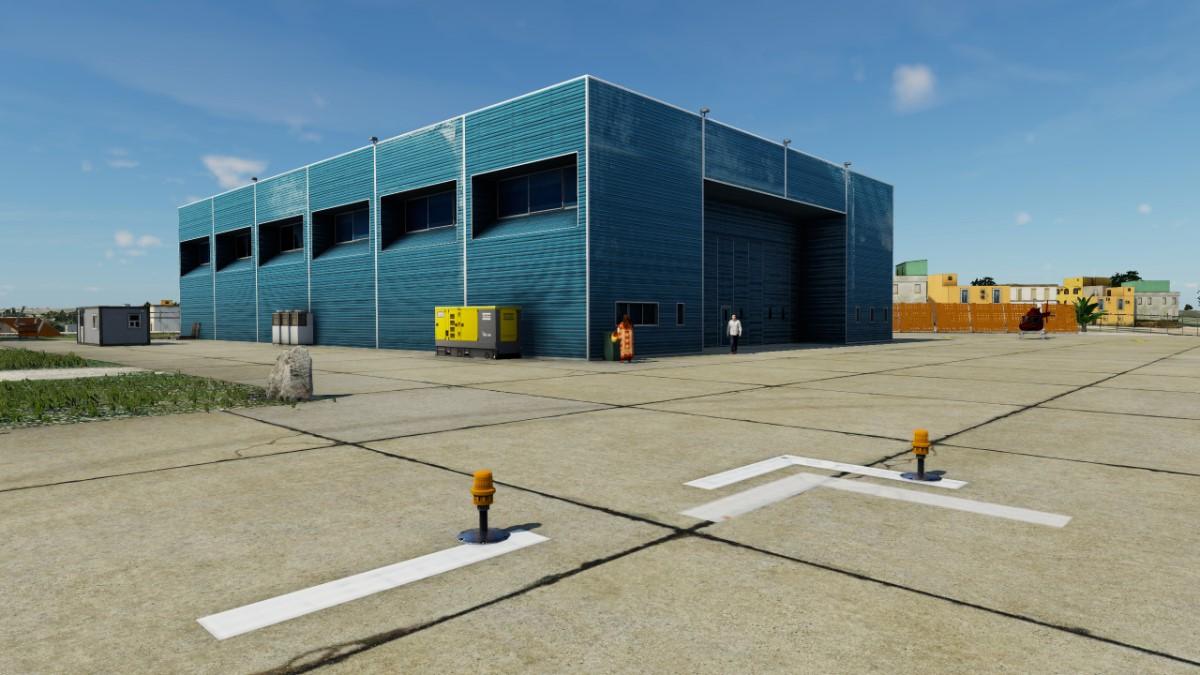
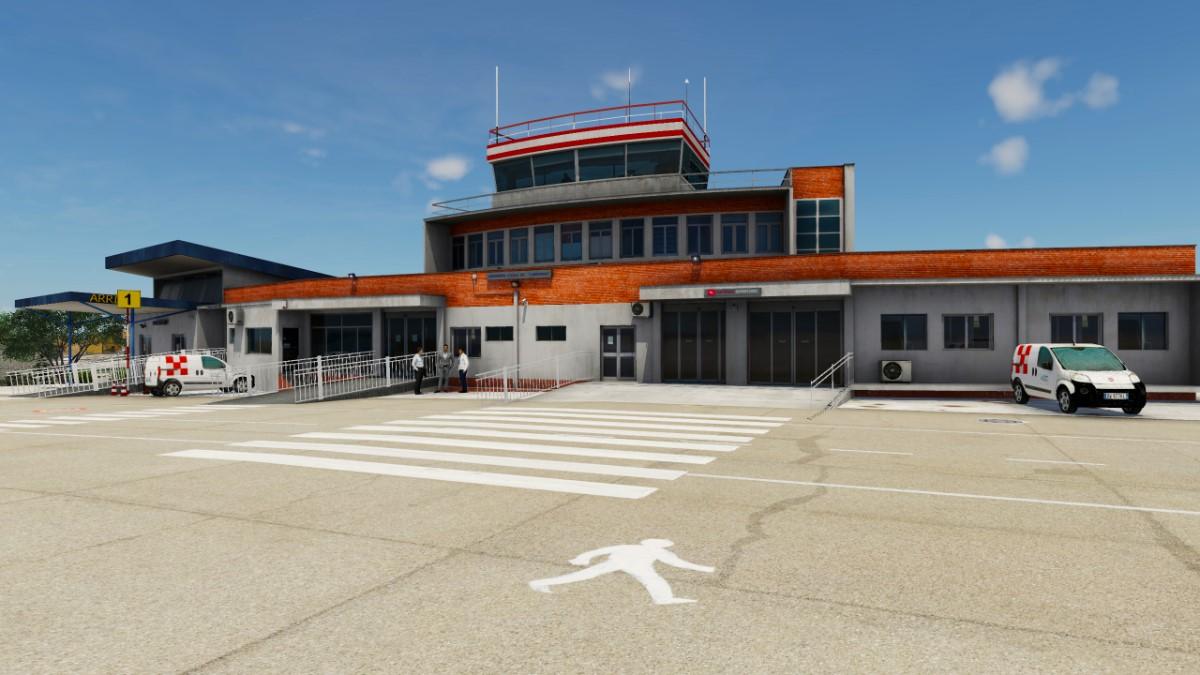
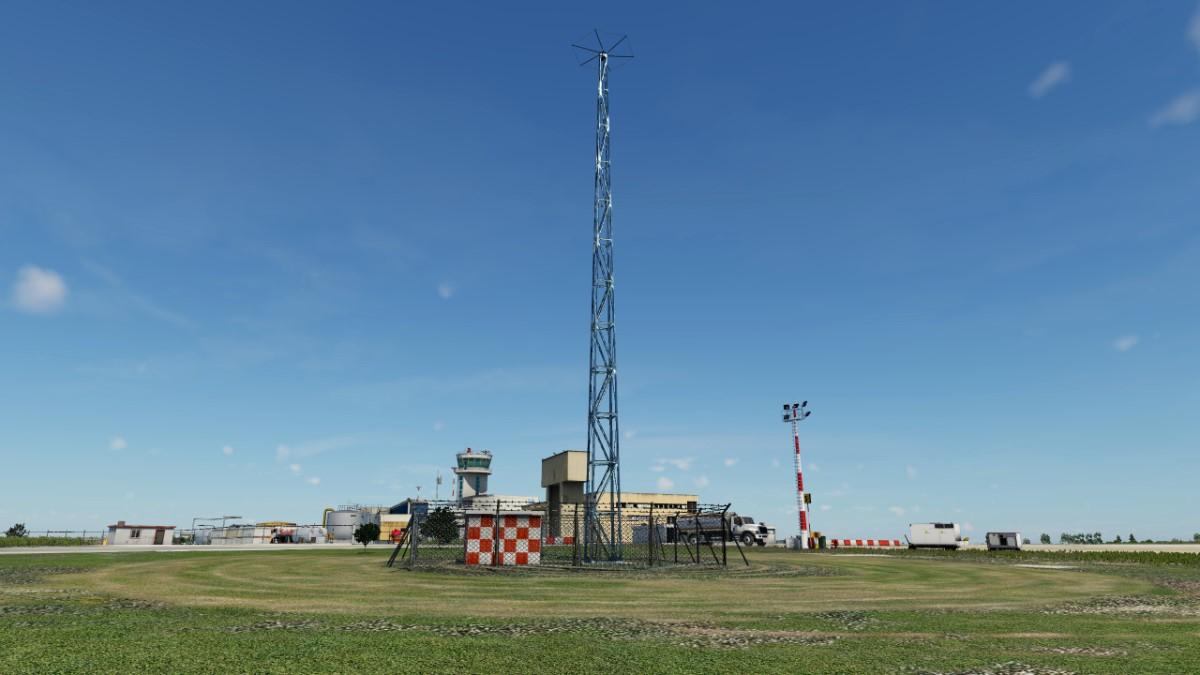
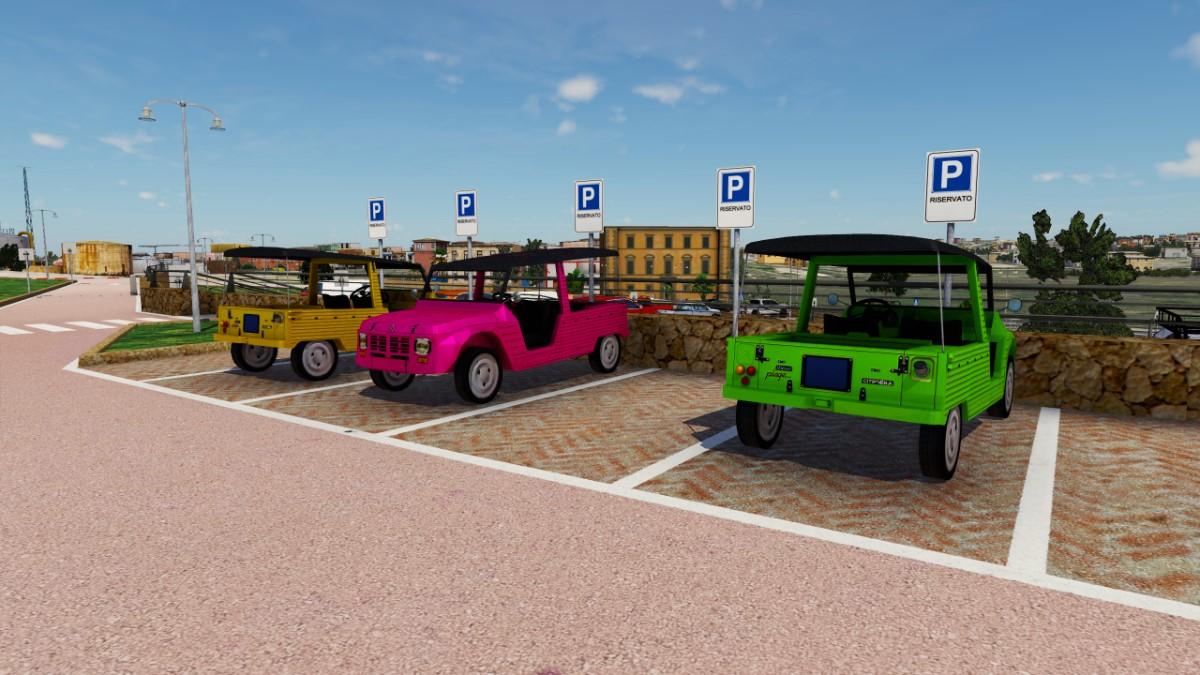
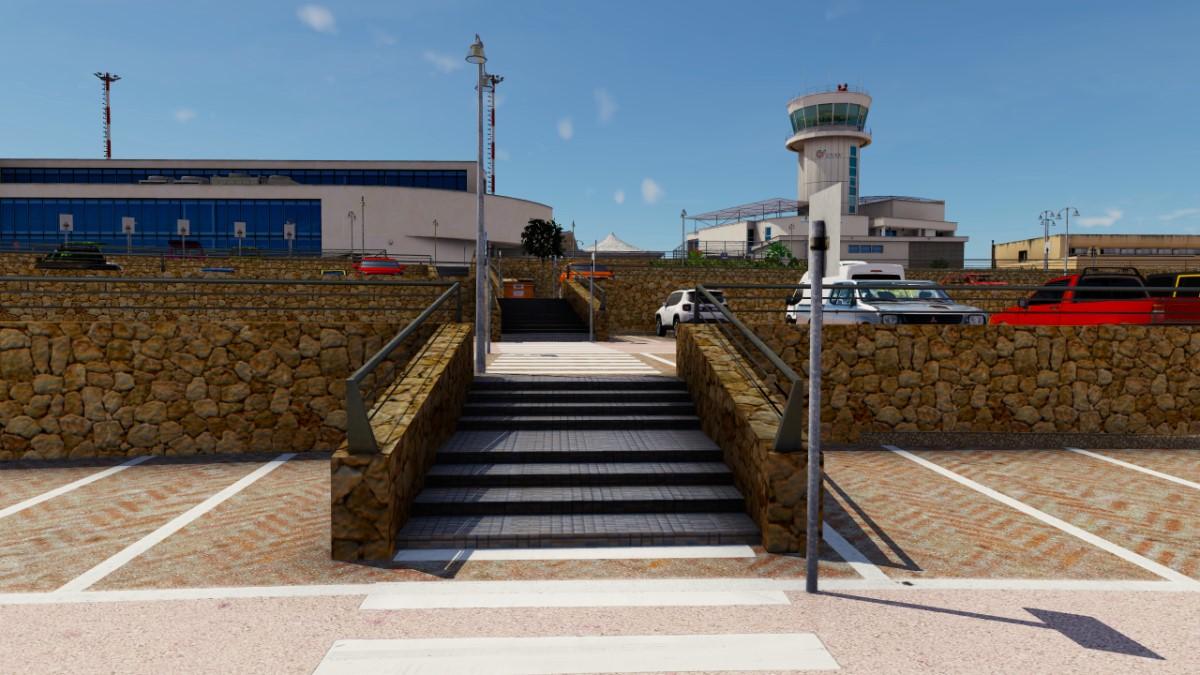
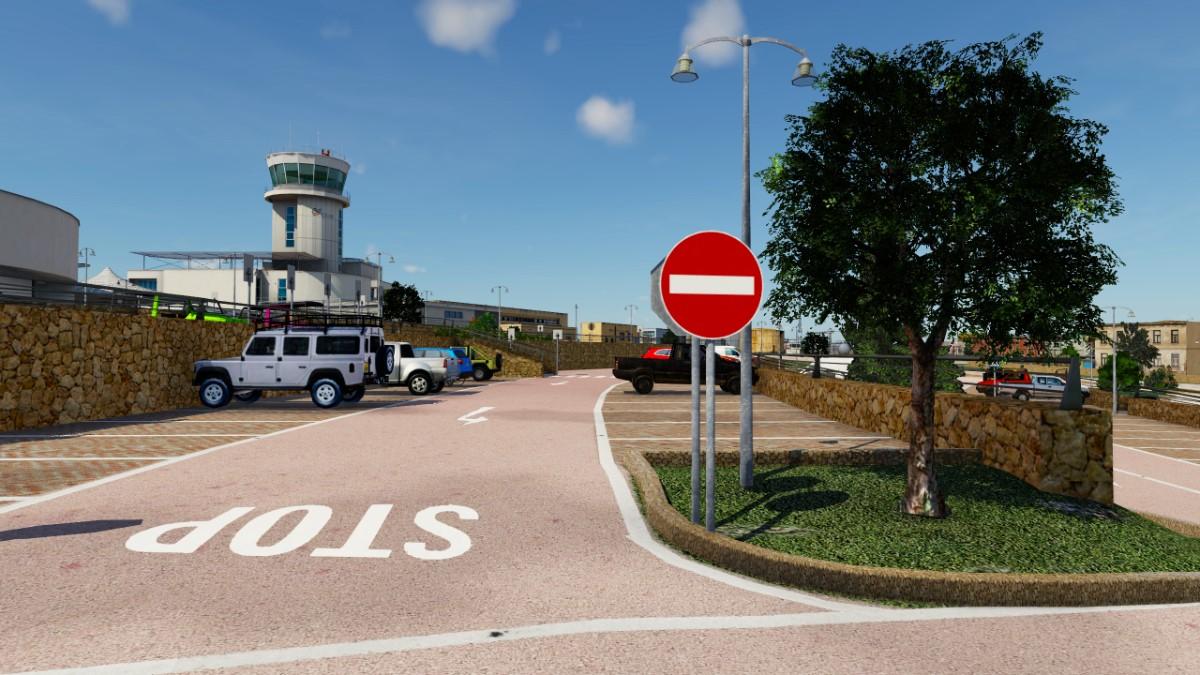
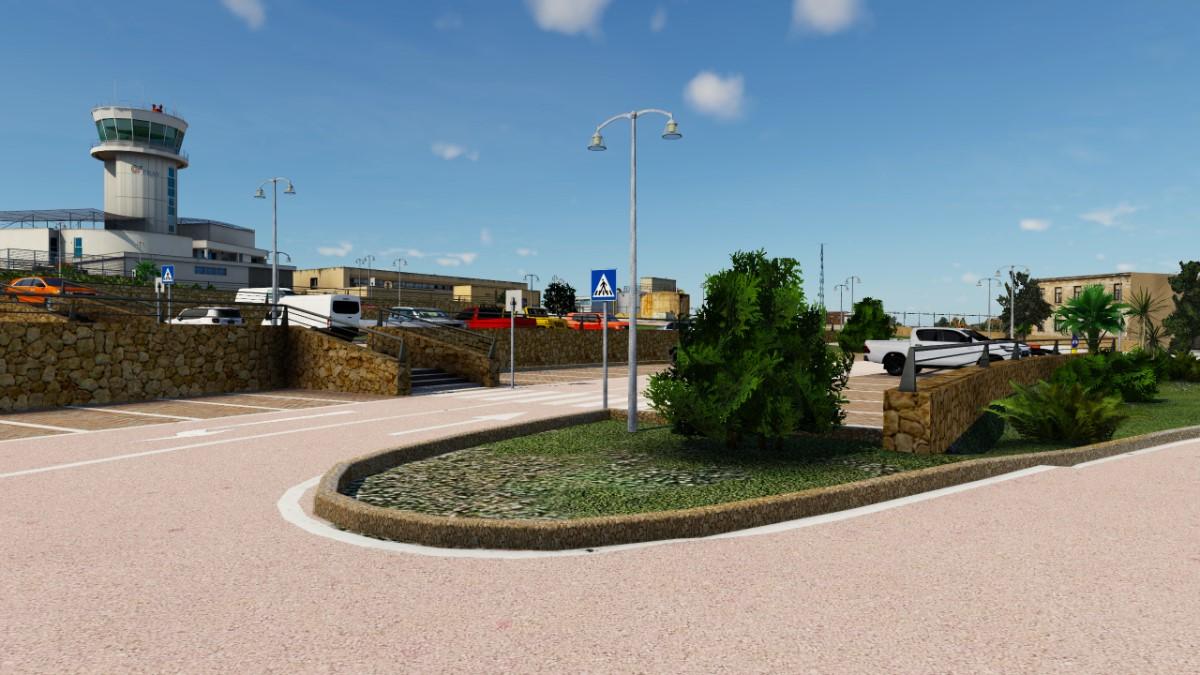
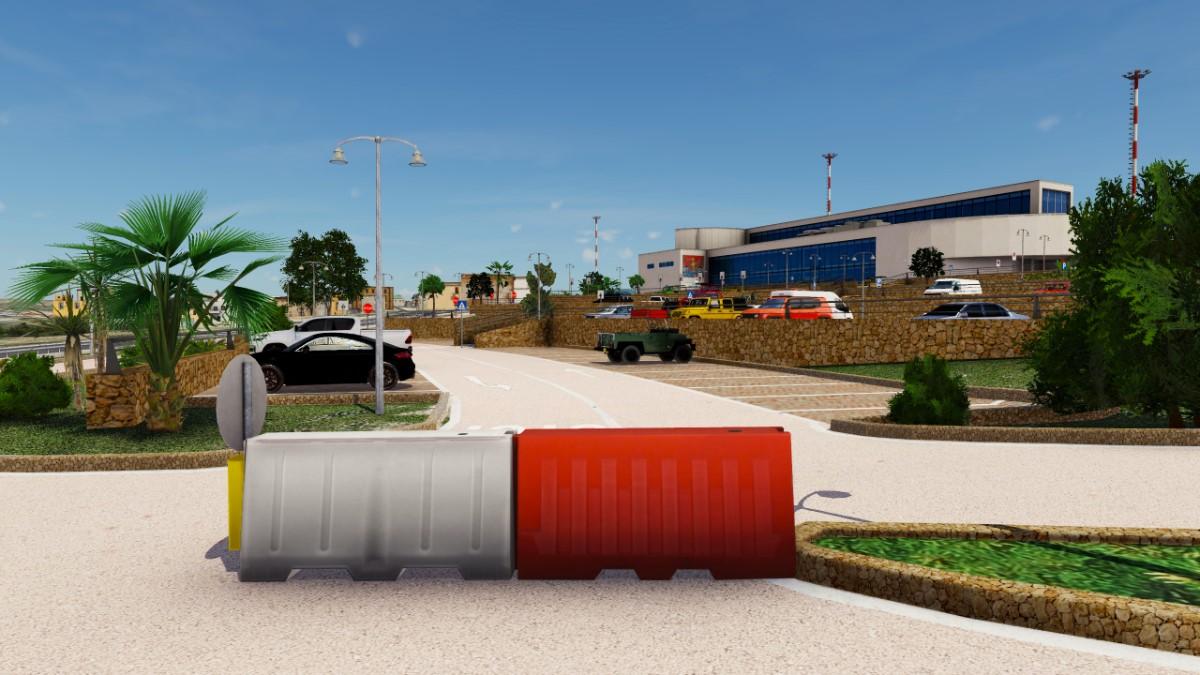
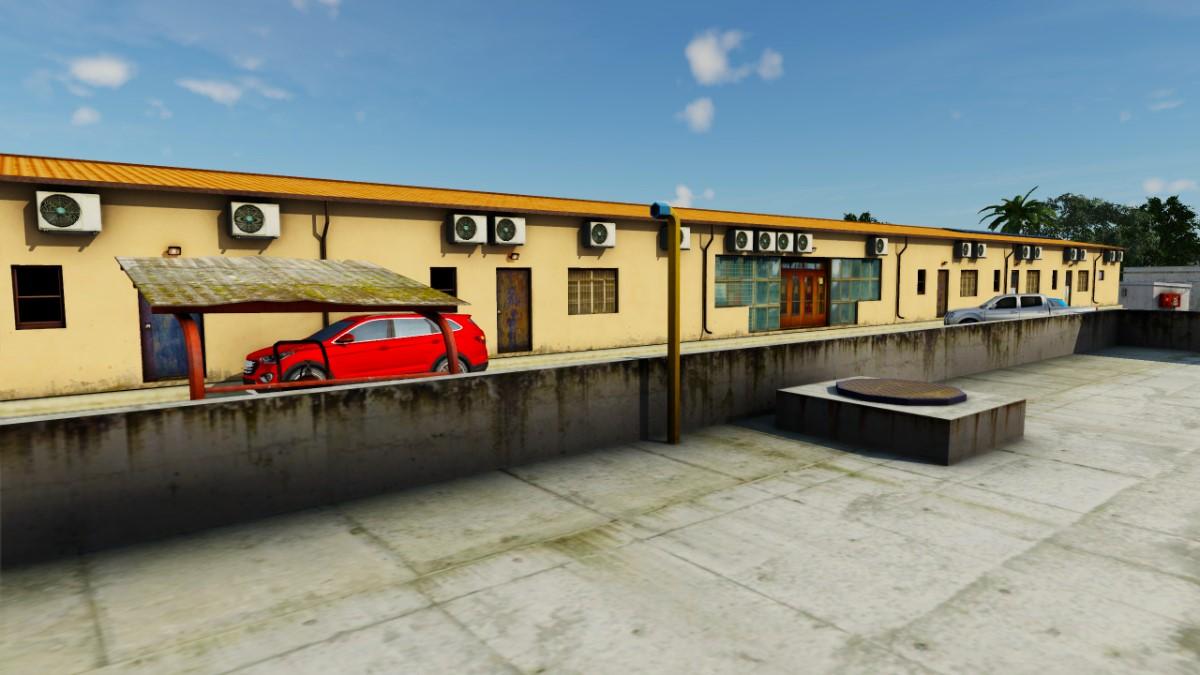
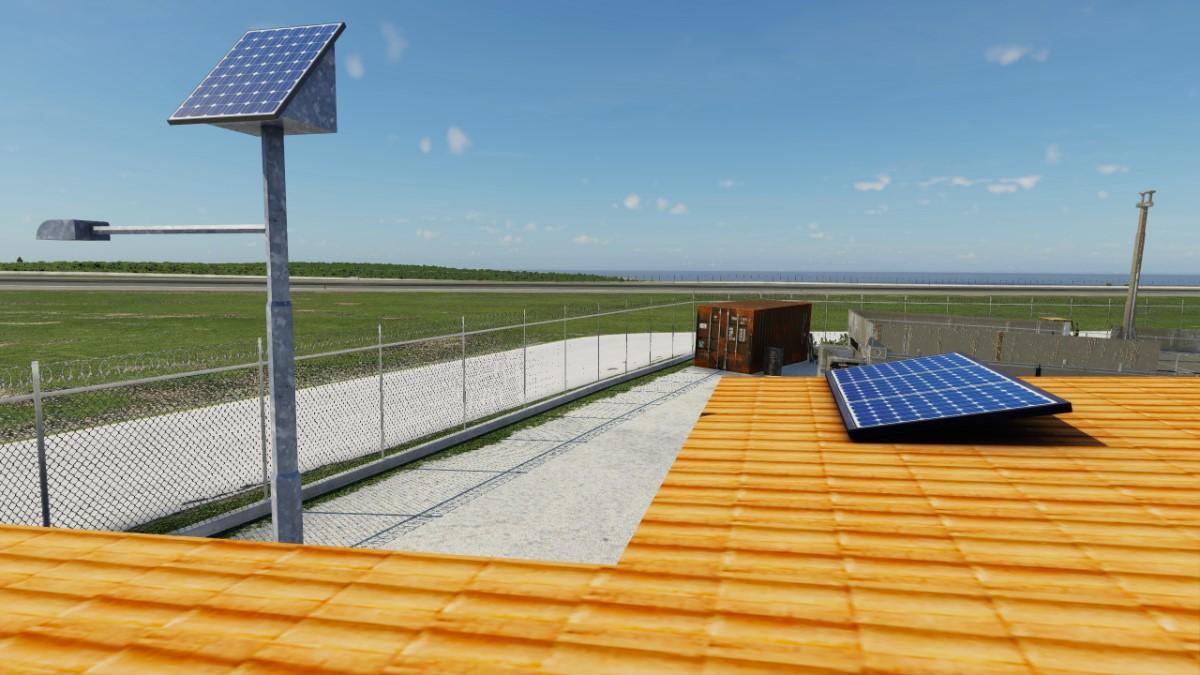
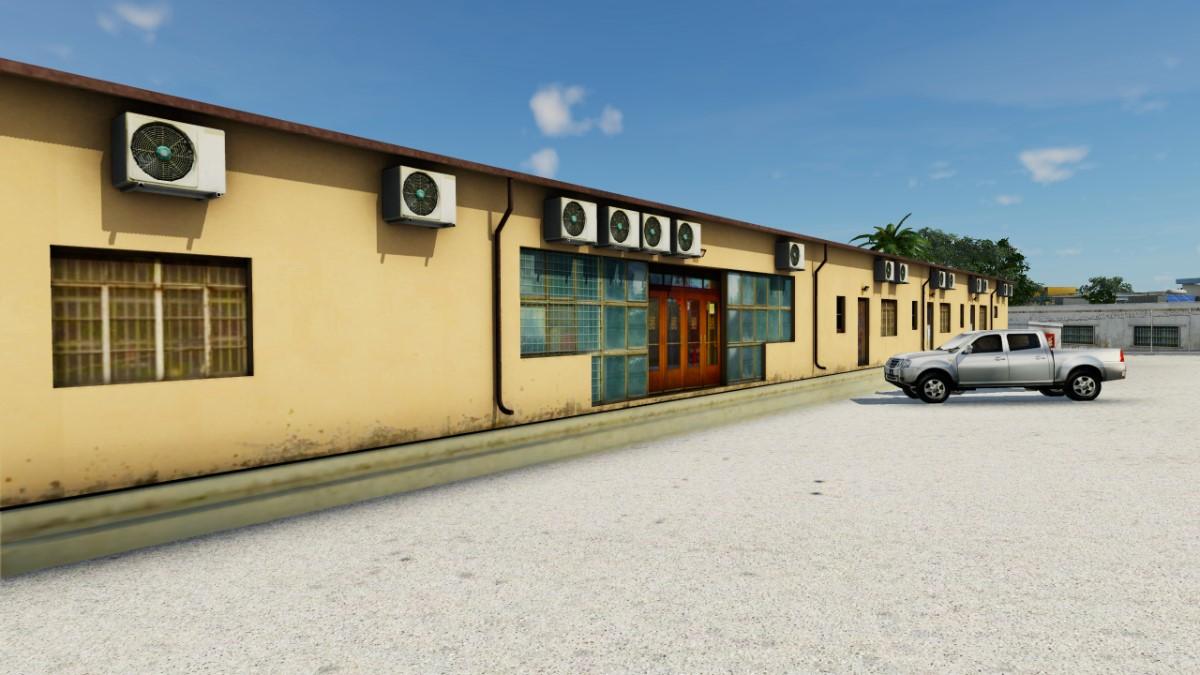
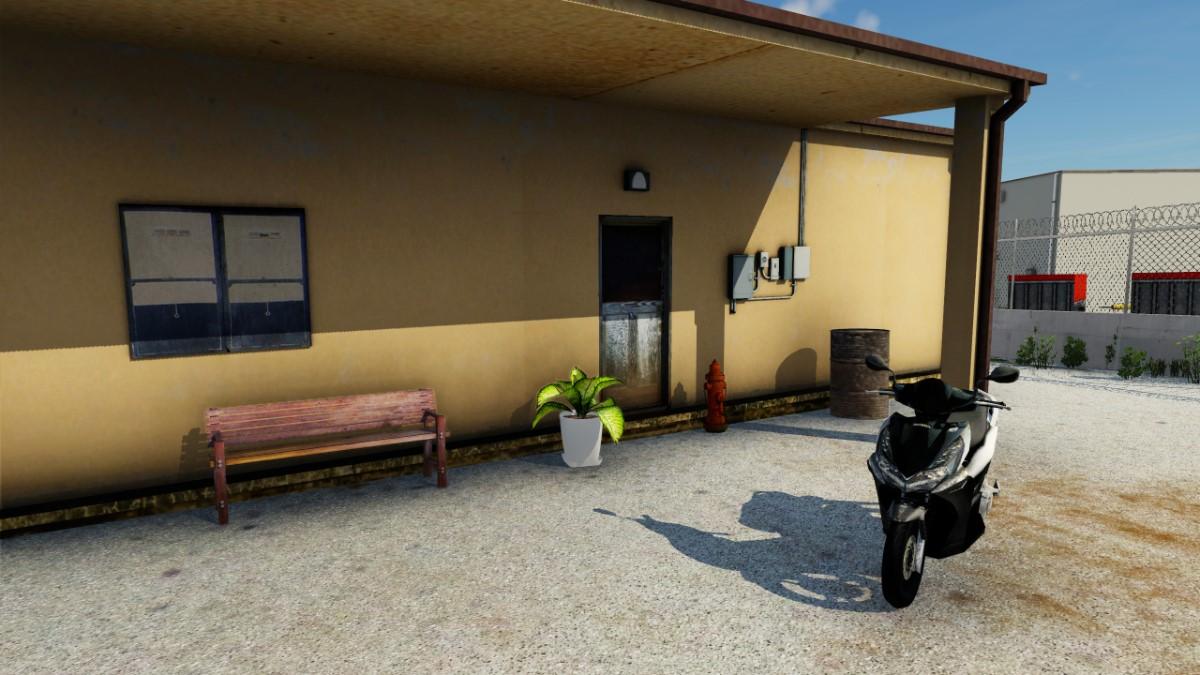
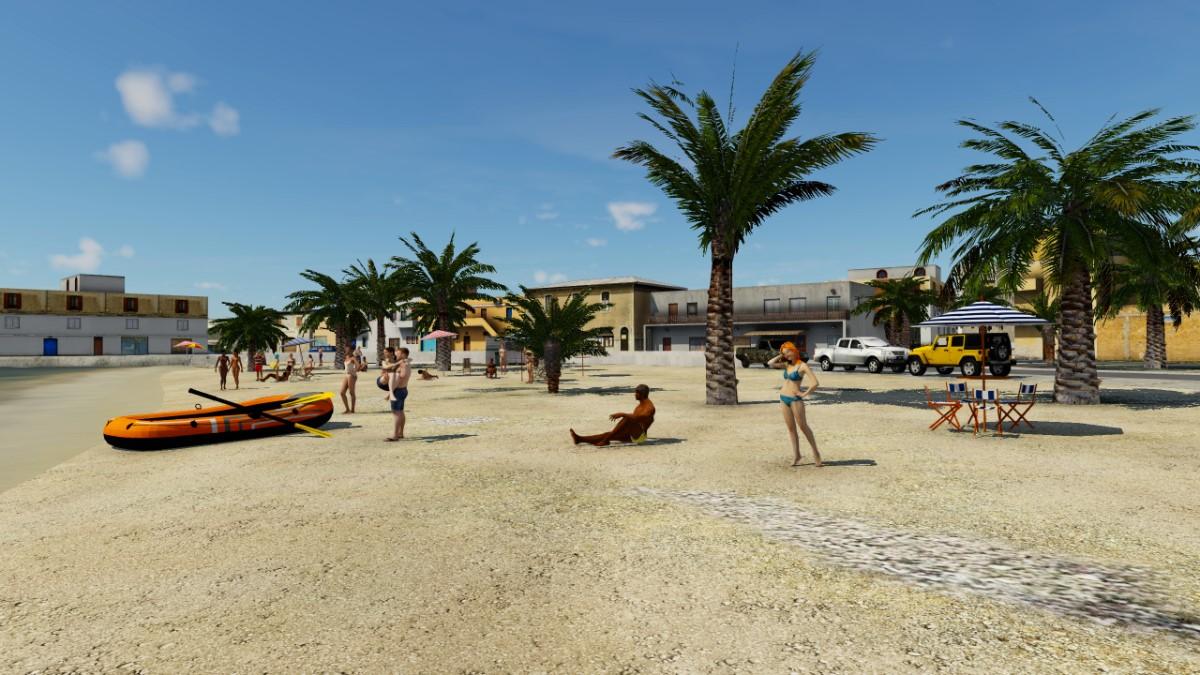
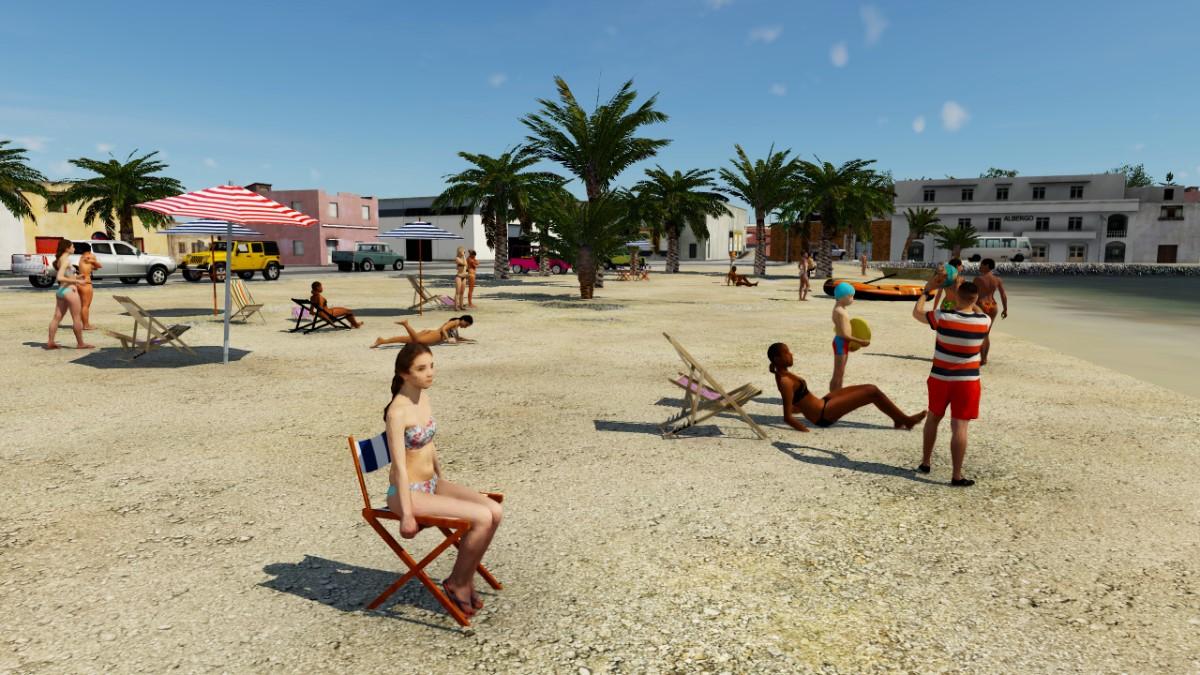
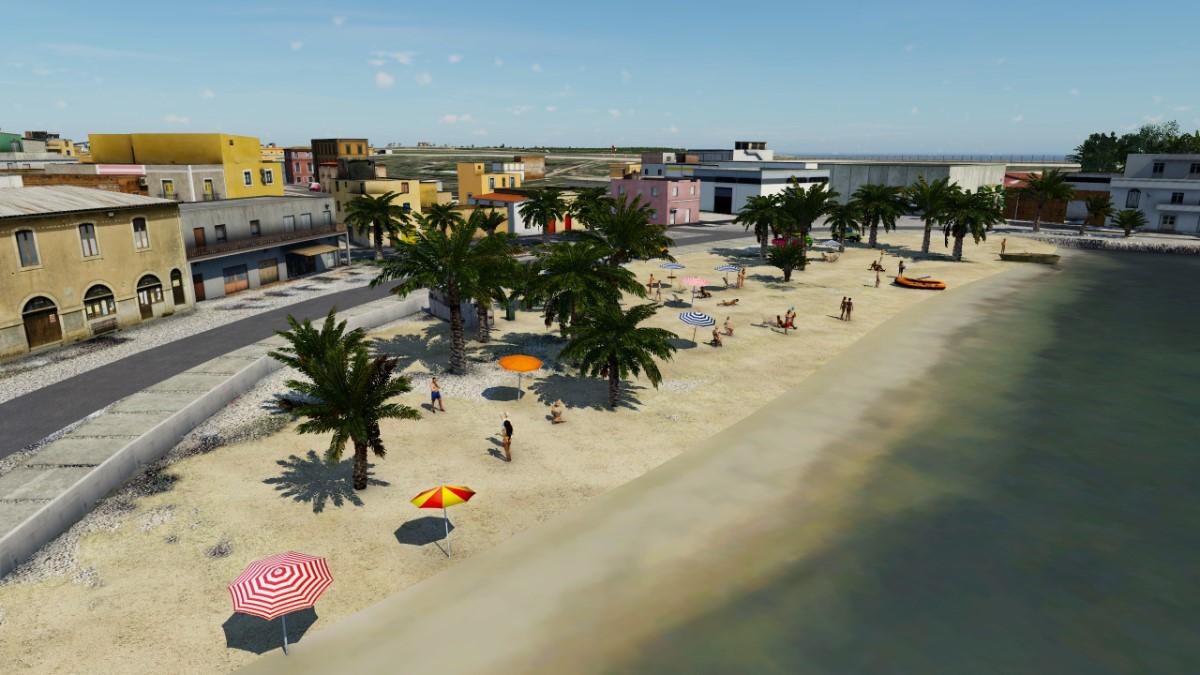
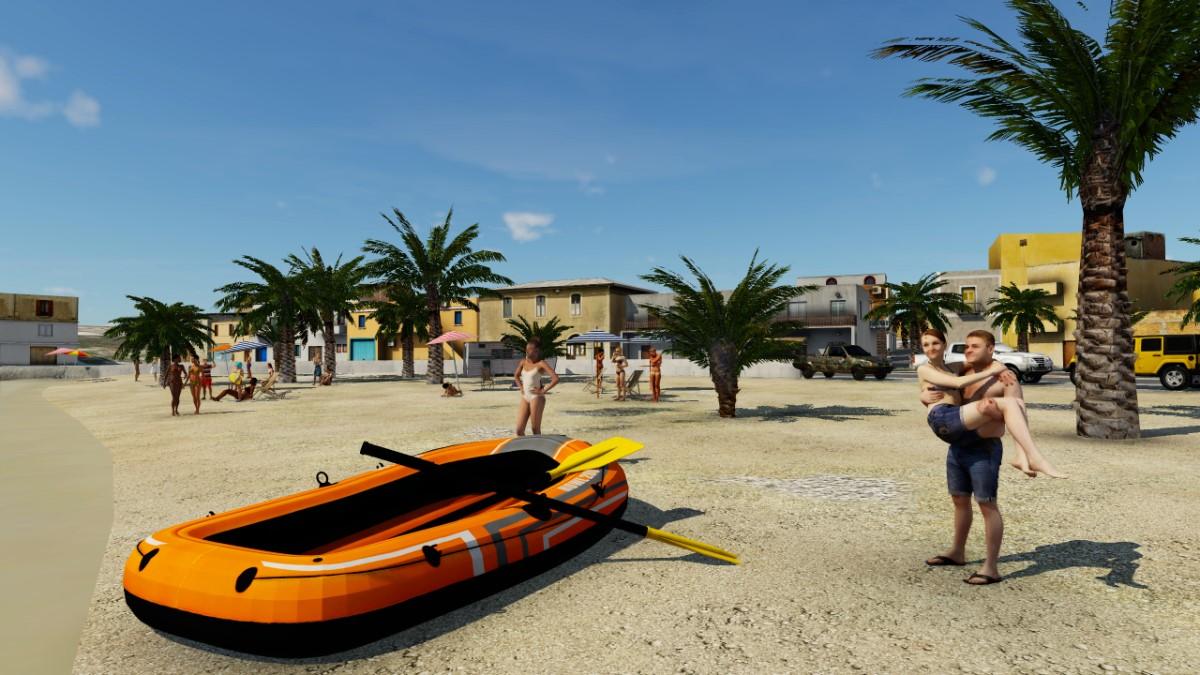
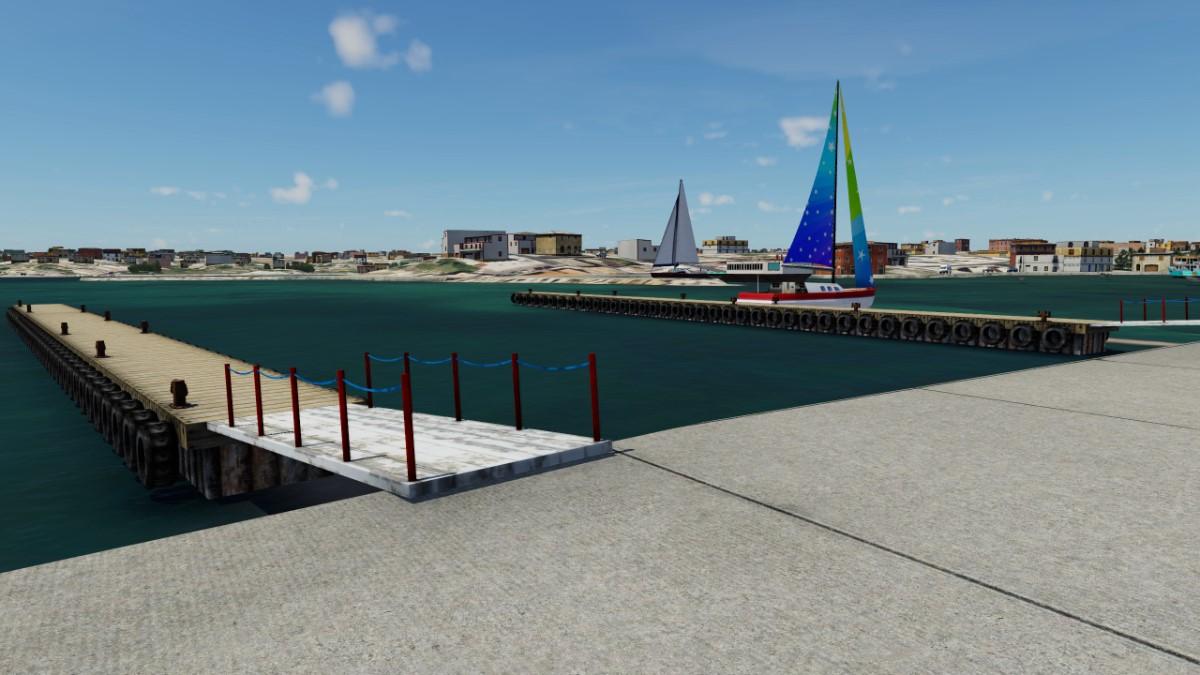
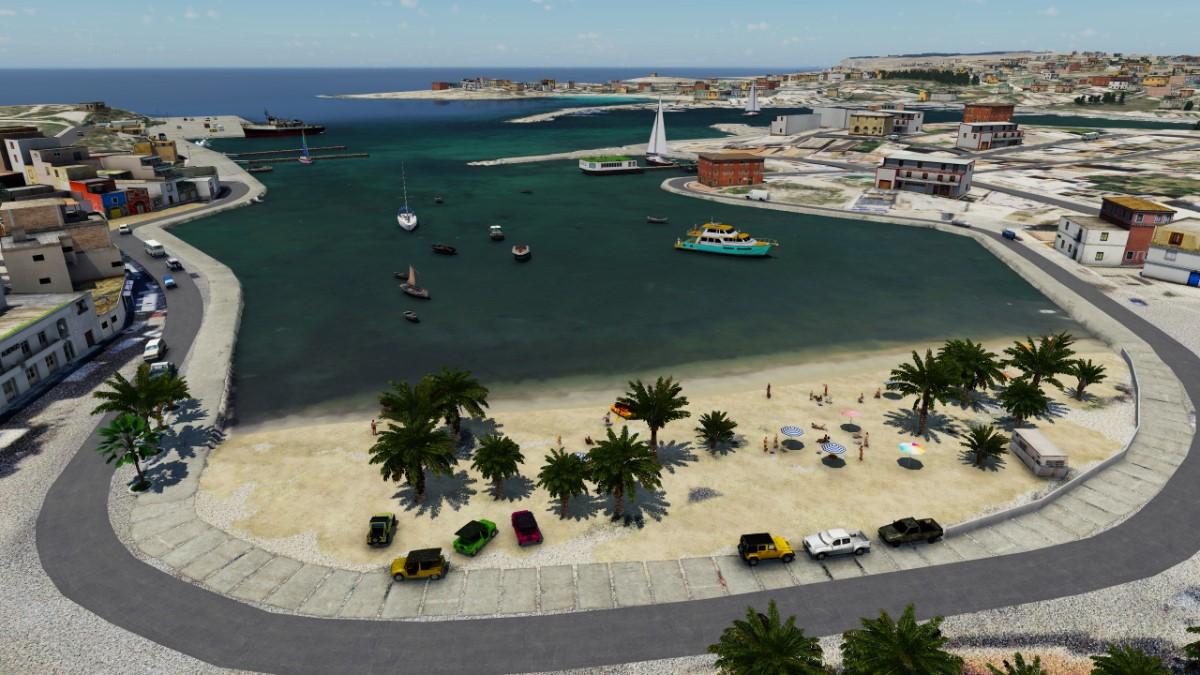
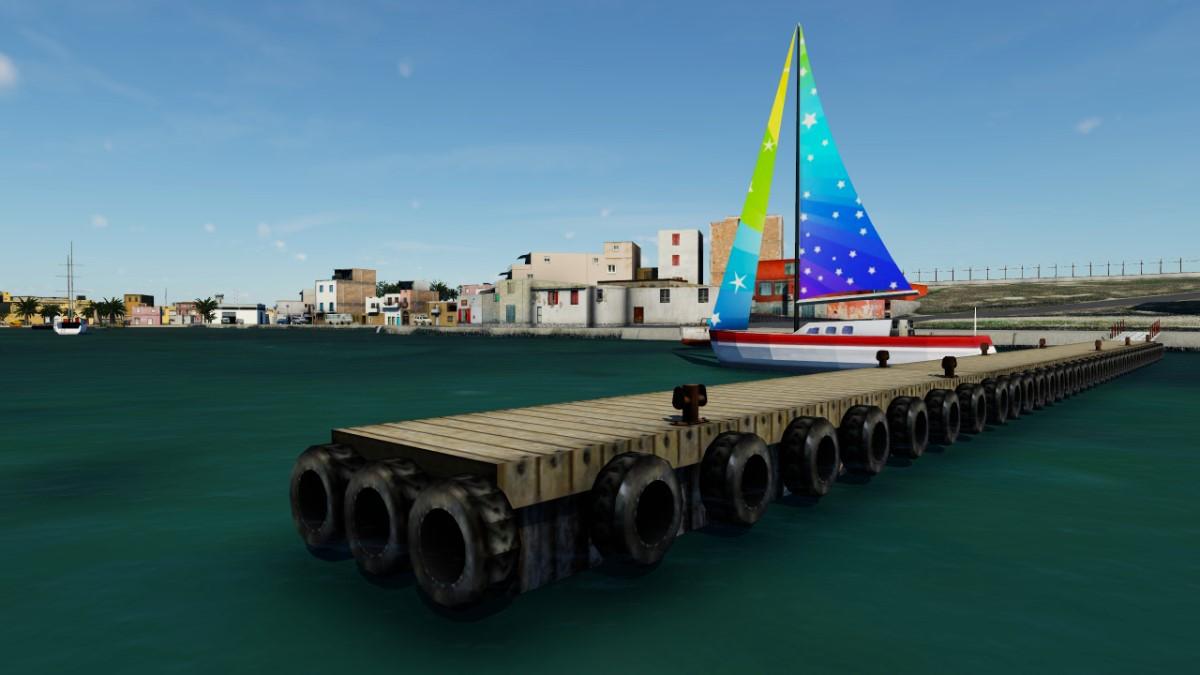
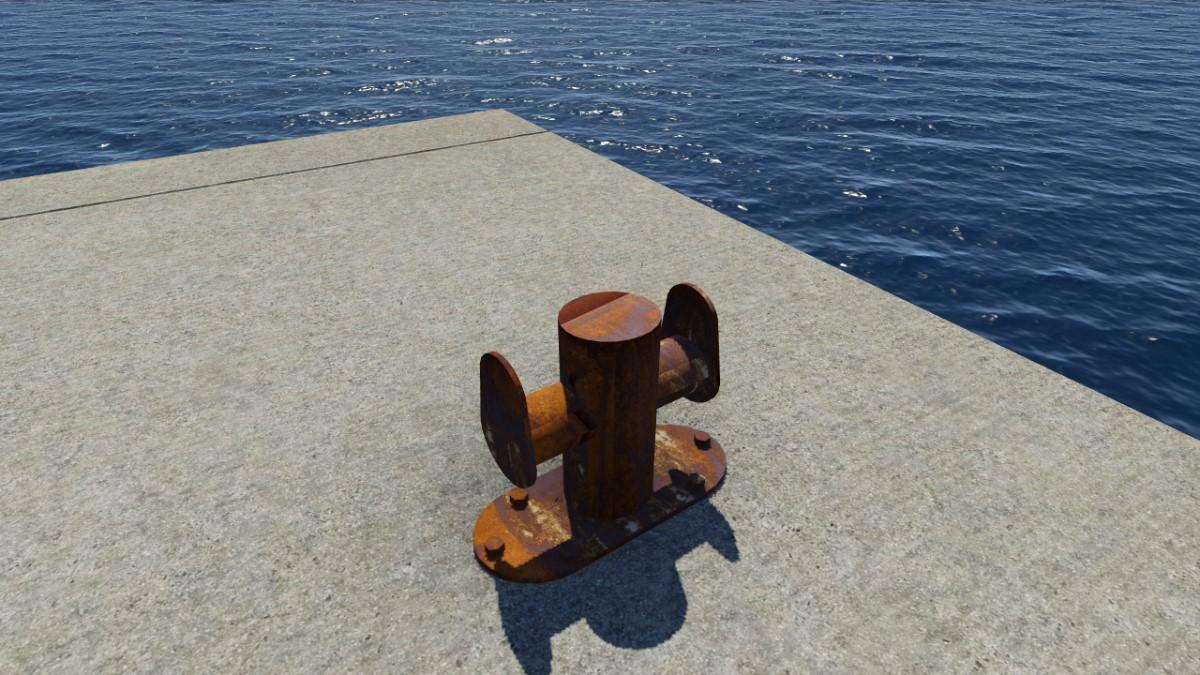
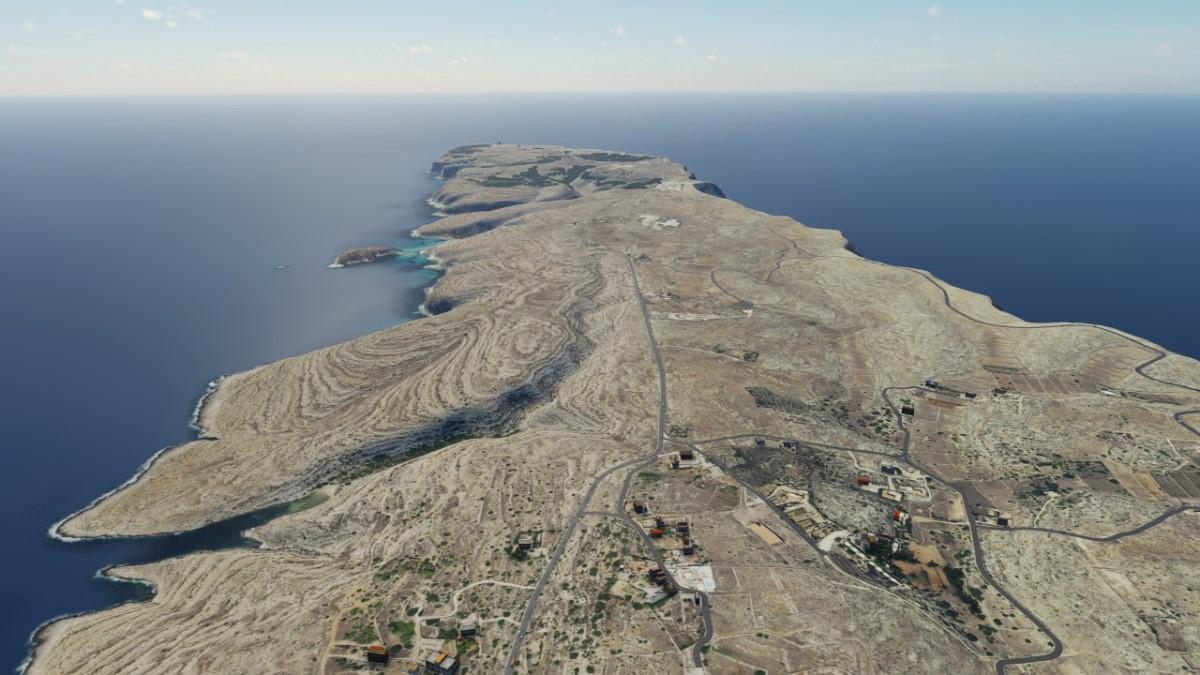
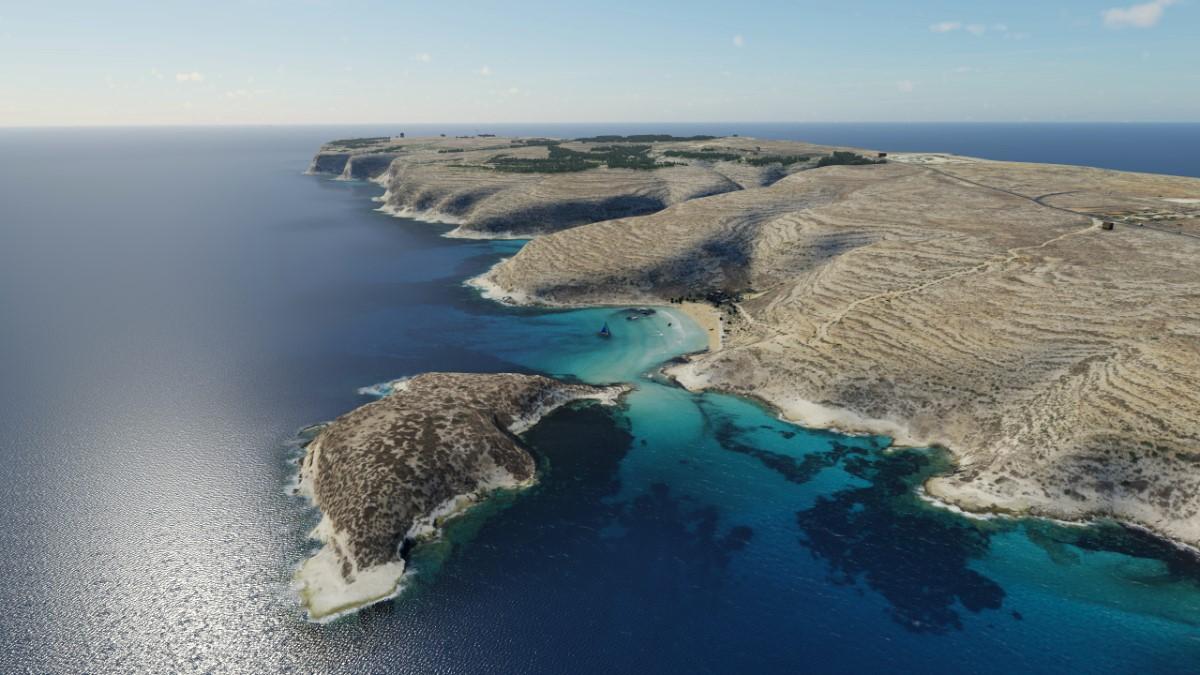
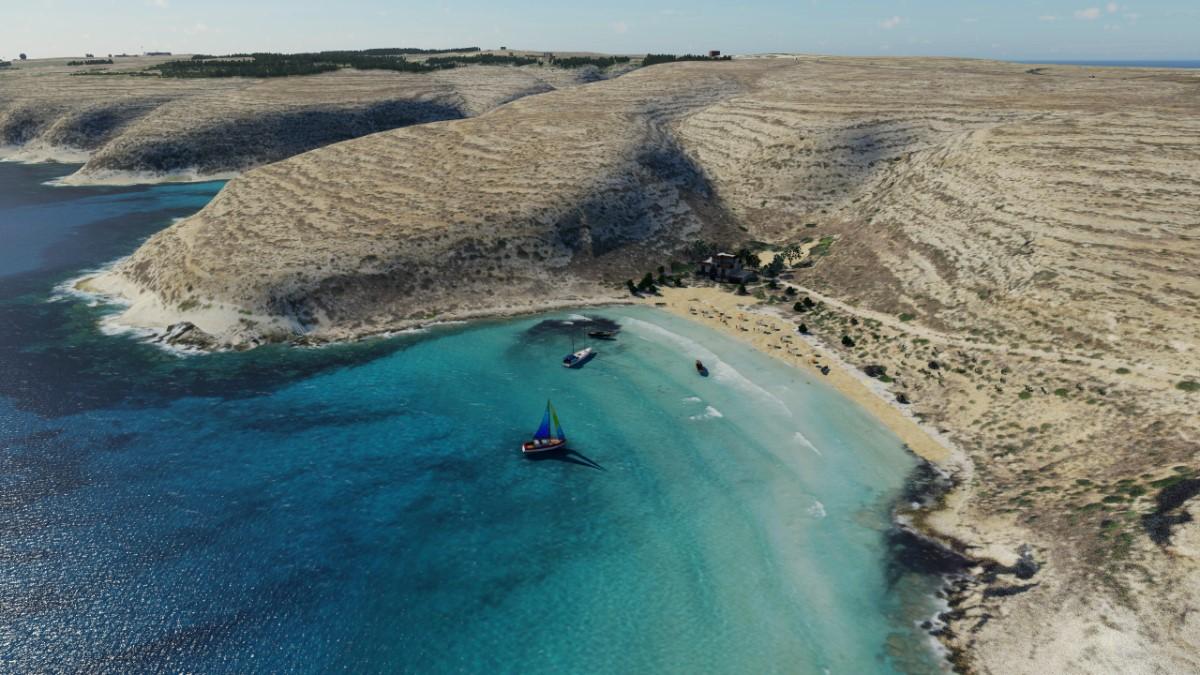
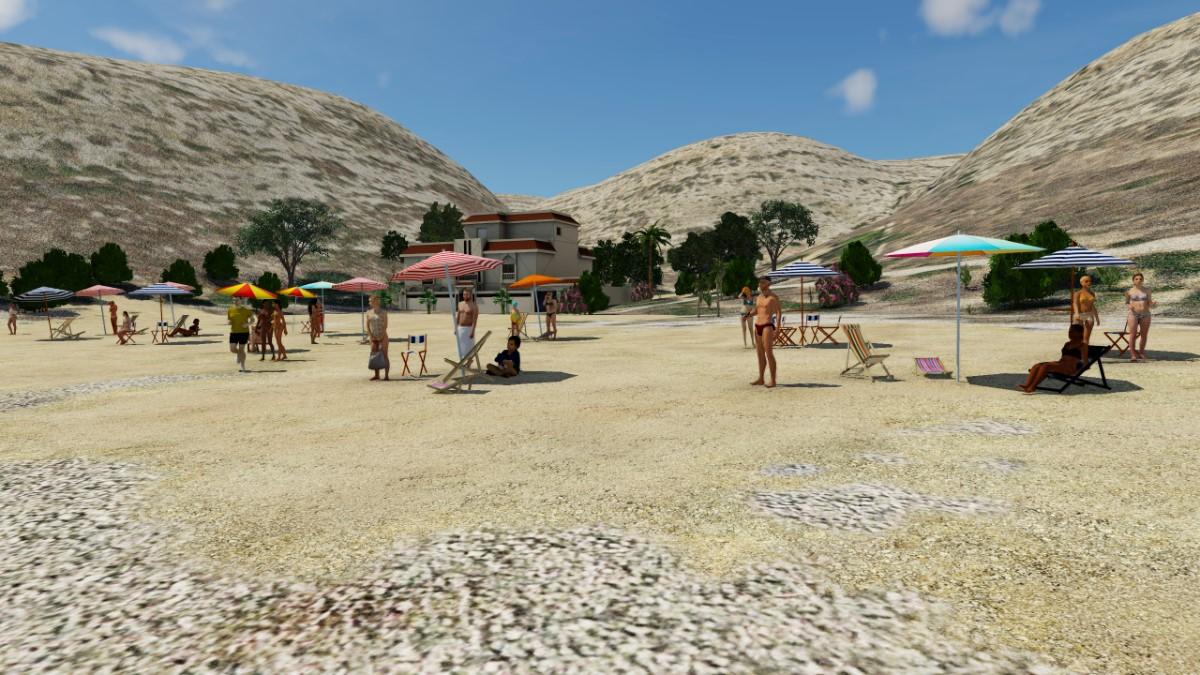
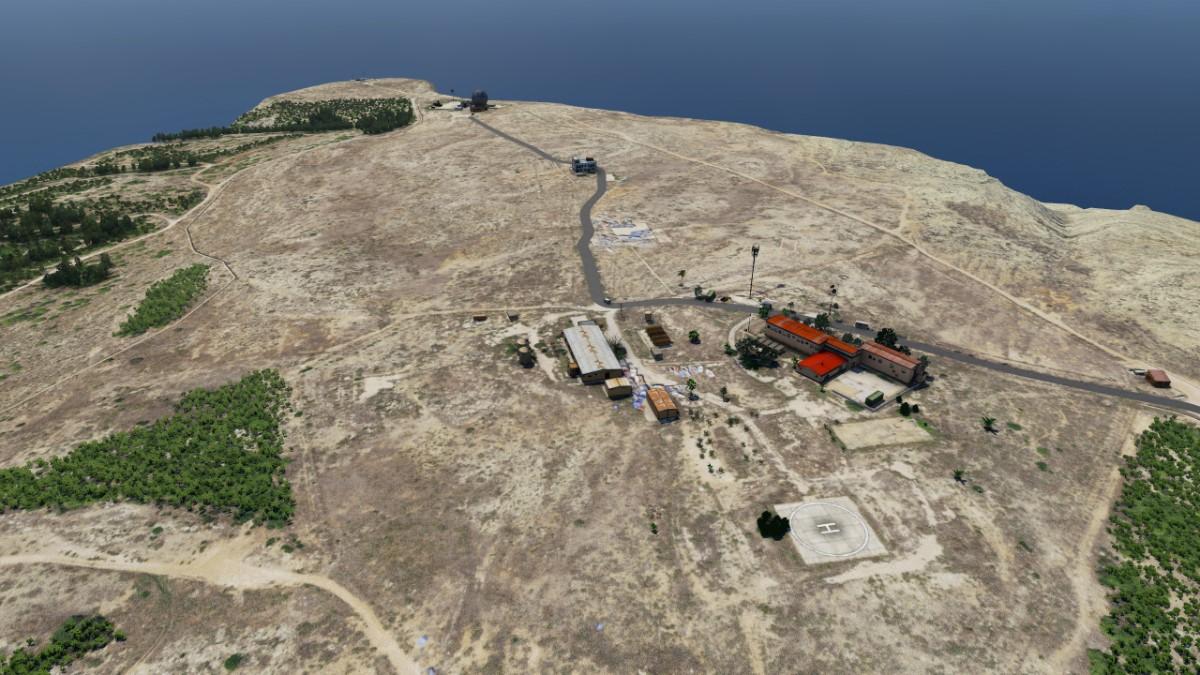
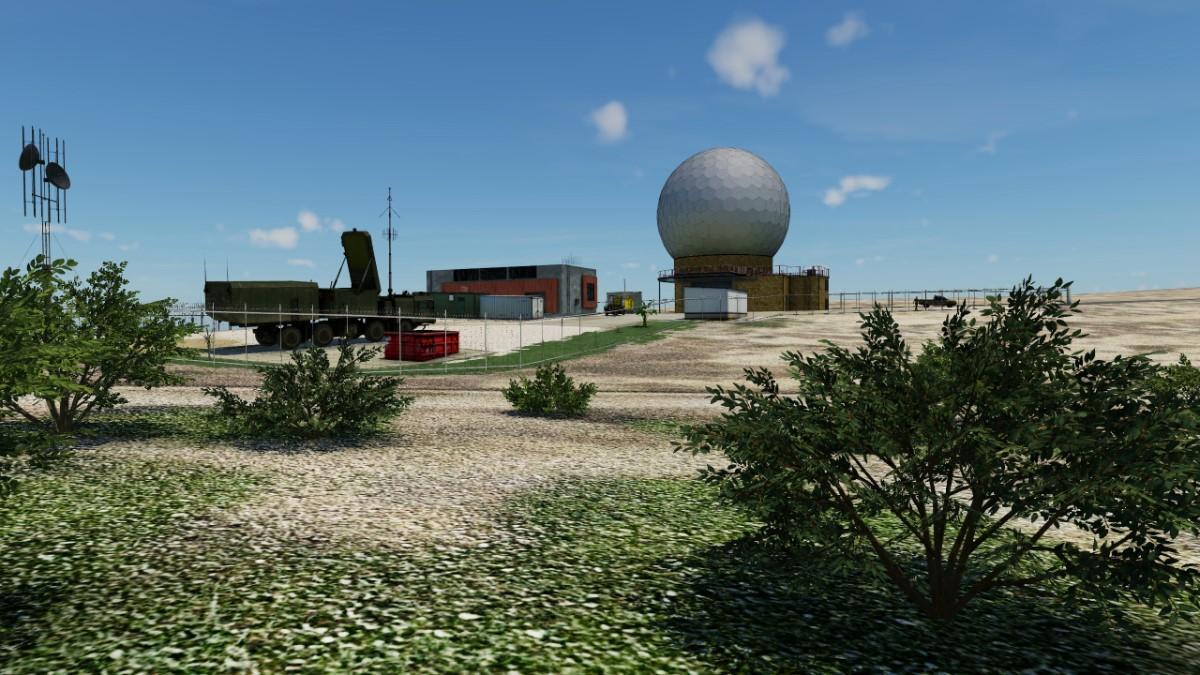
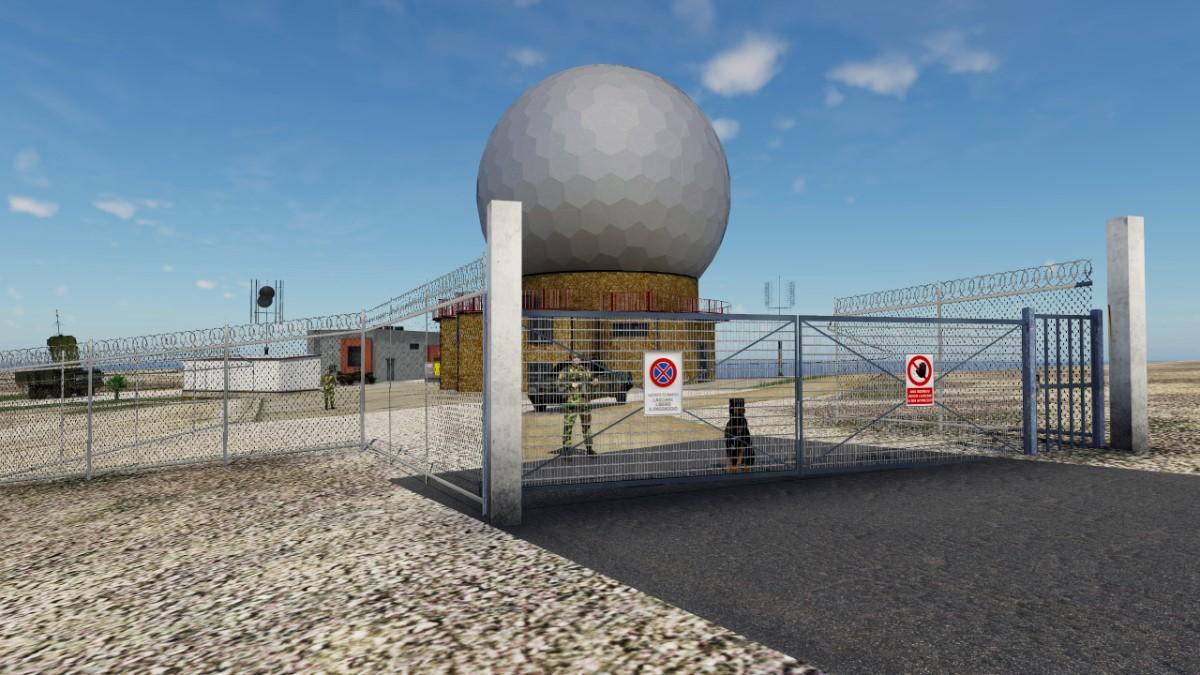
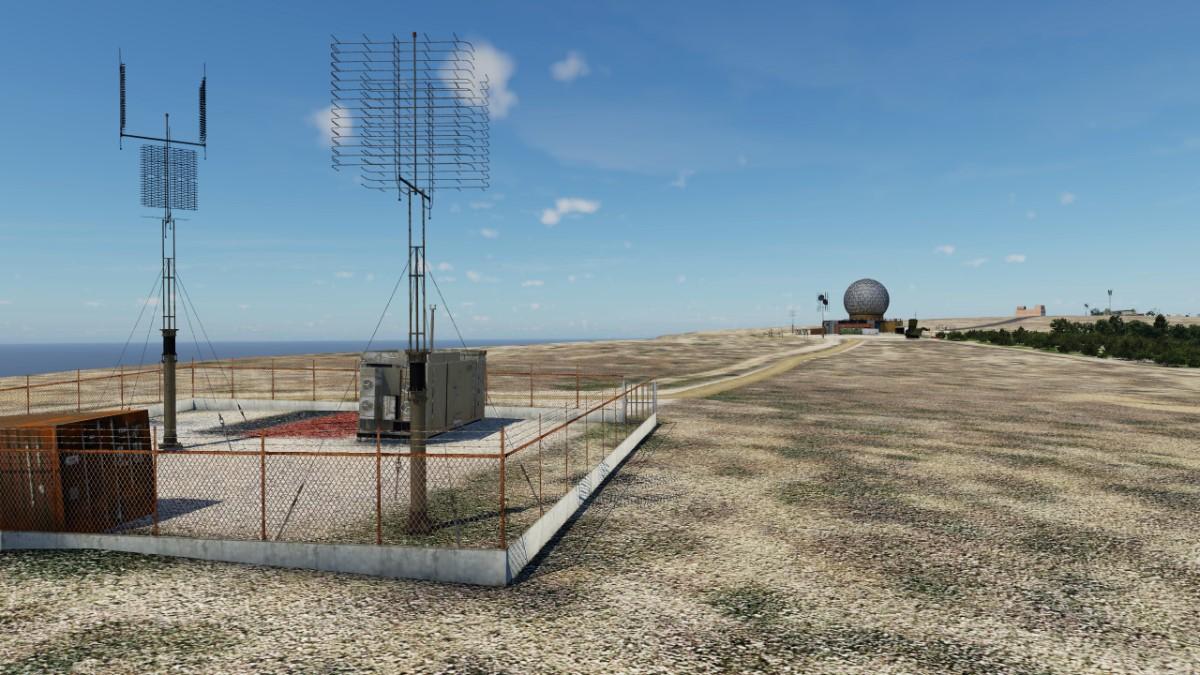
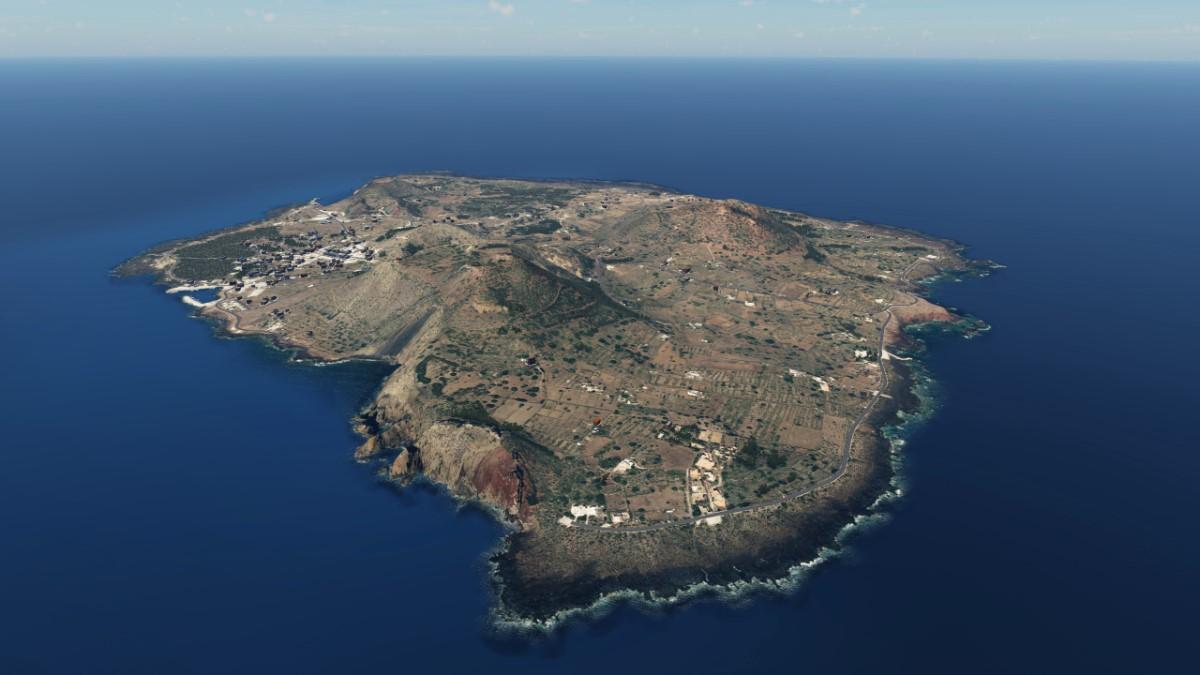
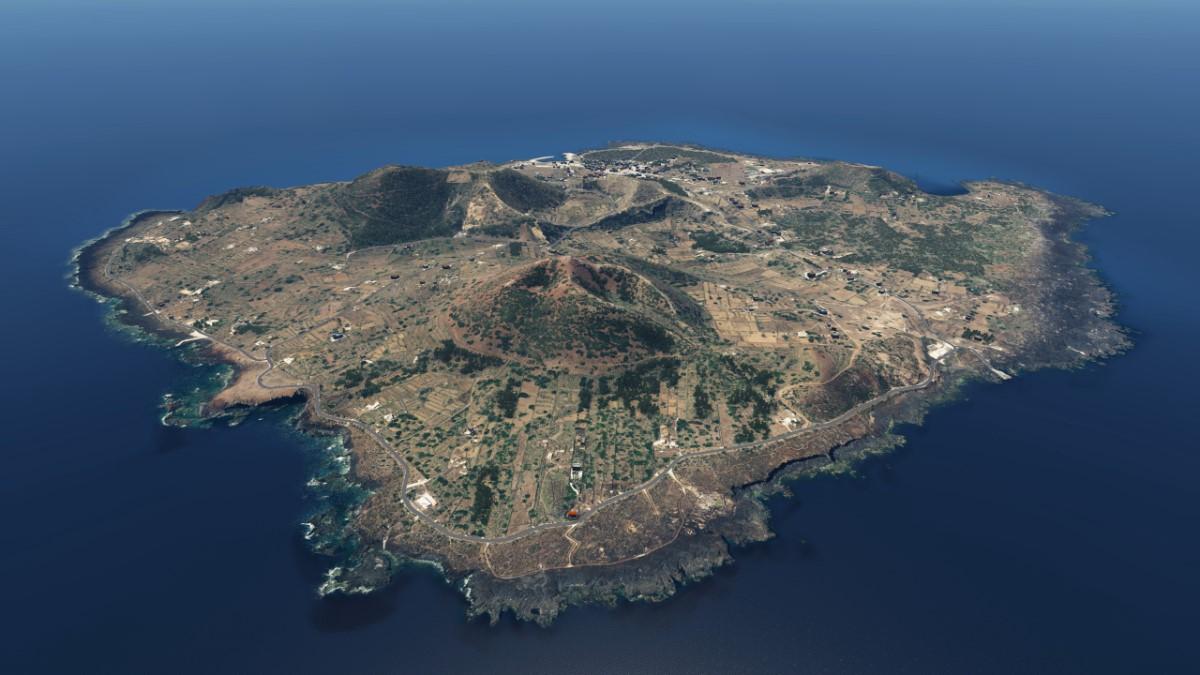
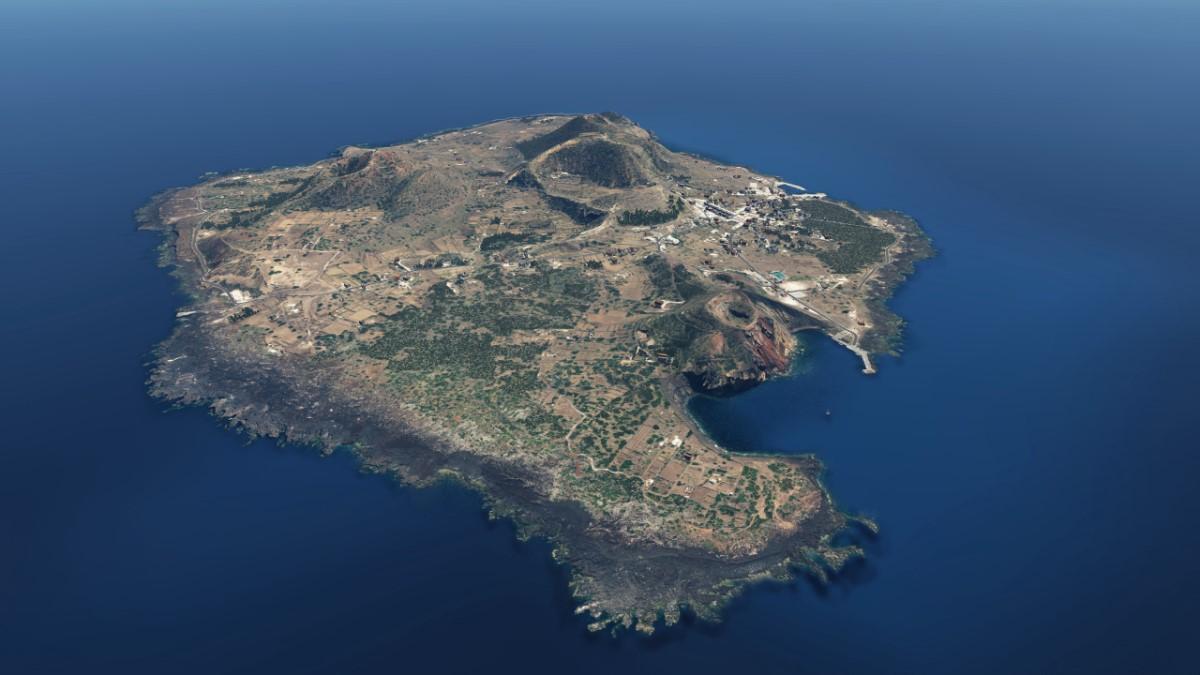
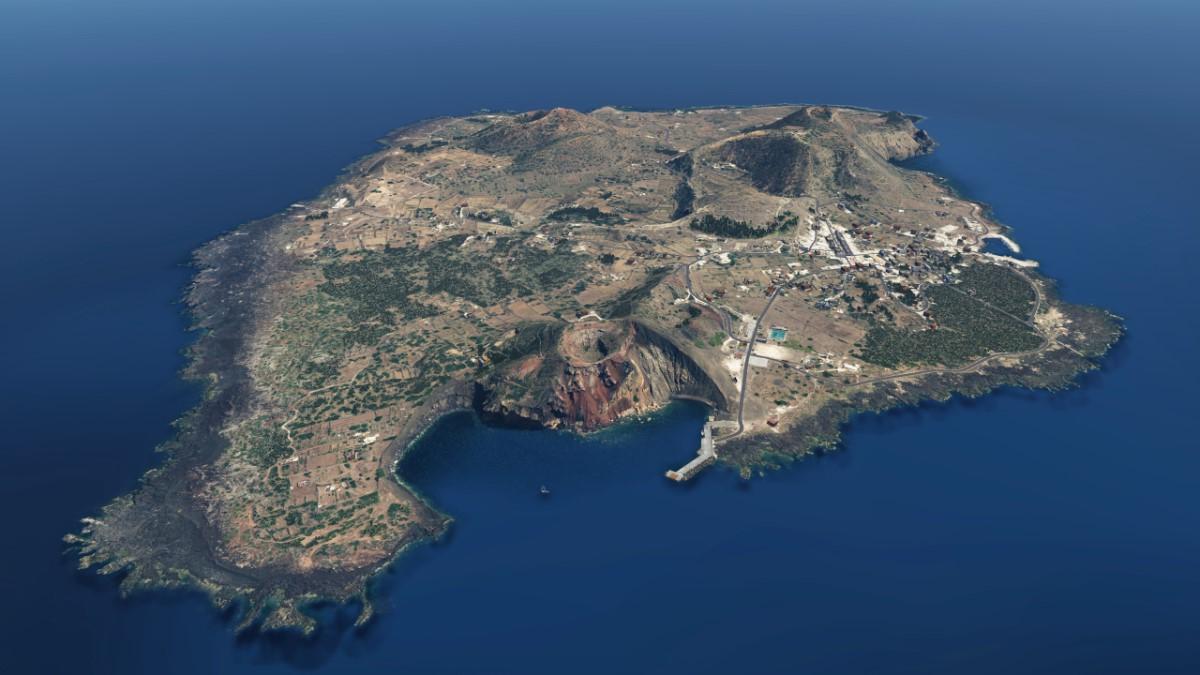
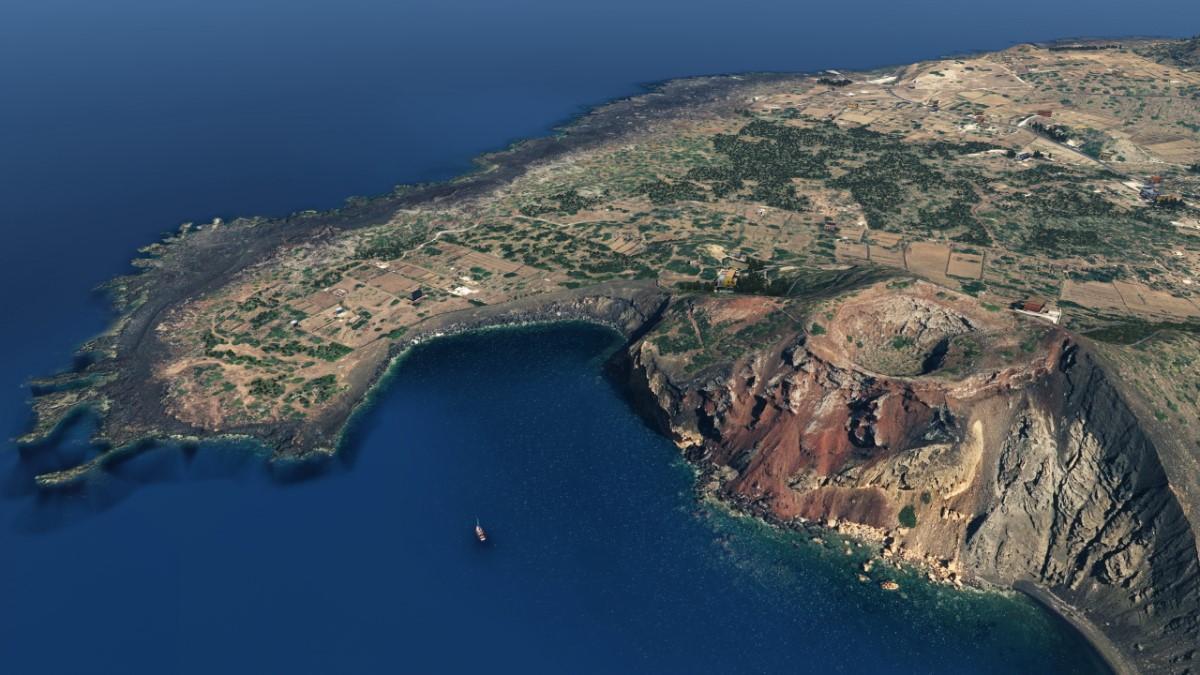
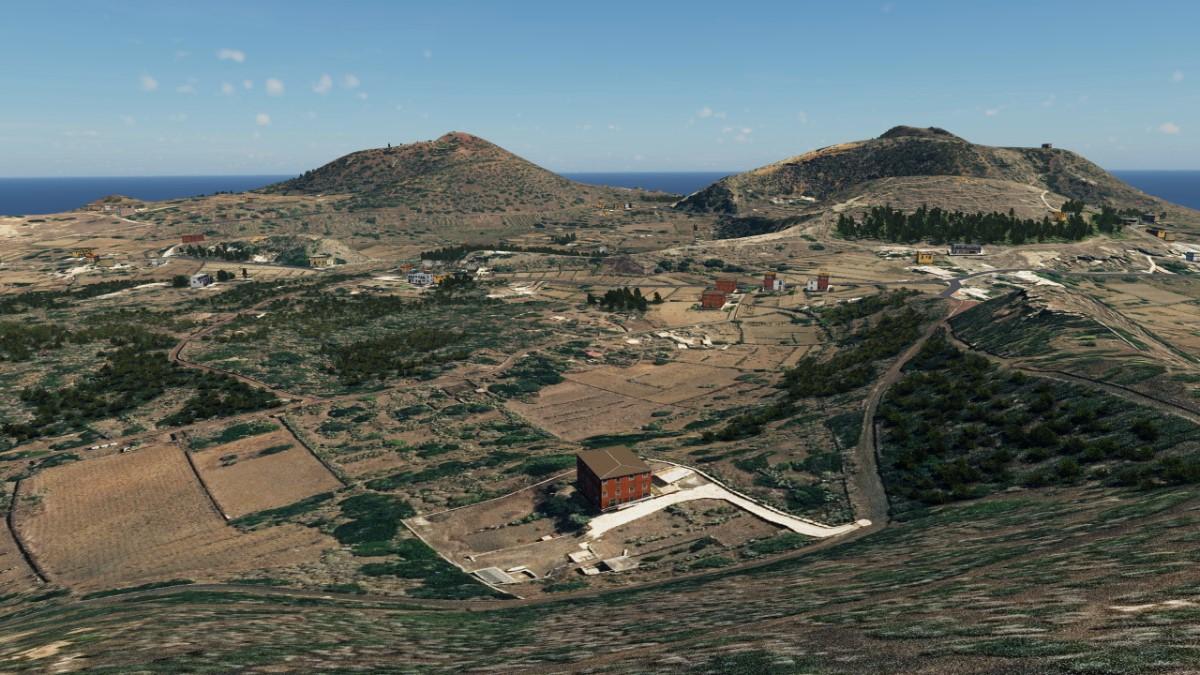
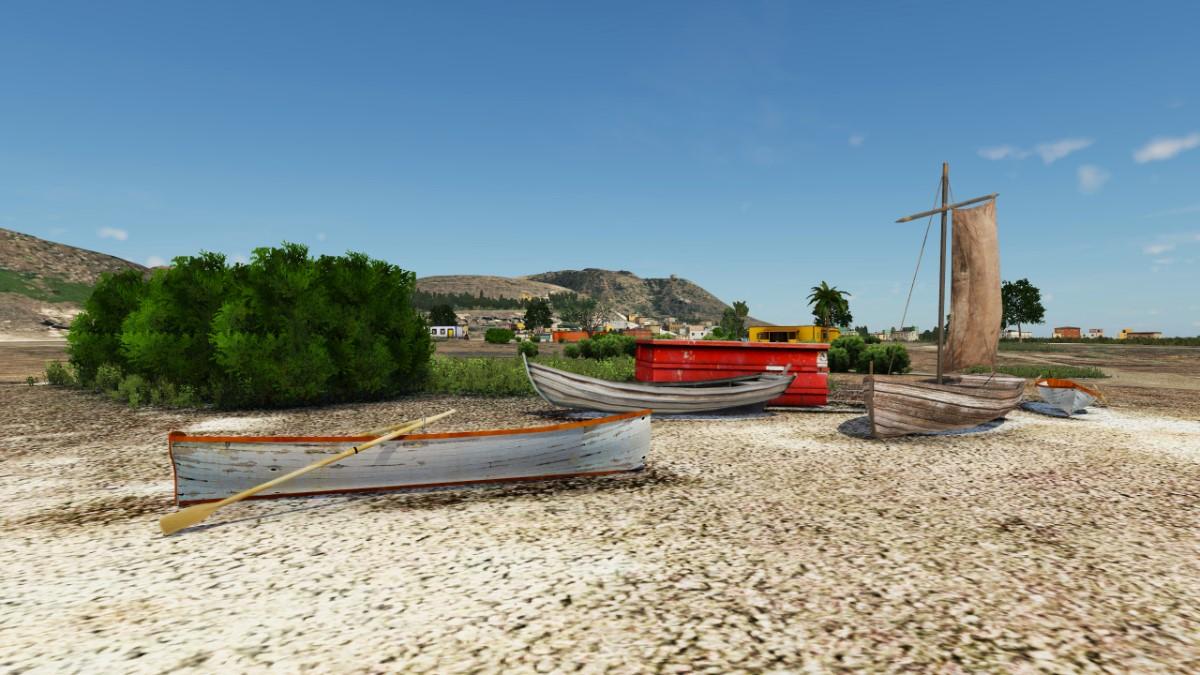
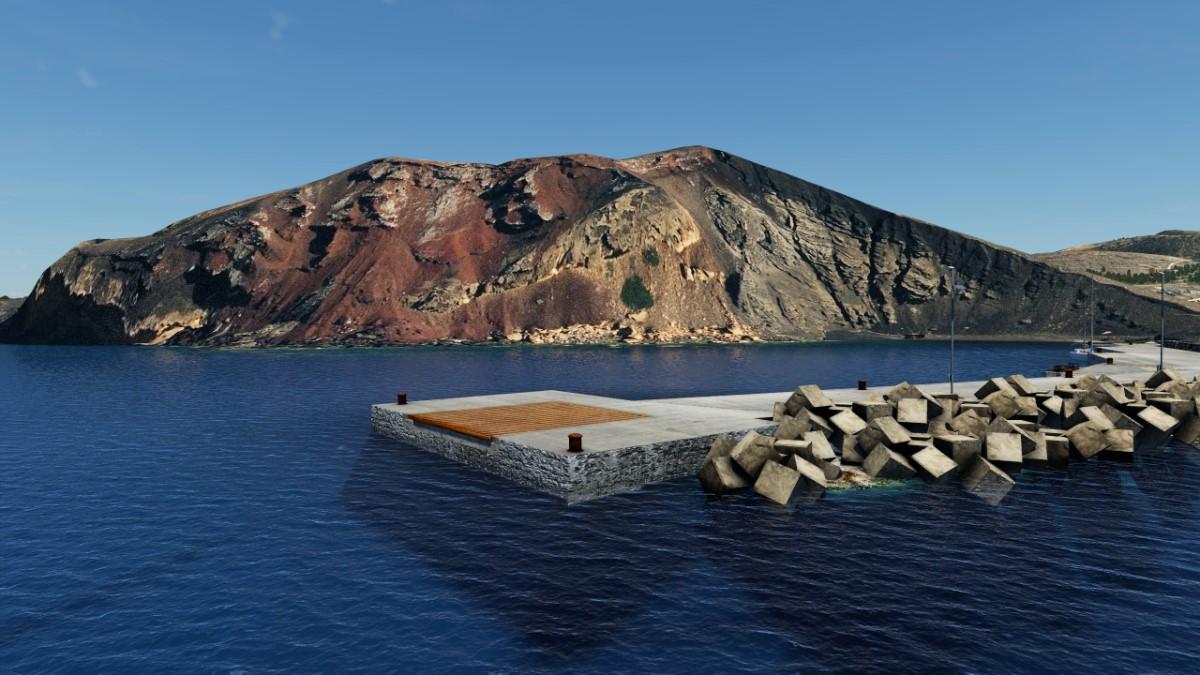
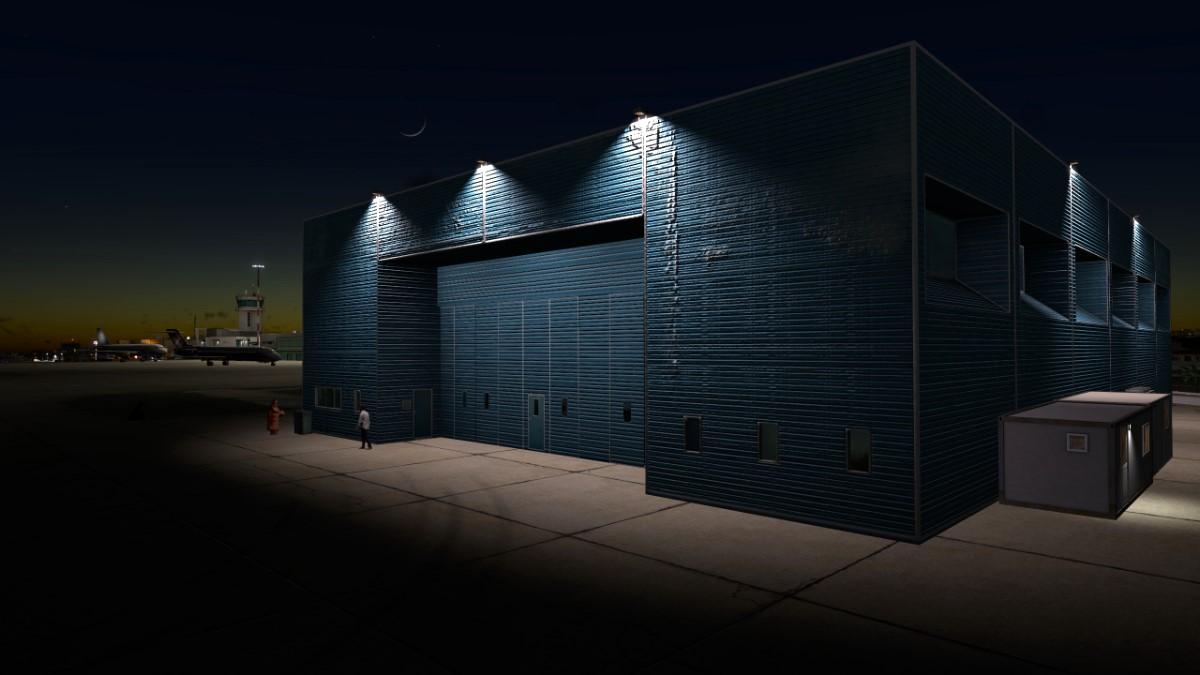
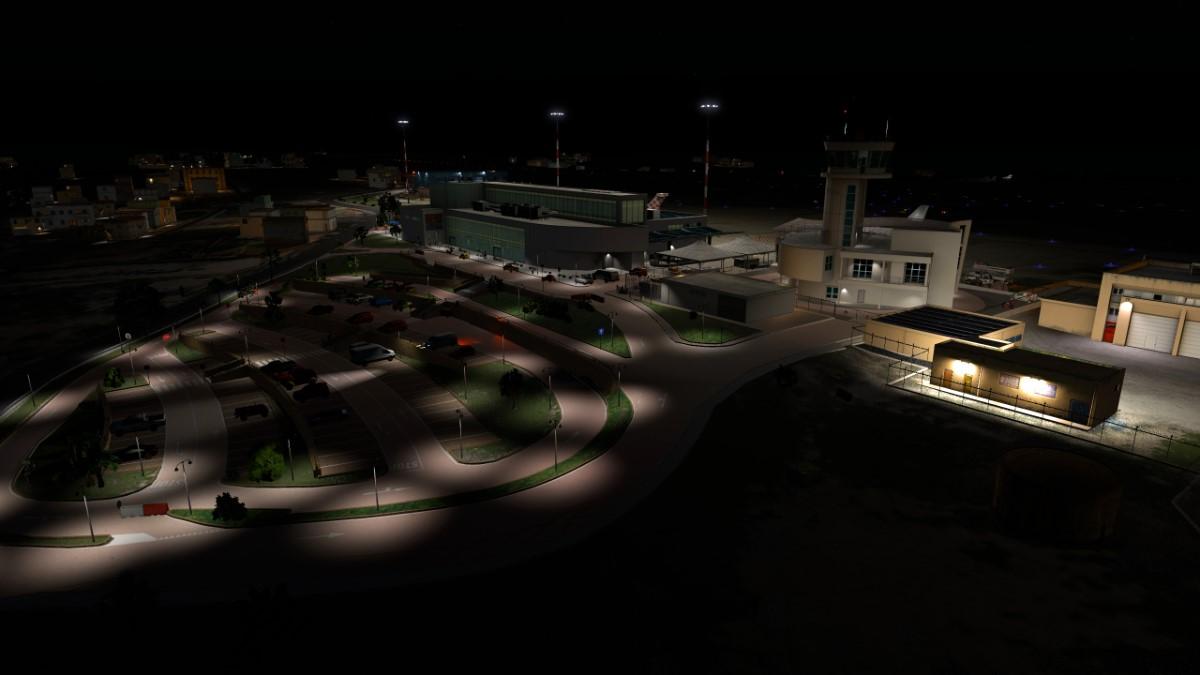
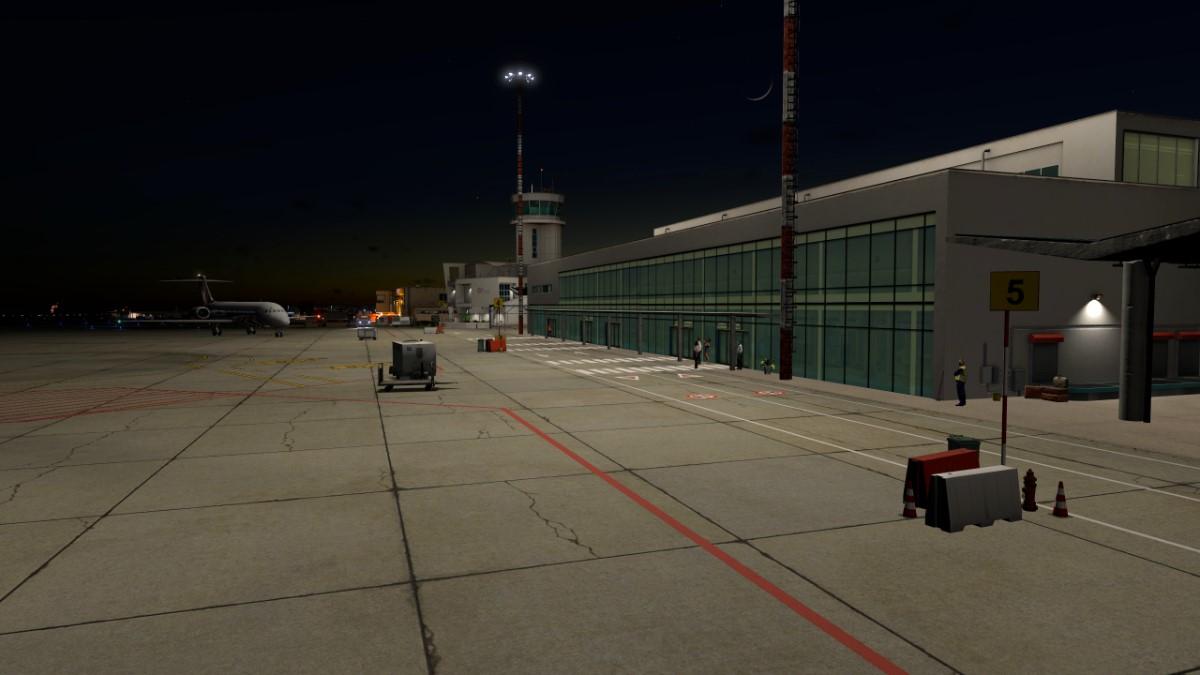
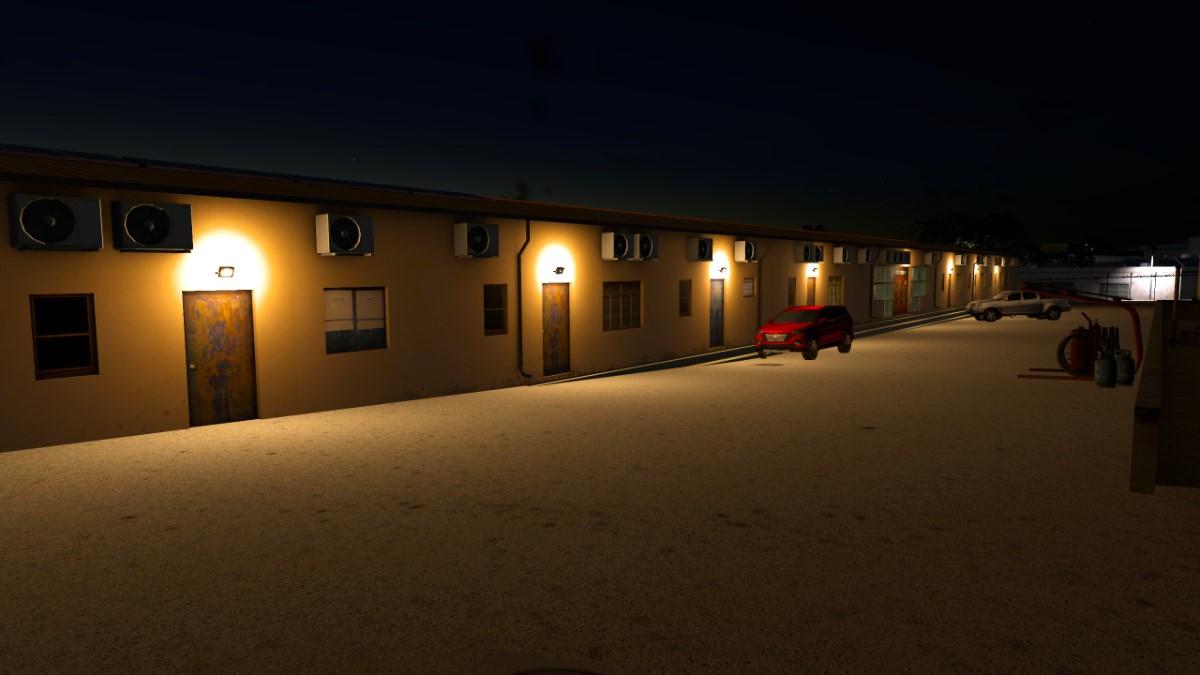
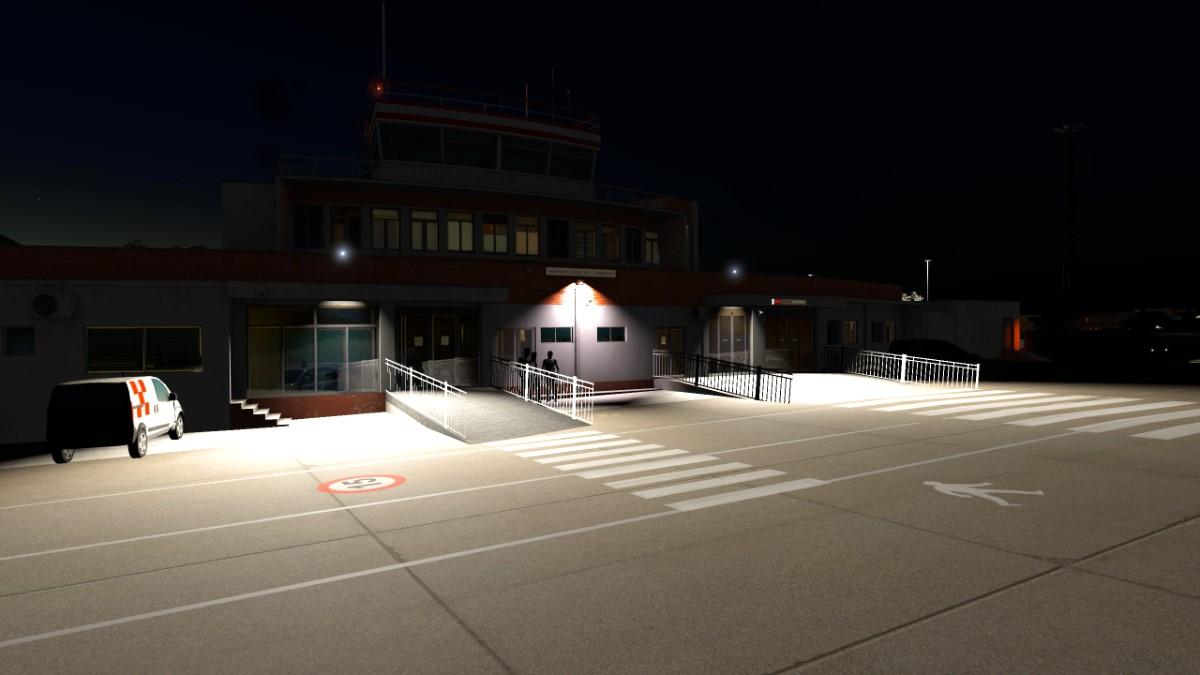
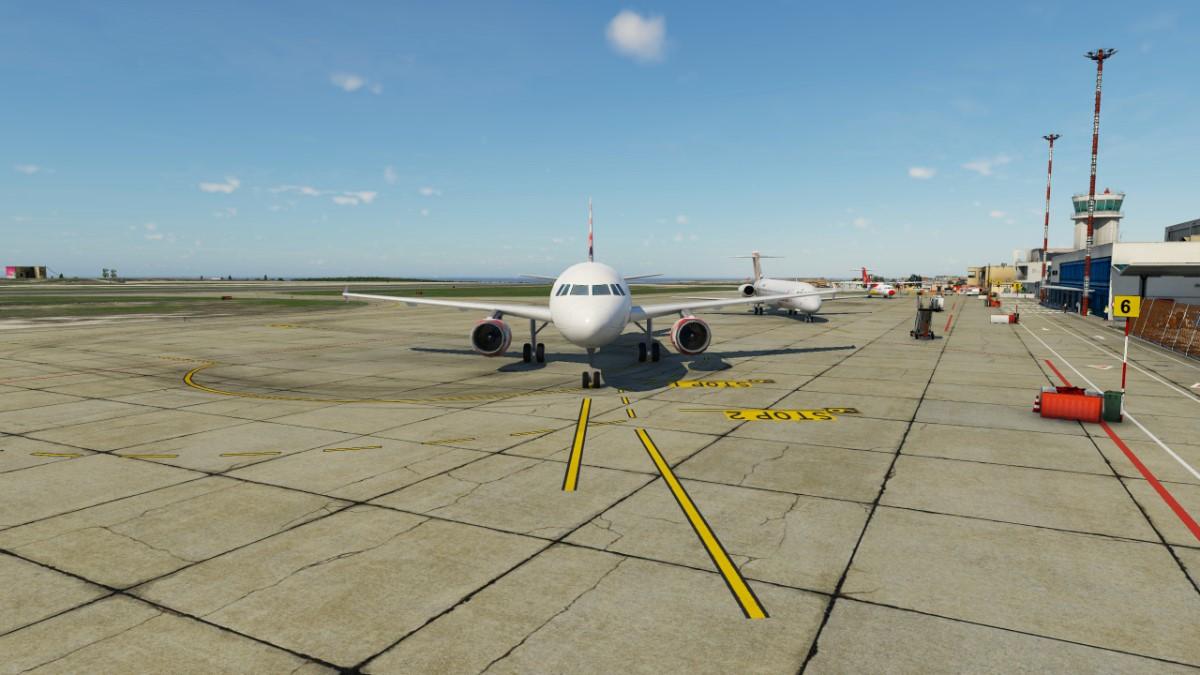
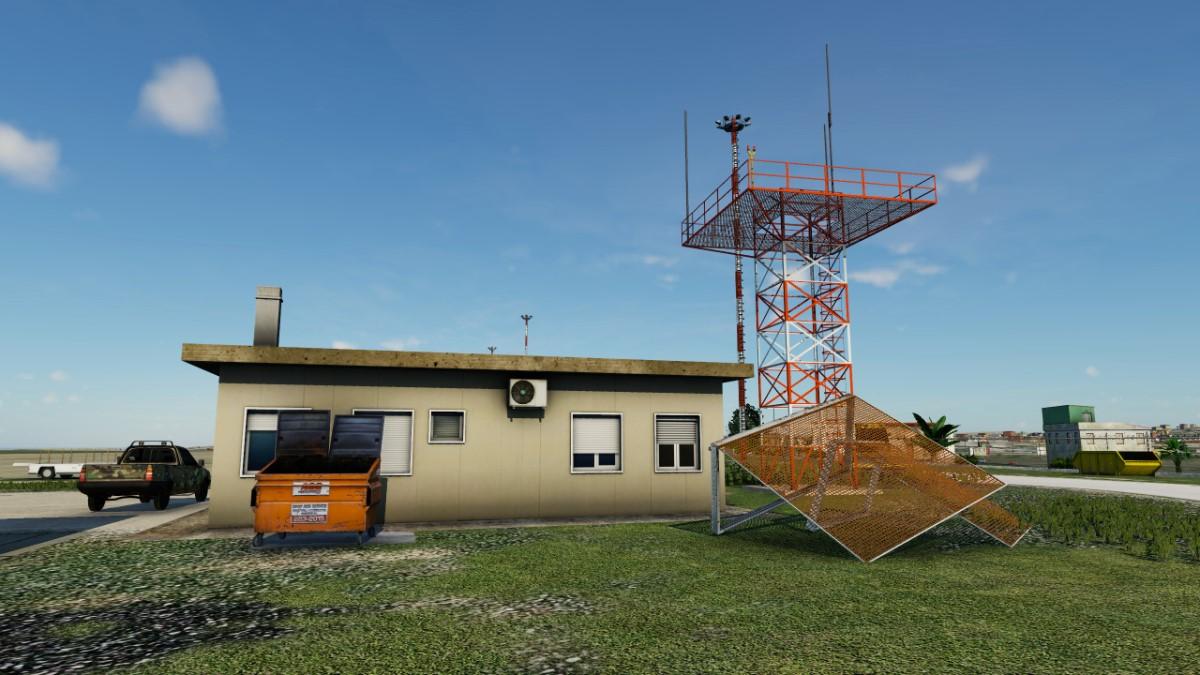
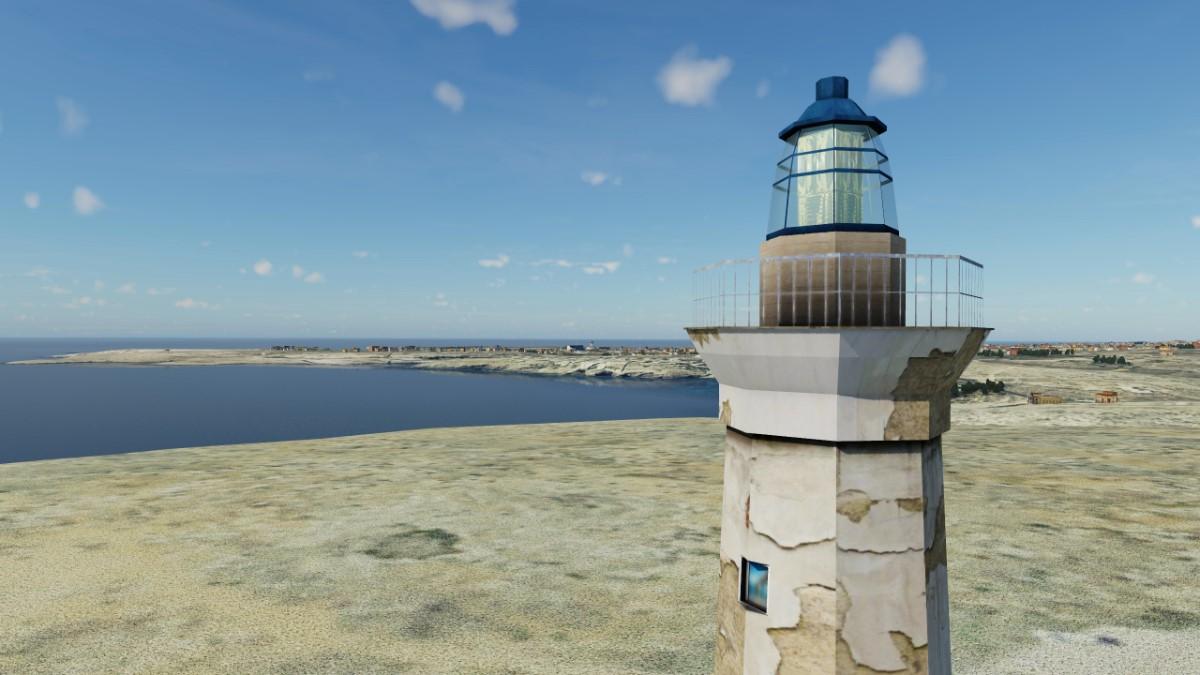
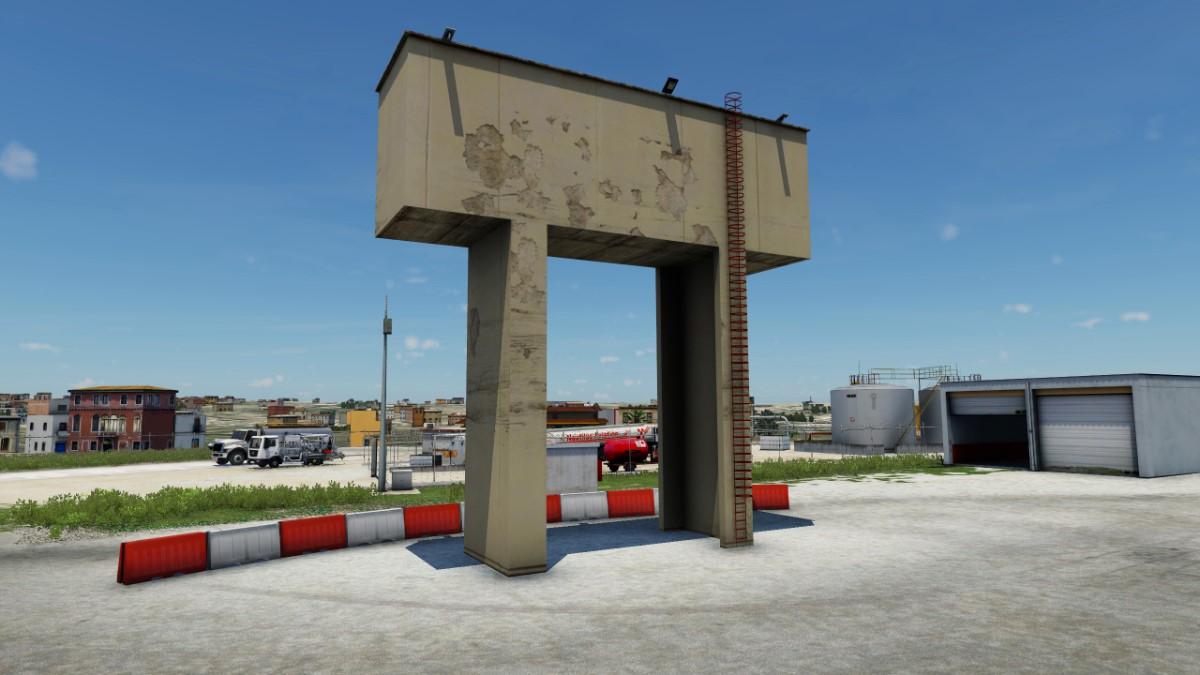
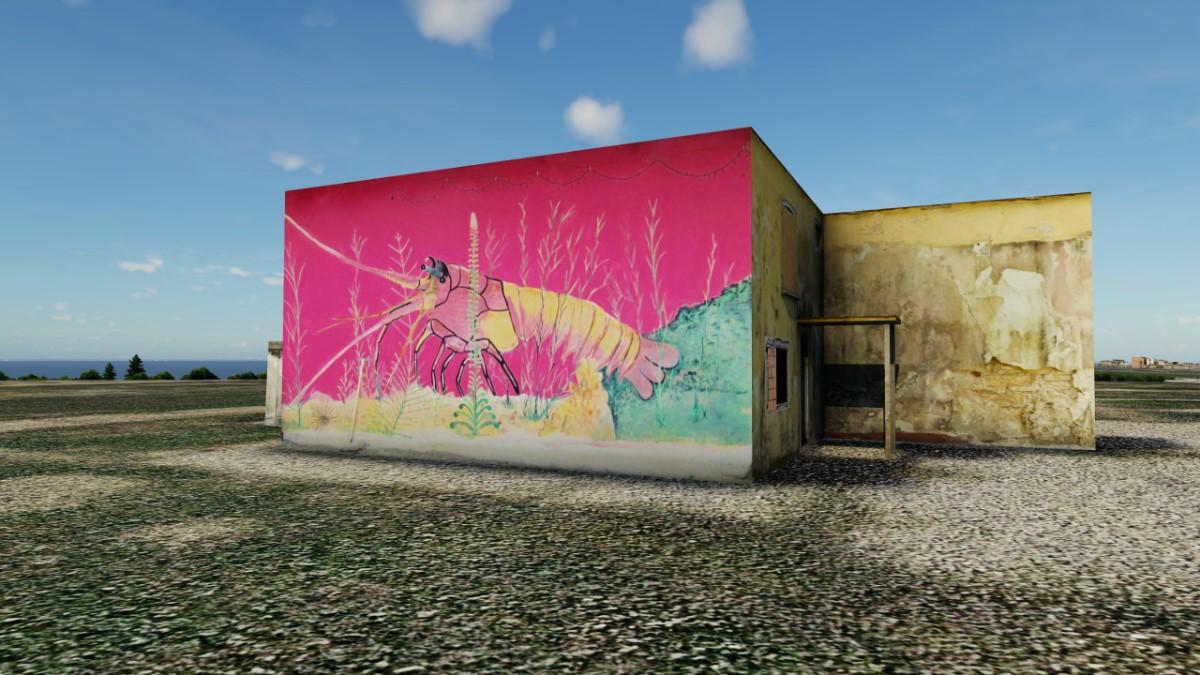
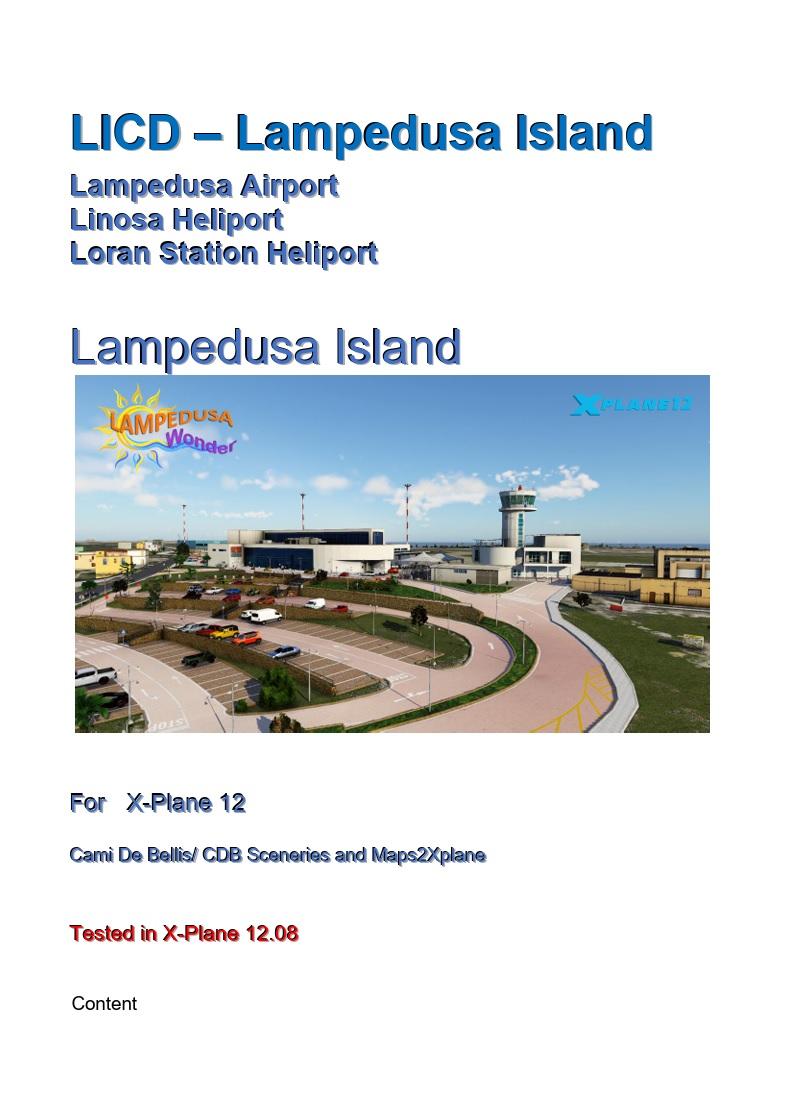
 Scenery Review: LICD- Lampedusa Airport and Linosa Island XP 12 by Cami De Bellis By Dominic Smith Introduction Lampedusa, the largest of the Italian Pelagie Islands in the Mediterranean, stands as Italy's southernmost point, closer to Tunisia than mainland Italy. Spanning 20.2 km2, it is home to approximately 6,000 residents. Lampedusa Airport, situated merely a few hundred meters from the town centre, boasts a 5,889ft asphalt runway and experiences peak traffic during summer, catering to medium-sized aircraft like the Boeing 737 and Airbus A320. Cami De Bellis' rendition of Lampedusa Island and its airport, alongside Linosa Island, showcases her hallmark attention to detail. This scenery features highly accurate representations of Lampedusa Island, its associated airport, Linosa Island, over 160 custom objects, and custom terrain mesh by Maps2XPlane. The package offers high-resolution textures in both 2K and 4K, native 3D characters and vehicles, two heliports, and much more, providing an immersive experience for users. As some of you may be aware, I am a great admirer of Cami's work, as her sceneries are superbly detailed, embodying a unique personal touch that distinctly marks her creations as special. There's something about the way Cami infuses her projects with her own essence, though it's hard to pinpoint exactly what, that elevates them above the ordinary. Installation The scenery is purchasable from the Org store at $18.90 and is notably large, with a download size of 2.8GB and an extraction size of 4.7GB. This size is substantial in comparison to many other sceneries, due in part to the mesh and ortho coverage. Within the package, there are three folders that should be transferred to the Custom Scenery folder within X-Plane. The naming convention of these folders eliminates the need for adjustments to the scenery_packs.ini file, simplifying the setup. Furthermore, the absence of any requirement for keys or activation streamlines the installation process, making it exceptionally straightforward. Documentation The documentation is comprised of two PDF files: one dedicated to installation and the other, aptly named "Tips & Tricks," offers guidance on maximizing the scenery's potential and highlights specific features. Both documents are well-composed, with a clear layout, making them invaluable resources to review before launching X-Plane. Admittedly, like many, I was too eager to explore the scenery after being captivated by the screenshots on the store page and so bypassed the initial read-through, so it’s straight to hell for me! Aerial View The aerial view of the island evokes strong memories of a journey I once made to a remote Greek island, characterised by its semi-arid, garrigue landscape. The custom mesh expertly highlights the topographical diversity of the area. The western side features deep gorges, contrasting with the shallow valleys and sandy beaches of the eastern part. The entire northern coastline boasts cliffs, offering a mix of gently sloping cliffs on the east and stark, vertical cliffs on the west, catering to a variety of adventures. The custom orthoimagery of the island is outstanding, providing clear, crisp visuals free from common anomalies like cloud cover. This is a notable achievement, especially for anyone familiar with the challenges of creating ortho sceneries marred by 2D cloud textures. Upon descending, the imagery retains its clarity, a testament to the high resolution used. Additionally, the custom autogen, leveraging Cami’s CDB Library assets, effectively represents the island's buildings, enhancing the overall realism and immersion. Airport and Taxiways The main runway and taxiway textures for both asphalt and concrete surfaces are custom made and demonstrate a high level of detail. The exposure to the elements from the surrounding Mediterranean has been artfully captured with a significant degree of weathering visible through cracks and pits. Tire marks on these surfaces add to the realism, with the concrete showing particularly impressive evidence of aircraft manoeuvres. These details, though small, significantly enhance the authenticity of the experience. Signage and Foliage The careful placement of foliage around the runway and taxiway adds depth without being a burden on system resources, striking a balance that complements the detailed orthoimagery. While the airport's signage is limited due to its size, what is present is thoughtfully executed, with clear apron demarcations and weathering effects on the ground, enhancing the visual fidelity of the airport environment. Main Terminal and Buildings For users familiar with Cami De Bellis's previous works, the detail in the main airport terminal and its associated buildings in this scenery won't disappoint. The terminal, while lacking an interior, showcases remarkable modelling and texturing, including local artwork that adds a unique touch. A particular standout feature is the lively 3D characters, including a dog, and custom passenger vehicles that populate the airport. These are all nicely modelled and contribute to bringing the airport to life. Adjacent to the terminal, you'll find the control tower, hangar, additional passenger facilities, and fire station, all mirroring the high standard of modelling and texturing work we’ve come to expect from Cami. The area is bustling with ground clutter, such as bins, pallets, cones, and several airport vehicles, all contributing to the realism. The main car park at the airport entrance utilises a custom texture rather than a standard ortho, achieving a seamless integration with the surrounding scenery. This method avoids the common pitfalls of flat 2D cars and texture anomalies, creating a cohesive look. The car park's design, including the dividing walls and vegetation, and the non-default, atmospheric vehicles, add greatly to the atmosphere. On the airport's perimeter, a building, likely a motel or hotel for passengers, echoes the airport's architectural theme. It features numerous AC units and solar panels on its roof, again showing the attention to detail. Lampedusa Venturing beyond the airport leads to the town of Lampedusa, where Cami’s custom autogen, utilising her CDB Library assets, truly shines. While it doesn't encompass every structure, the selection present beautifully captures the essence of this charming oasis. The beach scene was a personal highlight for me, featuring palm trees, deckchairs, and animated 3D characters enjoying their surroundings; a delightful scene that reminded me that I could do with a holiday! The bay area is dotted with small boats and a few jetties, predominantly for leisure, though a larger dock facilitates commercial operations. This blend of recreational and business elements adds a realistic layer to the portrayal of the town, further demonstrating Cami's careful attention to detail and her ability to create immersive environments. Further Afield Heading westward, the landscape transitions to a sparser housing distribution amidst more pronounced terrain, featuring numerous gorges. Yet, the attention to detail remains undiminished. Midway across the island, another beach scene greets you, alive with 3D characters revelling in the sunshine. The combined effect of custom objects with the enhanced mesh and custom ortho keeps the exploration engaging. At the island's far western extremity, where the cliffs become dramatically steep and the gorges deepen, we find the first of the additional helipads, just slightly before the radar station. It's here that Lampedusa's radar station emerges, its military essence underscored by the presence of soldiers and a vigilant guard dog. This setting, evocative of a scene straight out of a high-stakes drama, brings to mind the wise words of Walter White, aka Heisenberg, from "Breaking Bad": “tread lightly.” Linosa Island Located twenty-five miles north of Lampedusa Airport, Linosa Island spans 5.45 square kilometres and boasts a volcanic heritage. Its landscape is dominated by a series of craters, with Monte Vulcano standing as the tallest at 195 metres. The island's volcanic terrain is vividly brought to life with custom mesh and texturing, offering perhaps a more dramatic scenery of the already impressive Lampedusa. The harbours are thoughtfully modeled, although one appeared to lack vessels, a detail that, if added, could further enrich the scenery's authenticity in future updates. Just up from the tranquil harbour, the landscape reveals the second additional helipad, strategically positioned yet discreet, enhancing the island's accessibility without disrupting its peaceful charm. Cami's custom autogen, brings to life the sparse settlements, lending a serene depth to the island's allure, highlighting its status as a quietly detailed haven far removed from the hustle and bustle of more commercial destinations. Night Lighting As dusk turns to night, the airport comes alive with an elaborate light display. The runway, terminal, surrounding buildings, and car park are all bathed in a brilliant glow. Beyond the airport, the autogen lighting and the lighthouse at the island's northern tip, ensures that the night is alive with light, contributing to the immersive experience. Performance During testing, I experienced no performance issues, with frame rates remaining high and stable across all areas, despite my system being midrange. This speaks volumes about the optimization of the scenery, providing an exceptional experience without compromising on detail. Conclusion Exploring Cami De Bellis' Lampedusa Airport and Linosa Island scenery was an absolute delight, evoking fond memories of my visit to Greece. The rich foundation laid by the detailed mesh and photographic textures, combined with Cami's superb 3D modeling and texturing work, brings this scenery to life in a way that is both captivating and deeply immersive. The addition of animated 3D people and custom autogen only adds to the charm of this lovely little scenery package. It's not just the visual detail that impresses; the stability of performance despite the complexity of textures and objects ensures a seamless simulation experience. The inclusion of Linosa Island, with its distinctive volcanic landscape and quaint settlements, further elevates the overall appeal of the package. This scenery package is a testament to Cami De Bellis' exceptional skill in creating immersive X-Plane environments that are rich in detail and offer an unparalleled exploration experience, all at an asking price that represents significant value. In conclusion, for those in search of a scenery that not only embodies the atmospheric and realistic charm of Italy's southern islands but also offers a compelling escape into their serene beauty, Cami’s latest work might just be the perfect addition to your X-Plane collection, serving as the perfect excuse for a wonderful getaway. ________________________ LICD- Lampedusa Airport and Linosa Island by Cami De Bellis is now available from the X-Plane.Org Store here: LICD- Lampedusa Airport and Linosa Island Priced at $18.90 Features Highly accurate scenery for LICD- Lampedusa Airport and Linosa Island with all buildings modeled. Over 160 custom objects all with Ambient Occlusion Custom Terrain Mesh for the entire island of Lampedusa and Linosa by Maps2XPlane Custom Overlay/Autogen Scenery based on CDB assets by Maps2XPlane" Photo real textures on buildings, vehicles, trees… Photorealistic ground textures based on a satellite image 50 cm. Detailed airport objects and GSE vehicles Custom textured taxiways, runways, and apron Custom surrounding buildings Custom airport lights HD Custom Overlay High-resolution building textures – all in 2K and 4K Excellent night effects World Traffic 3 compatible Native characters and vehicles created specially Ground traffic The terrain mesh is complemented with custom overlays: dense vegetation and country-typical autogen, as well as custom road networks with dynamic traffic. Two heliports, for those fans of helicopters. One at the beautiful Linosa Island, and the other on the US Loran Station Base. Requirements X-Plane 12 (not for XP 11) Windows, Mac, or Linux 8 GB+ VRAM Recommended Download Size: 2.7 GB Current version 1.0 (January 11th, 2024) Review System Specifications Intel i5 10400 – 32GB RAM - Nvidia Asus RTX 3060 – Windows 10 Home 64 Bit __________________________________ Scenery Review by Dominic Smith 23rd February 2024 Copyright©2024: X-Plane Reviews (Disclaimer. All images and text in this review are the work and property of X-PlaneReviews, no sharing or copying of the content is allowed without consent from the author as per copyright conditions).
 1 point
 -
Perfection.1 point
-
 WOW!!!! I'm loving it! I can feel close to you Nigel, seated outside near to the harbour, sipping a granita al limone....1 point
 -
Dom, once more, I'm speechless!!!! In addition to my passion for recreating realistic scenarios for X-Plane, I have a second passion for reading Dom’s reviews. You can grasp the essence of my work like no other. Thank you eternally. Cami1 point
-

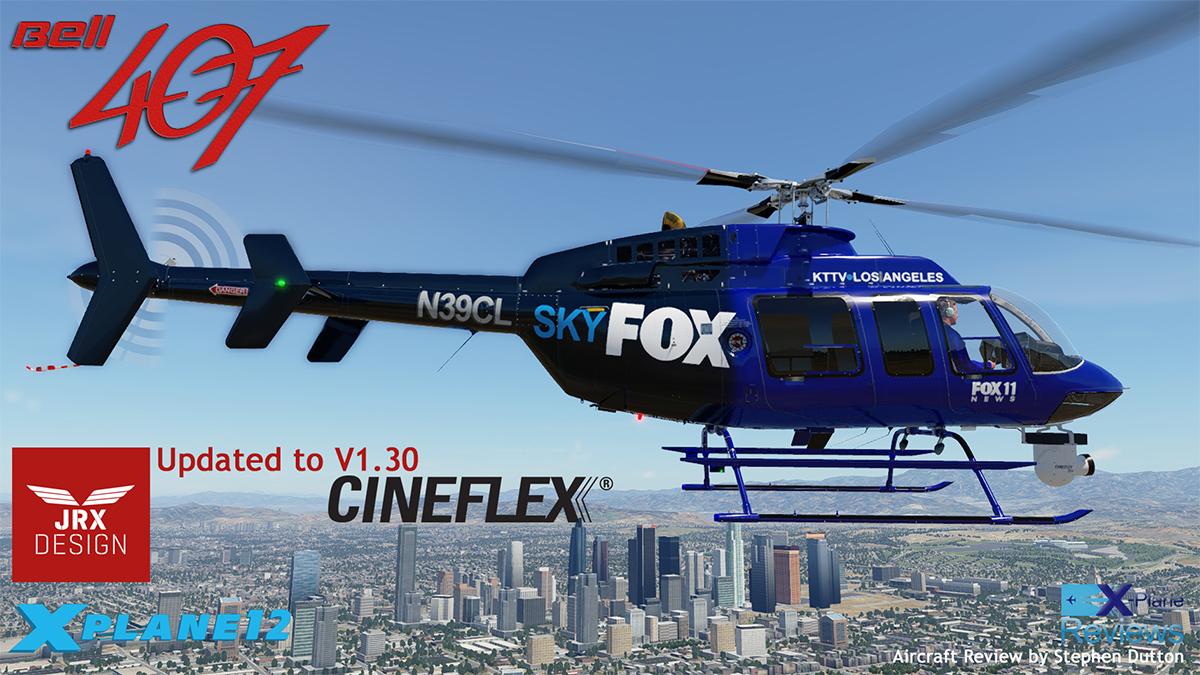
Aircraft Review : JRX Design Bell 407 v1.30 for X-Plane 11 and 12
Cami De Bellis reacted to Stephen for a topic
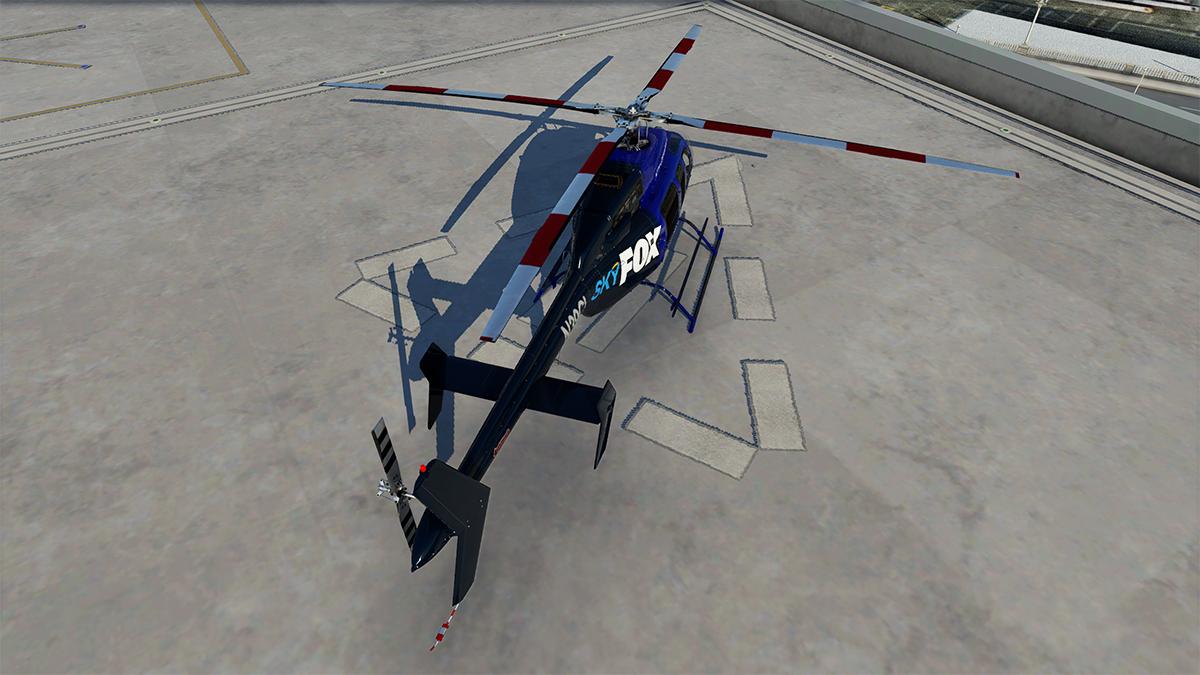
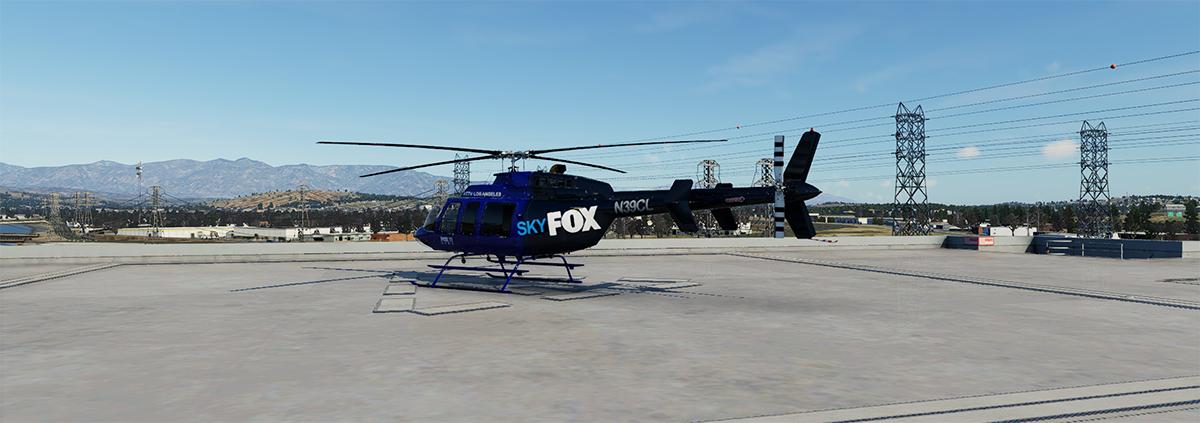
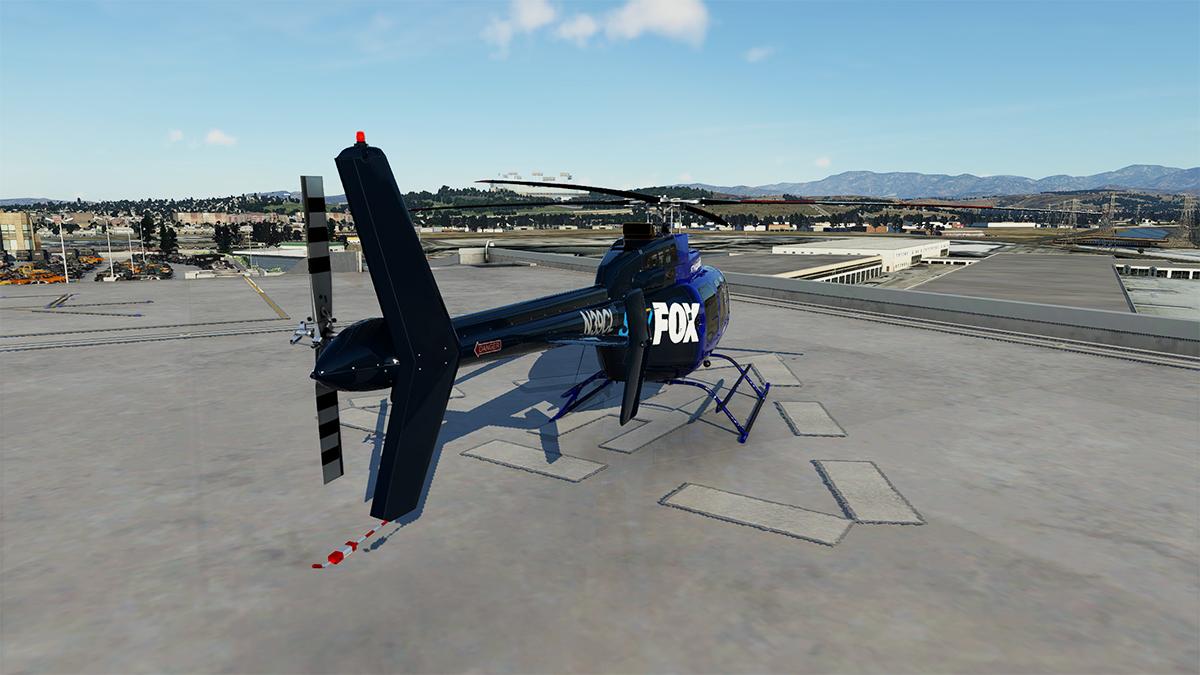
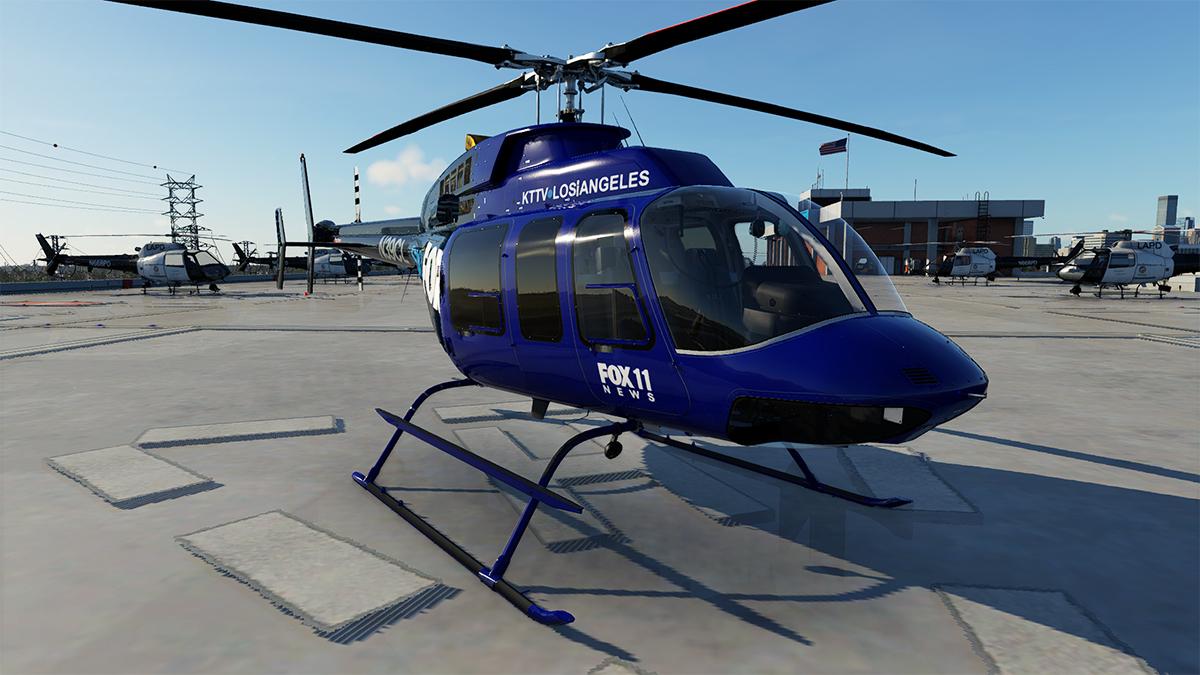
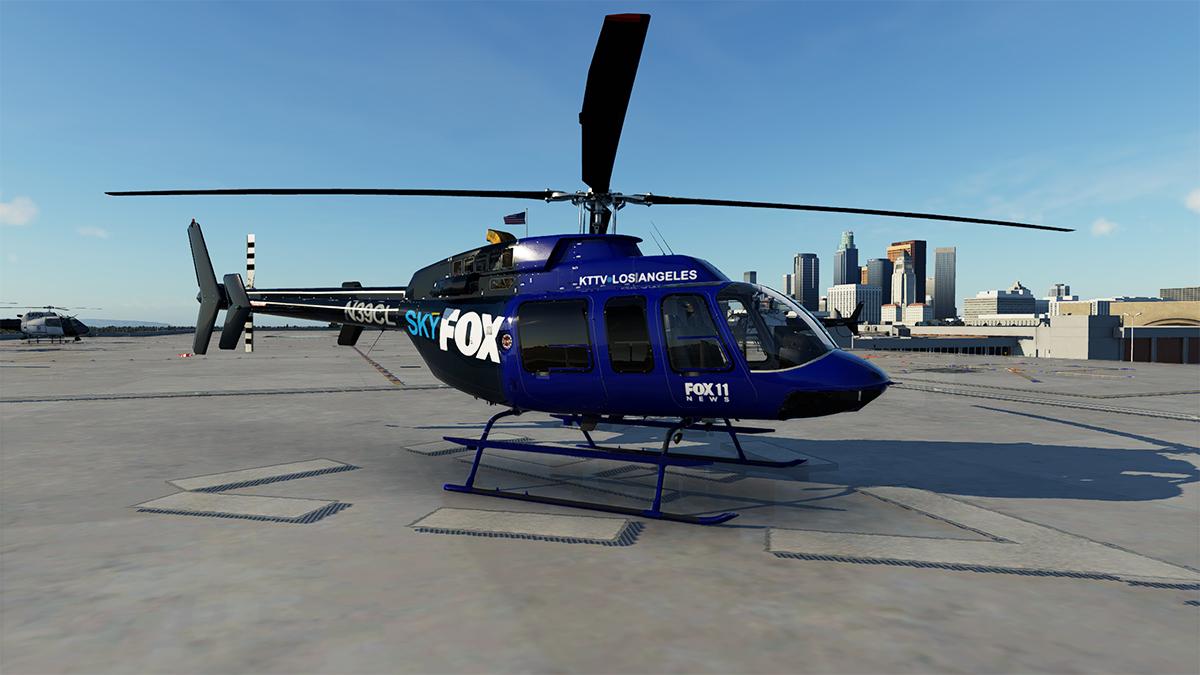
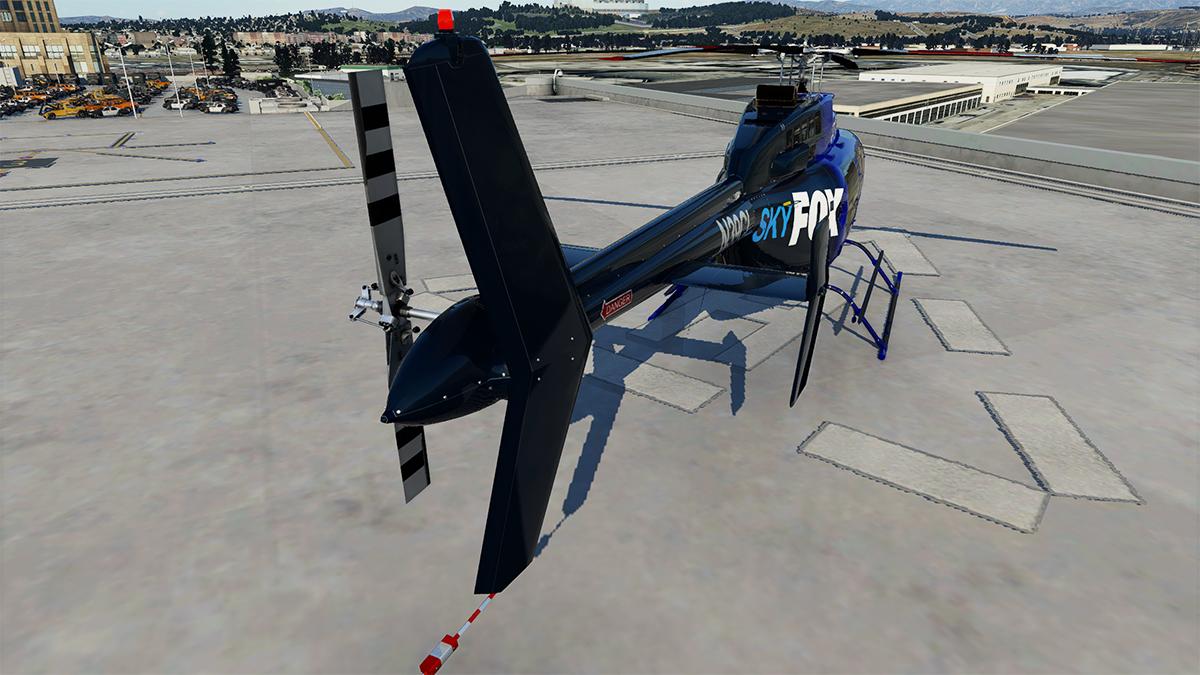
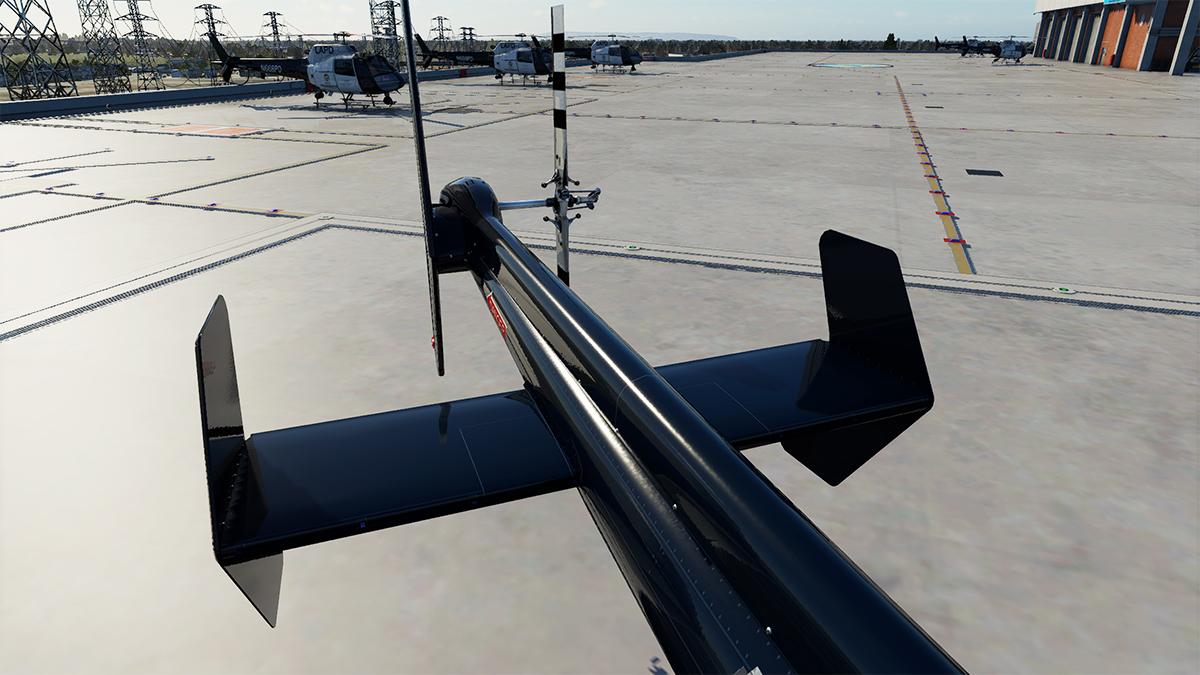
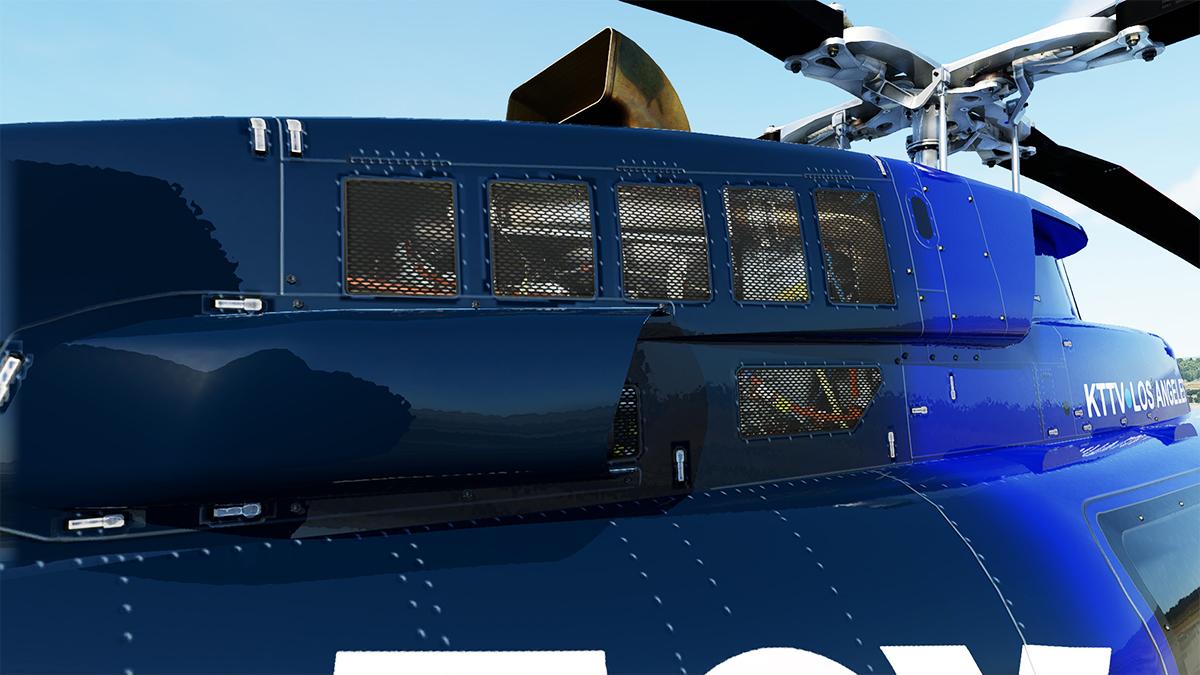
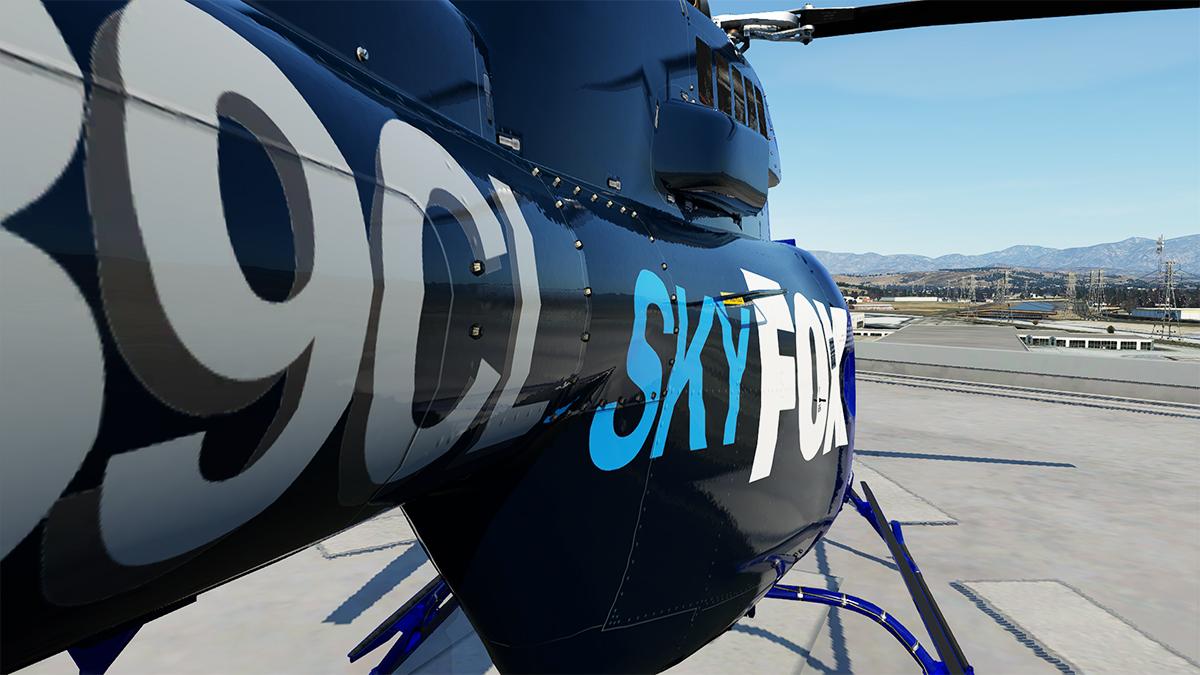
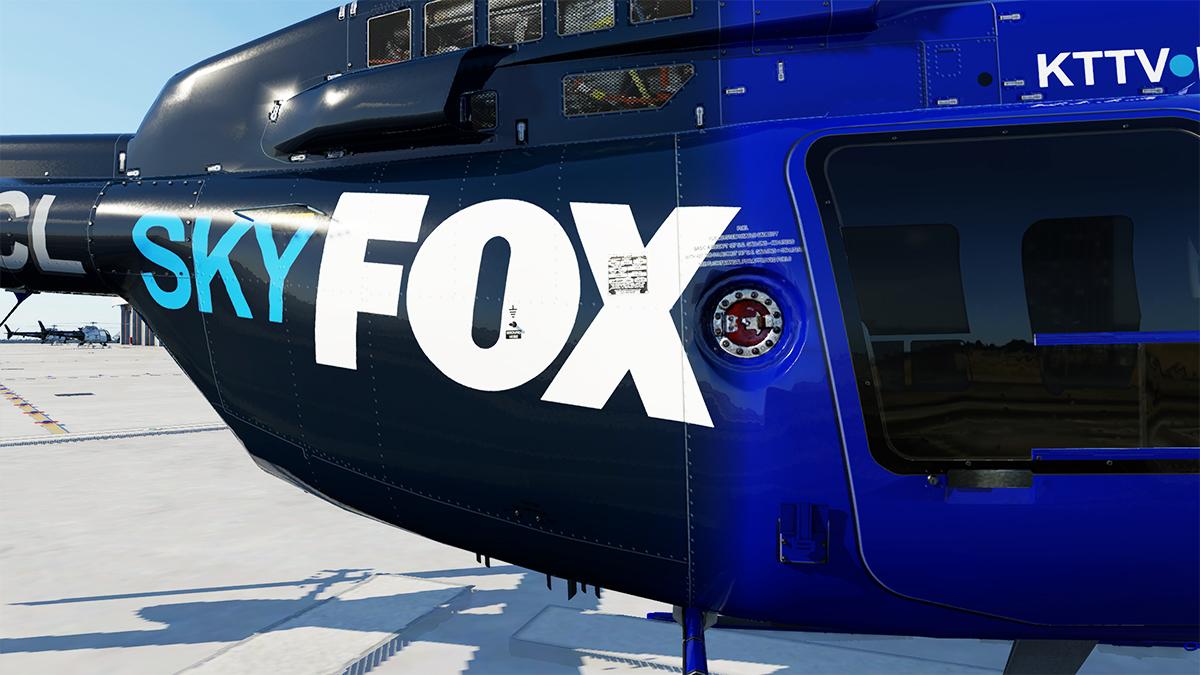
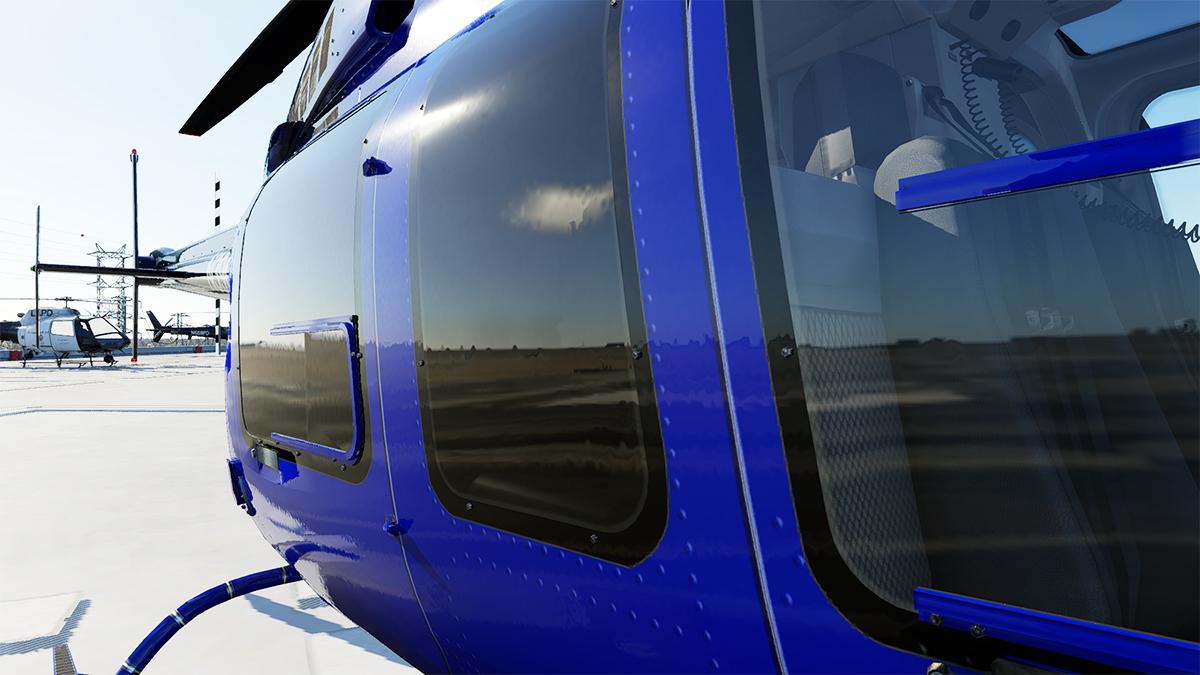
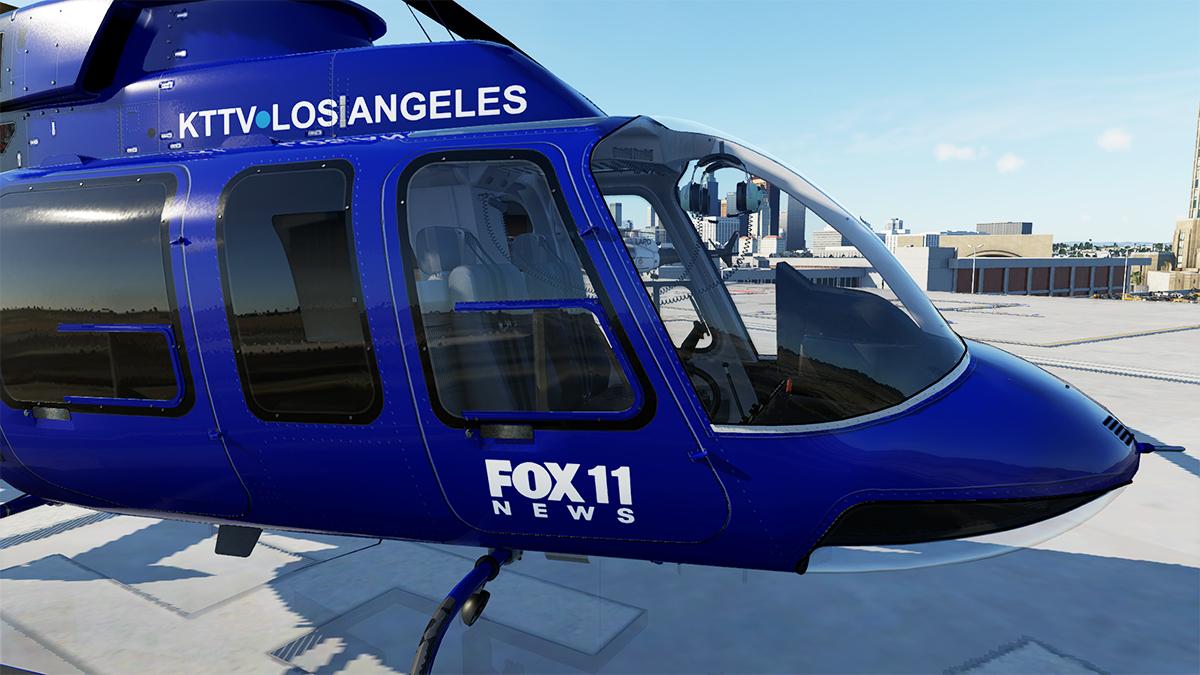
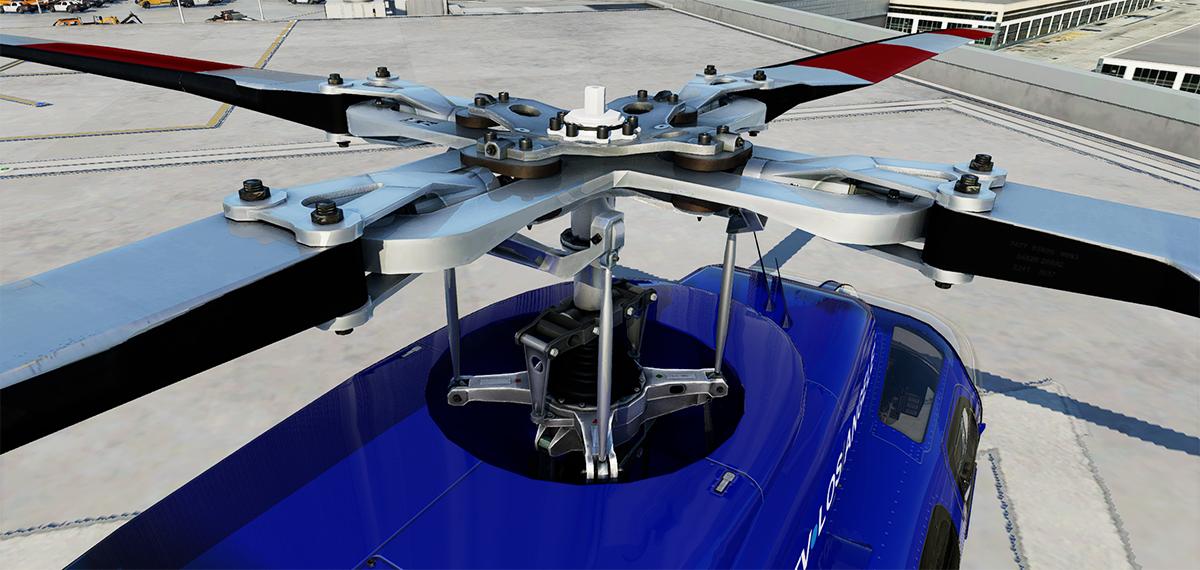
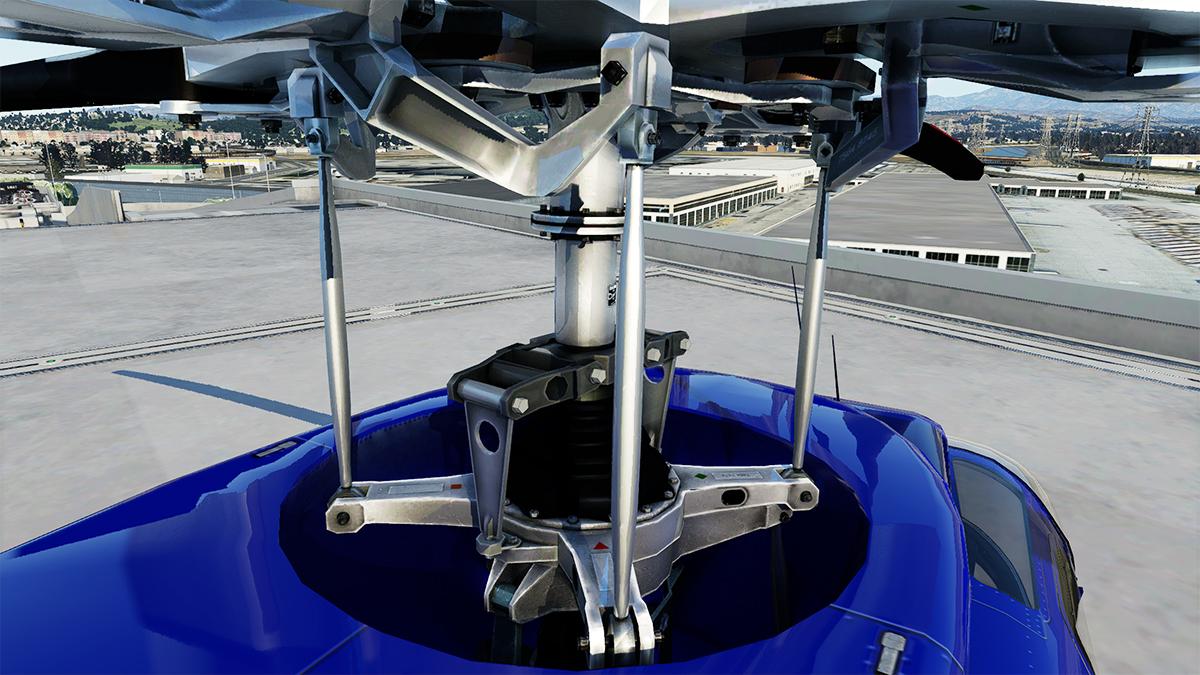
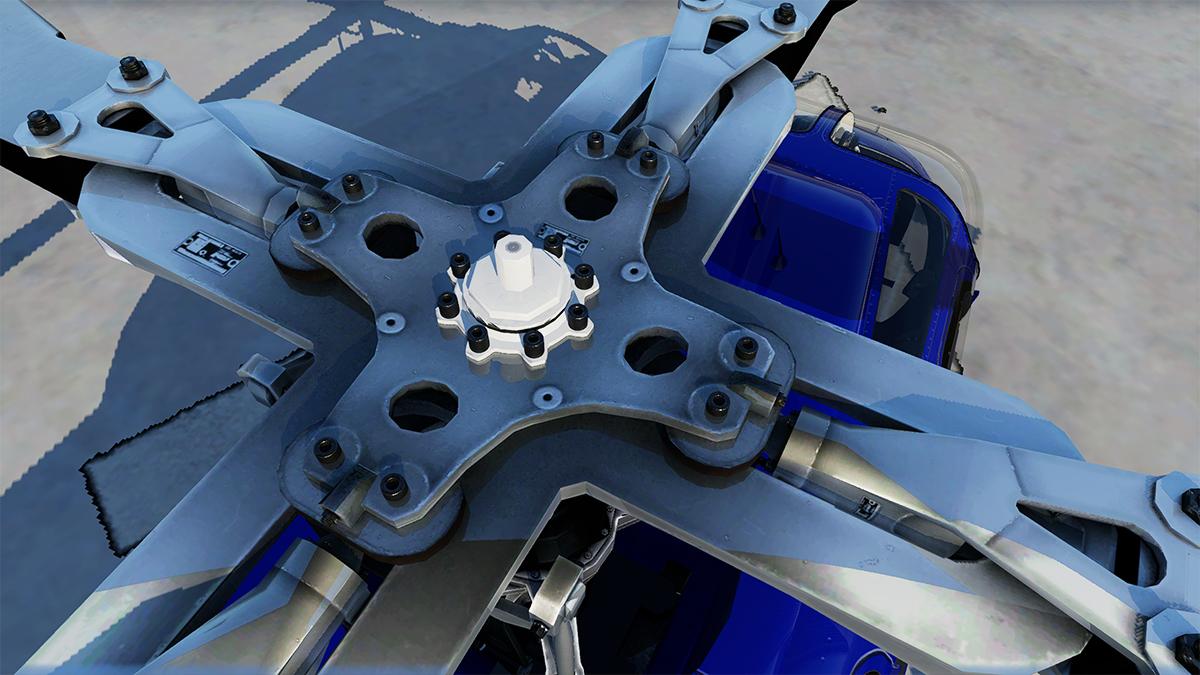
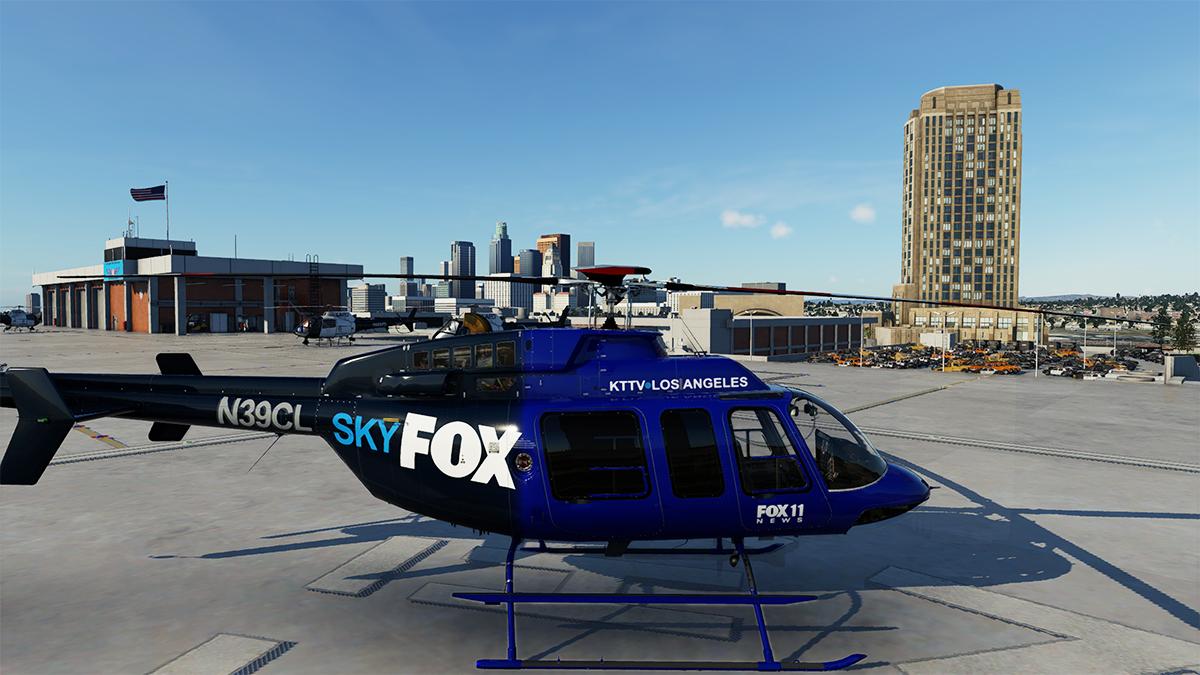
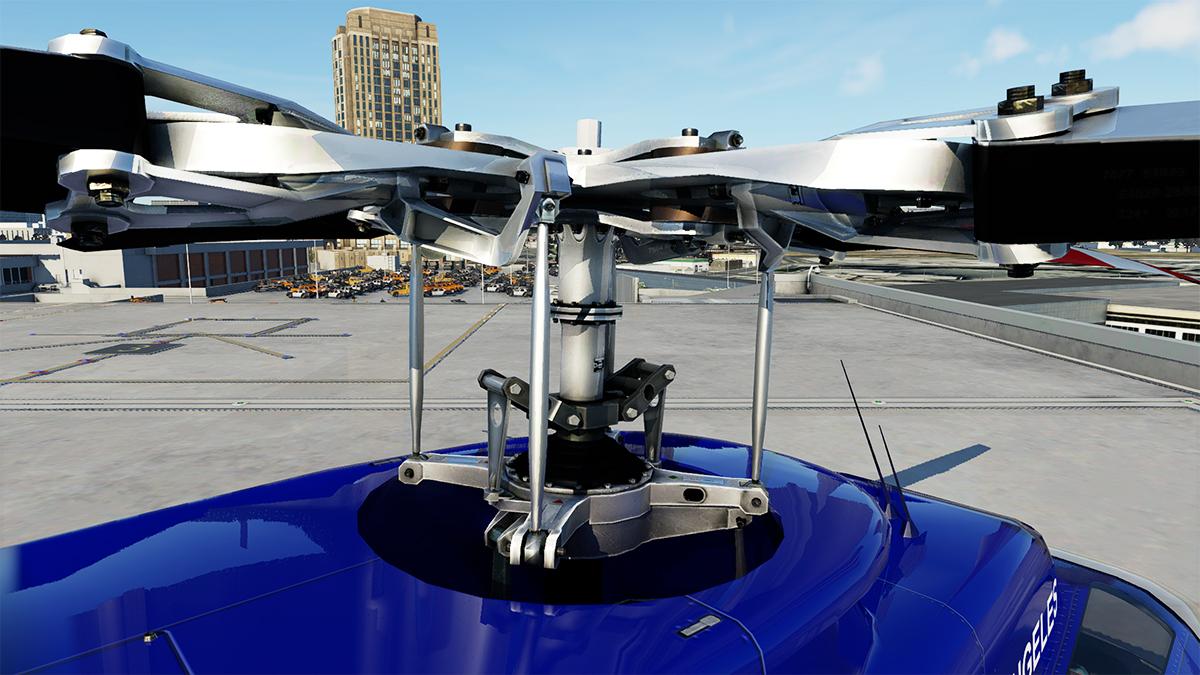
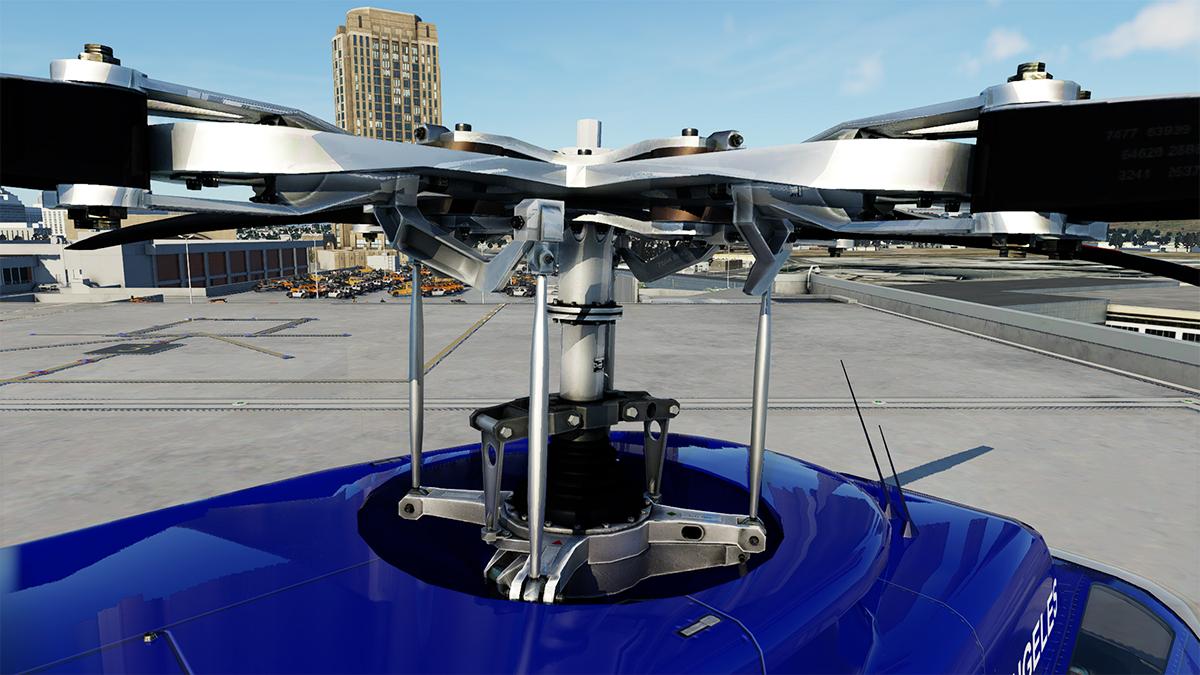
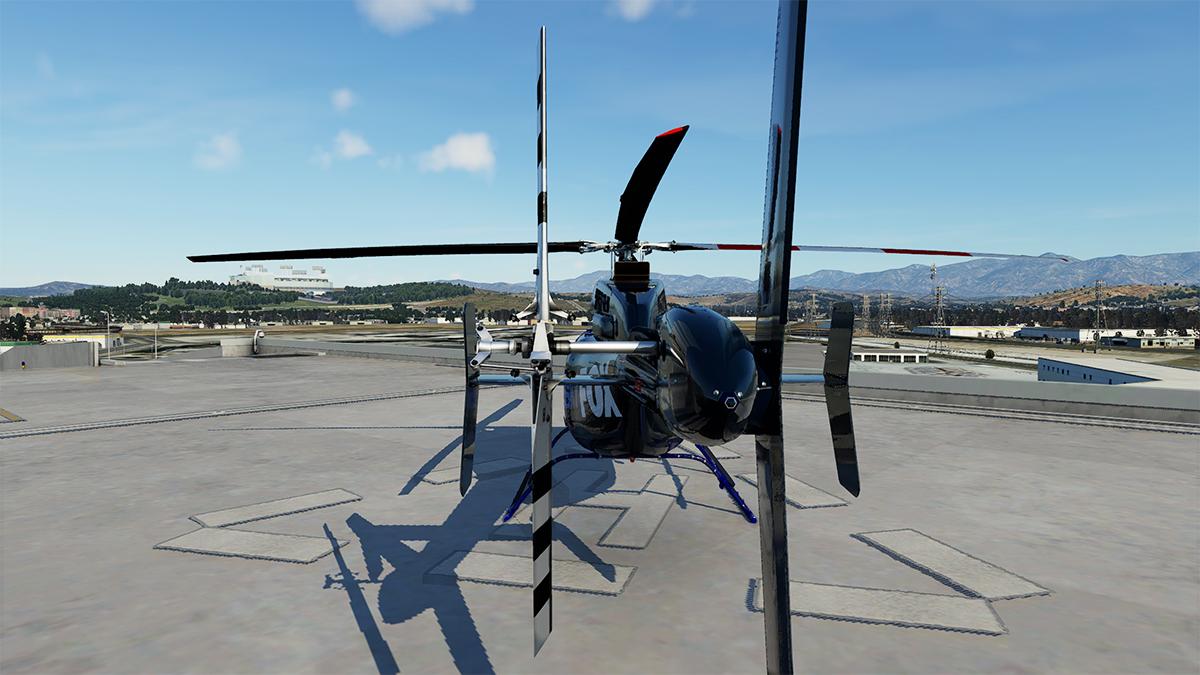
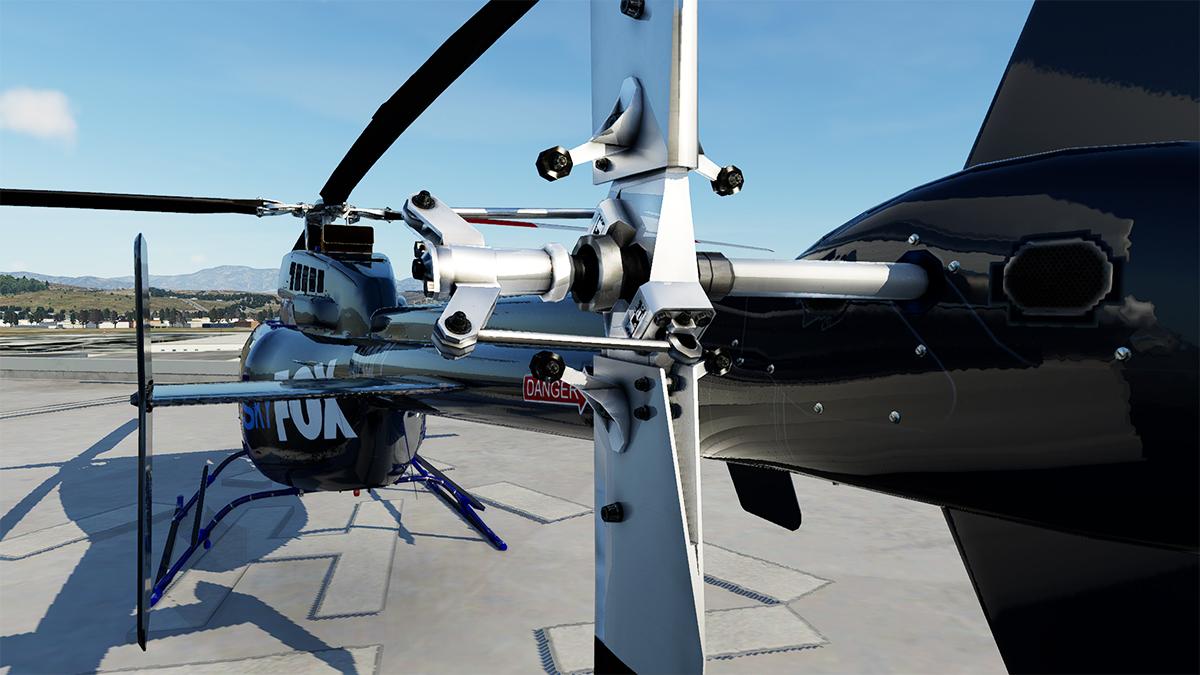
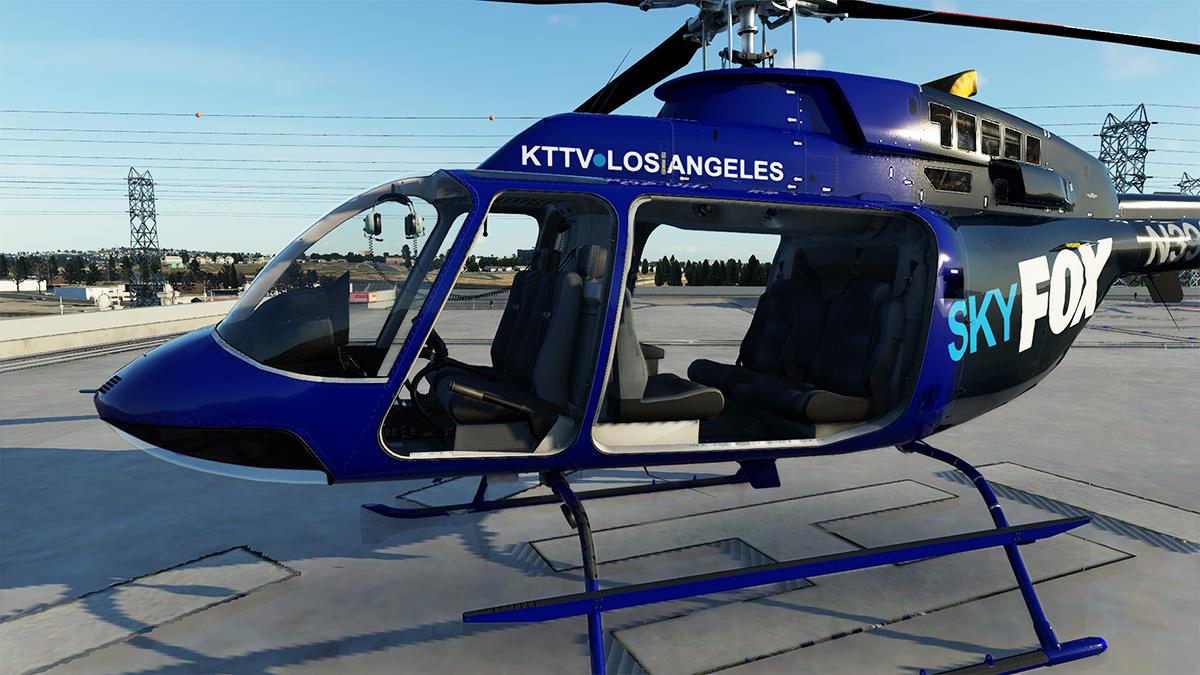
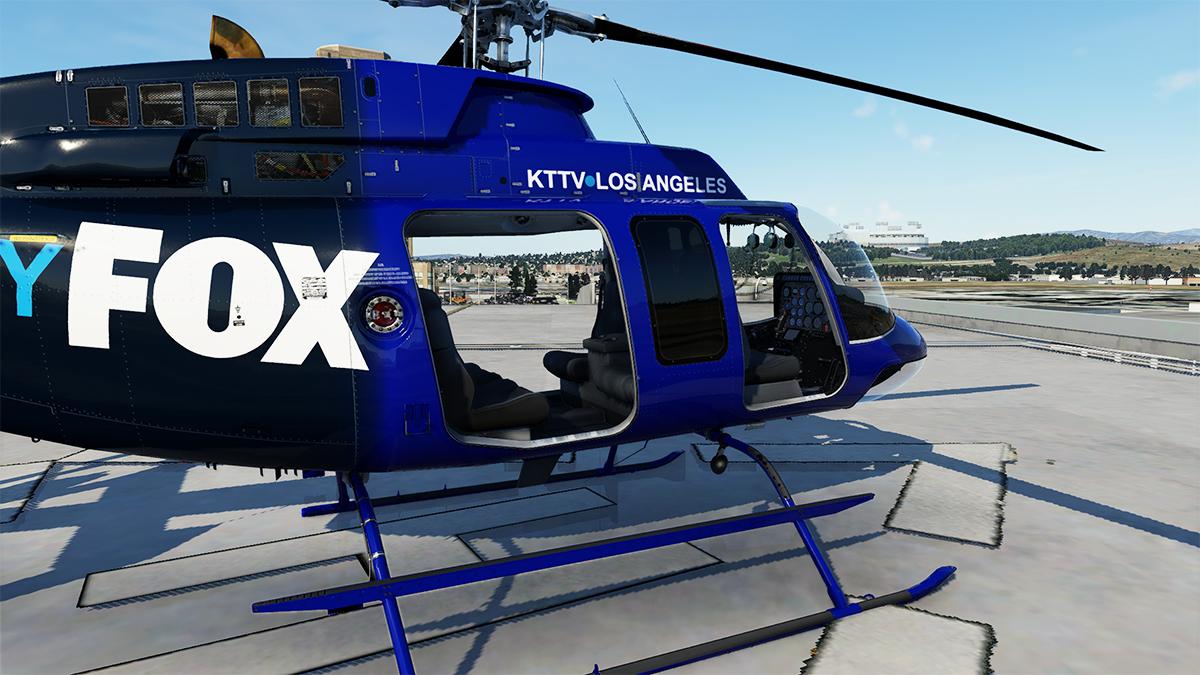
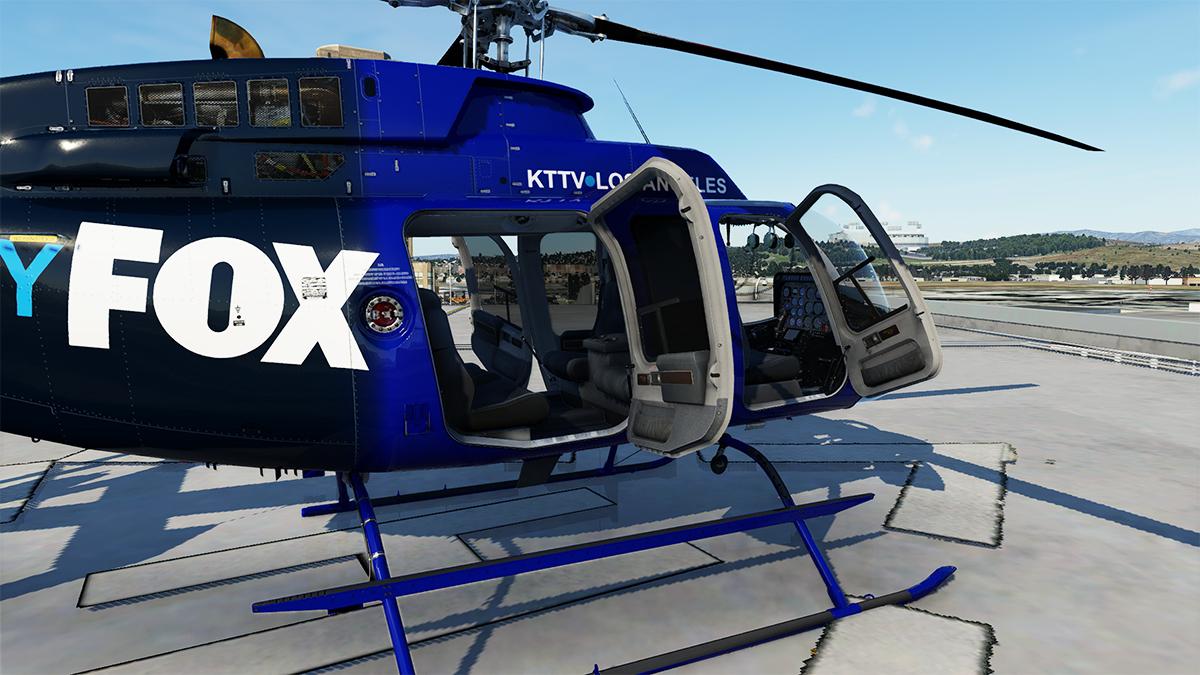
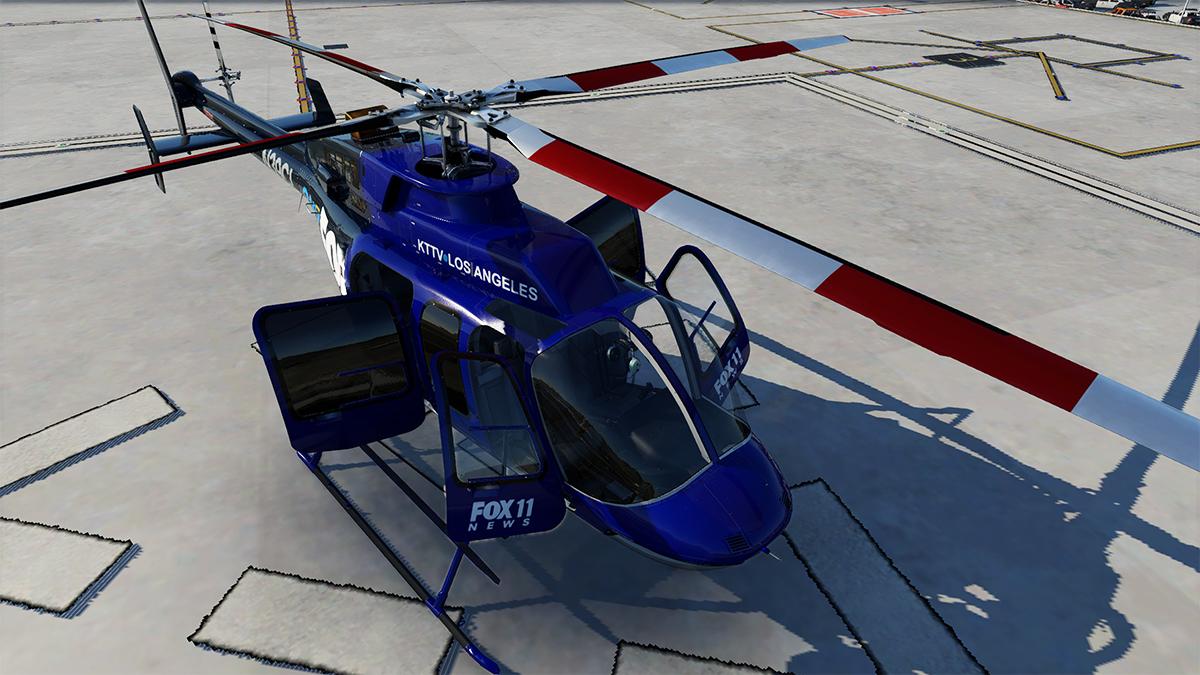
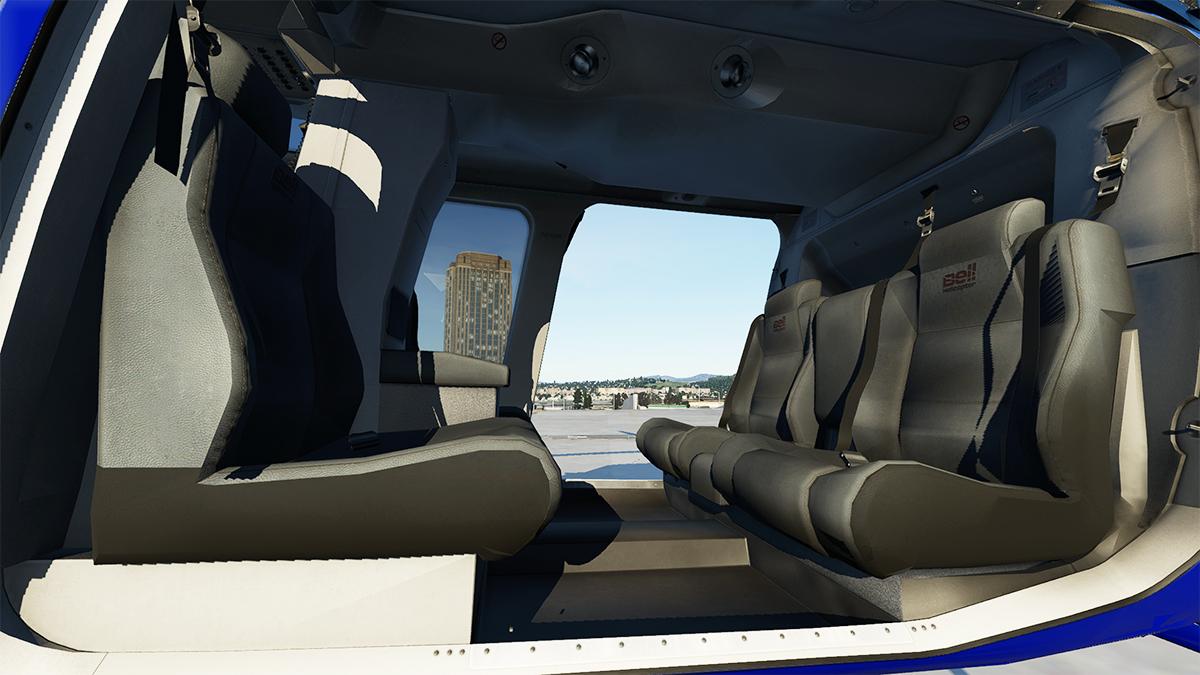
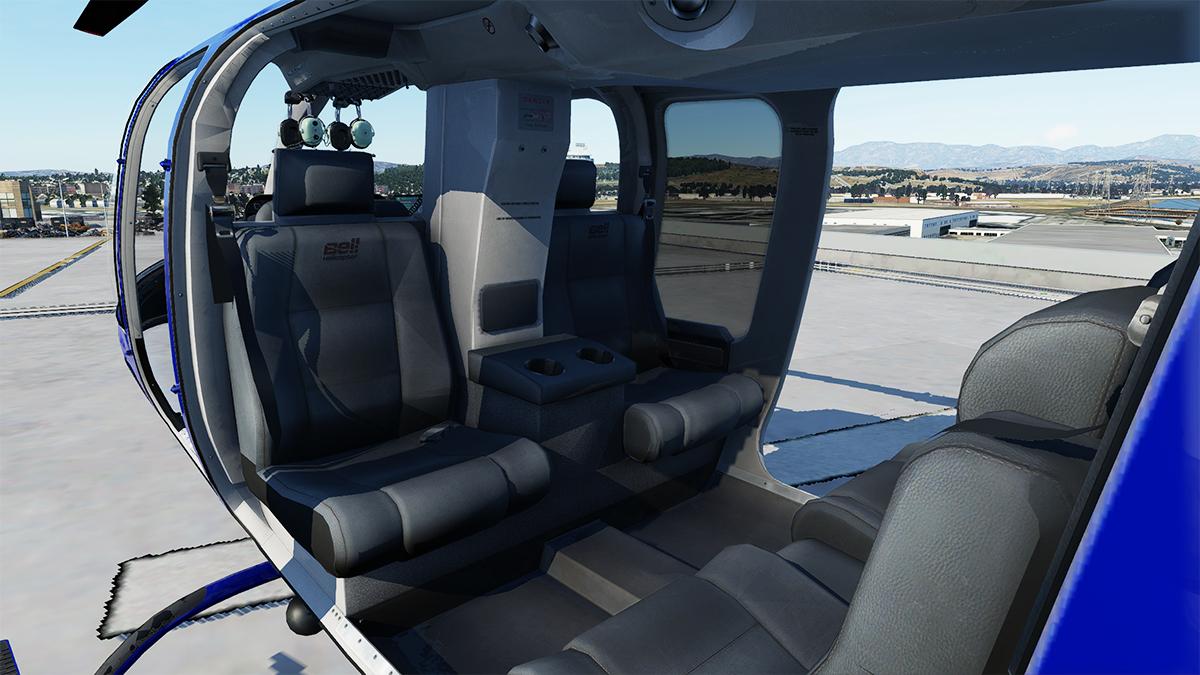
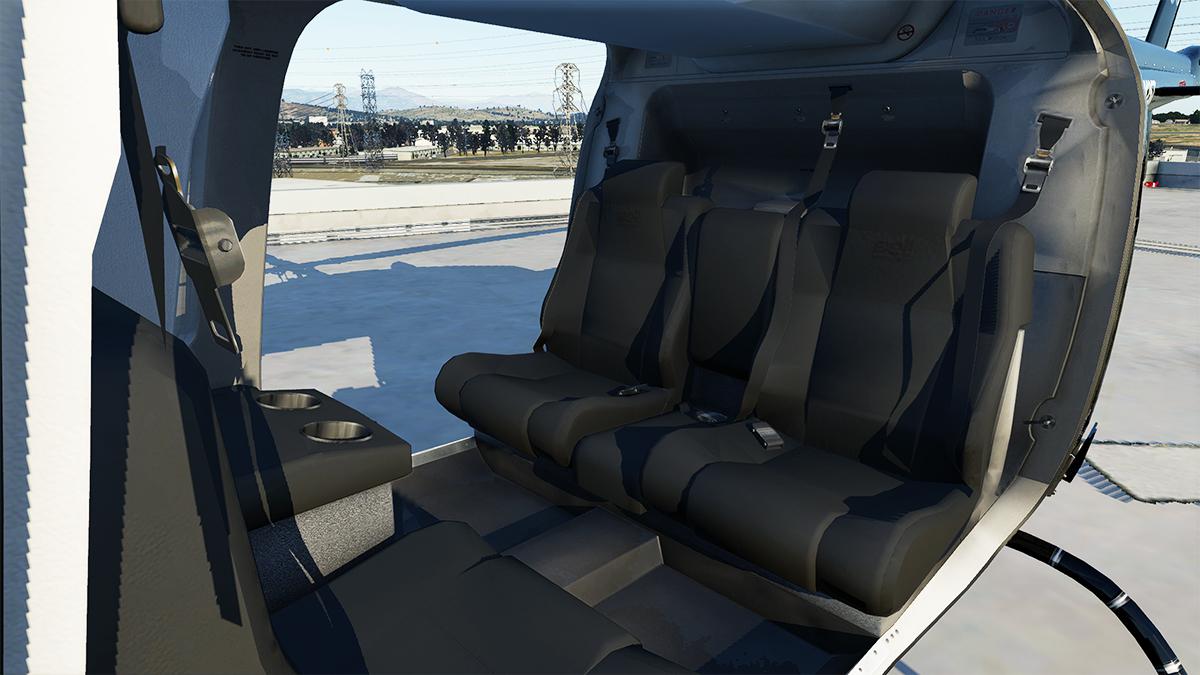
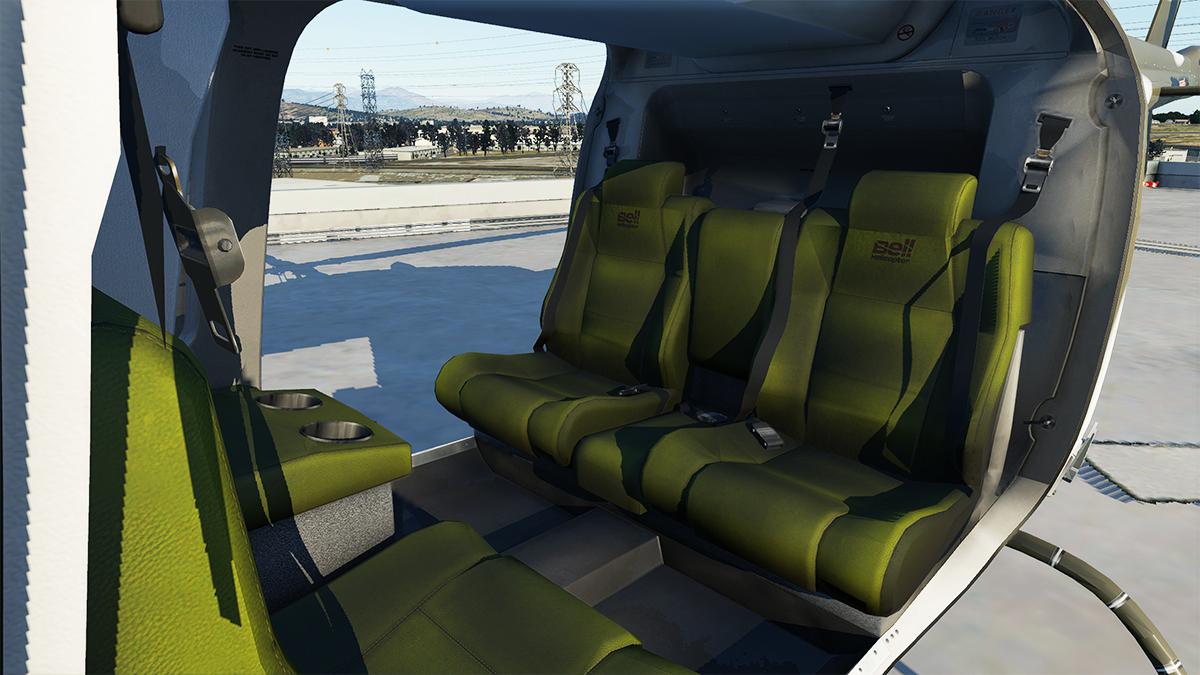
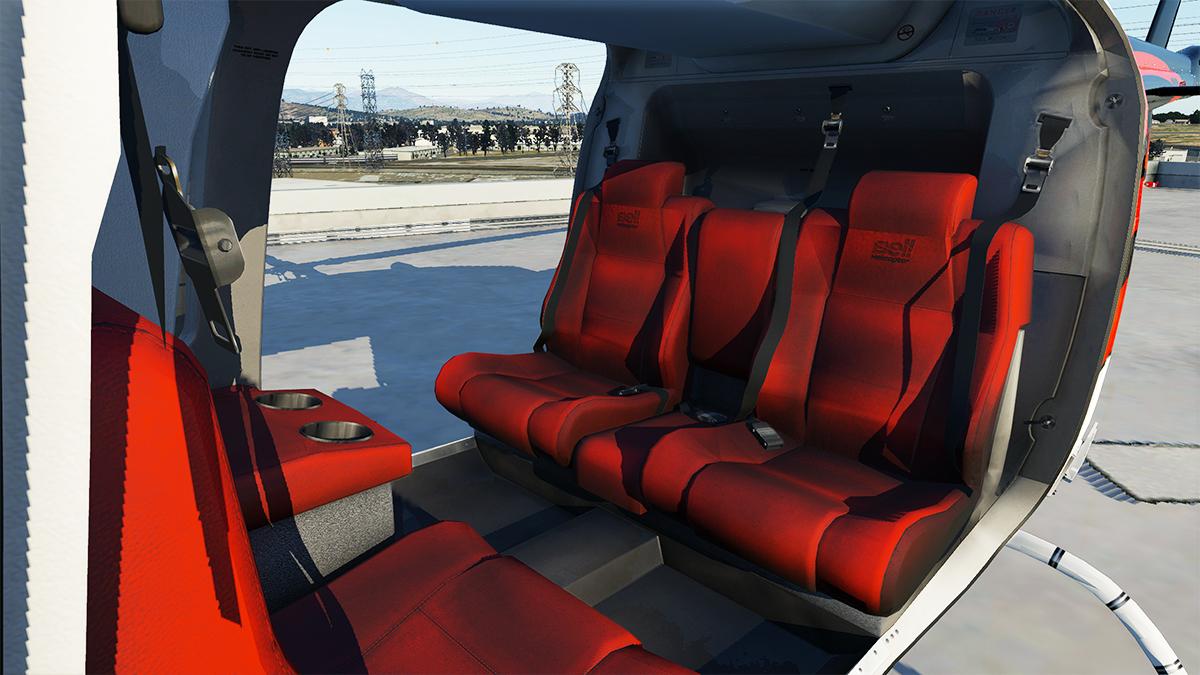
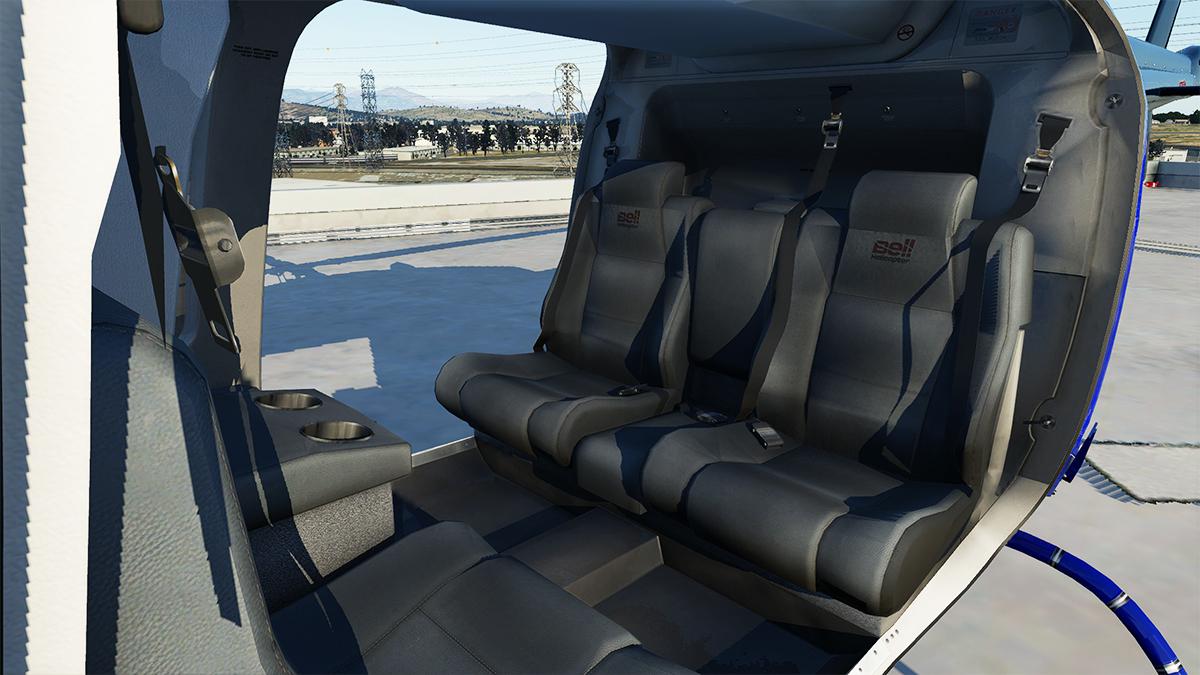
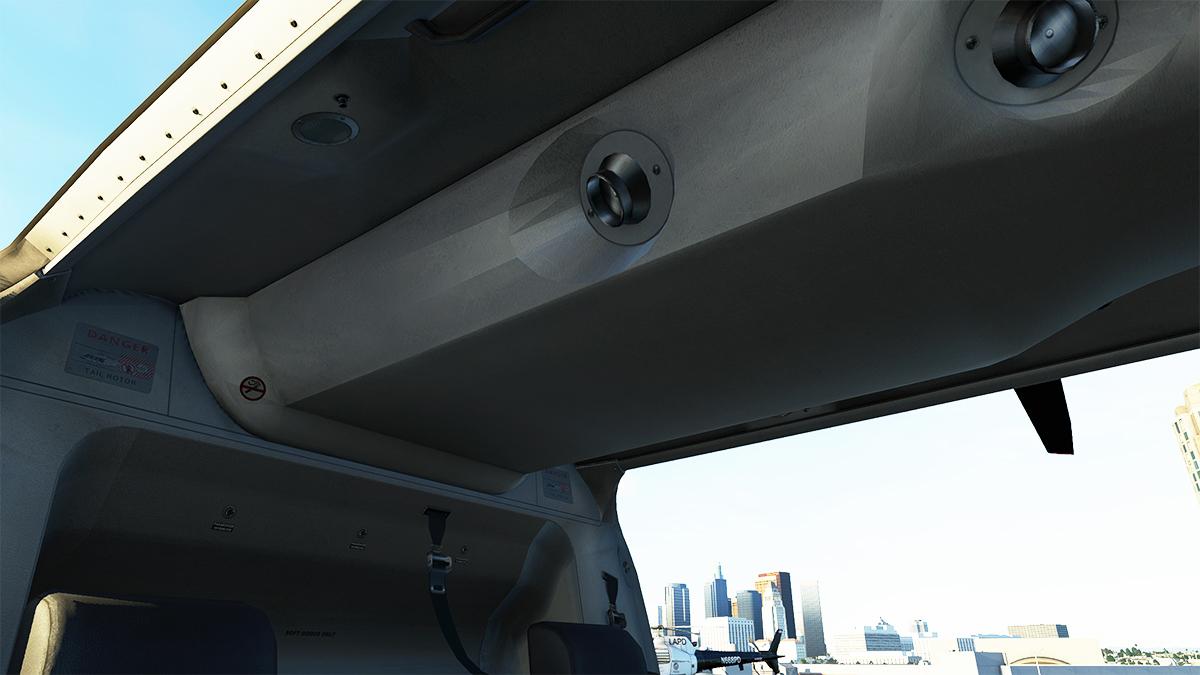
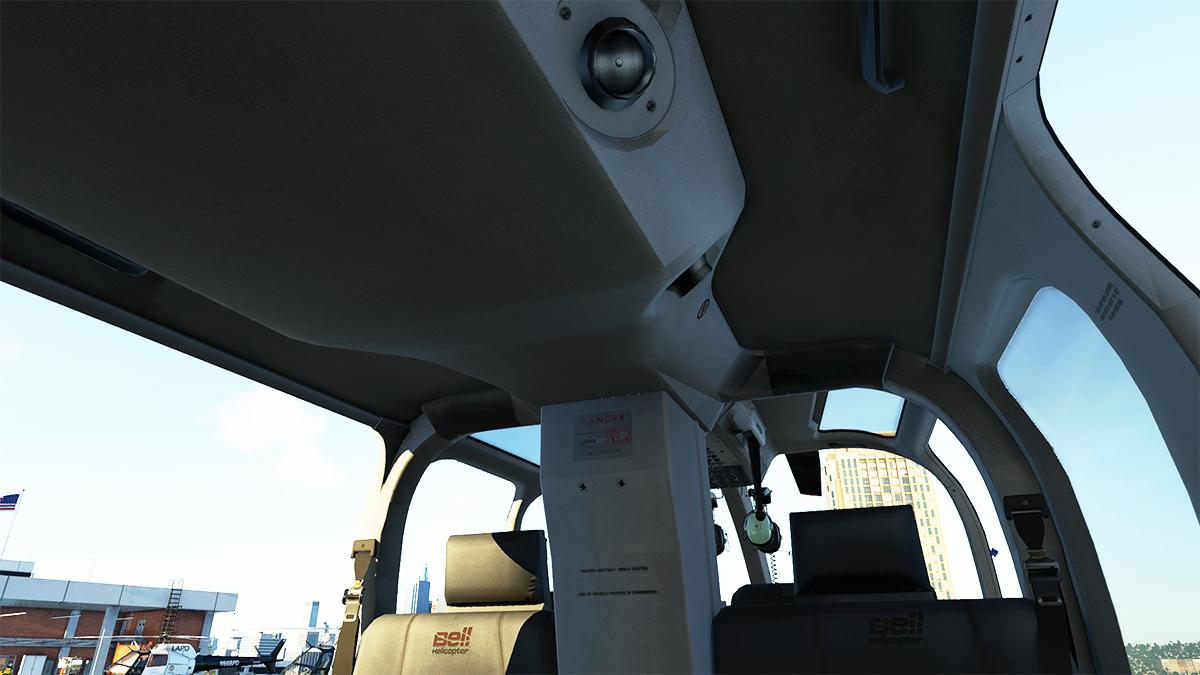
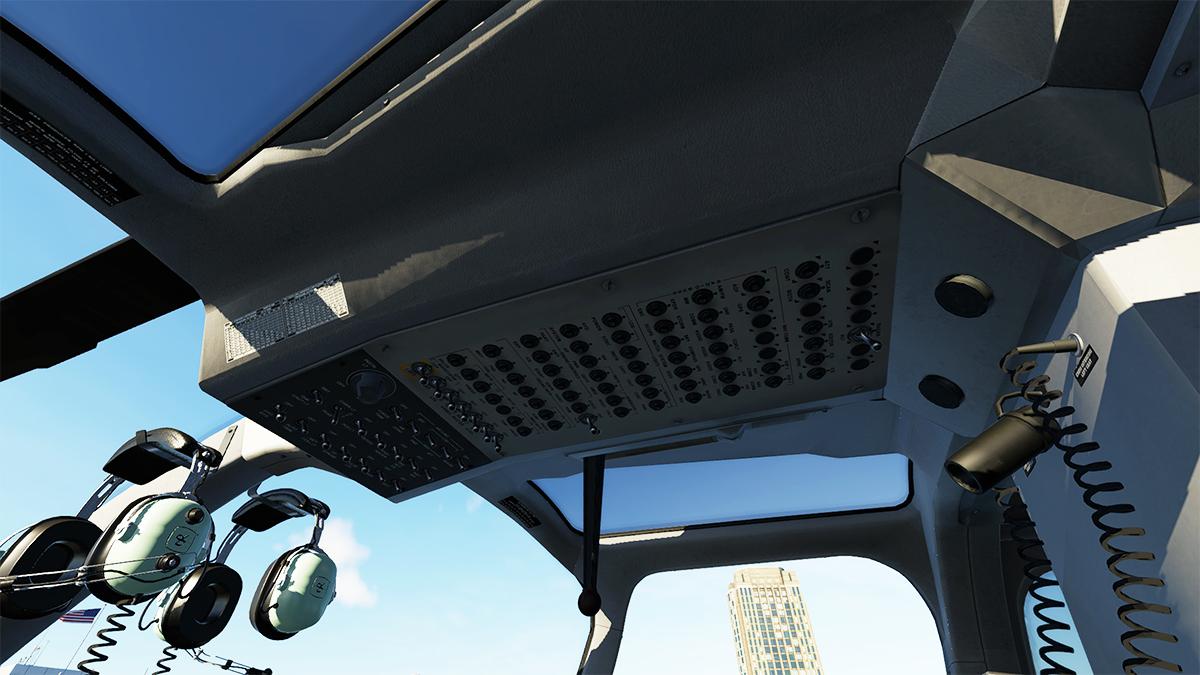
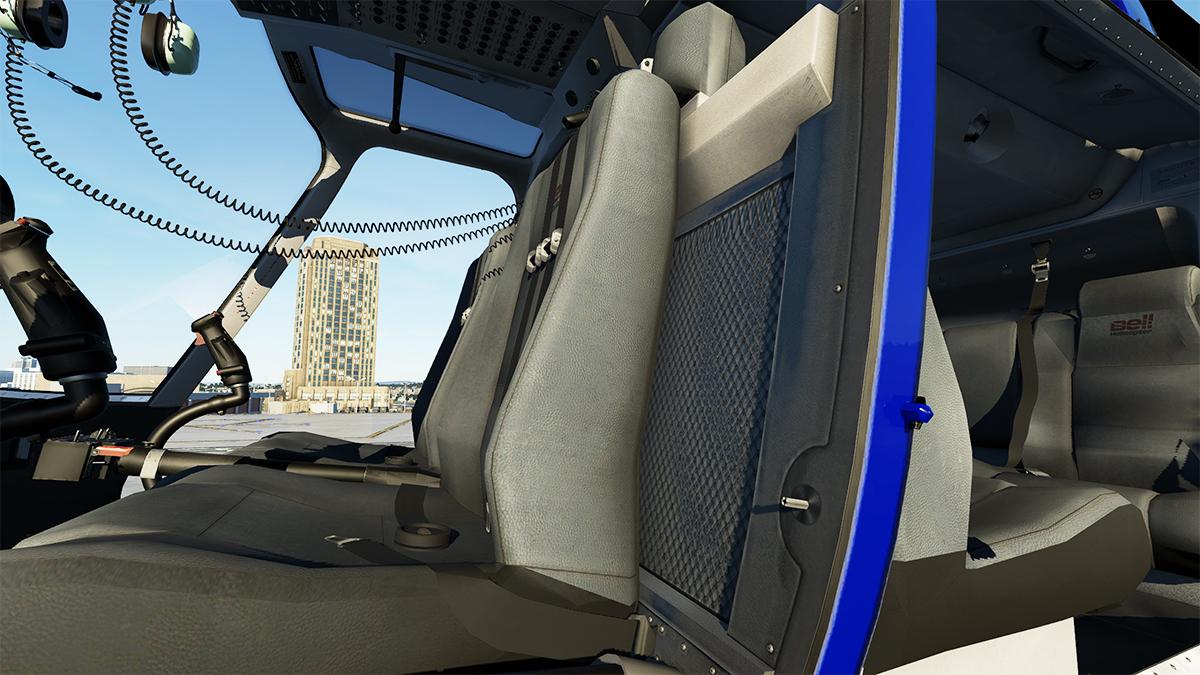
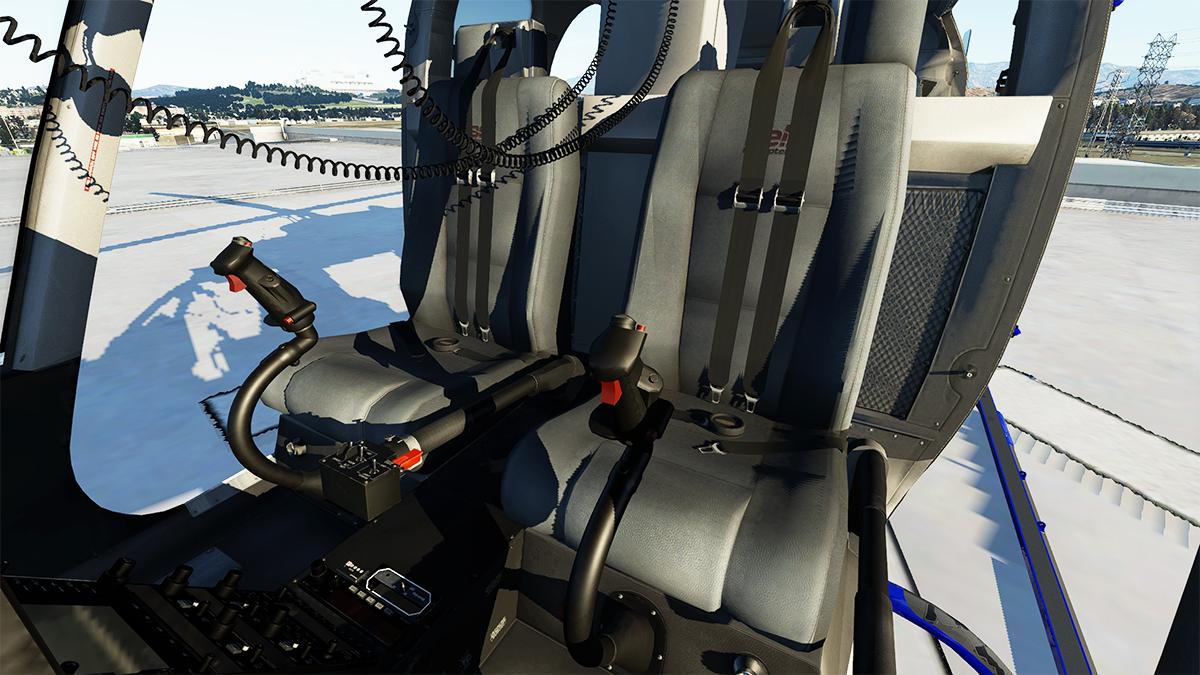
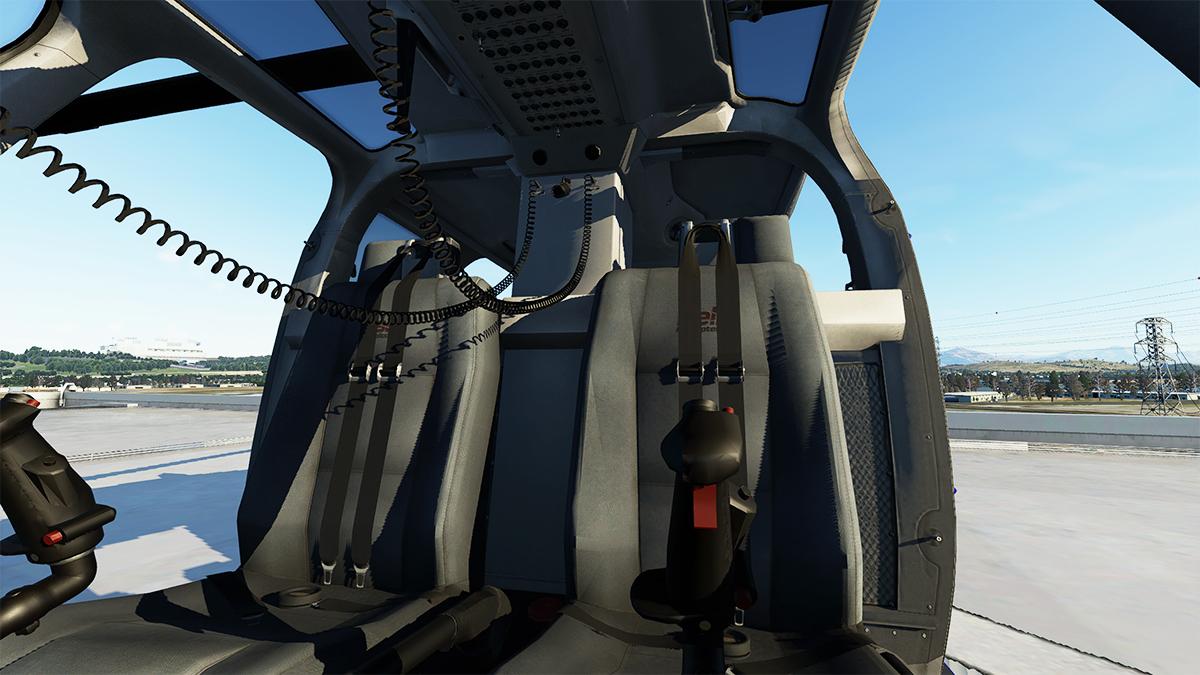
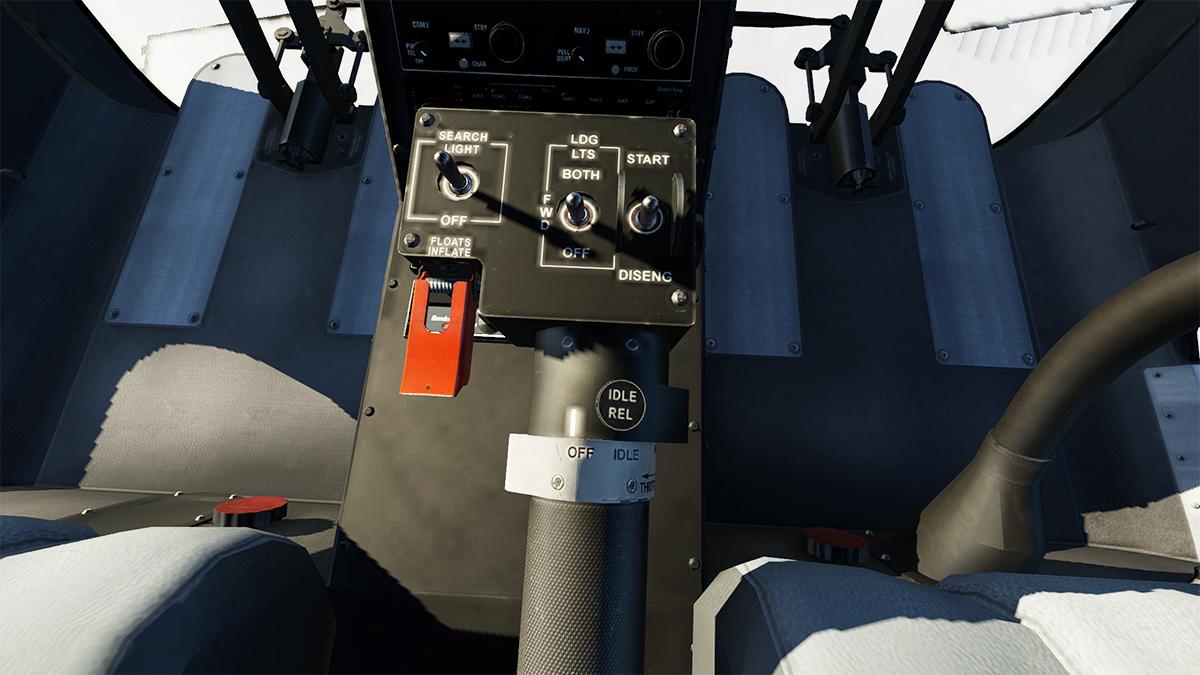
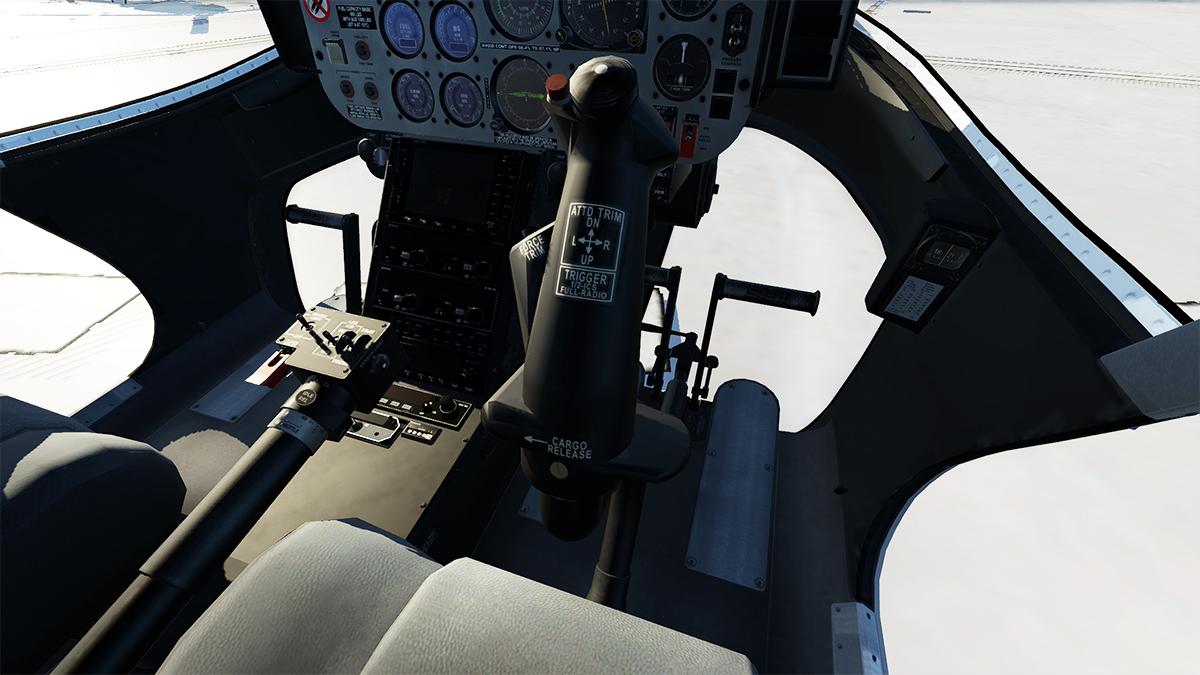
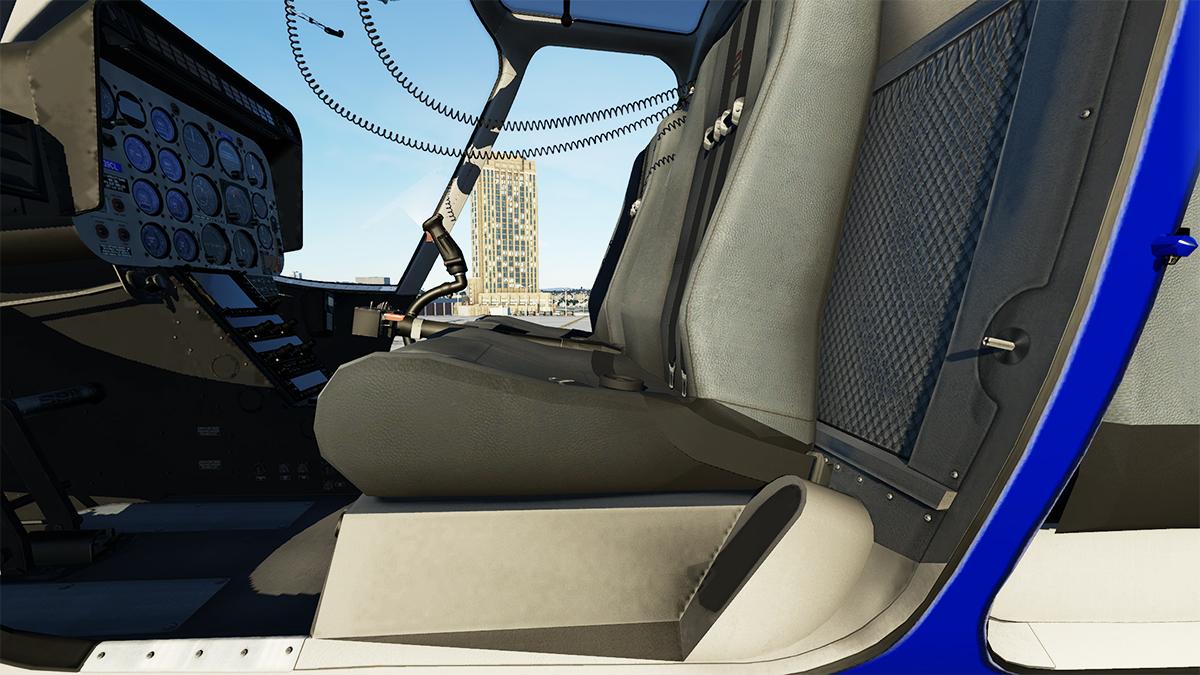
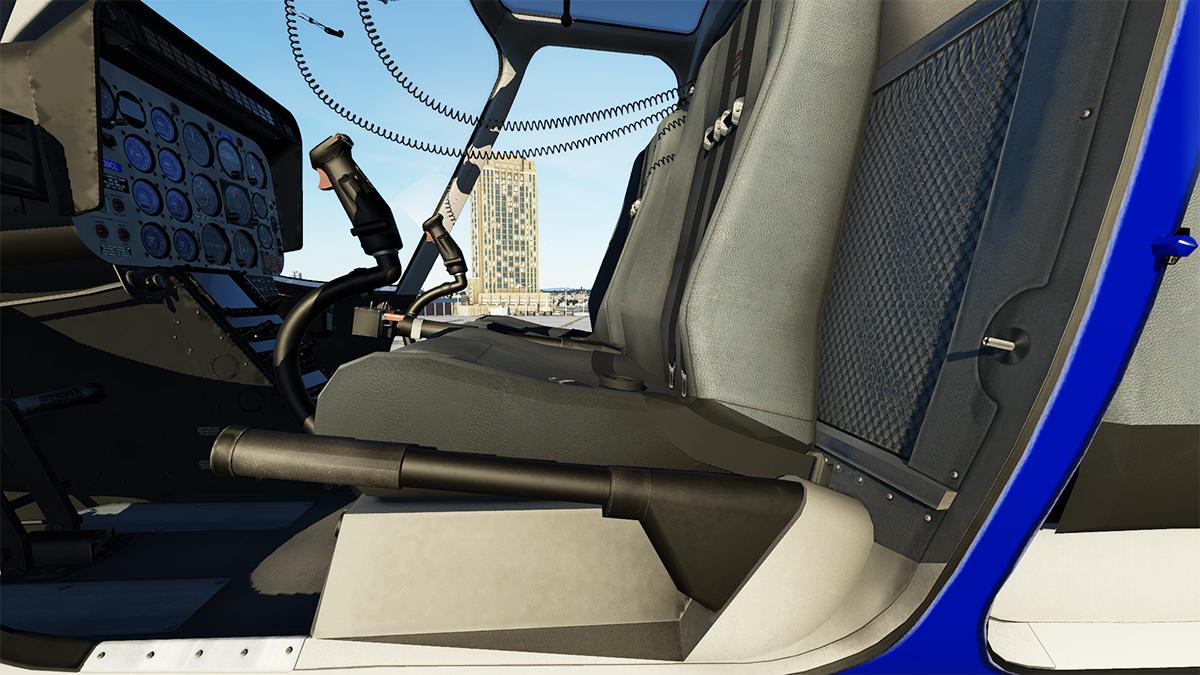
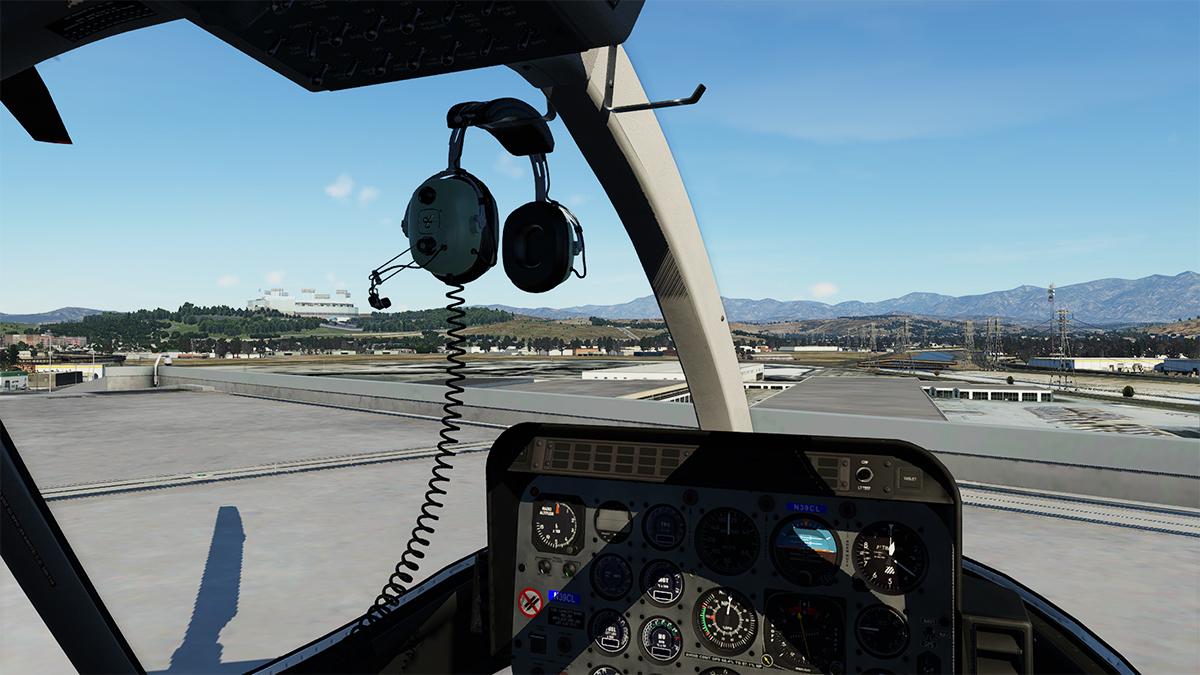
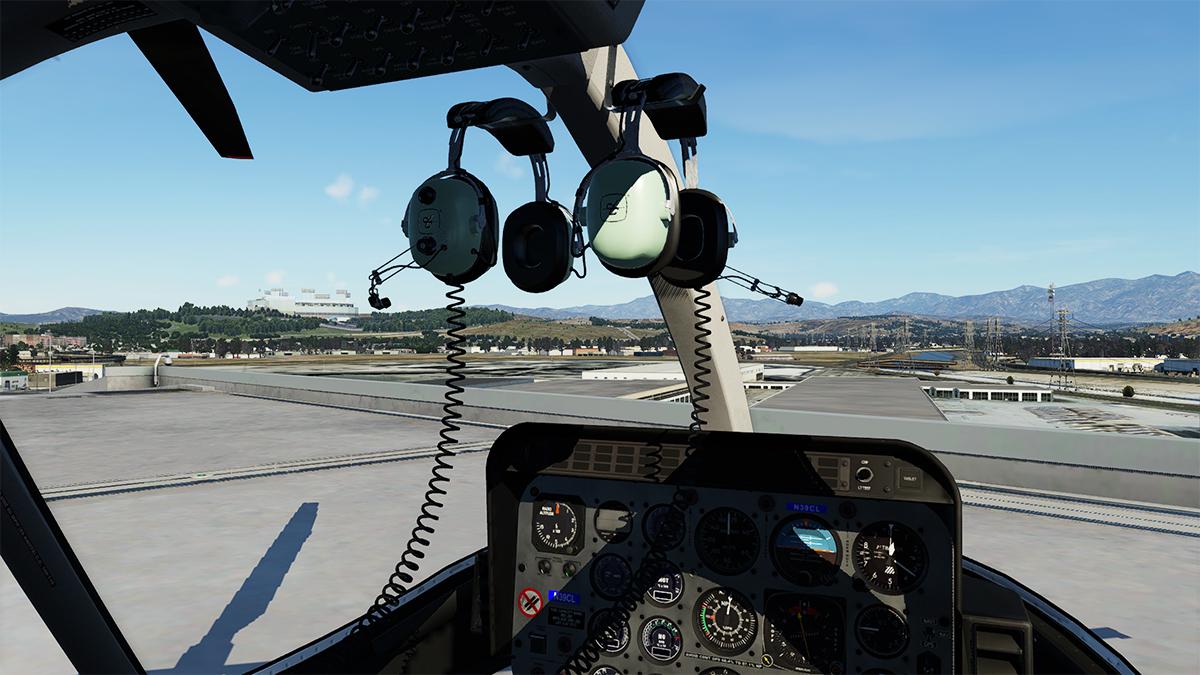
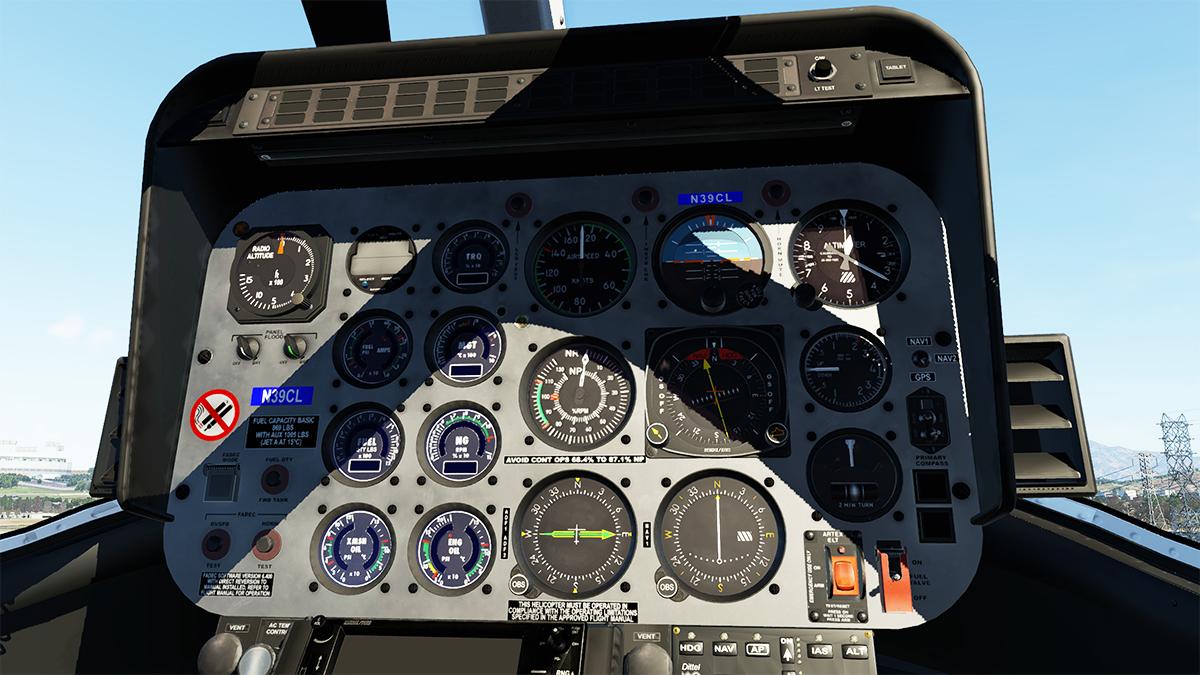
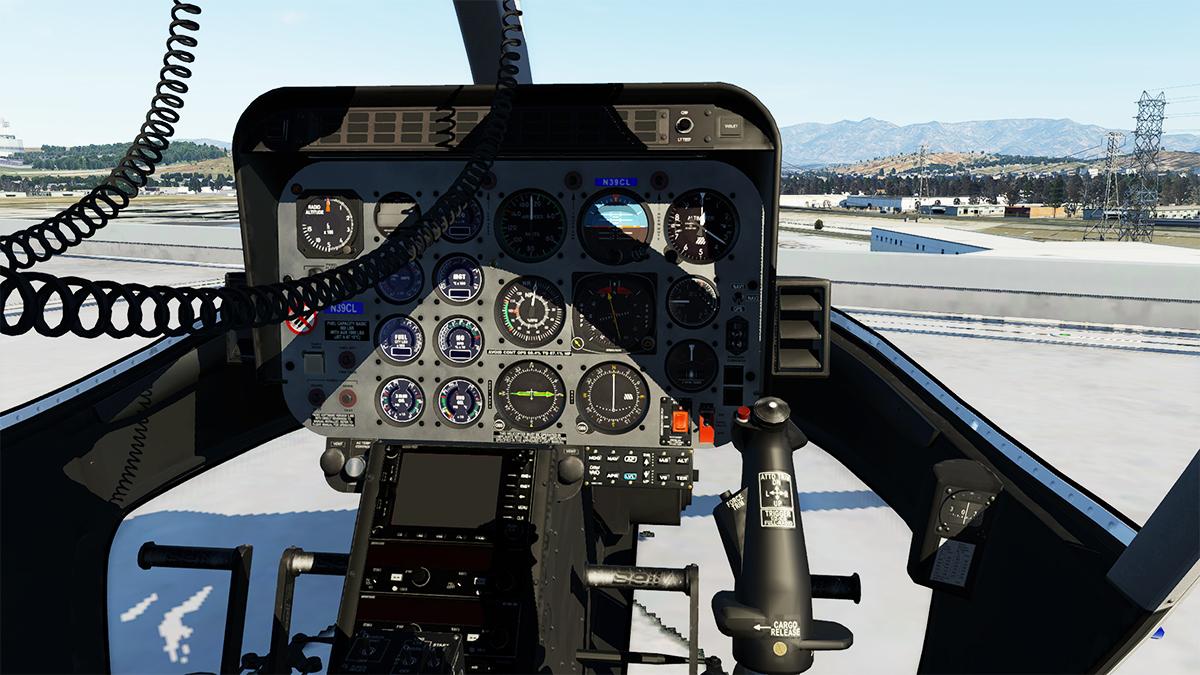
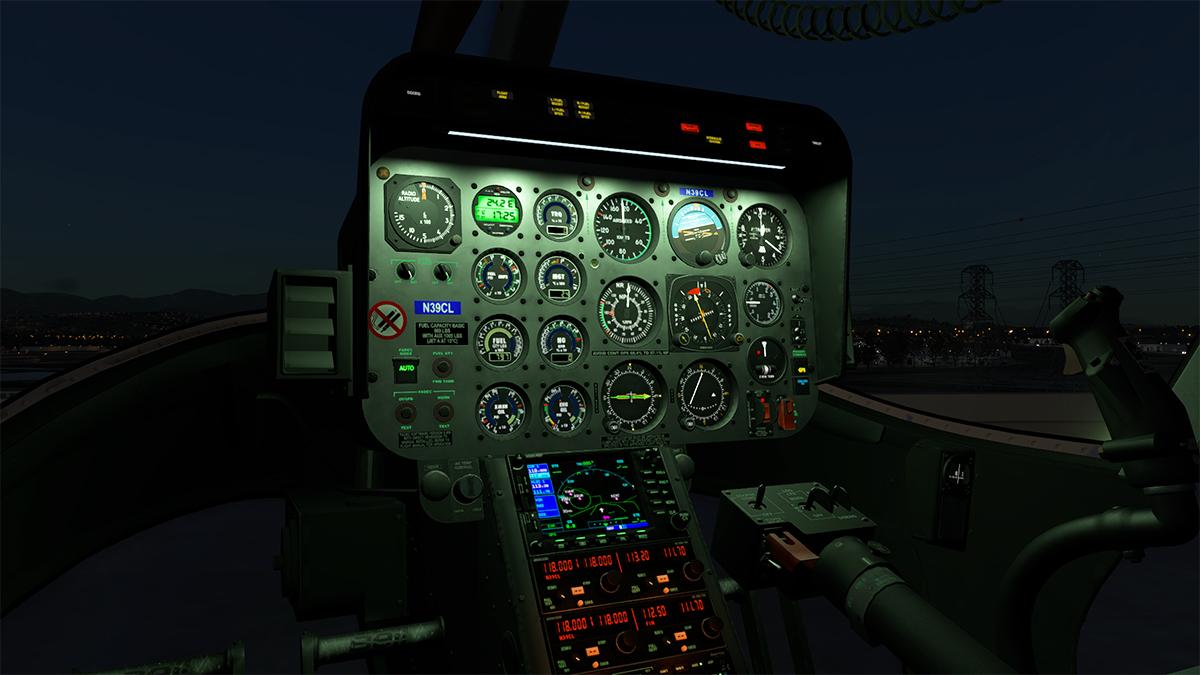
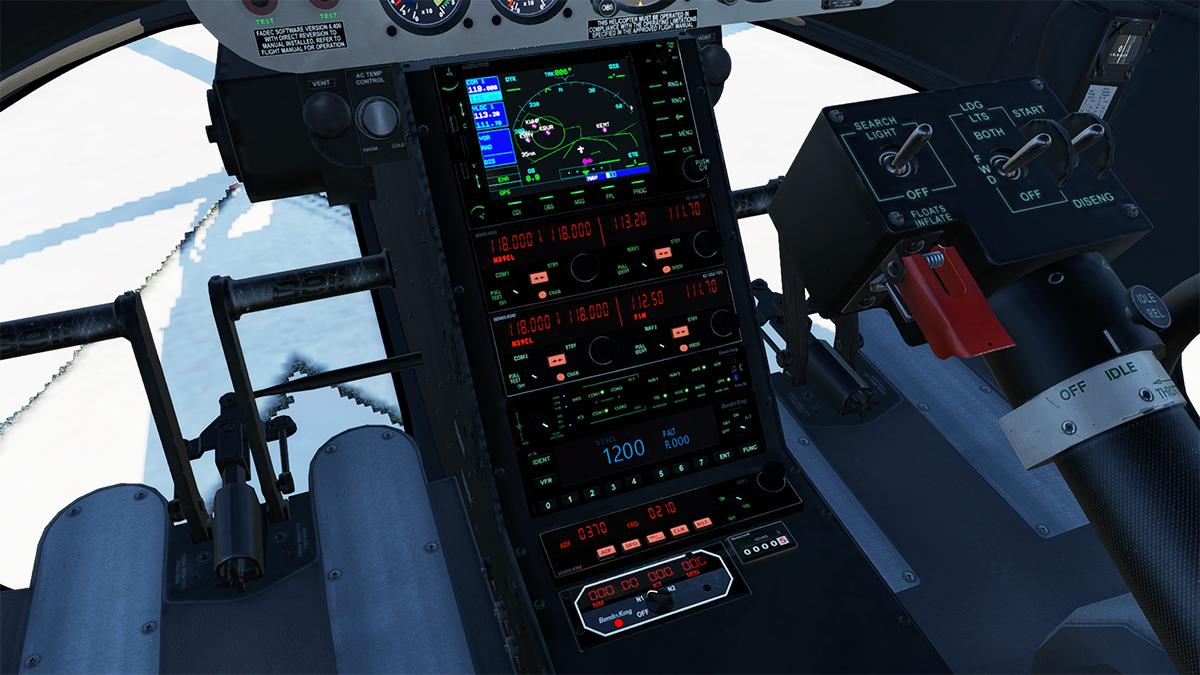
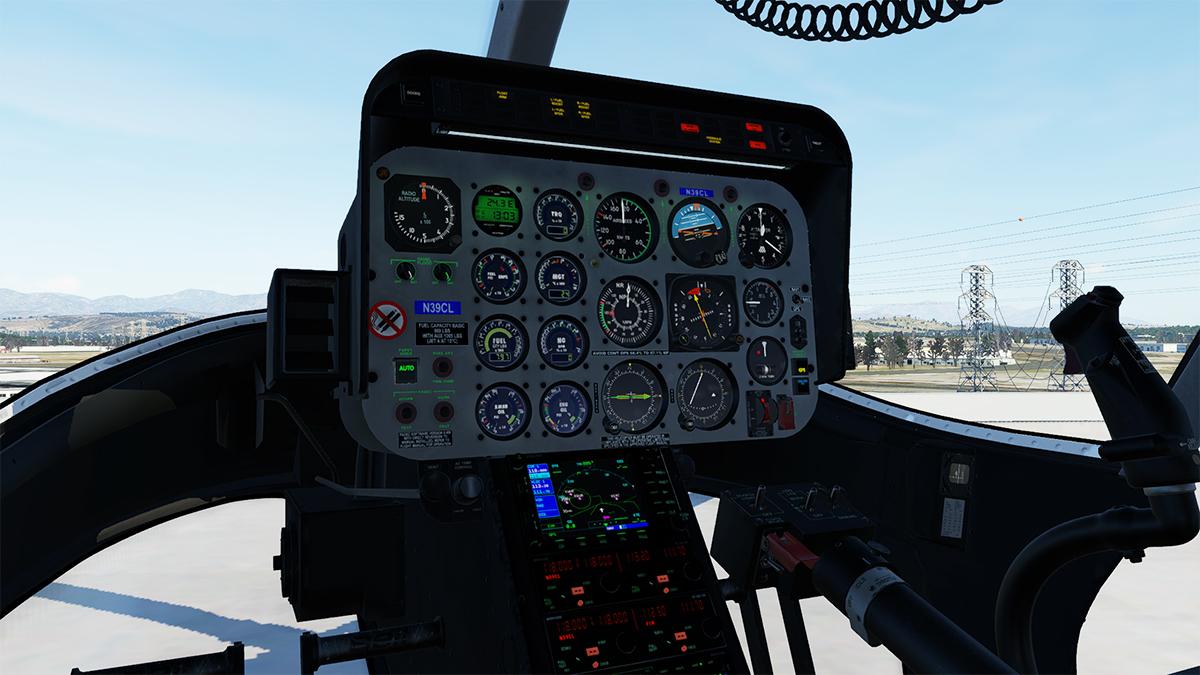
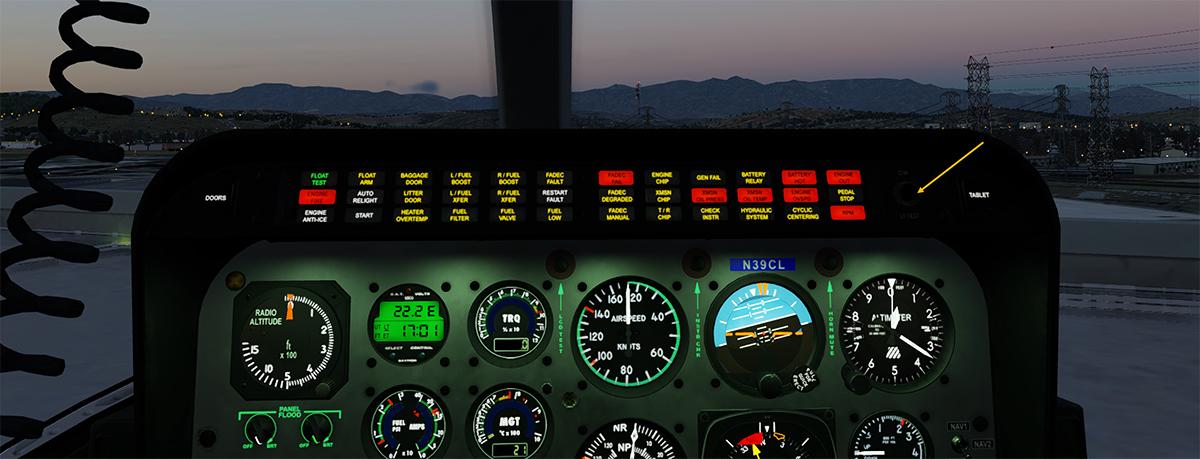
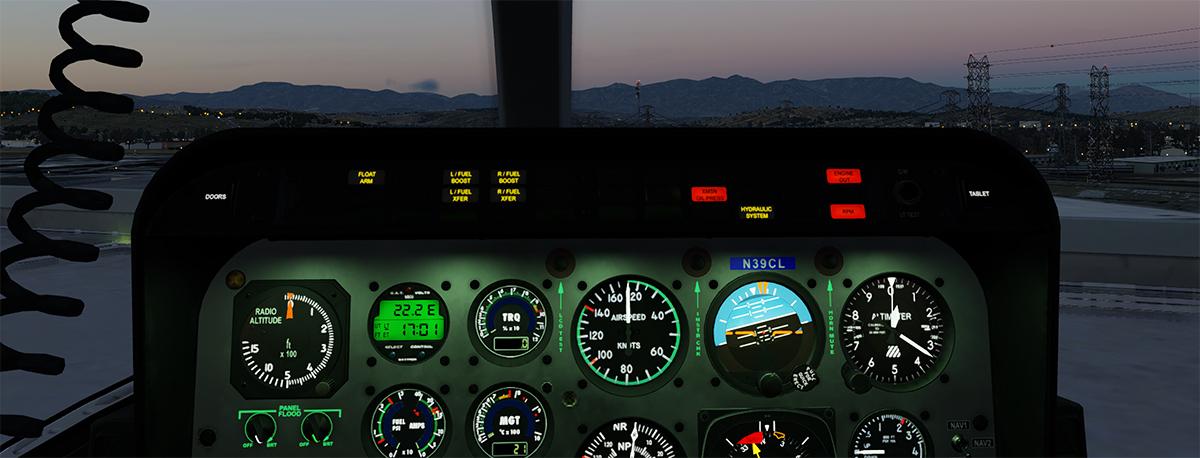
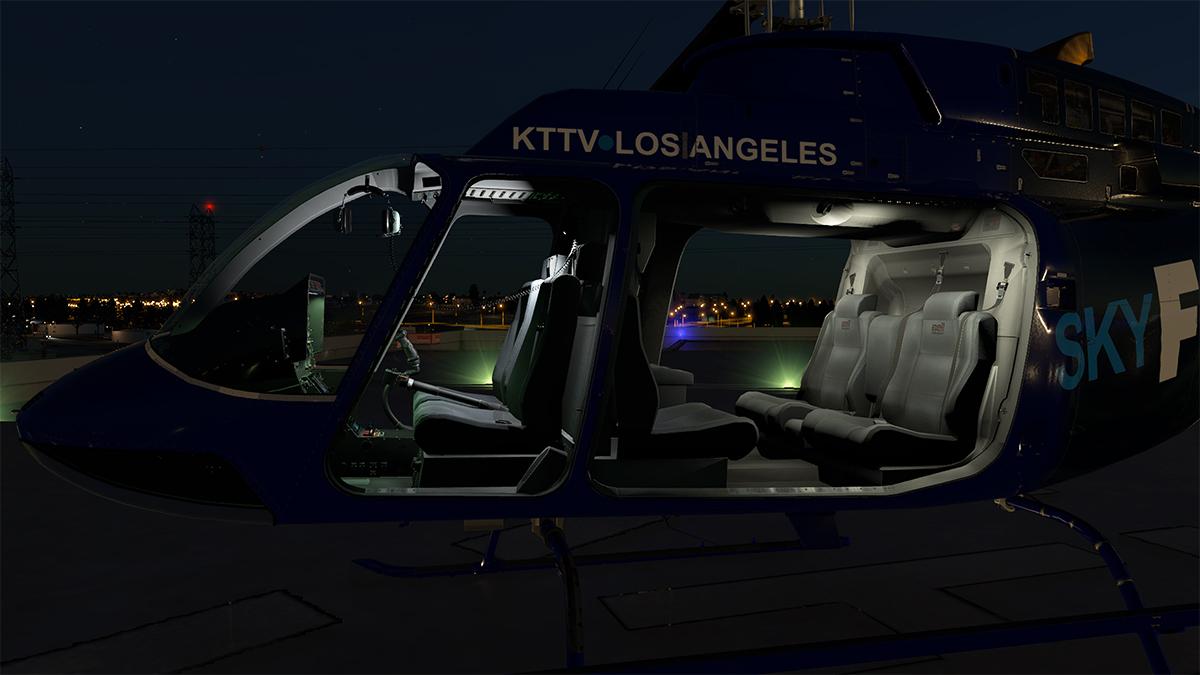
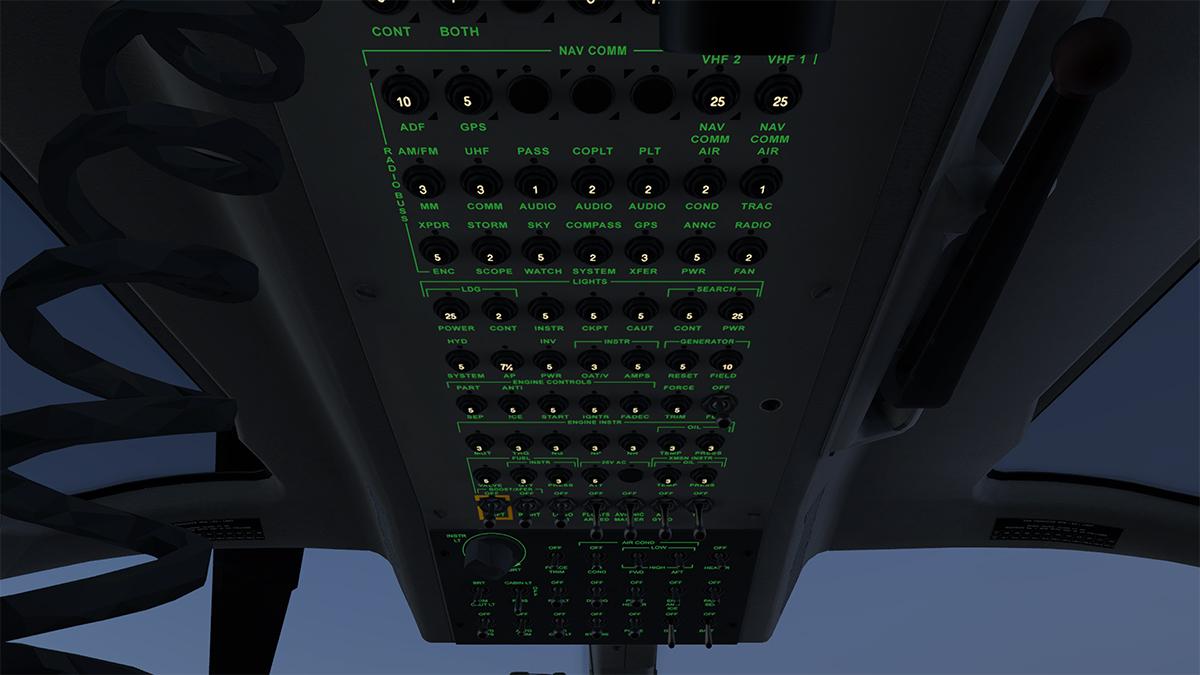
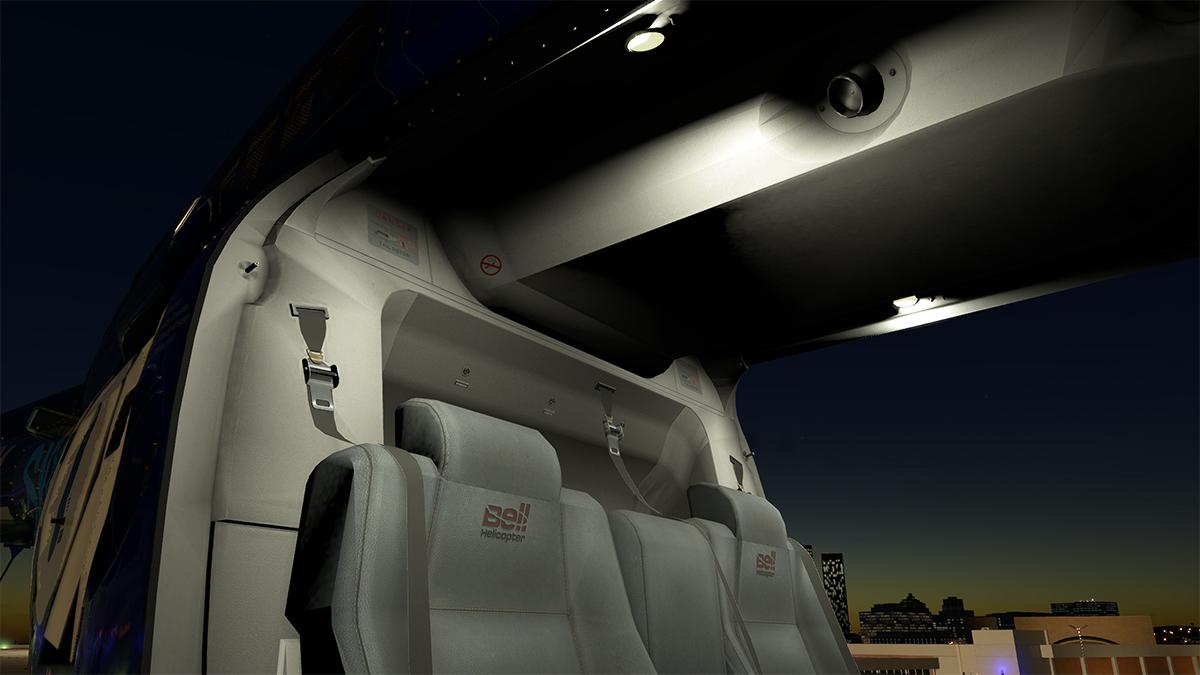
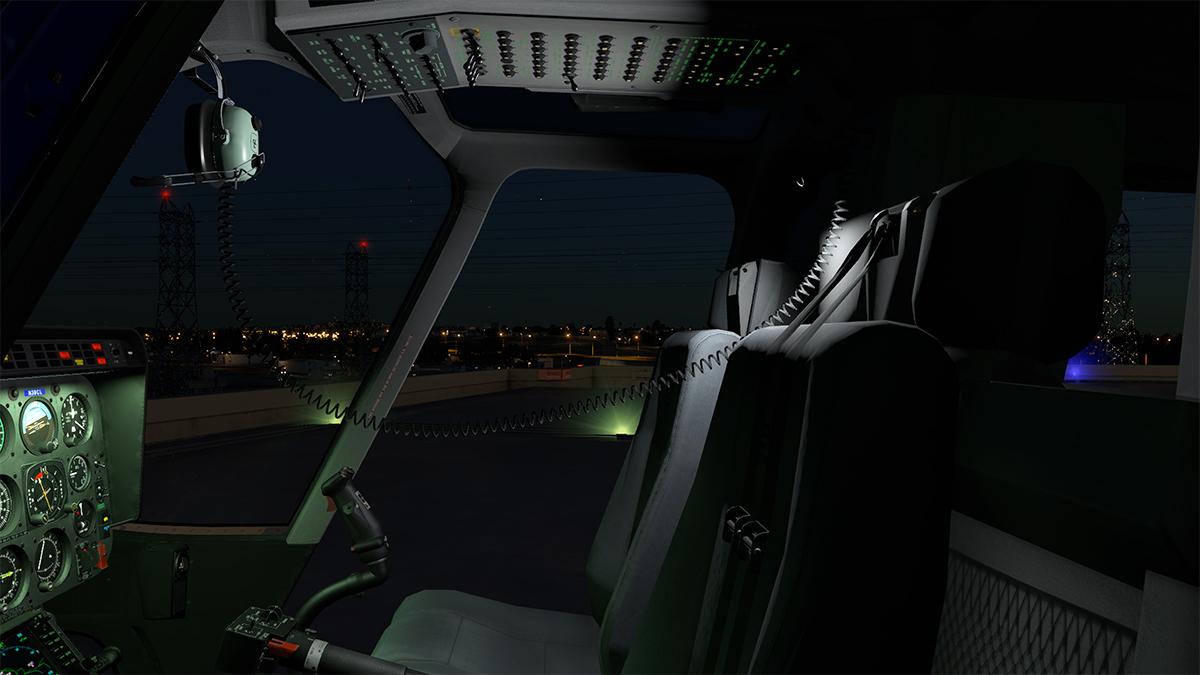
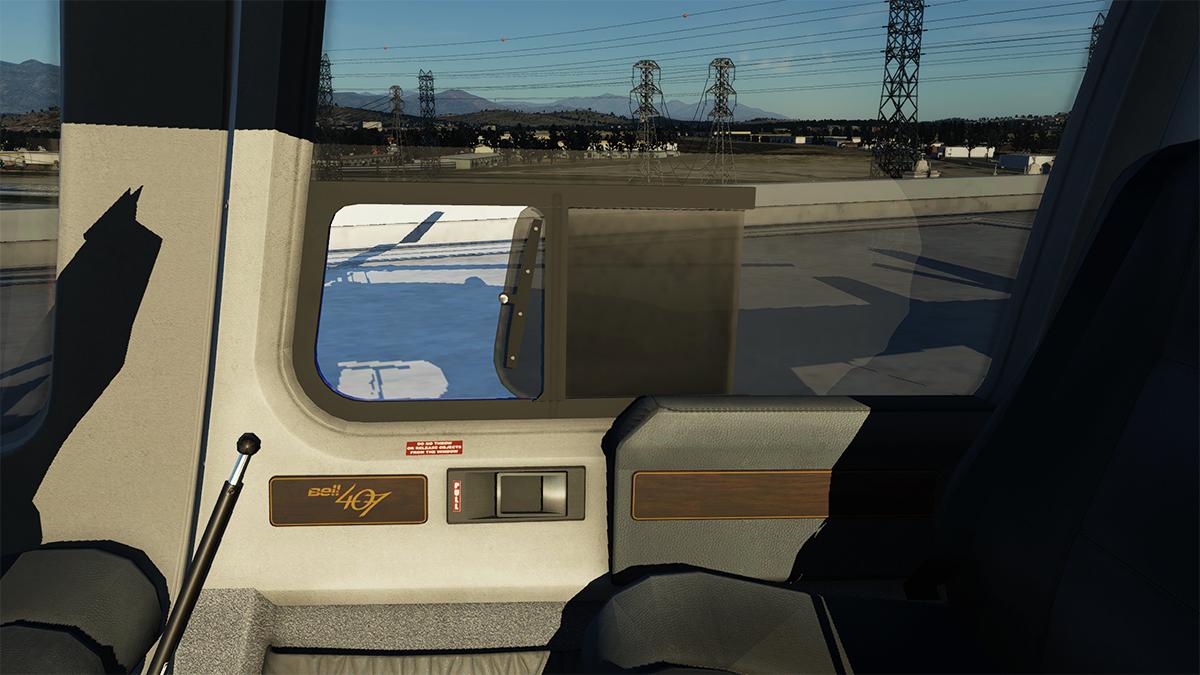
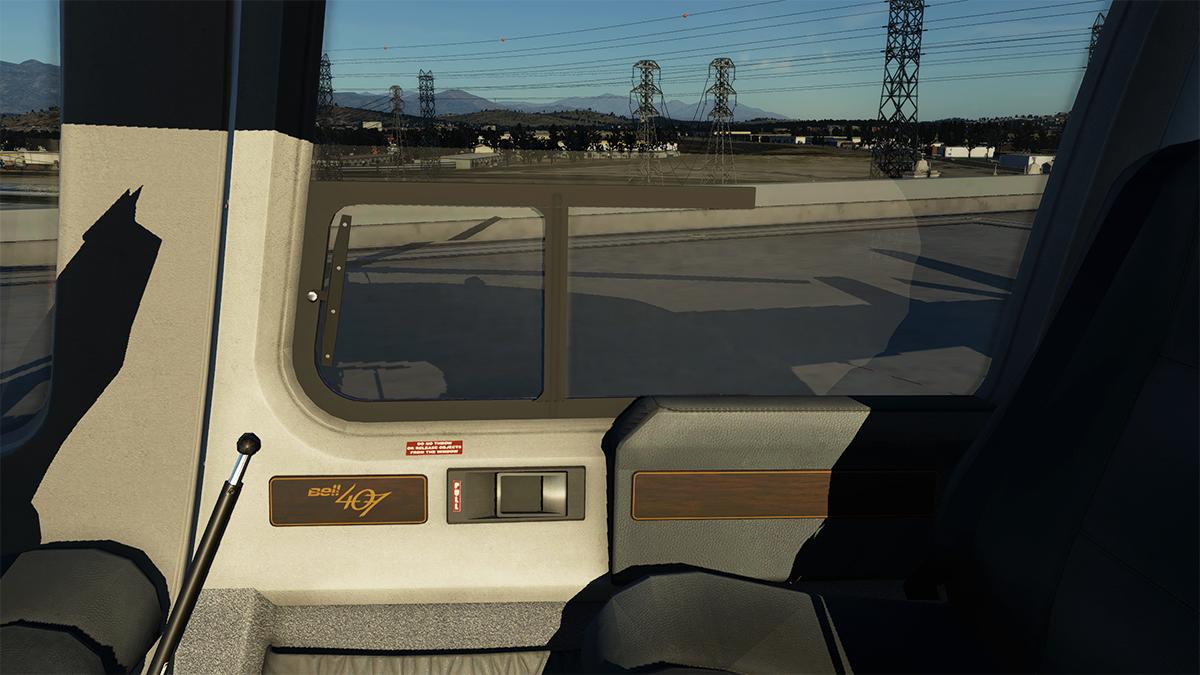
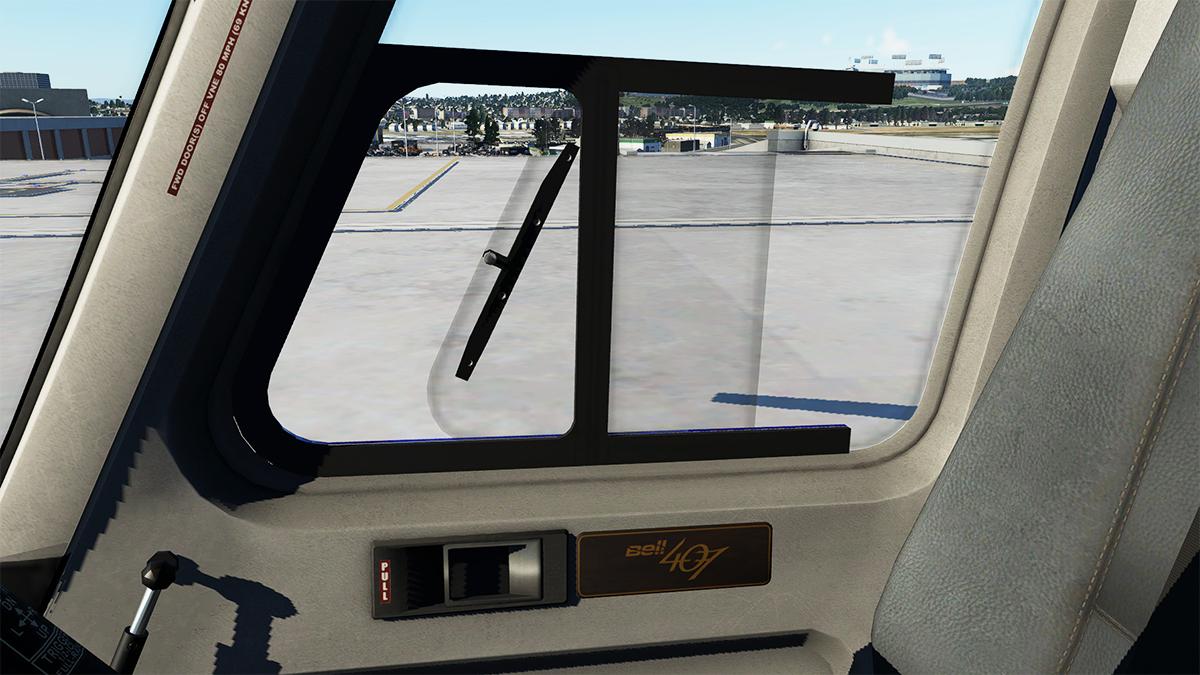
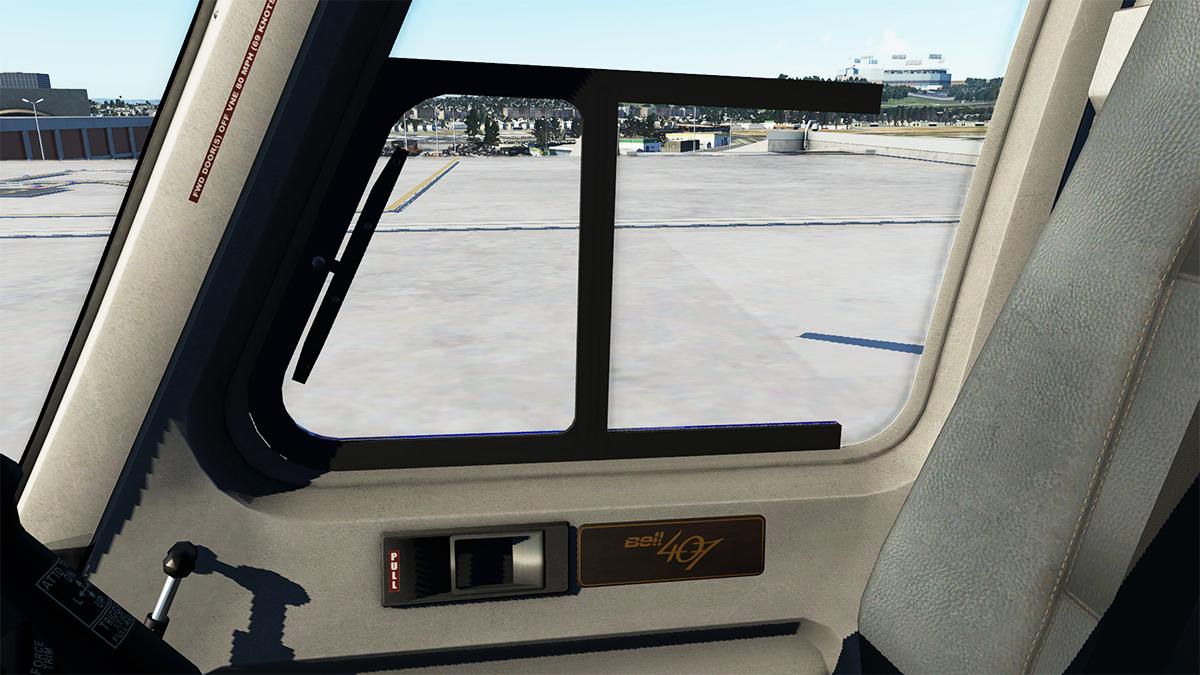
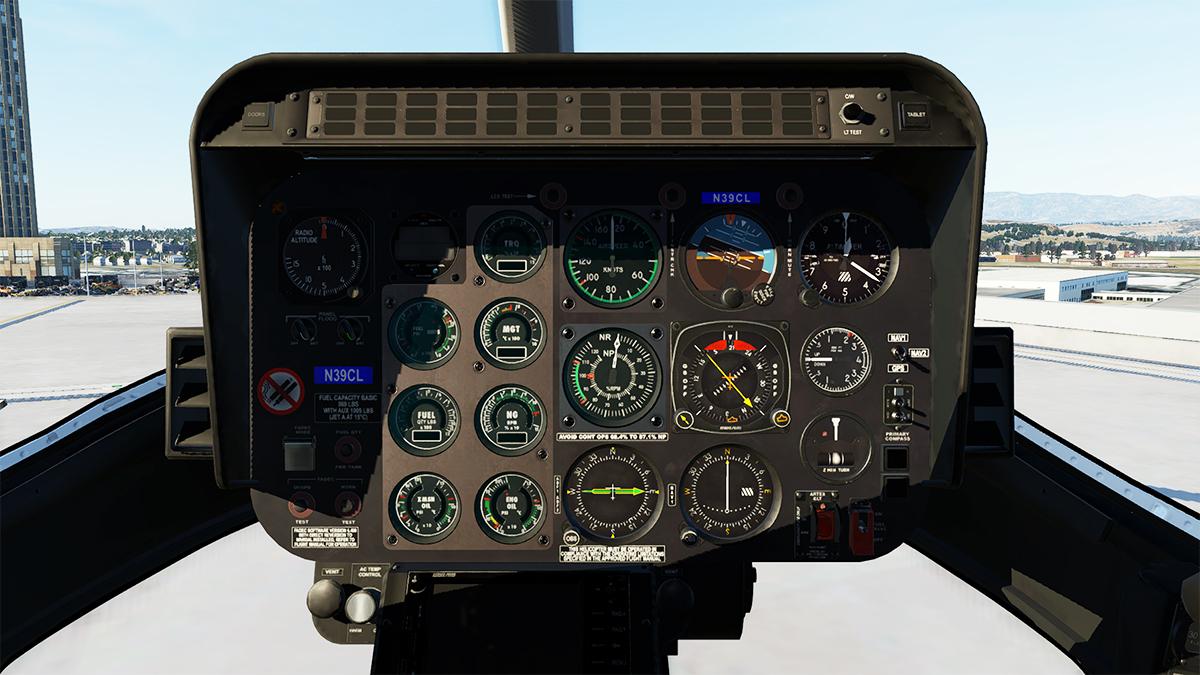
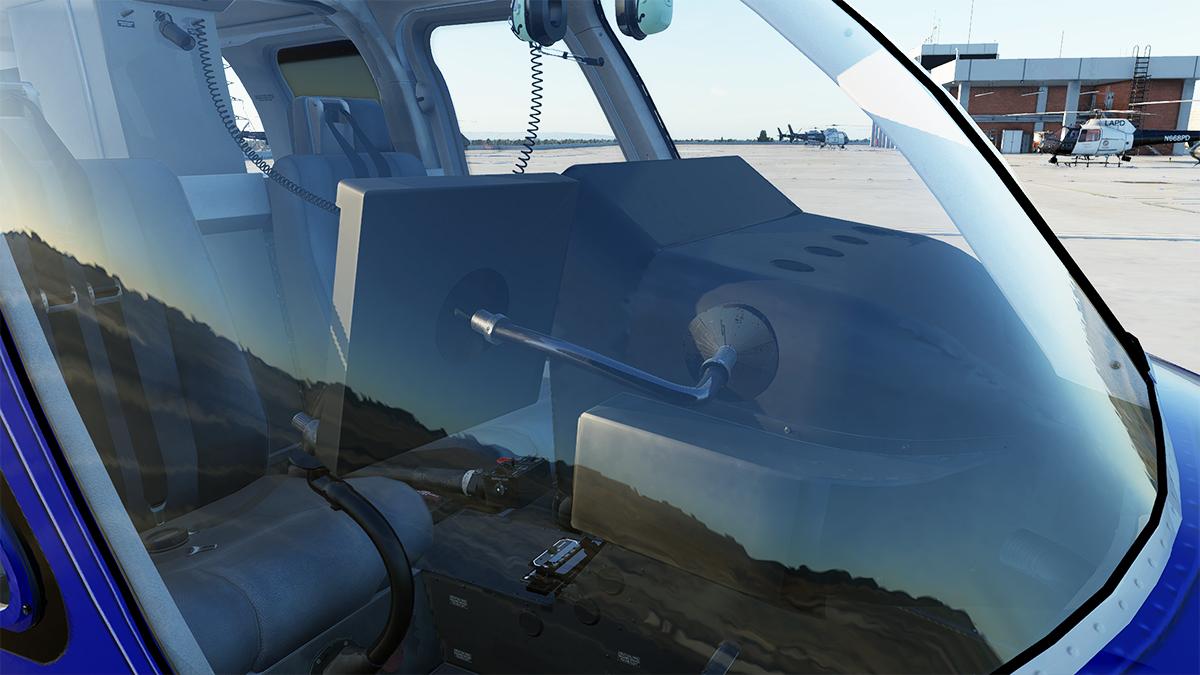
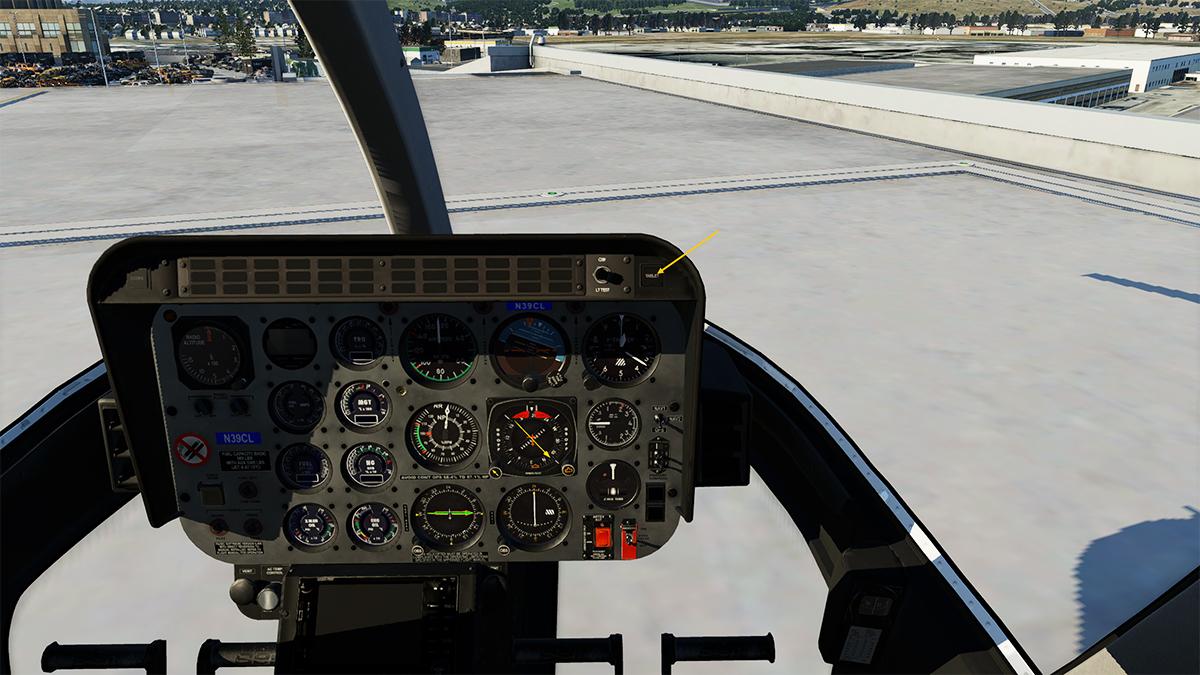
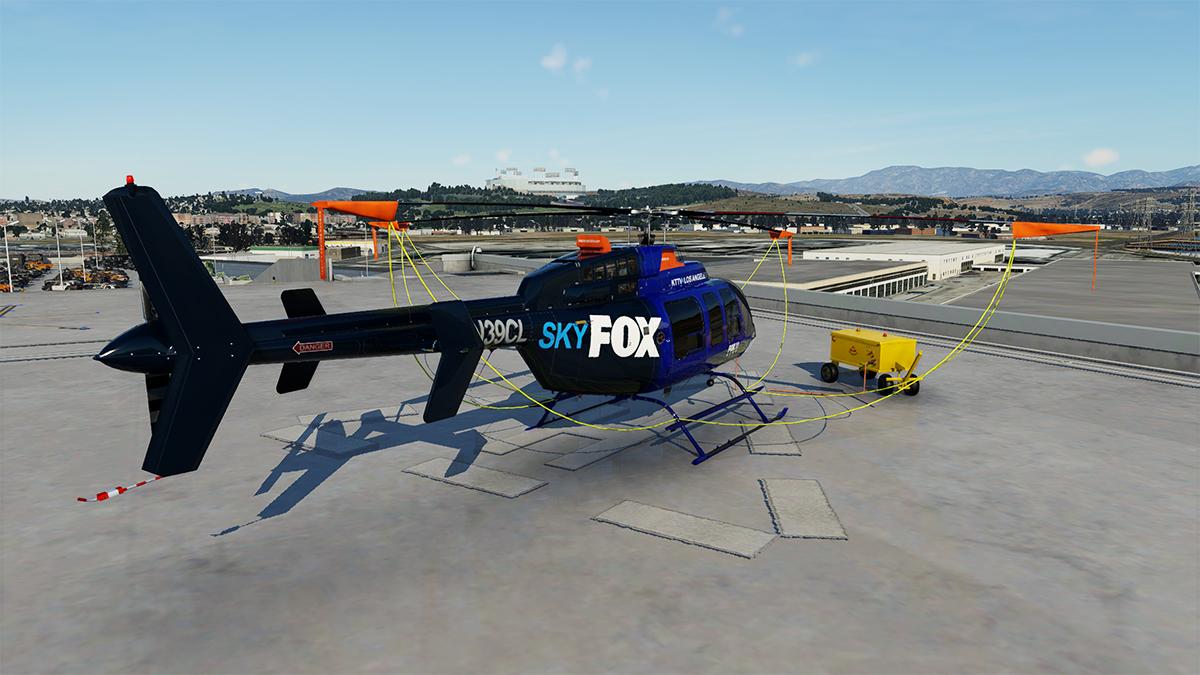
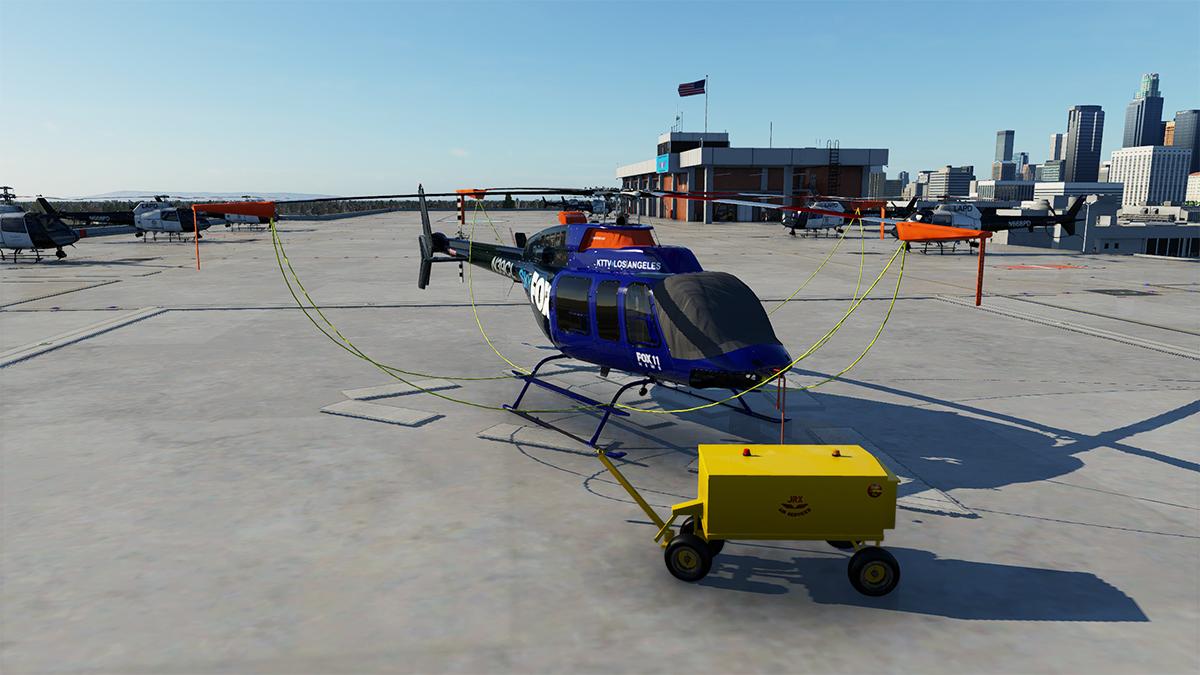
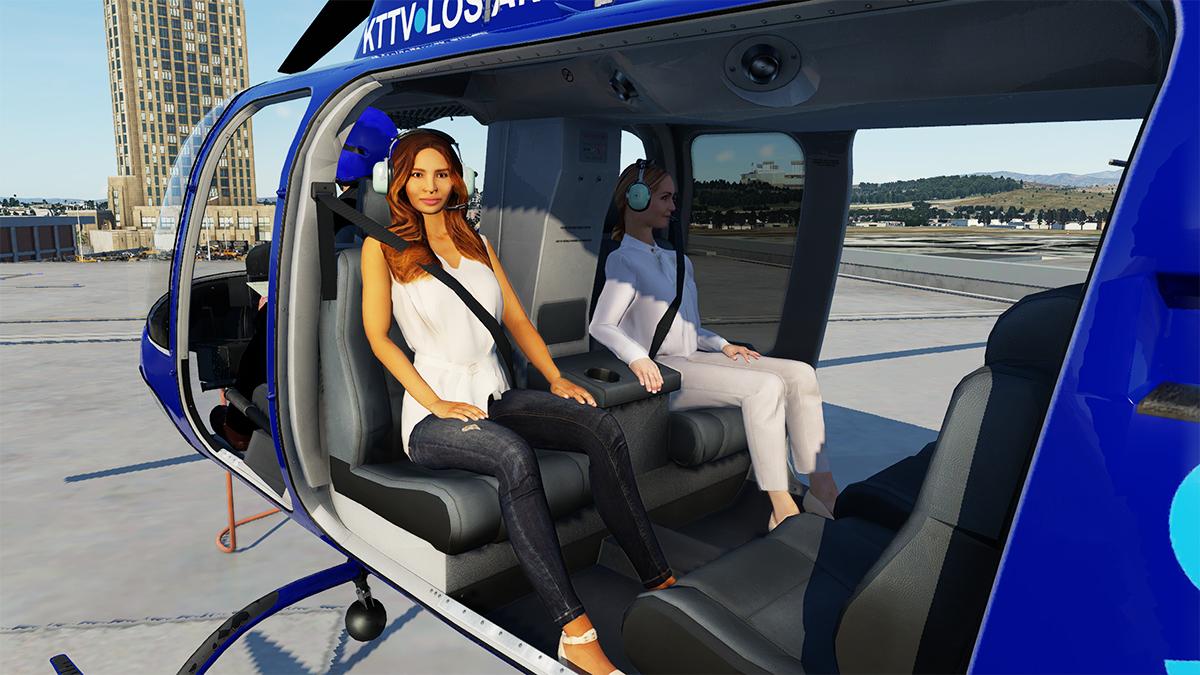
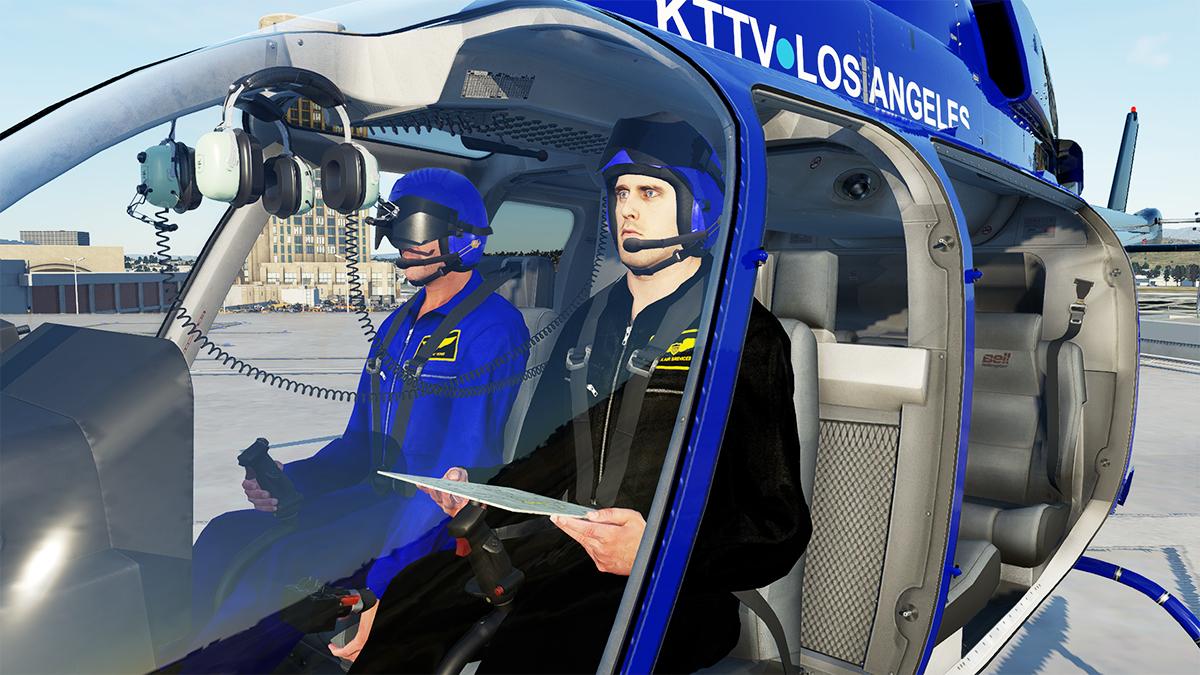
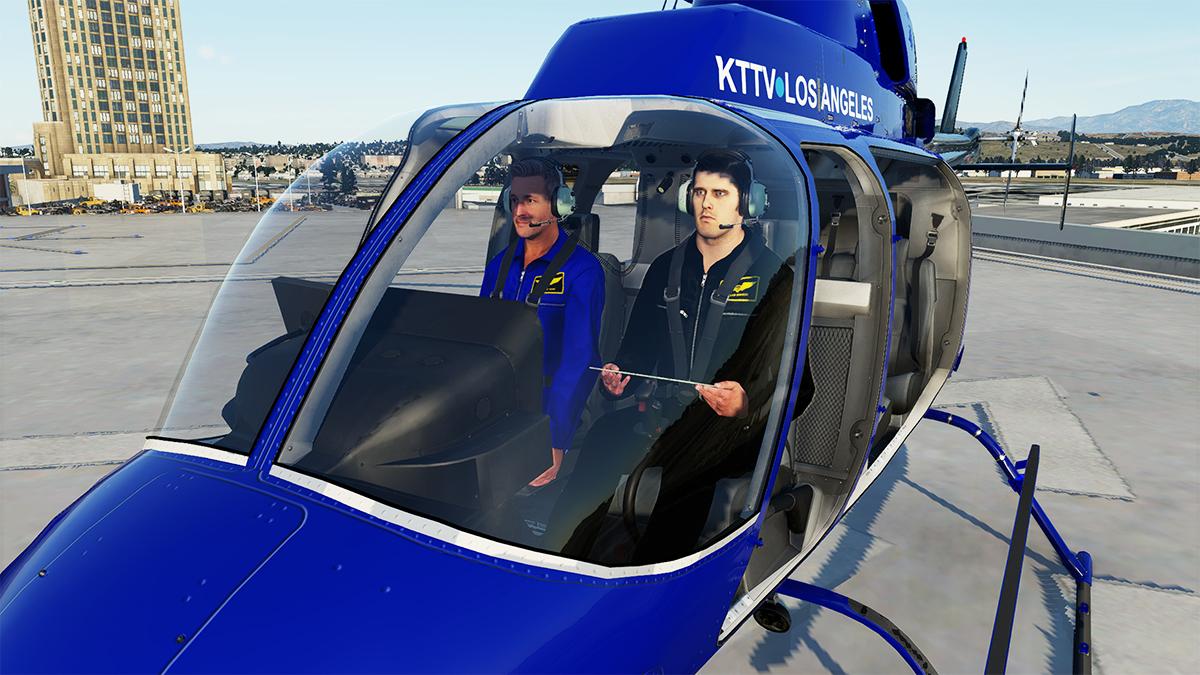
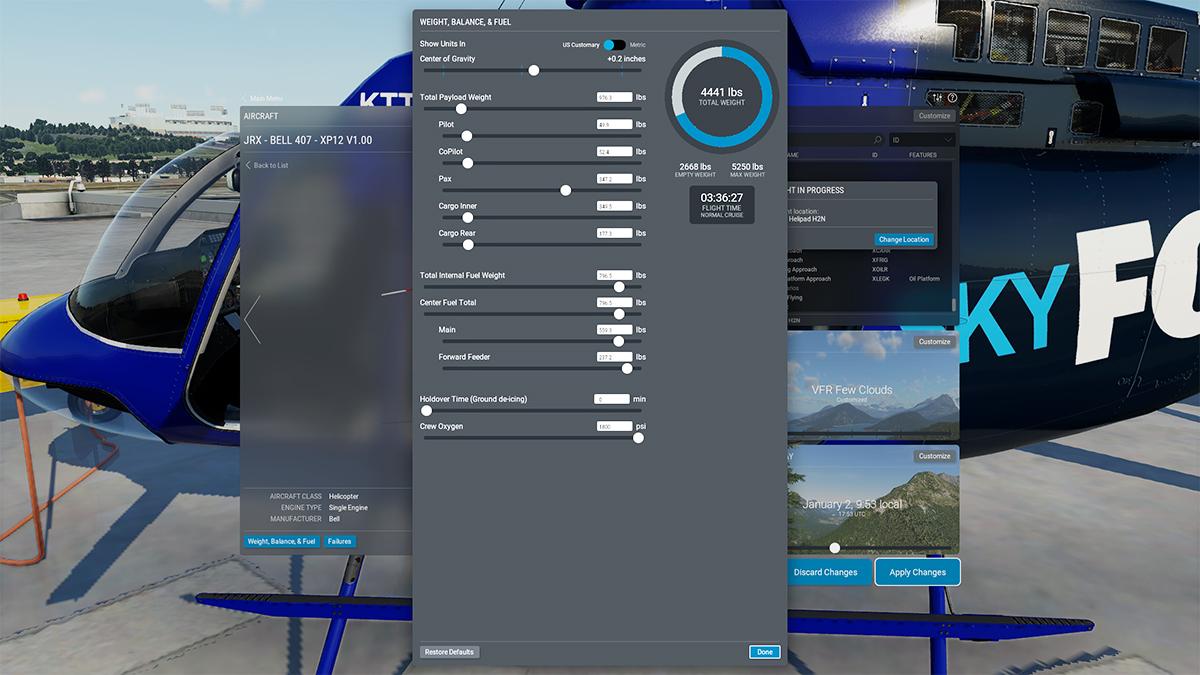
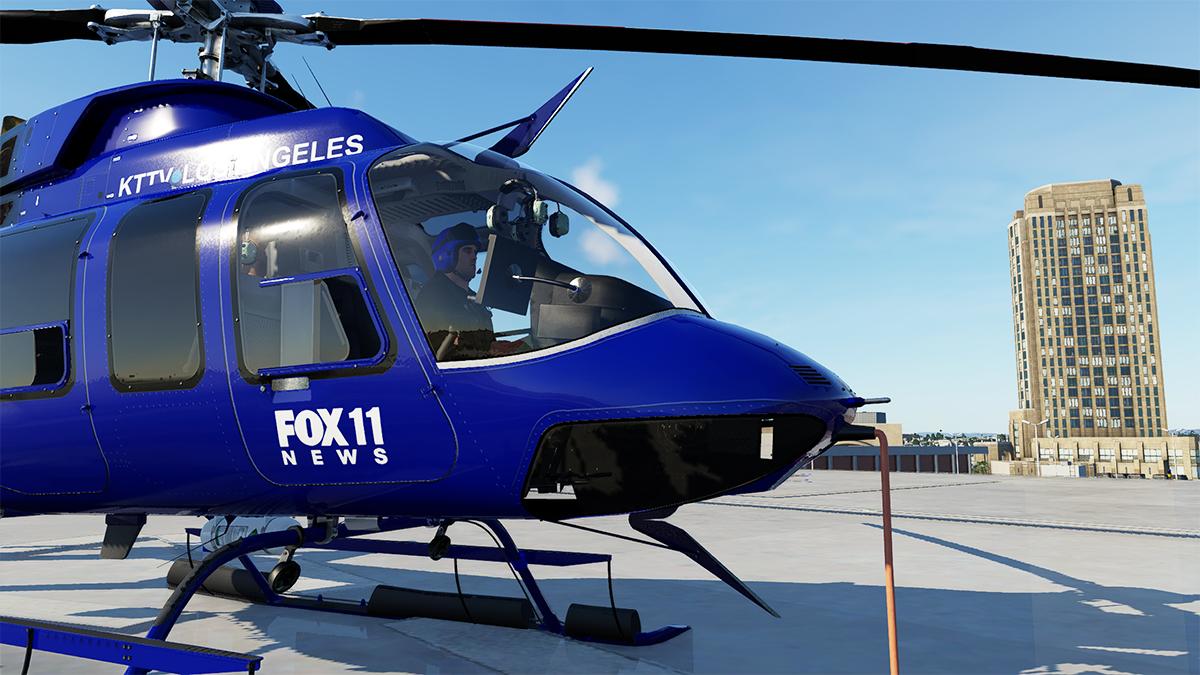
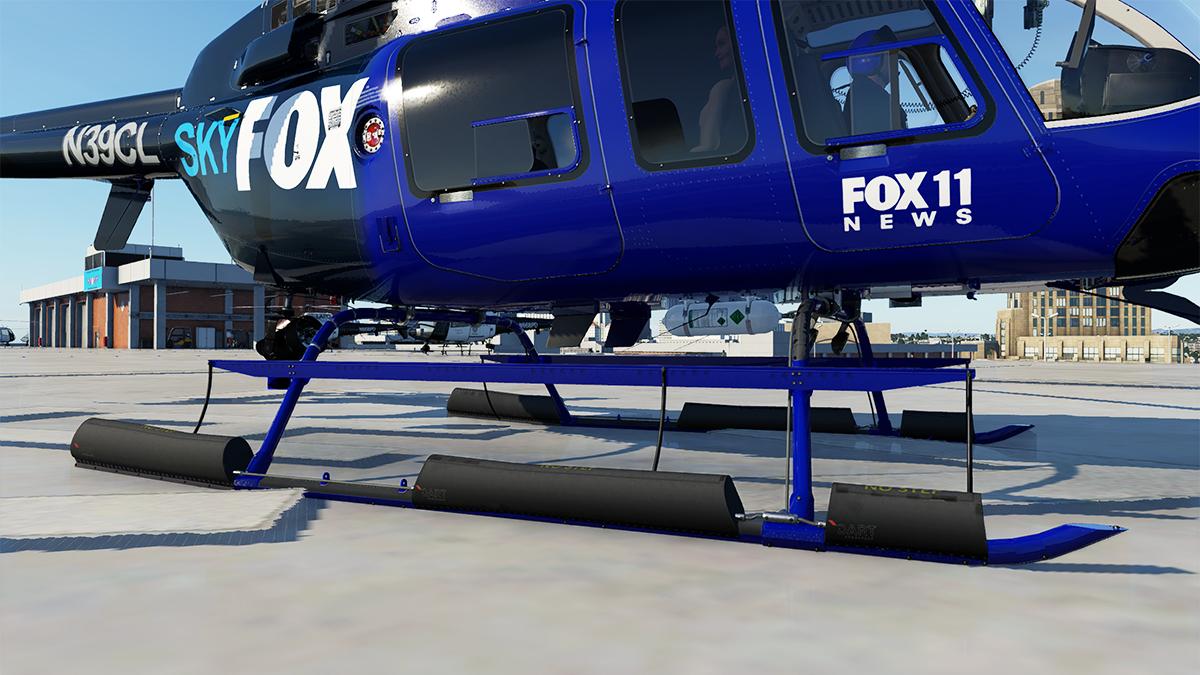
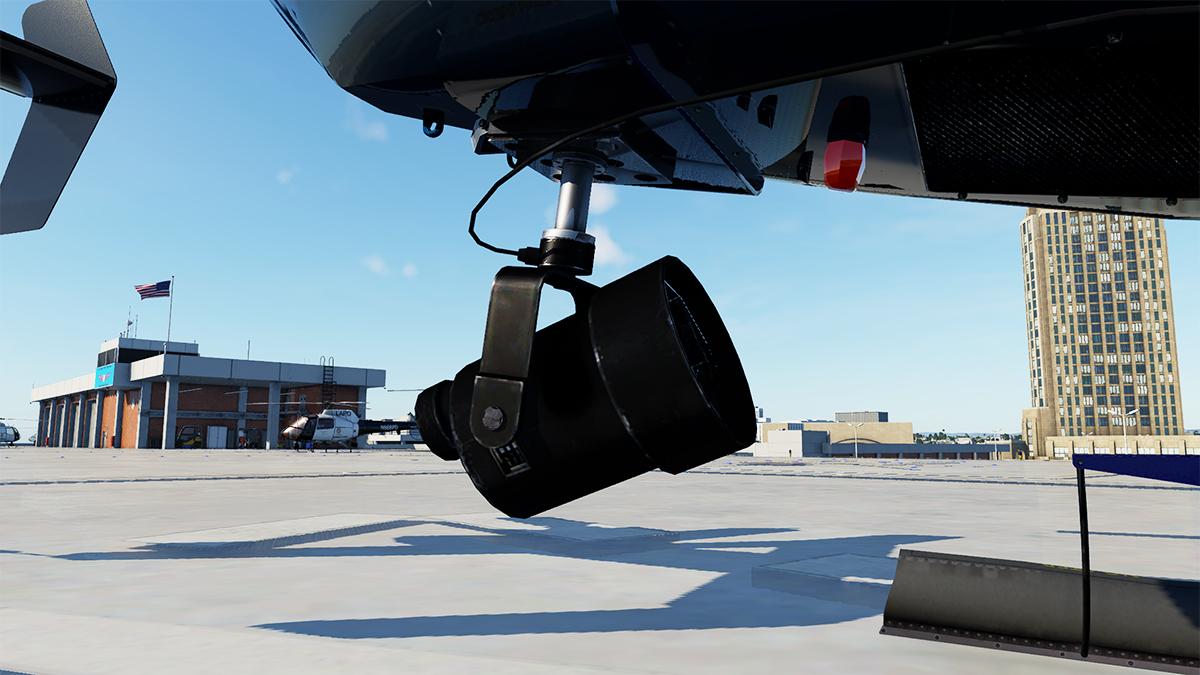
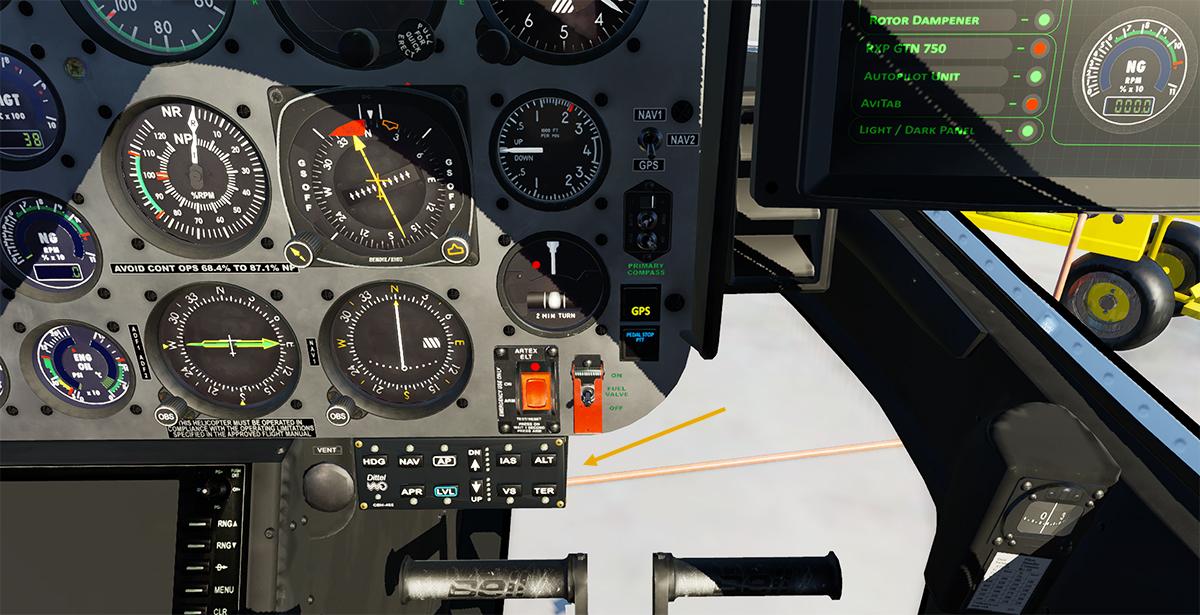
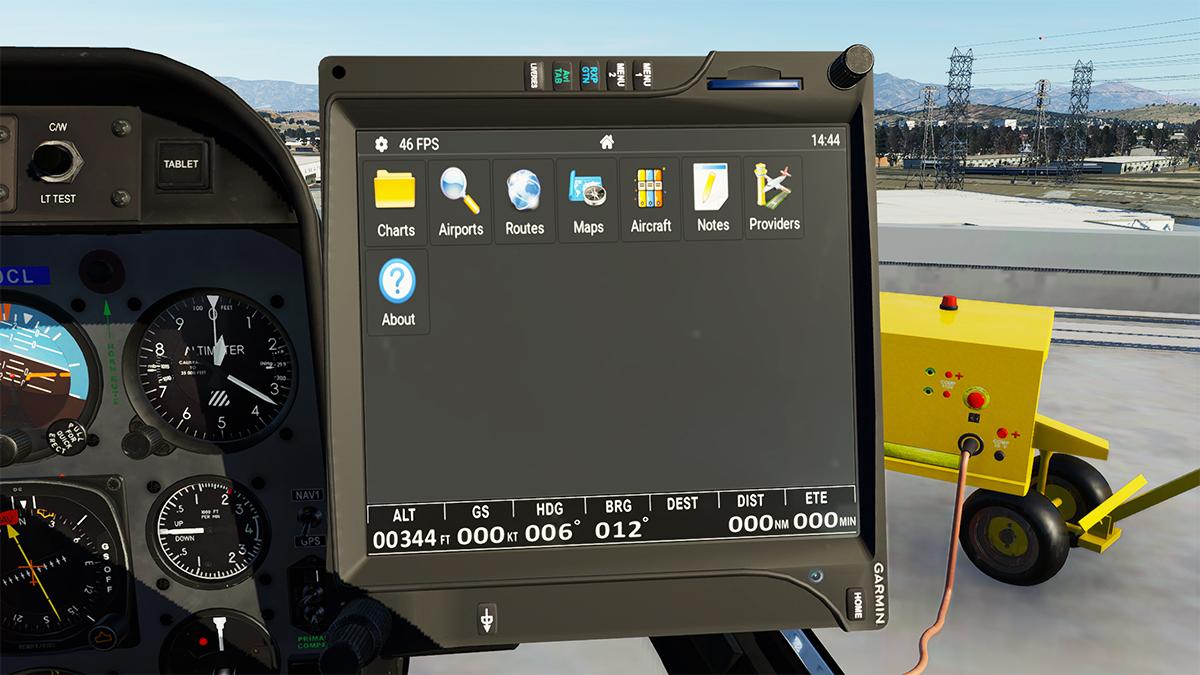
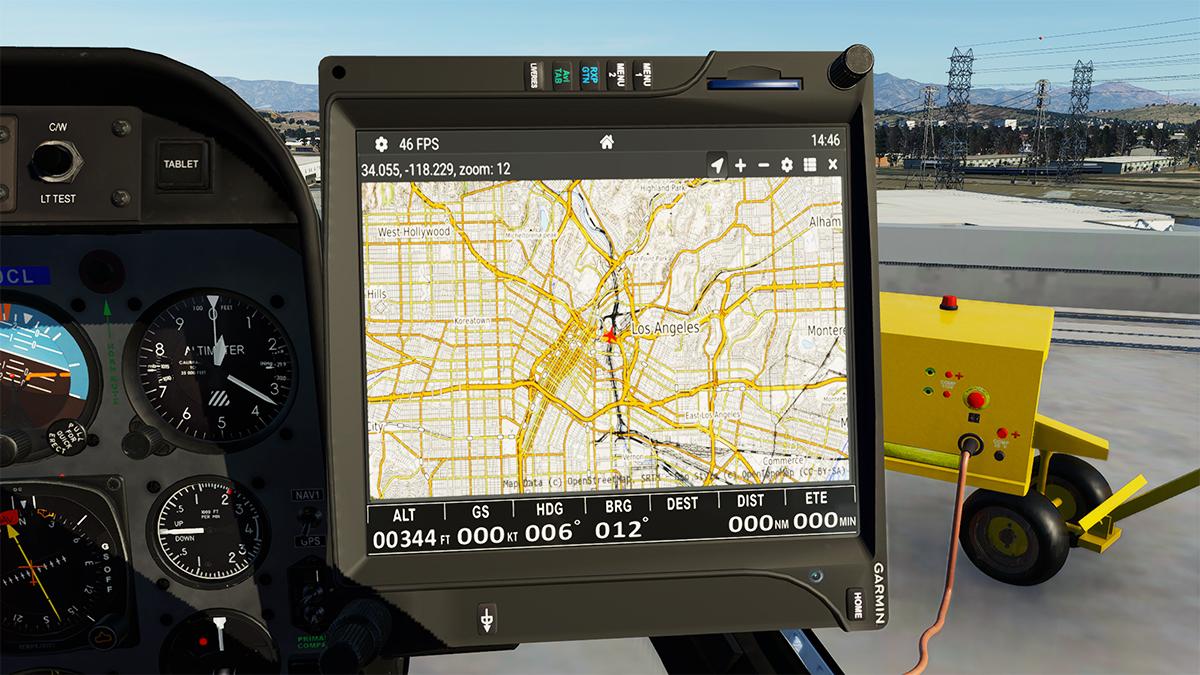
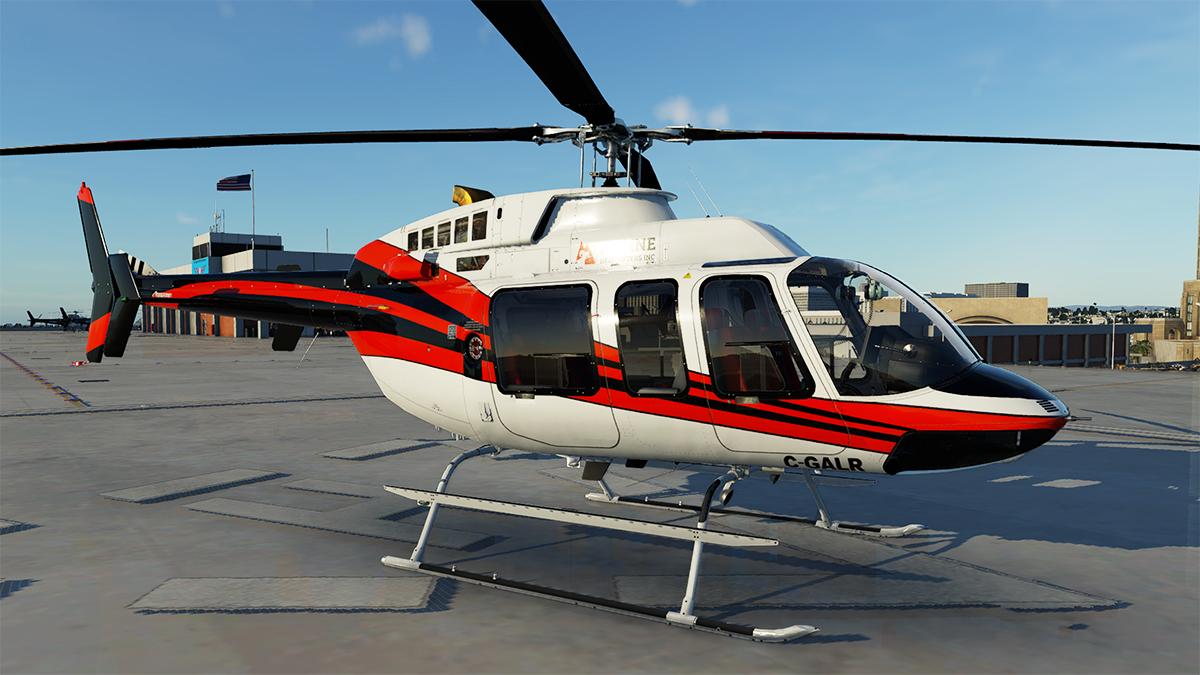
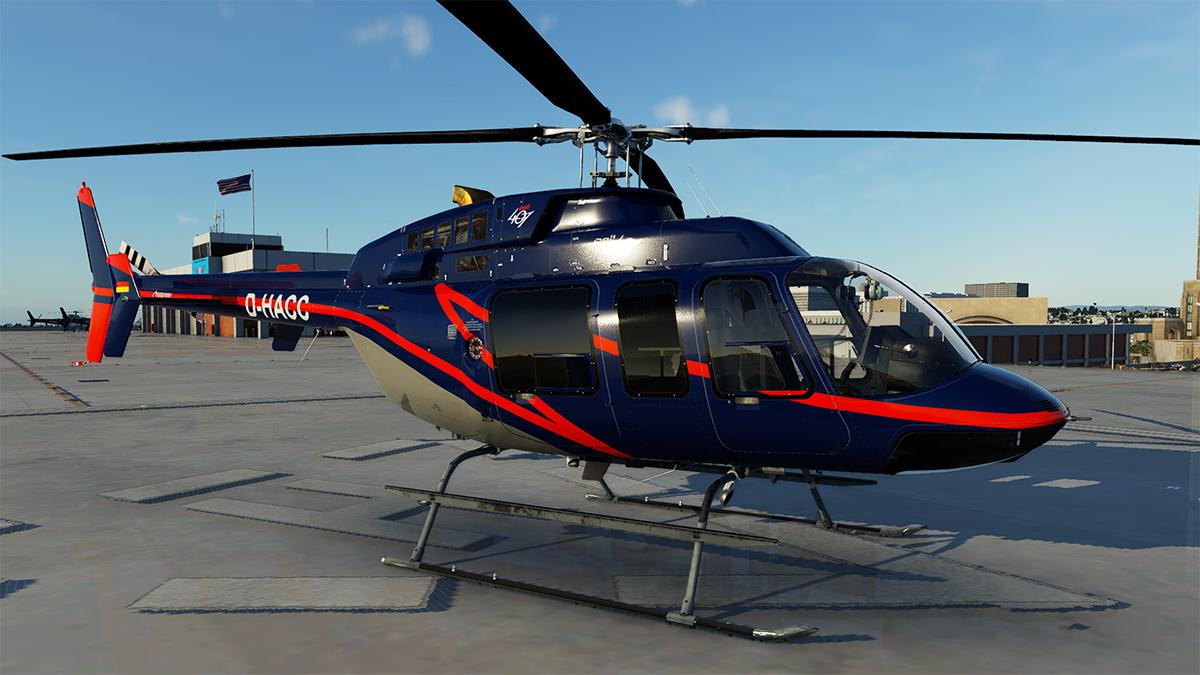
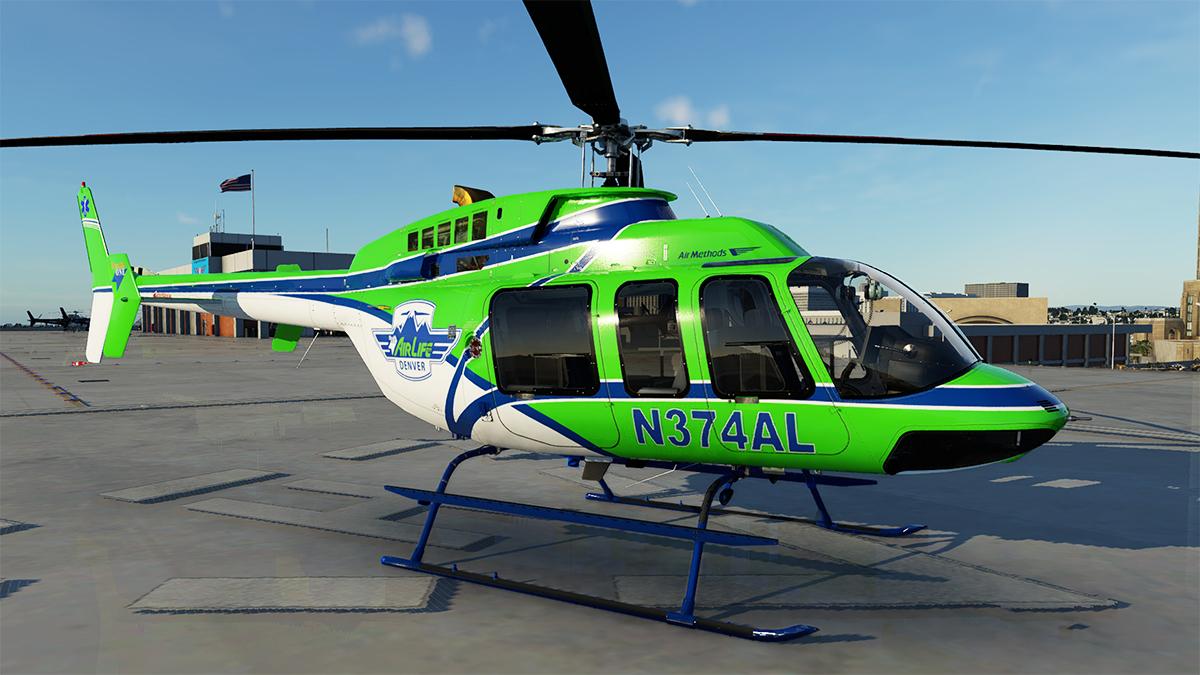
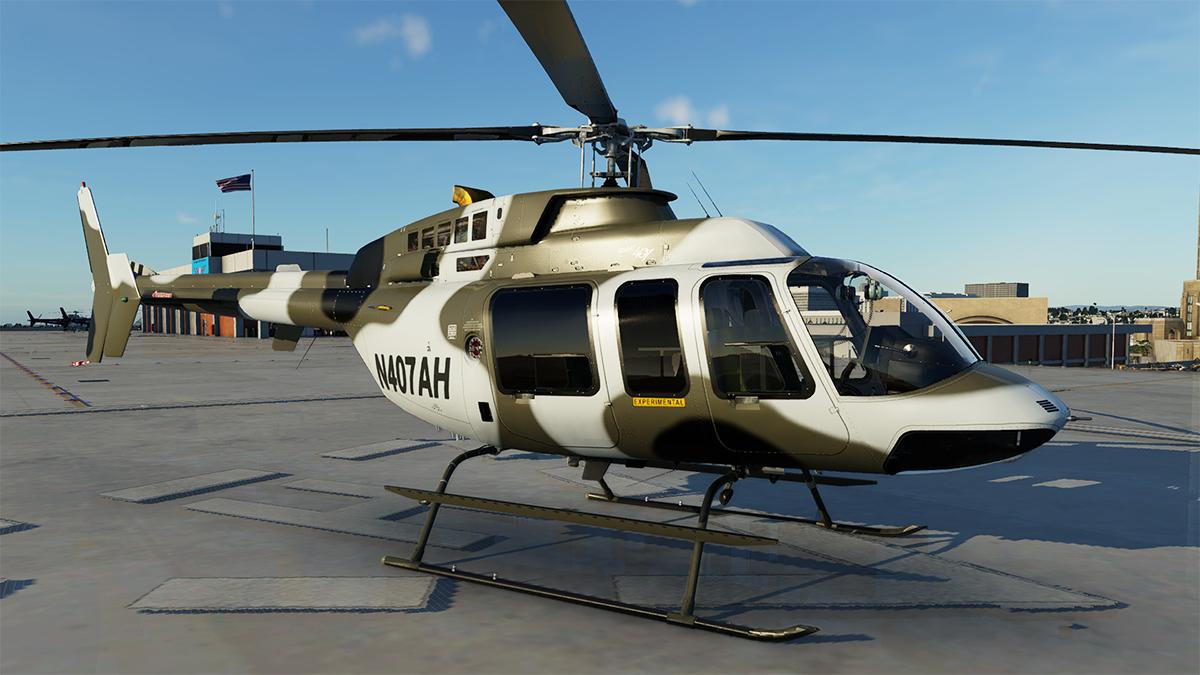
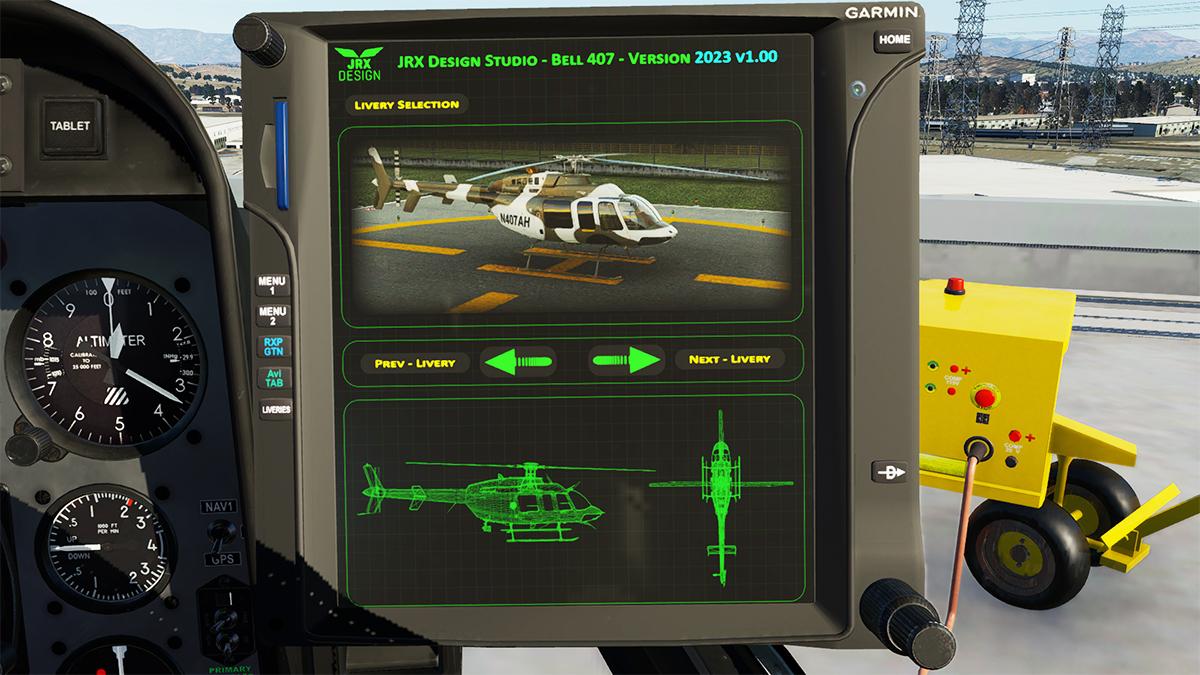
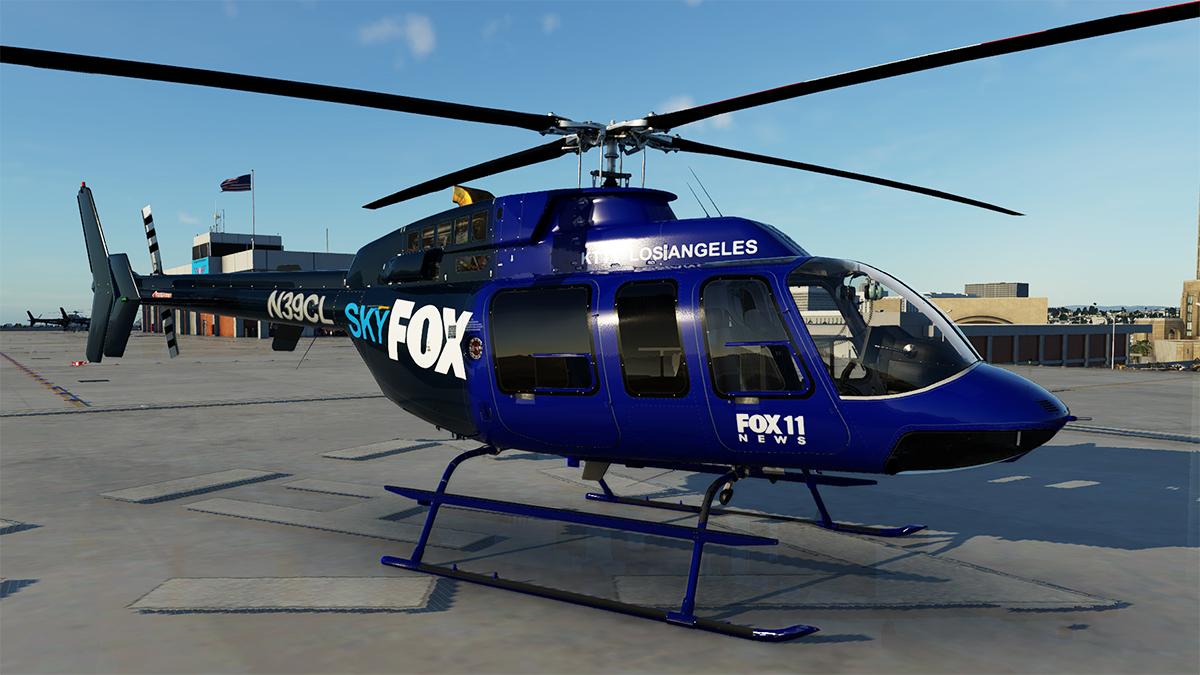
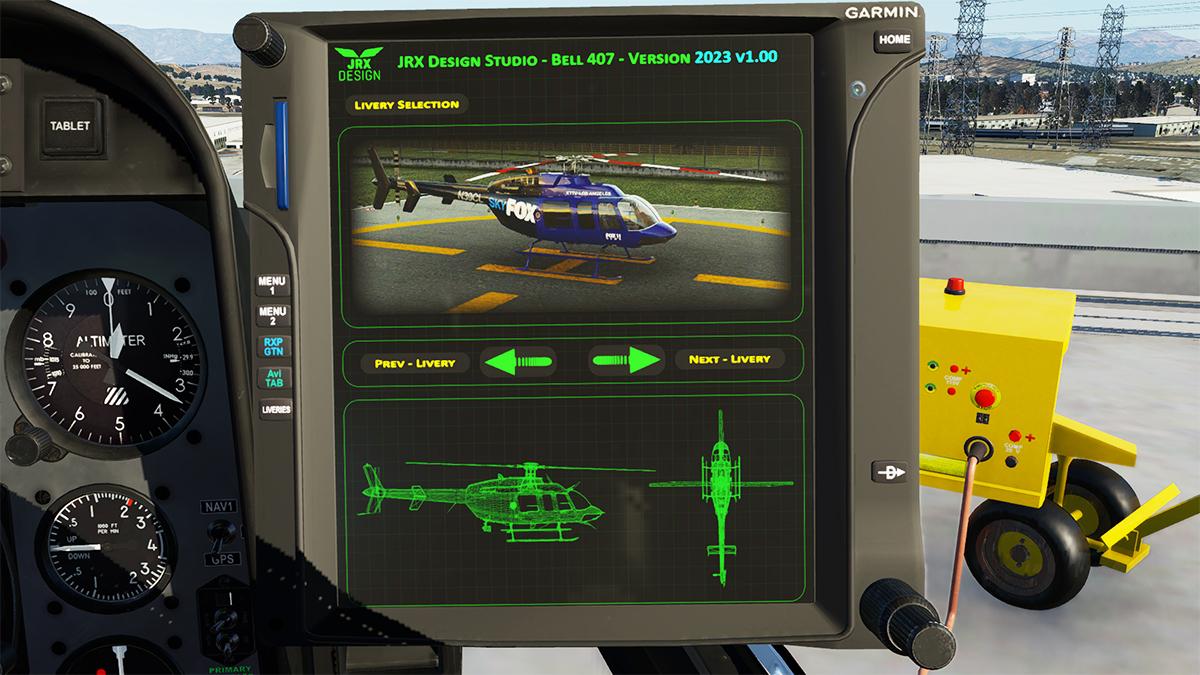
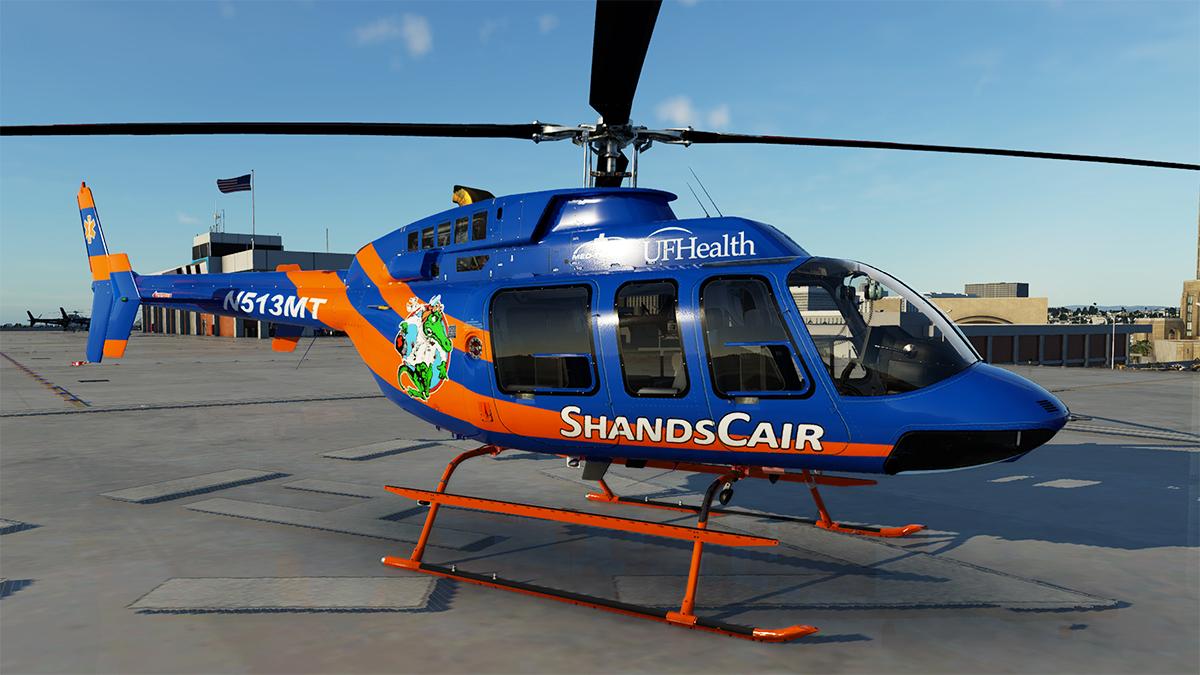
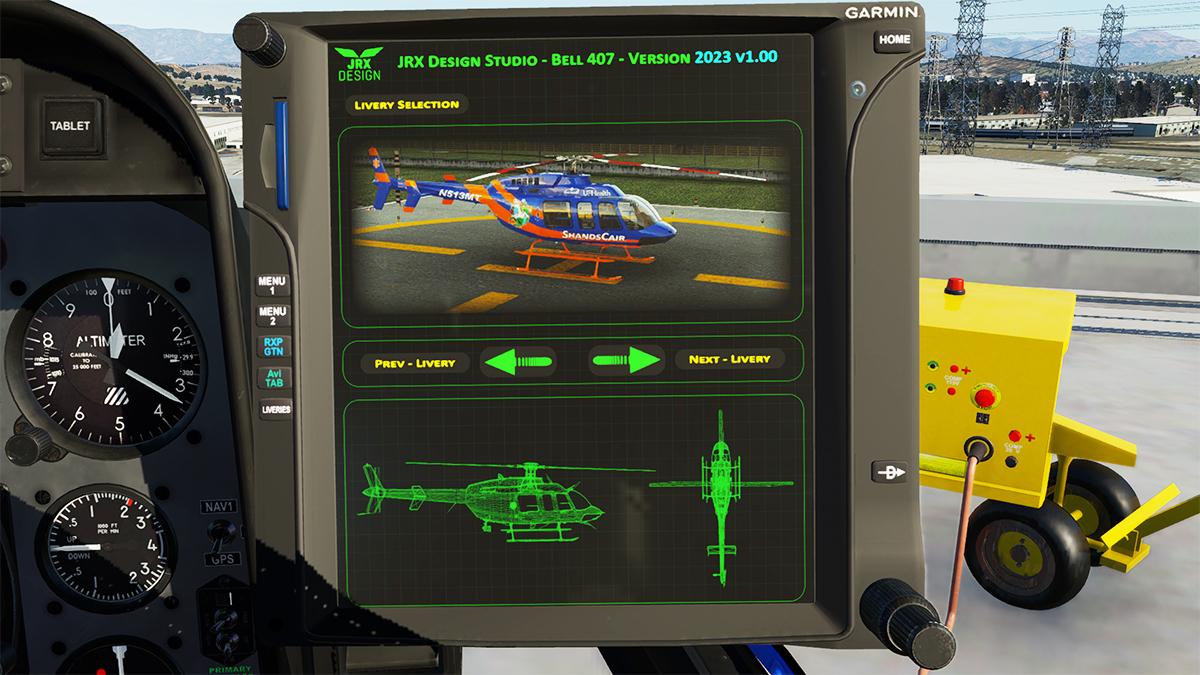
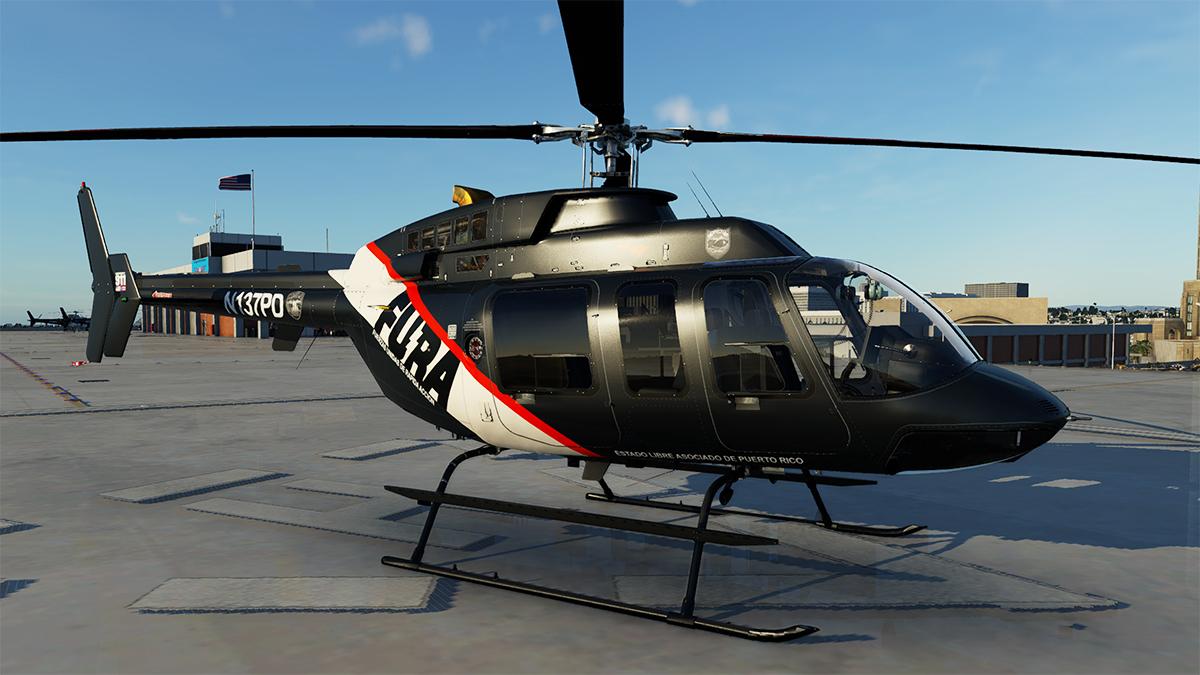
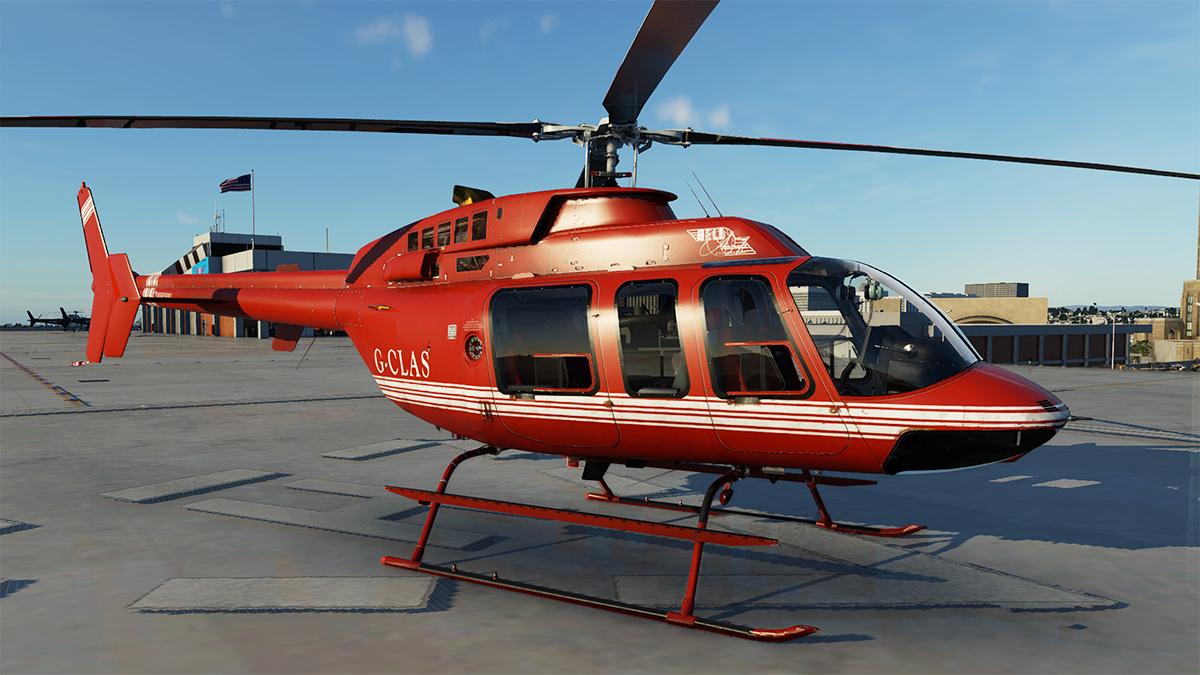
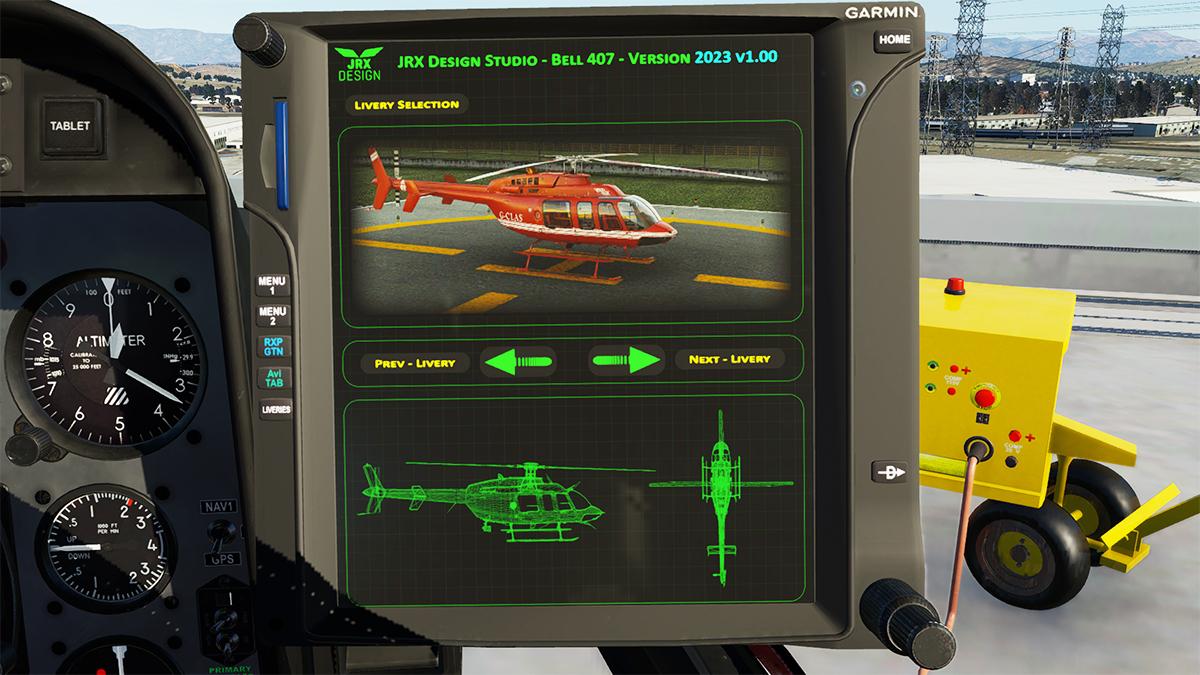
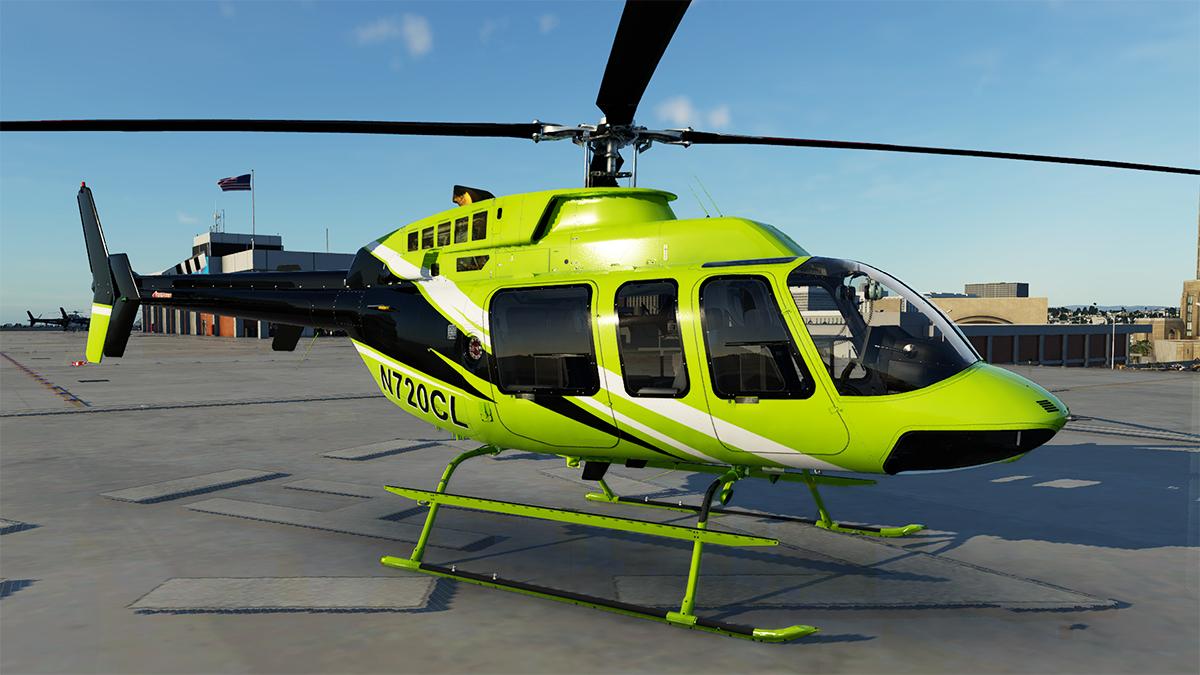
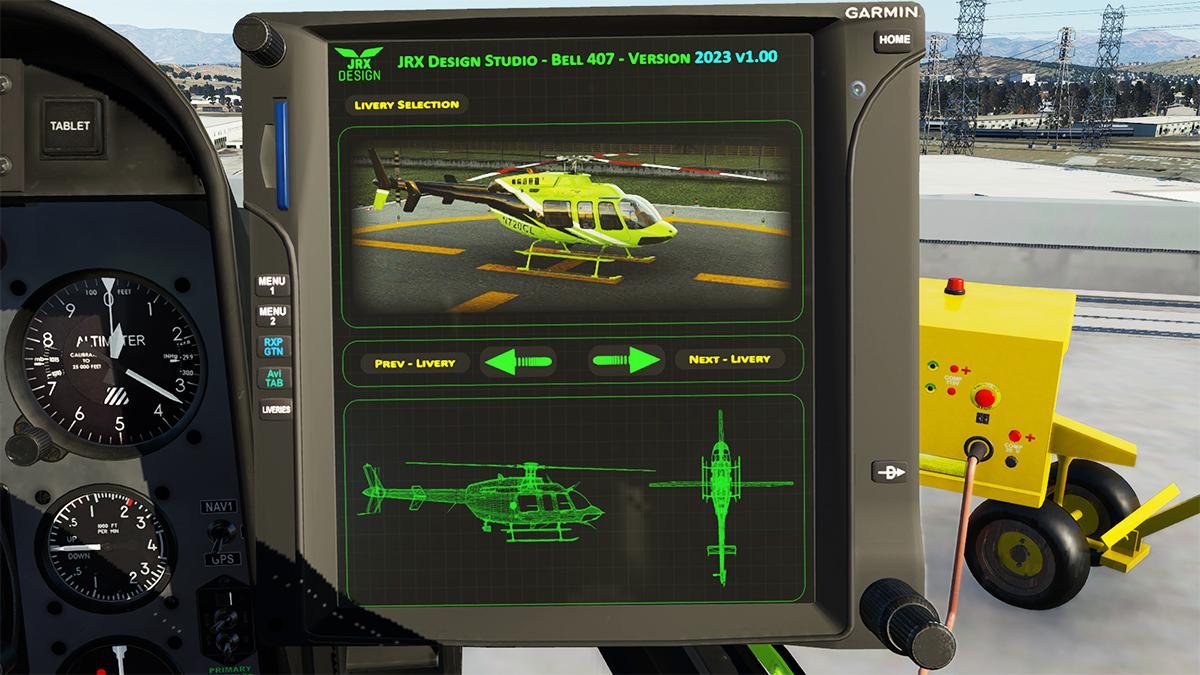
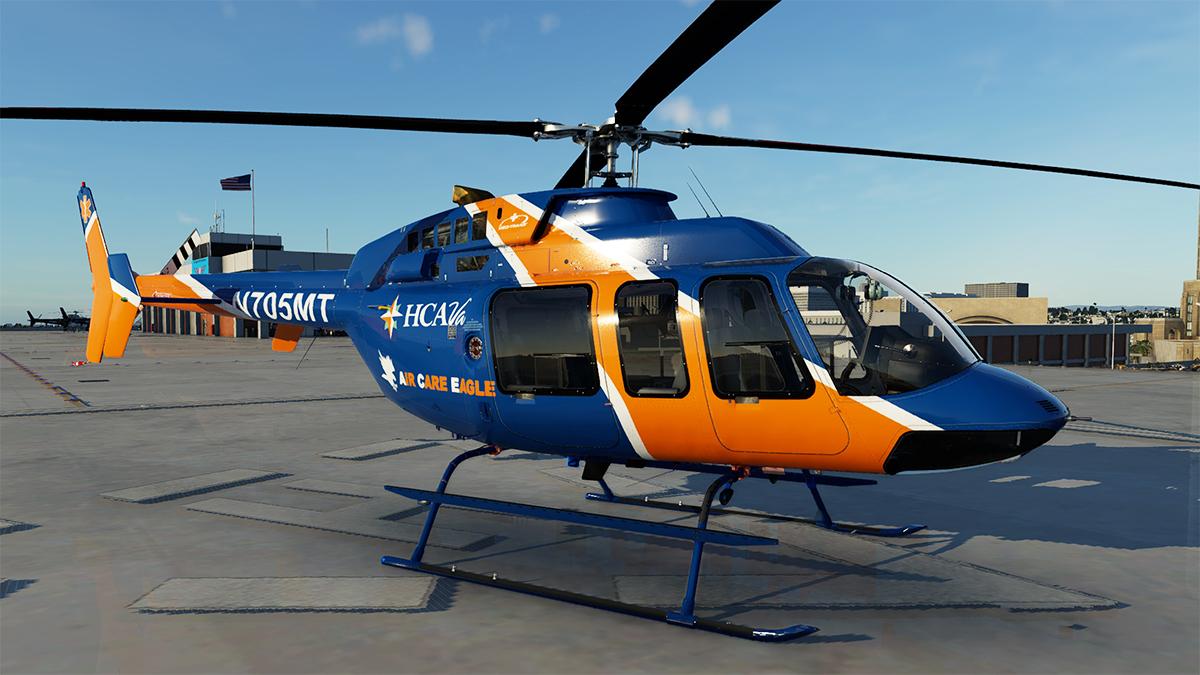
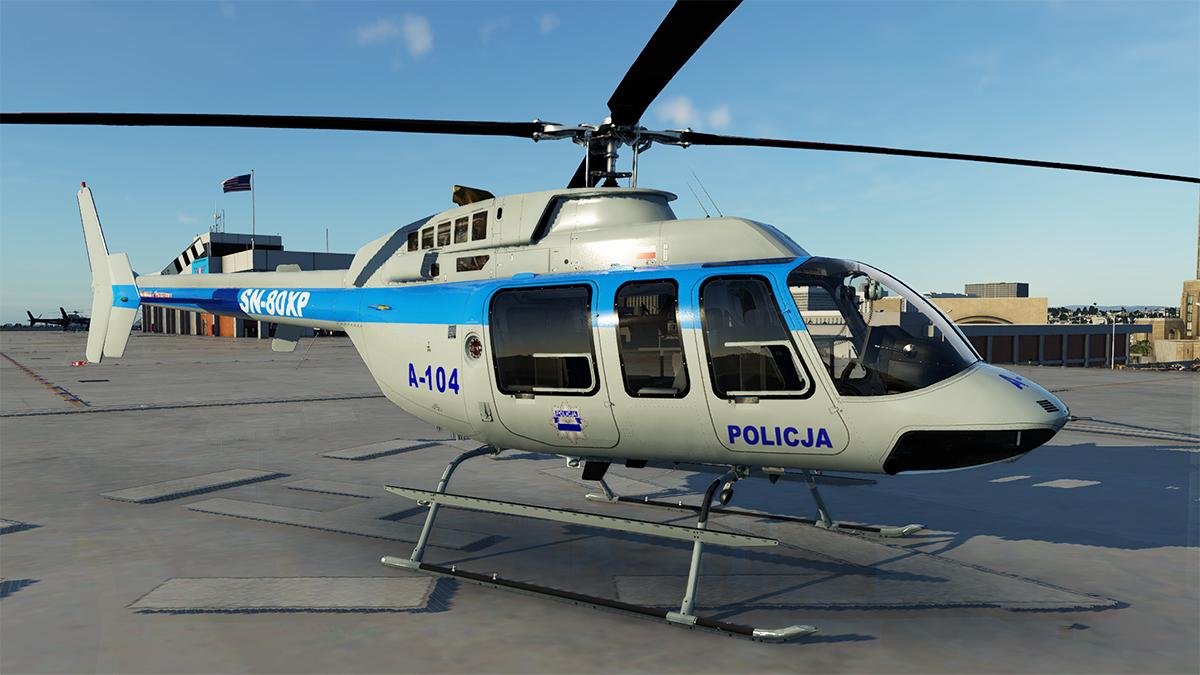
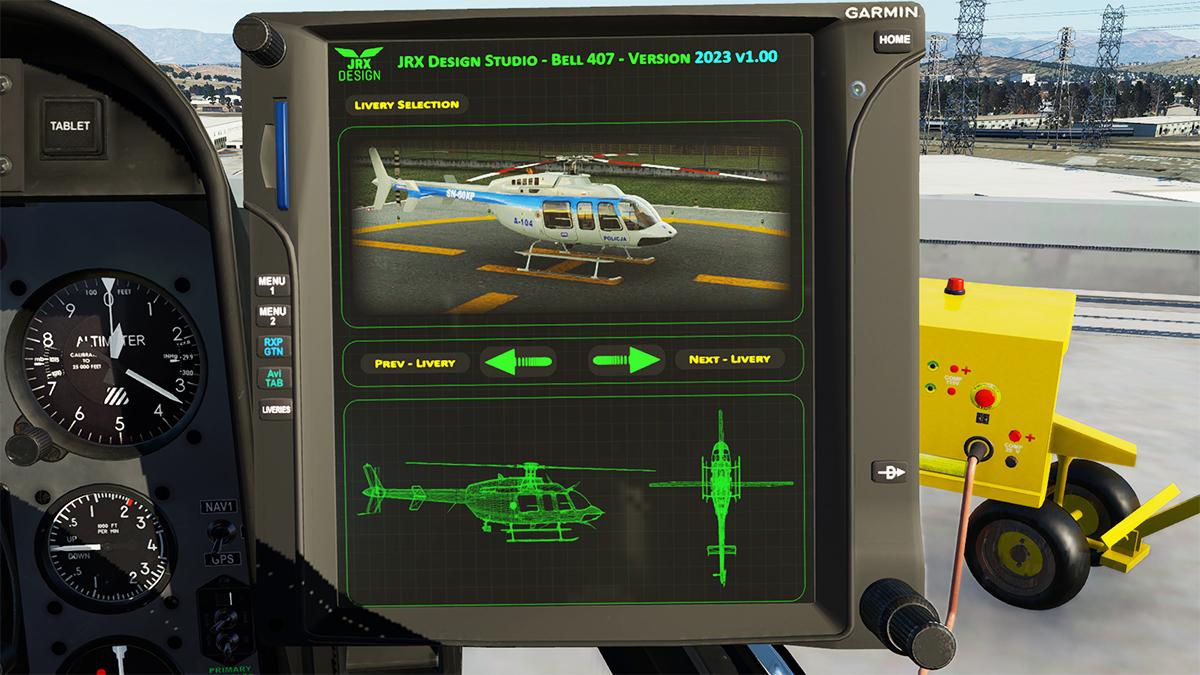
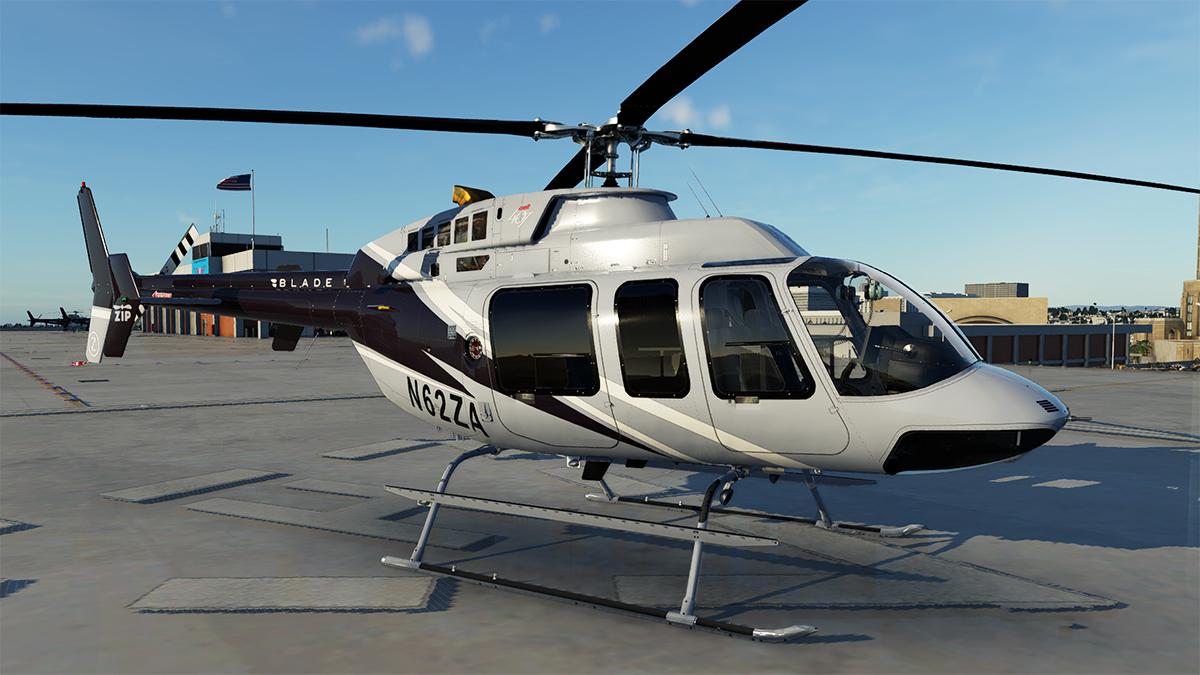
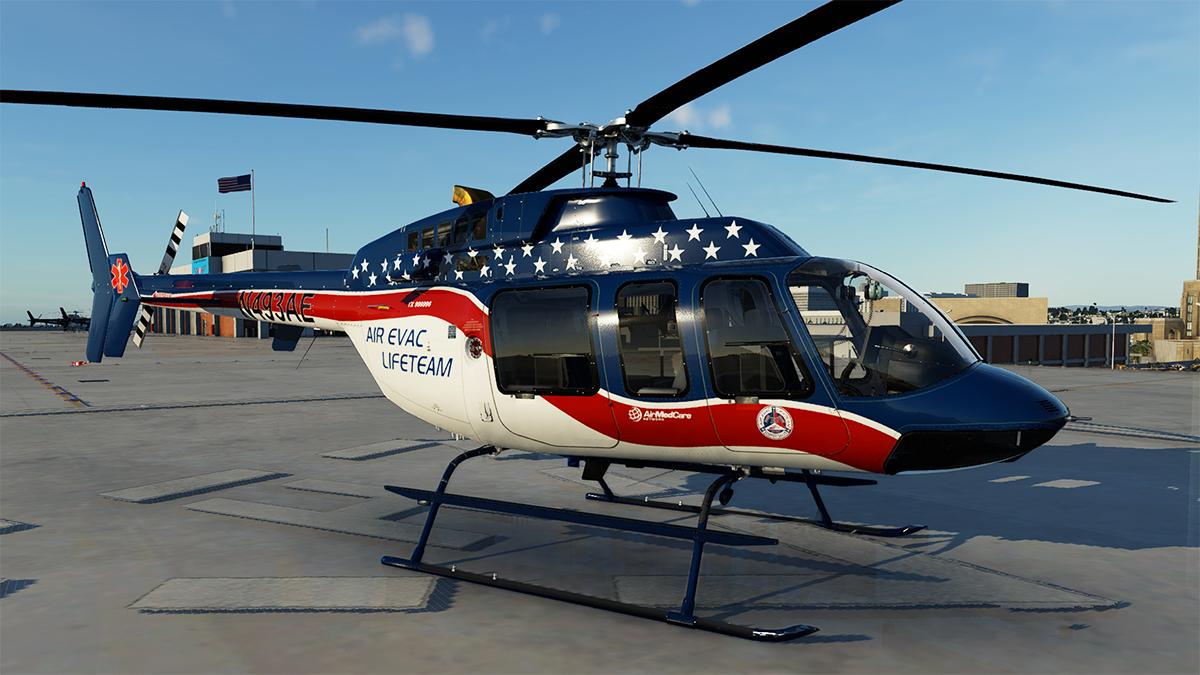
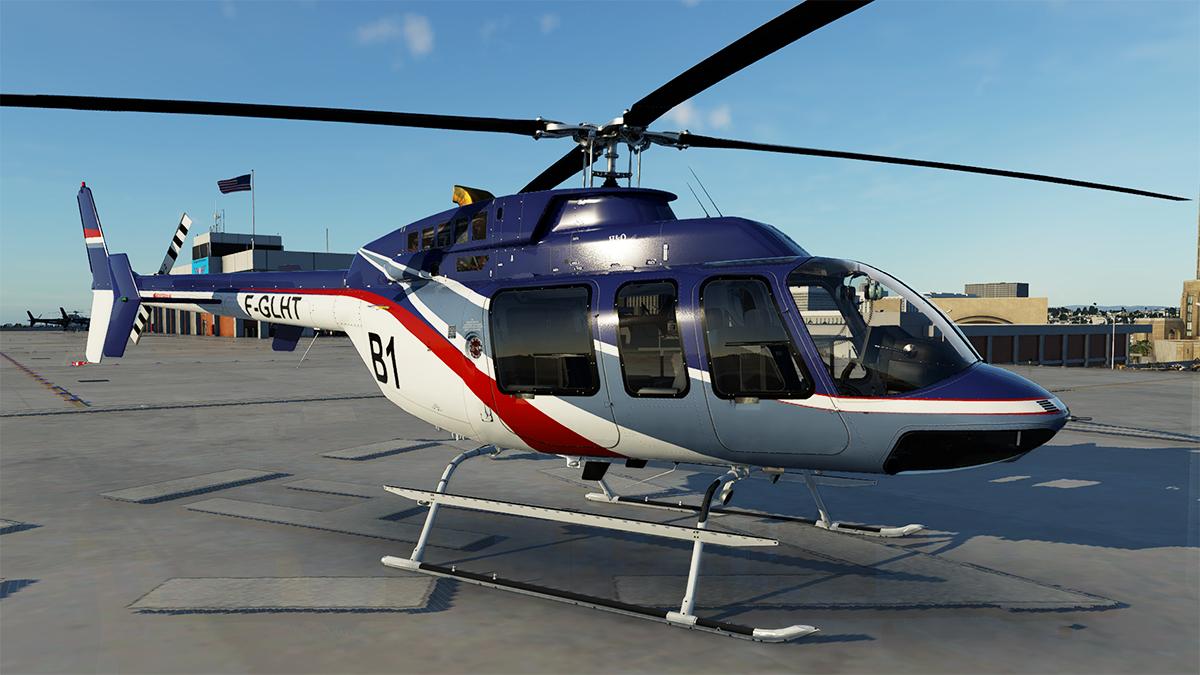
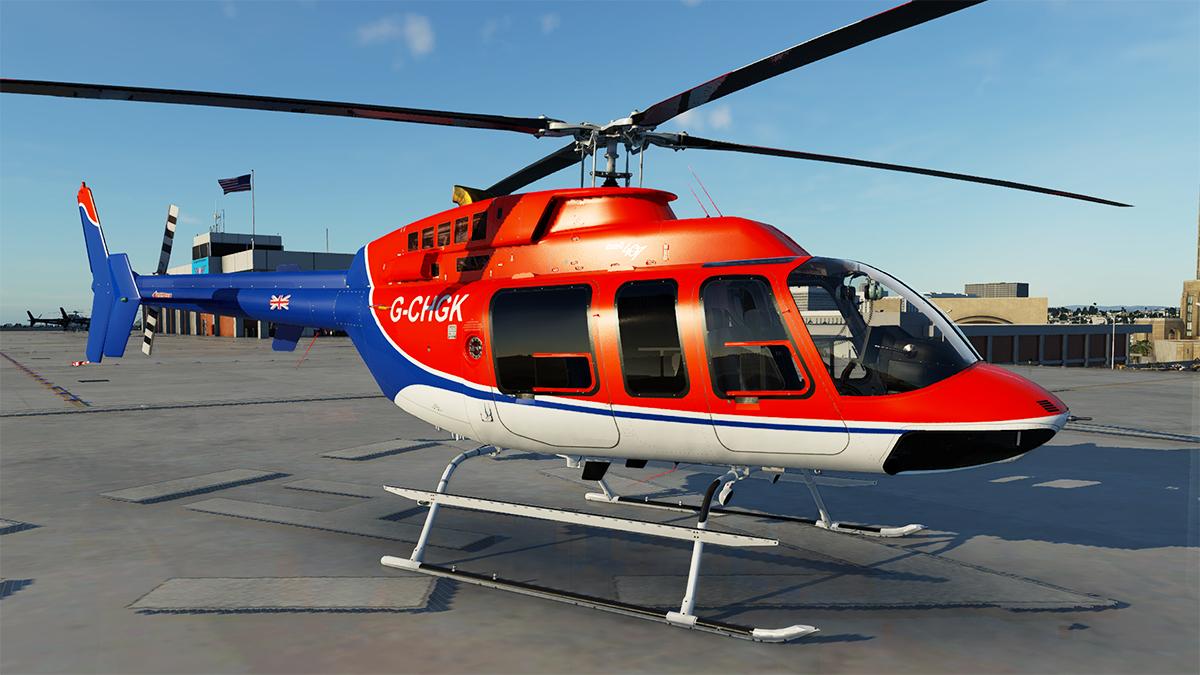
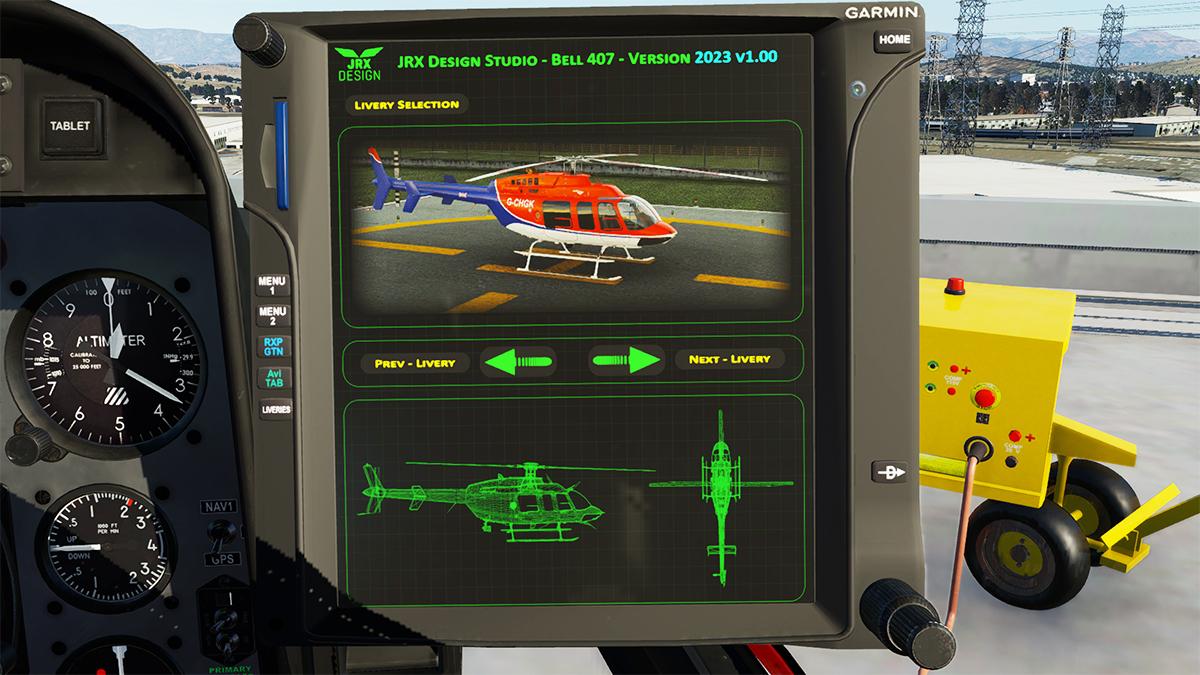
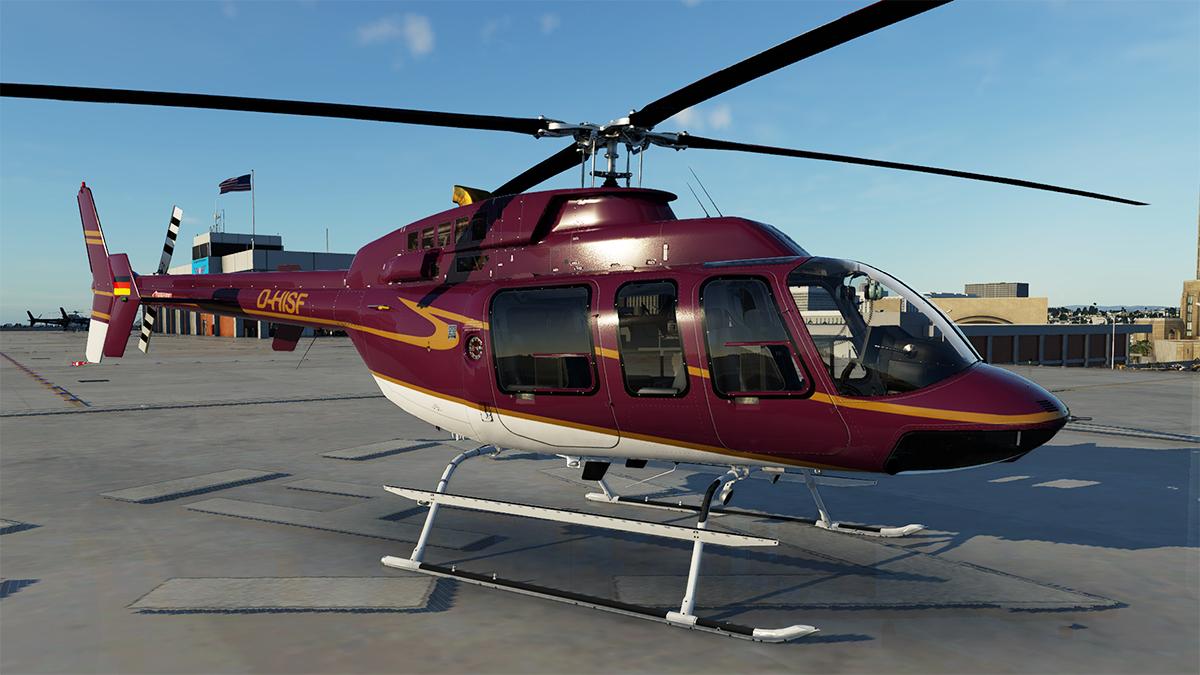
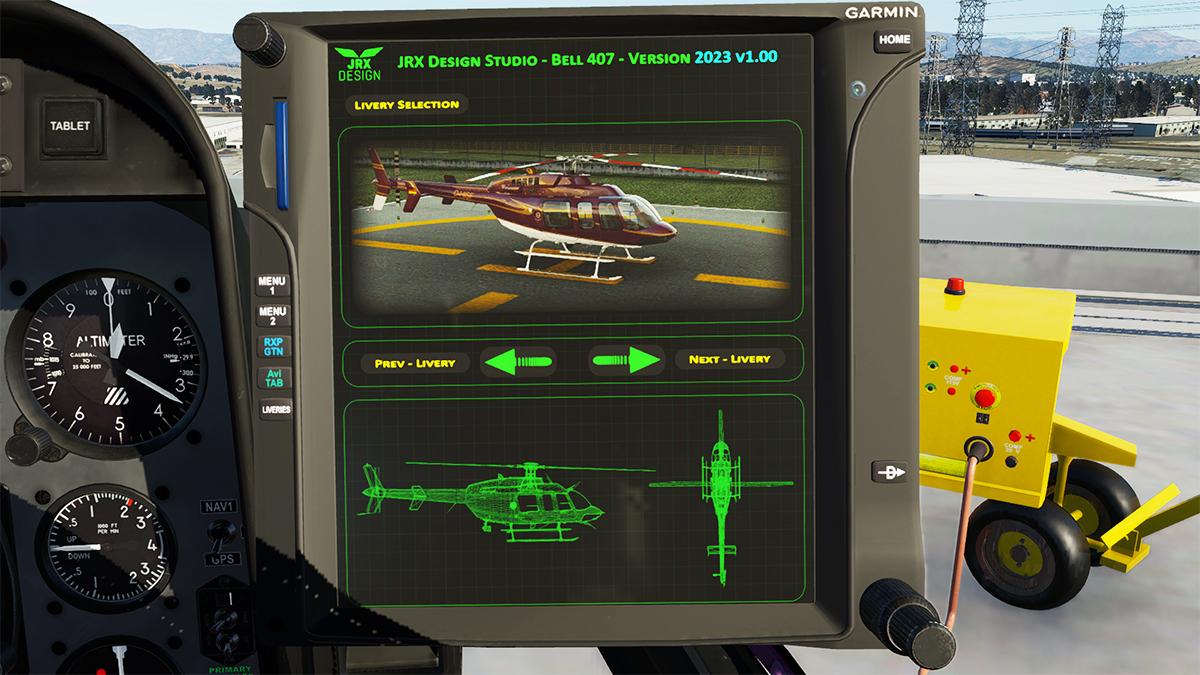
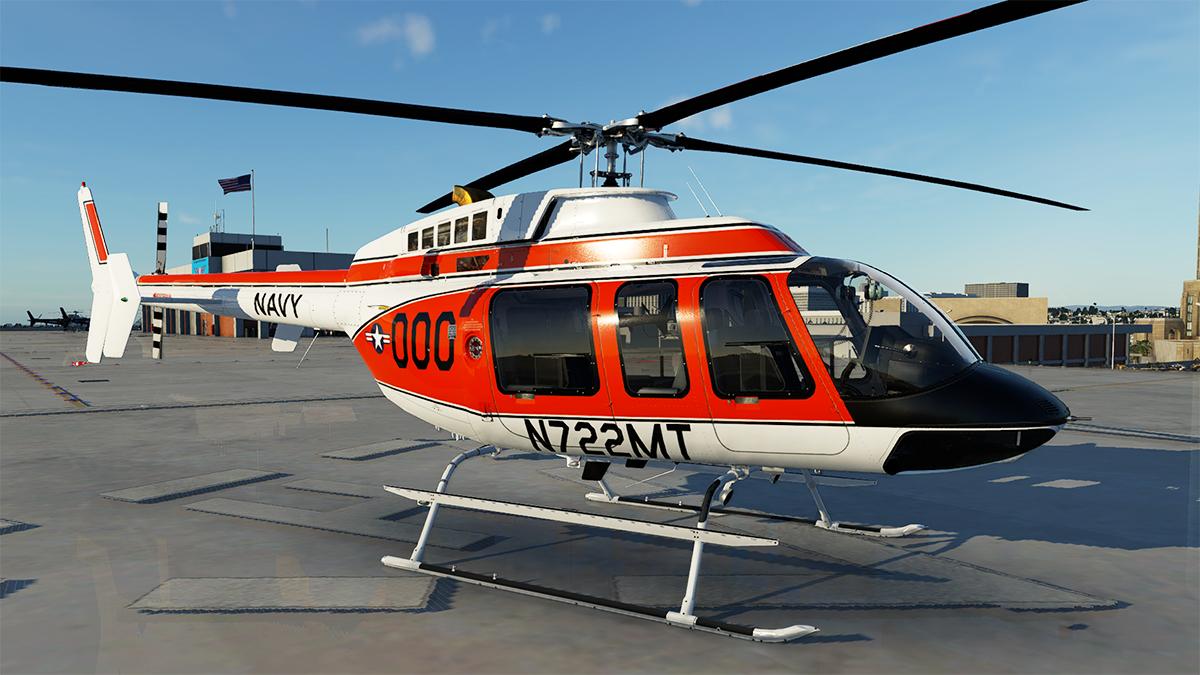
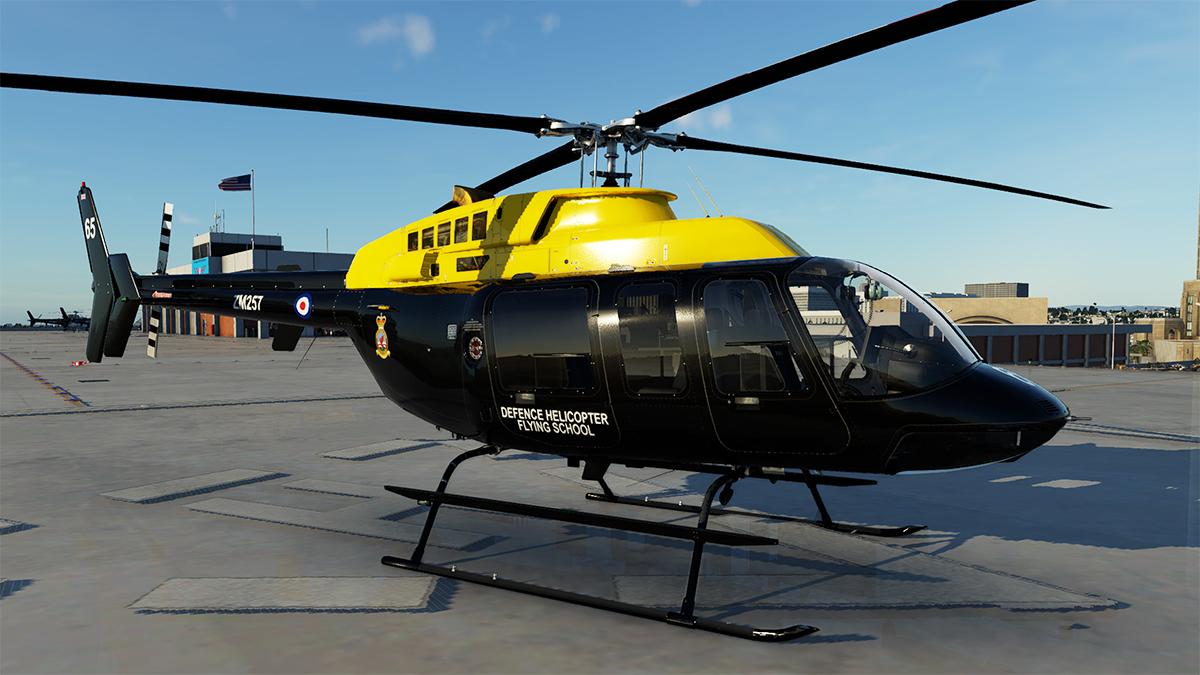
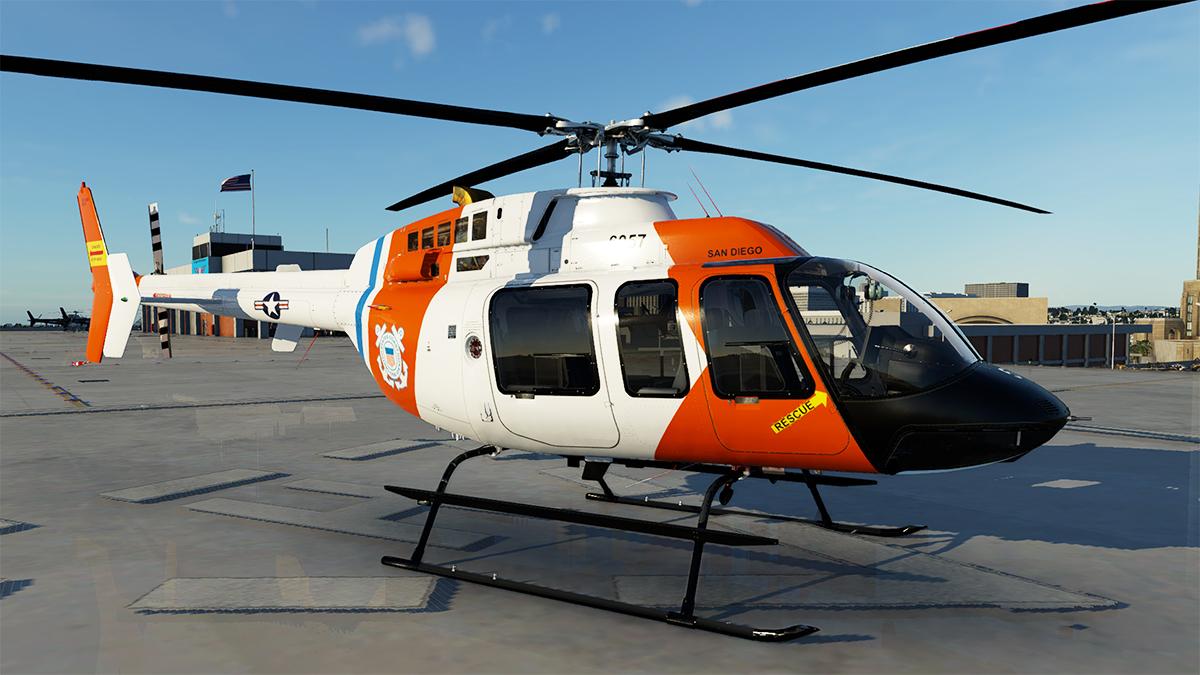
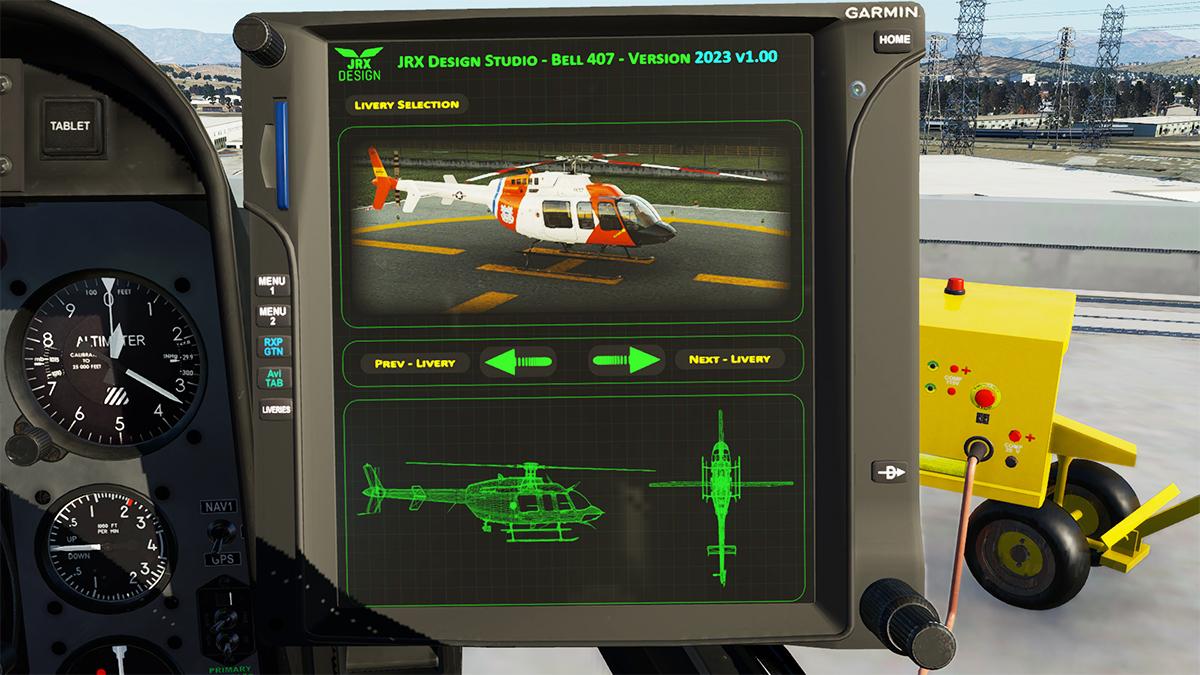
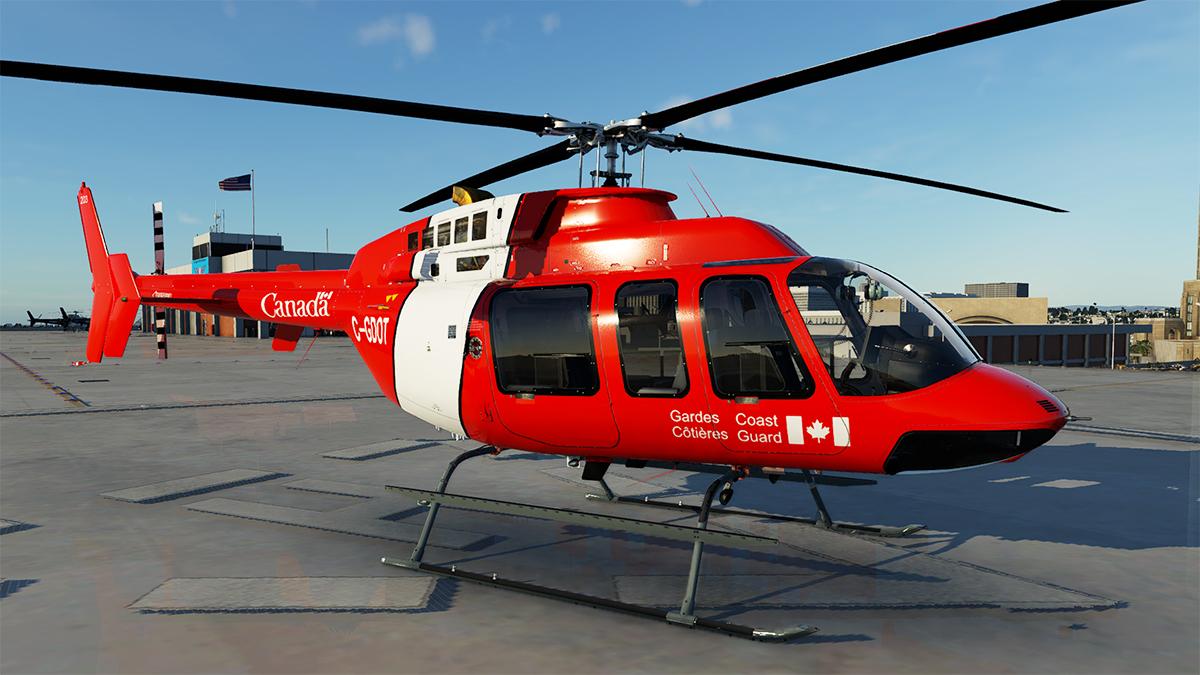
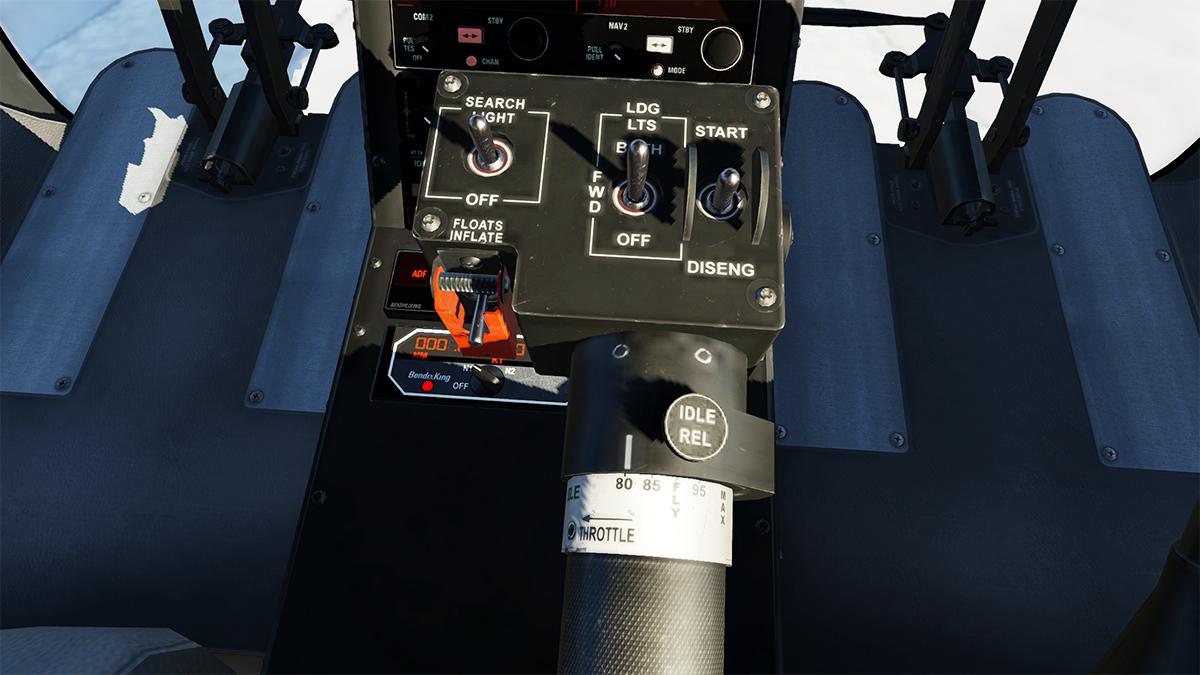
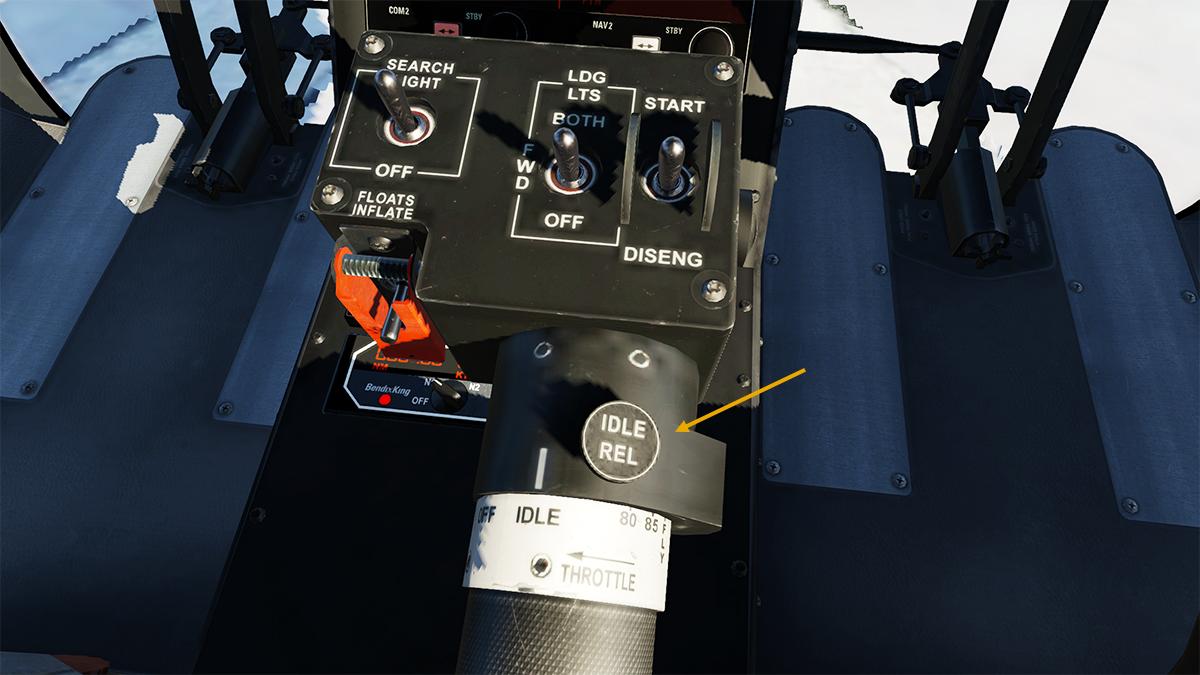
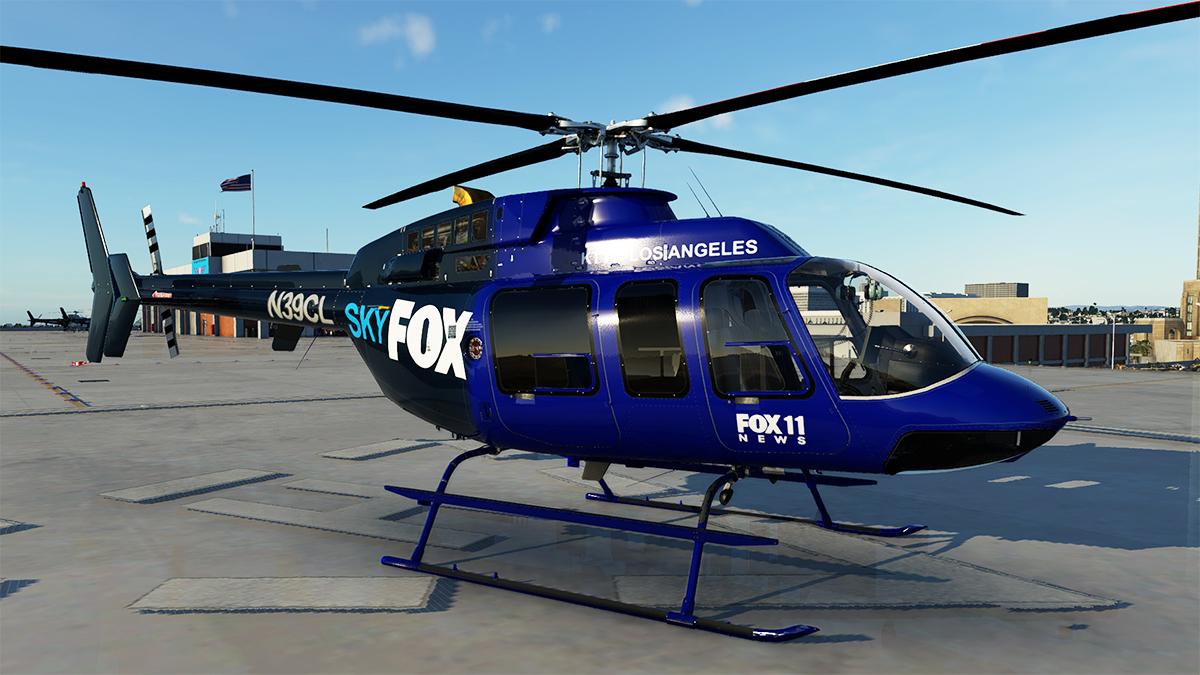
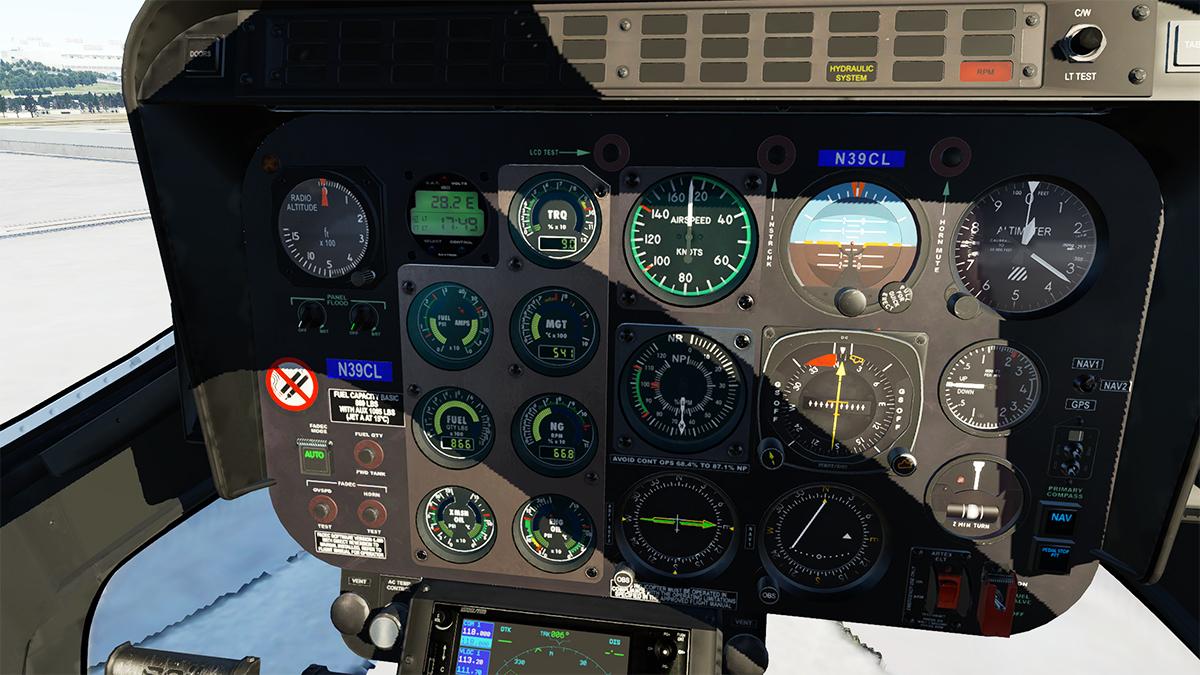
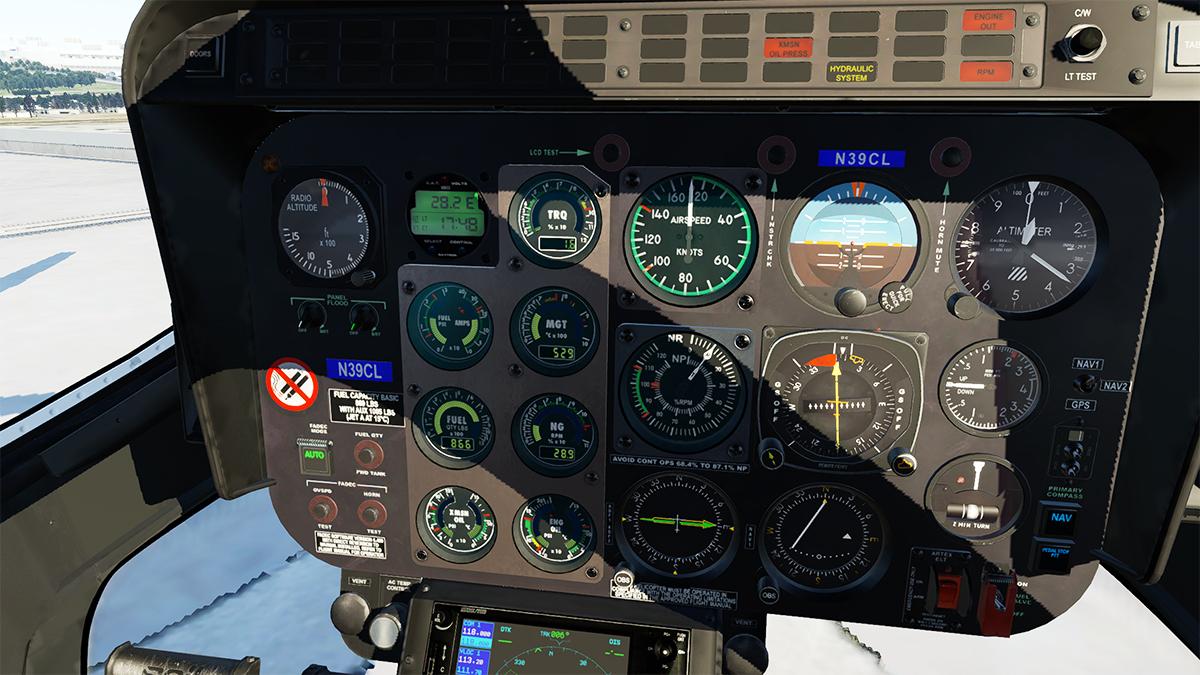
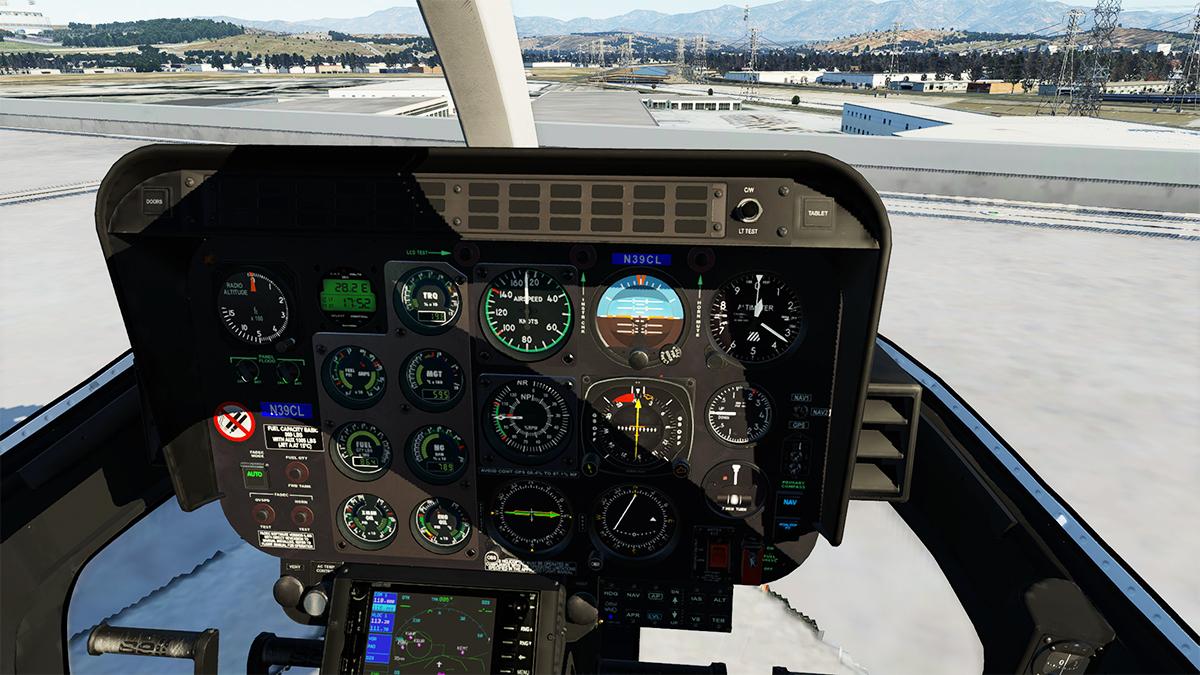
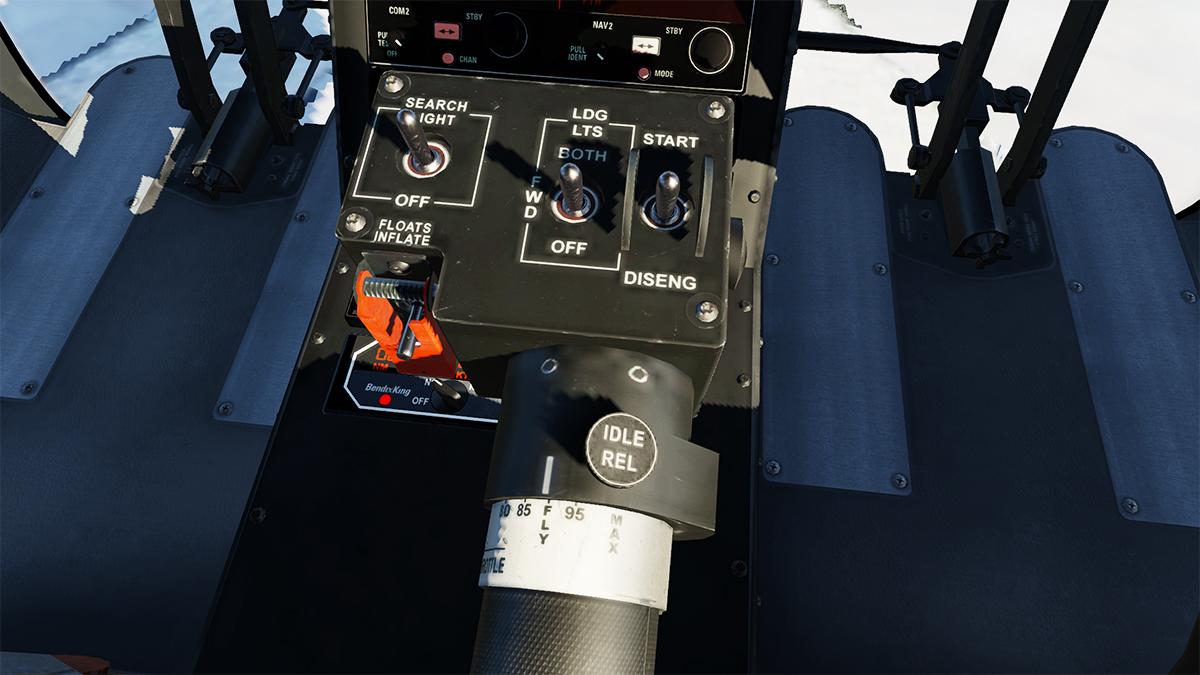
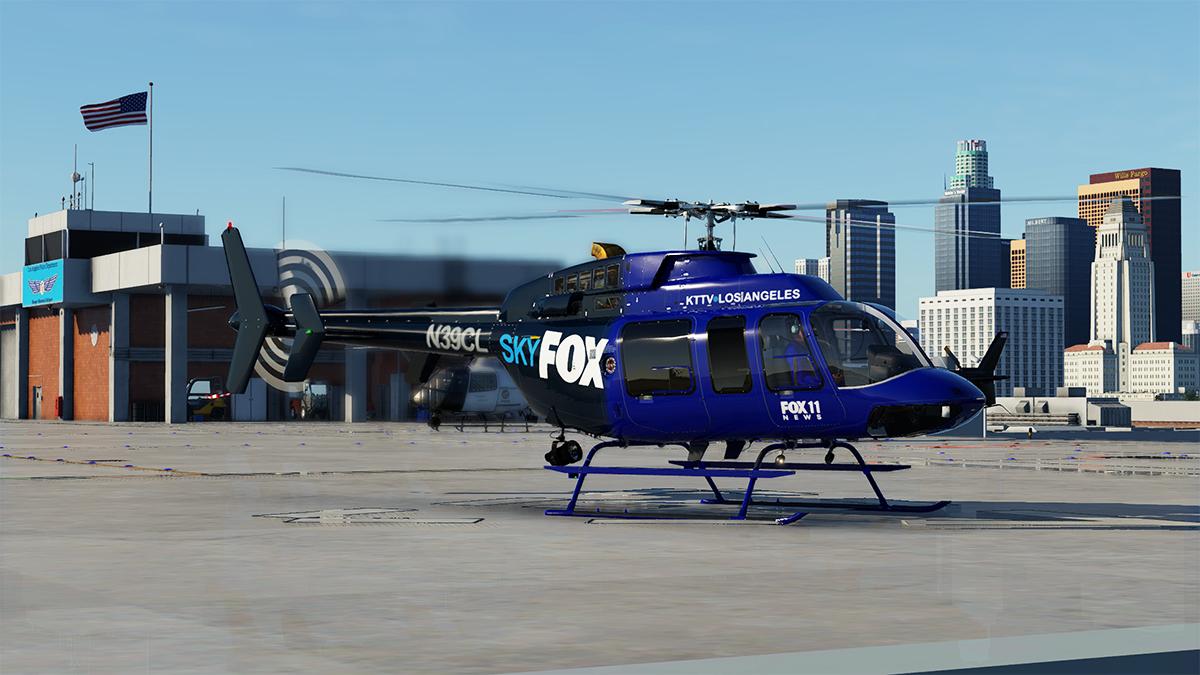
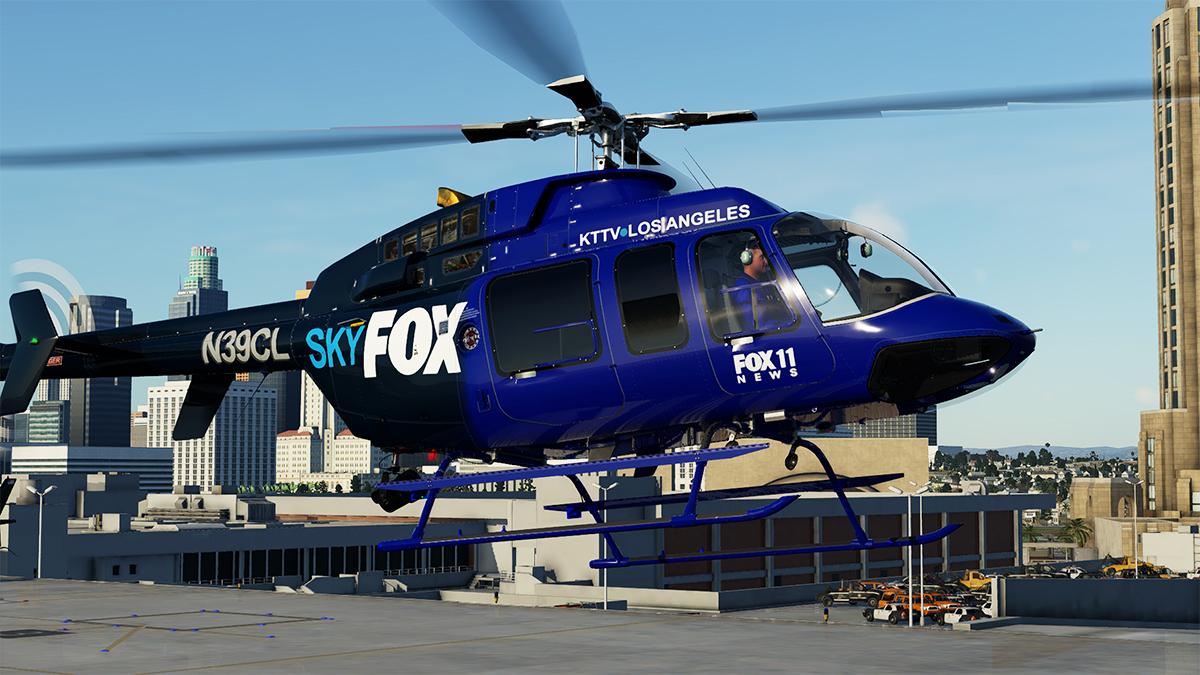
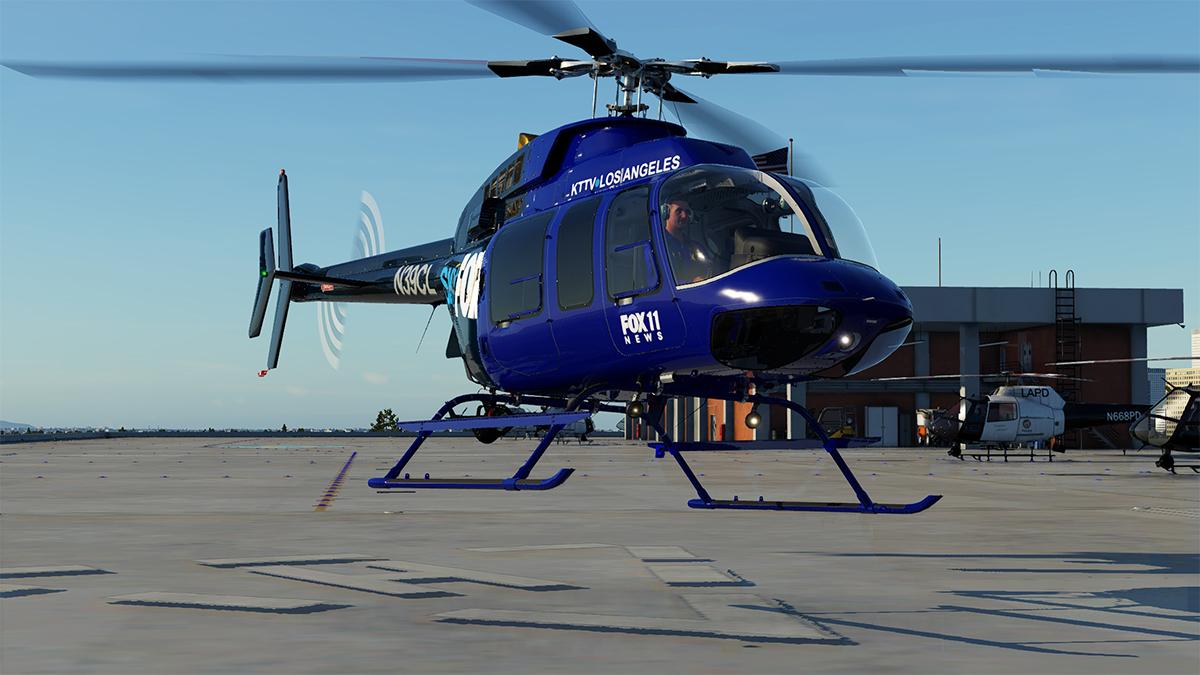
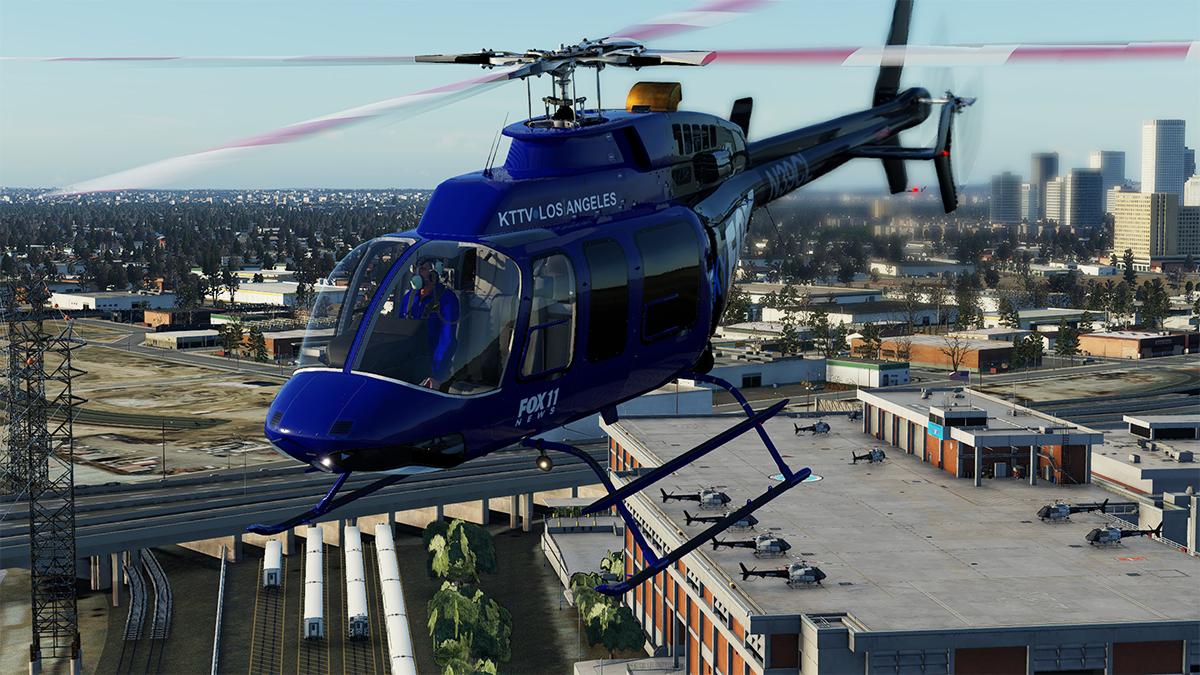
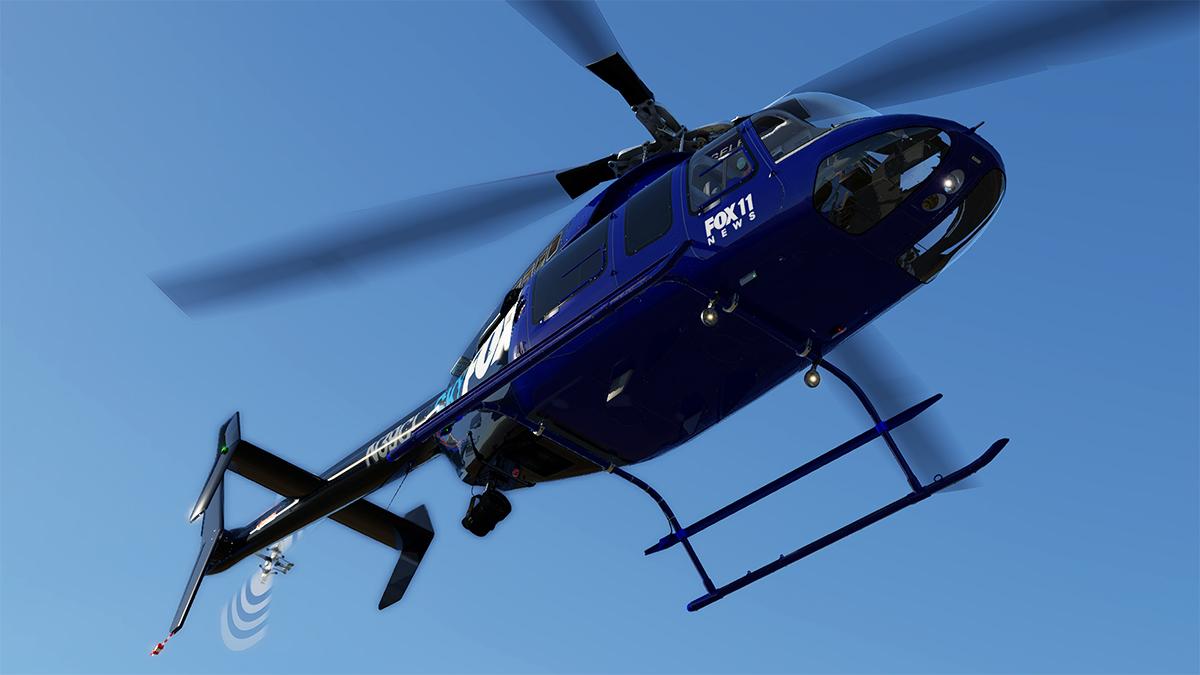
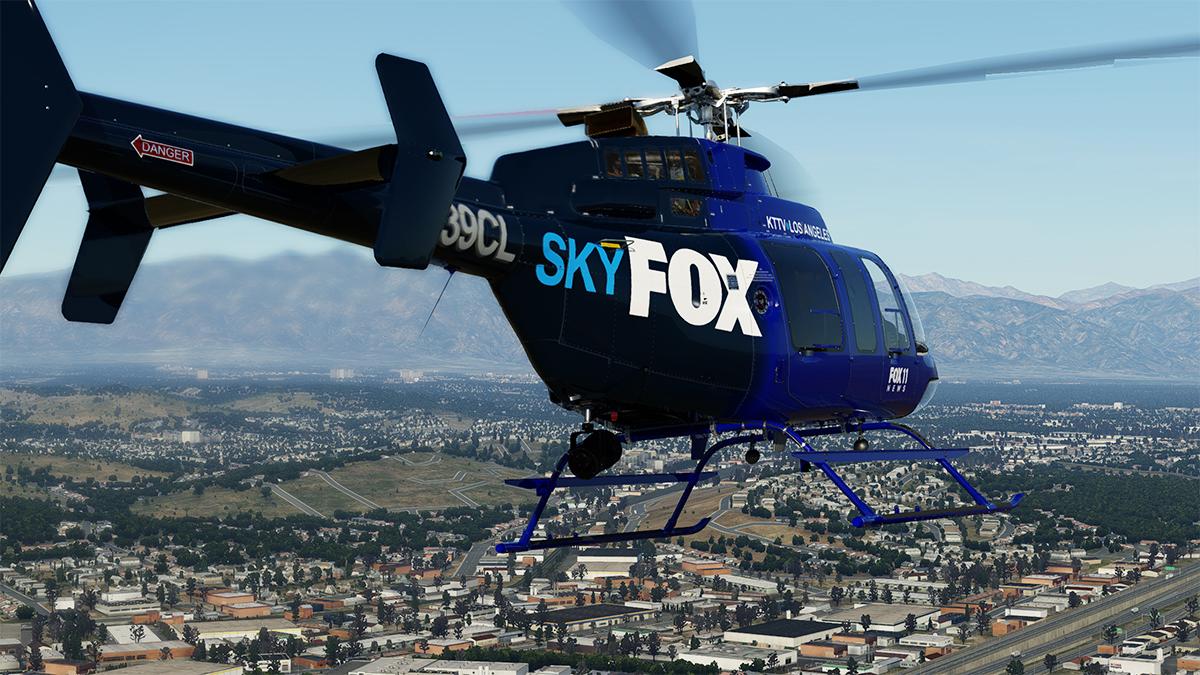
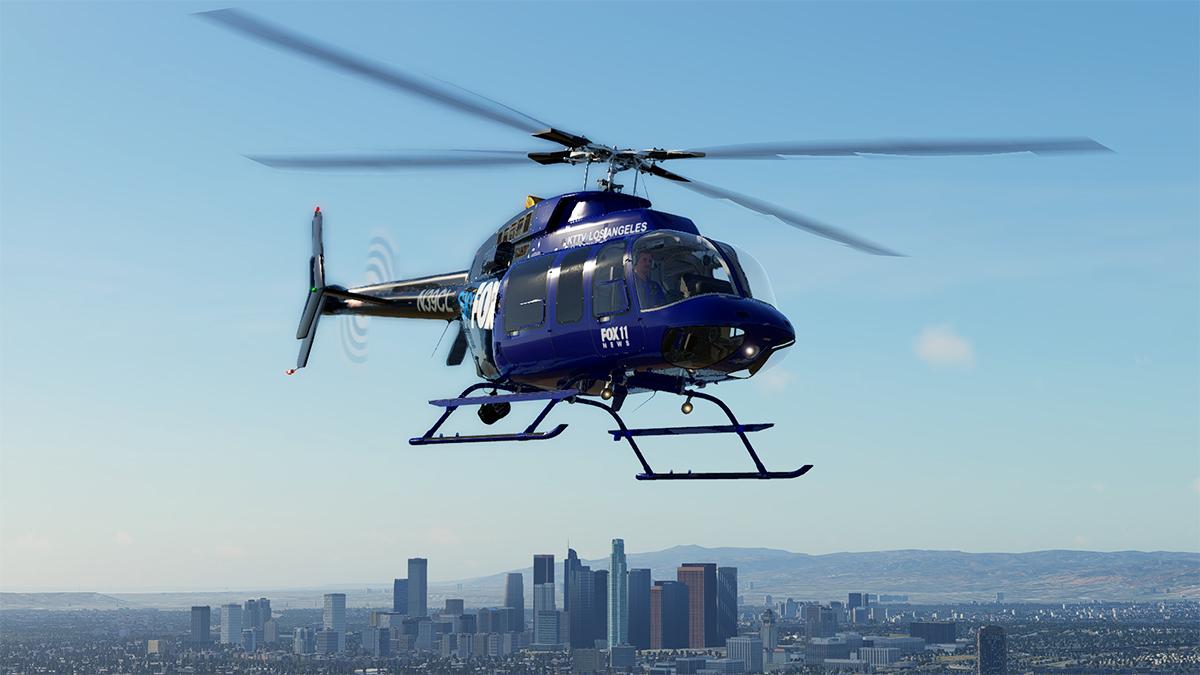
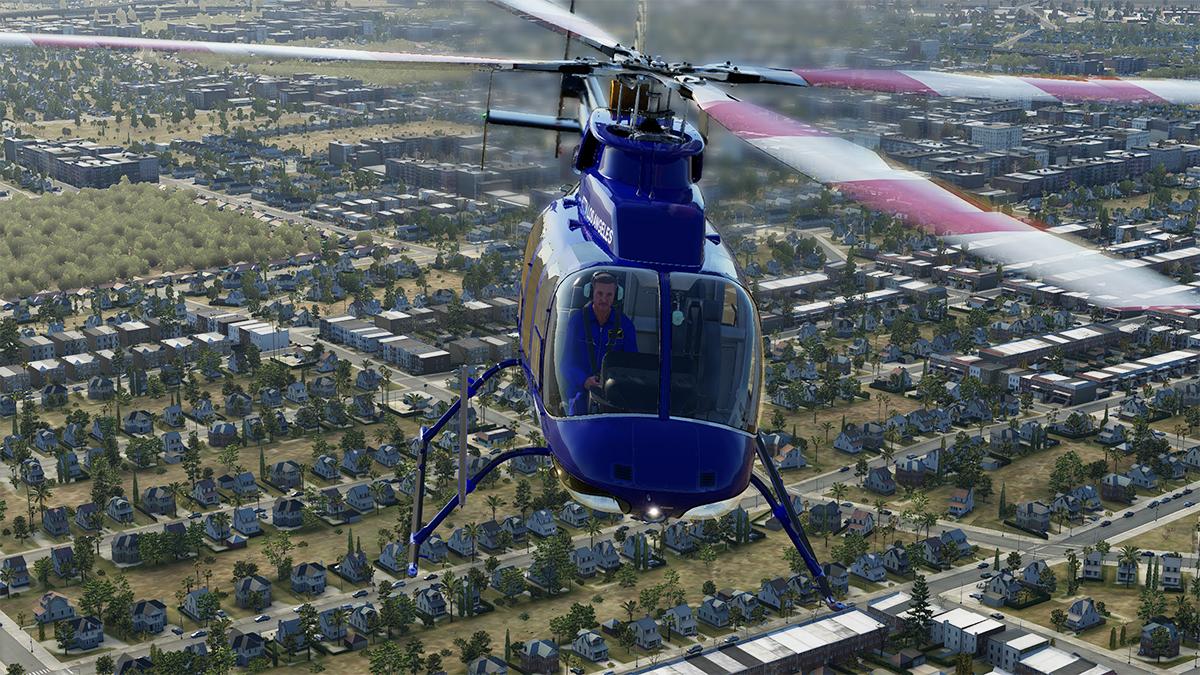
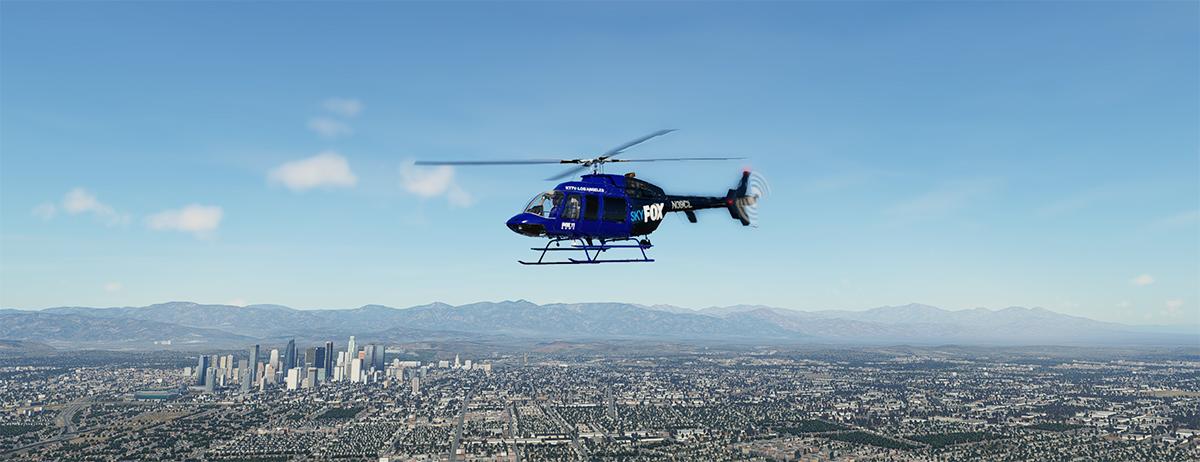
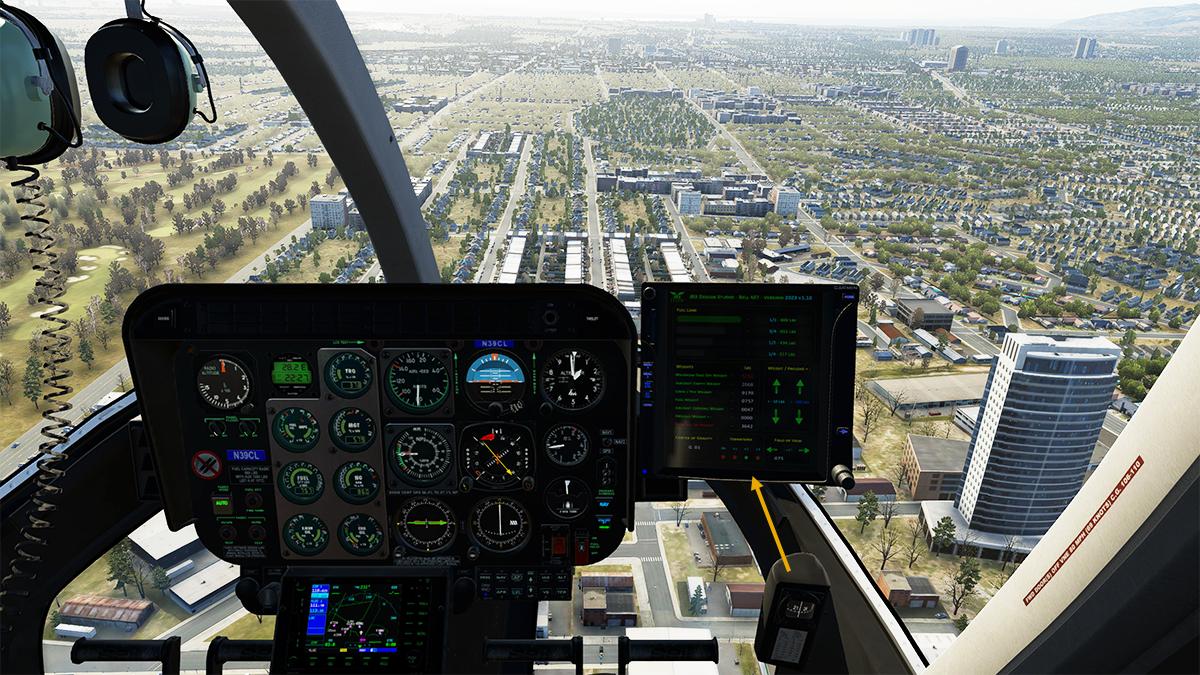
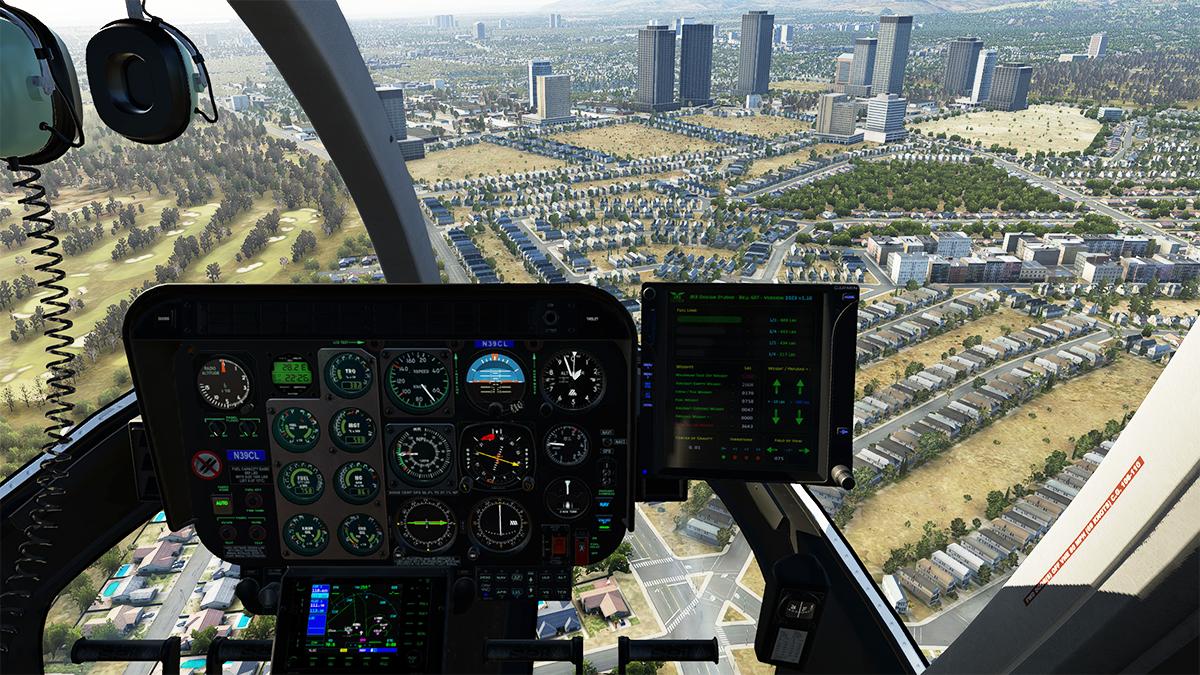
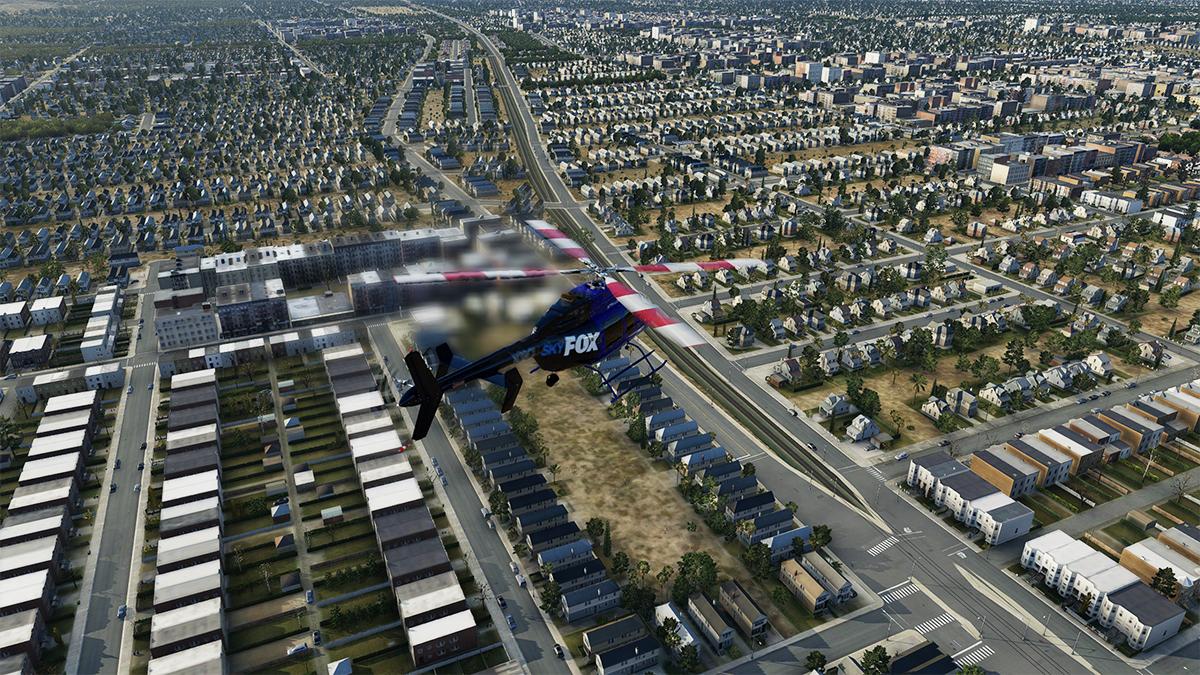
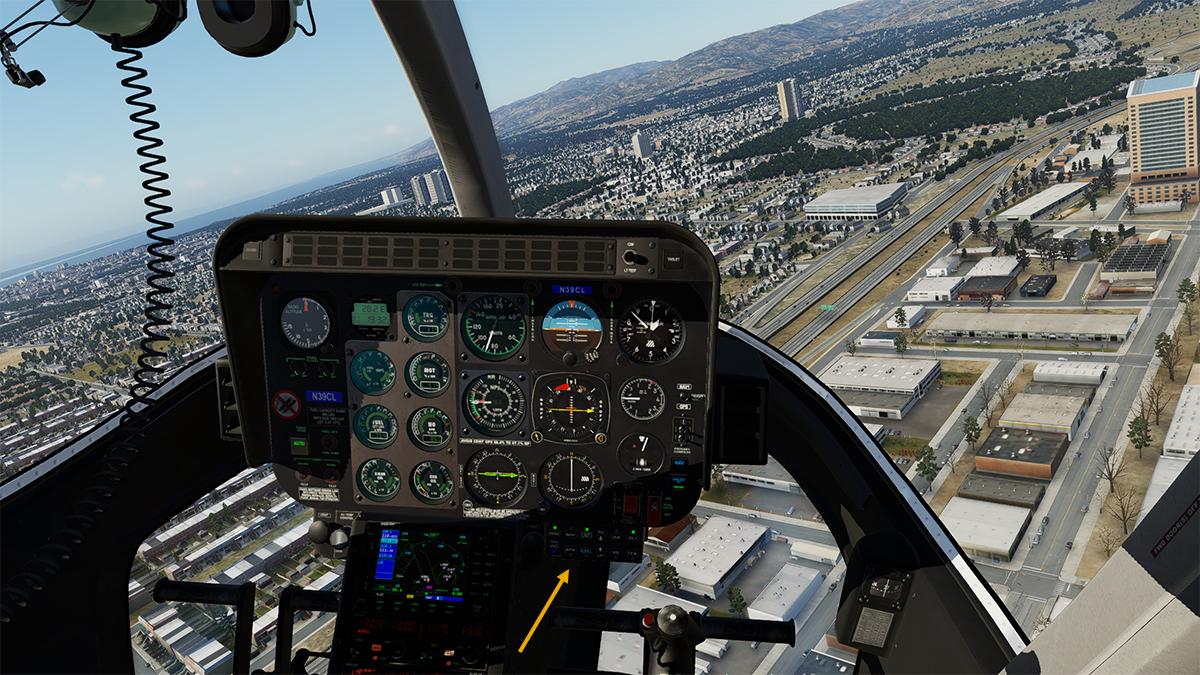
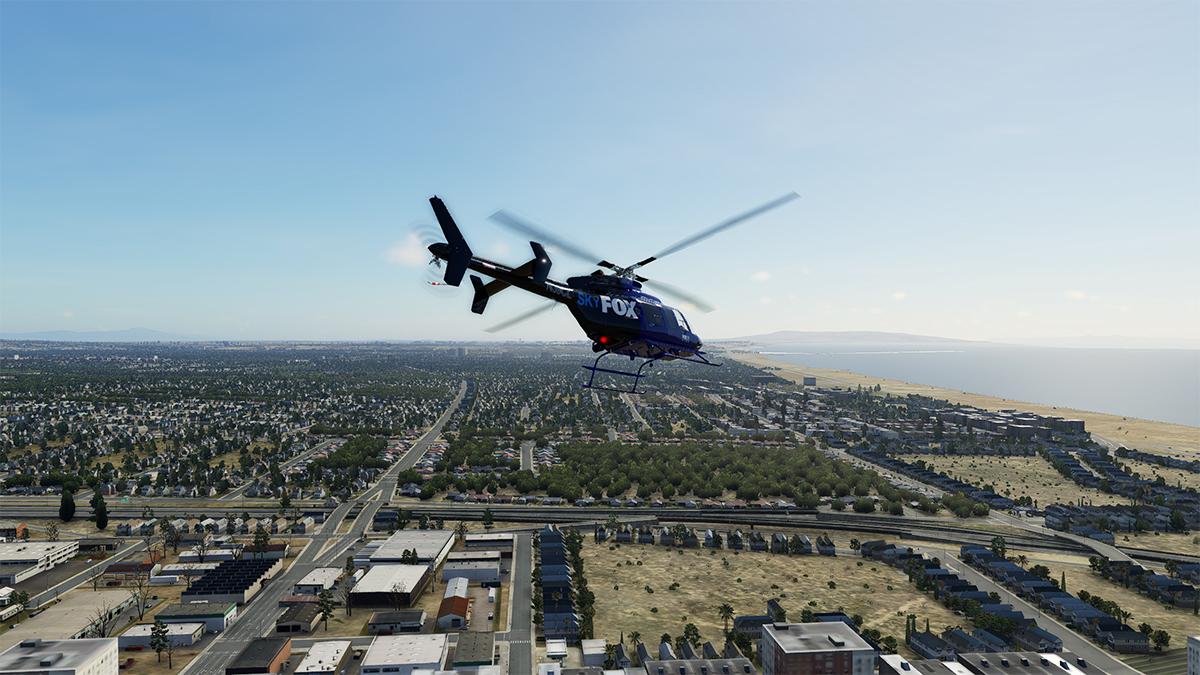
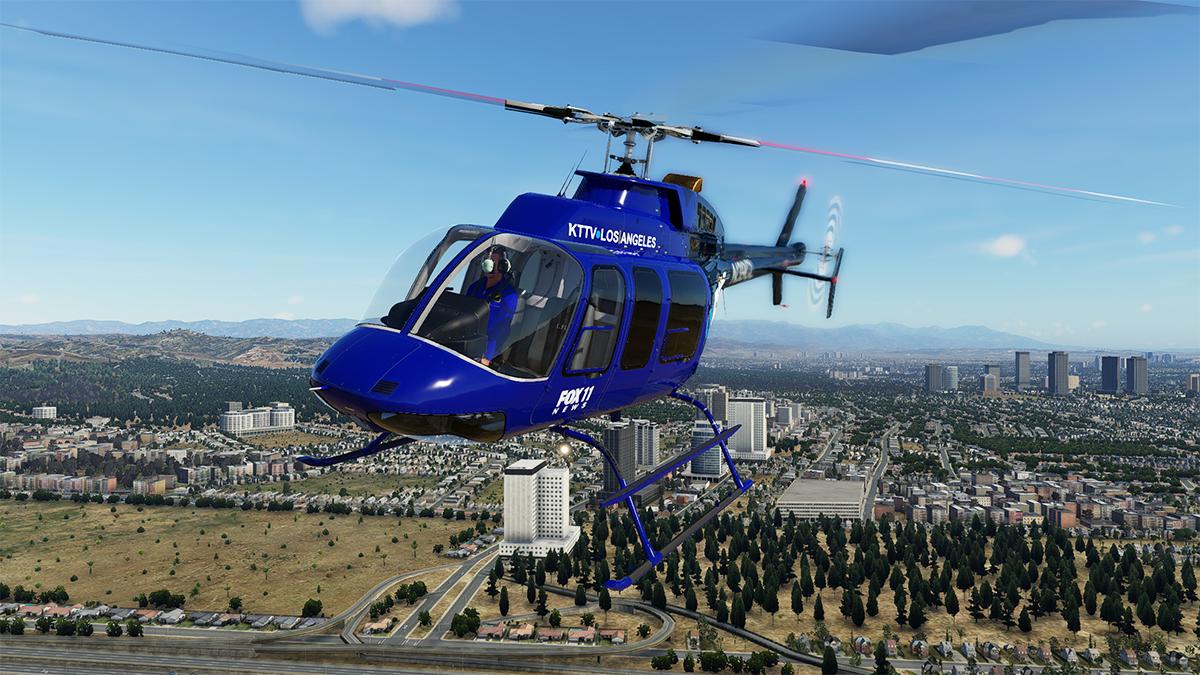
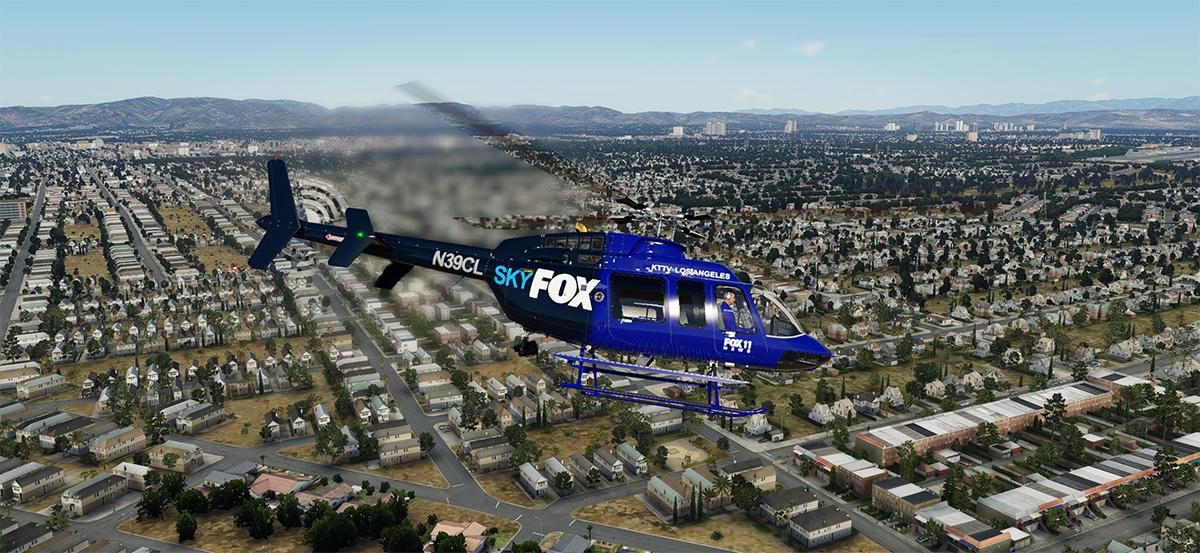
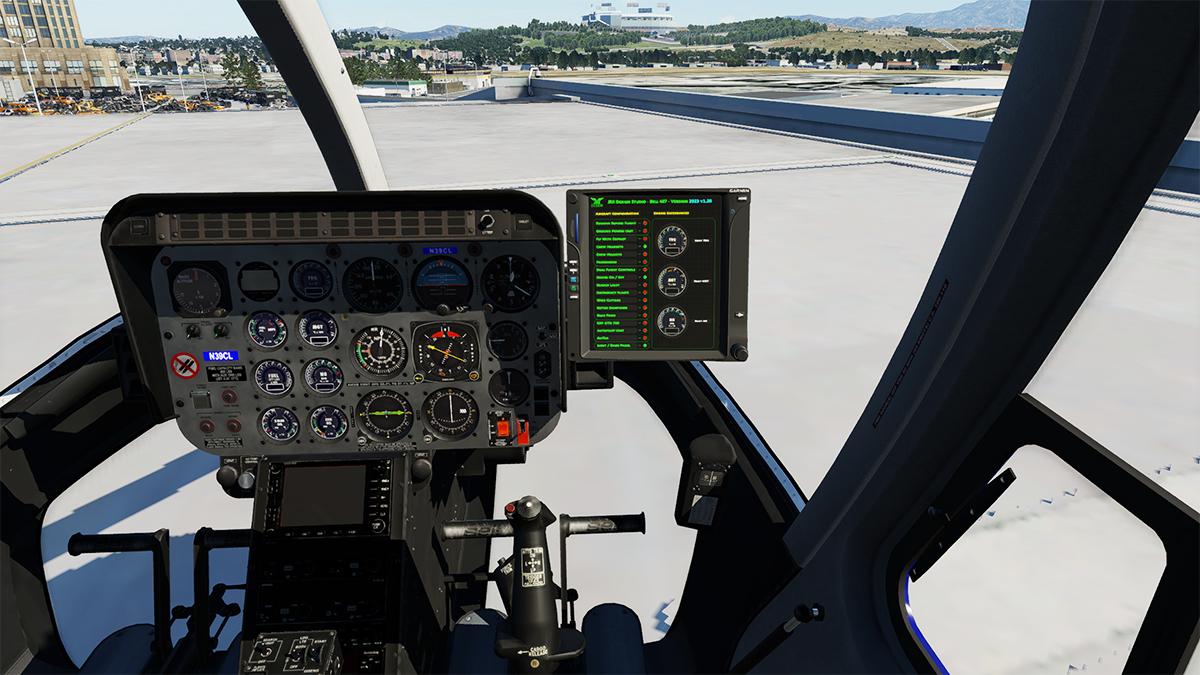
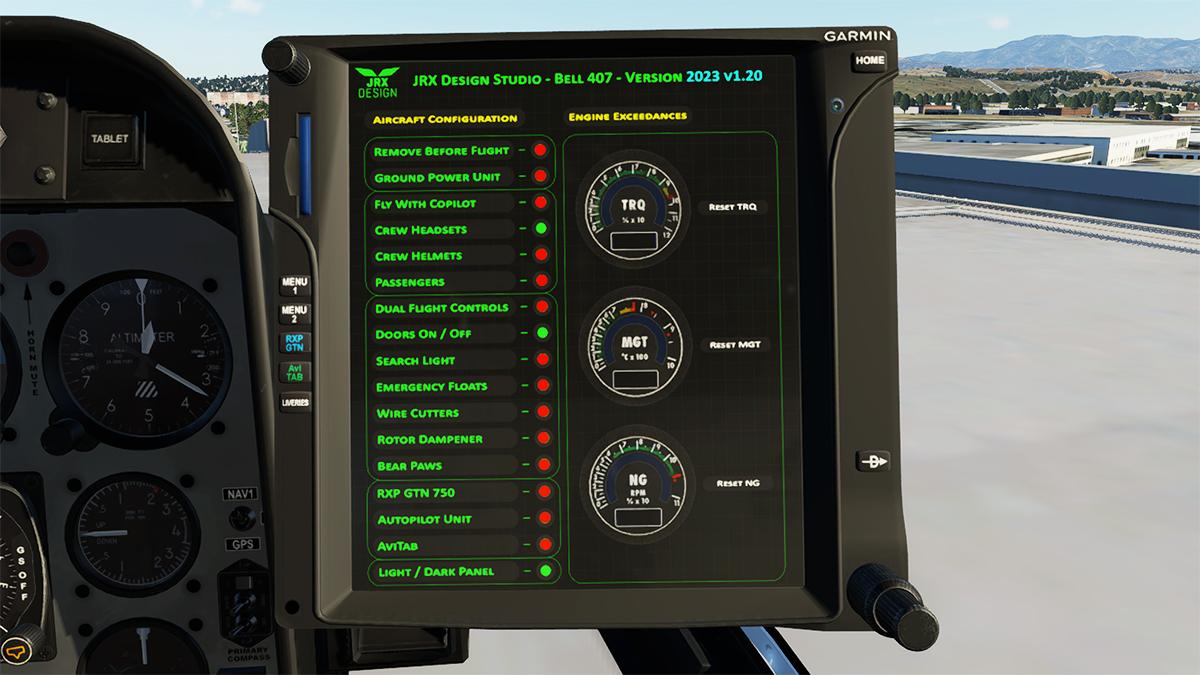
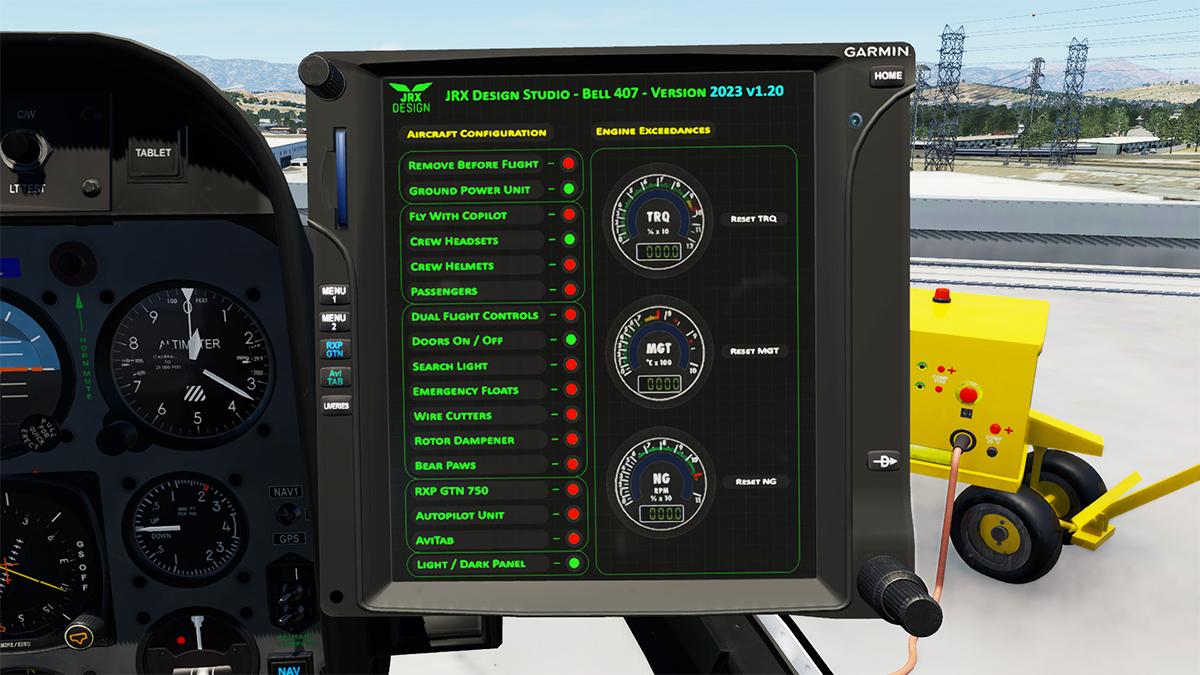
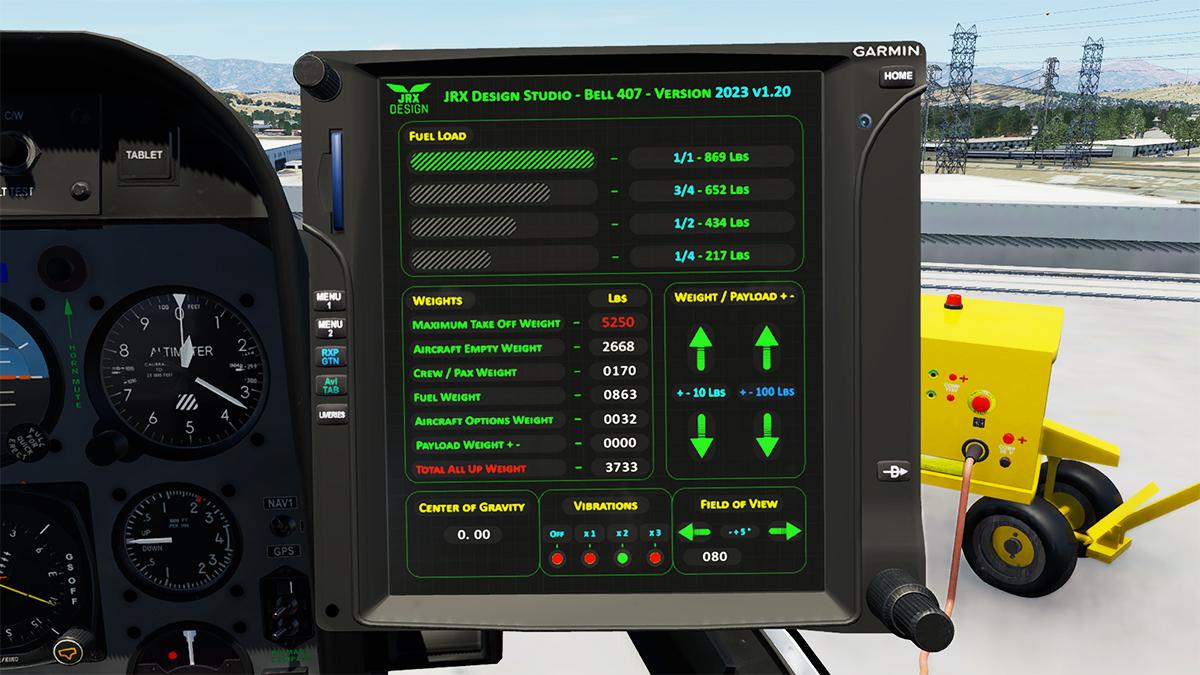
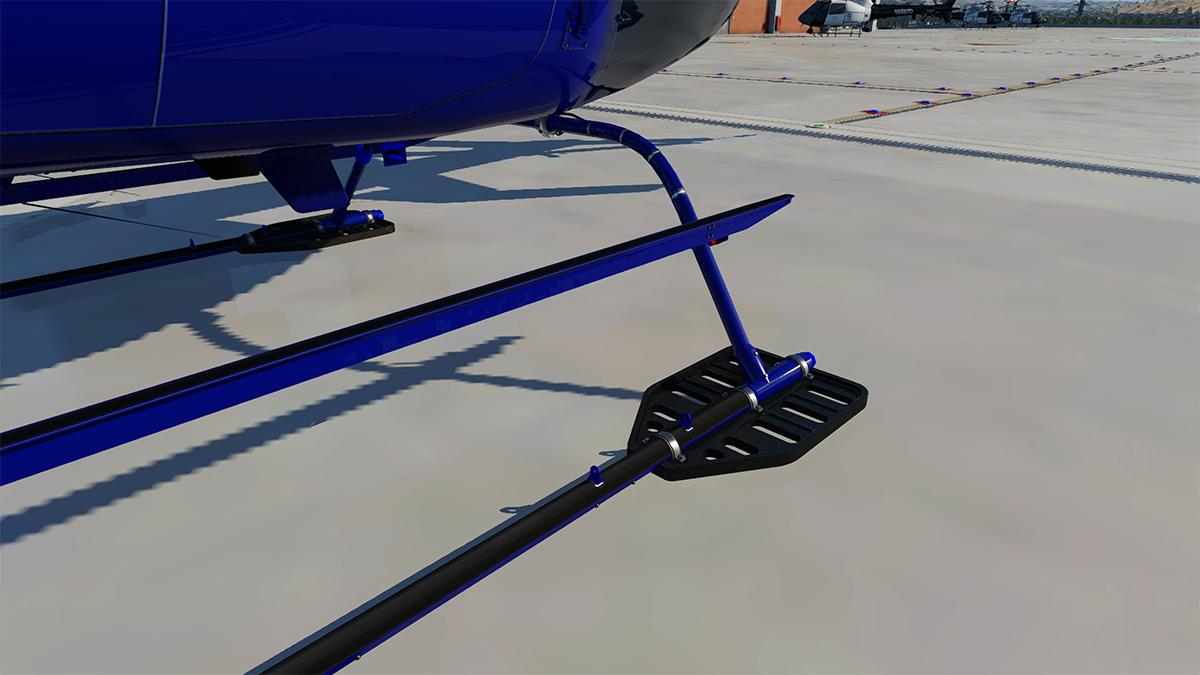
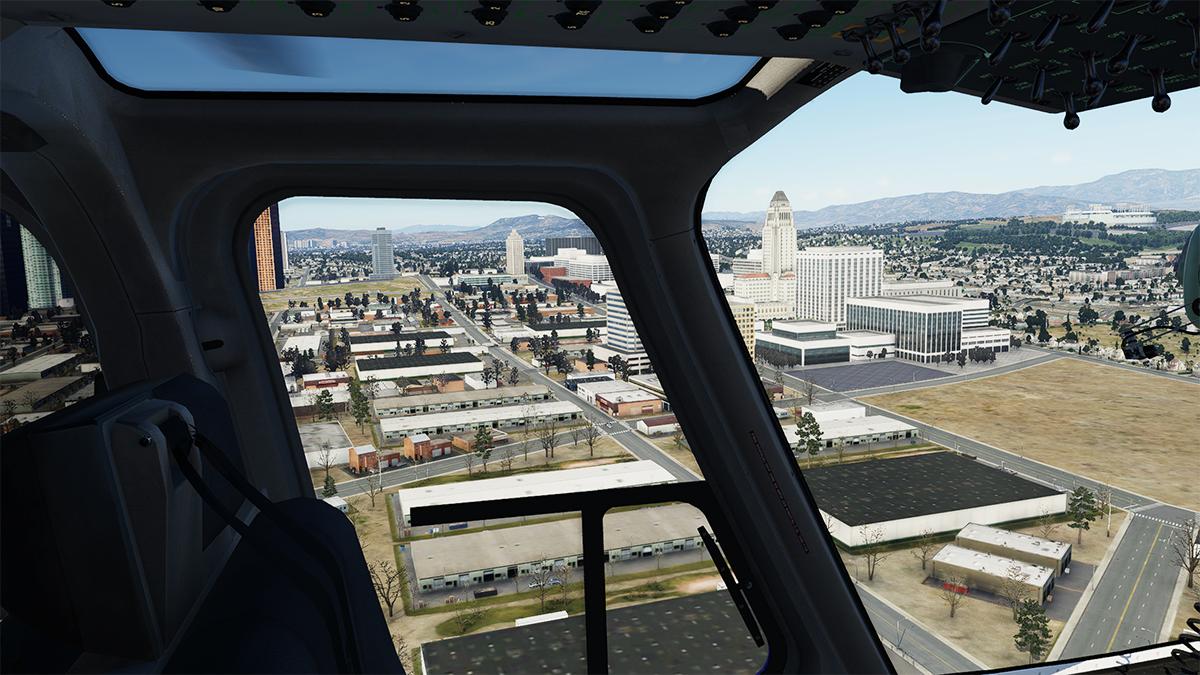
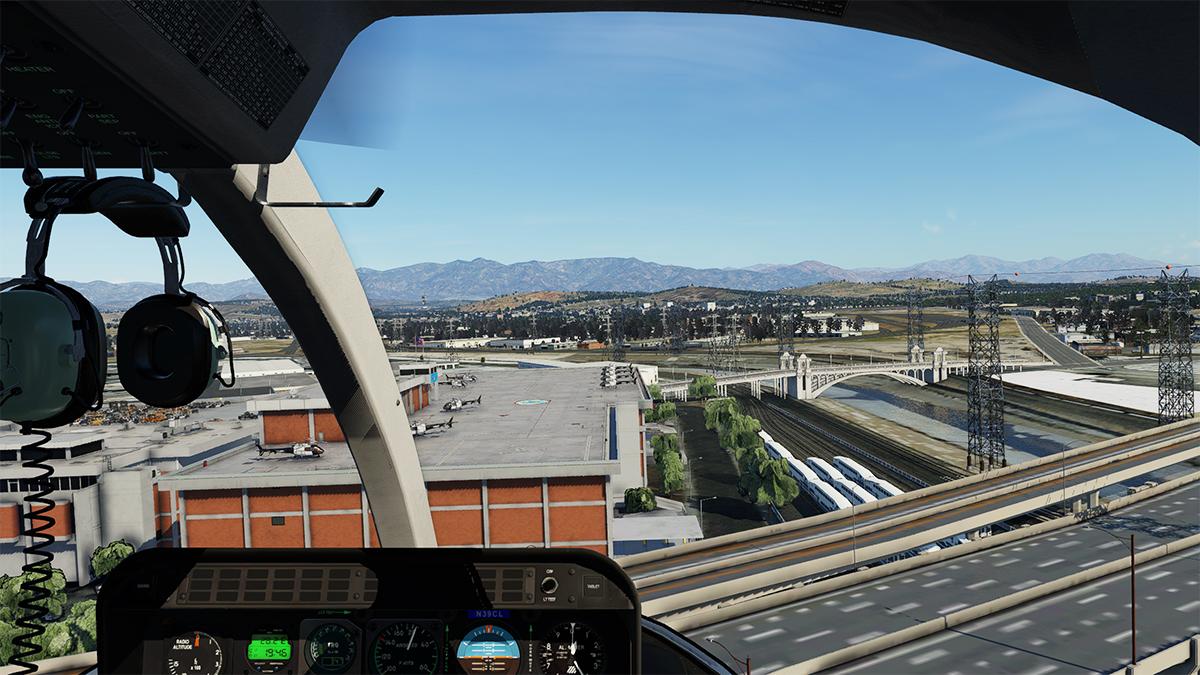
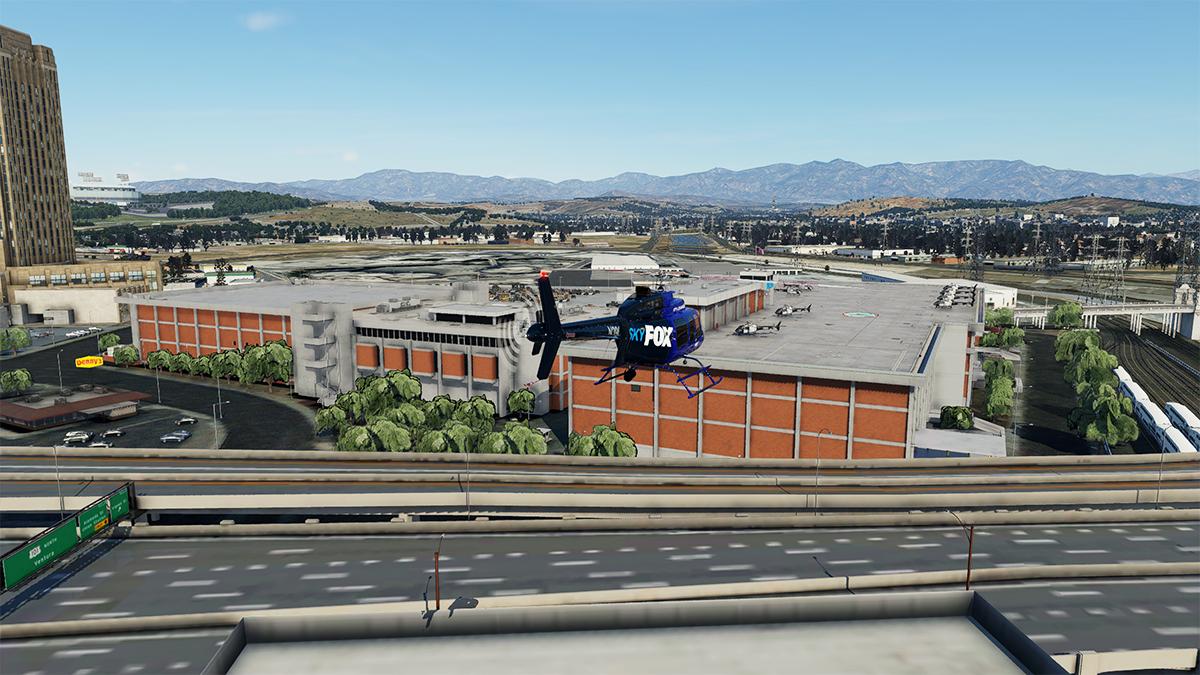
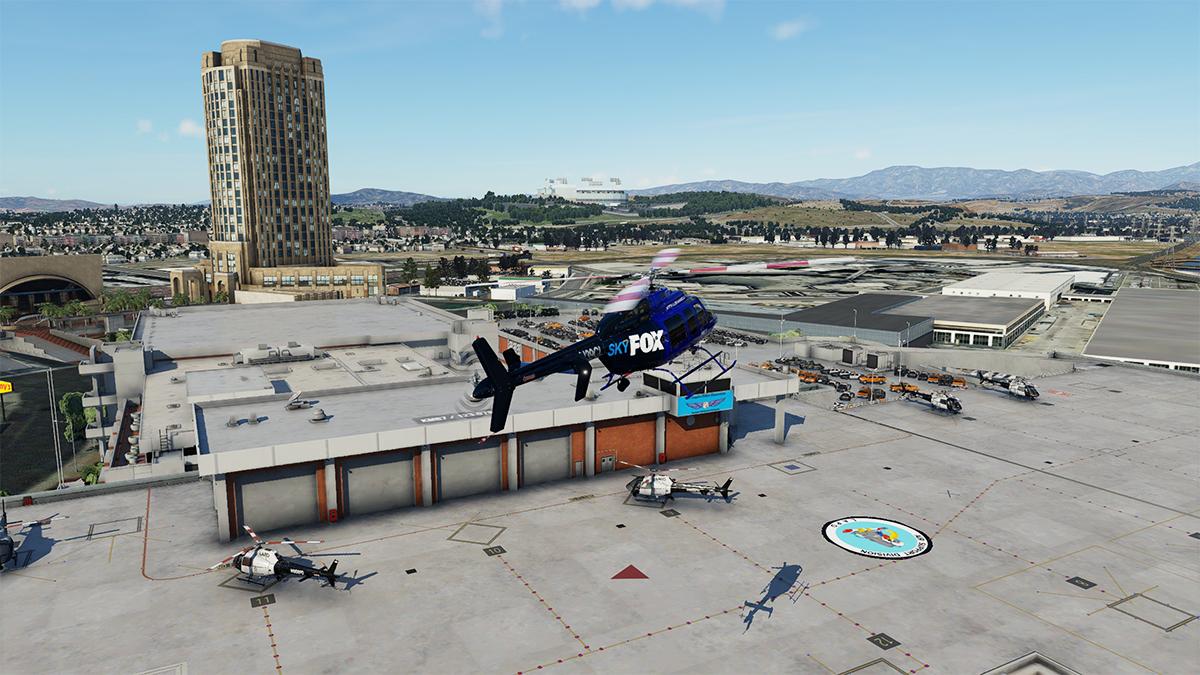
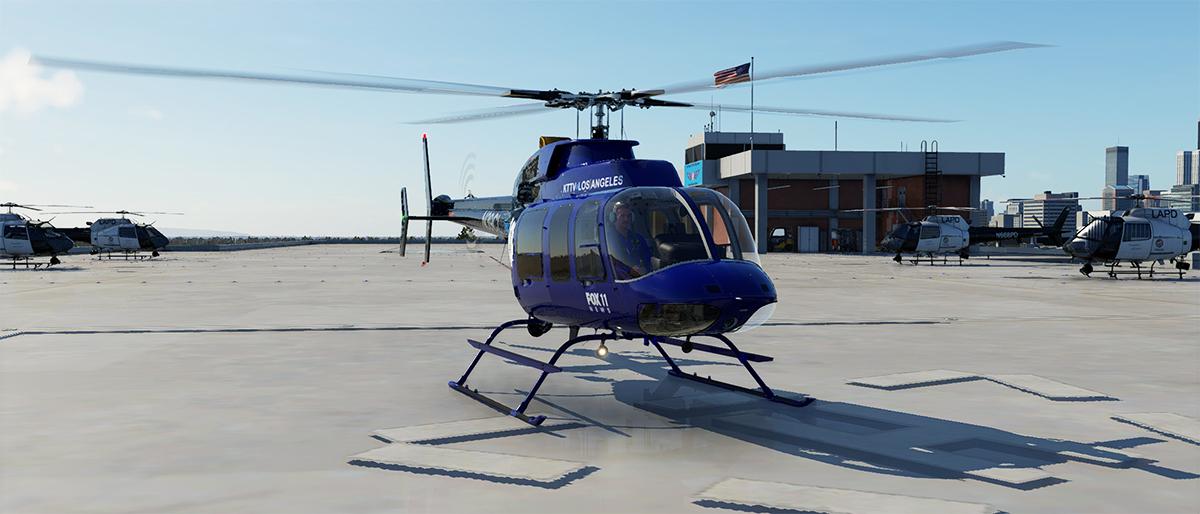
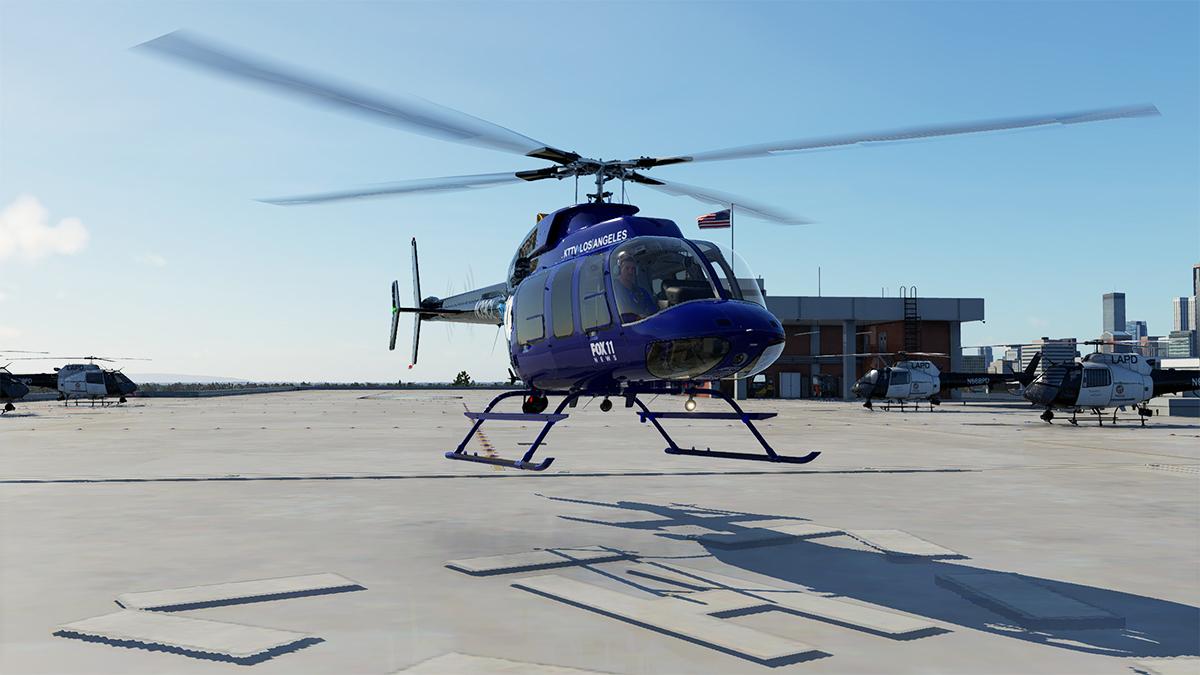
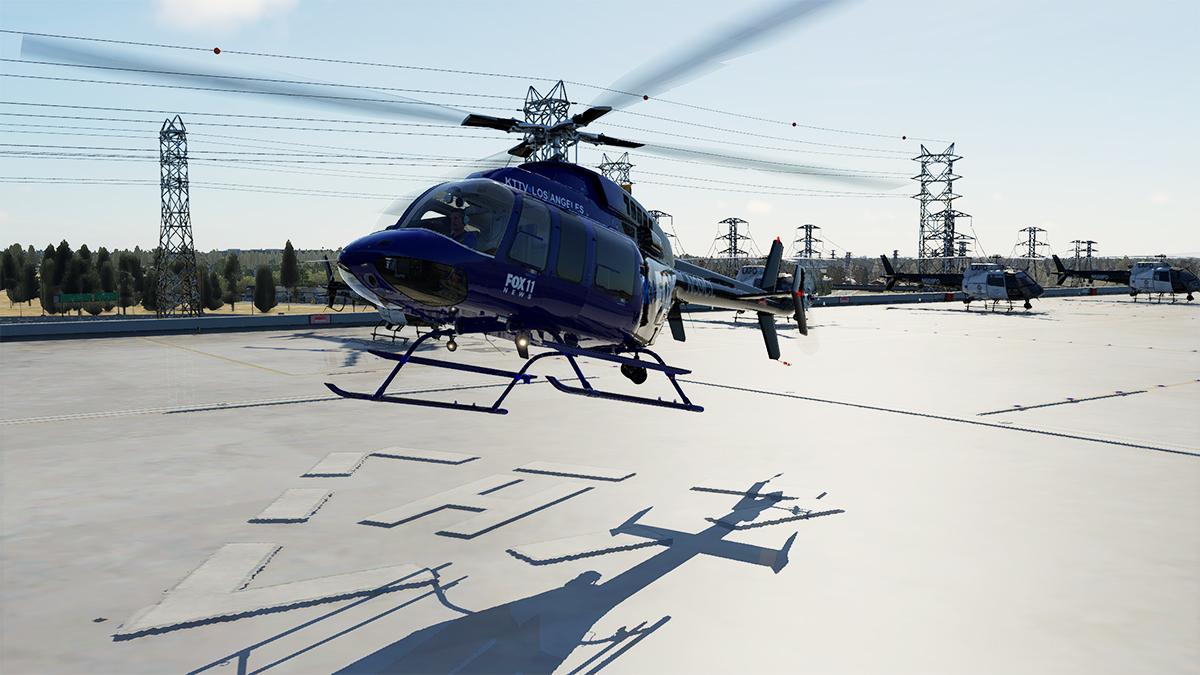
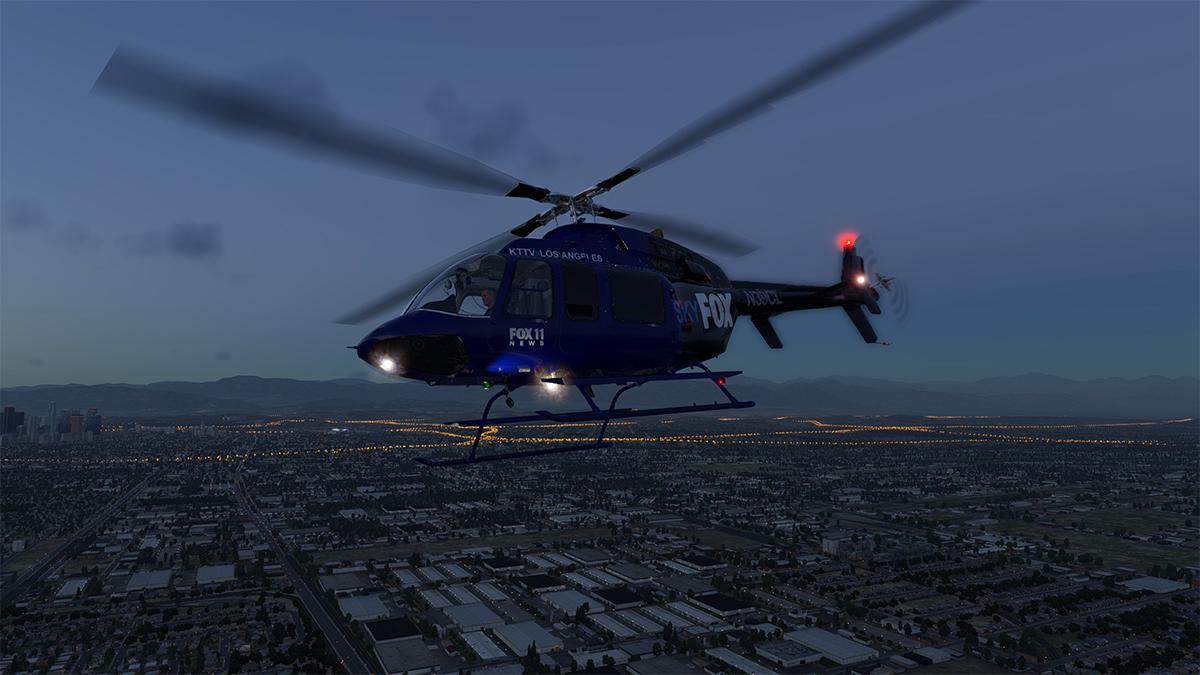
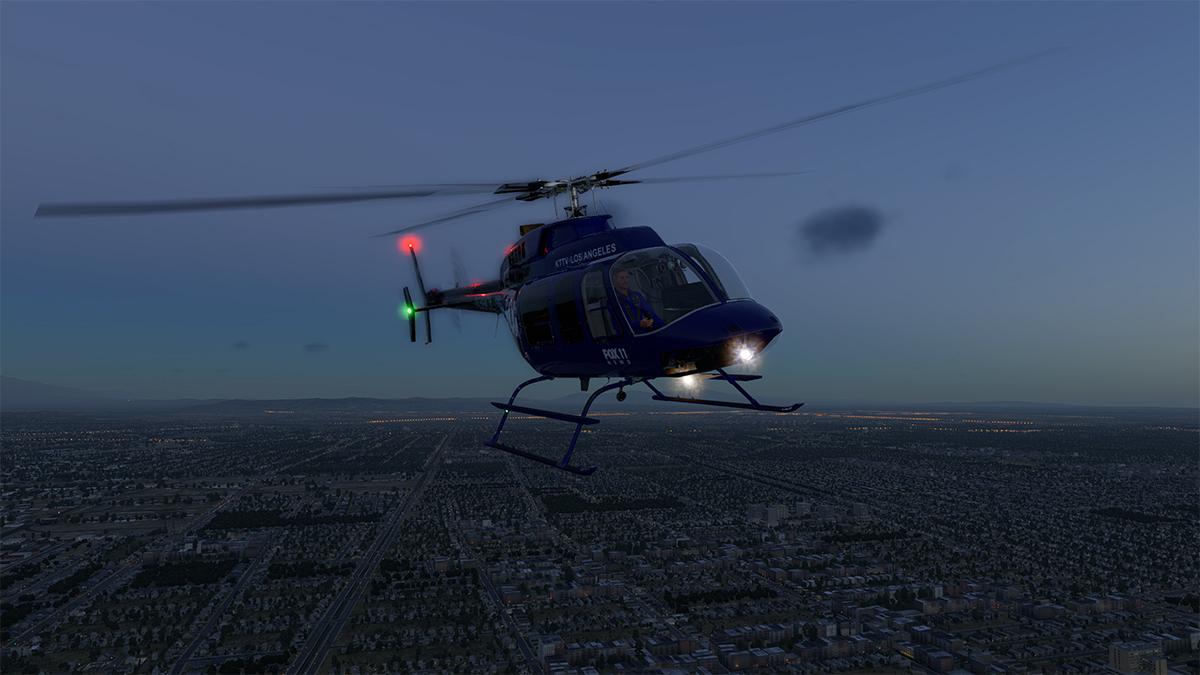
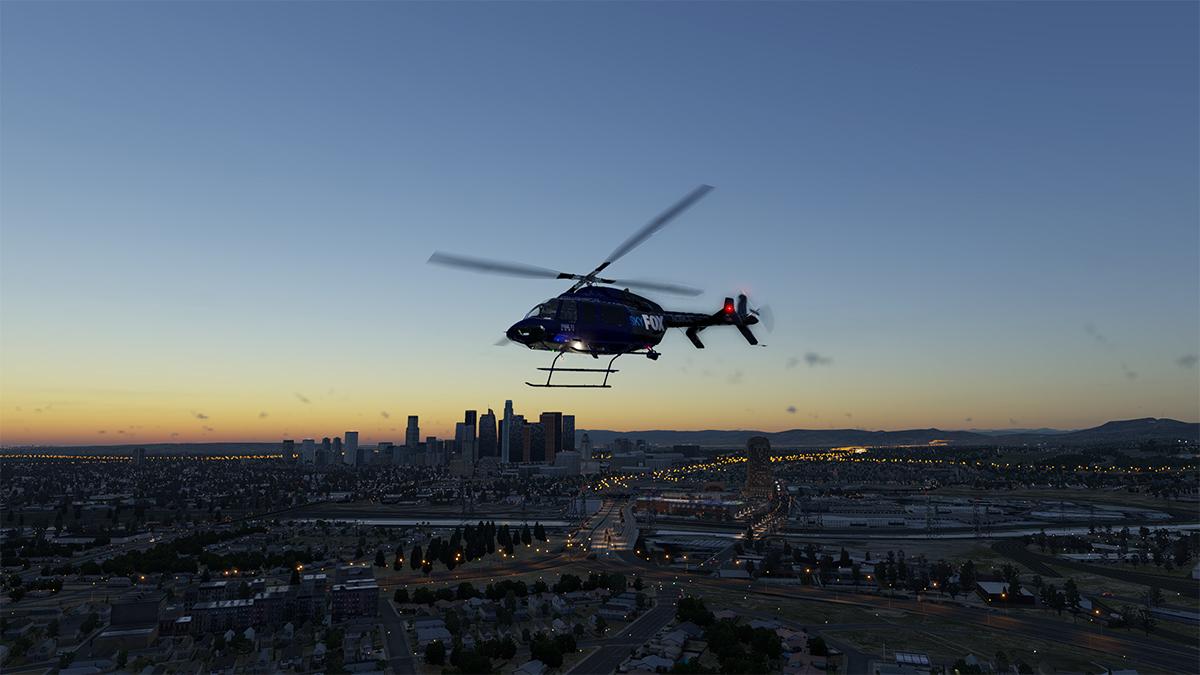
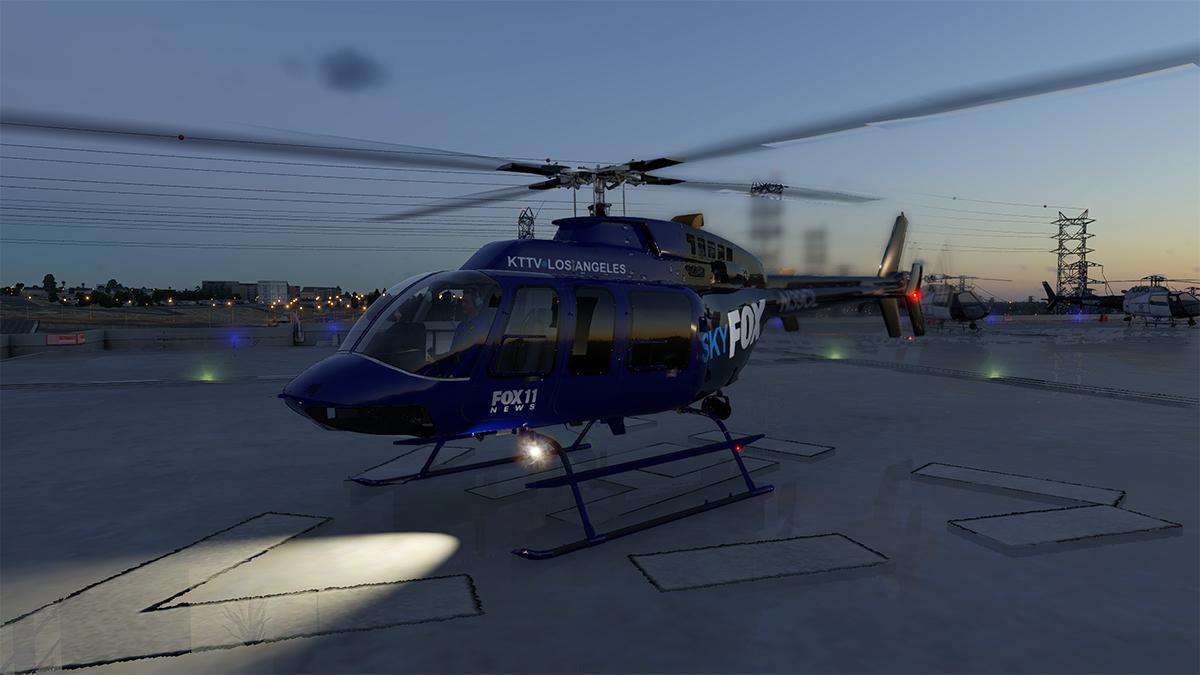
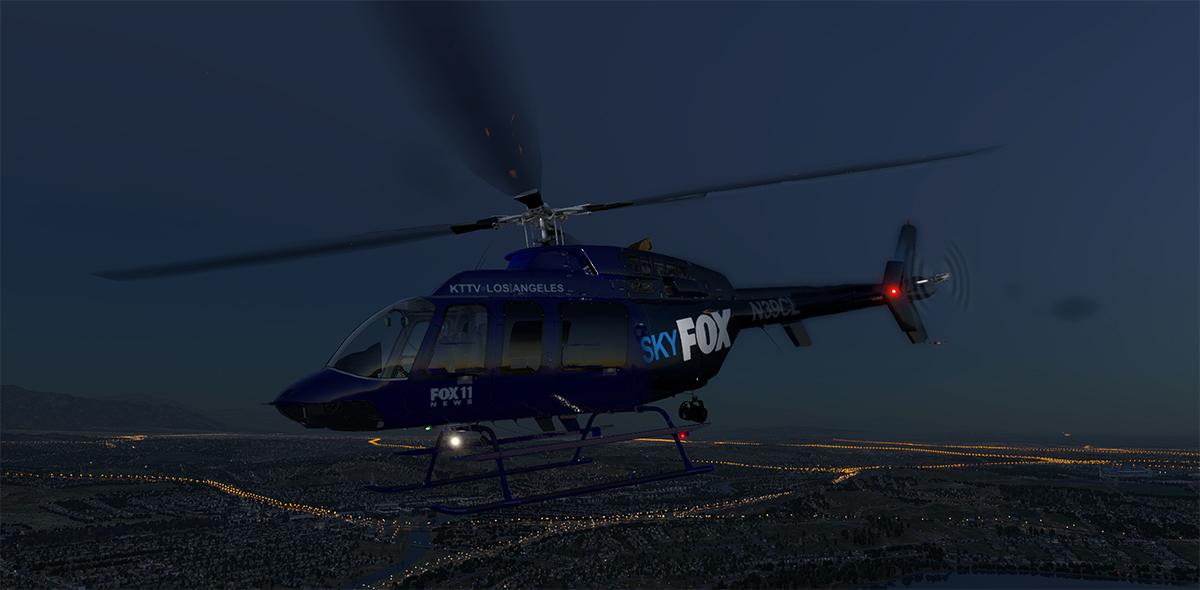
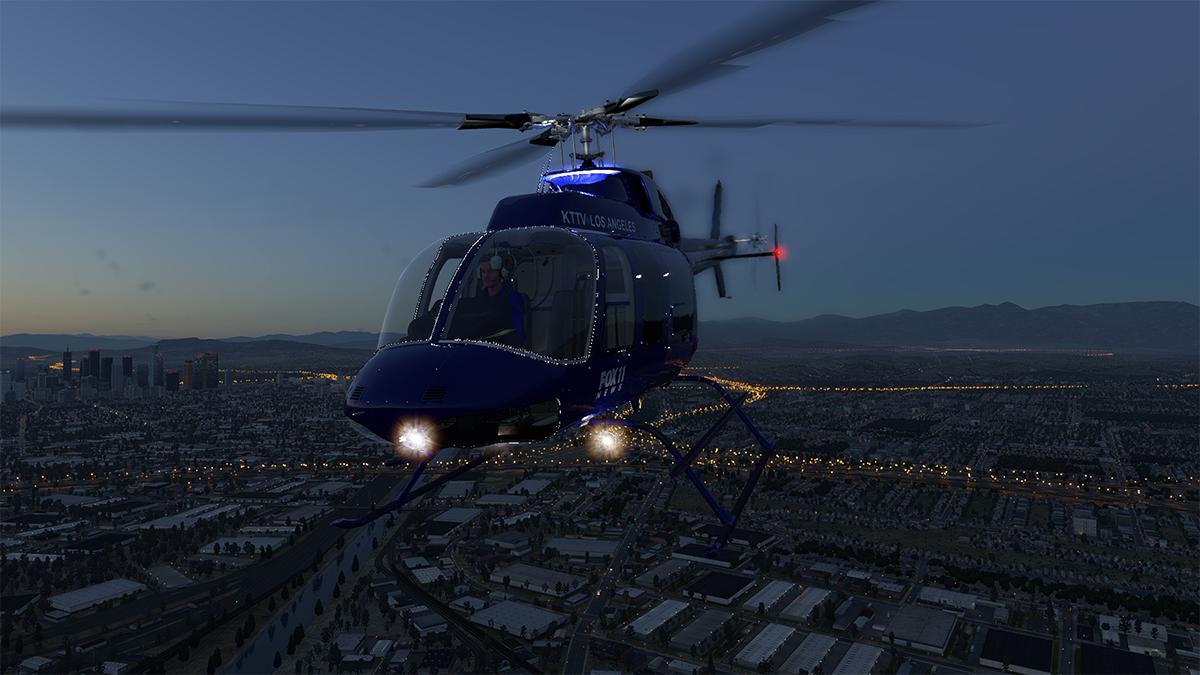
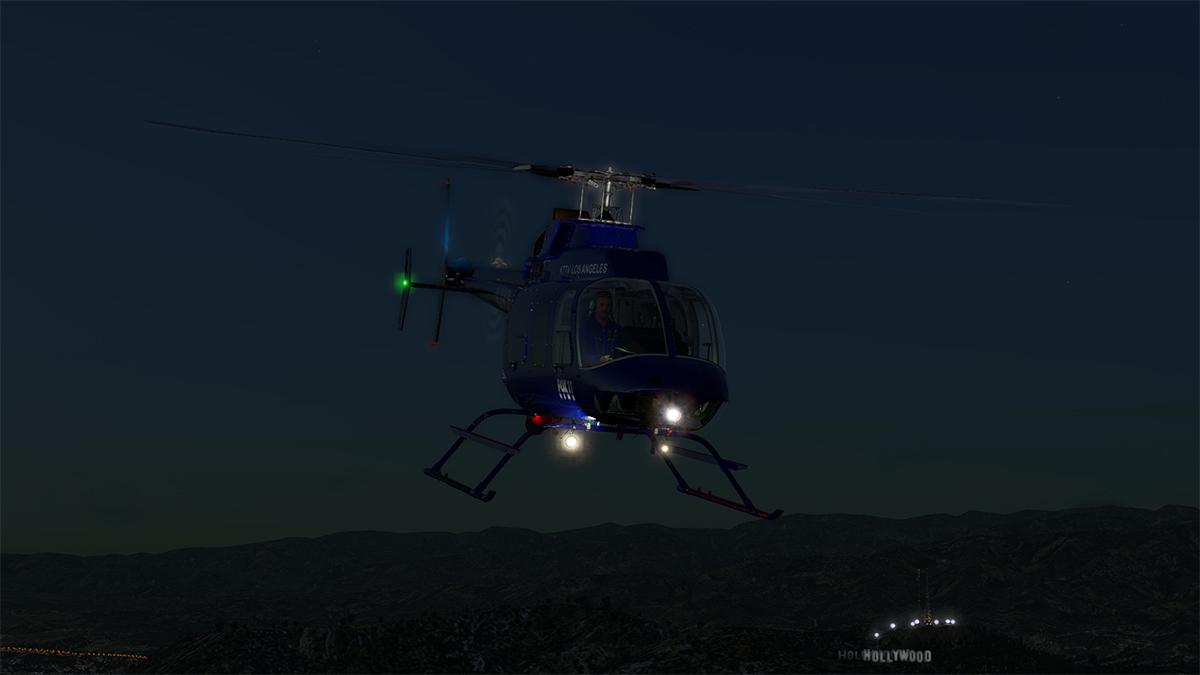
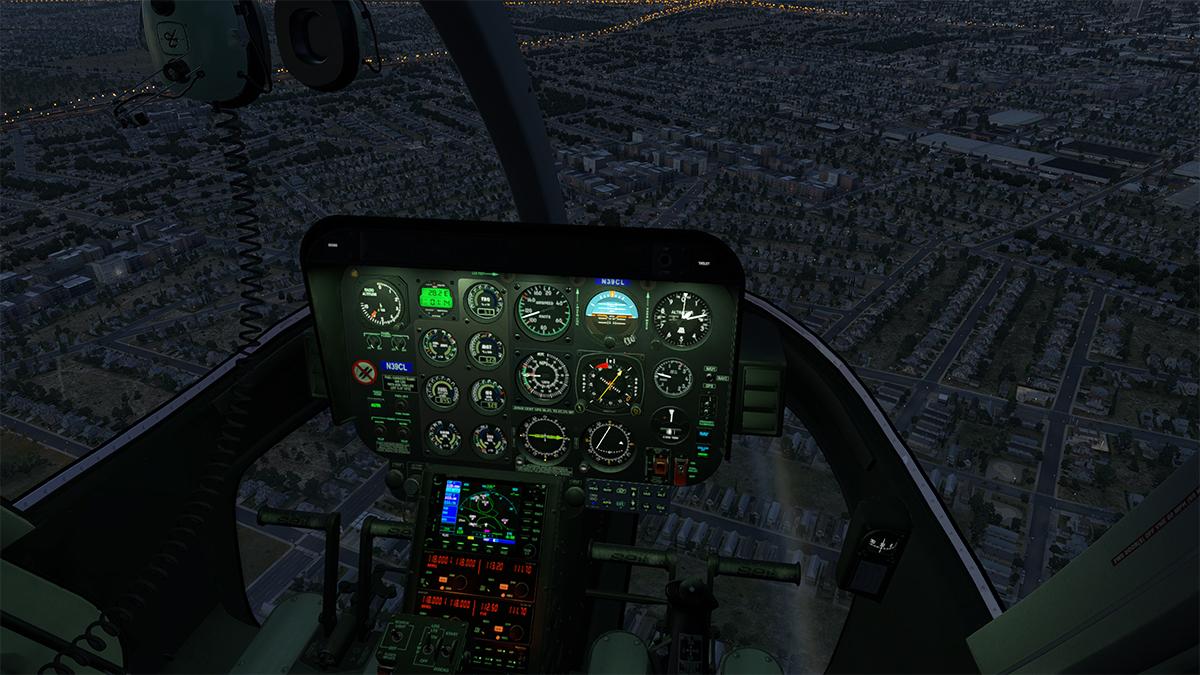
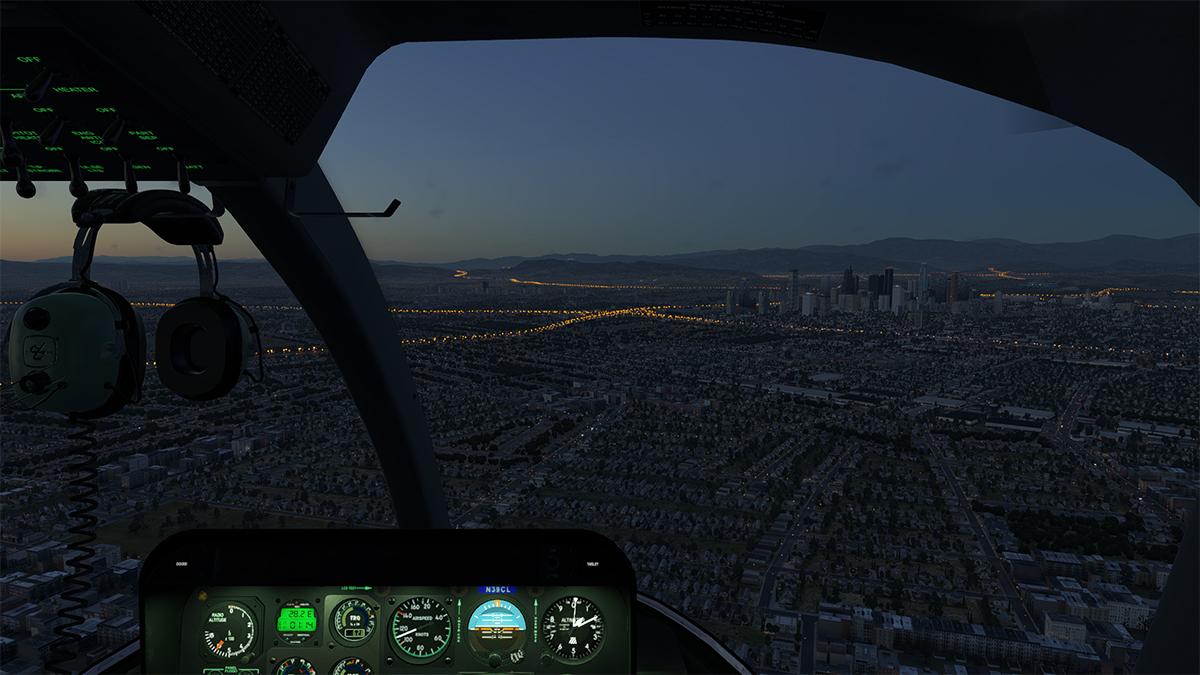
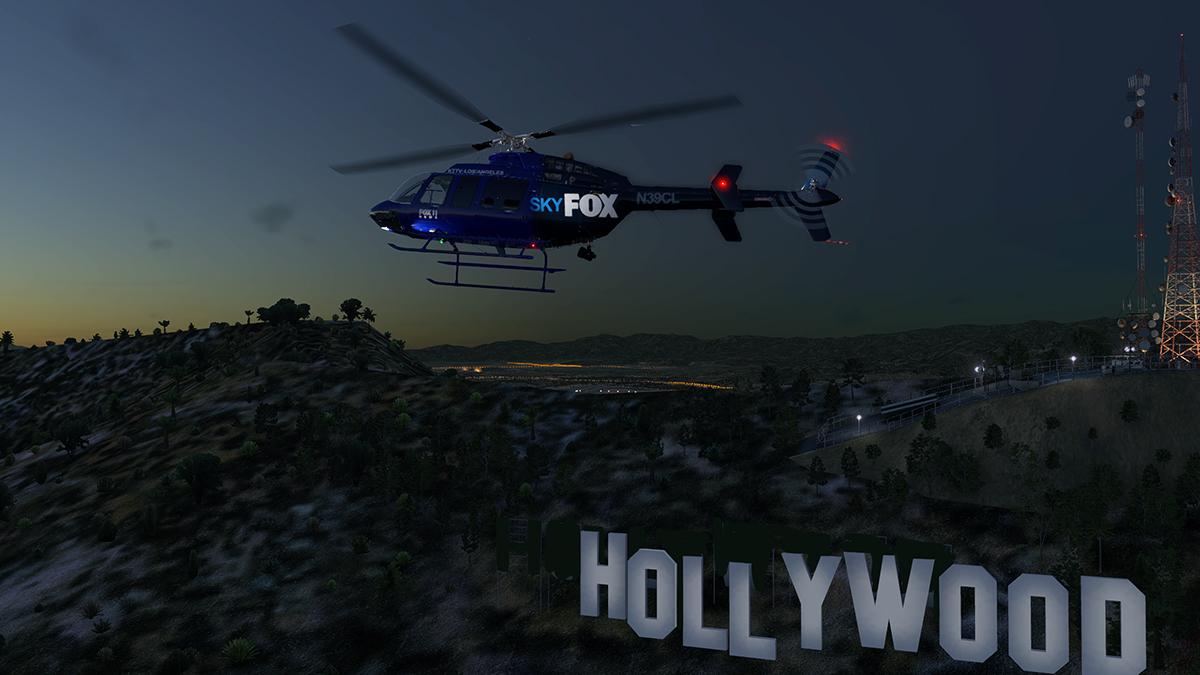
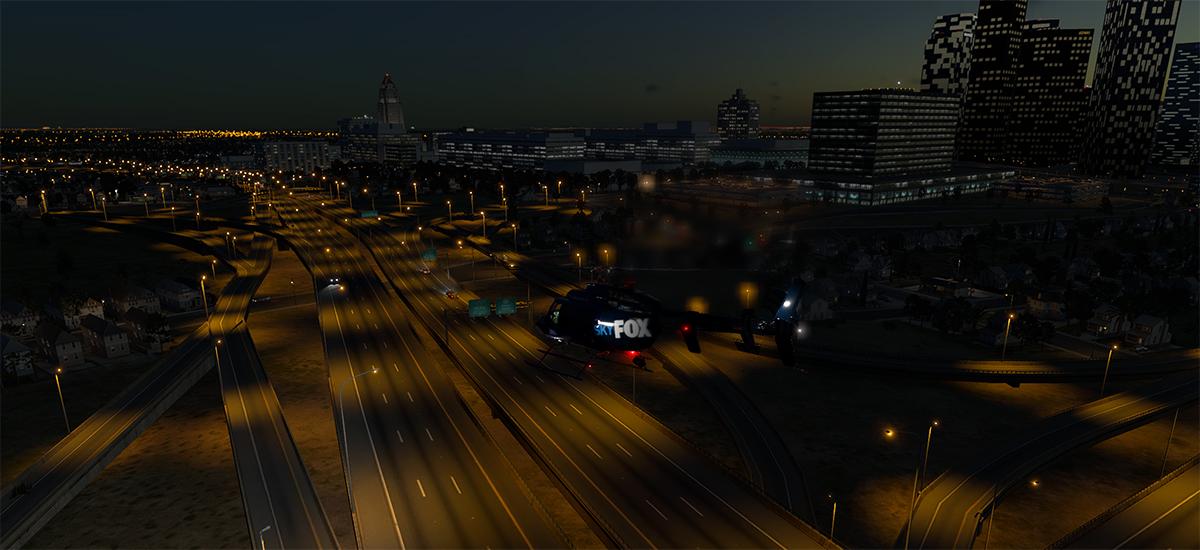
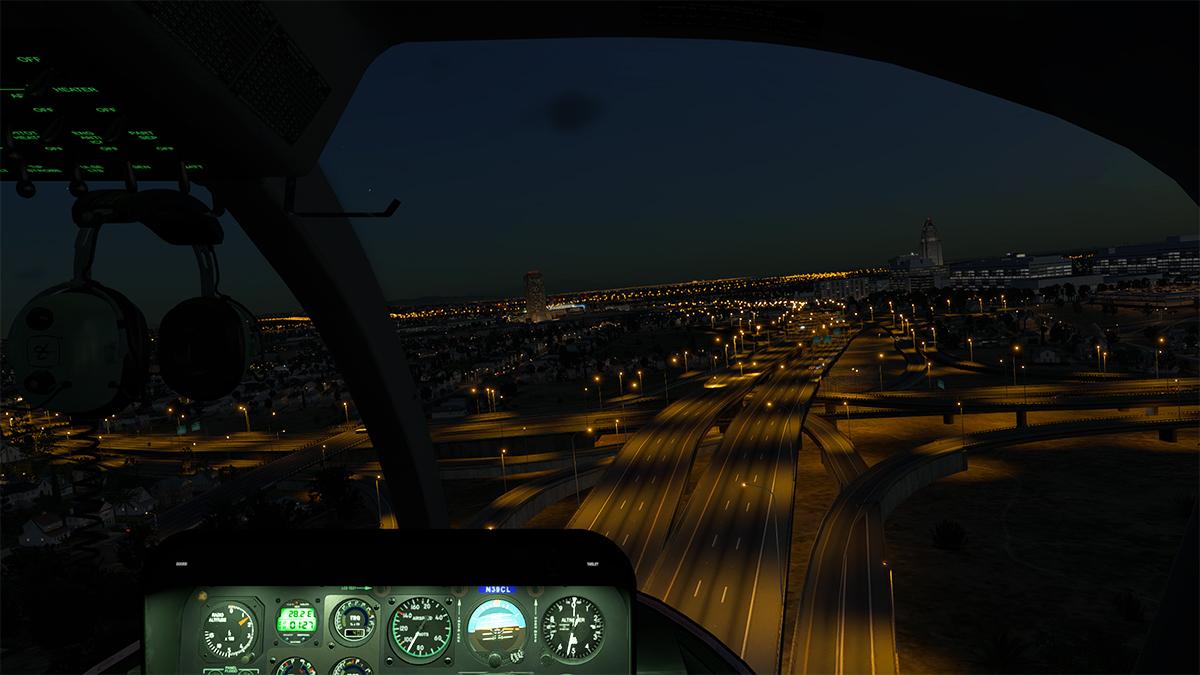
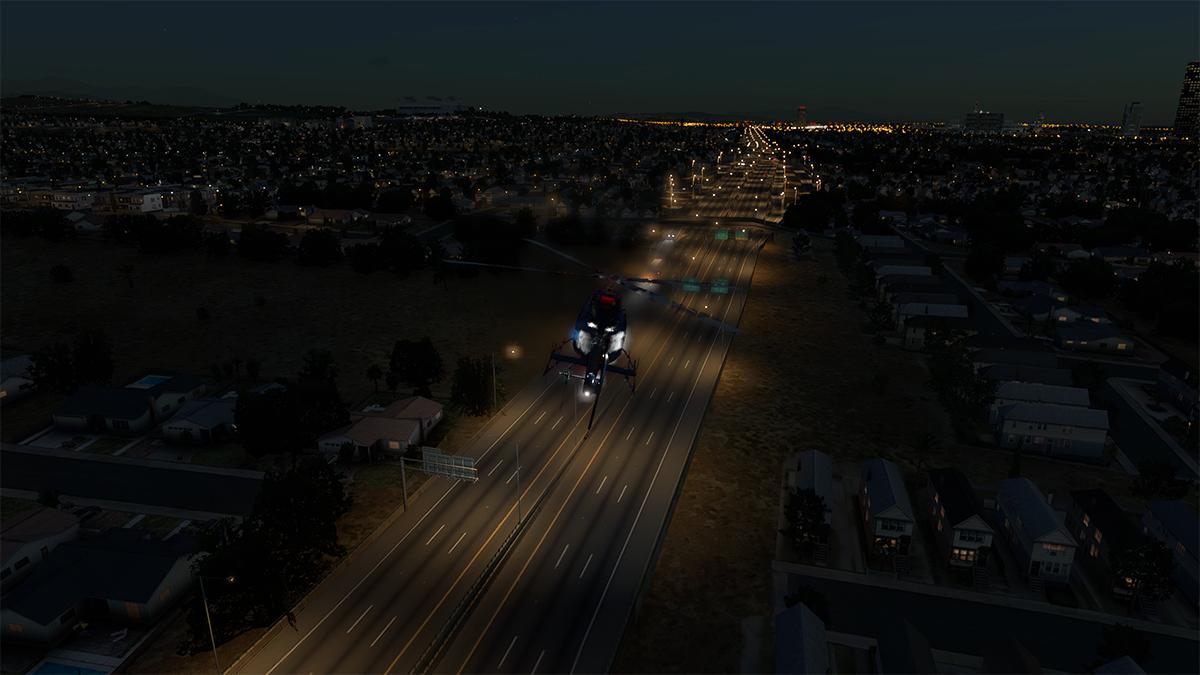
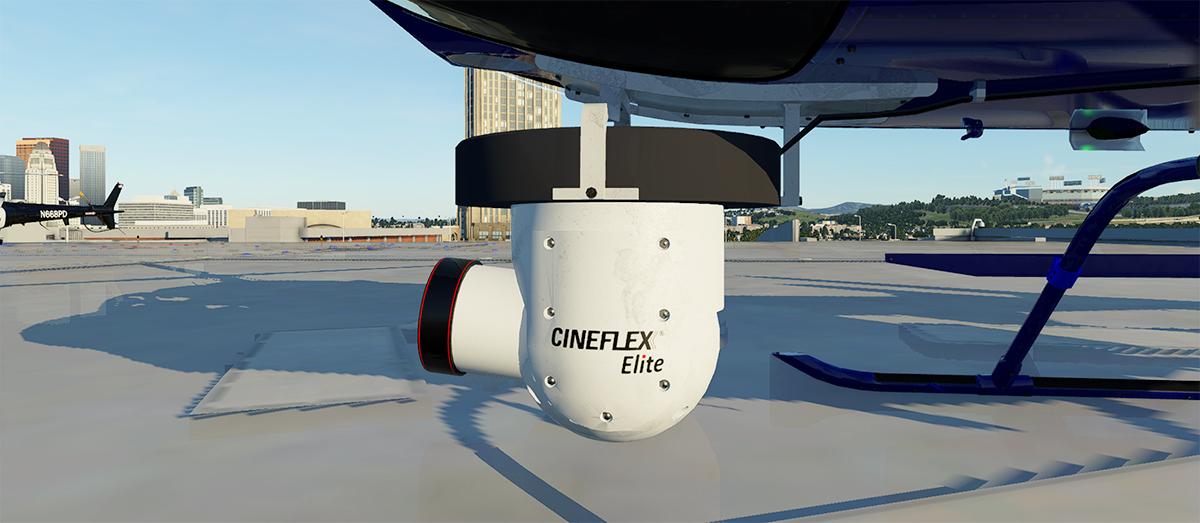
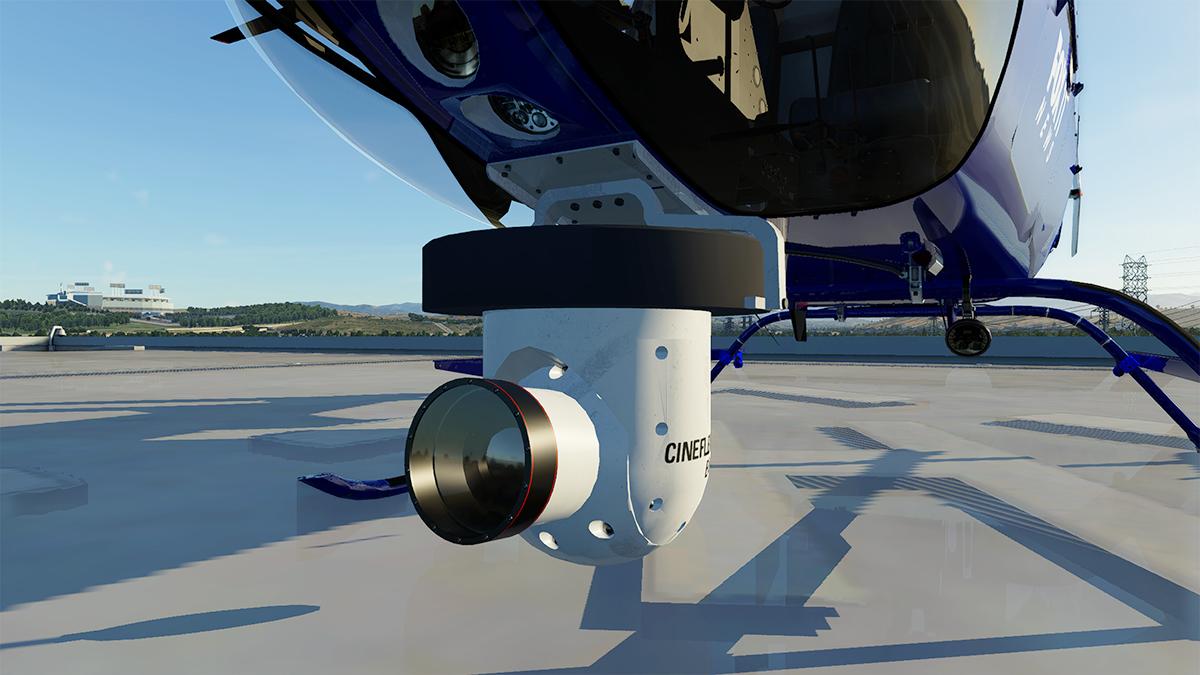
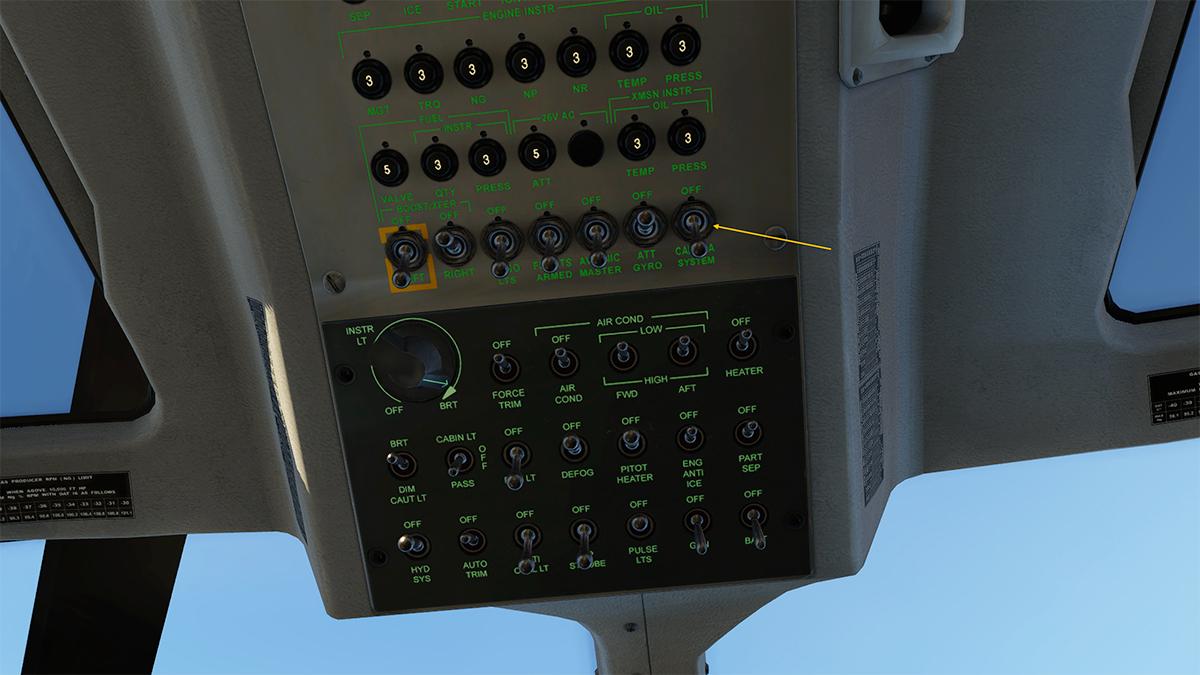
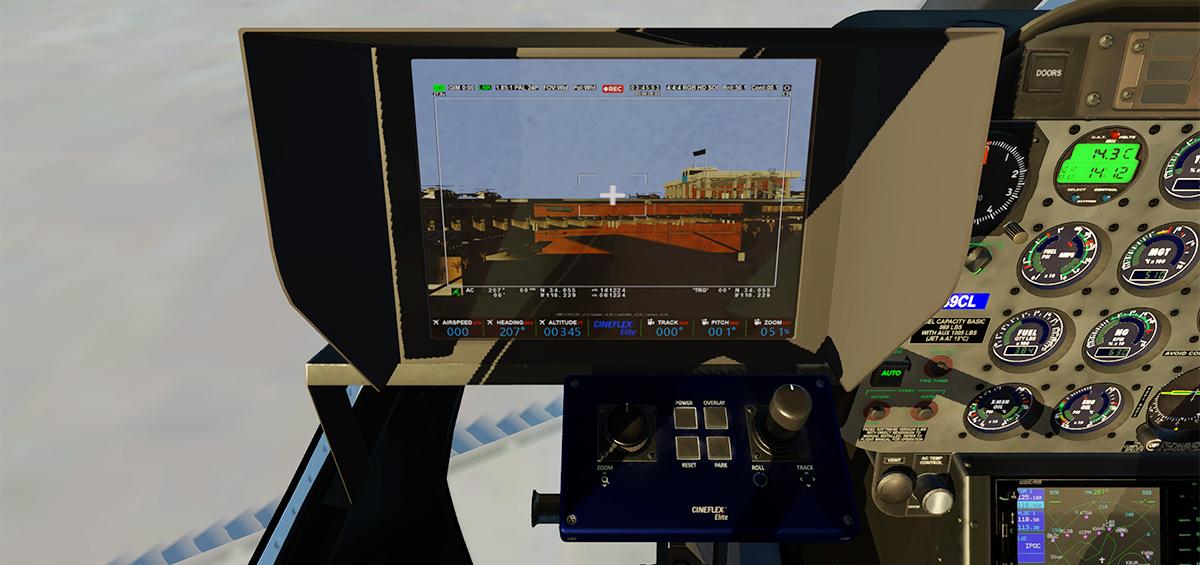
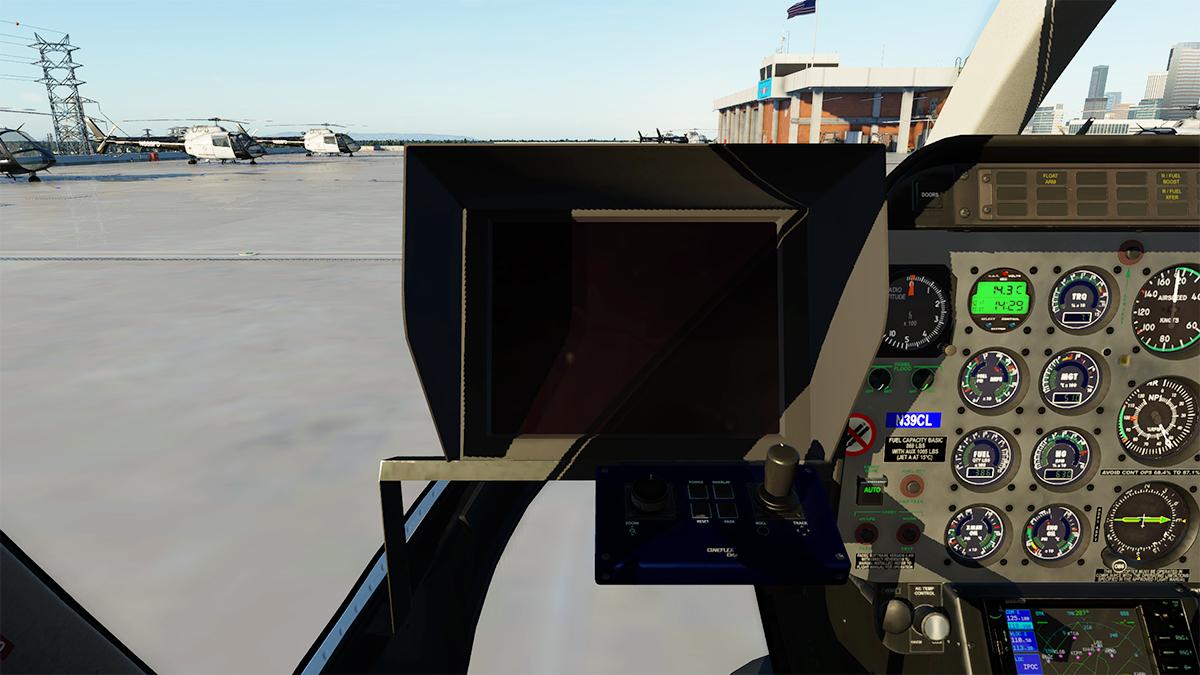
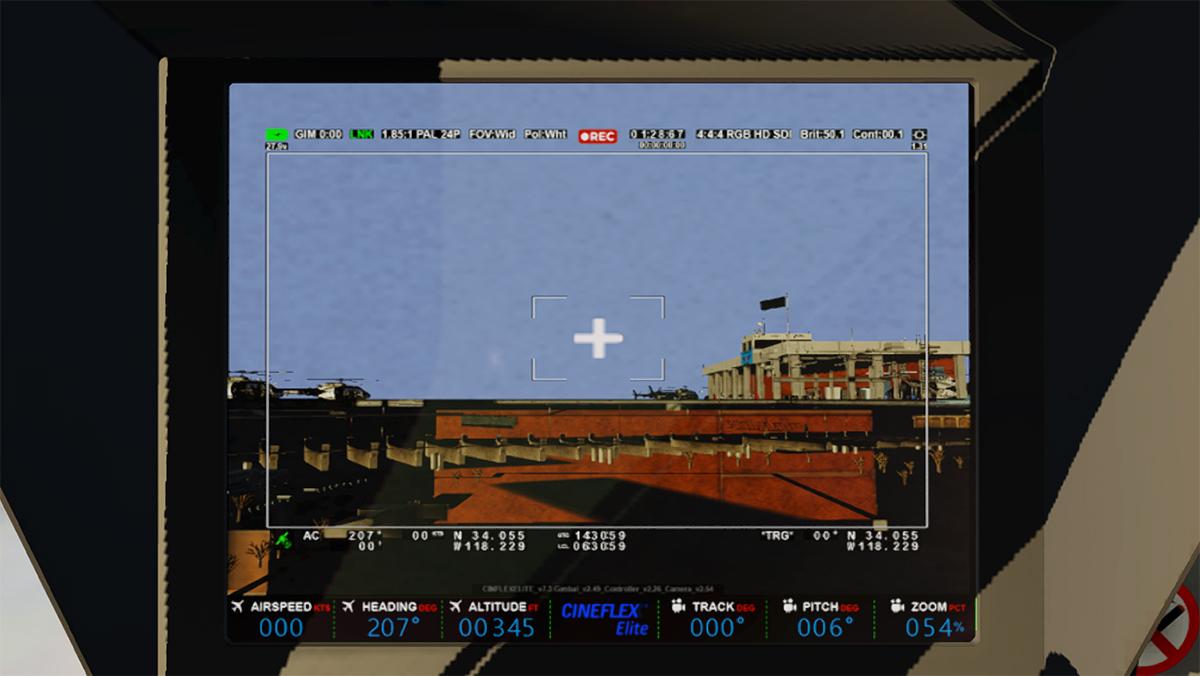
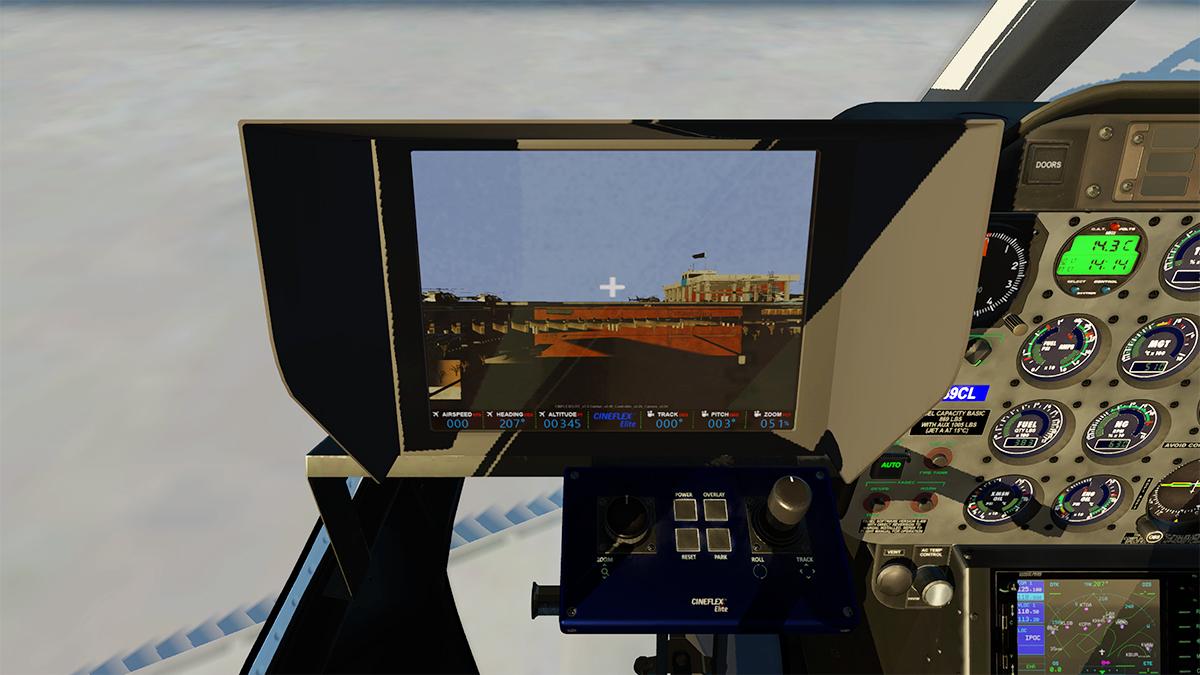
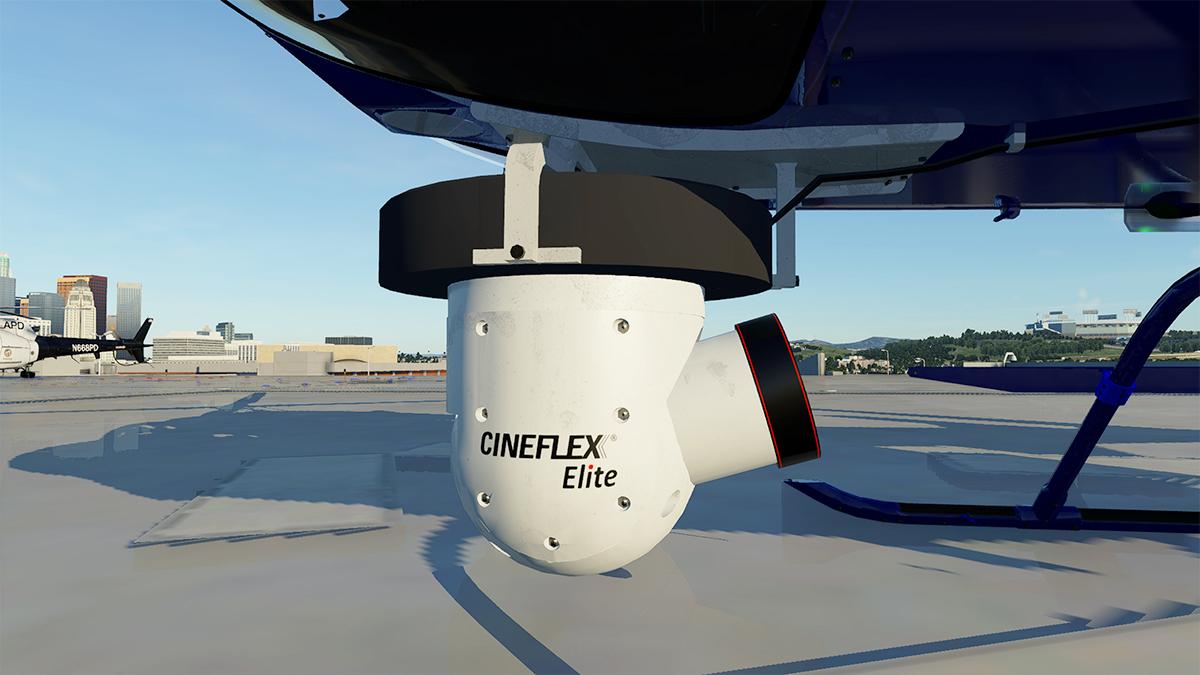
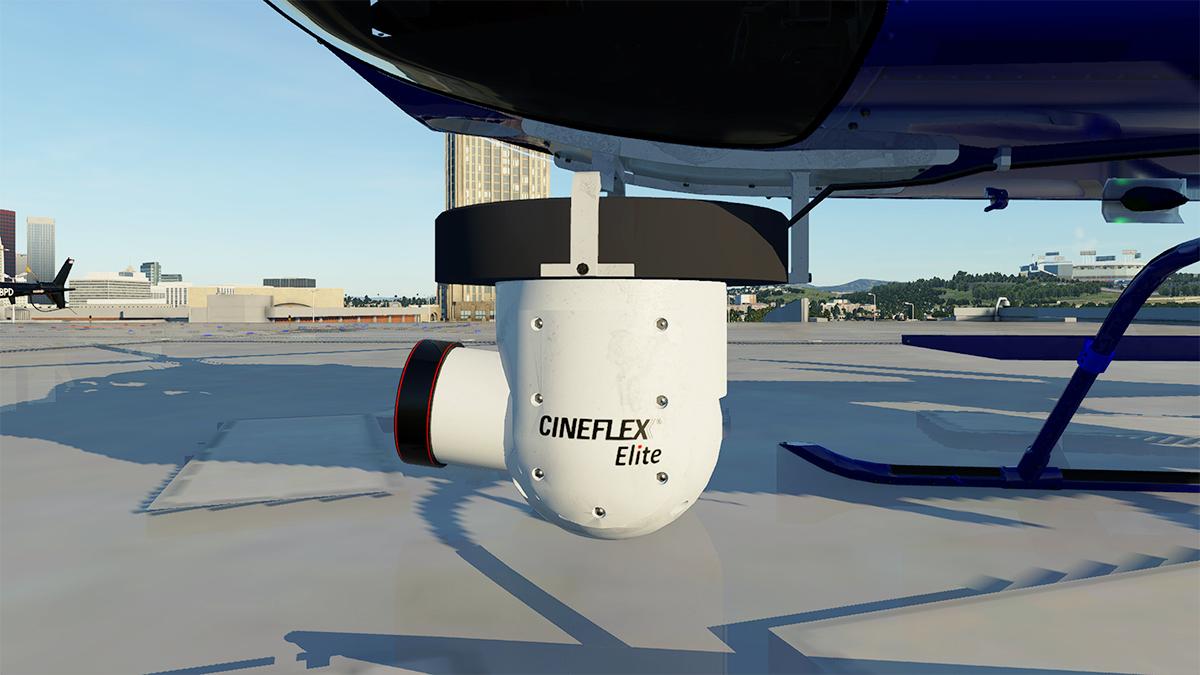
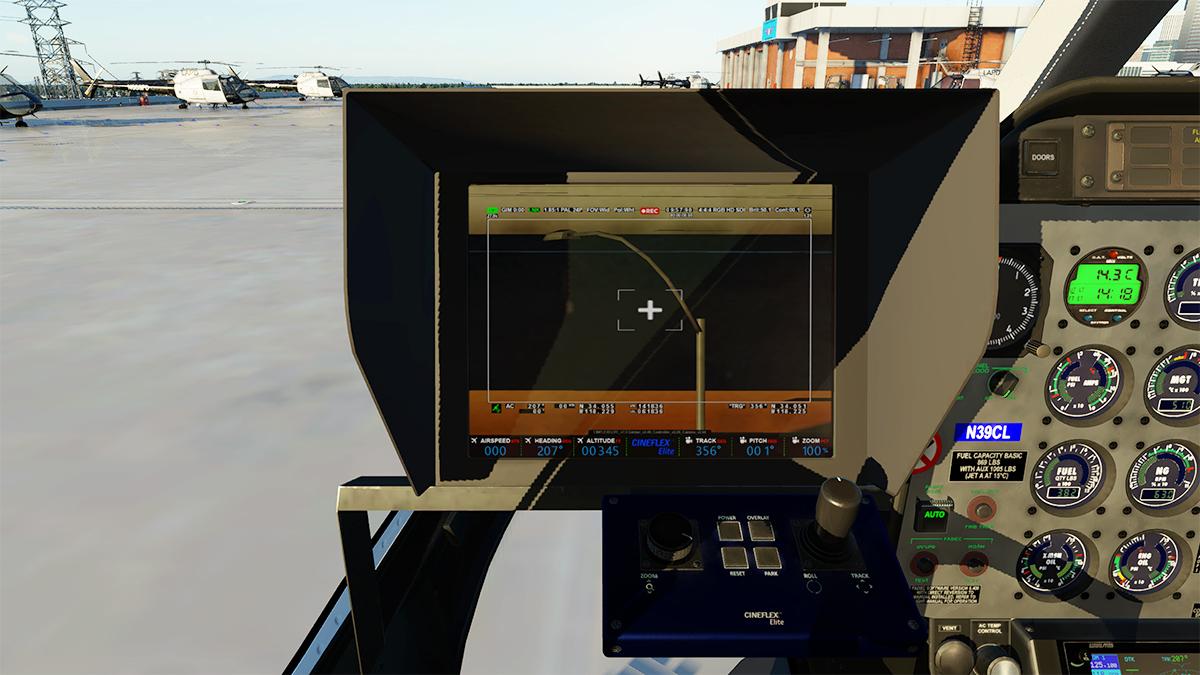
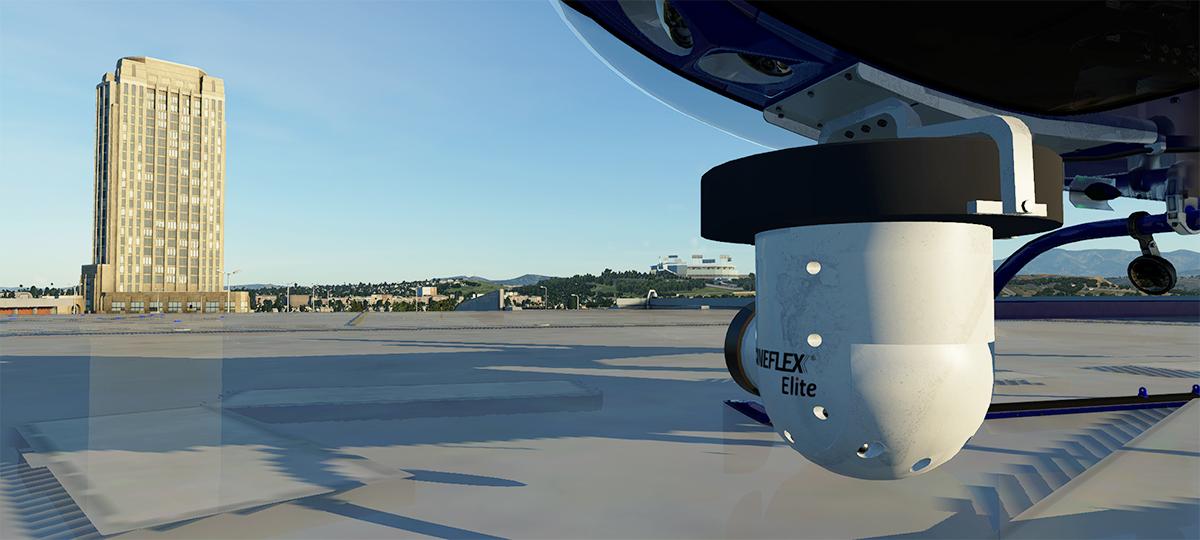
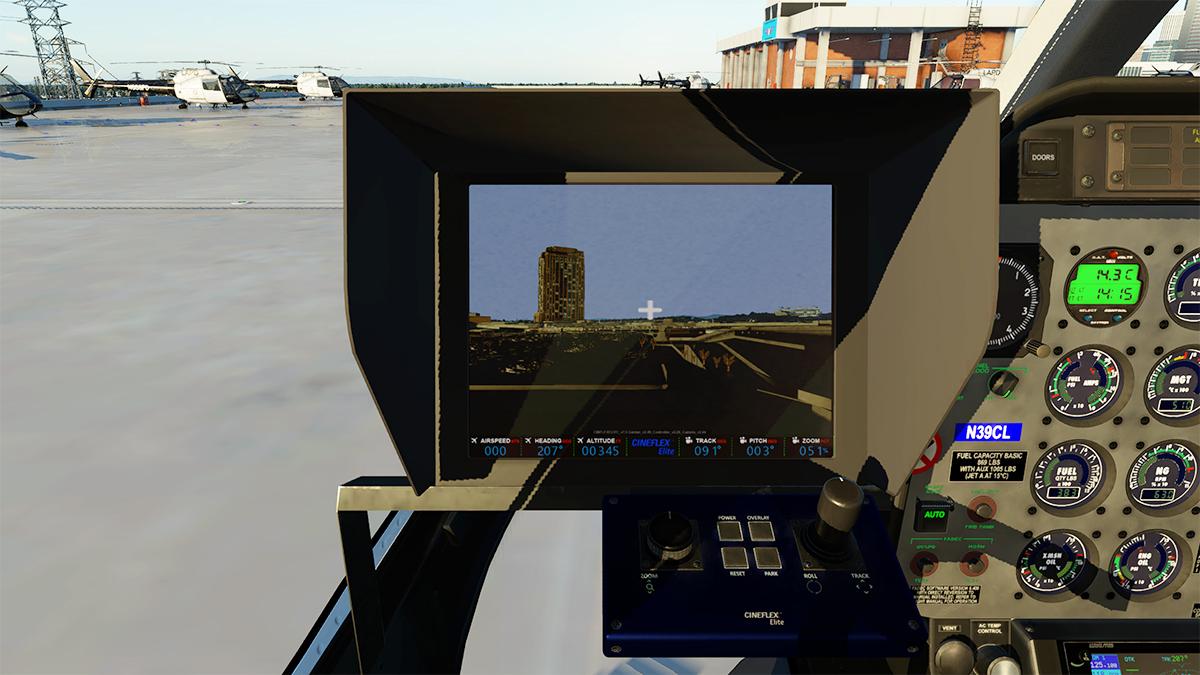
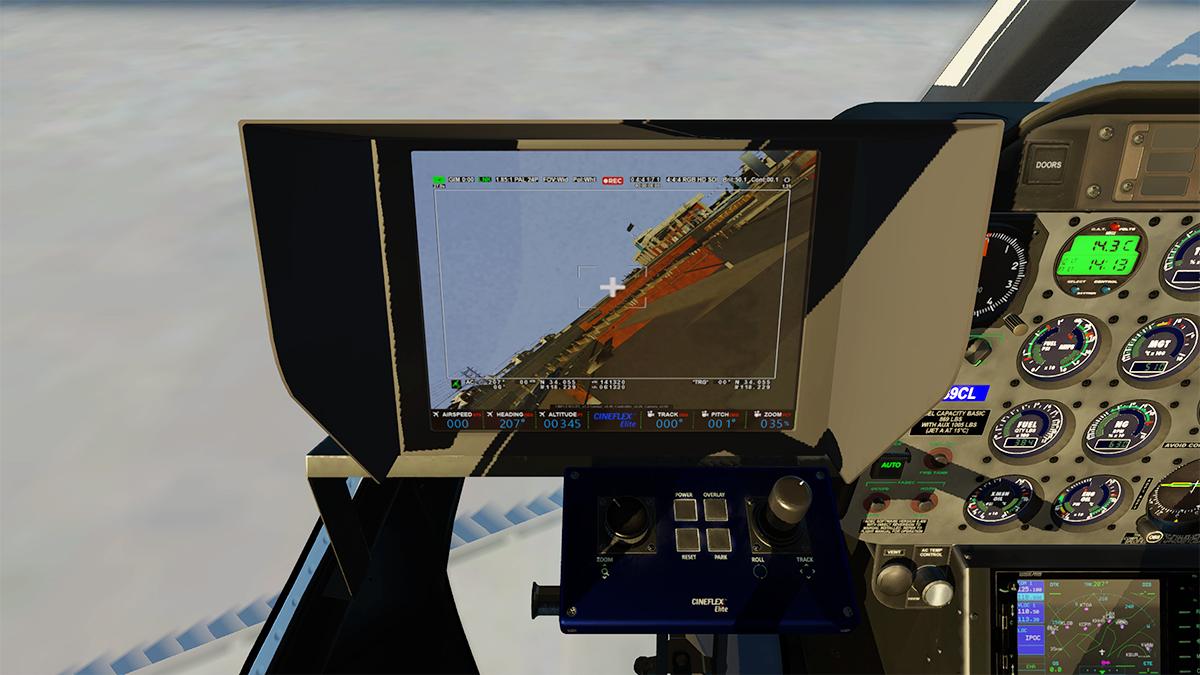
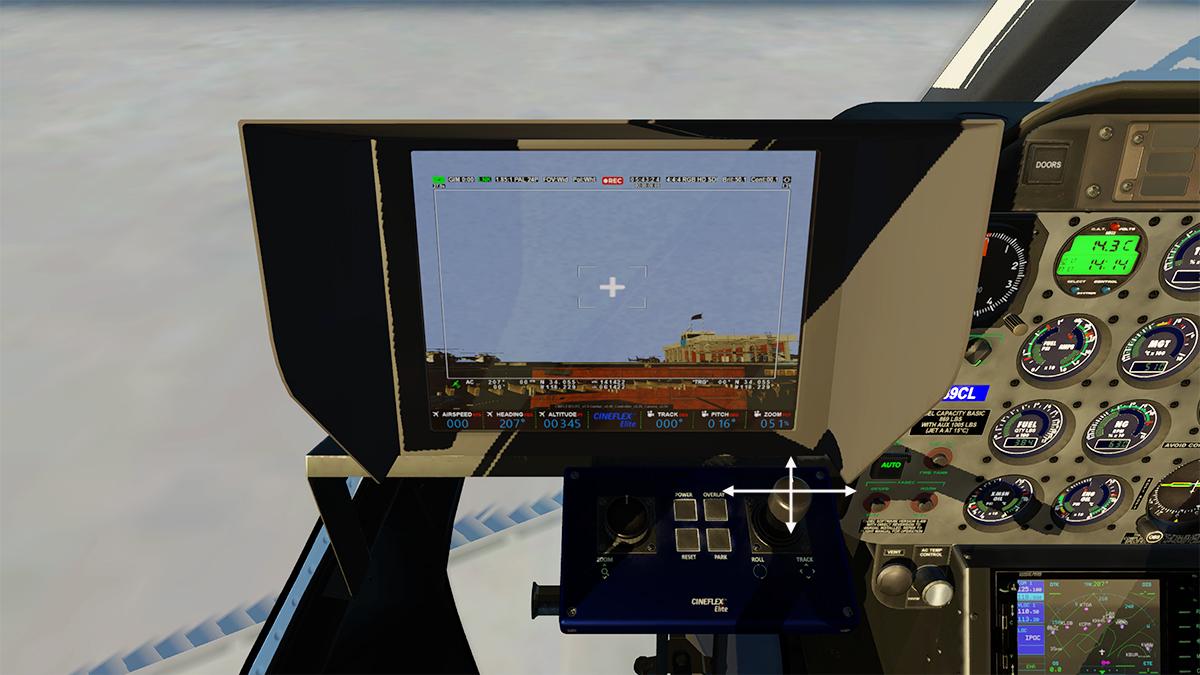
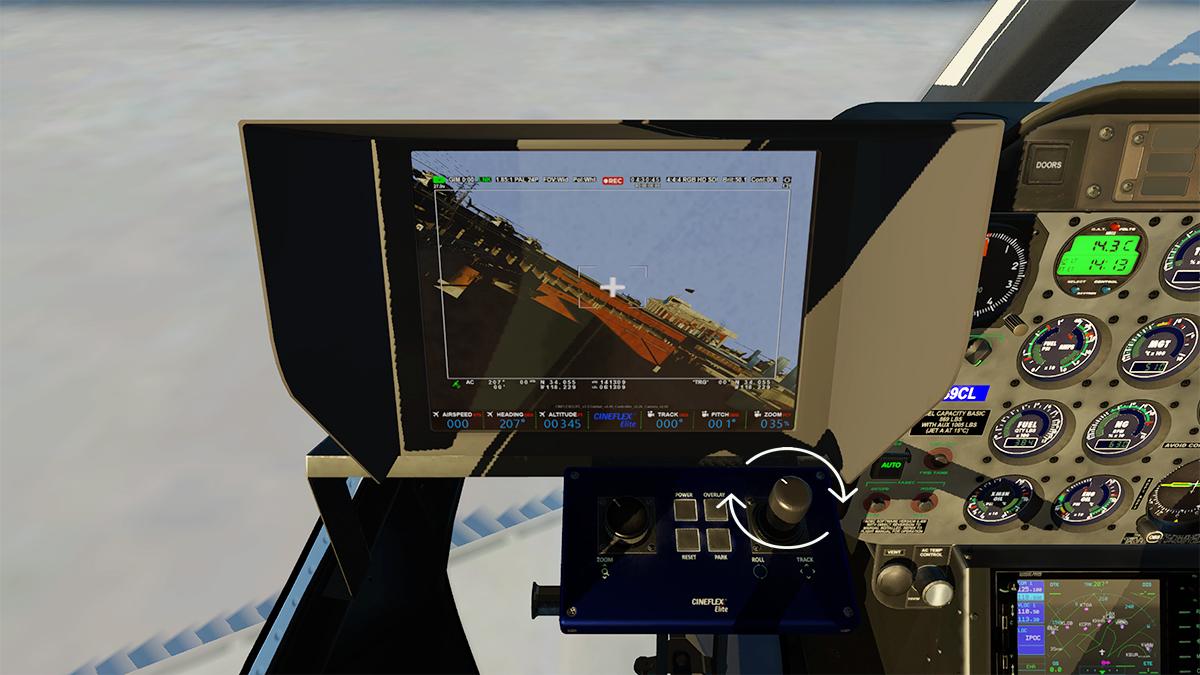
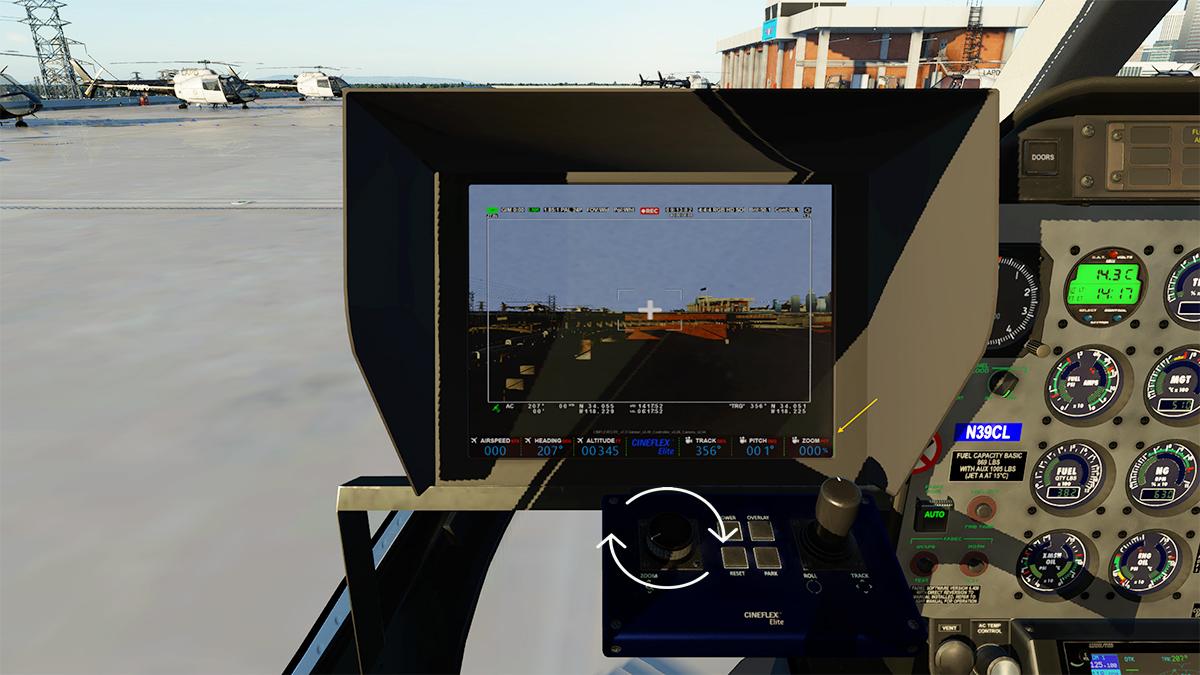
Aircraft Review : JRX Design Bell 407 v1.30 for X-Plane 11 and 12 A derivative of the Bell 206L-4 LongRanger, Bell 407 is a four-blade, single-engine, civil utility helicopter that uses the four-blade, soft-in-plane design rotor with the composite hub developed for the United States Army's OH-58D Kiowa Warrior, instead of the two-blade, semi-rigid, teetering rotor of the 206L-4. So the breed line is from the famous "Jetranger", but the 407 is the far bigger and powerful relation to the family. The Bell 407's fuselage is 8 inches (20 cm) wider, increasing internal cabin space, and includes 35% larger main cabin windows. The more powerful Rolls-Royce/Allison 250-C47 turboshaft allows an increase in Maximum Takeoff Weight and improves performance at hotter temperatures and/or higher altitudes. The helicopter has standard seating for two crew and five cabin seats. In 1993, Bell began the development of the New Light Aircraft as a replacement for its Model 206 series. The program resulted in the 407, a development of Bell's LongRanger. A 206L-3 LongRanger was modified to serve as the 407 demonstrator. The demonstrator used hardware for the 407 and added molded fairings to represent the 407's wider fuselage then under development. The demonstrator was first flown in 1994, and the 407 program and was publicly announced at the Heli-Expo in Las Vegas, Nevada, in January 1995. The first 407 prototype (C-GFOS) then accomplished its maiden flight on June 29, 1995, and the second prototype (C-FORS) followed on July 13, 1995. After a short development program, the first production 407 (C-FWQY/N407BT) flew on November 10, 1995. Since then almost 1500+ aircraft have been built. In 2021, only three years ago JRX Design started in the X-Plane Simulator with the dual SA 341B and SA 342J Gazelle, then their next release was the Messerschmitt-Bölkow-Blohm Bo 105 DBS-4, a big name, but also a lot of helicopter, which was updated only 12 months ago to X-Plane 12. All sensational and quality designs. This is JRX's latest release with the Bell 407. Notable is that the release(s) are separate for both the X-Plane 12 version or the X-Plane 11 version, as they are not packaged together here. We will of course focus on the XP12 version for the review, in details the X-Plane 11 is identical, but missing the X-Plane 12 dynamic features. This is not the first Bell 407 for X-Plane. That was the excellent Bell 407 from Dreamfoil Creations, a standard bearer for it's time with a huge feature list and flying dynamics. Currently still only X-Plane 11, but with the release of the terrific Schweizer S300CB, it noted the developer was back in a big way, and he notes that the Bell 407 (and the AS350 B3+) are now being developed for X-Plane 12, expect in a few months. So that obviously sets up a quandary, which would be the best B407 to buy? A hard one even for me, as both as we shall see are very highly quality developed machines. The B407 from JRX is available now and for X-Plane 12, but the Dreamfoil 407 will have a bigger feature list and personal familiarity... it is a very, very tough choice. Note, that since this review has been published, JRX Design has since updated the 407 to v1.30 (forget v1.10 as it was a non-starter). There were a few new additions, the biggest new feature was the CINEFLEX camera feature, and that item has now been included in the review. Design wise JRX have a superlative quality record, and to scale, and that aspect shows here. The 407 is beautifully done in modeling terms with excellent glass. Odd here though is you can't hide the glass reflections (inside or external), but it is still very well done with both front and rear doors with window (opening) hatch inserts. The huge fuel filler is excellent. Notable is that the riveting is drawn on and not modeled with highlights, same with the engine cover latches. It's well done but noticeable, but the external panel bolts are nicely 3d. The engine internals are also images, again highly realistic, so you admire them and are not as so distracted by them being only 2d Rear tail boom, horizontal stabiliser and upright tail support are well modeled, with the original orange/white tail-skid. The heart of a helicopter are the rotors and their assemblies.... The main rotor is a 35 foot diameter, soft-in-plane flex beam (flapping flexure) type yoke/hub with four interchangeable blades. Elastomeric technology is incorporated and allows for blade movement. The blades and yoke are all composite materials. The rotor is designed to rotate at 413 RPM at 100% Nr. As rotor heads go it is very, very simple design, just the tower and four pushrods. Plate construction is really good, as are the arms, but we are going to lose points because only the collective bite is animated (13 degrees of twist), shame as we know the Dreamfoil 407 is fully animated, but the movements here are good. Rear tail-rotor is intricately designed, great detail and fine work. The yaw animations are also well done and visible. All doors are animated, can be opened externally and internally, and they can also be removed, but only all and not individually. Left side also takes away the cam centre panel, for a very wide open space for the Medi-Vac. So you really do wish for more selection on which doors you want removed as you can't slide the rear doors open in flight, missing also is the long and short window door panel option. Rear cabin seats five, or four chunky seats and a tight centre child seat in the rear. Default colour is a light grey with the very nice "Bell" logo on the seat back, the trim material is all very nicely done. Seating colours change to the selected external livery, with four choices in Light Grey, Red, Green and Dark Grey. The familiar restricted cabin roof is well reproduced here, making the rear cabin feel very authentic to those familiar with a 206/406 environment. Forward pilot seats are also very chunky for a helicopter, but very well designed and created. Again the materials are of a quality nature, a feel real effect if viewed in closely of the excellent chosen materials, the above roof switch and CB-Fuse panel is also excellent. All circuit breakers are active and animated. Side doors are beautifully realistically molded, with the authentic bell 407 logos and opening slide window, same in the rear. There is the option for single or duel controls, the left side pilot's cyclic and collective are very basic, with just a throttle built in. The right side pilot has a more detailed collective head, with FLOAT activation and lights with SEARCH, LDG (landing) and Start/Disengage switch. Chunky could also describe the instrument panel, for a small helicopter the 206/407 instrument panels are massive. But the instrument arrangement is quite simple. Top left is a Radio Altmeter, Engine readouts (TRQ - Torque, MGT, NR/NP - RPM, Davtron Clock/OAT/Volt meter, Fuel PSI-AMPS, FUEL Qty and Gearbox and Engine Oil pressure/Temp). Flying instruments include Airspeed, Artificial Horizon, Altimeter. Main NR/NP Tachometer dual gauge, Bendix/king HSI (Horizontal Situation Indicator), Vertical Speed instrument. OBS (Omni-Bearing Selector) for ADF 1/2, OBS NAV 1 and Turn rate dial. Lower is the avionic stack, with a custom GNS 530, KX 155A COM/NAV 1 radio, another KX 155A COM/NAV 2 radio, Bendix/King KMA 30 radio, Bendix/King KT74 Transponder and bottom (flat) a Bendix/King KR87 ADF radio. The metal rudder pedals are also highly designed and have pretty Bell logos. Panel can be set in either a light or dark tone There are two sets of headphones, in that their cables drag across the cockpit and obscures the instrument panel, you can click (lower volume) to hide the right headset, but you can't click on the left co-pilot one to hide it? so it hangs there! and right in your view line (It can thankfully be hidden another way as we shall see later). v1.20 and the Co-Pilot headset can now be thankfully also hidden directly via a "hotspot" click. Power on and the panel is beautifully done, love the instrument contrast to the red radio readouts. Then simply glorious at night! Caution Warning Panel (CWP) is very authentic, you can also test the systems via the button right panel. CWP can be set to BRIGHT or DIM illumination. Other internal lighting includes rear bulkhead adjustable spot light, plus the same as a cabin (switch) light, rear cabin lights again look very nice in the darker light, single overhead panel switch, or the individual rear switches can be used. Overhead panel lighting is again sensational. Menu To access the menu, you press the "Tablet" button on the far right top of the instrument panel. It is in the design of the RWP GTN 750 module. The tablet is extremely well intergrated with a support arm to the instrument binnacle. There are four option tabs on the left; MENU 1, MENU 2, RXP TAB, Avi TAB and LIVERIES. MENU 1 You could call Menu 1 the options tab set into five categories (not labeled). First two, with first the Static Elements, Covers, Tiedowns and Flags, second is the external "GPU" (Ground Power Unit). Note the "Rotor Park Brake" has to be down to activate the Static Elements. Next category covers the pilots and passengers; you have "Fly With Copilot" that puts a crew member in the left seat, notable is when you do this that headset disappears from your POV. You also have "Crew Helmets" but those pesky hanging headsets then return... damn. Pressing "Crew Headsets" will hide only the Pilot's headset, but not the Co-Pilot's. Final option here is the "Passengers", which inserts two lovely ladies in the rear cabin If you adjust the X-Plane "Weight & Balance" menu, it makes no difference or adds in NO more passengers or cargo. In this area the JRX is limited in options Next category covers options; "Dual Flight Controls", and Doors ON/OFF... Under the rear there is a large "Searchlight", or you can have the "Emergency Floats" installed on the skids. There are upper and lower "Wire Cutters" and last is the "ROTOR DAMPENER" cap. New in v1.20 were some very nice rear "Bear Paws" Last category is the set of options for the (optional) Reality RXP GTN 750. There is also a "Autopilot Unit" or Stability Augmentation Systems (SAS), this panel is placed lower right on the instrument panel. Last two options here is the "AviTab" tool (Plugin required), and the selection of the Light/Dark instrument facia. Also on the right side of "Menu 1" are three "Engine Exceedances" readouts, these can also be reset in TRQ (Torque), MGT and NG RPM Listed top of the panel is the current "Version" MENU 2 In this tab you set the aircraft's configuration. Top is the "Fuel Load" in 1/4, 1/2, 3/4 and 1/1 or FULL. Lower left is the changing weights as you select the (Fuel) and Weight/Payload selections right, "ALL UP WEIGHT" and "MAXIMUM TAKEOFF WEIGHT" must balance. Lower are three options with CofG (Centre of Gravity), "Vibrations" Off-x1, x2,x3... last is the selection of the FOV or "Field Of View". RXP/Avi TAB Are both quick button selections of the Reality WP GTN 750 and the Avitab tool LIVERIES You can select your livery via the tablet, and it gives you an image of the 407. There are 21 liveries, that covers a wide spectrum of services and countries, all are excellent. CINEFLEX A new feature added to the JRX B407 in the update v1.30, was the excellent CINEFLEX camera system. The Cineflex V14 is a 5-axis gyro stabilized camera system that delivers images completely free from even the smallest vibrations. It has a Sony Cinealta HDC 1500 camera integrated in the carbon-fibre housing that rotates a full 360°, and all movements are operated from within the helicopter. The first place you would look to activate the camera is the JRX Menu, but it's not located on there? The Camera system is activated by the "Camera System" switch, on the overhead panel, row below the circuit breakers/fuses, far right. Switching it on comes with a disclaimer from the developer... it will deliver a 25% FPS hit on your framerate (any internal to external X-Plane viewpoint, usually has this same negative effect). It is a significant hit, so if the CINEFLEX is not in use it is best switched off. Activated you get the camera pod assembly now visible, slung under the nose of the B407, the modeling is excellent with the detail and the quality of the camera system. On the left side of the instrument panel, there is now positioned a cowled screen and operators panel... The panel has two sets of camera operation knobs, and four buttons. Power, Overlay, Reset and Park. "Power" is to switch on the system, "Overlay" puts a frame and recording data on the screen, including REC, Timecode, Resolution, Camera Coordinates, Airspeed, Heading, Altitude, Track, (camera) Pitch & Zoom "Park" will foldup and store the camera rearwards, "Reset" will set the camera to it's forward "ready" mode. Left small knob is the "Zoom"... 0%-100% Right is the knob/joystick to adjust the camera angle, ROLL, ROTATE and UP and DOWN angles. All the camera movement controls can be set as commands, for keyboard or joystick (HAT) actions, this allows easier control while flying. The CINEFLEX is expertly done, and a great addition to the 407. ___________ Flying the Bell 407 If you open the JRX 407, it will have the annoying habit of just shutting down again? even if the "Start with engines running" tickbox is active. There is a trick here... The issue is caused by the "Idle" button and throttle being set to closed, this is the shutoff point to kill the engine. To start you have to de-click the "IDLE-REL" and give the 407 a bit of throttle (80). Once running, then you can go back to the idle stop, but don't press the IDLE-REL, if not it will just shutdown the engine again... or your back to square one. The "Start" switch is on the same collective, and as long as the fuel is on, then a press and hold of the switch is all that is needed. At first you don't think it is going to fire, then at once around 50% NR rpm, the Allison 250-C47 turbio-shaft engine (813 shp (606 kW)) gets itself together and your in the flying business... its all a FADEC-controlled engine (Full Authority Digital Engine Control), as the FADEC system is designed to reduce pilot work load and increase engine reliability by fully automating the start procedure, and holding engine parameters to tighter tolerances in flight. It feels excellent in this JRX machine... .... then twisting the throttle to "FLY" will increase the NR % to 100% Does the JRX 407 sound good... brilliant in fact. The start whine is excellent, so is the throttle adjustments through the spectrum, then the full rpm chop is really, really good, I've flown on a 407 (and a 206) and it is as good as you will get. I couldn't get any noisy internal blade slap, but external blade sounds in movement when in flight manoeuvres are excellent. Whoa! off the ground with a bit of slight cyclic back, and a feel upwards movement of the collective, and you go into a perfect hover... ... "Oh I like this!" I've had my time with wiggly nervous helicopters for a fair while, "This one is smooooth". Already happy, a bit more collective and a push forward of the cyclic and you are up & away. 206/407 usually need a bit of low nose to get them moving... not too much here and the speed builds very quickly. Bell later replaced the tail rotor pedals with the taller and slightly closer-to-the-pilot versions, as many pilots complained they were too high, as they preferred the 206 pedals than the 407's. The Bell 407 has a maximum speed of 140 kn (160 mph, 260 km/h), with an economical cruise speed of 133 kn (153 mph, 246 km/h). The range is 324 nmi (373 mi, 600 km) with a service ceiling of 18,690 ft (5,700 m). There is the vibration option... OFF is no vibration, x1 is not really a lot, x2 is about perfect as x3 is very, very noticeable shaking, really it feels like your blades are coming loose! I was very impressed with the Autopilot Unit or Stability Augmentation Systems (SAS). It has had some fine tuning in v1.10, but it felt fine to me... you can LVL (Level) then hit the AP, then HDG (Heading) and ALT (Altitude) and the transition in flight is excellent, only a slight lift as you go to the auto system. V/S (Vertical Speed) changes are 5 points either way, but honestly, if your not climbing high, then unlock the ALT and add a little collective to go up, then reselect ALT at your set altitude, the same to go down with less collective. Coming out of auto is good as well, but you need to disconnect the HDG and ALT selections before you disconnect the AP itself for a smooth transition, or it bumps coming out. Heading changes under the SAS are nice and smooth, long and with not any tight jumpy turns, so excellent... yes very impressed. Really the 407 is so nice to fly manually (balanced when trimmed), you won't rely on the SAS, it is a relaxing controls machine, even distances are easy. Time to head back to the Jay Stephen Hooper Memorial Heliport. The 407 has a reputation for solid control feel in flight. That, combined with plenty of power, makes the 407 a real performer. The 206 (Jetranger) feels heavier than the 407 on the controls, so most pilots prefer the 407's flight control’s hydraulic boost, it is quite heavy if you turn the assisted system off. The Bell 407 is not a low-inertia system, it is also not a high-inertia system either like the JetRanger. So the feel is set somewhere in between, in making your approach it can be quite different. Autorotating the 407 going down I found there was still a high degree of maneuverability during the glide (power off), then the transition to Effective translational lift (ETL) was okayish, as you have to be aware on the loss of speed to avoid too much sink, so it's best to transition further out than closer to the pad in case of a sudden loss of lift. The flare and touchdown also requires a different technique than in the JetRanger. Timing is more critical because less energy is stored in the lighter-weight spinning rotors and the more collective pitch is used to cushion the helicopter’s touchdown. In addition, the pilot holds the helicopter in a nose-high attitude and touches down on the heels of the skids. It’s a fairly standard procedure for a lower-inertia rotor. One warning though is the 407 in the low hover is very susceptible to the swing effect, "Mast Bumping" is only present with a 2 blades rotor ...like R22 , R44, B206, but I found here the pendulum effect was very pronounced, the wrong (too heavy) input, and the 407 will swing quite violently, with the obvious results, so keep the final inputs extremely small, even pull away and do a new approach to get the procedure right. A few hours rest and I am airborne again, now twilight... The 407's external lighting is excellent, except for in one area. There is a "Landing" light in the nose, and two amazing flashing strobes underside, rear red beacon and Navigation/Strobes on the horizontal stabiliser fences, the best though are the fantastic "Logo" spots on the side, I totally absolutely loved the lit logo look at night! It is mostly excellent, but the collective switch "Spotlight" created nasty ant lit marks all around the nose and windscreen, so you need to keep it switched off. Now darker, and I am cruising low and fast over the Freeways & Highways Los Angeles County... my favorite Heli-Pilot pastime, the 407 is simply brilliant here, easy to cruise... did I say fast. In roles (or role-play) you are restricted here by the JRX door arrangement, there are no sliding doors on the rear, and not being able to individually remove, say the rear left door, restricts your role playing. Scouting for "News" I am playing a version of the "Nightcrawler", yes the movie , as I love this livery and the cruising above the LA landscape at night. I would have loved an open door, even a cameraman shooting the streets, but there is not even a Medi-Vac version, so it all feels all a bit limited if you wanted to be part of the action. So the JRX Bell 407 is excellent to fly, even say a novice could handle the aircraft and enjoy it's abilities... too benign, no I didn't get that feeling at all, it just felt right and the 407 was a totally enjoyable dynamic experience... then what a way to end the night flying with a visit to that famous "Hollywood" sign... perfect. _____________ Summary The Bell 407 is a four-blade, single-engine, civil utility helicopter that uses the four-blade, soft-in-plane design rotor with a composite hub. So the breed line is from the famous "Jetranger", but the 407 is the far bigger and more powerful relation to the family. The release(s) of the JRX 407 here are separate for both the X-Plane 12 version or the X-Plane 11 version, as they are not packaged together. So make your choice wisely as they both cost the same. JRX Design are now very accomplished developers, the Bell 407 is their third release for the X-Plane Simulator, after the earlier dual SA 341B and SA 342J Gazelle and the Messerschmitt-Bölkow-Blohm Bo 105 DBS-4. Notably the aircraft is created to a very high standard, beautiful modeling and lovely intricate details to scale. However rivets and engine fences are images and not 3d, but the main exterior bolts are modeled. Rotor hub is exceedingly well designed, but only has semi-animations for (twist) collective, and tail yaw. Glass is excellent (maybe the rear windows are bit dark) and there are no reflections disable for the internally or externally for the windows. Cabin and instruments are exceptionally well done, and all is very quality work in feel and look, but there are restrictions with only a singe door hide, and there are not many options for different fitout versions (Medi-Vac, lift hook) and role-playing that is mostly common with Helicopter packages. Lighting internally and externally is again excellent, but for ant whites around the frames with the spotlight feature. Although the official Bell 407 Manual and Procedures are very nice (authentic), a JRX Design manual was also required here. The updated v1.30 also comes with the sensational CINEFLEX camera system, hung on the nose, you have a full control of the camera and it's storage, v1.30 also has some other nice visual and menu tweaks as well. The JRX Bell 405 flies very well, I loved it as it was certainly not a edgy machine to fly, too benign, no I don't think so, so great for first timers and novice fliers, performance and dynamics feel also perfect. Would I like JRX Design to also do the famous 206 Jetranger? After this 407 I certainly think so, as it would be an excellent idea to do a fly off of their different capabilities, but more options overall would be nice. I love the 407, to a point now it is my current favorite helicopter to fly, I don't love niggly machines, I want to fly, hover and do things without the stress, throw in the sheer quality and X-Plane 12 realism and the JRX Bell 407 is a worthy winner... highly recommended. ________________ The Bell 407 by JRX Design v1.30 is NOW available! from the X-Plane.Org Store here : JRX Bell 407 for X-Plane 12 Priced at US$35.99 Requirements X-Plane 12 (not for XP11. If you want the XP11 version, get it here ) Windows, Mac or Linux 8 GB+ VRAM Recommended Download Size: 1.4 GB Current Version: 1.30 (January 28th 2024) JRX Bell 407 for X-Plane 11 Priced at US$35.99 Requirements X-Plane 11 (not for XP12. if you want the XP12 version, get it here) Windows, Mac or Linux - 8 GB+ VRAM Recommended Download Size: 1.4 GB Current Version: 1.30 (January 28th 2024) Installation and documents: download for the JRX Bell 407 is 1.38 Gb and the aircraft is deposited in the "Helicopters" X-Plane folder. Full Installation is 2.76Gb AviTab Plugin is required for this aircraft Documents supplied are: JRX Bell 407 - READ ME.txt Bell 407 - Operational Evaluation Board Report.pdf Bell 407 - Pilot Ground and Flight Procedures.pdf Bell 407 - Rotorcraft Flight Manual.pdf JRX BELL 407 - END-USER LICENSE AGREEMENT (EULA).txt Documentation consists of three official documents that cover the 407 Flight Manual, Pilot Ground and Flight Procedures and Operational Evaluation Board Report... but there is no JRX 407 Aircraft manual, that was badly needed and certainly required here. Designed by JRX Design Support forum for the JRX B407 Review System Specifications: Windows - 12th Gen IS1700 Core i7 12700K 12 Core 3.60 GHz CPU - 64bit -32 Gb single 1067 Mhz DDR4 2133 - PNY GeForce RTX 3080 10GB XLR8 - Samsung 970 EVO+ 2TB SSD Software: - Windows 11 Pro - X-Plane 12.09rc3 (This is a Release Candidate review). Plugins: Traffic Global - JustFlight-Traffic (X-Plane.OrgStore) US$52.99 : Global SFD plugin US$30.00 Scenery or Aircraft - Hooper Heliport (58CA) - ___________________________ Review by Stephen Dutton' 6th January 2024 Copyright©2024: X-Plane Reviews (Disclaimer. All images and text in this review are the work and property of X-PlaneReviews, no sharing or copy of the content is allowed without consent from the author as per copyright conditions) All Rights Reserved
1 point -
Behind the Screen : January 2024
Cami De Bellis reacted to Stephen for a topic
Great comment, go back to the core set up, see how it runs, then add in one component at a time, certainly with Plugins, the cause will stick out, I will say a few plugins that are essential like SAM are currently very buggy and are having no updates is a problem, this is causing a lot of anguish. But like I said do a core flight with a LR default aircraft A330 or B737, and see if you get the full clean Simulation, then work forward from there...1 point -
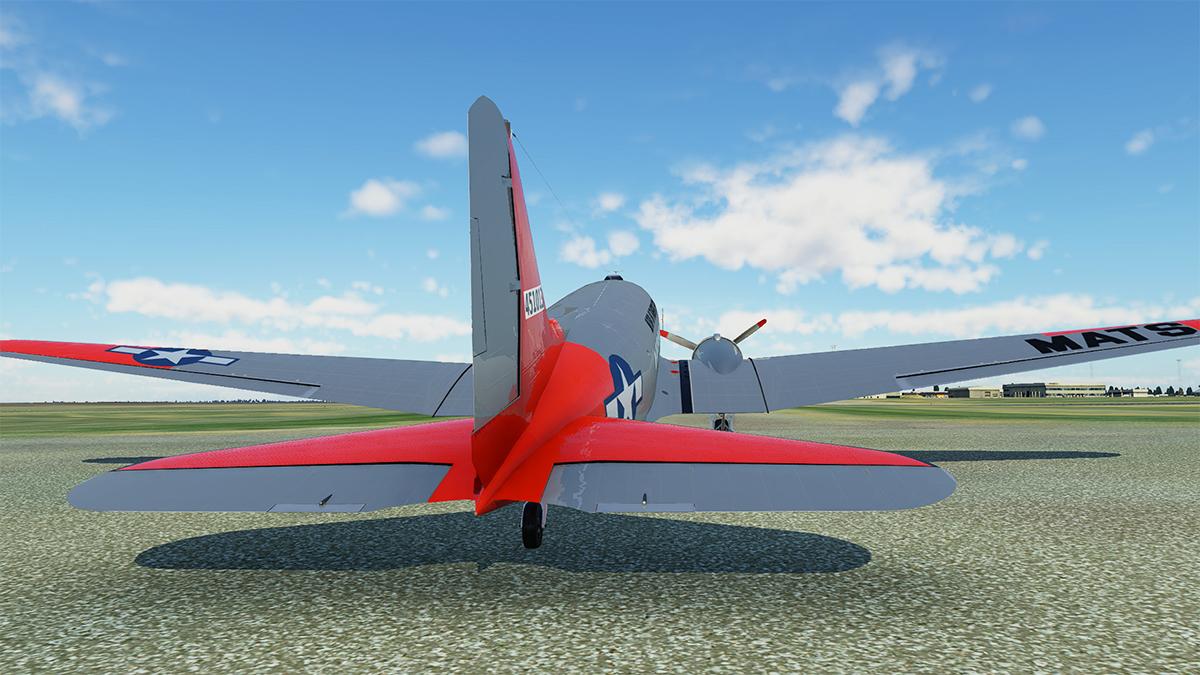
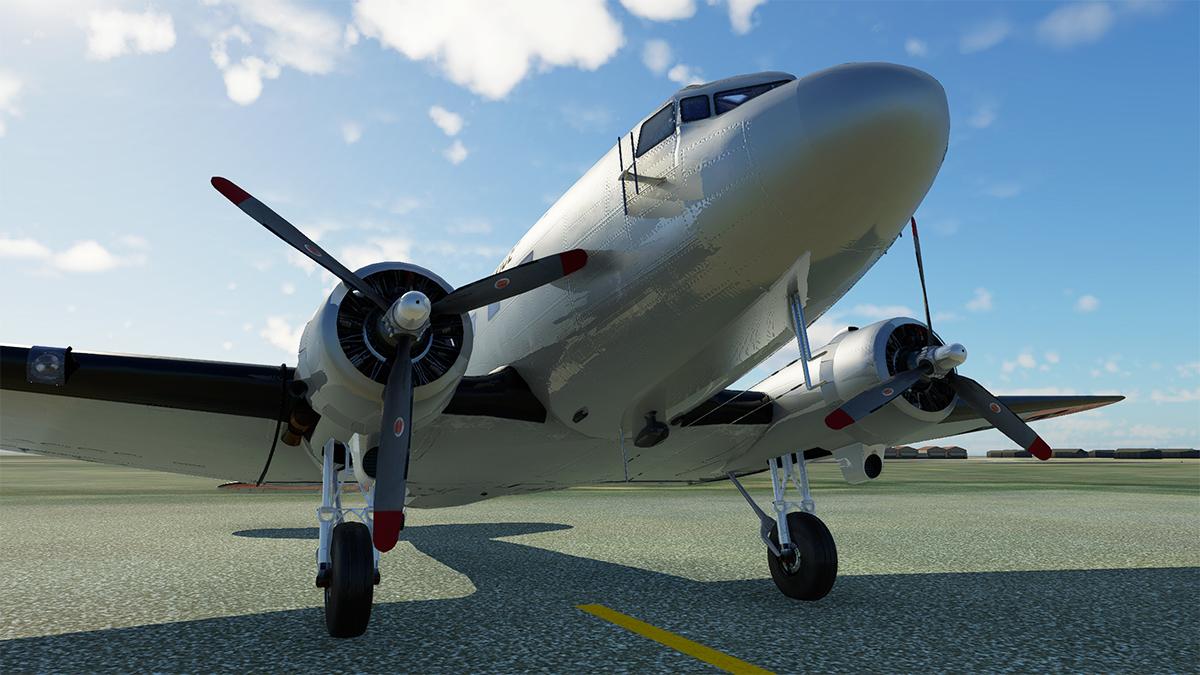
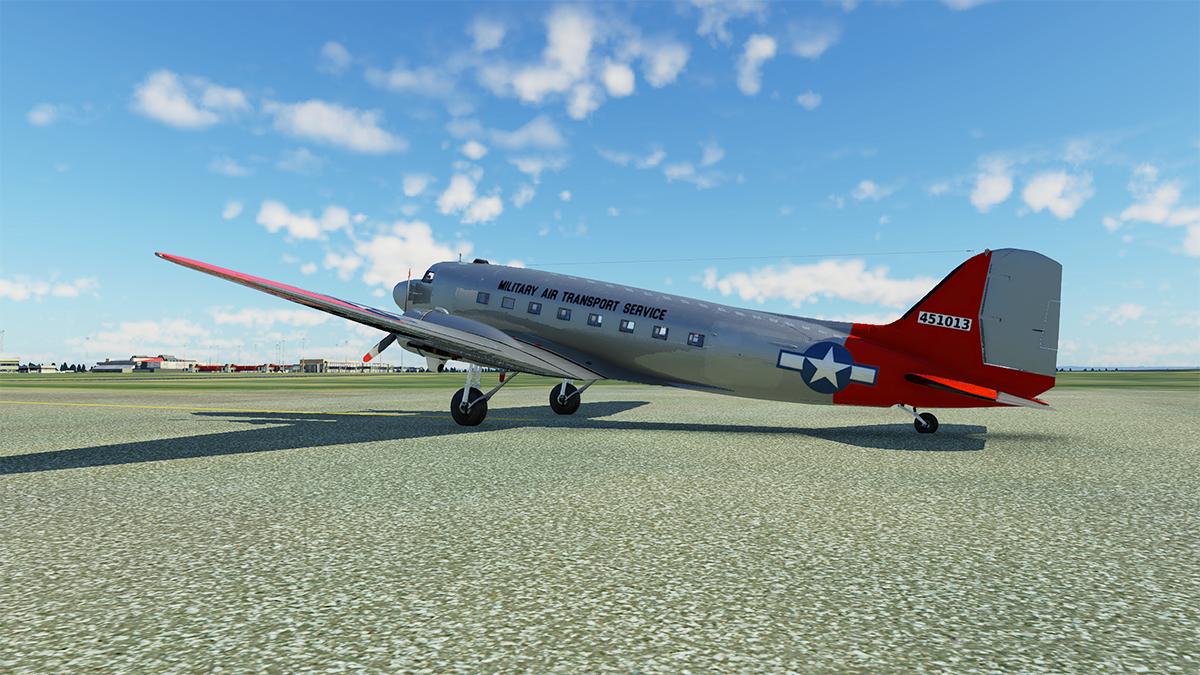
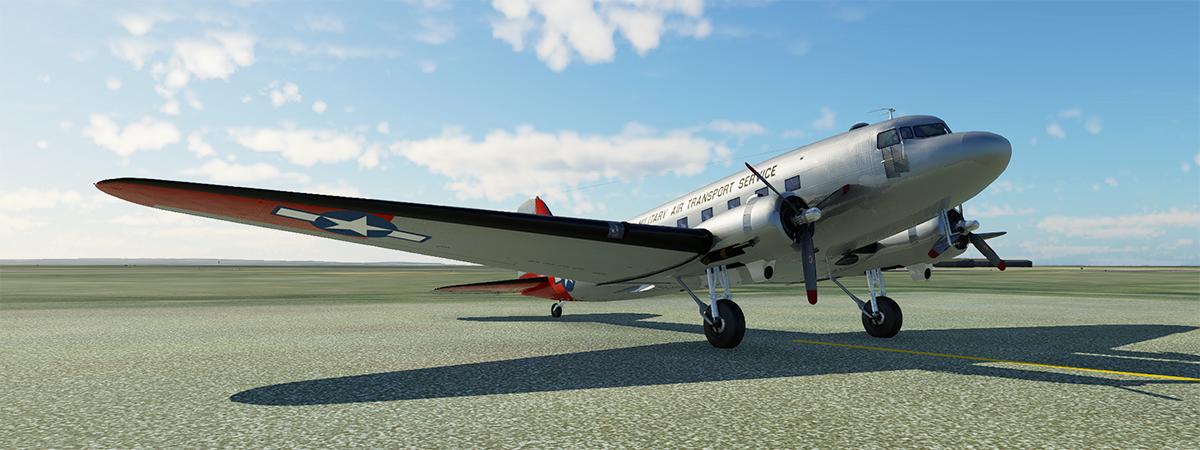
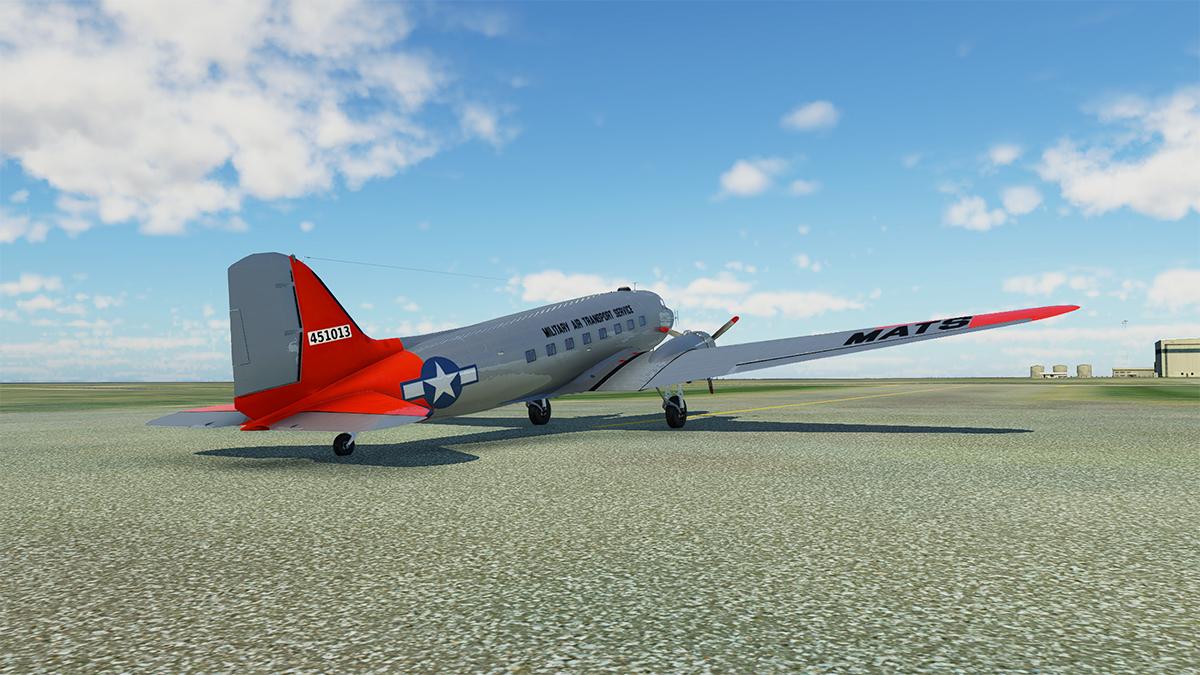
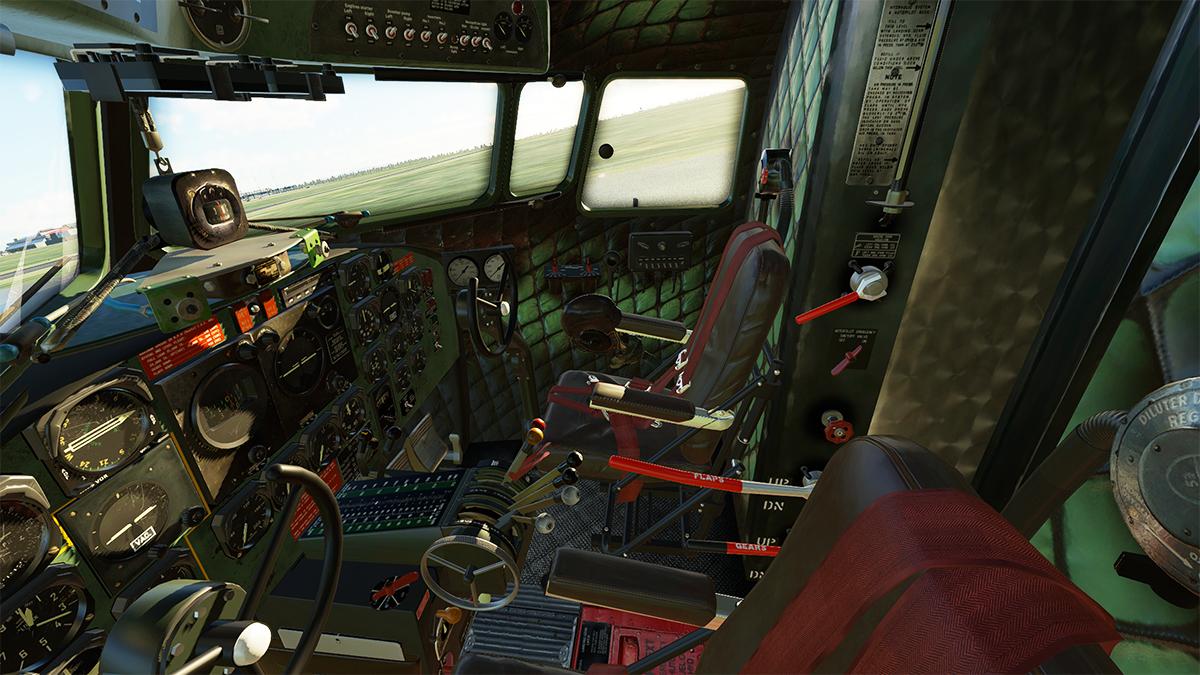
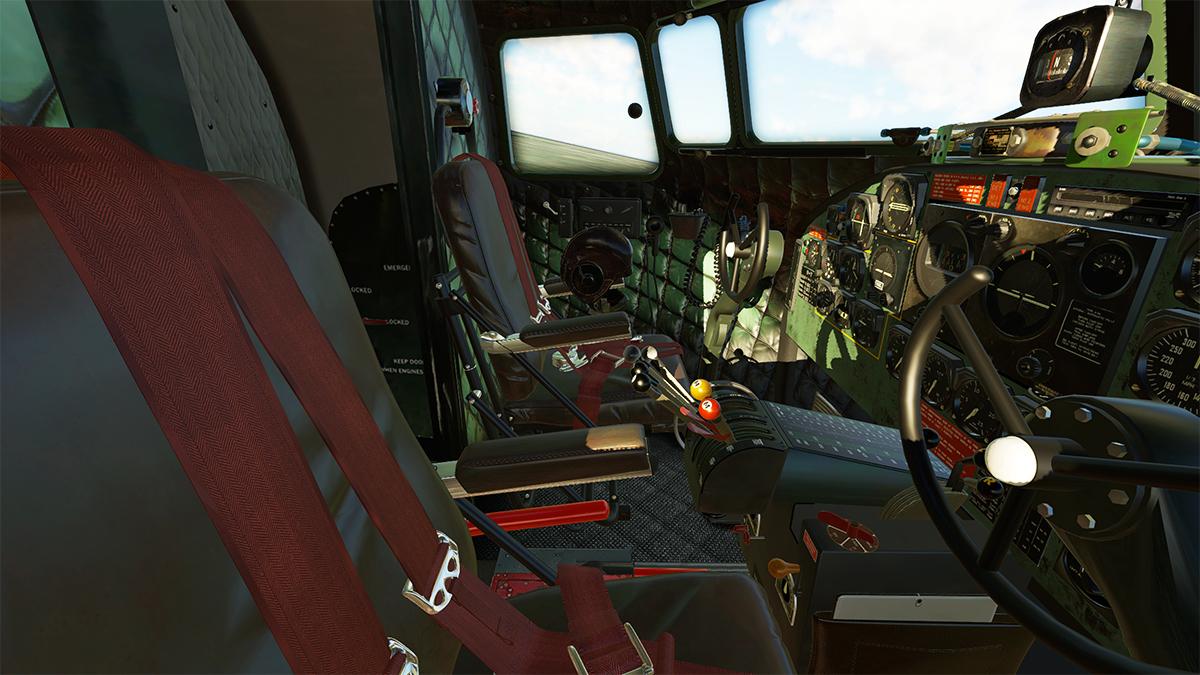
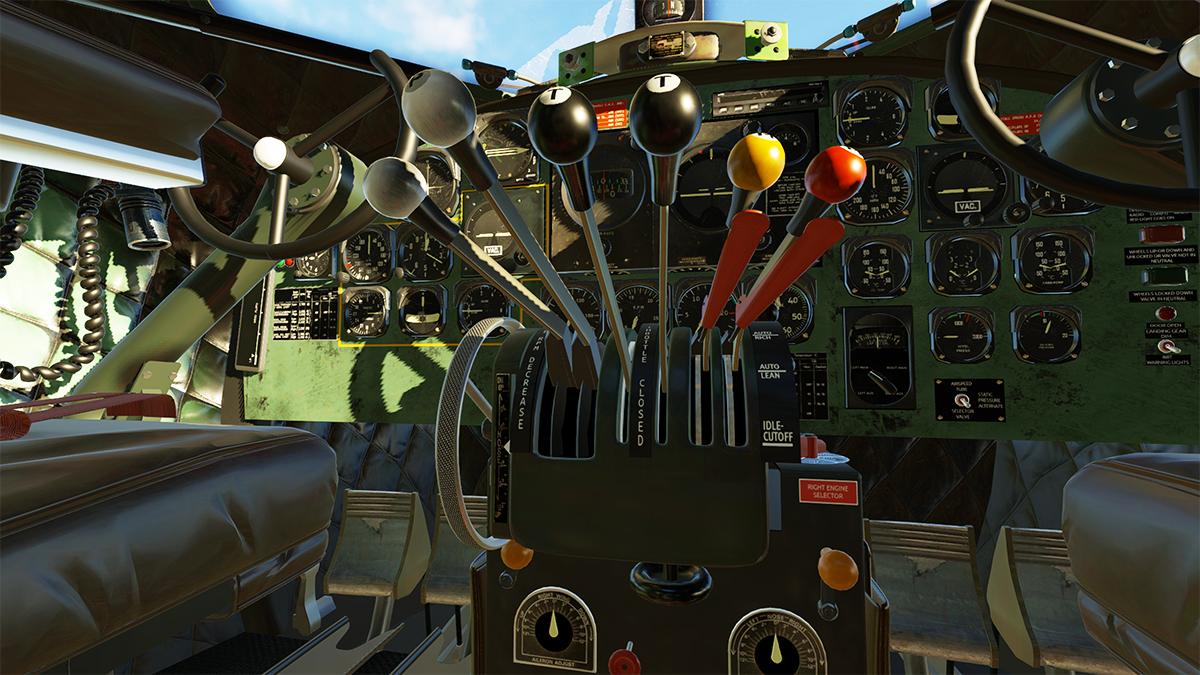
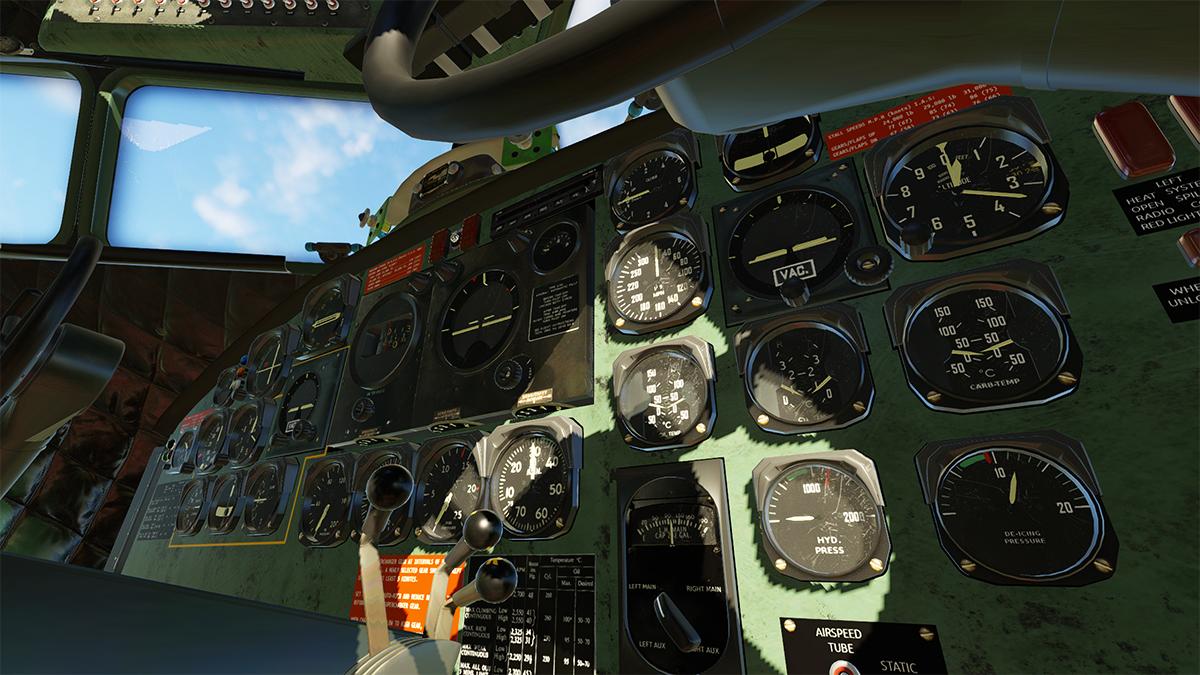
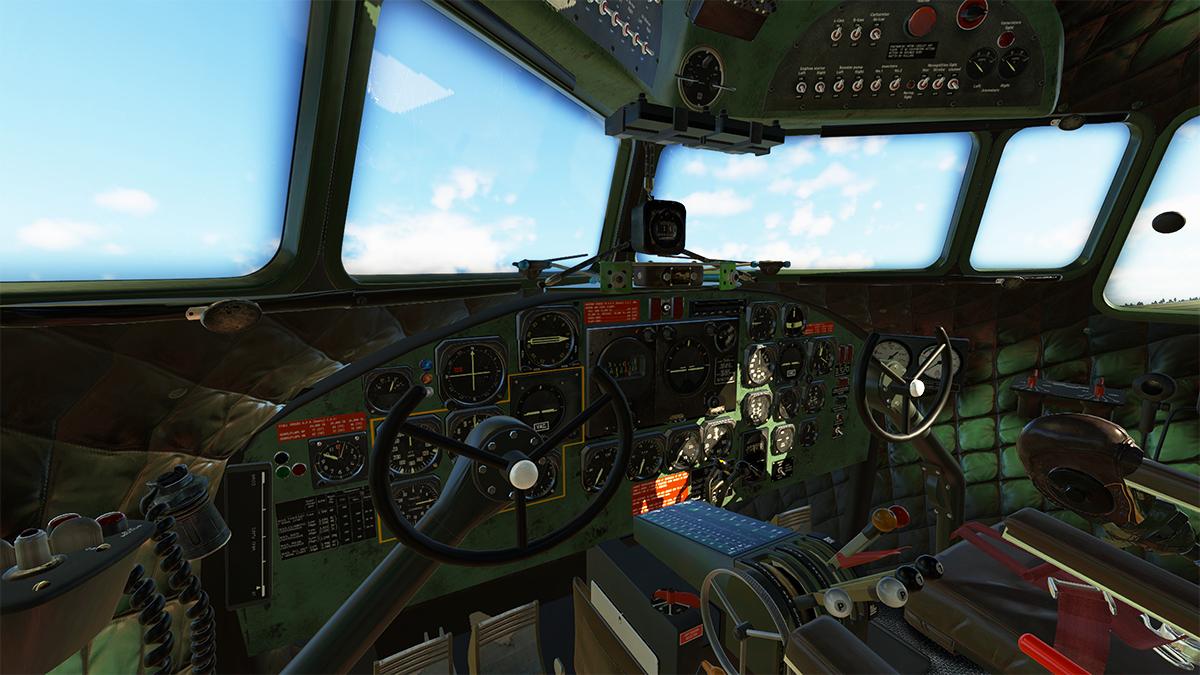
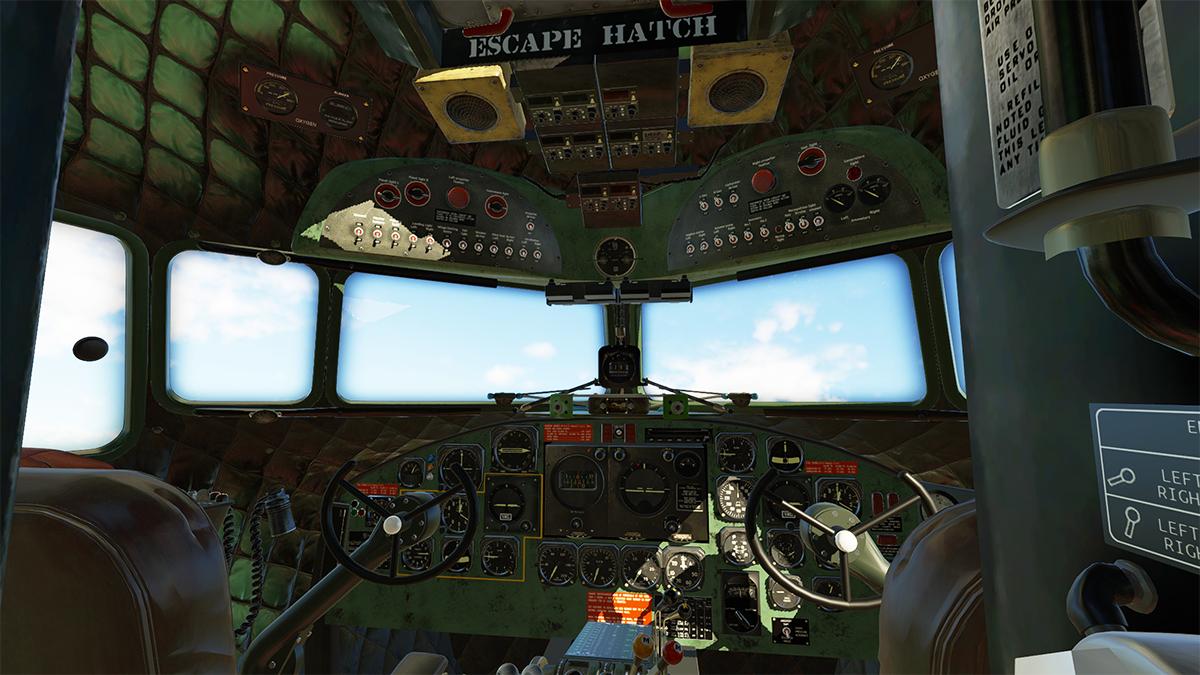
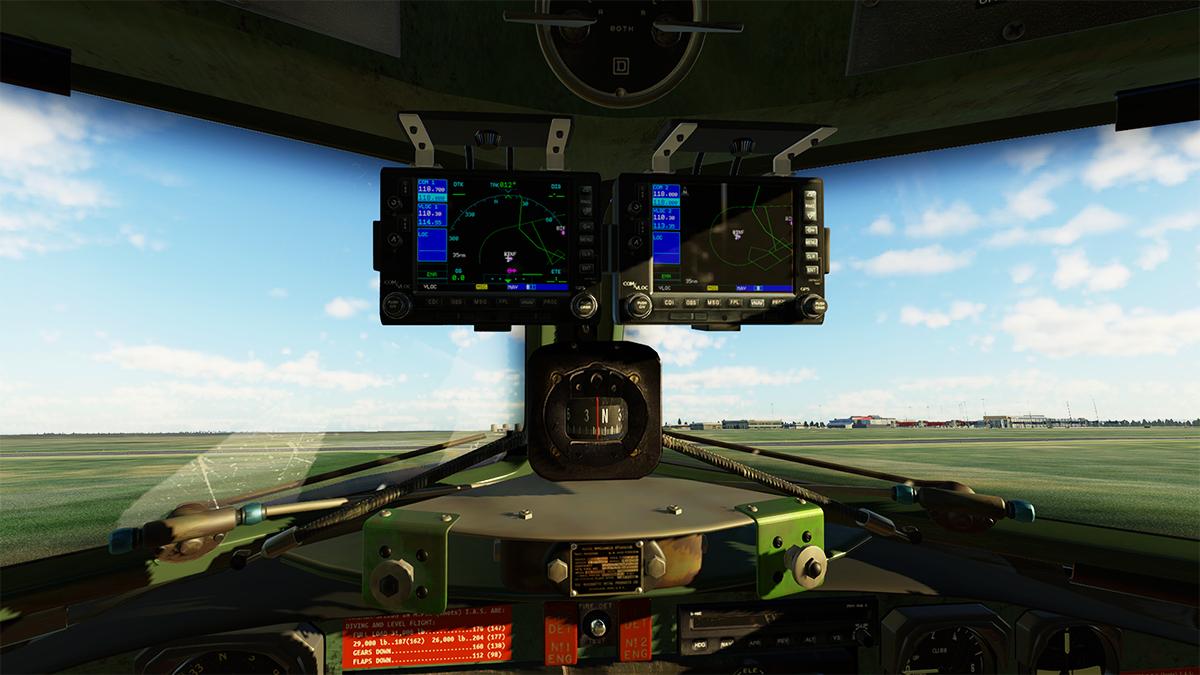
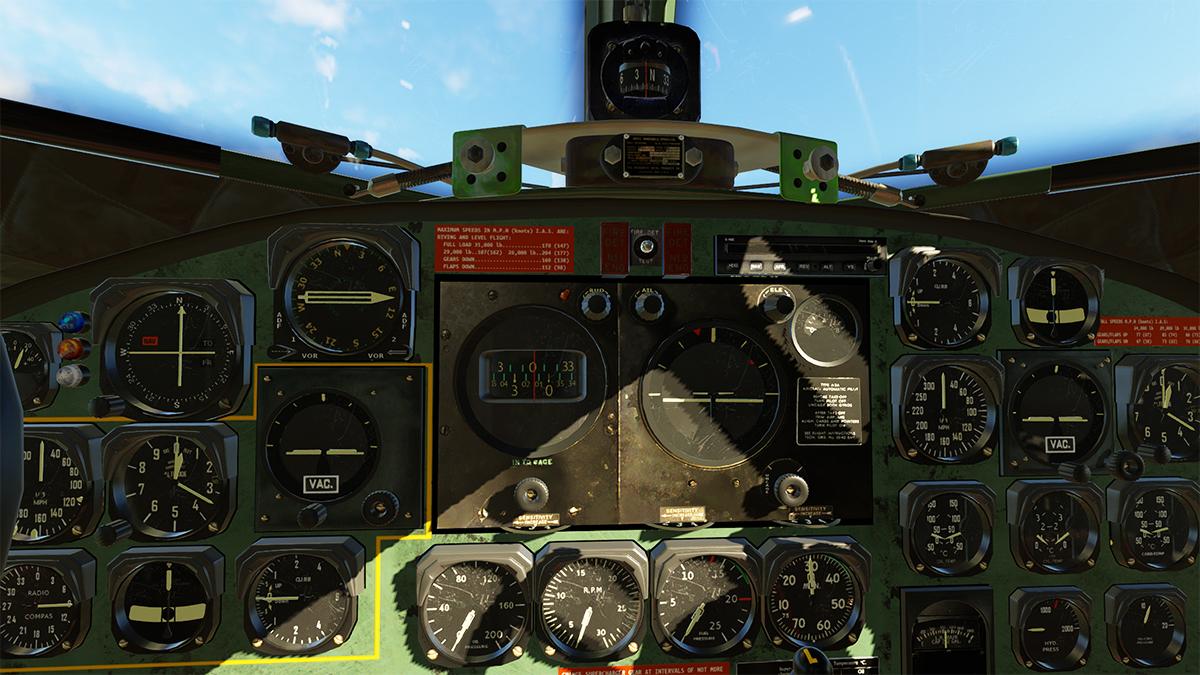
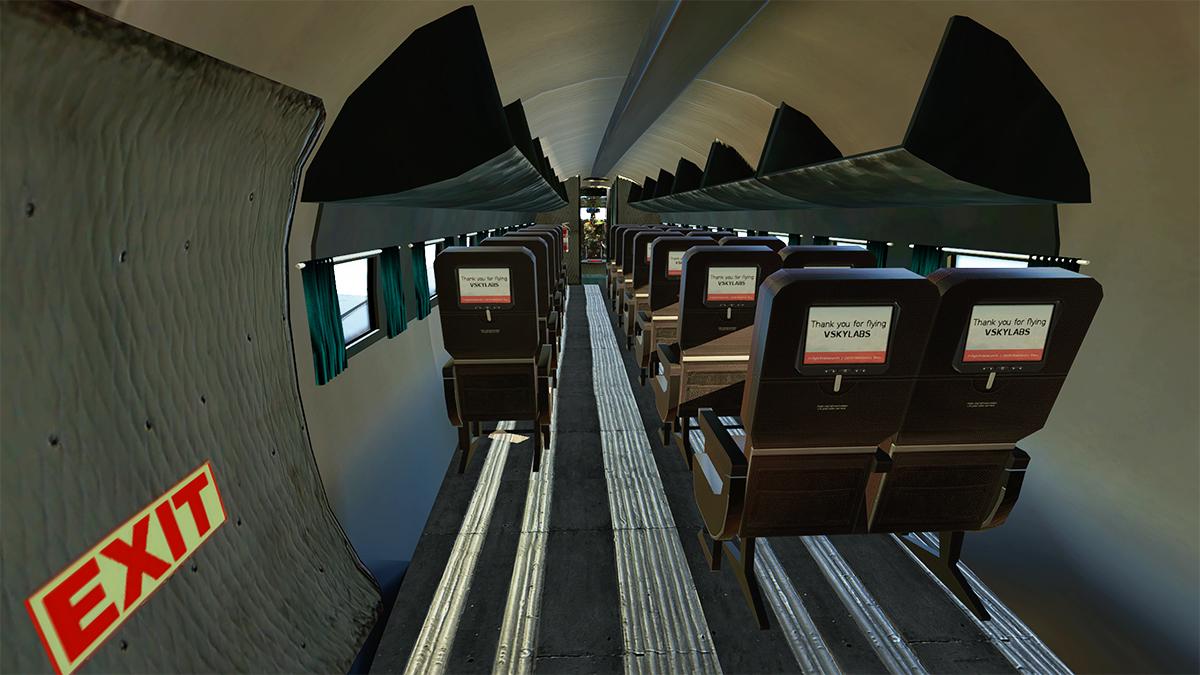
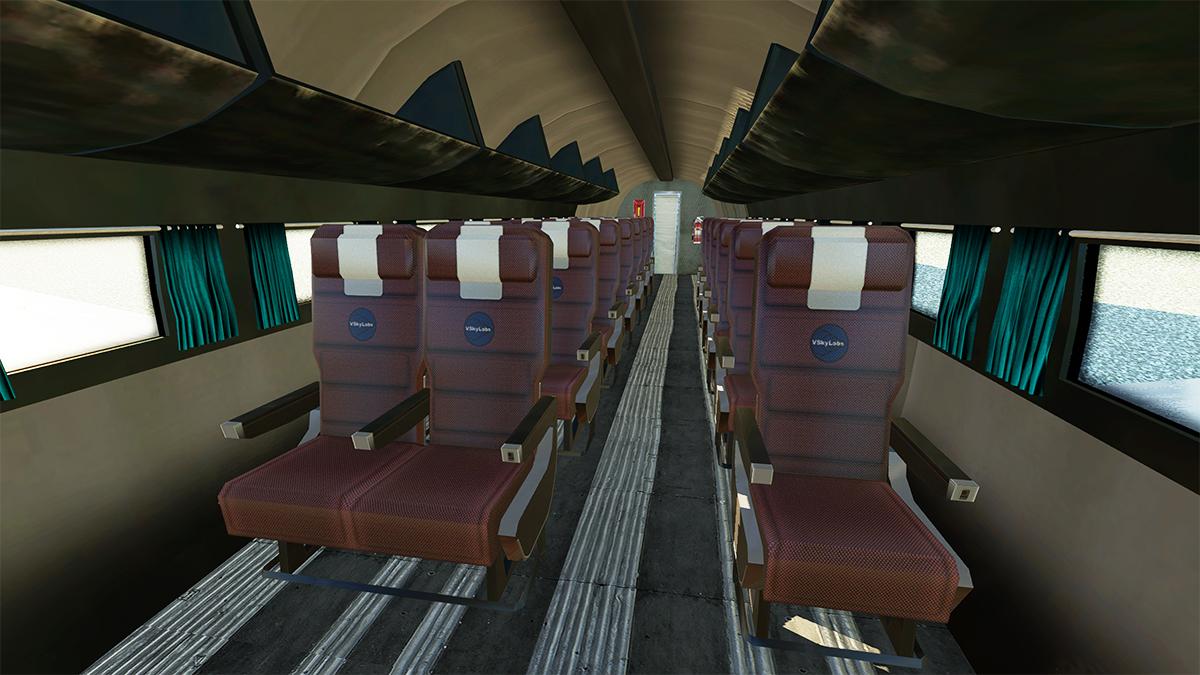
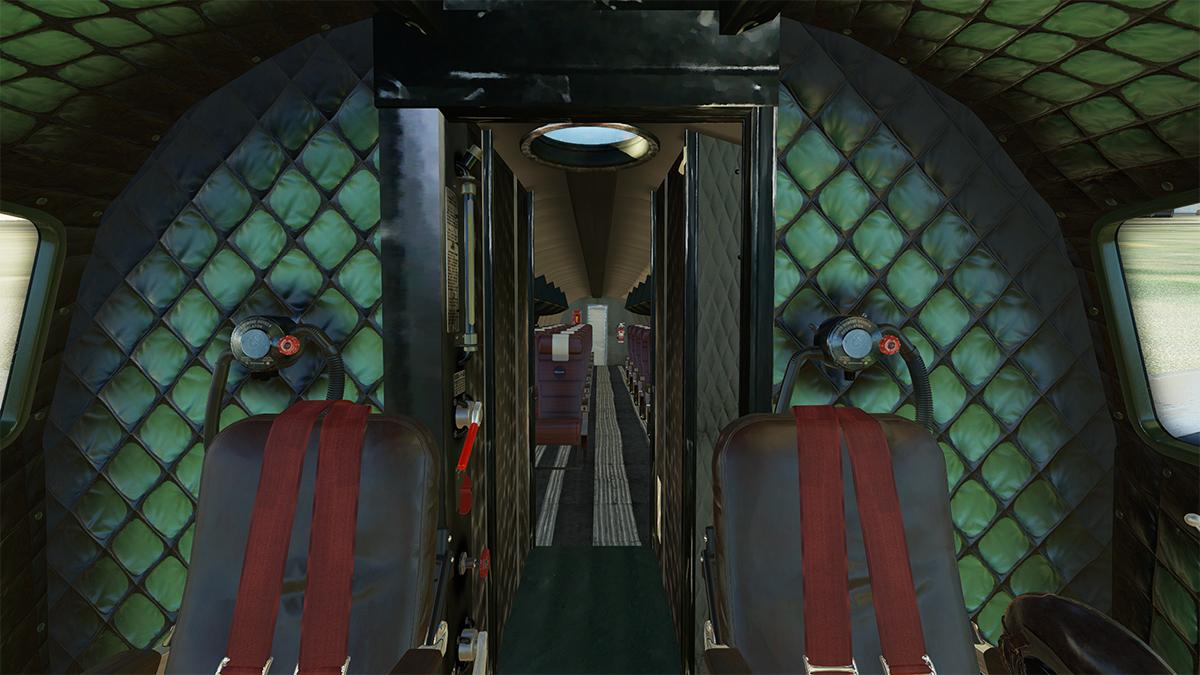
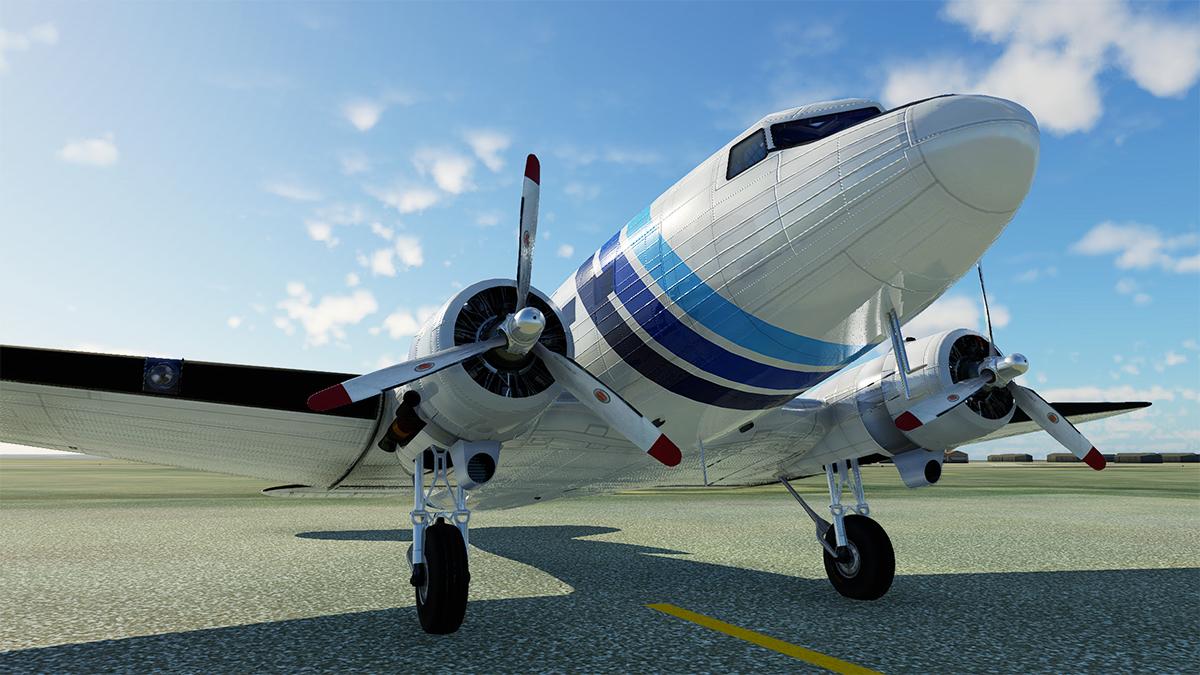
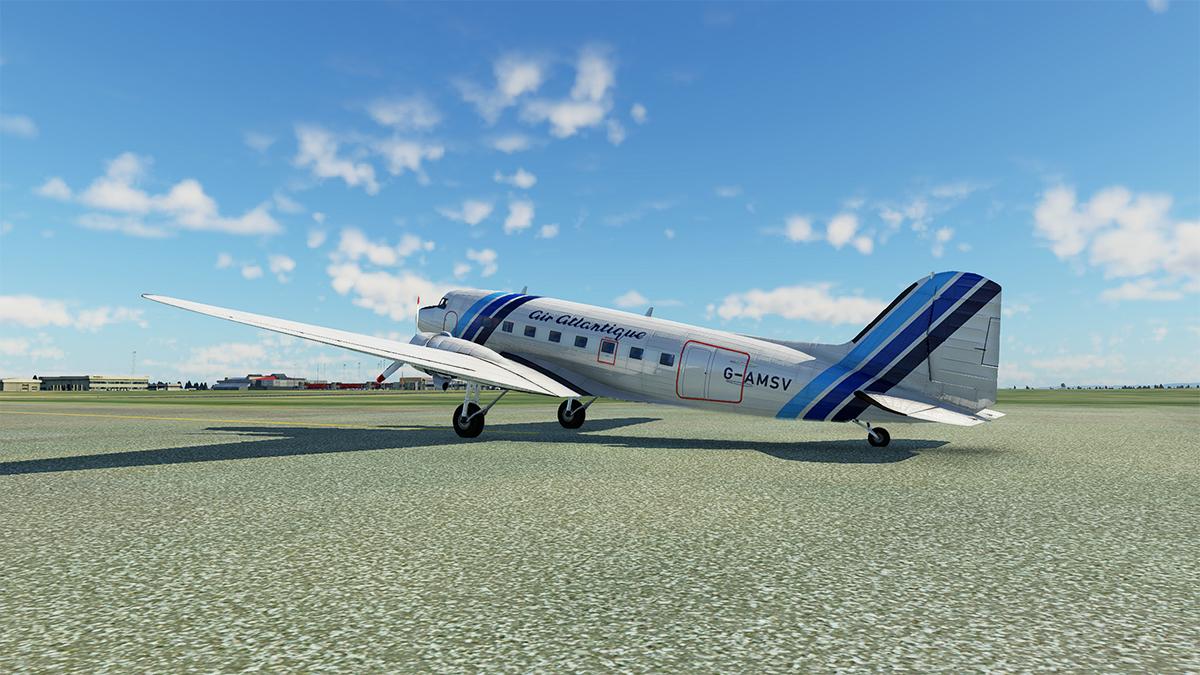
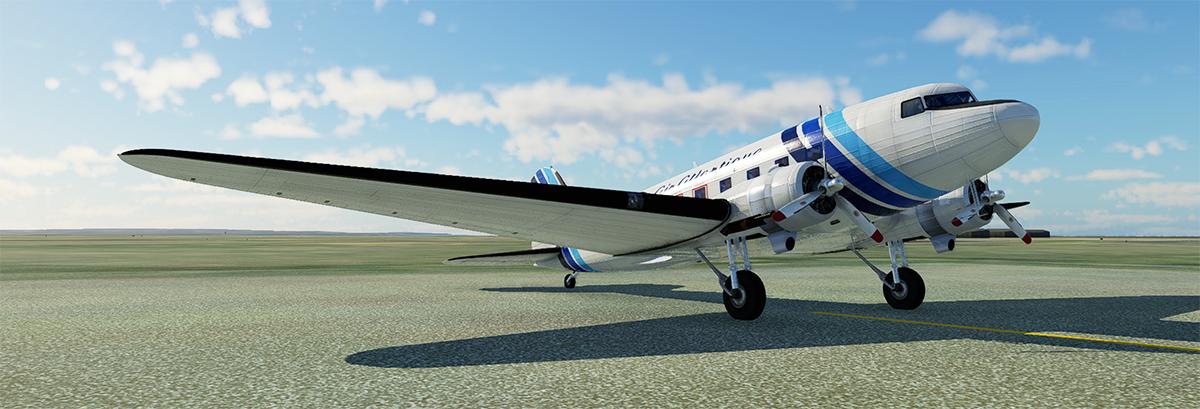
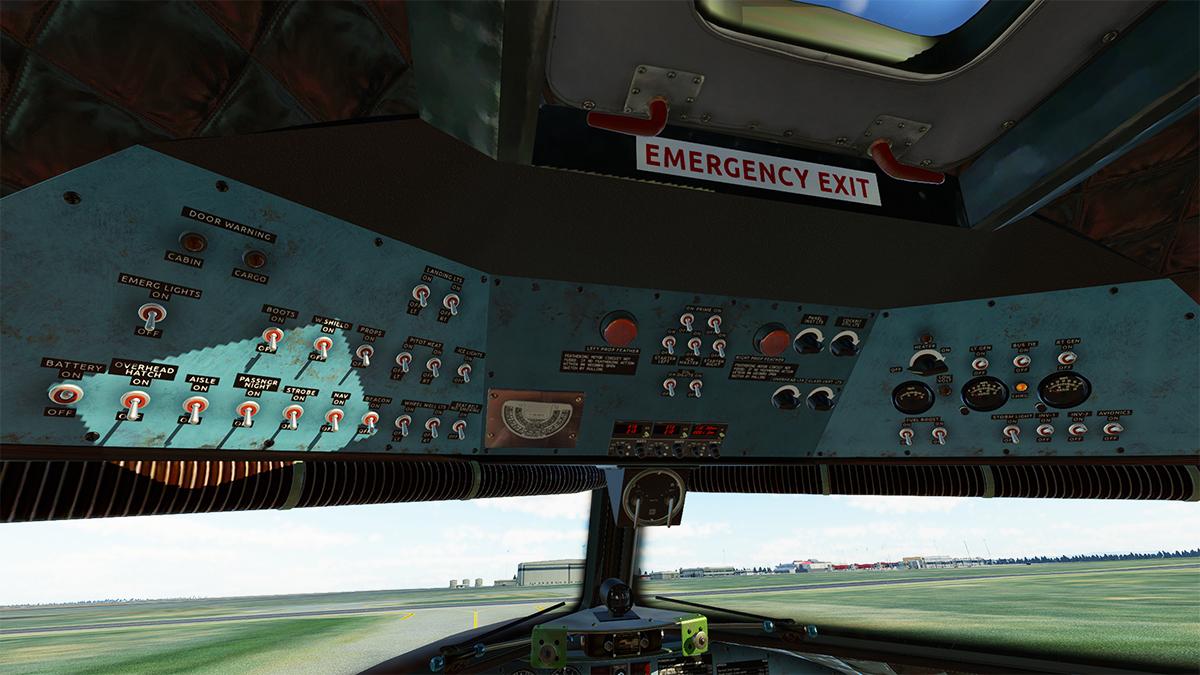
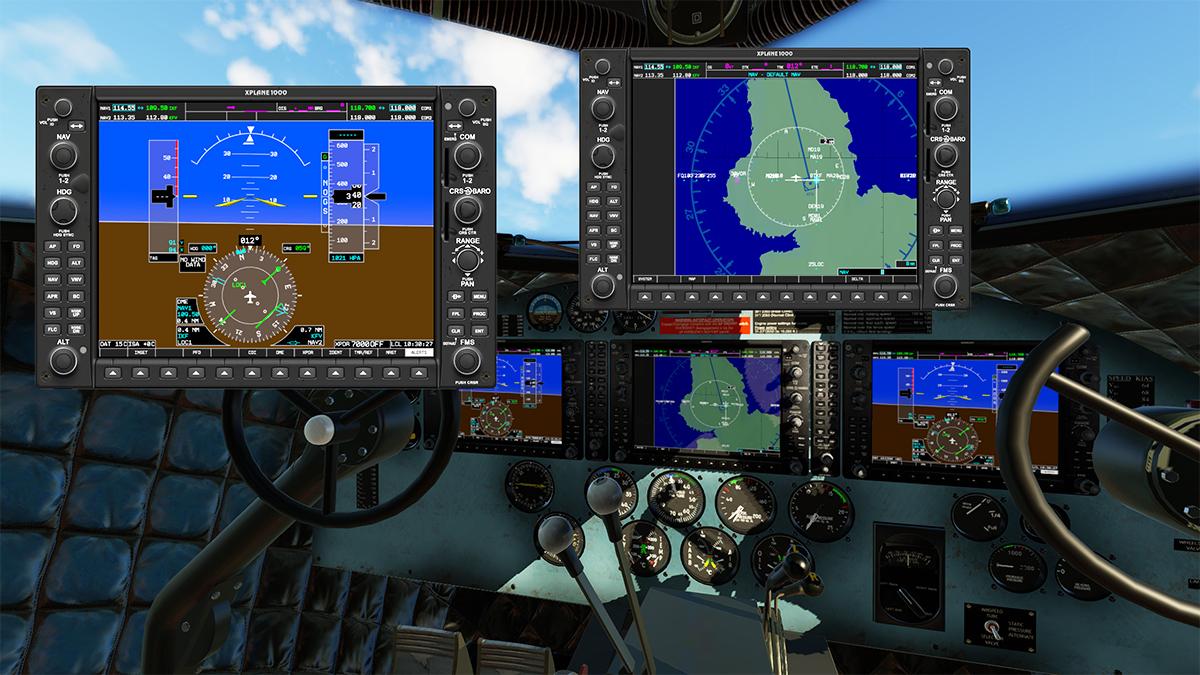
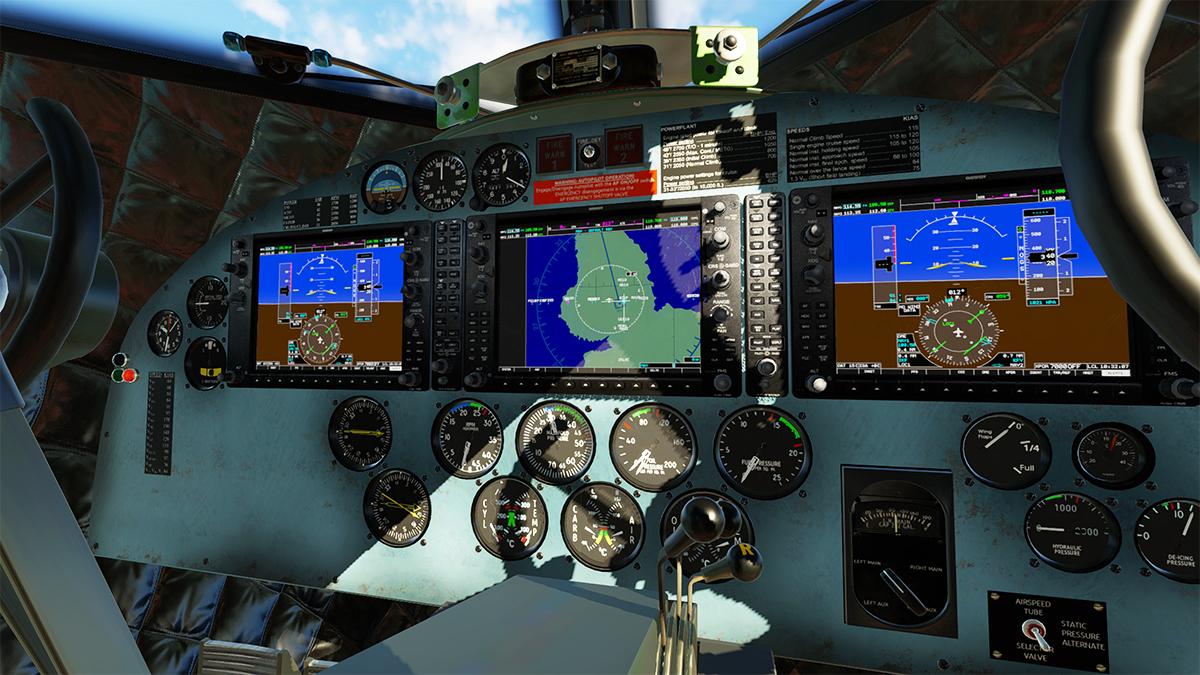
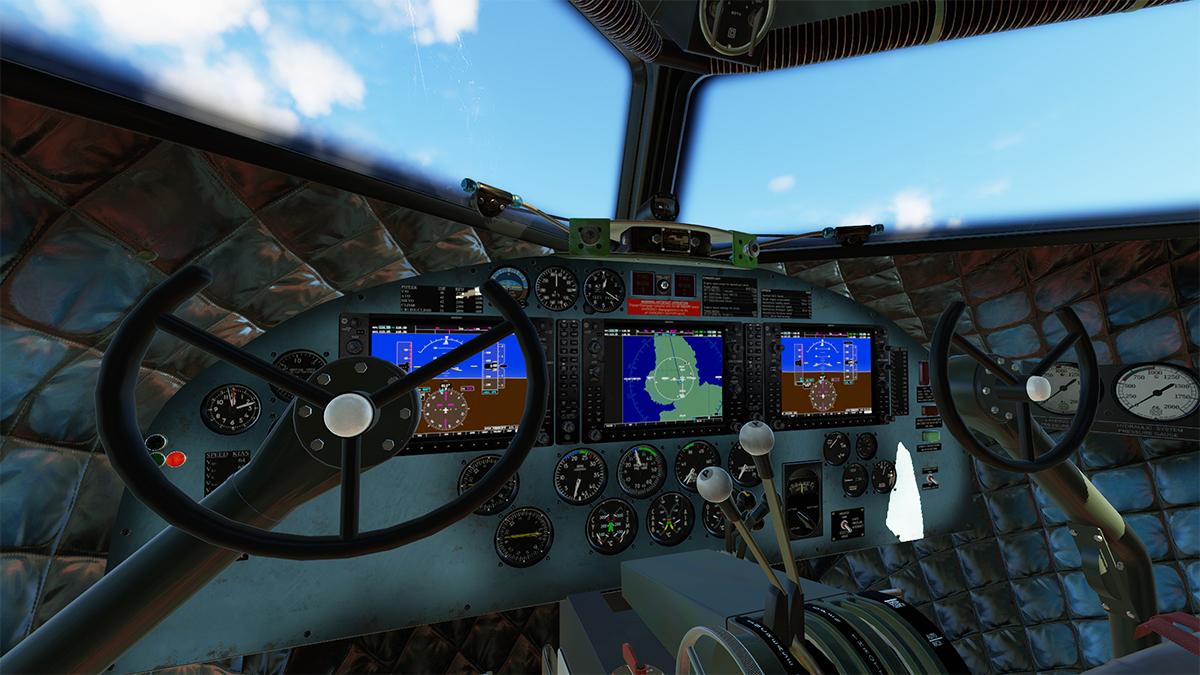
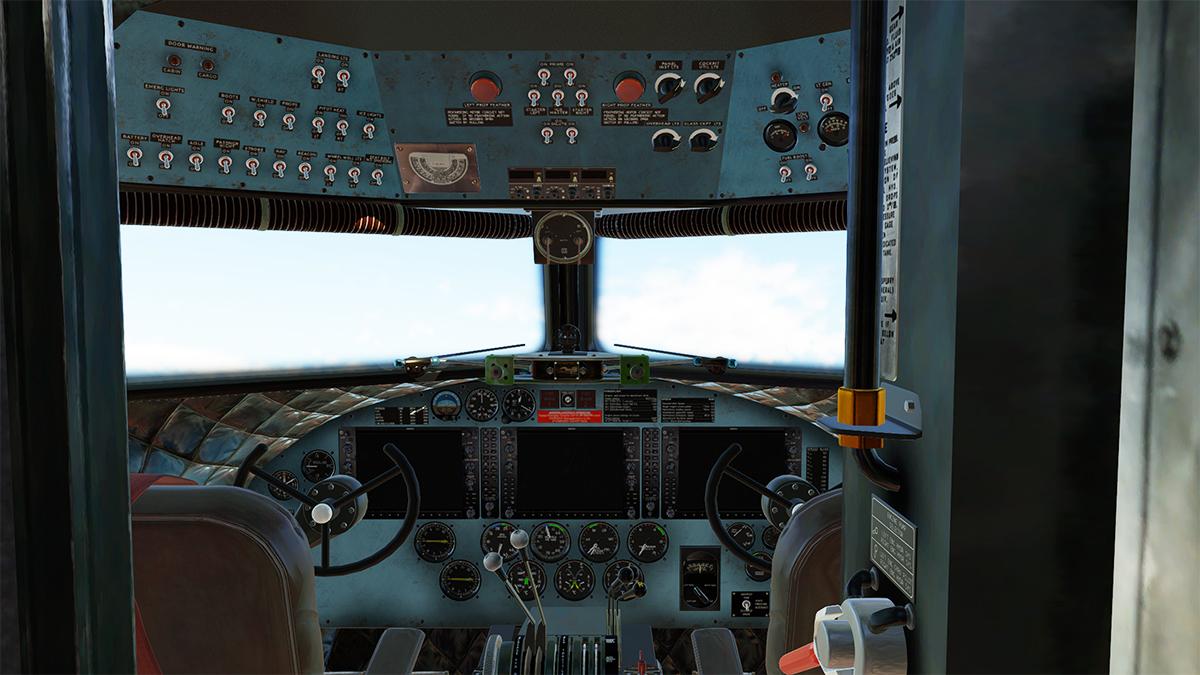
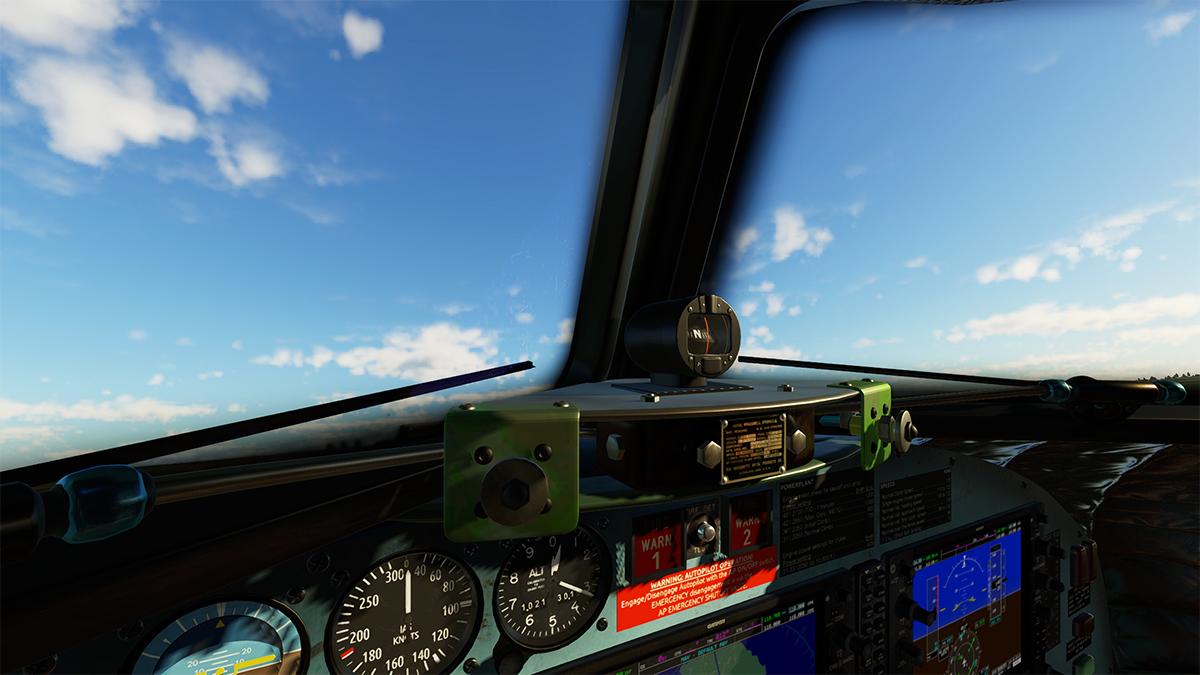
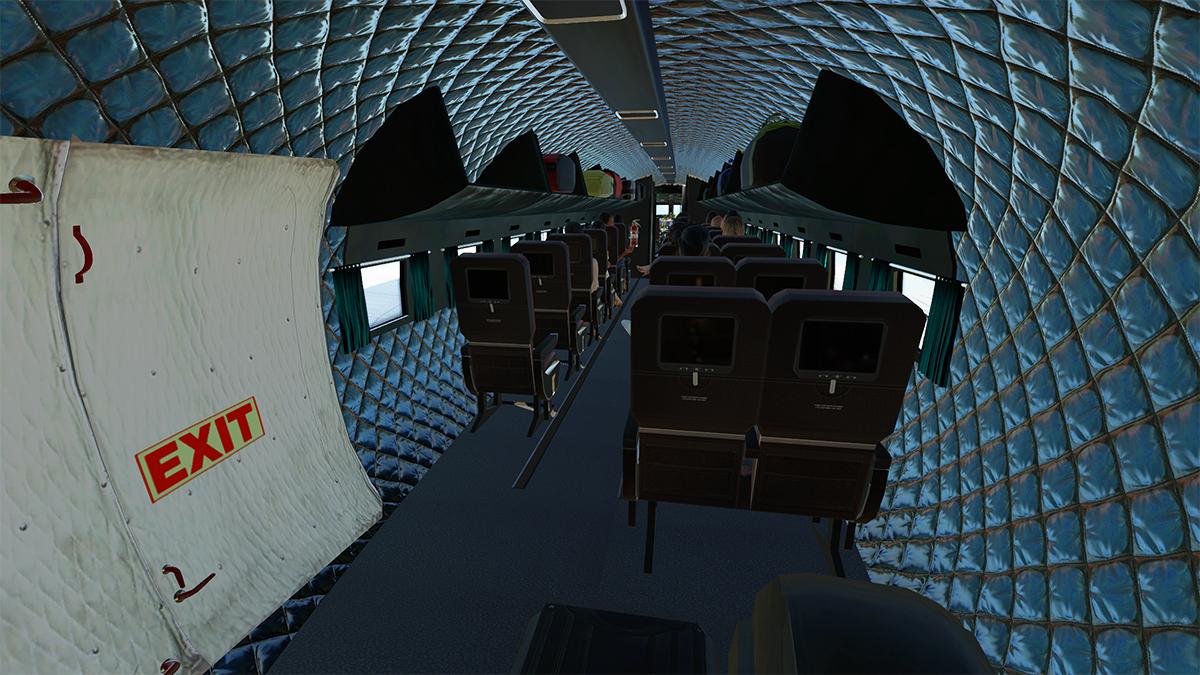
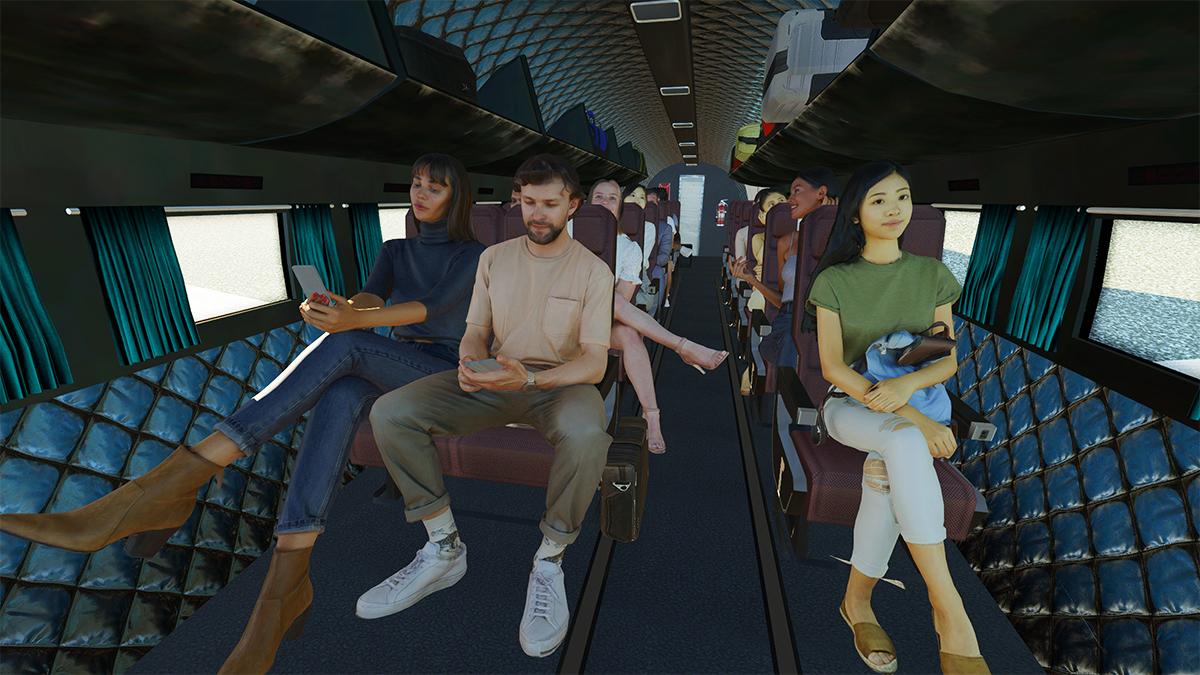
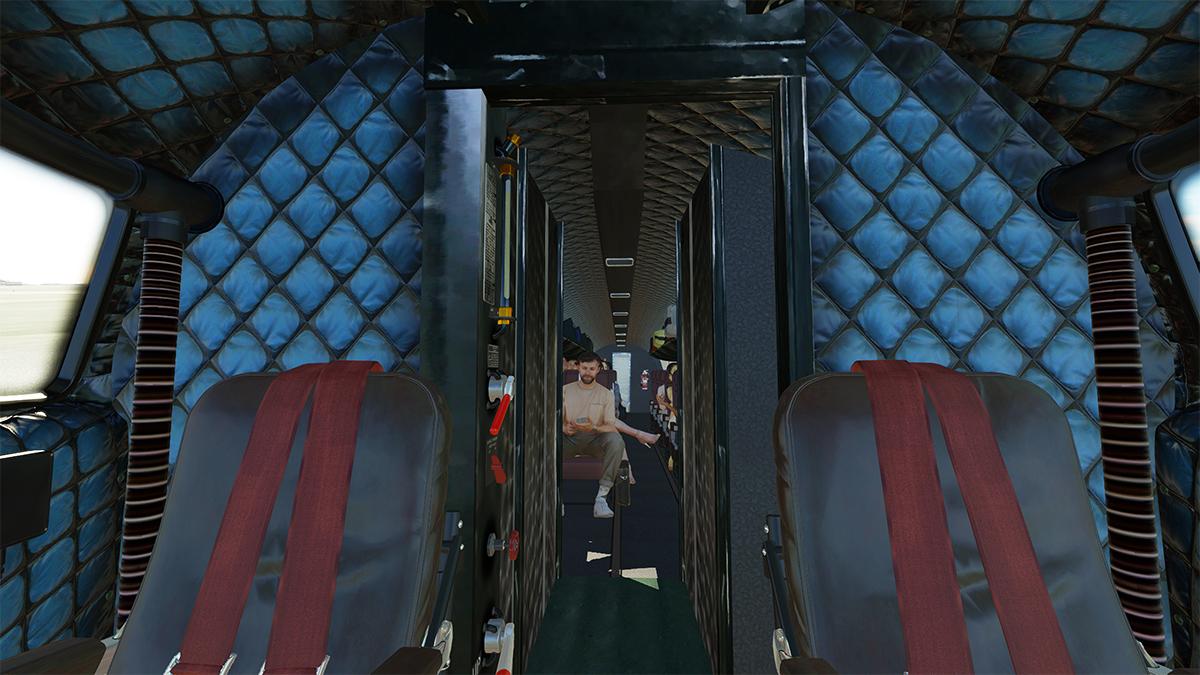
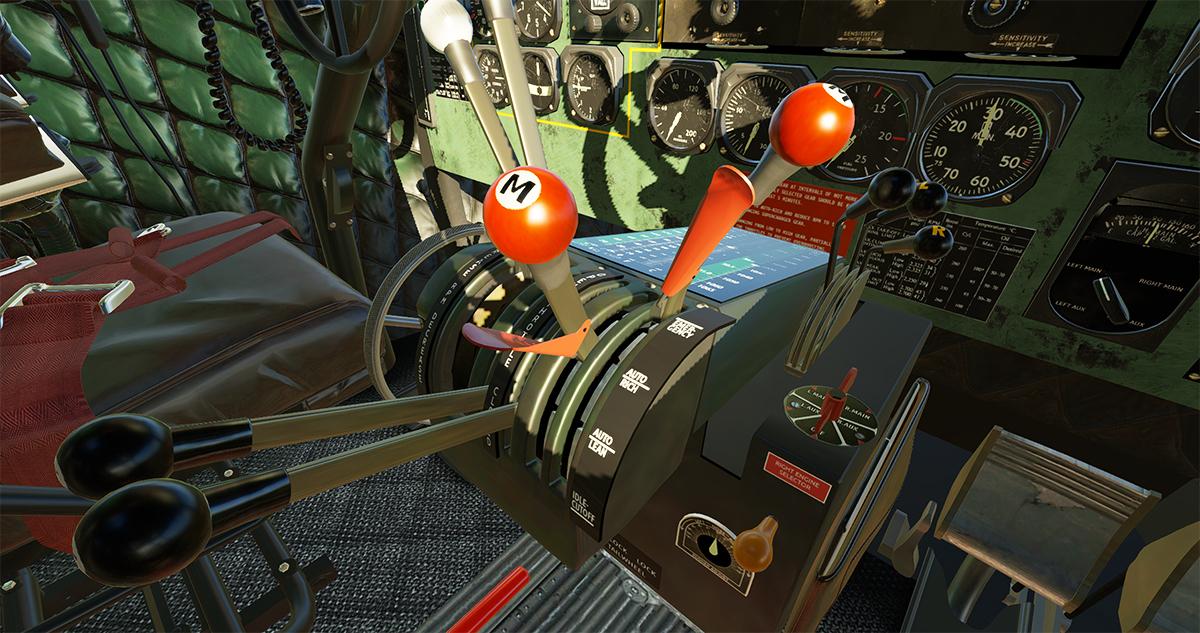
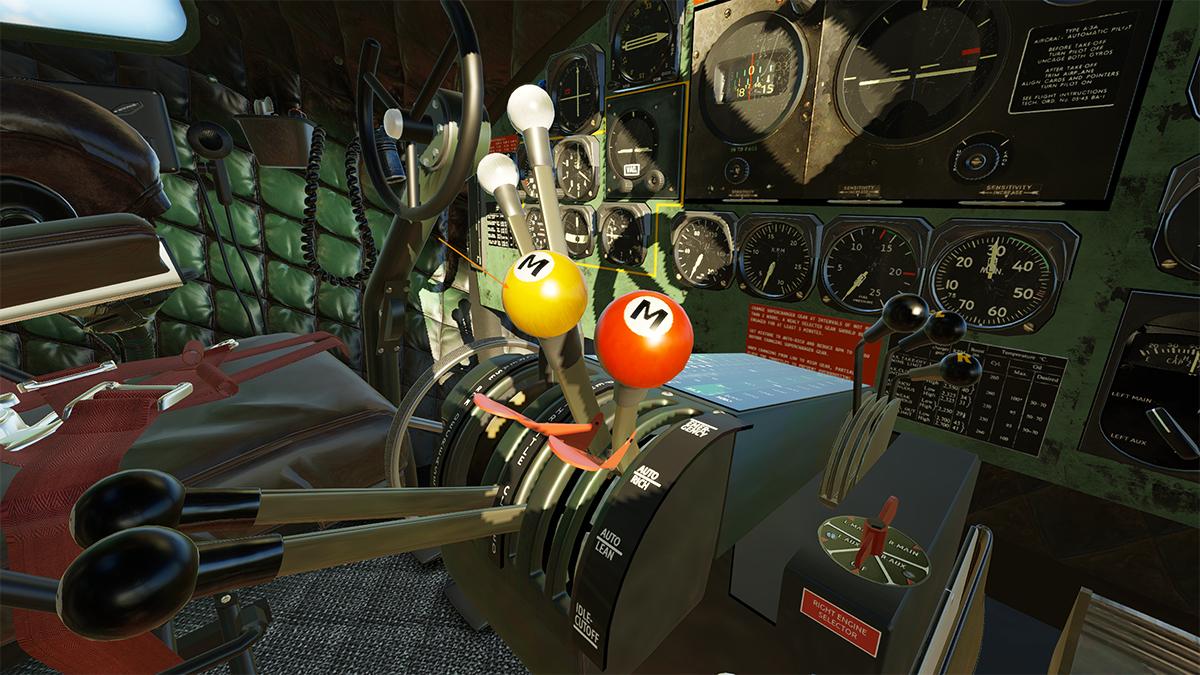
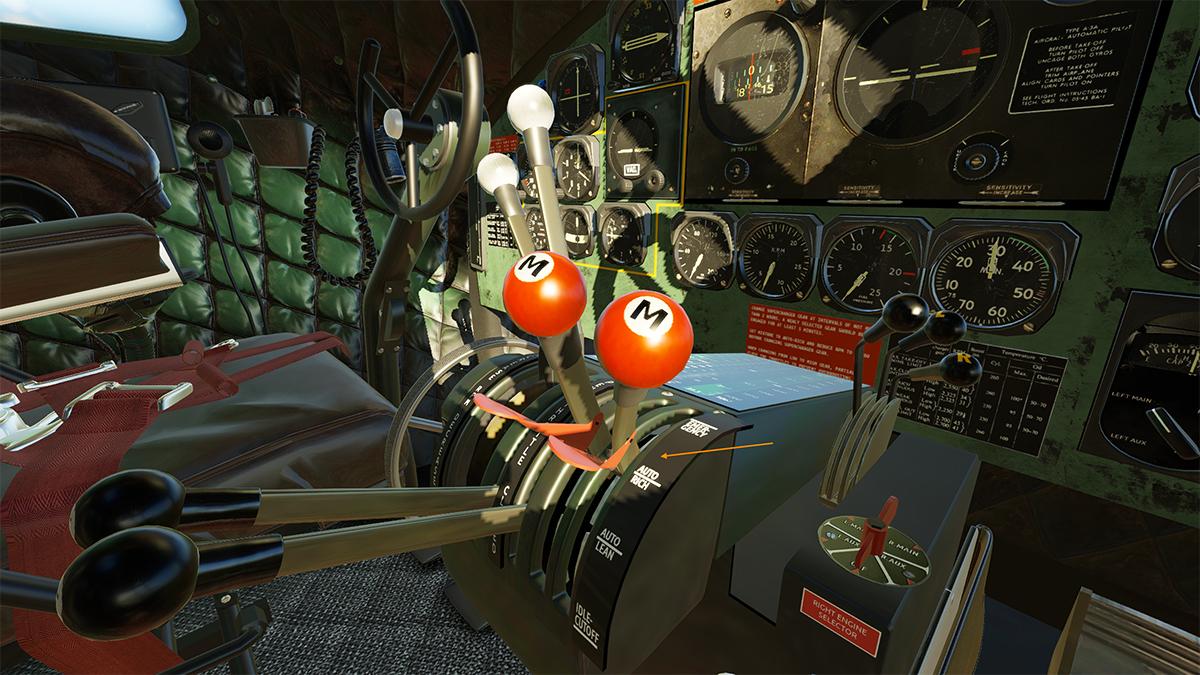
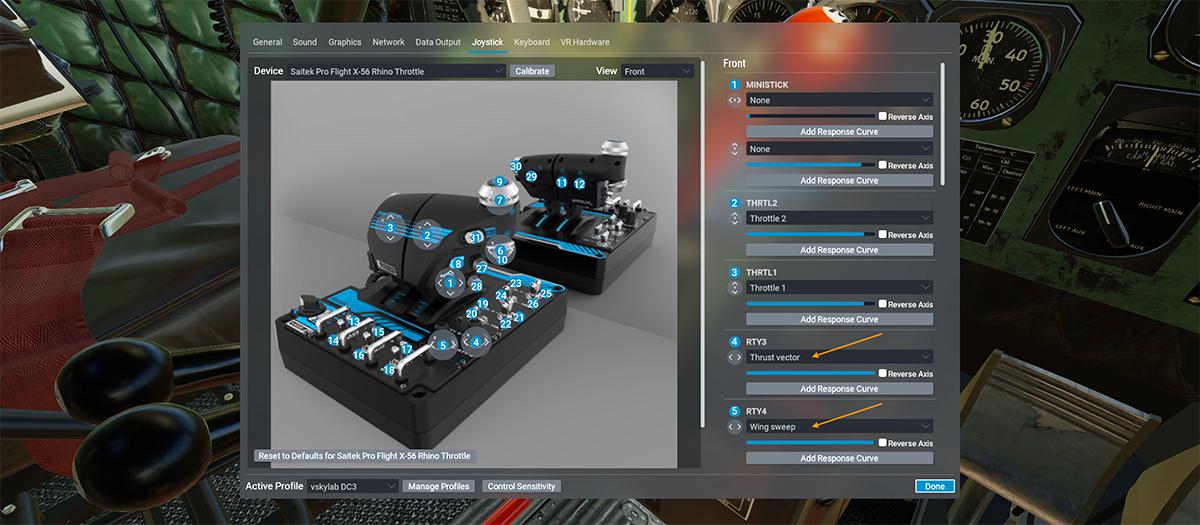
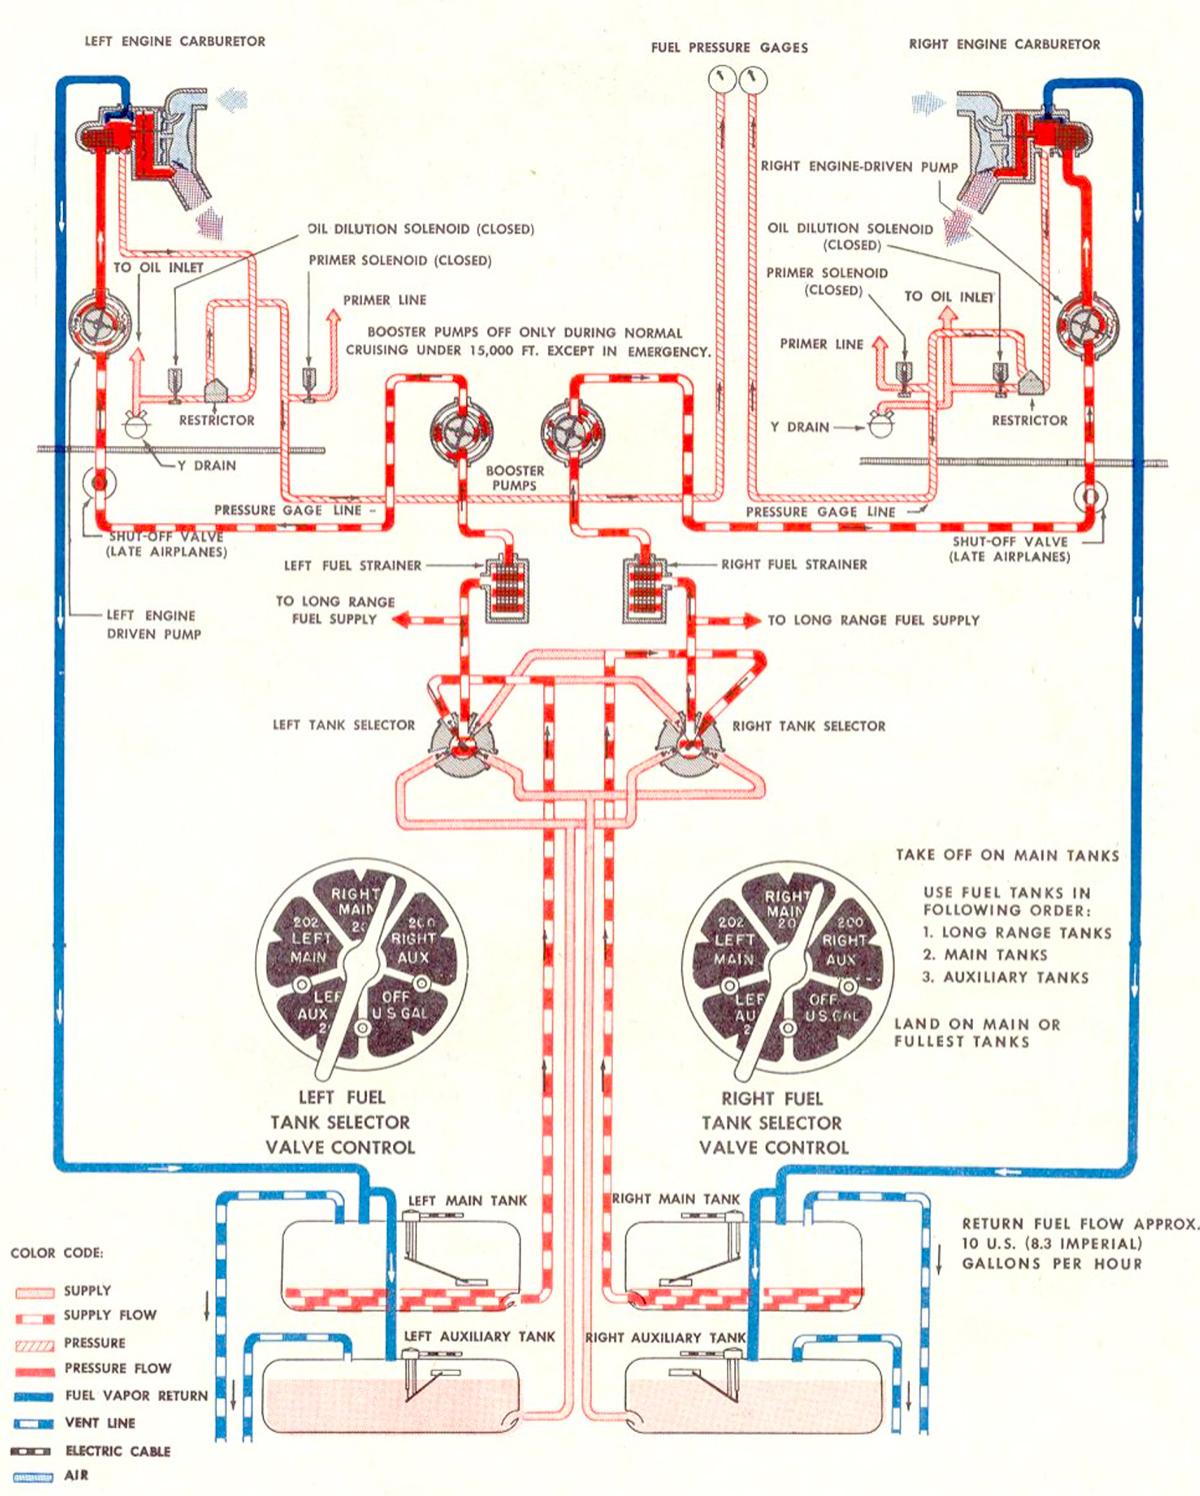
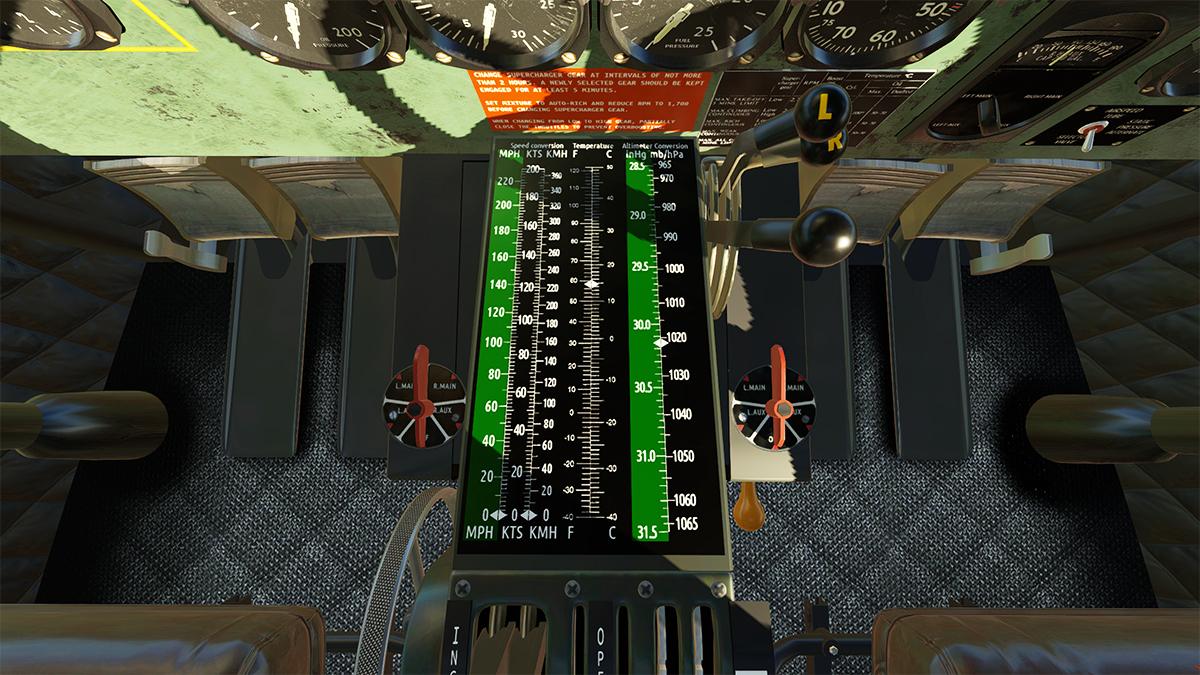
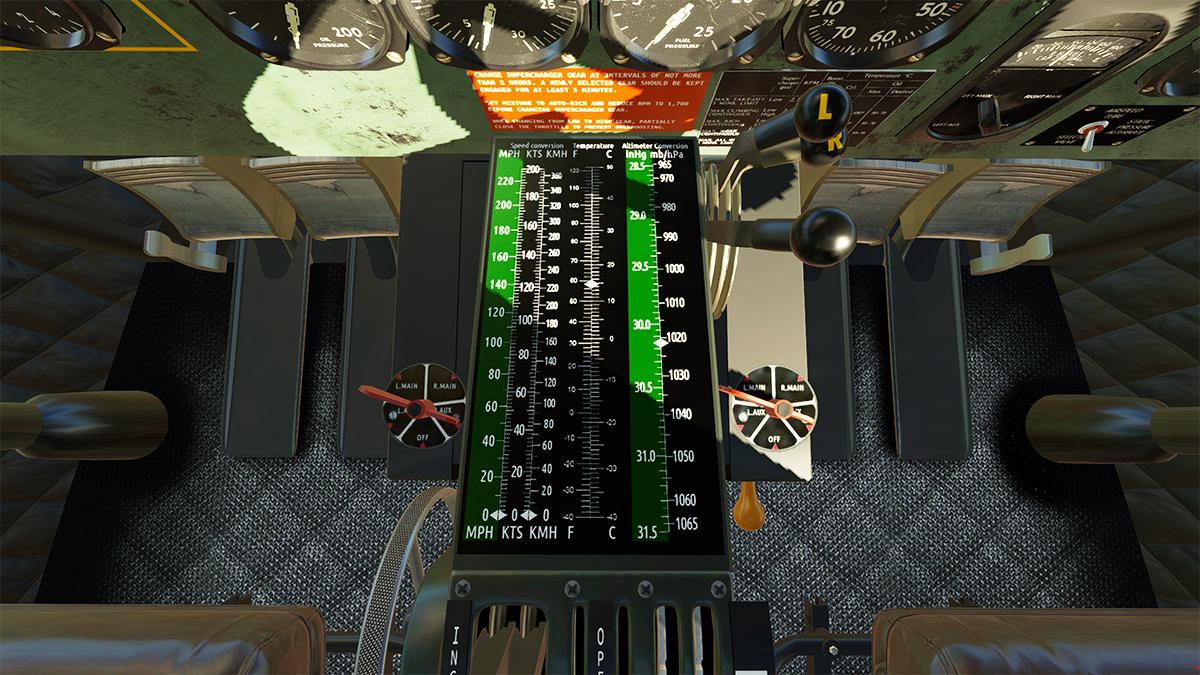
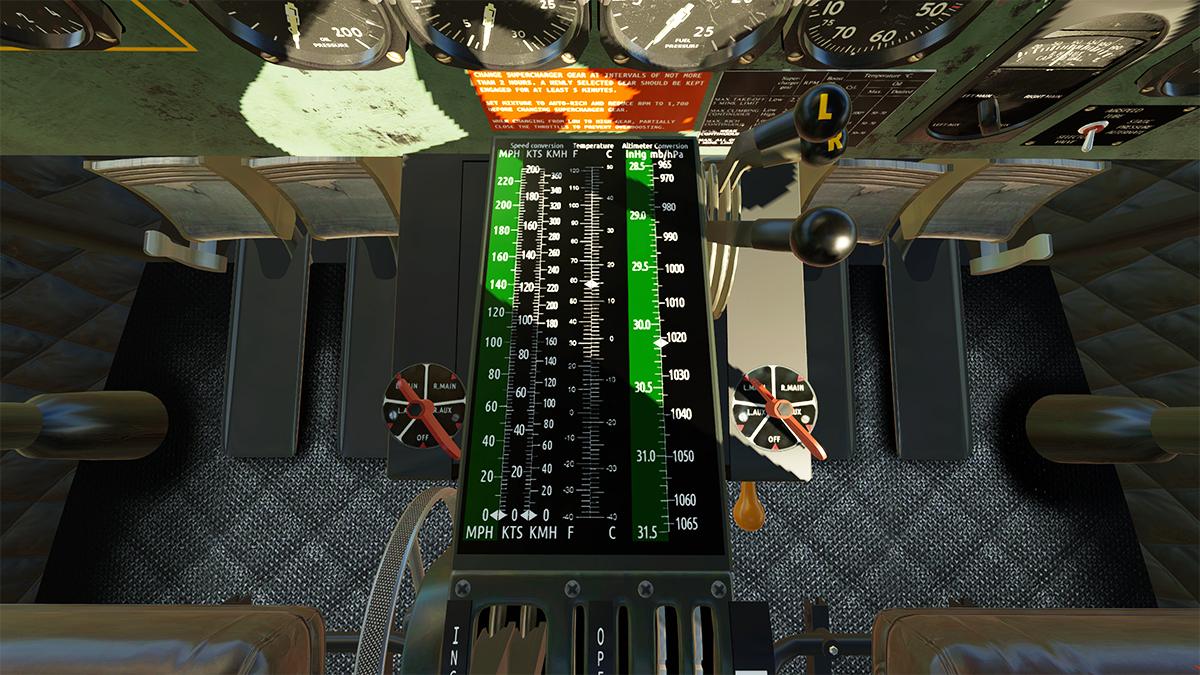
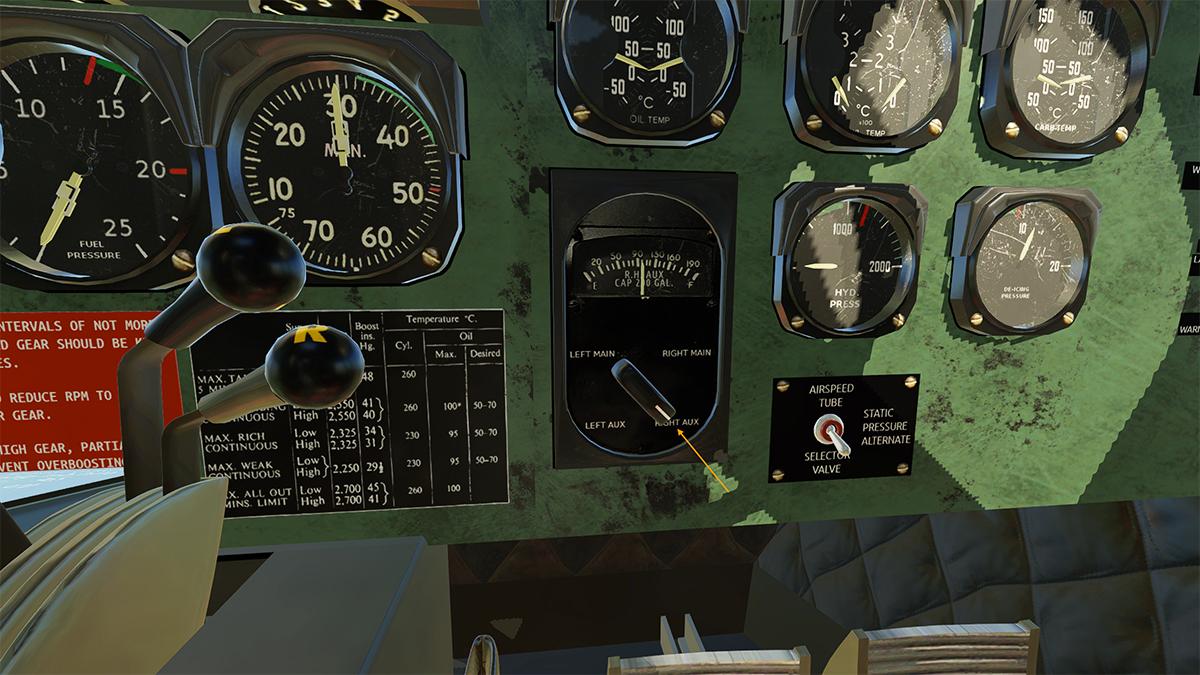
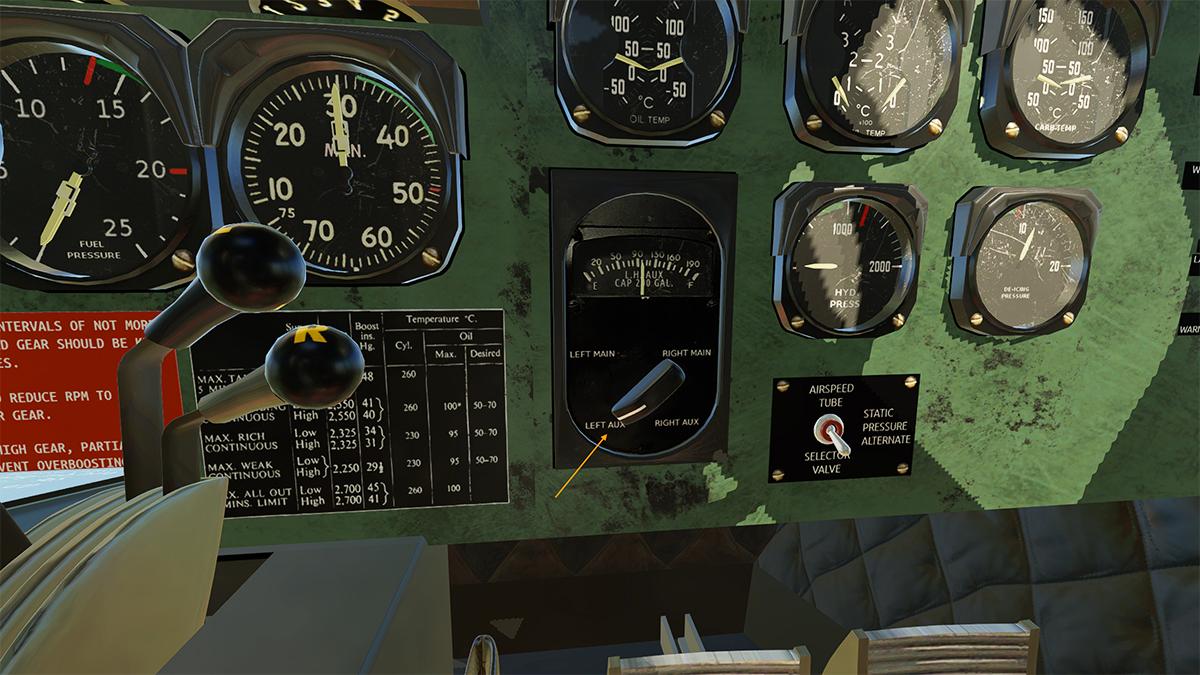
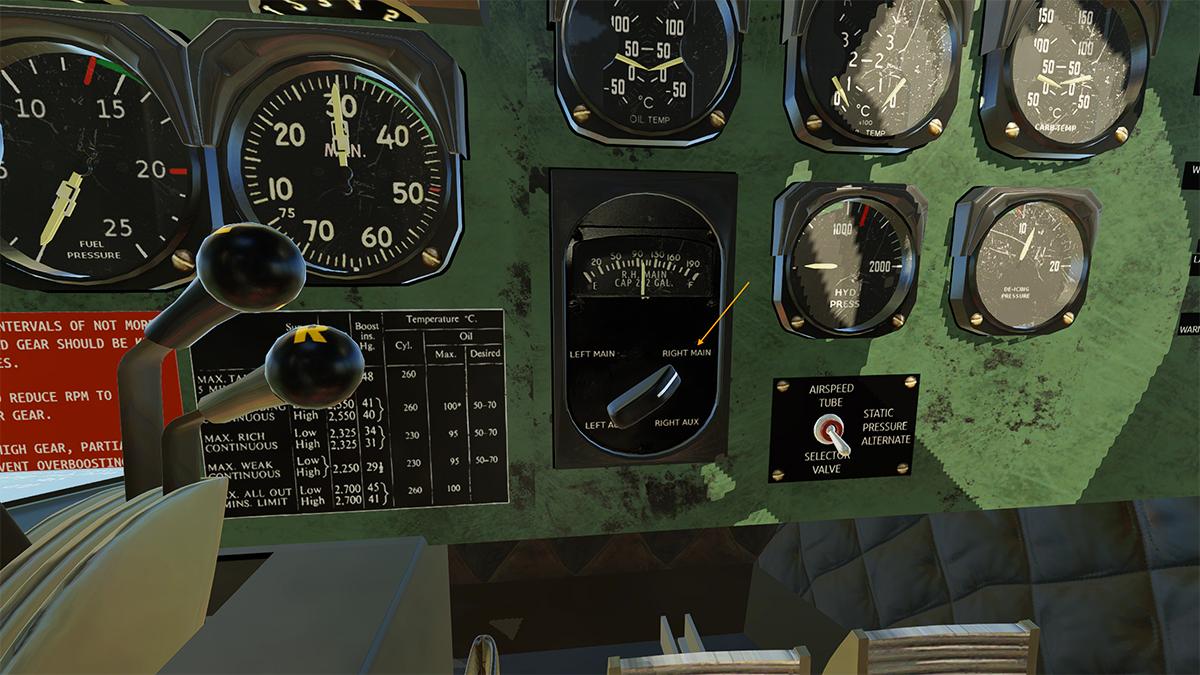
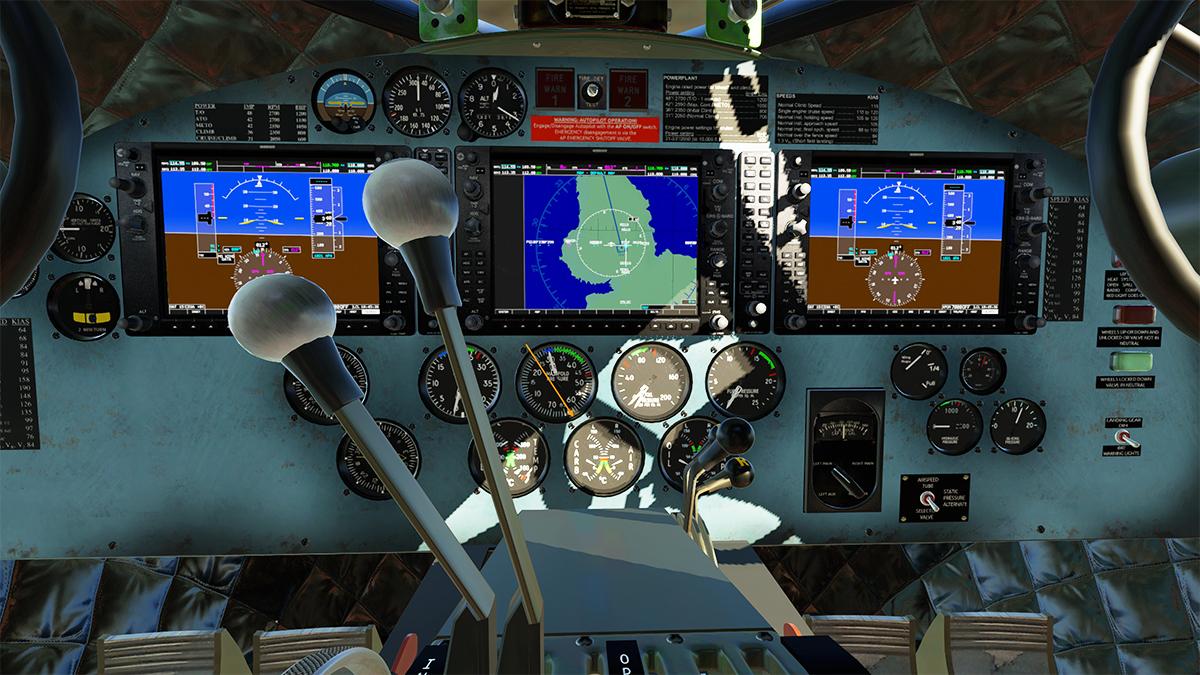
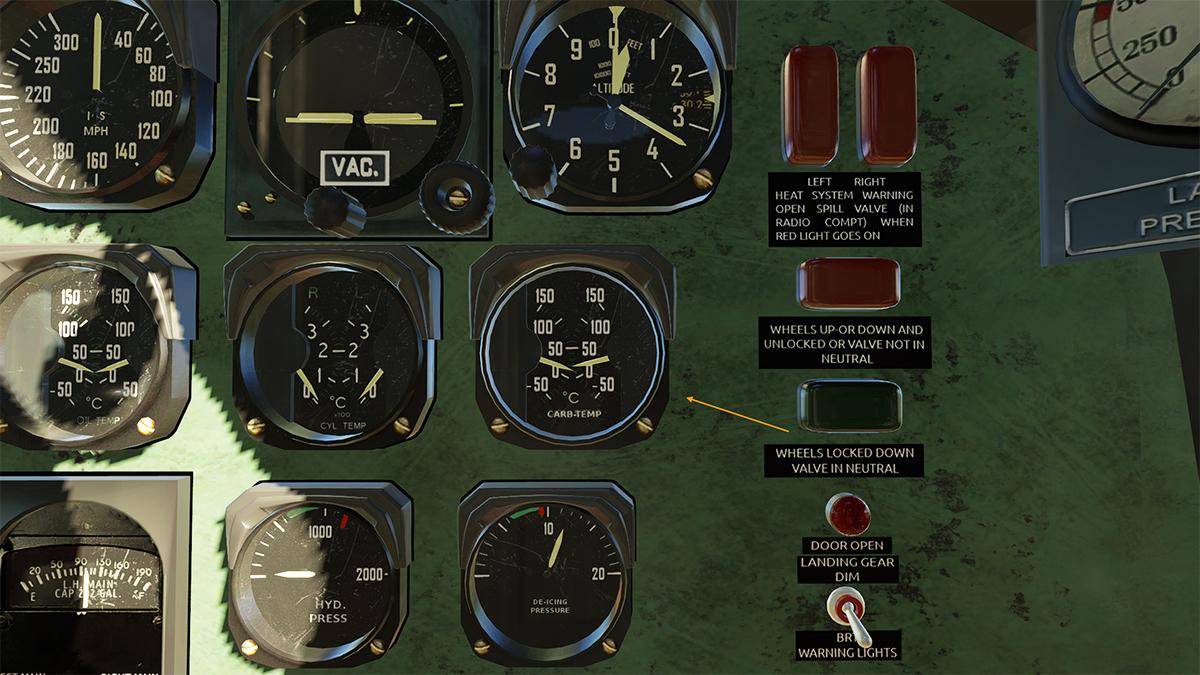
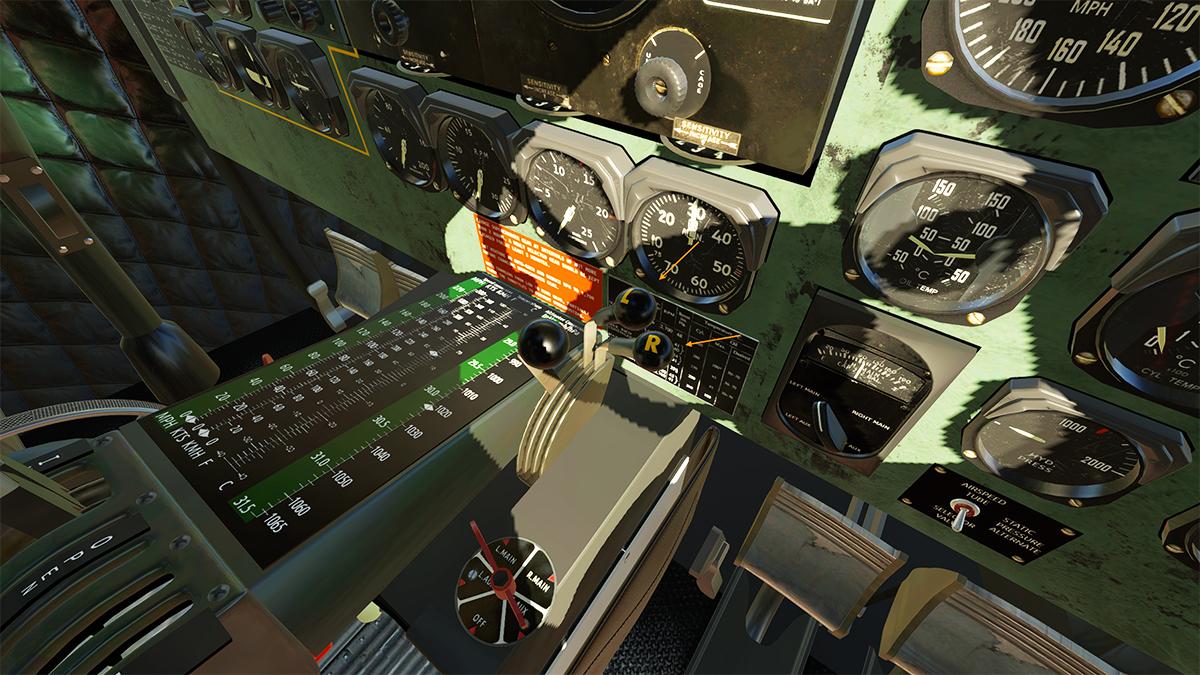
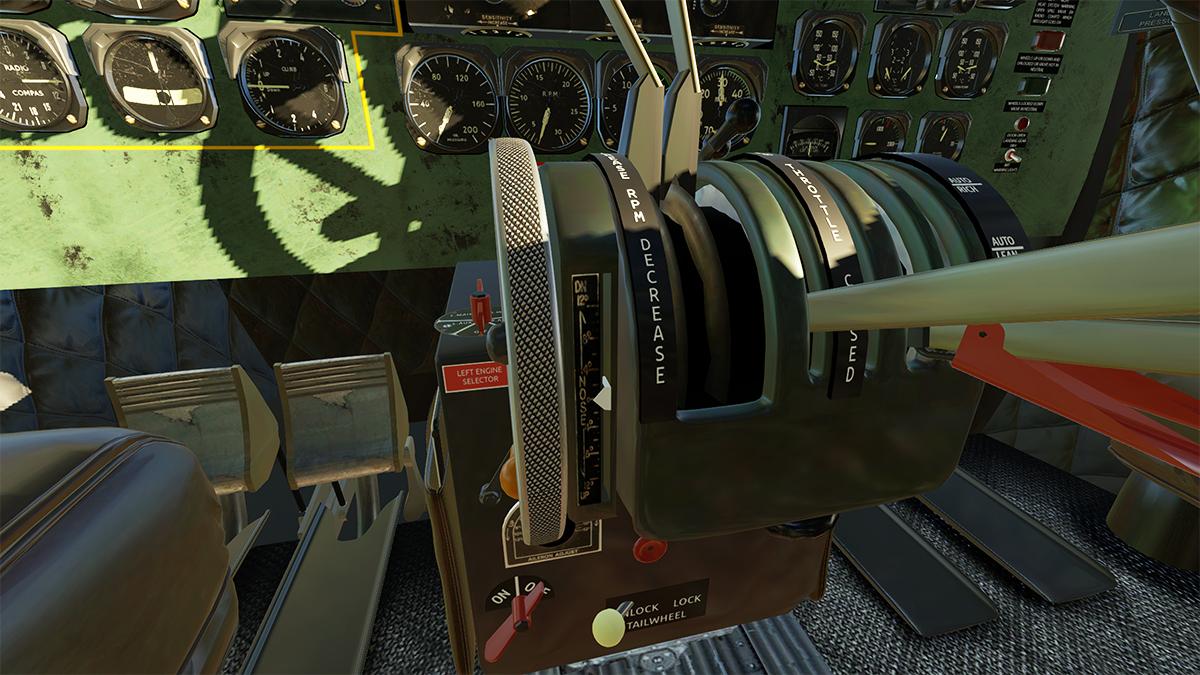
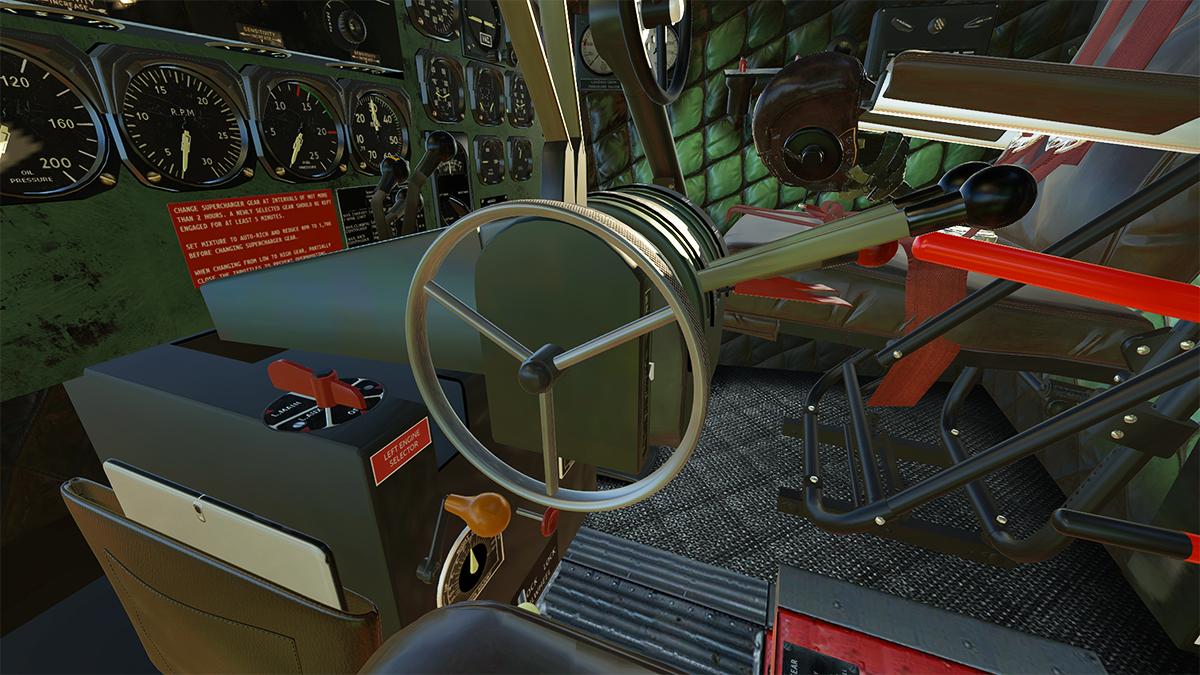
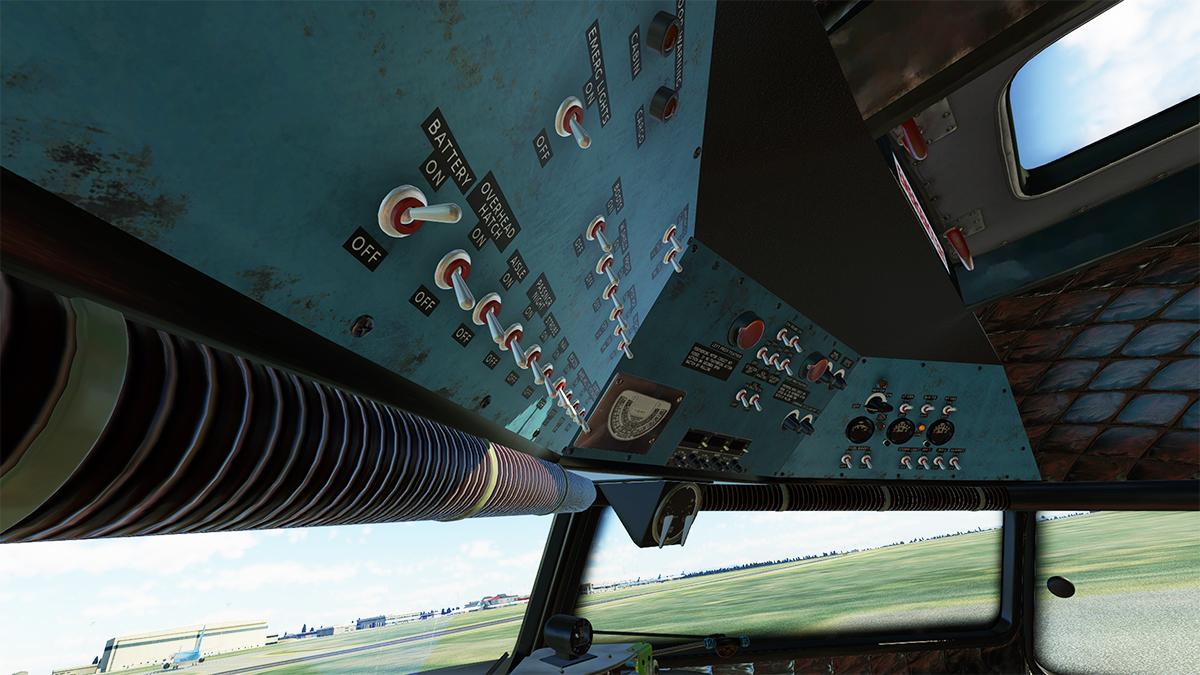
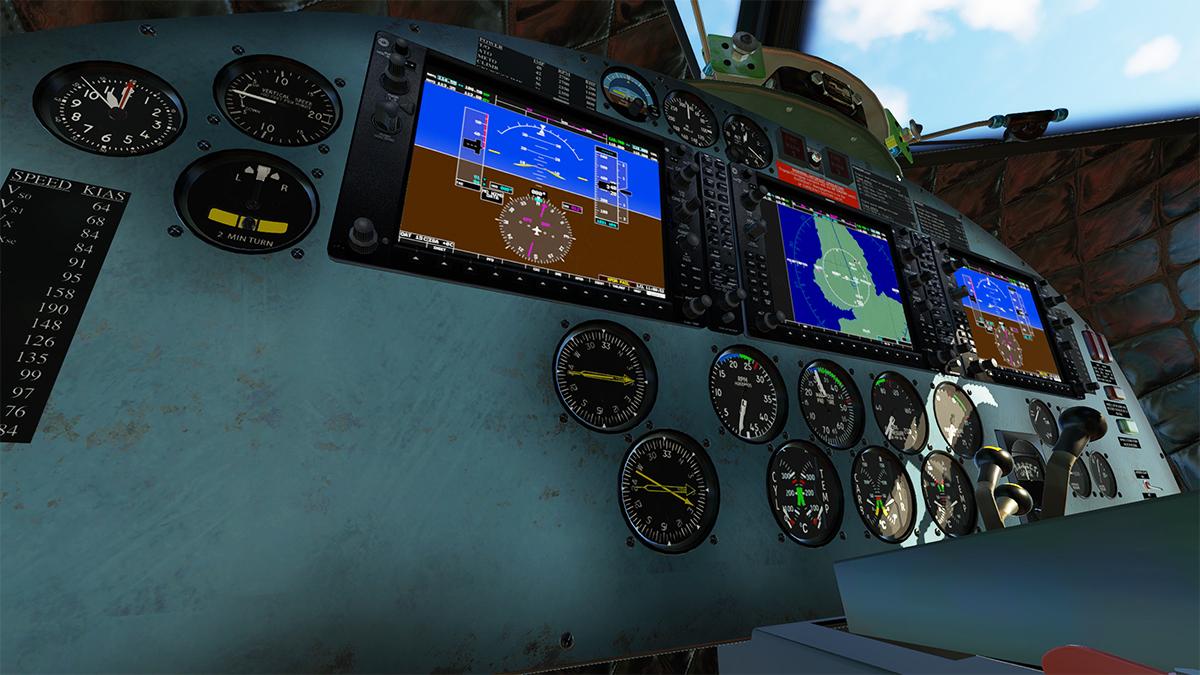
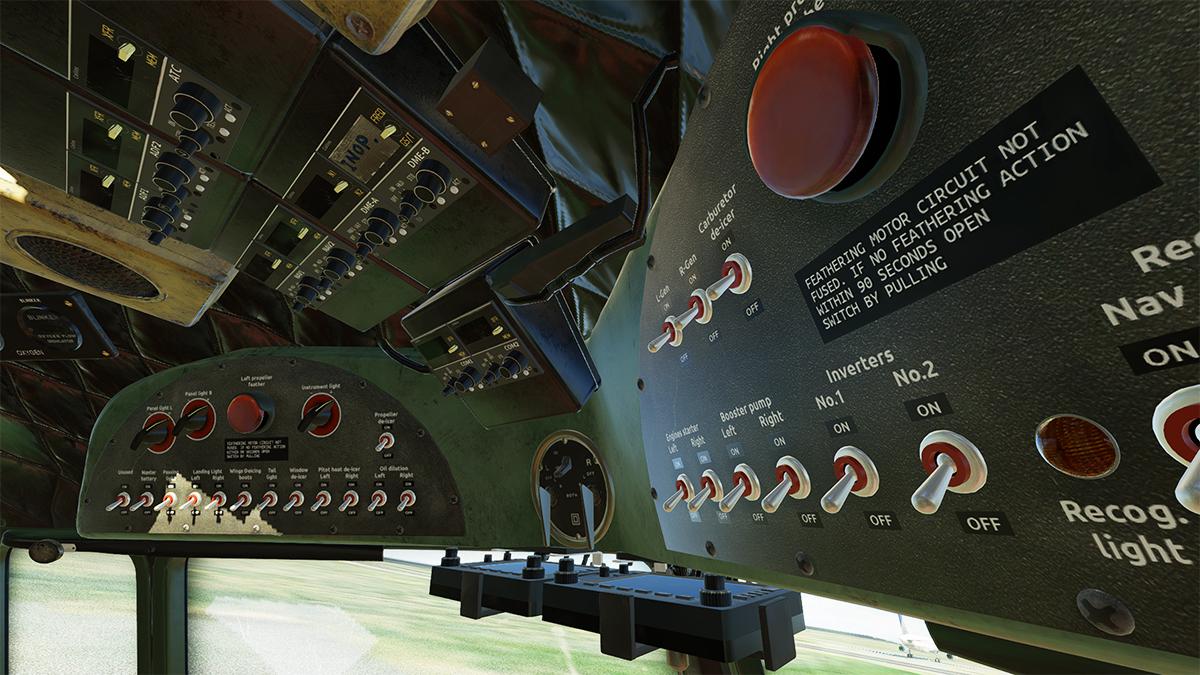
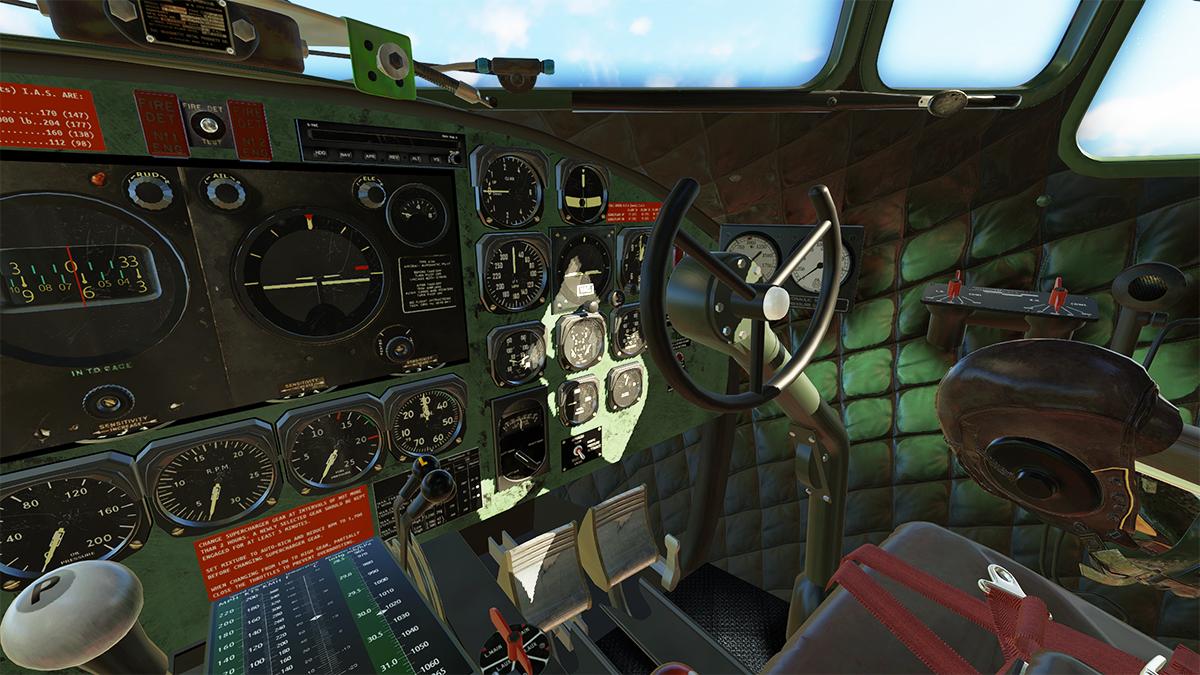
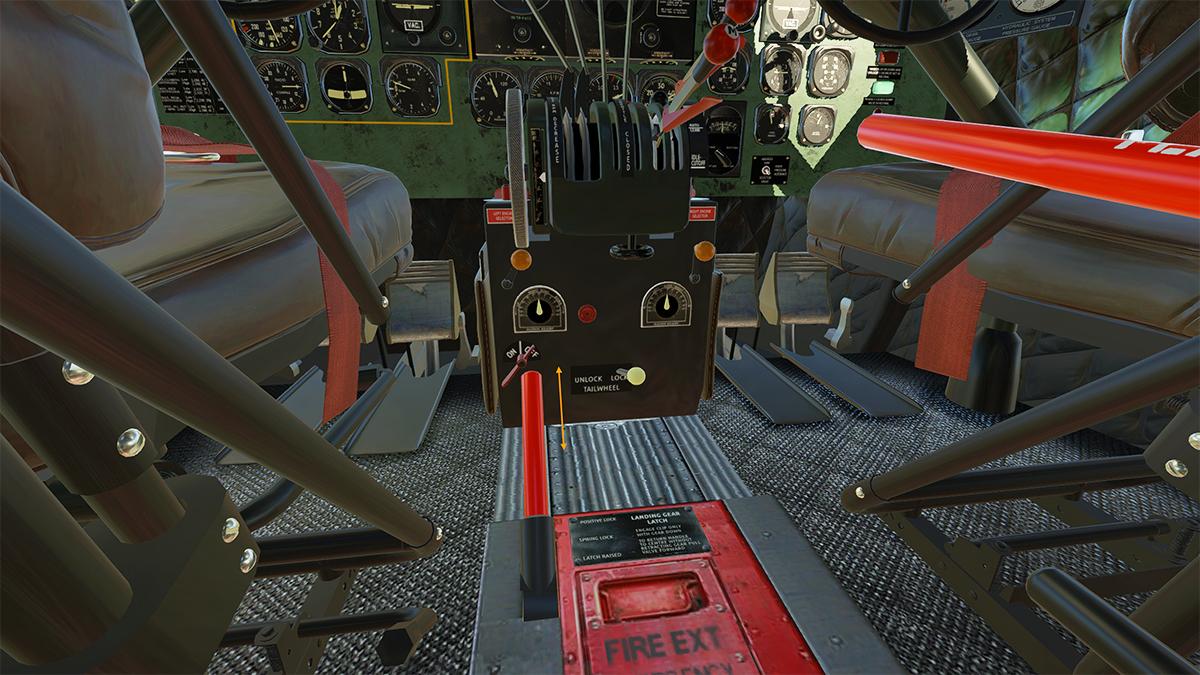
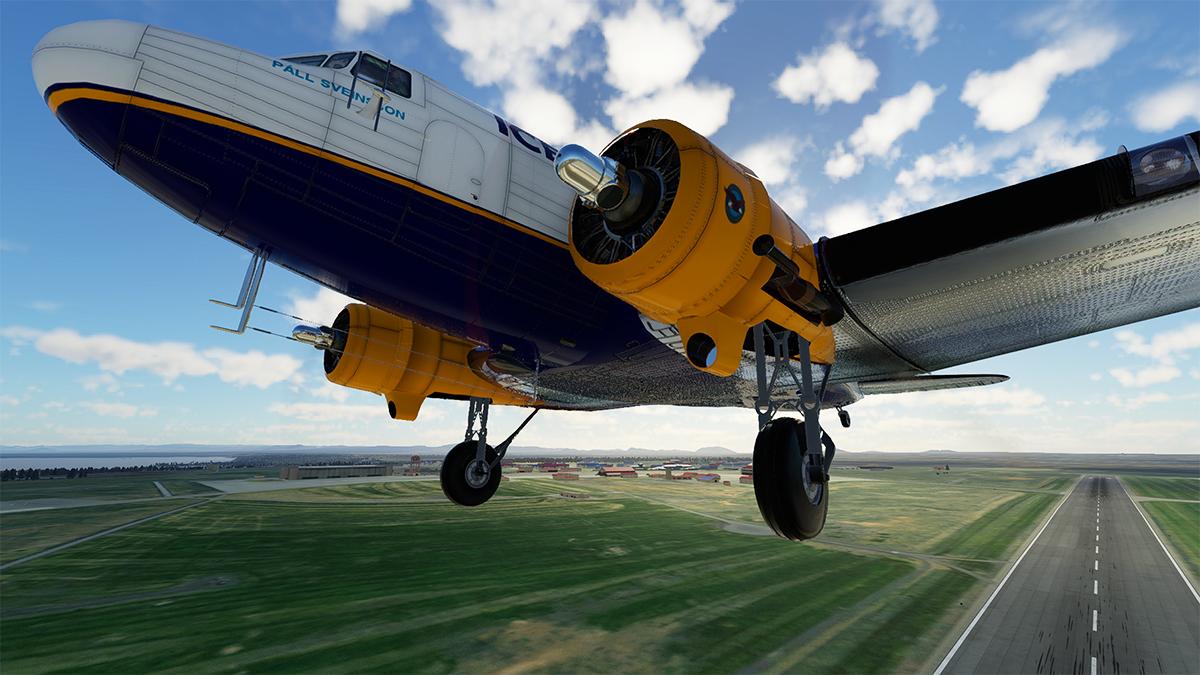
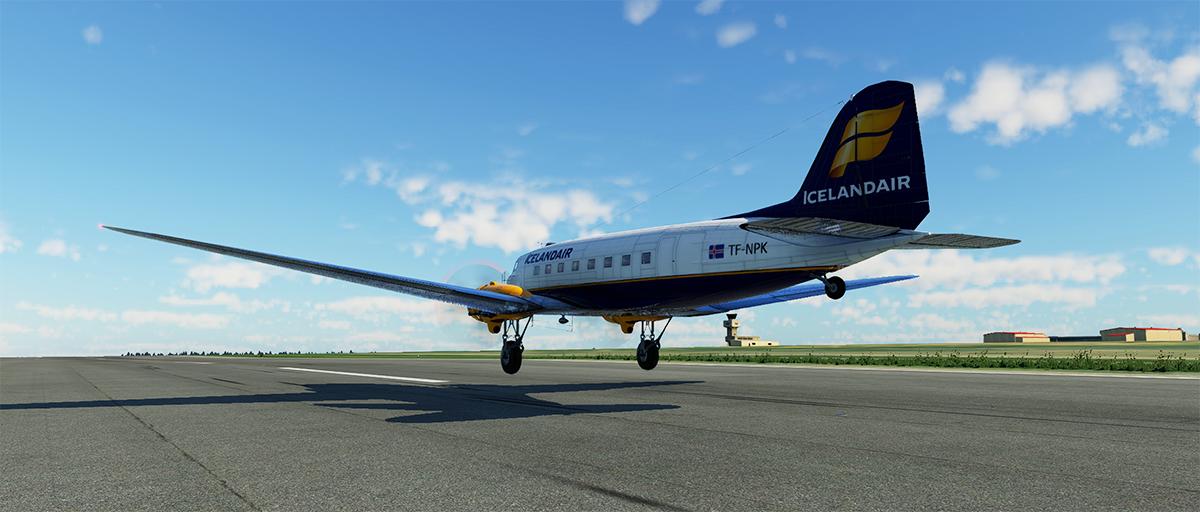
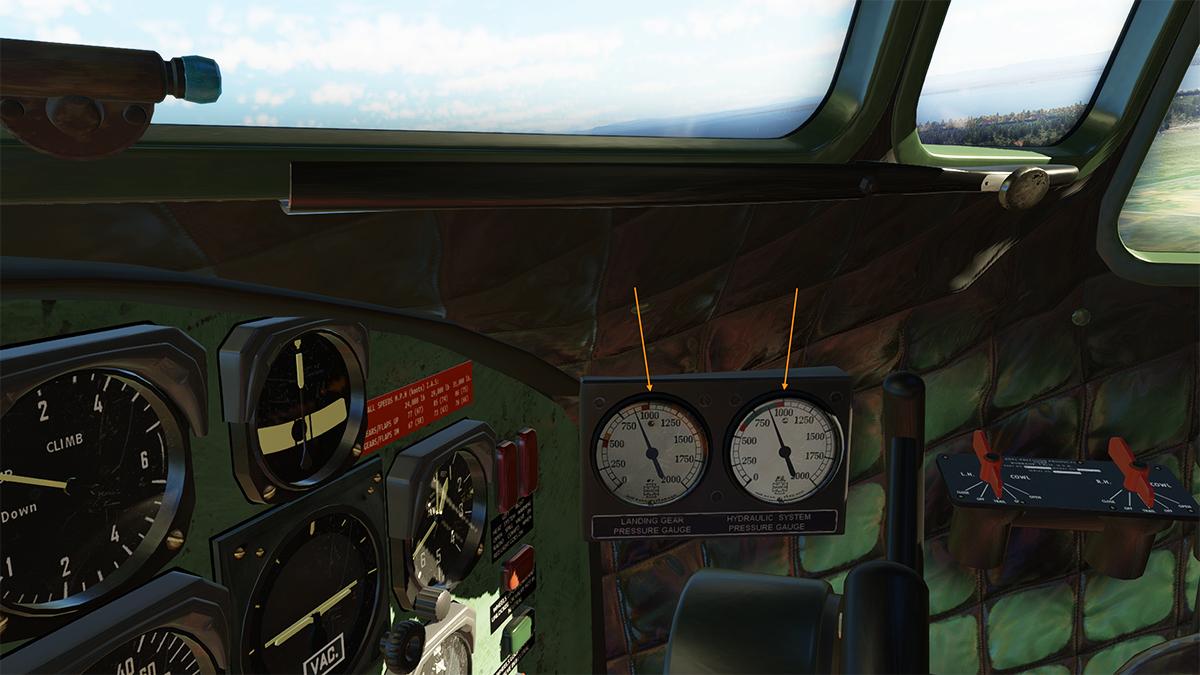
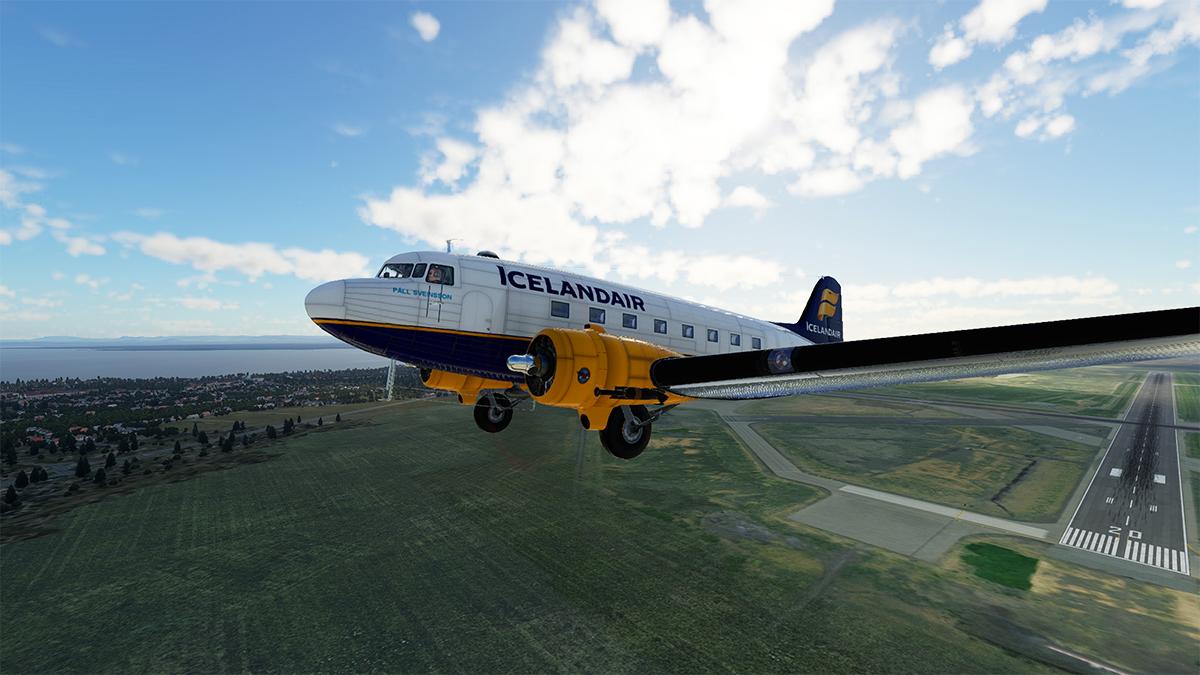
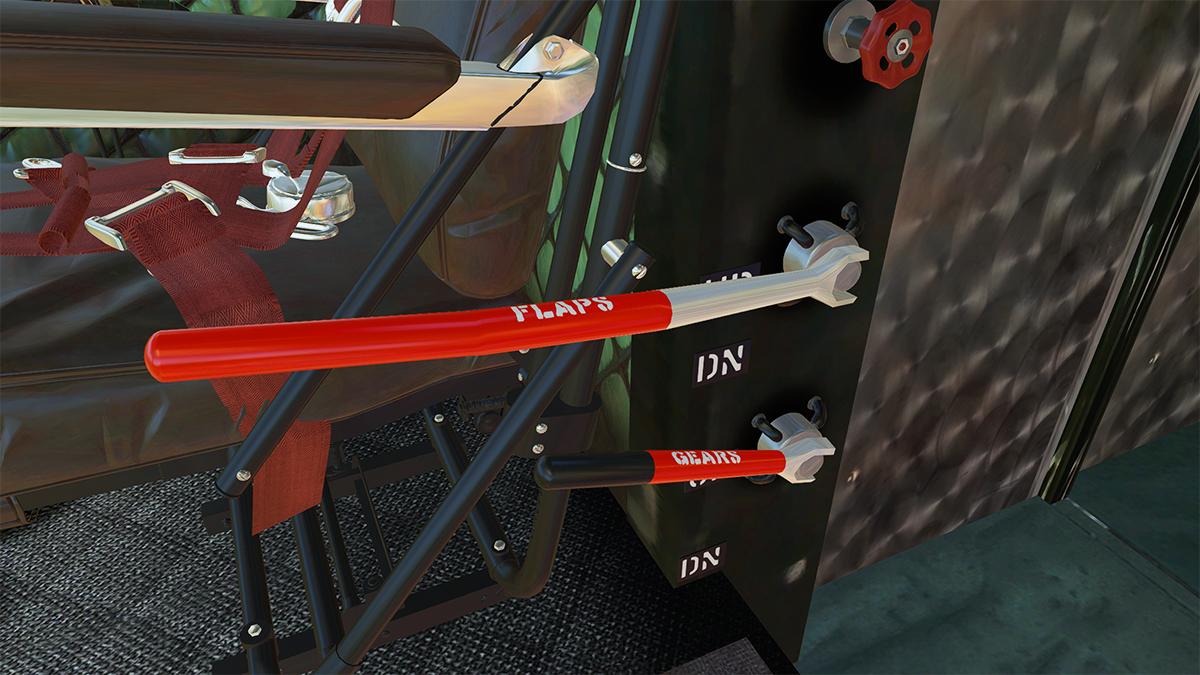
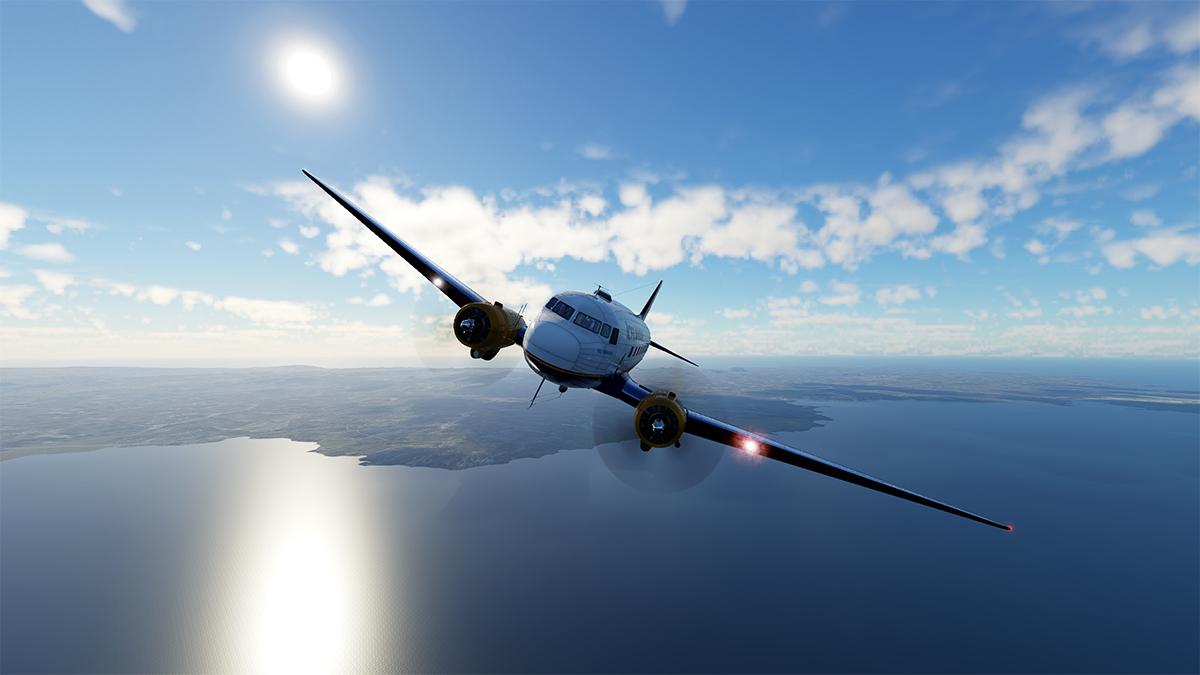
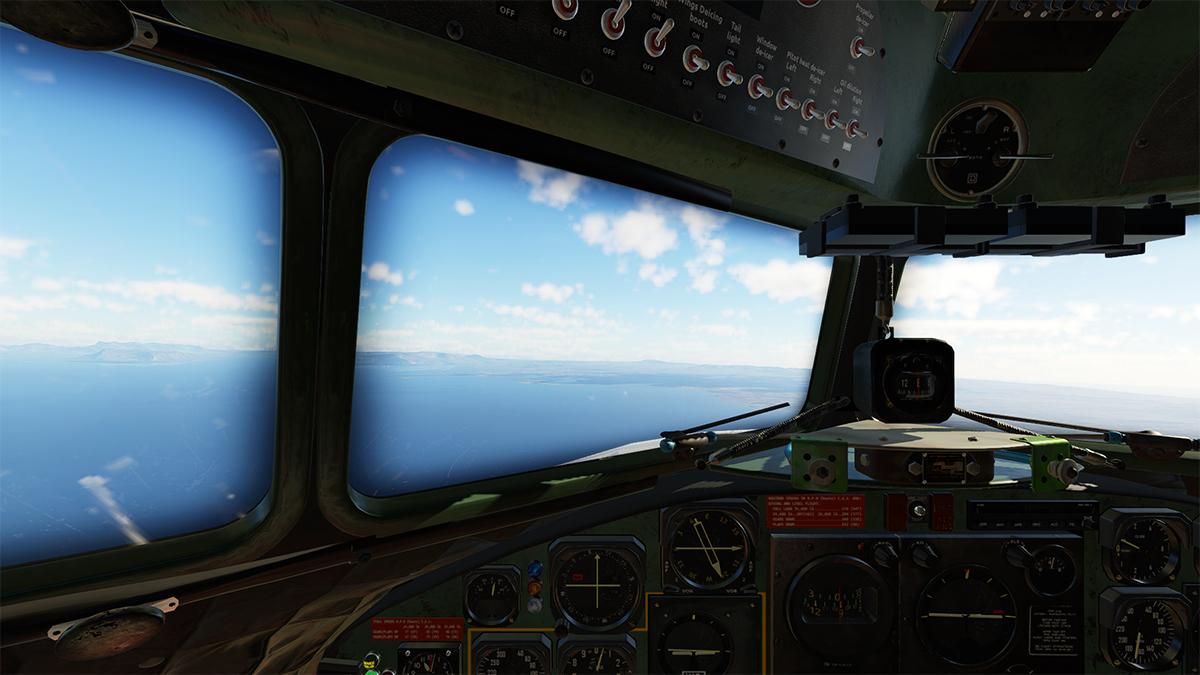
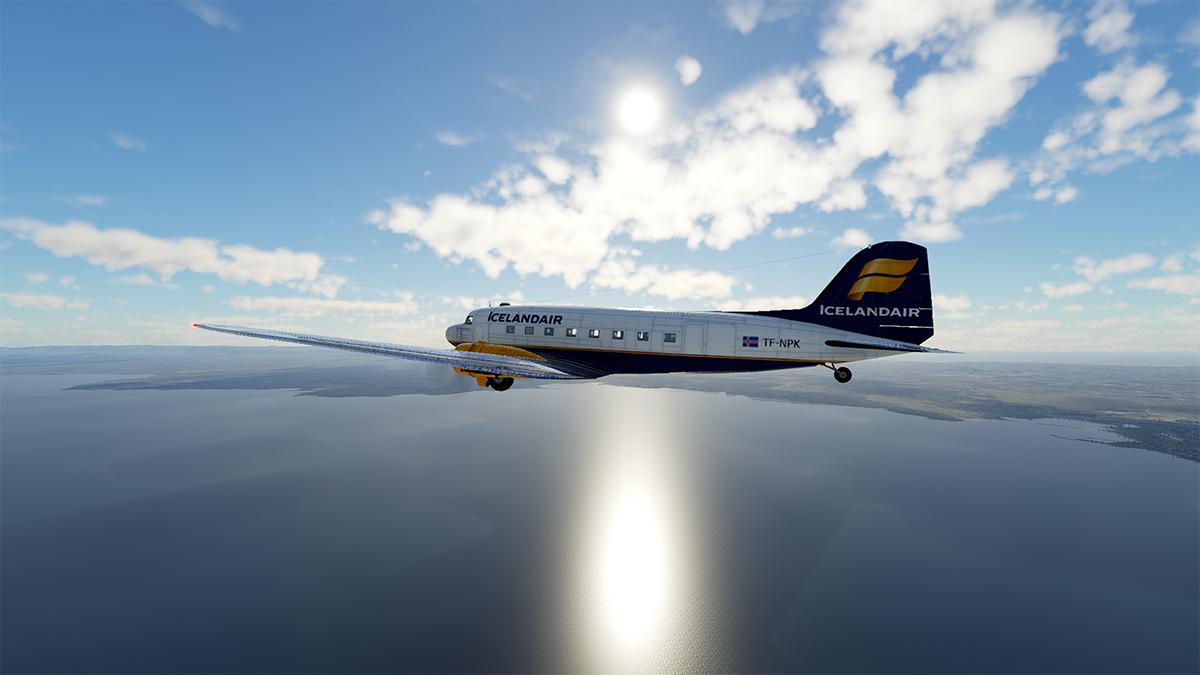
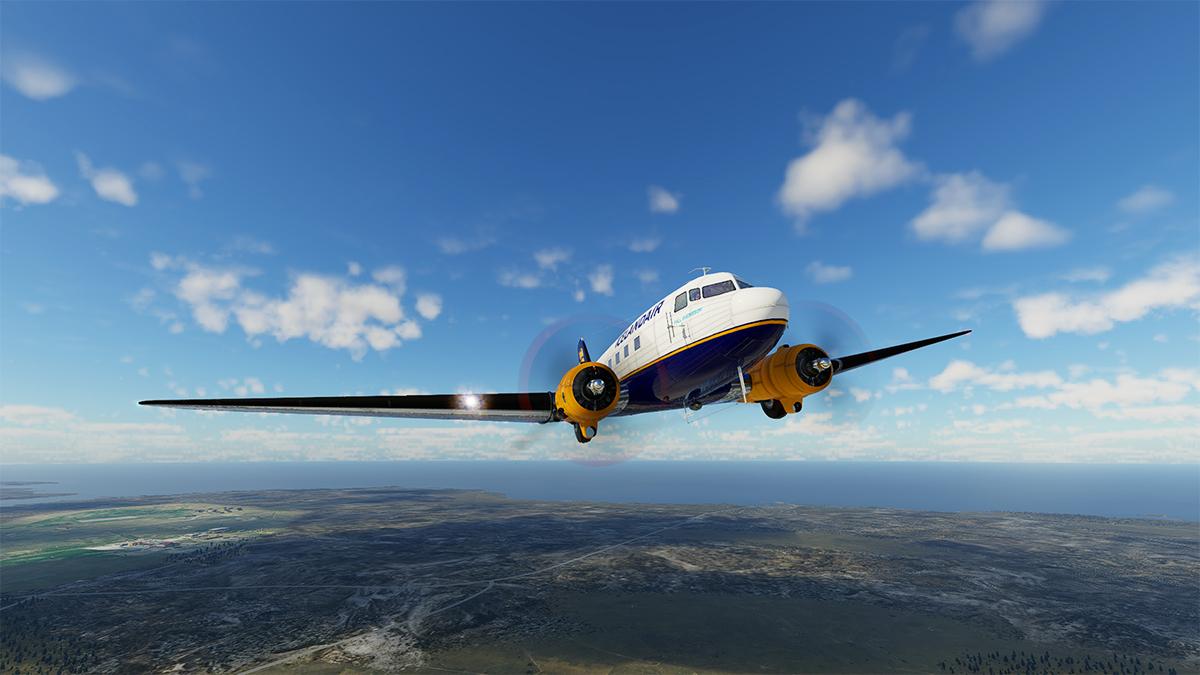
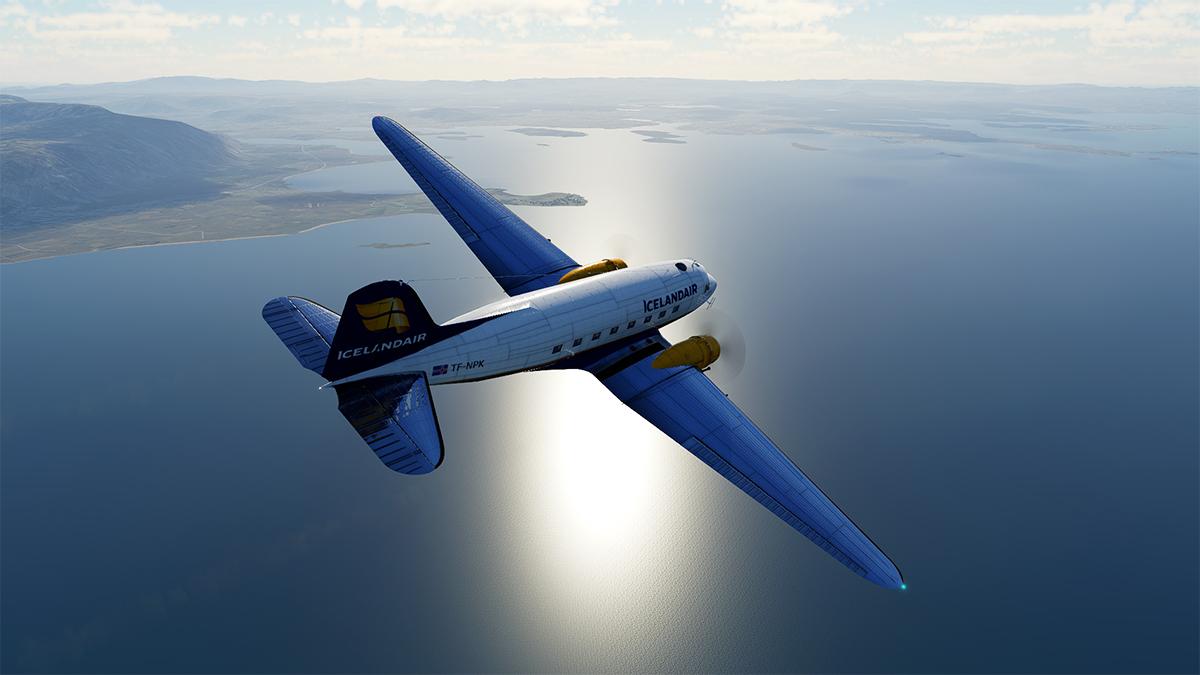
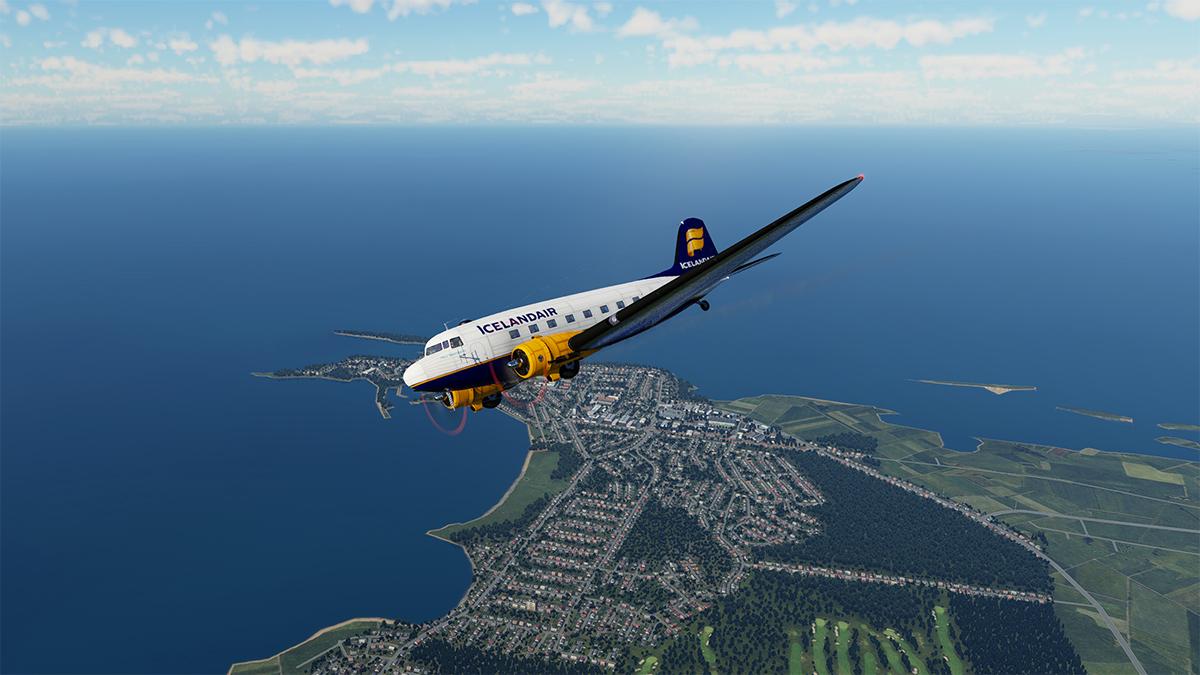
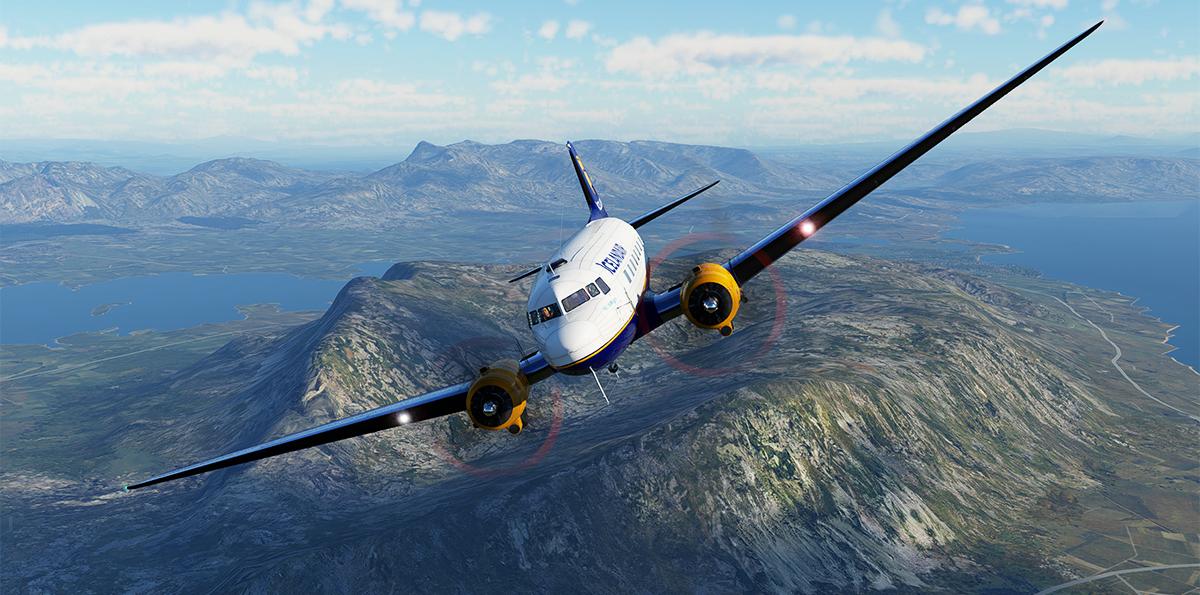
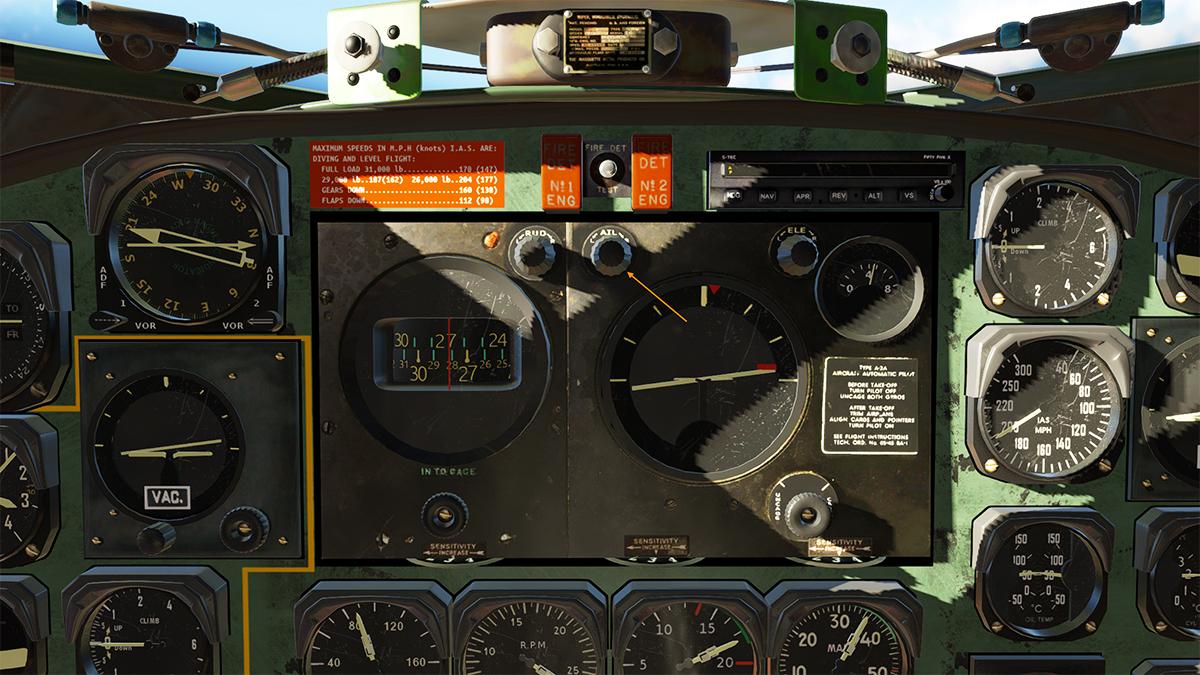
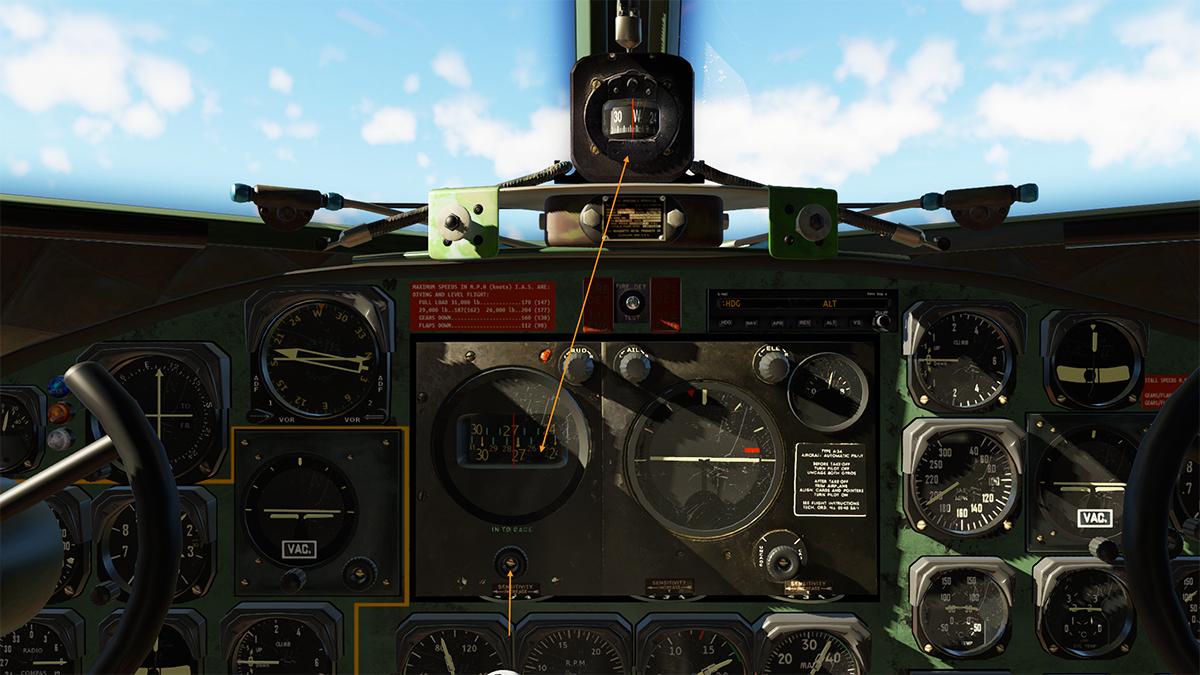
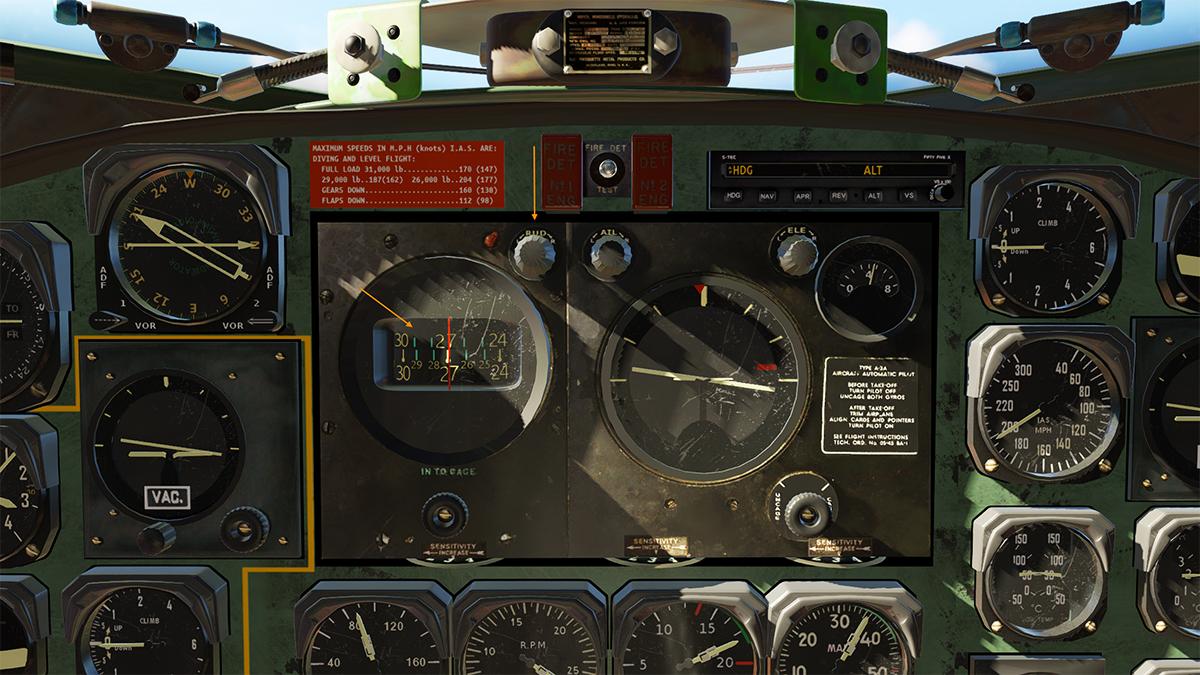
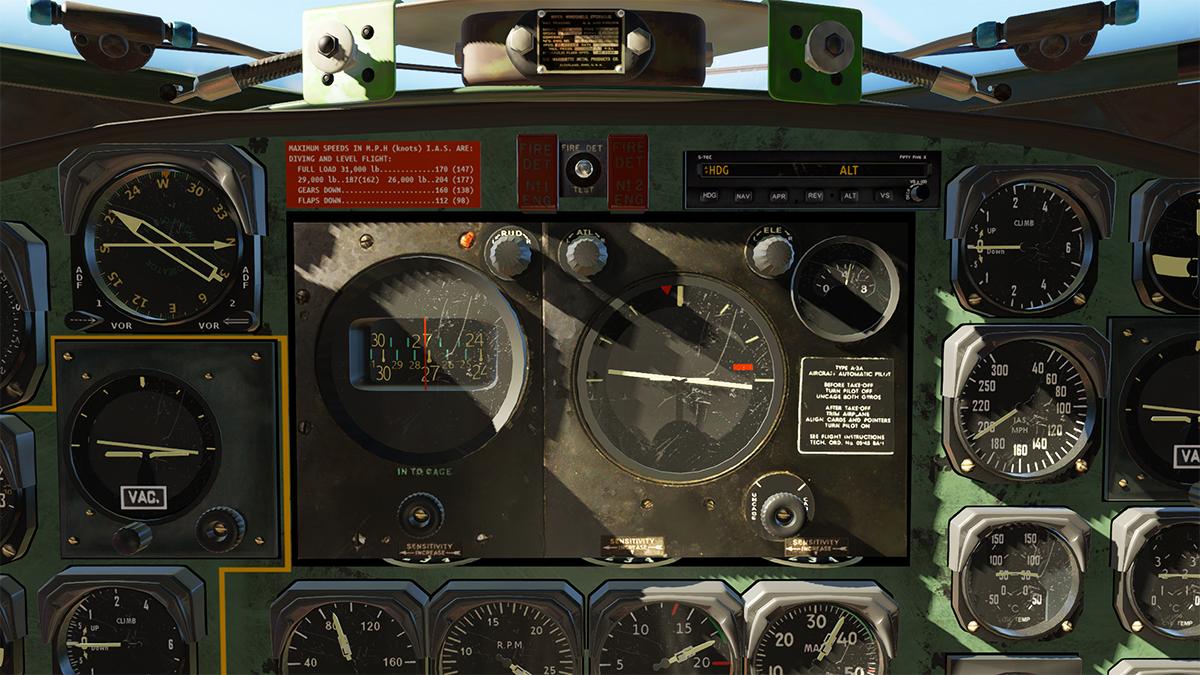
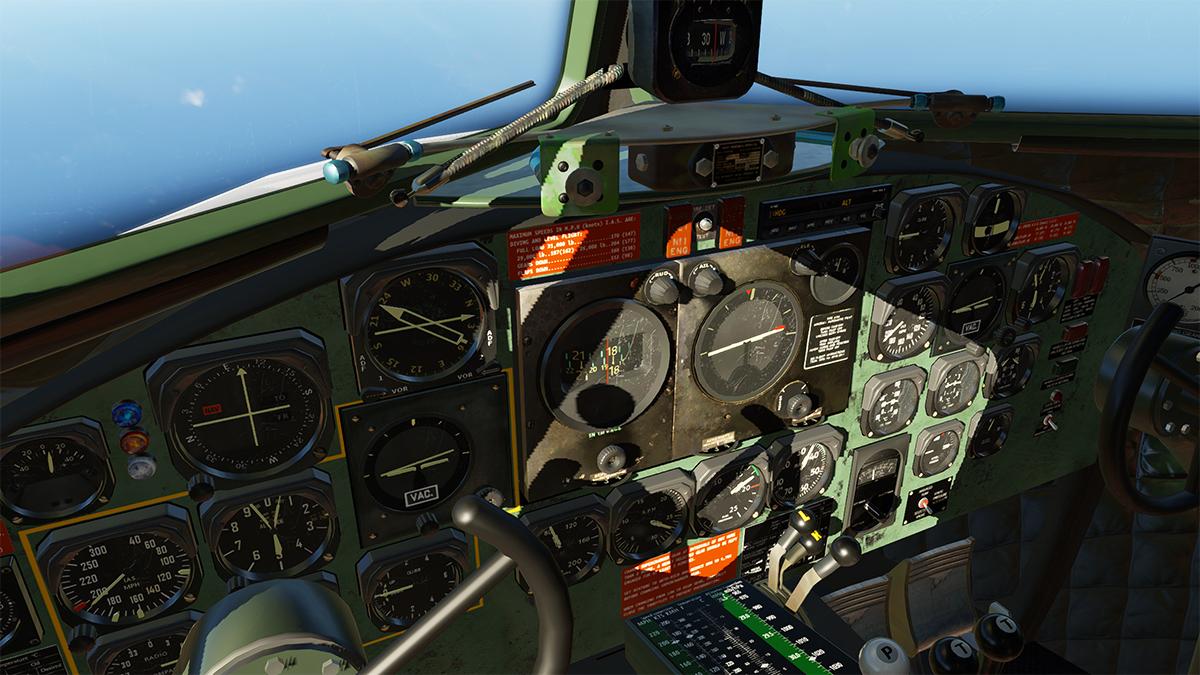
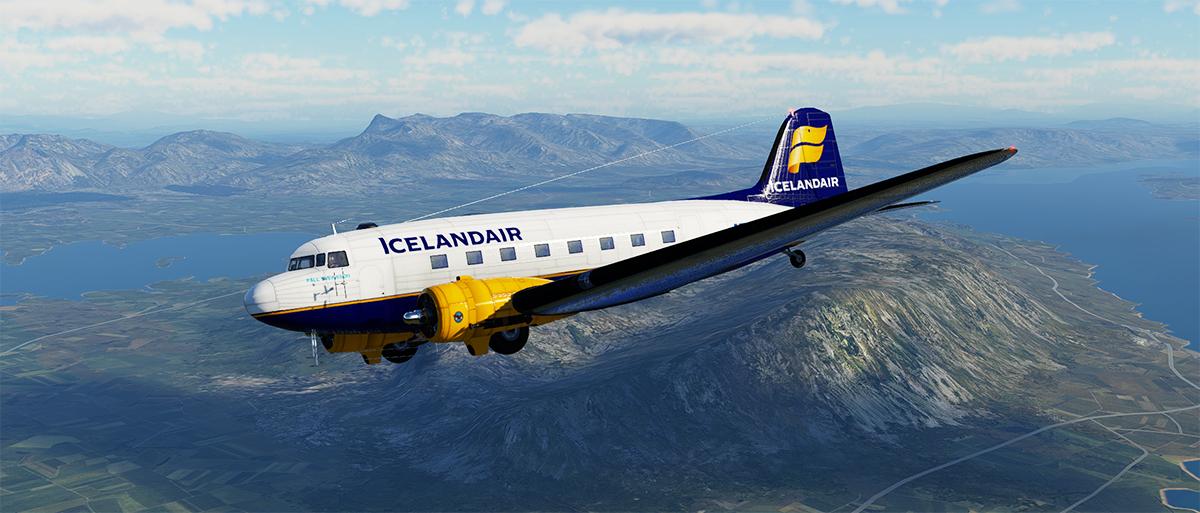
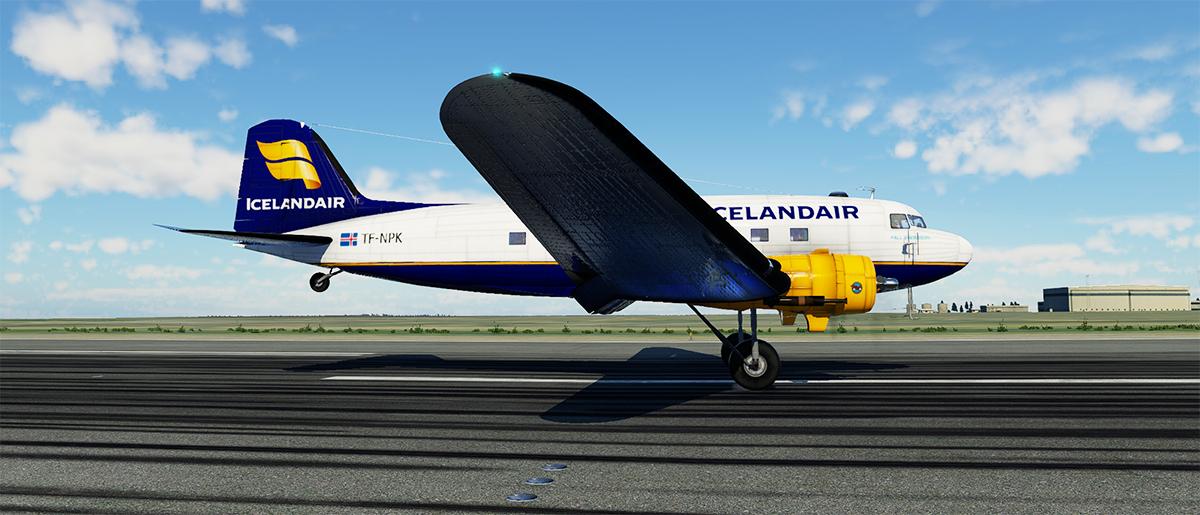
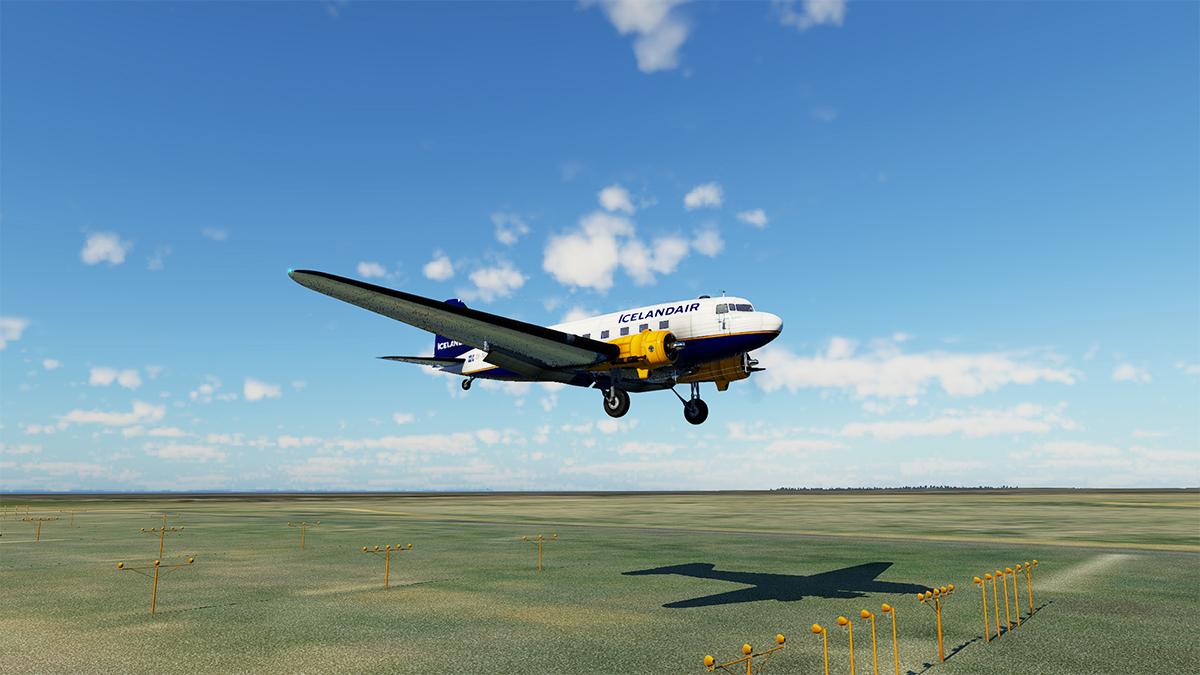
Aircraft Update : vSkylabs C-47 Skytrain v6.0b2 and DC-3 Airliner v2.0b2 Midway though 2017. Established developer vSkylabs released a classic aircraft for the X-Plane Simulator in the form of the Douglas Commercial 3, or DC-3 as it affectionately became known. The earlier release was of the C-47 variant, or the military "Skytrain" version that won World War ll. Well the aircraft had a big part in winning the logistics side of the war. But in reality the main success of the C-47 was post-war with the huge surplus of these ex-military aircraft becoming an aviation legacy that will never be repeated. The earlier vskylabs C-47/DC-3 aircraft was an analog design, but that all changed around Christmas 2022, when the aircraft was then divided into three separate variants... The original C-47 Skytrain, a new DC-3 Airliner and the forthcoming Tri-Turbo-Three, In context; VSKYLABS 'Test-Pilot': C-47B Skytrain: Highly defined C-47B simulation of the 30's-50's era; authentic WWII era cockpit, powered by PW1830-90C two speed supercharged engines, Astrodome, cargo loading, operational weights of the C-47's and more. Includes two variants - C-47B and XC-47C (float plane). VSKYLABS 'Test-Pilot': DC-3 Airliner: (this model) Highly defined DC-3 simulation, a modernized C-47A restoration, with modernized cockpit; 3-display G1000 cockpit, powered by PW1830-92 engines, passengers cabin configuration and loading system. VSKYLABS 'Test-Pilot': Tri-Turbo-Three: (Available soon) Highly defined DC-3 turbo-conversion based and inspired by the Conroy Tri-Turbo-Three conversion. The "DC-3 Airliner" split included a move to a glass Laminar Research default G1000 three display panel installation, which in my opinion is going away from the original philosophy of a pre-war designed aircraft. It is very good in this guise, but what if you still wanted the original "DAK". Well that is the original C-47B Skytrain variant, as the C-47B is a simulation of the 30's-50's era with an authentic WWII era cockpit, powered by PW1830-90C two speed supercharged engines, and the aircraft (unlike the DC-3 Airliner) is available for both X-Plane 11 and X-Plane 12. Both variants have now received updates a week apart, v6.0b2 for the C-47, and v2.0b2 for the DC-3 Airliner. There is a good 95% compatibility of the changes between the two aircraft, the other 5% is noted in separate changes to the Airliner variant in this update review. The vSkylab philosophy is that you are purchasing an ongoing project, so any aircraft you purchase is not fully completed or is completed to 100%, that is the deal you sign up for to get access to the aircraft, and all the development is free and ongoing throughout the X-Plane 12 version. These projects are under constant development: the development road-map is including flight model refinements, enhanced systems depth, additional liveries and other improvements. But first let us have a quick look at the two aircraft. C-47 Skytrain Over the years, the vSkylabs C-47 has evolved quite considerably since it's debut back in 2017, in fact not much of the internal design has survived. Some aspects I miss, like the very worn window surrounds, but overall the original design and great modeling has survived very much intact, that Dakota aspect is also still very strong. Bonuses currently is the much higher quality of the design with the changes and PBS effects, certainly now with X-Plane 12, were as the aircraft has a far more realistic feel to the eye. There are no menus with vSkylabs aircraft, so everything is accessed via "Hotspots", but they are cleverly done. The cockpit is the antique look of the post-war era, but if you have checked out the earlier C-47, it is a huge and significant difference in detail and change. The X-Plane 12 infused lighting is also a huge bonus on the overall feel and look of the iconic cockpit. The Sperry Type A-3A autopilot is thankfully still installed here, but added in is also a few mod-cons, like the S-Tec Fifty Five X autopilot, and the two Garmin GNS530 GPS units (they drop down mid-window)... another thankful retention from the original aircraft, which is the huge middle windscreen "bouncy wouncy" authentic whisky compass. Although a significant improvement over the original release, the cabin is still pretty basic in design, it could do (or is due) with another overhaul to make it more authentic like what was done to the "Airliner" variant, or a cargo aspect would be nice. DC-3 Airliner Put side by side and there are some quite considerable differences between the two aircraft variants. Externally it is the same "Dak", but in the cockpit it feels and looks very different with the Laminar G1000 Avionics in place, the panels eyebrows are different as well. It's also a greeny-blue in here, more than the older darker green diamond blanket look of the post-war aircraft. It is a taste thing, some will like the modern approach, a lot would probably like the earlier darker feel... the Laminar G1000 displays pop-out as well, but only one of each panel, for the PFD (Primary Flight Display) and the centre single MFD (Multi-Functional Display). In other changes the two GNS 530 GPS units are gone and so is the large whiskey compass, to be replaced by a smaller (non-floating) version on the top of the instrument panel, another item is the massive window de-mist piping, once on the C-47 (as an option) but removed to the DC-3 variant, personally I didn't like it? as it significantly blocked a lot of the view out of the front windows. Cabin has the different diamond padding and colour, and very realistic 3d passengers, very good they are as well. But the seats are actually the same as in the C-47. There is full review of the DC-3 Airliner release here; Aircraft Release : DC-3 Airliner by vSkyLabs Updates v6.0b2 C-47, and v2.0b2 DC-3 Airliner Common changes to both aircraft in these companion updates is with the New "Mixture and Carburetor" systems, here now replicating the C-47/DC-3 mixtures operation with better authenticity. Mixture levers are now set in 'steps' with; (Idle-)Cutoff, Auto-Lean, Auto-Rich and Emergency positions. So the text is still there, but now not just for show... they actually work with the mixture lever setting. Auto-lean and auto-rich are fully automatic modes, with separate control for each engine. To take advantage of the mixture lever settings, you have to set them to different axis modes... the Left-Engine mixture lever is set to the "Wing Sweep" axis, and the Right-Engine axis is set to the "Thrust Vector" axis... I set those settings here with the Saitek X-56 Throttle, I don't have extra levers on the add-on throttle, but only knobs, but it worked fine. You do have another option, that is to lock both mixture levers together. Press the area side-plate, and the right mixture lever knob turns yellow to signify that the levers are now locked, to unlock just press the side-plate again. In this locked guise, the left lever controls both. So the "Thrust Vector" action will now move both levers together. The lock set up however does also allow you to use both Saitek throttle levers, with the left "Throttle" setting, and the right "Mixture" setting, but you can't adjust both of the Throttles separately (you can't anyway) or the Mixture levers separately... of course any lever can be set manually, or to be used hands on. Personally I like my Throttles separate... the reason I found was the Dakota has a habit of drifting to the right over a longer distance, so a slight reduction of power on the right engine (or more power to the left engine) would keep you more on the heading. The new fuel system in these updates now allows you full control of all four tanks, feeding into each engine in separately... This is done by the cocks/valves each side of the pedestal, with each noting the L Main, R Main, L AUX, R AUX and OFF. Shown here in the OFF and MAINs running, with L-R cocks opposite, all four tanks all are accessible, here with accessing the only the L-Tank, and R-AUX. Reading any tank capacity is via a switch lower right Instrument Panel, which is totally authentic. Fixes in the update relate to the Fuel level indicator, which is now equipped with a shifting-plate, showing the designated tank in each mode, and the Fuel level indicator needle 3-d and animation has been changed to provide better a reading, and to be more accurate. But currently when feeding each engine from the Aux tanks (from the same side or opposite sides), the Aux tank with the higher remaining fuel quantity will feed both engines, until both Aux tanks are equal. Then, both tanks will feed both engines. This is an (X-Plane) limitation and changes are coming (from Laminar Research) to rectify this restriction. Fuel capacity is - Main tank (front) each - 202 U.S. galls. Auxiliary tank (rear) each 200 U.S. galls. Total each side: 402 U.S. galls, with total 804 U.S. galls fuel capacity. Carburetor air-intake heat controls now also work... Two levers top right pedestal controls the carburetor heating, for the left and right engines. The third (lock) lever is a dummy. Oddly it works back to front, forward is COLD, rearwards is HOT, or the rear selection brings the heated air from around the cylinder heads into the induction system to clear the ice, or for running in very cold temperatures. Carb heat is shown far right centre Instrument Panel C-47, and lower dead centre Panel DC-3 Airliner. What we are talking about here are authentic or realism in these operations. Yes a lot of aircraft have the same options, but these systems are created to be very authentic to the operation of the DC-3. The huge pitch trim wheel has been totally redone, or re-modeled to be more authentic to the real one. I personally would like more dirt, wear and tear on the wheel, it is supposed to be over 80 years old, but it looks like it came out the spares store yesterday. The cockpit PBR (Physically based rendering) and tone has been updated in both aircraft, bringing it up to X-Plane 12 specifications. We are now in X-Plane 12.06 and that comes with the better lighting adjustments, it shows in here as the detail now just jumps out at you... a far cry from the past vSkylabs cockpit environments. (note we are now actually in XP12.07r1, but it was in X-Plane 12.06 that the lighting adjustments were made). It's a quirky machine to fly is the DC-3/C-47... It is always a good idea to do a quick look through the (very explainable manual) in what is what, and how all the quirks work. Like the gear... as it is a two-operation, operation. You have to unlock (or lock) the gear up or down. This is done by the lever on the floor, before you can raise or lower the undercarriage. You also have to check (via the large Hydraulic Pressure gauges) if the pressure is working for gear operation. If all fails there is a manual gear pump to do the action, it is set behind the cockpit. There is also the two engine-driven pumps to operate the vacuum system. They provide air suction for the operation of the artificial horizon, directional gyros and turn indicator. Check suction indicator on automatic pilot instrument panel for vacuum indication of 3375" ti 4.25". Again very authentic to the post-war aircraft. It's a tricky aircraft to fly as well. You use a lot of rudder movement on takeoff to keep control, mostly far worse are the exaggerated movements required once the tail lifts. In the air it is a lot to handle as well, but you will soon get the feel of this very big taildragger design. Once you settle the "Dak", then it comes into it's own... but flights are usually long, because they are low and slow by modern, even regional propeller aircraft standards. You get a Maximum speed of 200 kn (230 mph, 370 km/h) at 8,500 ft (2,590 m), a cruise speed around 180 kn (207 mph, 333 km/h). But the range is excellent at 1,370 nmi (1,580 mi, 2,540 km) (maximum fuel, 3500 lb payload), but you get there very slowly, the Service ceiling is 23,200 ft (7,100 m), or regional propeller driven aircraft altitude... climbing is with a Rate of climb: 1,130 ft/min (5.7 m/s), but usually around 1,000 ft/min. The odd thing is I have had some really brilliant epic Journeys in this aircraft (maybe because they took so long), but thoroughly enjoyable. Maybe this is why I'm a little bit defensive on in there being too many changes away from the original concept of the DC-3. The Sperry Type A-3A autopilot is something I love. So adding in the S-Tec is going against my grain. Saying that it works very well, the Sperry is also very tricky to use... If connected to the S-Tec then the heading is adjusted by the RUD (Rudder) knob and the upper compass drum, but tricky is the alignment of the heading as the lower compass drum is adjustable... ... so the lower compass drum needs to be aligned with the main whisky compass. You do this by pressing the centre of the lower adjustment knob, known as "Cageing" or Cage, and that will align the two compasses together. If the lower drum is out of alignment, it gets seriously confusing on where your heading actually is, or set. If you want fly on the Sperry alone you still can. And the heading is adjusted manually by moving the AIL (Aileron) knob to bank the aircraft to the new heading and then adjusting it back again to keep the heading. In both adjustments the heading can still be very vague, but as noted... adjusting the throttles or power outputs on the engines can keep you on the heading a bit tighter. Odds in the updates includes a better (or brighter) tail beacon, the landing/taxi lights also now have that X-Plane 12 flare look as well... ... DC-3 Airliner only changes include Fuel pumps sounds tuneups, which now have reduced intensity (sounds overall are excellent). Also the DG sync, and a manual sync is now possible with the use of the sync-knob. Back at Keflavík BIKF, and I'm on approach. I'm not going to say the DC3 is an easy aircraft fly, because it isn't, even demanding. It takes skill to get it all right, and is a big challenge to your perspective. But that is also the attraction, the wanting to fly the aircraft again and again... .... my advice is to get in there, stay in there and learn it thoroughly. The systems, the odd handing traits, and yes... even do a lot of practise. But when the aircraft comes to you, you'll be glad you did all the time and effort... it is an authentic all round experience. Summary vSkyLabs have updated their C-47 and DC-3 Airliner to versions v6.0b2 for the C-47, and v2.0b2 for the DC-3 Airliner. This is after the earlier three way split of the original 2017 release of the C47/DC3 into three different variants; C-47 Skytrain, DC-3 Airliner and the coming Tri-Turbo-Three. The update covers about a good 95% compatibility of the changes between the two aircraft, the other 5% is noted in a separate change to the Airliner variant in this update review, these include different FMOD pump sounds and DG - Sync. The main changes are with new mixtures, carburetor system algorithm and mixture control is now also fully differential. Fully automatic. Mixture levers have now working detents (steps) for 'cutoff', 'auto-lean', 'auto-rich', emergency, and all auto-modes are fully automatic. New fuel system now allows to feed each engine from any of the four tanks, and the Carburetor heat system and levers are now also operable. Both aircraft have a lot of attention on the PBR (Physically based rendering) and tone of the internal areas to make them ultra realistic. It's sweet set of updates to an iconic aircraft. There is as noted a very authentic feel to these pre-war designed aircraft, with a few modern twists in the systems. My preference is still the analog C-47, it recreates the era, and has that Type A-3A autopilot as an added attraction. In X-plane 12, with it's more advances lighting, effects and features.... the original release C-47/DC-3 feels very far away now and the aircraft with it's current updates reflect that aspect. Go low and slow for a long flight, and you will love the "Dak" in all it's post war glory... it's an excellent simulation of the most iconic aircraft in the world. Currently both the vSkylab's C-47/DC3 Airliners are 50% off in a sale... ___________________________ The C-47 Skytrain v6.0b2/DC-3 Airliner v2.0b2 by VSkyLabs Flying Lab Project is NOW available! from the X-Plane.Org Store here : VSKYLABS C-47 Skytrain Your Price: US$34.95 Currently on sale for $17.45 or 50% OFF. Requirements X-Plane 12 or X-Plane 11 Windows, Mac or Linux 4 GB VRAM Minimum - 8 GB+ VRAM Recommended Current version: 6.02 (September 14th 2023) VSKYLABS DC-3 Airliner Your Price: US$34.95 Currently on sale for $17.45 or 50% OFF. Requirements X-Plane 12 Only (not compatible with X-Plane 11) Windows, Mac or Linux 4 GB VRAM Minimum - 8 GB+ VRAM Recommended Current version: 2.0b2 (September 19th 2023) ___________________________ Review System Specifications Windows - 12th Gen IS1700 Core i7 12700K 12 Core 3.60 GHz CPU - 64bit -32 Gb single 1067 Mhz DDR4 2133 - PNY GeForce RTX 3080 10GB XLR8 - Samsung 970 EVO+ 2TB SSD Software: - Windows 11 Pro - X-Plane 12.07b1 (This is a beta review). Plugins: Traffic Global - JustFlight-Traffic (X-Plane.OrgStore) US$52.99 : Global SFD plugin US$30.00 Scenery or Aircraft - BIKF - Airport Keflavik by Aerosoft- (X-Plane.OrgStore) - US$19.20 _____________ Update Aircraft Review by Stephen Dutton 23rd September 2023 Copyright©2023: X-Plane Reviews (Disclaimer. All images and text in this review are the work and property of X-PlaneReviews, no sharing or copy of the content is allowed without consent from the author as per copyright conditions) All Rights Reserved
1 point