

Stephen
-
Posts
2734 -
Joined
-
Last visited
-
Days Won
355
Content Type
Profiles
Forums
Articles
Posts posted by Stephen
-
-

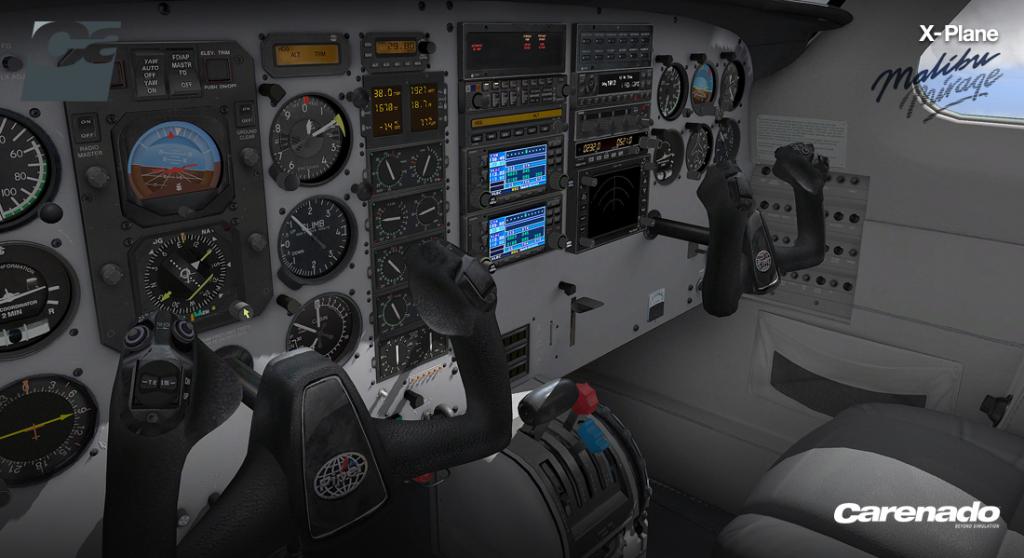
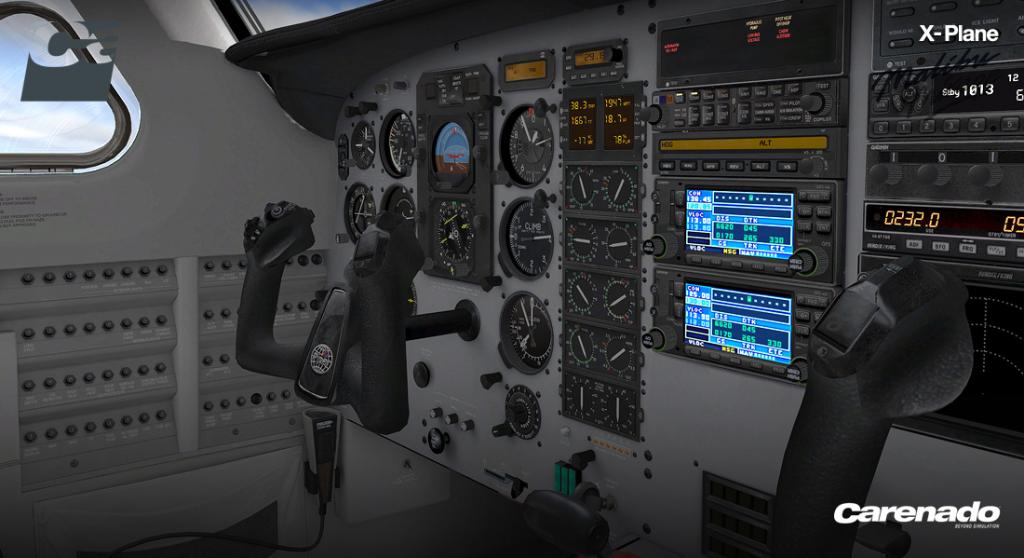
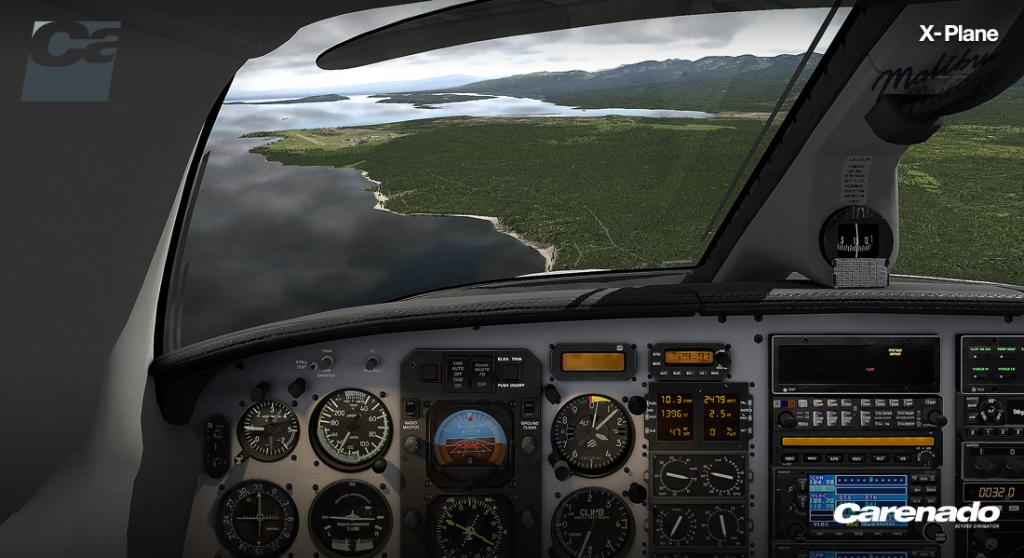
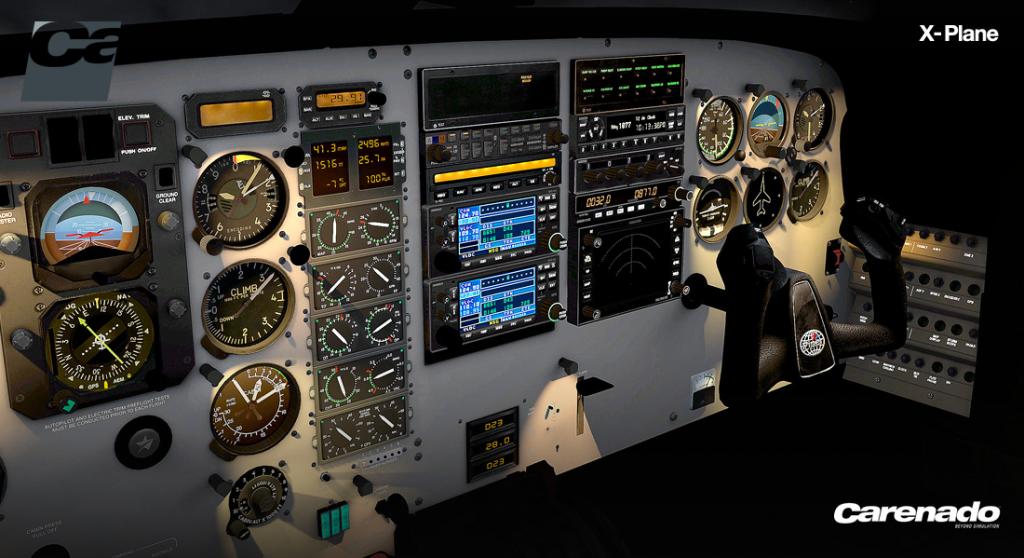
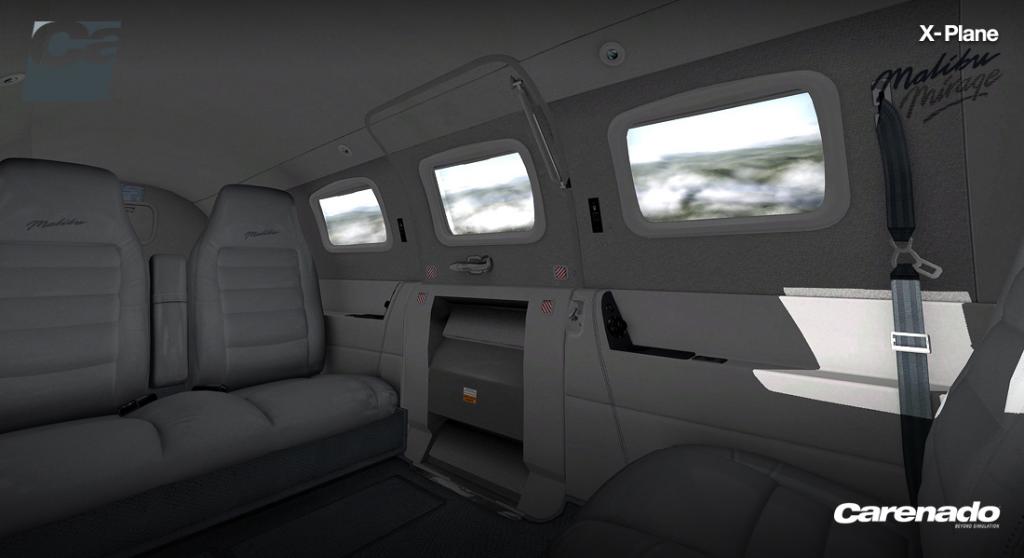
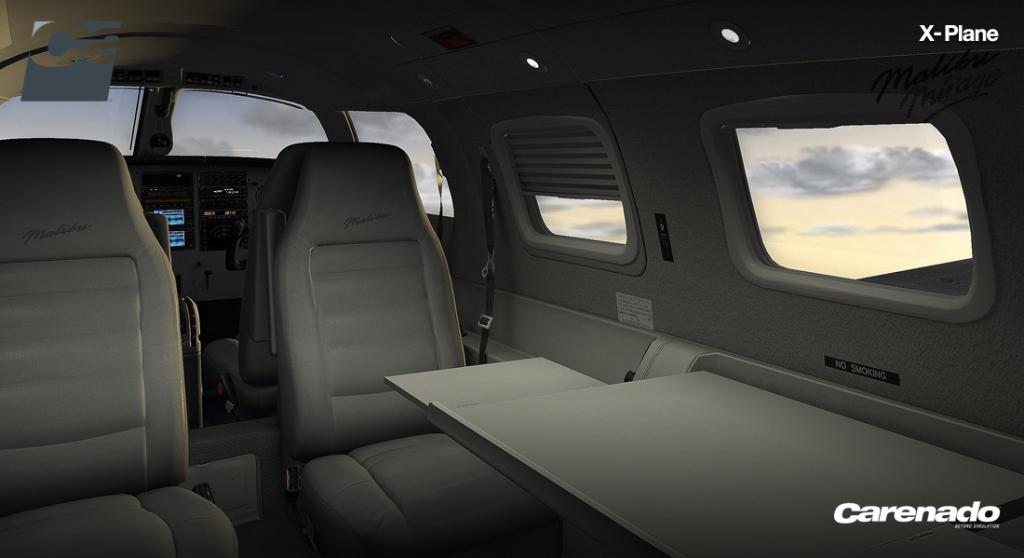
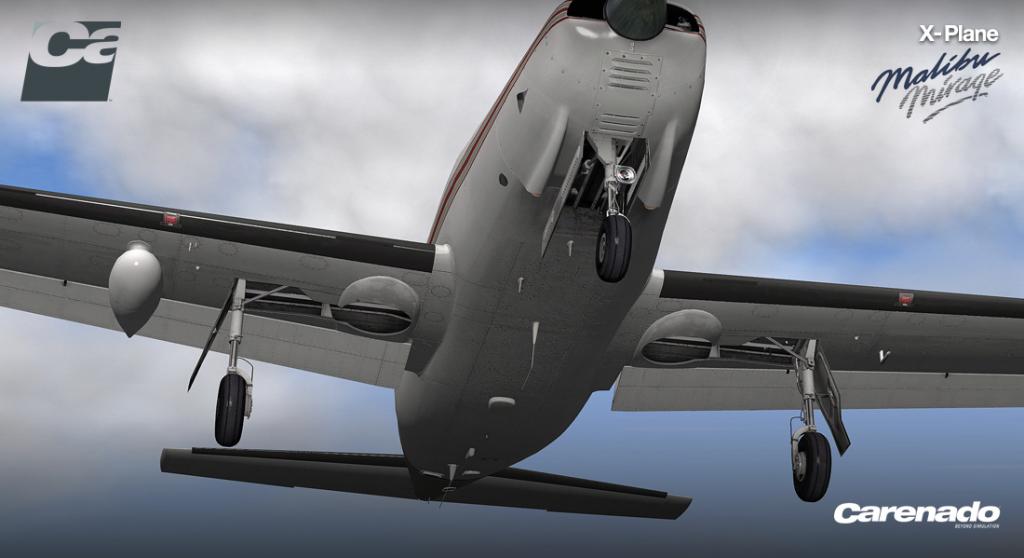
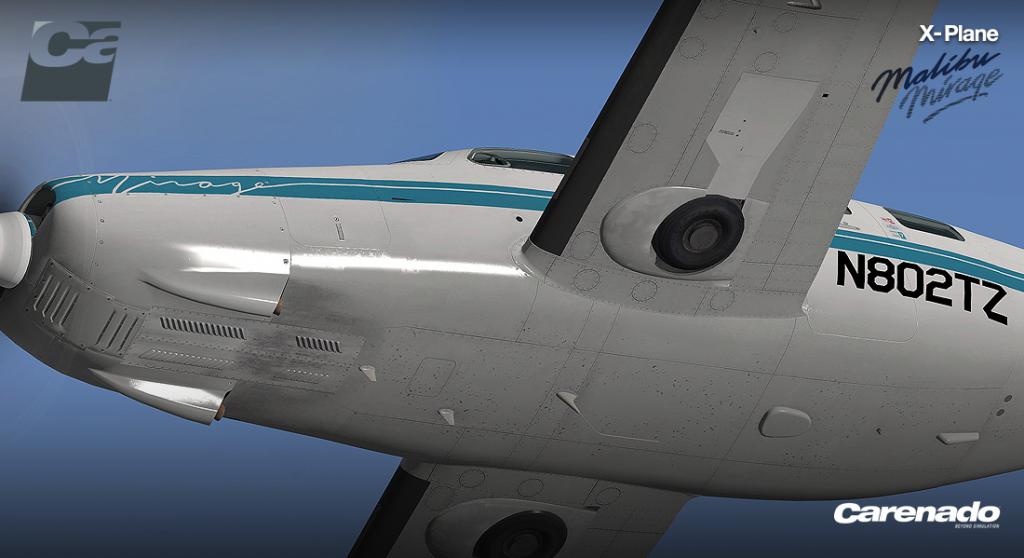
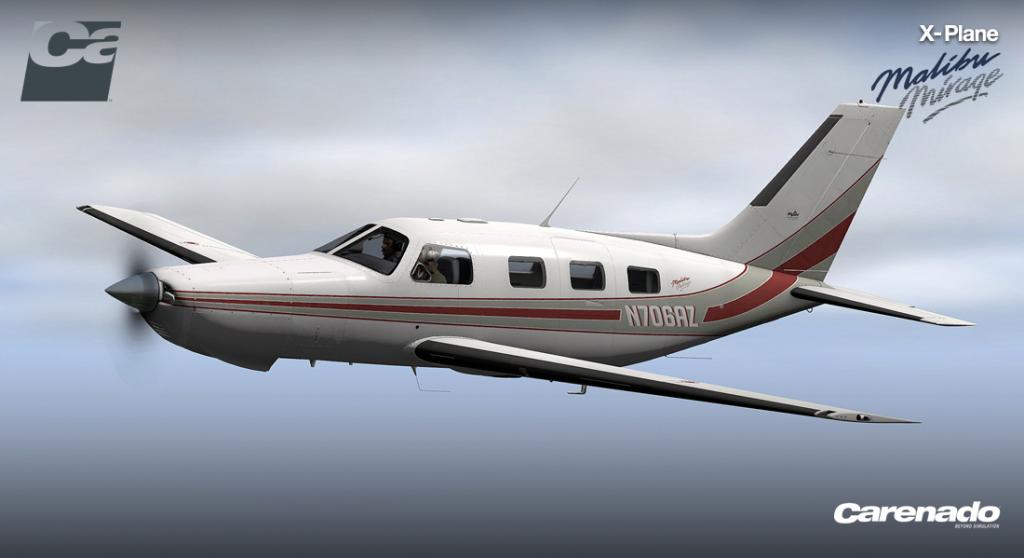
Now Released! : Carenado PA46 Malibu Mirage 350P HD Series
Carenado has released their next aircraft for X-Plane. The Piper PA46 Malibu Mirage 350P. Price is US$29.95 and NOW AVAILABLE from the X-Plane.OrgStore
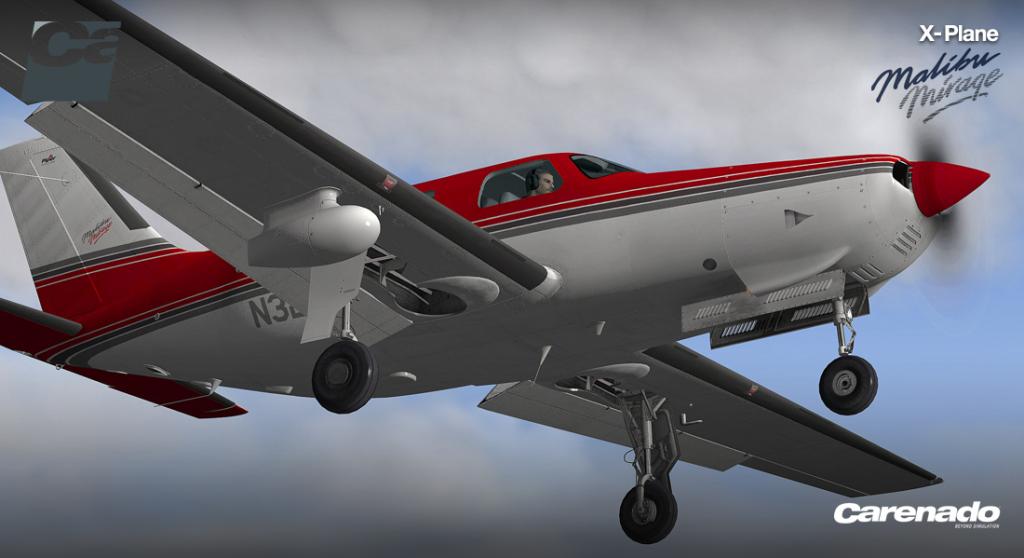
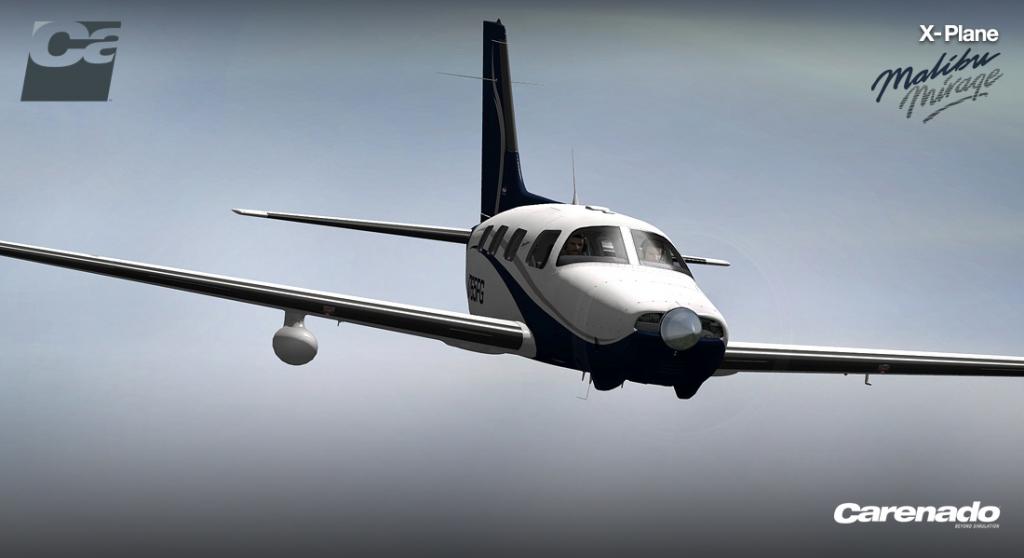

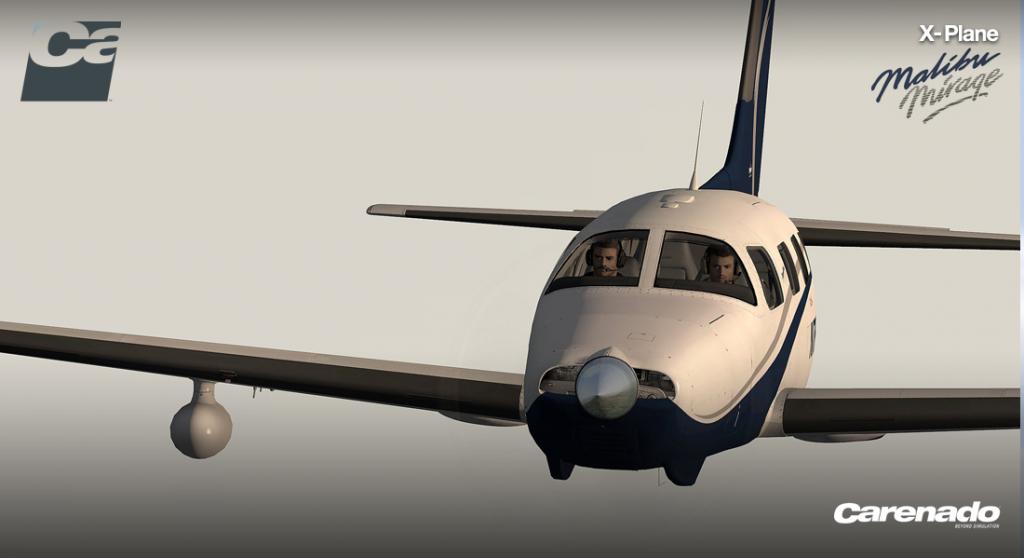
The Piper PA-46 Malibu Mirage 350P is a five seat and one pilot aircraft. It is powered by the single powerful Textron Lycoming TIO-540-AE2A 350 hp (260 kW) engine and has a new wing over the standard model. And the aircraft is currently still in production.
.
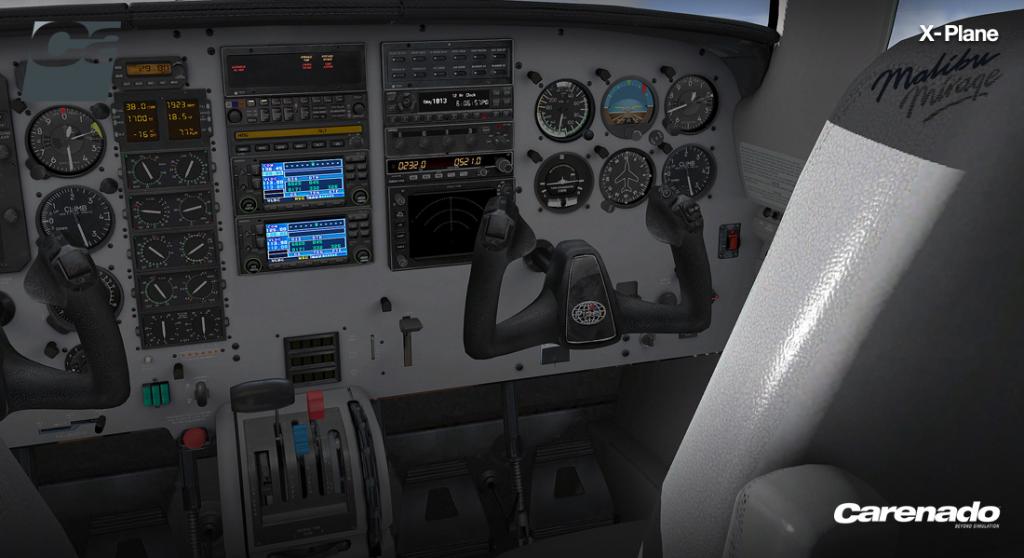
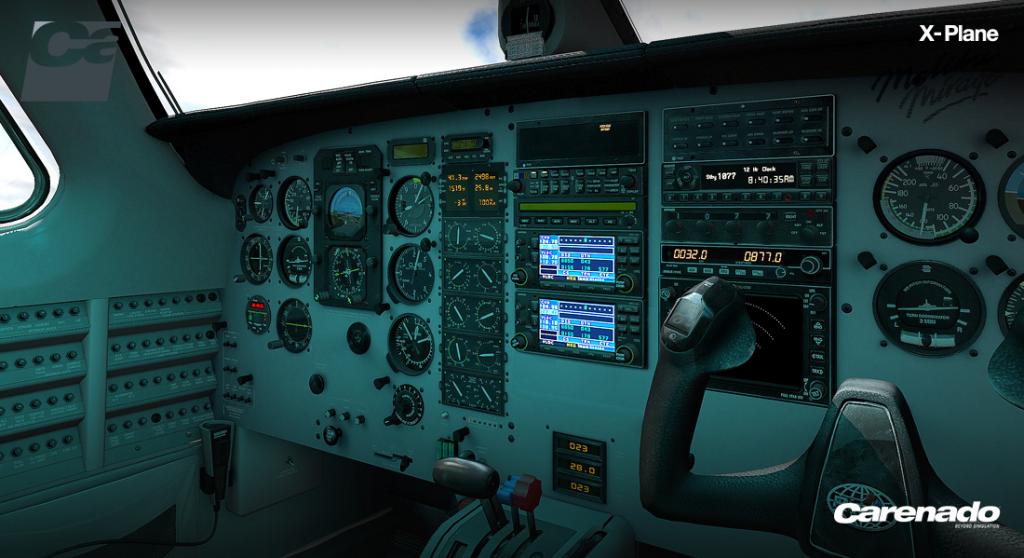
Features Include :
HD quality textures (2048 x2048)
3D gauges
Volumetric side view prop effect
Original HQ digital 3D stereo sounds recorded directly from the real aircraft
Volumetric side view prop effect
Advanced exterior HDR lighting system.
High quality animated pilots
Customizable panel for controlling windows transparency, instrument reflections and static elements.
Real behavior compared to the real airplane. Real weight and balance. Tested by real pilots.
Realistic night lights effects on panel and cockpit.
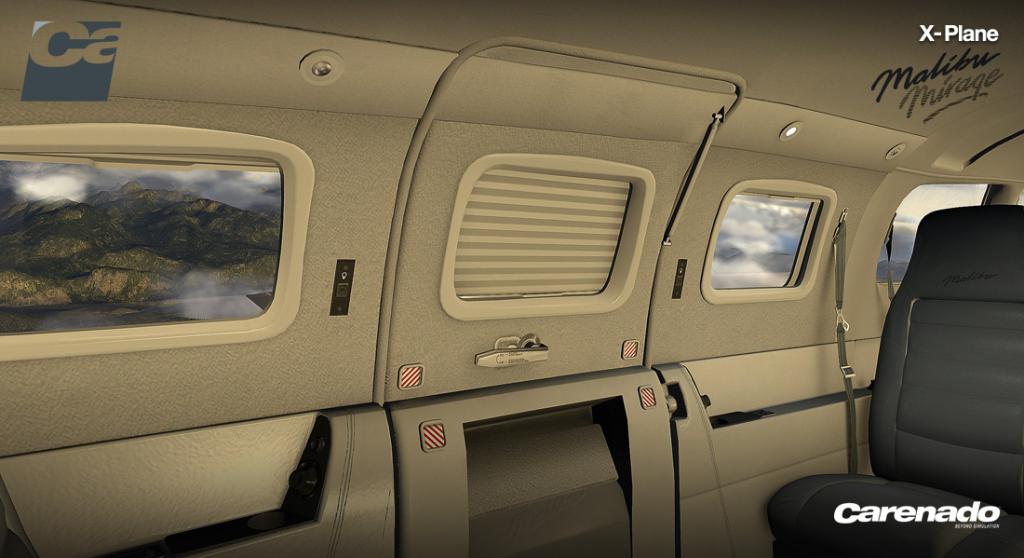
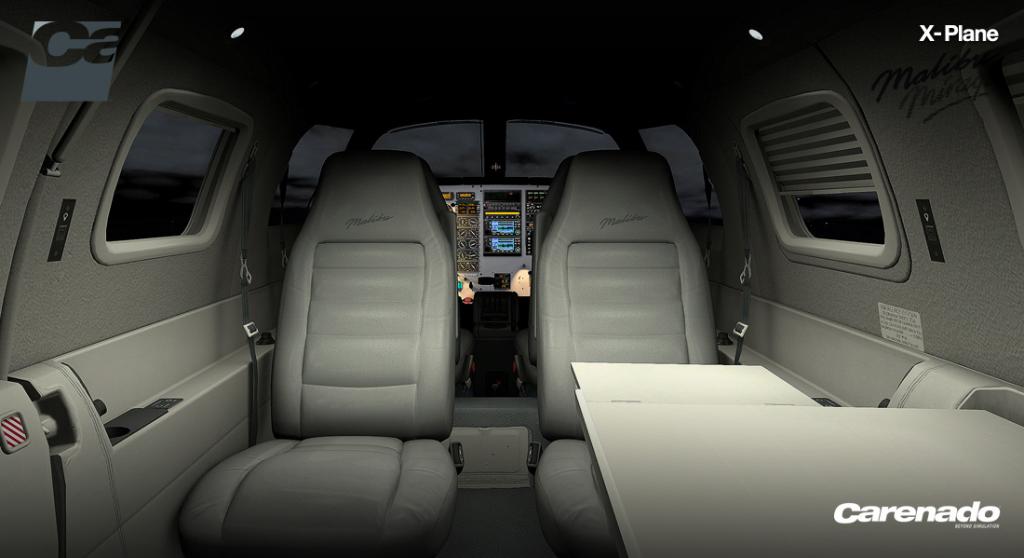
External and Internal lighting is as usual in the very high quality class from Carenado.


Included in the package:
5 HD liveries
1 HD Blank livery
PA46 Emergency Checklist PDF
PA46 Normal Procedures PDF
PA46 Performance Tables PDF
PA46 EMIS PDF
Autopilot and AVSS PDF
Recommended Settings PDF

The Malibu Mirage will be Available on the X-Plane.OrgStore Soon... Review to come as well.
Technical Requirements:
Windows XP - Vista - 7 (32 or 64 bits) or MAC OS 10.6 (or higher) or Linux
X-Plane10.21 (or higher)
2.5 GHz processor - 4GB RAM - 1GB VRAM
300MB available hard disk space
Stephen Dutton
copyright©2014 : X-Plane Reviews
All images in this post are courtesy of Carenado©2014

-
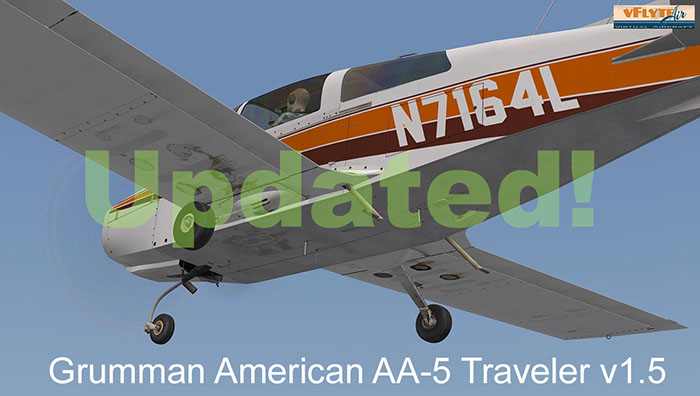
Developer Update : Grumman Traveler AA-5 v1.5 by vFlyteAir
vFlyteAir has updated their Grumman Traveler AA-5 to version 1.5
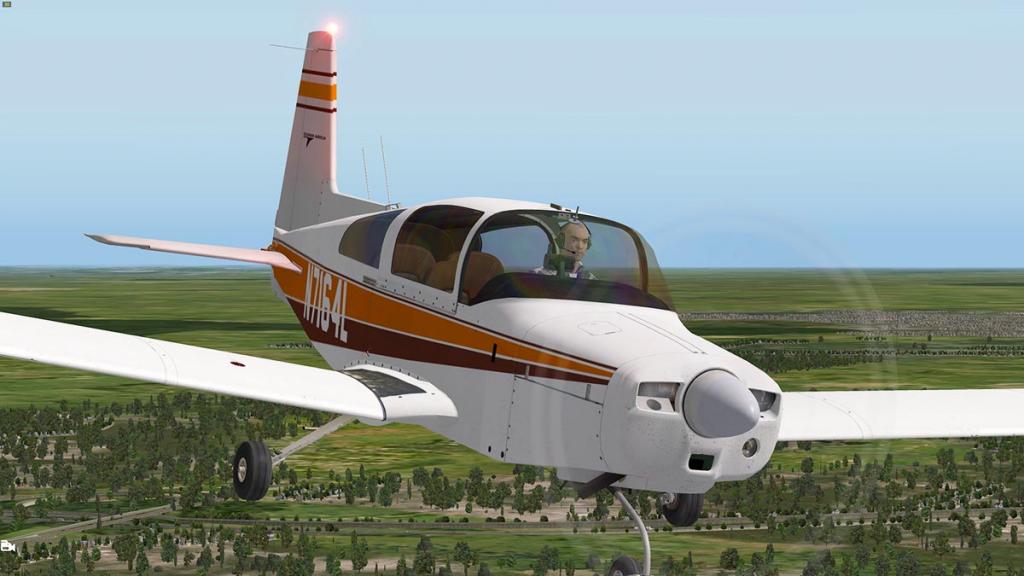
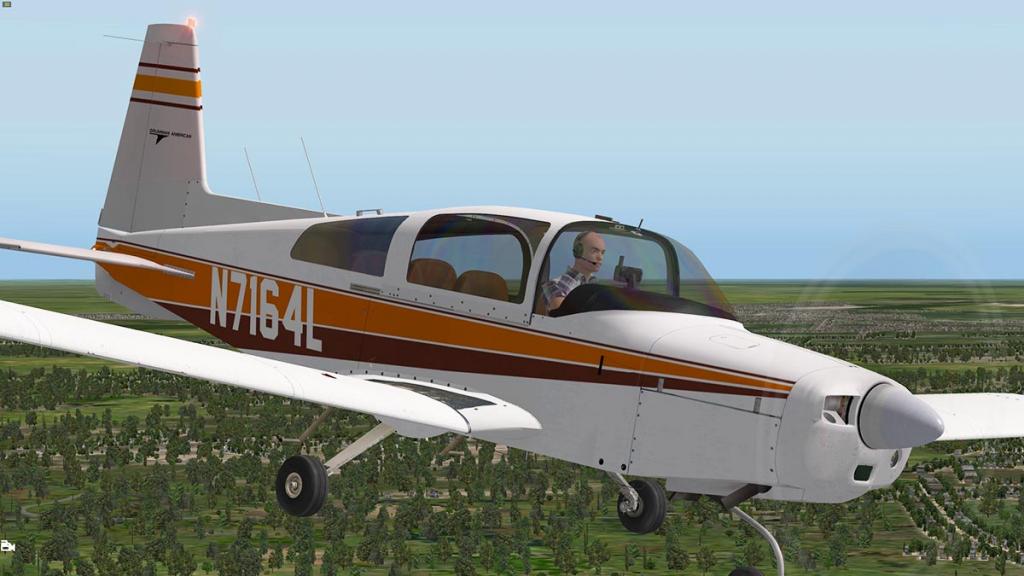


The new features include:
- brand new stereo-effect sounds! Recorded from an actual Grumman AA-5, the new sounds provide a stereoscopic dimension to the Traveler, providing a more immersive flying experience. Exterior sound effects are also improved with better distance-fading and Doppler effects.
- New “master volume” knob has been added to allow you to adjust the engine/cockpit sounds volume. NOTE: The “master volume” knob is the COM1 Radio volume knob. Air Traffic Control, weather and other sounds are still controlled via the X-Plane Settings menu.
- Two new liveries added! G-BBUE (Red/Blue scheme) and N356PV (Blue/Light Blue scheme).
- SASL Plug-In has been updated to the newest version.
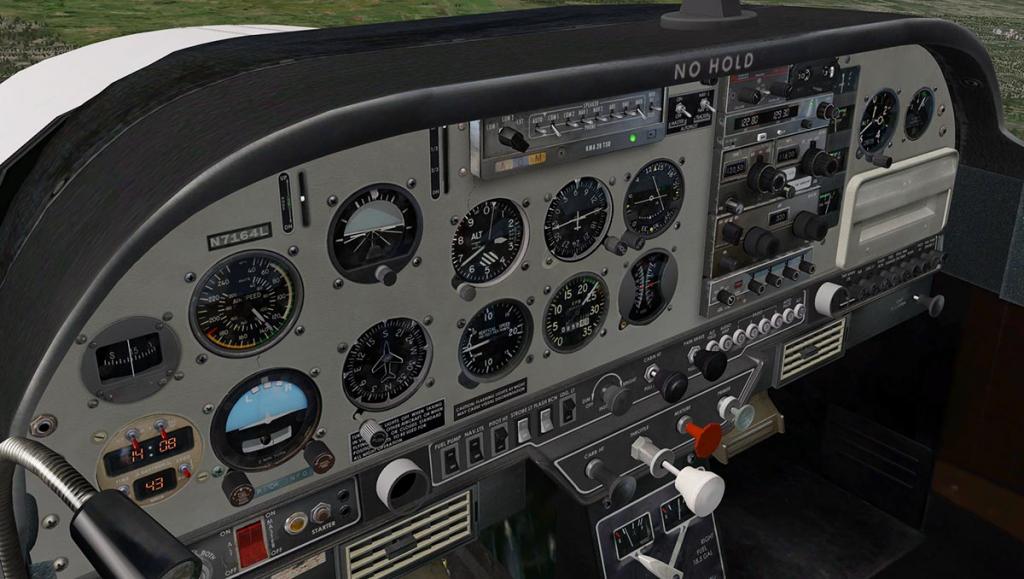
- The Trim Indicator and Flaps Indicator labels on the panel surface are now illuminated so that the pilot can see the indicator positions at night The Traveler now defaults to the mixture being set at FULL LEAN on start-up. NOTE: Pilots must remember to set the mixture to RICH prior to starting the engine.
- Increased brightness of the instrument gauges for better readability at night. (yeah that was very dull)
- Flight controls (ailerons, elevator and rudder) adjusted to be less sensitive at higher speeds.
There has been a few bug fixes on the AA-5 as well in :
- Dome light now slaved to battery bus (was working with battery off)
- Fuel gauges now slaved to electrical bus (were working with battery off)
- Map Light lens no longer illuminates when map light is OFF
- Wheel Braking improved to be more effective-
- Fixed LIT textures on illuminated lights - some lights were "showing through" when instrument lights were turned off or when it was daylight
- Moved IDENT button manipulator to the small push-button located directly below IDENT lamp (was incorrectly located on top of IDENT red lamp)
- Starter sound fixed – was playing sound with battery OFF
- Fuel Pump switch and Pitot Heat switch now work correctly (click upper part for ON, click lower part for OFF) - Thanks to "FloB" for the squawk
- Cowl flaps settings are now automatically controlled by the ACF (X-Plane overrides keyboard control or joystick control of cowl flaps - the Traveler does not have cowl flaps
X-Plane Reviews liked the Grumman Traveler AA-5 immensely as it is coming in to Carenado style of quality and features...
Read our full review here (original release version) -
Yes! the Grumman American AA-5 Traveler v1.5 is now Available from the X-Plane.OrgShop : Grumman American AA-5 Traveler
Stephen Dutton
21st February 2014
copyright©2014 : X-Plane Reviews

-
Just started using navigation during flight today with instructor.
This is great; I can program landmark waypoints and airports. Multiple, not just one at a time.
I think this is the first plane for x-plane that has this capability.
Thank you so much.
Yeah the Panthera is different because it is a modern aircraft... with modern equipment. So it can help you in that way SD
-

Scenery Review : CZST Stewart by beti-x
Any new scenery developers for X-Plane have to be brave. Creating really good scenery is hard and X-Plane has a smaller market and hence a smaller return on your investment in the sheer amount of work that has to be put in. Part of the problem is the chicken and the egg problem, as many new users won't come over to X-Plane because it doesn't deliver in the sort of quality and quantity that the other larger simulators can deliver and so until X-Plane can deliver that then it will still have that smaller user base and round and around it goes. Why invest so much time and effort in X-Plane when you can do the same amount of work and have a bigger market to sell your product to... And then make more money in doing so.
Simple facts. But there is more to the deal than what it looks like on the surface. X-Plane users may be a smaller user base, but they will spend more on quality than on other simulators. Secondly is that your market is much more open and you can select areas you want to do and have that portion of the market to yourself, than rather be one of several versions of the same product fighting in a crowded market. So you can't have it both ways, and that is why there has been so many new entrants willing to give X-Plane a go in creating scenery and hoping that the market will expand. At one point the balance will change, but we are not at that point yet.
X-Plane will however get to that tipping point a lot quicker though if it acquires more scenery like beti-x's - CZST Stewart.
CZST Stewart
As for being a remote place and unless you are otherwise in the Arctic wilderness or in the Australian Desert then Stewart in British Columbia is a very lonely place. Drive from Vancouver the state's capital and the journey will take you just over 17 hours and just under 1500 kilometers, give and take a hungry or angry bear or two. So the other options are Prince Rupert (442 km, 6 hours) or Juneau in Alaska. So flying to Stewart is obviously the easiest option. But that option is not easy either because Stewart's Airport (CZST) is only a strip and very small one at that... Very Small.
First View
I wanted to fly from Juneau to Stewart but it was just a little to far (and slow in a GA) in time required, so it was in a Canadian Twin Otter from Digby Island (Prince Rupert) that I made the trip up the Portland Canal to Stewart. You could also use Annette island or Ketchikan International airport, or you can fly in to Stewart with a sea-plane as well as there is a (small) base there.
Flying up the high sided inlet is an experience with brilliant views. In the distance as the inlet forks, Stewart come into view on the right fork by the Salmon River. The surprise is that not only is there an airstrip, but also a whole town. And I mean the whole town of Stewart. There is no default autogen scenery to be seen anywhere here either.
Flying a low pass and your eyes take all of the scenery in. Everything is here, and I mean everything it is a VFR heaven.
My next trick was that I had to turn around to land on Runway 18. That is easier said than done, and so there was no option but to climb up high and find the space to turn around and drop back down.
The area is around Stewart simply spectacular with high snow capped mountainous ranges in all directions. Stewart from this height is nestled far away deep down in the inlet.
Stewart is at the head of the Portland Canal... Which is not a really canal at all but an (Portland) inlet, The inlet is also the American (Alaskan) and Canadian border which runs the whole length of the inlet and just slightly north of Stewart.
The reason for Stewart being here is because of the gold and silver mining industry that dominated the early economy of the town. Nearby Hyder, Alaska, boomed with the discovery of rich silver veins in the upper Salmon River basin in 1917 and 1918. Hyder then became an access and supply point for the mines on the United States side of the border, while Stewart served as the port for Canadian mining activity. Mining and mining exploration is still an industry of the town as now is a large logging industry. Once there was 10,000 people living in Stewart, but today the population is only just under 500 (494). Sadly today Stewart is a dying town, but Stewart is still wanted by Hollywood as Insomnia (Al Pacino), Eight Below (Paul Walker), and the exterior shots from John Carpenter's science fiction classic The Thing (1982 film) were filmed in the around the area and in the nearby glacial mountains.
Installation
It is important to understand how the beti-x scenery in Stewart is assembled in X-Plane. The download package is 406.40mb and expands to 730.80mb when installed. You don't just drop the scenery into the Custom Scenery folder but to use an installation program to install it for you. If you are on a Mac you have to make sure your security settings will allow you to open the package (mine didn't until I switched them off) Then you do the install by selecting the X-Plane folder you want the scenery installed into, when the install is completed you will have three separate folders that make up the completed scenery.
BetiX - CZST_A_Overlay
BetiX - CZST_B
BetiX - CZST_C_Mesh
You will also need to have your "runways to follow contours" checkbox on (render settings). If not you will have buildings situated halve way buried under the ground and trailers floating (levitating) in the air... I recommend to do all your installation and settings and then restart X-Plane from scratch to make sure they all reload in the correct order. In my Aerosoft version I found the manual - 10 Pages (English and German) buried in the "B" folder.
Landing on Runway 18
Stewart has only one asphalt runway (more a sealed gravel strip). 18/36 (3872ft) Elev. 24ft. Landing on runway 36 is over water but still slightly difficult but more of a straight forward approach.
(note: if you use either of the runway landing approaches in the default 10nm setting, be ready to adjust your heading quickly... both settings for either runway 18/36 will pop you up heading straight into mountain!)
Landing on RWY 18 is for a skilled approach. VFR rules certainly apply here at CZST, low cloud and any gusting wind between the high peaks around you will make your life very interesting. Even on a a relatively calm, clear day the approach needs all your attention. The runway is actually slightly offset so you have to correct your path at the final moments, and even before that point you have to avoid high obstacles and you have to keep very close to the left side of the inlet while descending. You can early on use the Glacier Highway to guide you by sitting directly in the center between the highway and the tree lined wall on your left. The final approach has a last minute illusion as well, in that it looks on a downward angle like a straight run on to the asphalt, but in reality the asphalt is sitting slightly lower than the sloping ground before it (the early part of the runway is slightly sloping downwards), get it wrong and you find your landing will hit the slightly higher dirt ground coming up before you find the asphalt. The radar altimeter doesn't work for you because it is reading the constantly changing lower then higher ground heights and not the reading correct runway height. Coming in again on RWY 18 you will be aware of the illusion more this second time around and will over-compensate now by going too high and land (or glide) too far down the runway. The trick is to set your landing point and just aim for that and not allow the outside visuals or instruments to mess with your point of reference. If you want to land on Runway 18 in poor conditions and bad visibility... Well good luck with that - Amen.
CZST
You can't really call CZST an airport... more like a two door large shed, If you are looking for a terminal - forget it.
But do note the excellent gravel and asphalt. The runway and surrounds are done in 2cm per pixel depth and the detail shows. The volumetric grass is also excellent and well placed to be totally realistic, foliage is well done to fill in not only the town surrounds but right up the sides of the mountains to give continuous unbroken coverage over the whole scenery area.
I am a scenery junkie... I admit it. Nothing more excites me than great scenery. The scenery that really excites me is scenery so realistic you feel like you are really standing there, in that place, looking around you and seeing the real area and things you can almost touch as they are so real.
In that context Beti-x's scenery is simply outstanding, It is like being in Google maps or better still Stewart BC itself. At eye level you feel you are really walking around Stewart, turn this way or that way and every SINGLE building is represented. Everything...
Moving in the area behind the Terminal (Shed) you walk down Main Street (yes it is called that) and it just blows you away with the detail.
The further around you travel the more of Stewart you will see. From the old service station to the repair workshops and the old concrete blocks.
It just goes on, street after street of real recreated buildings...
It is mind boggling. You can spend hours moving around this place and see everything and nothing is copied or duplicated. Even the famous "Fire Hall" (now the Stewart Museum) is here and so are the other main town buildings in the church, schools, port & fishing facilities, fuel station, and even the standing out blue roofed Stewart Health Centre.
I recommend to have your traffic running, not in say "Los Angeles Downtown", but at least in "Chicago Suburbs". Beti-x has active collision detection built in so the traffic will run correctly on the false ground texture layers, this also means you can land your helicopter anywhere as well without falling through the scenery. With the traffic running the town is very buzzy and the traffic is running right out of the area in both directions.
Going East out of town is the timber yard (over the bridge) and RV park. The "Welcome to Stewart" sign is also perfectly reproduced as is the wall mural. To show the sheer detailing in Stewart then admire the towns electricity supply station... really excellent work and very realistic.
West is out of town still on the Glacier Highway is going past the small port facilities and the Granduc marine terminal. Then you cross over the US/Can border until you get to Hyder. Beti-x has recreated the small town of Hyder as well as Stewart itself.
Every building in Hyder is again recreated and placed as in real town, faded walls and wooden buildings are the signs of a hard life in this remote area. The Hyder port (pier) is here as well.
Finally in the South-west is the Stewart Water (Storage) and logging pens, All through out the scenery there are bundles or mounds of stacked wood, in either the wood being stored or packed.
Night-Lighting
With a location like this in the middle of ranges of scenic mountains the fading light of the dawn or dusk is going to be spectacular... On this front Stewart does not disappoint.
In the lesser light the lighting on the buildings start to come on.
As the night closes in the full lighting of Stewart emerges and it is very good with HDR on.
There is a lot of down lighting and pockets of street lighting. All windows are creatively different and nothing is repeated in the detail, brilliant small detailing like Coke machines and signs make it perfect. However you will need your torch on you at the airport as the ramp is quite dark.
Highlights are the well lit Service Station and Telecom compound that is excellent. Other out of town highlights are the viewing point parking area and the very spooky Marine Terminal brooding very authentic in the dark.
Frame-Rate
With all this amount of specified scenery it is going to cost you somewhere, and you will also be in need of your render settings set to "Extreme" to bring out the full impact of the quality of the scenery. I was restricted to "Too Much" in the settings and as the images show in many areas it gets a little buzzy. But beti-x have tried to soften the blow. As noted by the runway the textures are 2cm per pixel depth, moving around the town and that jumps that then to 50cm per pixel resolution for the 150 square kilometers around the scenery. For the size and depth with all that high quality 3ds MAX created objects your getting a good deal for your resolution. I found you can get a balance with the "Too Much" setting and still enjoy the scenery with out it dropping into the dreaded teens. The bonus is that there is nothing else out side the installed scenery that could otherwise drop your frame-rate down.
Conclusion
beti-x has noted that CZST Stewart their first scenery for X-Plane, and a dip into our market. As a scenery there is no doubt that it is one of the very best scenery products created for X-Plane. So if we want more excellent scenery from beti-x then we have to support them for them to support us.
The main thing to note with this scenery is that in most scenery the focus is on usually the airport itself and it's immediate surroundings. CZST is nothing like that. It really turns the concept upside down in that the scenery as a whole package is the destination and not just the focus on the airport. Flying over Stewart is getting a totally realistic view of the destination. Not just a simulator point of view but the real town of Stewart point of view.
Yes a location like Stewart allows you to deliver that. (and so does FSX Orbix scenery), but here it is for X-Plane users and not FSX/P3D, and that is what FSX/P3D users buy and have more of in a choice of quality scenery than X-Plane. CZST can be a game changer in X-Plane (and we do now have other great add-on scenery), but this extreme level of detail is well worth using and having as part of your X-Plane world. Besides not only the visual points of this excellent scenery it is also a great challenging scenery to fly into and out of. You won't get a Boeing Airliner in here, but it is a General Aviation/Seaplane (and small commuter aircraft) heaven sent destination.
Overall CZST Stewart by beti-x is simply outstanding scenery and well worth your investment as a destination and is outstanding in value...
__________________________________
Yes! the CZST Stewart scenery by beti-x is now Available from the X-Plane.OrgStore :
Price is US$25.80 (CZST Stewart scenery is only available for X-plane10)
Developers Site : beti-x
Review By Stephen Dutton
19th February 2014
©copyright 2014 : X-Plane Reviews
Technical Requirements:
Windows , MAC or Linux
X-Plane 10 (not compatible with X-Plane 9)
4GB RAM/1GB+ VRAM - 1.5GB HD - Version 1
(last updated Feb 10th ,2014)
Review System Specifications:
Computer System:
- 2.66 Ghz Intel Core i5 iMac 27”
- 6 Gb 1067 Mhz DDR3
- ATI Radeon HD 4850 512mb
Software:
- Mac OS Mavericks 10.9
- X-Plane 10 Global ver 10.25 (final)
Addons
- Saitek x52 Pro system Joystick and Throttle
Aircraft
DHC-6 Twin Otter v970+ 3D v2.0 - Pedrovl - free (.org - DHC-6 Twin Otter)
-
X Plane Reviews now on a New Server!
The X-Plane Reviews site has now been moved over to a bigger and better server... thanks for your patience...
If you see something missing then let me know...
Thank You

Stephen

-
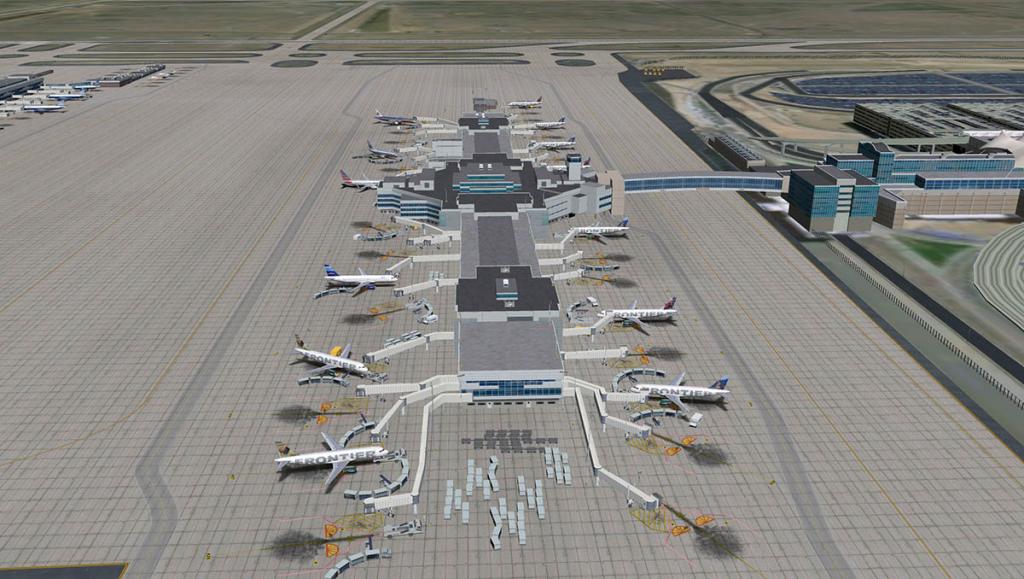
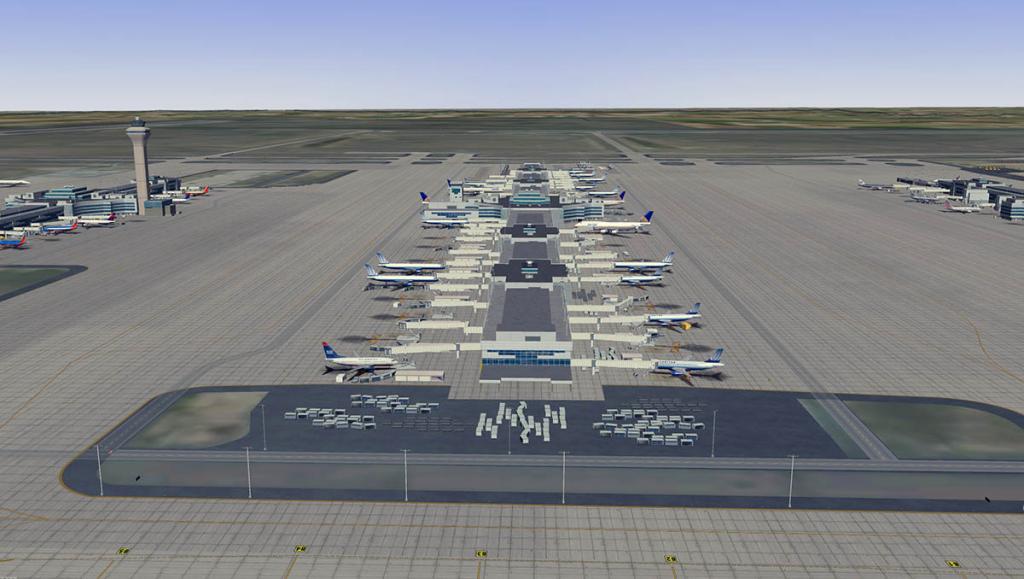
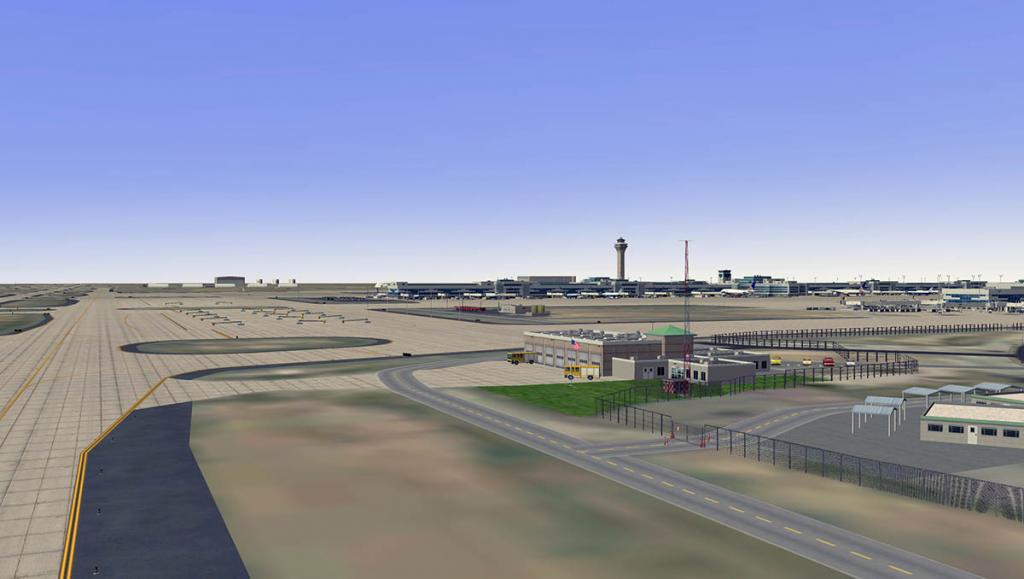
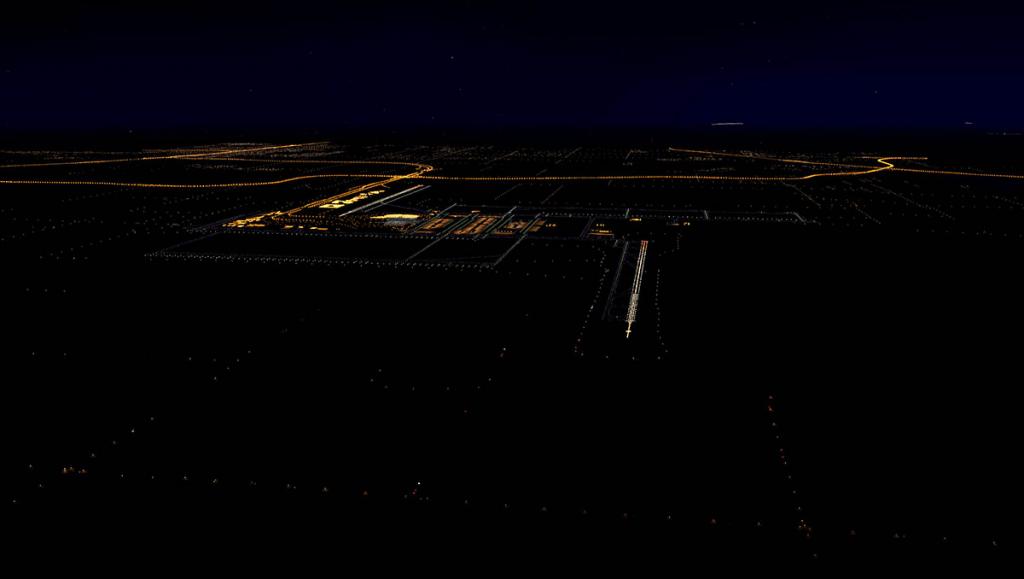
Scenery Review : KDEN - Denver International Airport by Tom Curtis
Route : KSEA (Seattle) to KDEN (Denver)
Denver International Airport (IATA: DEN, ICAO: KDEN), often referred to as DIA, is an airport situated in Denver, Colorado in the United States. Denver is known as the "Mile-high City" It is also known as" Wall Street of the West" (Queen of the West as well). Denver International Airport (DIA) is situated 25 miles (40 km) driving distance North West from downtown Denver, and at 140 square kilometres (54 sq mi) it is the largest airport in the United States by total area. Runway 16R/34L is the longest public use runway in the United States. The airport is surprisingly not very old as it was opened in February 28, 1995, which was 16 months behind schedule and at a cost of $4.8 billion. DIA replaced Stapleton International Airport which was Denver's primary airport from 1929 to 1995.

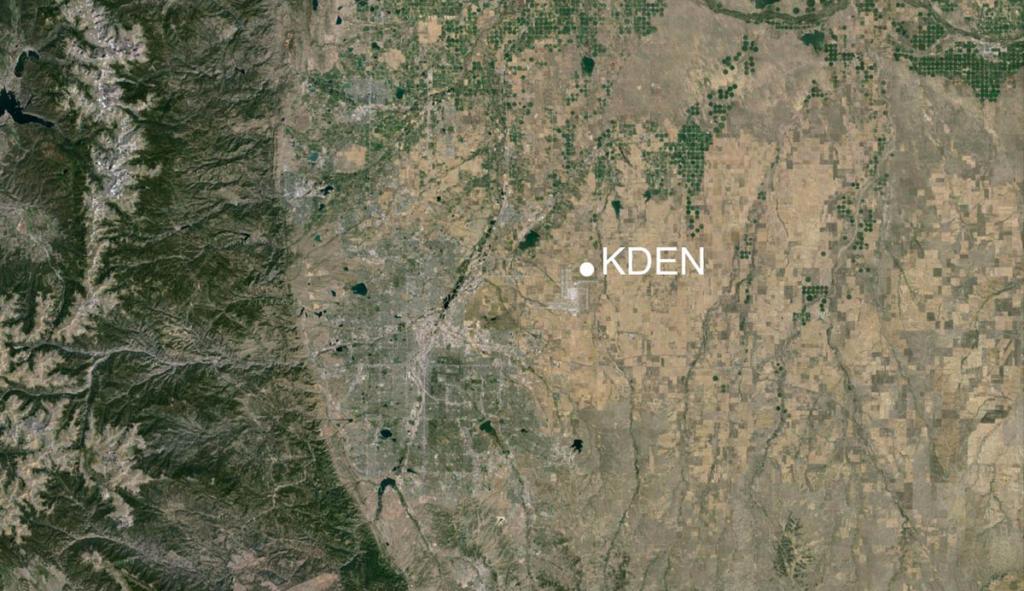
Denver has traditionally been home to one of the busier airports in the USA because of its central western location. Many airlines including United Airlines, Western Airlines, the old Frontier Airlines and People Express were all hubbed in Denver and there was also a significant Southwest Airlines operation at the old Stapleton International Airport (Southwest is now at DIA). At times Denver was a hub for at least three or four airlines. At the old Stapleton airport the gate space was severely limited and the runways at the were unable to deal efficiently with Denver's weather and wind patterns that caused nationwide travel disruptions. These problems were the main justification for the new airport. The project began with Perez Architects and was completed by Fentress Bradburn Architects of Denver, Pouw & Associates of Arvada, CO, and Bertram A. Bruton & Associates of Denver. The signature DIA profile is suggestive of the nearby snow-capped Rocky Mountains.
The airport opening was originally scheduled for October 31, 1993. But on opening the airport's computerized baggage system which was supposed to reduce delays and shorten waiting times at luggage carousels was an unmitigated failure. with back then there was a single system for all three concourses. These issues with the baggage system delayed the opening to February 28, 1995 with now separate systems for each concourse and with varying degrees of automation. The system's $186 million original construction costs then grew by $1 million per day during these months of modifications and repairs. Incoming flights on the airport's B Concourse made very limited use of the system, and only United which is DIA's dominant airline, and then only used it for outgoing flights. In August 2005 it became public knowledge that United would abandon the system, a decision that would save the airline $1 million per month in maintenance costs. Now today Denver International Airport is the 15th-busiest airport in the world by passenger traffic with 53,156,278 passengers and the fifth-busiest airport in the world by aircraft movements with over 635,000 movements in 2010.
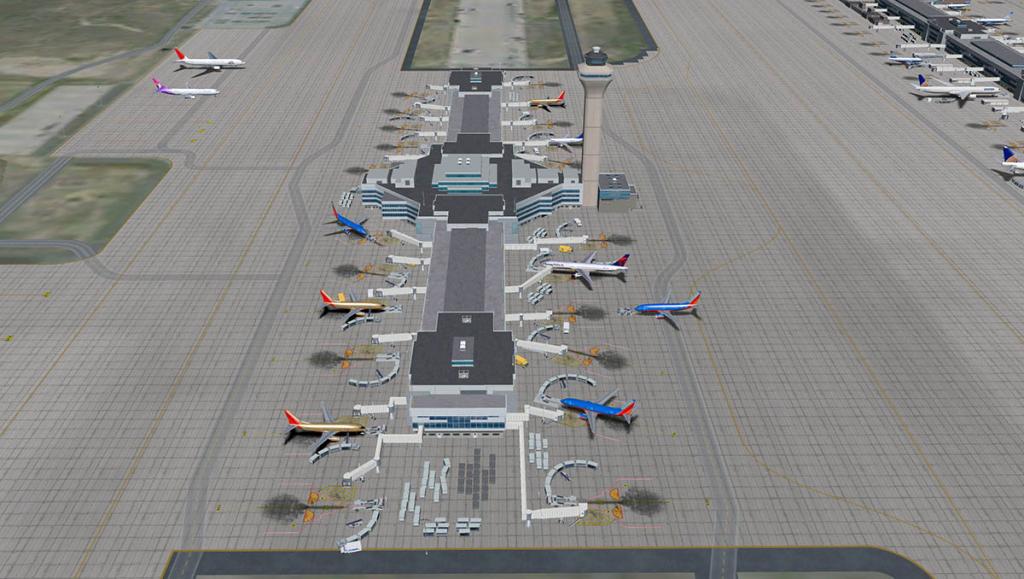
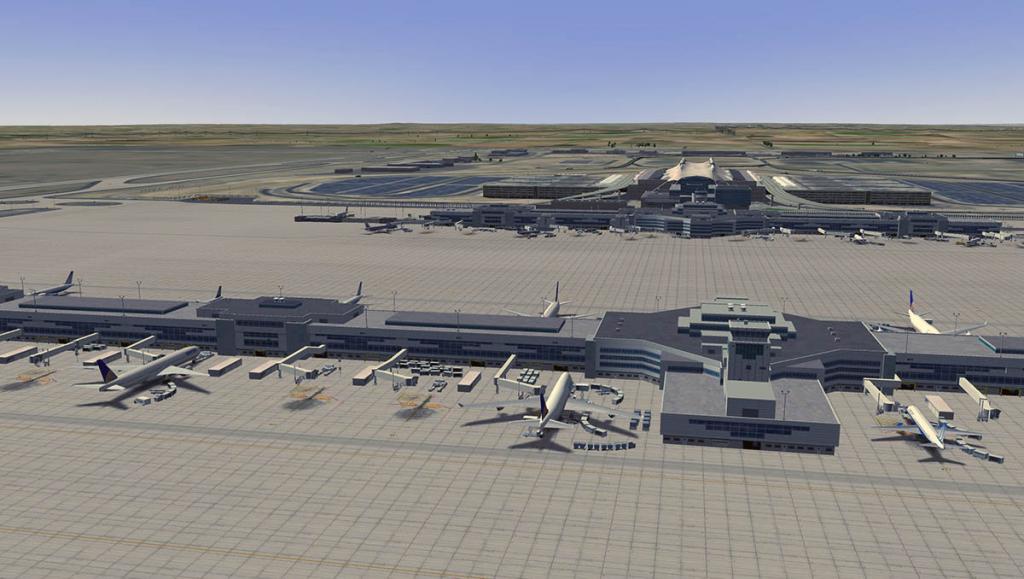
Airport Layout
There are 6 major runways at DIA. 7/25, 8/26, 16L/34R, 16R/34L, 17L/35R and 17R/35L (all certified for CAT III ILS operations). With the giant size of the airport layout you will find that taxi times are quite lengthy and extra fuel should be accounted for.
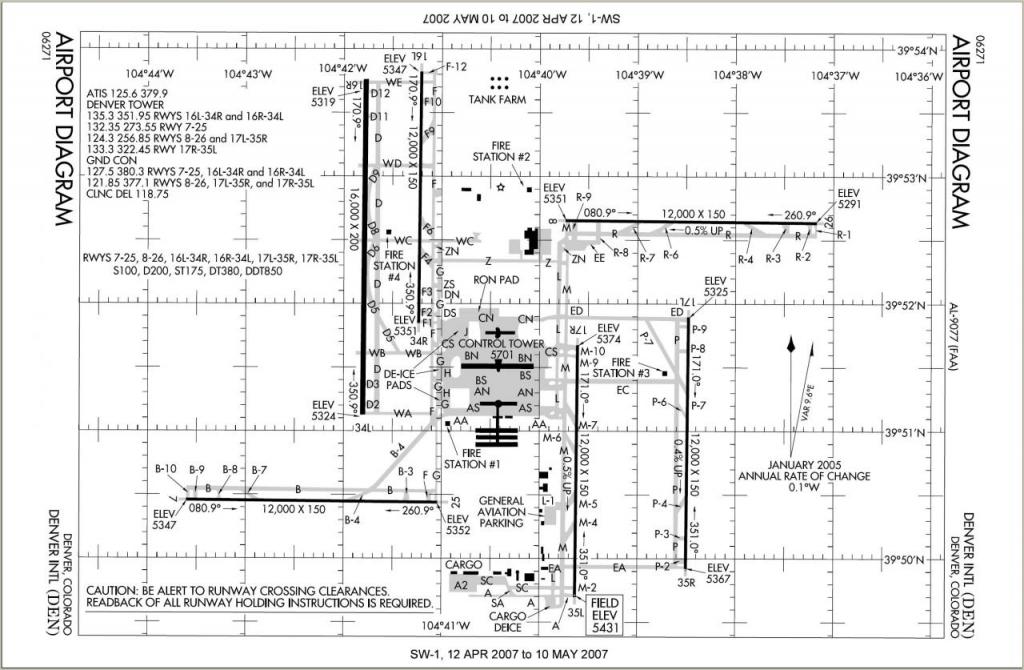
Elevation : 5,431 ft / 1,655 m
7/25 12,000ft 3,658m Concrete
8/26 12,000ft 3,658m Concrete
16L/34R 12,000ft 3,658m Concrete
16R/34L 16,000ft 4,877m Concrete
17L/35R 12,000ft 3,658m Concrete
17R/35L 12,000ft 3,658m Concrete
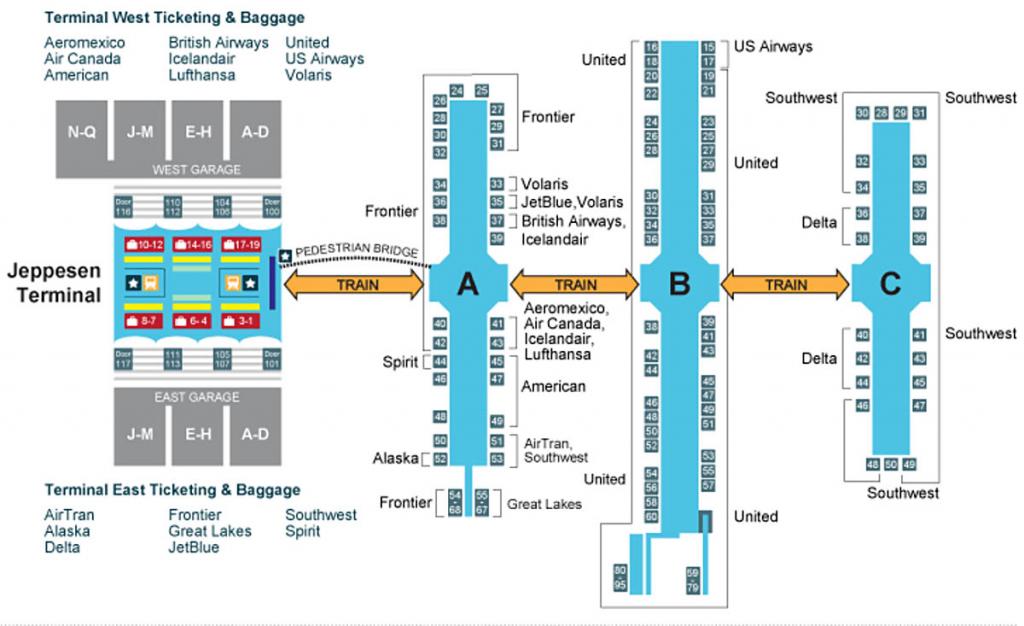
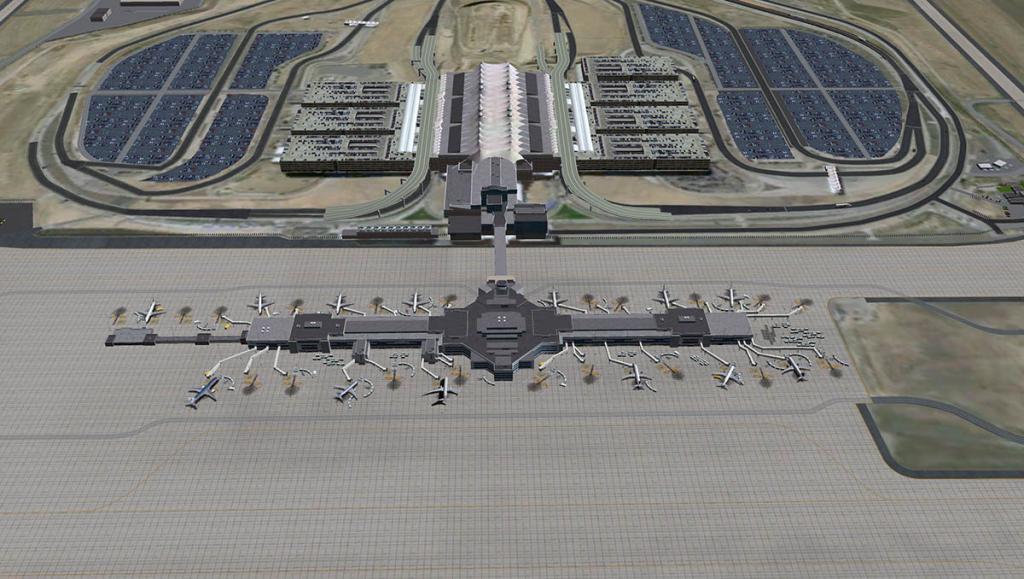
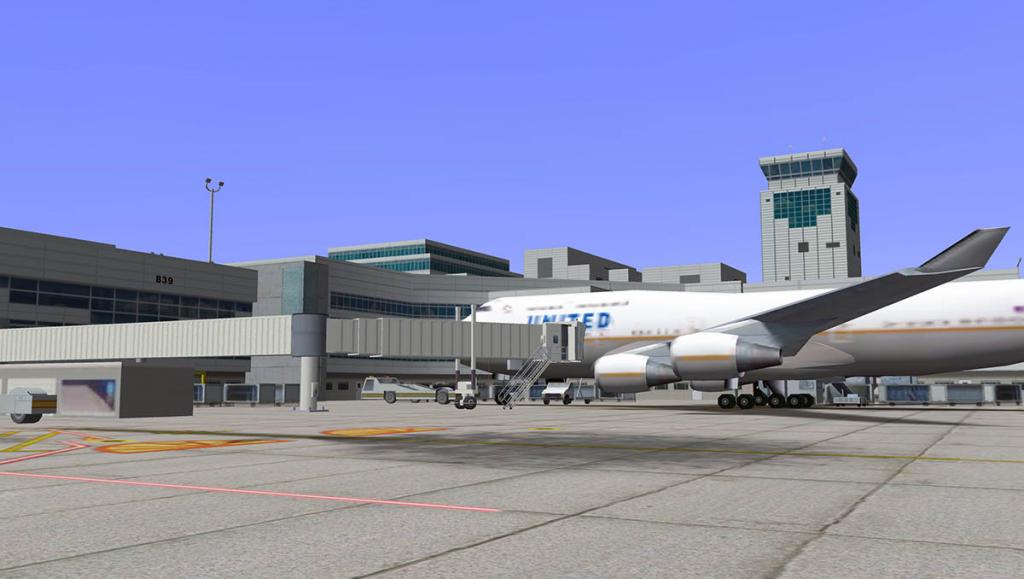
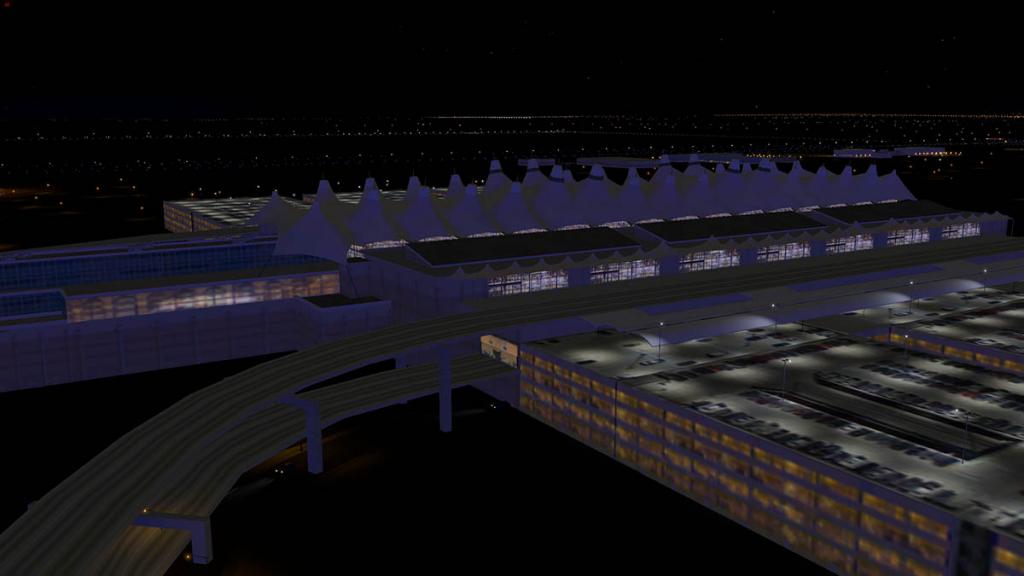
The airport configuration is interesting in that there is only one main terminal called the "Jeppesen Terminal", named after aviation safety pioneer Elrey Jeppesen. From there, there are three large island concourses connected together by an underground rail system. The first concourse (A) is also connected to the Jeppesen Terminal via a high pedestrian bridge.
Overview of KDEN
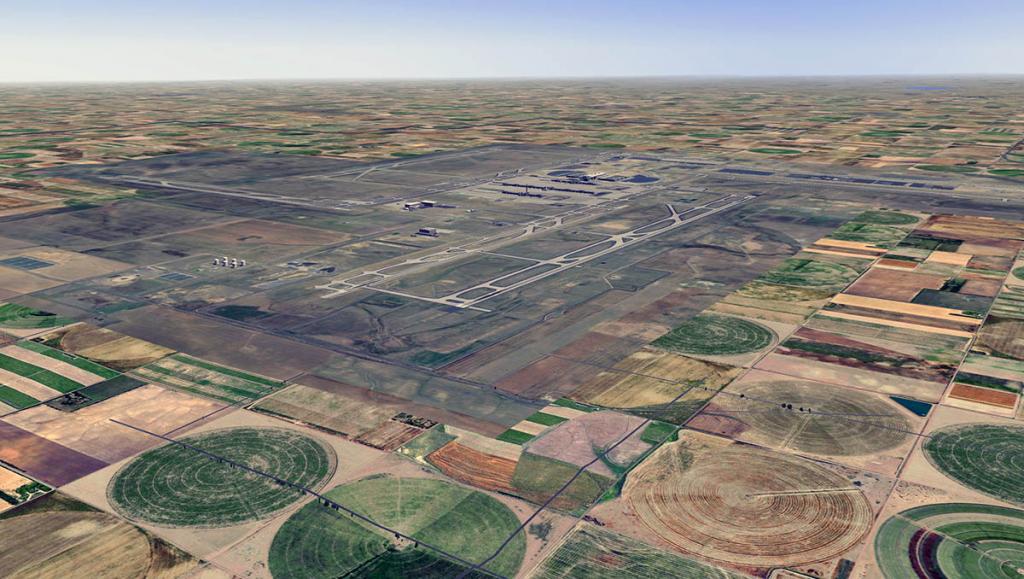
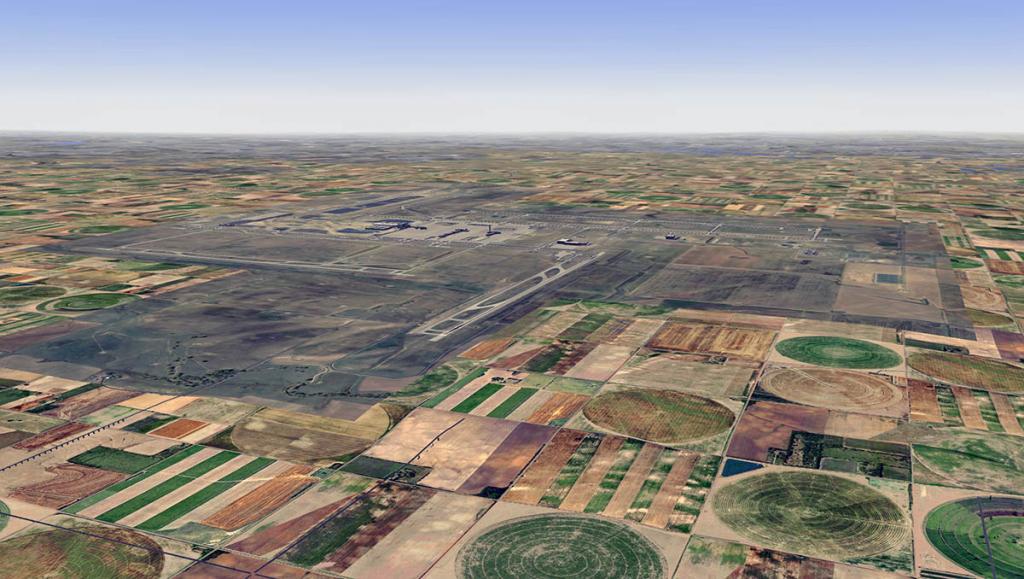
If you regularly use X-Plane then Tom Curtis's quality scenery will be familiar. Here his choice of Denver is a wise one and has been very well executed in the sort of detail and layout we expect today from quality scenery. Tom does use large amounts of photographic (Orthophoto) images to underlay the scenery. These photographic plates are very visible here as the airport has a very wide open spread-out layout, and they don't very well integrate into the default scenery around them, Inside the photographic area it is quite good but it is still a different colour from a distance (I am personally is not a big fan of these sort of layouts unless they have been seamlessly inserted into the surrounding scenery, many users however swear by them).
It is to be noted that these hub style airports are very complex and quite big in scale for scenery designers. To a point all scenery developers have to make a compromise and deliver only a certain amount of detail, Here at KDEN that is the case simply because of its huge size, so you can't expect the detail to be down to having completed perimeter fences and smaller detailing that you would get at a smaller airfield. but Tom has covered the detailing in a very comprehensive way as we will see.
There is some really great (default) densely populated traffic (highways) around the the airport, and many routes come well within the airports boundaries (turn your traffic settings up high for the best results!). If you have WorldTraffic then I would certainly get to work in filling in the huge empty spaces with working planes... If any airport that would benefit from a lot of ground routes it would certainly be KDEN.
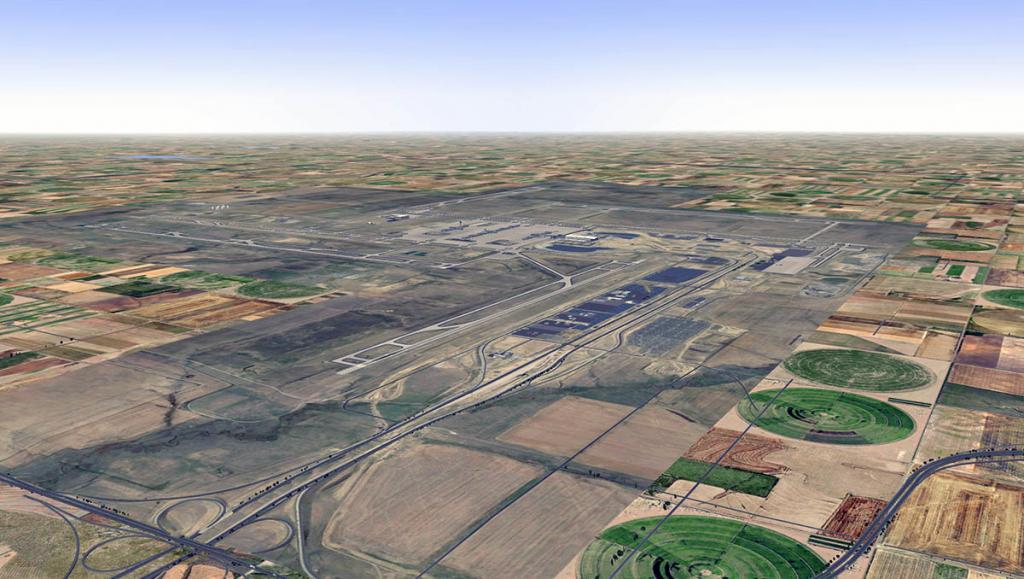
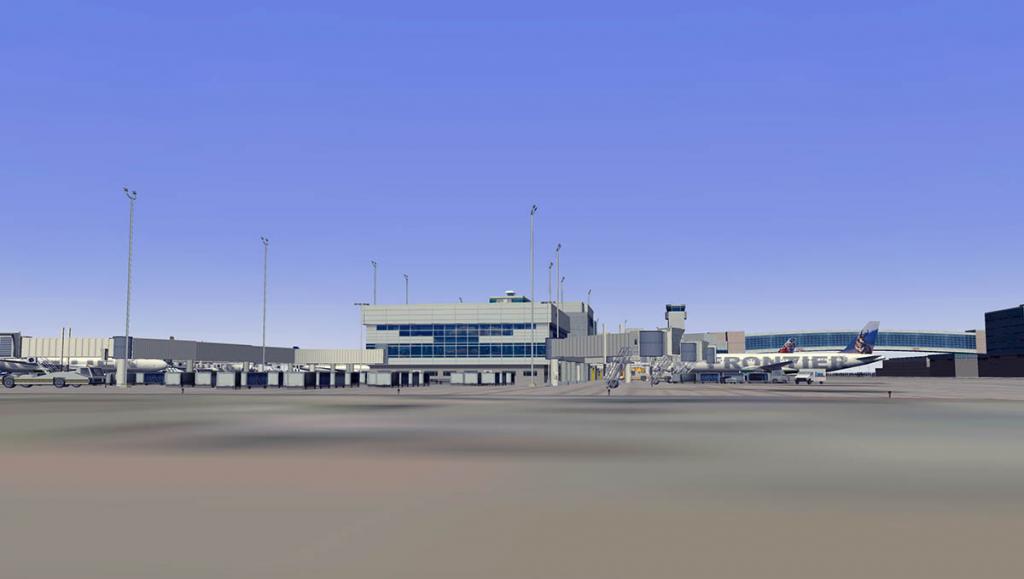
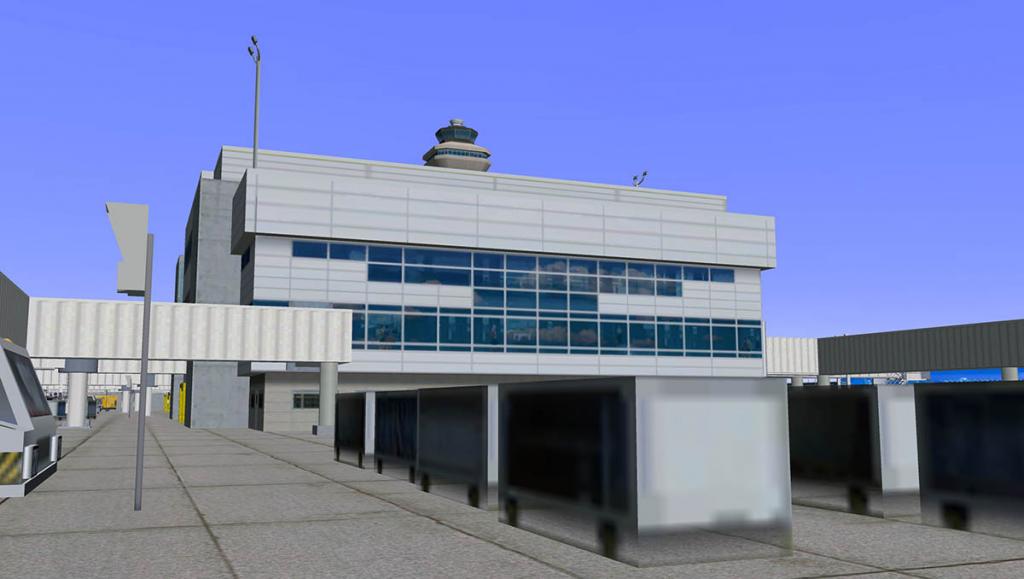
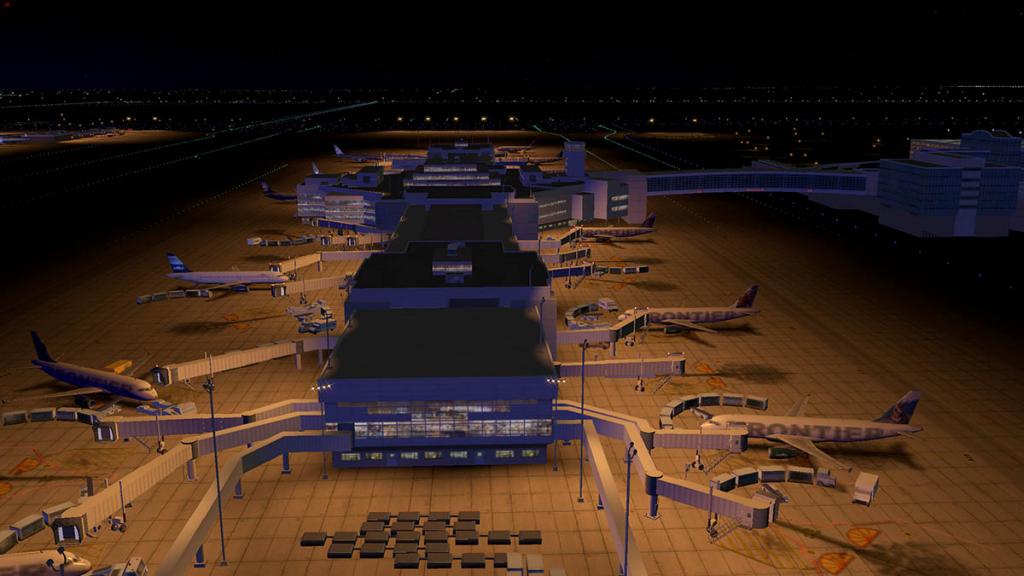
Jeppesen Terminal
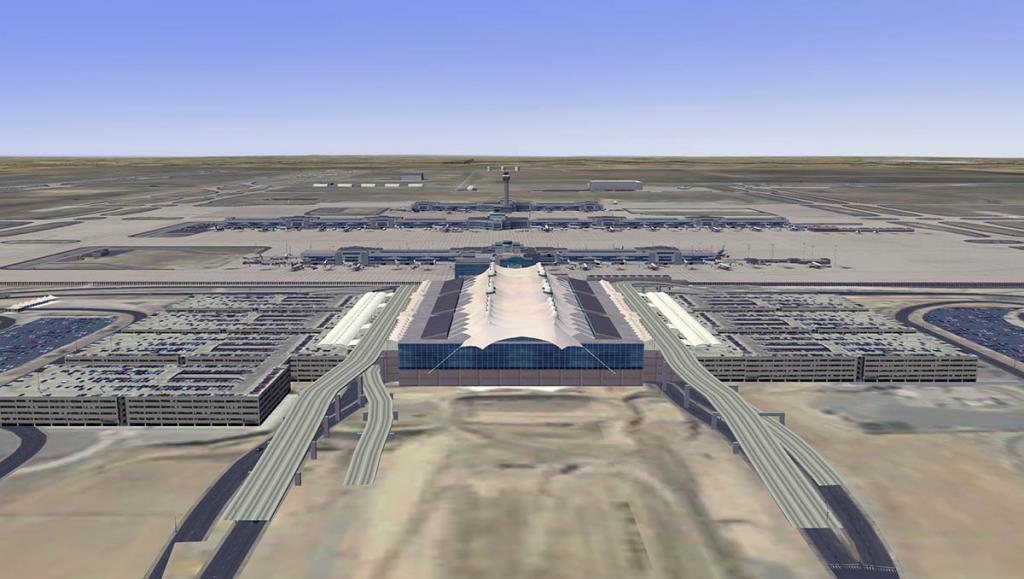
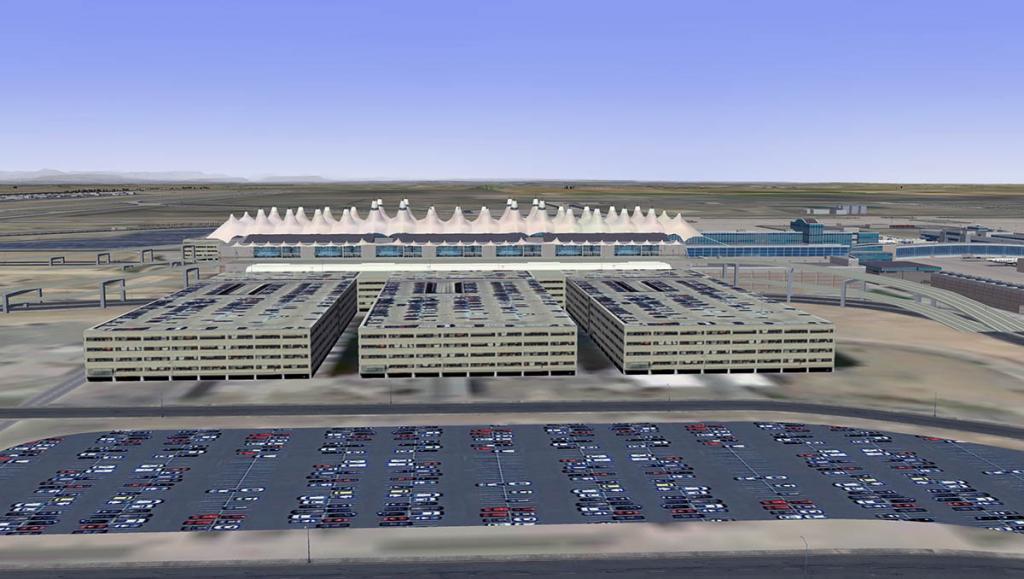
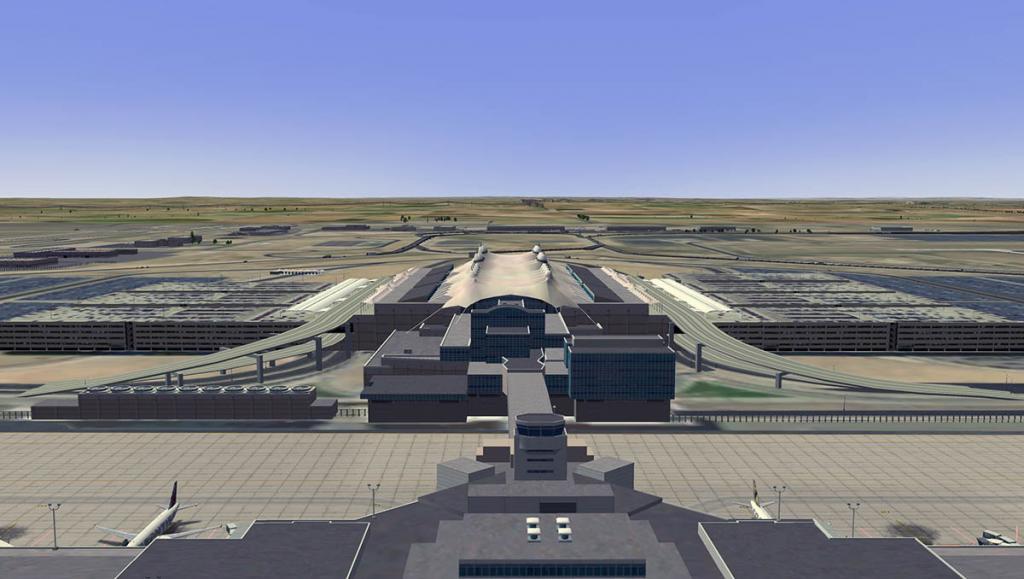
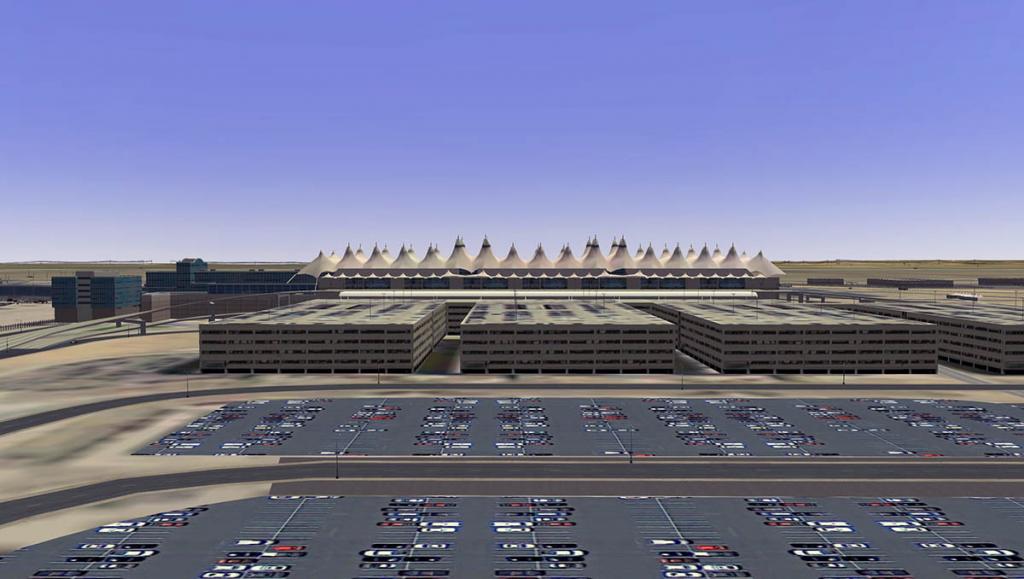

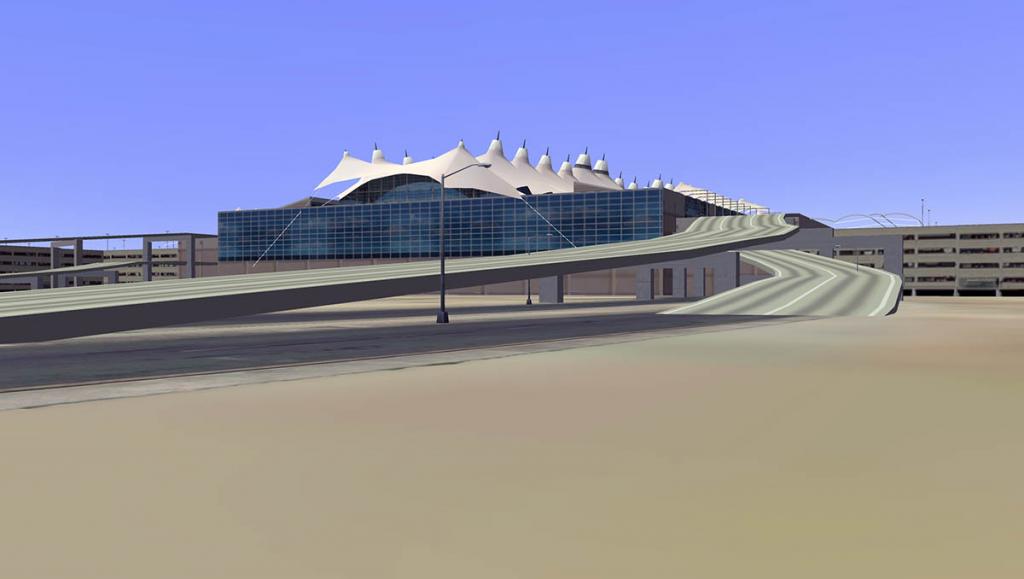
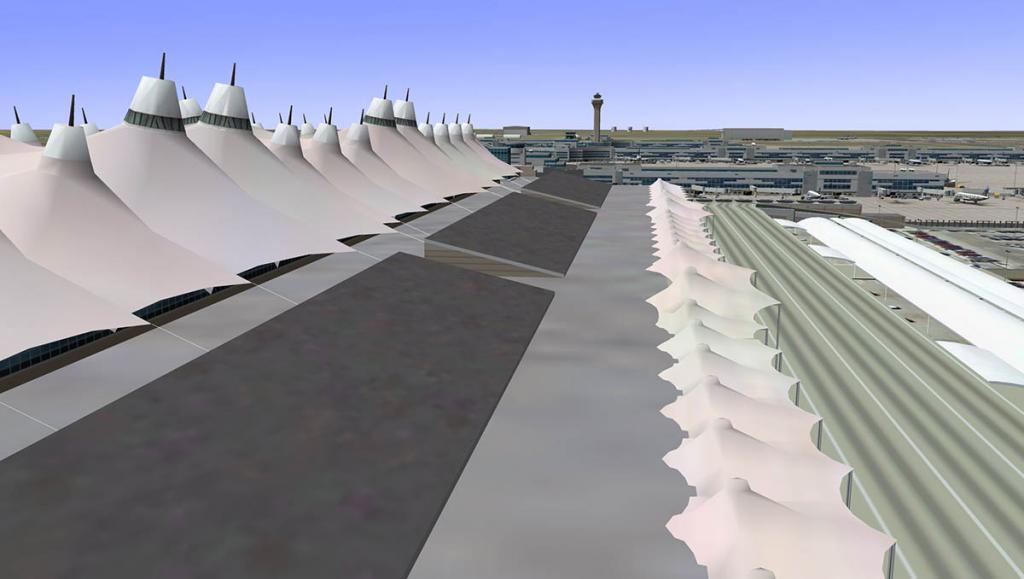
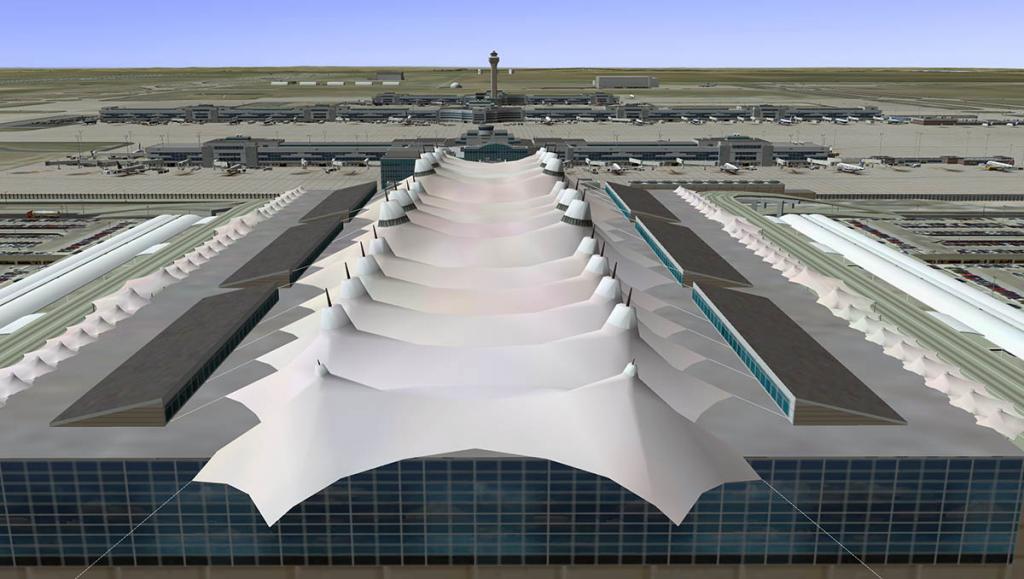
The focus of KDEN is certainly the striking white tent pole membrane roof of the main terminal. Some one even likened it to the Sydney Opera House? (It is nothing like the SOH as it is totally different in construction and profile). No doubt to recreate the terminal's unusual roof was going to a be a challenge as it is very hard to model canvas. And the results here are simply excellent. The detailing is first rate, and in either in being close up or set out from a distance the design is very prominent and iconic in the scenery.
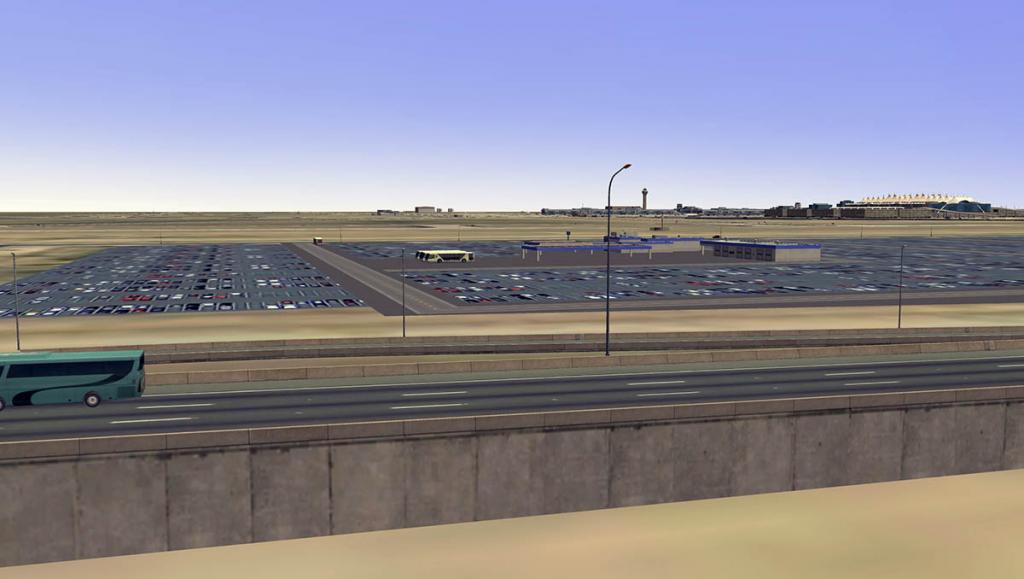
The glass in colour is excellent as well, and if you are very close up with good (slight) inside detailing. On both sides of the terminal are large (four west and three east) carparks that are well designed to be part of the overall terminal complex. wider out still are large open plan carparks that are flat. The scenery has a combination of carparks that have vehicles sited on them and others that are simply flat photographic plates, I understand that covering large areas with vehicles is painstaking slow work, but why do one area and not another? As it looks very odd.
Overall the buildings situated here in the terminal are complex in nature and have all been modeled with great skill in making them look authentic.
Concourse A
Concourse A has 37 Gates: A24–A68 with four international boarding gates (all international arrivals at Denver use Concourse A), gate A37 is used by British Airways and gates A41 & A43 are used by Air Canada, Icelandair, and Lufthansa. Frontier Airlines is the largest carrier on Concourse A with Great Lakes Airlines which KDEN is both being a hub (base) for the airlines, American Airlines are also located on the A concourse.


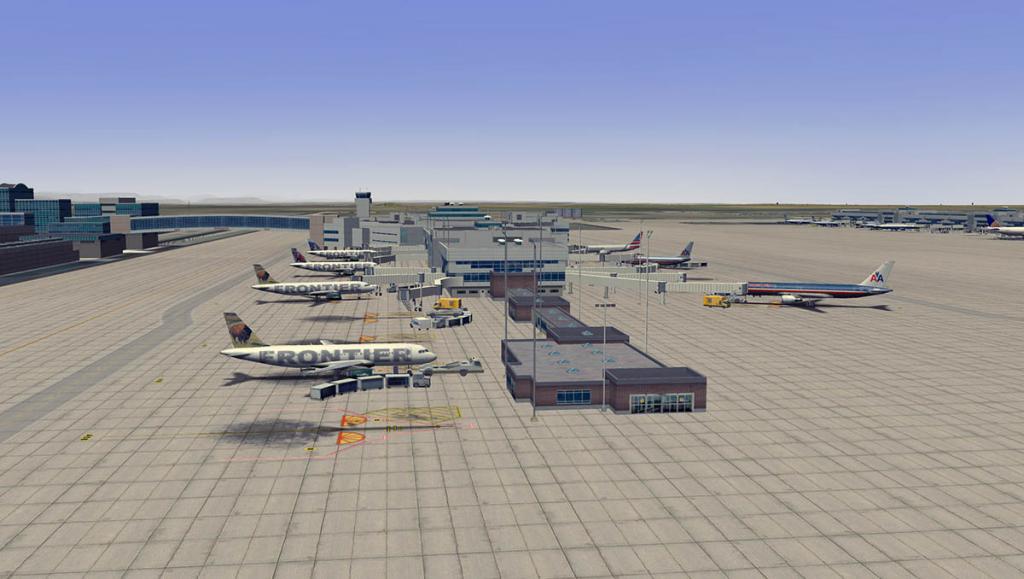
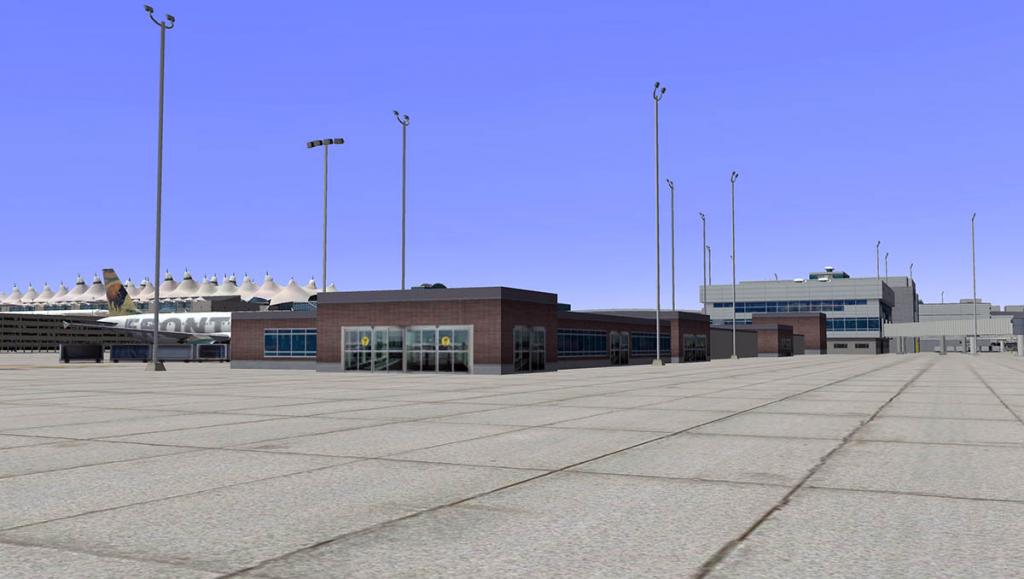
All the concourses are highly complex and individual. Concourse A is mainly different from the other two in because it has the pedestrian bridge from the main terminal. The concourse is highly detailed and has been comprehensively been recreated here in this scenery. The bridge is excellent in its upward curve and glass detailing. The concourse has a ramp tower to service all the gates of which most are filled with well placed static aircraft. There is large pallet storage area on the east side of the terminal and on the west side is a great (Frontier) regional area departure building.
Central of every concourse is a large central administration style building. These hub centers with an arm each side are very well created and are very imposing from the viewpoint of the ramp areas or moving along down the concourse. The one above is the "A" Concourse building.
Concourse B
Concourse B, is almost twice as long as "A" and "C", so it over shadows the two other island concourses. Concourse B has 77 Gates: B15–B29, B31–B33, B35–B39, B42–B95. This concourse is exclusive to Star Alliance partners. And so it is dominated by United Airlines and Star Alliance partner US Airways. United Airlines has two United Clubs on Concourse B, both one level above the main area of the concourse. One is adjacent to gate B32, and the other is adjacent to gate B44. In November 2009, United and DIA reached an agreement in which United released five of its gates in the western end of the concourse. DIA in return leased these gates to United's Star Alliance partner US Airways, as US Airways has now been merged with American Airlines then this agreement may change in the future. KDEN is a United Airlines hub.
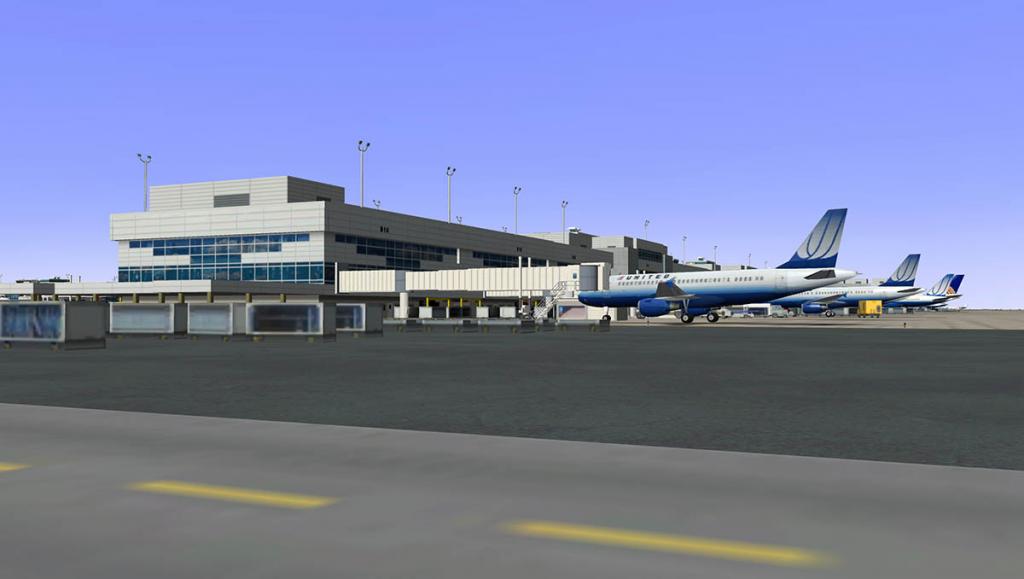

The "B" concourse is a simple island large core and an arm each side style concourse. Detailng is again excellent with well constructed concourses. The glass is again highly realistic as are the boarding gates. Ramp areas are full and detailed with well placed static aircraft. The central ramp tower is slightly larger than the one on Concourse "A" . At each end of the concourse there are pallet storage areas.
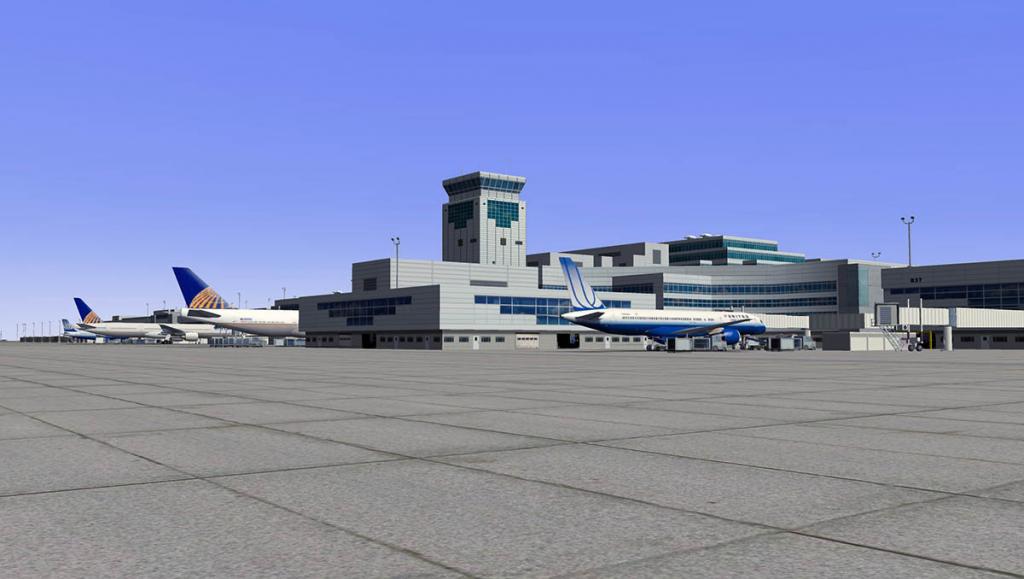
Concourse C
Concourse C has the bonus of having the Main Control Tower as part of the concourse. Concourse C has 22 Gates: C28–C49, and Southwest Airlines is the main carrier here, even though Delta uses the concourse as well. Concourse C also will have 6 new gates after an extension of the concourse is complete in November 2014. The new gates C22-C27 will be used by Southwest.
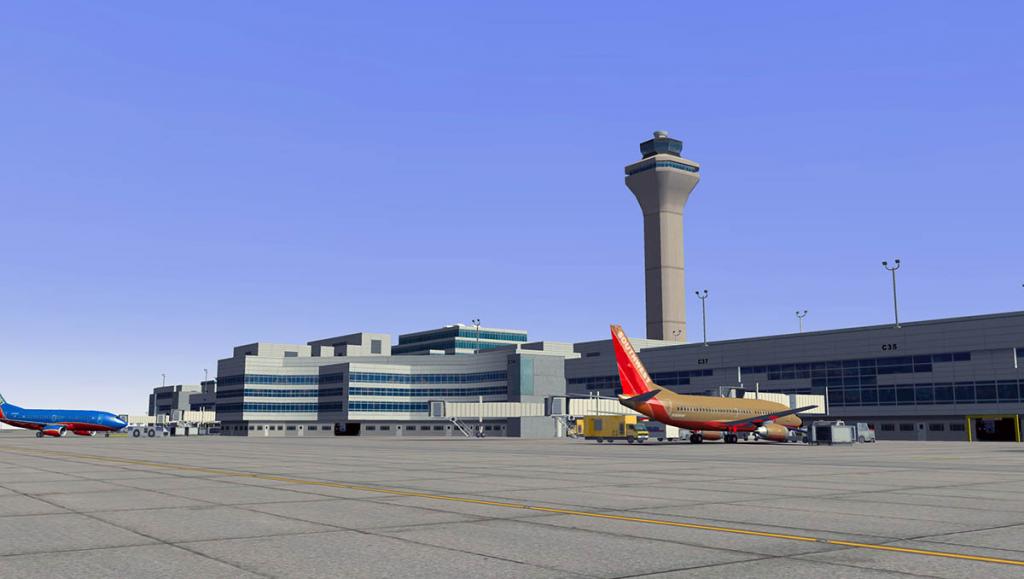
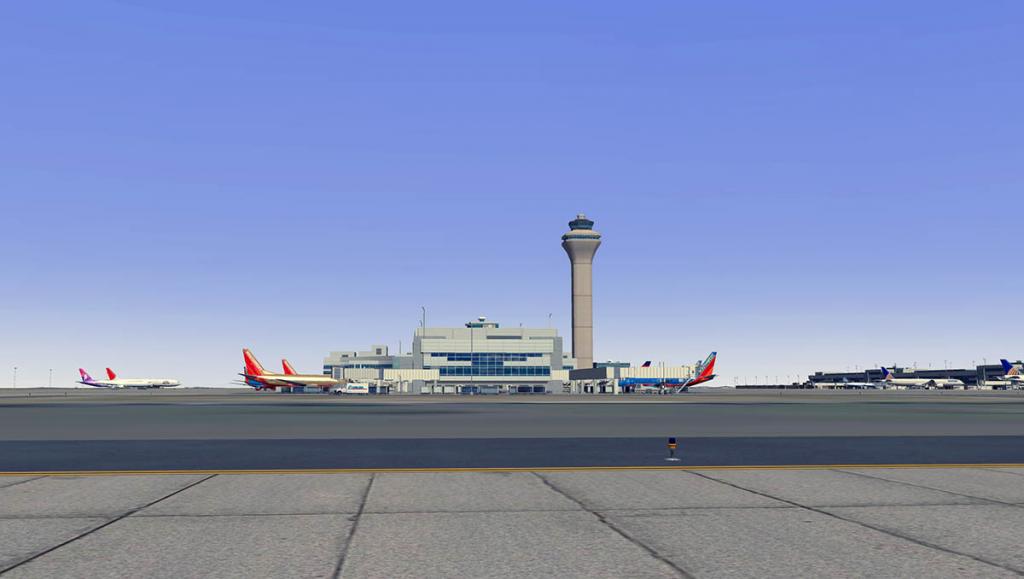
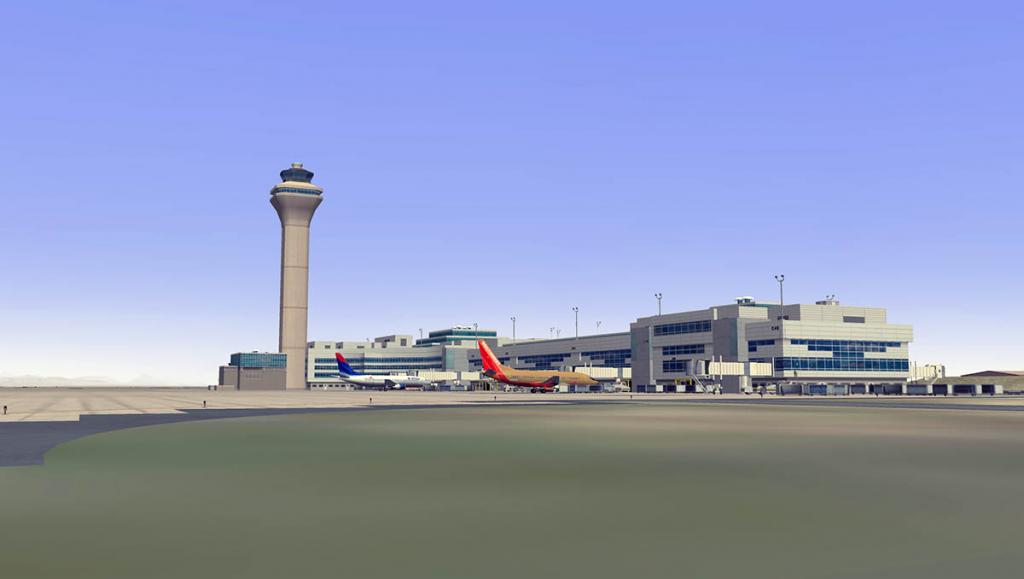

The control tower dominates concourse "C" and excellent in design it is, and at 327-foot (100 m) high it is one of the tallest in the United States. The concourse otherwise is very similar to A and B in construction and the same central hub and two arm layout, It feels far smaller than the other two islands but more full at the gates with Southwest static aircraft and some aircraft which are animated to pushback.
The areas between each island is quite large. Taxi lineage is good here but not comprehensive and it feels like there should be more. Runway and taxiway signs and lineage are however very good.
Expansion
There are plans at KDEN for two more Concourses to be built beyond Concourse C for future expandability. Concourse D can be built without having to move any existing structure. The underground train system, however, will have to be extended. Concourse E will require moving a United Airlines hangar. However, before construction on Concourses D and E begins, Concourses A, B, and C can also be extended in both directions.
North
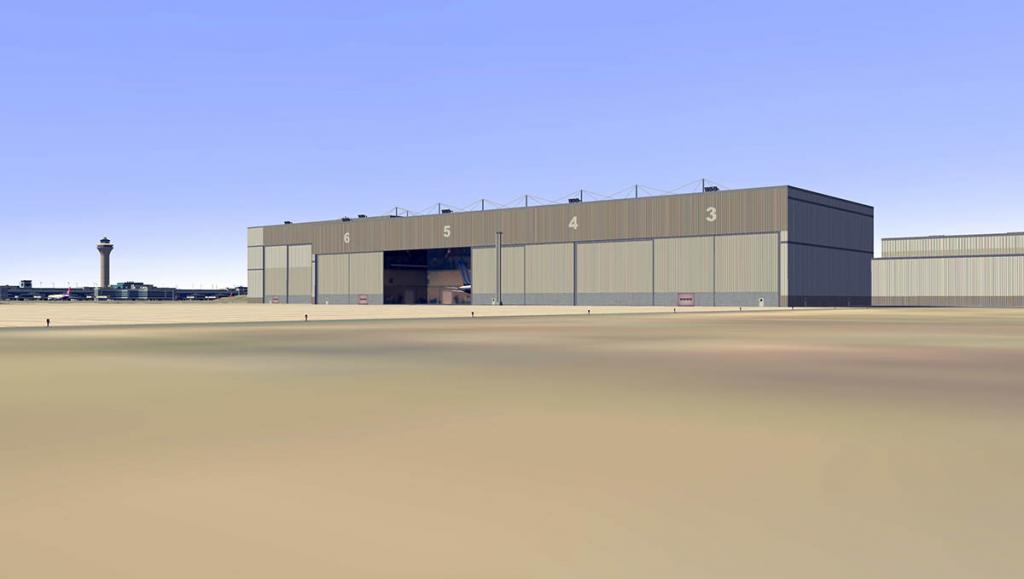
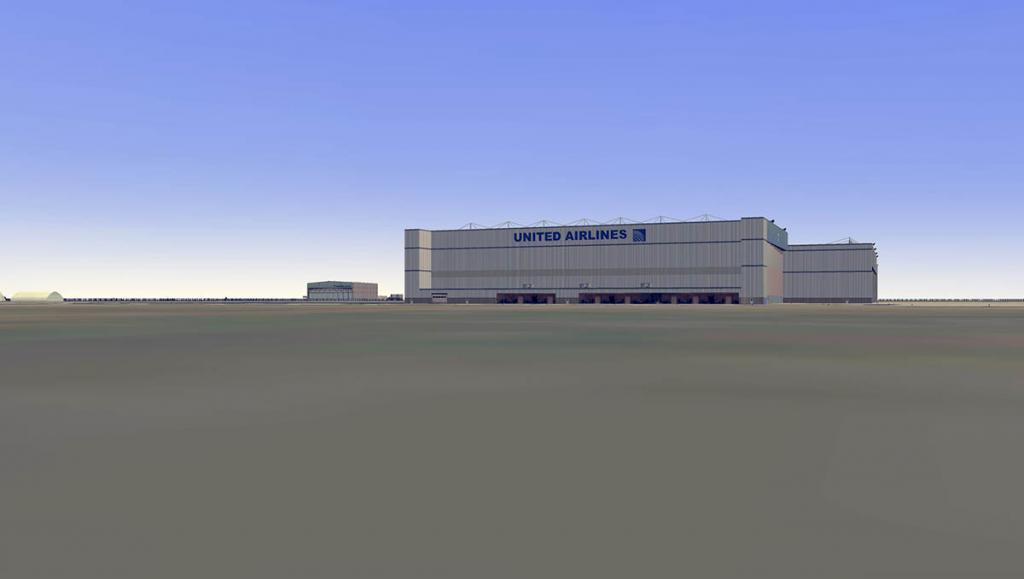
North of the central area is the well conceived Skychefs building and storage hangers. The northern area here is however mostly used for maintenance in the large United and Continental hangars. Both buildings and certainly the larger scale United base is excellent. A peek inside the hangar will find it is well detailed with an aircraft inside being serviced.
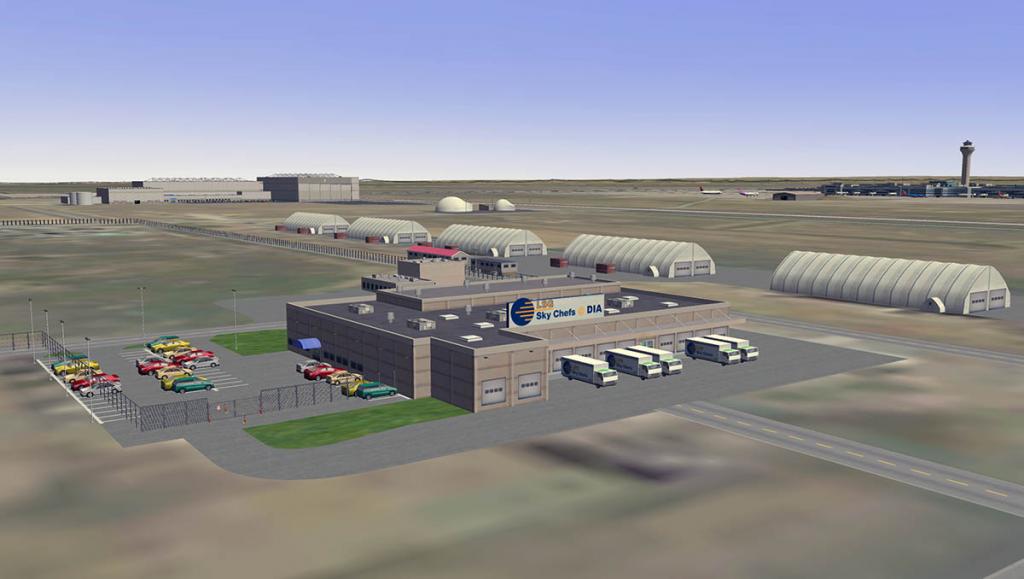
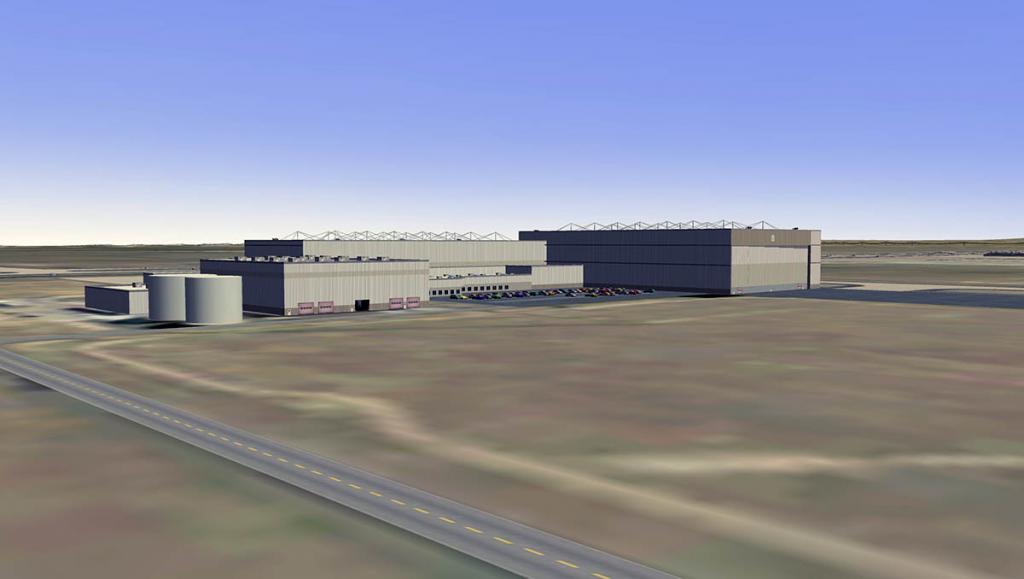

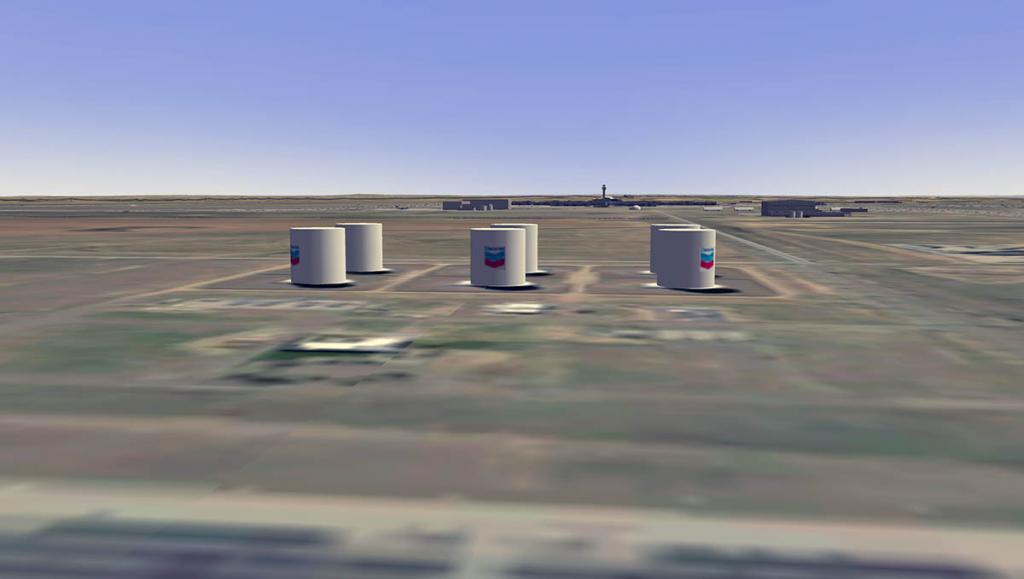
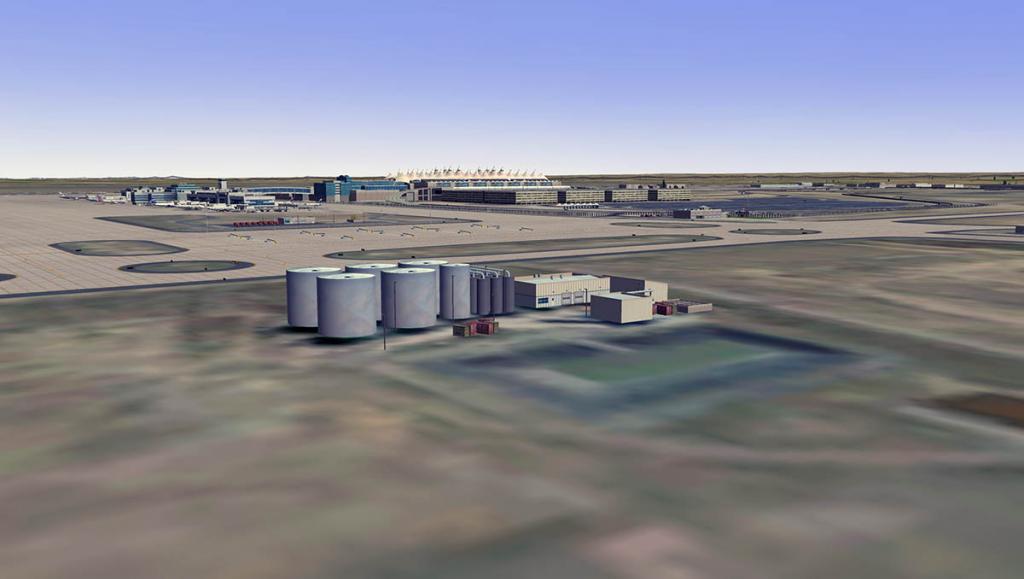
There are two small fire stations and a distance further away a large tank farm (fuel)
General Aviation and Corporate Jet services area.
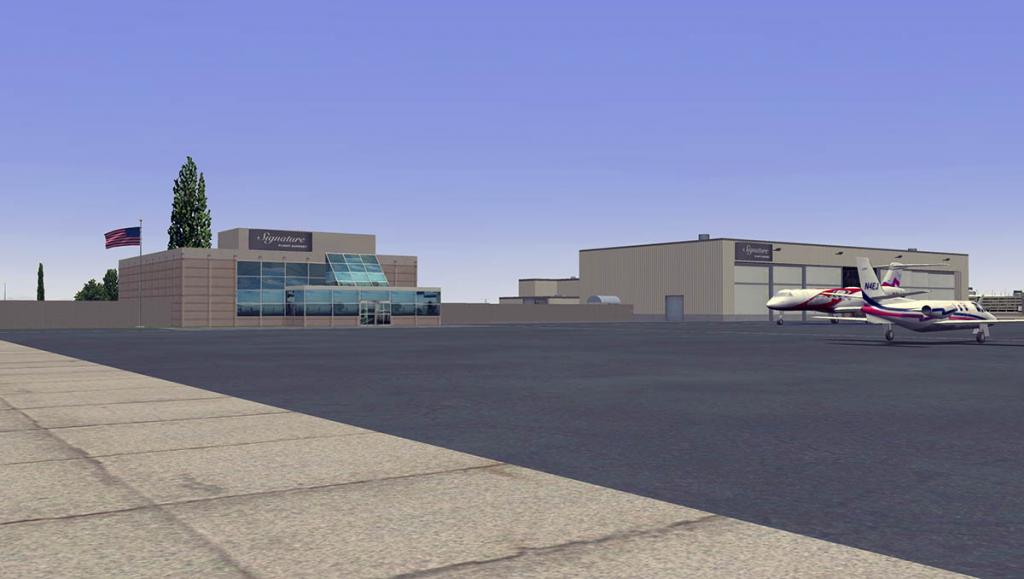
Down along the southern/western side of Runway 17R/35L is the General Aviation and private jet facilities, There is a Signature Corporate Jet terminal and hangar and some General Aviation parking.


Looking further south are the cargo ramps and warehousing.
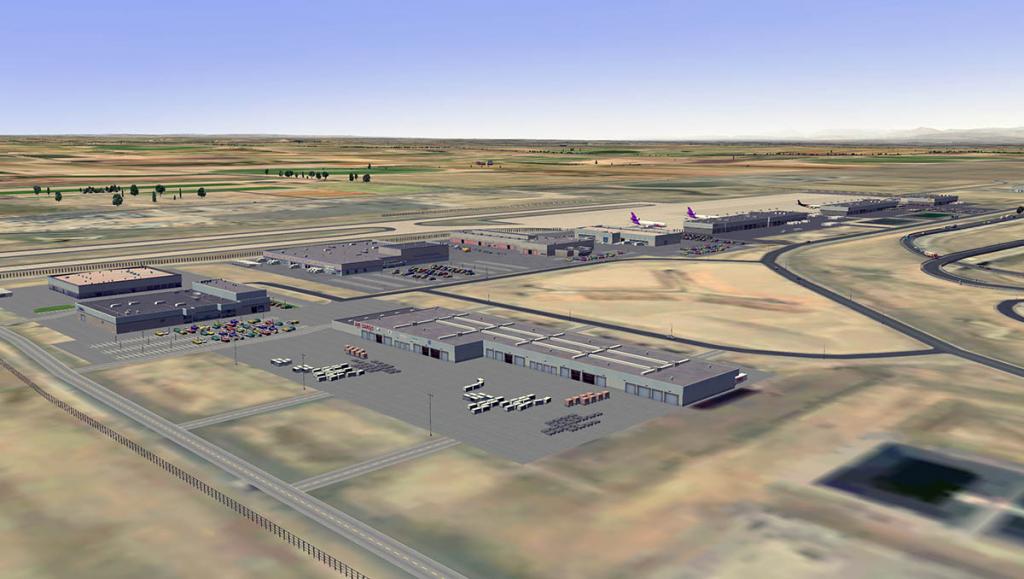

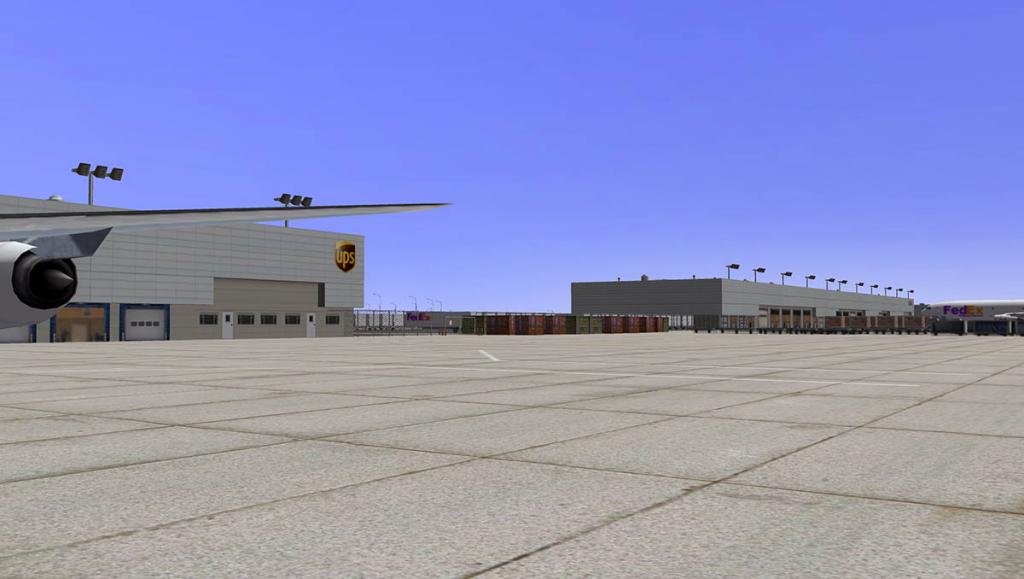
DHL, UPS and FedEx are all well represented, the ramps are well spaced with plenty of space between the static aircraft. Detailing is excellent.
Car Rental Yards
The Southern approaches to the airport is primarily covered by large branded car rental yards. All car rental companies are well represented here.

Again the car yards are a combination of placed cars and flat photo images of cars. Looking low across the yards the set up looks odd? But fine from the air, of which is the general idea. The area has however great traffic running through the scenery.
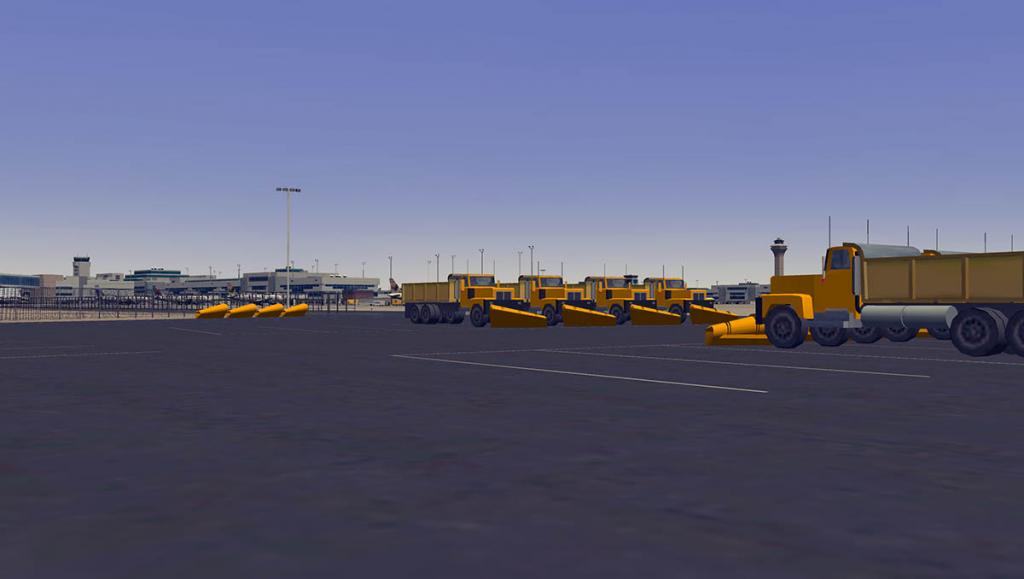
Finally on the western boundary of the central concourse areas is the main fire station and the large sets of De-Icing pads that are very well set out. Close by are another set of fuel tanks. Other details are a fenced in area with stored snow-ploughs ready for the harsh winter snow. There are many other small buidings and items spread around this very large area and too many to note here. no doubt KDEN is comprehensive in detail even down to the flags flying at the fire stations and signature terminal.

Night-Lighting
The lighting of KDEN is exceptional.
Coming closer to the airport from a distance gives you a great sight from the air. All the runways are very well lit and the taxiway lighting is perfect.


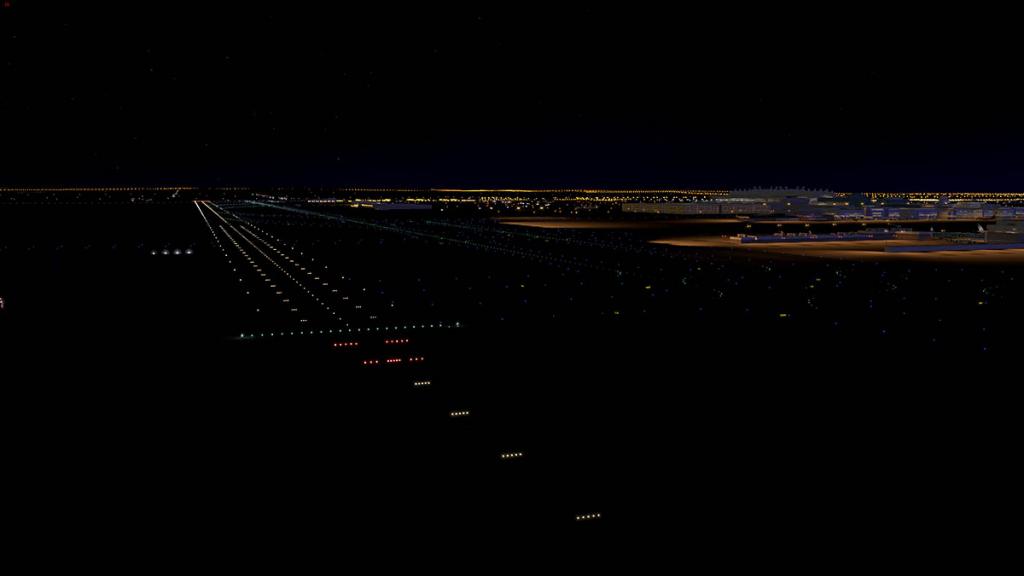
On approach at night you are faced with a great view of approach lighting and runways that go on a long way into the distance.
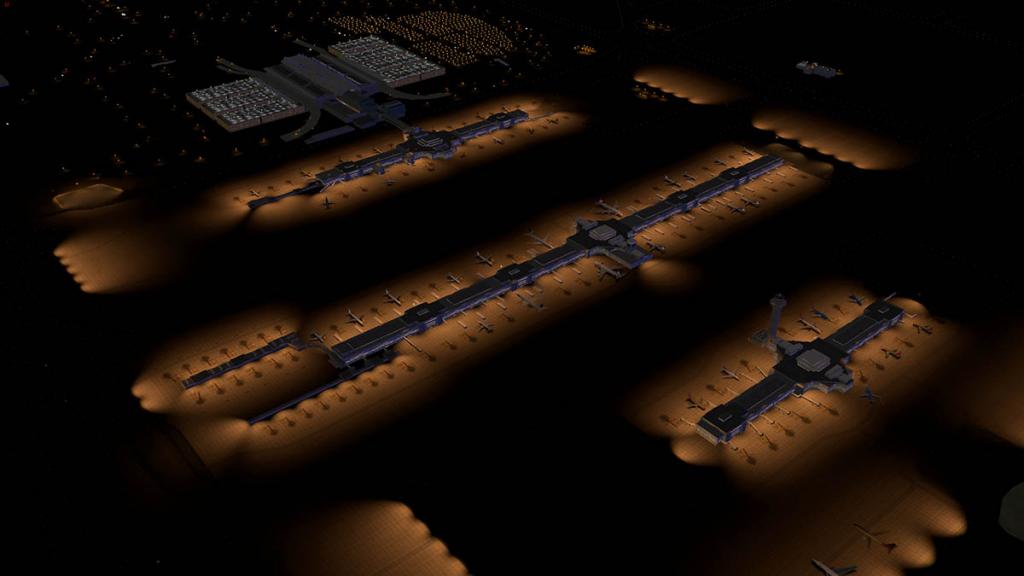
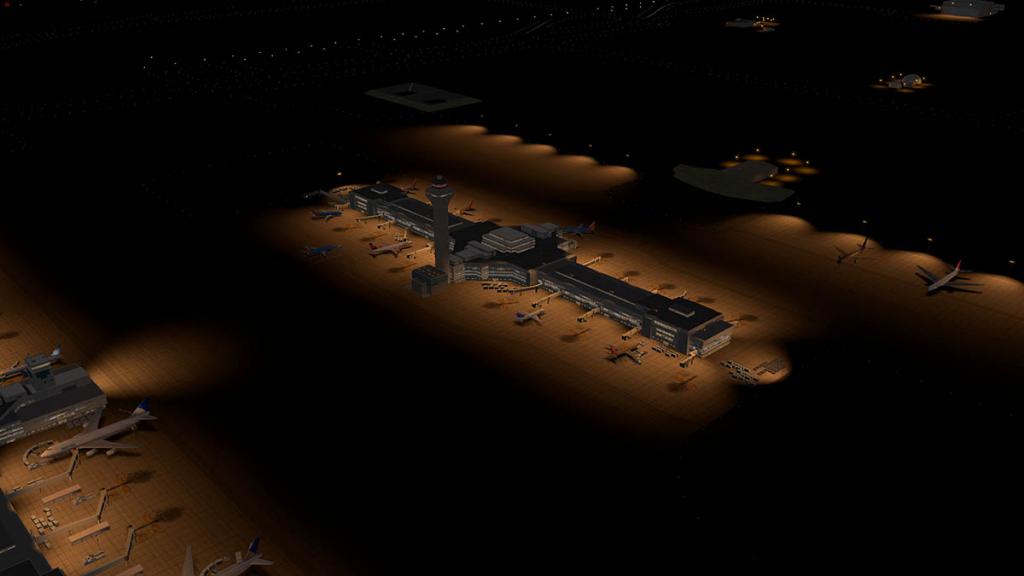
With the HDR selected then Denver International comes alive with colour. All areas are extremely well lit, even down to the parking ramps set aside from the main central area. Well done besides the standard tower lighting is the twin and triple lights mounted on concourses and other buildings. Car parks are well lit as well, giving you a total full coverage of all airport areas.
At night the terminals and concourses really come alive with some brilliantly great window lighting and details... So if you are coming to KDEN then arriving here at night is really something special.
Frame-rate
You would think all this scenery would heavily tax your frame-rate. The good news is that the frame-rate pull down is very light and good. There are are reasons for this. One) Tom Curtis is very good at getting the best out of his scenery without over excessive textures (The whole scenery set is only 137.30mb). Secondly) the default autogen is set a fair distance from the airport and doesn't kick your machine where it hurts. So the machine only has to process the airport scenery without taxing itself with other areas that can in most cases hurt you. It is to be noted you will need to set the texture level to "Too Much" to get the quality that you need and even then a few of the static aircraft are quite blurry. But I could easily sit in the "Too Much" setting without it going down into the 20's. so that is a great result. HDR on with all that candle-power does hurt however, and I found myself in the middle-teens, but feel I good get into the low 20's with a bit of fine tuning.
Arrival impressions
My arrival above the striking circular fields of Colorado was from the east with a turn to the north to start my second 90º turn back east as I circled around the Colorado State largest airport. The arrival runway was 16L, which was not the larger massive parallel 16,000ft 16R. On approach remember you are very high above AMSL at 5374ft (at RWY16L) and the height must be taken into account on setting your final approach height. A radar altimeter is invaluable here.
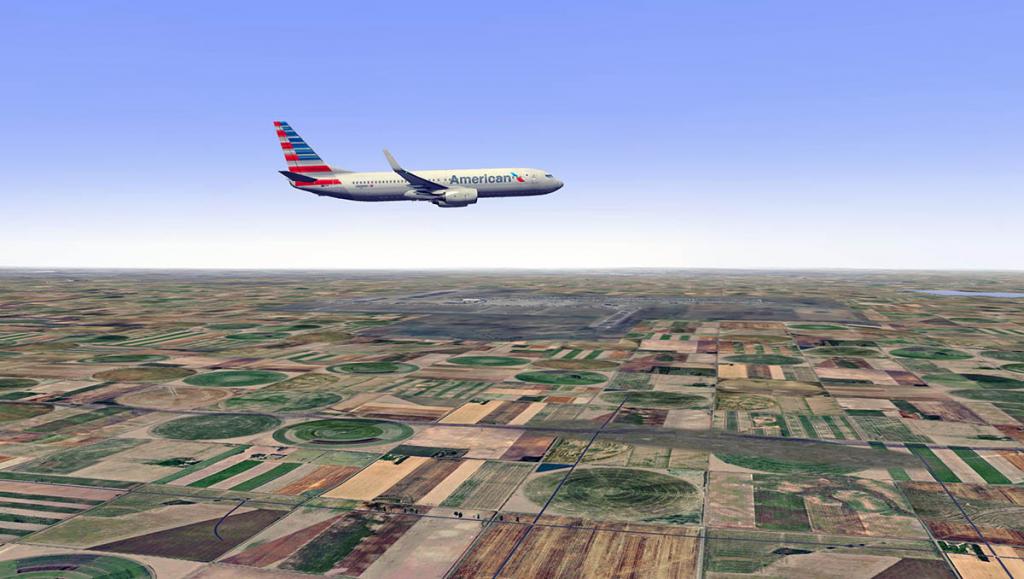
From a distance KDEN is very greyish compared with the greens around you and the line edge of the orthophoto underlay was annoying very pronounced as you reached the edge of the scenery. Once over on to the scenery it was very good and the runways the standard Xplane textures. As an arrival the airport was visually excellent in the distance. The sense that you had arrived somewhere was excellent.
KDEN is a huge and complex airport to navigate, to do some pre-landing work is always advisable. There is some taxiway signage and many direction signs that are viewable as well, the linage is very good. After cleaning up the aircraft the travel time to the gate can be quite long, certainly if you have arrived or are going to depart from one of the far out runways of the spiral as the total area covers 53 square miles. The photo underlays look very blurry at this close up distance, even with the textures set only one from the top at "Too Much". The large area also works again against these photo underlays in that it makes all the areas look very open, flat and bland... many scenery artists like Aerosoft use poking up grass to break up such areas. Here sadly the flatness is noticable.

The Control Tower view is excellent and very handy in rotation in finding the correct area (Concourse A) that I need to gate at (American). Passing all the row upon row of set out de-icing pads showed you that winter can be extreme here in Denver, It is a shame that currently Xplane can't do white snowy winters.
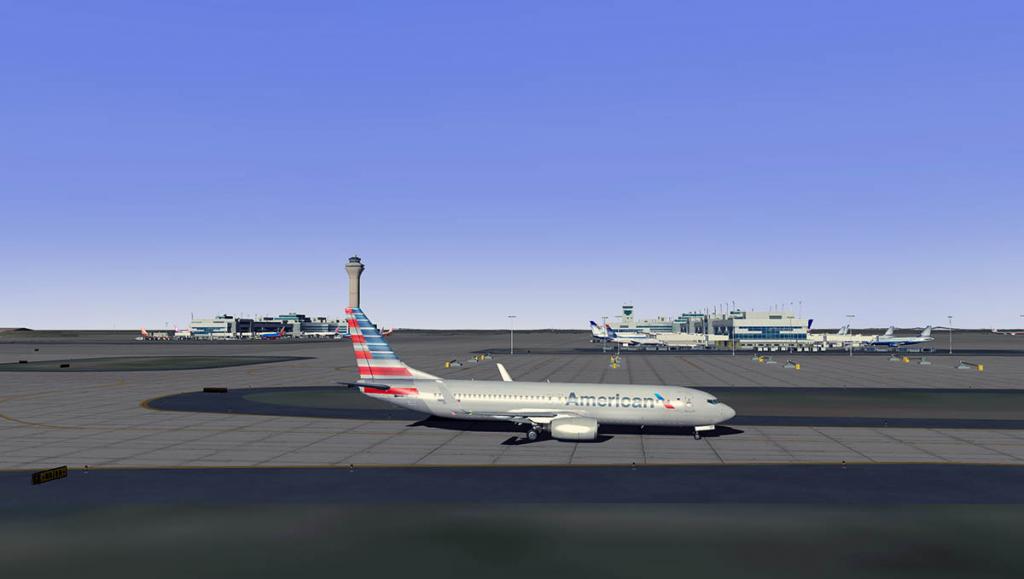

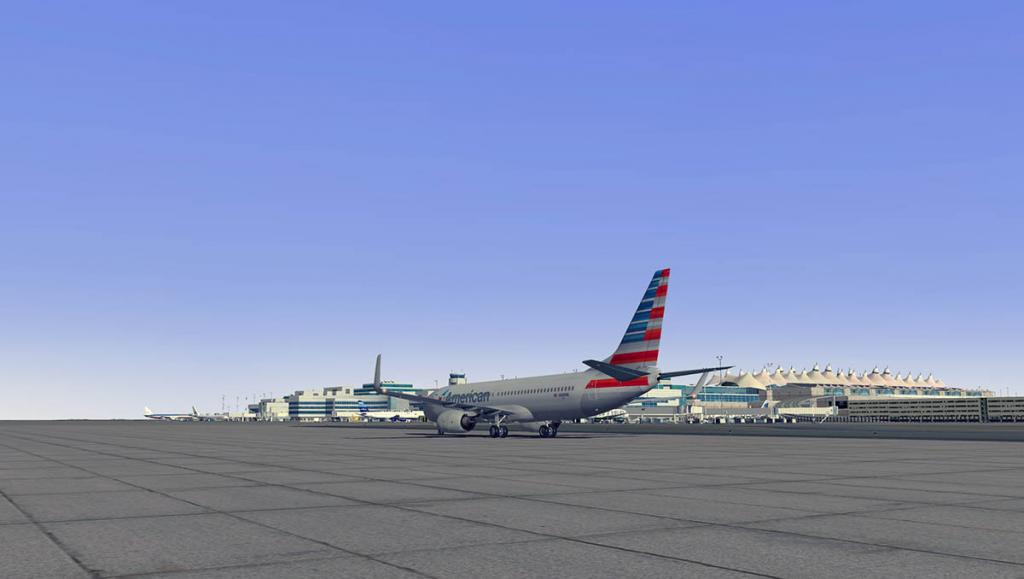
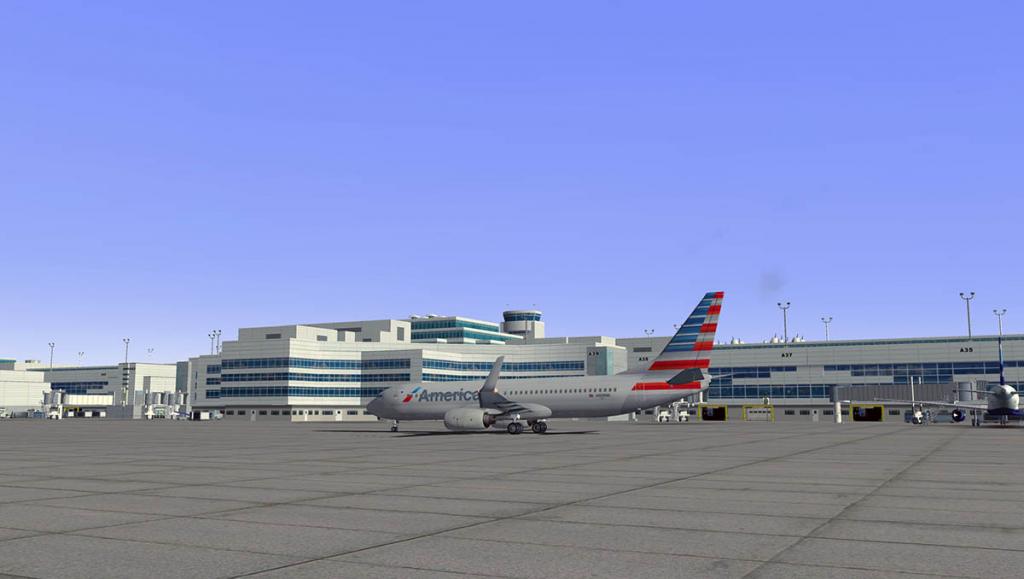
From this low ground viewpoint KDEN looks very good and the terminals totally realistic with the tall control tower most striking. The areas between the concourses are very wide and feel quite empty if you have no aircraft traffic running, but otherwise it is an excellent view passing gates and the tall towering central parts of the concourses. There are built in extensive traffic routes (Xplane ATC). My Gate was A43 on Concourse A. Gate markings (numbered) and position align lines are very good.
There are over 90 autogates (marginal) built into KDEN, so you can never complain of not finding a gate you need. I found that the autogate was excellent at A43, and the two part direction board very good. Only issue was the ground texture and gate line was not aligned with the final parked position of the Boeing 738 aircraft.


Of an arrival experience the arrival at KDEN is excellent, The same arrival at night as noted is even better.
Routes, these are the busiest routes to and from KDEN
Domestic
Rank City Passengers Carriers
1 Phoenix, Arizona 956,000 Frontier, Southwest, Spirit, United, US Airways
2 Los Angeles, California 933,000 American, Frontier, Southwest, United
3 Las Vegas, Nevada 882,000 Frontier, Southwest, Spirit, United
4 San Francisco, California 830,000 Frontier, Southwest, United
5 Dallas/Fort Worth, Texas 809,000 American, Frontier, Spirit, United
6 Seattle/Tacoma, Washington 757,000 Alaska, Frontier, Southwest, United
7 Minneapolis/St. Paul, Minnesota 735,000 Delta, Frontier, Southwest, Spirit, United
8 Atlanta, Georgia 707,000 AirTran, Delta, Frontier, Southwest, United
9 Salt Lake City, Utah 706,000 Delta, Frontier, Southwest, United
10 Chicago, Illinois (O'Hare) 667,000 American, Spirit, United
International
1 London (Heathrow), United Kingdom 356,798 British Airways
2 Cancún, Mexico 218,469 Frontier Airlines, United Airlines
3 Toronto (Pearson), Canada 206,954 Air Canada, United Express
4 Calgary, Canada 200,300 United Airlines, United Express
5 Frankfurt, Germany 194,566 Lufthansa
6 Vancouver, Canada 155,096 United Airlines, United Express
7 Edmonton, Canada 130,562 United Express
8 Winnipeg, Canada 101,169 United Express
9 Puerto Vallarta, Mexico 94,867 Frontier Airlines, United Airlines
10 Mexico City, Mexico 63,966 Aeromexico, United Airlines, Volaris
Conclusions
For value KDEN - Denver International Airport is exceptional for your hard earned money. You get a lot of scenery for just under 20 US$ dollars, It is light on your frame-rate as well, with just the heavy night-lighting pushing the HDR very hard. Overall the night-lighting is exceptionally good with great textures and the glass/windows are very realistic. 90 working gates are also a great feature, as there is nothing better than having a gate close on the aircraft when shutting down the engines.
All the concourses and buildings are very well recreated and reproduced, and the significant Jeppesen Terminal and its membrane roof is excellent. There are a lot of buildings in here, and far more than you can see at a first glance.
The huge expanse of the photo-underlays causes the wider areas to look very flat, and areas that should not be flat to look plain as well. The flat areas of carparks are not my ideal viewpoint either, especially with some areas with and many areas without static vehicles. The worse outlook of the underlays is the actual boundries, If the photo-underlays had been set in closer to the shape of the runways then the whole scenery would have certainly gone into the higher exceptional level of standards, but in this case the gray area squares stand out for miles against the more brighter X-Plane default backgrounds, and the crossover line edges are just as bad.
Certainly I would love to see this scenery under a seasons worth of snow and ice, that may come for X-Plane one day. But for now it is very good anyway. with very well laid in ATC routes, and if you have World Traffic you can really make KDEN buzz.
Overall KDEN is excellent destination scenery as all Tom Curtis scenery usually is. It is highly detailed and very well designed and modeled. KDEN is a huge space of an airport, just simply massive and very good scenery. A certain buy for anyone that need an excellent Mid-Western hub.
Yes! the Denver International Airport (KDEN) by Tom Curtis is now Available from the X-Plane.OrgStore : Denver International Airport
Price is US$19.95 - note : X-Plane9 is available on request
Installation
KDEN - Denver International Airport is a download of 46.1mb that is unzipped to 137.30mb install. There are two items in the download folder that need to be installed in your resources/plugin folder. First is the Marginal "autogate" plugin (If you don't have it already installed) the second is the "Real Flag plugin" (CustomSBDatarefs004) for flapping in the wind realistic flags.
Developers Site : Scenery4xp
Review By Stephen Dutton
14th February 2014
©copyright 2014 : X-Plane Reviews
Technical Requirements:
Windows , MAC or Linux
X-Plane 10 - X-Plane 9 available on request. Send us an email after you place the order
4GB RAM/1GB VRAM - 100MB HD - Version 1
(last updated Feb 6th ,2014)
Review System Specifications:
Computer System:
- 2.66 Ghz Intel Core i5 iMac 27”
- 6 Gb 1067 Mhz DDR3
- ATI Radeon HD 4850 512mb
Software:
- Mac OS Mavericks 10.9
- X-Plane 10 Global ver 10.25 (final)
Addons
- Saitek x52 Pro system Joystick and Throttle
Aircraft
x737 - EADT - 737 Project (free)
-
Freeware Release : Avro Vulcan BMk2 by Daniel G
The Avro Vulcan BMk2 has been purchased (former payware) by Nicolas of the X-Plane.orgStore and has now been released as freeware on the X-Plane.Org site.
The Avro Vulcan (officially Hawker Siddeley Vulcan from July 1963, is a four engined jet-powered delta wing strategic bomber, which was operated by the Royal Air Force (RAF) from 1956 until 1984. The Vulcan B.1 was first delivered to the RAF in 1956; deliveries of the improved Vulcan B.2 started in 1960. The B.2 featured more powerful engines, a larger wing, an improved electrical system and electronic countermeasures (ECM); many were modified to accept the Blue Steel missile. As a part of the V-force, the Vulcan was the backbone of the United Kingdom’s airborne nuclear deterrent during much of the Cold War. Although the Vulcan was typically armed with nuclear weapons, it was capable of conventional bombing missions, a capability which was used in Operation Black Buck during the Falklands War between the United Kingdom and Argentina in 1982.
In spite of its radical and unusual shape, the airframe was built along traditional lines. Except for the most highly stressed parts, the whole structure was manufactured from standard grades of light alloy. The airframe was broken down into a number of major assemblies: the centre section, a rectangular box containing the bomb-bay and engine bays bounded by the front and rear spars and the wing transport joints; the intakes and centre fuselage; the front fuselage, incorporating the pressure cabin; the nose; the outer wings; the leading edges; the wing trailing edge and tail end of the fuselage; the wings were not sealed and used directly as fuel tankage, but carried bladders for fuel in the void spaces of the wings; and there was a single swept tail fin with a single rudder on the trailing edge.
The normal crew of five, the first pilot, co-pilot, navigator radar, navigator plotter and air electronics officer (AEO) was accommodated within the pressure cabin on two levels, the pilots sitting on Martin-Baker 3K (3KS on the B.2) ejection seats whilst on the lower level, the rest of the crew sat facing rearwards and had to abandon the aircraft through the entrance door. The original B35/46 specification had specified a jettisonable crew compartment but this requirement was removed in a subsequent amendment and the issue of not providing the rear crew with ejection seats remained highly controversial, especially when a practical scheme to fit them was rejected. A rudimentary sixth seat was provided forward of the navigator radar for an additional crew member; the B.2 also had an additional seventh seat on the opposite side from the sixth seat and forward of the AEO. These seats were no more than cushions and a full harness and an oxygen and intercom facility. The visual bomb-aimer’s compartment could be fitted with a T4 (Blue Devil) bombsight but in most B.2s, the space was eventually fitted with a vertically mounted Vinten F95 Mk.10 camera for the assessment of simulated low-level bombing runs. (wikipedia)
The Vulcan was powered by four Bristol-Siddeley Olympus 201 12,000 lbf (53 kN) thrust or Olympus 301 of 20,000 lbf (89 kN) thrust) - two-spool axial-flow turbojets. Vulcan B.1 XA903, surplus to Blue Steel trials, was converted to a similar layout to XA894 to flight test the Olympus 593 Concorde engine installation.
Performance : Cruising speed Mach .86 indicated, Maximum speed Mach .95 indicated Mach .93 indicated (Mach .92 with 301 engines) Mach .93, Service ceiling 55,000 ft (17,000 m)[253] 45,000 ft (14,000 m) to 56,000 ft (17,000 m)[nb 2], Maximum Takeoff Weight 204,000 lb (93,000 kg). Avro Vulcan BMk2
If you like to fly aircraft that are very different and a challenge, then you can't go past the Avro Vulcan BMk2 by Daniel G. This Cold War bomber is like nothing else from its very tight (Nuclear bomb proof?) cabin to the huge wide delta wing. The work by Daniel is very good and you do have a 3d cockpit to squeeze into. Today the cockpit detailing here is now a little flat and old, but it all still works were it counts with pop-up panels (Pilots side, Co-Pilots side and centre), and most of the controls are well created and functional. features of the released version include.
- Flight dynamics modeled to Avro operating data
- Object model exterior incorporating detailed animation of control surfaces
- speed-brakes undercarriage and crew hatch
- 3D virtual cockpit with plugin-free pop-up panels
- Avro avionics modeled with generic instruments for all X-Plane capable Vulcan instrumentation
- JERA engine sounds sampled from Olympus engines
- Compatible with X-version 9 including 9.4 on Mac, PC and Linux
- 14 Liveries
The Vulcan is really like nothing else you have flown. The cockpit is very military and you will need to read the manual (Flight Manual) to work yourself around the cockpit... Flaps? There isn't any. but the speed brakes are very effective.
If you feel like starting a Nuclear War then here you have a tactical nuclear bomb in the bomb bay... The Vulcan initially carried Britain's first nuclear weapon, the Blue Danube gravity bomb. Blue Danube was a low-kiloton yield fission bomb designed before the United States detonated the first hydrogen bomb. These were supplemented by U.S.-owned Mk 5 bombs (made available under the Project E programme) and later by the British Red Beard tactical nuclear weapon. The UK had previously embarked on its own hydrogen bomb programme, and to bridge the gap until these were ready the V-bombers were equipped with an Interim Megaton Weapon based on the Blue Danube casing containing Green Grass, a large pure-fission warhead of 400 kt (1.7 PJ) yield.%5B133%5D[N 6] This bomb was known as Violet Club.[ Only five were deployed before the Green Grass warhead was incorporated into a developed weapon as Yellow Sun Mk.1.
The aircraft here also includes Avro Vulcan BMk2 modeled on XH558 "The Spirit of Great Britain". Which is the last flying Vulcan that is flown by the Vulcan to the Sky Trust.
Operation Black BuckThe only combat missions involving the Vulcan took place in 1982 during the Falklands War with Argentina. This was also the only time V-bombers took part in conventional warfare. The missions flown by the Vulcans became known as the Black Buck raids, which flew 3,889 mi (6,259 km) from Ascension Island to Stanley on the Falklands.] On 1 May, the first mission was conducted by a single Vulcan that flew over Port Stanley and dropped its bombs on the airfield concentrating on the single runway, with one direct hit, making it unsuitable for fighter aircraft. The Vulcan's mission was quickly followed up by strikes against anti-air installations, flown by British Aerospace Sea Harriers from nearby Royal Navy carriers.
In total, three missions were flown against the airfield, two further missions to launch missiles at radar installations; another two missions were cancelled. Victor tankers conducted the air-to-air refuelling; approximately 1.1 million gal (5 million L) of fuel were used in each mission. At the time, these missions held the record for the world's longest-distance raids. The Vulcan's ECM system was effective at jamming Argentine radars, British aircraft in the vicinity had a greatly reduced chance of coming under effective fire. Considering the Vulcan was never part of a long lasting conflict (Falklands War aside). The Aircraft had a very colorful history. The Sky Trust history is well worth reading in that many missions including Operation Black Buck (And the other Black Buck Missions of which there was 7 in all) are all highly detailed.
So the Avro Vulcan BMk2 is well worth the download and It would be nice if you could support and donate at the Sky Trust to keep XH558 in the air.
Avro Vulcan BMk2 by Daniel G Is available here - Avro Vulcan BMk2
Stephen Dutton
11th February 2014
Copyright©2014 : X Plane Reviews
-
Your readers may be interested in this checklist to bring the Boeing 727 alive. It closely follows procedures published with the aircraft and should help get the best out of the B727.
http://forums.x-plane.org/index.php?showtopic=65078&hl=vance
Vance
Tried the checklist out... it is very good, thanks Vance. SD
-
stephen
2 questions (which i couldn't spot a comment about)
- does the 757 have custom commands & which are "mapped / included" to a plugin for key / button assignment
- does the 757 have take off / approach / gwps callouts
thanks
I checked it out on this one John... For the custom commands directly from the B757. the answer is no... but you can do the X-Plane versions key/button assignments. I have all the main items set on my joysticks and throttles like, thrust reversers and airbrakes, nose wheel steer, flaps and brakes and they all work fine or me.
Yes the B757 does have callouts but only on landings, 1000, 500, 400, 300, 200, 100 then 50 to 10 and minimums. SD
-
As Ye Olde Aircraft Mechanic I have to ask, does this Sim give you EPR settings depending on pressure alt and temp? Because that is how your power is set in those jets. The RPM and EGT were limit and condition gauges. Pulling up from my memory bank the EPR could run from 1.7 on a very cold high pressure altitude day(34.00 hg), up to 2.4 on a high hot runway. It's been about 15 years since I ran JT3D engines but the principal is the same.
Hello Beverly.. The developers noted that EPR setting are not simulated for these phases of flight. Not because they did not want then in there but because X-Plane does not represent them very closely to allow you to do so. SD
-

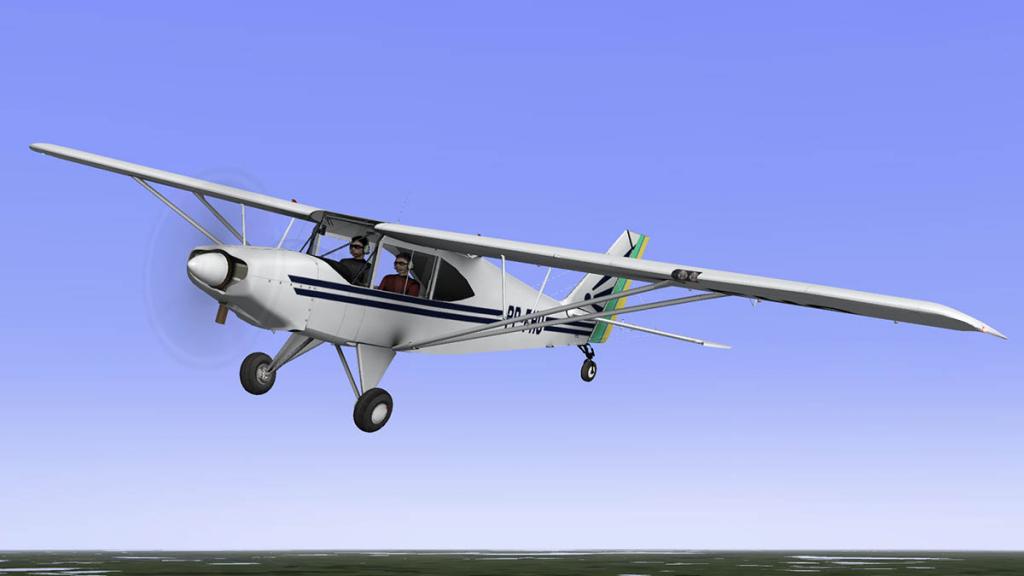
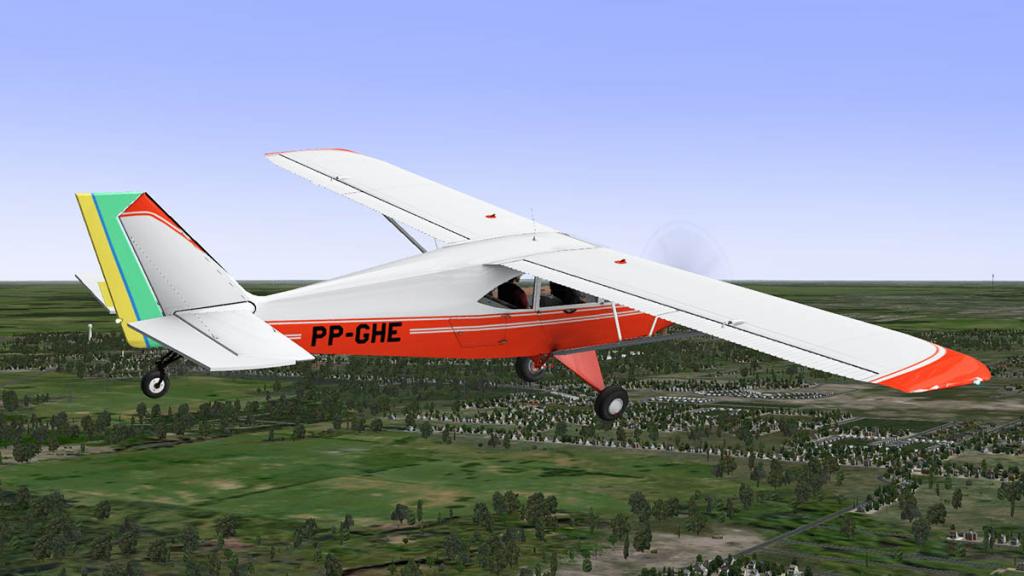
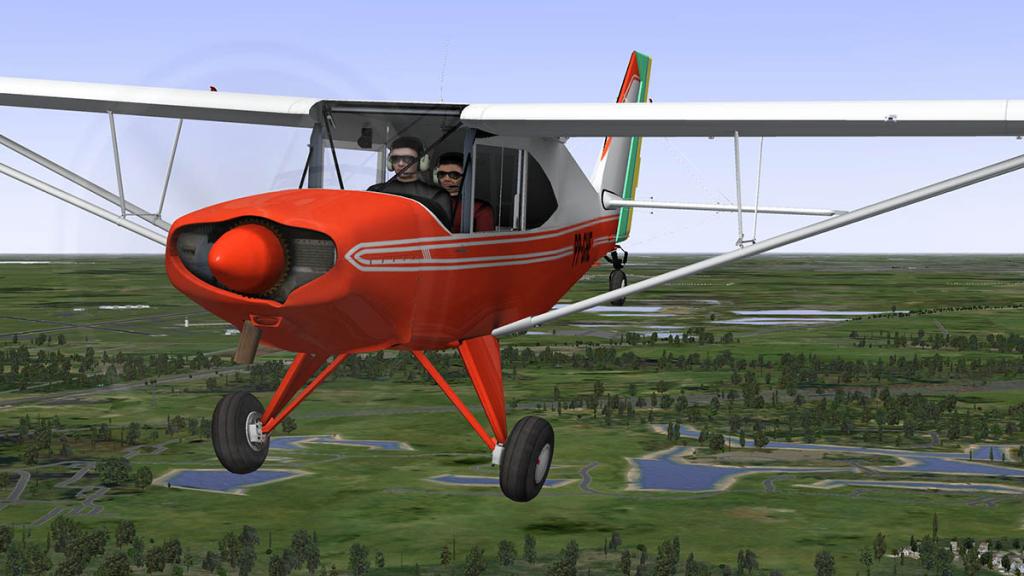
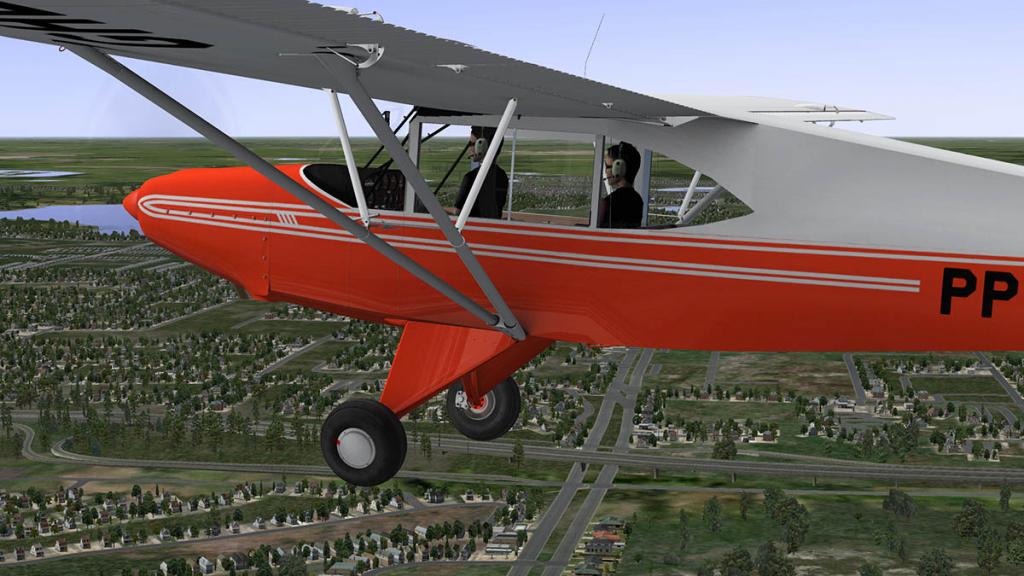
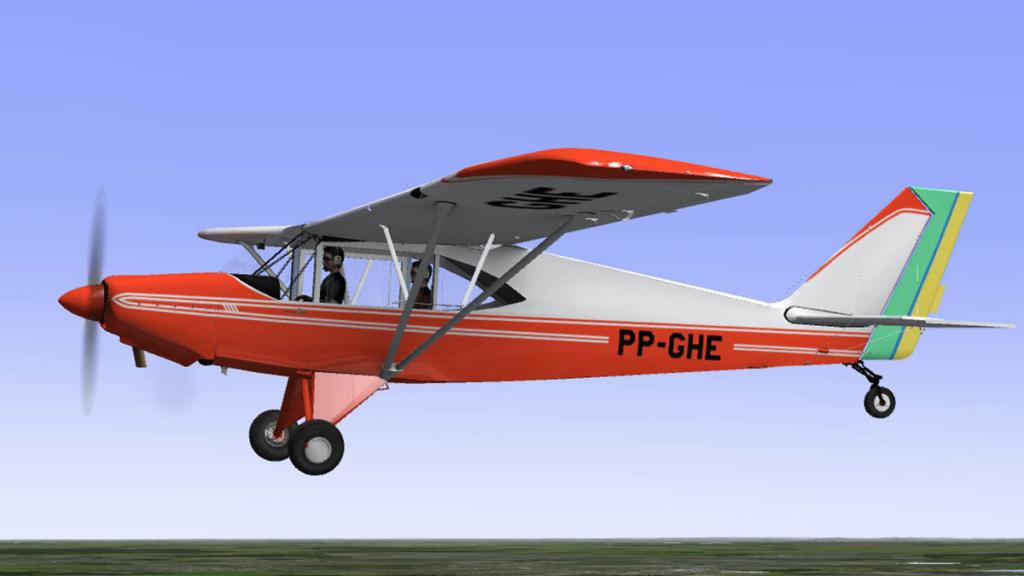
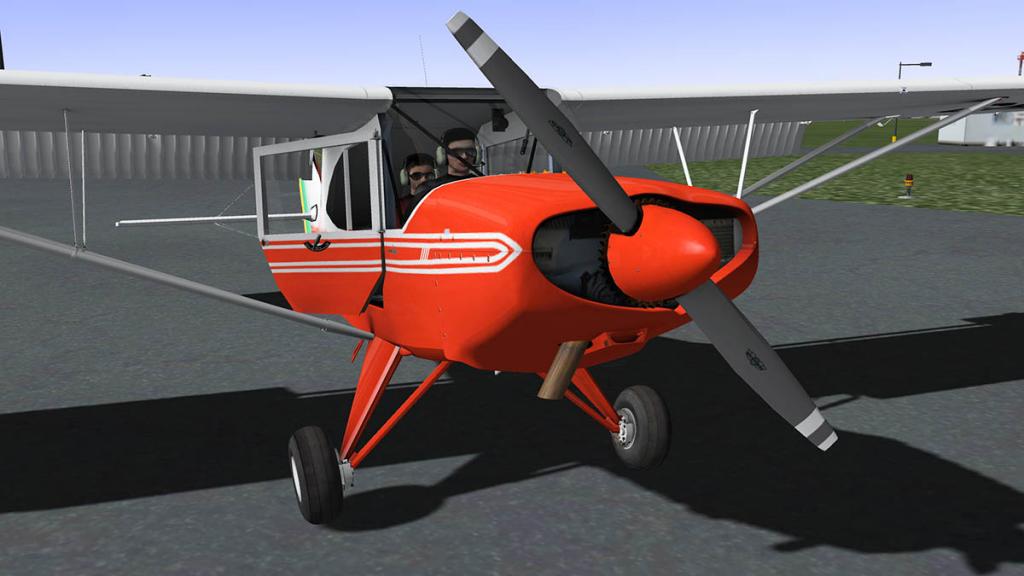
Aircraft Review : Aero Boero AB-115 by Dreamfoil-Creations
Route : KLAL - Lakeland Linden Regional : Circuits
The Aero Boero AB-115 is a basic two seat trainer from Argentina and was exported to Brazil. It was developed and refined from the AB-95 with a more powerful engine and improved aerodynamics. Specific differences included wheel spats, a redesigned engine cowling molded of fiberglass, and aluminum ailerons and flaps. This is the trainer version, the most common variant and it contains two seats in a tandem configuration, with the pilot-flying/student pilot in the front seat, Both the instructor and the student are connected together by a very simple cable arrangement between the left side mounted throttles, rudder pedals and the control sticks. (The rear stick and the throttle lever can be disassembled when carrying passenger(s)).

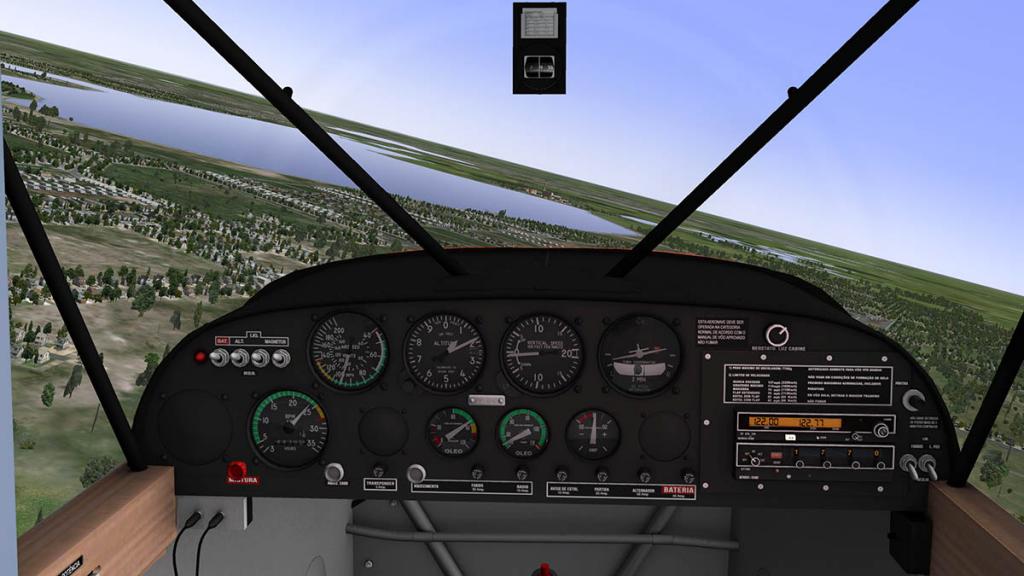
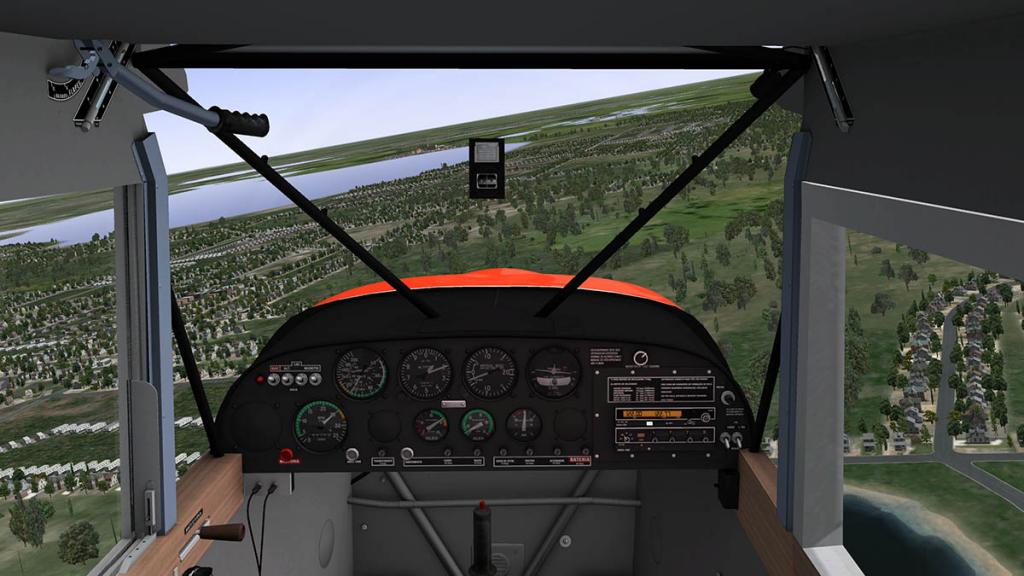
It is a simple but clever arrangement and Dreamfoil has done a very good job of replicating the system. In fact the whole design is very well done. This is a basic utility aircraft and nothing more than that. so instrument wise you are not going to get a very complicated aircraft. On the panel the flight instruments are an airspeed indicator, altimeter, VSI a turn coordinator, and a magnetic compass. With the engine instruments are a tachometer, oil pressure and oil temperature indicators, and an ammeter. The panel includes one Bendix/King VHF radio and one Bendix/King transponder. As noted the throttle handles sticking out of the side panel are very well done, as is the Flap handle located high on the left with four flap positions (neutral, 15°, 30° and 45°).
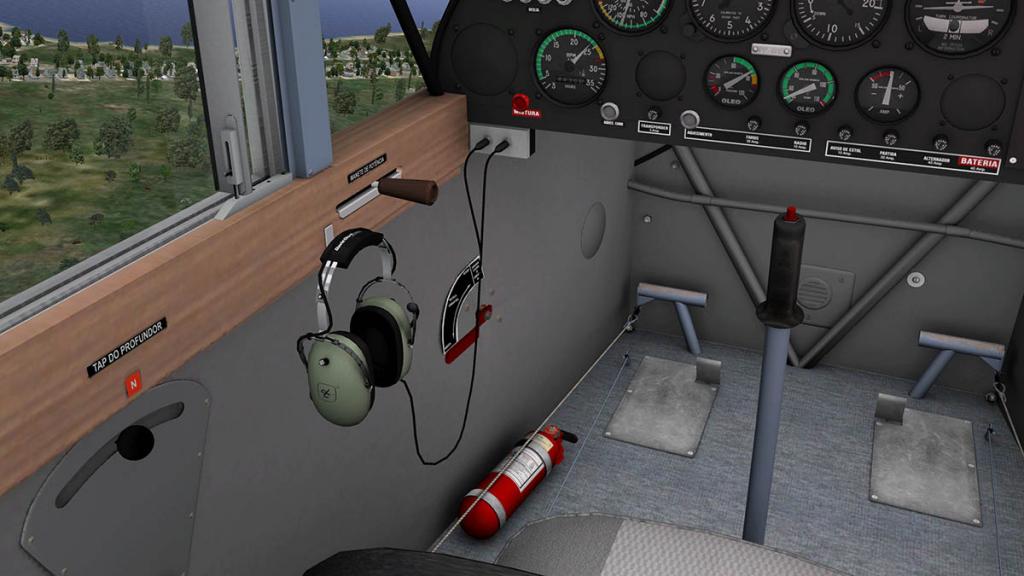
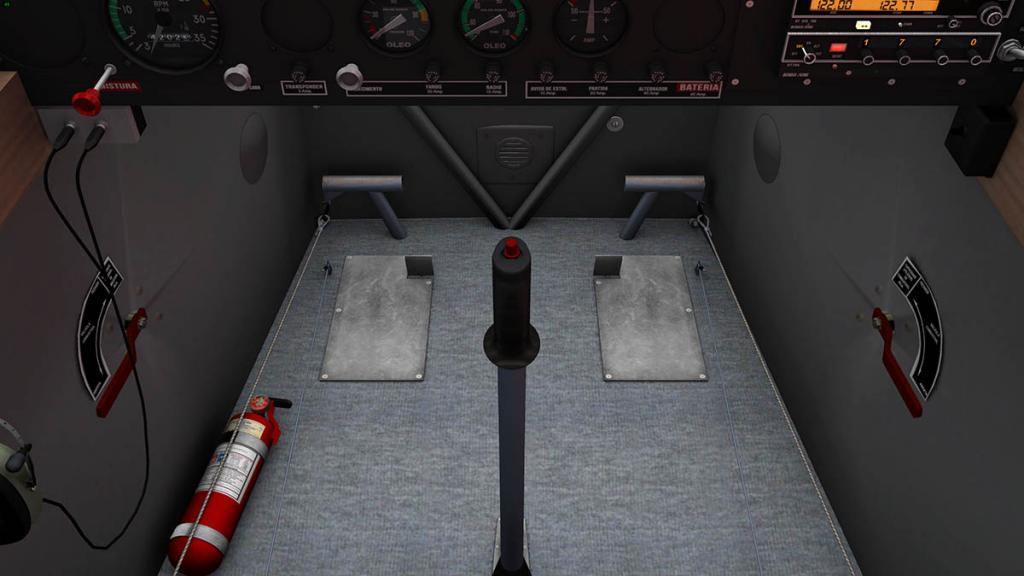
Detailing is excellent as well, The two sets of headphones and the red fire extinguisher, I'm not sure about compass on the windshield though.

The AB-115 is powered by a Lycoming O-235-C2A air-cooled engine, which is rated at 115 hp (85.8 kW) and drives a Sensenich Propeller model 72 CK-050, metallic fixed-pitch twin-bladed propeller. The fuel system uses a FACET MA 3PA carburetor, equipped with carburetor heat. Electrical power is supplied by a Prestolite alternator. The ignition system is driven by dual Bendix Scintilla S5LN magnetos; the starter motor is also by Prestolite. The engine incorporates a wet crankcase, and the lubricant is cooled by an oil radiator in the front of the engine's air intake of which is triggered by a bi-metallic thermostatic valve.
Utlity aircraft are hard to do, no matter how good you are at modeling they can still look flat. Your best aim is to do the details very well and that is what Dreamfoil has done here. The AB-115 is a high-wing monoplane with strut-braced rectangular wings. The wing, the fuselage and empennage members are made of fabric-covered welded steel tubes. The ailerons and flaps are made of aluminum alloy, while the rudder and elevators are made of steel tubes and fabric. The aircraft detailing is excellent with great sets of wires and showing the tube based construction. main gear is fixed to the fuselage at three points - two articulated joints, plus one shock absorber. The wheels are made of aluminum alloy and magnesium, and are equipped with independent hydraulic-actuated brakes. In all areas these items are well covered and created by Dreamfoil. With excellent detailing around the rear wheel and the brake system on the front wheels. The maximum fuel capacity is 115 liters, with 110 liters usable. And you can fill the tanks (on the top of wing) by pressing Shift + 4. The aircraft comes with the Geforce head view simulation feature. This feature will follow the real characteristics of human head behavior.
The AB-115 is a trainer... period. If you can't fly this aircraft then give up your flying career and do something else. It is a very simple aircraft to fly and manoeuvre. Nothing is going surprise you here. It does everything in a very stable manner, and that makes it great for learning or practising the basics... The Aero Boero is really in a sense a more modern metal Tiger Moth. In the air it will turn, slip, climb descend in an very orderly manner, the flaps give a bit of drag (45º is severe) on landing but nothing to worry you. In the flare it will glide or land on your whim. Just watch the brakes until you have lost enough speed and the rear wheel is firmly planted on the ground or you tip you forwards head over heels. On the ground the AB-115 is a tail-dragger, and that can mean it can be hard to steer. But I found it quite easy with the rudder if you control the speed correctly.
The aircraft was produced between July 1969 and January 1973 (First flight March 1969) and 45 were built.
Performance - Maximum speed: 220 km/h (119 knots, 137 mph) at sea level, Cruise speed: 145 km/h (75 knots, 90 mph) (normal cruise), Stall speed: 68 km/h (36 knots, 42 mph) (with full flaps - 45°), Range: 648 km (349 NM, 400 SM), Service ceiling: 2440 m (8000 ft), Rate of climb: 2.44 m/s (480 ft/min) (at 70 mph).


There is a menu system available by pressing the centre of the top of the panel. Included is: An adjustment of the sound (Dreamfoil pioneered the DreamEngine sounds, and they are all very good here), FOV a point of view that allows you to change the angle (field) of your view and a smart view menu that gives you custom views. At the top of the menu circle is an easy way to change the liveries.
The seven Included liveries are with a paint white:


Conclusions
The AB-115 is a basic trainer pure and simple. Great and very easy to fly, you can fly around all day and enjoy the scenery or practice your runway touch and goes with ease. Dreamfoil makes quality aircraft and the AB-115 is no exception. In every area it is very good (sounds are the stand out feature with 70 custom sounds). Mostly it is the best fun you can have in the rear seat of a tandem trainer (Leaving the front pilot in the seat as a feature, maybe a great idea?) and flying from this perspective is the best way to learn. Overall and all-round the Aero Boero AB-115 is very good.


Yes! the Aero Boero AB-115 by Dreamfoil-Creations is now Available from the X-Plane.OrgStore : Aero Boero AB-115
Price is US$19.95
Installation : Download is 170.80mb, and installation size in your aircraft folder is 234.50mb. Unzip and deposit in your General Aviation Folder
Documentation : Manual (10 Pages)
Developers Site : dreamfoil-creations
Review By Stephen Dutton
8th February 2014
©copyright 2014 : X-Plane Reviews
Technical Requirements:
Windows , MAC OS 10.7 (or higher) or Linux
X-Plane 10.20+ - 32 and 64 bit compatible - Not compatible with X-Plane 9
4GB RAM/1GB VRAM - 250MB HD
Version 1 (last updated Feb 5th ,2014)
Review System Specifications:
Computer System:
- 2.66 Ghz Intel Core i5 iMac 27”
- 6 Gb 1067 Mhz DDR3
- ATI Radeon HD 4850 512mb
Software:
- Mac OS Mavericks 10.9
- X-Plane 10 Global ver 10.25 (final)
Addons
- Saitek x52 Pro system Joystick and Throttle
Scenery
KLAL - Lakeland Linden Regional - Drankum (KLAL - Lakeland Linder Regional Airport 1.3)
-
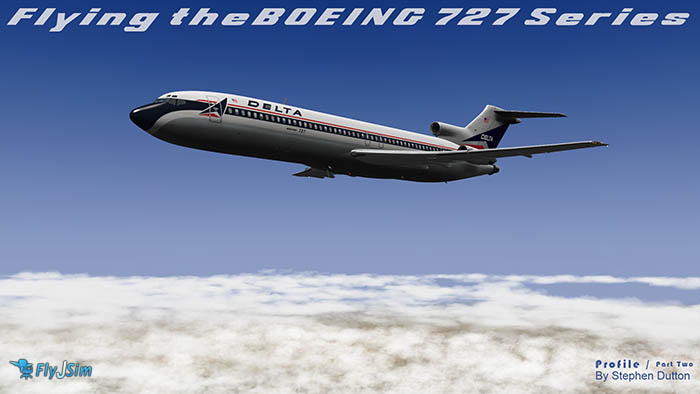
Aircraft Profile : Boeing 727 Series by FlyJSim (Part Two) "Flying the Boeing 727"
Route: KDFW (Dallas Fort Worth) to KOAK (Oakland International) Distance 1375nm
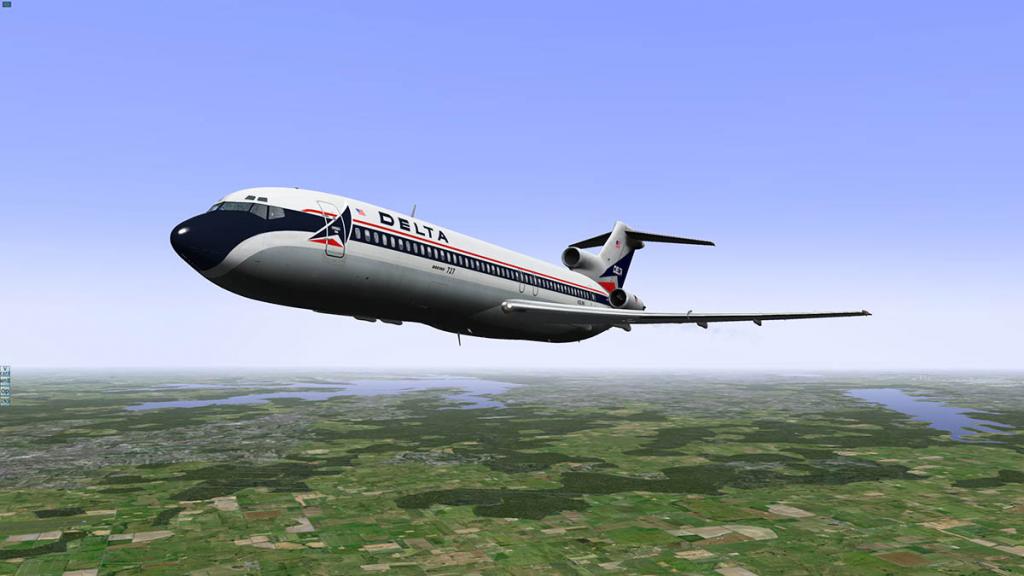

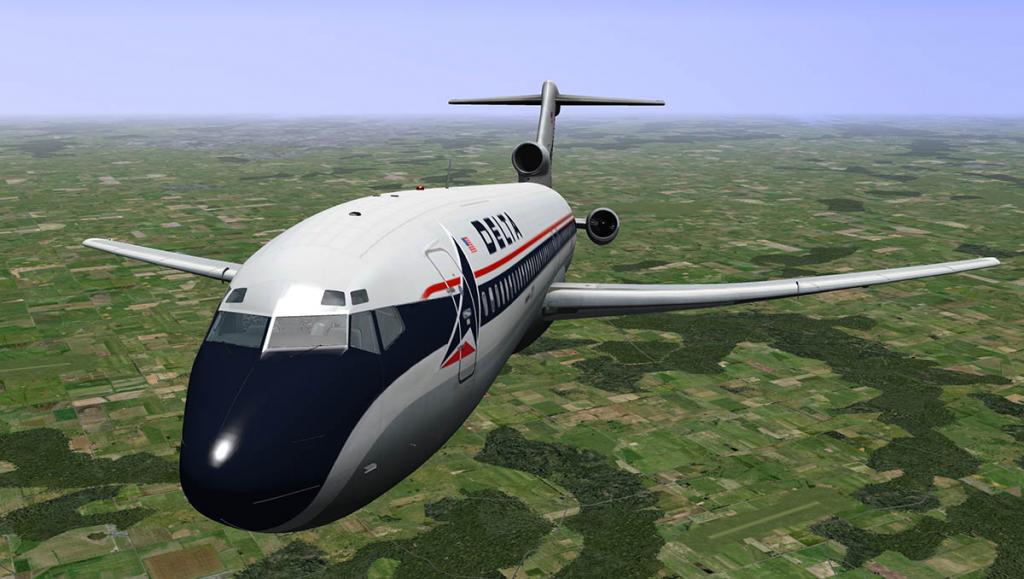
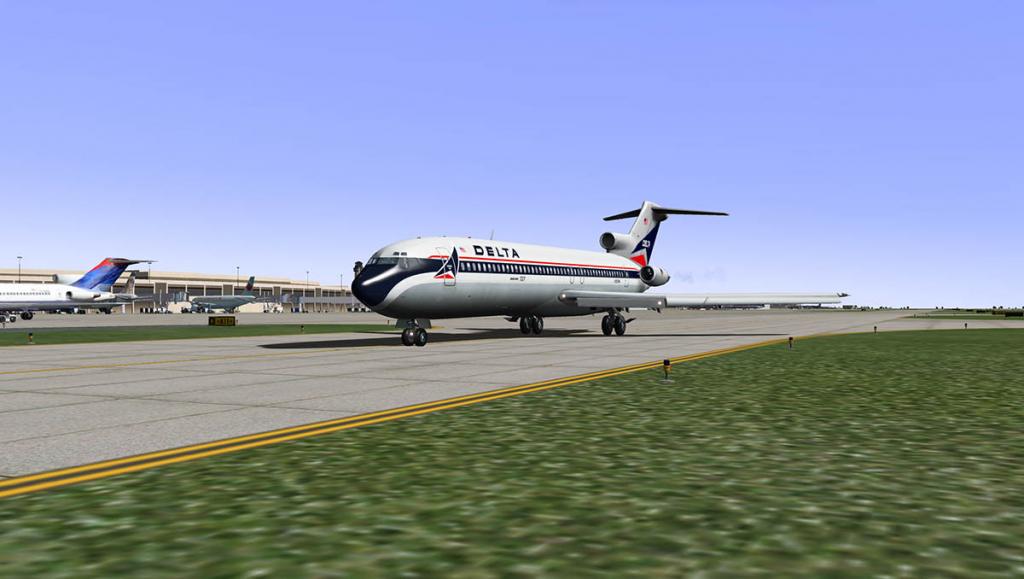
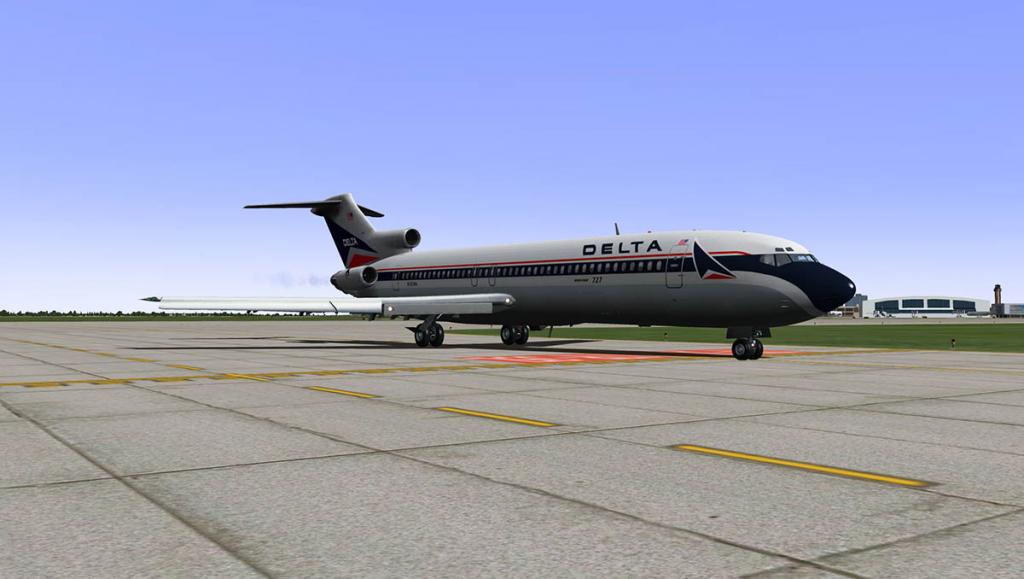
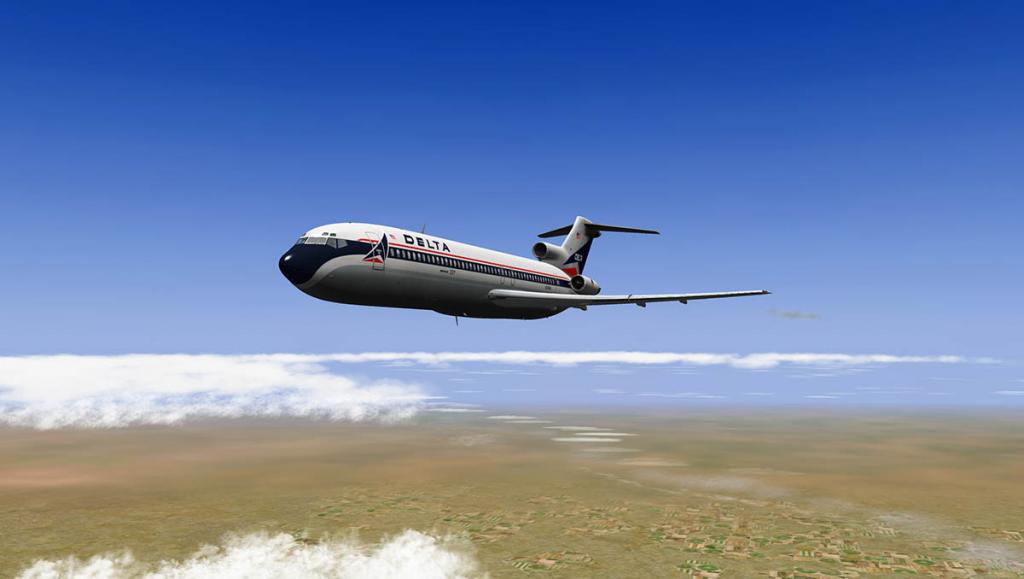
The FlyJSim Boeing 727 Series is a way of time traveling to another era. In this case the 1960's. Here is an aircraft that transcends time like no other in the feel and the flying environment of one of the "Golden" periods of flight. The Boeing 727 was in many ways a very unique aircraft and very popular with operators and passengers alike. The 727 was a creation of its time in that many airports were really very basic in the 1960's compared to even the smallest commuter airports of today. And the B727 was very able to land on short runways (around 4800-ft (1463m)), but to also unload/load passengers and even power itself while sitting on the ground. The aircraft brought a Jet service to even the smallest and remotest communities. It was also had an excellent range for short- to medium-range international flights and the safety of three engines over water. So what was airline flying like back then. How different was the way you operated the Boeing 727 compared to today's computer based systems and workflow cockpits. To do that we will fly the aircraft in this case the 727-200adv version from Dallas to San Francisco (Oakland), so buckle up and enjoy the ride.
Cockpit introduction
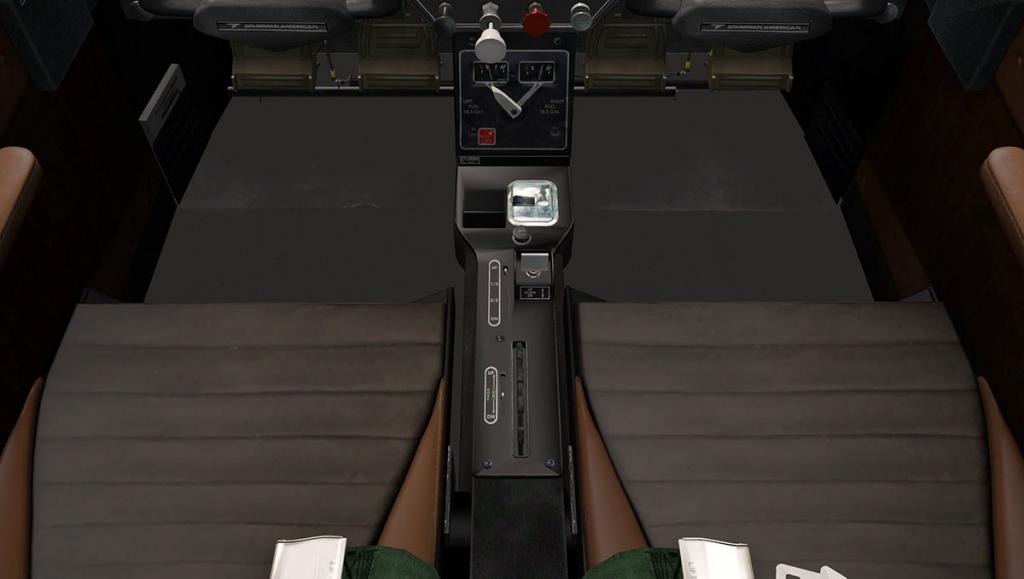
On any question an aircraft is an aircraft in the way it is basically laid out and flown. From a General Aviation trainer to the Airbus A380 you can easily see the the same controls and instruments and the way you fly them is in generally all in the same way. What has changed today is the way you interact with the machine. Today digital rules, as computers now run the flight-deck from the management of the engines to the routing and navigation and even now to the controlling of the flight controls (fly-by-wire). So if you took all this away then what do you have, In our case a Boeing 727. The integrated chip was still non-existent in the day the early B727's took to the air and yet these aircraft could and did function in the same capacity as the aircraft fly today, The main difference between them is cost-efficiency and reliability, and even then these Boeing aircraft were very reliable for their day.


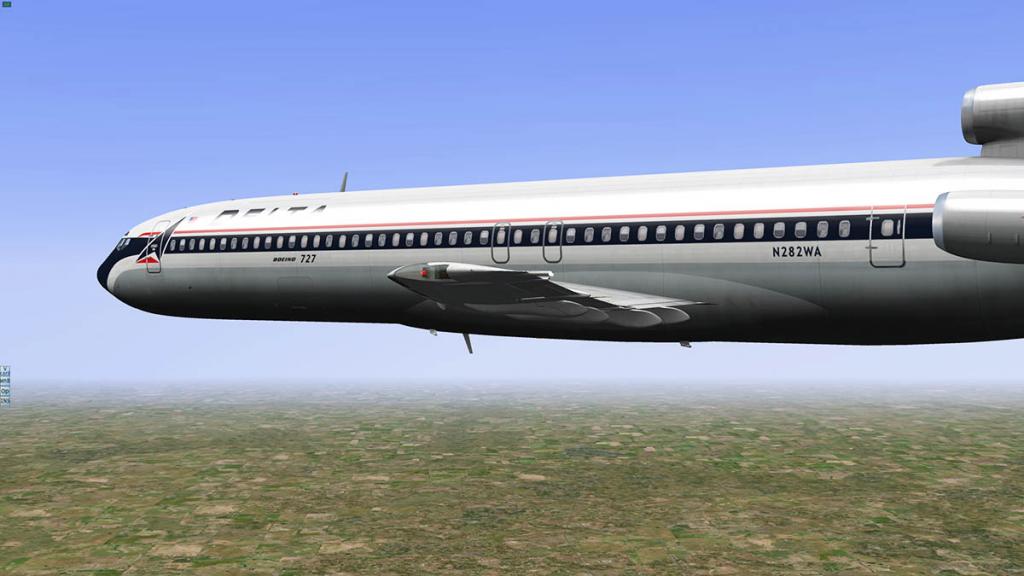
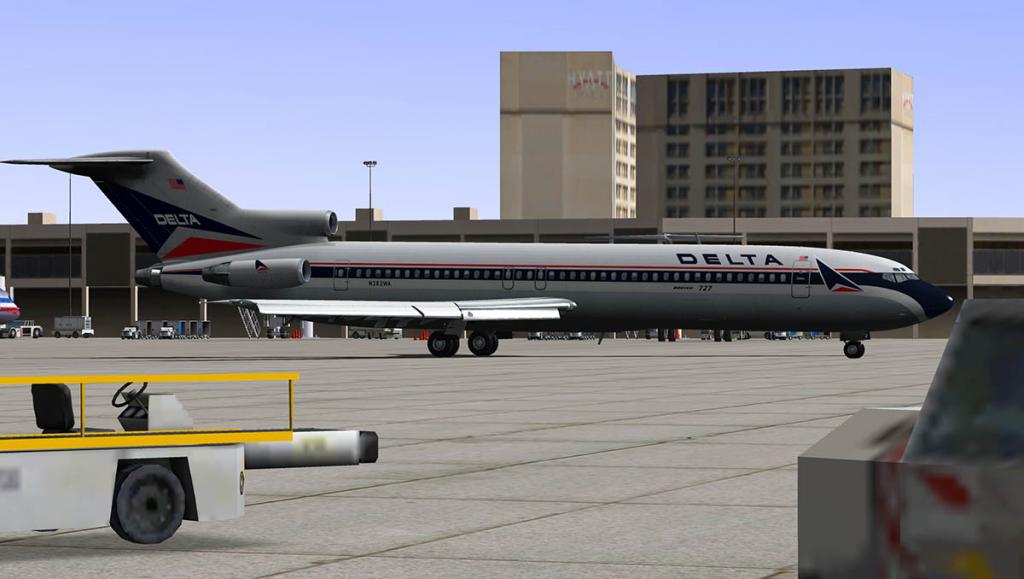
Looking at the Boeing 727 on the ramp you have to admit it has character, with that high large T-Tail and rear mounted engines (two exposed JT8D's and another one is buried in the tail). This left the wings clean and engine noise situated well into the background (they needed to be then as the engines were also very noisy and dirty)
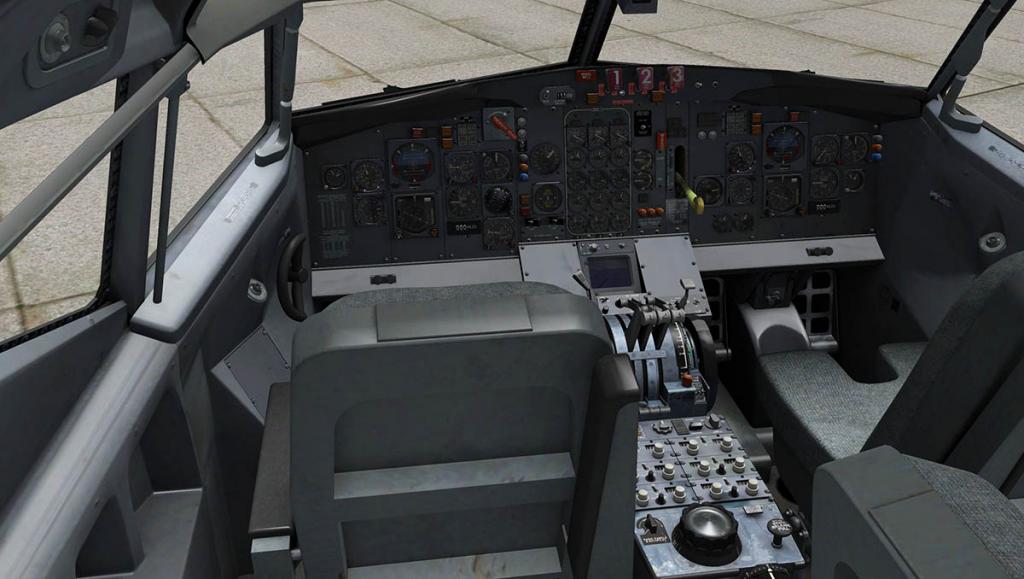

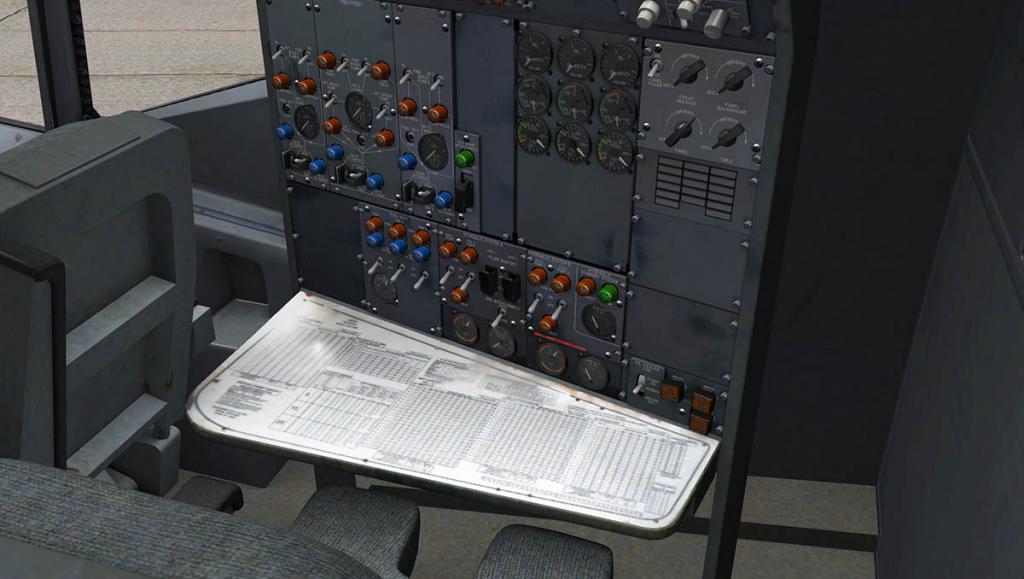
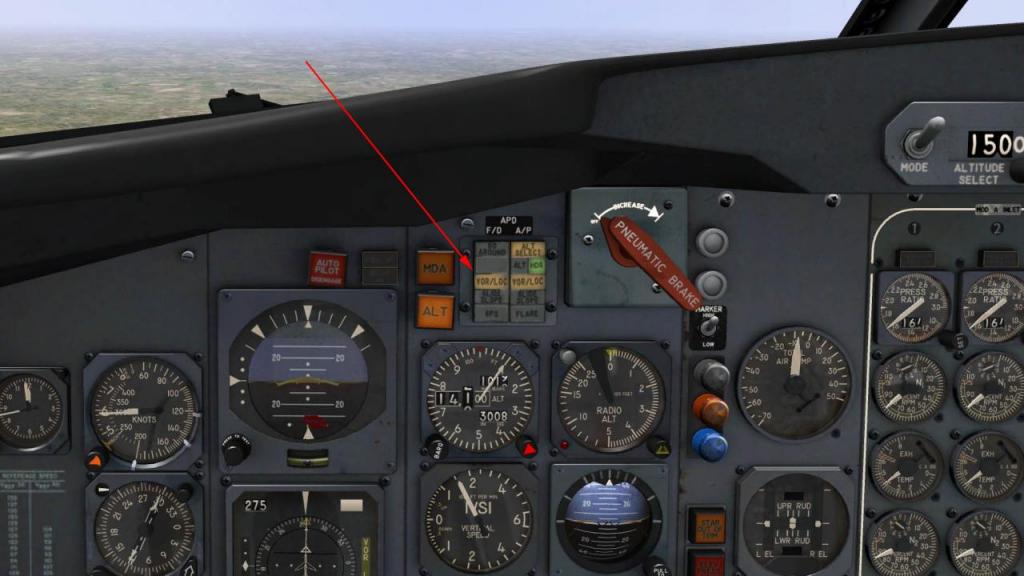
The 727 cockpit is very different in that it is all gauges and dials (known as a "Clockwork Cockpit), no glass screens or menu driven tabs are in here. There is also a third person to help you handle out with the aircraft systems as well with the Flight Engineer (FE) who is situated sitting rotated 90º behind the Co-Pilot. His panel is bigger than the main panel and today most of his systems have been transferred to the Overhead Panel (OHP).
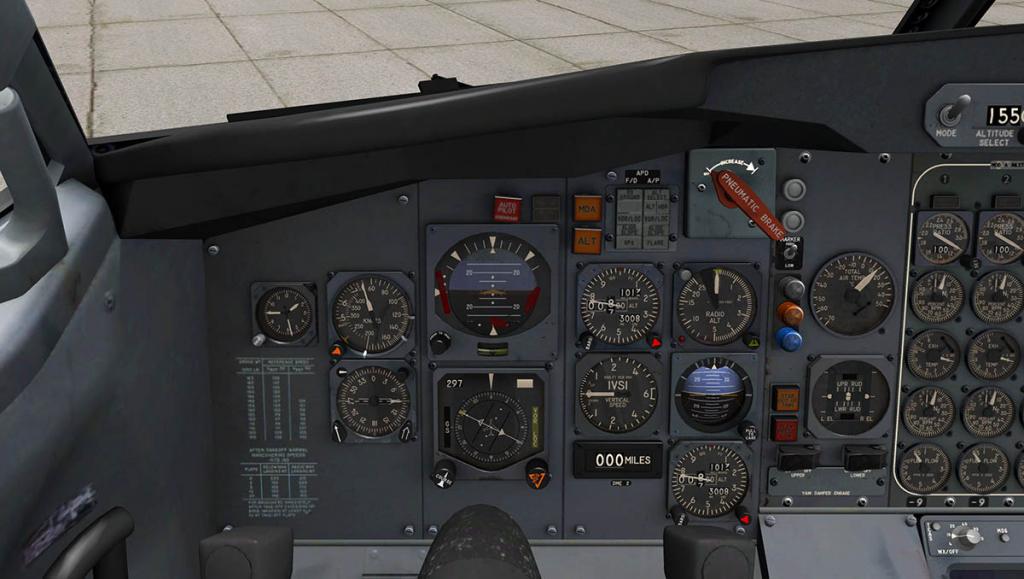
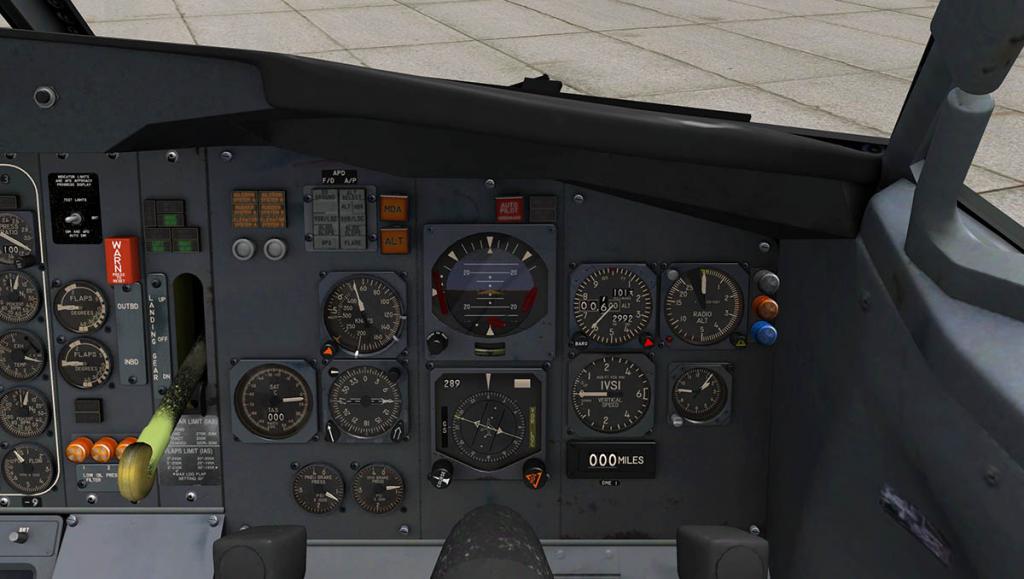
The instruments are the basics required for flying, The Standard Six - Artificial Horizon (sometimes known as the attitude indicator) with built in turn indicator, Heading, Compass, Vertical Speed, Altimeter and Speed (in knots and Mach speed, added to the SS is the back up instruments of Artificial Horizon, Altitude, Radio Altitude, clock and (outside) air-temperature, the DME 2 - NAV 2 (distance) is also situated lower down. The Co-Pilots set of instruments is very similar except they have a TAS (True AirSpeed) dial DME 1 - NAV 1 (distance). The landing gear lever is also on the right side of the panel. The Flap indicators are here as well for Outbound and Inbound flaps (0º, 2º, 5º, 15º, 20º, 25º, 30º and 40º settings)
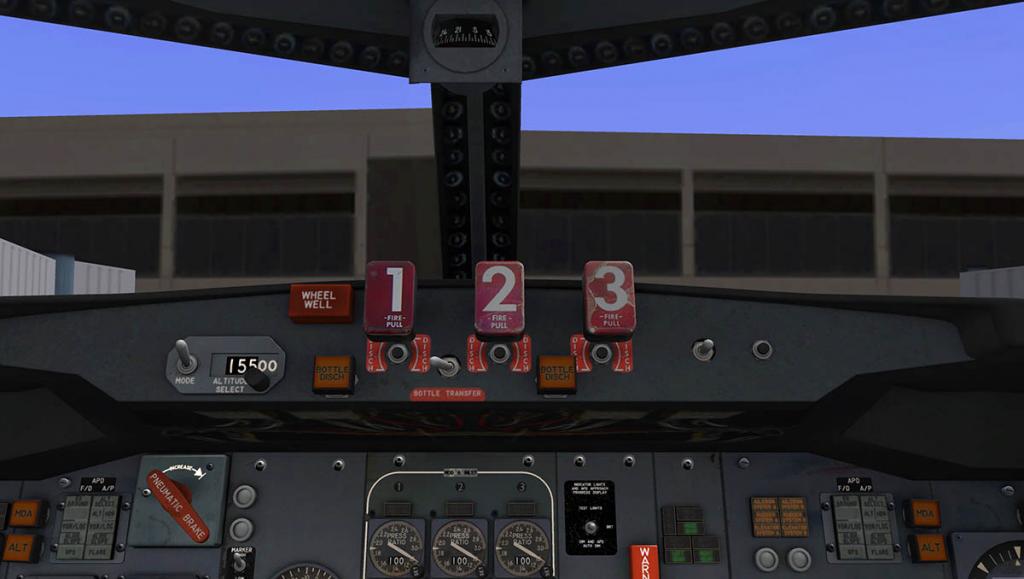
The center of the panel is dominated by the sets of three engine dials covering "Pressure Ratio (RPM), N1, EXH (Exhaust) Temp, N2 (RPM) and Fuel flow to each engine". The detailing of these dials is breathtaking and simply eye-widening in operation and in fact the whole panel is exquisite in detail and design from FlyJSim. I doubt you will never get a better 60's cockpit like this. Step out of a General Aviation aircraft and into the B727 and you would feel more at home than a current line pilot would in the way you interact with the instruments. The three red fire handles are on the top of the glare shield and the "Radio" panel is situated behind the throttle pedestal.
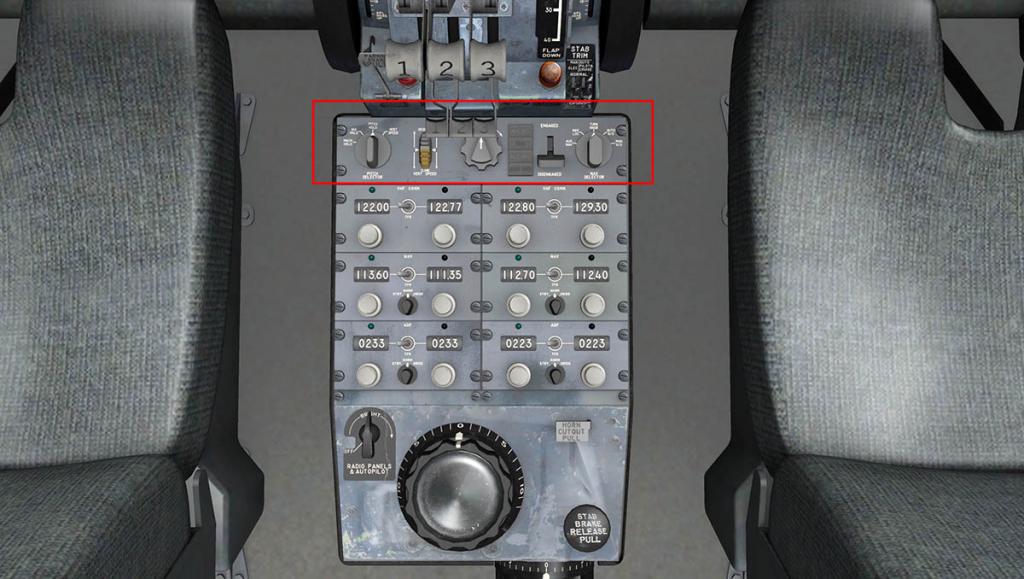
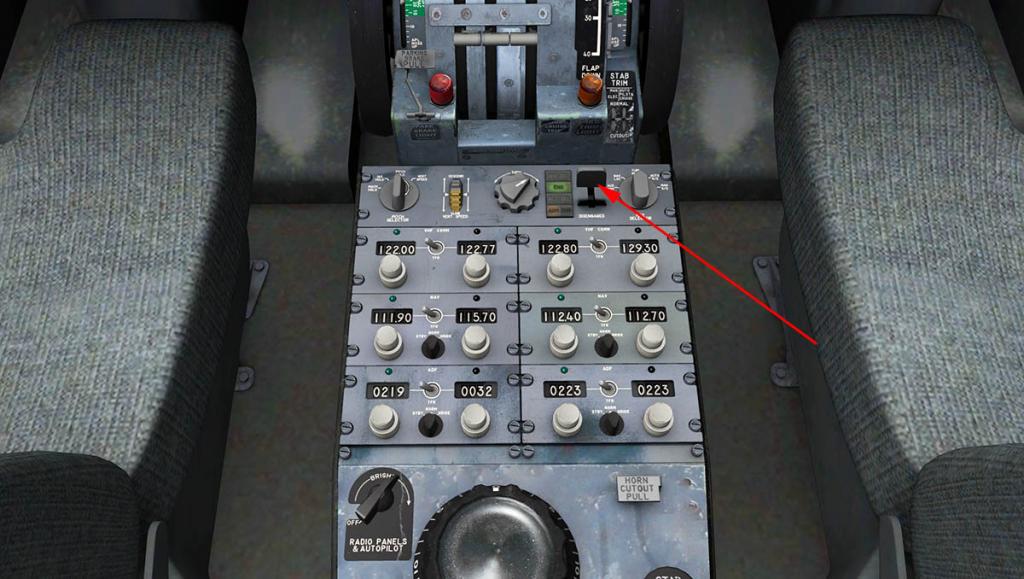
Each frequency is set and you just flip a switch over to activate the frequency that you require in all settings from COMM, VOR 1 and 2 and NDB (ADF or Automatic Direction Finder here). Below the radio is your large Rudder and Aileron "Trim" knobs and above the radio is the Autopilot (AP). For a large airliner it is quite rudimentary. In fact your GA has probably a far more powerful AP than the Boeing 727. The AP may be rudimentary, but it is still highly effective in its simplicity.
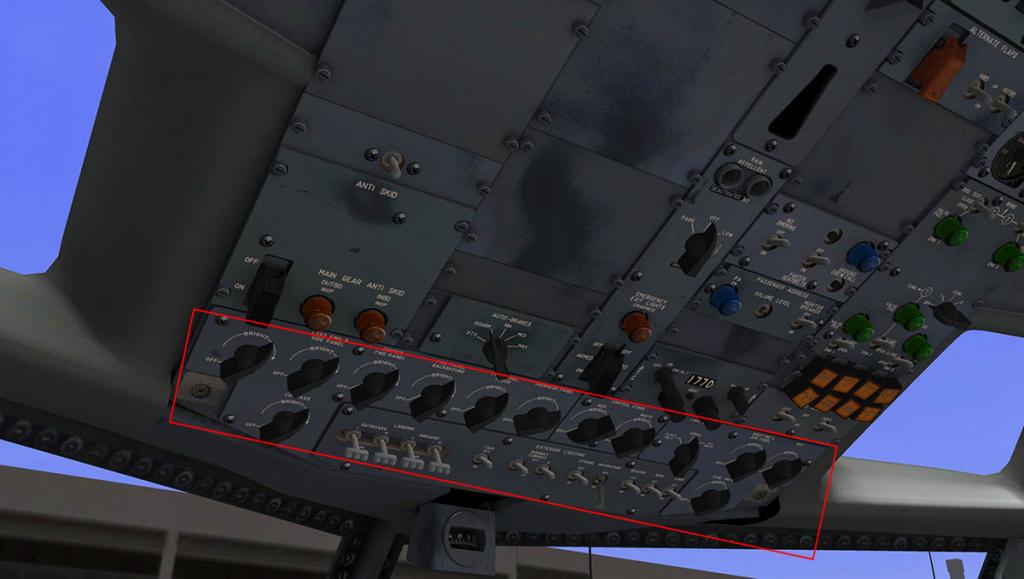

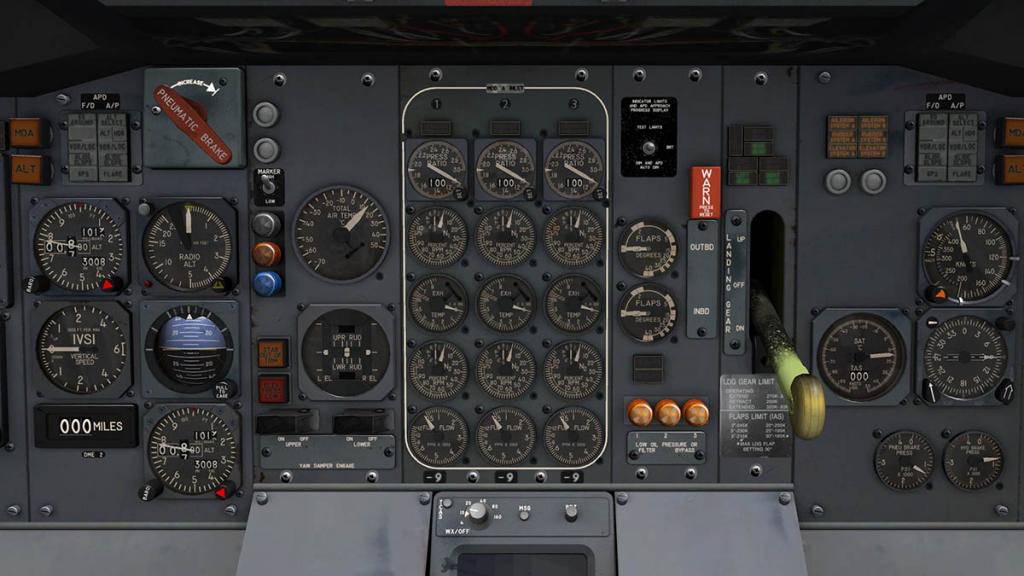
On the Overhead panel there is plenty of empty real estate, It dominated mostly by the (large swivel) lighting knobs and De-Icing switches (wing and engines), The pedestal is simply a beautiful sculpture to the age of mechanics. You can feel the levers and the metallic coldness in the design. In the three throttle (Built in reverse thrust) levers, Flap lever (right), Spoilers (left) and those huge trim (whirling) wheels with trim indicator. Lower down are also the three (one per engine) fuel flow/cutoff valves.
All warning lighting (large) on the OH and FE panel works in the modern way in that all dark means everything is fine, lit lamps (usually red) means a problem, unless they are green which means the item is activated (De-Ice).
Bringing the Boeing 727 Alive
The checklist provided by FlyJSim is very comprehensive "SeriesChecklistandProceduresManual", You need to study it and understand all of the procedures correctly to get the best out of the B727. Another manual "SeriesSystemsManual" will show you were everything is located A third in "FJS-727 SeriesManouversManual" helps in the flying areas. A bit of study time early will provide a better experience later. Again to the untrained eye it all looks complicated, but it isn't if you you understand which block or set of panels does what.

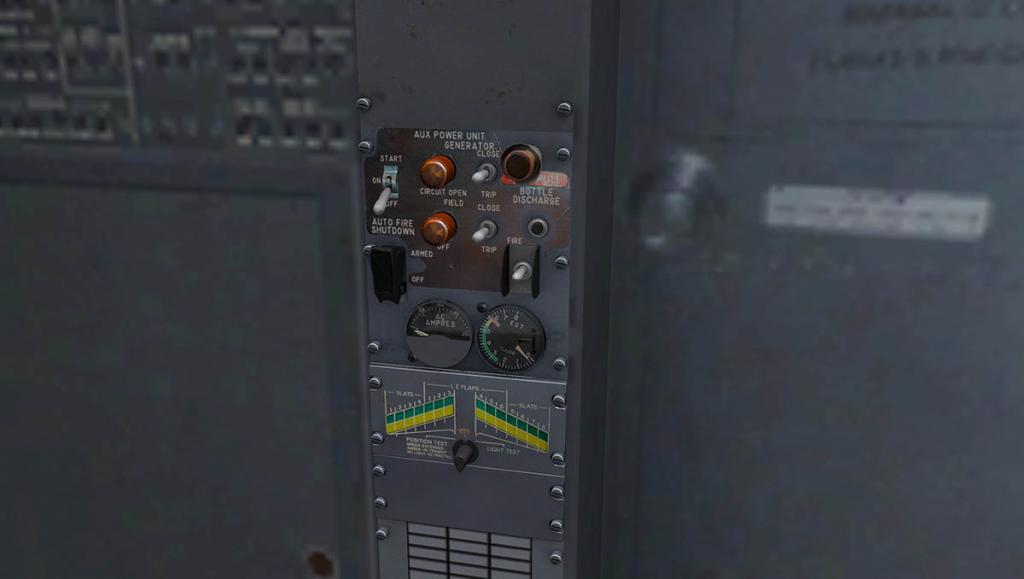
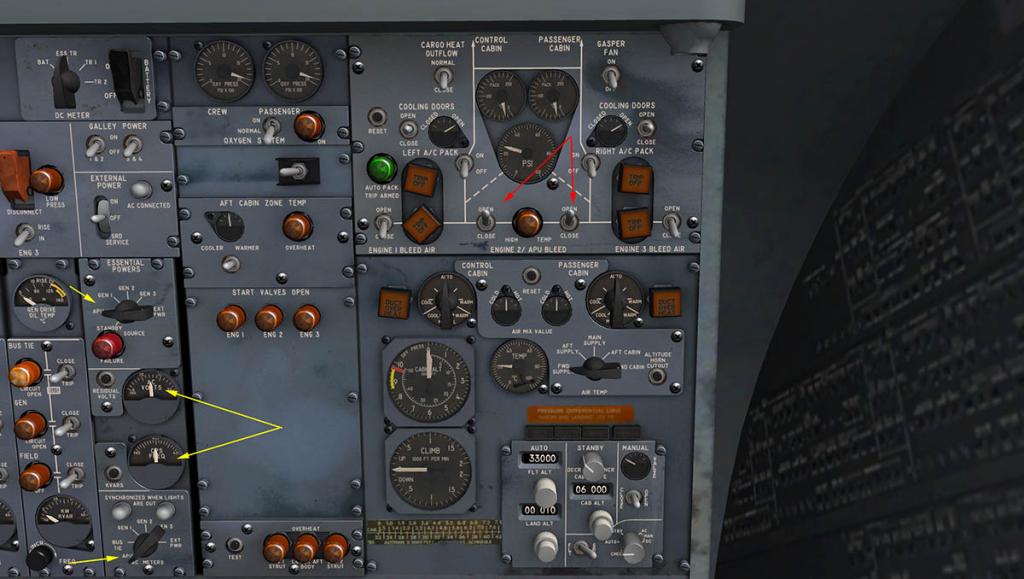
The main power (battery) switch is central high up on the FE station, If you have (AC) ground power then you can use that by selecting EXT PWR on the "Essential Power" dial switch, and switching the EXTERNAL power on (There is no power cart), However you will mostly use the APU engine (DC) and the APU panel which is situated on the back bulkhead. Flip the switch to start and wait while it warms up, Then select APU on the Essential Power dial switch and the two dials will show you the power supply.


The B727 come with a great set of menus that are situated on the left of your screen. First open the "Weights and Balance Manager" (W&B.) Here you can set your passenger and cargo payloads by selecting seats or containers, in doing so you can also see your Centre-of-Gravity (CoG) and the balance of the aircraft. Fuel loads can be selected here also and every change you make is reflected in the comprehensive weight (either Ibs or kg) references. Better still open the "V card" and this menu will give you a full set of vRefs (flap settings as well) for the aircraft on Taking off or landing. No spending hours in going through tables here, just set your weights and then just note your vRef's... can't be easier than that. I'm going for a pretty heavily loaded economy class load, and so the aircraft is pretty heavy at 170,751Ibs. A final menu is for (O) Options in Cold and Dark start, Engines running, Field of View, Interior/exterior sound levels, Zulu time, Default view in 2d, Hide the Yokes and to set the Ibs or kg in the W&B manager.
A look over at the fuel panel on the FE station and the fuel loads are now registered on the dials.

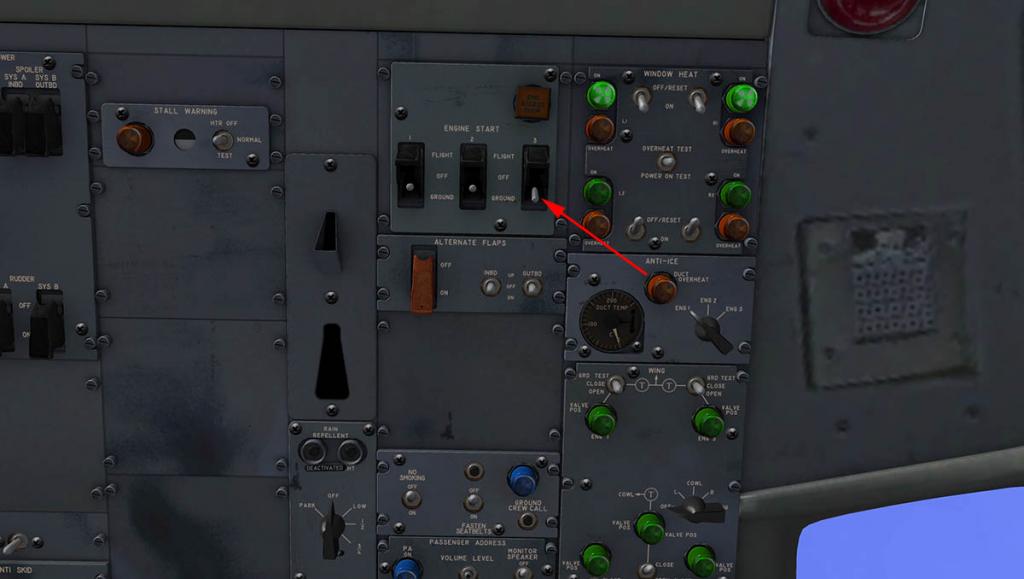

As noted the checklist is quite comprehensive and there is a lot of items to check off and test. The passengers are boarded and we are ready to start the engines. Window Heat "on" (OHP) and Beacons "on".
On the FE Panel right down low you turn on the hydraulics and then the boost fuel pump switches on the fuel panel. High right is the Air-Conditioning panel, but right right now we are concerned only with the "APU Bleed" switches (red arrows) to start the engines. So the Air-Con (A/C) packs must be off and the bleed switches open and the PSI will show on the dial. As noted you know the APU is pushing power to the aircraft by the (yellow arrows) dials (It will show the power output on the APU panel as well).
The three engine start switches are on the very top position on the OHP covered by black covers, flip each one open and the switch can go into two settings "Flight" and "Ground". Here we are starting on the ground so you would use "Ground" the other setting is for restarting the aircraft in the air (Flight). Clicking the switch down on number 3 engine (Start sequence is 3, 2 (center) and 1) and the dial will start to move in the n2 gauge, when it reaches 17-20% you introduce the fuel by flipping up the "flow/cutoff valve" up. From here on the engine will power up to full idle and you can now start the other engines in sequence. When done you can switch the electrical power to the engines and close down the APU (before flight). In now not requiring the "Bleed" function, then set your Air-Con A/C packs to provide bleed to the aircraft's pressure and cooling systems. Easy to do? yes after a few run through. It is slightly complicated but with a few practices it comes to you pretty easily. Knowing what dial or switch does what easily helps you find your way around.
The sound of a Boeing 727 in idle is that loud whining squealing noise that was so familiar only a few years ago. The FlyJSim sounds are extremely good... Noisy, but good. And they get better.
Flight Preparation
Flying the an aircraft of this era will mean many items you take for granted are not available to you. Flying today still means you have to prepare for a flight and a route basically still the same way. But you didn't have GPS points however in the 60's or mapping tools to plot your course to almost within a few feet of your route. Routing back then was mostly VOR to VOR (Nav-Aid) Navigation. So any route was mostly created around these Nav-Aids. NDB was also used but they don't have the distance (To or From) so they were a secondary aid.
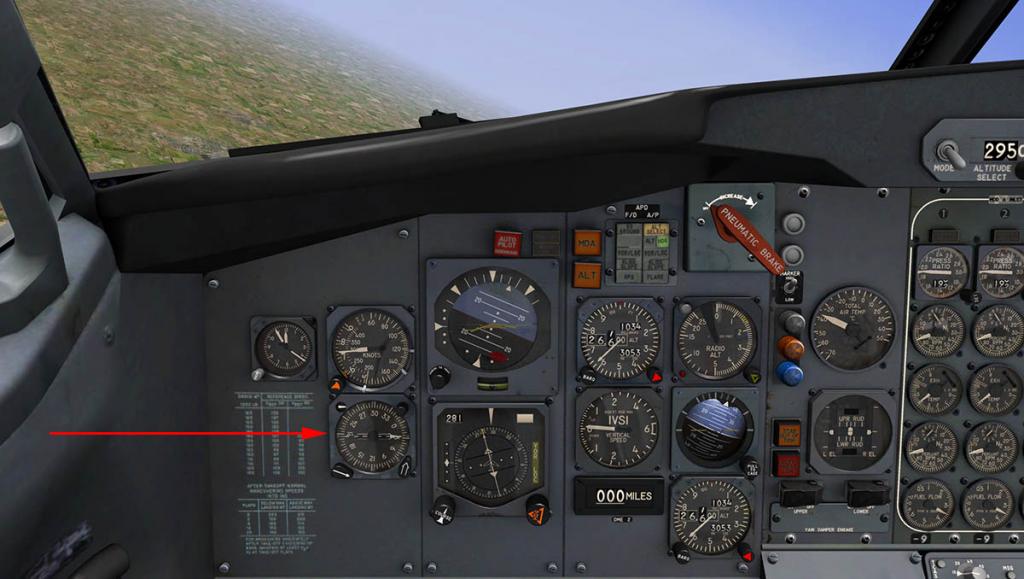
Still more importantly was that you had to have your course (Route) defined by headings, which was really the heading from one VOR to the next VOR (or NDB if used). So a preparation of a route is required that has this basic information. You can't use a standard FMS plan in the Boeing 727 or the later FMC routing systems. There is however as an optional extra (US$10) for the FlyJSim 727 an early inertial navigation system (INS) called CIVA for"Delco Carousel IV-A Inertial Navigation System". It can use a standard X-Plane FMS plan, but it is quirky to set up and use. Worse it has only 9 useable waypoint settings. Here I need far more waypoints than the CIVA can provide, and so I am doing the route VOR to VOR.
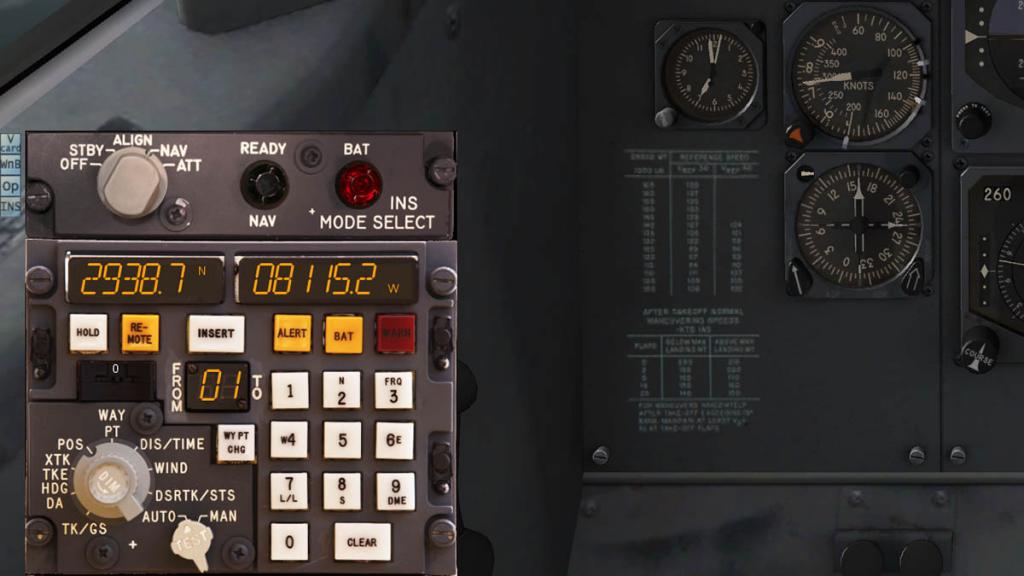
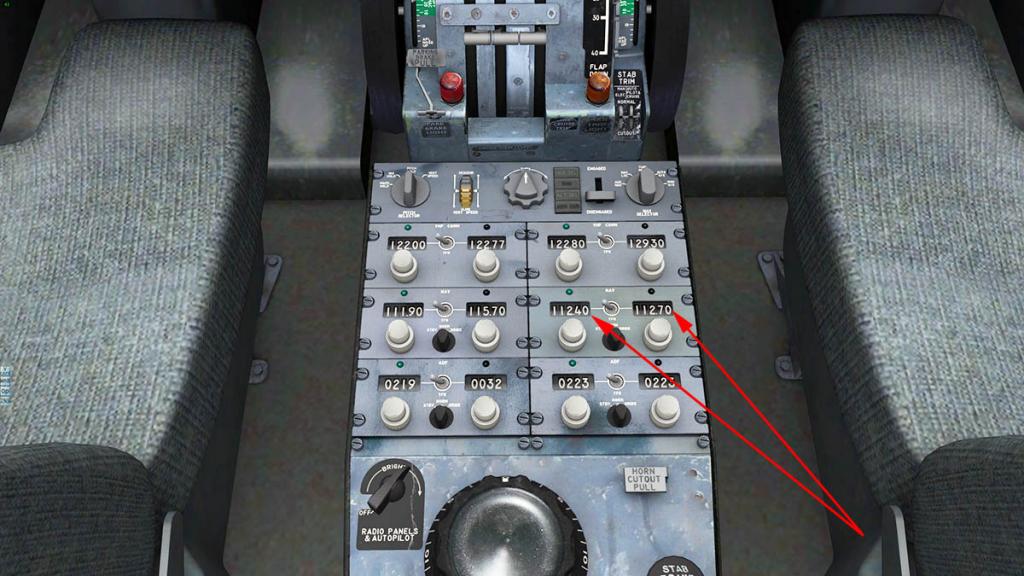
The route created and printed out will give you the frequencies of each VOR you require and more importantly plus their headings. I have set the first VOR UKW (freq 112.40) on the heading using the course (305º) needle (the FL NDB (219) is also set as my turn point to the VOR). On the radio panel the first (UKW - Freq112.70) and second VOR (SPS - Freq112.70) frequencies are set ready. It is extremely important you have this information collected and ready before a flight including the right charts and that the settings are correctly set on the radio panel. Here the VOR needle is pointing correctly to the UKW Nav-Aid and the course is set to the same direction.
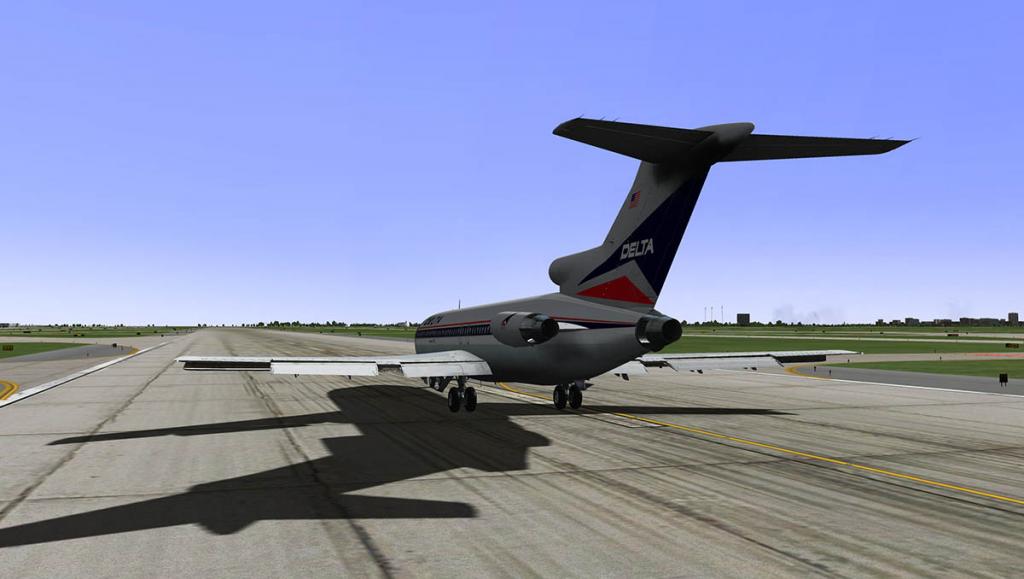
Taking Off
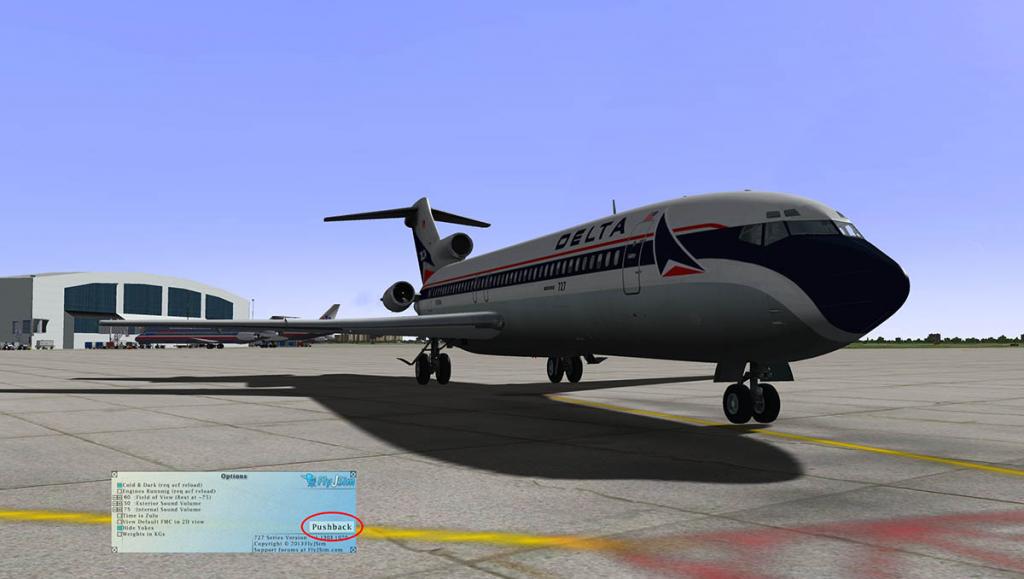
You have a "pushback" included in the (O) Options menu. It is very basic and no visible tug. select and then it pushes back, turn via the rudders and brake to stop. (You can use reverse thrust, the real 727's actually did. But watch those brakes as you can lift the nose off the floor if you stop to quickly.

Take-off flap setting is a very long 20º (or 4 clicks). FlyJSim's flap animation and detailing is the best I have ever seen in X-Plane, So complicated and so beautifully assembled.
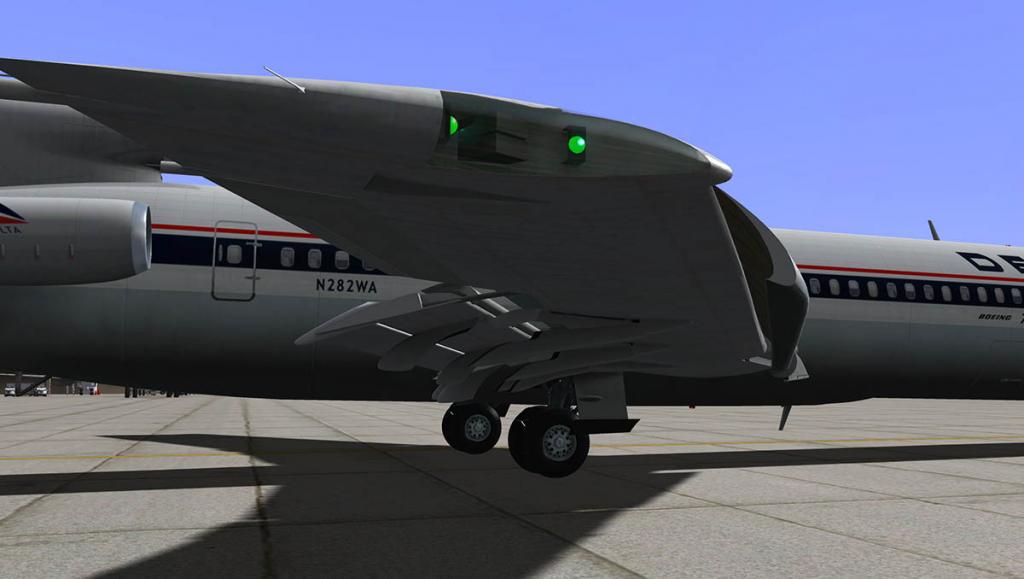

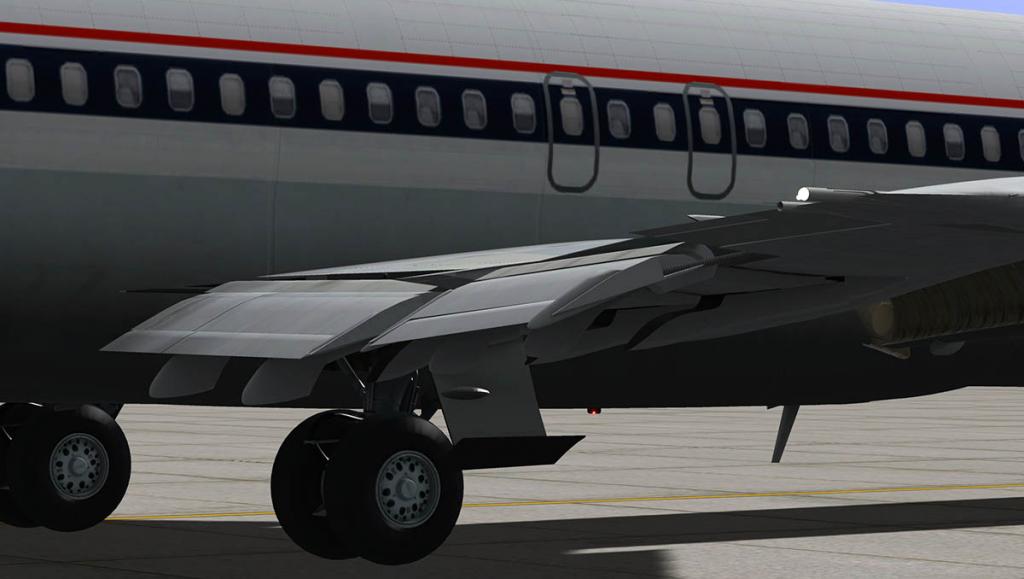
The Boeing 727 flap system is very complicated to allow the aircraft to land at very low speeds (130knts!). There are leading-edge devices (Krueger, or hinged, flaps on the inner wing and extendable leading edge slats out to the wingtip) and trailing-edge lift enhancement equipment (triple-slotted, aft-moving flaps). They also create a lot of drag.
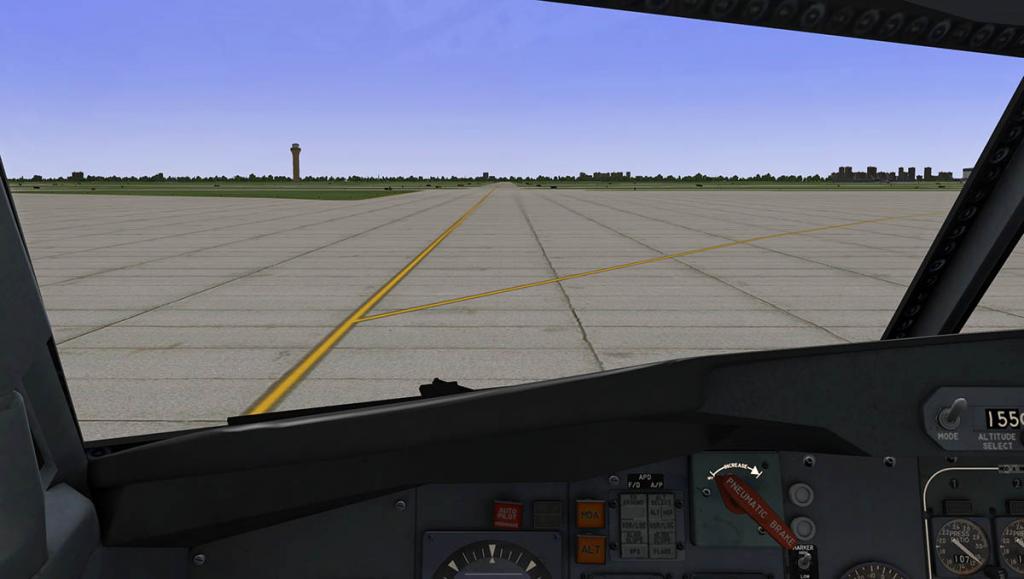

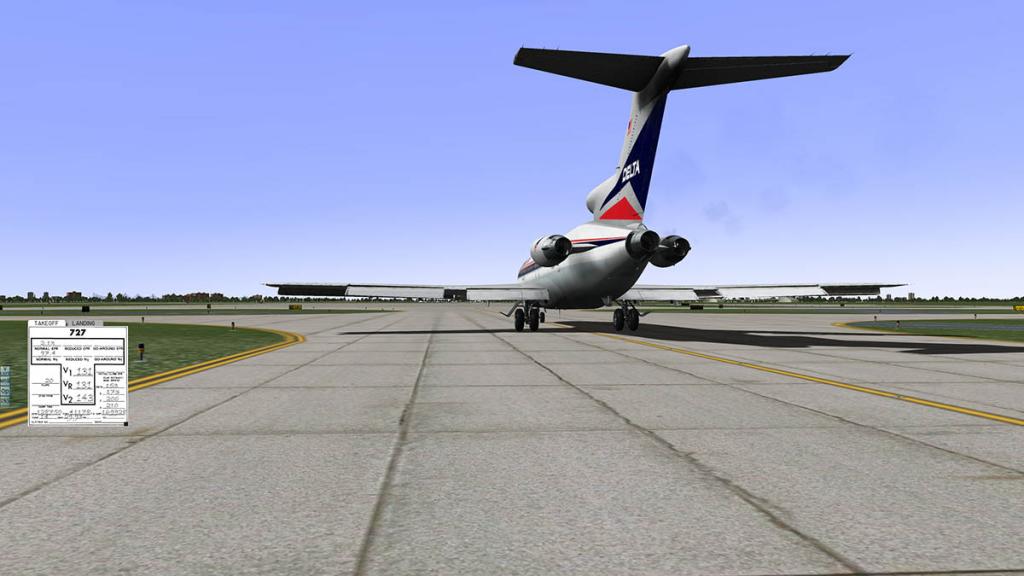
The 727 will need a fair push of the throttles to get some movement, The weight feels very realistic. But be careful as to much speed will drag the front wheels if you turn to fast. Find the right speed and it works perfectly, Walking pace allows you to turn the aircraft on a dime. Power off and slow... then power on to turn. On the taxi down to departure KDFW Runway 35L I recheck my completed Vrefs on the menu, v1 is 131kts, vR is 131knts and v2 is 143knts...
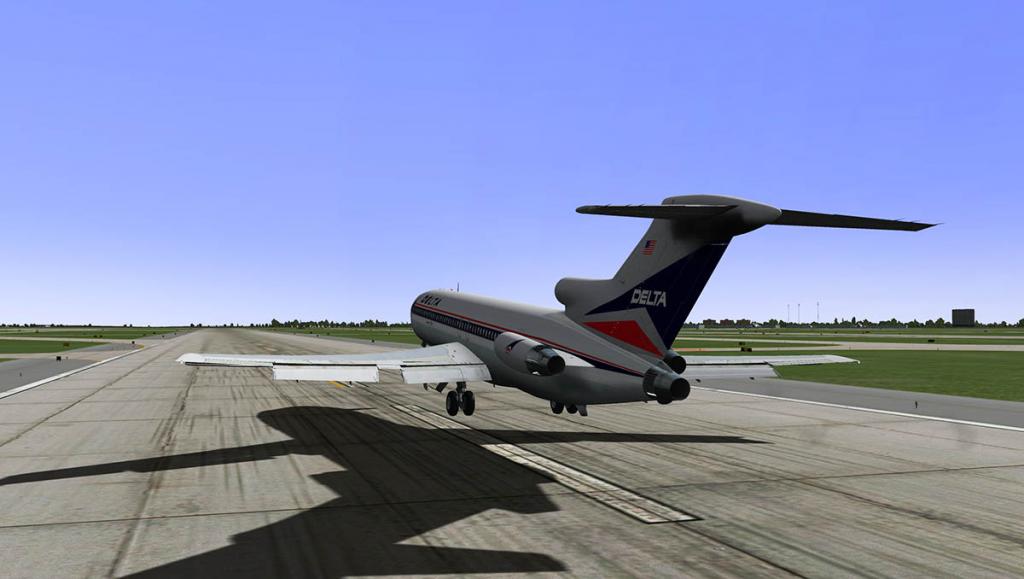

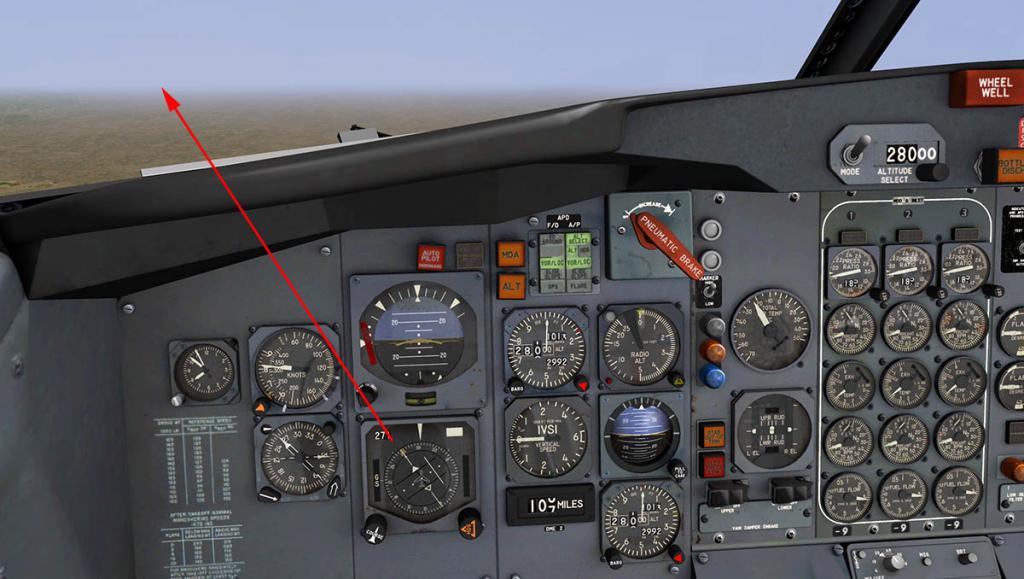
Cleared from the runway hold position I turn the aircraft on to 35L.... and straight into the full power up of all throttles to around 97% on the N1. The noise is deafening, but brilliant perfect sounds. The aircraft gathers speed but very slowly at first, and at 145kts (v2 +10 is recommended) I pull the stick back. You are not going to go into a very steep climb at first and only to... 5º-8º until the aircraft has some air under the wheels before gaining pitch to a more 15º or 2000fpm. You have a rear skid under the rear in case you mess it up, but that would be a sign of a poor pilot if you scratched it?... Flaps in quickly to 5º to reduce the drag and as you approach 250knts then they are fully retracted. The aircraft handles very smoothly under the climb and you can hold the pitch perfectly. At the right point now switch on the Autopilot and the AP will hold your pitch for you.


You have to maintain your vigilance on your "Press (pressure) Ratio". Go above the marker at 19 and nasty things can start to happen. The B727 does not have any engine management systems, so you (the pilots) are responsible in keeping the engines within their operating limits. push those JT8D engines too far and they will burn out... and quickly. So even in the climb you are finding the best compromise between the PR at 19 (or below), keeping 250knts and having the best pitch of around 2000fpm. You don't let that speed fall, not even by a small amount because that stall comes very quickly with a very quick loss of the speed. The B727 will climb very nicely if you get the balance right, keep to 250knts under 10,000ft and 300knts/Mo.78 above 10,000ft. Watch the speed in the other setting as well when you level off as the knots can then climb the other way very quickly, expertly adjusting the throttle can keep you in the right speed range. You don't want to lose the 727 in any situation, it is very hard to recover (It can be done...) the spins are lethal, but most of the time you will be going in to the ground. It is important to know the limits of the aircraft.
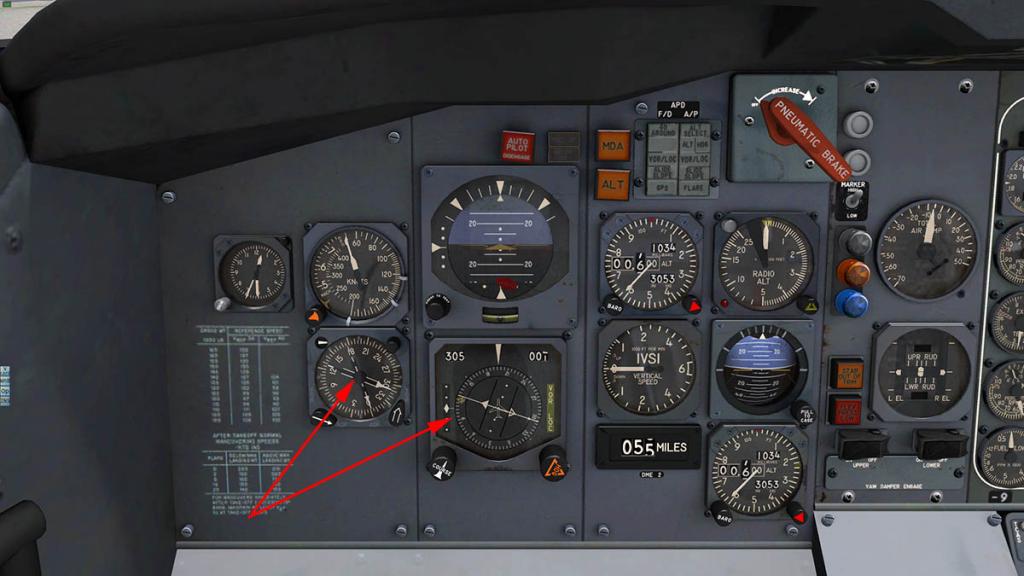
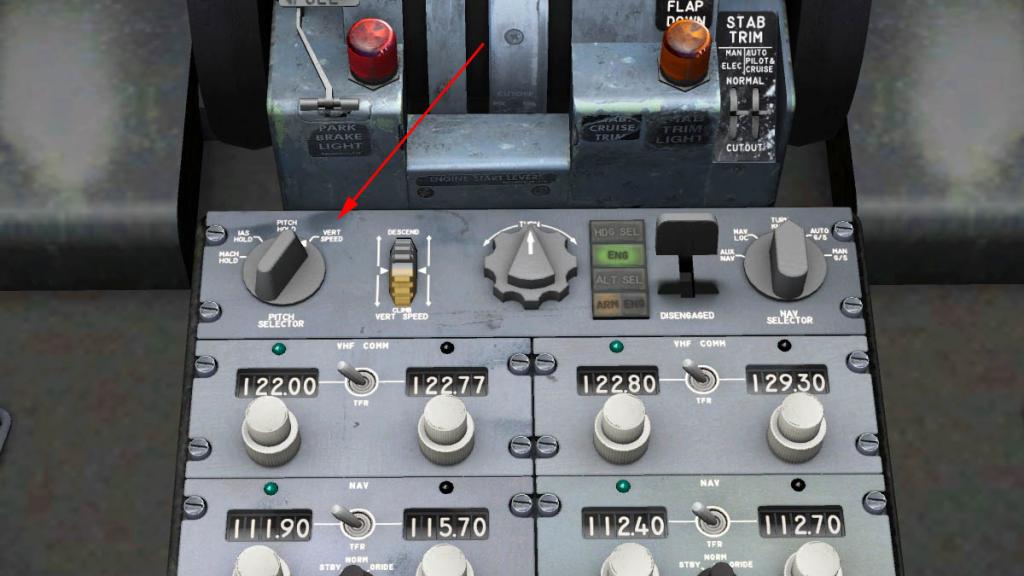
Select HDG SEL on the AP to turn to the heading bug set on the course needle (305º) and the 727 bird will turn to the heading. Then select "ALT SEL" (altitude select) on the AP to confirm to level off in this case the selected height of 15,000ft. The selection is on the top of the centre of the panel in large numbers (the switch will select 1000ft or 500ft increments). It is shown on the pilot's and Co-Pilot's panels that the "HDG" and "ALT Select" are active.
Now comes the tricky part? The aircraft is still holding the set pitch, and you want more control over the climb angle. To do this on the AP you switch to "VERT SPEED" (V/S) and adjust the pitch via the Climb or Descend selector. But the transition from the held pitch to the V/S is a bit of a guessing game. So you have to find the right angle you want very quickly in not to lose your current climb or any height. Practice can make the pitch switch over go smoothly, but it is a bit of an art to get it just right.
Reset the altitude to 29,500ft and the speed around 300knts is going to keep the climb clean. 1000fpm pitch and reduce to 400-500ft per minute as required (I usually do this in the last 3000ft).

Past now Waypoint UKW and the next waypoint is SPS (freq 112.70), I reset the old UKW WP to the next in line which is CDS (Freq 117.60) ready for the next switch over. The change in heading is small between UKW and SPS (301º)
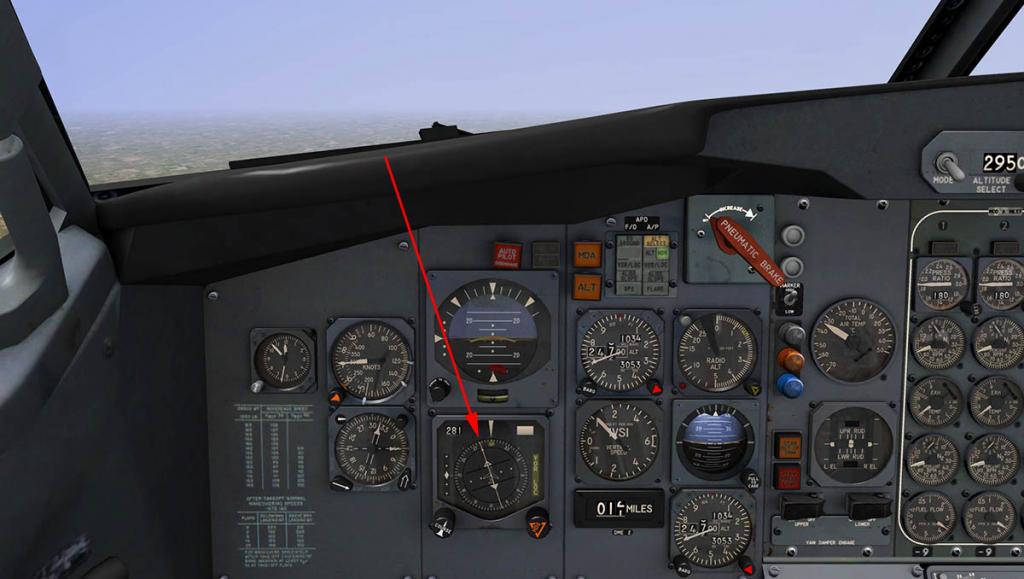

Just before the SPS waypoint. I set the next heading ready (281º) on the course needle. When I switched over the frequency from SPS to CDS the VOR (2) needle goes flat? Not every VOR station will register as you leap from one to another Nav-Aid. So your homework better be correct. and your charts must be handy in case your not. Get it right and when the VOR signal for CDS finally locks on you should be directly on the right course. (Cue big Smile
 )
)
There is the option on the AP to use the VOR Lock (NAV LOC), selecting this option should lock you on to the set Nav-Aid. It is yellow when searching and turns green when locked (you need to be on the right heading anyway). But it does work? At lock the aircraft turns away from the selected VOR heading noted by the the direction of the red arrow. Which is really annoying as you need this feature of the AP in the way you navigate. For reliability just stay on the heading setting (default) from VOR to VOR.
So even though the Autopilot is very basic, it is very good and covers most of the functions you require. Our route now covers the waypoints - TXO - ABQ - GUP - PGS - BTY - BIH to SAC (Sacramento).


This is an amazing aircraft to fly across a distance. And there is plenty to do in navigating and monitoring the systems (both now are mostly automatic functions on modern aircraft). Remember you are doing the work of three people in the B727. The only item that came at me was the alert of "You have ice on the wing by being below -20" It snapped the B727 into a deadly spin. Next time flying I switched on the Anti-Ice wing heaters (OHP) and the problem never came back... But FlyJSim says its not implemented into the systems. But it worked for me every time?

Landing the Boeing 727
Just past VOR - BIH (Bishop). I started the descent down to 10,000ft at SAC (Sacramento). You usually put the throttles to idle at a 2000fpm descent. However sometimes in the B727 you may need to use the airbrakes to control the speed back down to 250knts at the 10,000ft arrival altitude. A look along the wing with the airbrakes (spoilers) set shows the complexity of the FlyJSim B727 wings... It is also incredibly realistic with excellent wing flex.
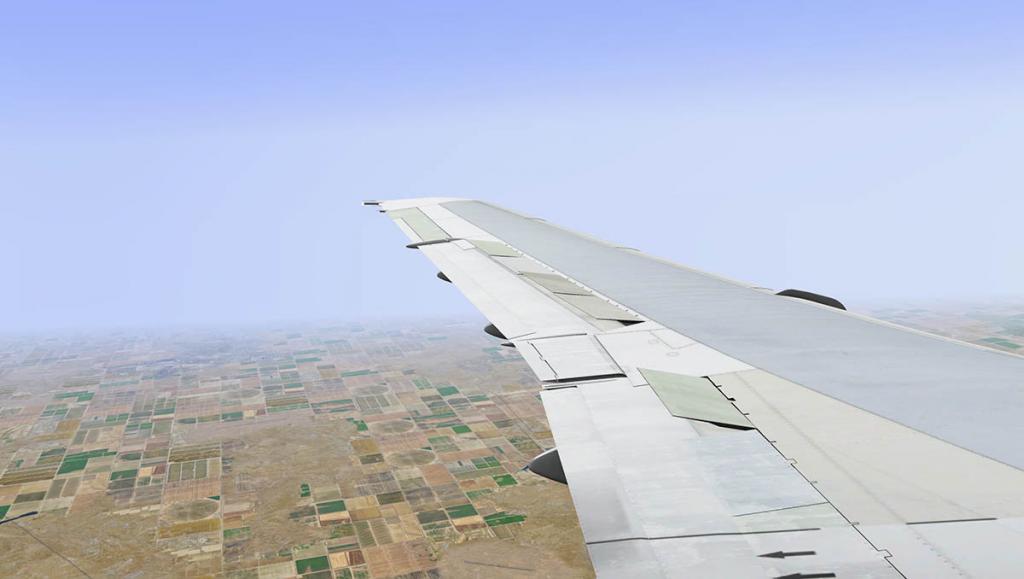

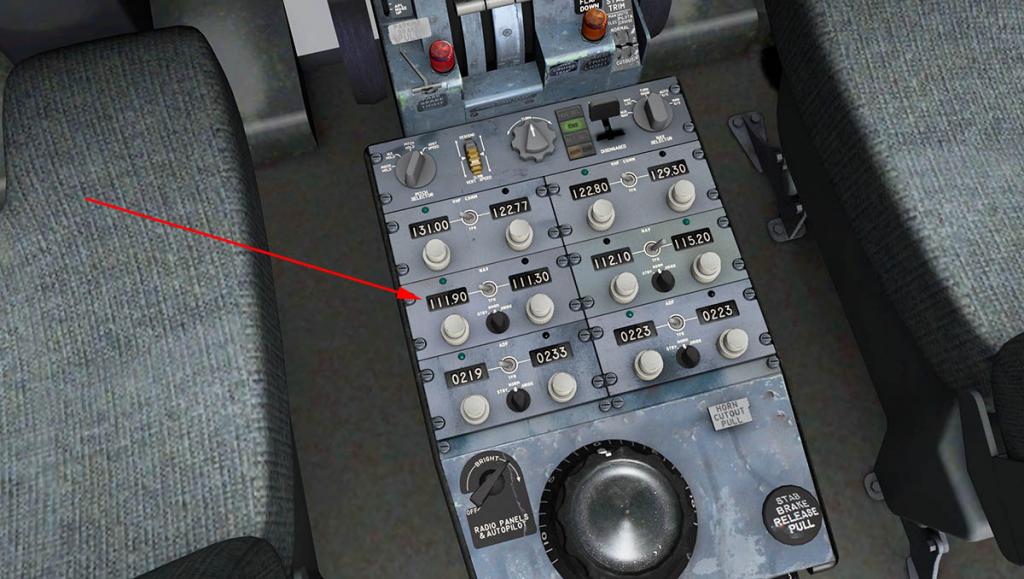

At SAC I set up the Oakland Runway 11 frequency (NAV1) of 111.90 and inserted RWY29 at 108.70 just in case I had to land from the south. heading to SGD at 234º and then I set up the SAU turn at 186º, In reality I will turn just slightly before SAU to line up directly for OAK's RWY11. Height is reduced from 10,000ft to 5500ft to a ILS collect at 1800ft. I usually get well below the ILS to control the speed down the beam.
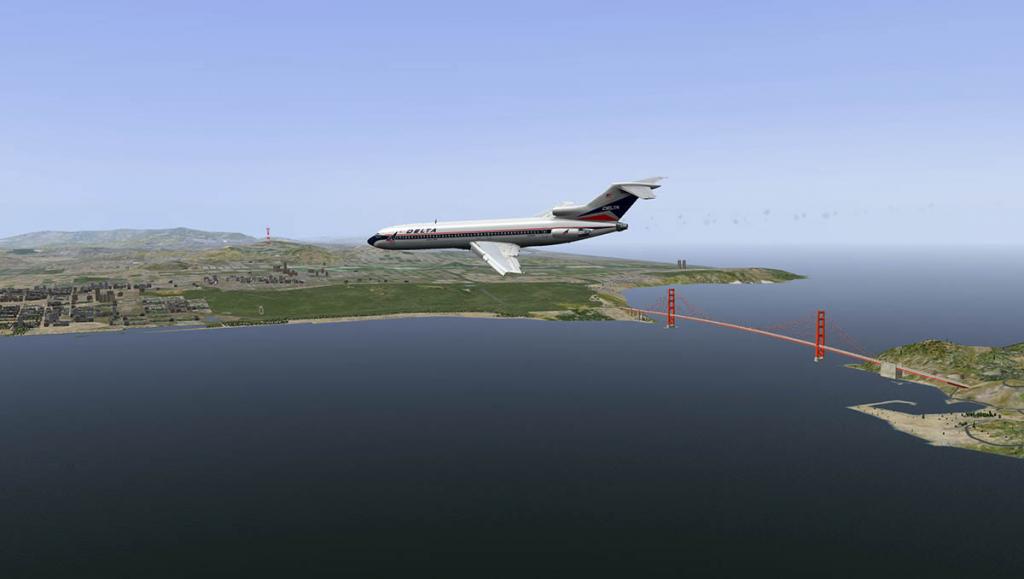

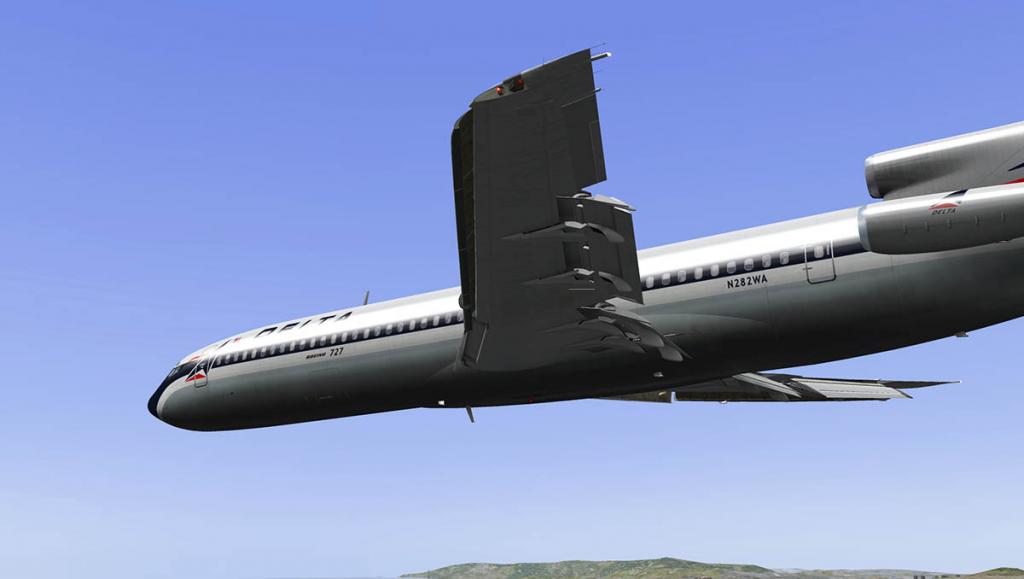
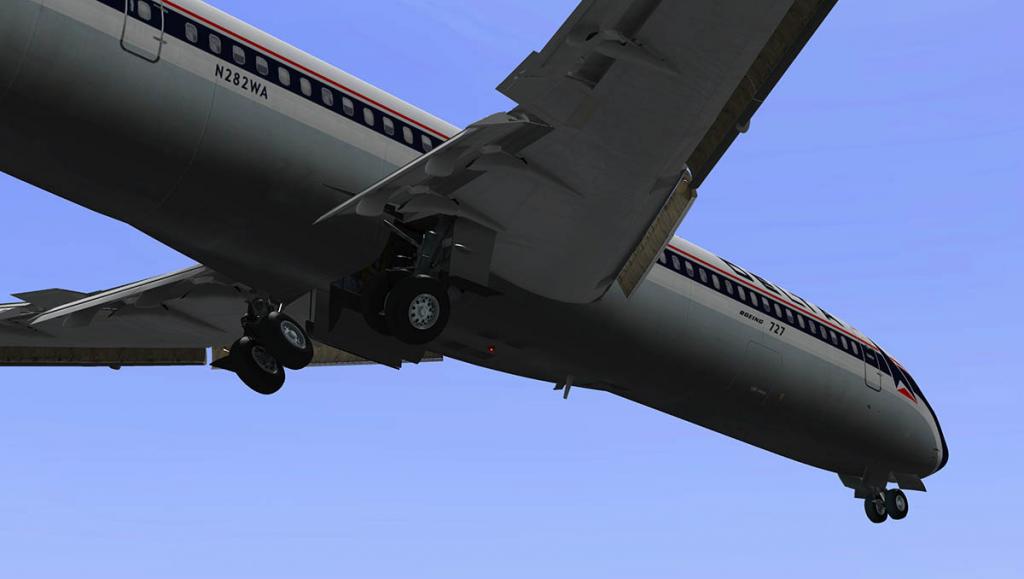
Using the flaps on the 727 is a devil you do or the devil you don't. The settings are 0º, 2º, 5º, 15º, 20º, 25º, 30º and 40º, but the 40º is rarely used. This lowest setting is very close to the stall speed noted as 106knts (which is very low anyway). The high T-Tail configuration would literally let the aircraft fall out of the air. There was a debate about this and 30º flap was made the maximum lowest setting to be used by most operators. The wing is effective down to 15º, but below that you get very heavy drag. Drop the undercarriage and the drag gets far worse. So as you set up your speed and lower the flaps past 15º you need a lot of engine power to counteract the drag, by 30º flap your thrust is quite high to keep the aircraft in the air. In saying that the B727 is very stable at these low speeds and excellent in a hands on landing. The landing lighting is excellent with two sets of lights on each wing, you can select all four lights or outbound or inbound lighting. Wing and runway turnoff lights are also available. The Menu "V card" is showing me a vRef of 132knts and so I will aim for a landing around that.

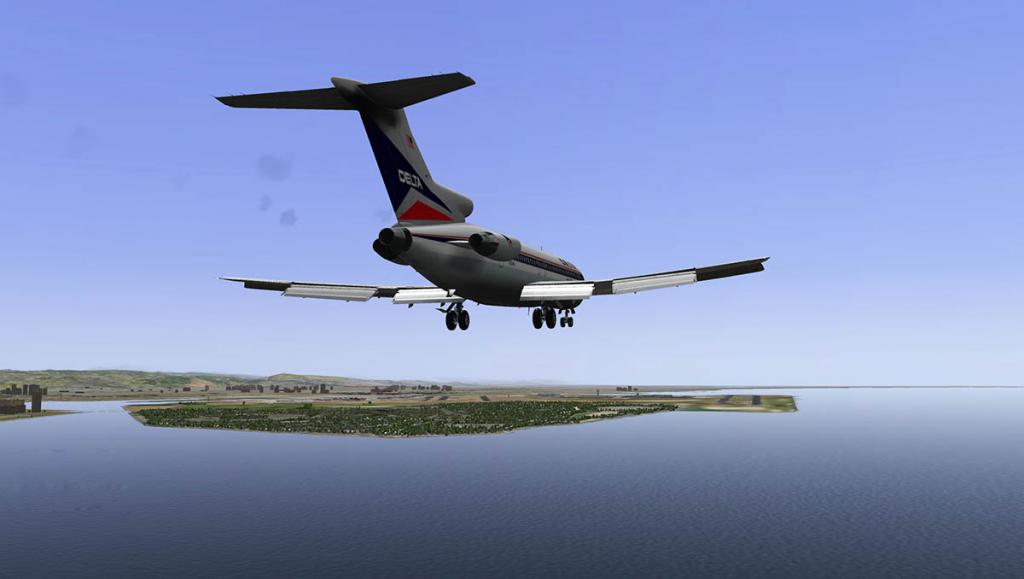
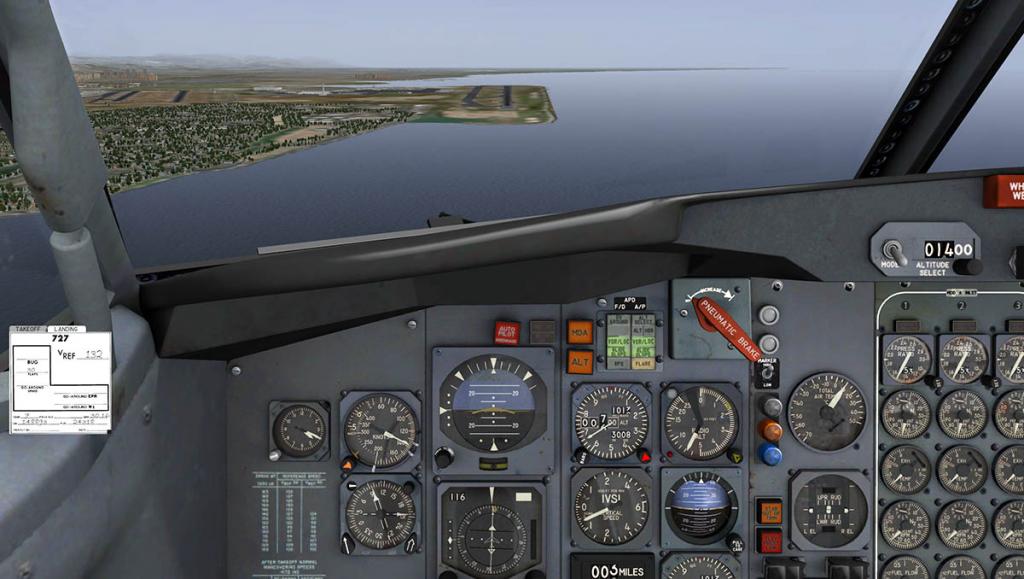
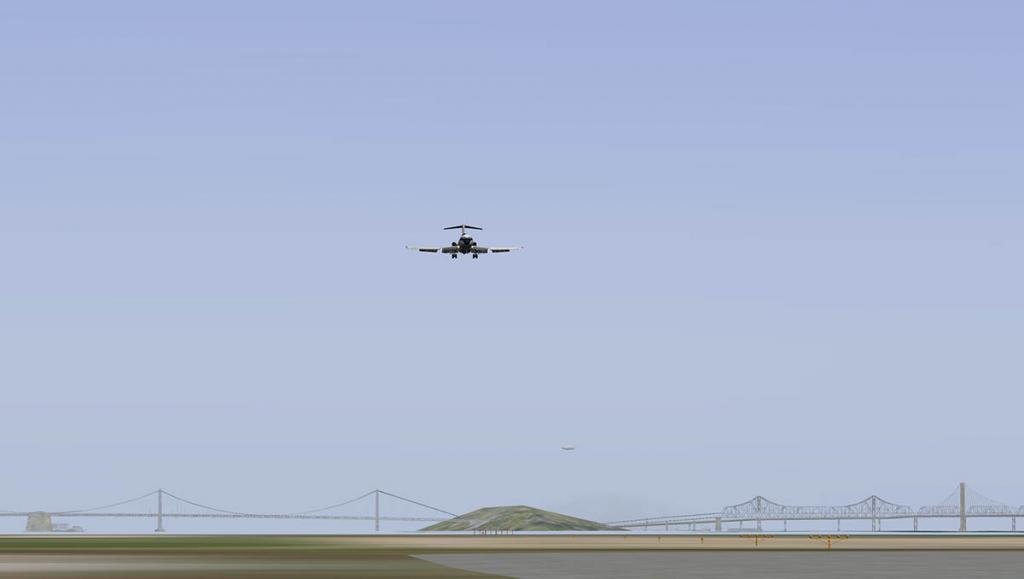
Auto brakes are set to "MIN", and the ILS is selected by "AUTO G/S" on the AP. And lock on is very good. A manual landing is also very good with more throttle control to adjust the height and speed.
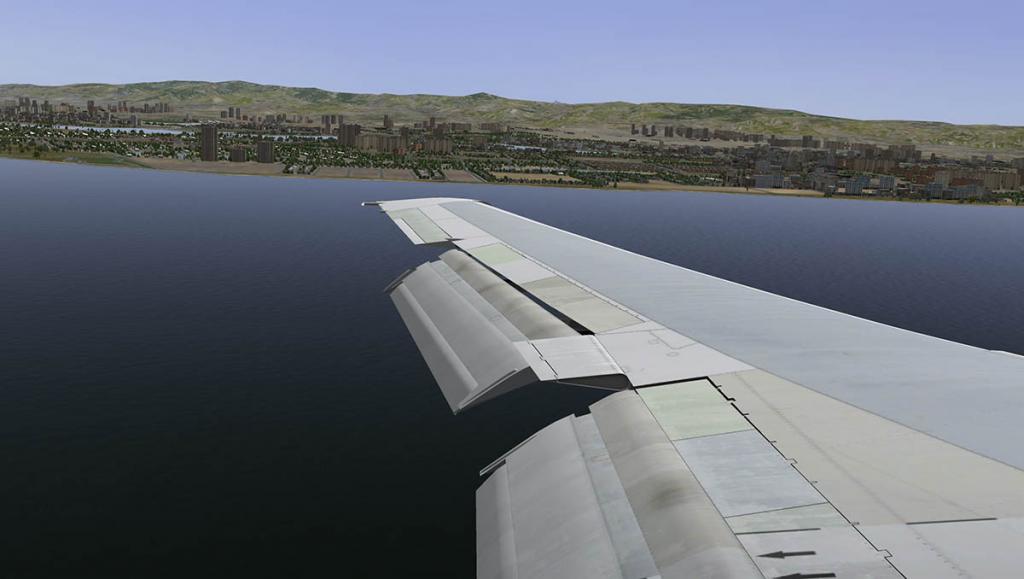
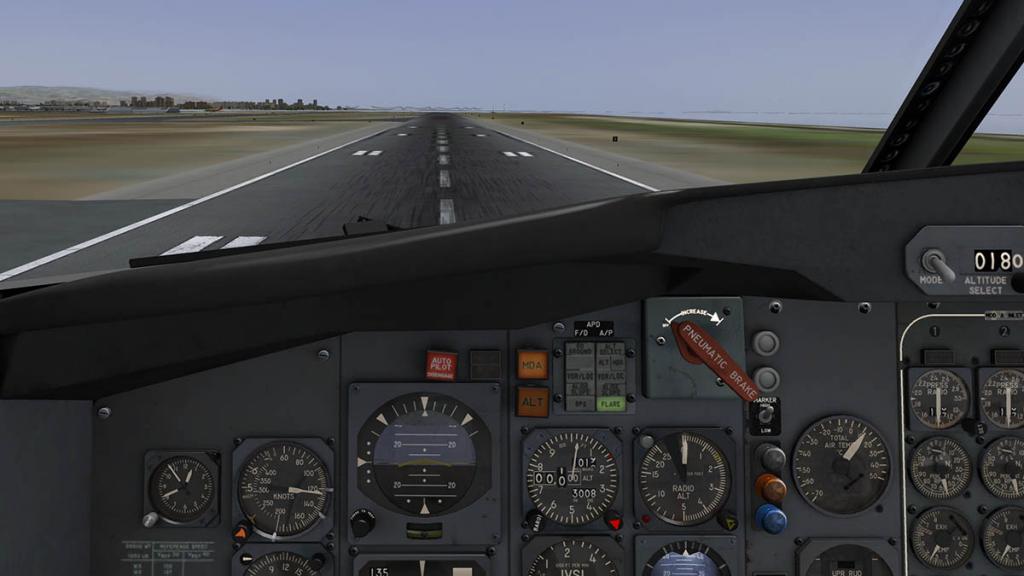
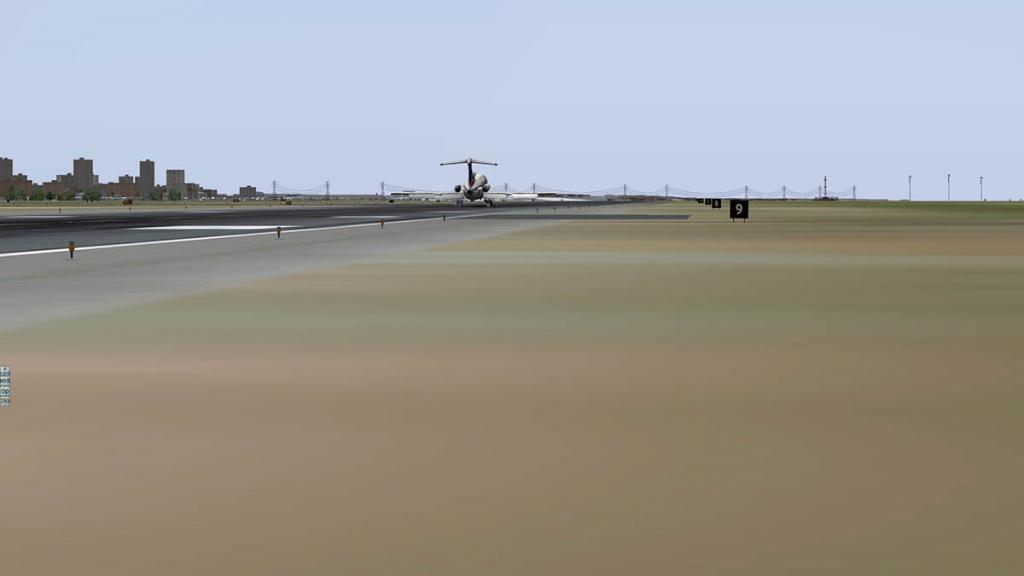
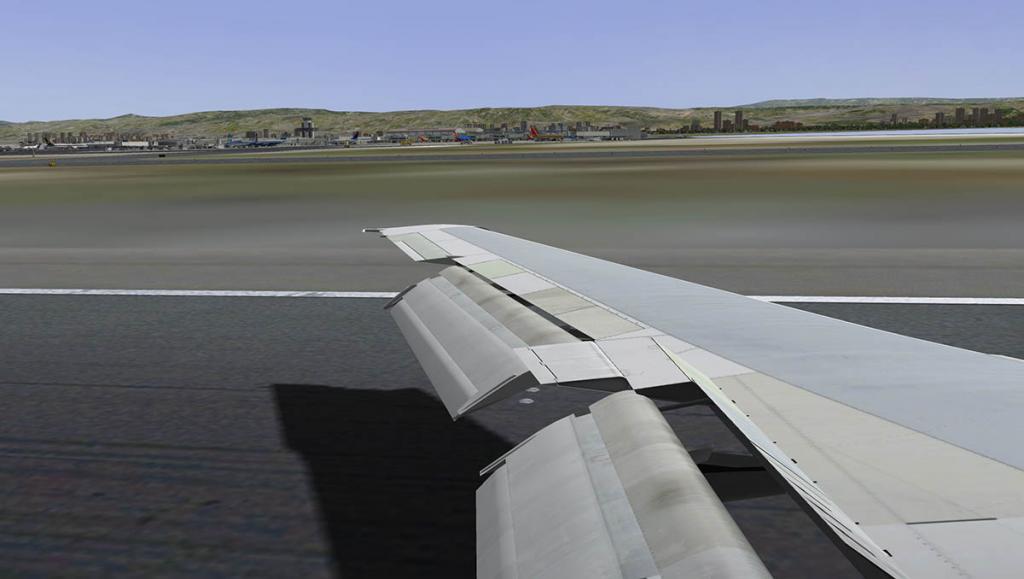
As noted landing speed is very low at around just under 140knts (135knts at touch). Light control of the throttles is needed to contain the correct speeds. The aircraft is great on the flare but slightly nose up to control the drift down to the runway. I have never made a bad landing in the B727 and that shows the control you have in the flare. Once you have contacted the runway then up the spoilers. These are manual so you have to work them up (and down) yourself with no auto deploy. Flip the throttle thrust-reverser handles and feel the power (and noise) of the engines reverse-thrust (Clam-shells close in the engines) and let the speed drop to a crawl. The Auto-brakes can grab the main wheels, so watch that and a flick of the brake should release them. Once down to taxi speed then pull off the runway and clean the aircraft up.
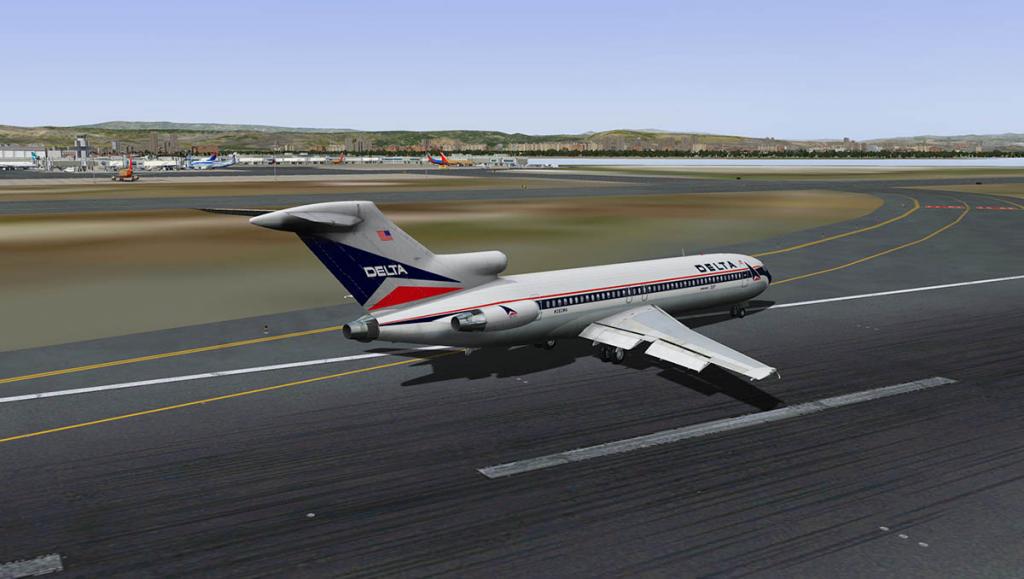


Heading for the gate the aircraft is lighter but still easy to manoeuvre in to a tight ramp area. When shutdown via the fuel flow/cutoff valves, I checked the Weights & Balances of the empty aircraft to note my final settings.


Summary
Flying the FlyJSIm Boeing 727 is an experience. It sends you back to another era of flight and you are immersed in the the way flying was done back then. The Boeing 727 is a very interesting aircraft to fly for many reasons. The main one is how much you had to do back then that is totally automated now. And that is the the deeper experience that comes out of the aircraft. preparation is the key in learning the aircraft in detail, right down to the little stuff of how the fuel, electrical, Air-Con,hydraulics the lot and how it all works and the limitations of the engines and systems. Also your routing has to first rate to get the flight perfect and get the aircraft from point to point. Through the flight you are constantly adjusting the speed and checking systems while navigating the aircraft across a fair distance. It is hard work. But get it right and do a perfect Gate to Gate service and you will be happiest person for days. So it is challenging the B727 but highly rewarding. It is a brilliant aircraft to fly, and fly you do. One of the best aircraft available in X-Plane.... without doubt.
____________________________________________________________
The FlyJSim Boeing 727 Series is available from the X-Plane.OrgStore :
727 Series Complete :
US$62.00- Currently on sale for only US$50.00727 Series 100 : US$32.00
727 Series 200adv : US$32.00
727 Series 200F : US$32.00
Technical Requirements:
Windows, MAC or Linux
X-Plane 10.20 or higher - 32 and 64 bit compatible. X-Plane 9 is not supported
Recommended: 1+ GB of VRAM, and 8+ GB of system memory
Release Date 12th December 2012 : Last updated: March 23, 2013
____________________________________________________________
Stephen Dutton
©copyright2014: X-Plane Reviews
Review System Specifications:
Computer System:
- 2.66 Ghz Intel Core i5 iMac 27”
- 6 Gb 1067 Mhz DDR3
- ATI Radeon HD 4850 512mb
Software:
- Mac OS Mavericks 10.9
- X-Plane 10 Global ver 10.25 (final)
Addons
- Saitek x52 Pro system Joystick and Throttle
Scenery
- KDFW - Dallas/Ft. Worth International Airport - Brian Godwin (X-Plane.org)
- KOAK - Golden Gate , KSFO and South Bay - Tom Curtis (X-Plane.org Store US$34.95)

-
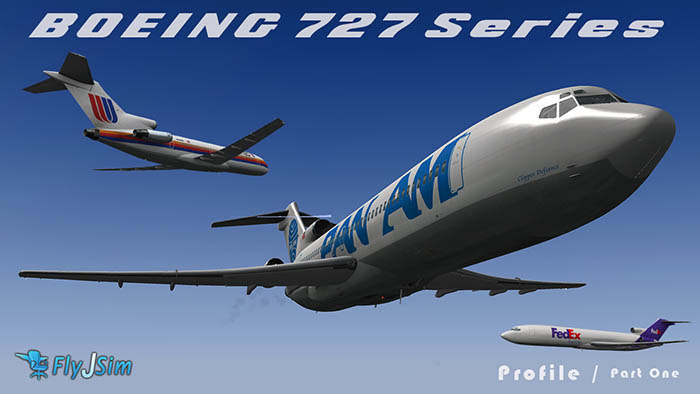
Aircraft Profile : Boeing 727 Series by FlyJSim
This is a two part series that profiles the Boeing 727 Series from FlyJSim. What is the difference between a profile and a review? Not much really but with profiles we look at releases that have been released for a period of time and not just a recent release and are worth noting either with the changes to the aircraft and its current status. Why two posts? Each post will look at a totally different angle on the aircraft. In this first post it is about the 727 Series and in the second post we will fly the aircraft from a point to point - departure to destination route and understand how the aircraft performs from a flight perspective.
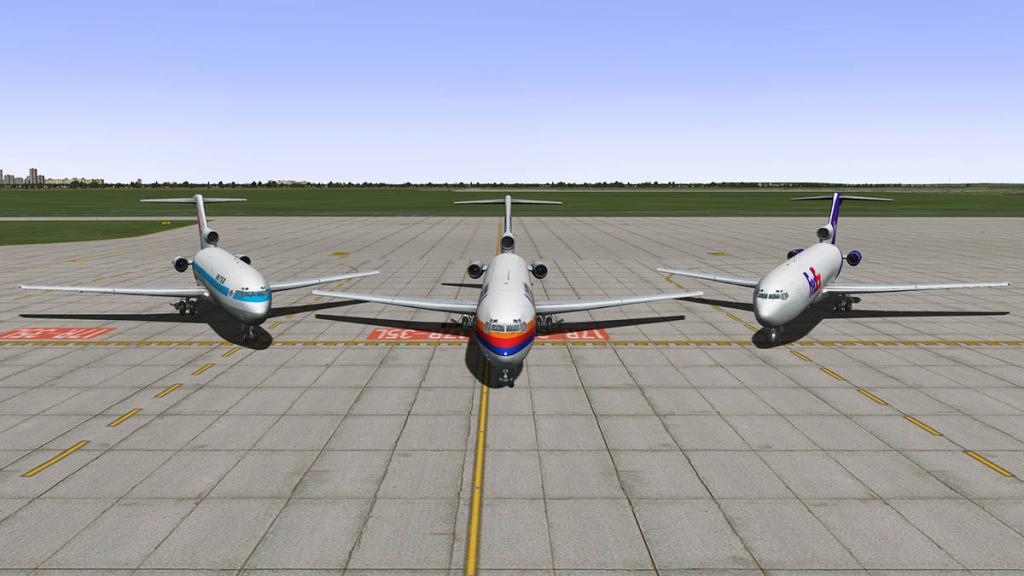

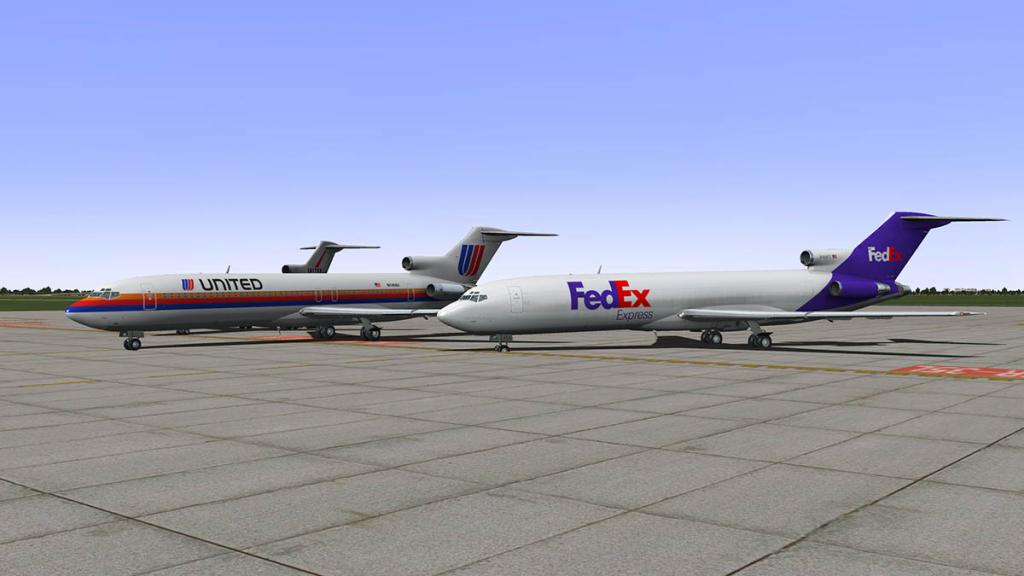
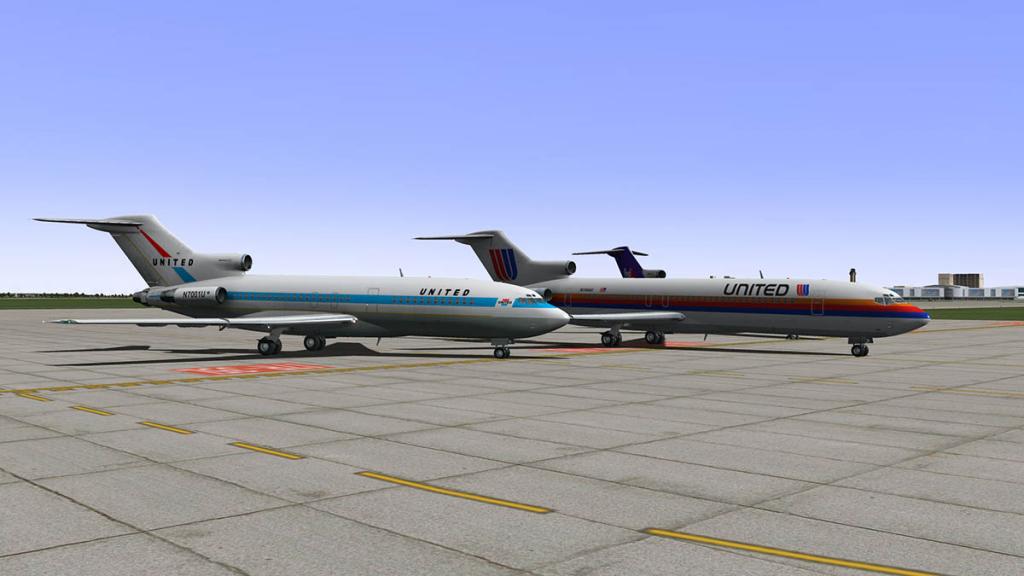
Boeing 727 Series
FlyJSim released its Boeing 727 Series just days before Christmas in 2012. It may seem a while ago now but in reality at this date that is just over a year ago. No doubt the release was immensely successful and certainly this aircraft series is one of the very best available in the X-Plane simulator. We can't really note on which aircraft is the very best. As we approach different aircraft for all our different needs. In saying that the B727 has to be in one of the higher positions of best top five available aircraft.
From a pilots perspective it is a vastly different aircraft than most aircraft that we add to our collections. It is totally from another era. Some would say that was the "Golden Era" of early jet travel in the late 50's and 60's. If you are used to flying modern glass cockpits over long distances, then Boeing 727 is as alien as you can get with very few support features in Navigation and Engine Management that are common in most aircraft today. Your workload is going to be far higher in flying these 60's birds, but that is also the attraction in learning on how they did things back then. If anything the Boeing 727 is a time machine back to a period that has now almost disappeared. That is more so the attraction of using the aircraft in heightening your skills. Fly the Boeing 727 over a period of time and you get very good at flying almost most heavy aircraft because it strides over many different areas in power, performance and weight. In its time it was a very high-performing airliner and that may seem quaint by today's standards. But get your skills right and the you can make this aircraft perform to a very high standard.
Boeing 727
The Boeing 727 was a compromise in a design for United Airlines, American Airlines, and Eastern Air Lines requirements for a jet airliner to serve smaller cities with shorter runways and fewer passengers. The very successful Boeing 707 series was perfect for transcontinental and oceanic routes but simply too big for domestic services. The noted airlines had various reasons to wanted a very wide set of requirements, high altitude (United), efficiency (American) and over-water operations (Eastern). The 1960's created other requirements as well, because back then many airports at a destination point where very basic in their facilities. The new aircraft then above everything else had to be also totally independent of any ground services. A final major requirement was that these same airports usually had very short runways. So any design had to take this into account. The full list was a very high order, But Boeing did cover almost every one of these requirements by producing a very different type of of aircraft.
The Boeing 727 is highly distinctive because of its three engines and a high T-Tail design. The middle engine (engine 2) at the very rear of the fuselage gets air from an inlet ahead of the vertical fin through an S-shaped duct.This S-duct proved to be troublesome in that flow distortion in the duct induced a surge in the center-line engine on the take-off of the first flight of the 727-100. This was fixed by the addition of several large vortex generators in the inside of the first bend of the duct. The set up of the S-Duct allowed also for a built in Air-Stair under the rear of the fuselage to allow embarkation and boarding at distant destinations. The aircraft had a built in APU (Auxiliary Power Unit) which is mounted in a hole in the keel beam web in the main landing gear bay. This allows the aircraft to have power for electrical and air-conditioning and not to have the main engines running while sitting on the ground, the APU is also used to restart the engines.
To be able to use the required shorter runways the Boeing 727 has a unique wing design. With no wing-mounted engines, leading-edge devices (Krueger, or hinged, flaps on the inner wing and extendable leading edge slats out to the wingtip) and trailing-edge lift enhancement equipment (triple-slotted, aft-moving flaps) could be used on the entire wing. Together these high-lift devices produced a maximum wing lift coefficient of 3.0 (based on the flap-retracted wing area). The 727 was stable at very low speeds compared to other early jets, but some domestic carriers learned after review of various accidents that the 40-degree flaps setting could result in a higher-than-desired sink rate or a stall on final approach (The T-Tail effect). So these carriers' Pilots' Operation Handbooks disallowed using more than 30 degrees of flaps on the 727 and even going so far as installing plates on the flap slot to prevent selection of more than 30 degrees of flaps. Another short runway feature was that nose wheel brakes were available as an option to reduce braking distance on landing and which provided reductions in braking distances of up to 150m. Another feature was the 727 is equipped with a retractable tail skid that is designed to protect the aircraft in the event of an over-rotation on takeoff.
The prototype 727-00 first flew on February 9, 1963 and FAA type approval was awarded on December 24 of that year.
Boeing 727-100


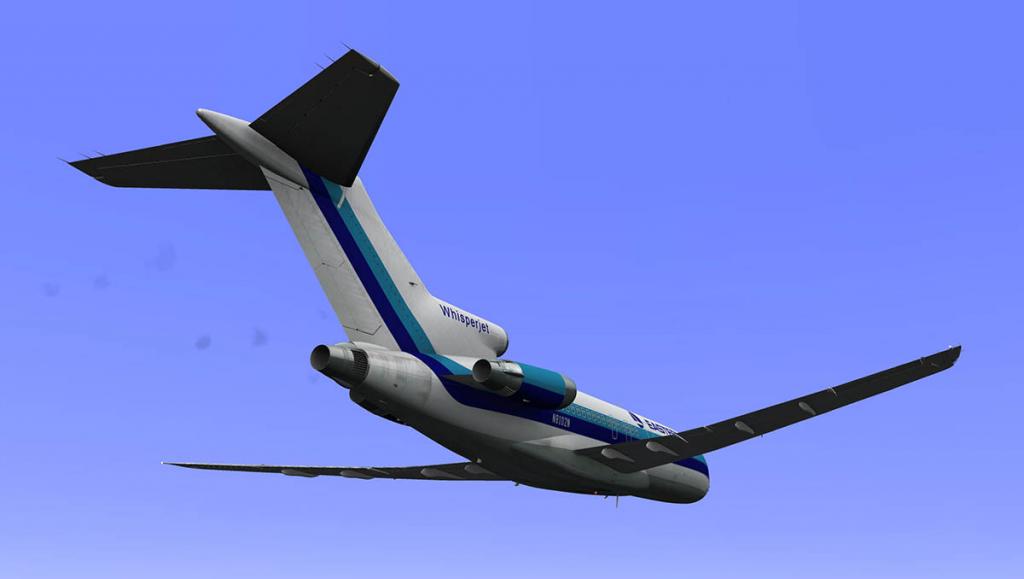
The first initial delivery to United Airlines of a Series -100 was on October 29 1963, to allow pilot training to commence. The first 727 passenger service was flown by Eastern Air Lines on February 1 1964, The aircraft was powered by a Pratt & Whitney JT8D is a low-bypass (0.96 to 1) turbofan engine, introduced by Pratt & Whitney in February 1963 on the inaugural flight of Boeing's 727 which was between Miami, Florida to Washington, D.C., and then to Philadelphia, Pennsylvania. It was a modification of the Pratt & Whitney J52 turbojet engine. The 727 was initially going to be powered by three Allison AR963 turbofan engines, which are the license-built versions of the Rolls-Royce RB163 Spey used by the Trident. However Eddie Rickenbacker, Chairman of the Board of Eastern, told Boeing that the airline preferred the JT8D for its 727s. Boeing had not offered the JT8D as it was about 1,000 lbs heavier than the RB163, though it is slightly more powerful. And the JT8D soon became the sole engine available.
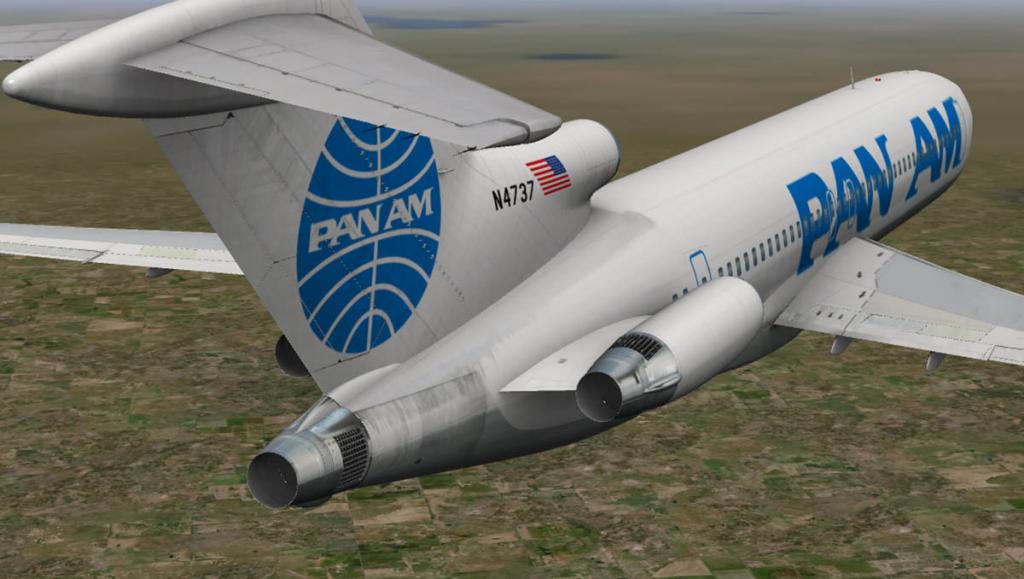

Each Pratt & Whitney JT8D-1 produces 14,000 lbf (62 kN) thrust each to carry an MTW 170,000 lb (77,000 kg) (empty 80,602 lb (36,560 kg)) over a range of 2,300 nmi (4,300 km). Max speed is Mach 0.9 with a service ceiling of 36,100 ft (11,000 m). A total of 572 727-00/100 series aircraft were delivered (408 -100s, 53 -100Cs, and 111 -100QCs), the last one rolled off the production line in October 1972.
The 727 followed the 707 quad-jet airliner of with the same upper fuselage cross-section. The 727's fuselage has an outer diameter of 148 inches (3.8 m). This allows six-abreast seating (three per side) and a single aisle when 18 inches (46 cm) wide coach-class seats are installed. And could carry 149 passengers in one-class or 131 passengers in two-classes.
The Cockpit layout is the same as the Boeing 707 as well, But adapted for the three engine design.
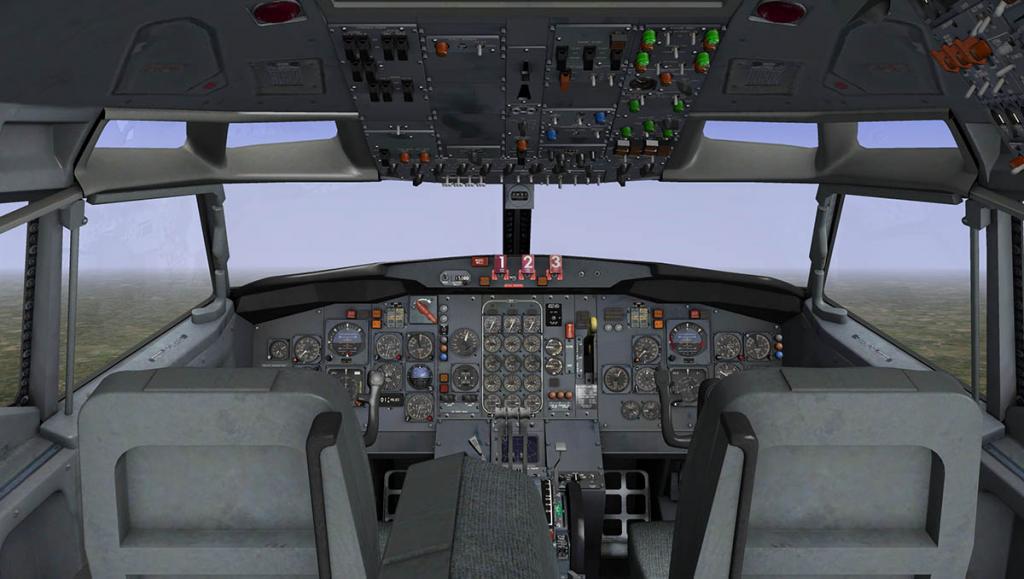

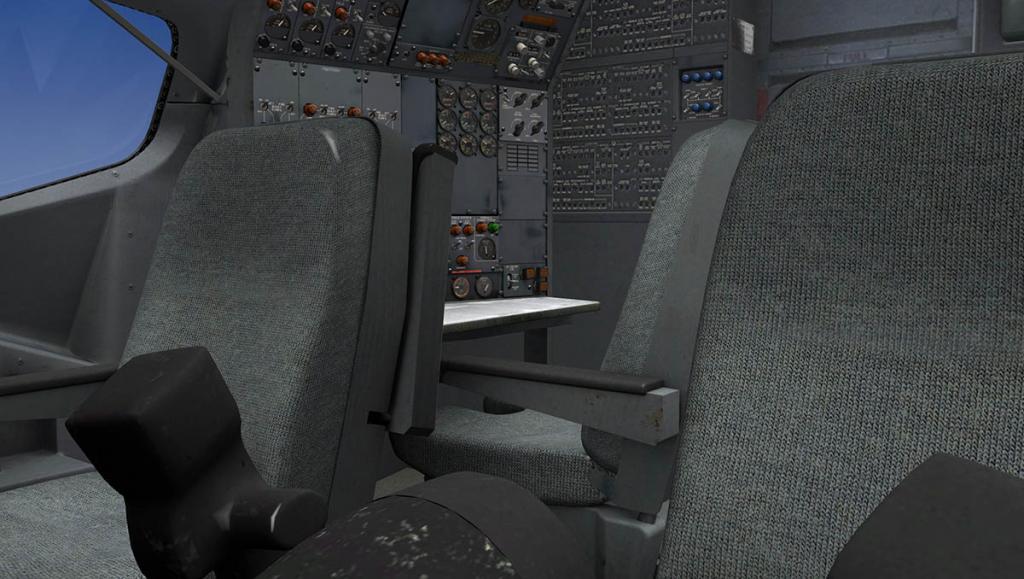
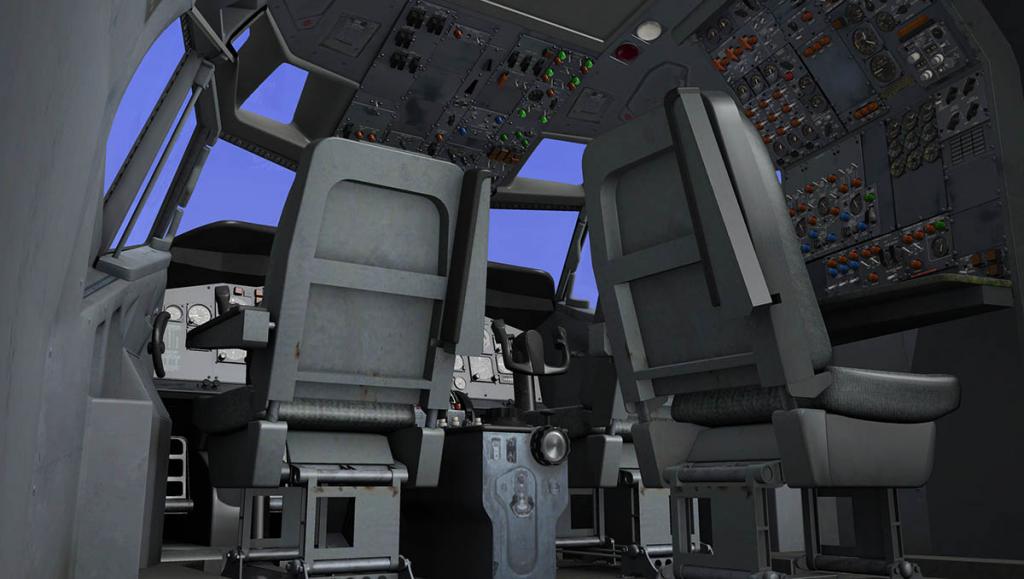
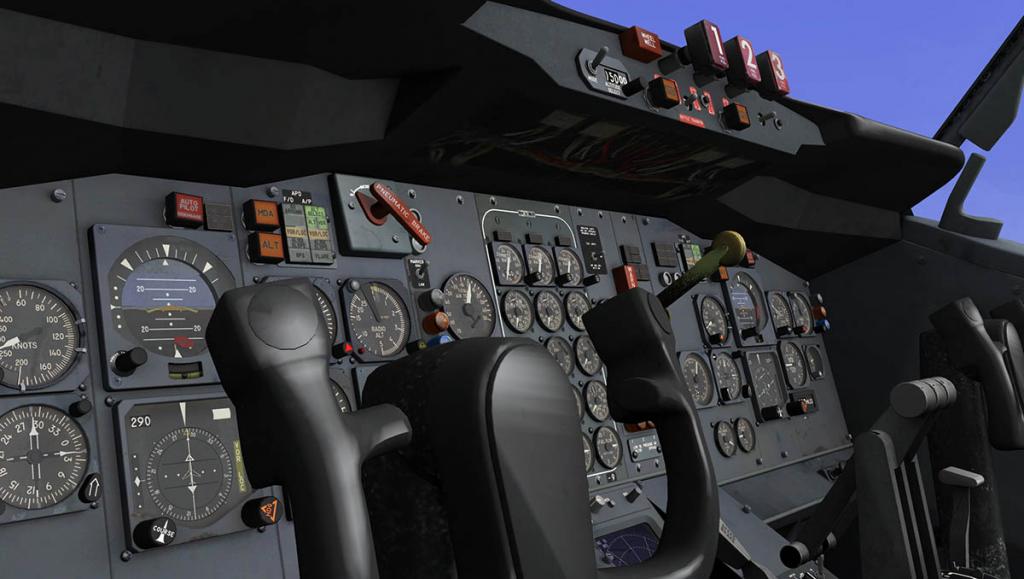
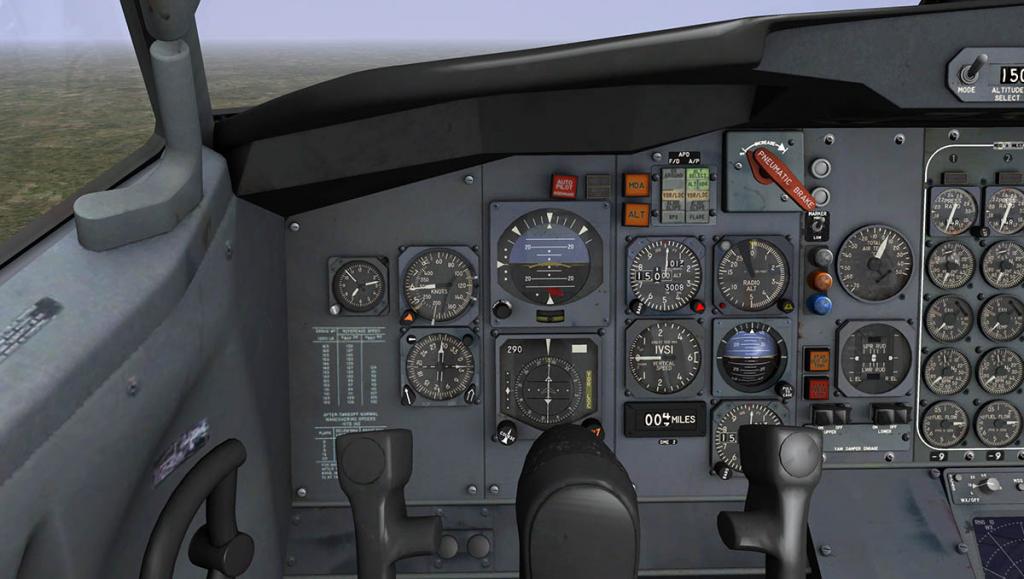
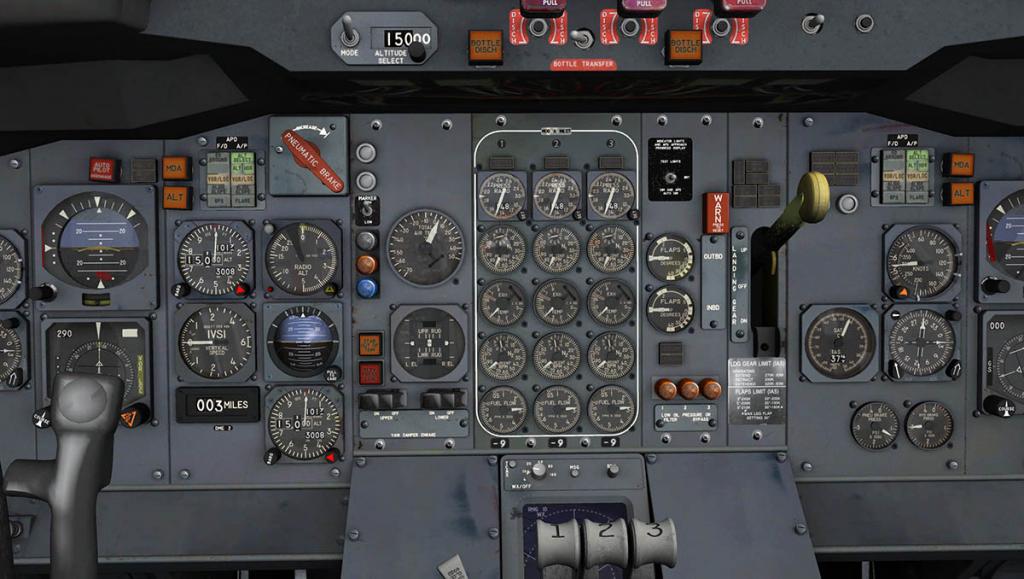

The Cockpit design work by FlyJSim is here simply exceptional. You certainly feel the Retro 1960's vibe and clockwork instruments. To note the detailing closely just admire the work on the throttle quadrant.

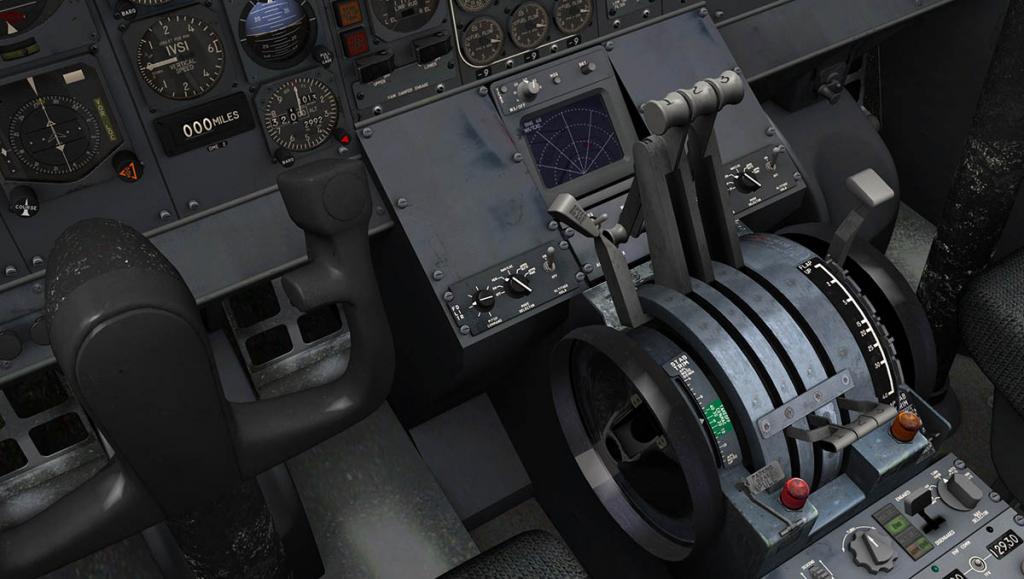
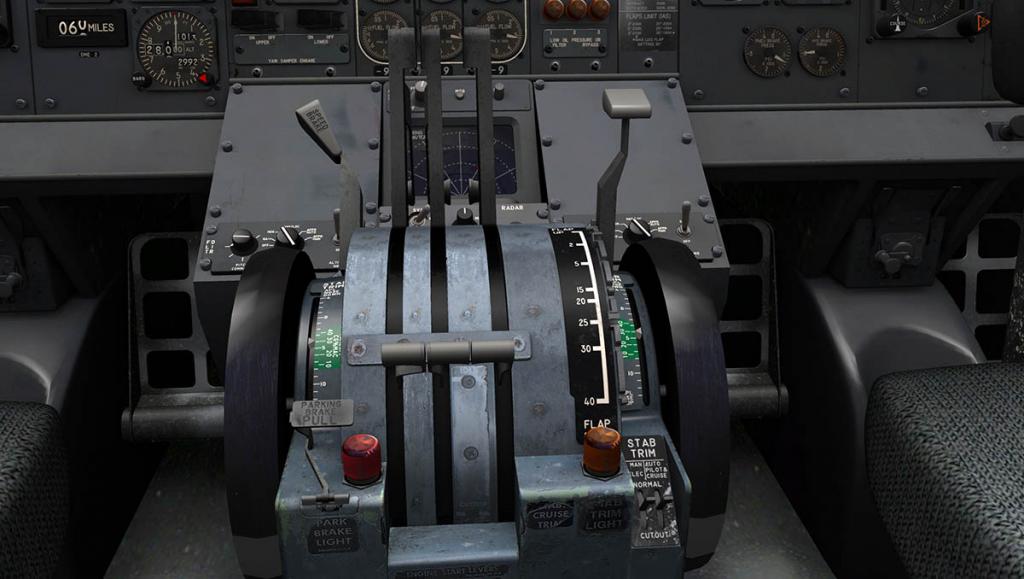
It looks like it has all been honed from real metal. The levers clunk and click beautifully as well. The aircraft is also different from today's cockpits in that it has a flight engineers station FE situated behind the Co-Pilots seat.
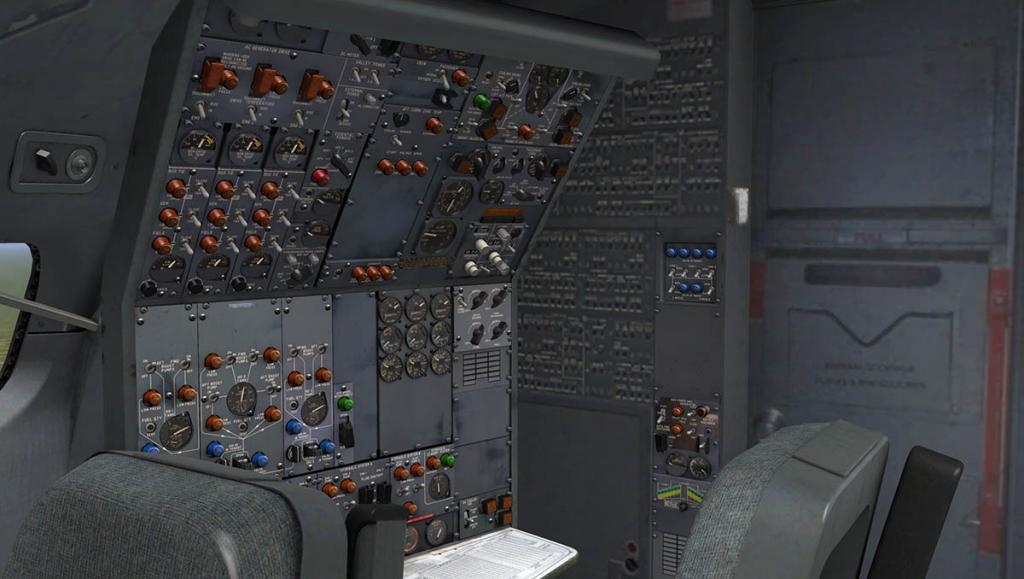


The items located here are now usually positioned on the Overhead Panel. So it is odd to see the upper OH panel in the B727 so empty. It looks very complicated on the engineers panels as well, but it isn't.
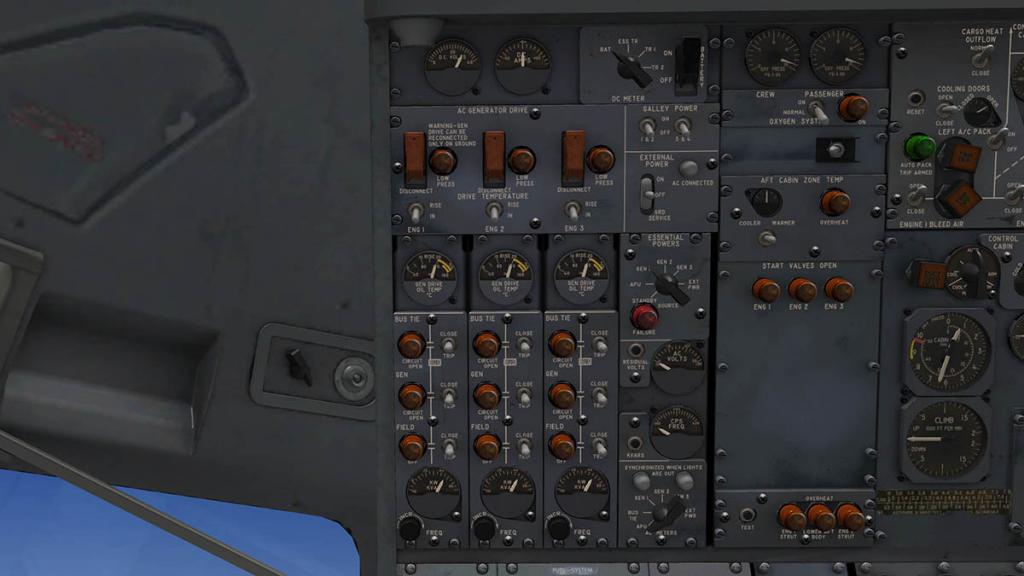
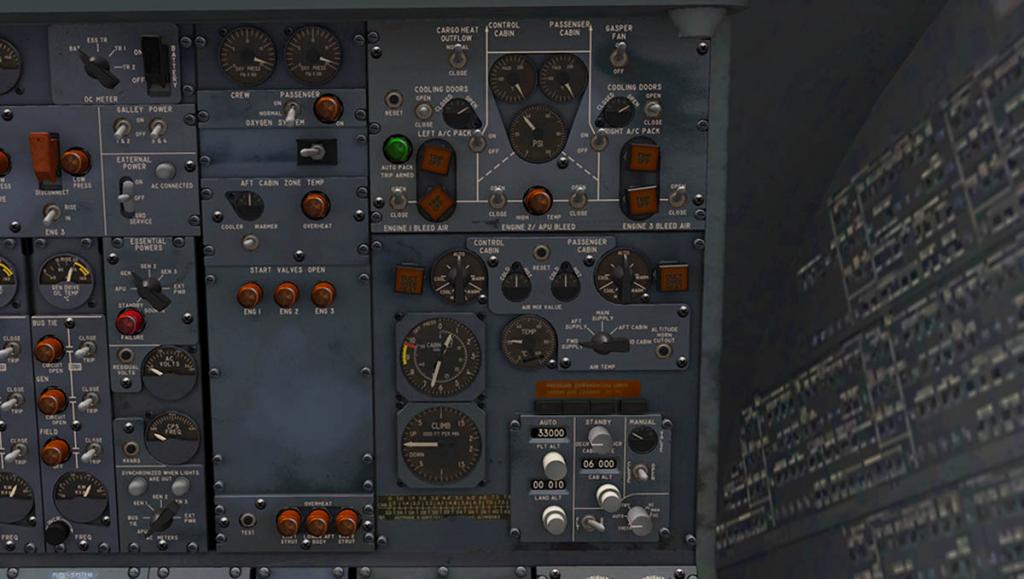
Situated on top of the panel is the Electrical and DC/AC dials (left) and Air-Conditioning (right). The Air-Con is also your "Bleed" panel to start the engines.


Fuel panel (Left) and systems oil temperatures (right) with the FE panel-lighting rotating knobs and warning lights.
Fuel heat (left) and hydraulic systems are across the bottom of the panel. On the rear bulkhead is the APU switches and Fuel Dump Valves.
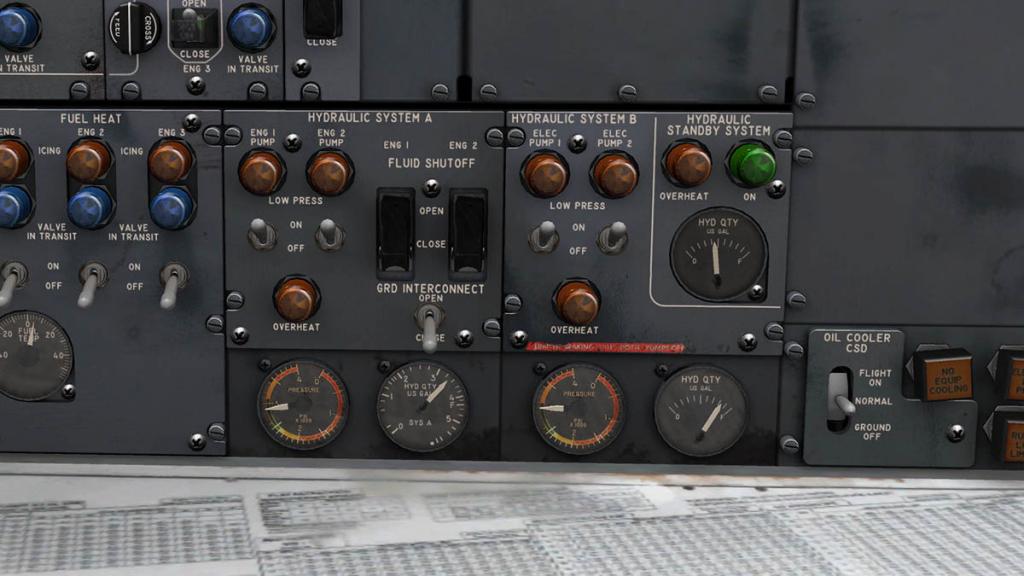

Detailing is completed by the overhead windows and central overhead panel.

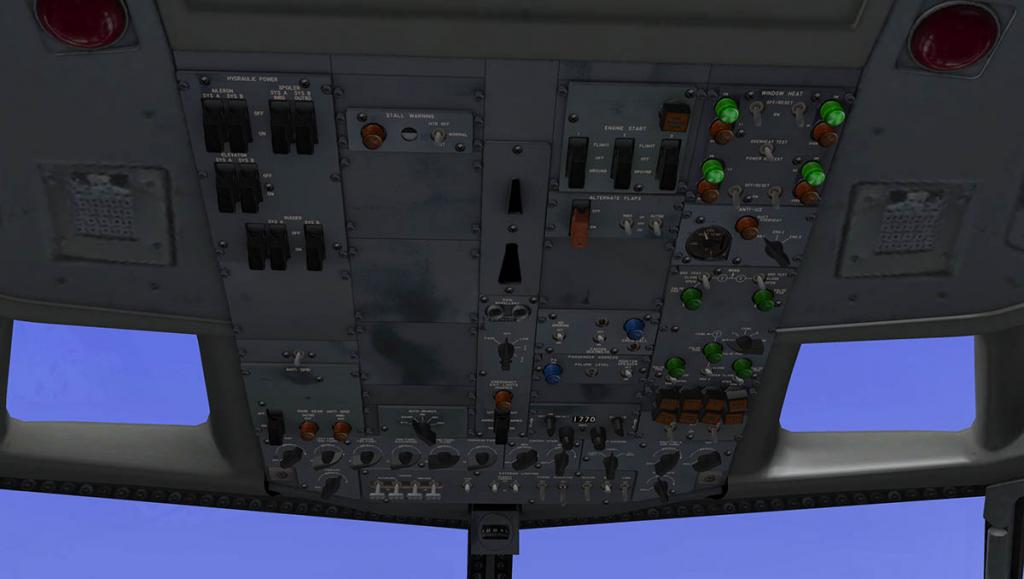
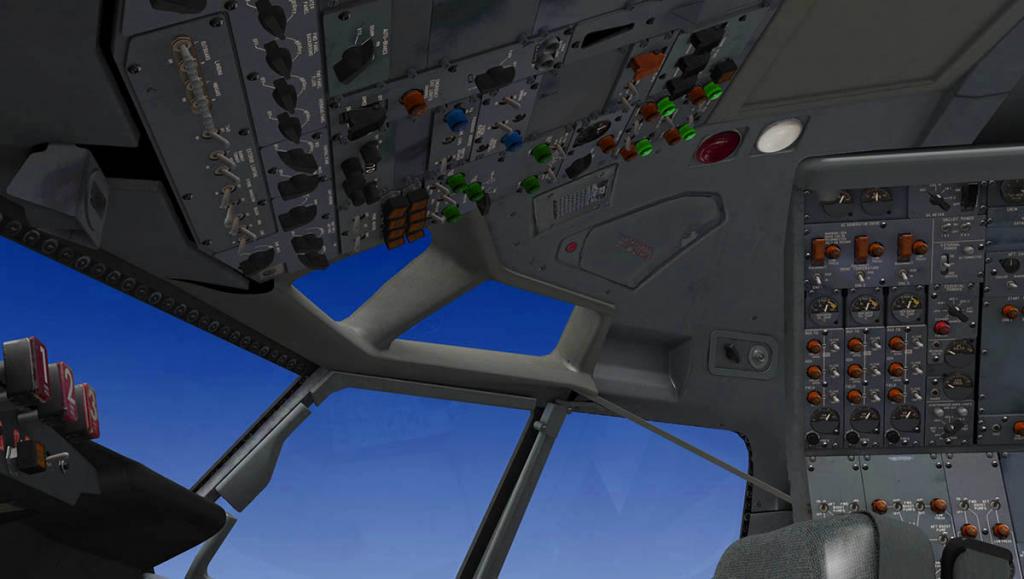
We will cover the flight instruments and the main panel in the second preview of the B727 as we use them.
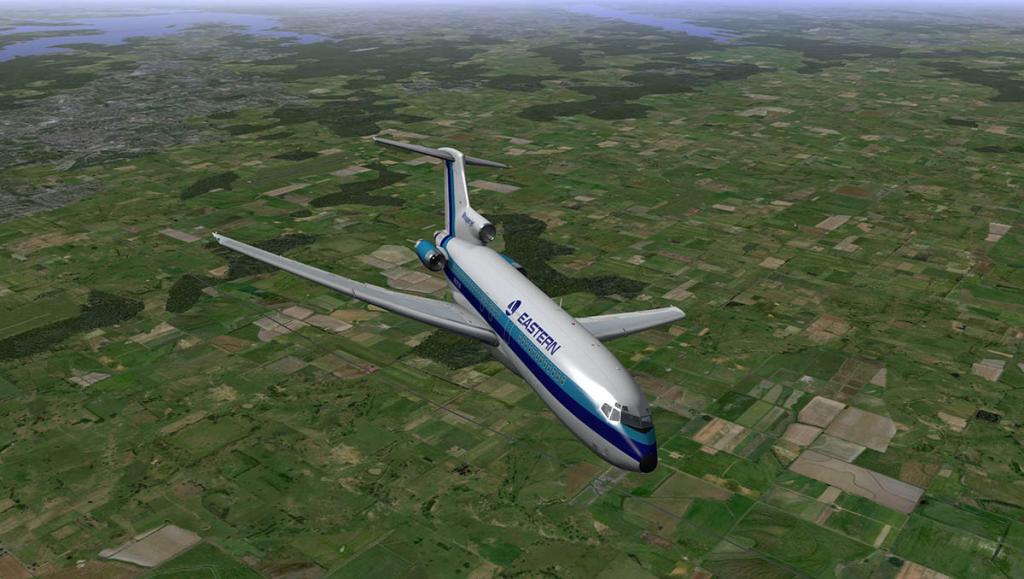

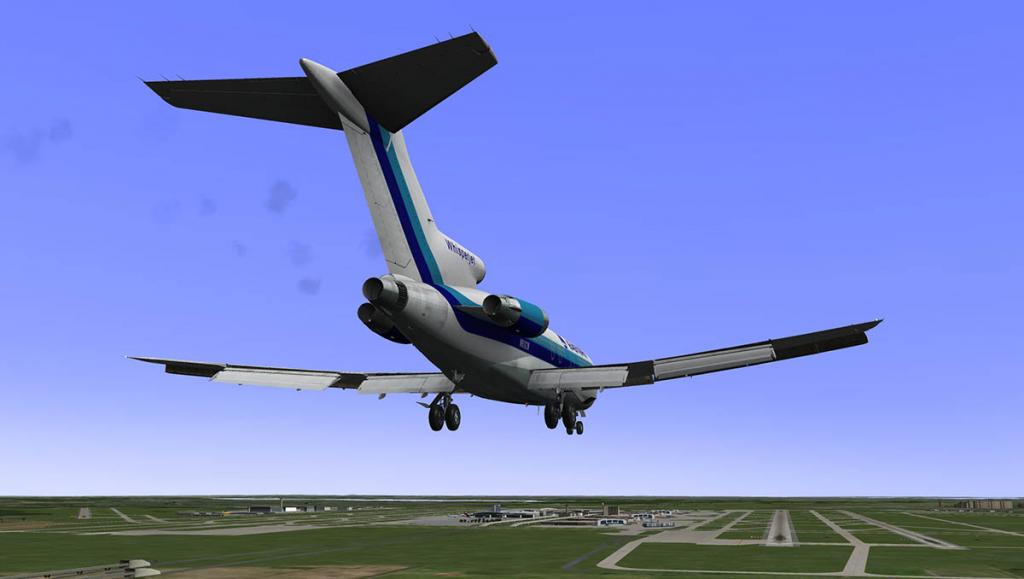

Liveries with the -100 version are: Eastern (default), American and United.
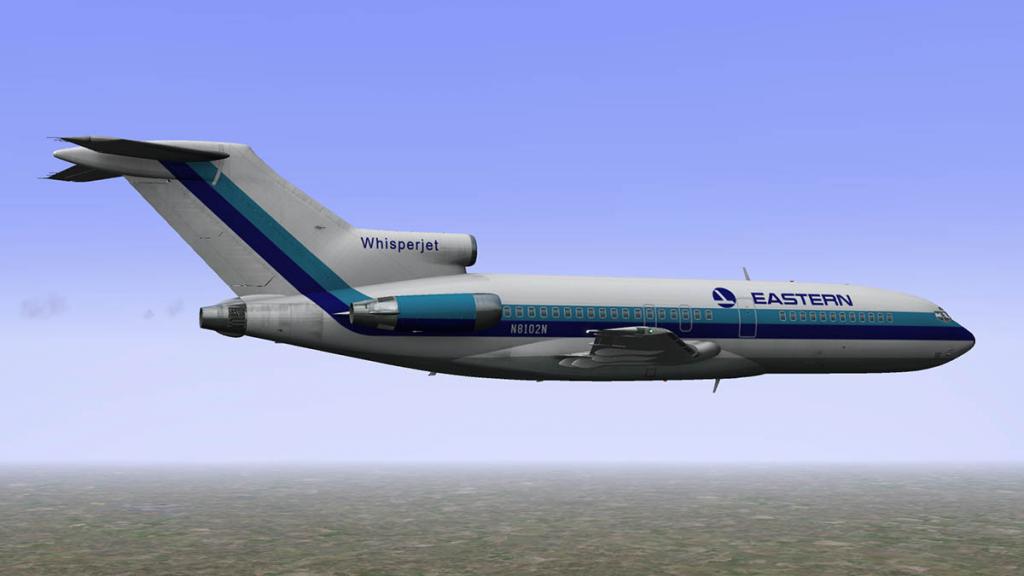


Boeing 727-200 Adv
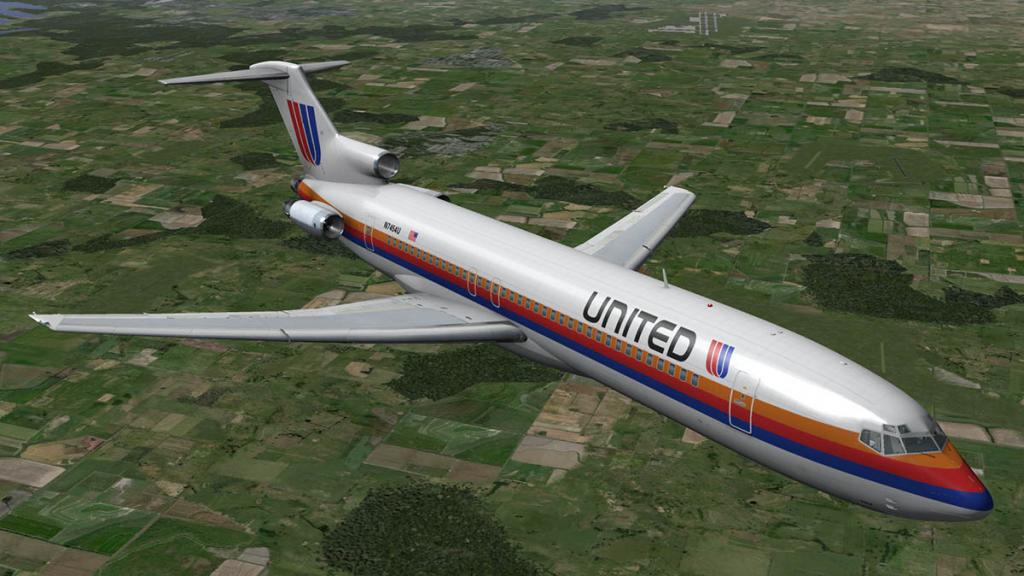

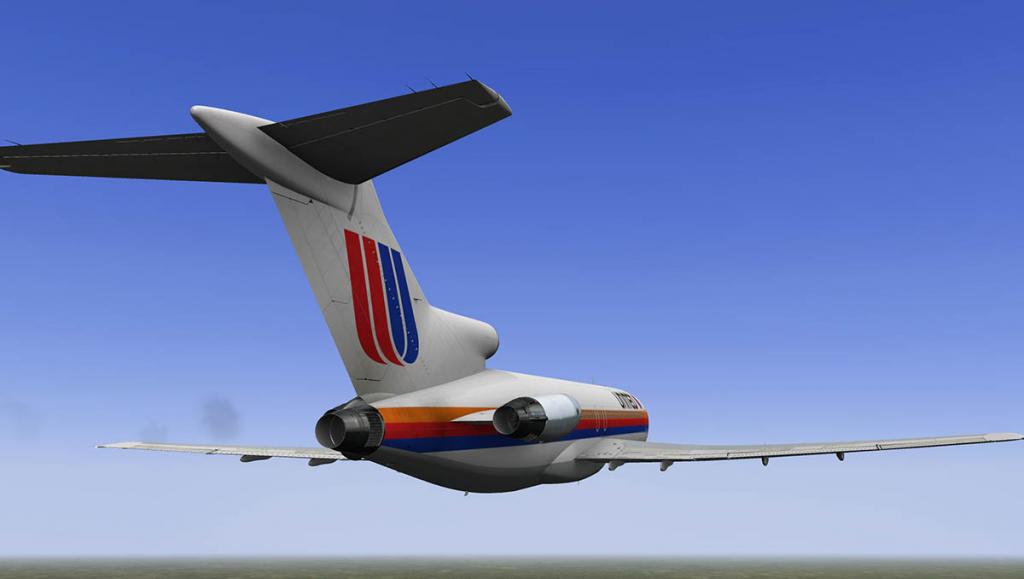
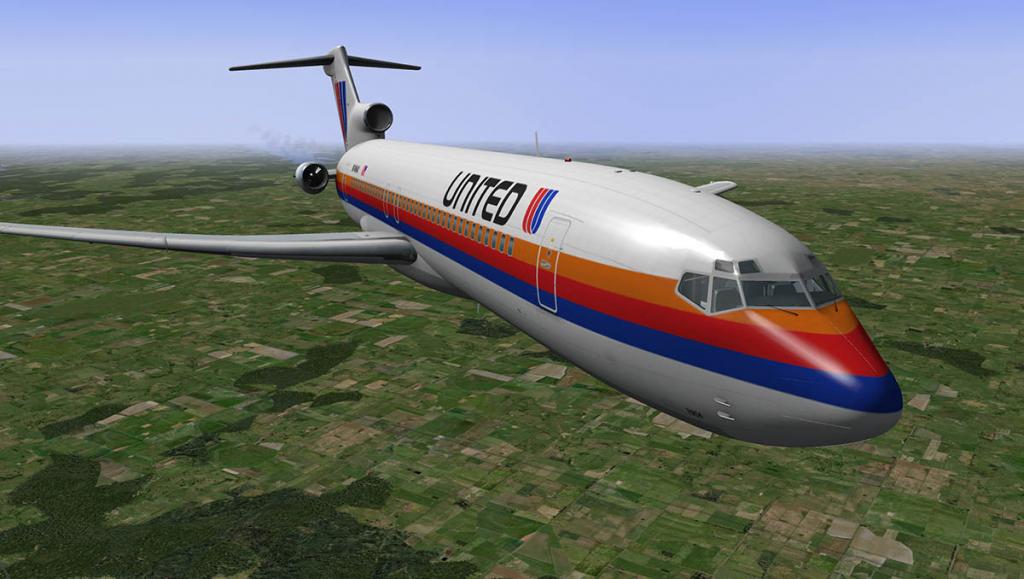
It is known fact that if you give airlines something really good and the very best you can offer. You can absolutely guarantee that it is still not good enough and they will still want something even better. No matter how good the Boeing Series -100 was, it wasn't long before they were all moaning again in wanting a longer range and more space to put more revenue paying passengers inside the aircraft. Out of these requirements came the Boeing 727-200.
The stretched version of the 727-100 became the 727-200, which is 20 feet (6.1m) longer than the −100. A ten-foot (3-meter) fuselage section ("plug") was added in front of the wings and another ten-foot fuselage section was added behind them. The wing span and height remain the same on both the −100 and −200 (108 feet (33 m) and 34 feet (10m), respectively). The original 727-200 had the same max gross weight as the 727-100. The MTW became 184,800 lb (83,800 kg) but the range was decreased to 1,700 nmi (3,100 km).
At that short range the aircraft then evolved quickly as a series of higher gross weights and more powerful engines was introduced along with other improvements, and then from line number 881 727-200s where then dubbed −200 Advanced (Adv). The aircraft gross weight eventually increased from 169,000 to 209,500 pounds (76,700 to 95,000 kg) for the latest versions. The range increased slightly to 1,900 nmi (3,500 km) (Standard) but if you loaded the aircraft carefully you could get 2,600 nmi (4,800 km) (Optional) range with 189 passengers (one-class) and 145 passengers (two-class) with a higher Cargo capacity which was the same for the standard -200 version. Ceiling was increased to 42,000 ft (13,000 m). The first 727-200 flew on July 27, 1967 and received FAA certification on November 30, 1967. The first delivery was made on December 14, 1967 to Northeast Airlines. A total of 310 727-200s were delivered before giving way to the 727-200Adv in 1972.
Liveries with the -200Adv version are: PanAm (default), PAS (Smile) and Alaska.
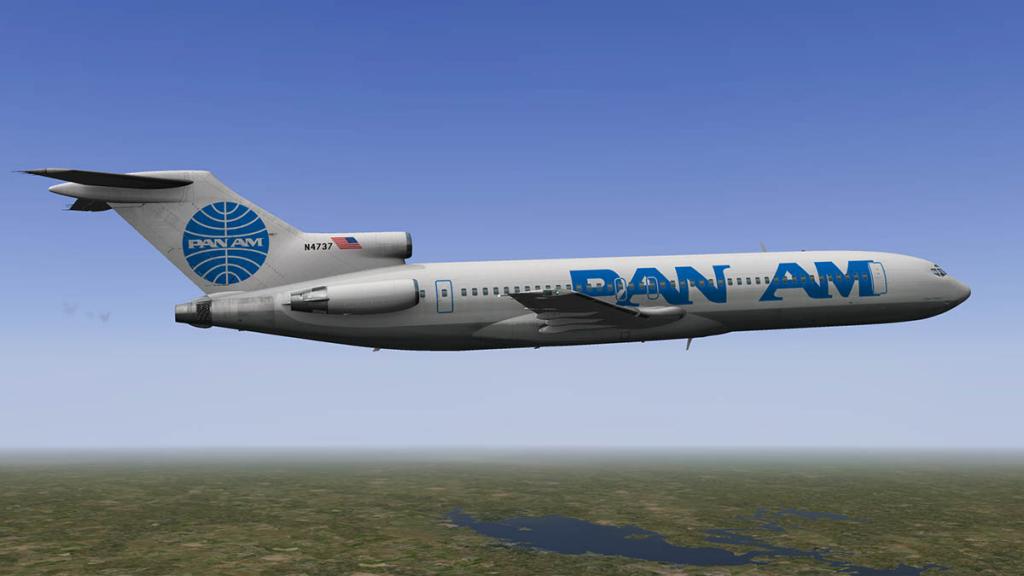


Boeing 727-200F Advanced
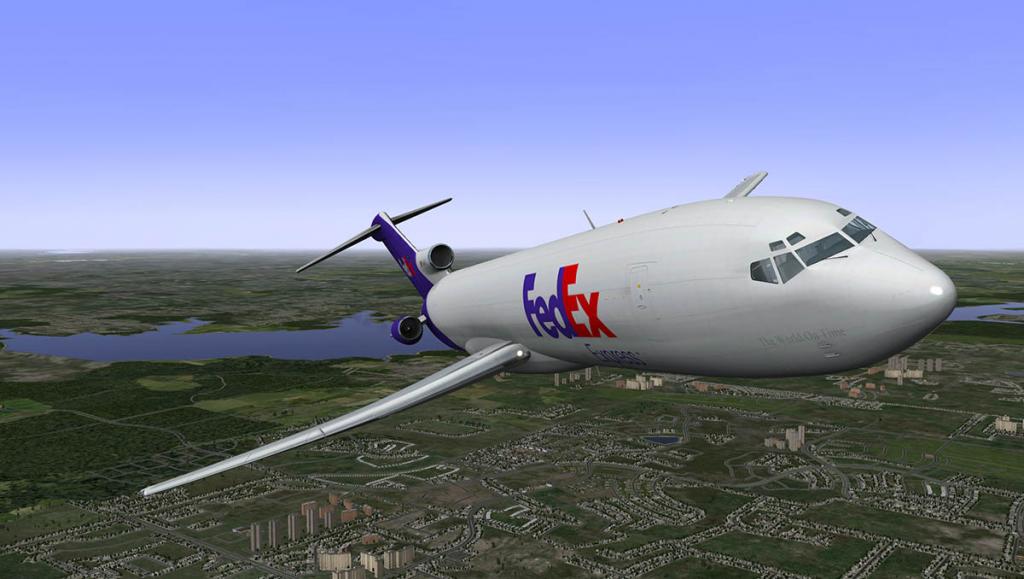

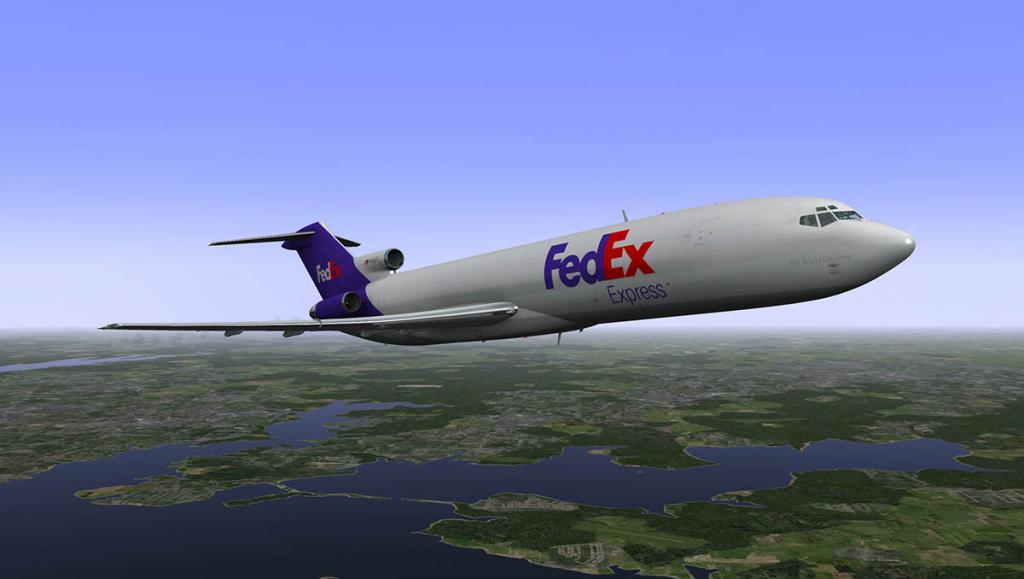
A freighter version of the 727-200 Advanced became available in 1981 was designated the Series -200F Advanced and powered by the Pratt & Whitney JT8D-17A engines. The F (Freighter) version featured a strengthened fuselage structure, an 11 ft 2 inch by 7 ft 2 inch forward main deck freight door and a windowless cabin. This was the last production variant of the 727 to be developed by Boeing and 15 aircraft were built, and all for Federal Express. The last 727 aircraft to be completed by Boeing was the Series 200F Advanced for Federal Express in 1984. In all the total Boeing 727's built was 1,832.
Although only fifteen Freighters were actually built. Many Series -200Adv passenger versions were converted to -200F's. The 727 is one of the noisiest commercial jetliners in service and was categorized as Stage 2 by the U.S. Noise Control Act of 1972, which mandated the gradual introduction of quieter Stage 3 aircraft. Current regulations require that a 727 in commercial service must be retrofitted with a hush kit to reduce engine noise to Stage 3 levels. All current flying -200F's are stage 3 except for some flying in parts of Africa.
Other versions of the B727 were C's for convertible - passenger/cargo version. The C had an additional freight door and strengthened floor and floor beams, with three alternate fits:
94 mixed-class passengers
52 mixed-class passengers and four cargo pallets (22,700 lb, 10,297 kg)
Eight cargo pallets (38,000 lb, 17,237 kg)
Liveries with the -200F version are: FedEx (default), DHL and Kelowna Flightcraft.
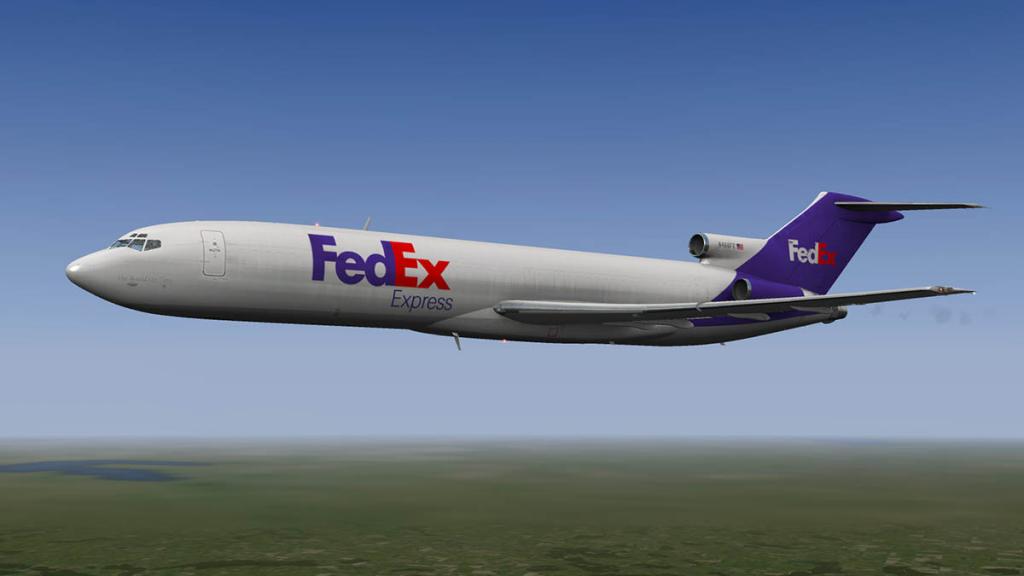
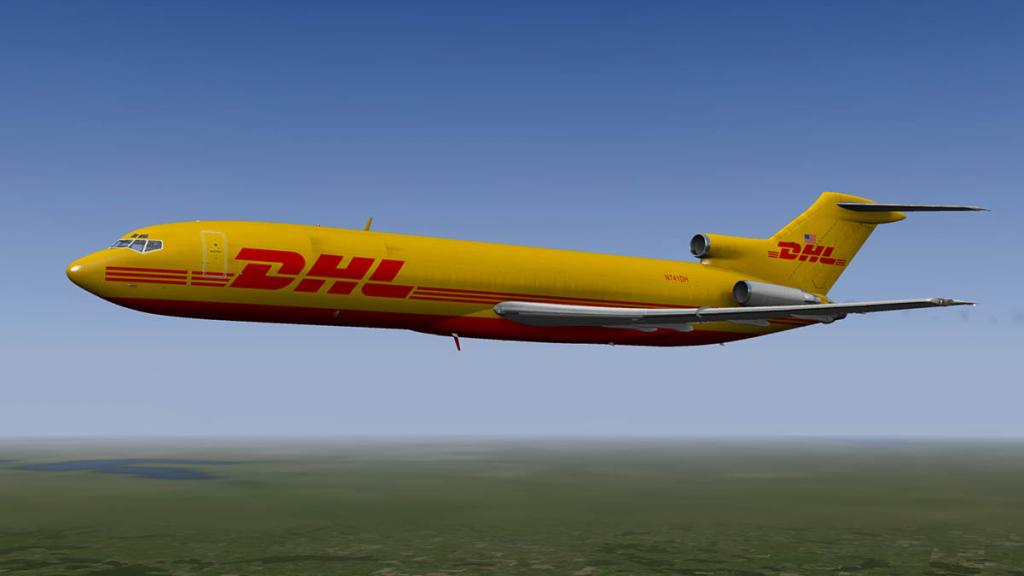
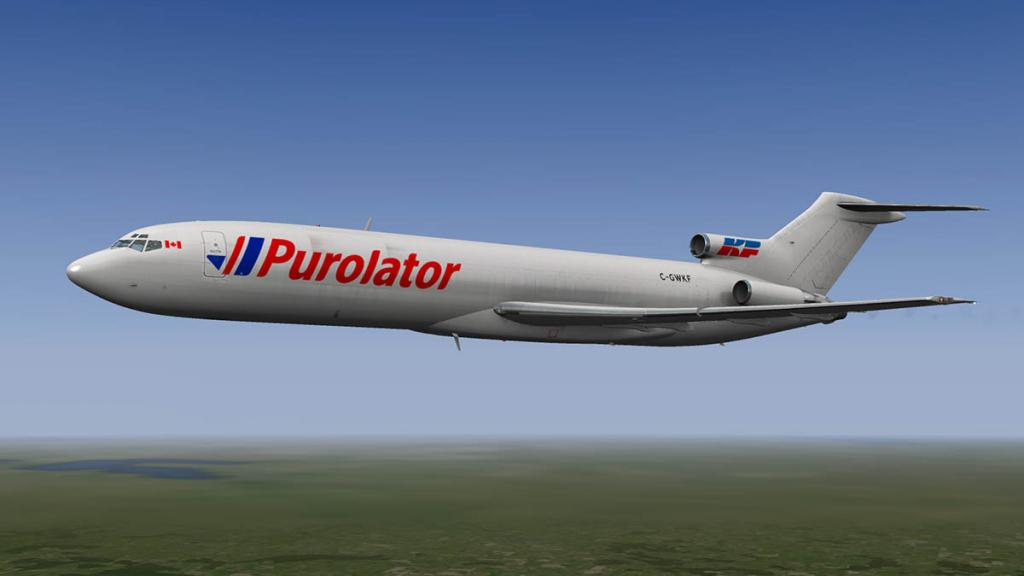
FlyJSim Boeing 727 Series Updates and versions
The aircraft has received only one major update in March 2012 and that was really for only 64bit compatibility. As an aircraft from the release date it has been a very solid aircraft with very few and if any issues. Only items noted is the Flight Director (FLT DIR) panel on the Forward Centre console does not work or with only some working functions. The VOR to VOR lock on the AutoPilot (vitally needed) does not work either, but is stated that it does. Updates promised were an internal cabin and opening doors (The rear air-stairs do open with F1). The Cargo F version is missing the large cargo door (opening) and that has reflected in poor sales of that version and that is interesting as the F versions are the 727 aircraft mostly still flying today. However the Cargo version is great introduction to the Boeing 727 Series and at a great price when on sale.- Current release version is: 1.1303.1020
Options
You can buy the CIVA (Delco Carousel IV-A Inertial Navigation System. Nicknamed "CIVA") US$10 and liveries can be bought in packs (usually 10 per pack) for US$10 each or all packaged together... 727-100 - 19 Paints : 727-200adv - 31 Paints : 727-F - 4 Paints, as one pack for US19.95 which is great value. The quality and variety of the liveries are certainly well worth the outlay.
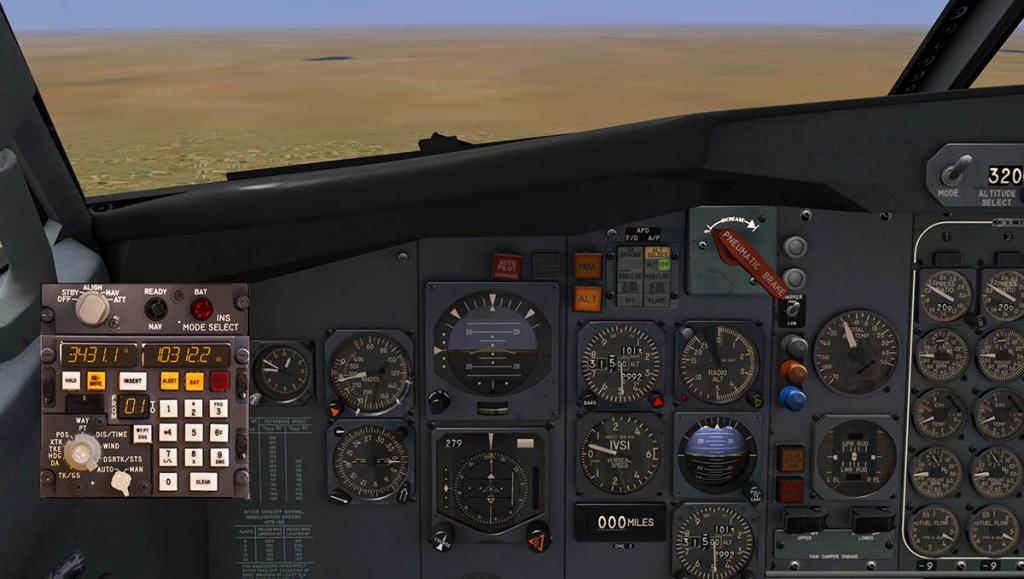
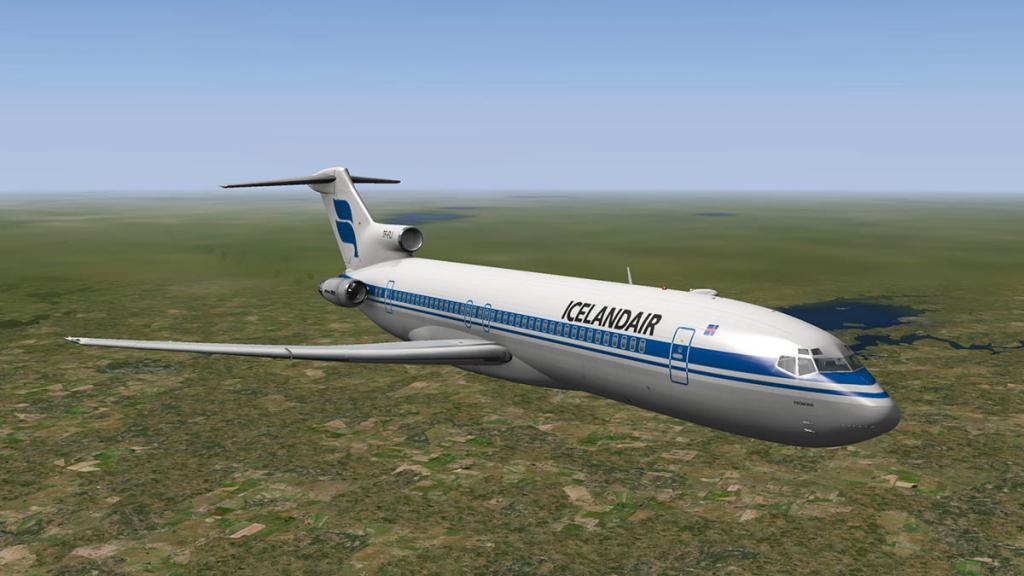
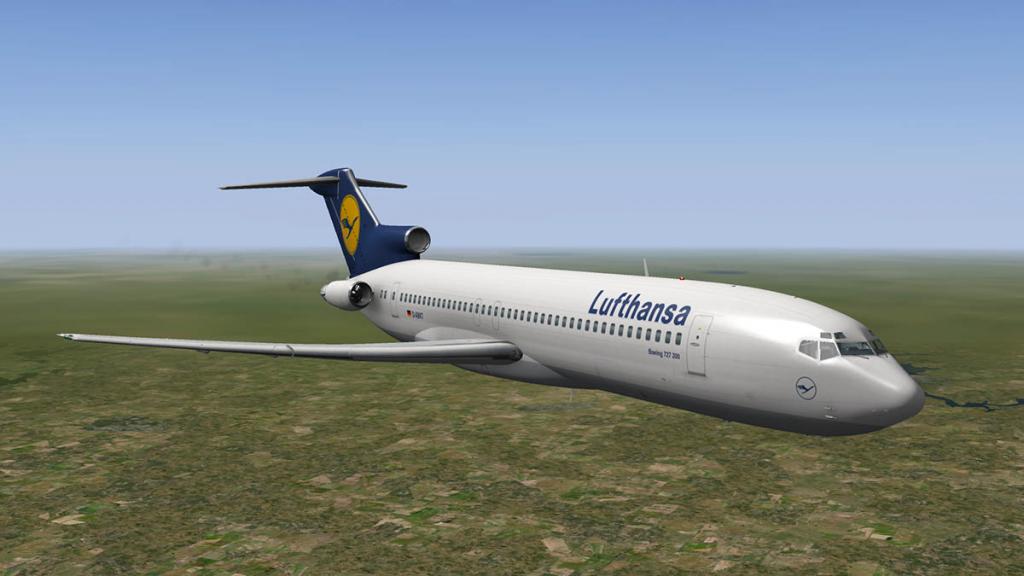
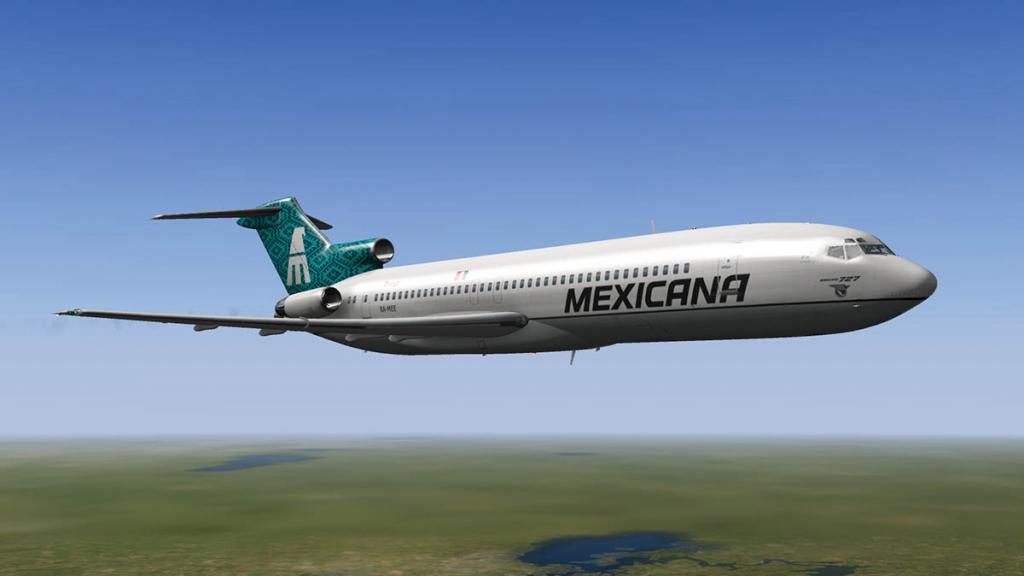
There are not a lot of liveries on the .Org site... But one I really like is the Delta by ppt.


Documentation
There are three items included in the documentation : All are excellent :
FJS-727 SeriesChecklistandProceduresManual (67pages)
FJS-727 SeriesManouversManual (9Pages)
FJS-727 SeriesSystemsManual (55pages)
Installation
Download is 761mb ( all 3 versions) or 313mb (per single version), with all added liveries your aircraft folder could bulge over 2gbs. Just drop into your aircraft folder.
Summary
The Boeing 727 Series was an aircraft on which that was built our modern domestic airline industry of today. Yes there was the those wonderful 50's icons in radial and turboprop aircraft. But the Boeing 727 created a whole new dimension in flying in that anyone could fly and fly cheaply and not just the well-off or rich patronage. For the Pilot the Boeing 727 Series from FlyJSim is exceptional. It is an aircraft from a totally different era. But that is also its main attraction. In modeling and systems it is totally as good as you are going to get. Any pilot that is serious about their simulation should have this aircraft in their collection. And over the period of time since its release it does not show any age or issues with its development. For quality from FlyJSim the B727 Series is about as good as you are going to get.
The FlyJSim Boeing 727 Series is available from the X-Plane.OrgStore :
727 Series Complete :
US$62.00- Currently on sale for only US$50.00727 Series 100 : US$32.00
727-Series-200Adv : US$32.00
727-Series-200F : US$32.00
Technical Requirements:
Windows, MAC or Linux
X-Plane 10.20 or higher - 32 and 64 bit compatible. X-Plane 9 is not supported
Recommended: 1+ GB of VRAM, and 8+ GB of system memory
Release Date 12th December 2012 : Last updated: March 23, 2013
Updated store#Stephen Dutton
©copyright2014: X-Plane Reviews

-

Aircraft Development and Announcement : FlyJSim Boeing 737-200 Twinjet
Jack Skieczius and Joe Vermeulen have announced their next aircraft to be released. The Baby Boeing the in the Boeing 737-200 Twinjet. Images posted by Jack (below) show an aircraft that is very similar to his wonderful Boeing 727 Series. And will be no doubt a great addition to your Boeing Family.
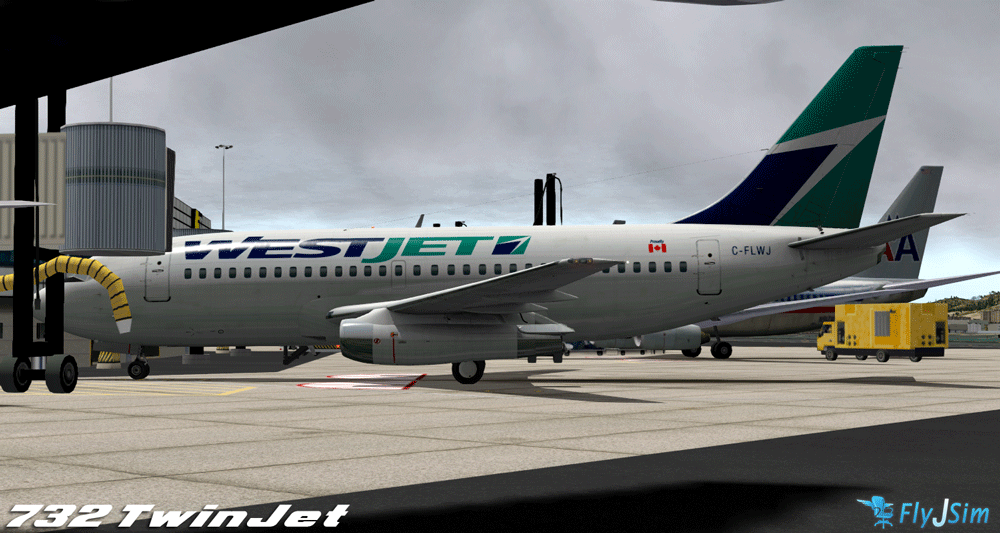


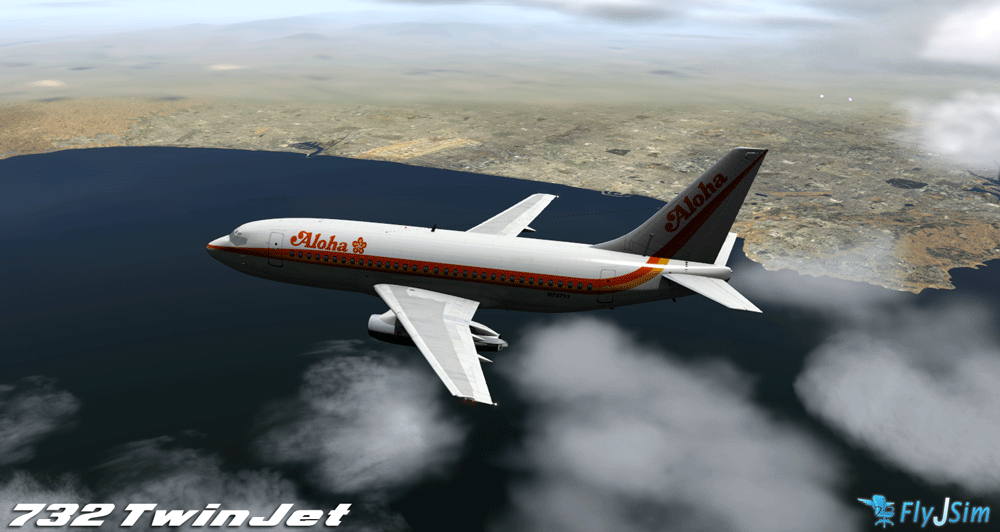


Release date? No idea... But Jack would not have announced the aircraft unless he was a long way along the development process. Teasing us, yes of course he is and it worked.
Stephen Dutton
2nd February 2013
©copyright2014 : X-Plane Reviews

(Images courtesy FlyJSim)
-
Greetings !
This is Pierre from the X-Plane Aviators. Since Aerobridge experienced distribution issues (their dropbox links are still currently suspended), we stepped forward and set up a page for them. The XP10 version of Portoroz is already available from this page, while the XP9 version will be added in today.
Also note that the package you can download from there is the latest version, with an optimized file size (120MB download, and 170-ish install size if memory serves), and of course, no taxi line glitch.
Now everyone can grab a copy for the weekend !
I have changed the link Pierre... If the scenery returns to Aerobridge Studios then just note it here and I will change it back SD
-

Scenery Preview : KDEN - Denver International Airport by Tom Curtis
It is no secret that Tom Curtis makes great scenery. His magnificent Golden Gate package should be part of every Xplane users scenery collection. It is also no secret that his next airport scenery (after KLAS) was going to be KDEN - Denver, USA.
Thanks to Tom. X-Plane Reviews have been able to do a few images of the new scenery to see what the new release will look like. Yes we are very impressed. As this DIA is very good.
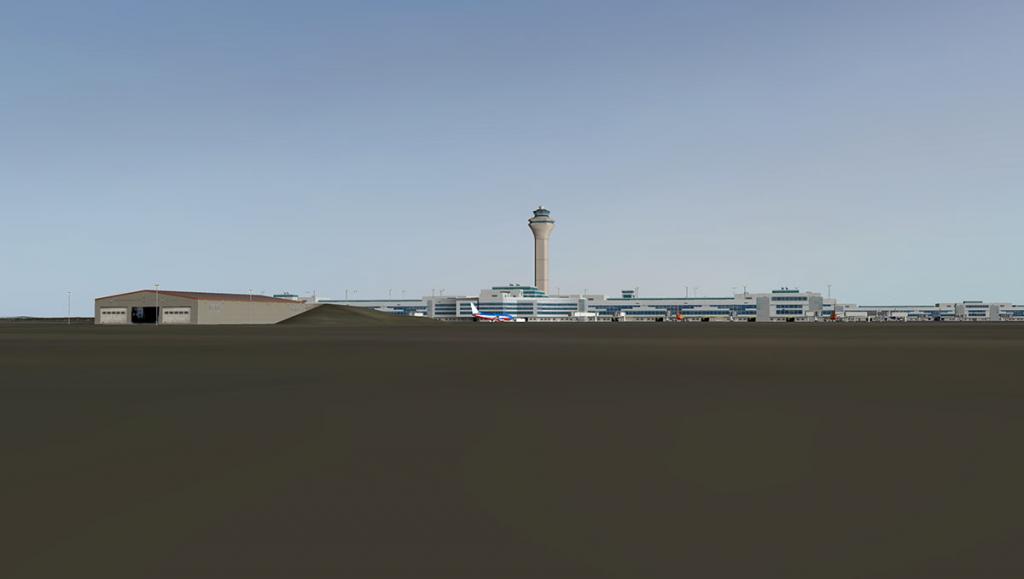
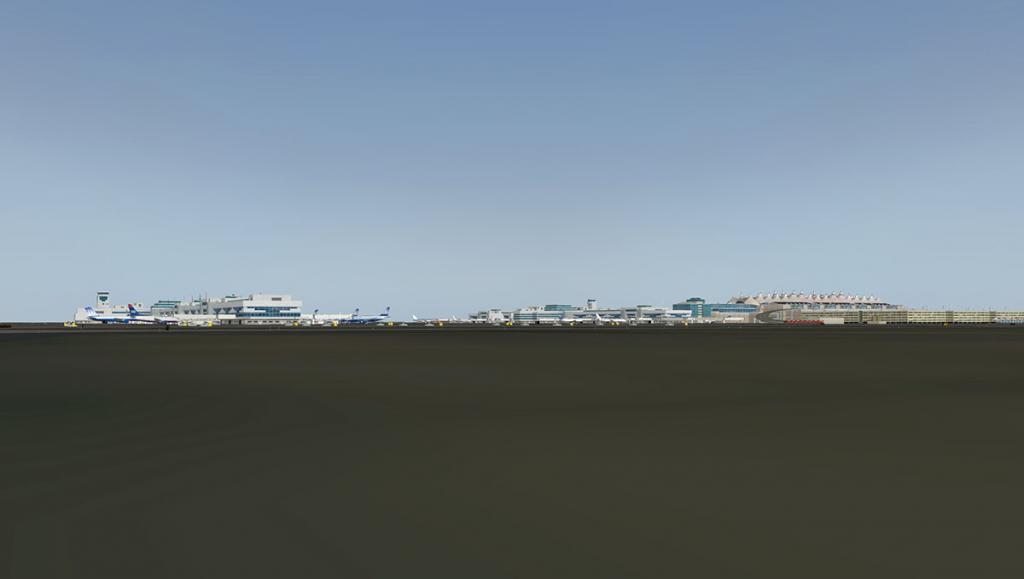
First views of KDEN are excellent and so is the framerate as the airport is situated away from downtown Denver. So that means not a lot of default autogen to run and take over all of your render space.
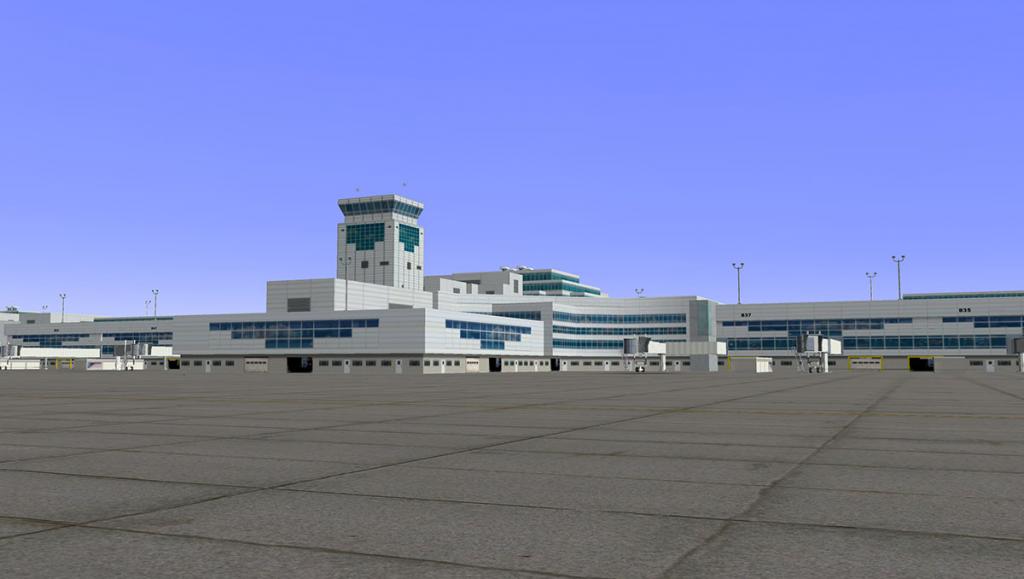
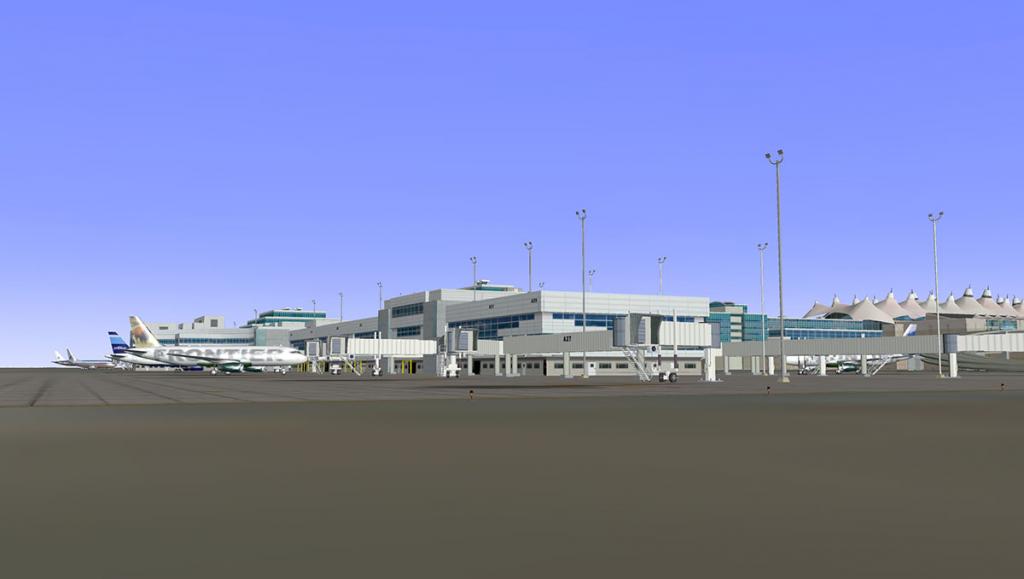
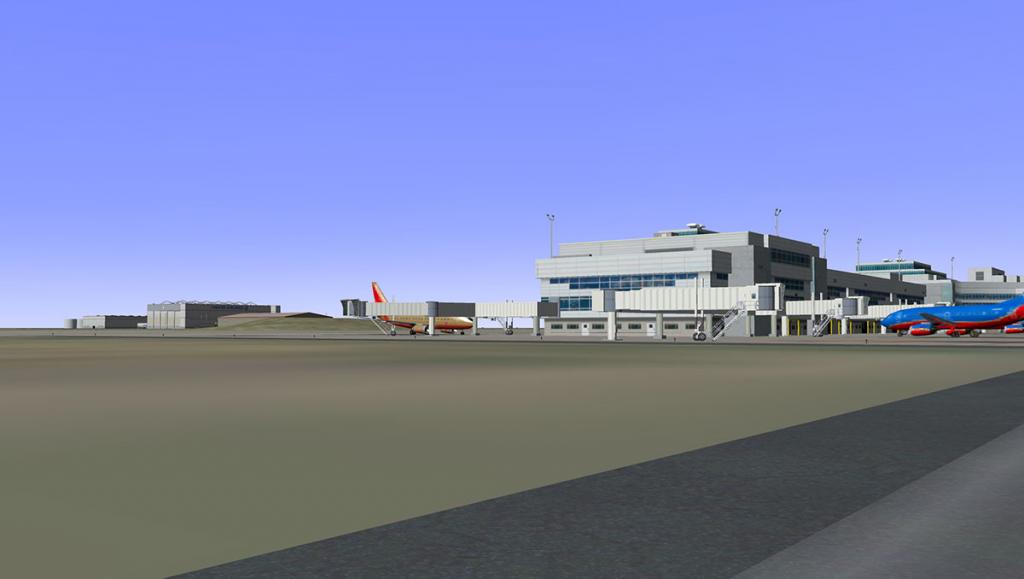
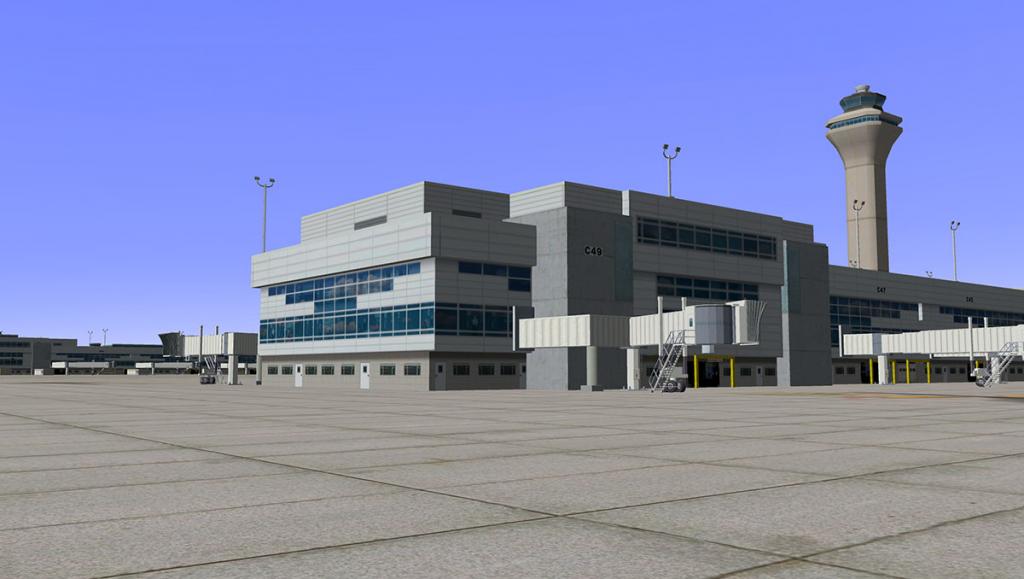
3d modeling is excellent.
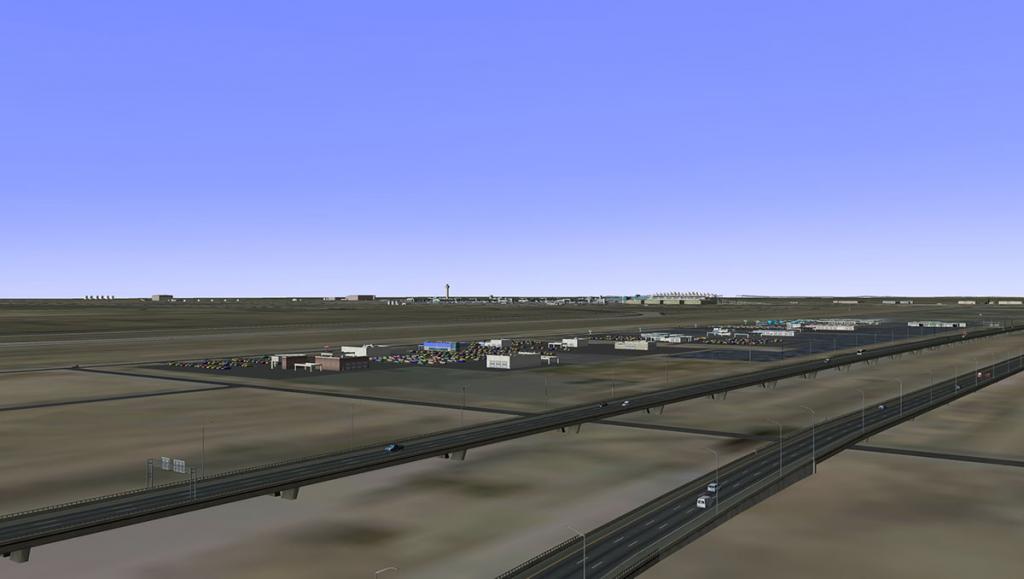
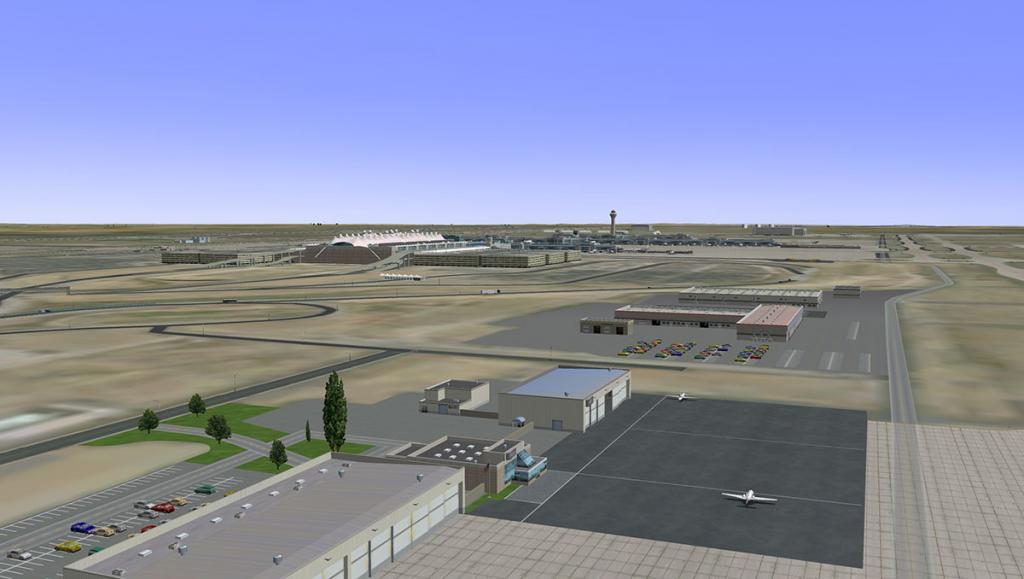
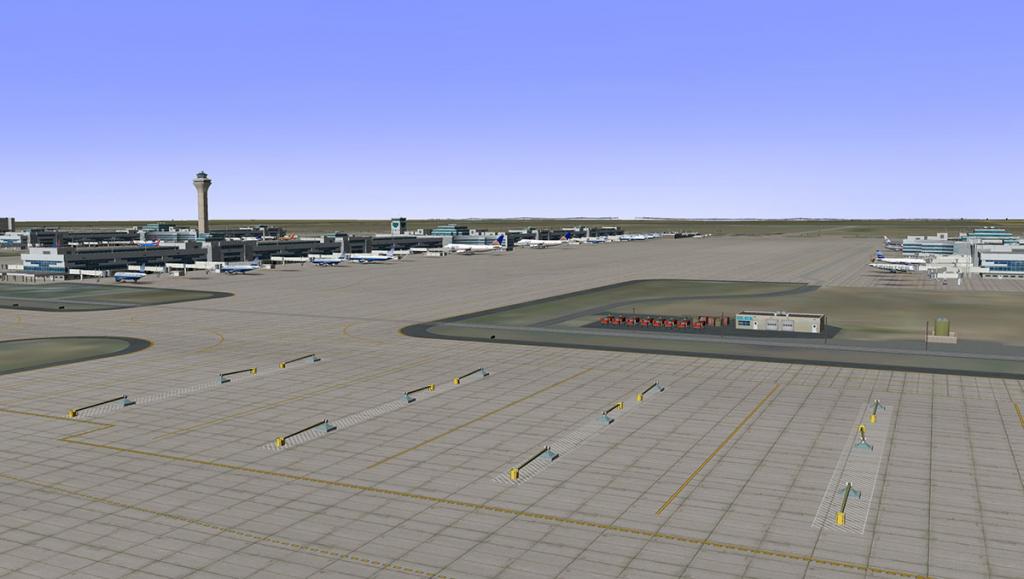
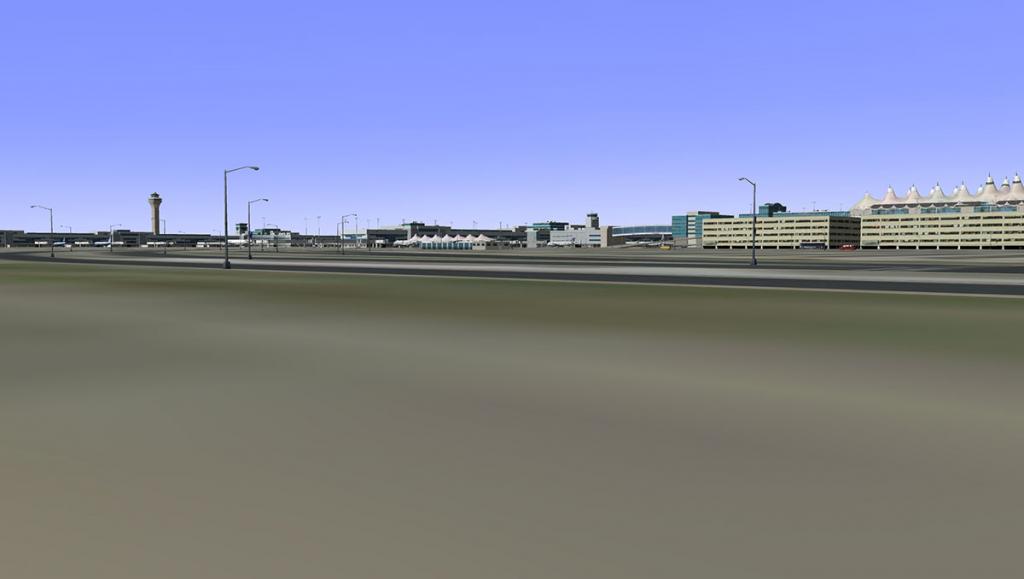
Tom Curtis announced that the KDEN scenery was going to be released very early in the new year 2014. So yes it is late. The reason was the autogates required a complete rework, all 90 of them, so that will give us something to look forward to. "90 autogates!" dream on boys, "there is now a gate for everyone".
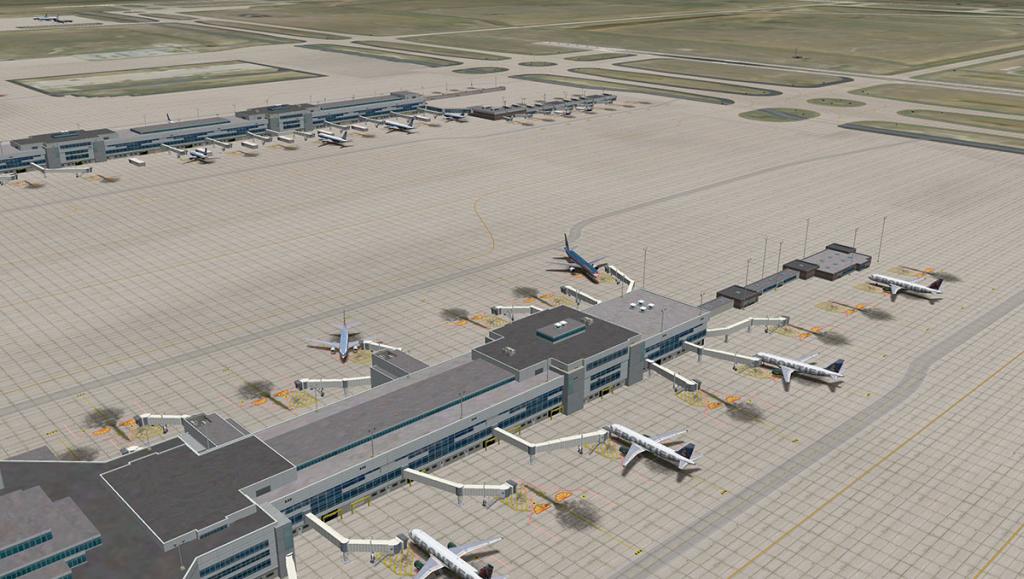
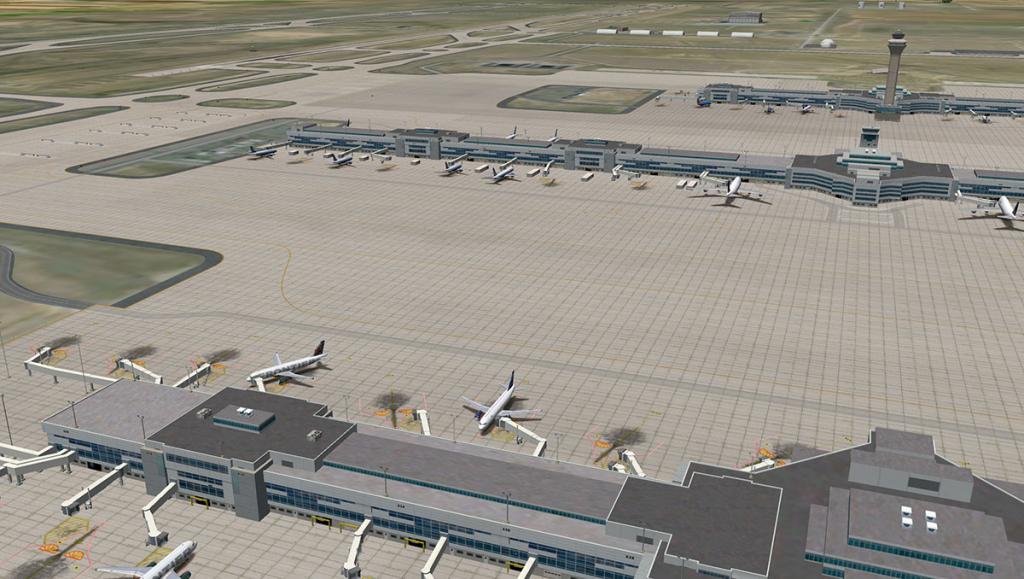
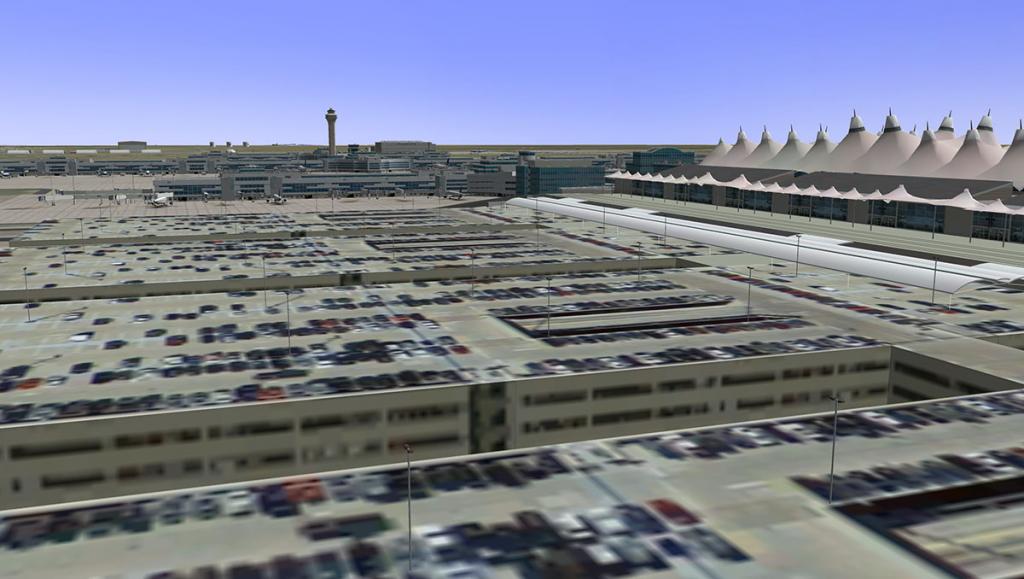
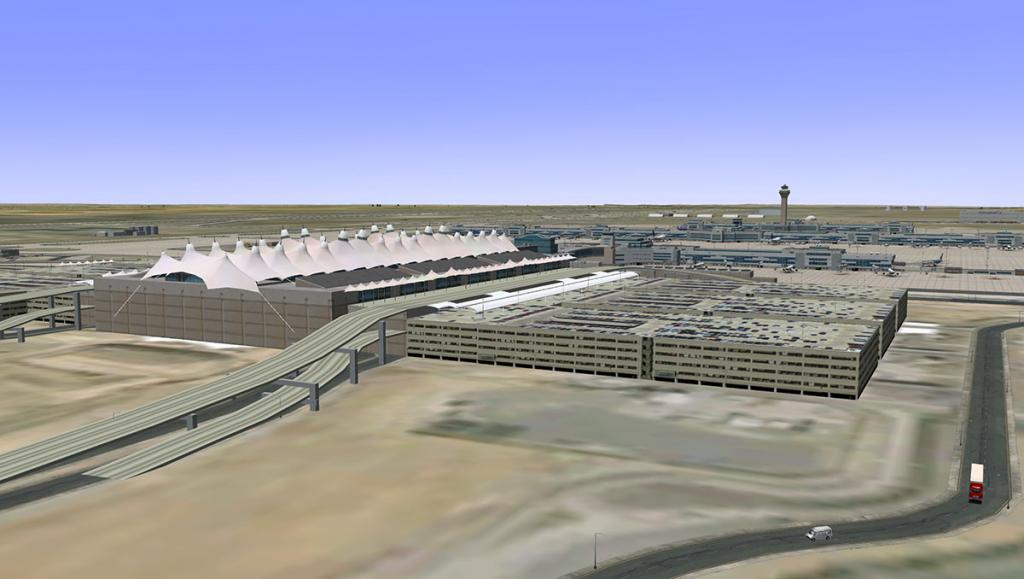
United Hangars and workshops.
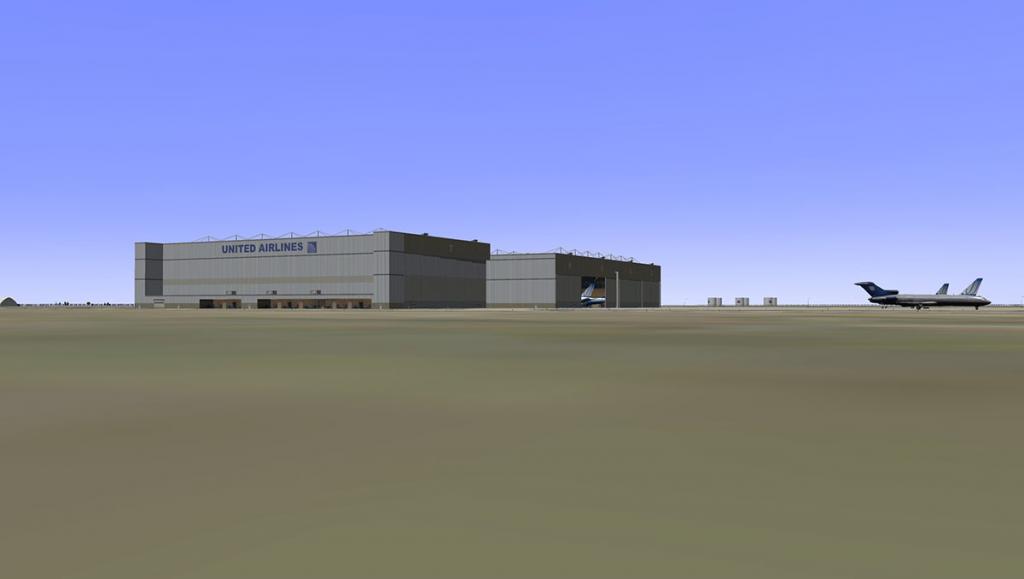
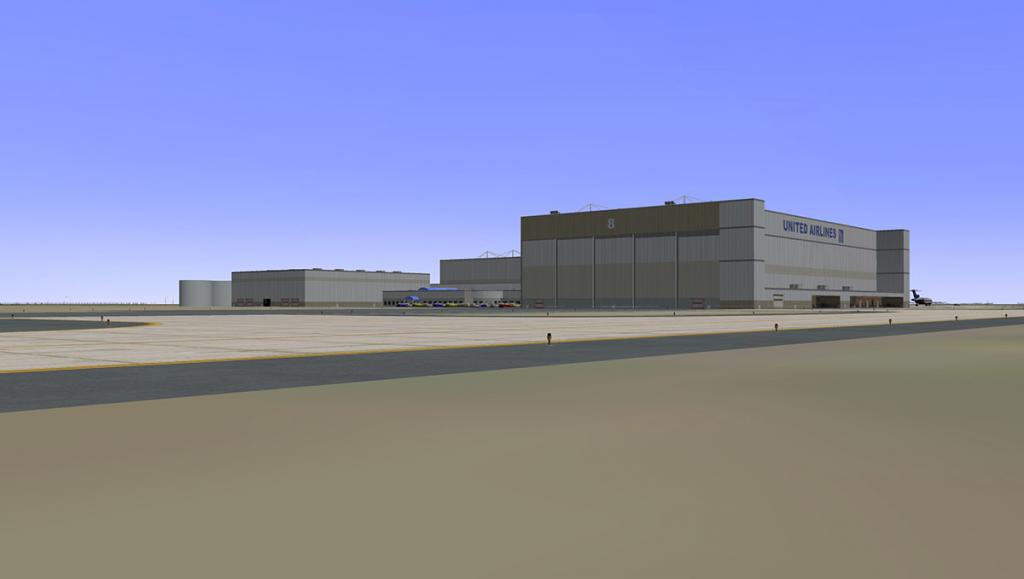
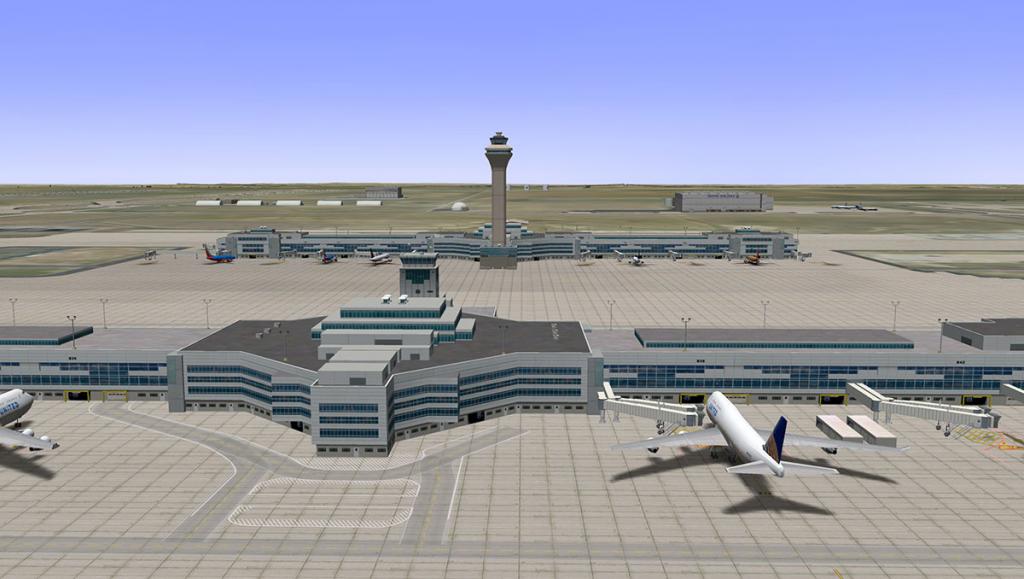
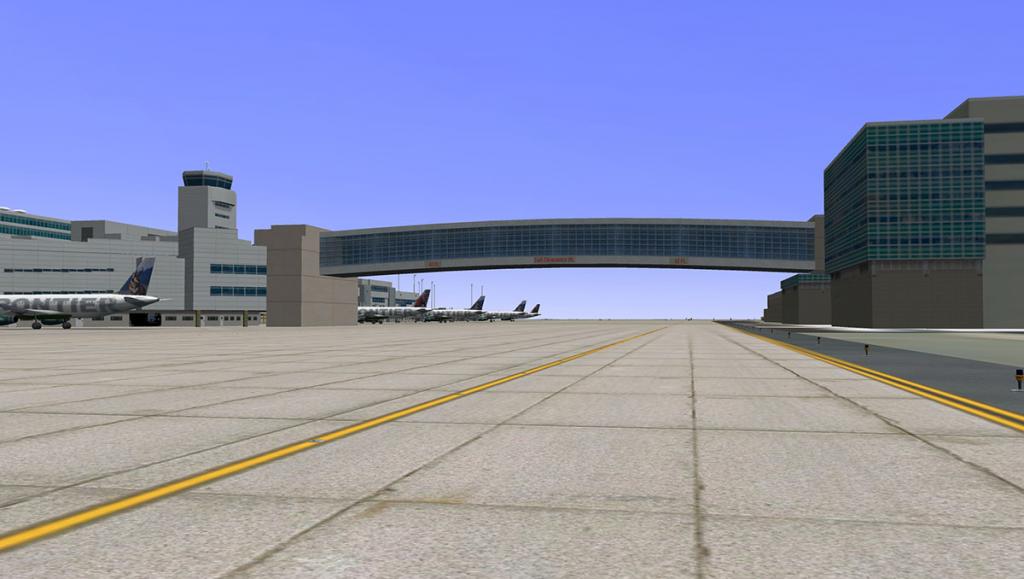
KDEN - Denver International Airport is coming very soon. And X-Plane Reviews will soon review the scenery and cover DIA in depth.
Stephen Dutton
31st January 2014
©copyright2014: X-Plane Reviews
-
Thanks Peter. Yeah I saw the taxilines?.. from that angle I thought they were correct. fixed the date. SD
-

Airport Freeware : LJPZ - Portorož Airport by Aerobridge Studios
Tucked up high in the Adriatic Sea by Trieste is Portorož Airport in Piran, Slovenia. LJPZ is the latest release from Aerobridge Studios of this small General Aviation and very light commuter airport. It is the third largest airport in Slovenia. But it is really small by most standards.
There has been two releases from Aerobridge Studios and both are well worth the download, KCGX - Meigs field was the first and now this one LJPZ. To be honest both of these freeware sceneries are demo versions of skills and ideas sought and implemented before creating a full sized airport (for payware) in what has been announced as VHHH or Hong Kong International. That is not to say that LJPZ is a average scenery, as in fact the opposite is true... it is first rate scenery with some really great detailing and excellent execution.


In scenery, small airports like these come off better in context than a very large airport. The detailing can be really detailed right down to rubbish bins and cones and various what-nots. Portorož Airport is in this case excellent. Best of all though is the texture work, a sort of signature feature that Aerobridge has spent time in perfecting and the results are simply outstanding.
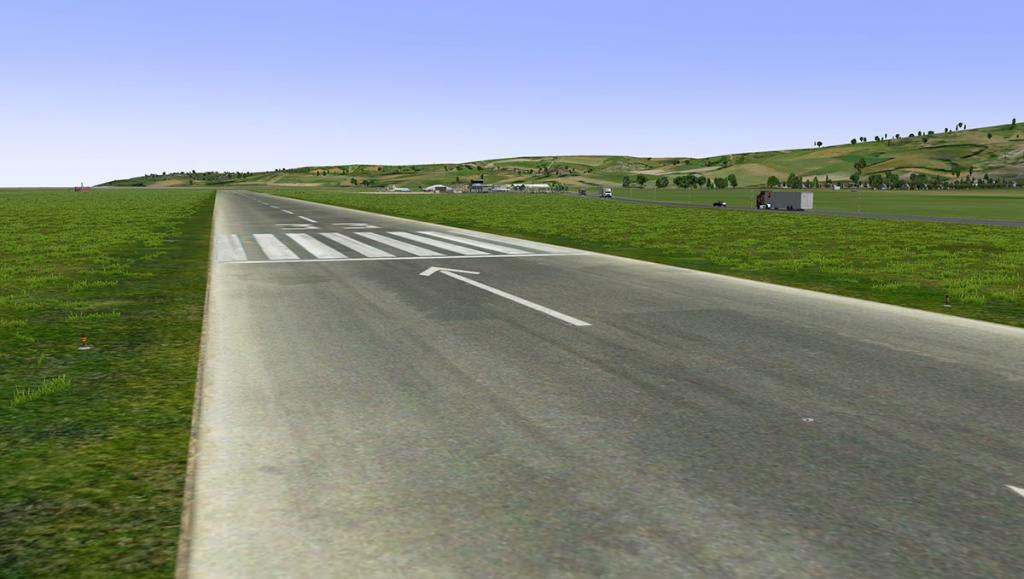
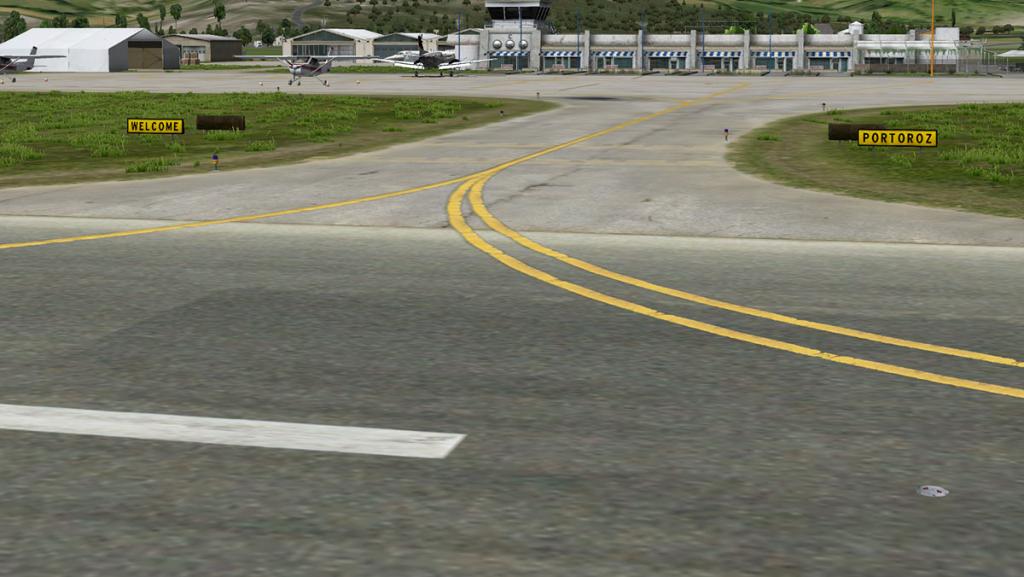
All surfaces are outstanding. From the runways to the taxiways you can feel the lines and grooves with the dark oil stains. They are highly realistic is showing the lighter side dirt to the darker centre rough used areas on the runway. The taxiway and runway markings are also first rate.
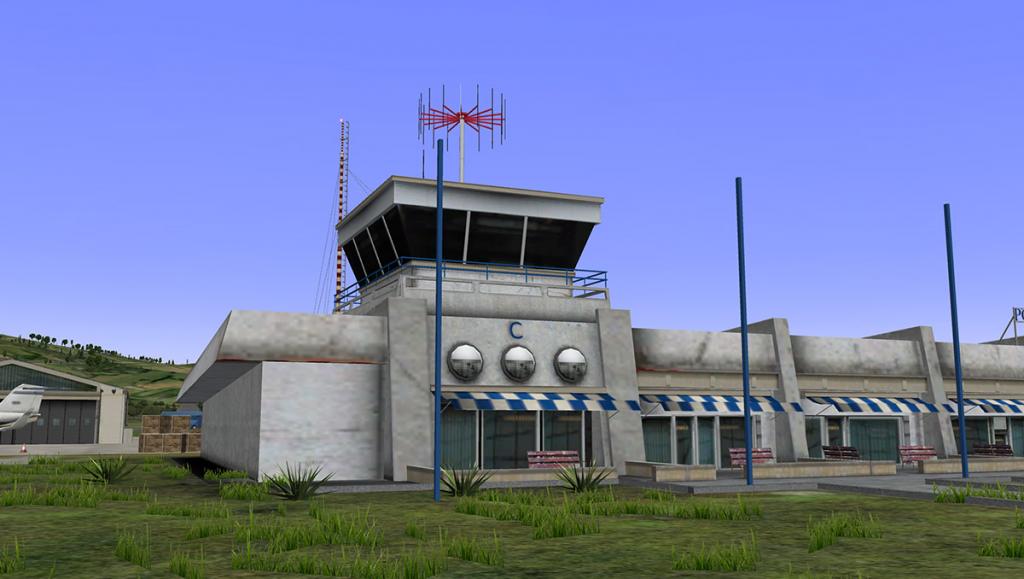
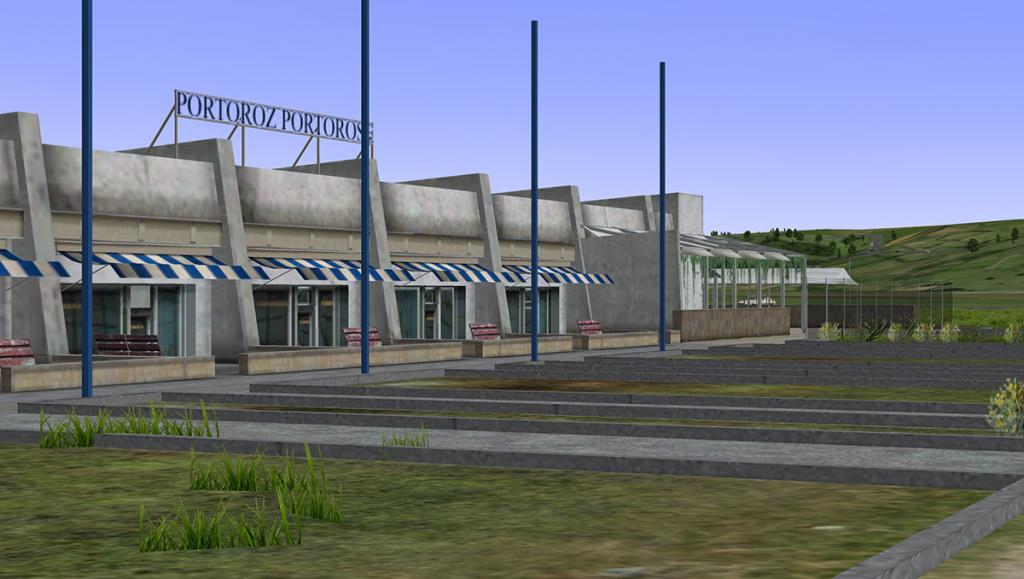
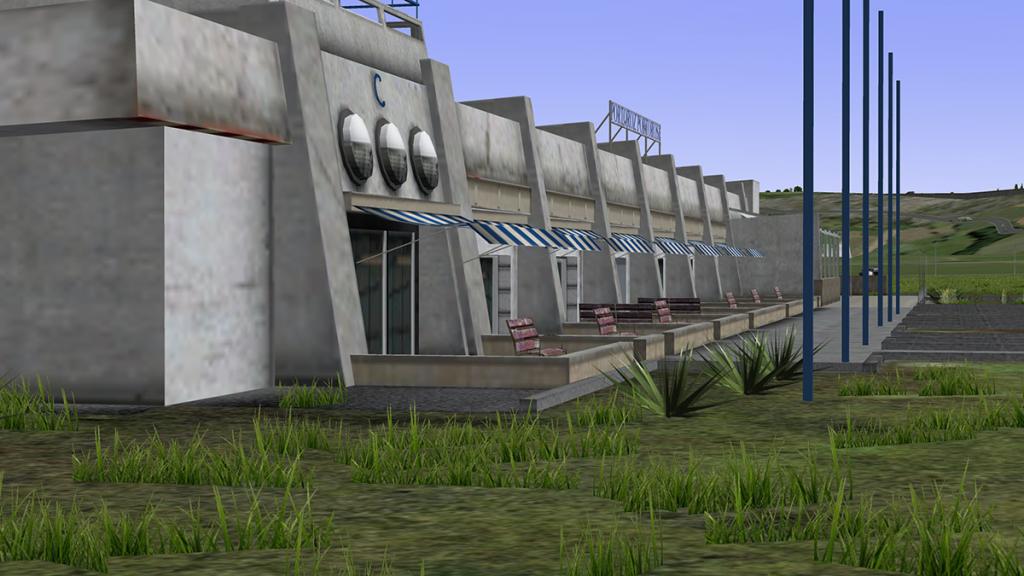
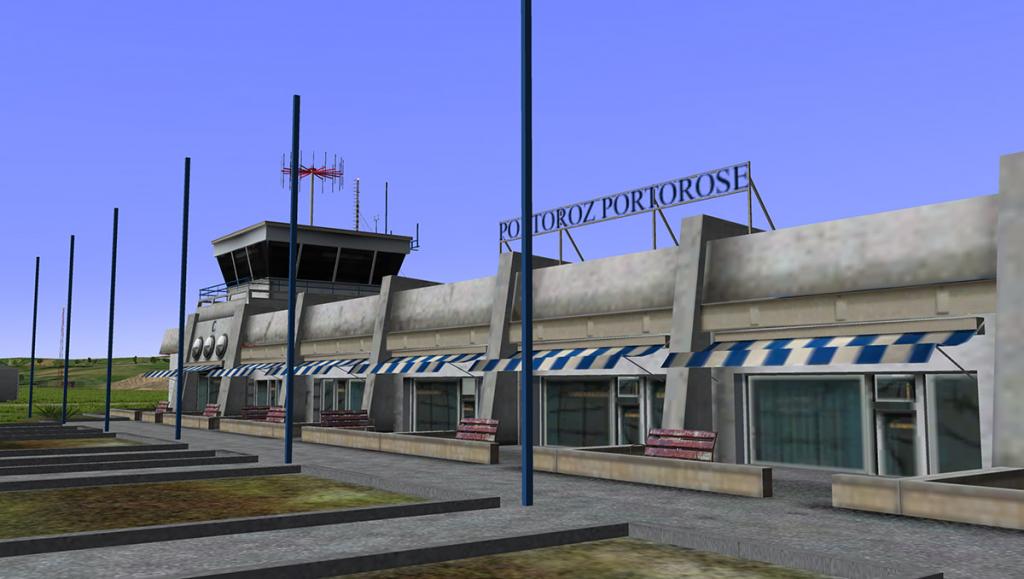
Same with the main terminal textures. The walls are worn and tired and the concrete looks like concrete. For detailing just look at the (red) benches sited along the front of the terminal. very worn and used. The brightly striped awnings are well covered with old fabric that highlights the the building. Glass and the windows are perfect and all the various elements look very realistic. The overall highlights though is if you like a spot of gardening. You could easily get stuck in here with your lawnmower and do a fair bit of weeding, nice rows of tropical plants fill also out the scene. Overall all the greenery is excellent and very well done
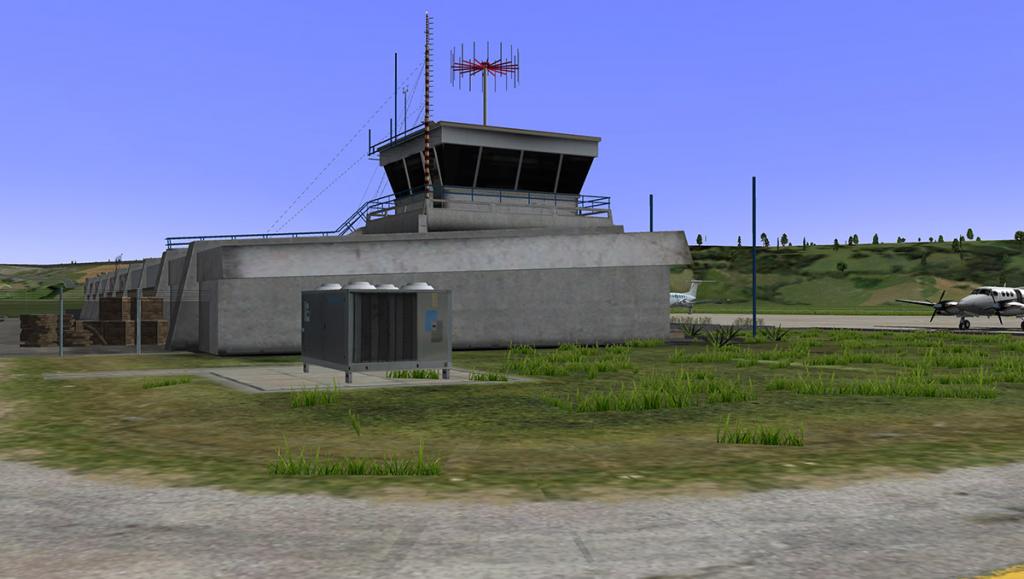
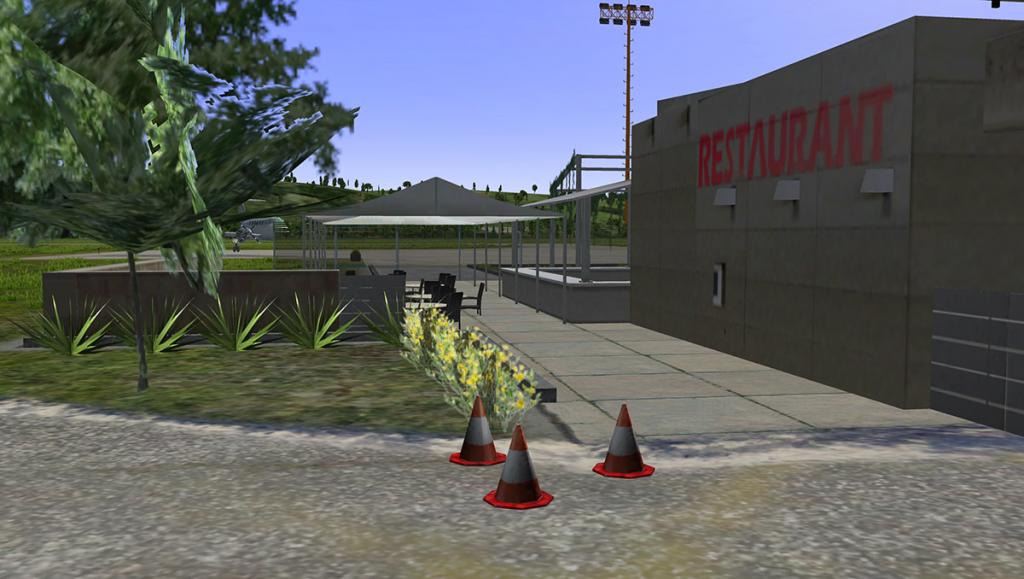
The front of the terminal is well done as well with great tired concrete and very good signage with advertising adoring the building. Details include Air-conditioning units, cones and pallets of wood.

A rotating view from the stumpy tower is excellent with a great view of the ramp and view above the terminal building over to the highway. The road cuts close on to the airport and the layout between the custom scenery and the default scenery is well... faultless.
To the side there are a set of hangars, and some with open doors. Detailing is again first rate with the inside of the hangers looking as good as the outside. There are few static aircraft and one with a twirling propeller?
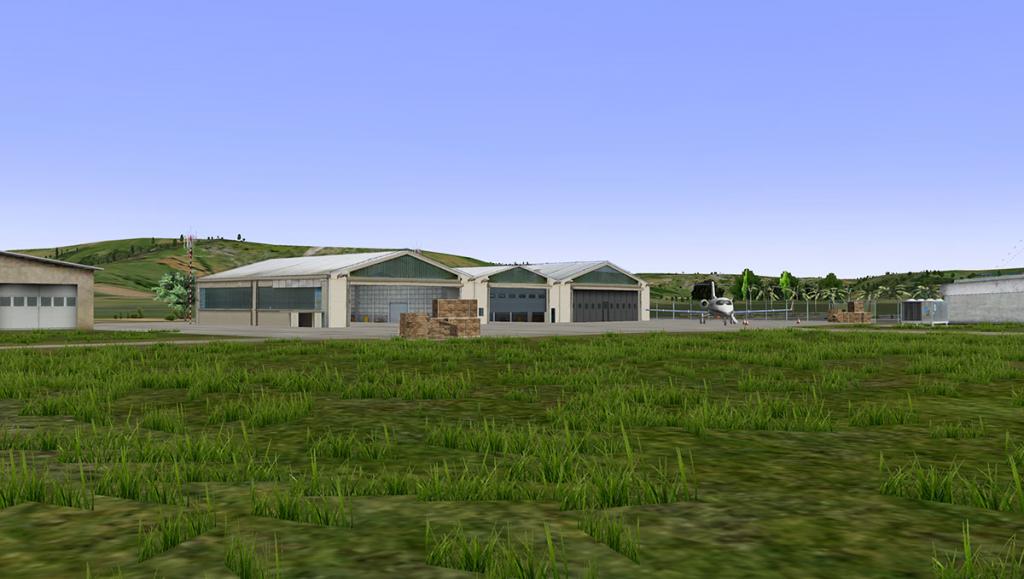
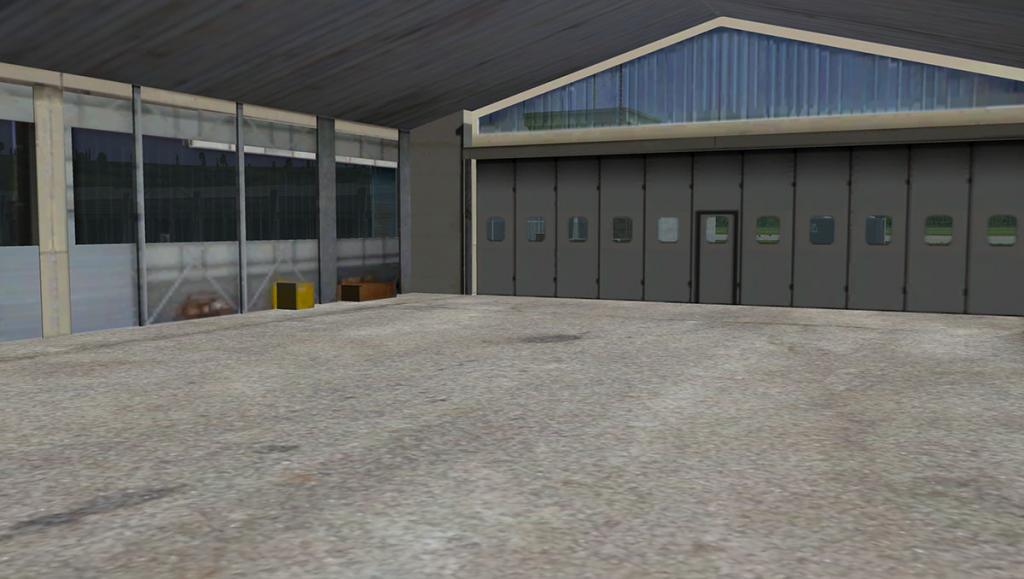
Night lighting is as good. The ramp is well lit if only from one lighting tower.
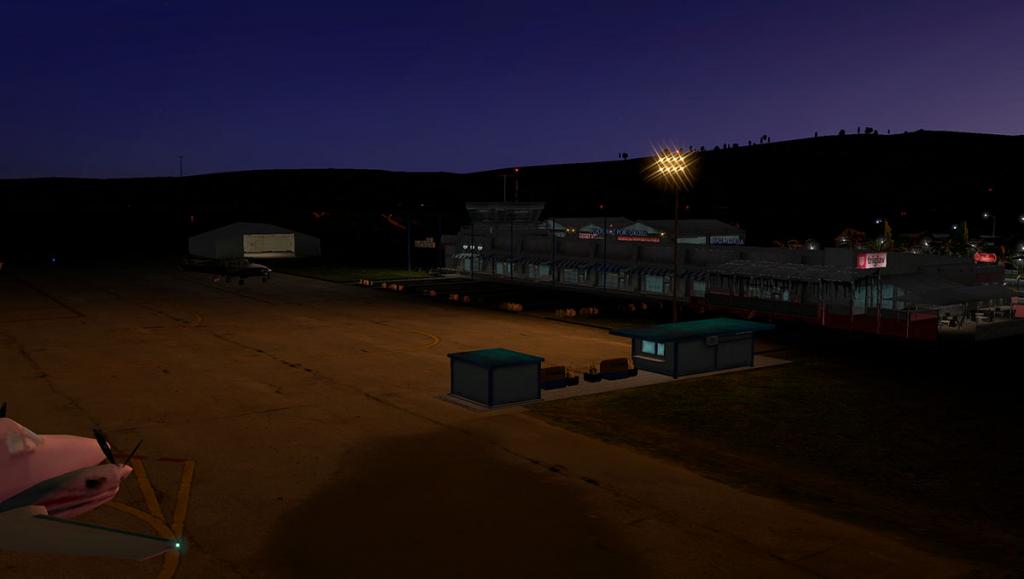
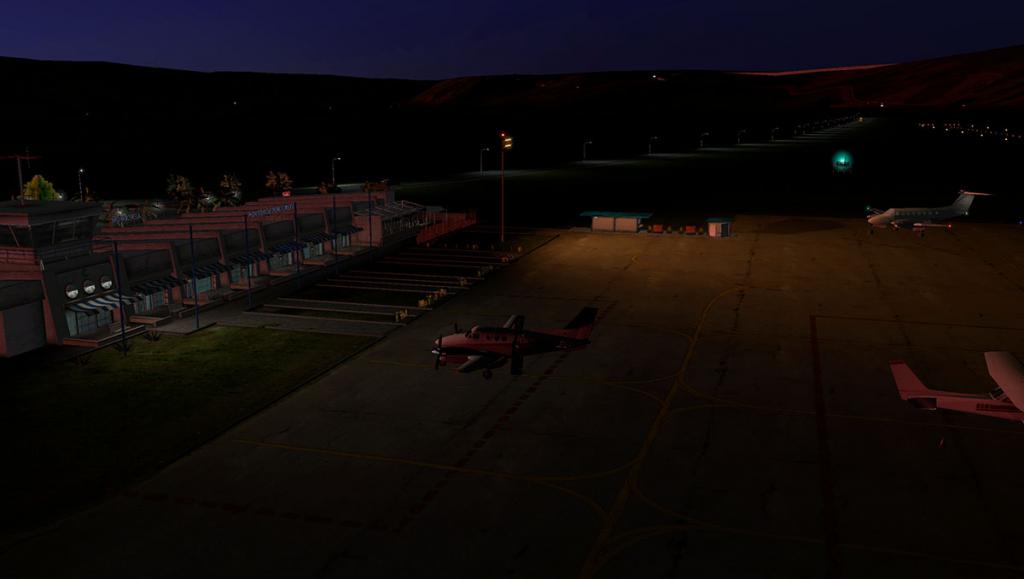
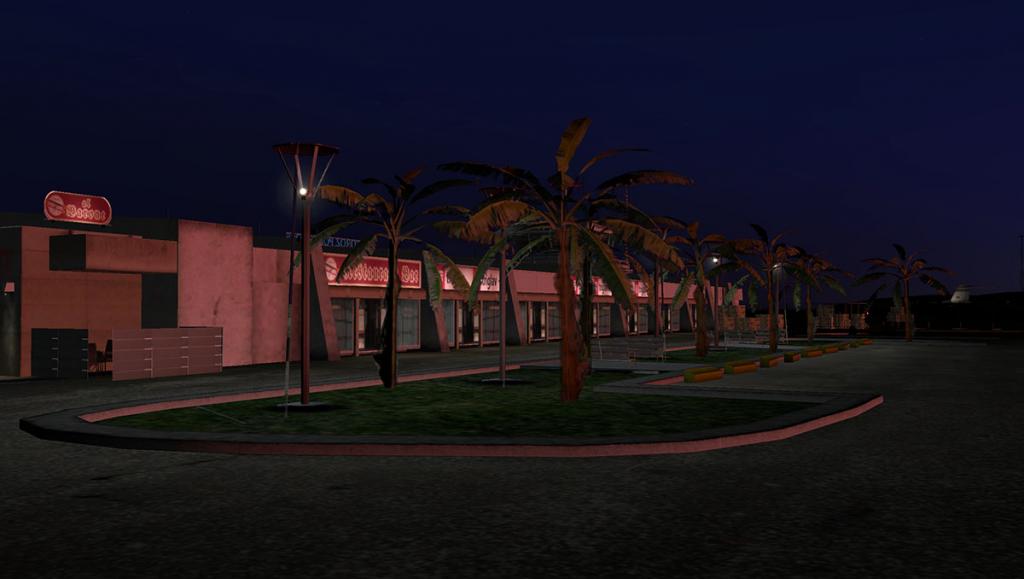
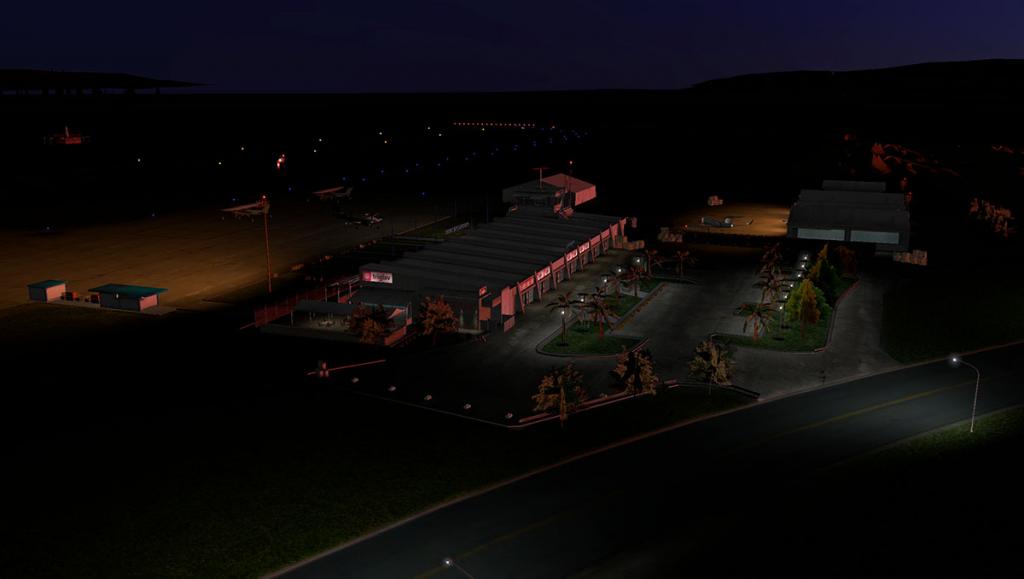
As in the day the bright building signage is well lit and so are the glass areas with just the right amount of shading in and brightness to convey the inner-building.
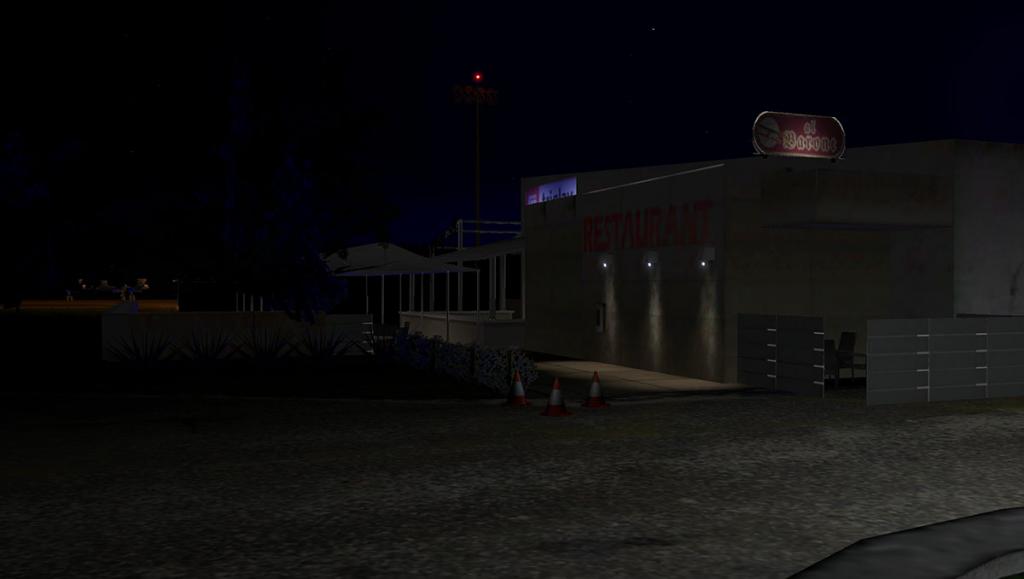
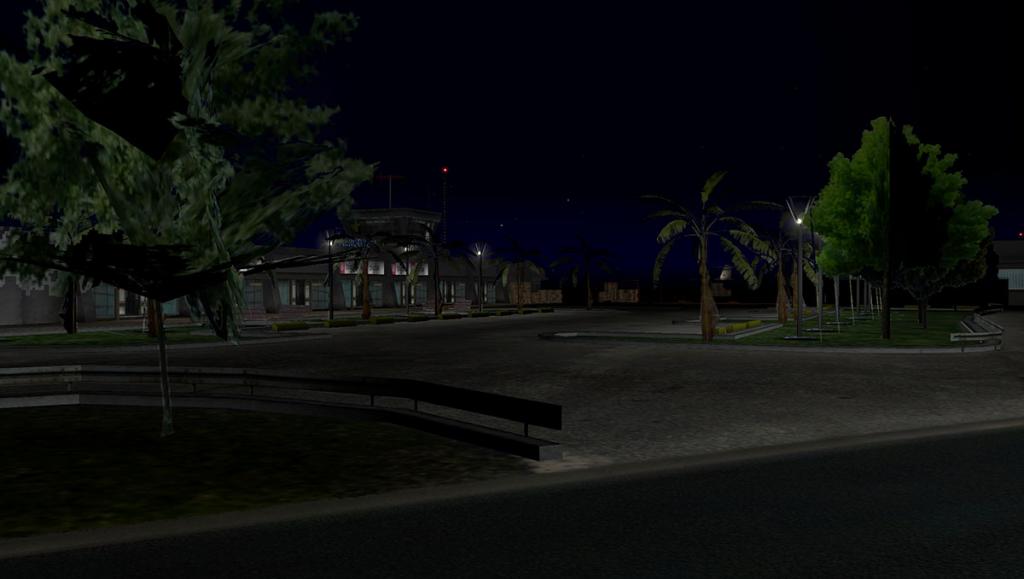
The smaller detail lighting is just as good with wall downlighting and the restaurant overhead spot lights, and really clever authentic carpark lighting. Overall the lighting effects from a distance are excellent and the runway and taxiway lighting and notable is the taxiway signage.
Any downside?
Only one. On the beta version the runway textures disappeared as you went a certain distance away from the airport, The runway markings disappeared under your aircraft as well, The runway markings are fixed and are now excellent. But the disappearing runway still exists.

From the air the area turns green, It is better than the beta version and usually you can fix it if you up the "world distance detail" but doing that takes a lot of your frame-rate away. It usually wouldn't be something to worry about, but coming around the headland it is very hard to see the right angle of the runway if it is not there and it makes lining the aircraft up to the correct landing angle annoyingly hard. It does pop up eventually. But it also takes away the completeness of the scenery if the runway is missing and it is always popping off and on your screen as fly around the area.
So without doubt LJPZ - Portorož Airport by Aerobridge Studios is a great success in scenery. And it is free for Xplane10 and Xplane9 (the effects don't run in XP9) and so well worth the download. If VHHH Hong Kong is as good then it will be certainly an airport well worth adding to your collection. Aerobridge is a studio to watch.
Stephen Dutton
You can download LJPZ - Portorož Airport here : Aerobridge Studios (Xplane-Aviators)
Installation : Size is 220.30 (.zip) and 231.00mb installed. The scenery comes with a manual and recommended setup guide (but it is Xplane9). Framerate is fine unless you max out the "world distance detail" and use the heavy HDR settings.
30th January 2014
©copyright2014 : X-Plane Reviews
-
As far as cockpit ladder, try clicking around on the left rim of cockpit. It was there in version 1.
Incidentally, I see you've changed (or suppressed) your personal views on this aircraft, as expressed to me in email

And you didn't mention the look-down shoot-down and helmet mounted hud? Or the proper sweeping radar screen?
Flight Freak
FF I don't have any record of writing to you in an Email (I don't even have your email address)? So how can I express my different personal views of the aircraft... This review was the first time I have flown the aircraft and I don't have any other comments about it except what is noted in the review... SD
-
Maybe I should have detailed this a little more... You don't have any power during the actual spin (around or under 100 KIAS) which is throttle closed as you noted. The trick is the speed at the point you recover from the actual spin, If you are under the specified 88 KIAS then you can (I was well under at 64 KIAS) as I came out of the bottom of the recovery and was bleeding off speed as I started to slightly re-climb.. That was the point I put the power on full to pull out (or in this case just slightly before). It is safety aspect of having the power available to bring the aircraft back up quickly to a safe flying speed (stall is noted as 48knts) without using any flap for loss of lift at a slow speed. To stall at that point would not be the best thing to happen to you, and the feeling of the safety of the power surge pulling you away from the end of the spin is the best feeling to have.
-
Thanks for the review. I'll be buying :-).
You won't be disappointed... I loved it.
-
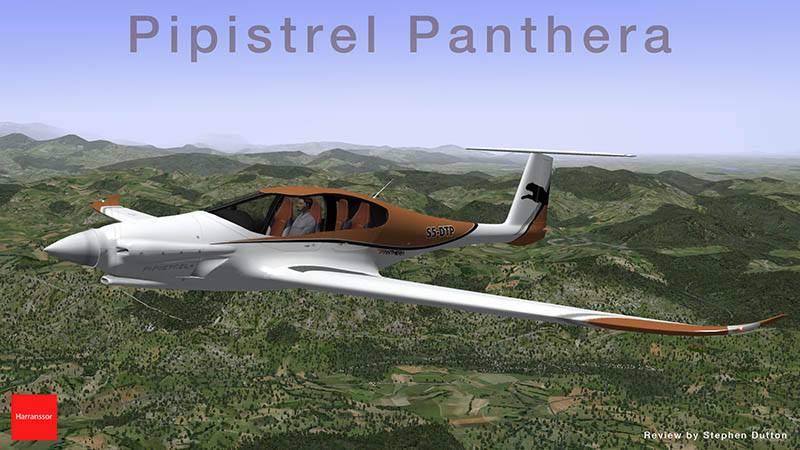
Aircraft Review : Pipistrel Panthera by Harranssor
Routes : LJLJ Ljubljana-Brnik to LJPZ Portorož Airport (return)
The Pipistrel Panthera is a lightweight, all-composite, highly efficient four-seater aircraft now under development by Pipistrel of Slovenia, First flight was on April 2013 and the aircraft is now going through the certification process to be Part 23 certified by 2015.
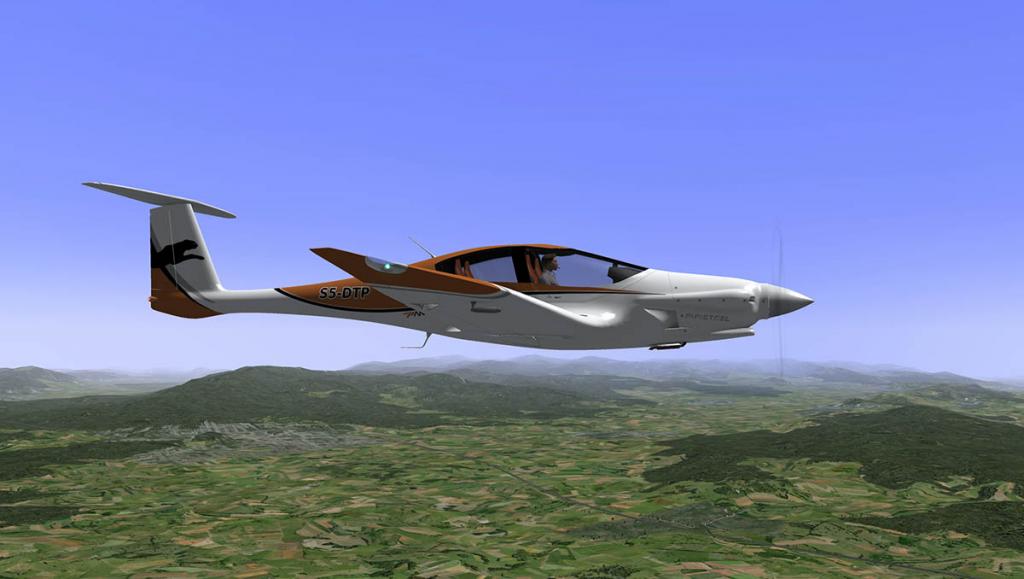
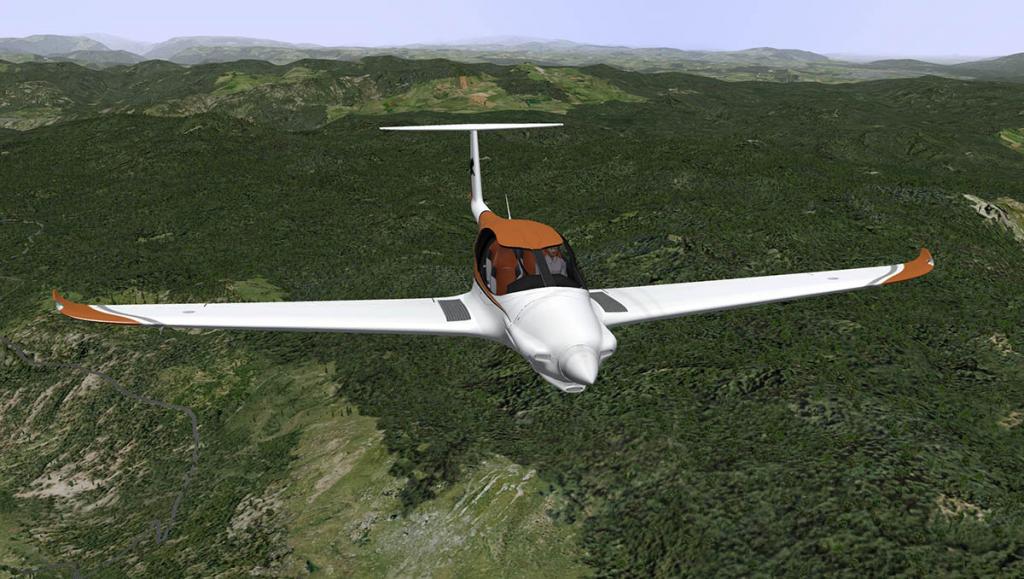


So whats it like? Well I went to Ljubljana, Slovenia to find out. Landing at LJLJ - Ljubljana-Brnik I found myself on the ramp looking South-East for the aircraft. I was to find the Panthera sitting here waiting for me, as Pipistrel are actually based in Ajdovščina, But as the certification work continues they are kind enough to meet me here and rather than me go to Ajdovščina.

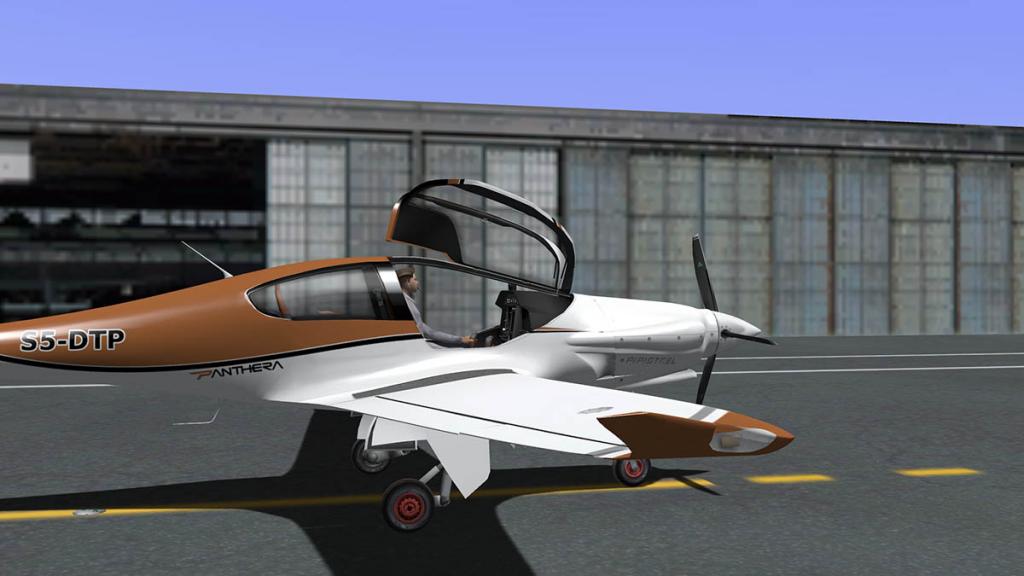
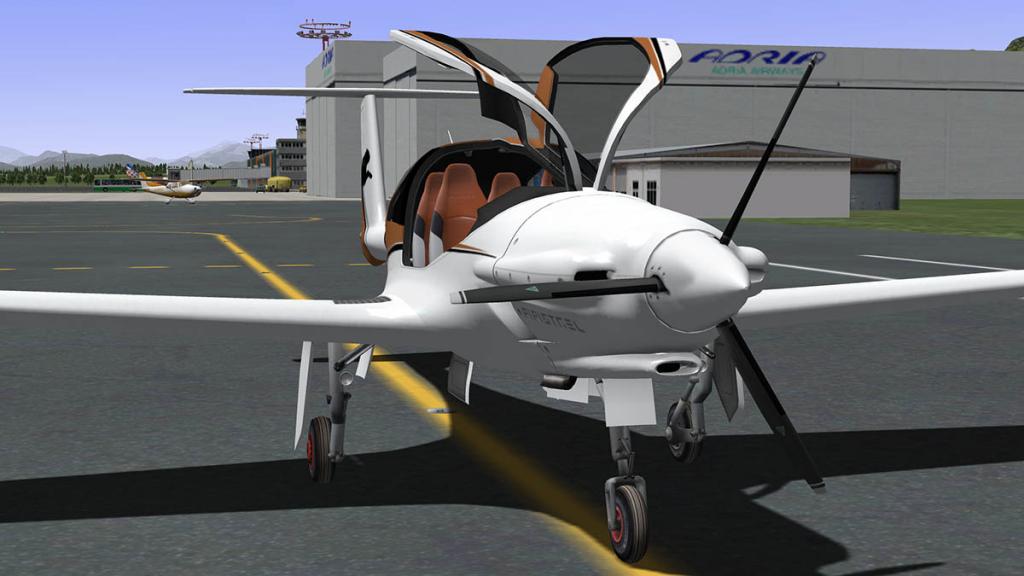
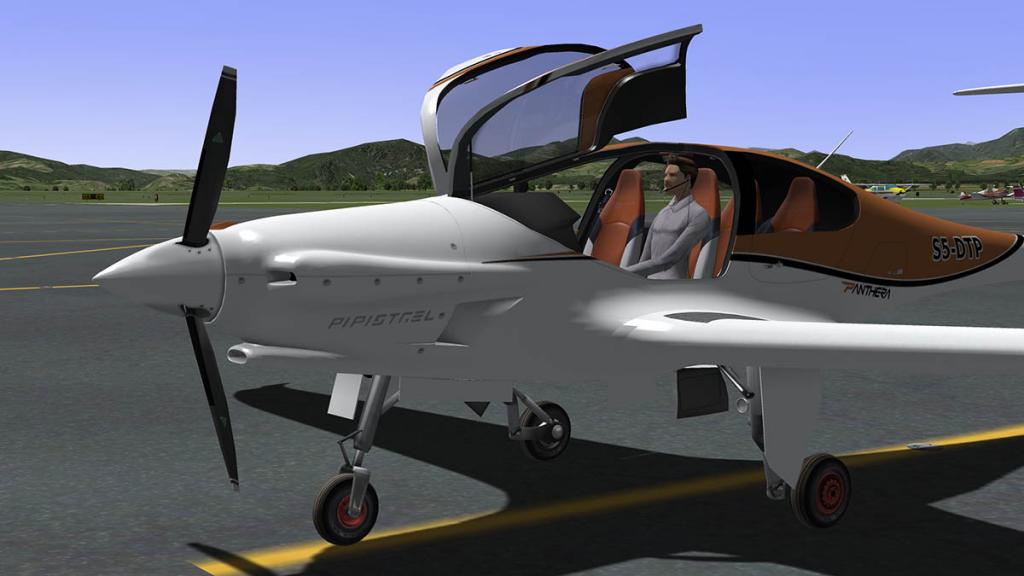

Walking along past all the maintenance hangars I reached the GA ramp and there was the Pipistrel sitting in the sun. It is a High T-Tail all composite aircraft with a 210HP Lycoming engine. Pipistrel intend to also build a 145 kW hybrid power system version, and the another with a 145 kW pure electric system. They will be however only two-seaters. Because of the composite construction the range is phenomenal at 1,181 mi; 1,026 nmi (1,900 km) and carrying four passengers. As aerodynamic looks go this aircraft is long and bulbous at the same time. Very modern looking it is. The wings at 10.35m (35.8ft) are very to extremely (thin &) wide at 10.35m (35.8ft) with very nicely turned up raked wingtips. The two doors open directly upwards, there are two rear passenger doors but they don't open?. There is a Tri-Cycle undercarriage that is well done and the main landing gear is a trailing link design.


Moving up on to the wing to get a better look inside you notice that the panel is quite high and fitted with two large screens and a central (touch) menu display screen, There is a smaller (touch) screen set out below.


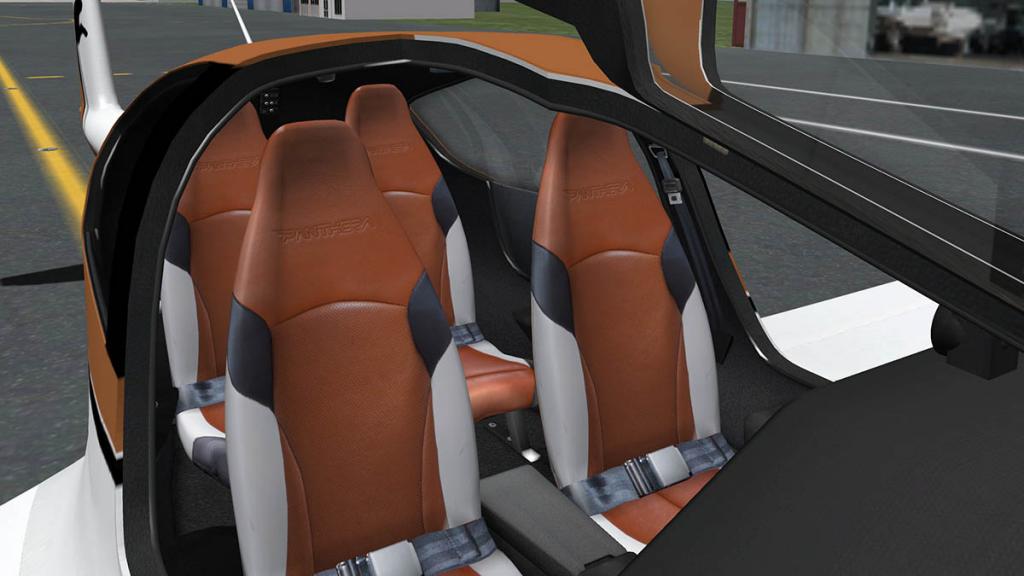
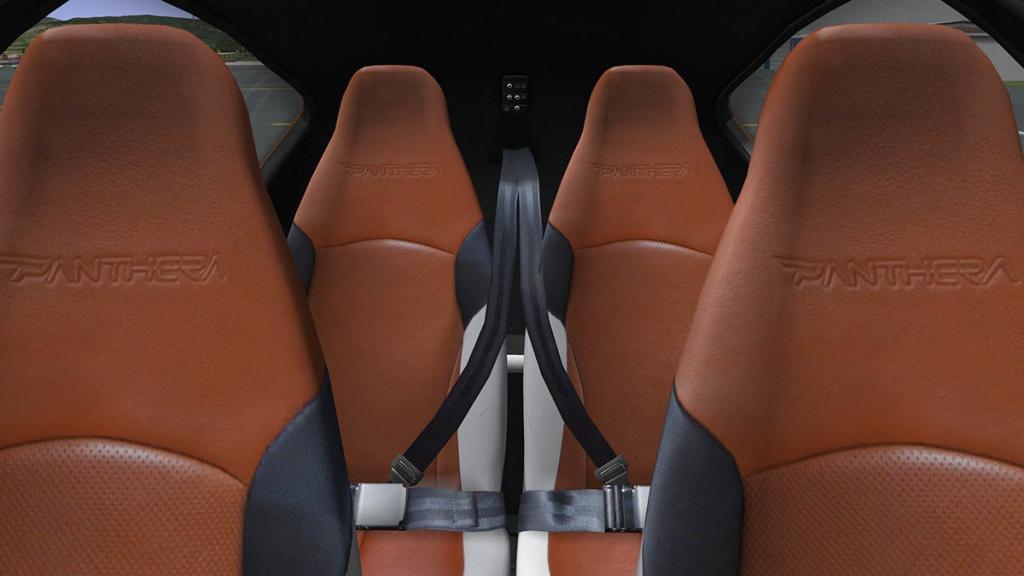
The interior is highly attractive with four lovely well fitted bucket seats, The textures look luxurious, although the seat belts look a little large, but are well done.

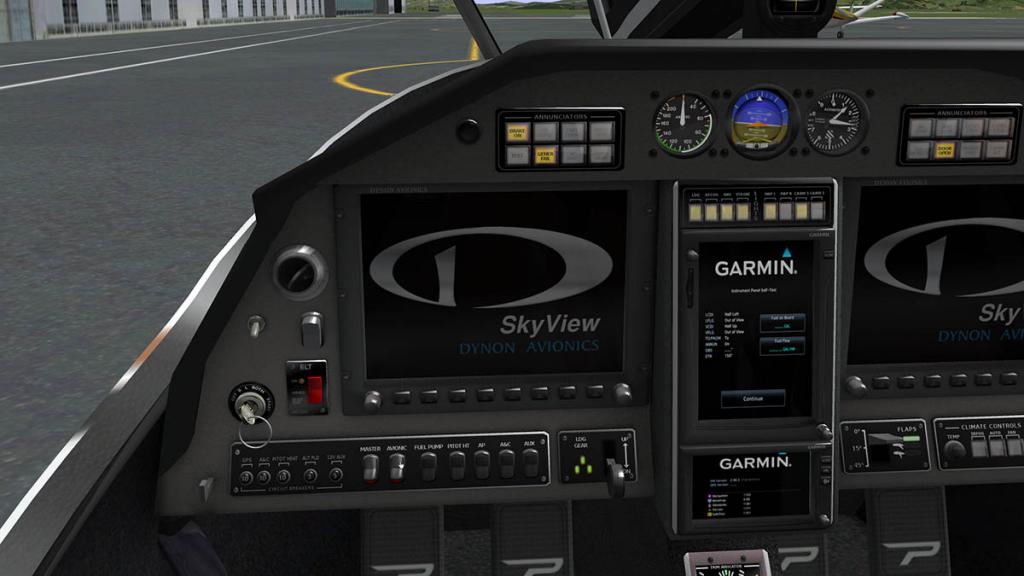
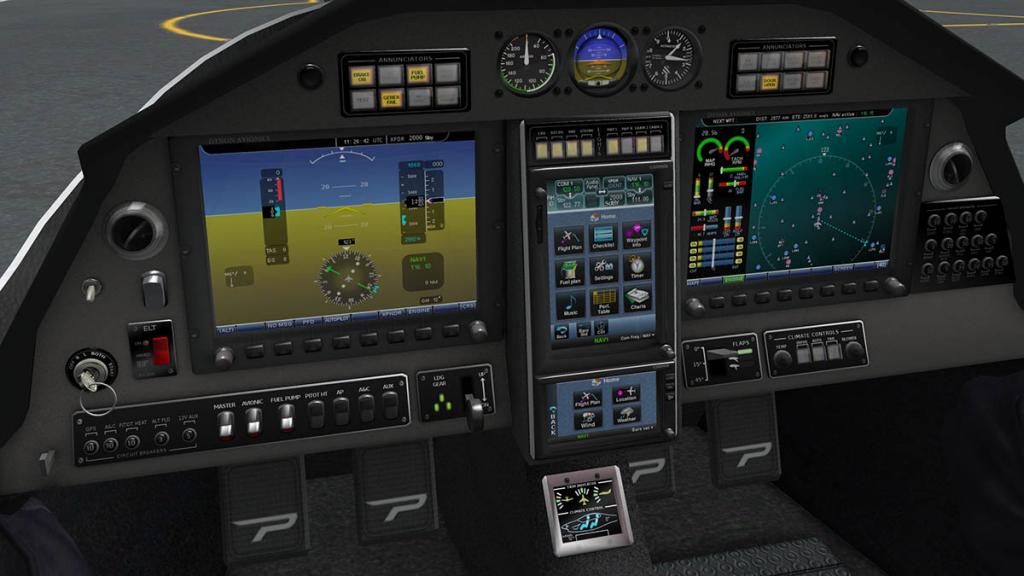

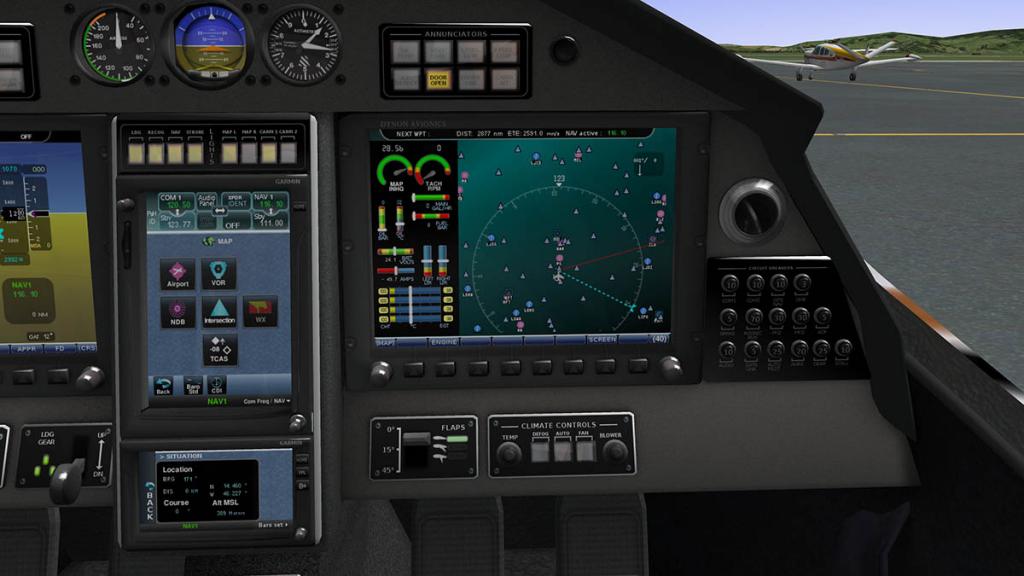

Powering up you activate the two large Dynon Avionics Skyview panels, the centre menu panels are the "Touchscreen Garmin GTN 750" series. You have to be very careful and not lose much time setting the aircraft up, Battery power is very limited with all these powered screens and your available power runs out very quickly. The panel has these two very large Dynon screens in the PFD (Primary Flight Display) and the MFD (Multi-Function Display) and both are MENU driven. You select your functions by the row of buttons (softkeys) on lower part of the panel, and the side knob is also a mode selector in two knobs on each screen. On the PFD display the left knob is the selection of MDA, ALT, BARO, HDG, VS, and ASPD and the left knob is CRS/ADF. The MFD the left knob is MAP MODE and right knob is MAP RANGE.
The PFD has all the main instruments in Artificial Horizon, Airspeed and Altitude tapes, slip indicator and roll scale. centre is your pitch scale and flight director (when activated), AP (Autopilot) and XPDR (Transponder) Annunciators are noted across the top of the screen. You get a very large double arrow to note extreme pitch that is very effective.
The MFD is dominated mainly by the (moving) map. The map seems to be off centre and too low, and the zoom is still quite wide even at the low 10miles setting, so making very close navigation decisions is quite hard at this range. You have the engine display on the left of the map (It is also available on the PFD but it badly covers the Altitude tape). A very bright and colourful display it is. Too bright or the future of panel displays? I found it confusing at a quick glance at this distance on the far side panel. The panel can be two colours of your choice.
In the centre is the Garmin GTN screens, which are touch menu driven panels. Six icons cover Flight Plan, Checklist, Waypoint Info (for map display), Fuel Plan, Settings, Timer, Music, Perf.Tables and Charts. the lower part of the panel has a menu (return) Baro/std and CDI (Nav source VOR 1, VOR 2 and GPS (for locking into your route FMS).


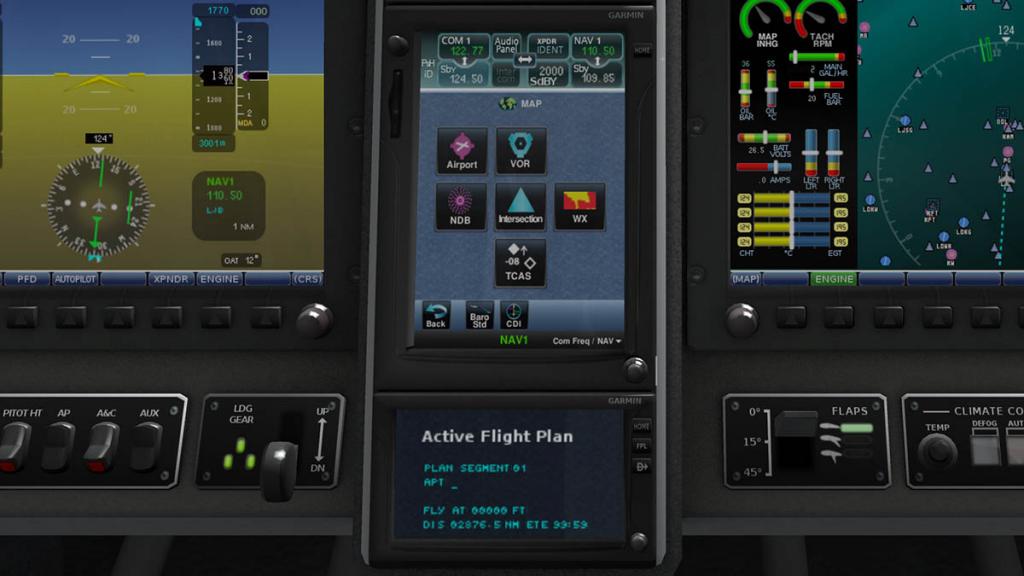
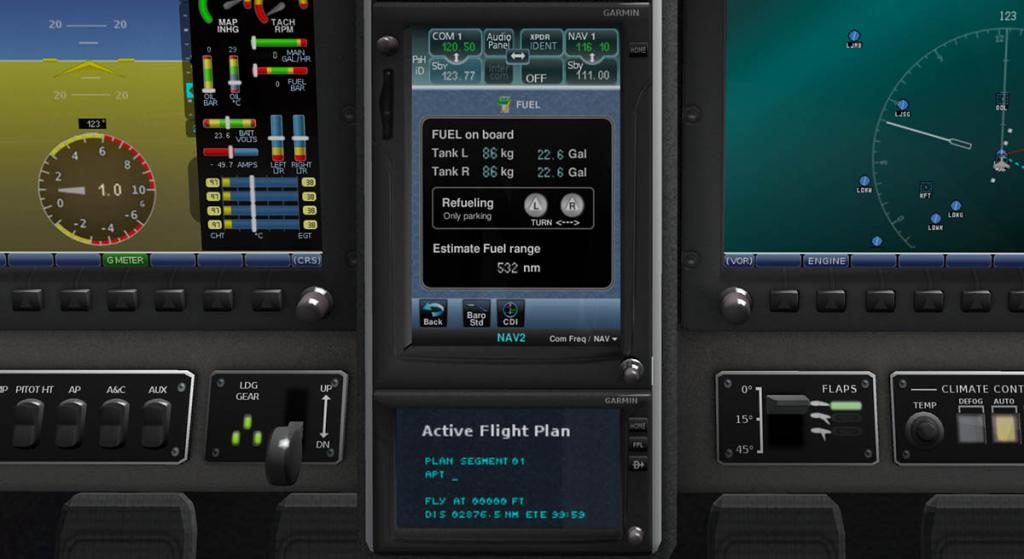

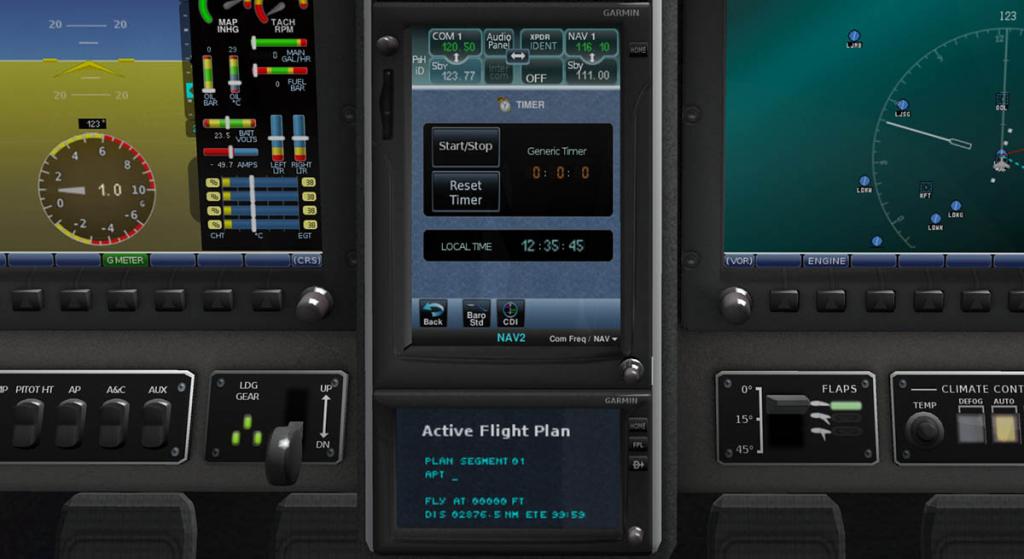
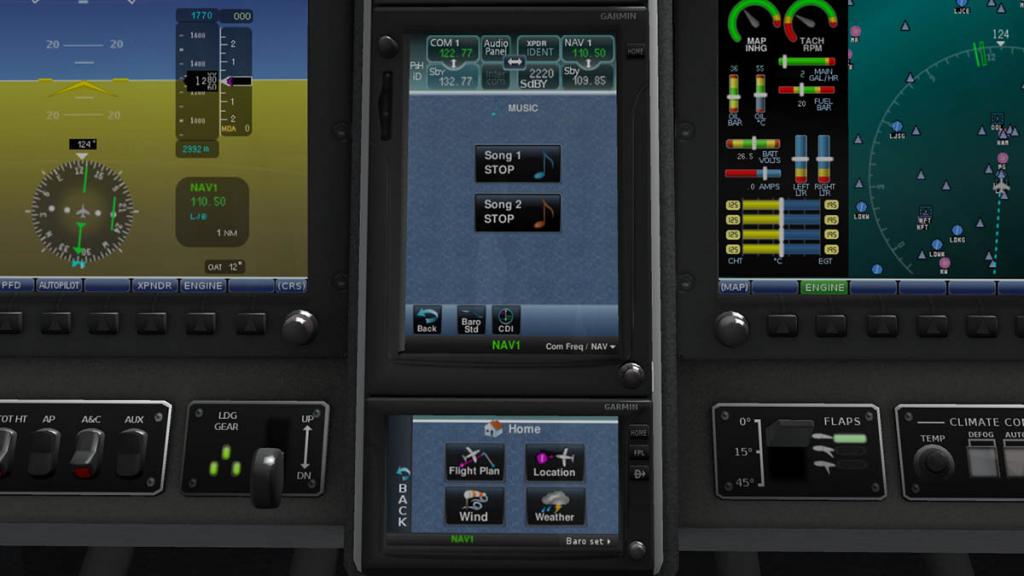
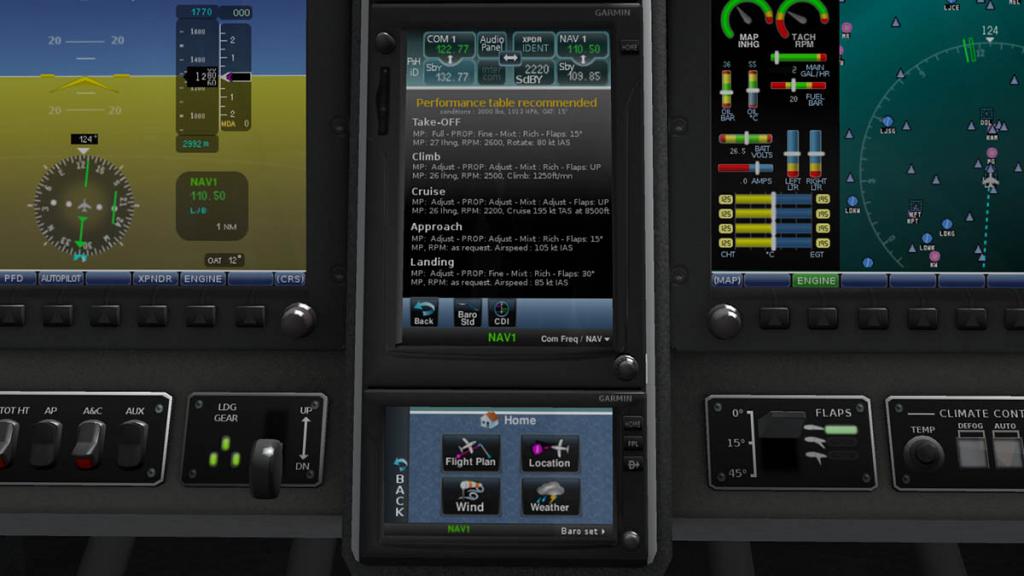
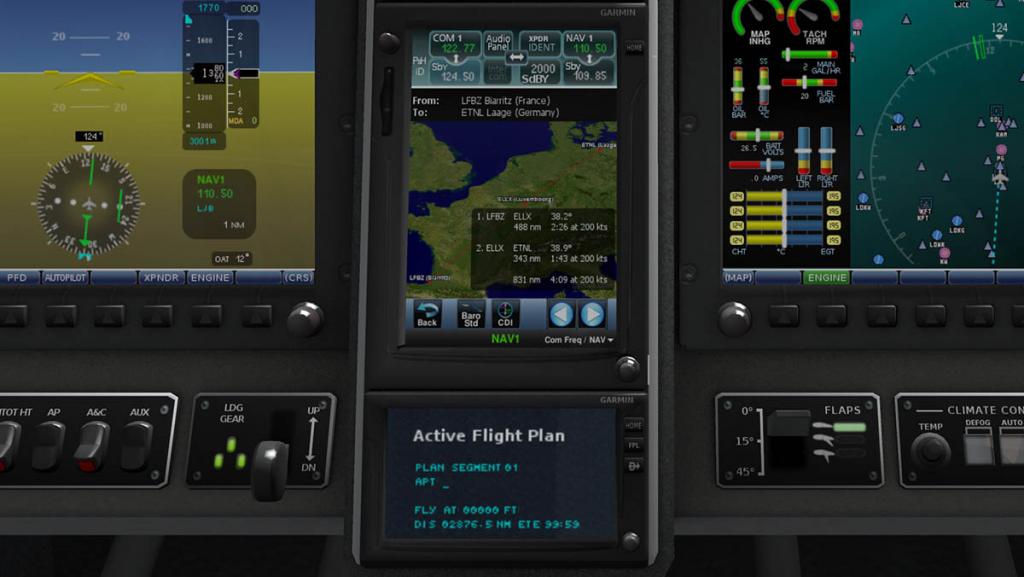
Bottom (smaller ) GTN 750 is four Menu items in Flight Plan (above far right image in Charts), GPS Location, Wind (Temp) and Weather (METAR).
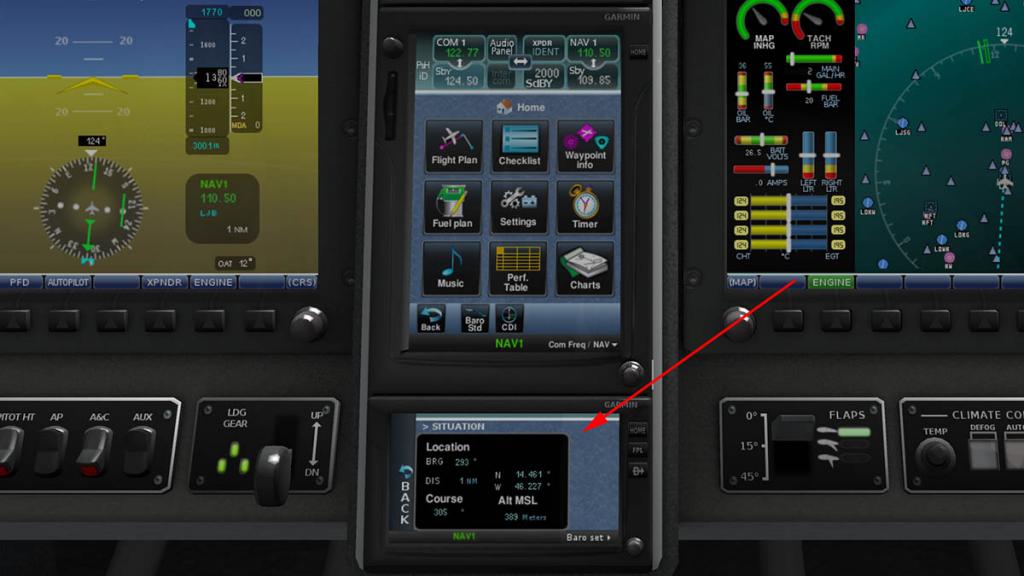
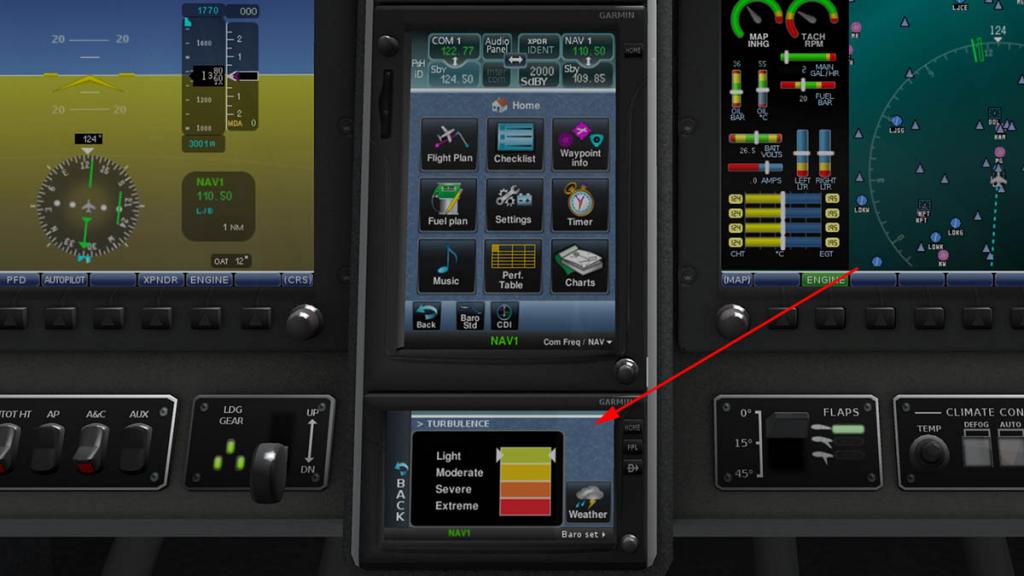

On top of the main GTN screen is your radio functions, here you can select your radio frequencies and transponder.
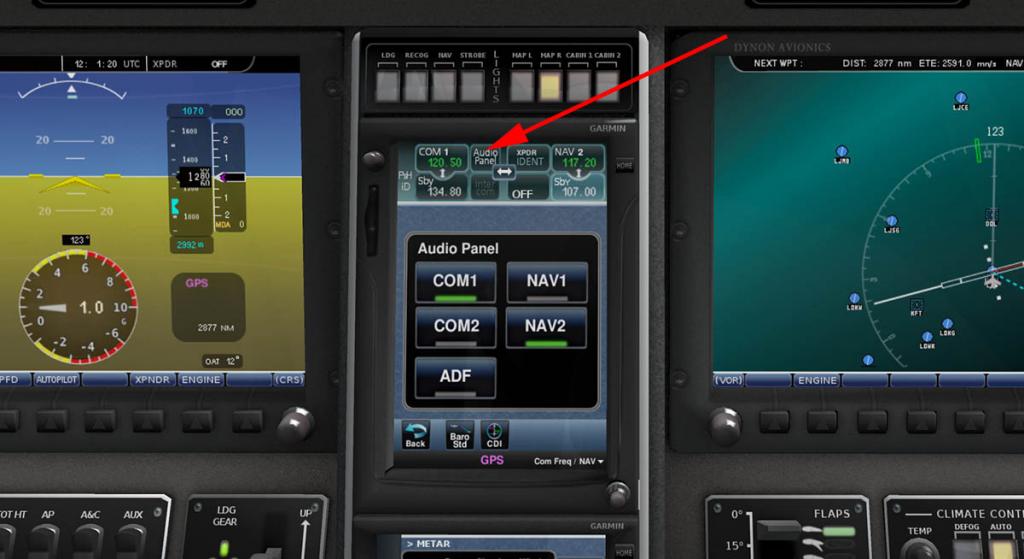
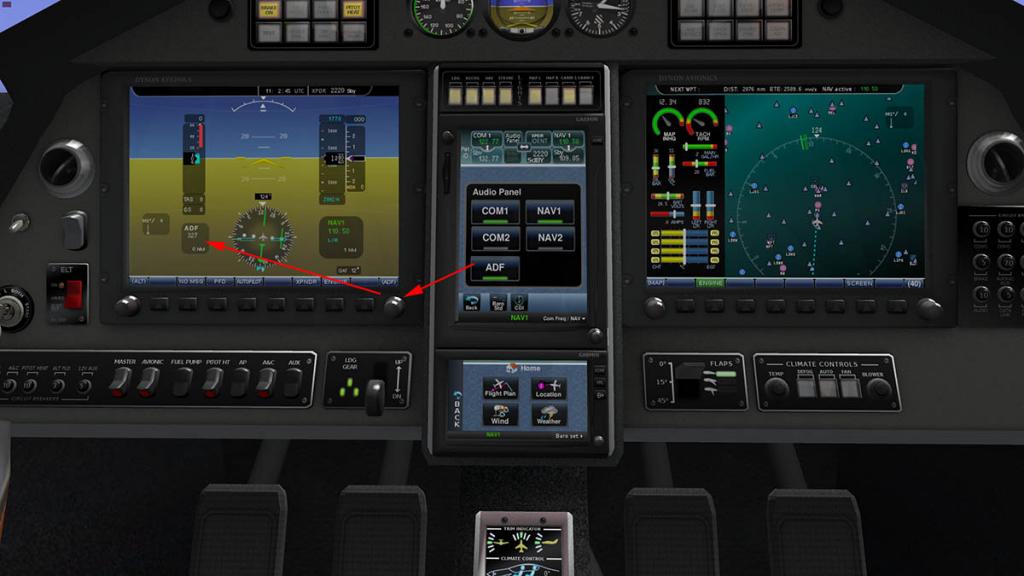
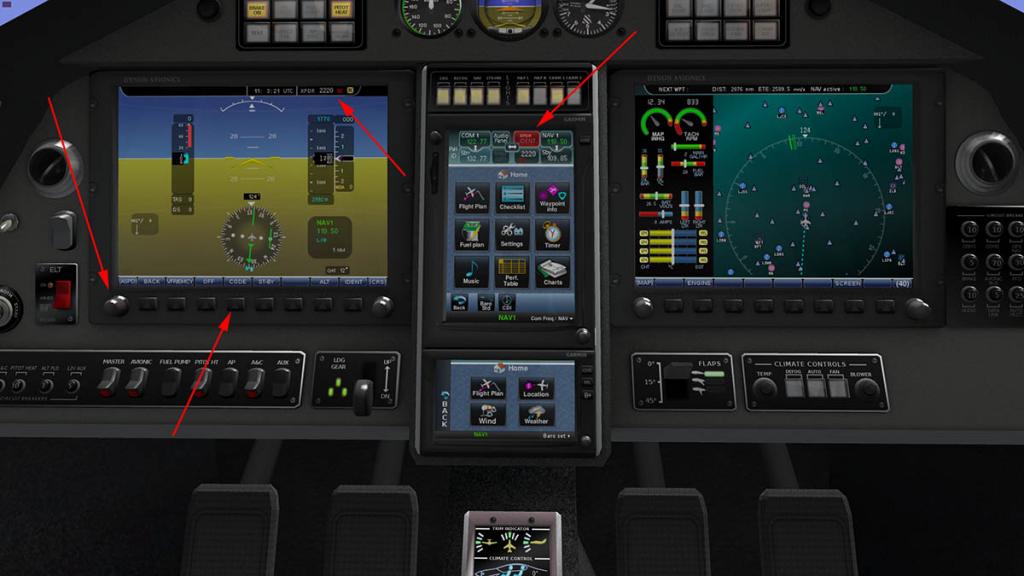
Select the frequency you require by the button, then change it in the above window. (the knob is at the bottom of the panel right), The ADF is a pain to find as it is tuned by a knob on the PFD. Ditto the Transponder which is again situated on the PFD, but on the far left knob and the correct menu. (CODE is for setting the IDENT) and the settings are noted at the top of the PFD panel.
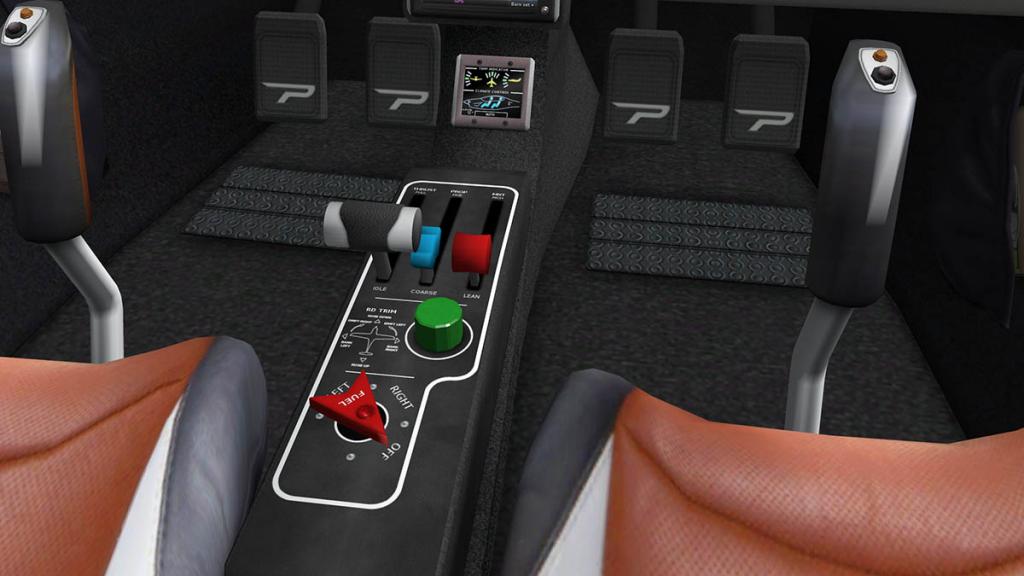
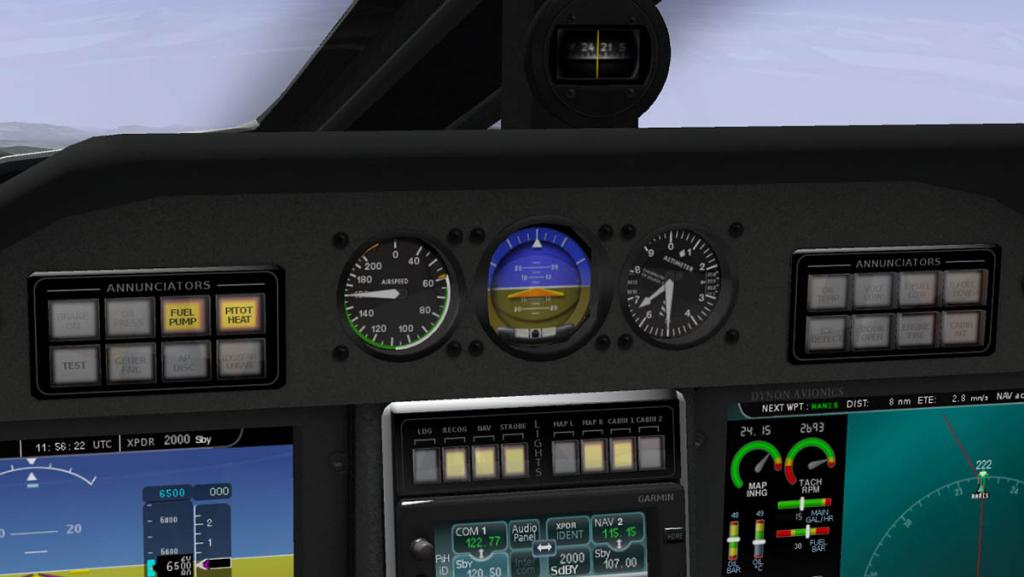
Lower is a small display for the TRIM Indicator and Climate Controls. The central divider has your throttle (Thust), Prop (adjustment Fine-Coarse) and mixture (MXT), Rudder Trim and Fuel selection (Left-Right-OFF).
Just under the glareshield is your backup Airspeed, Arti-Horizon and Altimeter. Warning lights are situated each side. The lighting panel is set out below.
Flying the Panthera
Check the fuel via the Fuel panel and the put MXT and PROP levers to full forward. Turn the key and nothing happens?... You have to press a sort of button on the side of a Key area before you get any action. Pull down the door via the handle, both doors close together as one action.
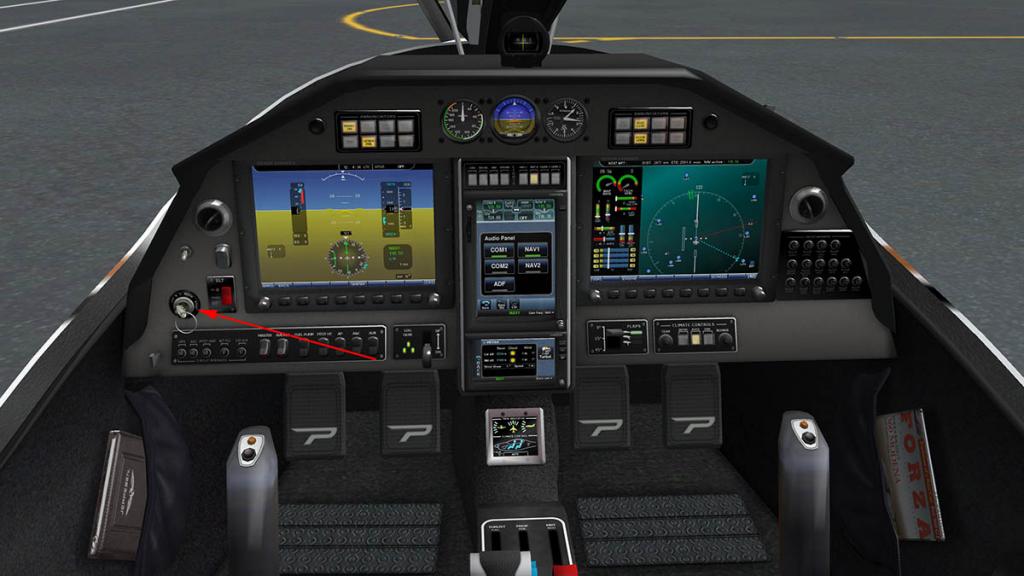
To taxi is very nice, speed is easily controlled and you can easily find the right pace. LJLJ-Ljubljana's runway is very long at 3300m, so the taxi run down to RWY13 took ages. The Panthera was how ever very comfortable but the view forward is slightly restricted by the high panel.
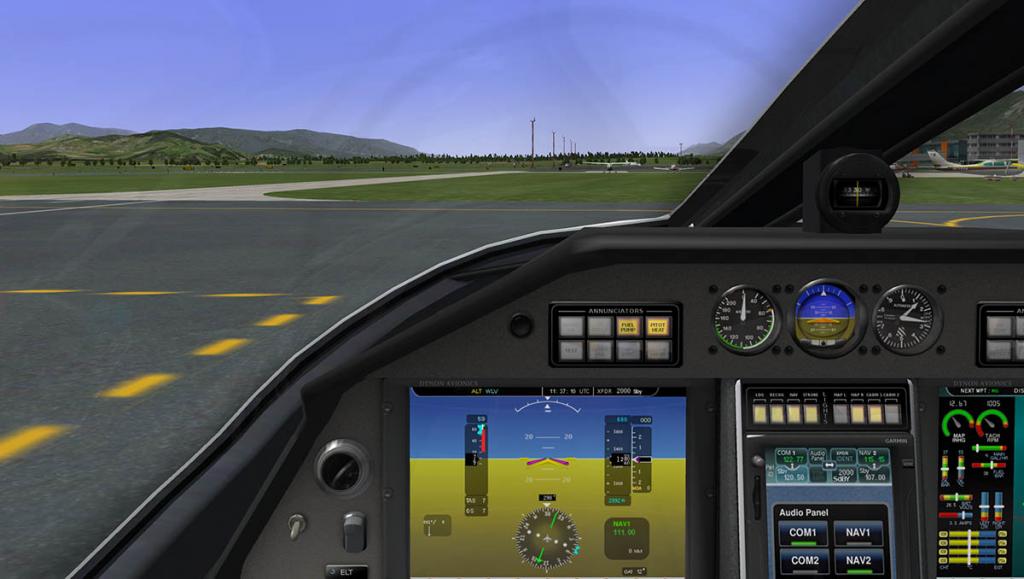
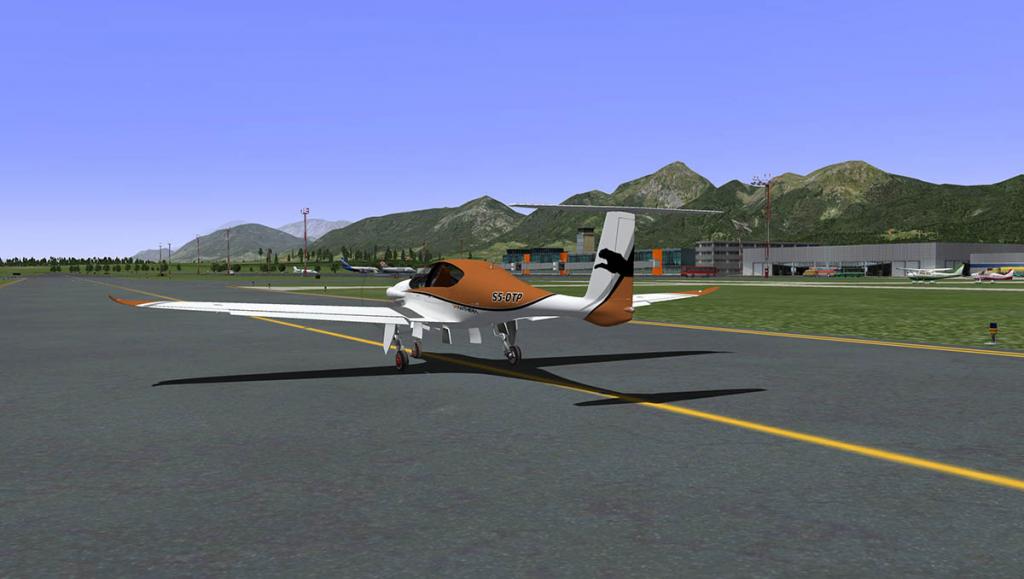
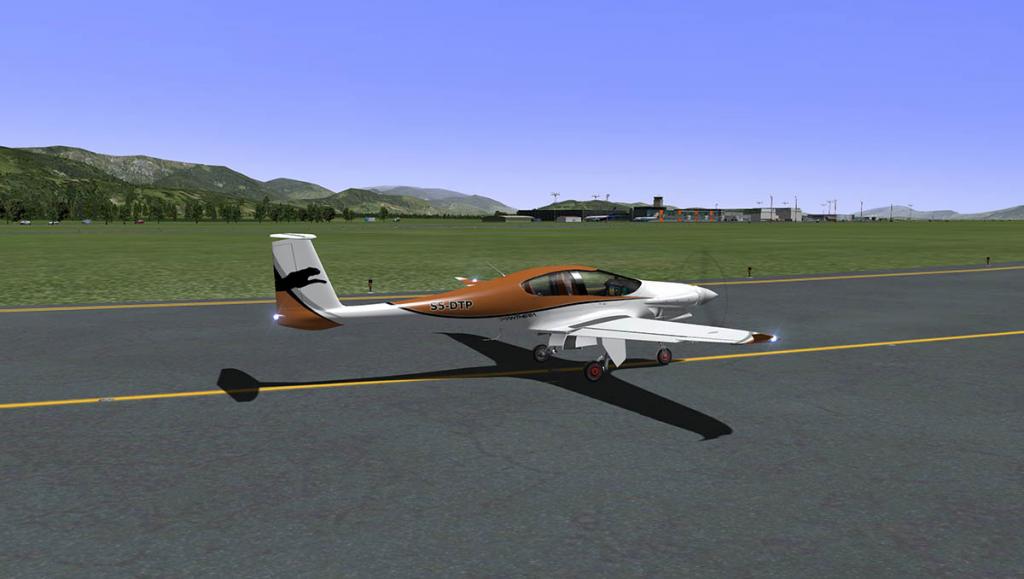
With the power going on you have to work the pedals a little to keep the aircraft straight, I selected 15º of flap as those long wide wings are highly efficient but more in the cruise zone than here at takeoff. Rotate was at 70kts that is shown by a green zone on the speed tape. The Panthera is not a great climber, with a full passenger load you would have to keep your pitch at less than 500fpm (feet per minute) here I can use 600fpm but that is close to rubbing the speed off (the specifications note a climb rate of 1200fpm? I never even got close to that?) my altitude today is only 6500ft as the flying distance is very small. It is also slightly nervy in the air, but nothing to serious. I doubt this would be an aircraft to throw around the sky. There is a G-Meter as well on the PFD to make sure you don't.
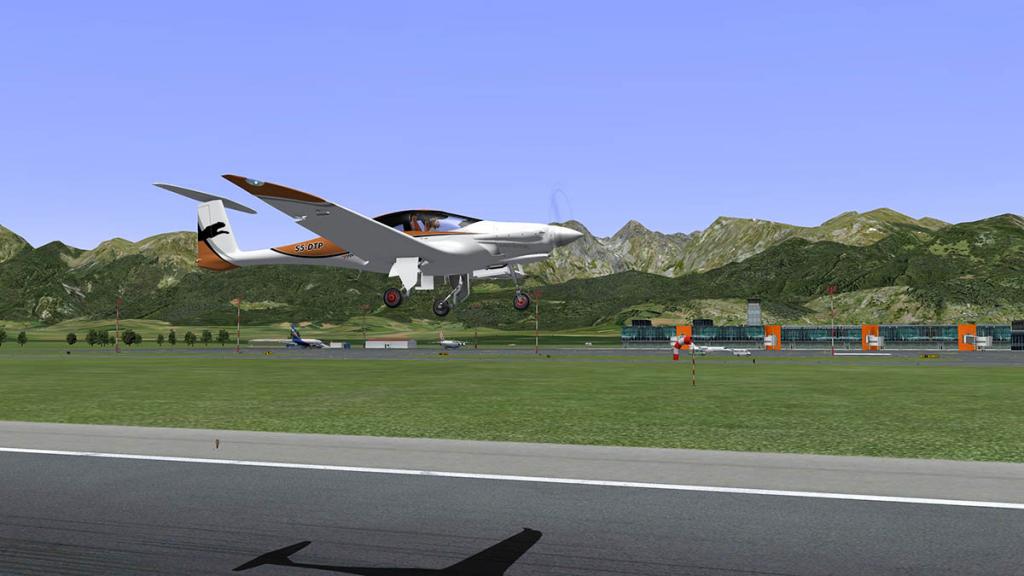

As the speed build to a cruise speed of between 160knts to 165knts the aircraft comes into its own. This Pipistrel is really at its best as a long distance cruiser, although spending eight to nine hours at this speed at full range would test your sense of humor.
Cruising speed: 232 mph; 202 kn (374 km/h) : Stall speed: 68 mph; 59 kn (109 km/h) : Never exceed speed: 253 mph; 220 kn (407 km/h) : Range: 1,181 mi; 1,026 nmi (1,900 km) : Service ceiling: 20,013 ft (6,100 m) : Rate of climb: 1,200 ft/min (6.1 m/s)
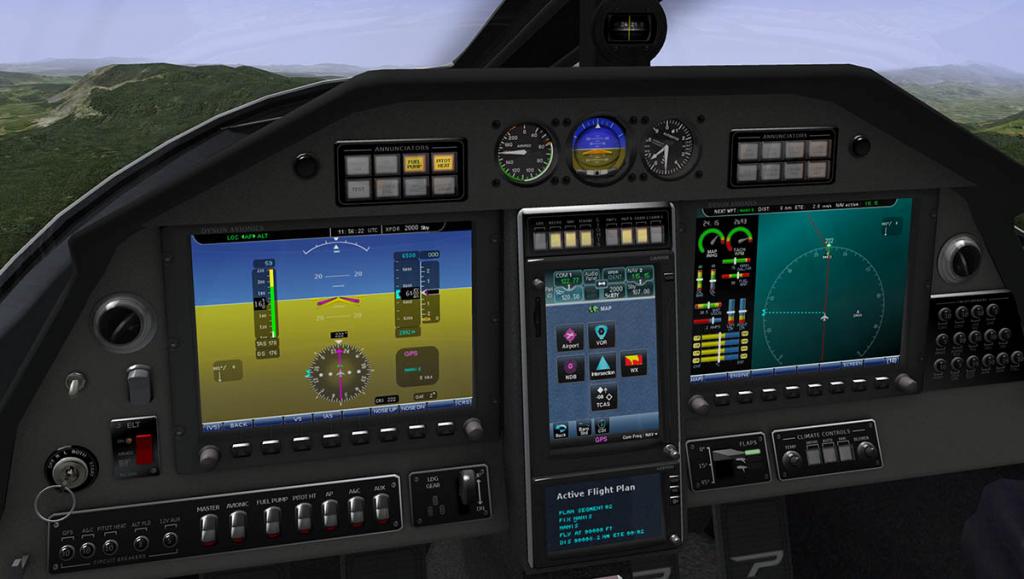


The aircraft looks graceful in the air. The work by Harranssor is very good and clean. There are no real nitty gritty dirty areas so it can be slightly bland in areas like the wheelwells and around the undercarriage. But it does have great curves and that modern plastic feel of composites. The side windows are beautifully shaped with great side views out. But you will need to use the high texture (render settings) to get the best out of it. The liveries are not very efficient as the Ultra-High Definition textures are large at 4096x4096 in size (there are "Lite" versions included) but using the higher texture setting of "Too Much" can use you more frame-rate than is really necessary. Lower settings create poor small jaggy's around many areas that is noticeable around areas like the cockpit windows. Choosing the right livery can help, as a dark one is better than a lighter shade.
Liveries
There are six liveries with the S5-DPT as the default, The white looks great but poor unless you use your higher texture settings. The is a great Pink Panther livery (If you remember the cartoons!) that looks real fun.
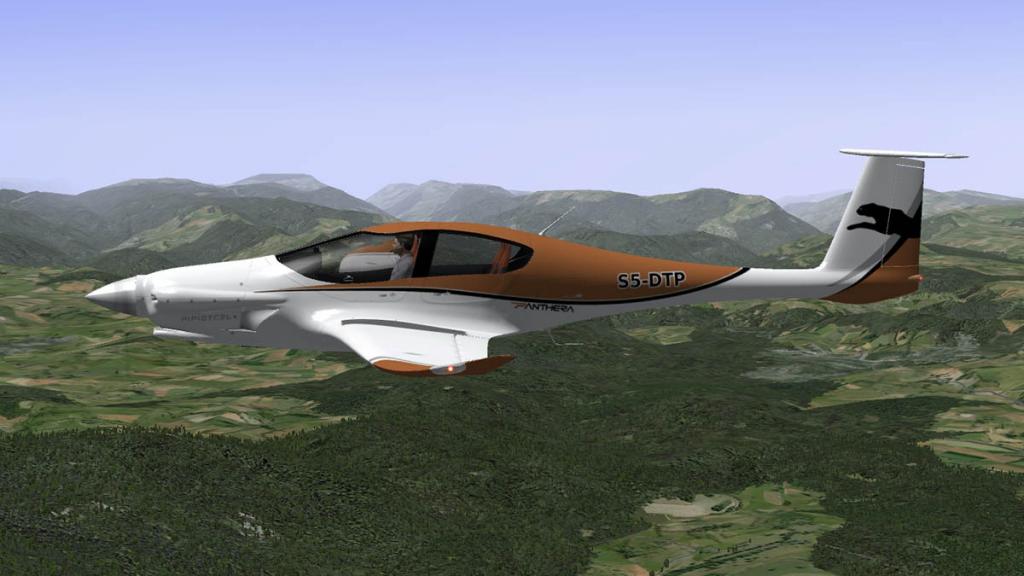
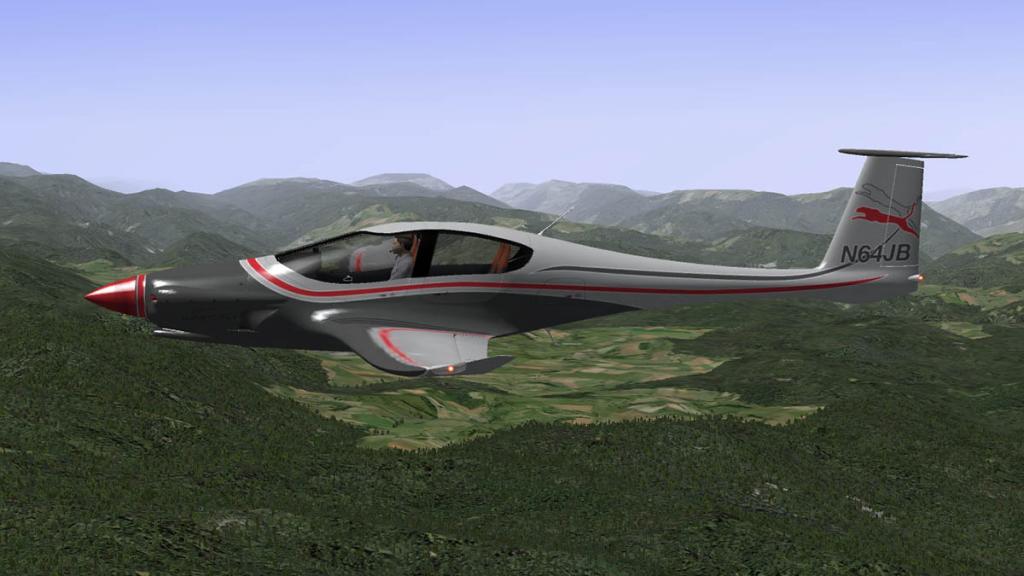
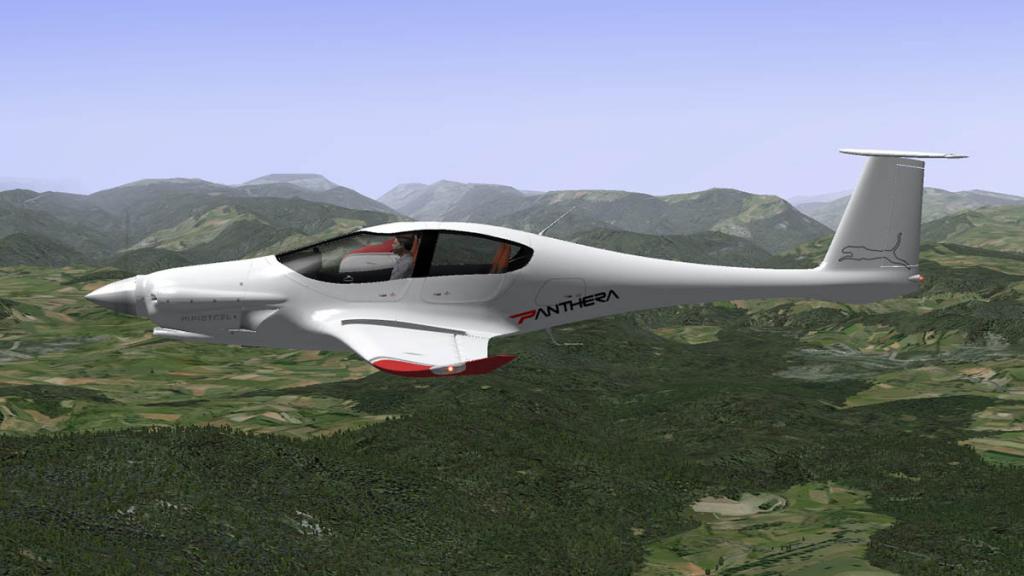
Sounds
Sounds are very good, and there is a lot of them. There is 60.3mb of high quality sounds by soundsnaps that includes a woman's voice telling you various actions that the aircraft is doing, like "Approaching Waypoint", I don't usually like these sorts of gimmicks, but here it works really well. You can have Music in the cabin as well. Two tracks of J.S BACH : Toccata and Fuge MOZART : Requiem in D minor are supplied, but you can change them to Eric Clapton if you want to.
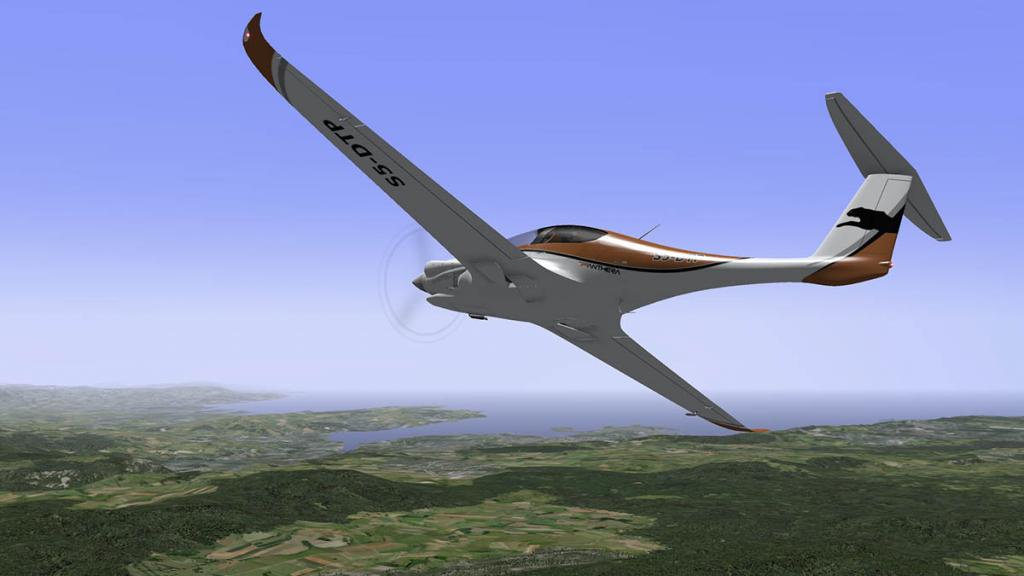
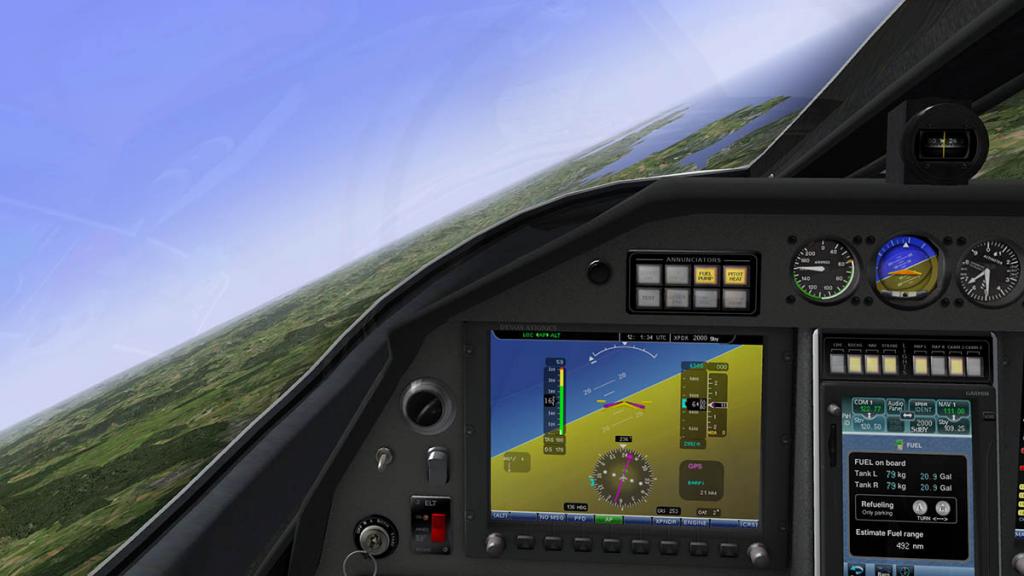
A turn to the coast over Trieste signals the point of descending to the altitude of 1200ft for landing at Portorož Airport. I like the big buttons on the centre GTN 750 display. the waypoint selection is very good and so is the fuel page that barely moves in consumption (you can only load fuel on the ground via the arrows). Glass and window reflections are excellent (They can be turned off in the settings menu). And you get drops of rain on the windows at lower speeds (no wipers).
Then your workload goes up... The aircraft is very heavily menu driven. So to do even simple things like change your heading (HDG) and vertical pitch (VS) can be a lot of button pushing


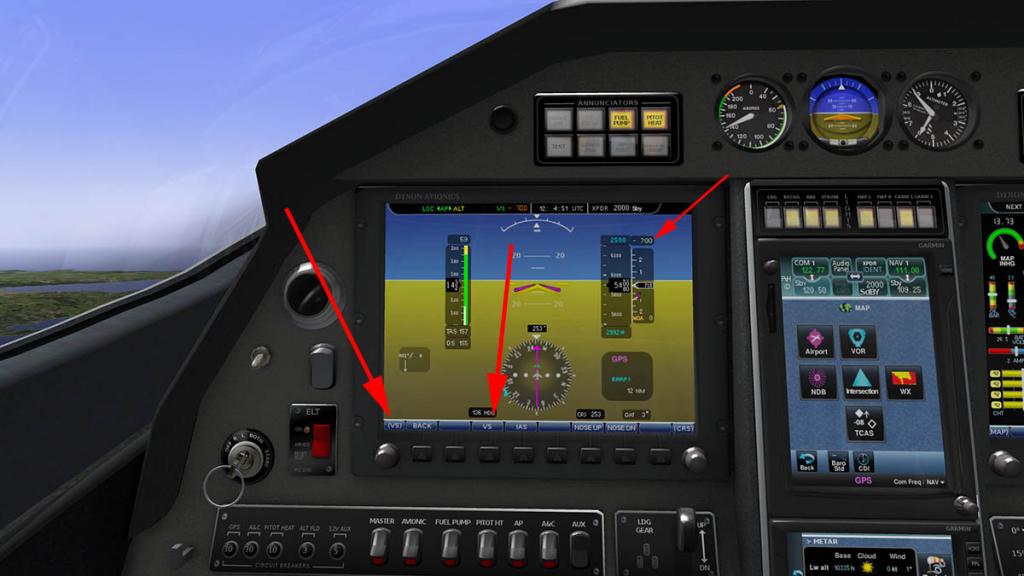
To adjust your heading you first press the knob on the left of your screen to select HDG. But where is the heading setting? It is located under ROLL?.. This then gives you three settings of HDG-WLV-HSI. Only then when you select the HDG button can you then adjust your heading via the left knob. (Note the HSI button is to select your route FMS flightplan, yes the function is buried deep here in the menus if you want to save two hours trying to find it).
Want to adjust your Vertical Speed (VS)? then go back to the main left knob and select "VS" to get get the VS button (soft key) to then adjust your VS via the knob. So just to change your heading and adjust your VS (The VS is shown on the altitude tape) you then have go back and forth through these 2-3 steps? Put that together on an approach and you want to wish you could just "Turn a Bl***y knob"to go either up or down or left or right. Your workload is very heavy by this system as your head is always in the menus.
Approach
The flaps are very aggressive, so you have to get your speed down almost in the red 70knts zone to set the 15º first setting, then get a little power back on to overcome the drag. With the next 45º setting will need as much caution, as the aircraft brakes heavily from the drag. So you will need the power then almost full up to counteract the drag effect. I found that you didn't need much pitch to lower your altitude? the easiest way is to use your throttle, because if you lower your speed you then also lower your height. If you pull back the throttle a long way then it can drop like a stone. so the power band is usually in the higher forward position.
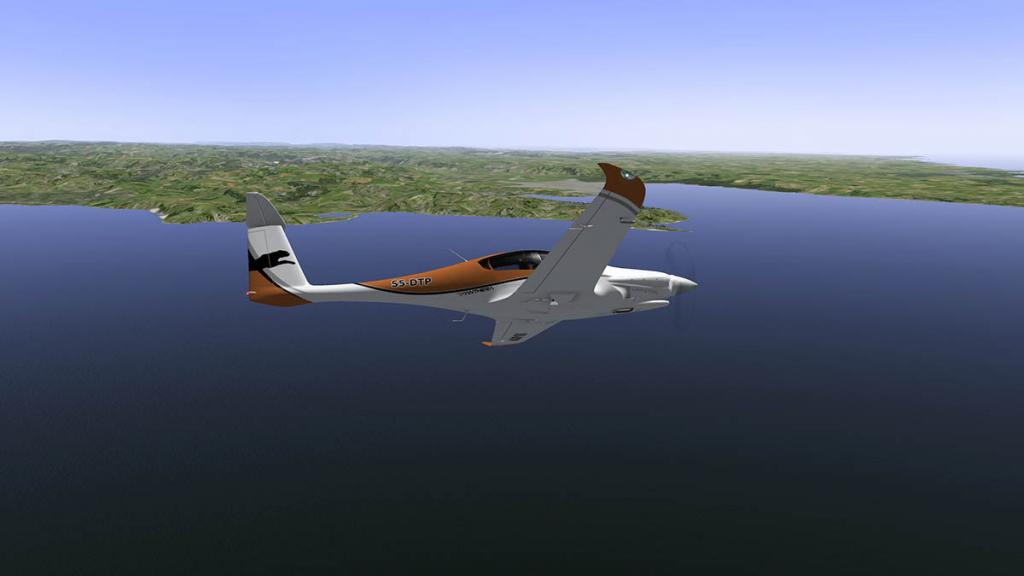
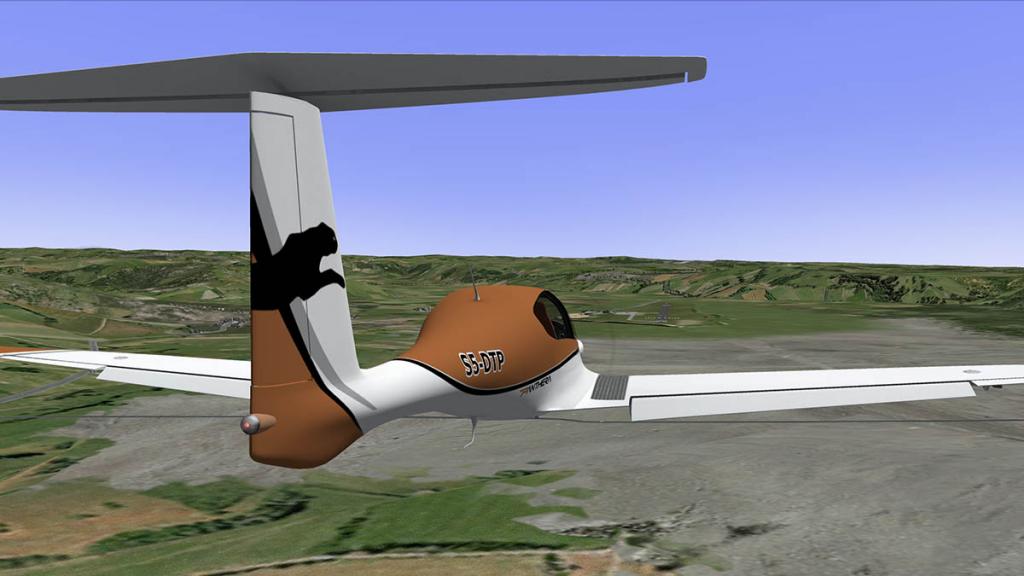
It is very effective in landing like this with the throttle, Your hands are on the stick and the throttle only as you lower you yourself easily down. Landing speed is only 65knts-to 70knts (here 66knts) and flare is very easy with just an ease off the throttle to touch down lightly on the Terra Firma. (just watch it being a little nervy in crosswinds).
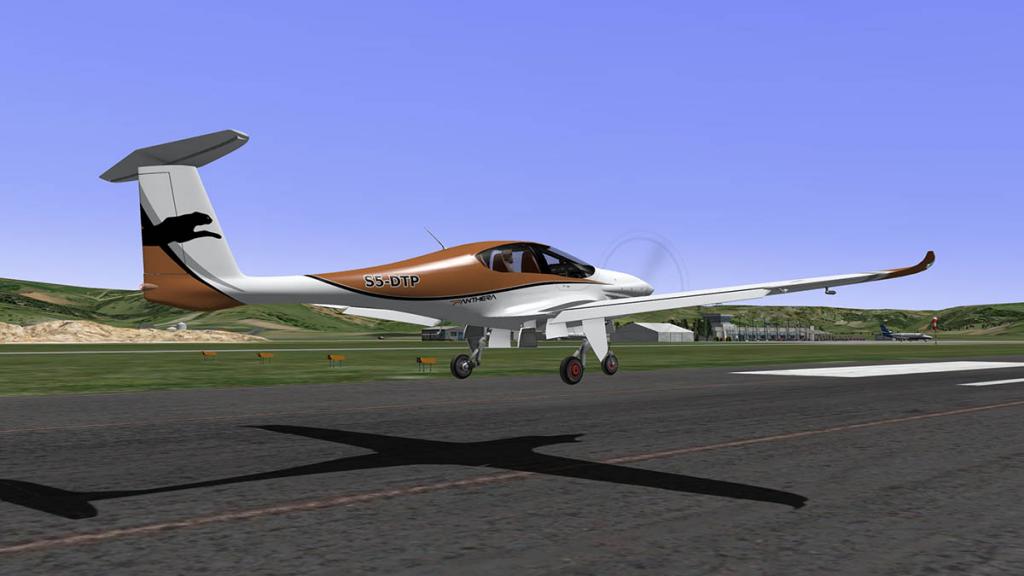

The Aerobidge LJPZ - Portorož Airport is an excellent place to park up and get some lunch and spend a few moments working the out the best menu actions to be smoother in the complex take-off and landing stages. Practice here will help, but add in a few extra elements (like a lot of radio traffic) then your workload is still going to be quite high.
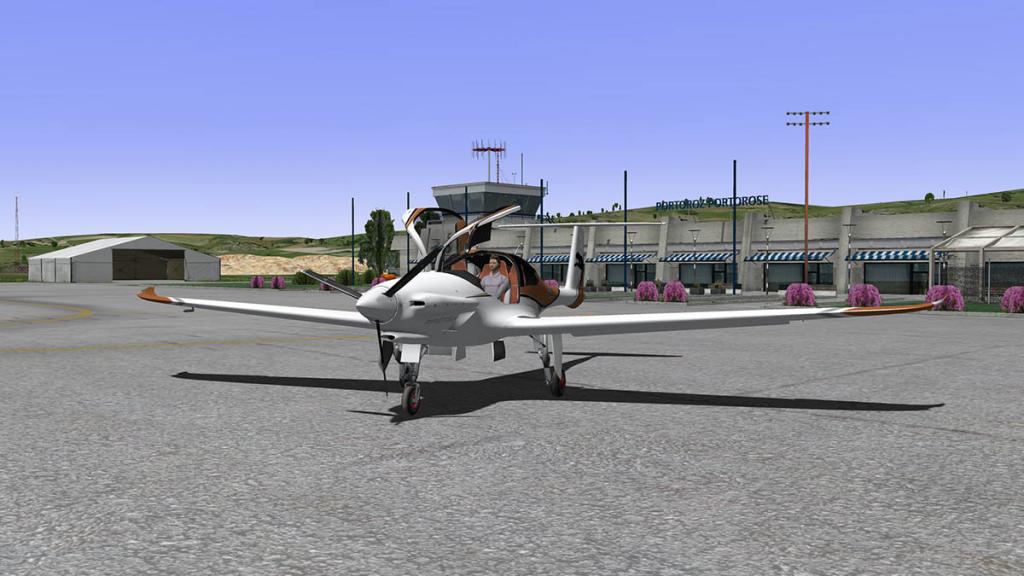
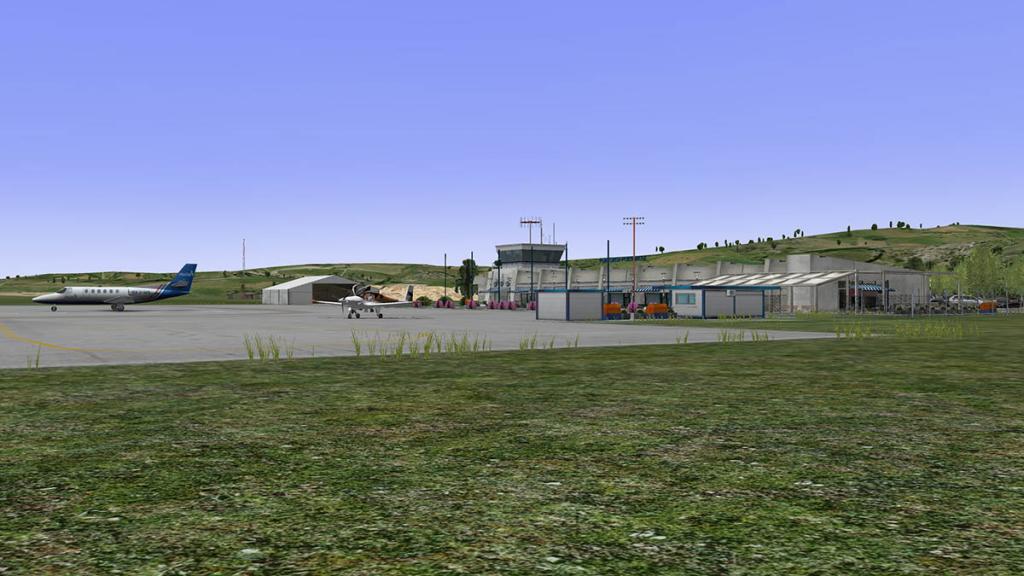

Night Lighting
With departure the light is starting to disappear. The aircraft looks very smooth in the low light as it highlights its long wing surfaces.
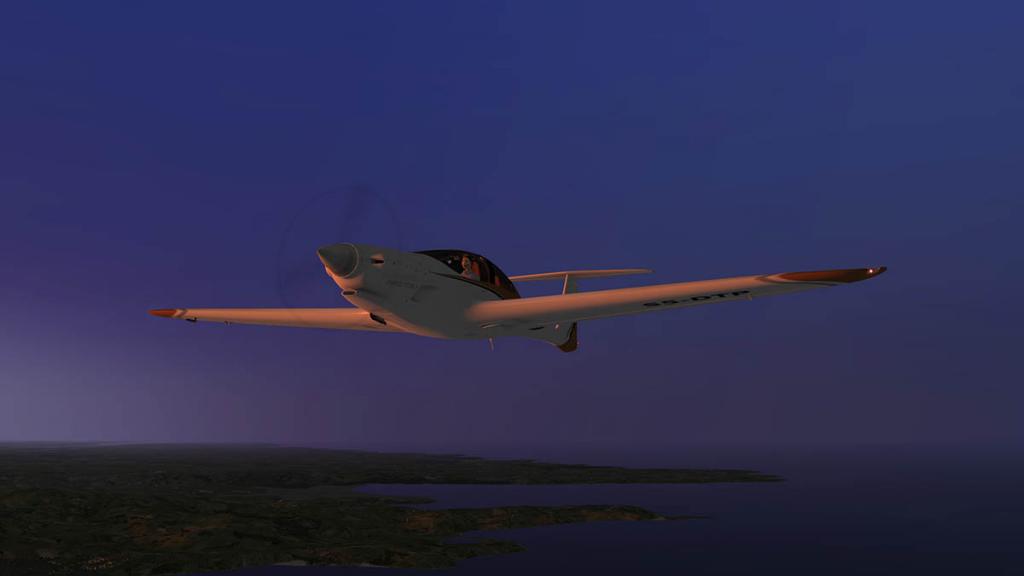
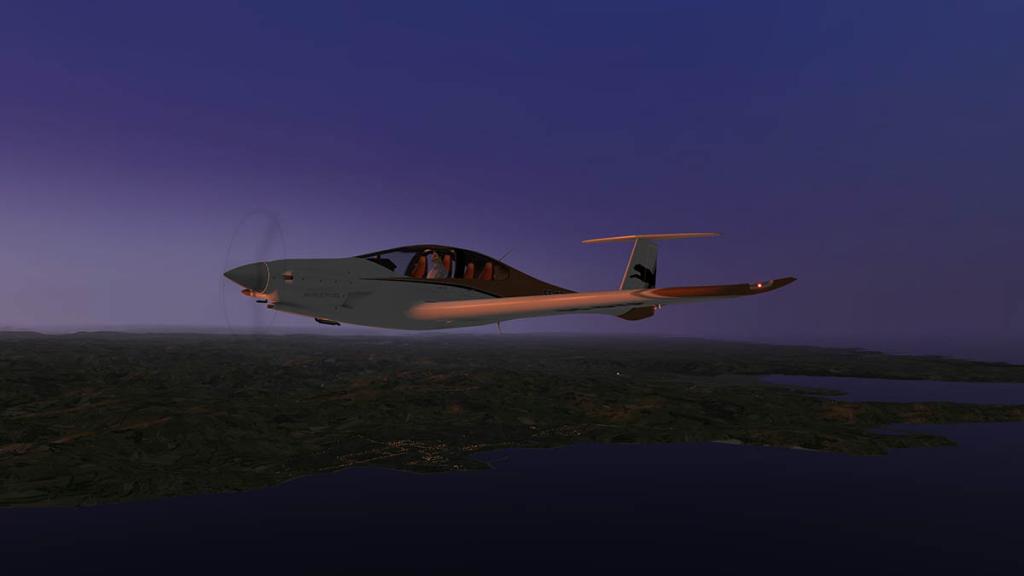

Lighting is good but no better with HDR switched on except for the landing lights.
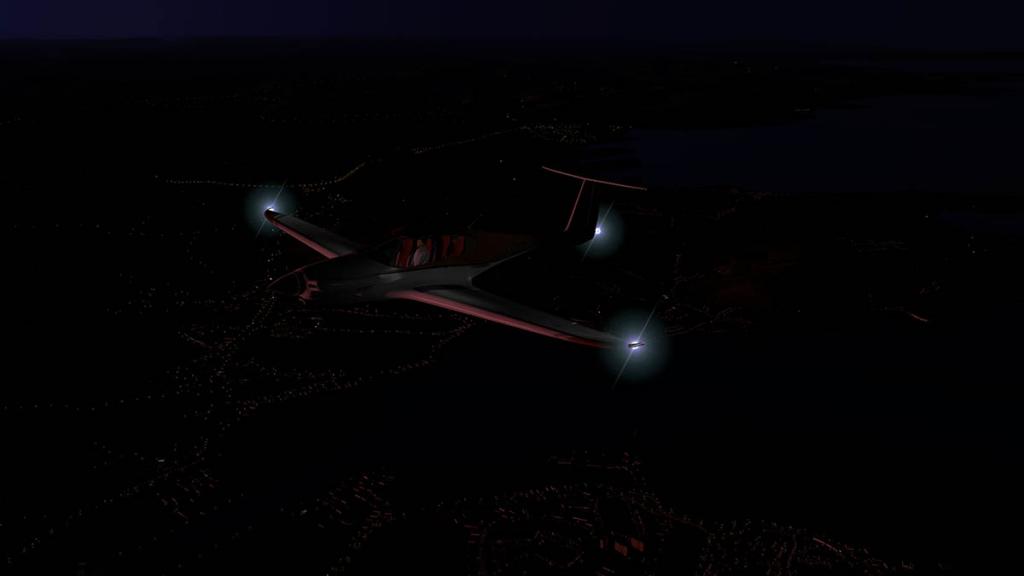

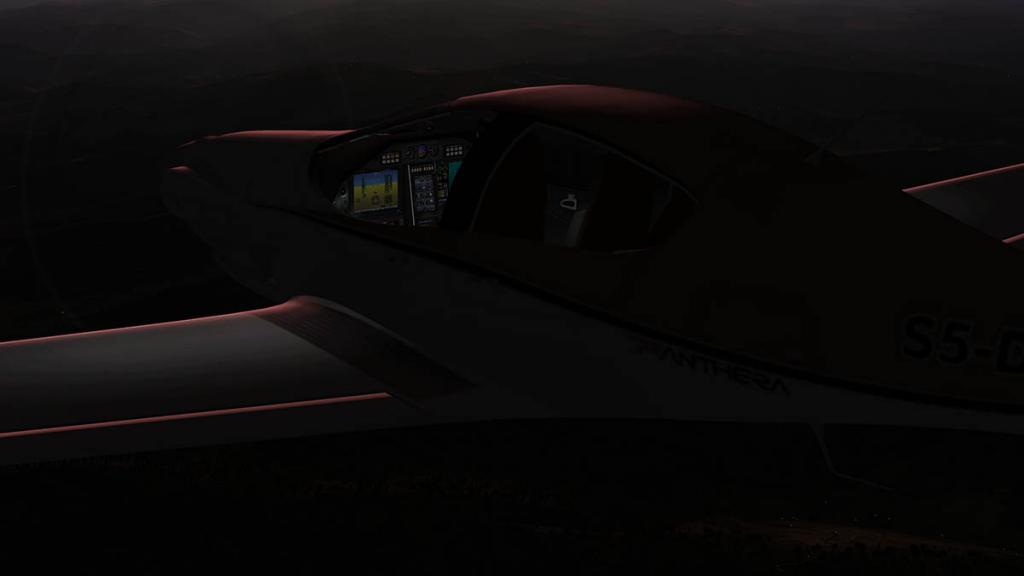
Standard Nav/Position lights are highlighted by the good strobes. Inside the lighting is fine but doesn't have much adjustment. The screens have three levels of brightness in dull, brighter and very bright.
Arrival LJLJ
As the Karawanks (Slovene: Karavanke, German: Karawanken) bathed in the fading light I made my turn to final on RWY31, you have to careful in the dark here as there are ranges on the approach.
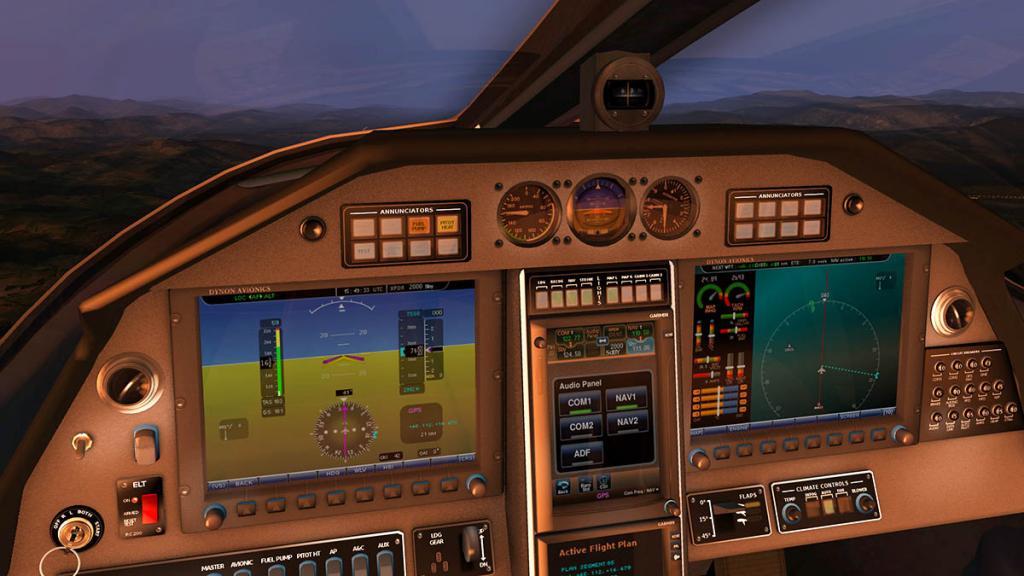

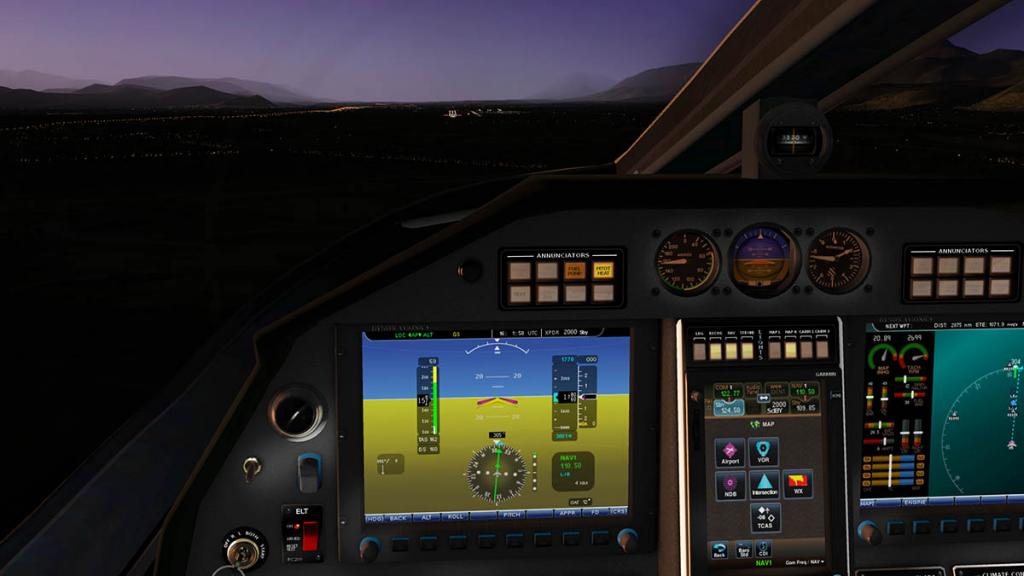

I wanted to use Ljubljana MDB (MG 296mhz) as the turn for my approach but gave up because I couldn't tune it in, I found it later on the ground. On the PFD the vertical ILS bar switches on for use. APP armed and I was soon aligned with RWY31 ILS (117.20) it is recommended to sort your flaps and speed out ready before collecting the slope. If you drop 45º during the ride in it may take you up out of the beam and to lose it. Coming out of the beam the flare was very good with a good throttle setting and again use the throttle to settle the aircraft. No airbrakes but the aircraft soon bleeds off the speed to use the effective brakes.

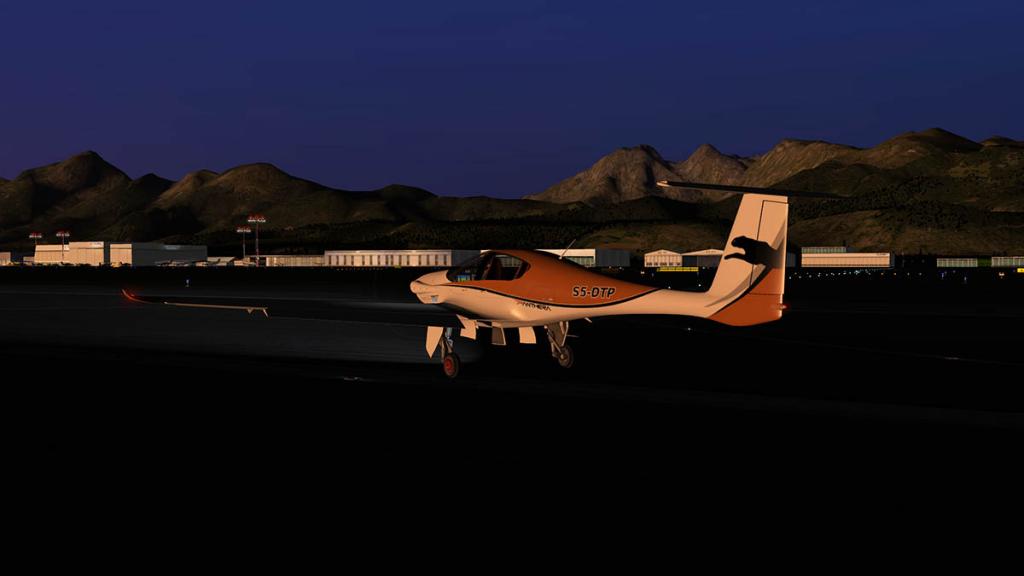
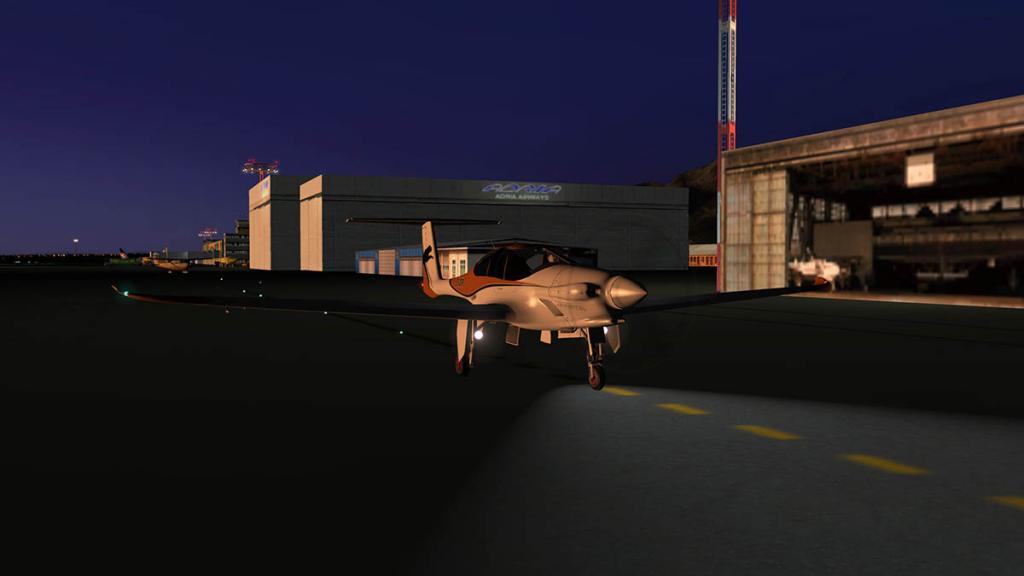

A taxi back to the hangar with the twin landing lights showing the way and shut down. You have to admire Pipistrel in doing such a innovative project like the Panthera, It is no easy task to create an aviation manufacturing business in this day and age, and do it so well as they do here. For a small country Solvania should be proud of this little company's achievement. One last feature of the Panthera is a safety feature... An emergency parachute!
So the engine gives out? what to do?.. well pull the big red handle above your rear passengers and a parachute will glide you back to safety...
So my Solvanian adventure has come to a close and it is time to catch a late flight out. But for a moment I look out at the mountain range in the distance and Austria is only over there as well. No doubt I will return.
Conclusions
Harranssor has done a great aircraft here. If you liked his Diamond DA-42 then you will love this. It is very modern and flies very differently than the usual Cessna or Piper. It is very complex on first viewing, but the manual is excellent (In Eng & French) and Mario Donick has done an excellent set of tutorial and charts , (there are real manuals for the GTN and Skyview panels included as well). The Hi-Def liveries can push your VRAM over the 512mb limitation if you computer is low on VRAM, this makes the frame-rate struggle (Low Def-Versions are available for 3 liveries). You really need to read and cross-reference the manuals to understand the menu system before flying the aircraft. In the end I found myself working them better than when I started. But they can keep your head in the screens for periods of time as the required items can be seemed to be hidden in menus under other items. If you are hunting around you can easily lose the sense of time. Once sorted the Panthera is an interesting aircraft to fly, and at its best when wanting to cover fair distances over 500nm. The panels are however excellent and the centre Garmin GTN Panels are easy to use and access and provide a lot of information.
Overall for the price it is excellent value and as noted the Panthera is an interesting aircraft to fly. If this Pipistrel is the future of General Aviation flying? If it is then it will be an interesting future for aviation. For simulator pilots that future is here now with this aircraft.
______________________________________________________________________

Yes! the Pipistrel Panthera by Harranssor is now Available from the X-Plane.OrgShop : Pipistrel Panthera
Price is US$19.95
Installation : Download is 231mb, and installation size in your aircraft folder is 282.10mb. You can change over "Black Panther (LowDef)", "S5DTP (LowDef)" and "White Panther (LowDef)" from the Hi-Def liveries.
Documentation :

Support: Pipistrel Panthera
Review By Stephen Dutton
26th January 2014
©copyright 2014 : X-Plane Reviews
Technical Requirements:
Windows, MAC or Linux. X-Plane 10.20 or higher - 32 and 64 bit compatible. (X-Plane 9 not supported)
Current version: v1.01 Last updated: January 21st 2014
Review System Specifications:
Computer System:
- 2.66 Ghz Intel Core i5 iMac 27”
- 6 Gb 1067 Mhz DDR3
- ATI Radeon HD 4850 512mb
Software:
- Mac OS Mavericks 10.9
- X-Plane 10 Global ver 10.25 (final)
Addons
- Saitek x52 Pro system Joystick and Throttle
Scenery
- LJLJ Ljubljana-Brnik - xflusi (.org LJLJ-Ljubljana-Brnik 1.1) - Tech note: I removed the heavy photo underlays to save VRAM and as it looks better
- LJPZ Portorož Airport - Aerobridge (Aerobridge)

-
There is also another flight-planner out there. Not specific for X-Plane, however it can be used for it:†. If I have to pay money could this also a good alternative?
Windows only... So its useless for a Mac user. Very expensive as well.
-

Aircraft Review : Alabeo PA-38 Tomahawk II
Route : YROM Circuits
We all start our flying career somewhere. 95% percent of the time it is usually in a very lightweight aircraft or if you are really serious a trainer. Usually trainers are two seats (one for you and one for the instructor) and the controls are very basic and clutter free. The main aspect of a good trainer is perfect balance, spin recovery and power. Most learners usually have got their wings on a Cessna 150, 152 or 172, but one of the very best trainers around is the Piper PA-38 Tomahawk.

Piper Aircraft wanted to share some of the trainer market, and so consulted many flight instructors not only in the design of the aircraft but also in the testing. The result was the Tomahawk, a T-Tail, two-seat, fixed tri-cycle undercarriage aircraft that has exceptional spin recovery that was better than the current standard bearer the Cessna 152. The first flight and introduction was in 1977, but it was noted as a 1988 model. The aircraft was highly successful with 2,4854 built when production ceased in 1982.
Besides being a widely used primary trainer, it is also an effective budget cross-country aircraft for two persons with its spacious and comfortable cabin. Though it shares similar performance and costs of operation to the Cessna 152, the PA-38 has more shoulder room. It also has good cabin ventilation, using automotive-style air ducts. The 1981 and 1982 models were designated as the Tomahawk II (this version). They incorporated improved cabin heating and windshield defroster performance, an improved elevator trim system, improved engine thrust vector, 100% airframe zinc-chromate anti-corrosion treatment, better cockpit soundproofing, larger 6" wheels and tires for greater propeller ground clearance and improved performance on grass and dirt runways.
Specifications : Maximum speed: 126 mph (109 knots, 202 km/h) at sea level : Cruise speed: 115 mph (100 knots, 185 km/h) at 10,500 ft (3,200 m) (65% power) : Stall speed: 56.5 mph (49 knots, 91 km/h) (IAS), flaps down : Range: 539 miles (468 nmi, 867 km)at 10,500 ft (3,200 m), (65% power) : Service ceiling: 13,000 ft (4,000 m) : Rate of climb: 718 ft/min (3.65 m/s)
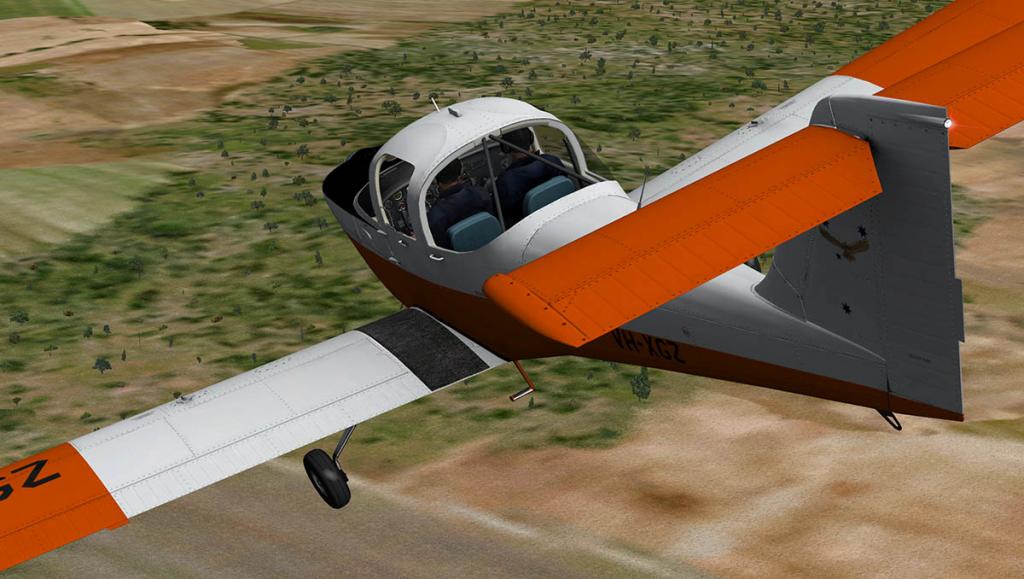
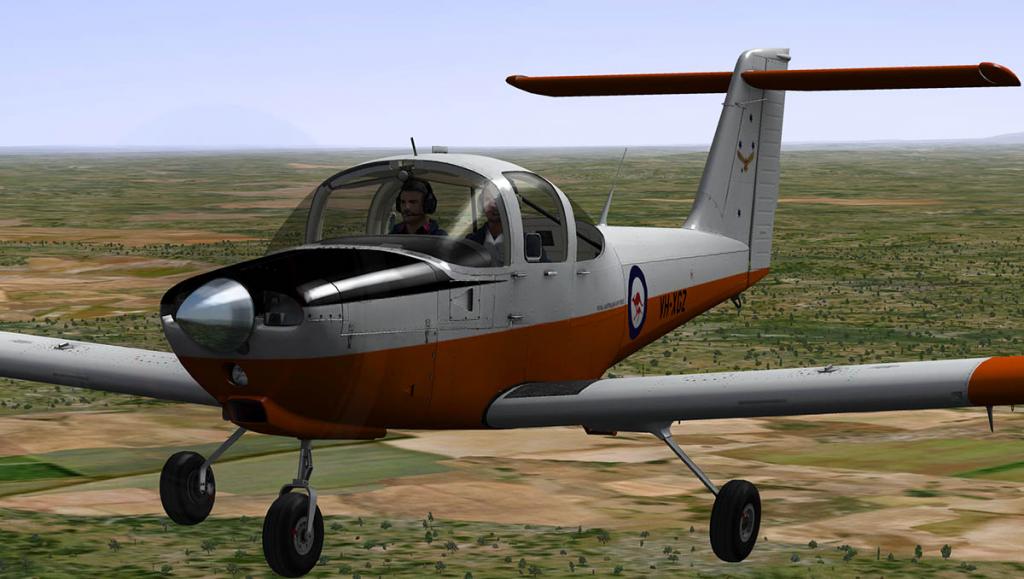
Alabeo has released the PA-38 Tomahawk. This is another quality aircraft from the Alabeo team. For its age the Tomahawk looks very modern for a non-composite machine. There are a few Tomahawks in Australia, but none flew with the RAAF (Royal Australian Air-Force) but I like the livery.
First hands on and you quickly realise this is a very sweet aircraft to fly. It is the sort of machine that with a slight trim you can steer though the rudder pedals and just revel in the balance. Hands back on the yoke and the aircraft will do anything you want with just a slight input of movement in the direction you want to go, even downwards. The throttle response is in perfect relationship with the controls, so you find the aircraft so very easy to fly. You could sit your elderly grandmother in the pilots seat and show her the controls, and I am quite sure she could fly the Tomahawk quite easily. (what do I do now dear?)
I doubt though you would want your grandmother to go into a spin. Here the aircraft is exceptional, The Tomahawk's GA(W)-1 Whitcomb airfoil addresses this requirement by making specific pilot input necessary in recovering from spins, thus allowing pilots to develop proficiency in dealing with spin recovery. And because of its stall and spin characteristics, the PA-38 earned the nickname "Traumahawk" from some pilots and instructors. The PA-38 is powered by a single Avco Lycoming O-235-L2C air-cooled flat-four piston engine, 112 hp (83.5 kW) that is required for its power to train pilots on the specifics of the important stall and spin recovery aspects of flying.
First of all the Tomahawk climbs exceedingly well, It can easily pull seven hundred feet per minute to get you to a safe altitude.
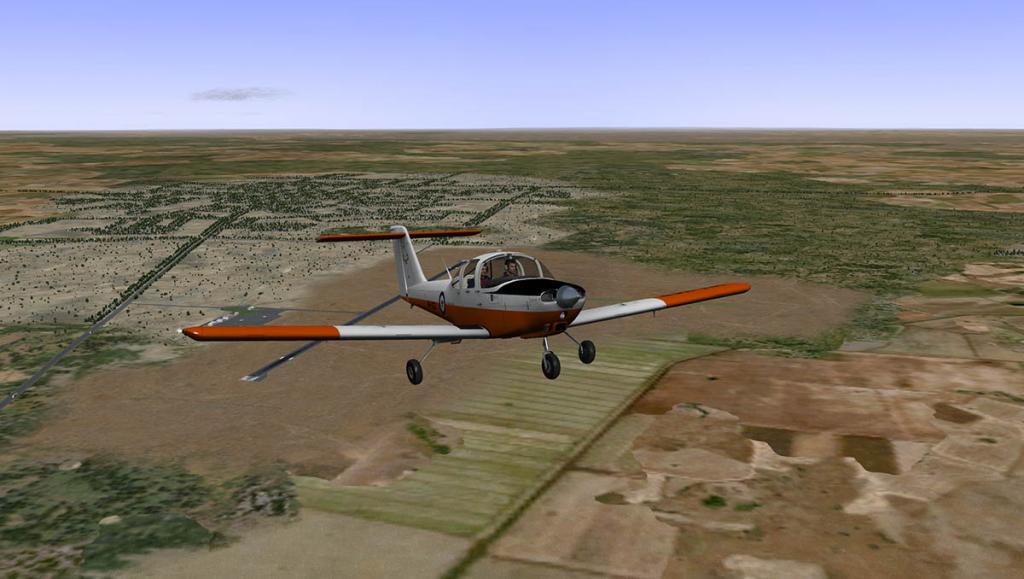
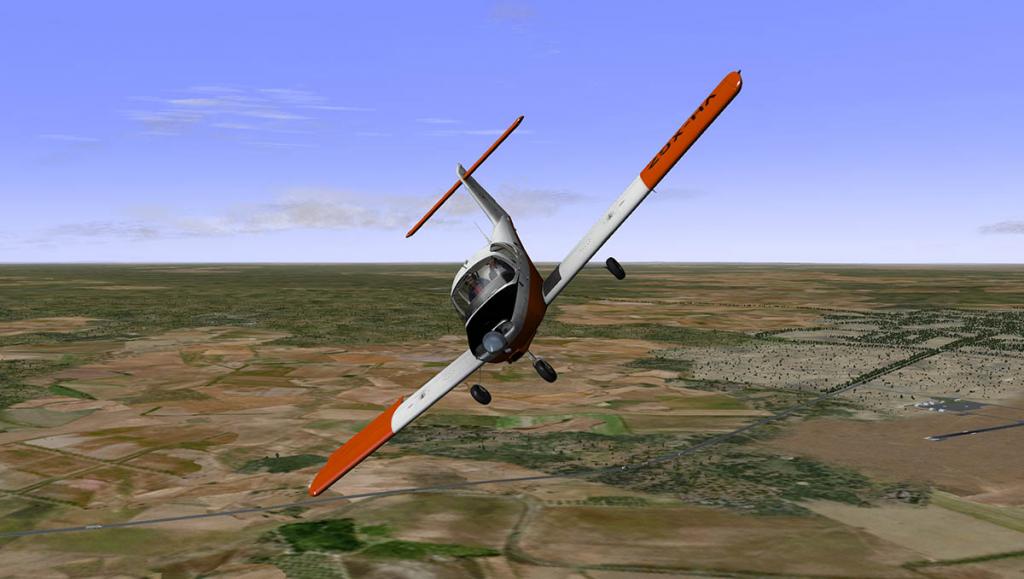


Slip the wing and put yourself into a bad spin. With ease you can bring in the strong power to pull yourself out of the spin and simply back into a near level flight. Impressive.
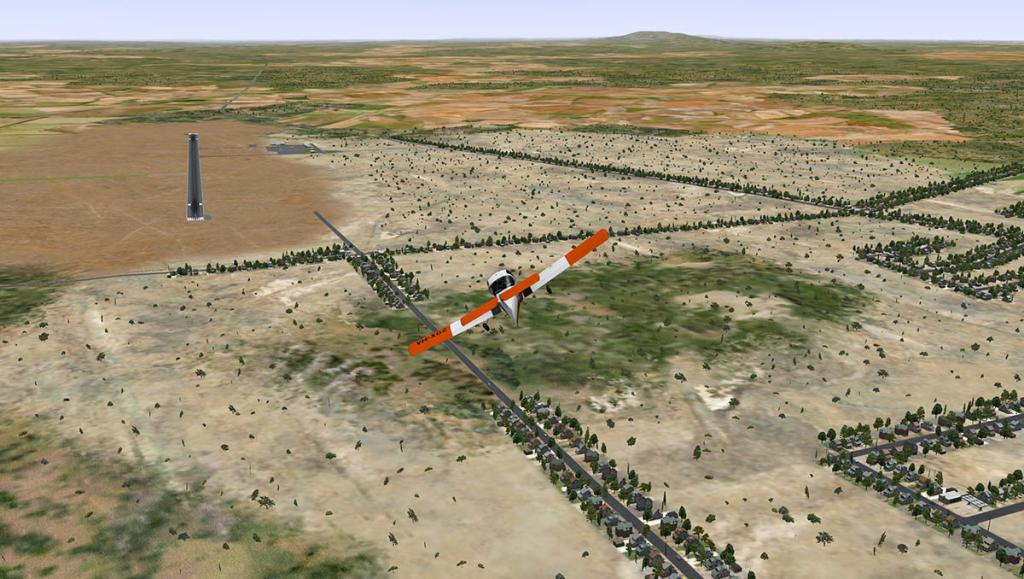
You can see why the aircraft is a very nice long distance tourer as well. It will power along all day without you fighting the aircraft and so you barely don't tire at all. There are no Auto-Pilot functions but you don't need them here either. A little trim and your happy.
Landing is a breeze as well, The landing speed is super low at around 75knots (stall is at 50knts). Even dropping the flap (twice) barely makes a ripple if your power setting is right.
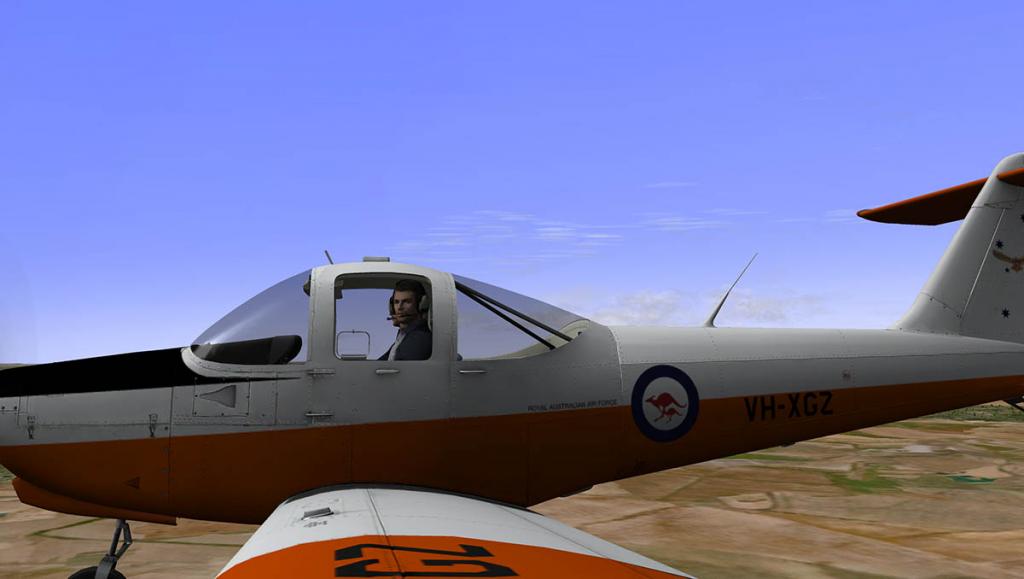
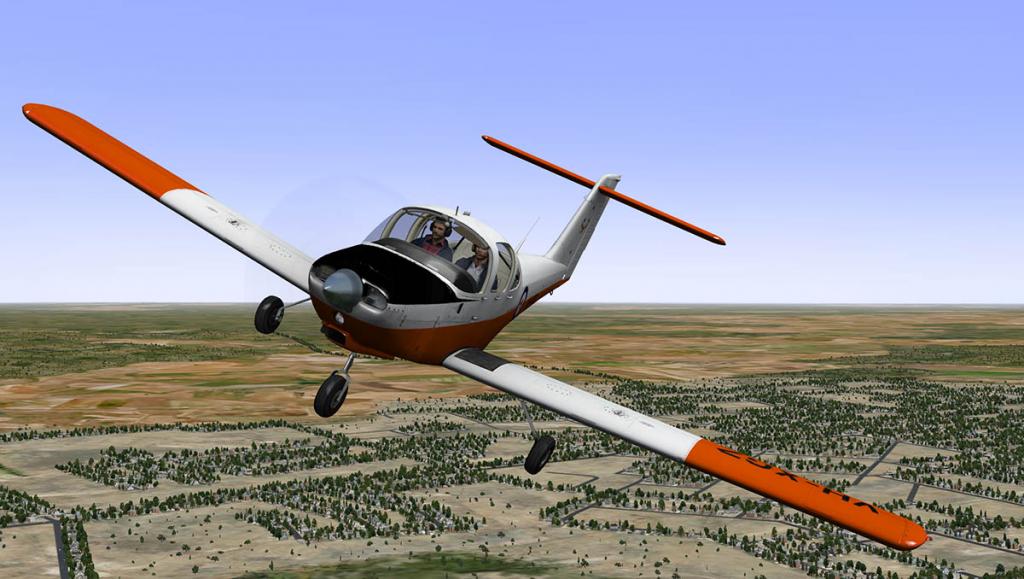
A quick look left at the airport and you can make your smooth turn. There is a slight cross-wind that I have to correct for, but otherwise the touchdown is just a small bump and touch of rubber.
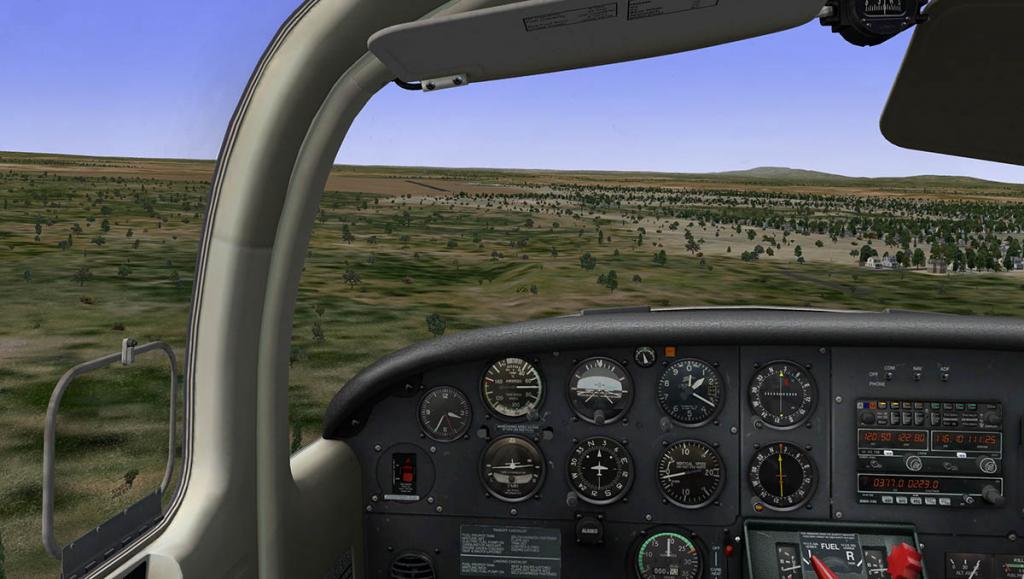
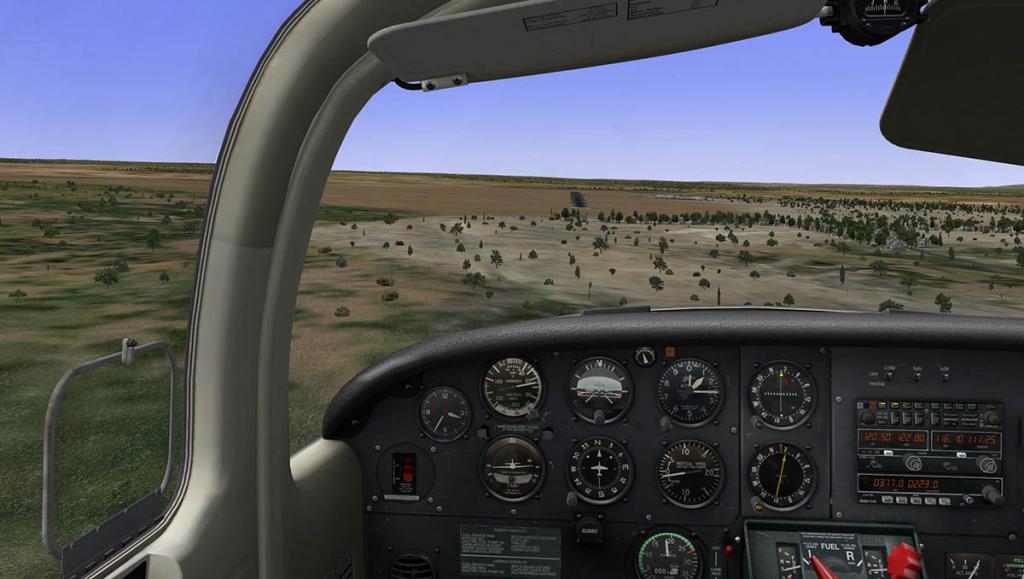

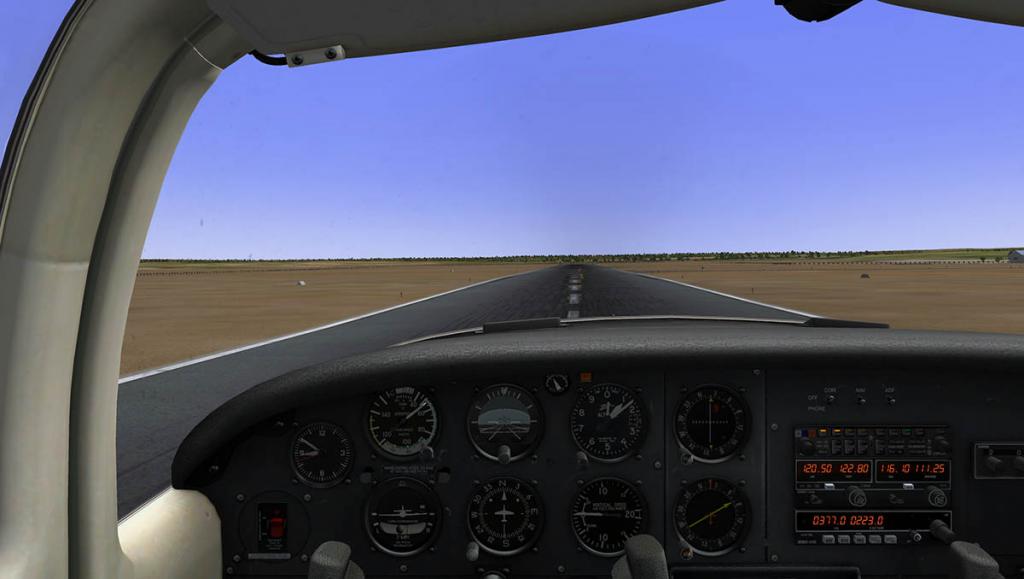
The aircraft is very good at touch and go's, even with full flap you can be quickly back into the air to go around for another practise.
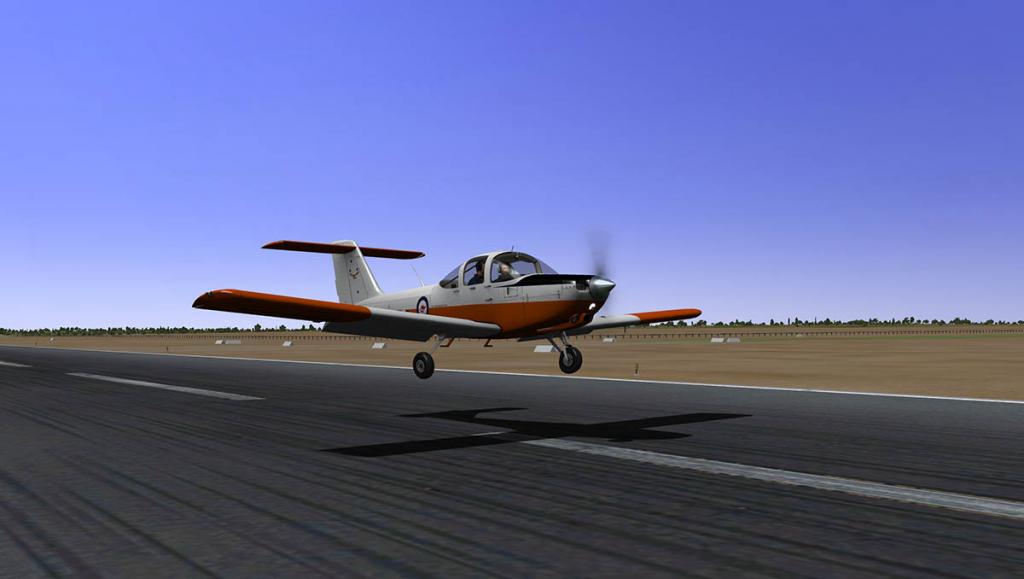
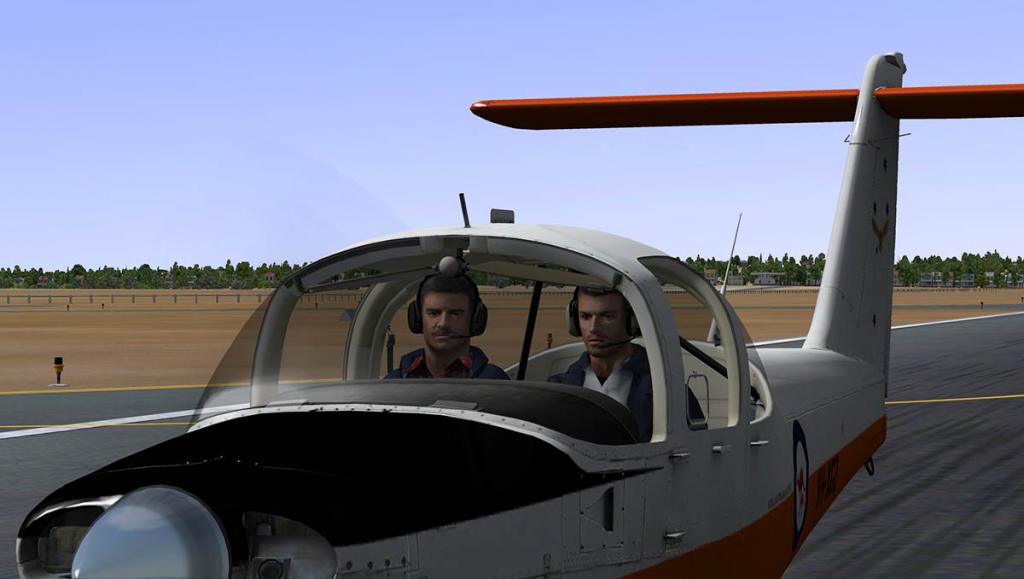
Our Trainee looks quite pleased with himself.
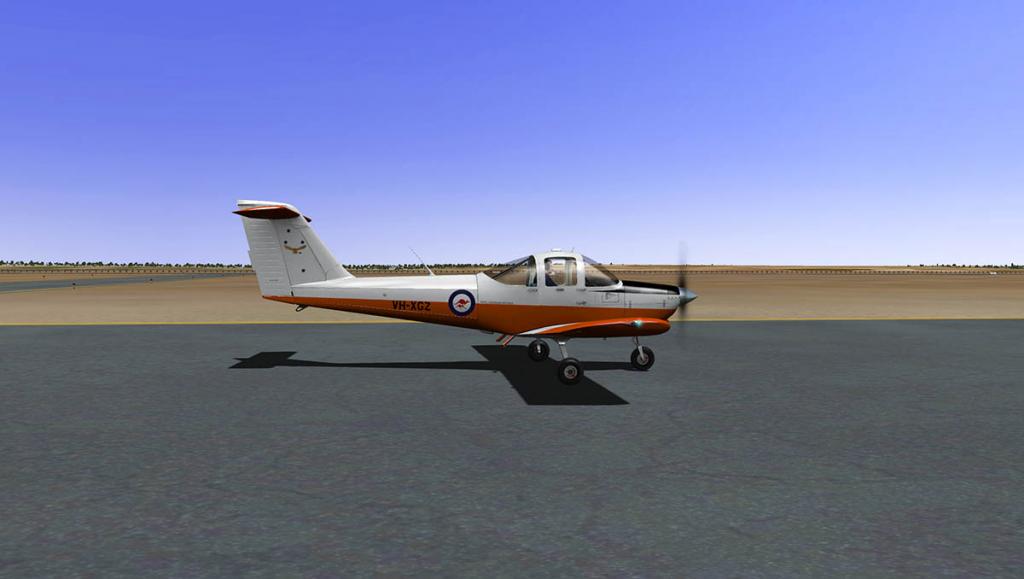
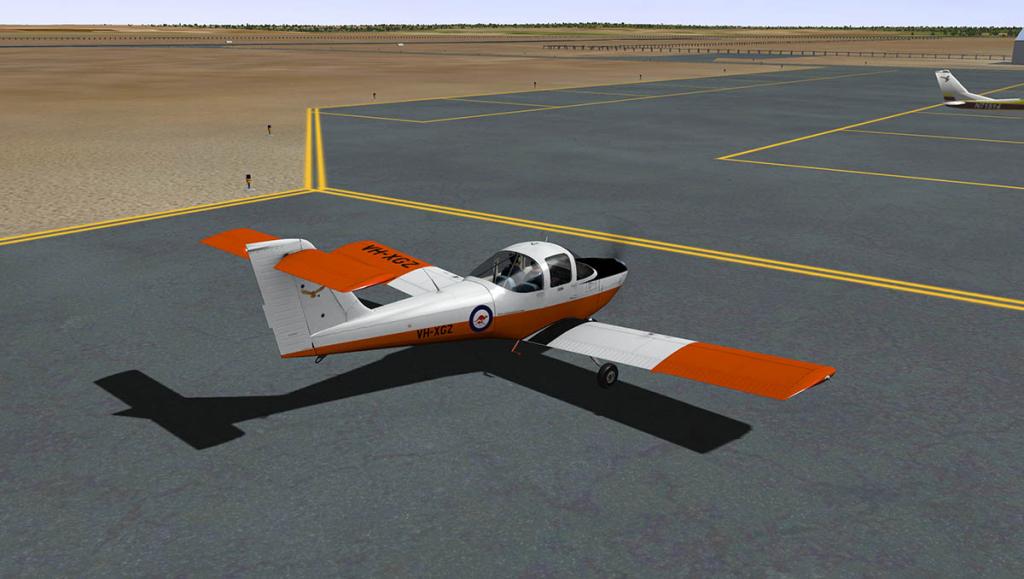


Alabeo PA-38
The gap between Alabeo and aircraft from Carenado is closing certainly, Not only in price but in quality. This aircraft is more in style of a Carenado in every form. The design and detail is better now than ever before and that is even by Carenado's high standards.
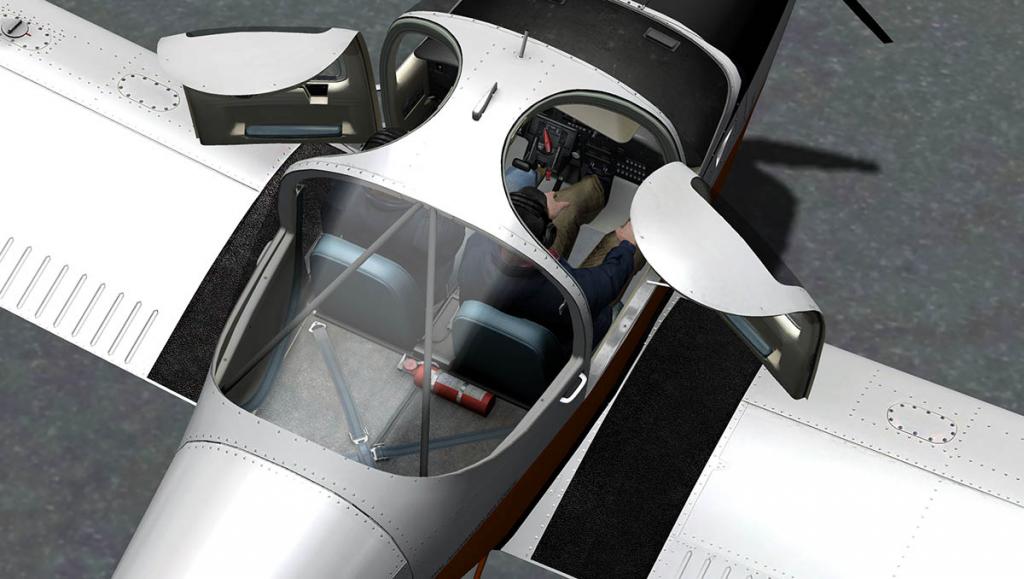
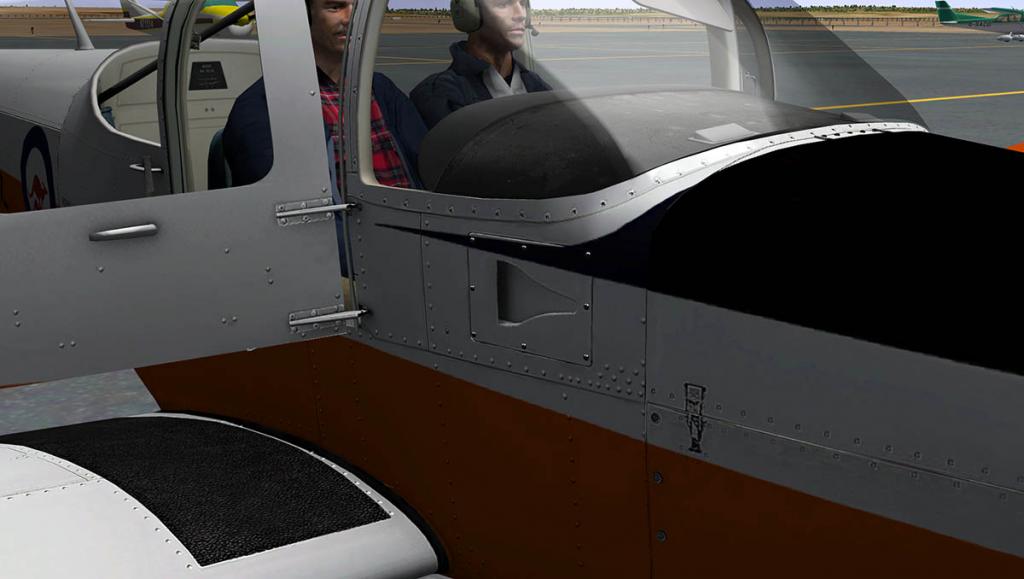
It is sublimely good in the way the rivets are completed and the panels hang on the airframe, The NACA duct is a prime example and so are the door hinges. The opening doors (Both Pilot's and Instructor doors) are wonderfully designed in the way they pull away from the roof section. The detailing behind the seats in the small baggage area with support struts Is also perfect. The main attention must be given to glass and their reflections, it is about as real glass as you could get. The shading is breathtaking but the detailing is more skin deep as we will see in the dark. The wings and high (T) tail section ribbing is also absolutely first rate.

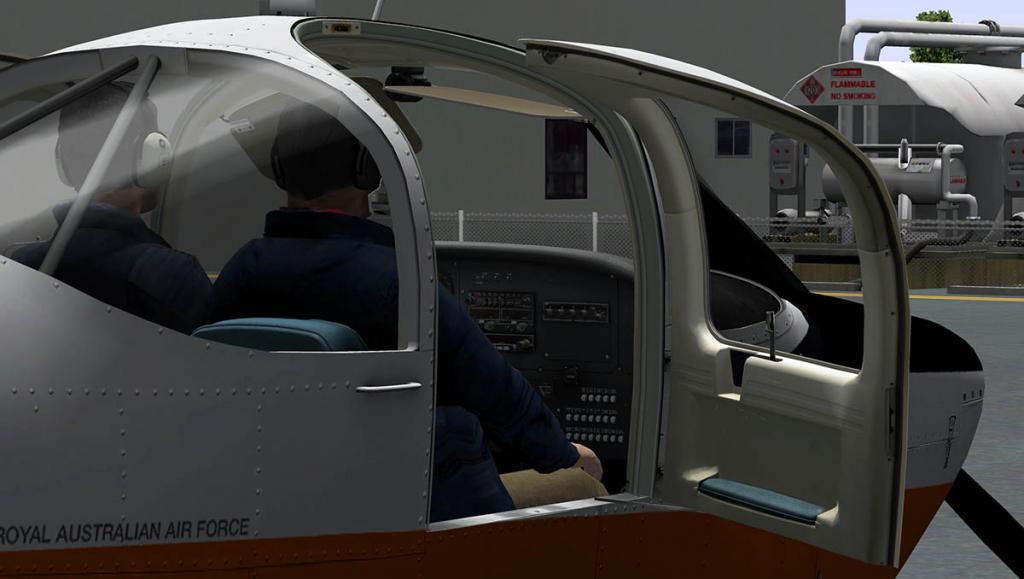
The propeller has some volumetric side view and dynamic shine effects. Put the aircraft into a low mixture setting and the shimmer of the low speed rotation is excellent., Undercarriage. Front and main is very simple in just struts, but the detail is excellent right down to the nuts on the brakes. With open doors you can see the excellent door detailing and the interior of the cockpit. Every area is well designed and textured.
Cabin and Panel


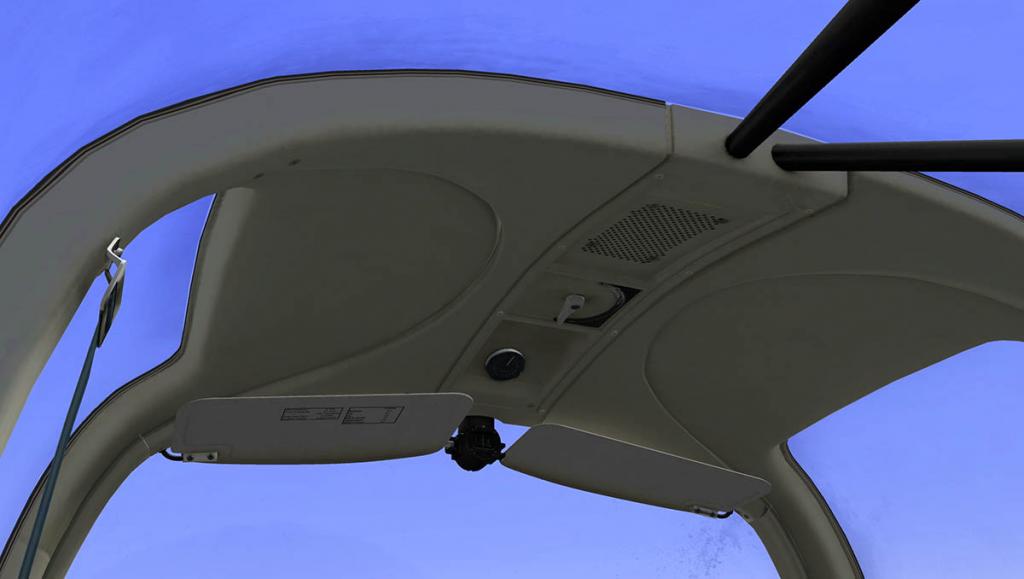
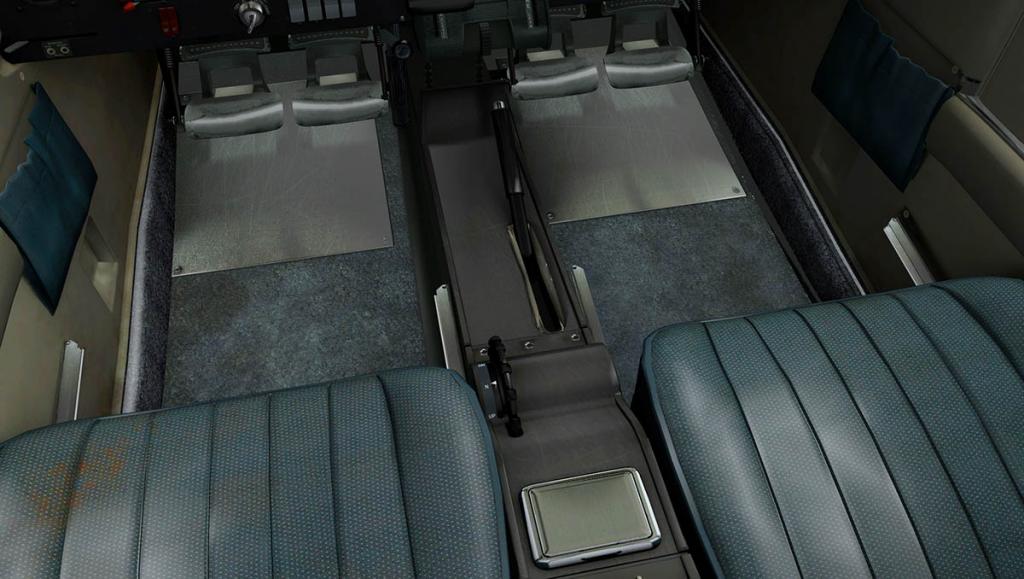
Inside the unpowered cabin the quality is again excellent, This Alabeo doesn't have that usual signature black hole as you look down towards the worn seats, carpets and metal heel scuff plates, The little trim wheel is expertly crafted and wonderful to use. The twin blinds are fully movable around both the front and side windows.
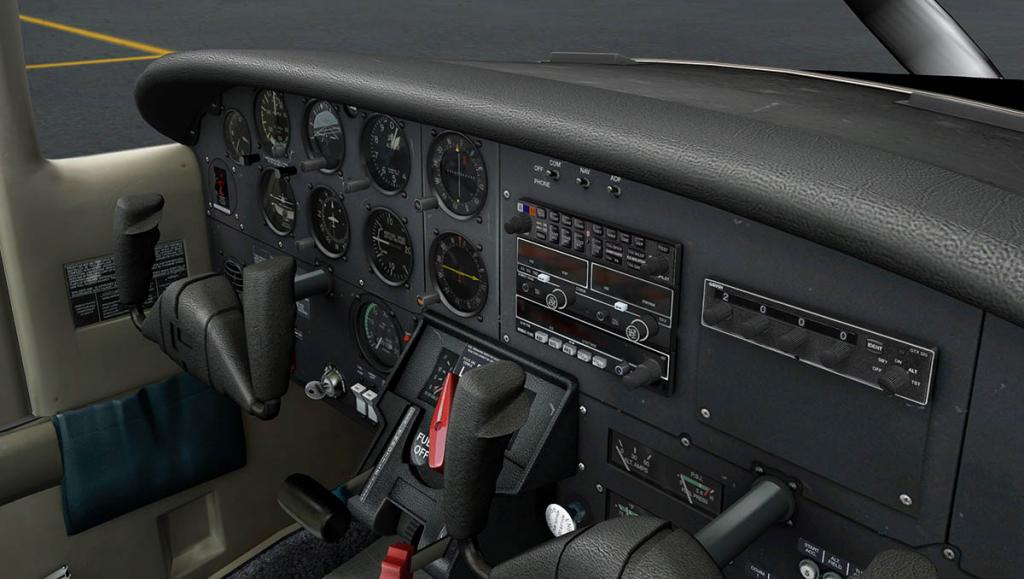
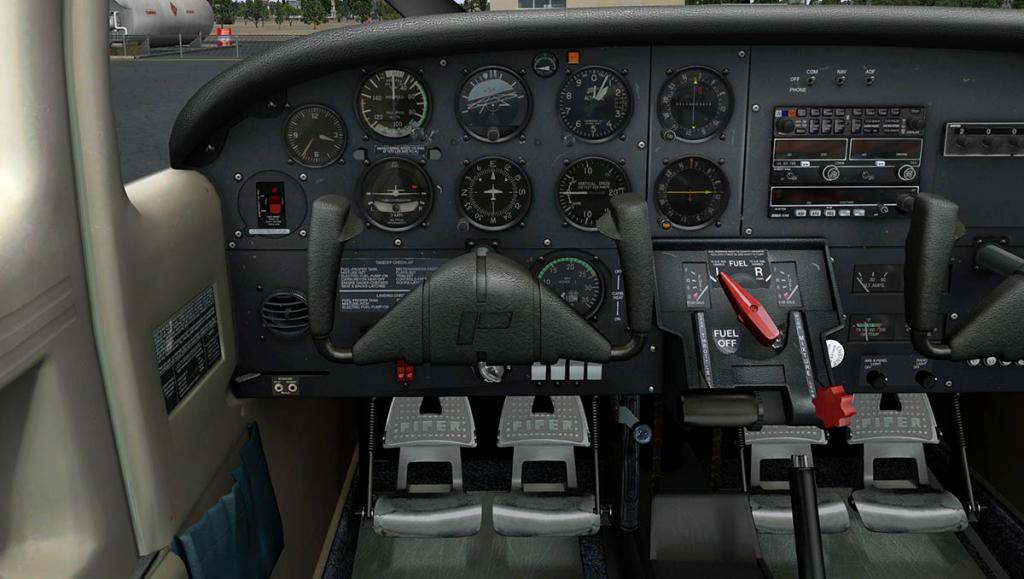
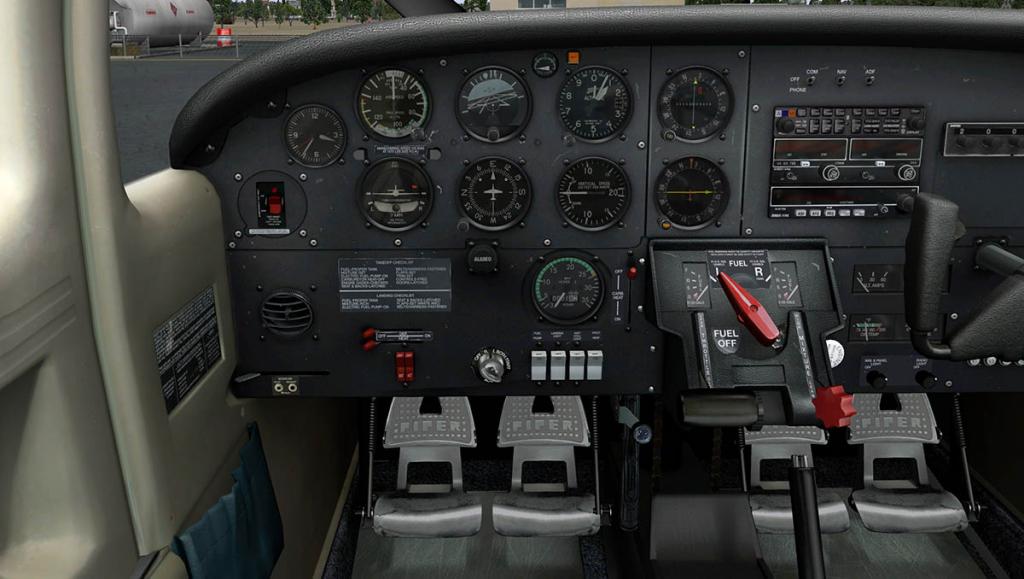
The glareshied textures are so real and touchworthy that you can easily smell that 70's vinyl. And you easily want to put your hands around the lovely chunky yokes with thumb tabs. It does not take much imagination looking here to know what the real Tomahawk would smell and feel like. A nice touch is that when you hide the yokes the "Alabeo" icon fills the hole.

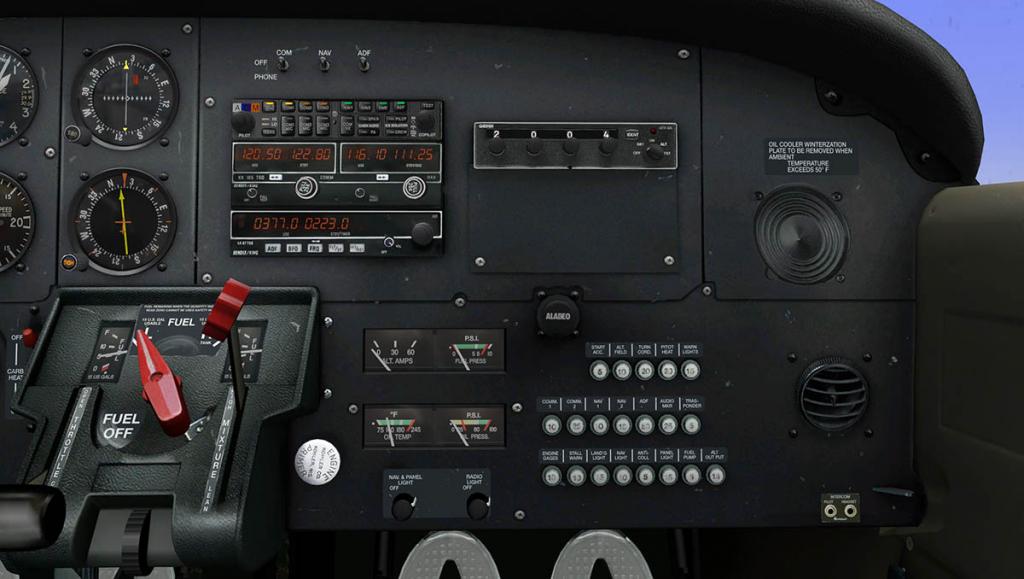
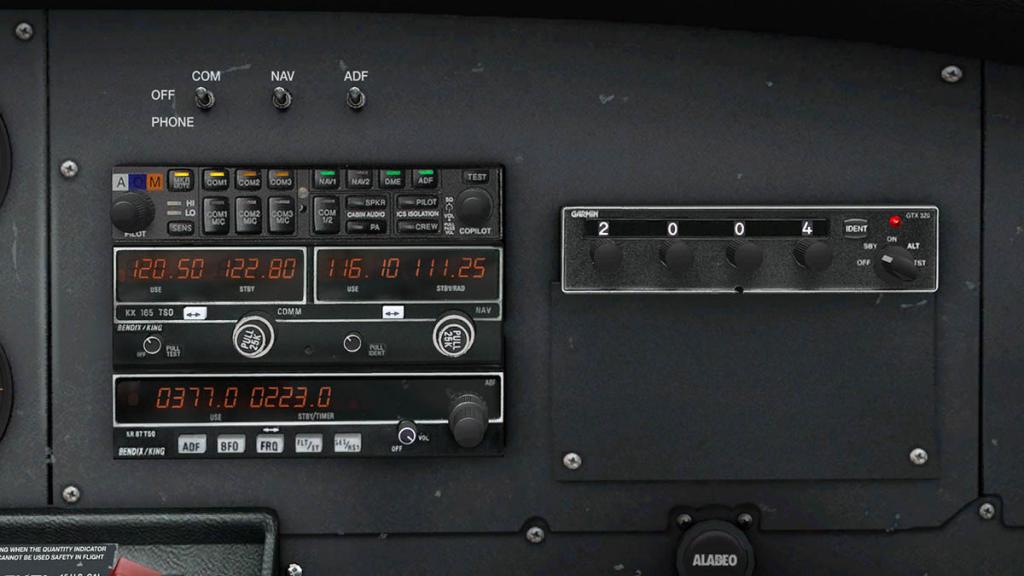
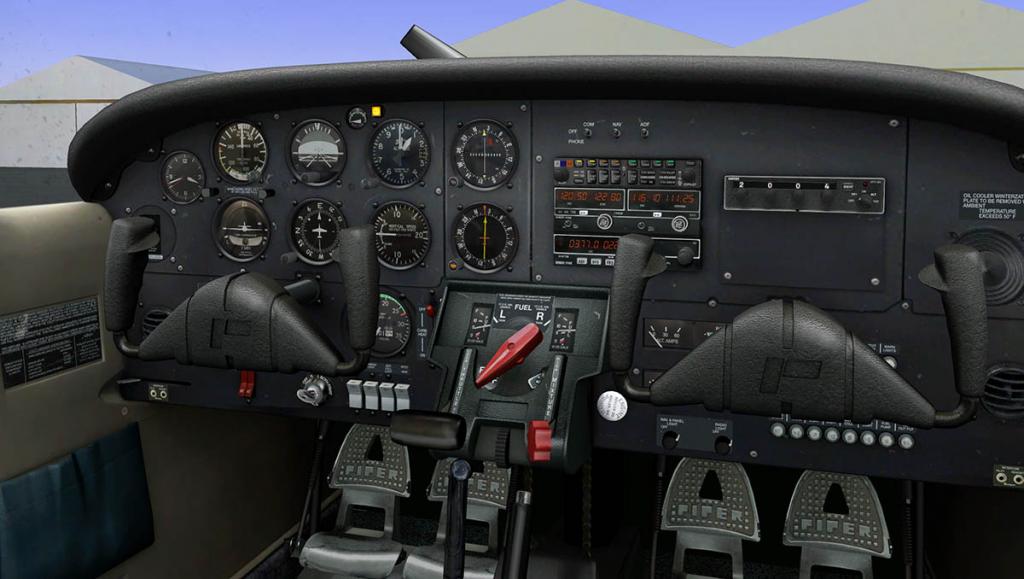
Being a trainer then the panel is going to be very simple. It is but with a quality feel. The standard six instruments are added (to the right) by a VOR (2) The Omni-Bearing Indicator (OBI) and Automatic Direction Finder (ADF) bearing indicator, Below is a engine RPM and hours insturument and clock on the far left. 70's rocker switches for main power (battery/ALT), lighting and Pitot heat and Fuel pump. The fuel pump is interesting in that turn it on and then move the (big Red) Fuel switch on (or off) and the pressure shows on a gauge.
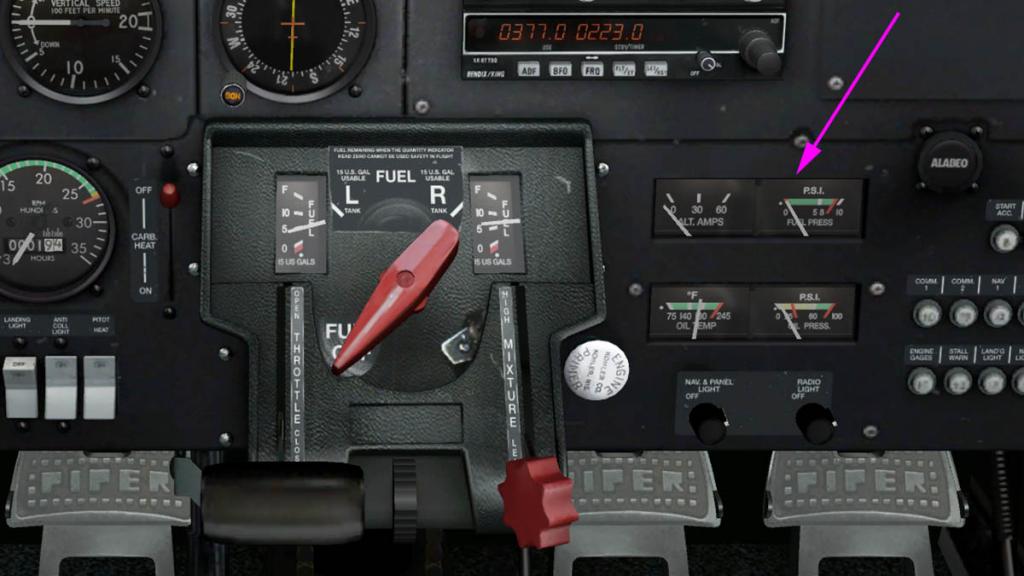
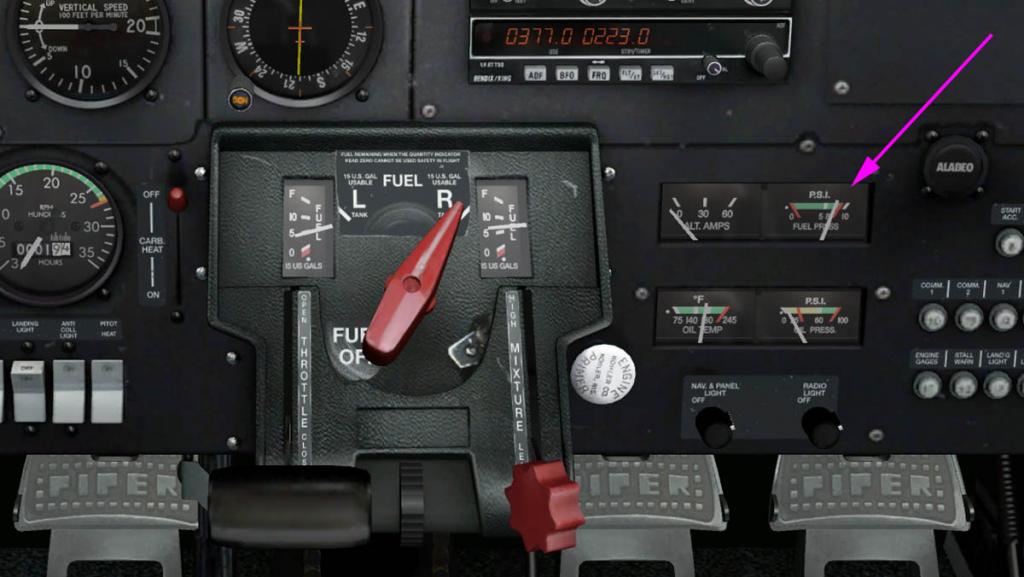
You can select left and right fuel tanks here also.
The radio stack is small but efficient, Standard radio set is set with a Bendix/King KX 165 TSO for COMM and VOR(2) settings, a KR 87 TSO is your ADF. (note a Technical Standard Order (TSO) is a minimum performance standard issued by the United States Federal Aviation Administration for specified materials, parts, processes, and appliances used on civil aircraft.) A Garmin GTX 320 is your transponder. It may seem a small stack but it is quite capable of navigating you across the country.
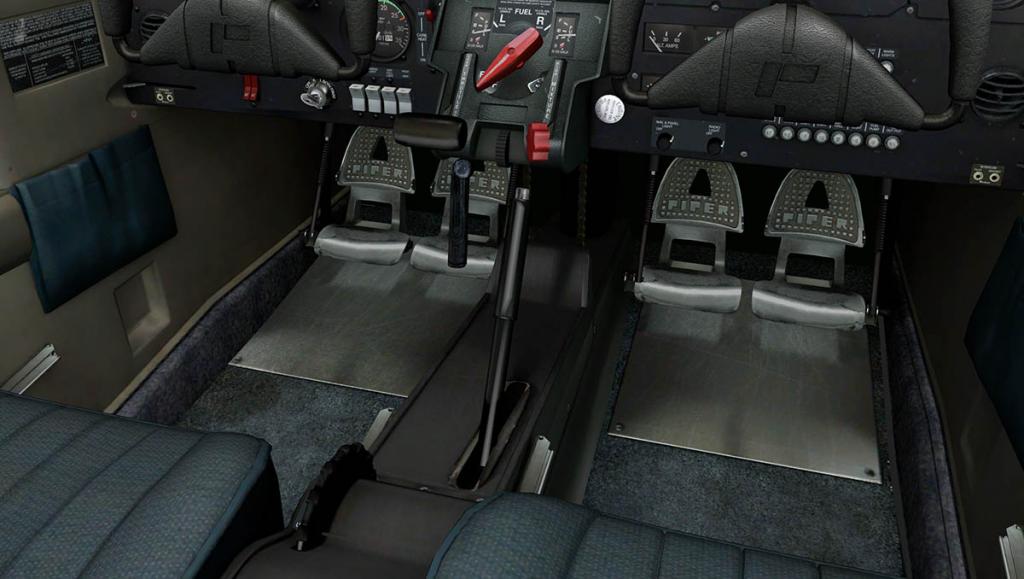


The two position flaps are used via the long stick that like looks like a standard car parking brake, The actual park brake in under the panel. Note the beautifully crafted rudder pedals.
The night-lighting is best seen from the air, A quick flick of the key and the engine stutters back into life, You actually have to hold the key on for a while until it finally chuggs into life, as only quick key turn will not give it enough time for the starter to give enough turns to fire it right up.
Sounds are excellent in the same as Carenado 3d directional sound, There is quite a throaty power feeling at full under load power.
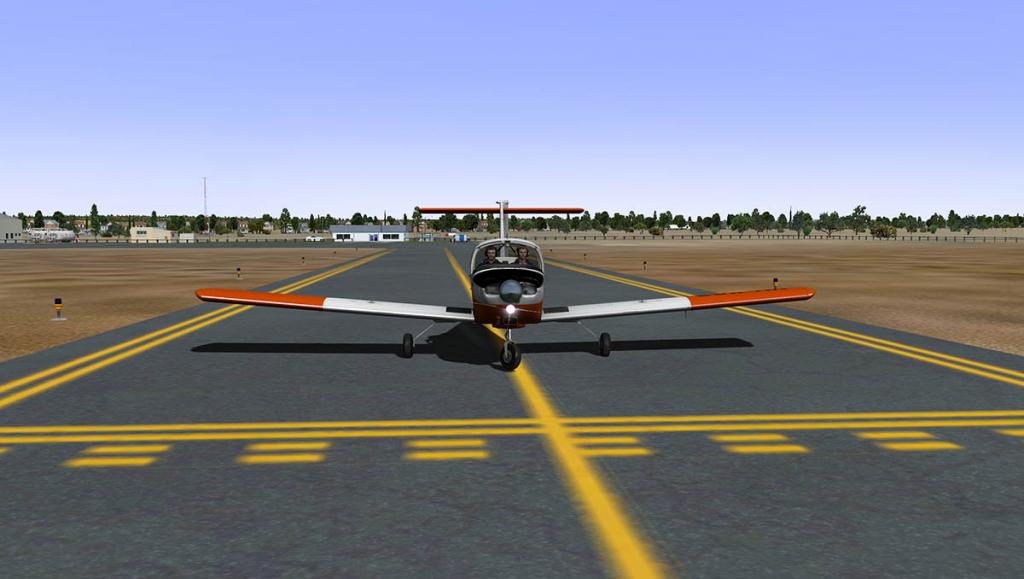

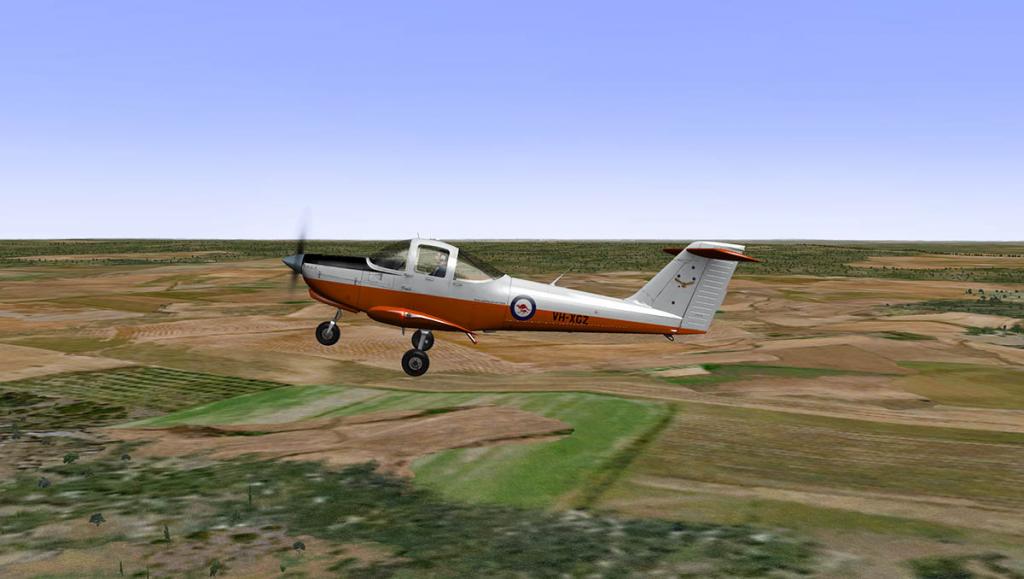
Only issue I found was with the front turning wheel, It doesn't turn cleanly even at slow speeds, To go straight in the taxi it has to be slightly off centre in that I presume is to counteract the asymmetrical thrust from the propeller which is quite large at slow speeds. When you disconnect the steering from the rudder, It does not do so well there either. So it is slightly odd and hard to manoeuvre around.
Night-Lighting
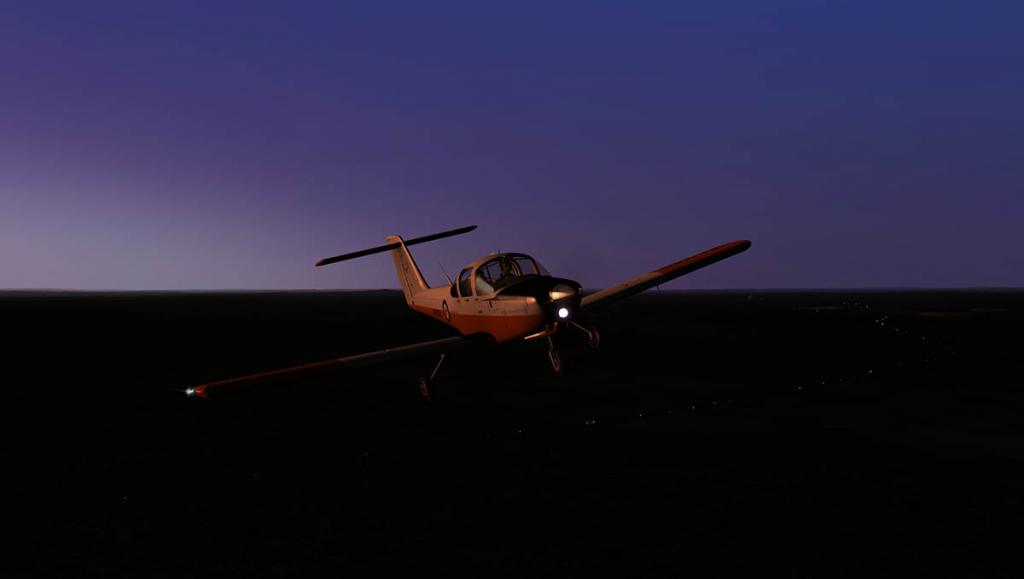
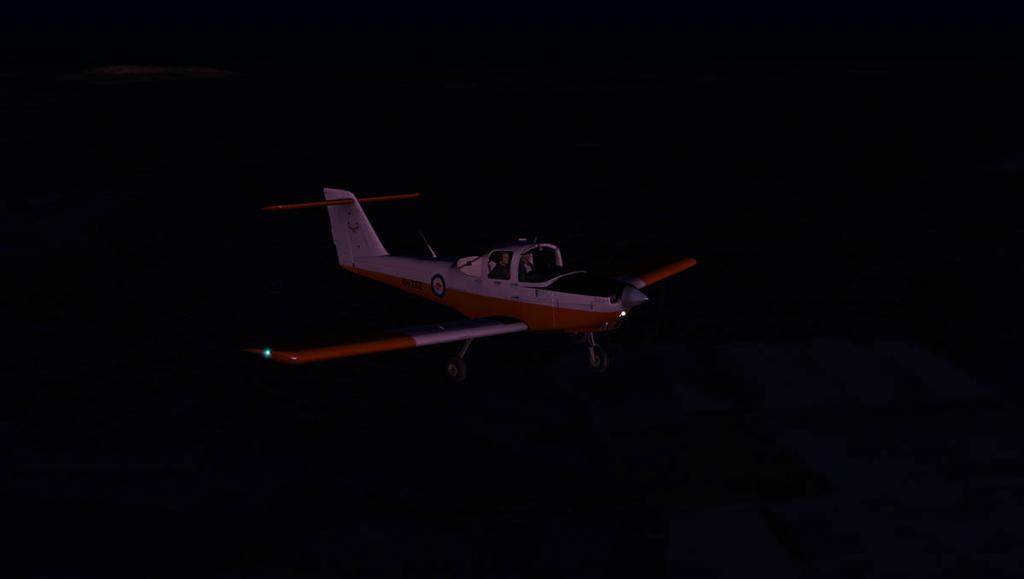
External night-lighting is basic but good, You only have one landing light, and the Nav/Position lighting. The strobes are the new Carenado design.
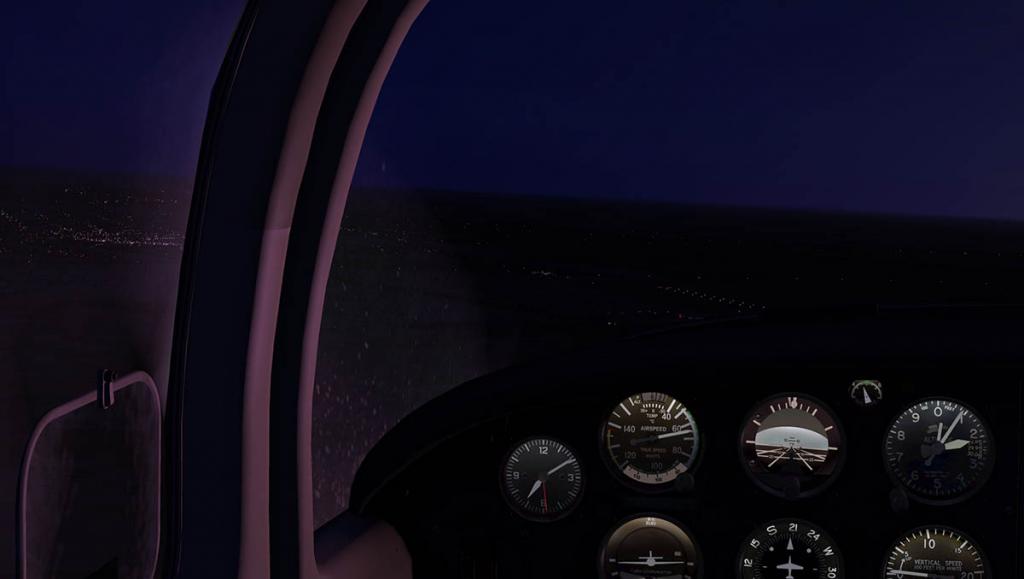

First thing that you notice as the low light comes into the cabin is the reflections on the glass, (side front), It speckles and it is excellent in its reflections of the markings on or in the glass, such detail is amazing, but it makes the flying very authentic.
The dials are well lit and slightly (just up or down) adjustable by the knobs low down on the instructors side. I couldn't find any overhead lighting except for a nicely lit air temperature gauge and a Compass.?
You can with the side menu (O) Options switch the panel lighting to be brighter or lower by the using the reflections options. You can also use this menu to transparent the windows and open both doors.
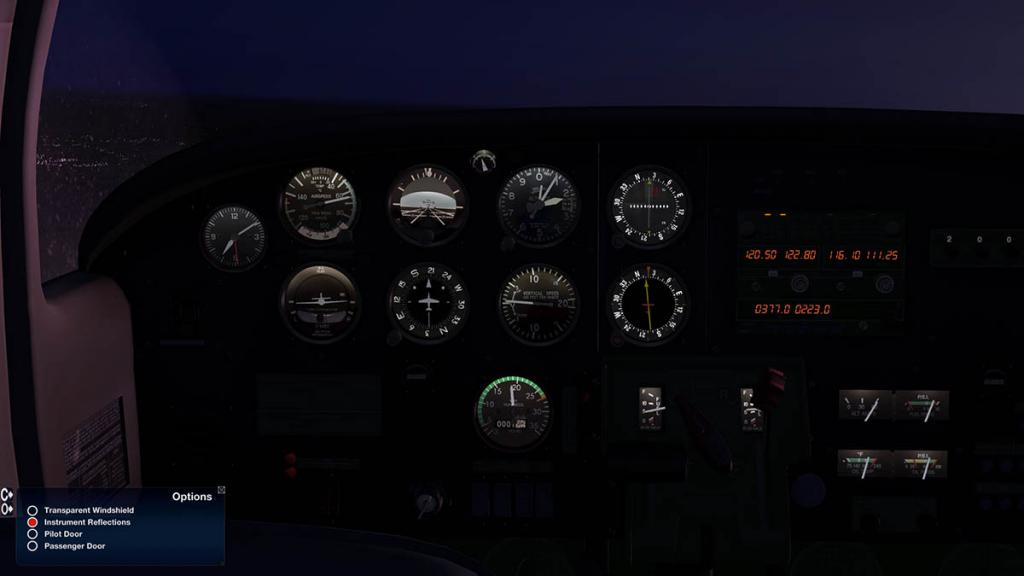

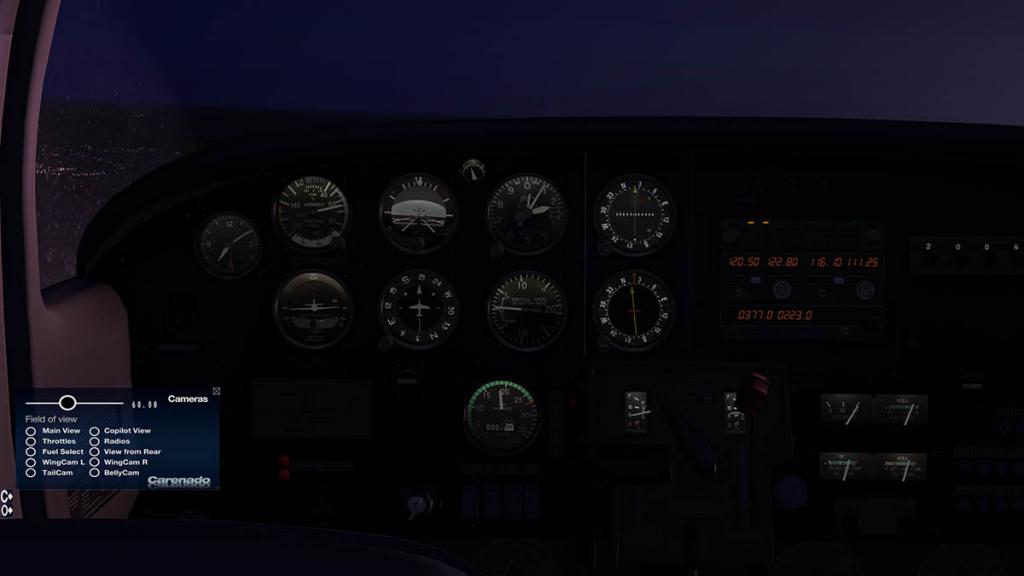
The other © menu is the standard Camera menu, that gives you the various views and zoom function.
Liveries
You get the default white and six other liveries in very high quality HD
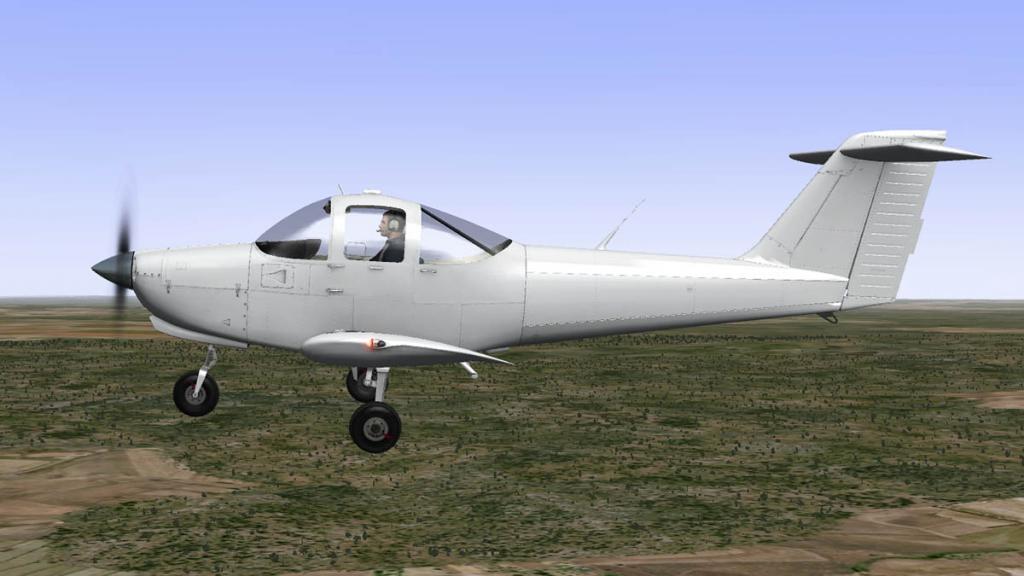

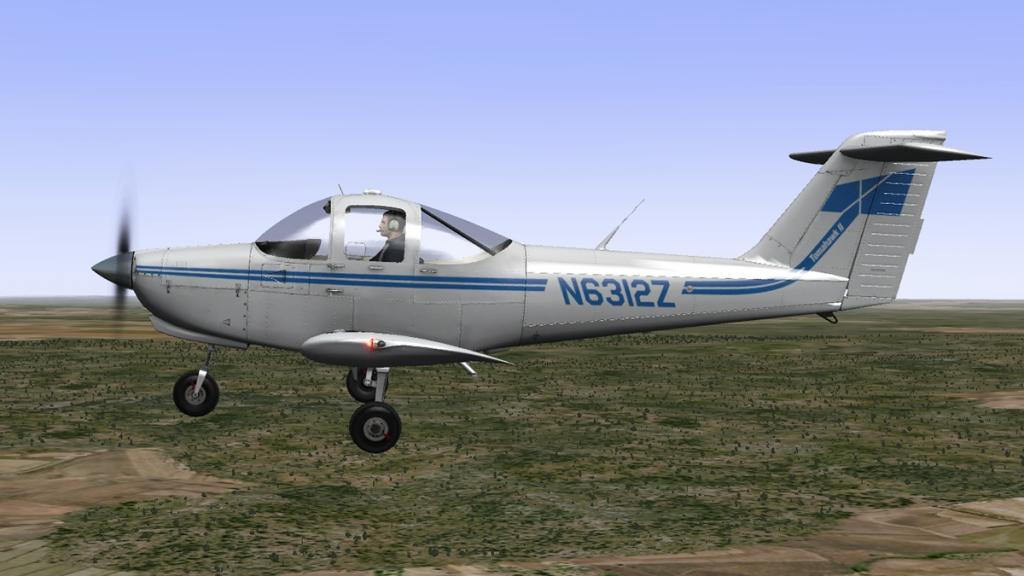
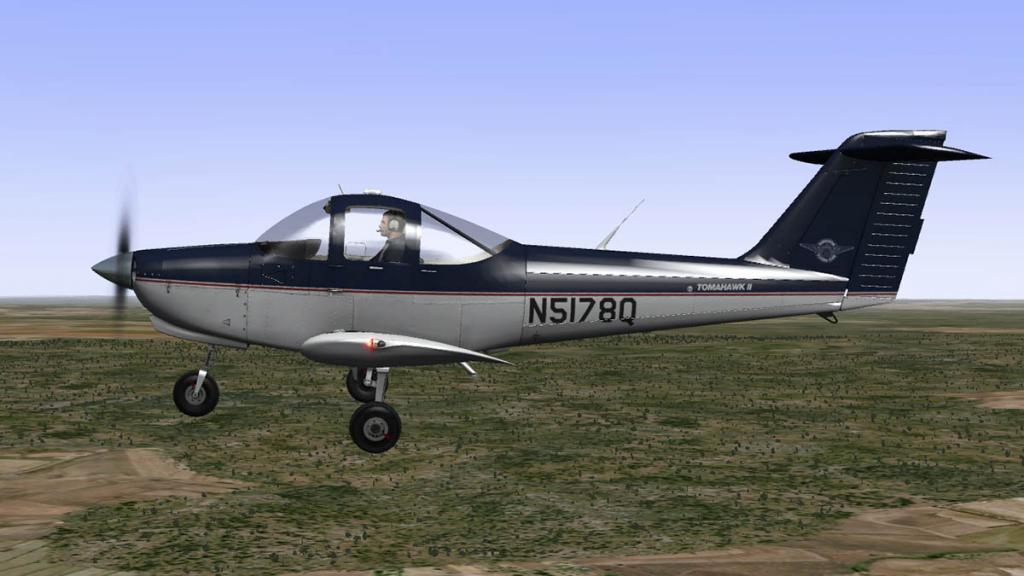
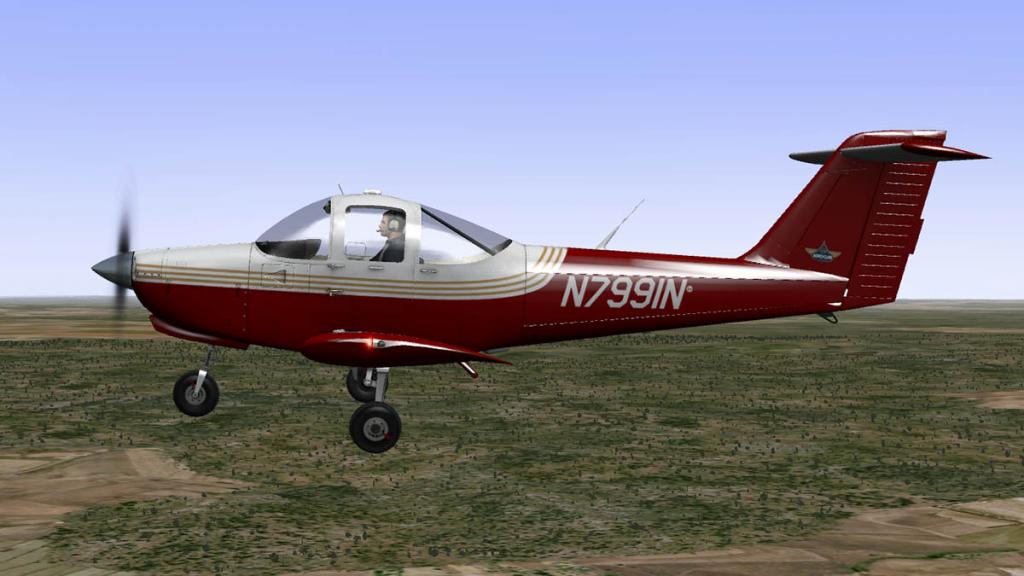

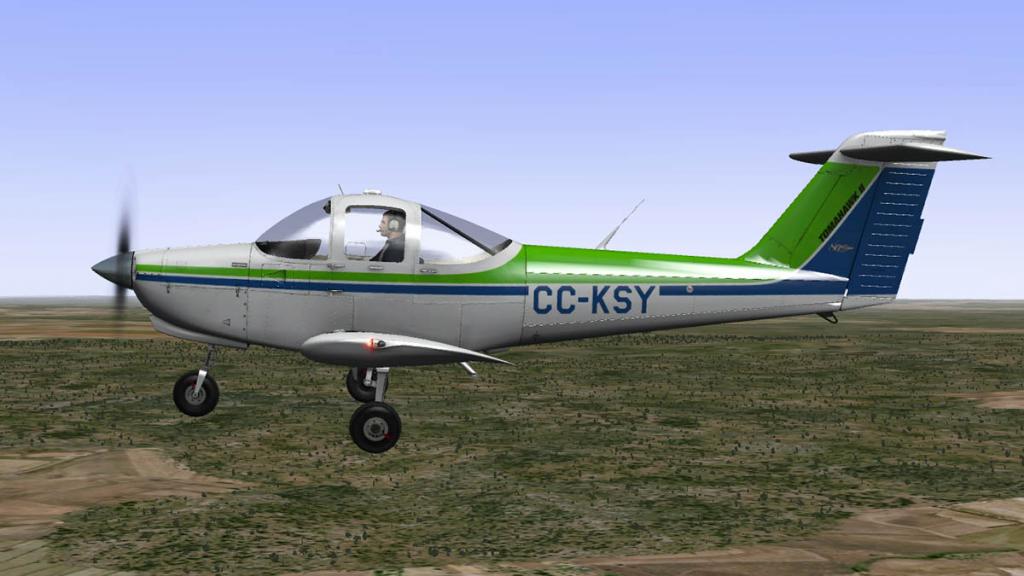
Conclusions
The PA-38 Tomahawk feels more like a basic Carenado than a Alabeo, and the higher price reflects that. Yes it is a basic aircraft, but it is still a fully functional one. Design and detailing is simply first rate (In fact I feel the quality has slightly gone up a notch). The glass here in the aircraft and in their reflections is simply astounding. It is a perfect trainer for the experienced pilot and also the beginner (Into simulation as well). The aircraft can be as easy or as challenging you want it to be, and still you can use it as a two seater tourer across the country.
Some aircraft instantly become a favorite and the Tomahawk became very quickly one of them. I loved it the minute I felt the air under its wings. For value and quality it can't be bettered.
Yes! the Alabeo Piper PA-38 Tomahawk II is now Available from the X-Plane.OrgShop : Piper PA-38 Tomahawk II
Price is US$22.95
Installation : Download is 165.80mb, and installation size in your aircraft folder is 228.30mb. Alabeo supply Recommended Joystick Settings and Recommended Settings X-Plane10. However with my standard settings I had no issues.
Documentation :
Developer Site : Alabeo
Review By Stephen Dutton
22nd January 2014
©copyright 2014 : X-Plane Reviews
Technical Requirements:
Windows , MAC OS 10.7 (or higher) or Linux
X-Plane 10.20 (or higher - 32 and 64 bit compatible)
4GB RAM/1GB VRAM - 250MB available hard disk space
Version 1 (last updated Jan 20th,2014)
Review System Specifications:
Computer System:
- 2.66 Ghz Intel Core i5 iMac 27”
- 6 Gb 1067 Mhz DDR3
- ATI Radeon HD 4850 512mb
Software:
- Mac OS Mavericks 10.9
- X-Plane 10 Global ver 10.25 (final)
Addons
- Saitek x52 Pro system Joystick and Throttle
Scenery
- YROM - Aussiepak7 - Barry Roberts (Aussie Scenery Packages)

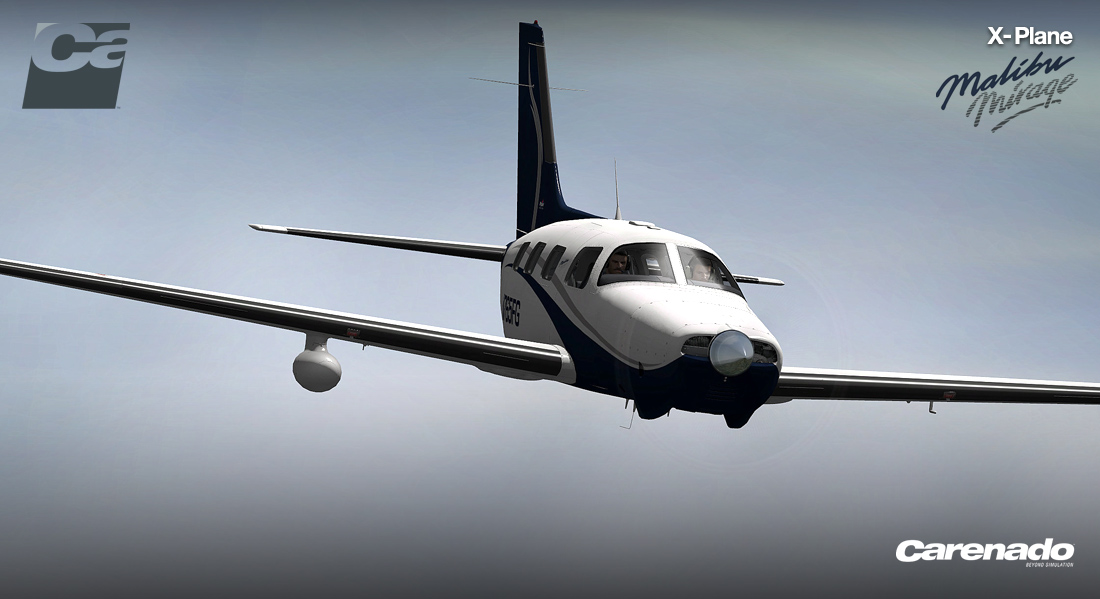
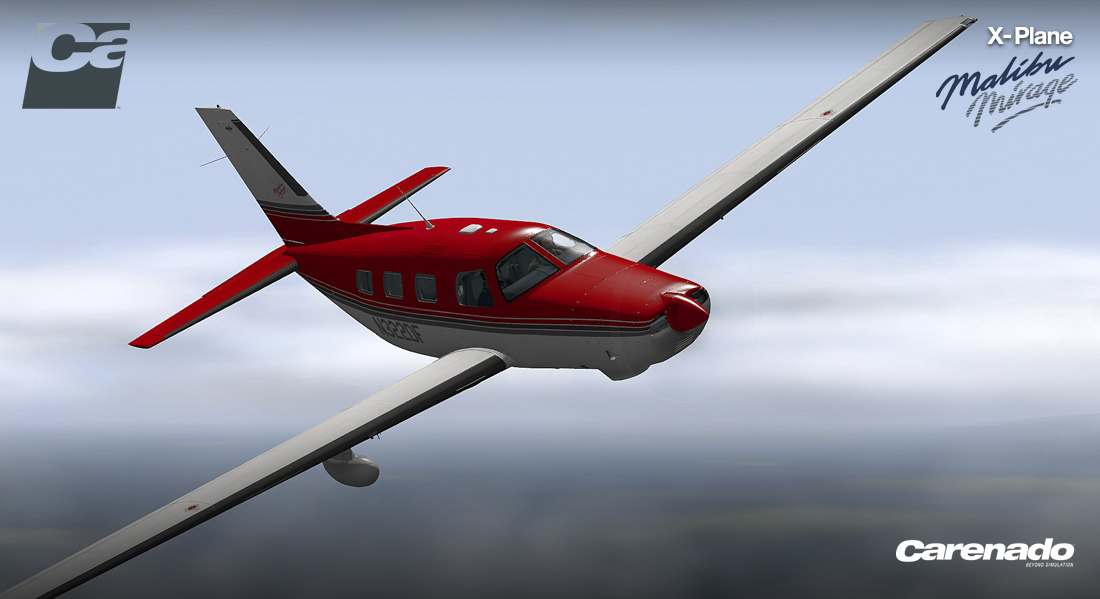
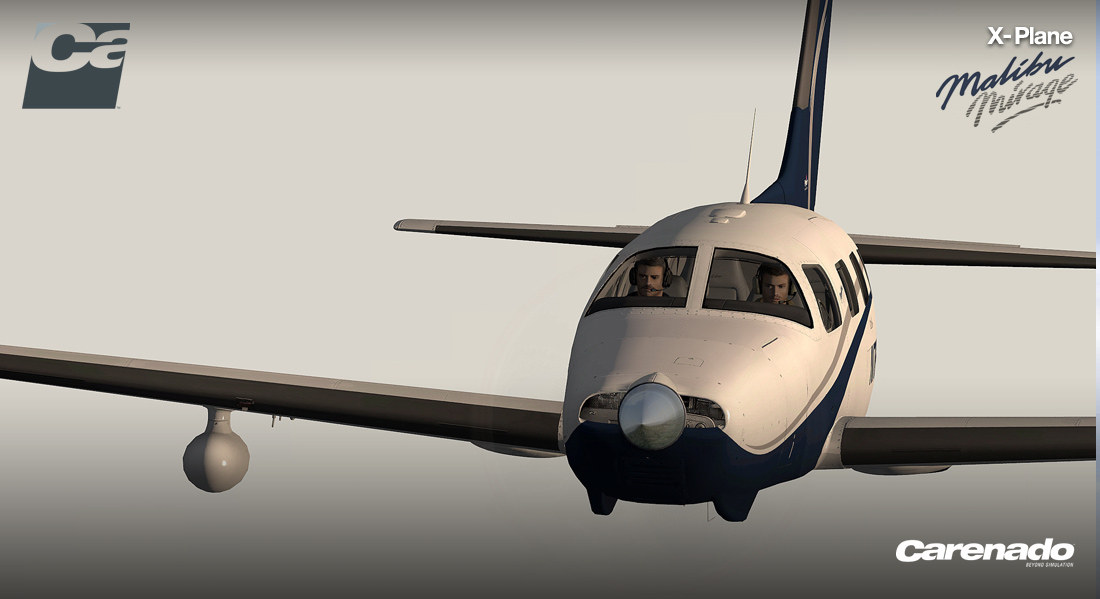
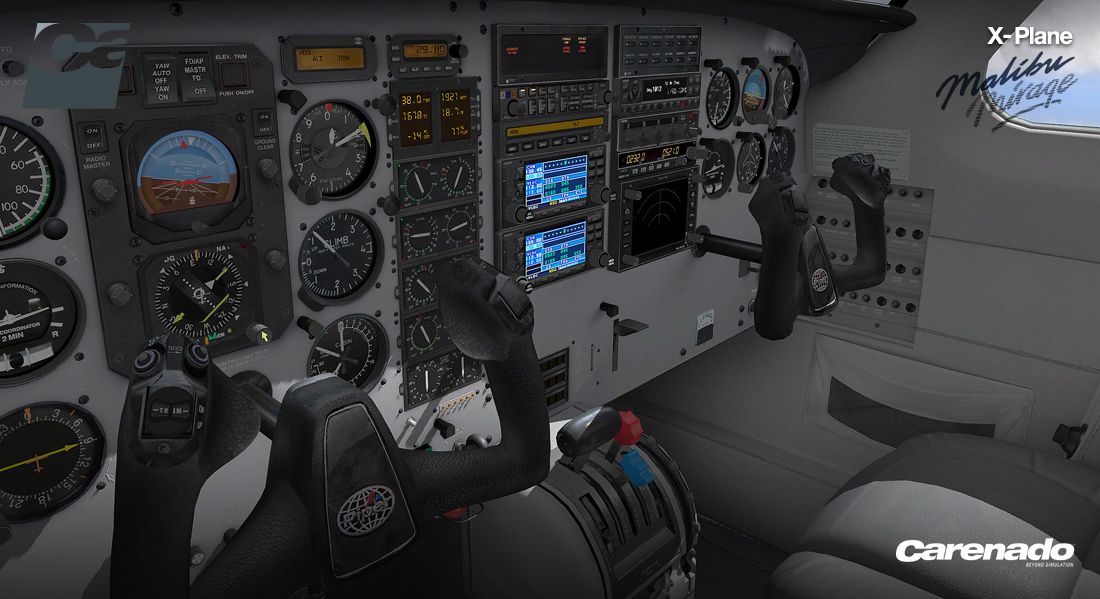
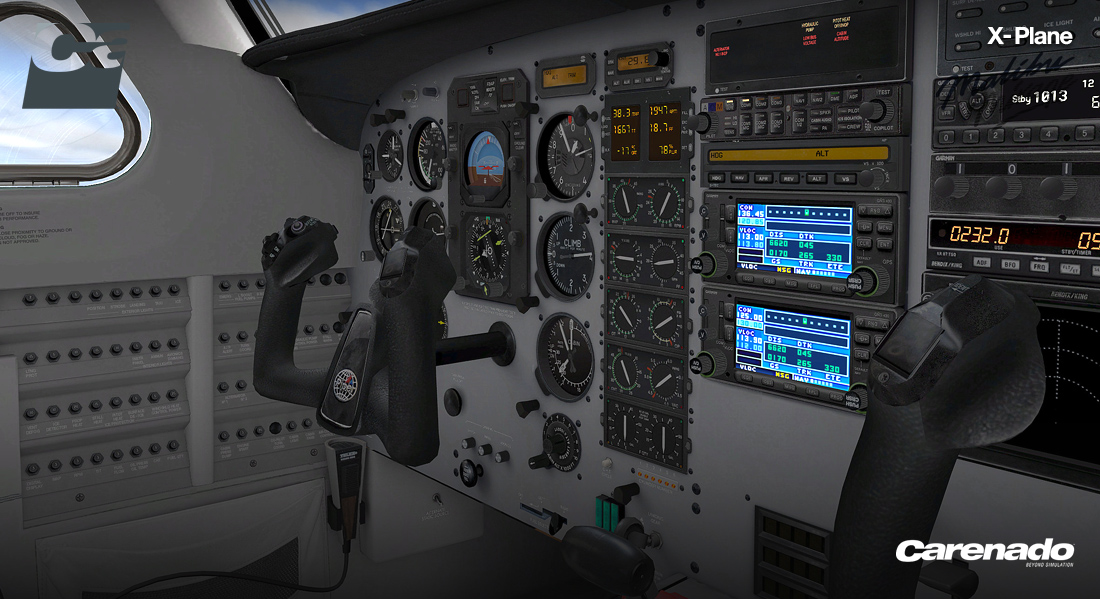


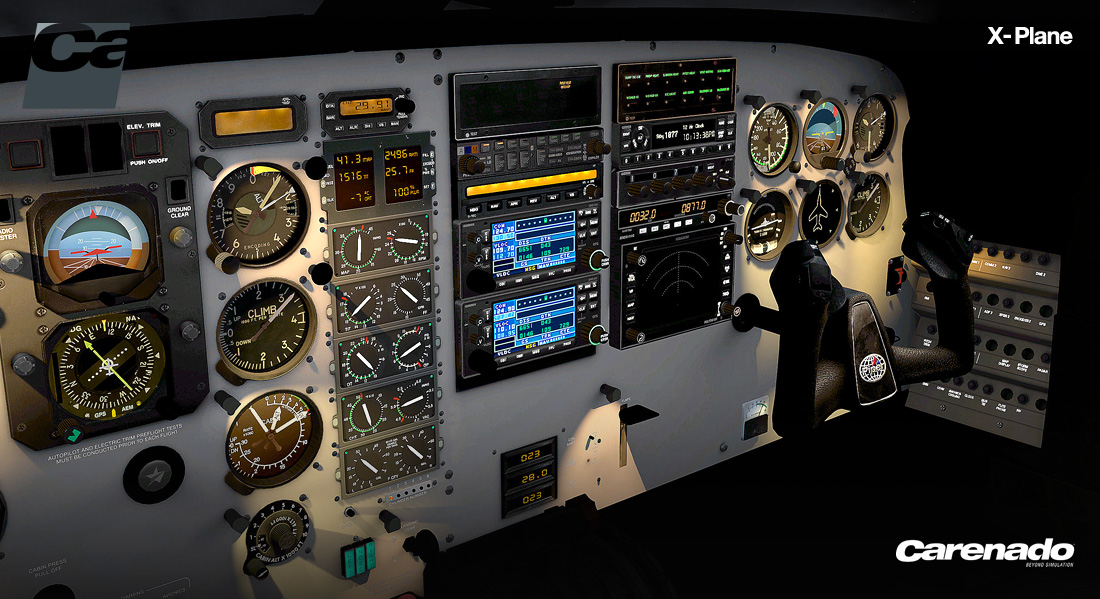
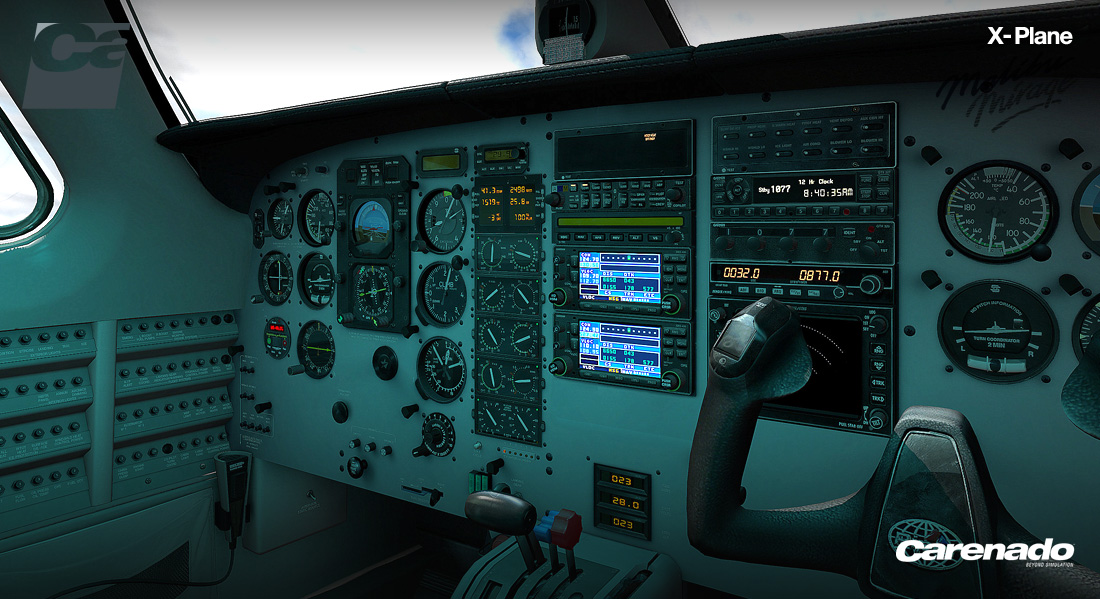
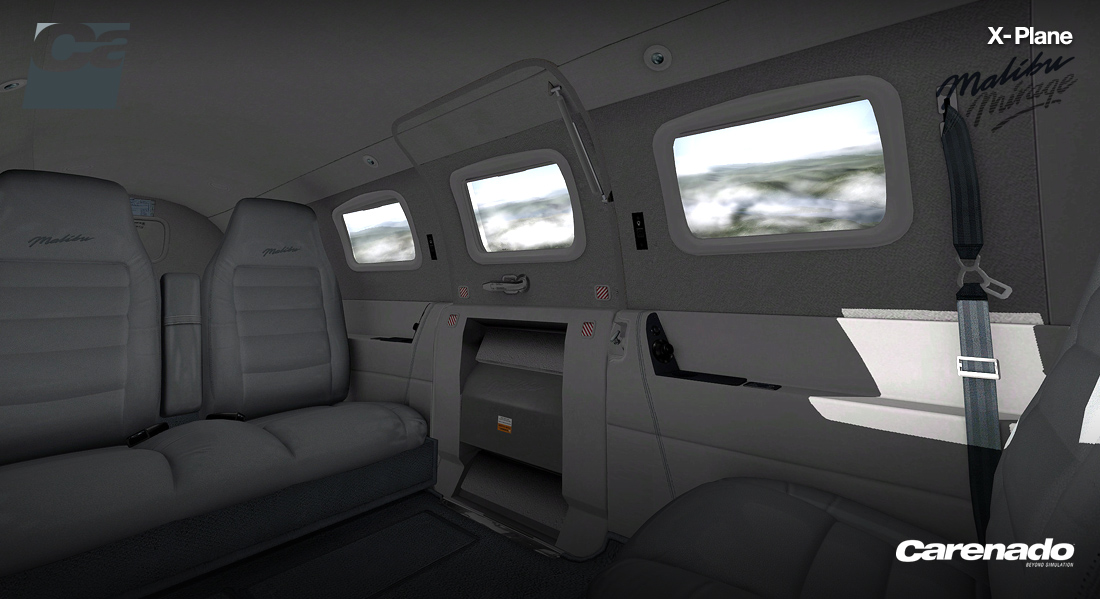
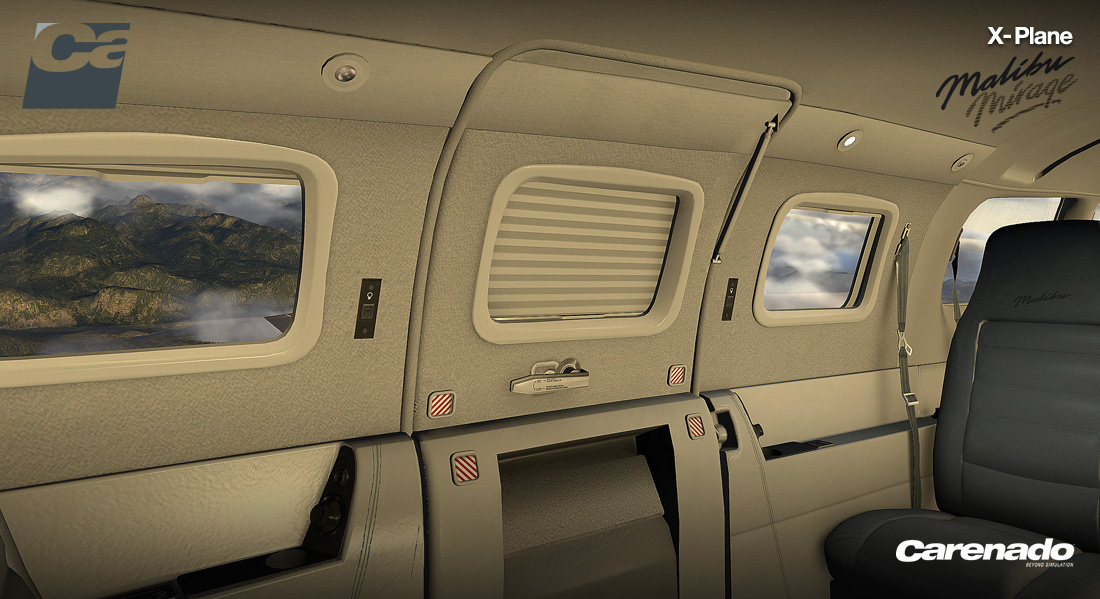
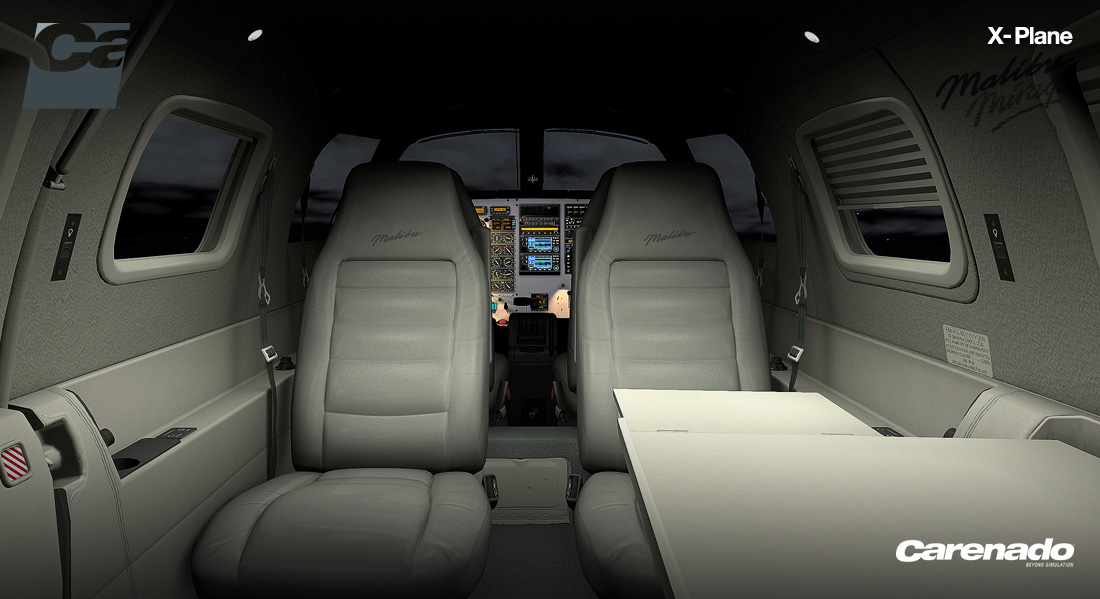
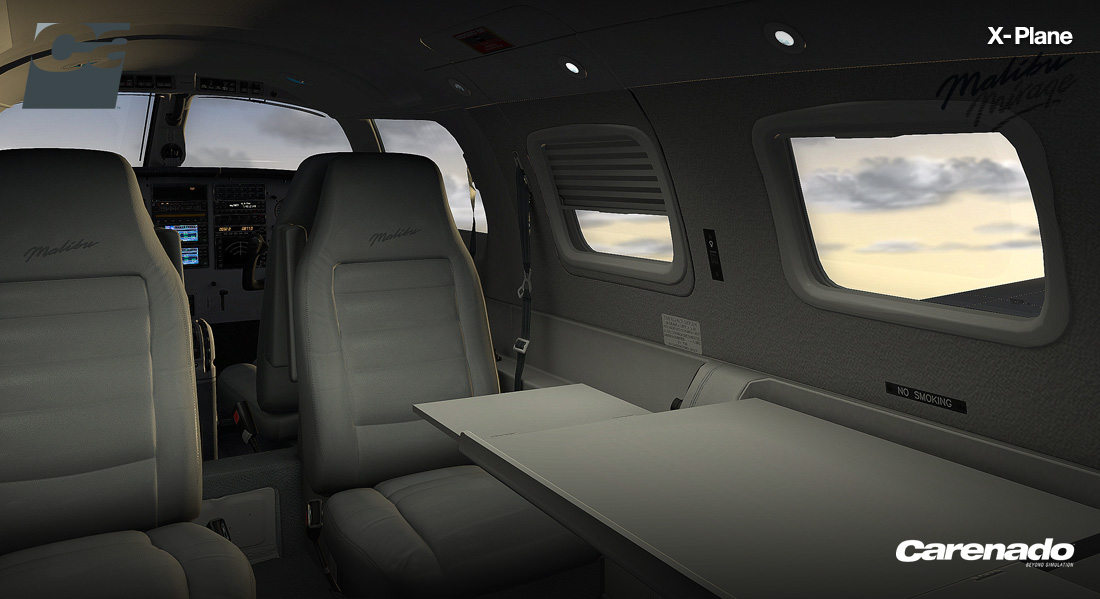

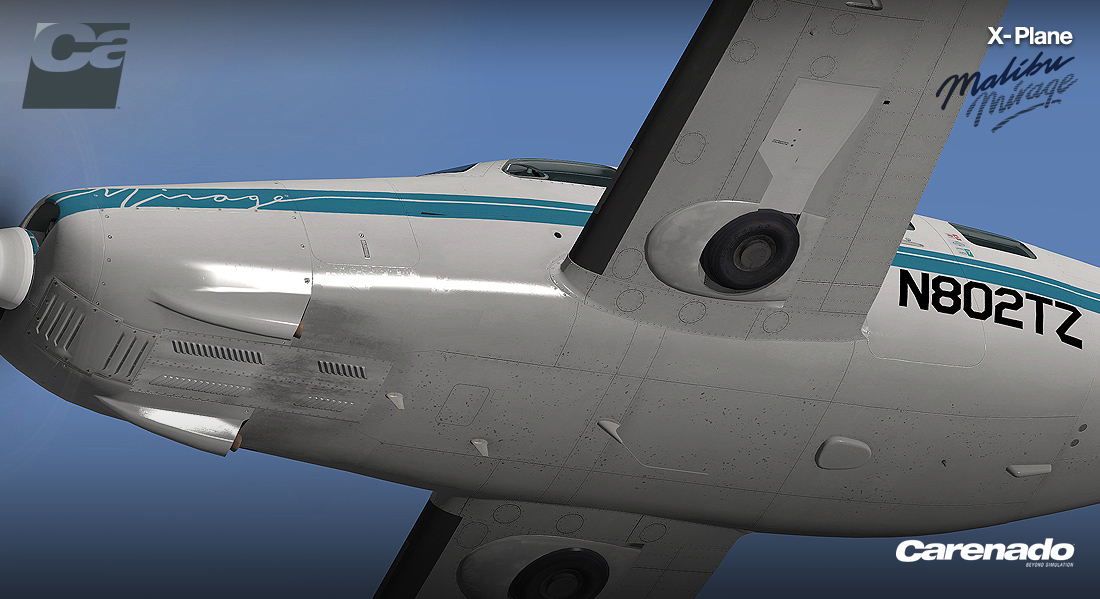
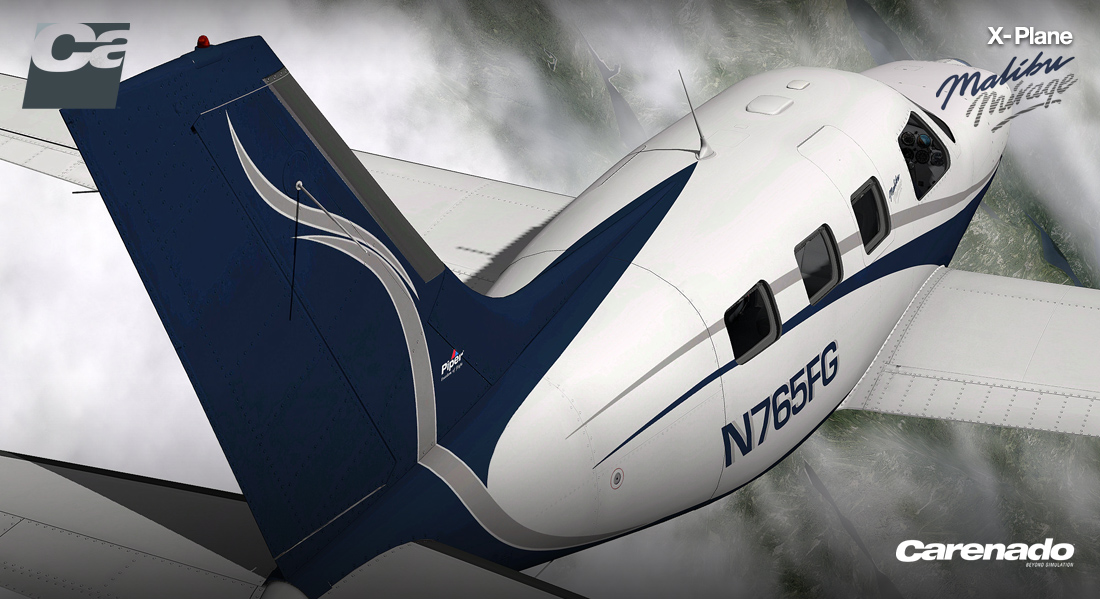
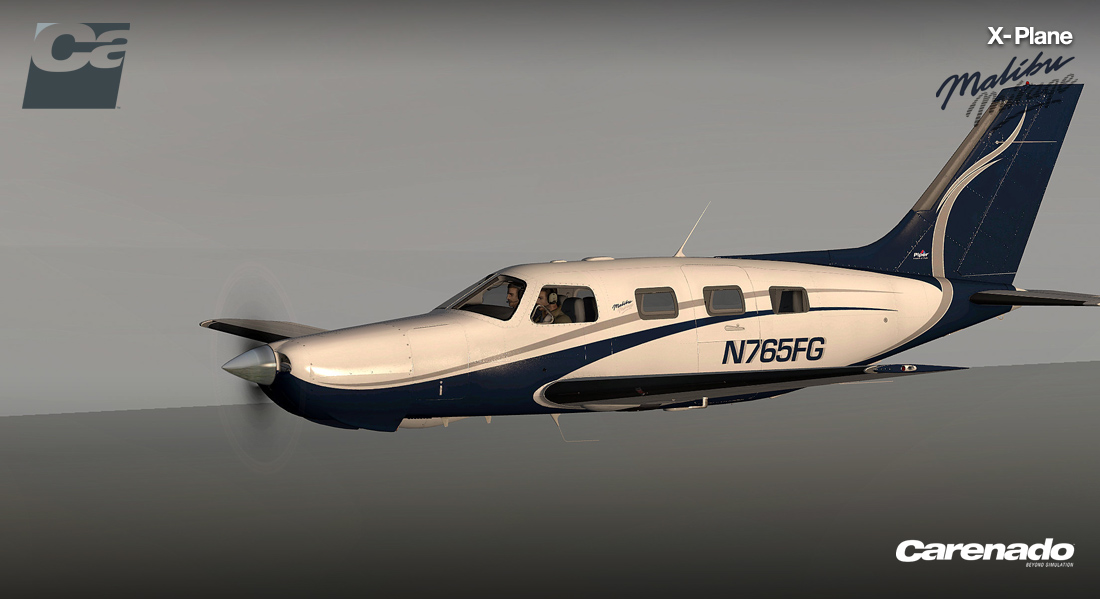
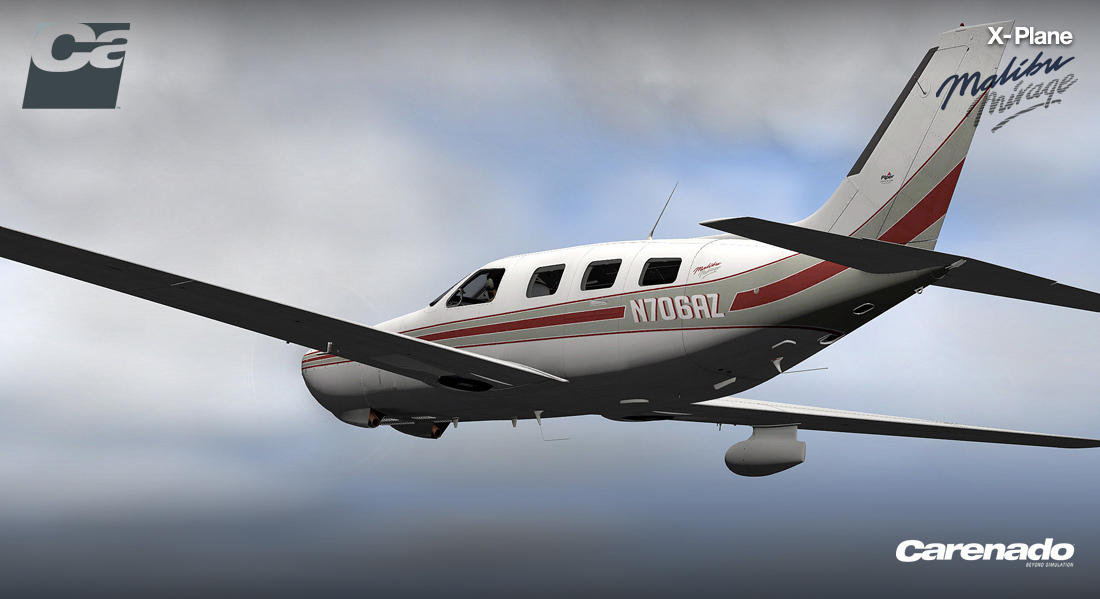


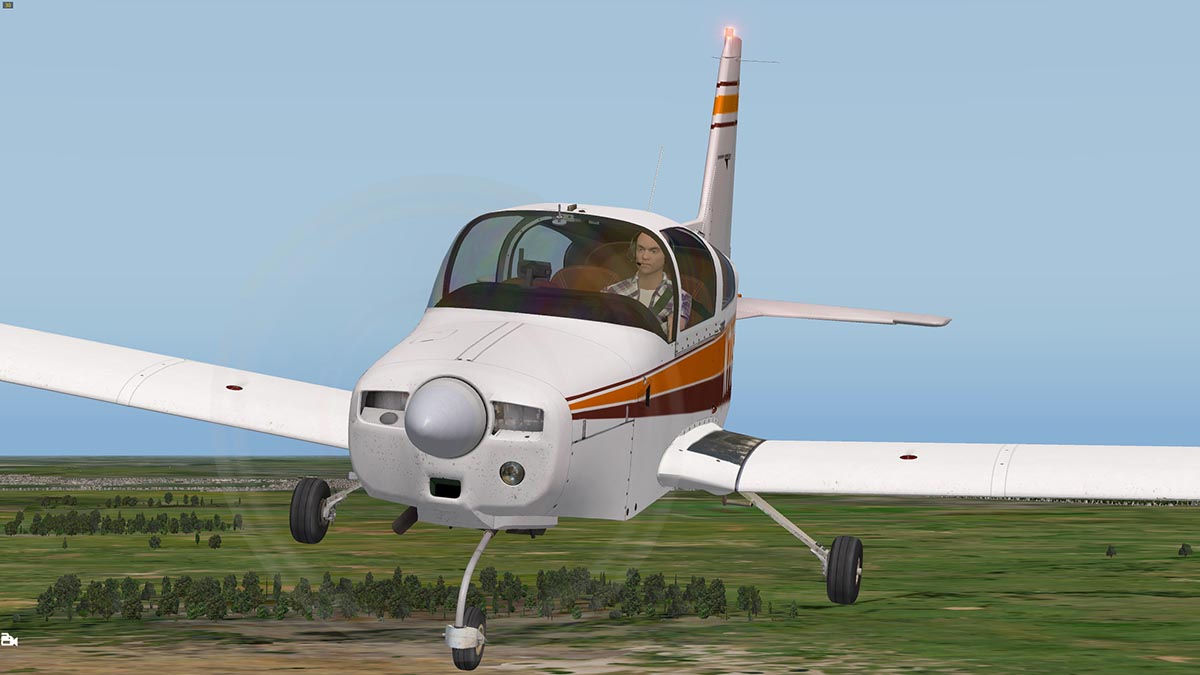
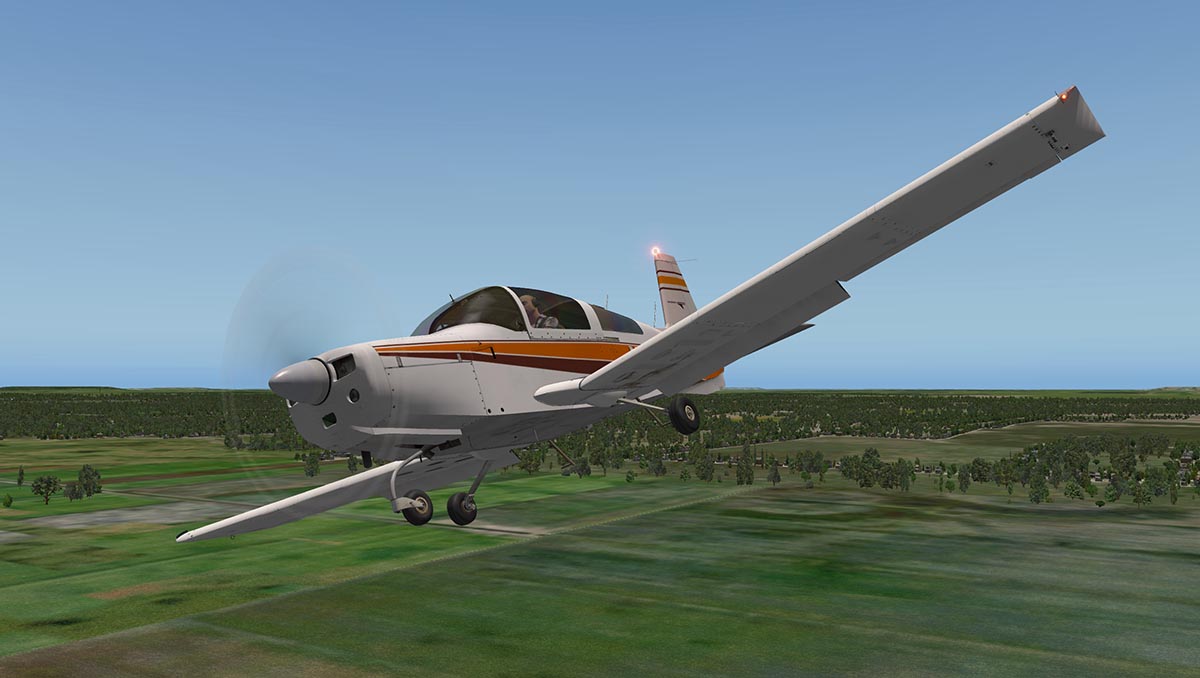
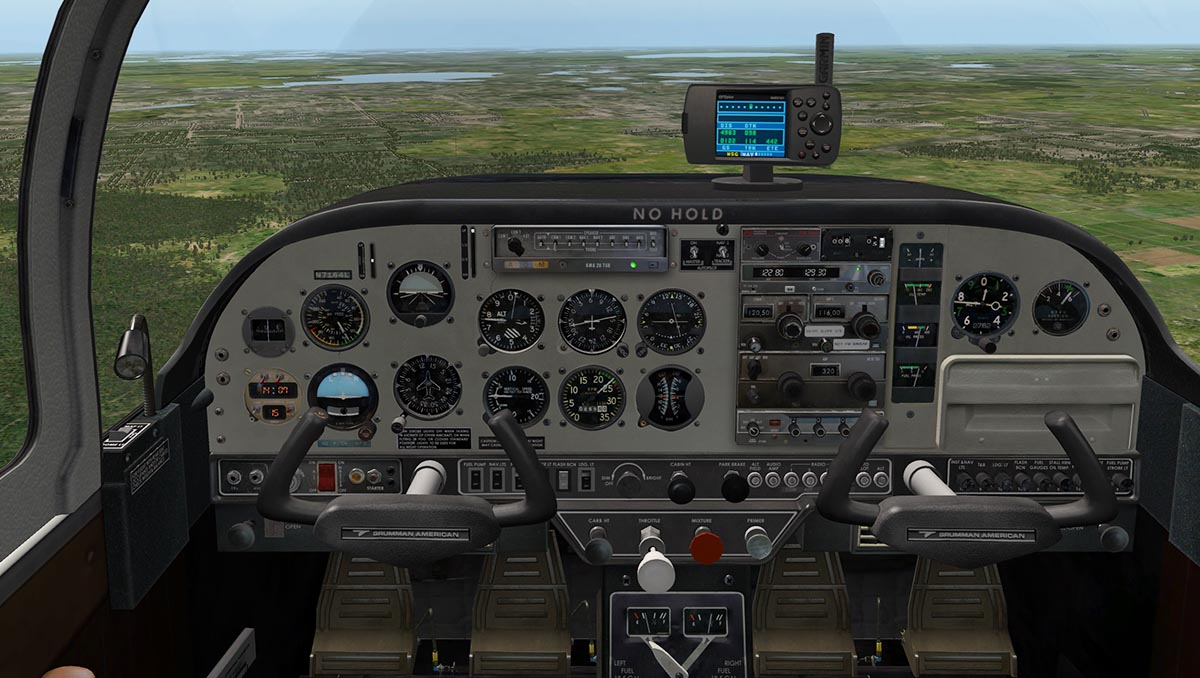
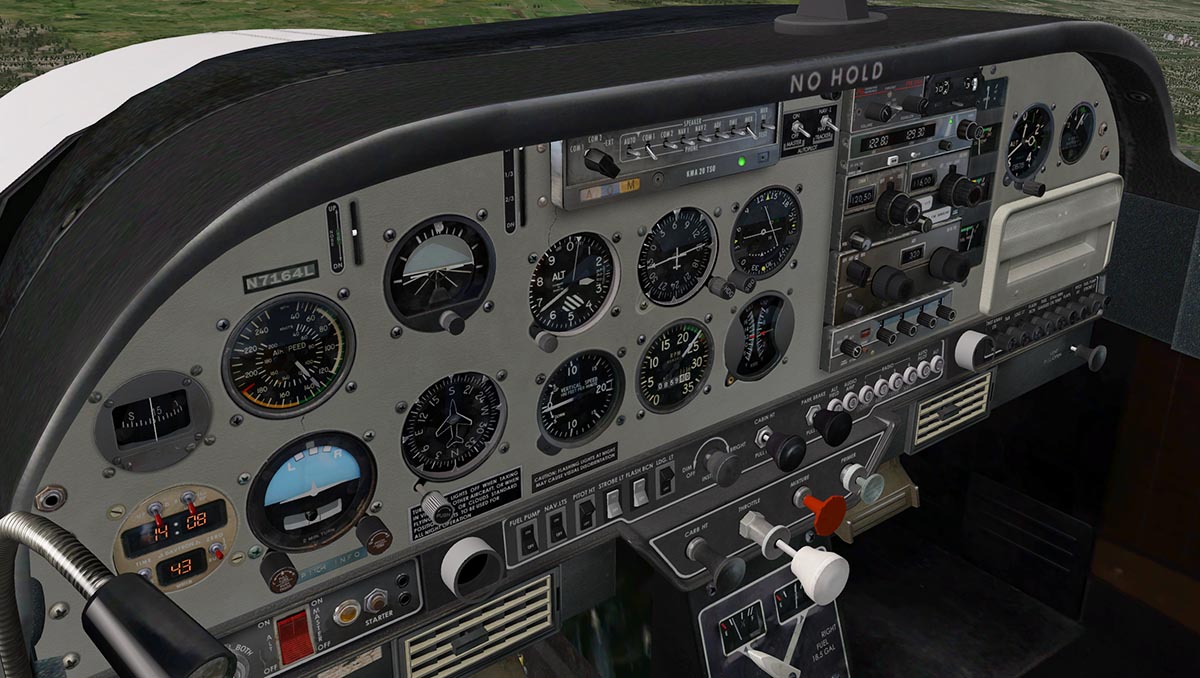

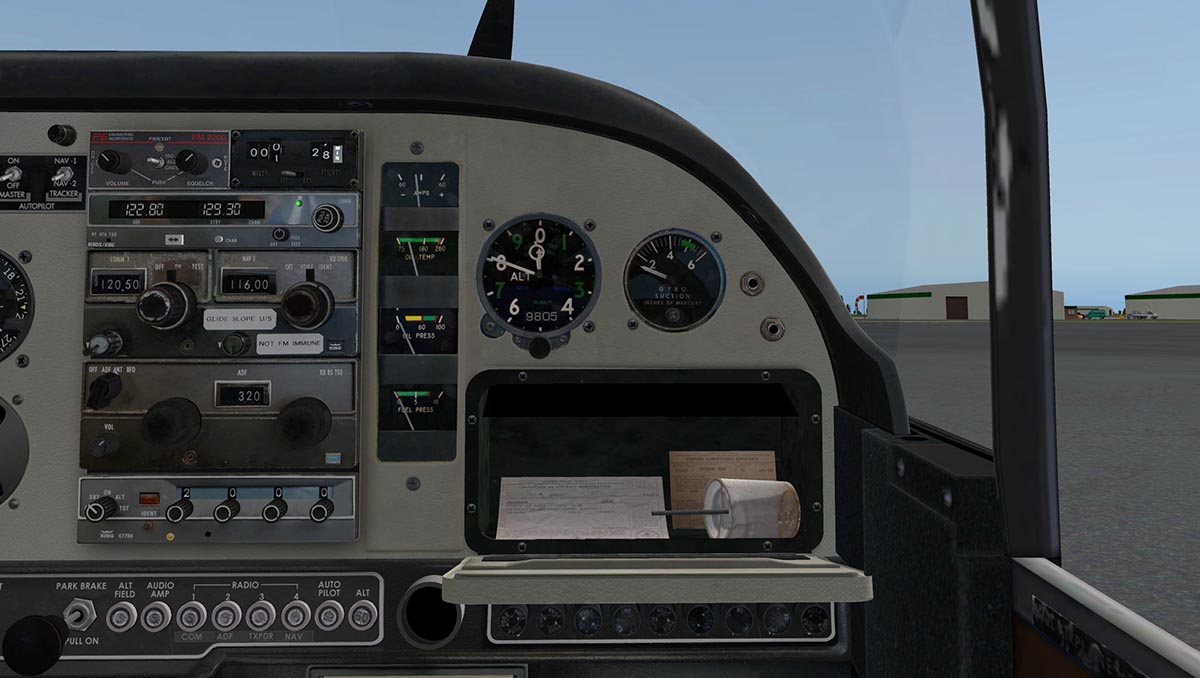
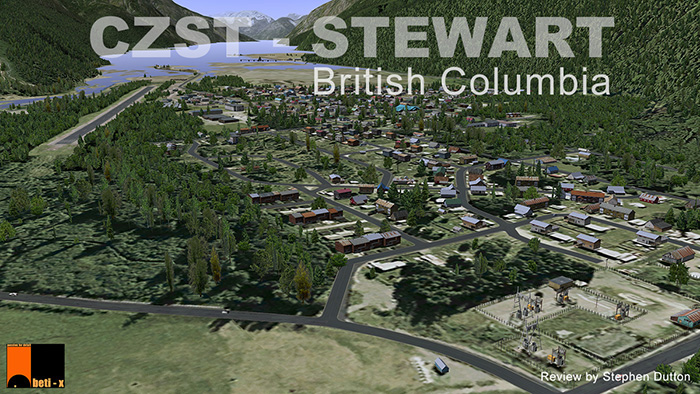

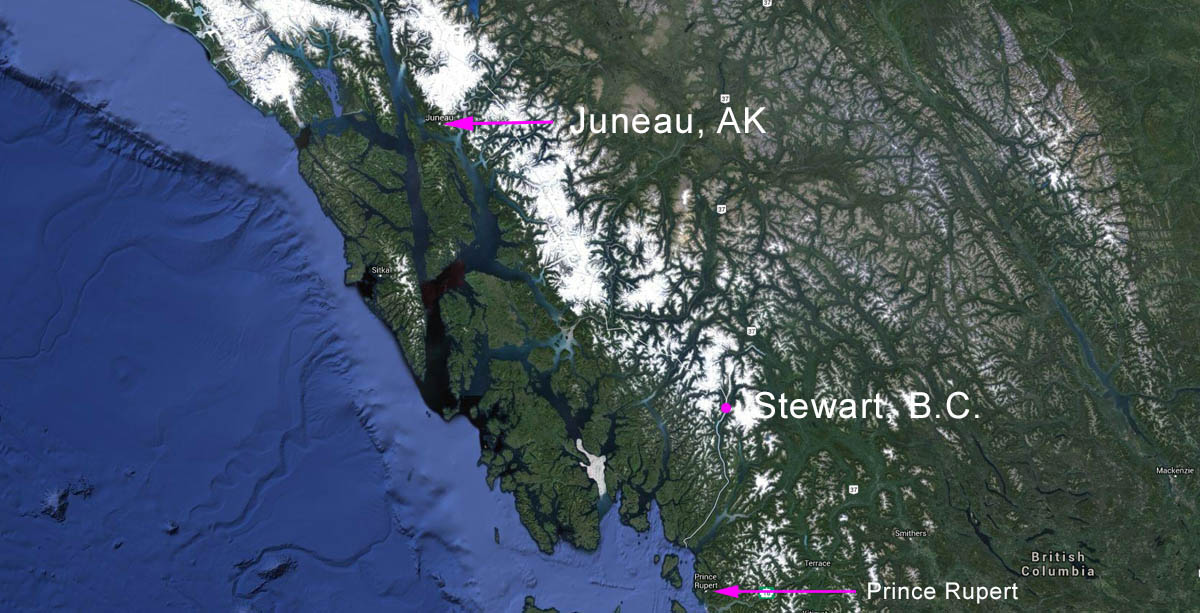

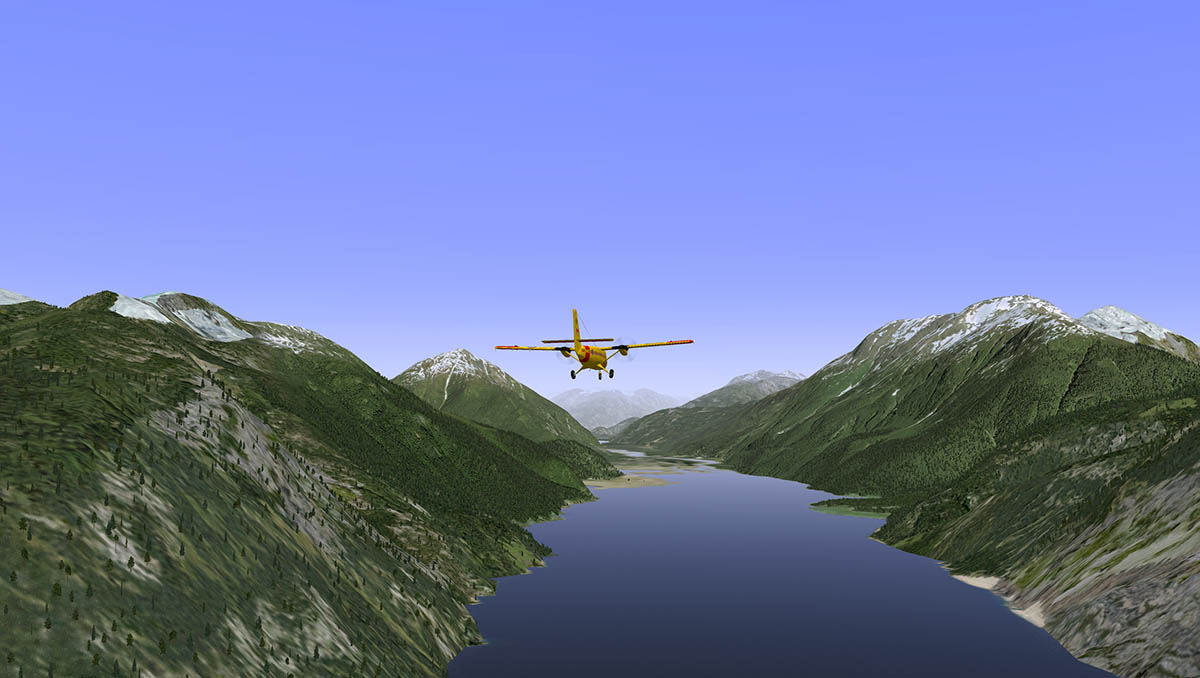
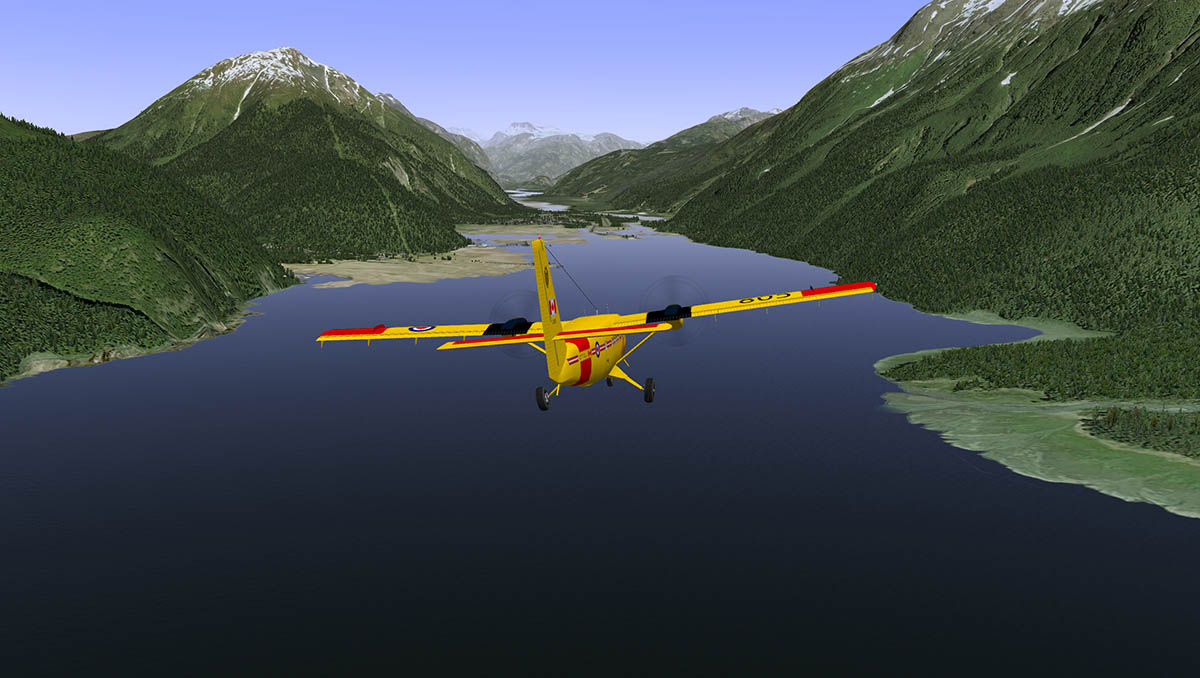

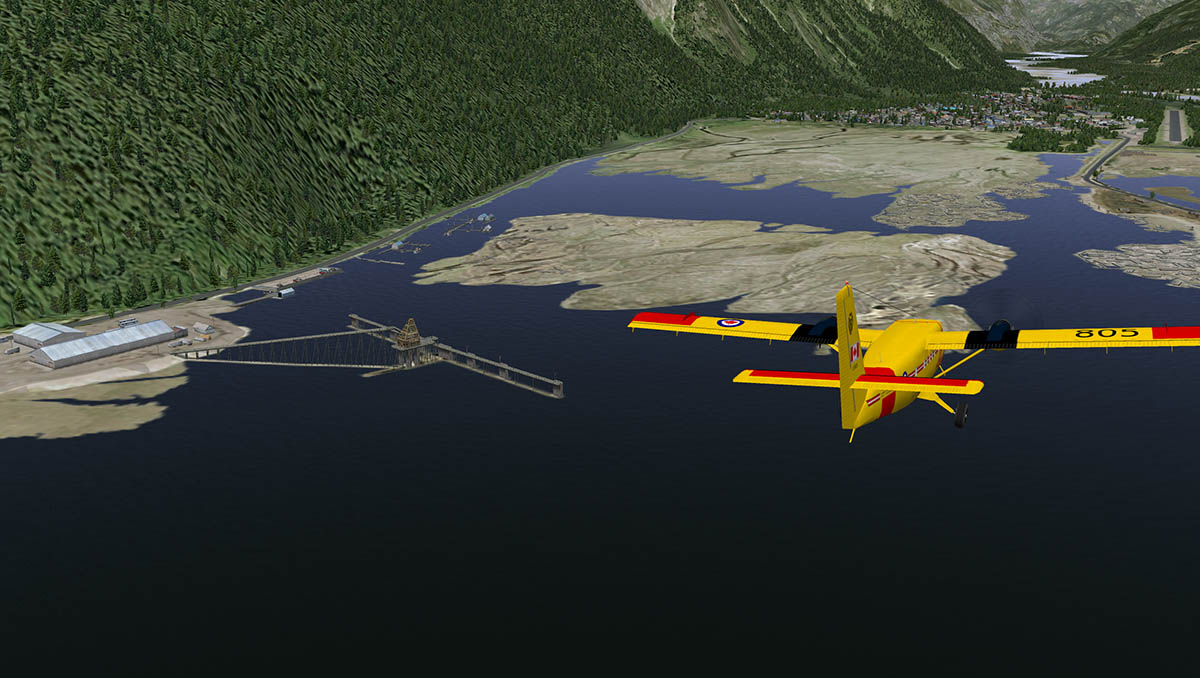

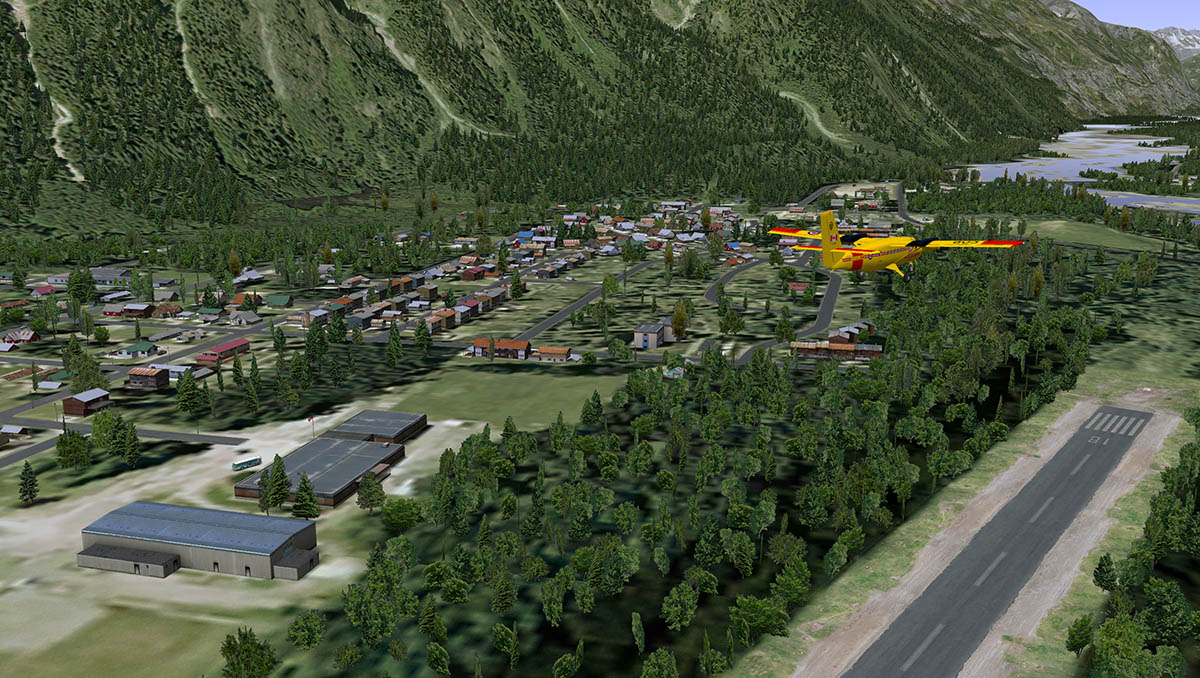
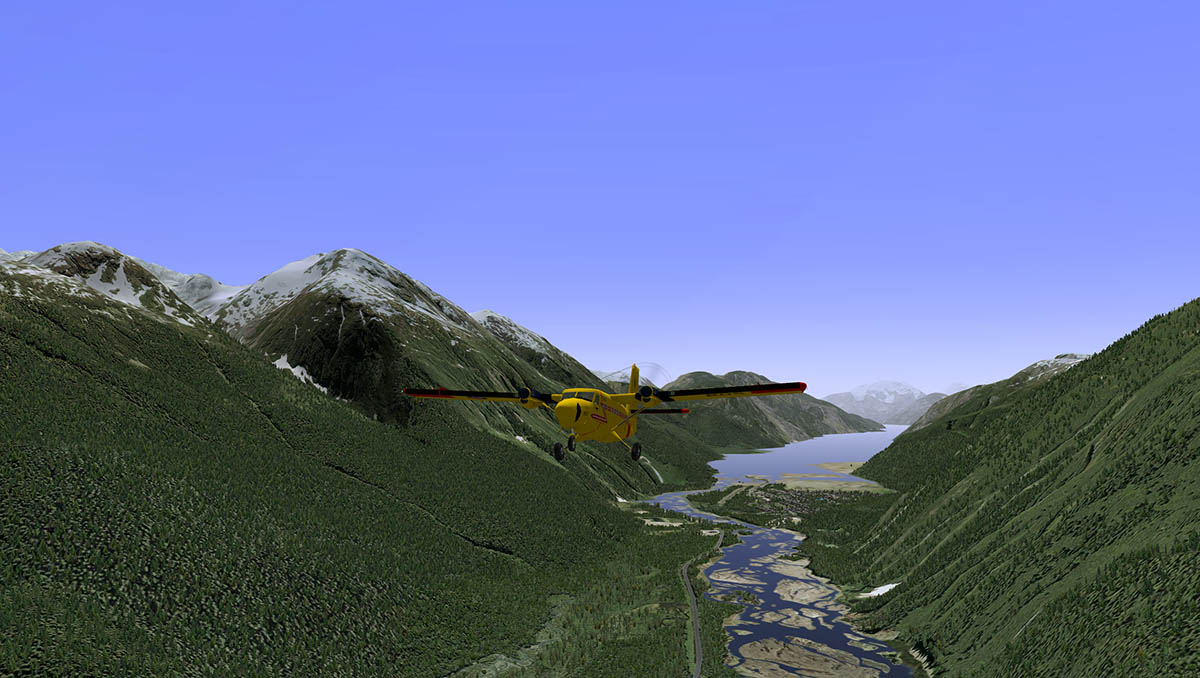

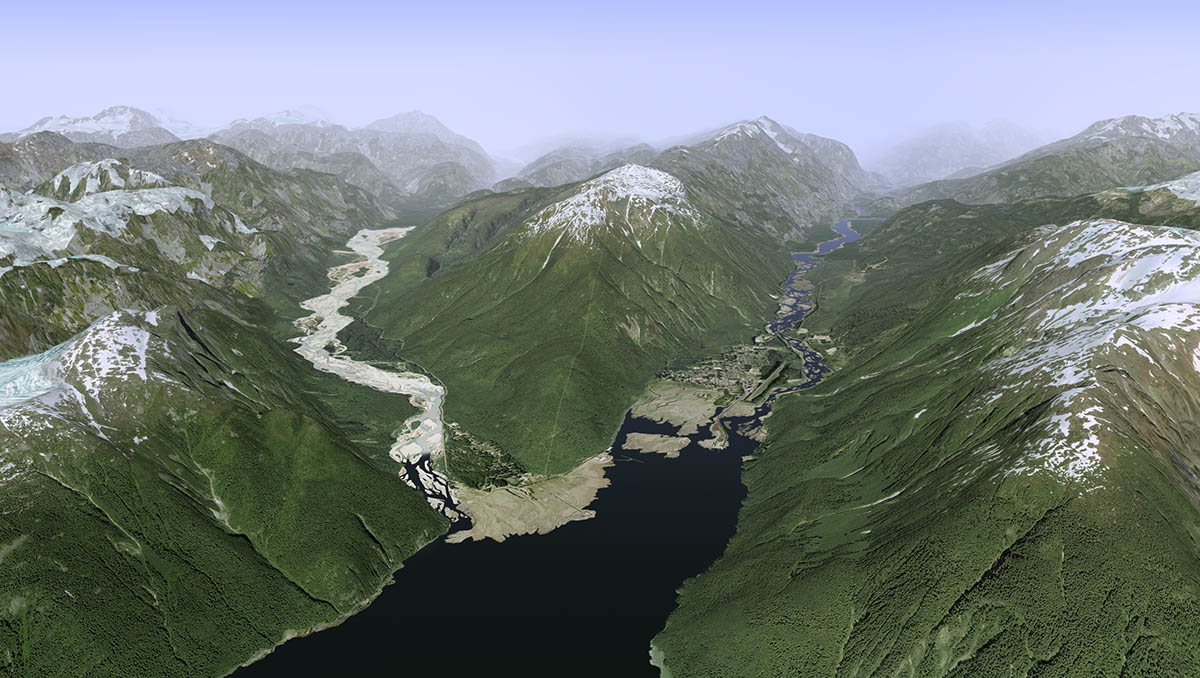
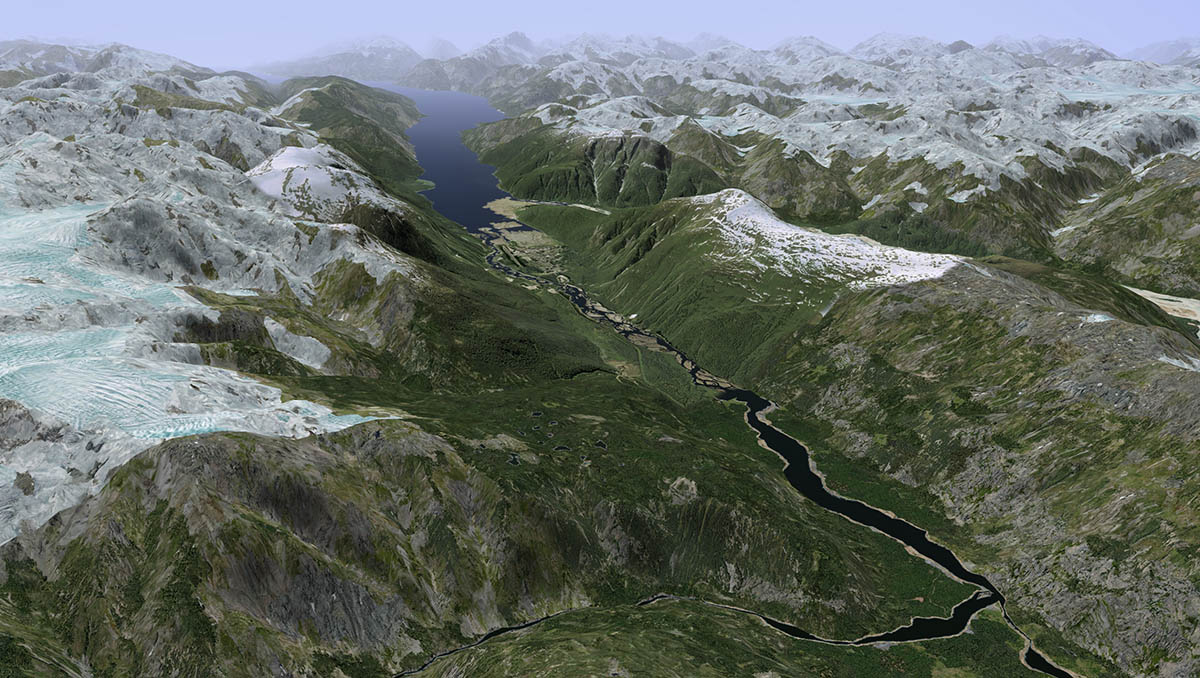
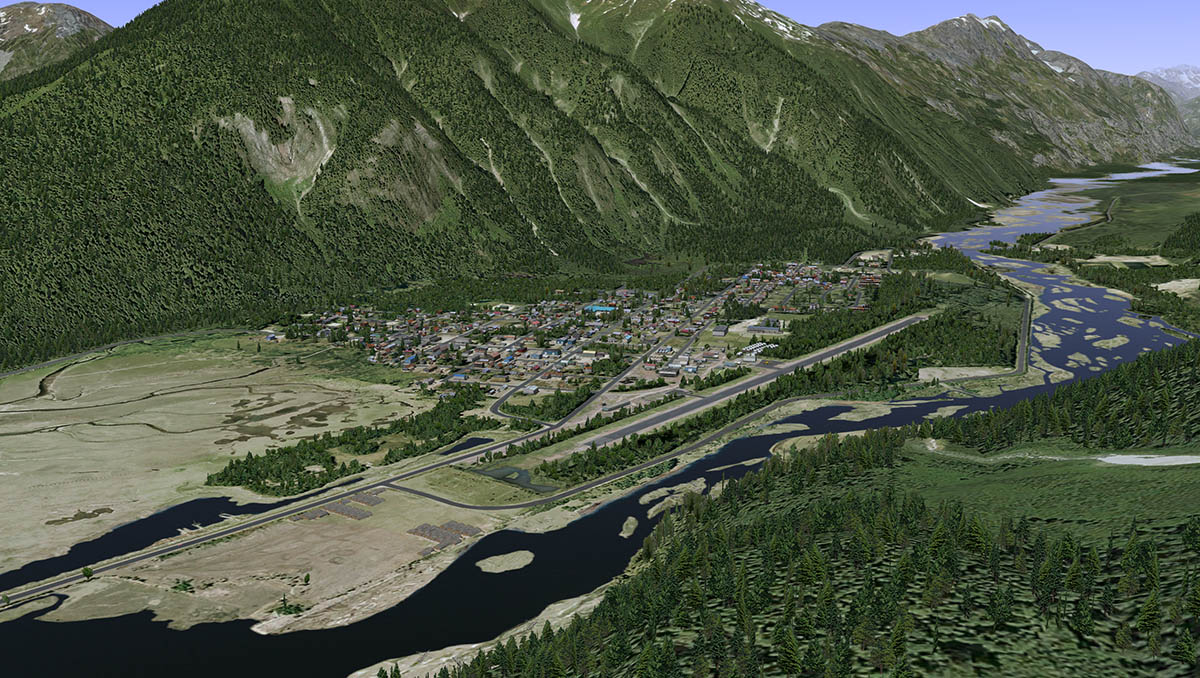

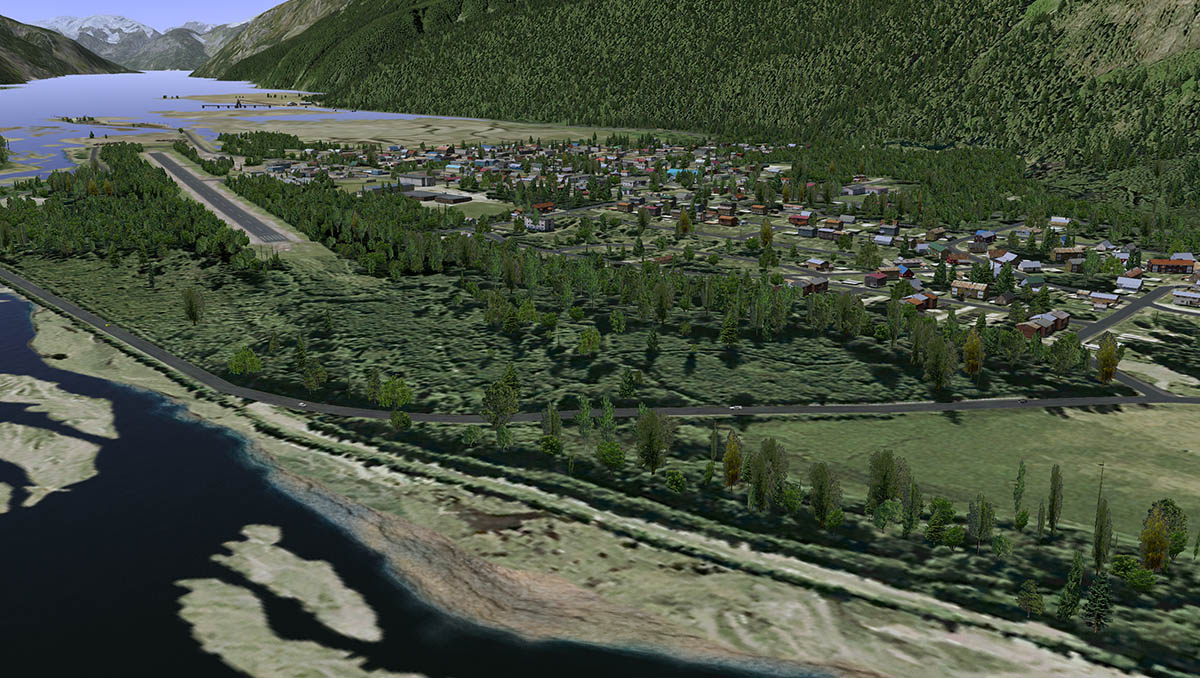
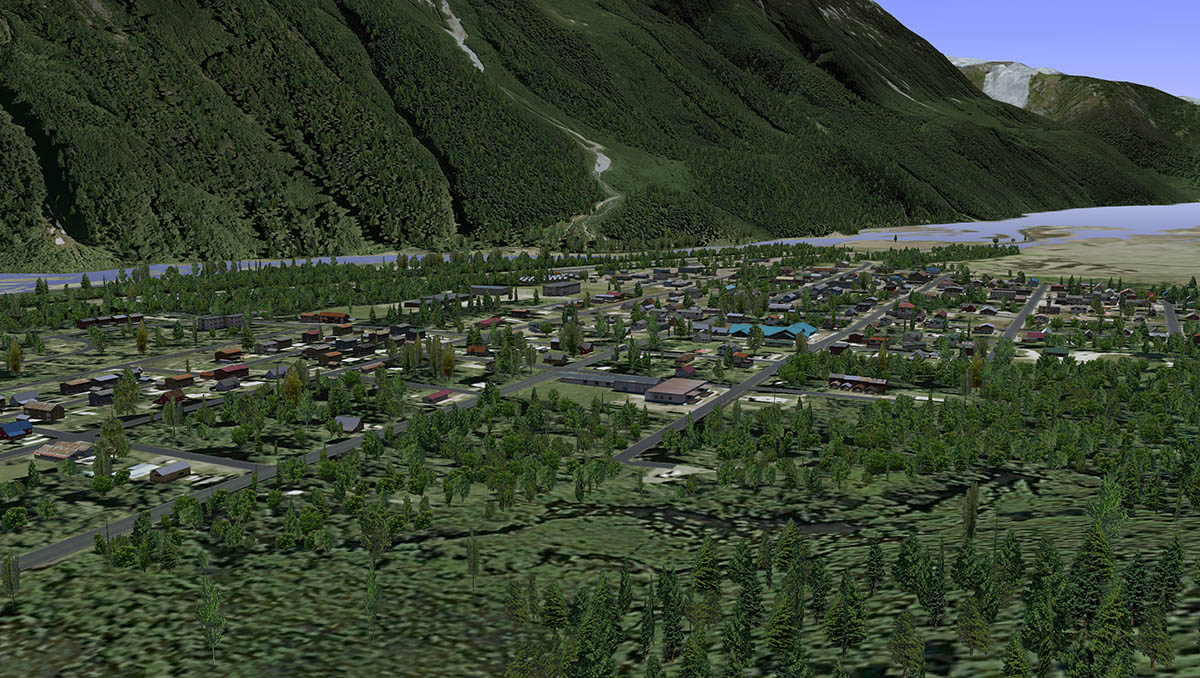
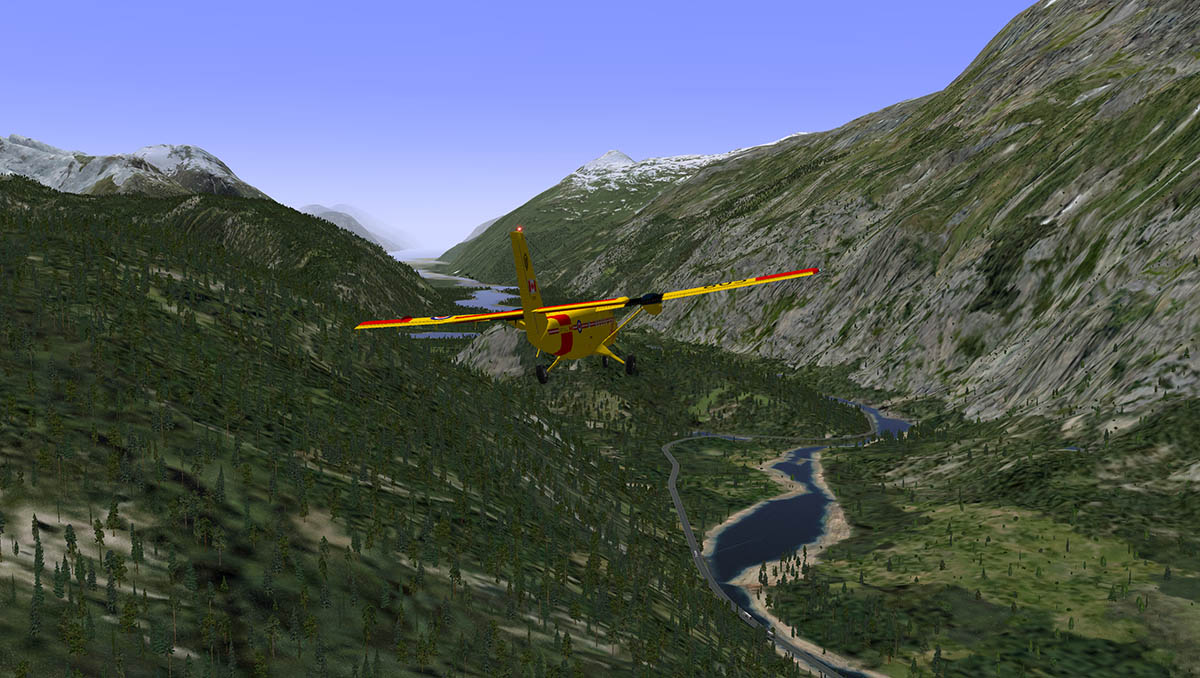
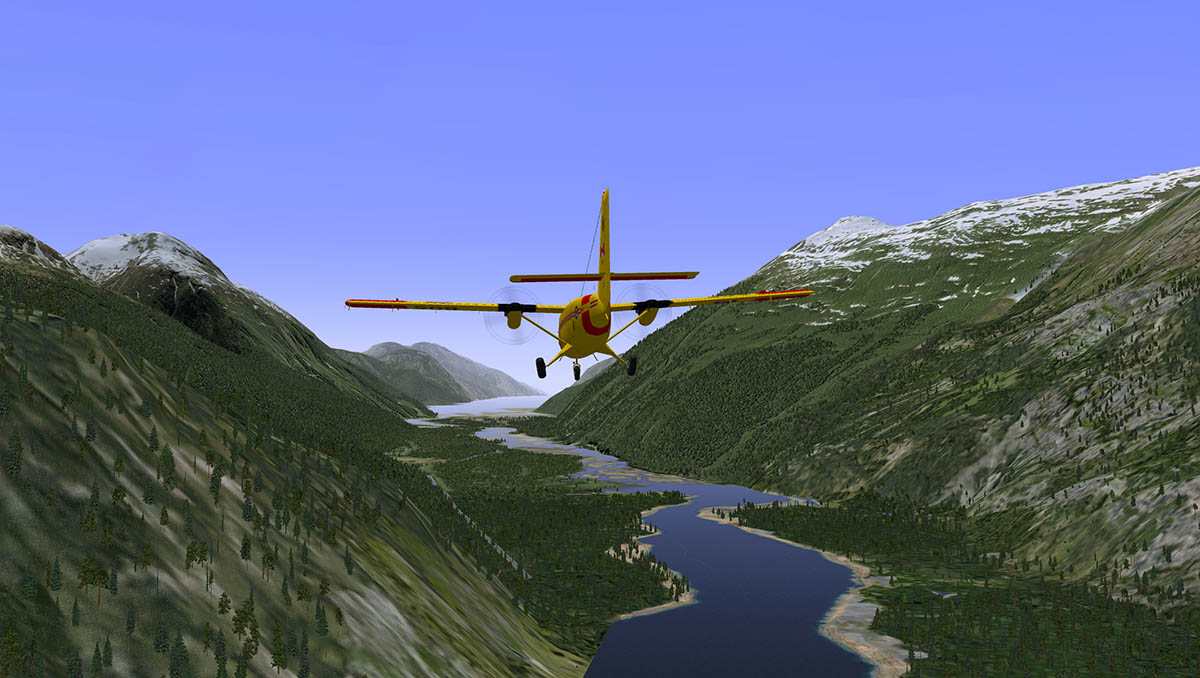

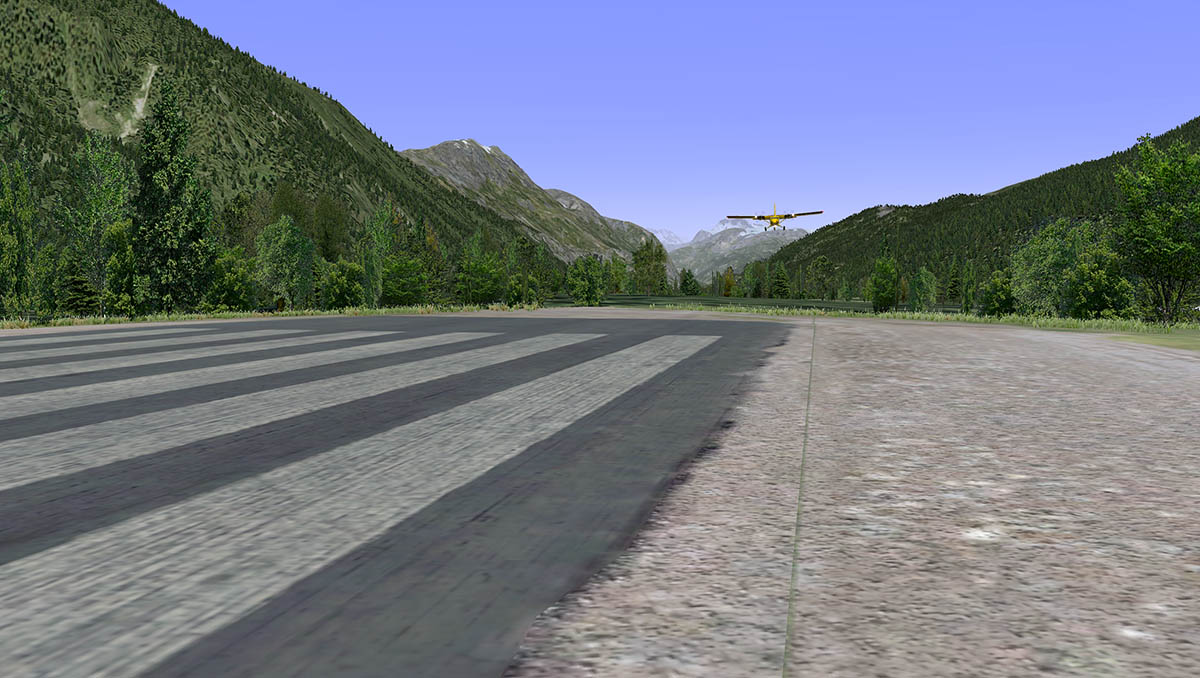
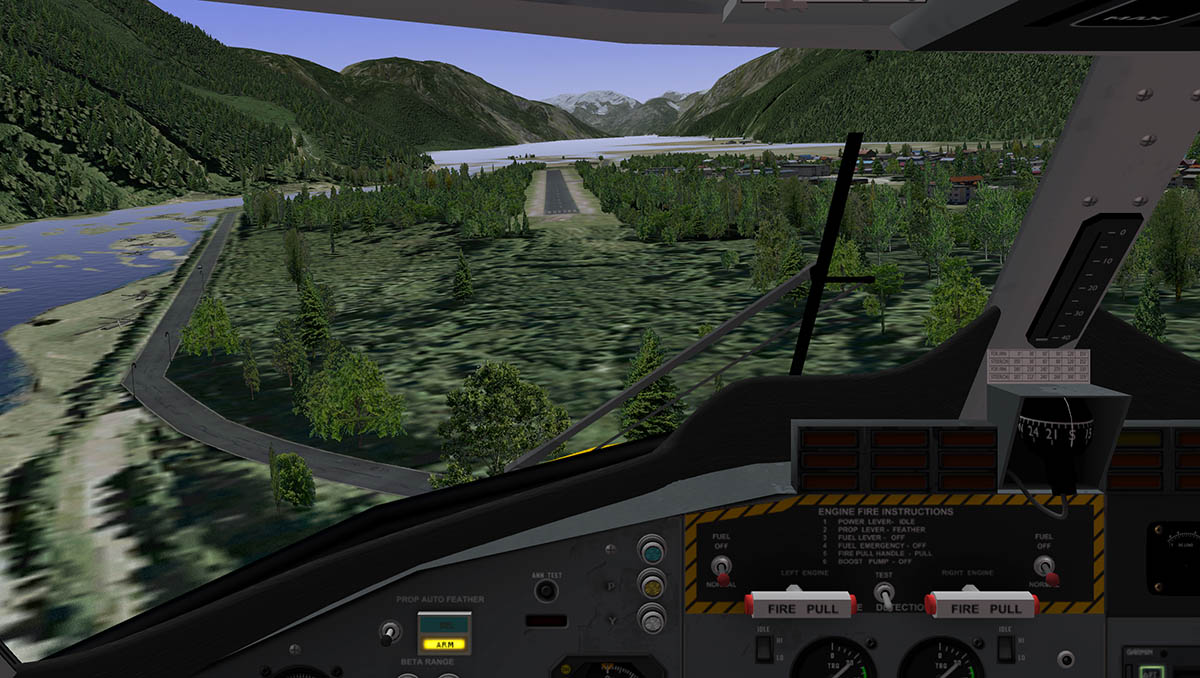
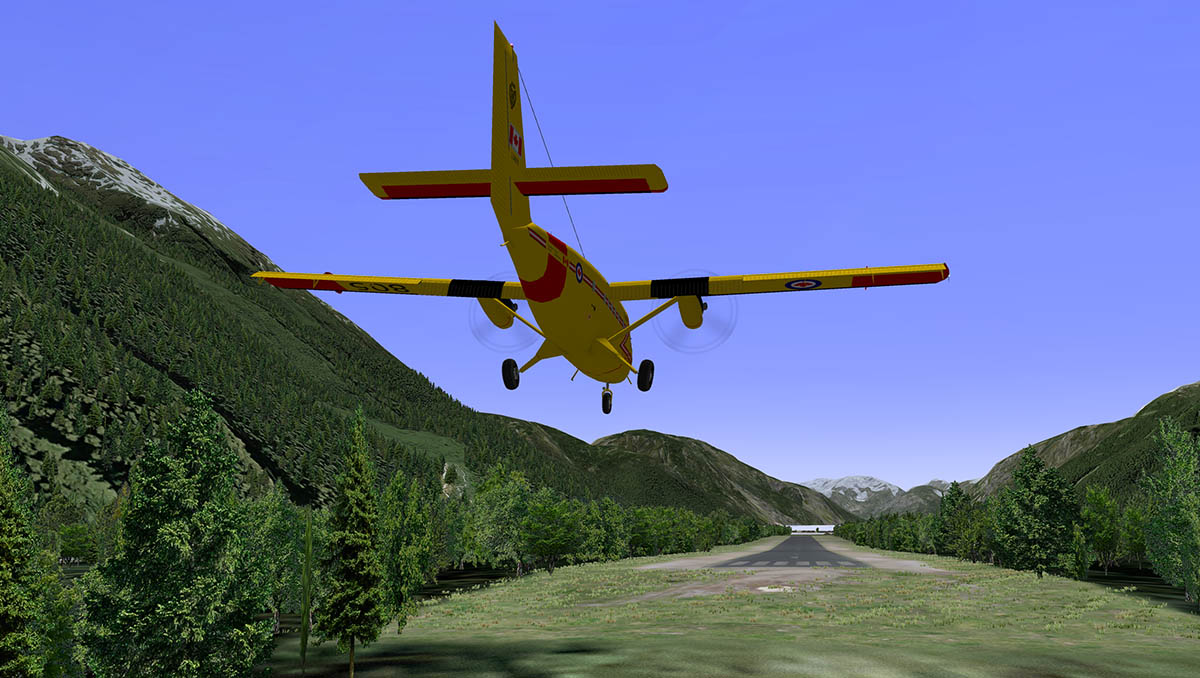

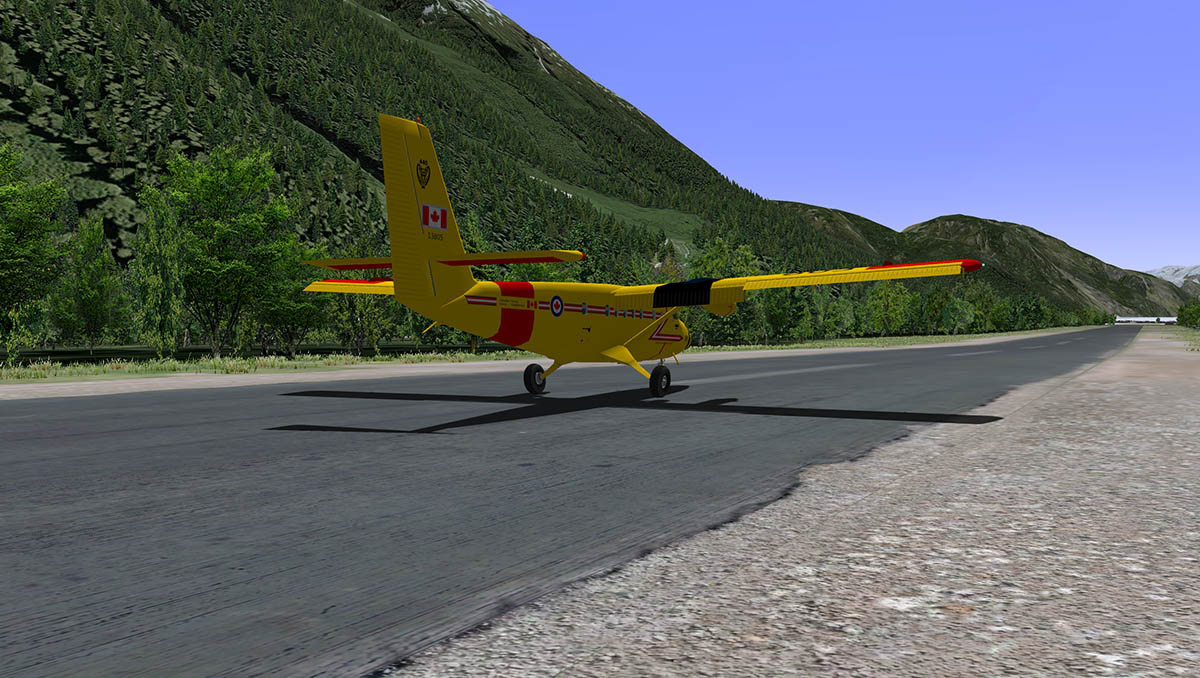
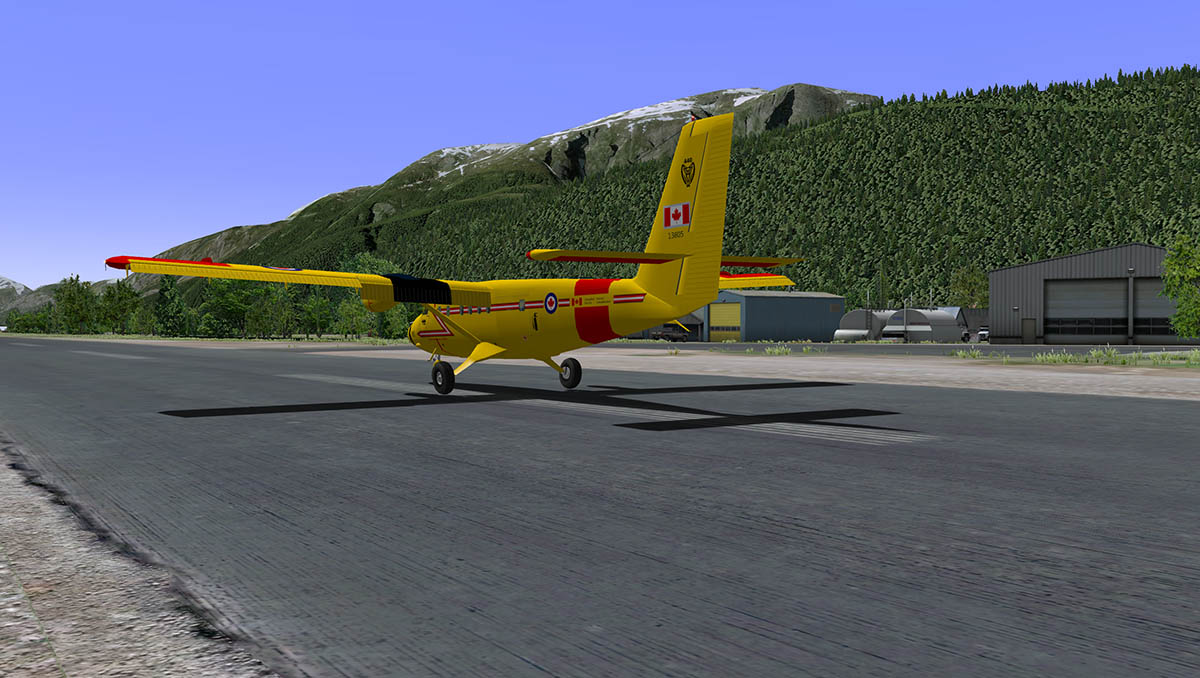
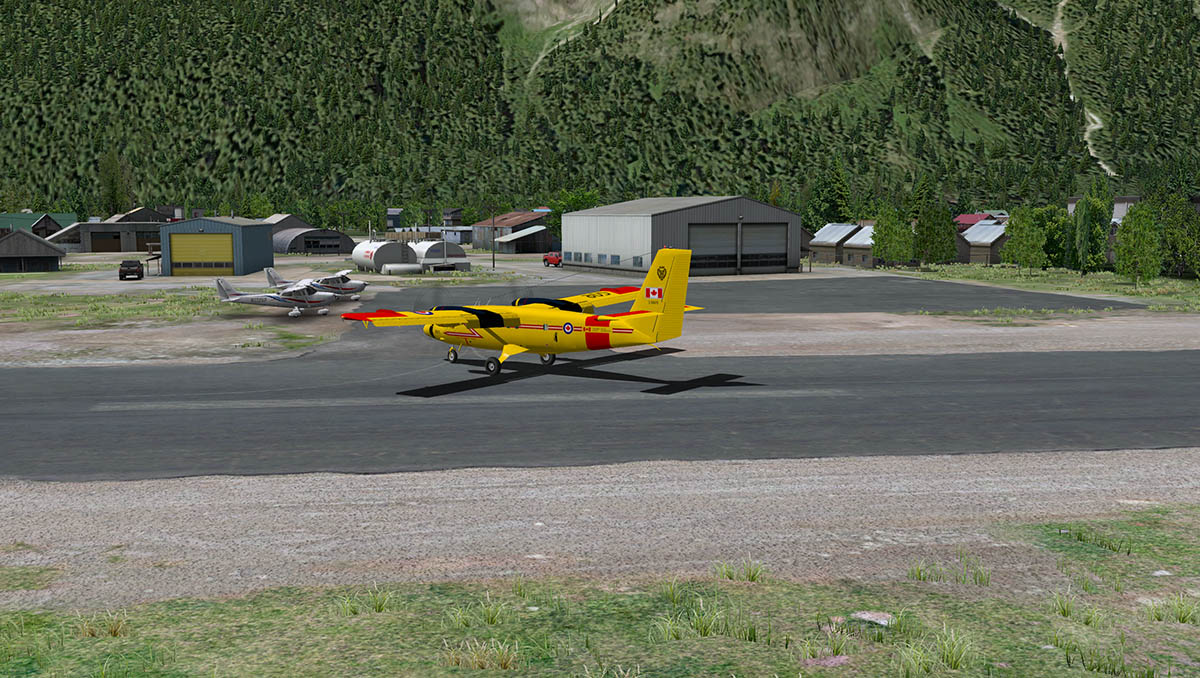
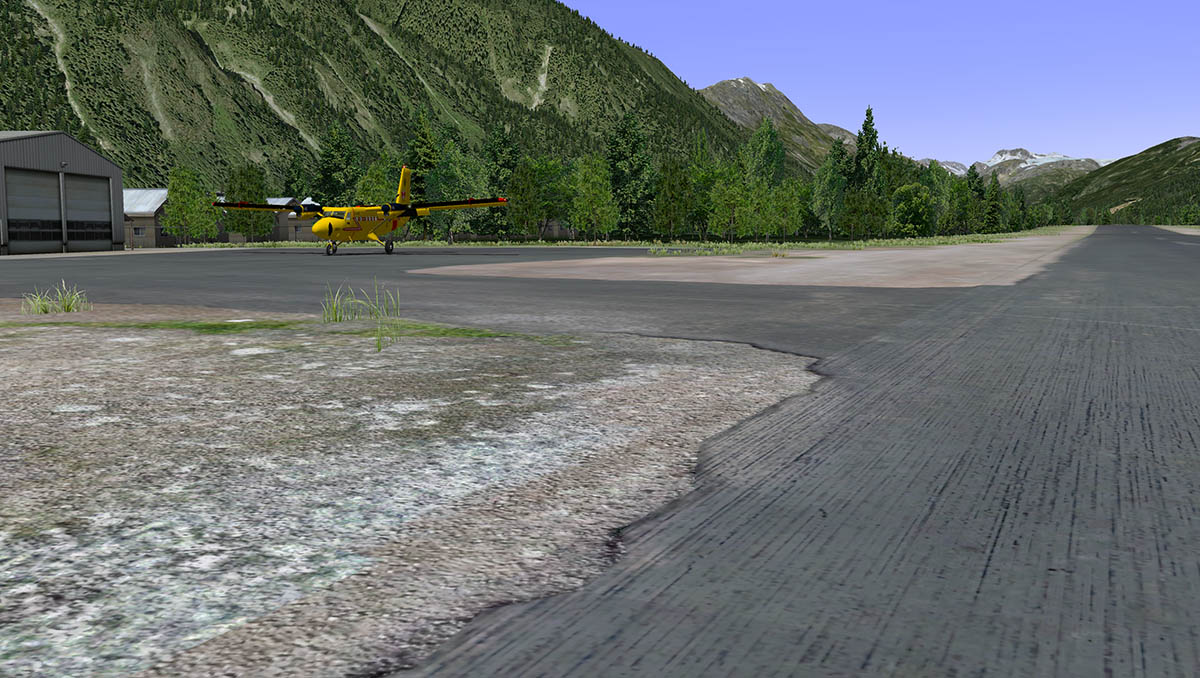

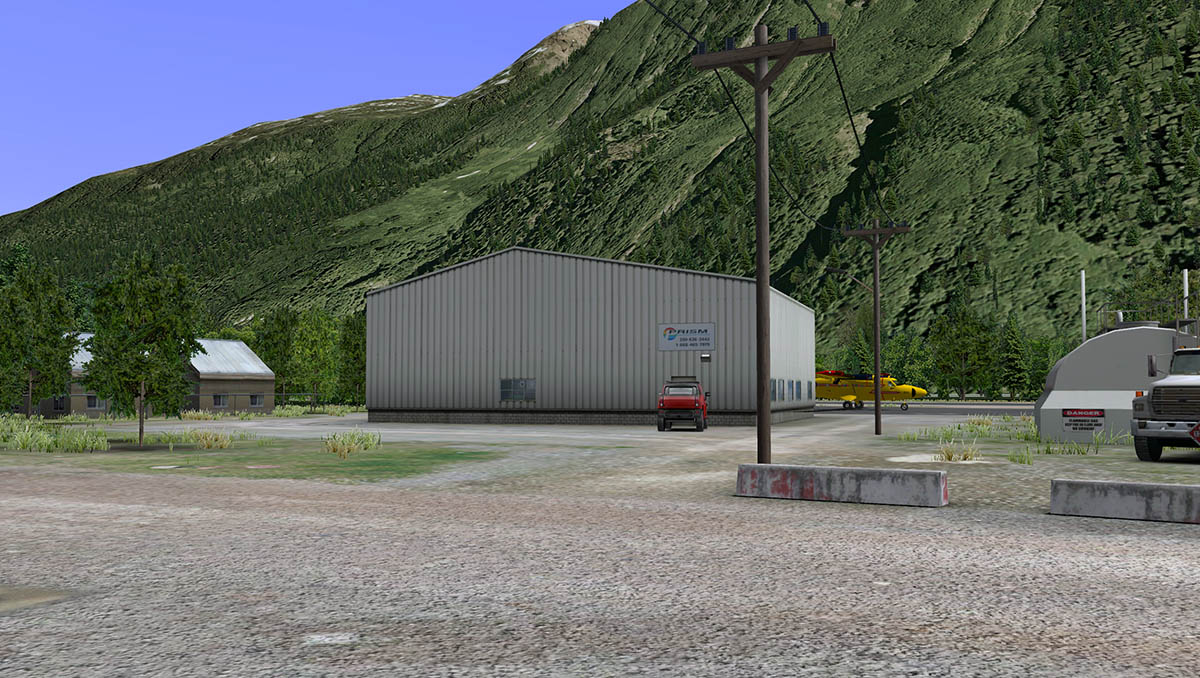


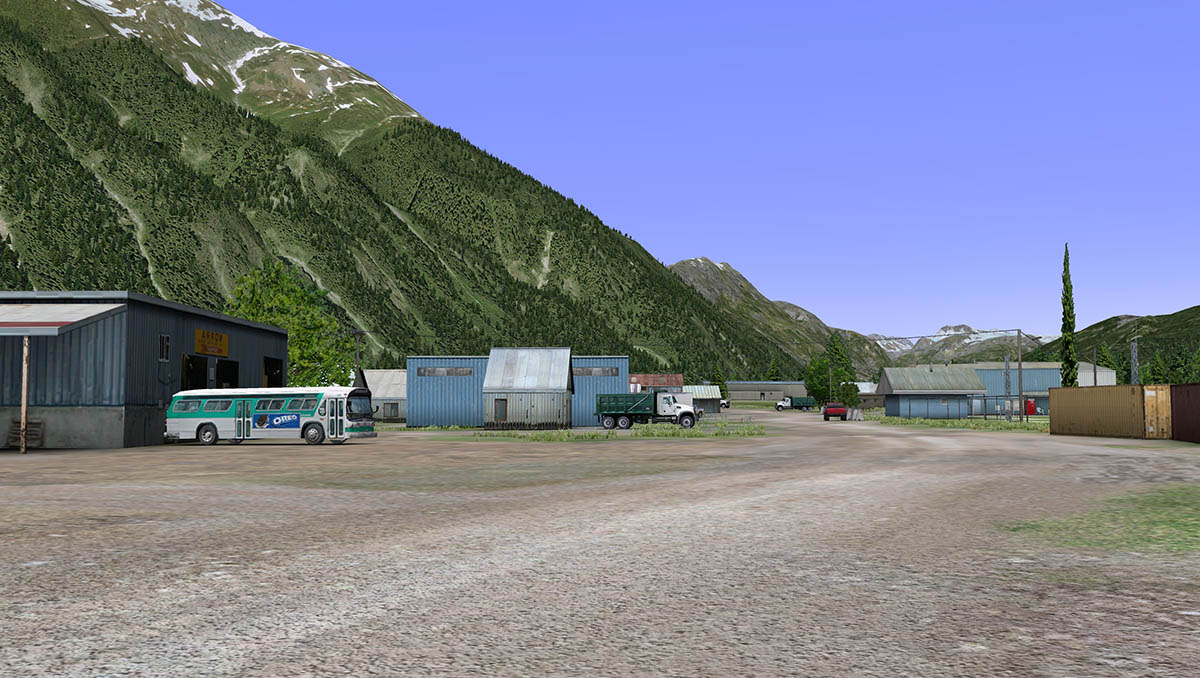
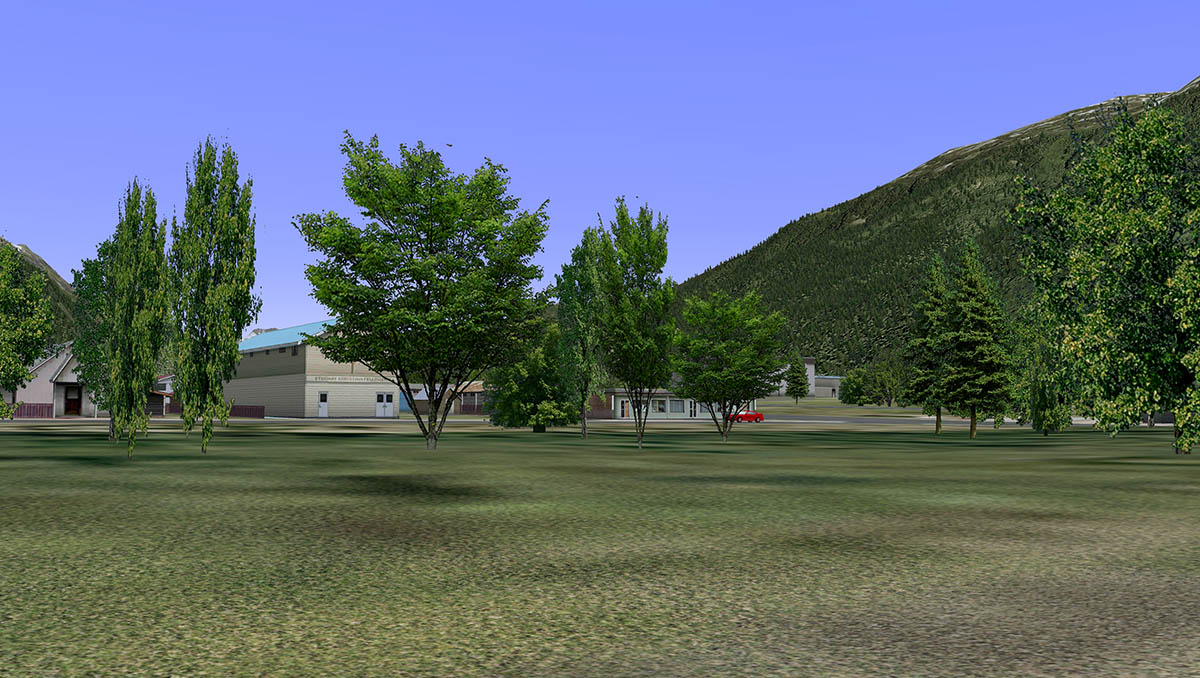

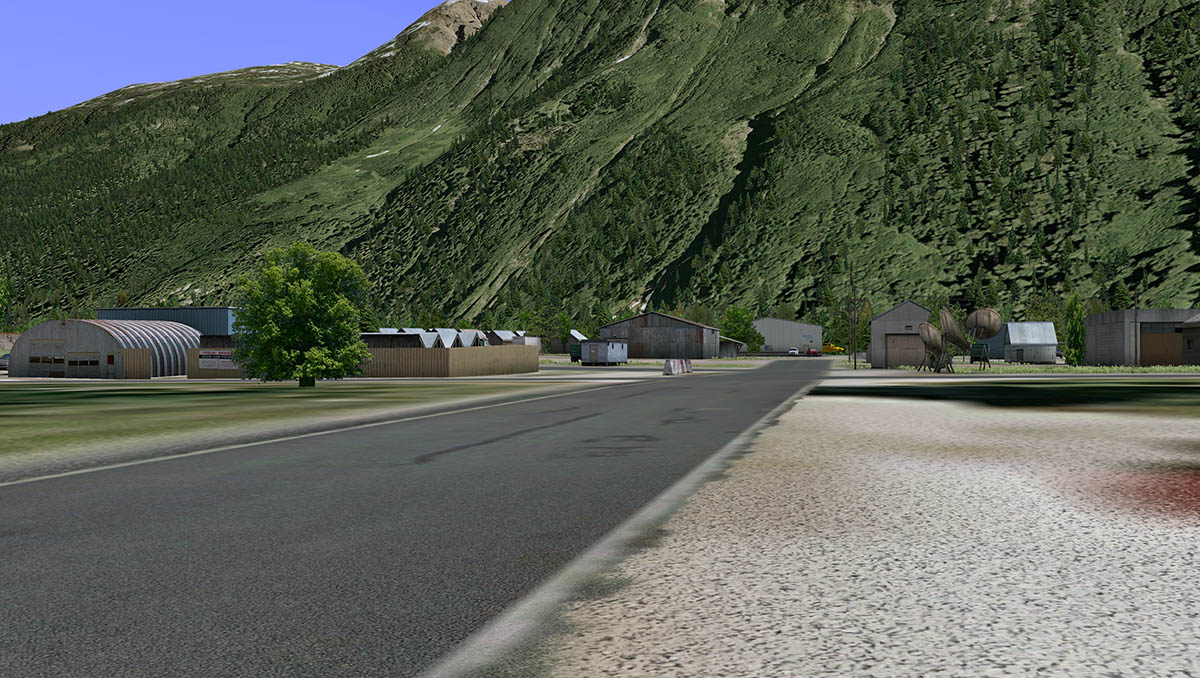
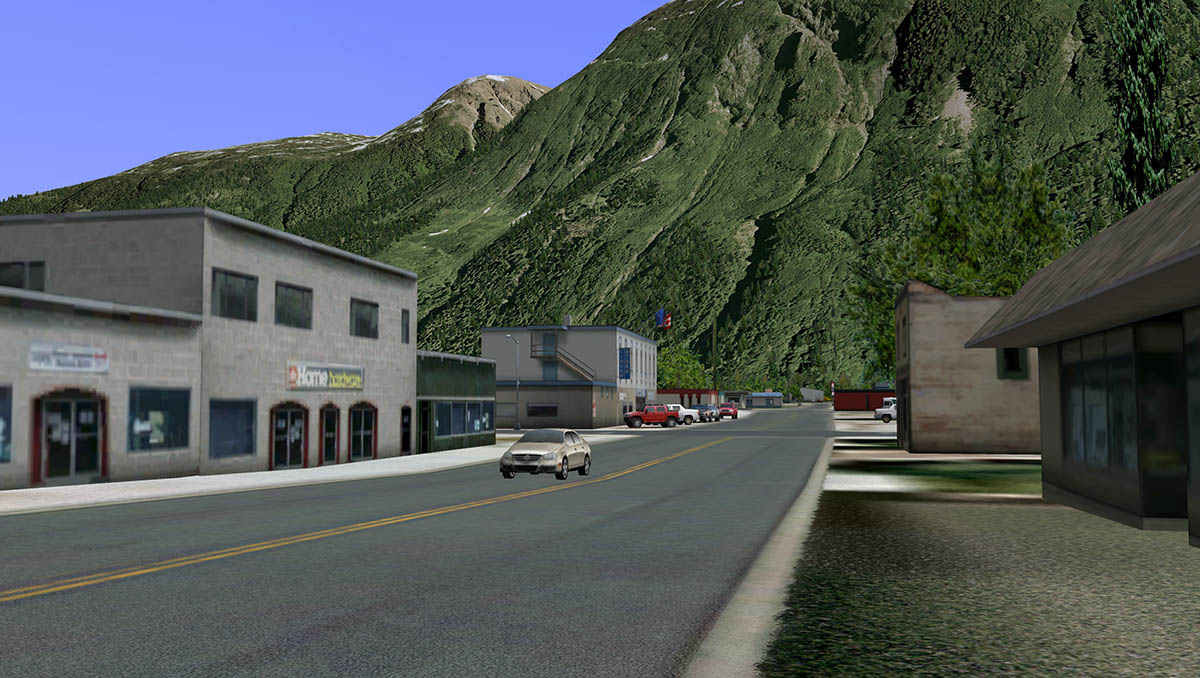
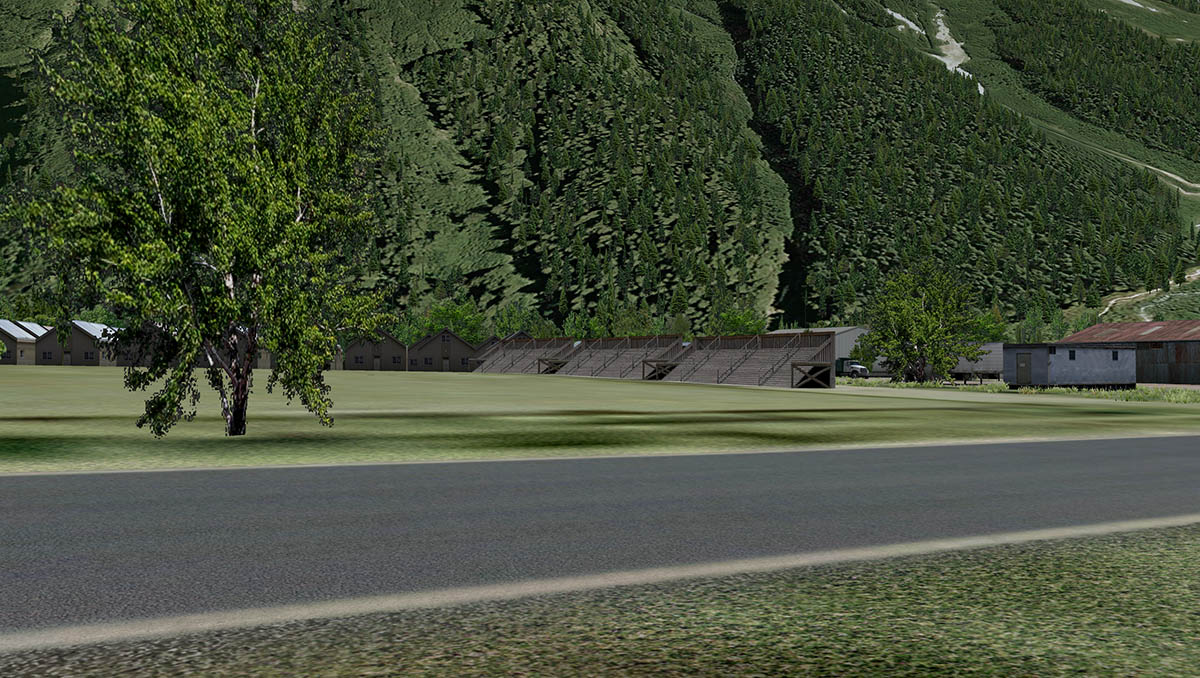
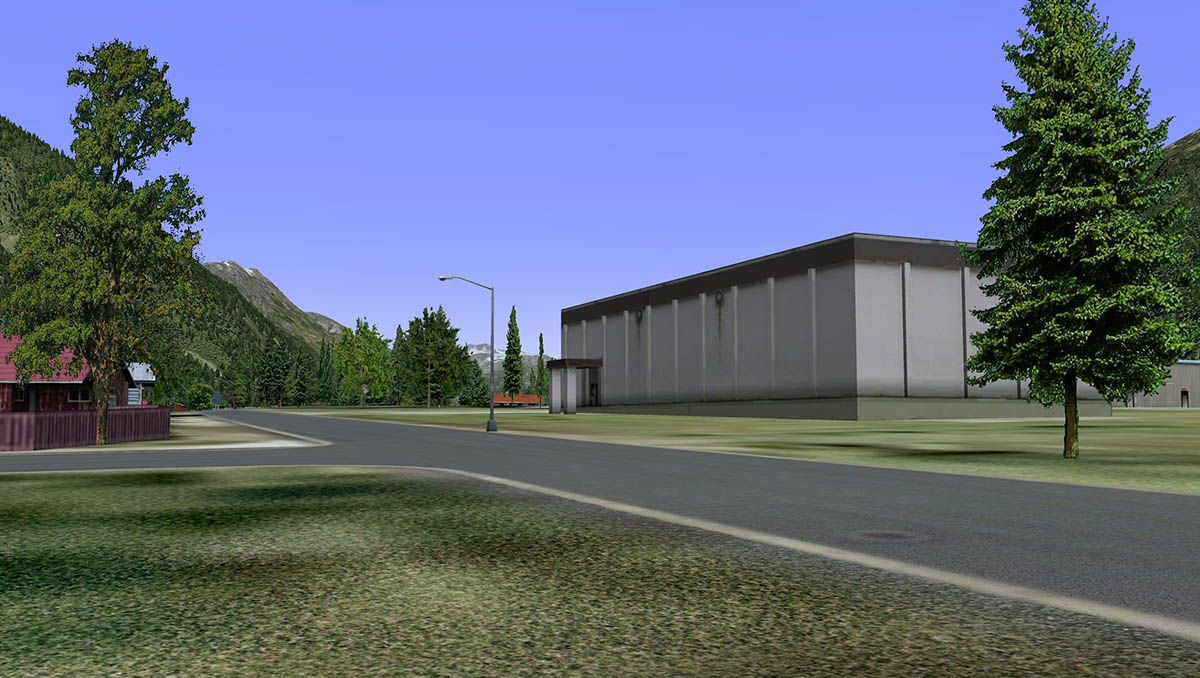
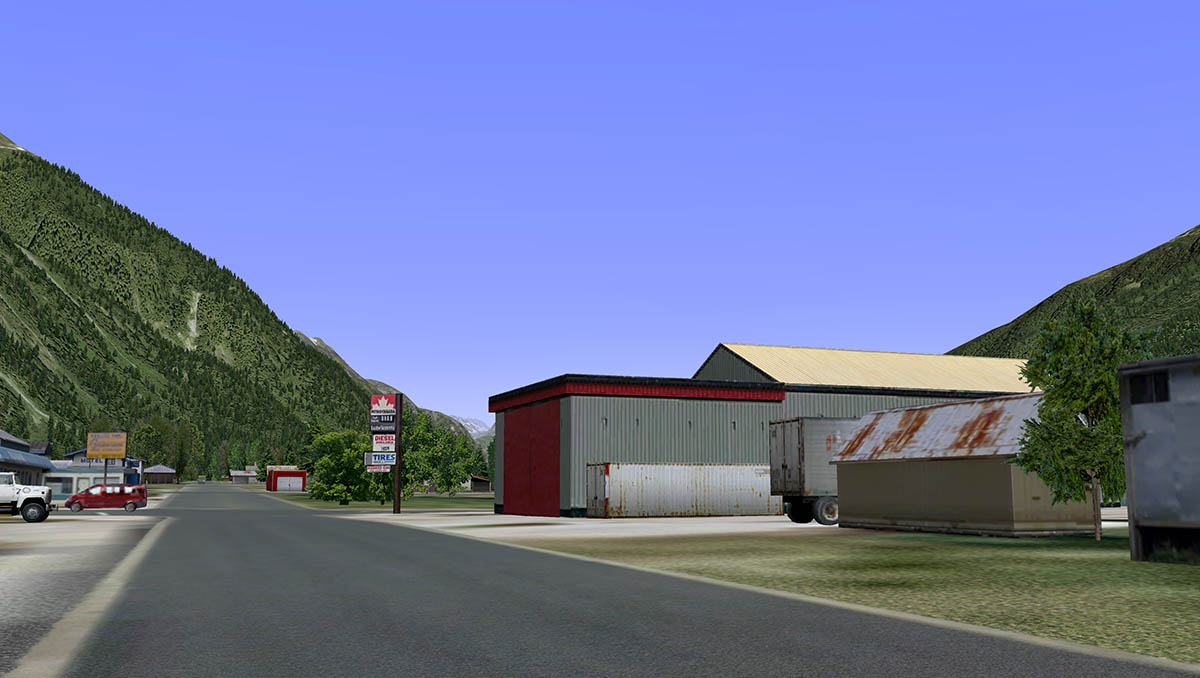
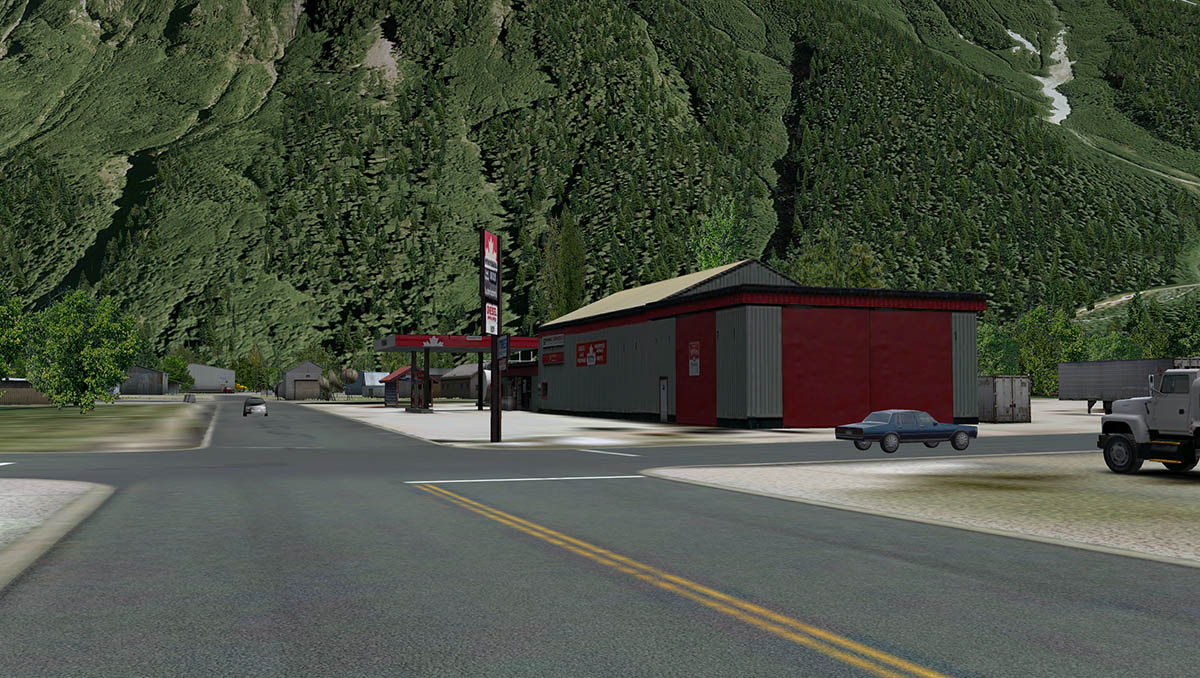
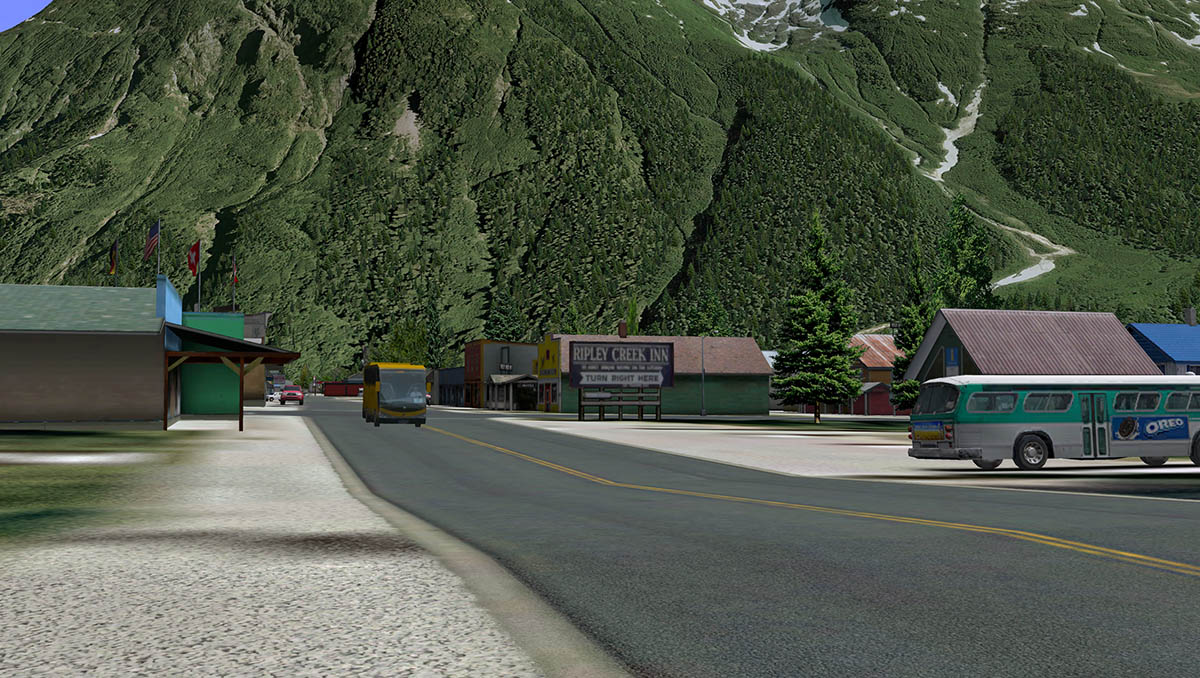
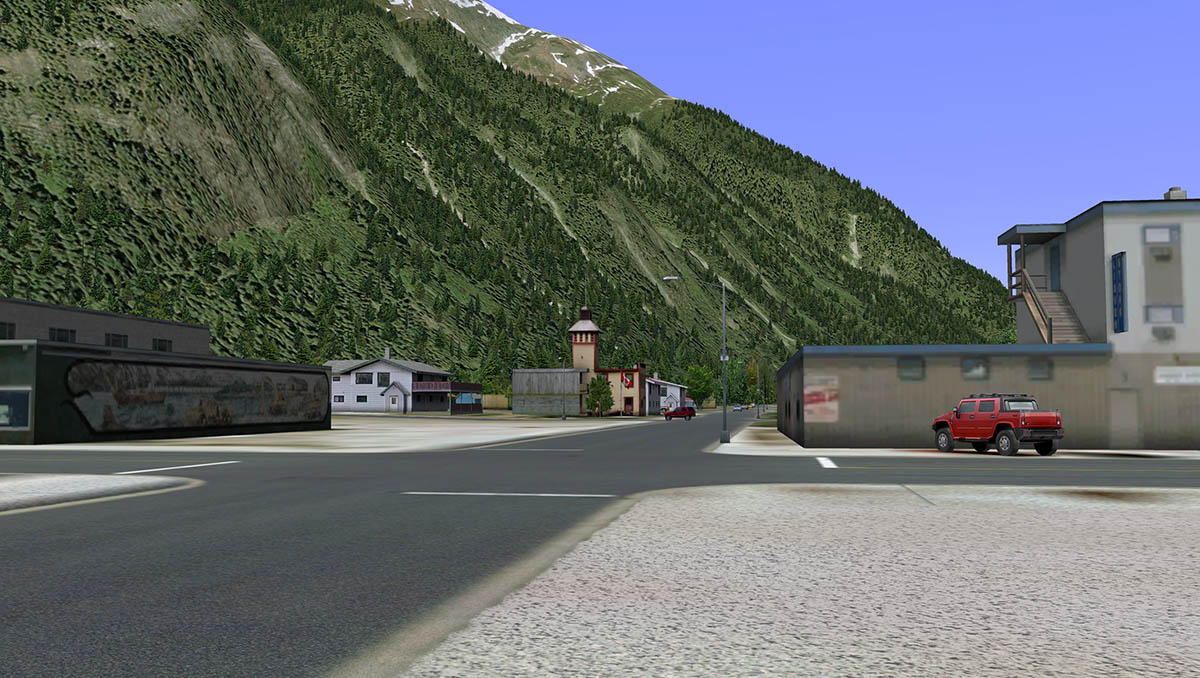
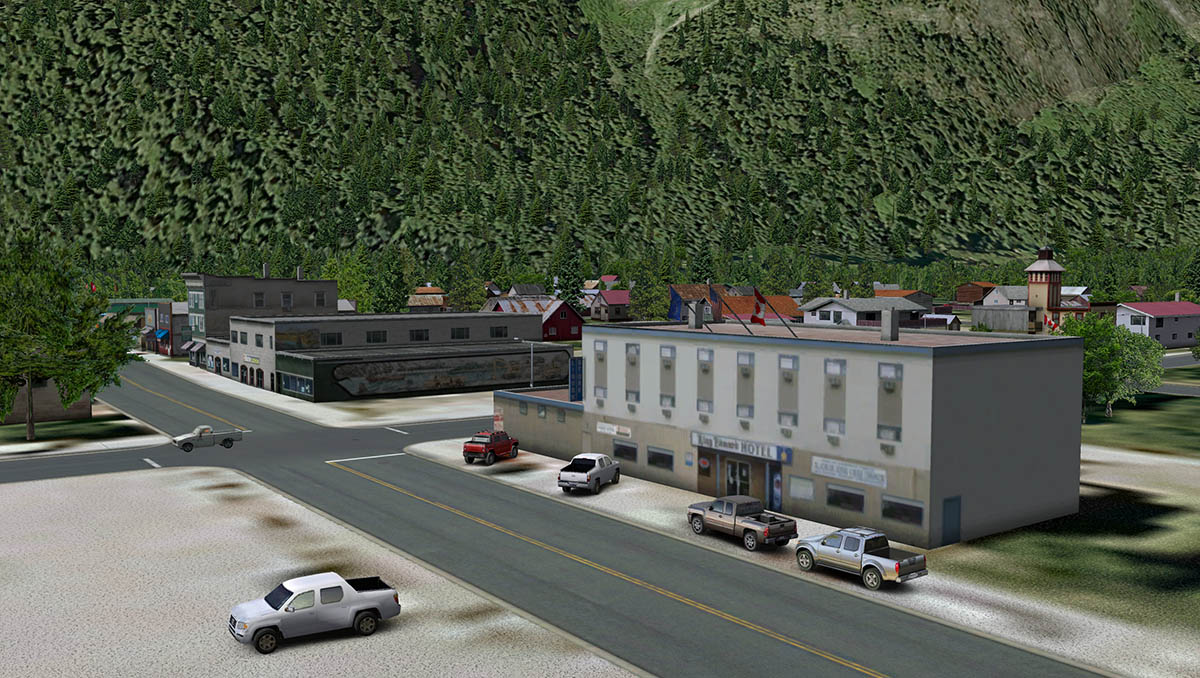
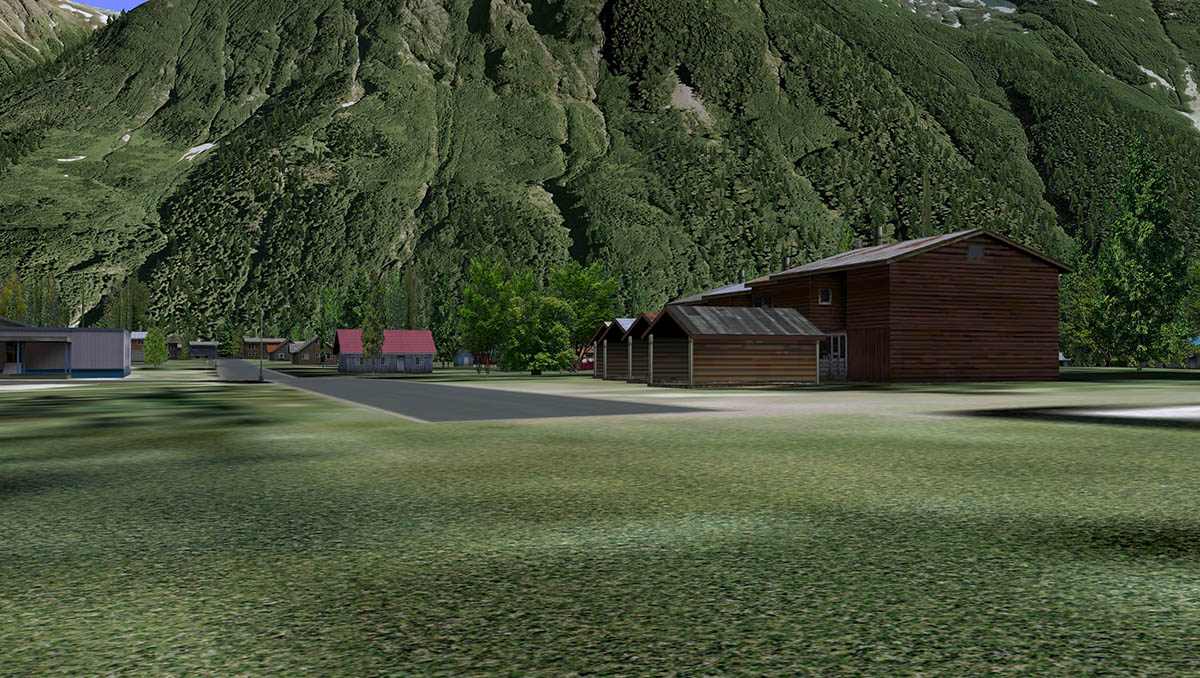
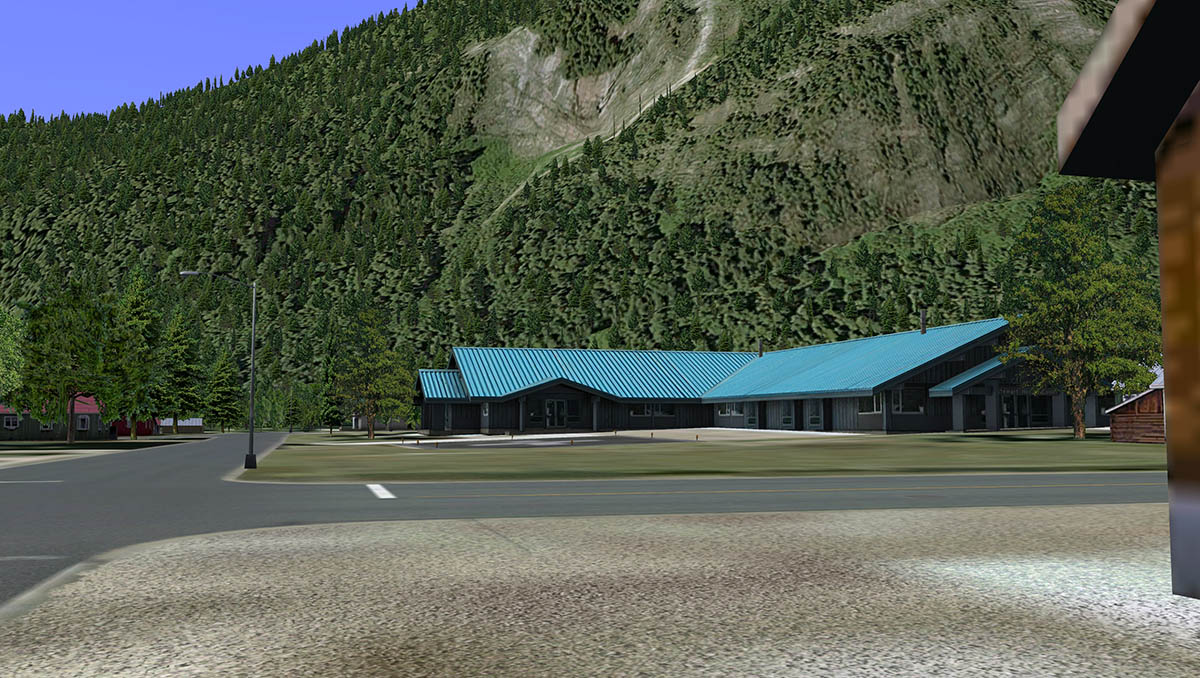
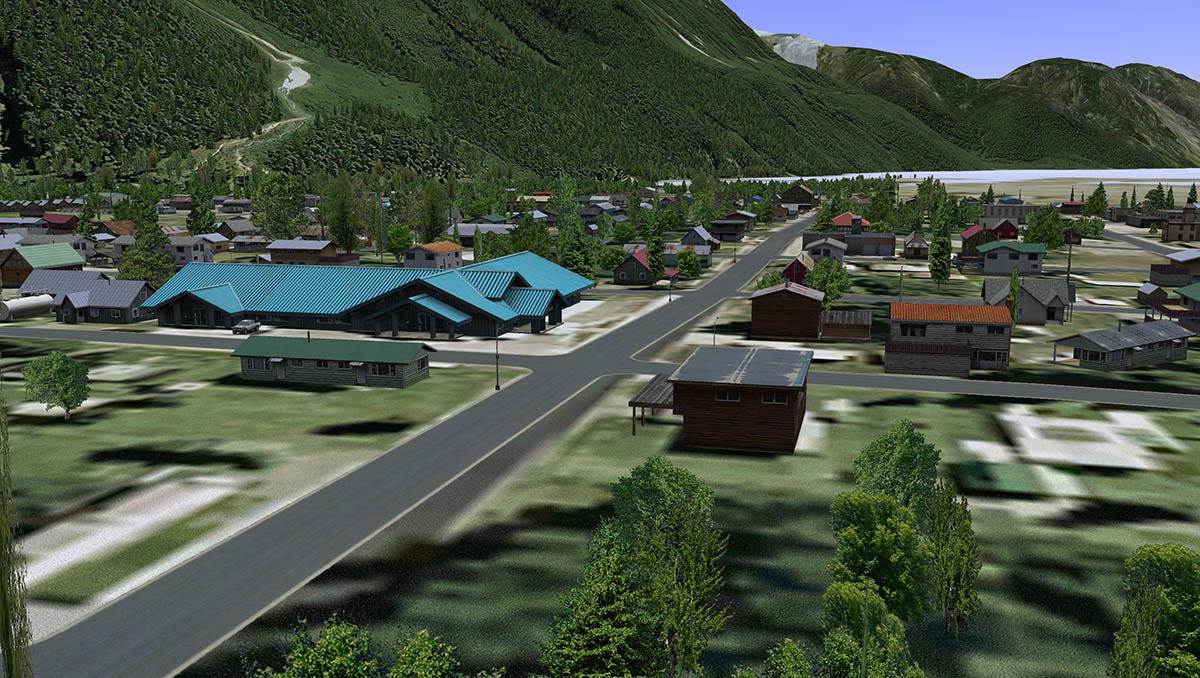
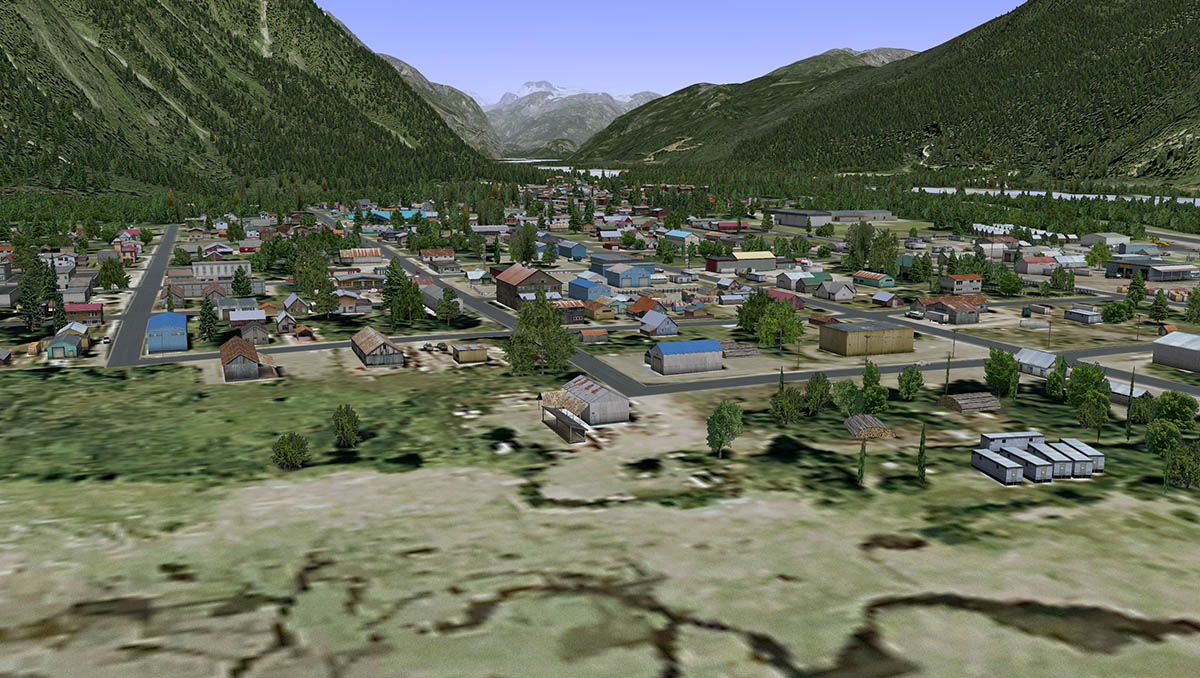

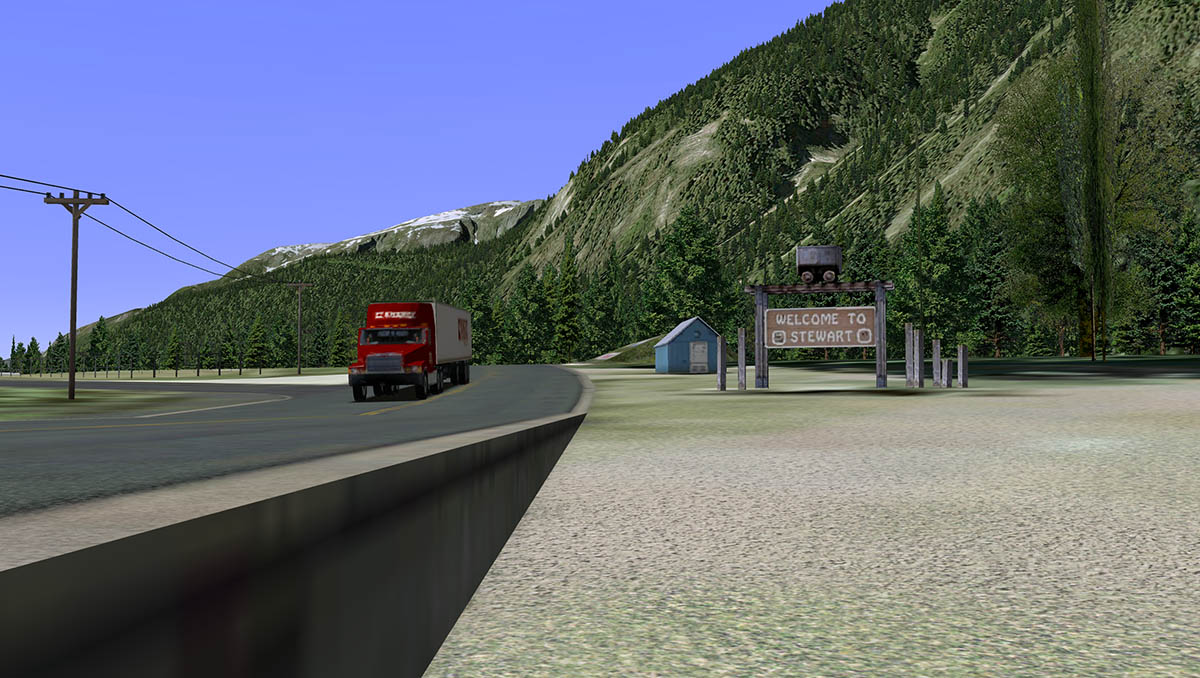


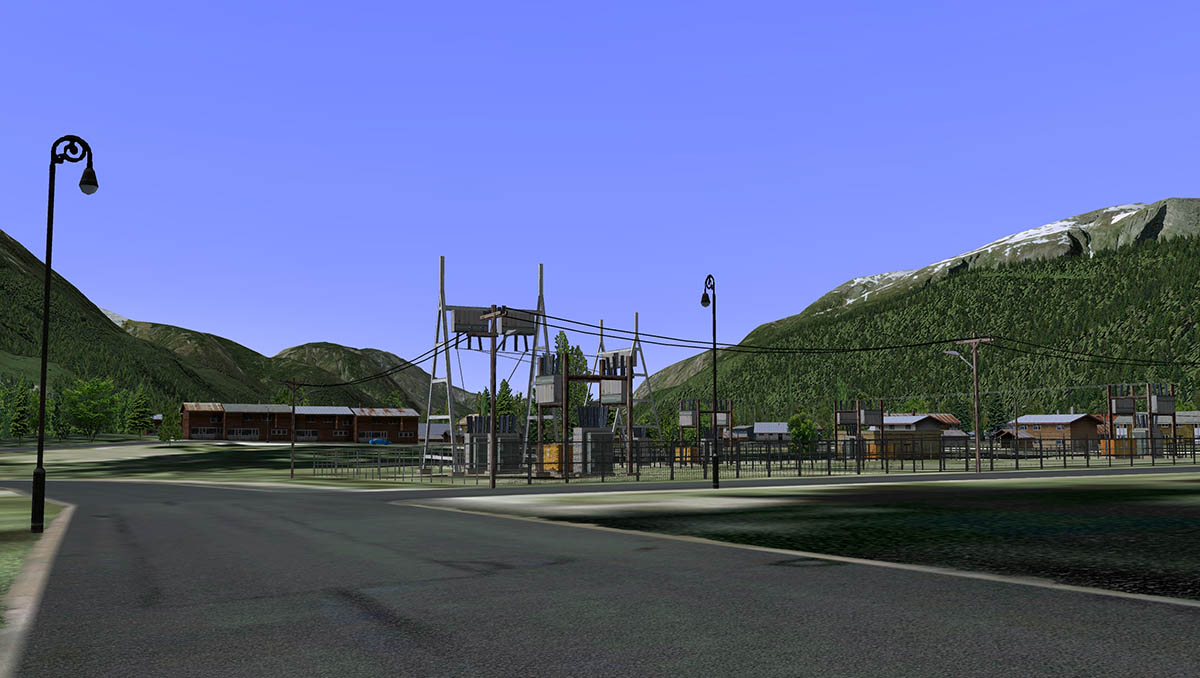
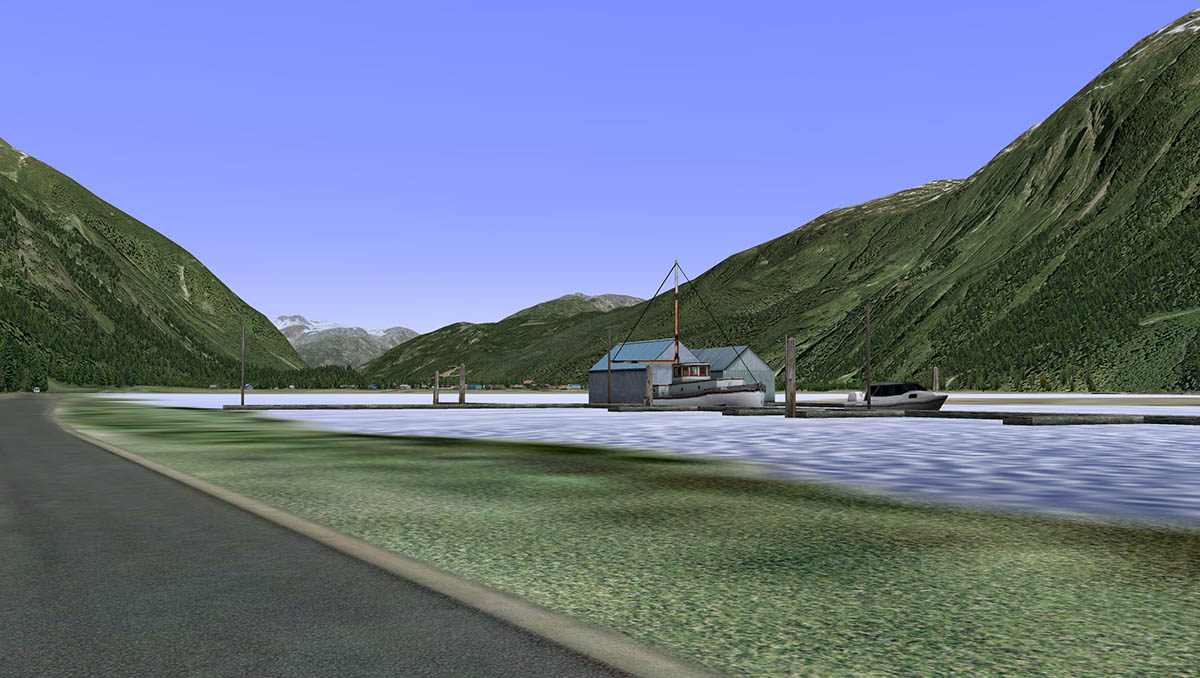
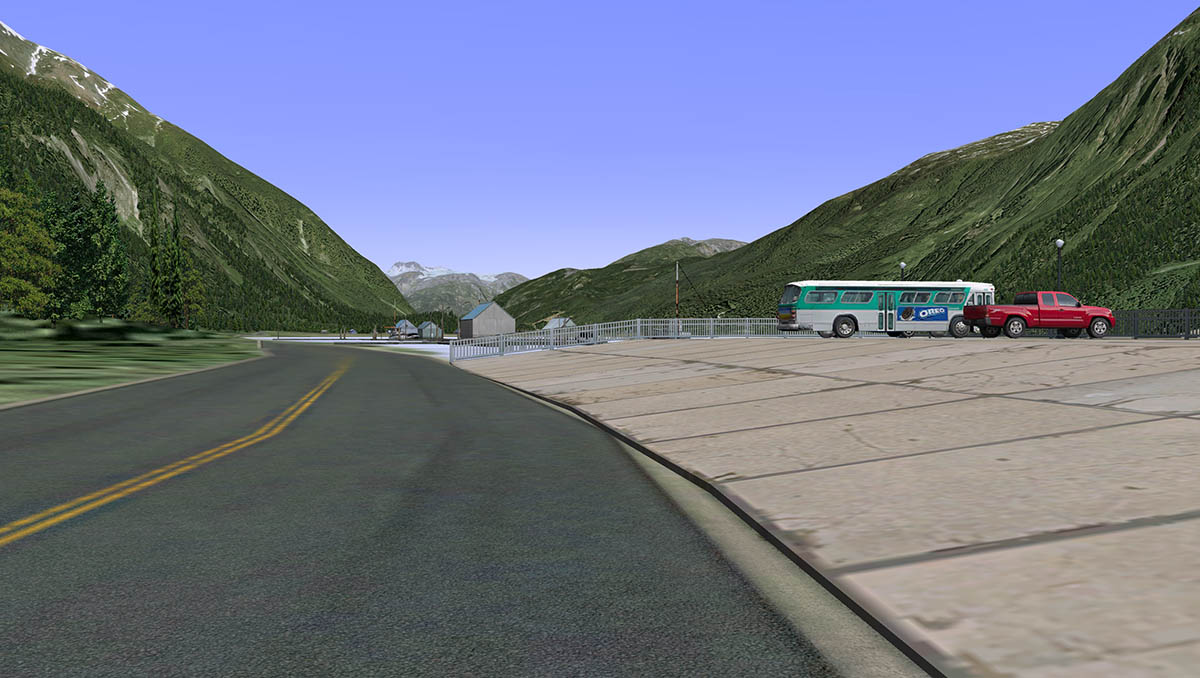
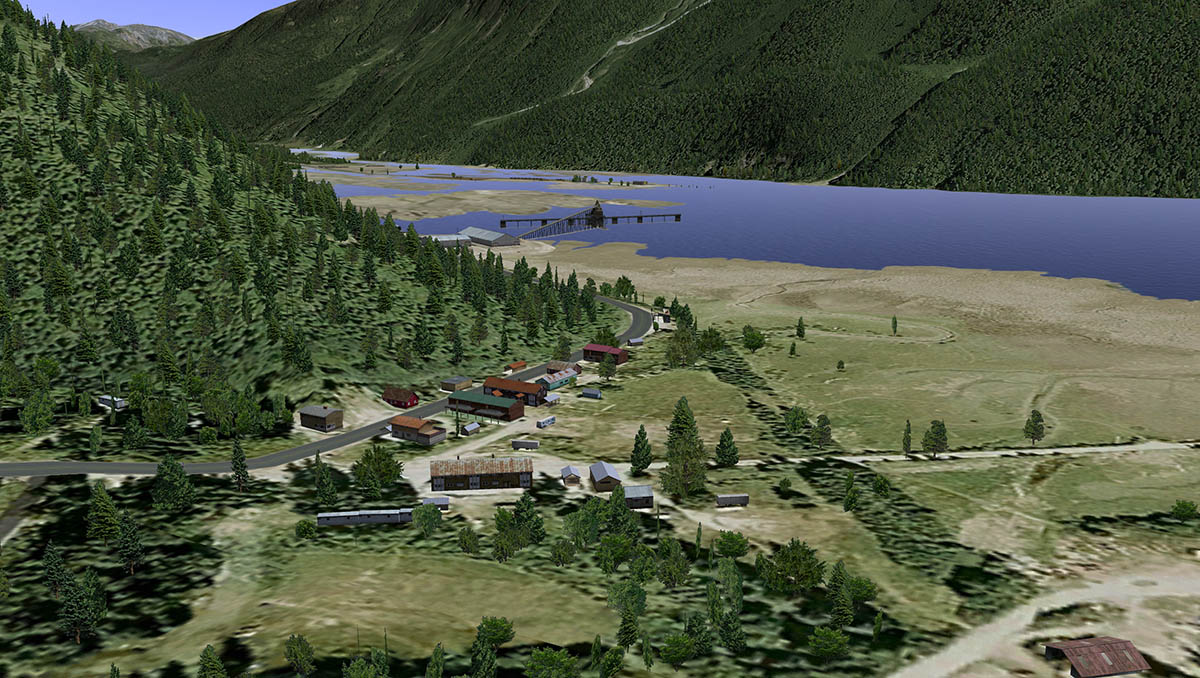


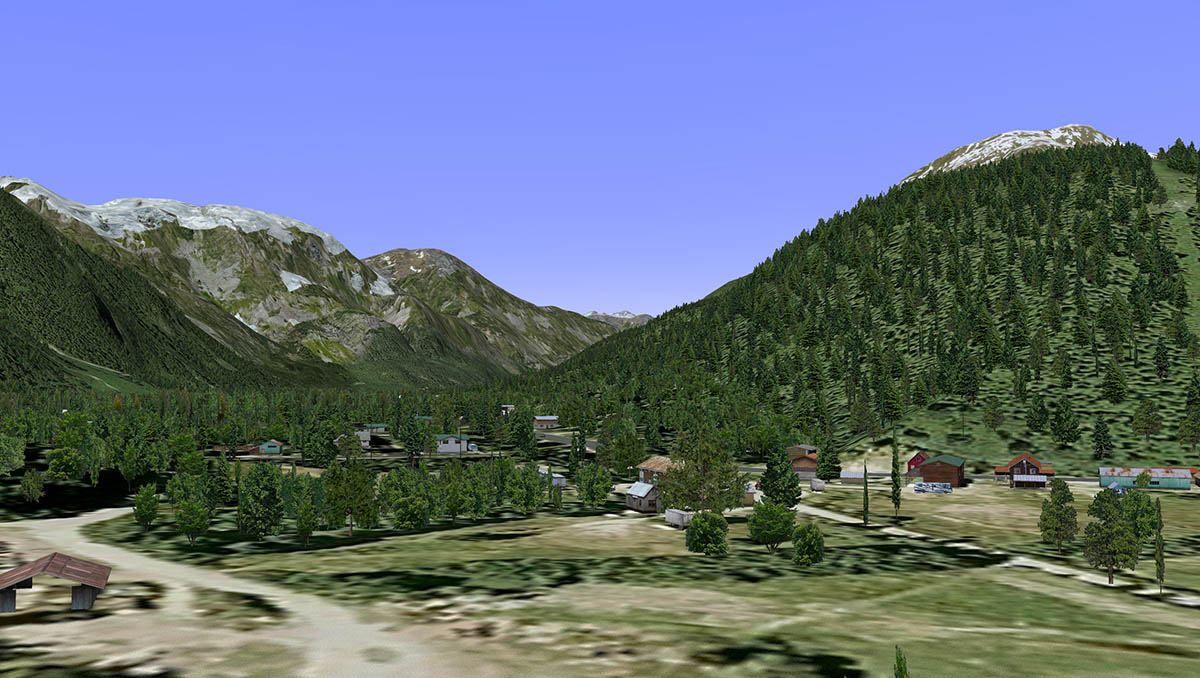
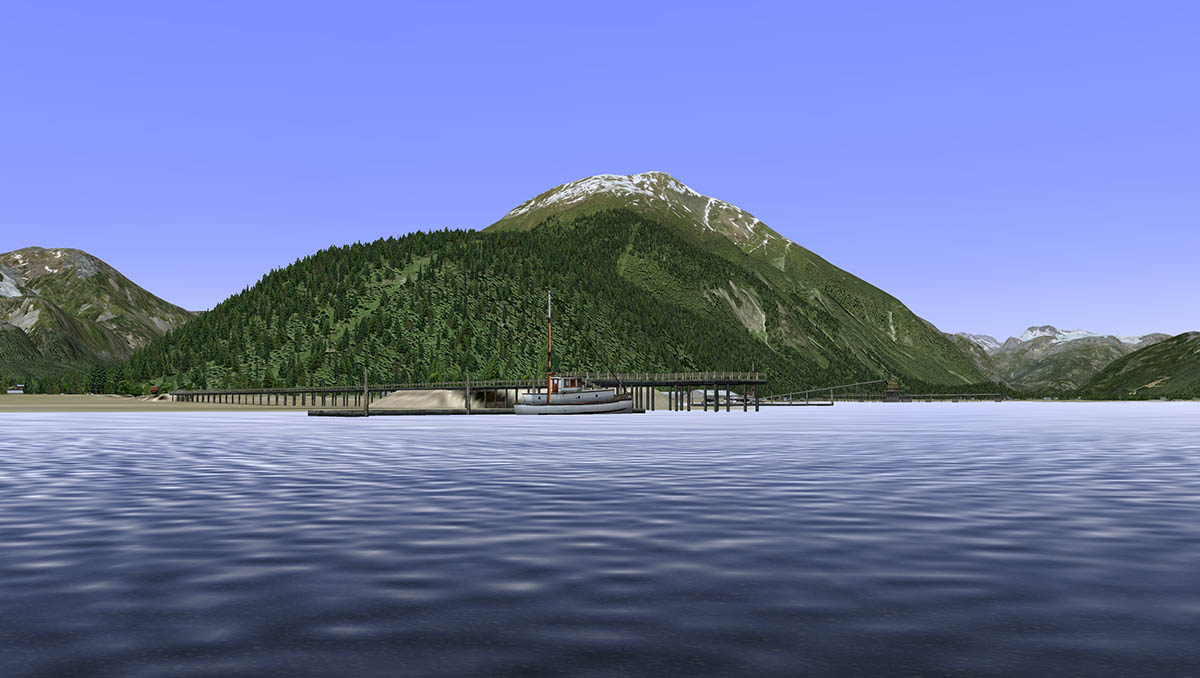
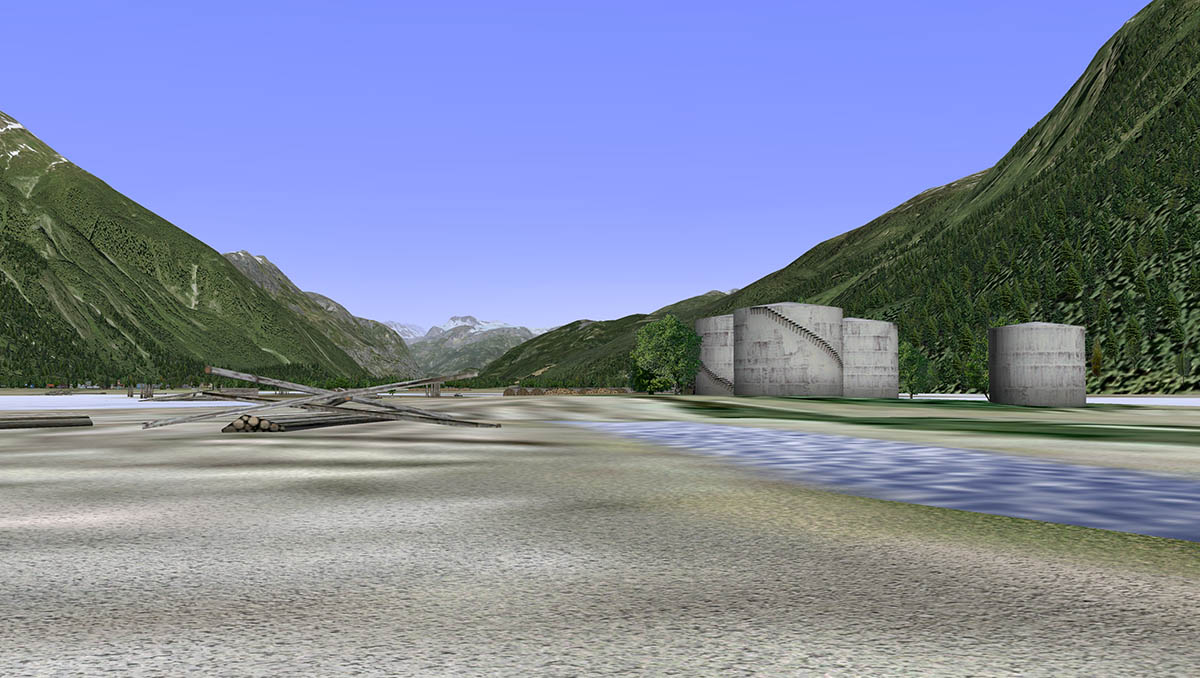
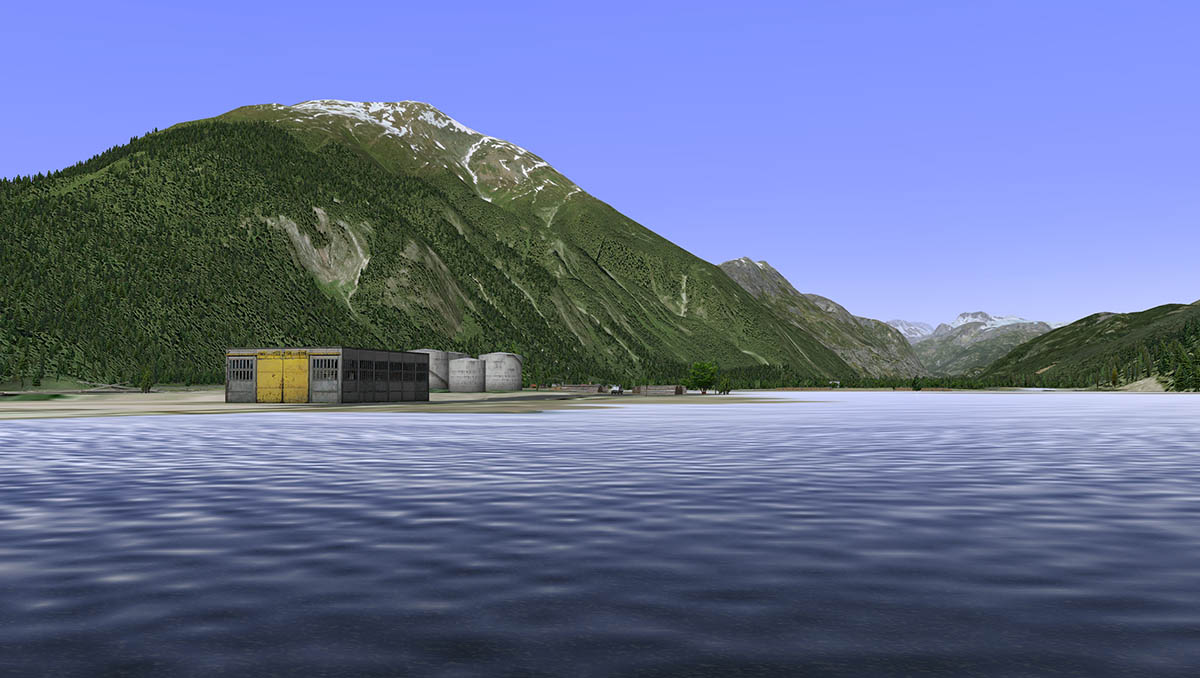
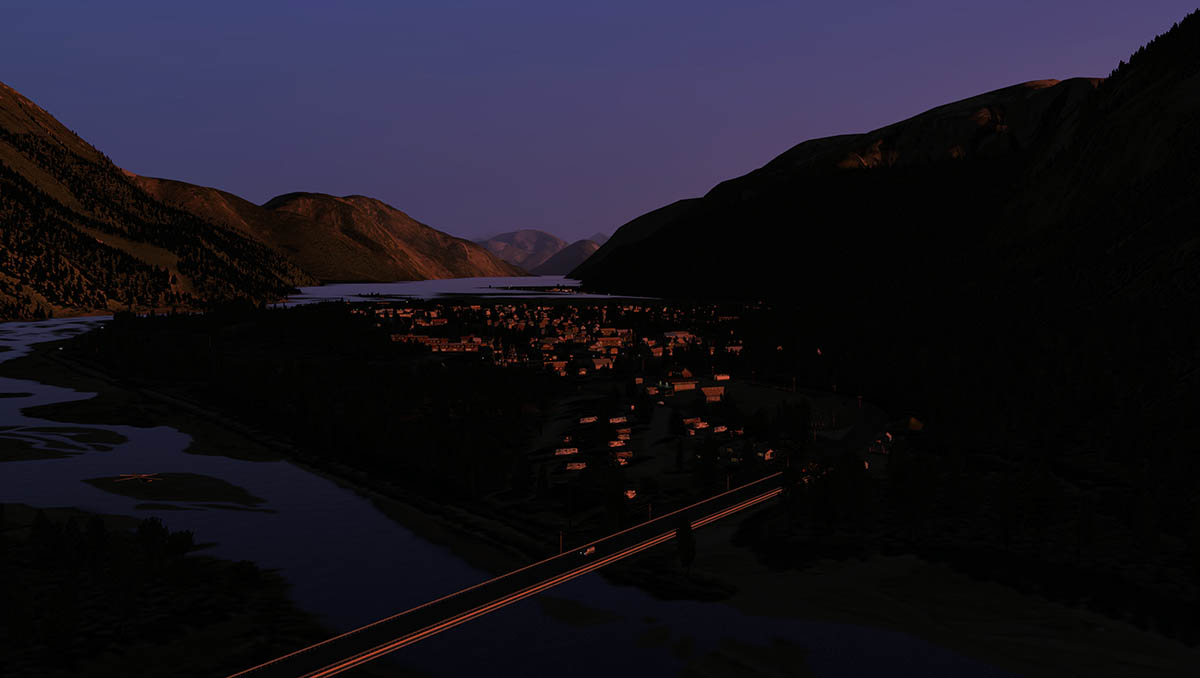
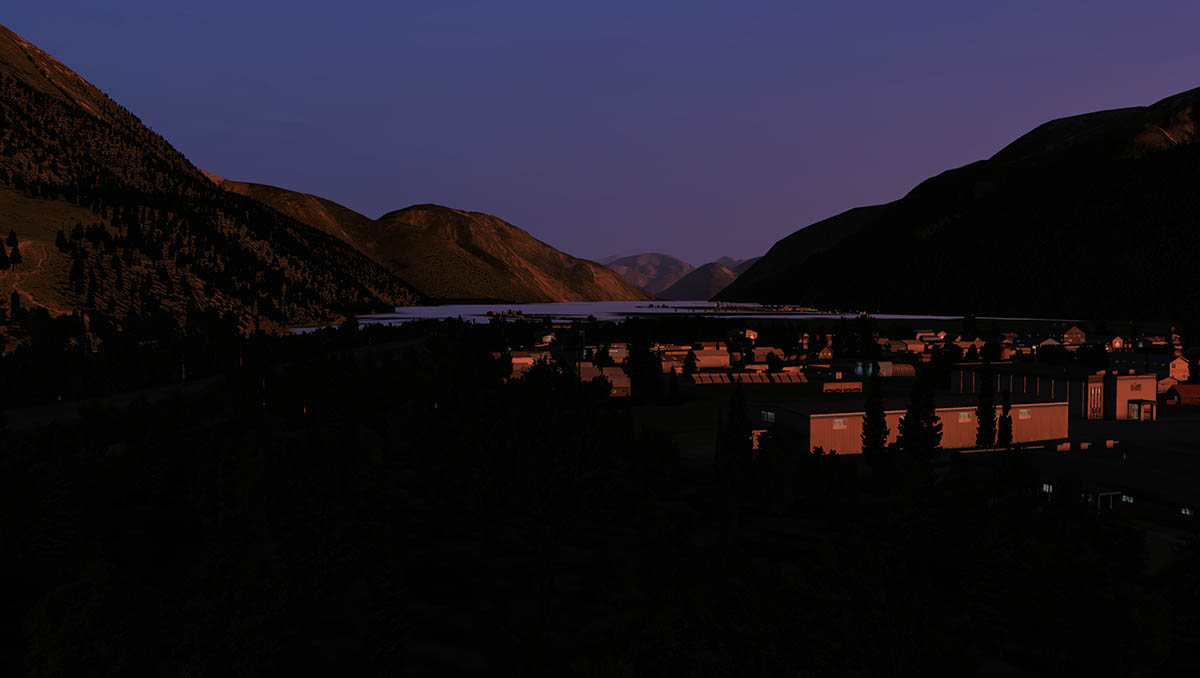

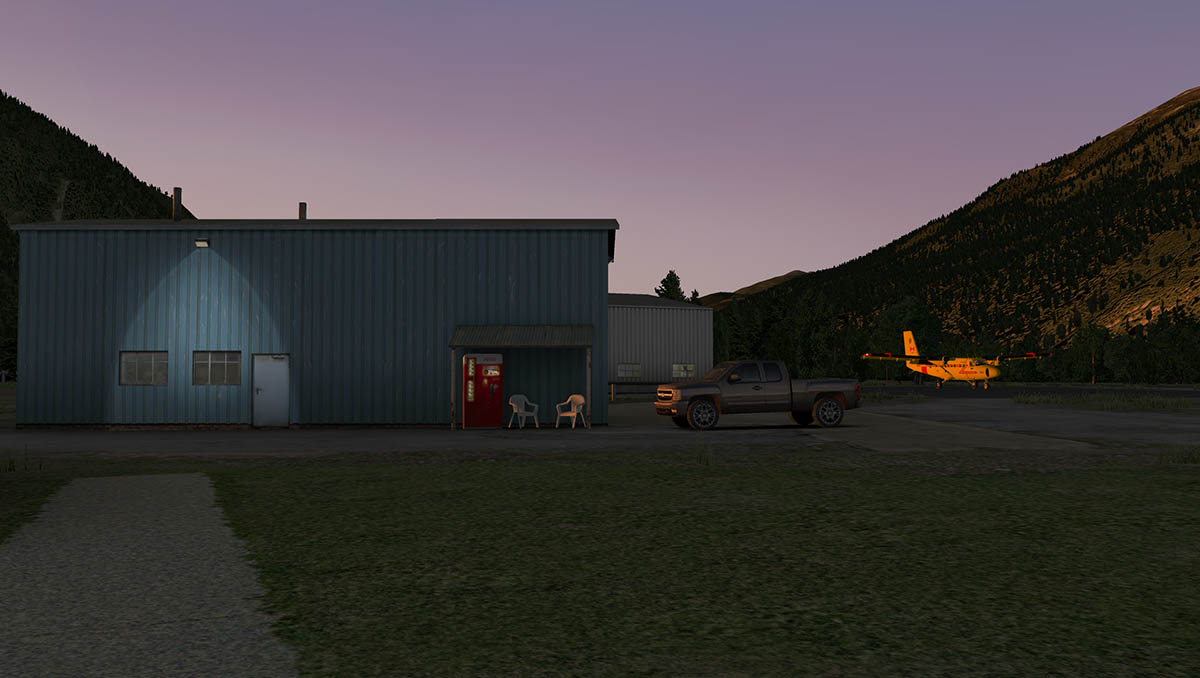
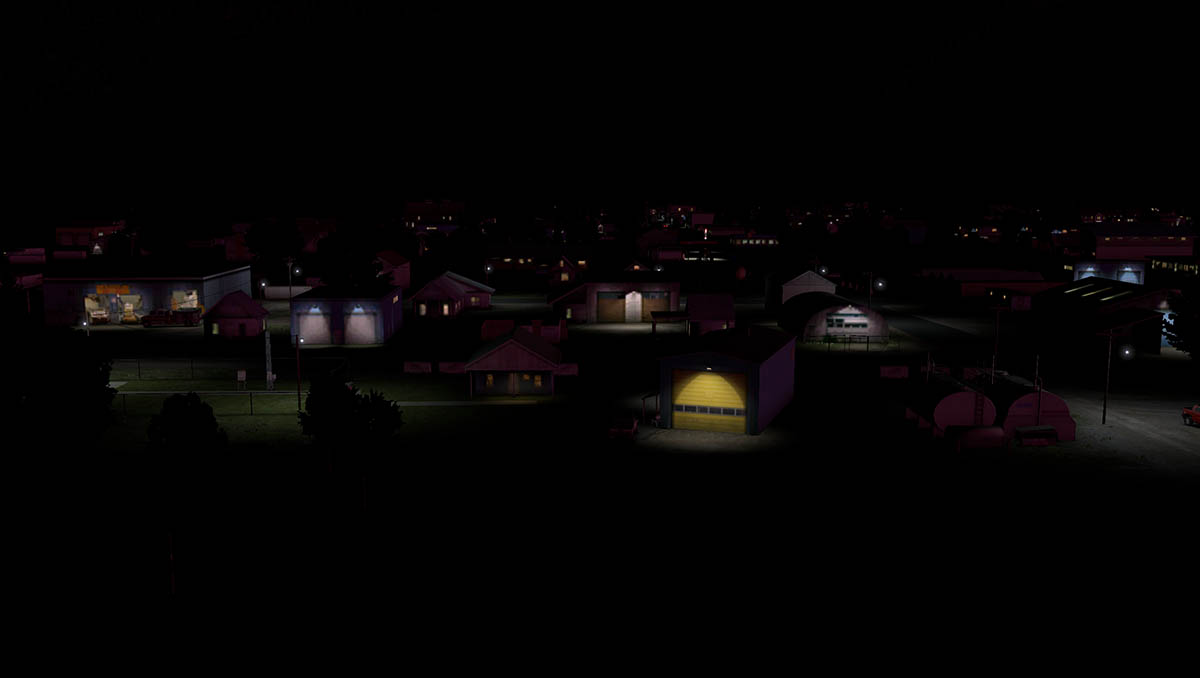
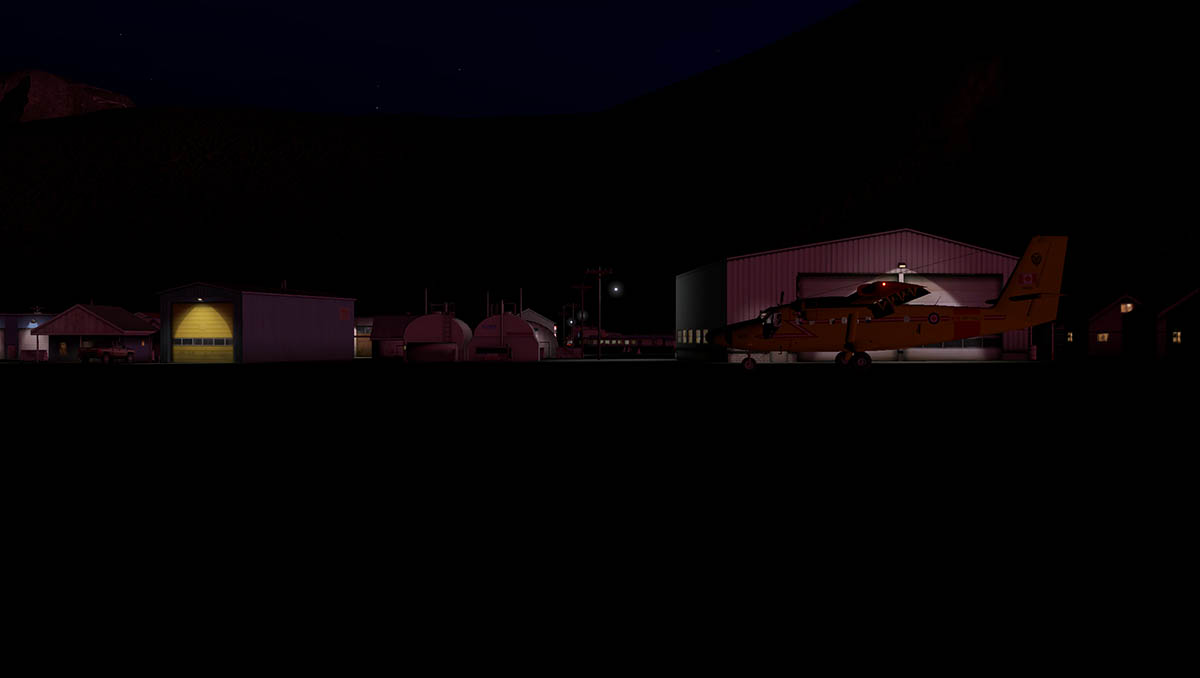

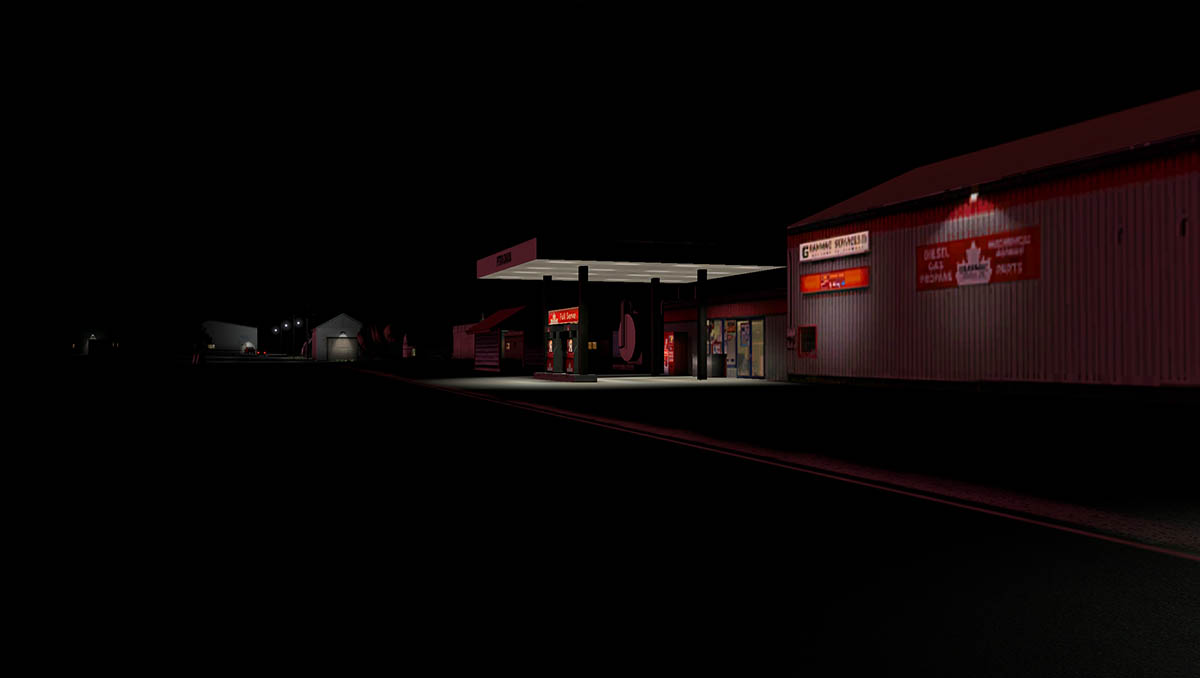

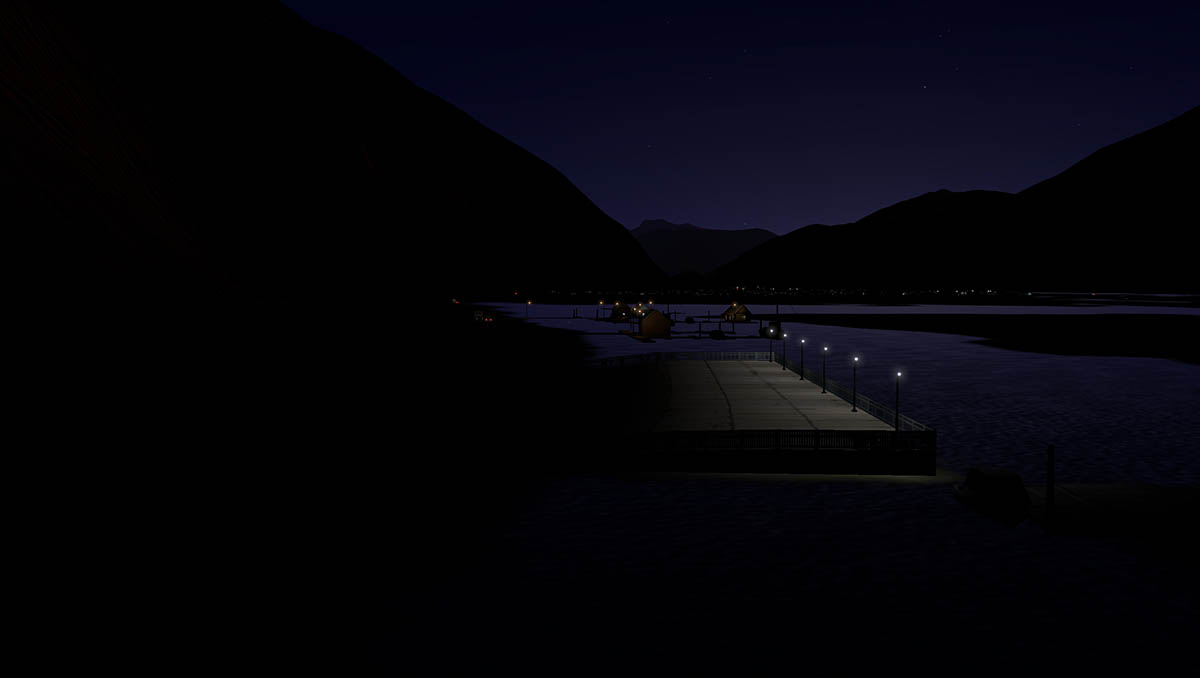
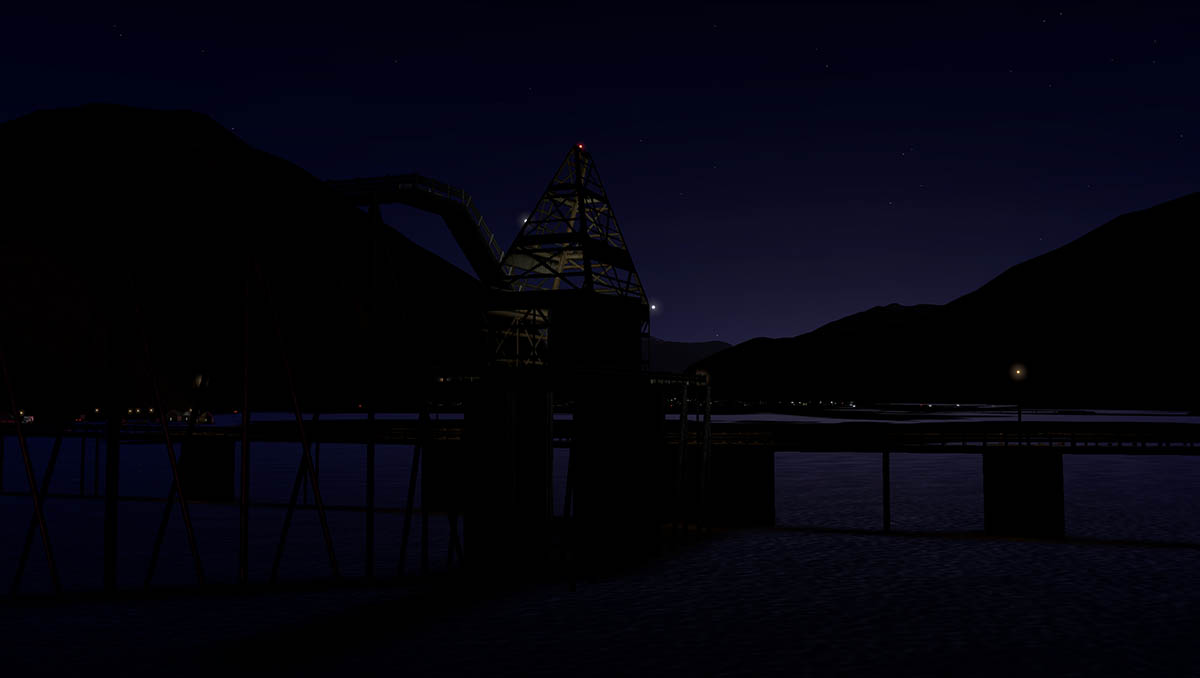


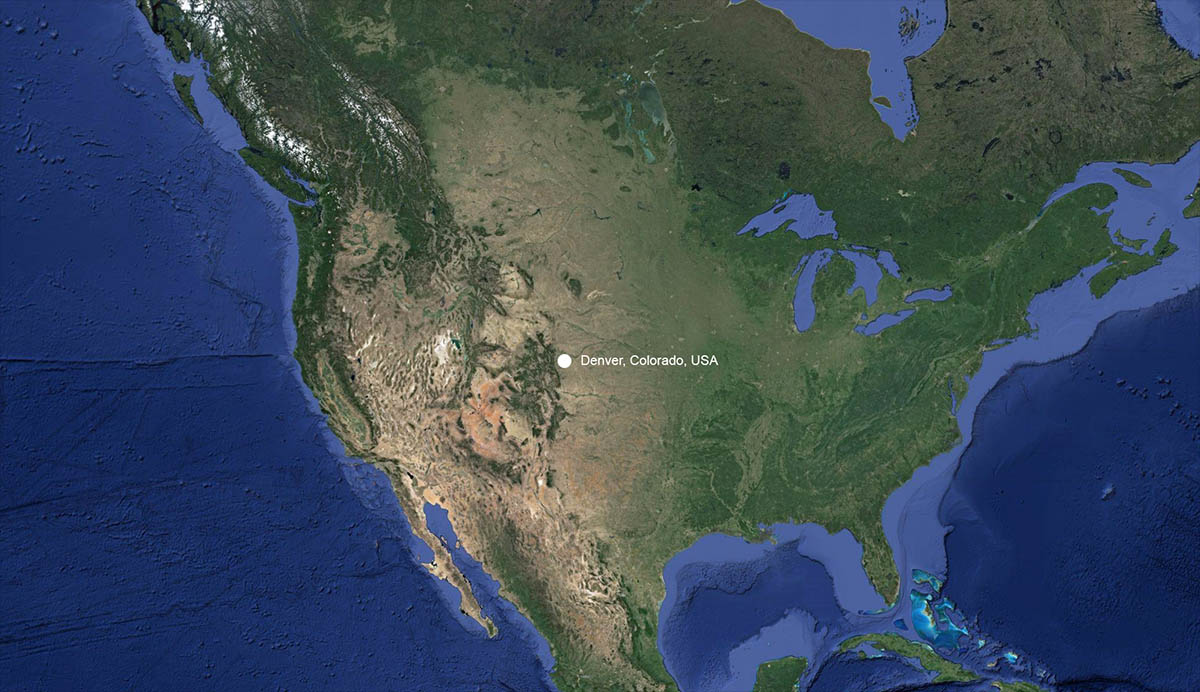

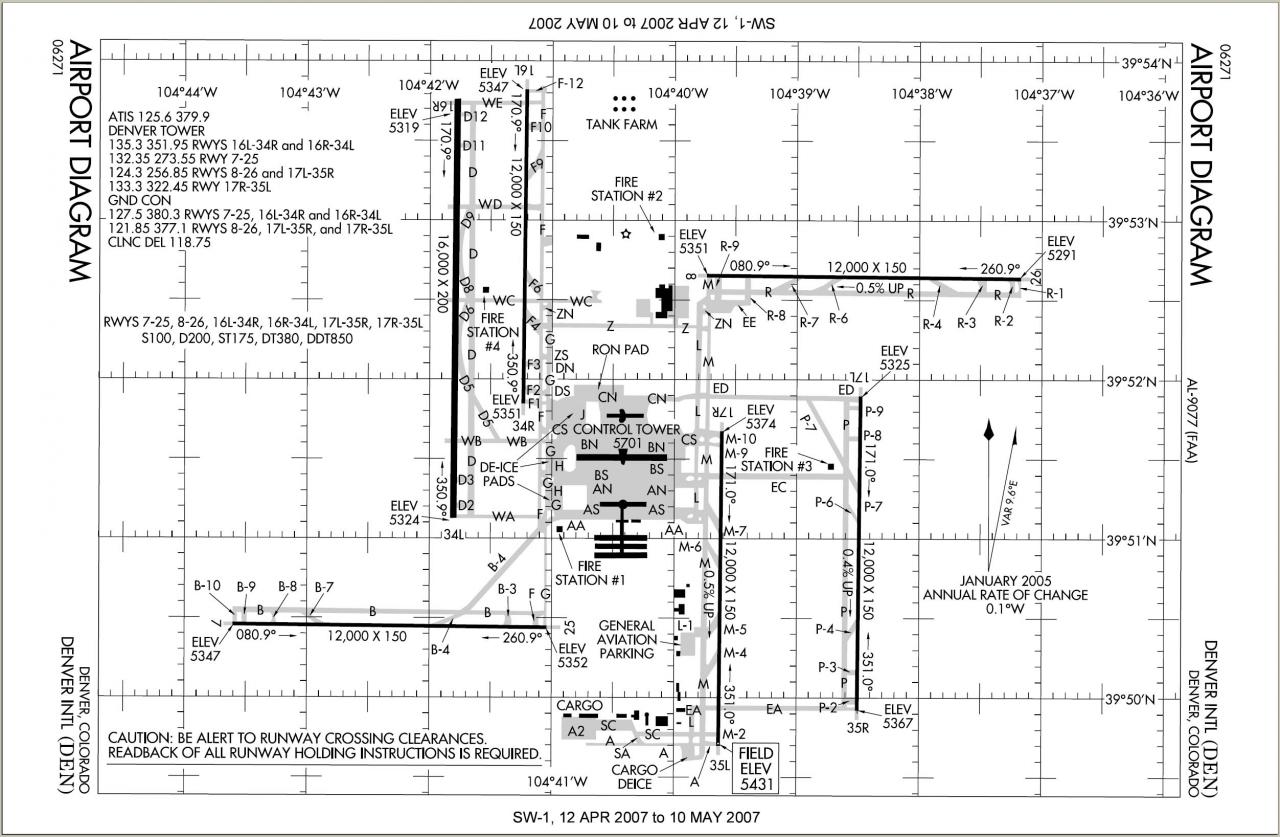


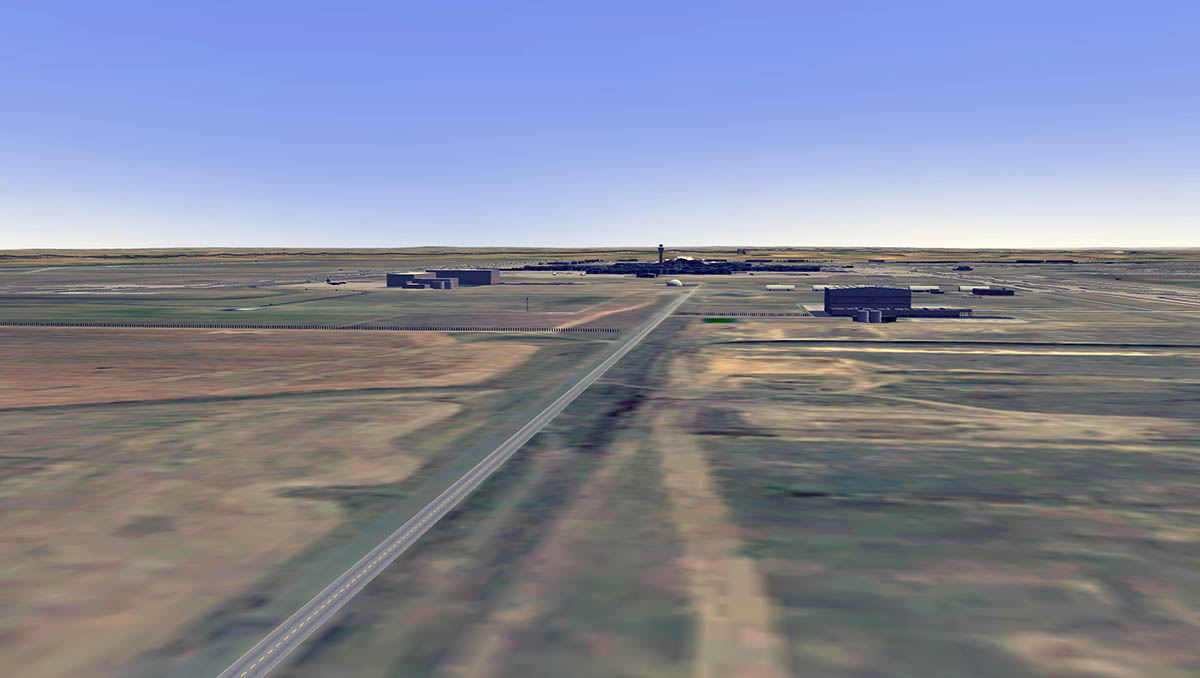
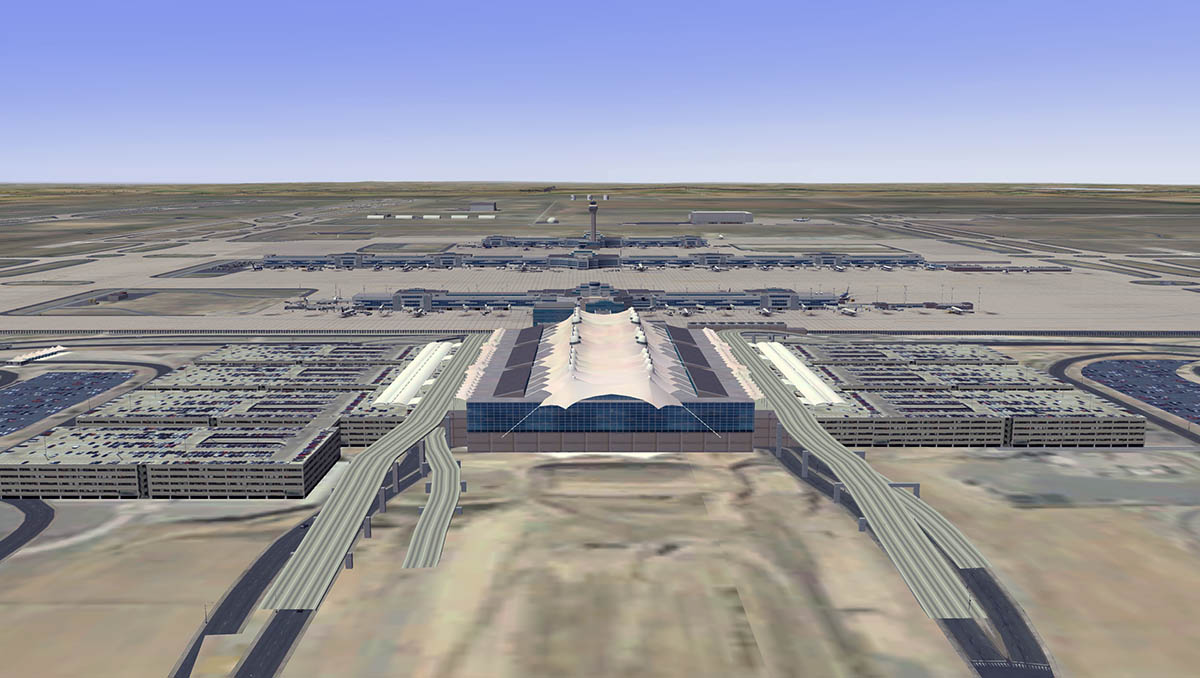
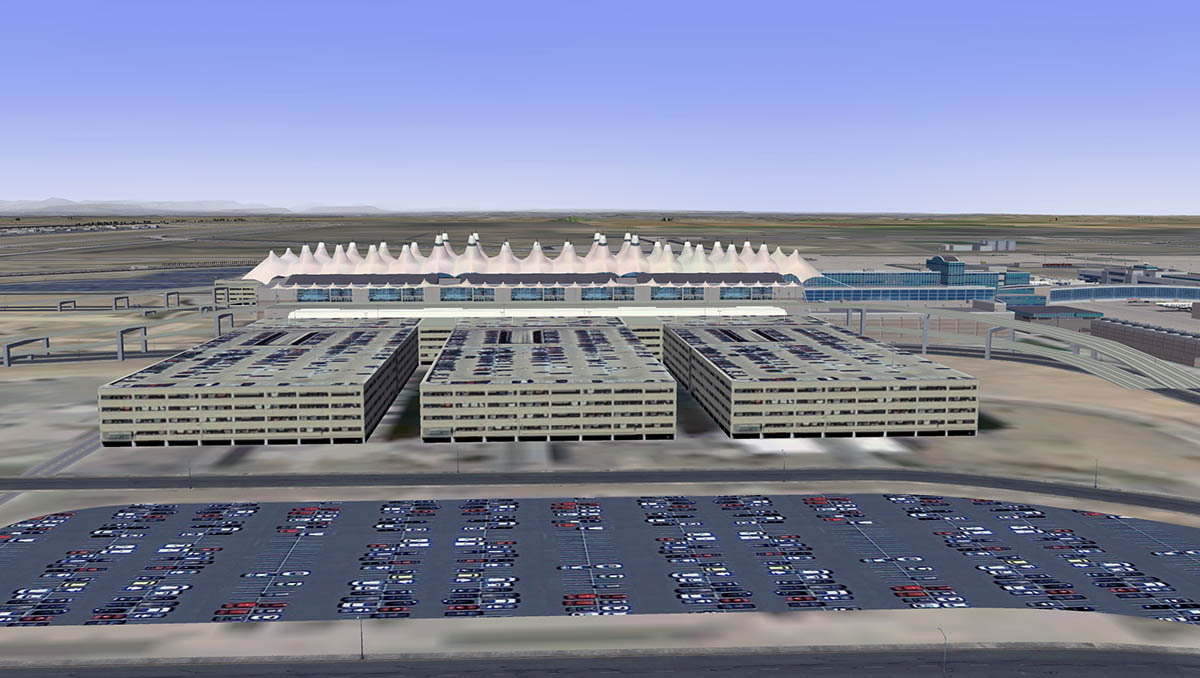
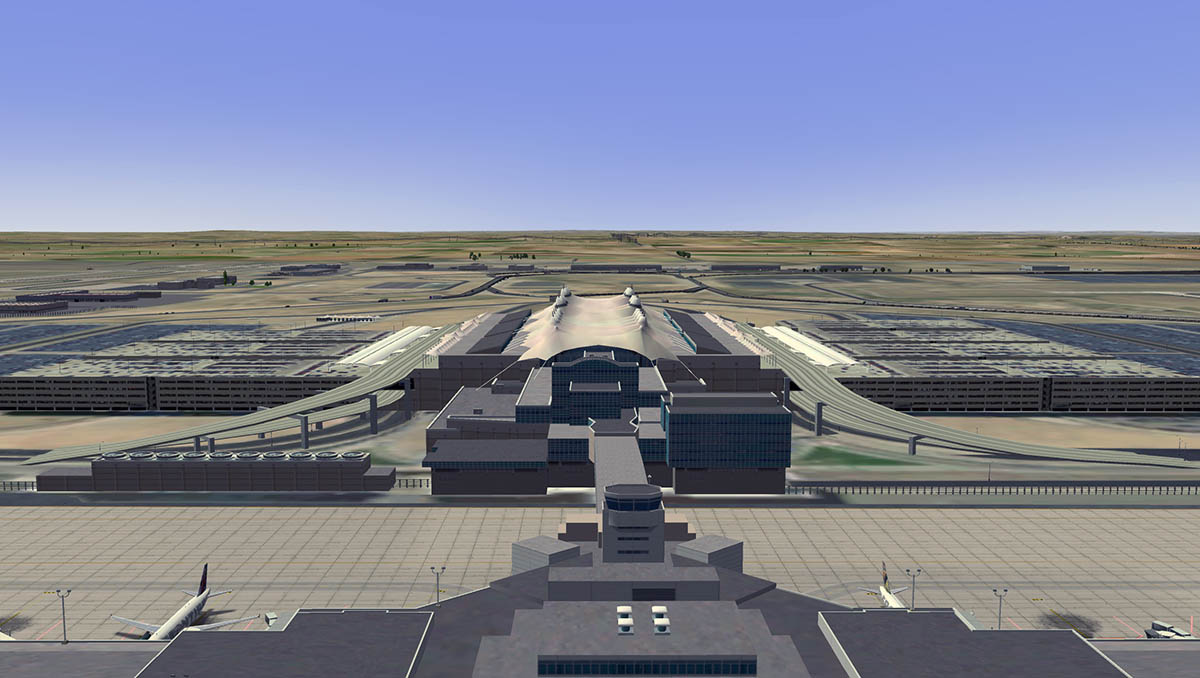
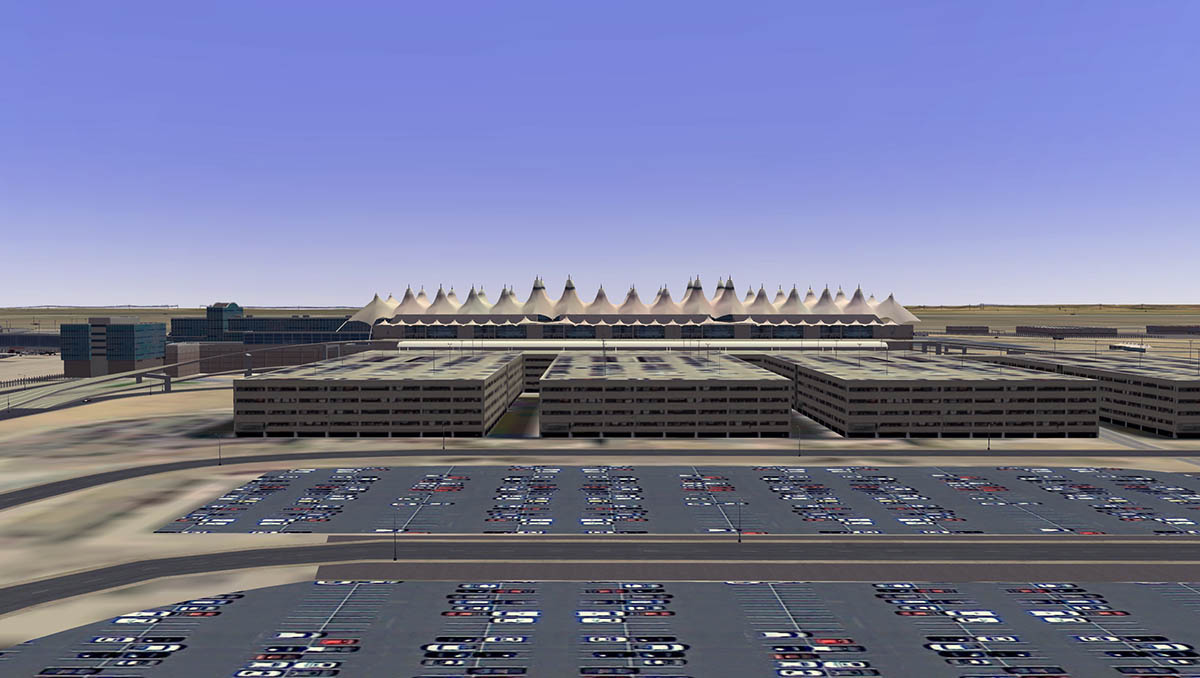
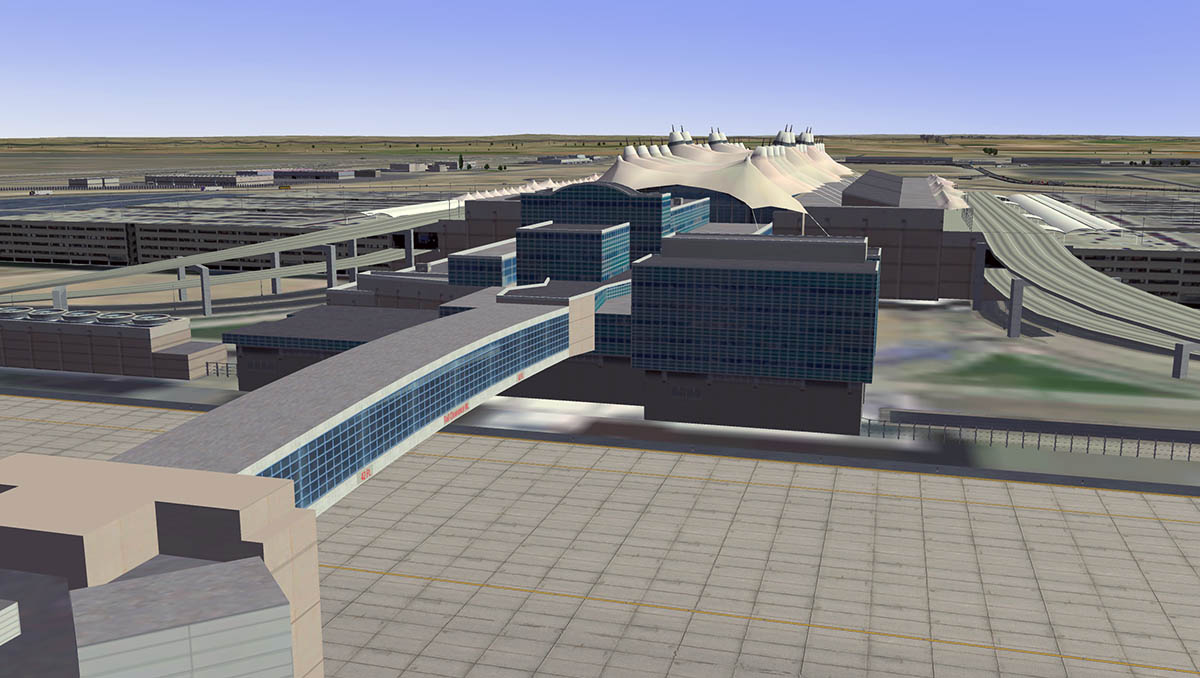


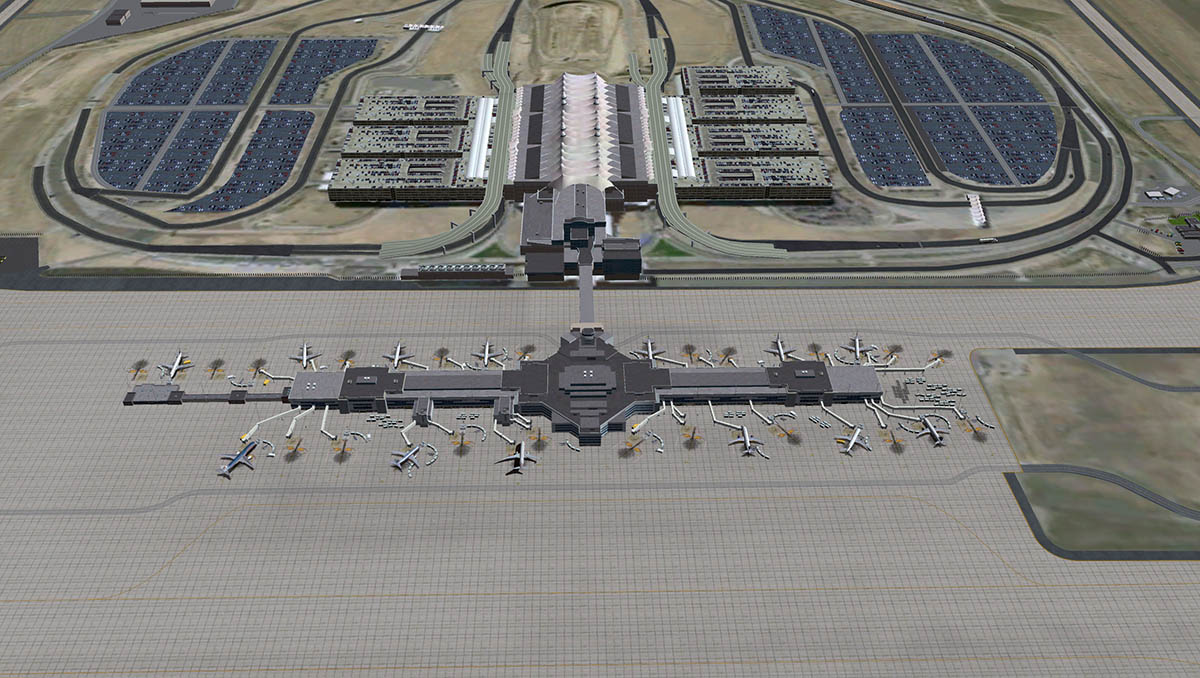
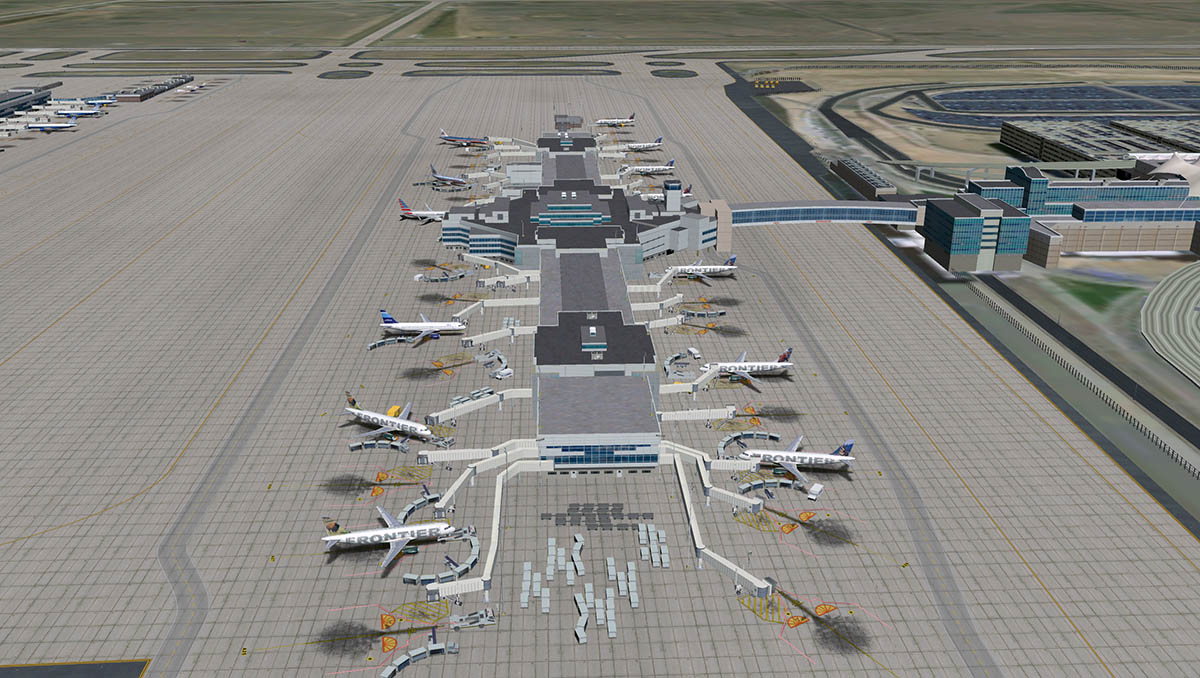

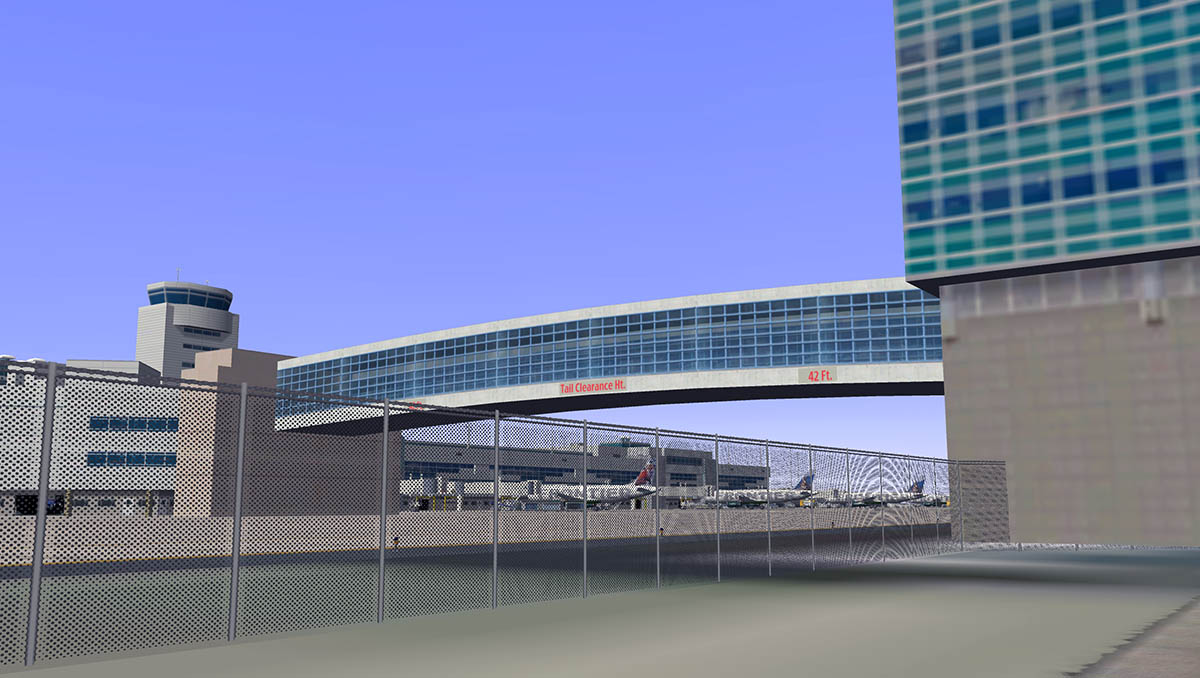


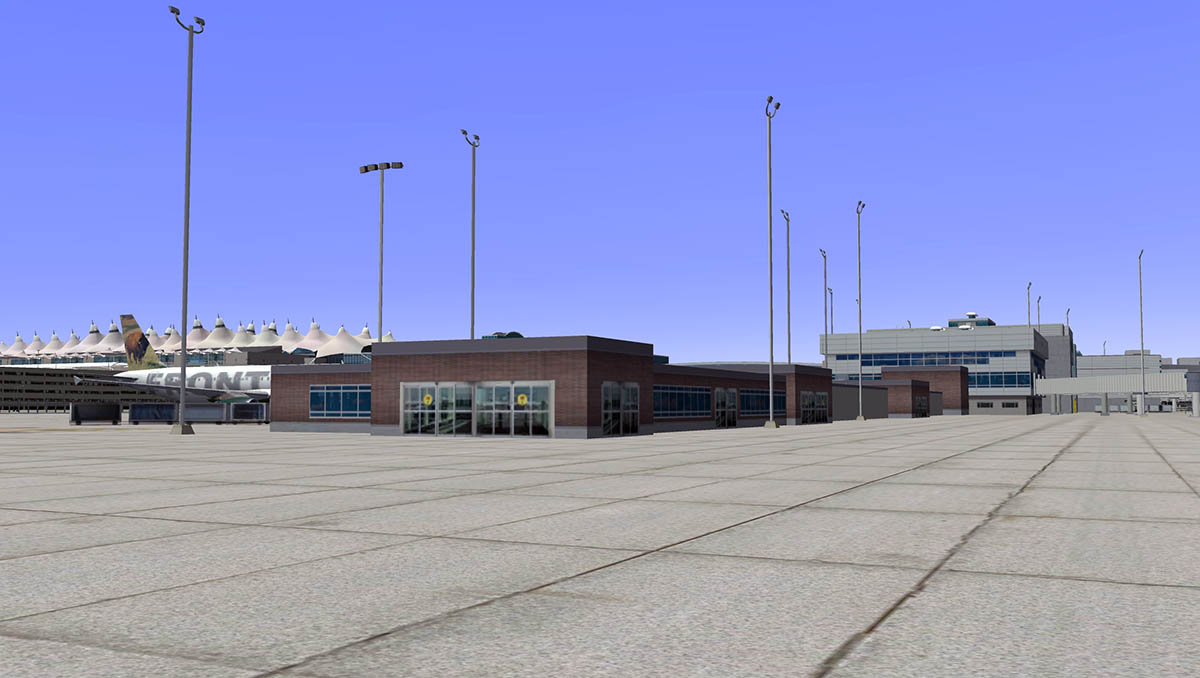
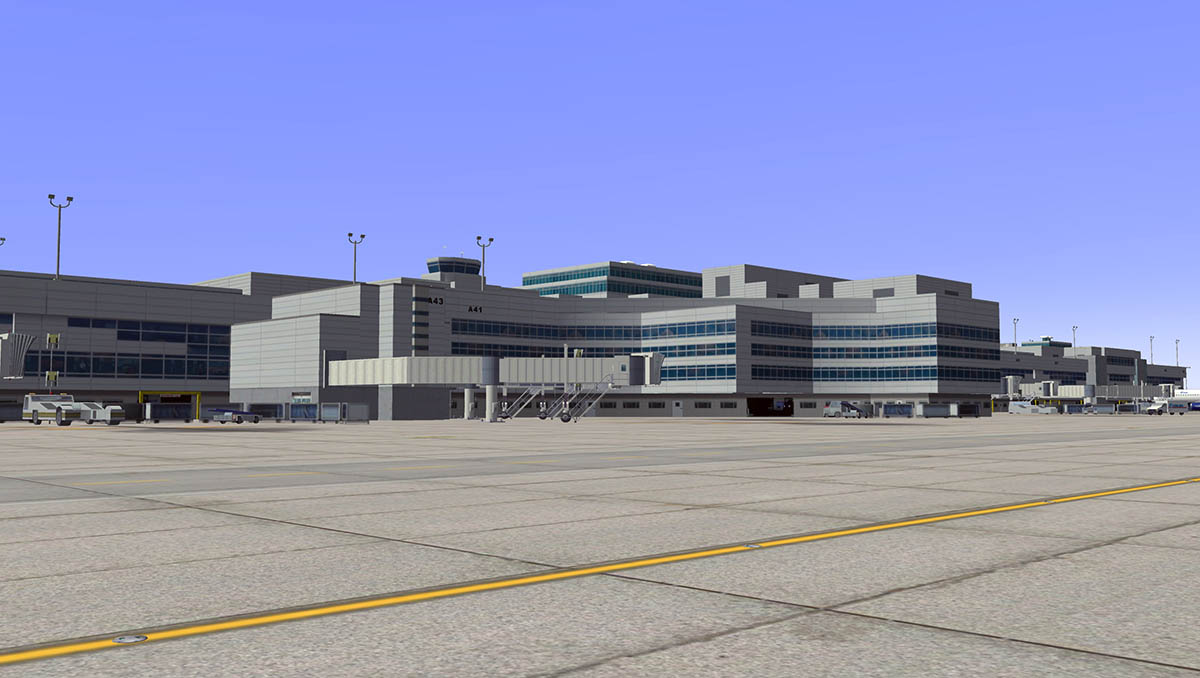


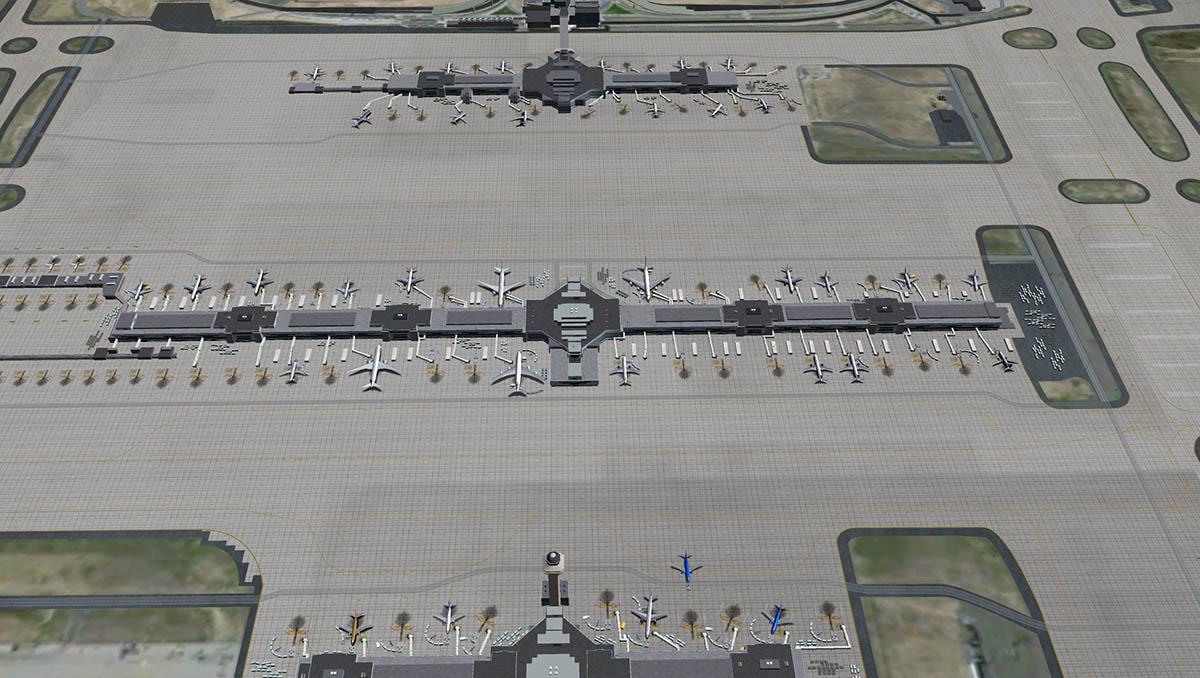
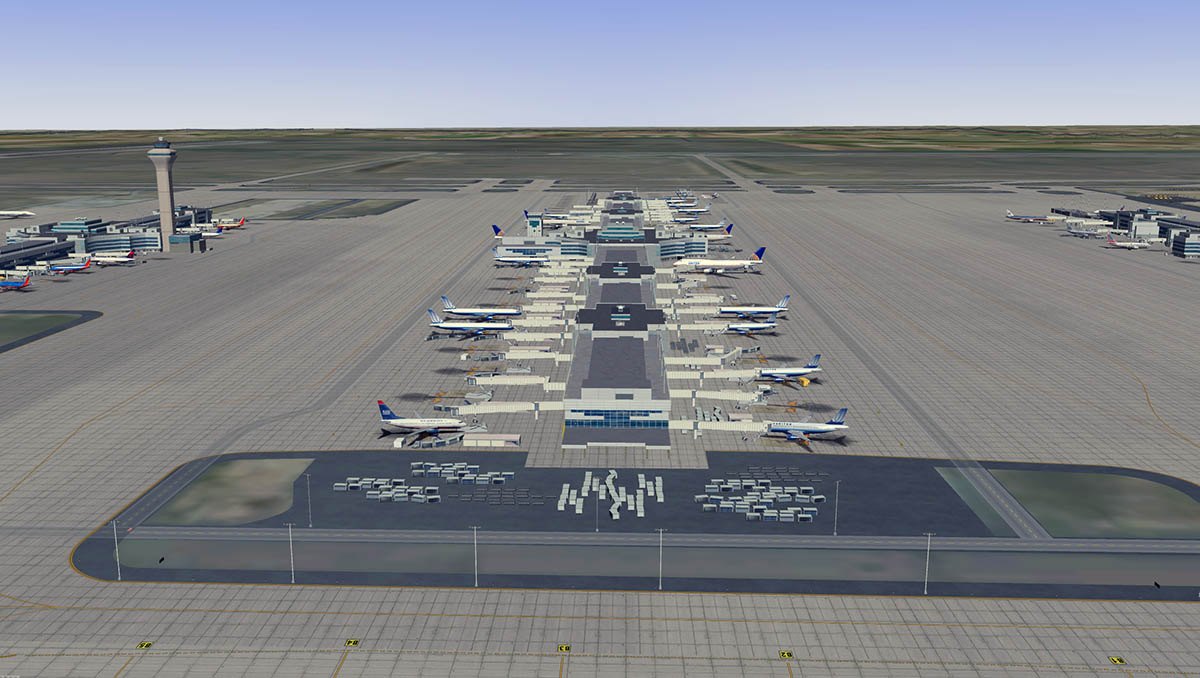

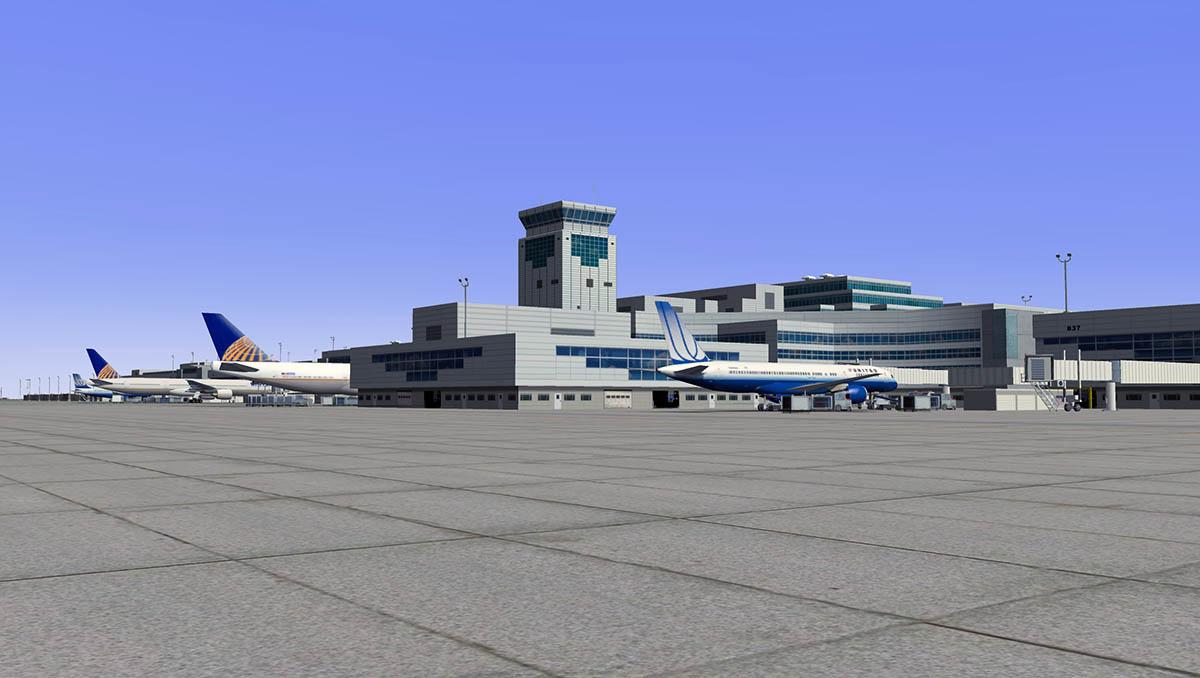
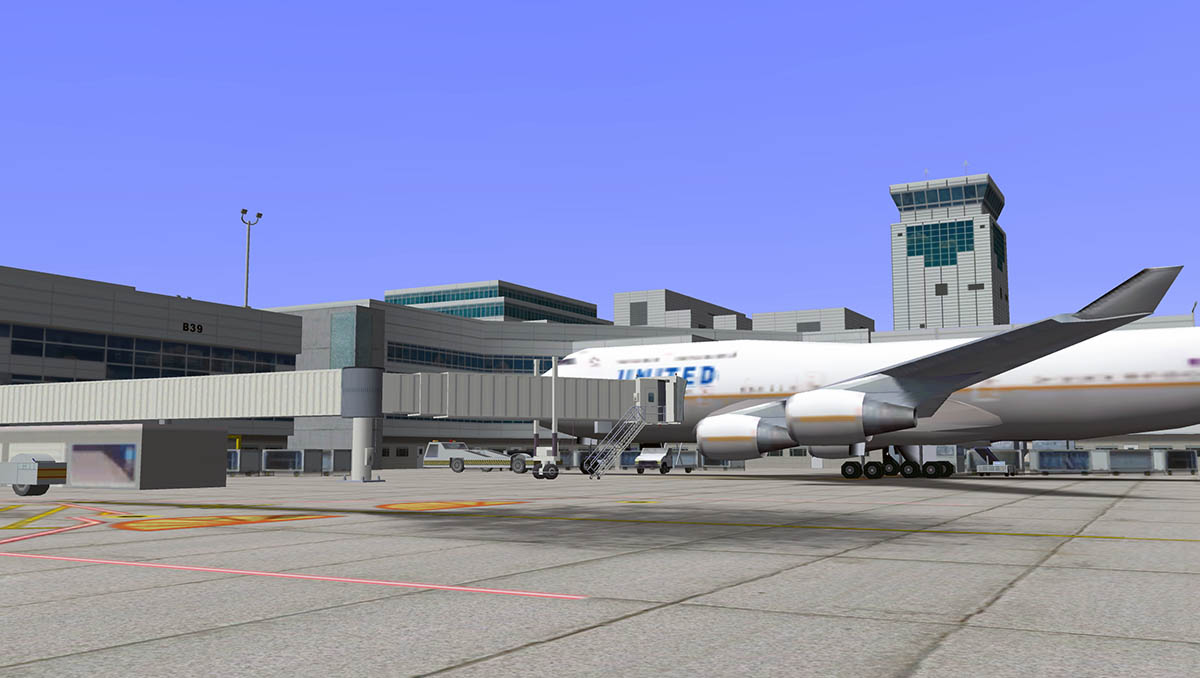
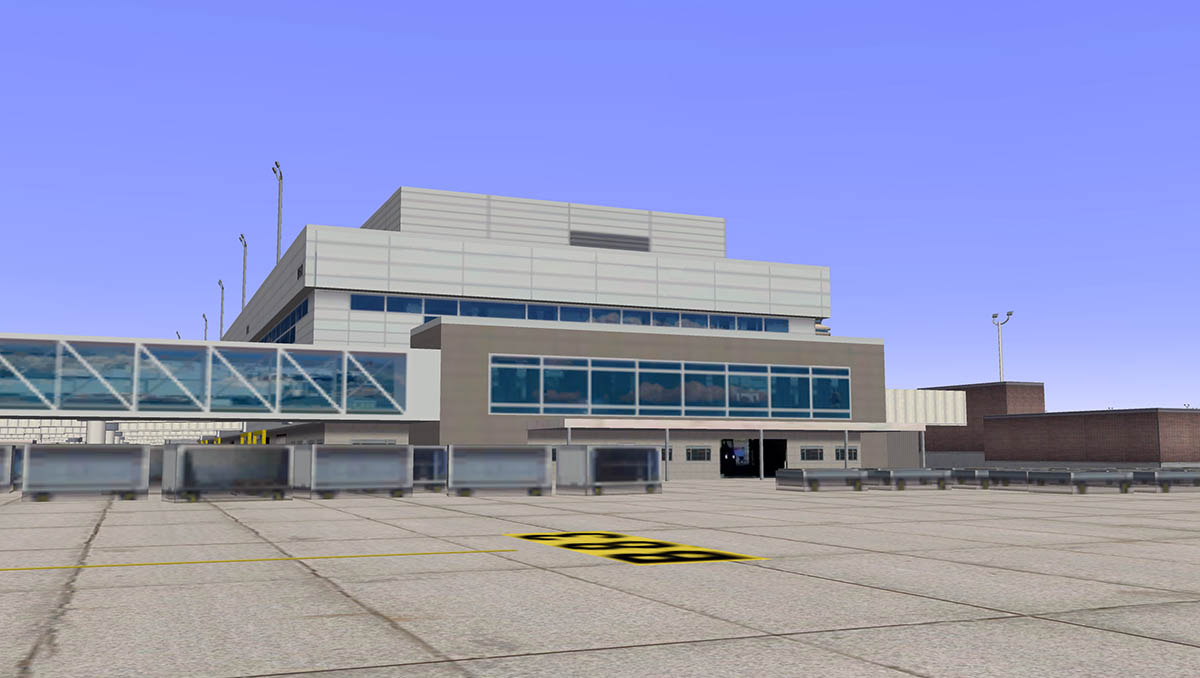


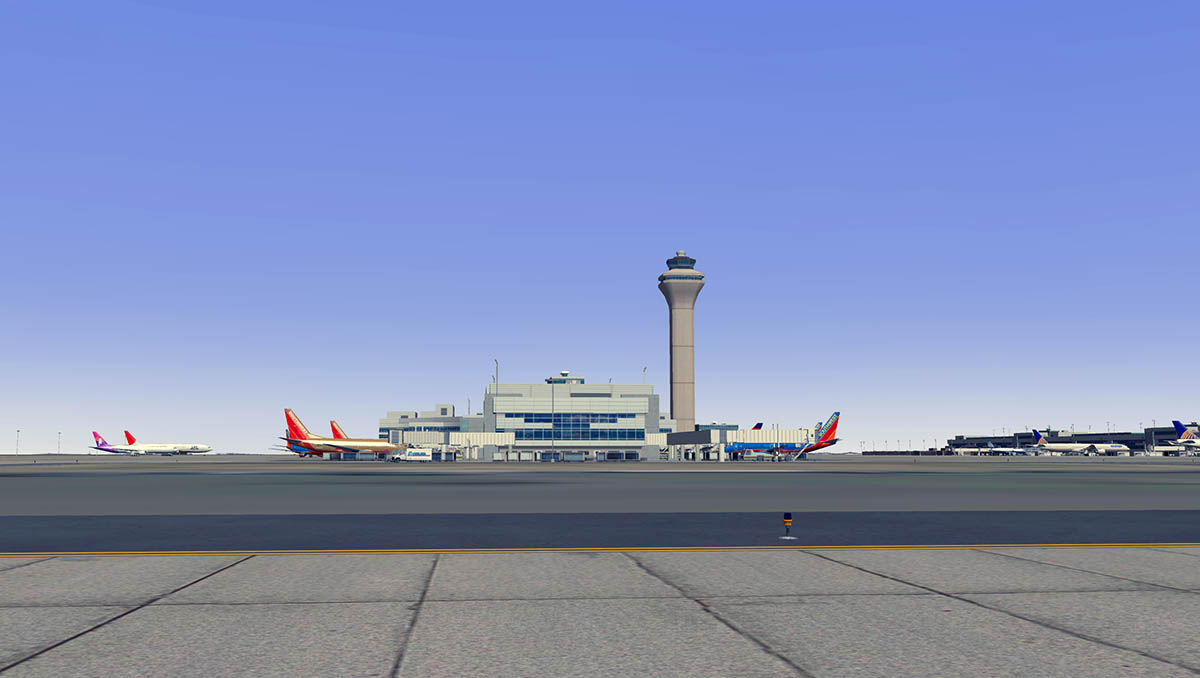
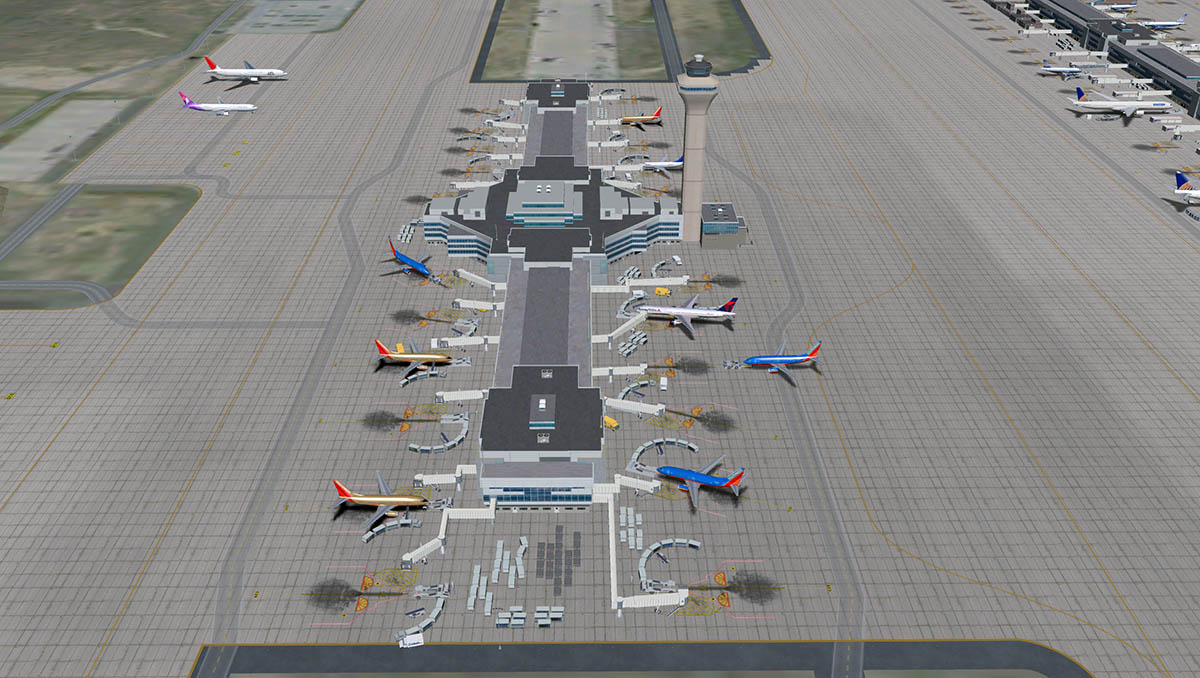


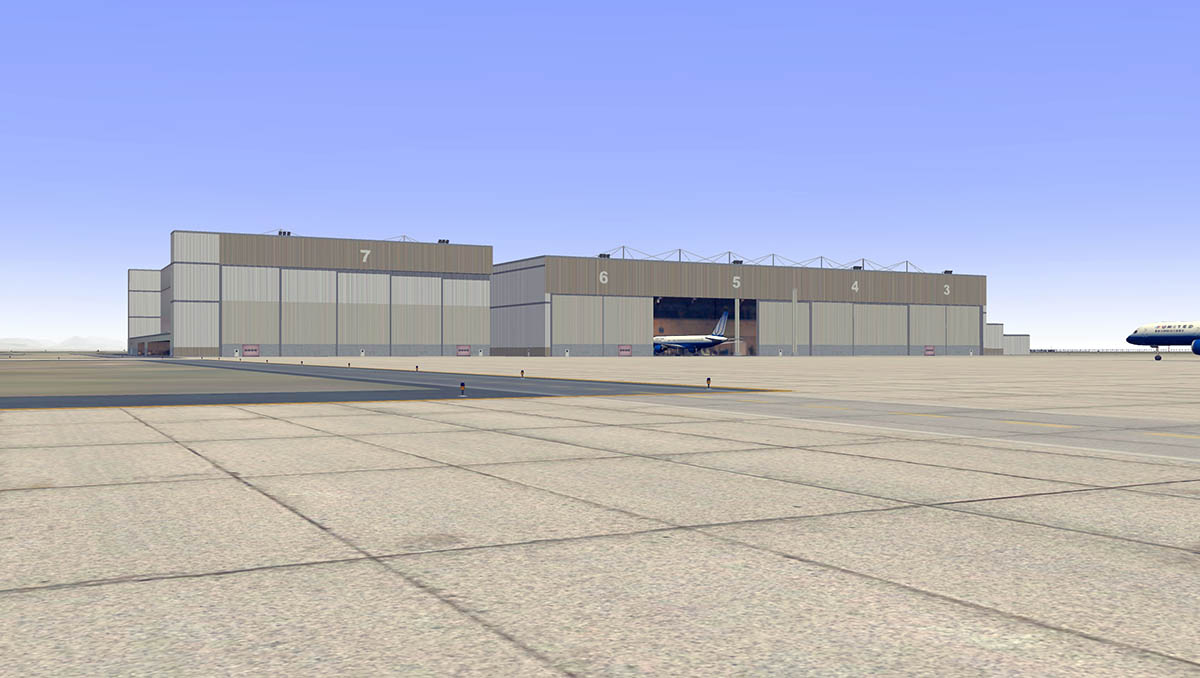
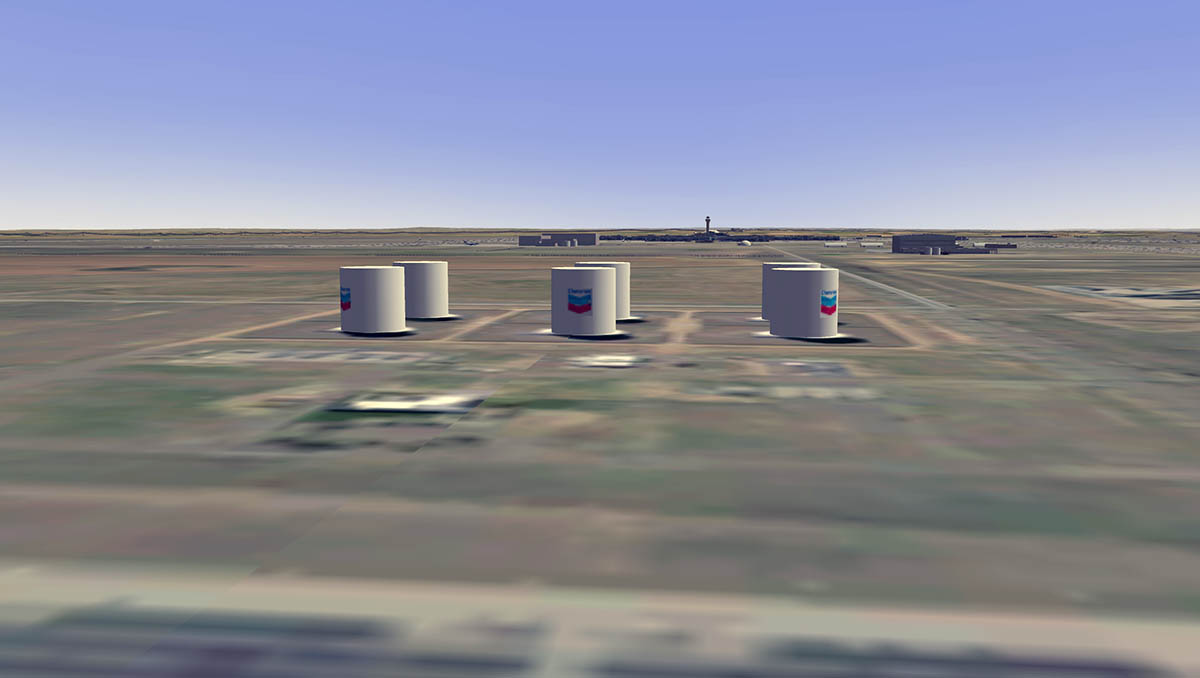
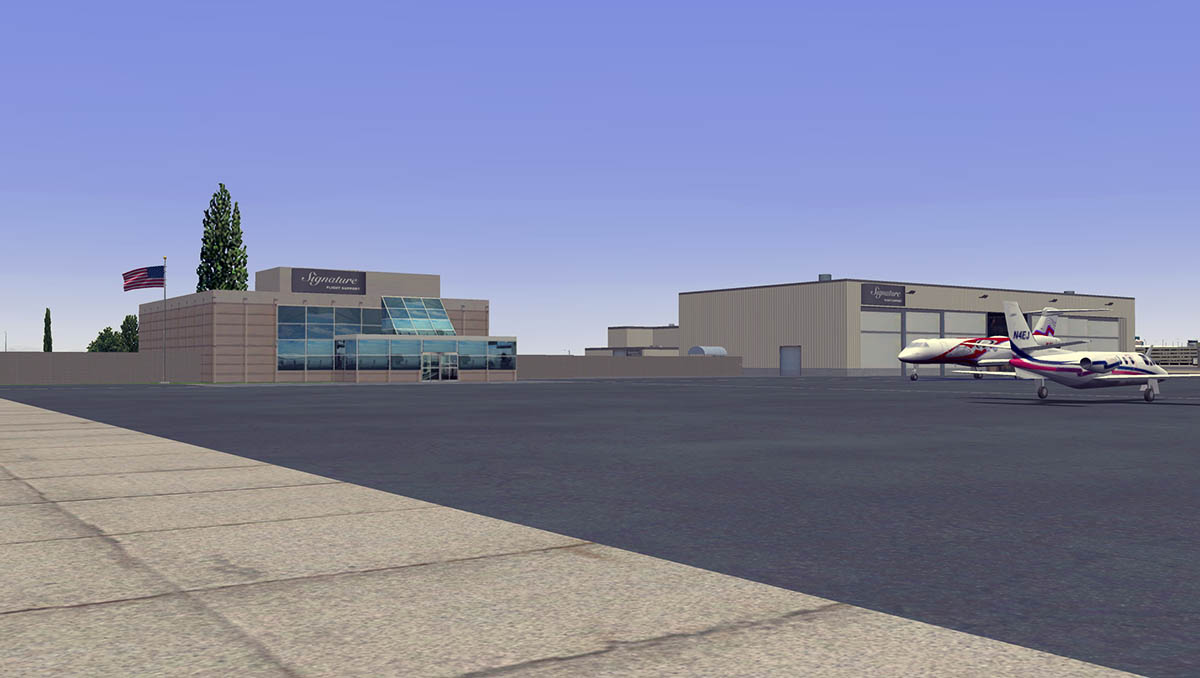
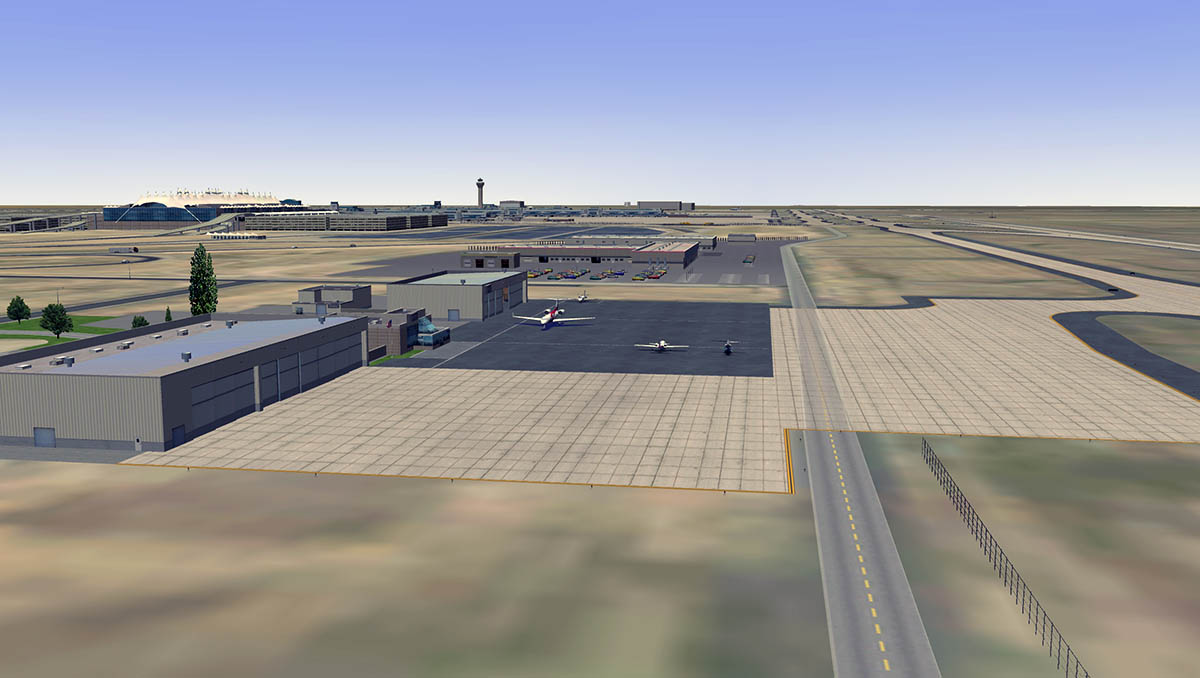
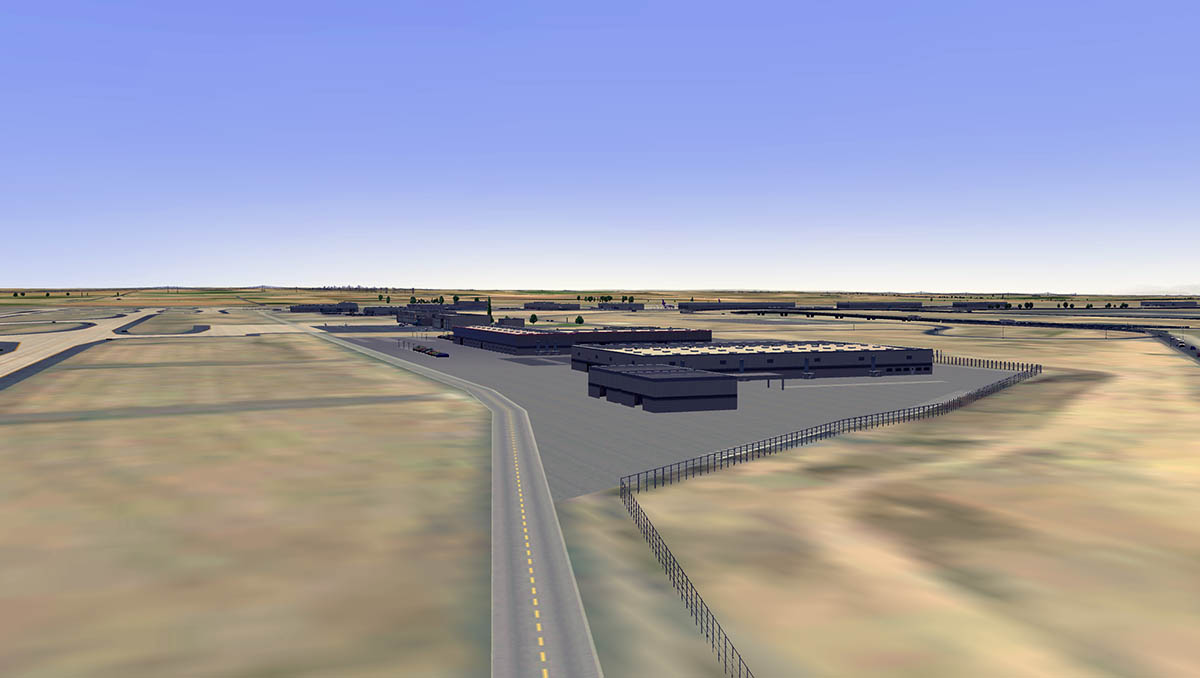
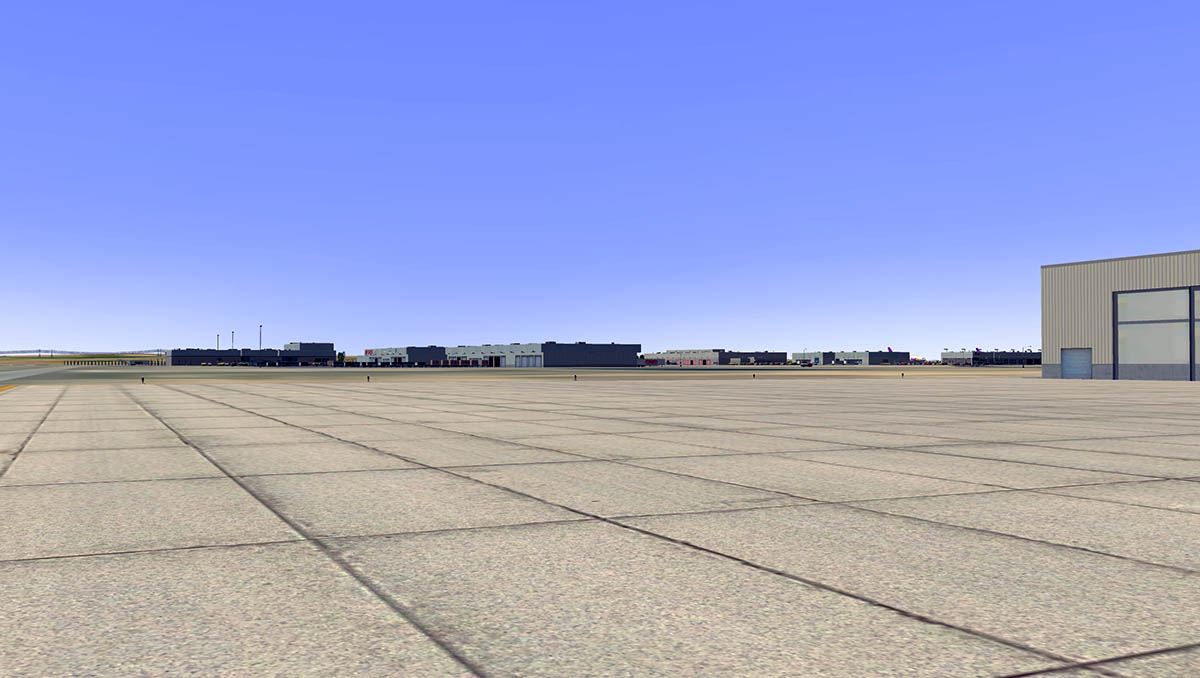
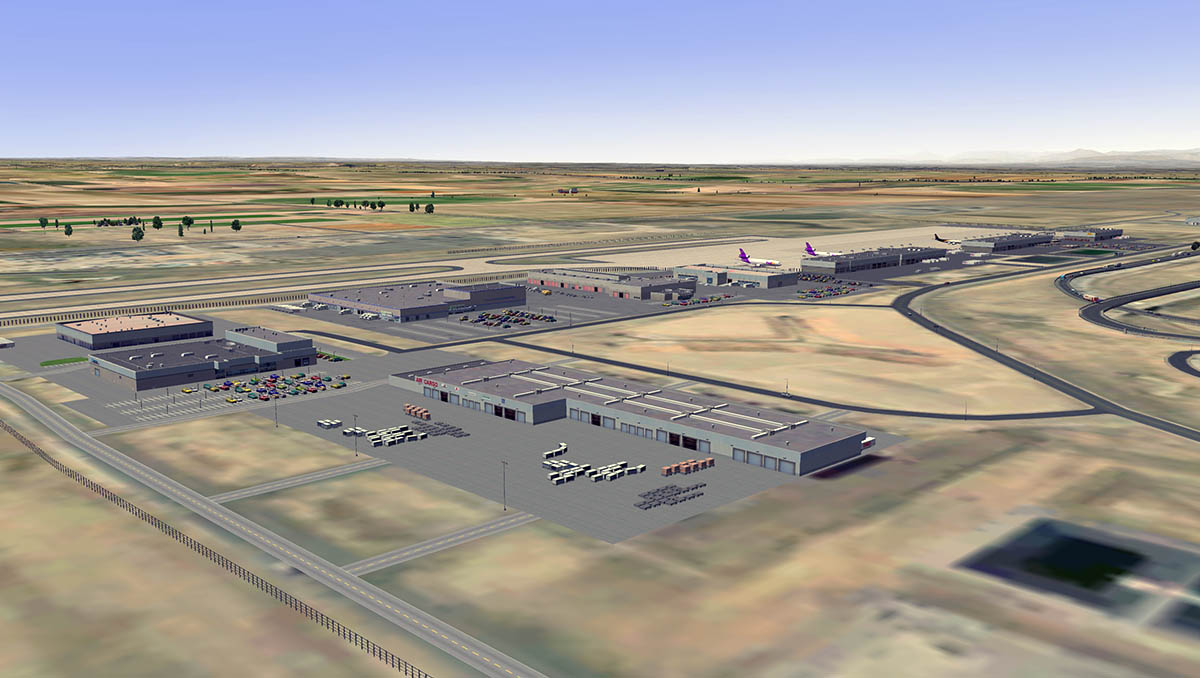
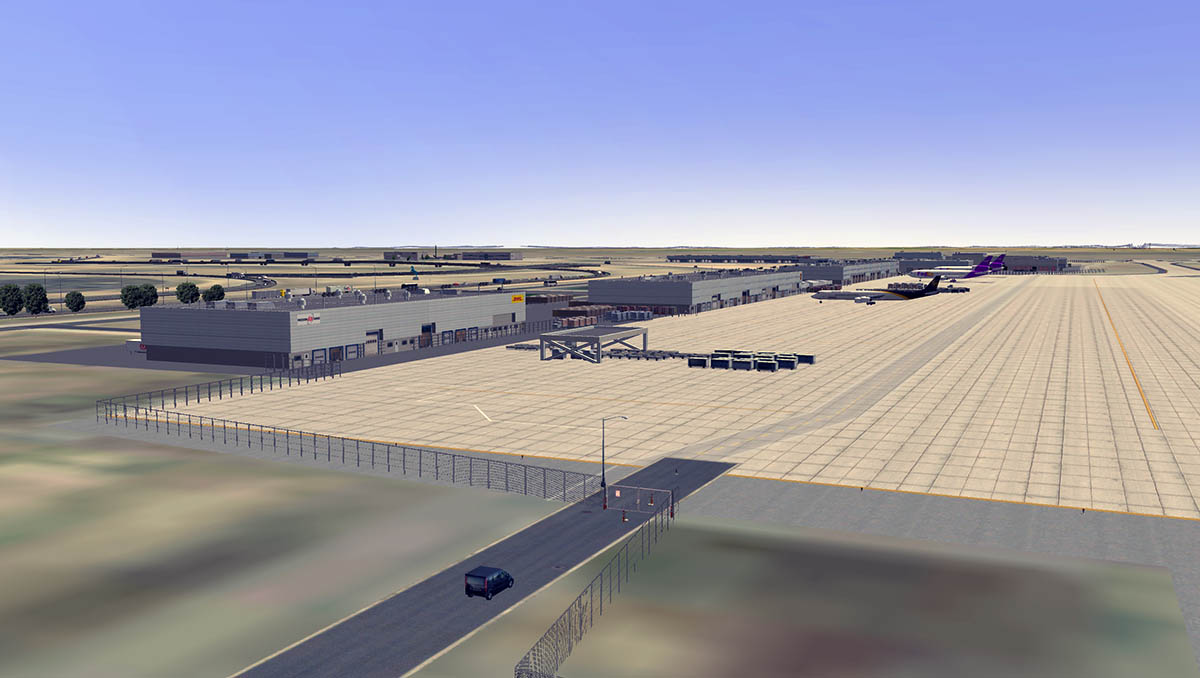

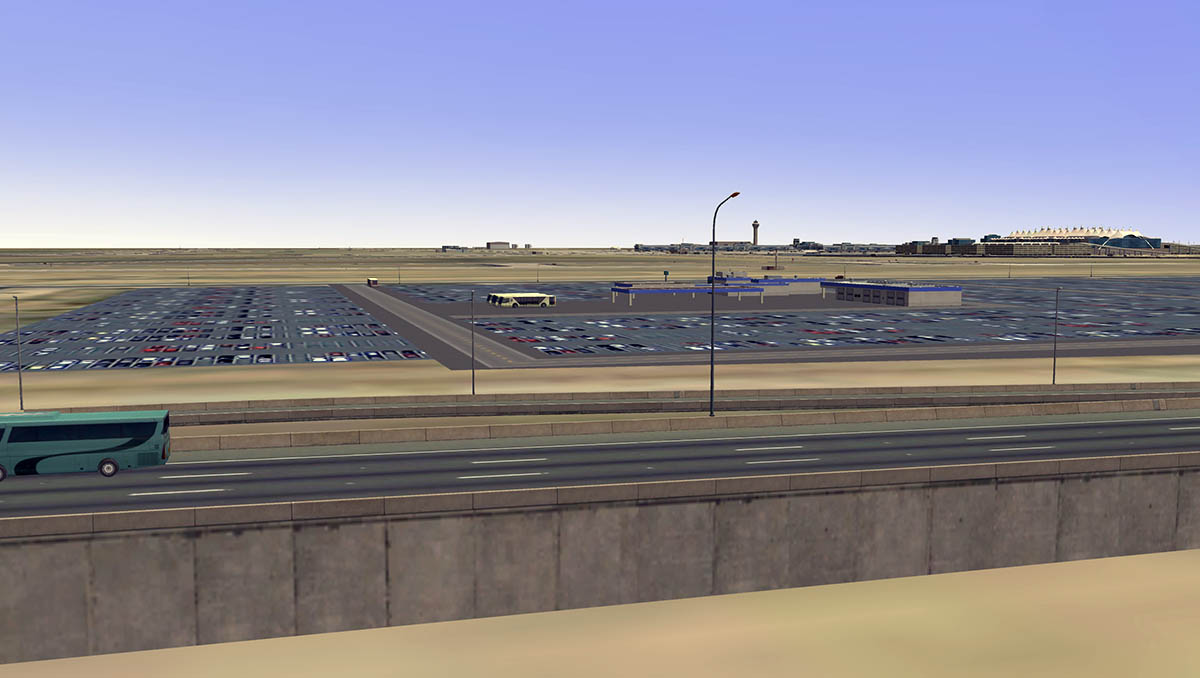
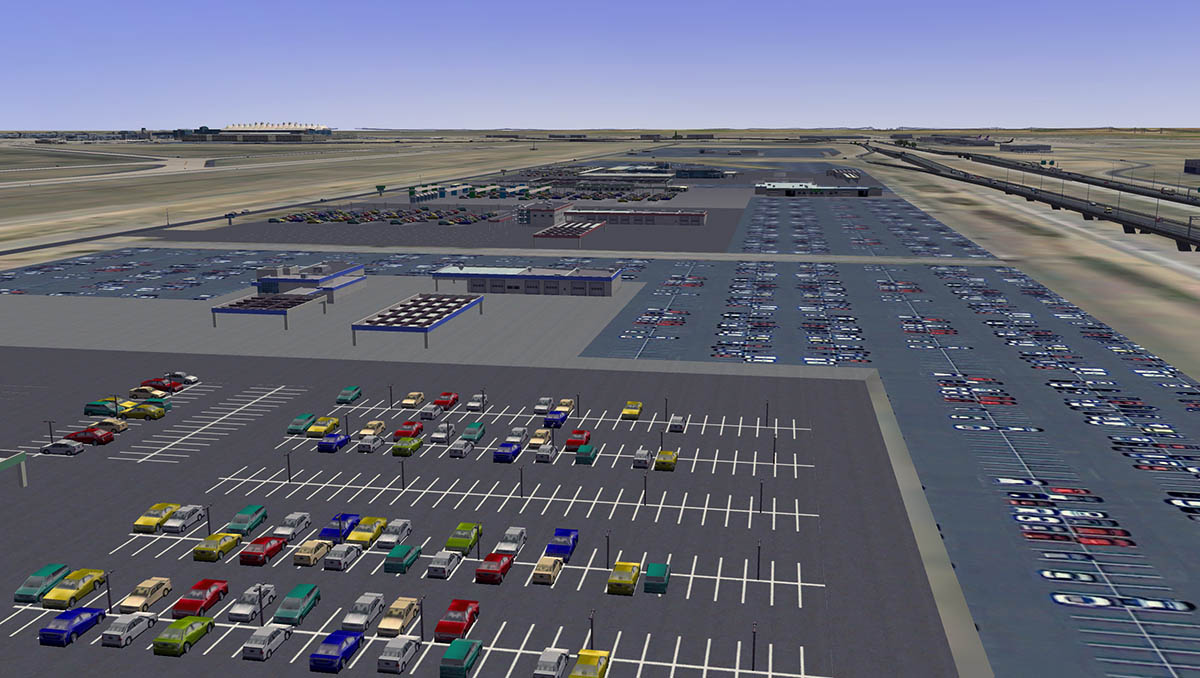
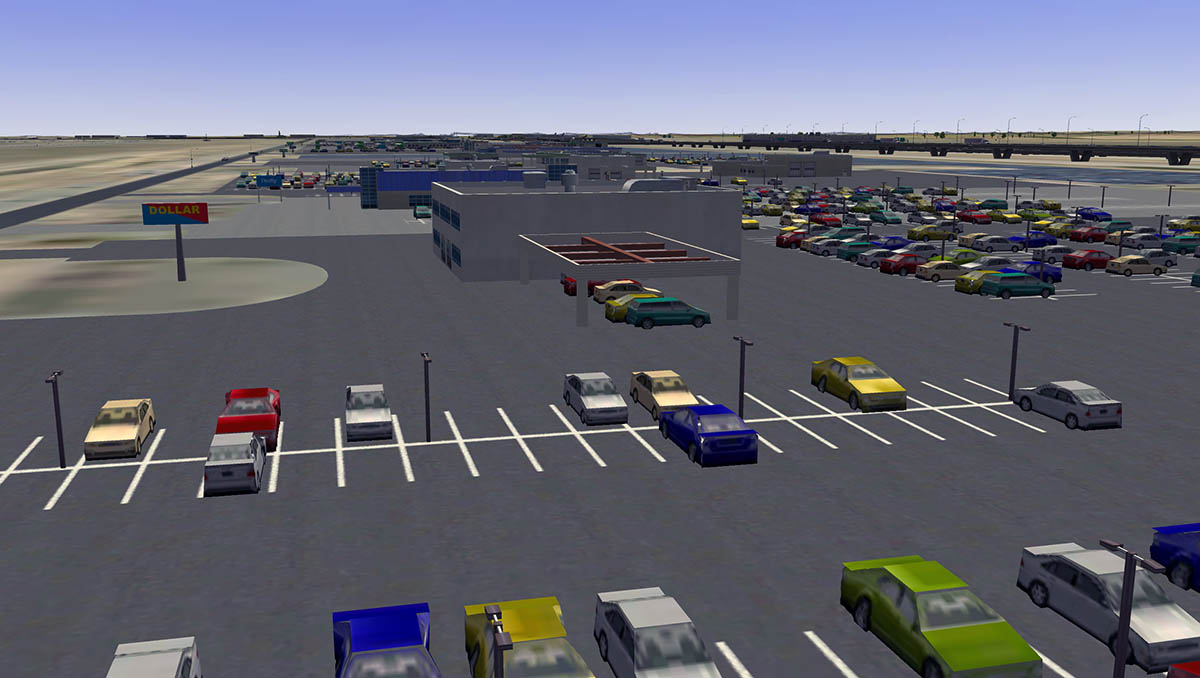
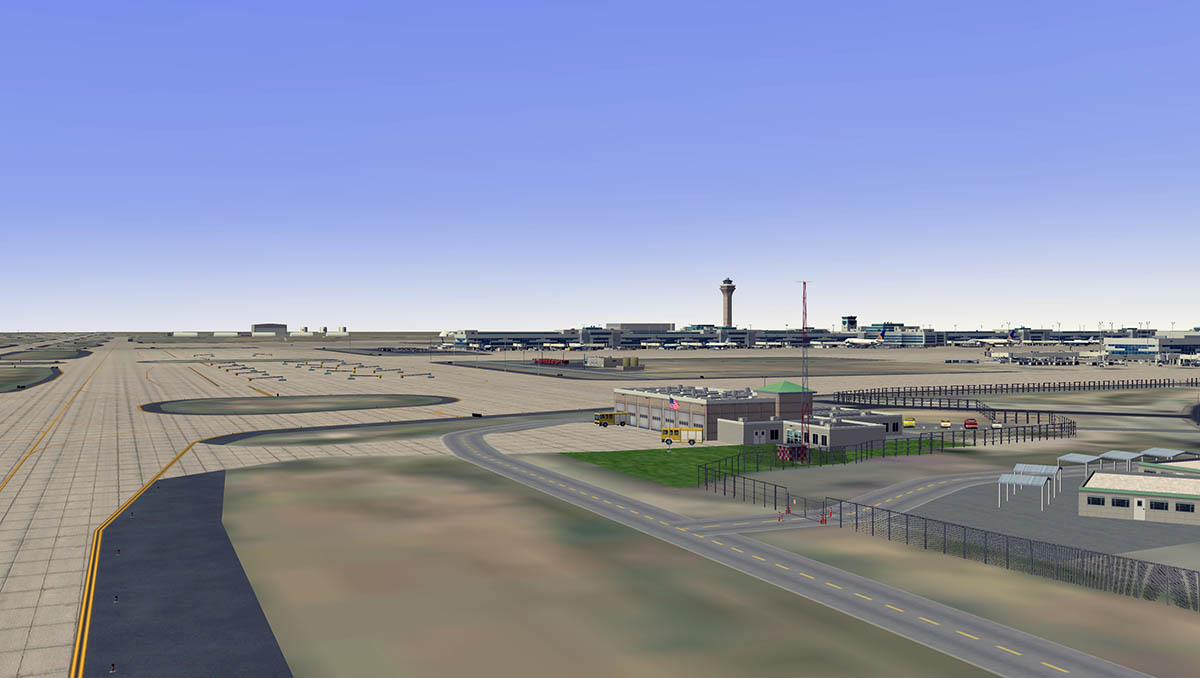
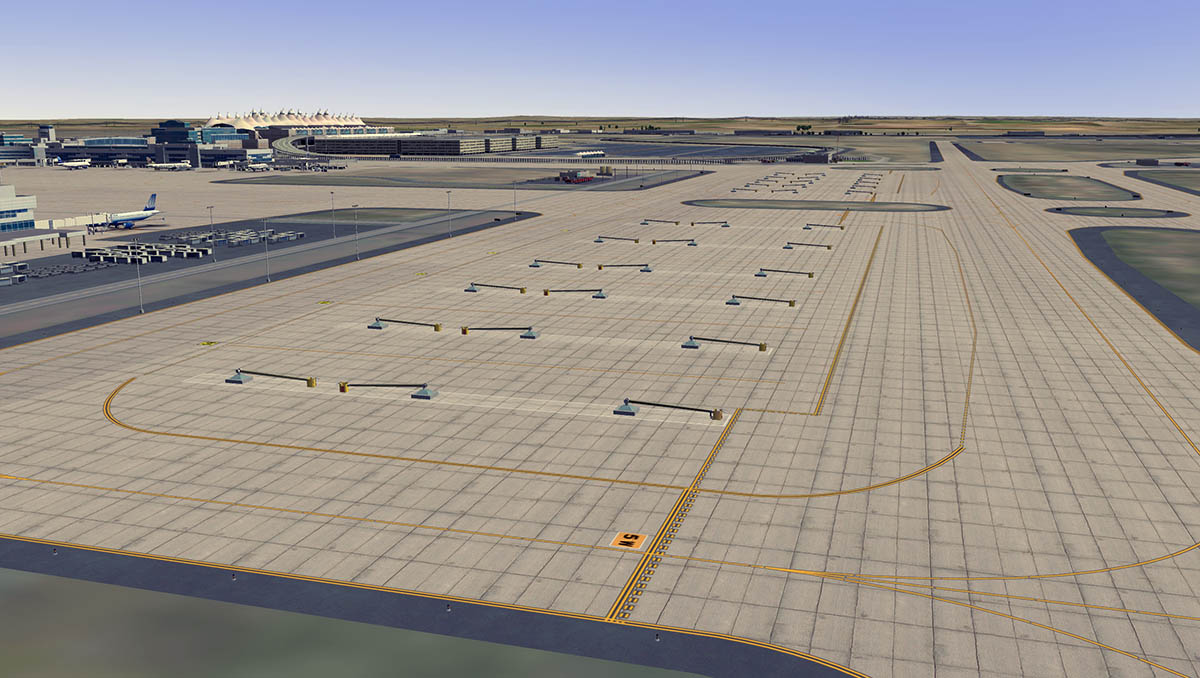

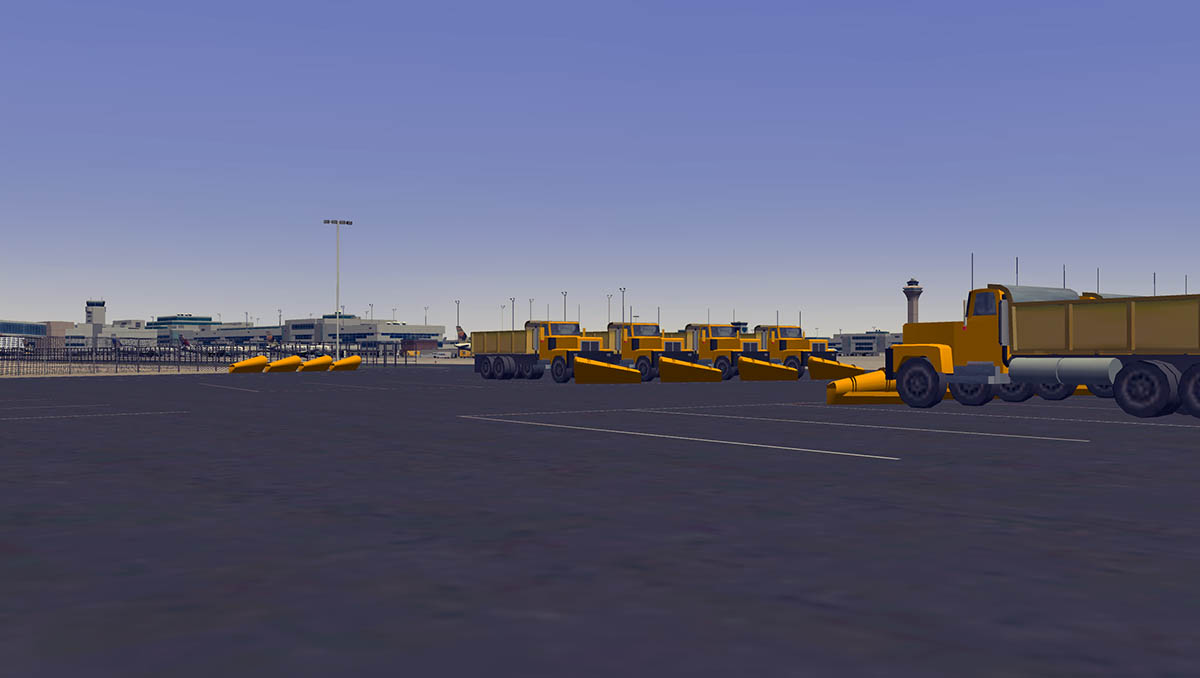


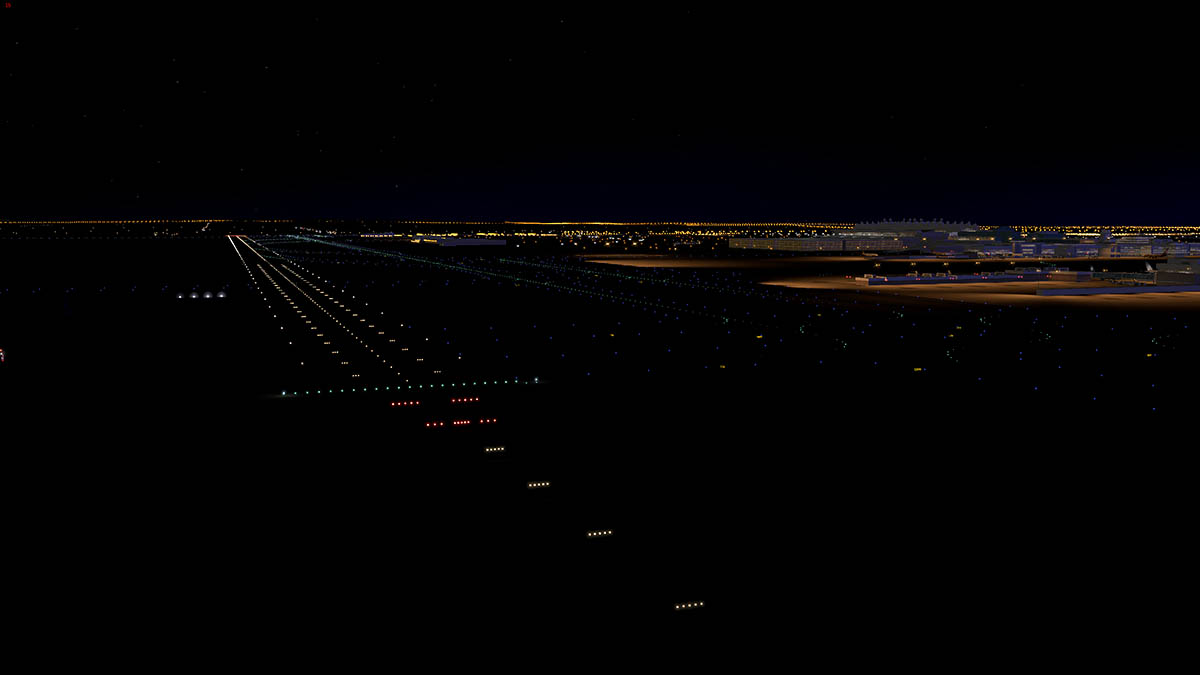


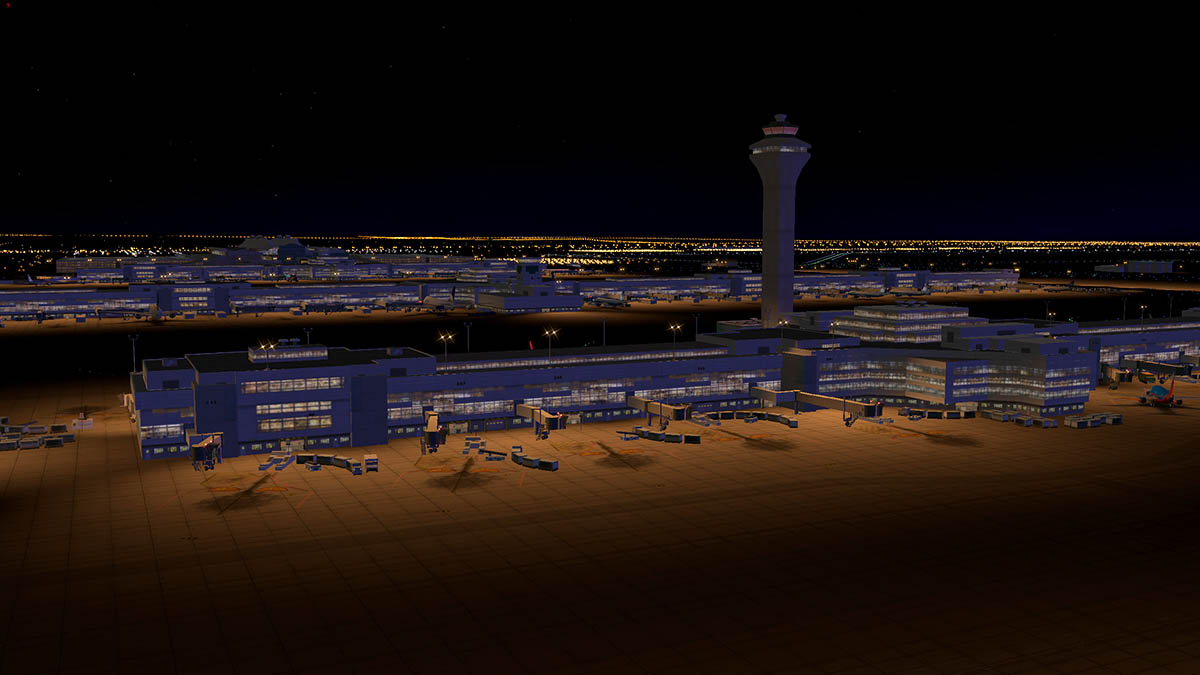
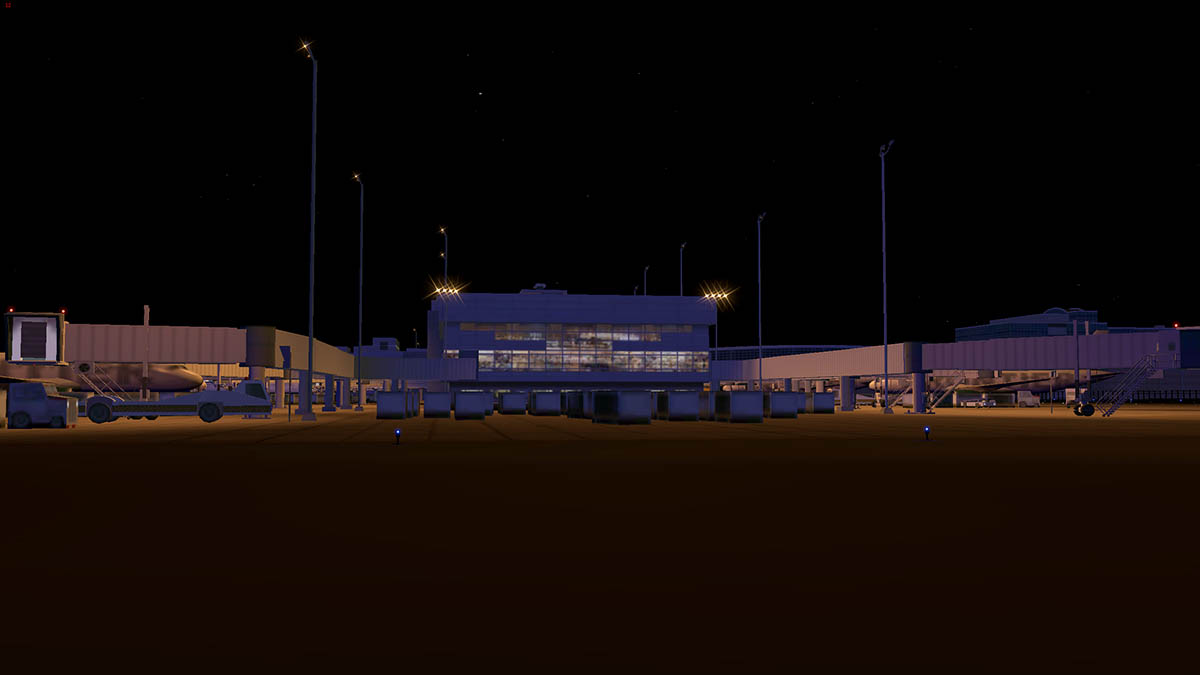


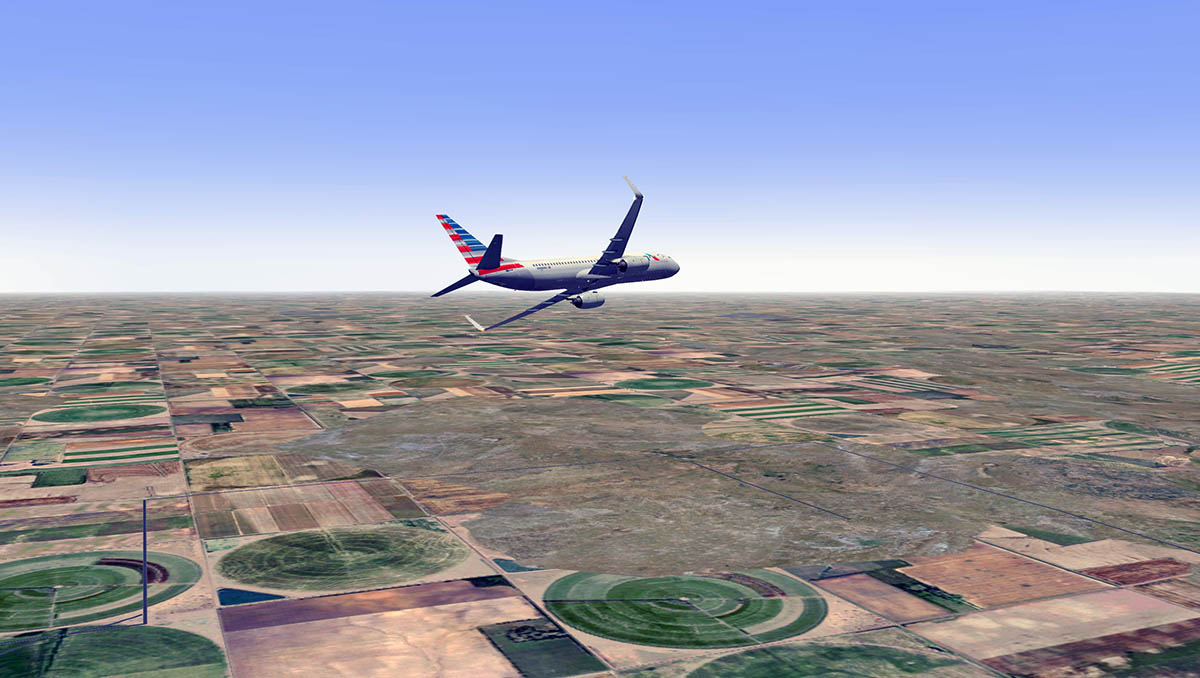


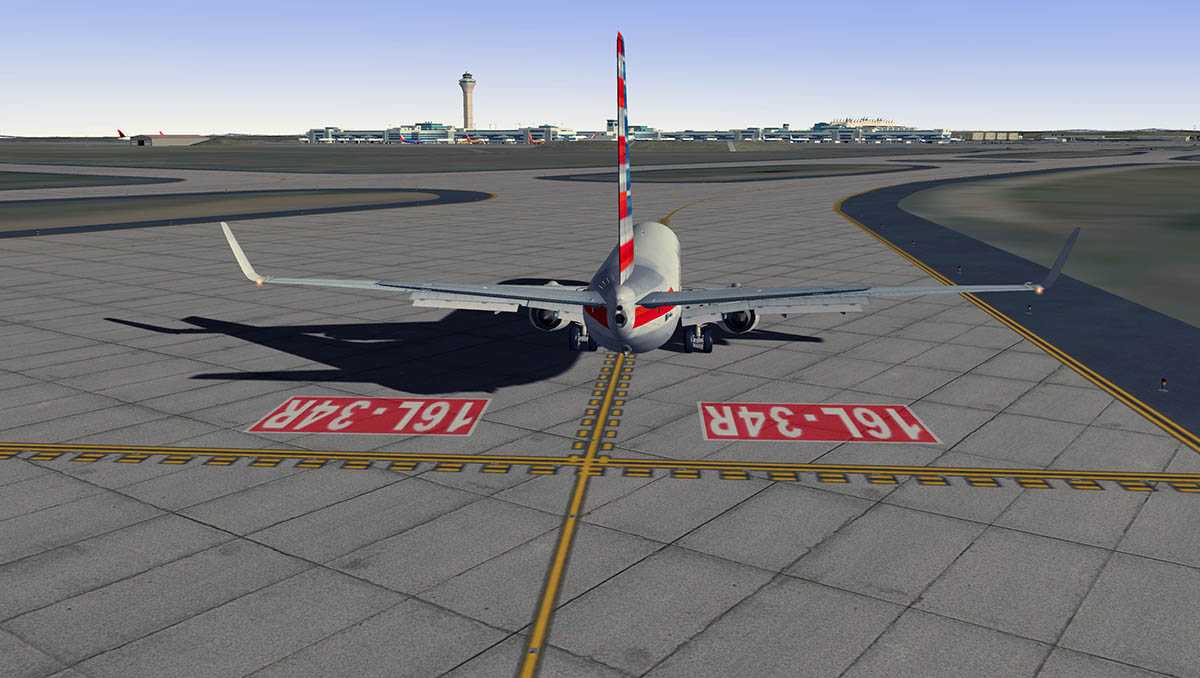
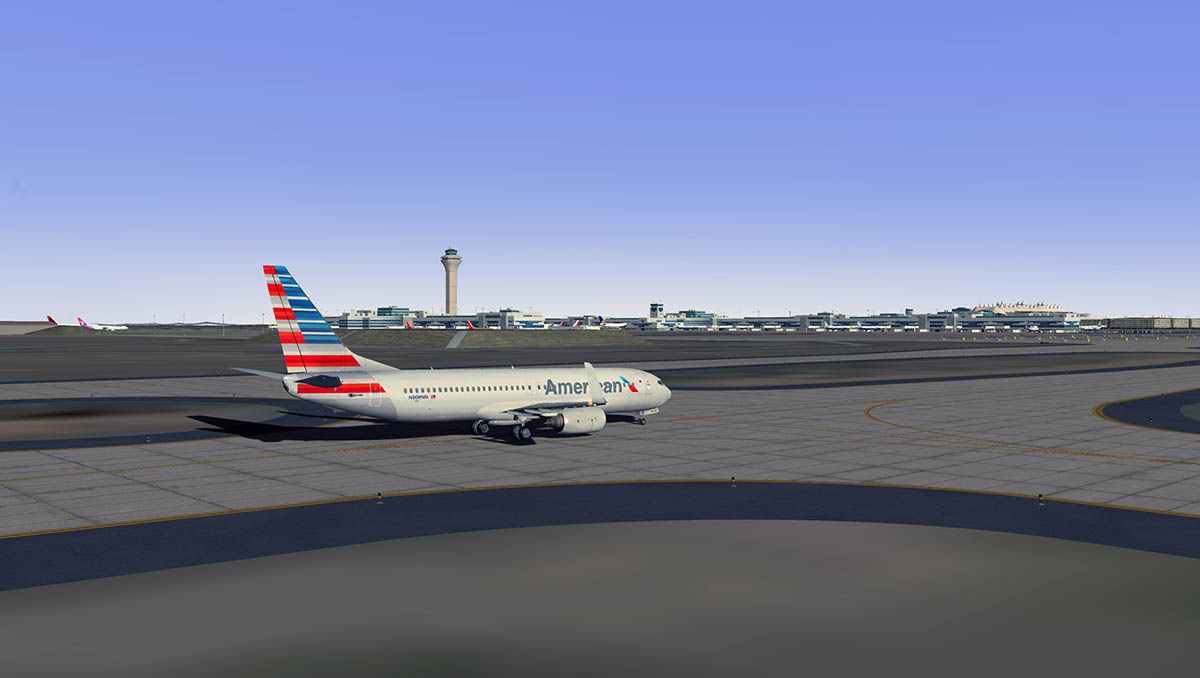
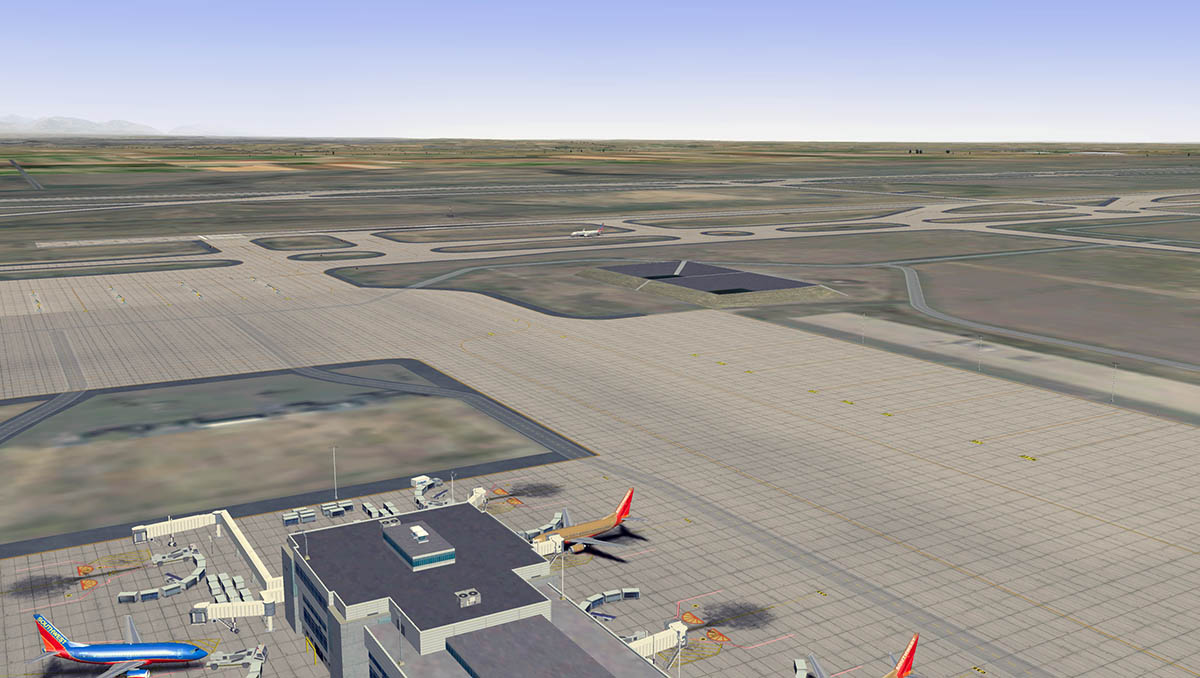
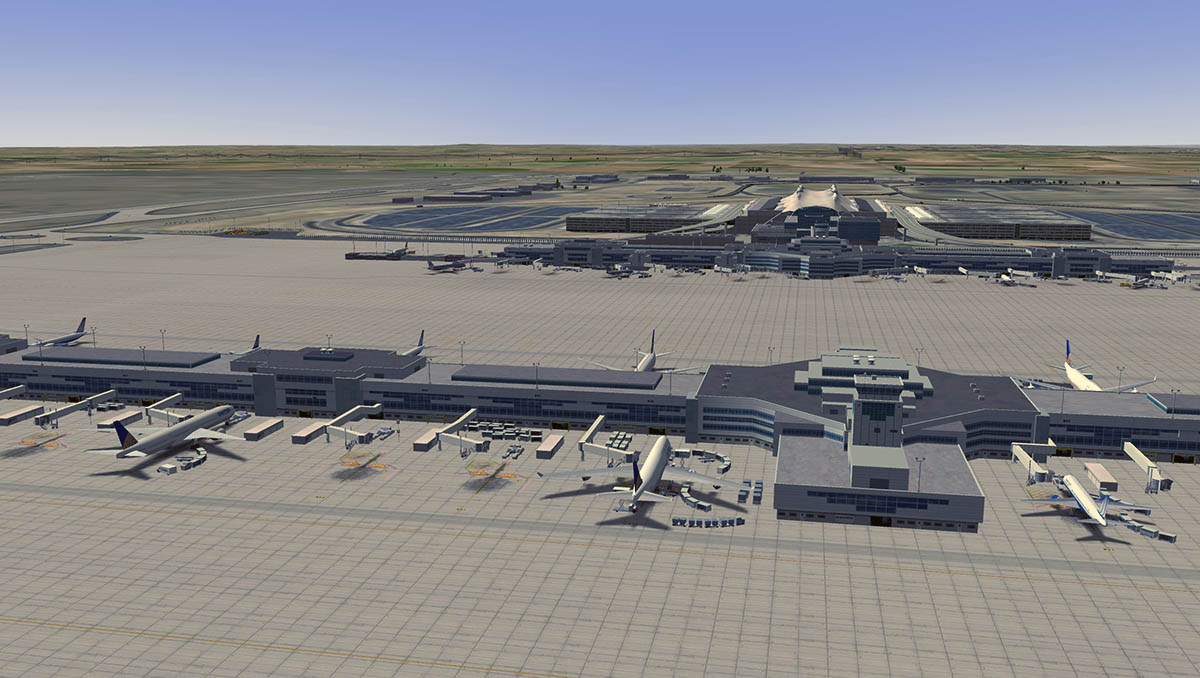
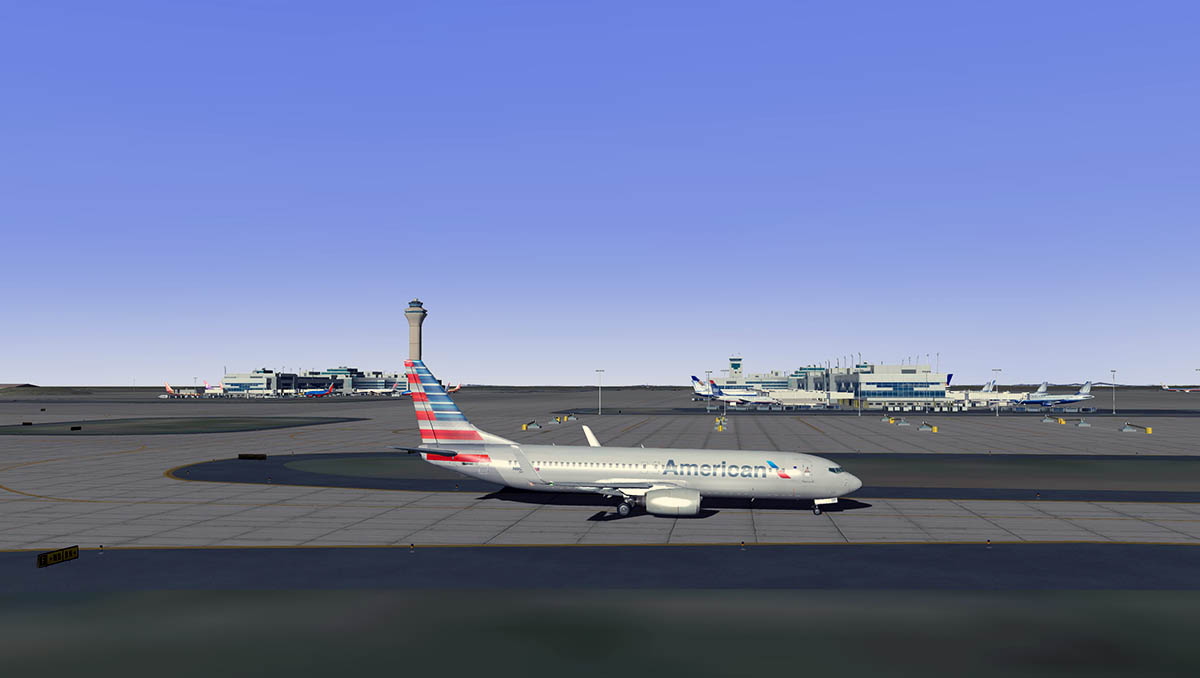
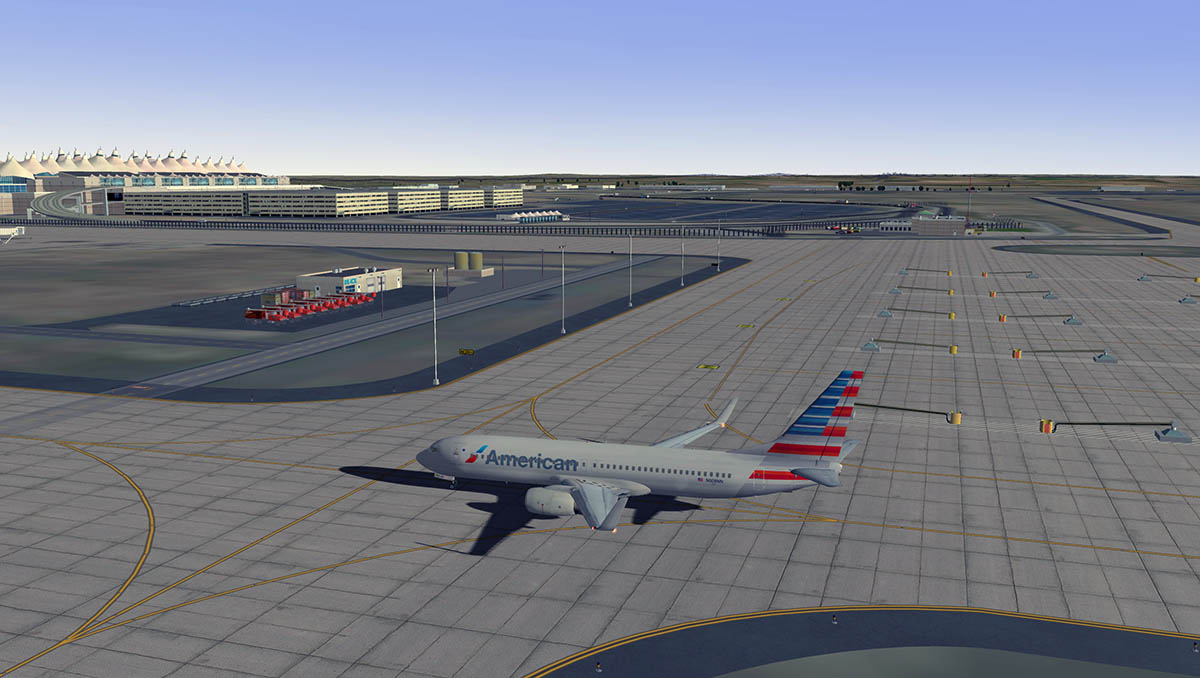
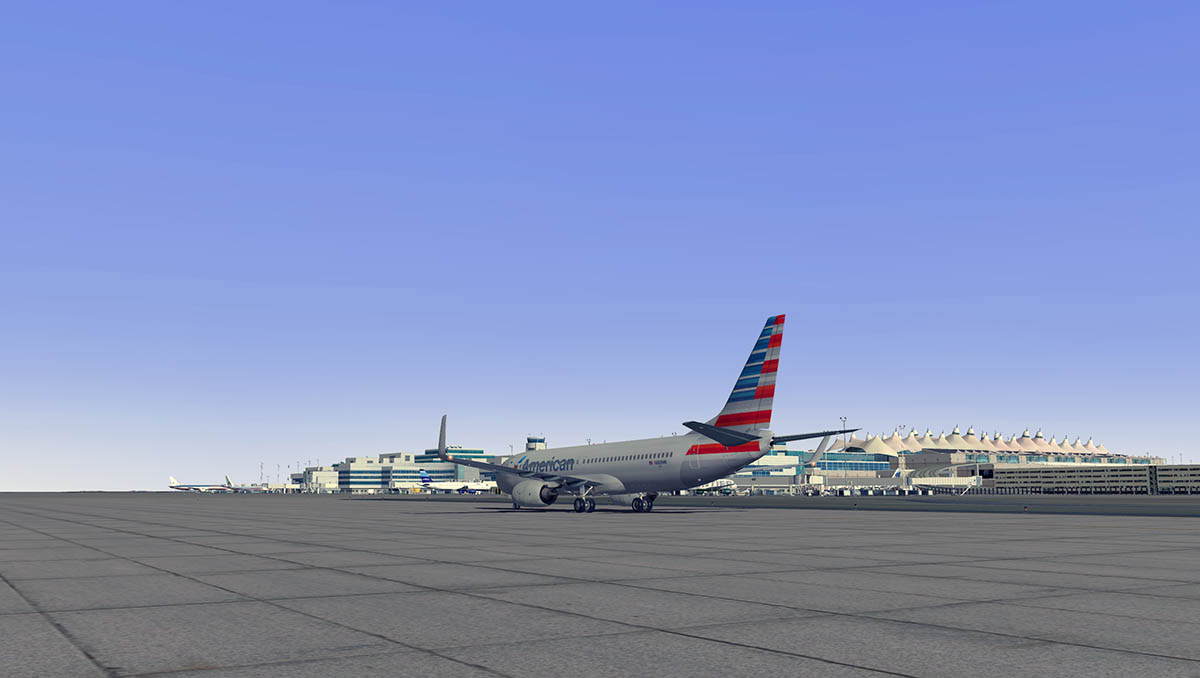


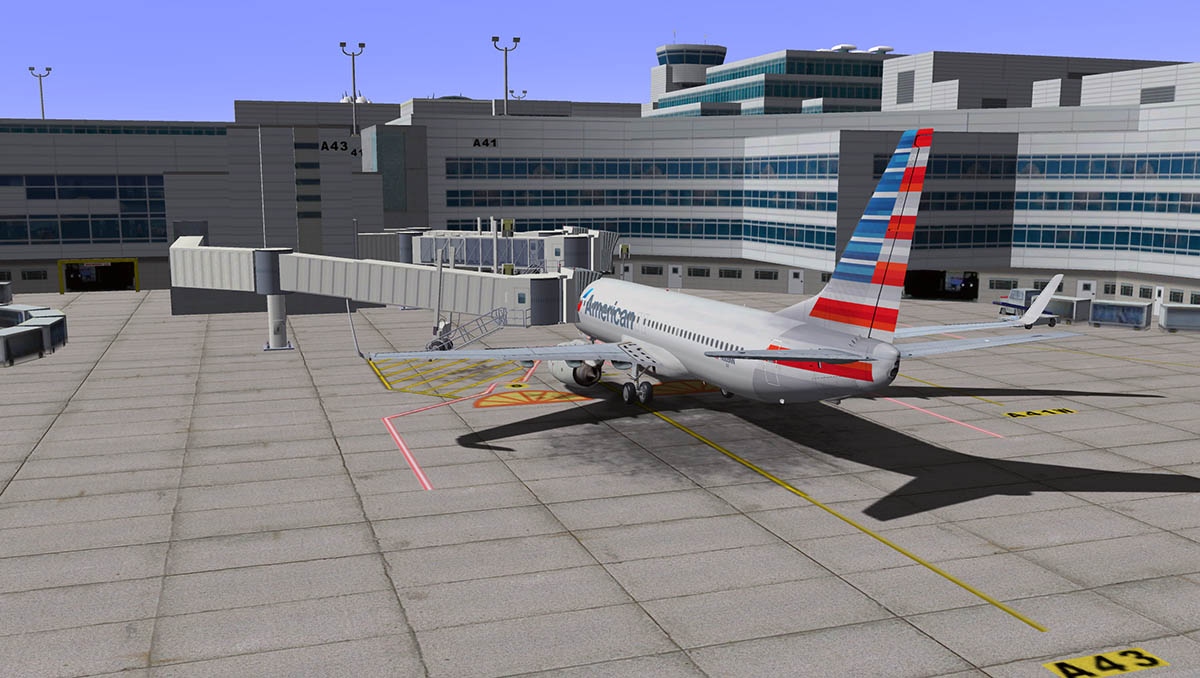
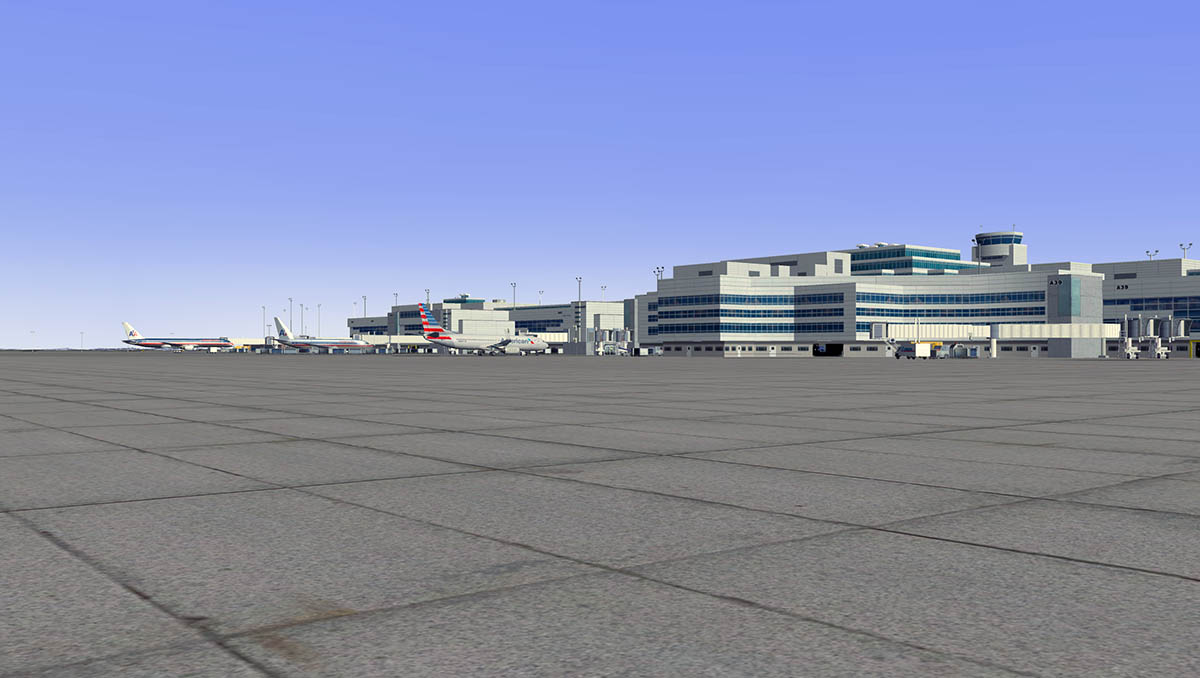

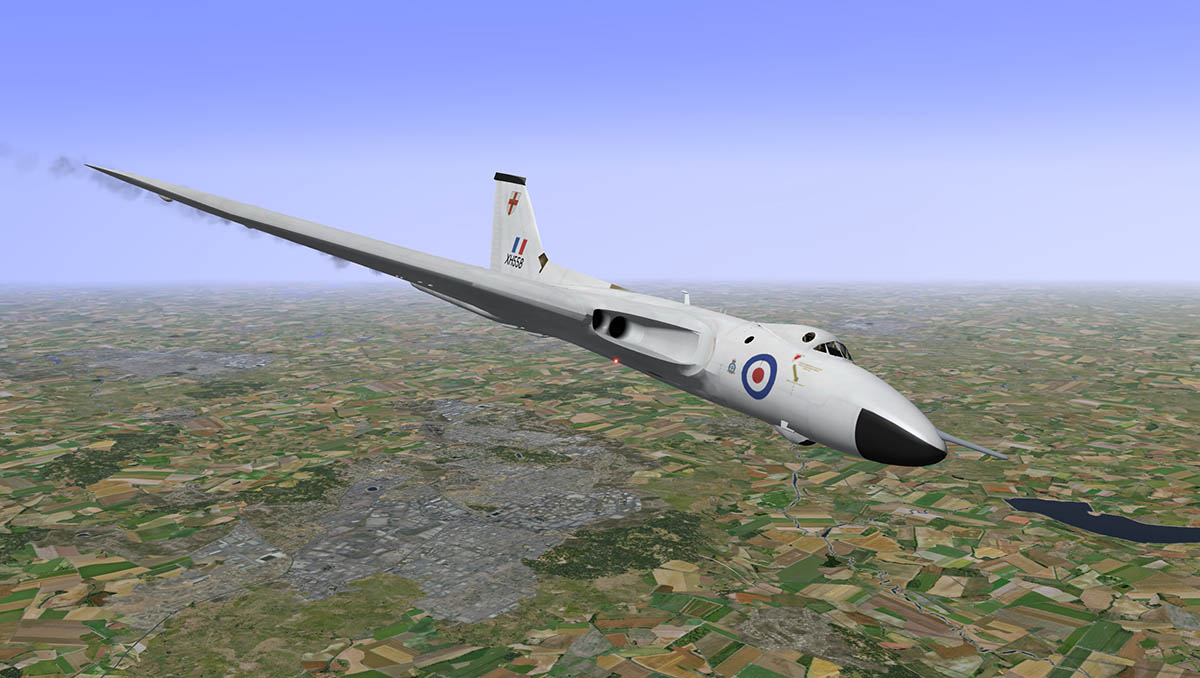

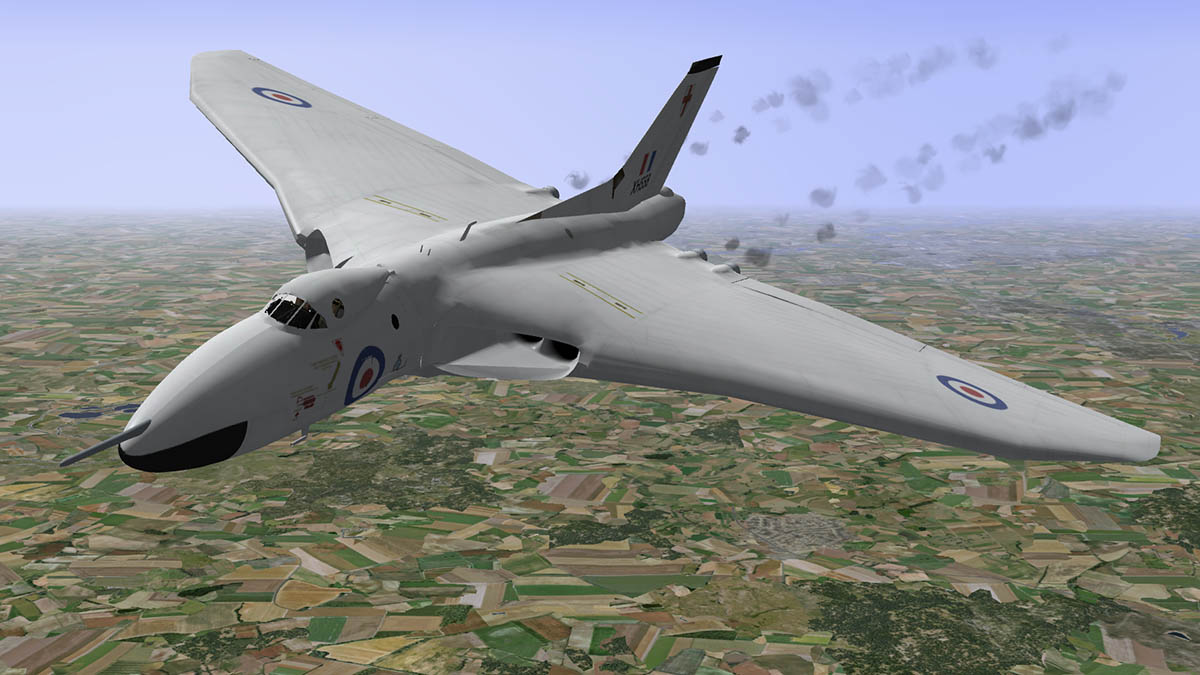
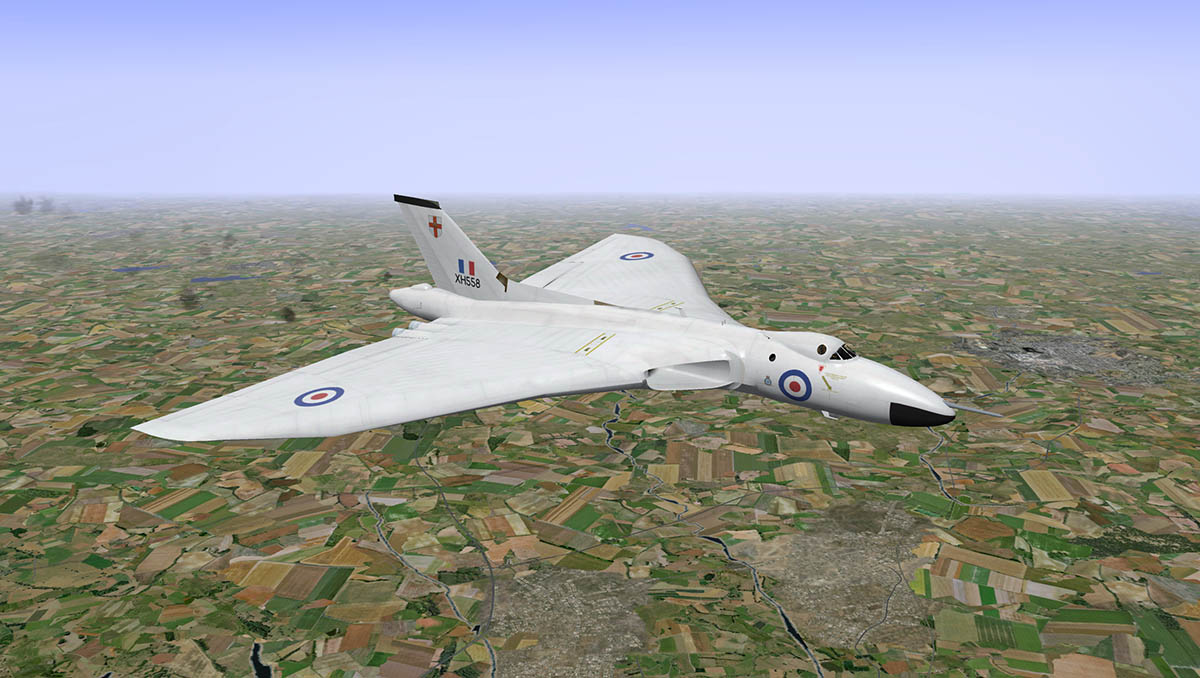
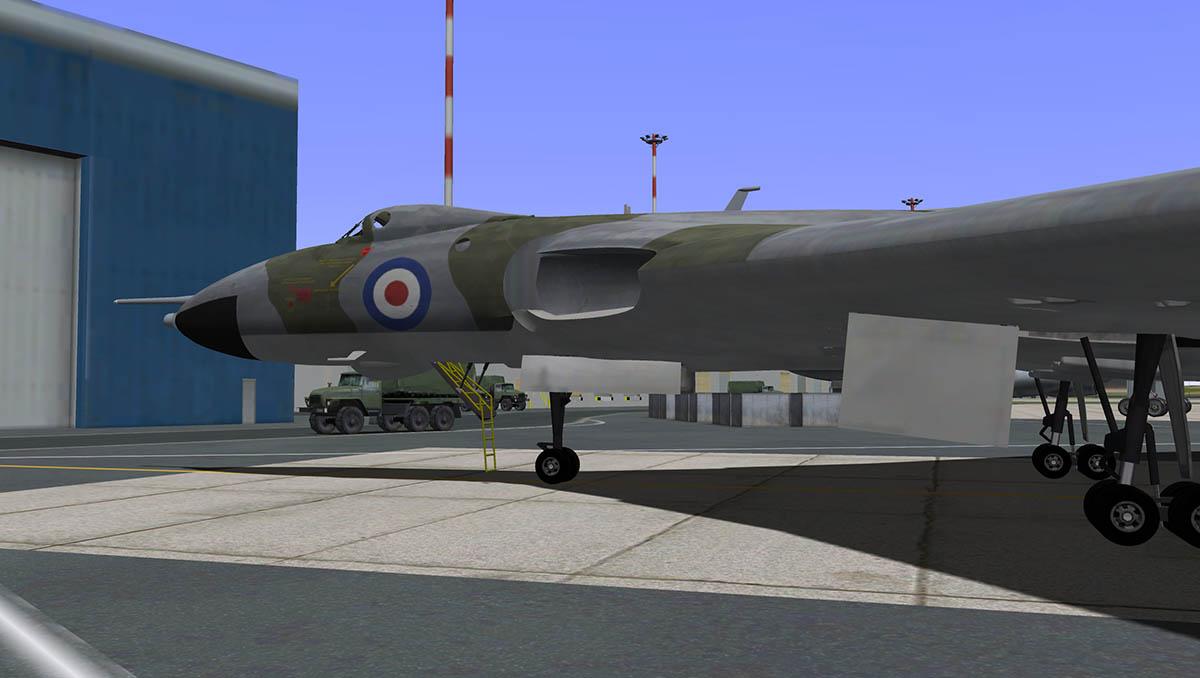
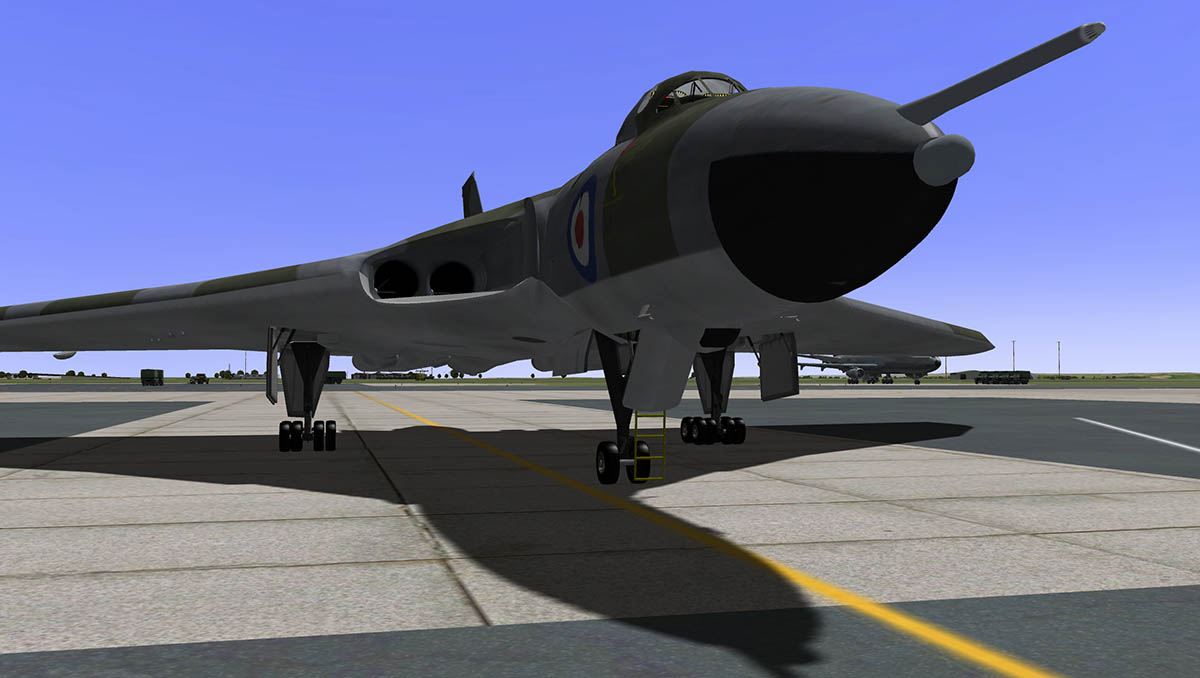
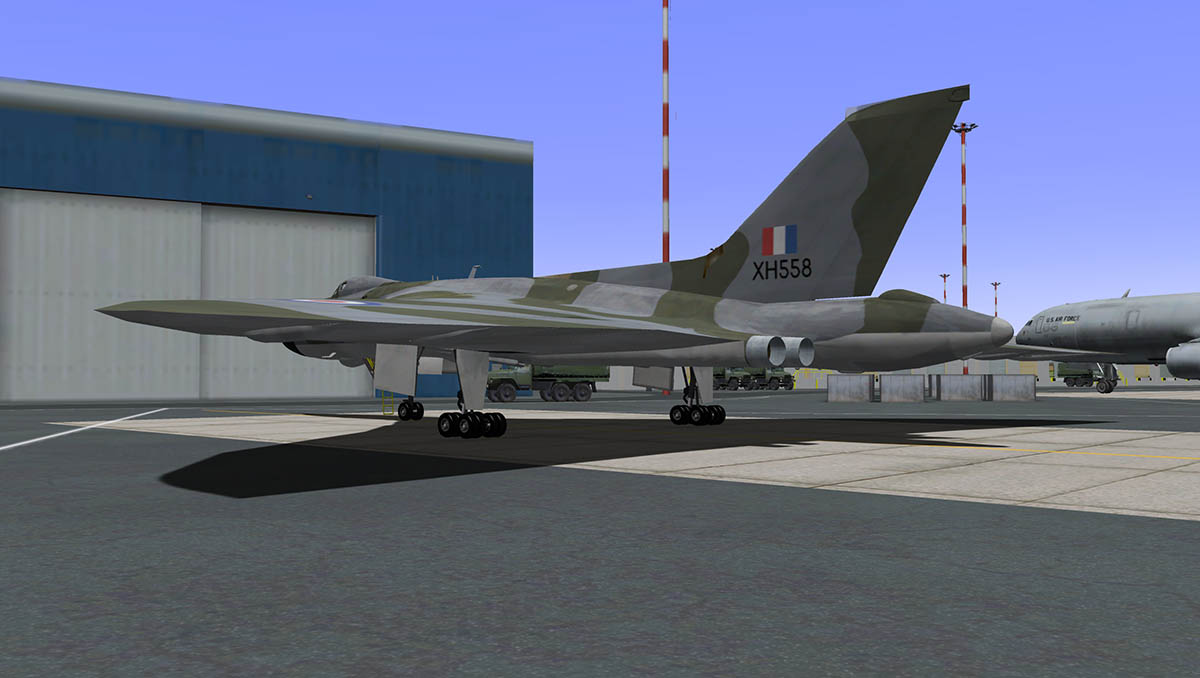
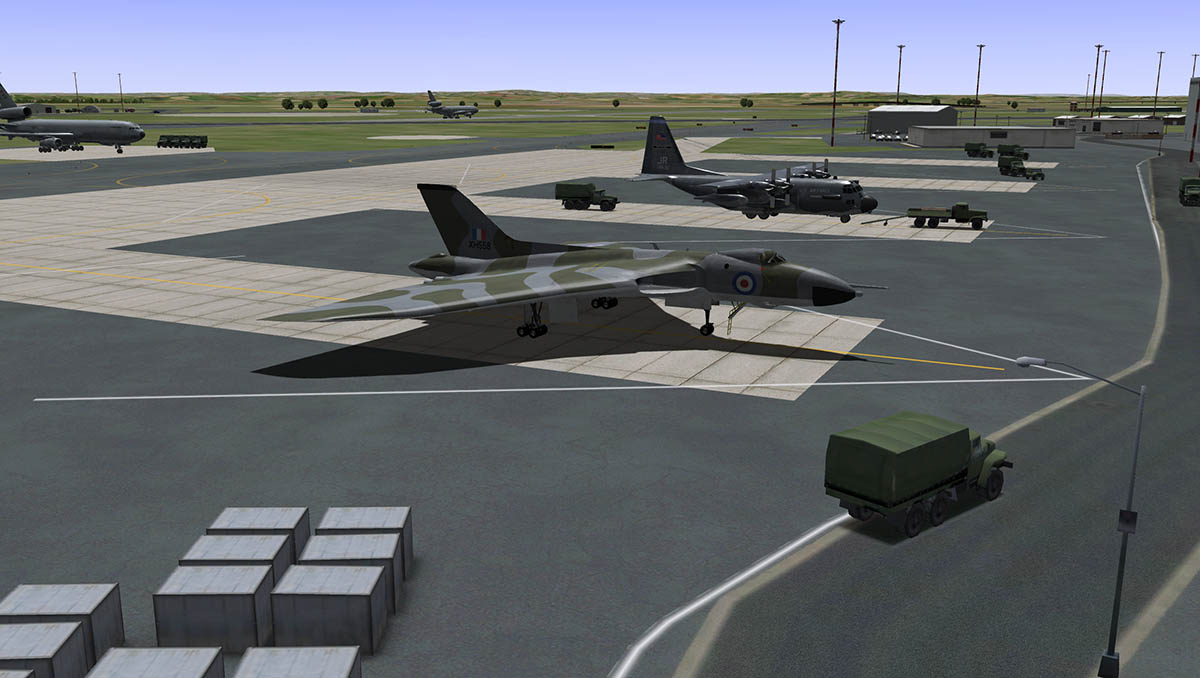
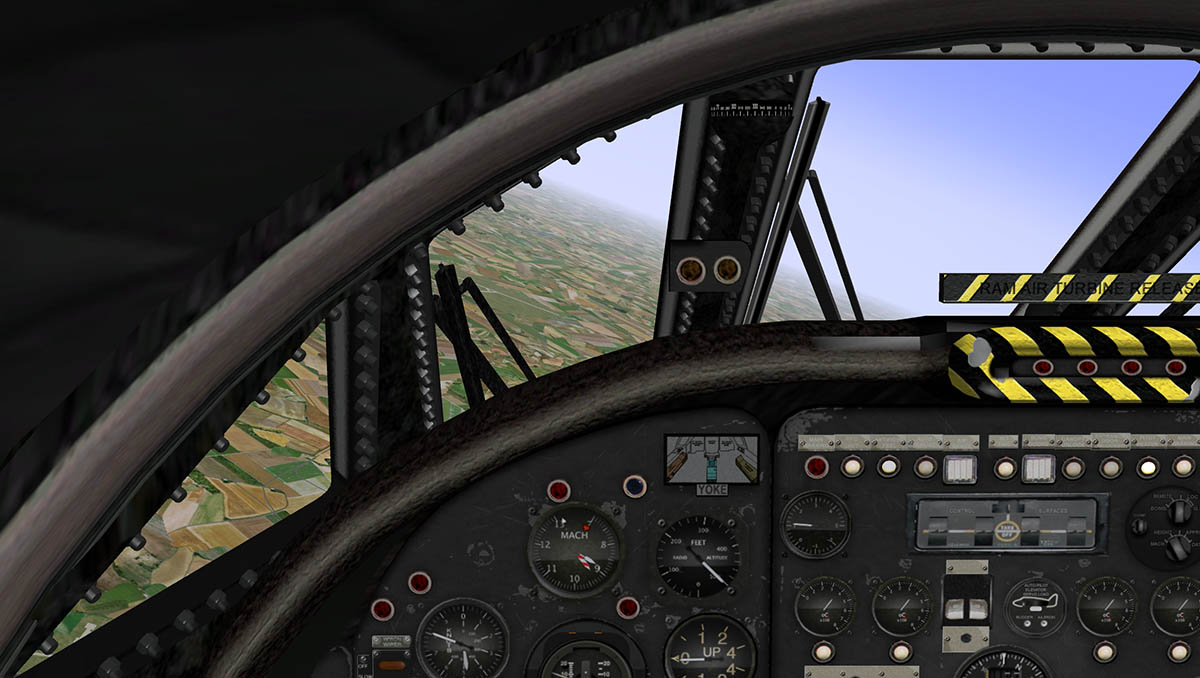
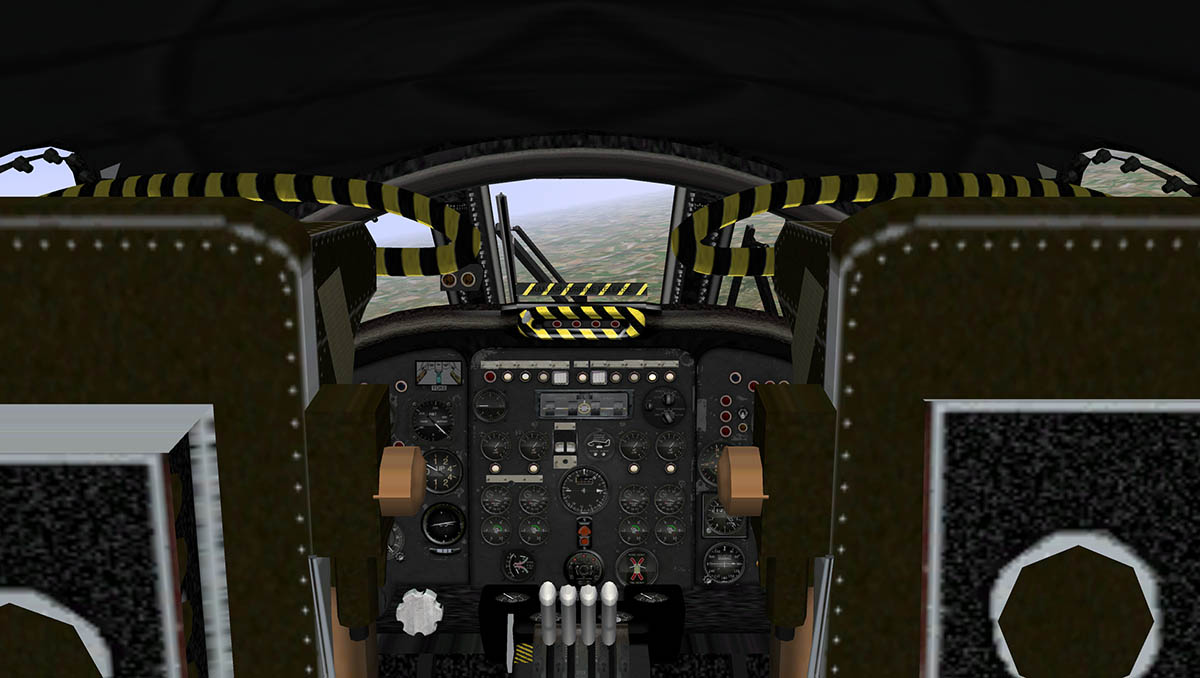


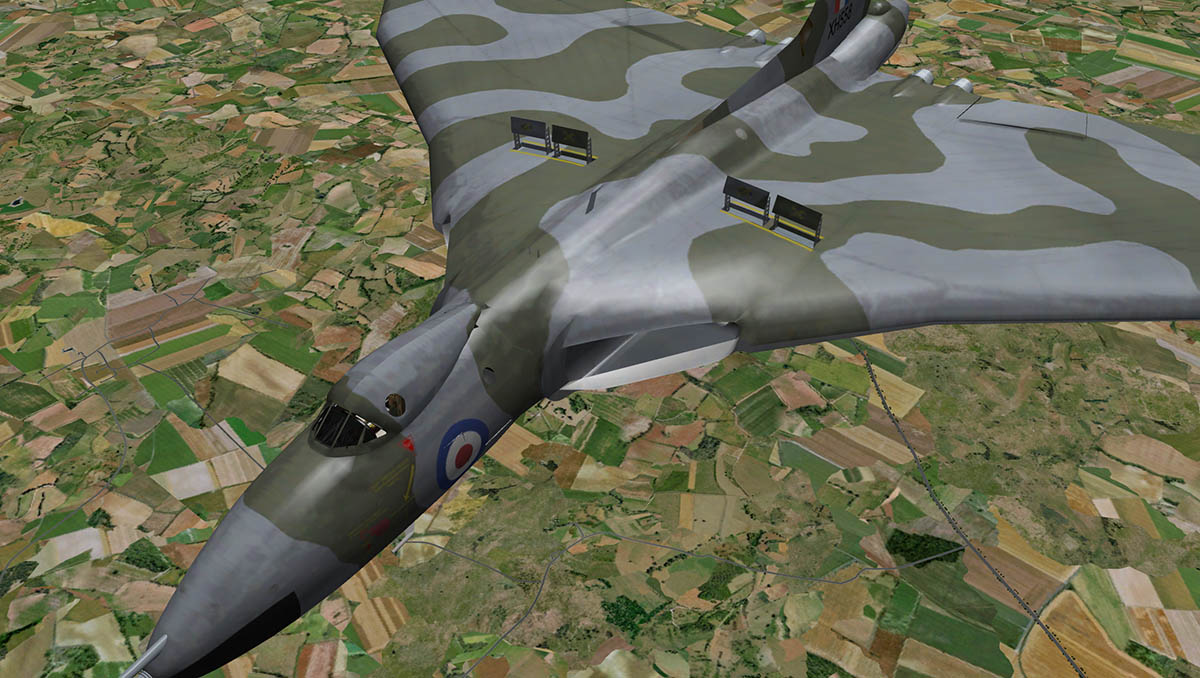
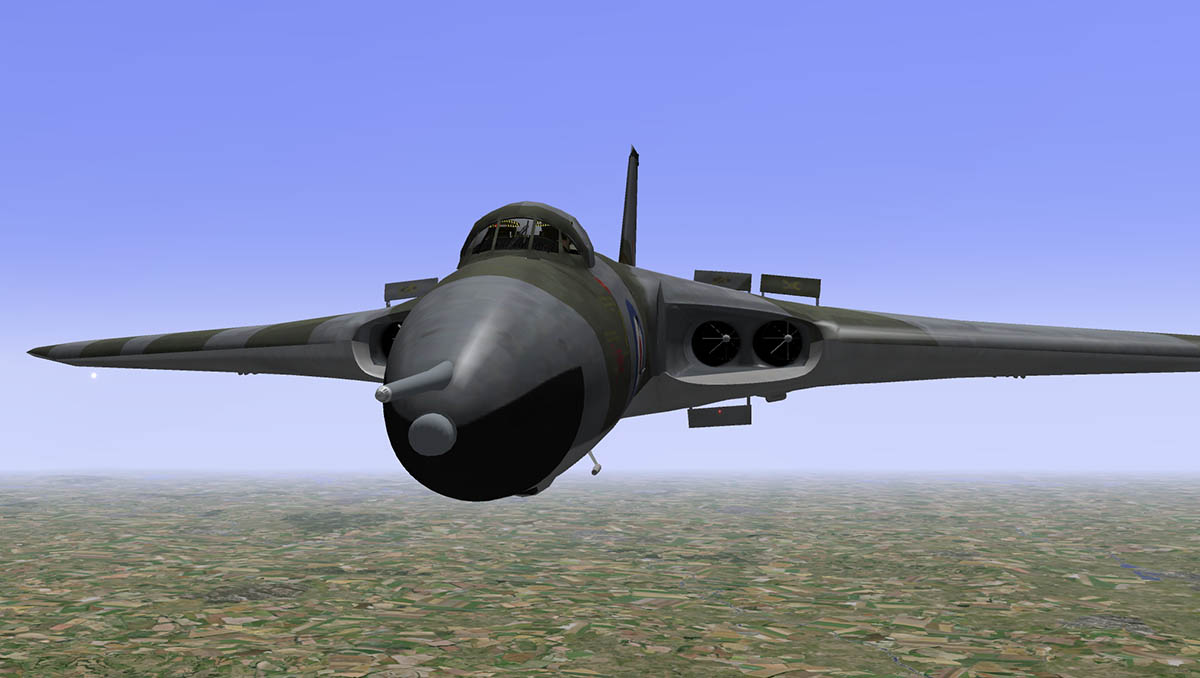
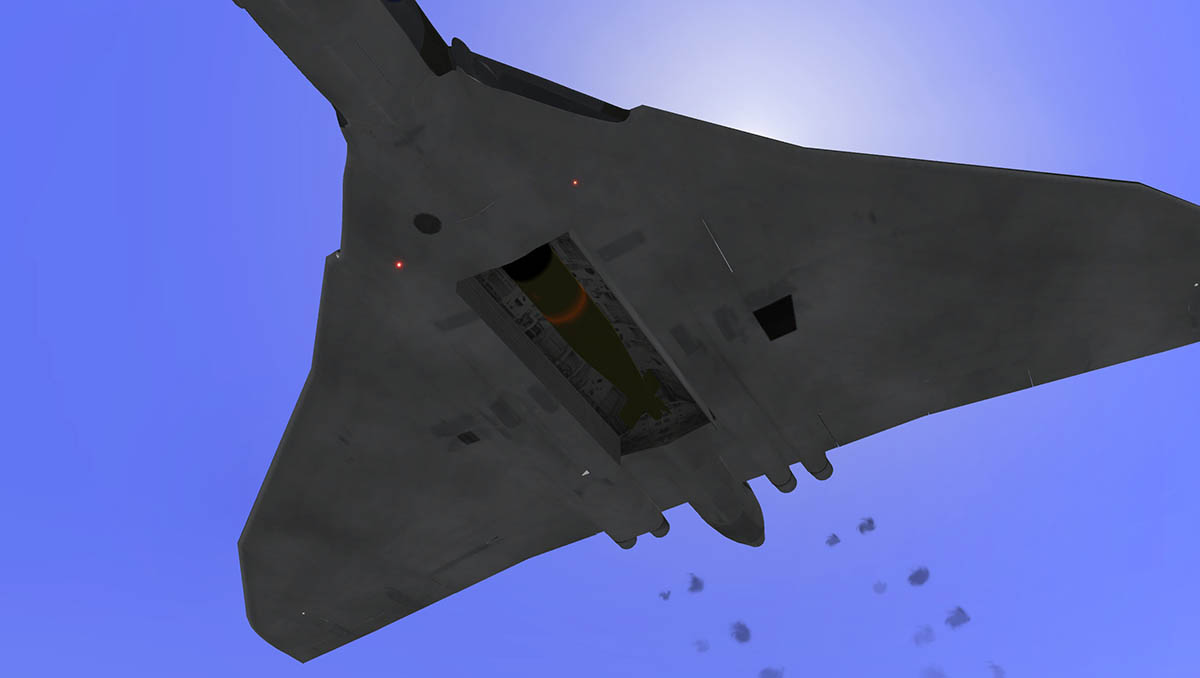
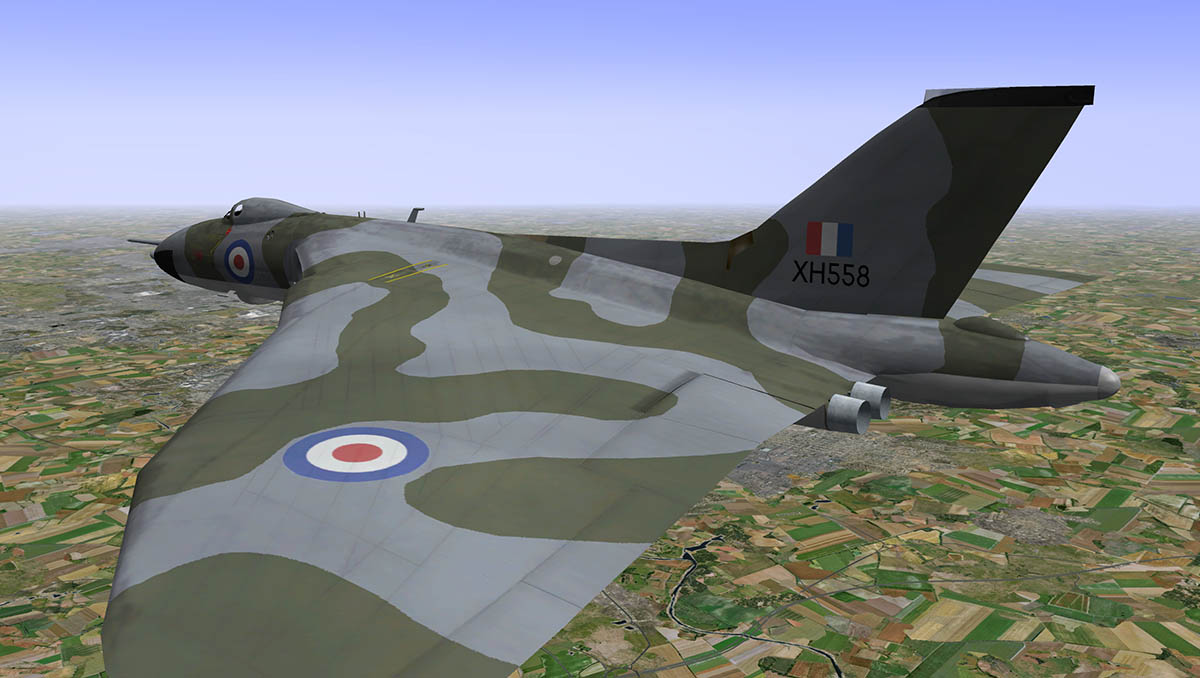
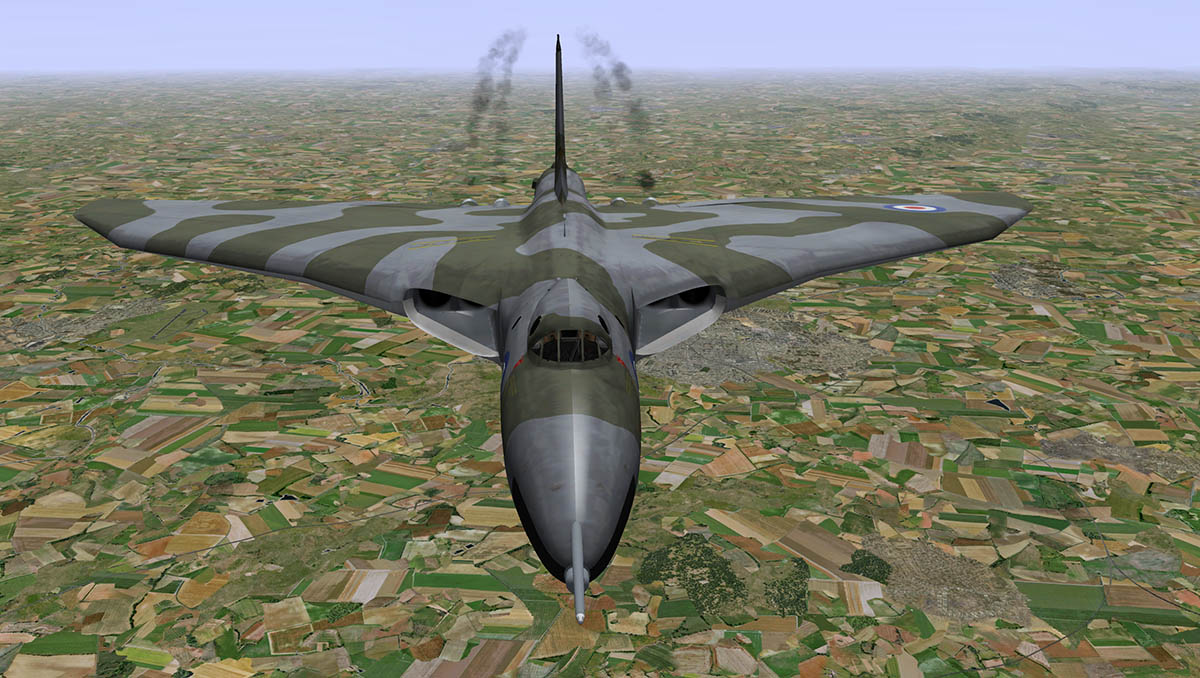
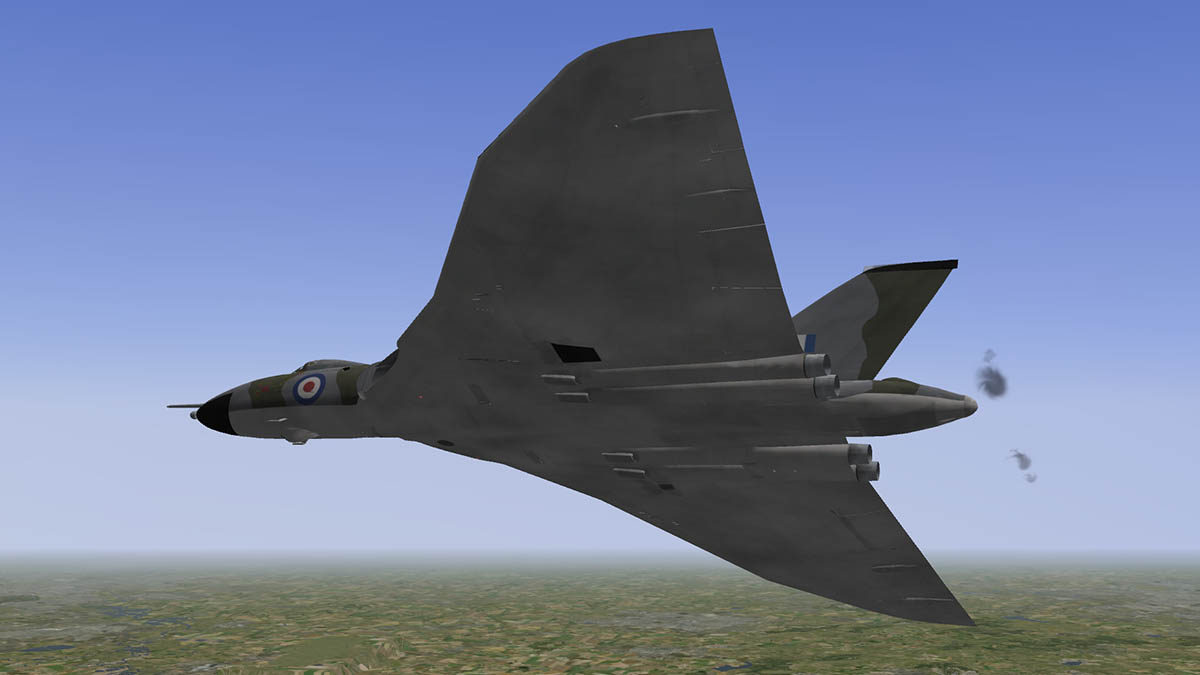


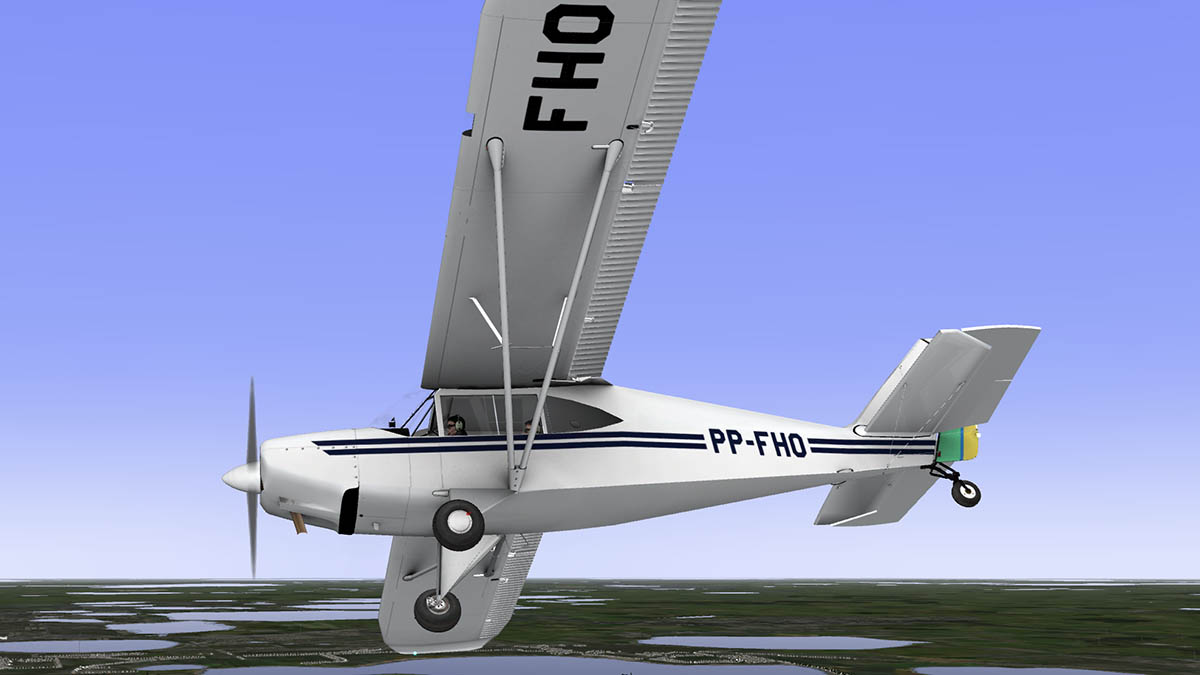


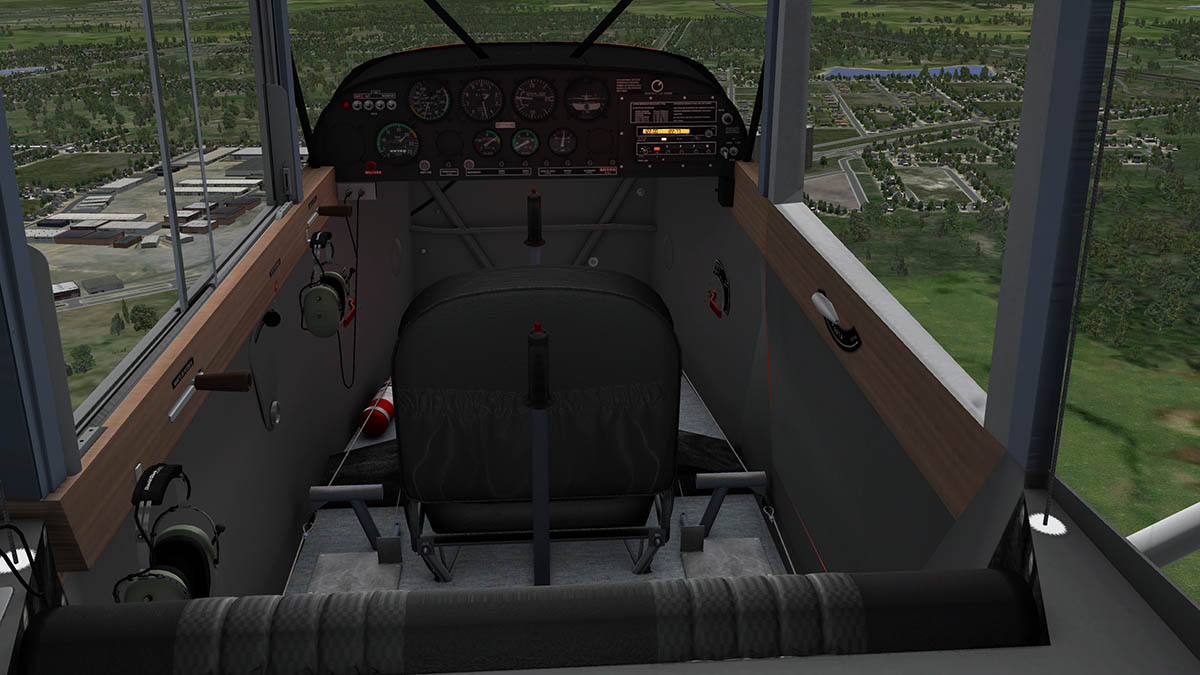
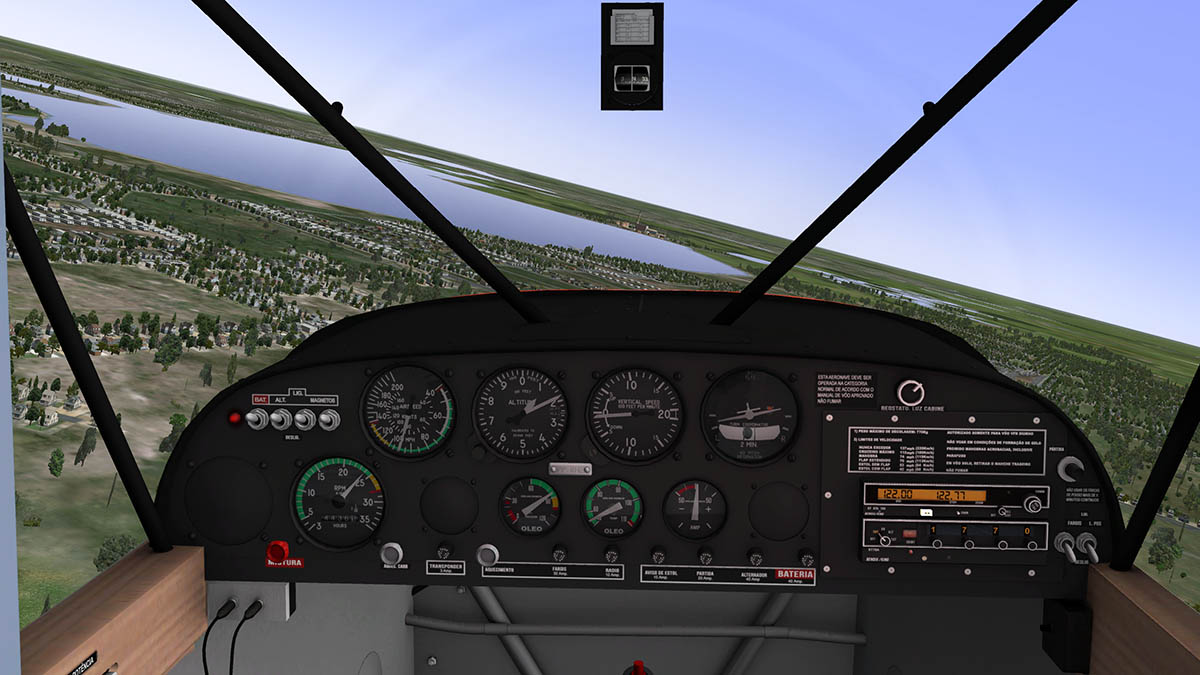


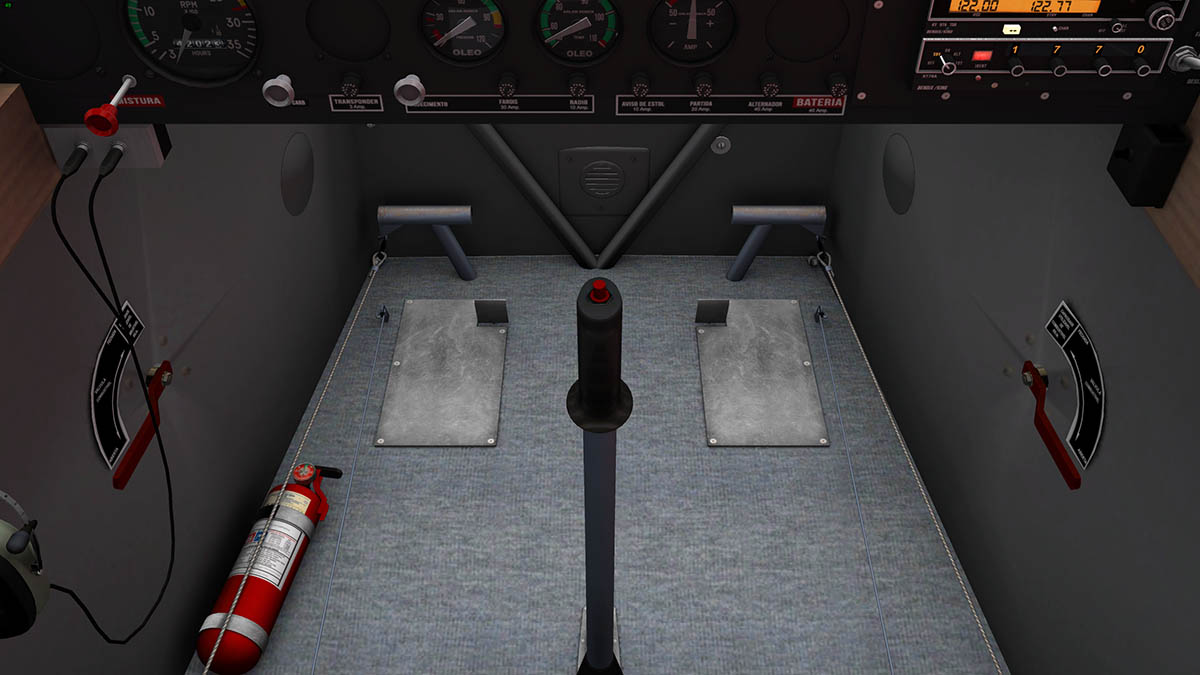


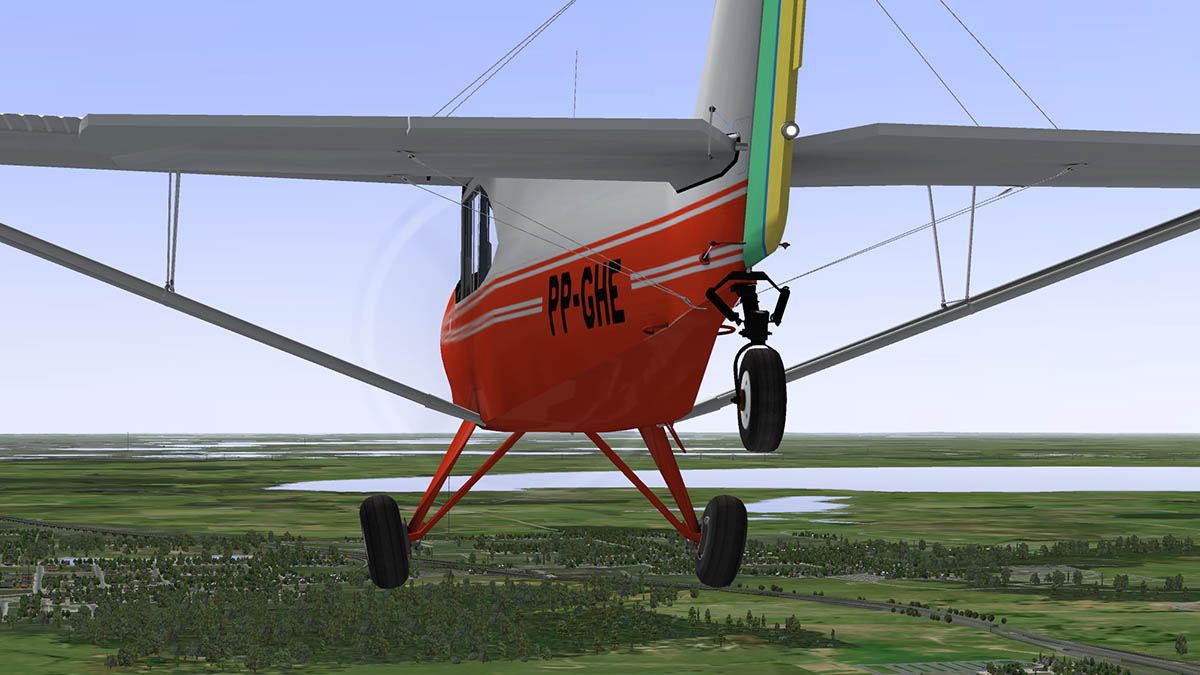
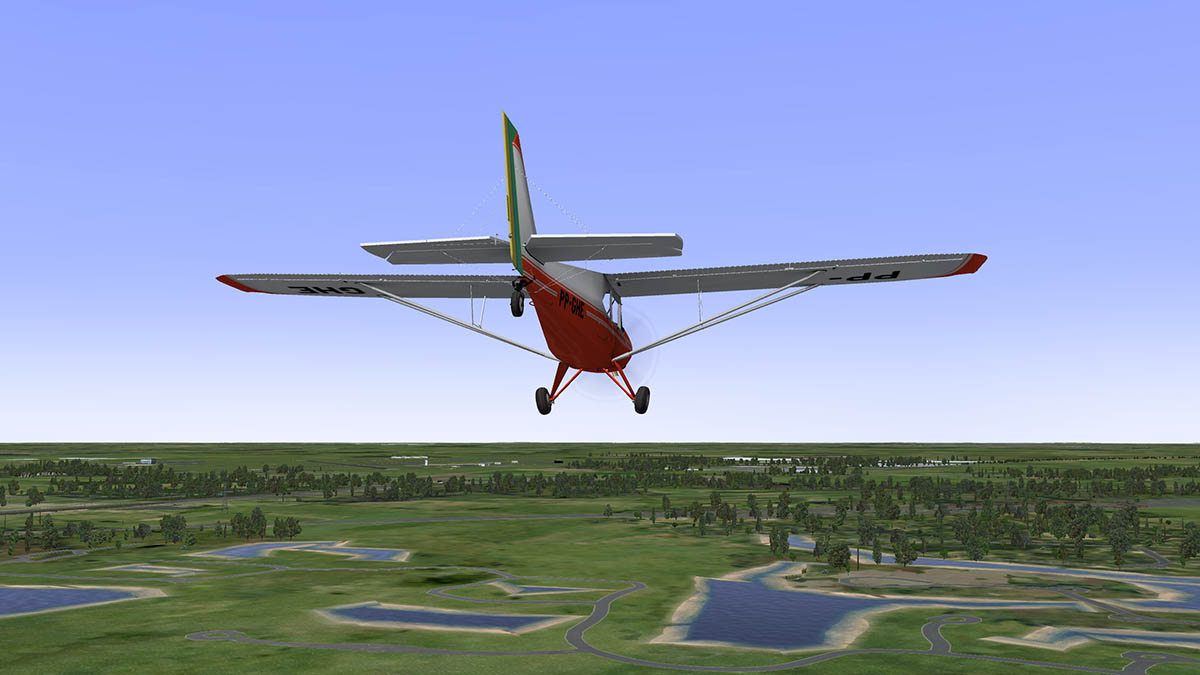
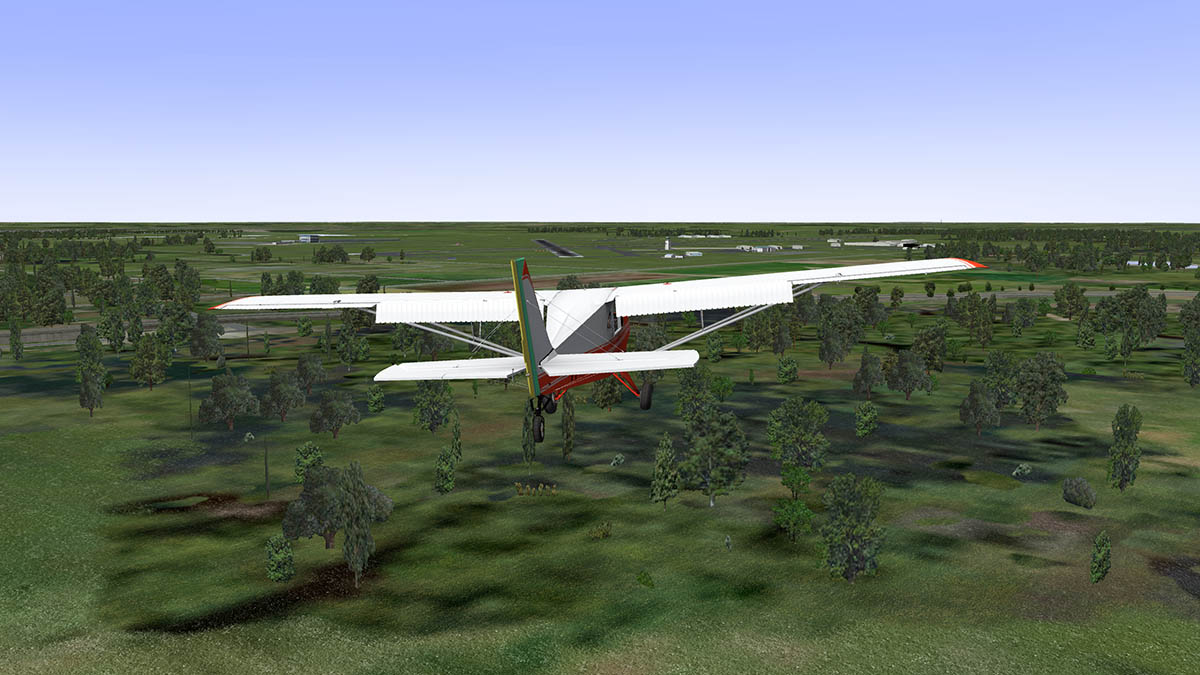
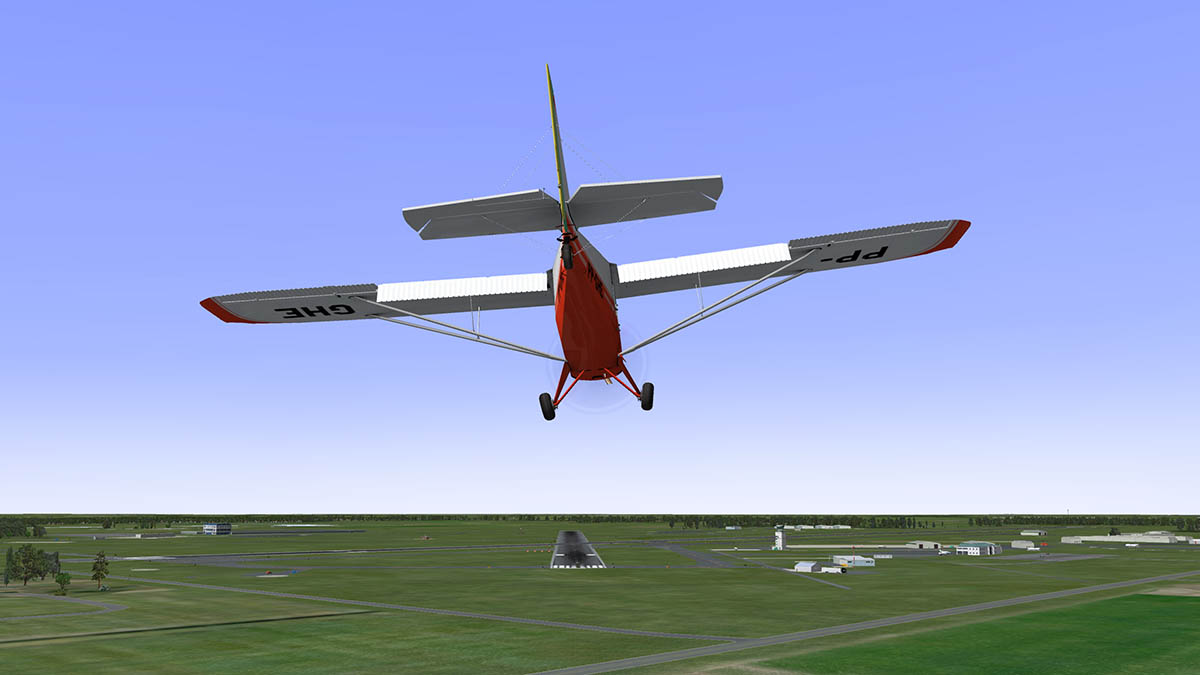

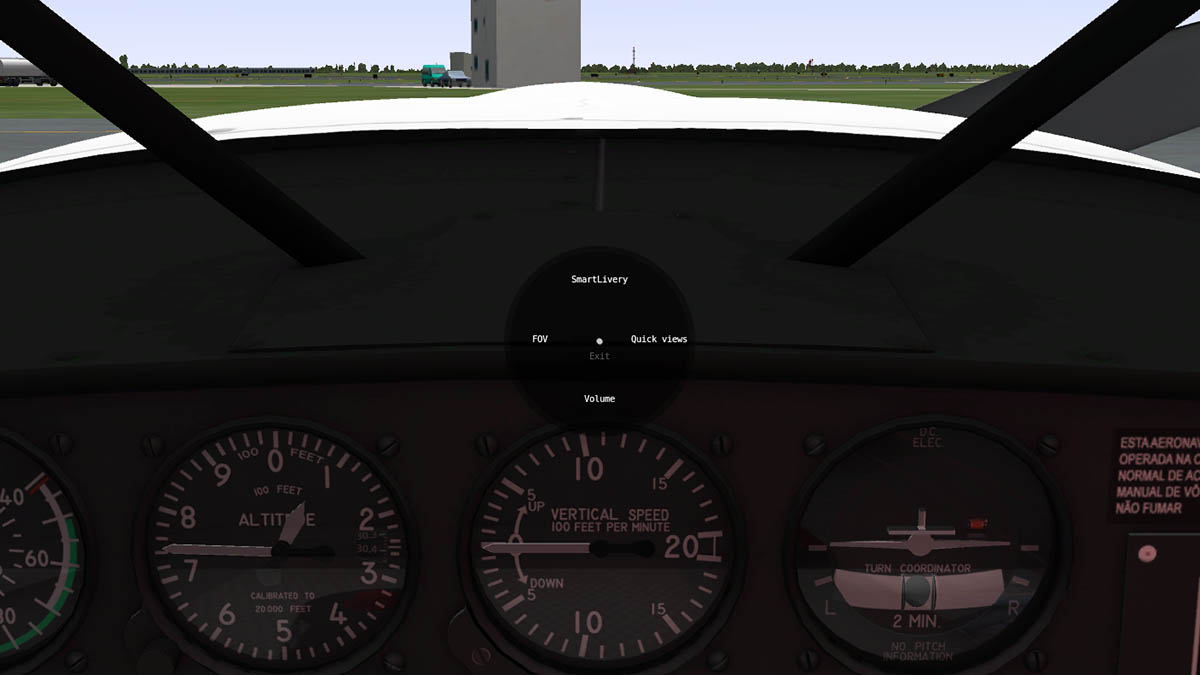

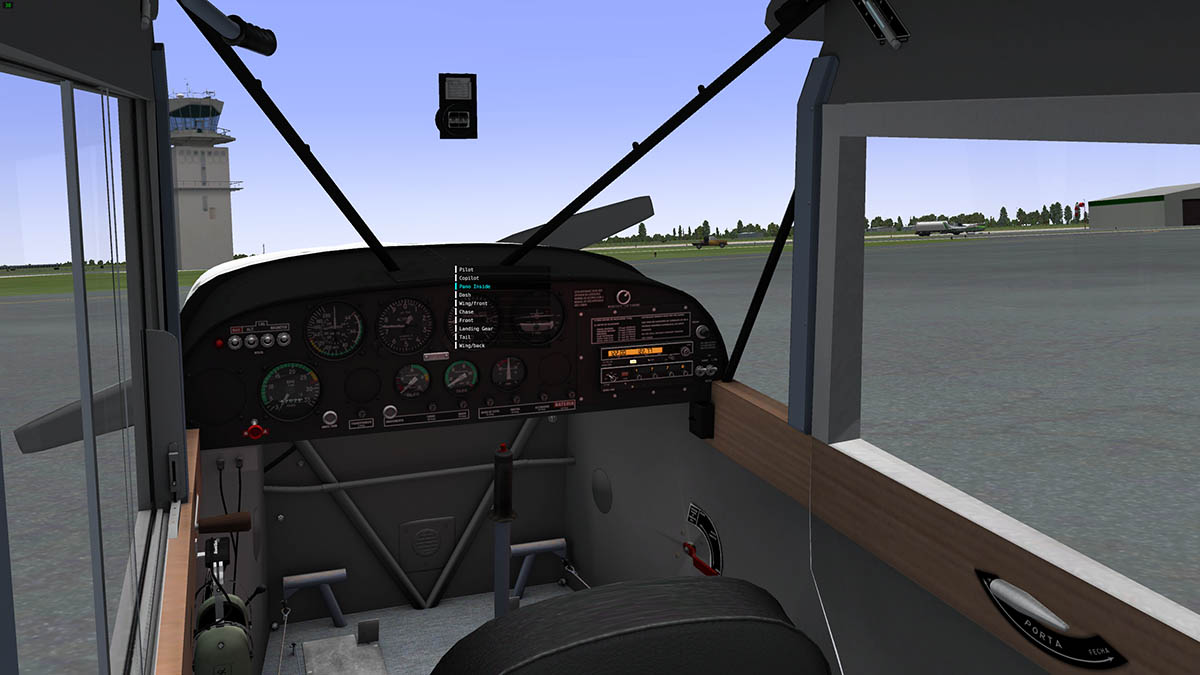
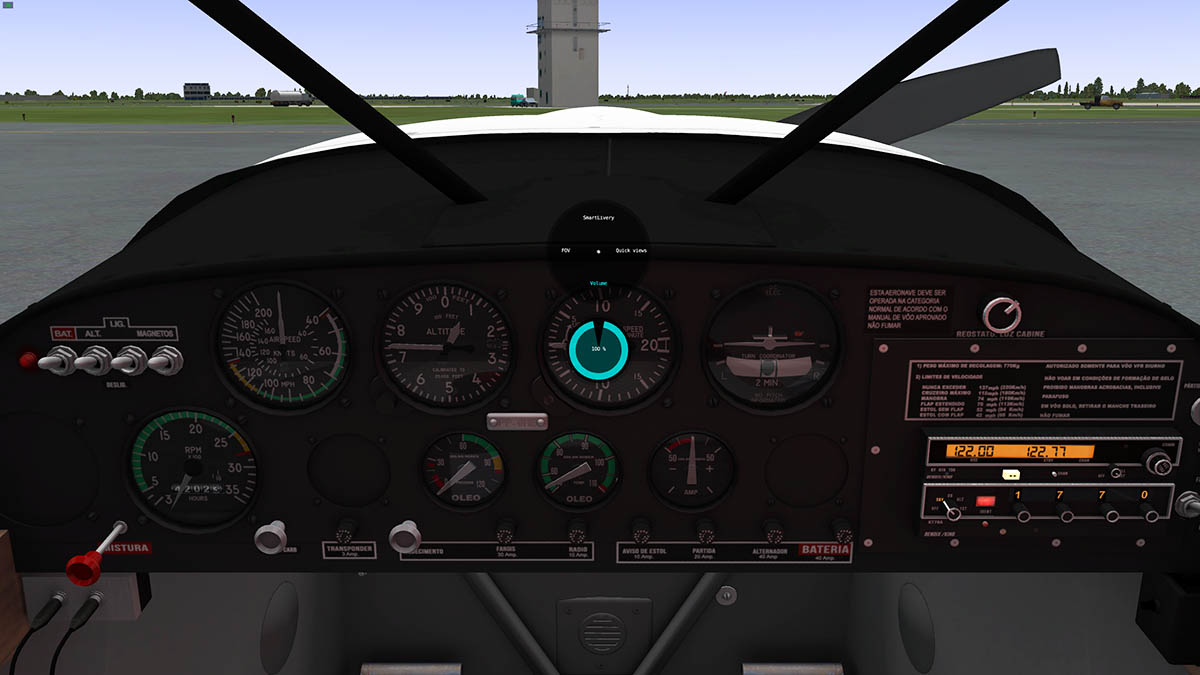

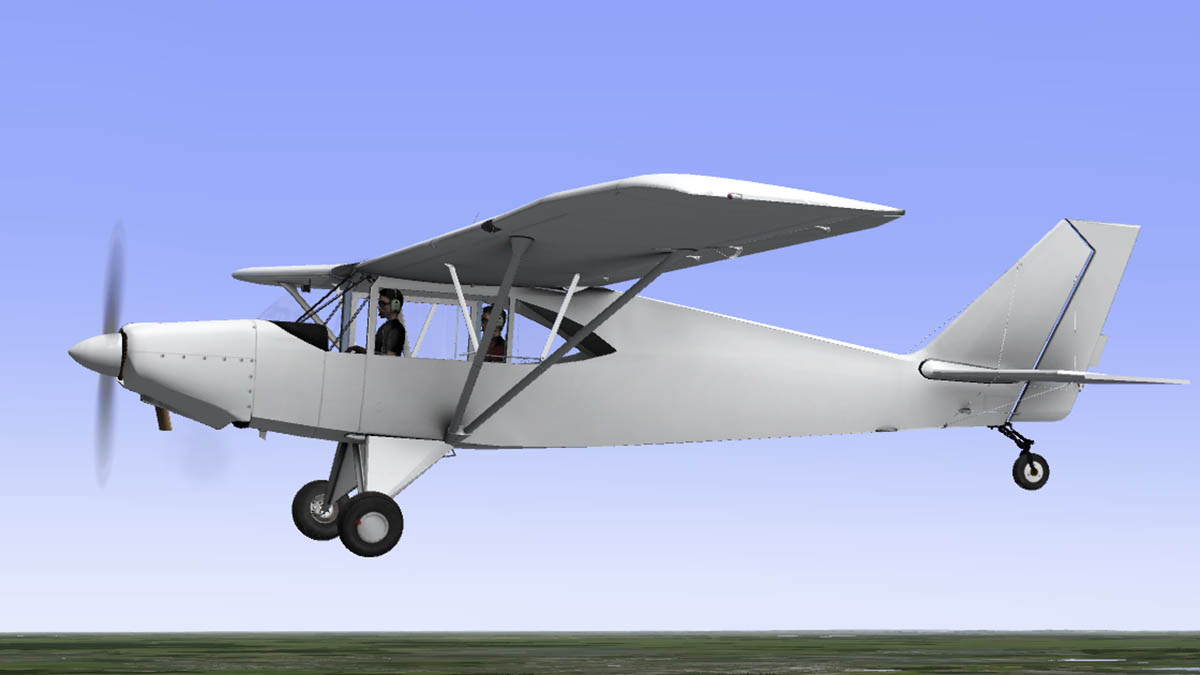
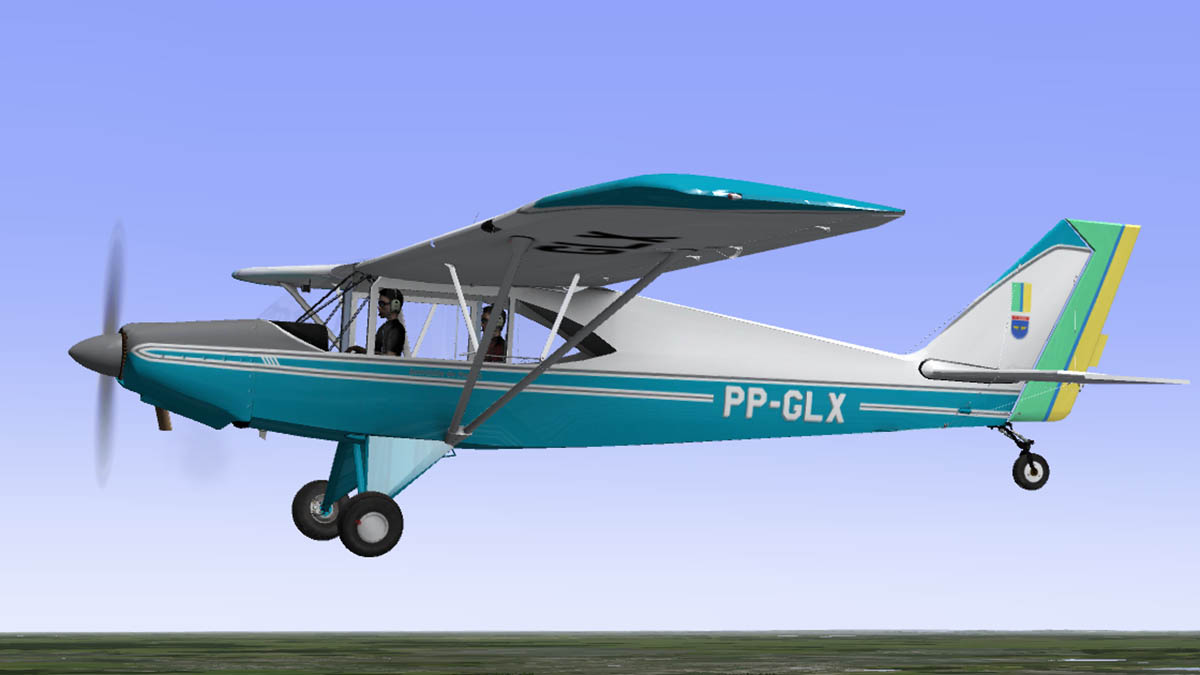


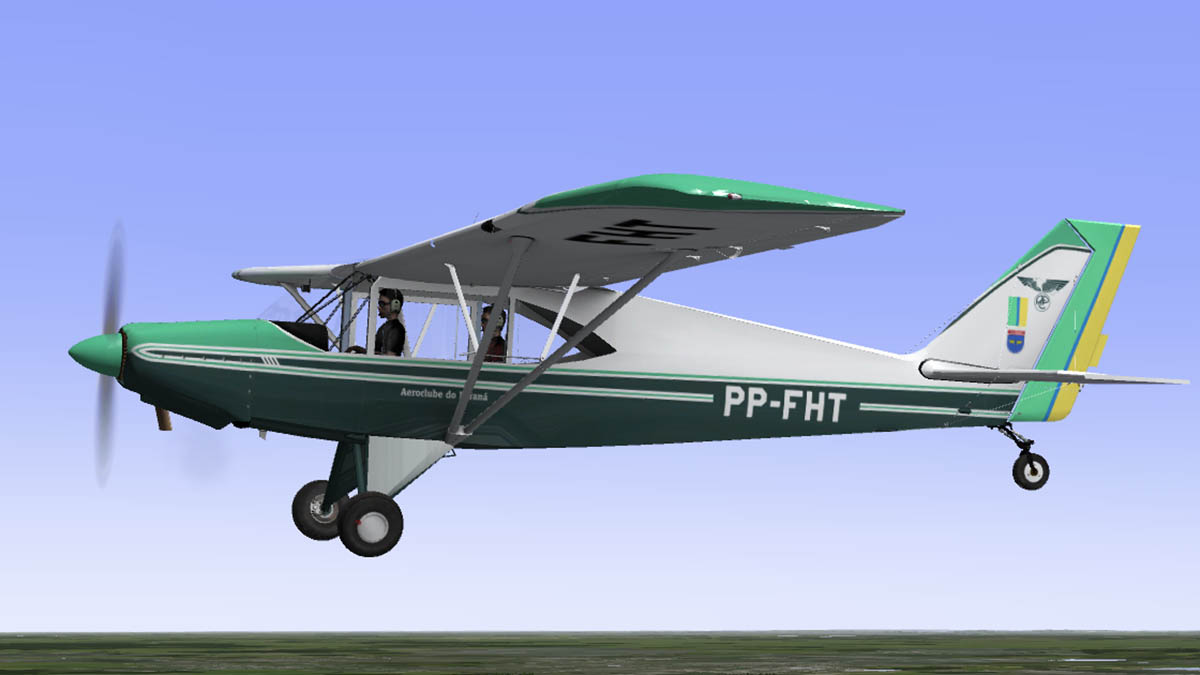
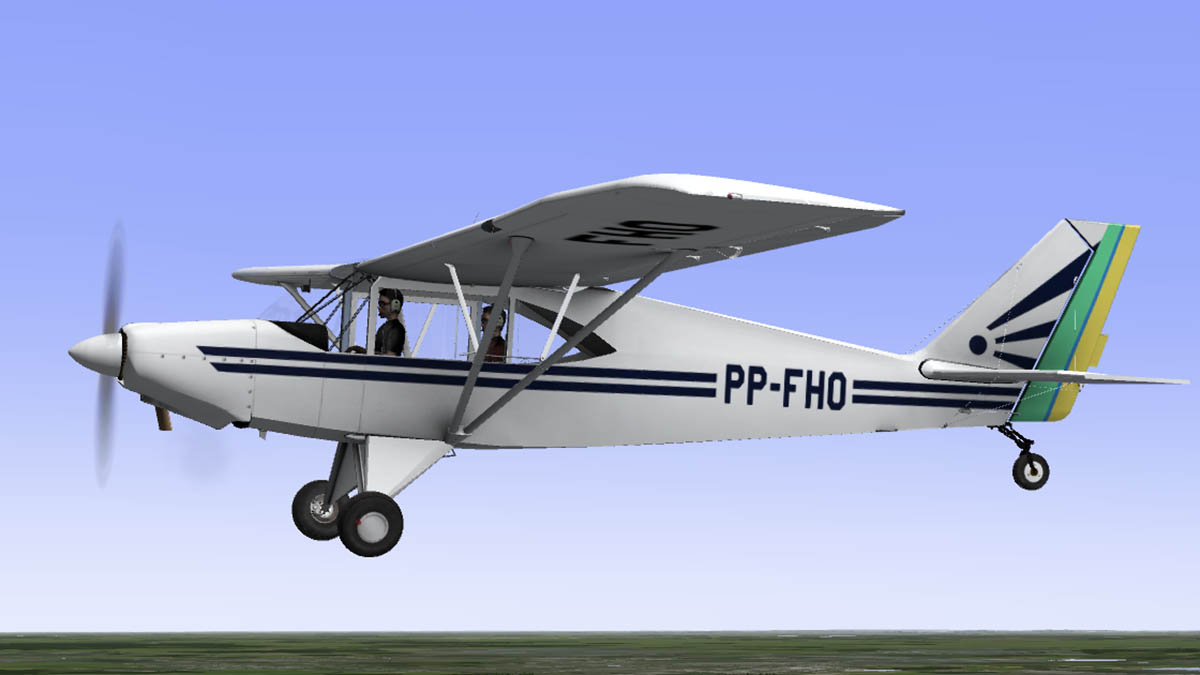

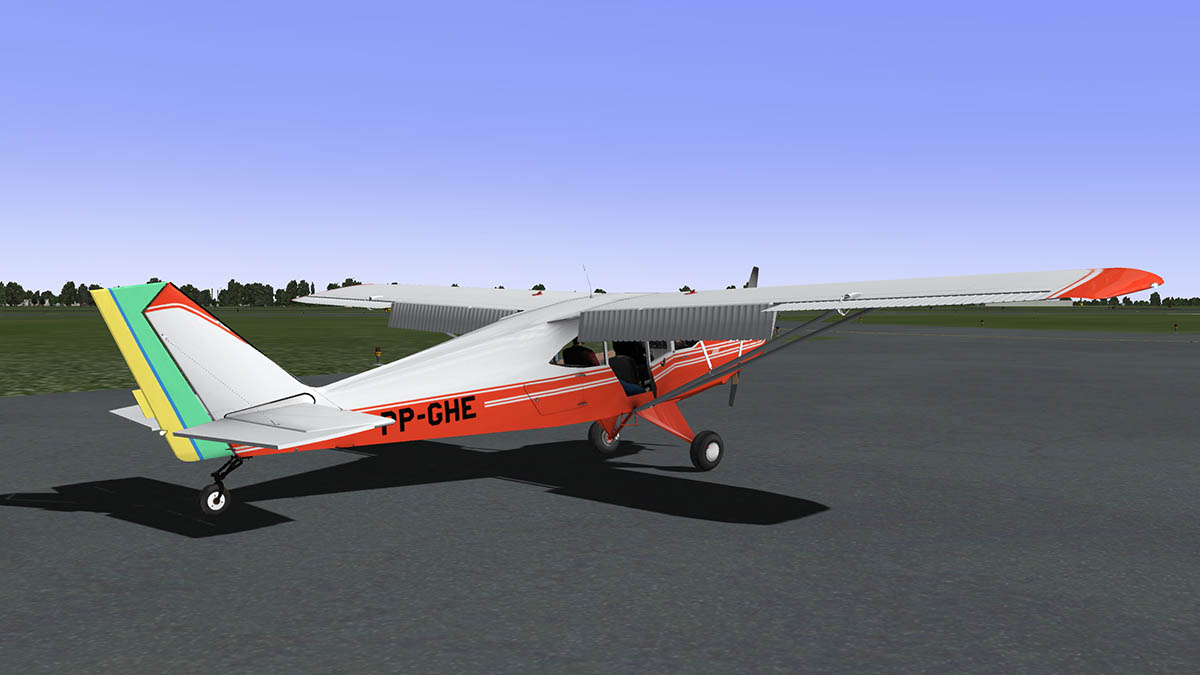

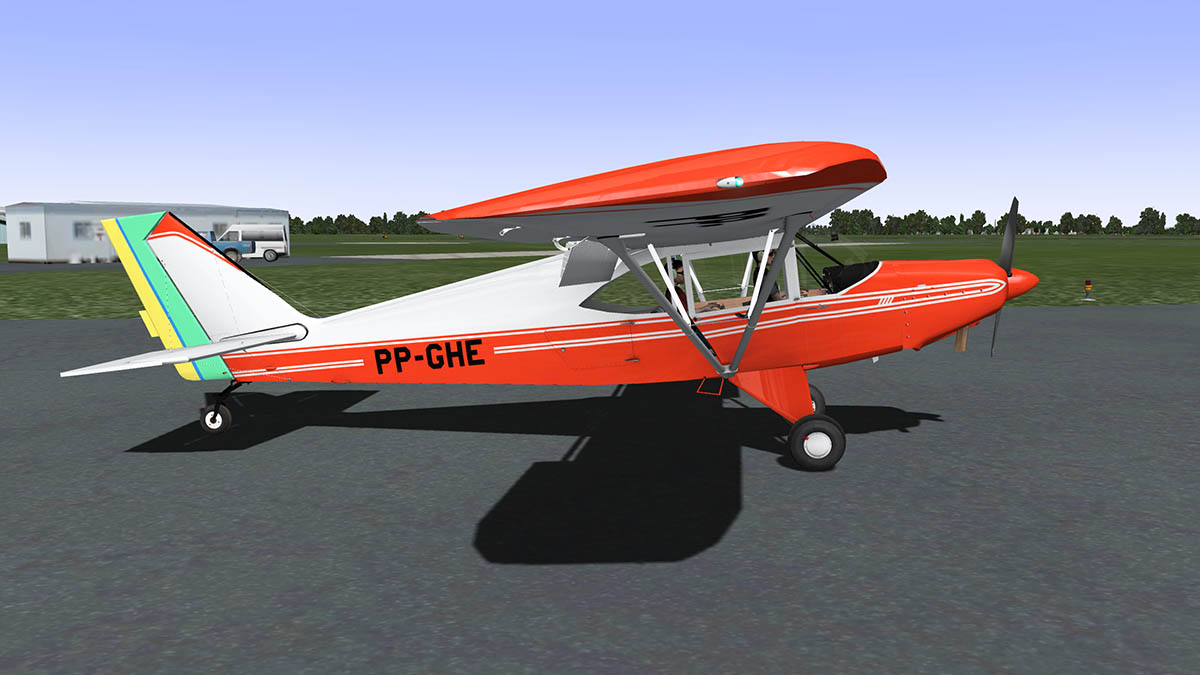


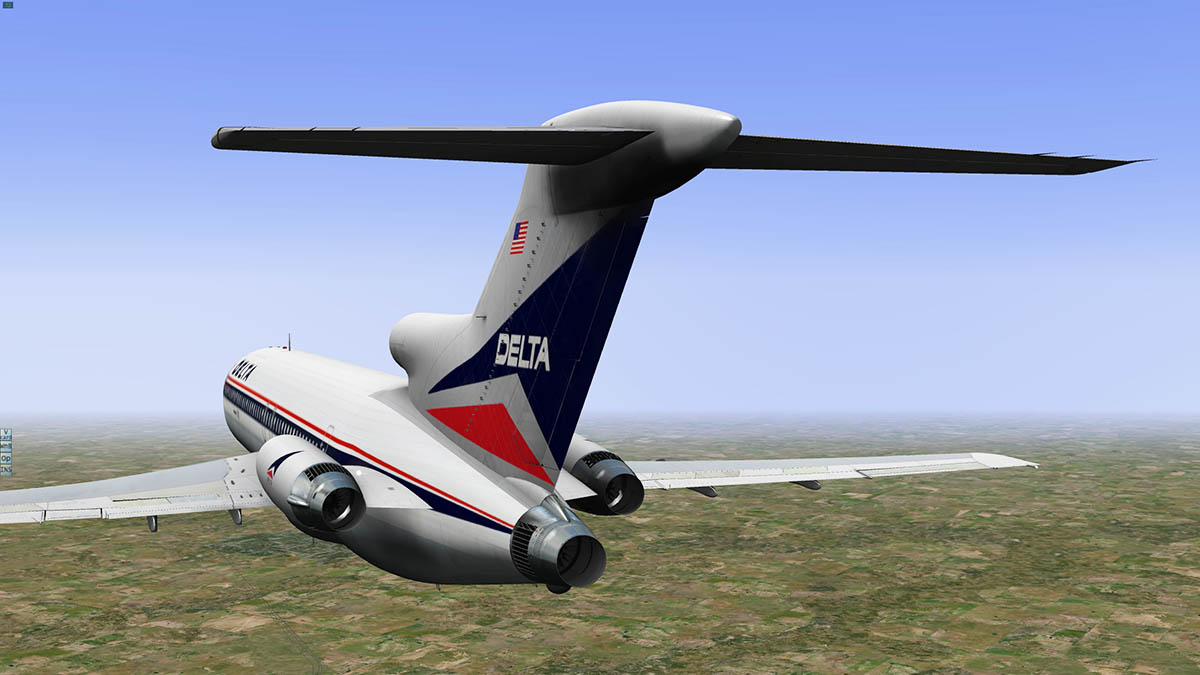

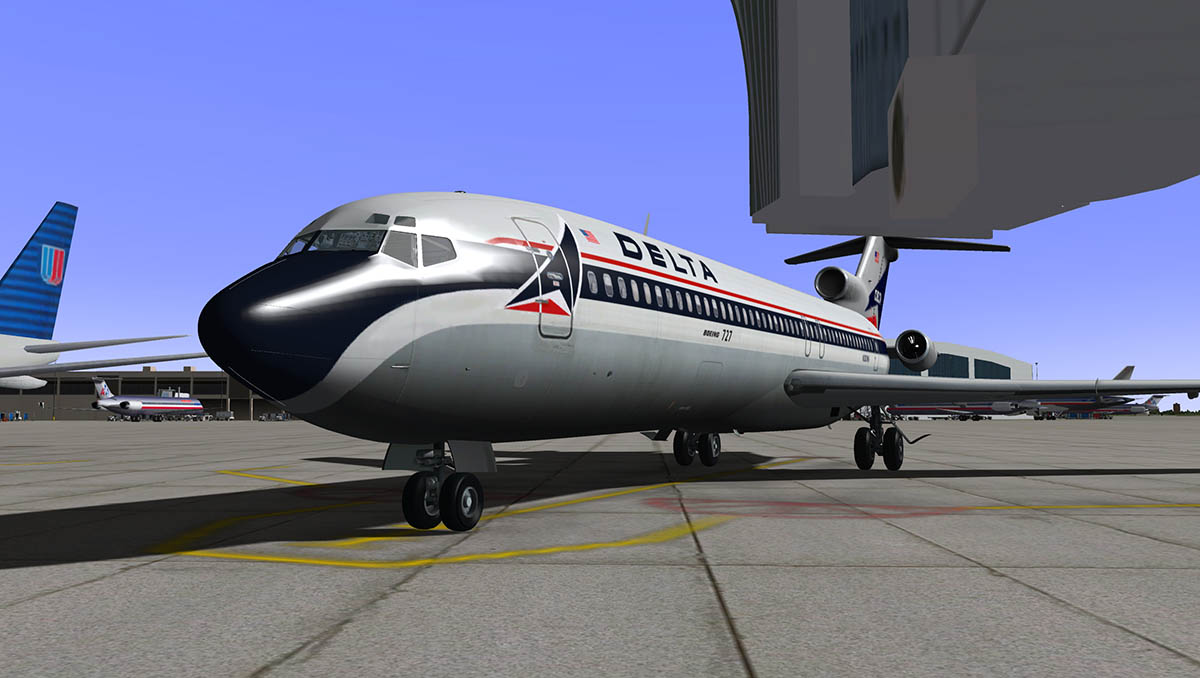
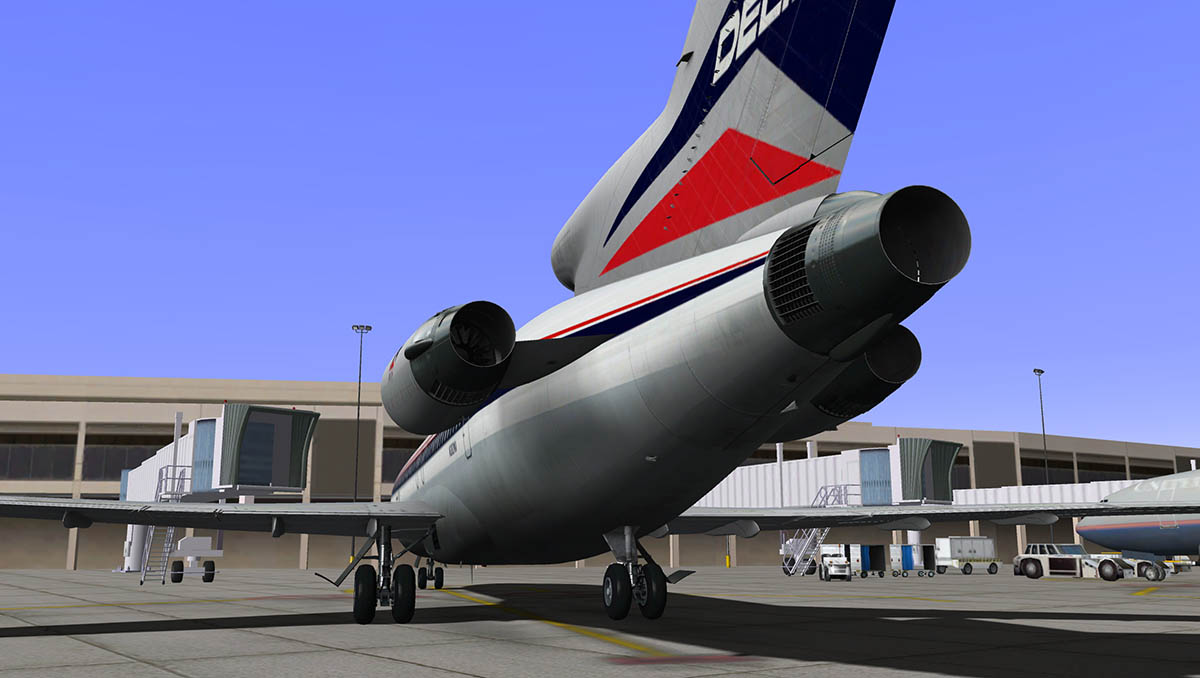

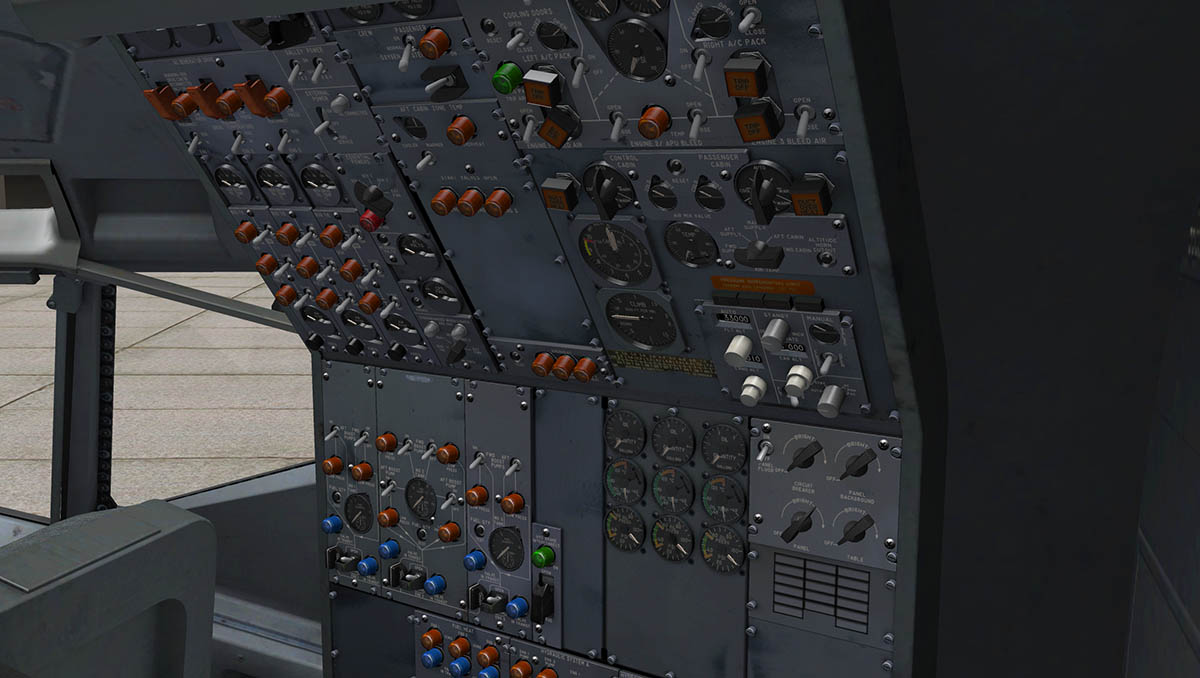
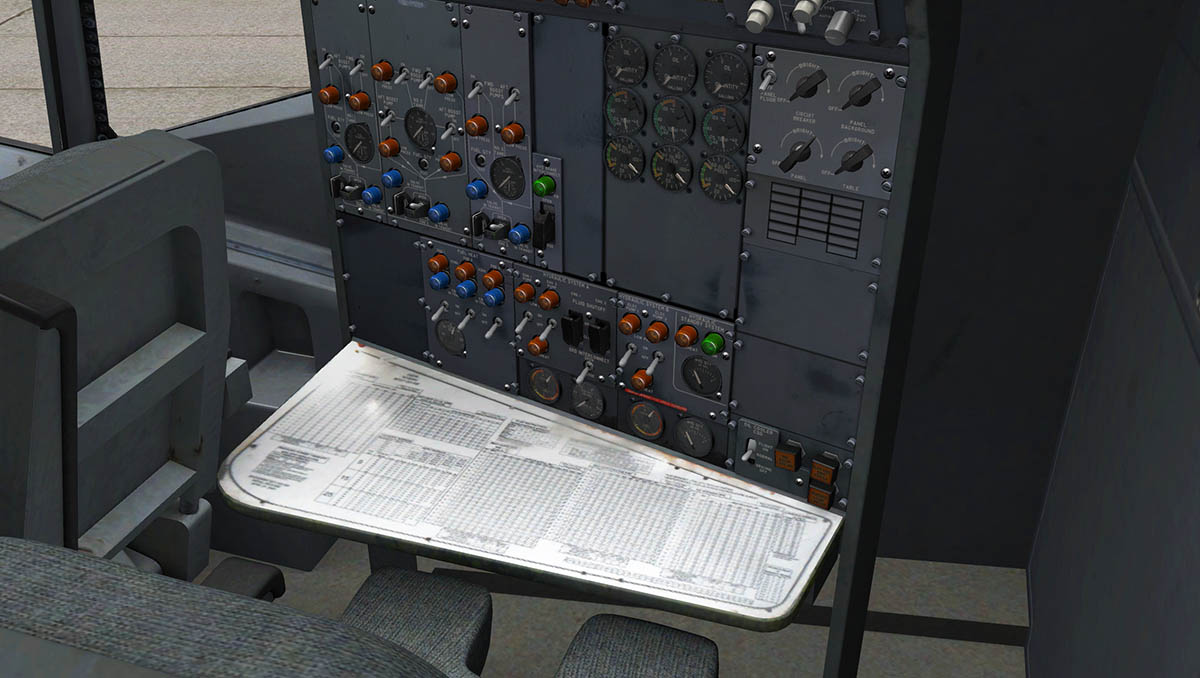
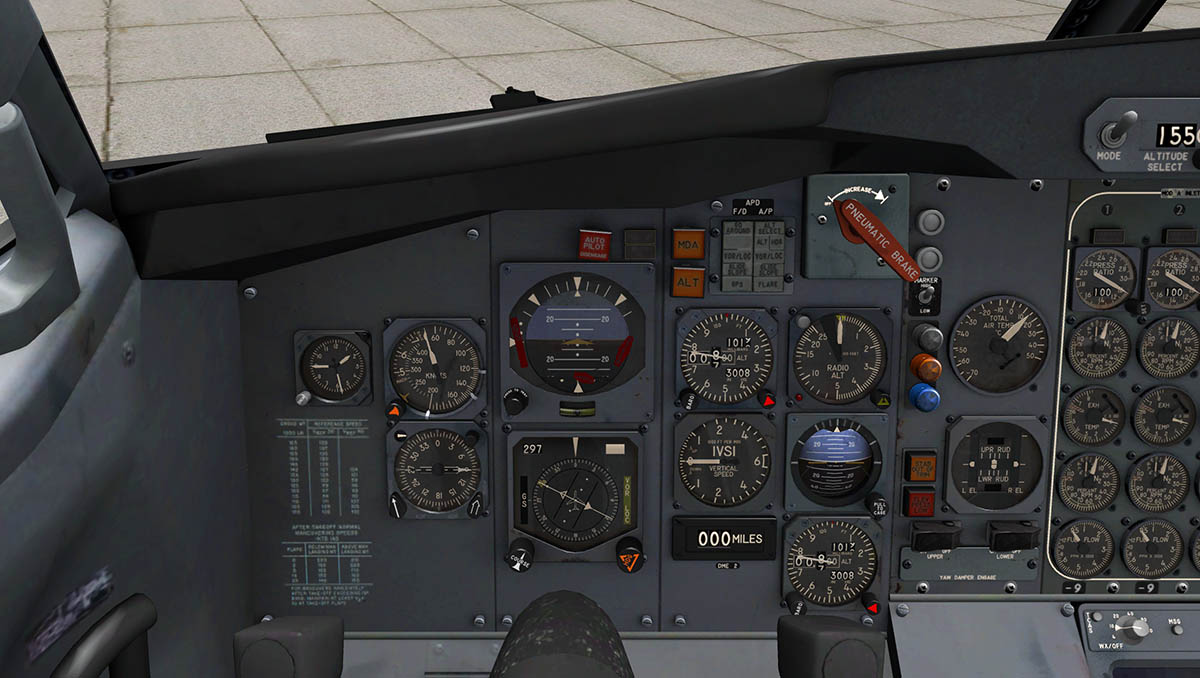


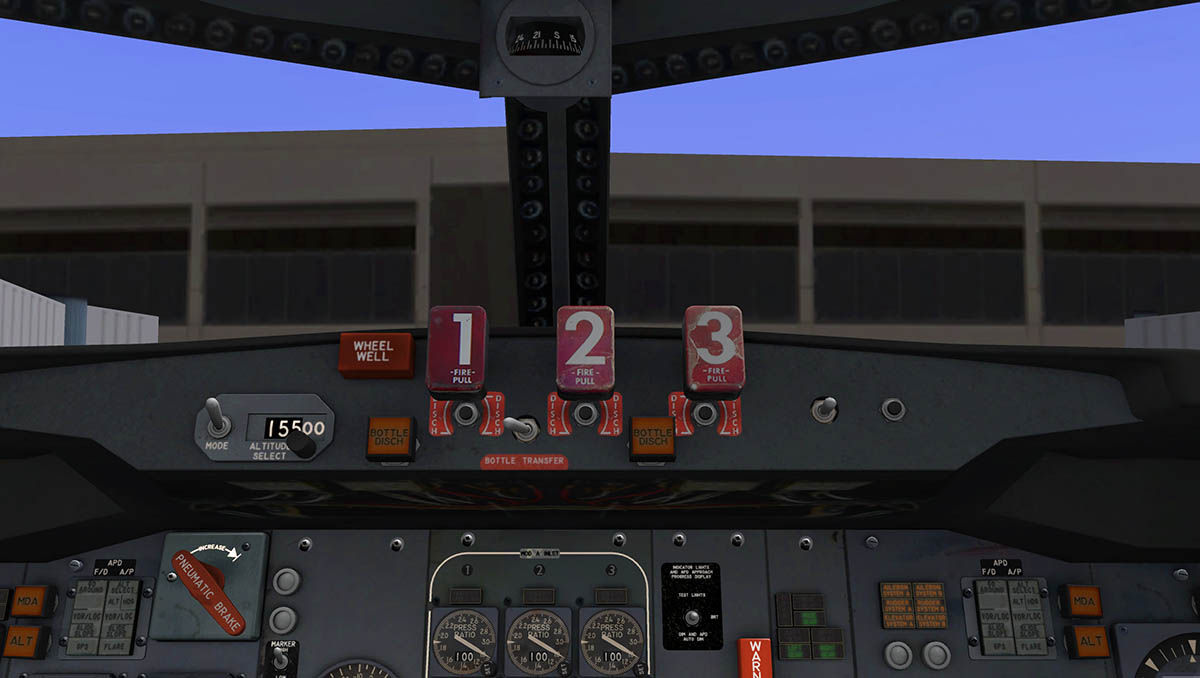
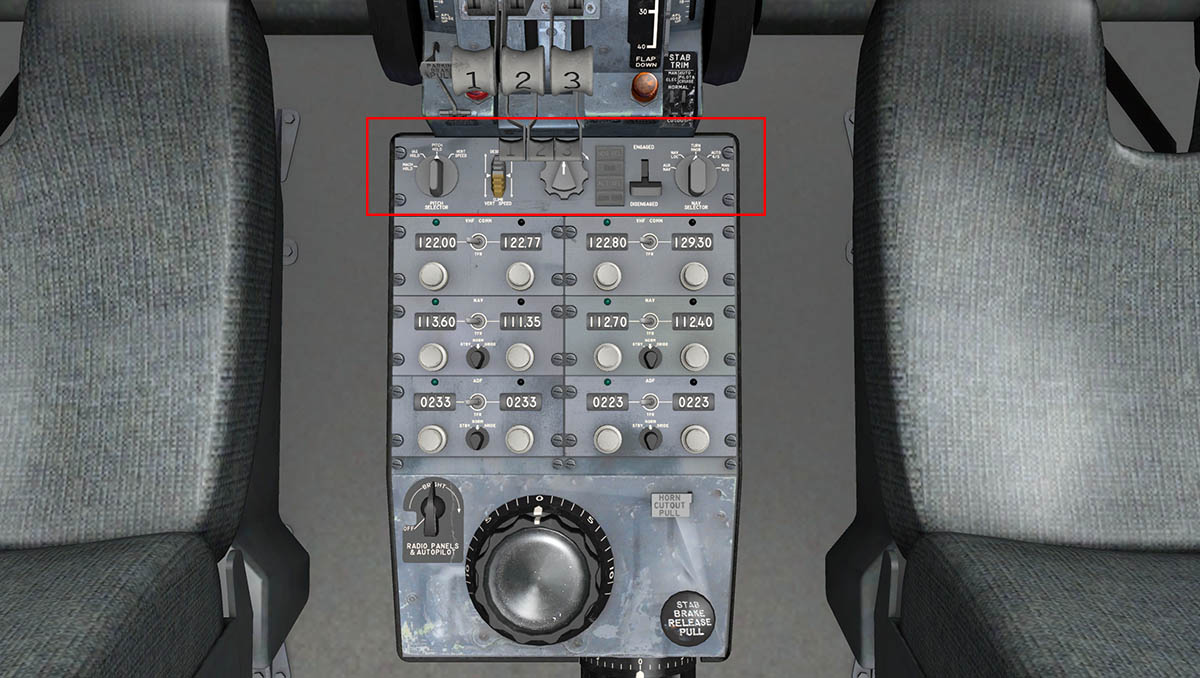

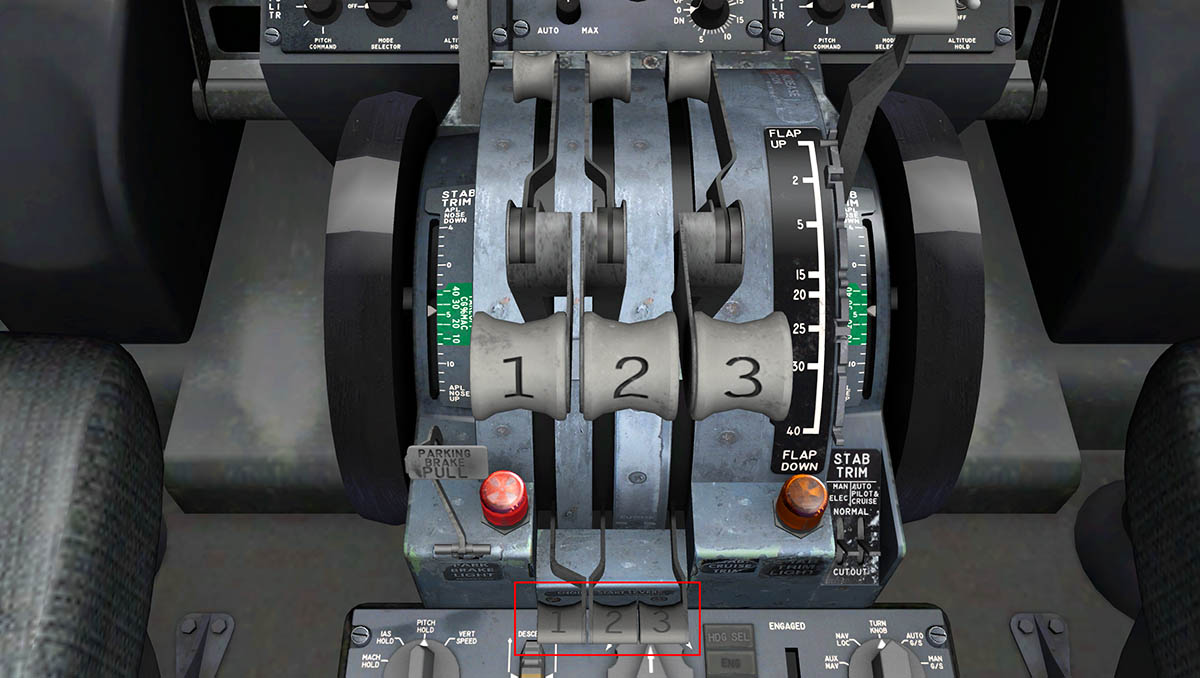
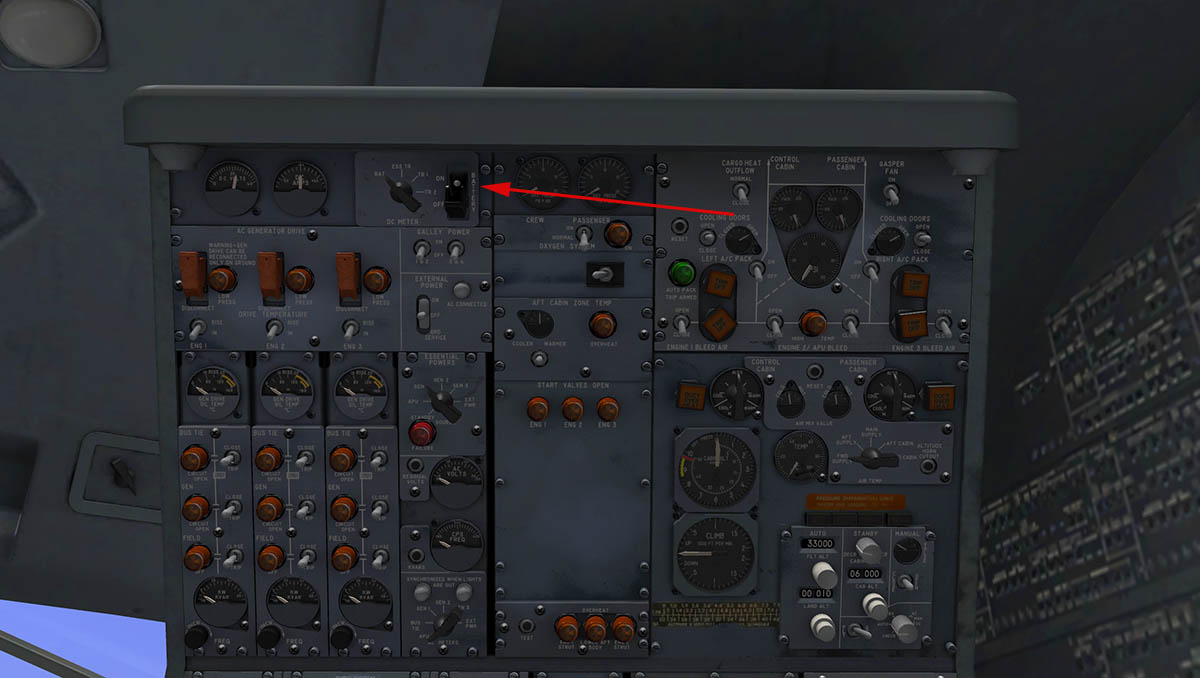
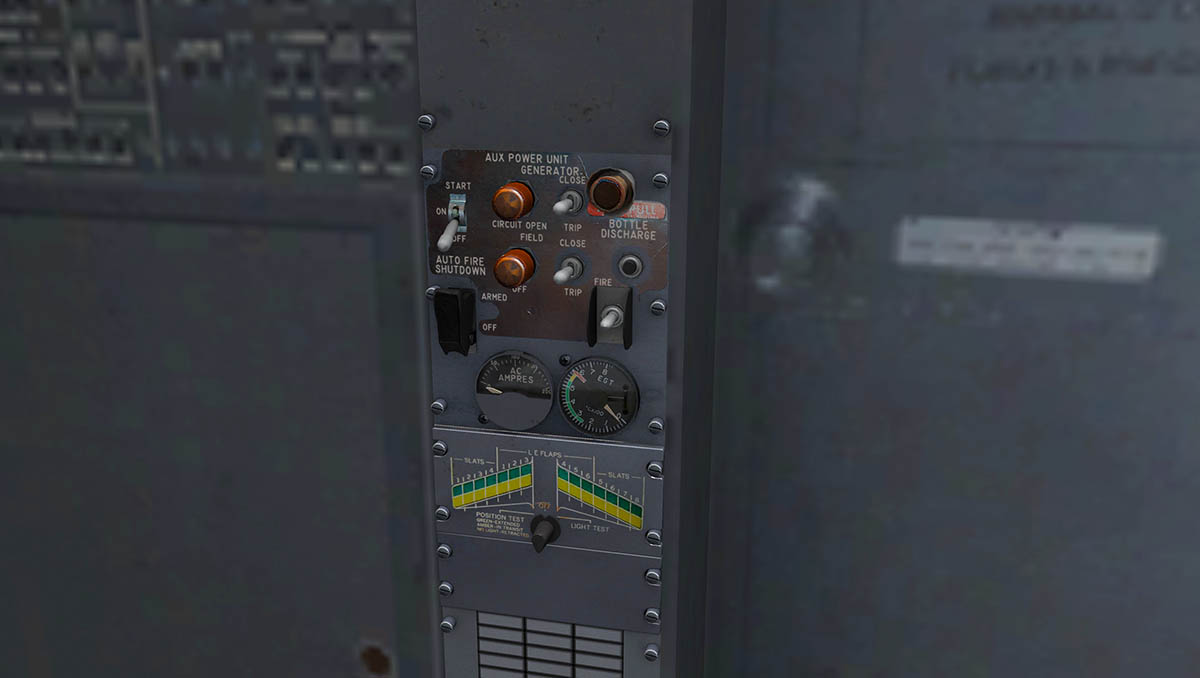
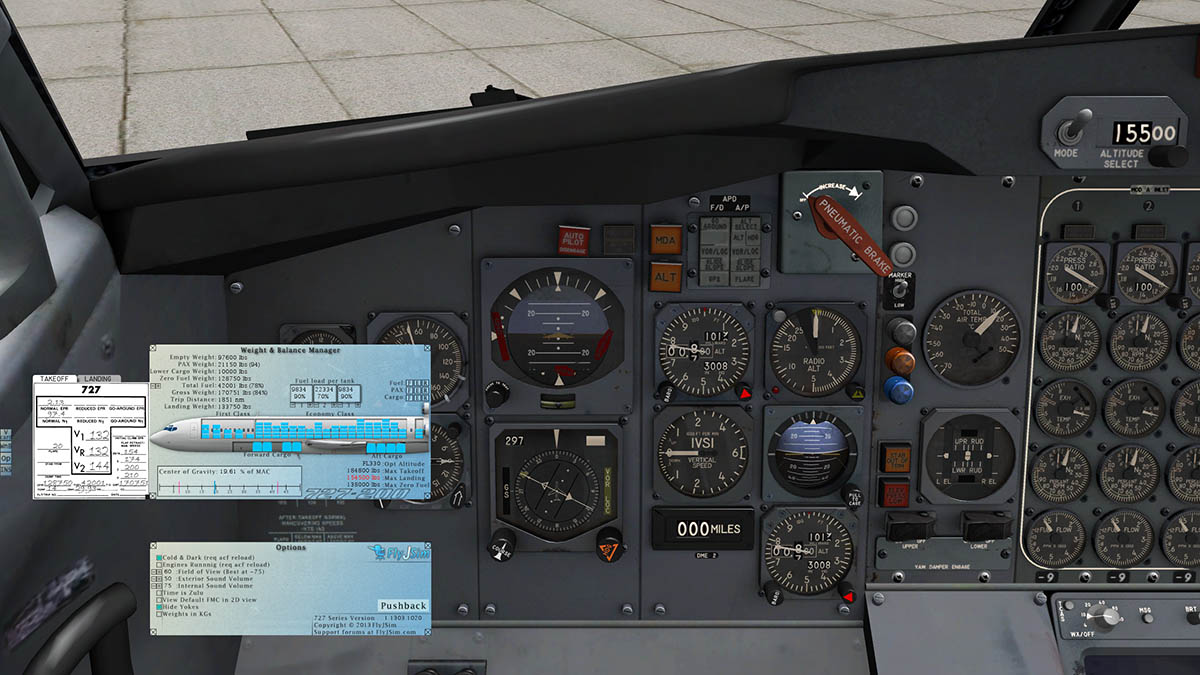
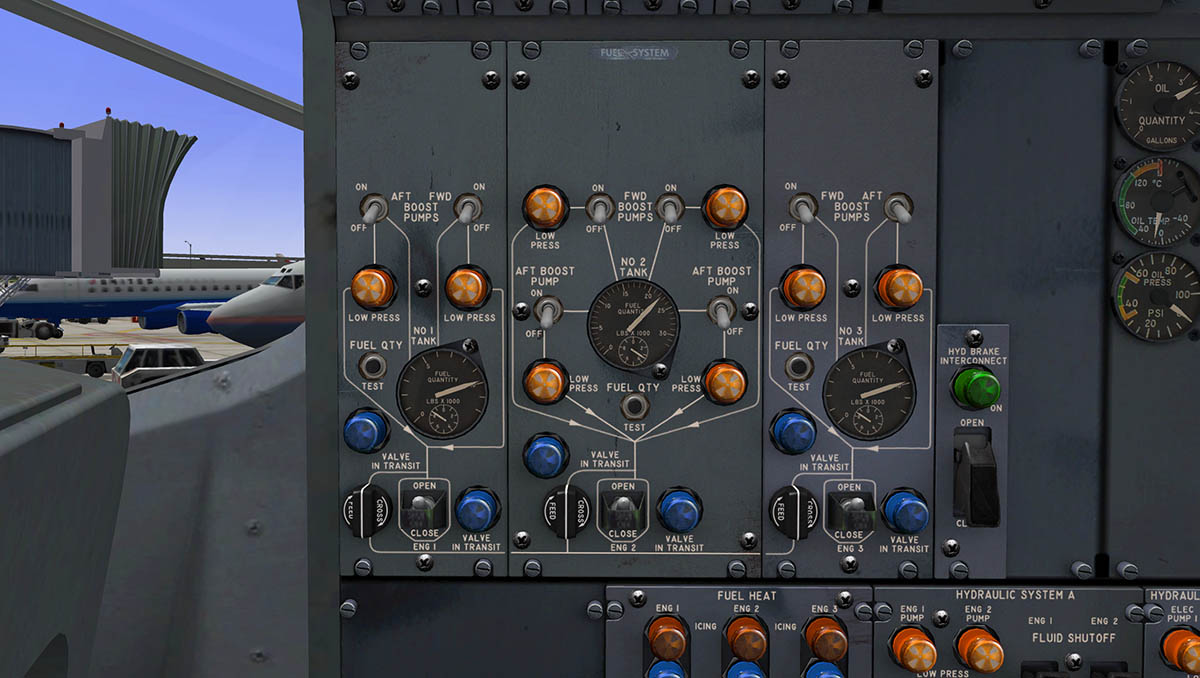


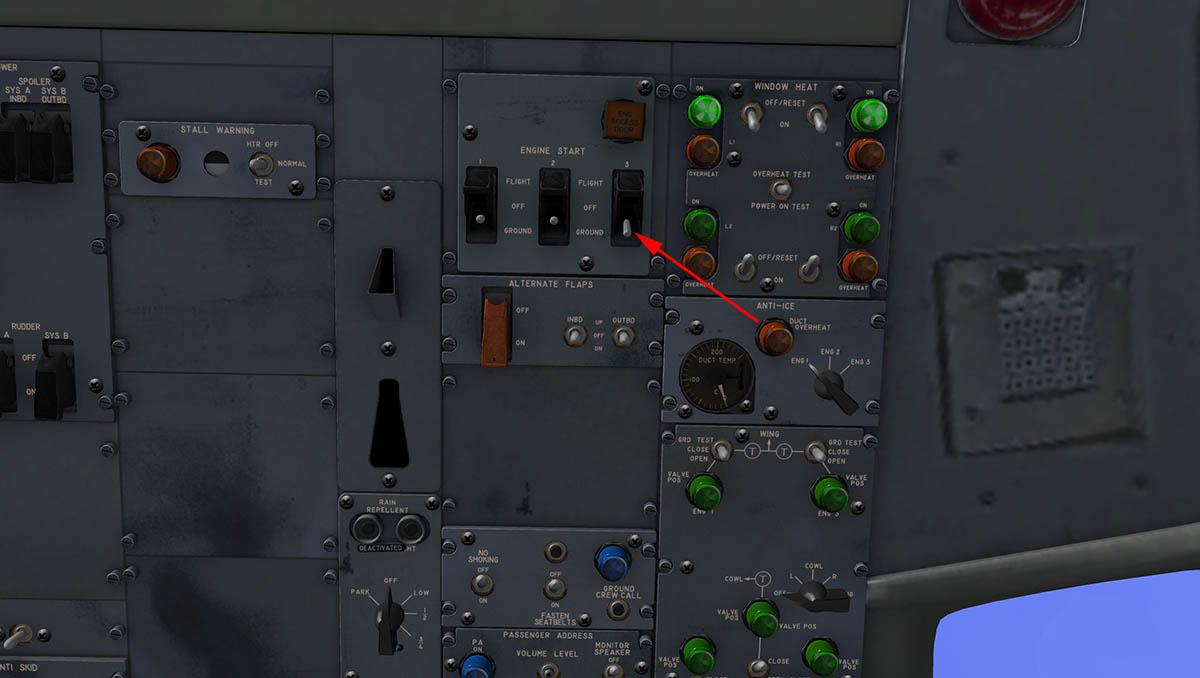
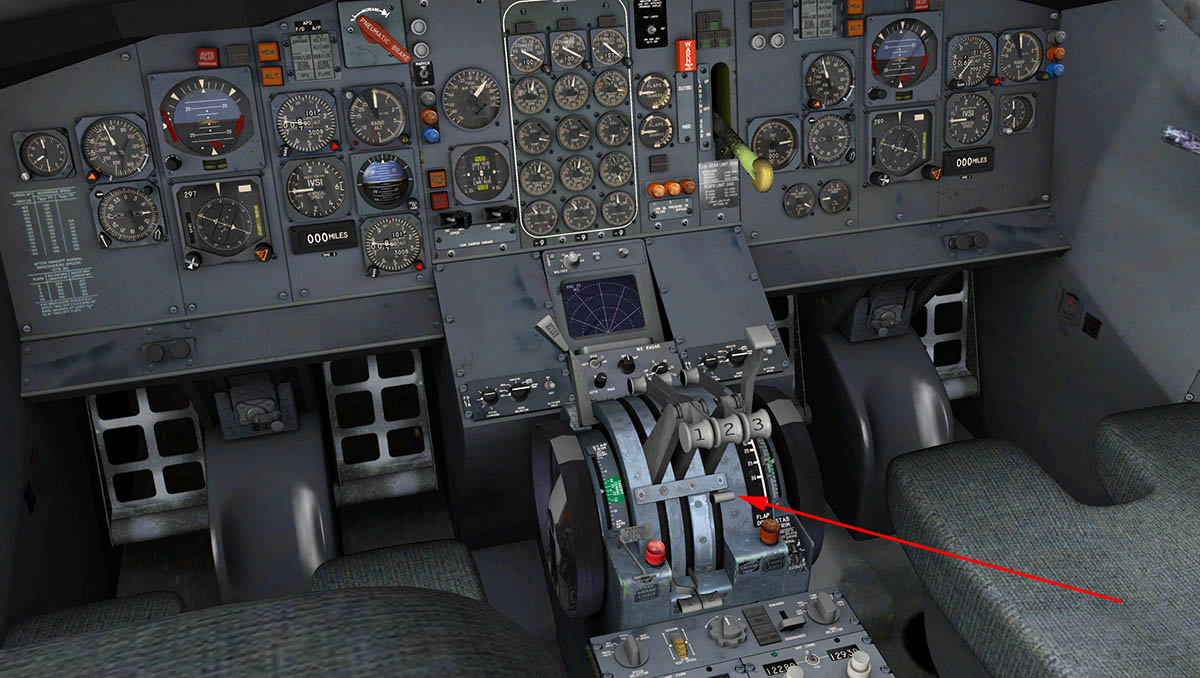


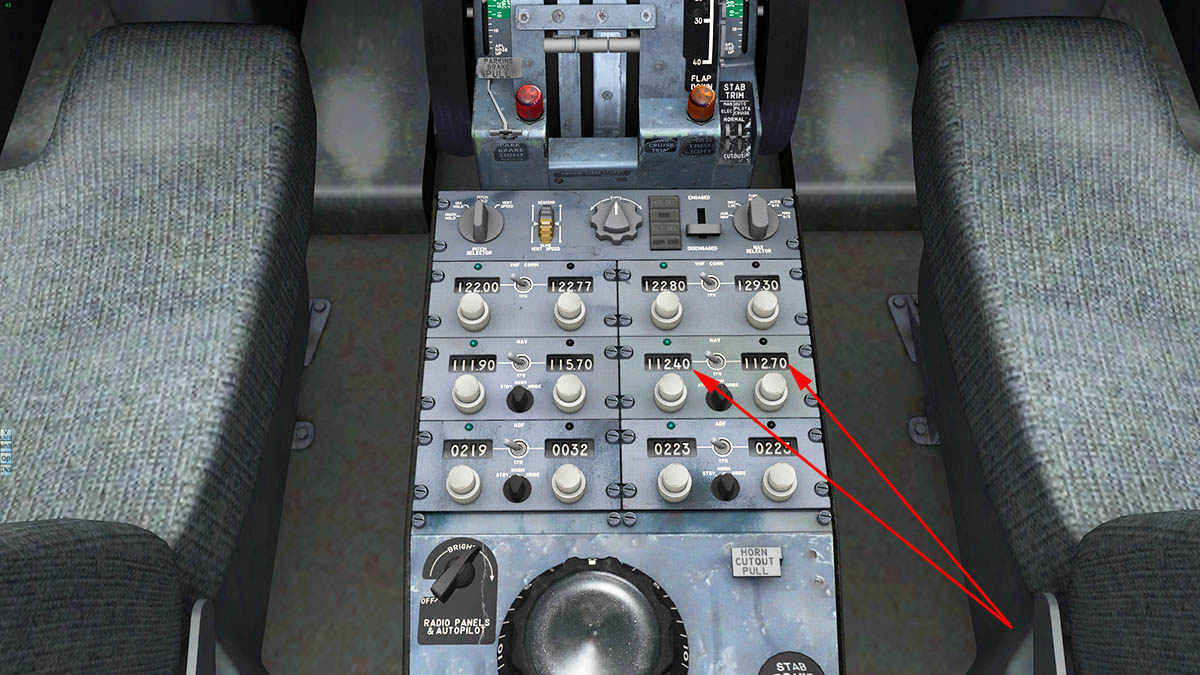


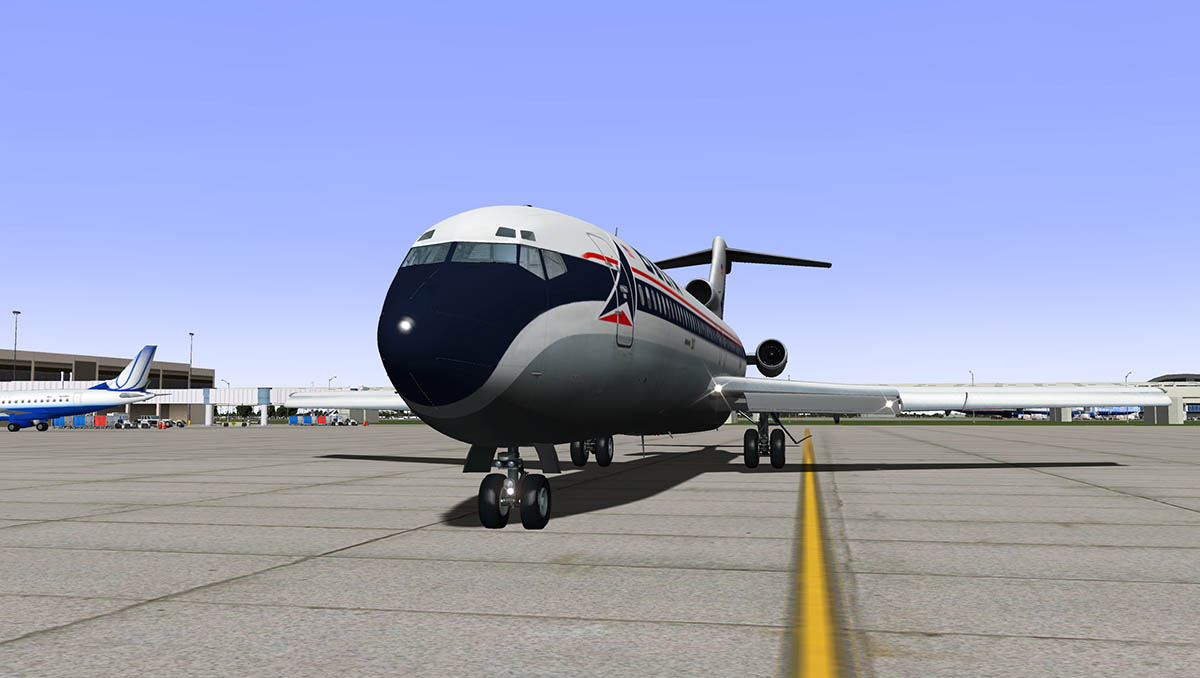


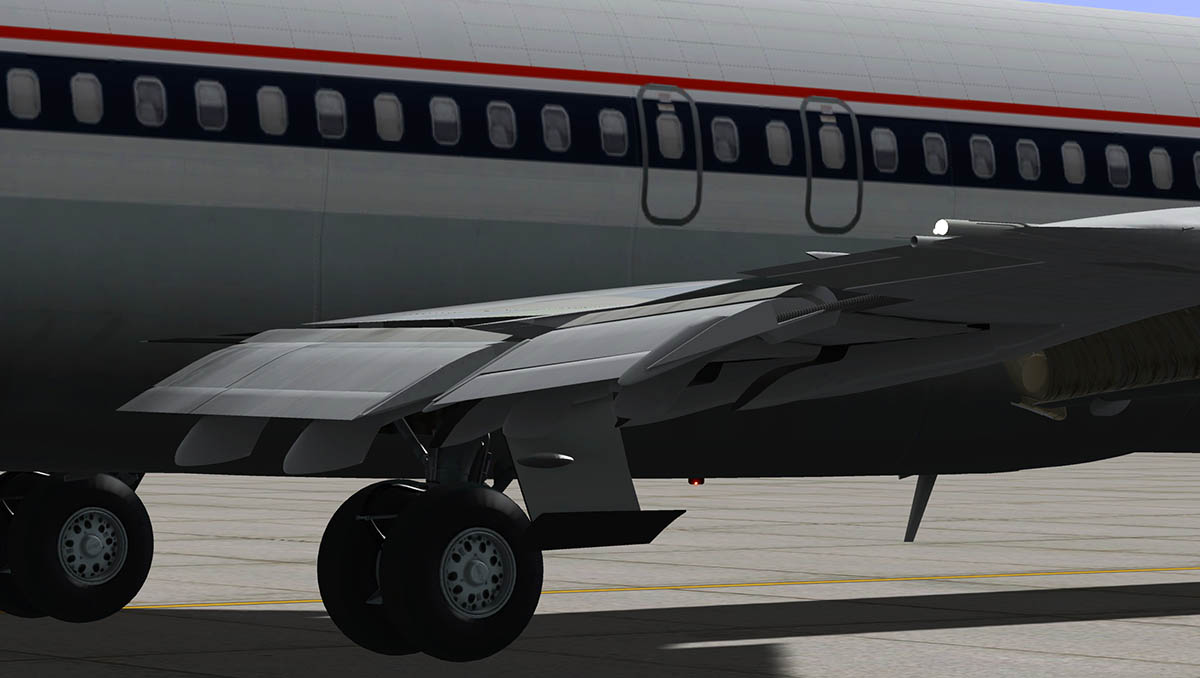
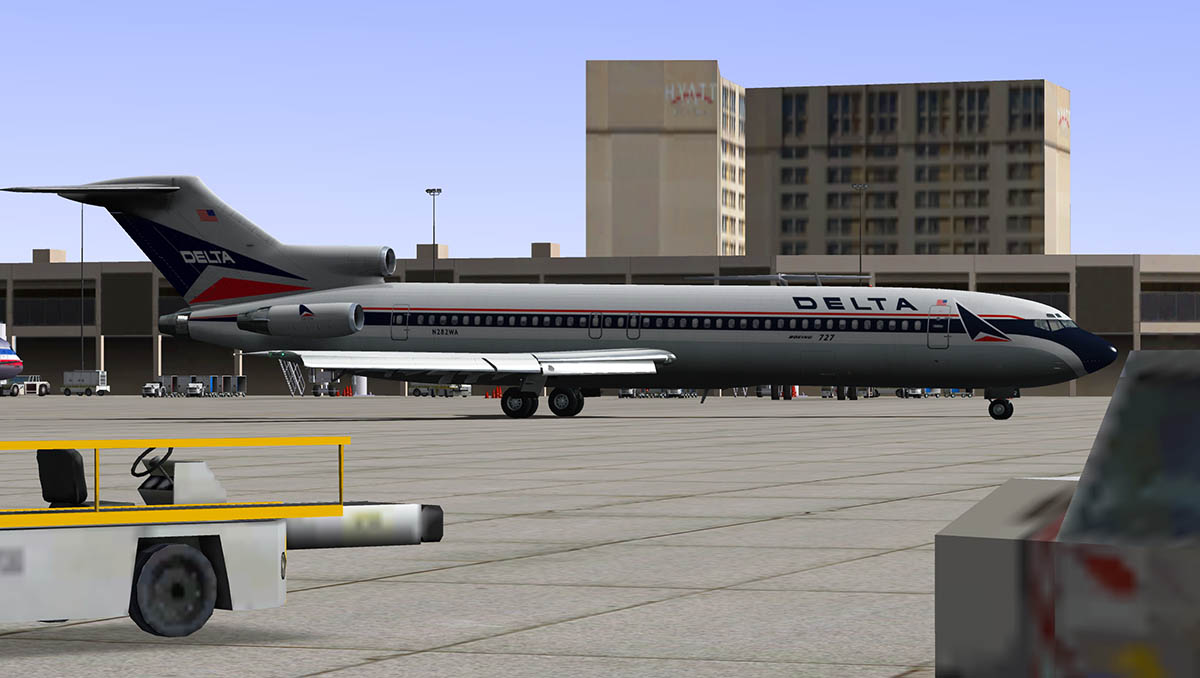

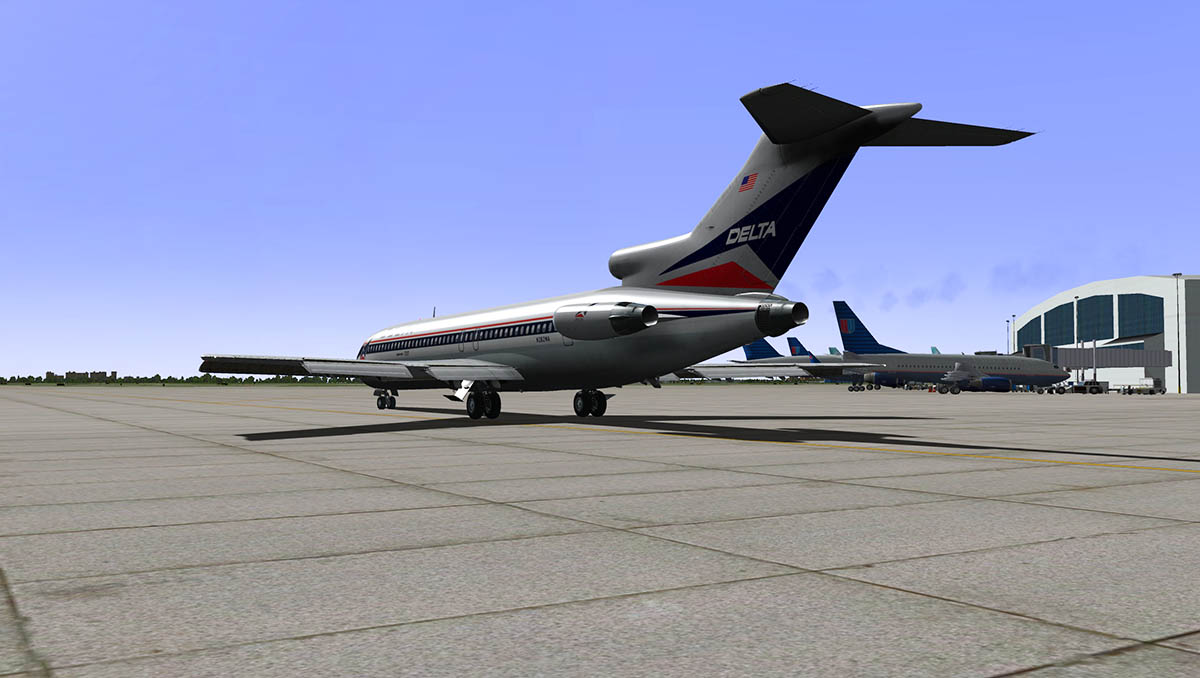

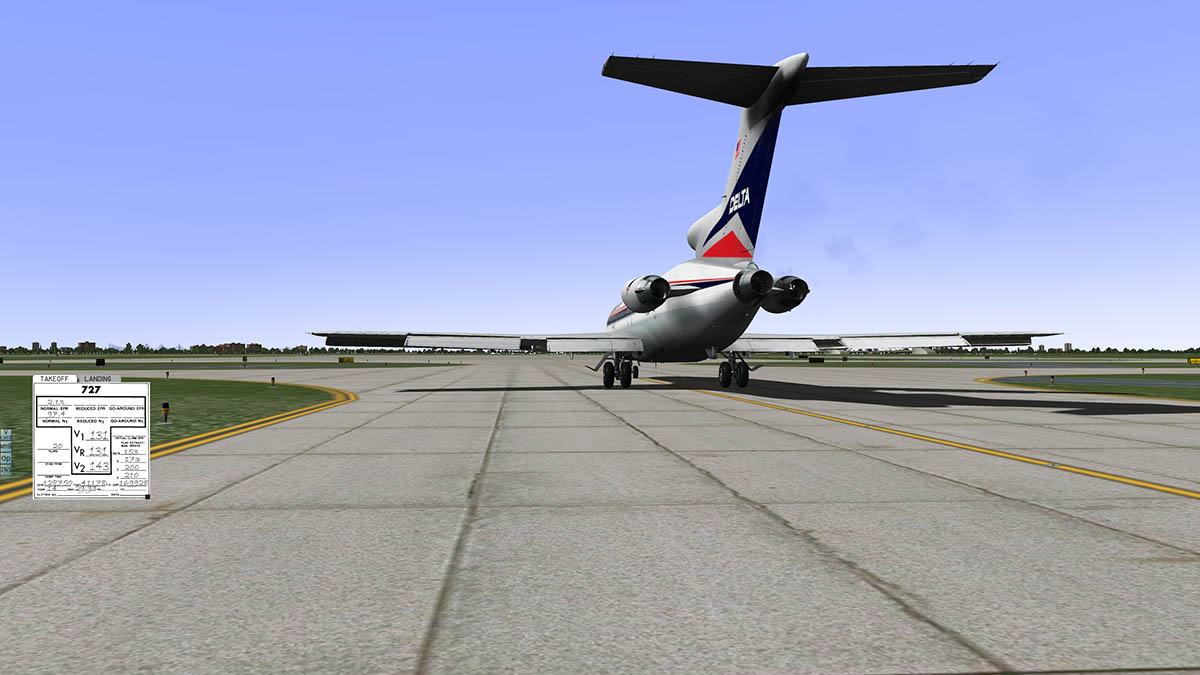
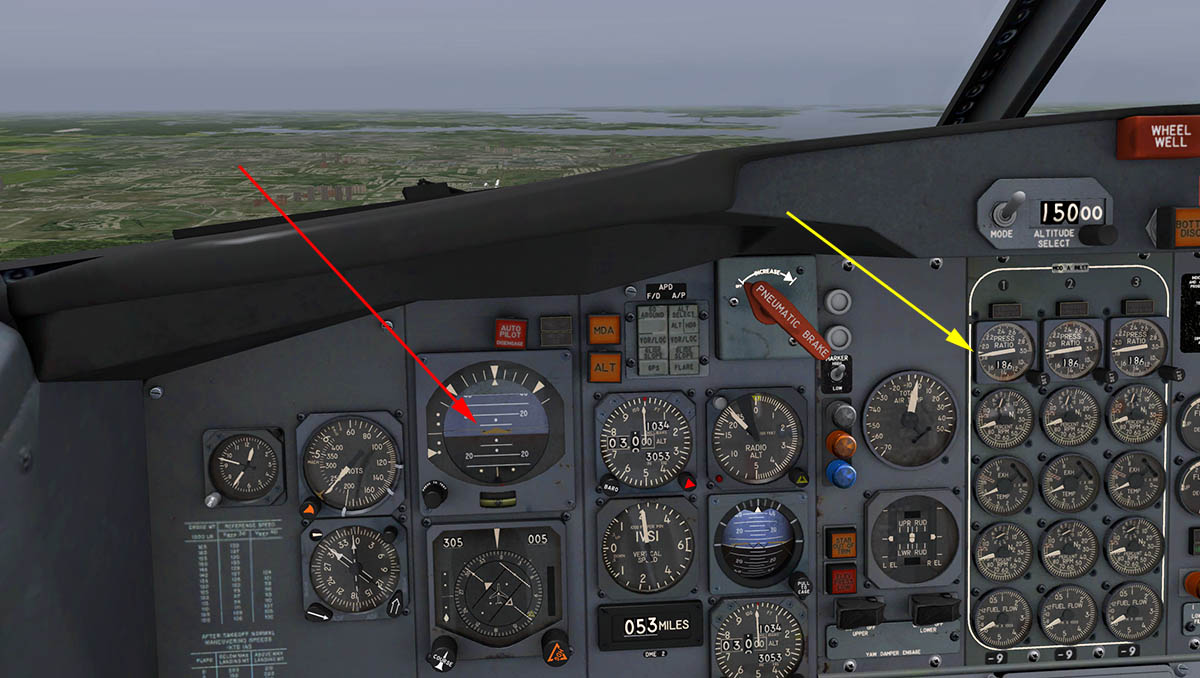
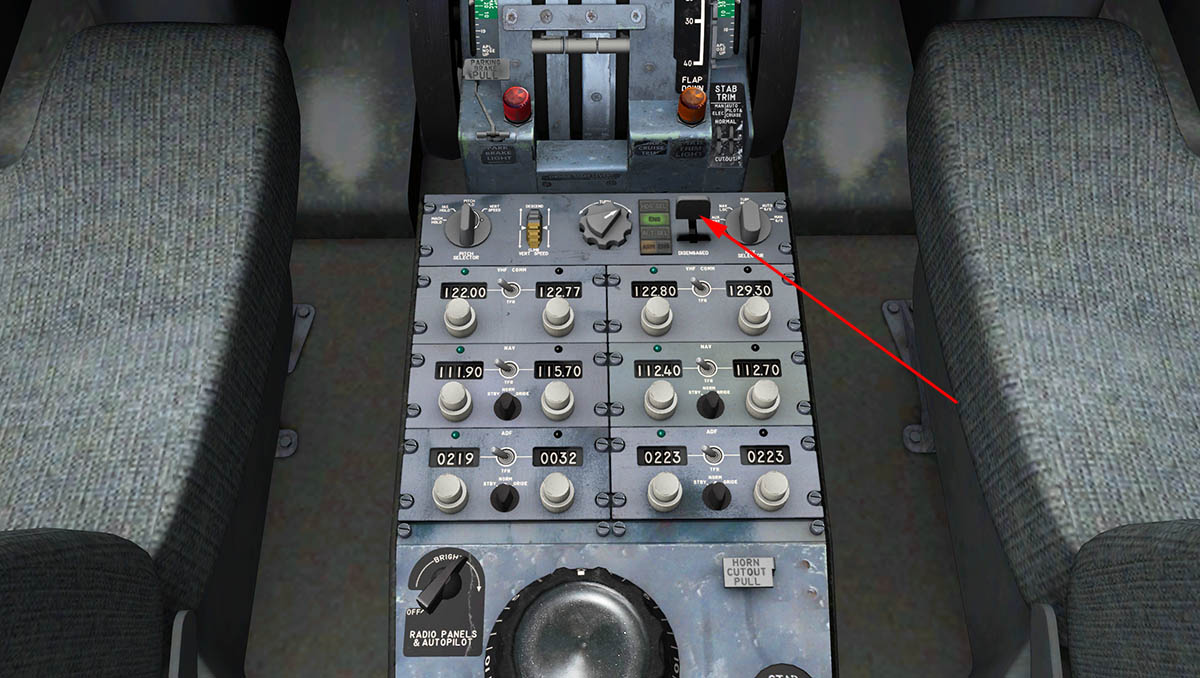
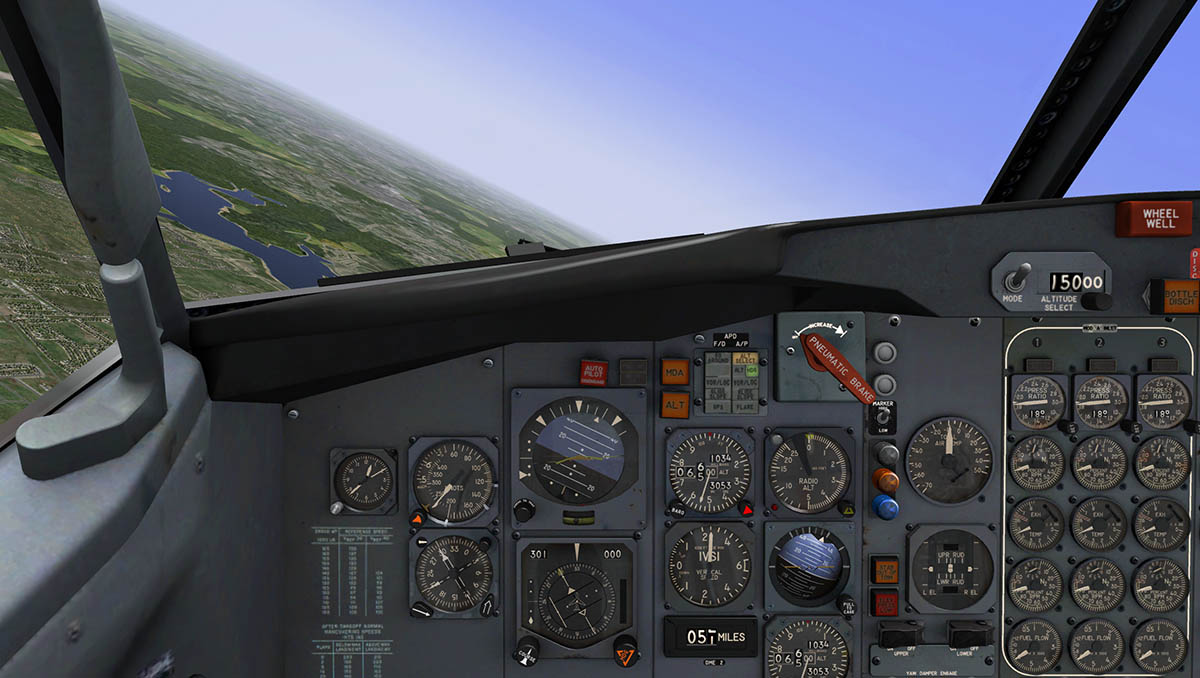
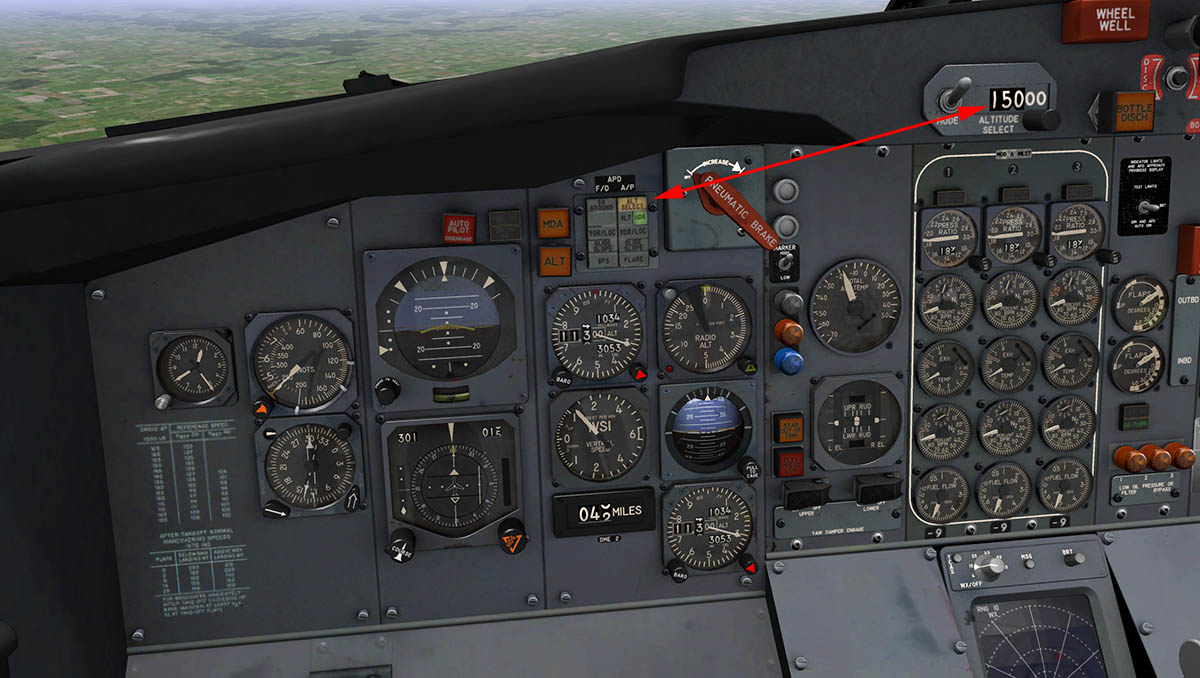
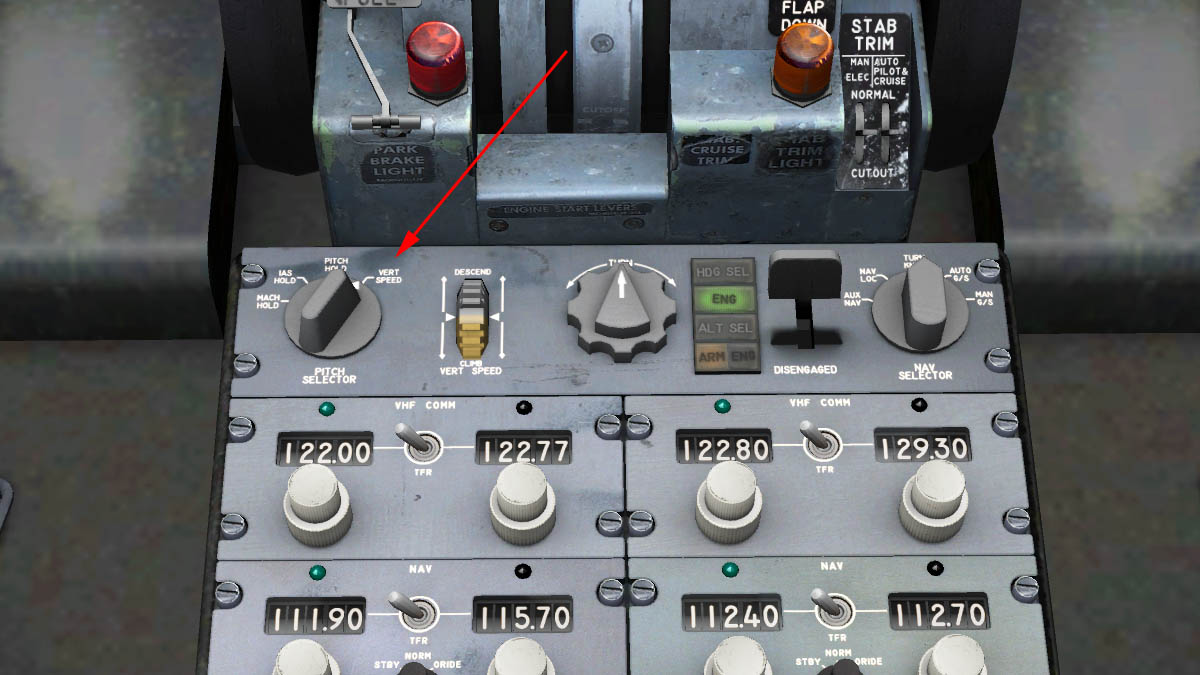
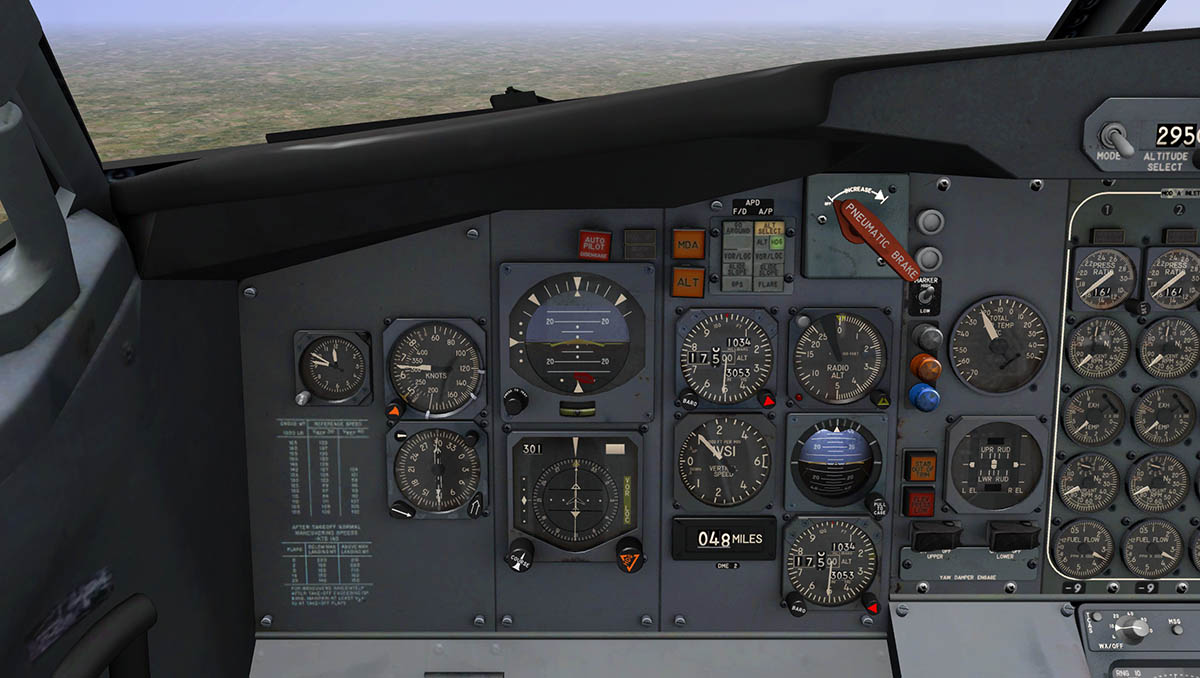
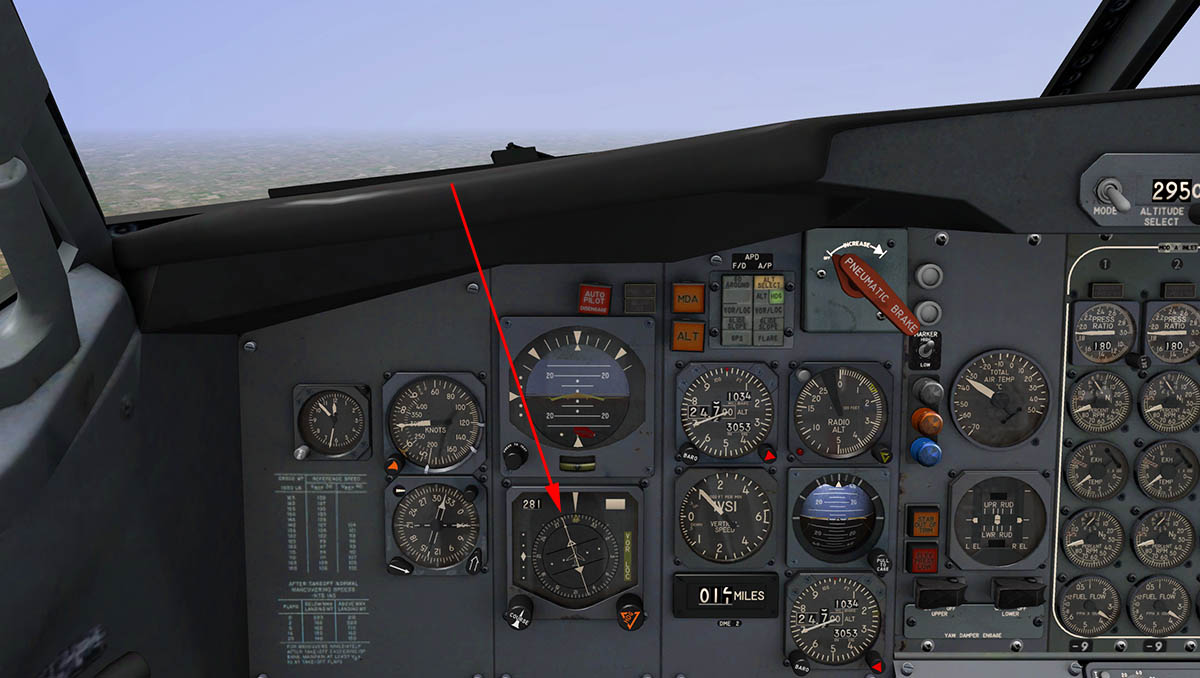

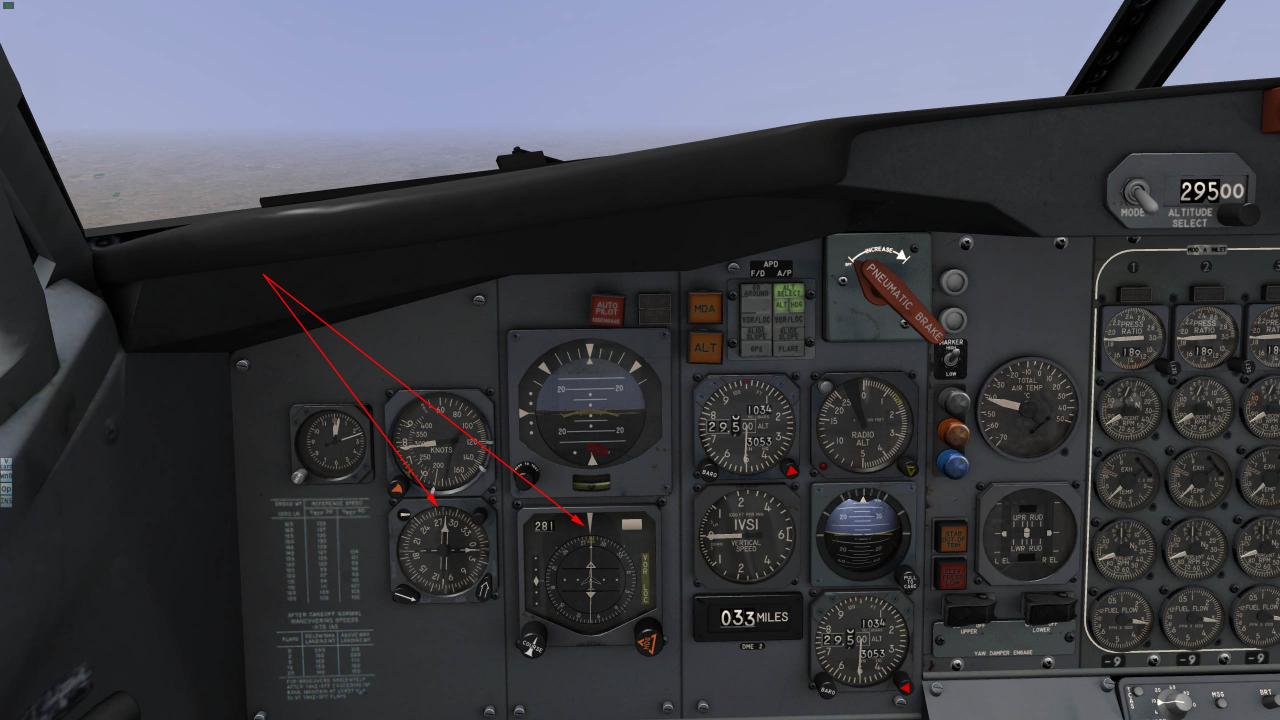

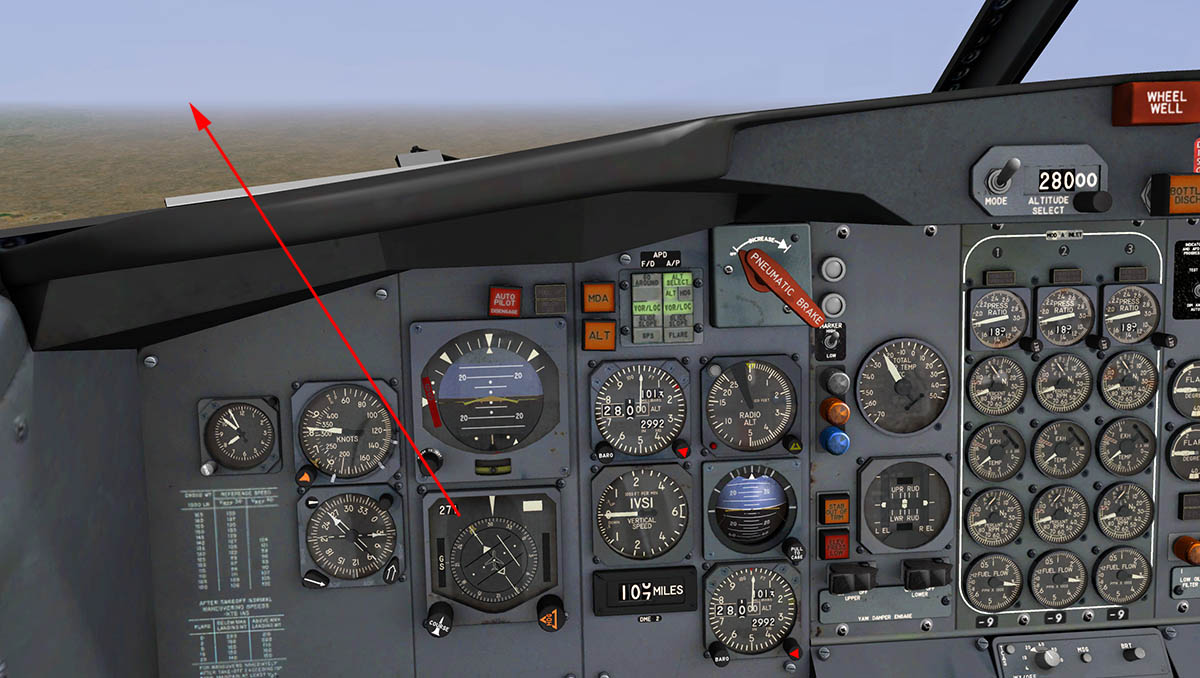

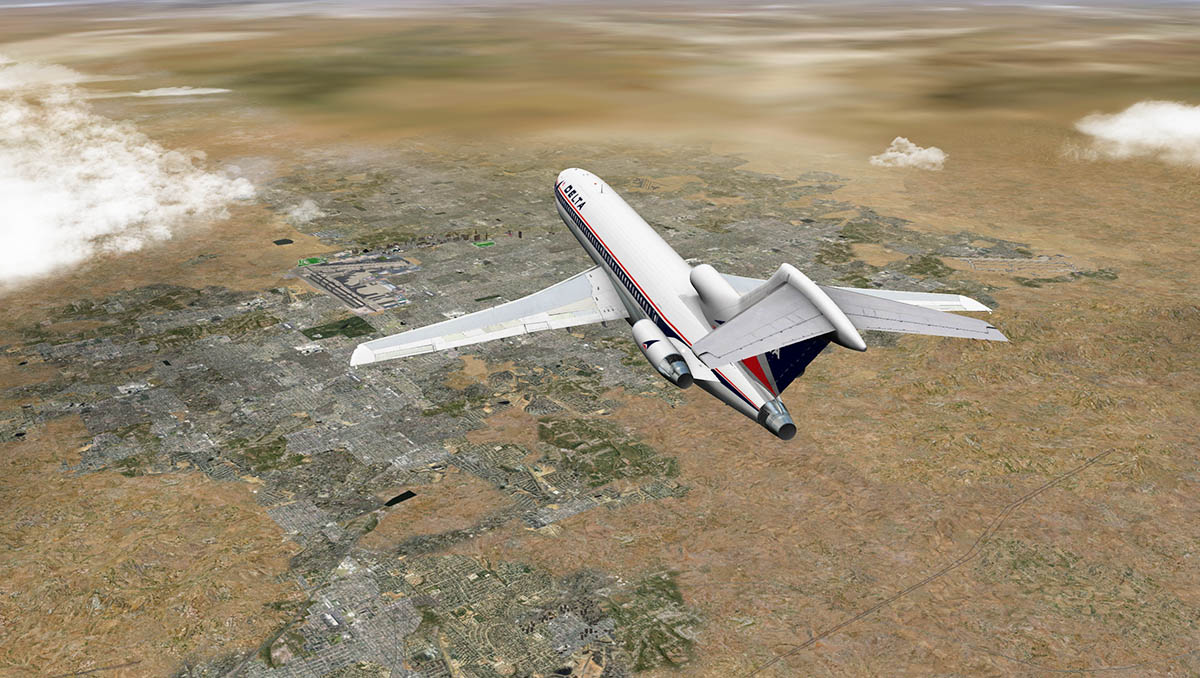
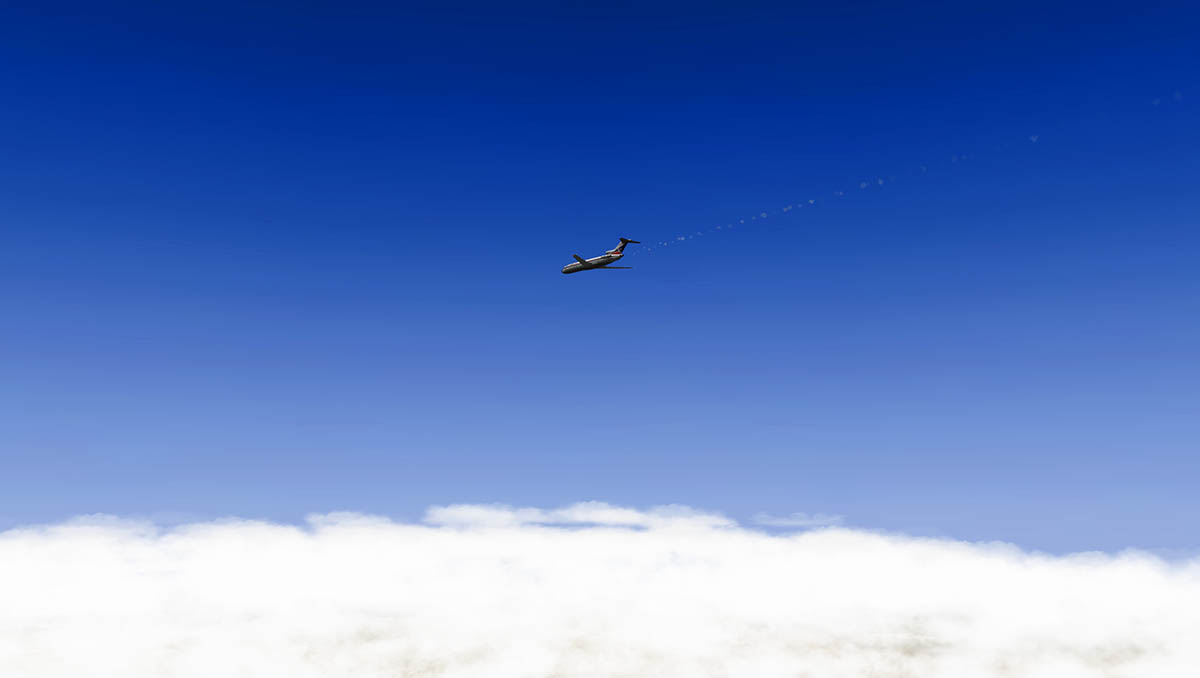

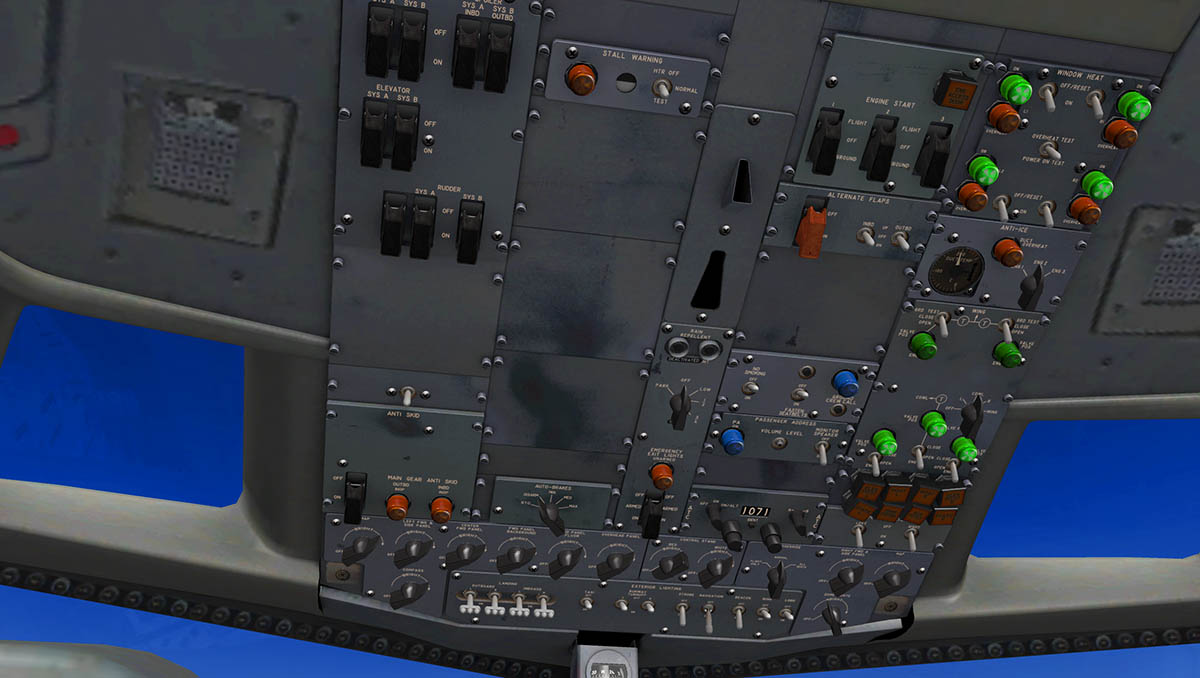
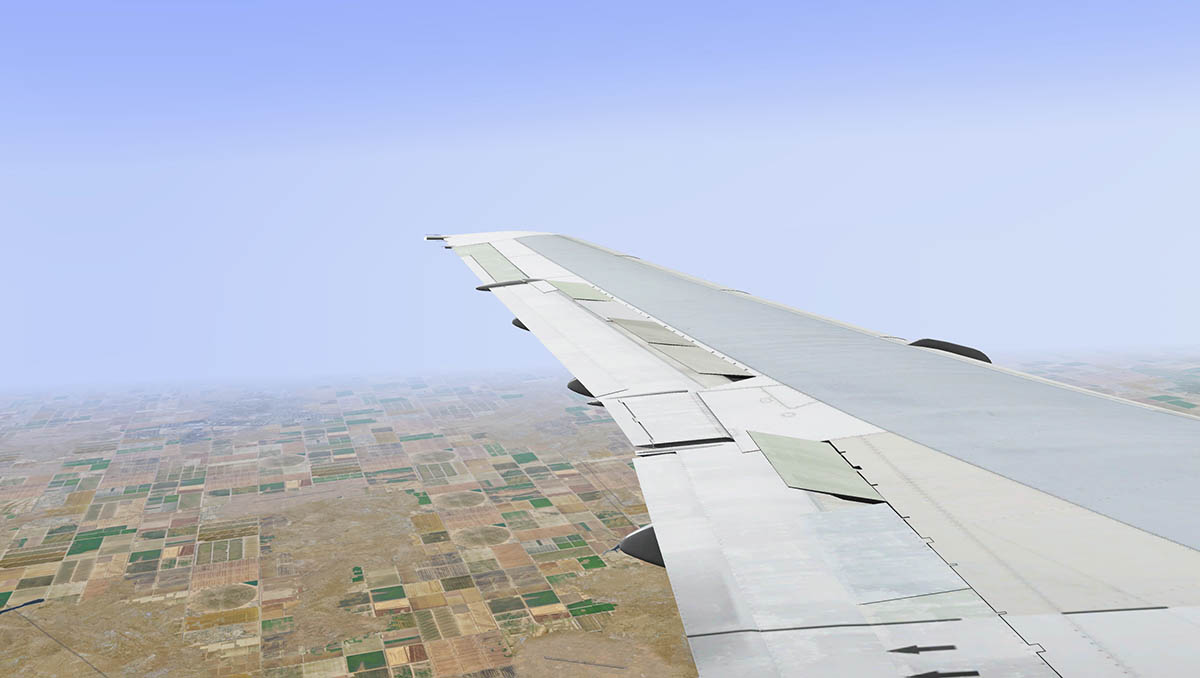


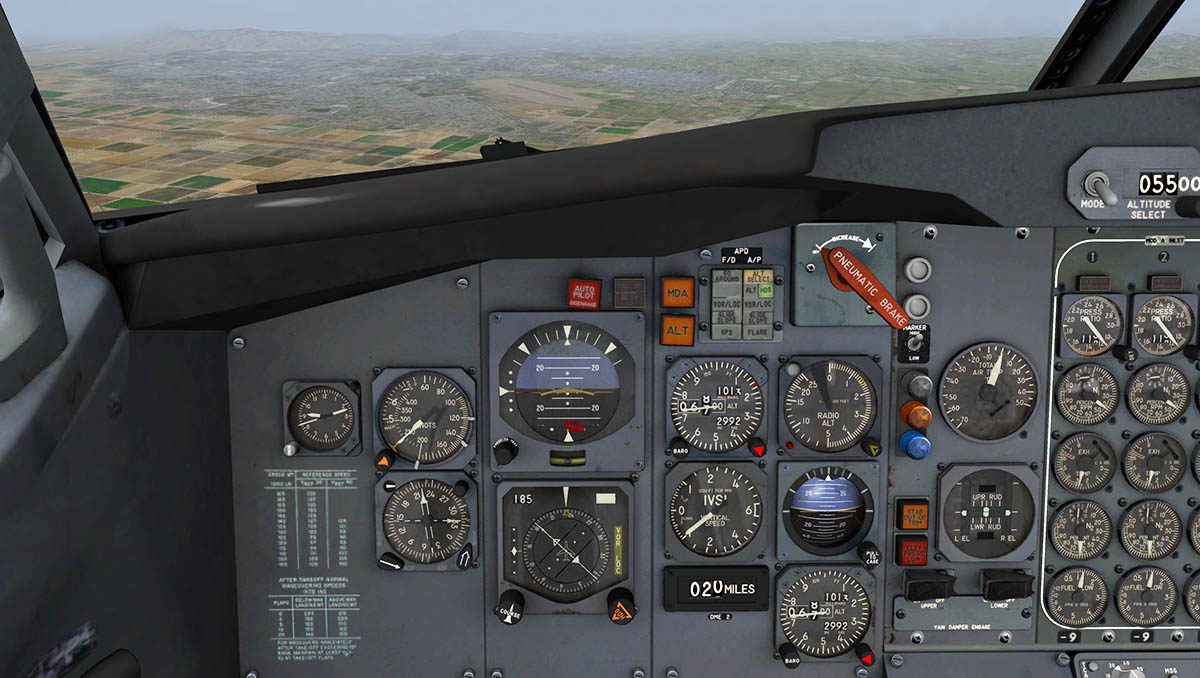

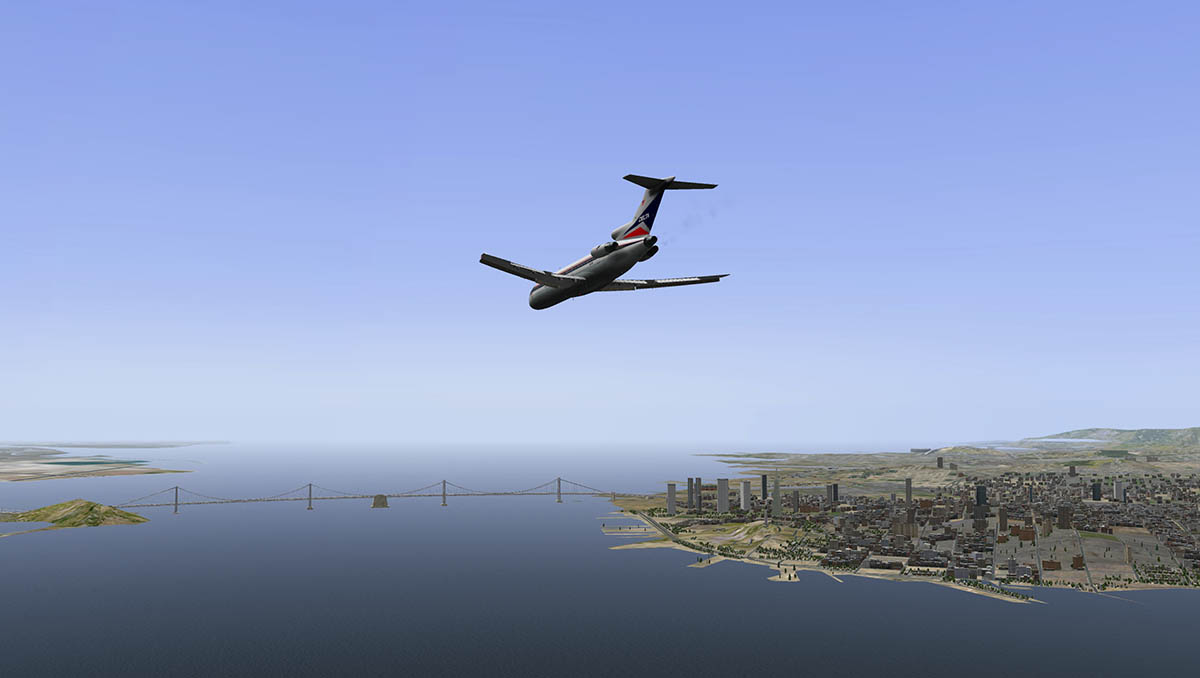


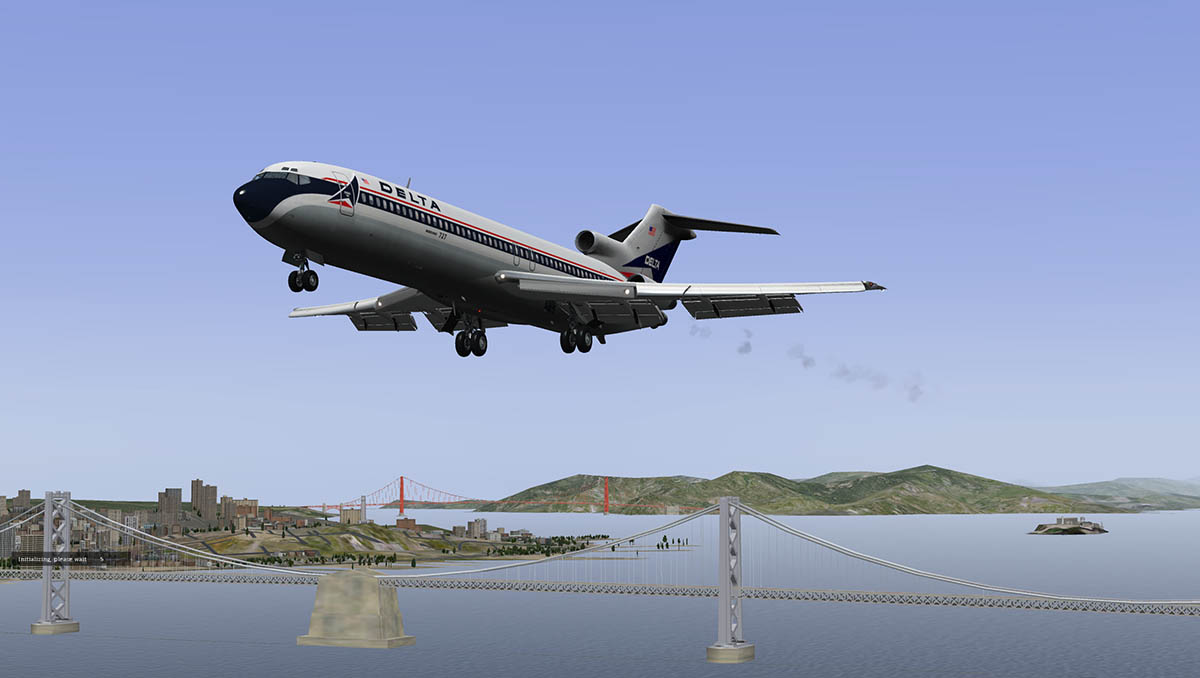
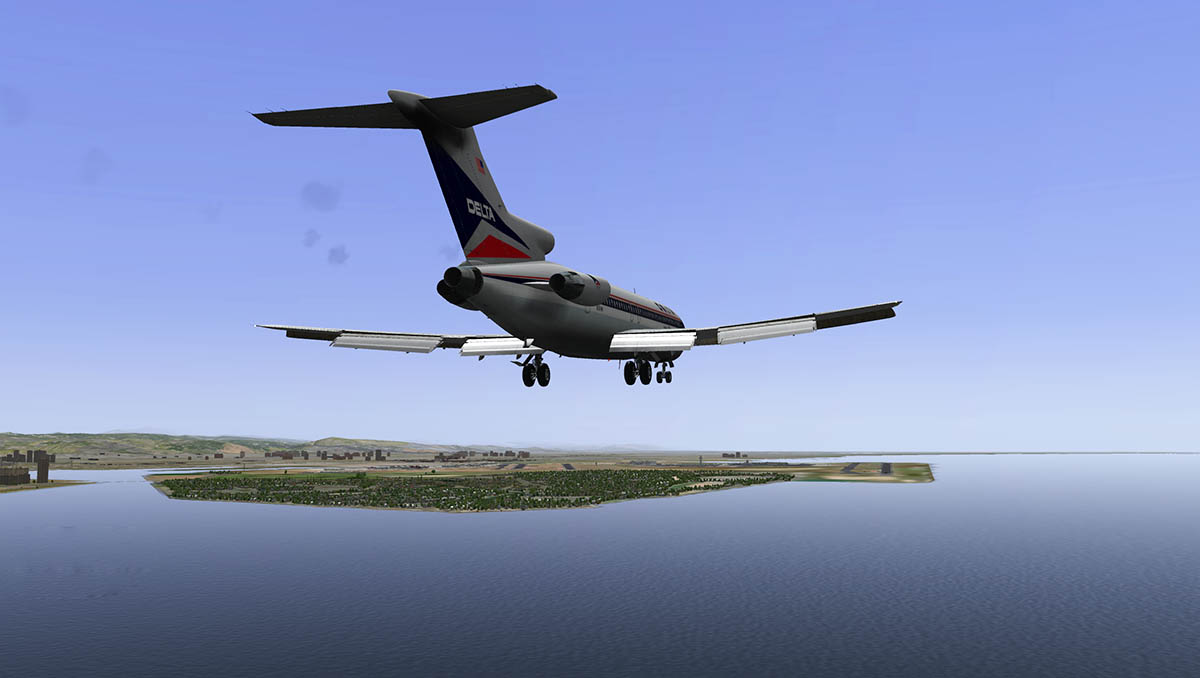
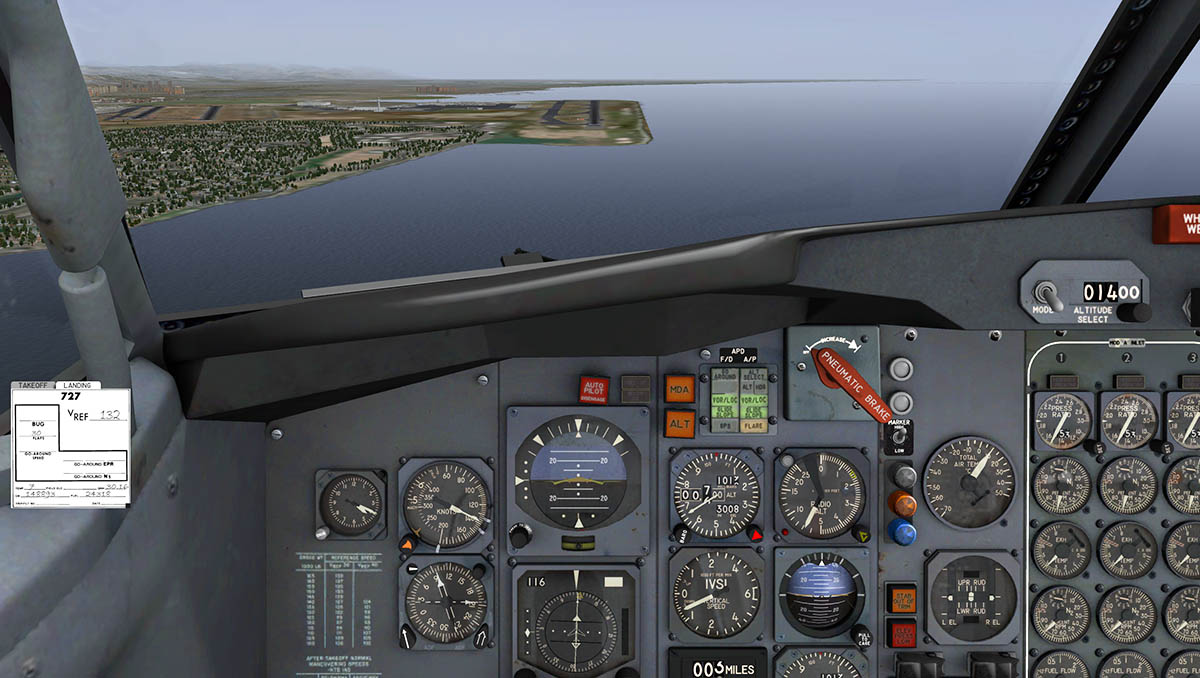

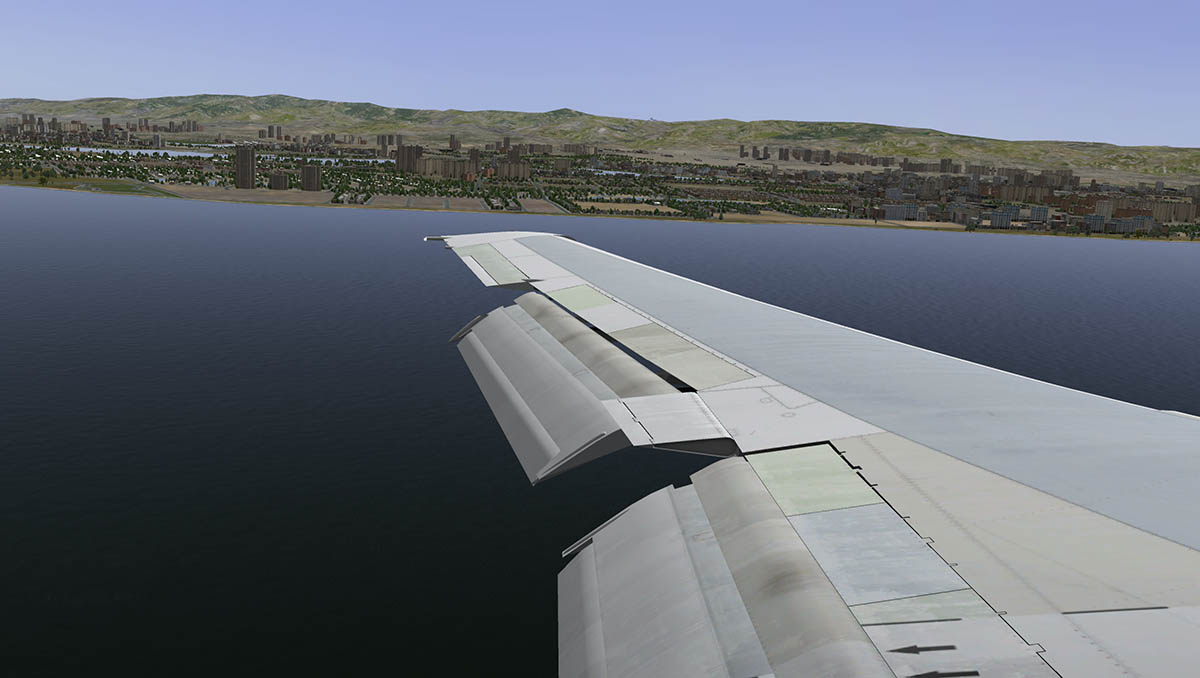

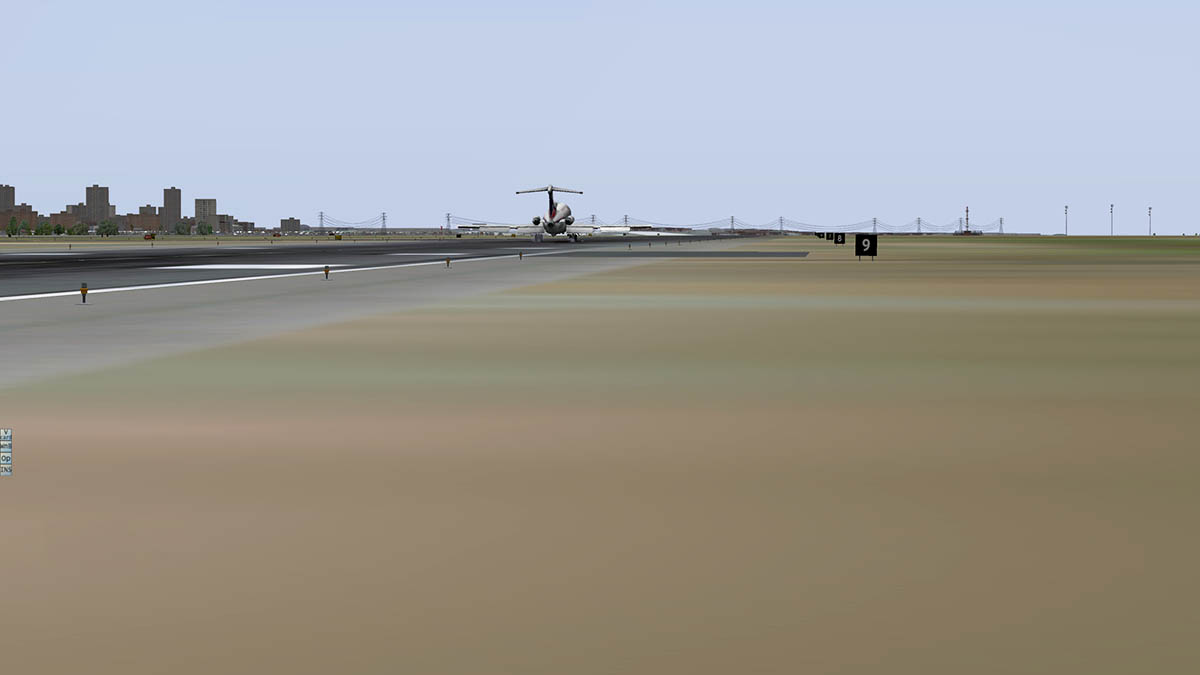

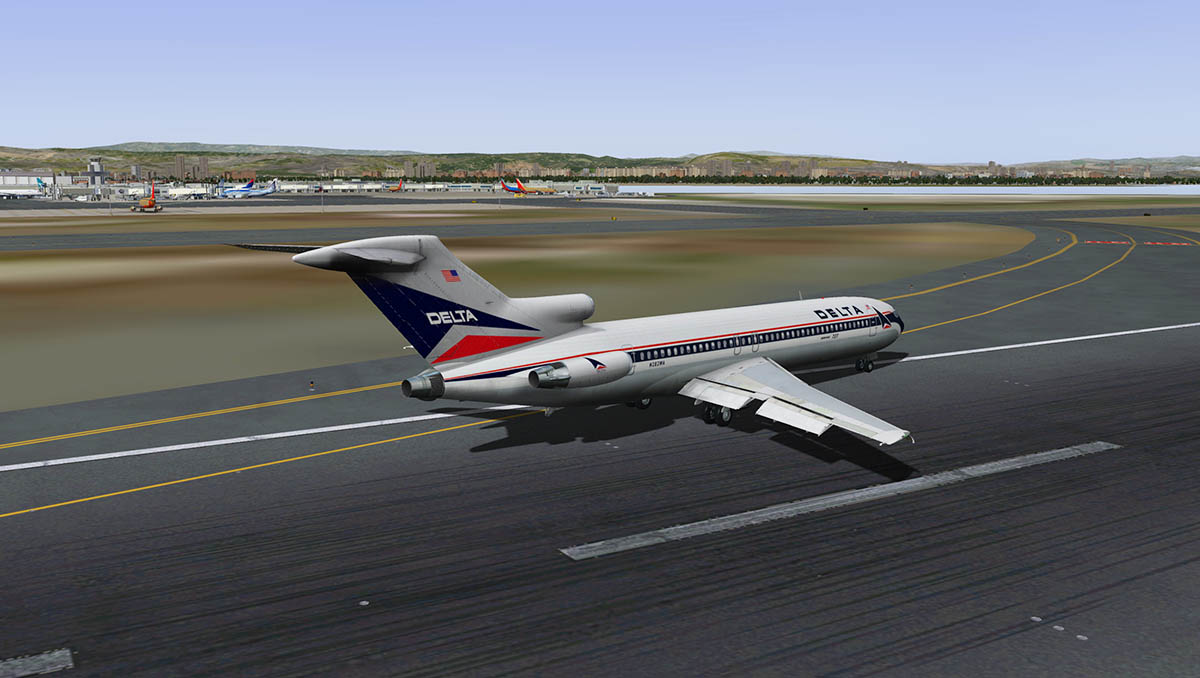

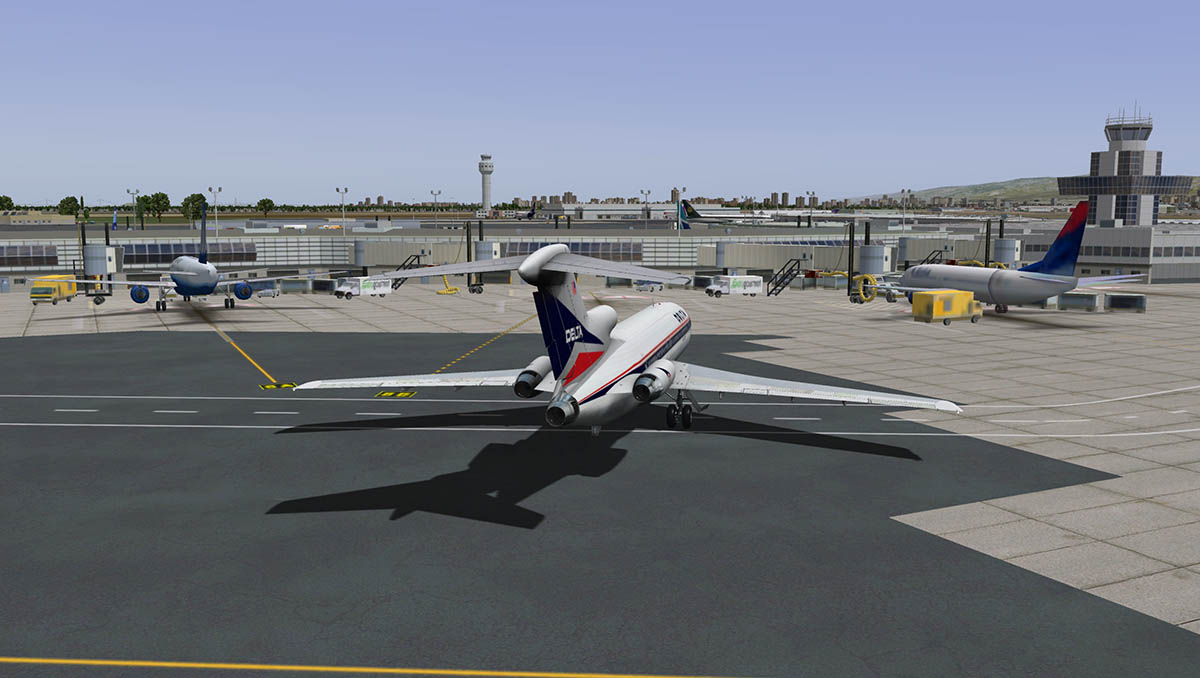
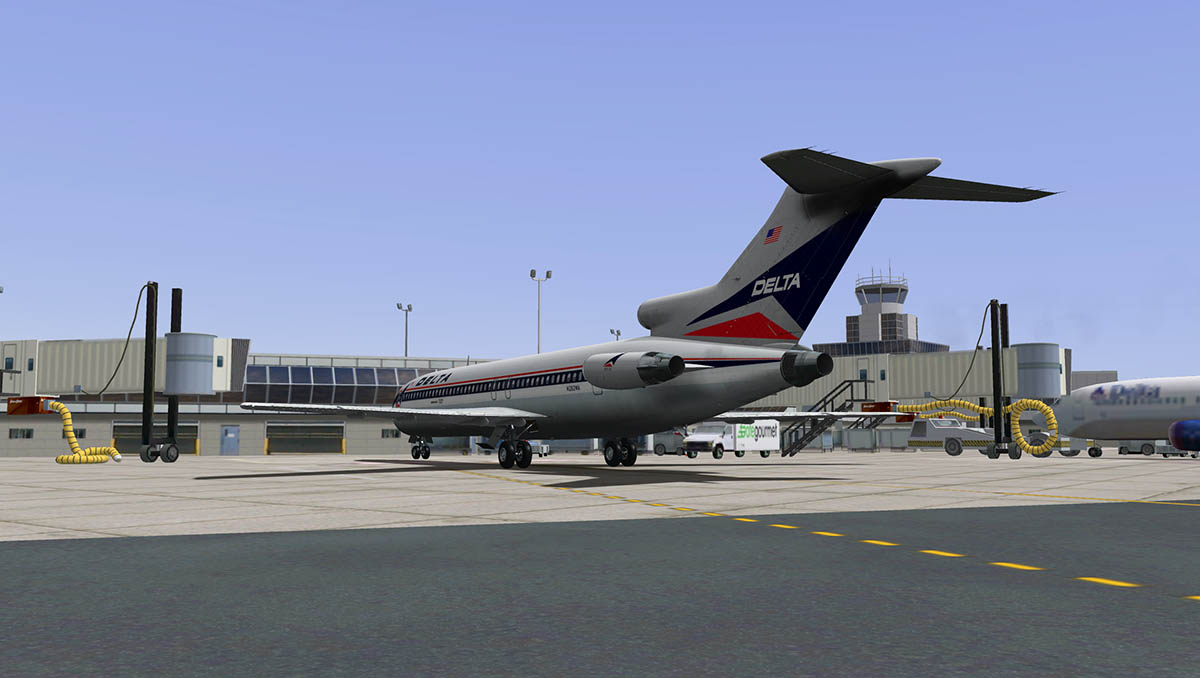
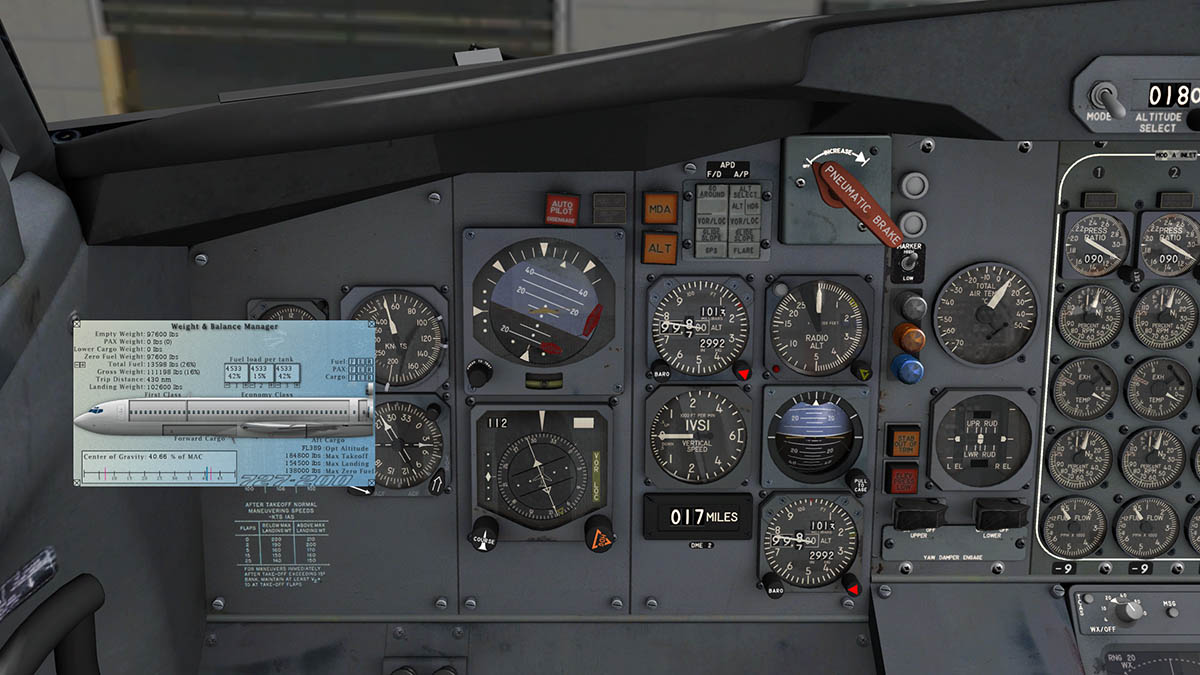
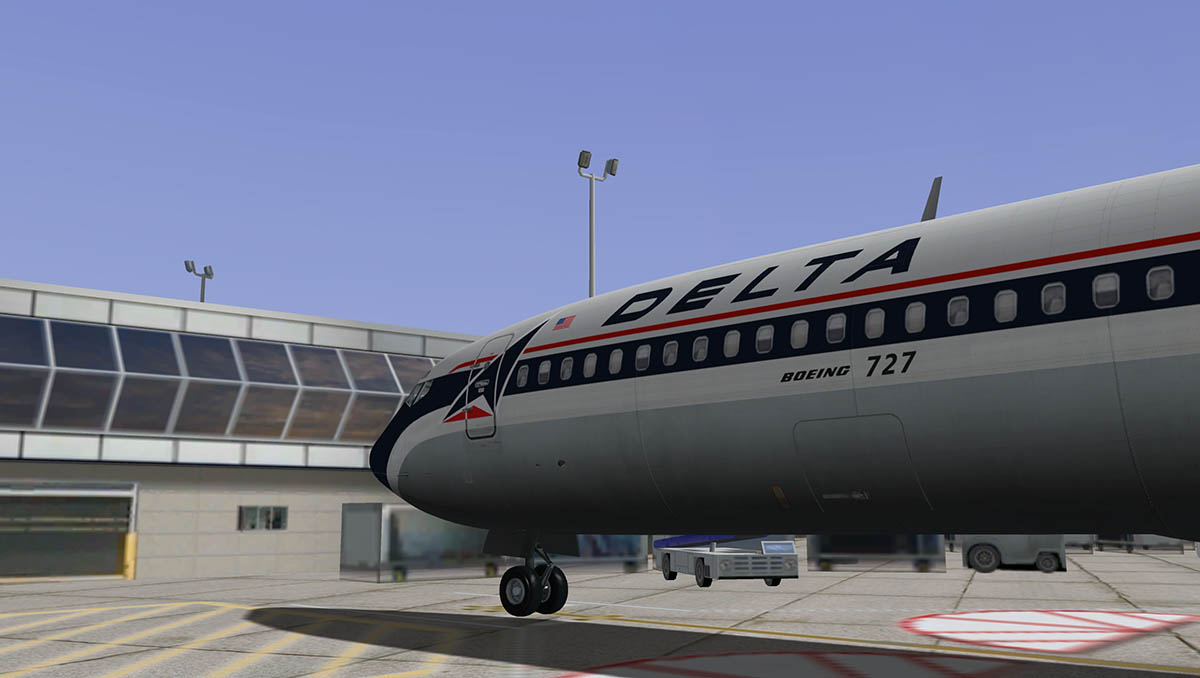

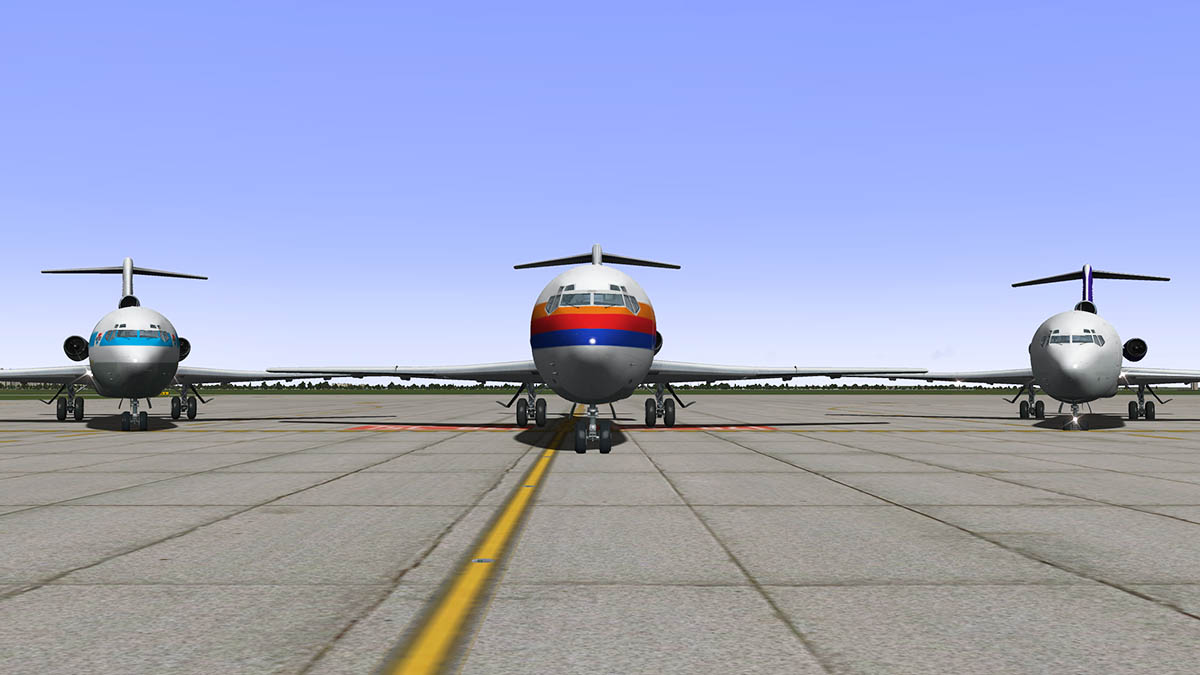
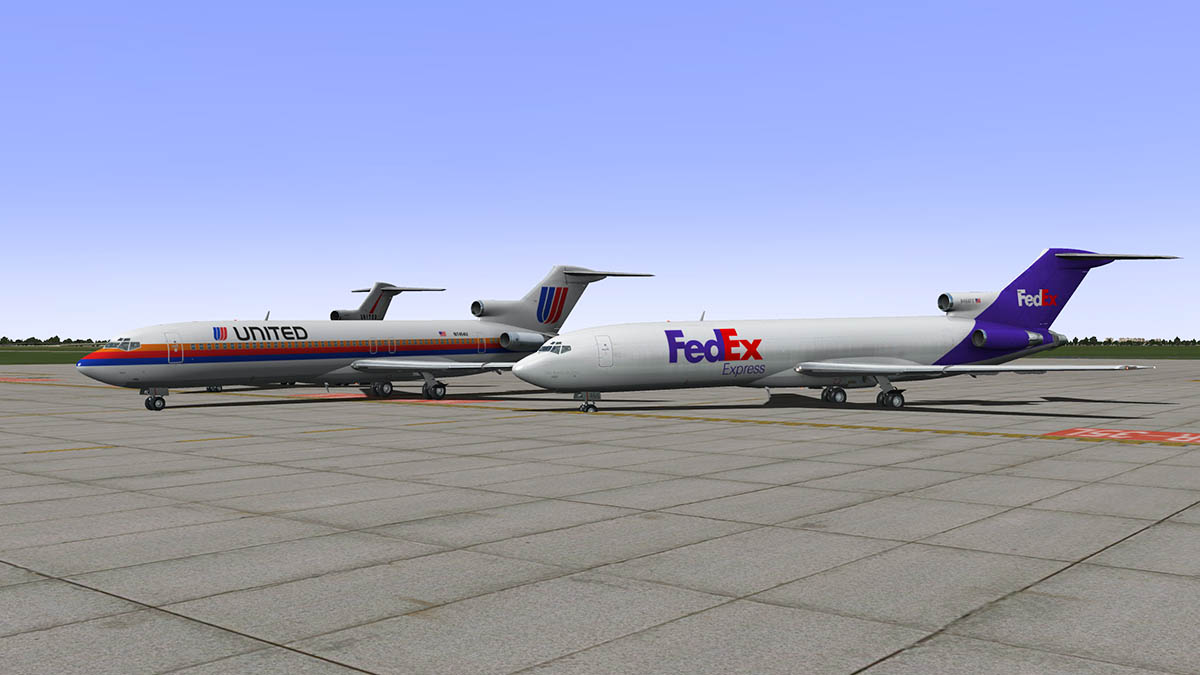

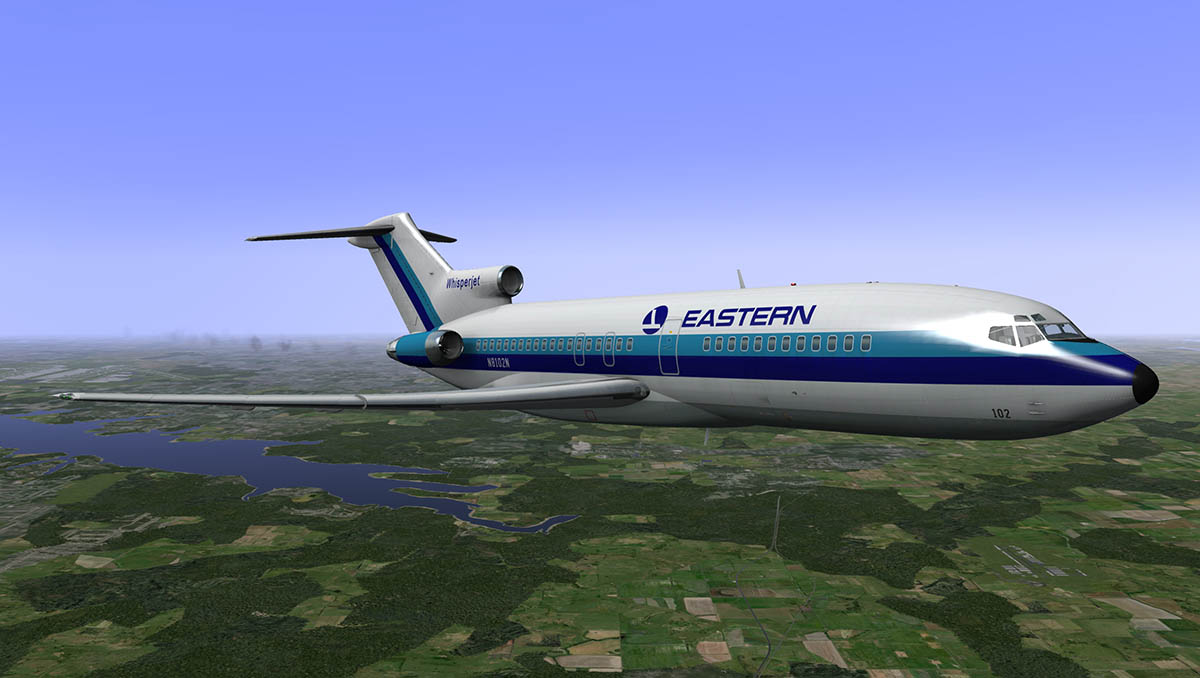


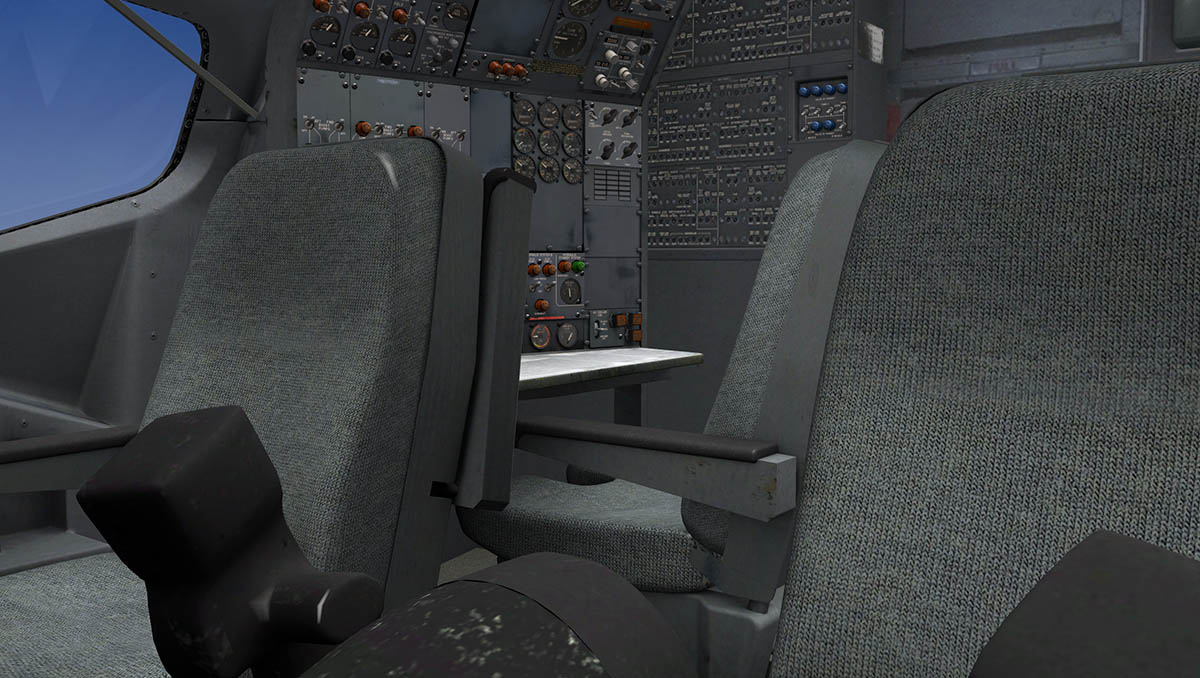
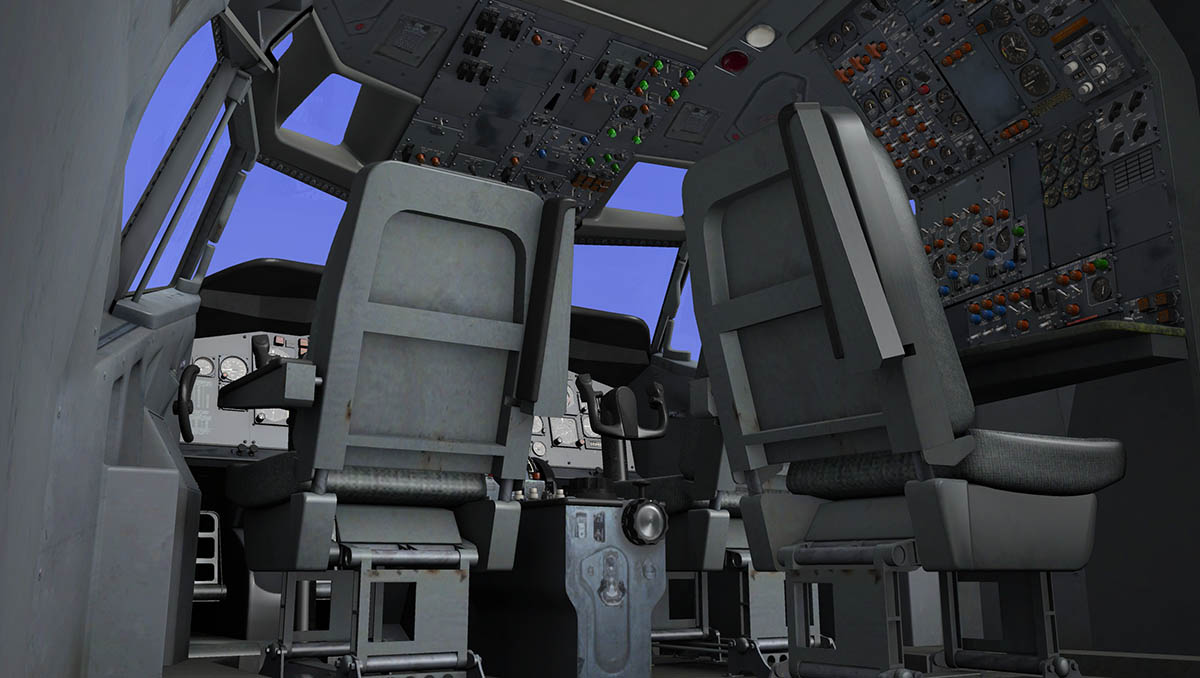
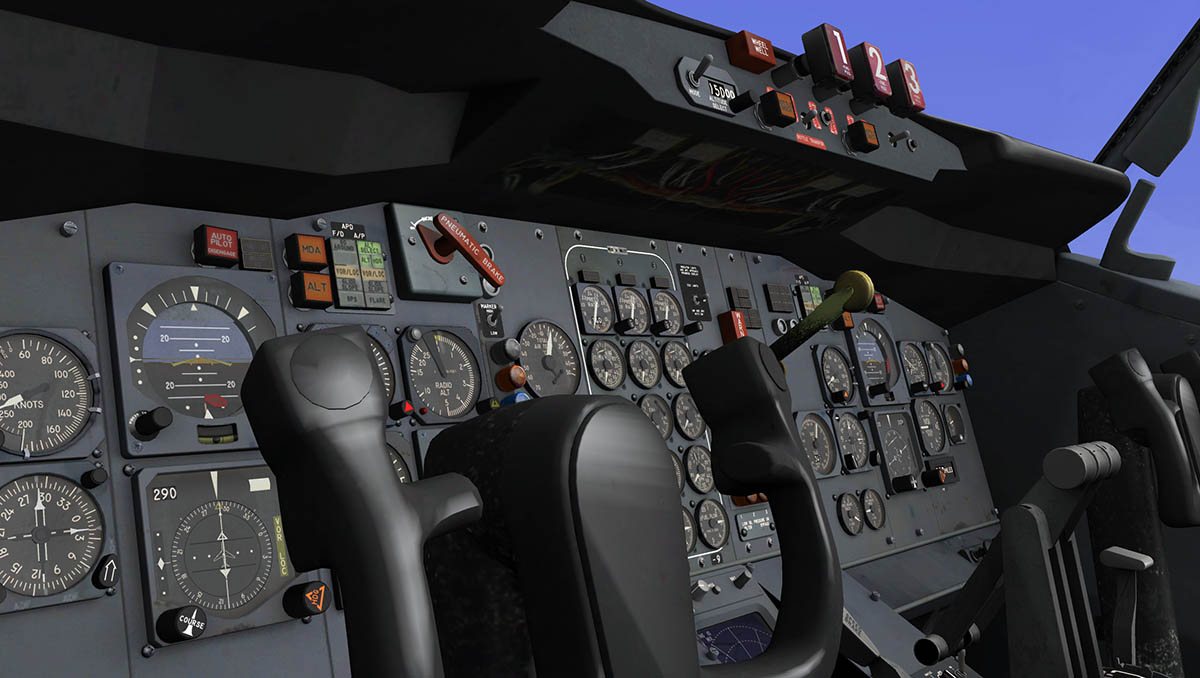


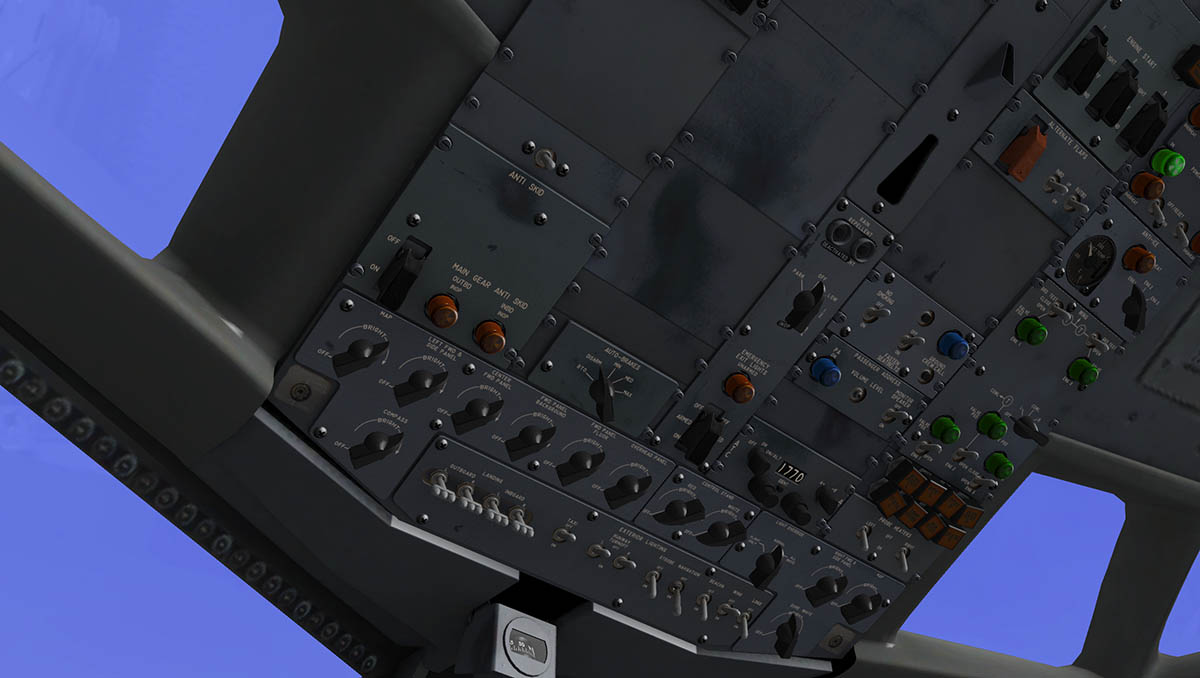
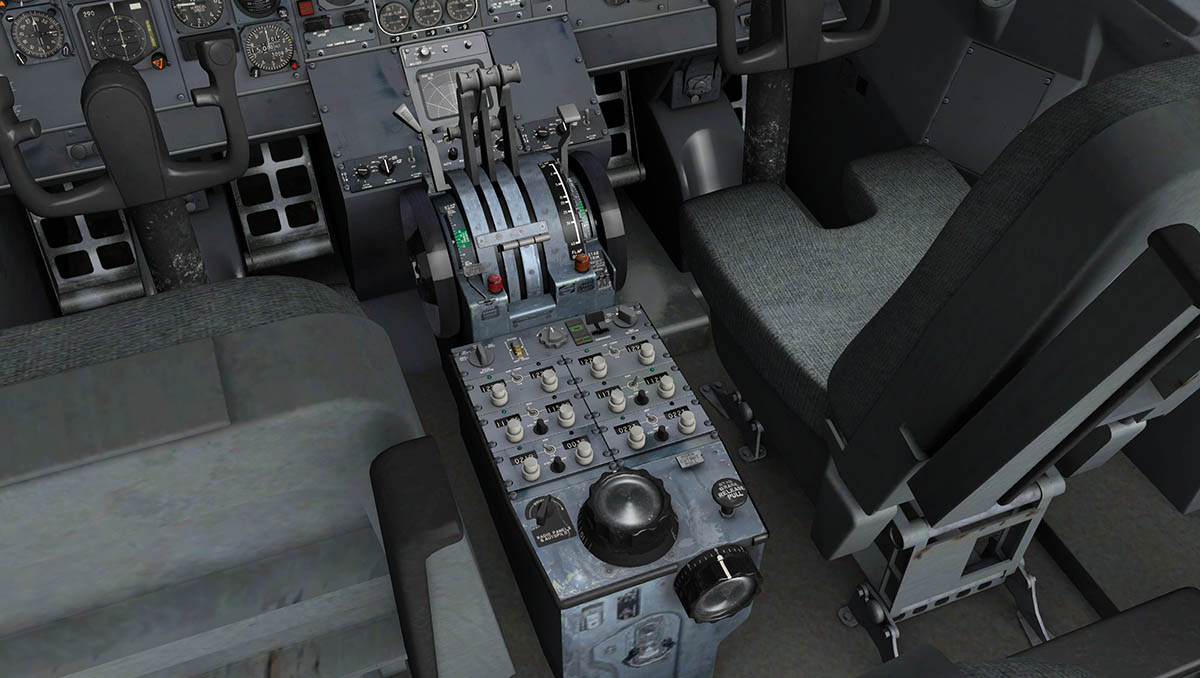
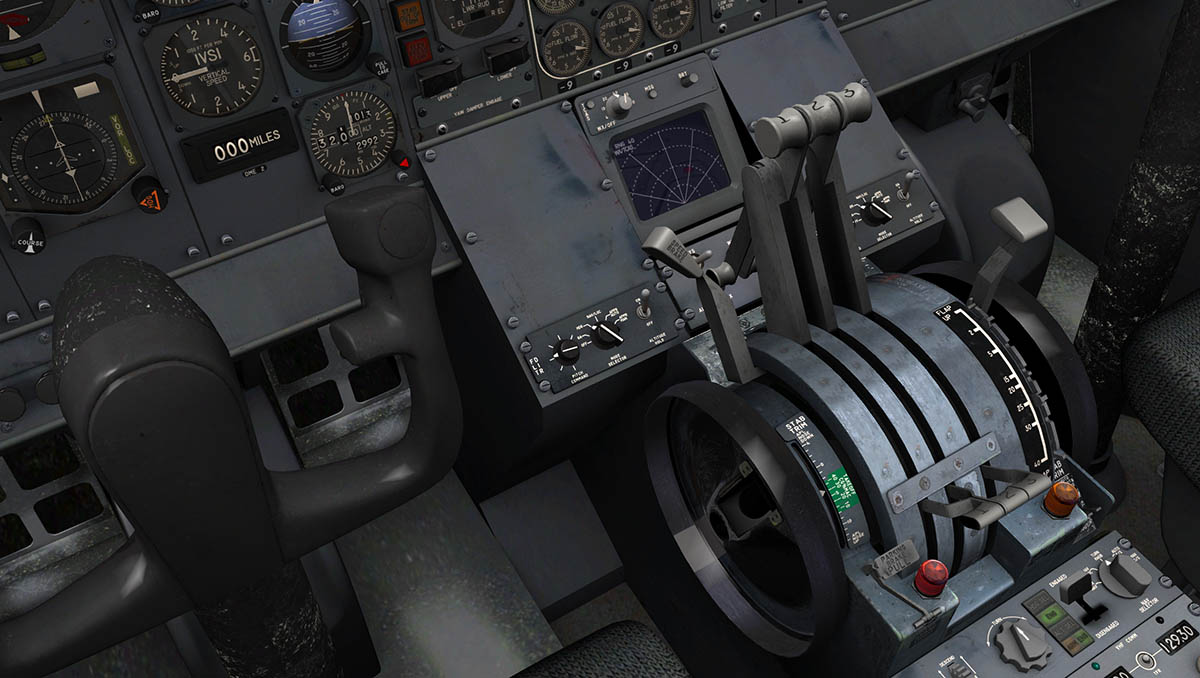
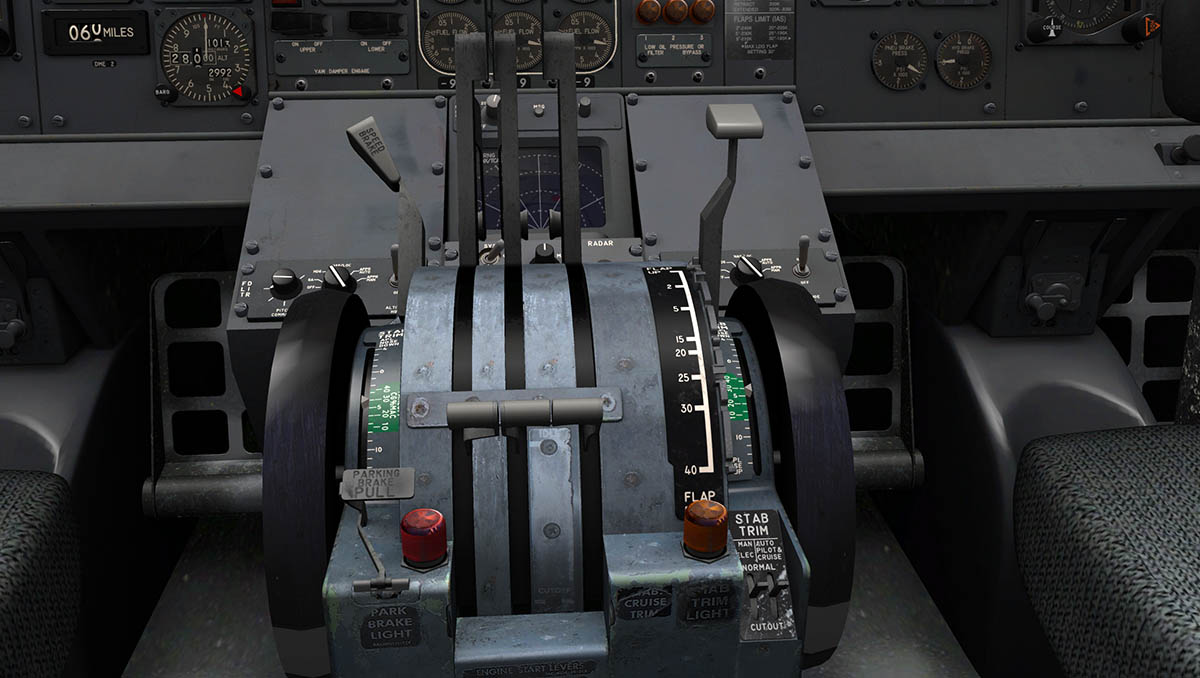

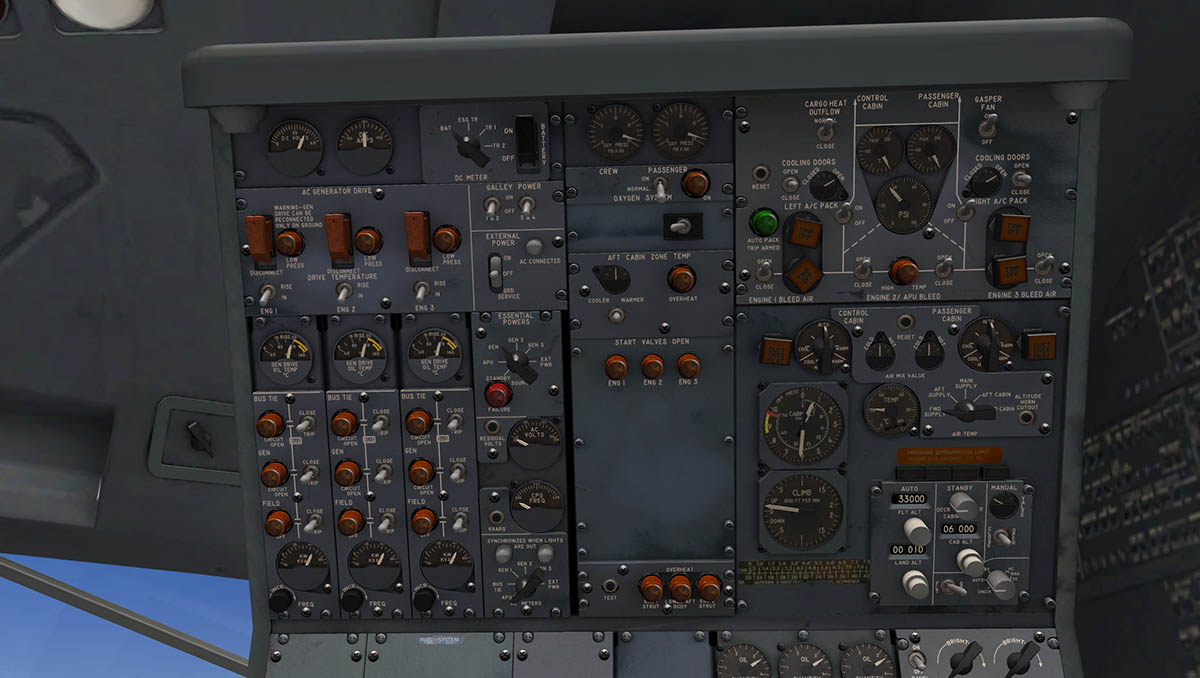


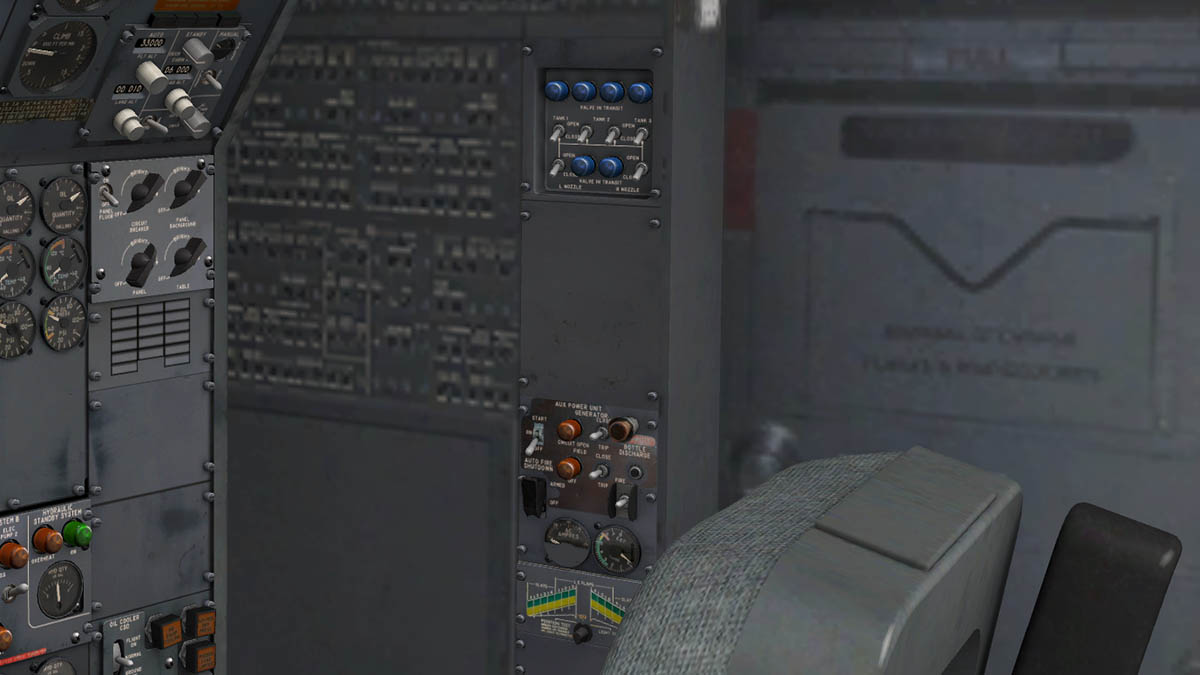
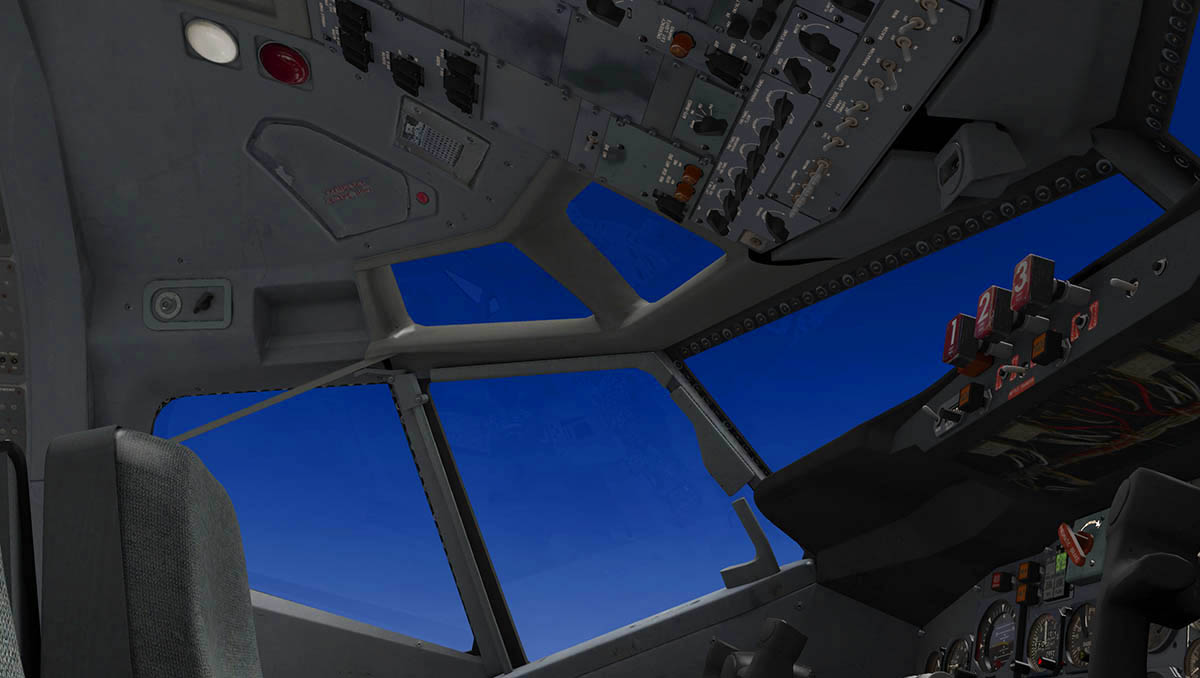


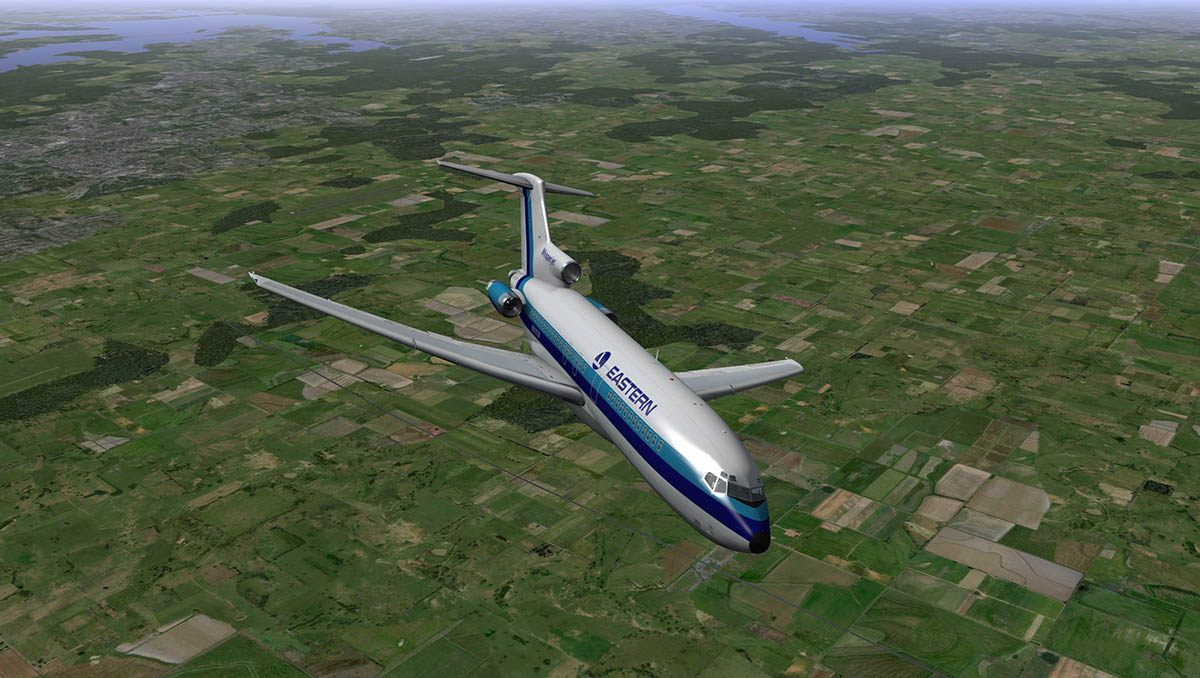
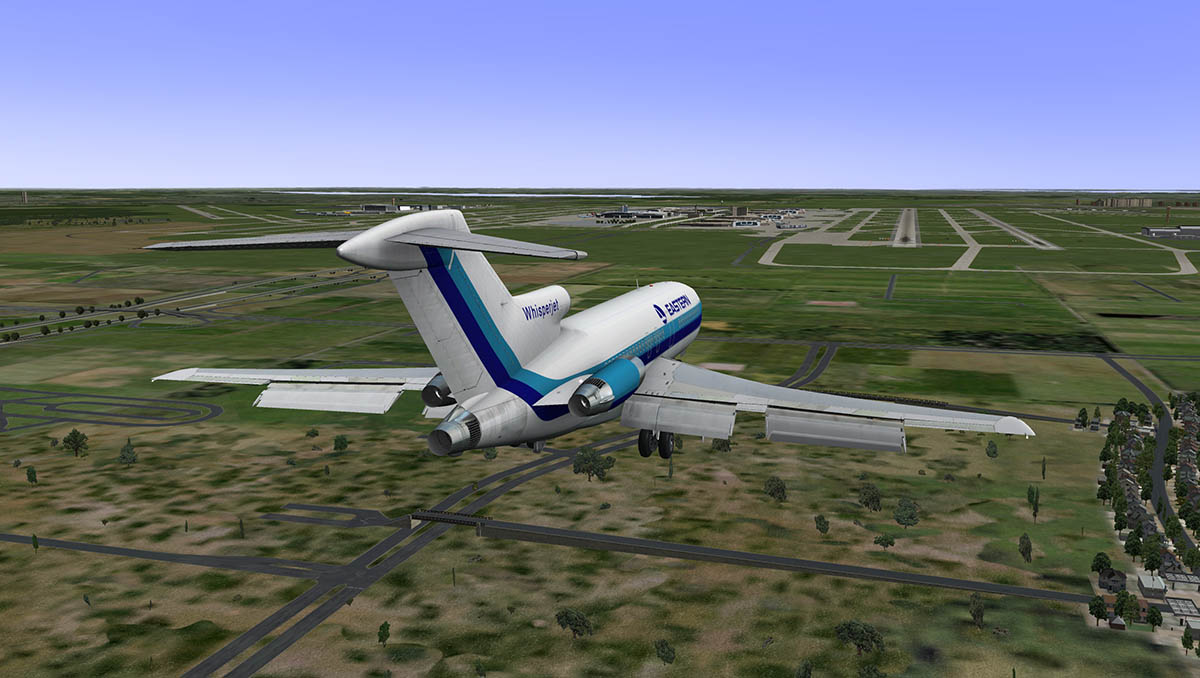


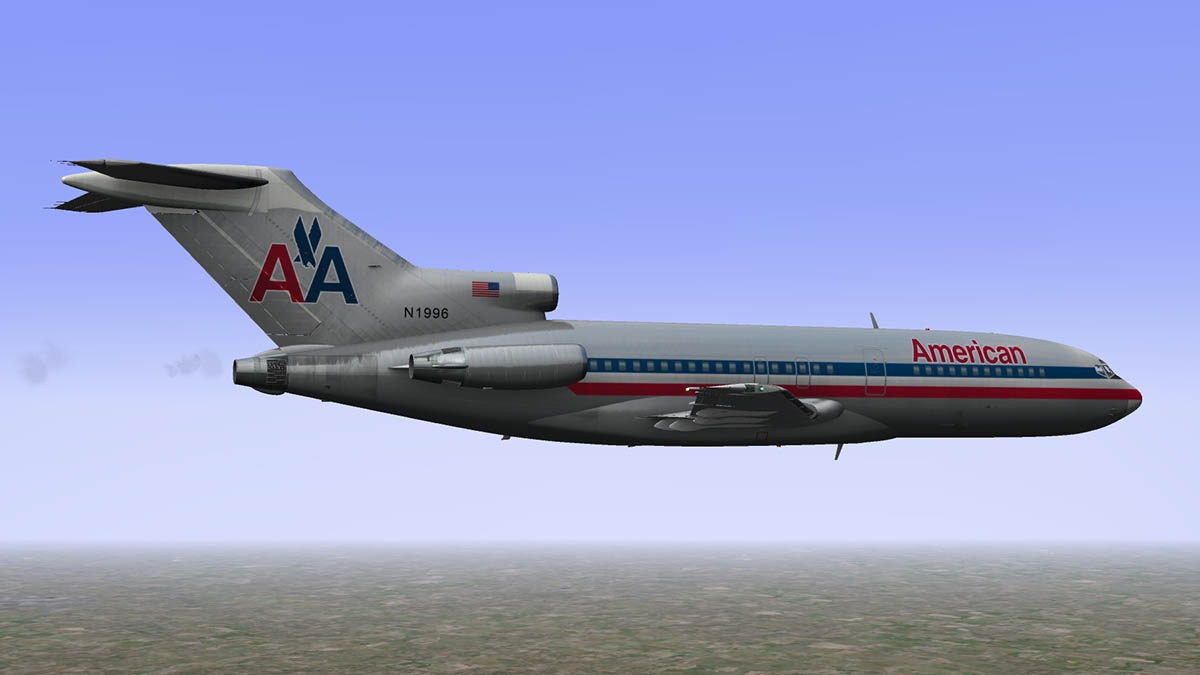
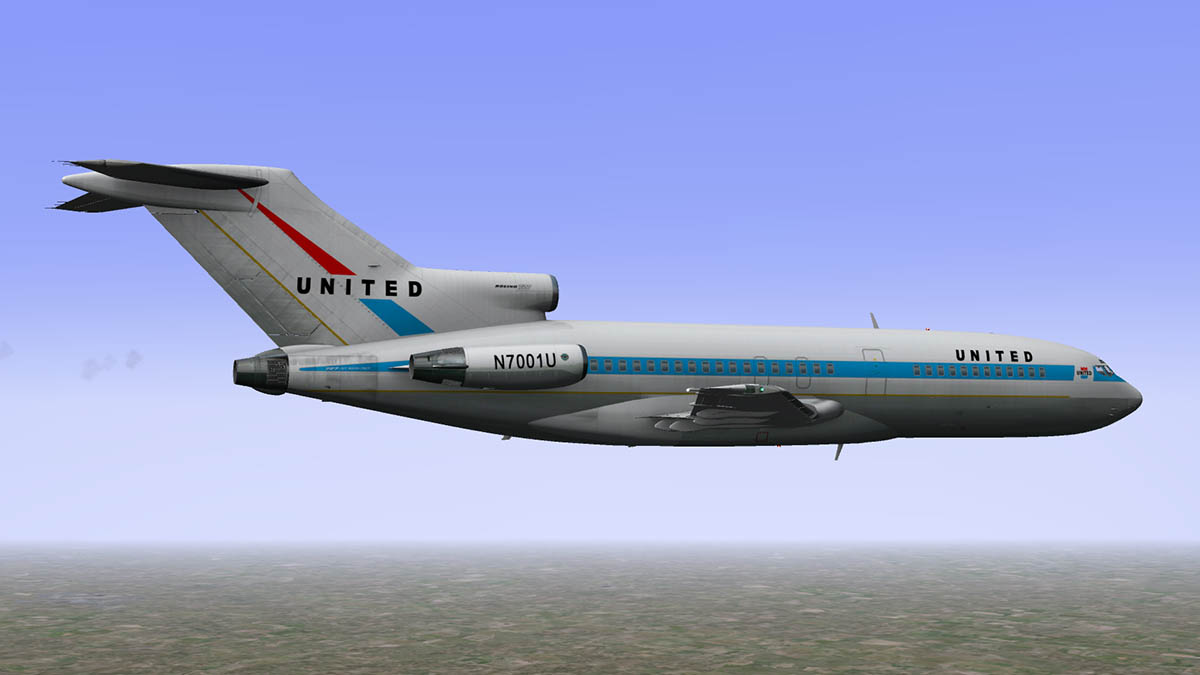

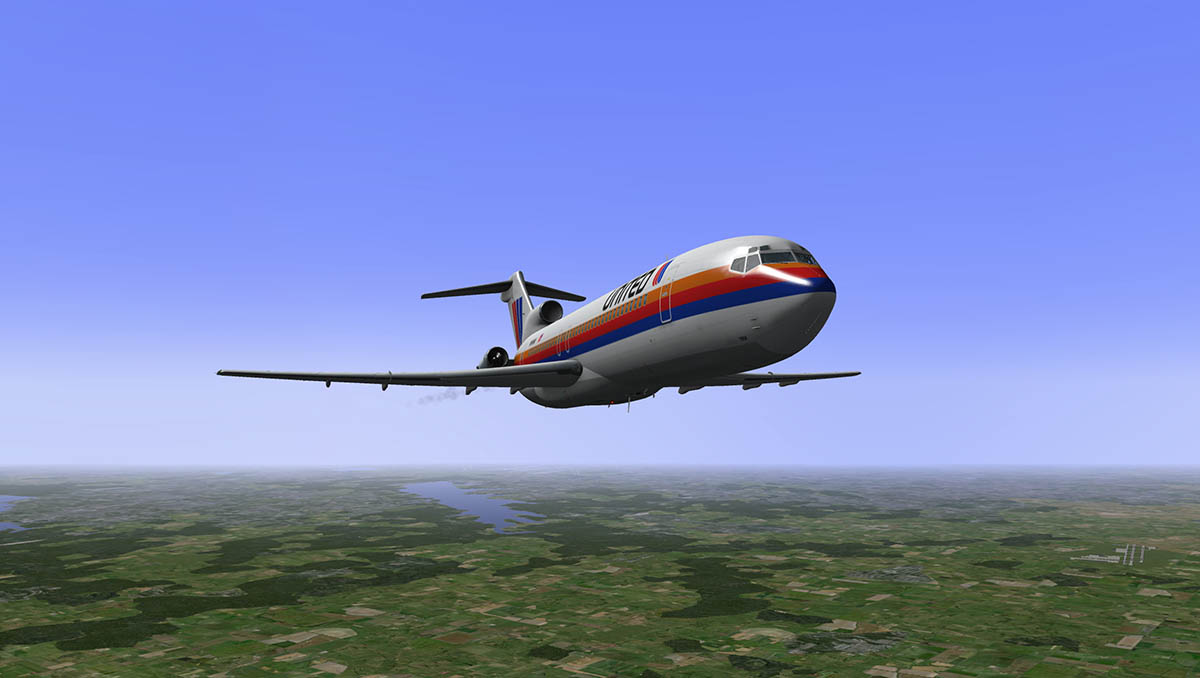
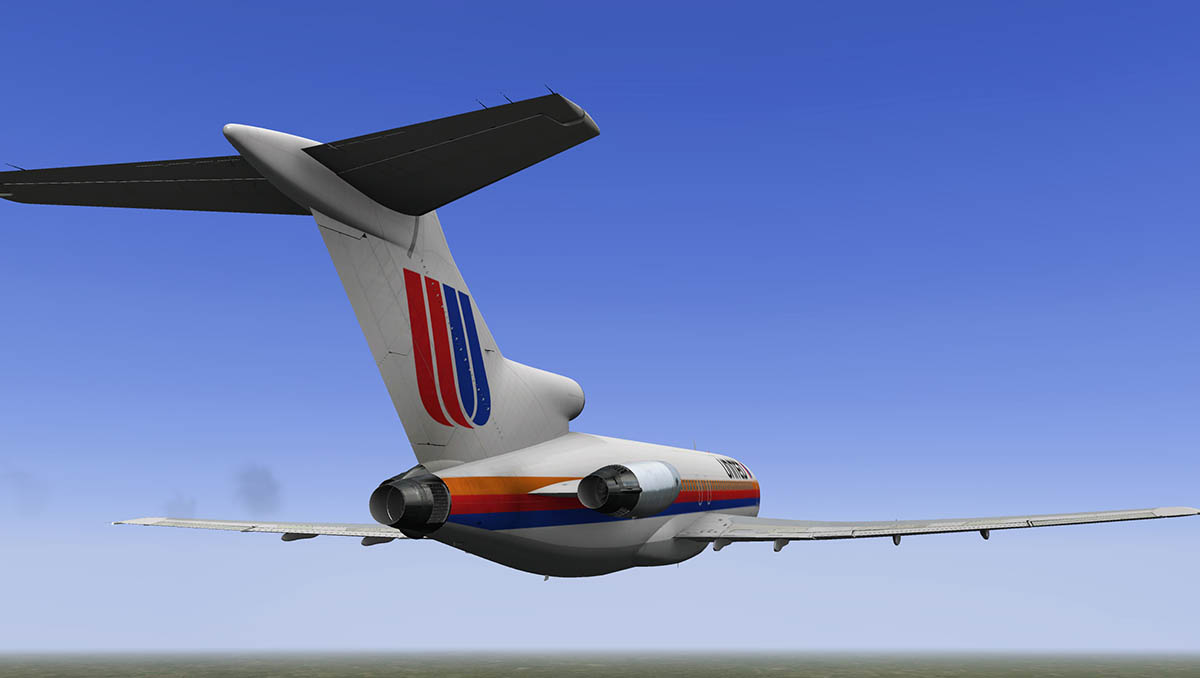

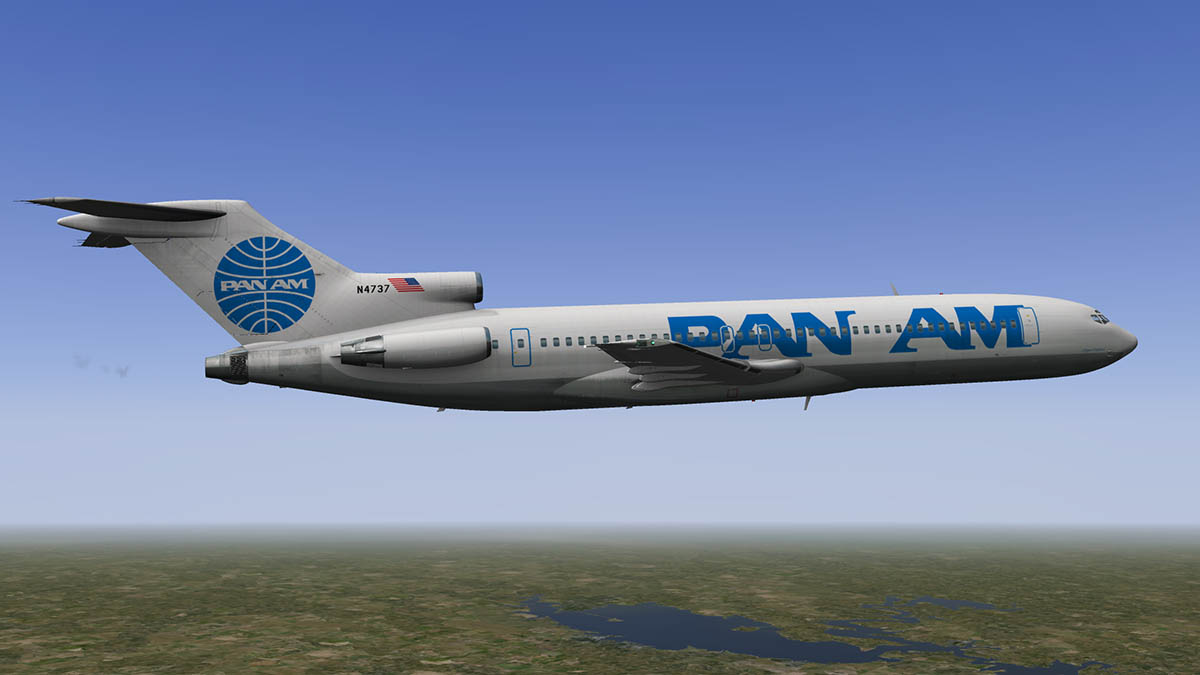
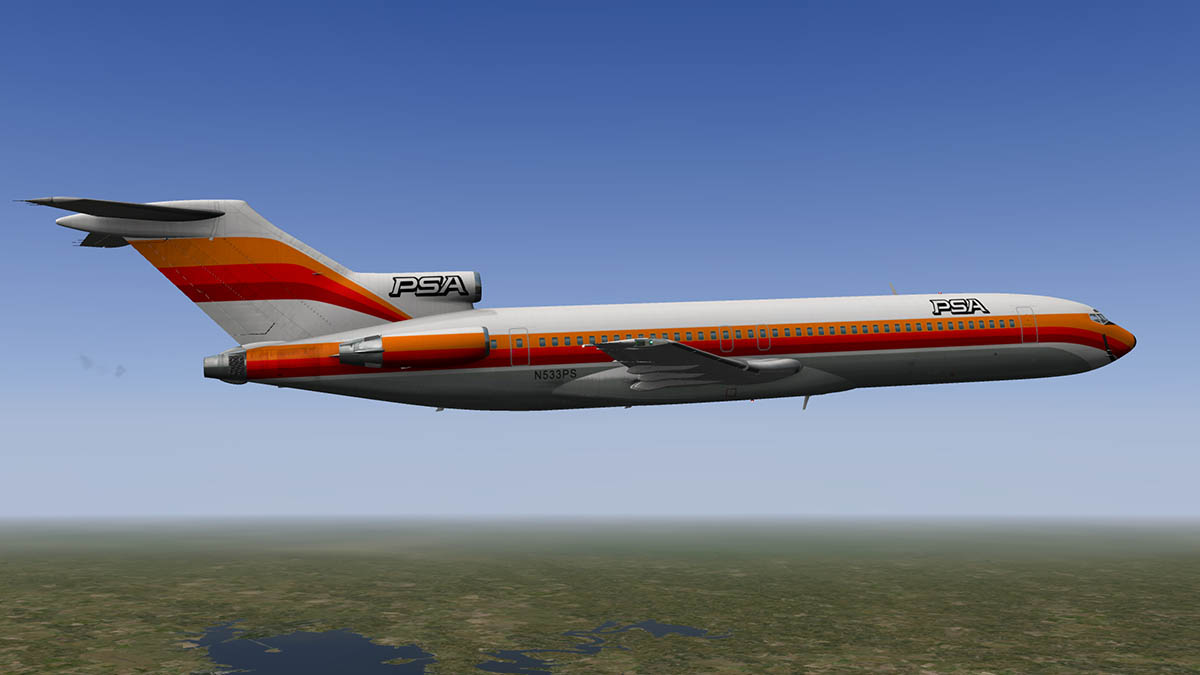
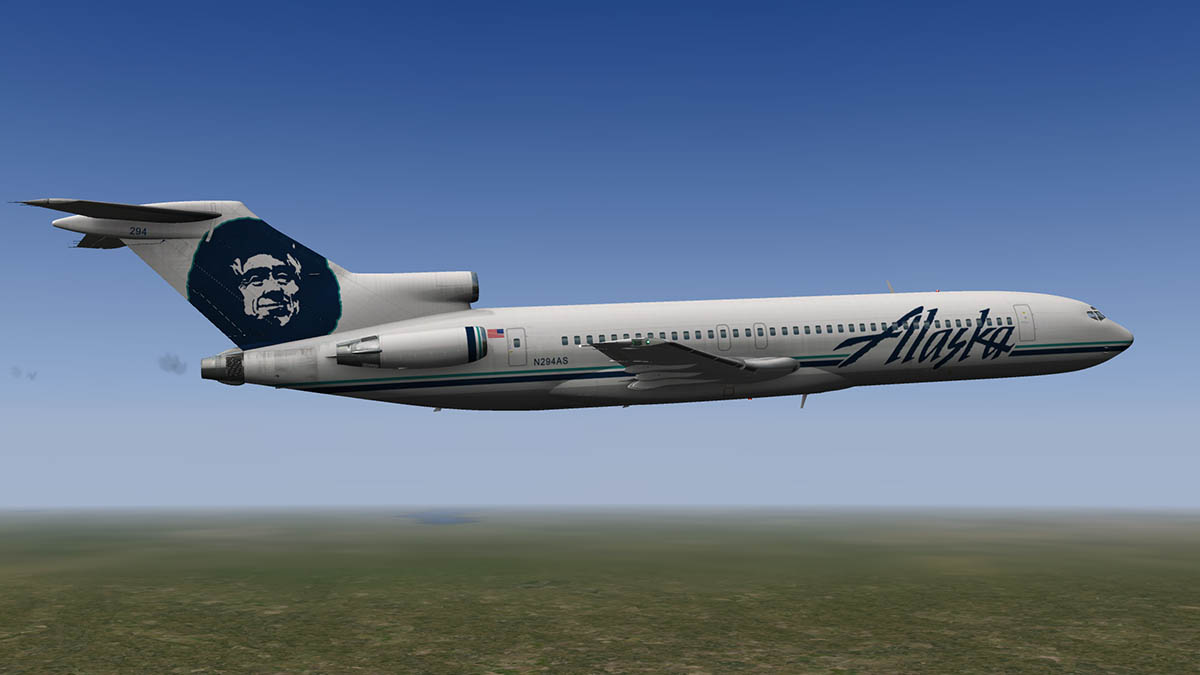
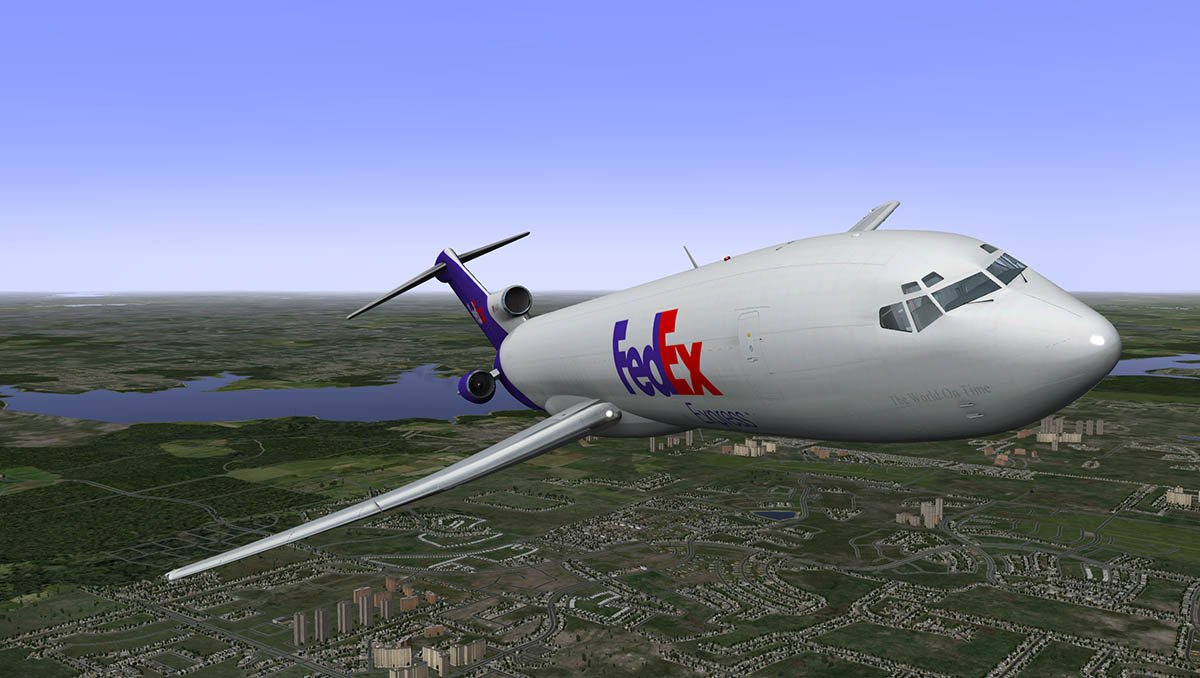


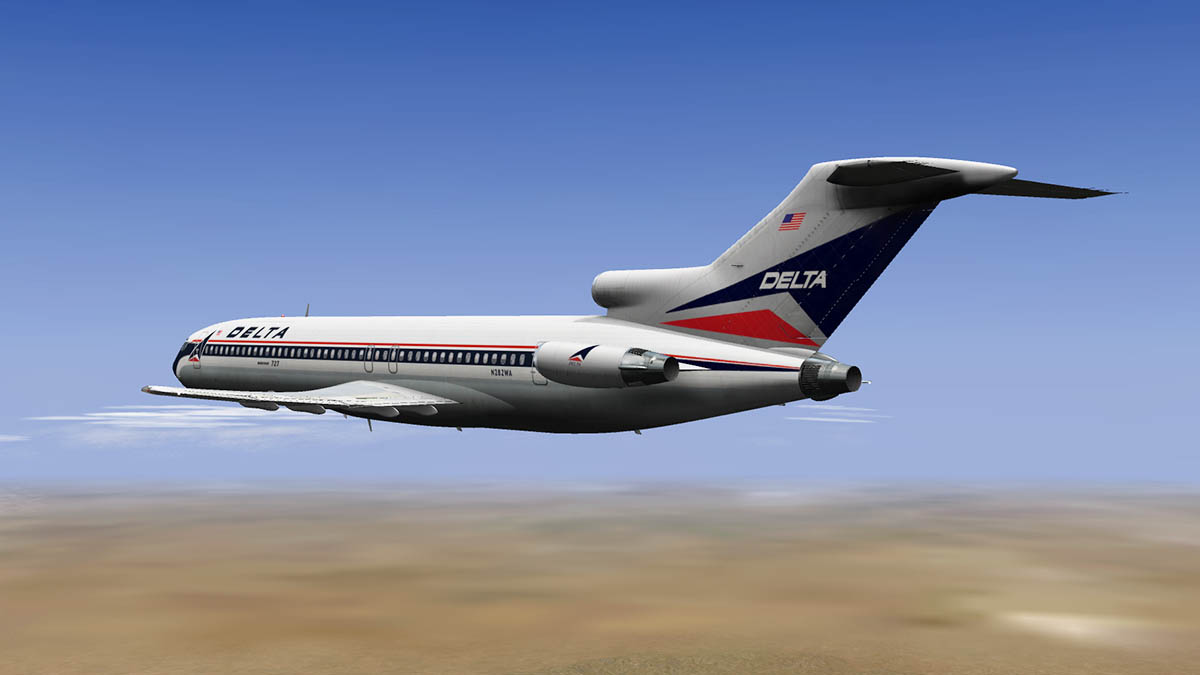


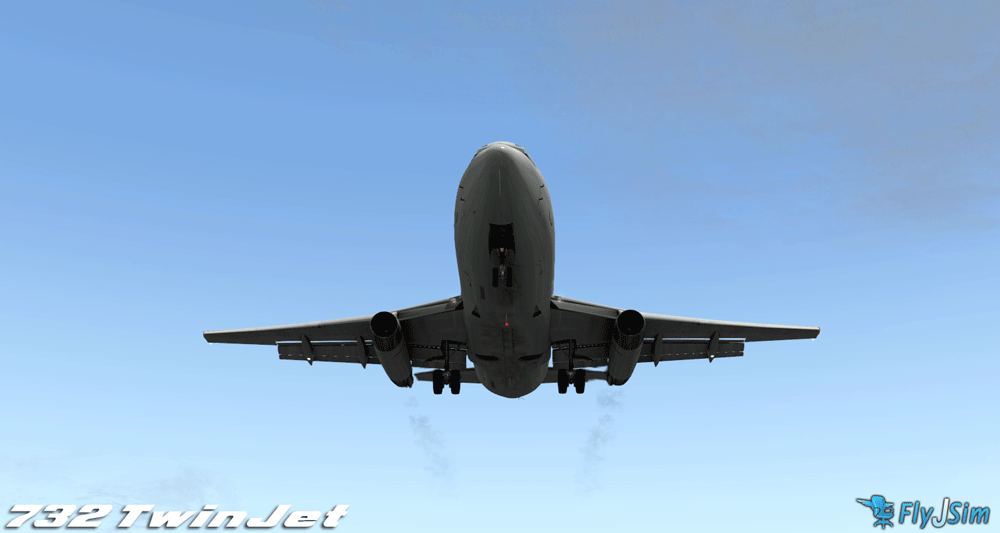
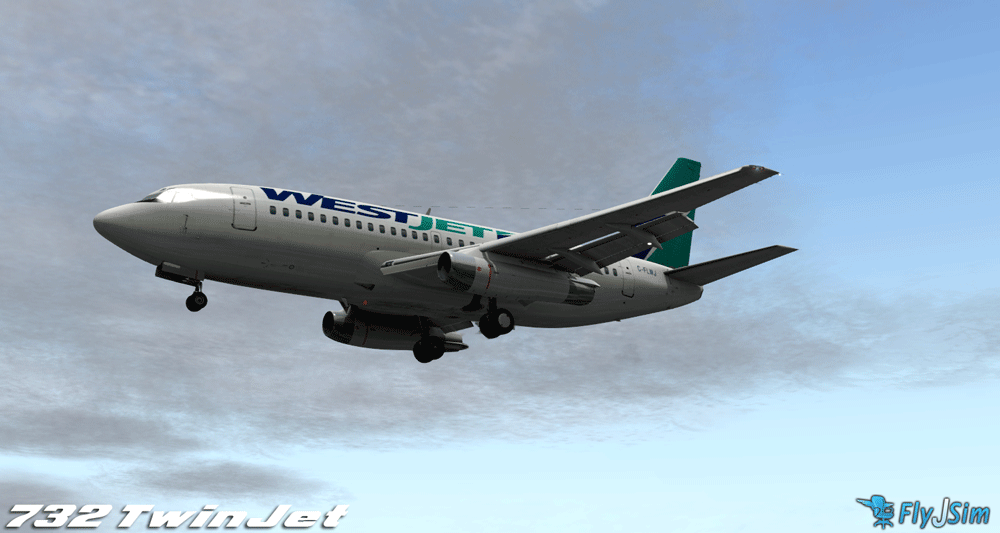
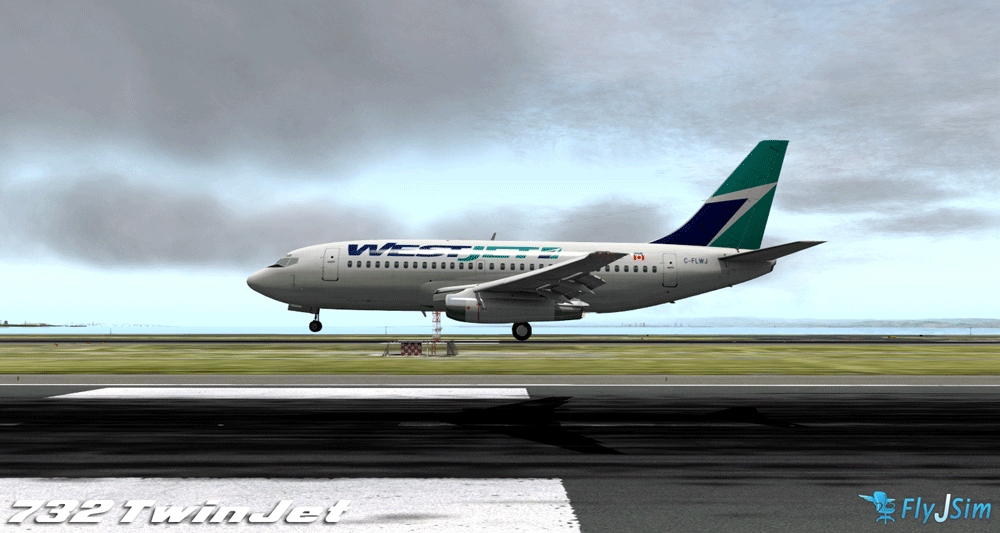
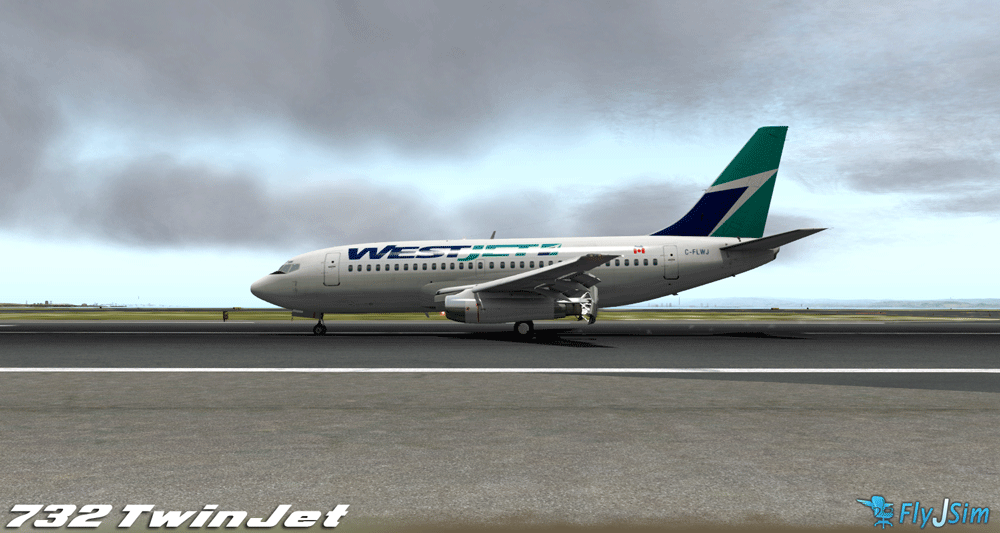


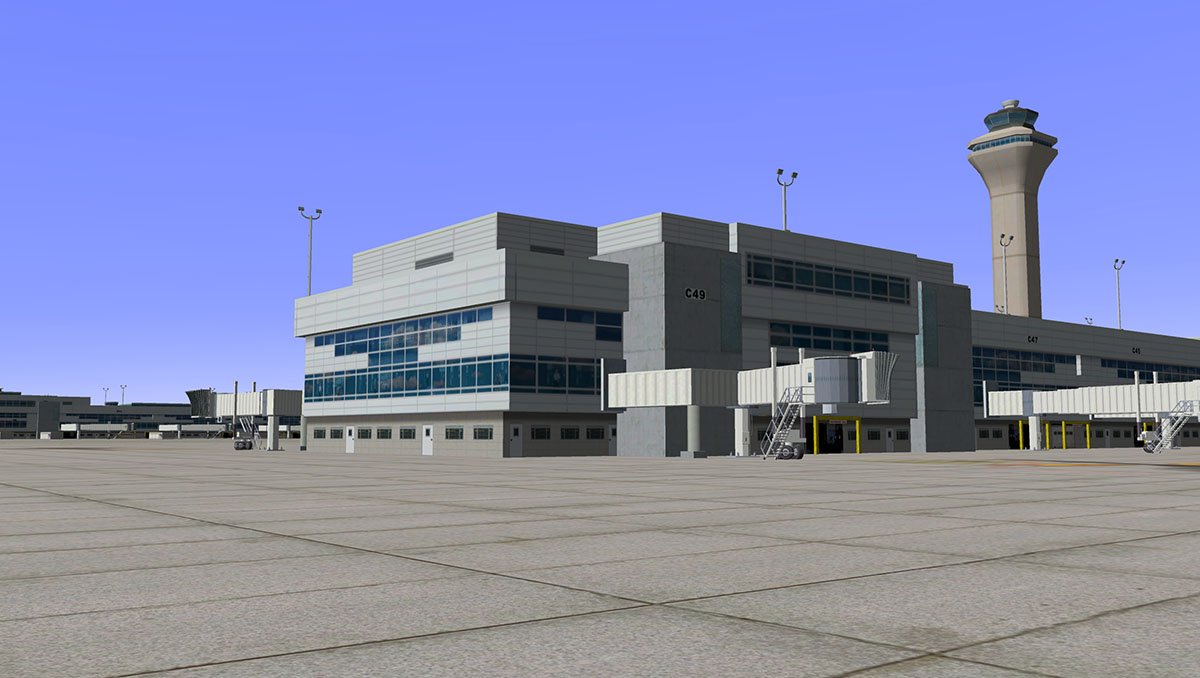
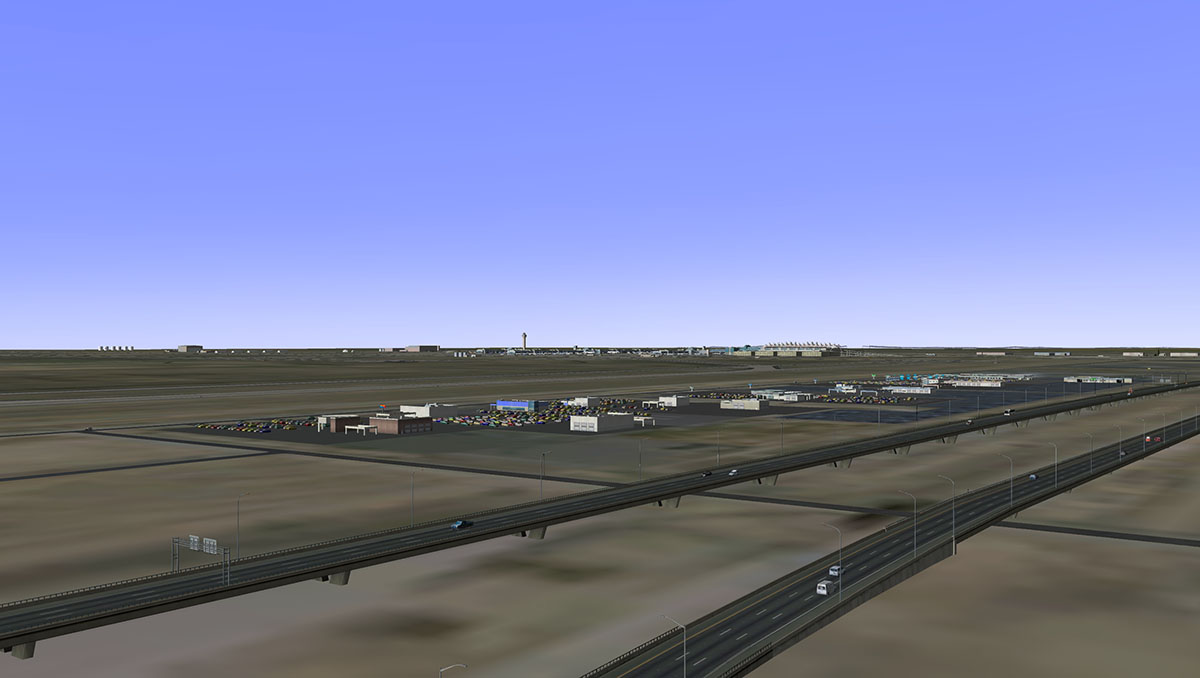


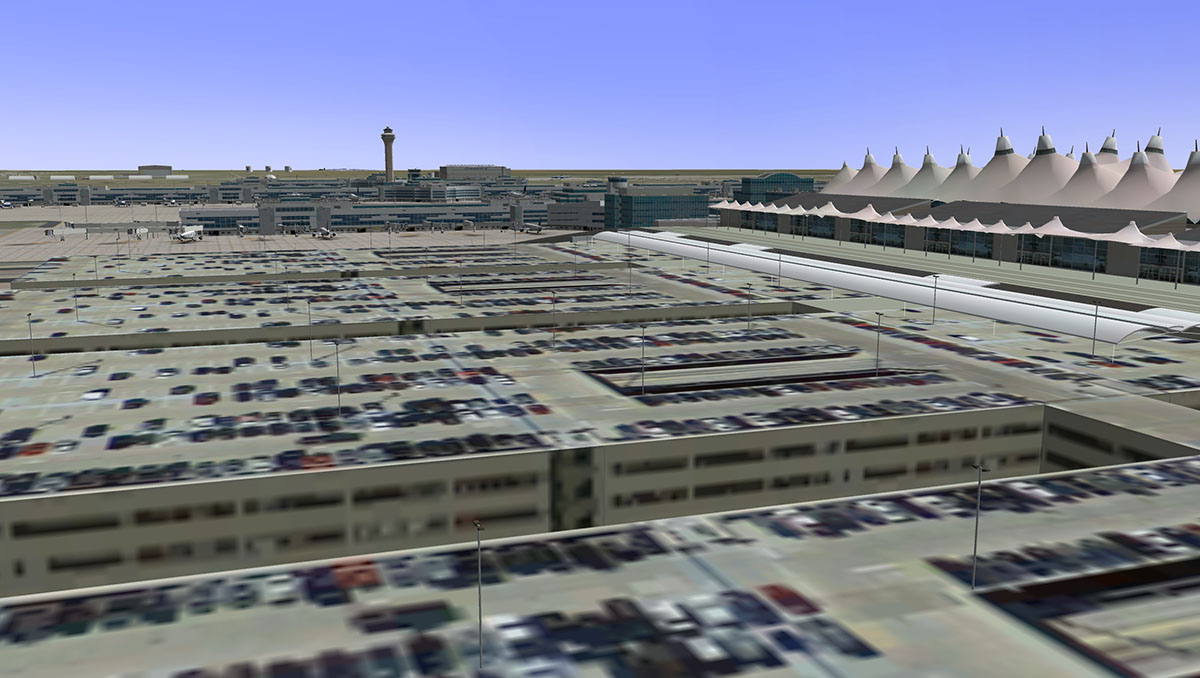
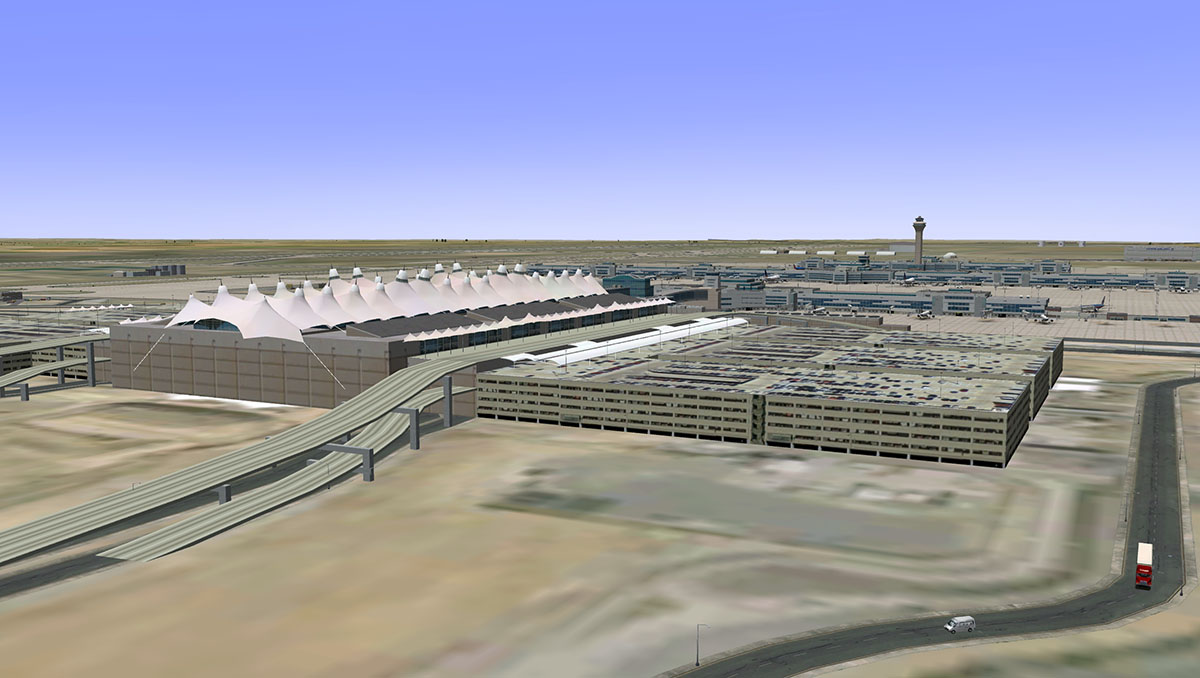
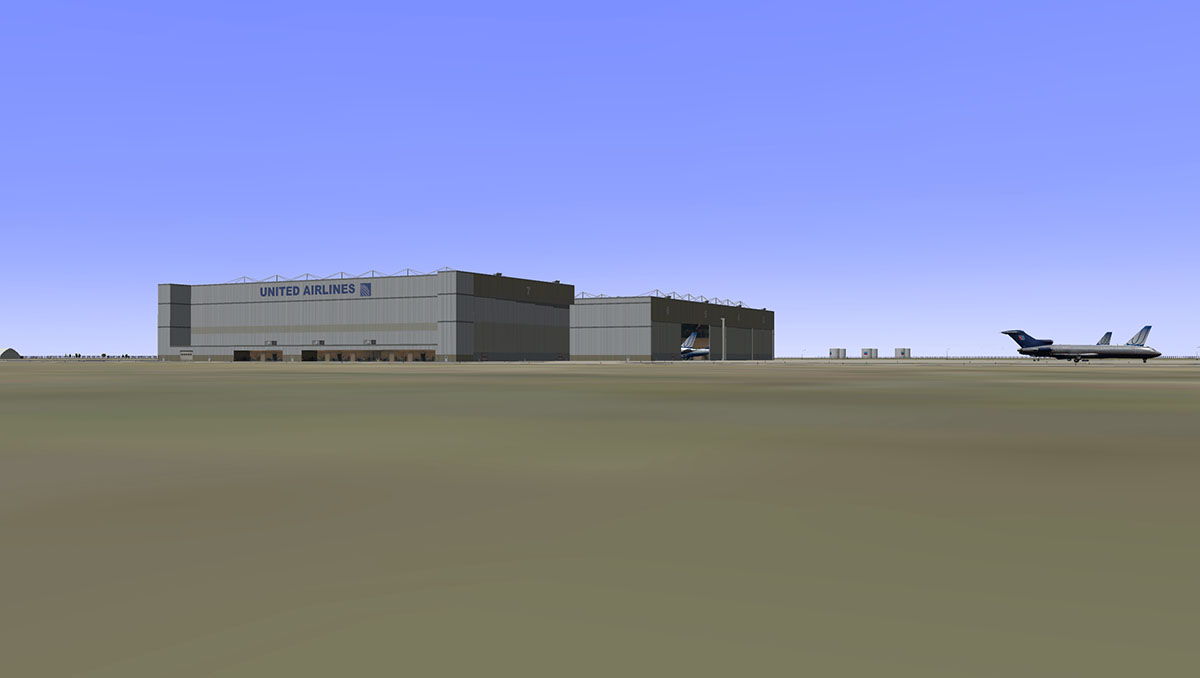
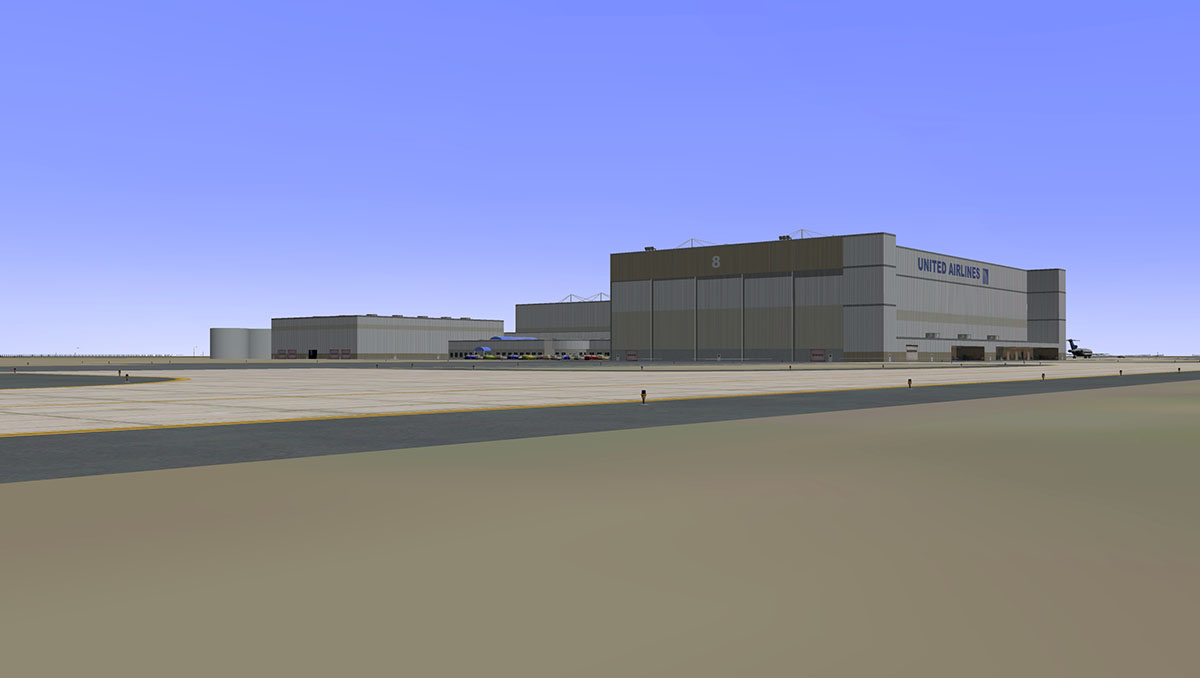
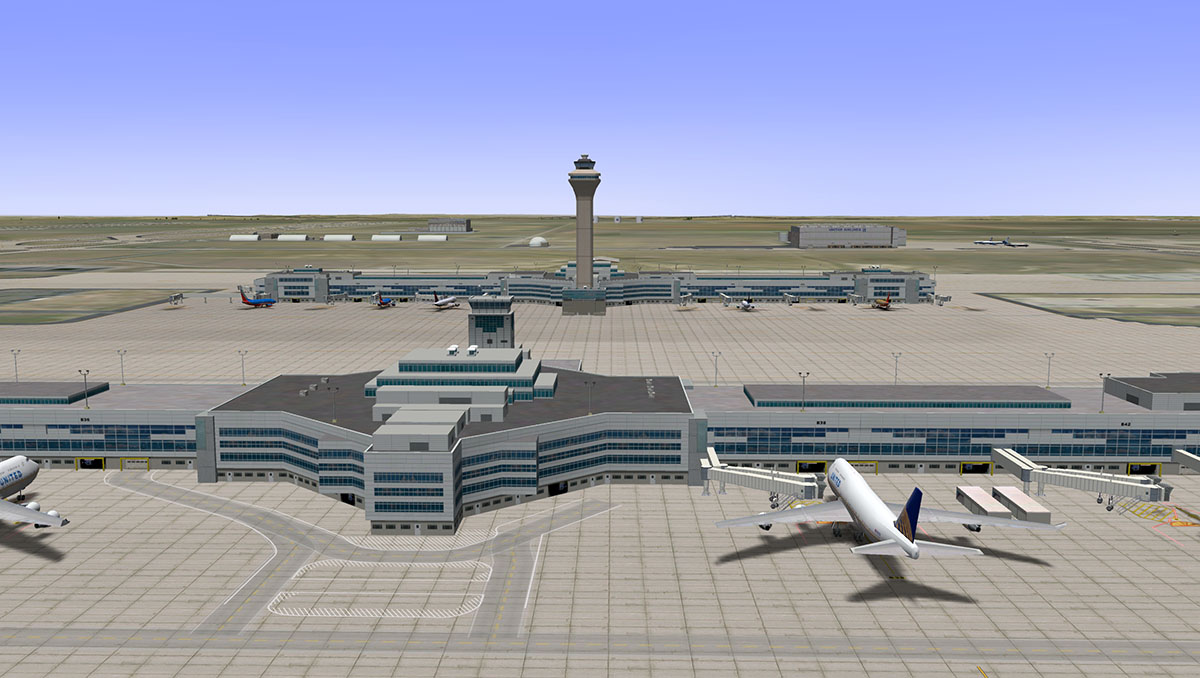


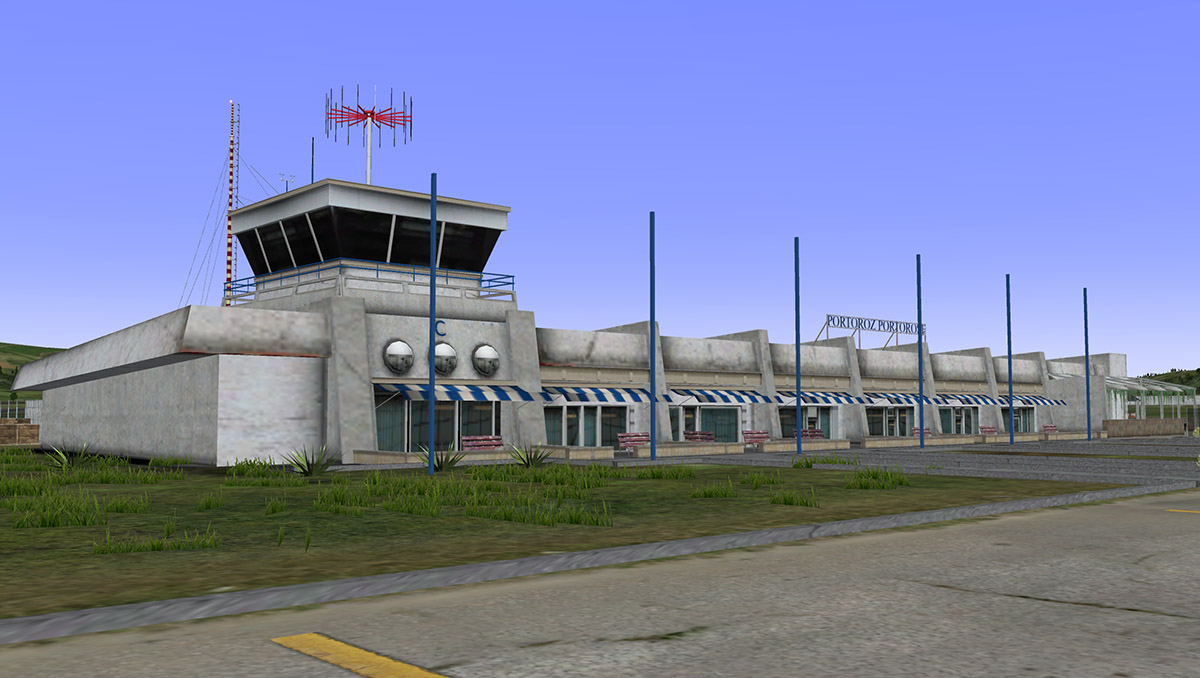
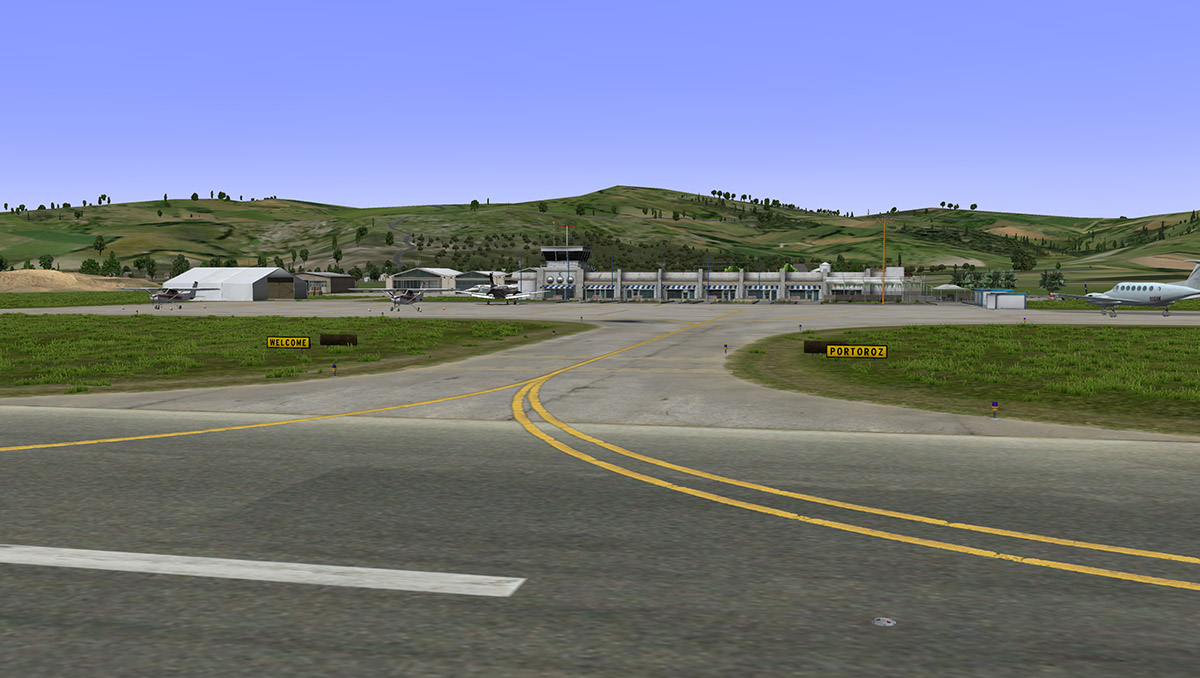
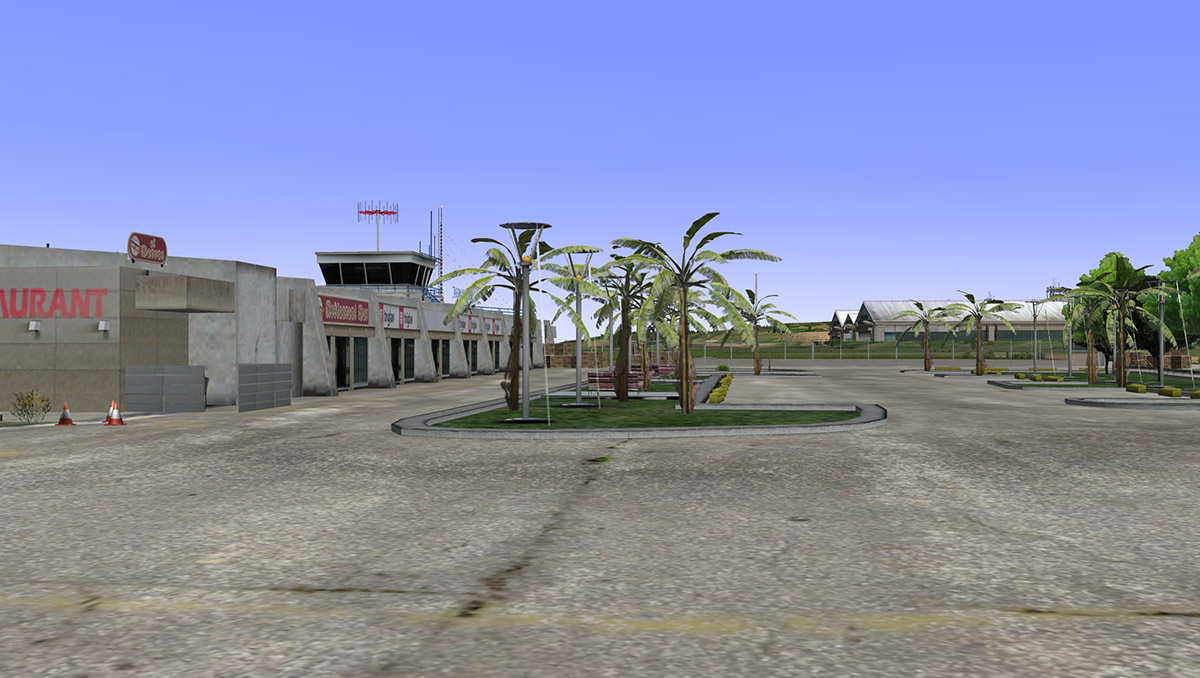


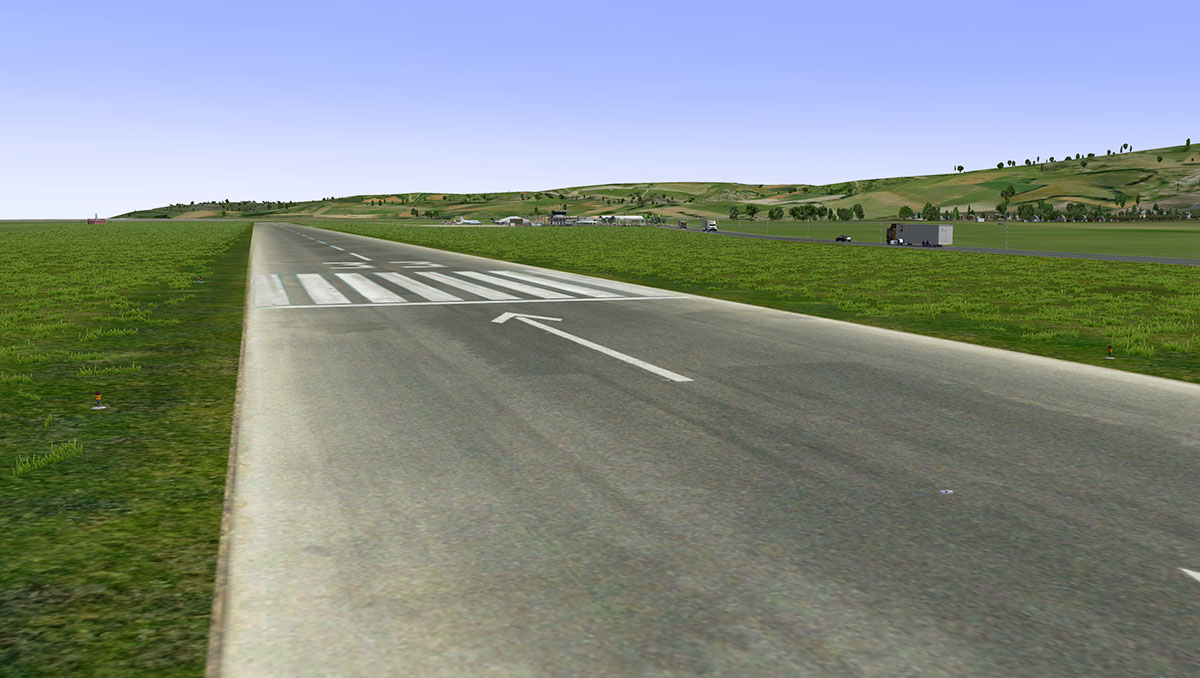
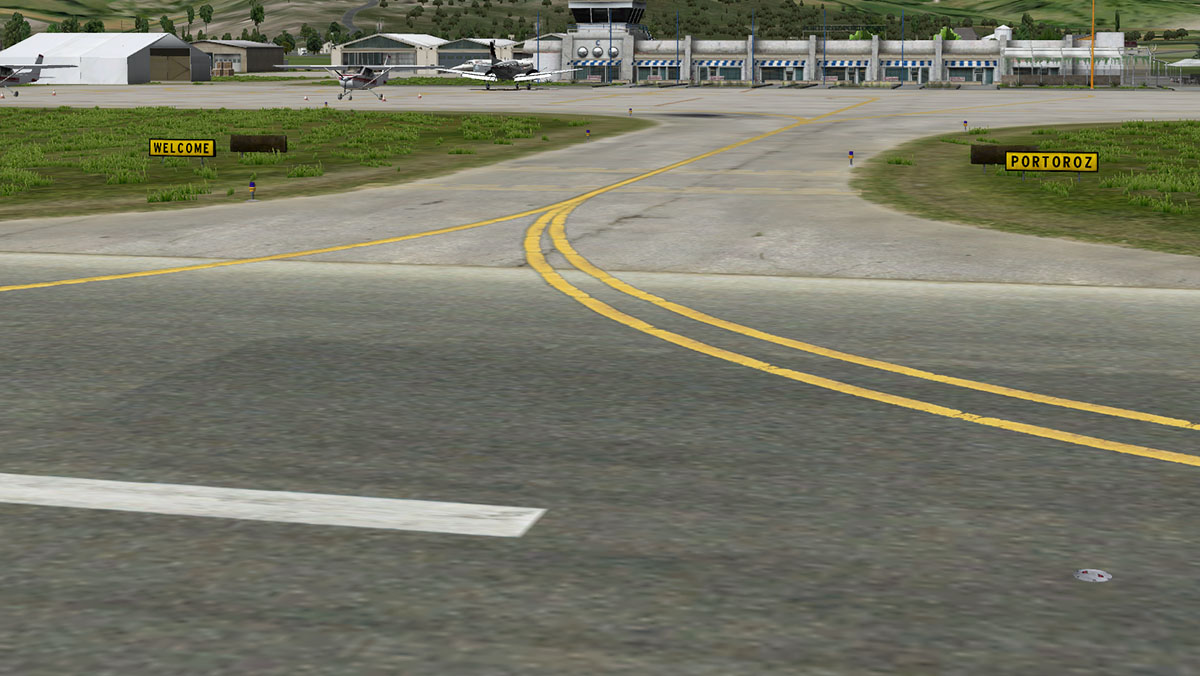


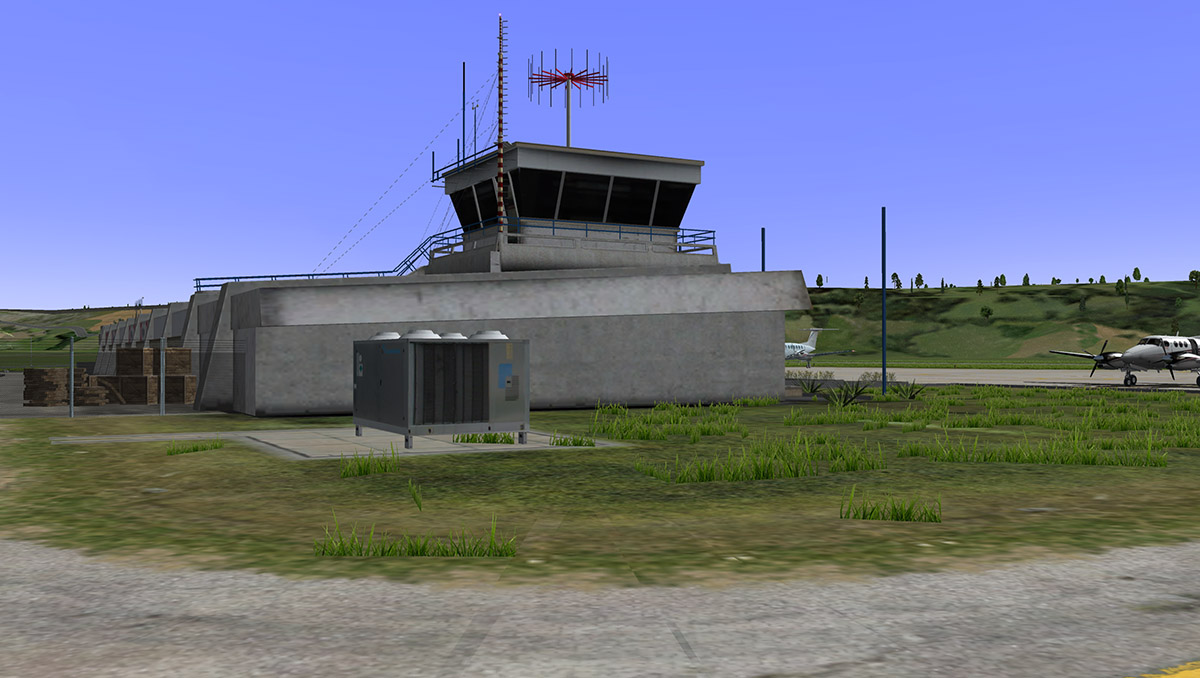


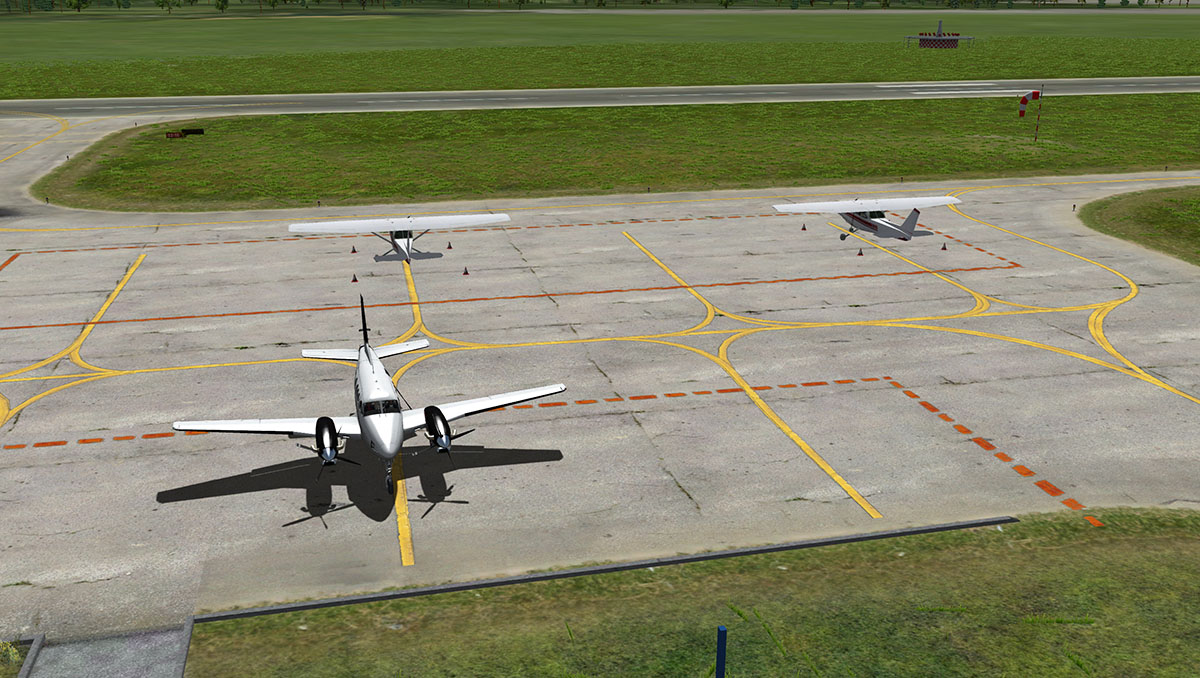
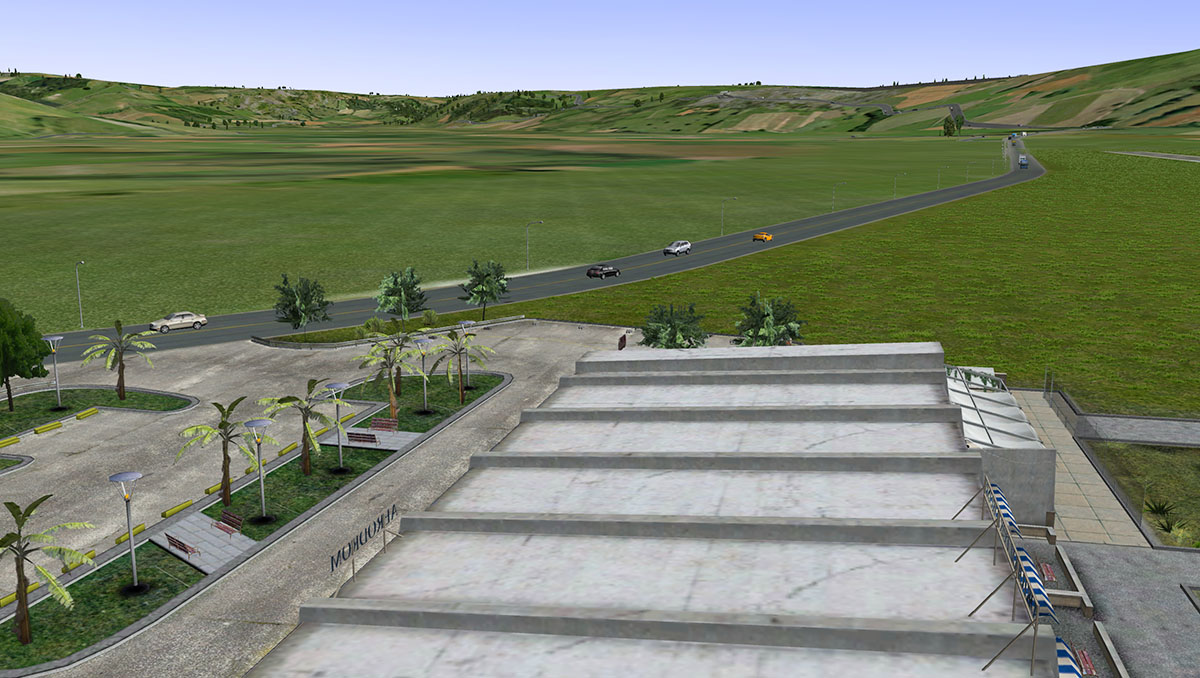
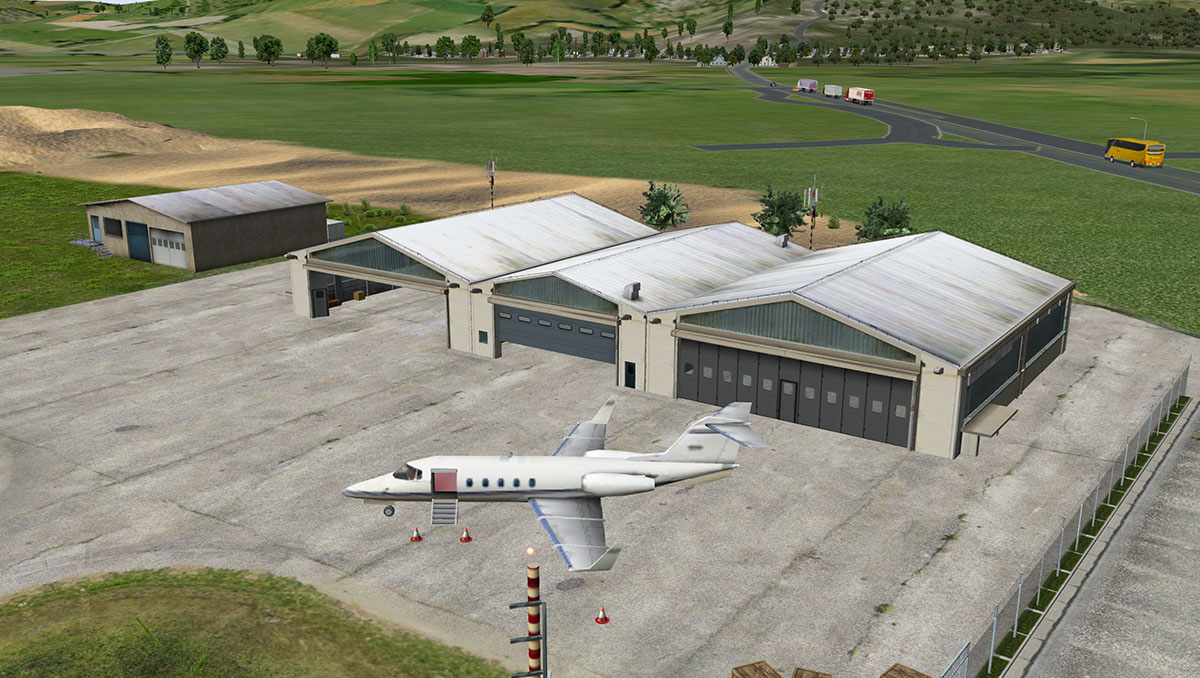


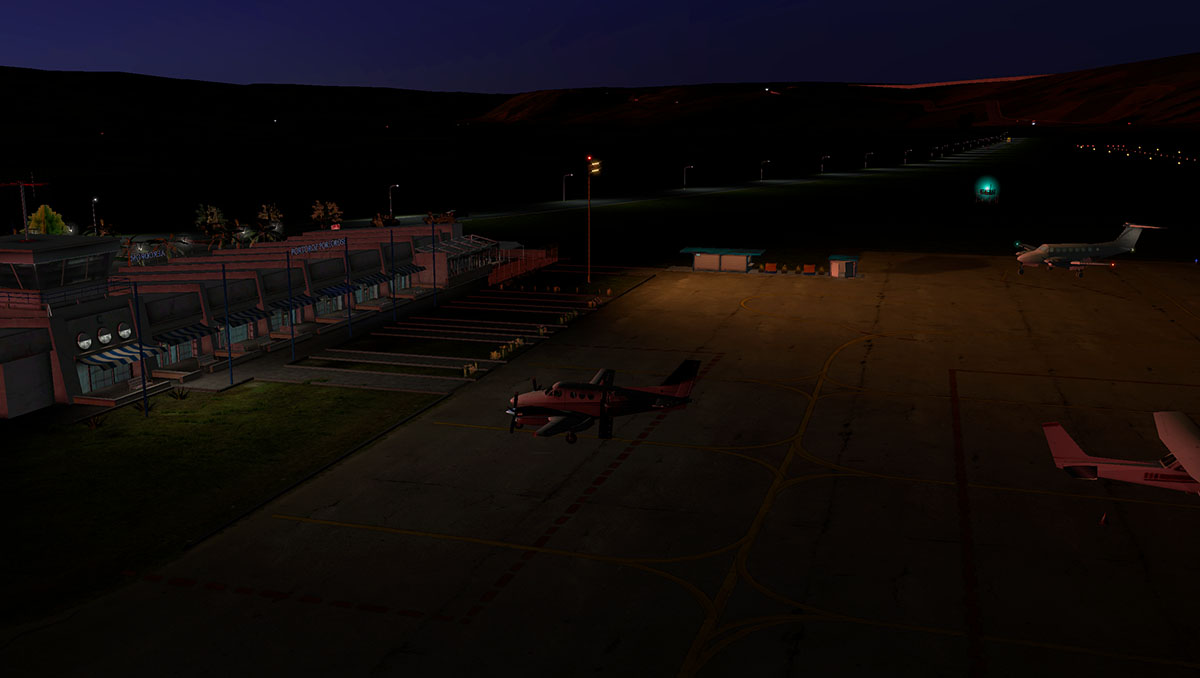

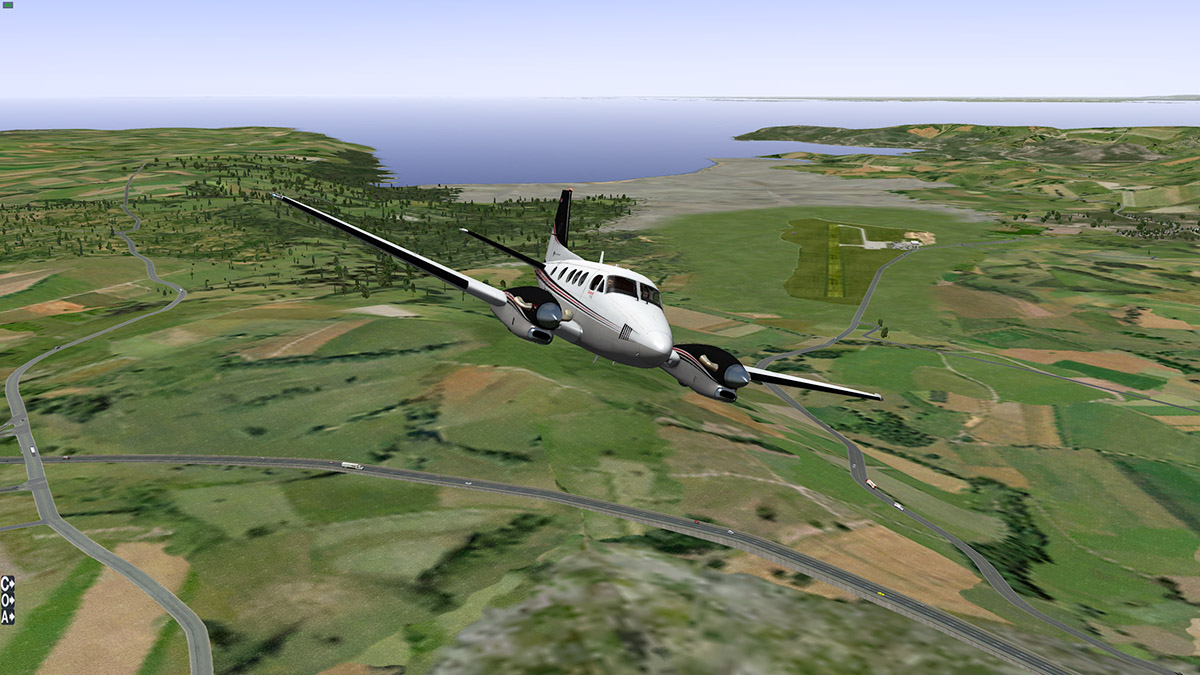

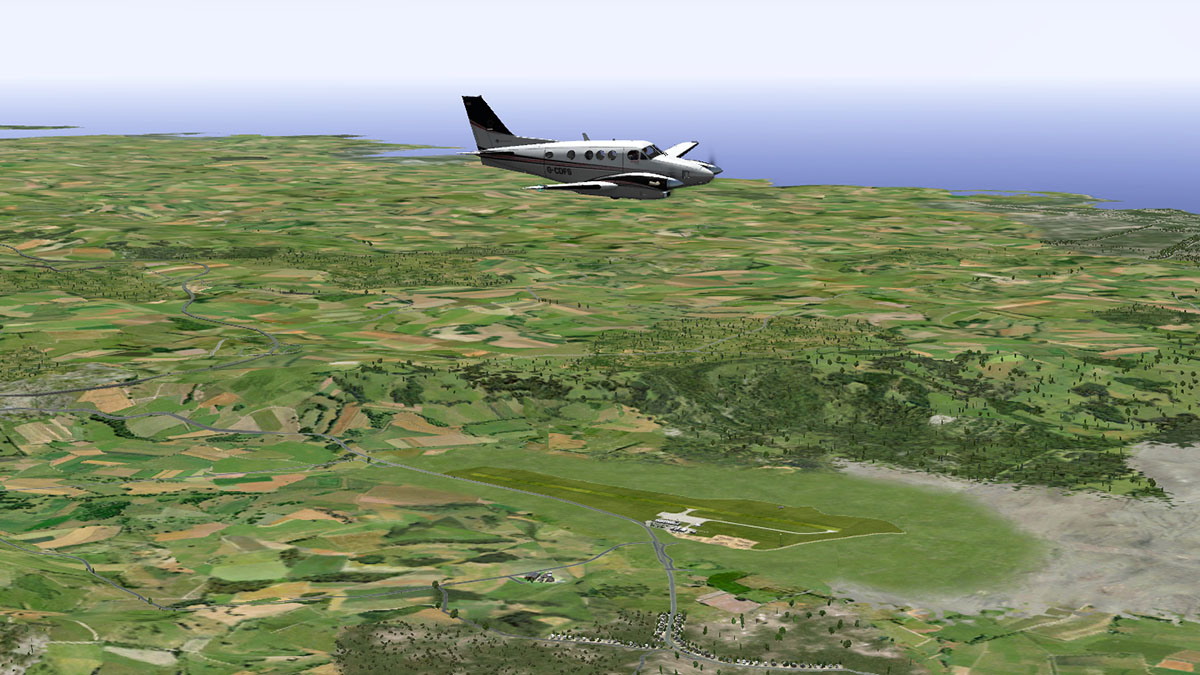
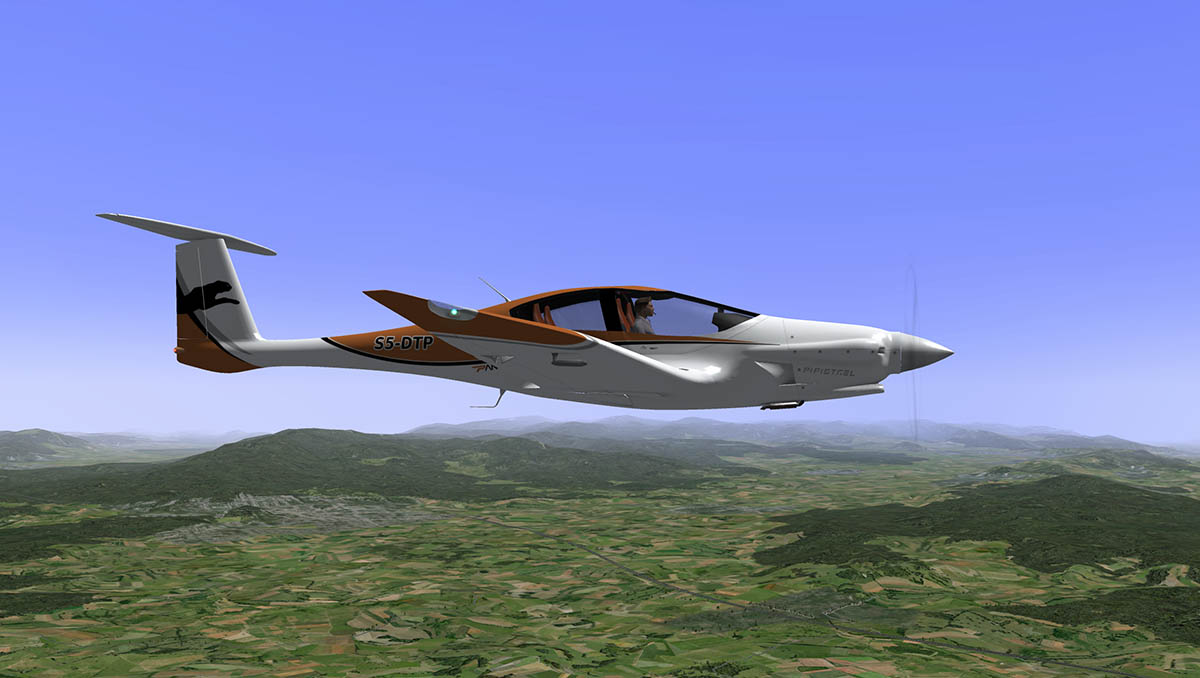
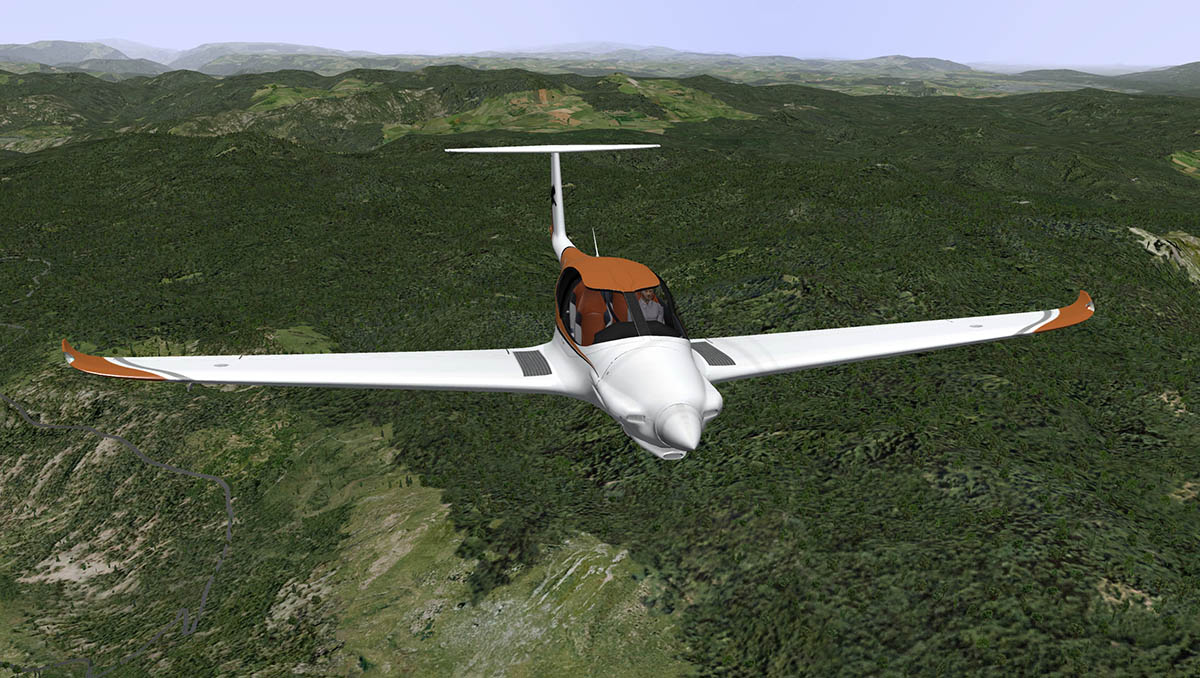
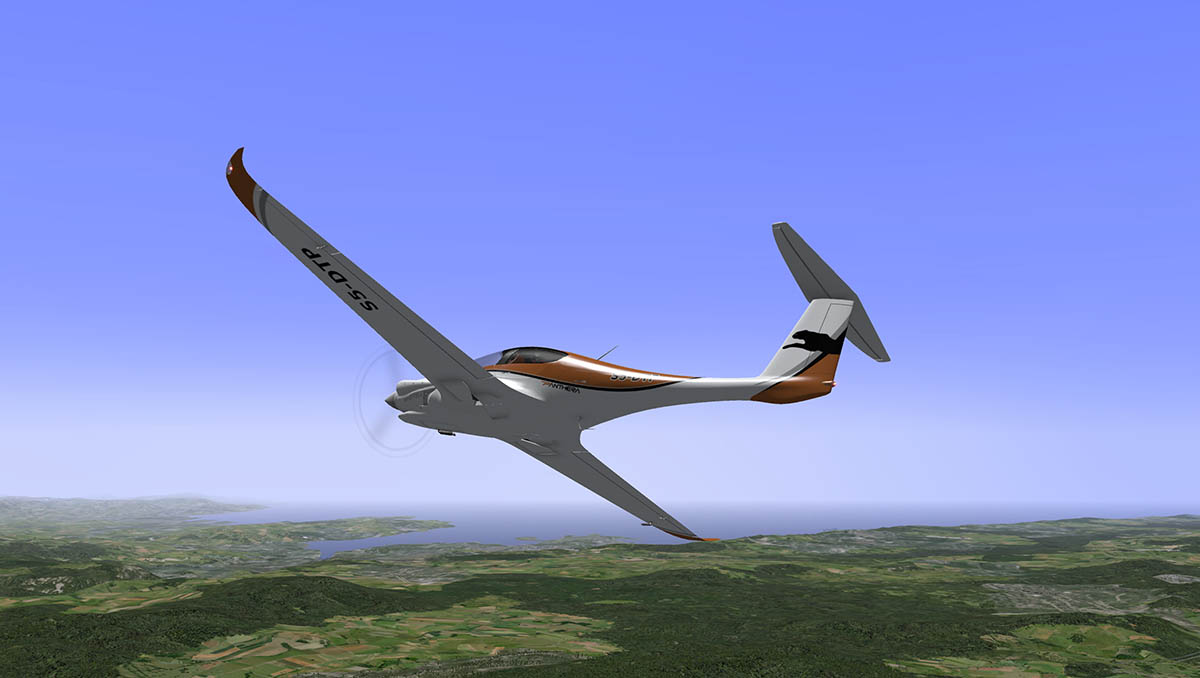
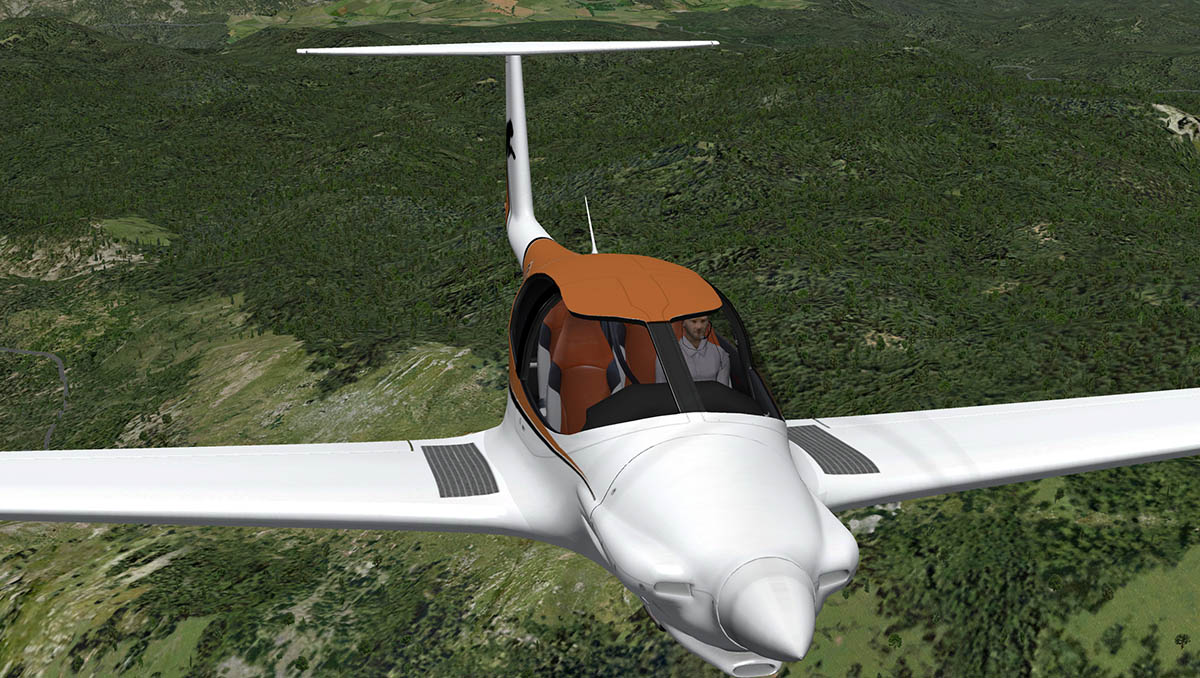

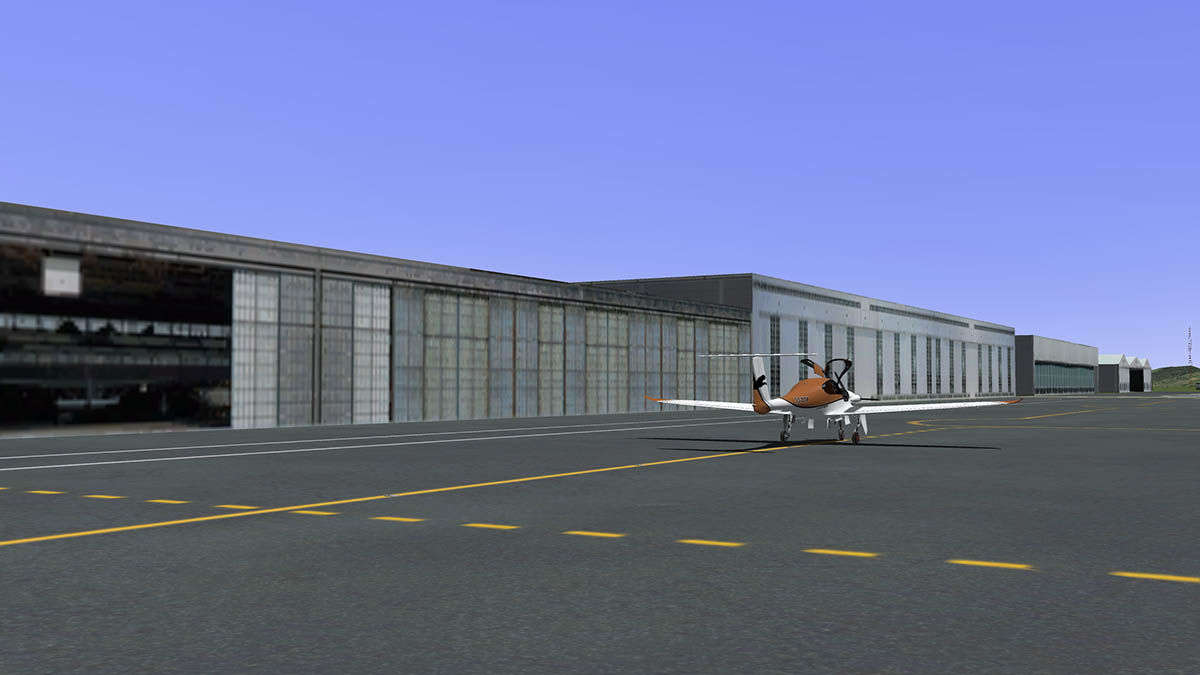


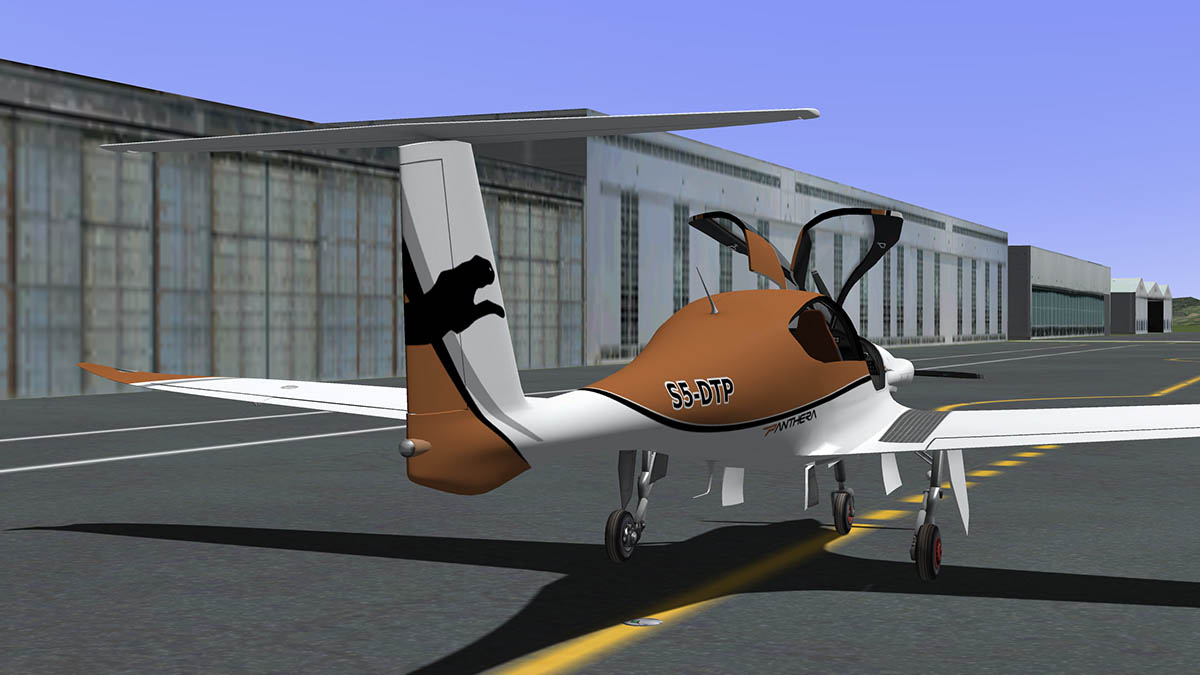

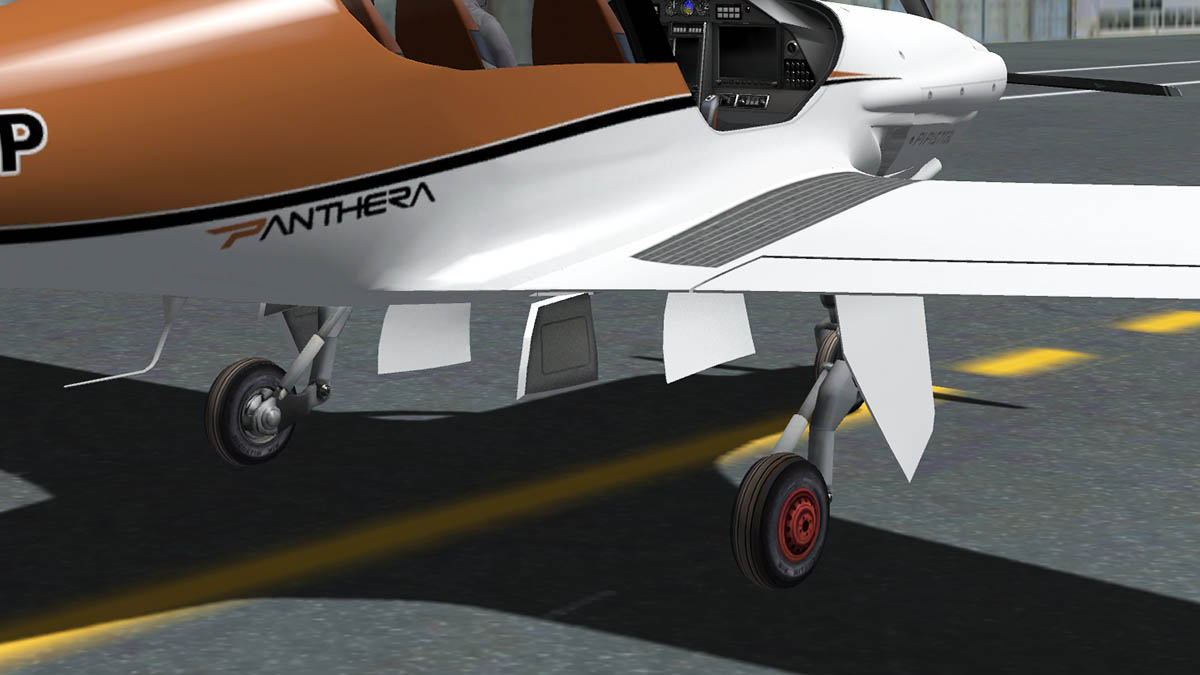
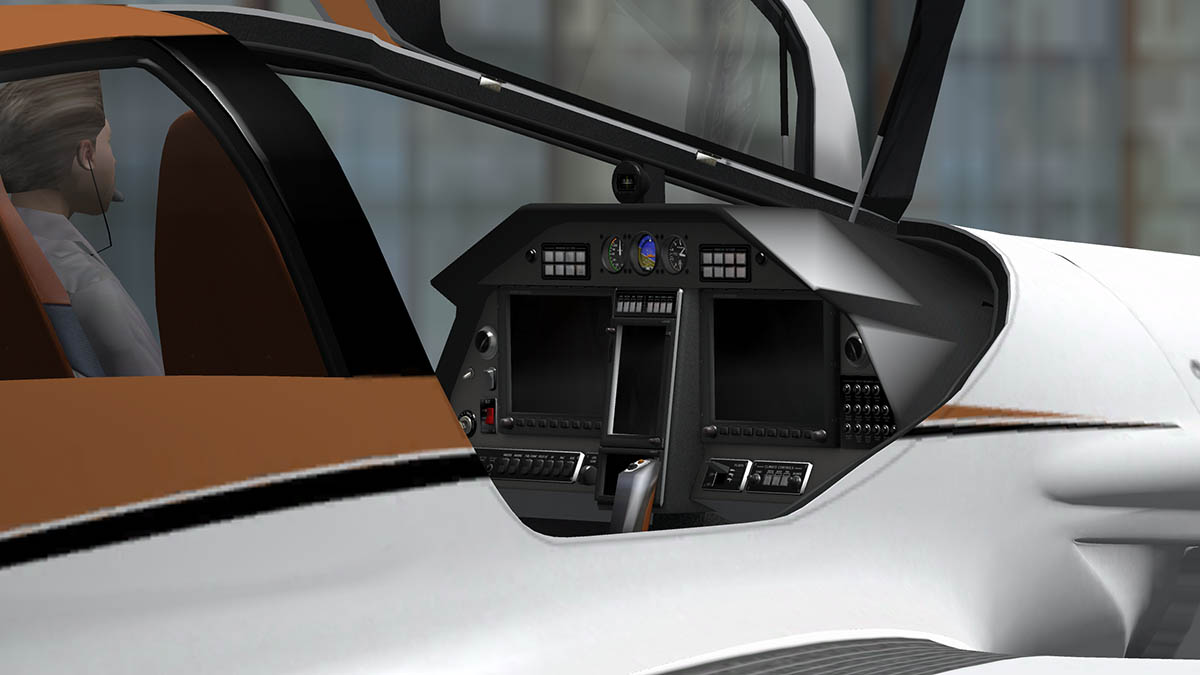
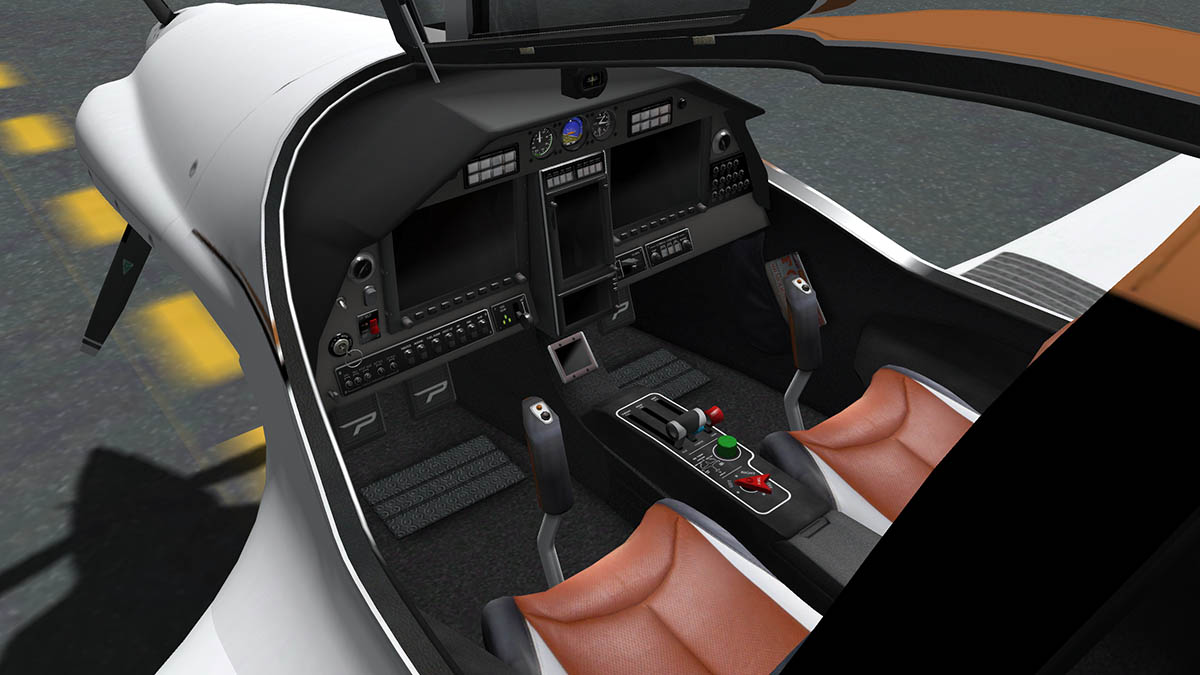


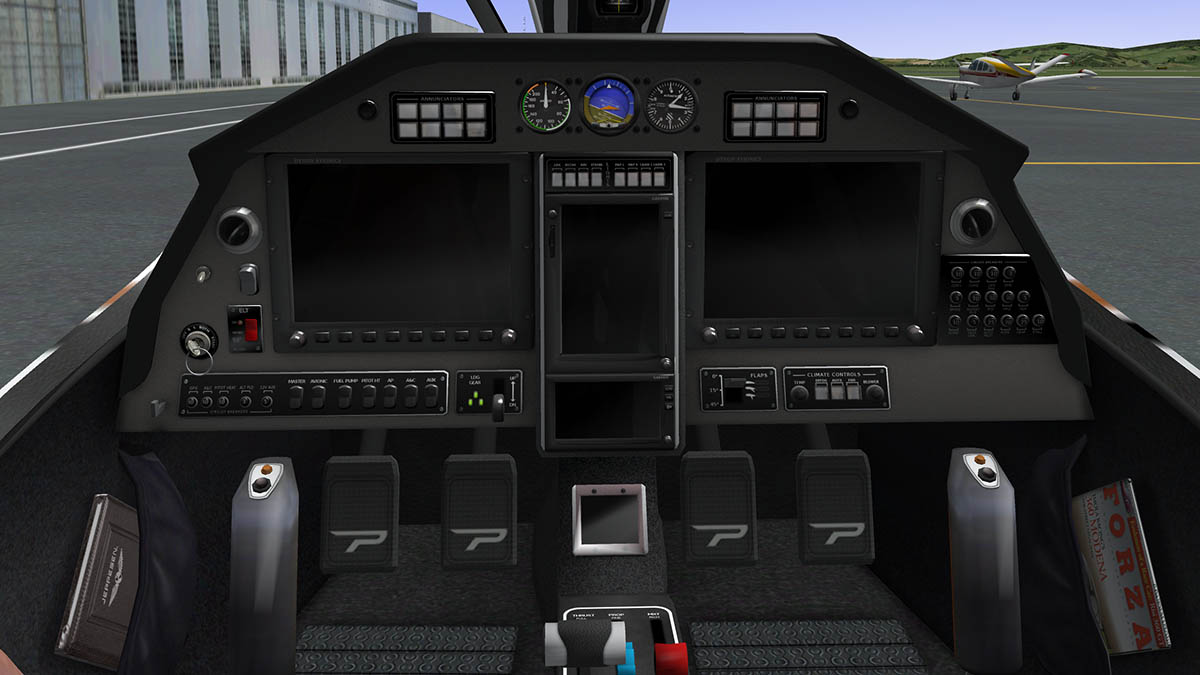
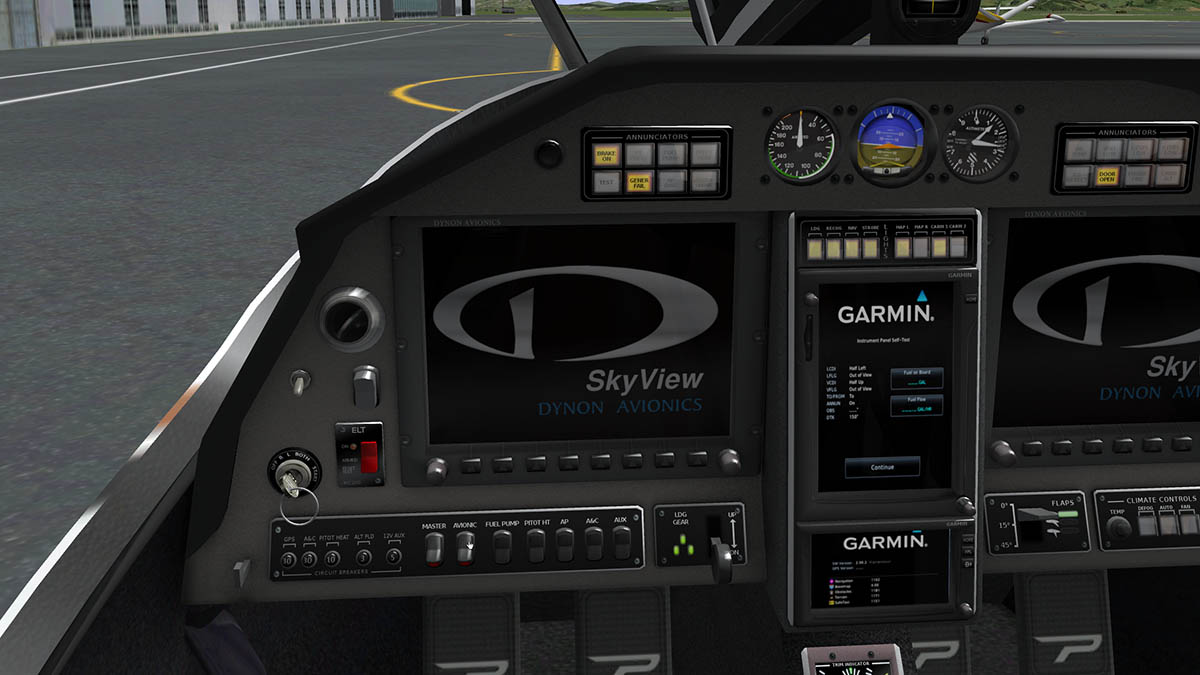

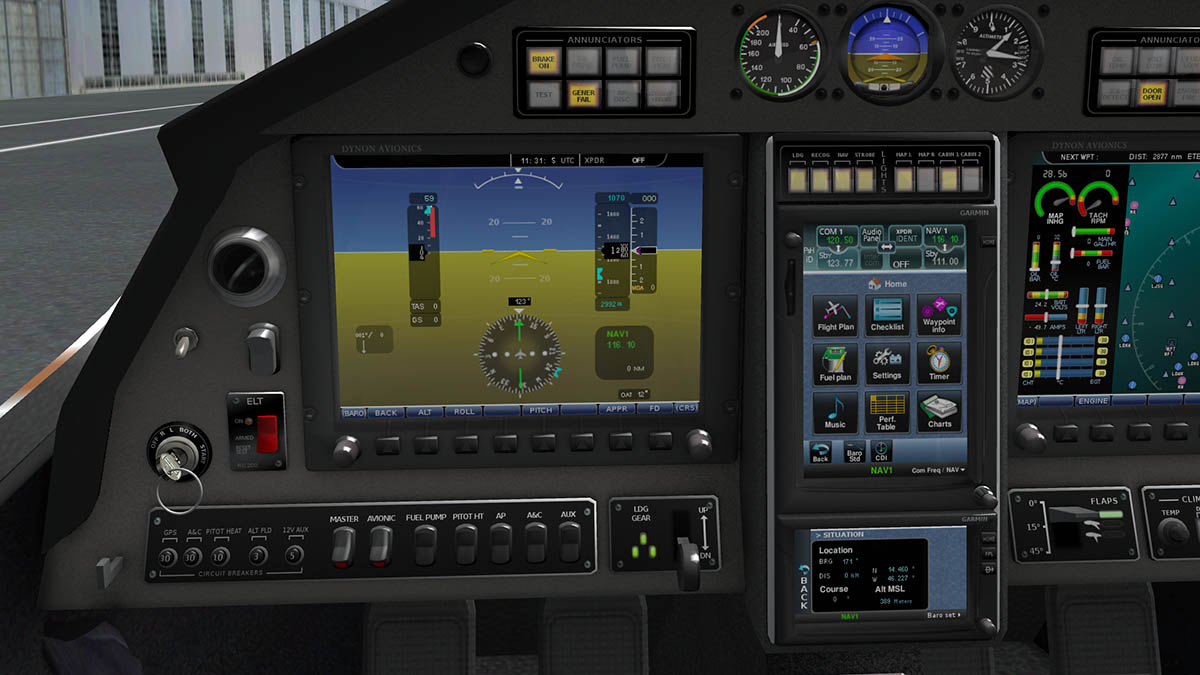


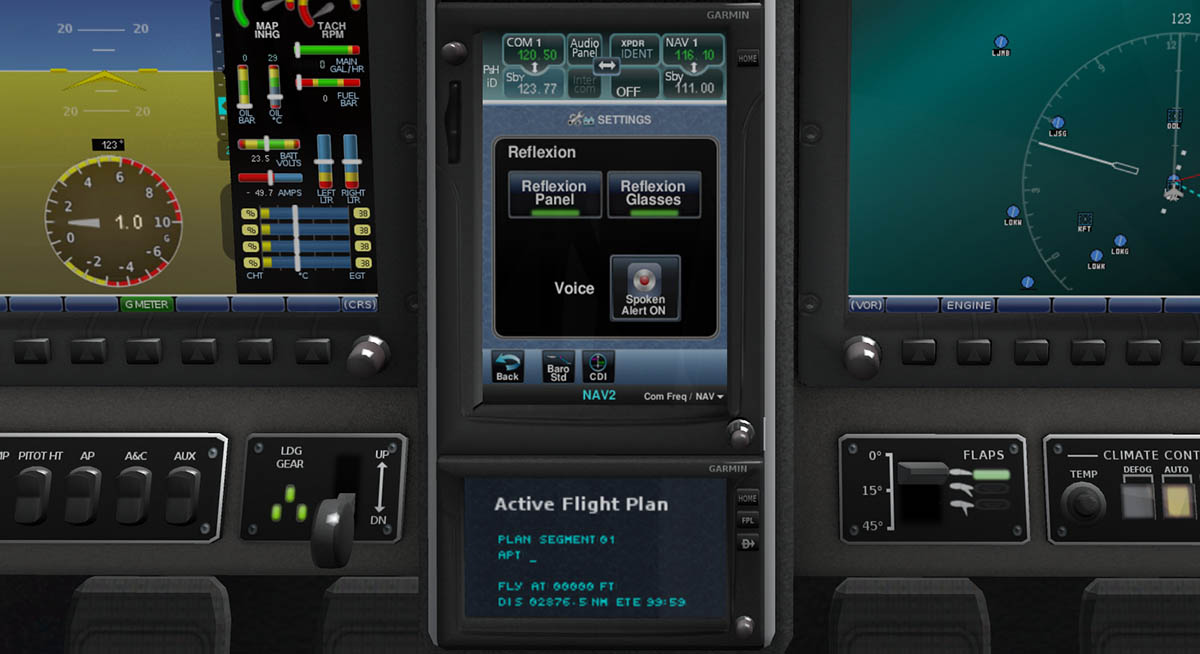


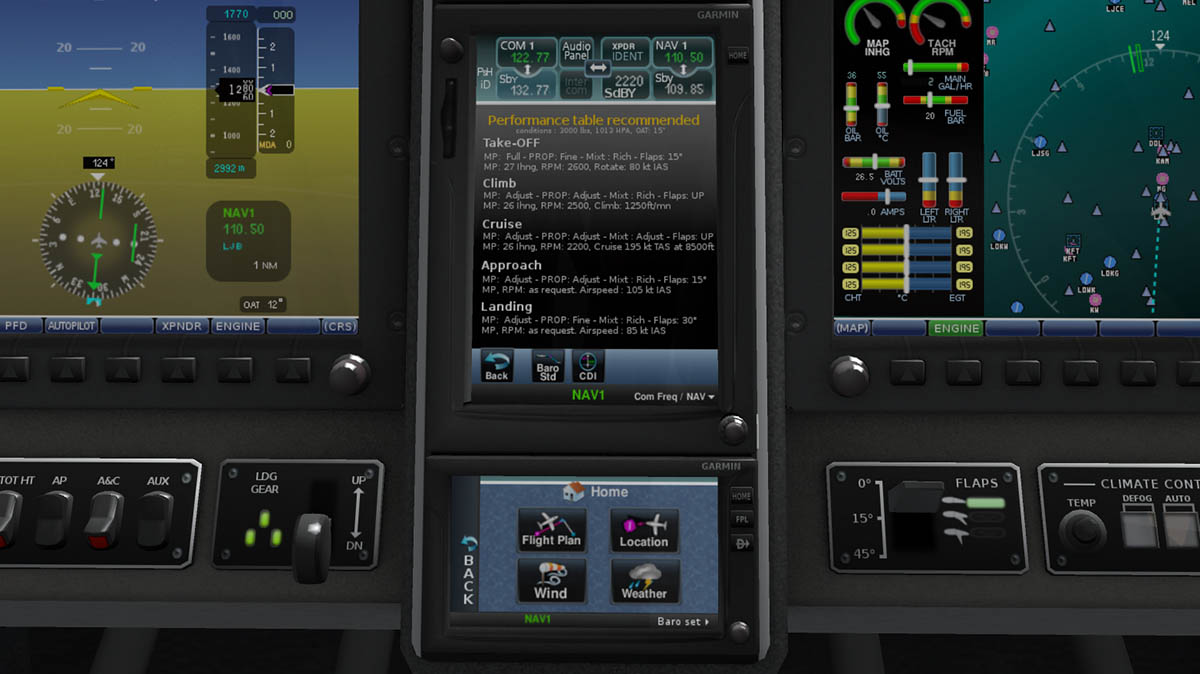

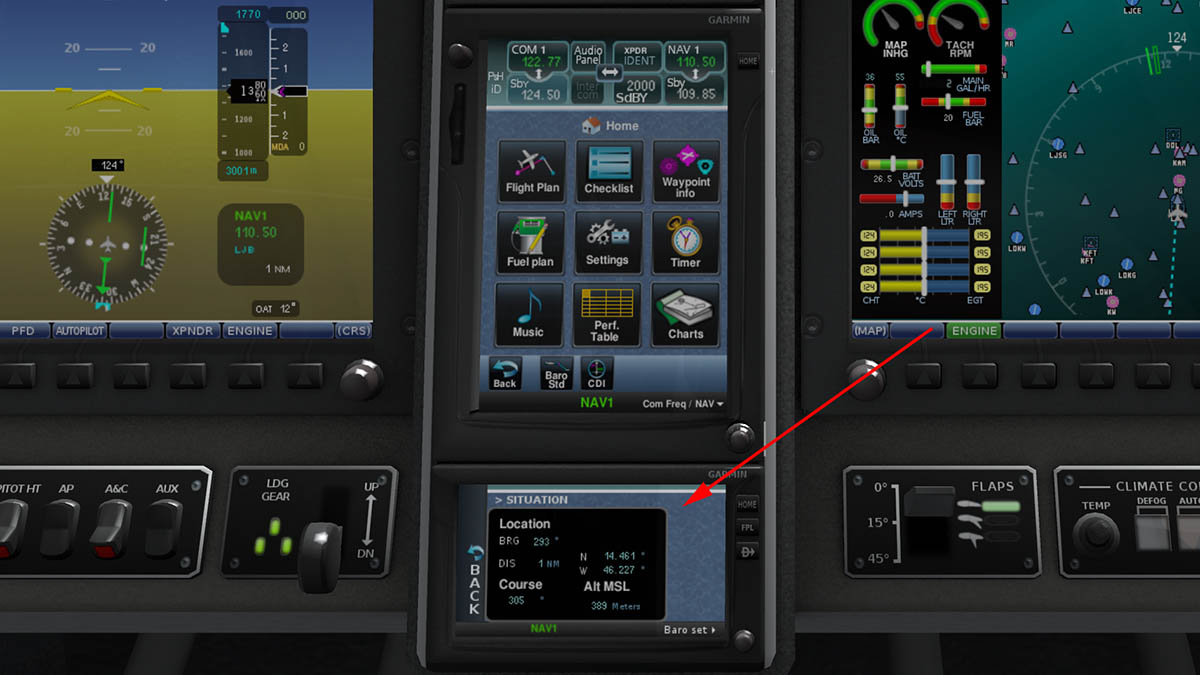

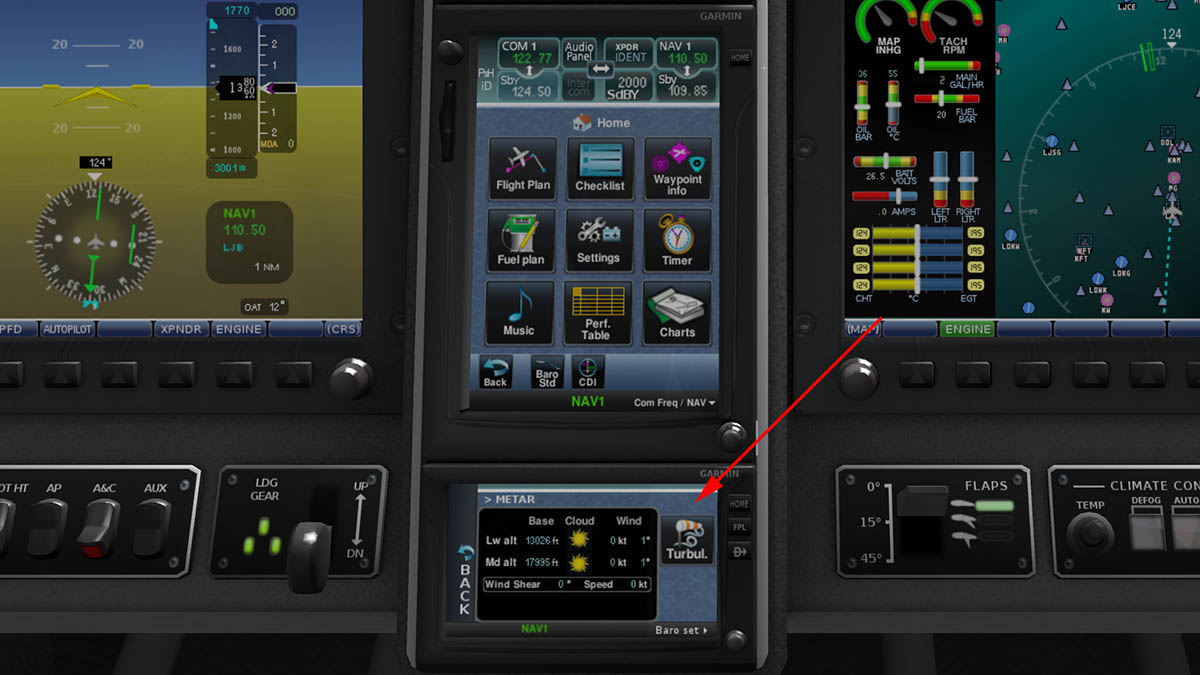


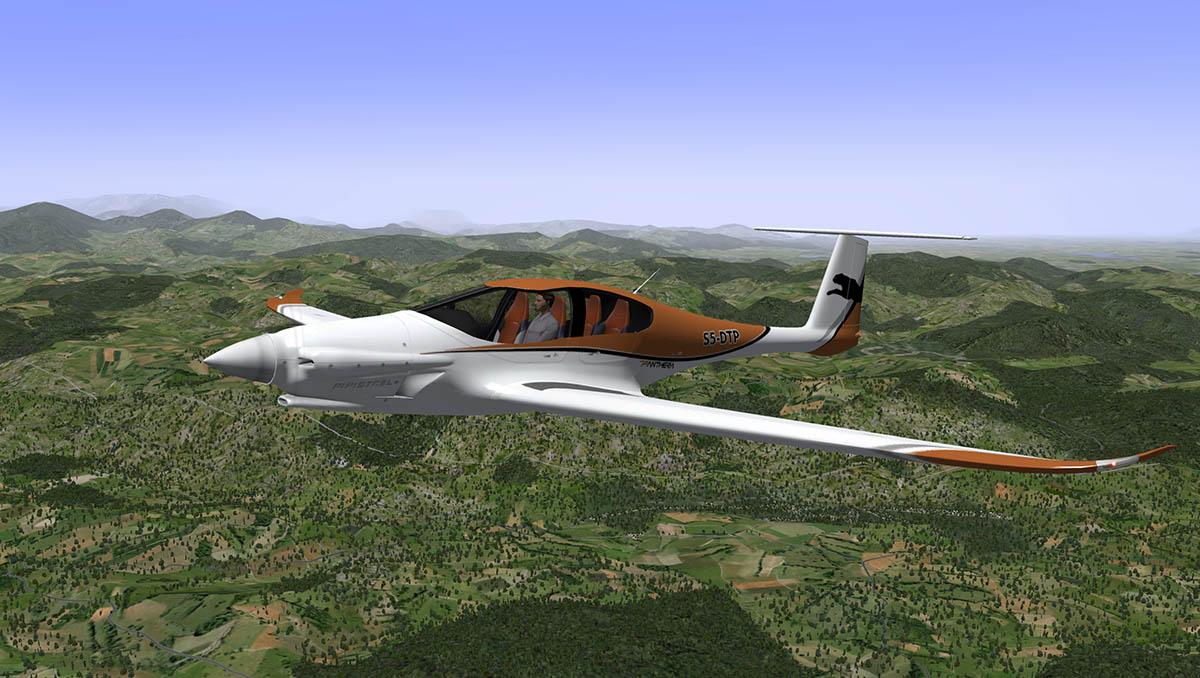
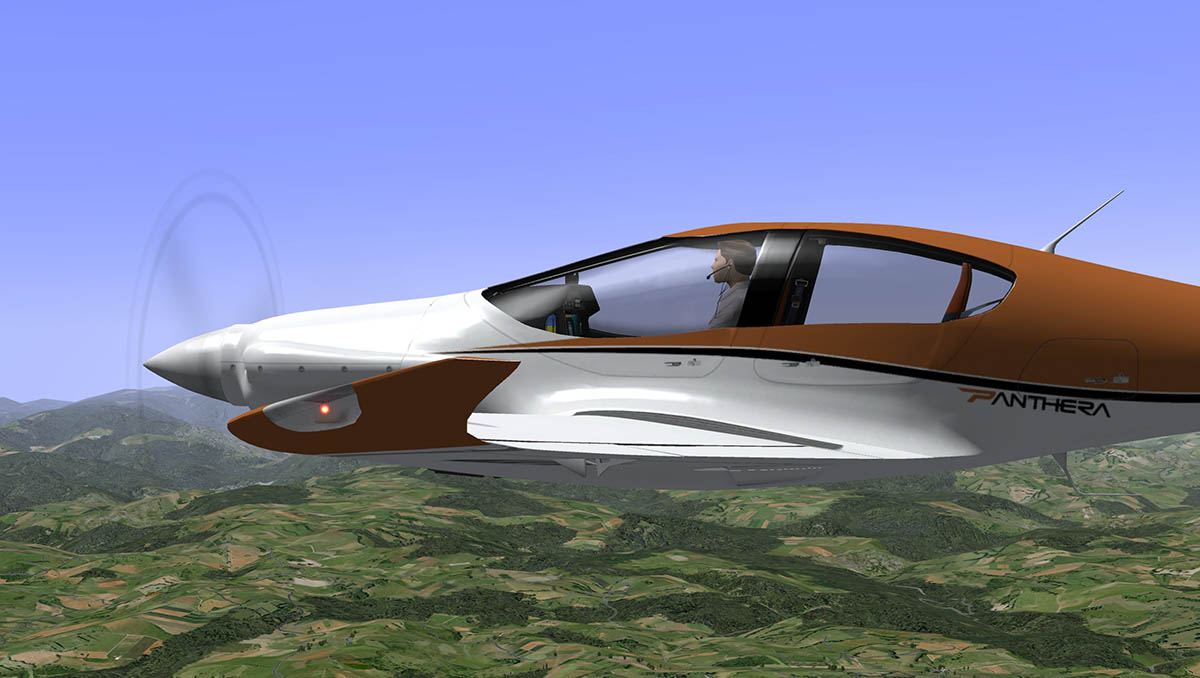
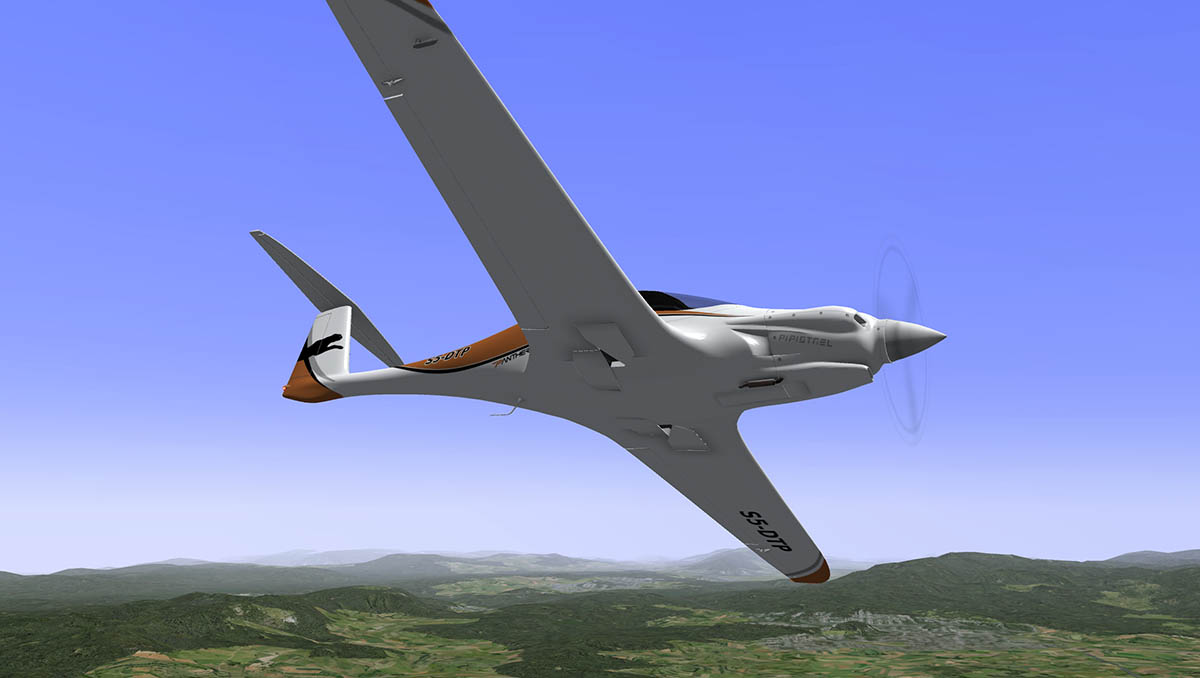


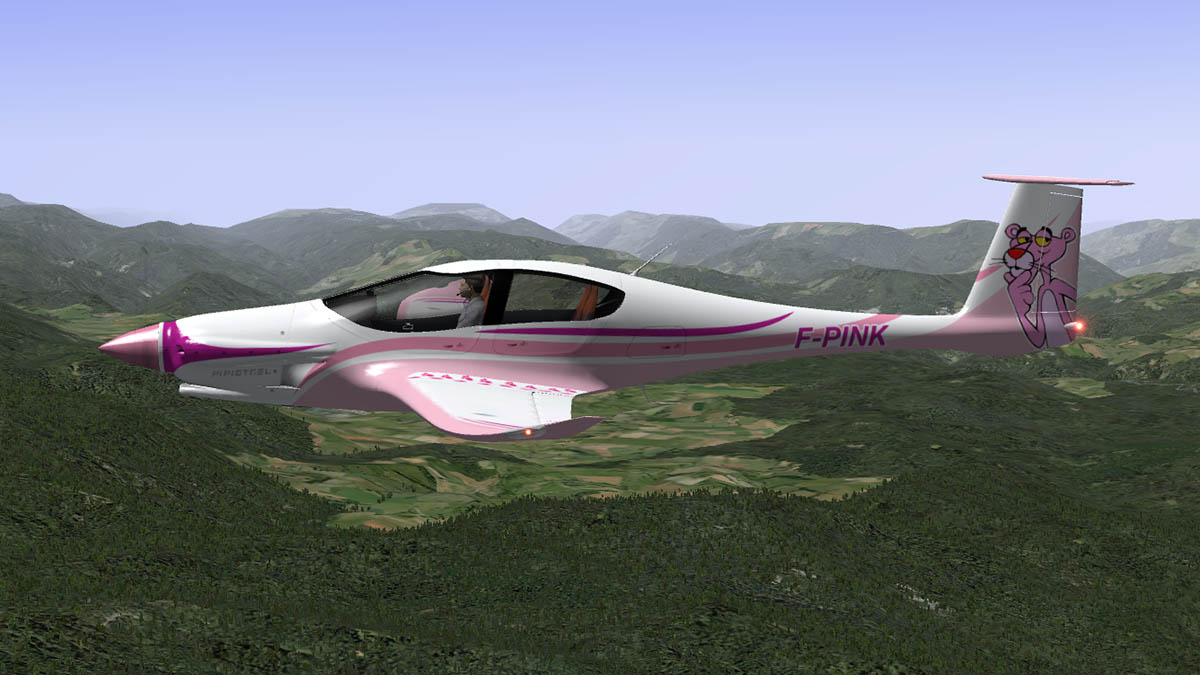
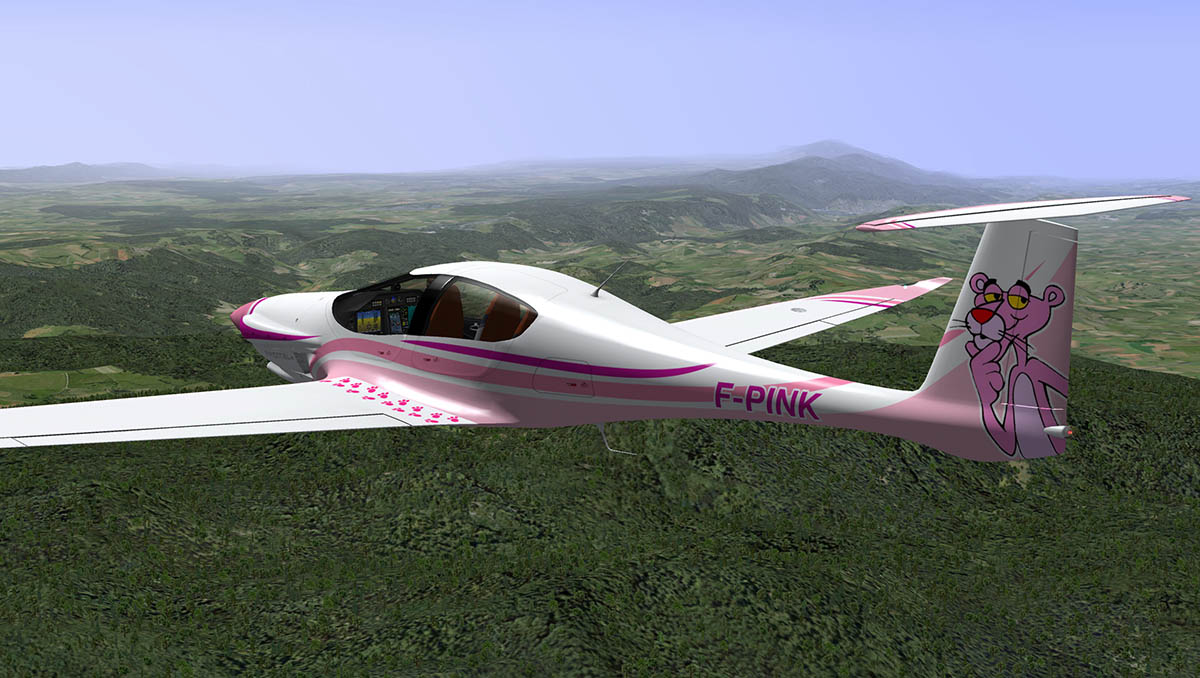

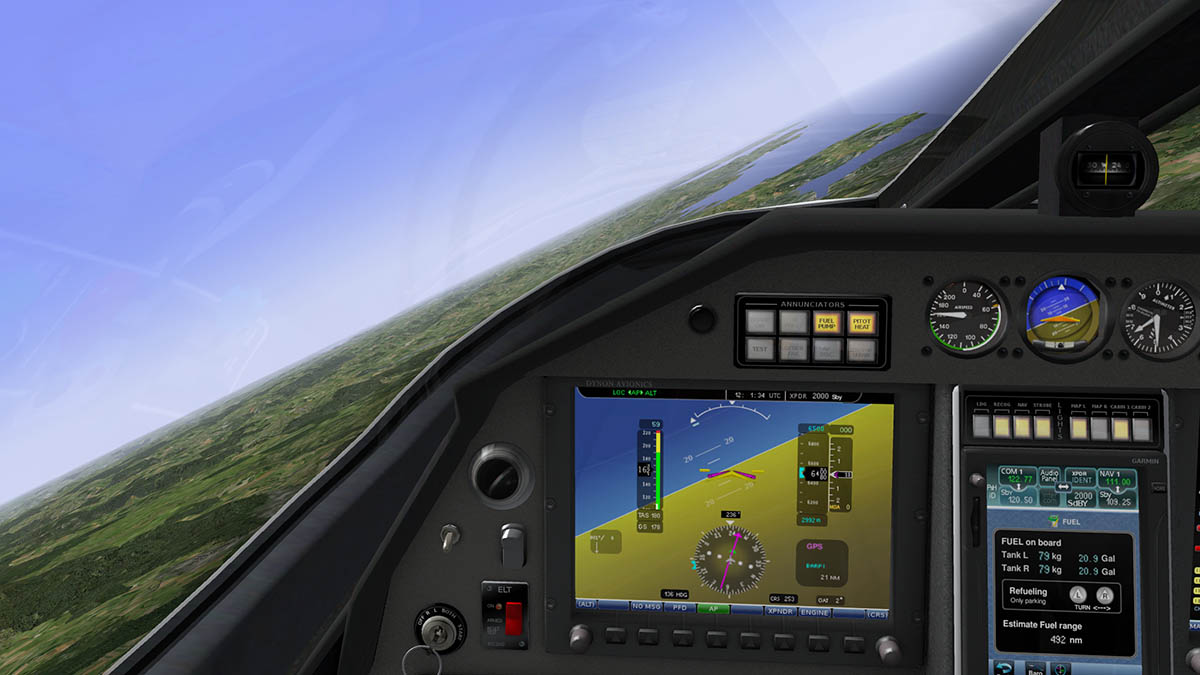
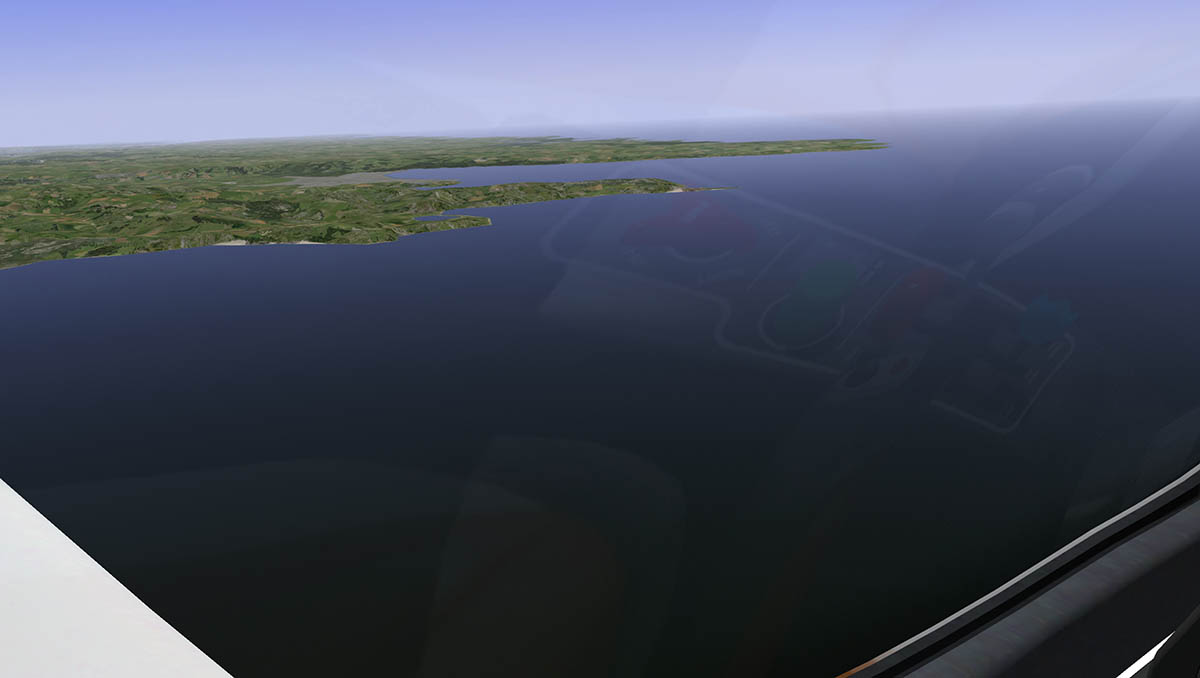
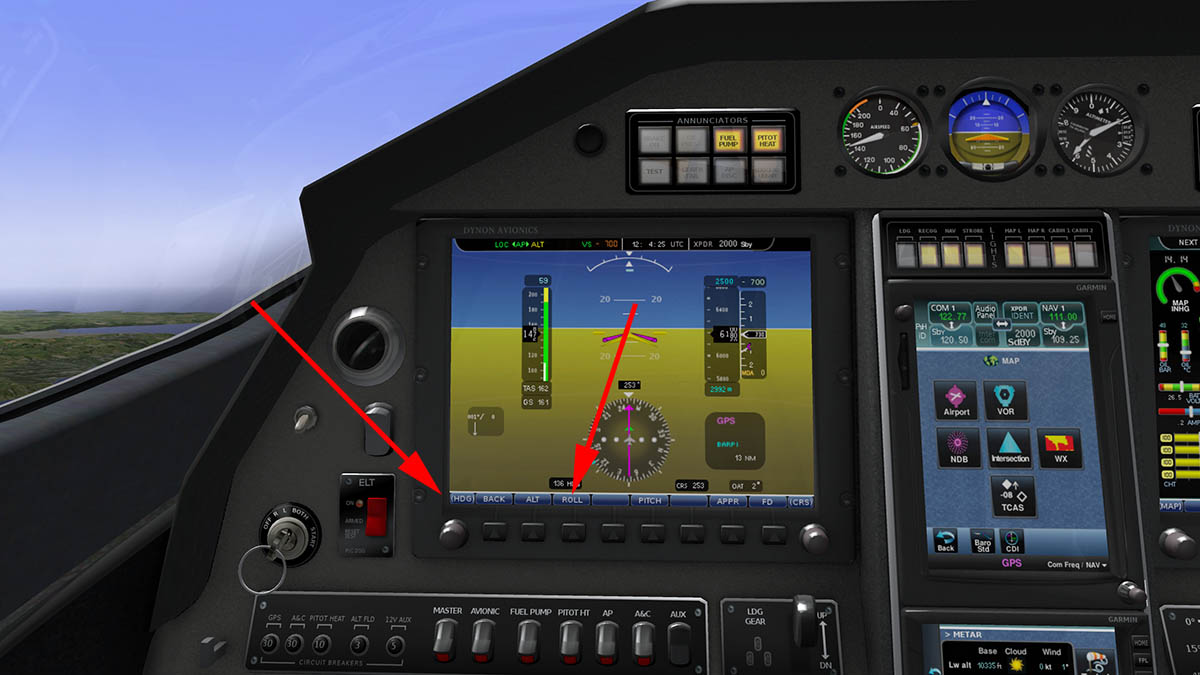
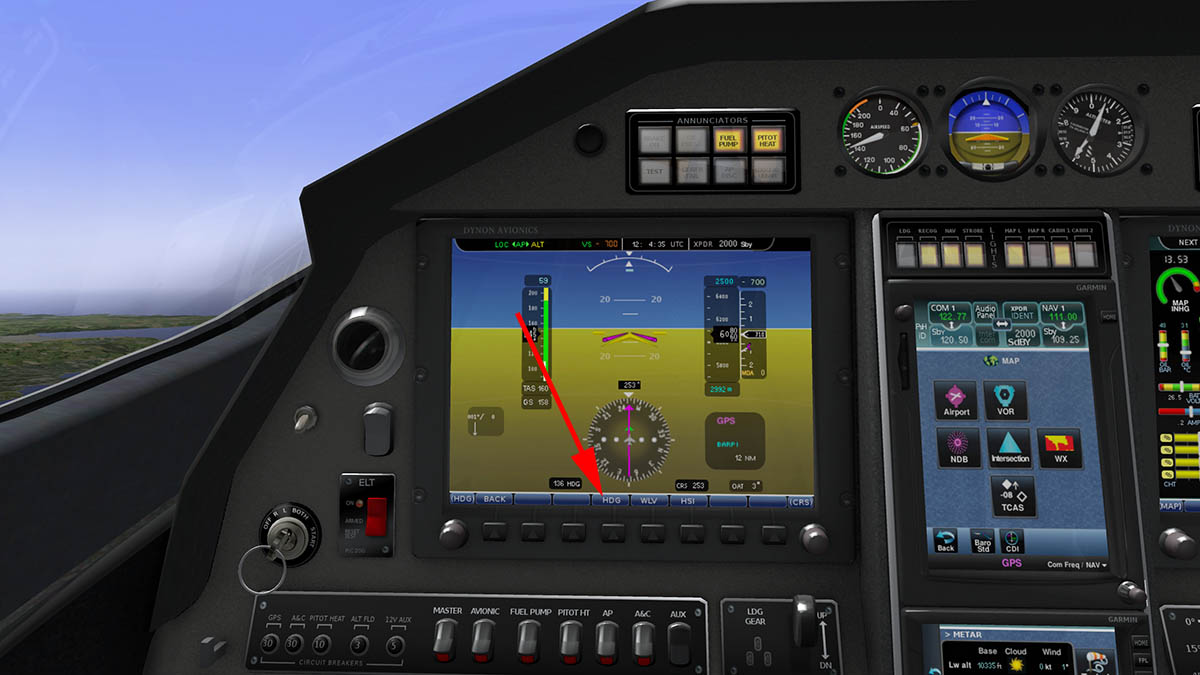
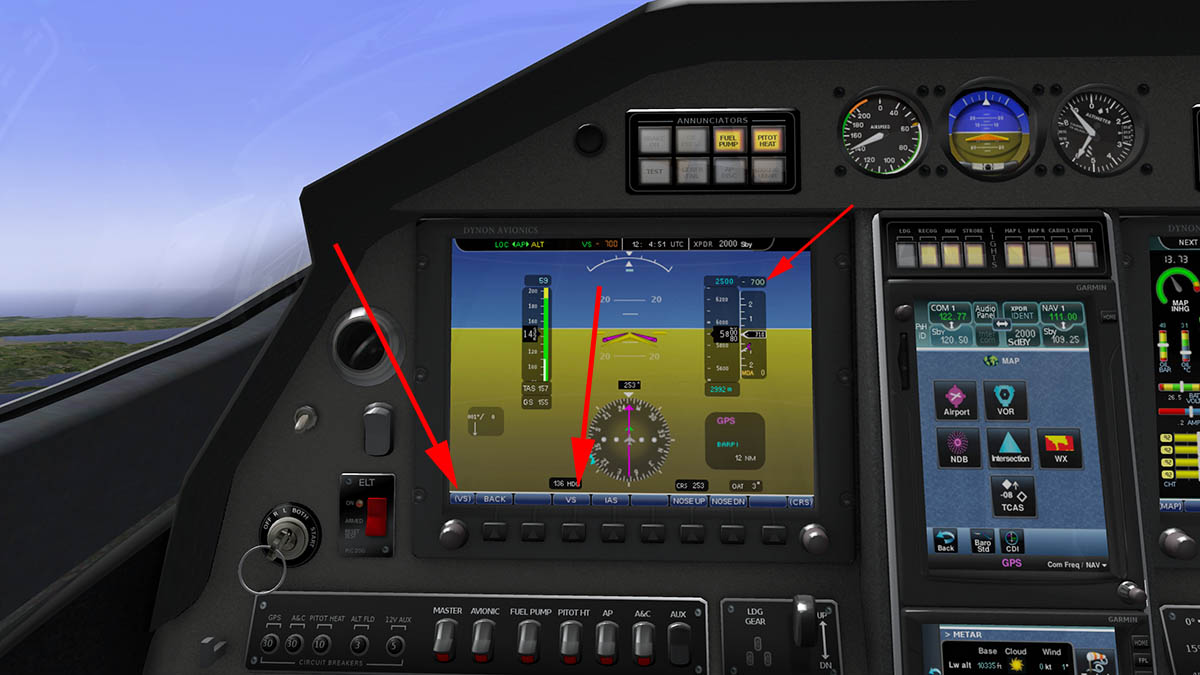
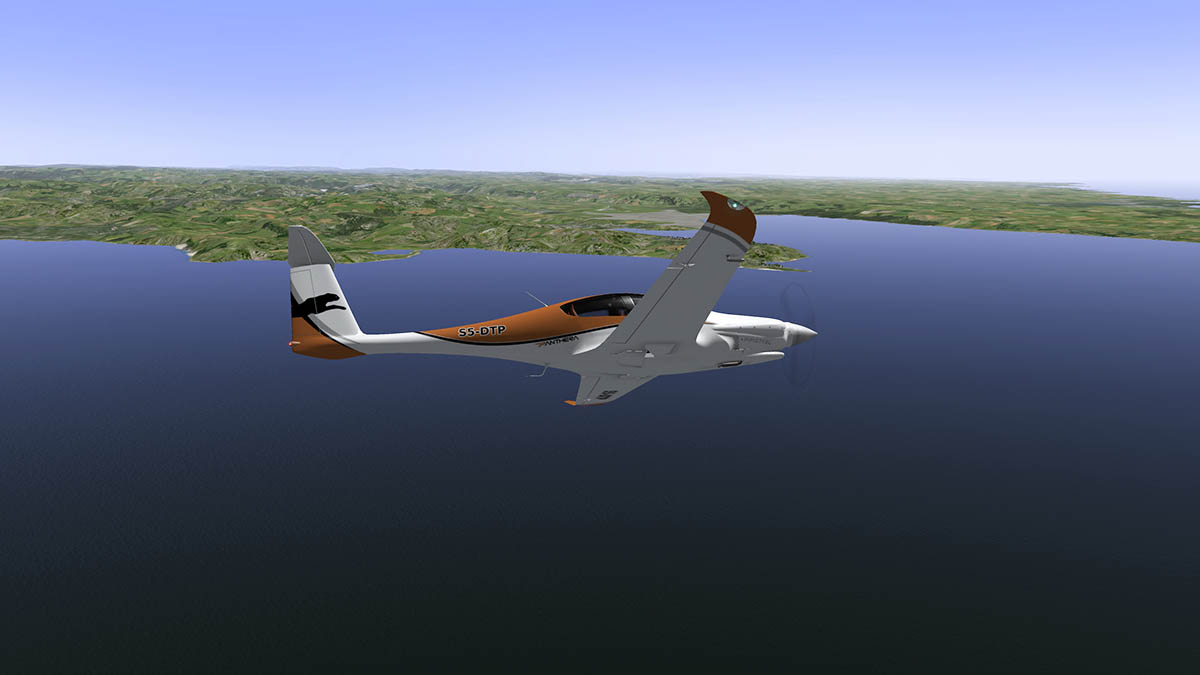
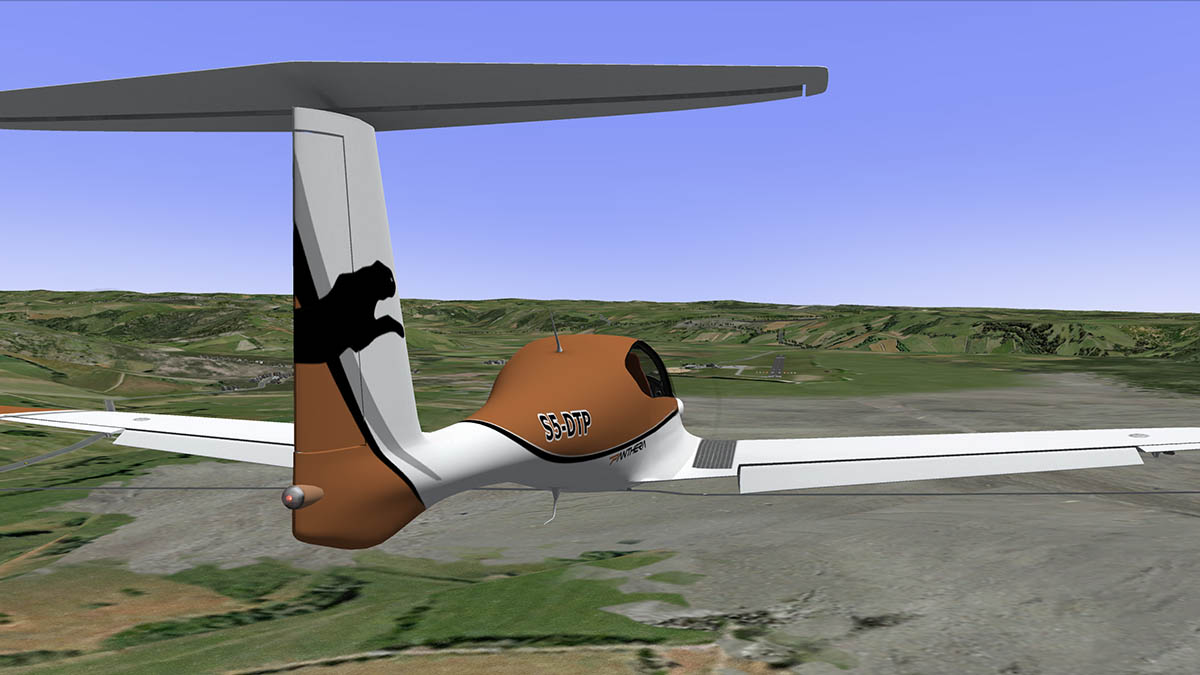


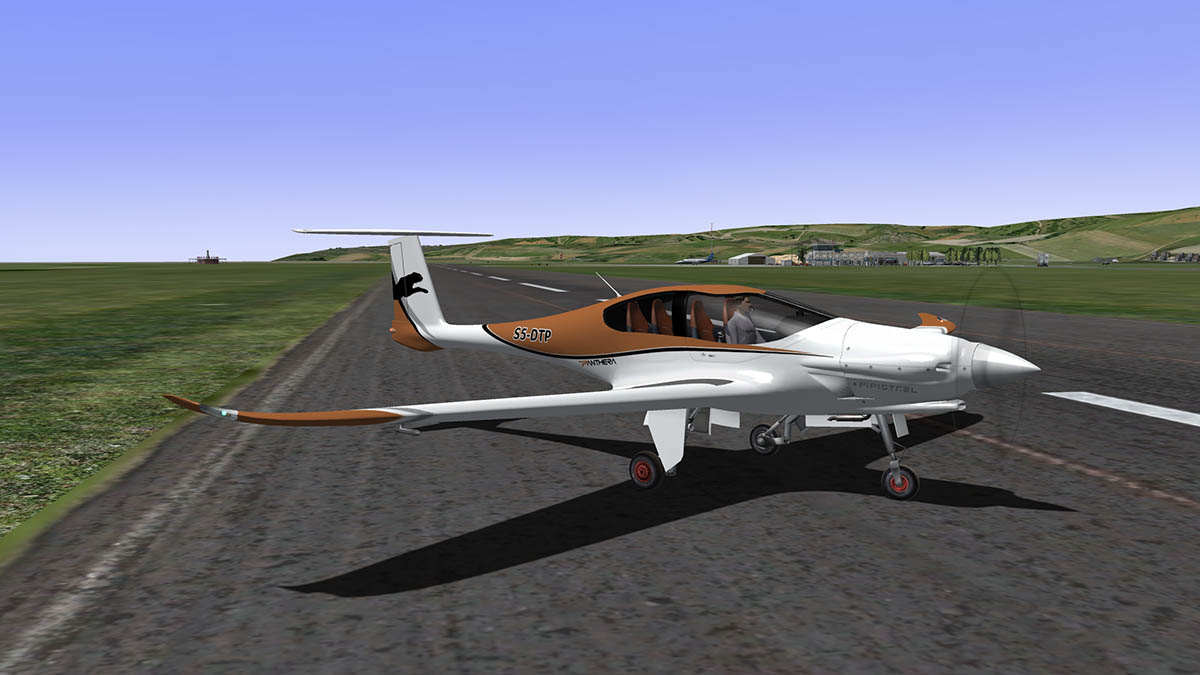
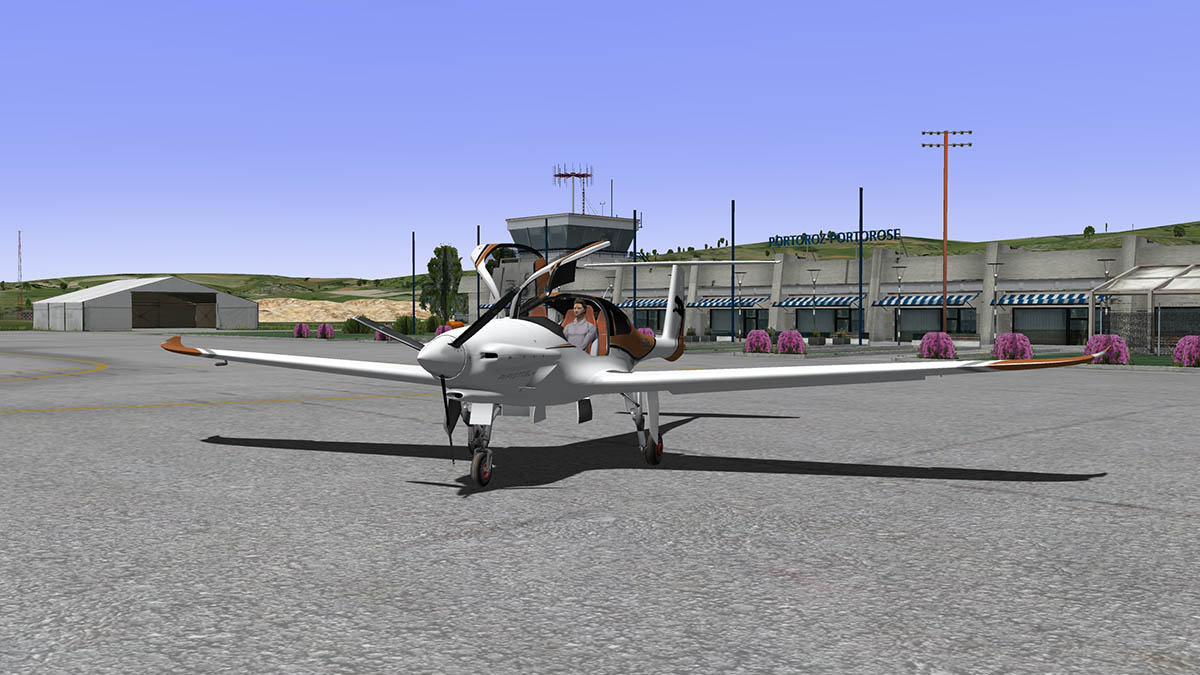


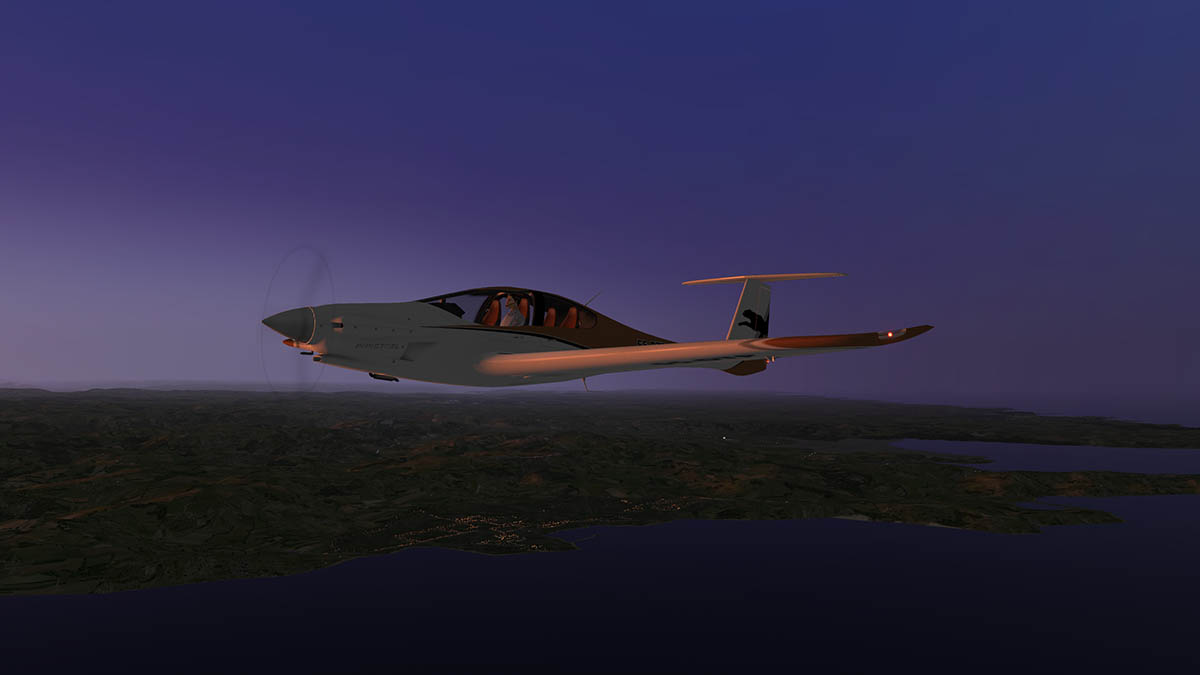
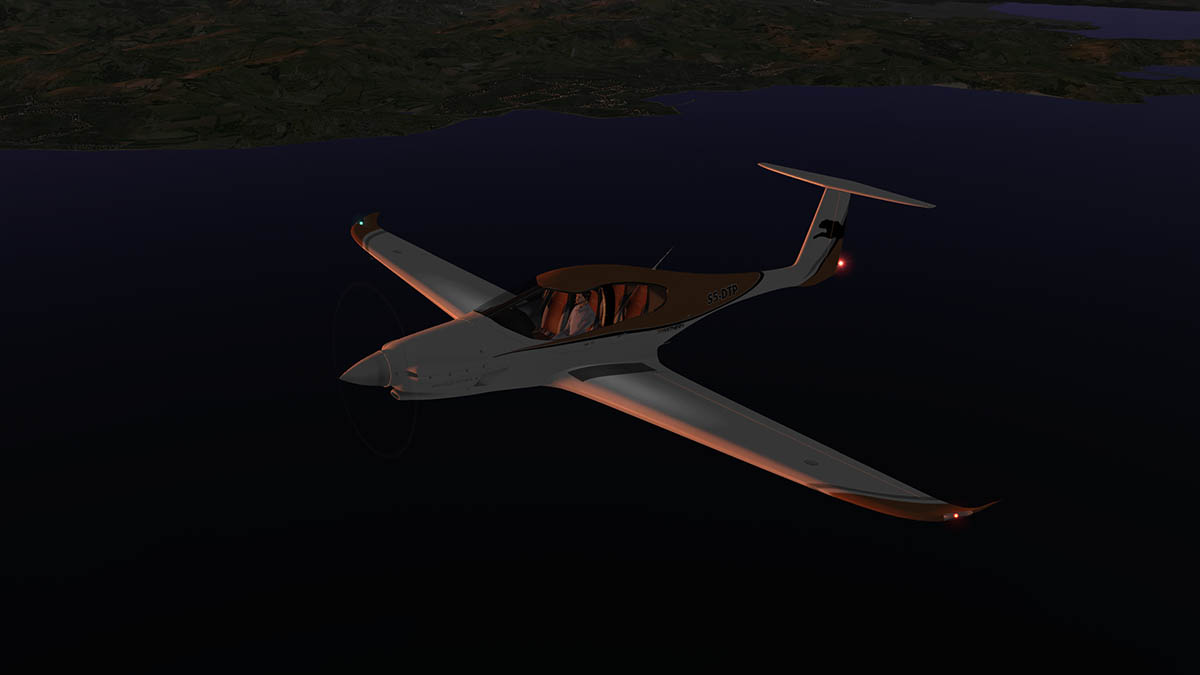

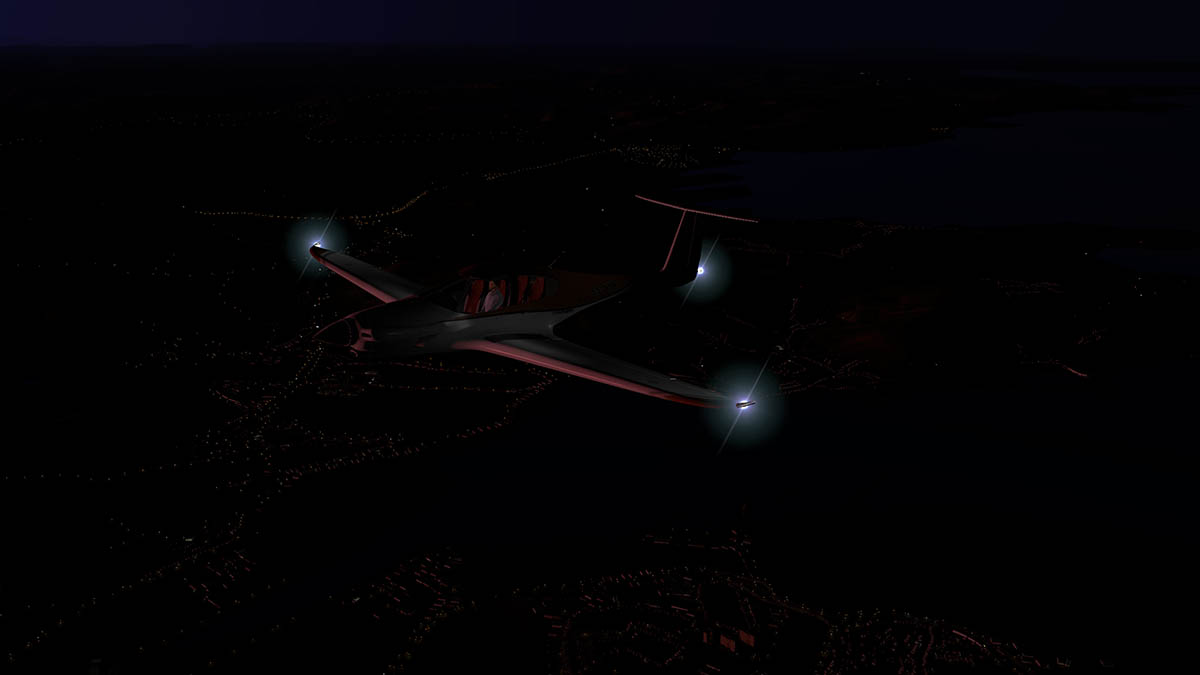
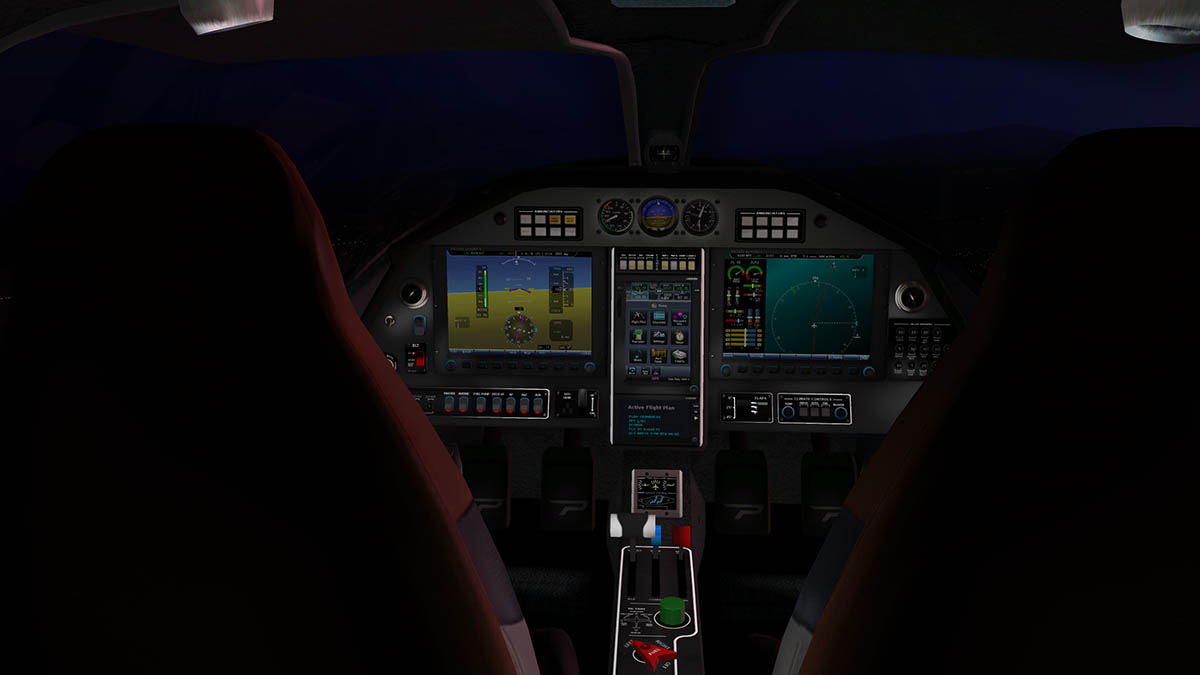


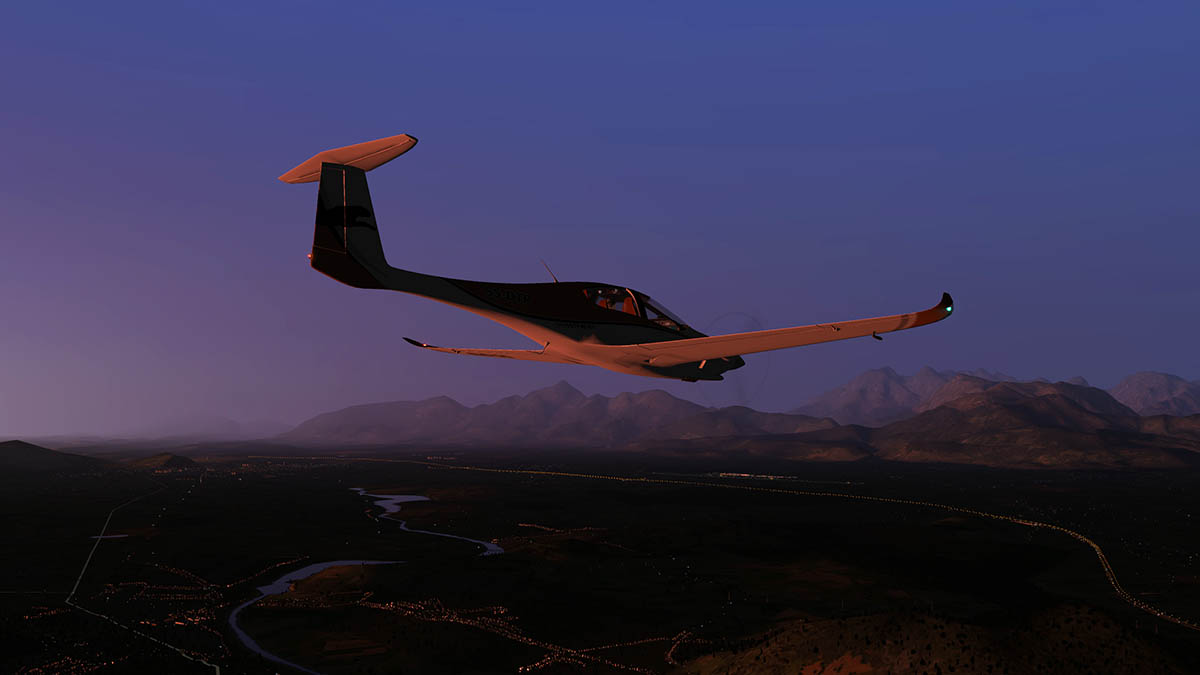

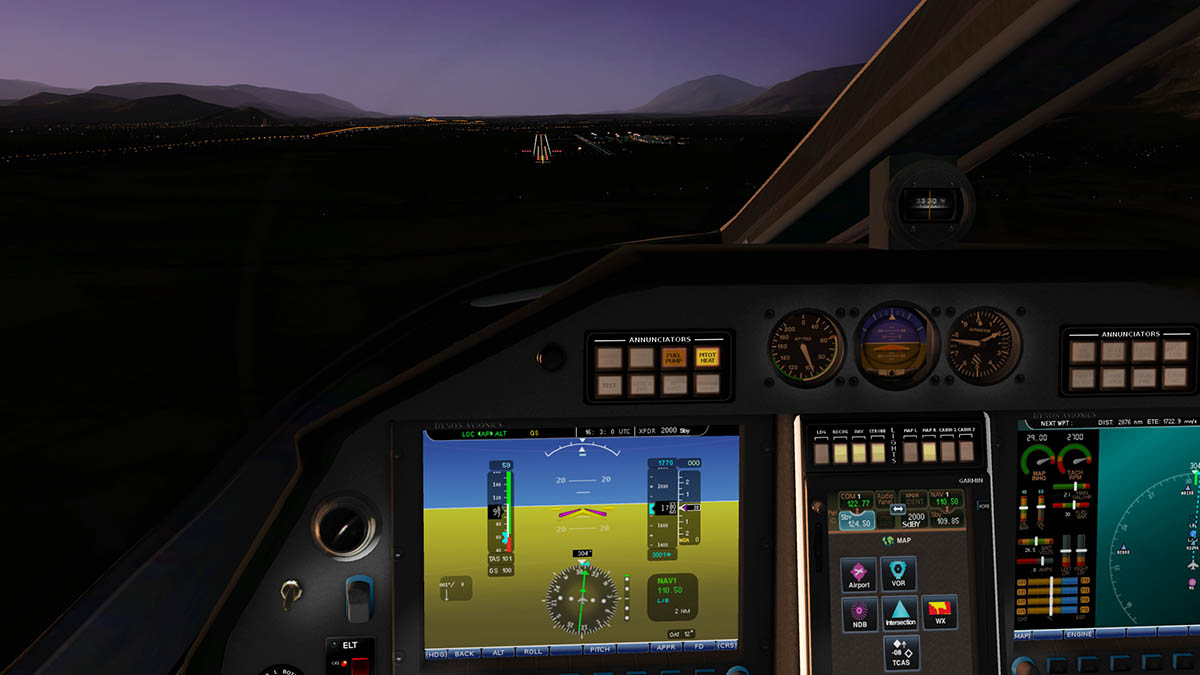
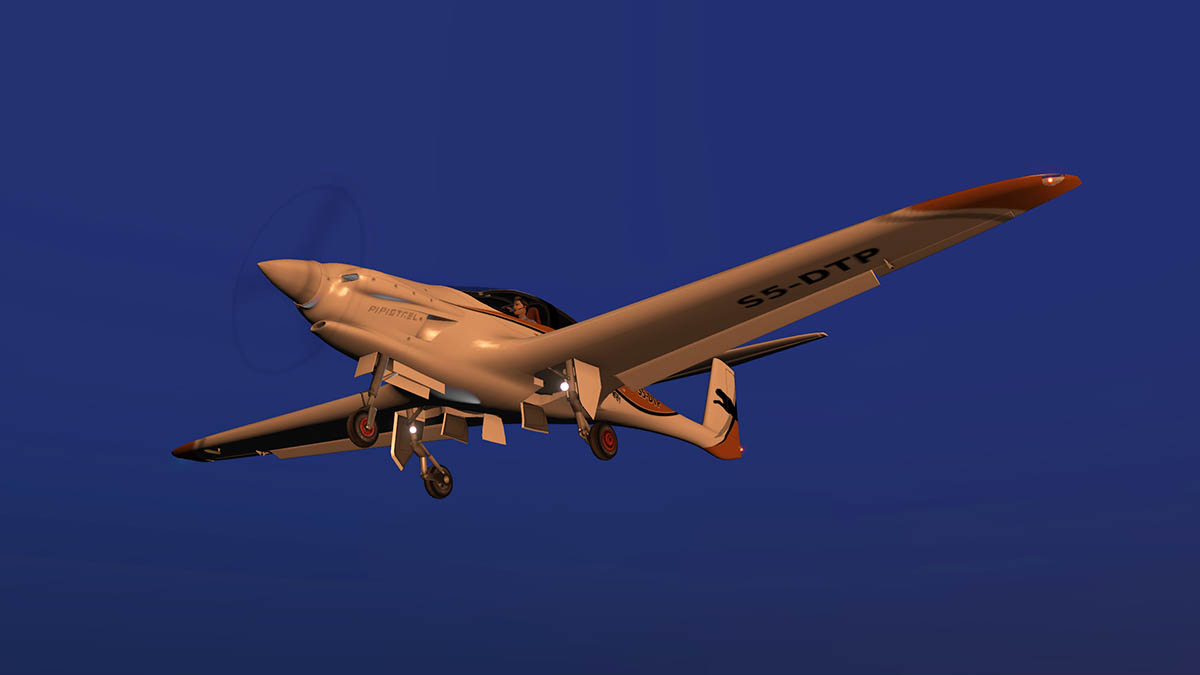


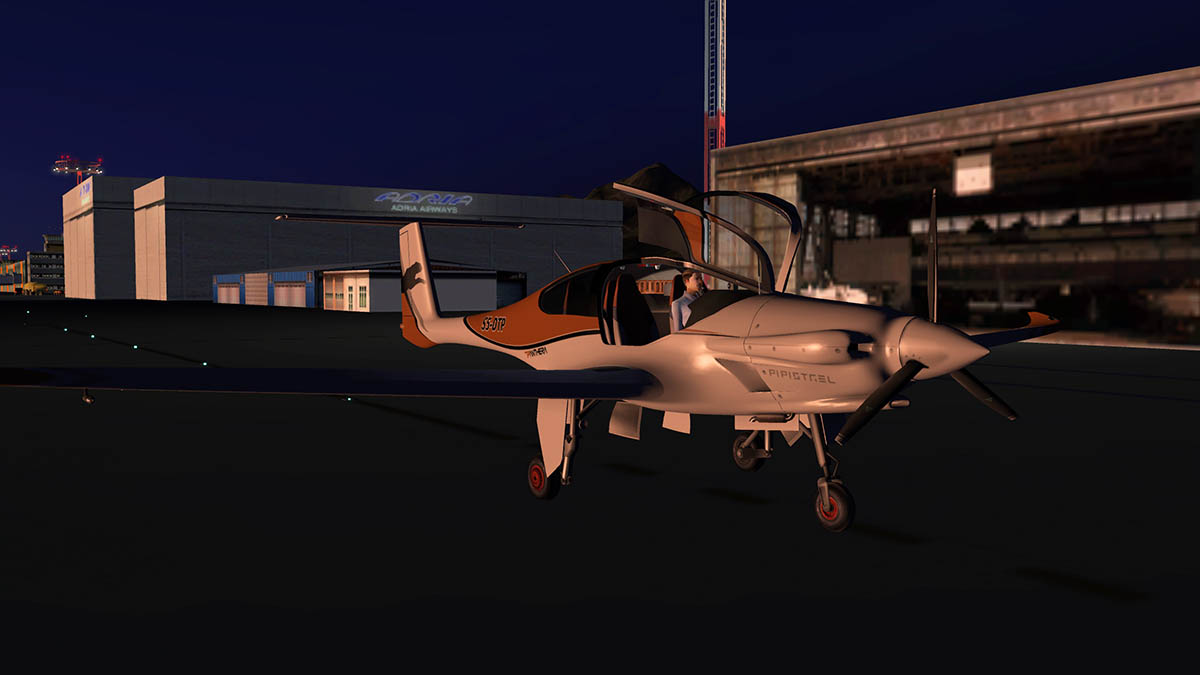


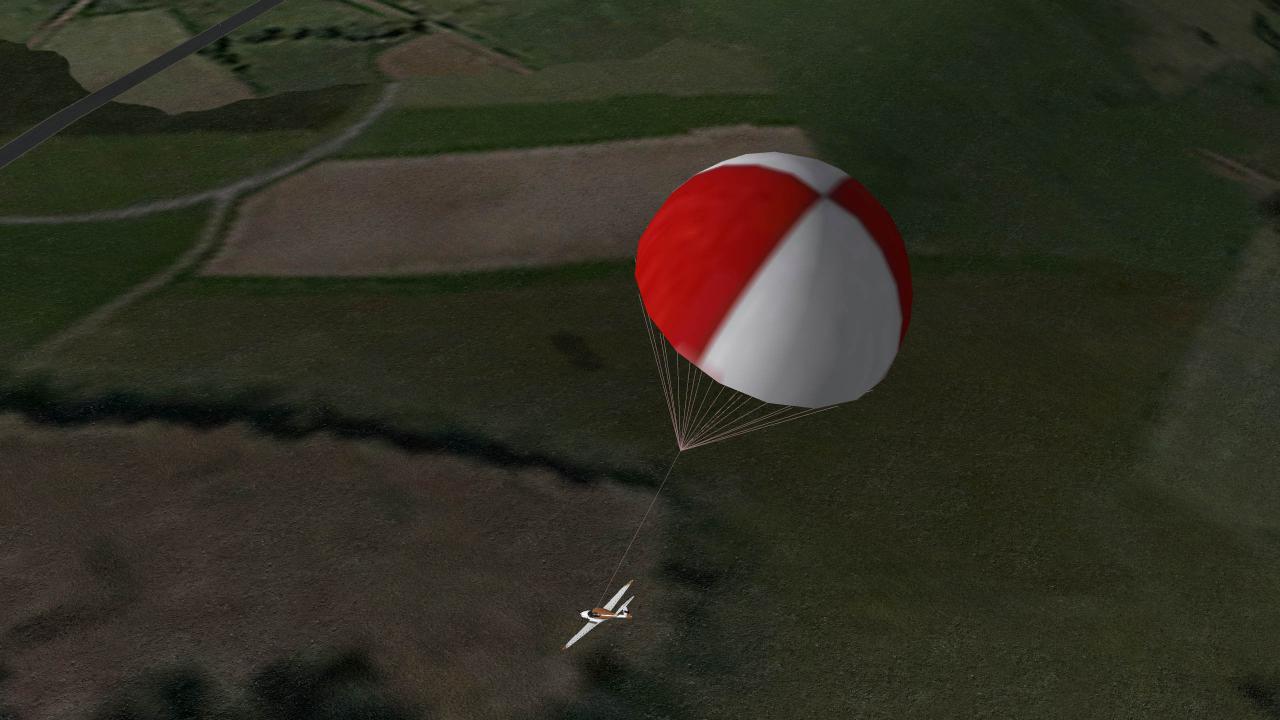


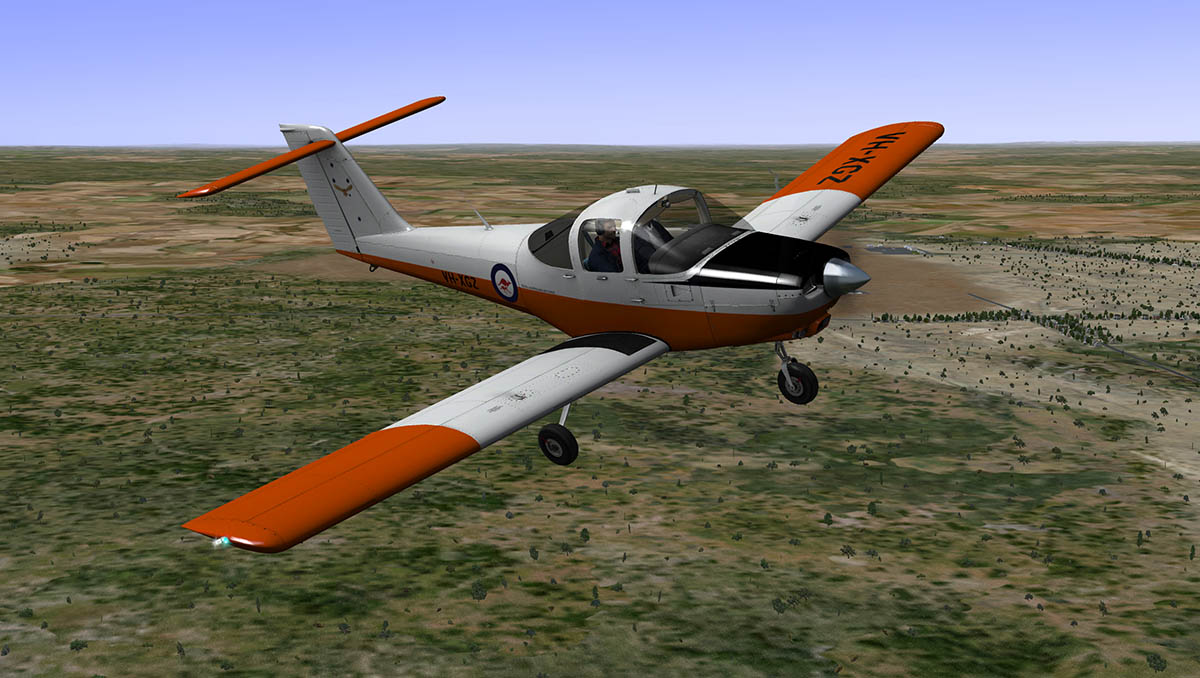
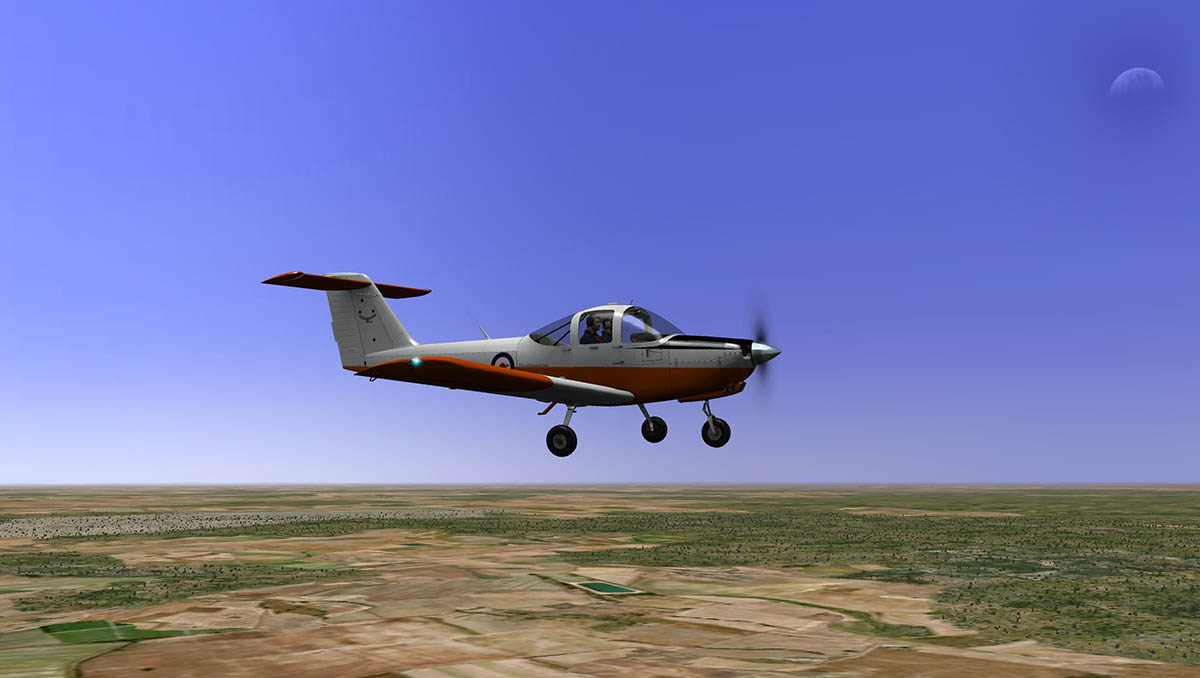
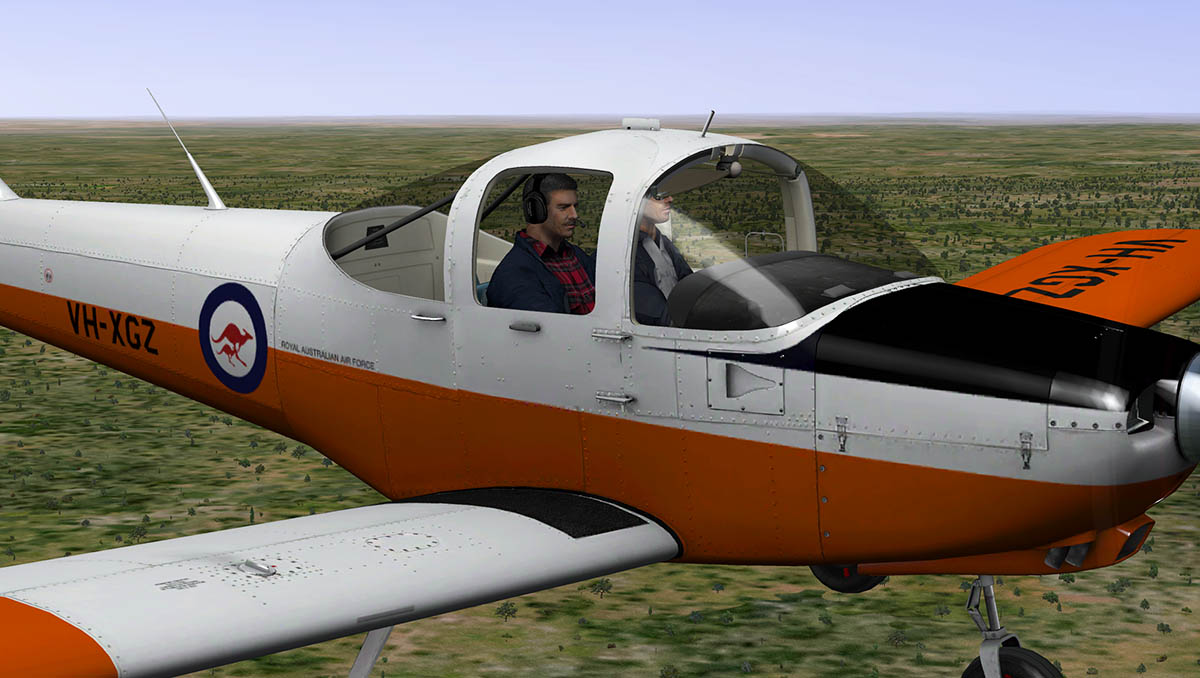


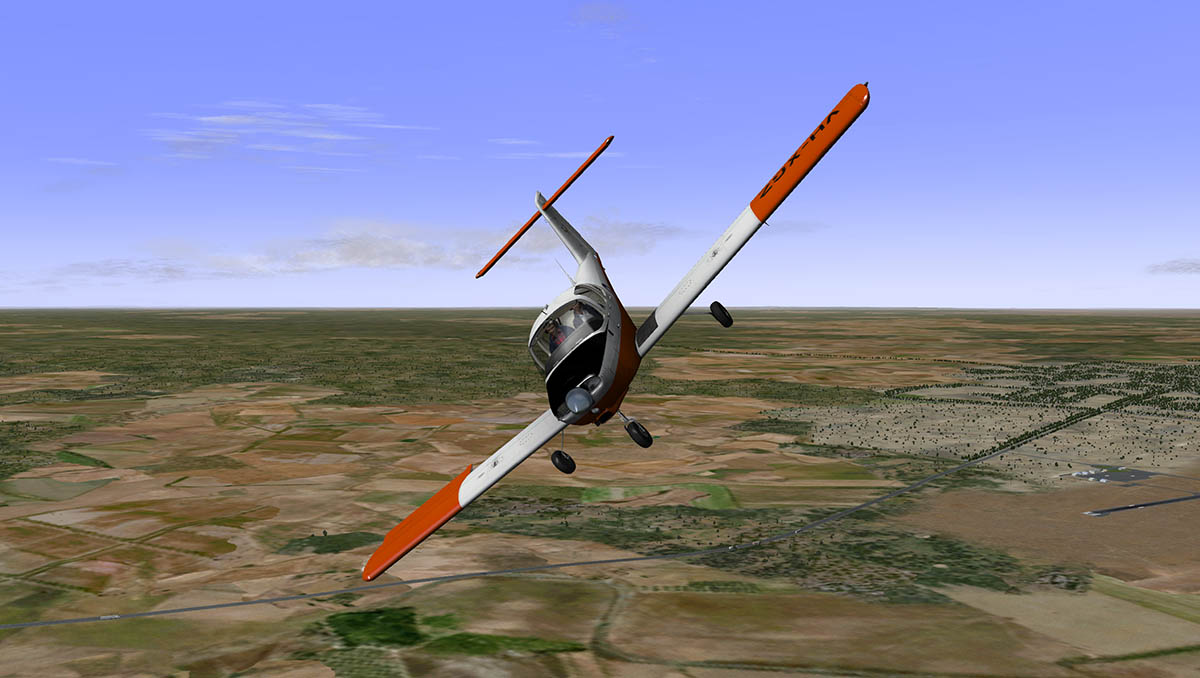

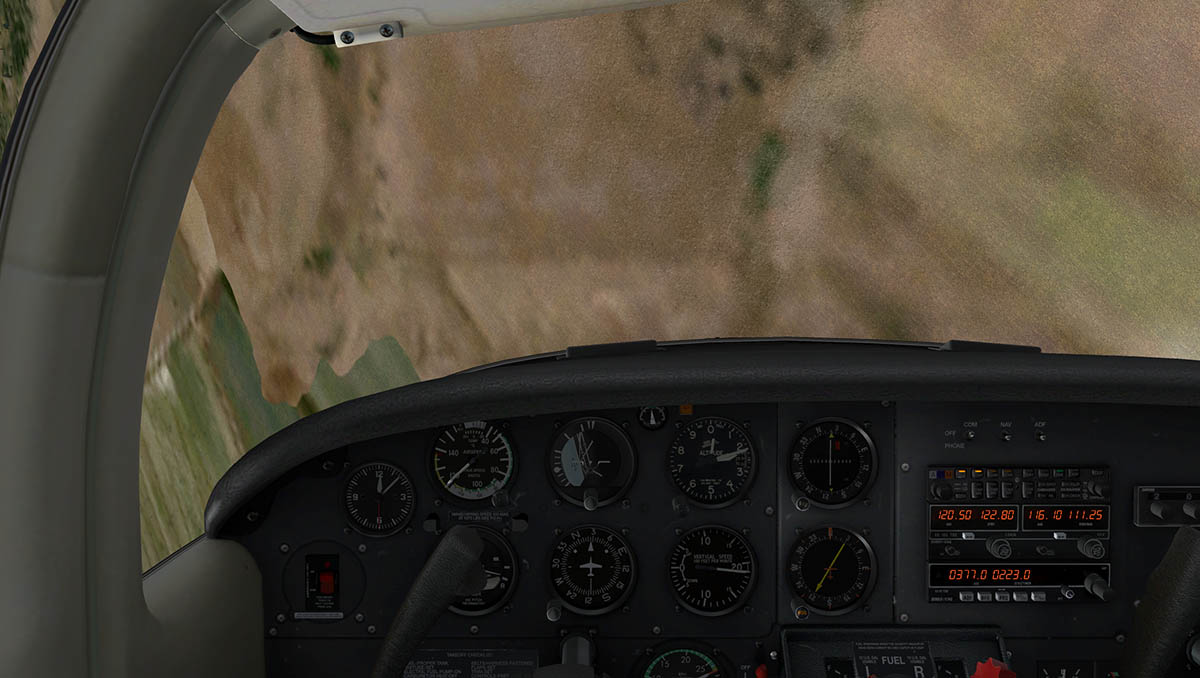
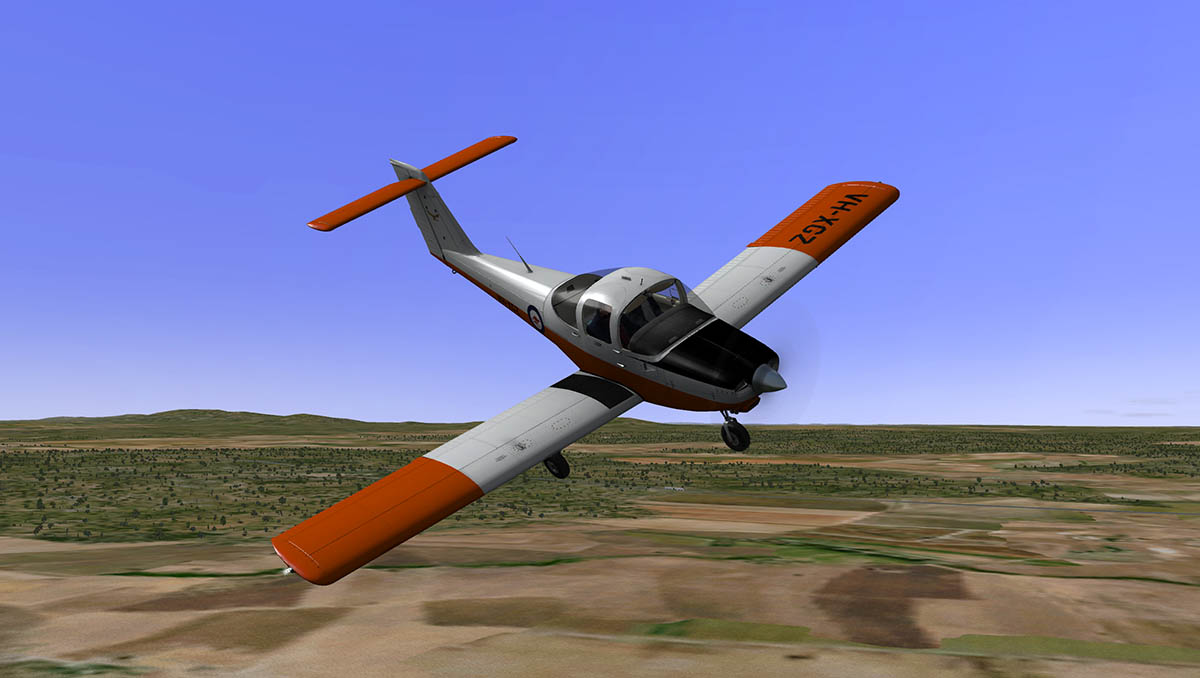
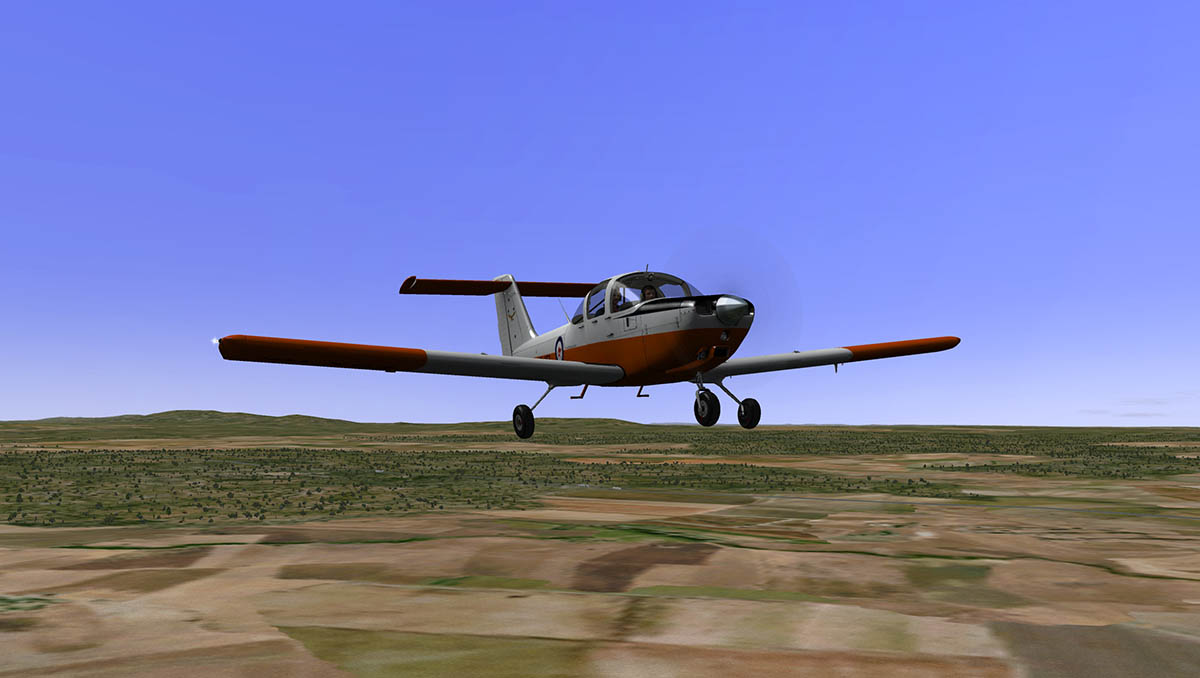

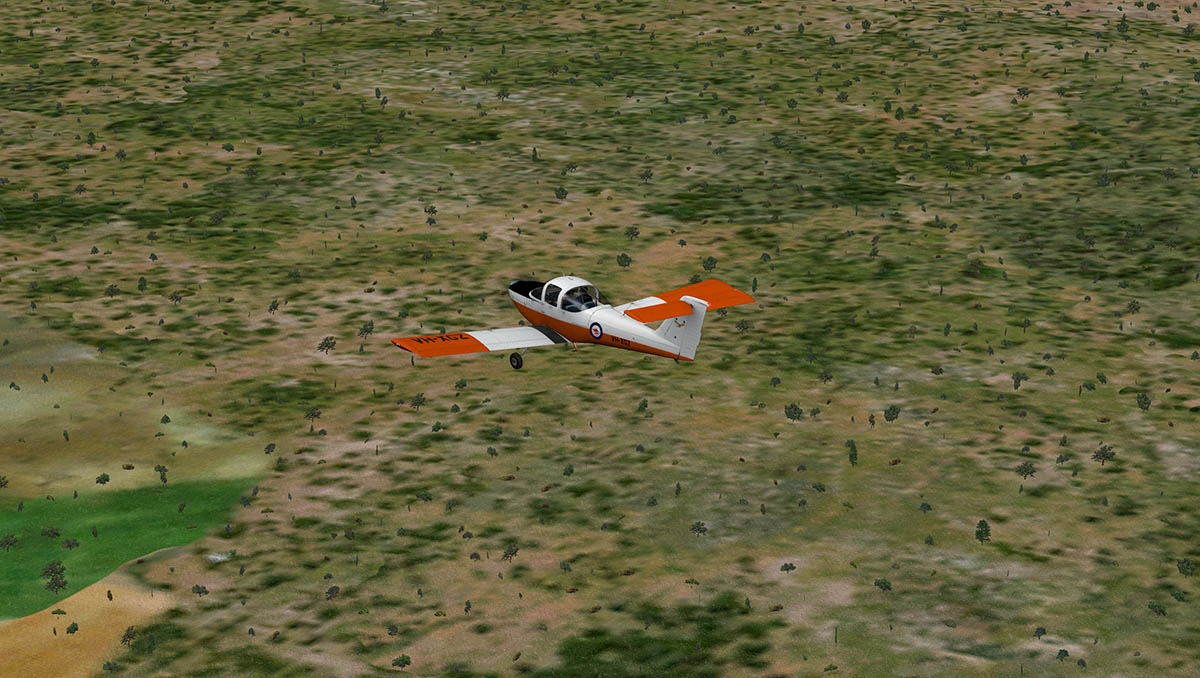

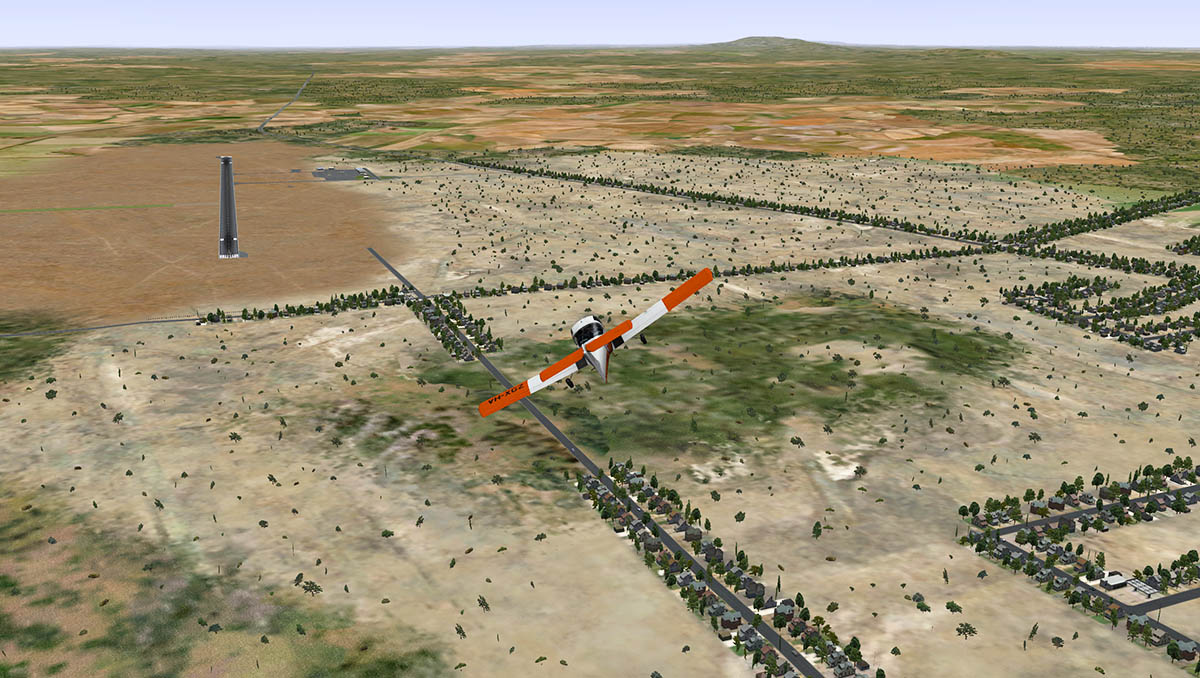


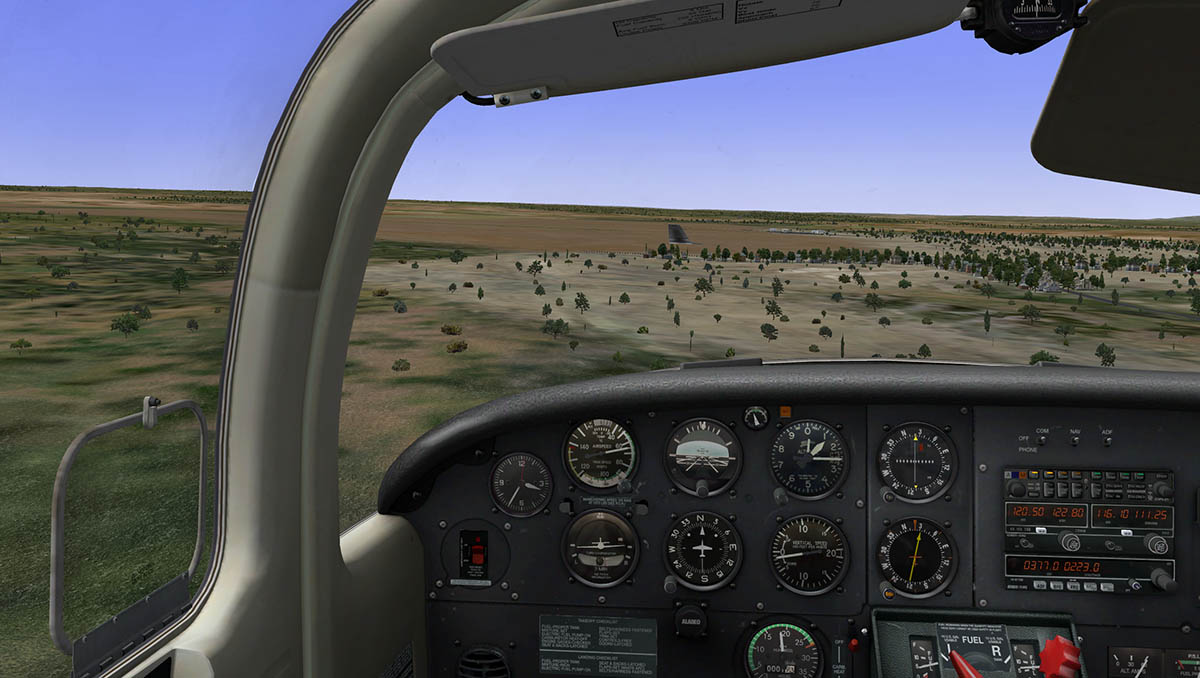


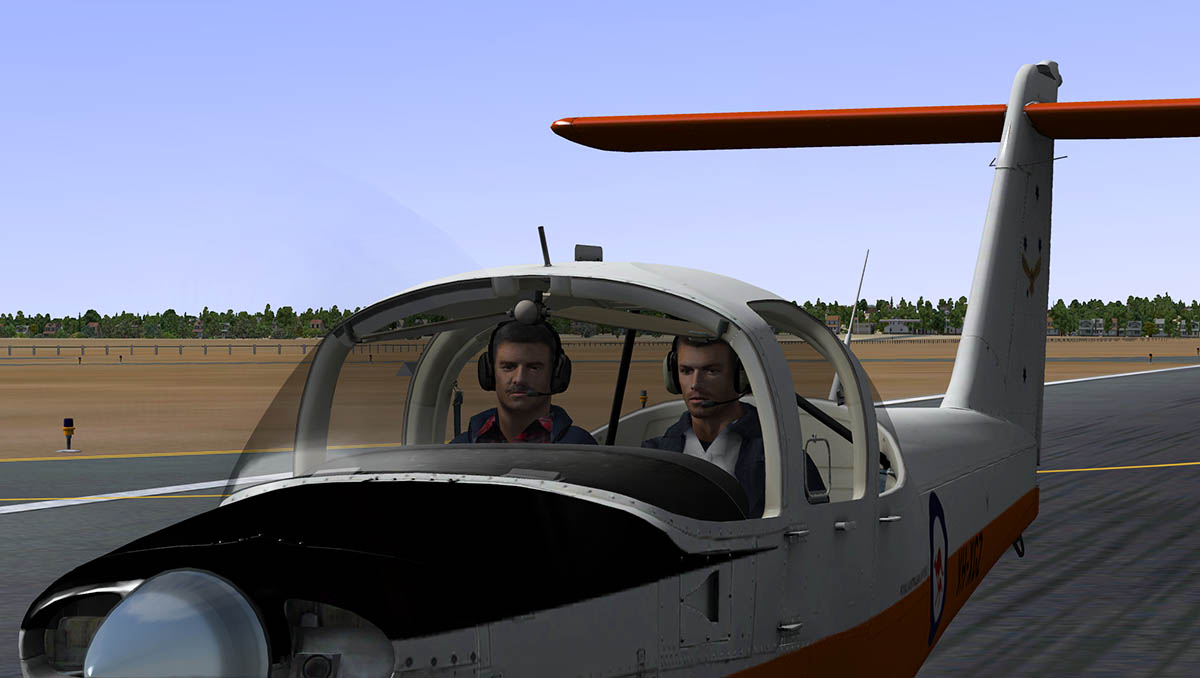
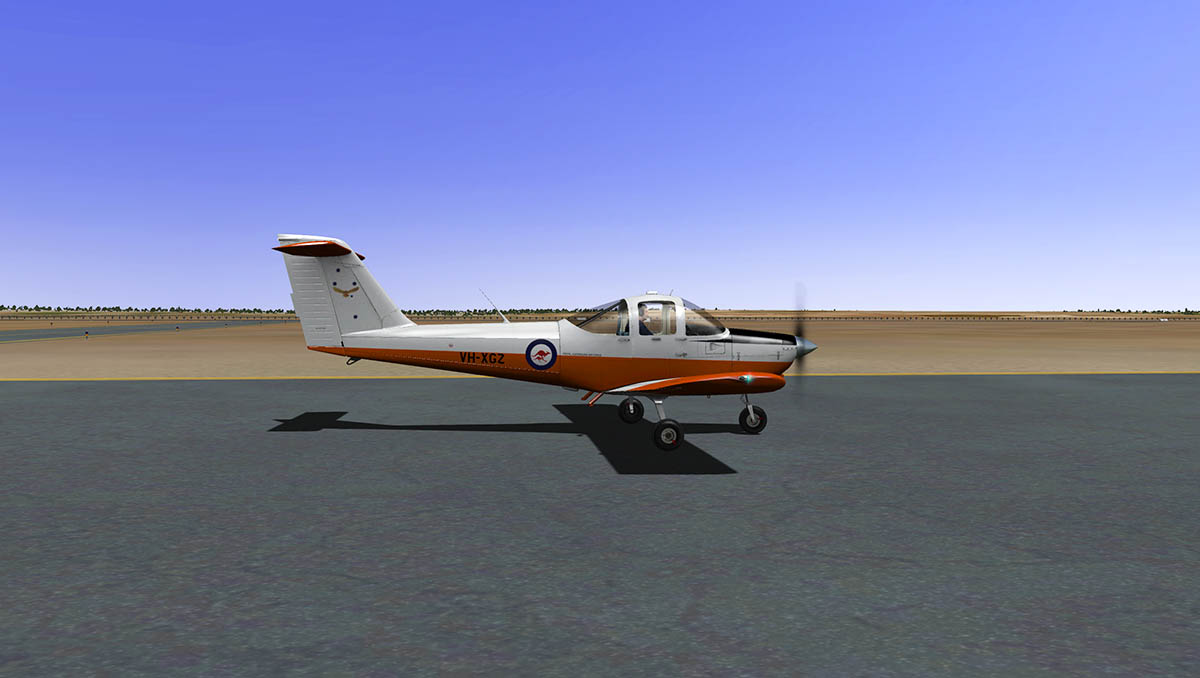

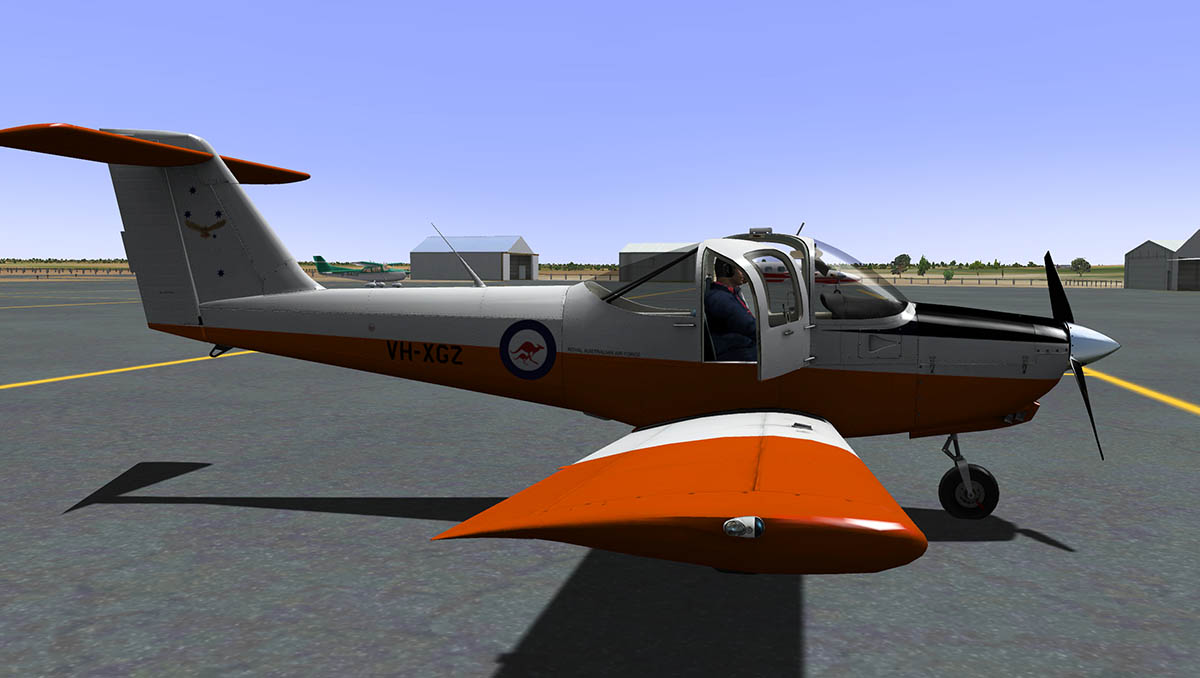
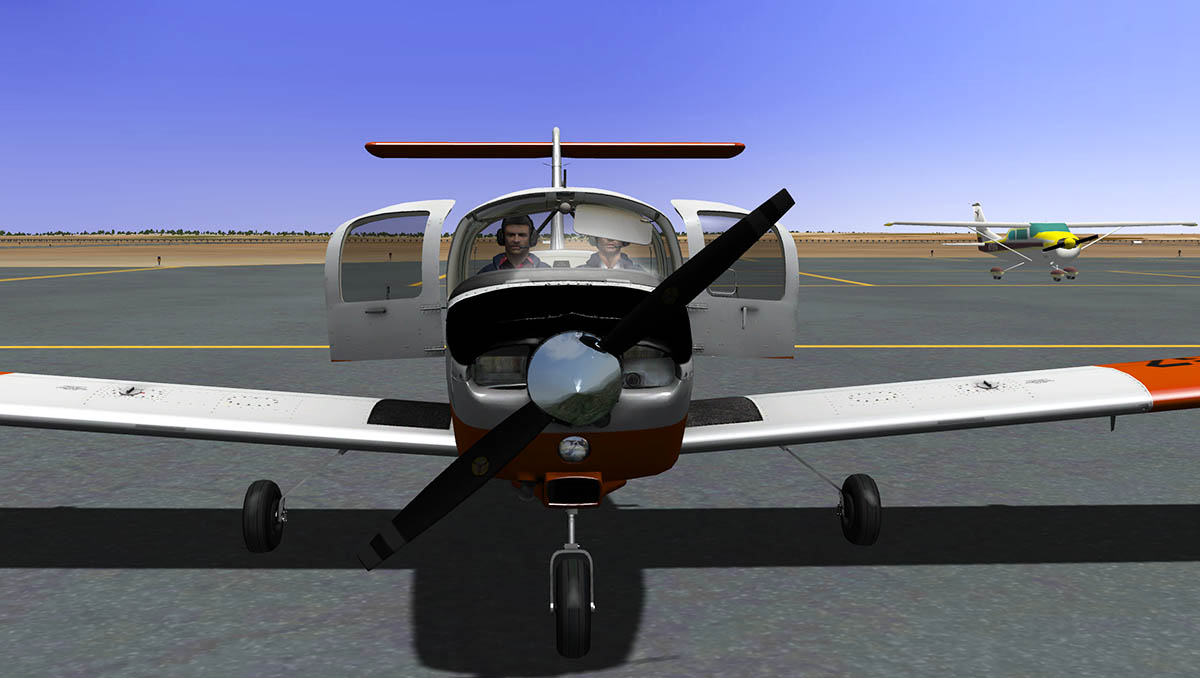
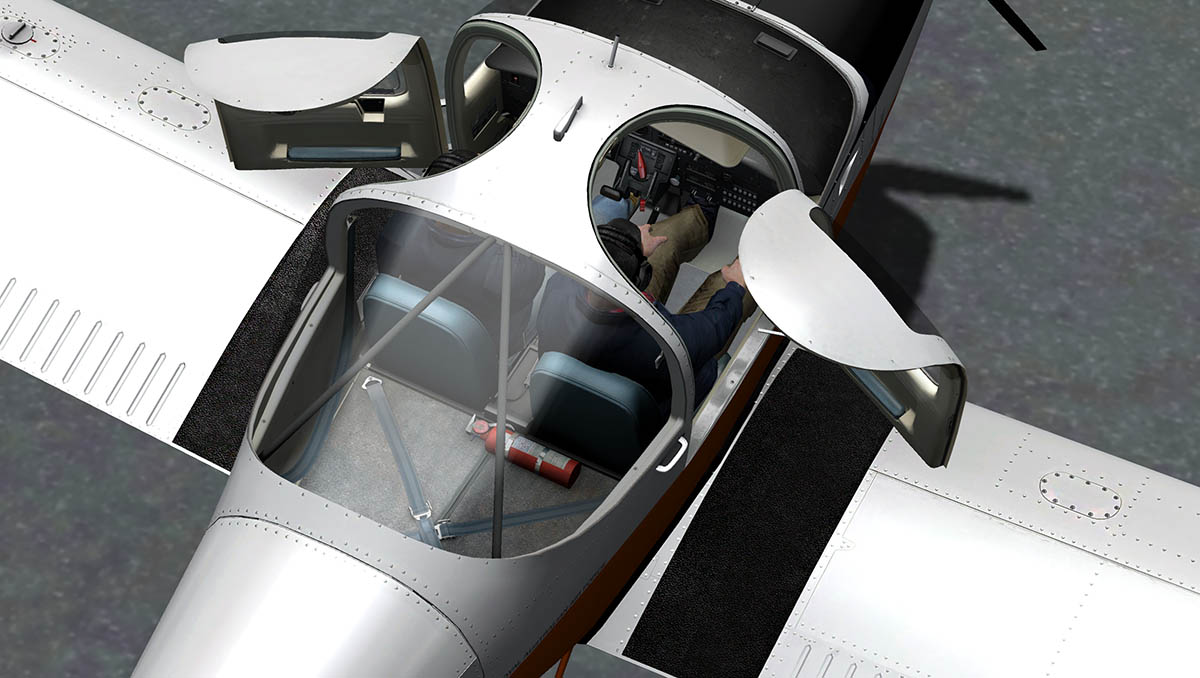


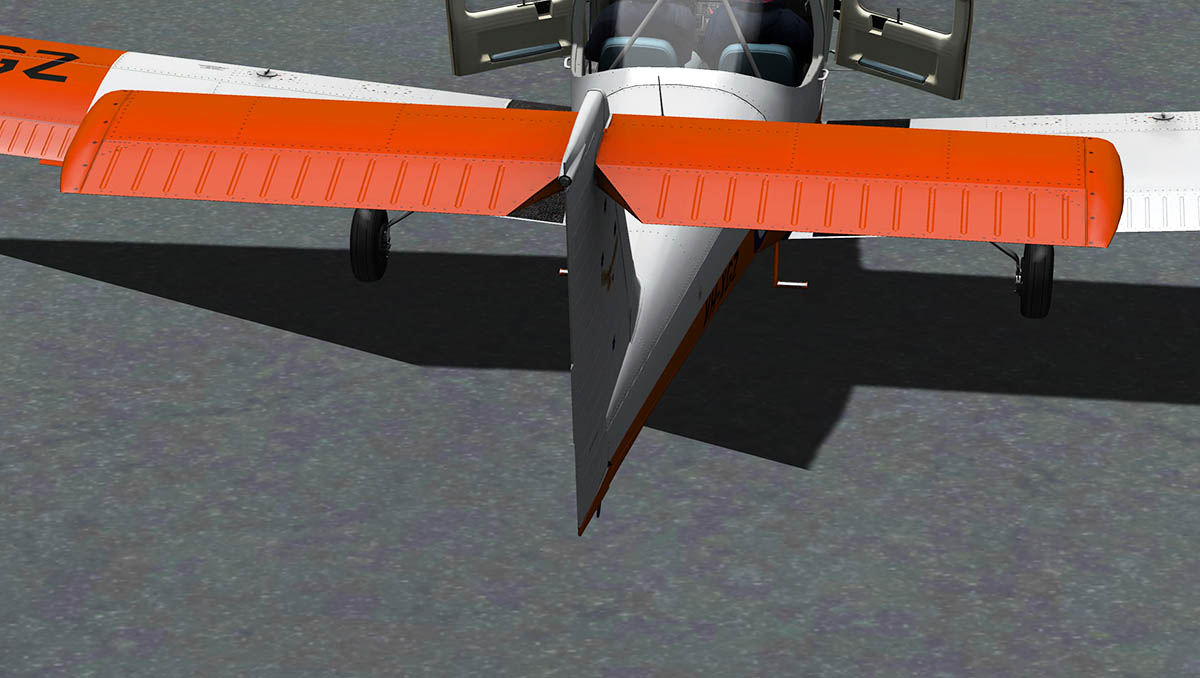


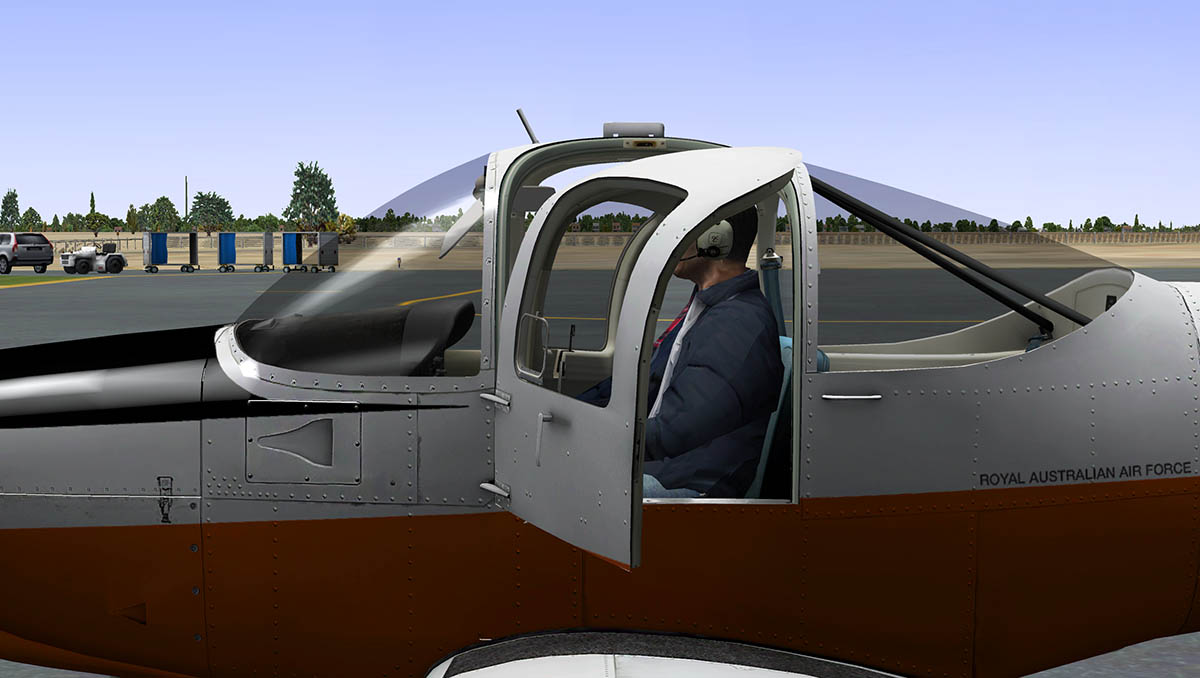

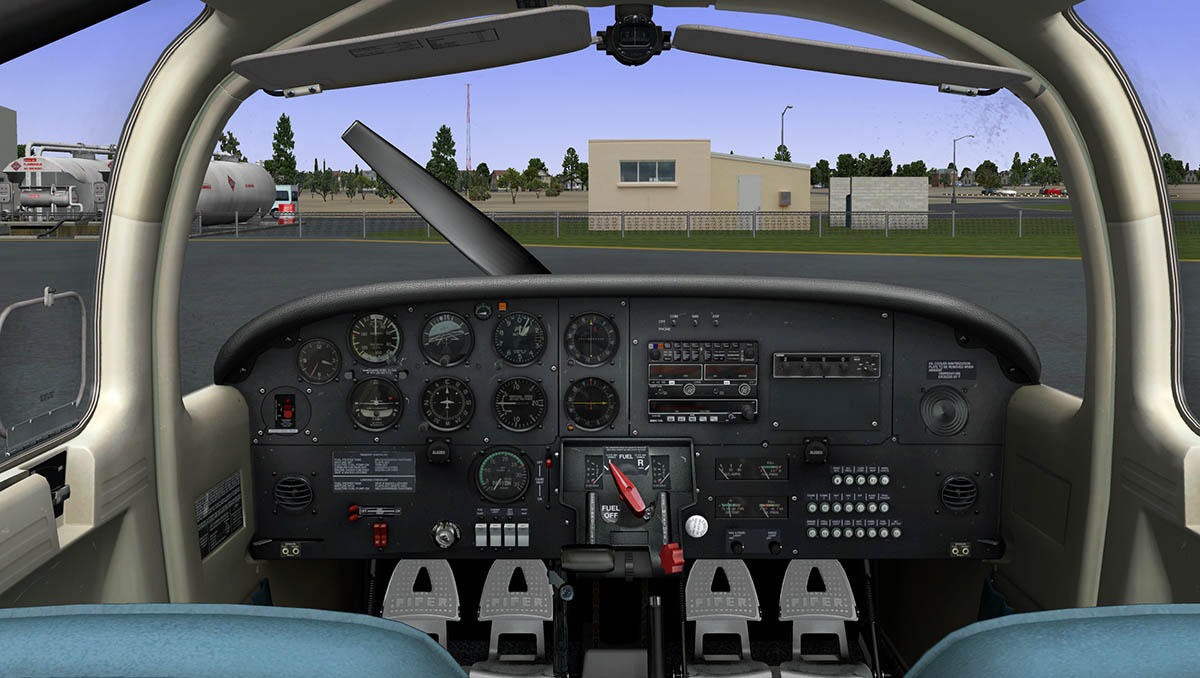
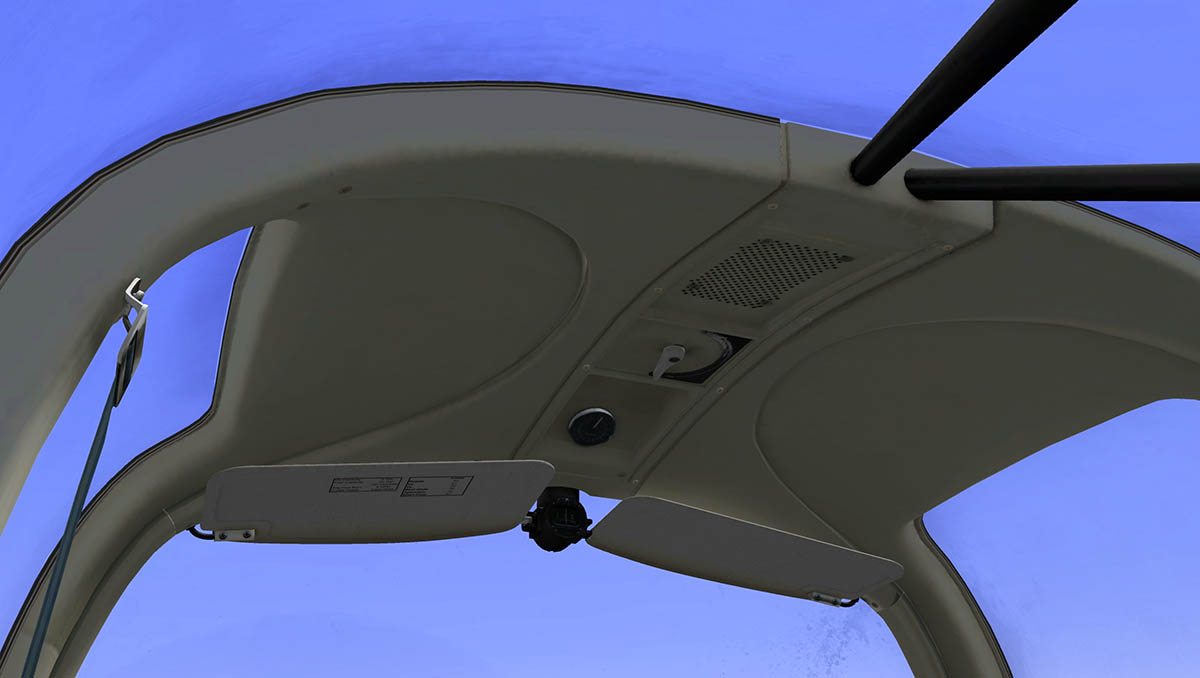

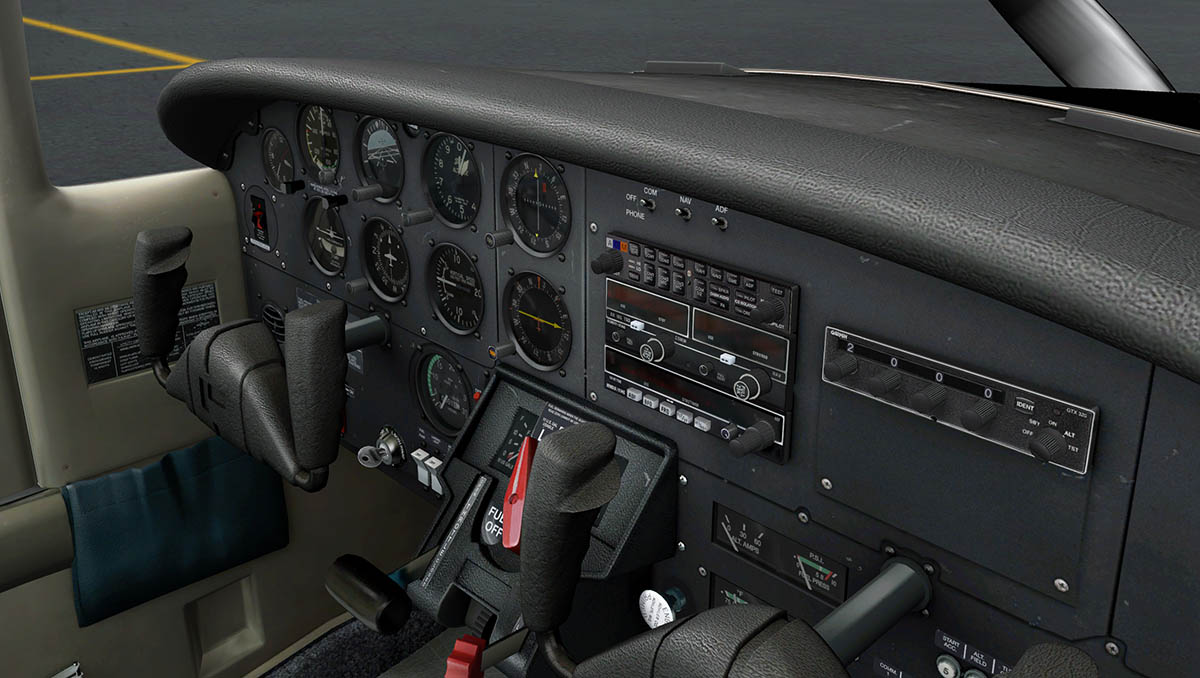


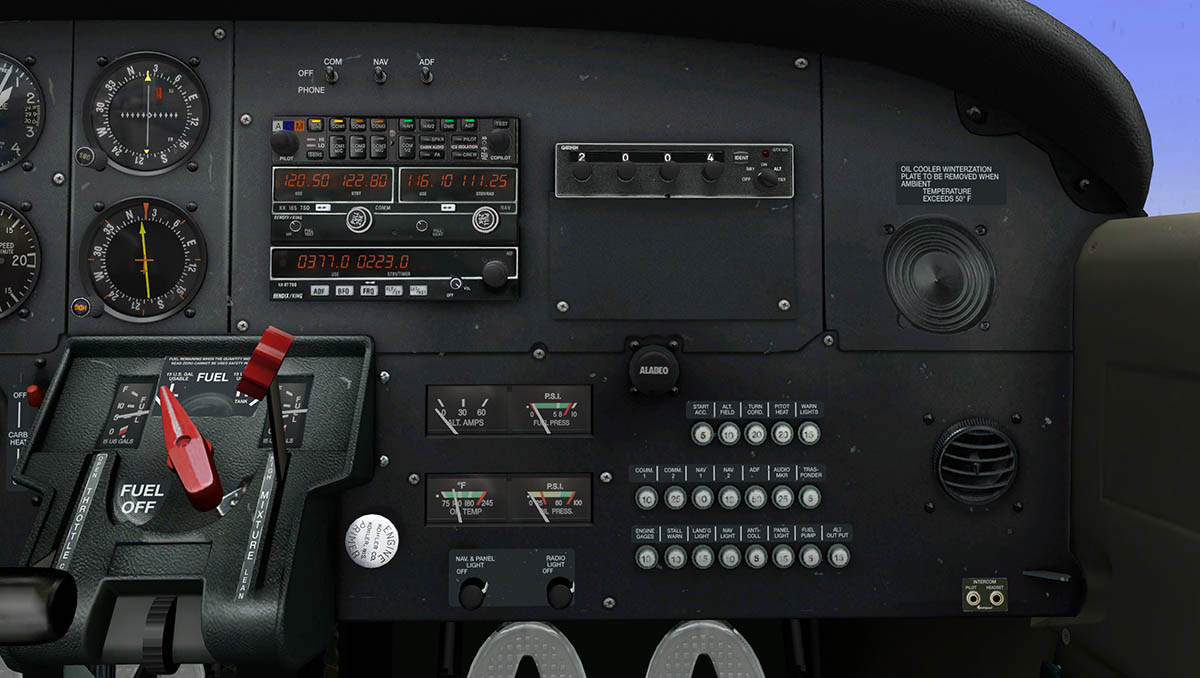


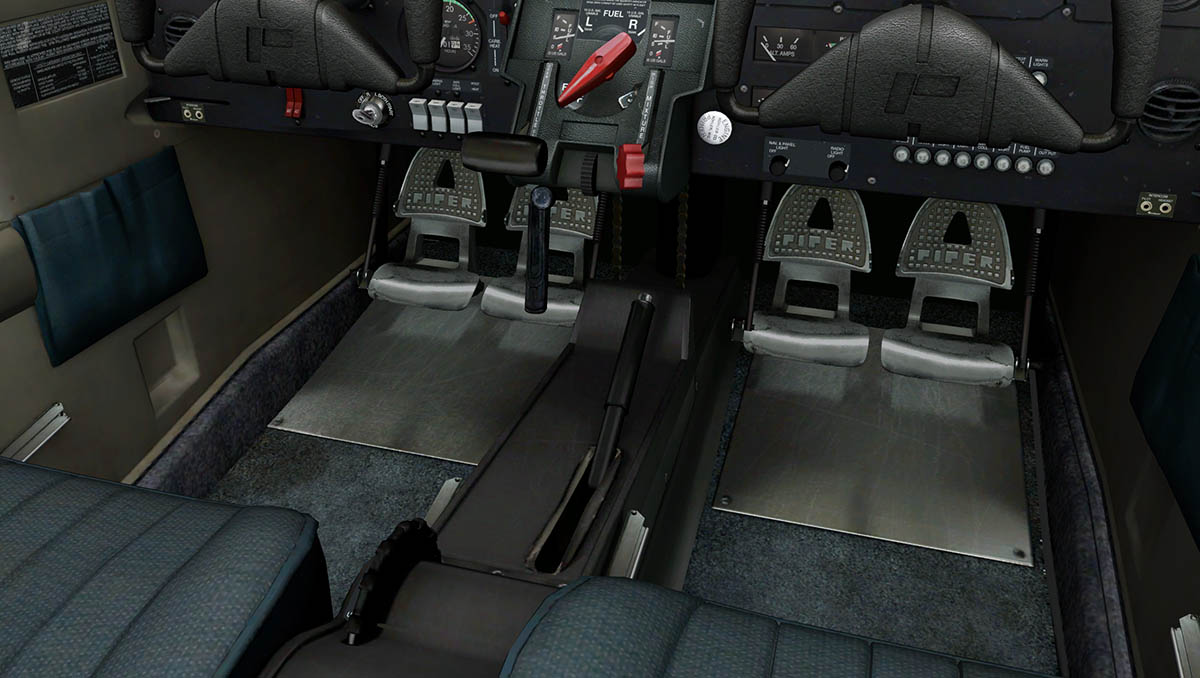


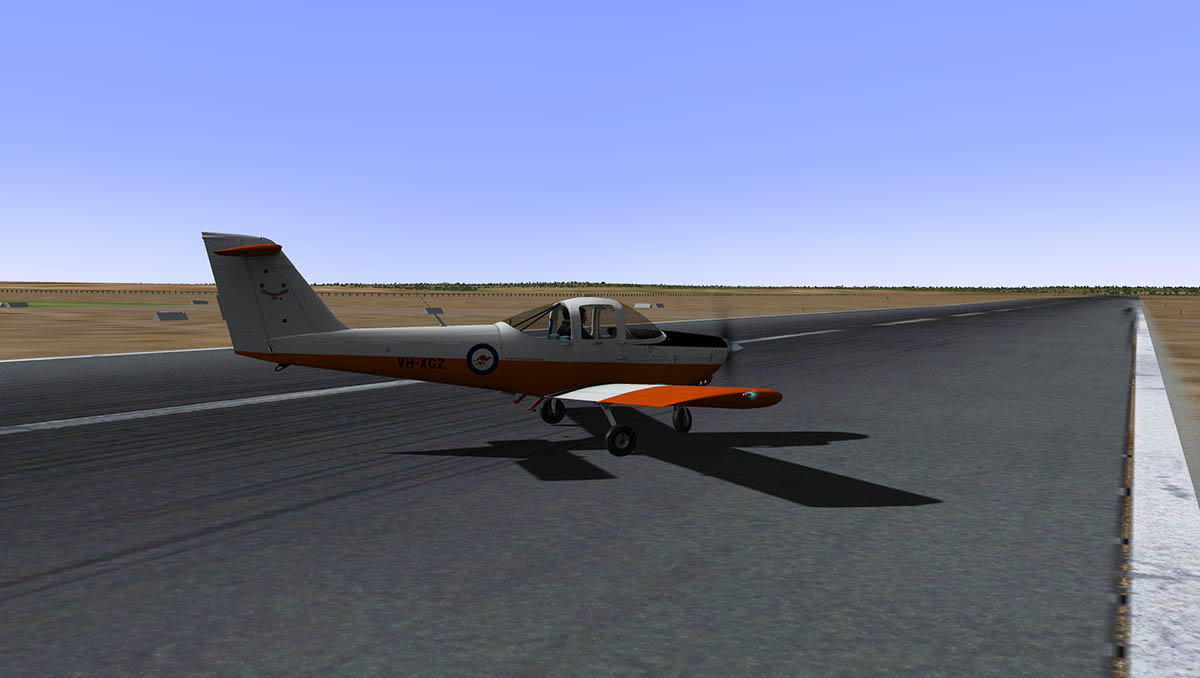

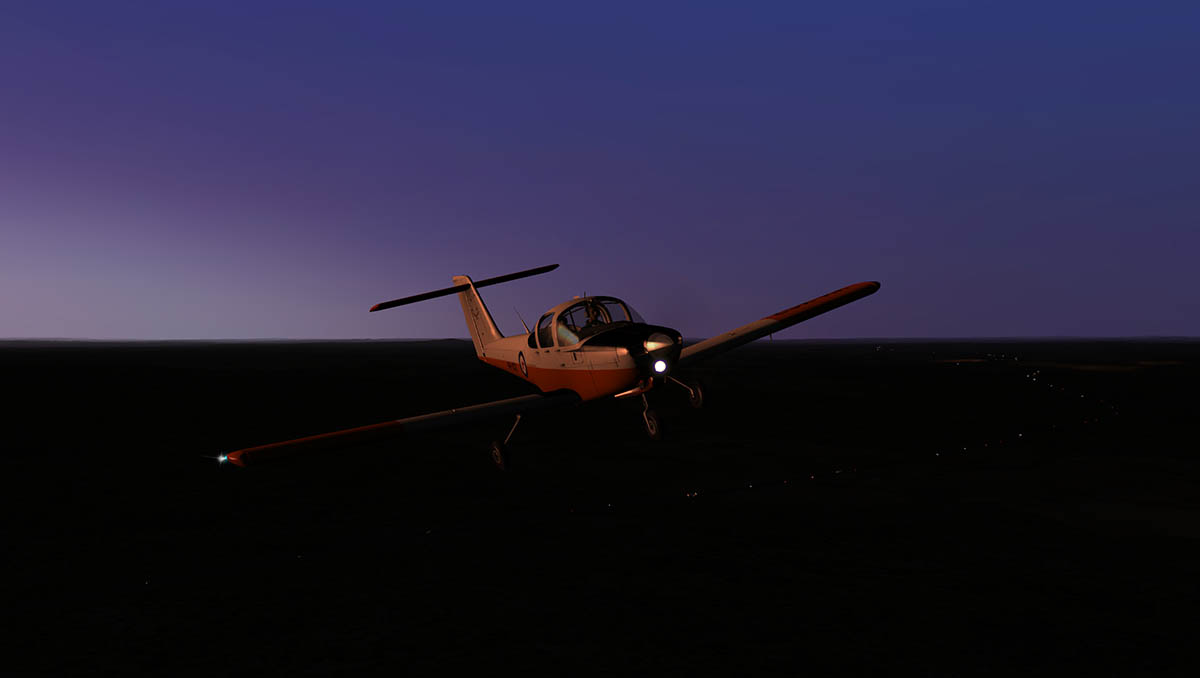
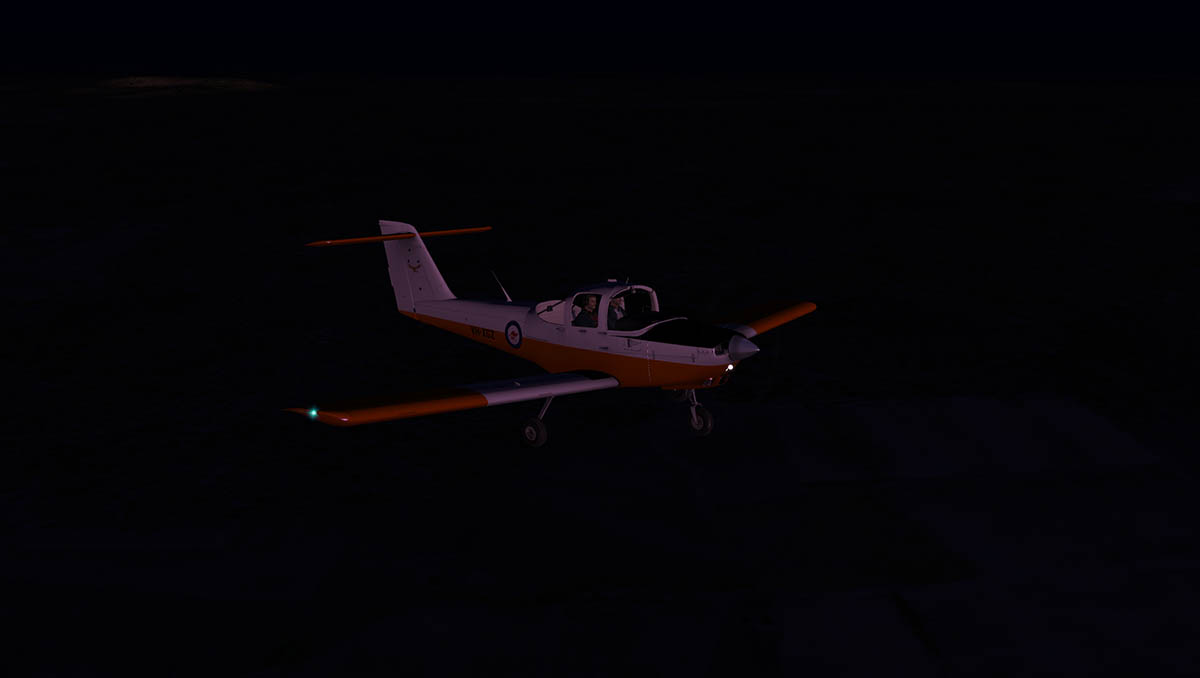
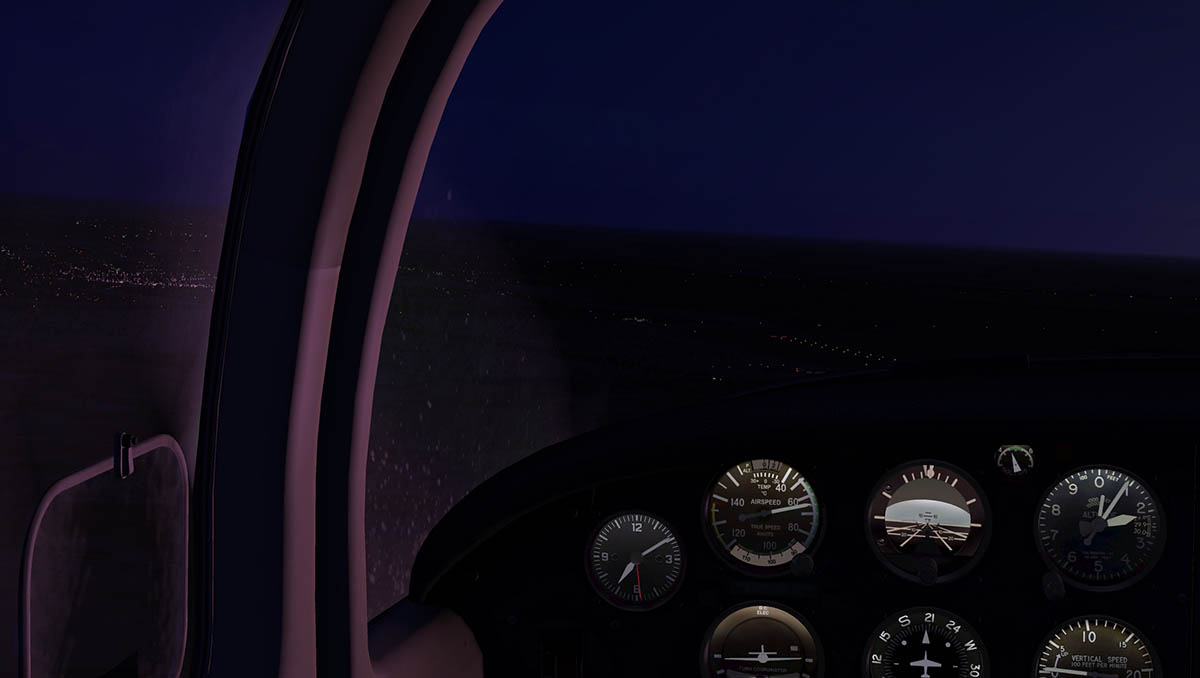


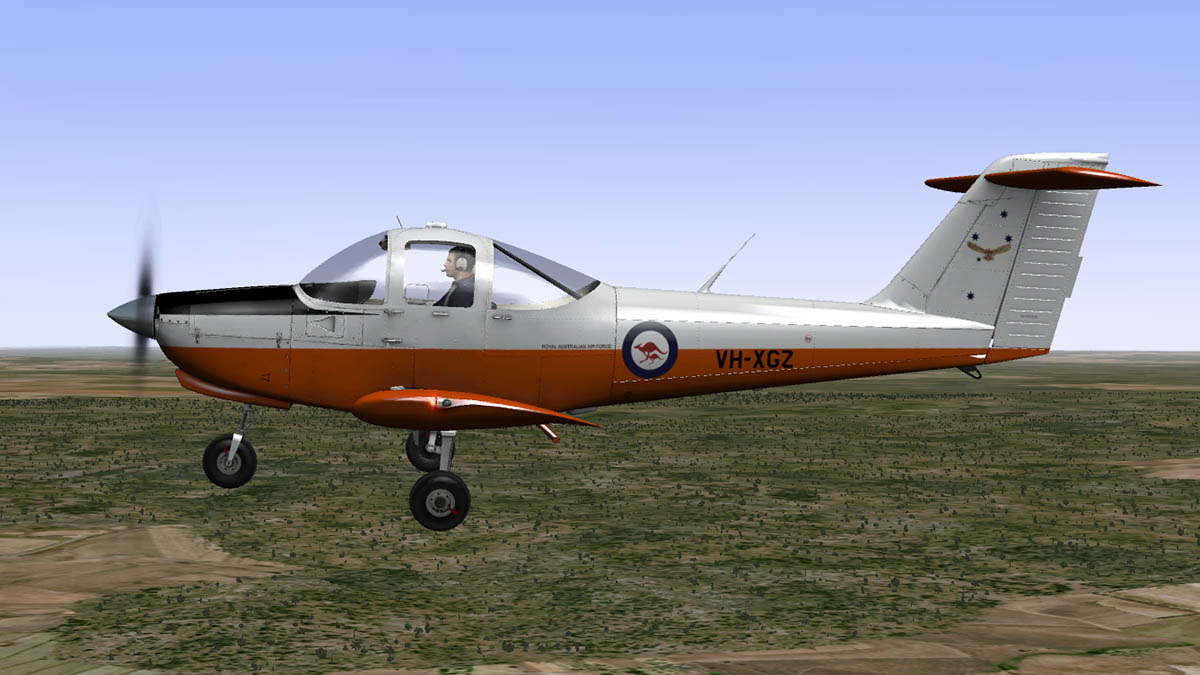


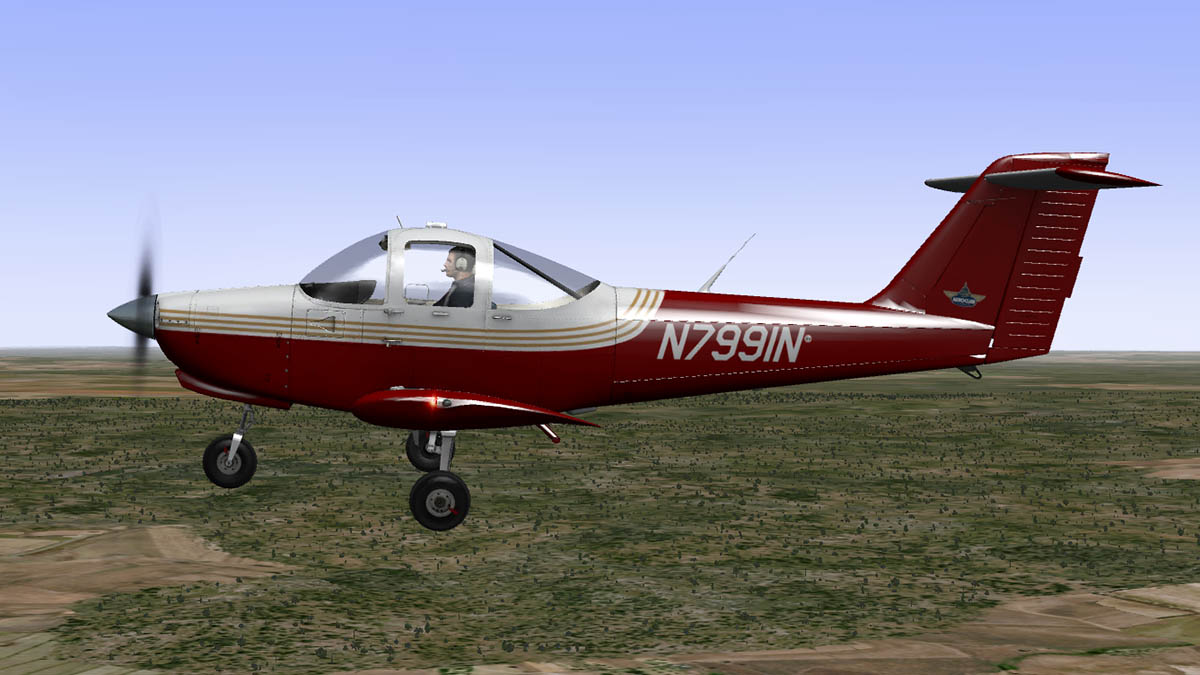
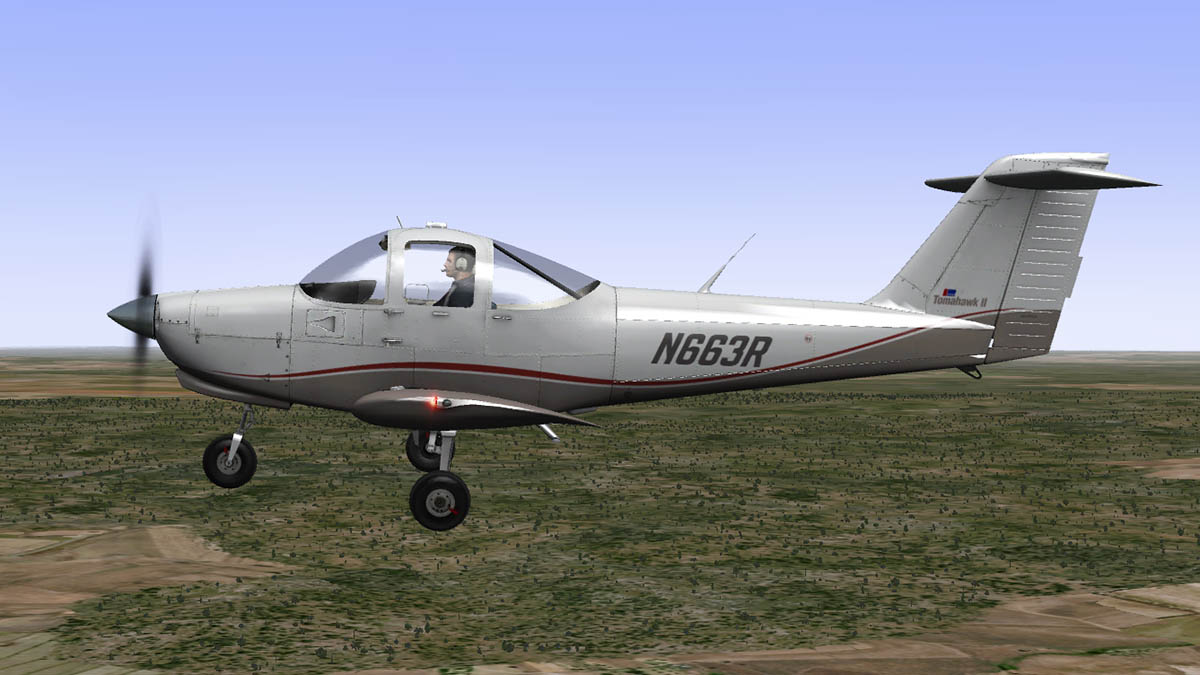

Scenery Update : KDEN Denver International to v1.1 by Tom Curtis
in Payware Airports and Scenery Reviews
Posted
Scenery Update : KDEN Denver International to v1.1 by Tom Curtis
Tom Curtis has already updated his excellent KDEN - Denver Intl to version 1.1
The biggest change in v1.1 is the addition of 50 animations with ground routes...
Now you have a vast selection of vehicles all working around the ramps (and across the vast terminal area taxiways)... Many items moving around are baggage trains, catering trucks, baggage loaders, vans and cars and a few more pushback aircraft. The animations also move into position around aircraft and raise and lower their catering loads and baggage belts, with the loaders loading from moving and positioning baggage trains
The animations have collision avoidance working in there as well, so the traffic will stop to let you pass as you pushback or park in the gate. The animations show off the latest improvements to the "GroundTraffic animated ground vehicle traffic kit" plugin by "Marginal" (Jonathan Harris) -See video below-
Buzzy, buzzy with lots of movement around KDEN there now is. It fills in a lot of the areas that I noted where very empty in our release review:
Tom shows us in a diagram of where all the ground routes go.
And it is comprehensive. He has also added vehicles to the Jeppesen Terminal ramps and passenger areas with the same animations. It looks good there now as well.
Other additions include two new Fire Stations out between the runways.
Besides the new stations the fire trucks are animated, and move around periodically.
To the south more Car Rental buildings and buses have been added as well.
But still the majority of the carparks are still quite flat (photo).
I checked to see if the gate ground markings have been adjusted to match the autogates?
I checked two gates and they certainly looked better aligned... but still slightly off.
All in all a great upgrade, I love it. And the airport doesn't look so empty (It is so very big), certainly the biggest improvement with v1.1 is while you are taxiing in or out of the terminal areas, the animations make KDEN far more active.
Here is a video to show the animations in v1.1
Yes! the Denver International Airport (KDEN) v1.1 by Tom Curtis is now Available from the X-Plane.OrgStore : Denver International Airport
If you have already purchased KDEN then check your account for the v1.1 update.
Price is US$19.95 - note : X-Plane9 is available on request
Developers Site : Scenery4xp
Stephen Dutton
26th February 2014
©copyright 2014 : X-Plane Reviews
Technical Requirements:
Windows , MAC or Linux
X-Plane 10 - X-Plane 9 available on request. Send us an email after you place the order
4GB RAM/1GB VRAM - 100MB HD
(Version 1.1 last updated Feb 25th ,2014)