

Stephen
-
Posts
2731 -
Joined
-
Last visited
-
Days Won
354
Content Type
Profiles
Forums
Articles
Posts posted by Stephen
-
-
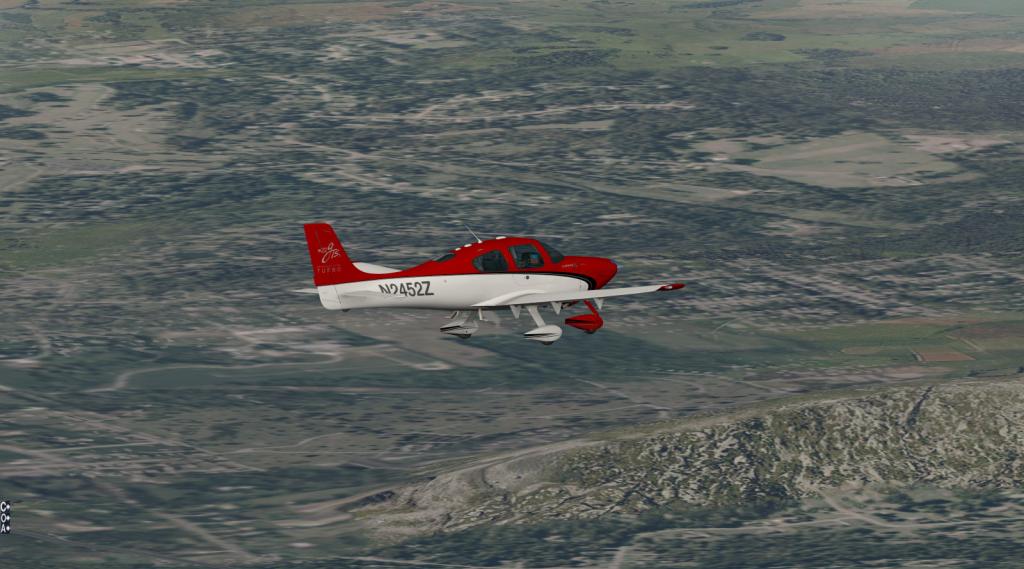
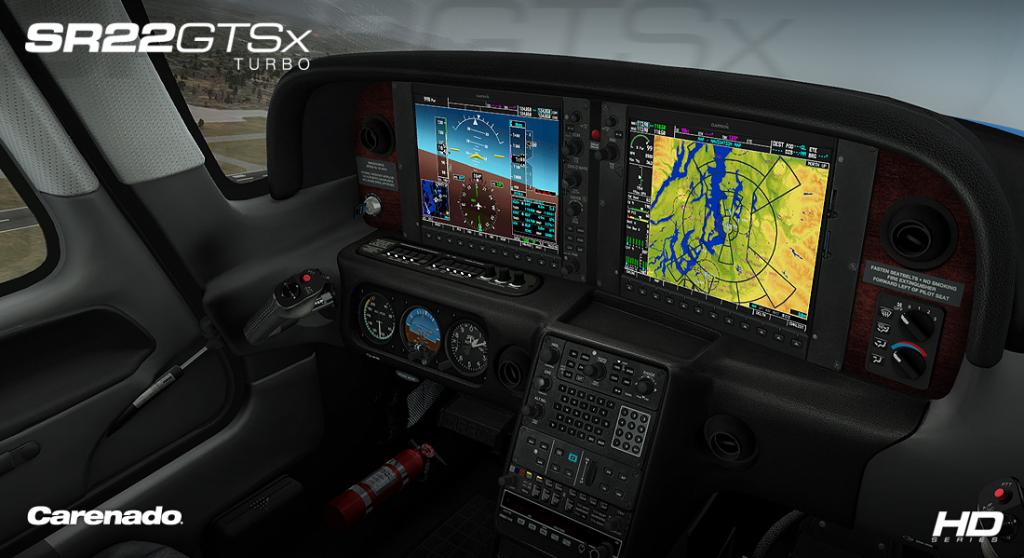
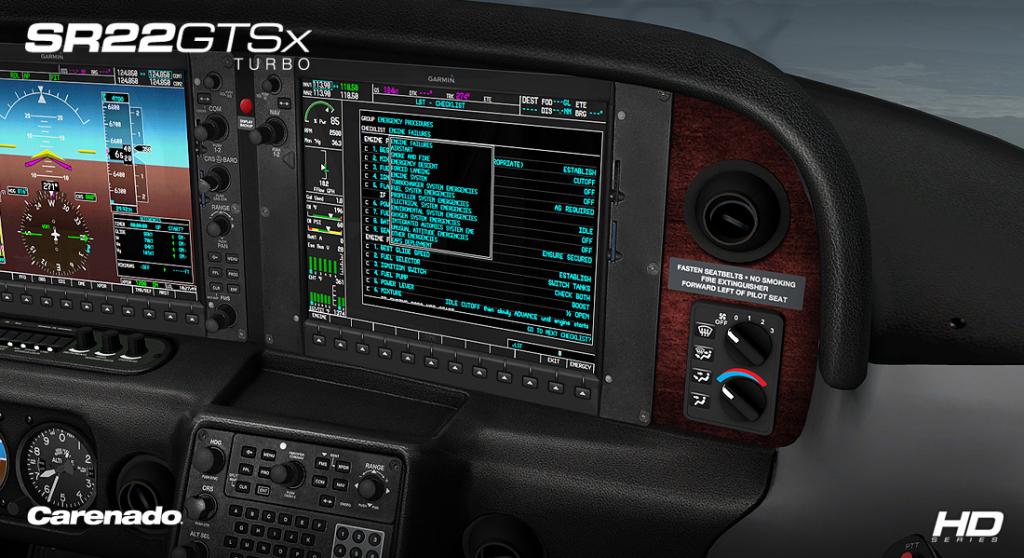
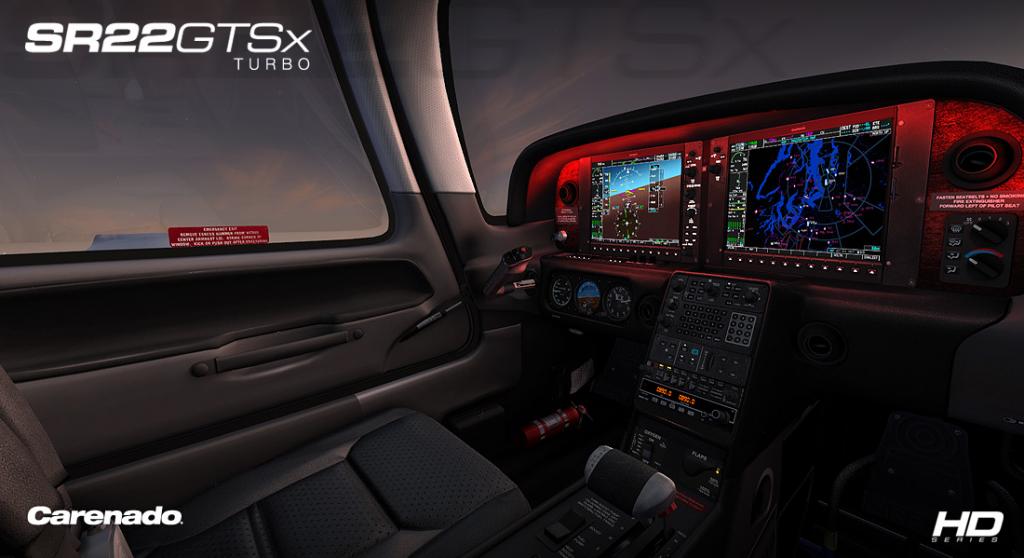
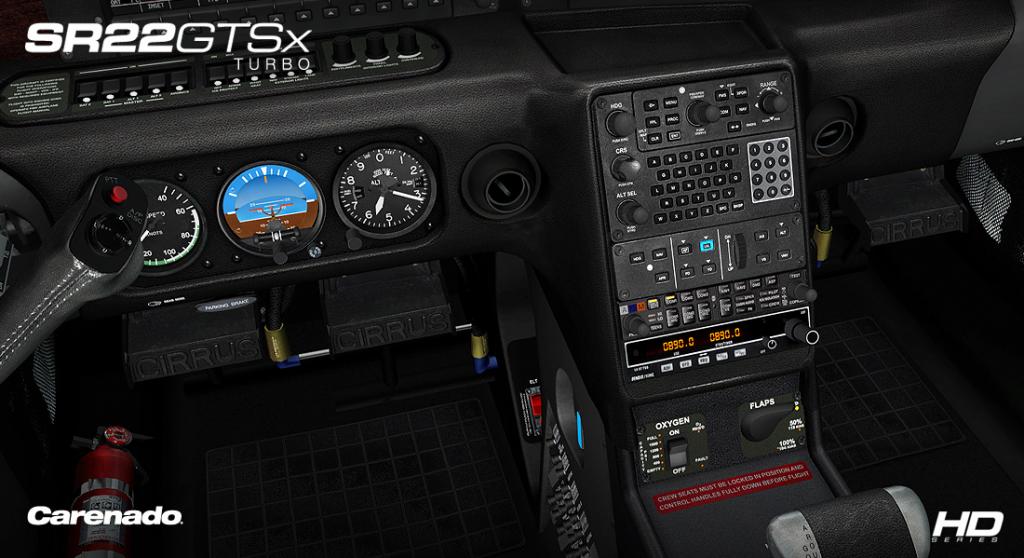
News! - Aircraft Announcement - Cirrus SR22 GTXS Turbo from Carenado
The Cirrus SR22 GTXS Turbo HD Series has been announced as the next aircraft for X-Plane from Carenado. This neat small single-engine four seater general aviation aircraft is an excellent choice to get the Carenado treatment.
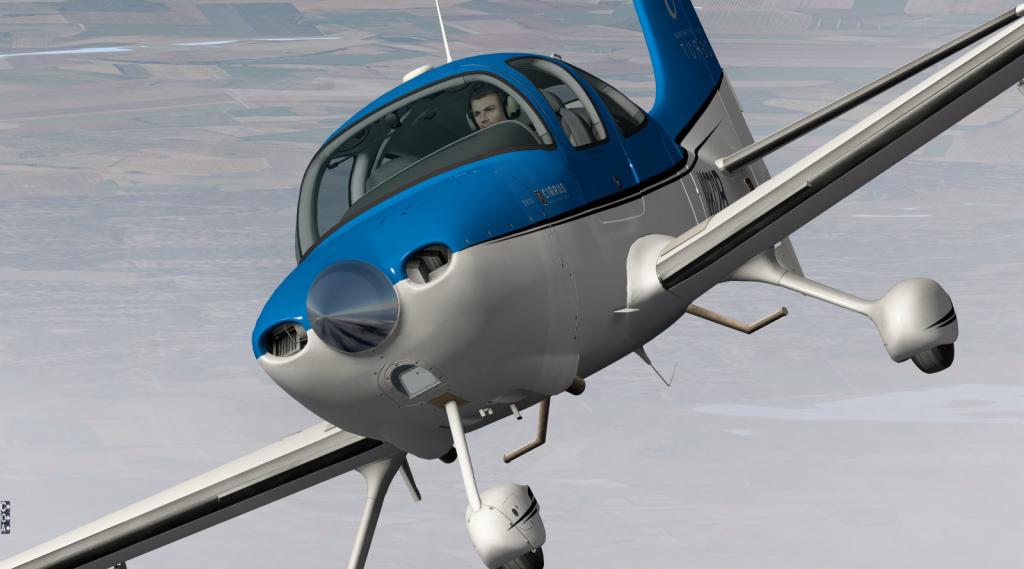
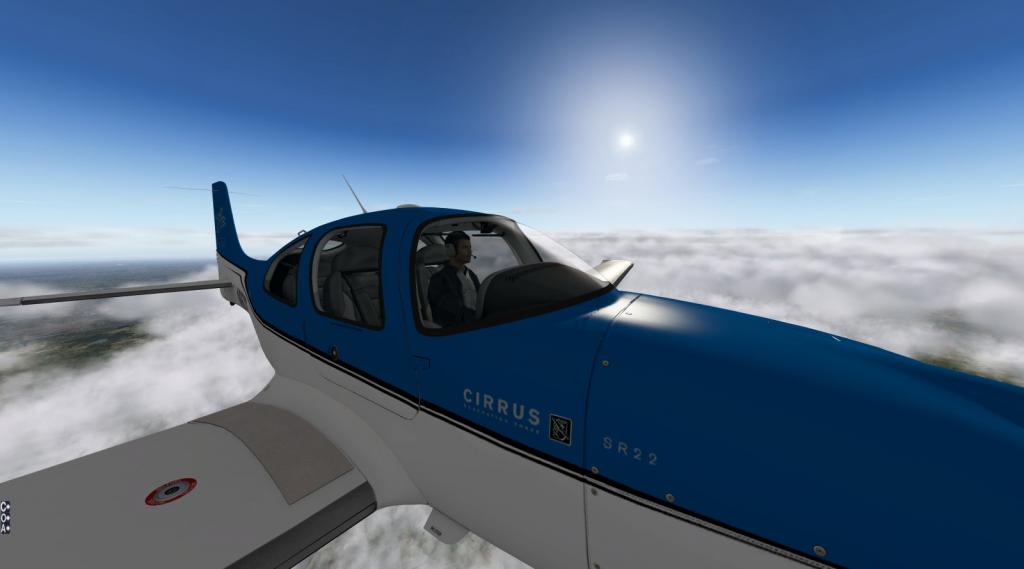
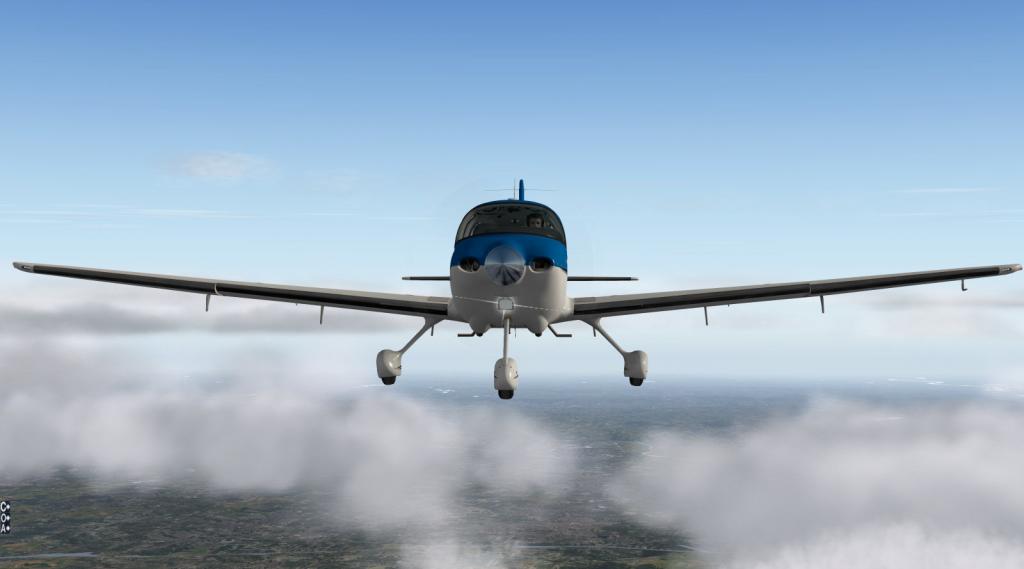
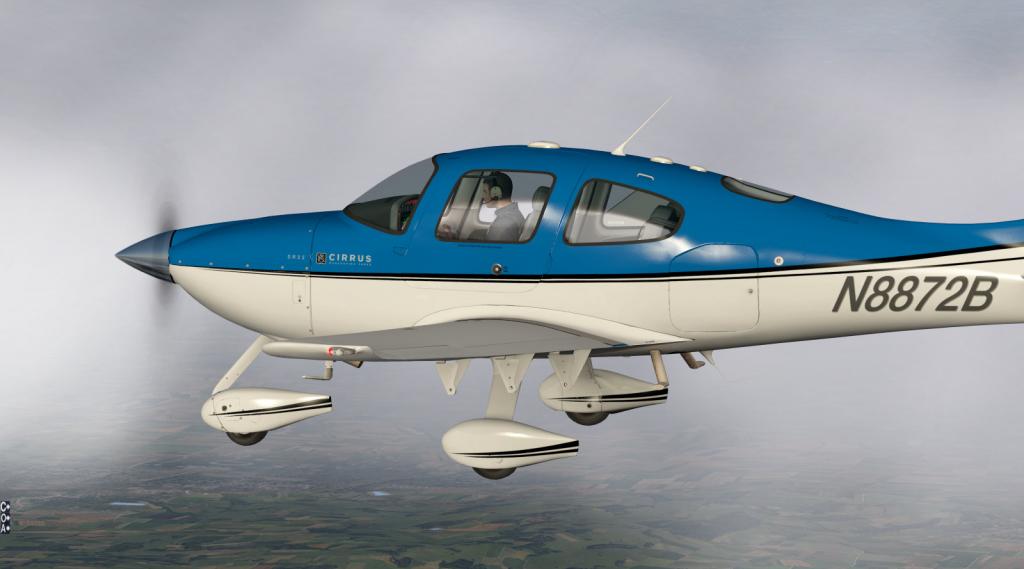
The GTXS Turbo stands for the Tornado Alley turbonormalizing upgrade kit which is factory installed. It features twin turbonormalizers and twin intercoolers. The conversion also includes built-in oxygen and a Hartzell three-blade lightweight composite propeller. The engine is the Continental TSIO-550K, which produces 315 hp (235 kW) with a 7.5:1 compression ratio and can run on 94 octane fuel. This turbo version has a certified ceiling of 25,000 feet (7,600 m), a maximum cruise speed of 211 knots (391 km/h), and a top speed of 219 knots (406 km/h). All impressive performance for a small aircraft.

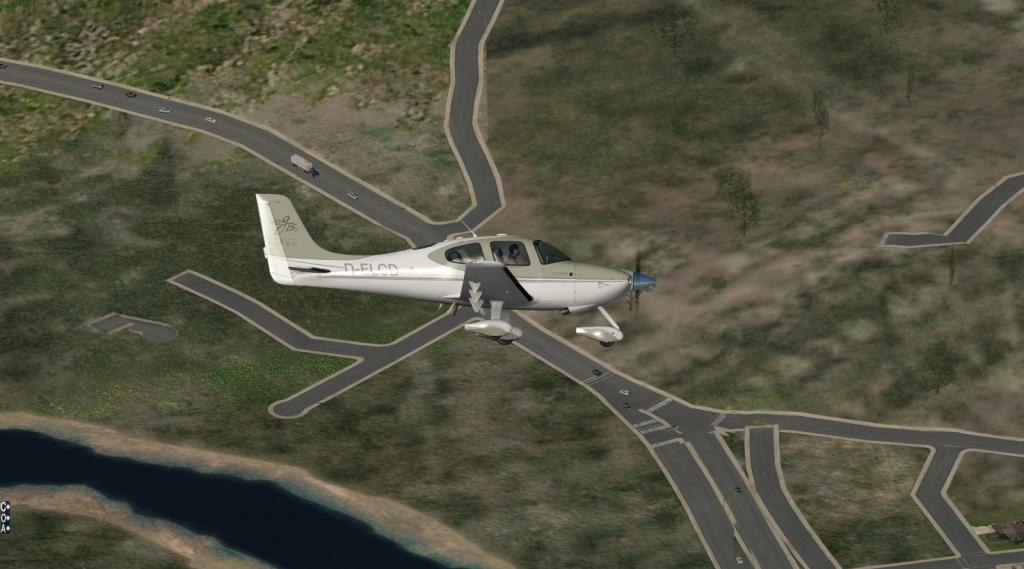
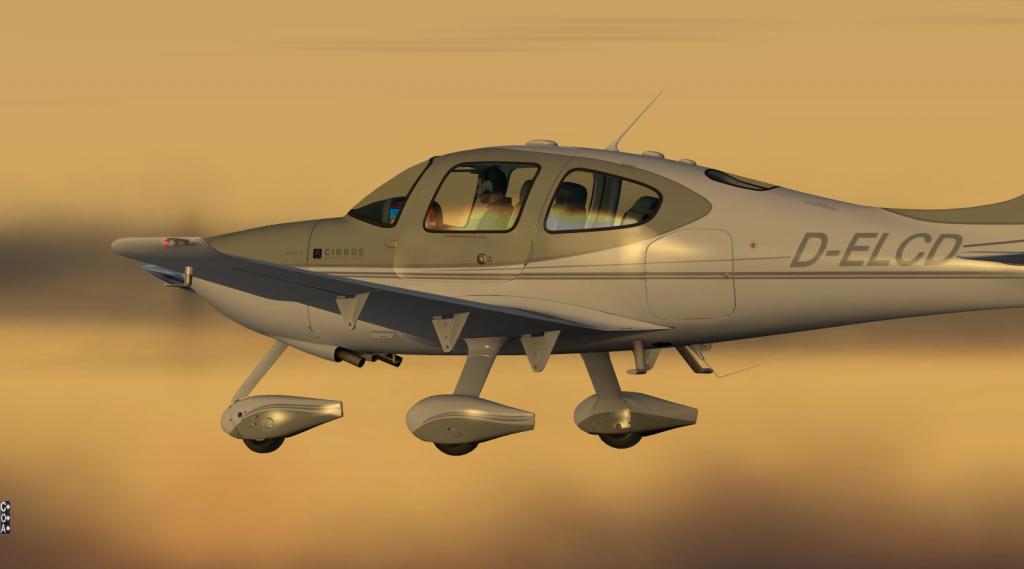
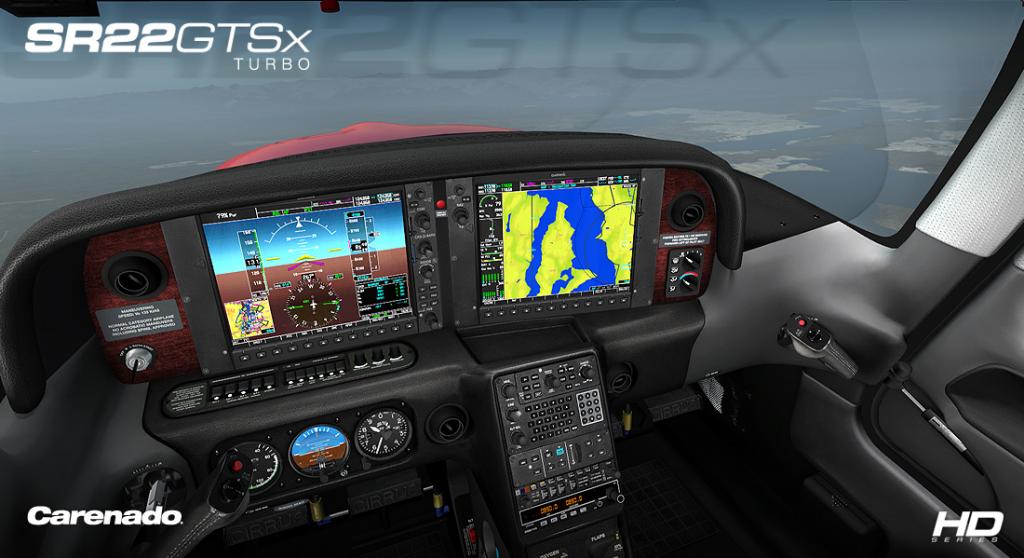
There is no detail of features or what you get from Carenado with the X-Plane version, but I am going to do a bit of crystal ball gazing and say the XP SR22 "Could have" not that it "Does Have" the G1000 twin-screen panel. The G1000 system is now available for X-Plane as it debuted in the CT182T Skylane G1000 HD Series back in September 2015. The FSX/P3D version does have the G1000 setup and the images below are of that version in a vision of what the G1000 in the SR22 could look like in the X-Plane version.

Release of the Cirrus SR22 GTXS Turbo HD Series is due soon, no solid date of course, but I would guess around the end of February 2016.
Images are courtesy of Carenado©
Developer site : Carenado.com
Stephen Dutton
15th February 2016
Copyright©X-Plane Reviews: X-PlaneReviews

-
On 6/2/2016 at 1:13 PM, Guest Ben said:
Hey, I'd like to know if you've got a review for the update of Michael Wilson's L1011 coming. Thanks
")
At this point the L1011 review has gone on a short hold till there is a completion of a set of major updates, then X-PlaneReviews will do a comprehensive review of this iconic aircraft.
-
The new v5.0 3-D cockpit manipulators are a very different than the other aircraft versions and are very good. I am a one-click Mac mouser, and I don't have any issues. The 2-D cockpit will still be in there, I don't think it will removed. Yes the workload is high, but that is all in the fun
SD@X-PlaneReviews
-
1 hour ago, Guest said:
hi guys, why cant i get the download update for b777
I don't know, you don't note where you bought it from? It is listed on the X-Plane.OrgStore as version 1.81 (last updated June 23rd 2015) so I gather there is no update available there... SD@X-PlaneReviews
-
Please put RW Duke comments in the right place or I will delete them... Thanks.
-

Aircraft Review : Epic Victory Light Jet by Aerobask There was a grand idea of to revolutionise air travel and put the everyday personal experience of a quick short point to point flight to carry a few passengers in a executive style environment at an affordable price. Up to date personal jet travel is restricted to overpaid company CEO's and rock stars and while your average Joe is still flying the airline way. It was a big dream that nearly came off. New operators started up to use the new very small light jet under Part 135 of the Federal Aviation Regulations (FAR) and use it in a taxi style business plan that would have thousands of these VLJ (Very Light Jets) spread at all major and secondary airports and cover a taxi network on delivering passengers quicker and outside the conditions of airline schedules and more importantly the saving of time. It failed to a point because it never got to the "Critical Mass" stage for where the air taxi service could sustain itself by having enough aircraft in the air to maintain profits and cover a large enough area of destinations to allow a constant supply of ready to fly aircraft. First off the cab-rank was Florida-based air taxi provider DayJet, which on October 3, 2007 began its Eclipse 500 service and planned to operate more than 1,000 of the VLJs within five years... they lasted a year. The Eclipse 500 and the Honda Jet were the main contenders for the business. Where if you got your numbers correct there was sales of thousands of these 1 million to 2 million dollar jets. and so enter the Epic Victory which was intended to cash in on this lucrative emerging market. To a point Epic succeeded in creating the correct aircraft in the single Pratt & Whitney Canada PW600 powered "Victory" (The Williams FJ33 was used for testing) for the exceptional low price of US$1 Million. Certainly it was the right aircraft and at the right price for this emerging market... but it all never came to pass, again. There has only been 16 Victory aircraft built and flown and all as experimental aircraft. As the Epic Aircraft company that builds the Victory has been mired into a decade old bizarre history of court cases, lawyers, embezzlement, fraud and god knows what else. Then the Epic company was bought out by the Chinese and now the Russians that makes the whole lot sound more now like James Bond and his megalomaniac villains than just building jets. The real tragedy of all nonsense is the aircraft, because it is an excellent little machine that could have changed in a small part aviation history... the Air-taxi. Aerobask Epic Victory Aerobask has already covered one other Epic aircraft in the excellent E1000 which X-PlaneReviews covered last year Epic E1000 by Aerobask. This Victory aircraft is really an extension of the E1000 as it has the excellent Dynon "Skyview" that was developed from scratch in being autonomous from the X-Plane systems and was developed exclusively with Aerobask by Lionel Zamouth for the aircraft. So X-PlaneReviews found itself in Bend, Oregon where the Epic company has it's company facilities based to look over this wonderful little light jet.
The Victory is small at 33ft 5in (10.19 m) long and a wingspan of 36ft 4in (11.08 m), but it is packed with a lot within its frame. The PW600 is going to be the 1,350 lbf (6,000 N) thrust, PW615F version which has a 16 inch (40.64 cm) diameter fan. As the PW610F demonstrator engine only has the 900 lbf (4 kN) thrust PW610F engine that is installed in a twin-configuration on the Eclipse 500, and I feel that a single PW610F is not going to be enough power just installed by itself.
Design wise it is an Aerobask aircraft through and through. Which means a very high quality and great design work of which we have certainly have come to expect from them. No doubt now a matured designer in Aerobask delivers again with the Victory as it is a beautifully rendered aircraft with a lot of great detailing. In a slight change this aircraft does not have really plastic look that you can get with these all composite aircraft, it is well molded of course but now with a more realistic quality a notch above. Small detailing in undercarriage wing and door design is first-rate and you are missing nothing.
Aerobask is also one not to stand still in ideas and features. The menu system in tabs in your left lower of your screen and are very well set out in three tabs in (From top to bottom) - Options - Weight & Fuel - GPU Control. The "Options" menu is quite light in that it covers hiding one or both Yokes (Which can be done manually inside as well) and turning on or off the window and instrument reflections. The "Weight & Fuel' menu is the interesting one.
Top of the pop up menu in yellow is the tag to add or hide the wheel chocks and the aircraft's parking flags. You have a fuel selector to add or empty the aircraft's fuel tanks (two), which is easy to use. But there is a gauge logo above and you think it relates to the tankage, but it doesn't, as it is just a graphic, which can be easily misleading. Lower right is a clever system of adding in weight and passengers. click on a seat or bag and you can load either an adult or a child in the seats (any except the pilot's) and with the baggage select a bag from the menu and it disappears from the adjacent baggage trolley, a full trolley of baggage means none on the aircraft. All the fuel, passenger and baggage weight is then calibrated on a display on the left to show you your actual aircraft weight. And it is all very well done and easy to do.
You can close the aircraft's door from the menu as well and then the notice will note that everything is locked and secure. With this the baggage trolley disappears.
The GPU (Ground Power Unit) is well done as you have a generator starter, and you press the green start button to start it up. Wait and the dial will show your power to the aircraft and "On" via the green light. Cabin
It is surprisingly very spacious inside the cabin considering how small the jet is, and it is very well appointed as well. There is also clever flip out table with a copy of the excellent English magazine "Flight International". The overhead spot lighting is adjustable, and you can see the detail and quality in the lighting fittings. Cockpit
The panel is very minimalistic in design and operation, just a few groups of (very) small LED buttons to cover the various operations with their fuse breakers lower panel. Center console is the large throttle (very nice), ground brake and far lower fuel switch-off and tank selection. You can as noted click on the nicely shaped yokes or use the menu to make them disappear. I found the aircraft easier to operate with them not visible and to activate the required buttons set out behind. If you flew the E1000 you will find the set up in the Victory quite familiar, with the same grouped buttons and the three large Dynon display panels. The grouped button arrangement is unique in that you start at the top left and work your way right across the rows to start up the aircraft and activate the systems, only one button is verboten!, and that is the red "Cut off" button which shuts down the engine.
On the pilot's side there are two panels of button with the left covering engine and systems operations. Including "Pre-Start" which includes your battery power (If the GPU is connected you will see the power via a few lit buttons). Next is the Pre-Taxi which covers the engine start and autopilot power. The bottom row is your aircraft "Systems" which includes air pressure, valves and emergency oxygen buttons. On the right button panel is the "Lighting" top and the lower selection of buttons cover the "Icing" or ICE protection and pitot heating. One note is that you have to be familiar with the buttons either by using a separate printout (hardcopy or iPad) or really study the buttons because at normal flying panel distance you can't read what they are, the text is too small. Certainly on the ground for start up you can zoom in (a lot) but otherwise you can't read them. You do quickly learn them, but really only the more in use aircraft functions and not the smaller optional items like icing. Far right is the very nice undercarriage lever in UP-DN. The Victory is only really a one person pilot aircraft, but you do have an extensive set of instruments for a Co-Pilot in the right hand seat. On their right side there is only one major panel that covers the aircraft's air-conditioning and oxygen systems and that is mostly on-off in operation. The flap lever in Up - 1 - Full selections and far right the panel and cockpit lighting adjustment knobs covers the Co-Pilot's area. Dynon Avionics Skyview Aerobask is rightly proud of the completely ground up created Dynon Skyview. The older ideas were very good in past Aerobask aircraft, but you found the knobs slightly lagging in operation and the map view also slightly blurred (later updated versions are certainly better)... that is not the case here as these screens have great clarity by using same resolution as the real instrument (1024x600px).
Click the two power buttons on and then the avionics button and the three screens come to life, and yes you notice the clarity difference, they all look really good.
Before we go to the Skyview system we will first cover the central items in the MVP50 EIS (Engine Information System) and positioned lower your communications Garmin GMA 350 audio panel. The MVP50 is an excellent display that gives you all your information on the aircraft's current engine performance and situation status. Covered is current N1 and N2 Engine status, Fuel and Oil status in left and right tanks and total fuel, Fuel/Oil Pressure, Oil temperature, Voltage & Amperes, Outside air temperature, Clocks (local and Zulu) Fuel Flow (FF) and remaining fuel and current cabin air temperature. Three lower buttons cover Exit - SCReeN - Menu. only the screen function currently works to show annunciators in the top of the display, a note says the Exit and Menu screens will come in a future update. Over all the EIS is excellent in showing you your current engine and fuel status and in flying operations. The Garmin GMA 350 audio panel is the standard X-Plane version we all know and love. A quick glance at the main PFD (Primary Flight Display) will show you two big X crosses over the engine data on the screen. This is realistic as the real Dynon in this configuration shows the same display as the EIS replaces that data in this aircraft. So no although it looks like it, the missing data is not a beta version with the data not working.
All three screens are independent of each other and all can be configured to suit your preferences. Within each configuration you can select even parts of full screen views to cover the full spectrum. This includes a HUGE or massive Artificial Horizon with rate of turn indicators, speed and altitude tapes and heading rose (with Course (CRS) - double VOR 1 and 2 and Skyview - FMS pointers) in the lower portion of the screen. An Engine and Aircraft status block known as the EMS which can be positioned left/right or centre of the display and also the MAP/NAV screen. Personally I kept it all simple with just the main PFD in front of me and the centre MAP/NAV screen shared with the EMS to the right.
There are a huge amount of selections on the Dynon menu driven interface, which selections are accessed by the lower row of buttons, or the two knobs (covering Altitude and Heading adjustment) that have also a built in joystick movement feature. The main PFD menu covers PFD (Primary Flight Display) - AUTOPILOT - XPNDR - TOOLS - SCREEN (selections) - MSG (Messages)
Under the Heading knob joystick selection is a secondary menu covering BARO - MDA - CRS (Course) - HDG (Heading) - ALT - VS - IAS - DIM, that use the knob as a selection tool with a centre push of the knob for selection. The point of reference is if you like these menu driven interfaces? Certainly they contain a huge amount of information and selections, but that is also part of their problem? Just setting the VOR1 and VOR 2 pointers can take time going through all the various button selections to get what you want, were as two buttons on a standard panel aircraft can do the same simple job at well... a push of a button. Personally I find it all a bit distracting in the air where as you have too take your eyes off the horizon for far too long just to get something as a simple VOR pointer to point in the right direction... Certainly a menu procedure manual is needed to be handy. The supplied manuals are however very good and do cover all the menu routes to the one you need, so keep them handy or print them out for reference.
MAP/NAV screen is also very detailed. You can have your MAP (aircraft position) in either "Heading UP" or "North UP" modes. Airport or NAV-AID information is highly detailed and NRST shows you your nearest points of reference. It is important to understand the under driving information on the NAV display and the data used to complete or run flightplans as it is based on the powerful X-Plane built in GNS430/530 Navdata. If you understand the various areas of using the default GNS430/530 then you will quickly adopt to this system abet with a different interface. So loading or saving flightplans is the same as well in the .fms format, same as creating a flightplan from an outside database site and loading it into the aircraft in the .fms format. So the displays are excellent but highly complex in operation until you become familiar with the maze menu of routes. Side of the displays are your backup instruments in left: Artificial Horizon top and a Altitude instrument below. Right side is the backup heading...
On the glareshield are two Garmin GNC255 radios for controlling COM and NAV frequencies. You switch between the two with the C/N button and the left one is COMM 1/NAV 1 and the right GNC255 is COMM 2/NAV 2. Centre top is the excellent Genesys S-TEC 5000 autopilot that can also be set via the Dynon panel menus and you turn it on via the "autopilot" switch on the PRE-TAXI button panel. All panels and radios pop-out for ease of use and can be moved around your screen, this makes learning or setting out the flightplan far easier. Flying the Aerobask Victory All loaded up, flightplan set and the doors closed and you are ready to start up this light jet.
The procedure is actually very simple and quick. Fuel tank selection by the lower arrow like selector, fuel pump on and set your beacon lighting. Then you just press two buttons in sequence in "igniter" and "starter" and watch the EIS as the minute Pratt and Whitney PW615F starts up in the rear. Start up sounds are in the "oh wow, that is fantastic" category. Yes they are very good and very loud. Gross weight is 5500 lb (2495 kg) and I am at 2404kg which means I am just slightly under it, in other words I am heavy. You feel that weight as you apply some thrust to get moving, but the aircraft is easy to move around and taxi. You set the flaps to the centre position of T/O on the flap display on the glareshield. The controls are really all very minimal, but you somehow have everything you need... If aviation was like driving a car then this system would be the closest to that ideal.
But cars don't fly, aircraft do and they are fast machines as well. Once lined up on KBDN runway 34, it was time to see what this Light jet had to offer. Considering the size and the weight on the aircraft it moved with a nice push as you gather speed quite quickly, sounds went high and you heard the PW working hard, sound quality is really, really good. When tracking at speed down the runway your yaw inputs have to be very small, get it wrong and soon you are suddenly seriously over correcting and you will lose it. If you keep that line in check with as little movement as you can it will track fast and straight. On rotation you feel THAT weight, but the aircraft will handle well and you can turn your heading in my case towards the Cascade Ranges and Portland. You have to gauge your climb-rate, you can use all of the 1200fpm that is official, but keep just under that and you can climb quite quickly.
I'm so heavy remember and the PW is being pushed into the red zone as a flicker every now and then, but the aircraft will climb easily to my set height of 15000ft to clear the Cascades.
When turning on the Genesys S-TEC 5000 autopilot it came in with a nasty thunk which I didn't like. But it was from then on easy to use and set up. I tried to see what a 3000fpm climb would do, and the speed didn't fall off as quickly as I thought it would, and the little Epic actually handled the extreme conditions. But as soon as that speed did drop below 130knts the aircraft would shimmy and swing from side to side as it fought the forces beyond its control. It would do that if you placed the Victory slightly out of its comfort zone, but bringing it down to the usual 1000fpm and getting some speed back and then everything went back to calm and normal again.
You have to admit the Victory is a pretty little aircraft. I love the clean lines and smooth modern design. Cruising at 15,000ft you just power along at around 235knts and you have say that is a fair click and that you can cover the ground at 319.70knts (592 km/h) at maximum speed, Cruise speed is 250knts (463 km/h) with a huge range of 1,380 nautical miles (2222 km) at an maximum altitude of 28,000 ft (8537 m) and that is impressive performance. Over the Cascades and it was time to descend into Portland International (KPDX), you throttle back and easily slip down around 1500fpm, once at the base I turned into a circuit to achieve a landing from the west on RWY10R. Portland Intl is a hard airport to find and hard to use with long approaches as it sits by the Columbia River, and mostly in a valley, any approaches are over hills or higher terrain.
After a tight 180º turn I intersected RWY10R. The Victory has no aids in slowing down the aircraft in airbrakes and on the ground there is no thrust reverse, so your approach speed is critical in that you don't arrive too fast. At a slow speed around 125knts and full flap you can set yourself up nicely, but have to remember your speed still needs to go a lot slower yet to land.
After all the noise from the Jet pack sitting behind you at this descending speed the aircraft is eerily quiet, just some wind noise and when the gear goes down some more heightened noise from the wheel struts. Coming in you realise your speed is slowing and you still need to wash off still more.
If you use the ILS-Approach you will know when the aircraft is disconnected from the beams, and you have to be ready for it as the aircraft becomes more loose. In manual hands on approaches you need to be hands on, but it is very controllable. This is an important point to make. The Victory may look and be flown by it's simple needs but it requires a firm hand on the yoke and control by the rudder pedals, you work very hard as a pilot to keep this little aircraft as smooth and controlled as the very good pilot in you has to do a good job in departure and certainly in the arrival points to keep the machine in your total control and not losing it to its own devices, not that the Victory is a hard plane to fly because it isn't but it needs a firm hand and skills to be super smooth and controlled as possible in these certain phases.
Over the fence and you need that speed low and in my case 85knts. Once you have put the wheels on the hard stuff you need to VERY fine in keeping the aircraft straight, get it wrong and as on takeoff your going for a ride into the scenery. Small inputs and corrections are needed until the rest of the speed rubs off and then you can let that breath out and use the brakes... tricky, yes very.
Taxiing around KPDX in this VLJ and the heavies look huge and very heavy. Parking is way over on the north-east of the KPDX at the "FlightCraft" area, and here we shutdown the hardworking PW615F and open up the aircraft. And the flying for today is done. Nightlighting
You can adjust the display brightness and a part of the panel, but mostly the panel is quite dark. There is an adjustable spot light above you but overall the cockpit is a feel and touch area.
The rear cabin is well lit with creative ceiling lighting, all spot lights as noted are adjustable to highlight areas.
External lighting has been adjusted, but it still shows a very large set of orbs, I am not a fan of these sorts of lights. Liveries All liveries provided have been taken from real aircraft except one, a Coast Guard livery, a great house livery is default. All are liveries are exceptional by artist Jean-François Edange and my favorite is the twirly line version N971AR.
Summary In real life the Air-Taxi dream is at this point in time just that... a dream. But that doesn't stop you from enjoying and flying an aircraft that should have and could have made that dream actually work. As an aircraft the Victory is an amazing perfect machine that can wizz four passengers and their baggage in speed and comfort nearly 1,400 nautical miles and at a economical cost in purchase price and running costs. Shame it never delivered because of bad or inept management. In a strange way the Victory is a bit of a contradiction of an aircraft. Easy to set up and basically fly. It does however need a slightly skilled pilot to get the very best out of it. Get it wrong or overfly and you are in trouble, and my guess is that the real Epic Victory would feel and fly exactly the same way. So that makes it challenging as well to hone your skills to ninth degree and get a very point to point perfect flight. Get it right and the Victory is highly rewarding. Aerobask has always delivered excellent out of the usual and modern designs in aviation. Here they deliver again, but without doubt have also upped the quality up a notch this time around as well. Everything here is very well presented in aircraft, menus and features (external lighting aside). Design and quality is excellent, and their achievements in the outstanding design of their Dynon Avionics Skyview system is excellent. Yes it is complicated system with so many different menus and functions and does require a few reads of the manuals to get all the different menu routes correct, but overall it is a reflection of the real world system that is excellent in operation. So a sum up in that the Victory is a little cracker of a light jet, an amazing aircraft really in design and great to fly with a little skill needed to get the very best out of it, certainly worth having in your hanger and whipping out to fly a few passengers on a small point to point taxi role. Overall amazing and different. Note: When purchasing the Epic Victory from Aerobask you also get an extra aircraft in the package with the very different LISA Akoya which X-PlaneReviews reviewed here: Aircraft Review : LISA Akoya by Aerobask ___________________________
Yes! the Epic Victory by Aerobask is NOW available from the new X-Plane.Org Store here : Epic Victory
Price is US$29.95
As noted the LISA Akoya aircraft is also included FREE in this package and part of the above price
Features
Aerobask Quality 3D Model- High quality 3D model throughout
- Flight model defined according to the specifications of public data. Fun to fly.
- Ultra-High Resolution textures. 4K, Ambient Occlusion, Specular, Normal mapping and night lightning.
- Fully functional and animated Virtual 3D cockpit.
- Panoramic windshield with reflections, rain and icing effects.
- Ground Power Unit
First ever modeled Dynon Skyview for X-Plane- 3 EFIS Dynon Skyview
-
Extensive custom logic to match the real Dynon Skyview
- Custom MAPs & FMS
- Flight Plans Management
- Transponder
- AutoPilot and radio
- All EFIS can be displayed in Pop-up view
Other Systems- EIS MVP50, 2 Garmin GNC255, 1 STEC5000 Autopilot, ADL110B weather radar, TCAS and vocal alerts.
- Can also be viewed as Pop-up windows
Dynamic Menus- Options Menu
- Fuel & weight management
- GPU
Custom 3D Sounds- Engine, gear, flaps, door, vocal alert, callout.
- Enhanced 3D sound engine using SASL functions.
Liveries- More than 6 different paint schemes using 4K textures (more available at aerobask.com)
Documentation- Victory general manual
- Aerobask Skyview manual
- Checklist normal operation
- Online Flight Planner tutorial
________________________
Installation : Download file size is 419.40mb to your X-Plane - Aircraft Folder. Installed file size is 472.40mb
Notes: None
Documents : Huge amount of documents and manuals including for the Skyview System, Checklist and Quicklook. Real documents include the original Skyview manual and S-TEC 5000 Autopilot manual.
_____________________________Requirements :X-Plane 10.42+ - Running in 64bit mode
Windows 7+. Mac OSC 10.7+, Linux - 64bit Operating System
2Gb VRAM MinimumThe aircraft is quite heavy in framerate- not overly so but more than the average aircraft of this size.
Current version: 1.02 (Last updated February 12th 2016)_____________________________
Aerobask site : aerobask.comAerobask Developer Support : Support forum X-Plane.Org______________________________________________________________________
Review by Stephen Dutton
11th February 2016
Copyright©2016: X-Plane Reviews
Review System Specifications:
Computer System: - 2.66 Ghz Intel Core i5 iMac 27”- 9 Gb 1067 Mhz DDR3 - ATI Radeon HD 6970M 2048 mb- Seagate 512gb SSD
Software: - Mac OS Yosemite 10.10.1 - X-Plane 10 Global ver 10.45
Addons - Saitek x52 Pro system Joystick and Throttle : Sound - Bose Soundlink Mini
Scenery or Aircraft
- KBDN - Bend Municipal Airport 1.2 by Gendo (X-Plane.Org) - Free
- KPDX - Portland International Airport 1.02 by MisterX6 (X-Plane.Org) - Free
-
8 hours ago, Guest said:
Is someone having news about the release target ?
Your guess is about as good as mine??? No idea. SD@X-PlaneReviews
-
1 hour ago, Guest said:
I'm kinda bummed on buying this. It doesn't have any instrument procedures in it???? I feel like I was a little misled given they tout that you can program flight plans so why is the the rest of the G1000 navy procedures not there?
I note in the review the Cirrus has "not a completely Garmin system but a variation in the aircraft and noted as a "Perspective system", but close. " which means it is not a direct copy of the G1000 system but a hybrid version of the system, so if you want a full G1000 system then this is not the aircraft for you. If you want that sort of precision then say the Aerosoft CT182T Skylane G1000 HD Series which is a full G1000 suite would be the better choice. SD@X-PlaneReviews
-

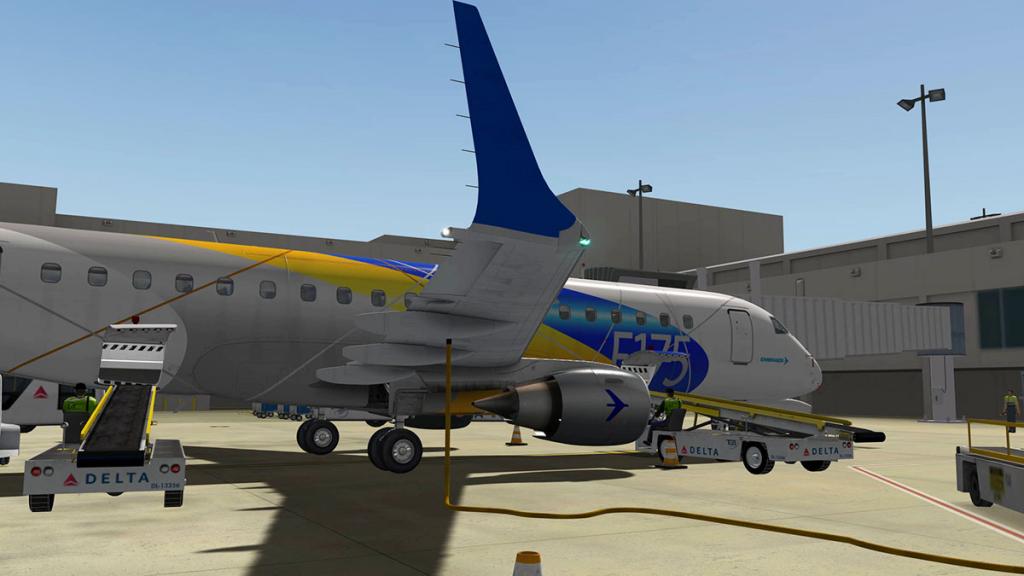
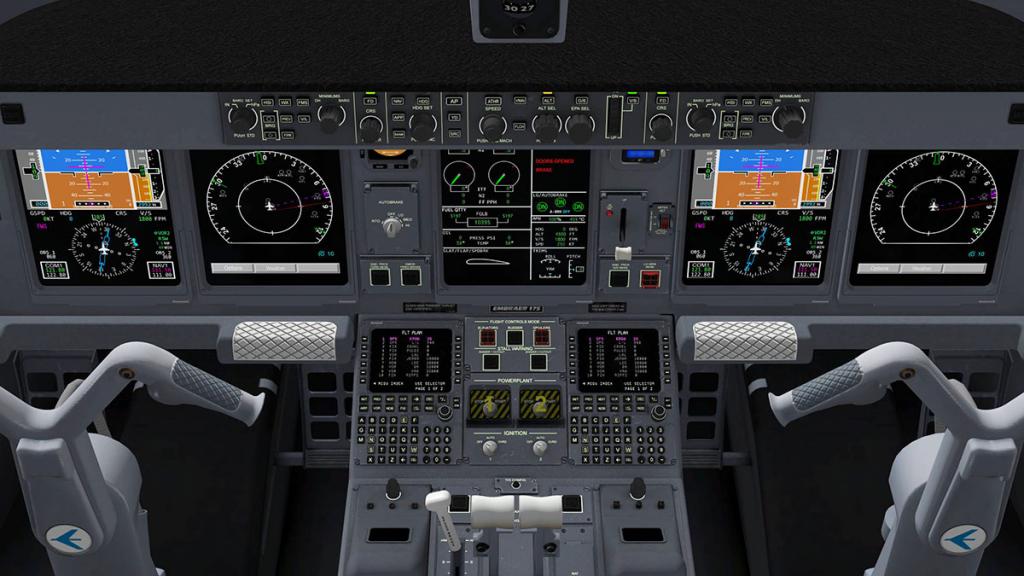
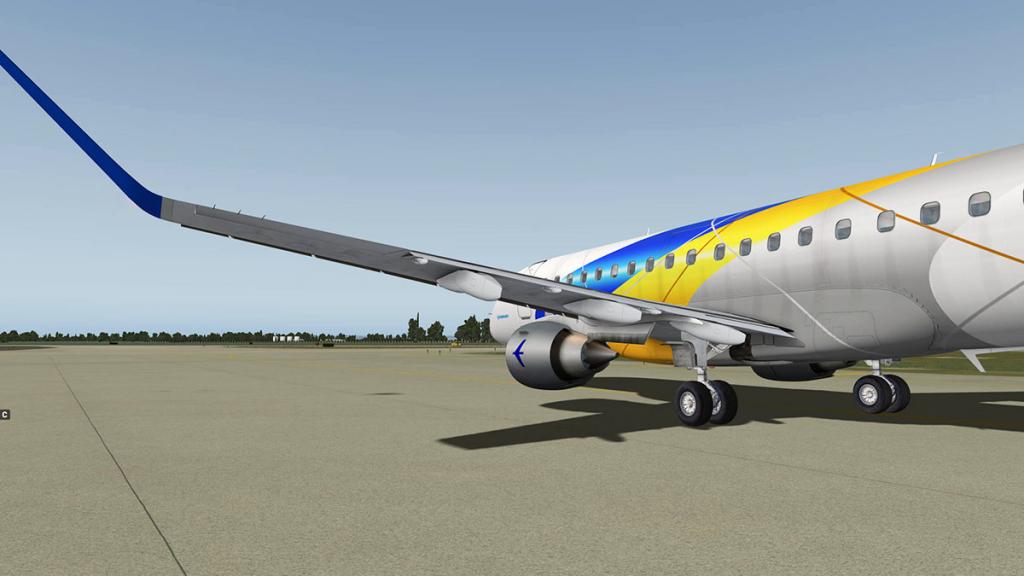
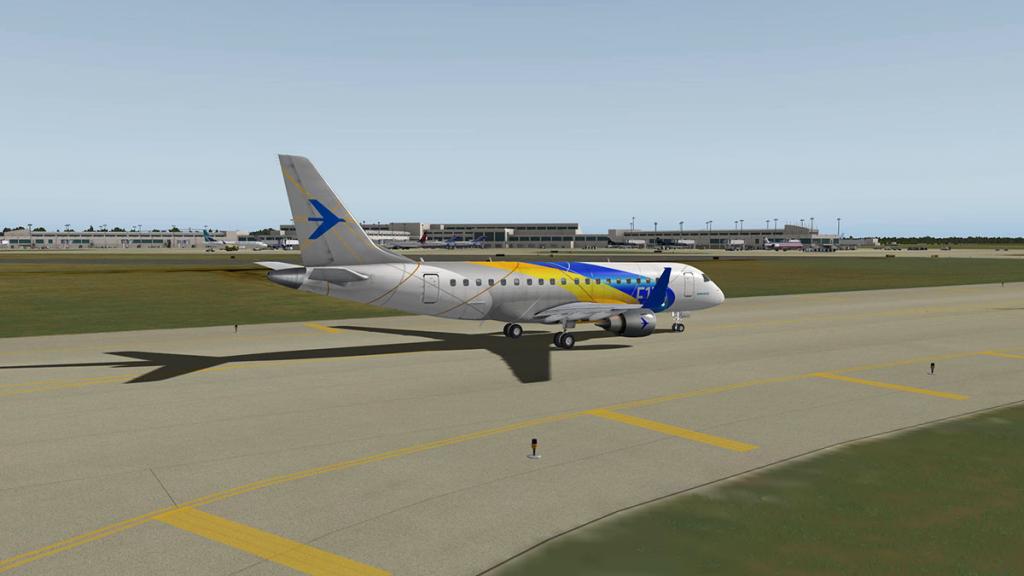
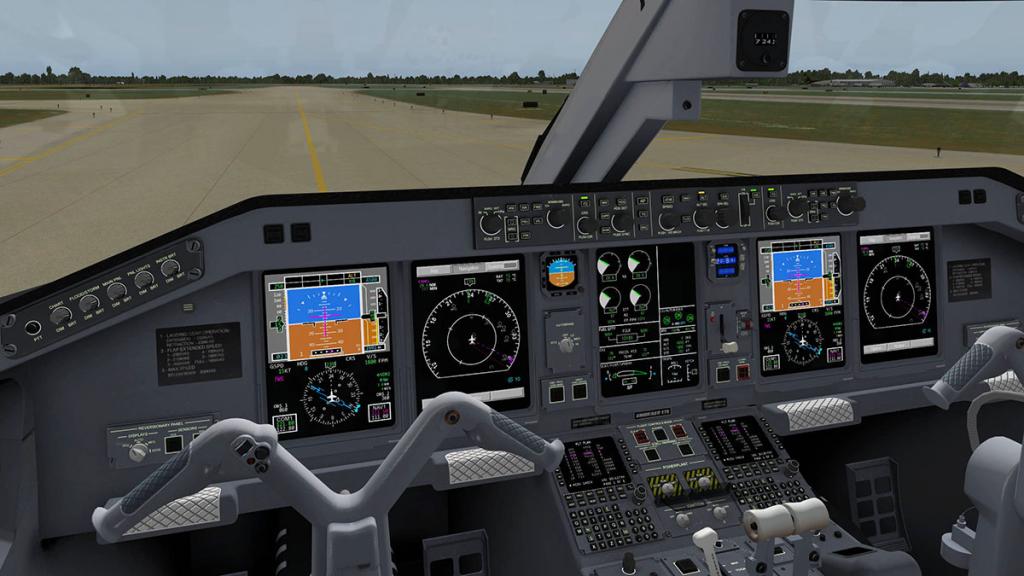
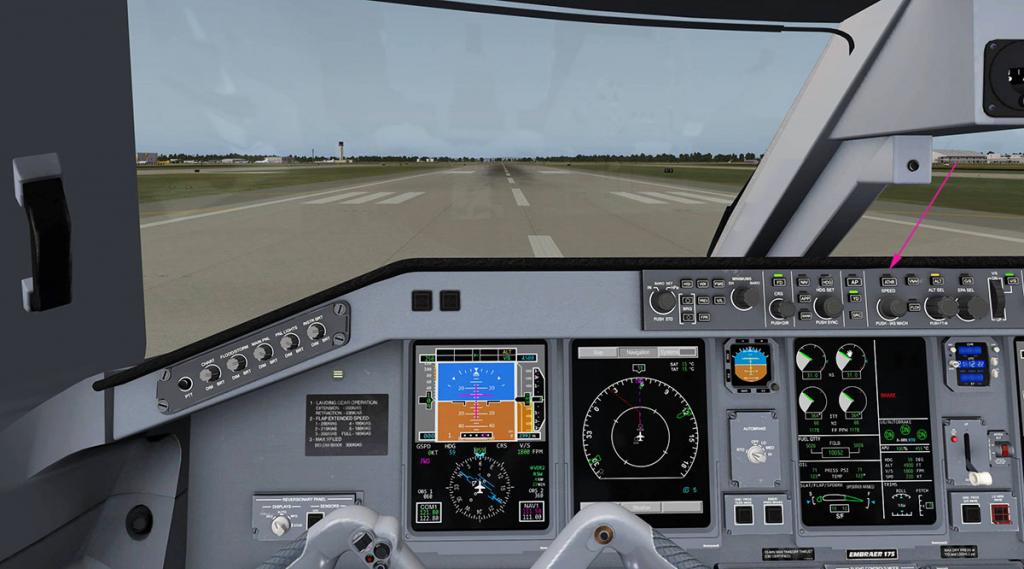
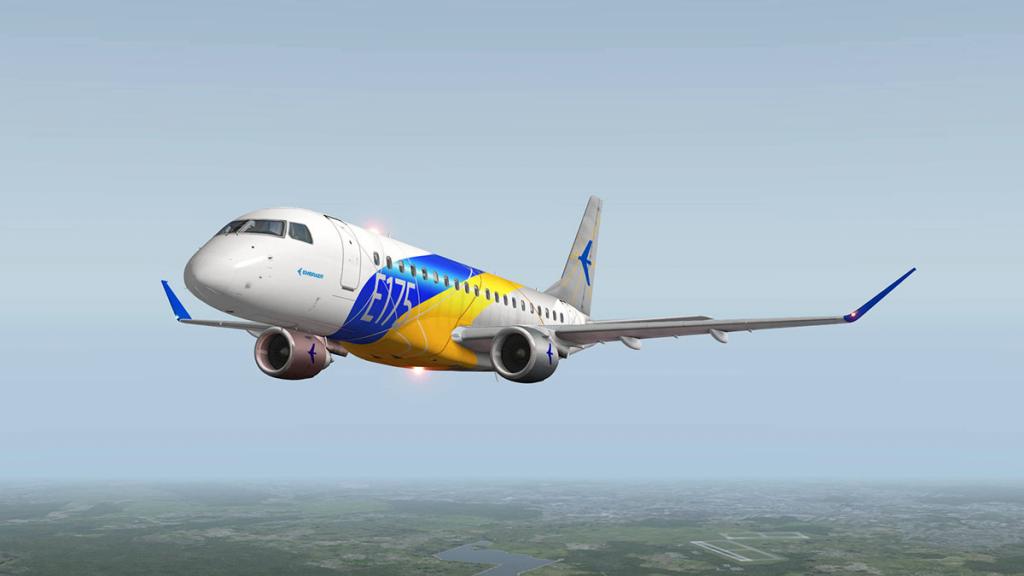
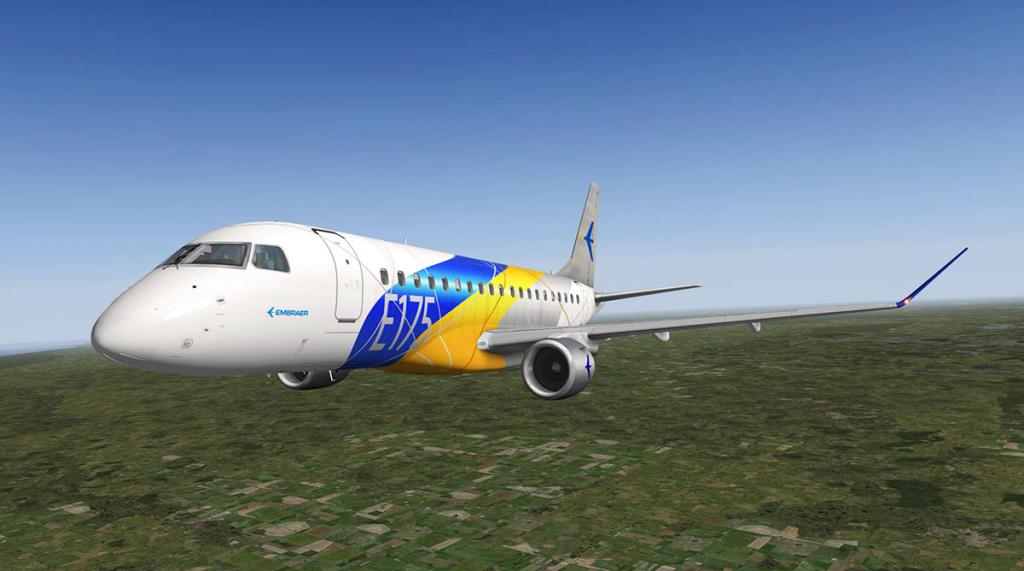
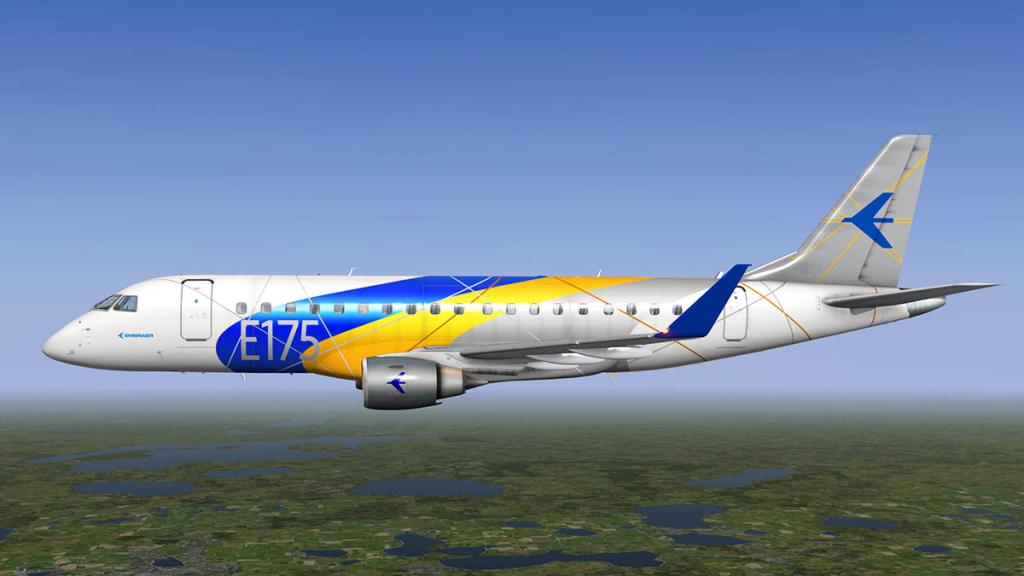
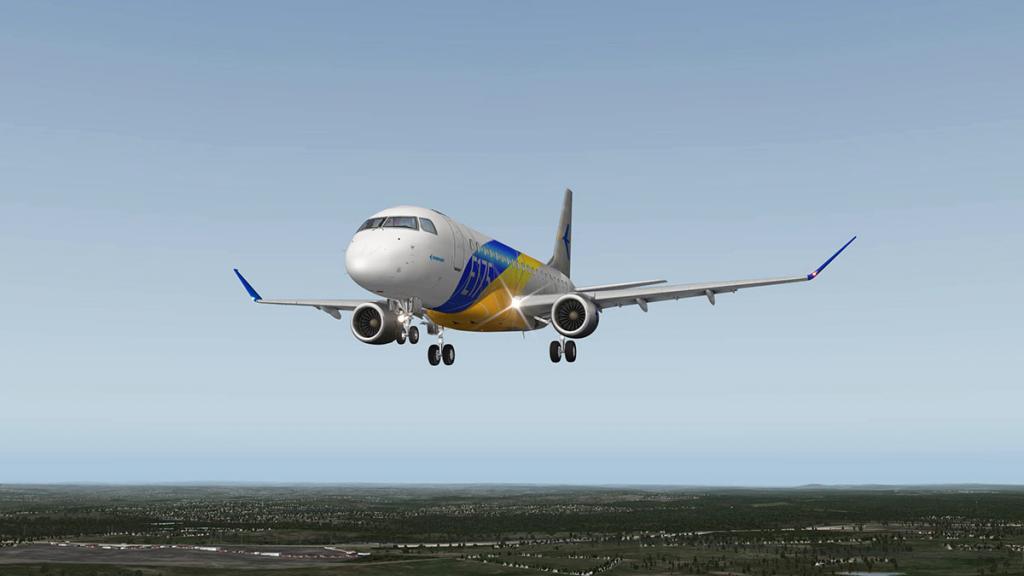
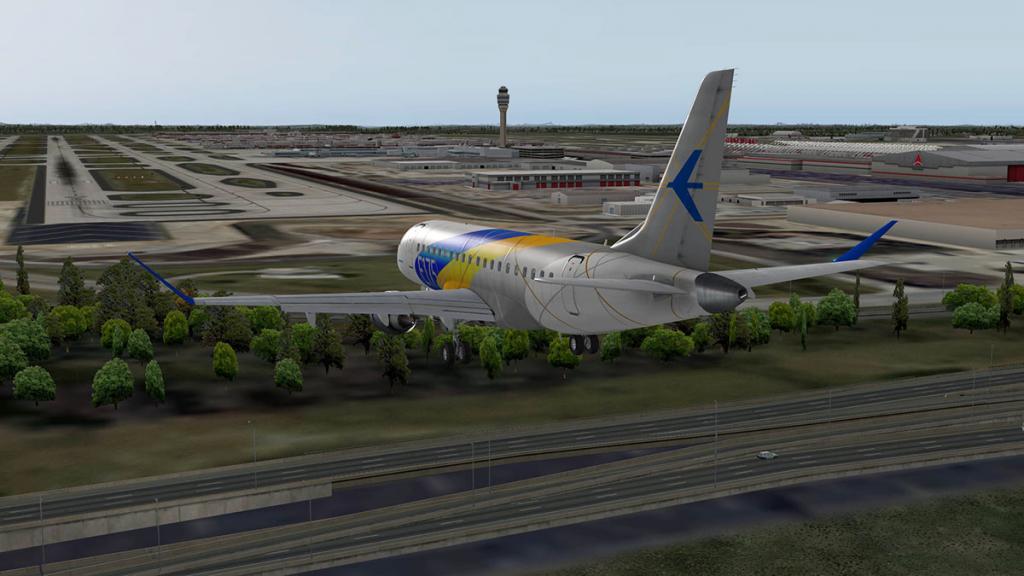
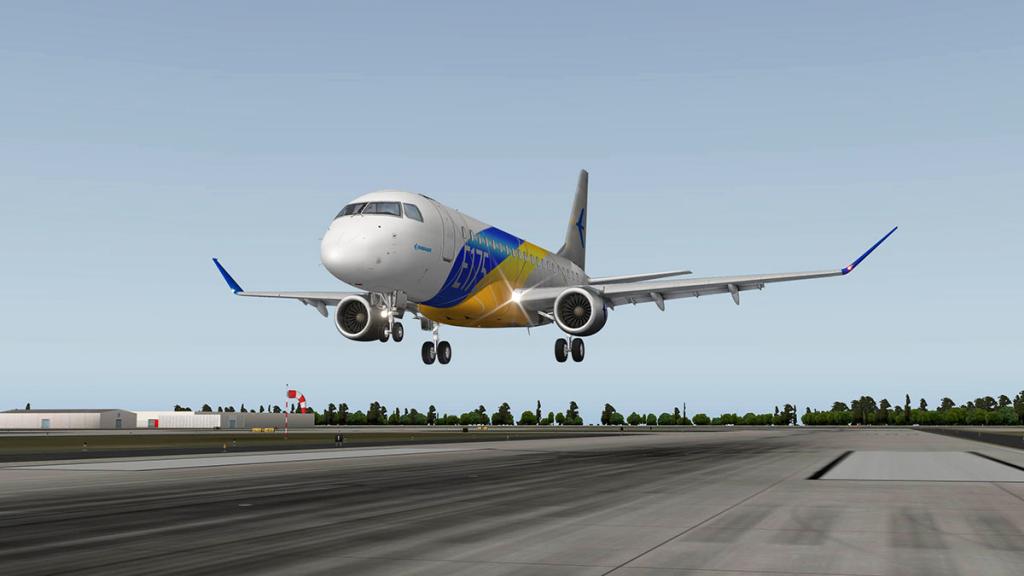
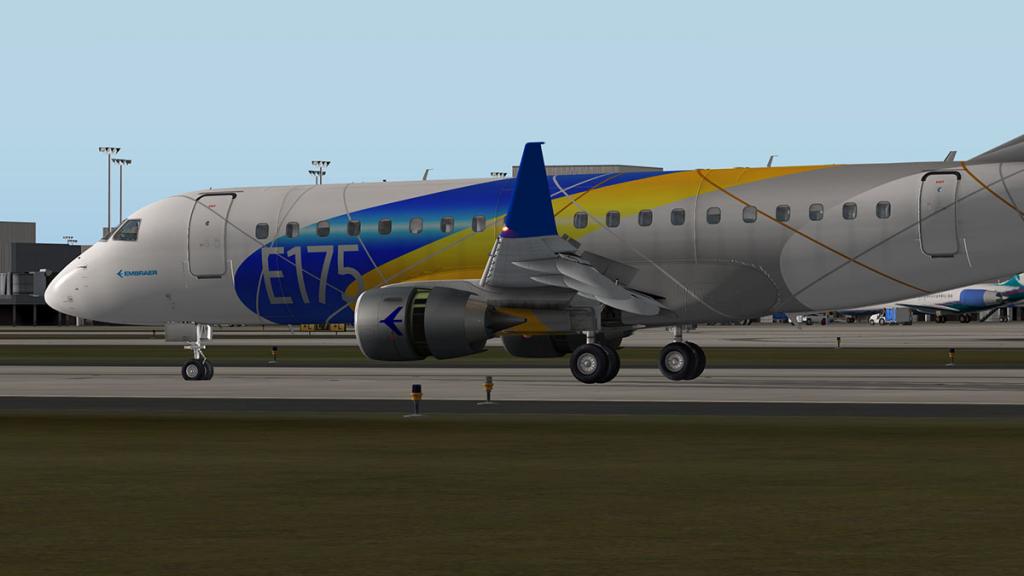
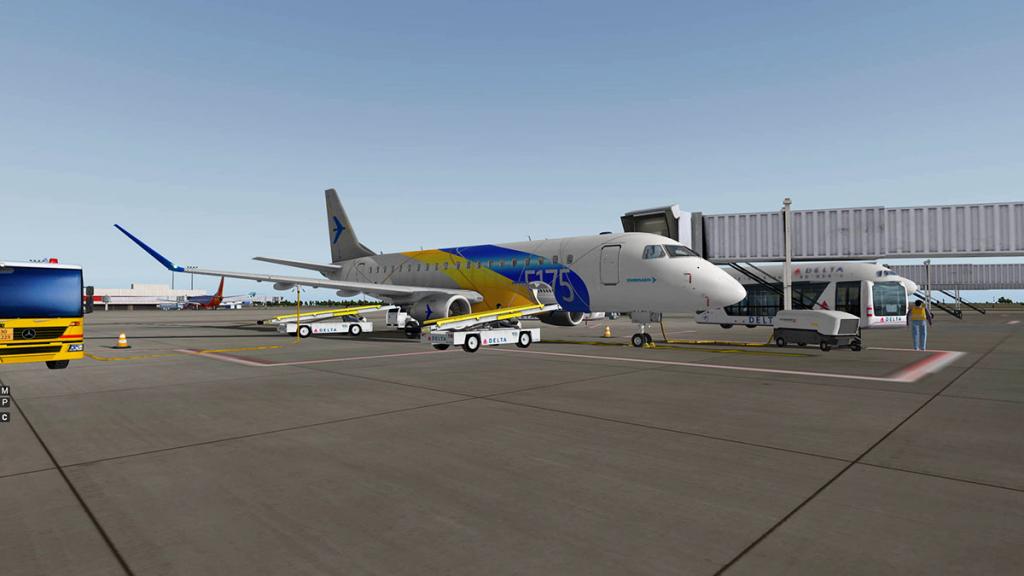
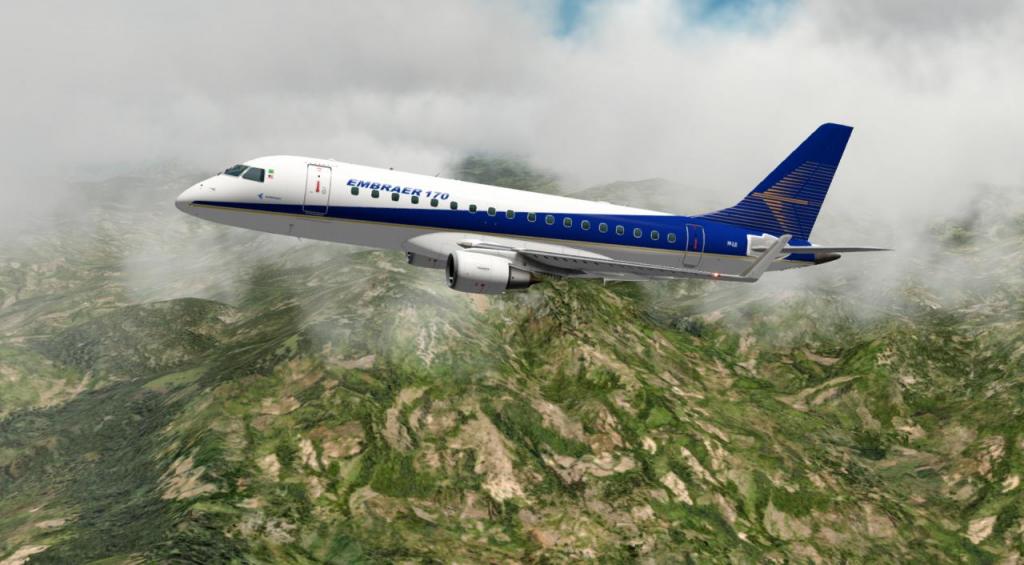
Aircraft Update Review - Embraer E175 v1.1 by X-Crafts
No matter how many t's are crossed and every i is dotted it is impossible to cover every single aspect of a first release of a quality aircraft. So the speed of an update and the spread of the coverage to clear those unforeseen bugs and fix those missed items and even add in a few extra new features is really the point an aircraft really starts to shine and you can see how good it really is.
This is the first update for X-Craft's excellent Embraer E-175 which was released in early December 2015. This v1.1 release certainly does cover a lot of ground and there are a few changes to the actual way you operate the systems of the aircraft, all in the name of refinement.
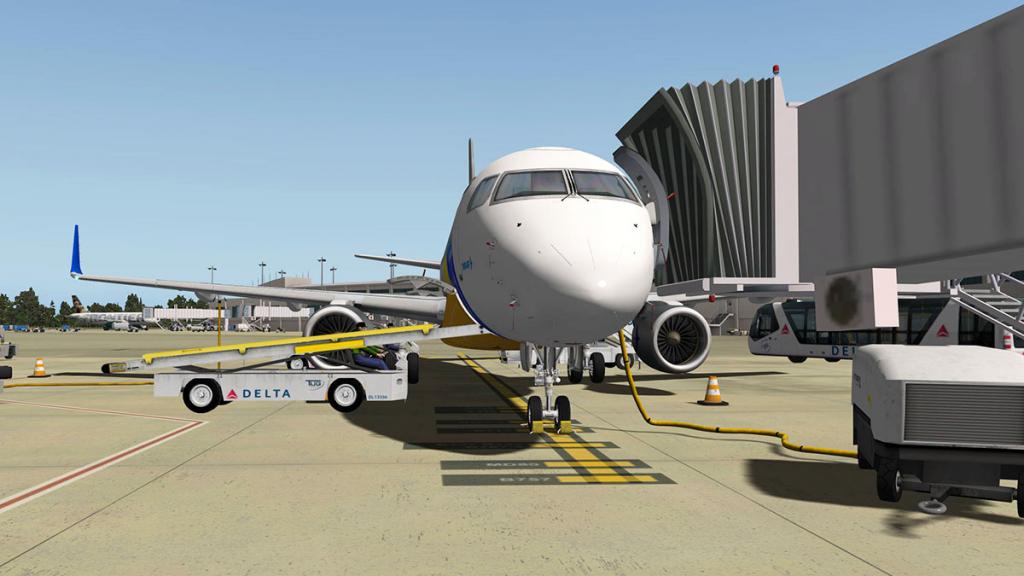
X-Craft's E-175 is certainly a big step forward from this progressive developer. Modeling and design wise it is overwhelmingly a lovely aircraft, you simply can't fault that aspect of the machine.

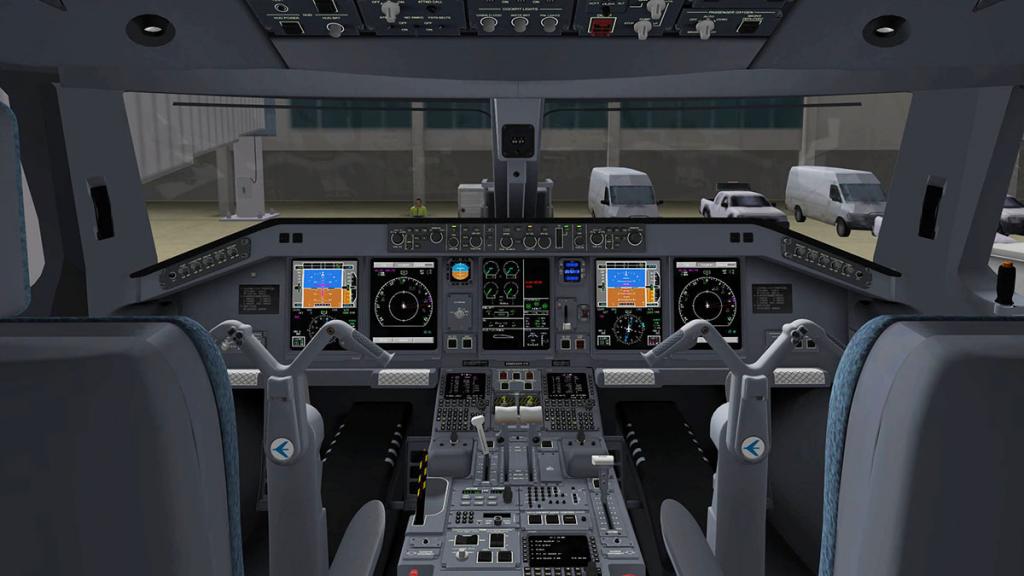

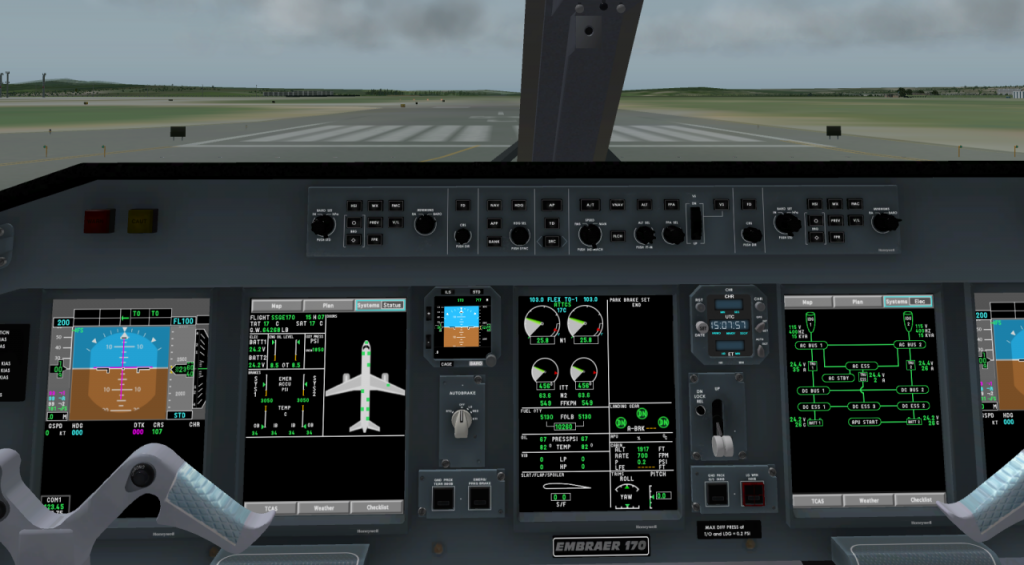
Internally the E-175's cockpit it is a great place to fly an airplane. But there was something just slightly missing when you flew it. The word that comes to mind is clunky, not a big clunky but a quality refinement missing clunky, small almost non-existent items jerked or activated with a bit too much sharpness and no matter how great everything else worked and looked you felt it was just slightly missing the mark.
It is what I call the missing 5%, that ever small gap that brings the aircraft to the high standard we all expect for our payments. But that 5% is also the most hardest if impossible margin to close, and I will make it clear that no aircraft will every be 100% perfect but you can get close, very close.
And you really feel that in this v1.1 E-175 update that a lot of that gap has been well and truly closed. Certainly it is a far more smoother and competent aircraft, not that I stress again the base release aircraft was bad or awful in the first place because it wasn't. but this version has a greater refinement now as part of the package.
There are a few changes as well and a couple of new features of where we will start.


The release aircraft did come with this "Enhanced Winglet" design but the operation to change them was messy. Now they are just a menu choice selection away as there is a new menu selection to switch them over in the plugins list.

Menu selections on the left lower of your screen are still very good, The GPU can now also be disabled on the OverHead Panel (OHP) as well.


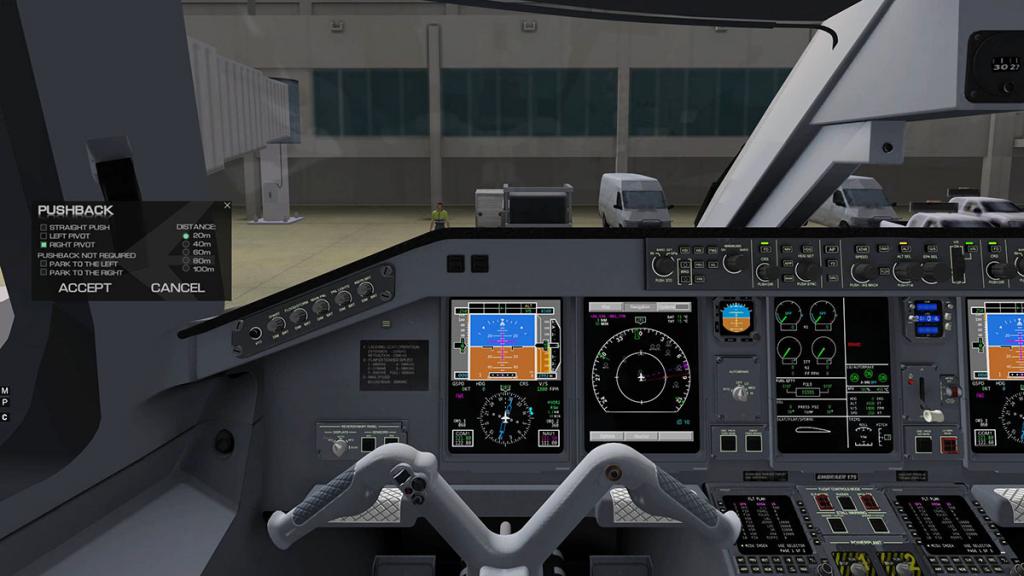
Startup your "Pushback" and now when you "Accept" the menu's disappear except for the "C" Checklist tab. Weird at first but you get used to it. On the other end when you park the aircraft and set the "Brake" and the aircraft is below 100ft AGL the menu's reappear. I found that originally they didn't come back correctly and when I needed the external GPU to power the aircraft when I shut the engines down, that is now fixed.

On engine startup you really notice a big change... the sounds. The sounds have had a significant overhaul and they are seriously better, deeper and with far more variation, besides a third party addon package they are now very good to excellent. The sounds have been refined in volume as well in the flaps were too loud, and the startup sounds were (really) average. You really notice or know the undercarriage is in the (going) down position in flight because the wind sounds have been refined and heightened, and so a significant upgrade there.
The main landing and taxi lighting has been refined to meet the X-Plane 10.50 conditions, still just slightly too large but far better than the large globules of light before. Wingtip lighting has also been adjusted and tightened to make them more realistic. A small note on that the engine fans are now running in the right direction... did you notice that?

The FMS has had some attention as well. There was an issue of a warning that a flight plan .fms file exists when selecting a file-name to use when saving the current route that warning has now been overrided. The coding has been corrected in that now it does not properly detect and reject waypoint misplacement if the waypoint is an NDB, and a VOR with the same NAVID that is found before the plugin finds the correct NDB waypoint. The display of the FLT PLAN page when no waypoints have been loaded is now correct.
You now also have the ability to read tail.txt files, placed in livery folders. This change allows the RADIO 1 page to display the actual tail number for the aircraft depicted in the livery. The maximum number of characters that can currently be displayed is eight (8). The Default is "ERJ-175".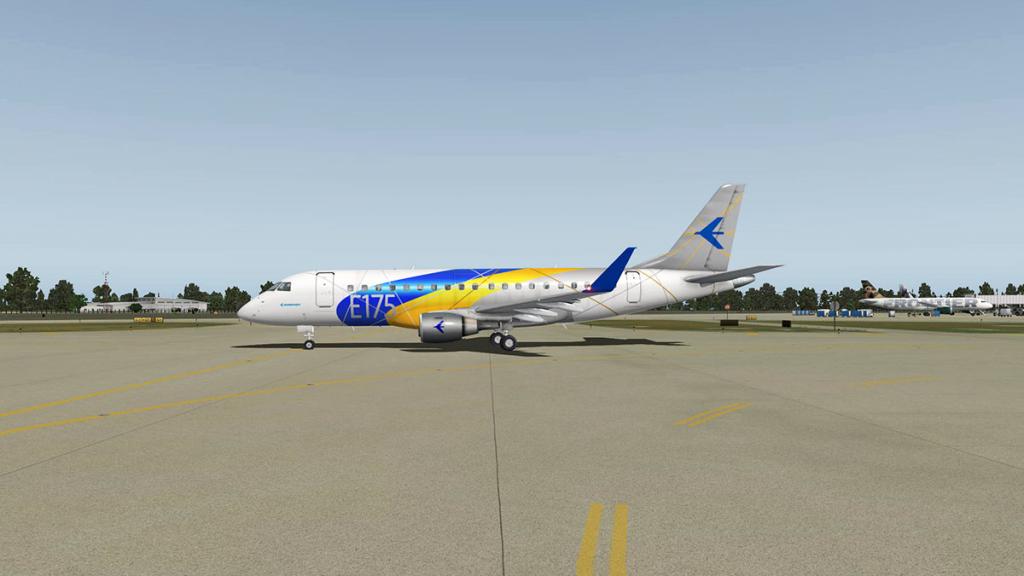

Your choice if you like the new enhanced winglets is to your personal preference. But I think it is all very Batmanish and they make the aircraft very wide in manoeuvring around tight airport ramps.
If you read the release review you would know the E-175 requires a set procedure to takeoff and climb correctly and needed a little practice to get the right rhythm to get it perfect. No doubt this update makes that procedure far smoother, better and you can't now use the ATHR (Auto Throttle) until you are airborne. This stops you from setting the ATHR on the ground and letting it power up the engines and sending you cascading through the scenery. A welcome addition.

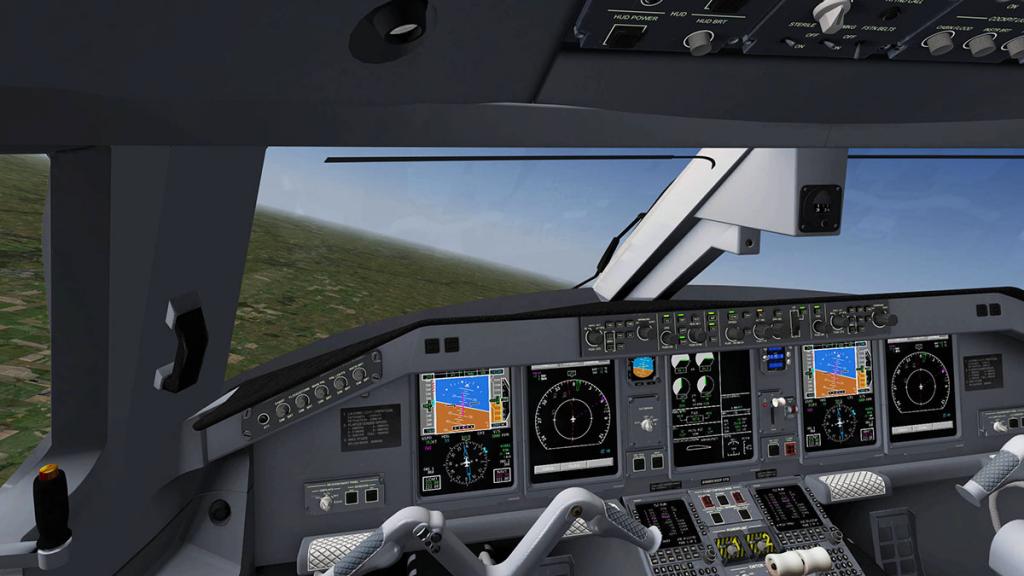
There has been a lot of adjustments to the Primary Flight Display (PFD). The artificial horizon was wrong in value and that has been corrected (it was terrible in the pitch) and the Vertical Speed (V/S) indicators are now correct. And that annoying vertical black line has also been banished. The CRS (Course) indicator now works. On the MAP display there is now a VOR pointer (I still would like one on the lower rose on the PFD) and NDB arrow. The clicking areas have been enlarged (way too small before) and the range + & - was the wrong way round, and replaced by a finger manipulator. You can now actually change the range by using the range indicator on the main MAP display which is very handy and easier than fumbling around menus.
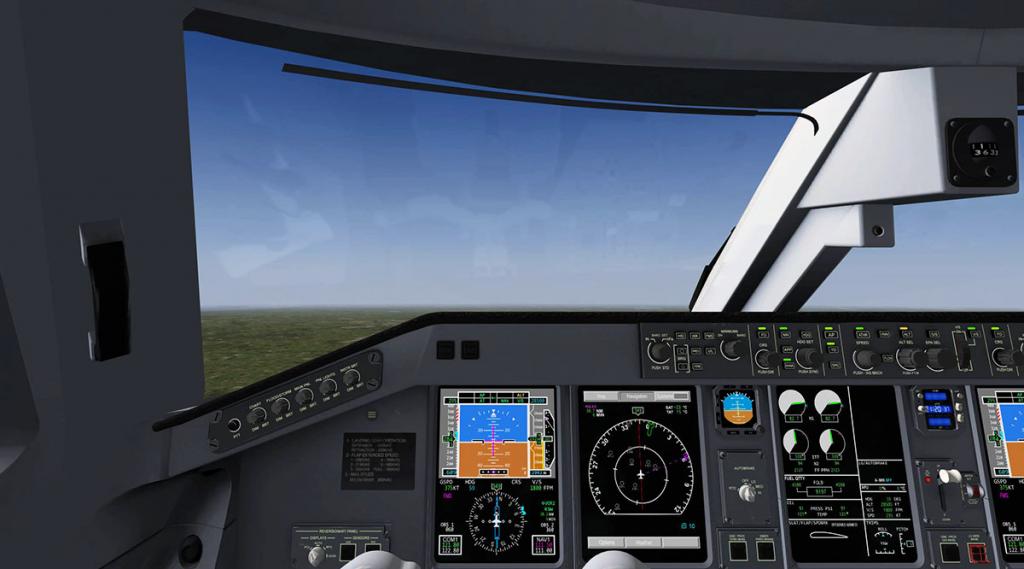
A few items around you in the cockpit have been touched up... The windshield is less shiny now in the center for better visibility. (and the glass stays in the window frames when you open them), and there is a new chrono clock.
But the biggest changes are the ones in the movement and actions. The aircraft feels so much more refined in the actions and controls, and I found the flying process far more easier and certainly better. It is the small stuff, the tweaks you can't see or touch that can give you the better feedback that the aircraft is just that... better.
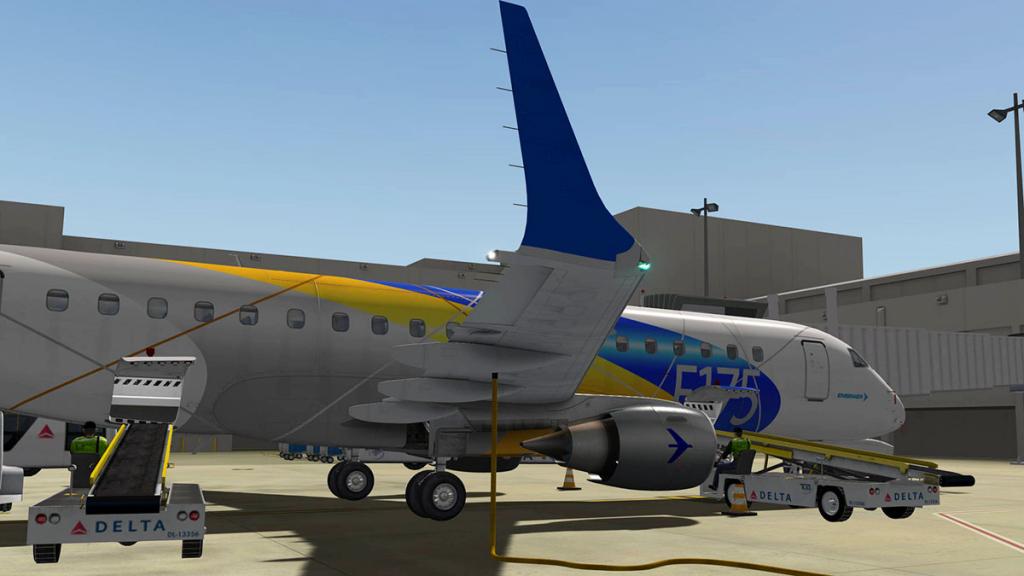
Liveries
More new liveries have been added to the package, including a sensational Embraer house paintjob.
Others include Lufthansa Regional, Two Star Alliance in LOT and U.S. Airways Express and a Tulip United. The Alitalia Livery has had some attention with more detail as well.
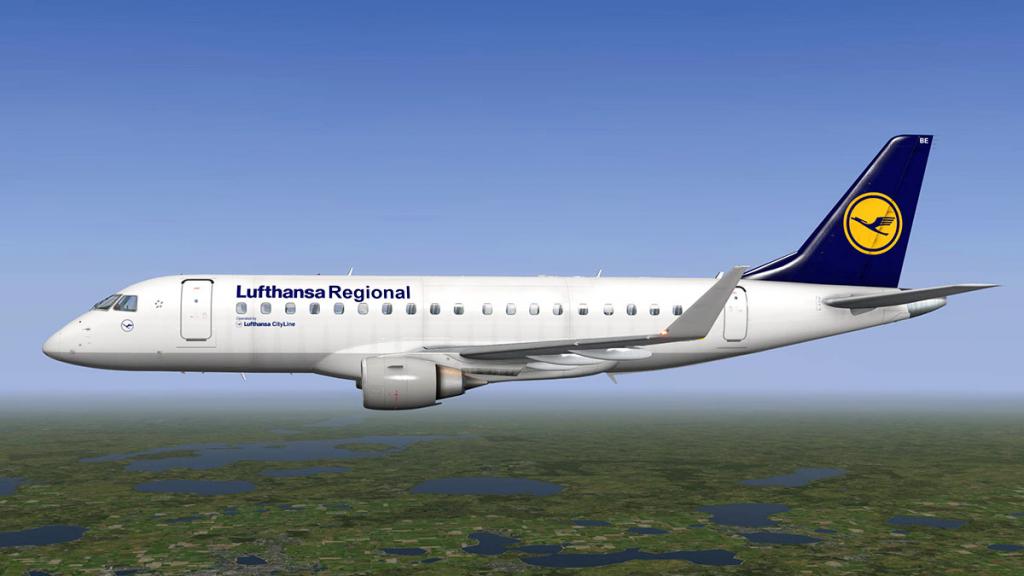
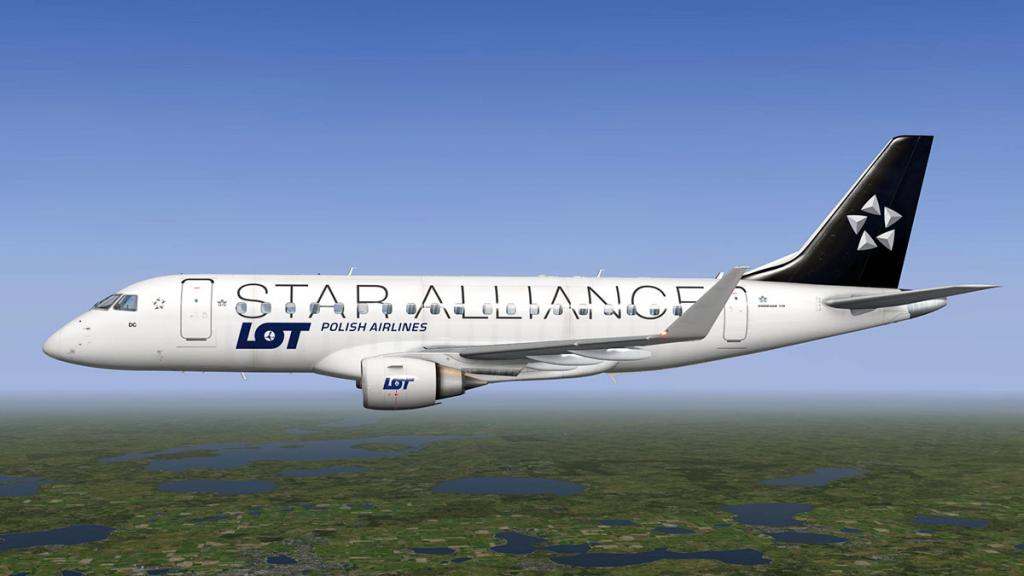
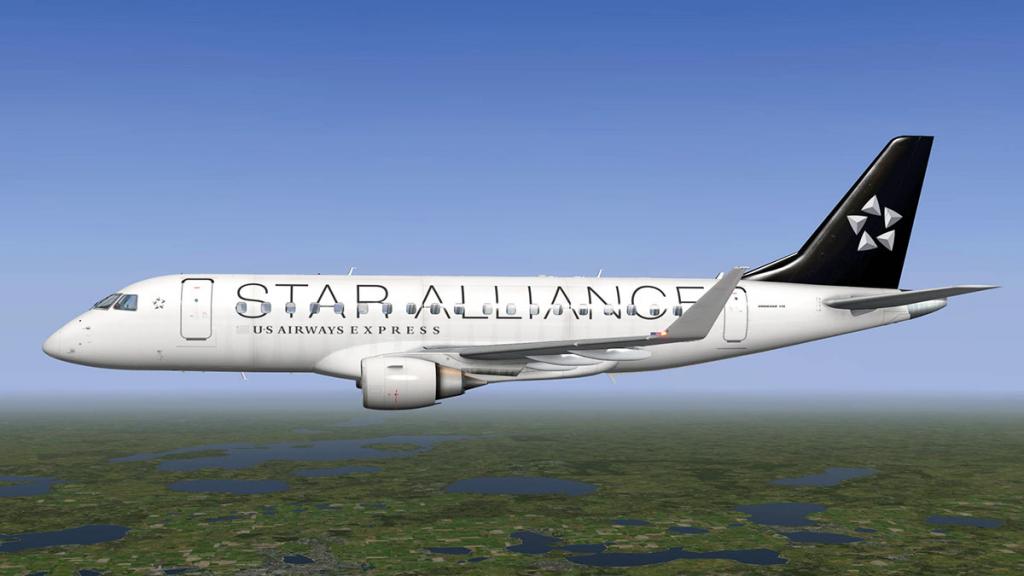
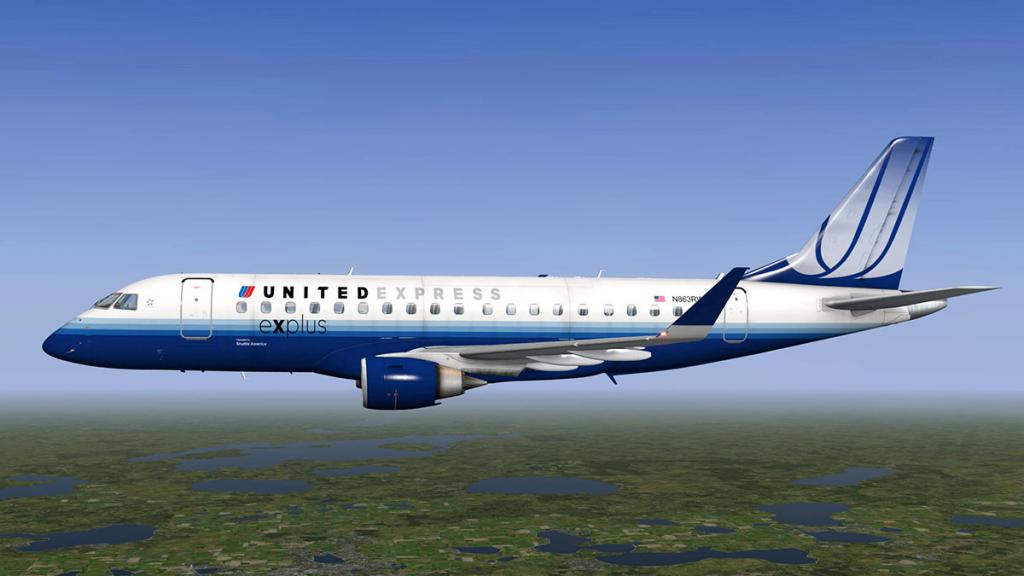
This aircraft looks great in any livery and there are now 22 to choose from from donators of their excellent work. Highlights are...

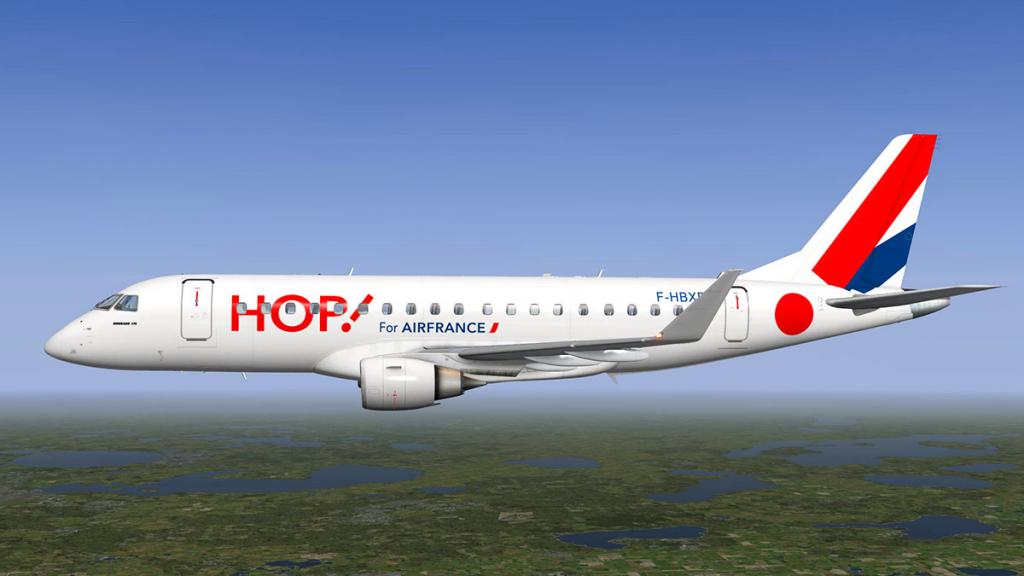
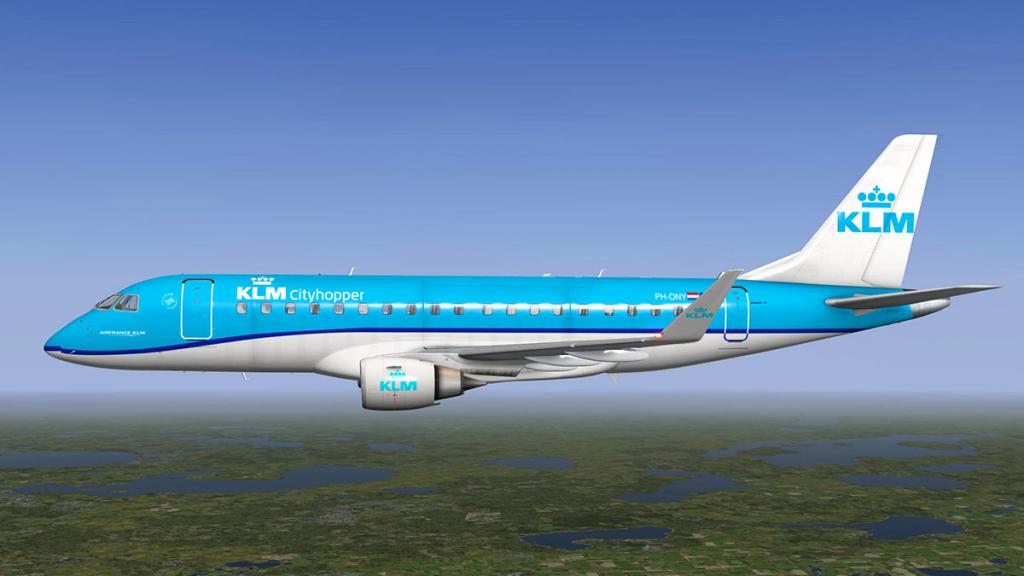
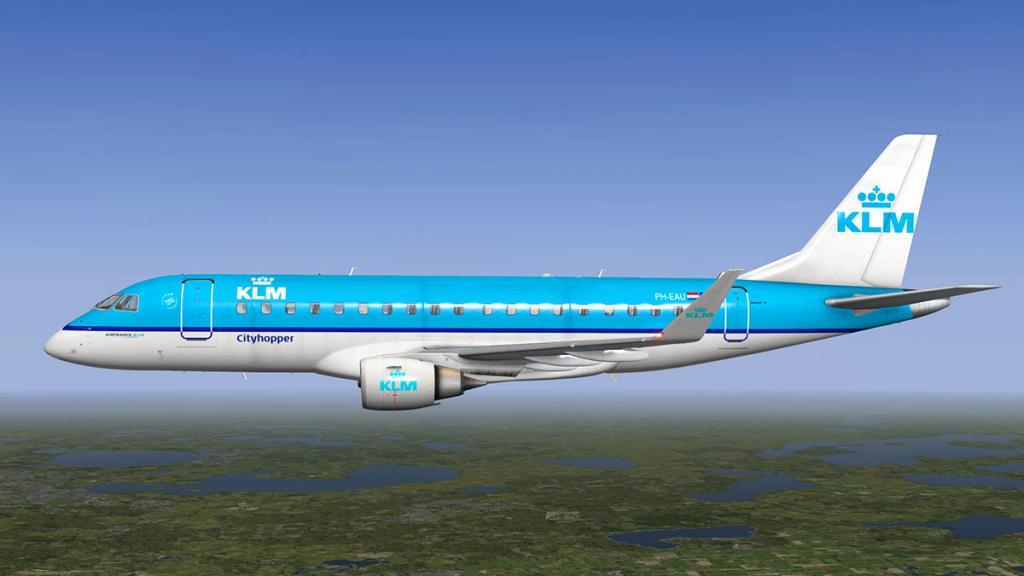
British Airways CityFlyer, HOP! (Air France) and two variations of the KLM "Cityhopper". There is now an excellent paintkit available.

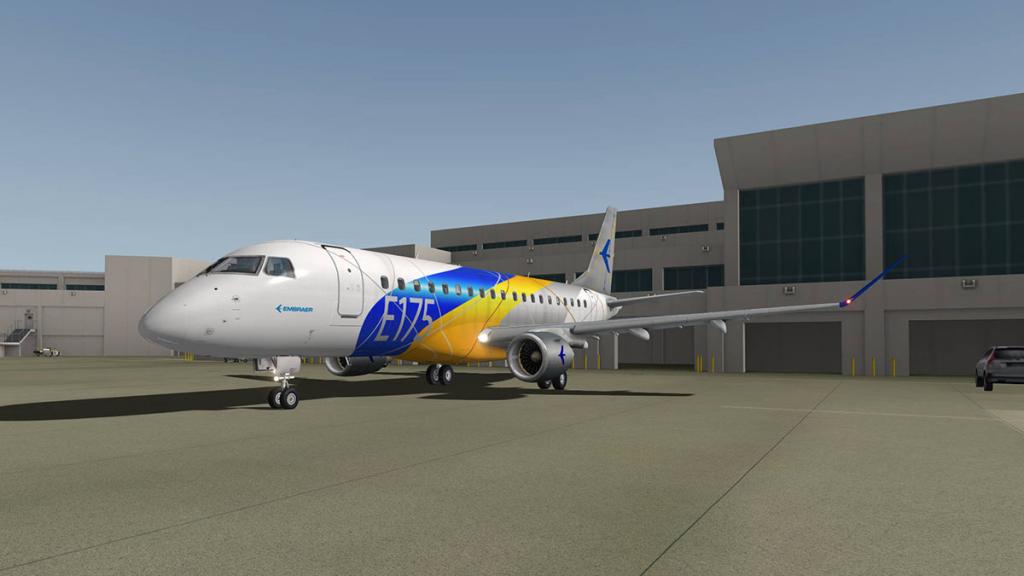
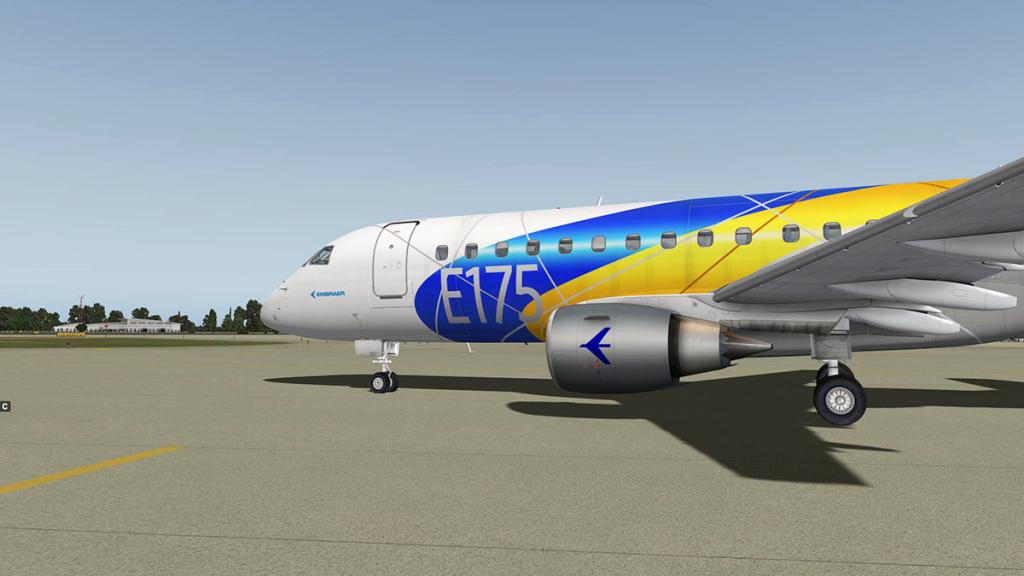
This is an aircraft that you never tire of looking at. In this regional design it looks great at any angle, just a nice looking aircraft.


This was the same route as with the review from KRSW (Florida Southwest) to KATL (Atlanta) and you just power there is a regional. It is an aircraft to enjoy and just do your job of flying point to point and doing the flying as efficiently as possible, get in groove with the E-175 and you really enjoy the aircraft. But it does demand you fly it well, and give it a lot of professional attention.
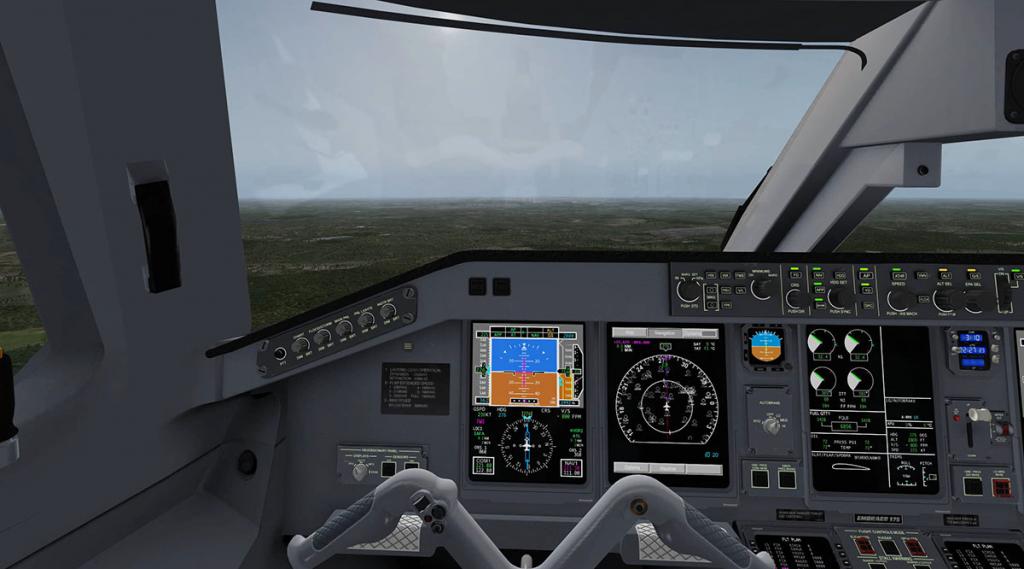
5000ft on the money and a turn to finals for RWY 27R. The ILS vertical diamond has been corrected and looks correct now, which I found annoying before. Gear down and the better sounds tell you enough that you don't have to look at the indicators to know they are down in the slipstream.
Over the fence and a nice smooth landing on 27R gives you good feeling...

As noted once you brake up you get your menu's back and and can shut down the aircraft... There is a GHDHanding set for the E-175 at the JARDesign site to add in more ground handling animations.
Summary E-175 1.1 update
No doubt a lot of tuning and ground was covered with this update. Not that the E-175 from X-Craft's was in need of attention on its release. But there is a lot of nice changes and just an overwhelming feeling that the aircraft is now much more complete and more refined for the changes. I ran many runs between KRSW to KATL (five actually) and loved the aircraft more and more each run, and compared to the release version it is certainly more smoother and more professional in the way it is controlled and activated... so all in all a really great update.
_________________________________________________________________

Yes! the Embraer E175 v1.1 by X-Crafts is NOW available from the new X-Plane.Org Store here :
Price is US$34.95
If you have already purchased the Embraer E-175 from X-Craft's at the X-Plane.OrgStore then go to your account and upgrade to v1.1 for free. The update is online for download now.
Full release X-PlaneReviews E-175 review is here: Aircraft Review - Embraer E175 by X-Crafts
Features
- Accurate dimensions based on drawings and documentation provided by Embraer ©
- Windows, Mac and Linux compatible
- Custom FMS
- Custom pushback plugin with animated tug
- On-screen checklist plugin - Plugin menu for door control, ground objects or GPU
- Tested by a real Embraer E175 pilot
CUSTOM FMS
- both the custom and stock FMS are available on the pedestal or as popup panels
- More details about the FMS below
INTERIOR:
- Amazing 3D modeling of cockpit and cabin
- High resolution textures
- High resolution Embraer style PFD, MFD, EICAS displays
- Pop-up screens, pop-up radios panel
- MFD with 8 synoptic pages and a new improved Navigation displa
- High resolution textures on panels - Text is crisp and clear to real
- Intuitive cockpit manipulation - I have always taken great care to make the cockpit as easy to use as possible. This means all clickable areas in the cockpit are very big so that you can easily click on any button, knob or lever in the cockpit
- Each switch, lever, knob, and handle is animated
- Detailed cockpit lighting - All cockpit lights are controllable
- Cargo area modeled
- HUD equipped
EXTERIOR
- 4K High resolution textures (fuselage 10000px/meter squared)
- Highly detailed landing gears
- Flap and speedbrakes mechanisms modeled
- Realistic Wingflex animation
- 2 versions of winglets available
- 9 Liveries included so far and more are on the way!
OTHER FEATURES
- compatible with UFMC, X-FMC
- compatible with JAR's Ground Handling Deluxe
- Night lighting, Nav and Strobe lights cast light on the surroundings
- Obviously a set of custom sounds
- 10 Liveries available
______________________________________________________________________
Requirements :
Windows, MAC or Linux.X-Plane 10.40+ (any edition)4Gb RAM - 1Gb VRAM
Current version: 1.1 (last updated February 6th 2016)(Note aircraft is very good on framerate, playback is current with similar sized aircraft and features)______________________________________________________________________
X-Crafts Developer Support : ERJ - 175 by X-Crafts - X-Plane.Org______________________________________________________________________Review by Stephen Dutton
6th February 2016
Copyright©2016: X-Plane Reviews
E-175 Full 1.1 changlog is:
- Ground equipment and pushback options are now restored after landing
- The winglets can now be changed through a plugin menu
- There are now 12 liveries included in the package and 21 additional liveries available at the x-plane.org forum (http://forums.x-plane.org/index.php?showtopic=91249)
- More details and dirt added to all liveries included in the package
- Engine start sounds fixed
- Cockpit windows are fixed (the glass of the windows wasn't moving)
- New avionics sounds
- New chrono clock
- Reverse now works separately with hardware throttle
- Clicking spots on the MFD are all bigger now - very easy to click on all the buttons
- Vertical ILS diamonds fixed
- CRS indicator in PFD is now working
- GPU can now be turned on and off on the overhead panel
- ATHR can only be engaged after takeoff
- Cursor changed when changing the range in MAP Options menu. (TIP: You can also change the range directly from the range indicator in the map!)
- windshield was shiny in the middle
- VOR bearing pointer added to the NAV map
- Alitalia livery has many added details
- Flap sounds inside are too loud
- Updated xfmc and xchecklist config files
- Fans were rotating in the wrong direction
- The lights on the new winglets also illuminate the surroundings now
- Big misplaced nav lights on winglets corrected
- Artifitial horizon was showing wrong values
- N E S W highlighted on the FMS
- The little black line on the EFIS horizon is goneFMS changelog:
- Corrected ability to override warning that a flight plan .fms file exists when selecting a filename to use when saving the current route.
- Corrected coding that does not properly detect and reject waypoint misplacement if the waypoint is an NDB, and a VOR with the same NAVID is found before the plugin finds the correct NDB waypoint.
- Corrected display of the FLT PLAN page when no waypoints have been loaded.
- Added ability to read tail.txt files, placed in livery folders, allowing the RADIO 1 page to display the actual tail number for the aircraft depicted in the livery. The maximum number of characters that can currently be displayed is eight (8). (Default is ERJ-175).
-
1 hour ago, Guest Ben said:
Hey, I'd like to know if you've got a review for the update of Michael Wilson's L1011 coming. Thanks
Yes Ben we are doing the L1011, but it won't be this week till next weekend. SD
-
The Aerosoft KRSW review has been amended to reflect the notes from Omar, thanks for the comments
SD@X-PlaneReviews
-
News! - Sound Package Updated - A330 BlueSkyStar
As expected BlueSkyStar Simulations have released their updated v2.0 JARDesign A330-243 Trent700 sound package. No details as yet, you can update the new package at the X-Plane.OrgStore and just login and download from your account.
Details to follow...
In the mean time check out the BBS video of the new sounds, exceptional!
______________________________________________________________________
Stephen Dutton
2nd February 2016
Copyright©2016: X-PlaneReviews

-
News! - Aircraft Announcement - ERJ 170 LR by Supercritical Simultions Group
SSG (Supercritical Simultions Group) have announced their next project as the E-170 LR. This not the standard current E170 but the new E-Jet Evolution” series aircraft.
Based and heavily revised on their current SSG E-Jet series (E-170 and E-190) and incorporating a lot of elements of the SSG Boeing 748 series features, the new aircraft is due as noted late this late 1stQ or early 2ndQ of 2016.
Feature list noted is:
- Accurate 3D external model complete with detailed animations and textures.
- Many detailed liveries upon release with any subsequent liveries available as free downloads.
- Aircraft will meet most of the real aircraft's performance data for consumption, AOA, speeds, flight dynamics, etc. in close consultation with real world E-Jet pilots.
- Realistic 3D cockpit with high resolution in all render settings.
- Realistic displays (PFD, MFD with system synoptics, and EICAS).
- Many systems are implemented with realistic logic, such as electrical, hydraulic, pneumatic, engine fire extinguishing, fuel, wing and engine anti-ice (including automatic mode), communications, and TCAS.
- Electronic checklist system that can automatically detect certain aircraft configuration changes.
- Comprehensive autopilot functioning in modes similar to those of the real aircraft
- External lights and strobes operating realistically.
- Display management similar to that in the real aircraft.
- First Officer's MFD display is independent from the Captain's, and MFD has a pop-up option.
- EICAS messages based on the real aircraft's with lists and scrolling.
- Autobrakes with anti-skid system that works in all conditions and includes a realistic rejected takeoff mode.
- Realistic wing flex and other animations.
- Window rain effects and animated wipers.
- Option Menu incorporated into the cockpit VSD.
- Ground vehicles include a tow truck, fuel truck, GPU and airstairs.
- 3D sounds with DreamEngine plugin.
- Turbine Sound Studio sounds recorded from the real aircraft.
Custom built-in FMC and Navigation systems (subject to change) including:
- FMC made by FJCC especially for the SSG Evolution Series, including SIDs, STARs, transitions, approaches, flare and rollout modes.
- FMC is compatible with AeroSoft's NavDataPro and Navigraph navigation databases.
- Manufacturer's performance data embedded as tables in the fully functional FMC.
- Option to use either a 2D pop-up (resizable) FMC or one within the 3D cockpit.
- Custom radio communication audio consoles optimized for on-line virtual ATC operations.
- FMC performance information based on real aircraft data, including calculated V-speeds.
- FMC includes capability for autotuning navaid frequencies.
- Vertical Situation Display (VSD) on the ND.
- Terrain display mode on the ND, which is a part of the Enhanced Ground Proximity Warning System (EGPWS) on the real aircraft.
- Comprehensive Flight Crew Operation Manual (FCOM) and a Quick Start Guide.
The E-Jet Evolution Series is designed for X-Plane 10 and will be compatible with Windows, Mac and Linux.
______________________________________________________________________
Images are courtesy of Supercritical Simultions Group
Stephen Dutton
2nd February 2016
Copyright©2016: X-PlaneReviews
-

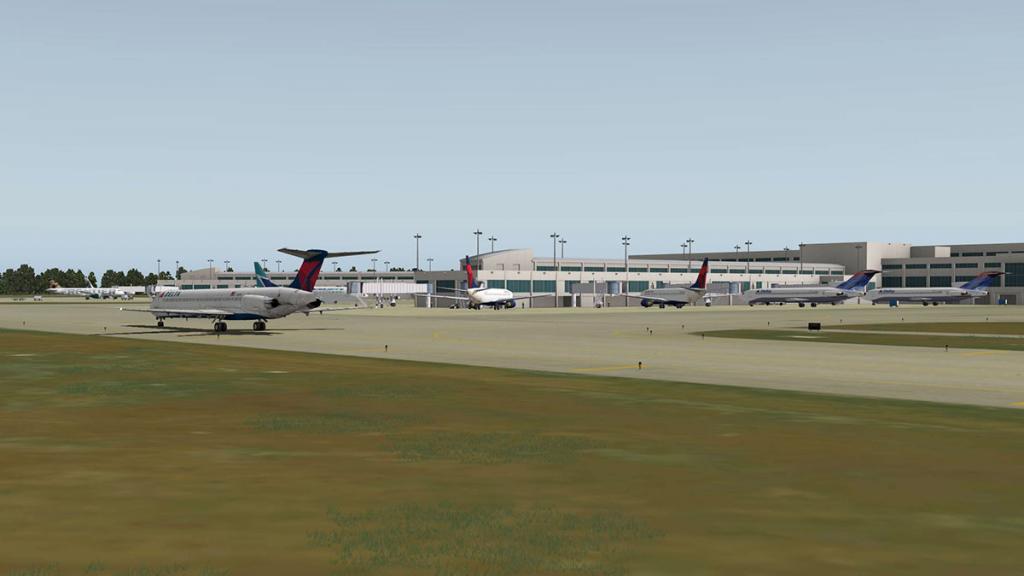
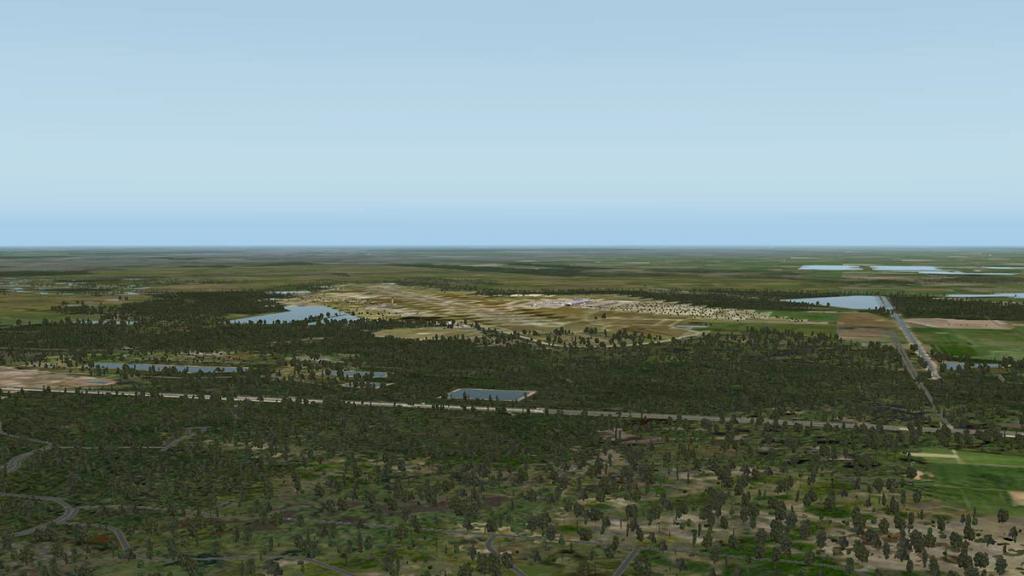
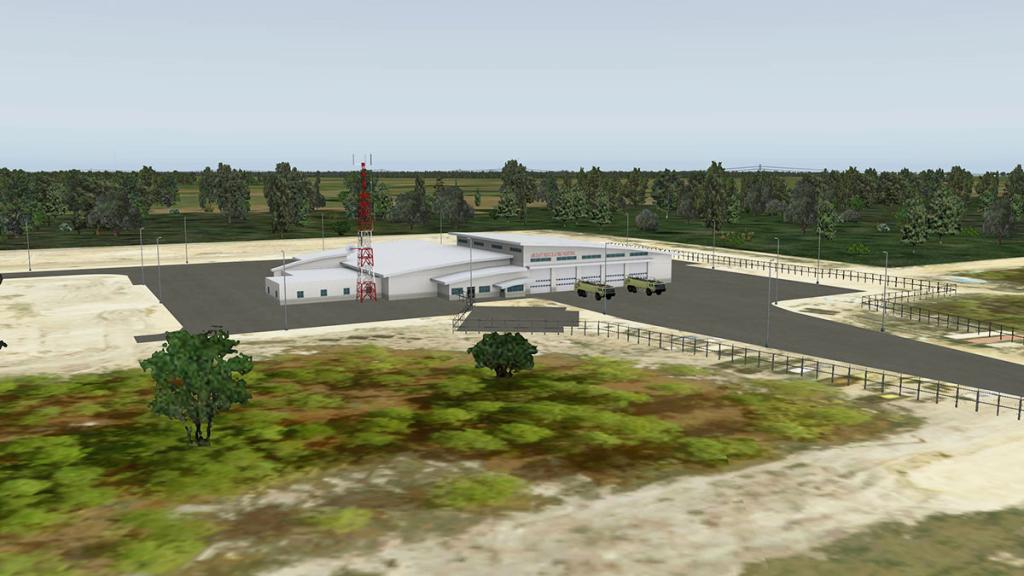
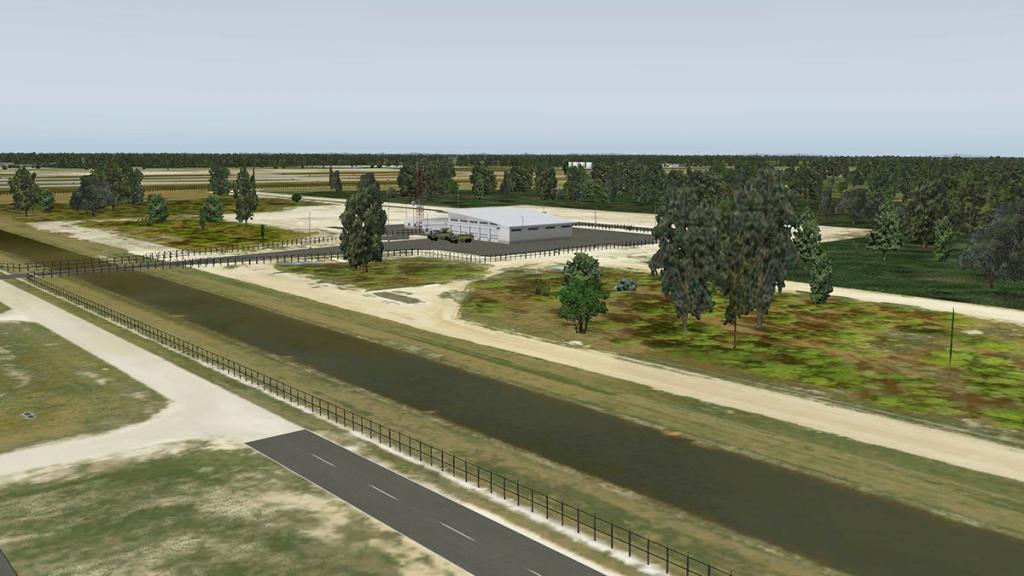
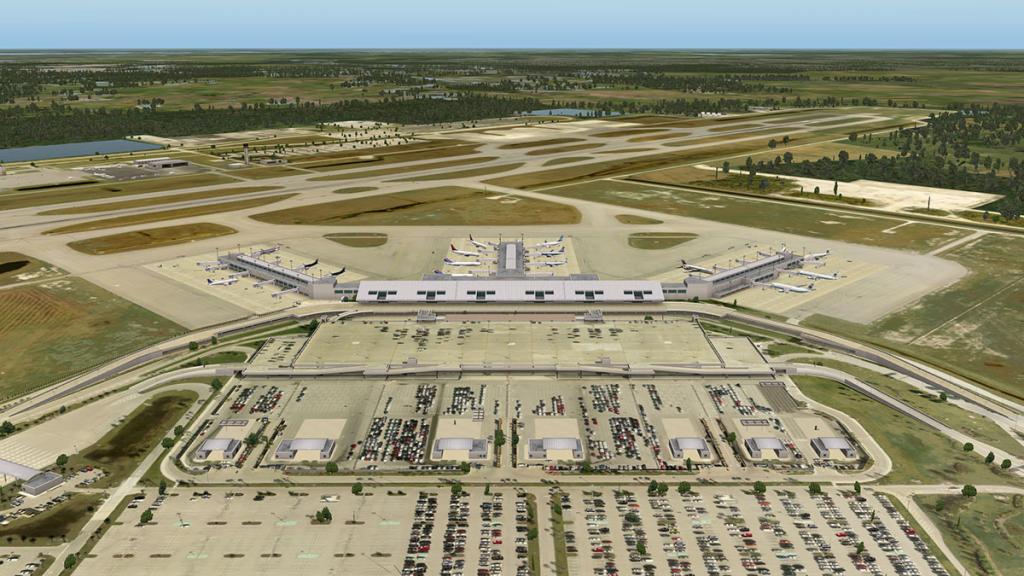
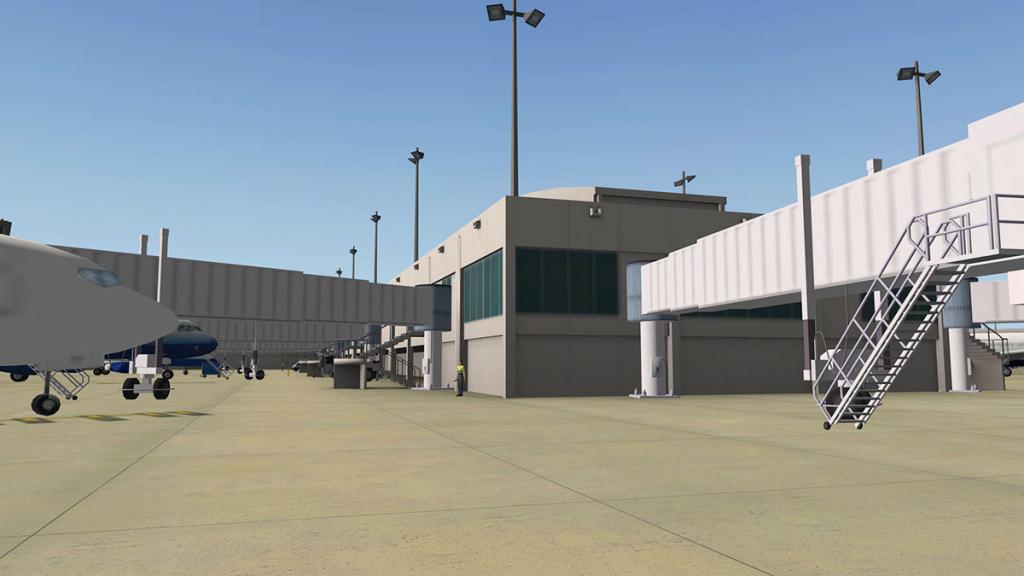
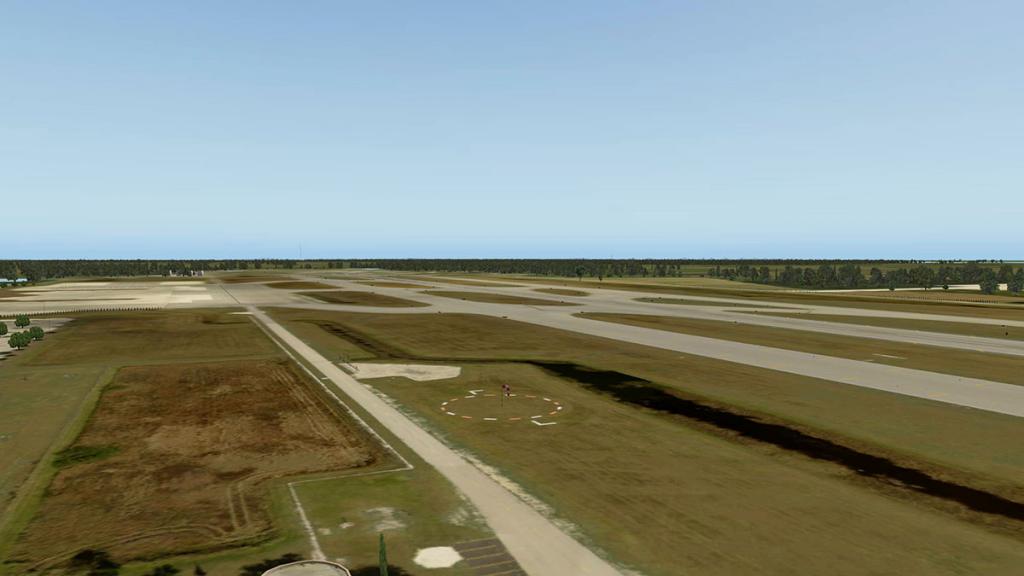
Scenery Review - Updated : KRSW - Southwest Florida International Airport by Aerosoft It is funny in X-Plane where you find your place. I live in Australia and I do use my local airports in YBCG - Gold Coast International and YBBN - Brisbane Airport a lot in my everyday flying. But my place is set out in Florida, KLAL - Lakeland Linder Regional Airport. I even made a home there by installing a portable office and all the odds and items in fuel drums and cones and all the odd stuff I needed to make it look like it was a work place. Most reviews start there, but I do try to make different reviews match certain locations. But KLAL is still my first port of call in any review. There are many reasons for this, but mostly it is a set parameter in finding out an aircraft's frame-rate (which I call Frame-Weight) and if the aircraft delivers the certain performance and conditions the developer has set out in the aircraft, in other words the scenery is an excellent base line. KLAL works well for other items, mostly in checking the frame-rate against X-Plane's default scenery (a lot of autogen on one side and none on the other), Its runways are extremely wide (Needed for aircraft like the Akoya) and you have great approach paths with the runways that are very good for circuits and you have one single ILS approach. Taxi distance to the runway is very small, but overall it is a really great airport to do reviews... so KLAL stuck. So if you want to do a review flight (Mostly in the lighter aircraft catagories), the most common routes I use is to either KOPF - Opa-Locka Executive Airport but it is surrounded by a lot of (heavy frame-rate) autogen or I go to KFMY - Page Field in Southern Western Florida. KFMY - Page Field is a lovely little airfield situated in Fort Myers but until now there was a huge blank space by the side of KFMY airport... This is KRSW Lee Country-Southwest Florida International Airport. So when Aerosoft announced that a KRSW - Southwest Florida scenery was in the works I was very interested, that scenery would certainly fill in a very big hole in my network and it was perfect for testing out larger regional and small airliners from KLAL. KRSW is just a perfect fit from so many angles, and so it has proved to be just that in my use of the airport in reviews since it was installed. KRSW - Southwest Florida Intl Airport (RSW) As airports go RSW is not an old airport as it was only conceived in 1973 when it was clear that the existing airport in Page Field would be too small (They were certainly right there). So the government of Lee County selected a site near Interstate 75, which was then under construction. The aipport groundbreaking was done in 1980, and Southwest Florida Regional Airport was opened on schedule, May 14, 1983, with a single 8400-ft runway. Delta Air Lines operated the first flight. The original terminal was located on the north side of the runway at the end of Chamberlin Parkway. The airport was renamed Southwest Florida International Airport in 1993, though it had hosted international flights since 1984 and U.S. Customs since 1987, mainly for flights to and from Germany. The name change coincided with the completion of a 55,000 square foot Federal Inspection facility annexed to the original terminal's Concourse A. The single runway was also lengthened to 12,000 ft (3,658 m) at the same time to better accommodate international service (making it the fourth-longest runway in Florida). The airport has hosted Boeing 747s (including Air Force One), but as of 2009 the largest aircraft scheduled to RSW are the Airbus A330-200s on Air Berlin's non-stop flights to Düsseldorf and seasonally the Boeing 767-300s operated by Delta Air Lines non-stop from Minneapolis/St. Paul, Atlanta, and Detroit .
The Midfield Terminal Complex expansion was required when in 1988 the original airport terminal had by then already exceeded its annual capacity of 3 million passengers; by 2004, the airport was severely overloaded in serving nearly 7 million passengers annually. The original terminal had only 17 gates on two concourses. While three of the gates were added in a minor expansion of the B concourse in the late 1990s, the original terminal's design was however not conducive to a major expansion.
With this small terminal operating at more than double its intended capacity, construction of a new Midfield Terminal Complex began in February 2002. The $438 million terminal opened on September 9, 2005. The terminal, was designed by Spillis Candela/DMJM Aviation, and has three concourses and 28 gates and which can eventually be expanded to five concourses with 65 gates. Demolition of the former terminal north of the airfield was completed in spring 2006.
KRSW first Impressions
First a note. This review has been updated to cover the changes by Aerosoft since the original release in November 2015. Since the changes were recent I thought it was better to update this current review than redo the changes in a separate post.
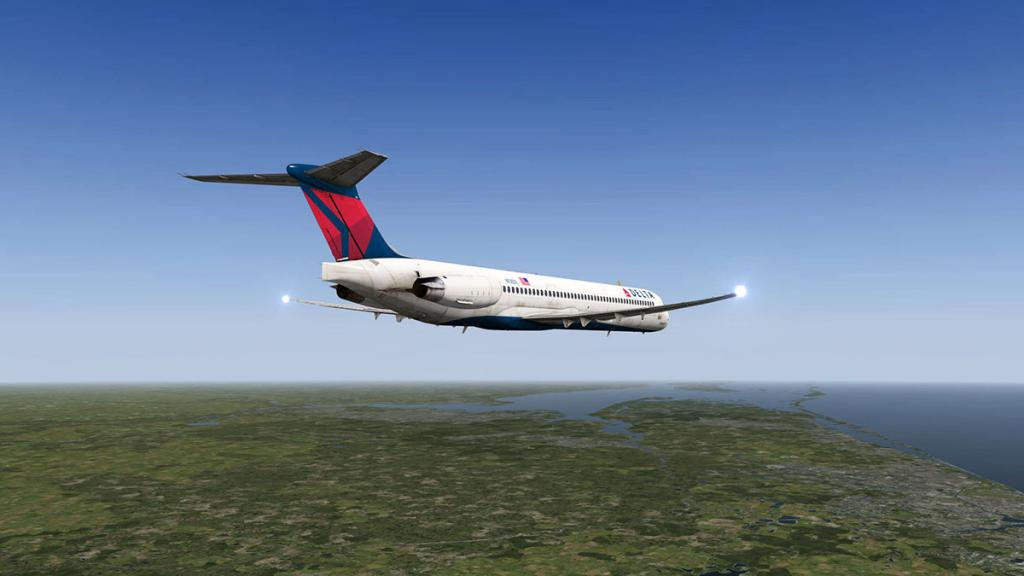
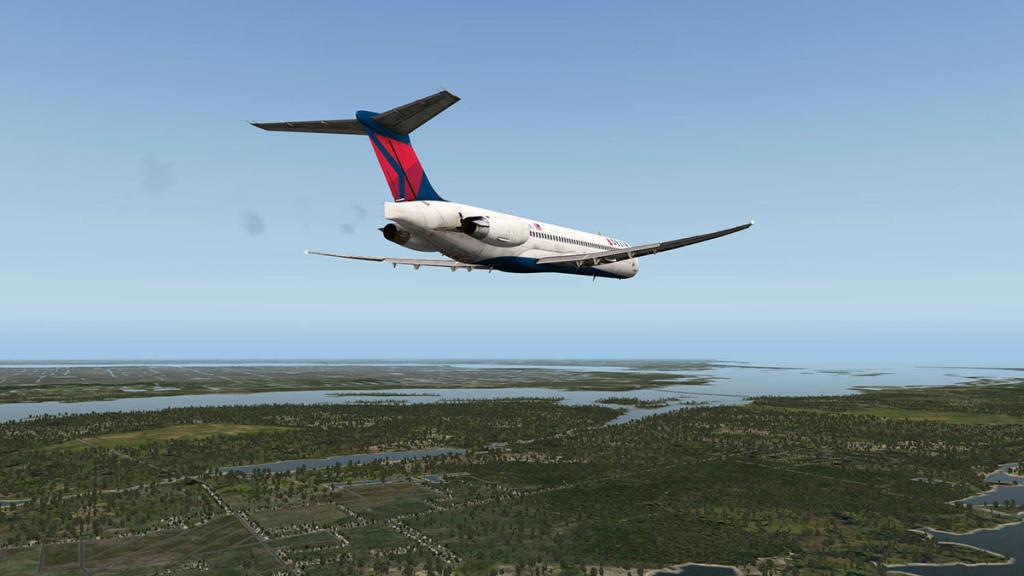
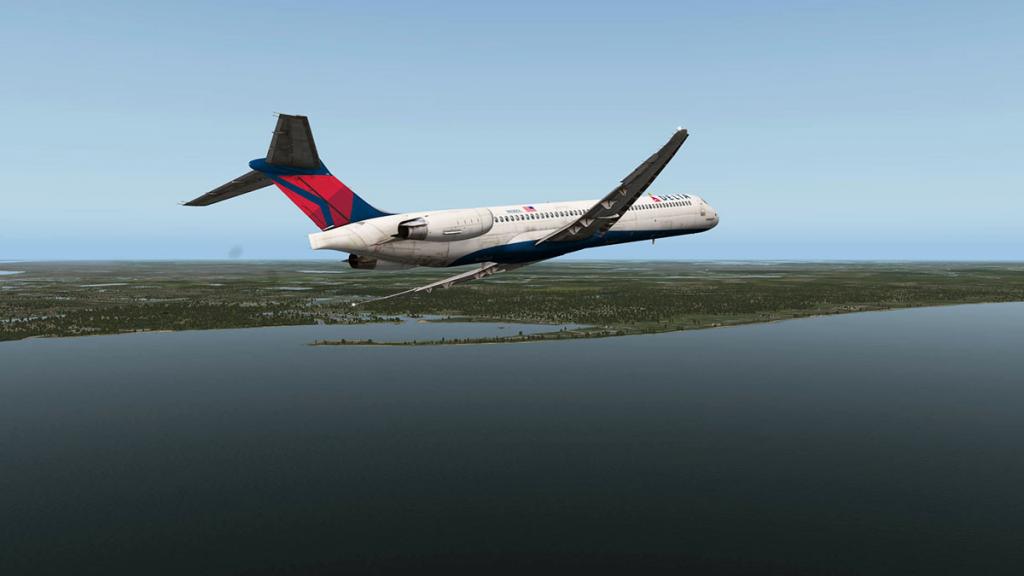
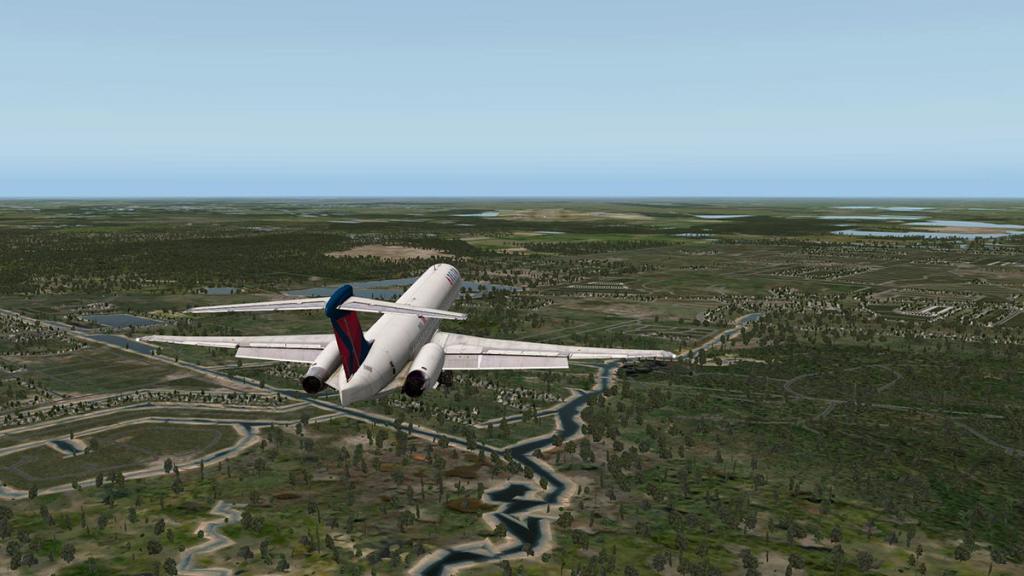
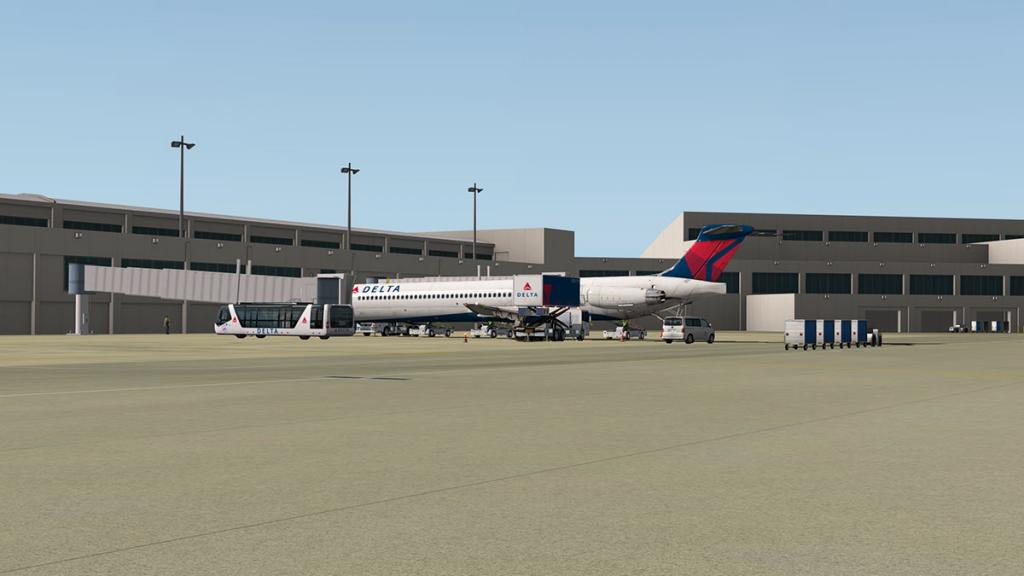
The route flight was from KATL-Atlanta to RSW by Rotate's MD-88 in current Delta colours.
The route is almost a direct line south from Atlanta and around the half-way mark you come directly over the western-Florida coast. You follow the coastline directly all the way down to a descent point just south of Tampa around Sarasota.
Approaching Fort Myers is a great panorama as there is a set of barrier islands called Boco Grande, Cayo Costa, Captiva and Senibel Islands which are national park areas. The following directly above the Island chains they are a great tool for selecting the approaches for both Page Field and RSW. Page Field is a slightly easier vector because it is directly inland from the hook of Senibel Island, where as the Southwest Florida approach is just slightly more south over Estero Bay. In GA approaches you can get a lot lower (1500ft) and it is visually a great approach over the chain of islands.

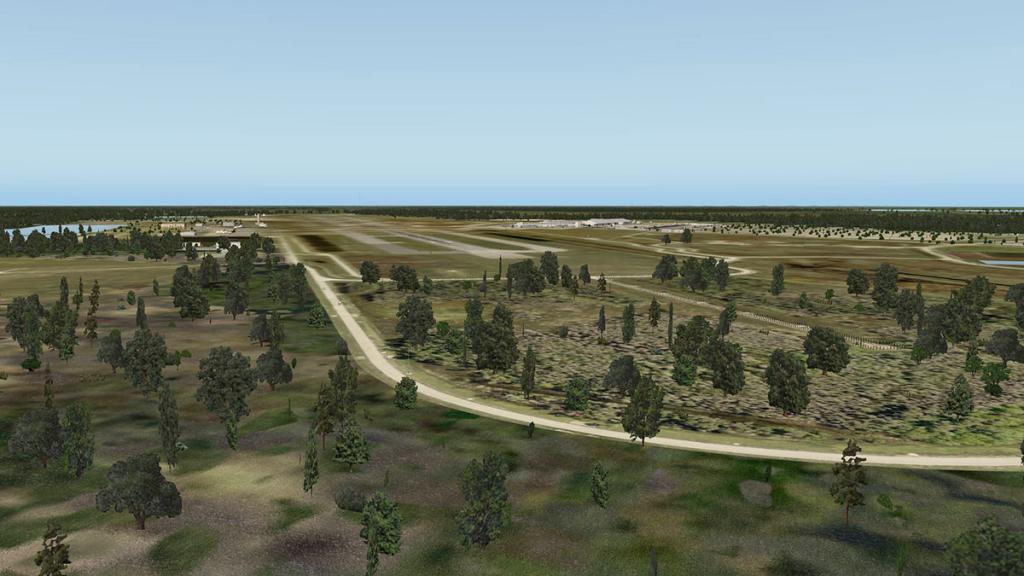
RSW can be very hard to locate. I am arriving on RWY 06 the only runway with an ILS approach. And you can't see the actual runway from a distance.
The problem is created by the way the developers have used the photo texture base in squares. At a distance they blend into the background and you get a green cast over the actual airport approaches. Approaching RSW lower in a GA the problem is magnified by the fact you can see the only the photo texture squares which are zig-zagged when angled from a distance. It is almost impossible to get a course or angle directly onto the runway as the runway itself does not exist, so your only choice is to use the ILS or CDI (course deviation indicator ) to get a line on the centre of the runway...

This issue is caused by not having your "Anisotropic Filtering" setting too low, it has to be set at least 16x or the full setting to make the textures clean and if you use this high setting and then runway texture quality will be very good to excellent.
Closer to the runway you can see great detailing on the surfaces with ribbing and joins that are very good. The ribbing design however can cause a little interference in patterns on my iMac screen. but I didn't find it annoying or distracting.
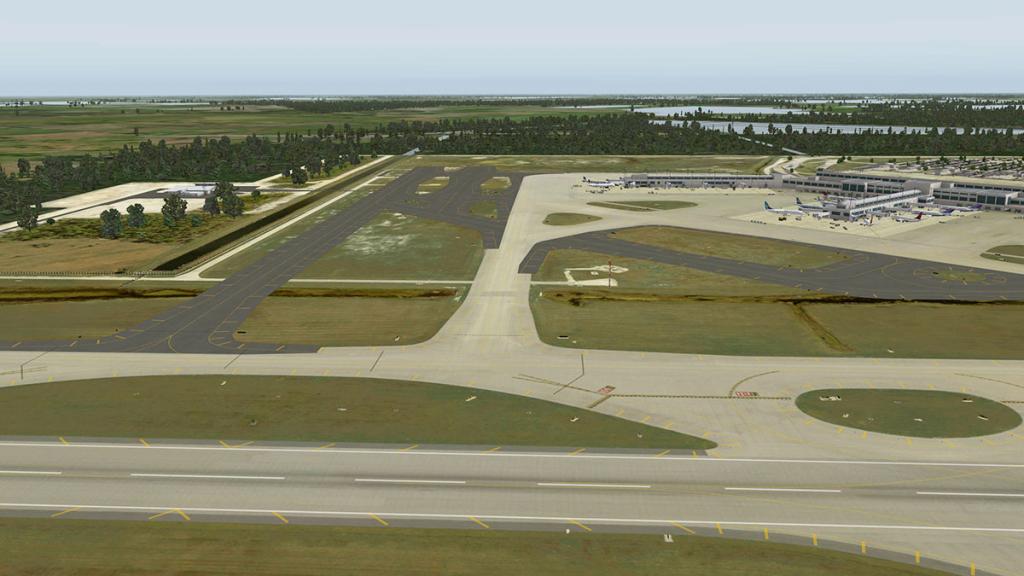
The actual airport and terminals is to your right (landing on 06) and a cargo facility and the GA areas are on the left. Mid-field on the left is the control tower complex. From a landing perspective the terminal buildings look excellent and realistic and you enjoy the arrival at RSW.
Runaway and taxiway marking and runway/taxiway signage are excellent, as noted the surfaces are very good at this level. Infields are also good and the visual aspect is great. There are no charts provided with the scenery but a link http://airnav.com/airport/KRSW) is provided for download. There are three arrival charts (STARS) and four departure routes (SIDS) and five instrument procedure charts.
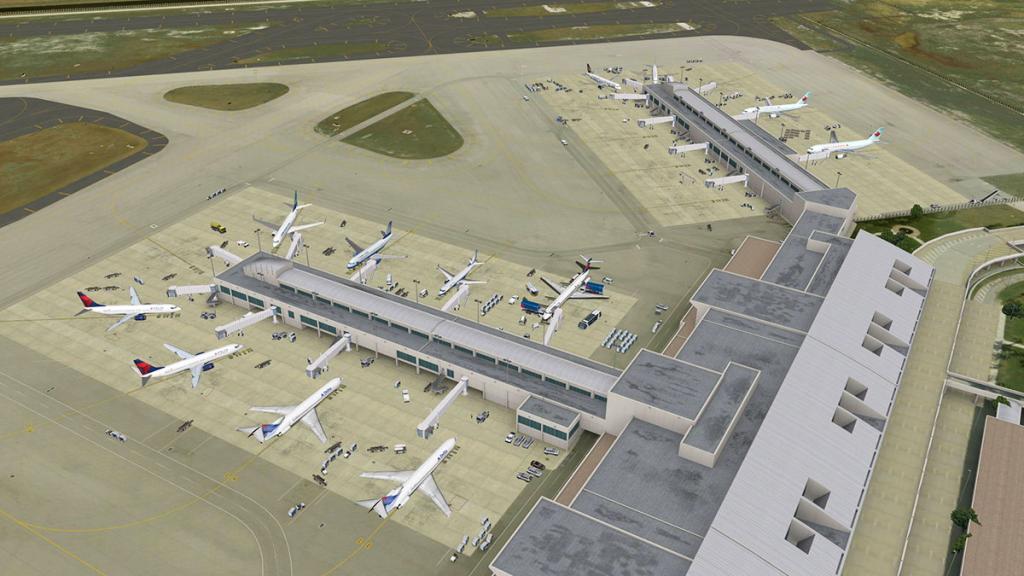
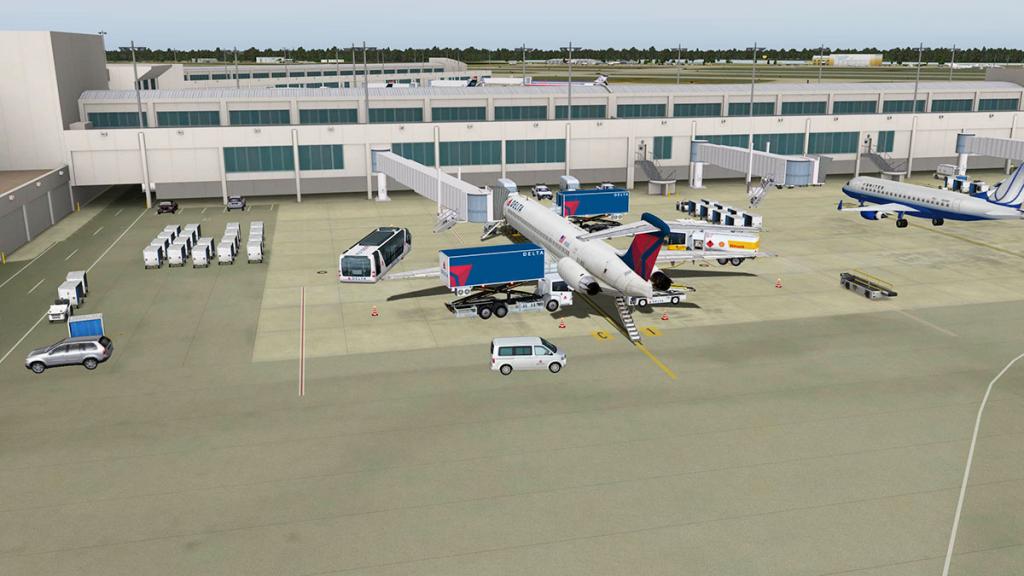
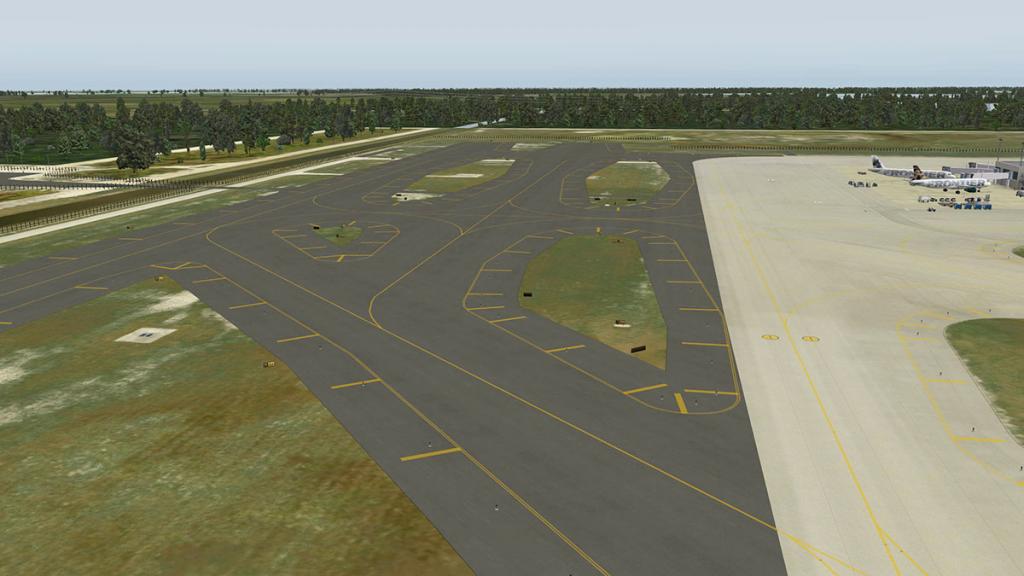
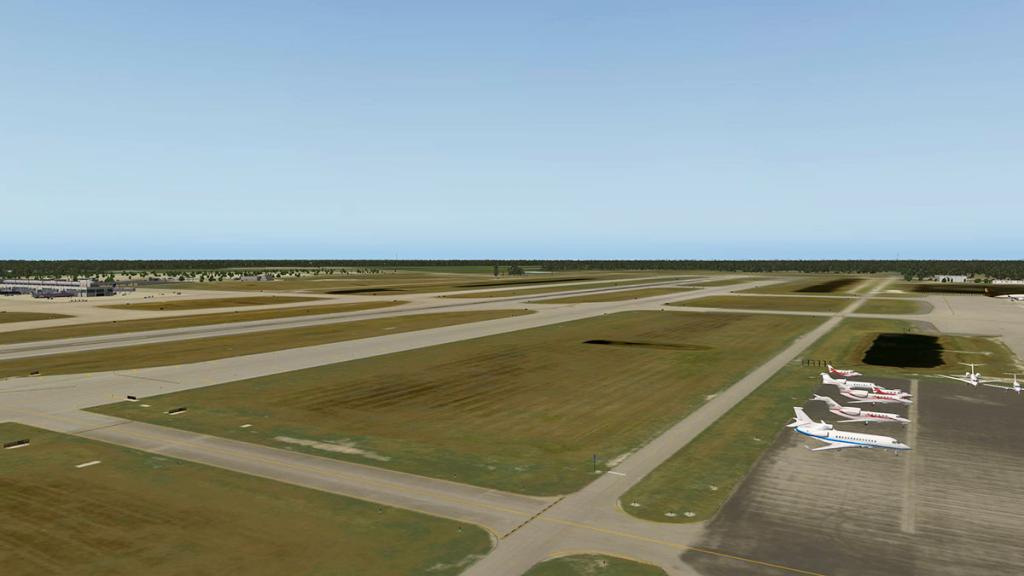
The main parallel runway taxiway is F with another A which is a smaller parallel taxiway on the north side of the 06/24 RWY. Taxiway's J and L are arrival and departure taxiways for the main three concourses. There are no ramp numbers at RSW just gate numbers with my bay B4 which is situated on concourse B (far south).

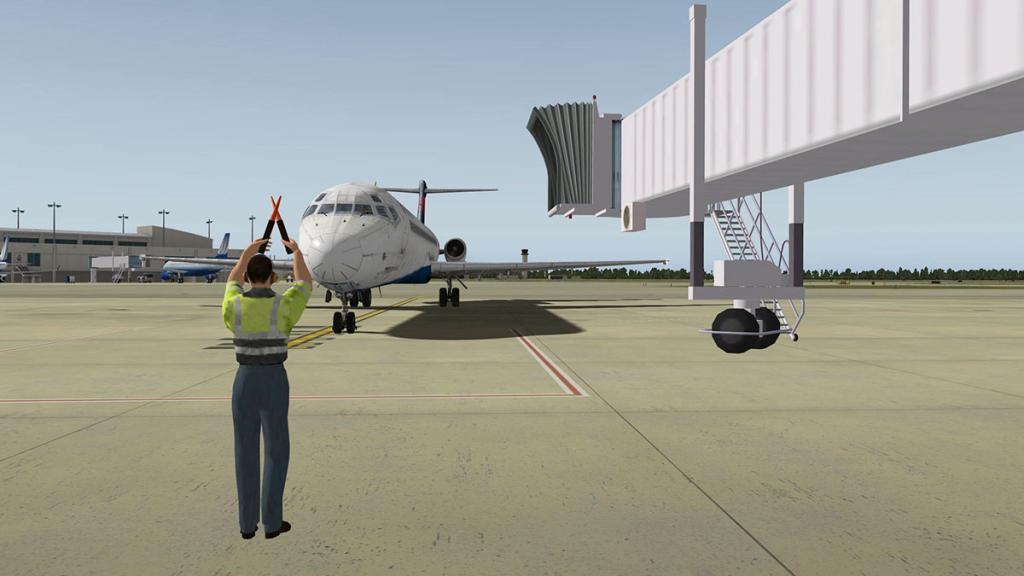
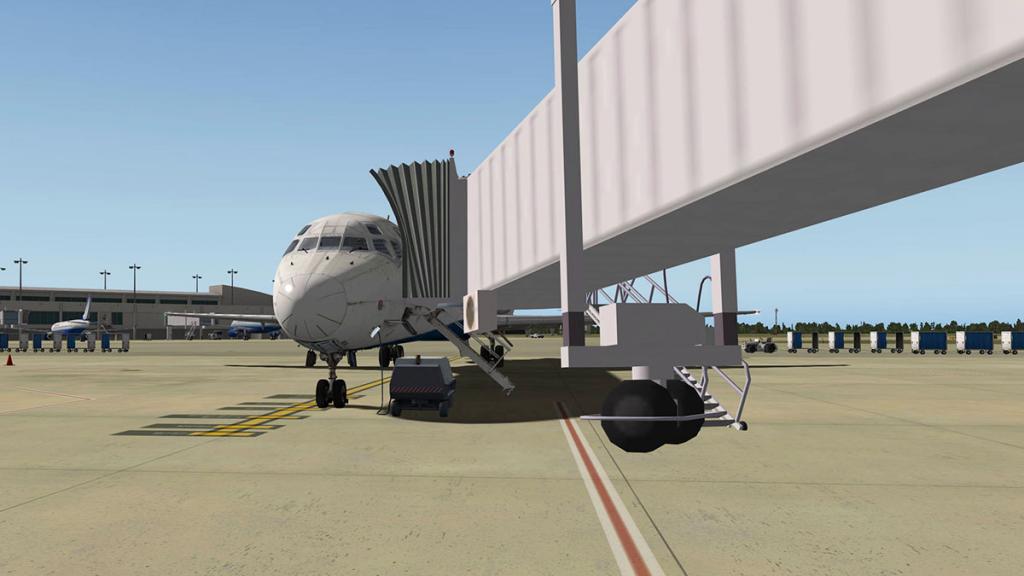
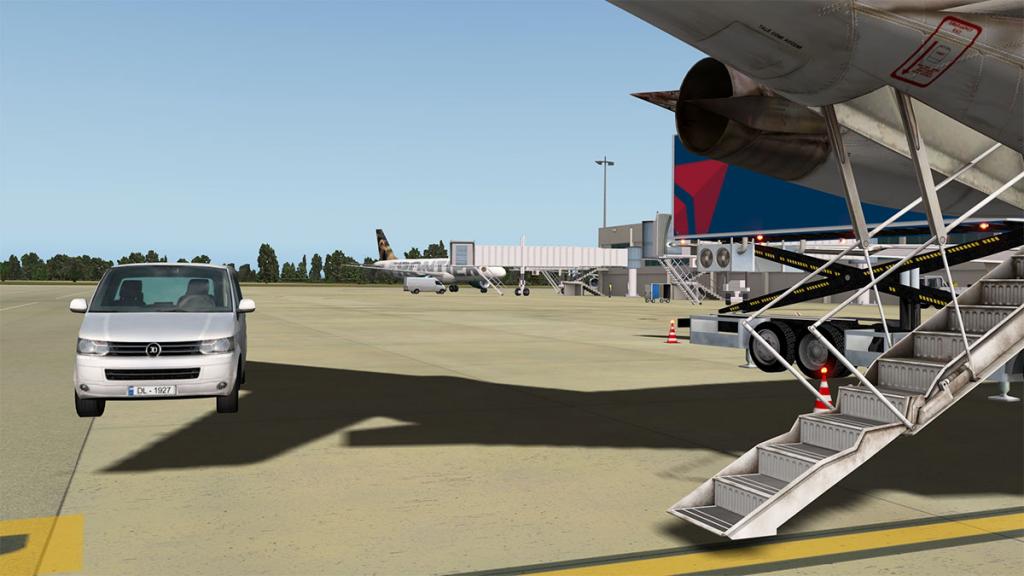
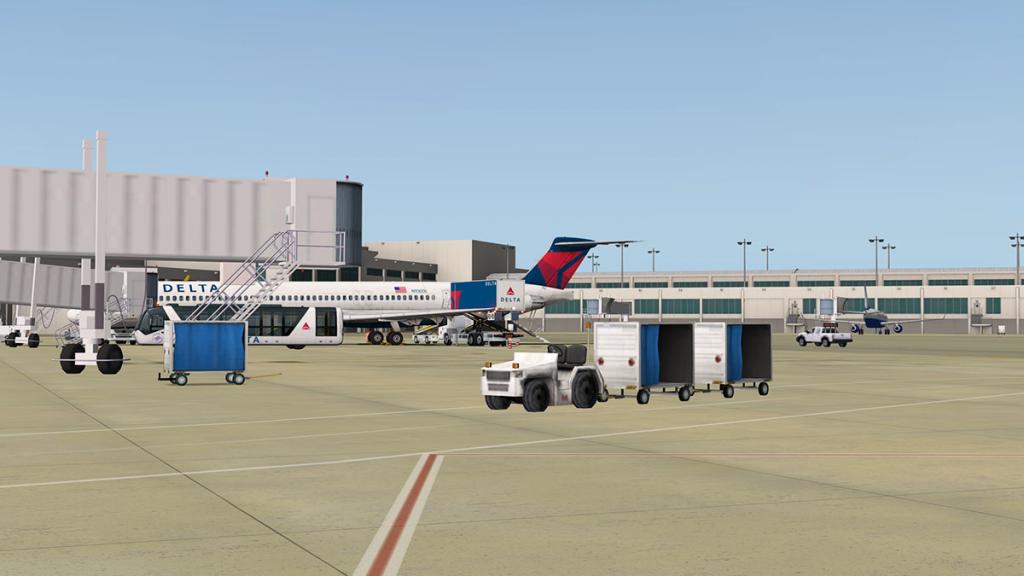
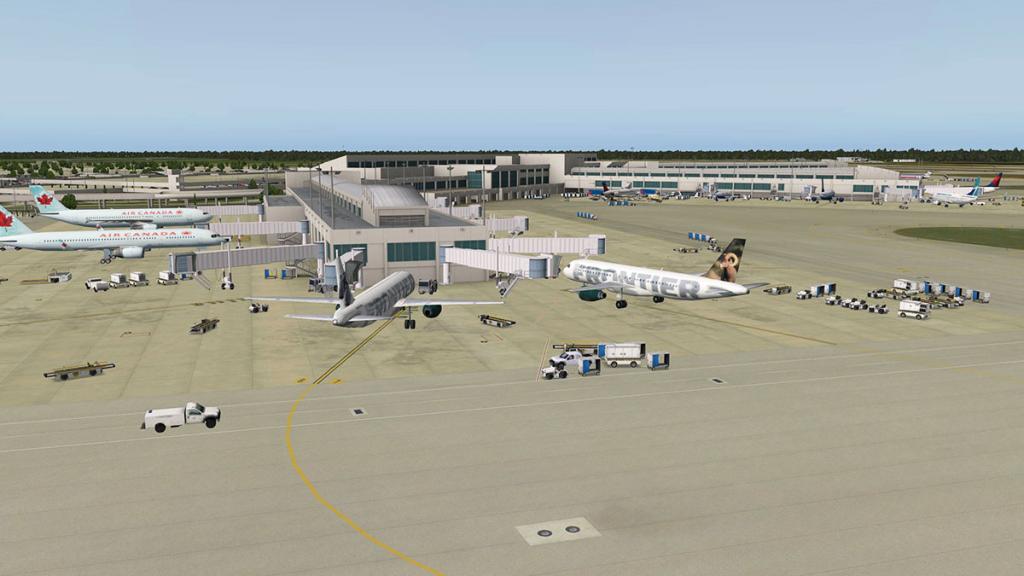
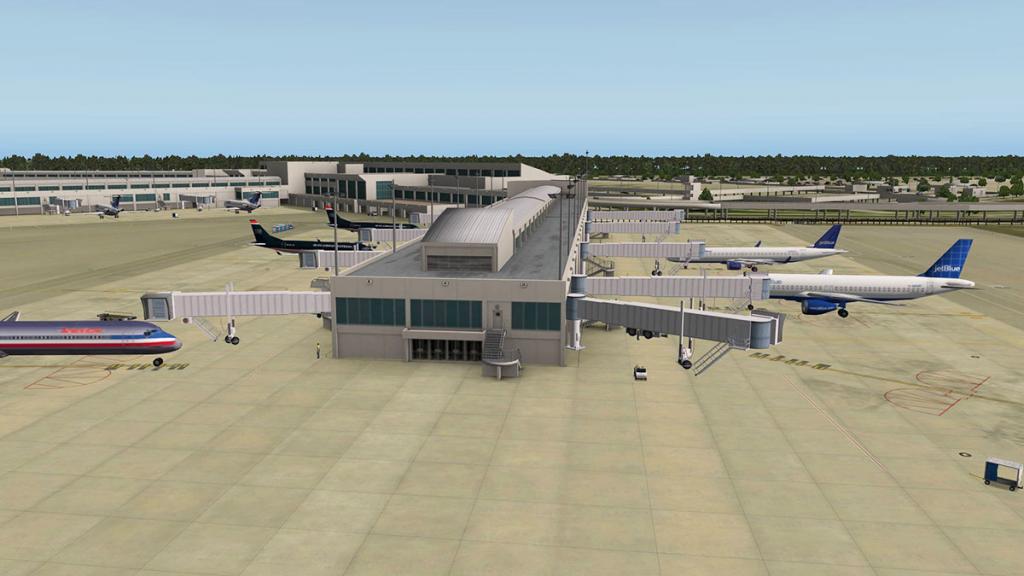
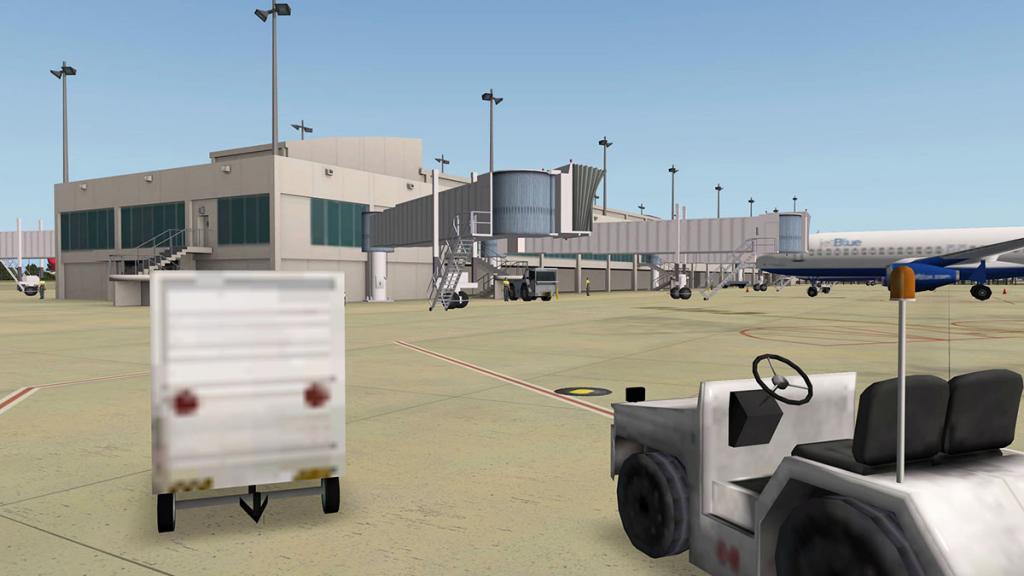
The airport is buzzing with vehicle animations, a lot of movement in mostly baggage trucks and carts, vans and service trucks. The animation routes are excellent and you enjoy the visual movement when departing or arriving at RSW. Gates are also all activated with Marginal's animated gates and here you have marshals to guide you into the bays and park the aircraft.

Visually the airport looks great from the ramp. There is the option for static aircraft that requires xOpenScenery to be installed.

There are few placements of vehicles and gate equipment, but I have my "Number of Objects" set at "a lot" and if you go up to the higher settings (Tons - Higher Tons) you certainly do get a lot more ramp objects but they come at a severe high frame-rate cost (in my case nearly 50%) and so a bit more refinement on the objects would compliment the excellent airport animations.
In the update Aerosoft have changed the above settings on the "Number of Objects" to be more efficient at a lower setting i.e. "a lot". That now means that the ramps are now full, if even cluttered from the sparse view that you had before.

In one way you would think that adjusting the object setting would be a great advantage and a visual step forward, and it is. But I found different situation in that it pulled my frame rate down because of the all extra loaded objects. And it took away the advantage that before if my framerate was too low I could then reduce the amount of objects and lose a certainly a lot of the visual impact of static ramp objects to gain framerate and have that user factor of the scenery. Now I can't do that? and my framerate suffers because I can't now adjust the amount of "objects", so it is one step forward but two steps backward in trying to fix the feature. (see Important update notes below on object changes).
Aerosoft KRSW - Southwest Florida International
Southwest Florida International Airport
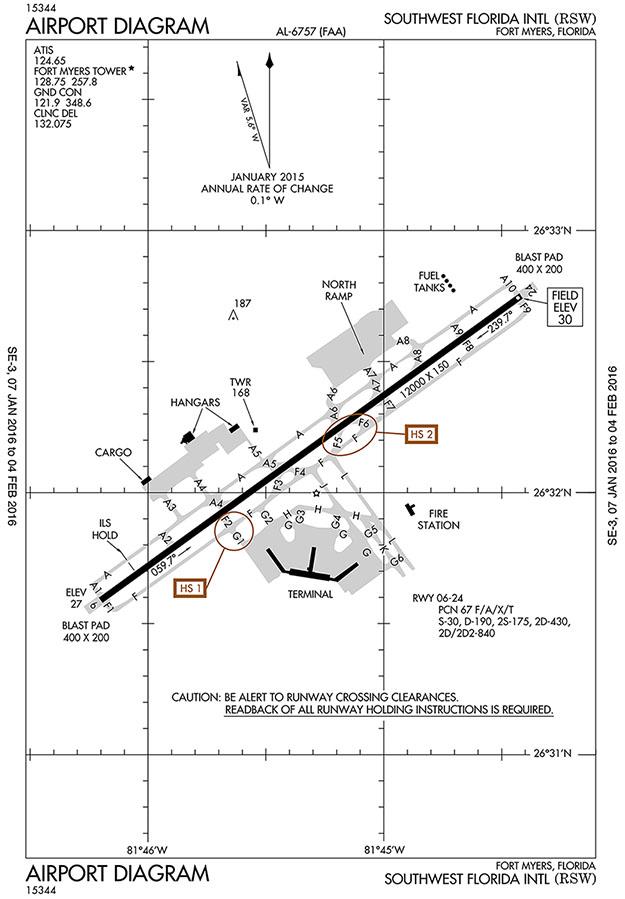
IATA: RSW – ICAO: KRSW – FAA LID: RSW
6/24 12,000ft (3,658m) Asphalt
Elevation AMSL 30 ft / 9 mAirport Overview
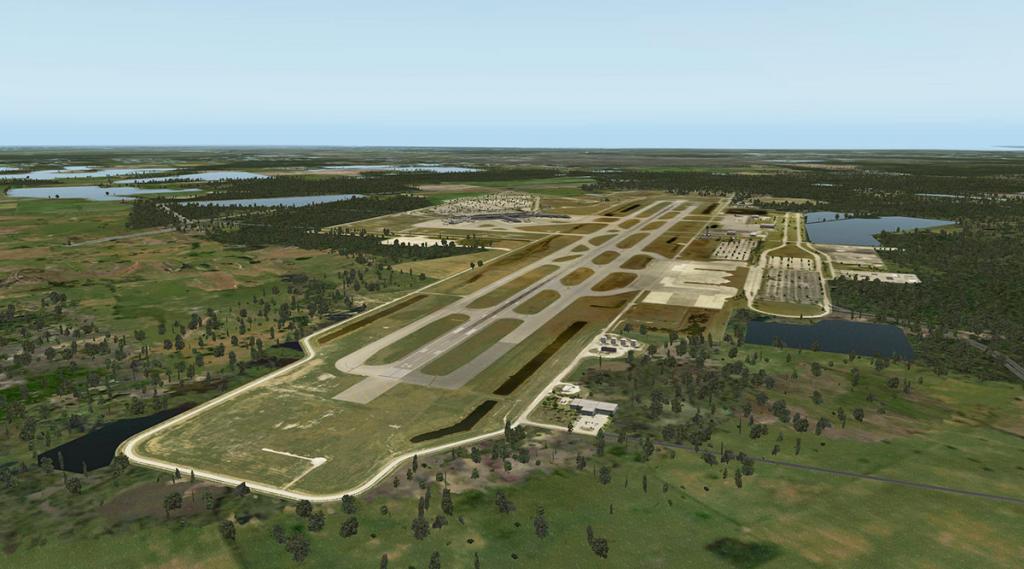
Orthophoto images are used under the scenery and they are very good, quality and has great definition. There is a slightly different colour balance to the default X-Plane scenery but not to the point it looks false or stands out poorly visually. So from a visual on the ground or approach view the airport looks very good.
In the update you have an extended area now to the east with a full set of new of added taxiways in G3, G5, G6, H, K and L.
This greatly enhances your arrival and departure options and make the latest airport developments current.
Also added in with the update by the new taxiways is the new $16 million Airport Rescue and Fire Fighting facility that was opened in July 2013. And well recreated is this new facility.


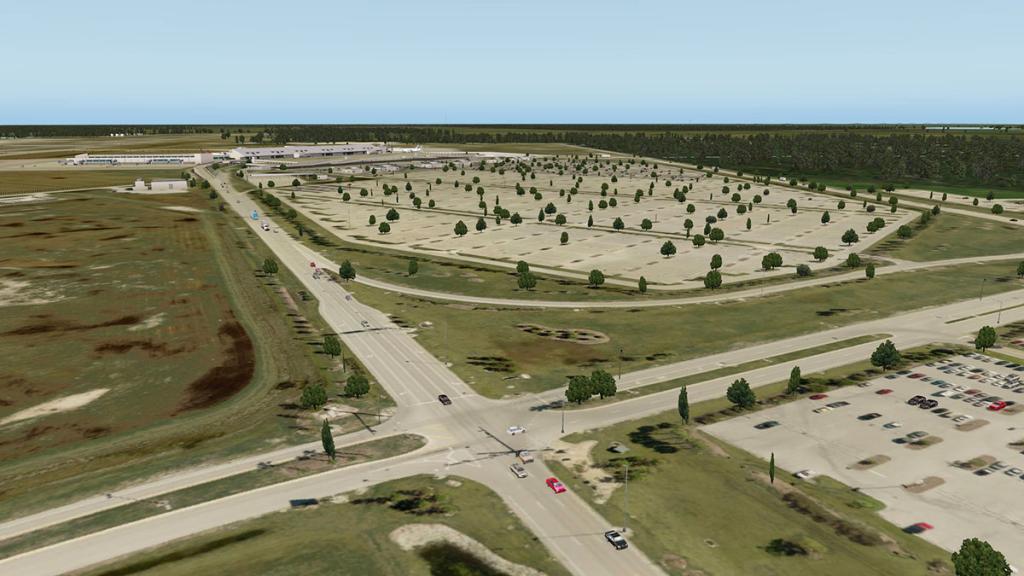
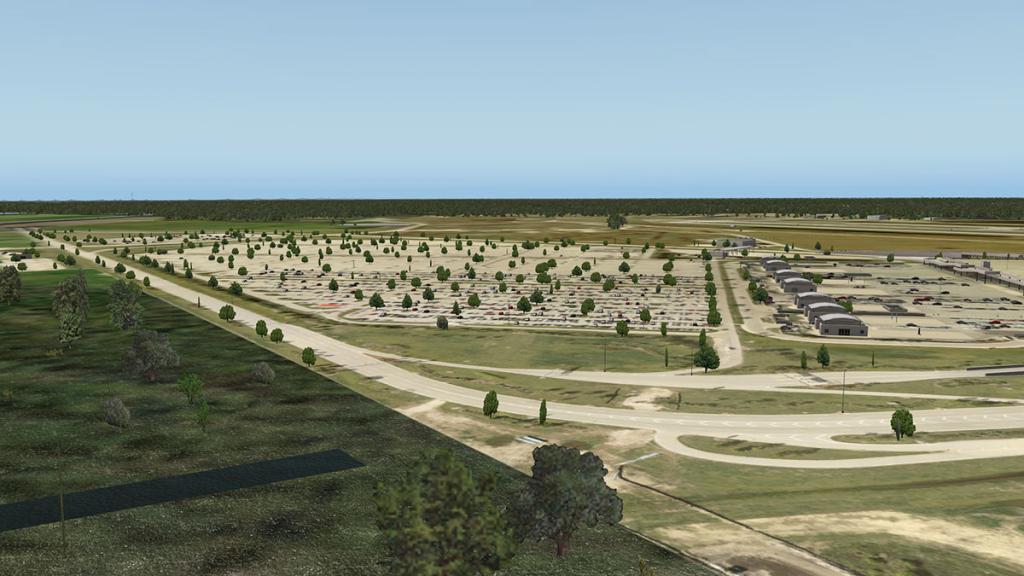
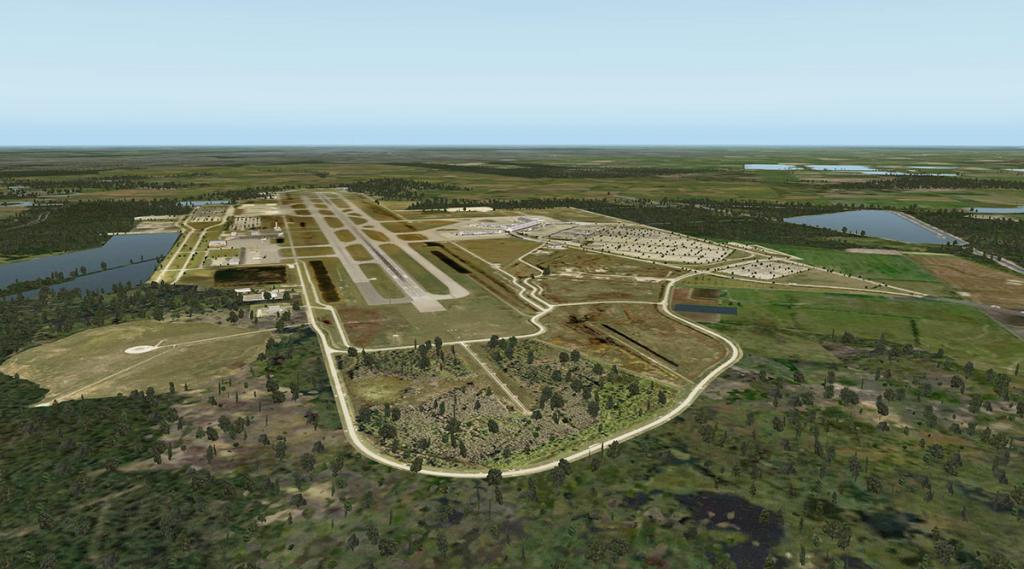
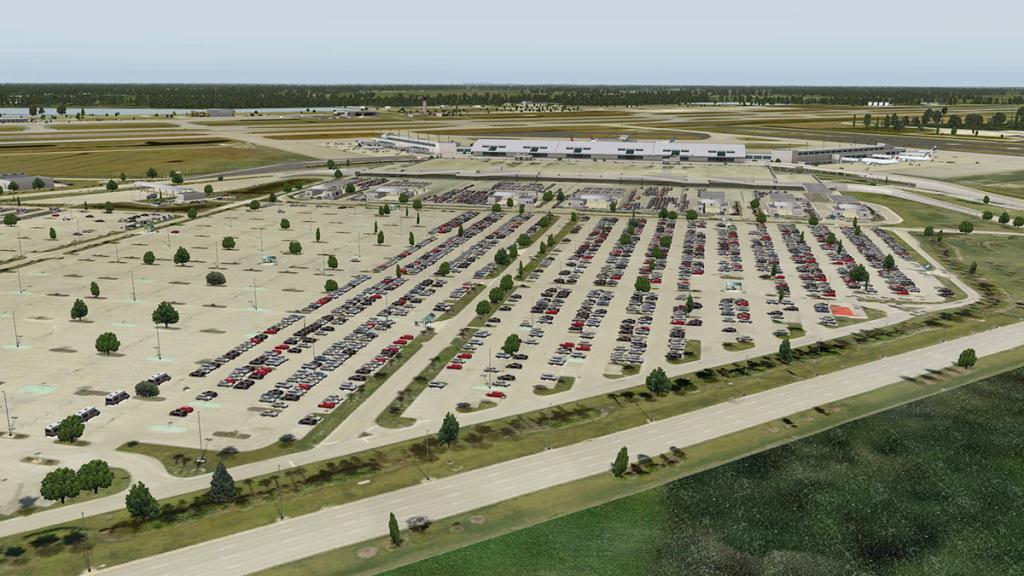
Intergration with the X-Plane scenery is excellent with a lot of traffic entering and departing the scenery, so you have that activity aspect to the areas, As noted in the first impression on arrival the runways and taxiway textures and detailing is excellent, and from the air point of view they do look very authentic. The huge carparking areas do dominate the southwest points of the scenery, and they are a mixture of flattened cars in the orthophoto and added in 3-D vehicles, but only one southern section of the carpark is covered by the 3-D items, with the rest of the parking areas empty unless you use those heavier higher "Object" settings, and then still one large carpark is empty. There are a lot of outlaying airport support buildings that are very good, if a little blank in texture detailing.
Terminal

KRSW has only one large terminal with three concourses D, C and B. There are no A area gates (probably in the older demolished terminal).


The airports landside and terminal construction is very good in that lots of pored concrete infrastructure look. The terminal design is well done and detailed. The areas are however quite blank. There is no advertising, roadway direction signs or small items like coke-cola machines and other great detailing details, so it comes across as bland, certainly far more could have been done.
The outlaying airport support buildings that are very good, but again a little blank in texture detailing. Can you find your rental car company from the rows of buildings? I can't because they are not branded. And the "Welcome to Southwest Florida International Airport" signs over the road are missing as well.
In the update the amount of static objects as noted above have been increased substantially and this does come across as a better viewpoint.


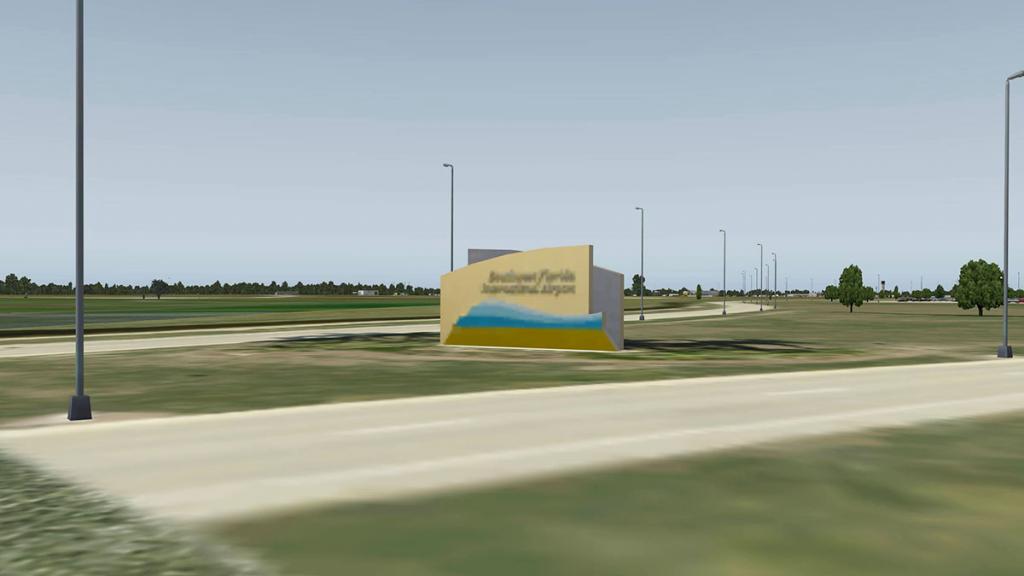
The changes have reflected well on the rental car areas and many areas of the carparks, but the upper level terminal carpark is still quite barren when is should be quite busy. The RSW airport entrance sign has been added, but the resolution is quite low, but at least now it is in there.
Concourse B - Gates B1-B9
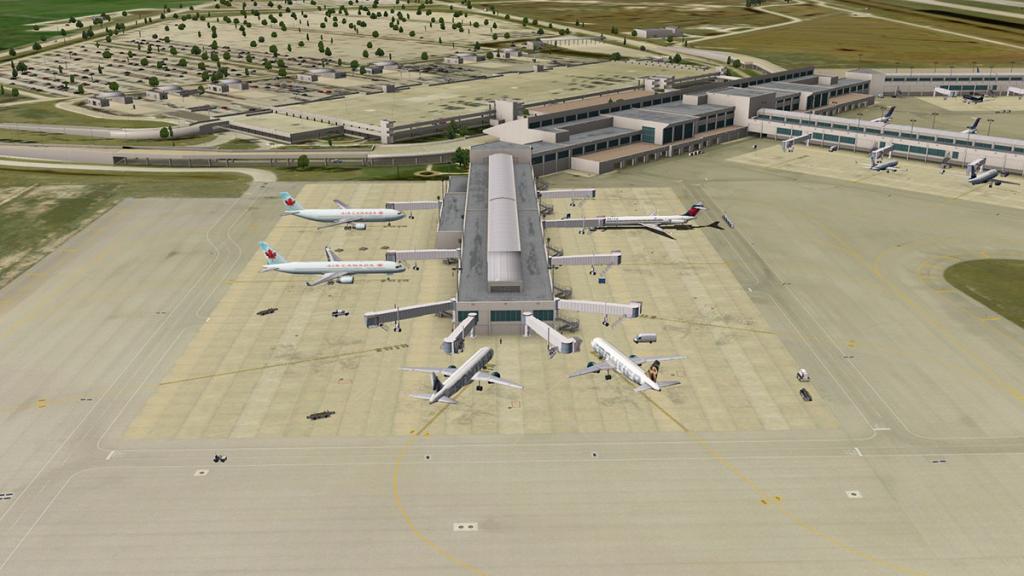
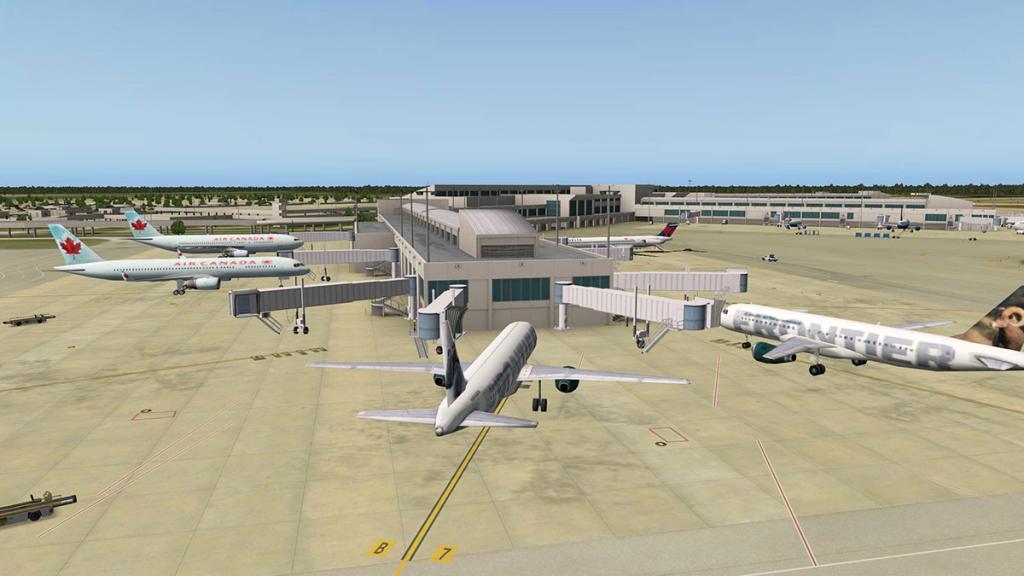
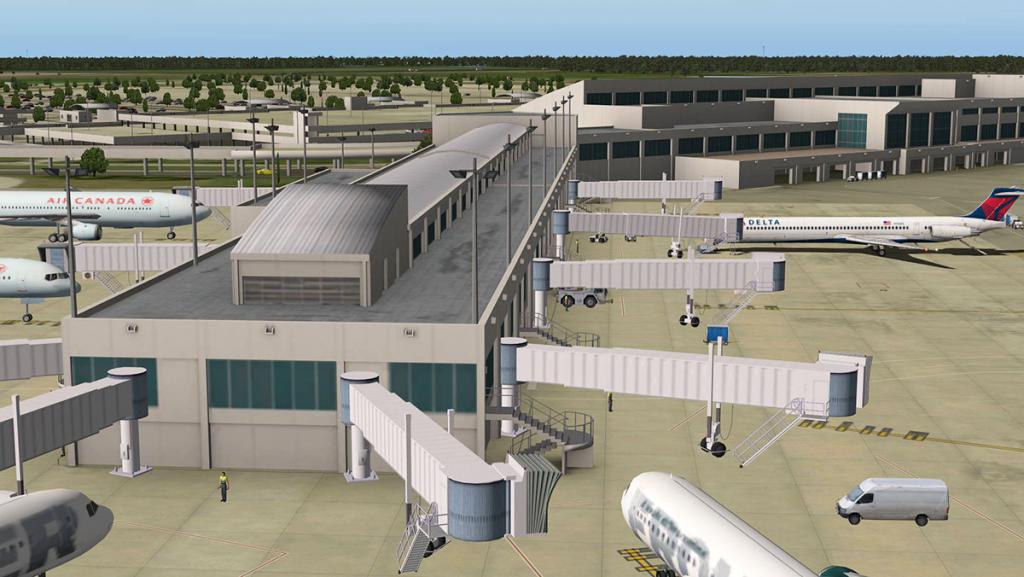
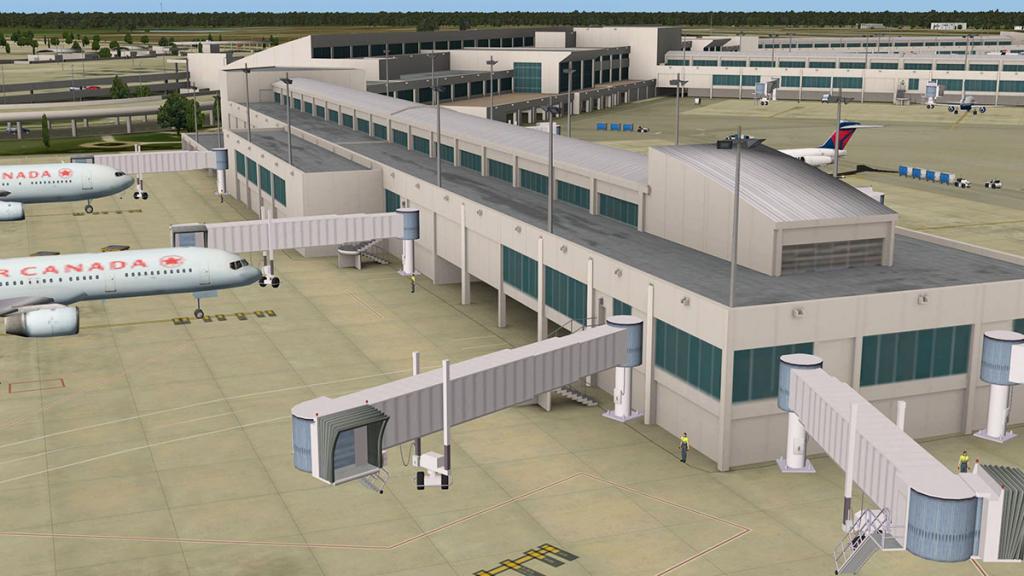
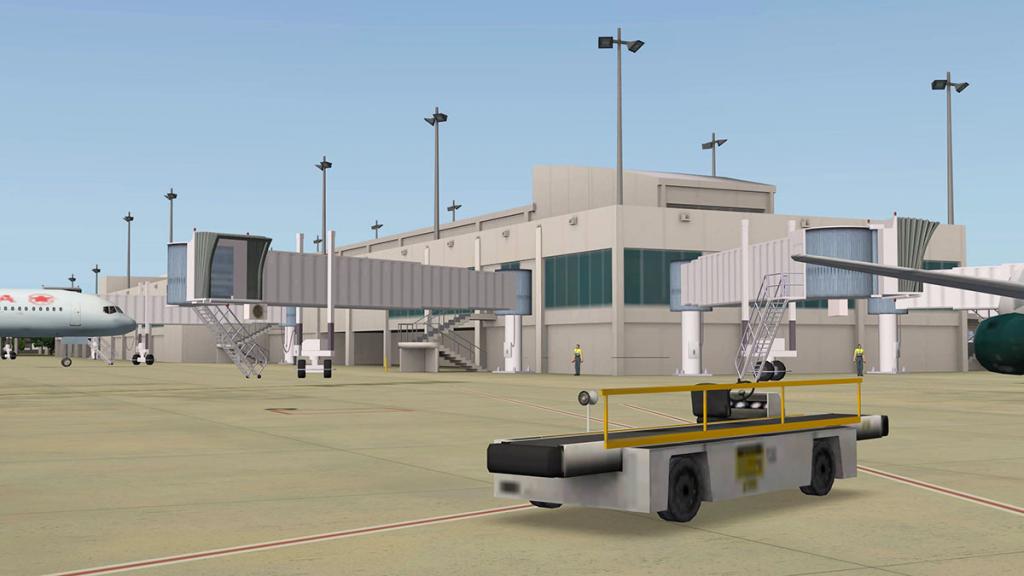
B Concourse is for International departures in Air Berlin, Air Canada, and far northern state American airlines in Frontier, Sun Country and LCC Southwest Airlines. The concourse in design is excellent with as noted has with all gates it has working airbridges. The Customs and Immigration services for the international flights are located on the lower level of Concourse B
C Concourse - Gates C1-C9

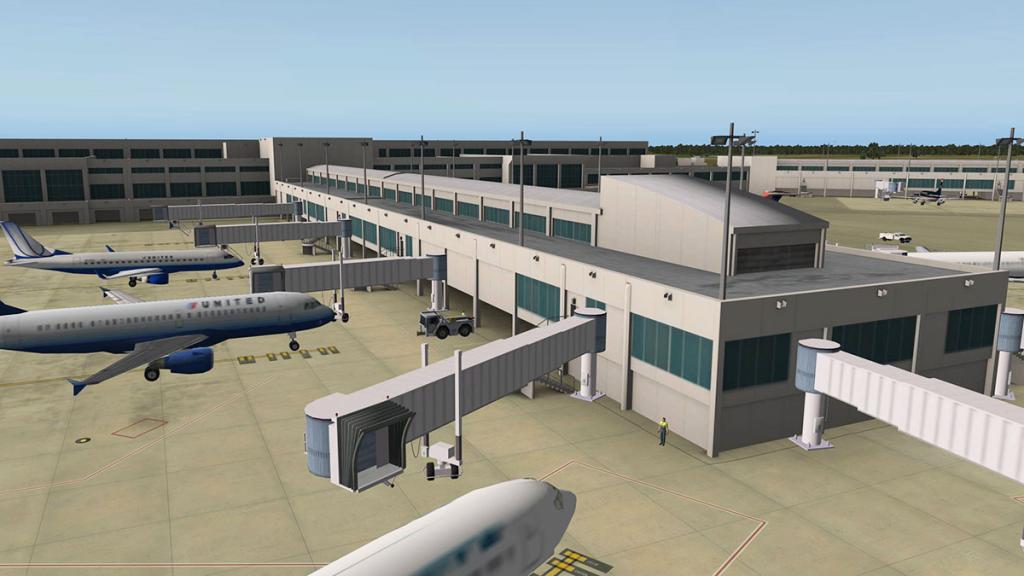


Central C Concourse is used by Delta, Delta Connection, United, United Express and Westjet. There is not a lot of differences in all three concourses in design or construction as there is no different buildings built at different times in the airport's history, so they all have a samey appeal.
Concourse D - Gates D1-D10
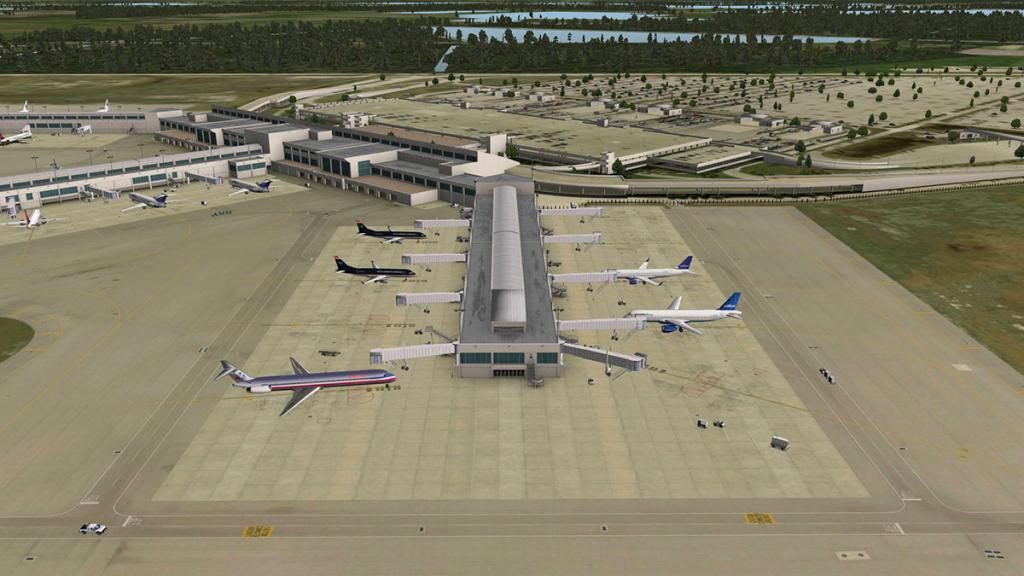


The northern concourse D is home to American Airlines, American Eagle, JetBlue, Silver (local) and Spirit Airlines. All three concourses are identical as noted but Con D is the one I favour and use gates D2 and D4. No particular reason, but it feels great there and taxi times are closer to RWY 06. Concourse detailing is good.
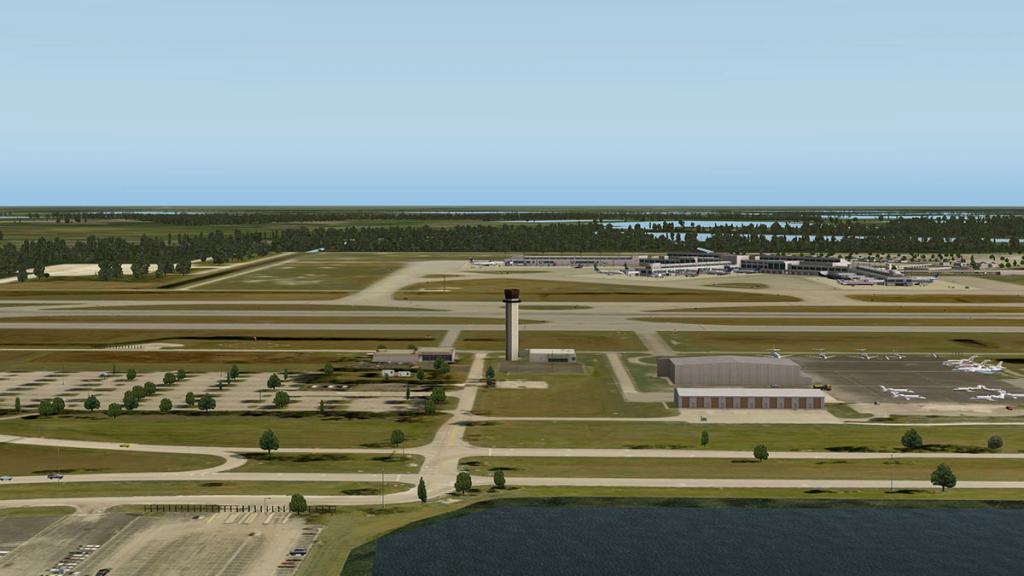
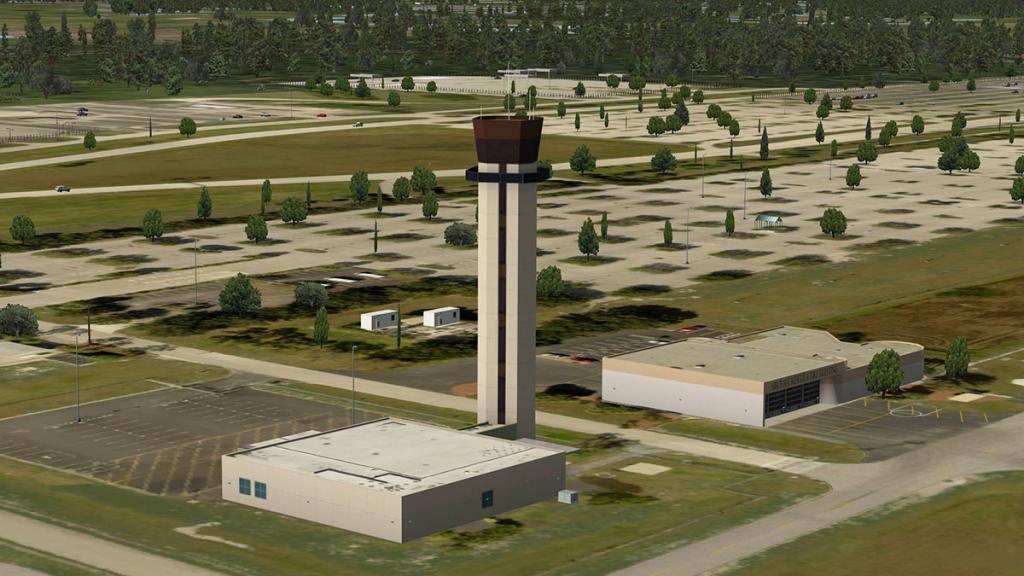
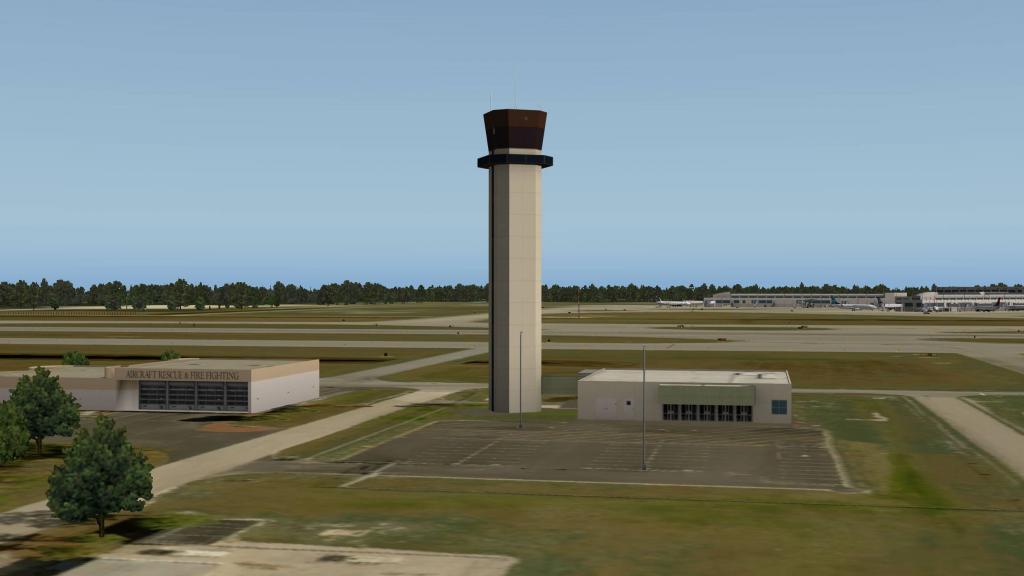
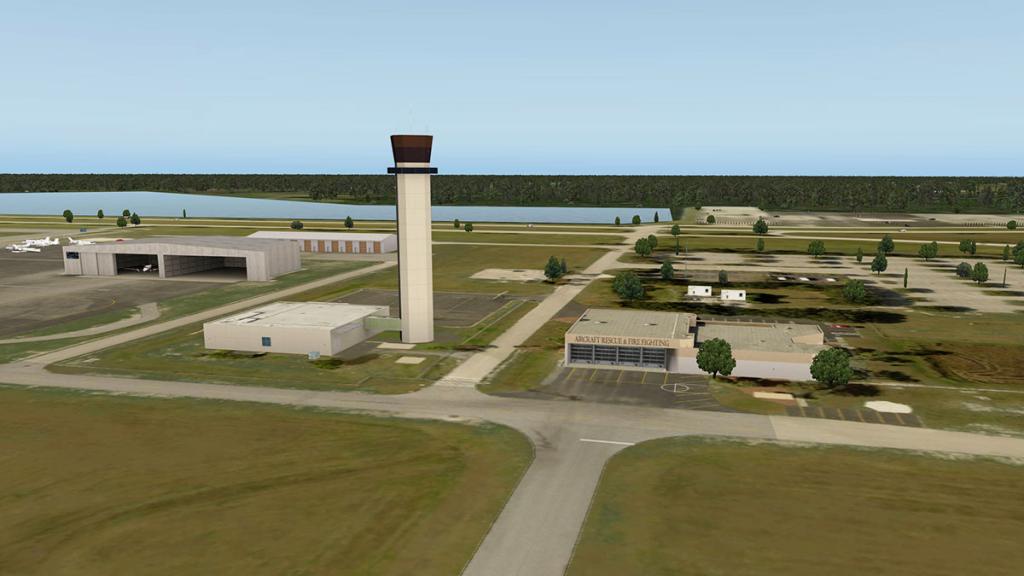
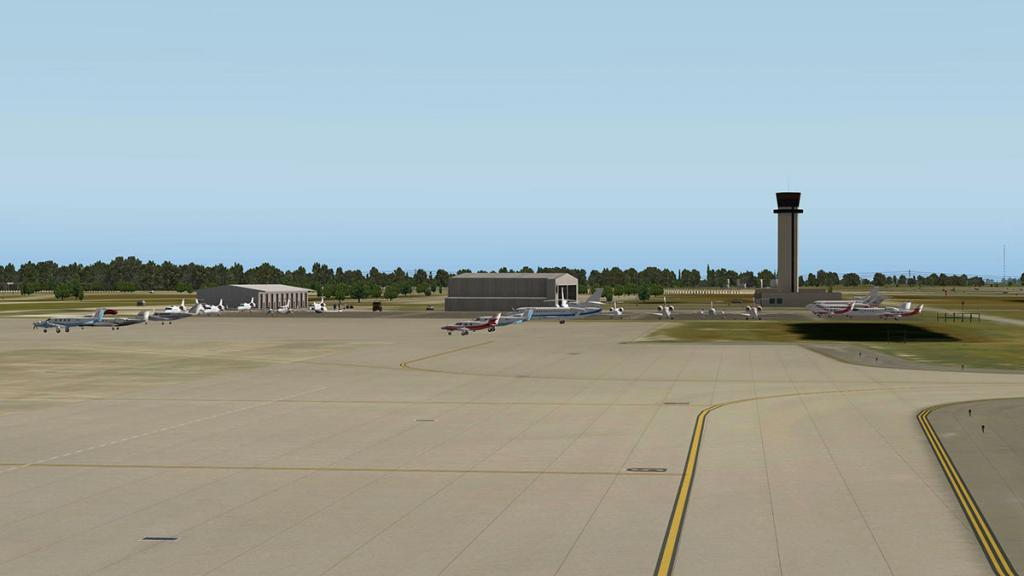
Mid-Field north is the control tower and firestation complex. The complex is a modern US standard in design, functional and efficient the tower is not distinctive. The design is however well done but the carpark behind could do with at least a few cars and trucks... The Fire Station on the airport layout chart is noted on the south and opposite Concourse B, but this is the new $16 million Airport Rescue and Fire Fighting facility that was opened in July 2013.
Tower view is excellent with no obstructions to block or hide the view, and both ends of the runway are clearly seen.
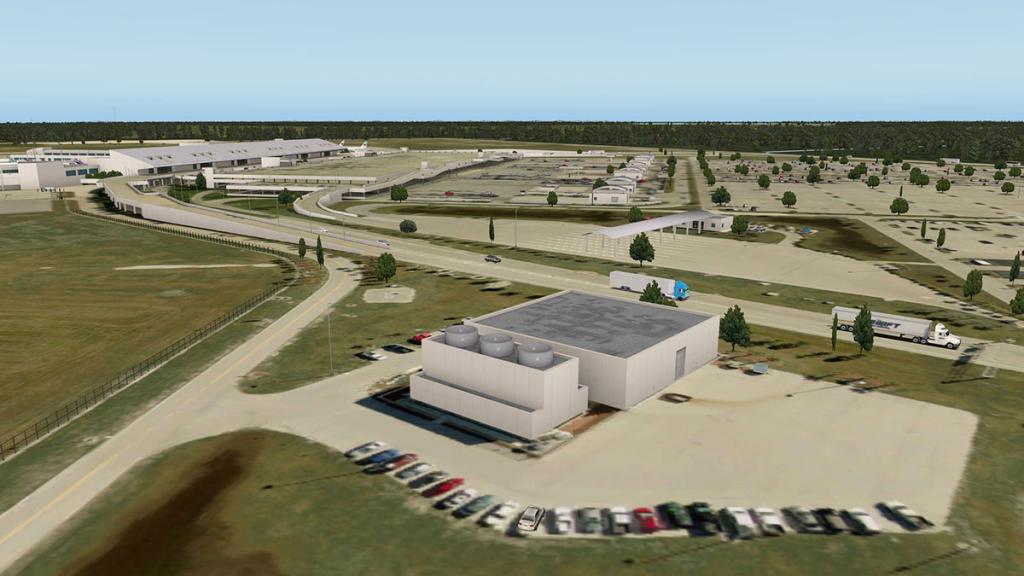
East of the Tower/Firestation complex, There is a small industrial area and the airport's fuel storage.


And slightly north-east of the Control tower is the long term undercover carparking and rental outlet.
West is the General Aviation area.
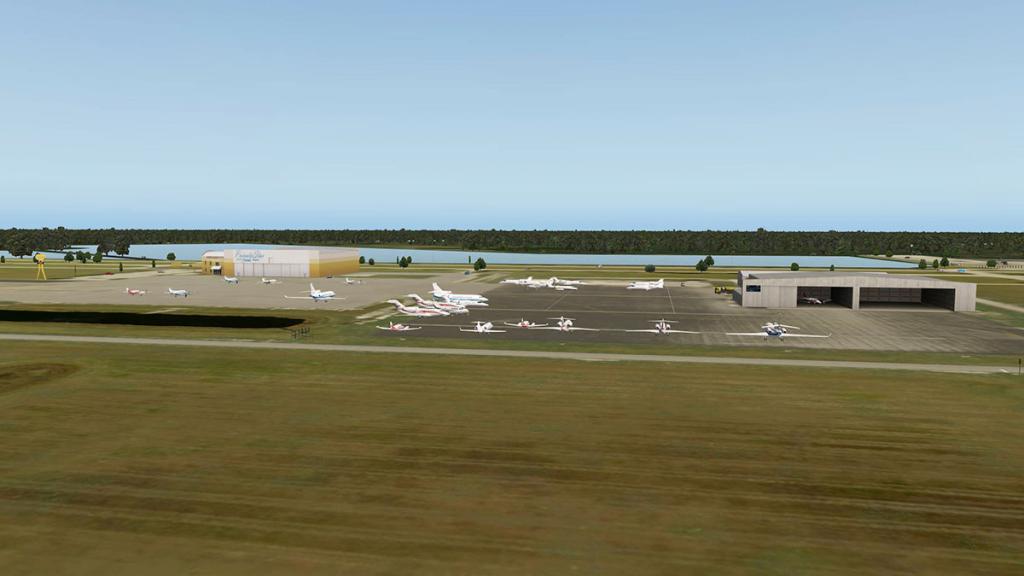
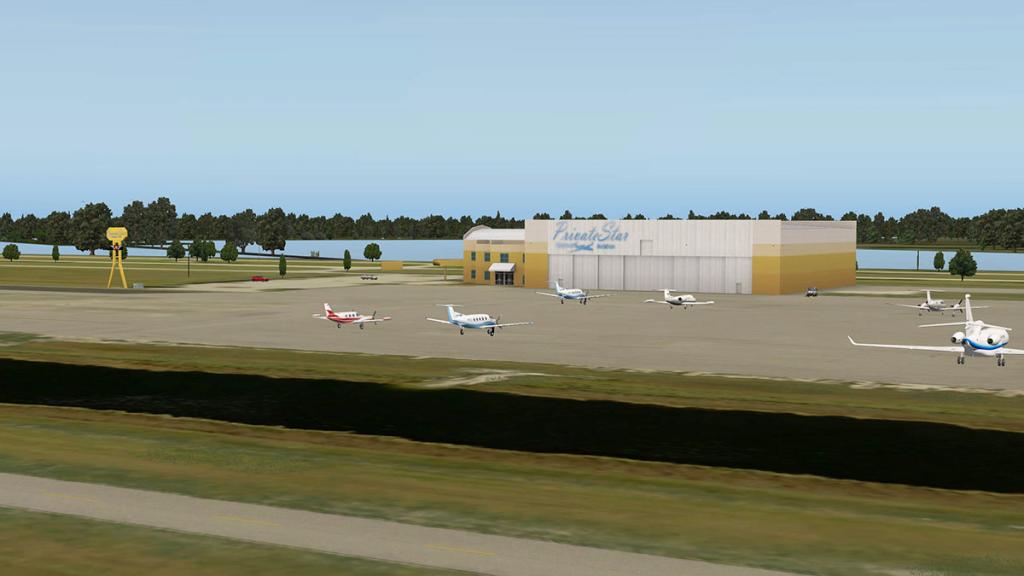

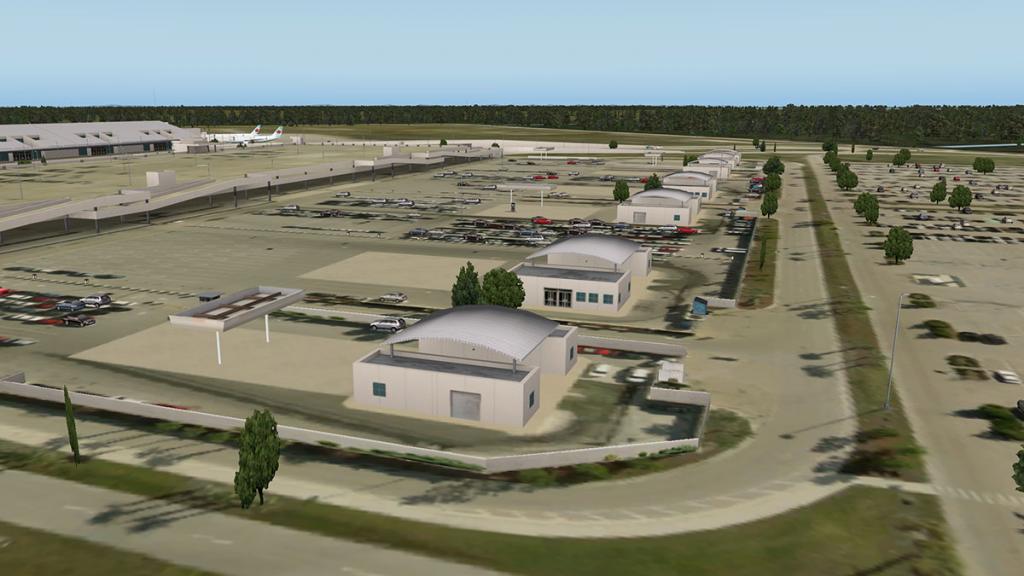
There are two general aviation hangars, one smaller behind, but the larger open door hangar is very usable. GA ramp areas are excellent with just the right amount of GA aircraft to find the right parking space. To the east there is a very good "Private Star Services" hangar and office building.

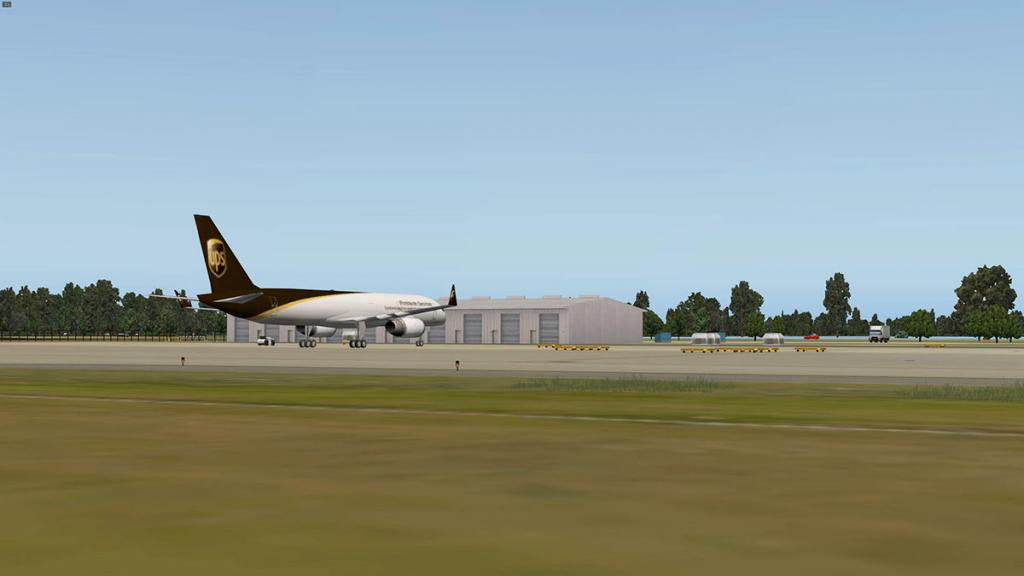
Finally far east on the north side there is a small cargo area run by the Lee County Port Authority with one warehouse that is mostly usable for regional cargo routes, certainly you can still park a big hauler here but it is not that big a facility.
KRSW Nightlighting
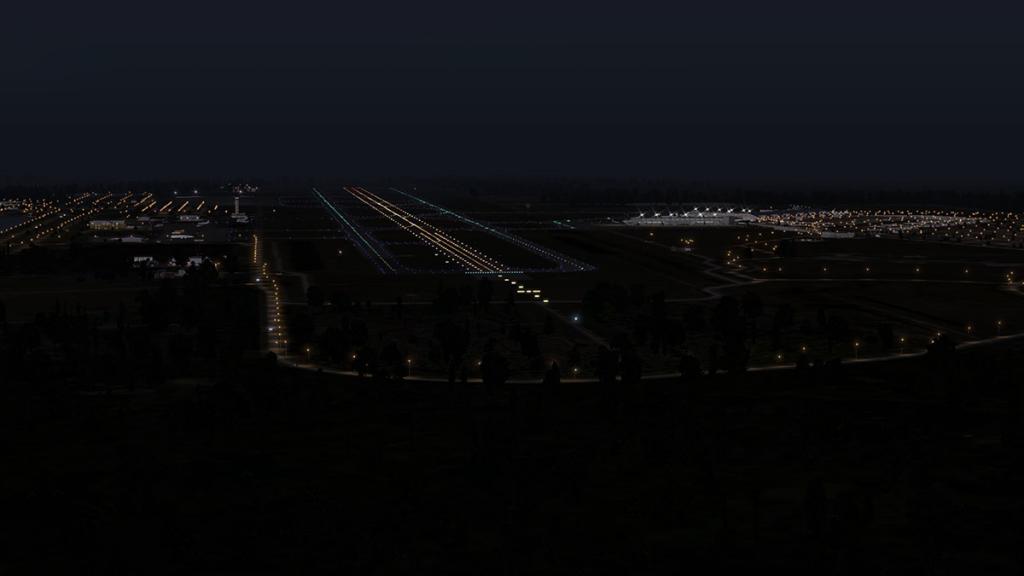

All runway and approach lighting is very good with a MALSR: 1,400 foot medium intensity approach lighting system with runway alignment indicator lights on RWY 06. Taxiway and signage is very good.

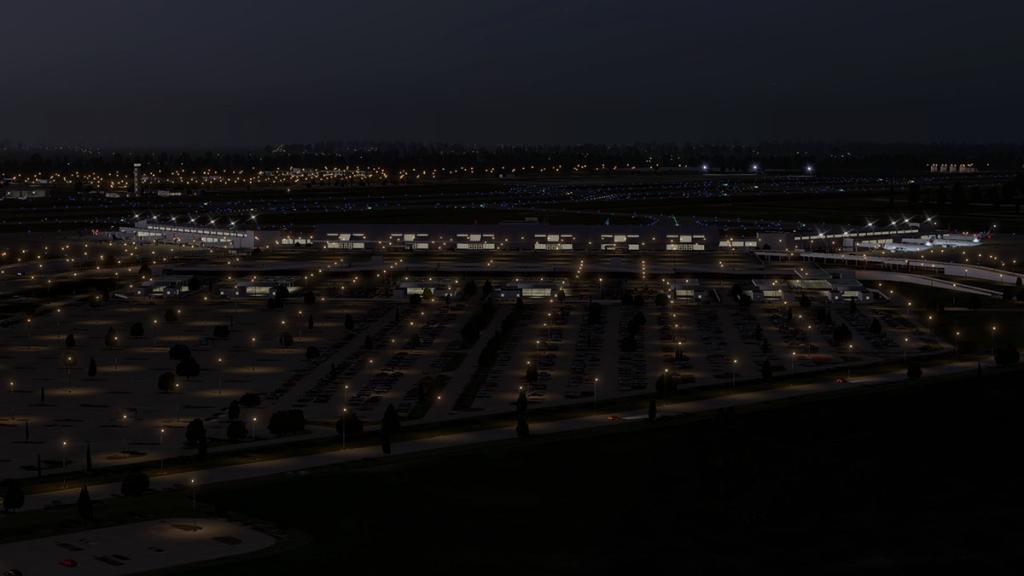
There is not much variety in the lighting in one for landside and building ramp lighting airside, but there is a lot of it and it covers all the airport's areas including the carparks and inner and outer roads. Terminal and concourse windows are all one dimensional grey and quite boring.
The ramp work areas are well lit but with not much variation and do not throw the lighting out far from the concourses. So overall the lighting is good and workable, but not exceptional.
Services
Southwest Florida Intl Airport is an extremely popular airport, mostly because it does not have the serious heavy volumes of the eastern Florida ports. Basically it is regional port, but a far reaching one and its position on the western end of the Floridian peninsula gives the airport a wide arc of destinations. Seasonal is big business here as the winter snowbirds come down here to escape the northern Canadian and higher US states cold winter weather.
Domestic
In rank Atlanta is the overwhelmingly busiest route, double of anywhere else and no doubt a hub connection route. But many airports to the Eastern seaboard ports are also very heavily utilised.
- Atlanta, Georgia - 597,000 : Delta, Southwest, Spirit
- Chicago–O'Hare, Illinois - 313,000 : American, Spirit, United
- Detroit, Michigan - 283,000 : Delta, Spirit
- Charlotte, North Carolina - 238,000 : American/US Airways
- Boston, Massachusetts - 229,000 : JetBlue, Southwest, Spirit
- Minneapolis/St. Paul, Minnesota - 221,000 : Delta, Southwest, Spirit, Sun Country
- Newark, New Jersey - 215,000 : JetBlue, United
- Baltimore, Maryland - 172,000 : Southwest
- Chicago–Midway, Illinois - 166,000 : Southwest
- Dallas/Fort Worth, Texas - 152,000 : American, Spirit
1 Delta 22.44%
2 Southwest 22.44%
3 JetBlue 12.32%
4 American 9.56%
5 United 8.62%Delta and Southwest are the most popular airlines for RSW taking between them almost halve of the passenger loads.
1 Toronto 133,534 - Air Canada, WestJet
2 Düsseldorf 39,891 - Air Berlin
3 Montréal 5,713 - Air Canada
4 Ottawa 4,165 - WestJetCanada is easily the most popular international route, but the Düsseldorf numbers show the future potential of more overseas vistors to RSW.
Summary
The overall impression of KRSW - Southwest Florida Intl Airport (with the update included) is that this is now a very good scenery. the road signage and general advertising are still missing and the terminal windows are bland and really boring at night and building lighting is average. There is an annoying MM (Middle) marker beacon that drives you mad as you sit on the go point of RWY 06 (I moved it in the local map).
There is the situation of the "Number of Objects" settings that for me in the first place was a viewpoint of sparse ramps but good framerate. And now with this update the situation of full ramps, but as the lower "Number of Objects" setting does not allow for any lowering of the number of objects (well you can go lower but to a detrimental effect of the overall X-Plane view being worse) in the scenery it has now created the opposite effect foe me on that now I have all the visual fulfilment that I can wish for but I can't adjust the render settings and recover any usable framerate. So if you have a slower or less powerful computer the original release version is actually a better performer in the framerate area.
That is a shame because the airport building basics are all very good, so are the orthophoto textures, runway and taxiway textures, animations are first rate and in all KRSW is overall a really great airport.
From a personal point of view I love Southwest Florida Intl Airport and use it regularly if not most of the time while doing reviews, in fact if you follow the reviews here you will find that KRSW is in most of them, and that is the main point to understand about the scenery.
Its geographical position and lightness of frame-rate (if the objects are kept down) keeps me coming back here and it is a regional airport par-excellence. It is just a really good and flexible airport to have and use in your network, so usable and flexible that you do easily overlook its now minor faults. With Aerosoft addressing KRSW's those small faults it is very close to perfect. RSW overall well worth adding to your network, as noted in the images here the airport is great visually and the airport is highly usable.
This always brings up the question on how you value your scenery. Good scenery is a great investment in one main area... How much you actually use the scenery. Yes you can spend money on a really great detailed scenery, but if you never use it then it is a waste of money. But a scenery like KRSW that if like me in that if I use it almost constantly then I know I am getting my money's worth and that is a very good investment... So yes overall KRSW it is a very good to great investment.
______________________________________________________________________

Yes! KRSW - Southwest Florida International Airport by Aerosoft is available from the new X-Plane.Org Store here :
KRSW - Southwest Florida International Airport
Price is US$24.99
Features :
- 10 cm/pixel aerial ortho imagery covering the entire airport (approx. 8.41 sq. km)
- 1 cm/pixel custom ground detail/markings
- Baked-in, ray-traced ambient occlusion on all major buildings
- Baked-in, ray-traced night illumination on the airport terminal building
- Specular reflections and all-HDR lighting
- Accurate building heights, measured using LIDAR (Light Detection and Ranging) elevation data
- Designed using X-Plane 10-native methods for maximum performance
- Animated jet bridges and marshallers at all gates (using the freely available AutoGate plugin by Jonathan Harris)
- Static aircraft as an option
- Animated and static ground vehicles
- Volumetric grass
- Road traffic
- Compatible with HD Mesh Scenery v3 by Andras Fabian
Installation : Download file size is 1.75gb to your X-Plane - Custom Scenery Folder. Installed file size is two files -
"KRSW 1_Roads" 10.80mb
"KRSW 2_Scenery" 1.09gbAerosoft scenery installer is provided and you require an installation key
Notes: There are a lot of ground textures in gigabyte size and they take up a lot of memory. So a minimum of 2gb in graphic VRAM is recommended, there is not a lot of autogen around the airport so that aspect does not have an impact on your frame-rate.
There is a clever trick that the developers of KRSW - Southwest Florida Intl has built in to the scenery to adjust the amount of objects (hence your framerate) to your preference. You need WED 1.4r2 (WED 1.4r1 does not work on saving) and open up Aerosoft KRSW 2_Scenery folder in the WED application. In the OBJs group you will find the groups of scenery objects named New, Density Level 1, Density Level 2 and inside those folders are the categories of scenery objects. You can adjust the amount of objects in the categories by clicking off the eye and resaving the scenery. I found I needed to only adjust a few categories to recover a significant amount of framerate, and still leave a great selection of objects in view. Well worth adjusting and making the scenery as efficient as you can to your system's capablities.
Documents : There is an Aerosoft manual (12 Pages) in German and English. No charts are provided with the scenery but a link http://airnav.com/airport/KRSW) is provided for download. There are three arrival charts (STARS) and four departure routes (SIDS) and five instrument procedure charts.
Requirements :
X-Plane 10.40 + (any edition)
Windows Vista / 7 / 8 / 10; Linux; Mac
Multi Core Processor (CPU): Quad Core 3,0 GHz
Minimum 8 GB RAM
2 GB Free Hard Disc Space
2 GB of on-board, dedicated VRAM_____________________________________________________________________________________
Review by Stephen Dutton
Updated review 17th February 2016
Copyright©2016: X-Plane Reviews
Review System Specifications:
Computer System: - 2.66 Ghz Intel Core i5 iMac 27”- 9 Gb 1067 Mhz DDR3 - ATI Radeon HD 6970M 2048 mb- Seagate 512gb SSD
Software: - Mac OS Yosemite 10.10.4 - X-Plane 10 Global ver 10.45
Addons - Saitek x52 Pro system Joystick and Throttle : Sound - Bose Soundlink Mini
Scenery, Plugin or Aircraft
- McDonnell Douglas MD-80 by Rotate ((Rotate MD-88 - X-Plane.OrgStore) - US$59.95
- JARDesign Ground Handling Deluxe Plugin (Ground Handling Deluxe - X-Plane.OrgStore) - US$14.95

-
Behind the Screen : January 2016
I'm going to try in 2016 to do a Behind the Screen as a monthly column, as I like the idea of reporting of what goes on behind our website and what is happening in X-Plane as much as the reviews we do. You can give out a different perspective on what is highlighted or what is not by having a more non-ridged way of talking about X-Plane which is hard with such a structured Review post.
Top of the month was that I installed the BlueSkyStar Simulation sound package on JARDesign's A320neo. Oh wow, stand back people. I called it "Extraordinary" in our heading and extraordinary it is, amazing, can't believe this... and so on. These sounds have totally absolutely changed my perception of how sound relates to the aircraft's simulation and to your overall experience, and still weeks after the installation I am running the A320neo every moment I can to just rerun over and over again that feeling of a A320 on my desktop. No one, I mean no one who owns or buys the JARDesign A320neo should be without this BSS sound package installed. I found out later that the FlightFactor B767 has the same BSS sound sets and if you read the B767-300ER review I noted I really loved the sounds in there as well, those sound sets just stand out so well.
The BlueSkyStar A330 sound set is originally a basic set that is reflected in the price, but a more full comprehensive set is noted as coming, so is a set for the JRollon CRJ-200. No matter, and any sound set from BSS in the future in my books is a certain must have... start your wish list here.
A lot of forum noise was made on the JRollon CRJ-200. Most noted the aircraft was out of date now, and be prepared to see it sent out to Victorville for storage. Myself I still think their is still a lot of life left in the old girl, I certainly don't want it sitting out there in the desert with weeds climbing up into the wheel-wells. The coming BSS sound set will maybe be the aircraft's savior, but JRollon will have to give the aircraft a magic wand wipe over to convert it to the current X-Plane v10.45 conditions. The BIG question is he willing to do that, no word or hints yet if he will. So maybe we should start a "Save the CRJ-200" campaign! .... crowd-fund?
The start of the year had another source of confusion in the updated SASL 2.4 plugin and X-Plane v10.42 or 43 or 44 or 45, now in beta 45b1. But confusion reigns that even I myself have lost all total proportion on what I have in my aircraft folder is legal and current. The SASL 2.4 update is an important one that is the fix for all those crashes in Mac El Captain 10.11 OS. Myself I am still on 10.10 Mavericks OS because I am still waiting for the 10.11 OS to become stable and now the problems are worse as I have no idea what SASL changes in aircraft have actually been done and what has not, there is no guide unless you go to the X-Plane.OrgStore and check the version number and update. Then Laminar Research noted to developers to fix the " torque bug fix" in planemaker (you can do it yourself by re-saving the aircraft in Planemaker v10.42 or higher) and the developers have had to do it all over again and resubmit their aircraft with the upgrade. No doubt a few developers where not happy to say the least, and total compliance confusion reigns.
I have simply no idea what aircraft in my folder is compliant and what is not and is faced with at least months of downloads to correct it all. My current feeling is leave everything as it is, as it is all thankfully at the moment all running smoothly and that I doubt I will be able to install El Capitan at all and just move straight on to the next Mac OS in September 2016.
Laminar Research in X-Plane v10.50 has finally seen the light. I love the "Global Airport" idea but it hopelessly didn't work for me. Almost every airport I landed at had two airports merged together in some sort of of drug fueled hallucination. I got to the insane point when I just threw out the Global Airport folder to reinstall it again only for X-Plane updates.
Laminar's Ben Supnik expected all developers to fix their exclusion zones, but I thought that was a never, never land expectancy because many airport developers are long gone, most can't be actually bothered and the rest did have a half-hearted go at fixing the zones. I foresaw this issue well before the Global Airport feature was installed and noted forthwise. The solution is as simple as it is easy, If the ICAO code is noted on the installed scenery then the Global copy will ignore it... beautiful and it works and only a global perspective could have fixed the issue. There are a few poor set out custom sceneries without ICAO's , but you can't cover every bad developer can you. Now my "Global Airport" folder stays right there in its rightful place and I can thankfully use its extra wonderful selection of fill airports.
Six weeks on and the hairs on my neck still get angry with the comments on the Rotate MD-88 that was released in early December 2015. Still users are complaining that the aircraft is not sorted and you would think the aircraft is some sort of lopsided disaster. It goes beyond belief that this ranting is still going on and mostly because it is not warranted. I myself will admit that the aircraft is not absolutely totally not perfect, but hail Mary's it is not that bad either. I find it (and so do many, many) other users a great experience and a far better aircraft than any aircraft that was released to acclaim only a few years ago. But let us get some perception here of what the situation is. First Rotate is a first time release developer (He has been part of a team on other projects) so his learning curve is stratospheric. It is a very small team (Not even close to the mega team FlightFactor uses as one scribe commented) and any product today in this scale in X-Plane needs many updates after its release to bring it up to cover all the different aspects of running on different computers to different specifications. Rotate has already listed a long list of updates on his v1.1 notes and I will confirm the beta is very good.
Finally I will repeat the point also that a purchase today of a payware aircraft is not just limited to the release download, but included in the cost is also years of updates and extra features. You are not buying an aircraft but a large investment that a developer has to maintain at no extra cost for years, and that is where a large percentage of your money goes... support.
JARDesign gave us another significant update to his excellent "Ground Handling Deluxe" plugin and I am really loving it with the changeable livery feature. I did over the weekend a few "liveries" for Alitalia, Qantas and British Airways, and you can see the huge potential in the idea. I am debating of if airline colours or airport logo's are the best sets, but for the moment I am leaning to airline colours, because they can be spread and used over more than one airport like all around the airports in Australia. More ideas are flowing in this area.
Sitting the JARDesign A320neo at Heathrow and spending the time setting the aircraft up. I found I was quite busy in calling all the action around the aircraft as much as getting the A320 ready to fly. With Greg Hofers WorldTraffic running solidly at full throttle and the Aerosoft EGLL airport's vehicle animations you are not short of action on the ground. Yes I was contented and happy little bunny with my little X-Plane world and all the action turned on again at my arrival at LIRF (Rome). How far we have come in a few years in this area were as I would have landed and parked up and just sighed.... and then turned off the computer. Now after landing you just leave the X-Plane world running on and on, hey you now have a plane to unload... contented is the word.
Over a month I usually get to cover and fly a wide section of aircraft, but this month was for one cut short in half by a nasty cold, with two weeks off the computer and 13 days without leaving my home and I was crawling up the walls. "sick as" as the Queenslanders state, this was not "Manflu" but a full on head and chest killer in 40º heat (yes it is hot here in Australia at the moment). I survived to fly another day, but it did restrict my flying exploits. But JARDesign's switch that resets X-Plane's "Cold and Dark" setting would mean that 90% of the months overall flying was from "cold" and a lot of setting up before each flight. But I was willing to practise hard these constant routines over and over. You get very good at it and understand the aircraft better every time you totally redo the same sequences.
One thing that has been my biggest learning lesson in X-Plane was that good flying is created by good practice, discipline is paramount to get the very best out of yourself and the aircraft. I was never ever a practise to refine person, I wanted everything and usually wanted it right now. I have learnt to learn and take slow steps and my discipline has been rewarded by my self-esteem on how really good I have got at something I love to do.
So Practise does make perfect and in aviation it is paramount to fly at the very best you can achieve. I also spent a lot of time just flying between just three ports in KATL, KDFW and KRSW. Refining the way to do the same routes with different aircraft, and you do notice the differences between the different A320, A330, x737, E175 and MD-88 machines doing exactly the same route. It was more fun than I expected as I did expect a sort of monotonous repeatable sort of flying experience, but it proved overwhelmingly not to be the case. Which brings me to another interesting fact that in X-Plane less is certainly more, keep your flying and routes simple and refine those ideals better. '
Ciao! Stephen Dutton

-
Plugin Update : Ground Handling Deluxe by JARDesign
JARDesign's Ground Handling Deluxe plugin was my "Plugin of the year" in 2015 and a worthy winner it was. Selections of criteria for yearly submissions is not if the aircraft or plugin is just good at the point of release but also it's future contribution to the overall X-Plane landscape.
The Ground Handling Deluxe plugin is a clever idea of extending an aircraft features with ground support animated vehicles for any X-Plane aircraft. Obviously that has some great advantages because of the many great aircraft we fly like the x737 series and the FlyJSim aircraft which don't come with ground support equipment and static elements. There is another bonus in the fact you also get a consistent type of a quality set of ground vehicles whenever you use it, I like that option because some developers use very eastern-block types of support tankers and trucks that don't really fit into the landscape of western airports.
But the plugin is becoming far more versatile than that as we will see. For myself the impact of the plugin was enhanced because I couldn't use it. For a few months it crashed my X-Plane app that was traced to a faulty key (the installation system has since been overhauled) and it affected only me and no one else. But my empty gates were a reminder that how much I missed the activity and control the plugin created around the aircraft before departure or after arrival. I am one of those users in that I want the full impact of from battery on to battery off and the full service in between. Landing and opening up the aircraft and loading and unloading the aircraft is as important as actually flying the machine... I want the full deal.
And in a way the Ground Handling Deluxe plugin fills in a big part of that picture.
I looked quickly at the plugin in the JARDesign A330-243 update and we will quickly recap the plugins features here...
The GHD (Ground Handling Deluxe) plugin is activated in the drop down X-Plane/Plugins menu. And that brings up a floating menu selection.
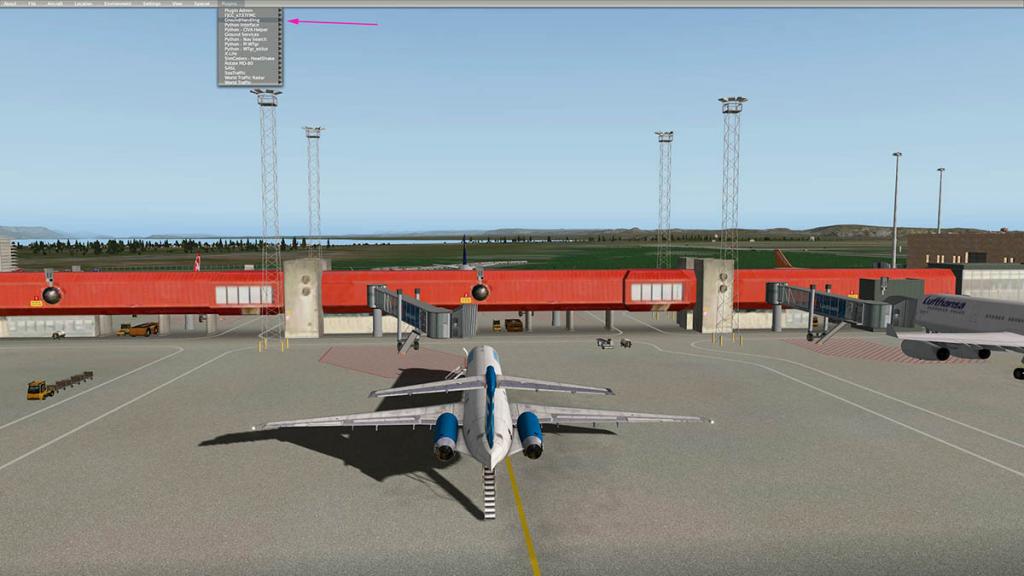
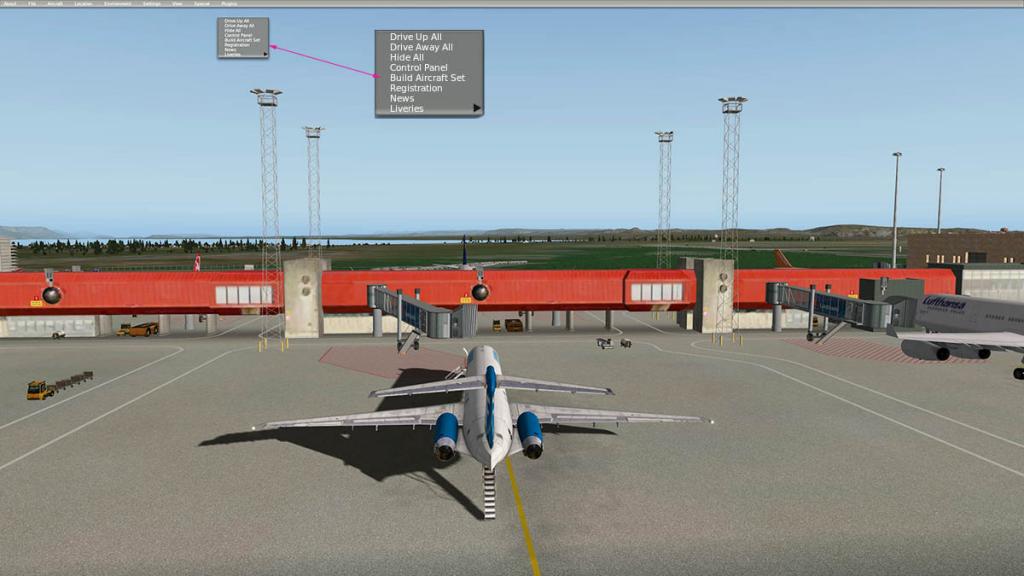
Including:
Drive up All
Drive Away All
Hide all
Control Panel
Build Aircraft Set
Registration
News
LiveriesThe allows you to - "Drive up All" and "Drive Away All" service vehicles in the list, "Hide all" vehicles and brings up a Control Panel that allows you to activate or hide individual vehicles. It is best to bring up first the control panel (highlighted larger)...
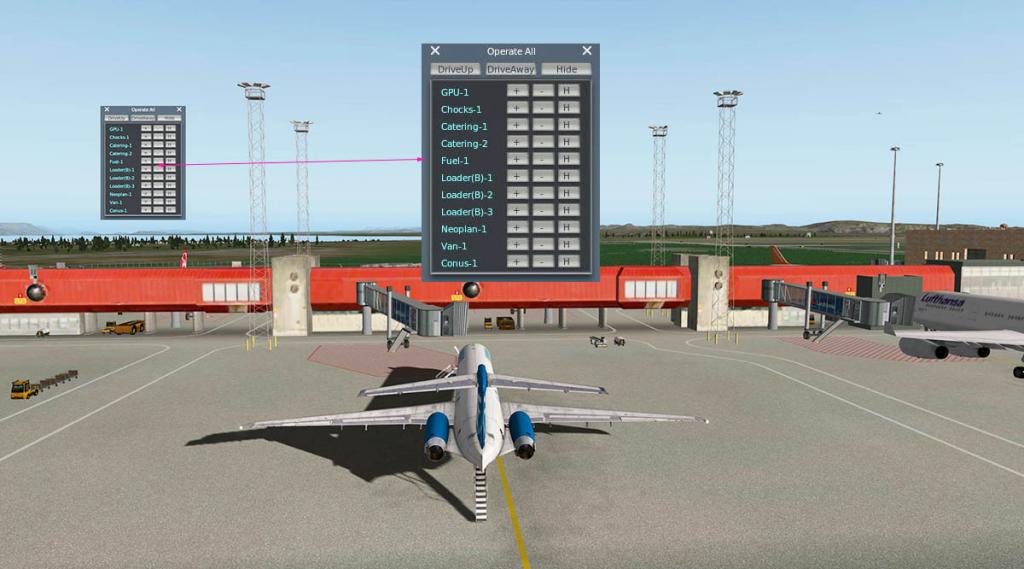
Open the Control Panel and you can see the list available, and it is extensive. Even better the system allows you to add vehicles in as well.
Three buttons do all the work in Press + to activate a vehicle and Press - to drive it away and "Hide" will make the vehicle disappear. The top three buttons are the "All" activations. This system allows you to control the vehicles on the ground, when you want them to appear but also when to finish the job and go away, simple but very effective.
Press "Drive up All" and you unleash mayhem!... The Service vehicles all appear and then go about their business with gutso.
And totally great fun to watch it is.
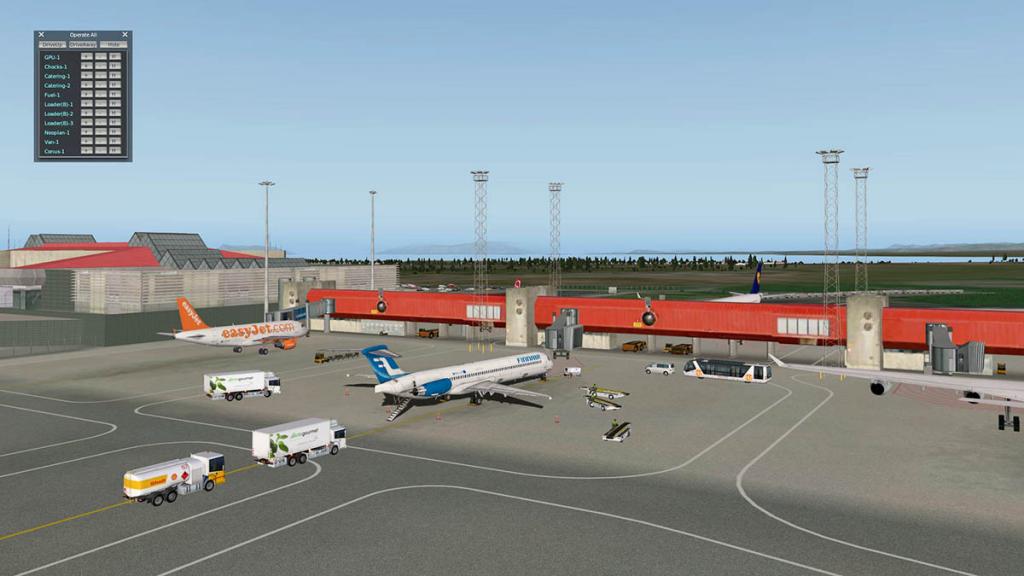
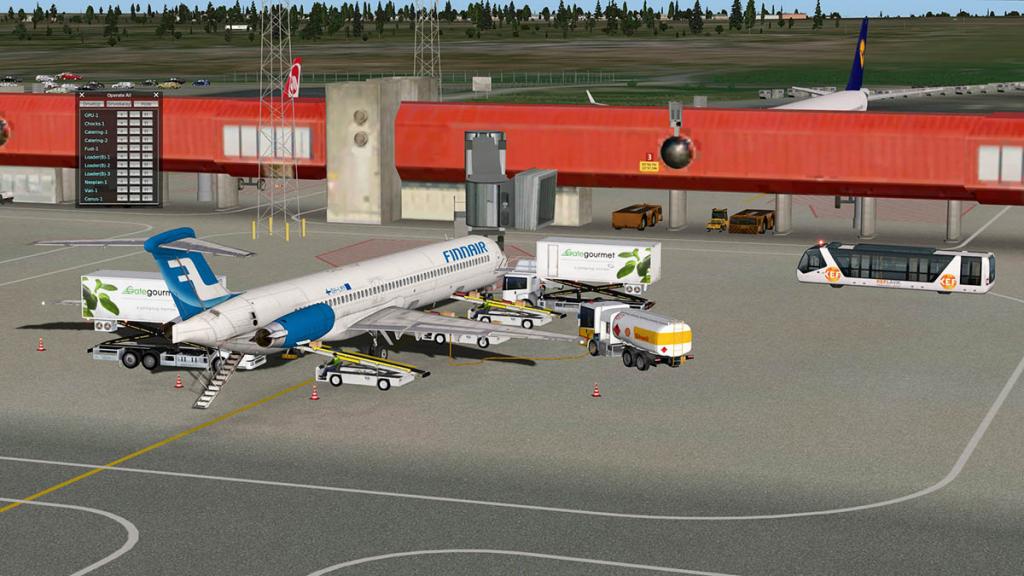


The highlights certainly are the pallet loaders, Pallets come on to the base, turn, then lift and then move the pallet inside the aircraft, then repeat. The catering trucks are also excellent and the Neoplan buses are very realistic with opening doors. Quality of the vehicles in design and texture quality is outstanding.

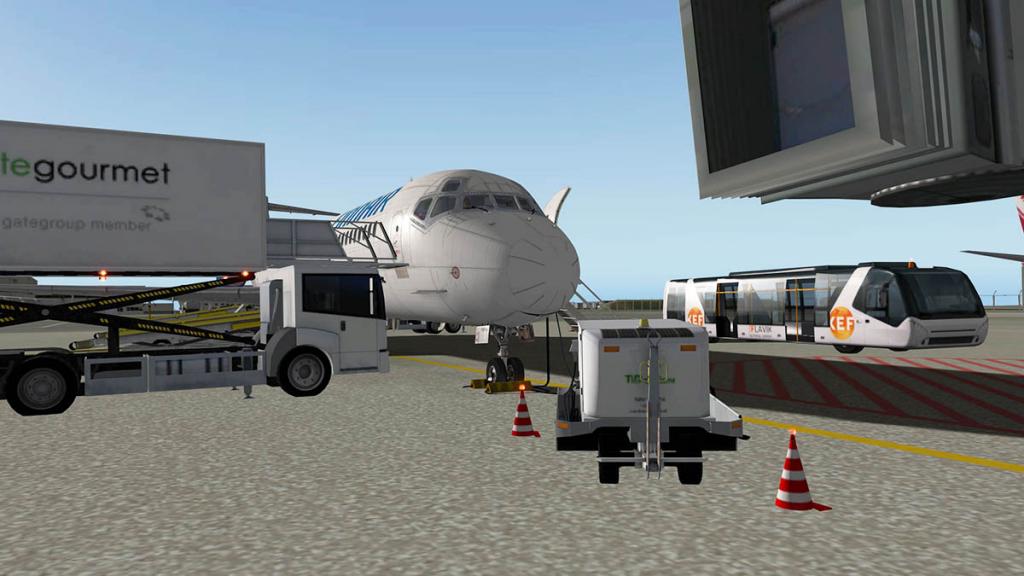
As noted you have total control, or just use the three "All" commands to use every vehicle and static elements.
Sets
There are "Sets" for different aircraft that can be created or completed sets that can be downloaded from the JARDesign site (registration required).
And there are defaults sets that come with the plugin and "custom" sets that can be downloaded. As an idea of what is available here are these five different aircraft:
EADT x737

The x737 from EADT benefits by a huge amount with the GHD plugin. Even a fire truck in case you spill some fuel. But I loved the fuel truck that goes very well with the x737 fuel loading system... overall excellent.
FlightFactor Boeing 757
The FlightFactor Boeing 757 already comes with a great set of ground support systems, but you can mix and match more by combining both the GHD and the FF default units to your benefit.
X-Plane Boeing 744

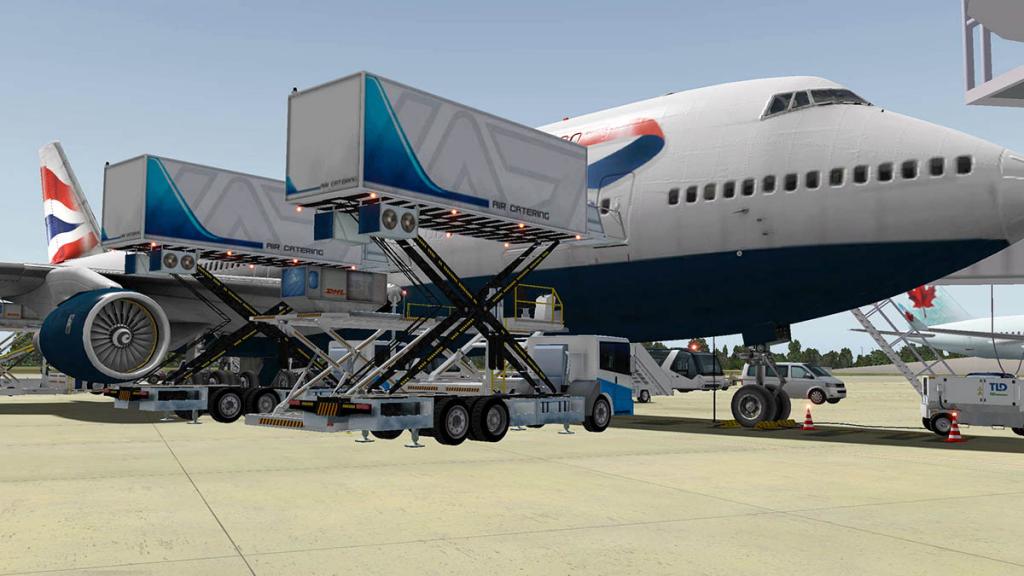
The default X-Plane Boeing 744 is greatly enhanced by the support ground services. The days of sitting alone at the gate after a long haul are long gone. It just looks excellent and realistic with all the gear packed around the 747 at the gate.
Regional Aircraft

You are not restricted to the "Heavies" either. The plugin enhances other aircrat that you wouldn't associate with static ground vehicles like regional aircraft. Here is the FlyJSim Q400 and Aerosoft ATR72, and they both benefit from having a built in ground handling support.
_____________________________________________________________________________________
Ground Handling Deluxe update January 2016
That is the basics of GHD, now what is new in the update. The eagle-eyed of you would have noticed that a lot of the support vehicles have different liveries. And you don't have them either...
When the first release of Ground Handling Deluxe came out if you wanted a brand at an airport it was quite difficult as you had to change over the actual art of the vehicles in the root folder of GHD. I created a great KEF for Keflavik (BIRK) but when I arrived at Manchester (MAN) I had to change the files over directly to get the representative brand there? And then worse I had to restart X-Plane to get the new branding to appear.
I loved the idea, as you could tailor the brand to an airport or company, but the process was very awkward.
In the update we have a brilliant fix to the problem of different brands.
Now there is a "livery" option as part of the menu (bottom). This option now allows you to change the brand livery on the run, select a new livery and "wah-la" you have a complete set of new branding for your airport...
It is extremely easy now to create your own sets of liveries. Duplicate a livery set you like or duplicate the default set. Then there is a great paintkit as part of the plugin package that allows you to create very quick branding of your required vehicles. And replace them (with the same correct title) of the vehicle you want. Here in the first column is my saved QF.psd (Photoshop) files and the paintkit. The Liveries are stored in the Plugin in the "Liveries" folder and in the far right column is the replaced QF (Qantas) liveries in the .png format. It is important that in renaming your set of liveries that there is no breaks in the title (It won't work). When you run X-Plane and select the plugin and the liveries option it will change instantly to the correct branding.... brilliant!
As a note I will upload these liveries to the JARDesign site.
You can create your own aircraft sets as well. There is a built in system for creating sets under the GHD menu selection: Build Aircraft Set

There are a few video's that show you how to build sets or modify them. Like all things there is a little learning curve. Here I am adding in a second set of chocks under my QF Q400. But once you get the hang of the system and its animation it is quite easy to do.
___________________________________________________
Another exciting additional feature to the update is.... K Loaders! The really big ones!
There was the smaller K's "Container loaders" also known as a Unit Load Device (ULD) with the original plugin release, but what of those huge 30Ton container lifting loaders.

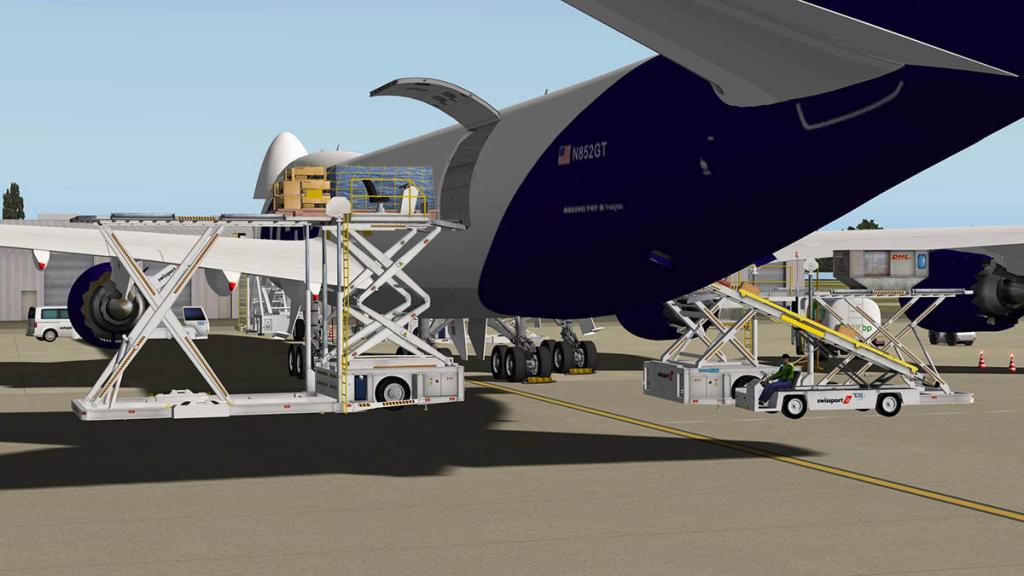
If you are a serious cargo hauler like me there was nothing worse than flying 10 hours half way around the world to just parking your freighter on the cargo stand and... going home. No fun in that.
Now you have in the update a smorgasbord of fun as the aircraft is swamped with huge loaders to load on and unload off your precious cargo.

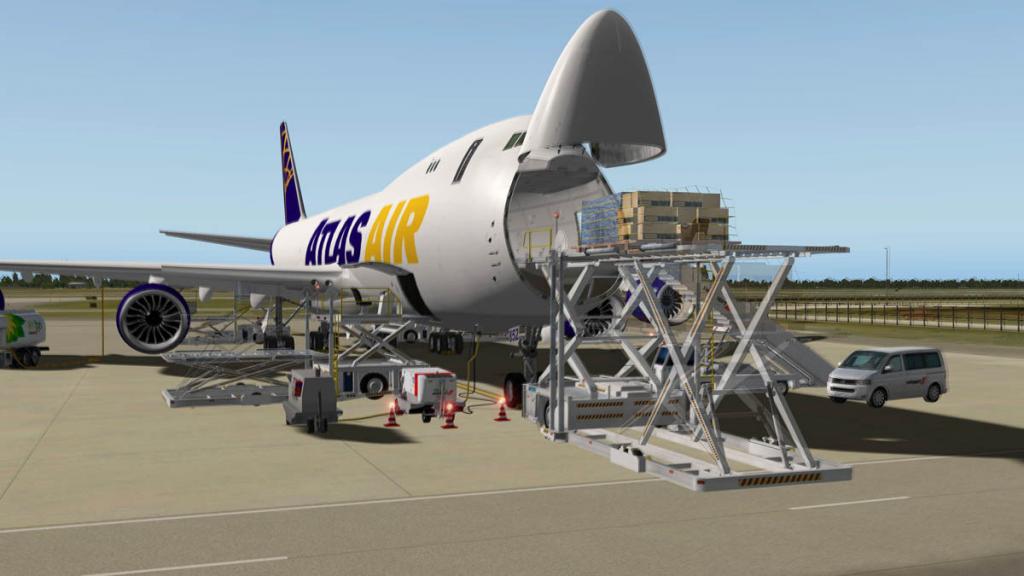
These huge loaders will bring tears to any hardened cargo flyer. And for myself I can now wallow in the loading and off loading at my ports around the world.

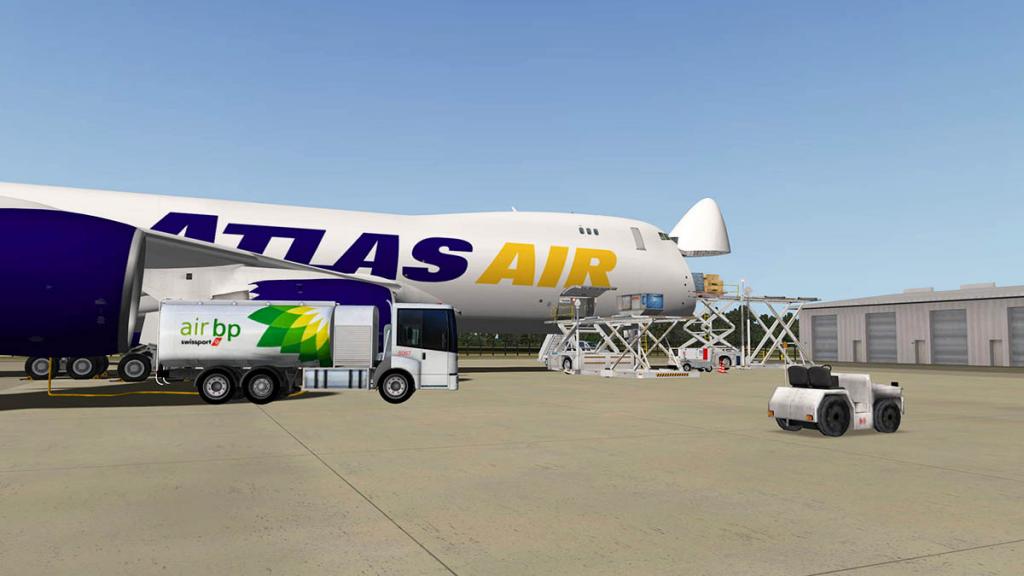
Hopefully the new Super K Loaders will be soon part of the FlightFactor Boeing 777 and 757 Freighter sets... please.
A full v220116 update list is:
+Add ability to change Liveries using Menu->Plugins->GndHandling->Liveries
+6 Liveries as example
+Improved registration system
+Add Instant News system
+Add BIG loader
+Add set for 747F cargo aircraft
+minor bugs fixedA small note on the "news" system in that JARDesign will let you know of any changes to the JARDesign products. Which is very good. But the problem with developers "Letting you know" is that they think their notice is the only one going to you. If the trend continues it may clog up the X-Plane start up with you waiting for all the notices to parade in front of you... so we do require the choice if we want their notices or not, I still prefer the Email version.
_____________________________________________________________________________________
JARDesign X-Life
A notice that the next product from JARDesign is X-Life. It is a plugin that allows you to have the tools around you that covers the full flight from gate to gate.
The plugin will create Aircraft Traffic (using X-Plane default aircraft), Aircraft Traffic maps, ATC and vocal ATC interaction, Follow Me car and flightplanning.
You can try out a beta version for Windows and Mac then go here: X-Life Public Beta
And there are a few YouTube videos to see the action then go here: X-Life EDDL Departure
Well worth checking out.
_____________________________________________________________________________________
Ground Handling Deluxe Summary
Once bitten you will never want to be without "Ground Handling Deluxe". As noted it was my "Best of 2015" for plugins and it is now even better with more excellent functionality of the changable liveries (and very easily customised) and those brilliant new huge K Loaders...
GHD is a really great addon and for action around the ramps it is just invaluable, and simply adds so much more to the whole X-Plane simulation.
An amazingly great investment at a great price.
_____________________________________________________________________________________
Yes! Ground Handling Deluxe by JARDesign is available from the new X-Plane.Org Store here :
Price is US$14.95
Features :
- Perfect 3D with Awesome animation
- 3D Sound and Light
- Advanced motion algorithms
- Set-Editor to Create your own set easy
- Ability to change Liveries
- News System
- Compatible with any X-Plane 10 airliners
Installation : Download file size is 433.20mb into your X-Plane Plugin Folder. Installed file size is 817.10mb. Registration is required and a product key is deposited in the plugin for use.
Notes: Aircraft for sets are not provided. Most current X-Plane payware and main Freeware aircraft are covered.
Requirements :
X-Plane 10.40+ Any Edition (64 bit only)
CPU: 2,4Ghz Multi-core.
Memory: 8 GB RAM.
Video Card: 1Gb VRAM. 64 bit OS (Windows 7 / Windows 8, Mac OS X)
For best performance, you need a 2Gb Video Card, with HDR mode ON.
Last updated January 22 2016Developer Support Site : JARDesign Group Board
_____________________________________________________________________________________
Review by Stephen Dutton
28th January 2016
Copyright©2016: X-Plane Reviews
Review System Specifications:
Computer System: - 2.66 Ghz Intel Core i5 iMac 27”- 9 Gb 1067 Mhz DDR3 - ATI Radeon HD 6970M 2048 mb- Seagate 512gb SSD
Software: - Mac OS Yosemite 10.10.1 - X-Plane 10 Global ver 10.42
Addons - Saitek x52 Pro system Joystick and Throttle : Sound - Bose Soundlink Mini
-
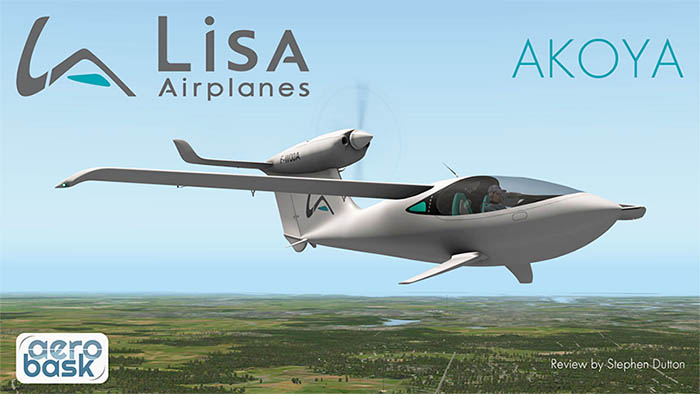
Aircraft Review : LISA Akoya by Aerobask If you are the champion pilot that states... "If it has a stick and a set of rudder pedals, then I can fly it!". Well here is an aircraft that will certainly test that theory. It is the LISA Akoya... and what a strange critter of an aircraft it certainly is. The LISA Akoya is a French made two seater aircraft with the unusual set up of a rear high-mounted tractor configuration engine. It looks like a flying Dolphin with wings and that is because it is designed to takeoff from land, water and ice. And only a strange critter like this would come from a developer like Aerobask, and you have to admit it is different. (note the new Aerobask logo) 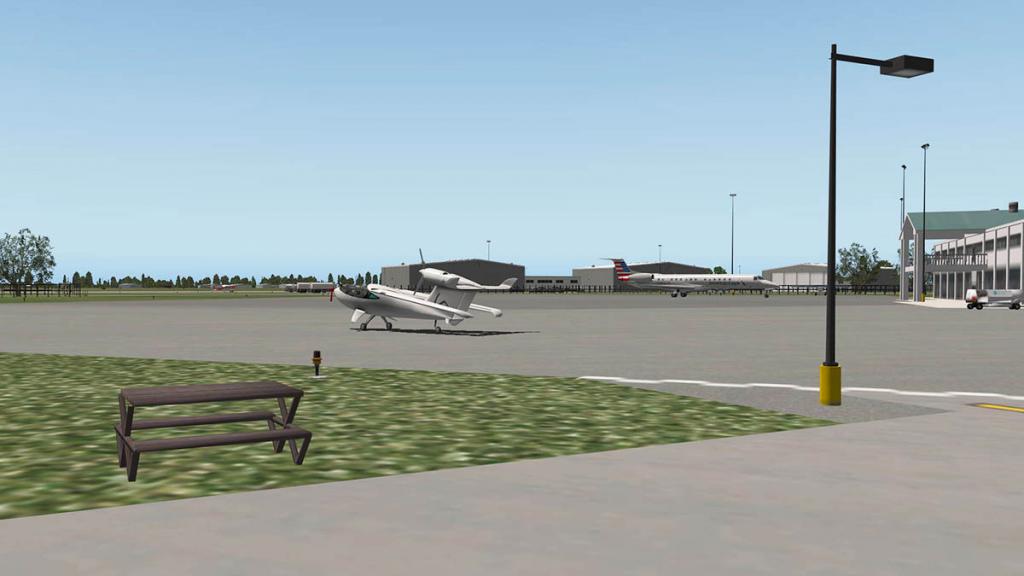
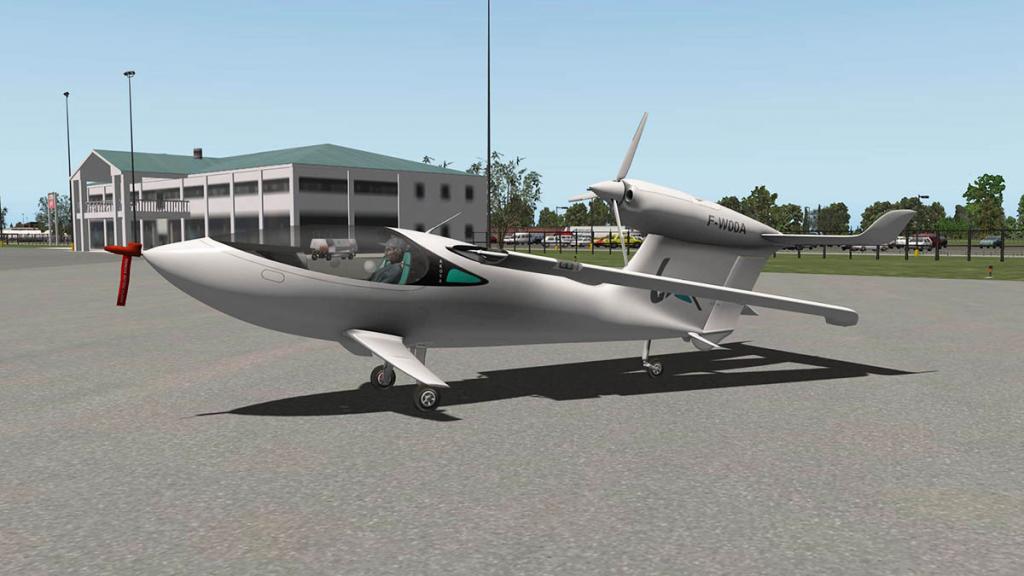
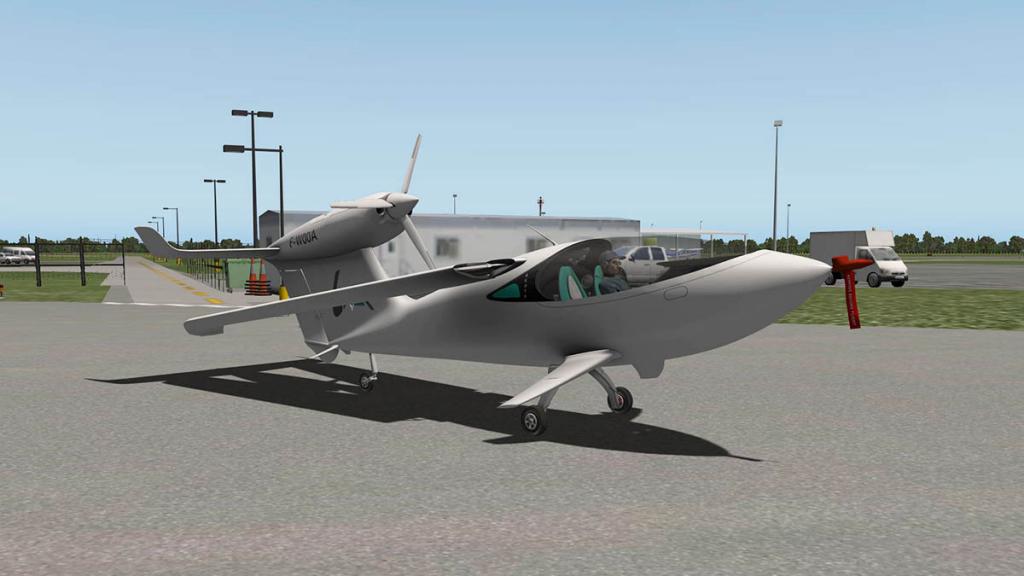
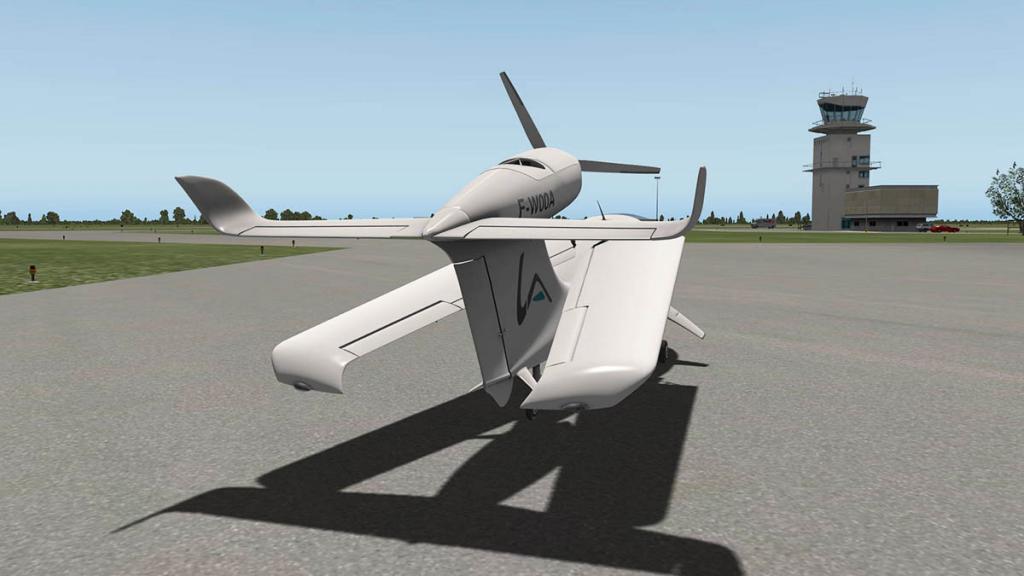
I am used to seeing strange aircraft outside the Florida office but the Akoya goes that one mad step further. The wings can be rotated back, either for clever aircraft storage or if you want to the aircraft to be also be towed behind a vehicle to the airport from home (on a specially built trailer). Versatile this aircraft is without doubt, you can't do that with your average Cessna 172. 
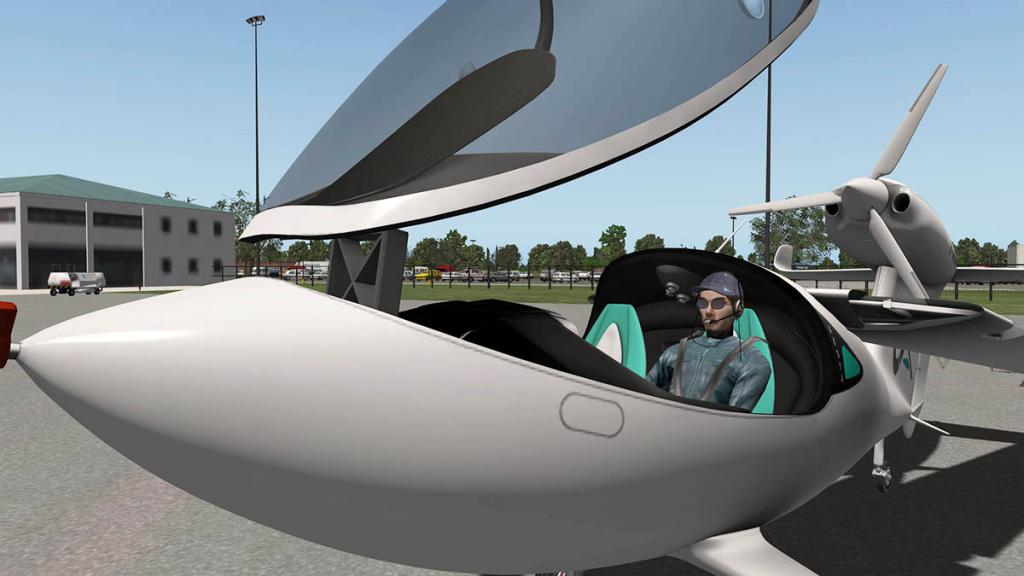

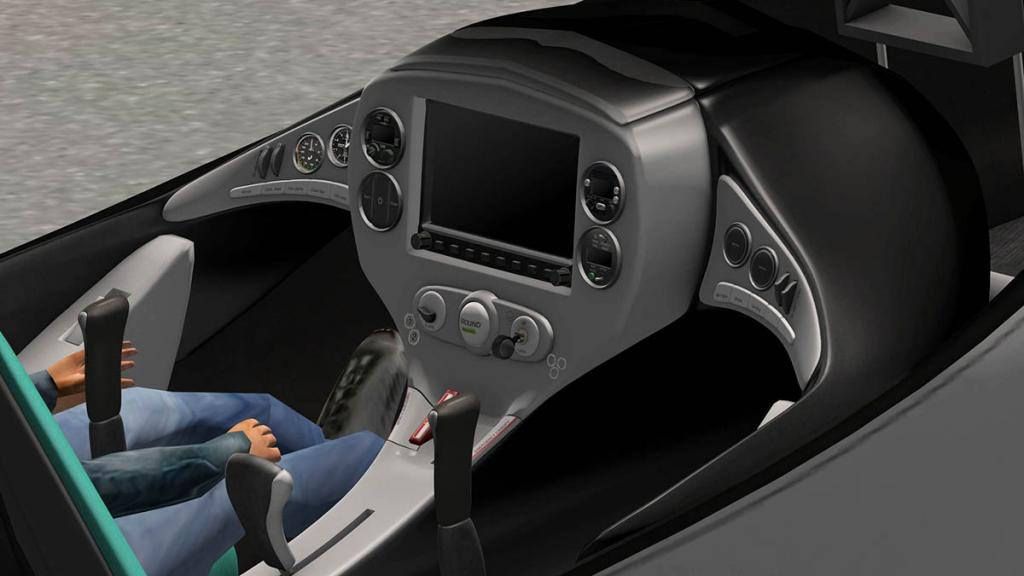
Open the one piece canopy and the cockpit is very simple, clean and modern. But before we go too far we have to make the road dragster look like an aircraft. 
In your X-Plane menu Settings/Joystick & Equipment panel you have too set up a few key assignments to extend and retract the wings. I used Shift/E and Shift/R to cover the wings of which the selections can be found on the top X-Plane addon key custom menu. (top red arrow). More key custom commands available include a toggle choice for the wings, CSC or "Constant Speed Controller" options and landing gear options. 
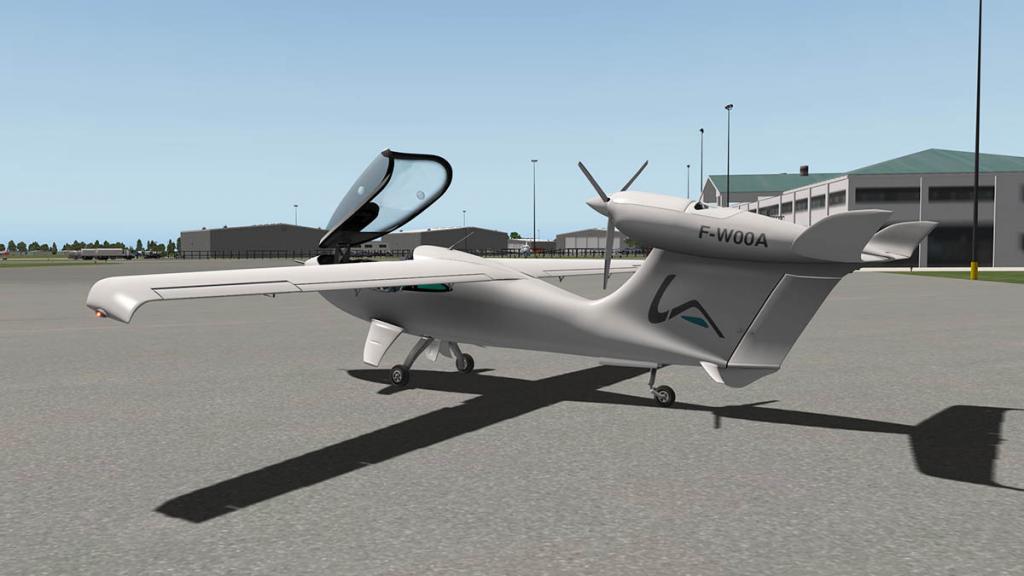
Design wise it is a very unusual aircraft. Long fine constant chord thin wings with downturned edges that have an aspect ratio of about 18:1, with those strange upper elevators with slightly upturned tips, and flipper stubby wings by the cockpit and very small airflow stub wings down on the lower tail. And all these aerodynamic surfaces are mounted on a circular cylinder tapered fuselage. All very Burt Rutan in concept. 

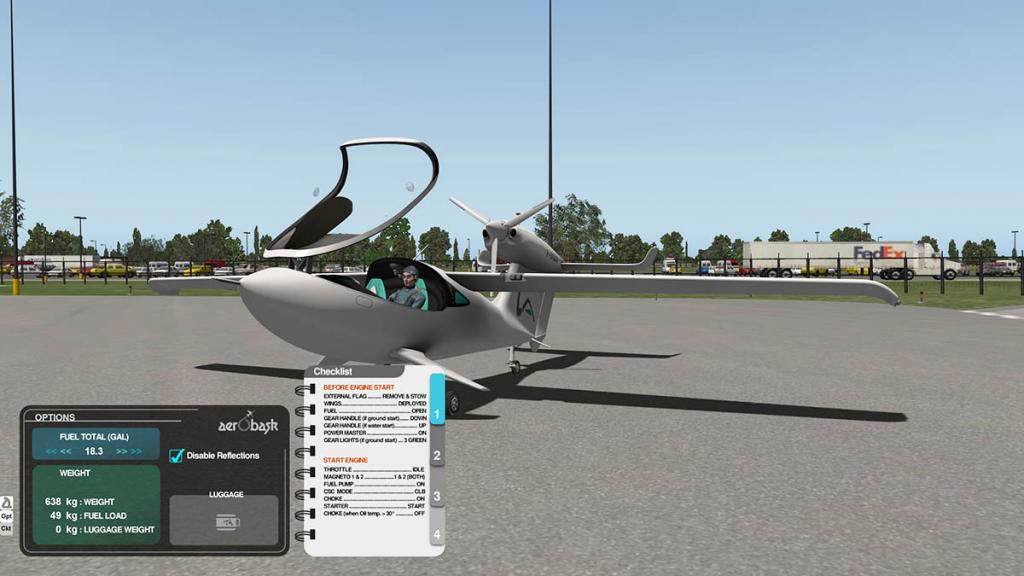

Two Menu tabs are located lower left of your screen. One is a basic weights and fuel menu and the other a basic checklist binder. You can add in fuel and a one piece luggage bag, but the that small bag can cost you a lot of fuel weight. The menu will show you in red if the aircraft is overloaded. There is the option of canopy tinting or clear (Reflections). 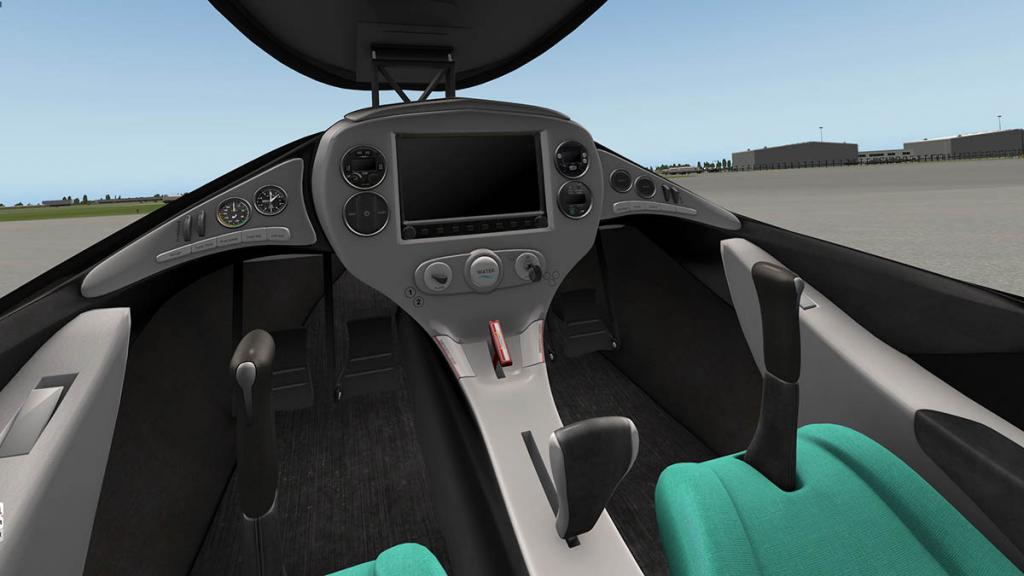
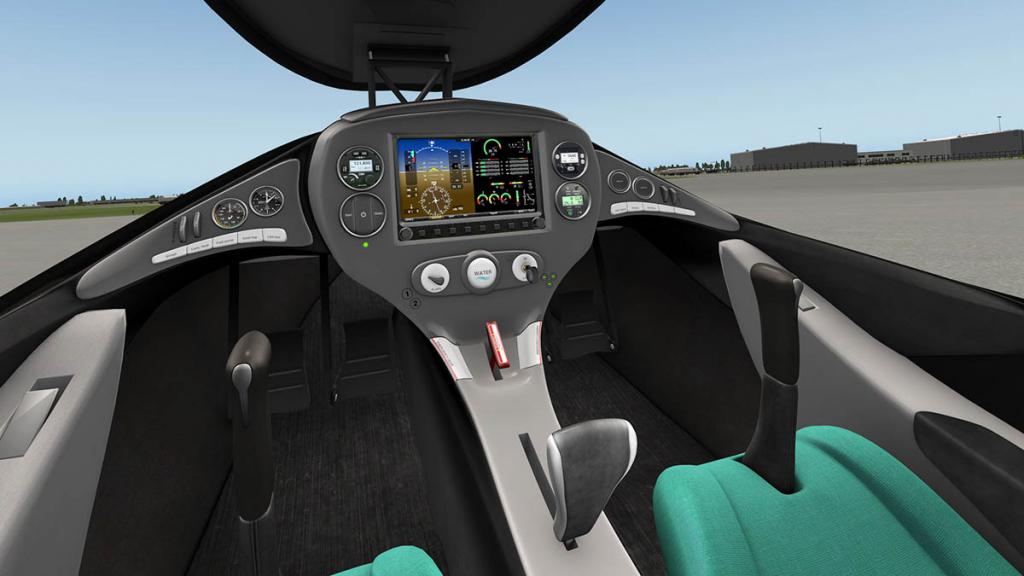
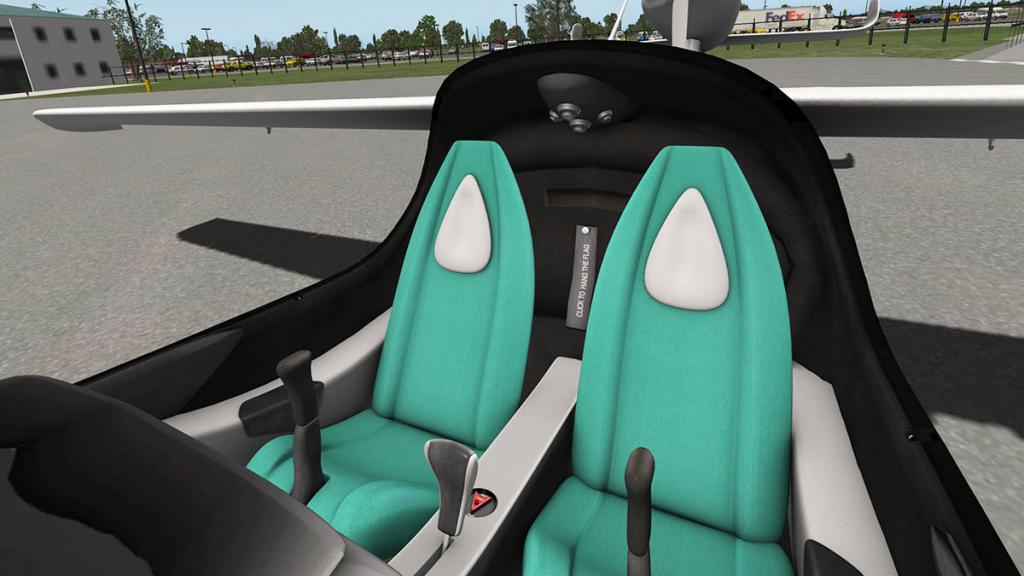

A term for the cockpit could be "Futuristic Minimalism". It has what you need but nothing more. No key just a power button, no trim wheels or buttons, fuel is on/off, no mixture or prop pitch and altogether in here you have just that "a stick and rudder" aircraft with no frills. It all makes even a basic trainer look overloaded with equipment. 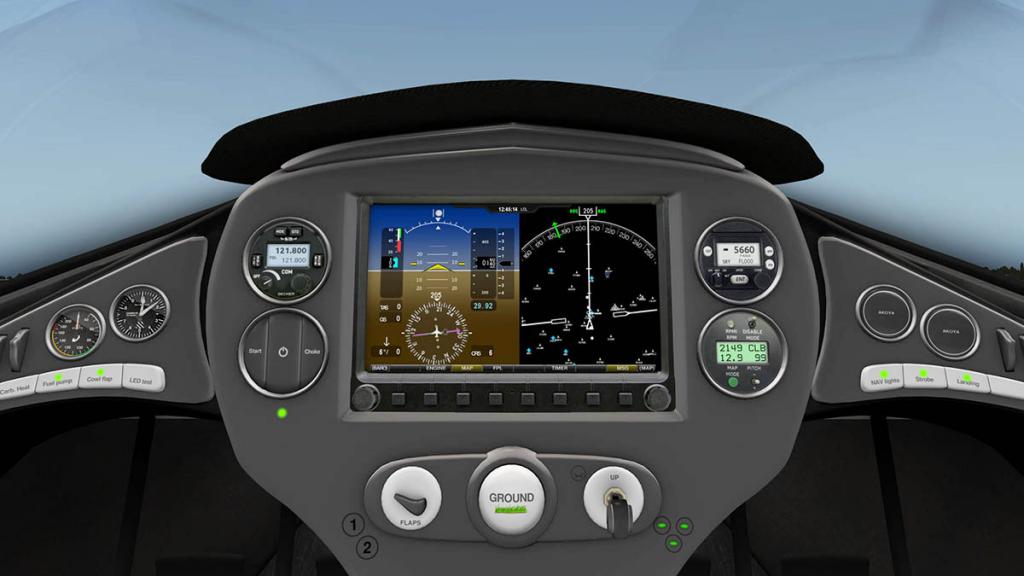
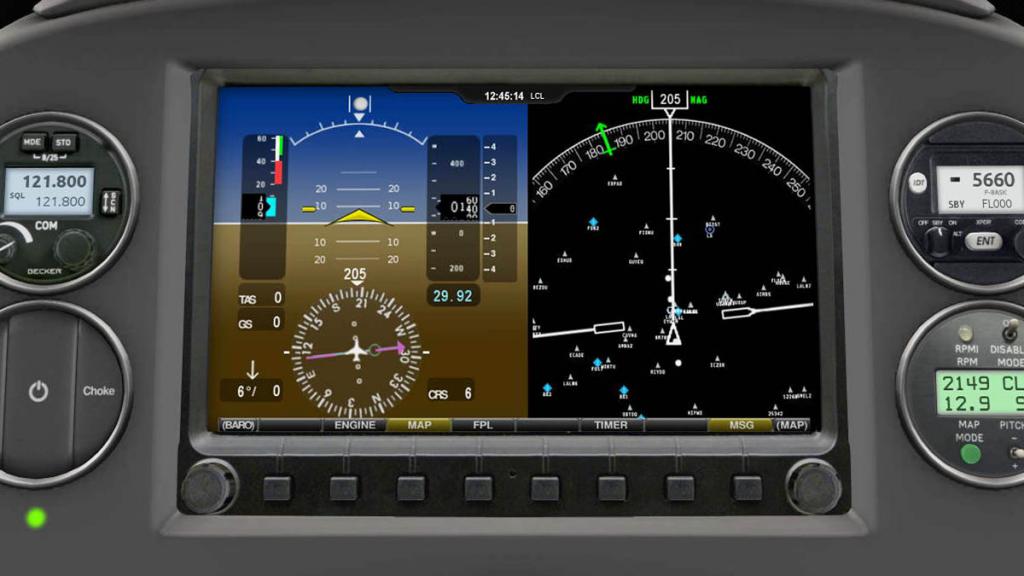

The central "War of the Worlds" looking panel is dominated by a twin screen EFIS (Electronic Flight Instrument System) and noted as the "Aerobask (DYNON) SkyView" display. The display is your standard electronic layout with located on the left side is the main Primary Flight Display (PFD) incorporating on the top with an Artificial Horizon/Pitch, Speed and Altitude tapes and built in lower rose/heading dial. A rate of turn/angle gauge is spread across the top. The panel is a menu driven system that is accessed by buttons on the lower display. In menu selections it is really quite basic. available is (left to right) BARO - ENGINE - MAP - FPL (Fightplan) - TIMER - MSG (Message). Most buttons access the information on the right side screen, with "MAP" the main navigation view and "ENGINE" bringing up the engine display. (ENGINE) Engine parameters covered are engine CHT and EGT outputs, MAP INHG (Manifold Absolute Pressure ) Carb ºF and Oil pressure psi/temp, fuel pressure (PSI). Electrical displays covers AMPS and Battery Volts. Fuel quantity and Fuel usage (Fuel flow) is noted in "Gallons per hour". Trim and flap position is also noted 
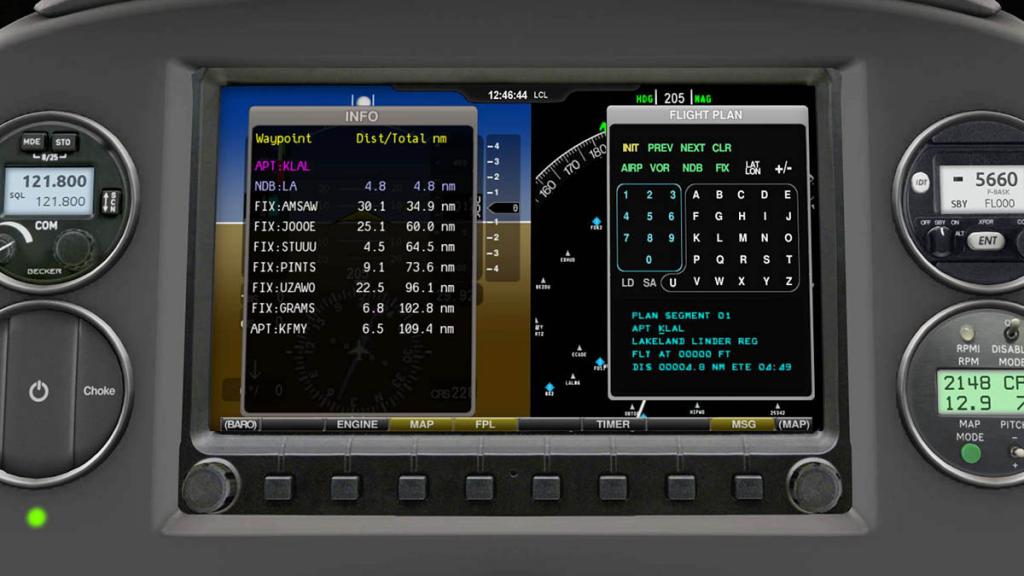
(MSG) the message display gives you items either active (Yellow) or (Red) warnings. (FPL) Fightplan selection is the X-Plane FMS in another form and you can create or save/load the routes in standard .fms route format. The aircraft does not have any autopilot or any means to follow the FMS route, so the flightplan is only displayed there as guide for you to fly by. 
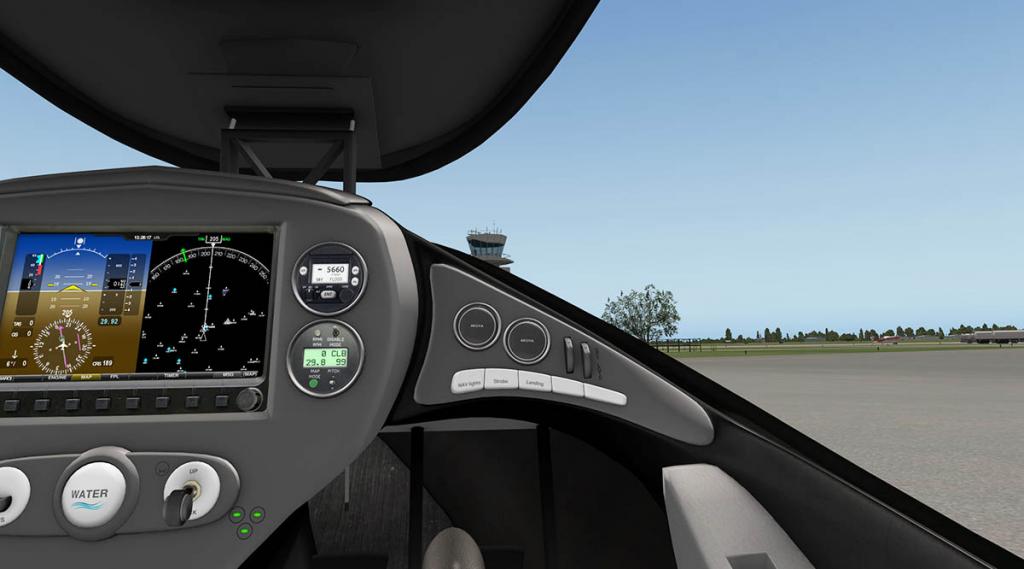
Left panel are the two "Magneto" switches (turn off the engine) and two back up instruments in speed and altimeter. The left switches below cover Wings Carb heat - Fuel pump - Cowl flaps - LED test switches. Inner left top is a clever COMM 1 radio, and Start-Power-Choke switches Right Panel Inner are two instruments that are top a "Transponder" and lower the CSC or "Constant Speed Controller". The constant speed Akoya propeller is managed by a controller instrument (CSC-1/P), which monitors and displays the Engine RPM and Manifold Pressure. Instead of a lever the propeller pitch is controlled here and you can set a Propeller Mode of: MAN : Manual mode
CRS : Cruise mode : Pitch 70 %
CLB : Climb mode : Pitch 99 %There is a RPM overspeed warning as well. Far right are the lighting switches and panel light (Dynon display) adjusters.
Mid lower panel are three large selectors... Left flaps in 0-1-2 three positions and right undercarriage up/down, the centre button we will come to later. As noted the layout is just plain basic, no more or no less than you need.
Flying the Akoya
It can get hot very quickly in the Florida sun, so you want to start up and get moving as quick as possible. After the walkround you need to bring in the pitot cover by pressing the "Remove before flight" tag on the rear bulkhead.


Starting the Akoya is as simple as 1 - 2- 3. First turn on both the magnetos (fuel tank switch is in front of the seats, but it is already switched on) 2. give the engine a little choke if required, a little throttle helps... then 3. hit the starter switch and the noise will start up high above you. Sounds are very good and it feels like the chop, chop noise is close and is right behind your neck... of which it is.
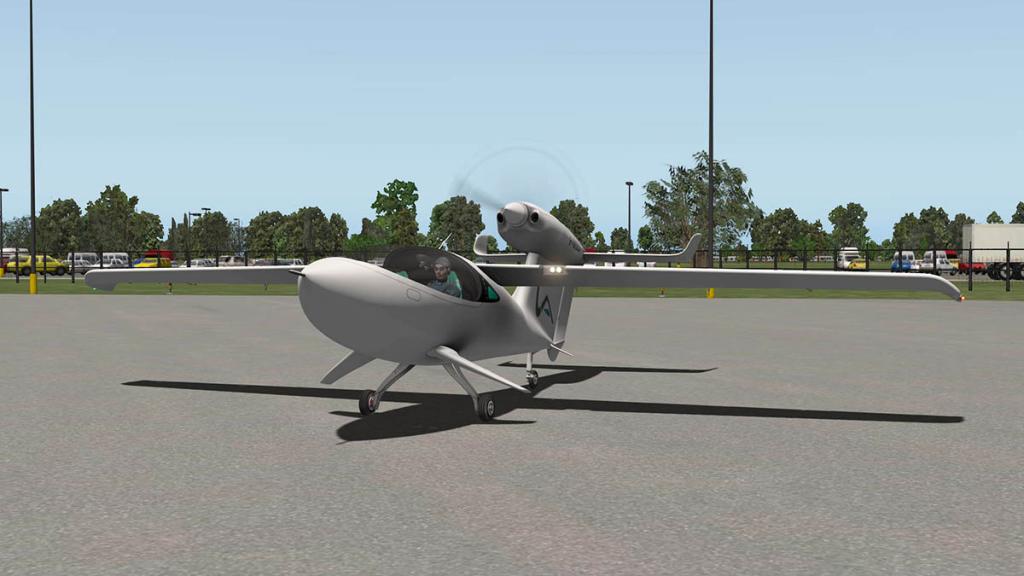

Taxiing was quite easy, but the aircraft is very high-nosed as the Akoya is a tail-dragger (sort of).
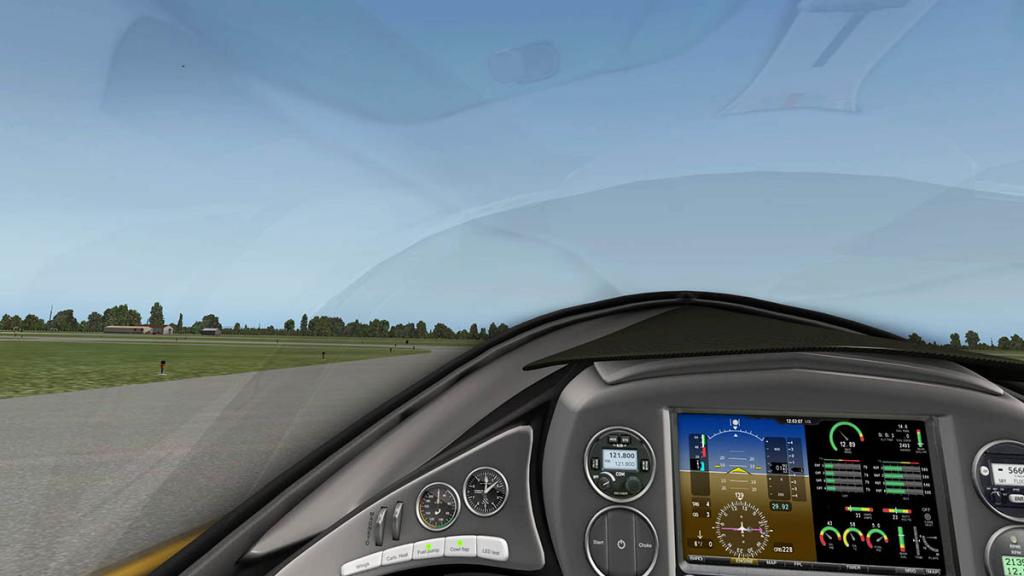
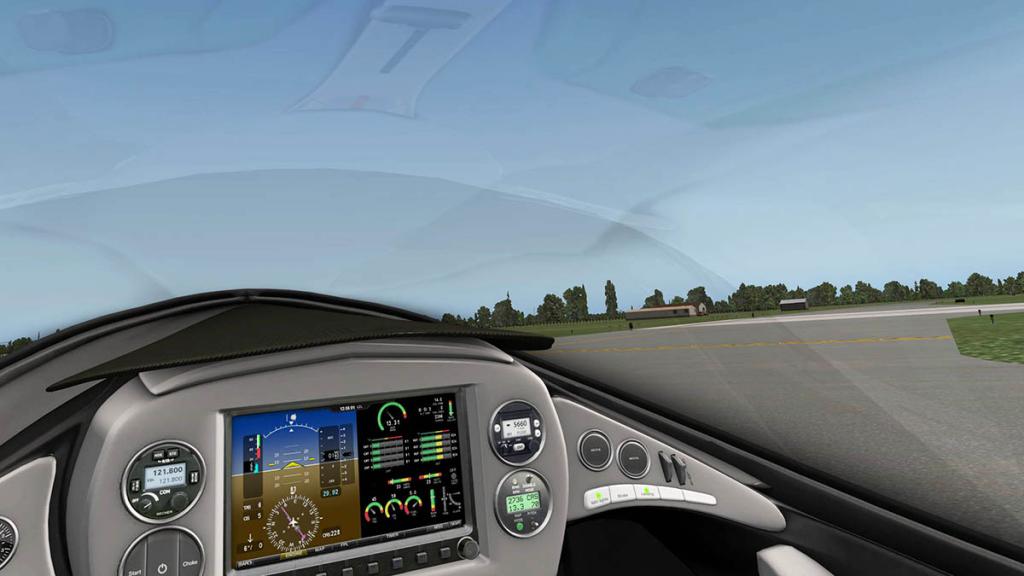
So I kept the taxiway centreline to the left and visible to make sure I had a visual line to follow.
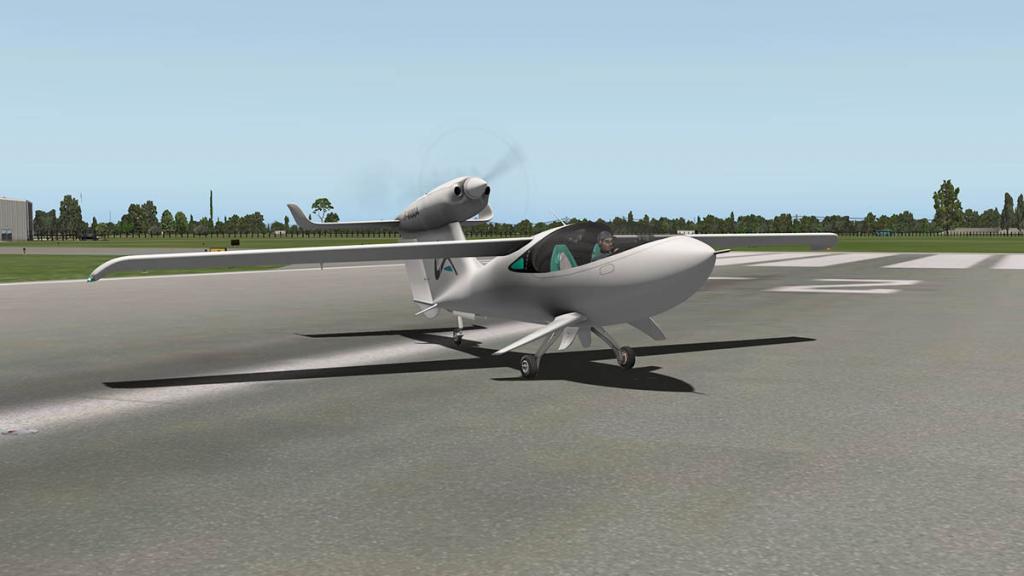

Power up and you quickly realise that this Akoya flying caper is not going to as easy as it looks. I am very smooth on the throttle, and only give out small stick inputs, but it soon becomes very apparent that there is not a lot of slipstream going over the rear rudder, and whoops your gone...
This second time I tried the "hold brakes and a lot of throttle" theory to try to slingshot the aircraft straight forward as the nicey, nice approach certainly does not work.
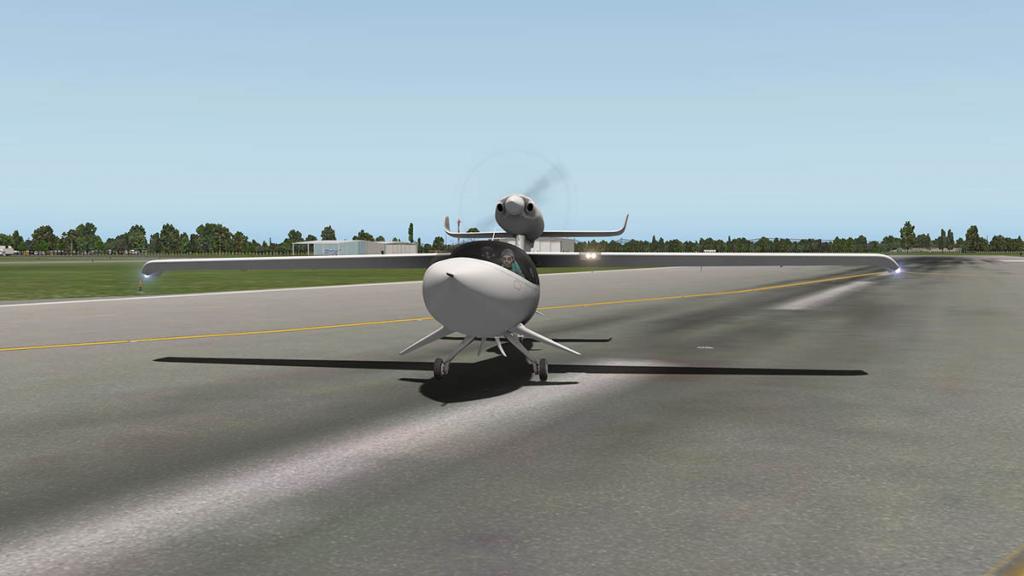
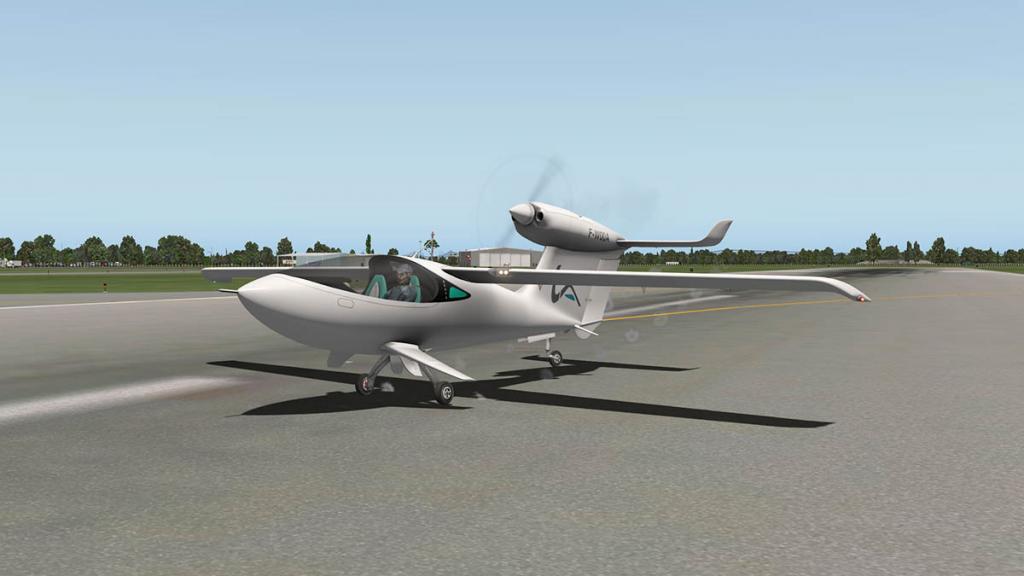
To a point it was more successful. But you are hanging on for your dear life and trying to keep the aircraft as straight as a die on some sort of a straight line... then the moment the tail rises your in business and you can gain control back and then as the speed rises more you are going to finally slip the Akoya upwards and away from mother earth. overall Nasty!

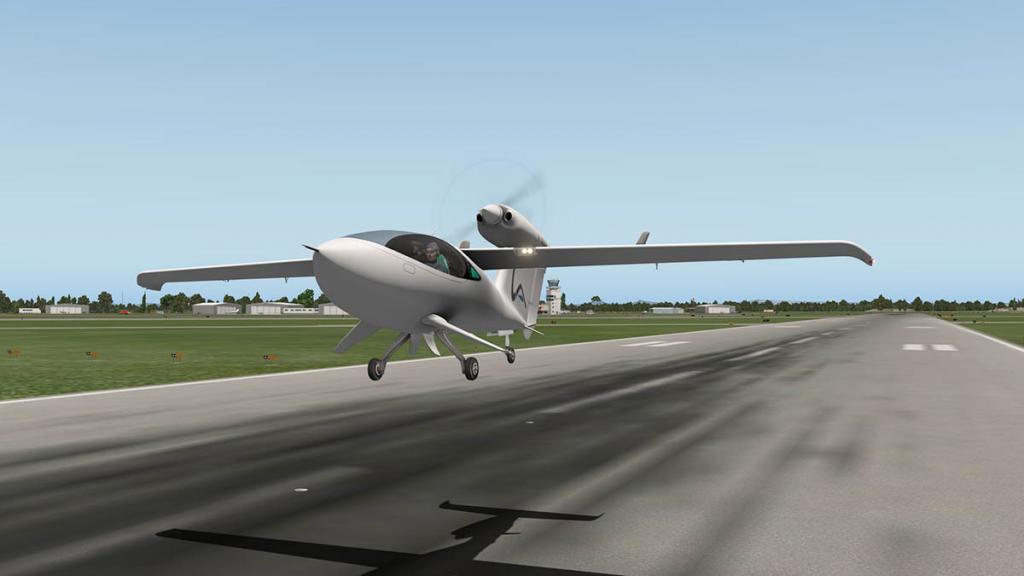
Once in the air the Akoya is very nice, and balanced, which is a good thing as there are no pilot-aids at all, it is all stick and rudder flying.
You need only small stick inputs to do what you want, and the aircraft is very nice and neutral. Plenty of power allows you to climb easily at around 800fpm, a 1000fpm is possible, however this is not a "throw the aircraft around in the air " type of machine, its hybrid nature disallows that sort of behavior.
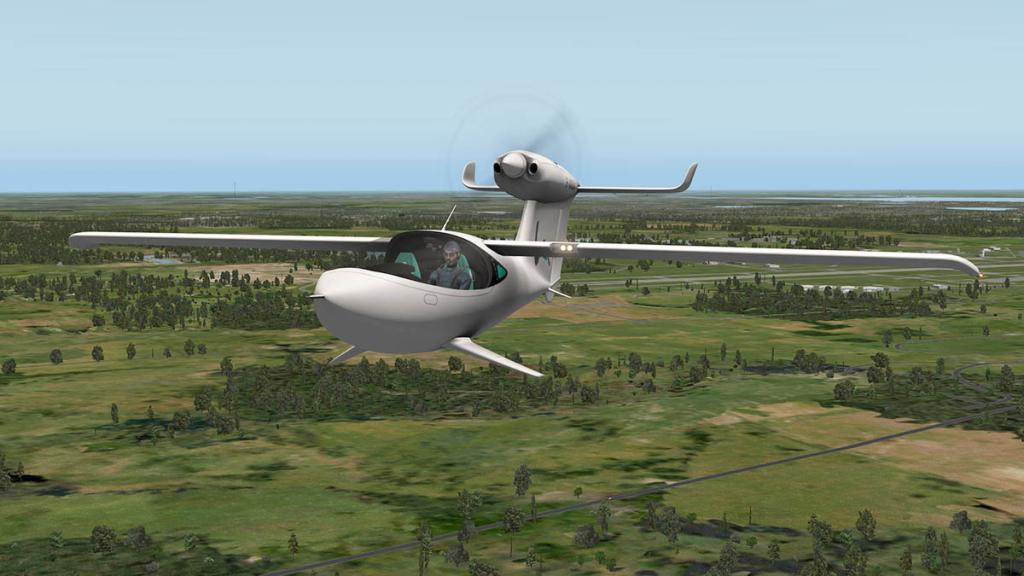
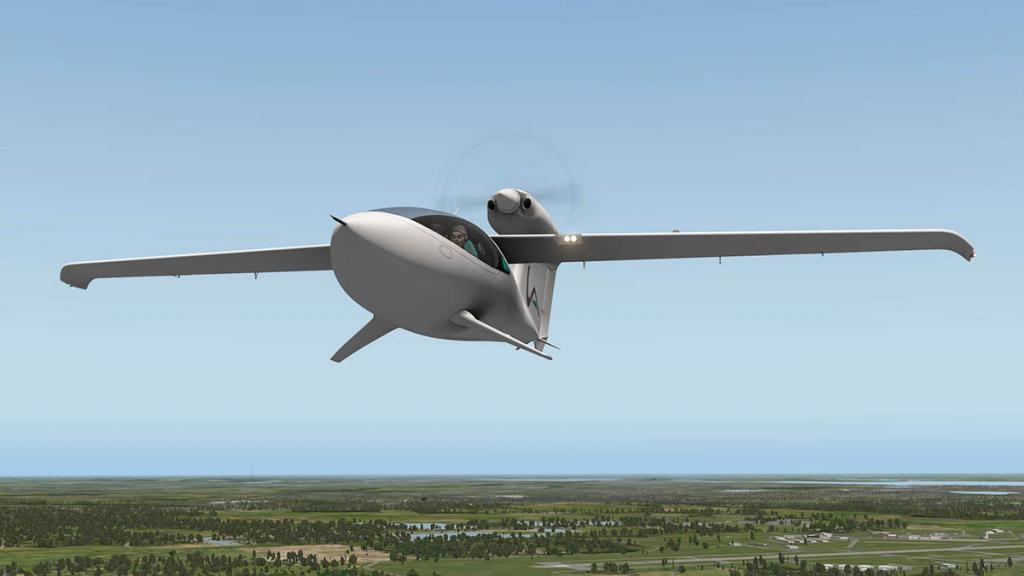

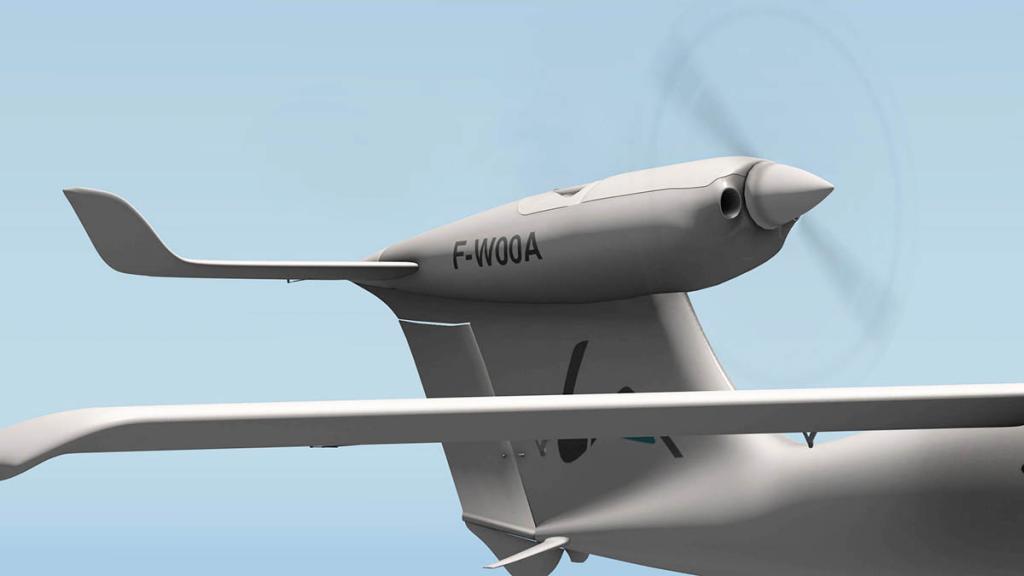
You do feel you are being pulled (upwards?) as the Rotax 912 ULS flat four cylinder piston with 1:2.34 reduction gearing, delivering 73.5 kW (98.6 hp) does its job. I was surprised that the aircraft was as smooth and as easy to balance as it was considering its odd shape and aerofoil configurations.
But the main feature of the Agoya is its waterbourne abilities. Flying around over Florida's Lakeland area means there should be something below to aim the Akoya's nose at. But first.
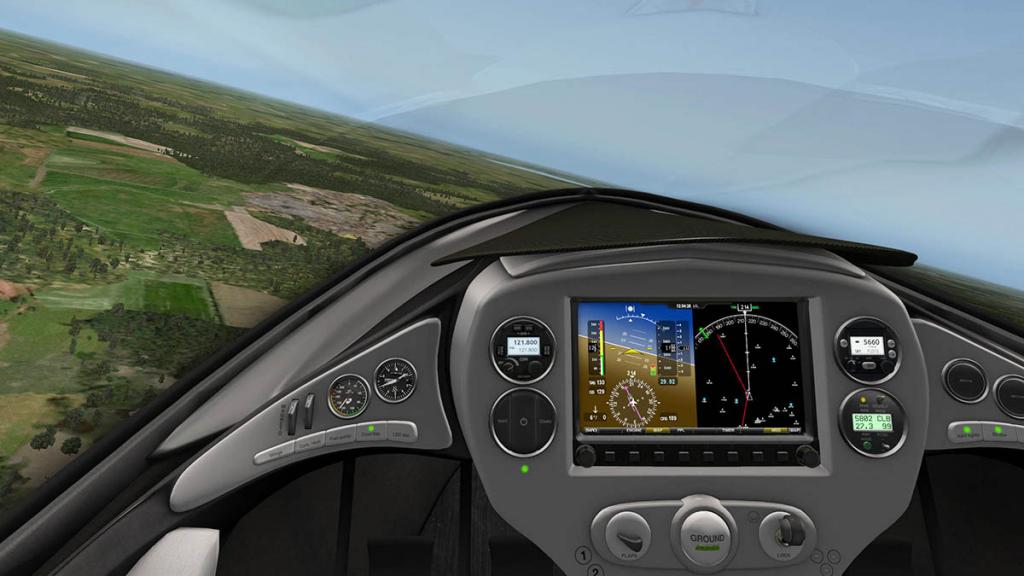
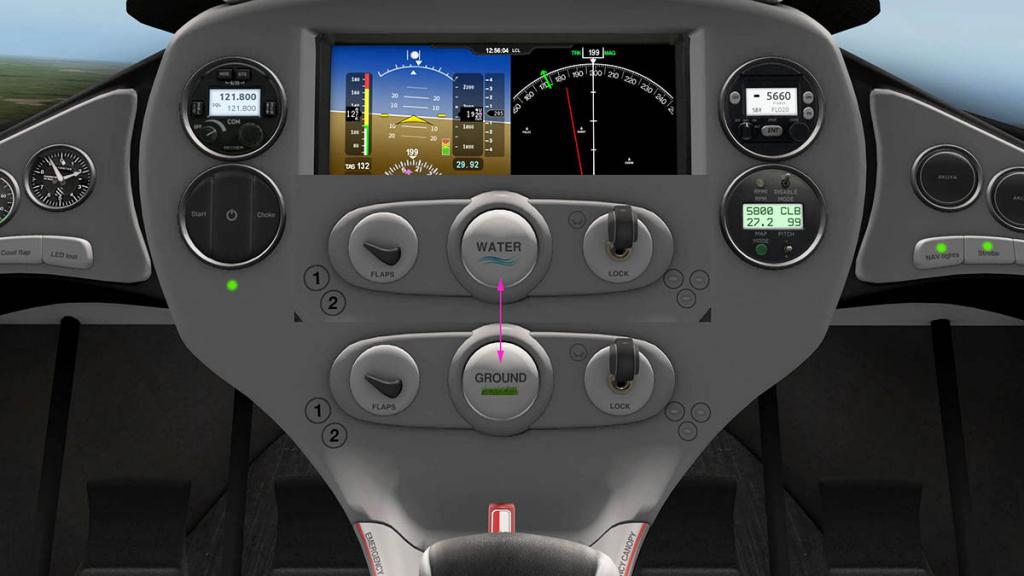
Centre lower panel there is a large button called "Ground". Press it and it turns to "Water" to seal up the aircraft ready to do some swimming.
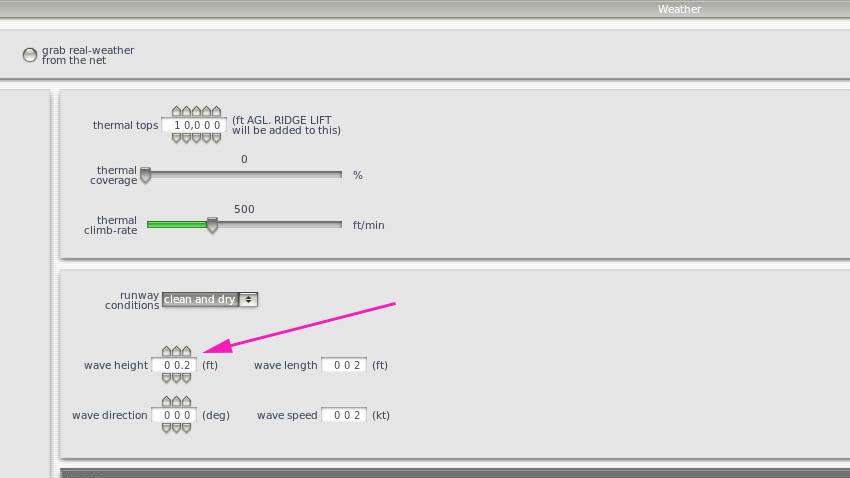
You are going to give the little aircraft some chance of not being swamped, by setting on X-Plane's Menu/Weather page the wave height and length. I used .2 of a ft (foot) to keep the swell down to a minimum.


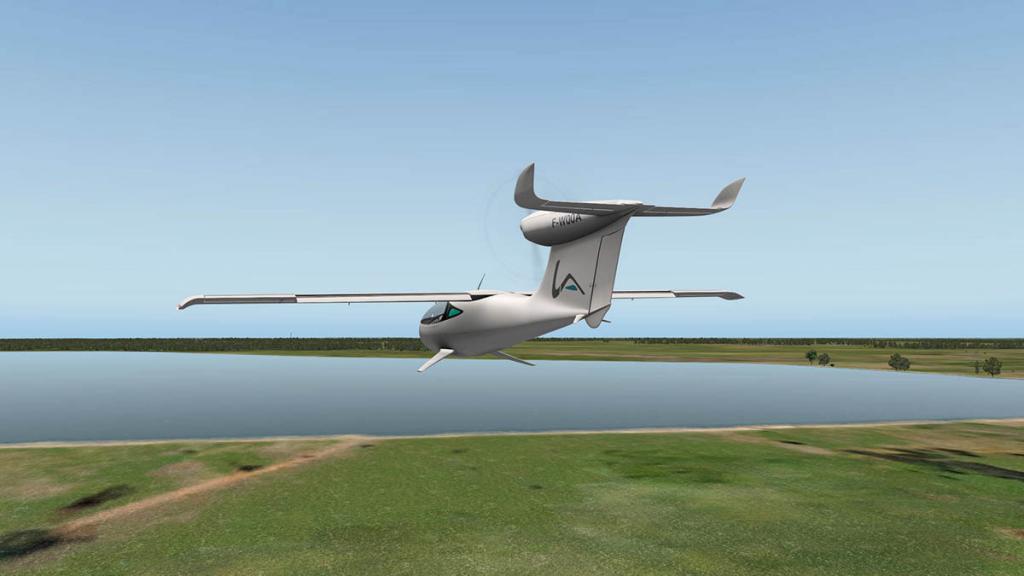
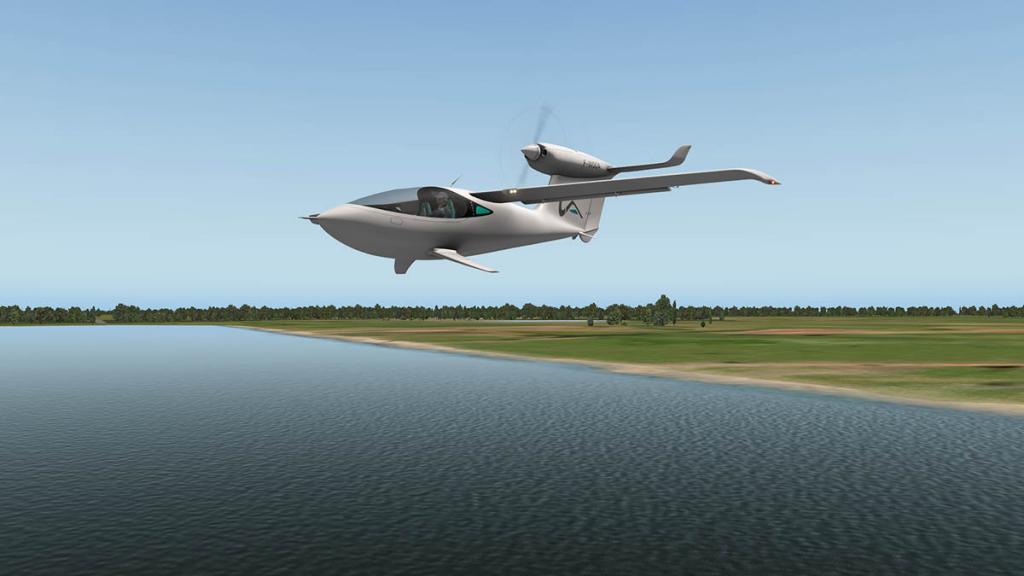
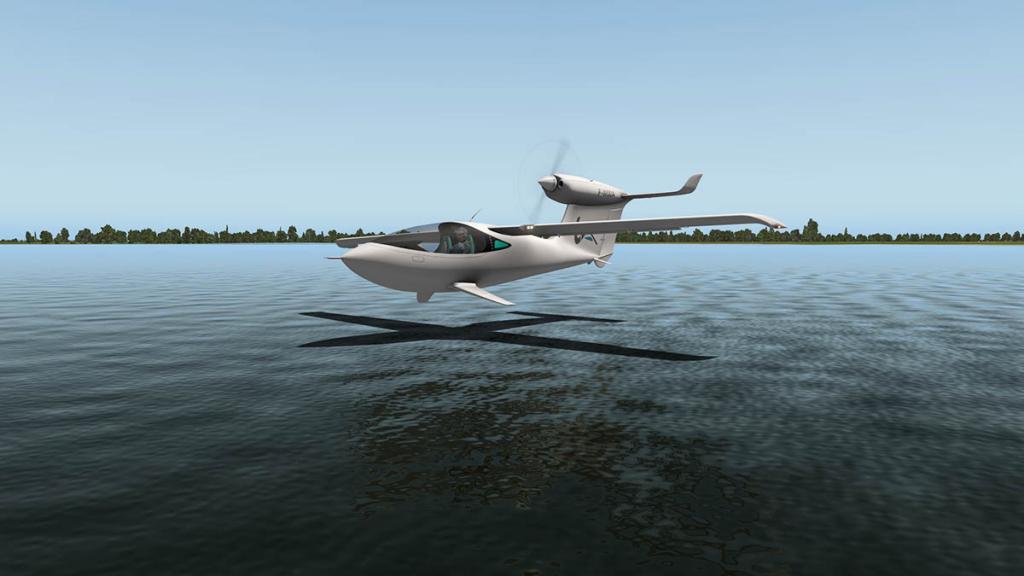
Flaps down your speed can be less of 70knts, but you need as much a lower speed you can find. A very shallow approach can keep the aircraft at the best position for watery landing, but the speed is critical no matter how slow your descent is. You have to find the very least knots you can, which is not as easy as it sounds while not losing height and not stalling, still too fast and you will easily bounce off the surface like Mr Wallace's "Dambusters" bouncing bomb. It will take a few goes to get a clean perfect water landing just right.
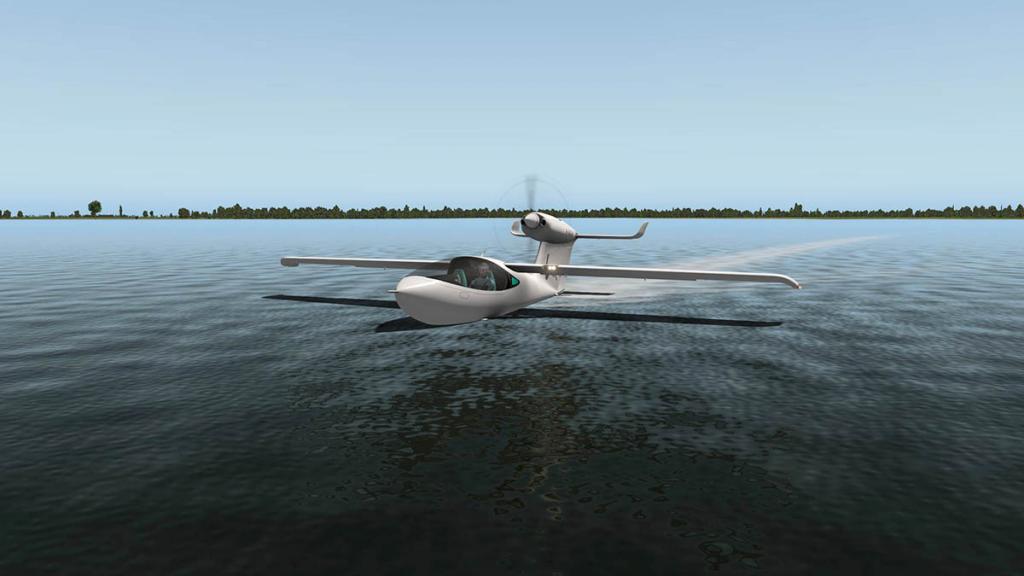
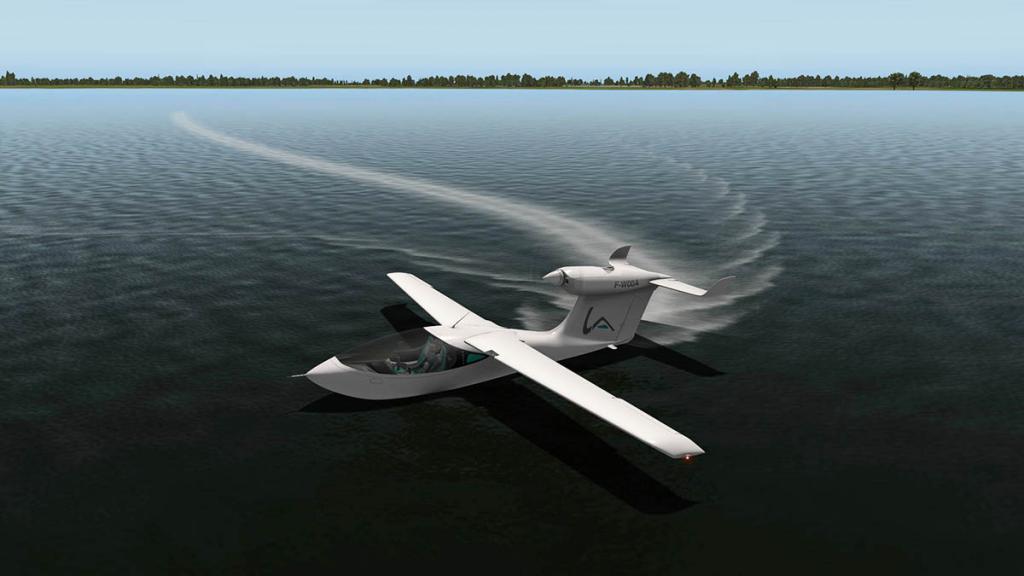
Once on the water the aircraft is surprisingly great and easy to manoeuvre, very easy to turn or park at a jetty. Opening the canopy will mean you can put your hands in the water and easily do a bit of light fishing, I doubt any sailfish fishing as the fish may pull you with him, than you with the big fish. But it is a nice feature if you want to hop around lakes looking for dinner or fill out the freezer.
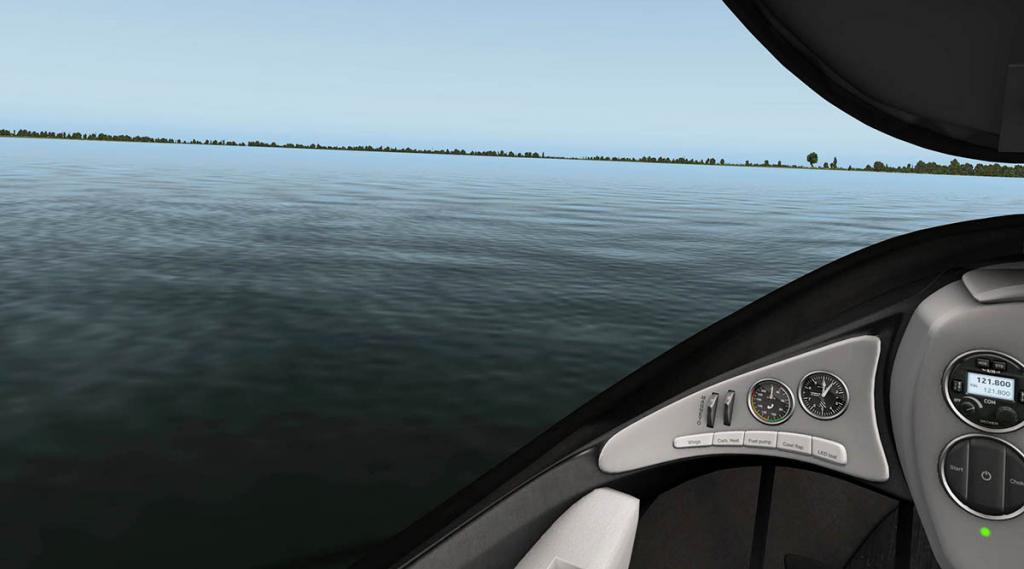

Taking off from the water is far easier than on the runway, as the water tends to help keep the aircraft more in a straight line, pretty soon you are going some knots and are easily skyways again.
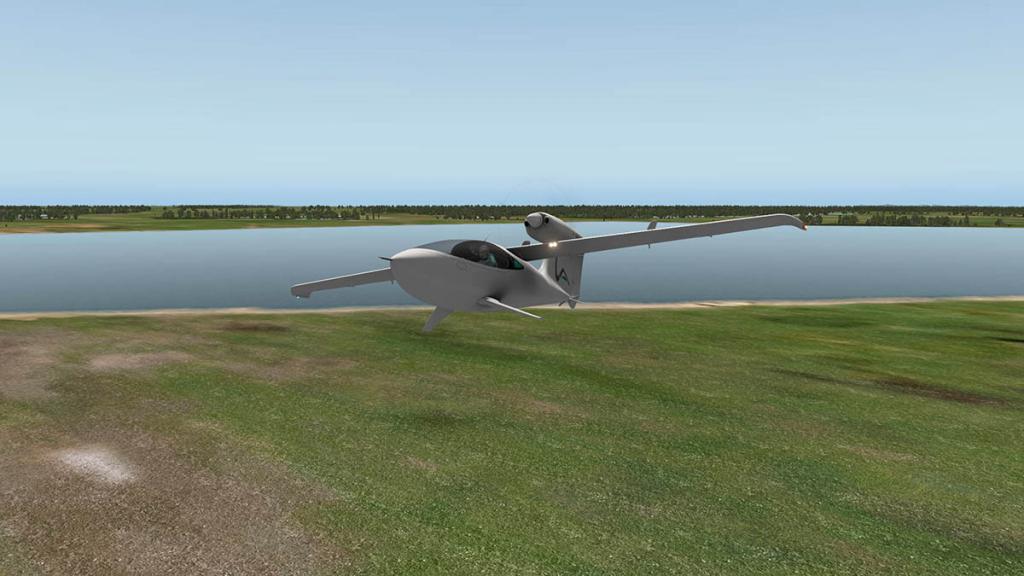
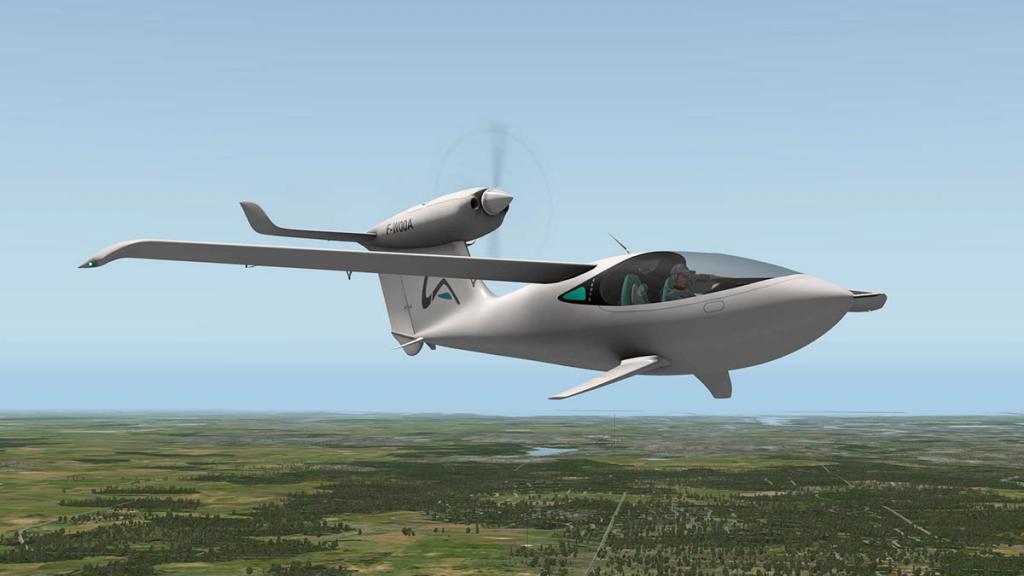
All liveries are French (F) with the LISA logo F-WOOA as default. The two other are WAOW a swipy green and WOOH a garlish pinky-red
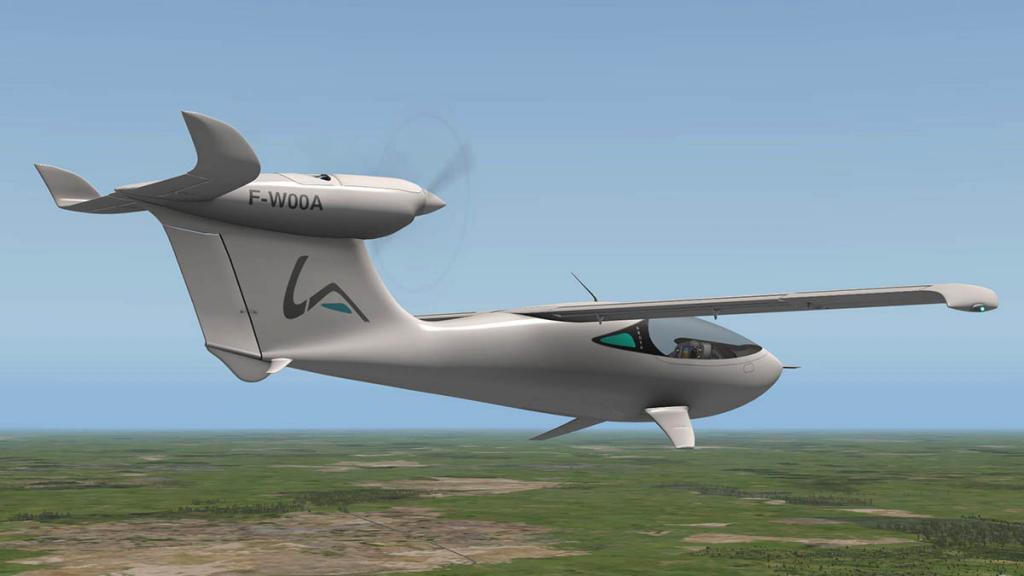
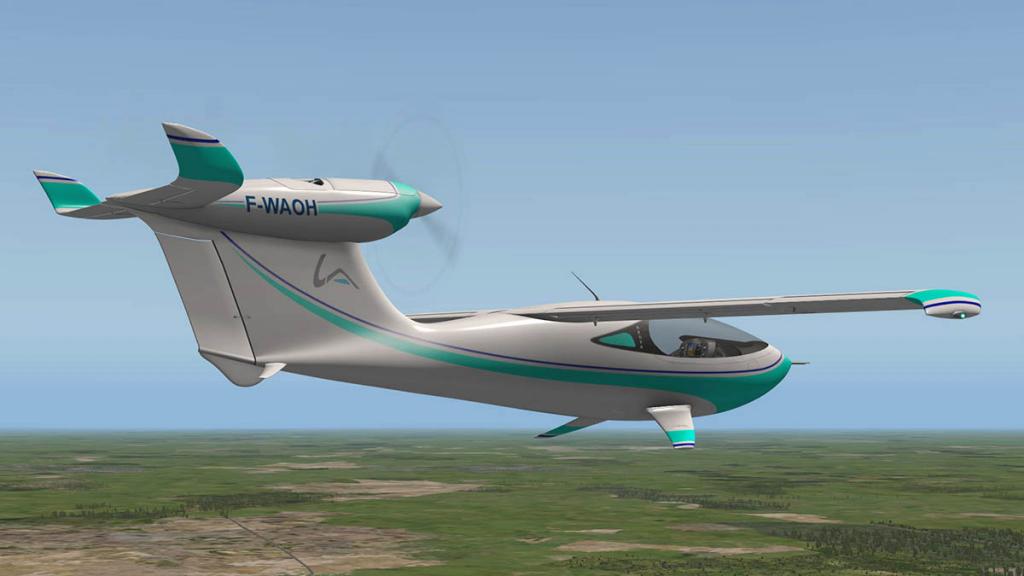
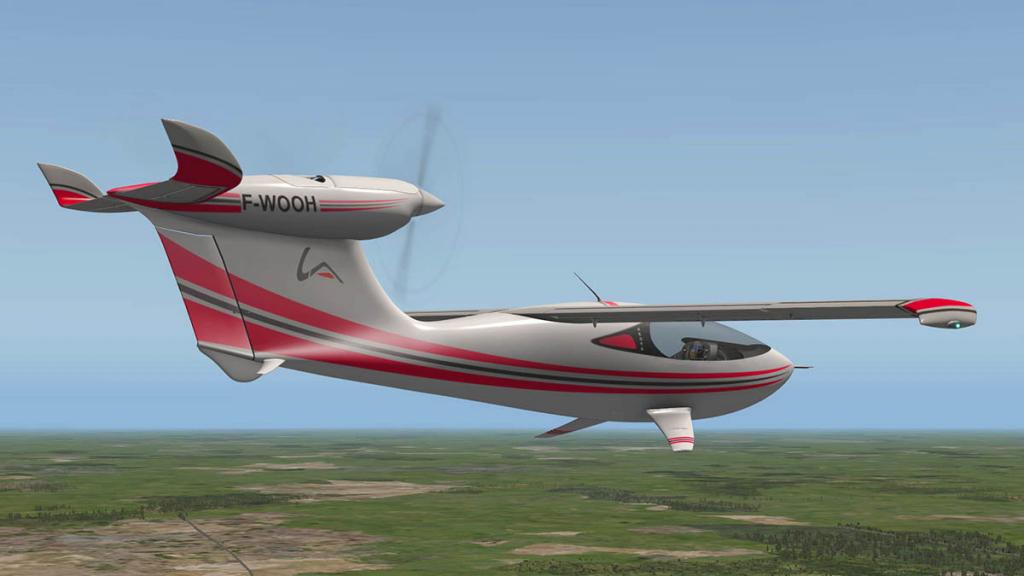
Nightlighting is basic but very good.


One far right panel adjuster will adjust the Dynon screen, the other the amount of light in the cabin. Not much variation but you easily create the right feel you want from very bright to just showning the instruments, so it is very easy to find the right lighting point you require. Up on the roof above you there is a strange four way vent and cabin lighting arrangement, very well created.
External lighting is basic with Navigation and Strobe. Landing and taxi light in the inner left wing.
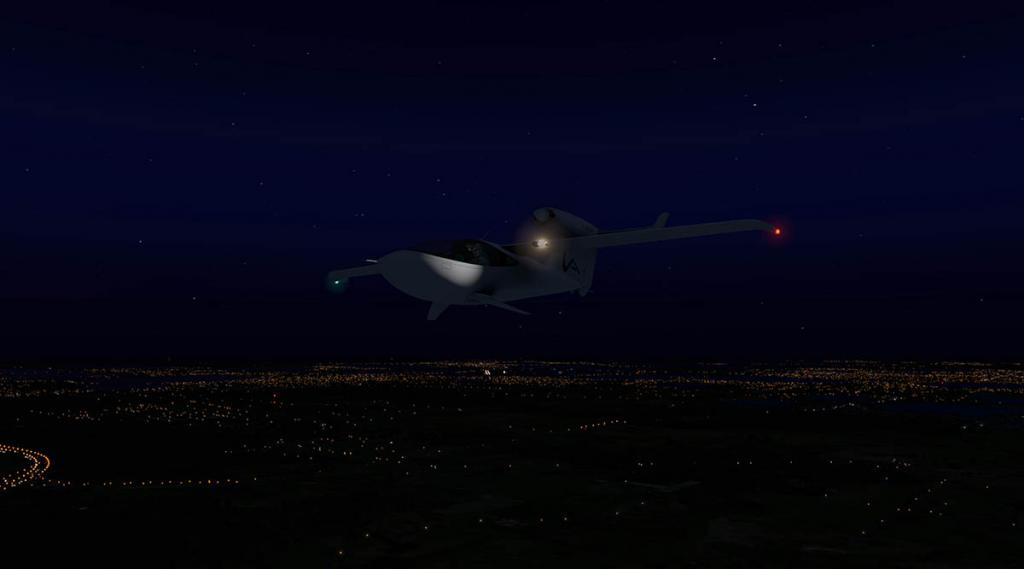

Heading back to KLAL (Lakeland) you reflect on this strange critter of an aircraft.
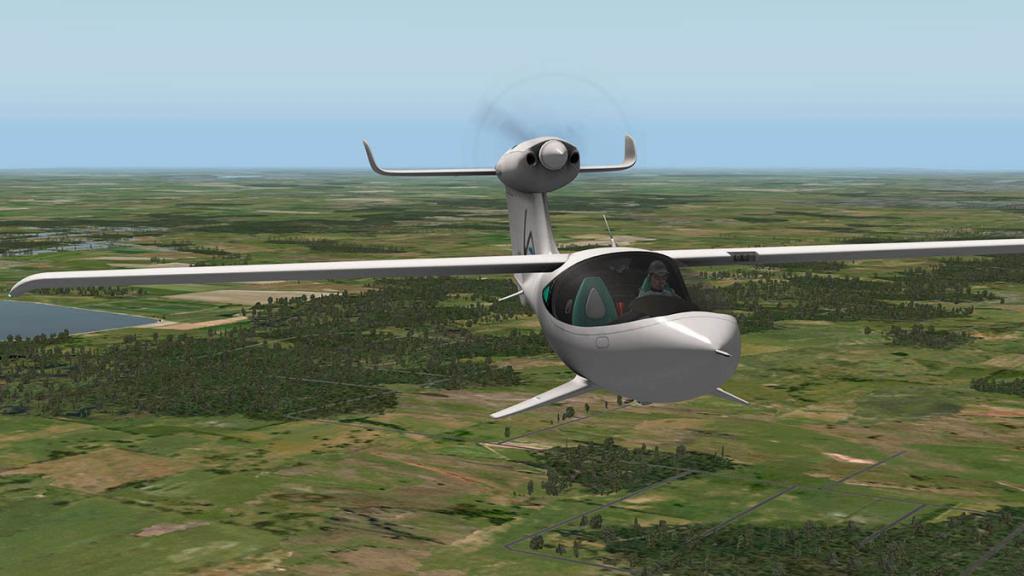

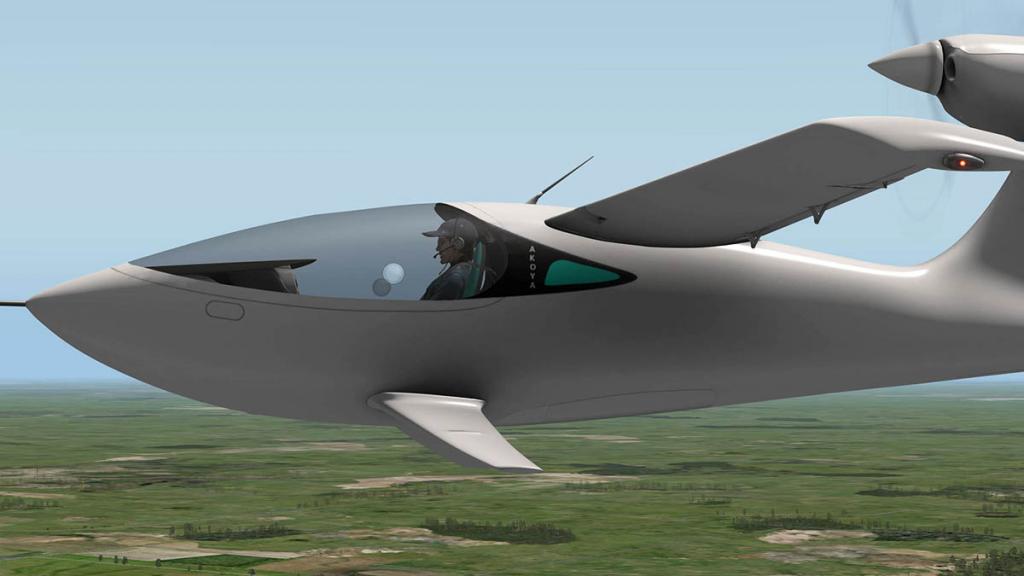
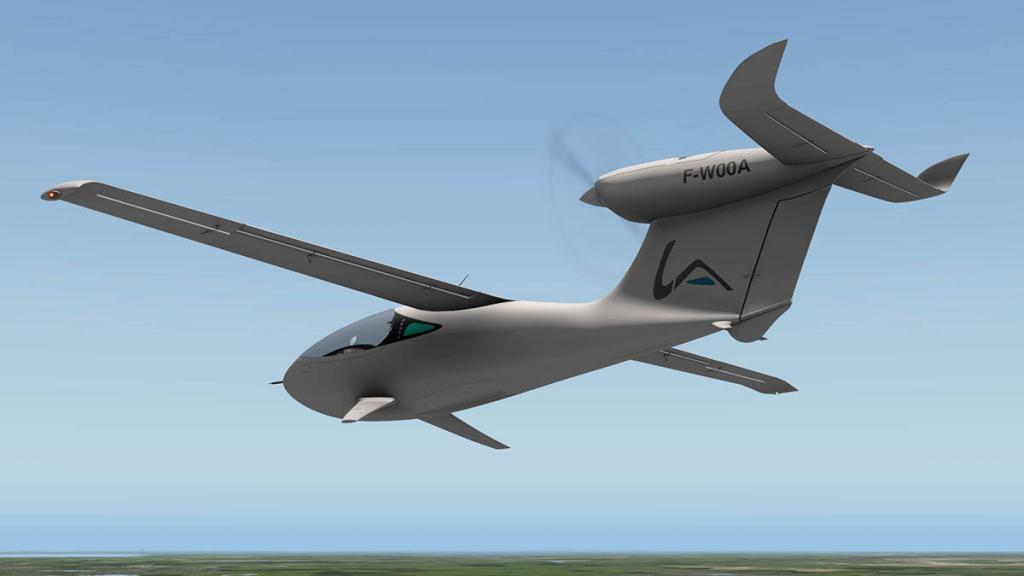
Humankind are always looking to do the same thing in very different ways, and to sort of refine the idea. Here the French want to make a two-seater multipurpose aircraft in land-sea-ice operations, and as clever as it is, and it certainly covers all the bases. But it is an aircraft in the real world that is not really a usable machine in the way an DHC-2 Beaver is for example, that aircraft can still do land-sea-ice missions but can also carry more passengers and cargo. The Agoya is really nothing more than a clever hobby aircraft, and yet we need a new design of a workable DHC-2 for today's aviation, and that is why there are so many old tired Beavers still flying around and yet only a few of these sort of aircraft that are struggling to sell.
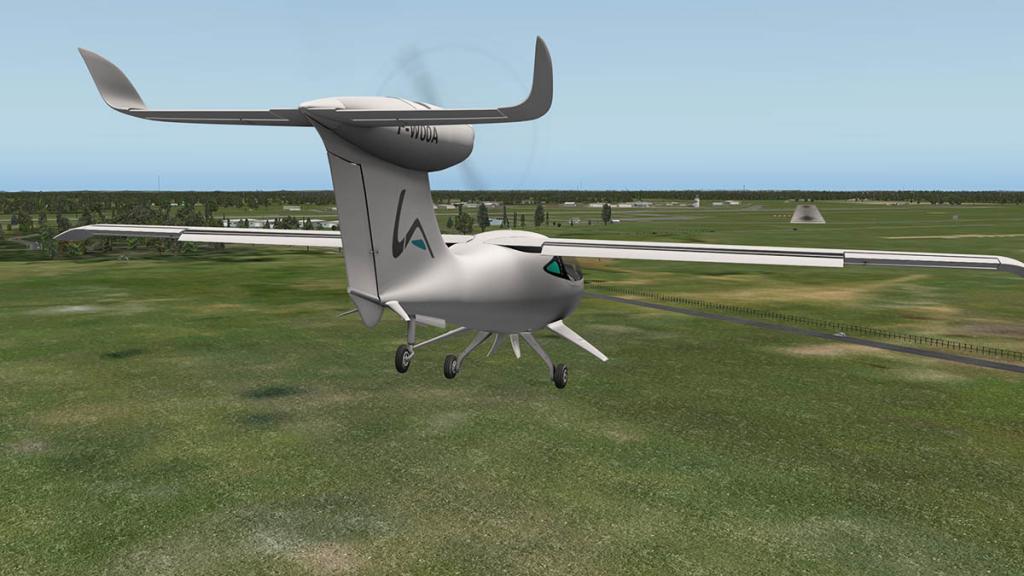
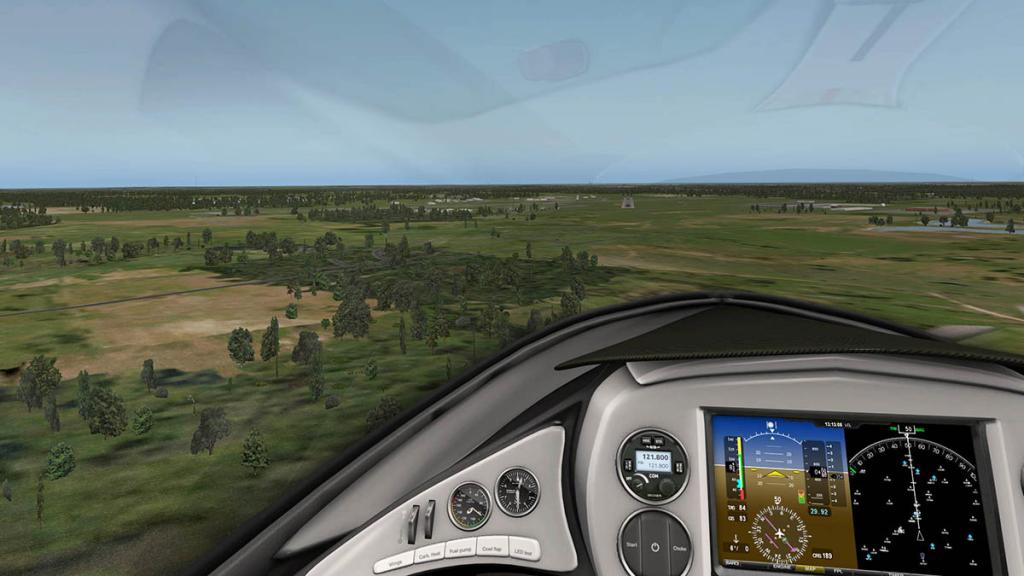
Landing the Agoya on wheels is the same frightful challenge as taking off. Once again you are confronted with a very low speed and a very shallow approach as so not to do the bouncys. It is not so easy unless if your speed is not right down to crawl slow to suddenly find yourself hopping hopelessly down the runway. In finally get those narrow set wheels actually down on the hard stuff and you are then confronted with trying to keep the aircraft in a long straight line and not quickly disappearing into a rounding spin off into the scenery. It is fun the first few times, unless you master it.

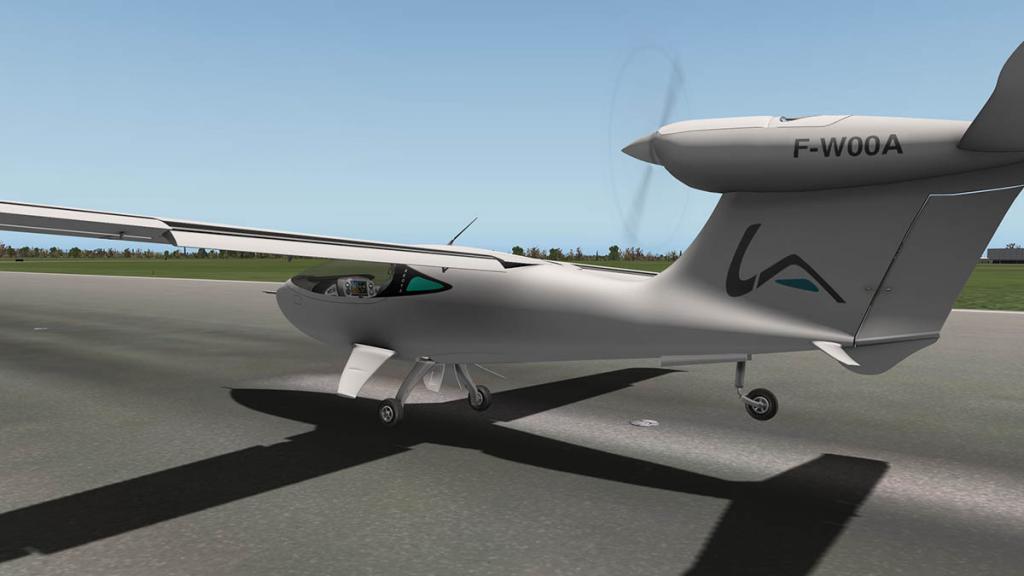
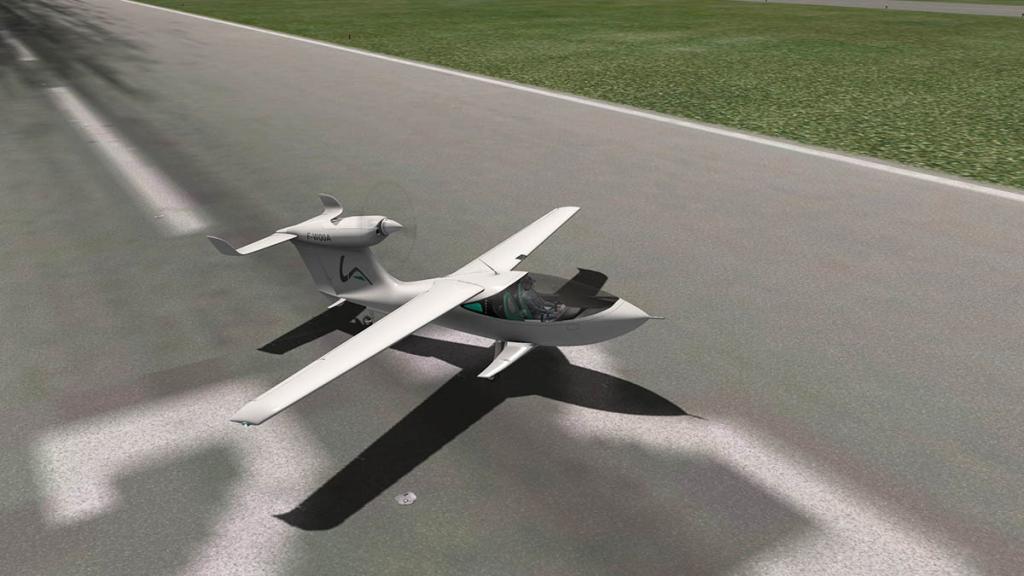
The Akoya is not your usual General Aviation aircraft, yes versatile it is and even fun, but I think the aircraft will be more in the oddity section of aviation than mainstream.... great for fishing though.
Performance
Cruising speed: 210 km/h (130 mph; 113 kn) economical
Stall speed: 64 km/h (40 mph; 35 kn) flaps down
Never exceed speed: 290 km/h (180 mph; 157 kn)
Range: 1,250[13] km (777 mi; 675 nmi) at economical cruising speed without optional tank
Rate of climb: 5.2 m/s (1,020 ft/min) maximumSummary
Weird, fishy, strange but interesting. Yes the Akoya is a very critter of a strange fish. Hard to takeoff and land (on the hard stuff) but I don't doubt many pilots will see the challenge and the versatility in the aircraft. I wish there was more navigation aids, even in a course adjustment to angle in runways, but the aircraft is very basic in that area.
Certainly a clever design by Aerobask, and very well created and in keeping with their usual high standards.
So where can you buy the LISA Agoya from Aerobask? Well you can't just yet. The aircraft will be bundled (free) with the soon forthcoming "Victory" light passenger jet. So you get two aircraft for one price. If demand is there then the Agoya might be listed as a stand alone purchase.
_____________________________________________________________________________________
Installation : Download aircraft file size is 226.60mb. Installed file size is 268.40
Documents : One in depth manual and one real document "csc_manual-pv50"
Developer Site : Aerobask
Manufacturer Site : LISA Airplanes
Requirements
Windows, Mac OS, Linux (please refer to the requirements of X-Plane®)X-Plane® 10.40 (64-bit only!) or higher_____________________________________________________________________________________Preview by Stephen Dutton27th January 2016Copyright©2016: X-PlaneReviews
-
News! : Update P51-Mustang from Khamsin Studios
Khamsin Studios has published more images of his forthcoming P51-Mustang. Mostly just aircraft liveries but that is no waver on the anticipation of this the coming to X-Plane of a quality aircraft of the most iconic of all American WW2 fighters.

Cockpit is extremely detailed, but obviously still not completed, so release won't be very soon but more like coming in the near future.
No doubt the P51 will be a great addition to your warbirds collection, and for showing off at the odd airshow. Although Khamsin notes that initially there will not be a race version available.
Khamsin Studios Site: www.khamsin.org
______________________________________________________________________
Images are courtesy of Khamsin Studios
Stephen Dutton
Updated : 25th January 2016
Copyright©2016: X-PlaneReviews
-
Personal notice : Slow site activity due to cold (In other words I'm sick)
Sorry about the slow activity on the site over the last week, but I am down and out with a major cold... I thought it would last only a few days (My doctor did as well), but the cold is solidly persisting and is hard to shift, hope to be back on board soon... cough, cough...
Stephen Dutton

-
News! - Aircraft Release : Aviat Husky A-1C from STMA
Shade Tree Micro Aviation (STMA) have released the Husky A-1C. This is not to be confused with the STMA's A-1A as the A-1C is a totally new aircraft.


This excellent bush pilots aircraft comes in three versions...
- Alaska Bushwheel tundra tires.
- Retractable Rossi-Fernandez 8001 skis with 8.5x10 tires.
- Amphibious Wipline 6001 floats.
There is also an underbelly Cargo pod.
Features Include:
- Detailed exterior model includes fabric textures
- Liveries match the best of Aviat paint scheme options
- Painted or polished spinner option selection in all liveries
- Animations on all internal and external equipment
- Paint kit available for your custom design
-
Engine and prop sounds created from actual Husky operations
The Aviat Husky is a two seat, high wing, utility light aircraft built by Aviat Aircraft of Afton, Wyoming. It is the only all-new light aircraft that was designed and entered series production in the United States in the mid to late 1980s.
Internal Features
- 3D cockpit with 3D instruments using day and night textures
- Laminar G530 GPS
- Dual VOR/ADF RMI
- HSI
- Dual COM/NAV
- Garmin Interphone panel
- Becker Radios (Light weight soaring favorites)
- Custom simulation of the Trio Pro Pilot autopilot system
- JPI EDM 930 Engine monitor
- Custom All-Season Gear and Flap indicator
The A-1C cockpit is fully equipped to give you an excellent piston-single instrument platform for training and proficiency as well as automated flight to reduce your workload in instrument conditions. There is a dual ADF capability and built in XP G530 GPS. There is a STMA version of the Trio ProPilot autopilot system that provides automated flight for the aircraft. The cockpit equipment is a collection of all the best instruments and indicator systems we would like to see in the aircraft and it is a pleasure to fly “in the soup” or in clear air on a steep approach to your favorite secret fishing spot.
Aircraft performance of this A-1C model follows the improvements of the actual factory model. An improved wing design provides quicker roll response and wider Fowler flaps for more stable slow speed performance. To get you off the ground quickly and cruise efficiently we go to the top drawer of options and add the 200 horsepower Lycoming IO-360 with aftermarket Power Flow muffler system driving the best scimitar prop design. Flight model data was extracted from the Type Certificate Data Sheet (TCDS) and from the Pilot Operating Handbook (POH), with actual flight experience, and the aircraft was built and flight-tested by the STMA modeler, a Husky owner, and flight instructor, Todd Denning.


The aircraft can also be used with the excellent STMA "HangarOp's" plugin.


______________________________________________________________________
Yes! the Aviat Husky A-1C from STMA is NOW available from the new X-Plane.Org Store here :
Shade Tree Micro Aviation : Husky A-1C
Price is US$24.95
STMA Aircraft Site: STMA/Aviat A-1C Husky
______________________________________________________________________
Images and text are courtesy of Shade Tree Micro Aviation
Stephen Dutton
Updated : 15th January 2016
Copyright©2016: X-PlaneReviews
-
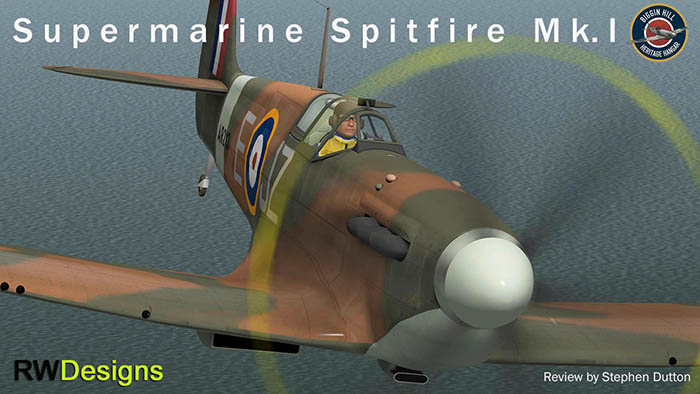
Aircraft Review : Supermarine Spitfire Mk.1 by RW Designs "I either go up, or blow up... Which one do you want" Says an irascible Sir Michael Caine in the 1969 file "Battle of Britain" as he sat in a Supermarine Spitfire waiting to get back into the fight with some annoying Germans that wanted to invade the United Kingdom in the long summer of 1940. Forever the Spitfire will be associated with those few months of desperation to counter the German advance across the English Channel. To a point that is unfair as the aircraft was very successful in many other European, Mediterranean, Pacific and the South-East Asian theatres of war including Burma (Myanmar) of where it was in a ground attack role helping to defeat a Japanese breakout attempt in the last battle of WW2. Much loved by its pilots, the Spitfire served in several roles, including interceptor, photo-reconnaissance, fighter-bomber and trainer, and it continued to serve in these roles until the 1950s, and was also a World Record Speed holder when a modified Spitfire XI reached 606 mph (975 km/h, Mach 0.891) in a 45° dive, which was just a touch under the sound barrier. Even in the Battle of Britain it was actually the Hawker Hurricane that shot down more aircraft than the Spitfire. Namely in the higher numbers of aircraft of Hurricanes and it's ability to quickly be turned around on the ground in 9min compared to the Spitfire's time of 26min to rearm and refuel. But the Spitfire's fame came from its interceptor role and its ability to out turn the German main fighter escort the Messerschmitt BF109 at 212 m (700 ft) in radius while the 109E's was estimated as 270 m (890 ft) radius at 3,657 m (12,000 ft). The Bf109 had an counter advantage of fuel-injection that allowed steep attacking dives against the Spitfire's carburettors that would dry up against similar negative "G" forces. Speeds were relatively the same with the Spitfire having a slight advantage of 355 mph with the Bf109 at 342 mph. So overall both fighters were very close in performance, so what was the deciding factor that made the Spitfire famous and the Hurricane to shoot down the numbers. It was the Bf109's range. The Bf109 could only stay on station over the South English countryside for twenty minutes before having to turn tail and head home, while the Spitfire had the speed and agility to make the German aircraft fight to survive and burn more of those precious pounds of fuel. No doubting the immense bravery on both sides and that created a classic battle of survival of which could have easily gone either way... the rest as the say is "history". The film makers even in the late 60's battled to get flyworthy aircraft to make the "Battle of Britain" which even if the actual film is by drama standards just good, it was the aerial filming that makes the film a unique record of the period and the only chance to see real Spitfires doing what Spitfires do best in the air. To an impressionable 12 year in myself I followed the making of the film more intently than actually watching it. Most aerial footage was filmed from a North American B-25 Mitchell N6578D, flown by pilots John "Jeff" Hawke and Duane Egli of the Confederate Airforce fame, and in that 27 Spitfires were available for the aerial flying although only 12 could be made flyable. secondly use of six Hawker Hurricanes, of which three were only actually used for flying. Altogether 100 aircraft was used in the film's aerial sequences which was mostly filmed off the coast of Spain and Malta. Two double seat Spitfires were also used for internal aircraft filming and the huge cost of all this would certainly mean a film that would never make any actual money at the boxoffice in its release in 1969 (It has in time and through multiple VHS/DVD sales over the years the film has finally made a profit). Most of the World War 2 field airfields have now past well into history in the lower counties of the United Kingdom. 75 years gone now and very few of the "Few" remain. The aircraft themselves are also slowly disappearing, a few crash and a few just disappear and lost to time. But still many of the machines of that significant battle do still remain in our lives if only now housed mostly in museums and private owners. One place to see the best collection of Spitfires is the Biggin Hill Heritage Hangar in Kent UK, that was once home to two Spitfire Squadrons 32 and 79 and three Canadian Squadrons No 213, No 229 and No 242 that were active at the airfield during the Second World War. Currently in flying or restoration condition there is noteworthy list of aircraft including a classic Spitfire Mark I X4650, Mark XVI RW382, MKIX TD314 with MKIX LZ842, MKIX BR601 and MK V EE602 aircraft and a rare airworthy Hawker Hurricane Mk I. So I though that Biggin Hill would be the best place to checkout X-Plane's latest release of the classic Supermarine Spitfire from RW Designs. RW Designs Supermarine Spitfire 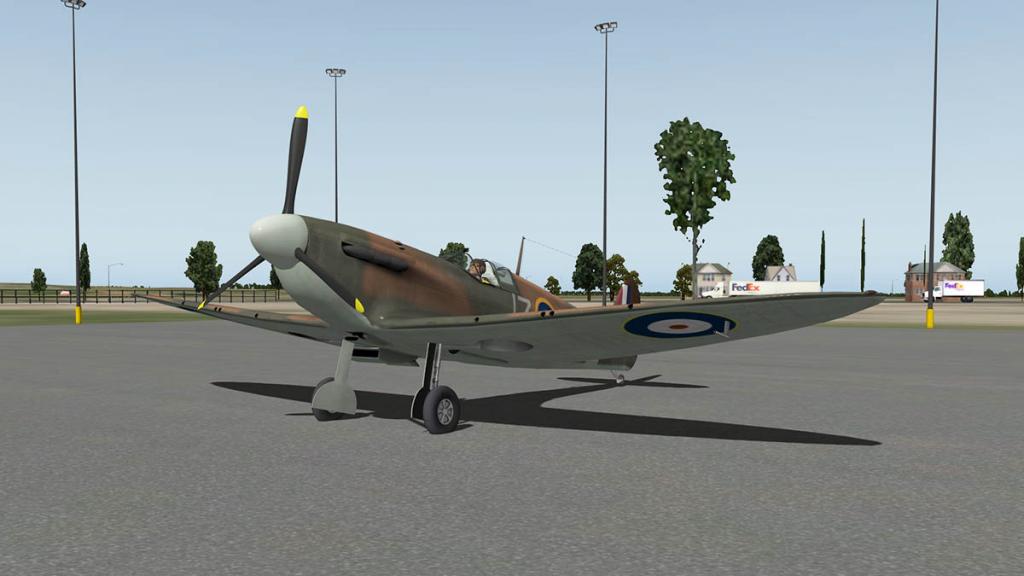
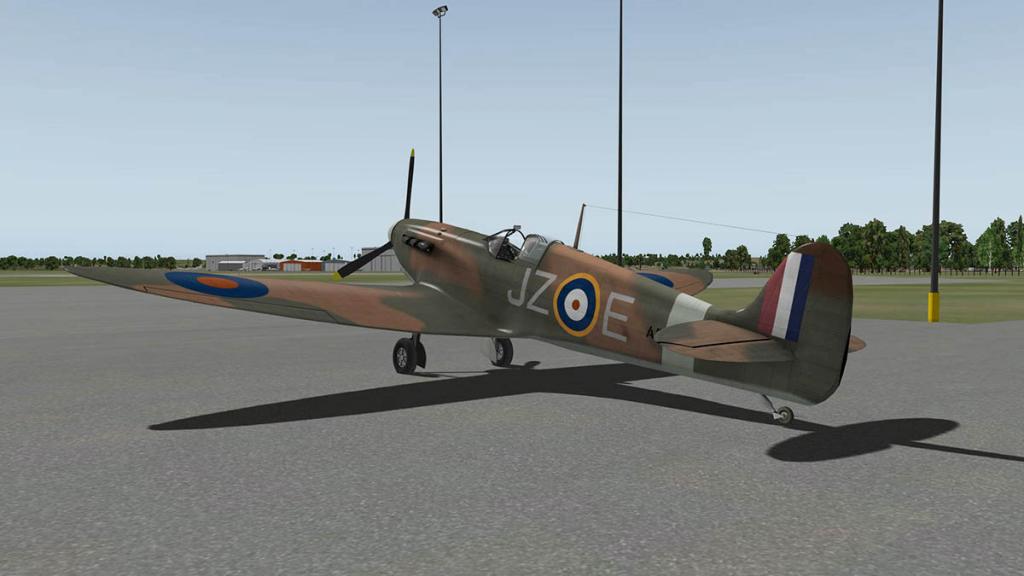
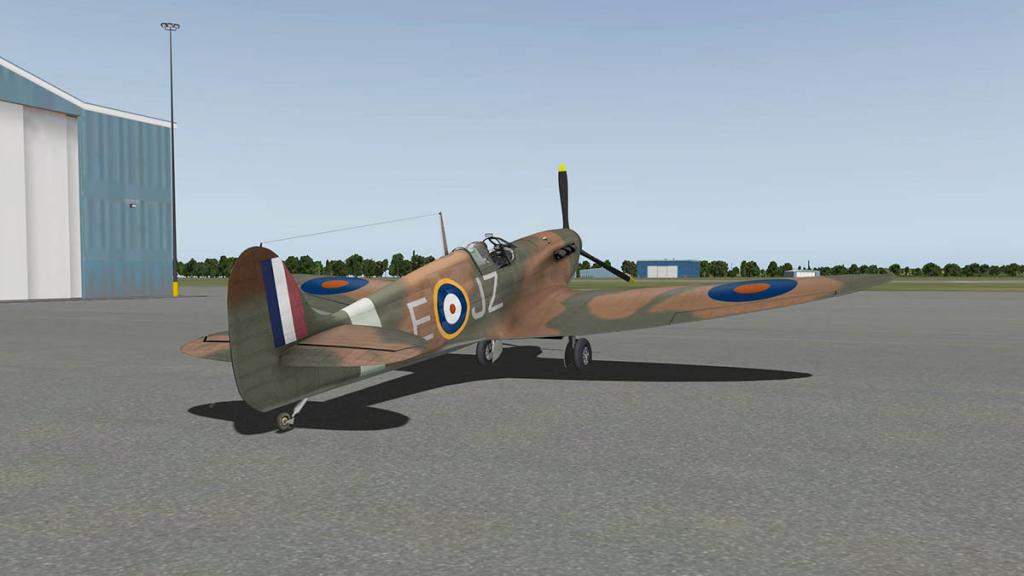

RW Designs are a bit like Forrest Gump and his box of chocolates in that you "Just don't know what you are goin' to get next" With first an airliner in the Airbus A332, The excellent Twin Otter and then the Beechcraft Duke B60 and now a WW2 fighter in the form the Supermarine Spitfire Mk.1. So there is no recurring theme in there other than they are all great aircraft. 


Modeling of the aircraft is very good, but not overly detailed. The rivets are well done but overall you would expect more harder detail and a more worn war weary model. Panels do look like panels but there are no dirt noted joins or rough edges. Where there is good detailing is around the cockpit, frames and the glass (glass canopy is a highlight) are excellent. (a removable engine cover and Merlin engine would have been a great feature). 
But that classic Spitfire silhouette is unmistakable, a Spitfire is a great looking aircraft. Cockpit 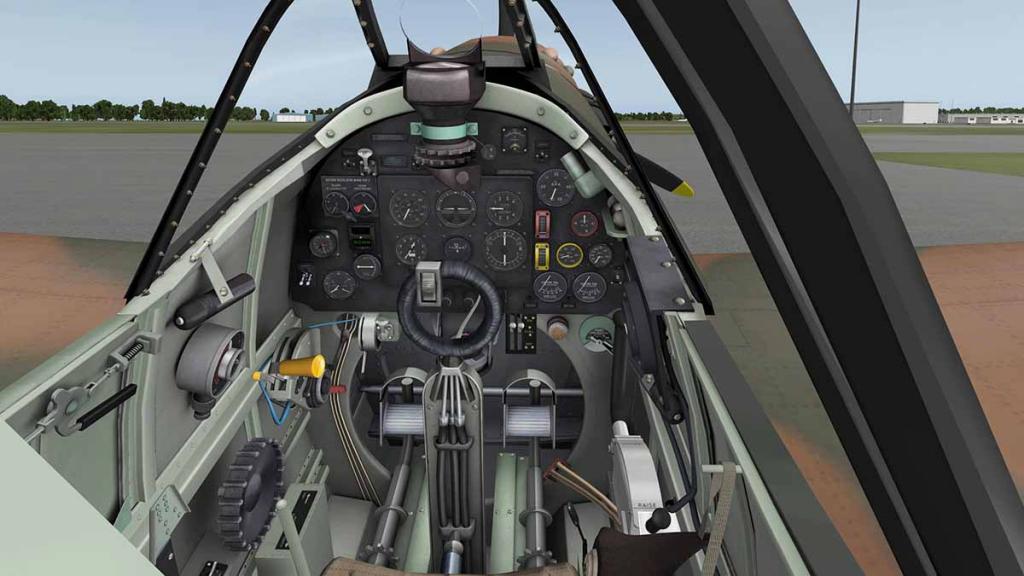
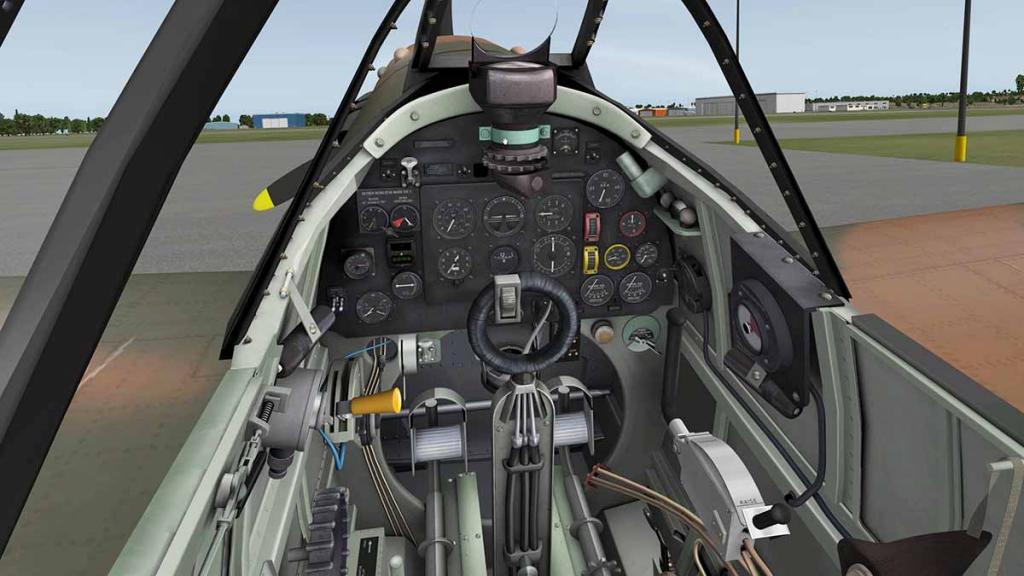

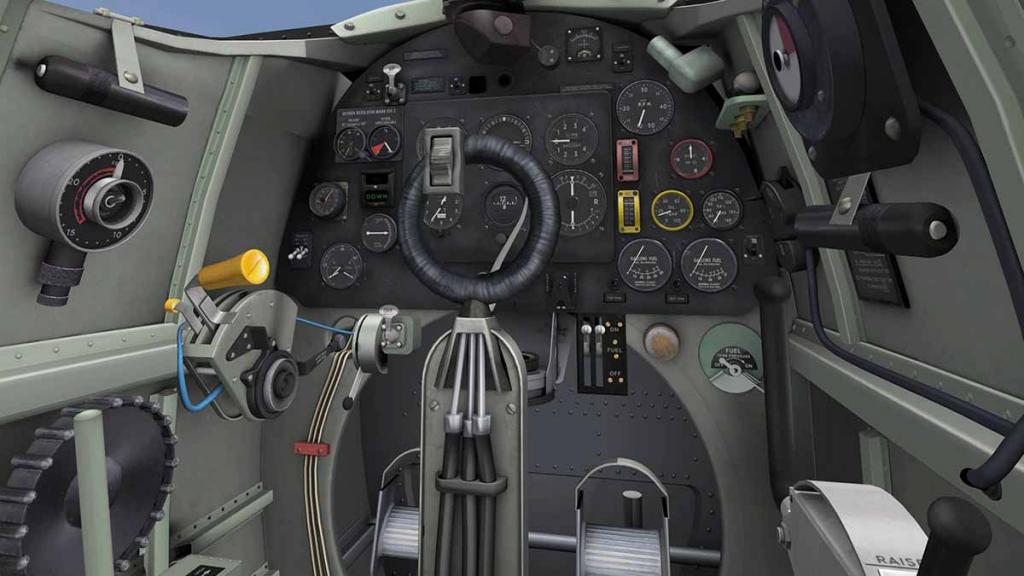
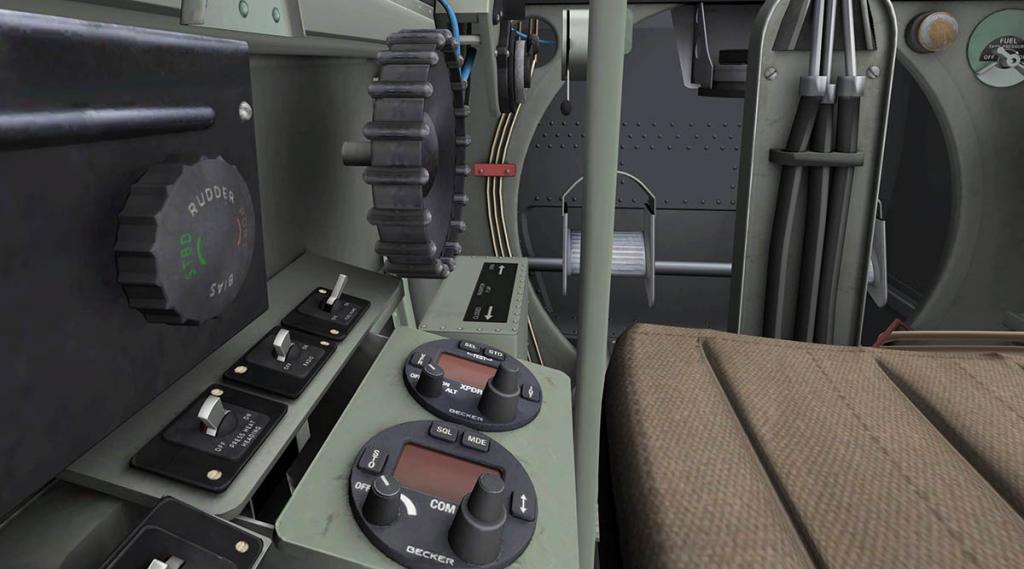
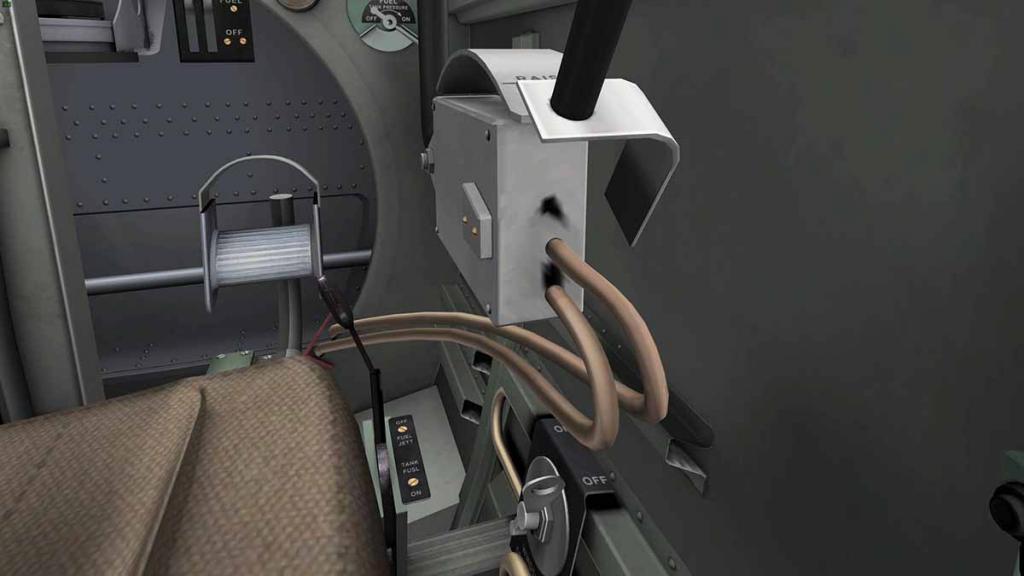
In the cockpit the 3-D work is excellent, but a few worn through areas would have helped in the authenticity. The aircraft looks brand new, with a straight out of the factory look. But you can't deny it is all very well done. Like any aircraft cockpit it looks at first very complex, but when you break the areas down to there working places it all quickly falls into place. The Spitfire uses a spade grip style control column, which is the one of the signature visual clues of the aircraft. The wing armament cannon trigger is perfectly right thumb placed for instinct quick firing.
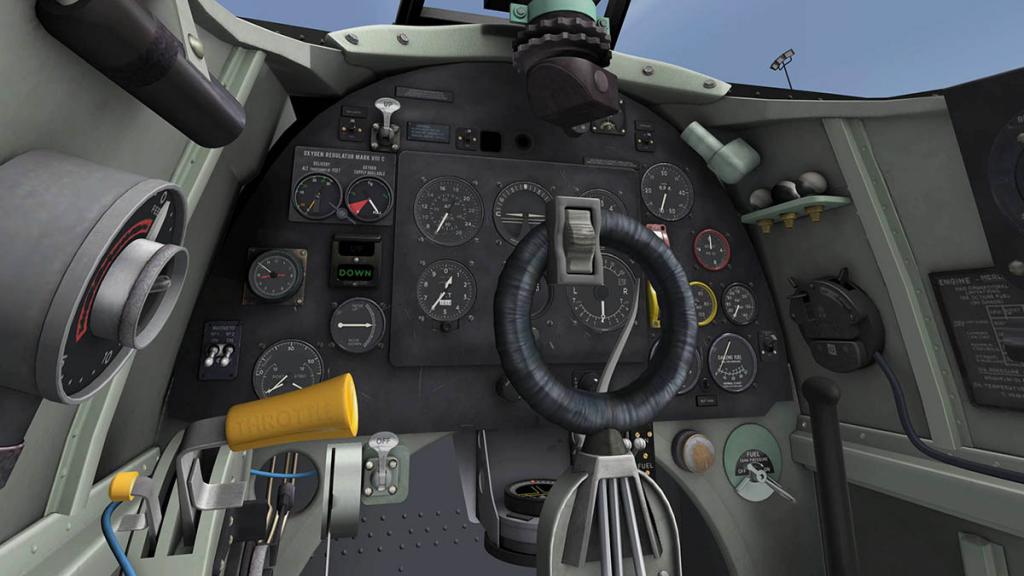
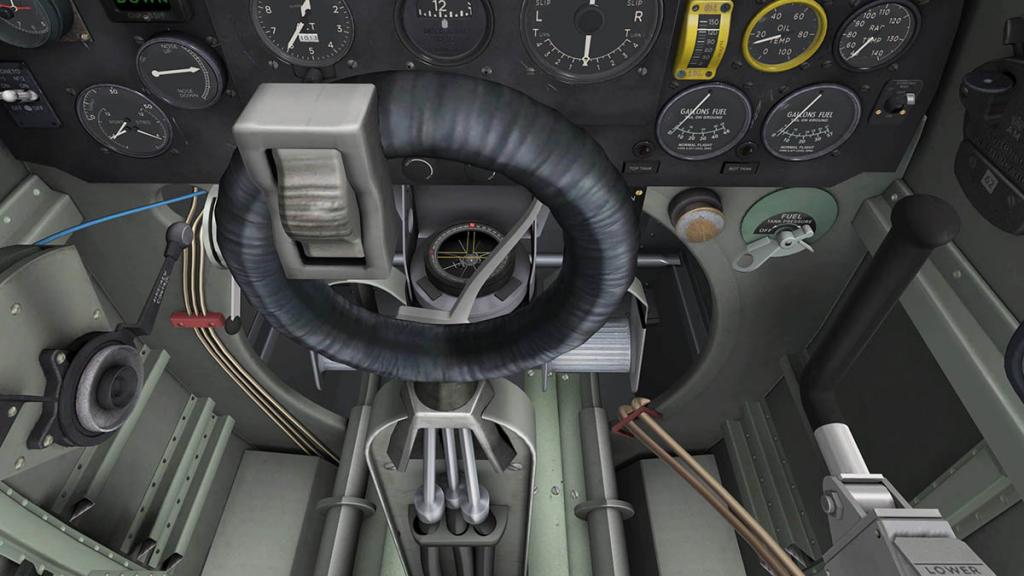
A P8 Navigation computer is installed deep behind the control column, hard to see and use while flying. 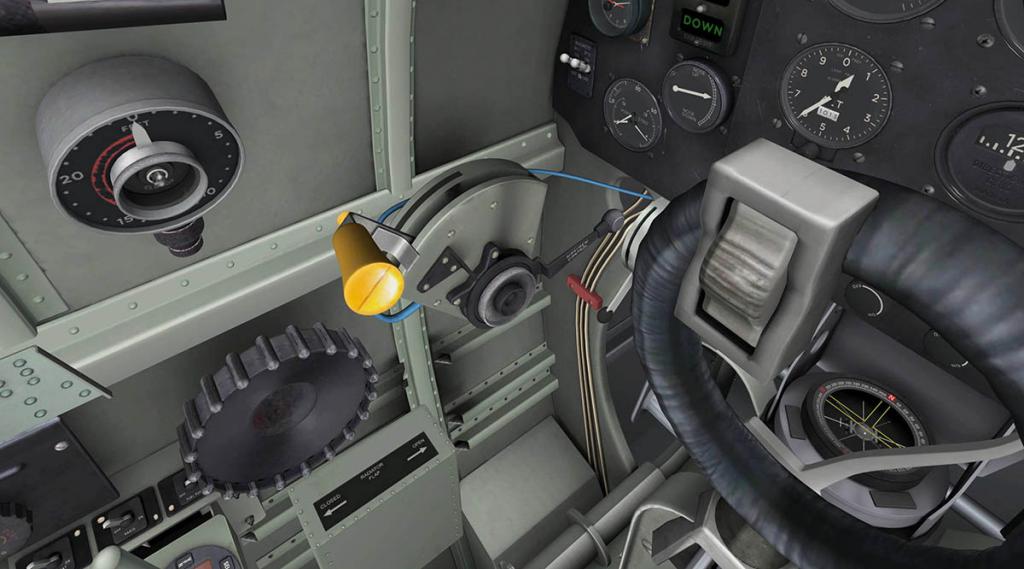
Throttle and mixture levers are to the left as is the large trim wheel or elevator control. Airscrew control lever is here as well which changes the pitch of the propellers. The main instrument panel is very pre-war in design but very effective. Main centre panel has six instruments in speed (MPH), Artifical Horizion, Rate of climb/descent (Thou/feet), Two dial altimeter, Heading Compass and Turn/Side Slip indicators (L-R). Top left row are the Navigation Lights and Flap switch (up or Down). Below is the Oxygen regulator of which you have a mask situated back right besides your seat. Clock and Landing Gear Indicators are down next and the final lower row are the two Magneto switches, Brake Supply and Elevator position indicator. Right side top is a huge RPM dial with engine boost pressure and fuel pressure gauges below. Oil Temperature and the vital Radiator temperature dials are next to the Oil Quantity gauge. Lower right panel are the two top and lower fuel tanks in Gallons. There is 48 gallons in the larger top while the smaller bottom tank carries 37 gallons, note they are both read with different settings as with sitting tail down on the ground and level in the air. There is a starting heat switch lower right. High right is a Volt dial and generator switch. 

Directly in front of you is the gun sight, huge thing it is with two adjustment wheels which we will use in flight. The view forward is certainly restrictive. So how do you start a Spitfire There are certainly no electronic engine management system or any other modern gizmos on a Spitfire, so you have to coax and be very patient when bringing Pre-War aircraft into life. If you have owned a really old car with carburettors you would know how the deal works. 
First you need to switch on the top and bottom fuel switches (1.), then open the throttle (2.) a little (half-an-inch). Then set the mixture (3.) to full on (forward). The Airscrew pitch needs to also be full forward (4.). Right lower is the Fuel pressure switch (5.) and the two far left magneto switches (6.) have to be on. 
The important lever in the Spitfire cockpit is the radiator flap control (7.) Full forward or open to start. You can check your tanks fuel load (8.) by pressing the button to activate the dial. For start magneto power (9.) switch on the far right switch and the fuel and oil pressures (10.) should respond. You have to prime the fuel system to start. To do this you nudge the fuel primer pump handle (11.) and out it pops, touch again to pump. The amount of strokes depend on the air temperature (cº) which is noted in the tutorial. 
I gave the pump (12.) handle 5 strokes and then lifted the guard on the starter switch (13.) which is situated on the lower panel behind the stick, push to start. The Spitfire Should then fire up in a cloud of white smoke, adjust the idle with the throttle to smooth the rotation out. You can switch off the start magneto and switch on the engine generator switch (14.) on the top right next to the volt indicator. Note how quickly the engine heats up (15.), you can't sit on the ground for very long with a running Merlin and that is why Sir Michael became very agitated and cursed his ground operations crew. 

On your left are three switches to cover lower (16.) Heading heat and Radio power. You have a basic COMM radio and a transponder (17.) and you will need to turn them both on. There is also higher a fuel pump switch (18.) and left lower is a pitot heat switch that is not marked. Here in this left side area is also a MENU popup. It is quite basic and is really only a view and two setting menu. Three views cover the "Pilot's (forward) view, The hard to see "P8 Navigation Computer" and the "Radio". Settings include Engine vibration (very good) and Engine Heat Management. Flying the Supermarine Spitfire 
You keep the canopy open while on the ground and until you are in the air. In the real aircraft it is cooler, but it is really required open to see where you are actually going... this is a tail dragger of course. But visually it is hard, if not impossible to see out of the aircraft on the ground. 

You are totally relieved to get some air going into the Merlin to cool it down, but easy on the power and feel the aircraft into the air. It's efficient wings don't need any flap.But practise is needed to keep the aircraft on the centre line, myself I took off to the right of the centre lines to see them. You unstick from the ground around 150mph and there is a lot of power for the age of the aircraft. 
Spitfires have a handpump mechanism to raise and lower the landing gear. There is a pump handle you move backwards and forwards to do the job, but in X-Plane the work is done for you. Just move the lever to RAISE or LOWER. 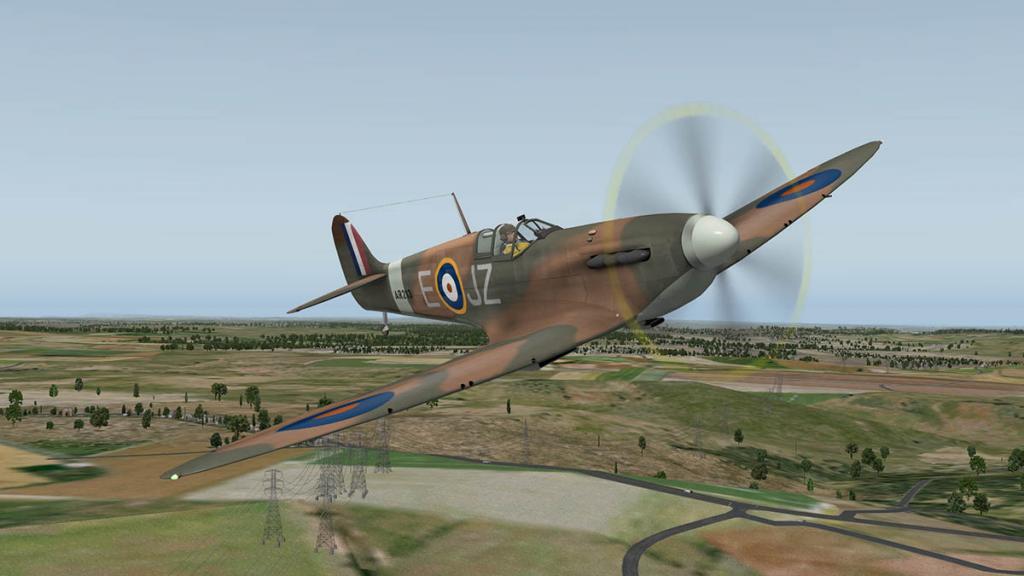
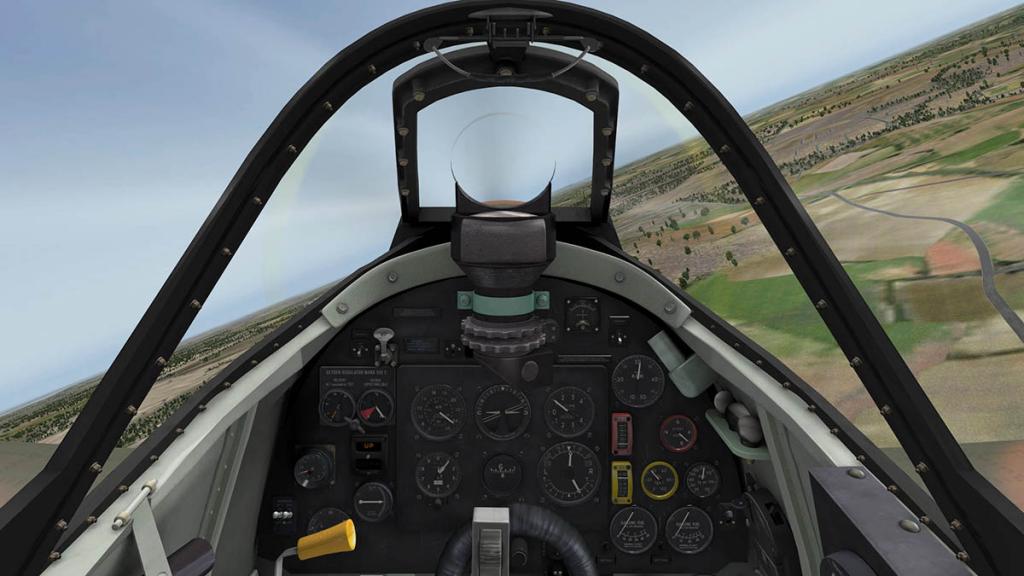
In the air the Spitfire it is like a formula one car, just you closed in there and all that power. The biggest factor is not to get fixated on the panel dials. If you do you find yourself flying around keeping the speeds level and then also slightly climbing and lowering your altitude in following around the clever artificial horizon instrument. It is best just too relax and fly the aircraft, forget the instruments and balance everything out of the real horizon and settle the speed. Although you do feel the fear of a17 year old, thrown into a Spitfire cockpit for the first time and wondering what the hell they had got themselves into, difference between them and me is that there is no Bf109 coming down at me from inside the sun trying to kill me. What can kill me is the engine overheating? It is a strange process to keep that Merlin happy and cool. Keeping the radiator flaps open creates huge drag, close them and the engine overheats. There is a strange equation of the faster you go the cooler the engine gets. problem is to go faster means closing the flaps and lessening the drag, but do that and heat spirals again. So you have to go faster slower until the speed cooling over-rides the radiator cooling than you can go to the Spitfires maximum speed. Same on slowing down in the opposite way to keep the heat at bay. 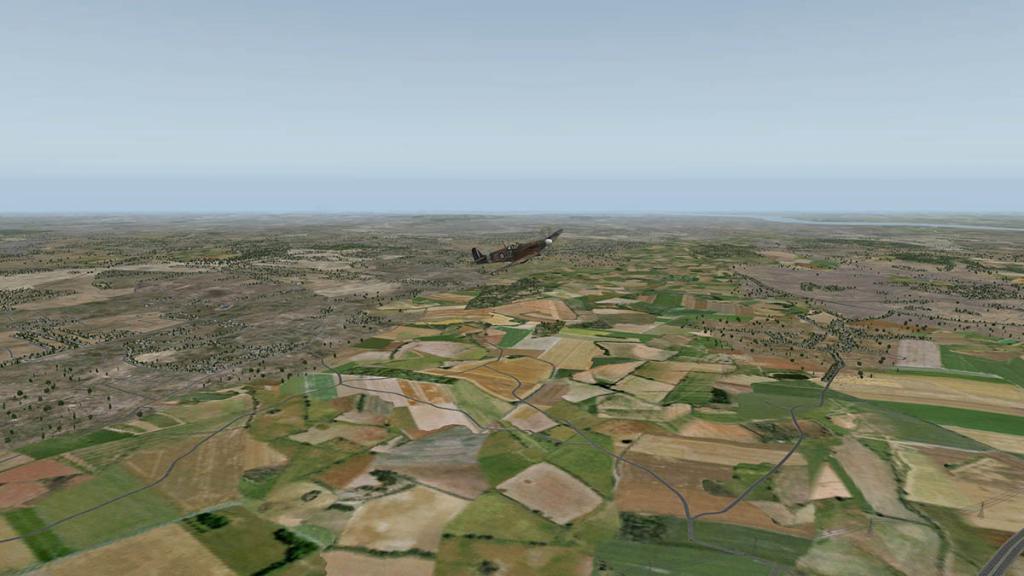
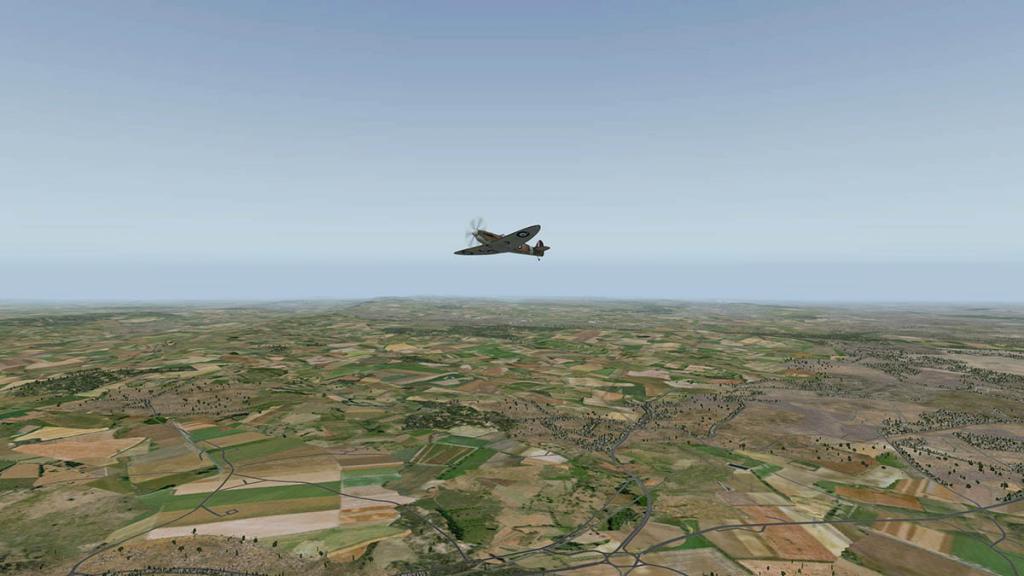
No doubt it the Spitfire is a pilot's aircraft, the machine is light and putty in your hands and you can see why it was such a great interceptor with speed one moment and flipping around in a graceful if lethal curve to kill the next, just watch out for any carburettor starvation. 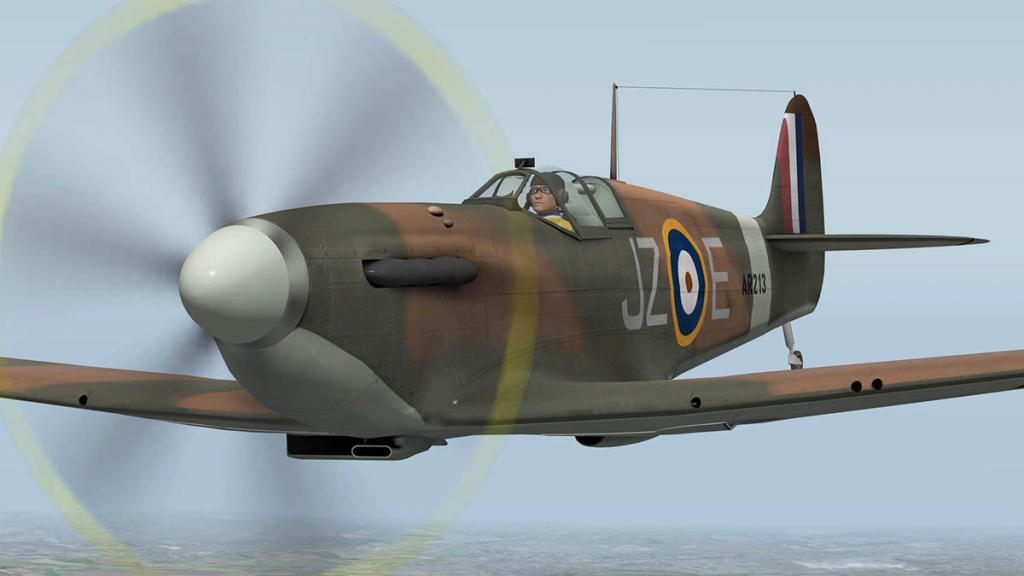
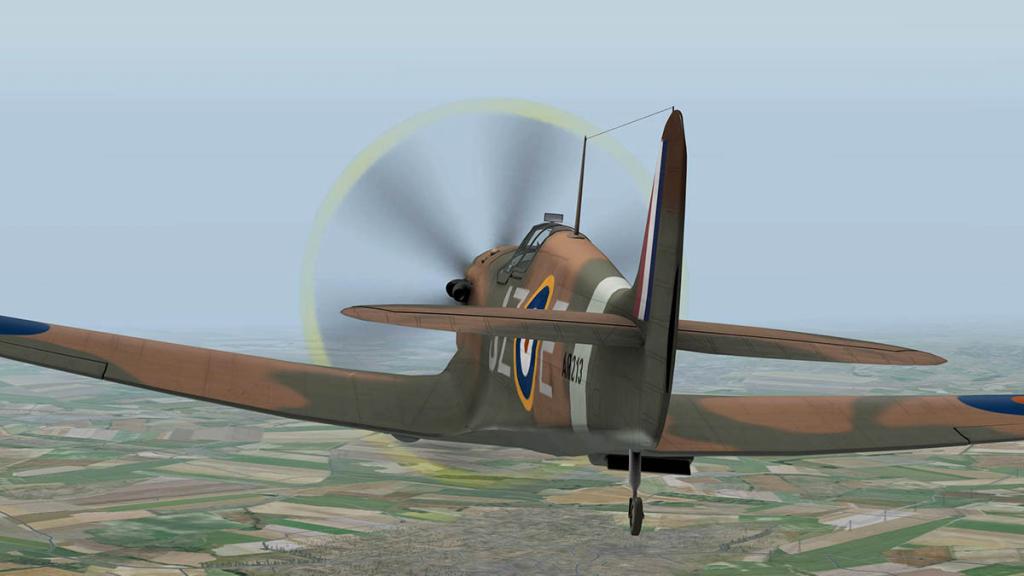
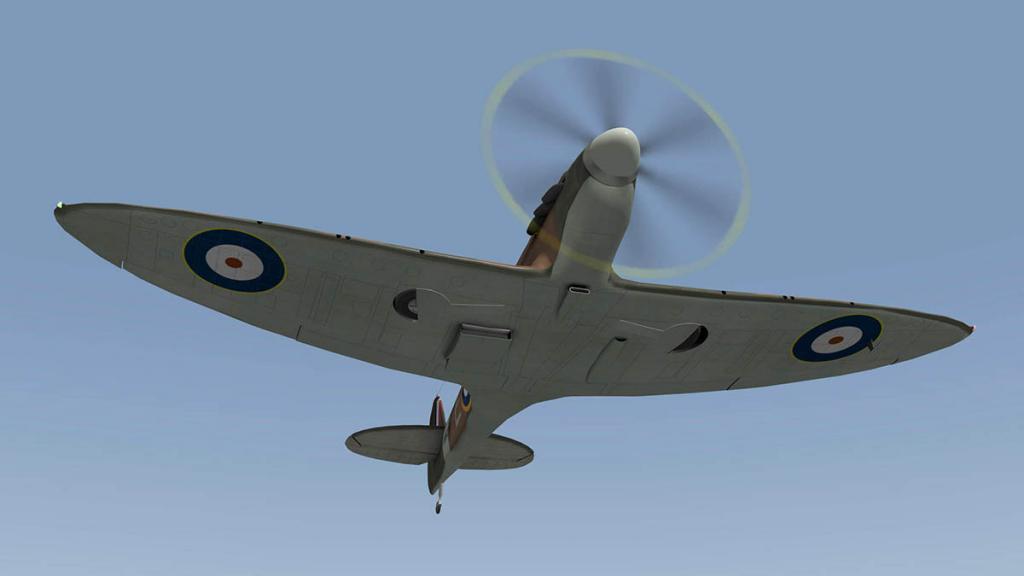
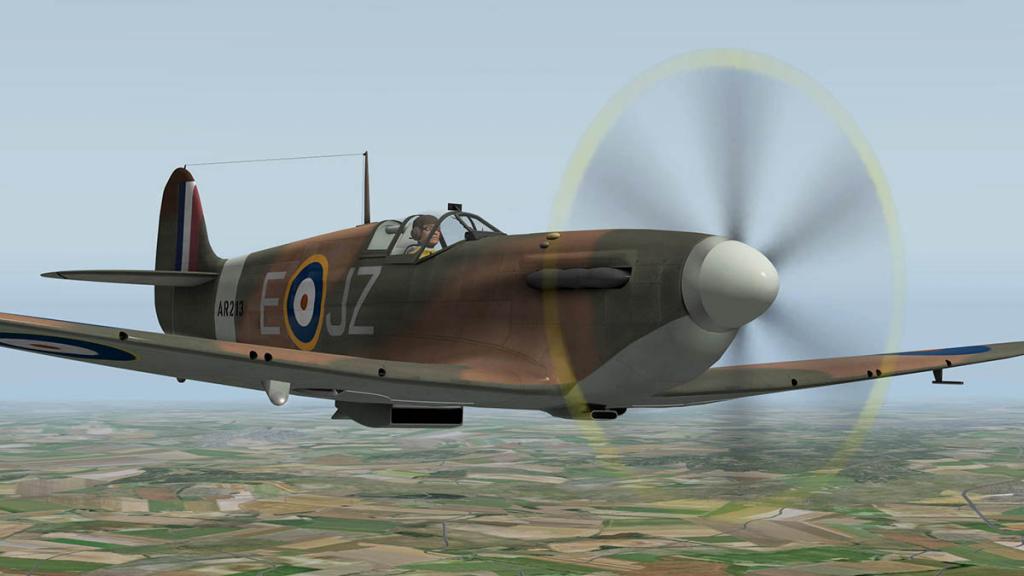
You have two panel lights, one situated either side of the cockpit that throws a red glow over the instruments (Canopy has to be closed for the lights to work), adjustment for each panel light are the rheostat knobs deep behind the control column next to the starter switch. There is a landing light on the right wing which you drop down which is feeble thing and nice navigation lights. 

The gunsight is turned on by a switch to the left of the sight, the twin wheels are your adjustment... but the cannons do fire as per X-Plane's armament system (A note that the review copy did not have the firing cannons, so I could not see the fire power delivered. But RW Design's says this is now working on the release version). 

Except for straight ahead the view is very good all round, although real Spitfire pilots complained of early poor perspex warping that made other aircraft trying to kill you hard to find. 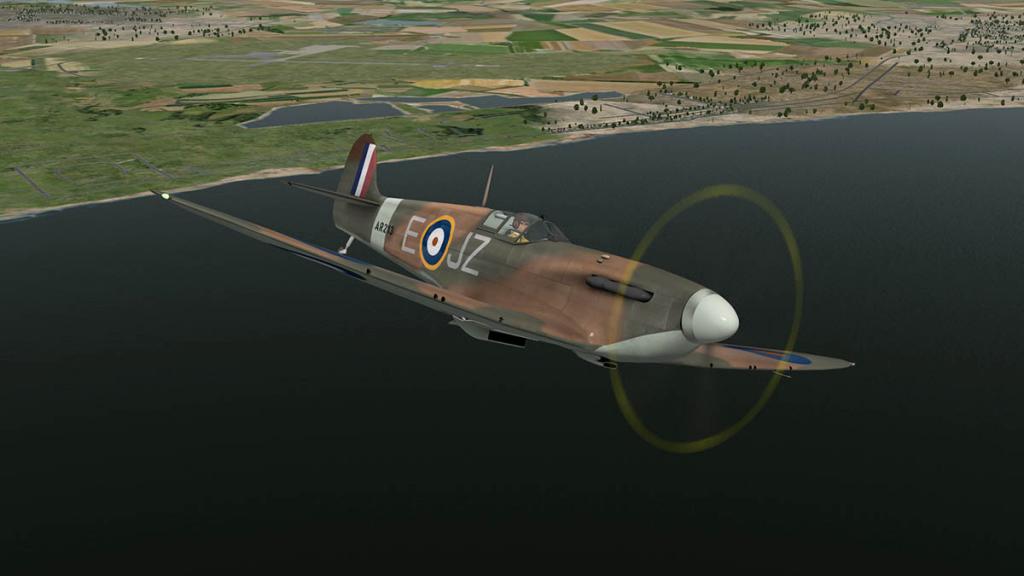
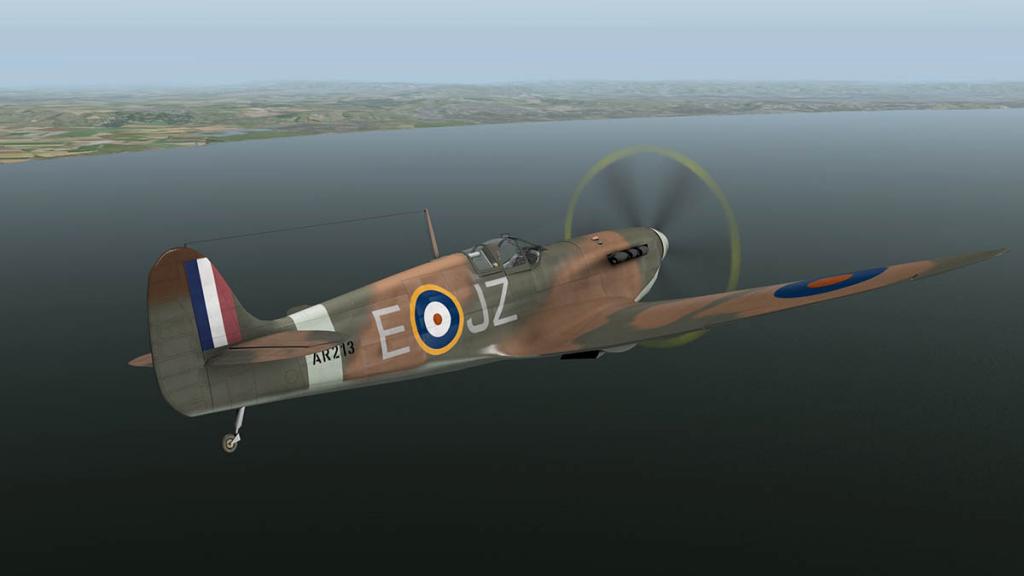
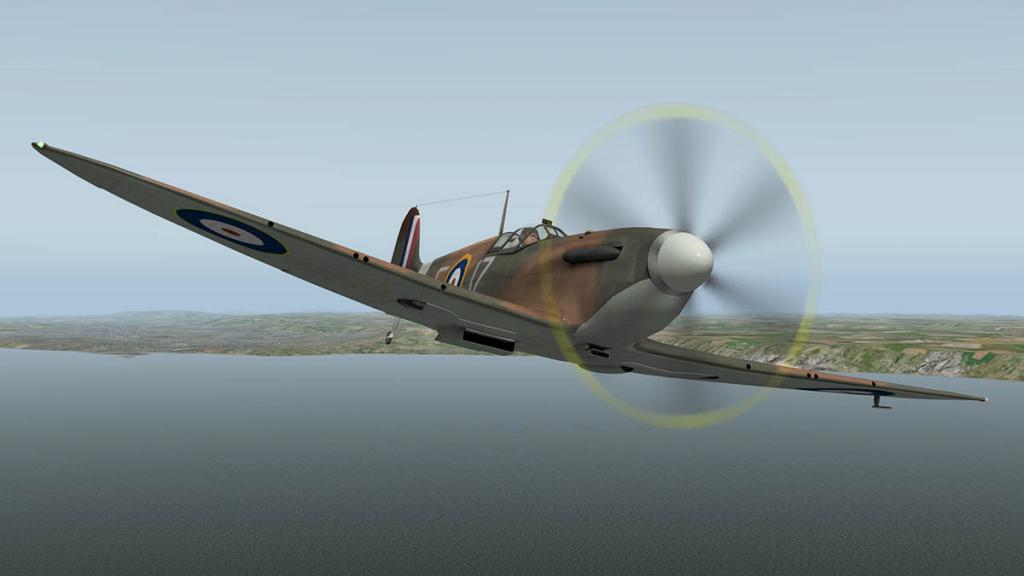
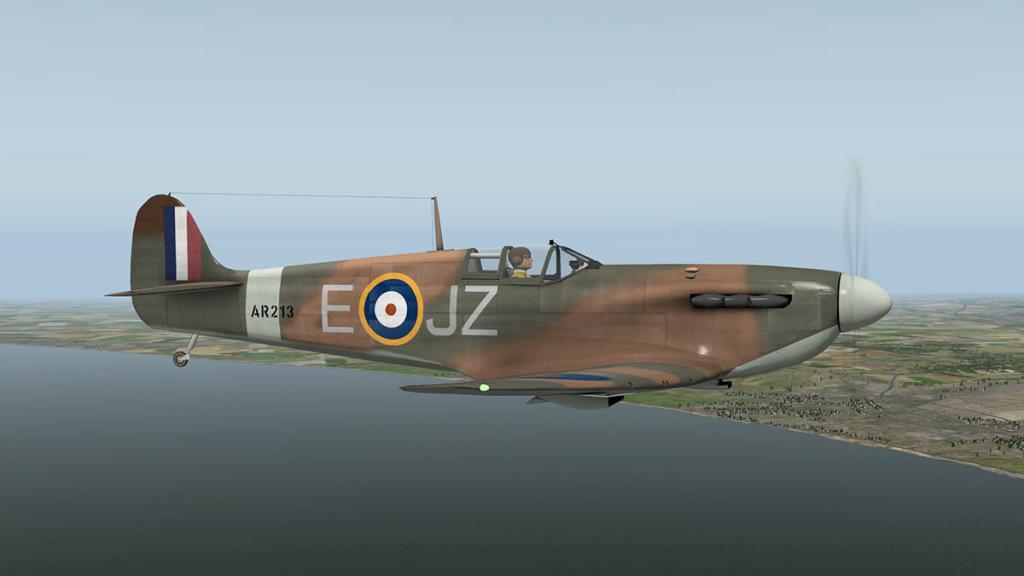
Flying out fast over the coast of the English Channel you can't but give refection of the bravery of Spitfire pilots, the real diamonds were the intelligence gathering souls. Flying many hours solo alone in the dark over enemy territory finding targets to photograph or changes to the enemies defences. Their own best defence was speed and the Spitfire was the best aircraft for such missions, but many of those gallant souls never came back... Liveries There are five liveries in JZ-E (G-AIST) - J (G-MKIA) - KL-A (G-CGUK) - PR-O (X4586) - QV-I (G-CCCA) of which I gather are still active flying Spitfires. JZ-E is default. A paintkit is also supplied. 

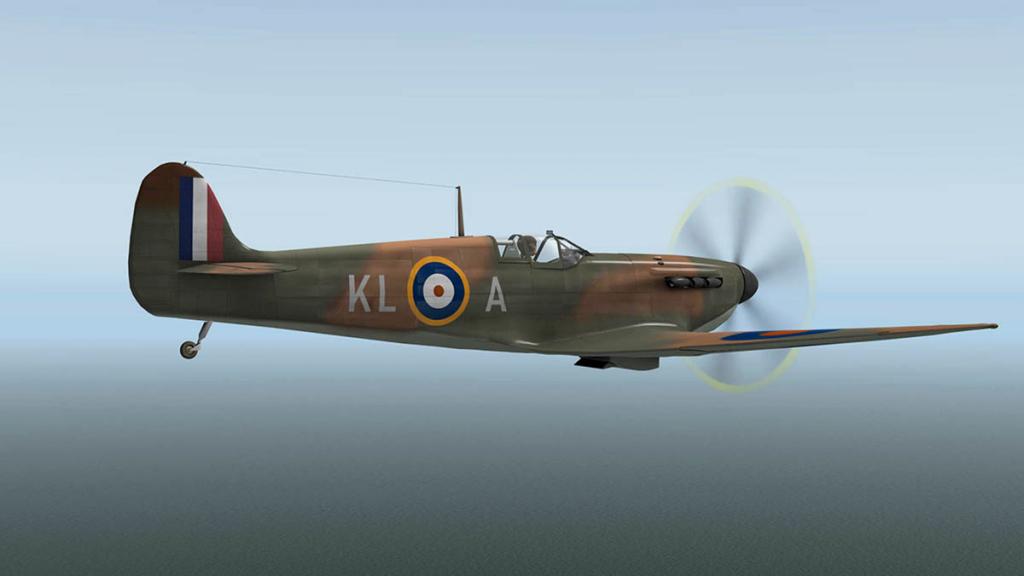
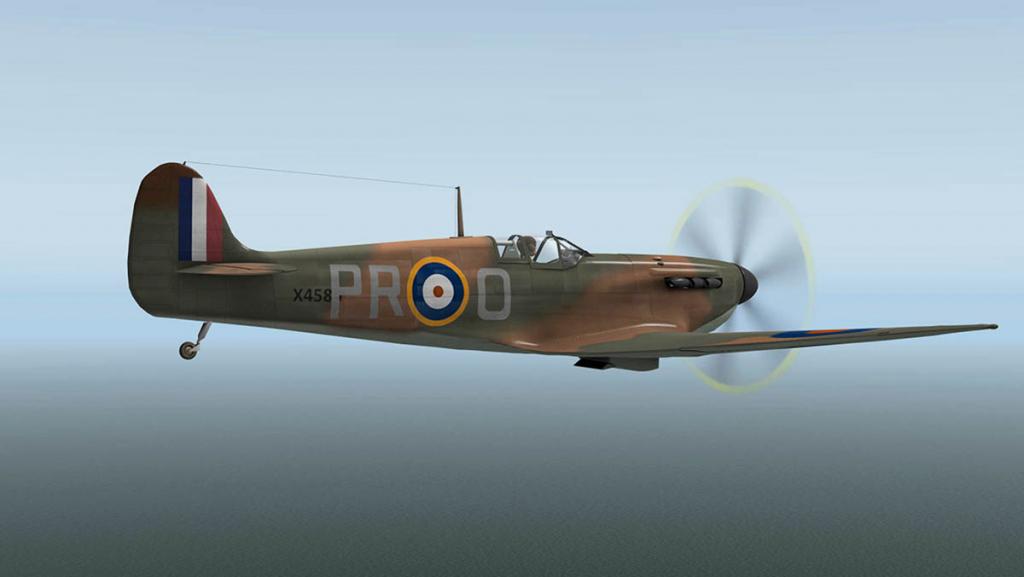
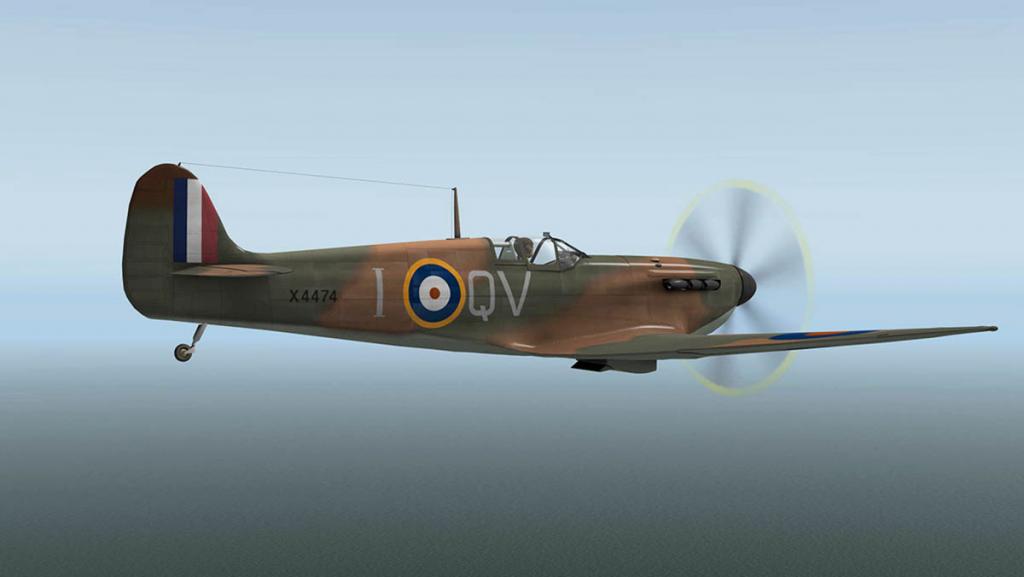
Time to head back to the Biggin Hill airfield. Low and fast is always fun and you feel the speed of the aircraft. 
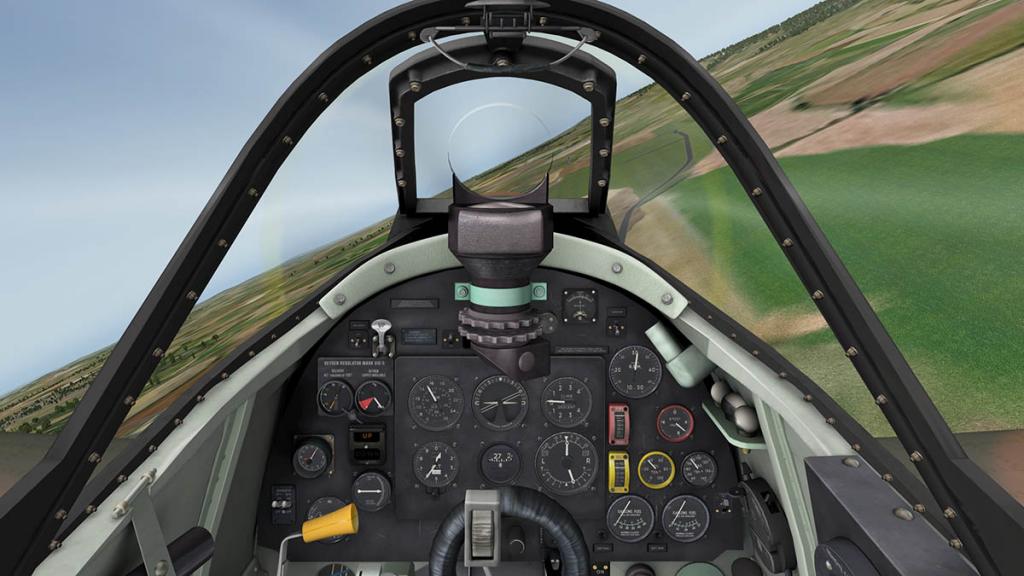
Twisting left and right, the right to rule the skies over the Kent countryside has long gone, this is now not a war footing area, as peace and bureaucracy now presides... But I still got permission to do a flyover of the Biggin Hill control tower and its original vintage passenger terminal. 

I powered over low and very fast before breaking off left to slow right down to circuit land on RWY21 from the North-East. The Spitfire is a blunt instrument, so you have to watch coming off the throttle and settling down at a slow speed (and yes the engine gets hot again, this time going through the roof in temperature) worse is that the wing will stall at the root, but there is more lift at the edges. 
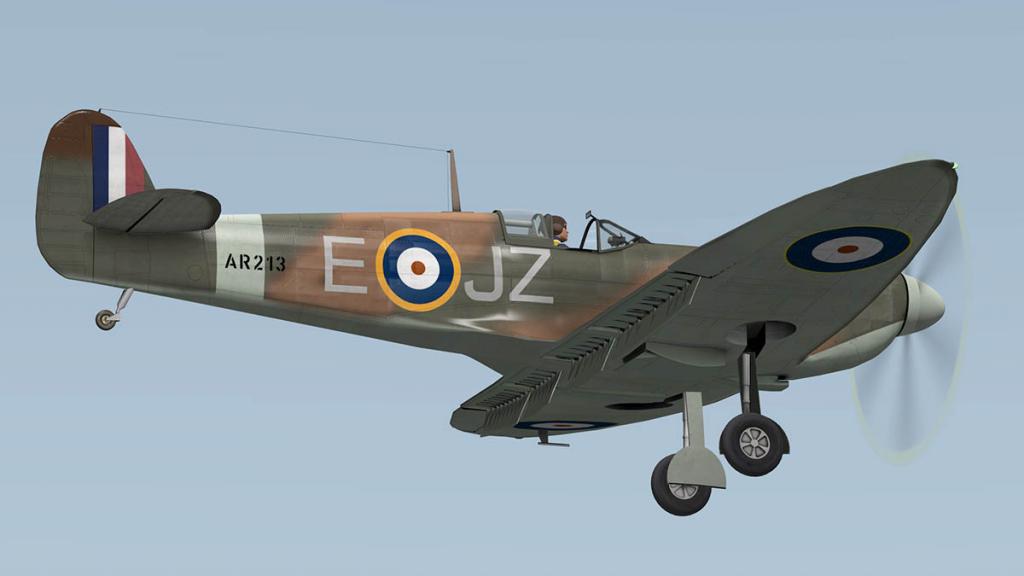
Flaps are simply "up" or "down" which is easy and again you tune the speed with the throttle power. Pump... pump... gear down and 10mph is quite easy to achieve for a slow landing. But you will need all of that slow speed to check out exactly were you are going to place down the aircraft in flying almost blind to the runway edges, those spindly legs of the undercarriage will mean you will need to keep the aircraft very level to land and not hop from one wheel to the next. 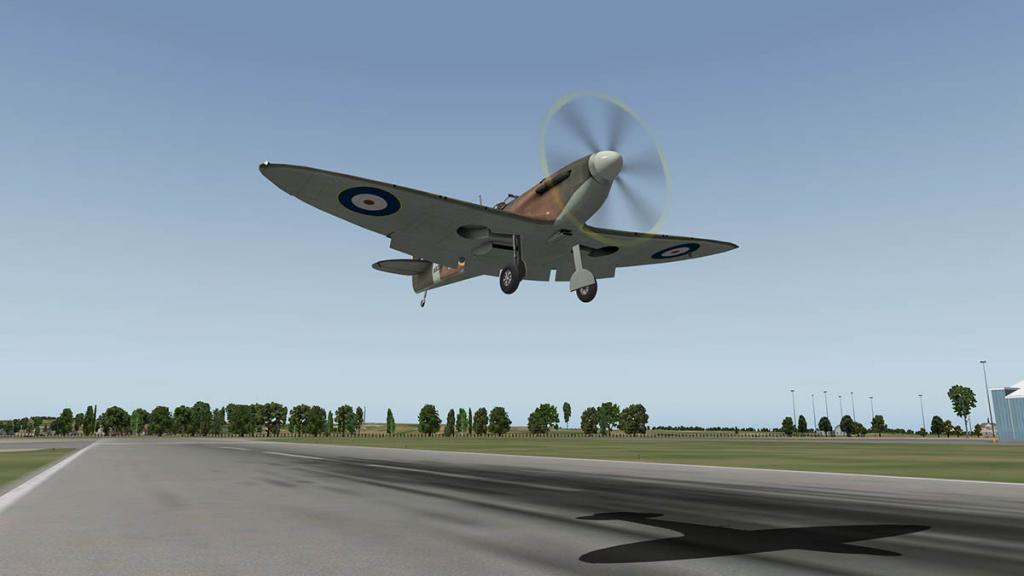
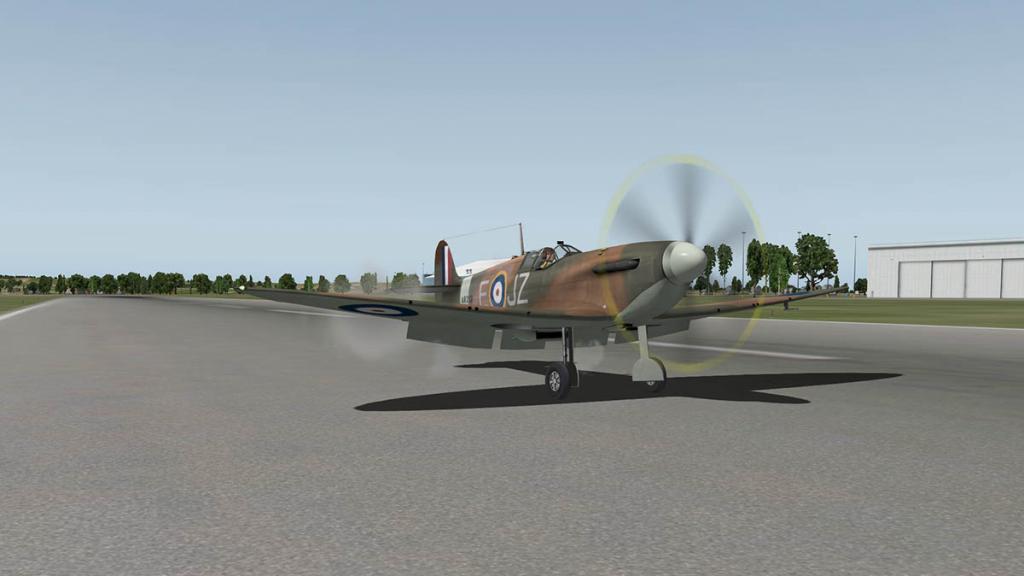
Down and a taxi to the area in front of the old Fighter Command base area. Fancy flashy Private Jets now dominate EGKB, as today it the an reinvented airport to cater for the rich classes and their expensive toys. But without doubt the true heart of Biggin Hill still sits here. On the grass in front of the old apron in retirement, here is an old warrior reflecting in the afternoon sun of her glory days. The the long gone days when she with her sister the Hawker Hurricane defended the realm still can be heard if you listen closely into the wind... Rule Britannia. 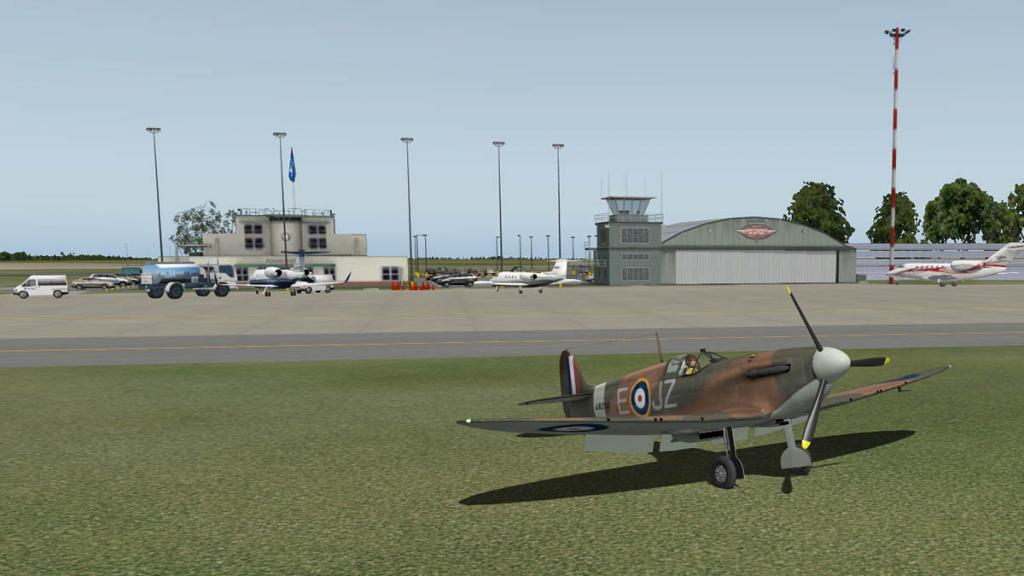
Summary A Supermarine Spitfire Mk 1. is a beautiful aircraft, A single seater fighter of its time of simple perfection. loved then and beloved now. RW Designs have done a great Spitfire, the cockpit detailing, instrumentation and replication of the aircraft's systems and their actions is excellent. From the inside of the aircraft it is very, very good. Externally you want a little more? Opening hatches, engine covers just things to interact with the machine more and the certainly the external aircraft modeling is good, but you feel it is slightly bland and needs a bit more dirt and oil to make it more realistic and not look like a museum piece. For the users that just want to fly then the Spitfire is very good, but if you want interaction with the aircraft (ground power, restocking armaments, static elements) then you are missing those items here. Overall the Supermarine Spitfire is a great classic aircraft, really great to fly and you can really interact with the aircraft in setting and starting up the machine and the distinctive Spitfire eccentricity foibles are all in there to master, and you get a big part of history to fly around in as well... A truly great war hero of an aircraft, even Sir Michael Caine would totally agree with you on that one. ______________________________________________________________________
Yes! the Supermarine Spitfire Mk.1 by RW Designs is available from the new X-Plane.Org Store here :
Price is US$22.95
Features :
- Detailed and complete 3D model
- 4K texturing
- Normal maps
- Custom lights
- 3D night lighting
- 3D engine vibration
- Reflective gun sight
- Over 150 animations
Systems- Period accurate navigation computer
- Oxygen
- Electrical
- Retro-fitted radios
Custom Sounds- 7 different sounds to replicate the roar of the Merlin Engine
- Sounds powered by SASL
- Custom systems modeled with sound
Installation : Download file size is 241.50mb to your X-Plane - Fighter Aircraft Folder. Installed file size is 355.00mb
Notes: None
Documents : An Aircraft Manual (23 Pages) and a Flight Tutorial (6 Pages)

Requirements :
X-Plane 10.40+ (any edition)
Windows 7+, MAC OS 10.7 (or higher) or Linux
1GB VRAM - 2Gb+ VRAM Recommended
Version 1.0 (last updated January 16th 2016)Developer Support Site : (RW Designs X-Plane.Org Support)
_____________________________________________________________________________________
Review by Stephen Dutton
16th January 2016
Copyright©2016: X-Plane Reviews
Review System Specifications:
Computer System: - 2.66 Ghz Intel Core i5 iMac 27”- 9 Gb 1067 Mhz DDR3 - ATI Radeon HD 6970M 2048 mb- Seagate 512gb SSD
Software: - Mac OS Yosemite 10.10.1 - X-Plane 10 Global ver 10.42
Addons - Saitek x52 Pro system Joystick and Throttle : Sound - Bose Soundlink Mini
Scenery or Aircraft
- EGKB - Biggin Hill (XP10) 1.3 by Chars (X-Plane.Org) - Free
-
News! - Updated - Peters Aircraft Airbus A380 and A320 Series
Peters Aircraft have issued updates to his A380 and full A320 Series (A319, A320, A320-NEO, A321) aircraft.
Airbus A380
The A380 has at this point just had a lighting update to cover the new X-Plane v10.40 lighting feature that allows for the lighting to widen or compress depending on the angle that you look at it. Also the A380 COM1/2 frequency selection of digits are also fixed, and finally the new SASL-plugin does not crash anymore in El Capitan.
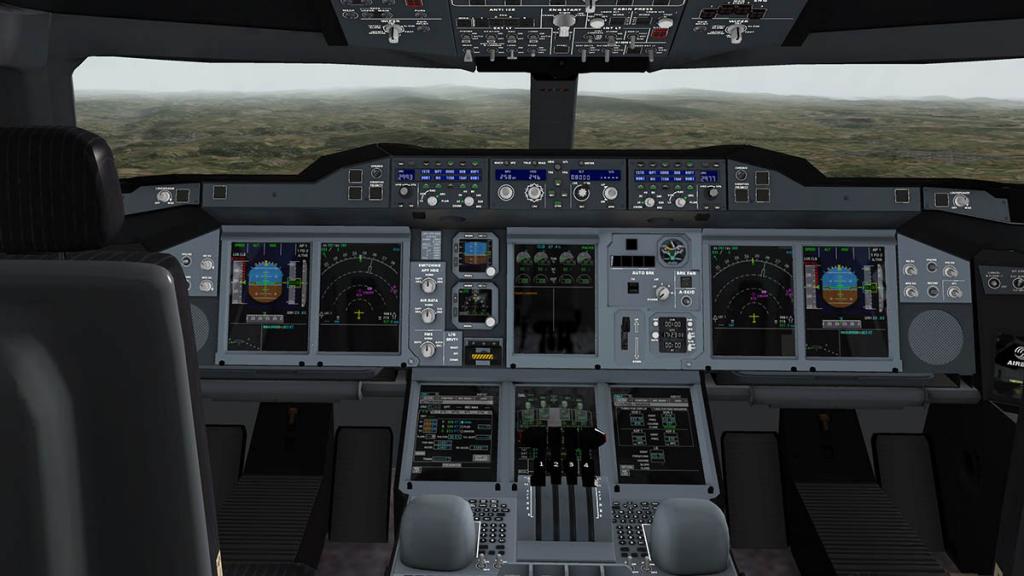
More significantly noted is that a more comprehensive update of the A380 is coming (Which is well overdue by current standards) that includes the ECAM or Electronic Centralized Aircraft Monitor systems display. (at this point the current ECAM is limited to just a few functions)


The systems on the A380 are of course complex and the point of the ECAM is to reduce the system complexity to a visual overview that is easier to monitor all aspects of the machine or to troubleshoot systematic failures within the aircraft. Just adapting the A320 Series ECAM to the A380 is a far more complex job, but the results will be worth waiting for. Hopefully a more intergrated 2-D to 3-D cockpit input is also on the update list.
The A320 Series (A319, A320, A320-NEO, A321) update is mostly on the APU start up procedures.
The original APU START was simply the triggered OPEN FLAP and APU START. Now it is APU MASTER button triggers OPEN FLAP, the APU START button triggers APU START. As Peter Hagar notes why this operation is needed.
"This is how it works on the real Airbus. So the pilot has the option to open the flap early, even some minutes before APU start. This is of advantage when the taxi time after landing is difficult to predict, since opening the flap does not burn fuel, but it shortens the entire APU start procedure by ~20 seconds. So the APU can be started shortly before reaching the parking position, thereby avoiding unnecessary running time of APU or worse, of main engines."
X-PlaneReviews will keep in tune of any A380 update news and release dates.
You can get the A380/A320 updates via Emailing Peter Hagar or checking your X-Plane.OrgStore Account.
______________________________________________________________________
Yes! the Full updated A380 Series by Peter Hargar is available from the new X-Plane.Org Store here :
Peter Hagar : Airbus A380
Price is US$54.95 Includes 3-D Cockpit

Peters Aircraft Site: Peters Aircraft
______________________________________________________________________
ECAM images are courtesy of Peter Hagar
Stephen Dutton
Updated : 11th January 2016
Copyright©2016: X-PlaneReviews
-
Aircraft Addons : A320neo/A330-243 Sound Packs by Blue Sky Star Simulations Realism in sound is mostly taken for granted in simulation. It is mostly accepted that if you buy a high end aircraft then the sounds should be perfect and are of a very high quality. In most cases they are, or at least the quality is usually very good. But how good is very good? If you look through an expensive aircraft's sound library they are usually extensive, but getting extremely high quality sounds are a nightmare for developers and even then they don't live up to expectations, worse they can be downright awful no matter how carefully or how well they are created and mixed to perfection. But like the every other area that has progressed though unattainable high quality barriers in X-Plane over the last few years, sound has never really been front and center of major feature lists, but also they were mostly until now average in use. The breakthough is using third party developers who create (from real world sound) very high quality sound sets, in other words they specialise in just sound. So they have the time and the equipment to create sound packs that are levels above and far more comprehensive than any one aircraft developer can do alone. There has always been small specalised producers selling addon's for X-Plane, that is nothing new. But in the last year 2015 in X-Plane there has been the shift to a more commercial approach in the addon specialist being a designer house of their own quality and are heavily branded as a creator of certain products unlike the past hobbyist approach of filling in a gap in the market. In other words they are the new big boys in the game and they mean business. The developer has two choices with quality sound, buy them outright on a license (very expensive, which will be added on to the cost of the aircraft) or collaborate with the specialised outfit and then allow them to sell the sound packages as a separate addon to the OE (Original Equipment) aircraft. The first approach has been there for a while in simulation, but with the rise of specialised outfits the game is changing towards now the addon market that has been a much bigger factor in FS (Flight Simulator) than X-Plane. In fact now the addon to OE developers has broken big time in X-Plane in SimCoders developing addons for Carenado aircraft in the form of REP (Reality Expansion Packages) and here with sound Blue Sky Star Simulations with sound packages for JARDesign aircraft and coming soon for JRollons CRJ200 aircraft. No doubt this will be a developing story and it will be interesting to see where it goes. But the early signs are very significant and very good, and with the collaboration of the actual aircraft developers in hand with the specialised house (in this case sound) the amalgamation of both products are as we will see here is seamless and enhance each others products in operation. That means the results are a win-win for both parties. The hard thing with sound is that you have no really good base to compare them with except your own ears and your memory. In most cases what you remember may sound like that particular aircraft, but your memory is going to be fickle with you, it sounds right so it should be right. I had two test cases this year that showed me both ends of the equation... bad and good sound. Strangely enough it was the JARDesign A320neo that was the bad case. I flew my Tasman Sea route from YBBN (Brisbane) to NZWN (Wellington) When I left YBBN I thought the A320neo's sound was quite good, but by the time I was ready to drop down to land at NZWN I was completely over the buzz saw sounds that made up the sound package of the aircraft, add in a headache and I was not wanting to do that anytime again soon no matter how good the aircraft is. I realised the sounds are to a point average and there was a (significant) difference. I will make the point that after doing reviews for four or more years for X-Plane you see there is always an area that a developer can be weak. That is not their fault, it is just a human being thing of which I would be a hopeless long distance runner, it is just not in my physical or mental makeup. In developers cases if they are smart (which most are) they will add to their team other developers that are strong in the areas that they are not. But if they are control freaks (which many are) then it can come at a cost to their products in the areas that they cannot address. The good was the FlightFactor Boeing 767-300. This aircraft opened my ears to really good sound on an aircraft (FlightFactor were always good on sound) but here with the B763 they did something that now and even with that huge feature list on the aircraft is still that the one thing that stands overwhelmingly out and every time I use or if I come across the machine is that sound. It sounds like the Boeing 767, the real one, the one I have flown on many, many times. Sound is not a hearing thing it is a gut feeling thing and when the sounds are really good then you know it and revel in their feedback to recreate the total full environment of being (usually in the rear seats) of that aircraft. It is the whole experience factor and only then do you totally realise how important really good high quality sound is... The FlightFactor Boeing 767 had me crying while flying as I sobbed and wallowed in my memories of "It is just so like the real 767" and it is. JARDesign Airbus A320neo The JARDesign Airbus A320neo (which it isn't as it is the A320ceo (Current Engine Option)) comes with the CFM56 engines. There is one thing about the A320 Series, aurally it is very distinctive aircraft, certainly from the passenger seat. Ansett Australia had some of the earliest A320-211 build aircraft from Serial 022 - 030 (6,821 sold as Nov 15). As an aircraft tragic I was on one from OOL (Coolangatta/Gold Coast) to MEL (Melbourne) within weeks of the aircraft being in service. Used to flying on Boeing 737-377's it was like getting on board another planet. But the biggest change in the cabin was the way the A320 sounded. We are used to A320's today, but in 1991 it was very different in that yes the engine start up and when running the sounds were slightly modernly efficiently different, but it was noises coming through the floor that made the machine really unusual (It is the PTU which stands for Power Transfer Unit known as the "barking dog"). At the time it was the future, which is now. But back then 25 years ago it was a wide eyed experience. You can sit me now blindfolded in an A320 and start it up and I will tell you what version it is, so you can see why the original sounds just didn't cut it. Blue Sky Star Simulations have created a sound expansion pack for the CFM56-5 series engines and a optional extra pack to cover the IAE V2500 (sadly only the CFM engine is modeled). You also have to have the main CFM sound pack to add the extra IAE package. To expect just a new engine sound experience is totally understating the sound package you get here, as actually the engines are really a small proportion of the total package... In fact you get possibly everything you hear on a real A320 aircraft. First to note that the sounds are not just placed on or in the aircraft, but are significantly placed at their correct points on the aircraft in full 3-D surround sound. Which means as you move around the aircraft outside or inside you move within and out again of the range of the noise or sound.
Covered items are all real hydraulic logic, you will hear all the hydraulic pumps when activated, real life conditioning systems inside and outside, and turn them on or off for the full cabin and cockpit areas. Notably the conditioning pack sounds are different inside and from the outside as the avionics air coming out from avionics bay, and inside you have logic to blower override changes. I will note that if you have the APU (Auxiliary Power Unit) running which its sounds are extensively covered here from startup to running. You will know when you board the A320 via the rear stairs of the aircraft they are very noisy buggers. Those sounds can of course override the fainter external sounds of the aircraft, they are still there though if you position yourself into the right places during the walkaround and are quite distant when nose on the aircraft. All switches, buttons, selectors, handles, levers are carefully mapped and all sound like in real thing as you press them, but some buttons are a very loud audible click (notably the APU switches) which I don't doubt are realistic, but they sound like someone is banging hard on the underside of the cockpit floor from inside the front gear compartment, you jump at every switch press so are they just a little too loud? In the cockpit environment you get a lot of sounds, small ones and constant ones in context of the aircraft sitting on the ground. Like all sounds Blue Sky Star has recorded (or someone with access to the aircraft) the real audio of the real moment of the activity or function of what the sound is to represent, all together they blend together of course to be really just background noise unless you do a certain function to activate an item. The sound is mixed and highly polished to be almost perfect and that is what these sound packages represent. Ambient ramp sound and internal aircraft people noise is very realistic, even if you do have to put on your headset to get through the checklist load. The base pack is for the CFM56 engines but the references here are for the IAE engines as well. In engine sounds JARDesign have adjusted the A320neo's logic to match the new engine sounds.
The full engine start sequence is covered including the different N1 (Fan) and N2 (Compressor) sounds. N2 compressor sounds come in the start sequence actually first. vibration is created by high and low sounds and when fully running you have a full 360º sound variation of front, mid, back and inside sounds. The PTU sounds are all too familiar on start up as the system pressurizes the hydraulic system of the none starting engine as it cycles on and off, on and off, on and off, due to pressure fluctuations, even when both engines are running the PTU will still make noises until the system pressures stabilise, the PTU self tests on startup as well. Engine start up sounds actually can be heard better inside (different in the cockpit, but perfect in the cabin) than outside until you switch down the GPU/APU noise generators. Sitting in the passenger cabin you are overwhelmed by the realistic and perfect A320 environment. Flap extension is good and different from your perspective position on the aircraft, and when you set the seatbelt signs you get an announcement. That familiar A320 low level whine is perfect from the cabin and in taxi you get a perfect reproduction of the A320 sound volumes and movement. Sound is very different in the cockpit and you feel more isolated, but hear more background aircraft system noises.
Sound volumes are adjusted via the MCDU interface. Blue Sky Star give you full sound preferences with the package, but like me you will find your own self balance that suits your own requirements. Taxi movement thuds (concrete joins) are excellent as many developers tend to over-emphasise these noises, and your actions in the cockpit are are well replicated with small details like the clicks with throttle movement as an example.
You give the A320 50% N1 power to get the engines spooled up and than full FLEX or TO/GA detent to commence the takeoff roll. The sound of engine changes are far more finer (more pronounced sound changes are noticeable on landing), and runway position callouts with V speeds are excellent. There is a certain more quality and fullness to the sound which is noticeable and the building wind noise is more bufferer. This is because you have to change (if you want too) the core "wind.wav" file in the X-Plane/resources/sounds/weather folder. I don't like changing core root files (messy when updating X-Plane), but here it is a significant change for the better, the "wind.wav" file is provided in the package. Wind noises calm more when the undercarriage is retracted, so it shows that the lowered gear is creating turbulence sounds, yes the noises are usually sometimes present on landing (FlightFactor are again the master of such sounds) but it is again a significant aspect of your aural spectrum that creates the full simulation realism factor. BSSS climb and cruise sounds are excellent, certainly as good as FlightFactor's sounds that reduced me to tears, and even then a smidge better in the cockpit/cabin sounds that are perfect as they are slight changing all the time slightly in tune just as really aircraft does, it is subtle but clever and of course if get up in the aircraft to walk around the sounds move as you do and change as you
The Route today for both the A320 and the following A330 aircraft is the same KRSW (Southwest Florida) to KDFW (Dallas) and both in Delta colours. After takeoff and climb to cruise, sound is really a background noise, a good one mind you but still a background noise, the good test on sound is in the landing, reduction of thrust, wind changes and speed, change of flap and the undercarriage sounds.
You always know the point of TOD (Top of Descent) as the engine sounds change and the speed starts to wind down. So the subtle changes are the most profound ones, the difference in landing is there is no sound, by the point that engines are at a lower throttle position and the wind noise is dying (or slowing) down and that highlights everything else in the aircraft. So by the time you get to the approach phase the speed is low and every change like the lowering of the flaps, power changes (which are extremely fine and good here) and actions in the cockpit are pronounced and highlighted more so than at any other segment of the flight. Gear noises, speed brake noises, flap noises, ultimate real wind sound, touchdown sounds, vibrations are all very well done to perfection as are the landing callouts. The reverse thrust is highlighted because it is not a reverser higher engine sound but that hard air rumble sound (not to be confused with ground rumble) that you realise on how real this simulation of sound really is. A final finale is the CFM engine spooling down that goes on for ages.... glorious!
Installation Installing the Blue Sky Star Simulation package is really easy. In the JARDesign plugins folder there is the "sound3d-1" folder which is replaced by three sound (3d) folders 1-2-3 that come in the package. To highlight the detail of sound you get, just one folder (cockpit) has 86 wav sound files, and there are 45 wav sound files for the engines alone and the default JAR engines sounds are only covered with just 11 wav sound files. That is a big difference in sounds. The IAE engine optional pack is harder to install. You have to replace 43 engine sound files in the engines folder but remember to keep the older CFM files in case you want to change engines or do what I did and create a separate IAE_Engine folder and CFM_Engine folder and swap them over as you need them. There is an mp4. install video supplied with the package. Another Blue Sky Star video below highlights the A320 aircraft sounds ______________________________________________________________________
JARDesign A330-243
In this case the A330-243 sound package is not a complete mirror of the A320neo, as it is not quite as expansive but still very comprehensive. Biggest difference is that you have three engine options in the default Trent 700 (main pack) and two extra optional packs for the:
Pratt & Whitney 4000 Series
General Electric CF6 Series
Installation
Installing is a little trickier as well. In this instance you add the files in to the 330_JARDesign/plugins/sound3d as a "Custom" folder and you have the option of adding in the optional GPWS sounds as "sound2d". The process of changing over the optional engine sounds are the same as the A320 packages. There is an "install" video included.
But as the KRSW to KDFW flight proved the Trent sounds were excellent, detailed and a huge advance on the default sound files. Certainly I would like the GE CF6 option to be more of just a RR engine sounding like a GE engine and would I pay more for that option, the answer is yes. Hopefully that option will come in time.
A final note on this A330 package is that an new sound package is coming from Blue Sky Star Simulations and I would expect it to match the extensive systems of the A320 version, it will be probably priced accordingly as well, but that would still be good value.
______________________________________________________________________
Summary First I will admit I was sceptical that purchasing an extra sound package and certainly one priced at nearly US$20 would make that much difference. But these packages have been a real change in my thinking in how they fit into the full X-Plane landscape. They prove that even the top aircraft developers can not deliver this sort sonic level of detailed sound (except maybe FlightFactor, but then again they do have a dedicated sound engineer on their team). So only a specialised house that is dedicated to truly innovated sound can deliver performances of this level. It is also a huge factor in how an optional 3rd party can totally enhance and even change the basic aircraft performance in a significant way. The way these packages change the already excellent A320 Series from JARDesign is so significant that it creates a very much more user experience. Blue Sky Star Simulations has here totally changed the landscape in good quality sound, and the optional packages are a very worthy investment and that is because Blue Sky Star Simulations just do good sound, source and mix the sound at a level that is far beyond the usual high quality sound files you find in your aircraft. It is with these sounds in the end just another extension of the simulation experience, the full package. But until you have heard really good sound then you realise how much more a deeper level detail you can have in a different dimension for other than just the obvious aircraft features and good aircraft modeling. No doubt in the future more specialised brand developers will bring more excellent options and detail to the X-Plane simulator, if they are as good as Blue Sky Star Simulations are in sound, then the simulator experience is going to get even more exciting but more importantly even more realistic to the real aircraft we use and fly. ______________________________________________________________________
Yes! the Blue Sky Star Simulation Sound Packages by Real Pilots is available from the new X-Plane.Org Store here :
Airbus A320neo
JARDesign A320 CFM Main Sound Expansion Pack
Price is US$19.99 (JARDesign Airbus A320neo US$59.95 is Required to use this sound pack)
JARDesign A320 IAE Sound Expansion Pack
Price is US$7.99 (JARDesign Airbus A320neo and CFM main Sound Expansion Pack is Required to use this sound pack)
______________________________________________________________________
Airbus A330-243
JARDesign A330 Main Custom Soundpack (Trent700)
Price is US$9.99 (JARDesign Airbus A330neo US$60.95 is Required to use this sound pack)
JARDesign A330 Pratt & Whitney 4000 Series Soundpack Expansion
Price is US$7.99 (JARDesign Airbus A330 is Required to use this sound pack)
JARDesign A330 GE Soundpack Expansion
Price is US$6.99 (JARDesign Airbus A330 is Required to use this sound pack)
______________________________________________________________________
Blue Sky Star Developer Site : Blue Sky Star Company______________________________________________________________________Review by Stephen Dutton
12th January 2016
Copyright©2016: X-Plane Reviews
Review System Specifications:
Computer System: - 2.66 Ghz Intel Core i5 iMac 27”- 9 Gb 1067 Mhz DDR3 - ATI Radeon HD 6970M 2048 mb- Seagate 512gb SSD
Software: - Mac OS Yosemite 10.10.4 - X-Plane 10 Global ver 10.42 (final)
Addons - Saitek x52 Pro system Joystick and Throttle : Sound - Bose Soundlink Mini : Headshake
Scenery or Aircraft
- KRSW - South West Florida Intl by Aerosoft (KRSW - SouthWest Florida Intl - X-Plane.OrgStore) - US$24.95
- KDFW - Dallas Fort Worth by Brian Godwin (KDFW-Dallas/Ft. Worth X-Plane.Org) - Free
-
19 hours ago, Guest said:
So this has no sids and stars? Like the A350?
Yes correct, basically it uses the X-Plane FMS system. I call these hybrid FMC's


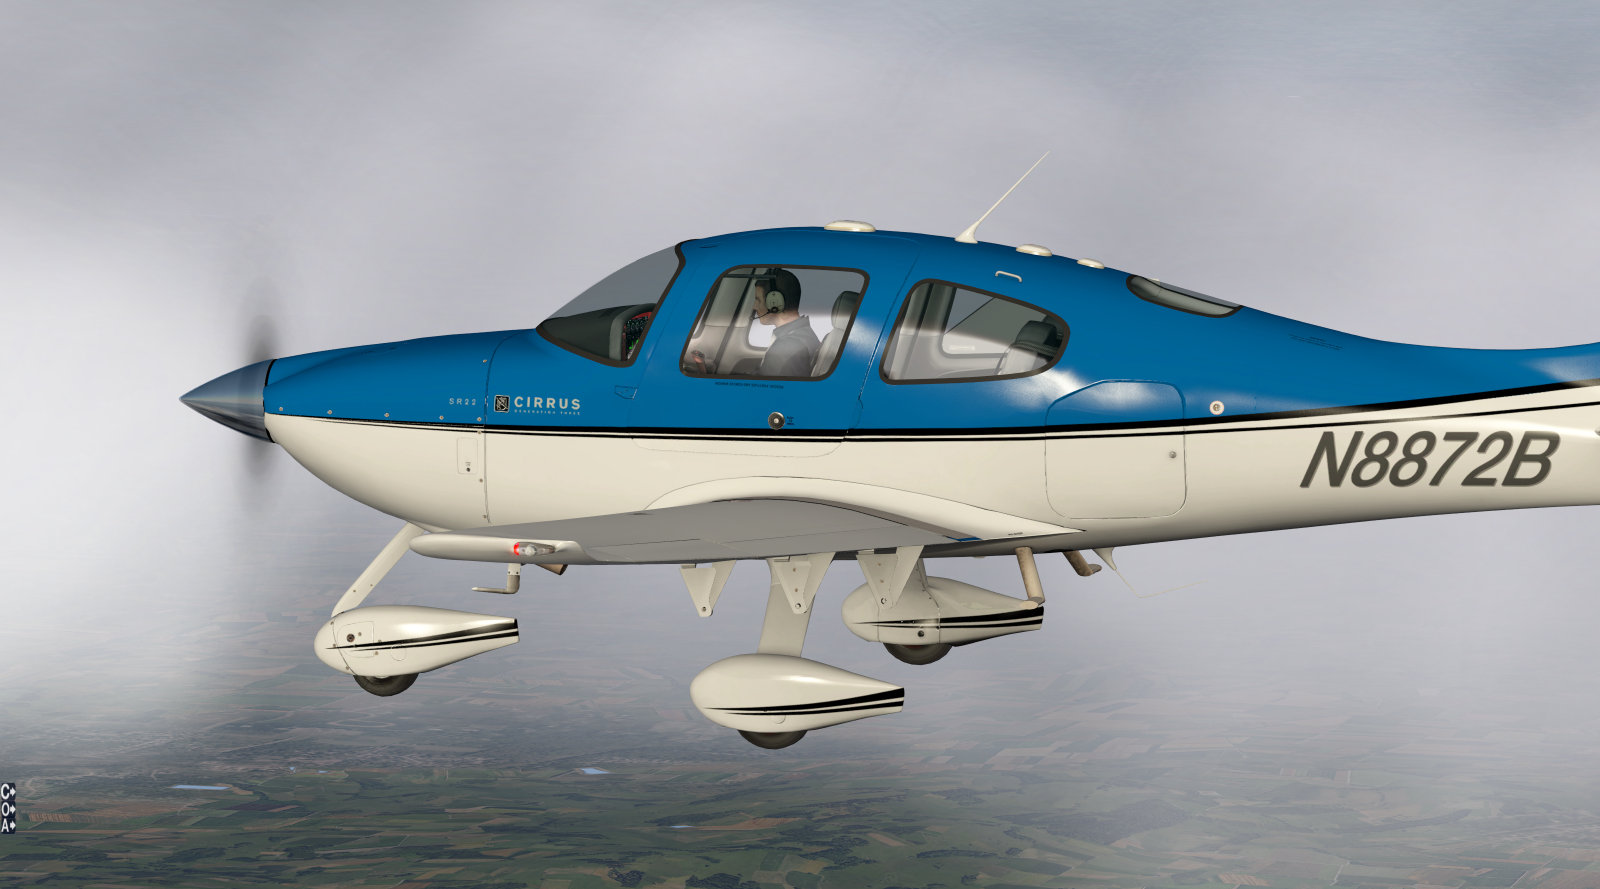
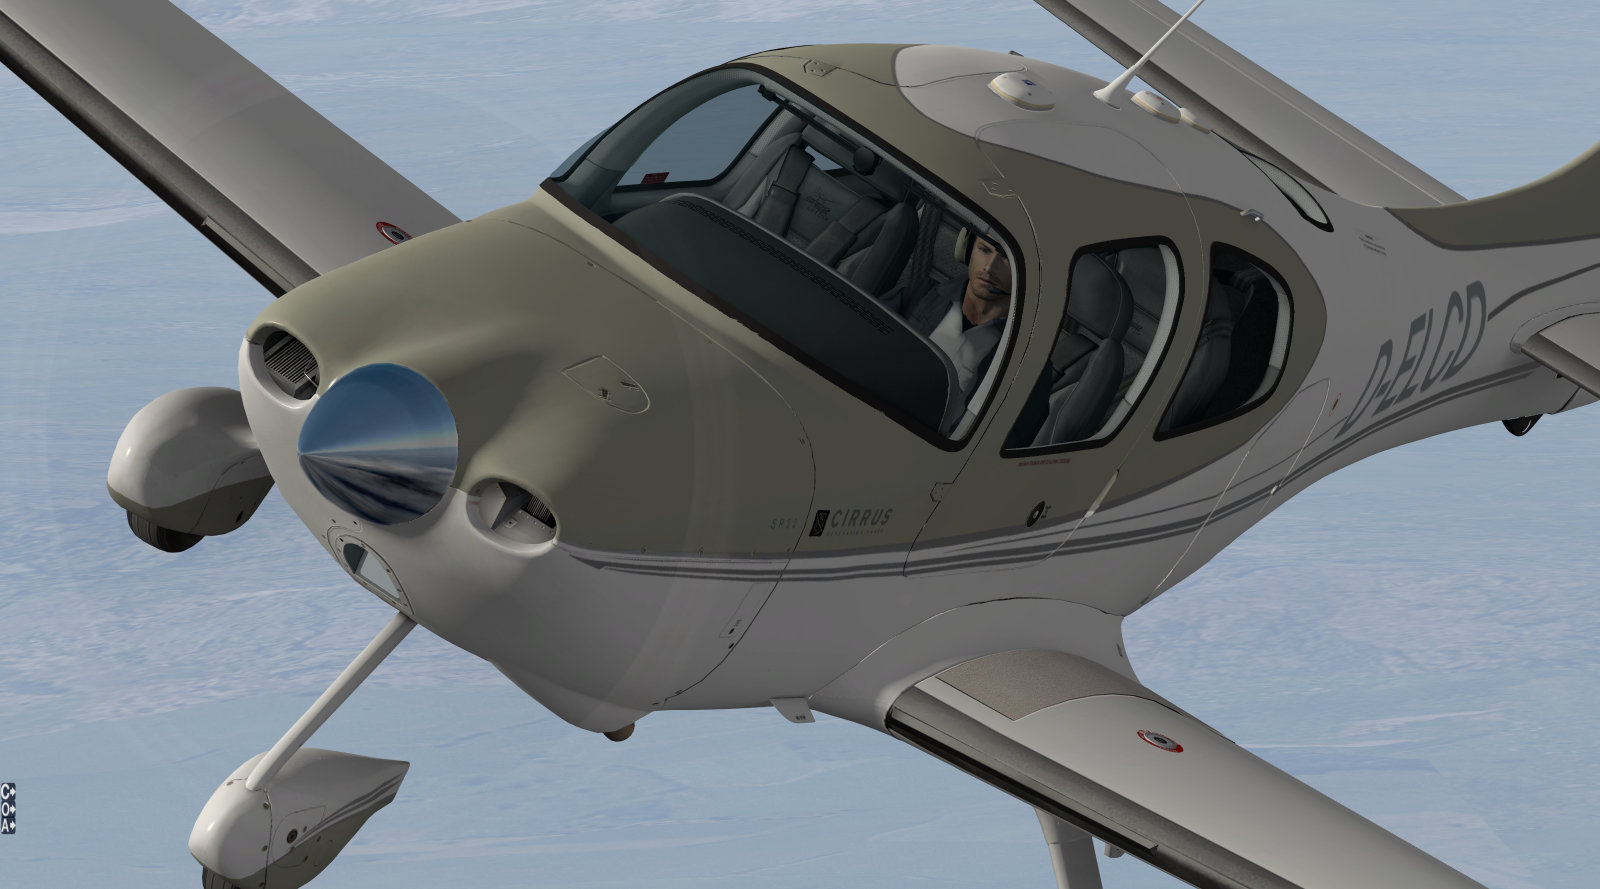
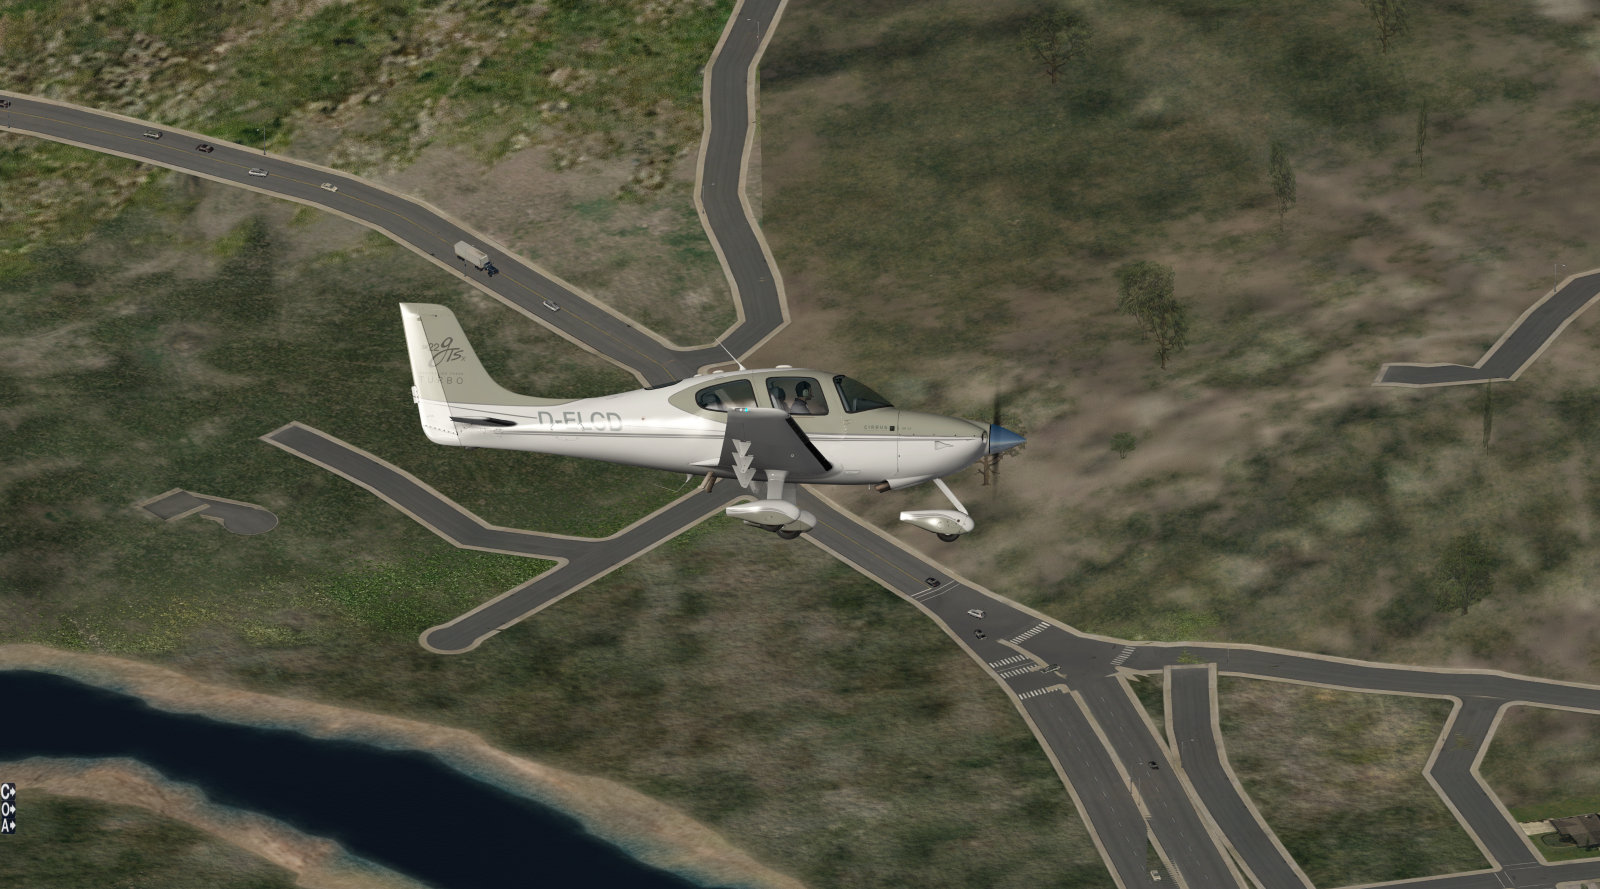

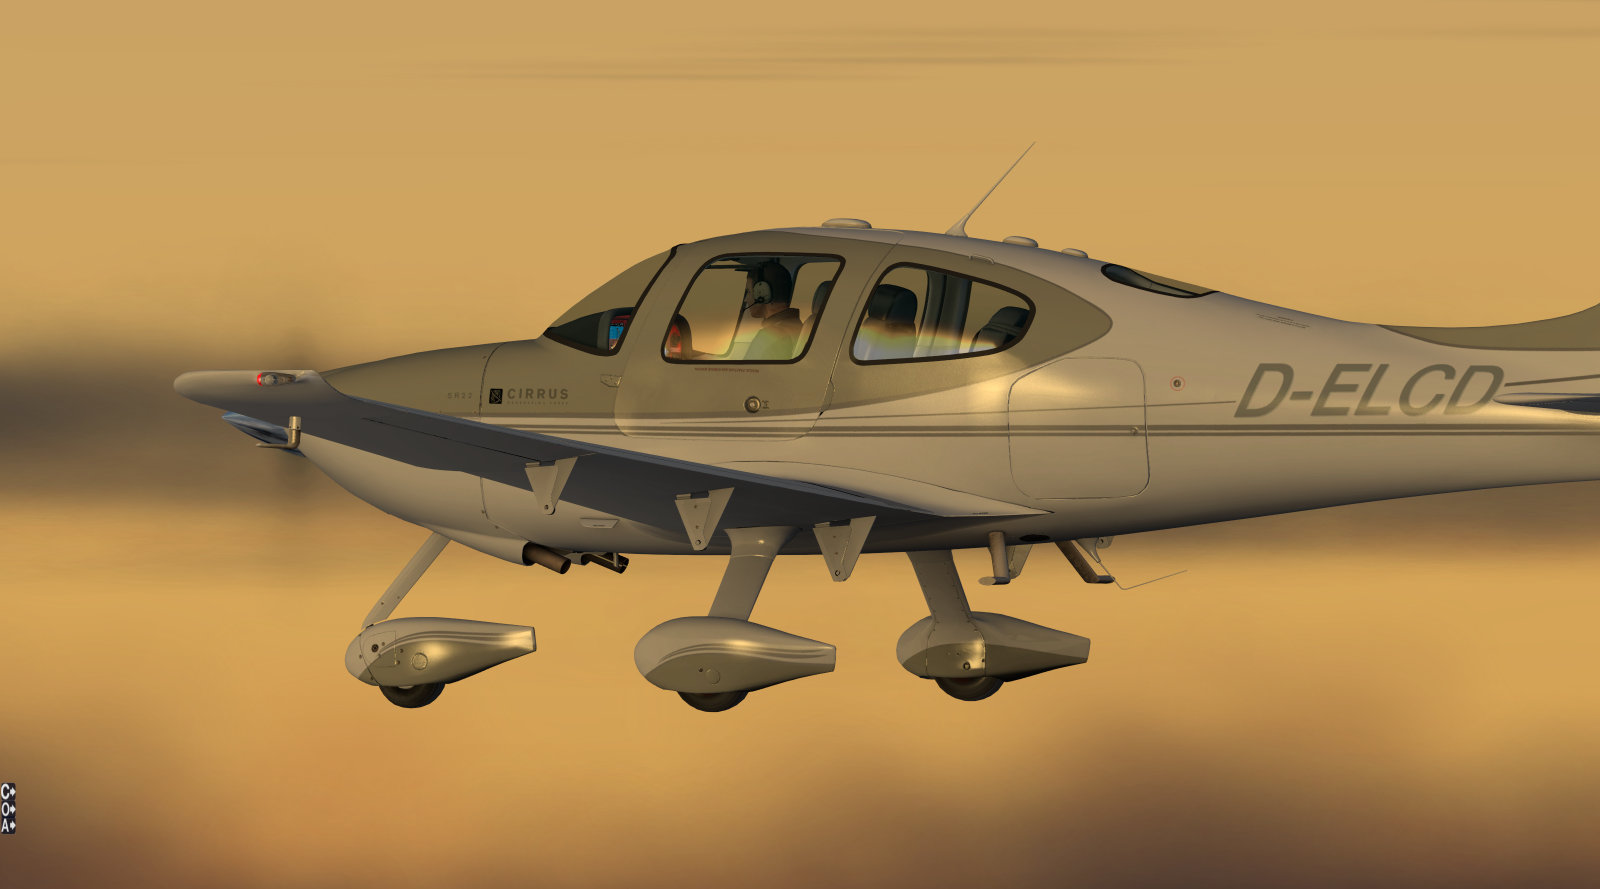


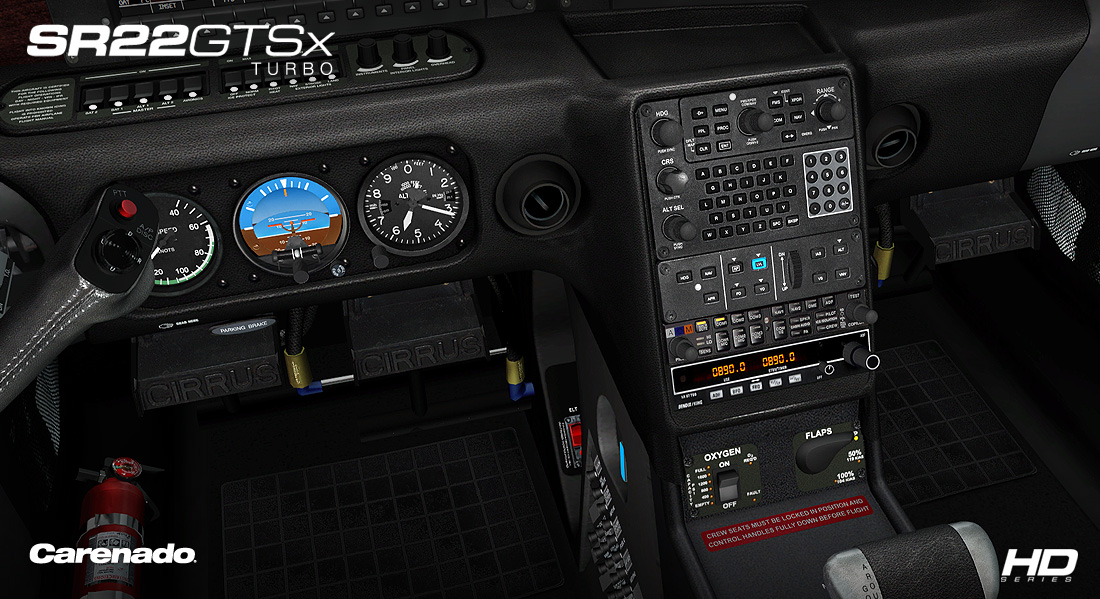

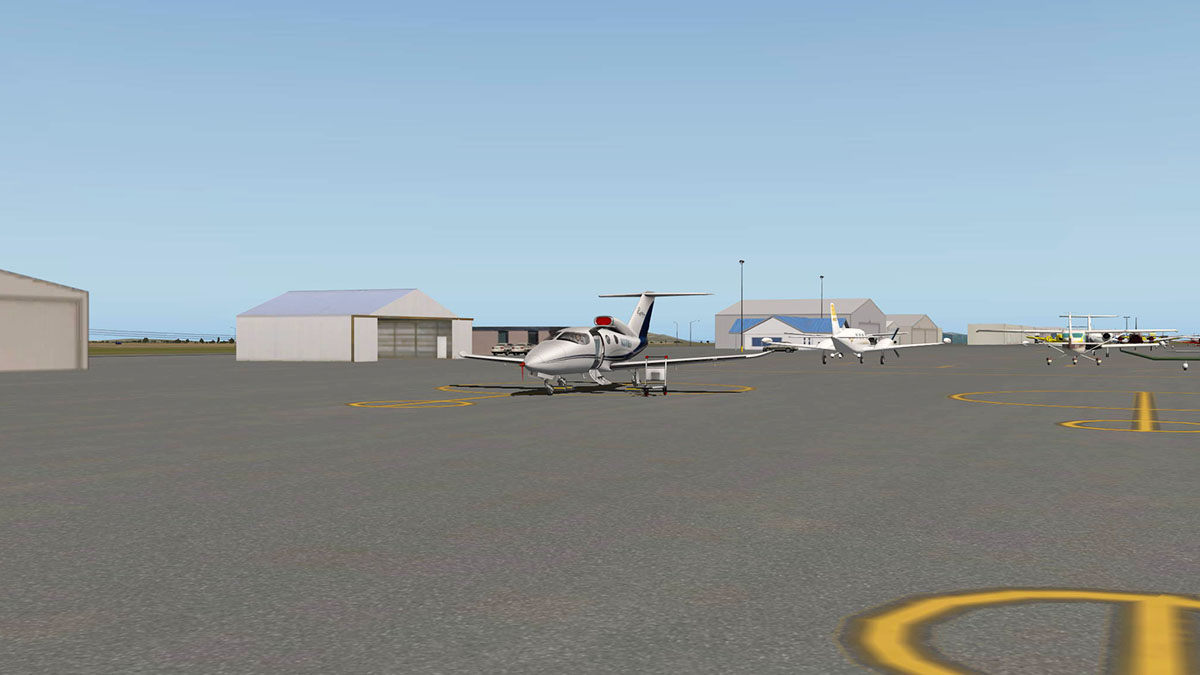

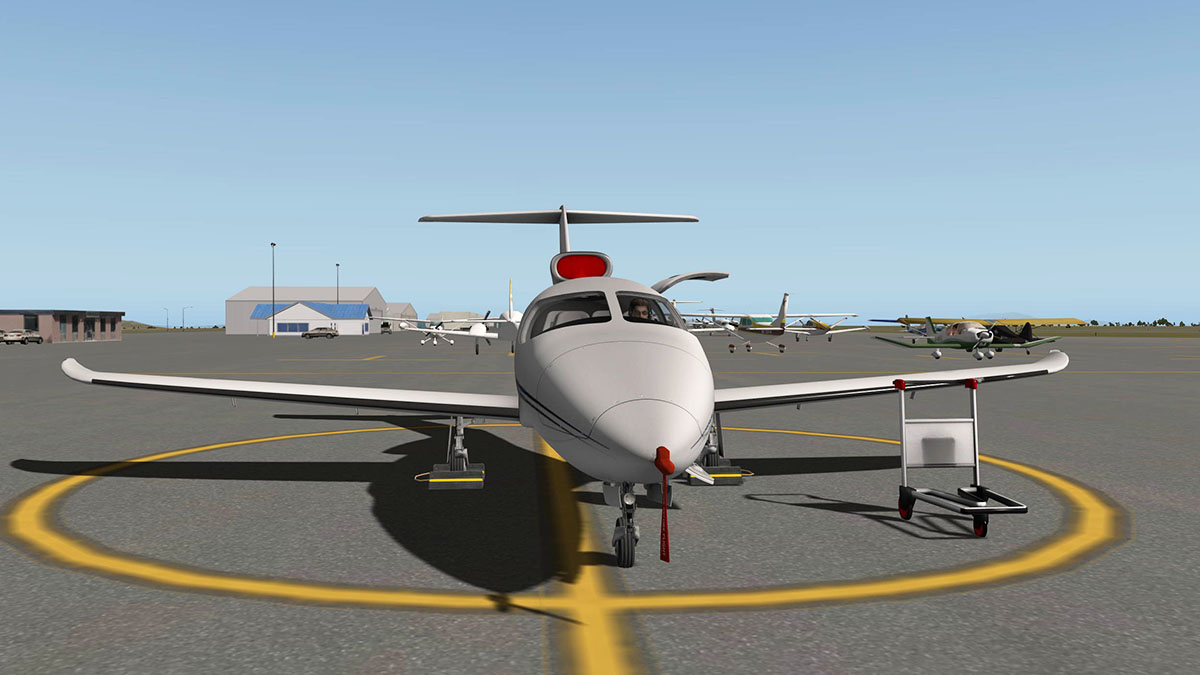

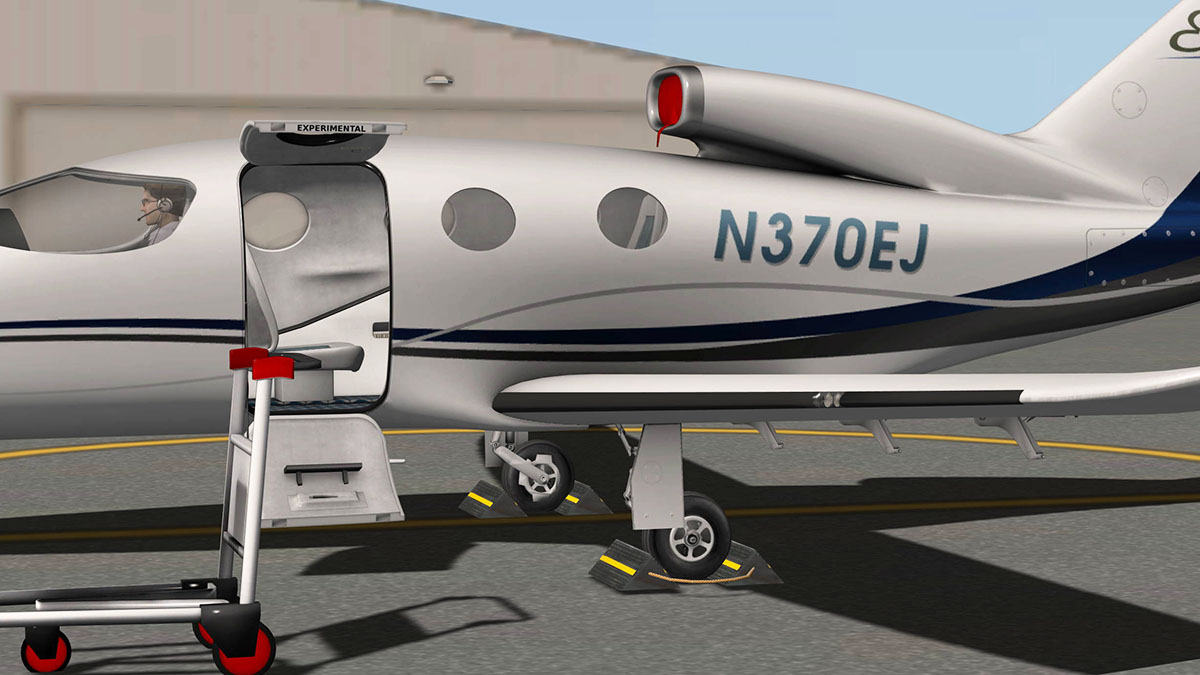


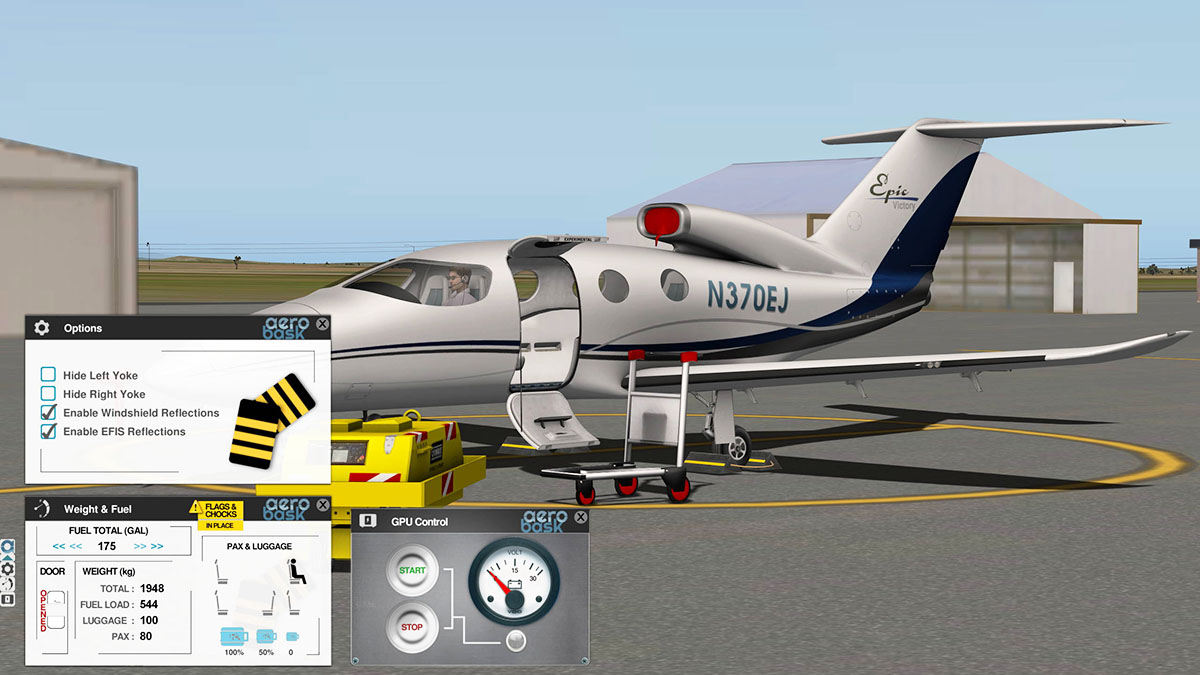
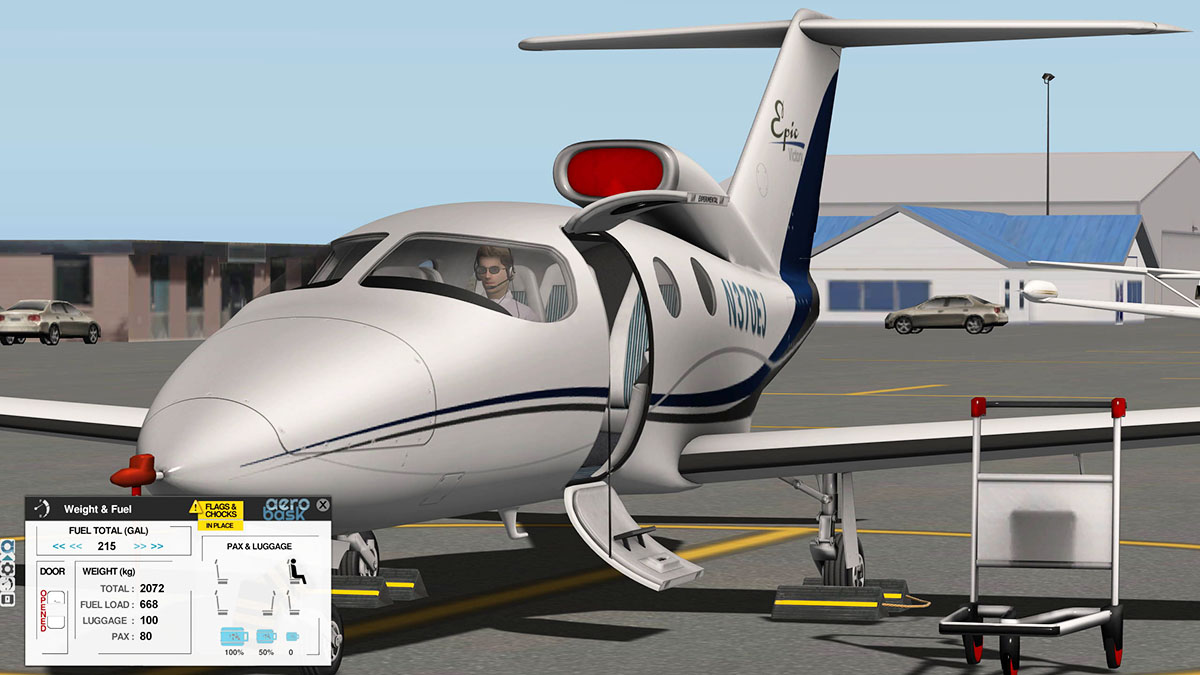
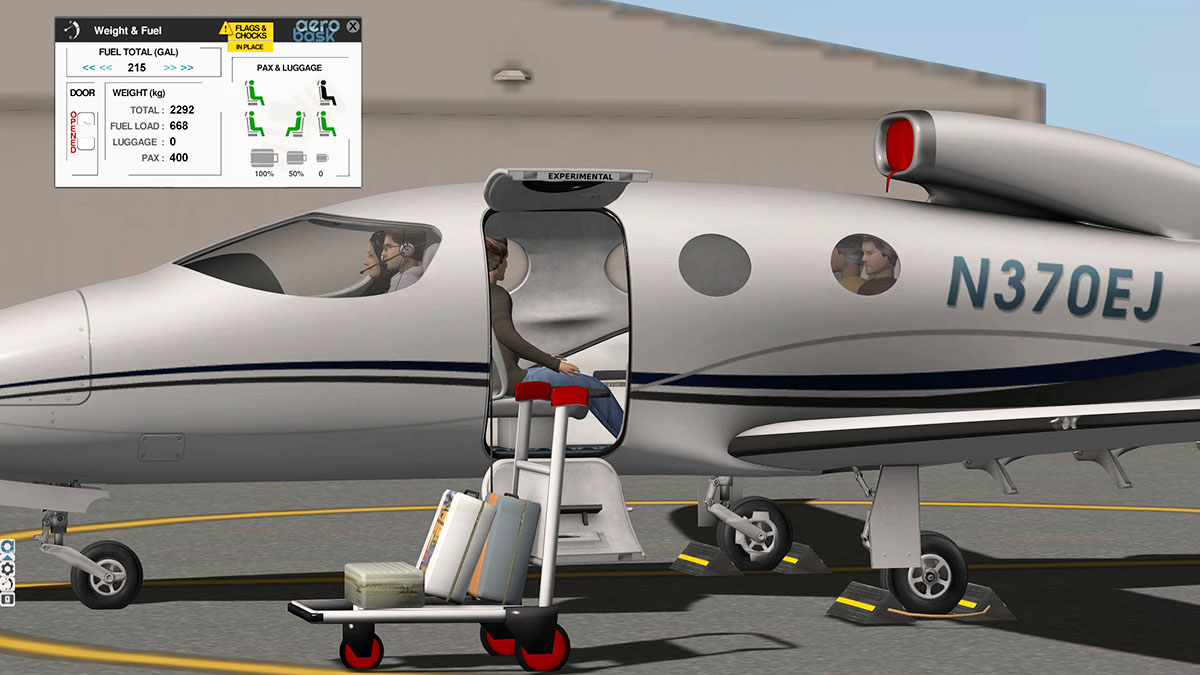
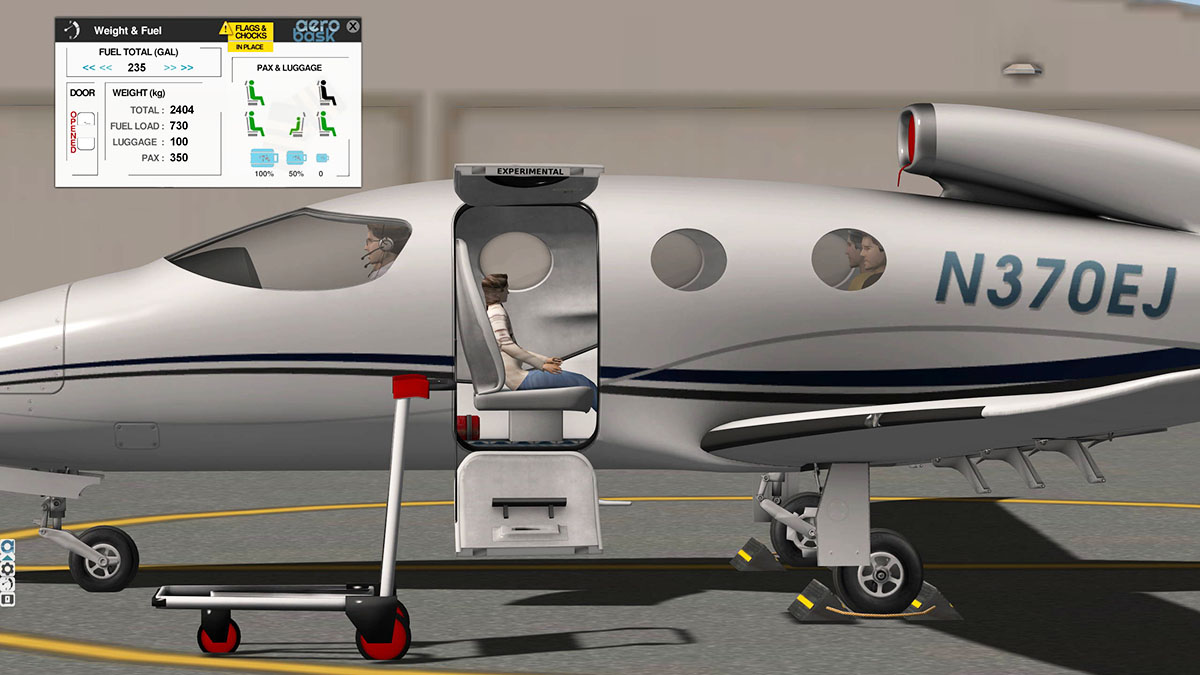
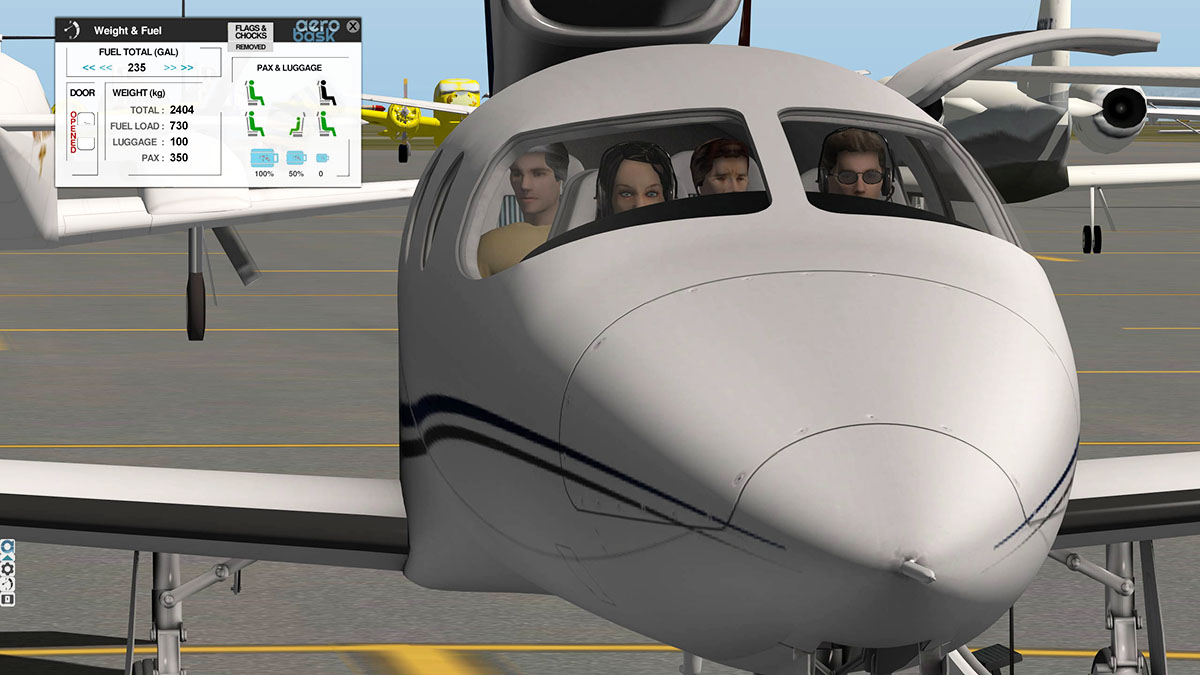

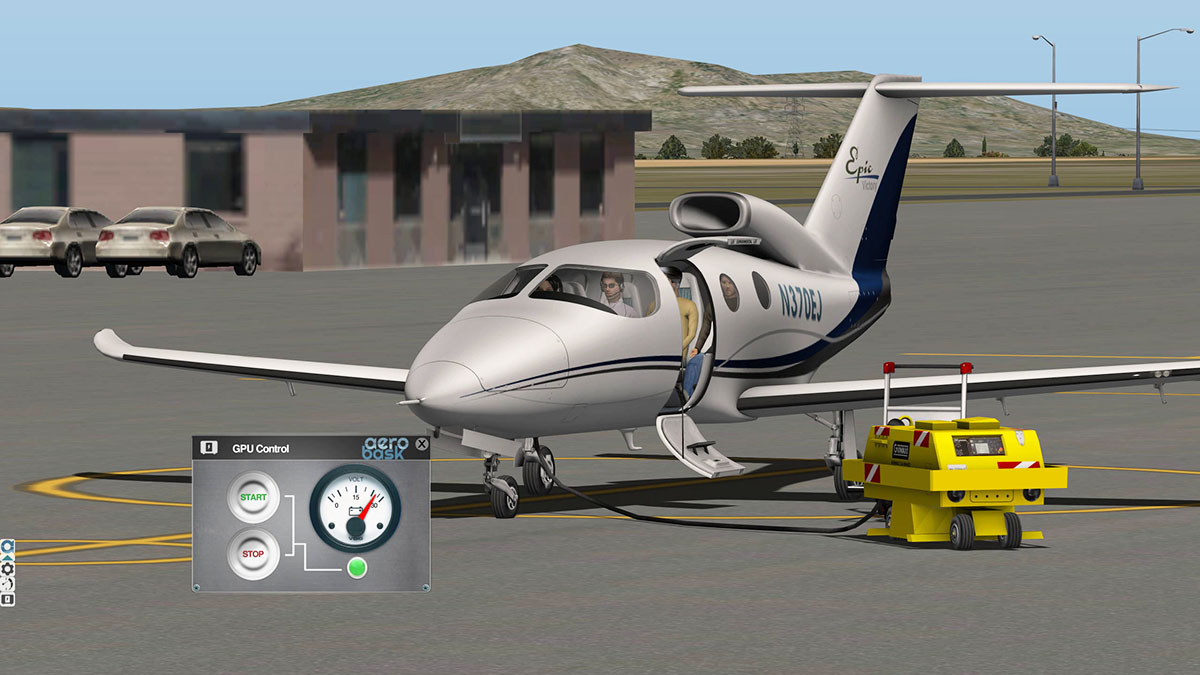
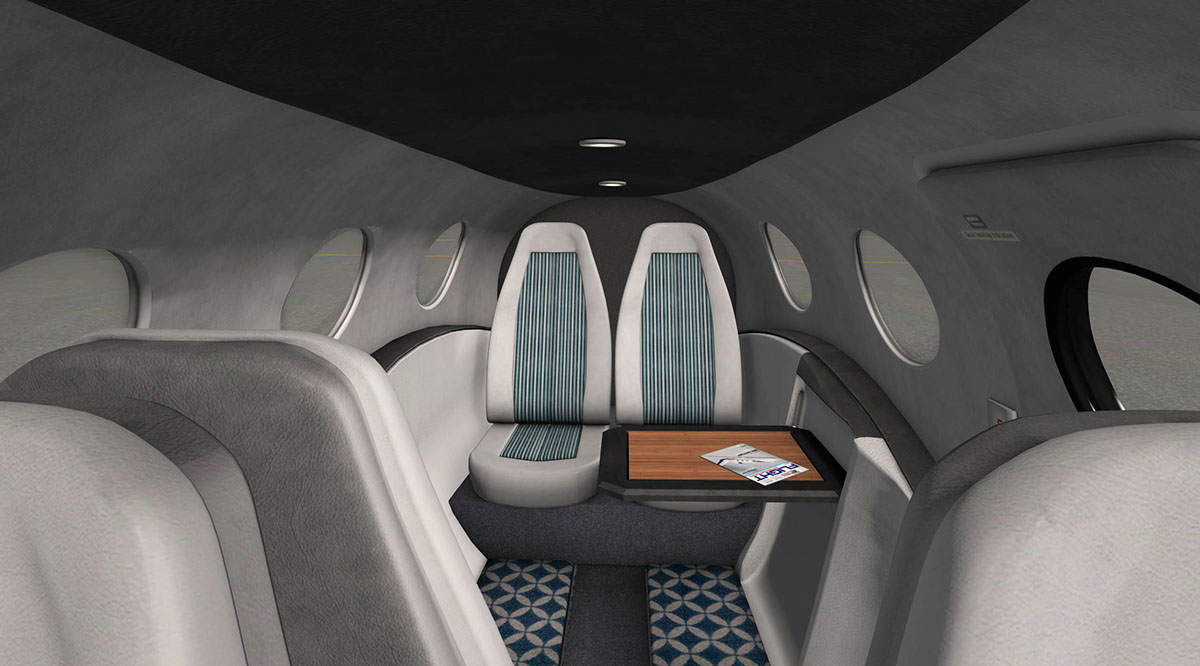


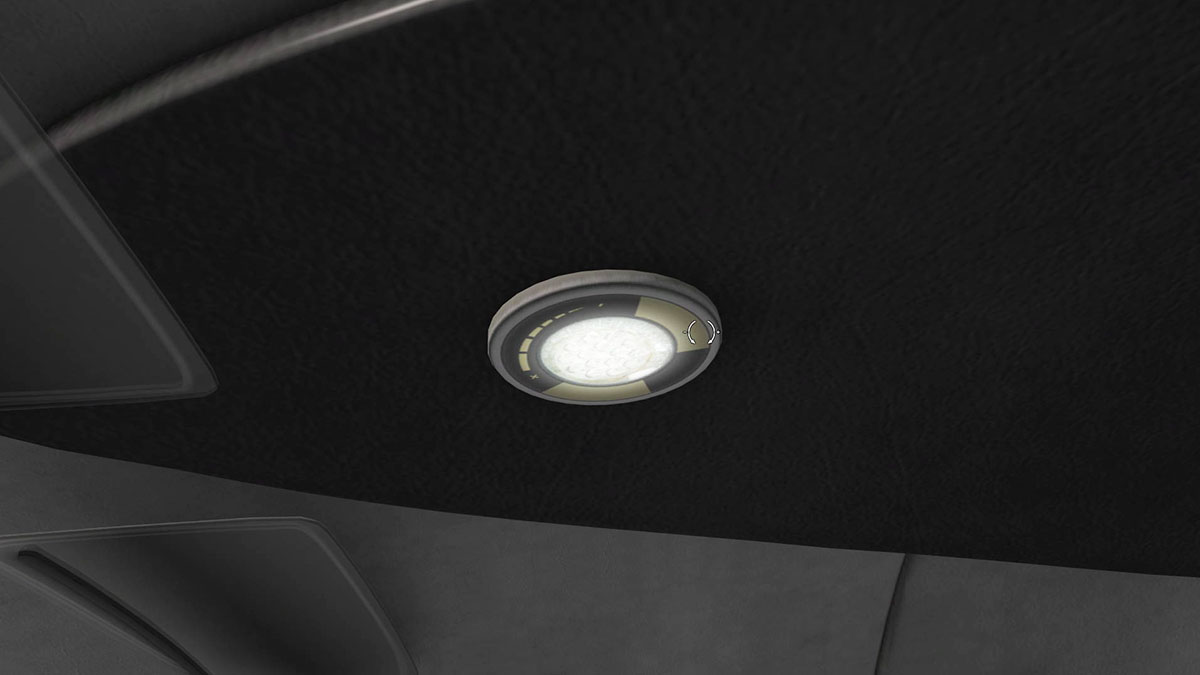
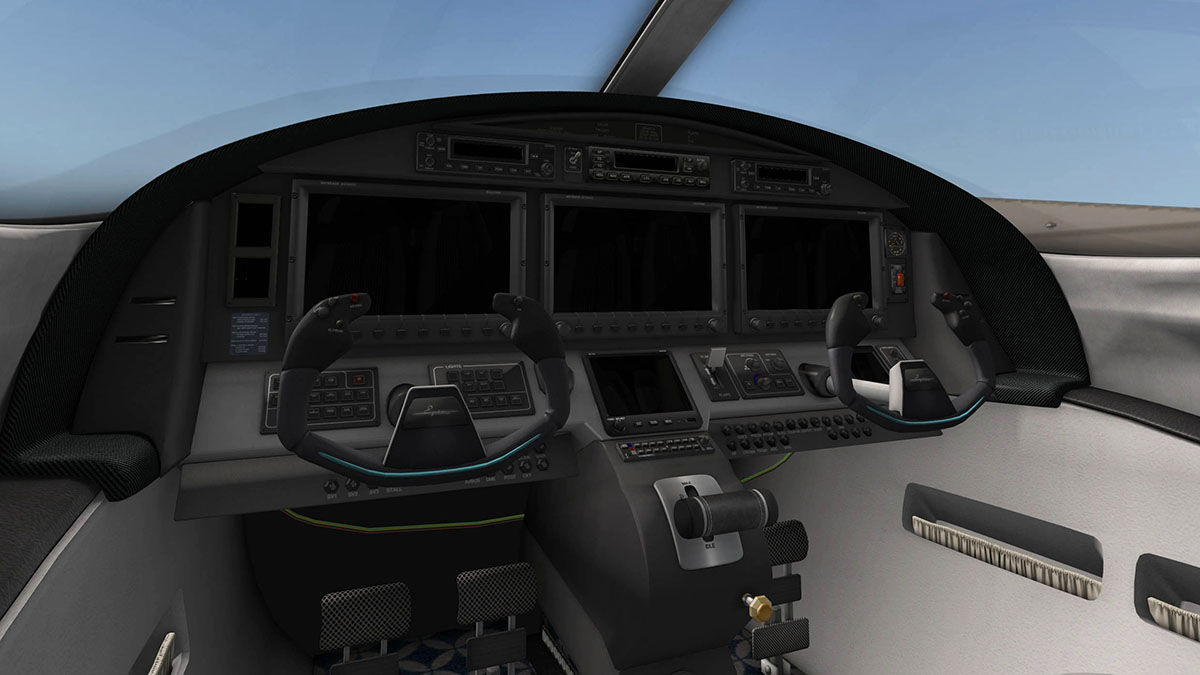
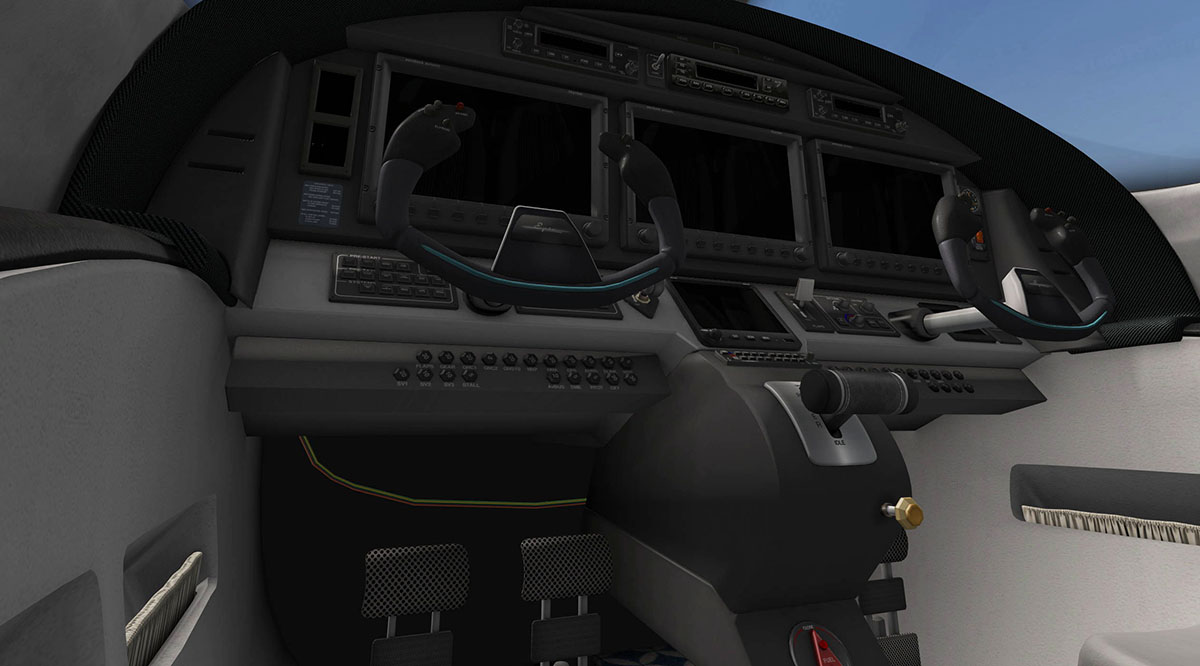

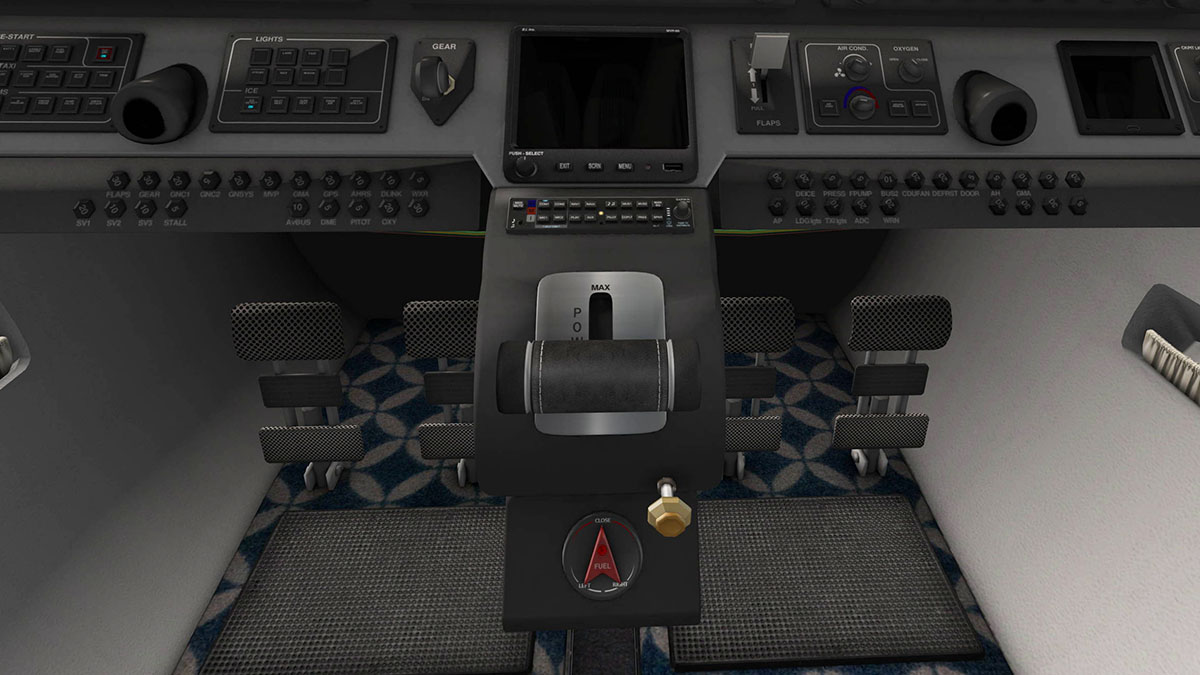
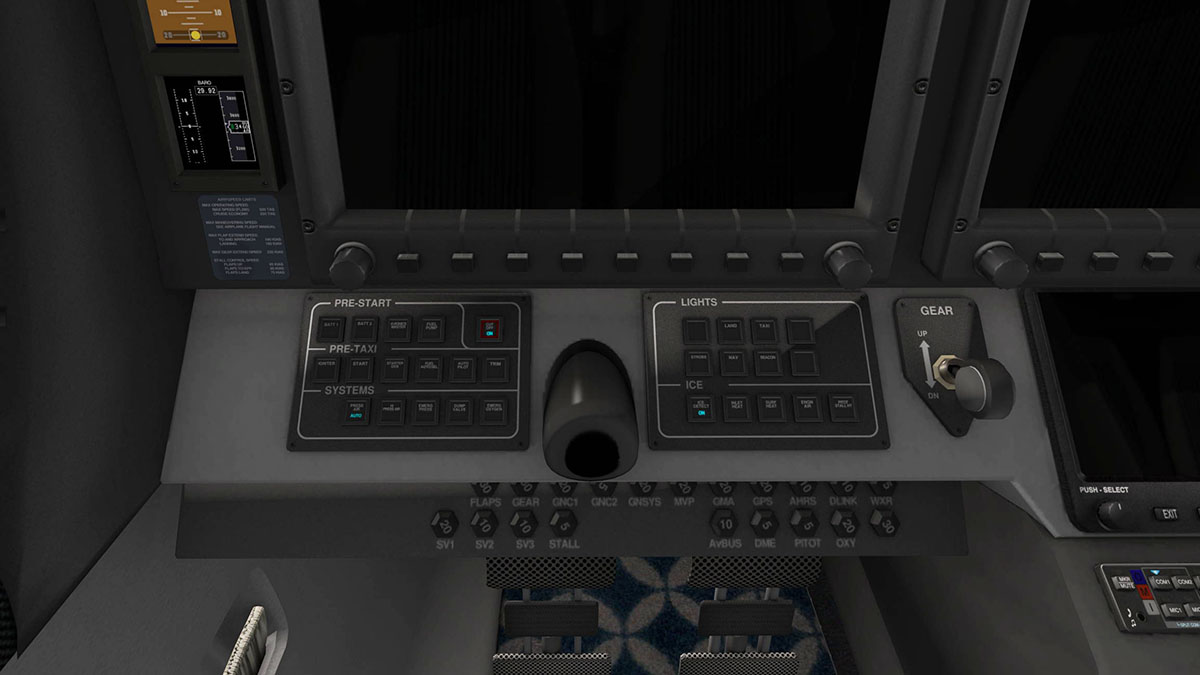
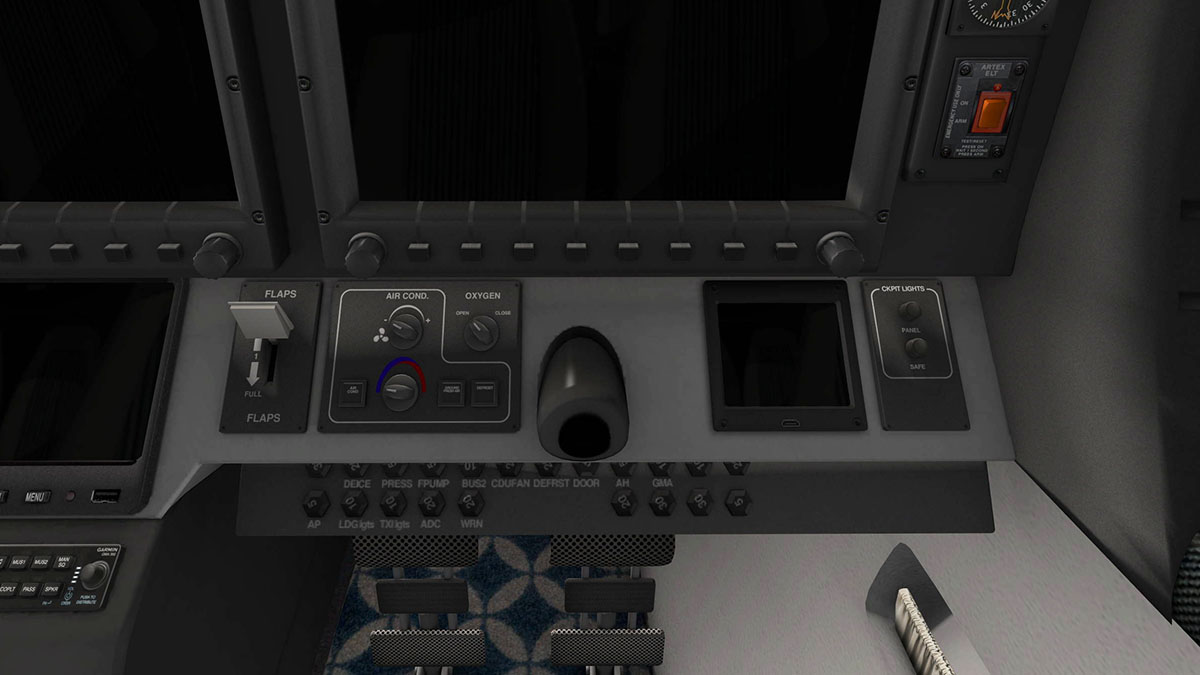


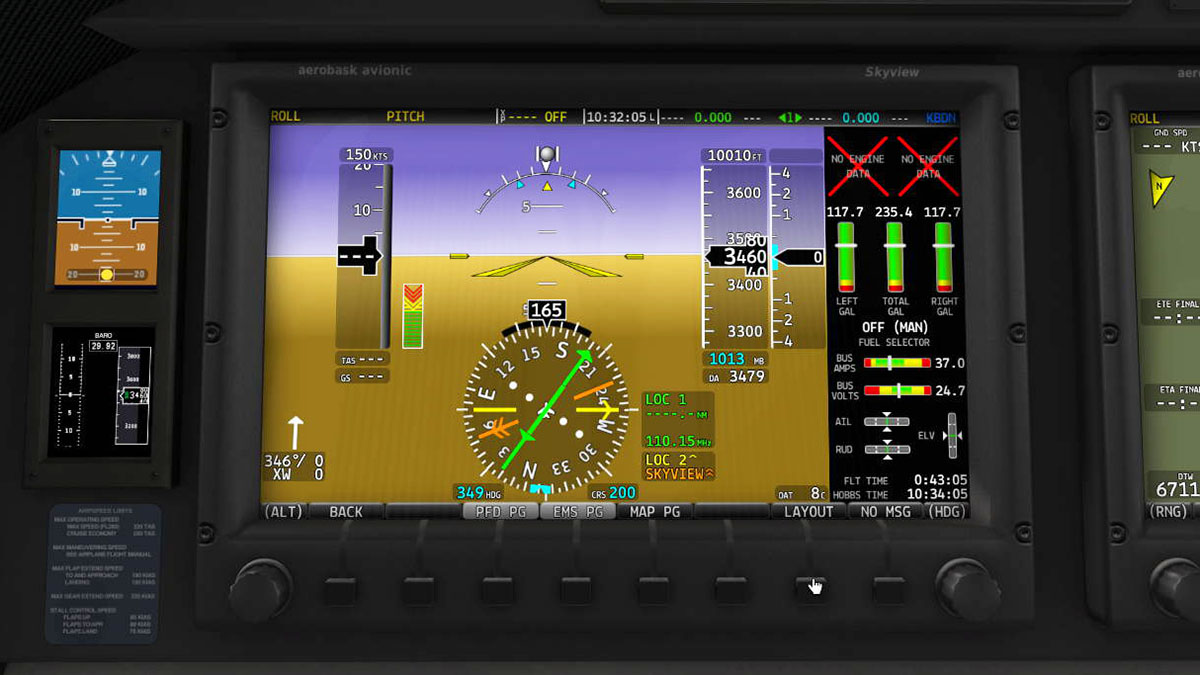
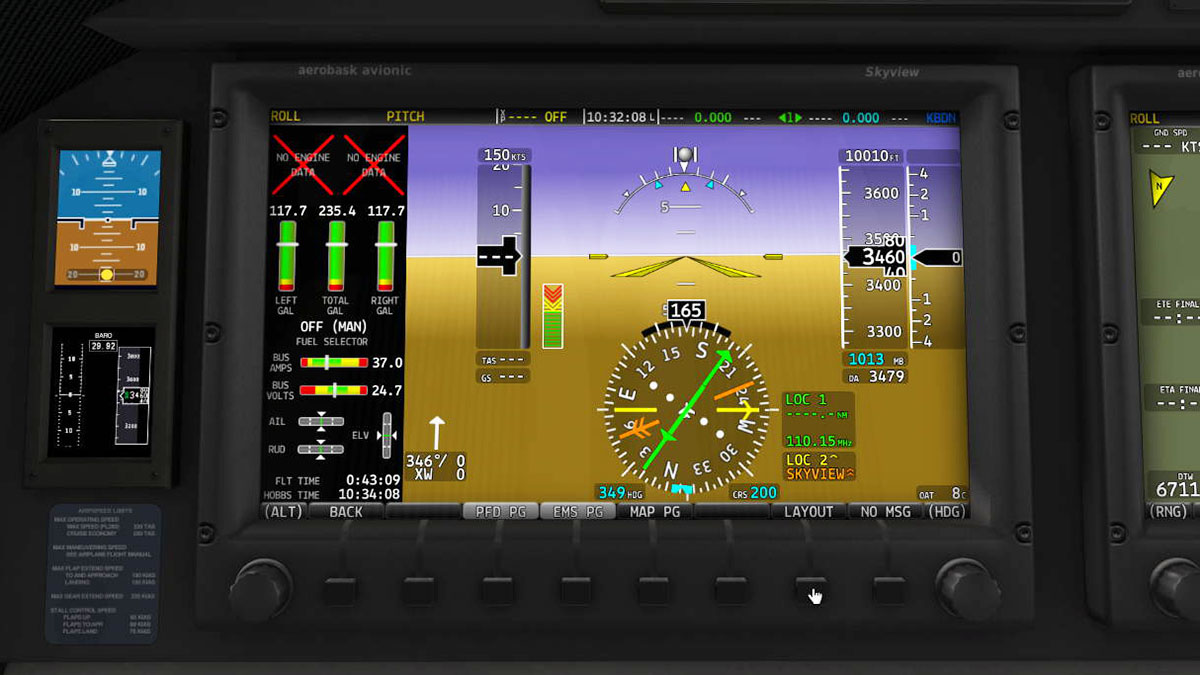
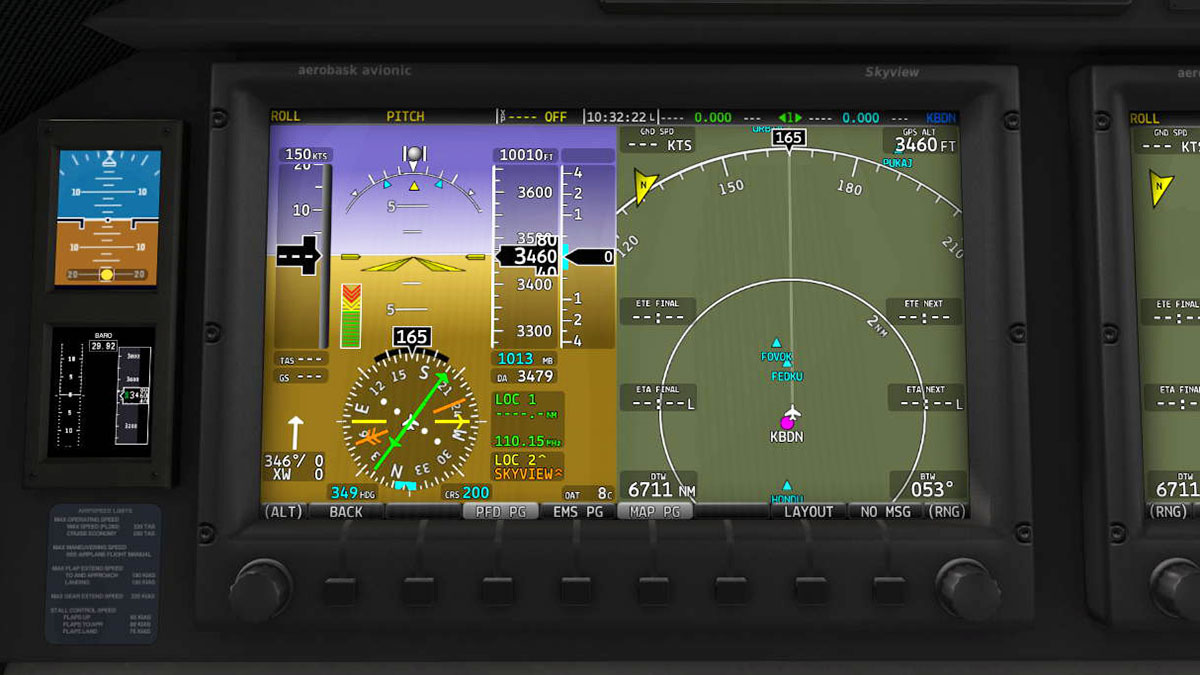
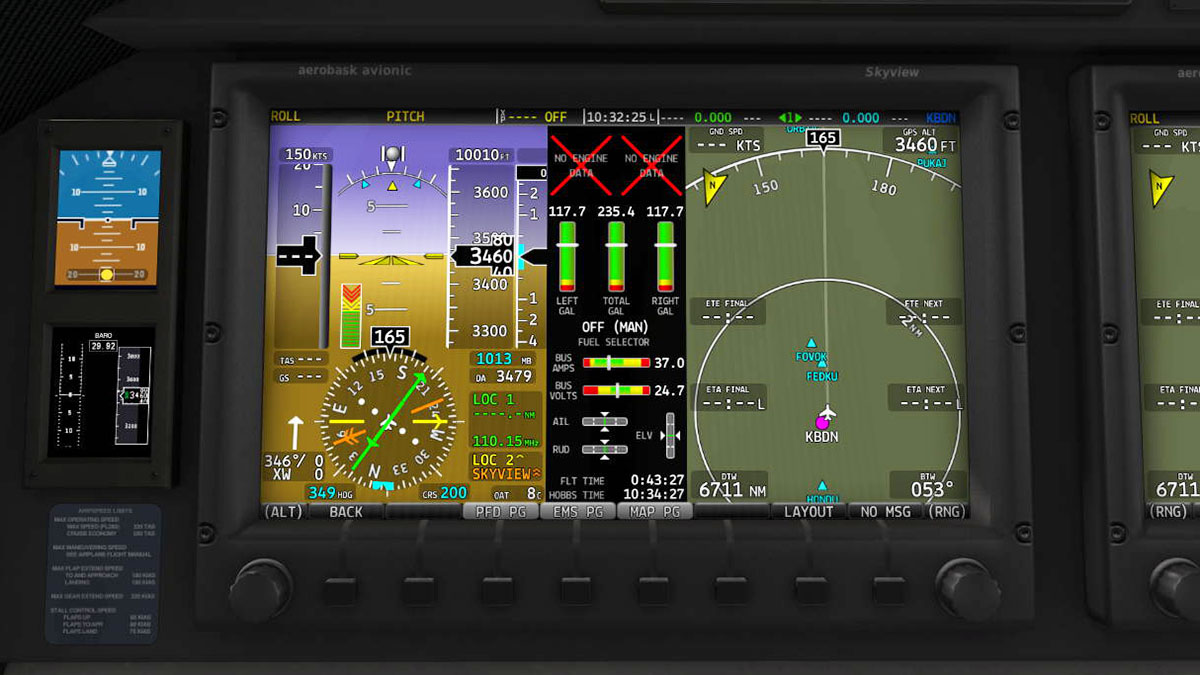
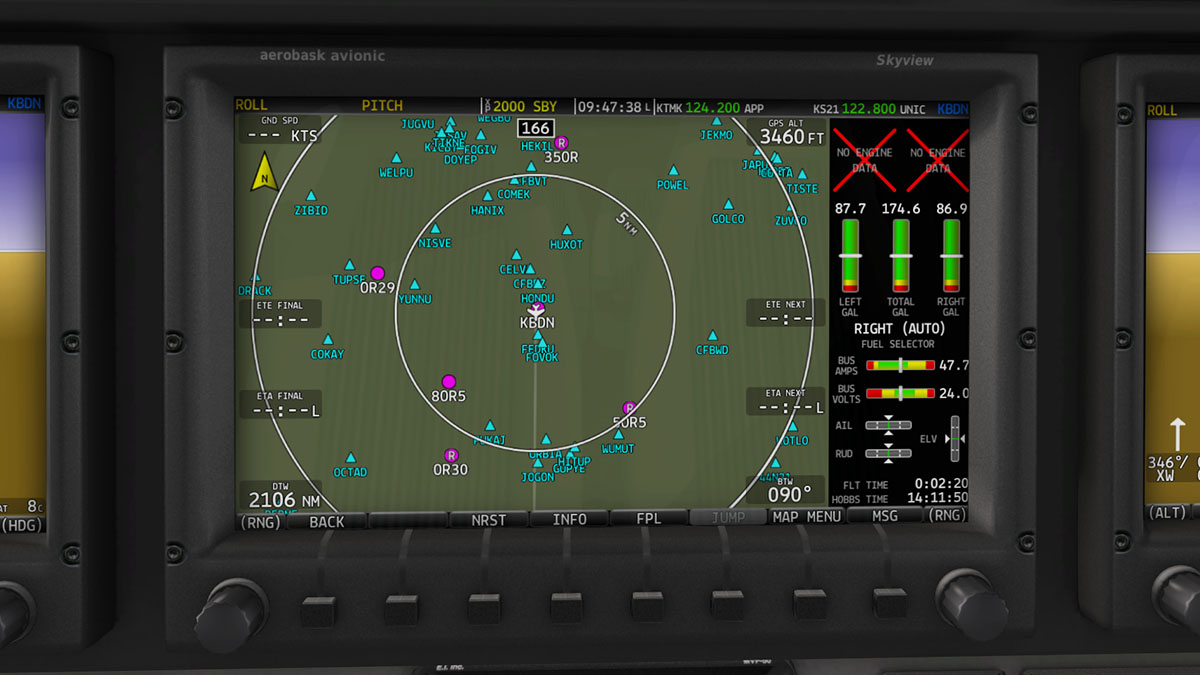


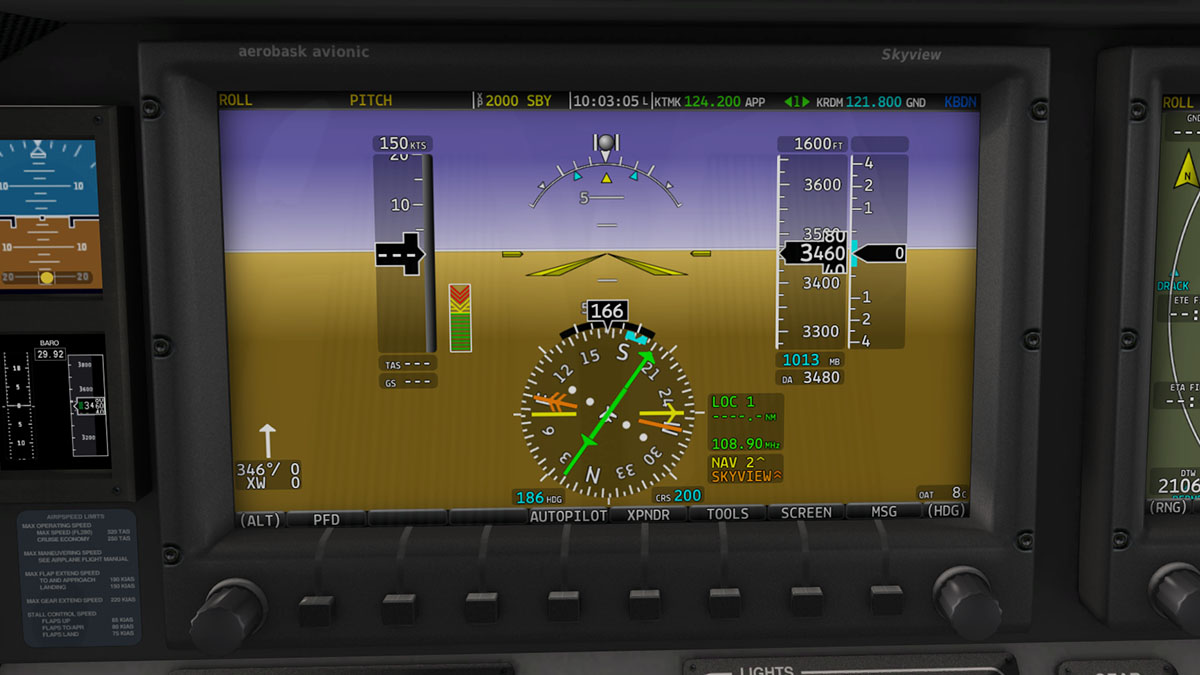
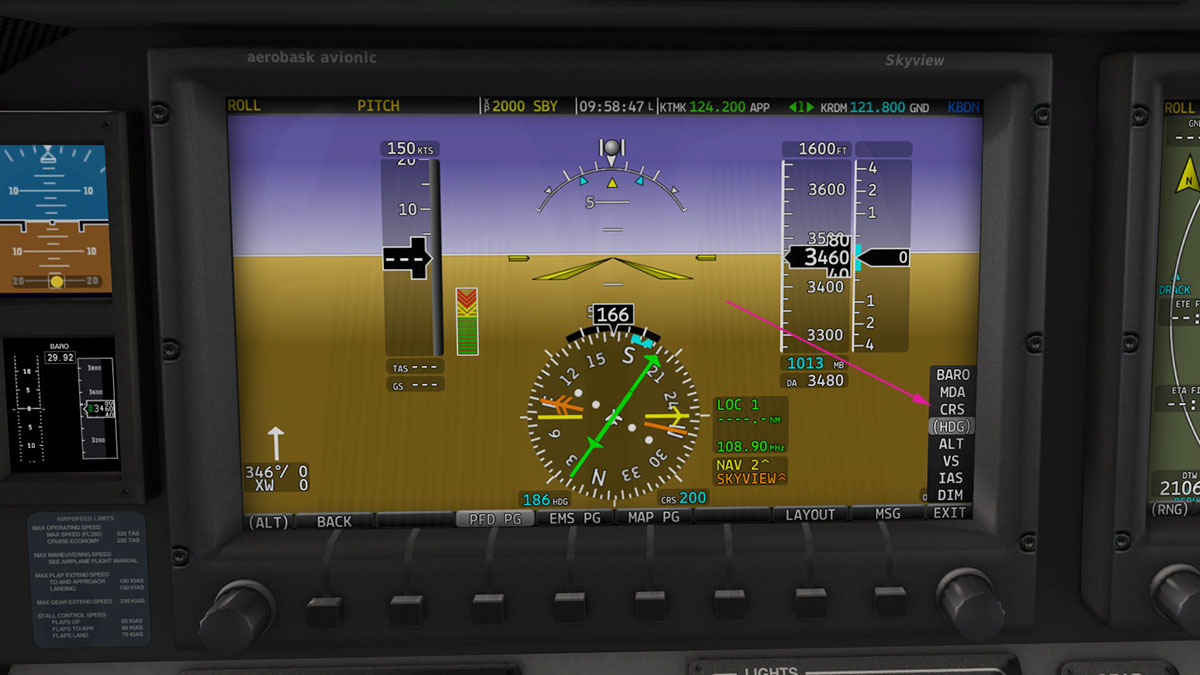
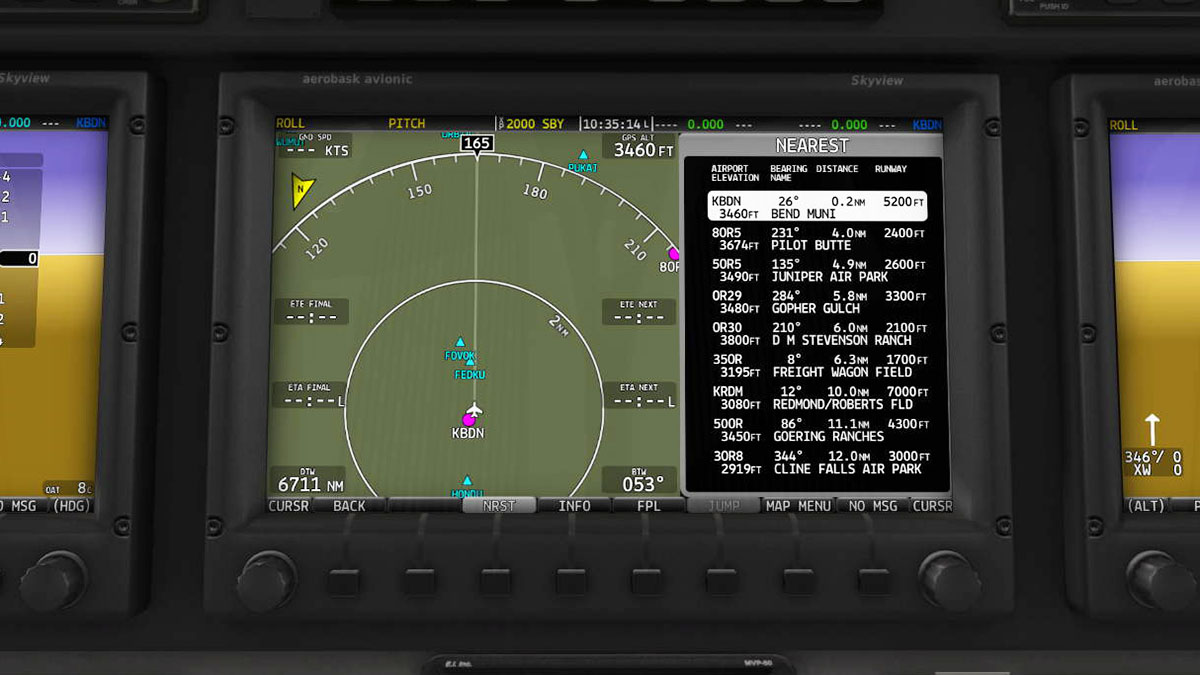
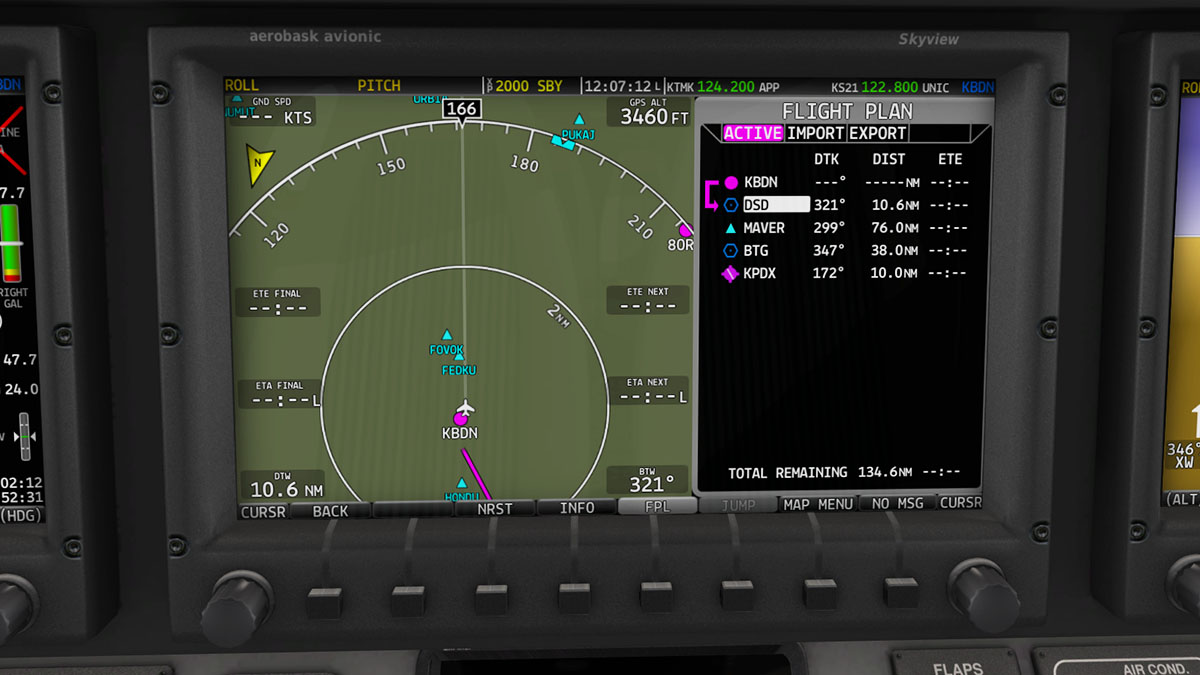
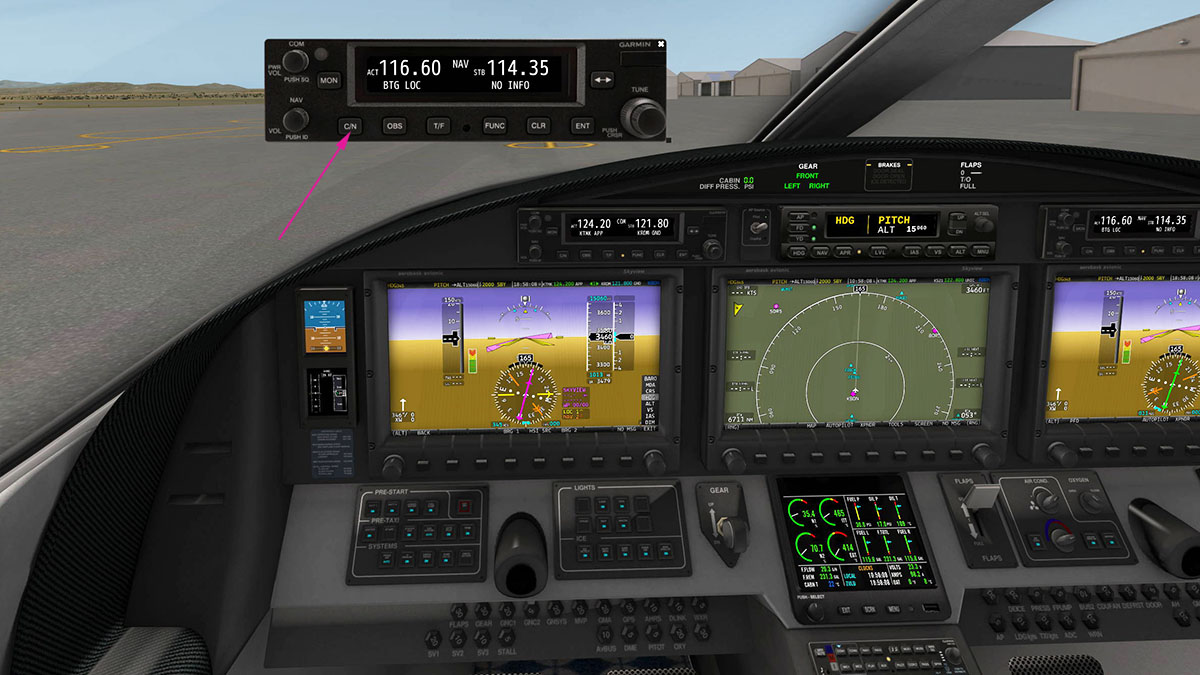
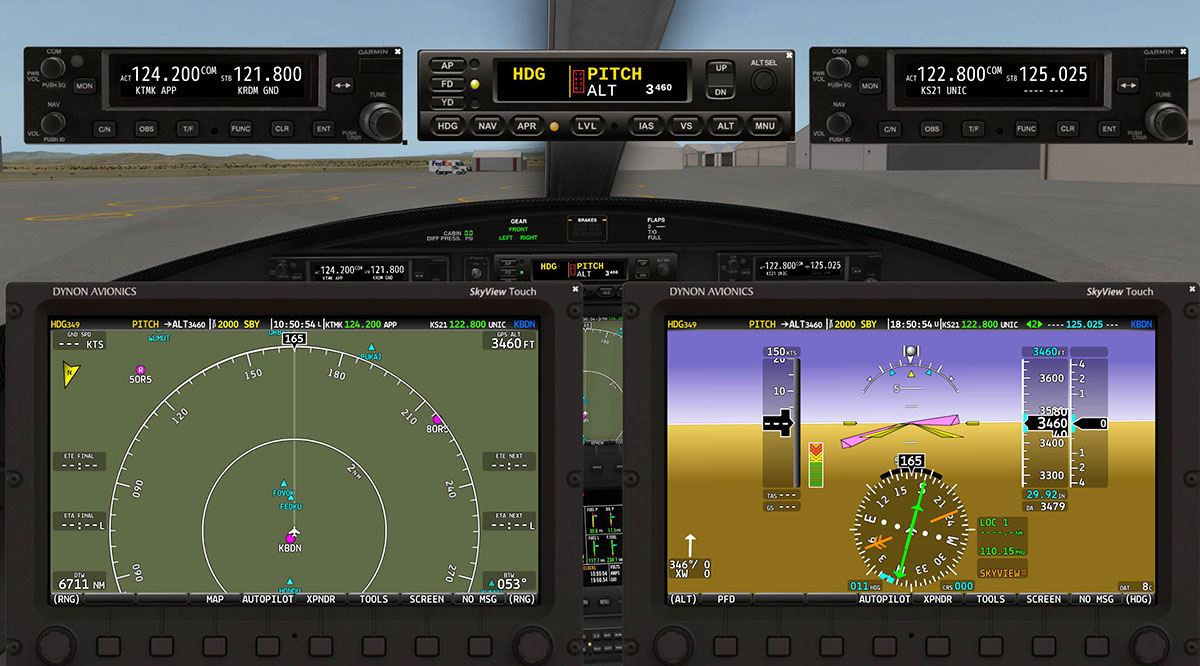
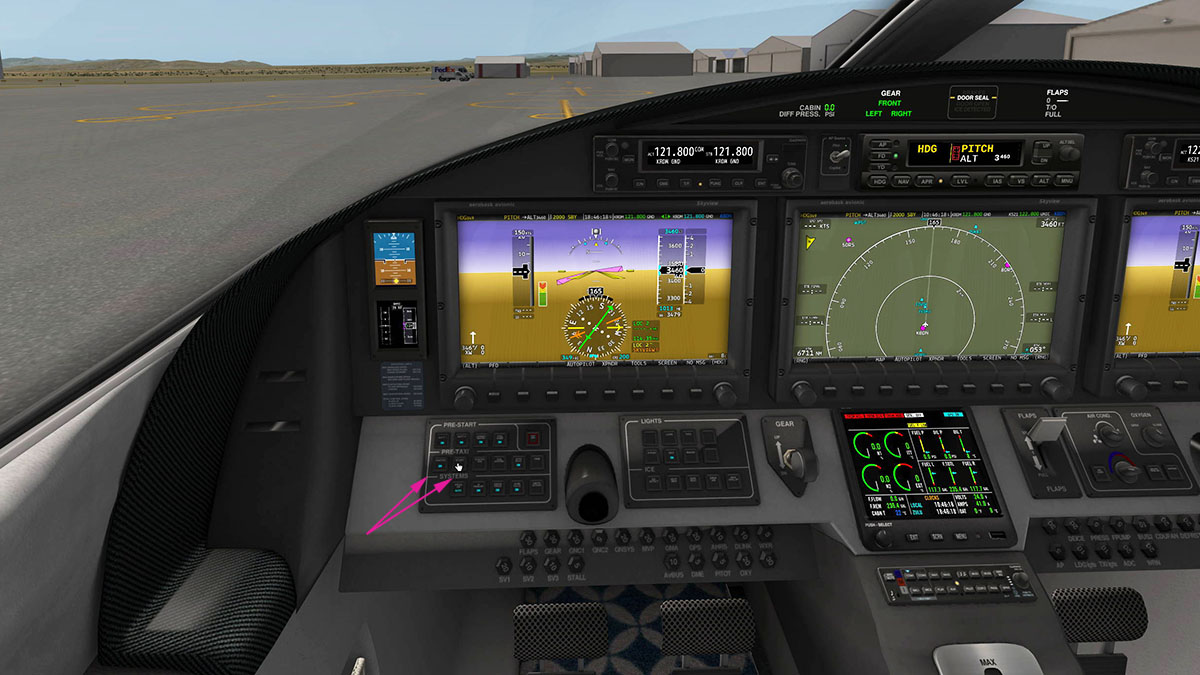
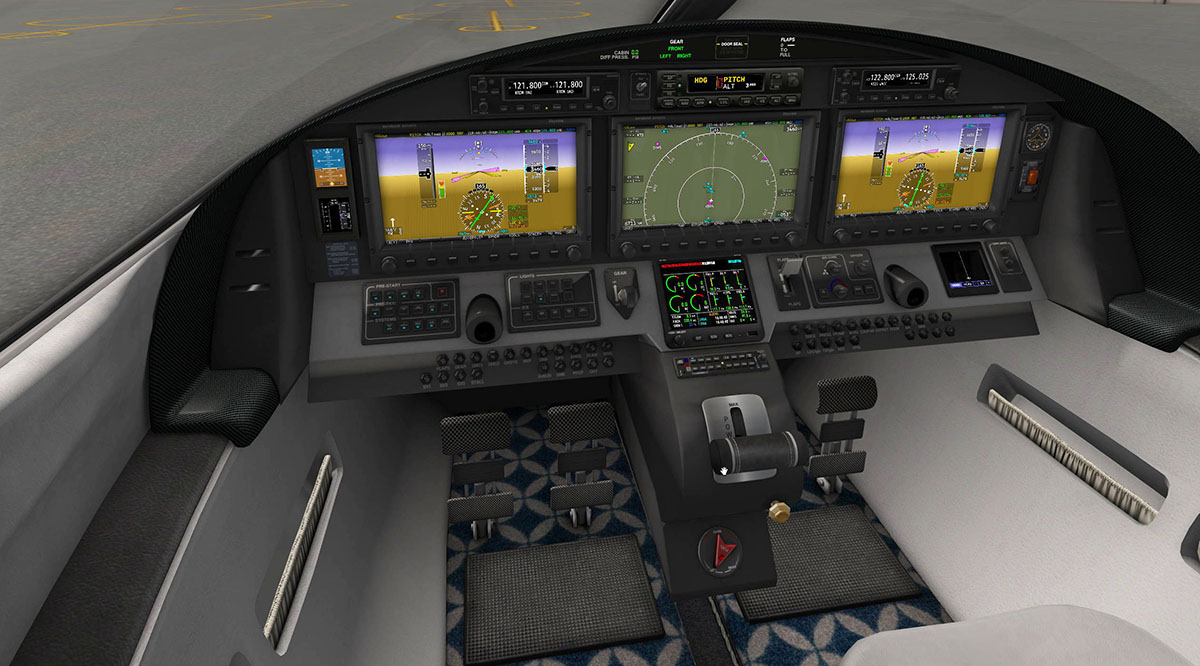
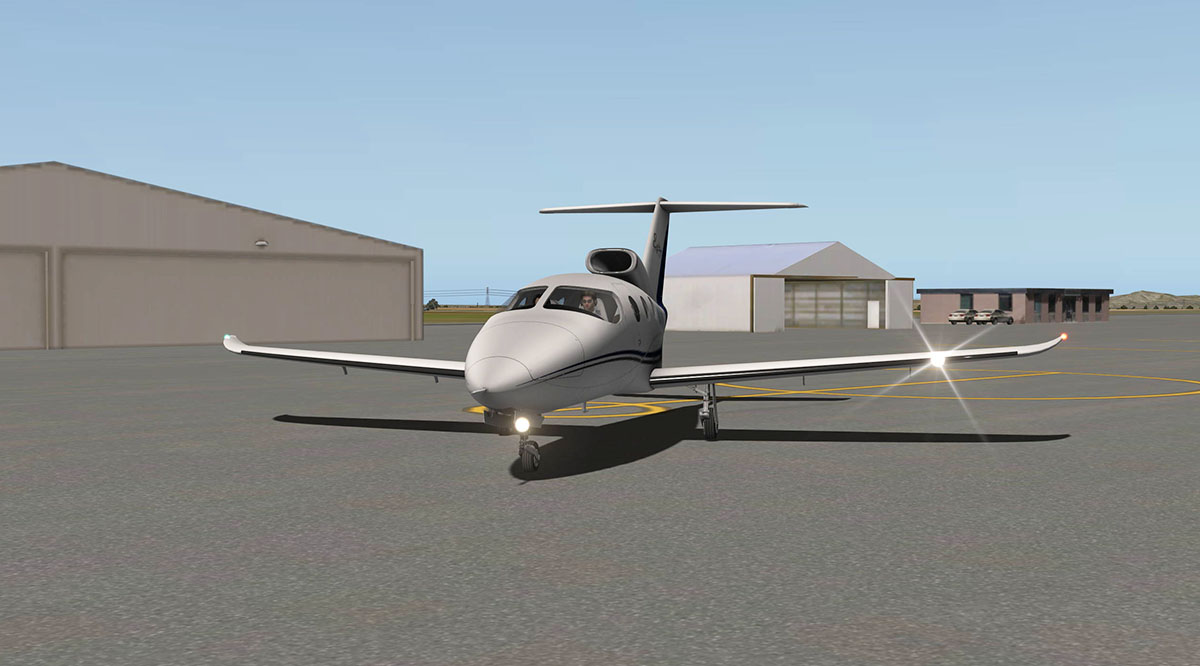
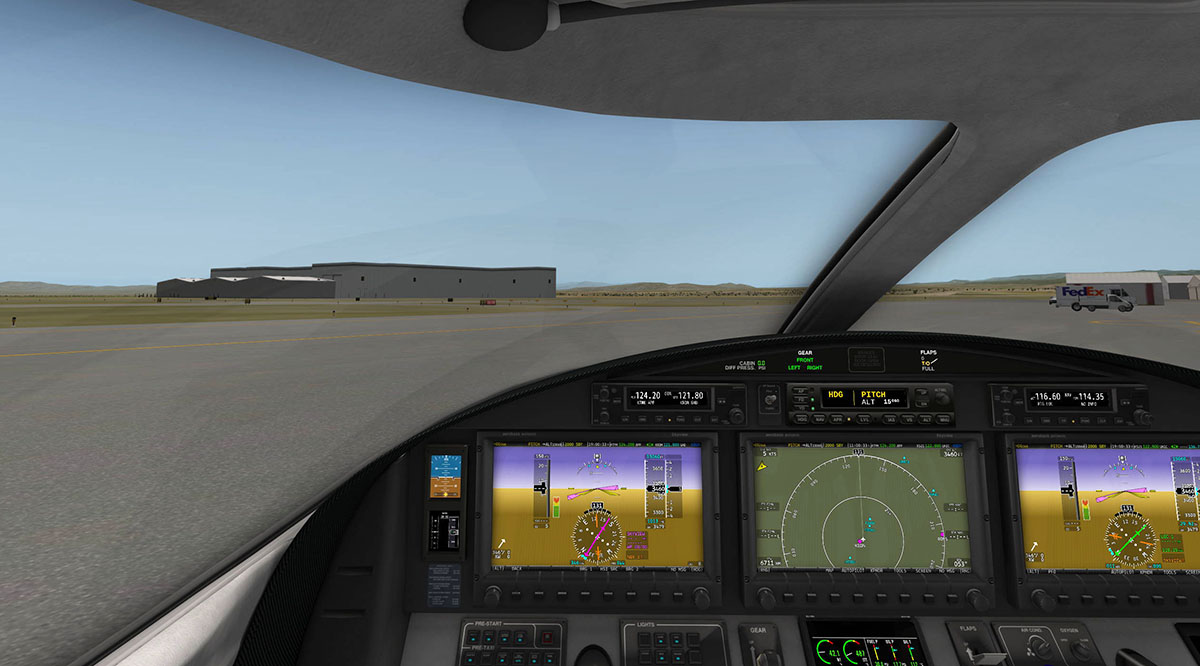
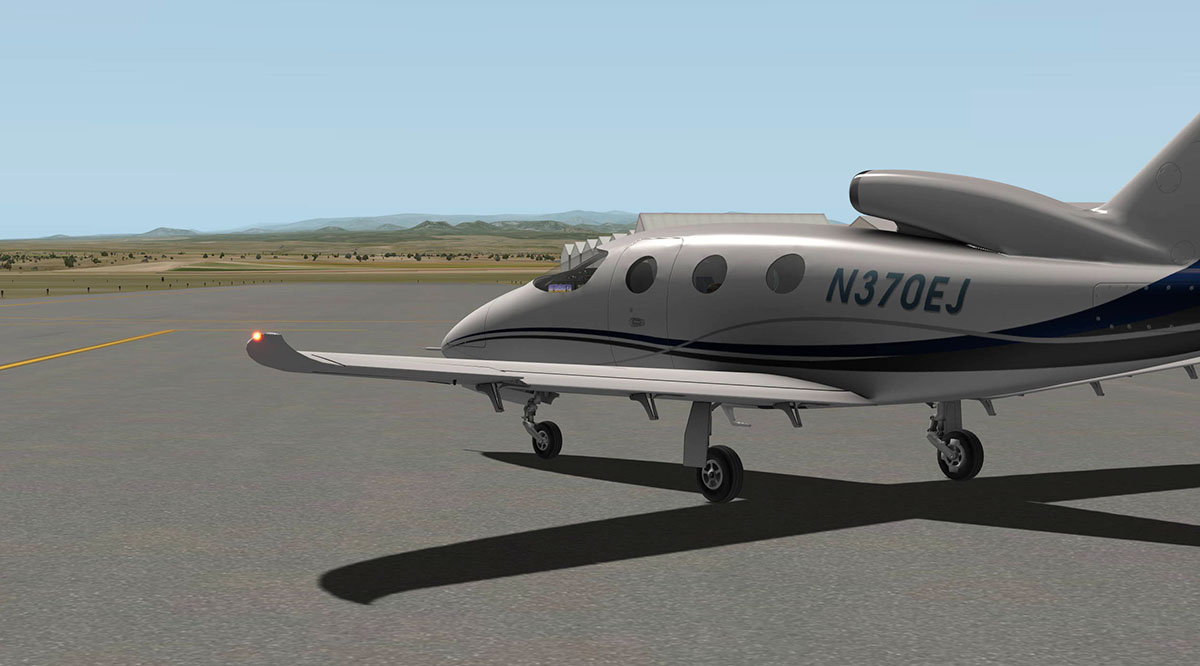
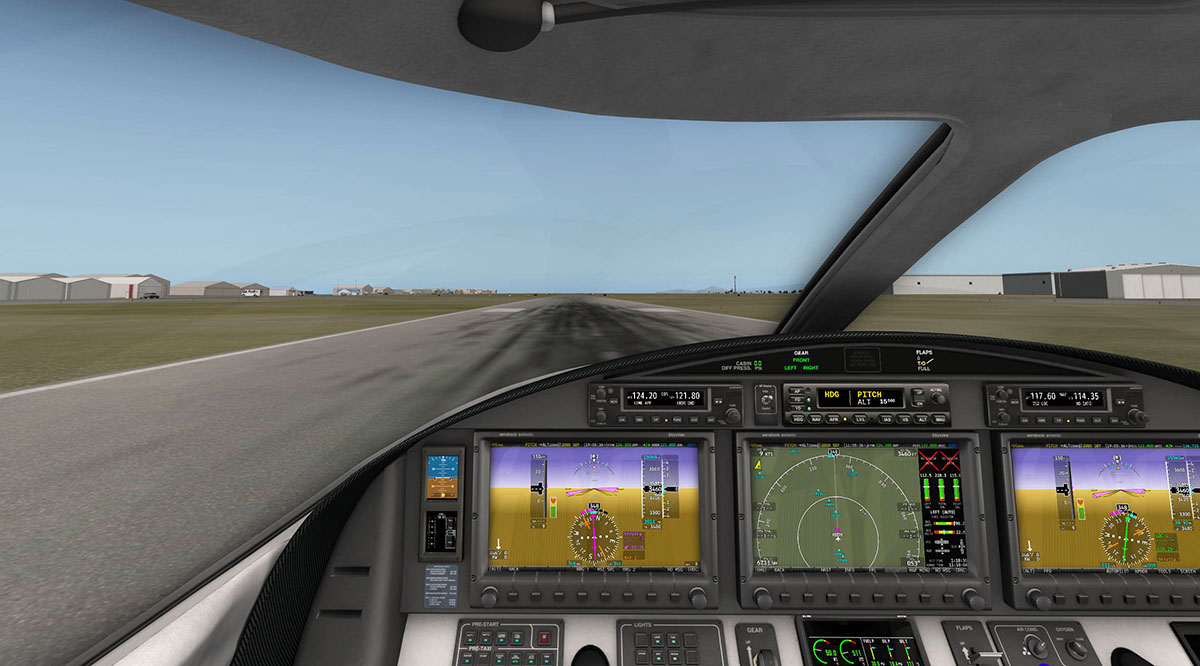

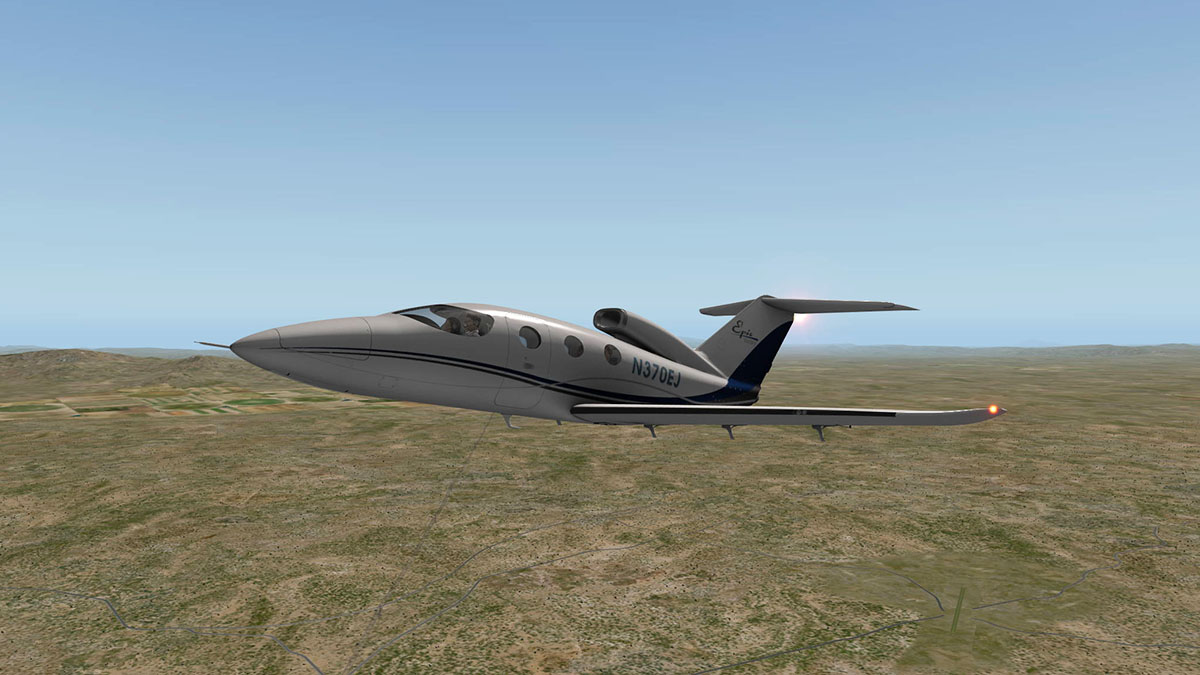
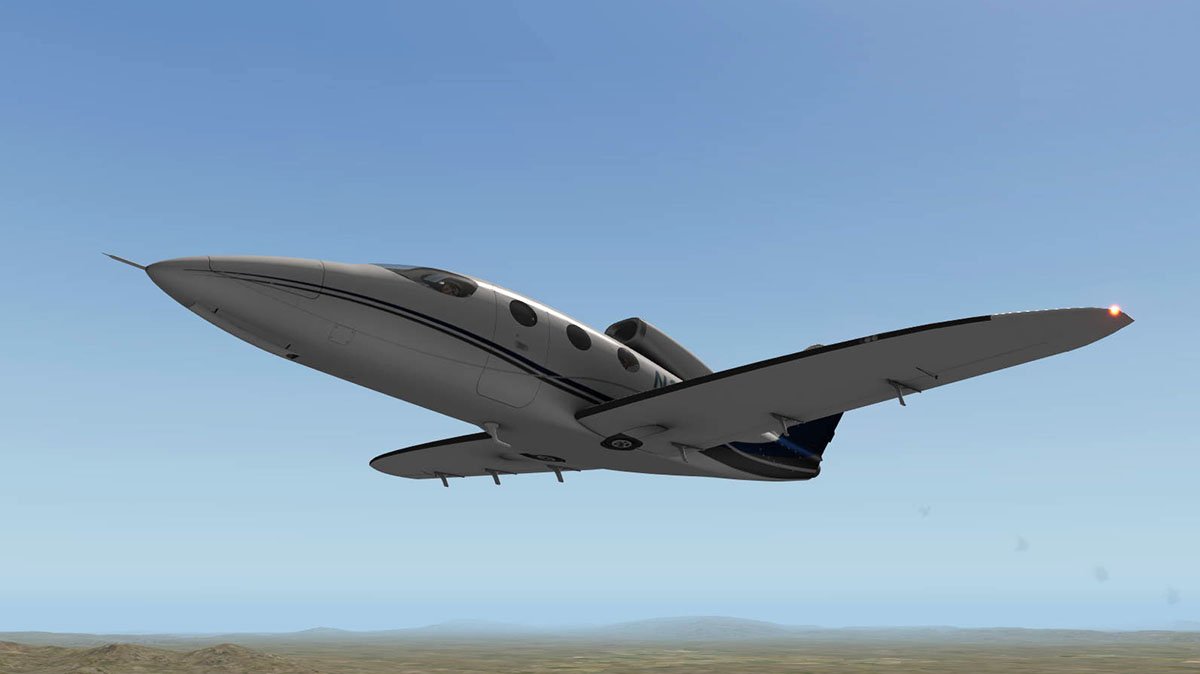

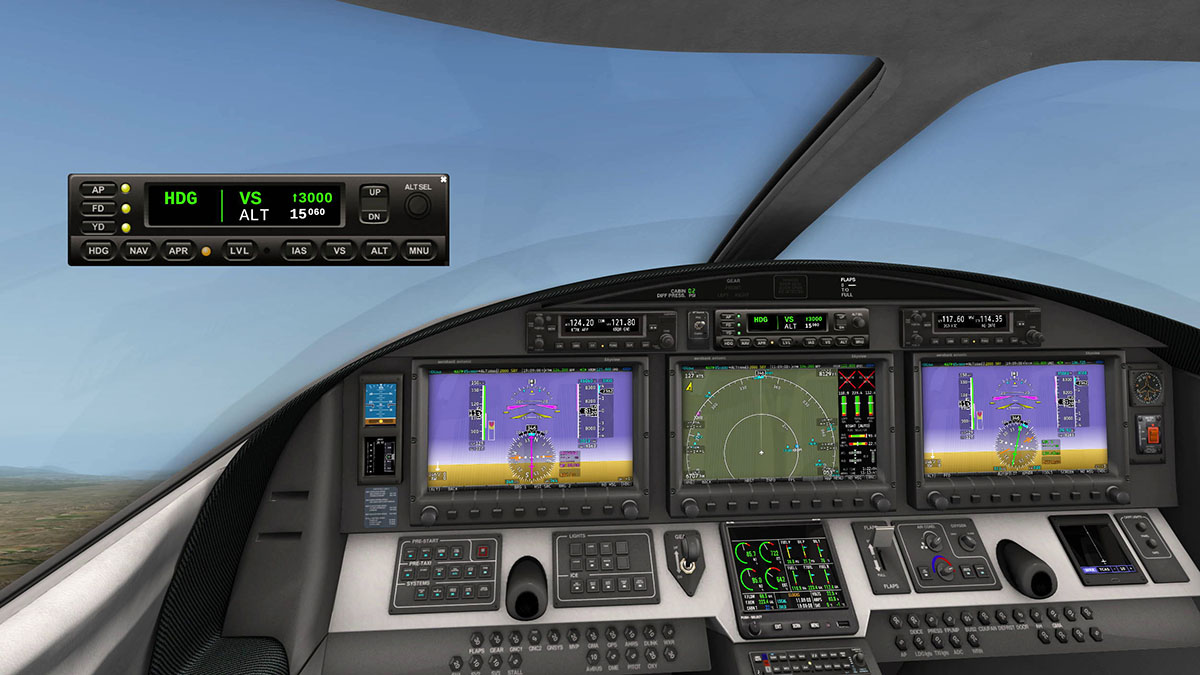
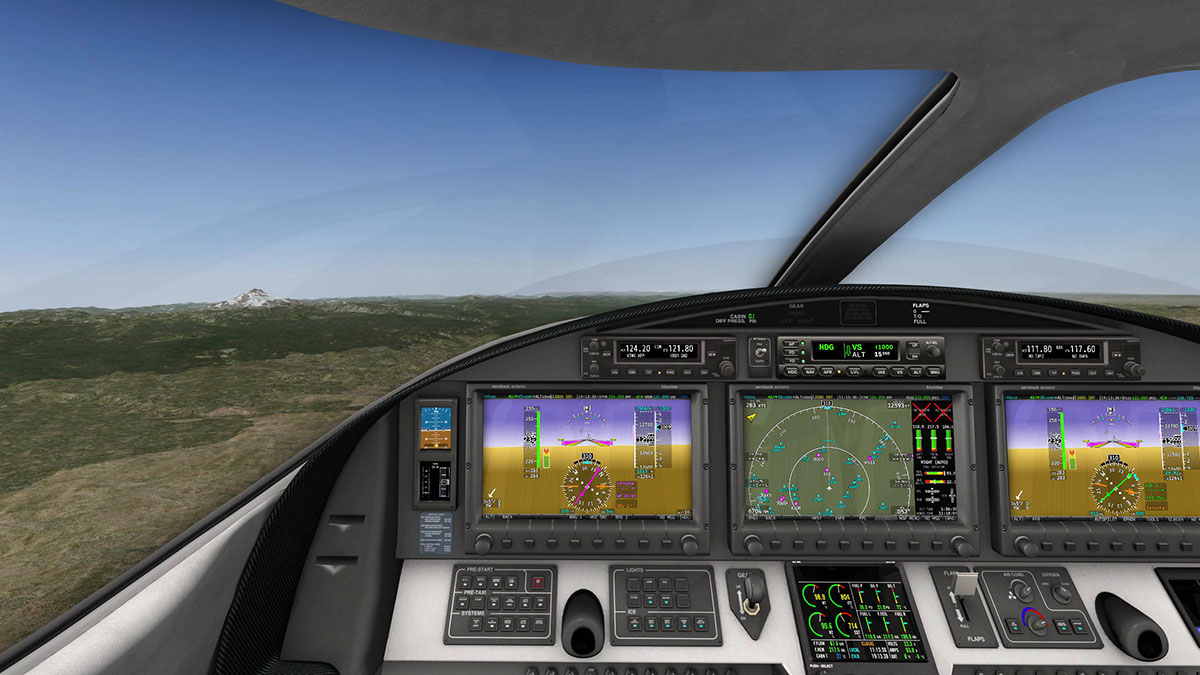
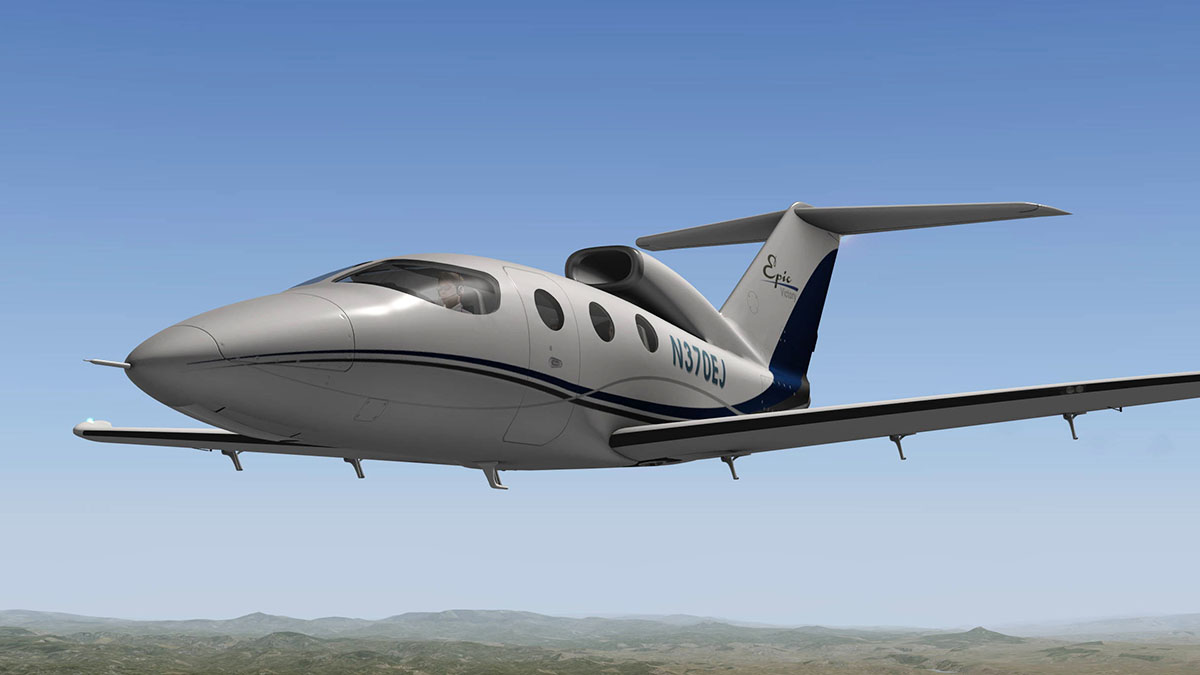
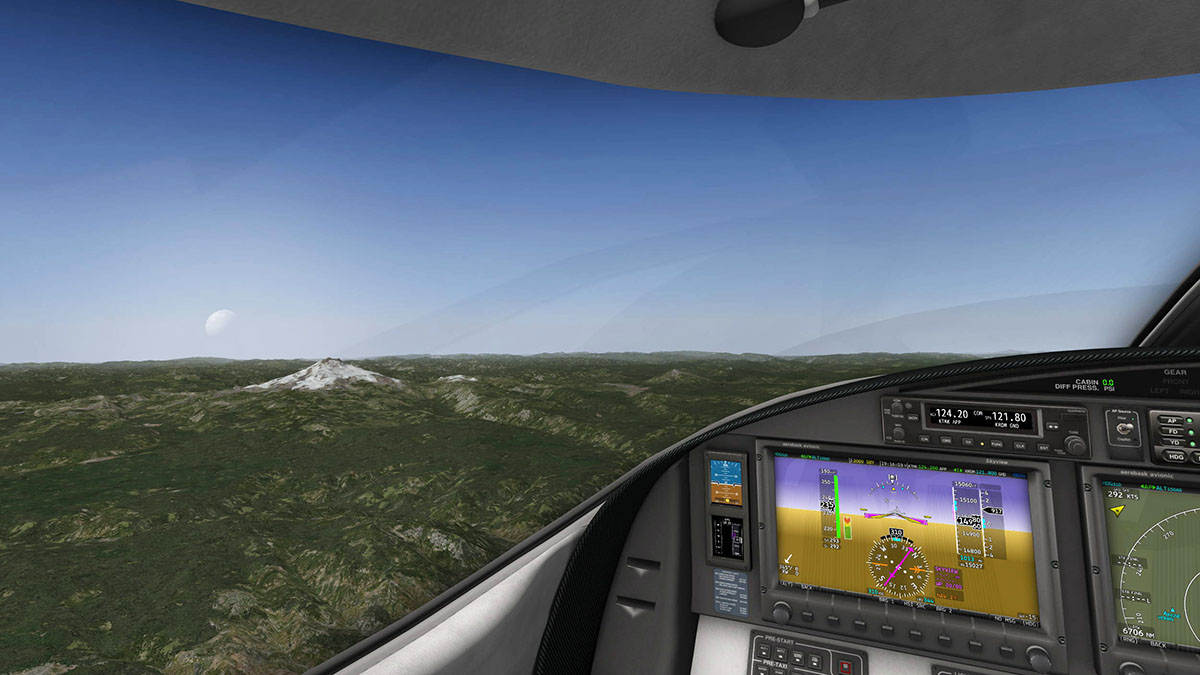
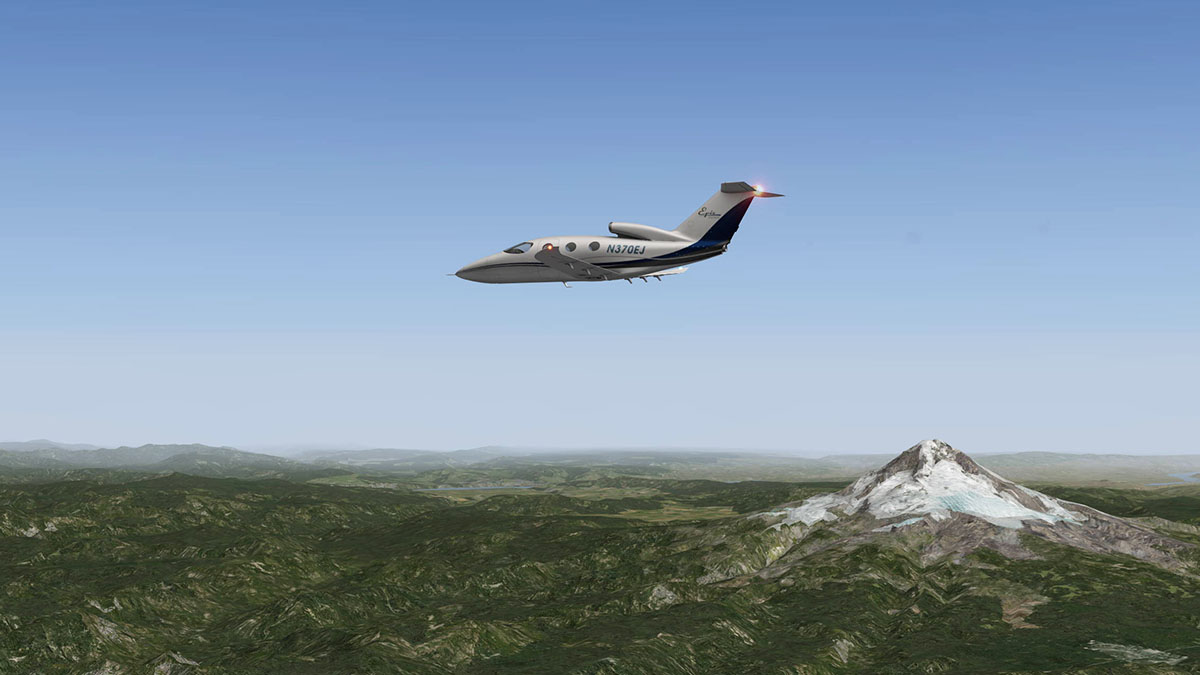
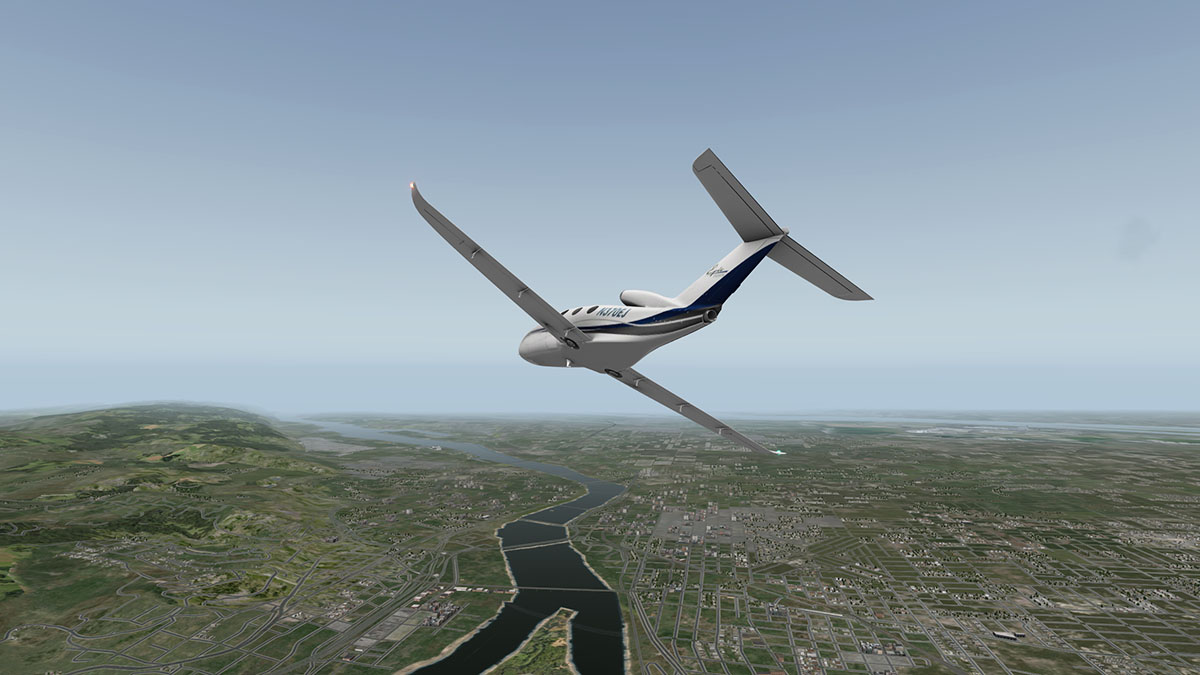
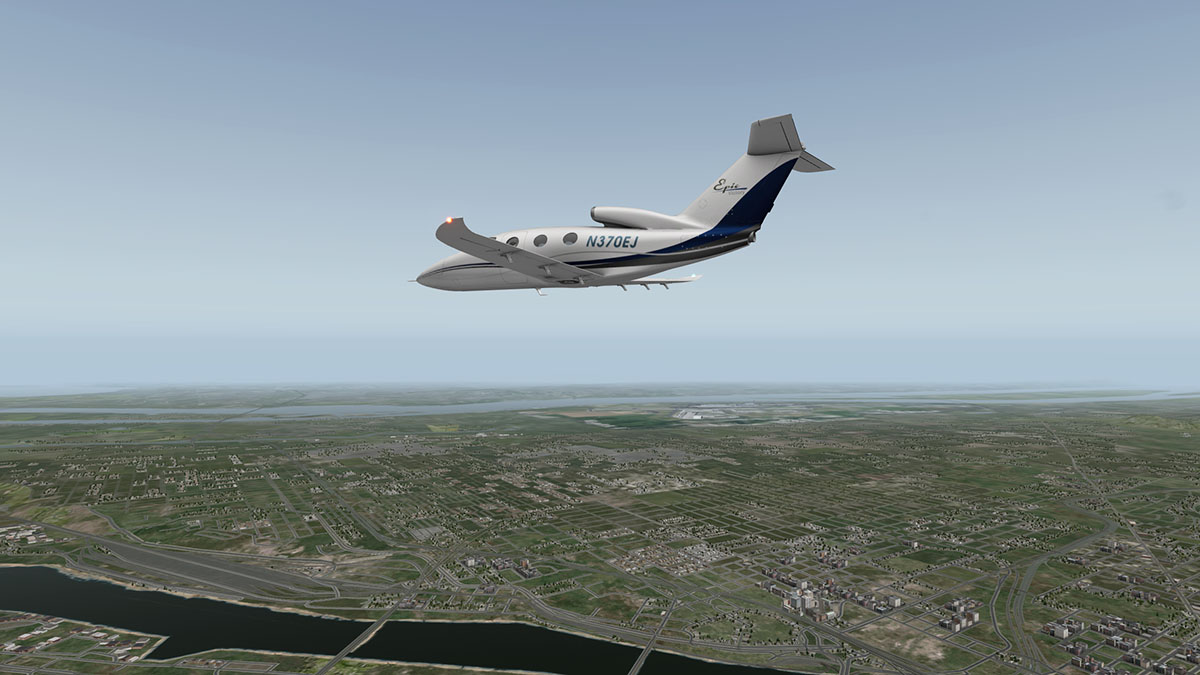
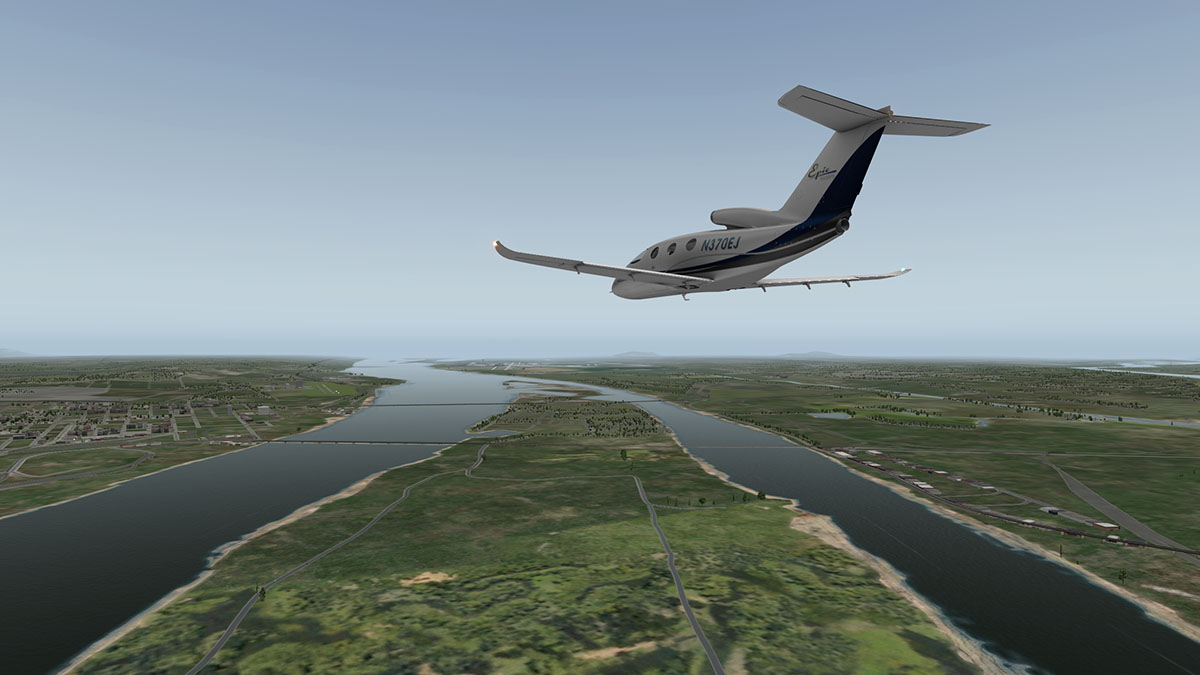

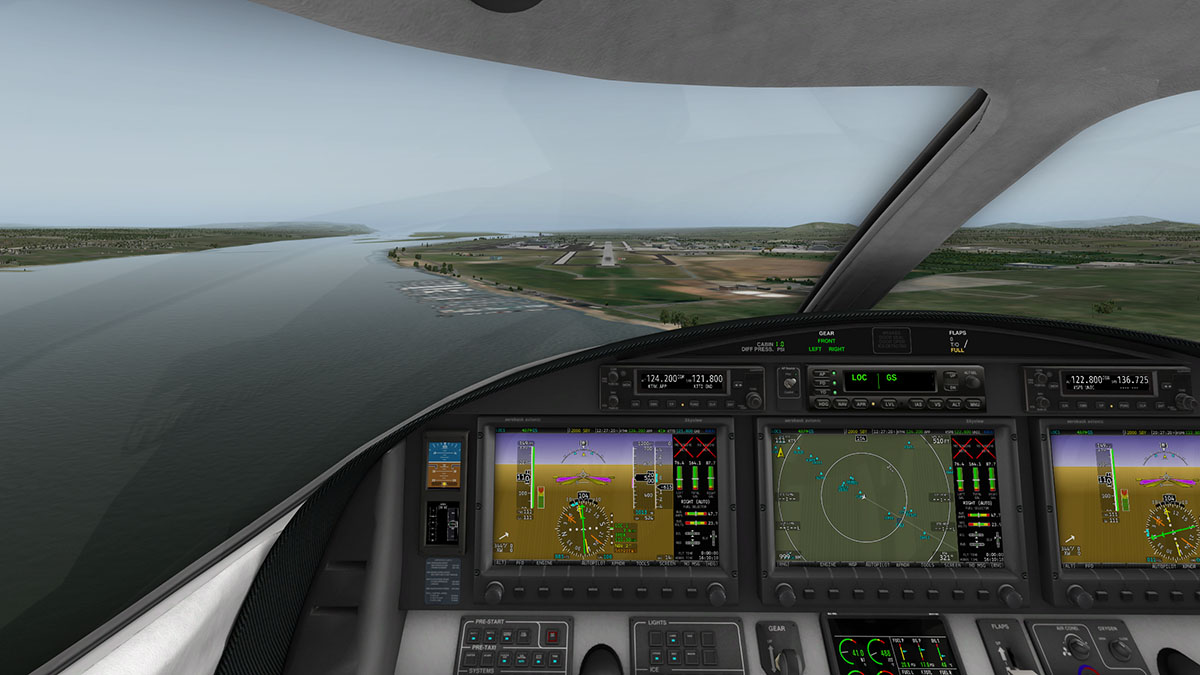
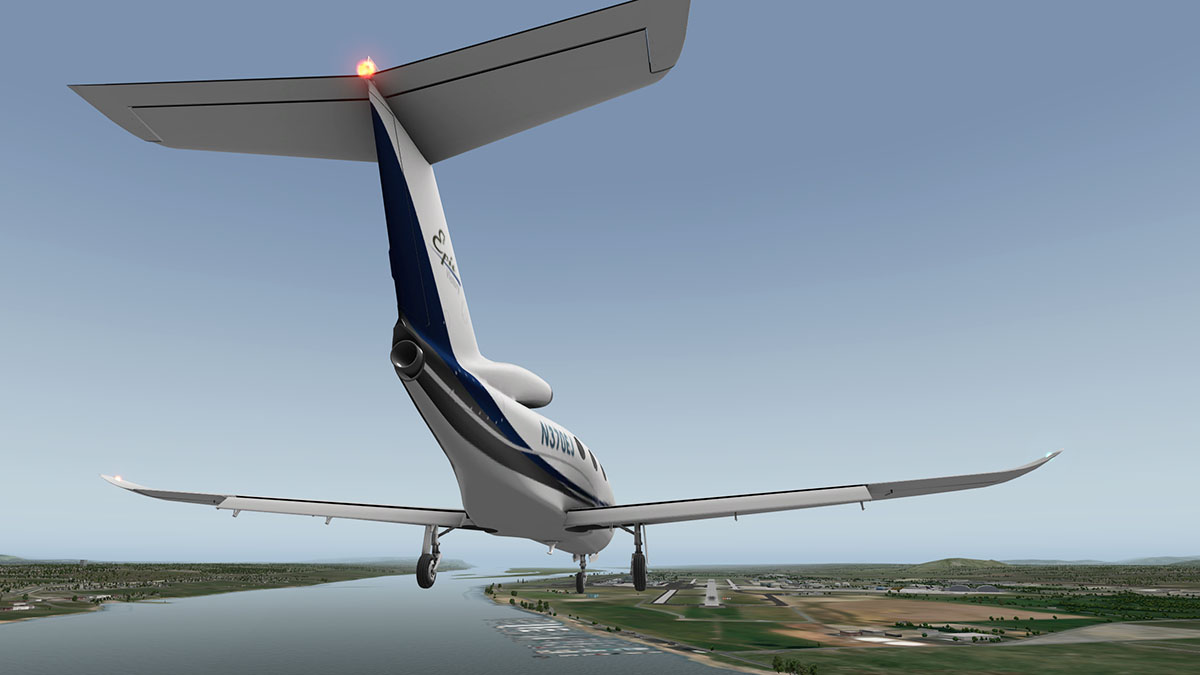
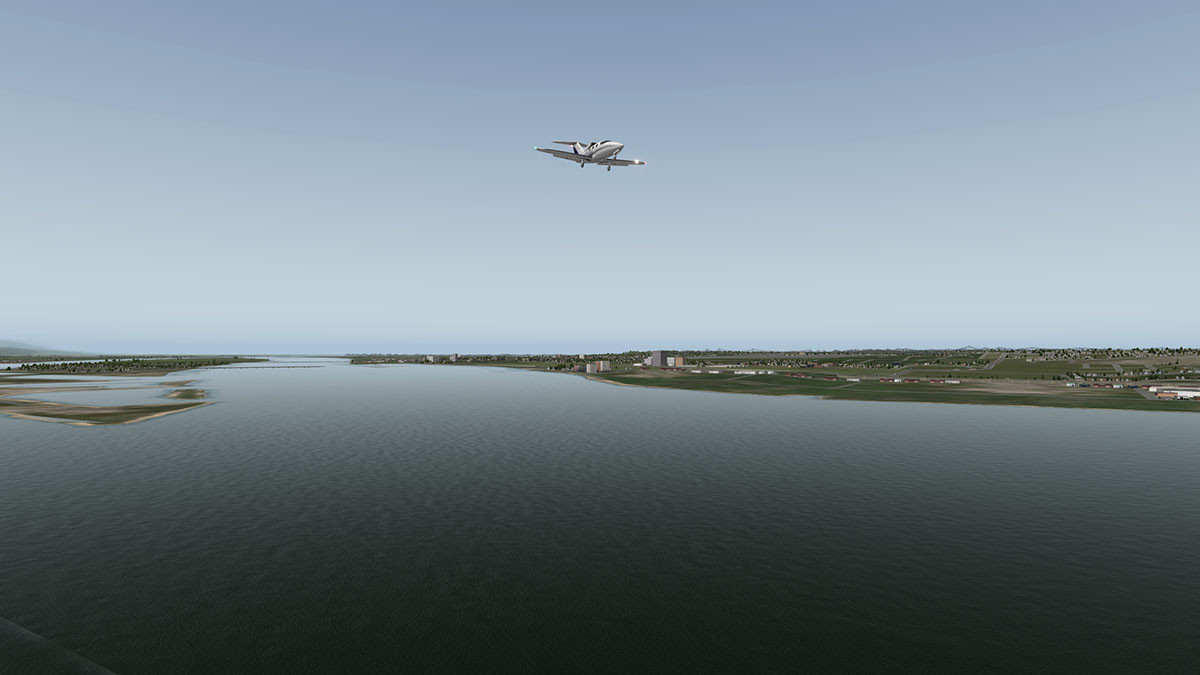
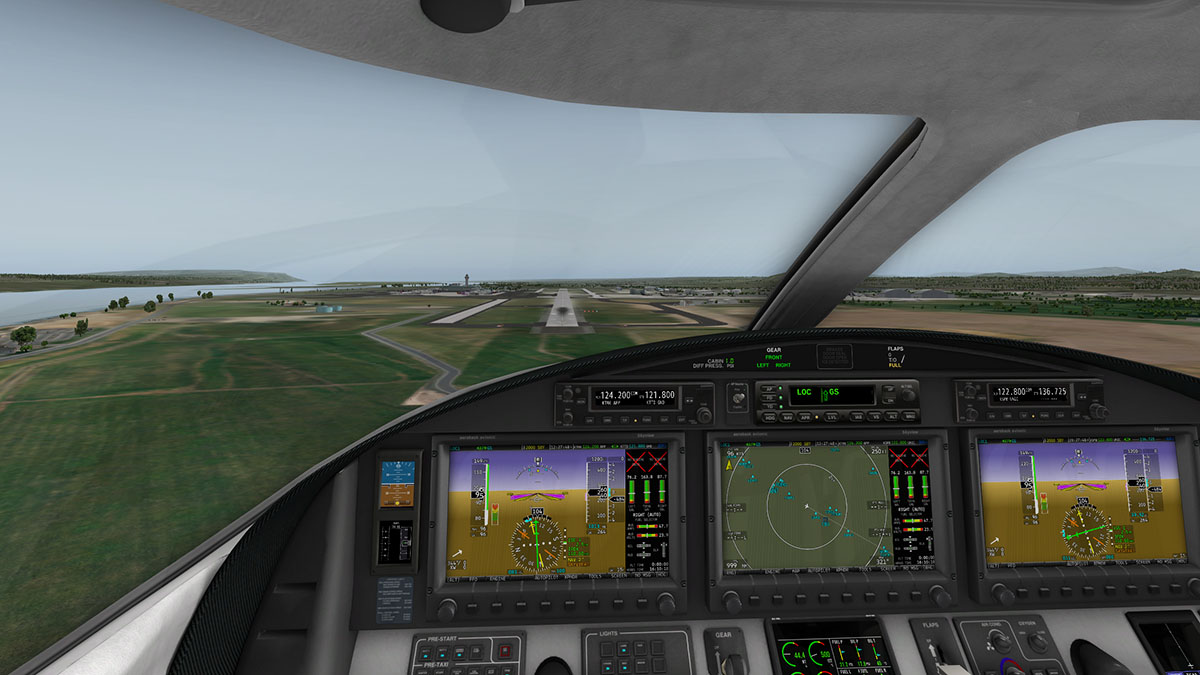
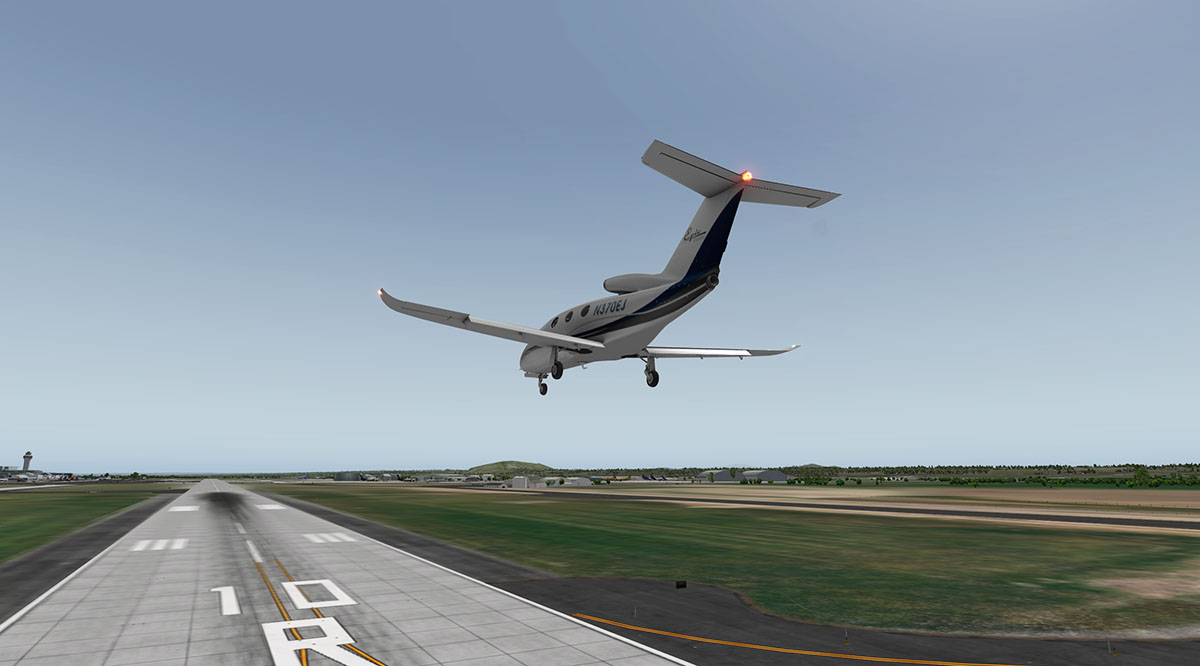
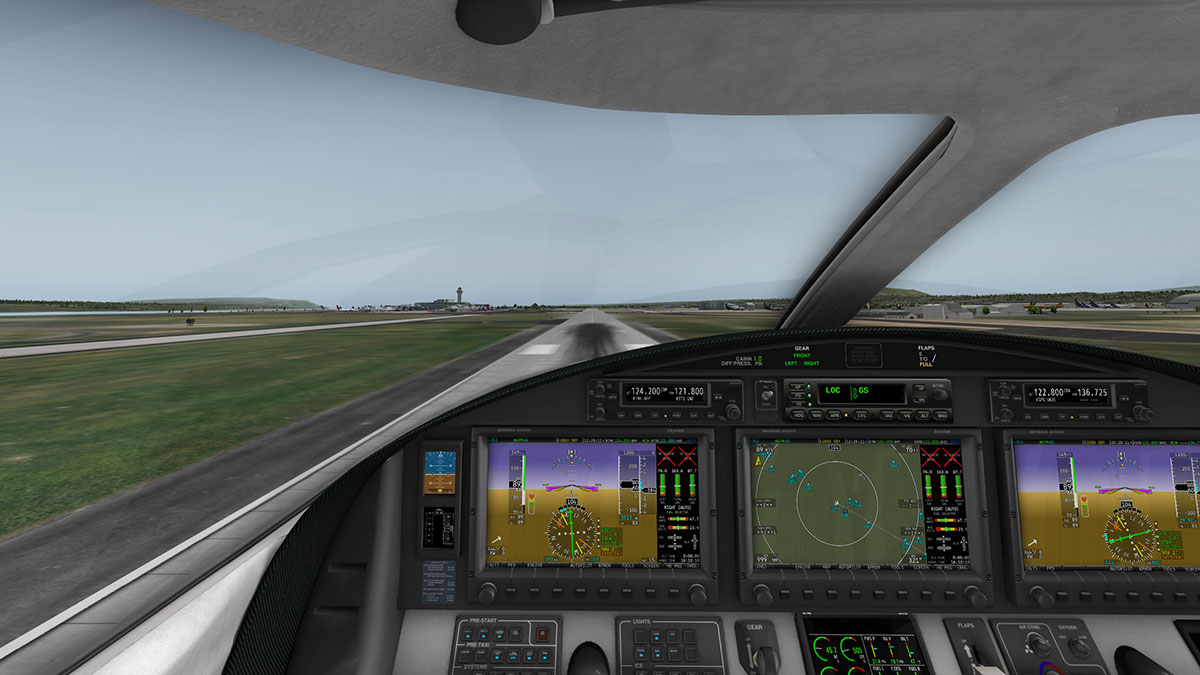
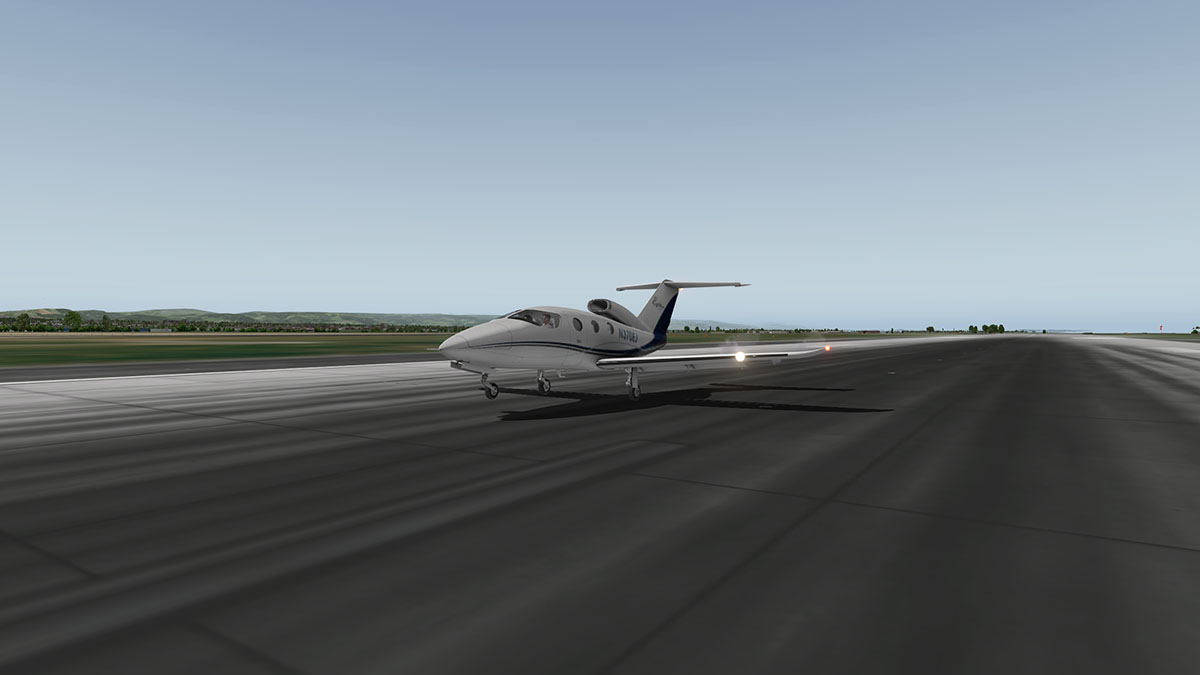
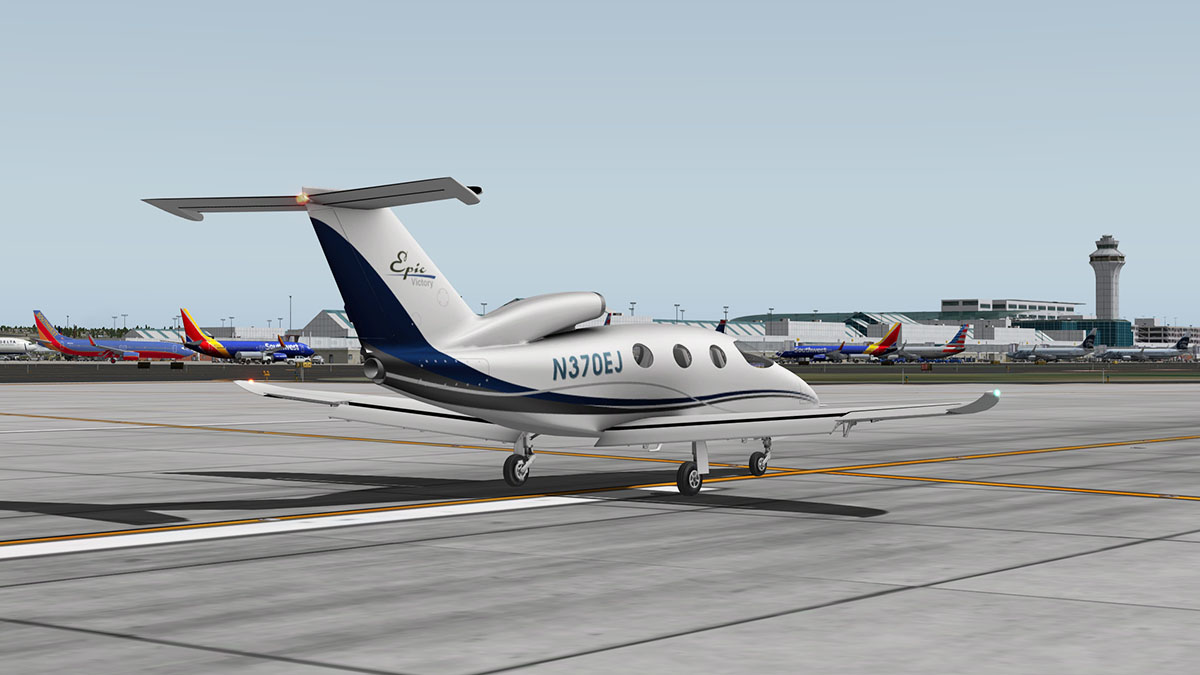
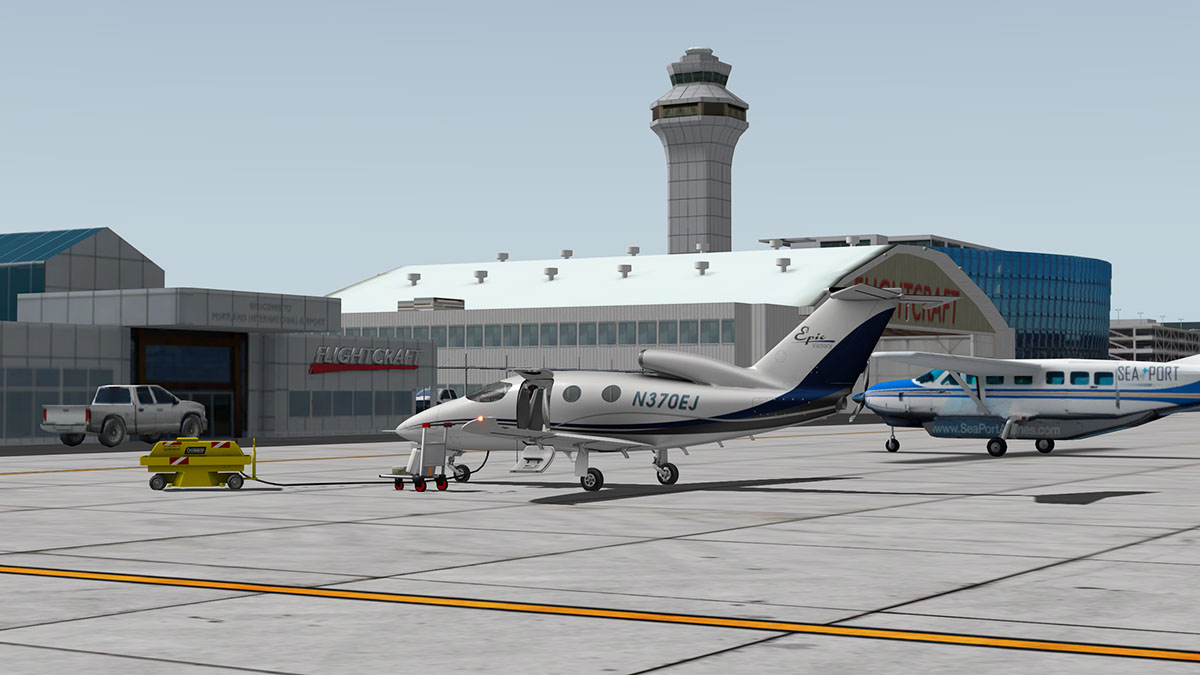
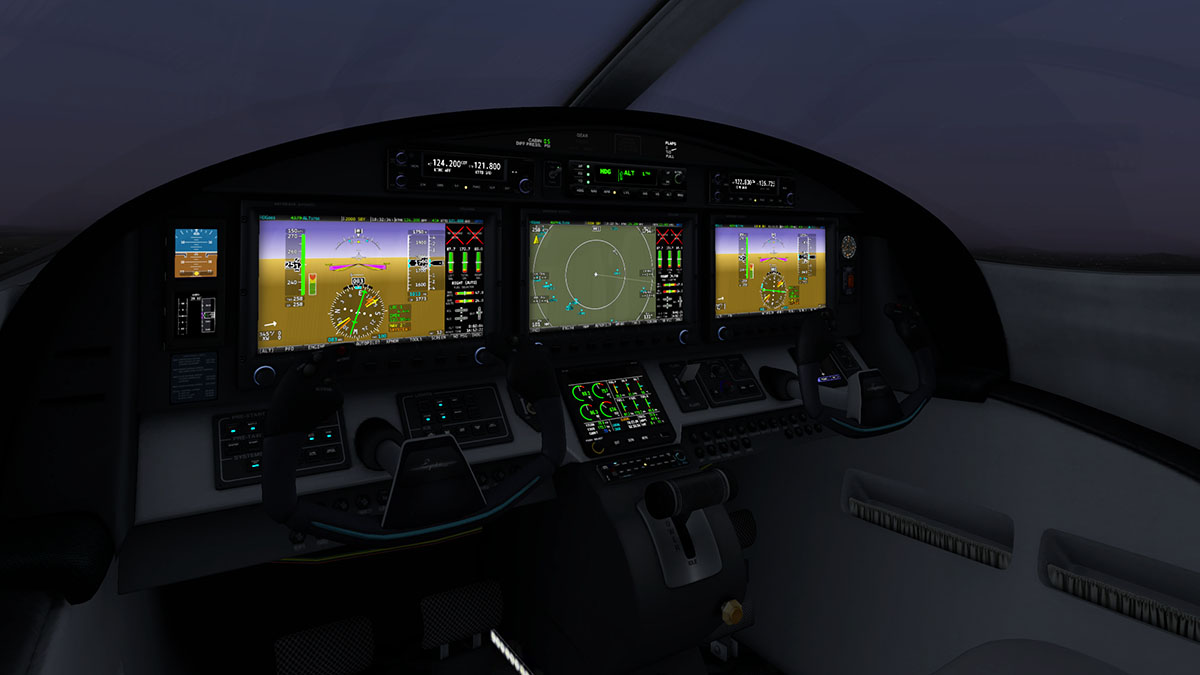
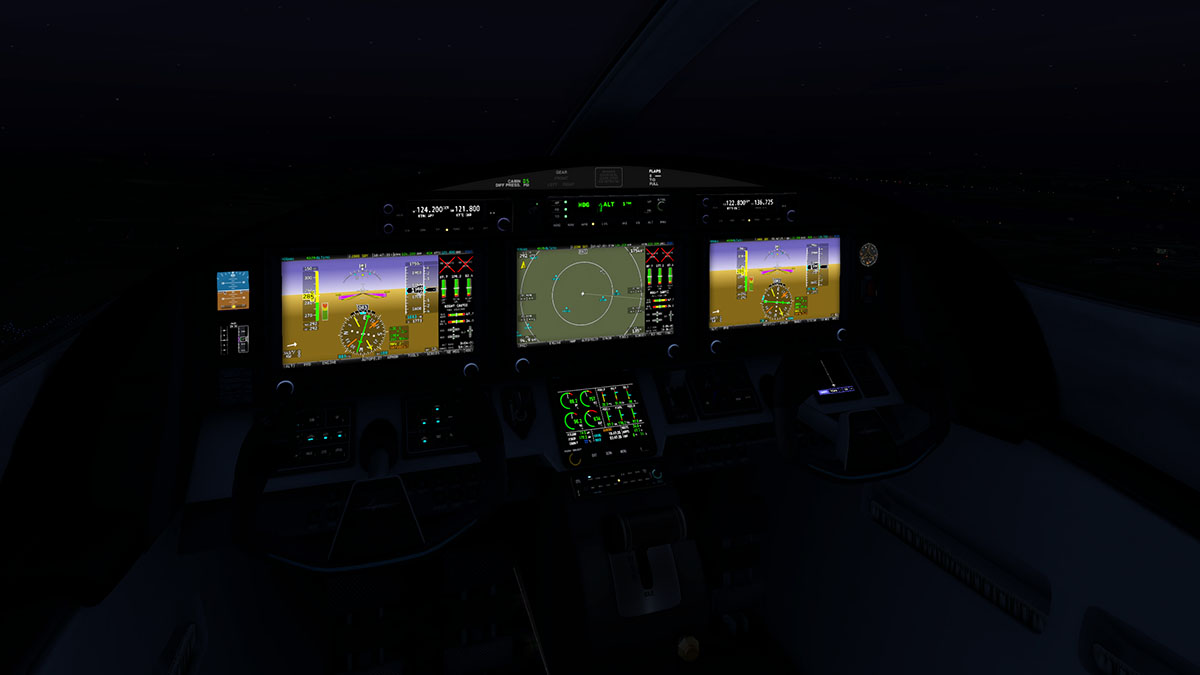


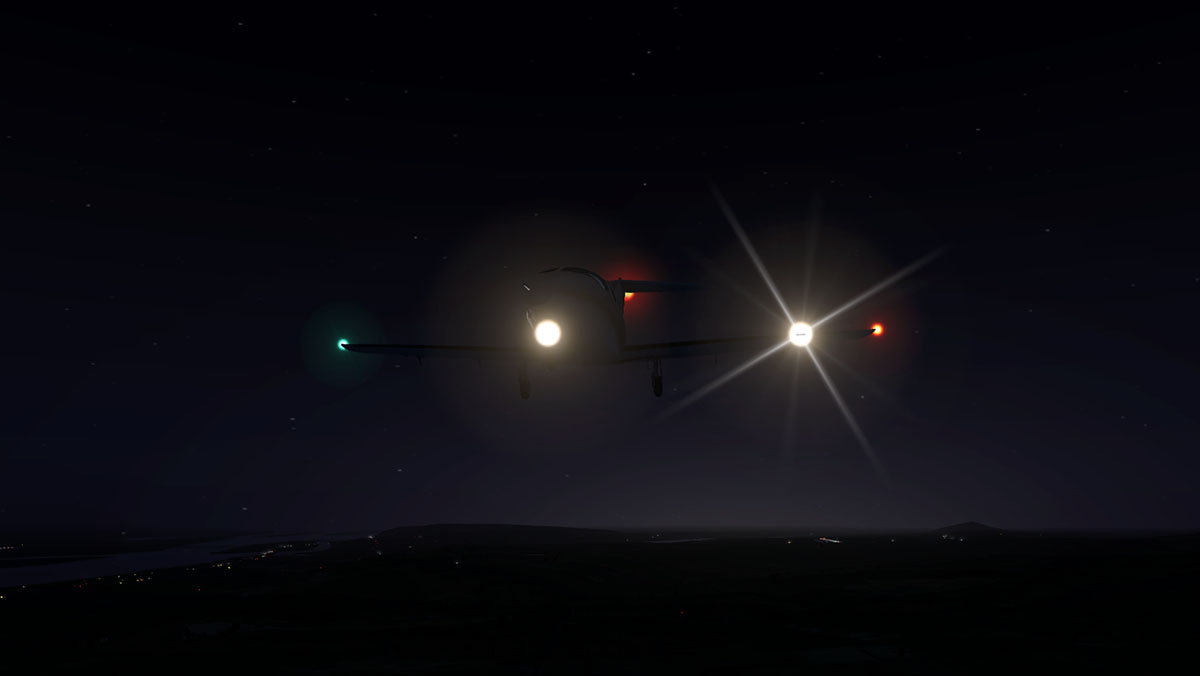
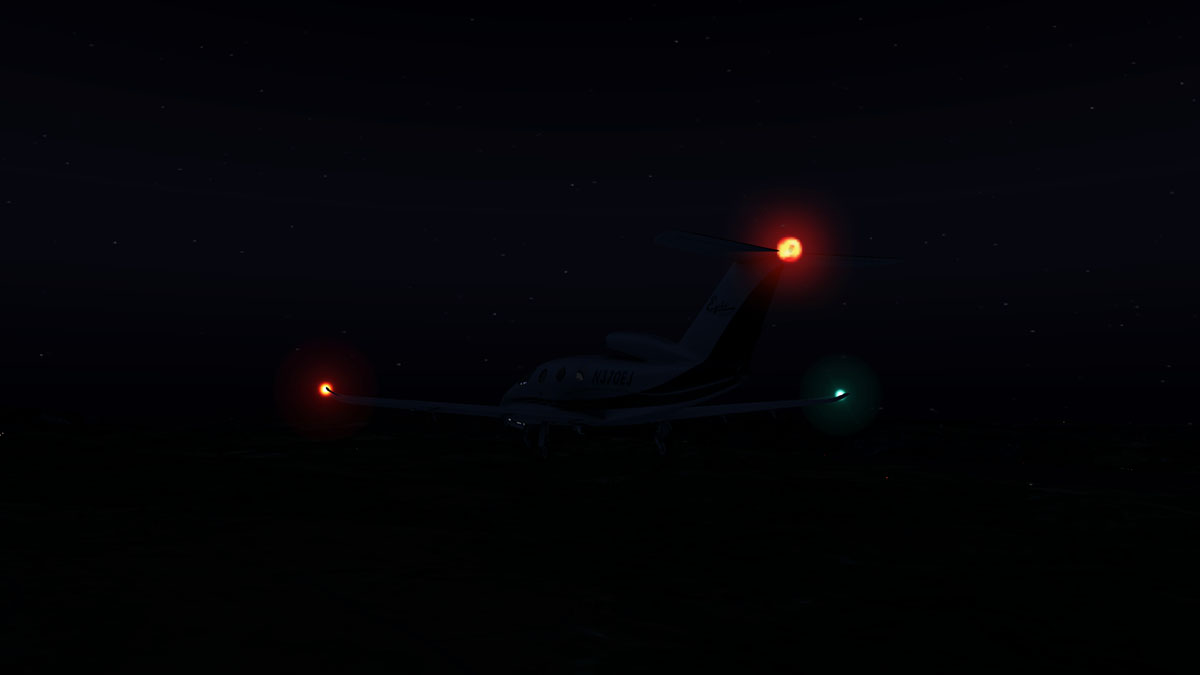
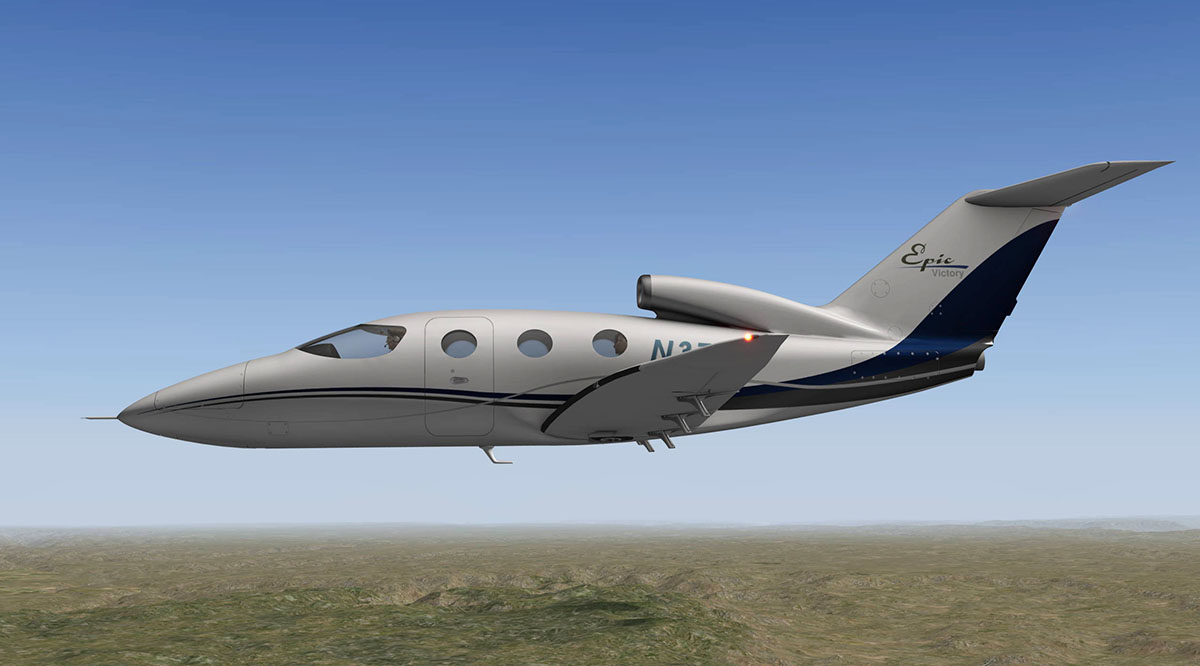
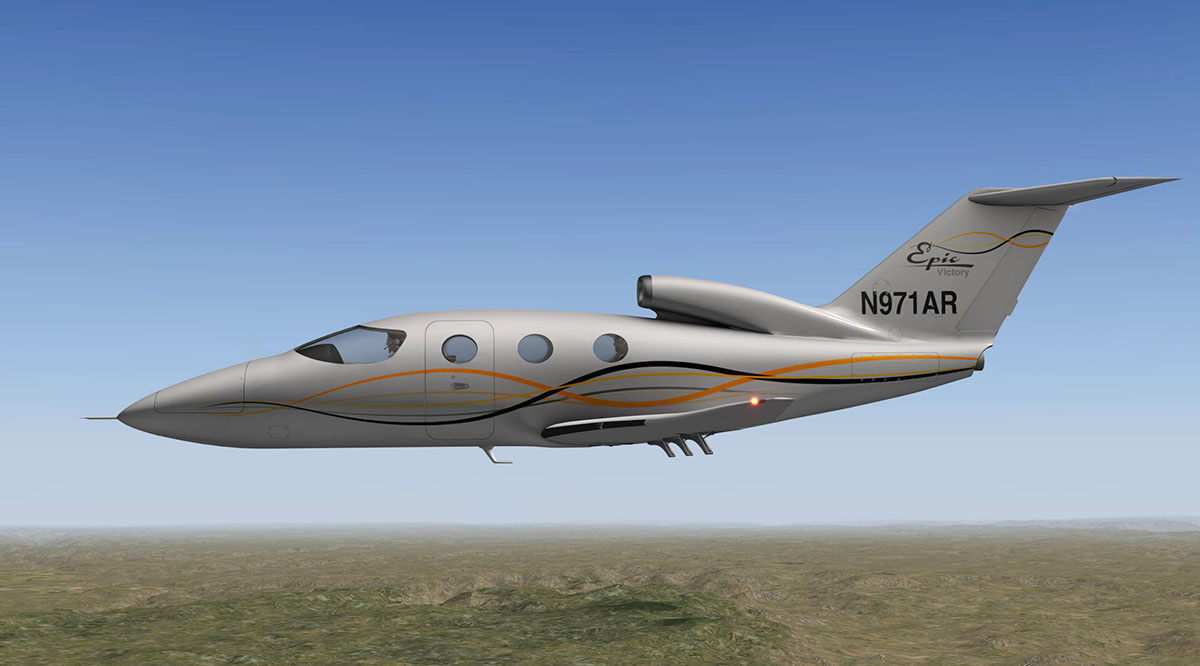
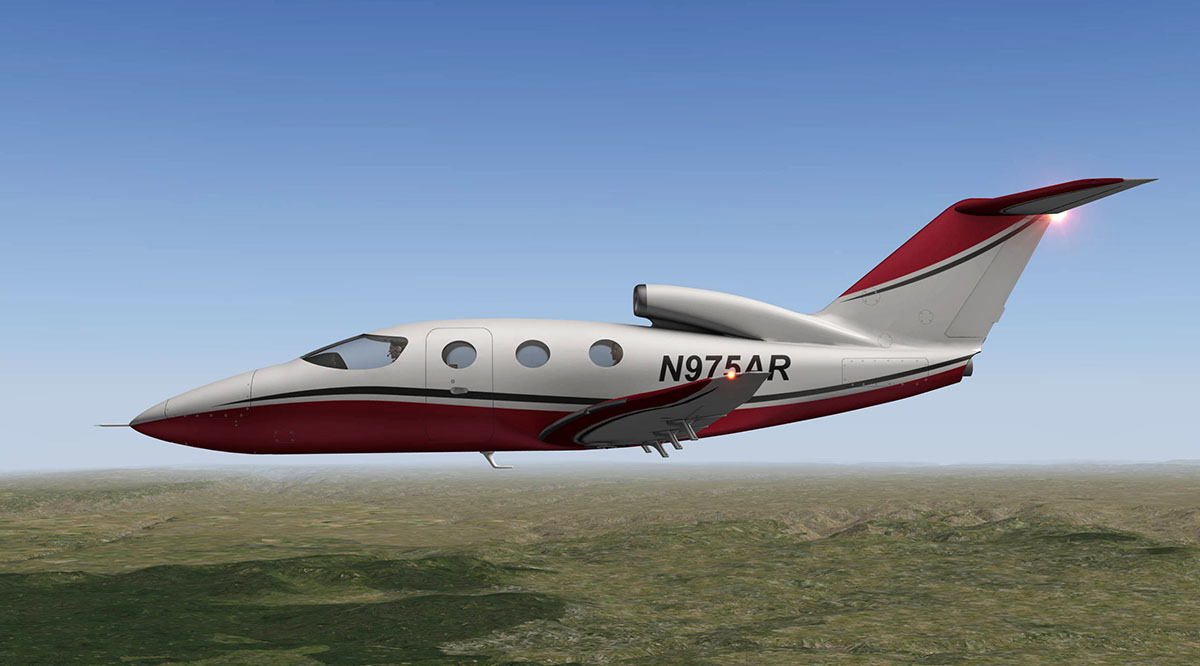
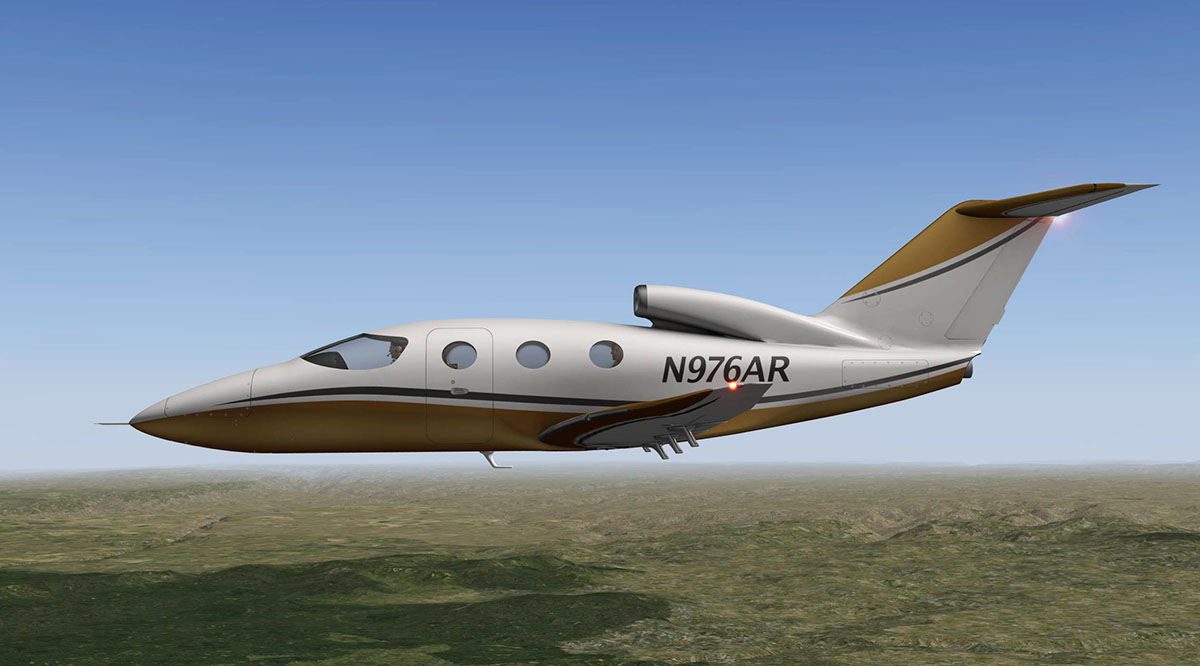

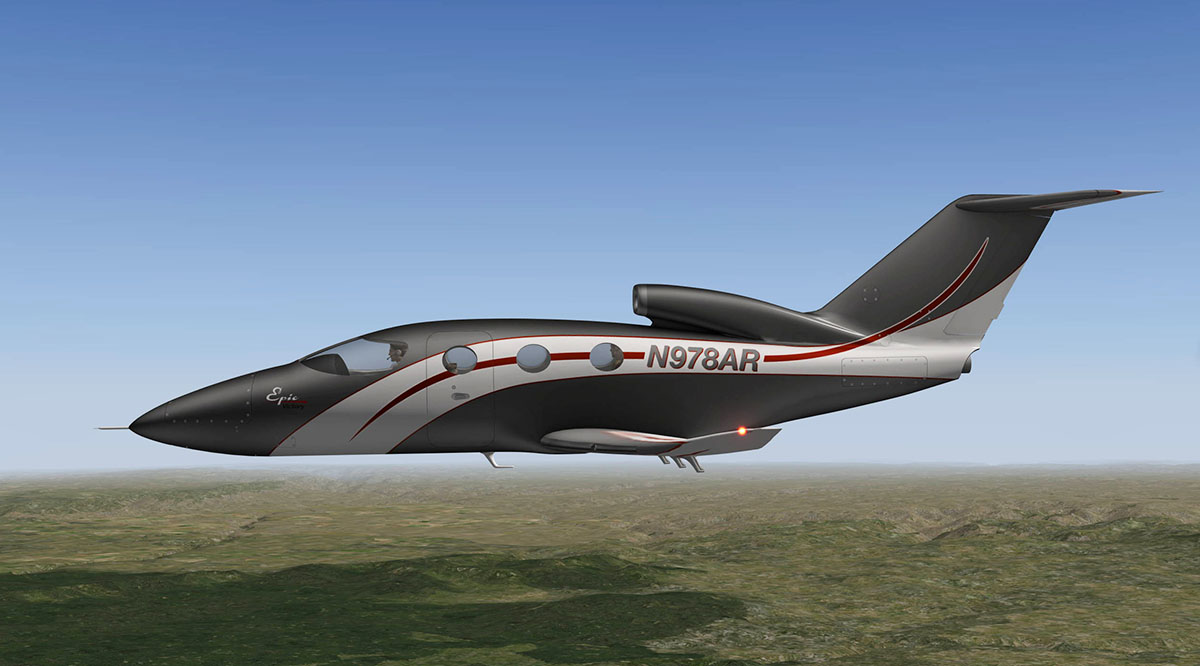
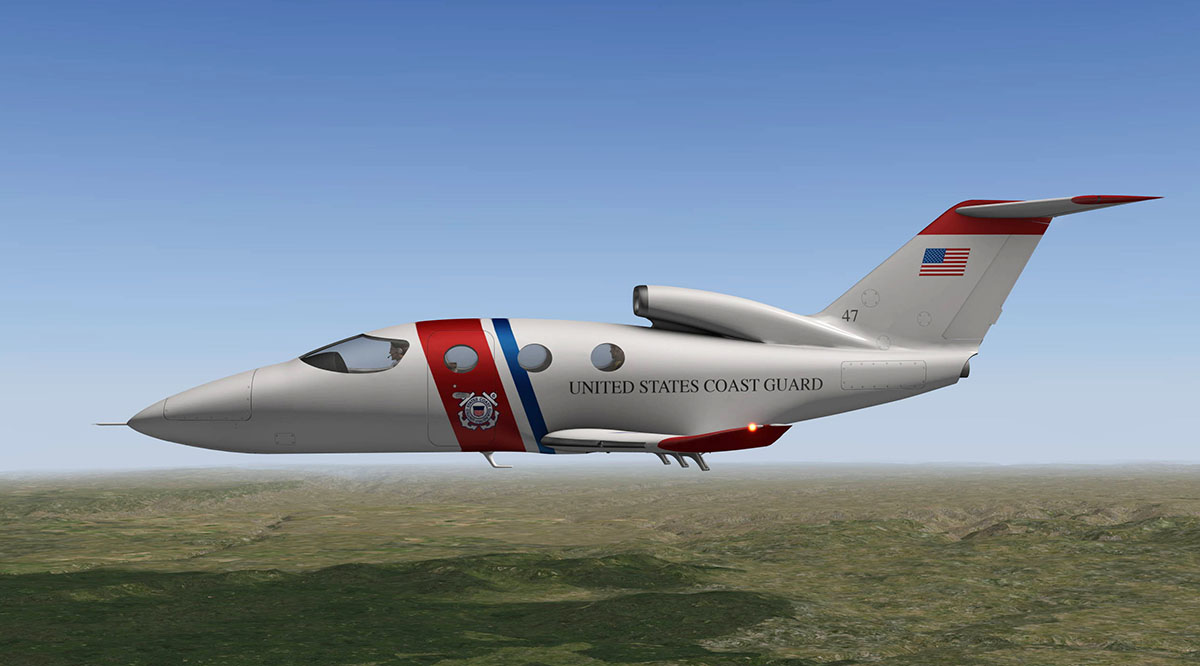

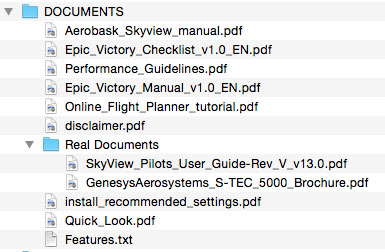


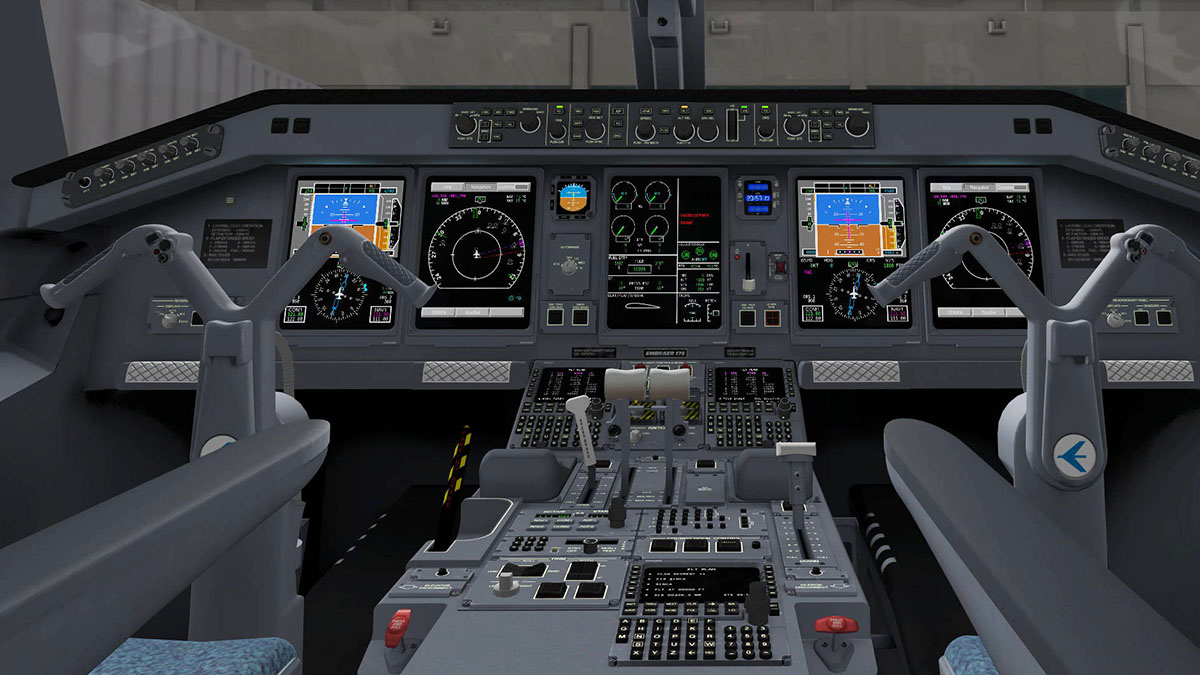


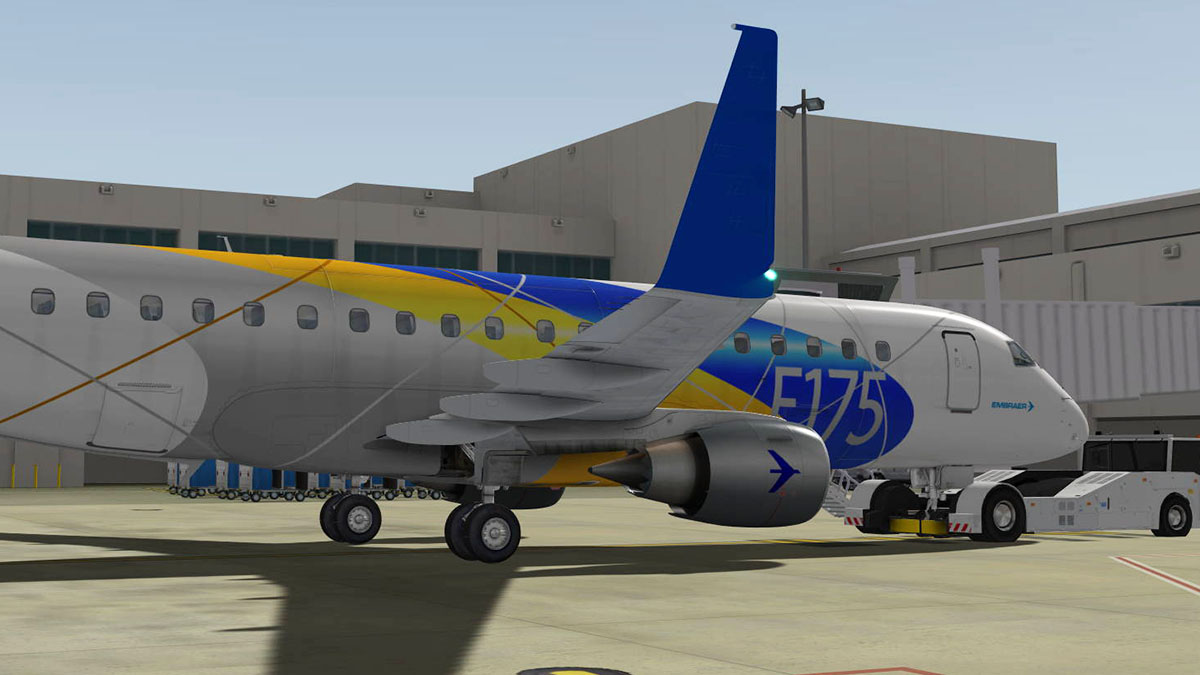
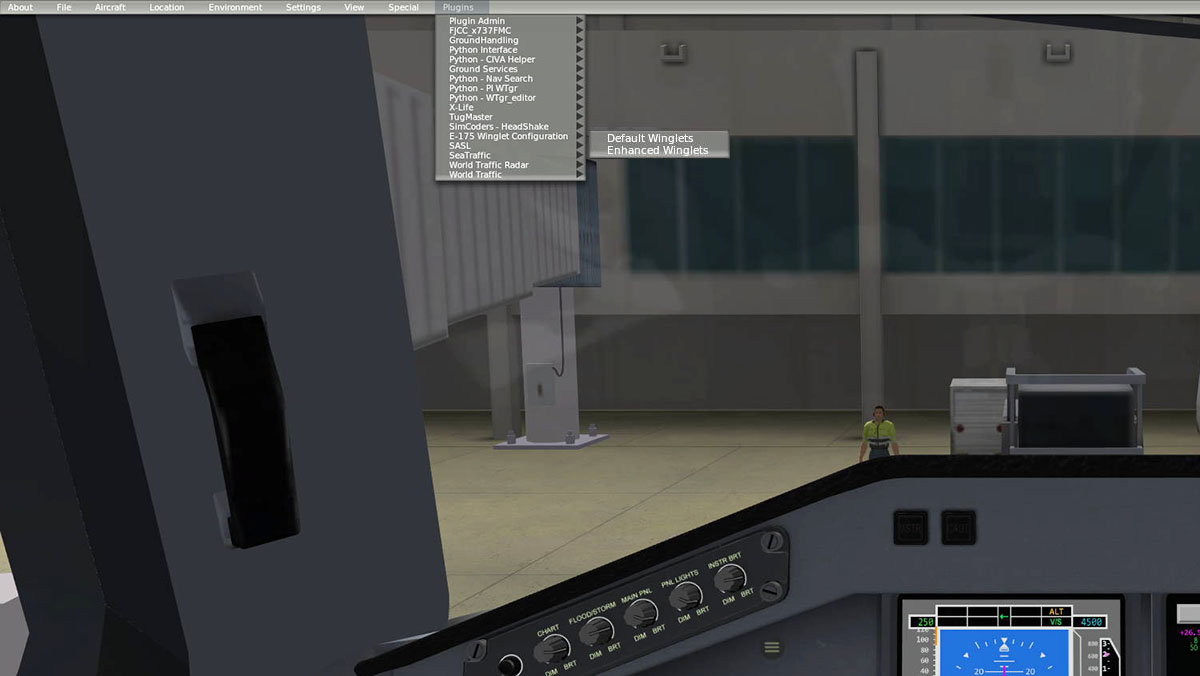


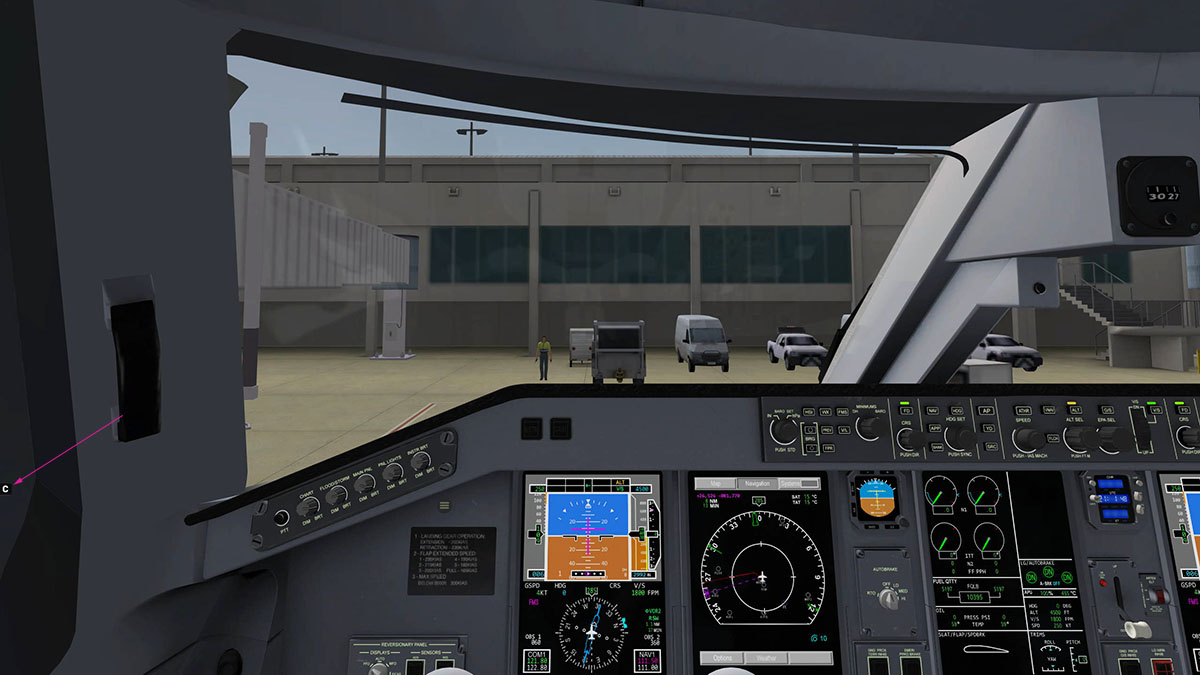
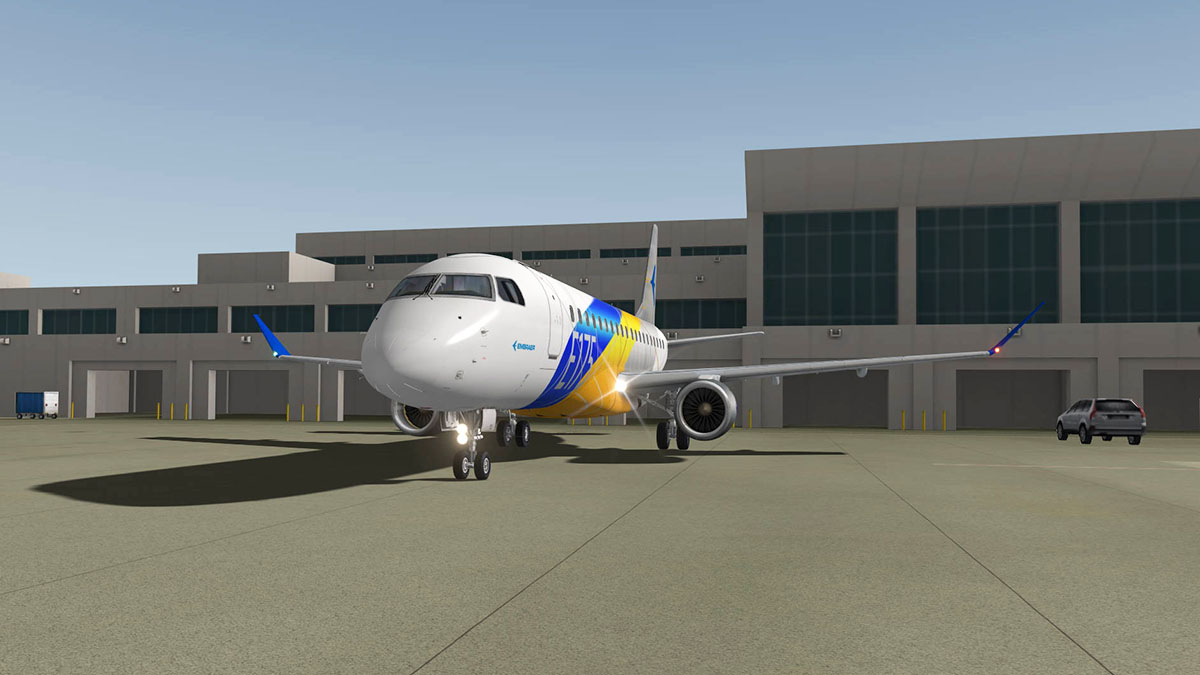


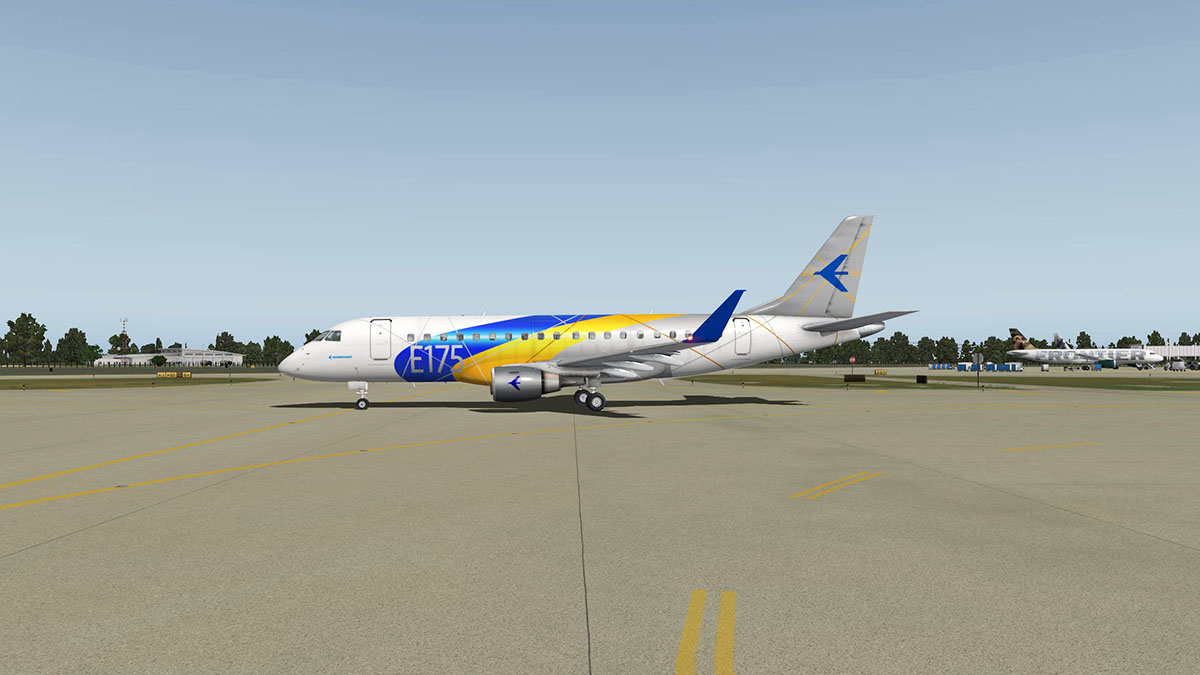


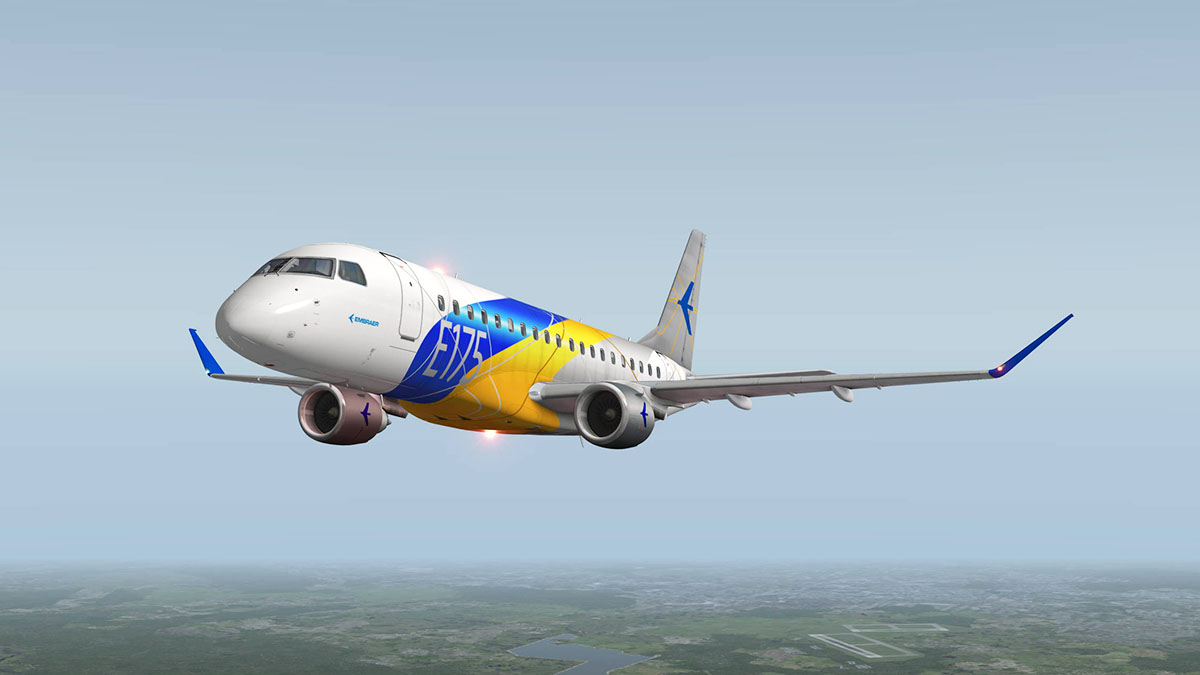

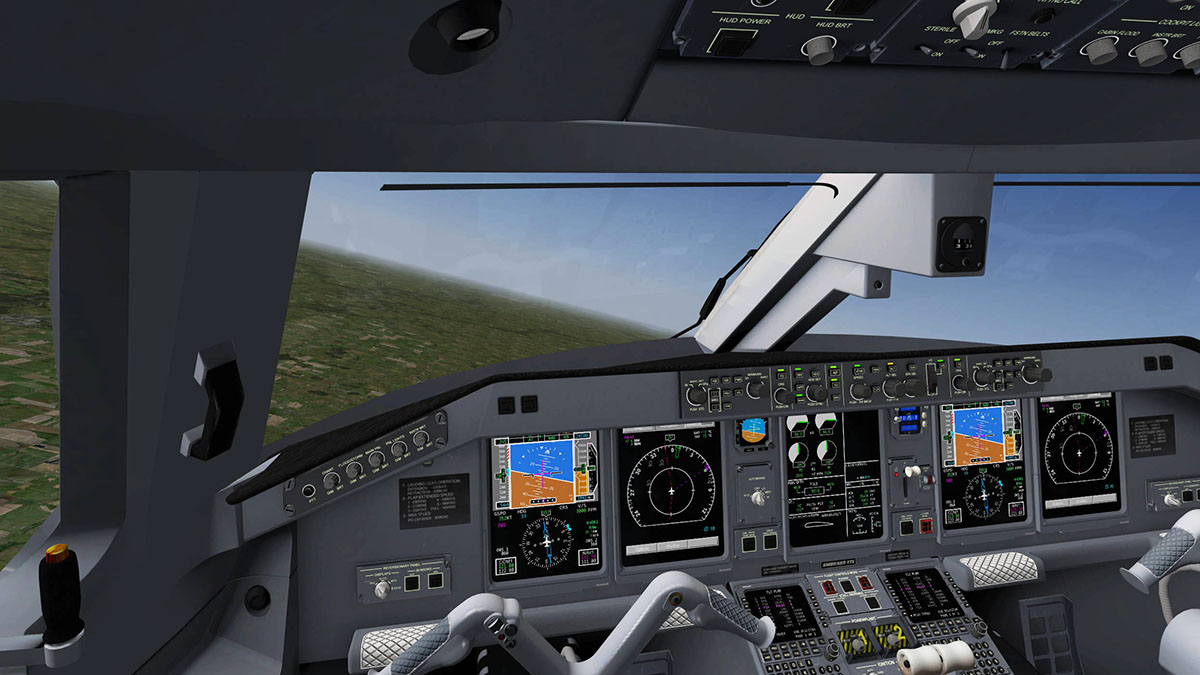


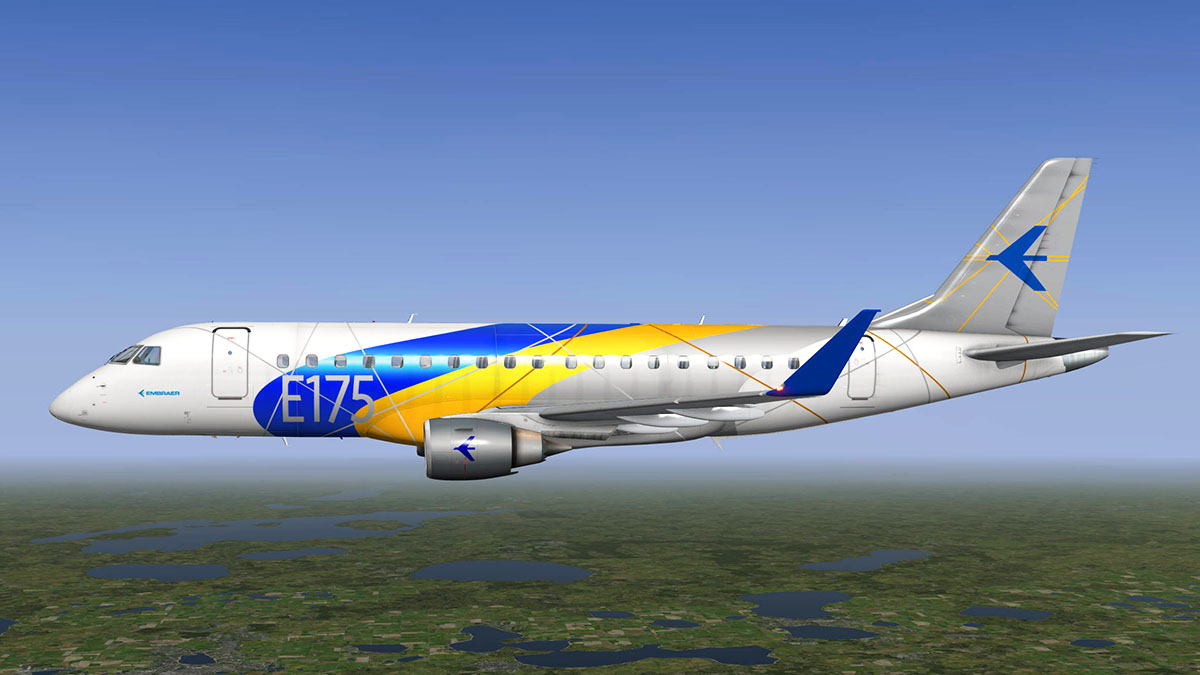


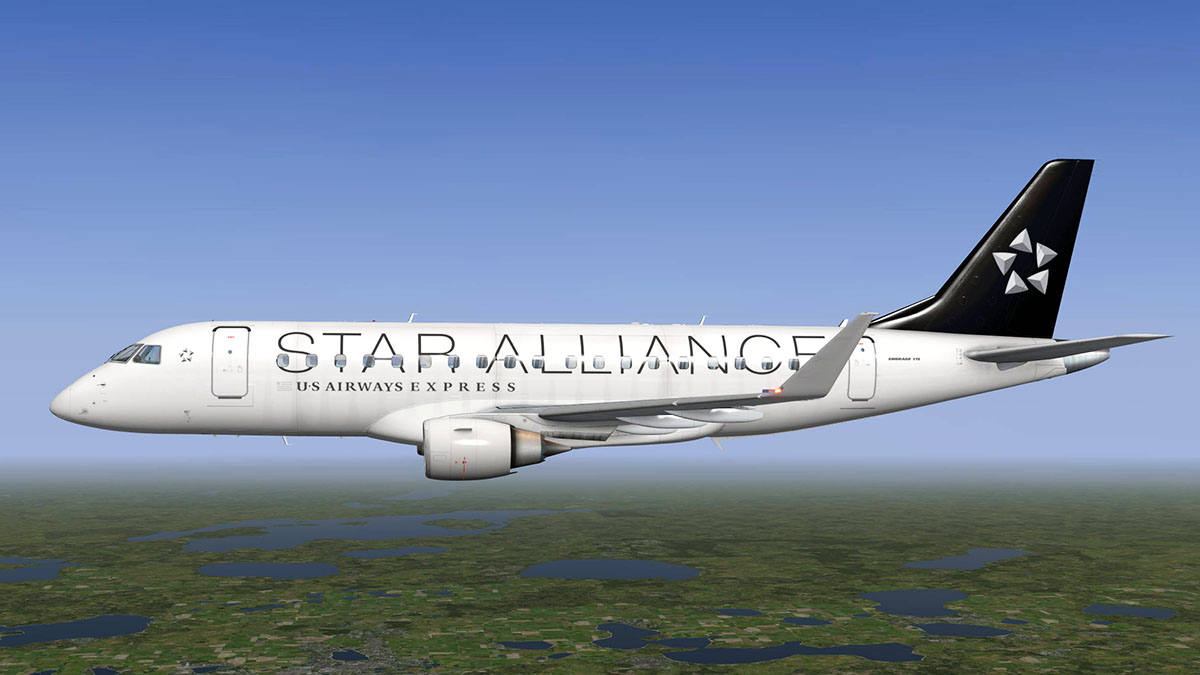

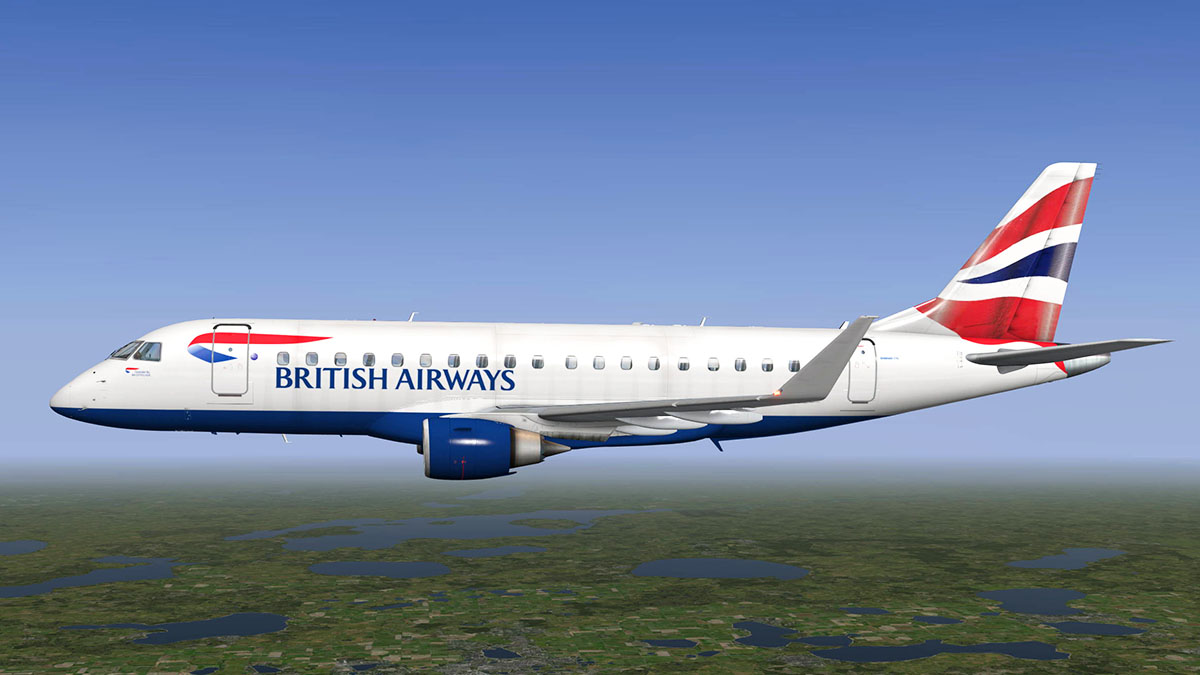


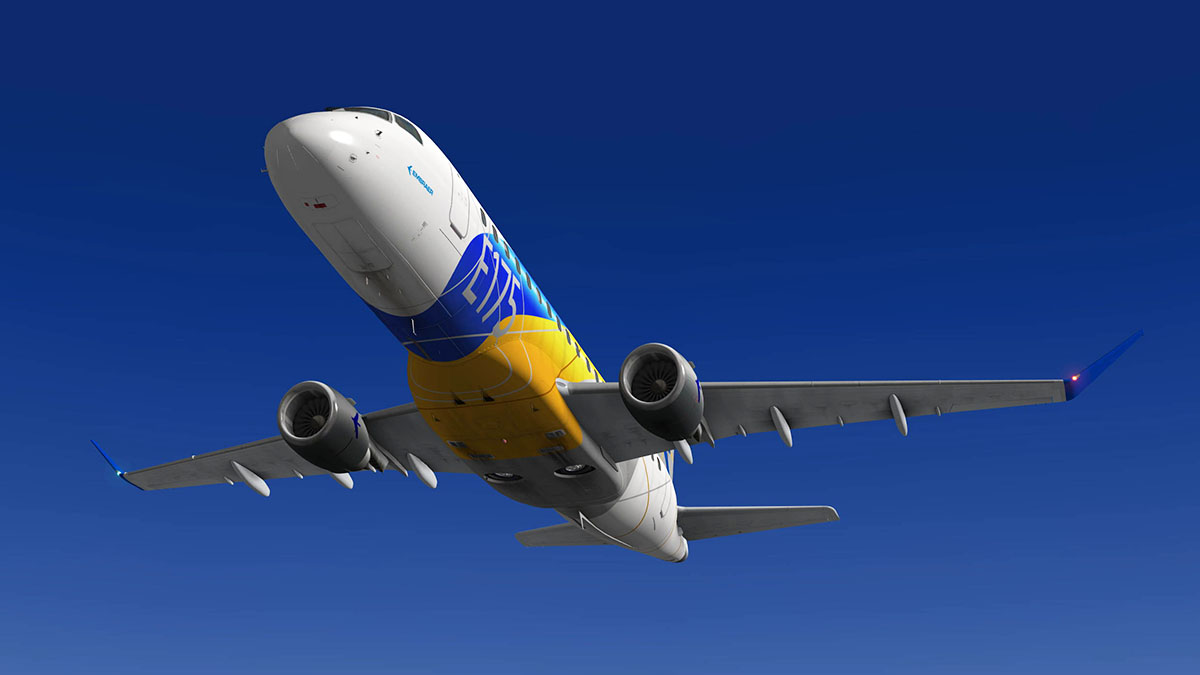


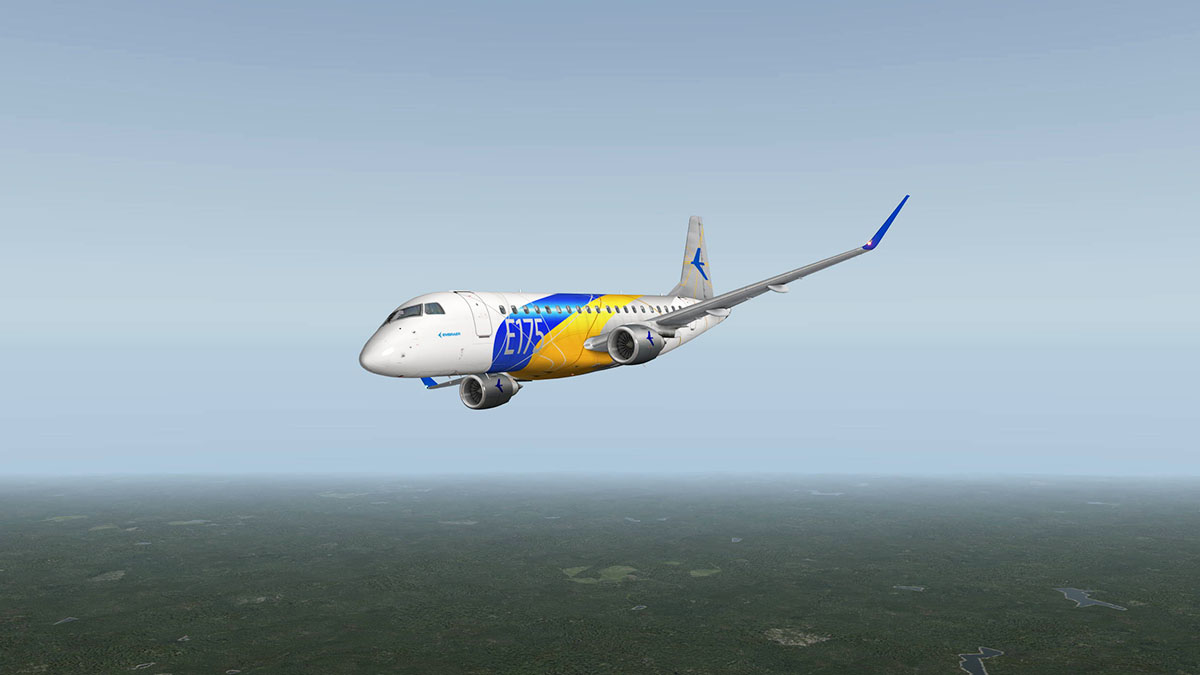
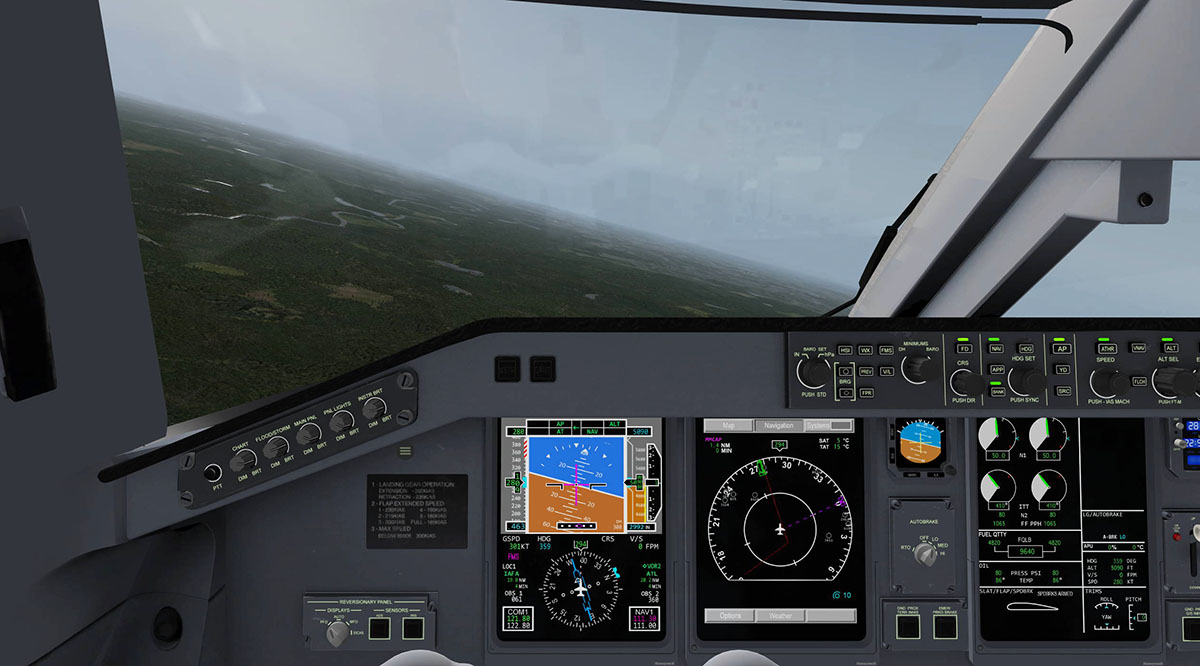

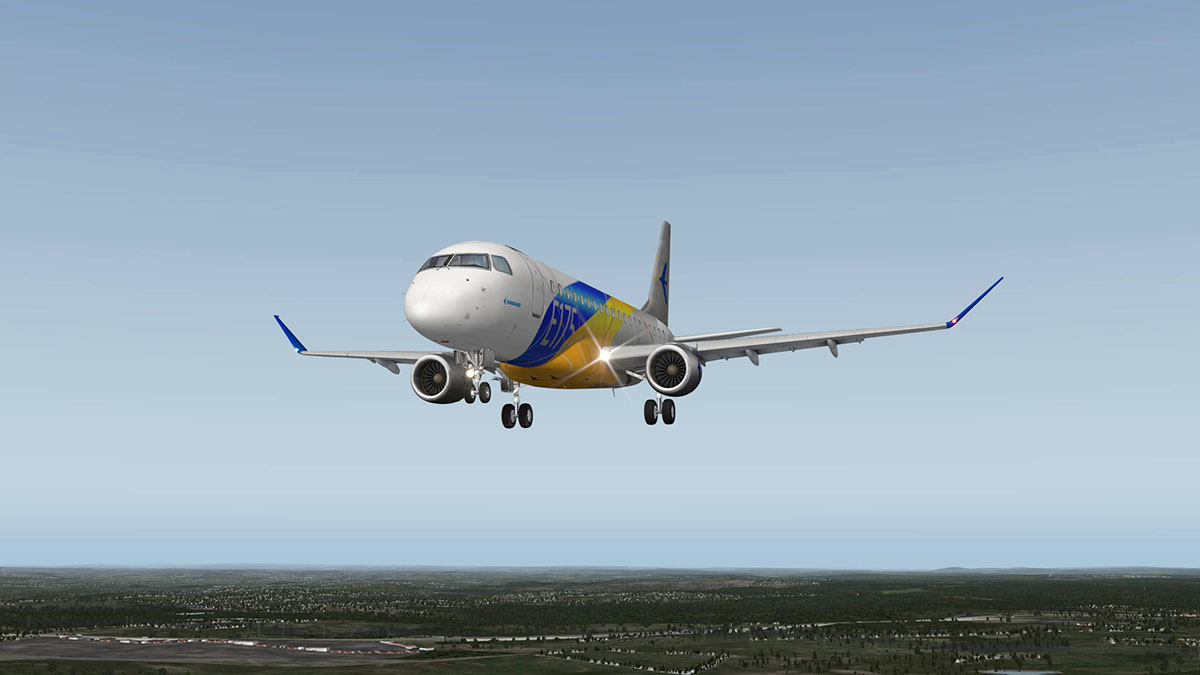
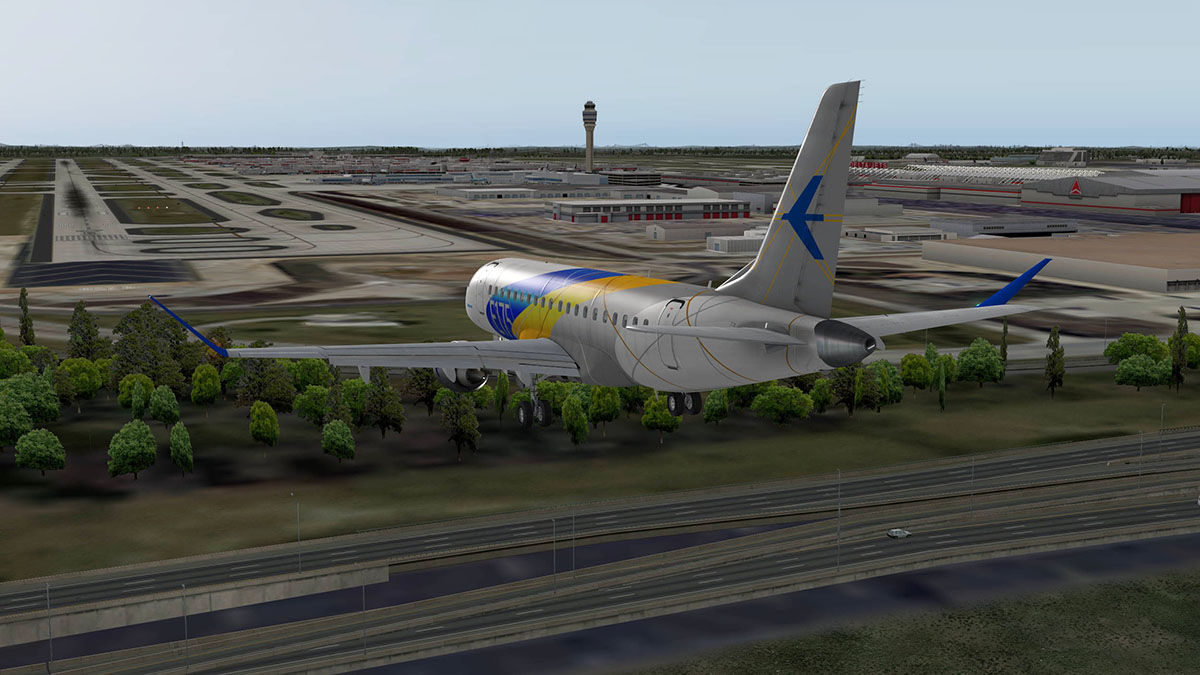


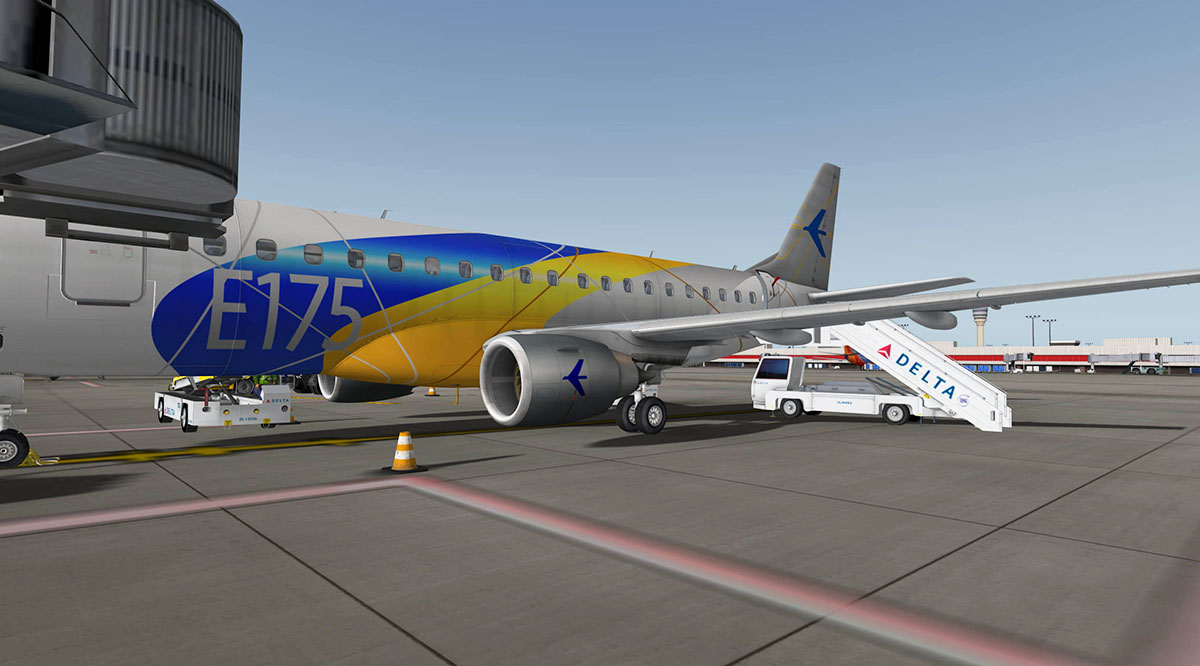

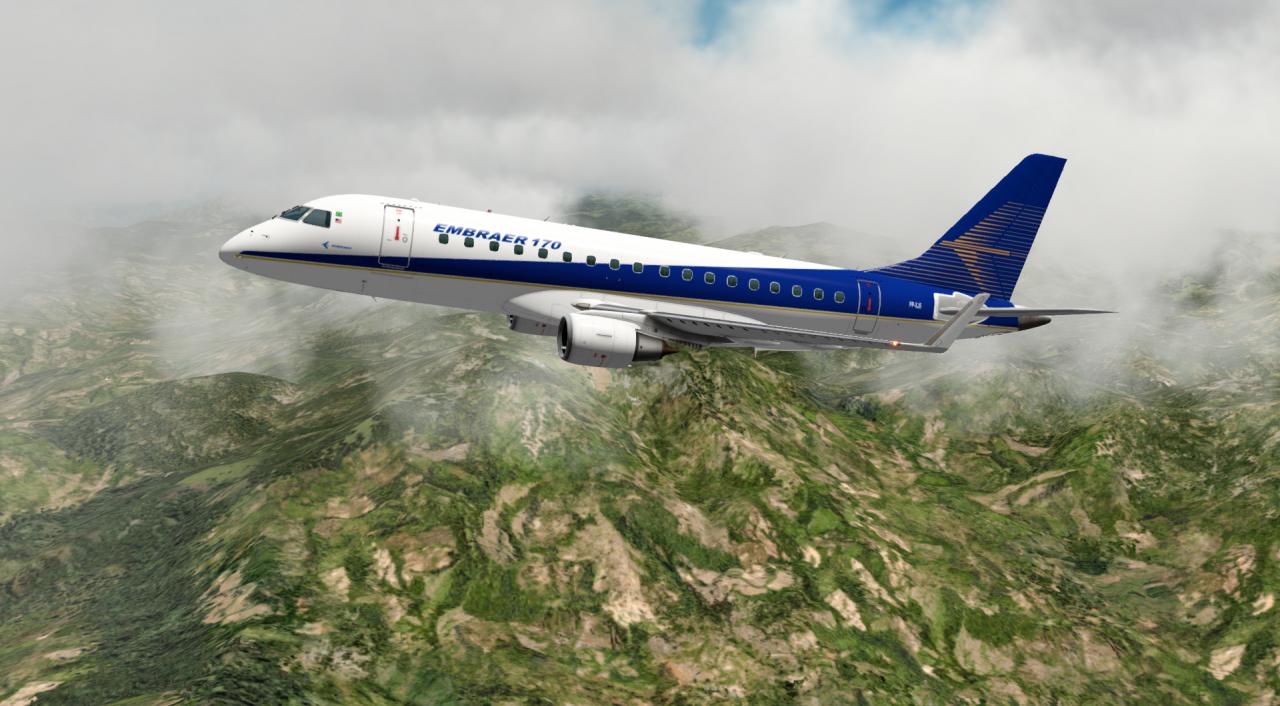


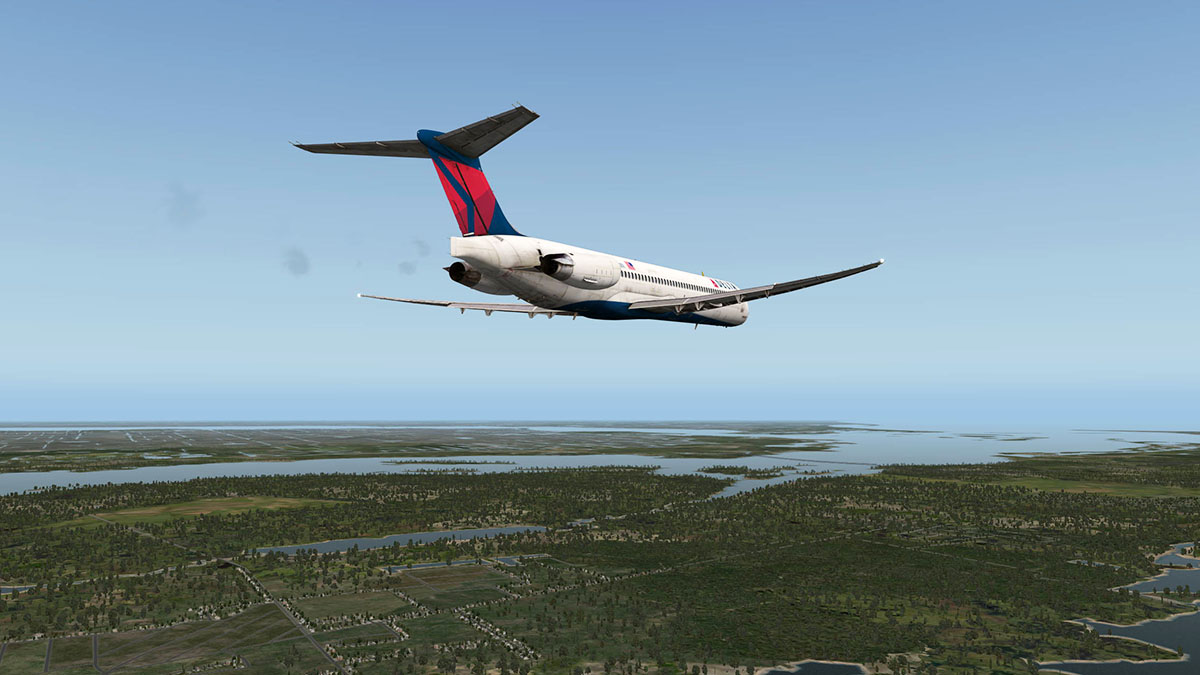
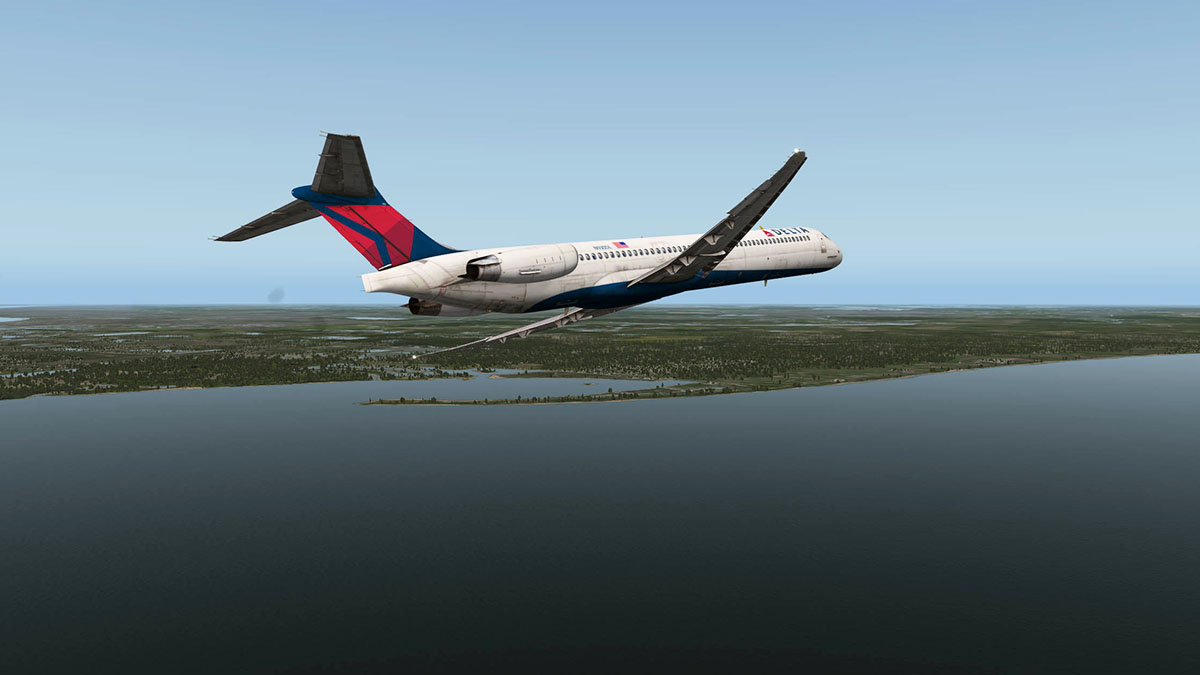


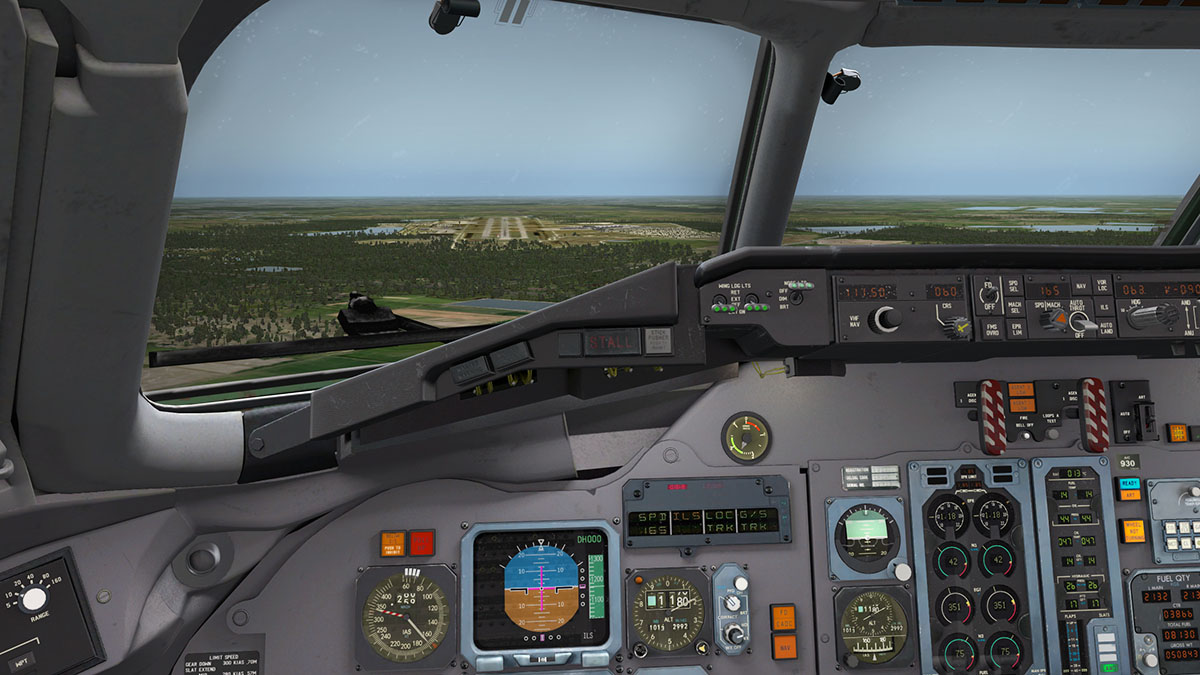
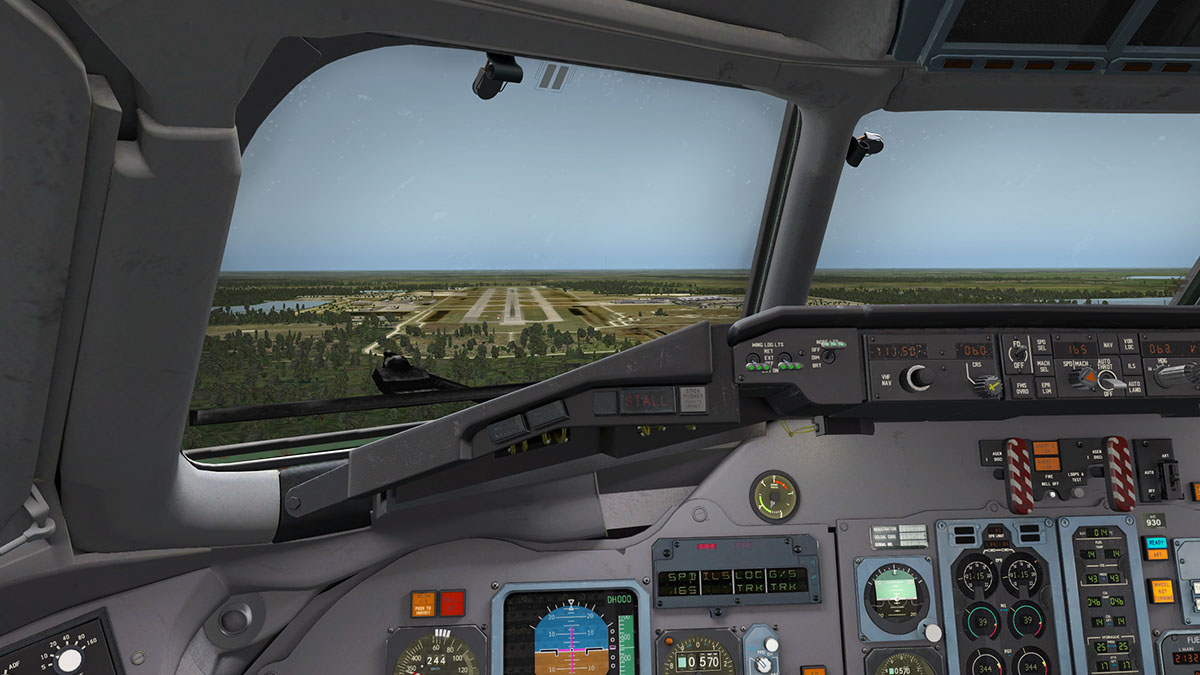
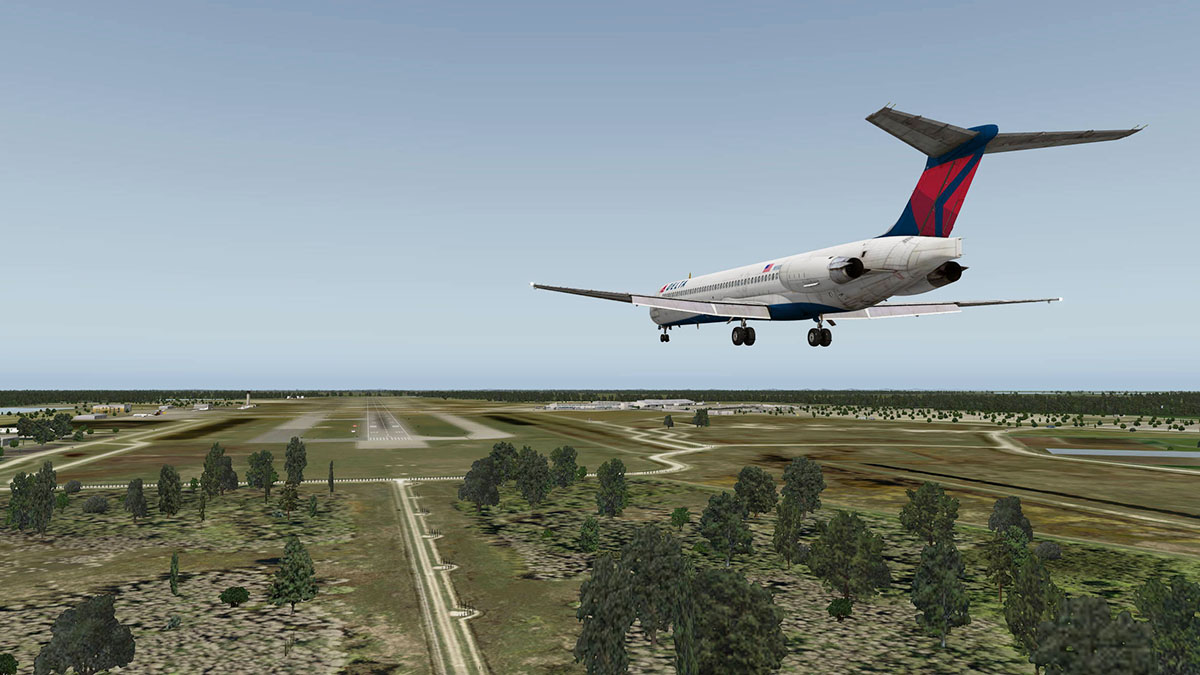
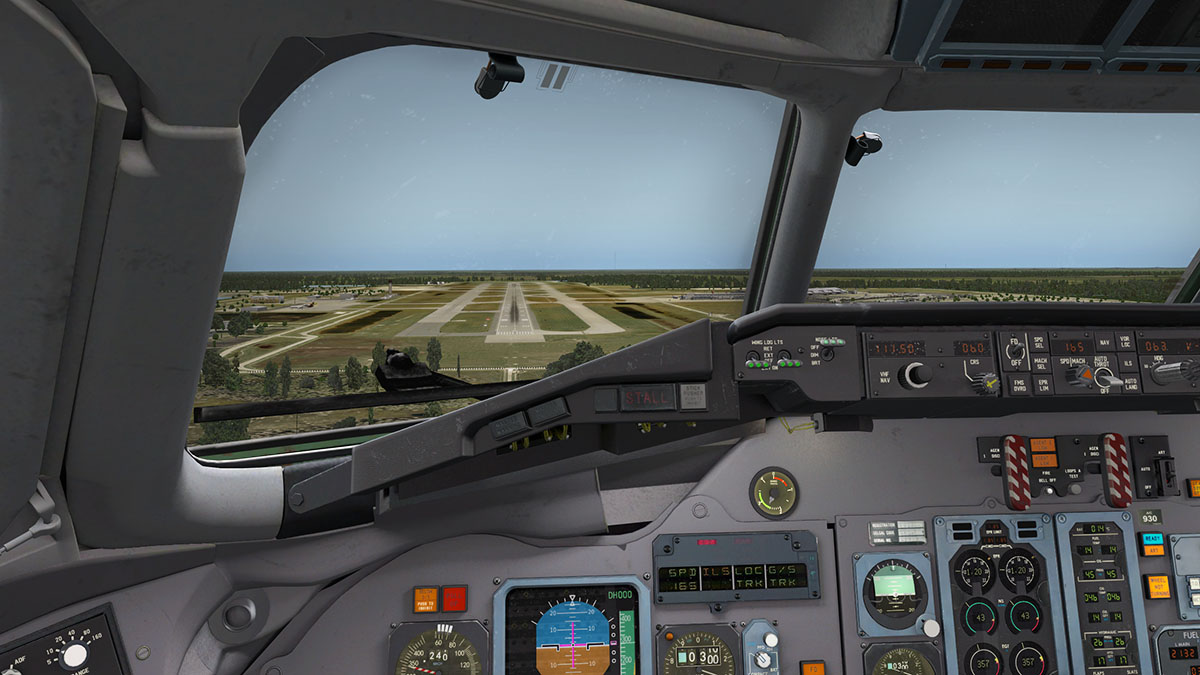
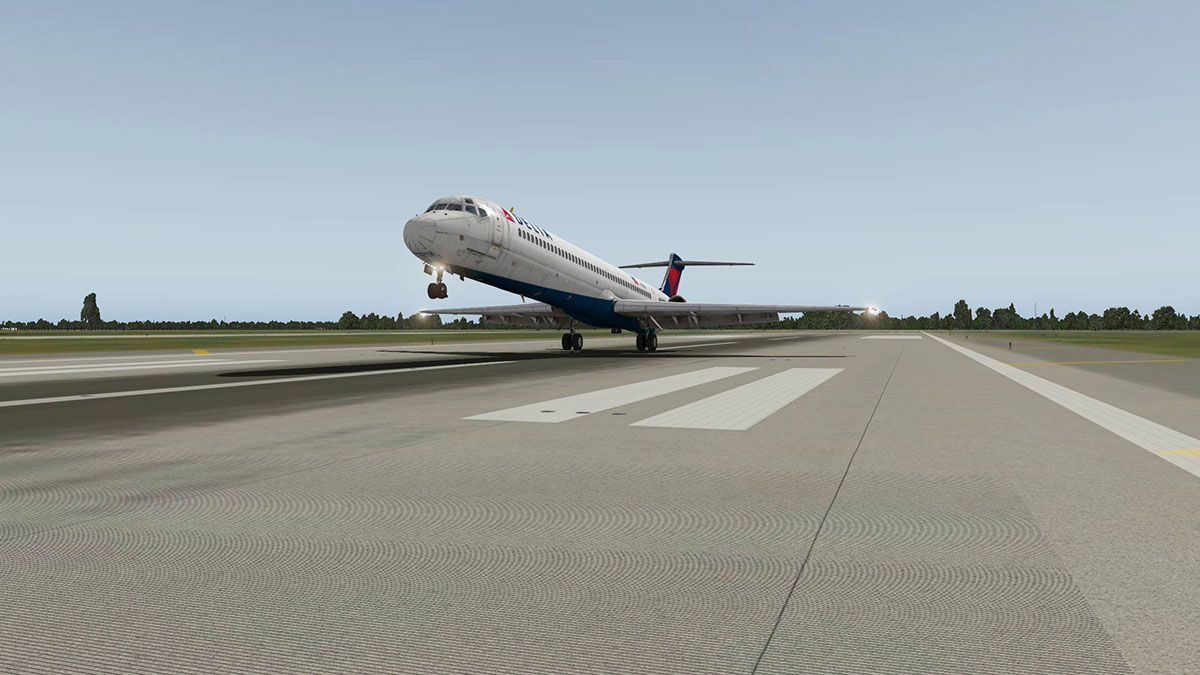
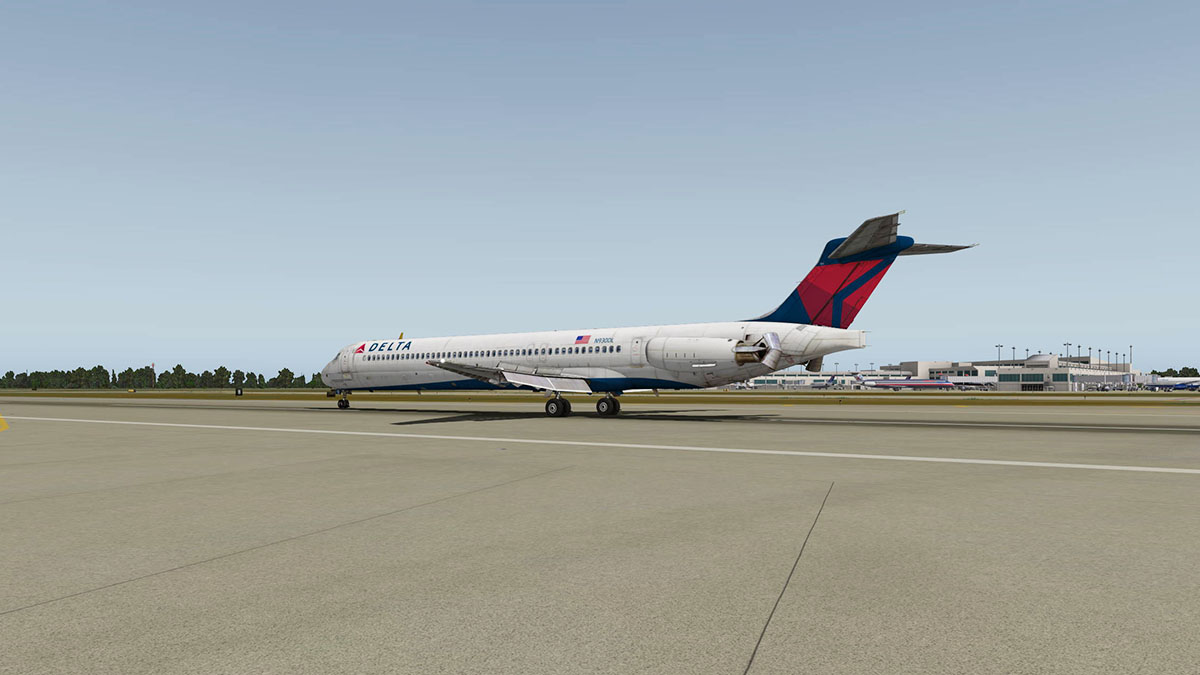
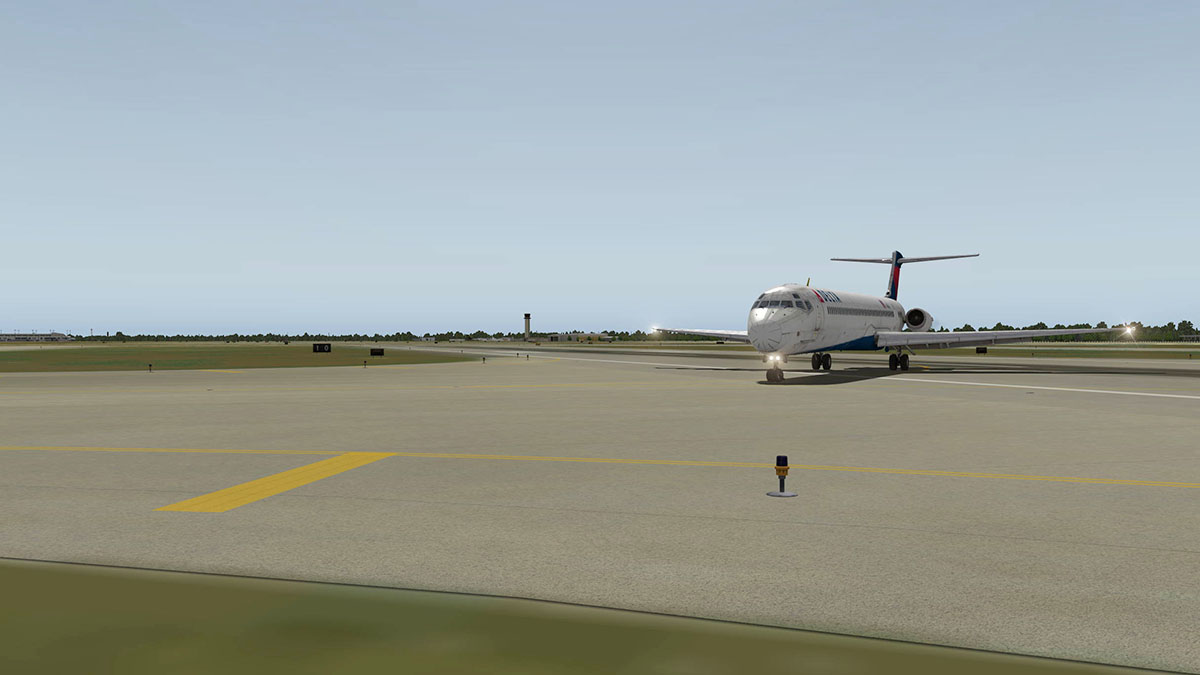
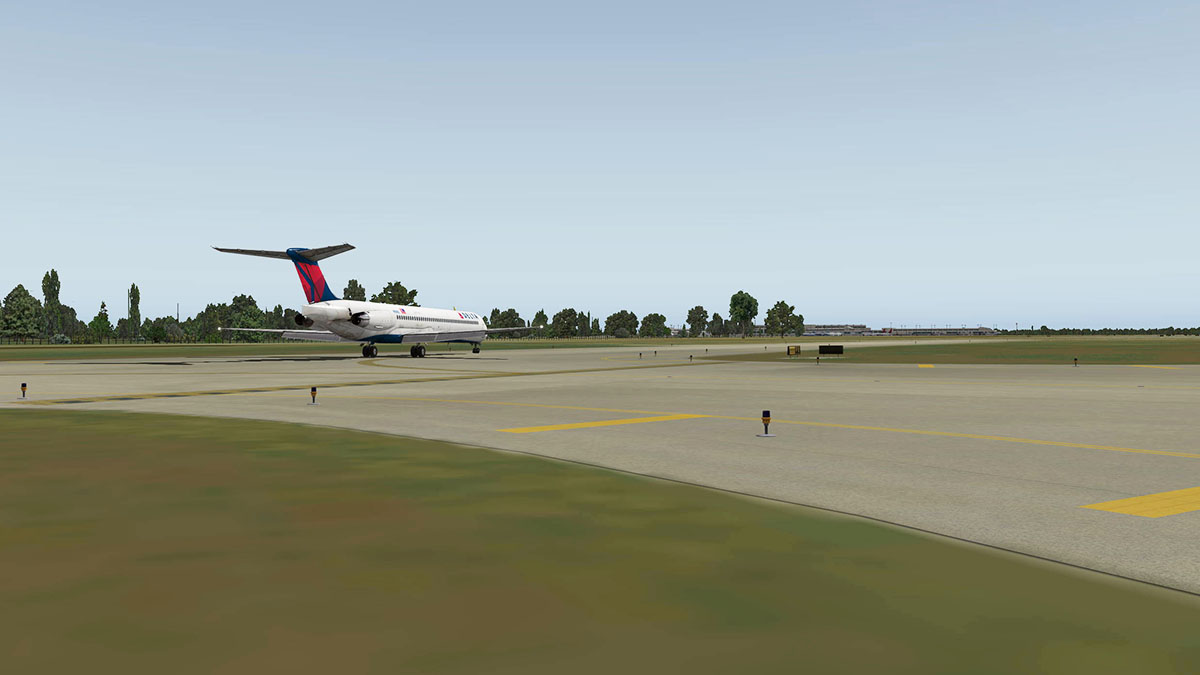
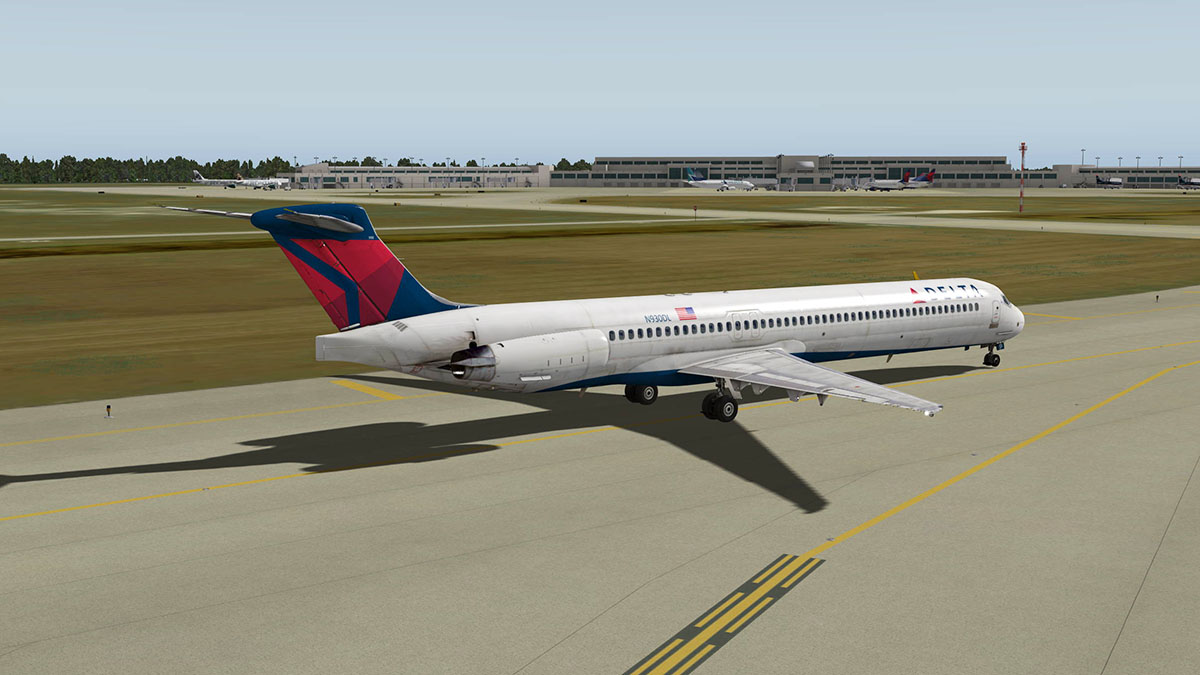

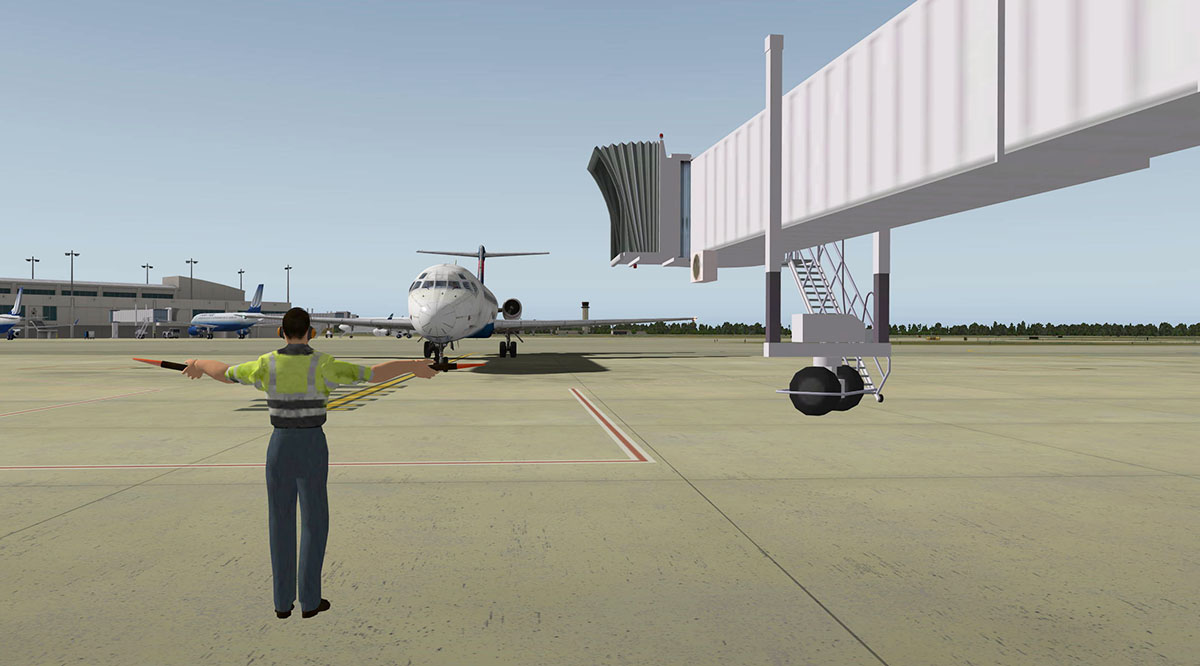


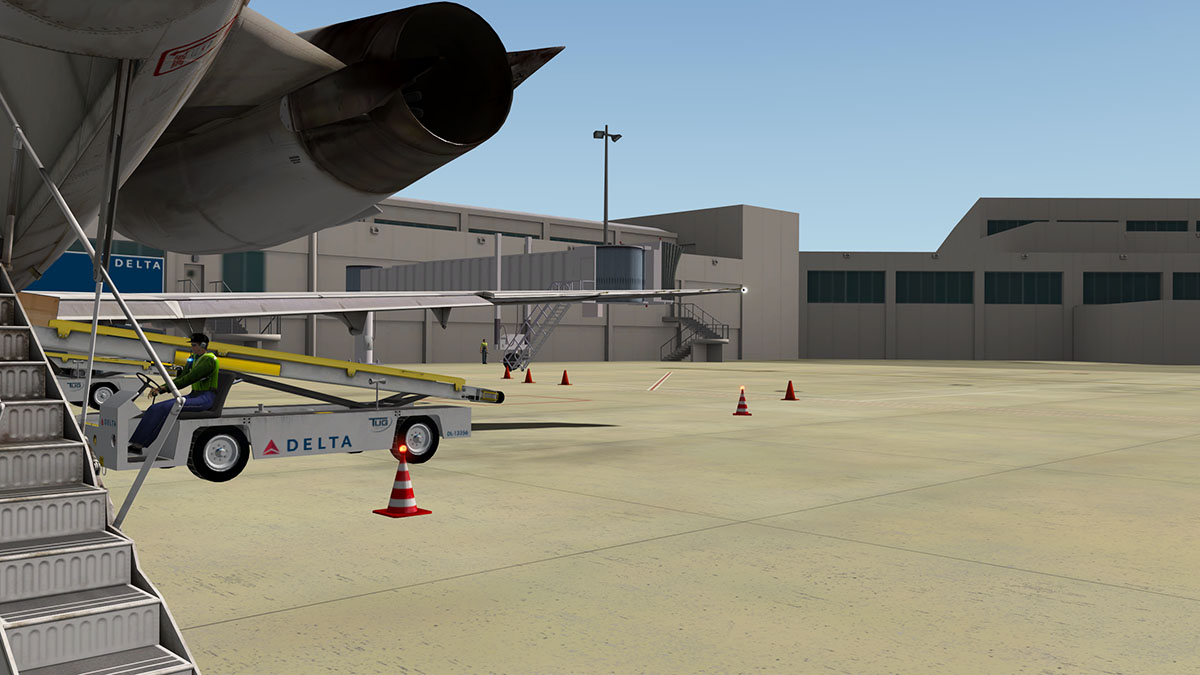
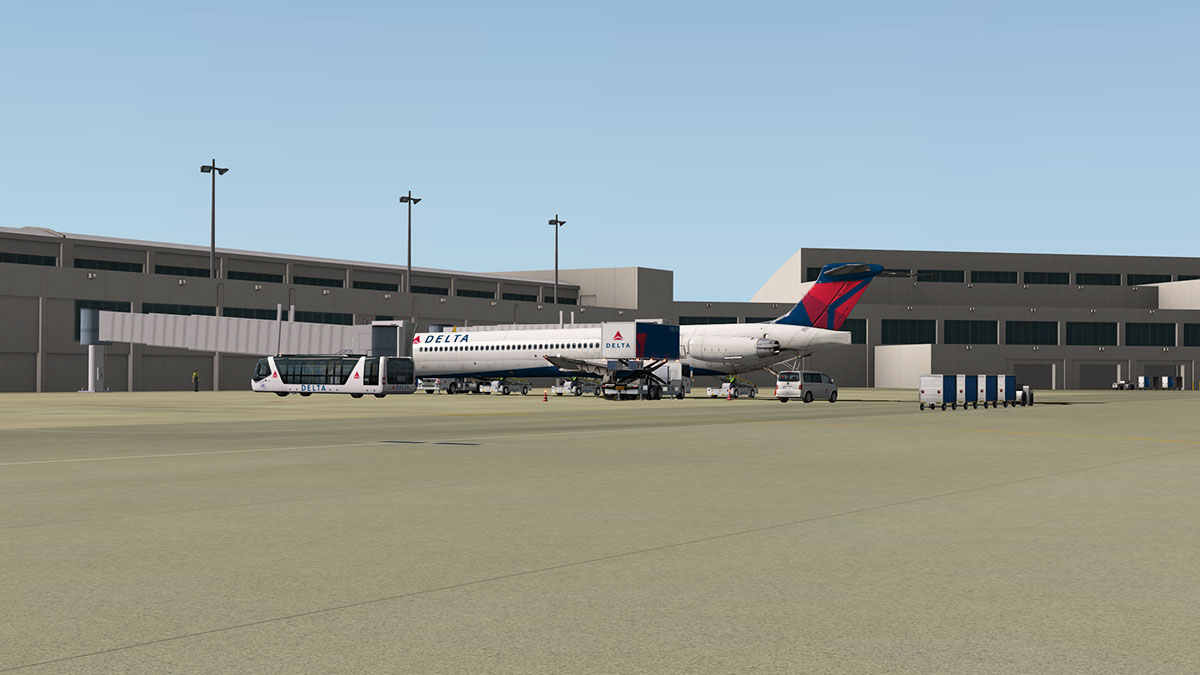

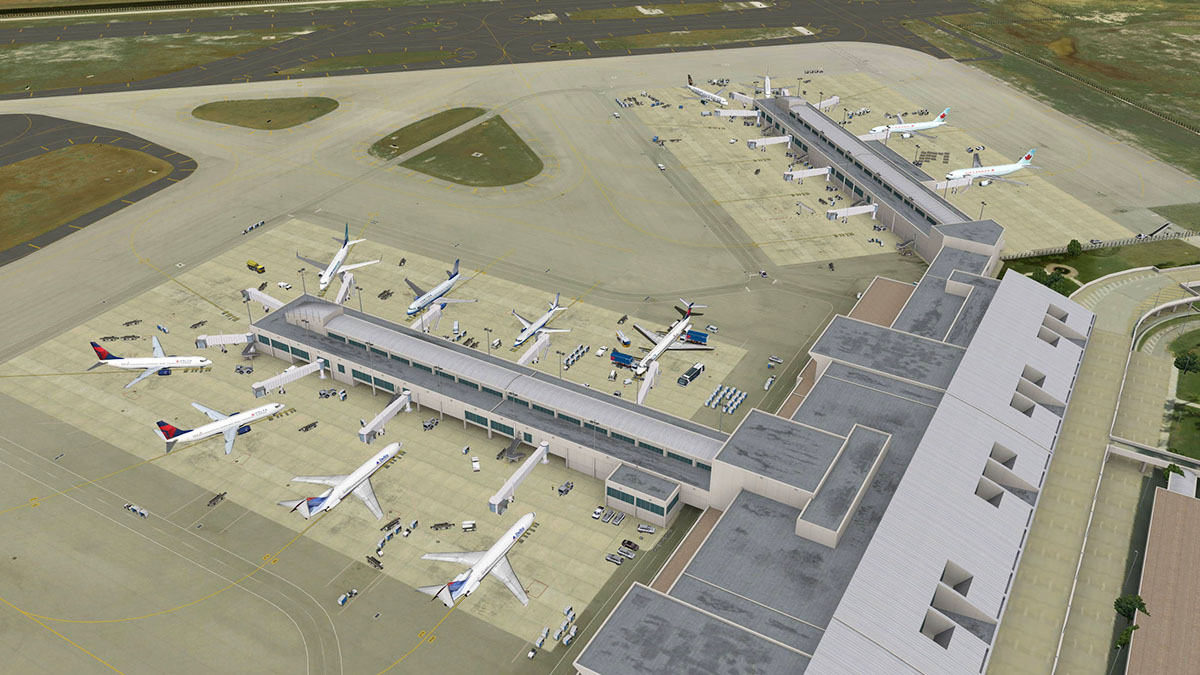

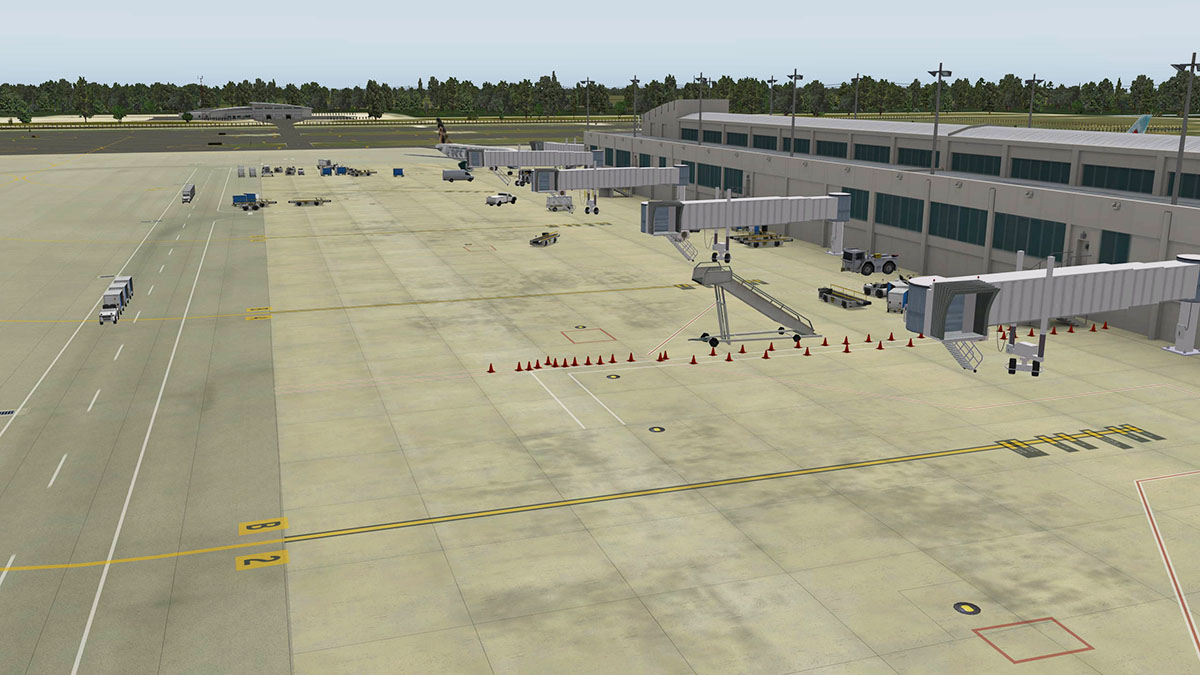

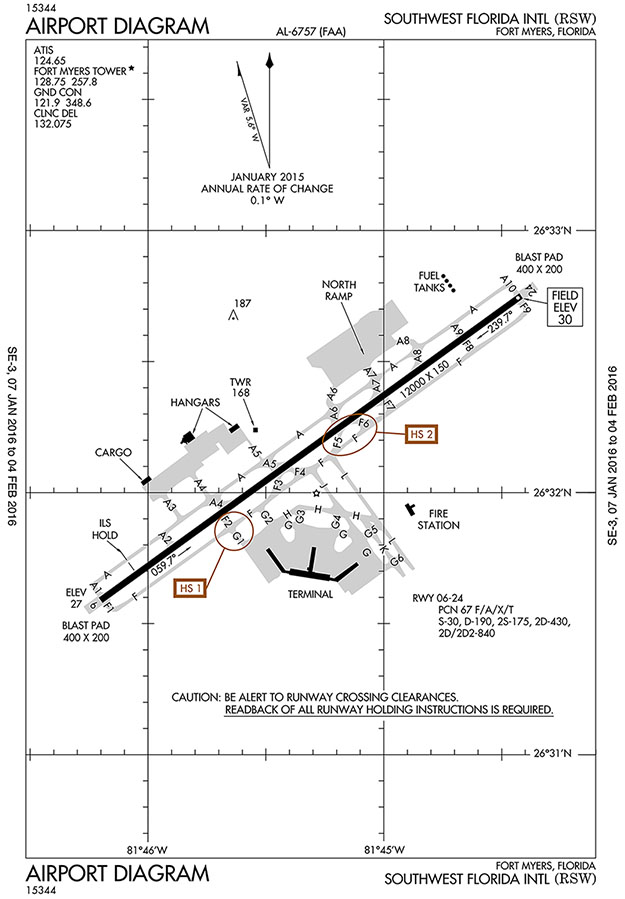

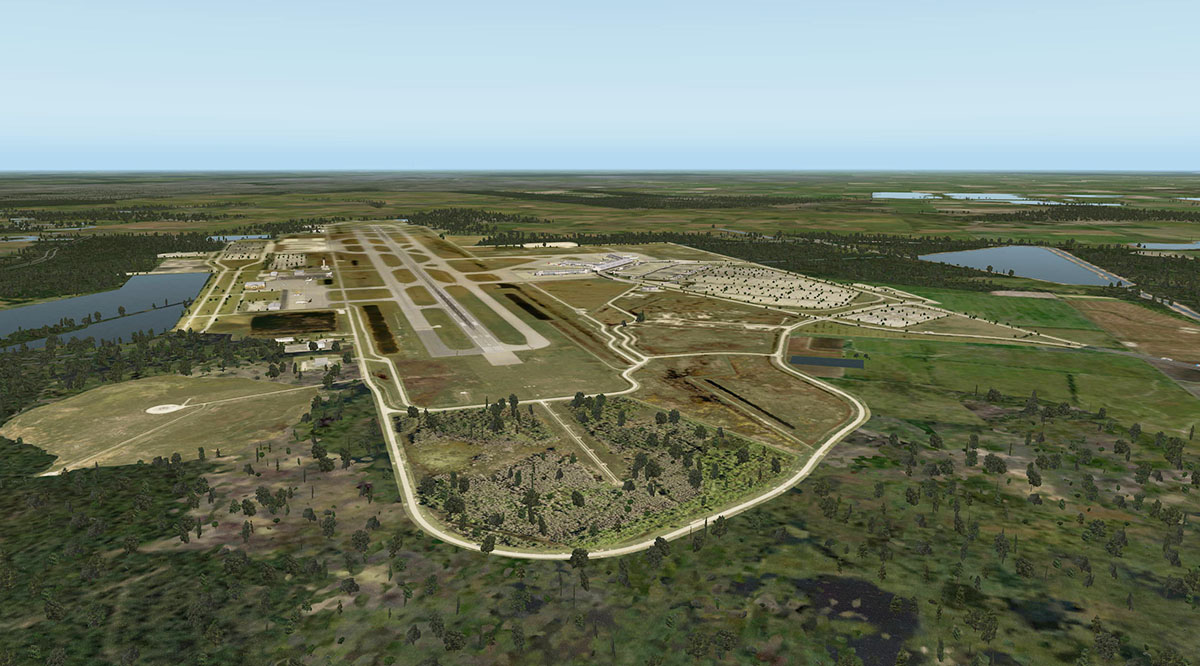
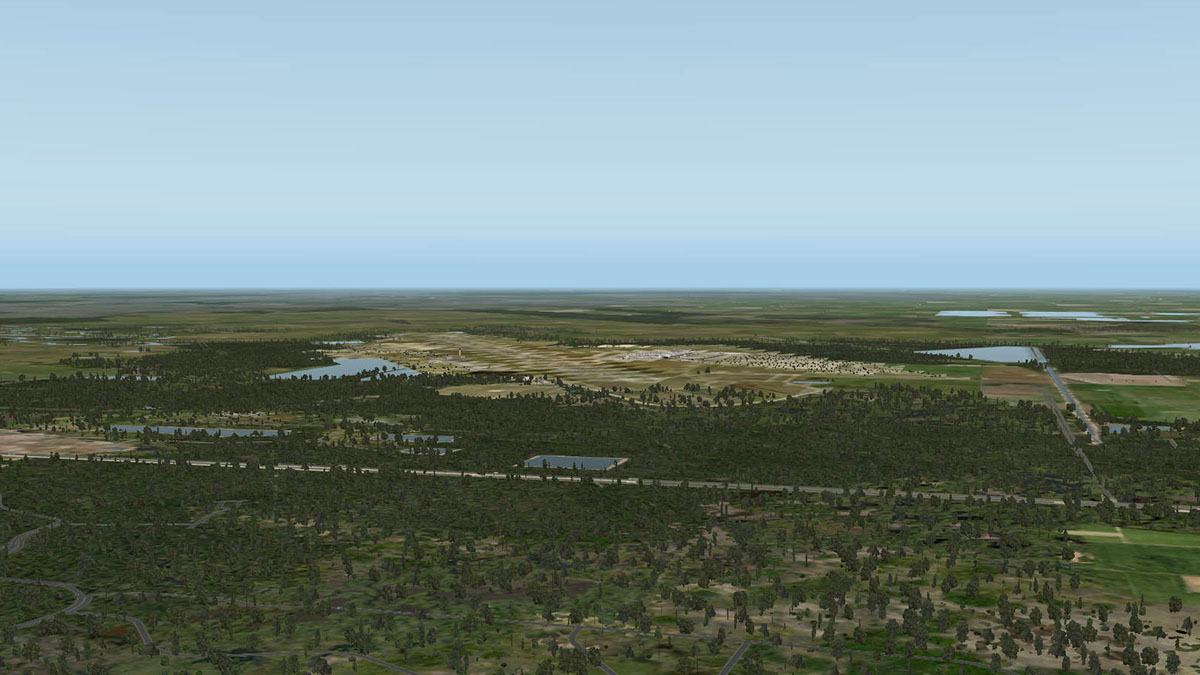
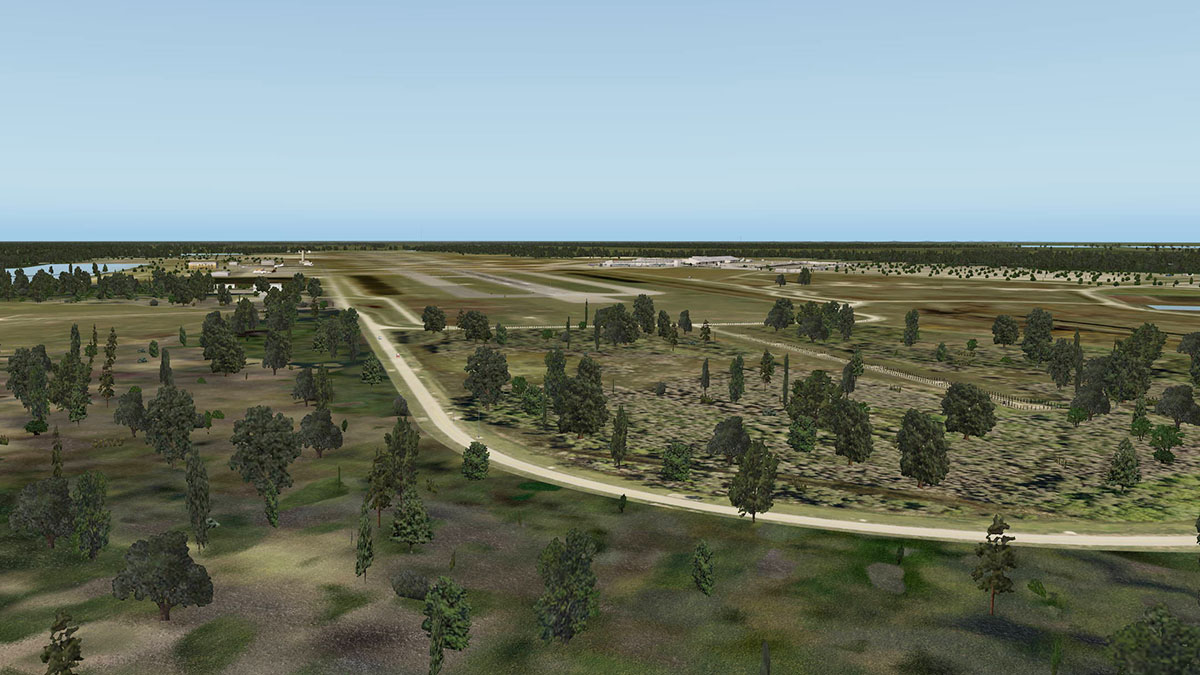
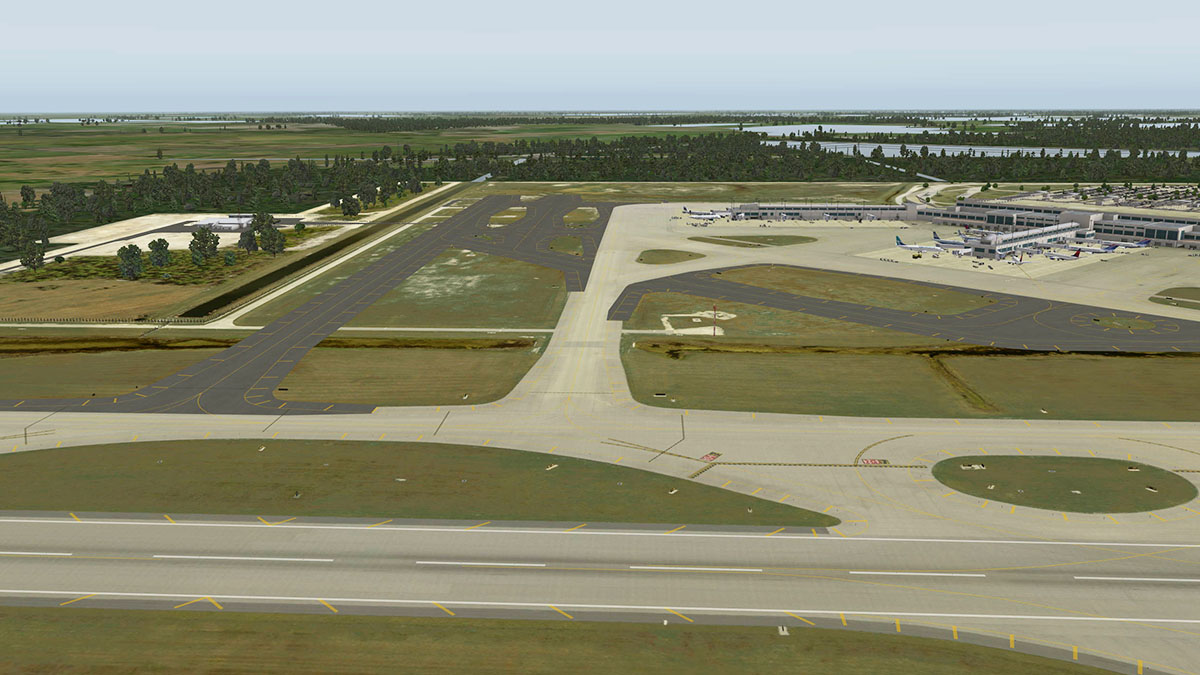


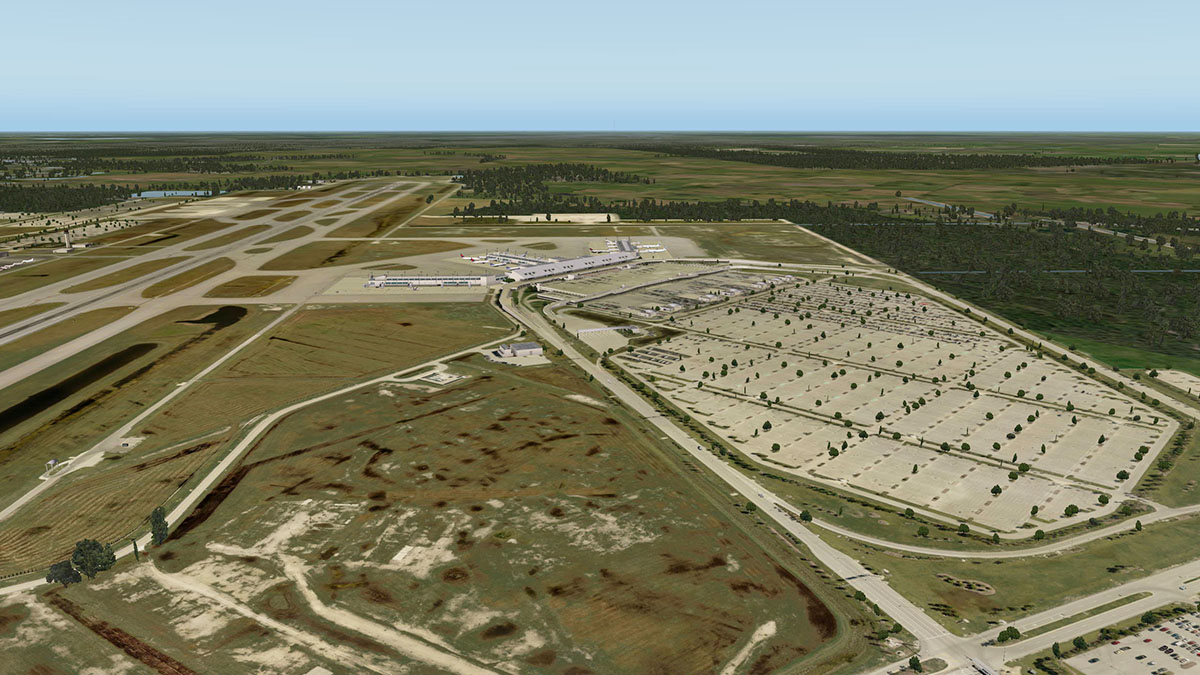
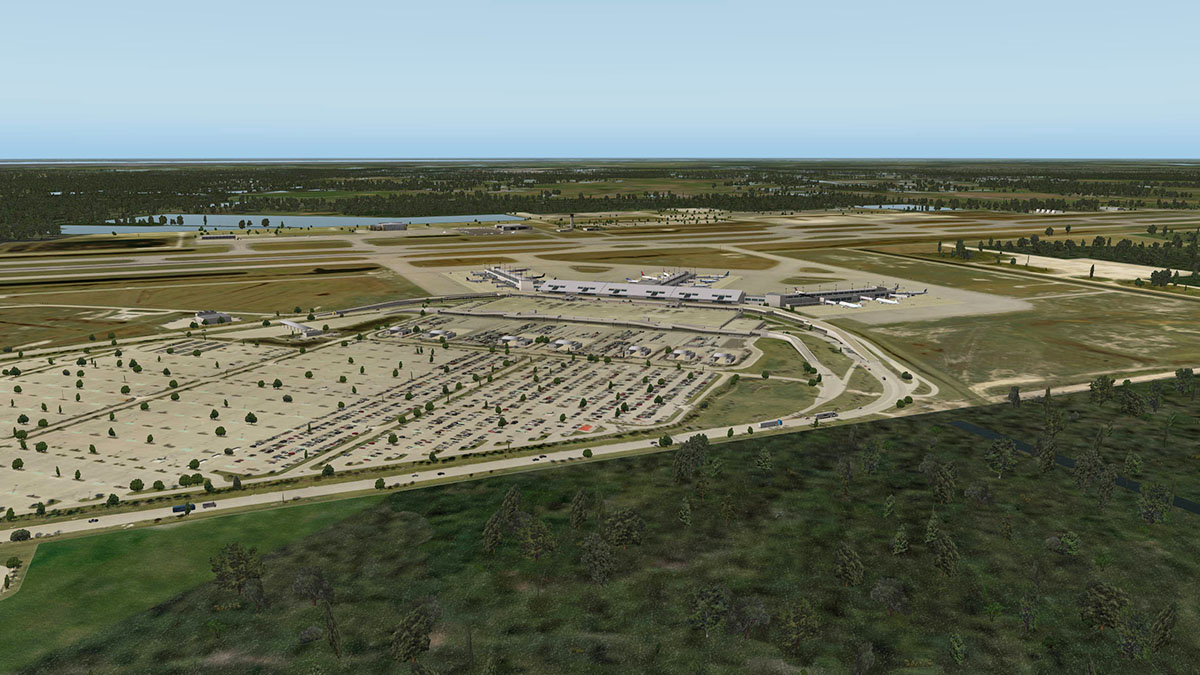

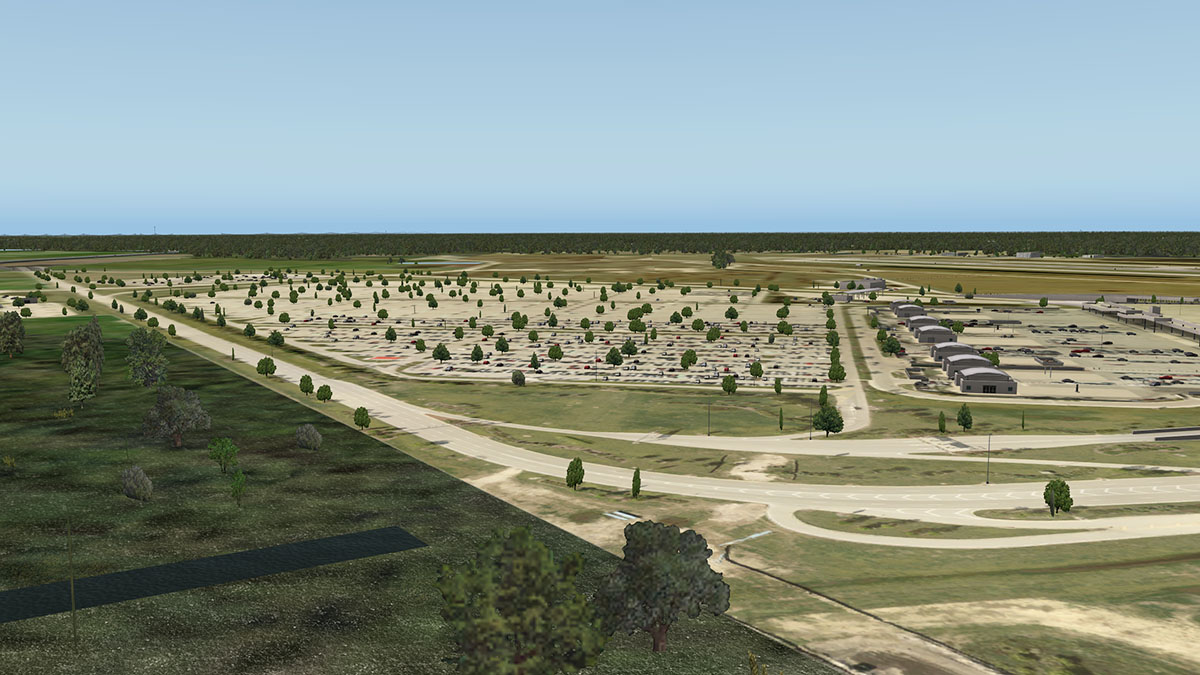
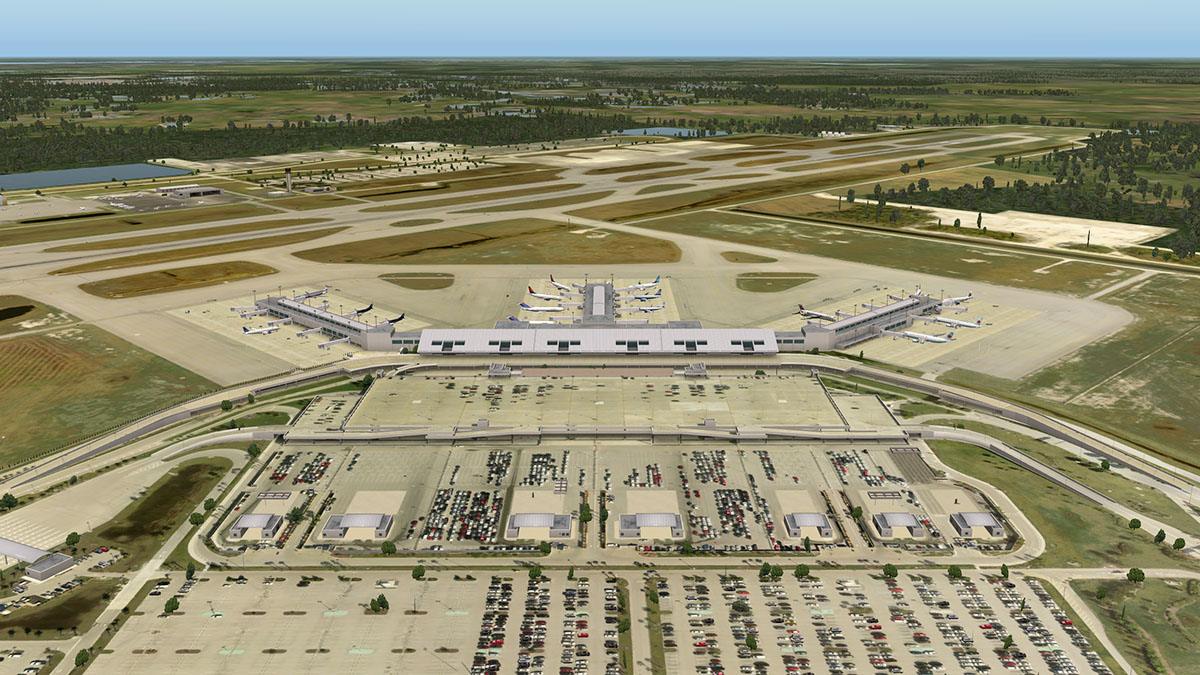
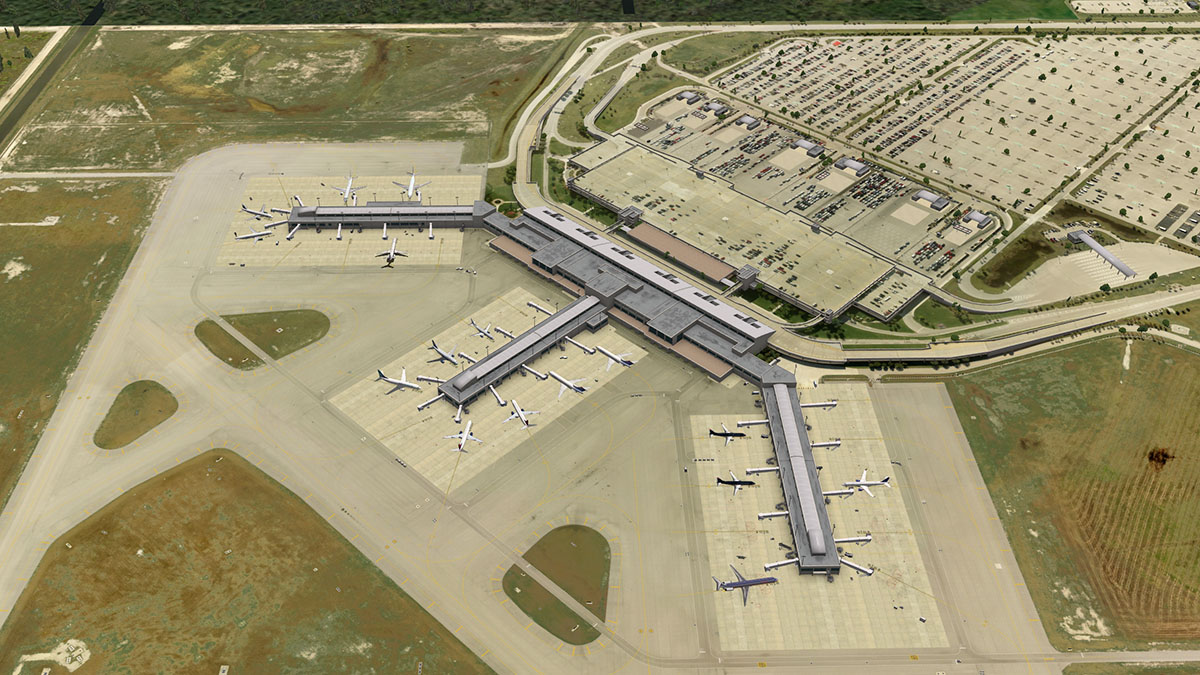

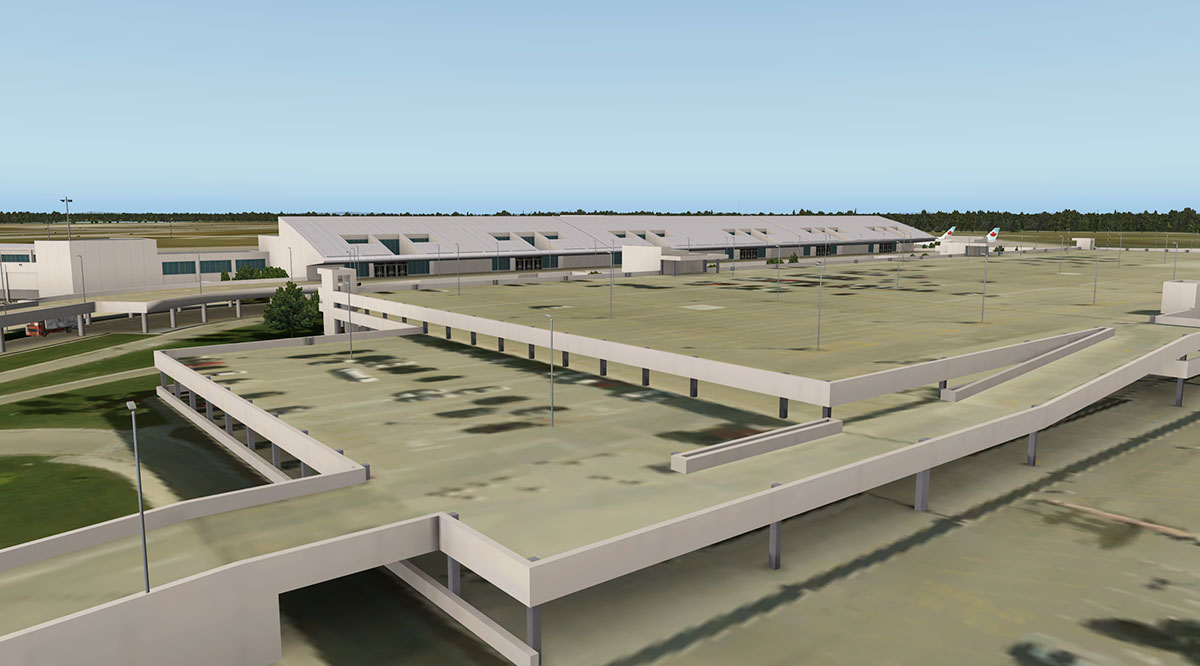
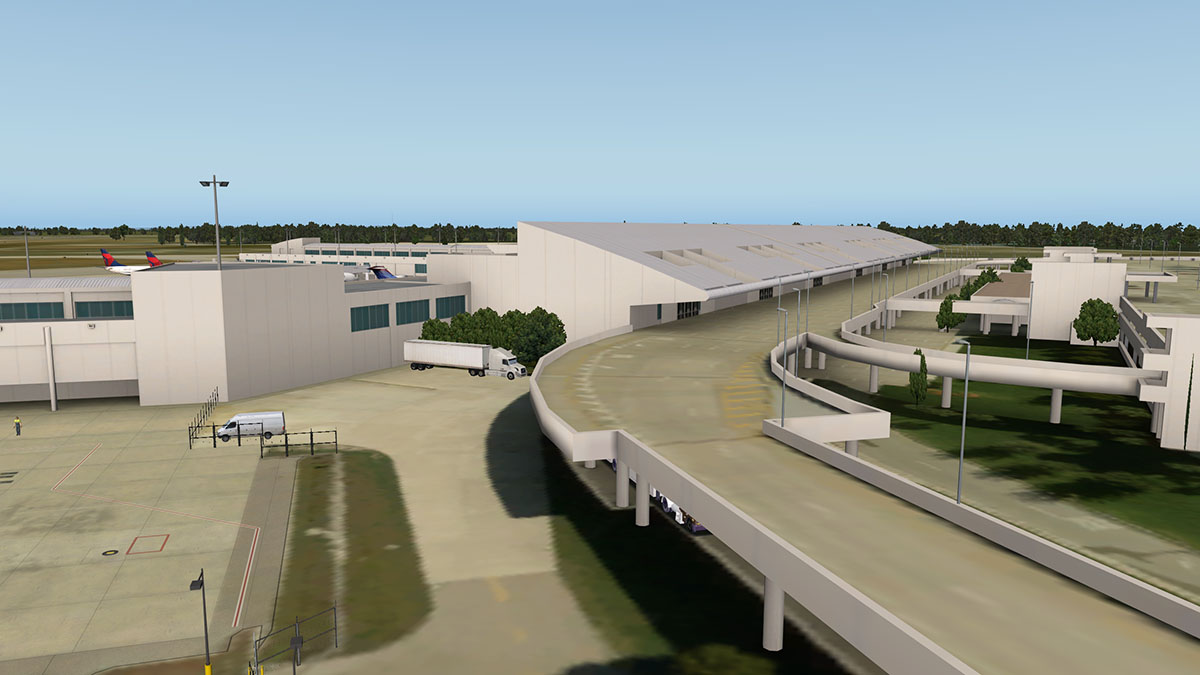


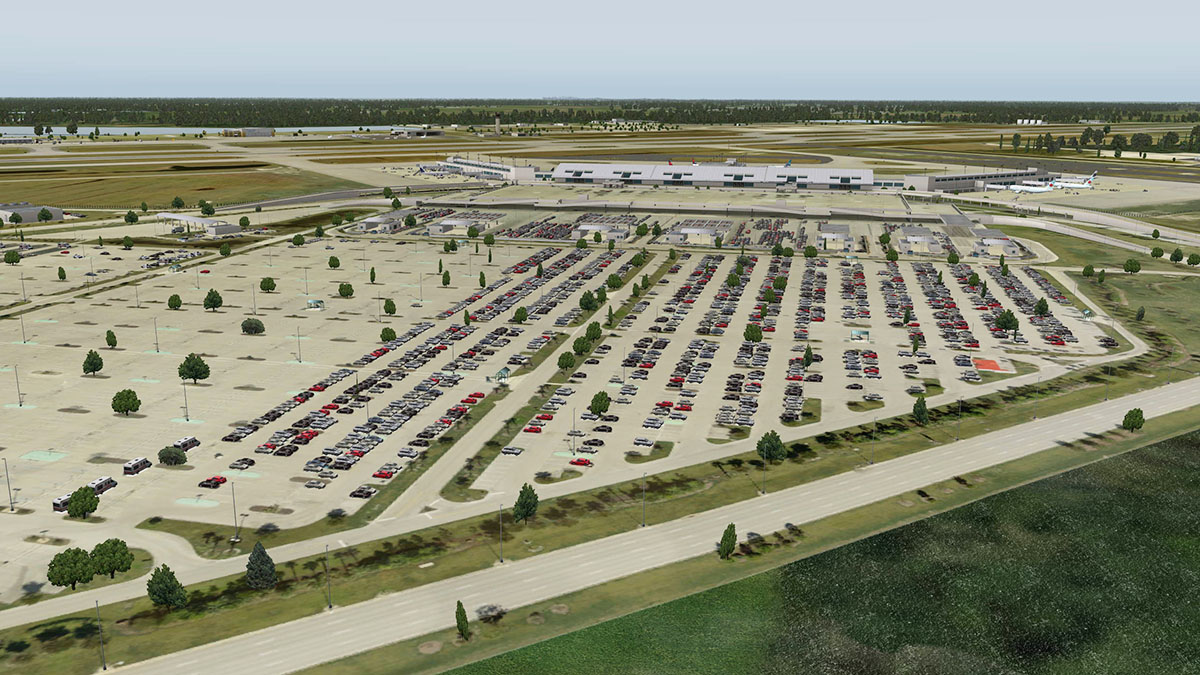

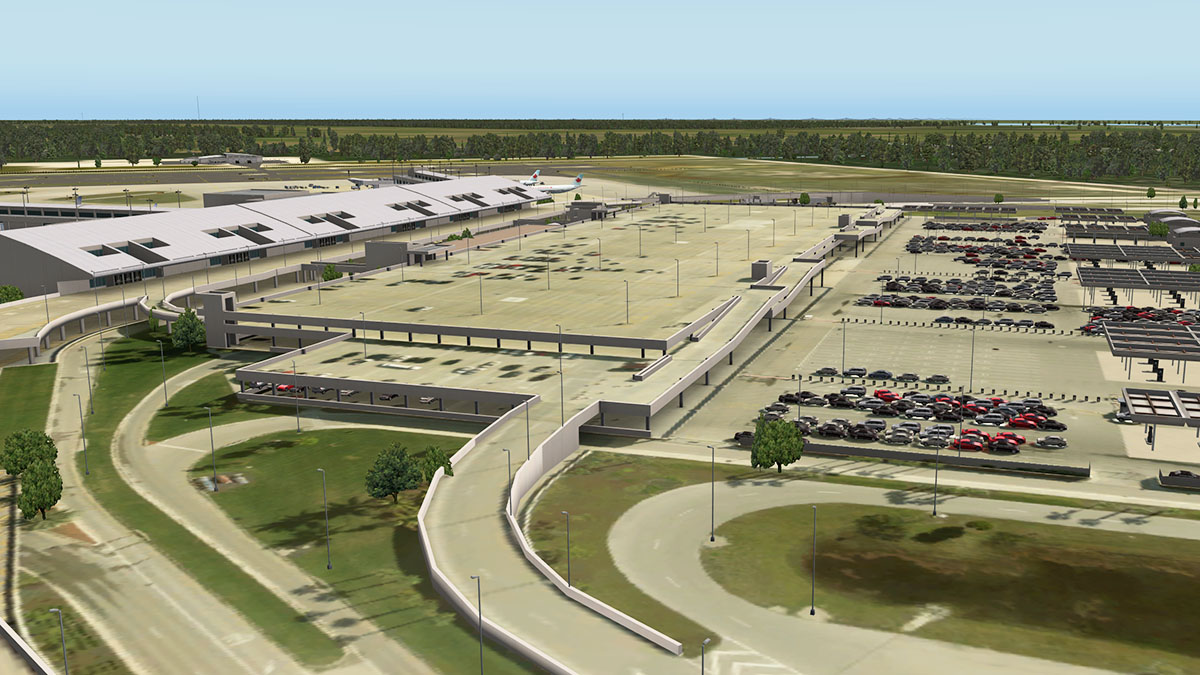
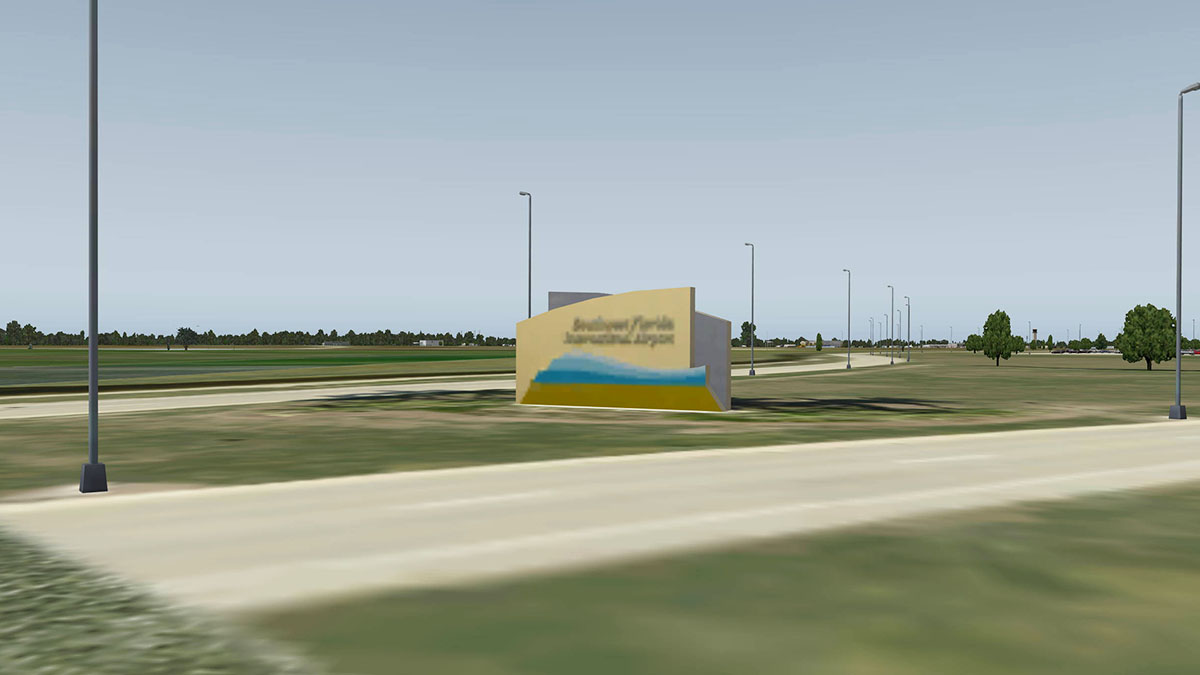
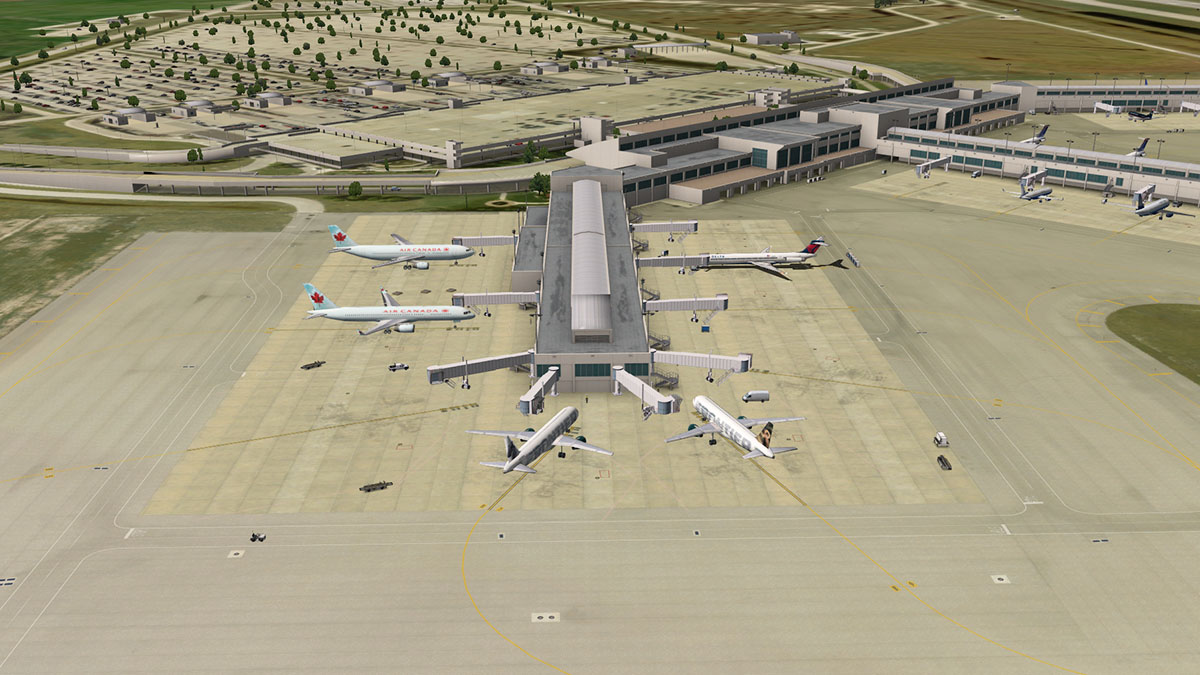

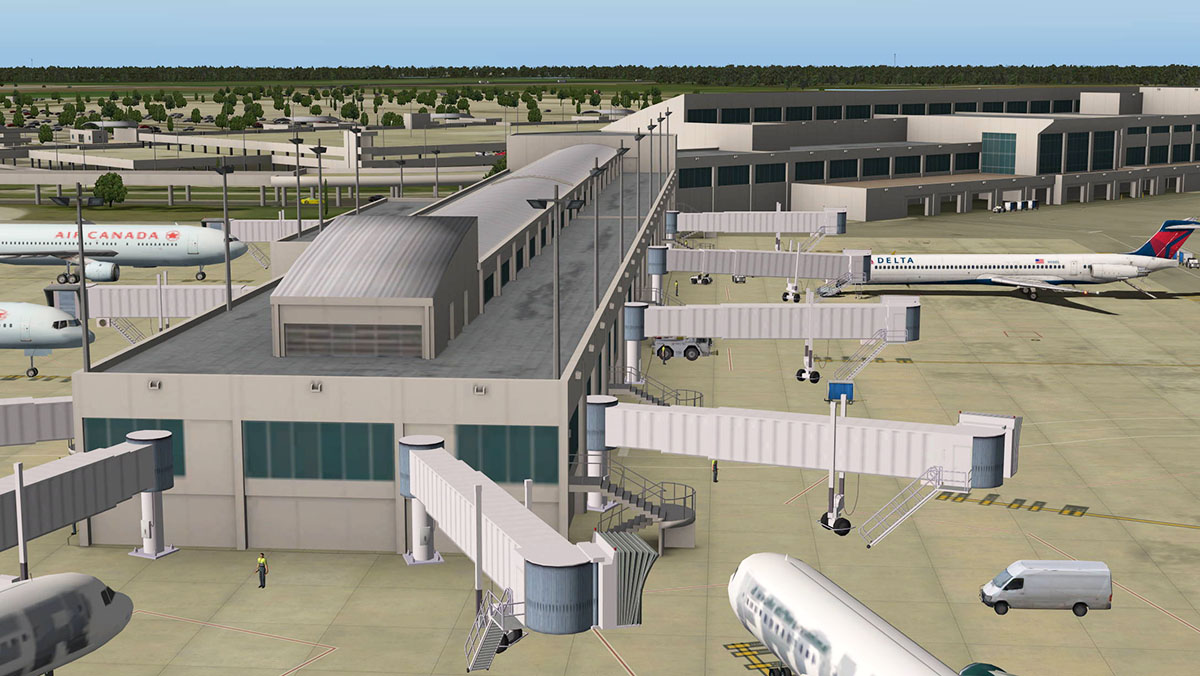


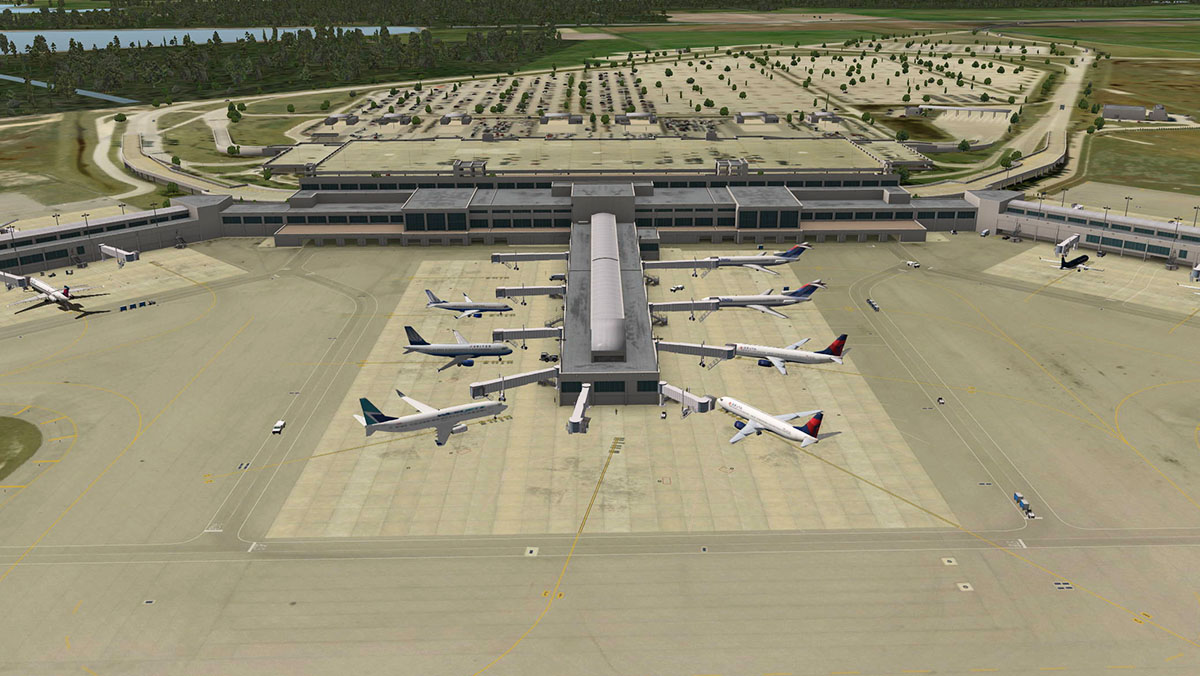
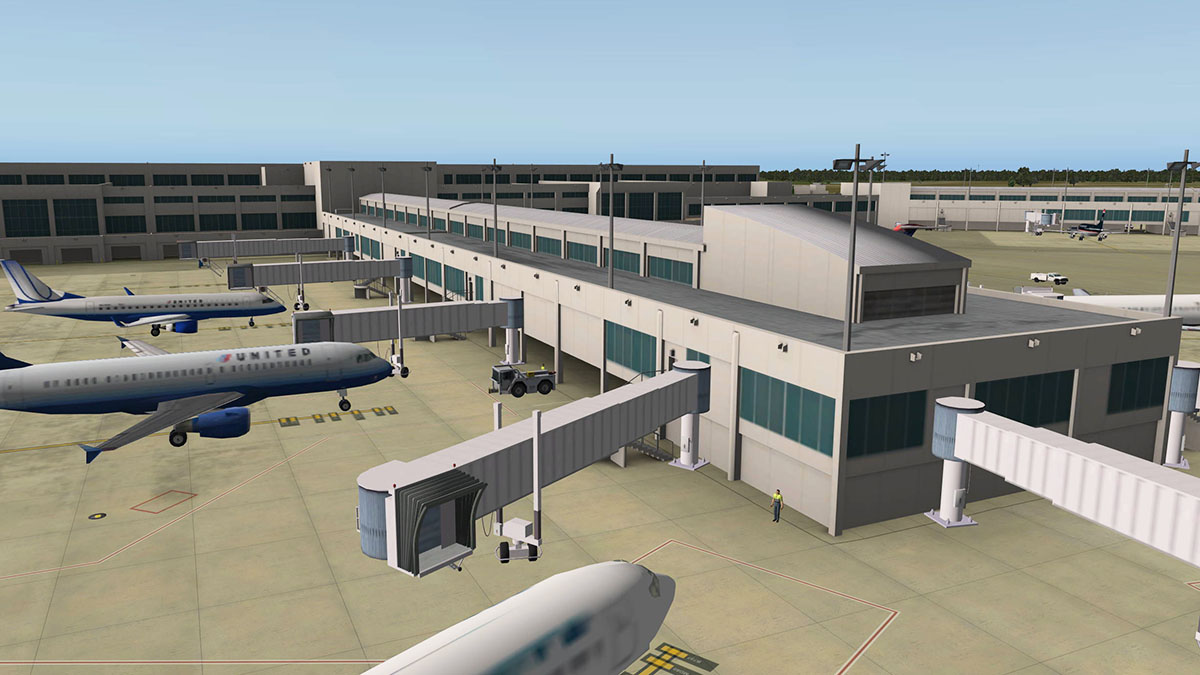
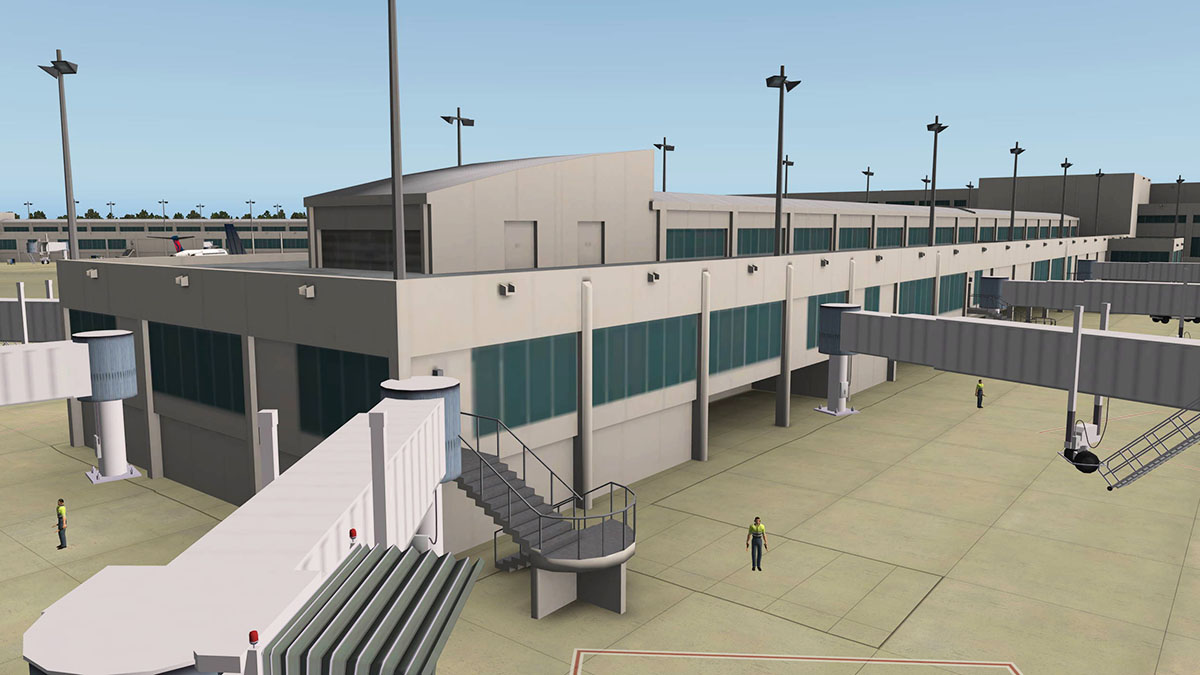
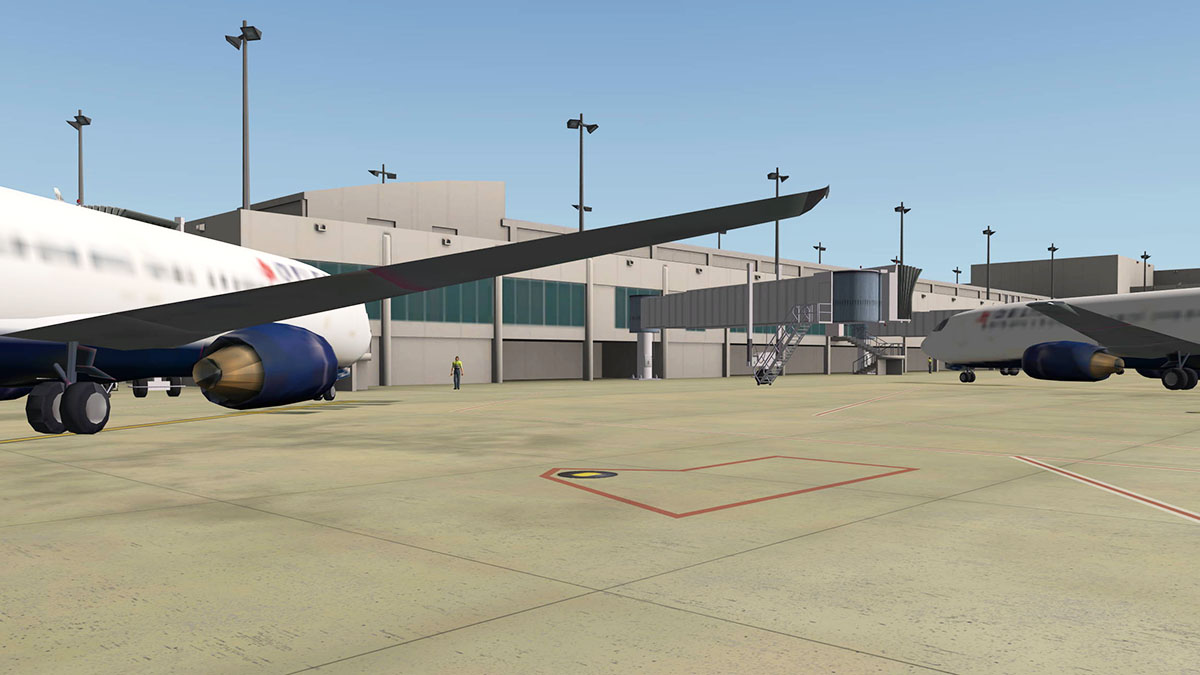
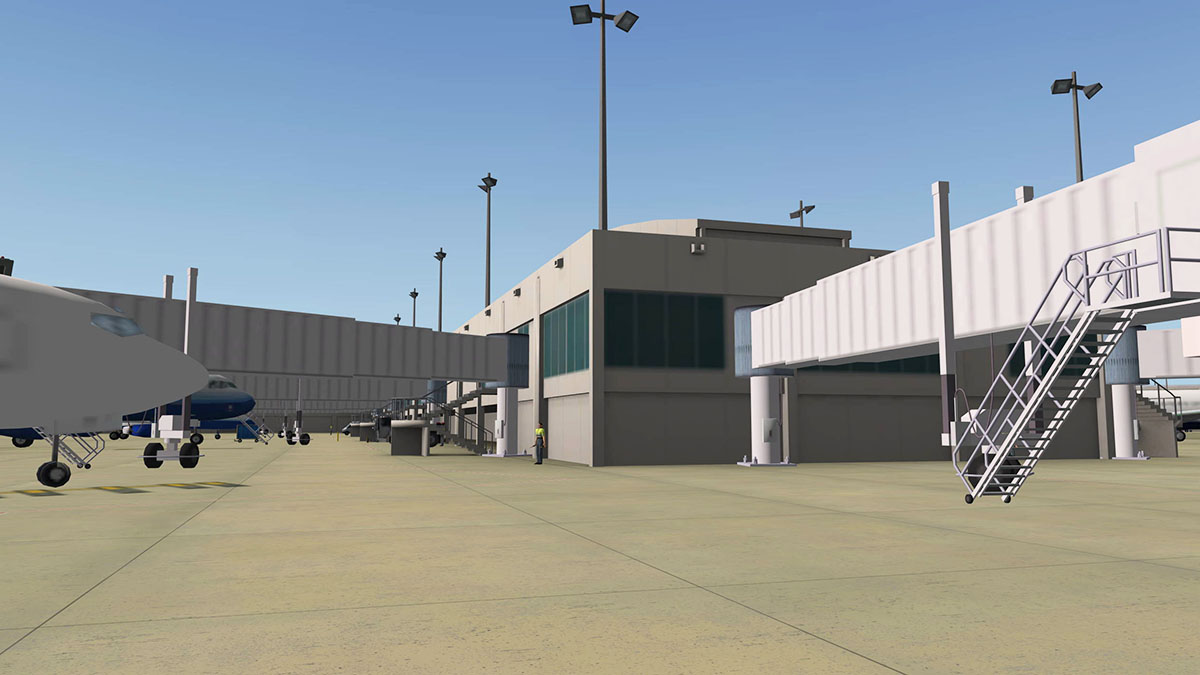
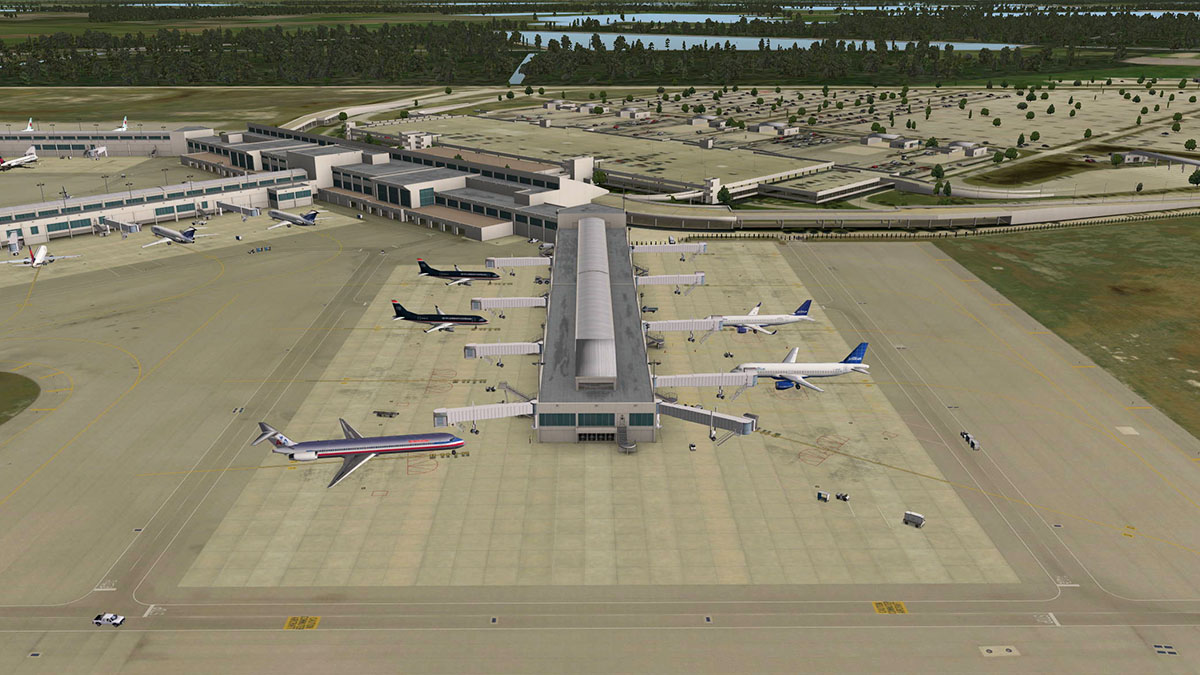
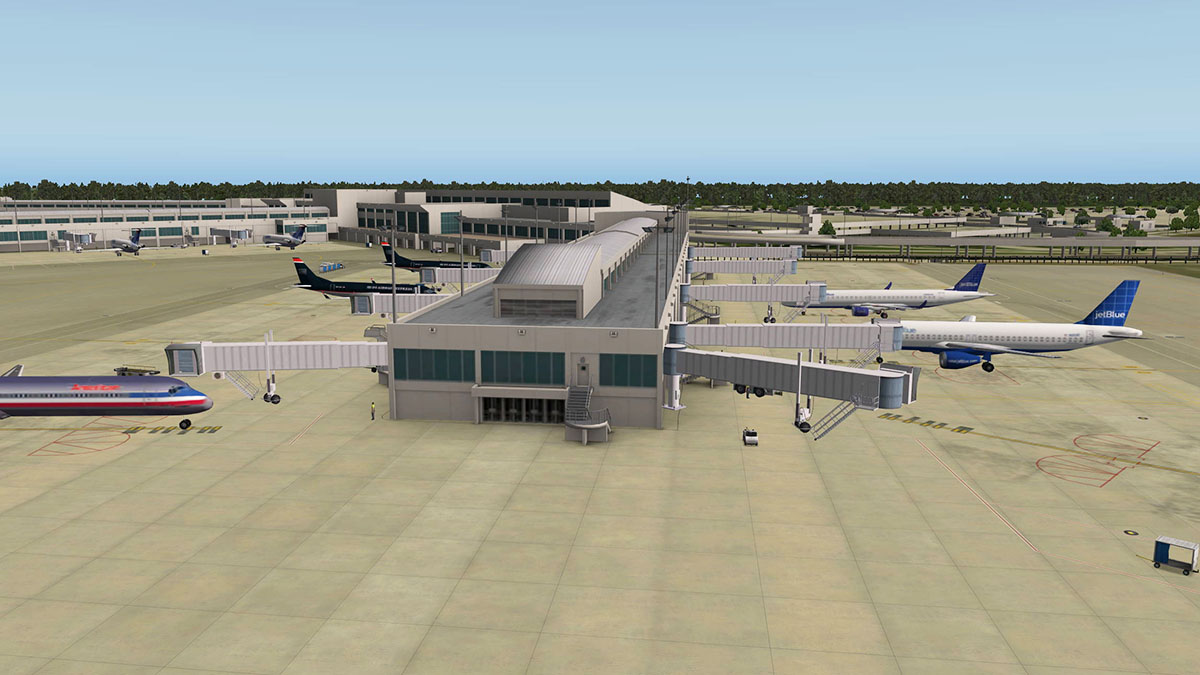
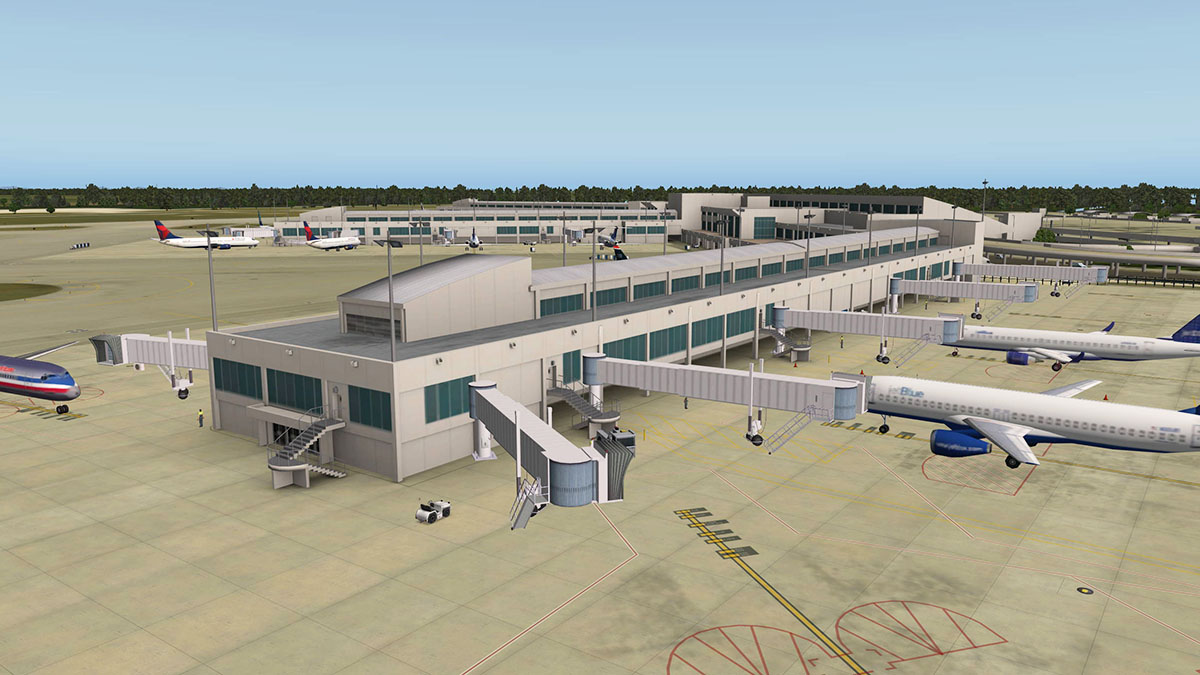
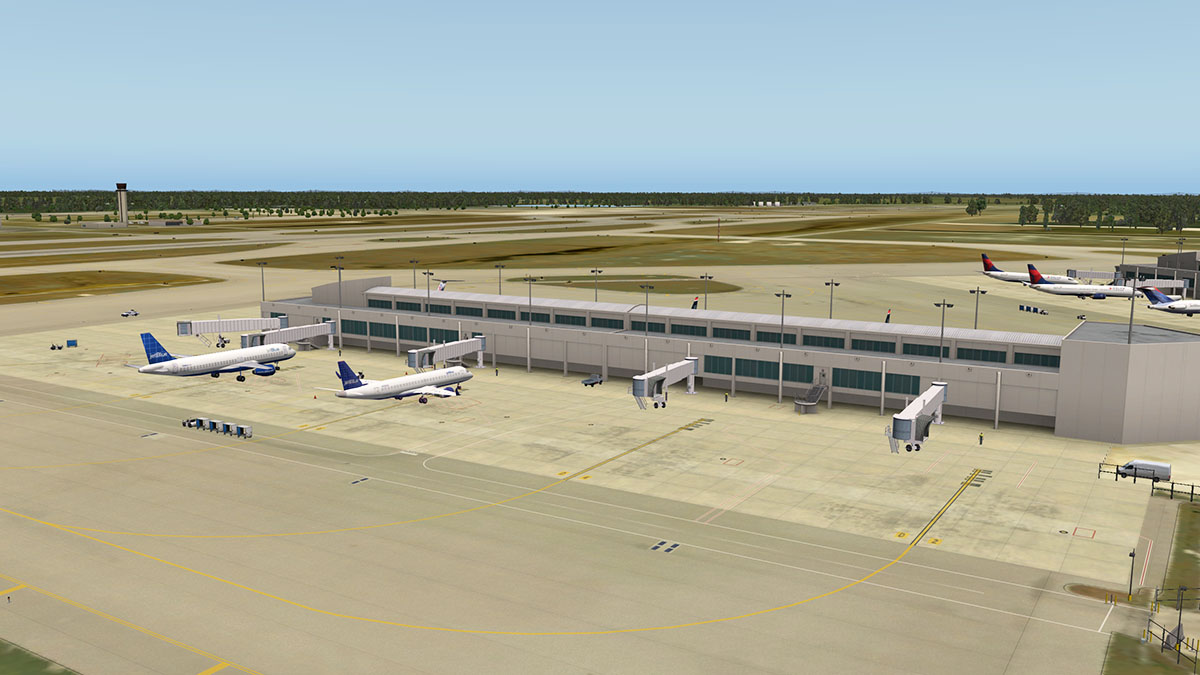

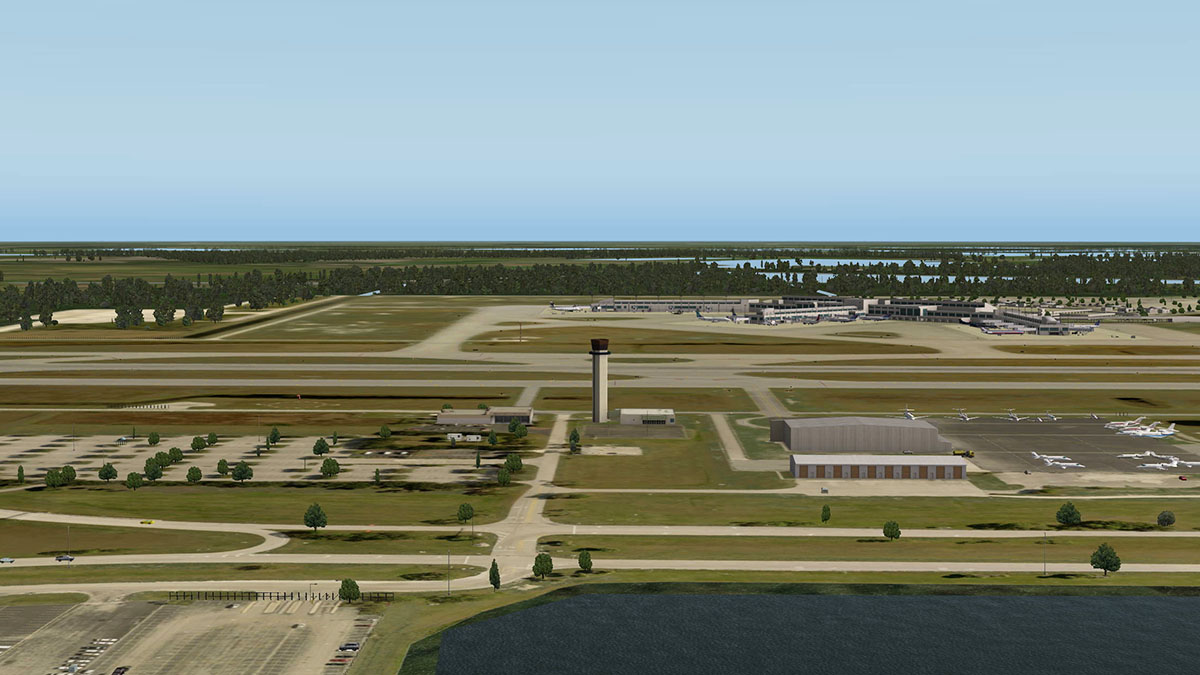

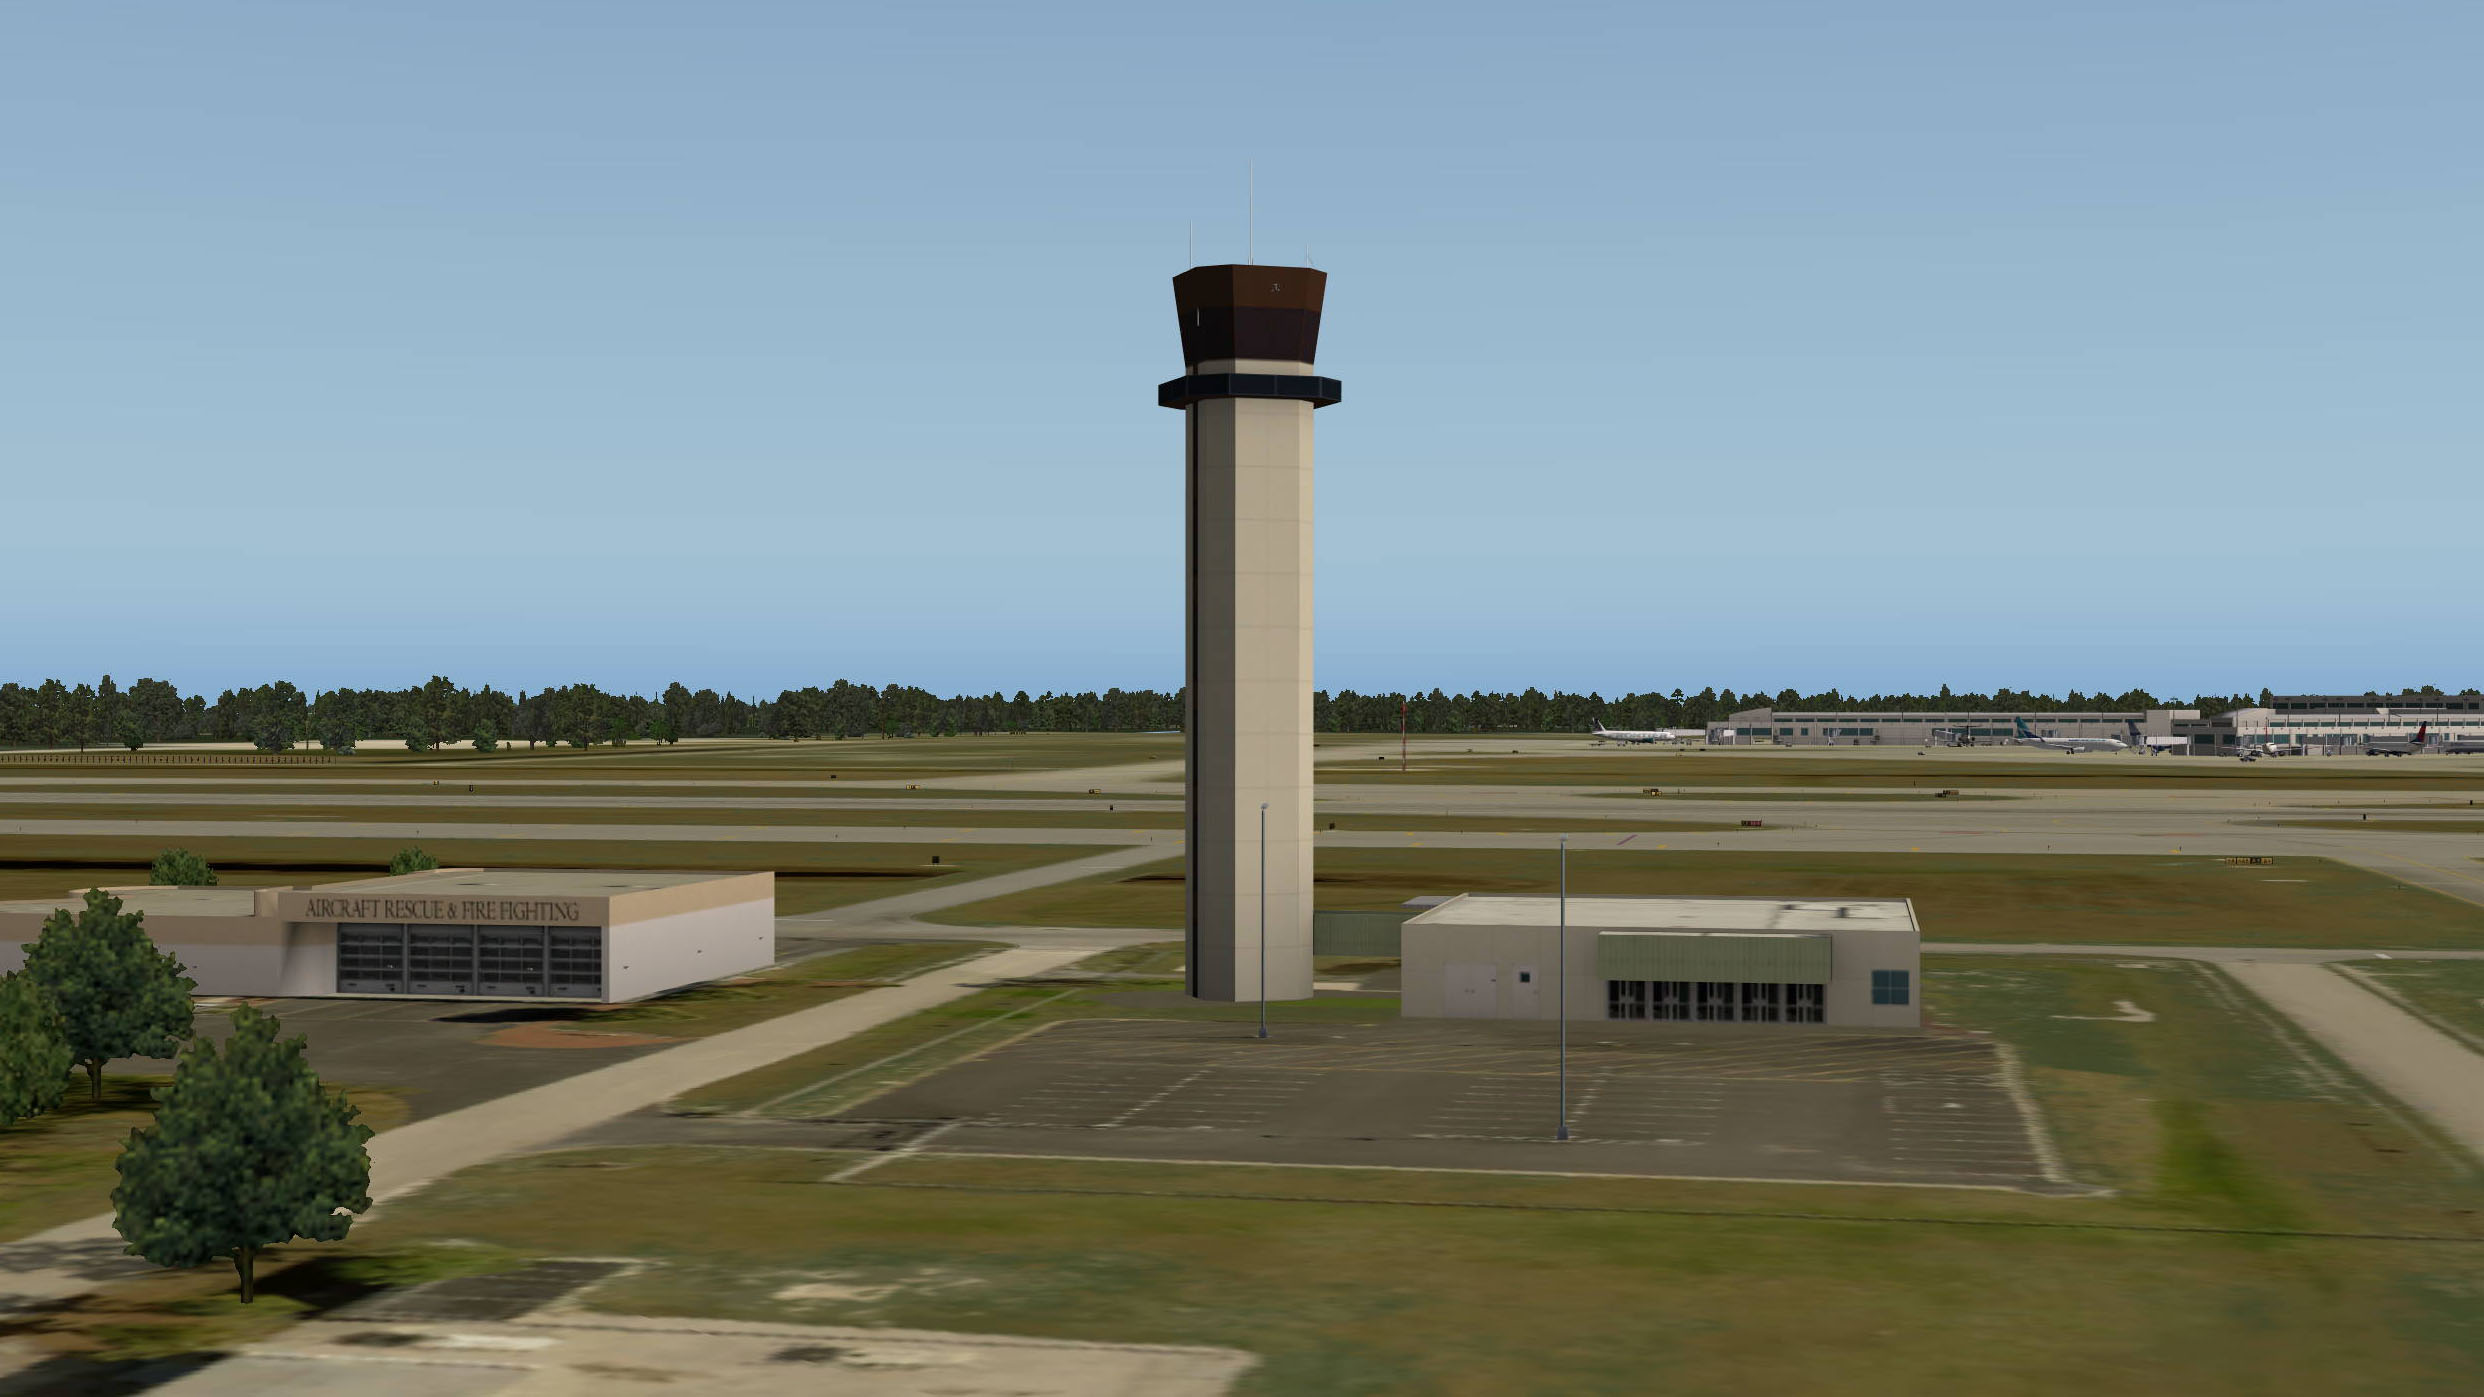

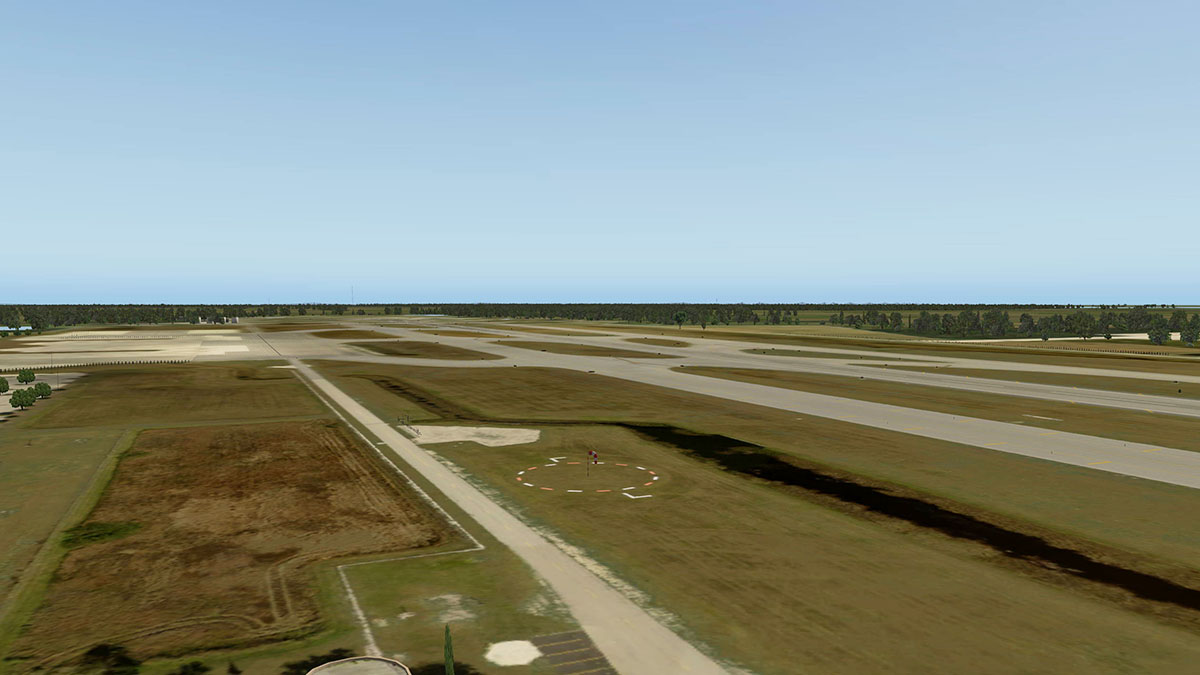
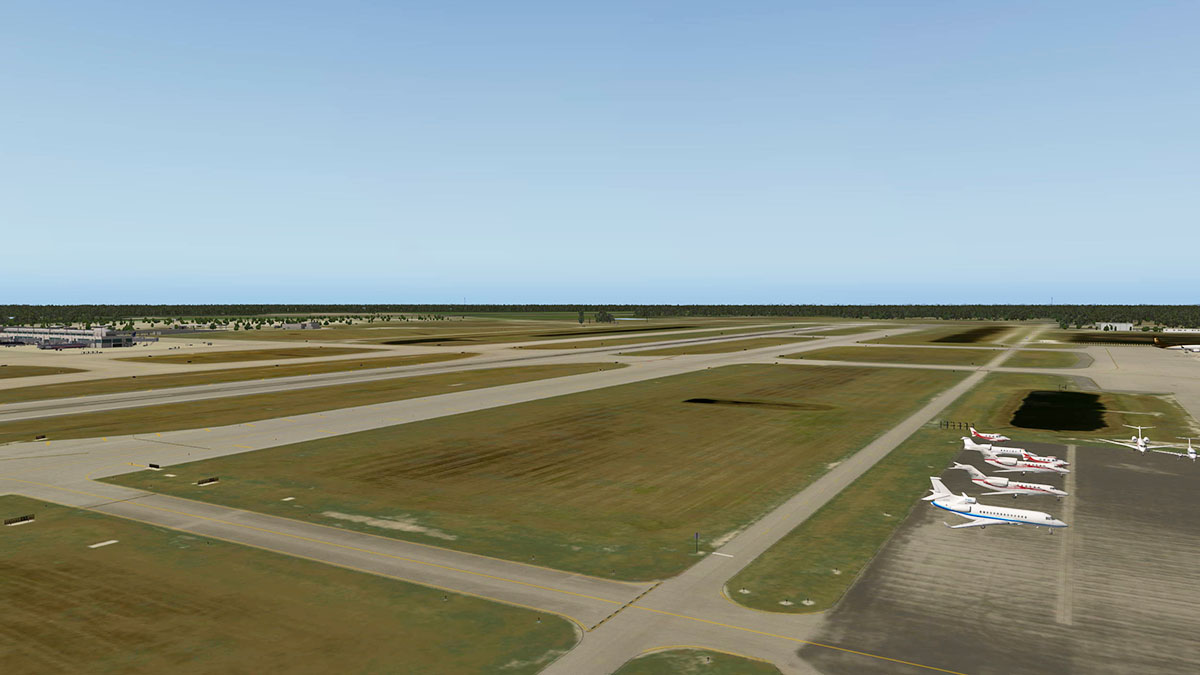
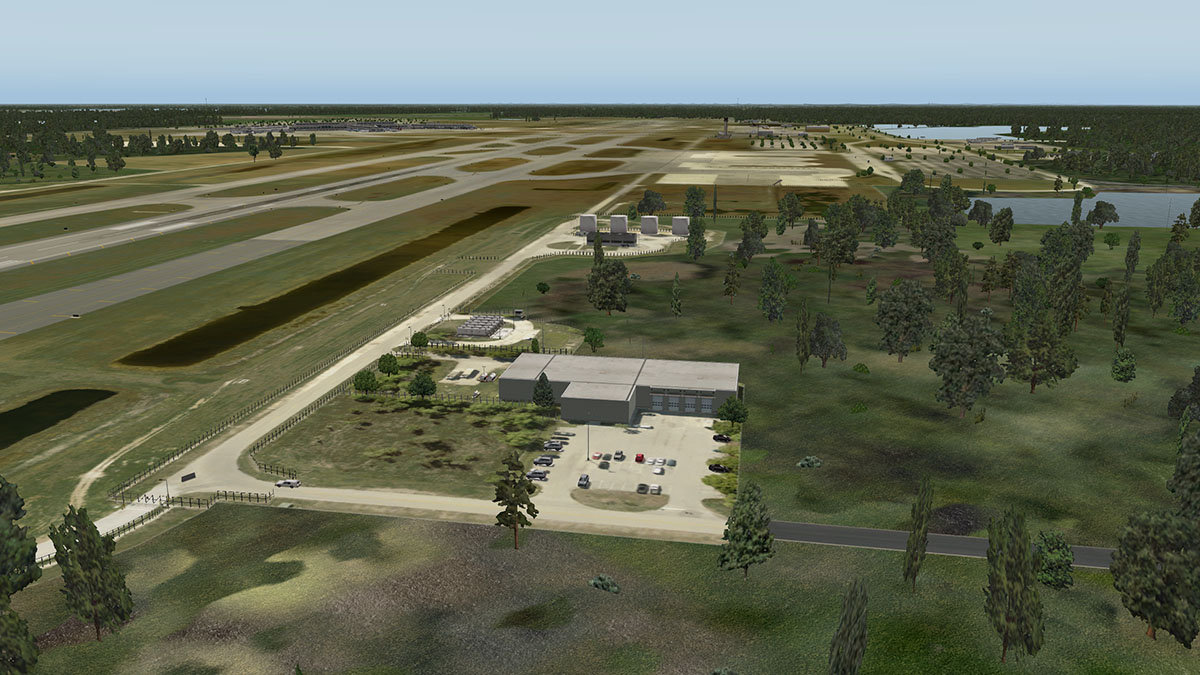
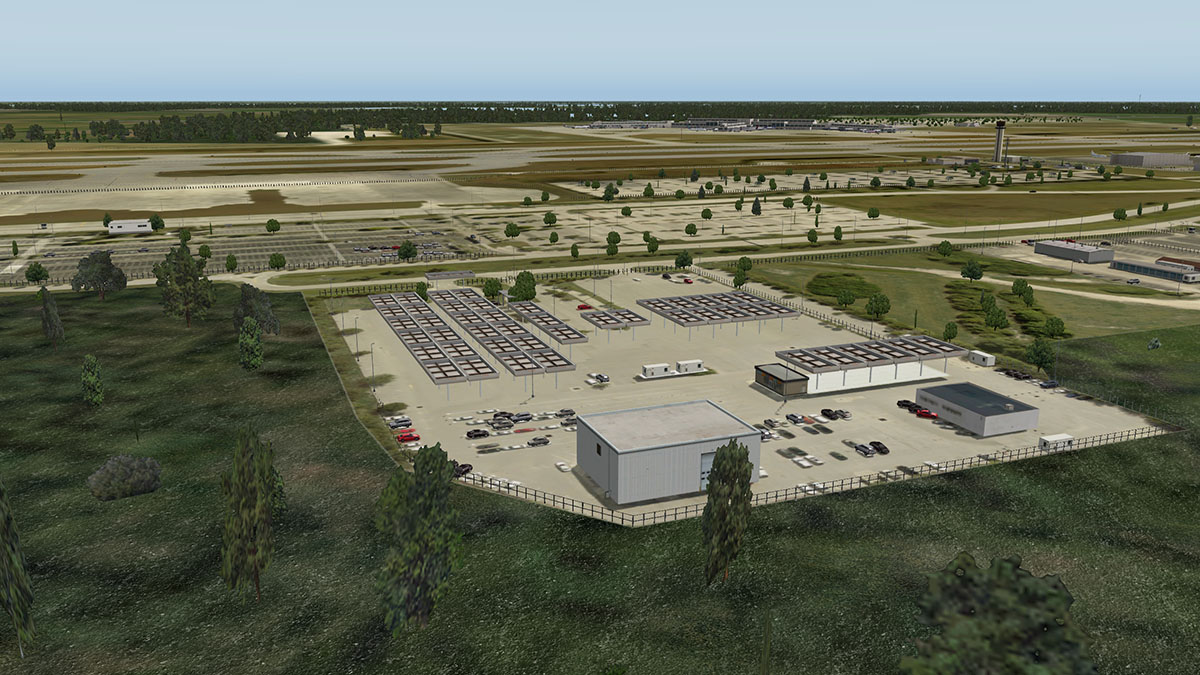


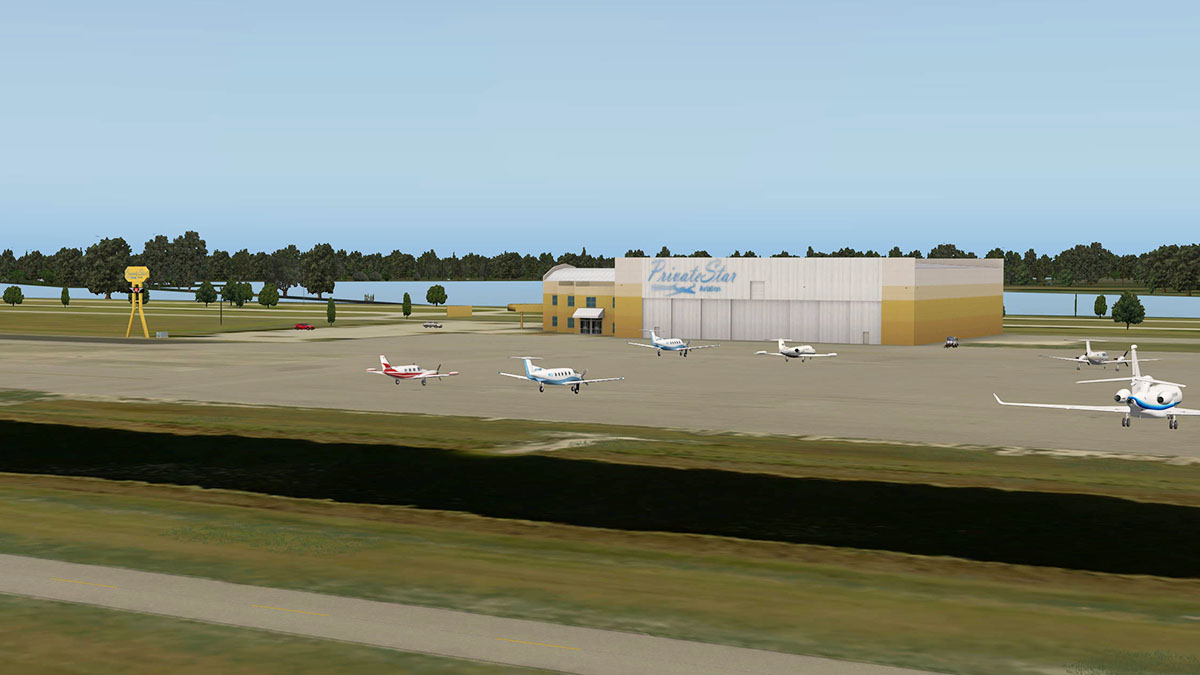
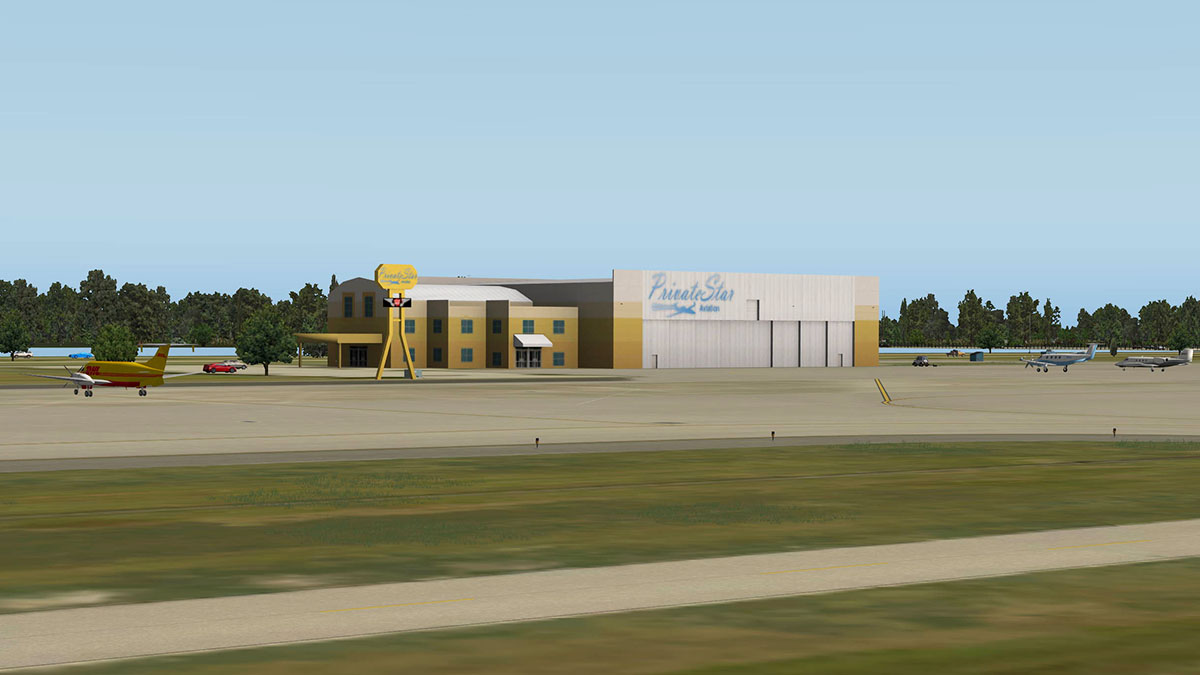
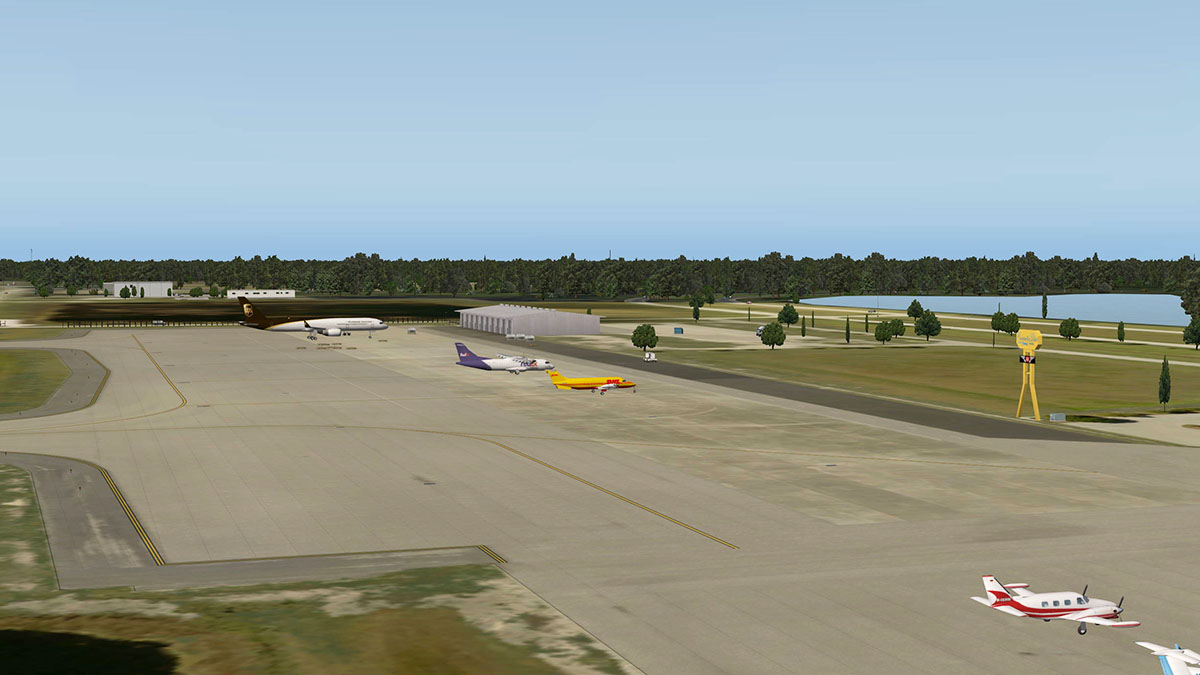
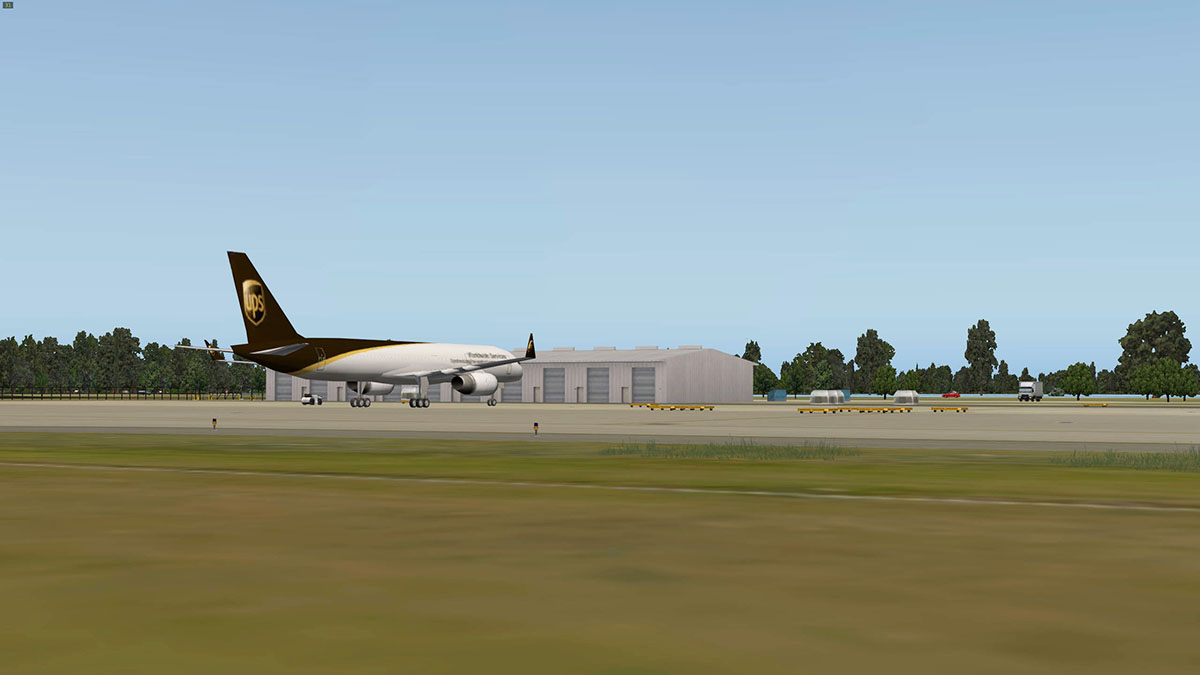
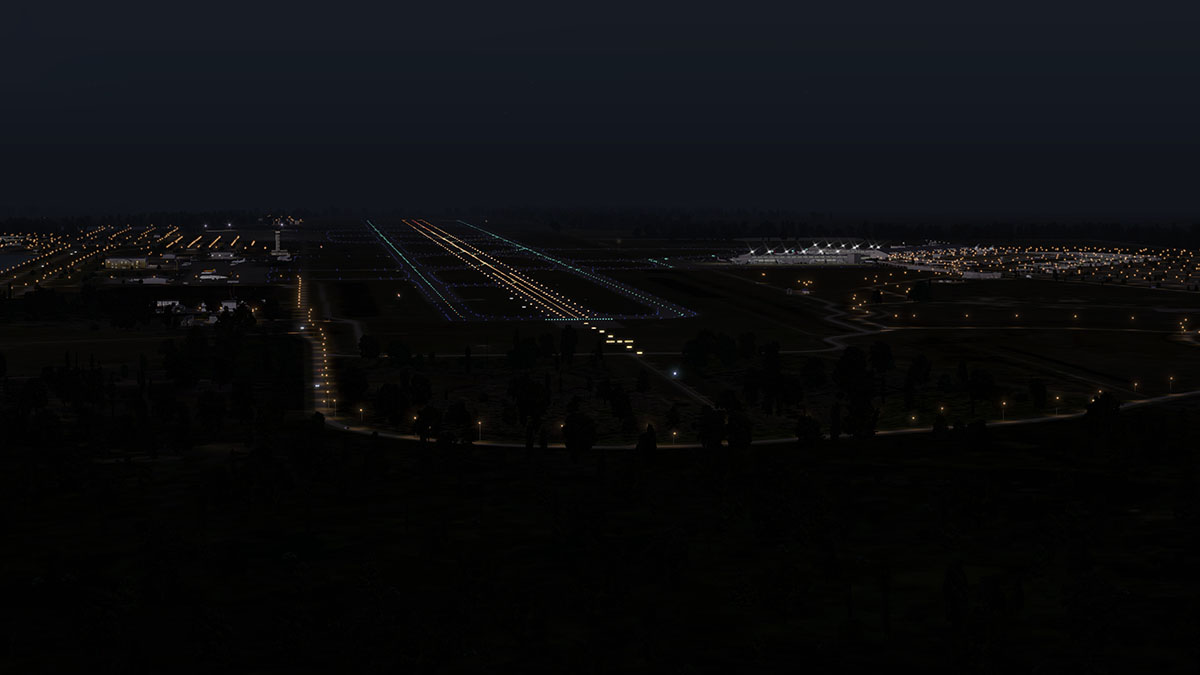
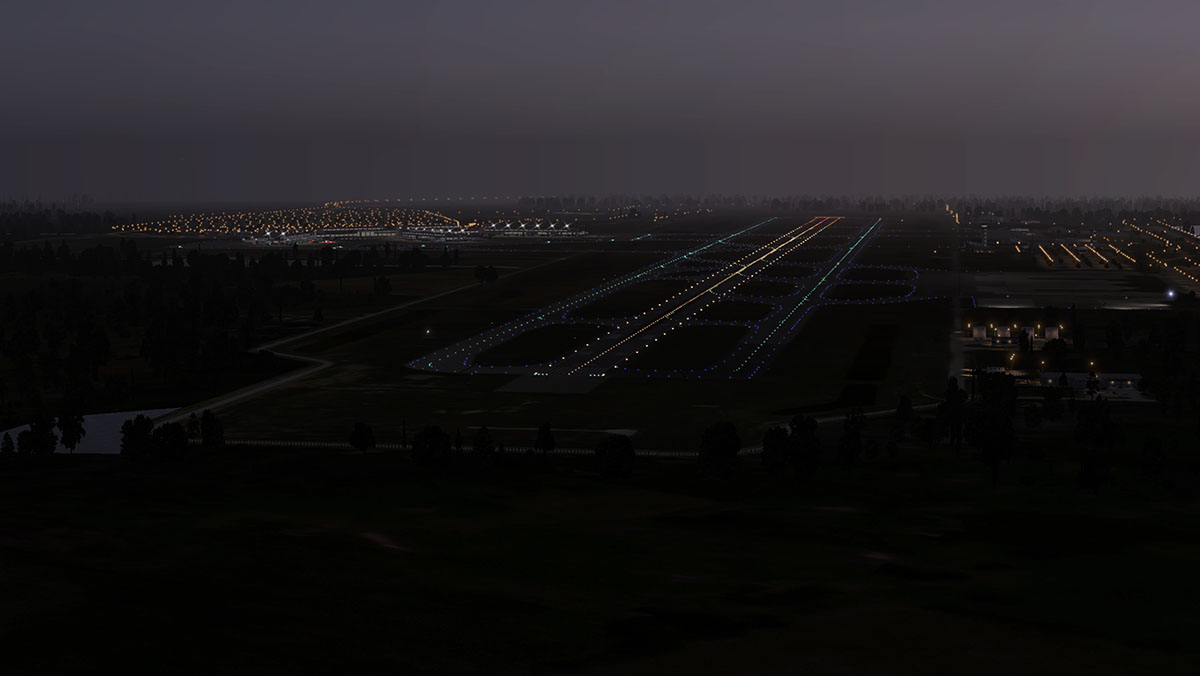
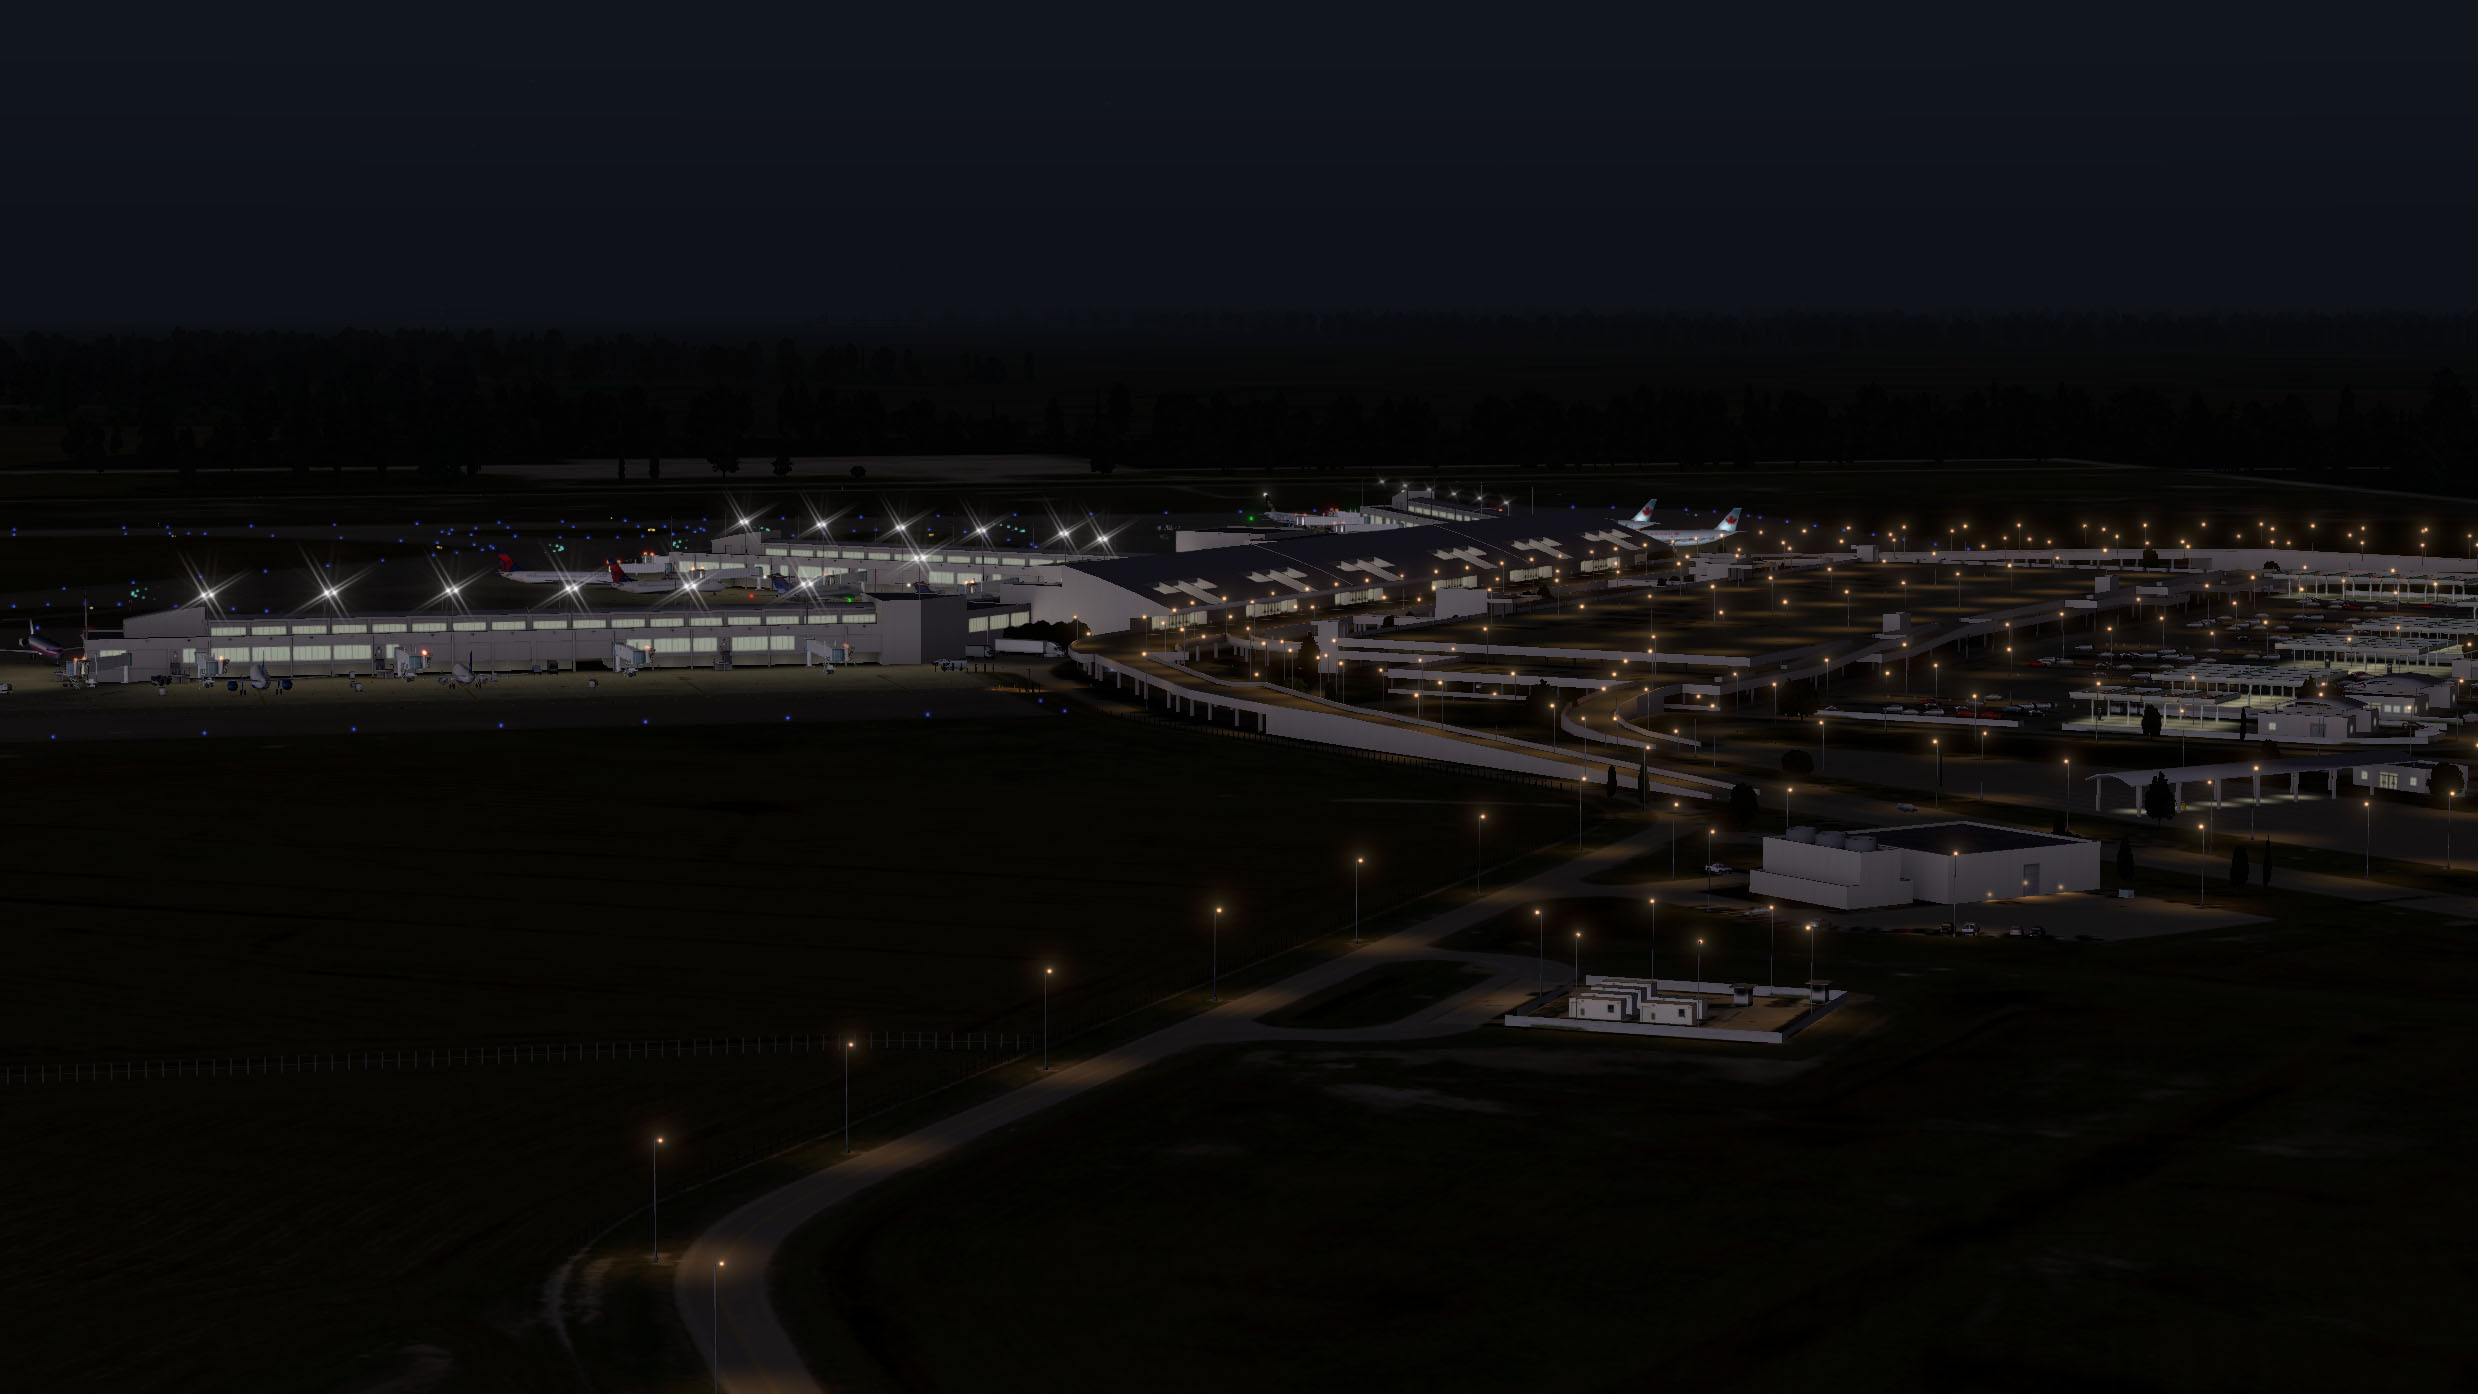
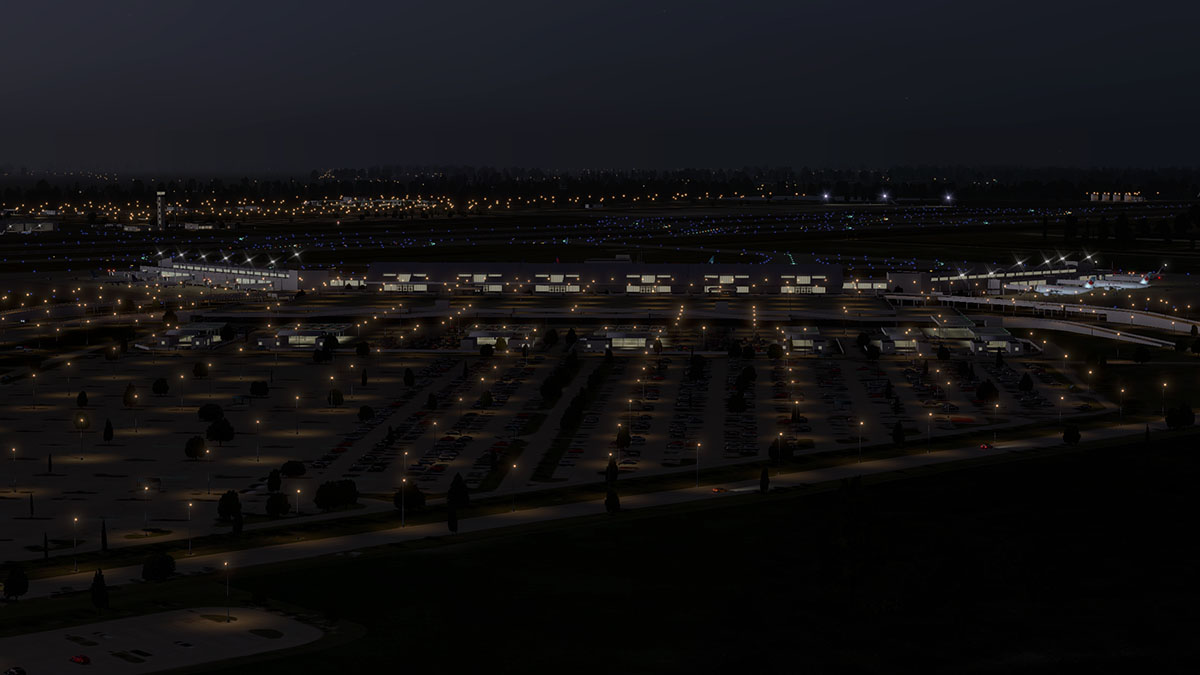


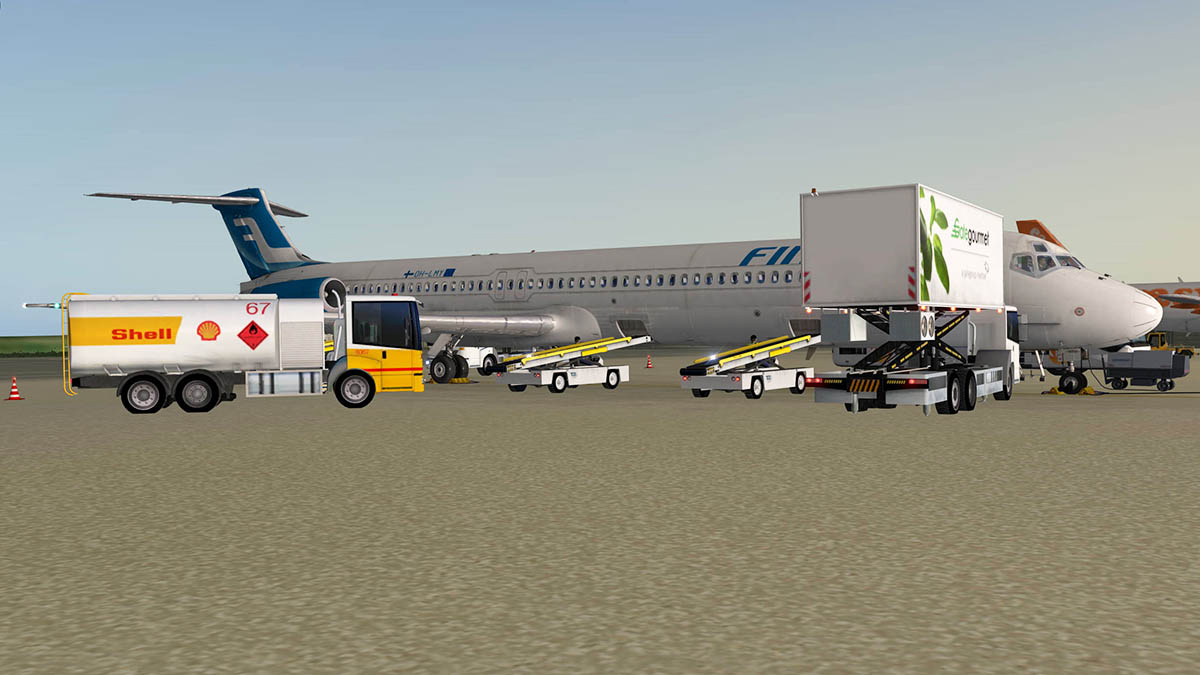
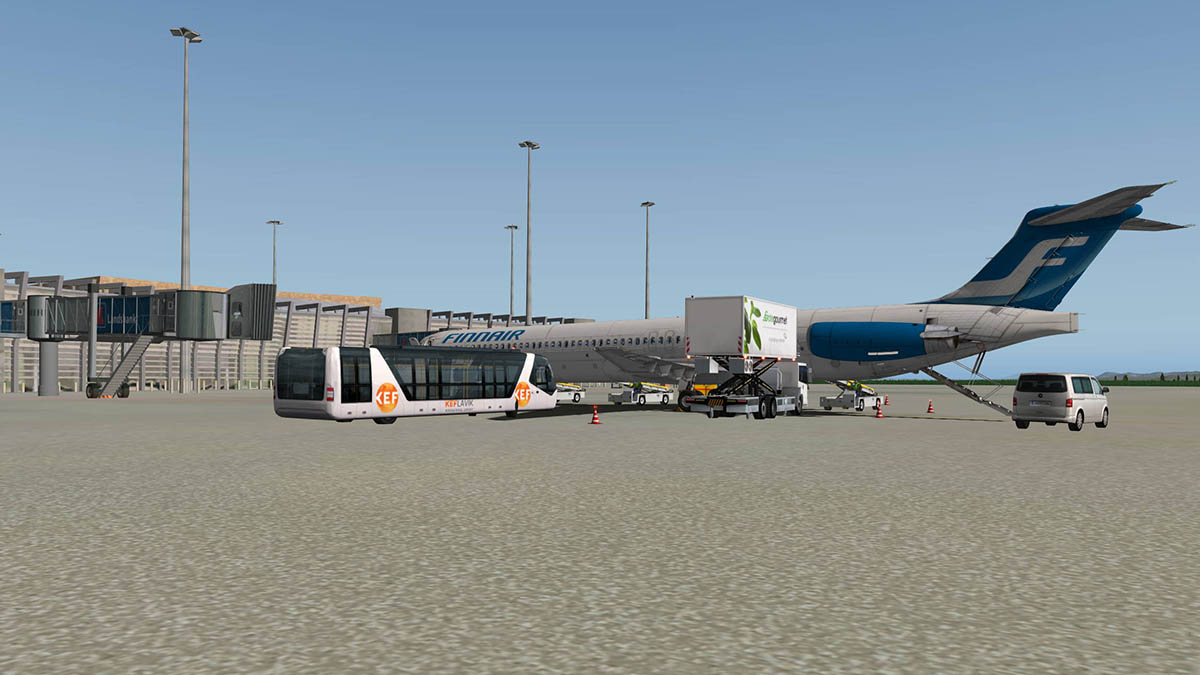
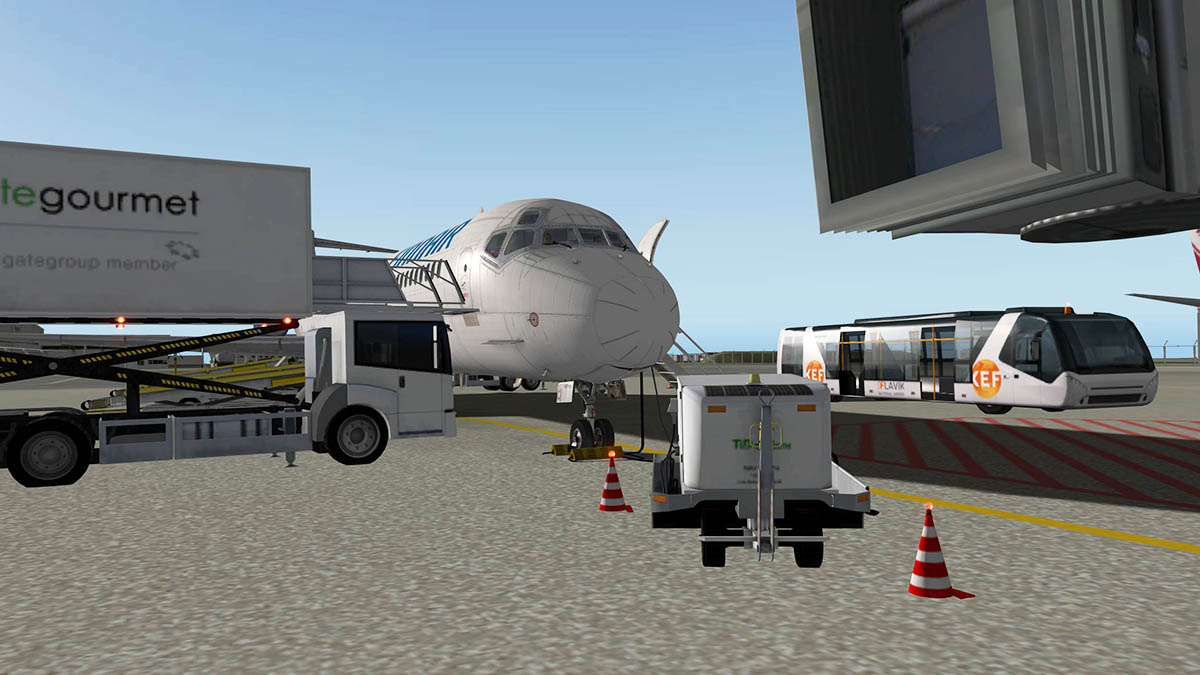


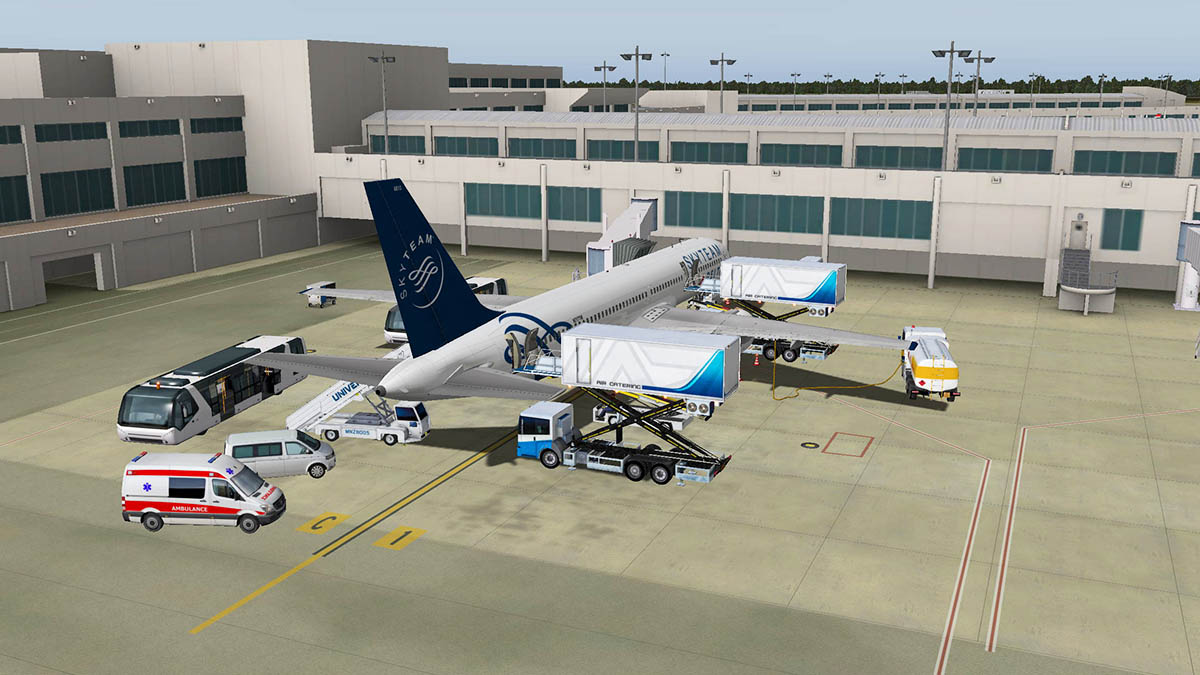

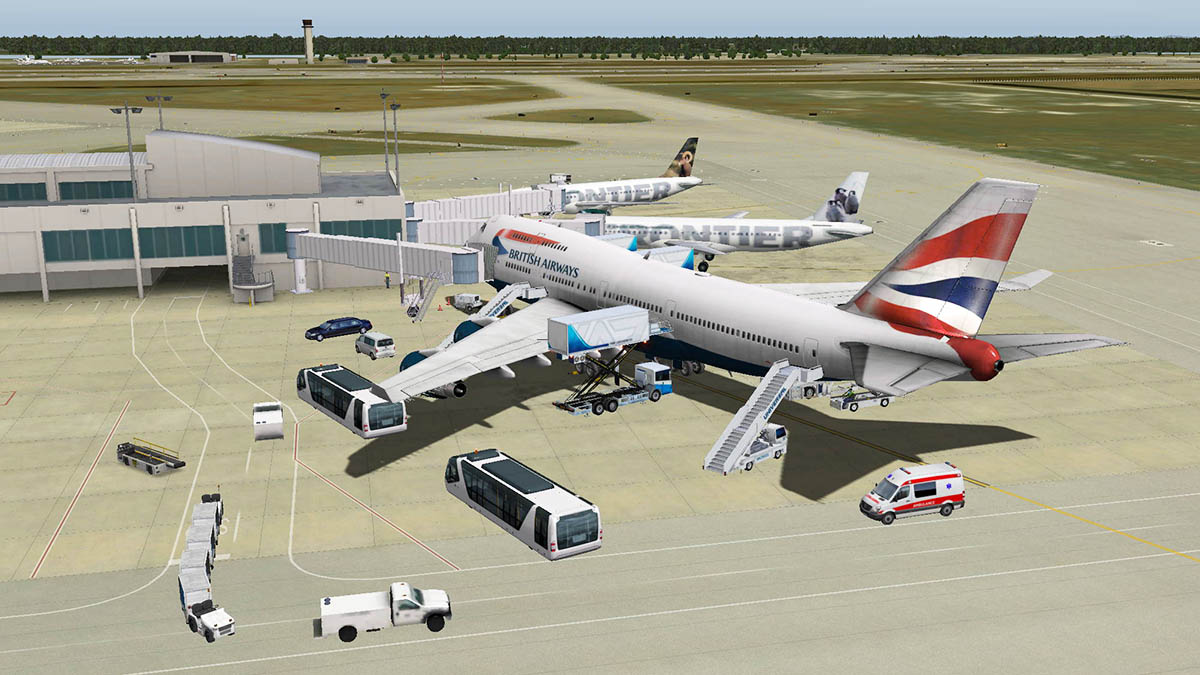


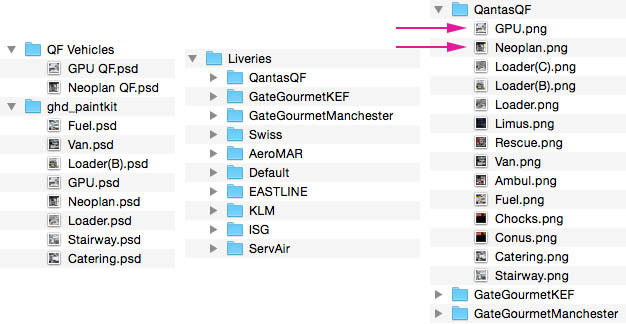
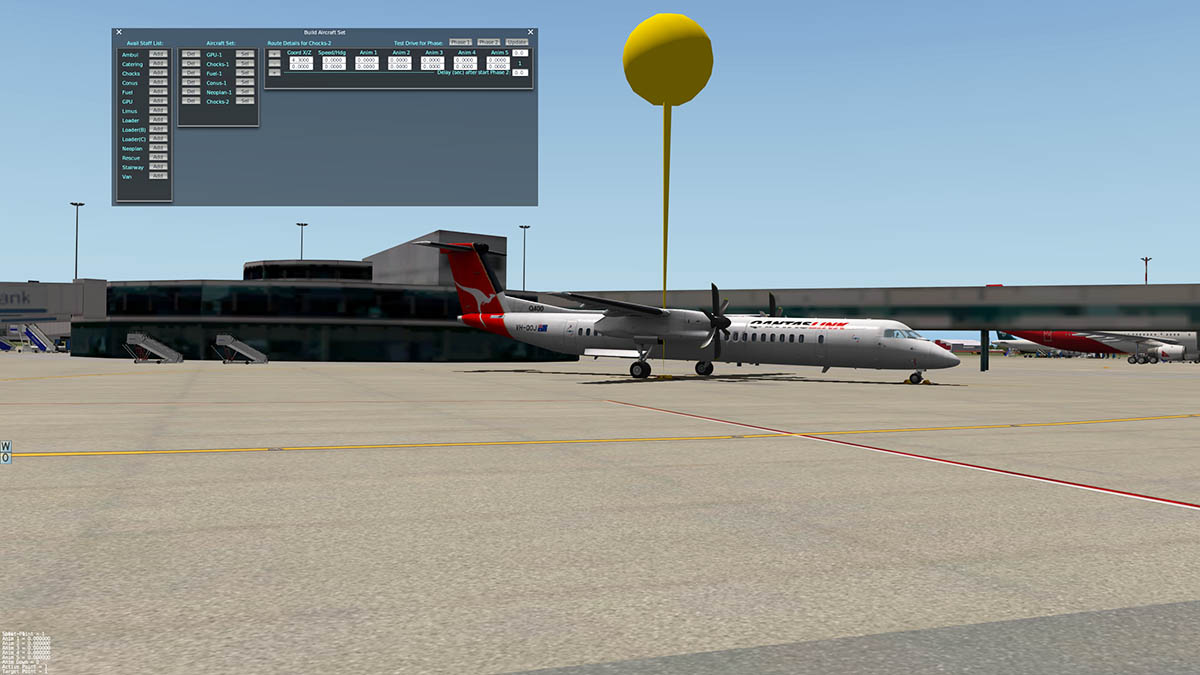

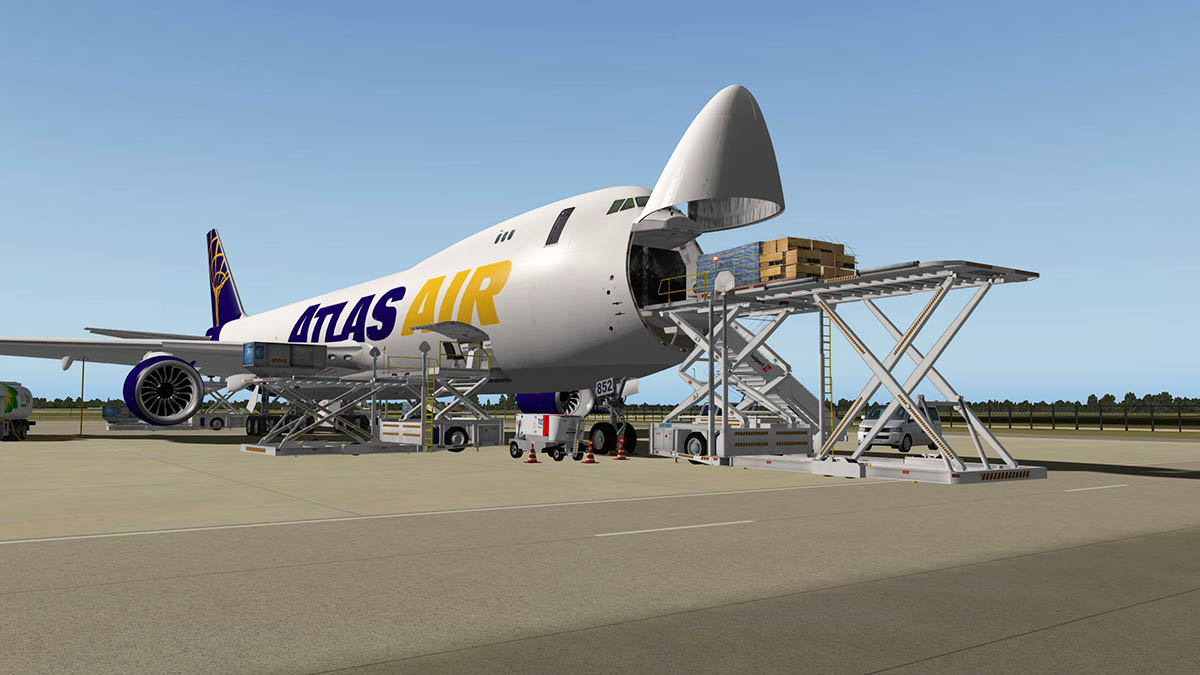

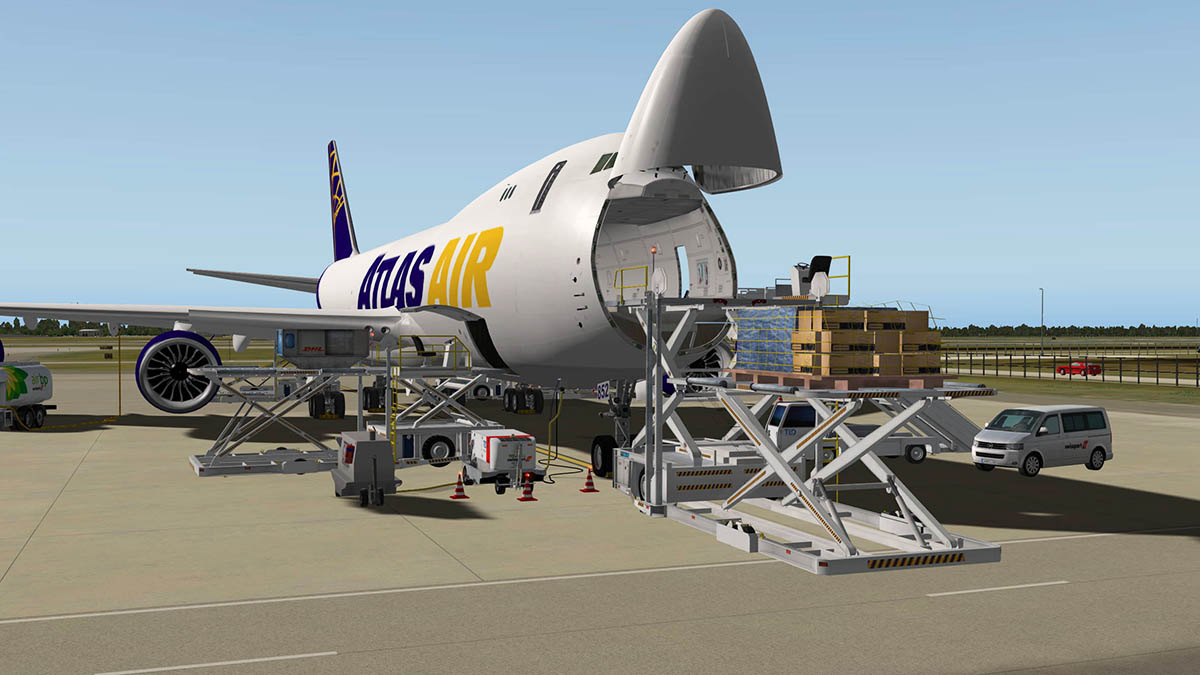

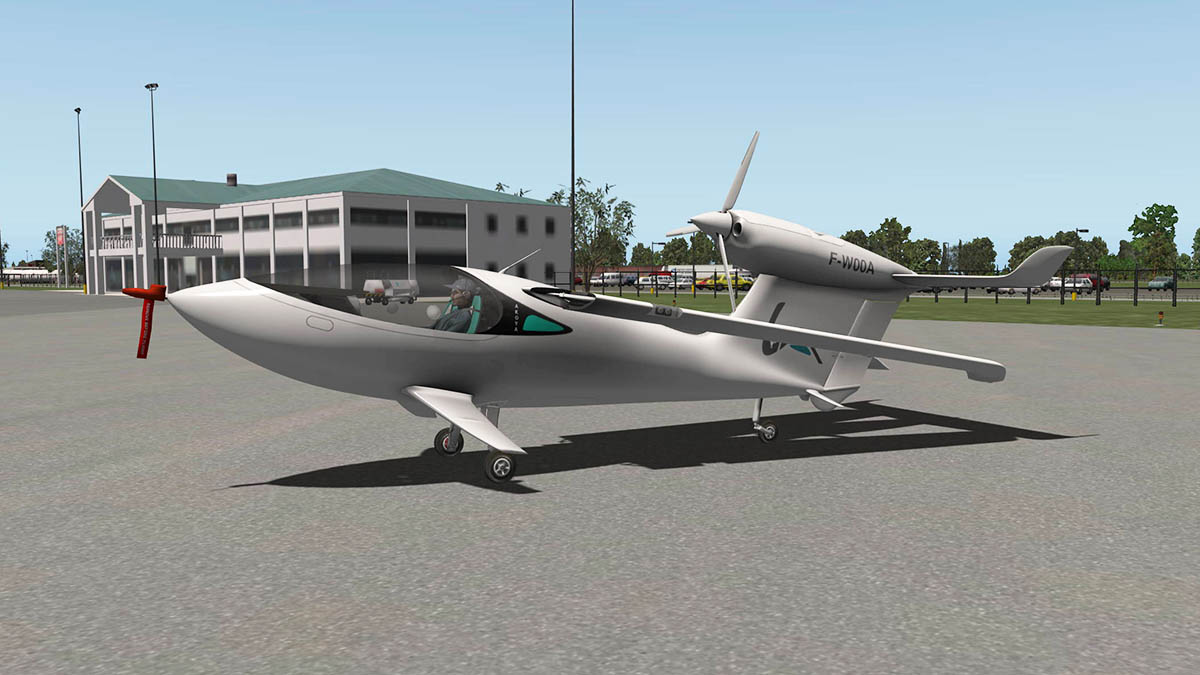

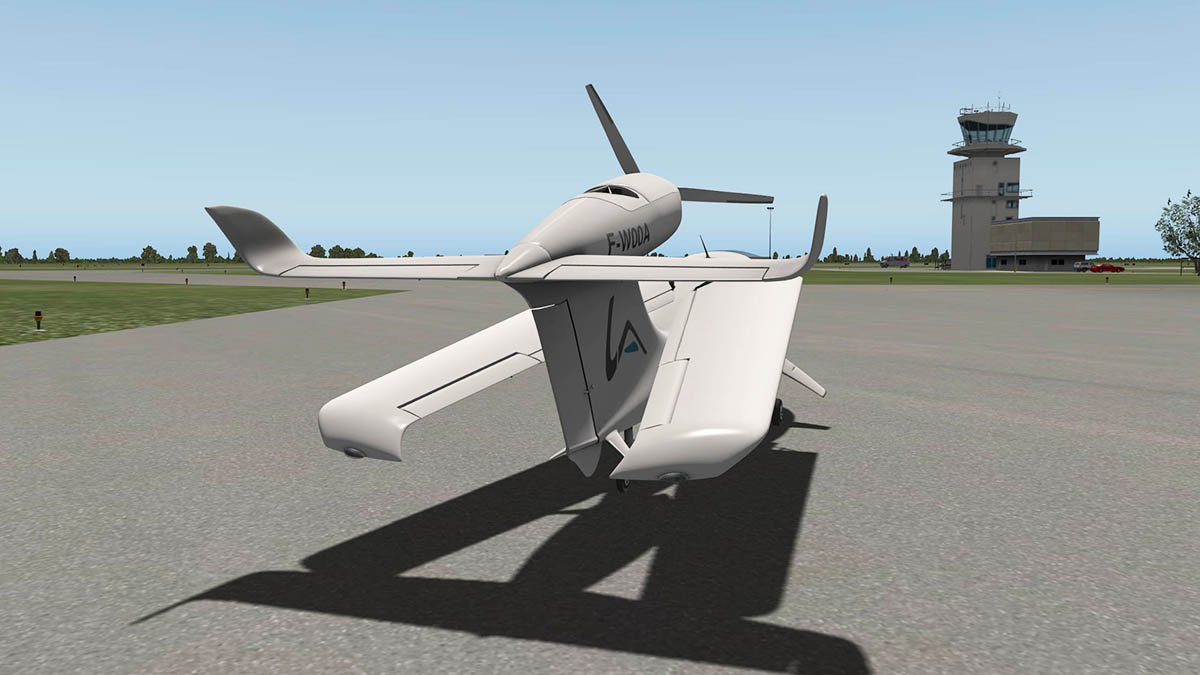
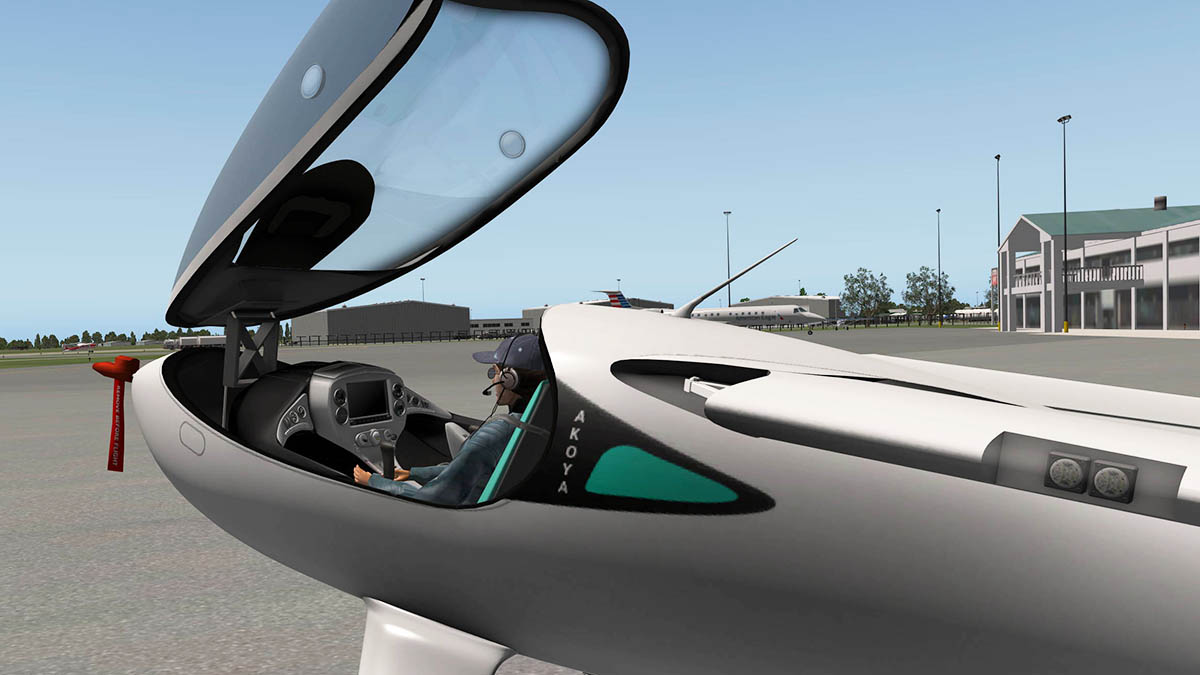
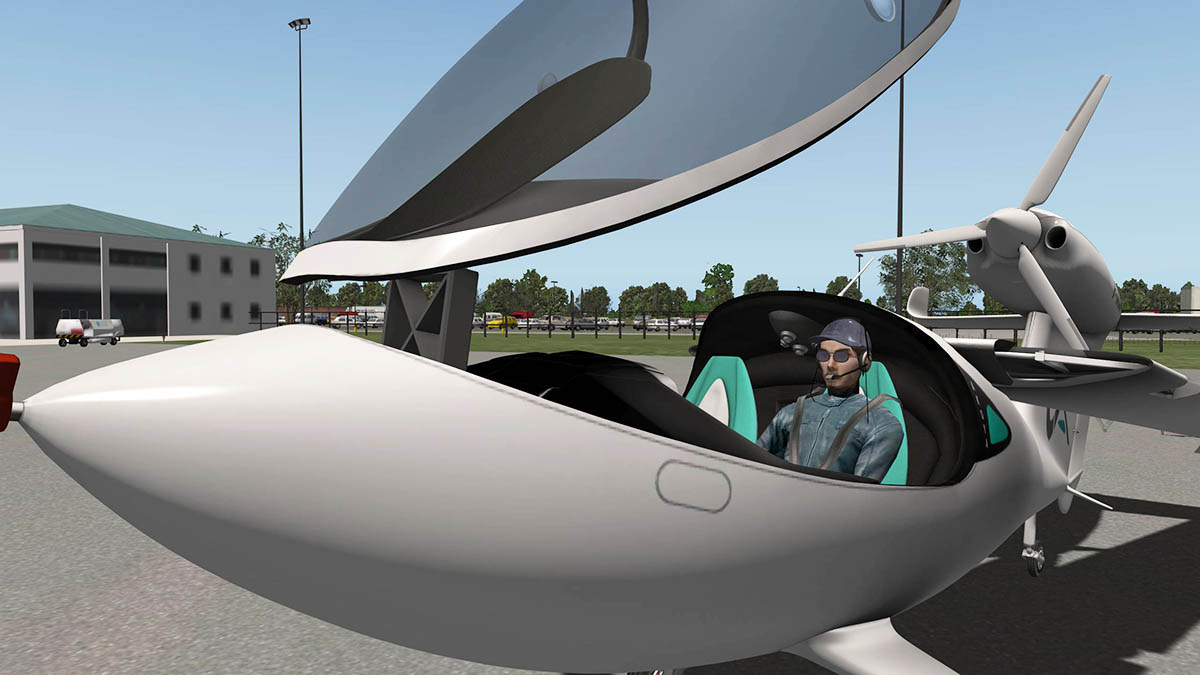
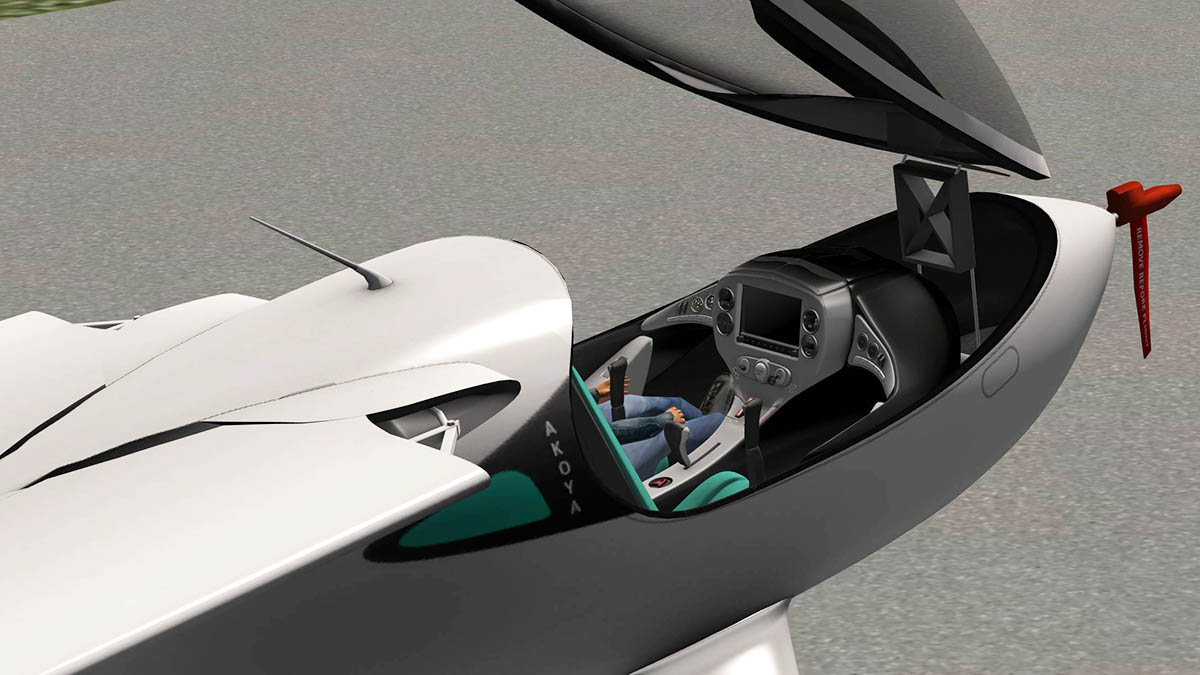
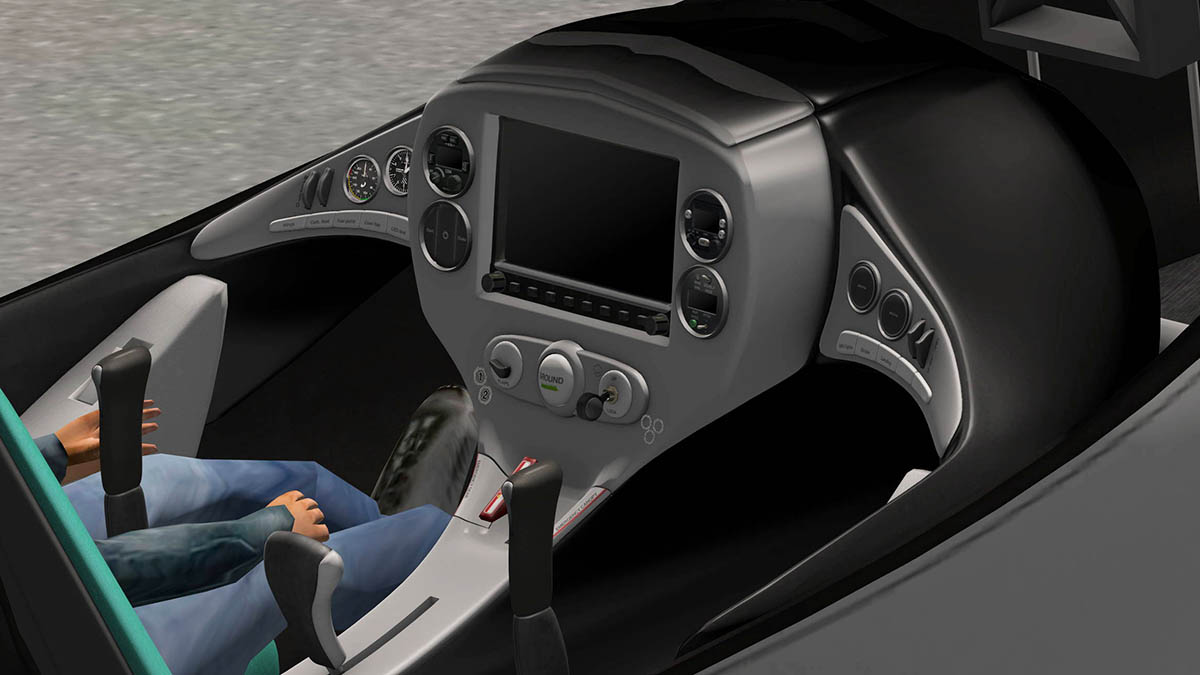

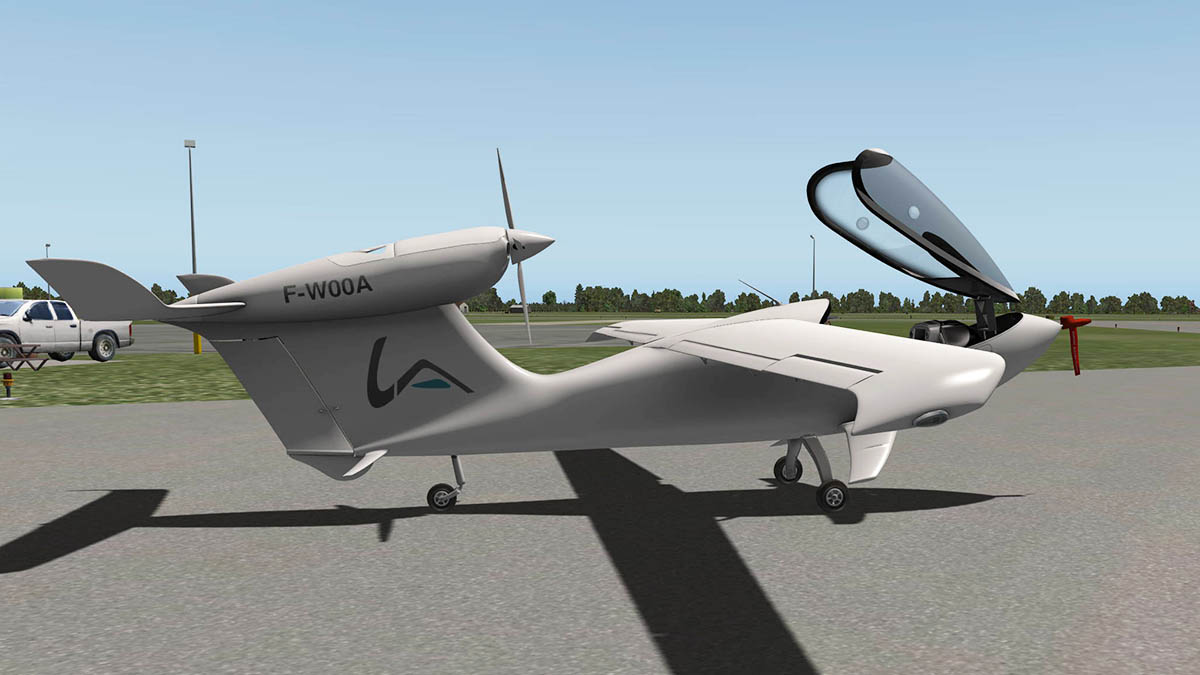
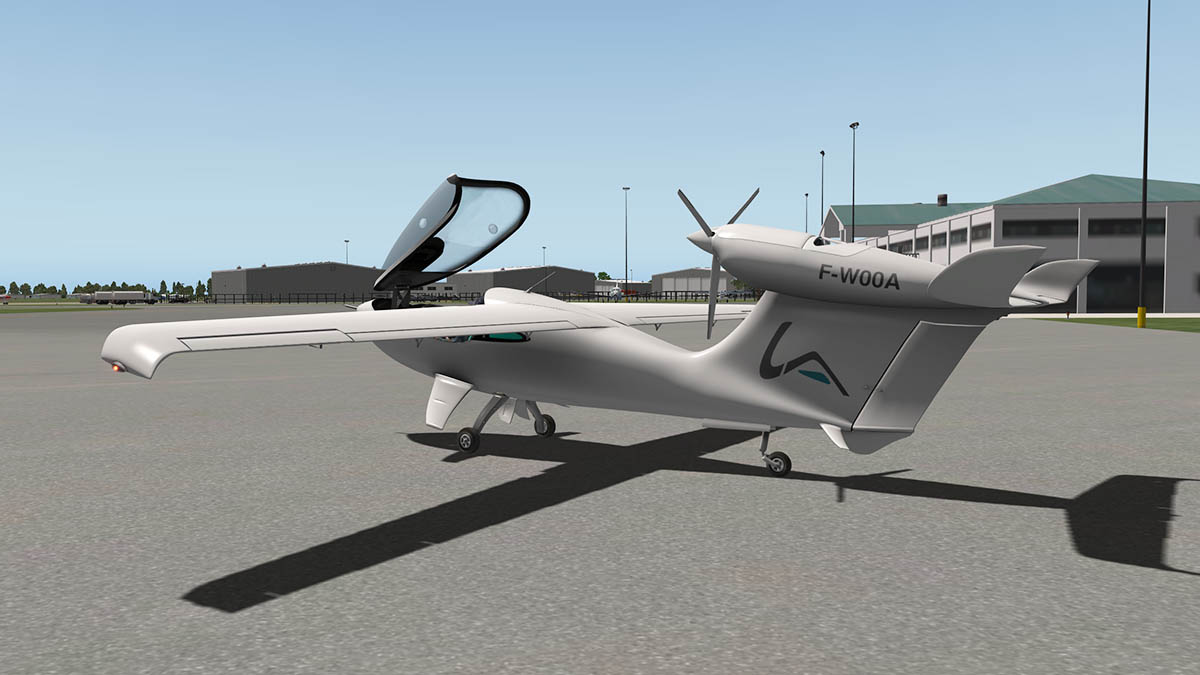
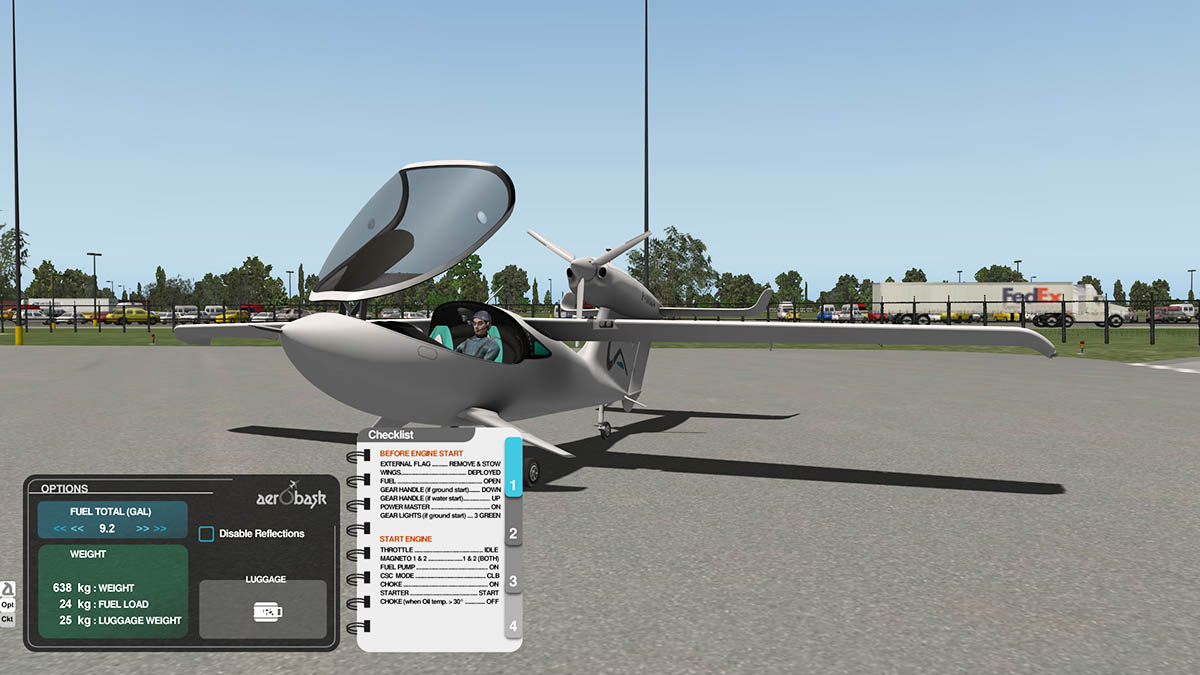


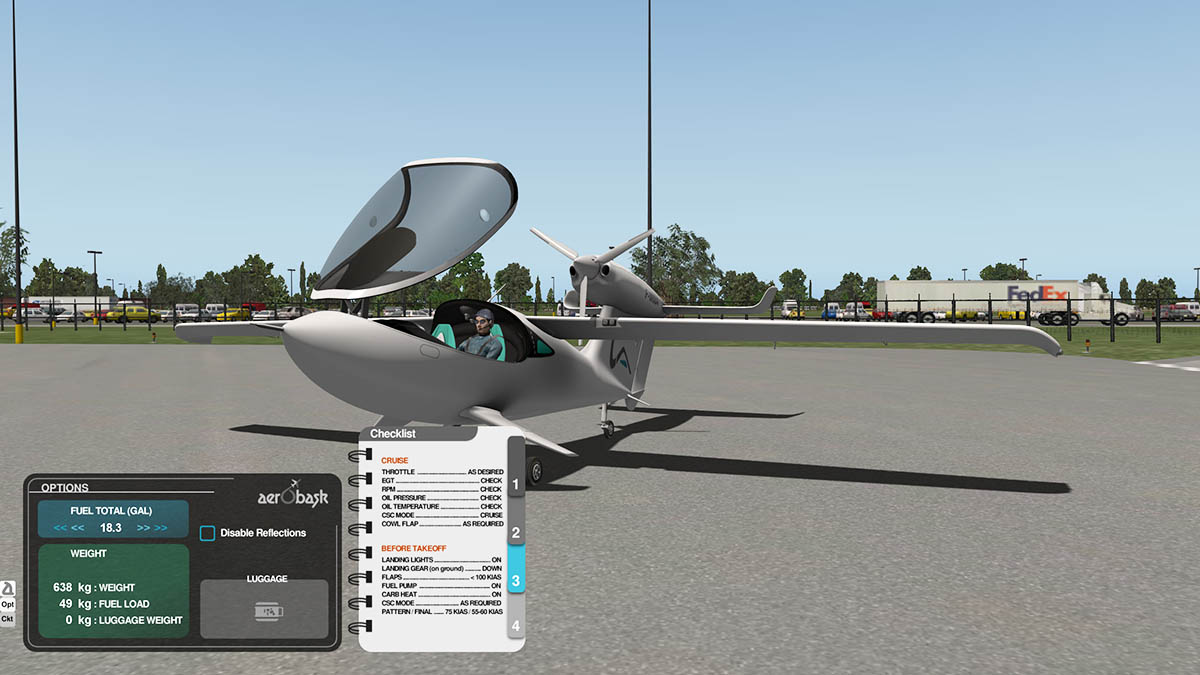


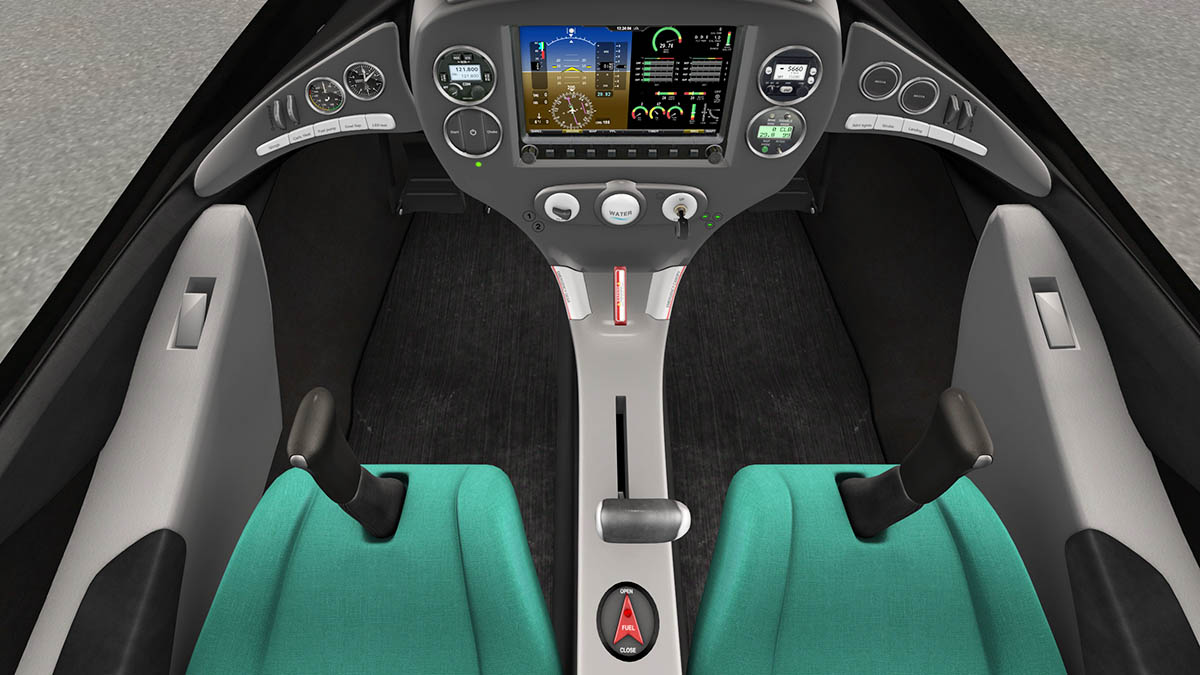
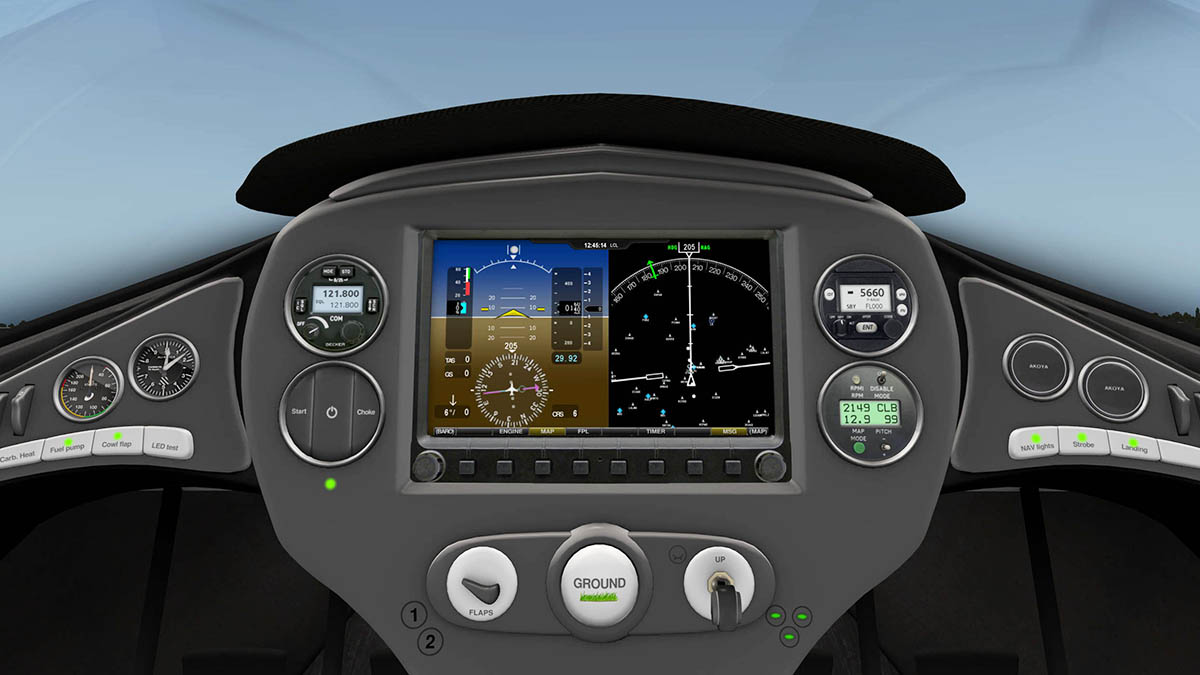

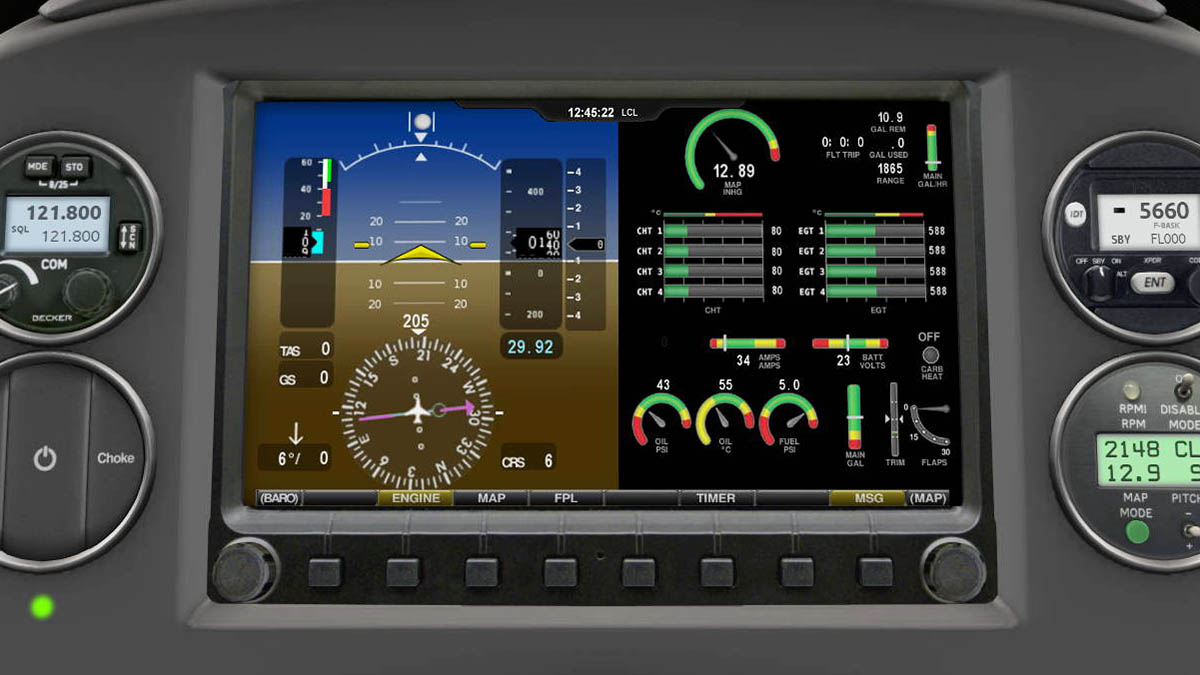
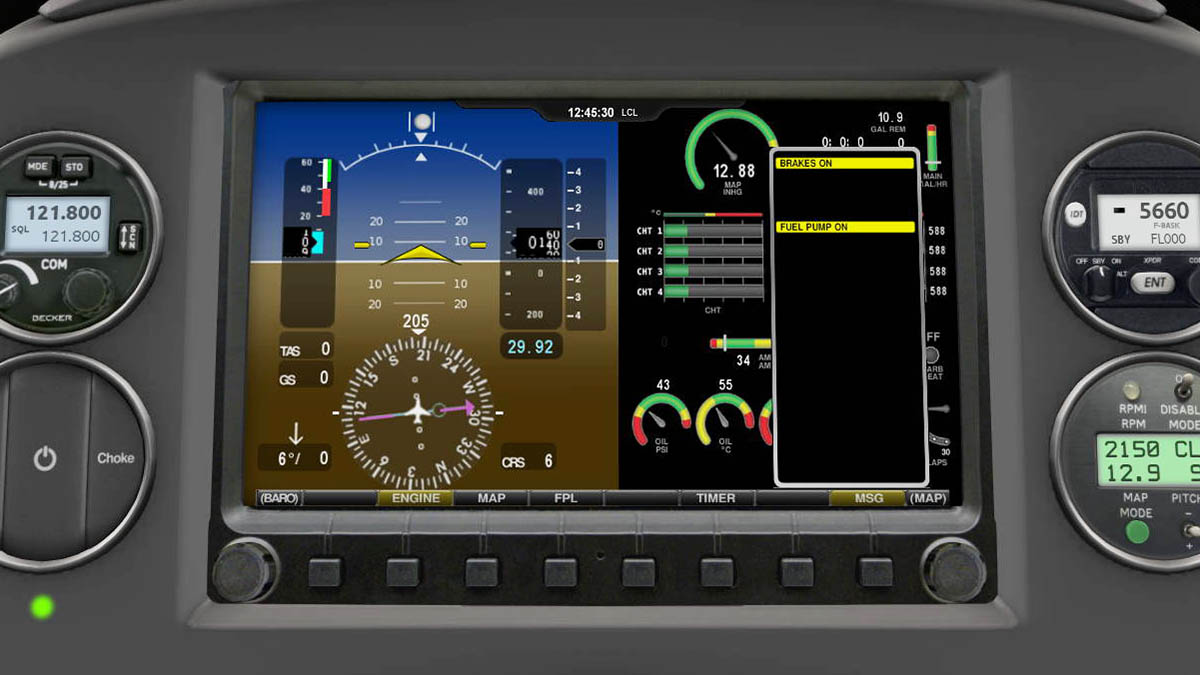

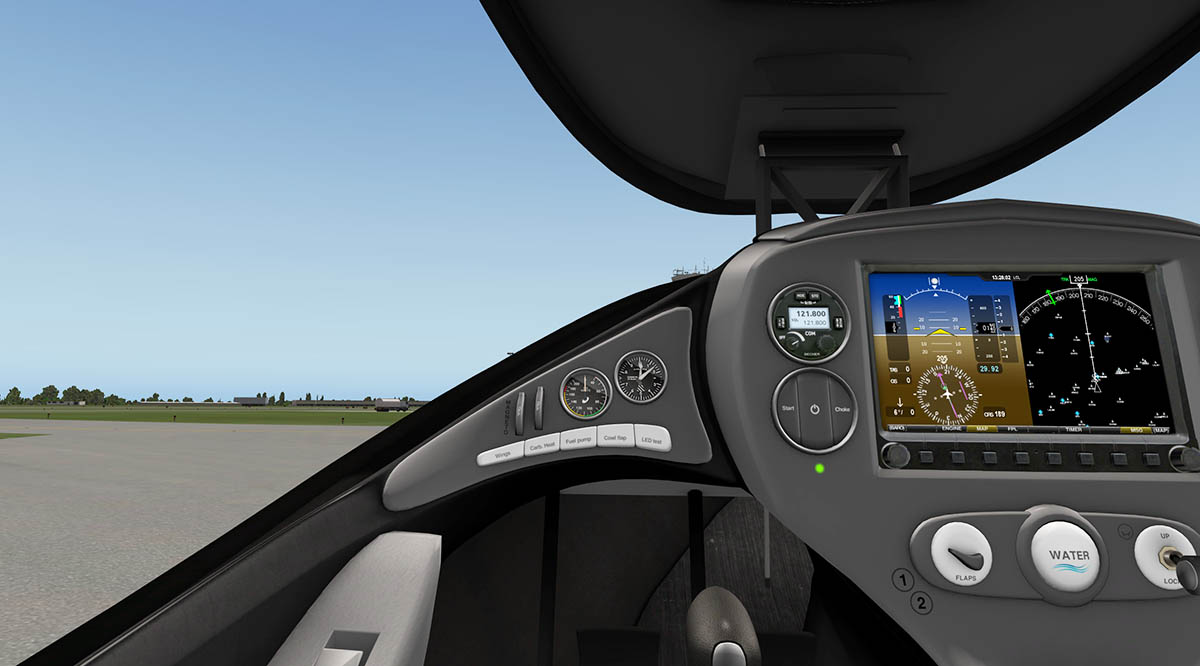

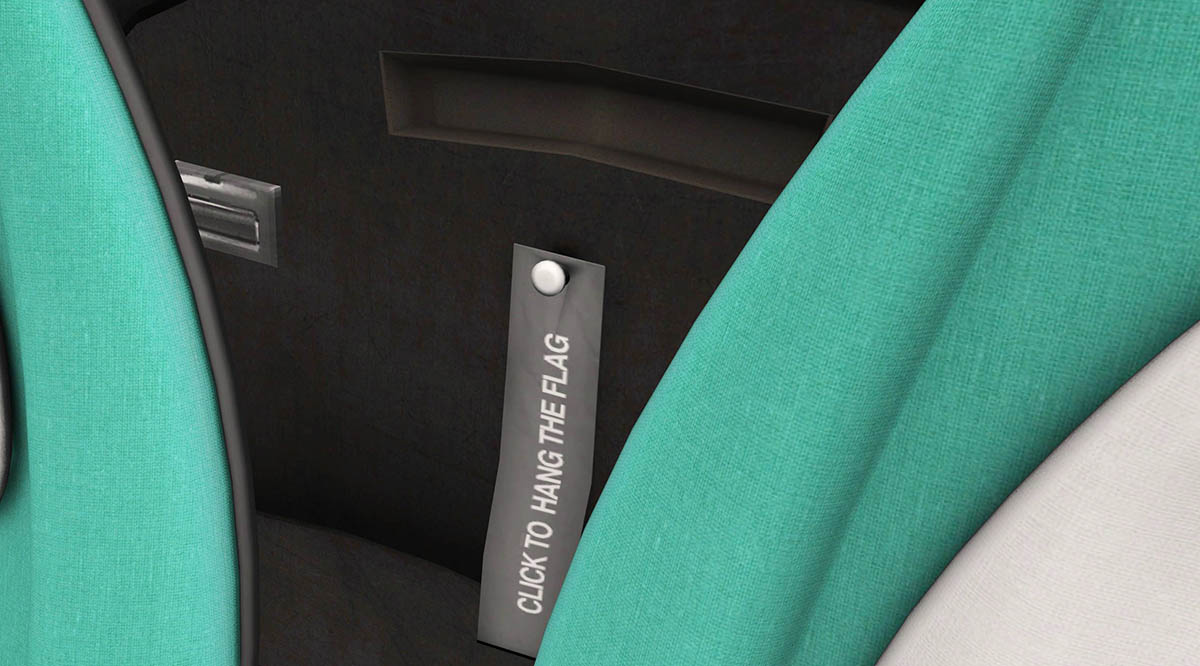
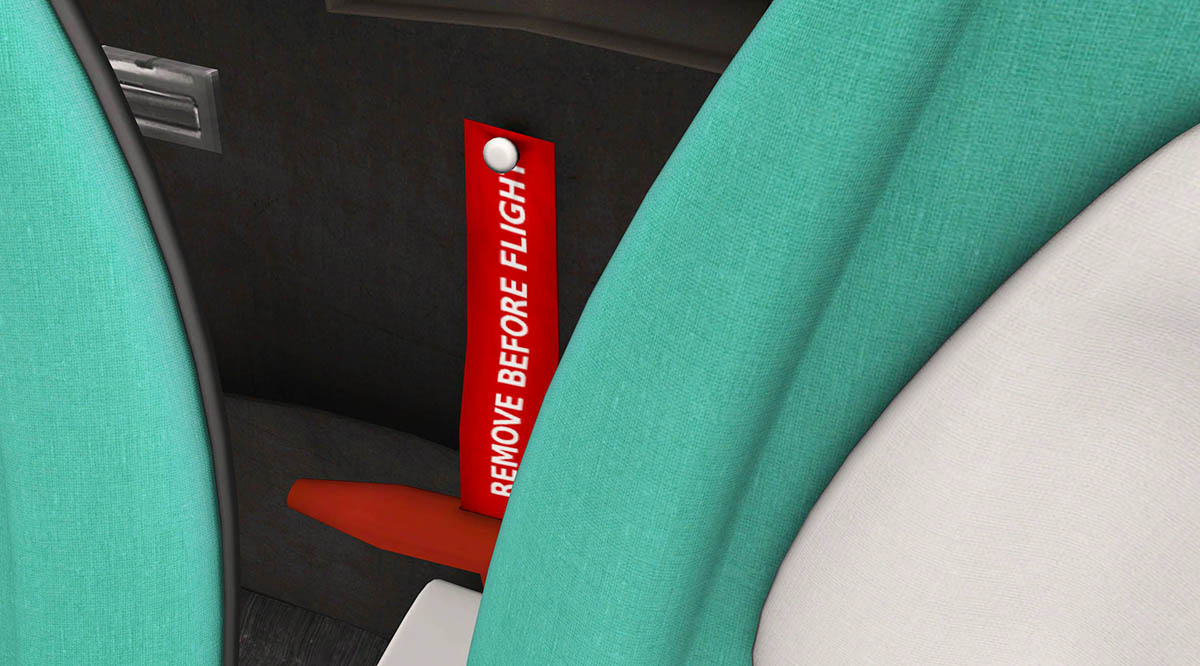

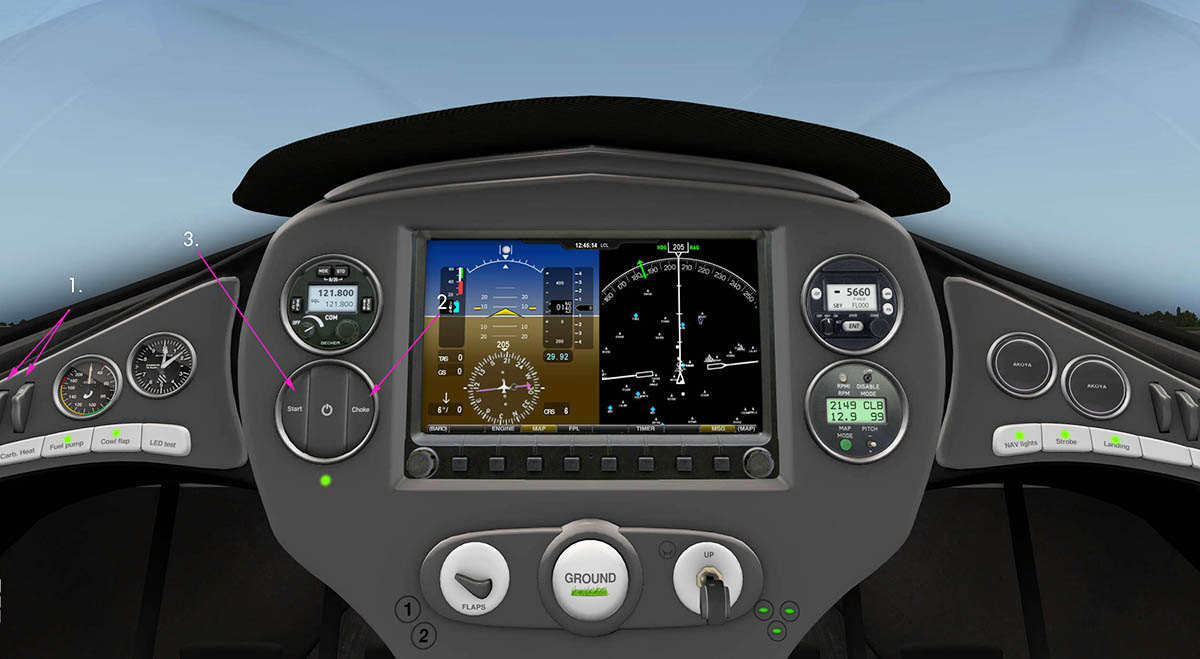

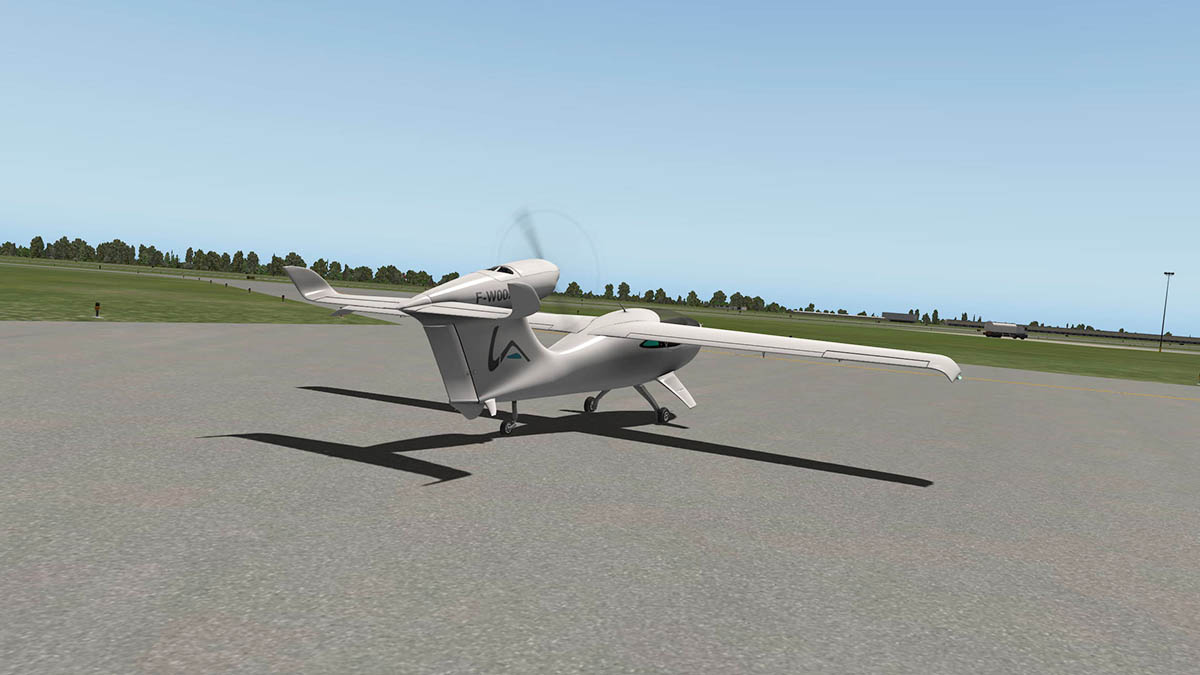


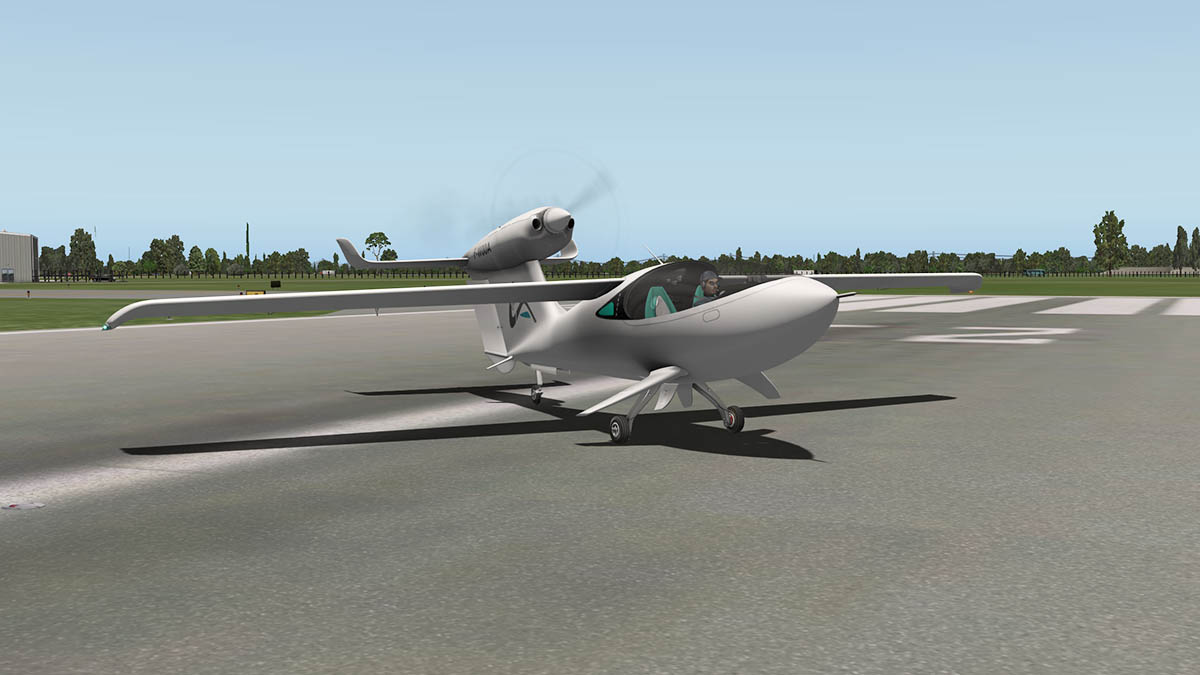

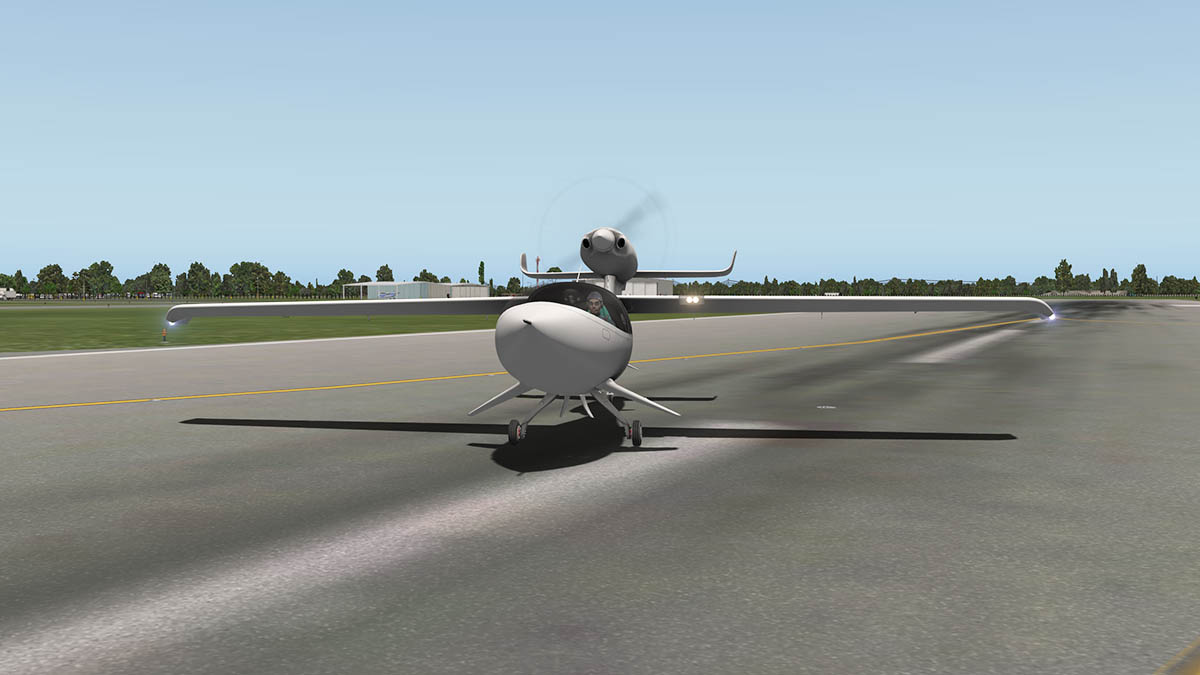
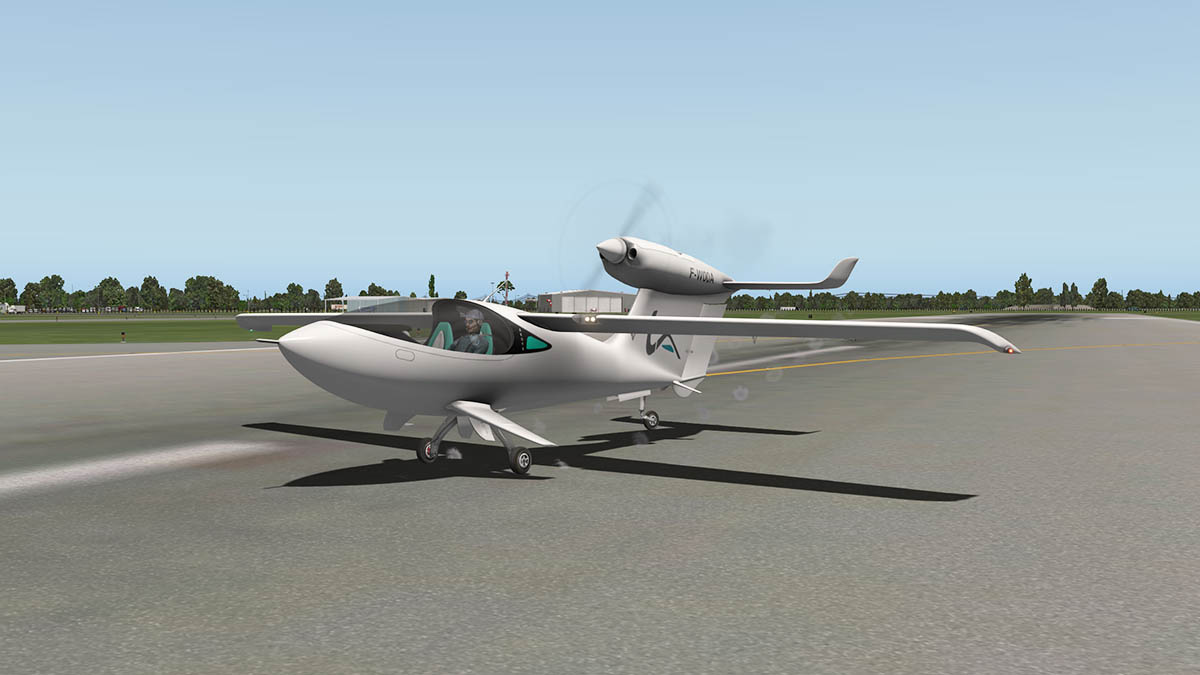
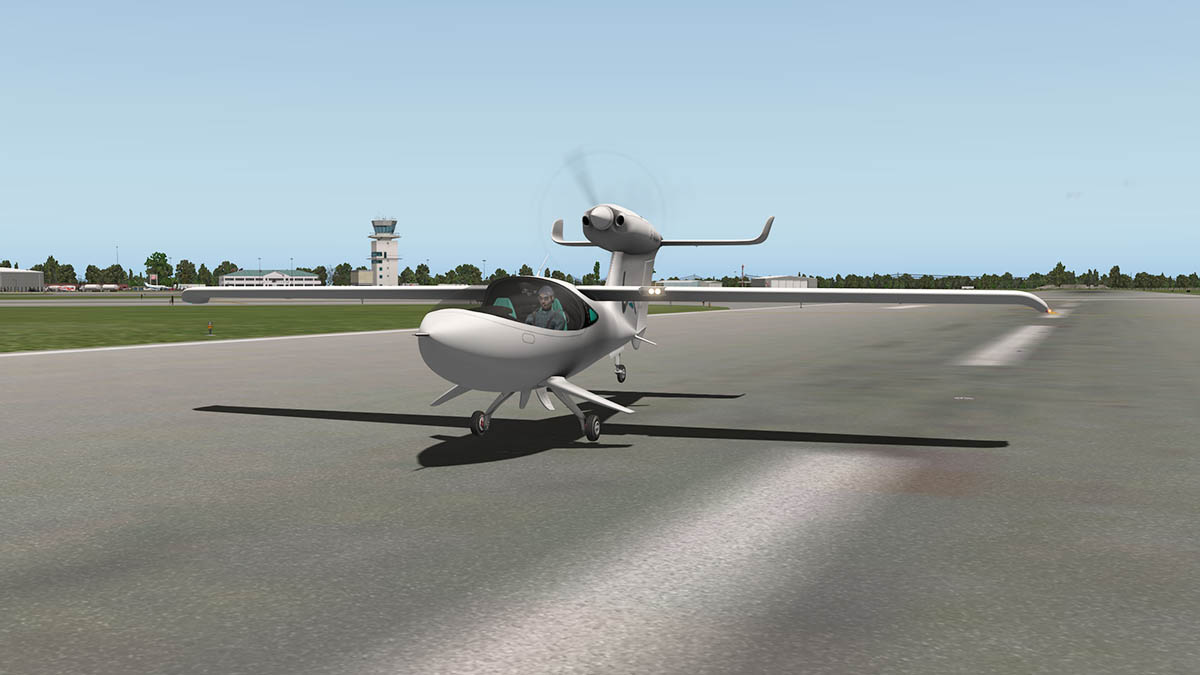
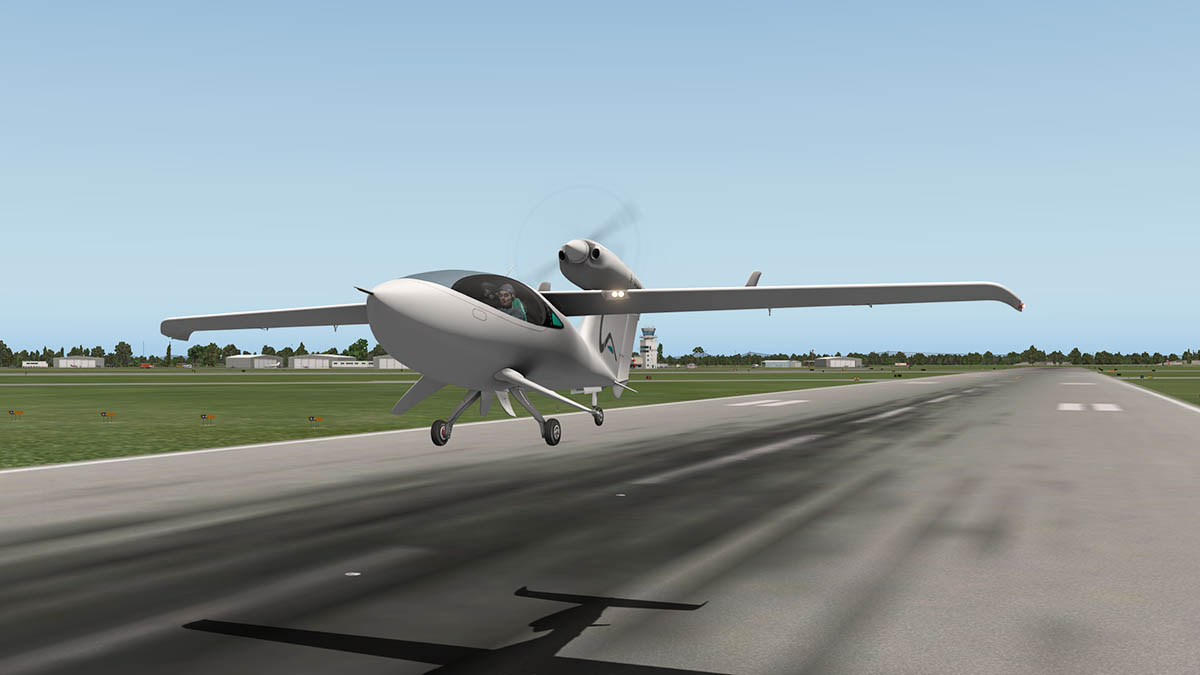
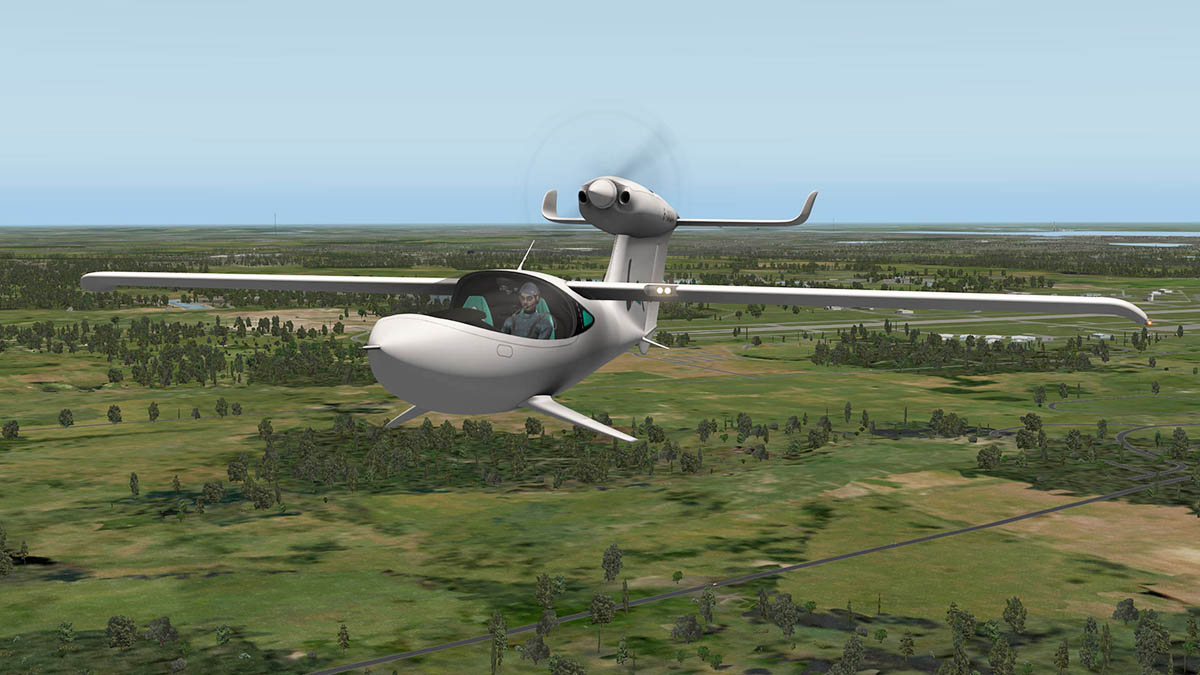
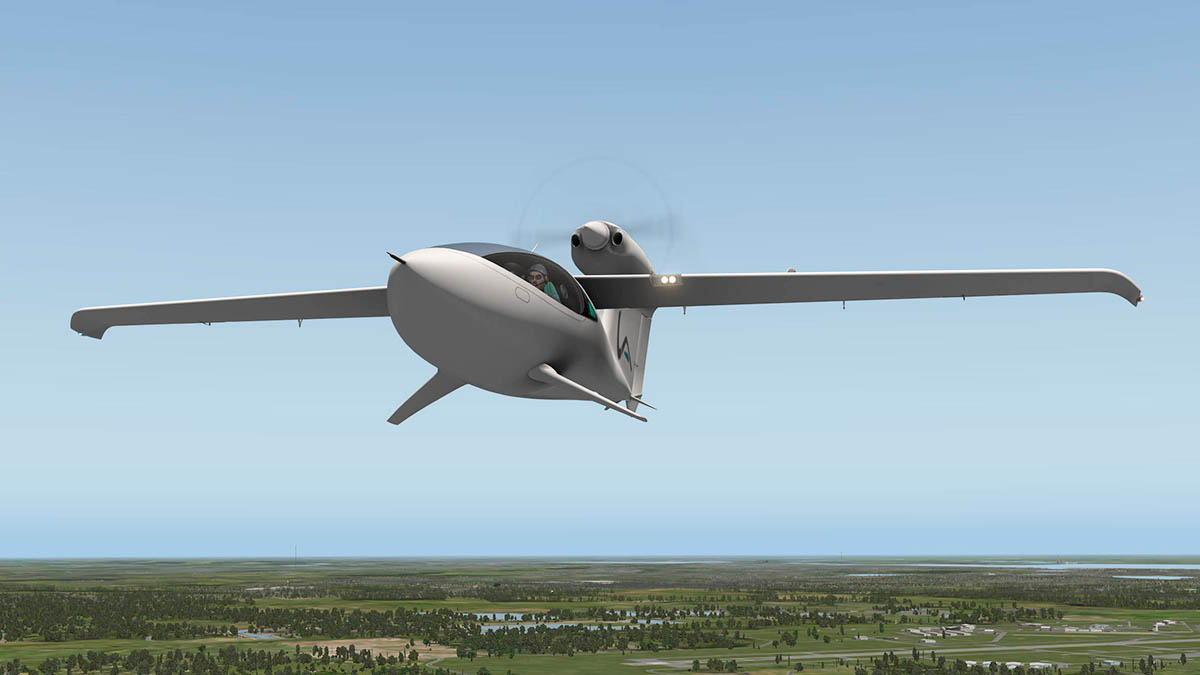
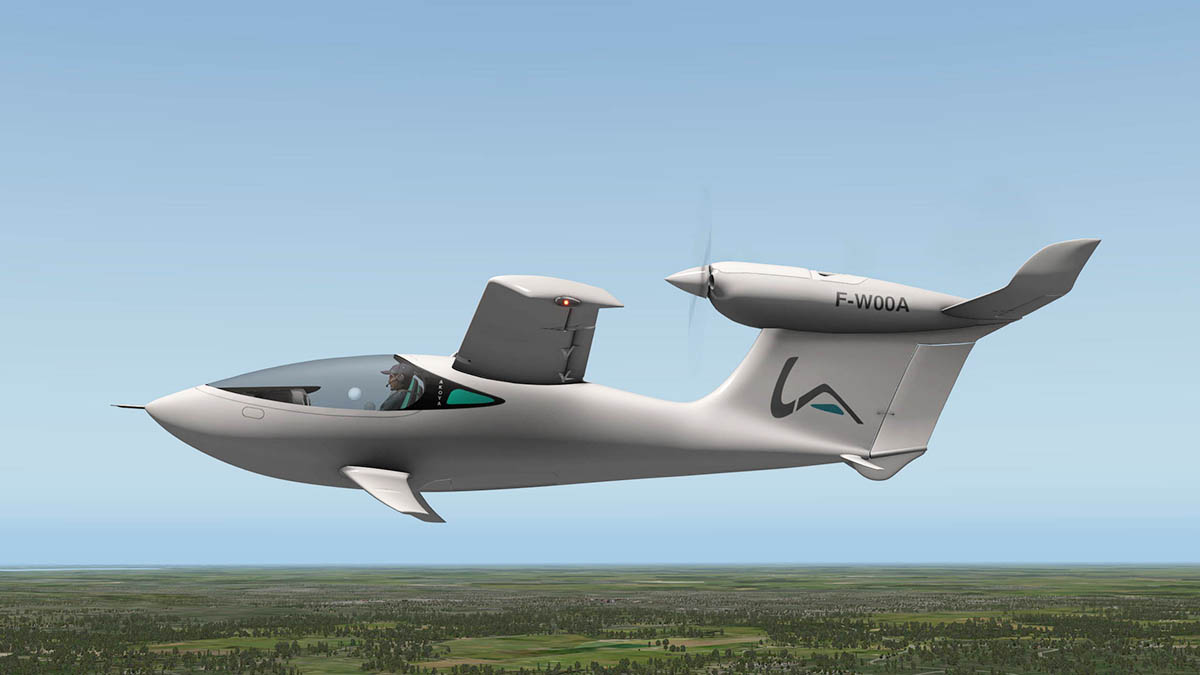

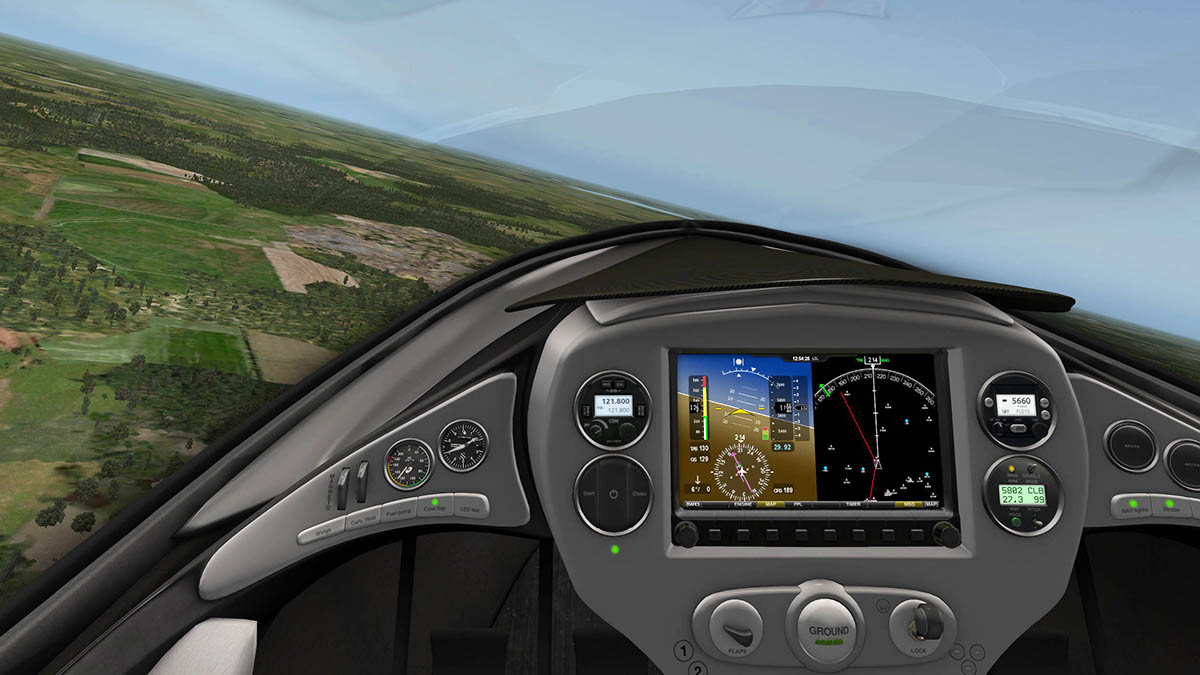

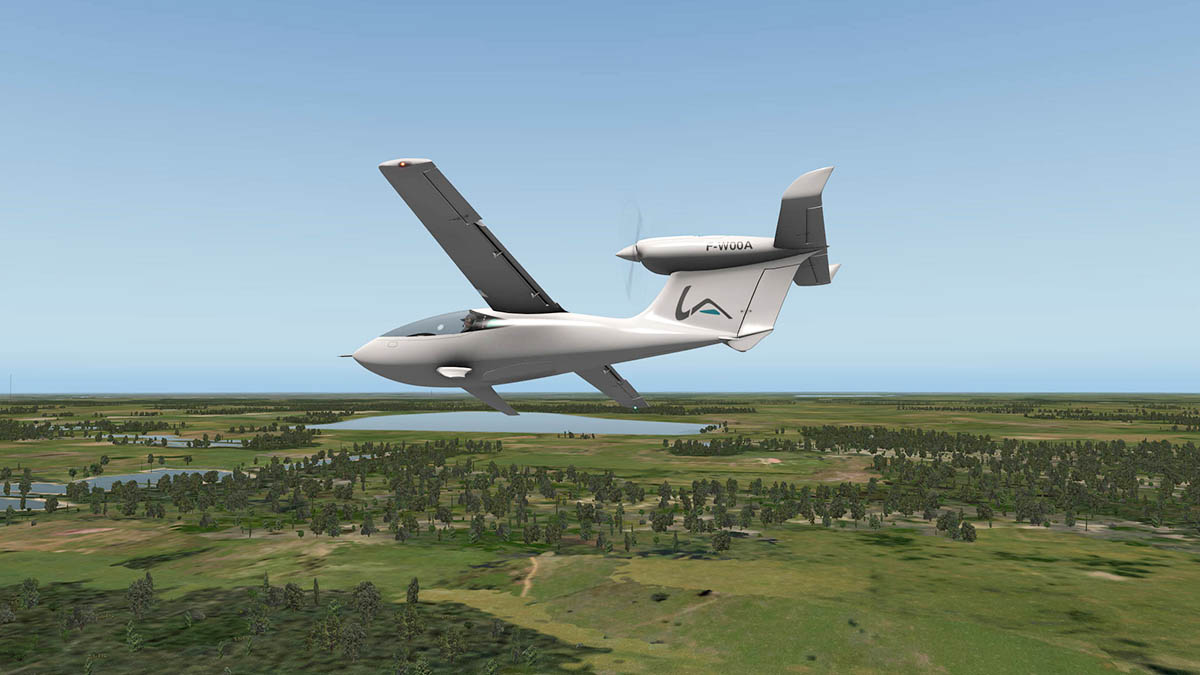

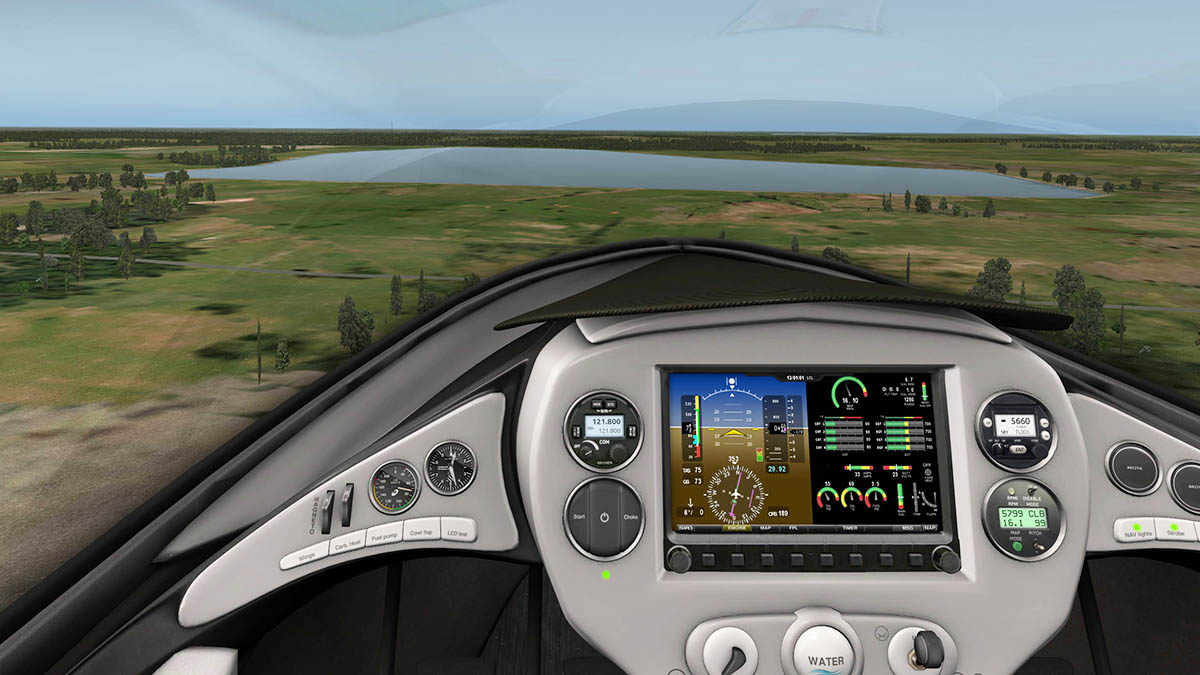

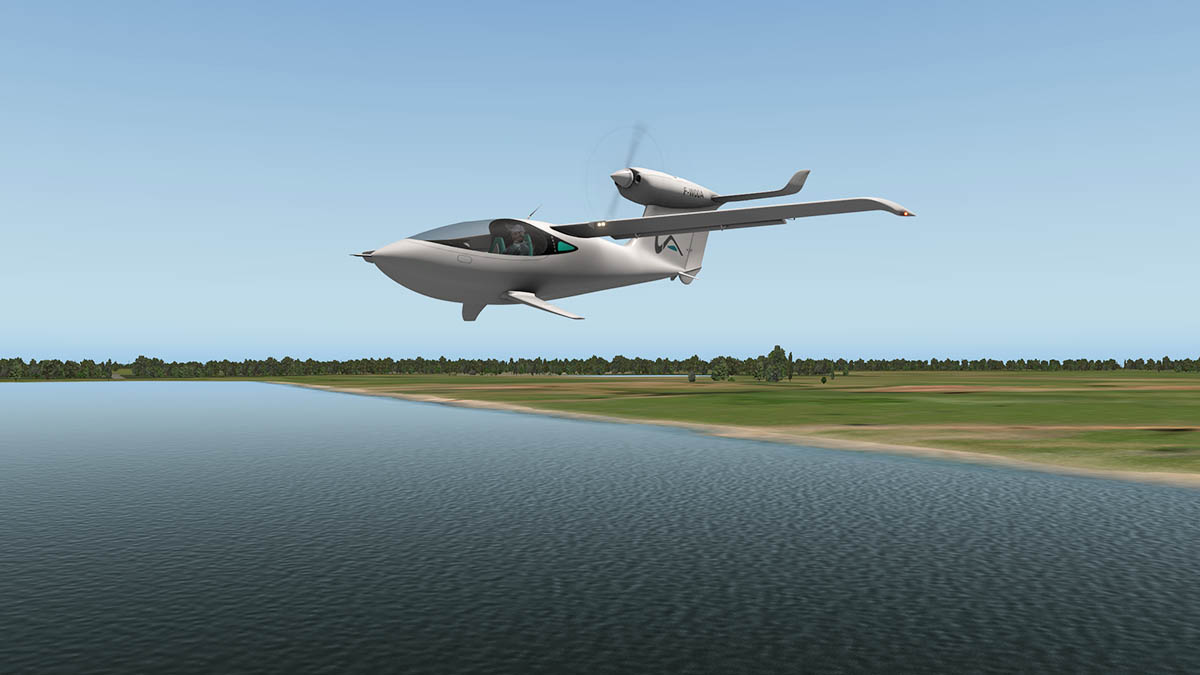
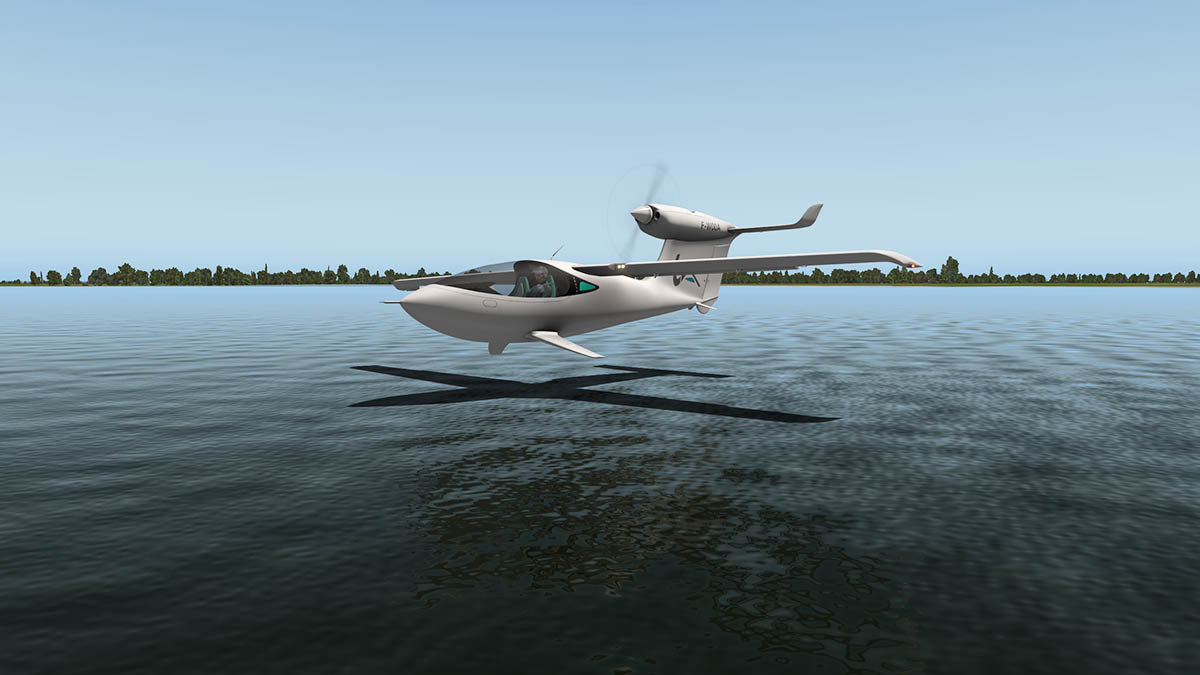
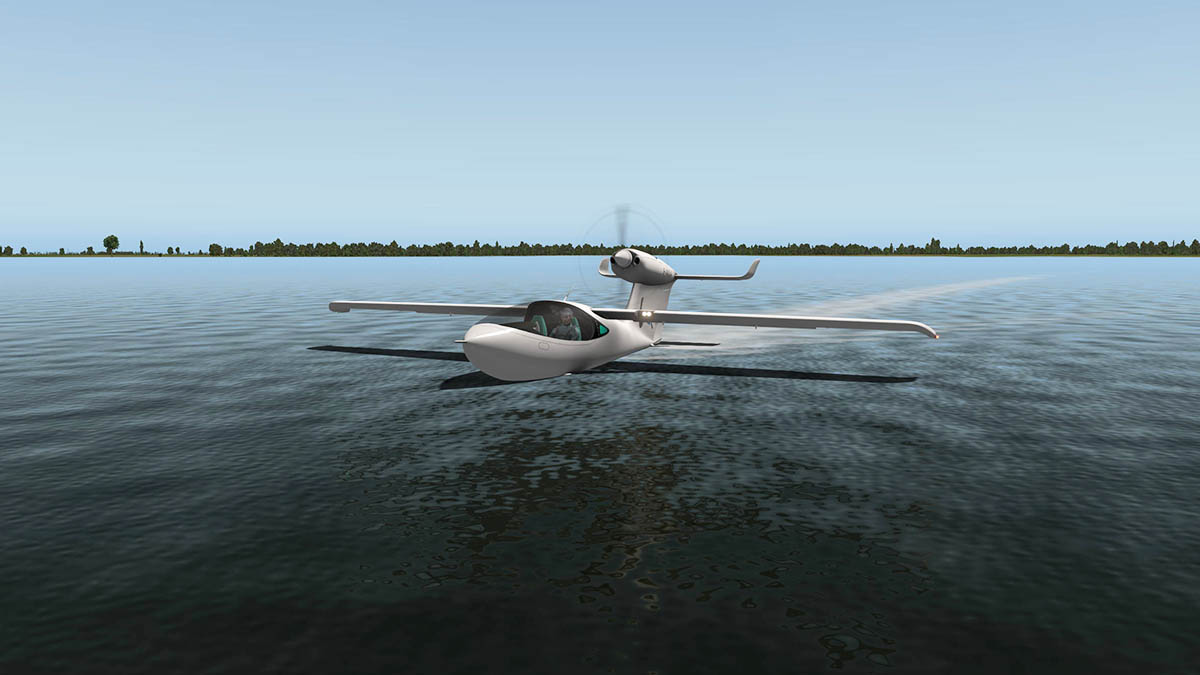
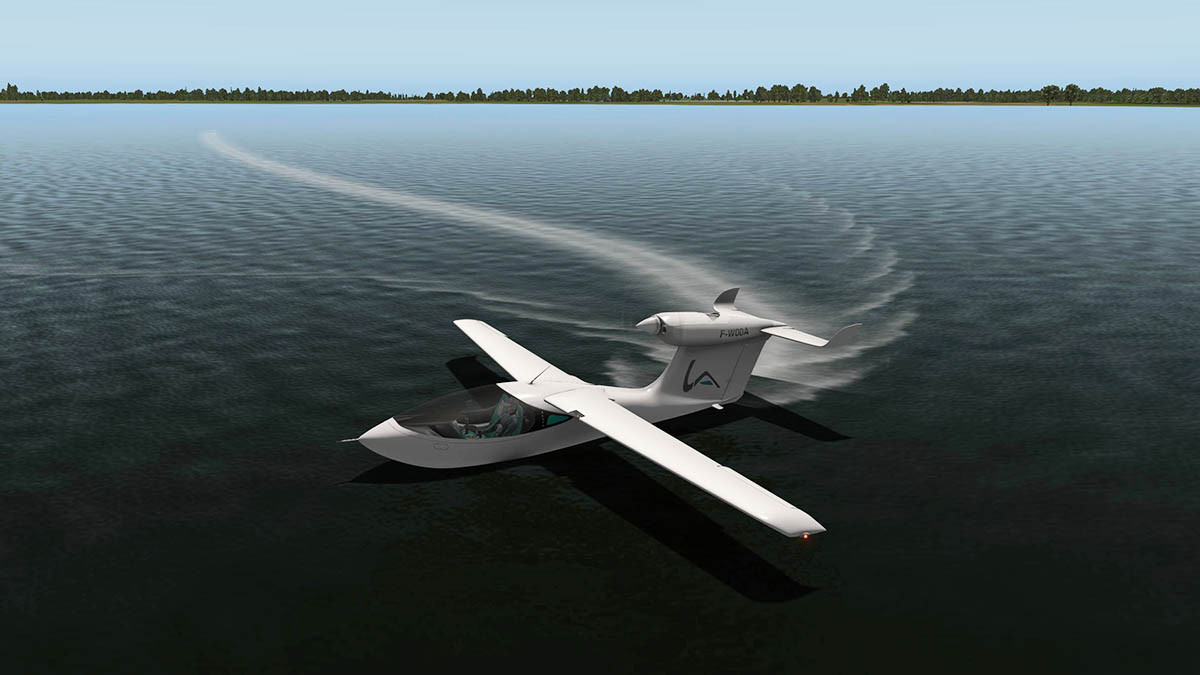

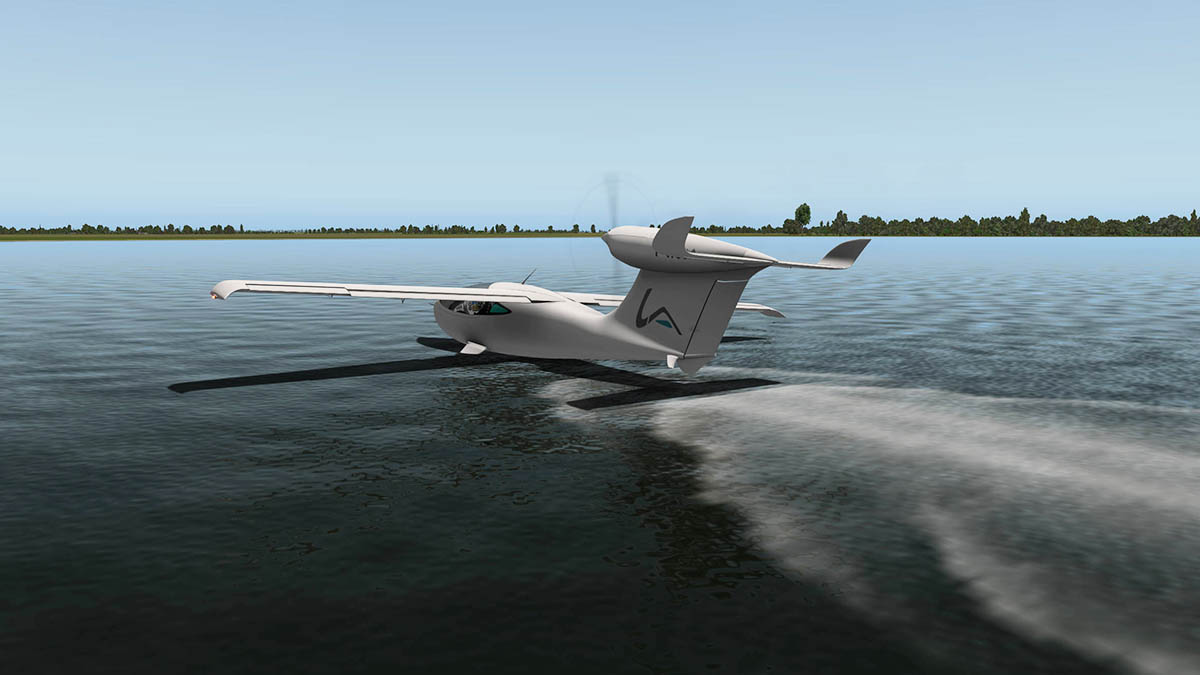


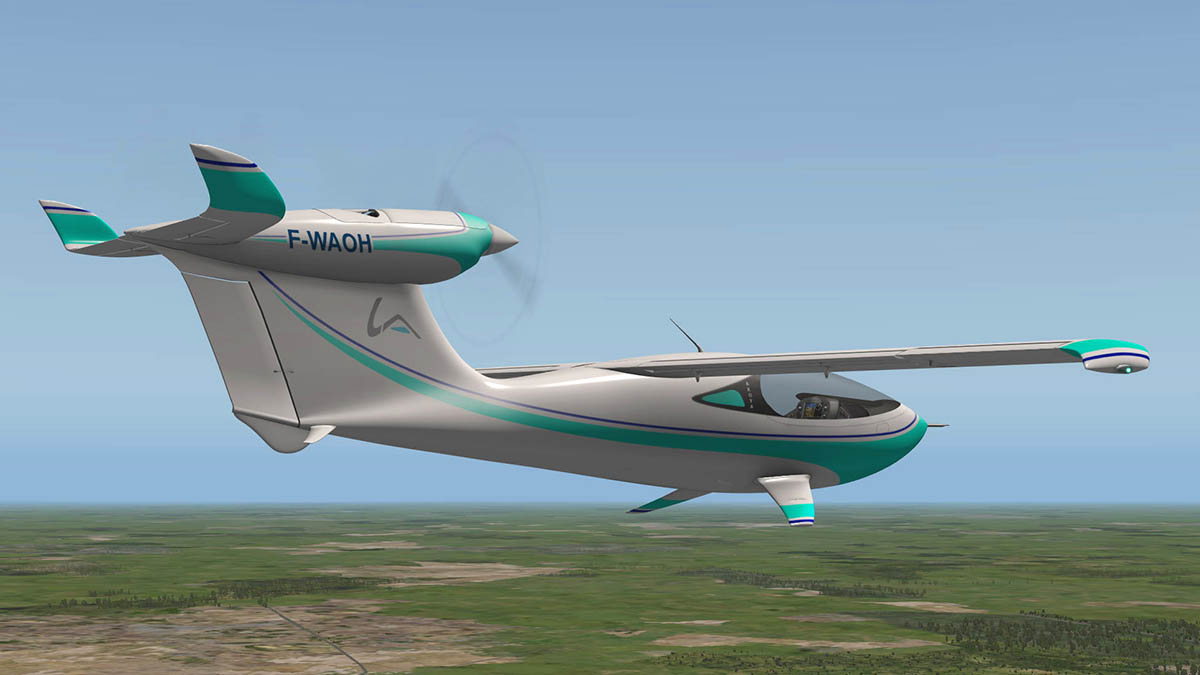

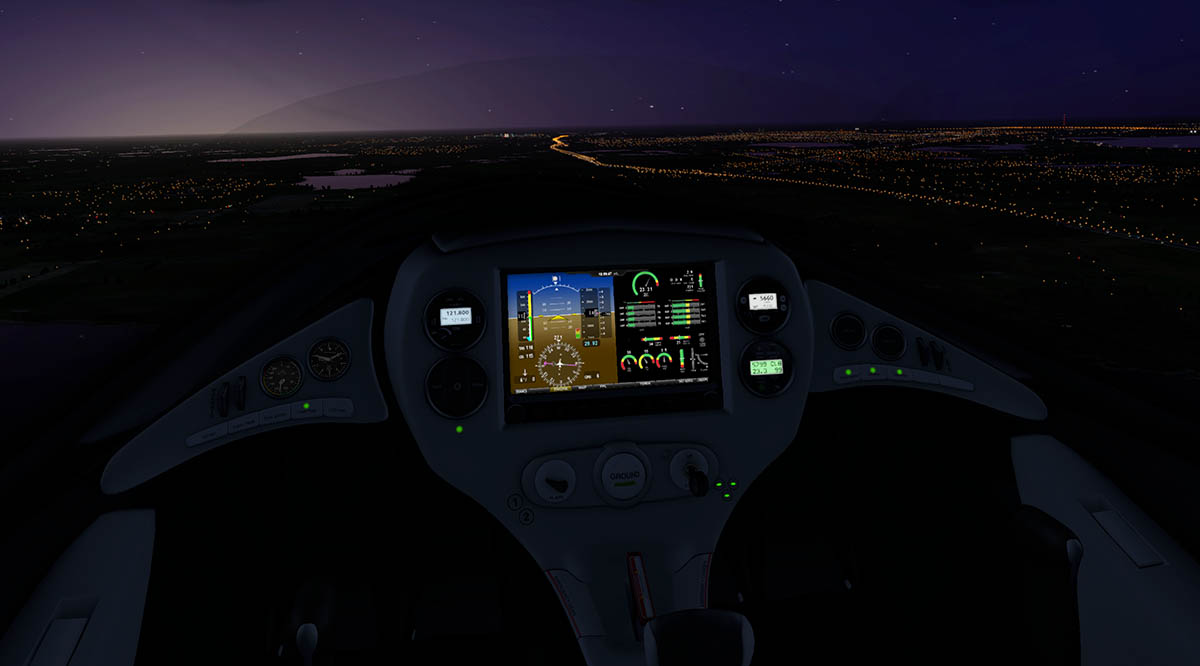
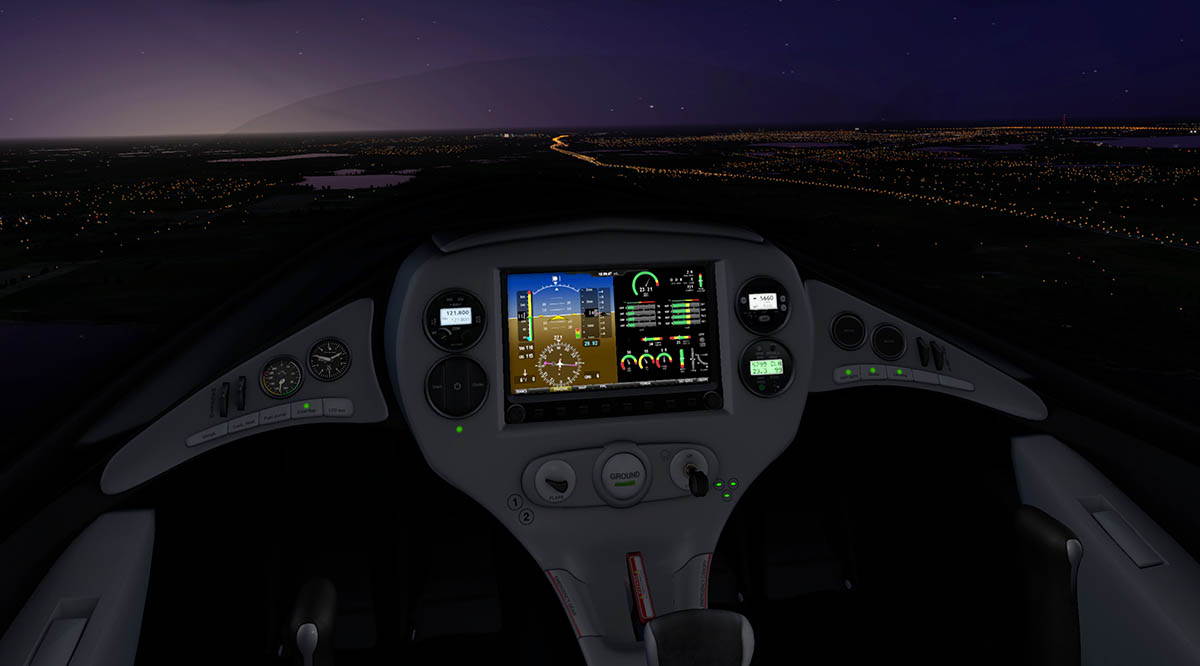
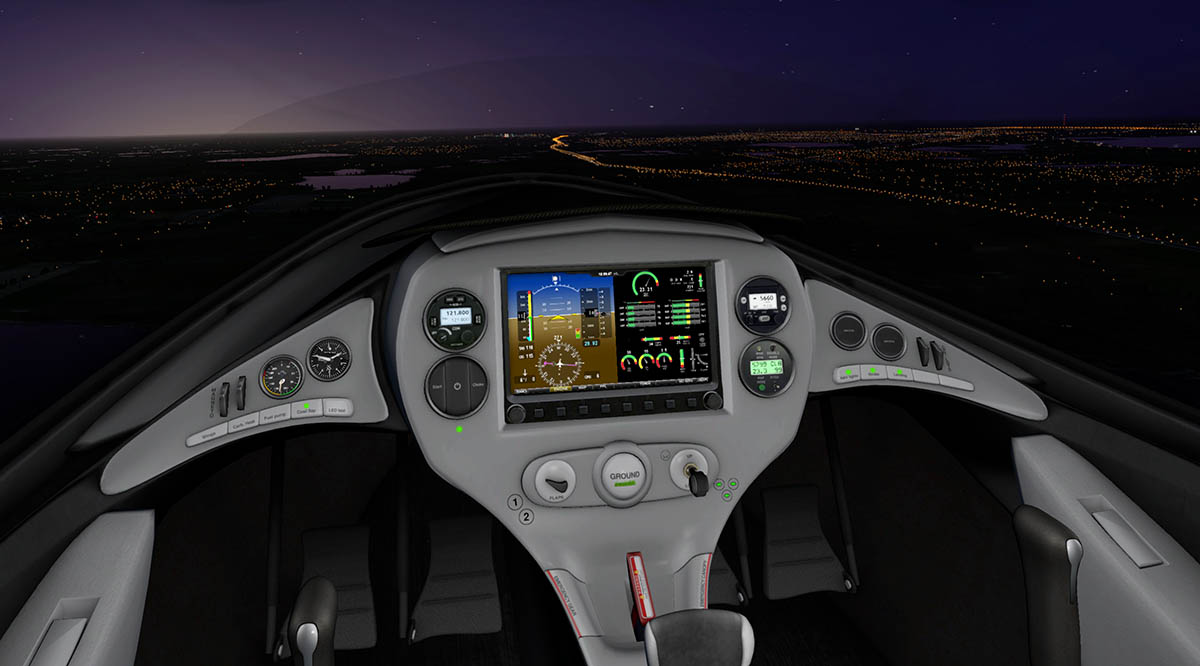
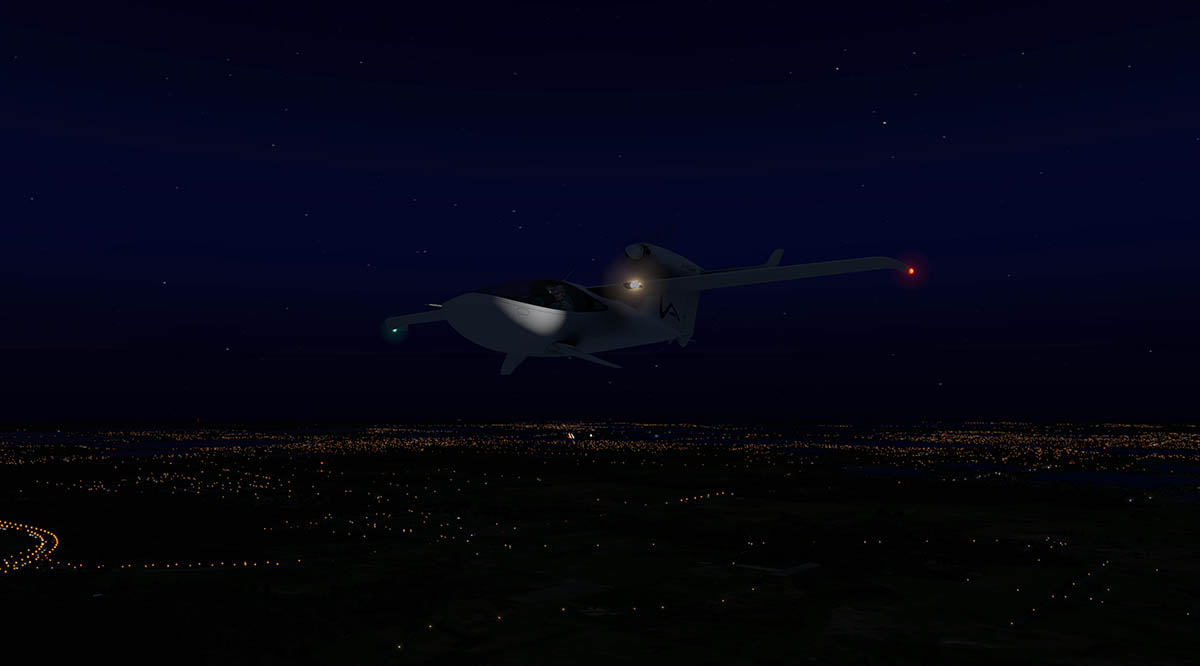
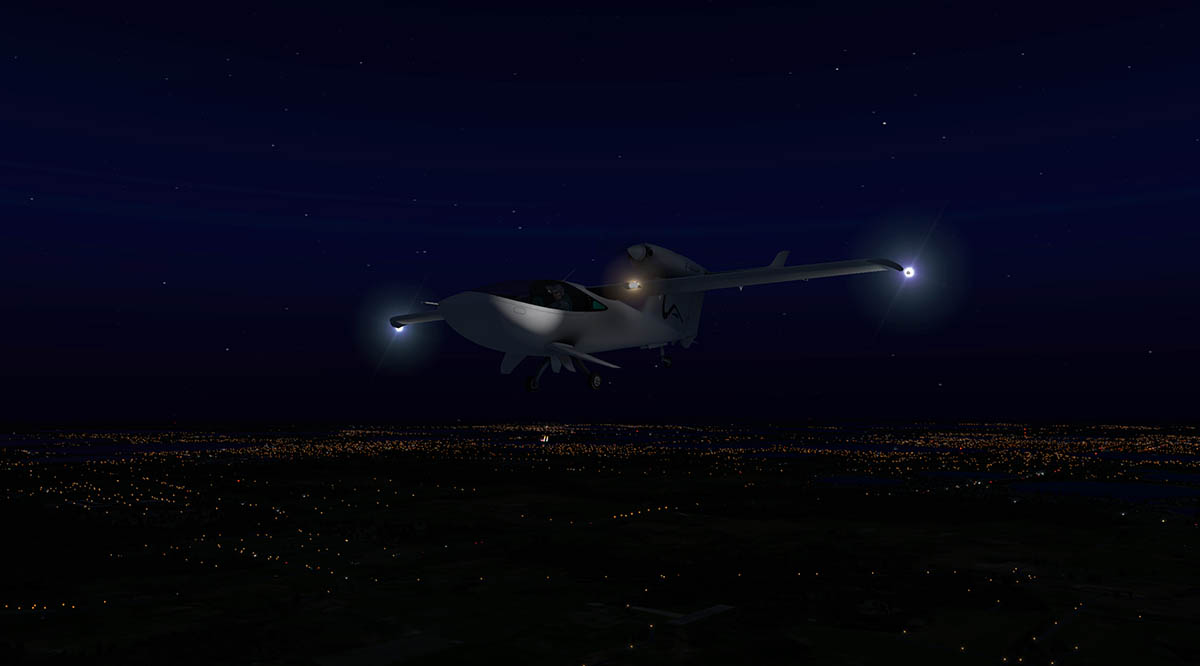

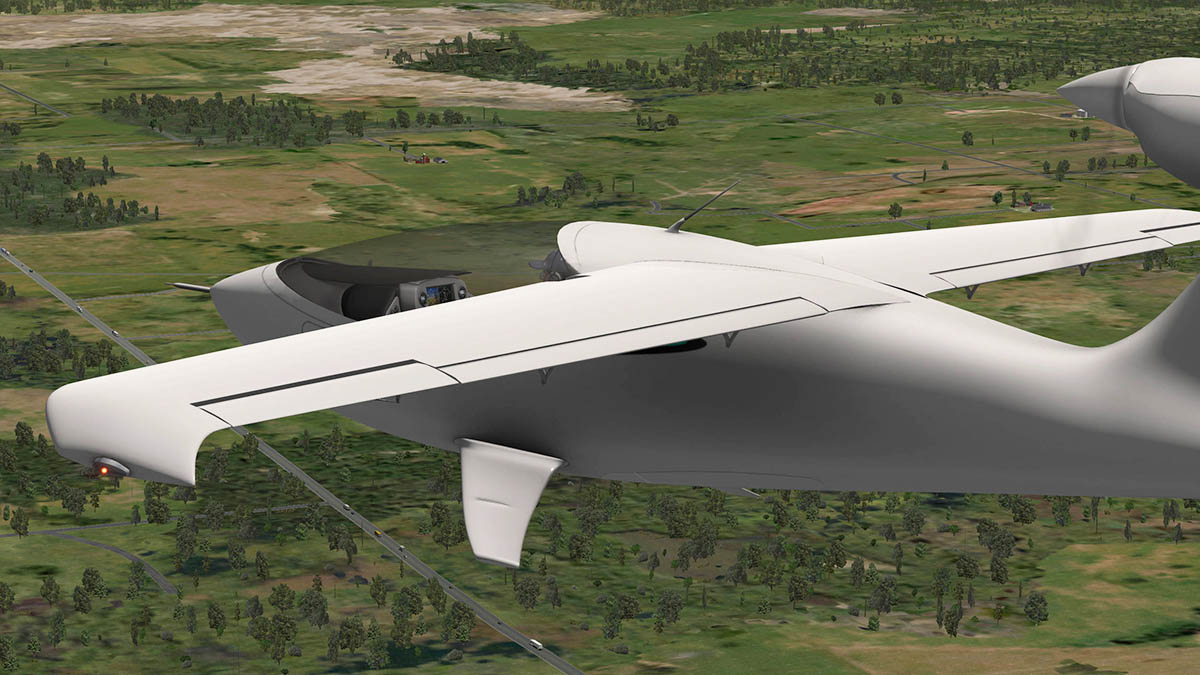


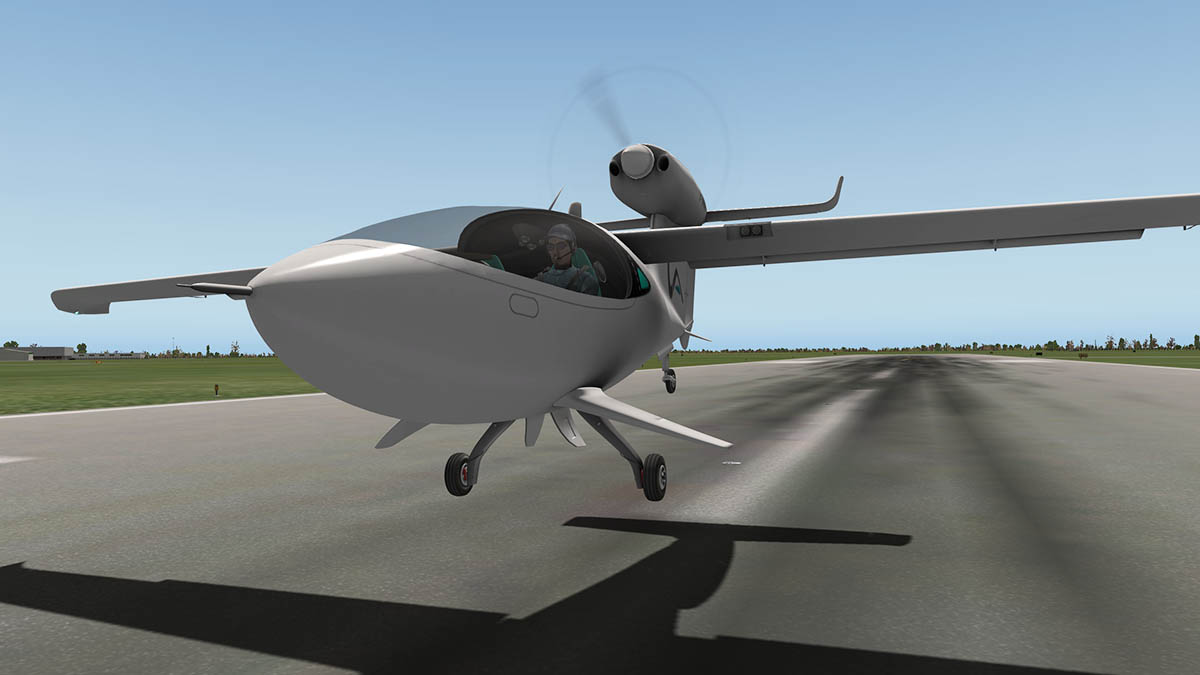


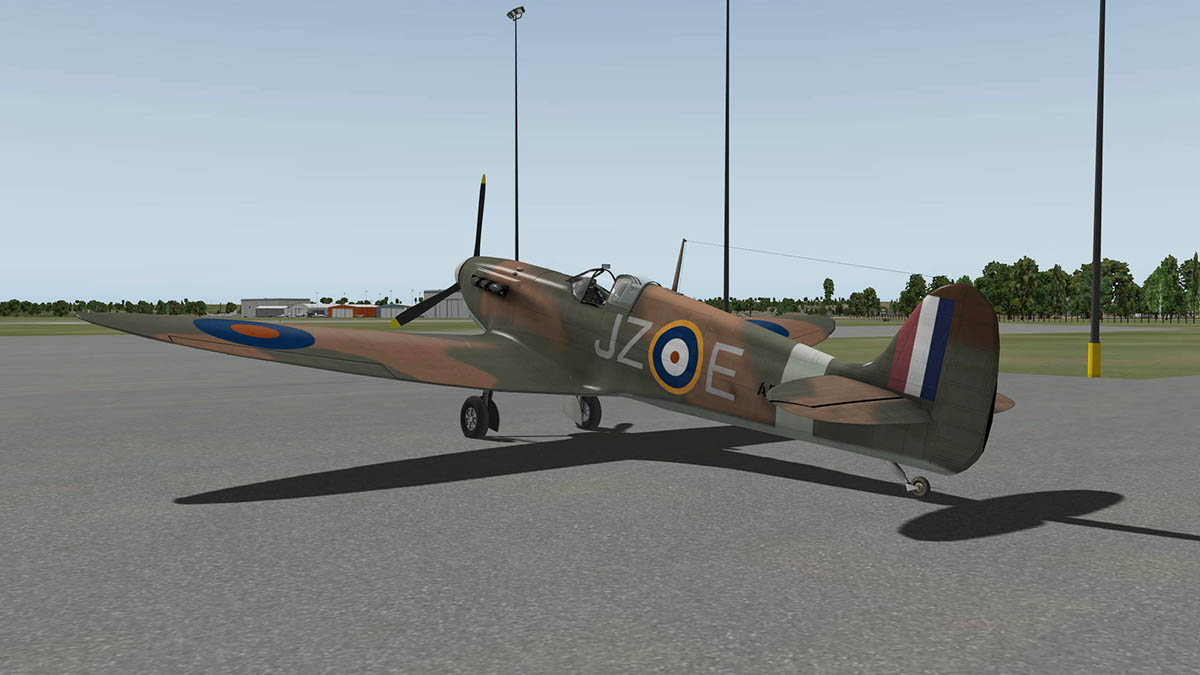

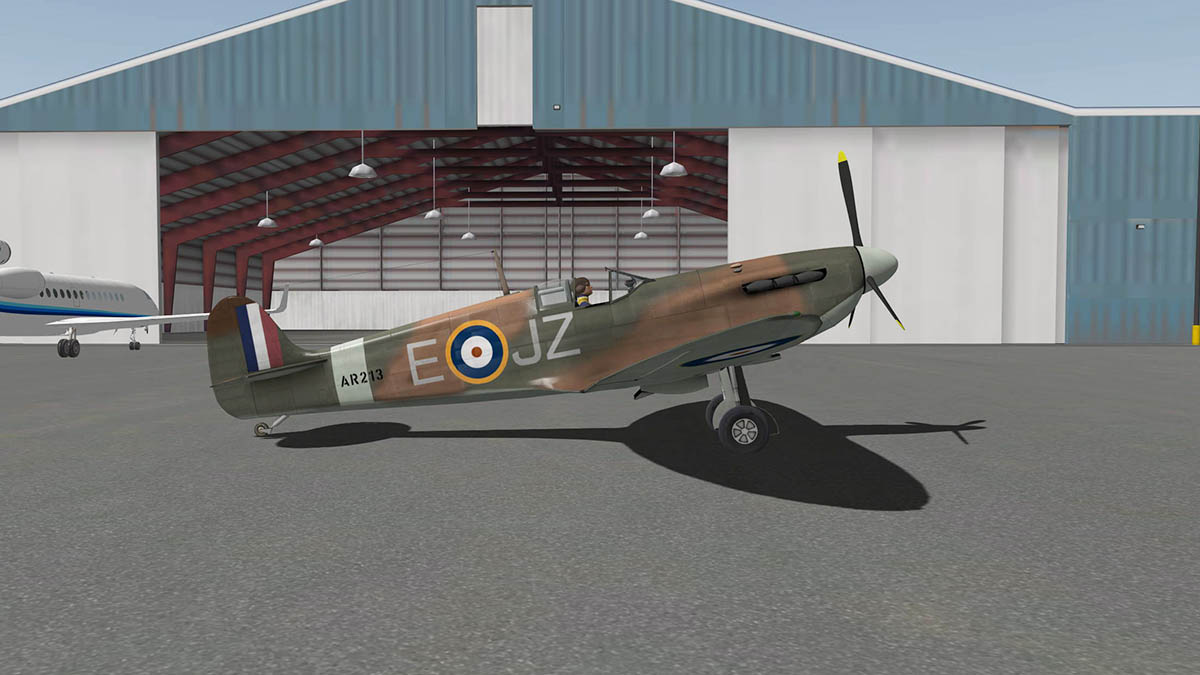
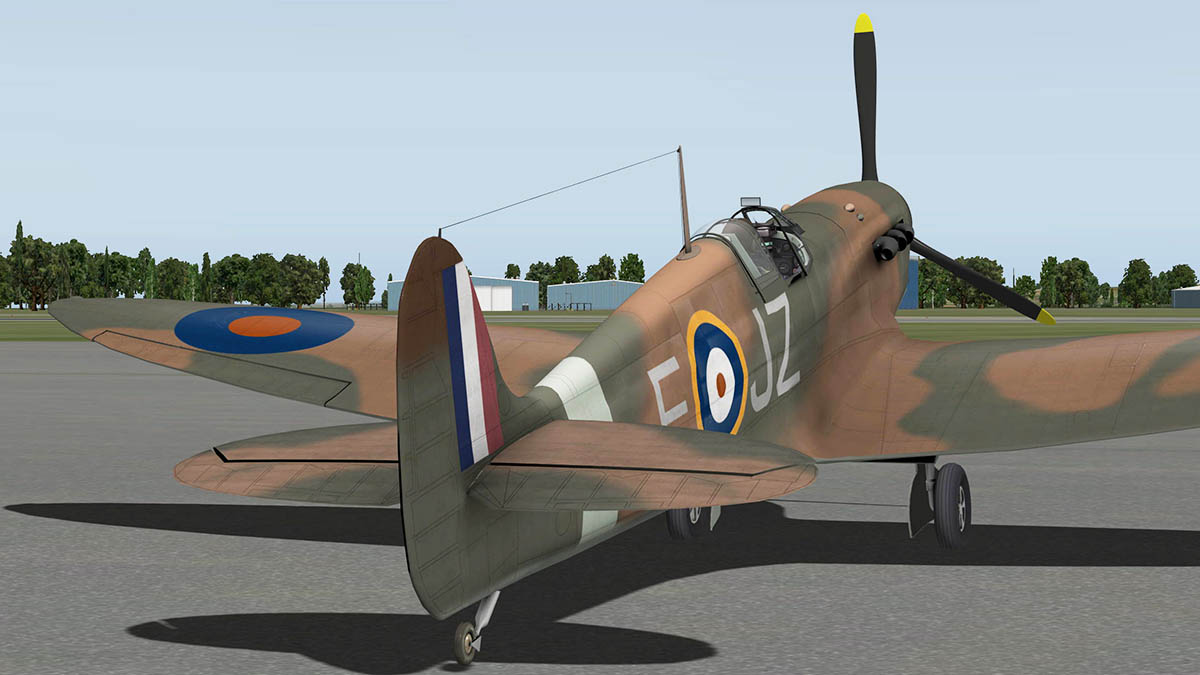
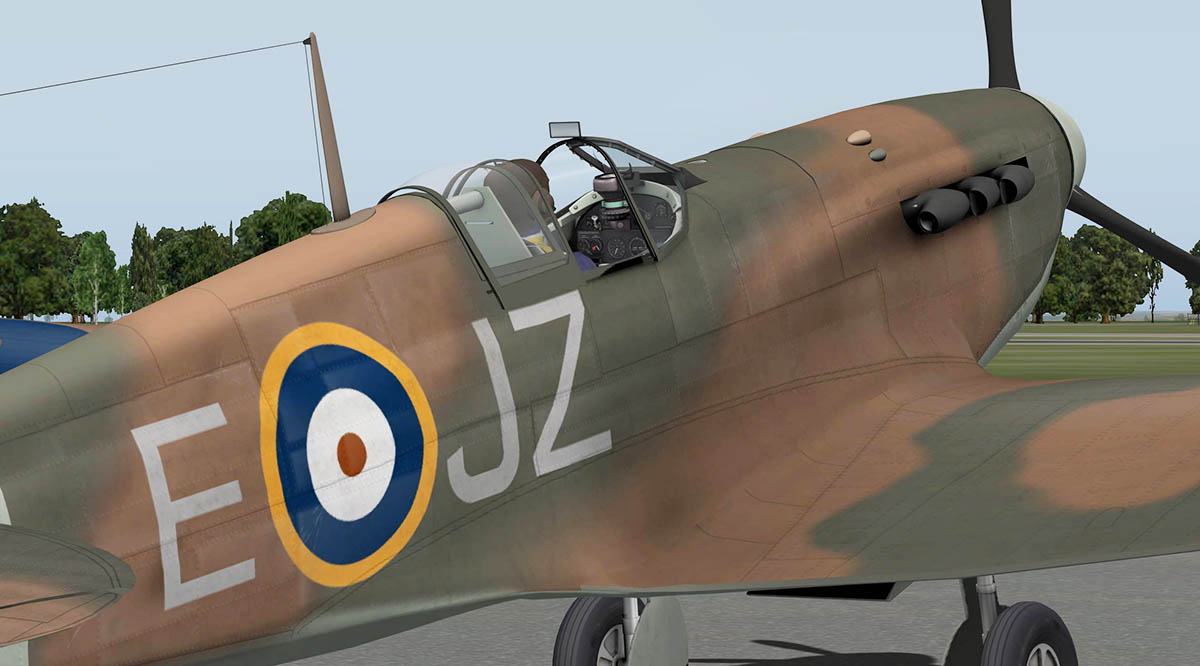


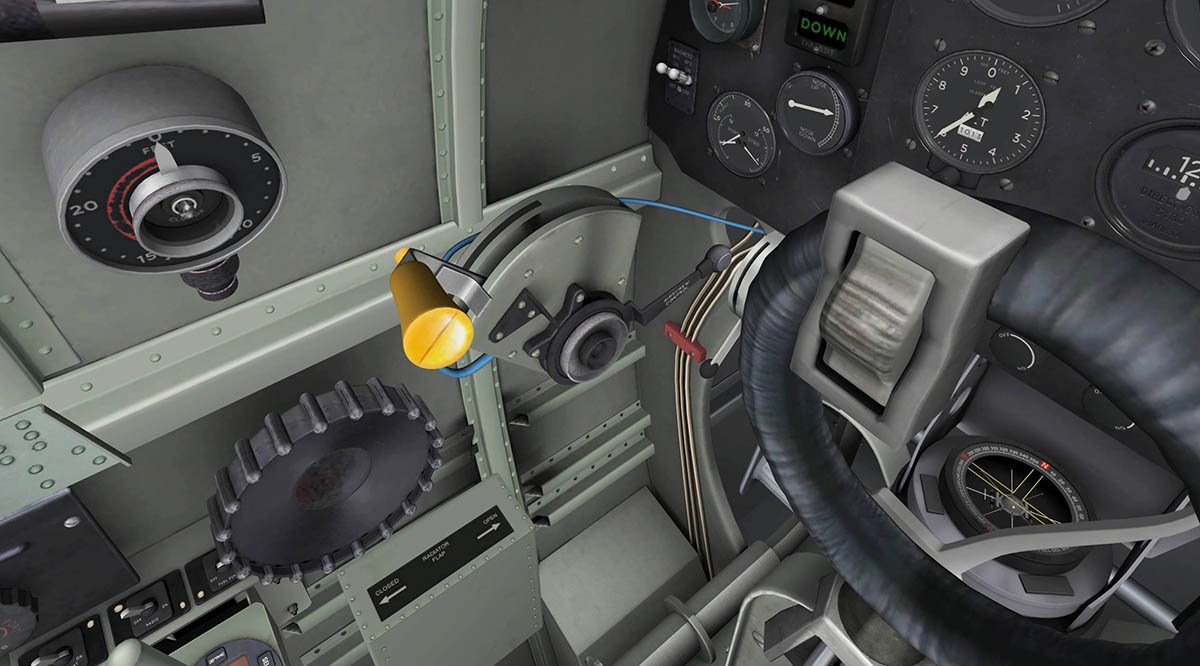
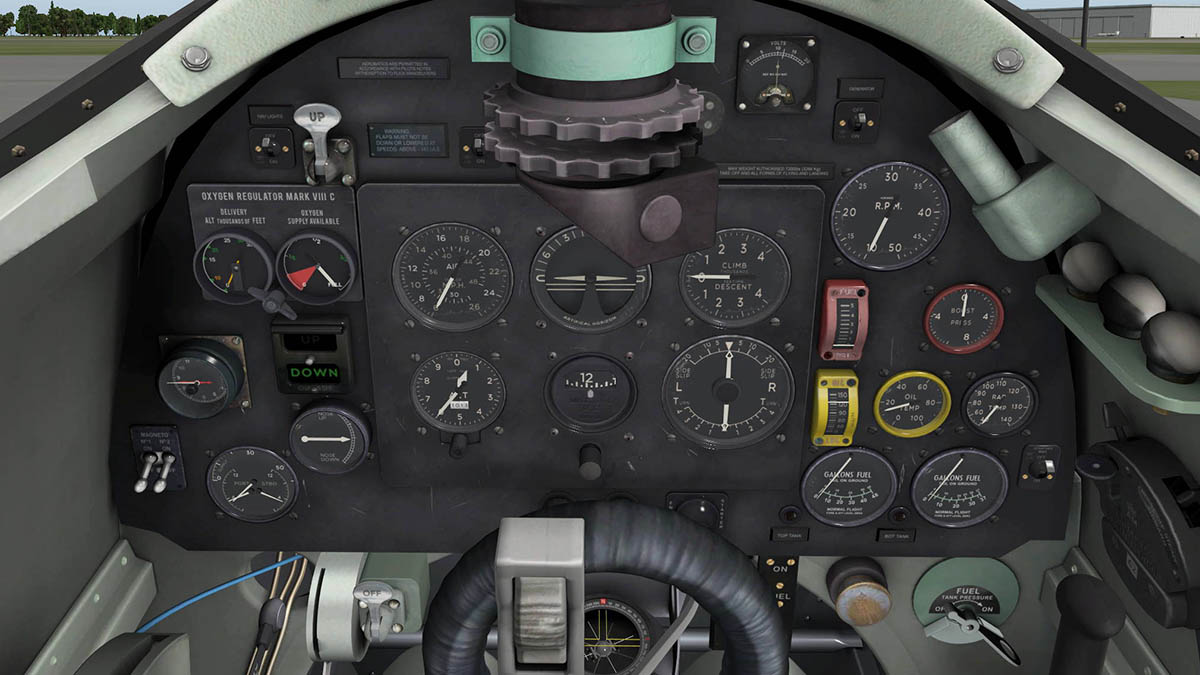
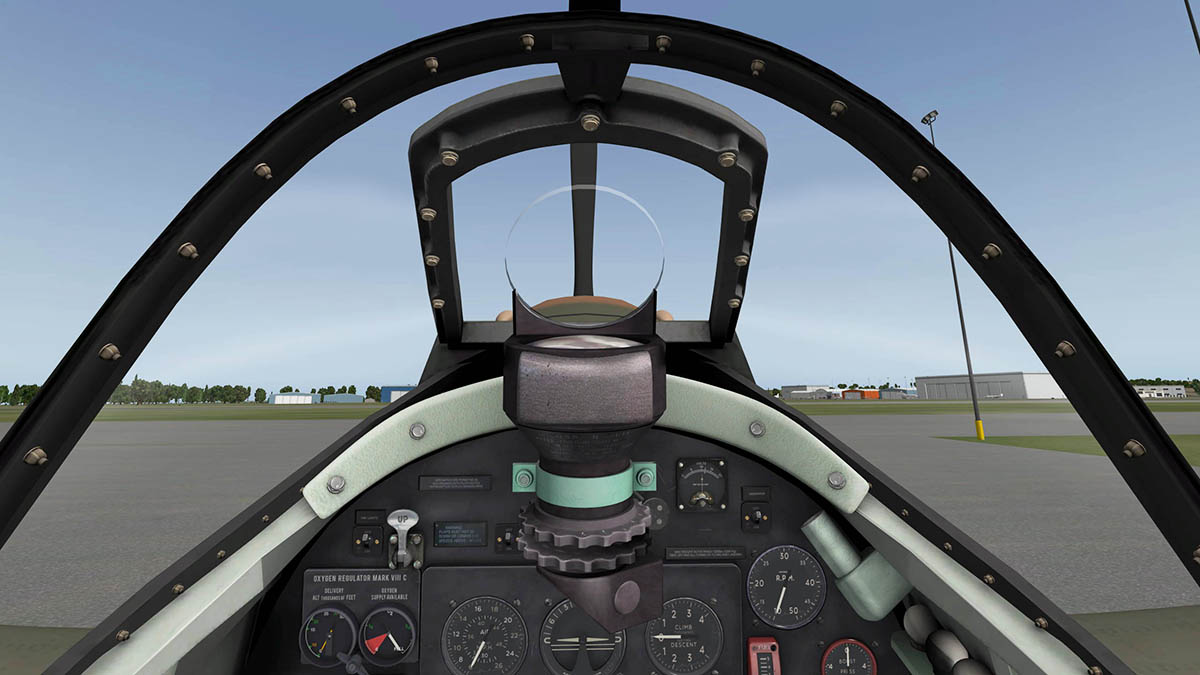


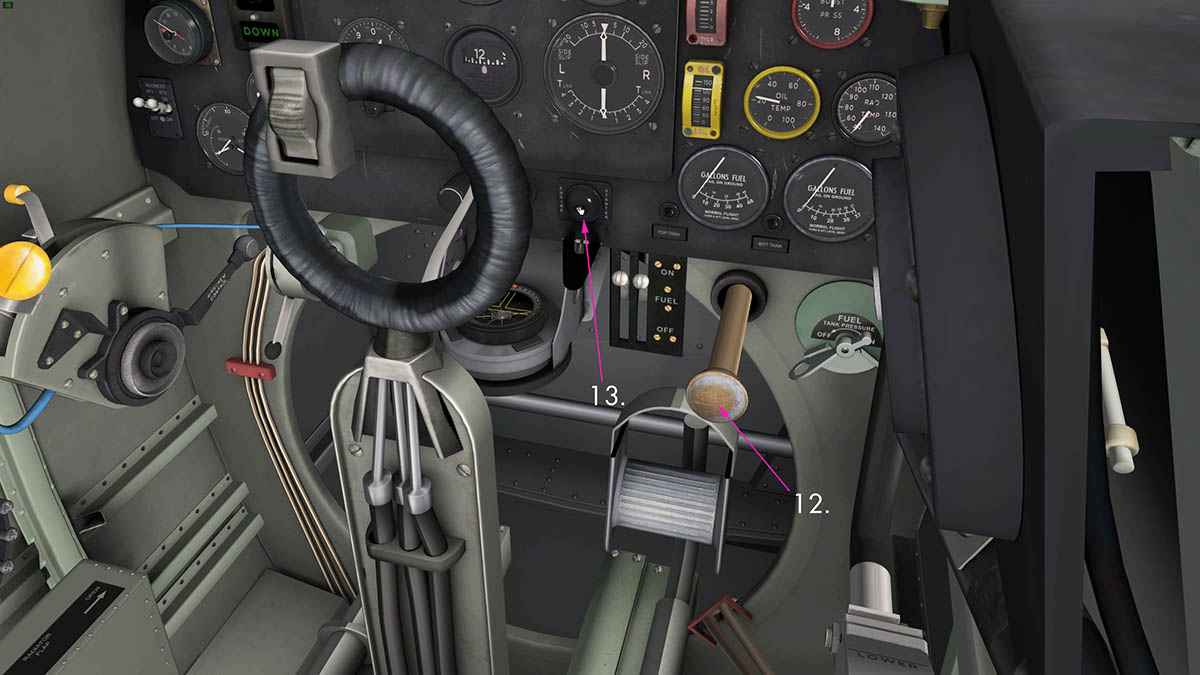
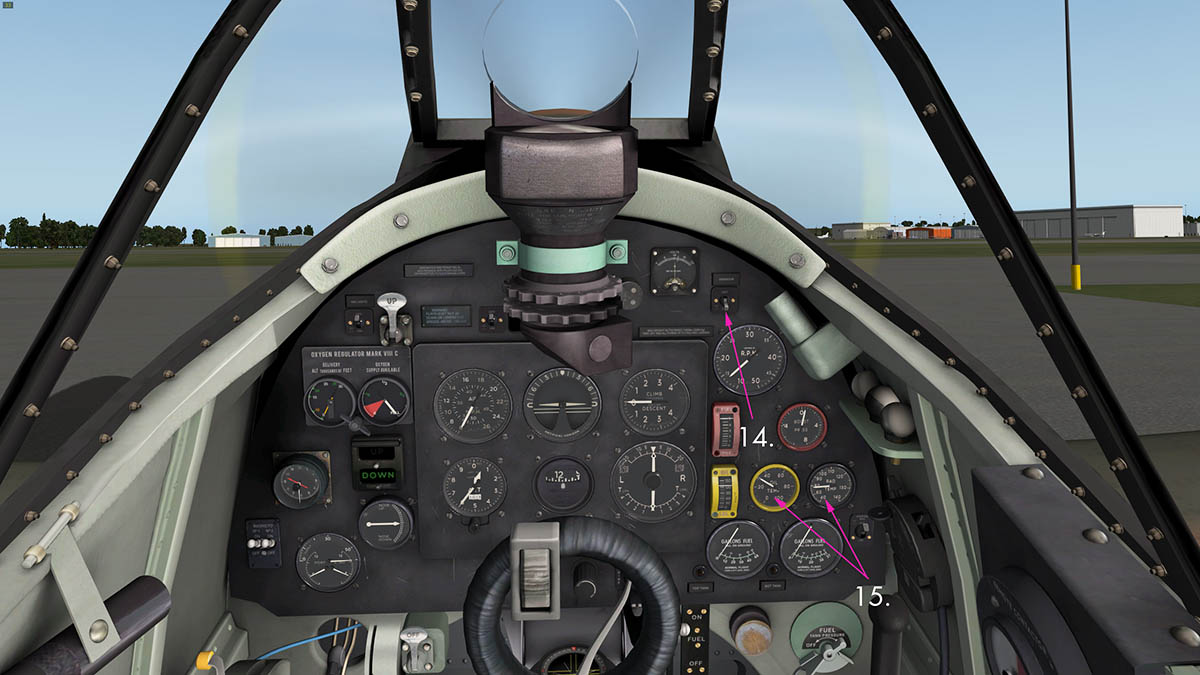
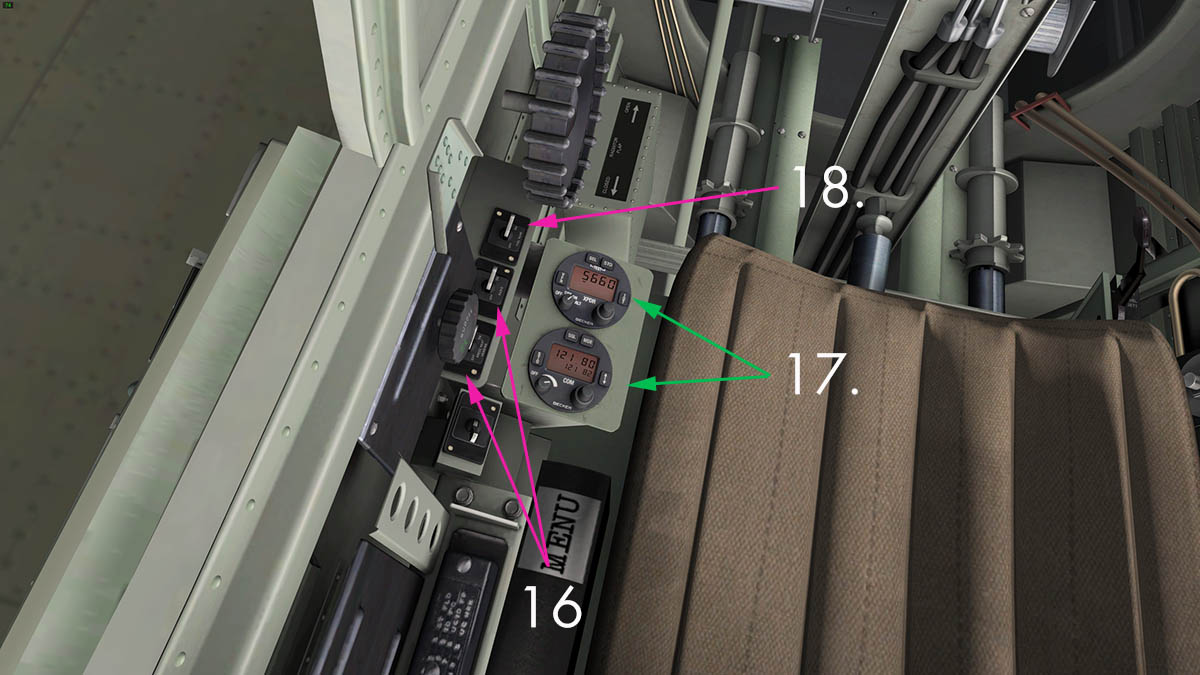
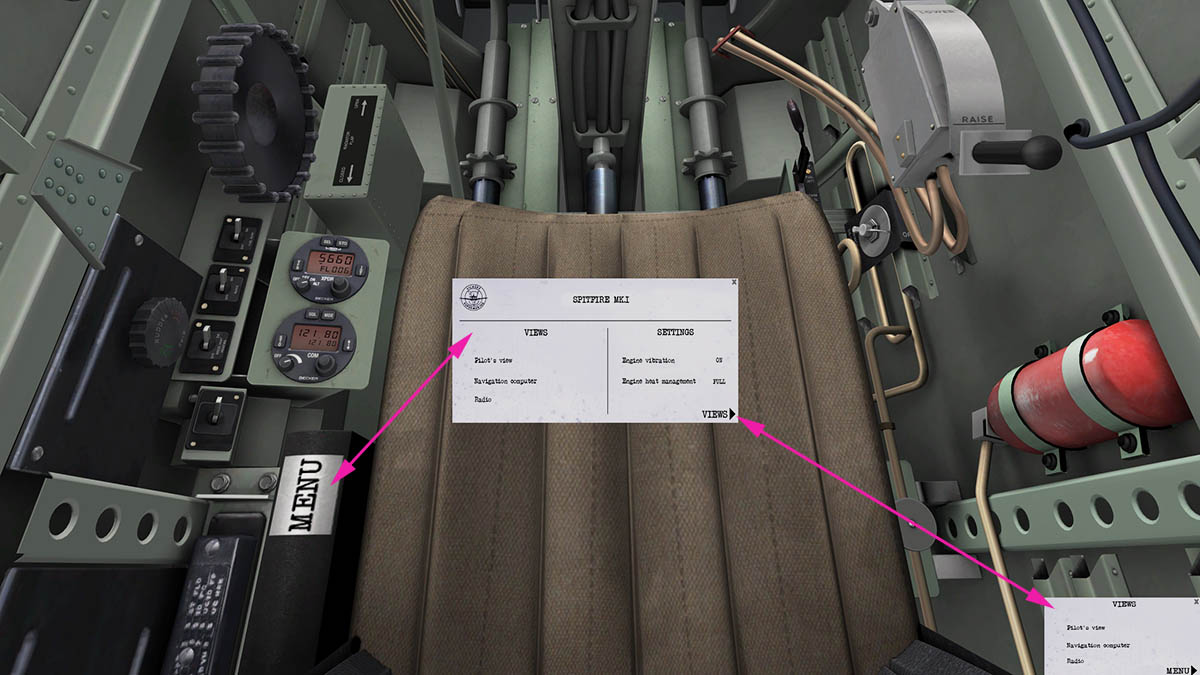
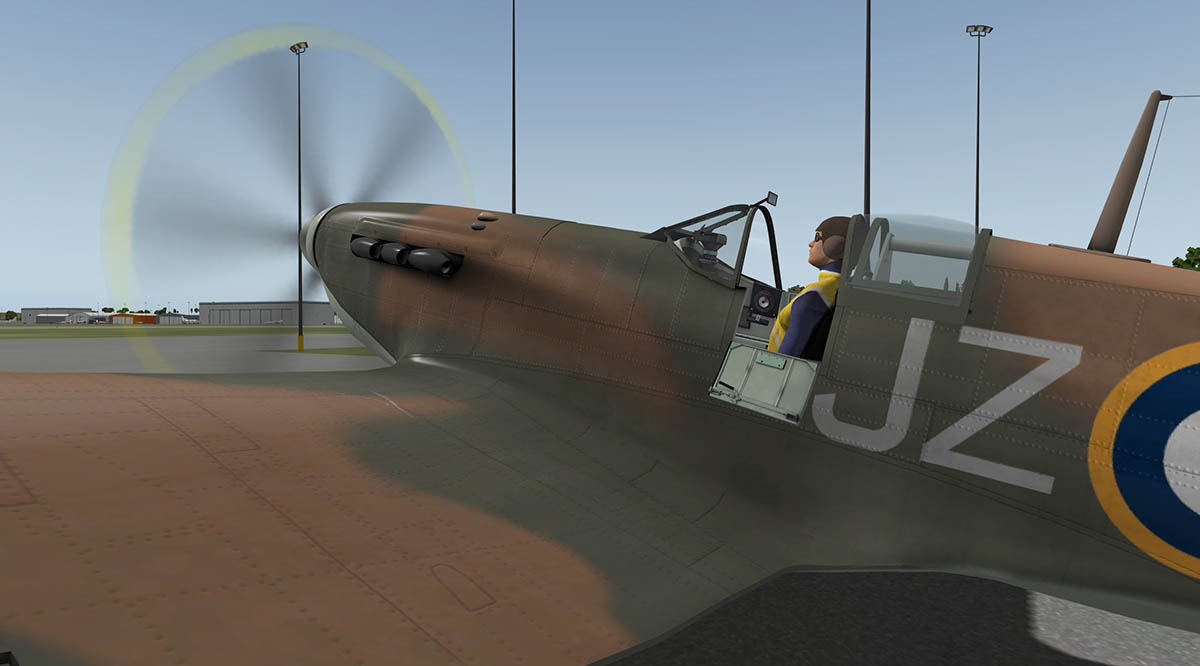


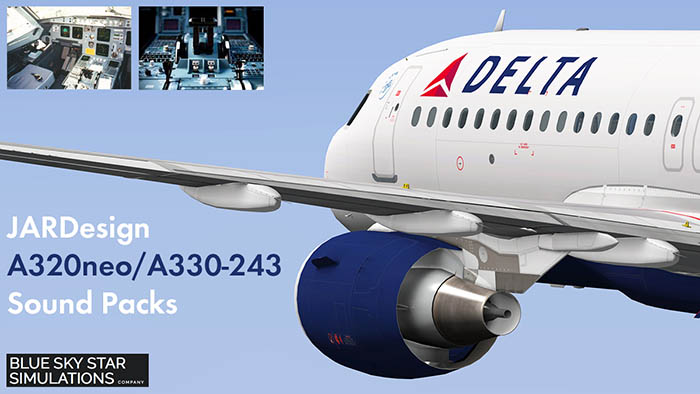
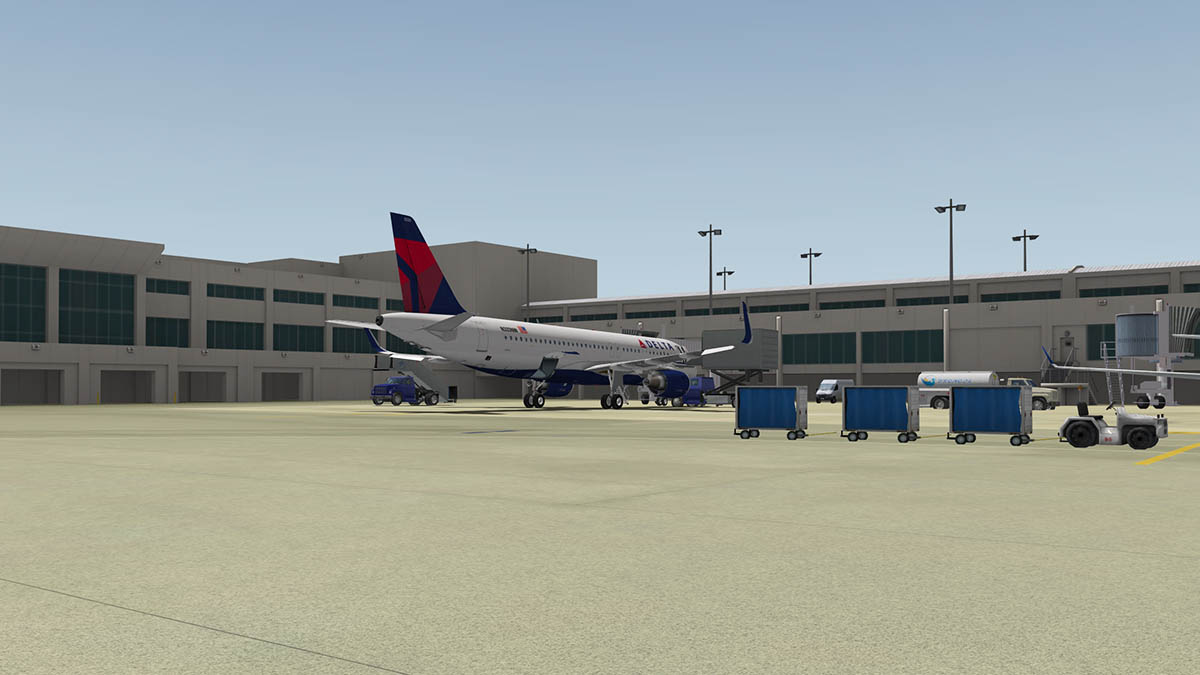


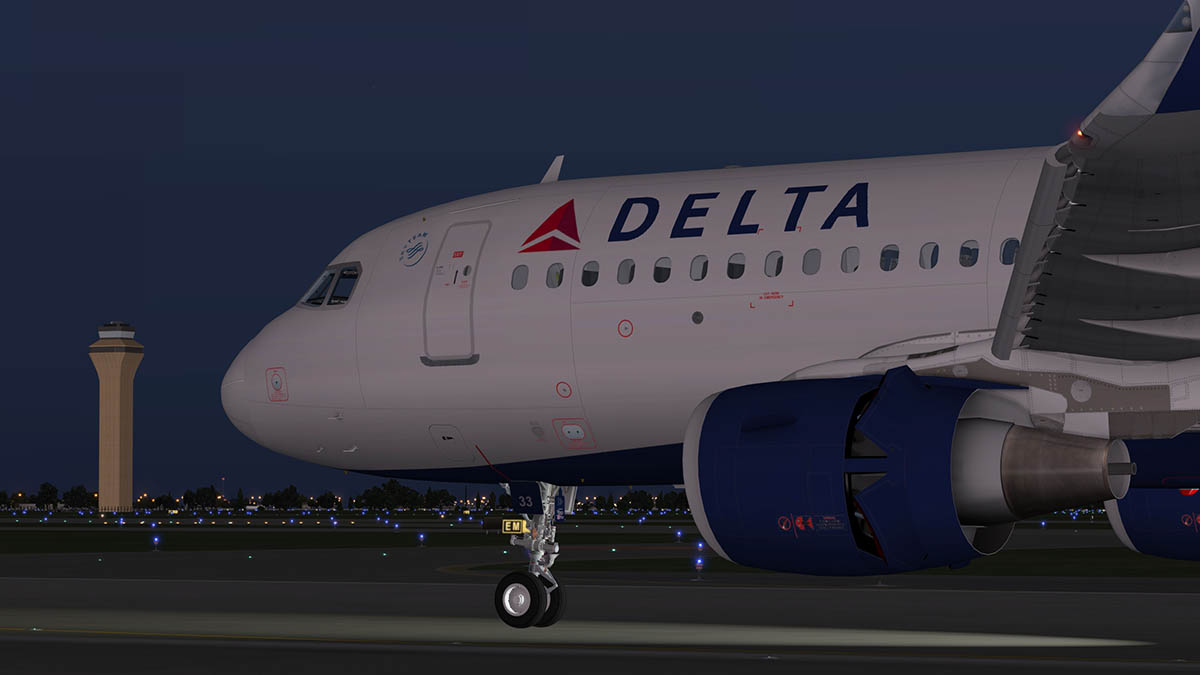


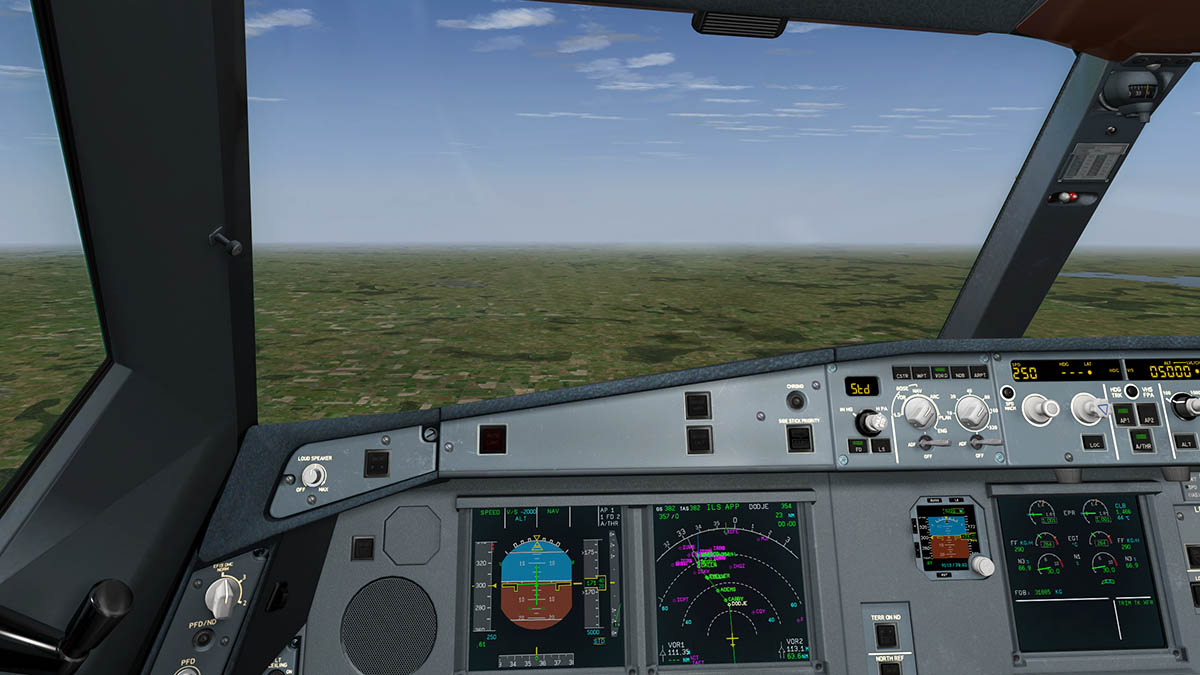


_sm.jpg.9f4e96fd2a3c4a5a385cc3c5d0d75ad1.jpg)
_sm.jpg.2ba32bb840dae058170500a41a635516.jpg)
_sm.jpg.cfca86cf2990bd0087740c7bd23b4674.jpg)

Aircraft Review : Aviat Husky A-1C from STMA
in Classic Aircraft Reviews
Posted
Aircraft Review : Aviat Husky A-1C from Shade Tree Micro Aviation
Flying in its purest form is a personal journey. Just yourself and the machine in perfect harmony, moving through the air in a momentum of power, noise and being completely free with the elements... It is a glorious thing.
You are certainly close to the elements in an Aviat Husky A-1C, there is no doubt about that. This utility aircraft is a strong structure of steel tube frames with a Dacron (known as Terylene in the UK) which is a hard plastic that is covering over all but the rear of the fuselage of this aircraft and metal leading edges of the high-set monoplane wings. Noisy power is provided by a Lycoming IO-360-A1D6 of 200 hp (149 kW). The 200 version has a gross weight of 2,200 lb (998 kg).
Outwardly you would think the Husky design is far older than the aircraft actually is, more 60's than 1980's. For design work by Christen Industries began in 1985. The aircraft is one of the few in its class designed with the benefit for at that time the newly-fangled CAD (Computer Aided Design) software. The Husky prototype first flew in 1986, and the aircraft's certification was awarded the following year.
Performance - Maximum speed: 145 mph (233 km/h; 126 kn) - Cruise speed: 140 mph (122 kn; 225 km/h) - Stall speed: 53 mph (46 kn; 85 km/h) flaps down, power off - Range: 800 mi (695 nmi; 1,287 km) at 55% power - Service ceiling: 20,000 ft (6,096 m) - Rate of climb: 1,500 ft/min (7.6 m/s)
______________________________________________________________________
I am flying this Husky from the Miami Seaplane base (X44) in Florida, right down the keys to KEYW (Key West). A delivery flight, but an enjoyable one at that. Just me, flying and taking in the scenery, and note that this aircraft package is the A1-C version and not the earlier STMA A1-A aircraft that has been released for a few years now.
There is no doubt it is spartan in here. You sit in the frame with your rudder pedals, long stick and frame mounted one piece instrument panel. Your seat is basic and the seat in the rear is not there but instead what you have is simply just empty space, but the controls for a rear pilot are present, and you can carry 880 lb (399 kg) in this empty space if you require it.
The aircraft is used for a multiple of roles in bush piloting, observation duties, fisheries patrol, pipeline inspection, glider towing, border patrol and other utility missions. Notable users include the US Department of the Interior and Agriculture.
Instruments are basic, but with surprisingly powerful tools for such a bush utility aircraft. Centre panel is dominated by the standard six set of instruments that are large and clear with the Airspeed Indicator, attitude indicator (also known as an artificial horizon), altimeter, heading and Vertical speed indicator (VSI), the missing large instrument is the turn indicator, but that is built into the lower part of the artificial horizon. Instead in its place is the bearing indicator for VOR(2) and ADF bearings.
Left is a large digital engine instrument panel known as the "JPI EDM 930 Engine Monitor" that is very powerful for such a small aircraft. It covers in rotary dials: RPM and Manifold Pressure. EGT (Exhaust Gas Temperature) and CHT (Cylinder Head Temperature). Three levels of strip gauges cover top to bottom Oil Temperature and Oil, Fuel Pressures. Middle layer is the electrical outputs in Volts, Amps and Carb-T (Carburettor Temperature). Lower line is Fuel in fuel pressure and left and right wing tank levels. Besides the two panel fuel indicators, there is a unique fuel gauge system noted directly on each of the wing tanks high above your head.
How simple and easy is that, great idea.
Right panel has a Garmin GMA 340 comm unit and a large Garmin GNS530 gps (standard X-plane) that pops out. Highlights here are the four Becker radio tuners in VOR 2 and ADF top, and a COMM 2 with a transponder tuner lower. (VOR 1 and COMM 1 is on the GNS530).
Across the bottom of the panel is a row of power and lighting switches and on this float version of the aircraft, there are two levers for the (inside float) undercarriage up/down position lever and another lever to high/lower the rear float rudders. Left bottom panel is a (standard) chronometer.
Two push/pull knobs cover your propeller (blue) and mixture (red) settings, throttle lever is high and to your left with a large "Elevator" trim wheel on the left side panel.
The Trio Avionics Pro Pilot autopilot is not a standard issue on the Husky, but it is installed here. Basically it is a simple autopilot that allows you to hold a heading, hold an altitude and change altitudes by a set vertical speed (V/S) to a designated set altitude. The Pro Pilot will also lock into a planned route on the GNS530 gps and that makes it versatile tool. But is quite tricky to use. The main knob has two sets of manipulators both sides of the knob for each adjustment of the side of the instrument you want to adjust.
The left is the HDG (heading), NAV (GNS530), VOR LOC and the right side is IAS, V/S, ALT (Altitude) and ALT SEL (Altitude Select) and ALT HLD (Altitude Hold). You change the selection modes by the buttons on the lower corners H MODE left and V MODE right. Activation is via the selection on the top two corners in H NAV and V NAV. The small lights in yellow for in progress and green for active (or locked in).
Overall it is a simple system but complicated until you get familiar with it, once you work it out then it works fine, but the manipulators are difficult to use, in that when selected usually you click on the mouse button to change the numbers (say V/S) but here you have to hold the mouse down for it to work, and (laboriously) slow it is at the start, once moving it gets faster the longer you hold the manipulator down, but you miss that one click change for fine quick adjustment. But as with anything you get used to it but it is ponderous if you have a lot changes in heading, altitude or V/S speed changes to do. You can adjust the heading on the Pro Pilot or on the heading dial which is quicker to use.
Quality and modeling is a good notch above STMA's range of aircraft. All the panel's text is clear, sharp and intelligible even at lower texture setting, unlike the fuzzy STMA text of the past and that gives the aircraft a more pro modern look than the others. Aircraft construction and detailing is good as well. The riveting could have been more pronounced than coloured dots, but overall it is very good from any angle.
The Husky is called a utility aircraft for a reason, it is a very basic but flexible aircraft, sort of small van for the air. If either using the Pro Pilot which is great over longer distances like the Key's, manual Stick and Rudder flying is great fun. It is a nervy light aircraft so inputs have to be Mr Smooth, no over corrections or sharp movements as the aircraft will move quickly and some times mildly violently in the air and certainly at slow speeds. Fly too fast at around 135 MPH and the nose will dig in and pitch downwards and so you are using too much power (and fuel) to go at a slightly higher speed, Drop the speed to around 128 MPH and the aircraft will actually be more efficient through the air, and you lose nothing in time in the long run. There is push/pull knob on the left side of the panel to adjust the underside cooling vent, push it in for better airflow and pull it out when the oil and engine temperatures go skyhigh, as this knob is a management tool to be used wisely.
I got permission to fly over the NAS Boca Chica Field, Key West Naval Station. It must have been a quiet day for operations because they were all smiles and waves as I flew over the airfield, you don't get this close without getting shot down usually.
KEYW (Key West Intl) came in to view on my left. There is a small strip of water behind the airport that is my destination and landing point.
It was an extremely tight approach and I kept the aircraft at full flap (a pump affair on the left side floor) and flaps are noted with 4 settings – faired (up), 10 degrees, 20, 30 and 40 degrees and I hovered the speed around just under 60MPH. It worked but only just in fact I cleared the beach with only meters to spare, but the aircraft washed off the speed quickly once in the water. I set the wave limit height to a low 0.5, but the A1-C still bounced around like a jack-in-a-box on steroids at this low setting... you would tip over on anything more than 1.0 meters, STMA notes to start at 1.0 meter but I think that is too high.
I use an old trick to get on to the high terra firma. Stick right back and a fist full of high throttle and you clear the water and drop the throttle down to settle on the grass, then it a quick taxi over to the ramp.
There is a split door on the pilot's right that is opened from the inside. But otherwise there are no menus or external features. You can use the supplied STMA Hangar's feature (open and close the hangar doors) and the plugin and notes are provided.
Besides the "Float" version above there are two other Husky variants provided.
Tundra
The "Tundra" variant has those huge balloon tyres that allow you to land on wet swampy land. These are huge oversized tyres, that here look a little to large although modeled on the 28” AK Bush wheels. There is also provided an under-fuselage “lookie-loo” baggage container.
There is no standard wheeled version which I would use more than the "Tundra" variant.
Ski
There is a "Ski" variant based on the Rossi Fernandez 8001 skis that are used on the real Huskys, they are well done and work well.
Liveries
There is a large selection of ten liveries in various styles, and a plain Black & White that could be used as a paint version. A paintkit is available on request. I liked the above Blue N7ZR cover and it looks great on the aircraft.
Nightlighting
Panel lighting is adjustable and it is nice, clear and easy to read. There is an above cabin lighting that is fine, but there are two spot lights on the frame with switches that don't work or spotlight areas below. The lighting switch panel is high on the upper right.
External lighting is fine but they haven't yet been adjusted (to date) to the X-Plane 10.45 lighting specs, so they are big and blobby. There is a rogue strobe on the right wing that stays on (flashing) unless you kill all the power.
Summary
STMA (Shade Tree Micro Aviation) have a huge built in X-Plane fan club, and they won't be disappointed with the A1-C Husky. It is a utility aircraft or if you like a bare-bones machine that is what it is, and there is a lot to like there... a free flying personal aircraft that like its real world counterpart is a real winner and well liked.
There are a few niggles that need cleaning up, like I had to create a key to start the aircraft as the panel key didn't work, but STMA are usually very good and quickly rectify those items within a few updates.
For STMA the design and quality is up a notch here, but there is still a few items that are bare 3-D design and are not textured (mostly struts and internal bracing) but are not overly noticeable in this case and in fact work for the utility viewpoint.
For a basic machine the instrumentation and flying tools provided are above the standard. You don't have to hang on to the stick for hours if you have to do a ferry flight or like in this case fly right down the Florida Keys, the Pro Pilot autopilot is good, but tricky to use.
If you love your bush planes or simply love flying alone and with skill then the Husky A1-C is right in your hangar. You will love it and find many roles to use it for. But overall this is a simple aircraft flying on a mission that can give you your flight of freedom and the love of what real flying is all about, just you, a machine and being in the air.
______________________________________________________________________
Yes! the A1-C Husky by Shade Tree Micro Aviation is NOW available from the new X-Plane.Org Store here :
Husky A1-C
Price is US$24.95
Features
Installation : Download file size is 58.40mb to your X-Plane - Aircraft Folder. Installed file size is 97.60mb
Documents : Huge amount of documents and manuals provided with Owners Manual, Water Takeoff Techniques, Checklist and O-360 Engine performance table.
Windows 7+, Mac 10.6+ or Linux
512Mb VRAM Video Card minimum - 1Gb VRAM Recommended
Current version: 1.2 (Last updated February 12th 2016)
______________________________________________________________________
_____________________________________________________________________________________
Review by Stephen Dutton
19th February 2016
Copyright©2016: X-Plane Reviews
(Disclaimer. All images and text in this review are the work and property of X-PlaneReviews, no sharing or copy of the content is allowed without consent from the author as per copyright conditions)
Review System Specifications:
Computer System: - 2.66 Ghz Intel Core i5 iMac 27”- 9 Gb 1067 Mhz DDR3 - ATI Radeon HD 6970M 2048 mb- Seagate 512gb SSD
Software: - Mac OS Yosemite 10.10.1 - X-Plane 10 Global ver 10.45
Addons - Saitek x52 Pro system Joystick and Throttle : Sound - Bose Soundlink Mini
Scenery or Aircraft
- KEYW - Key West International Airport V1.0 by Fletcherj (X-Plane.Org) - Free
- KNQX - Naval Air Station Key West 3.0 by Nicolas (X-Plane.Org) - Free (Note this scenery is part of the NAPS Freddy-de-Pues scenery packages)