Stephen
-
Posts
2740 -
Joined
-
Last visited
-
Days Won
359
Content Type
Profiles
Forums
Articles
Everything posted by Stephen
-
I never use the Saitek Tools with my X56 Rhino, why would you anyway as X-Plane provides all the control and key settings you could need, it sounds like the external settings is confusing the simulators settings... my bird works perfectly well... my guess the tools are for FSX/P3D and not for X-Plane in features.

-
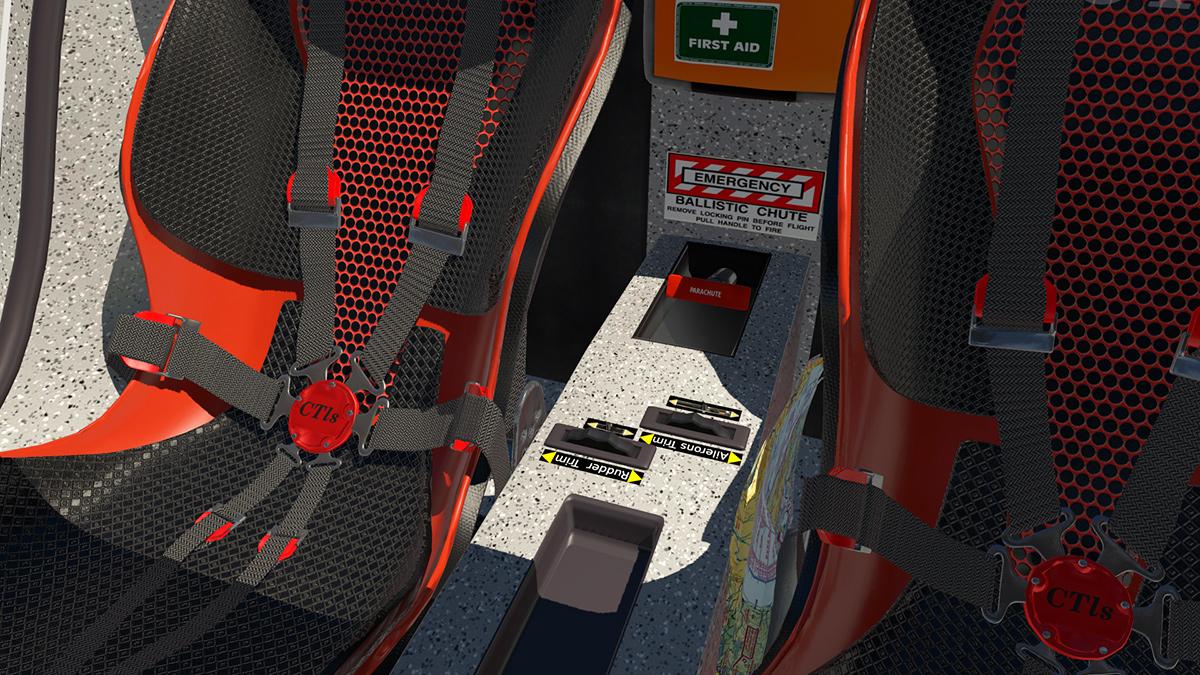
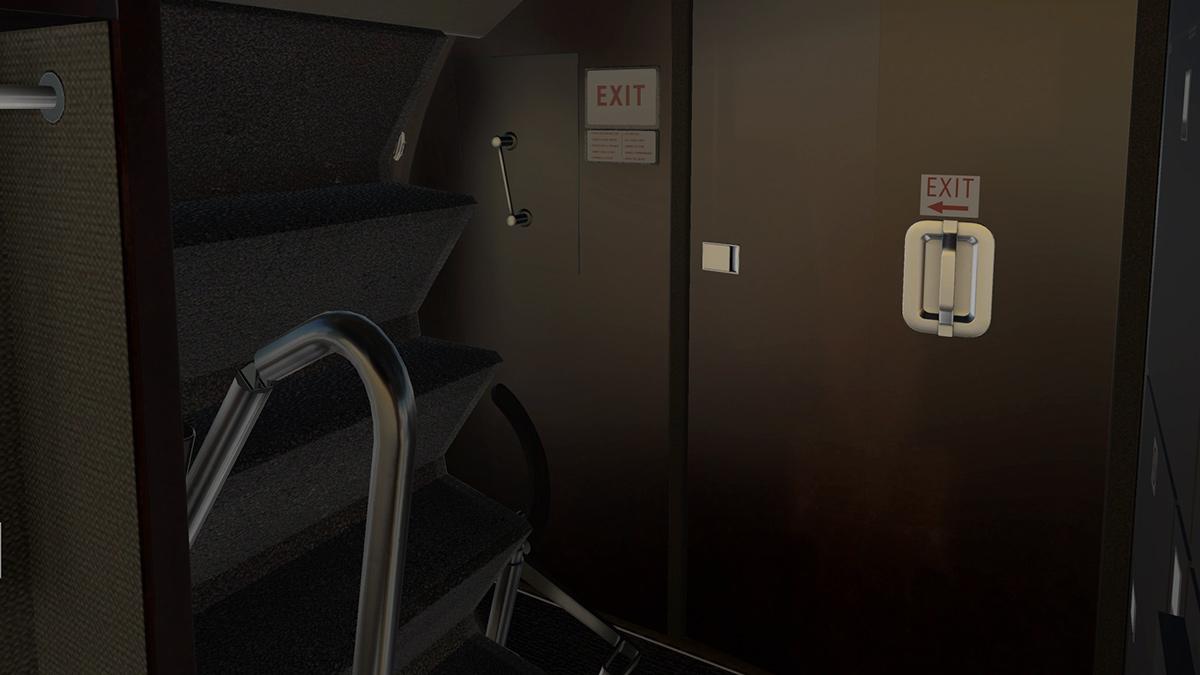
 It is actully a floor panel, that looks like a small storage bin, but there is no warning around it, but it could be weak.
 -
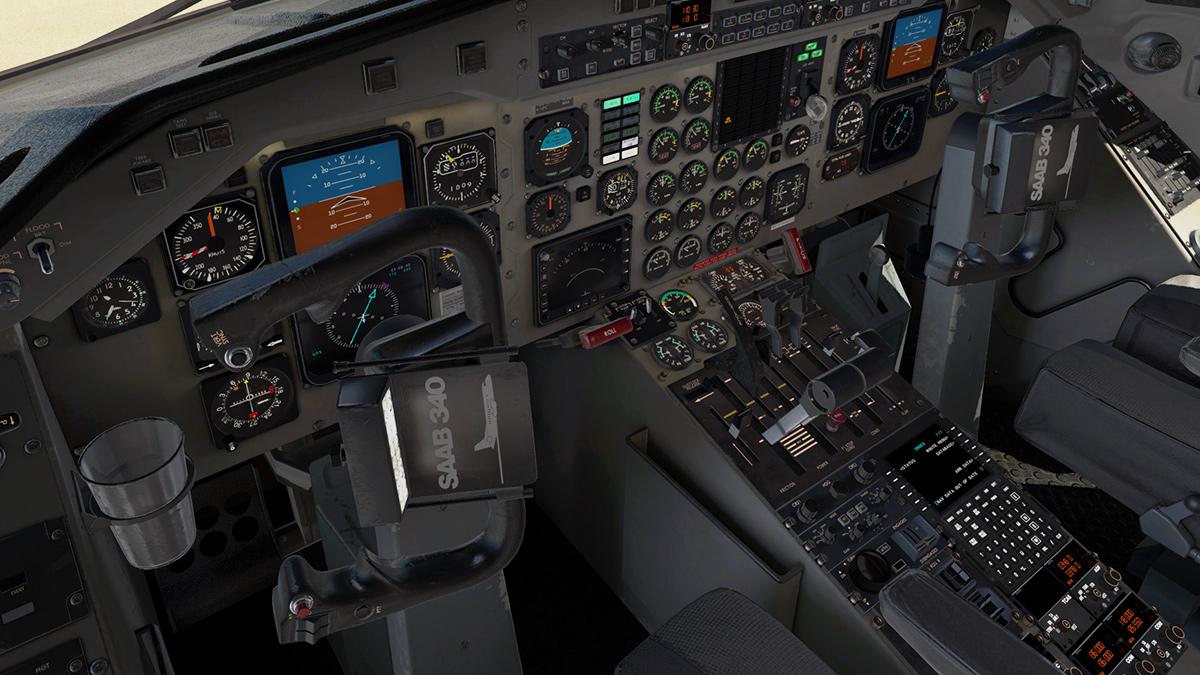
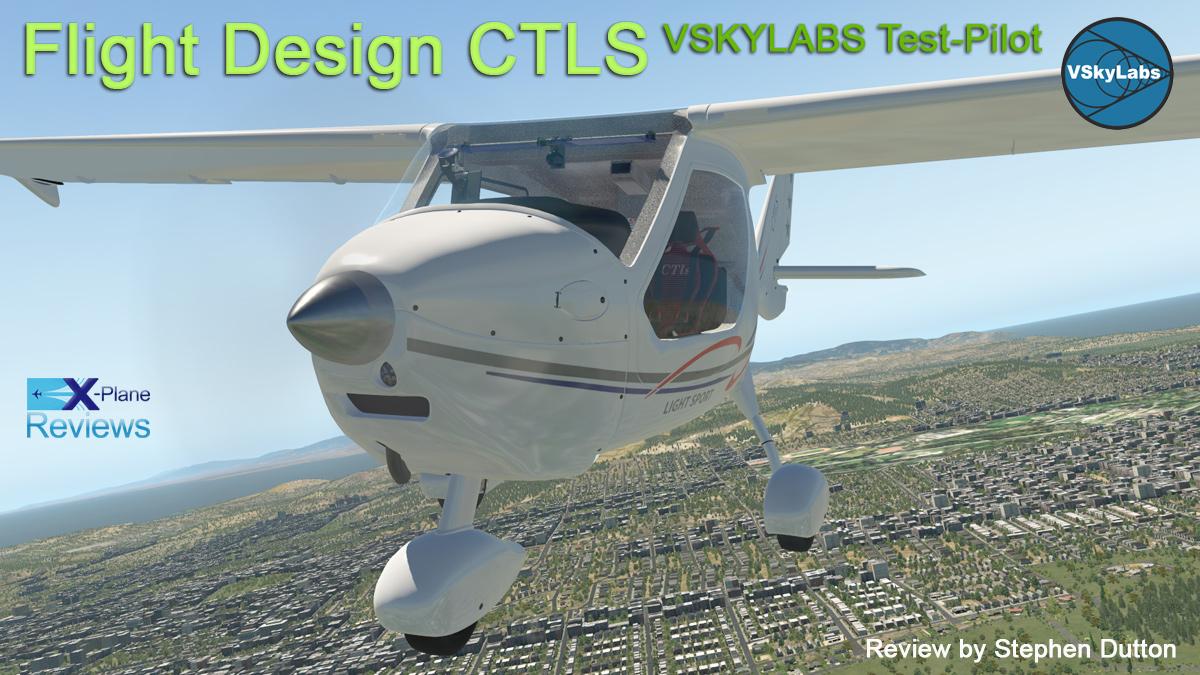
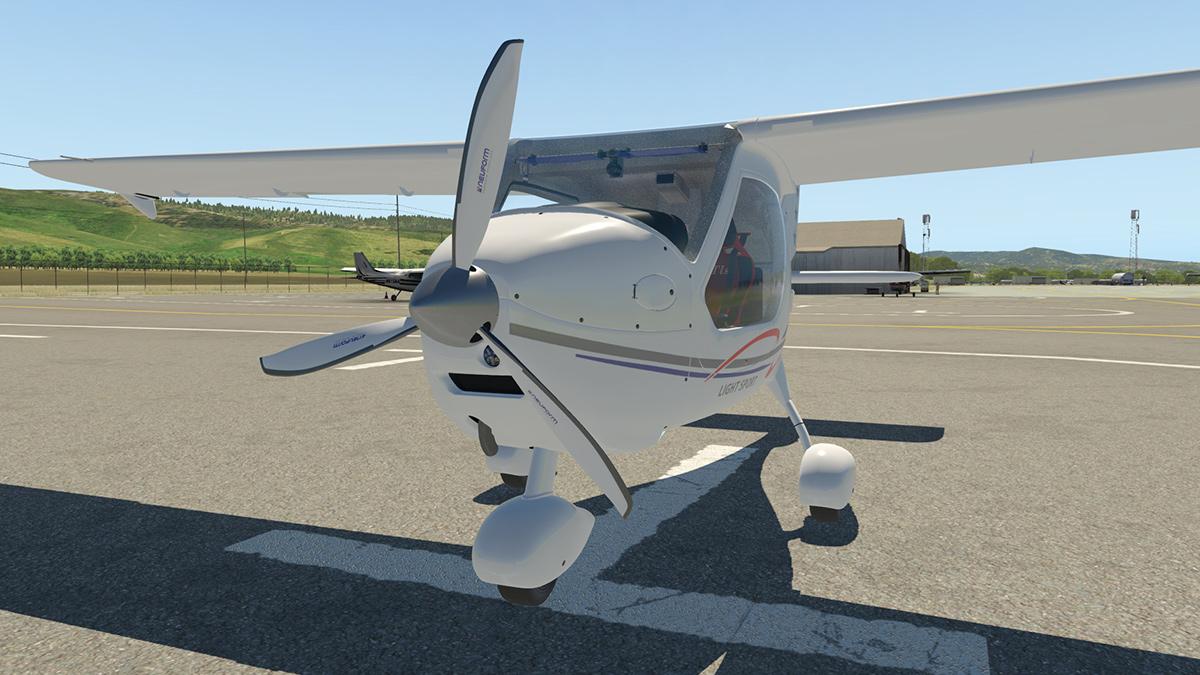
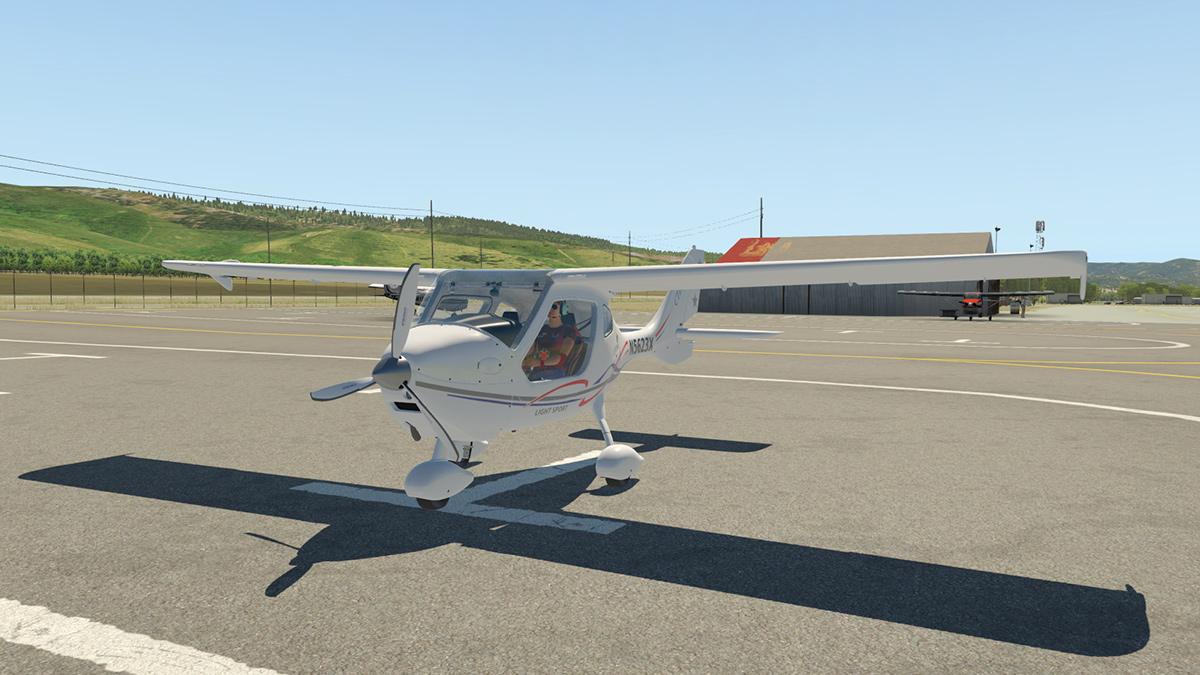
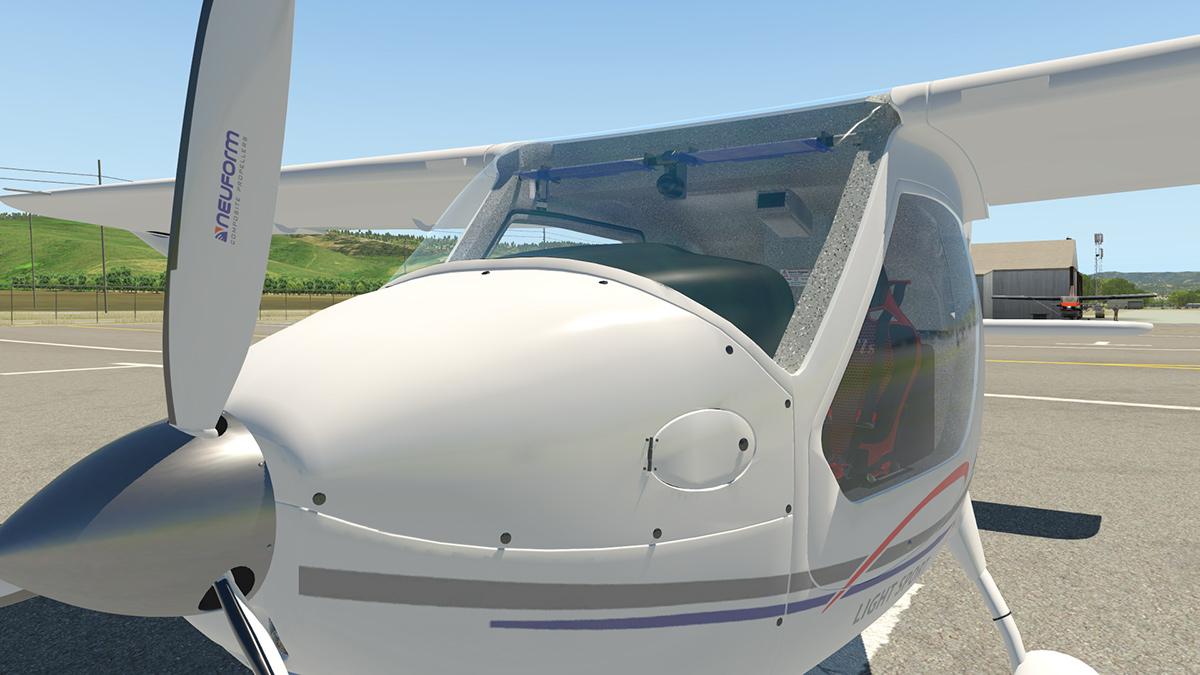
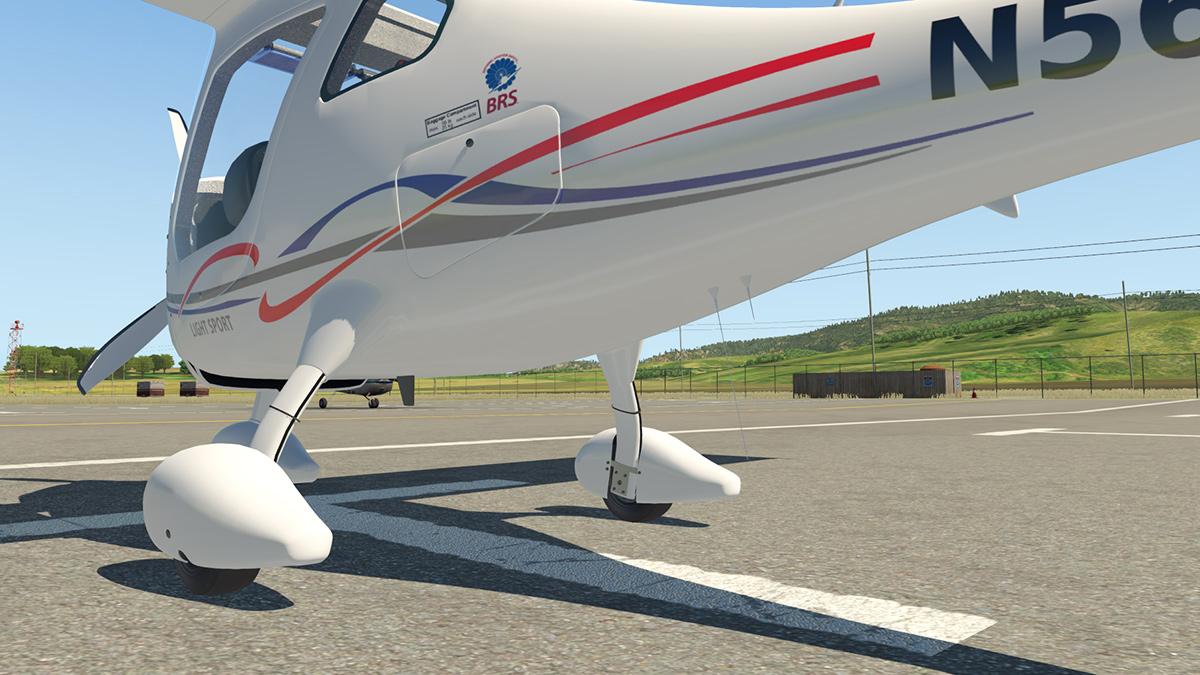
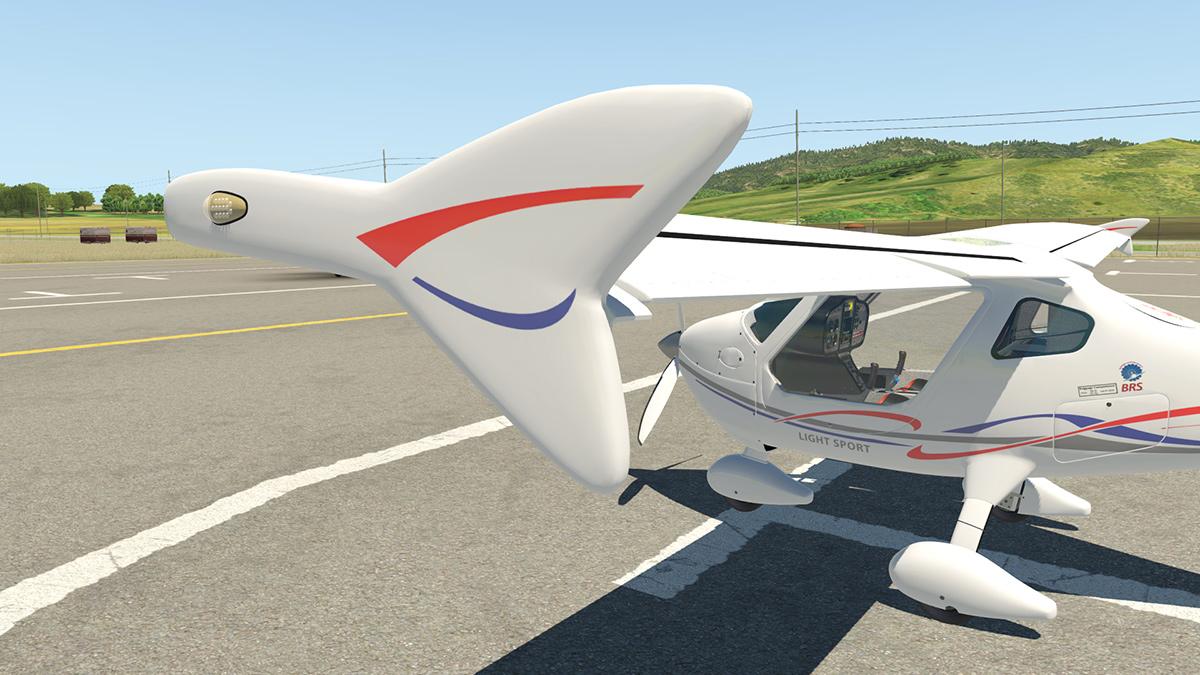
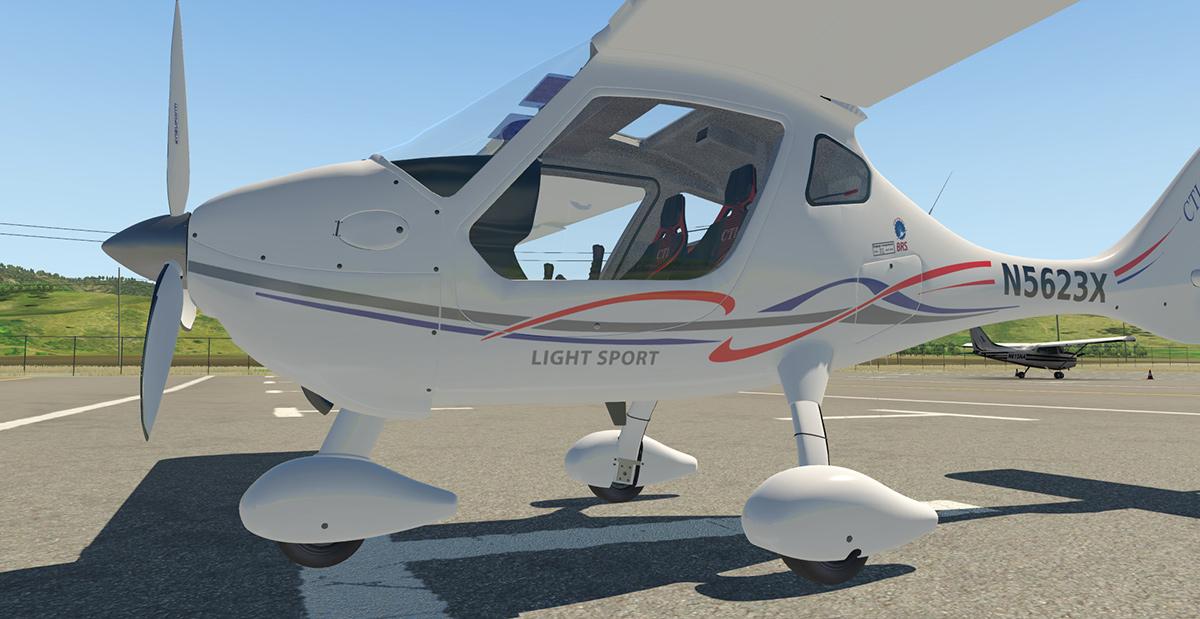
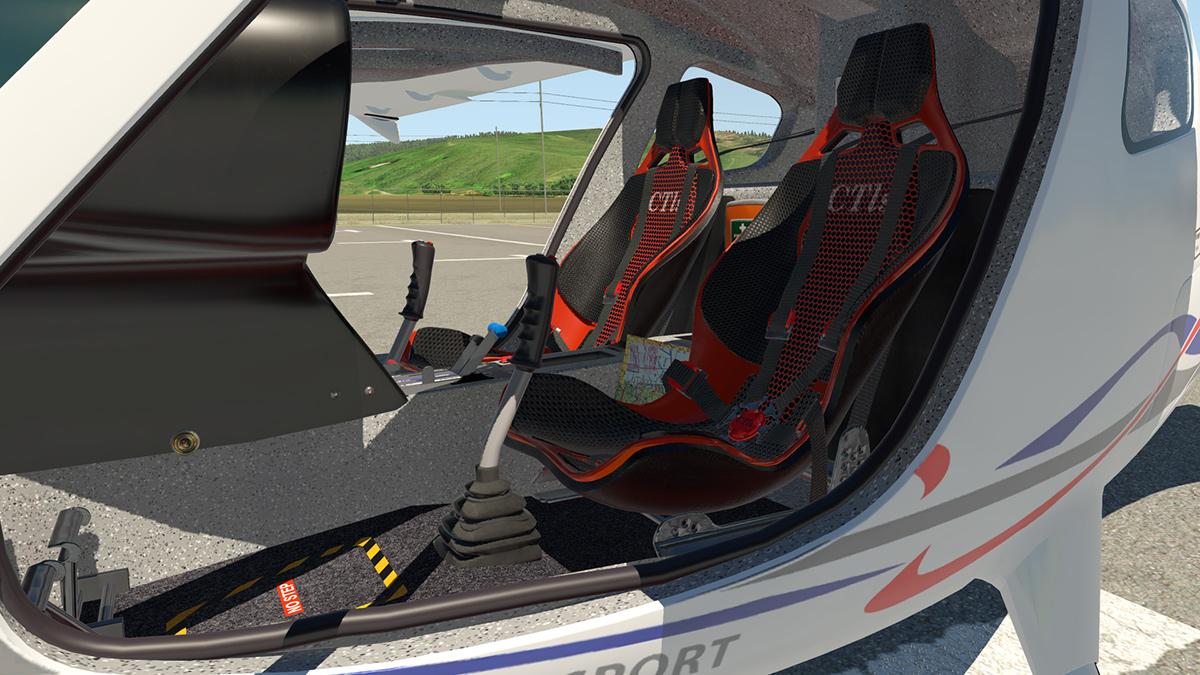
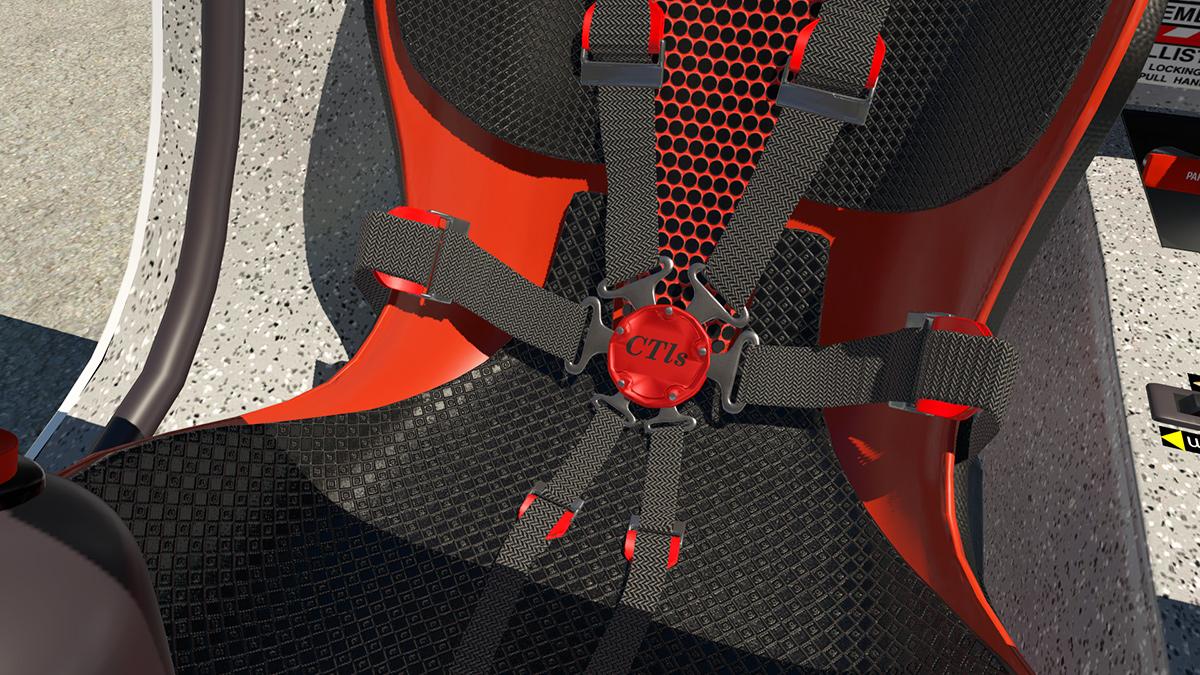
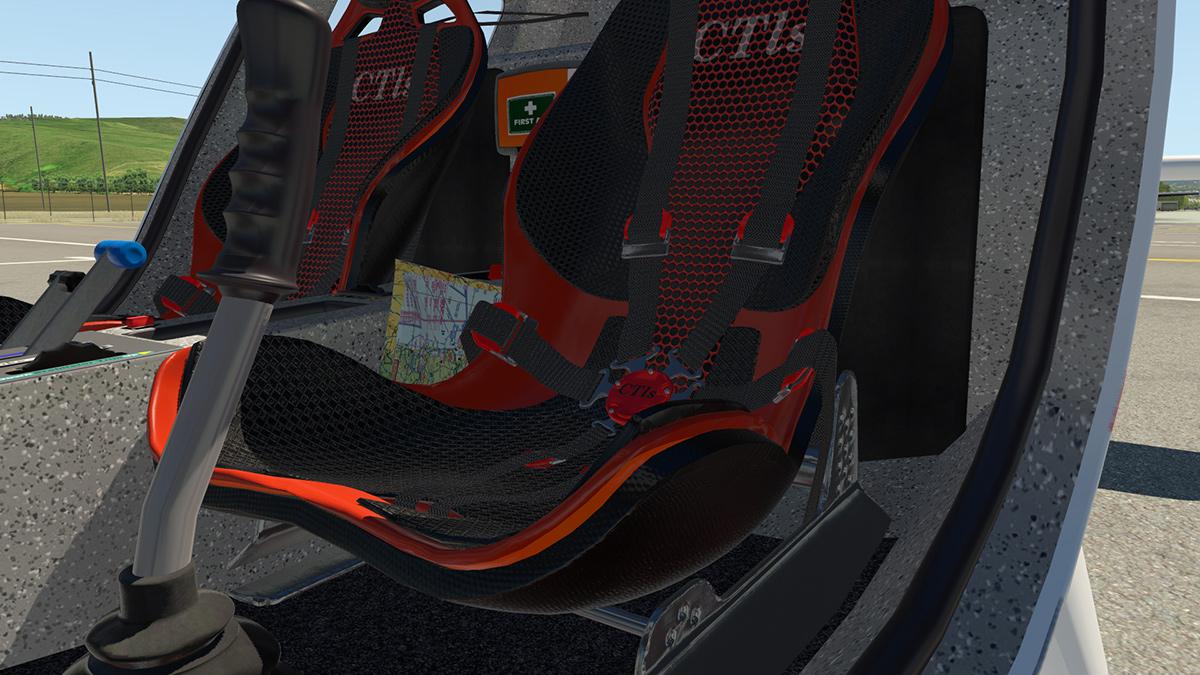
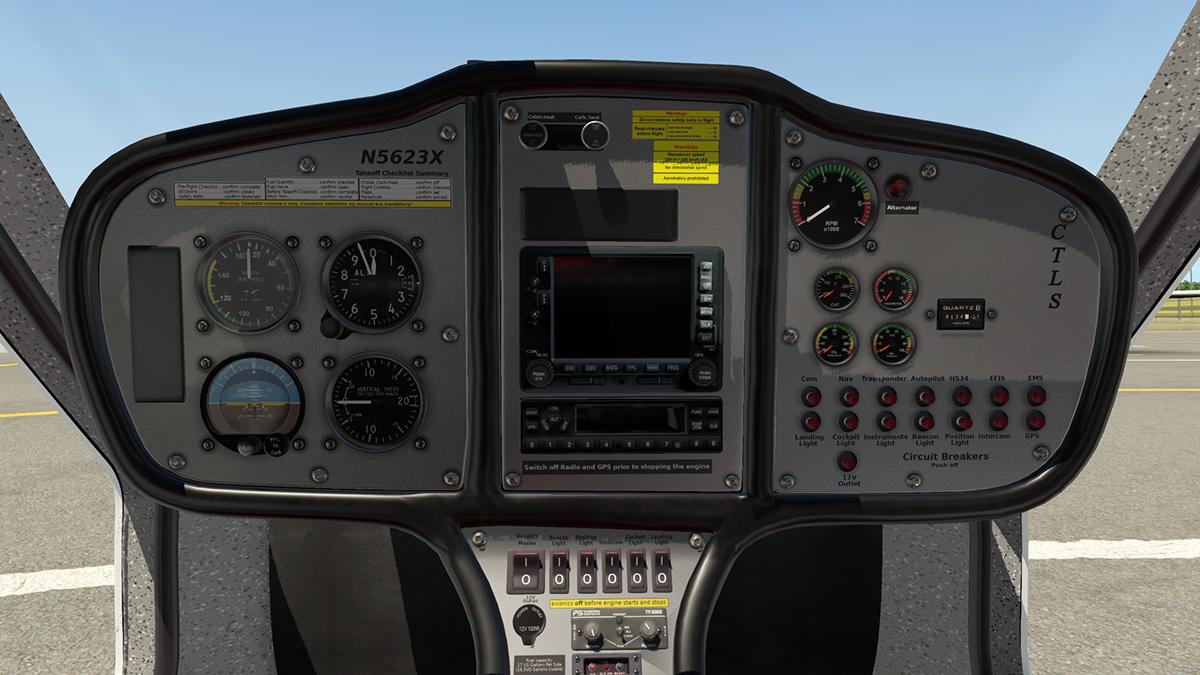
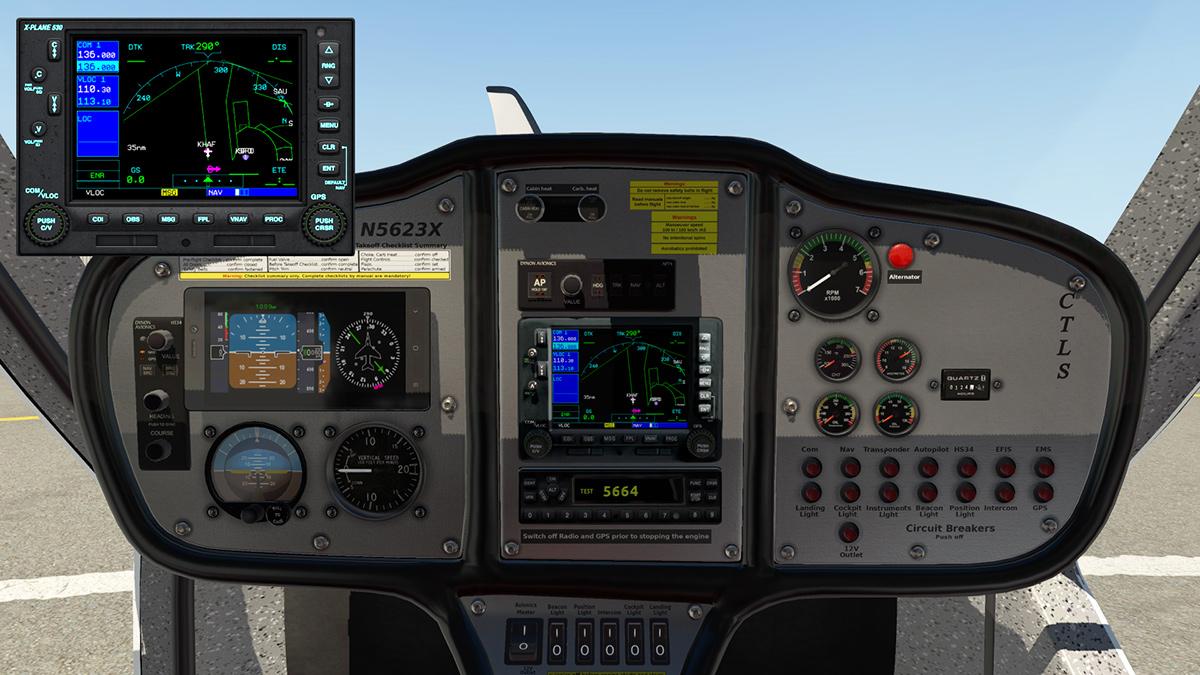
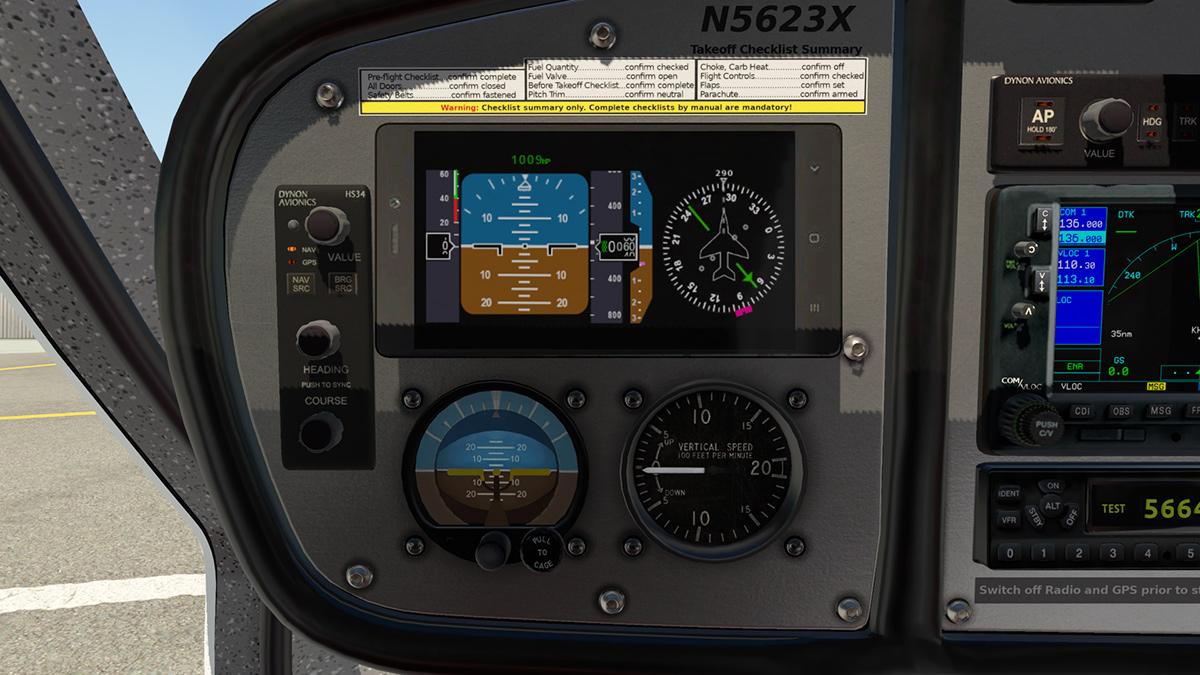
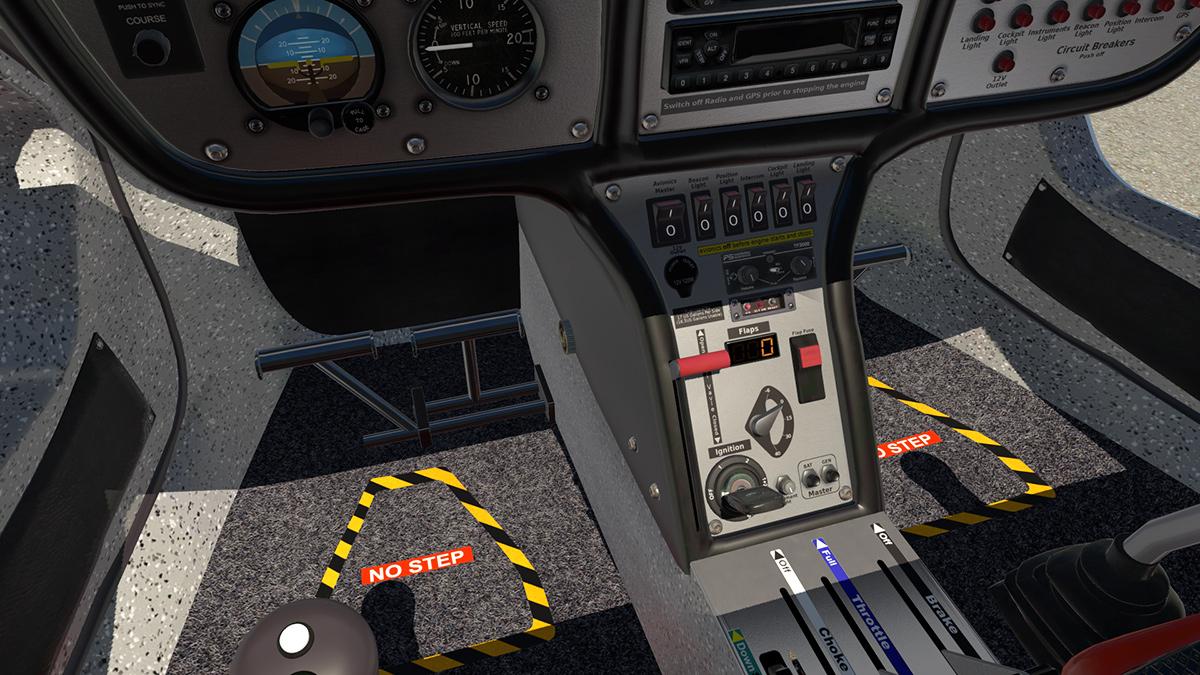
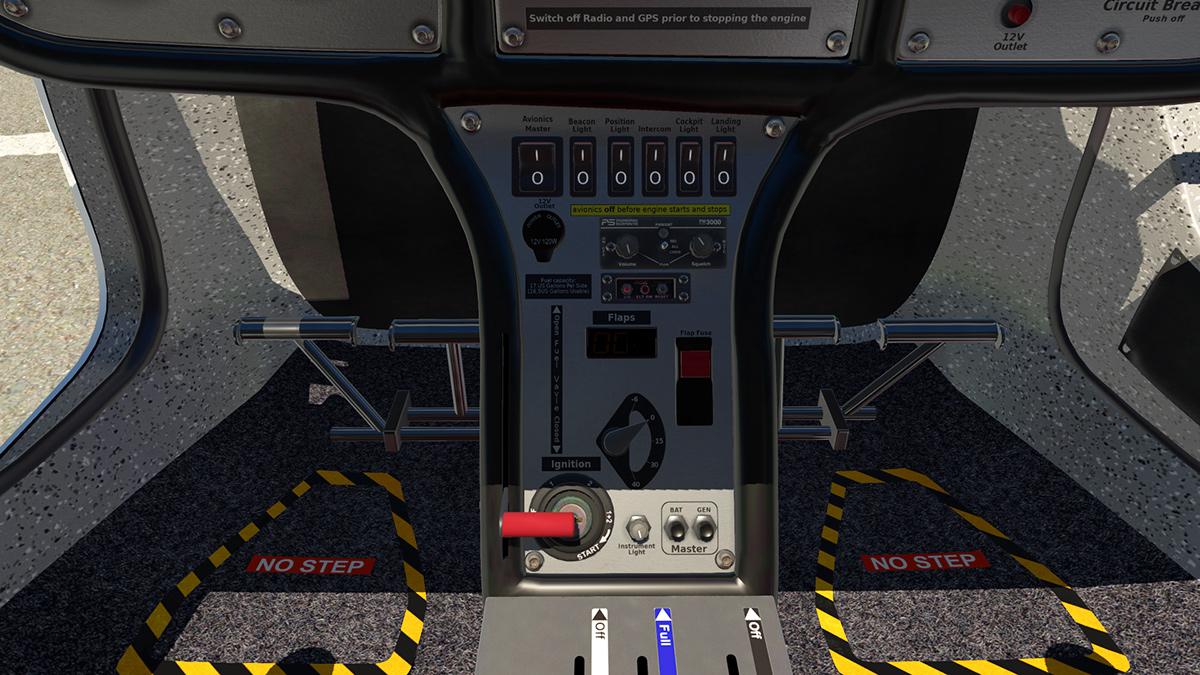
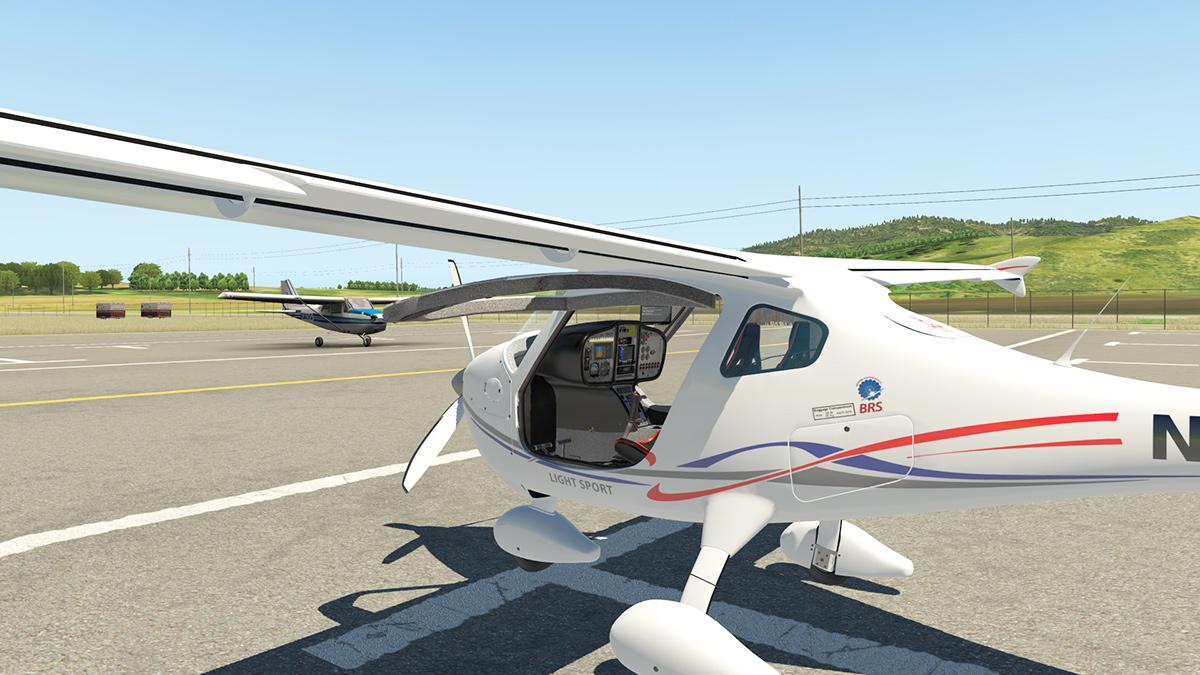
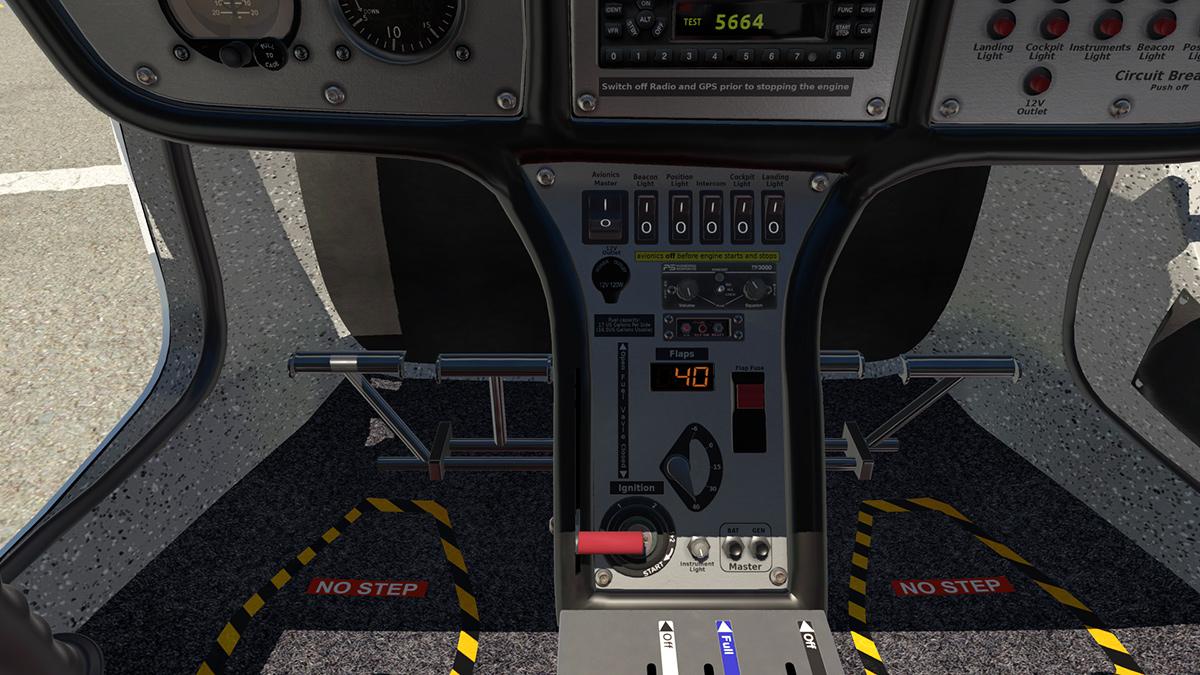
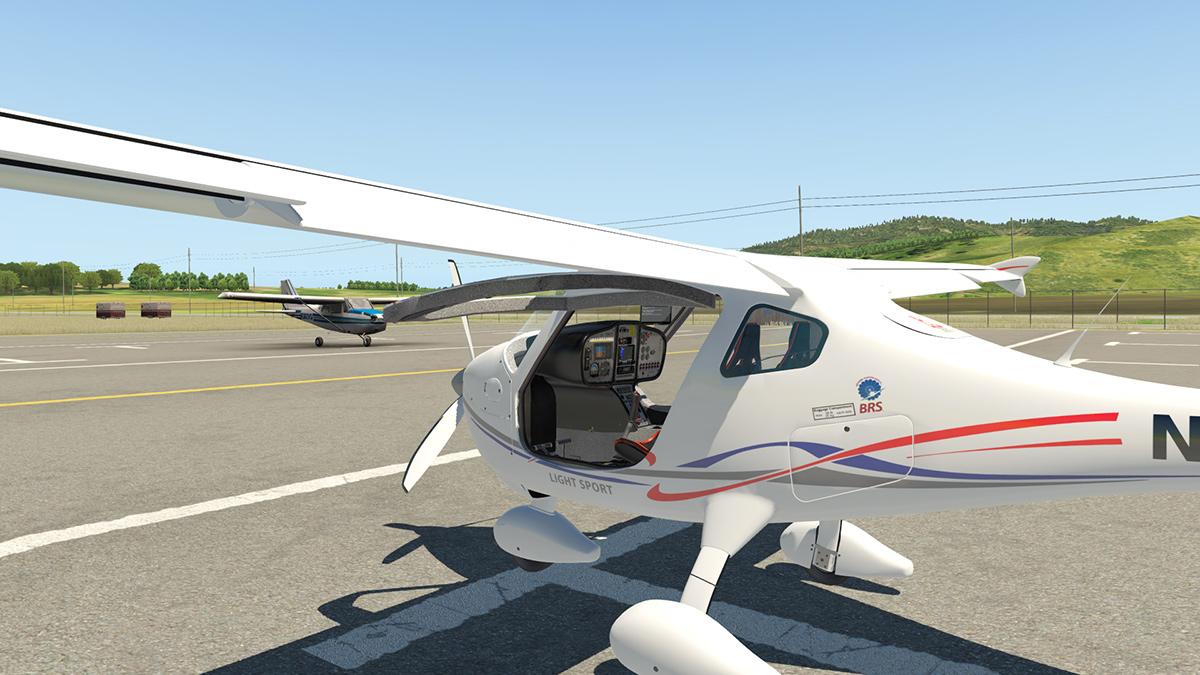
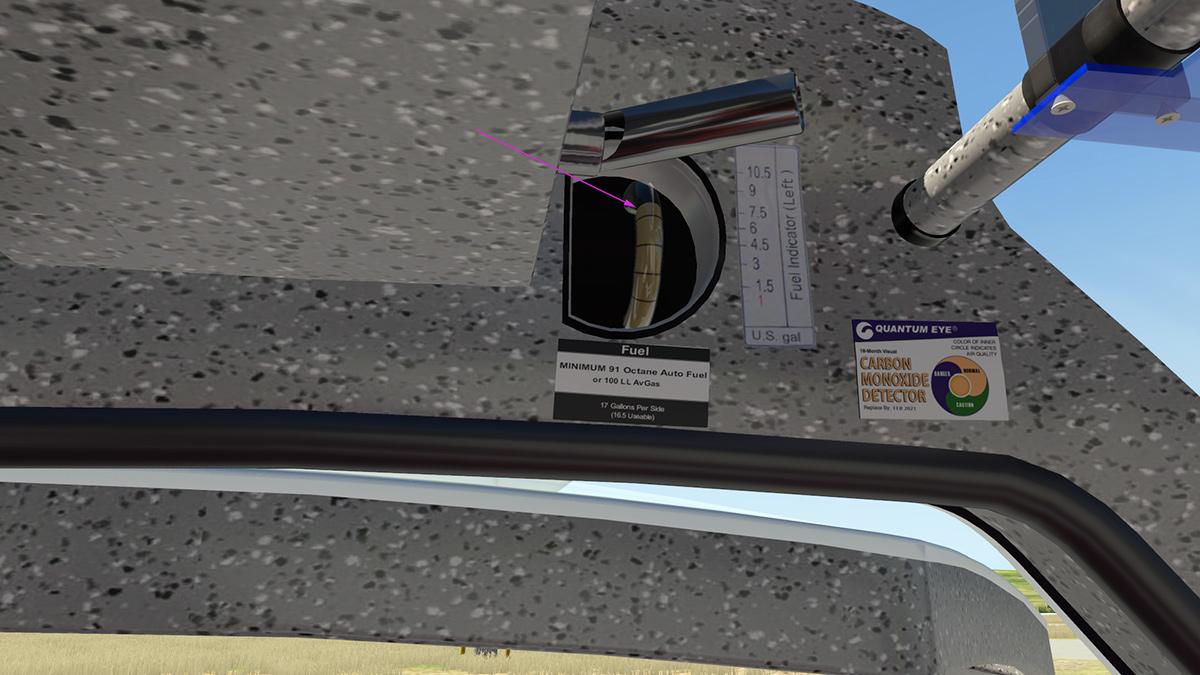
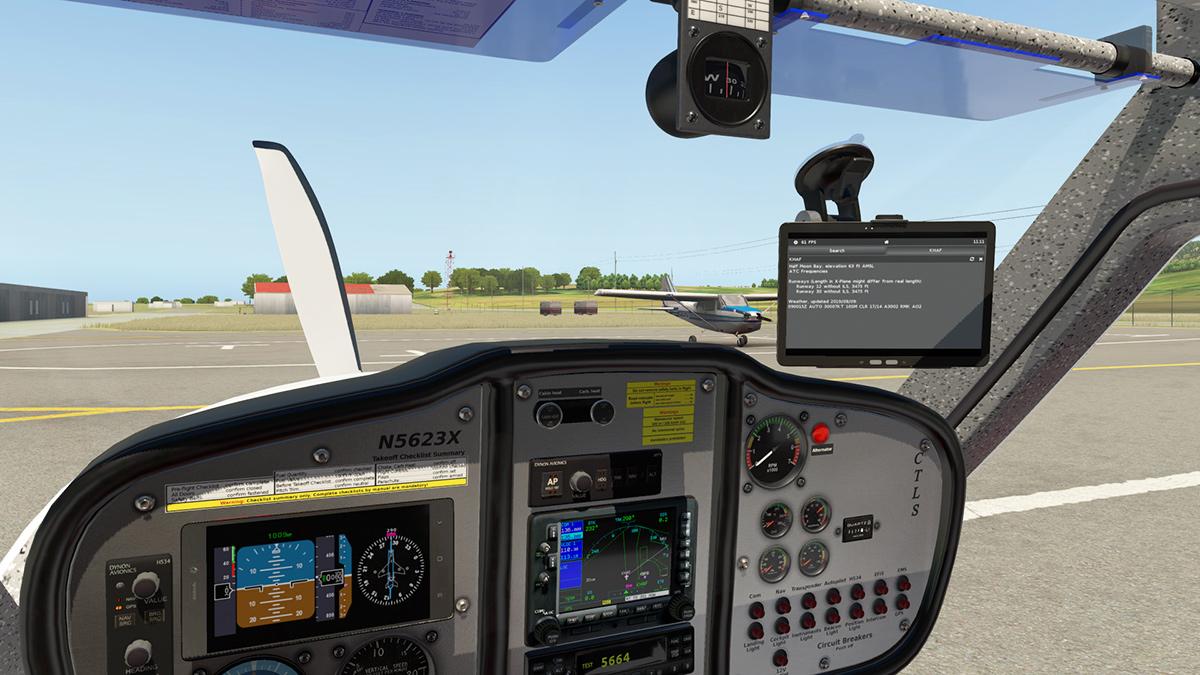
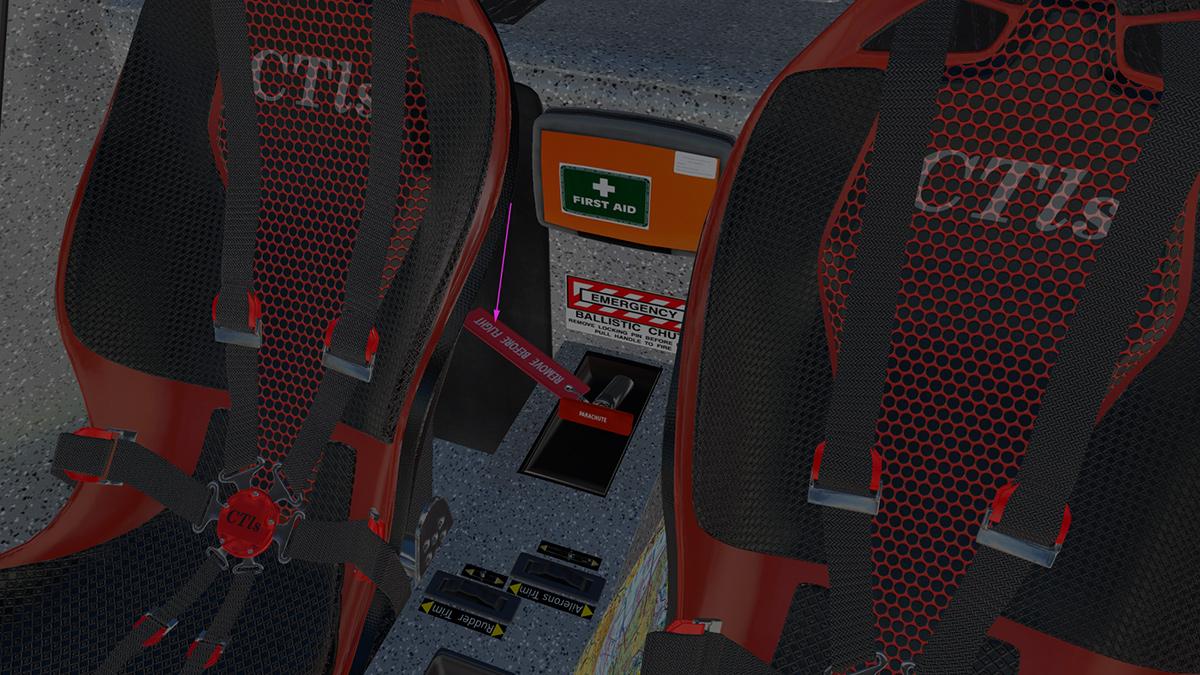
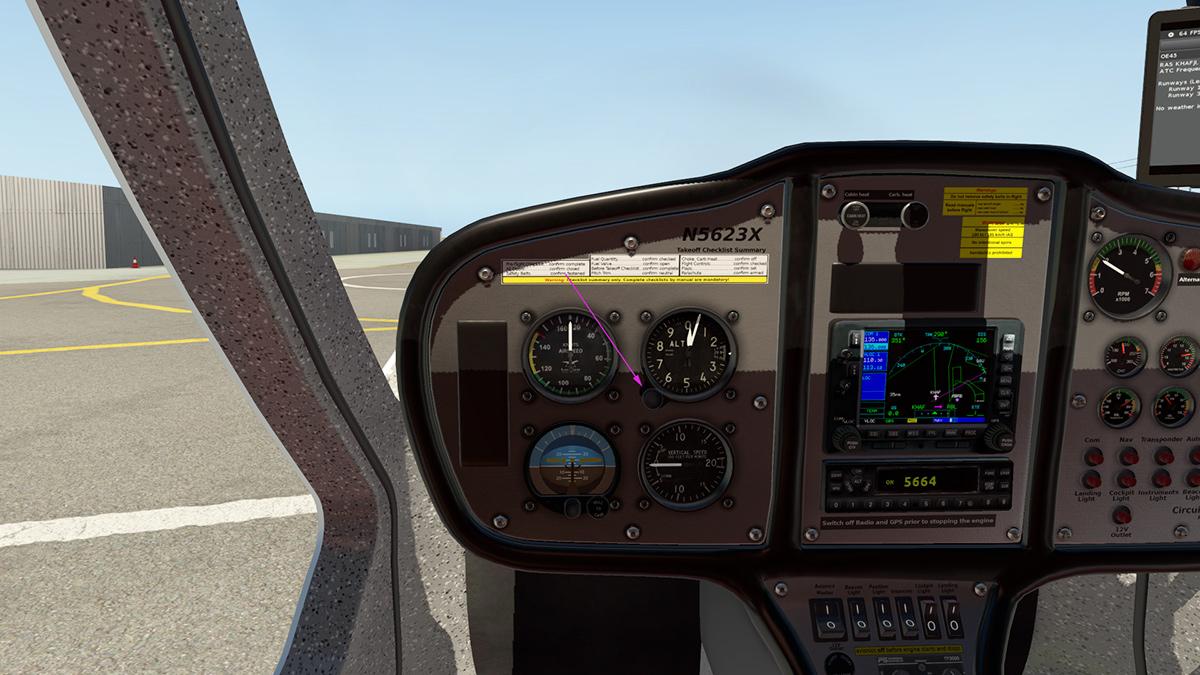
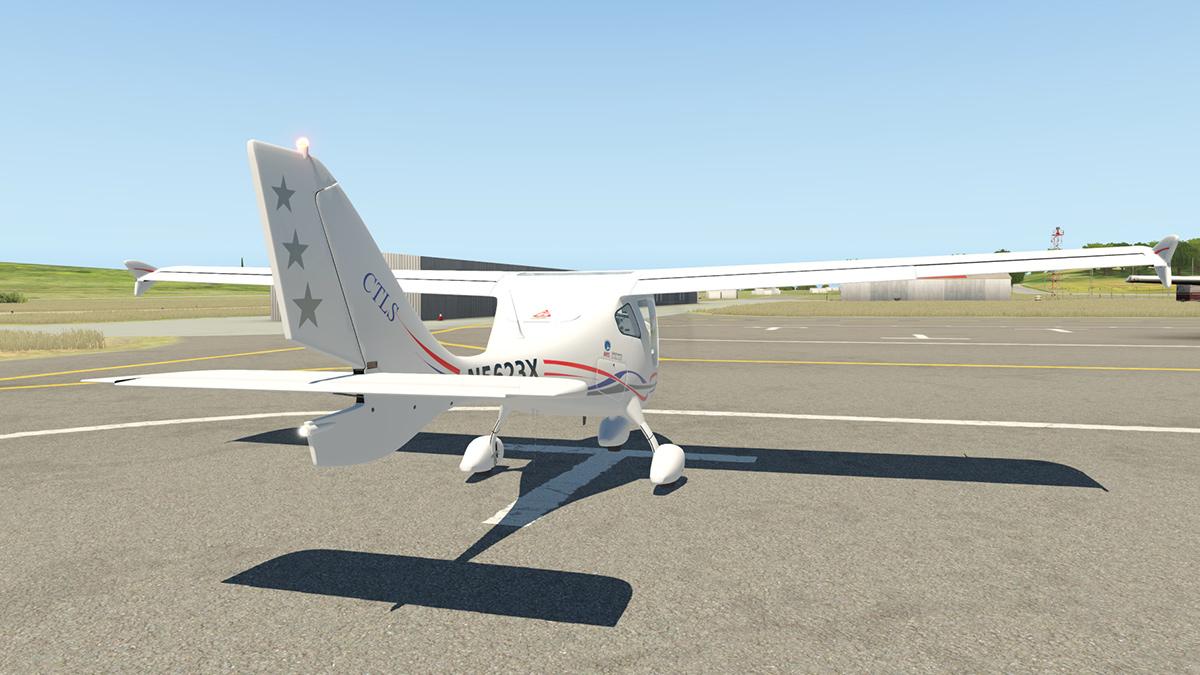
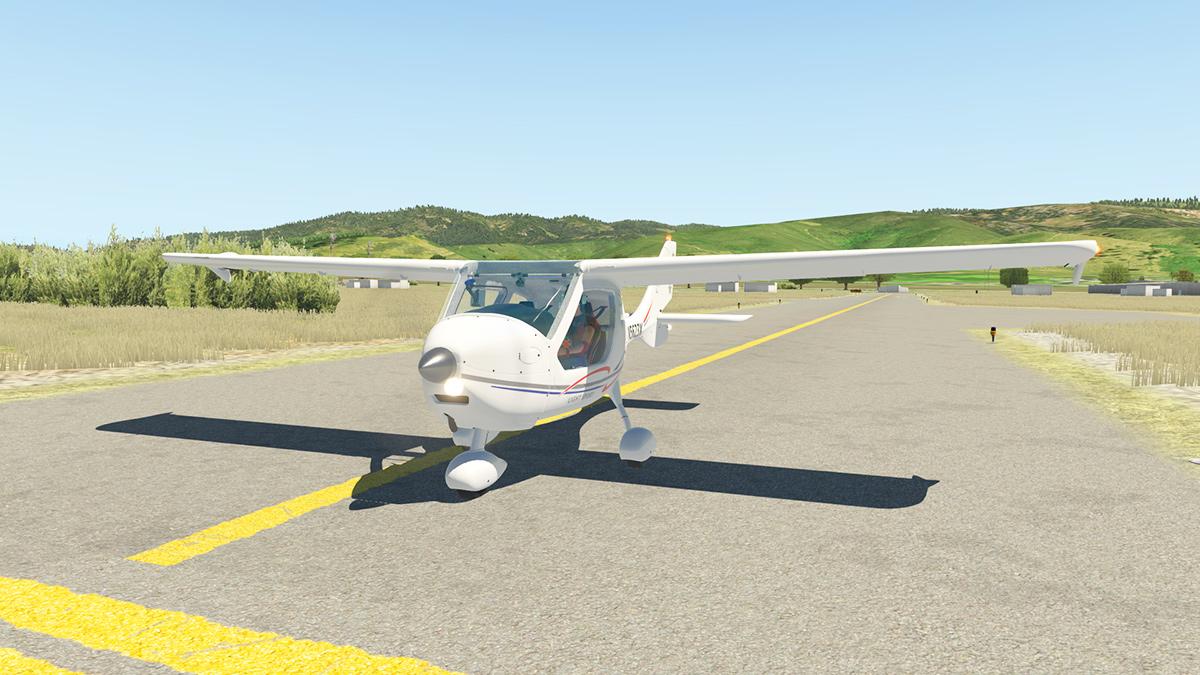
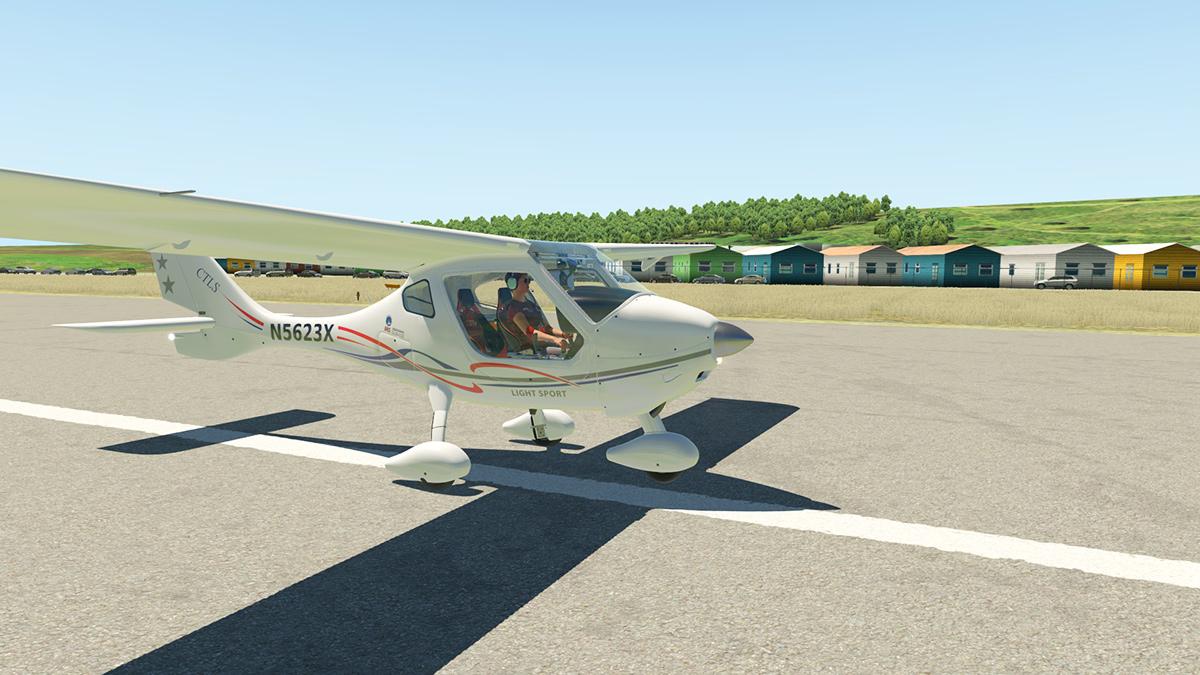
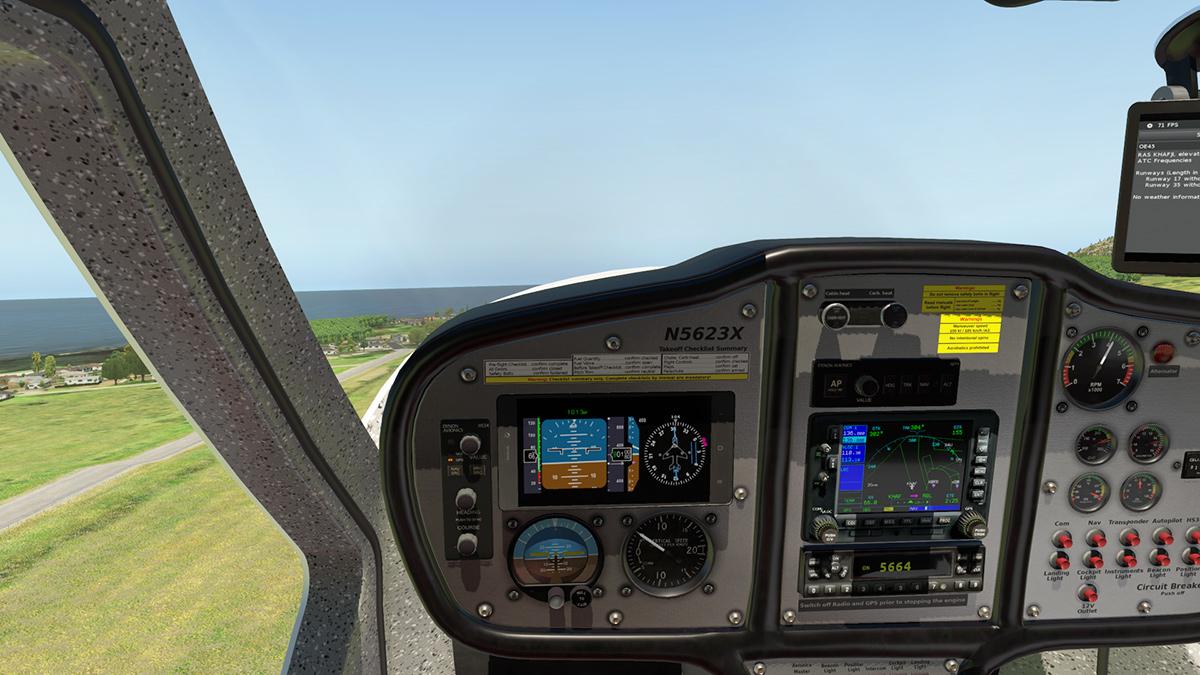
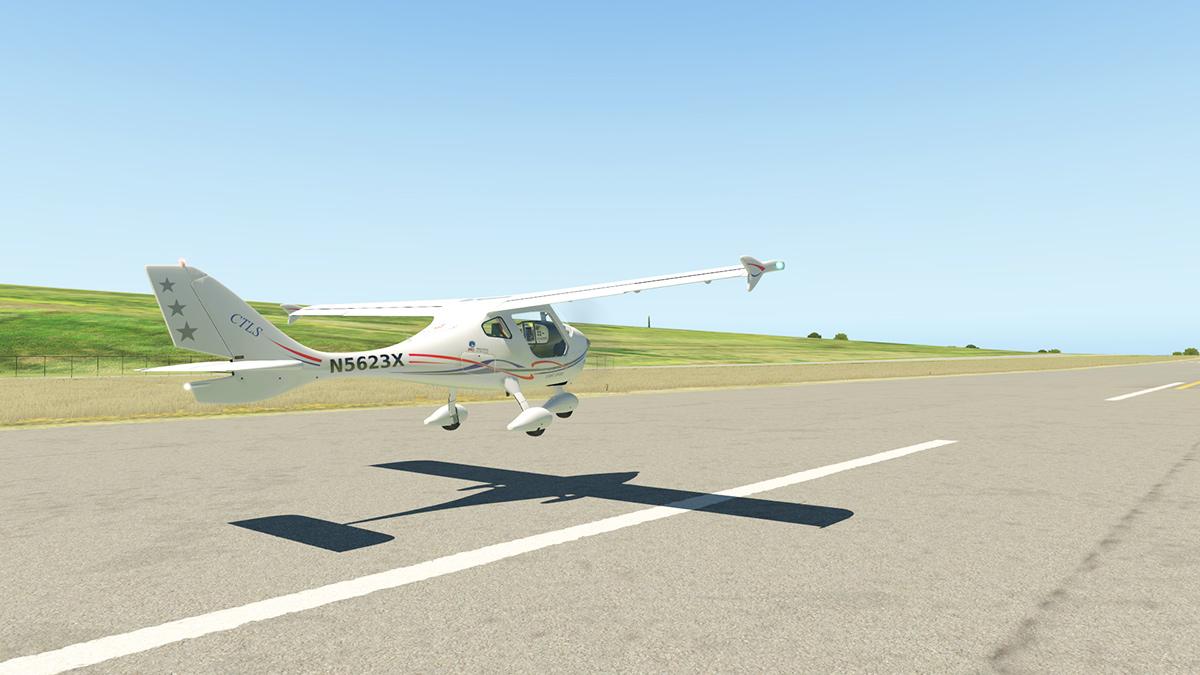
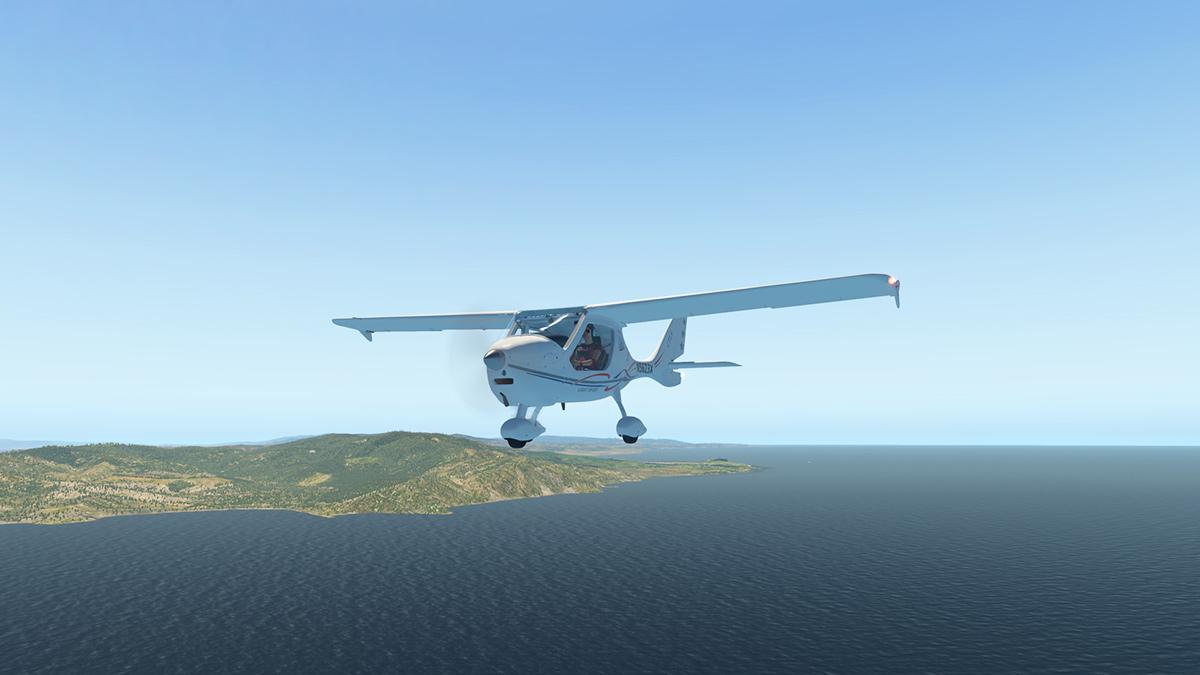
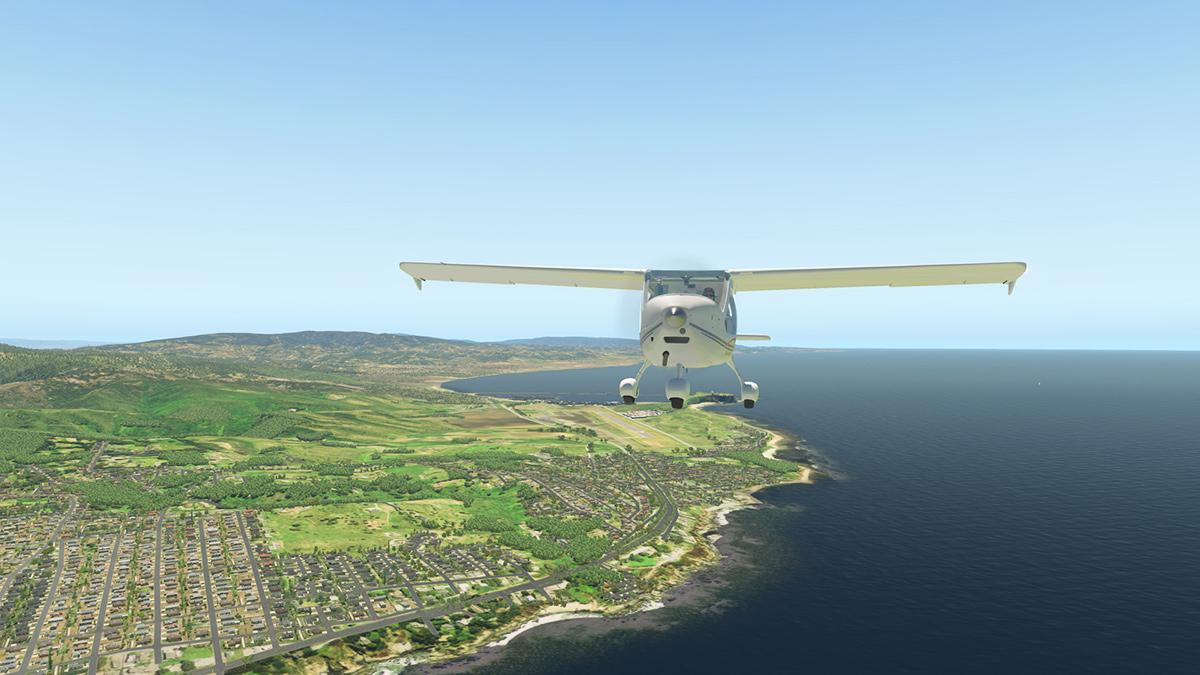
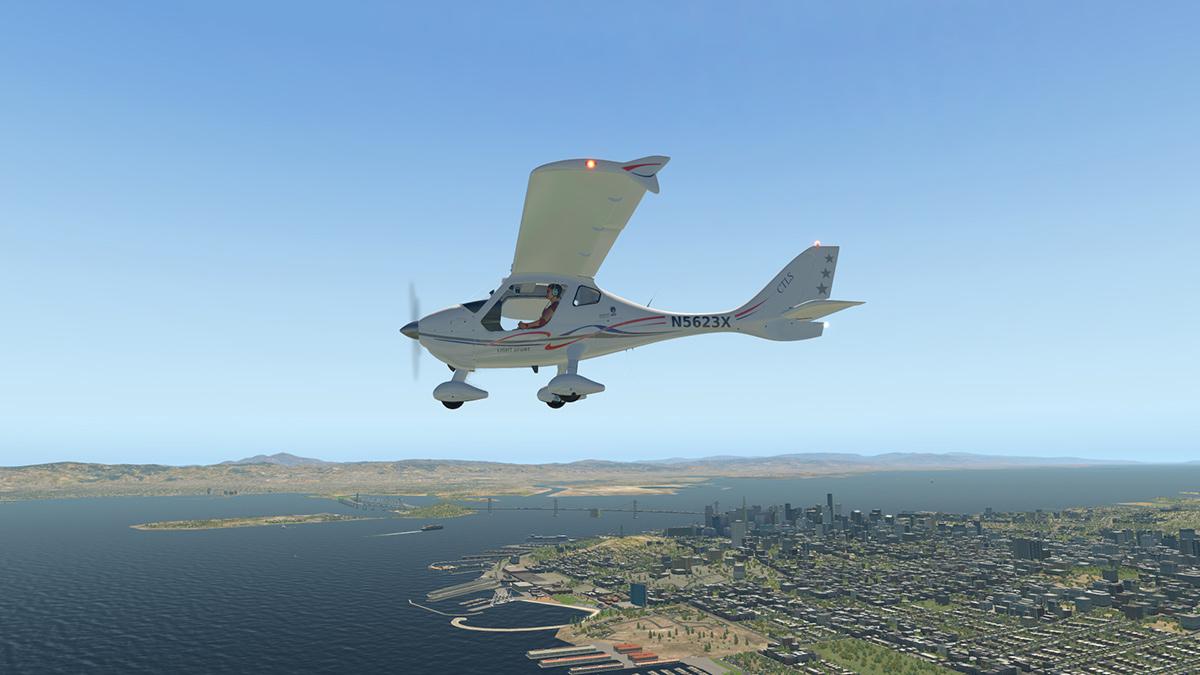
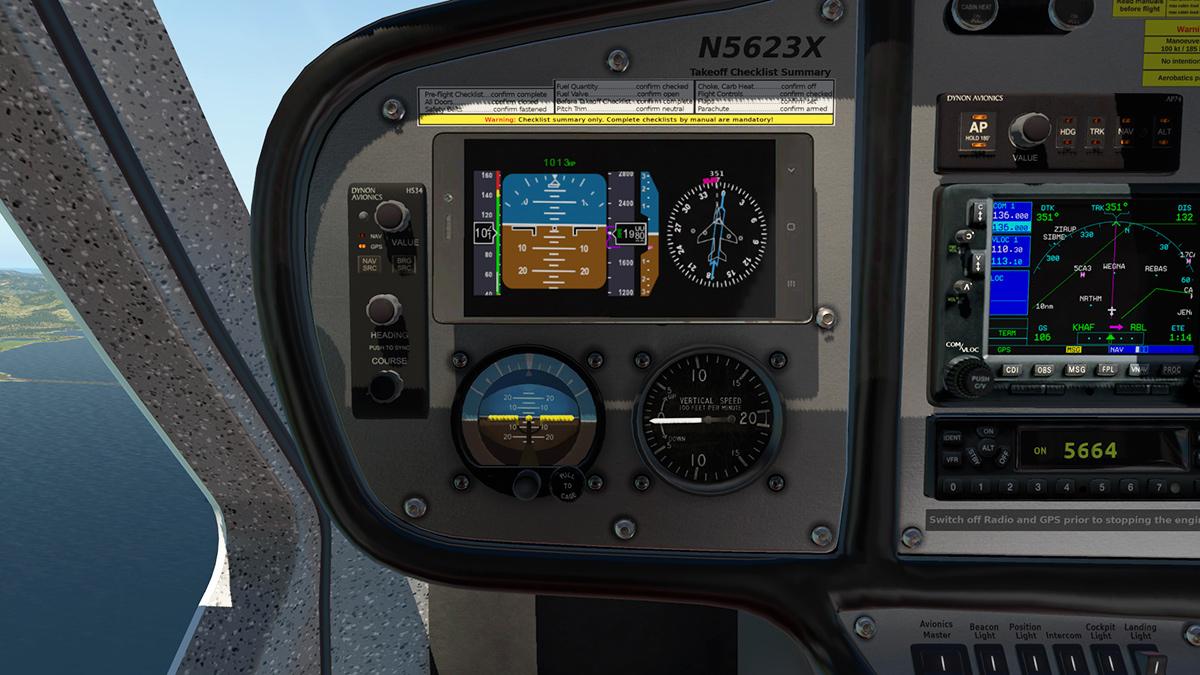
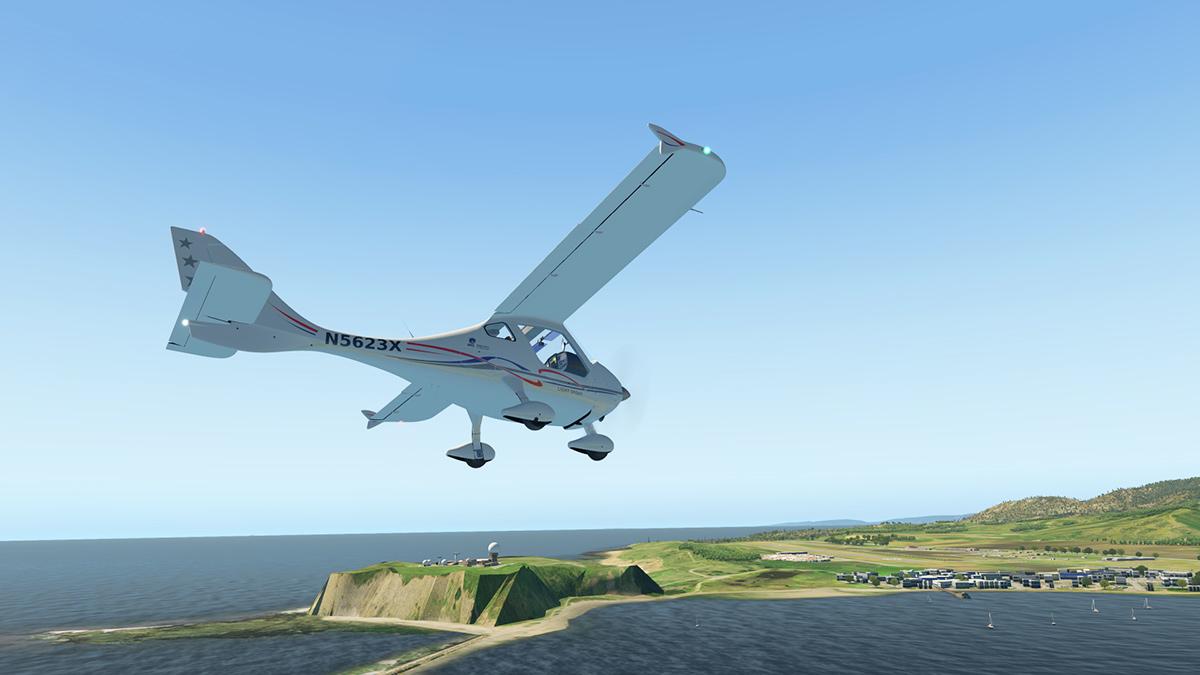
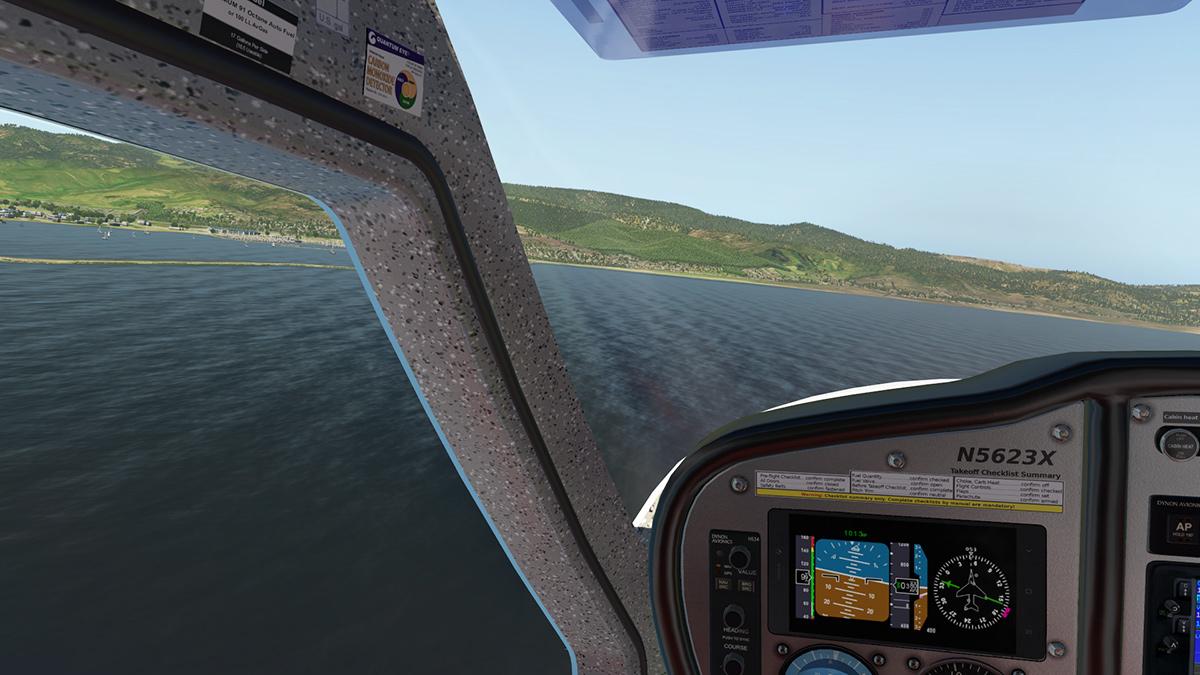
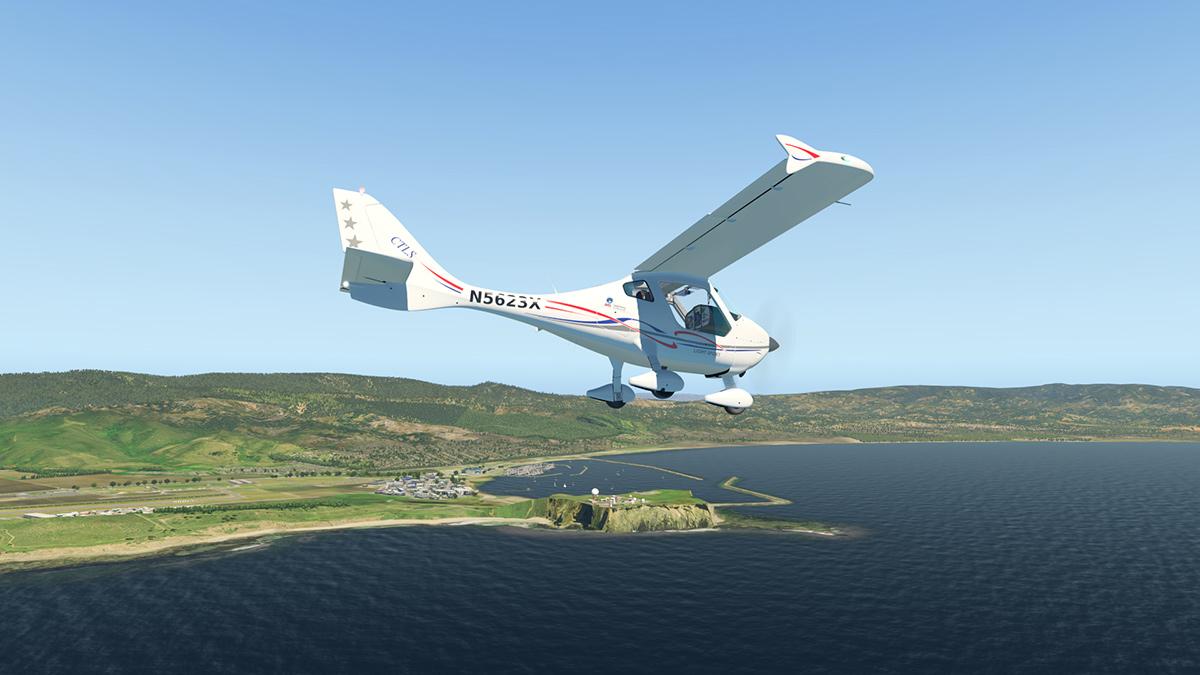
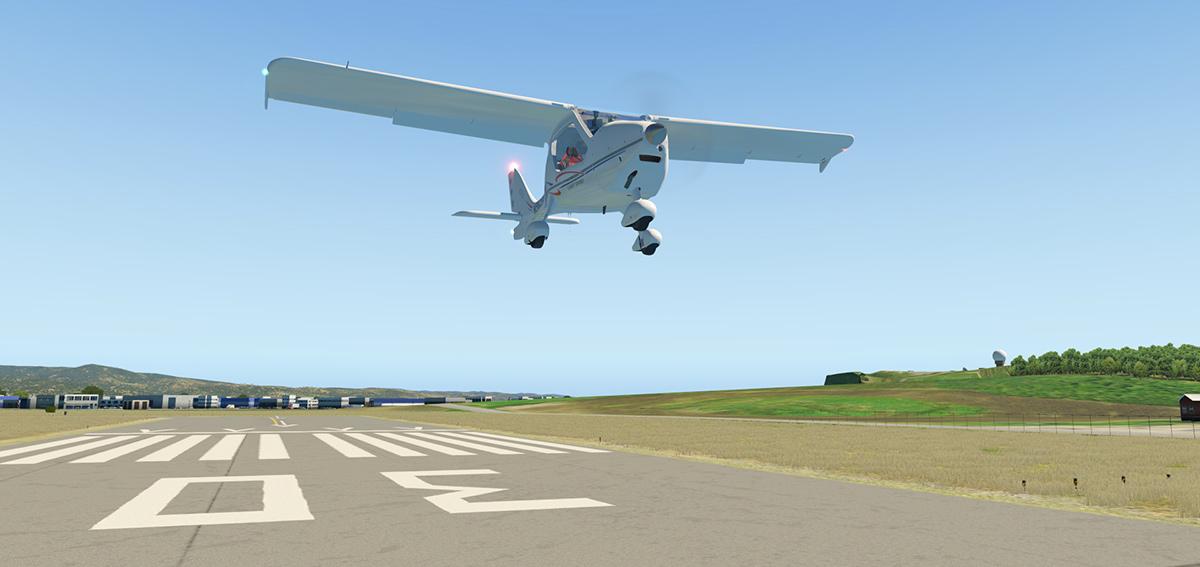
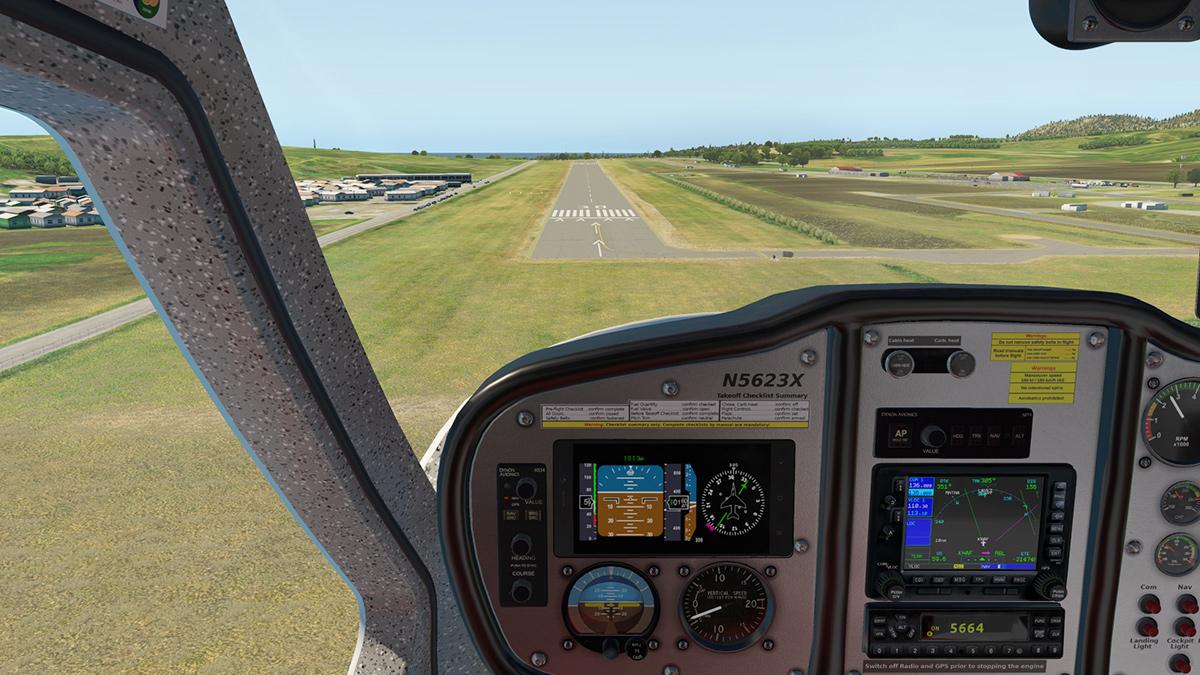
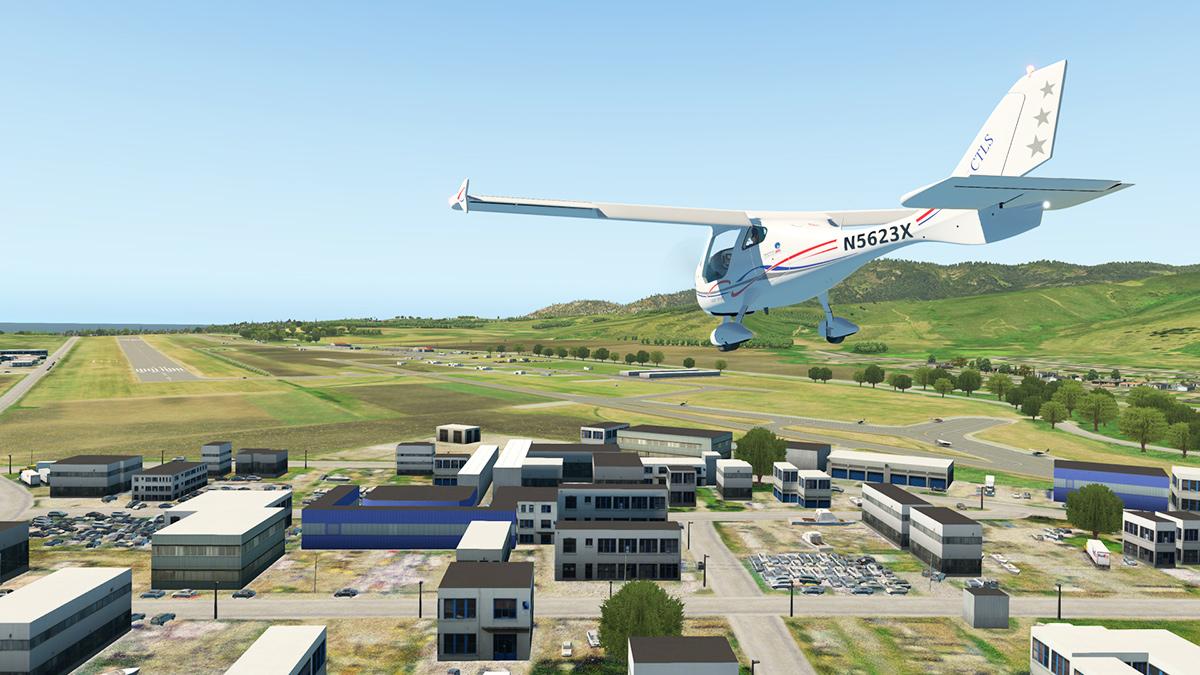
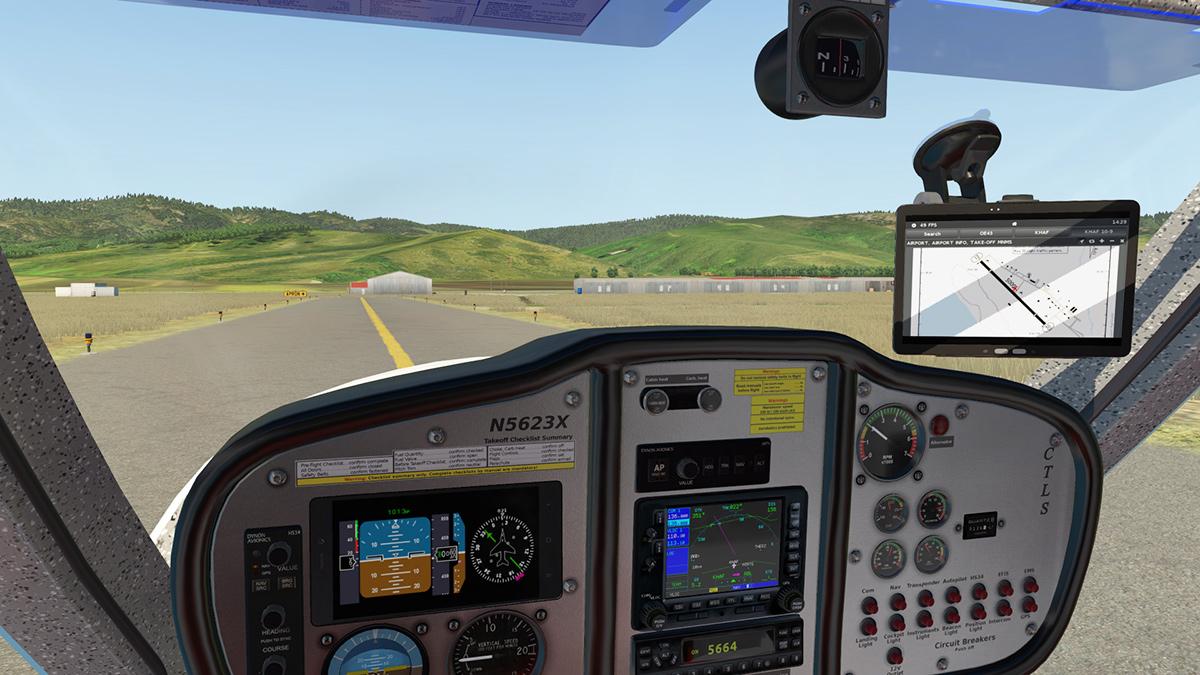
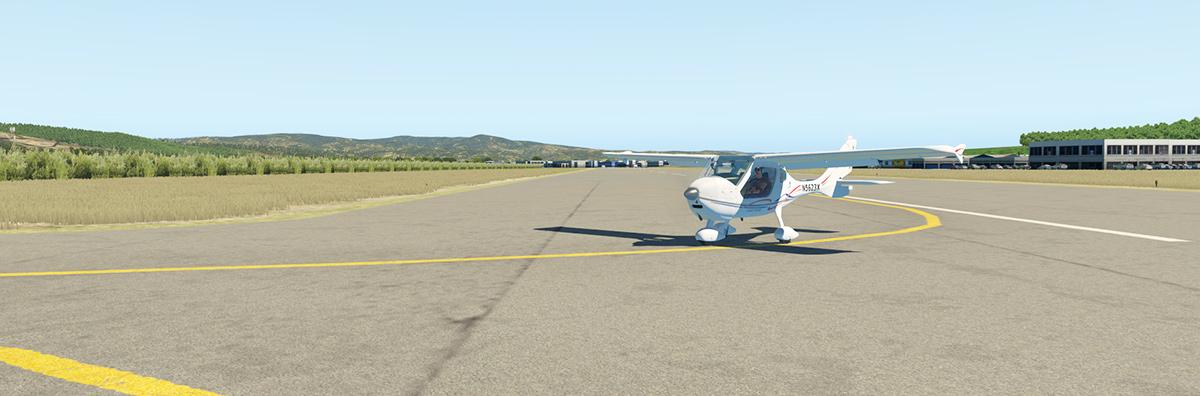
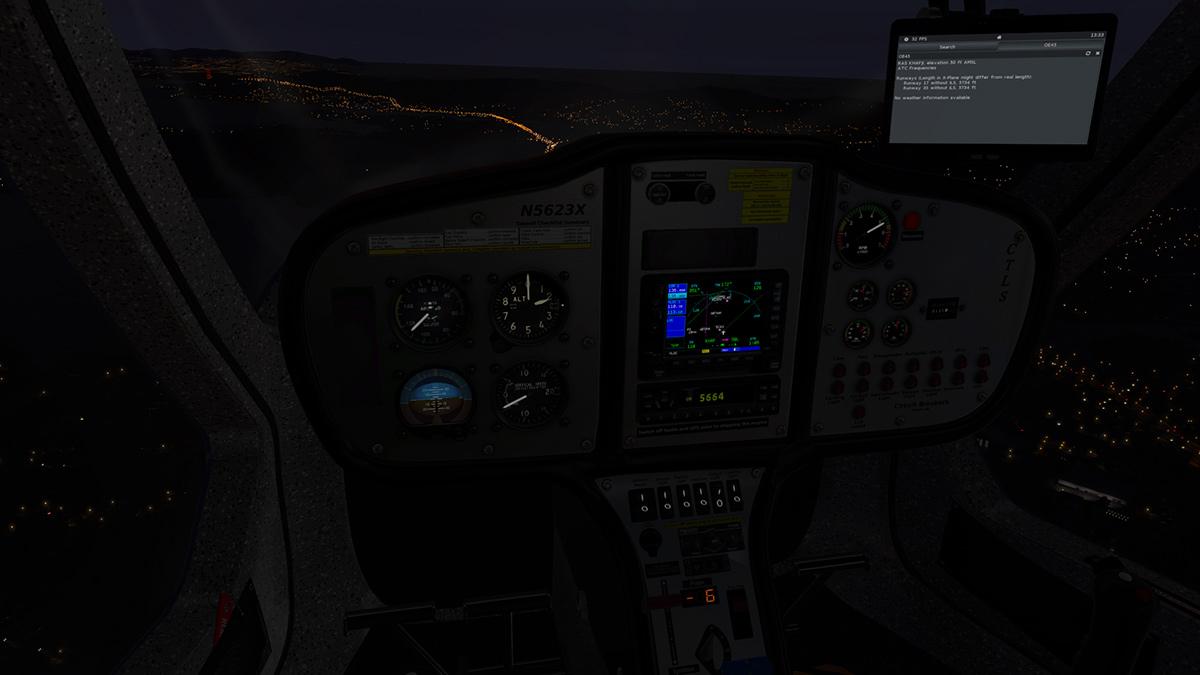
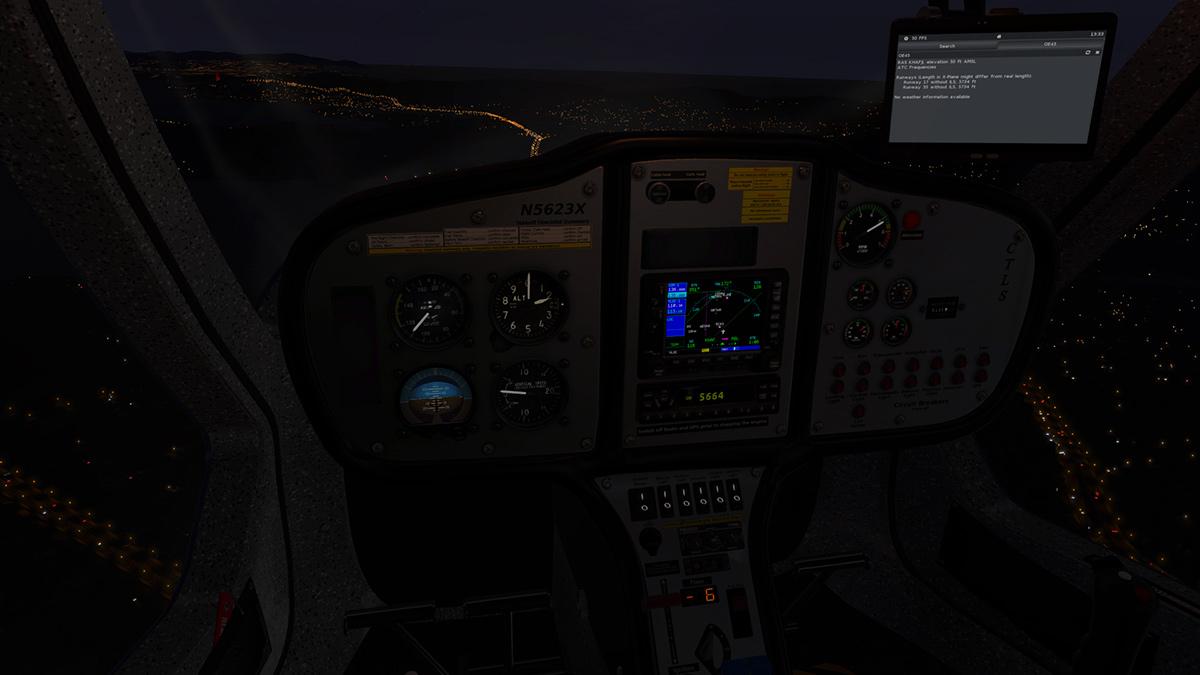
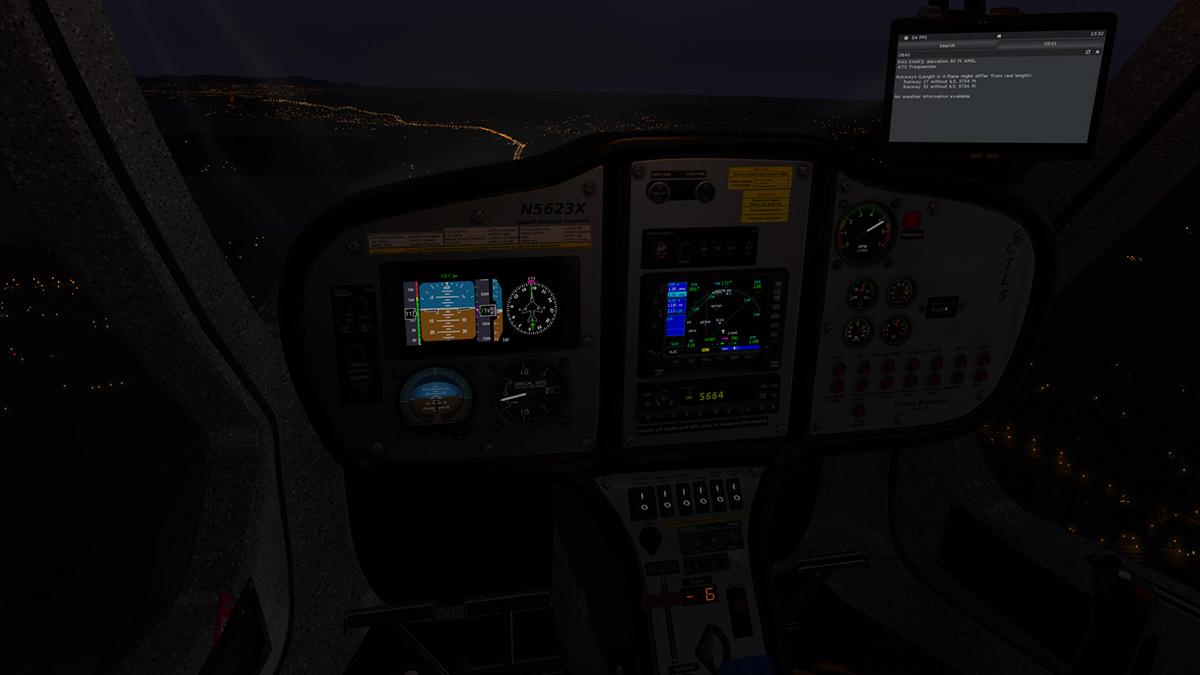
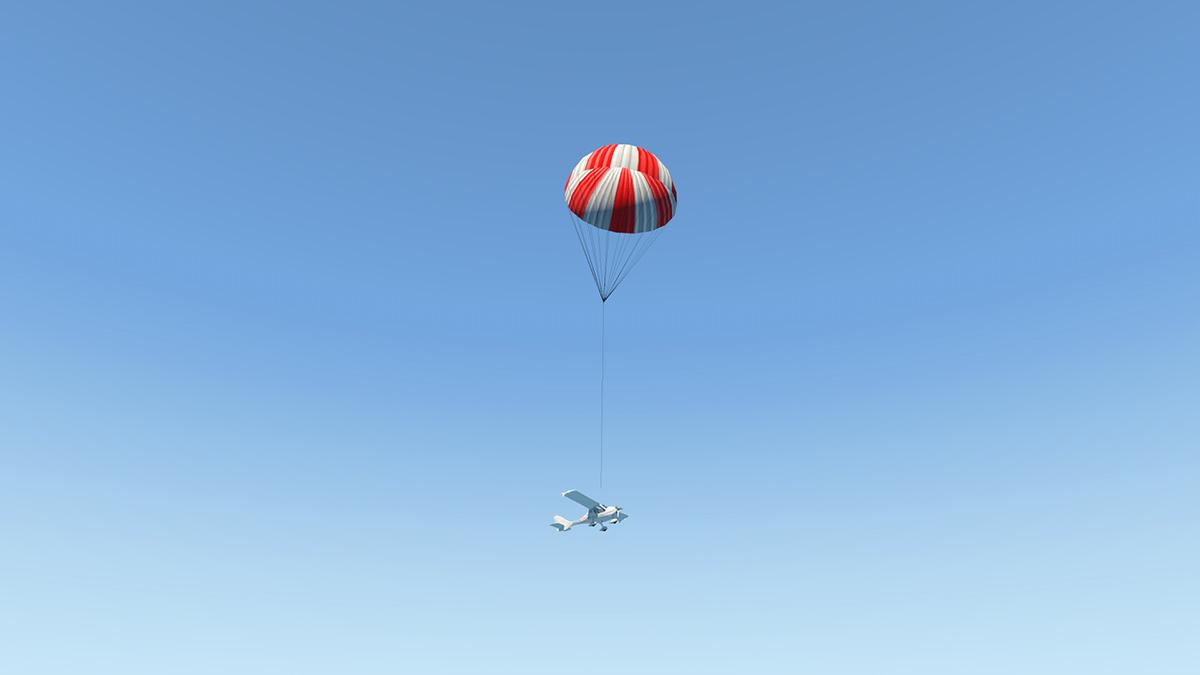
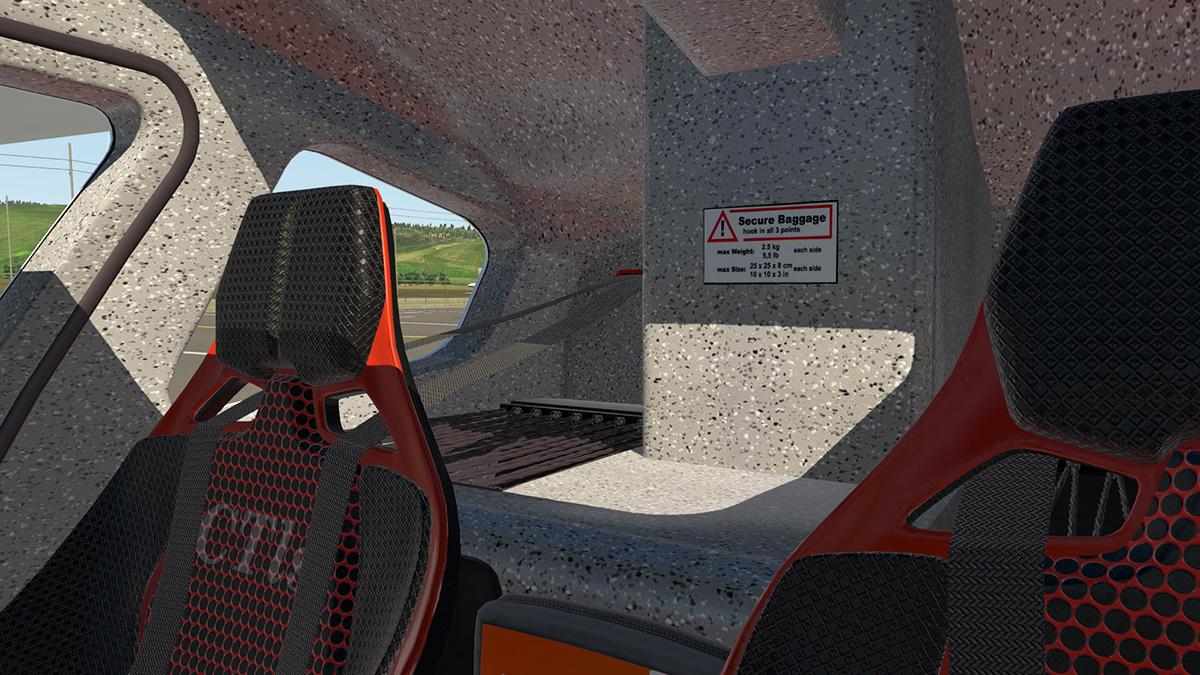
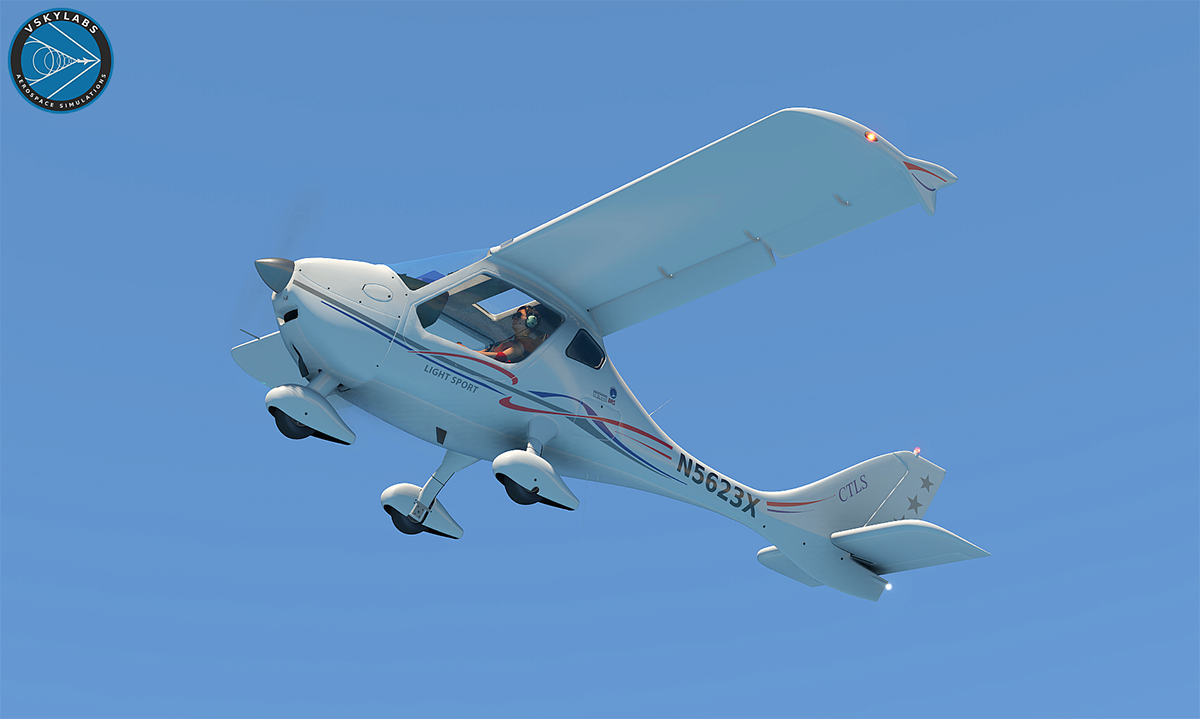
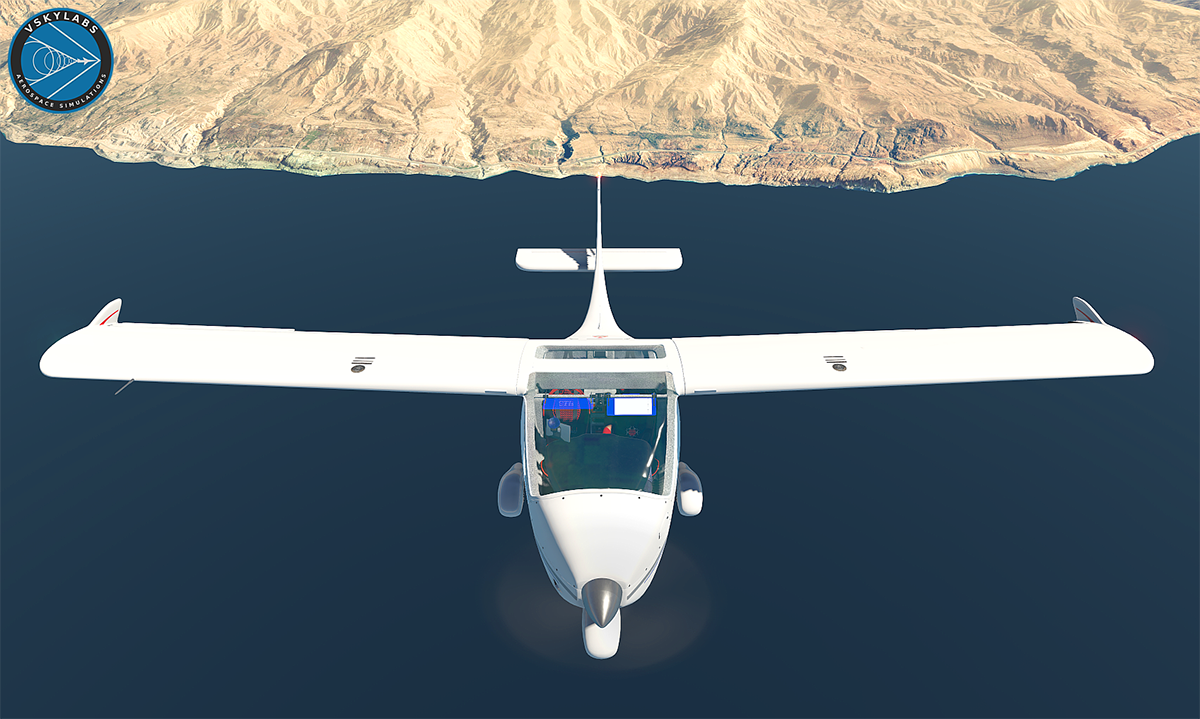
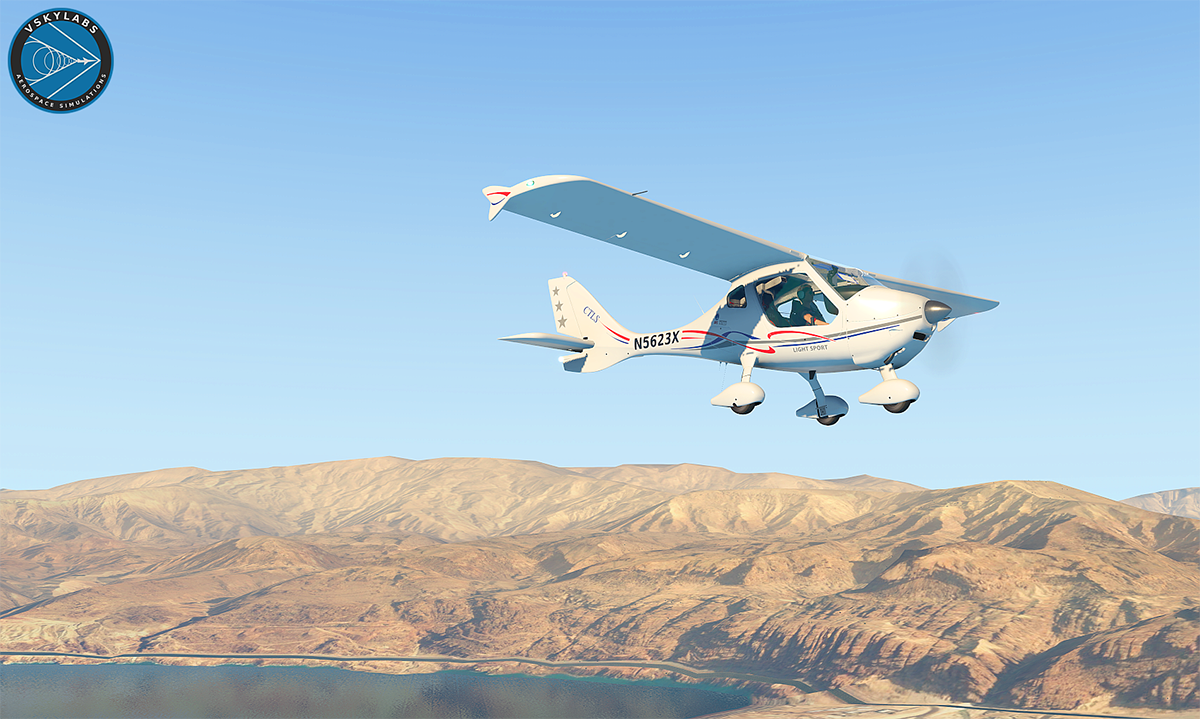
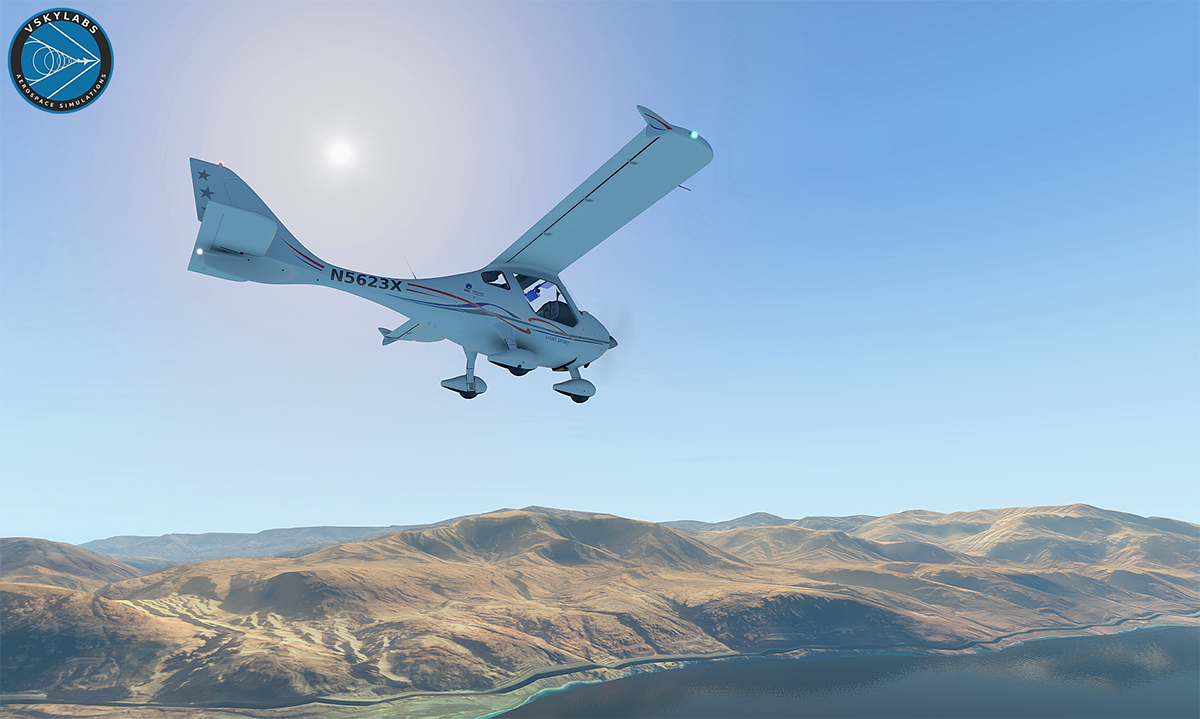
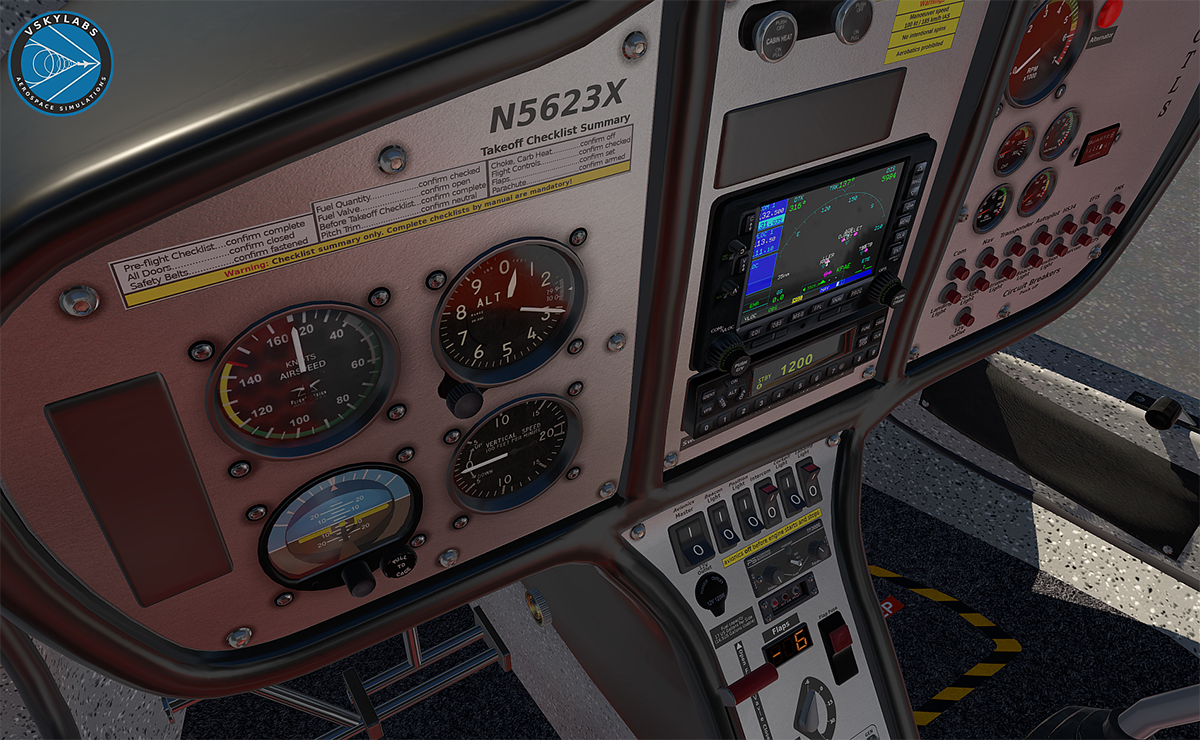
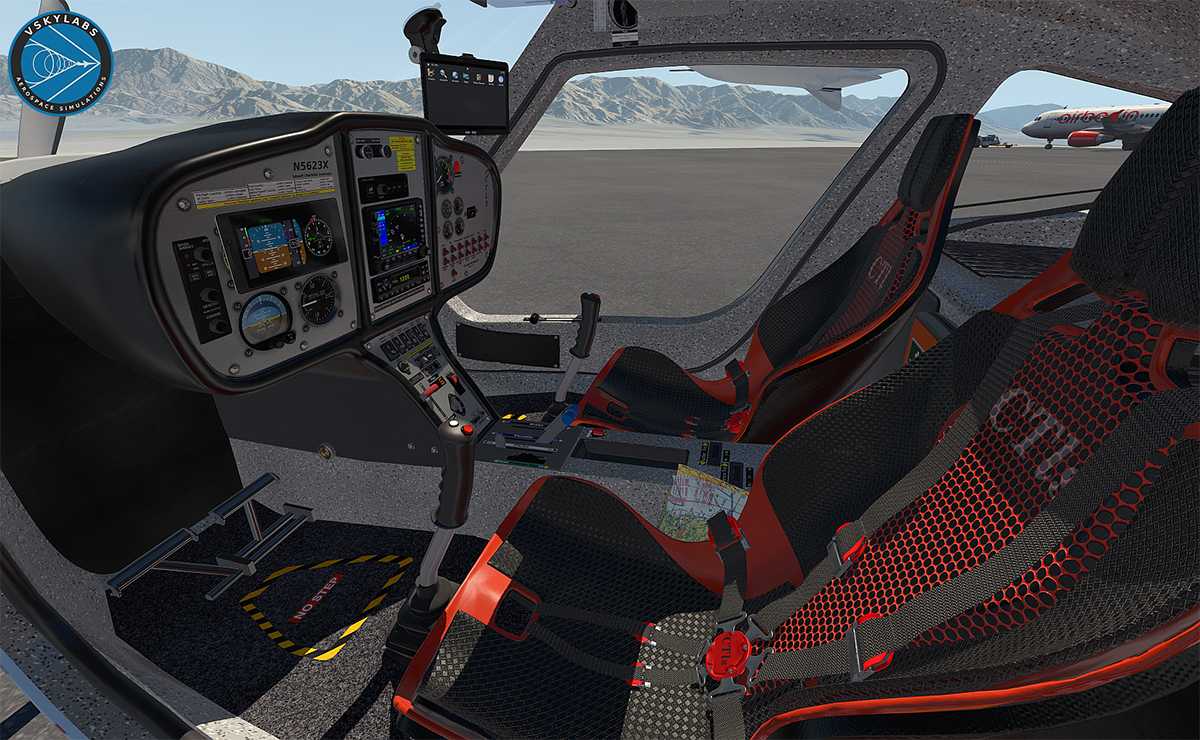
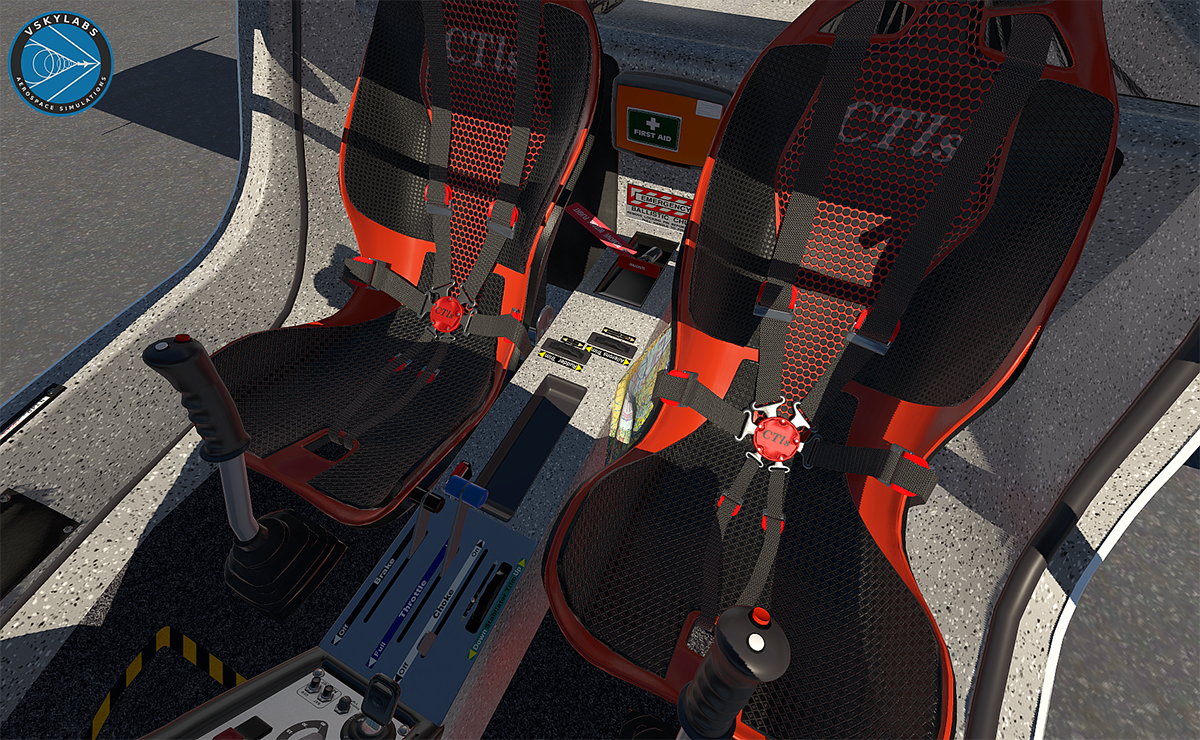
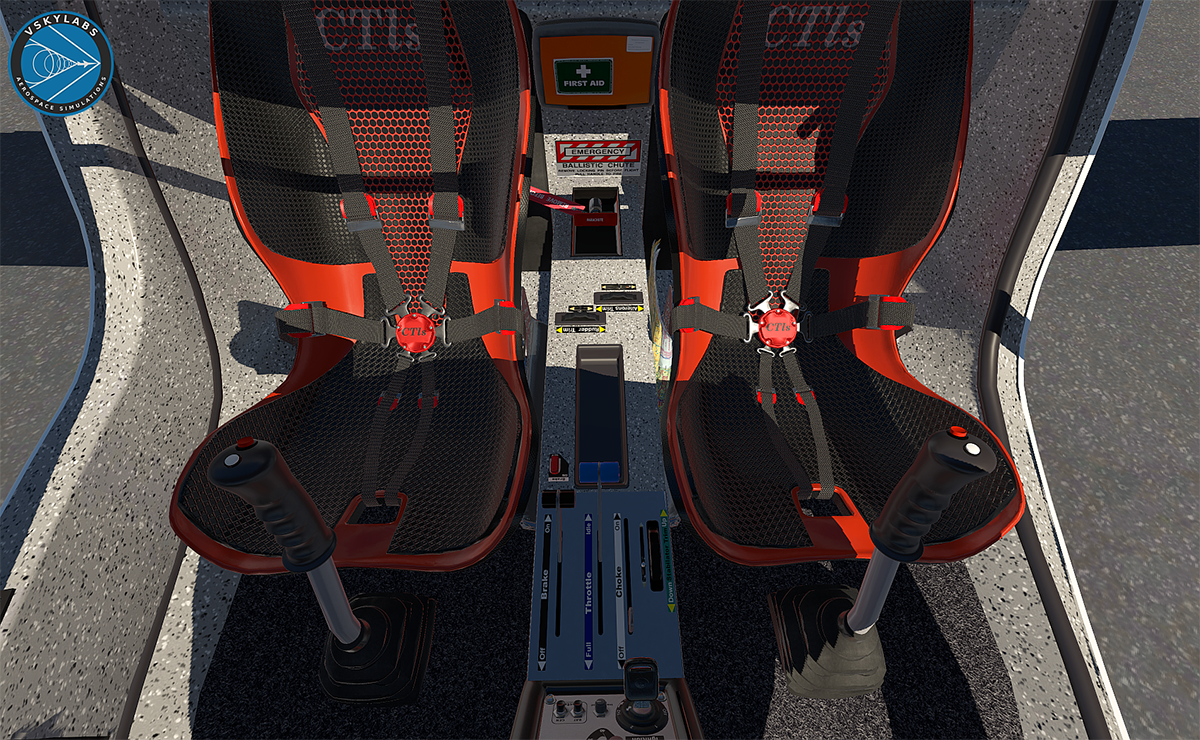
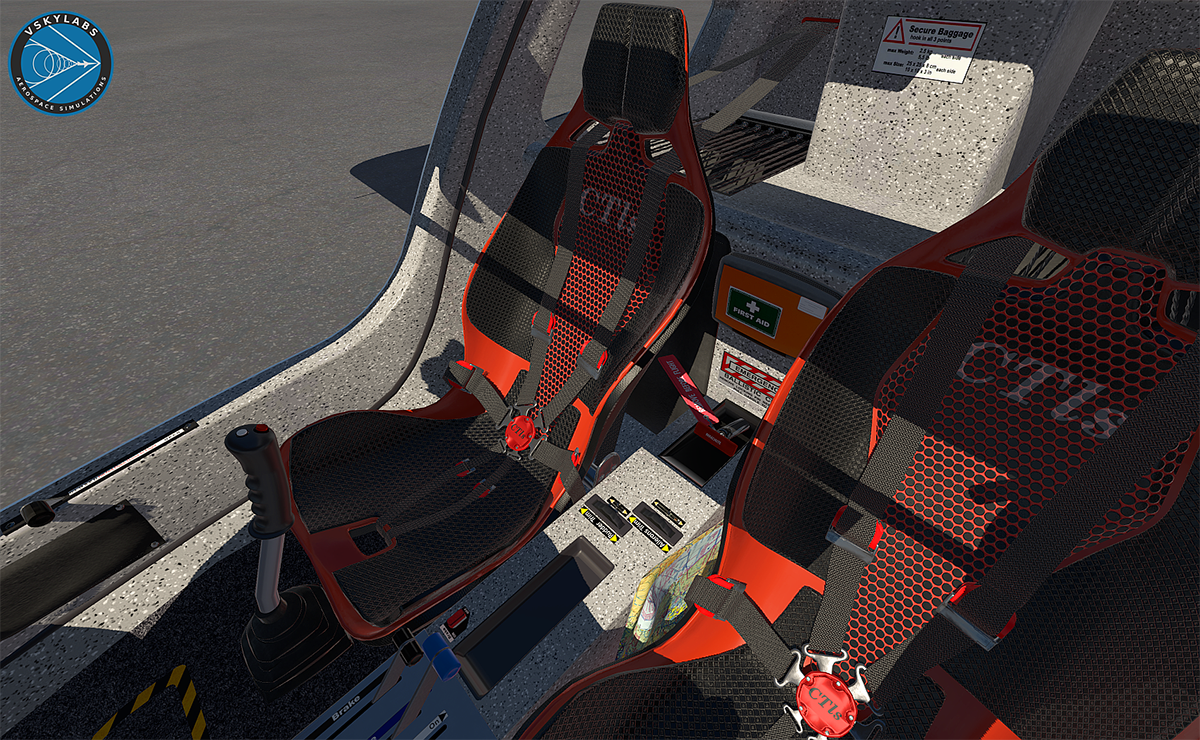
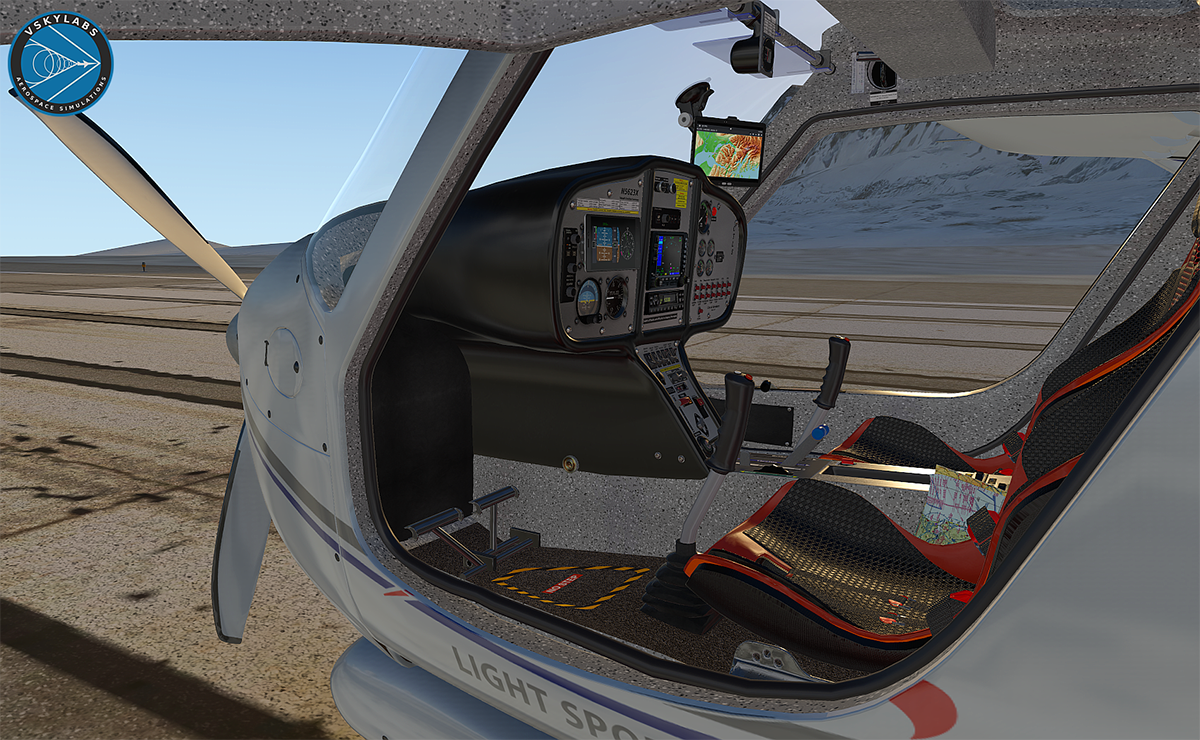
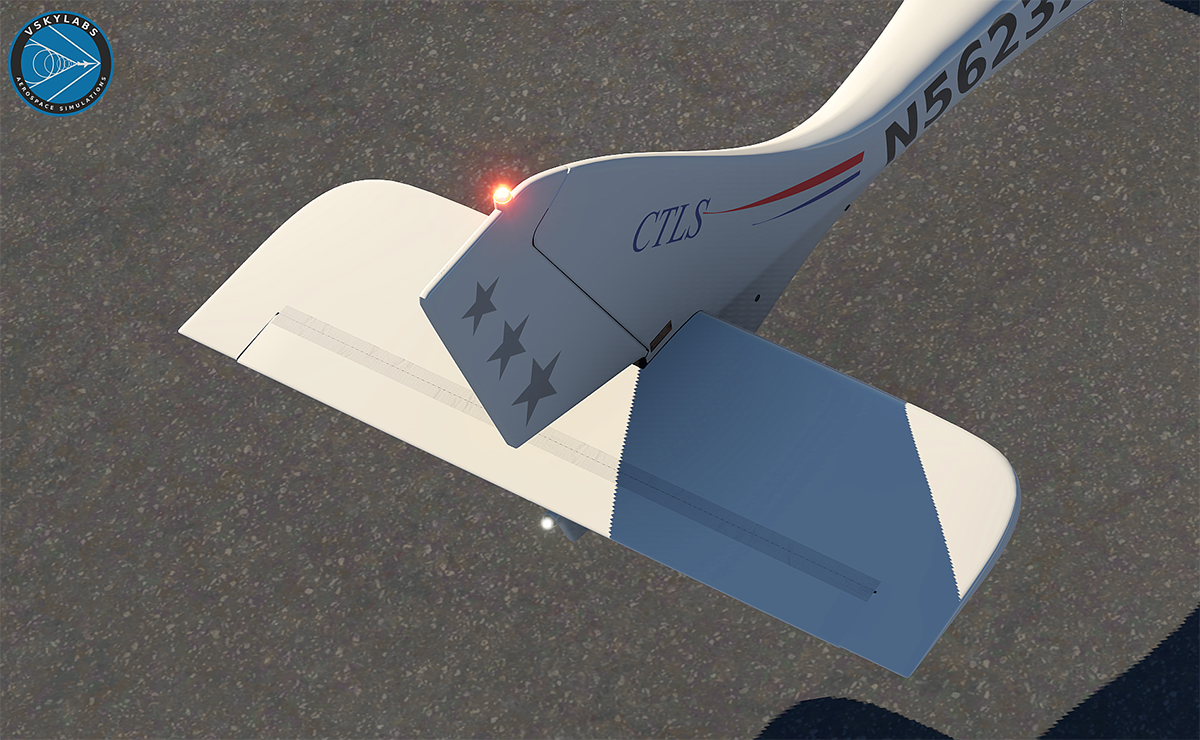
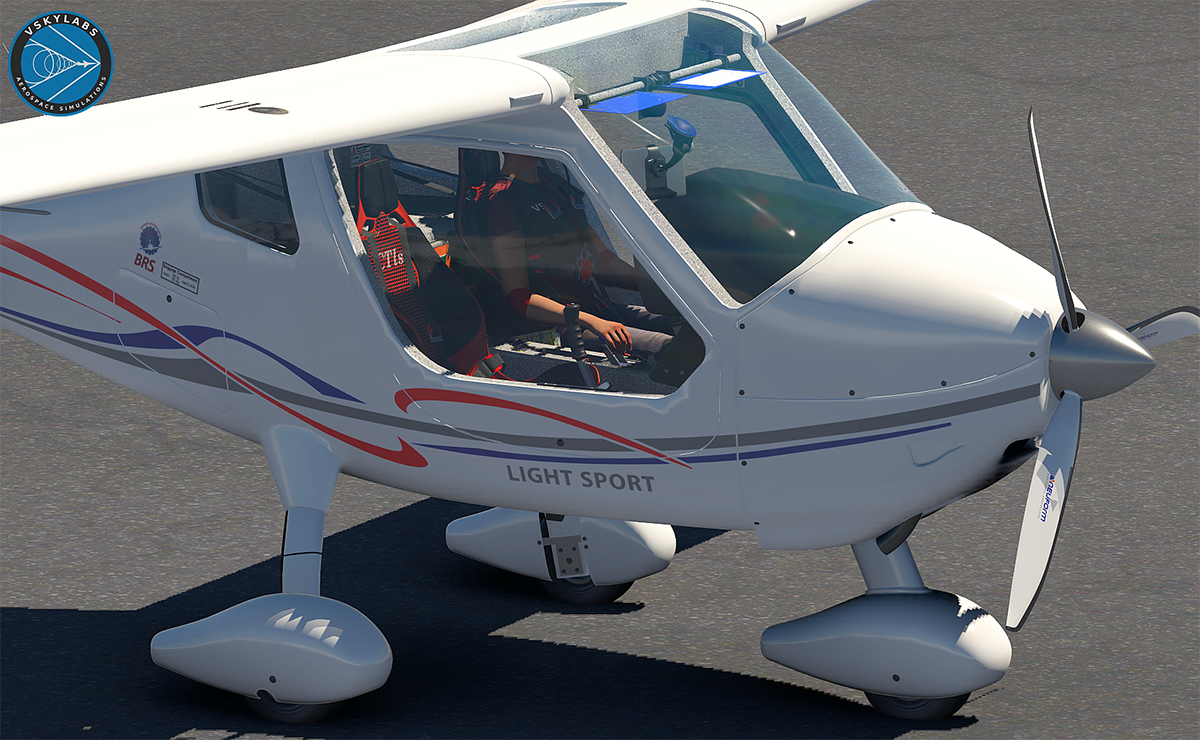
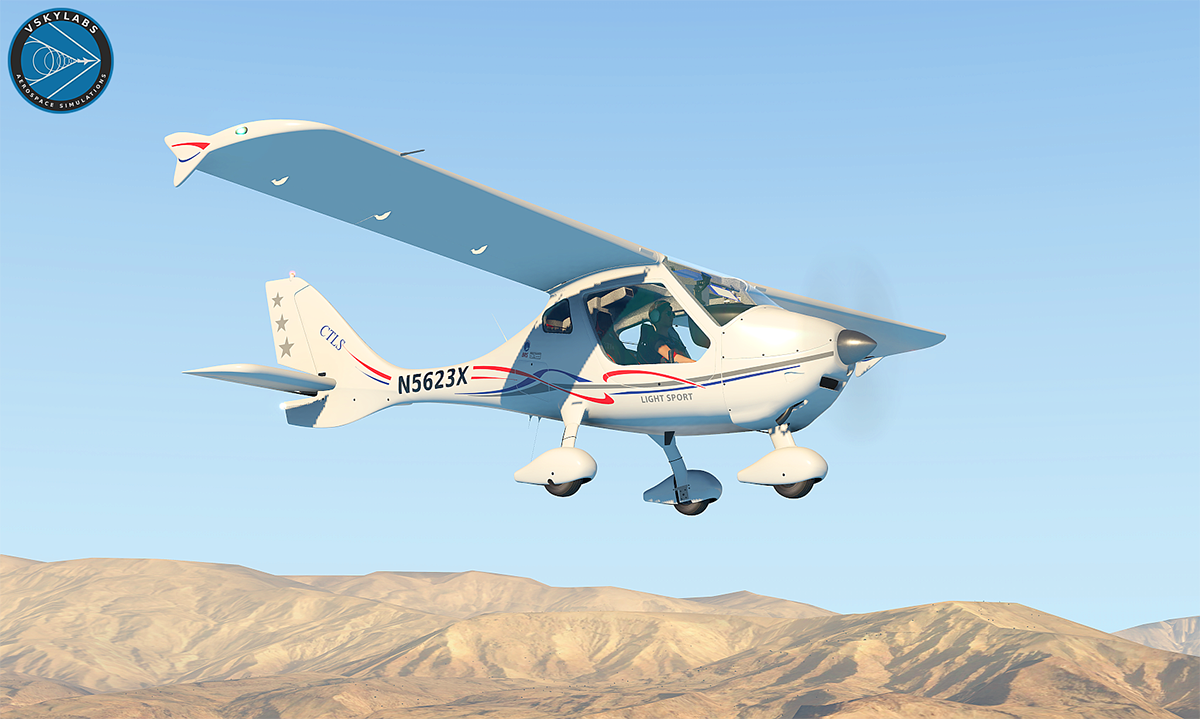
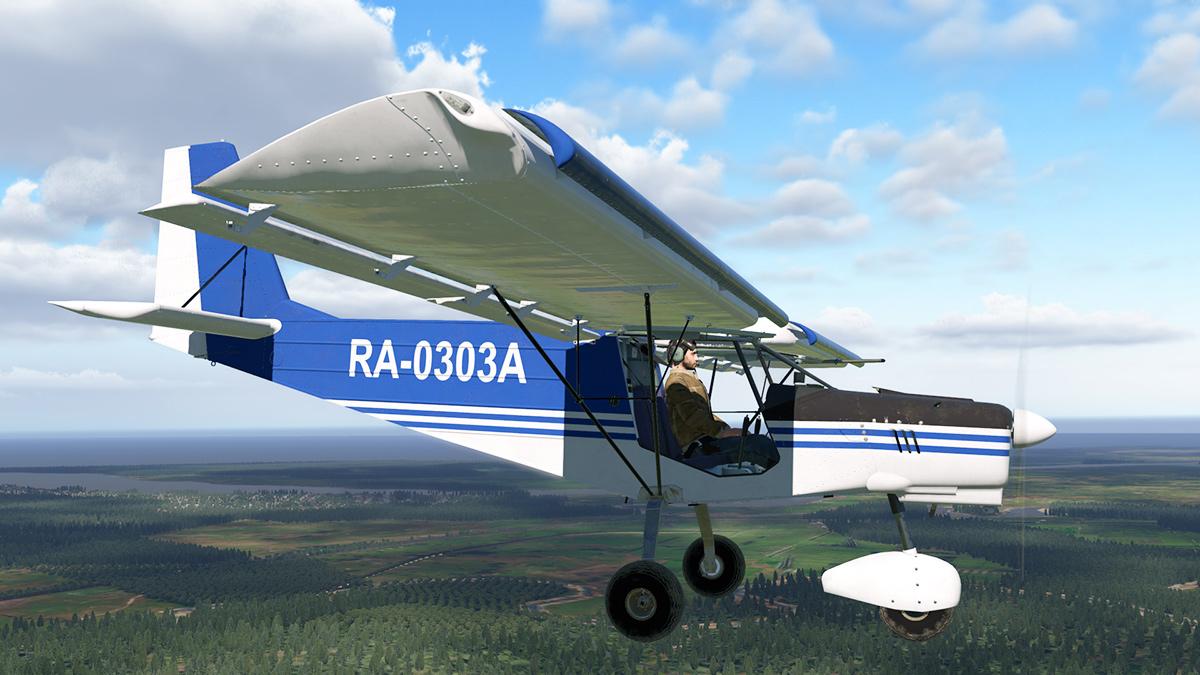
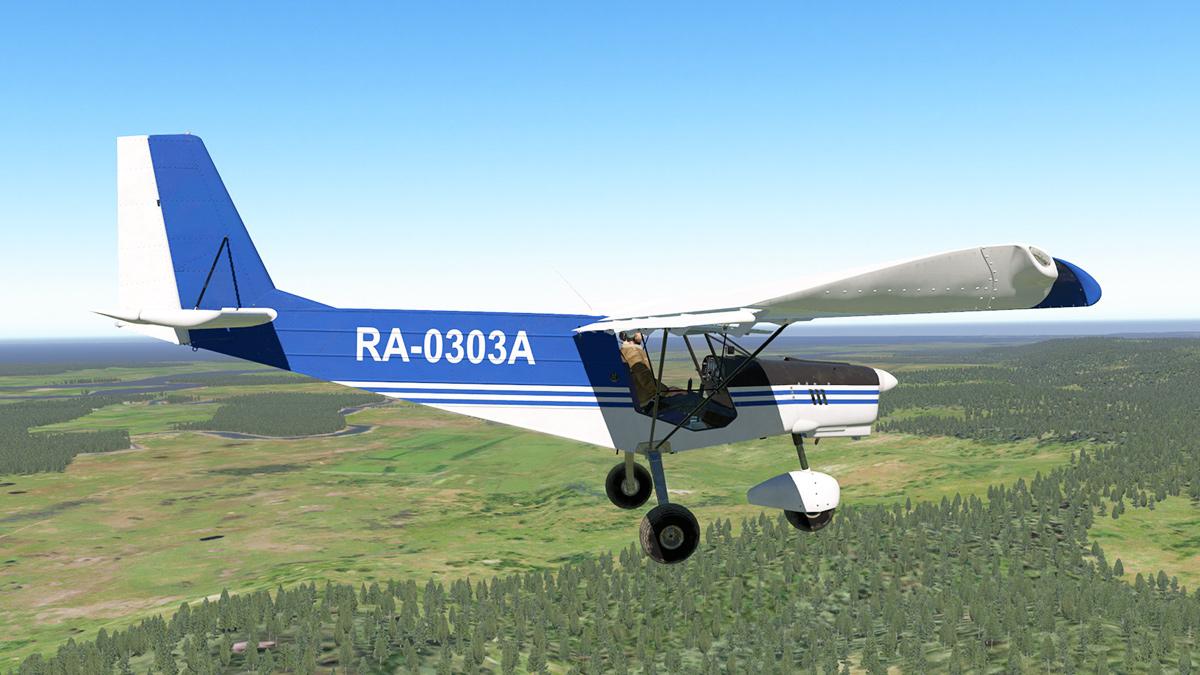
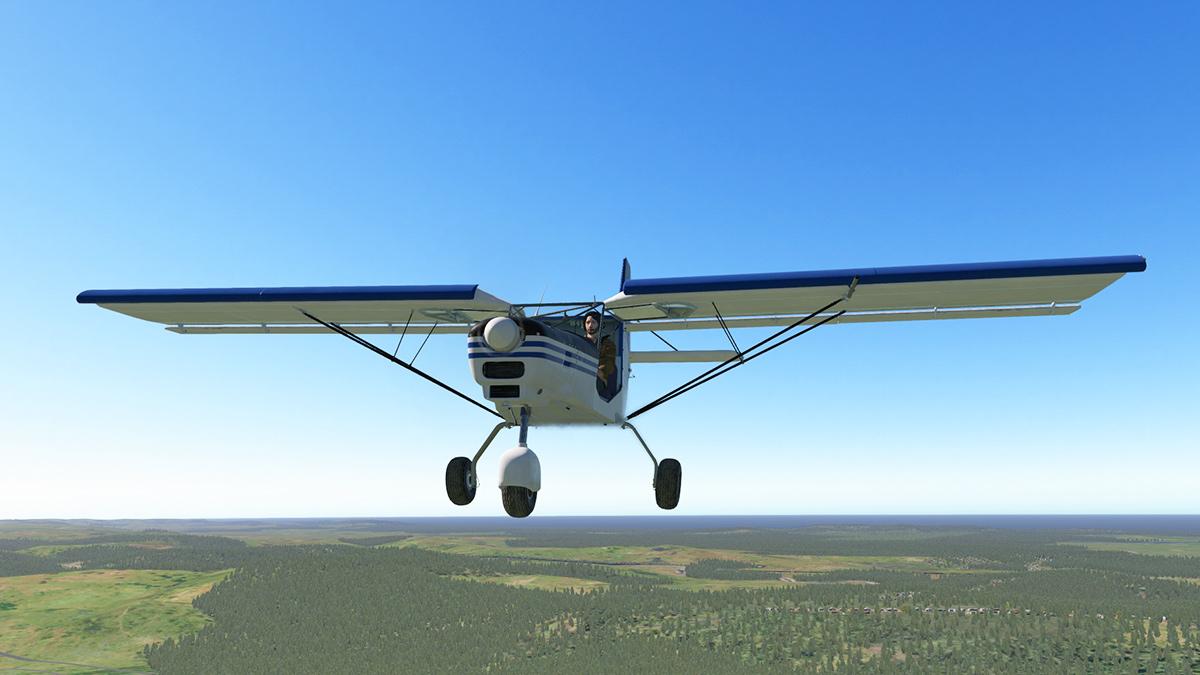
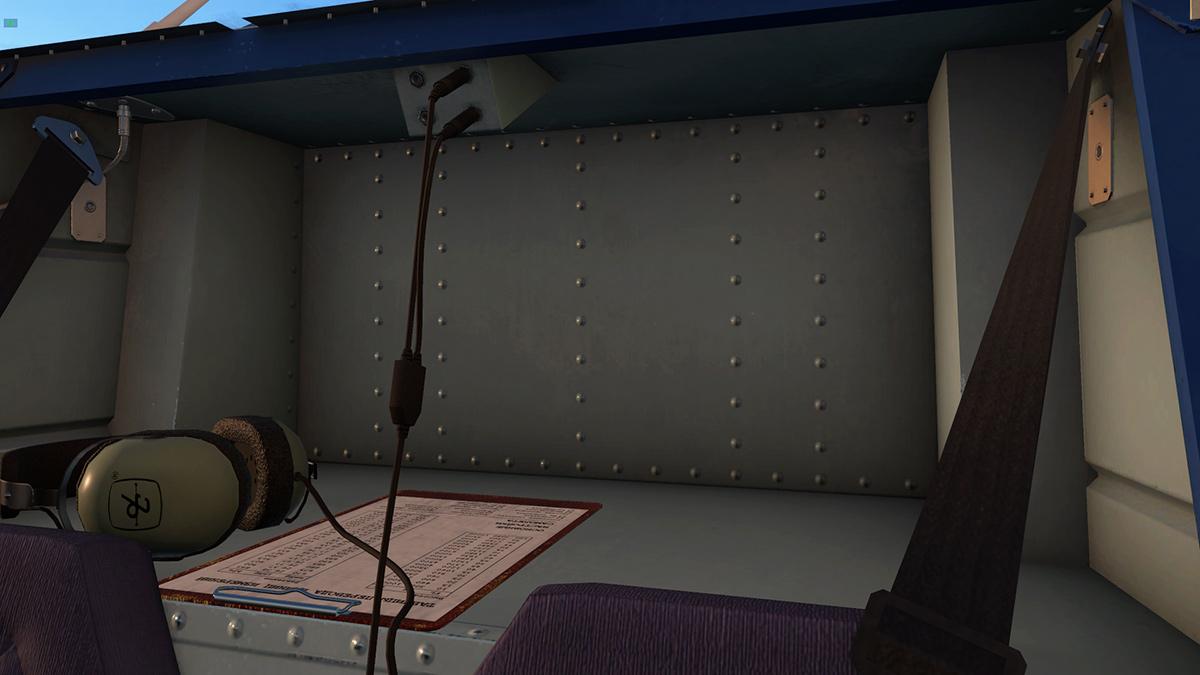
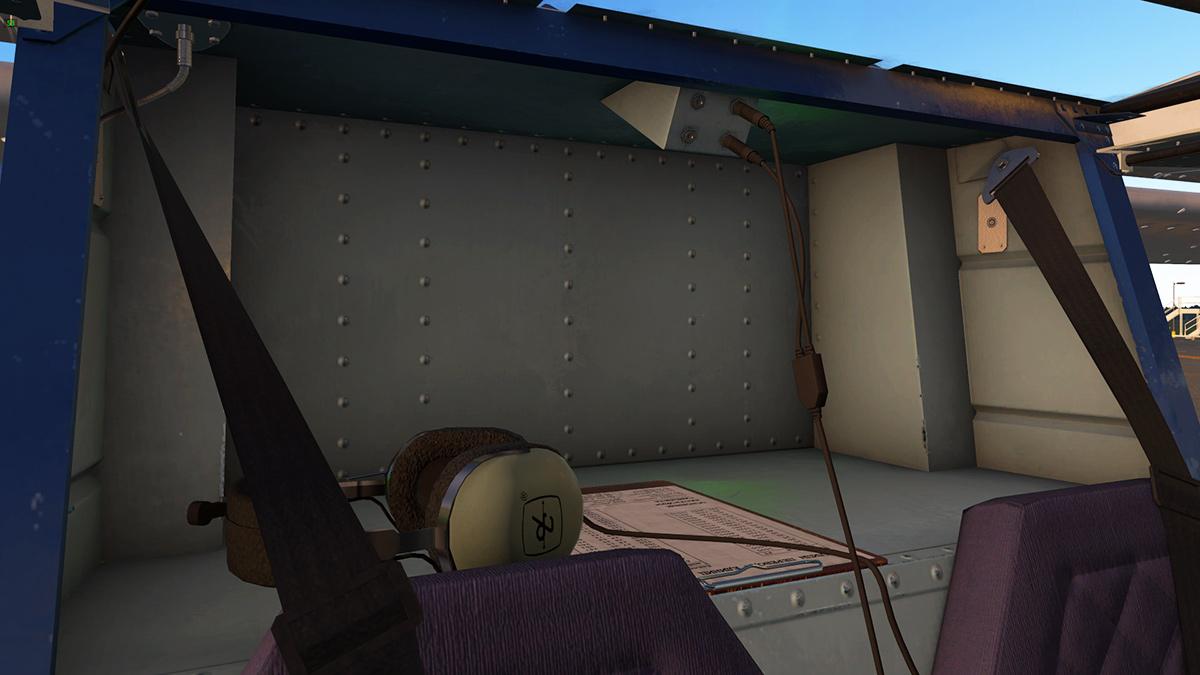
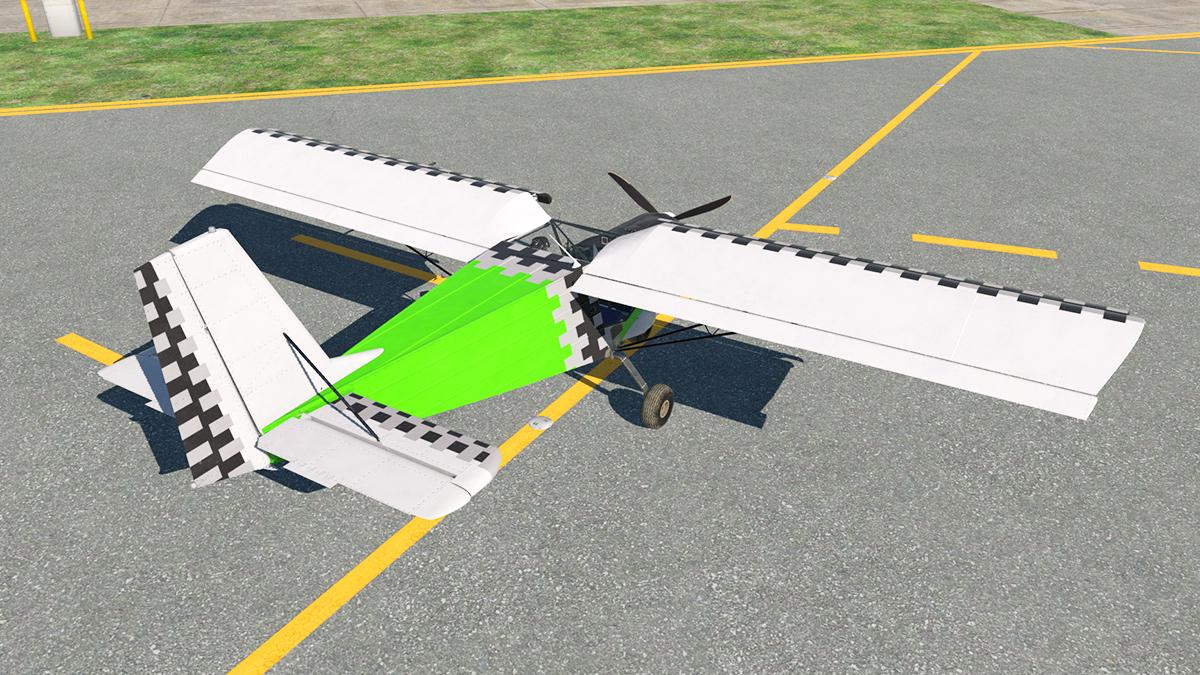
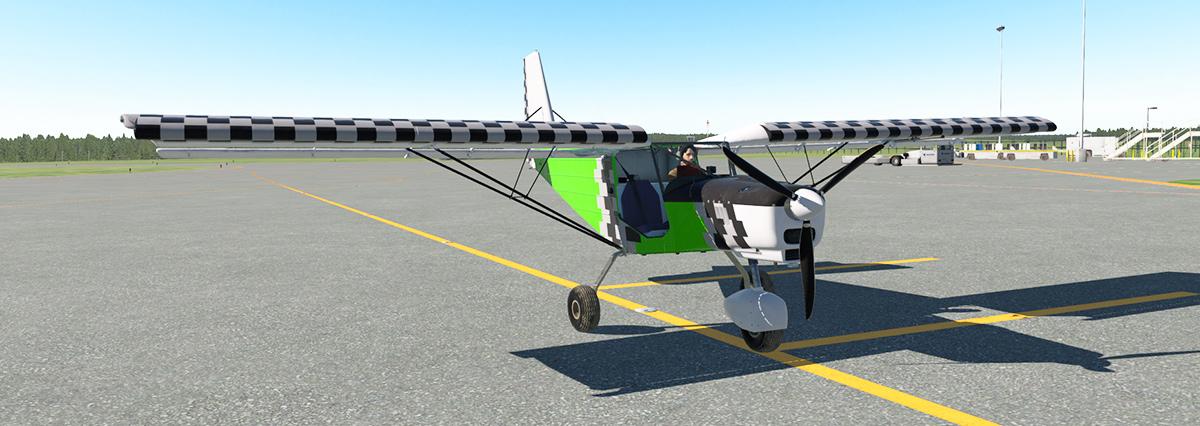
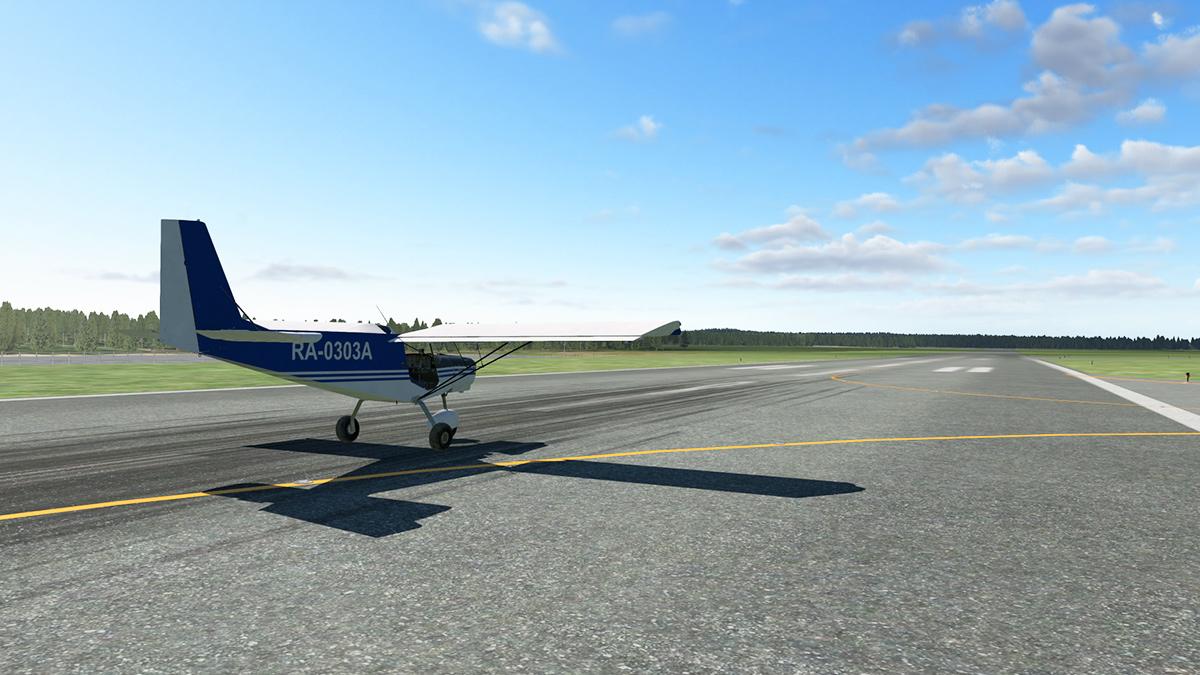
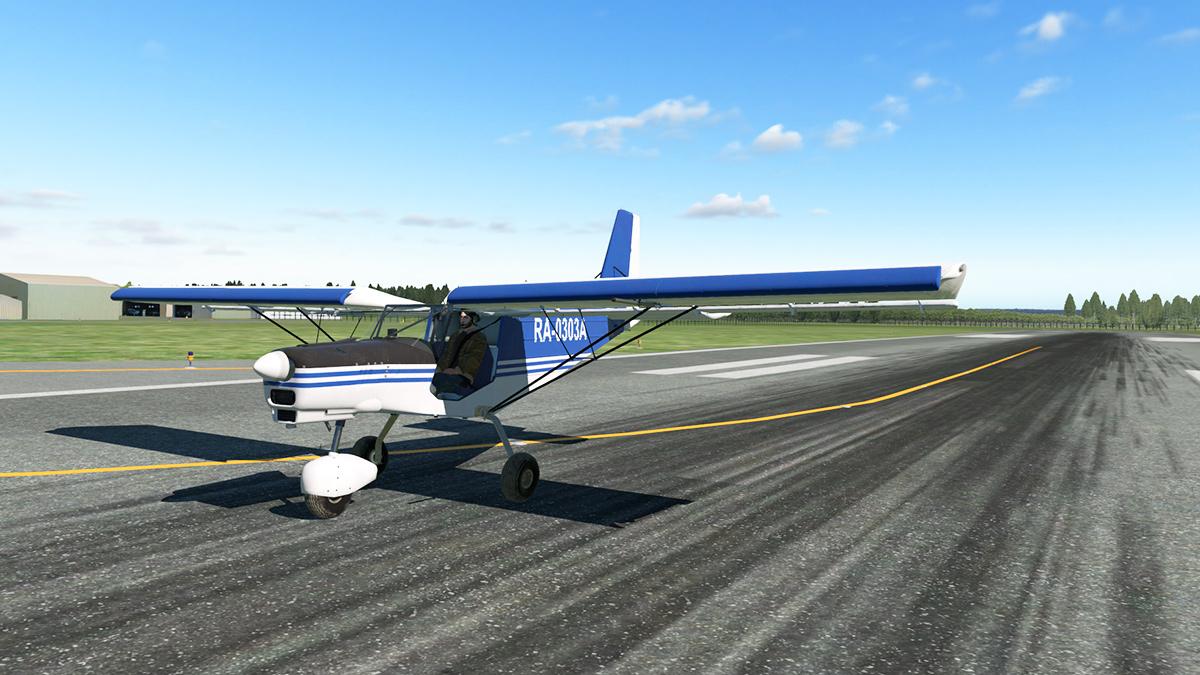
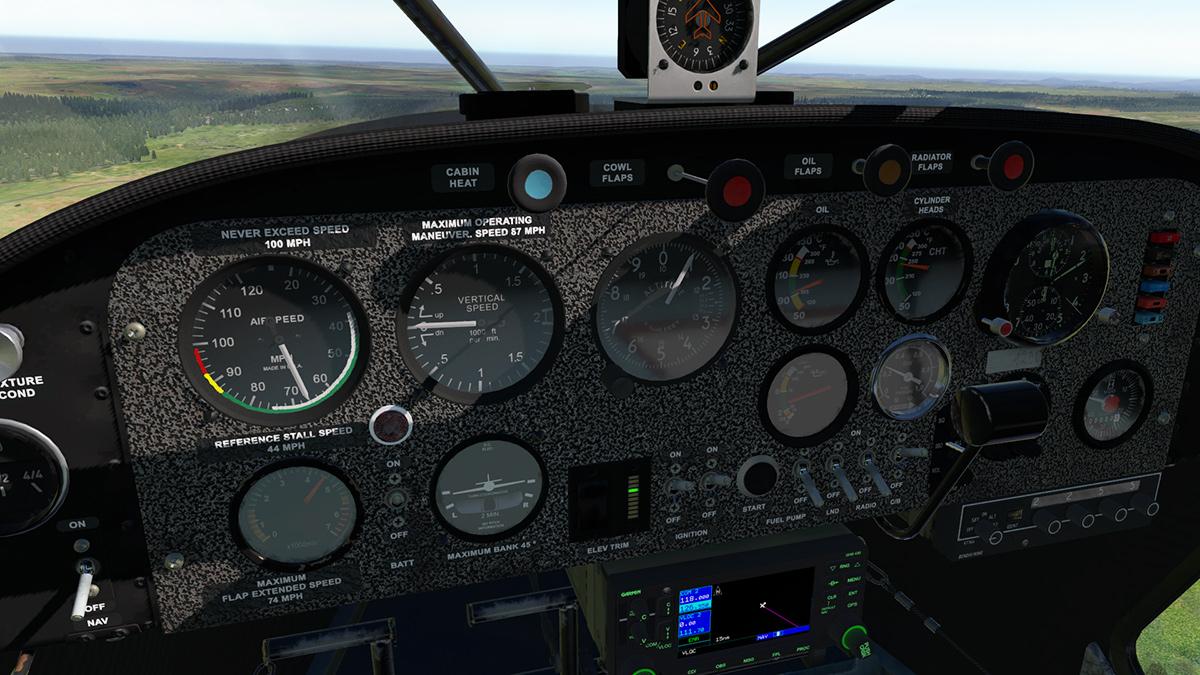
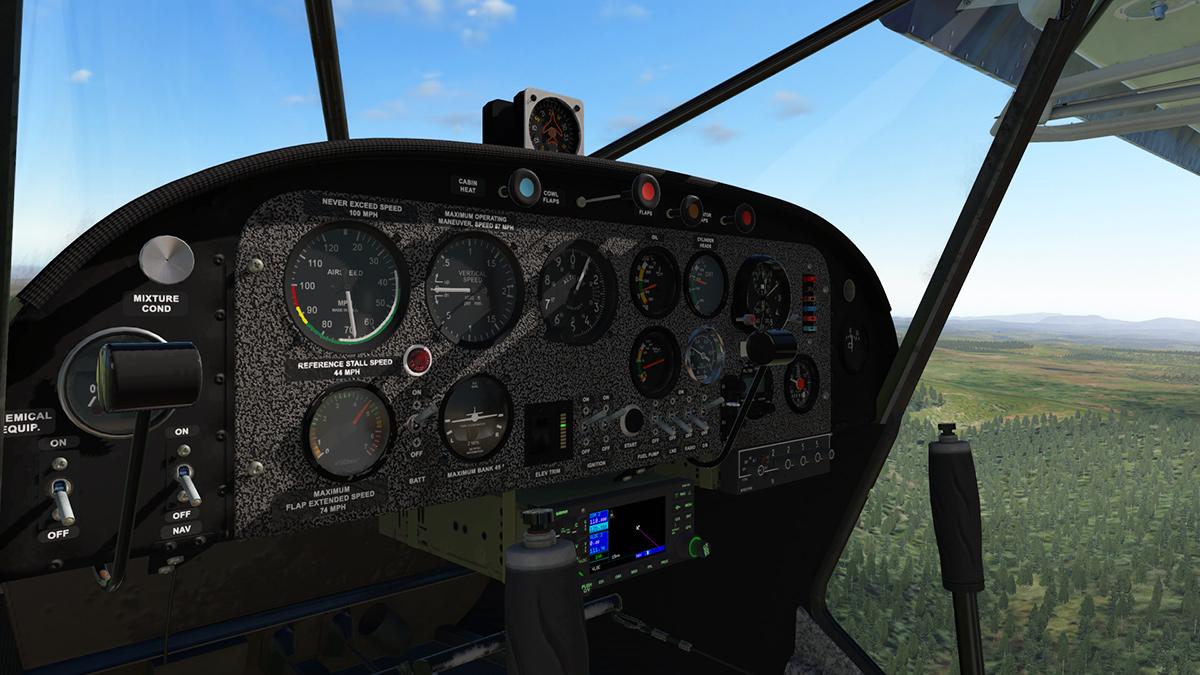
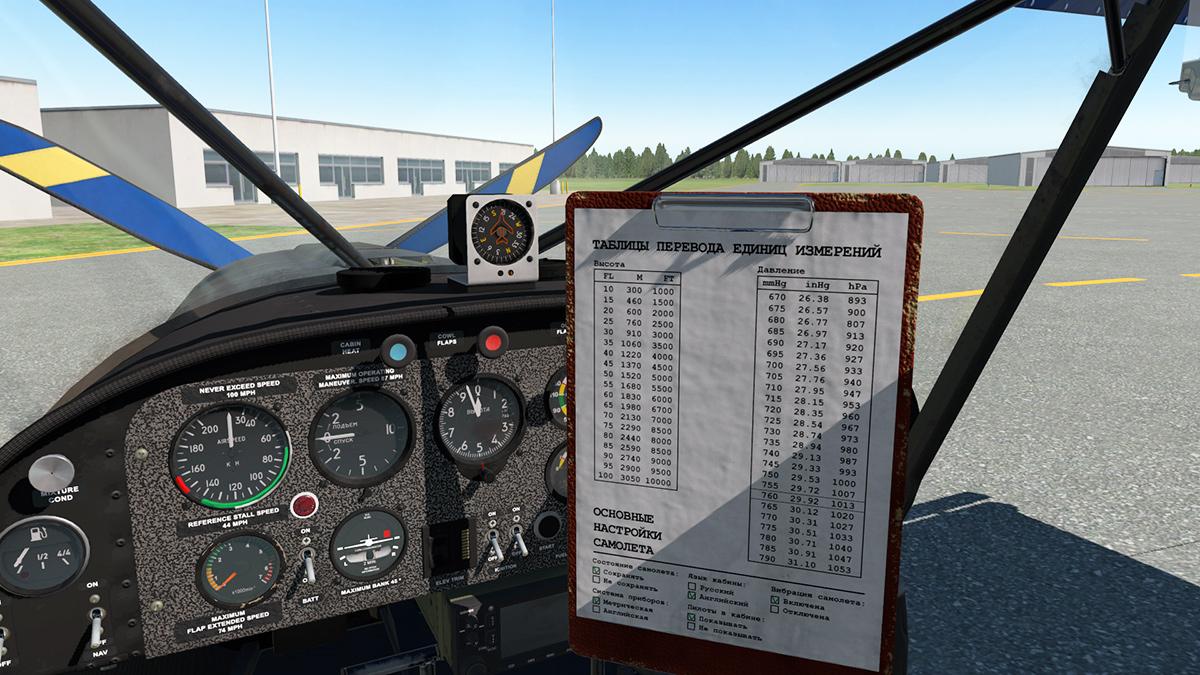
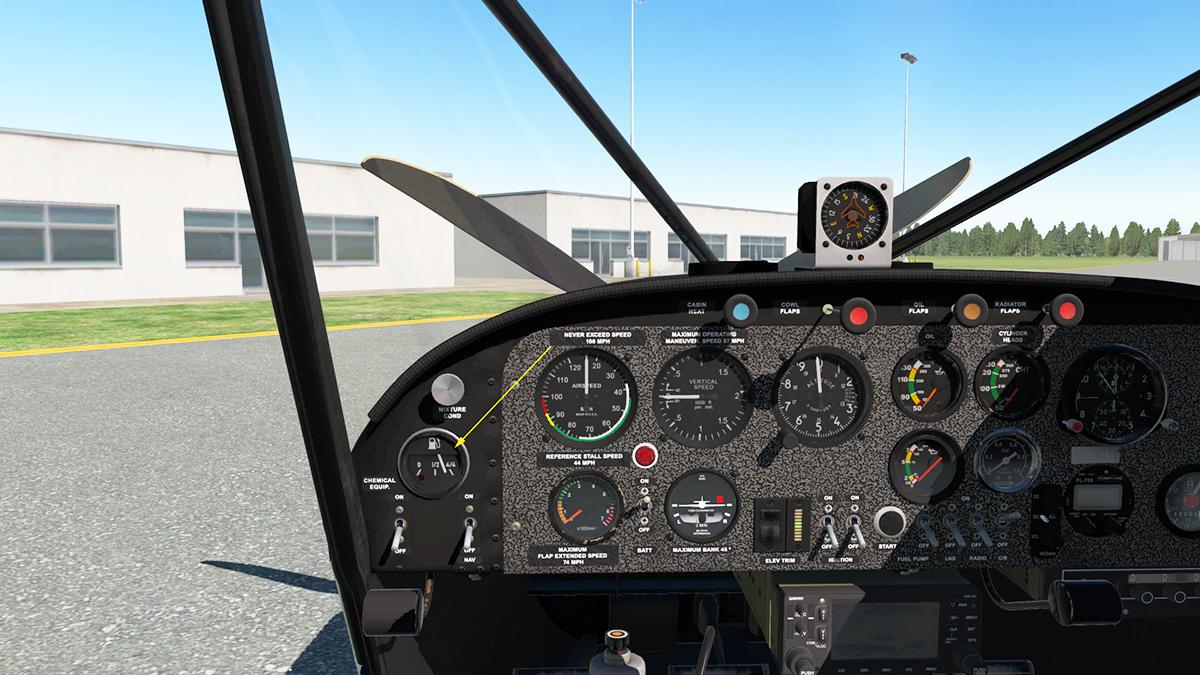
Aircraft Review : Flight Design CTLS Project by VSkyLabs This is the next new project released by VSkyLabs and it is a high-wing, tricycle, two seat light sport/ultralight aircraft and part of the Flight Design CT series family of Germany. But to note first the VSkylab philosophy is that you purchase an ongoing project, so any aircraft you purchase is not fully completed and 100%, that is the deal you sign up for to get access to the aircraft, all updates to the aircraft are free but changes can come infrequently if sometimes slowly. Basically small ultralights or light sport aircraft are aviation's version of Buzz lightyear's set of wings on your back, the fuselage is there just to carry the wings and put an engine in front of you and in the case of the CTLS that is a Rotax 912ULS (Carburated, 100 rated BHP @ 5800 RPM) engine with a Propeller gear reduction of 2.43:1, the rest is a pure plastic body. At first glance the tiddler CTLS feel like one of those packaged toys that you get where you click in the wings, click in the elevator, click on the three wheels and finally put the propeller on the nose to create an aircraft, only in full size. The design is very, very simple with an plastic or composite molded fuselage with the wings and appendages fastened together.... or a pure ultralight design. The look and feel is a bit like a large fish, bulging nose, wide centre to a flappy tail. VSkyLabs detail is very good as their modeling usually is. Plastic composites always come across as plain in simulators, and there are shades of that aspect here, but the modeling's tight lines and curves does eliminate a good part of those areas and making it interesting. Appendages and aerodynamic surfaces are thick, even clunky but perfectly designed here. Tri-cycle gear is all aerodynamic covers and not much in assemblies, but again they are well done. Glass is very realistic and nicely reflective, the doors can't be opened in flight like a lot of these light designs, but the huge panorama windows compensate for that, and again they have been well created. The fixed pitch Neuform CR3-65-47-101.6, 3 blade, composite propeller has also been really well rendered. Open the quite thick side door and there is the well designed instrument console and to the right the highlight of the aircraft with two very modern design sport seats. Both seats are insanely well created in detail, with the hard shell with the rubber body hugging insert is excellent work, the full detail can be observed by just admiring the sheer detail of the six point harness and straps. Note the nice rubber seals around the doors for quality work. Rear shelves have areas for bits and pieces with a rubber string restrainers, both wells are well done here but don't expect to get any sized bag in here. Looking forward the CTLS comes with two instrument panel configurations. One is the standard, basic analog CT VFR + night pack panel (Left) and the other the enhanced panel, which is including the addition of a notebook-based glass PFD (Primary Flight Display) along with a Dynon style AP74 and HS34 avionics package (right). In the review I will use the avionics package version. To change the panel then press the glass PFD (Primary Flight Display) and it changes over to the analog dials. The only difference instrument wise is that the top two instruments in the Airspeed and Altimeter are replaced with an electronic version, lower two instruments are the Artificial Horizon and the Vertical Speed instruments are both represented in either configuration. The overall panel design is very nice, as for the raised chrome nuts that hold the metal panels with the instruments in place is all expertly done with skill, realism 101. The glass arrangement is simple but highly effective for an aircraft of this class, and it feels right up to date. Centre panel has the default Laminar Research GNS 530 but enclosed in a custom housing, pop-out is standard GNS 530. Lower is the GTX-327 transponder. Right panel is top a large RPM dial and alternator warning light, lower are four engine dials that cover CHT (Cylinder Head Temperature), Voltmeter, Oil Temperature and Oil Pressure and right is a Quartz Hobbs meter. Lower are fifteen circuit breakers, and all are active (to note when starting from cold all breakers are out or off, so you have to click in to use). We will look at the Dynon AP74 and HS34 panels in flight. Centre forward console has the lighting and avionics switchgear top (6 Switches). PS Engineering PM3000 4-Place headset Intercom. Below is the ELT panel. The red lever to the left is the fuel valve (cutoff) that covers the start-key when in the lower position. Main Battery and Generator switches are set right, and we will look at the flaps in a moment. Centre console has left the stabilator (stabiliser) trim wheel, then the choke lever... right are the throttle lever and the brake lever, rear is the brake stop switch. Rear console between the seats are both the Rudder and Aileron trim wheels, and the BRS Ballistic Chute handle. Flap selections are interesting, there are five selections with Zero as the main position... dropping flaps are positions 15º, 30º (not shown) and full flap set at 40º... .... the interesting one is a setting in the negative at - 6º or the flap is set upwards, we shall see how this works in flight. There is the feature of a Avitab screen, stuck on the right side window and it is free and available here: AviTab: VR-compatible tablet and a Navigraph account is also required for active charts. This is a nice installation that can be hidden via pressing the suction cup, a lot of these 3d tablets are too large and hard to see around while flying, and if real you would bang your bonce on it if you moved your head around, but this one is about perfect in size and functionality. Window blinds are nice, and the left hand one has the checklist applied on the surface, very nice. The frame mounted compass is nice as well If you are aware then you will be wondering in "Where are the fuel gauges?" There are two left and right, both visual and are both set up in the wing roots, top up the tanks to see the volume of 17 US Gal (65 litres) in each wing. Note the "Carbon Monoxide Detector", but personally what could you do if it went into "Danger", jump out? The whole internal cabin comes in this motley composite texture, it looks good... but you feel it is more like your kitchen bench top than a quality internal aircraft design. As with most of these tiddler aircraft the instrumentation and controls are fairly basic in use and layout, but you get a great balance here. Flying the CTLS Is the CTLS difficult to start? no not really. Lots of circuit breakers to click in, main power BAT (another breaker really) Choke to "On", Throttle to 10% and that big red fuel cutoff lever to up... which exposes the start key and to note the avionics have to be switched off to save power. Then a twist of the key a few times and the Rotex purrs into life. One thing you expect is what you don't get is... movement? These Rotexs shake violently, so you need that visual feel, so I grabbed and installed "Headshake" by SimCoders to add in the shake effect, again I wanted more shake even when set with the plugin's full 100% settings, but some movement was better than nothing and gave you at least some vibration. But before you bombard me with emails on instead in using XPRealistic Pro, I will note I won't use the FlyWithLua plugin as it creates too many conflicts with my system. Another note is that the Experimental Flight Model checkbox on the X-Plane/General menu page has to be selected for this aircraft, a restart is required. Put the Choke in after about 30sec, but keep the revs up until the aircraft's vitals are showing normal, then turn on and set up the avionics. But before you can leave you have to arm the BRS emergency ballistic chute system by removing the pin, it is stored in the left lower pocket. Two things to note, you can adjust your horizon pitch target in the Artificial Horizion and set one and it sets in the glass version as well, secondly is that to set the Baro you can to switch over to the analog version to adjust to inHG or use the "Value" knob on the on the glass version via the right side Dynon HS34 panel for hPa. When warmed up and the throttle at idle you are ready to go, brake safety off and off goes the park brake, the braking has three settings, park and off, but also the standard X-Plane 50% braking action. Sounds are FMOD, and very good, but not highly dynamic in rotation and direction but more than enough for this type of aircraft. Tuning the stabiliser trim needed careful setting to be exact, if not the whale stabiliser will flutter badly, line it up correctly and it will calm it down. Taxiing is very nice with just a slight throttle to get you moving, yes the aircraft needs fine control to taxi, but it is a very short small aircraft and all of these types require that control, ditto going too fast, and if you do there is the feeling you will lose control and flip the aircraft. Power up but gradually and even just over 4000 revs is enough however VSkyLabs say 4800 rpm, but that feels too much for me, max I would do would be 4500 rpm... and almost straight away the nose wheel wants to lift, so for the first few hundred yards you need to keep the stick pressure forward... ... VSkyLabs note you can takeoff with the flaps set at 15º for a short almost handglider of a cliff-face lift off, but even the 0º setting will have you off the ground in a very short time at around 60 knts (official 54 knts) so you don't need to do that. Climb-out is around 500ft per minute and official max climb is 960 ft/min. Finding the right power position is critical, as too much power will rise the aircraft more and making it harder to trim. Trimming is tricky, even hard to get right because if you use keys (like I do) to trim, you have to hold them down to move the trim wheels, just clicking will not change the trim. So holding hard can make you go too far past your trim position, or the other way in in being too low... you work it out, but finding that sweet spot is kinda hard but doable. Once sorted you do have the option of using the flaps now in the -6º position to balance the aircraft better and gain more speed, again it is best to sort this out and manually trim it out before using the autopilot. But the aircraft never seems happy, with constant slight climbs and drops and sometimes as much as 300fpm either way no matter how much you try to flatten out the curve via the stick or manual trim, the CTLS is nice to fly and even very realistic, but not over time and distance a smooth experience. The Dynon Avionics autopilot system is very basic, but quite innovative for an aircraft of this category. The AP74 panel has the main engage selector, HDG (Heading), TRK (Track), NAV (Navigation GPS) and (hold) ALT (Altitude), the value knob does not work but is noted as Multi-Purpose) Left of the glass display is the Dynon HS34 panel that knobs adjusts top Value (Baro), Heading (middle) and Course (Lower) all push to sync. Other selections include NAV-SRC (NAV or GPS), BRG-SRC (just resets pointer). Like with the manual trim the aircraft's Dynon AP struggles also to keep the climbs and drops under control even in 5 knt wind conditions. It is a good little system that will take all on all the flying work from you, and with a 850 nautical mile range a requirement, top speed is 230 km/h (143 mph; 124 knts) but you cruise around 112 knts. Big huge side windows give you a helicopter panorama view... ... and the particle effects are effective on the tinny exhaust. There are no liveries except for the default N5623X VR (Virtual Reality) is a big feature here with designated zones for interaction and is fully operational with the use of mouse manipulators or VR touch controllers. Any manoeuvring for the CTLS has to be under 100 knts, and aerobatics are for the insane... The AP won't let you descend even if you disconnect the ALT button, so the only way to lose height is to disconnect the AP completely and then manually adjust the trim. You can come down quite quickly if you want to but be aware of that nose pitch... ... you also can turn on a dime, so short approaches are easy to do, but running off the little speed you use anyway can be quite hard. The problem is if you lift the nose to slow the aircraft it will then easily gain height, working the throttle helps, but even that action is not always totally effective, dropping the flaps is... but you still have to be well under 80 knts (15º) to do so, so be aware to get your speed down ready for an approach, 35º is 63 knts. You will need to have a few practise landings to find that perfect zone of speed and lift, too fast and you pitch the nose too far down, too slow and of course you lose height, so you tend to favour the former and safety. But the tiddler is very responsive to inputs, even to a point a bit nervous... .... so flying skills are everything here. Final approach is 55 knts and down to 48 knts in flare, and 42 knts is stall, you can land in -6º flap but add on a few more (2-3) knts to the approach speeds. Once those wheels contact then active steering control is everything to keep the CTLS straight until the speed rubs off, if not you will end upside down in the grass. So your first circuit in the CTLS will be a bit of a shocker, but after a few takeoffs and landings you will find your groove and understand the aircraft's limitations. Avitab is very handy (with a Navigraph account) to find your way around airports, then time to put the tiddly machine home to bed, but remember, that before shutting the engine down to switch off the avionics! The BRS emergency ballistic chute system works very well, you get thrown around a lot at first, but then gradually descend to the terra firma. Lighting Instrument lighting is basic, but adjustable. In fact it is quite good with the limitations. Glass and analog are nice to use and there is one overhead light that is not really very bright, but illuminates the glareshield nicely.... External is average with non-refined lighting (landing light is very blobby) and this light can then only be switched on and off via the panel switch and not by a key input, which I have set on me throttle system. Summary You sort of know what sort of aircraft project that comes with a VSkyLabs release. They are well if even extremely well done models with a lot of clever ideas. What you don't have are detailed menus and lots of active features, but this CTLS from Flight Design has more features than most with both glass and analog instrument panels and with the glass version there comes also a very nice if basic Dynon AP74 and HS34 autopilot system. They are clever and extremely dynamic flying aircraft, but I found the CTLS a bit nervous with the trimming and the up and down constant adjustment while in the air, and in both manual and auto trimming selections. It is certainly an aircraft to fine-tune into to get out the maximum rewards that it can deliver, but to note the aircraft is built to Sport/Ultralight rules and is just a step away from being just an upmarket handglider. You do also get great responsive service from VSkyLabs as part of the project, but remember the purchase deal just that, access to a project and not a fully designed and completed aircraft, but to me with only a few refinements needed the CTLS overall feels pretty well completed here. So overall this is another great little VSkyLab project, clever, different and challenging... it is all that and more. The VSKYLABS Flight Design CTLS Project is now available! from the X-Plane.Org Store here : VSKYLABS Flight Design CTLS Project Price is US$27.50 Project Highlights: VSKYLABS 'Test-Pilot' Project: designed for use with X-Plane 11.30+ cutting edge Experimental flight model environment, featuring a superb flight dynamics with authentic performance and flight handling characteristics. Built for VR: development was tailored specifically for VR, and optimized for 2D usage. Engineered and designed as a default X-Plane aircraft (Like all VSKYLABS projects). The VSKYLABS projects are practically show-casing X-Plane, as they are stretching X-Plane default features, systems and flight model to its limits without any dependencies on complementary plugins or software...delivering a very robust simulation model, having maximum compatibility with the ever evolving X-Plane flight simulator. Perfect fit for beginner and expert pilots: The VSL CTLS is featuring the standard, basic CT VFR + night pack panel. The simple and clear analog gauges layout is perfect for beginner pilots. It is also featuring an enhanced panel, which is including the addition of a notebook-based glass PFD along with a Dynon style AP74 and HS34 (these are incorporated with simplified, yet functional features). Built-in Avitab Plugin Compatibility (AviTab plugin is not included). STMA Autoupdater plugin is included - all updates are being pushed smoothly without the need to re-download the entire base package (base package will be updated every once in a while to minimize the gap). Highly responsive VSKYLABS support forums: Professional discussions which results in incorporating users feedback into the on-going scheduled development plan. Real-pilots inputs (as well as sim-pilots feedback) are always welcome, and in practice sets the the VSKYLABS projects within solid, professional margins over time. The project is under constant maintenance and development - updates are free. Requirements: X-Plane 11.30+ Windows, Mac or Linux 2Gb VRAM Minimum - 4Gb+ VRAM Recommended - 8Gb+ VRAM for VR Current and Review version: 1.0 (Aug 8th 2019) Installation and documents: Download for the Flight Design CTLS Project is 189.20 Mb and the unzipped file is deposited in the aircraft "General Aviation" X-Plane folder at 265.30 mb. Download of the"Headshake" by SimCoders effect plugin is highly recommended with this aircraft, Navigraph account also recommended Documentation: Manual included VSKYLABS Flight Design CTLS POH vSkyLabs Aerospace Simulations also has a full extensive website on all projects for updates and information including aircraft manuals available here: www vSkyLabs.com All VskyLabs projects are also available for purchase from the source developer here: VSKYLABS ______________________________________________________________________ Aircraft Review by Stephen Dutton 15th August 2019 Copyright©2019: X-PlaneReviews (Disclaimer. All images and text in this review are the work and property of X-PlaneReviews, no sharing or copy of the content is allowed without consent from the author as per copyright conditions) Review System Specifications: Computer System: Windows - Intel Core i7 6700K CPU 4.00GHz / 64bit - 16 Gb single 1067 Mhz DDR4 2133 - ASUS GeForce GTX 1080 8Gb - Samsung Evo 512gb SSD Software: - Windows 10 - X-Plane 11.31 (v11.30 is required for this aircraft) Addons: Saitek x56 Rhino Pro system Joystick and Throttle : Sound - Bose Soundlink Mini Plugins: Environment Engine by xEnviro v1.07 US$69.90 : Headshake by SimCoders - Free : Navigraph Charts - Subscription Scenery or Aircraft KHAF - Half Moon Bay by Rising Dawn Studios (X-Plane.OrgStore) - US$19.00
-
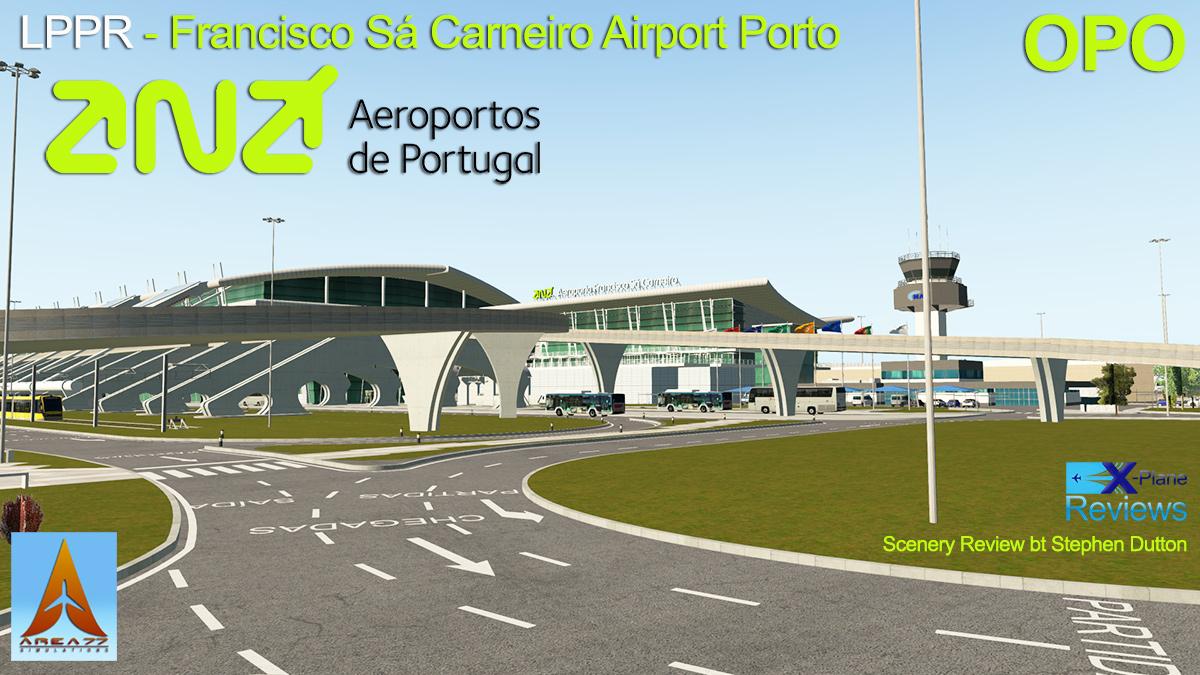
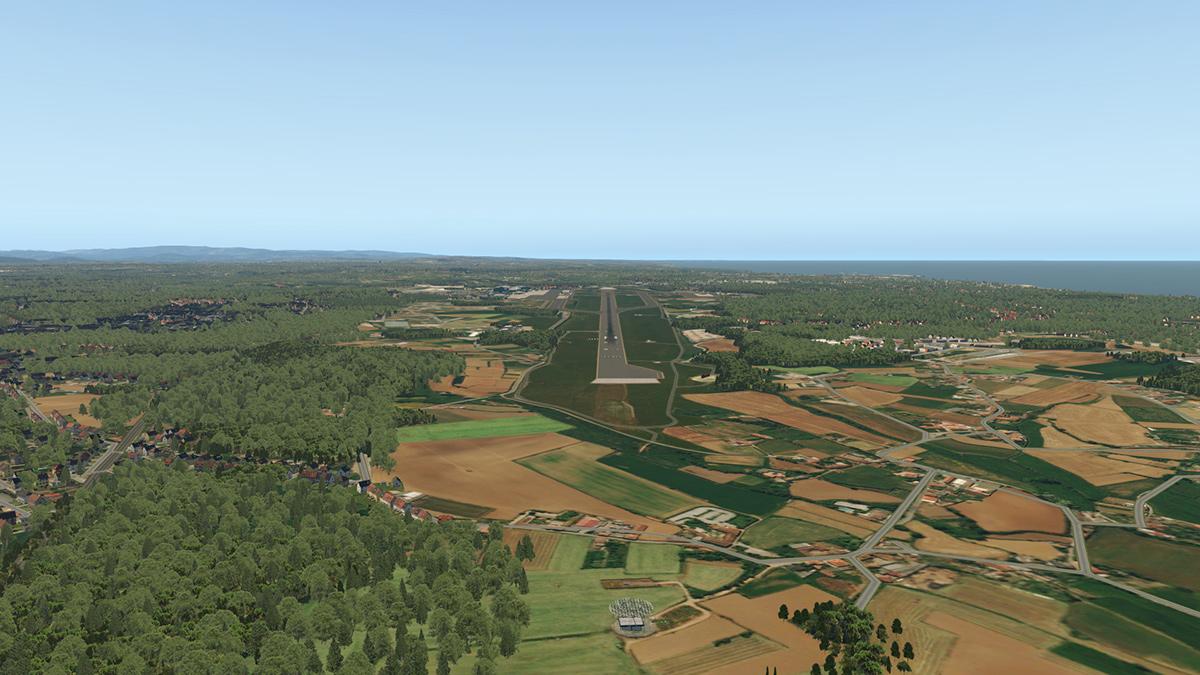
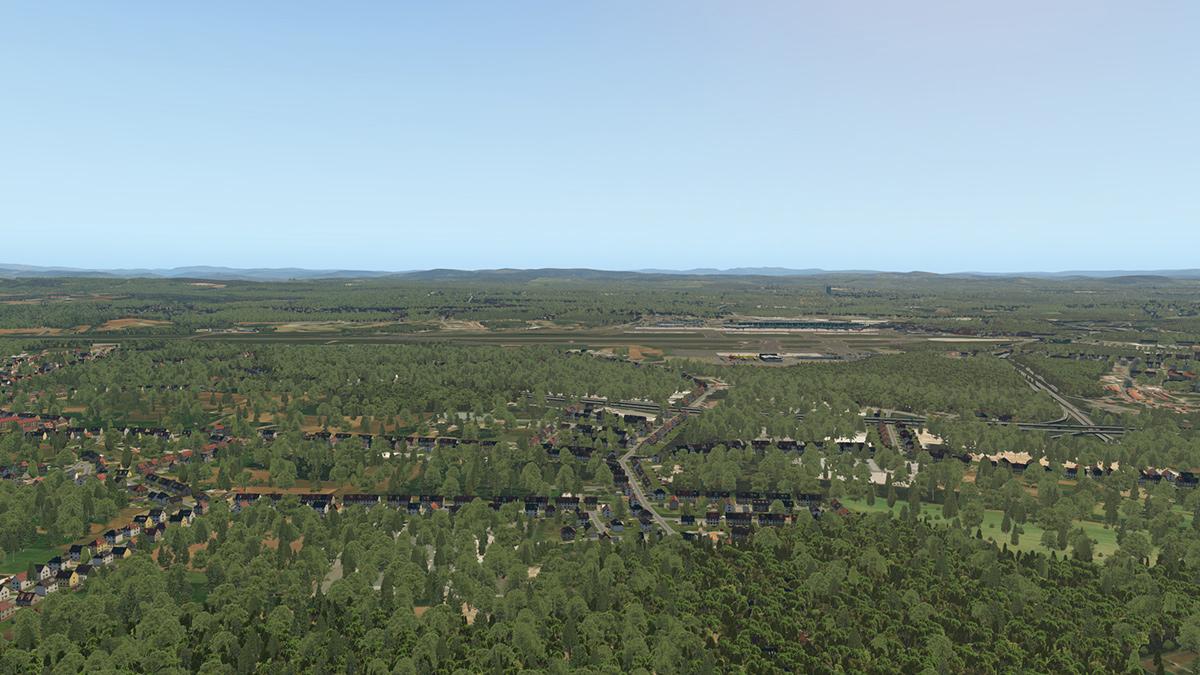
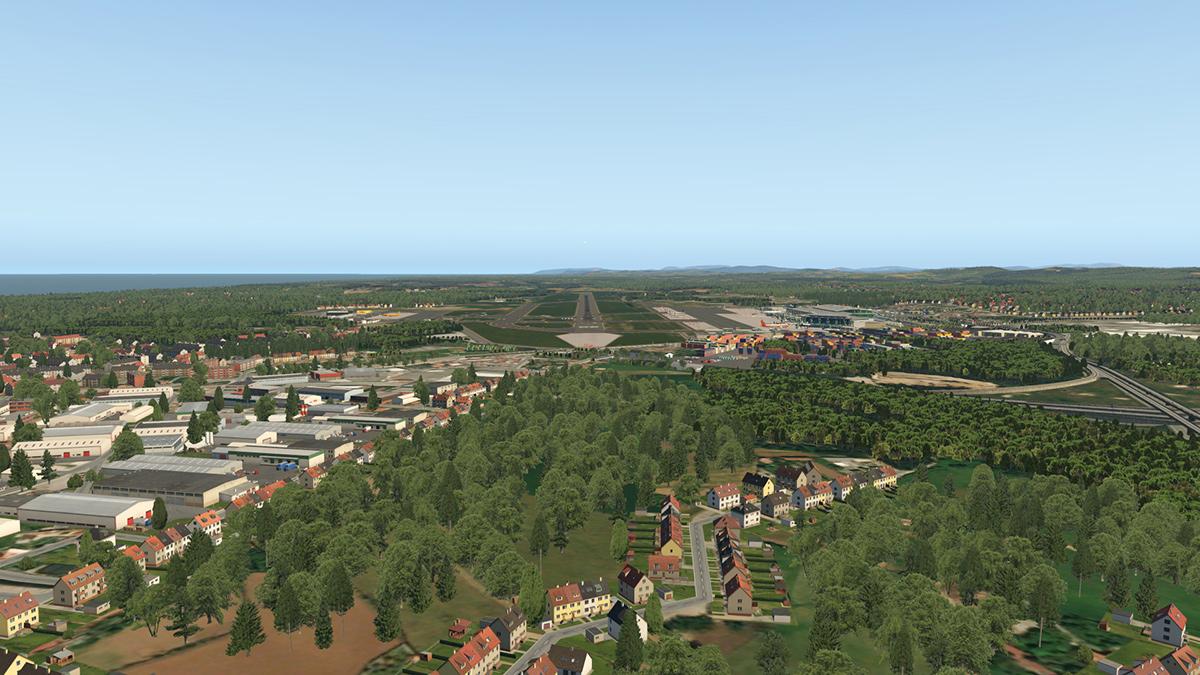
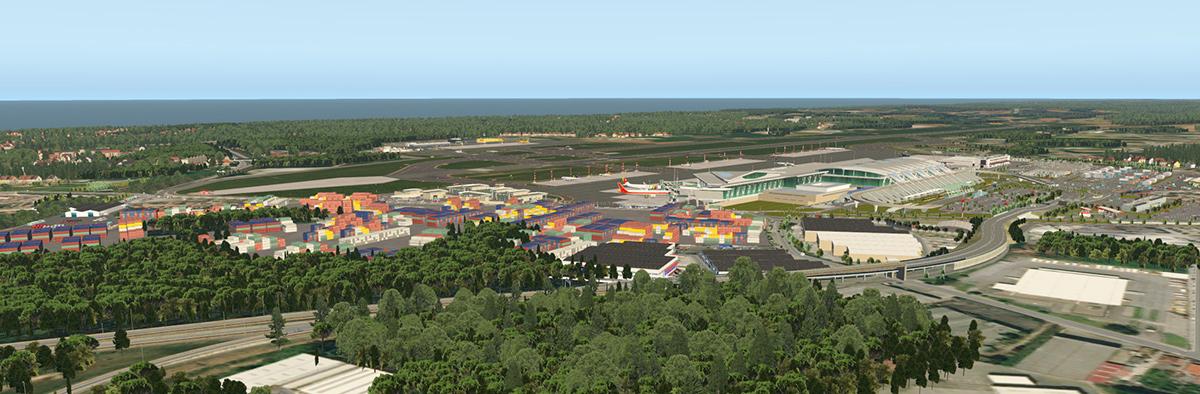
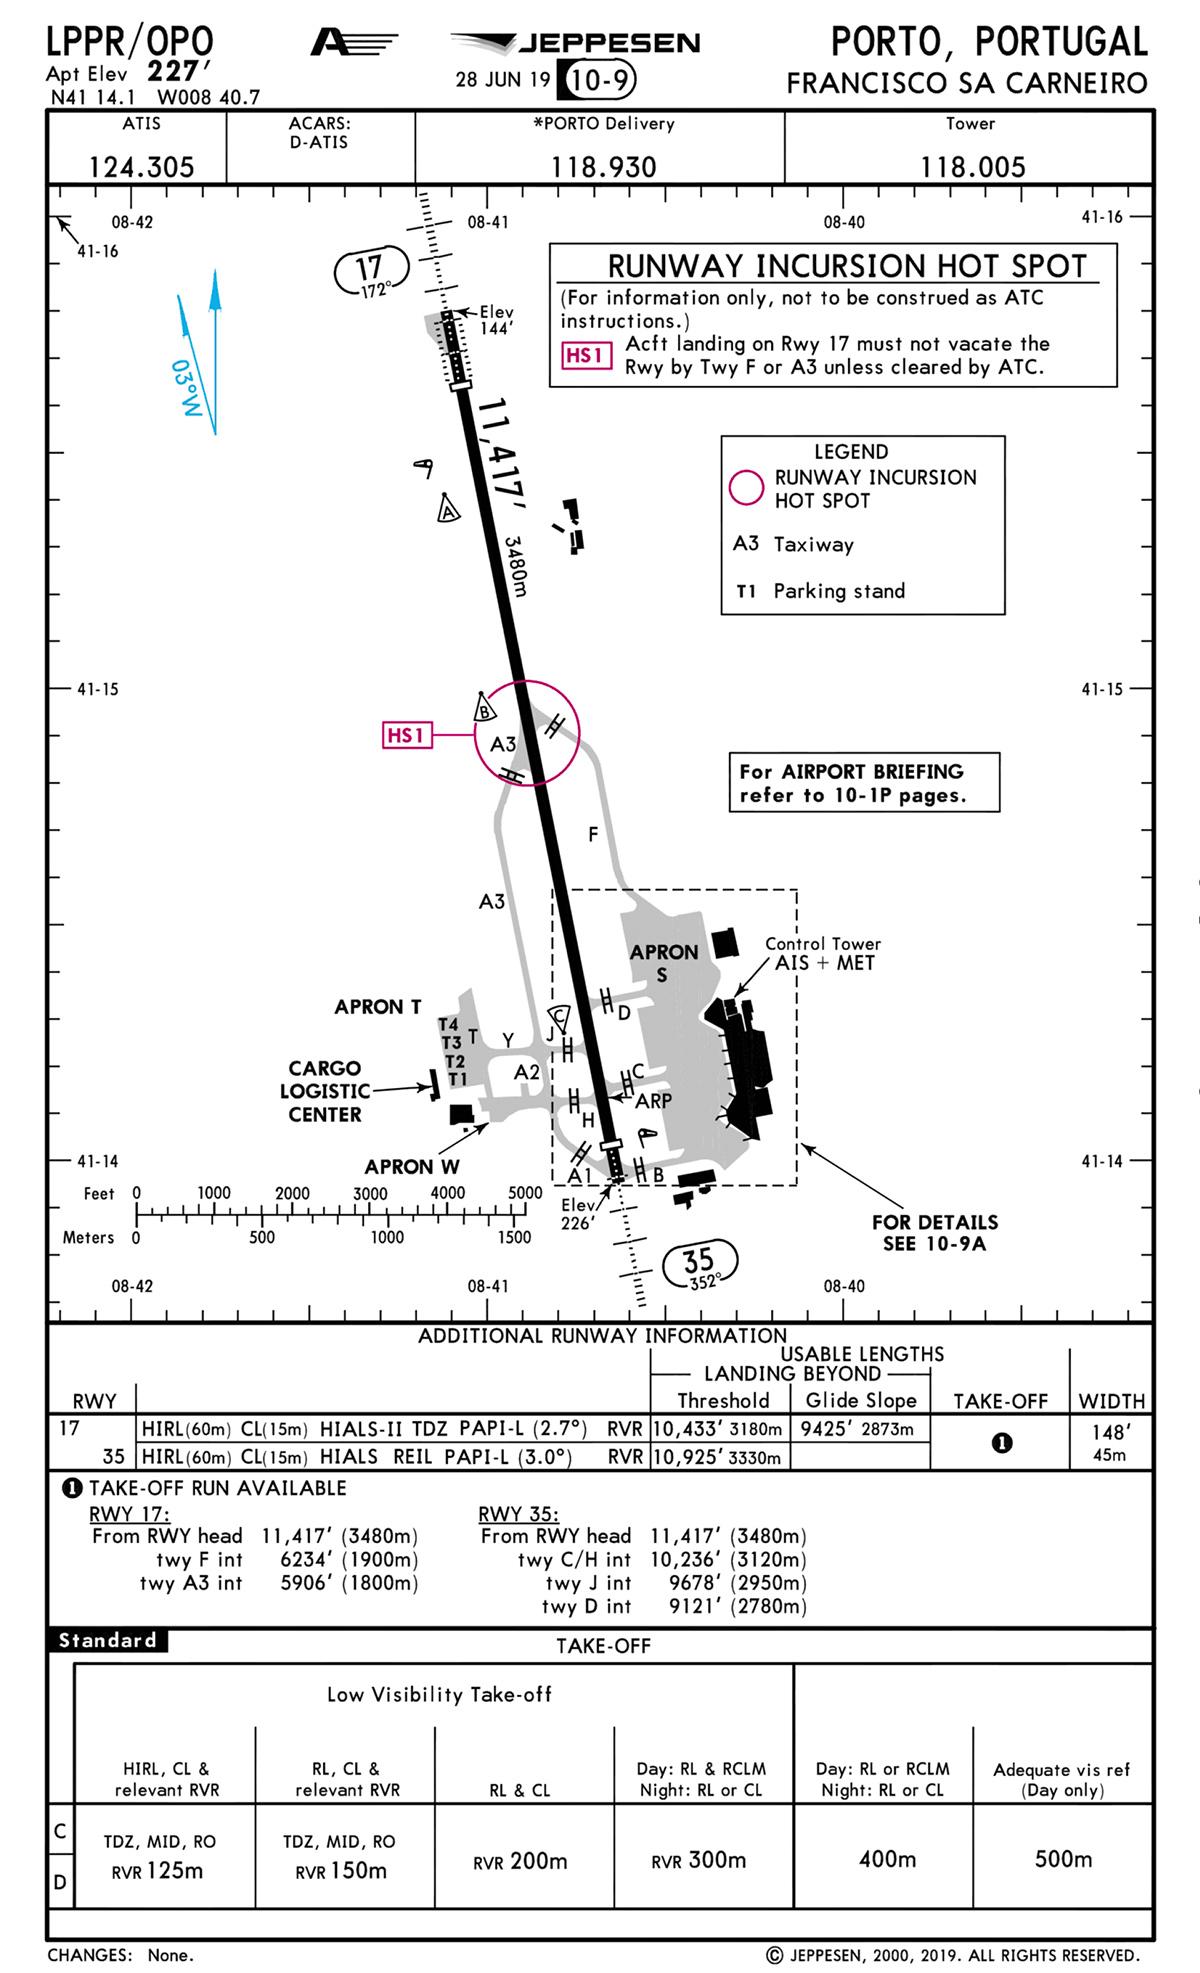
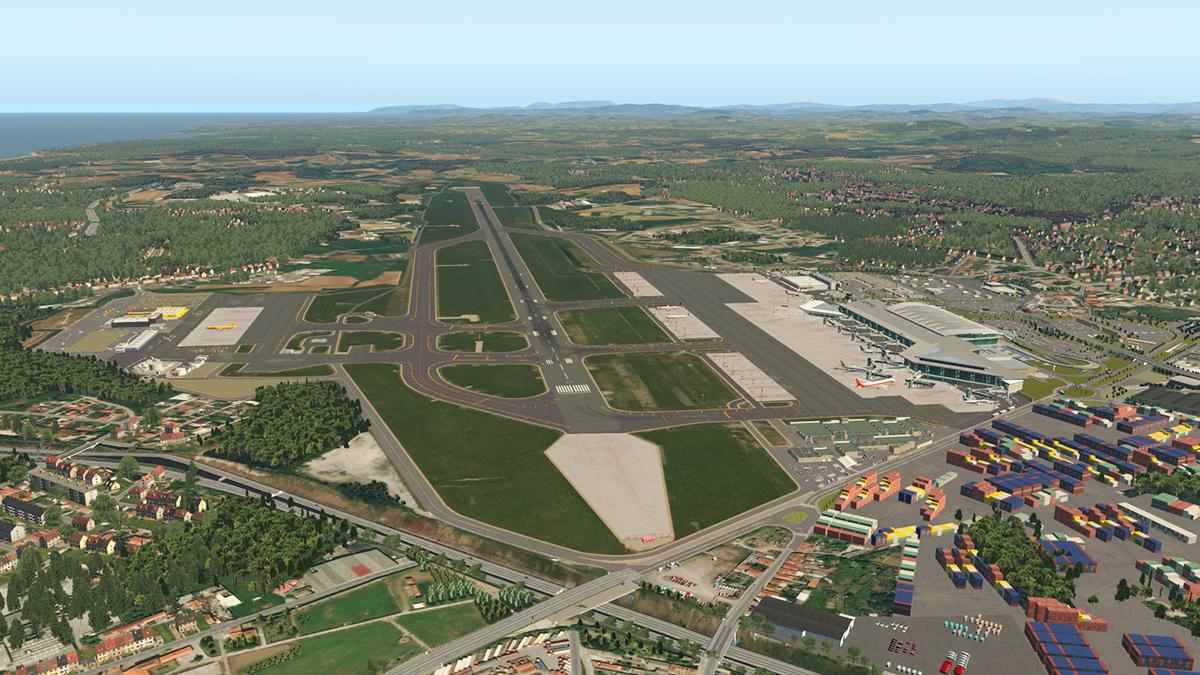
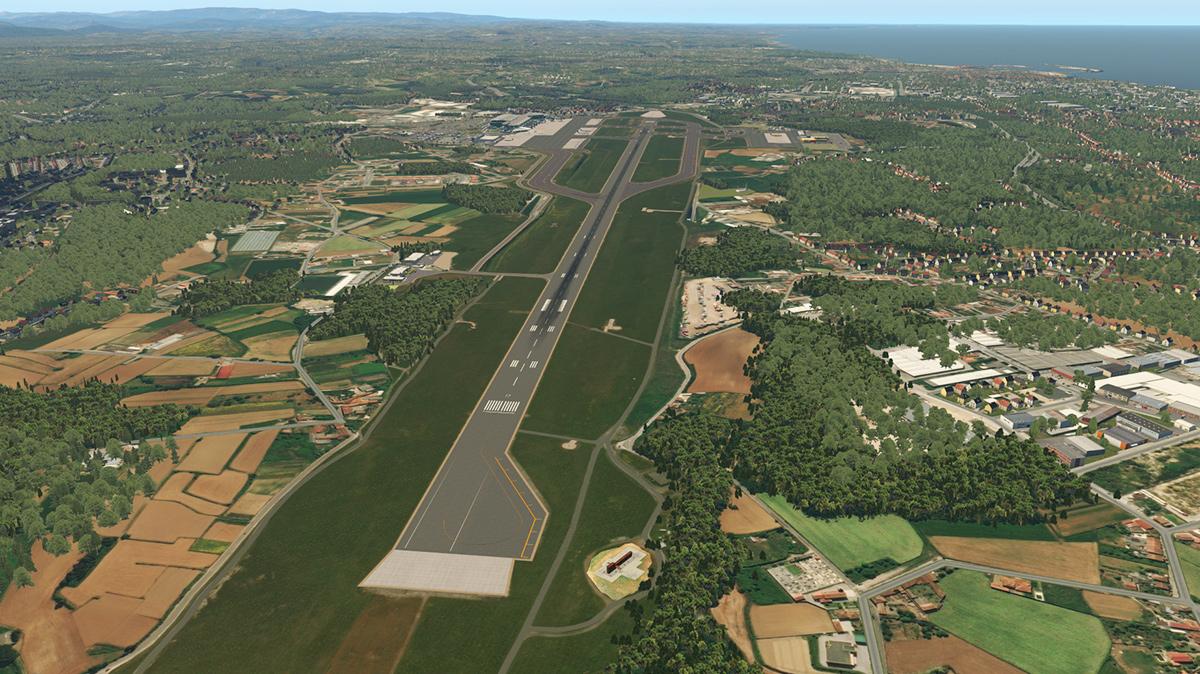
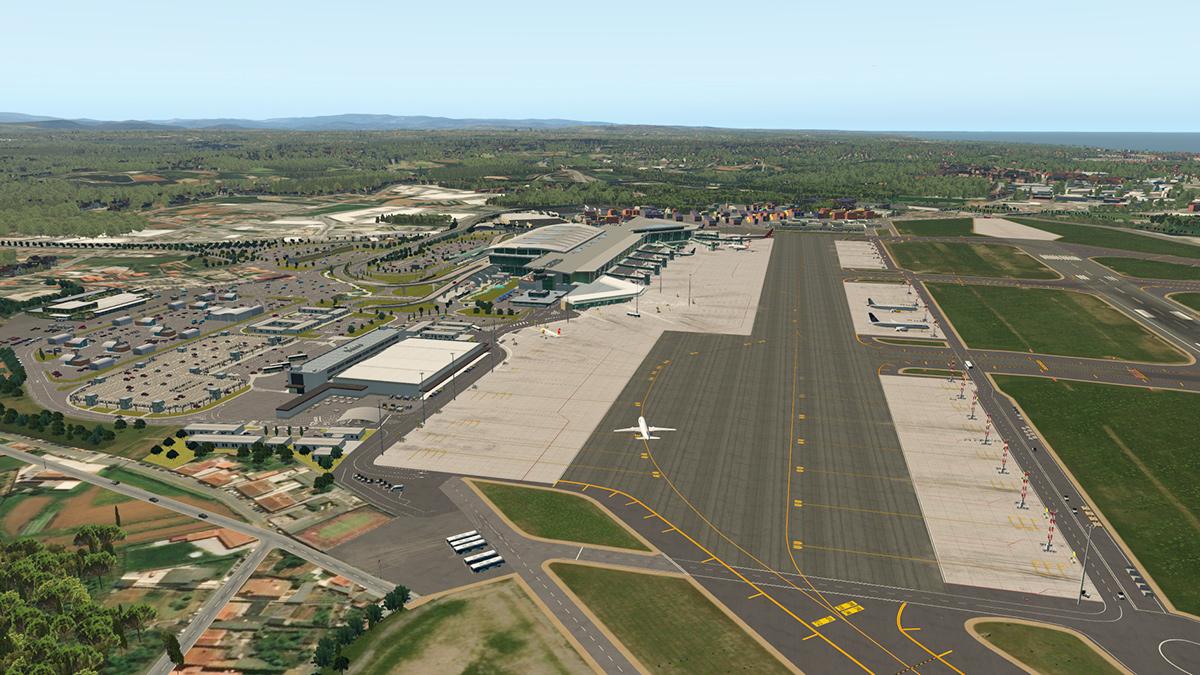
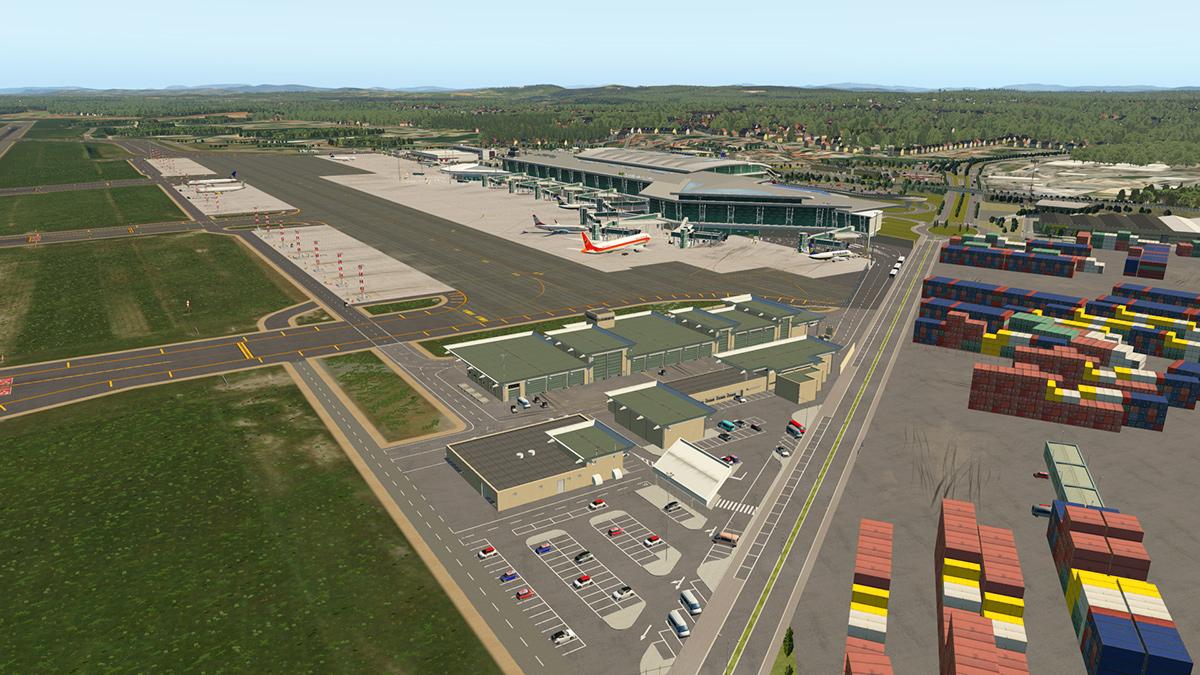
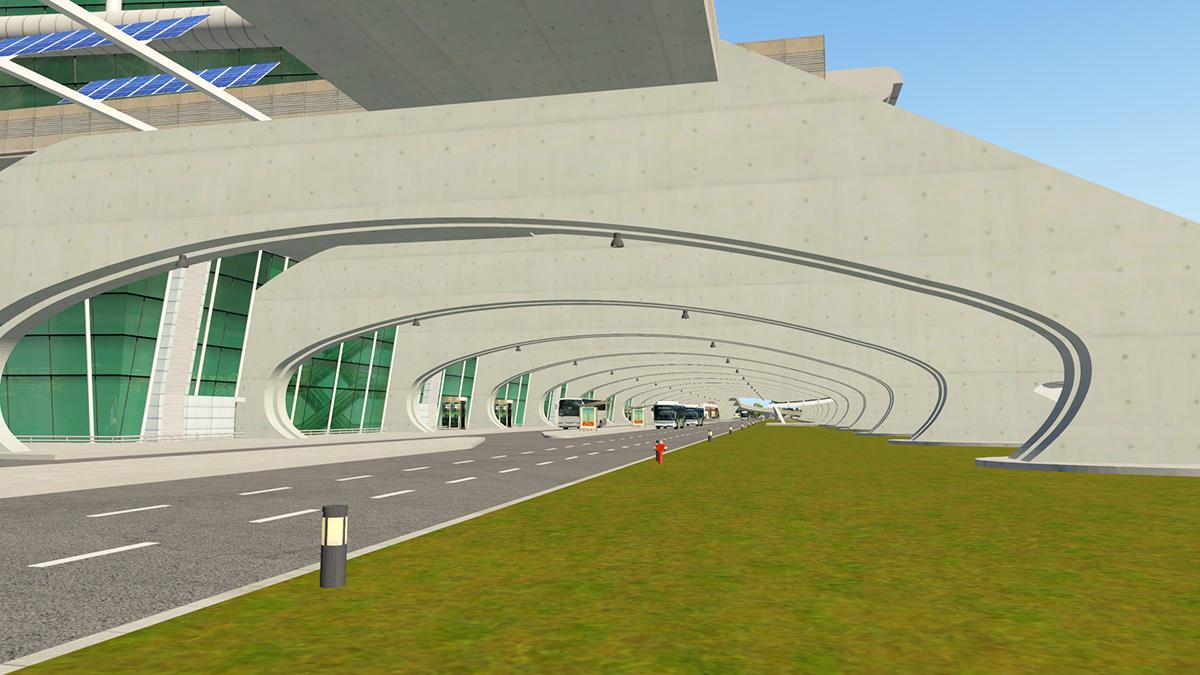
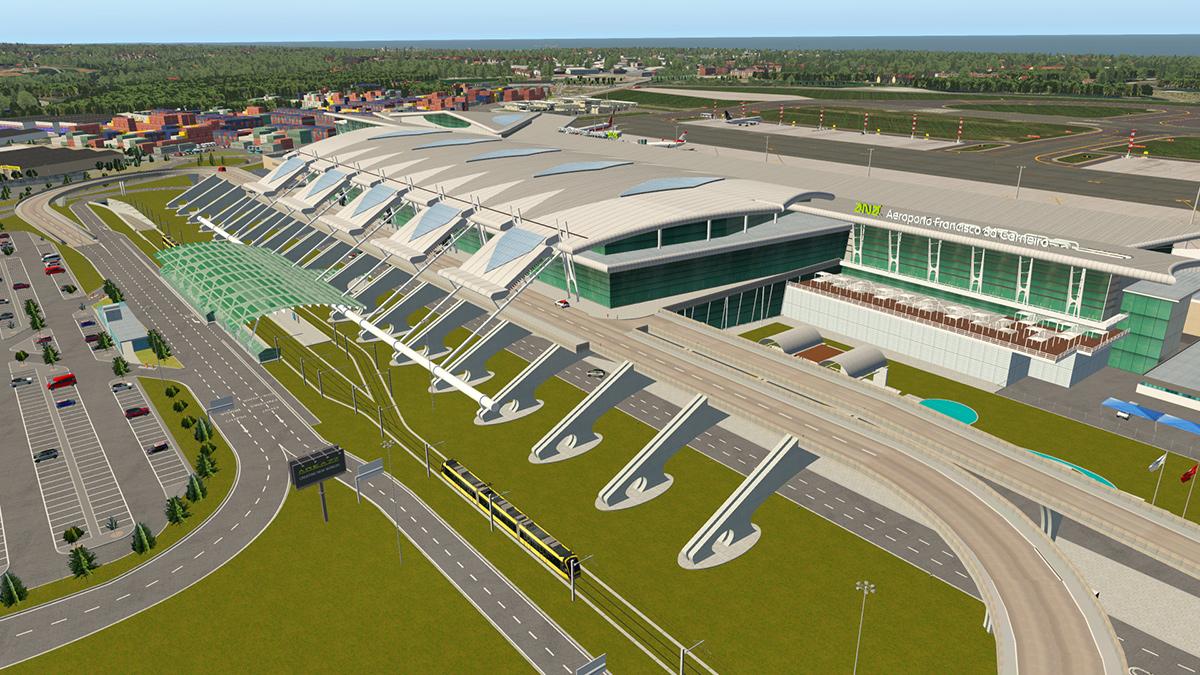
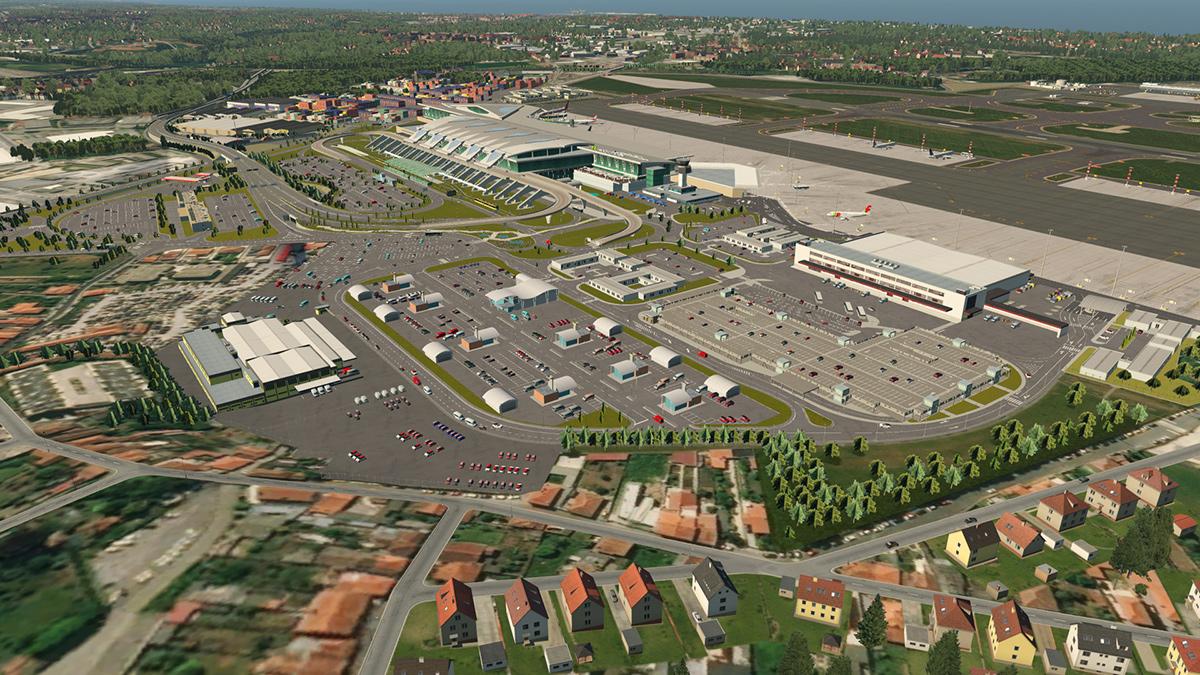
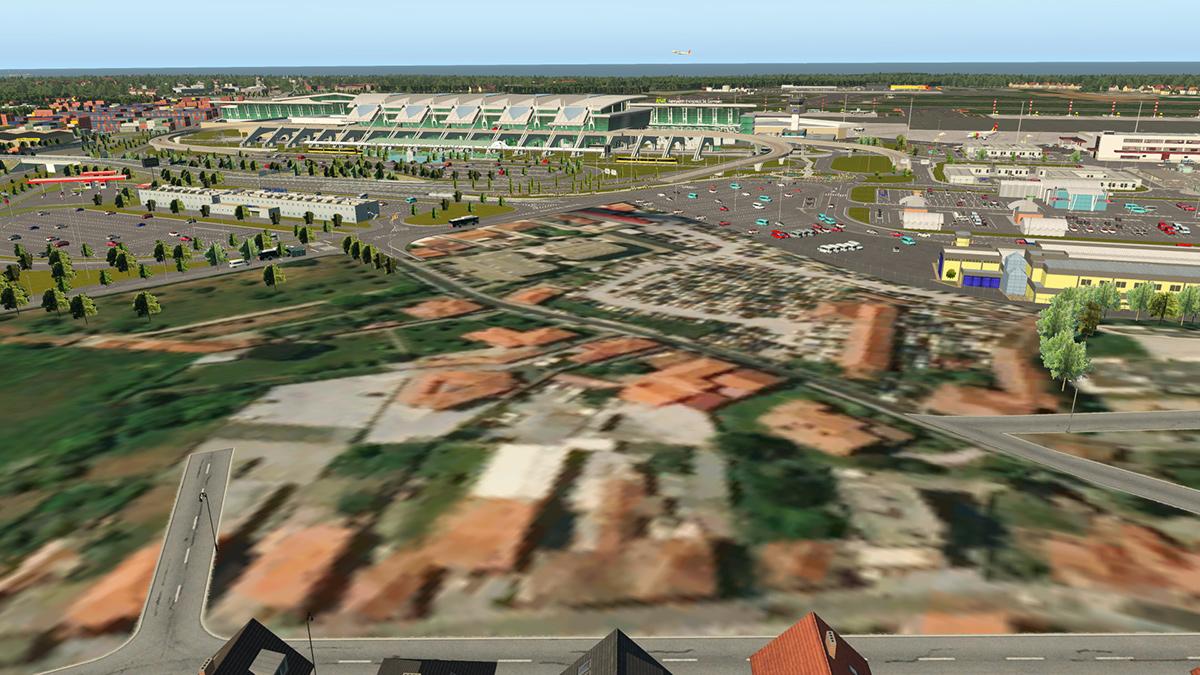
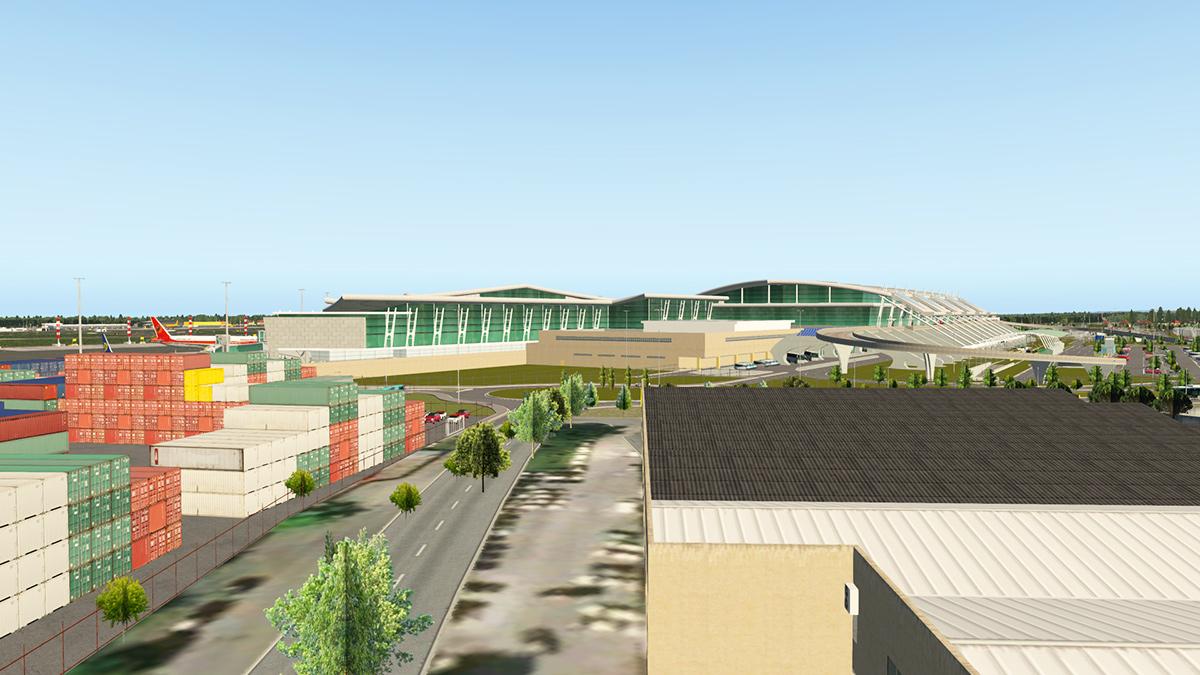
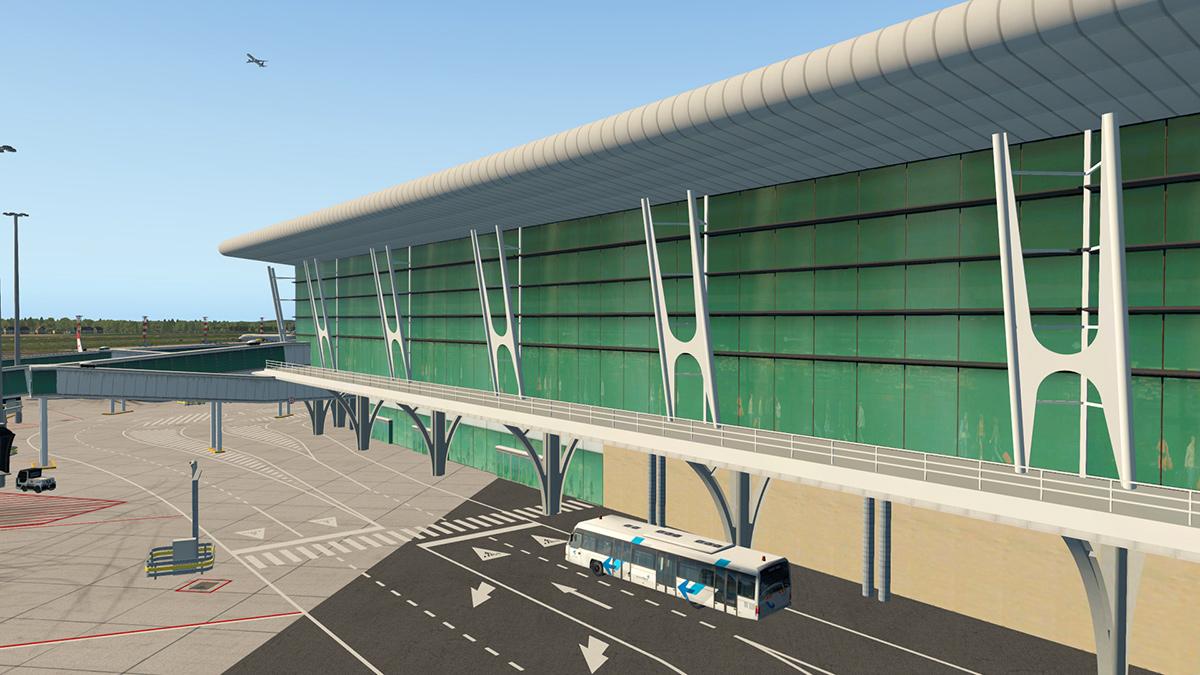
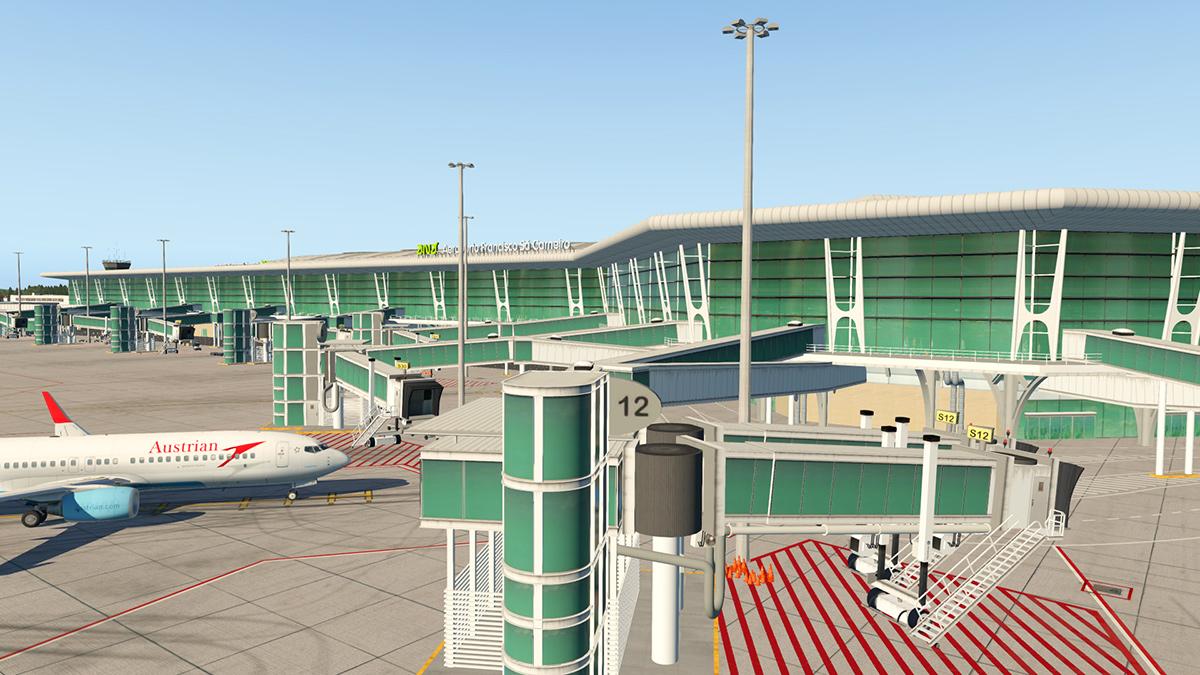
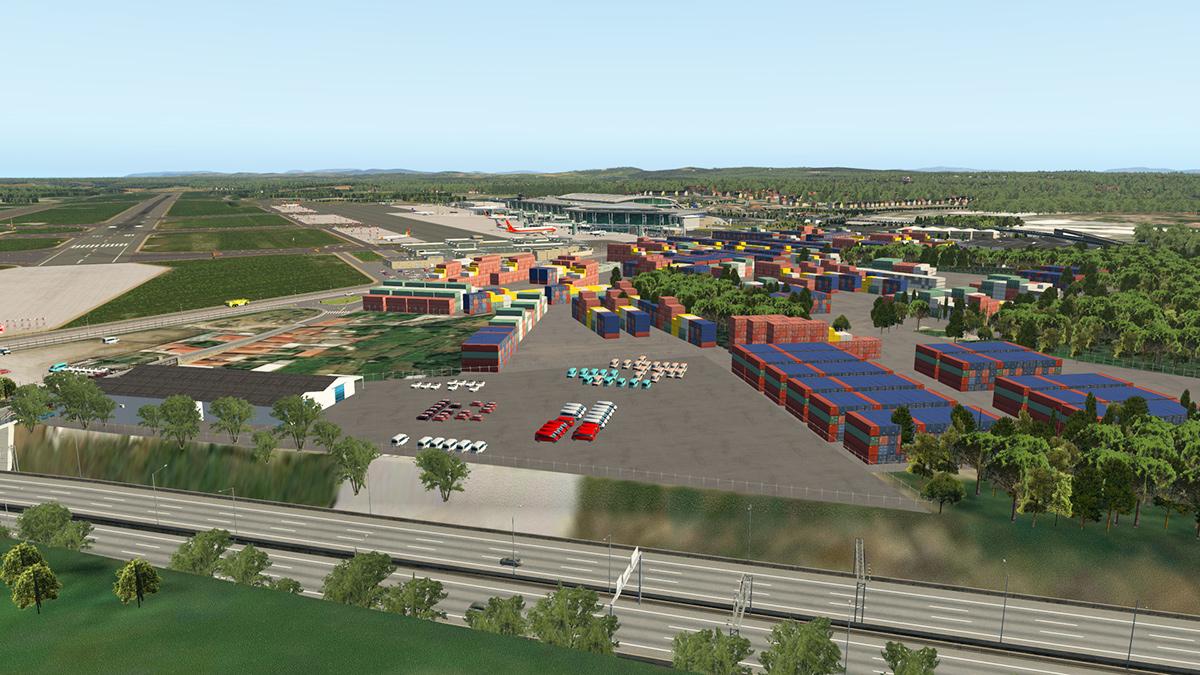
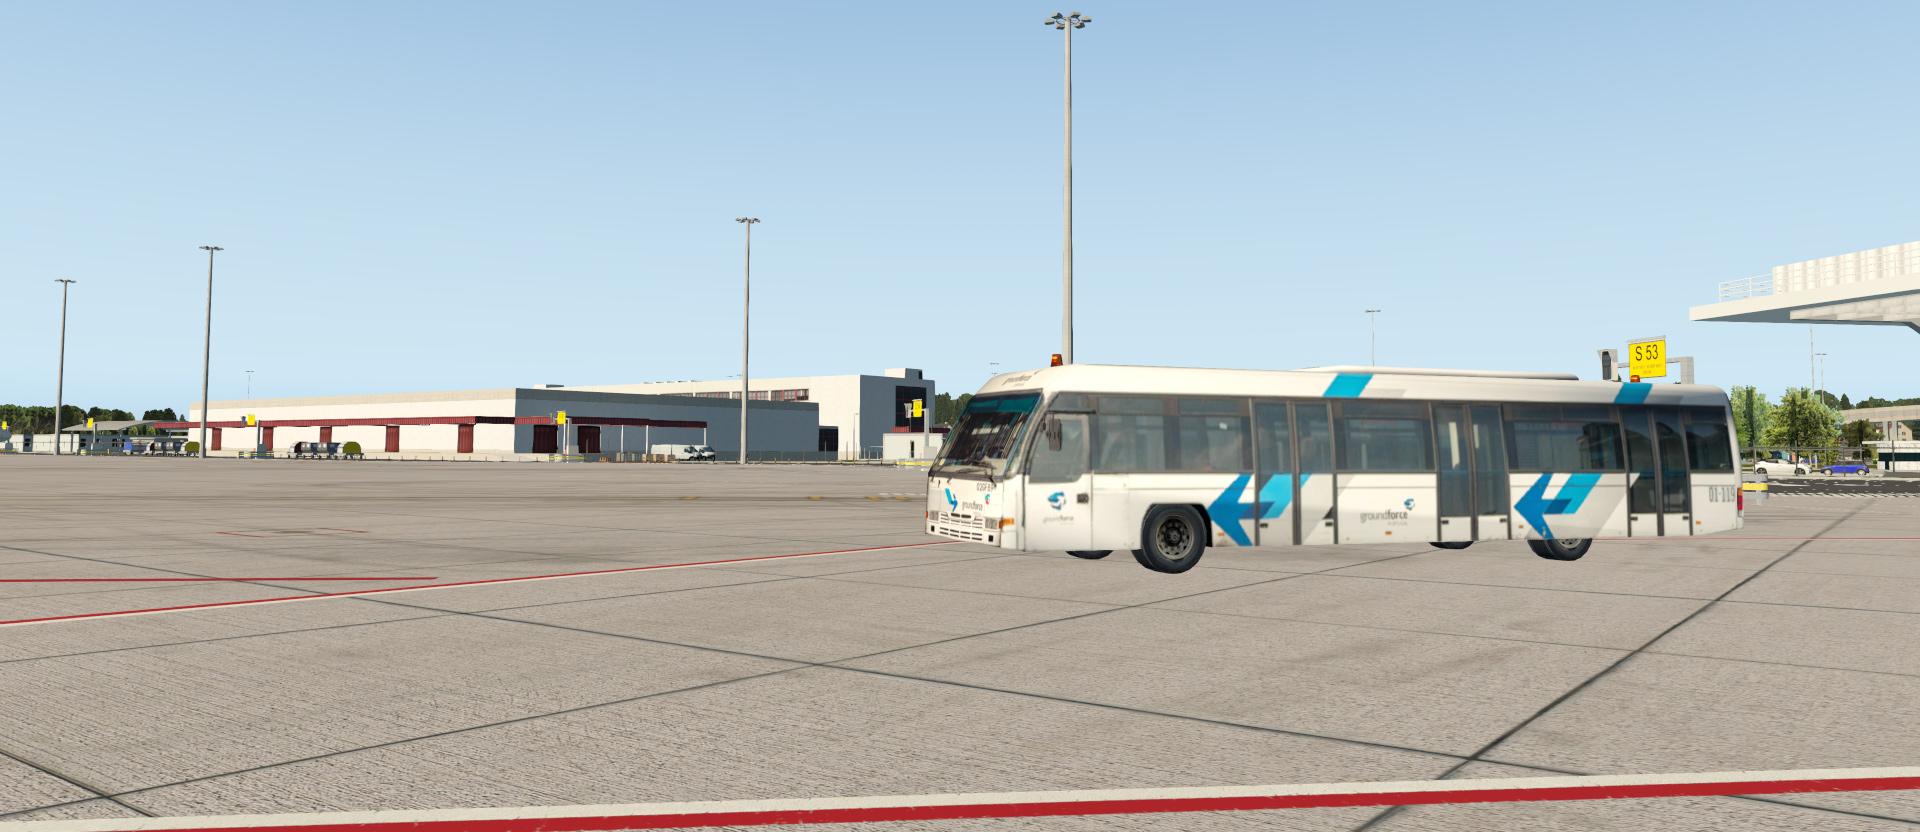
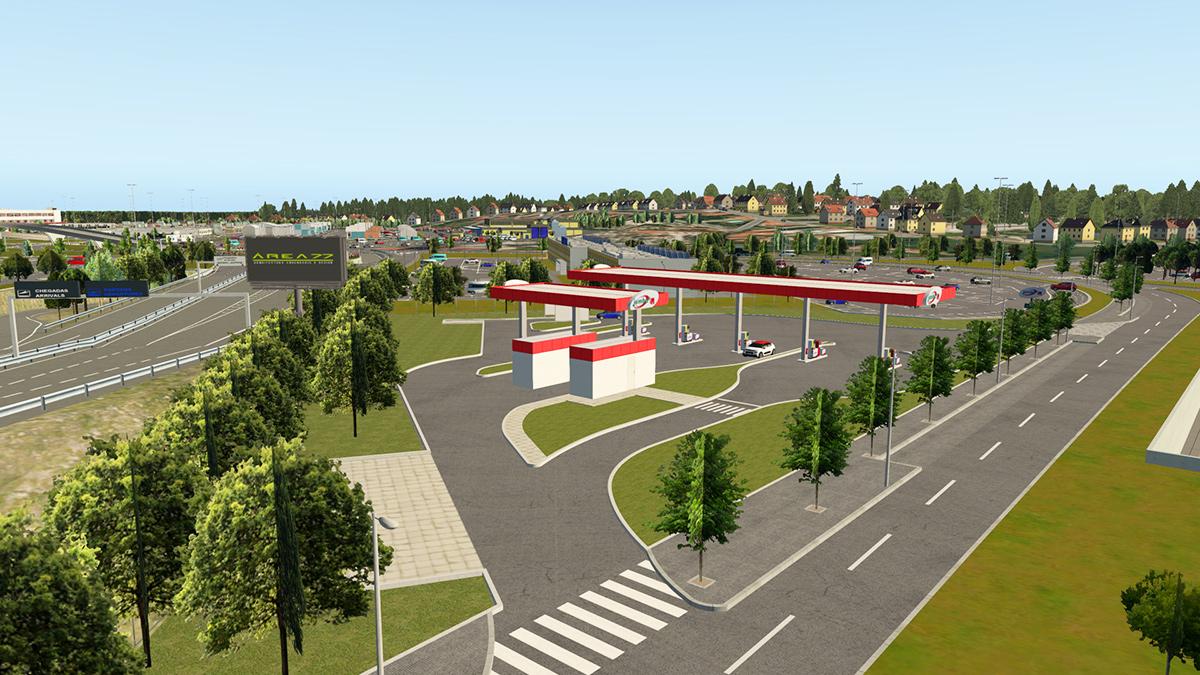
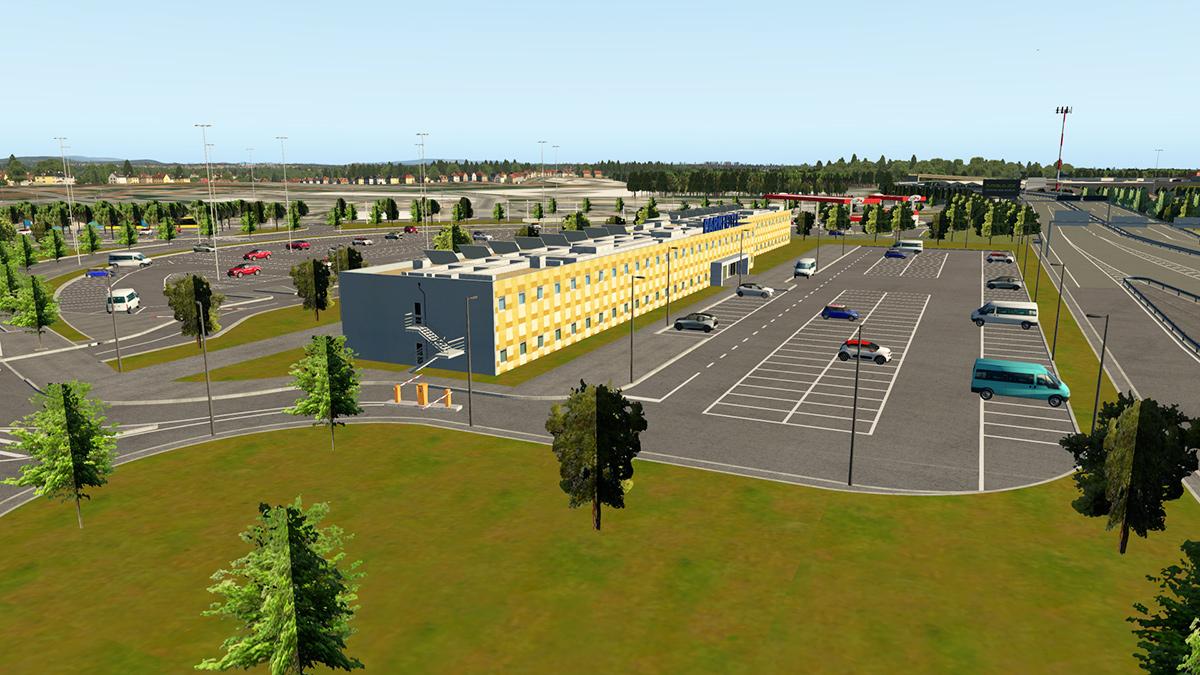
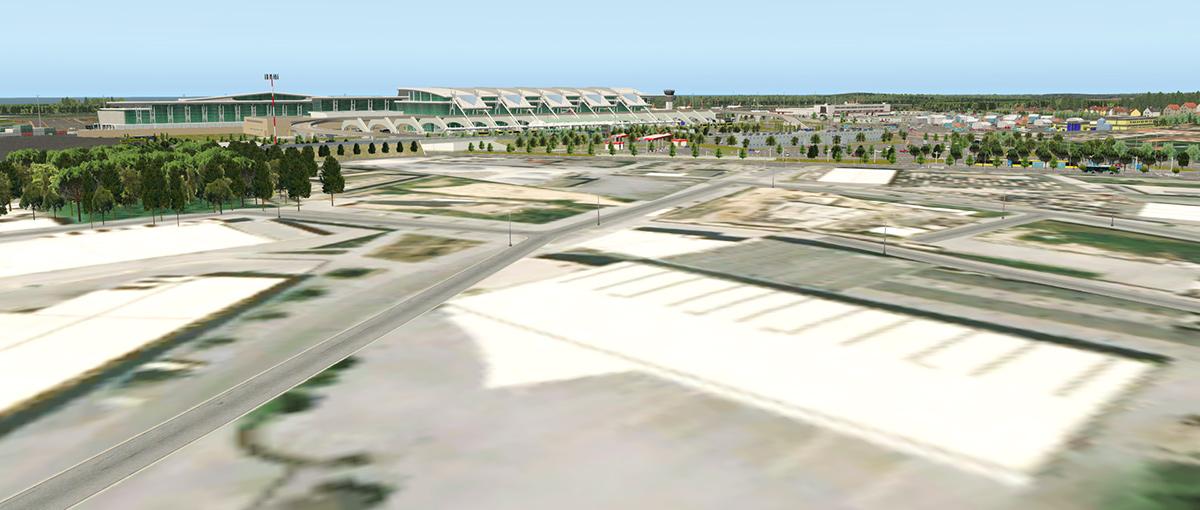
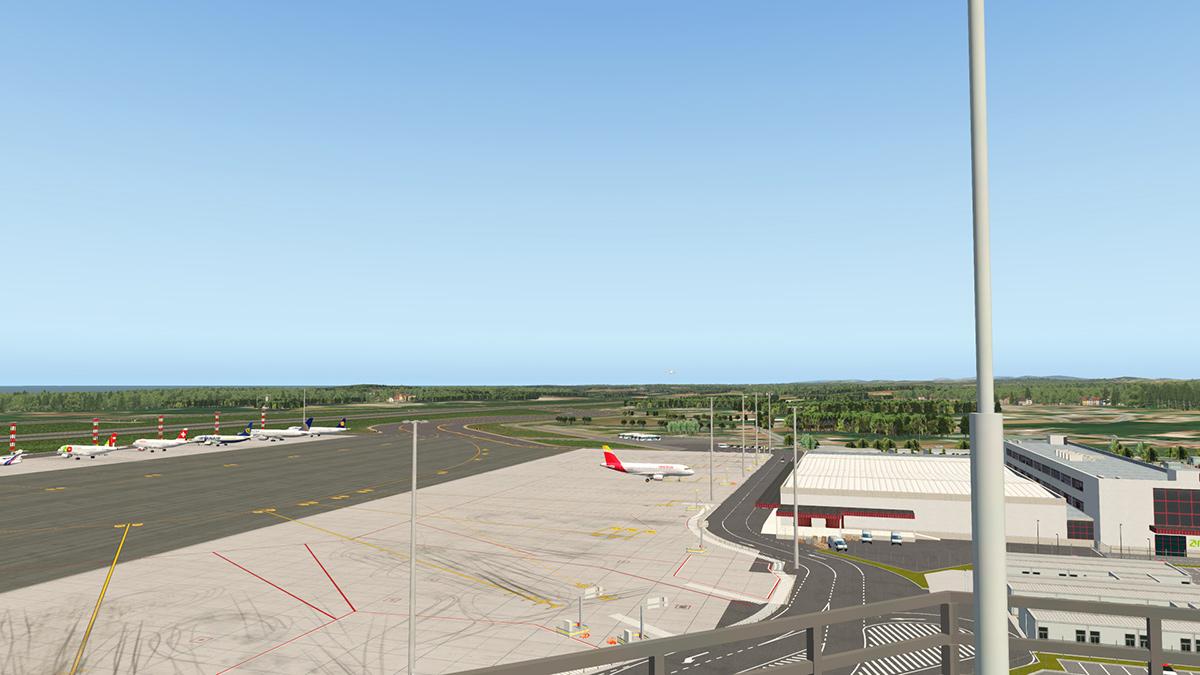
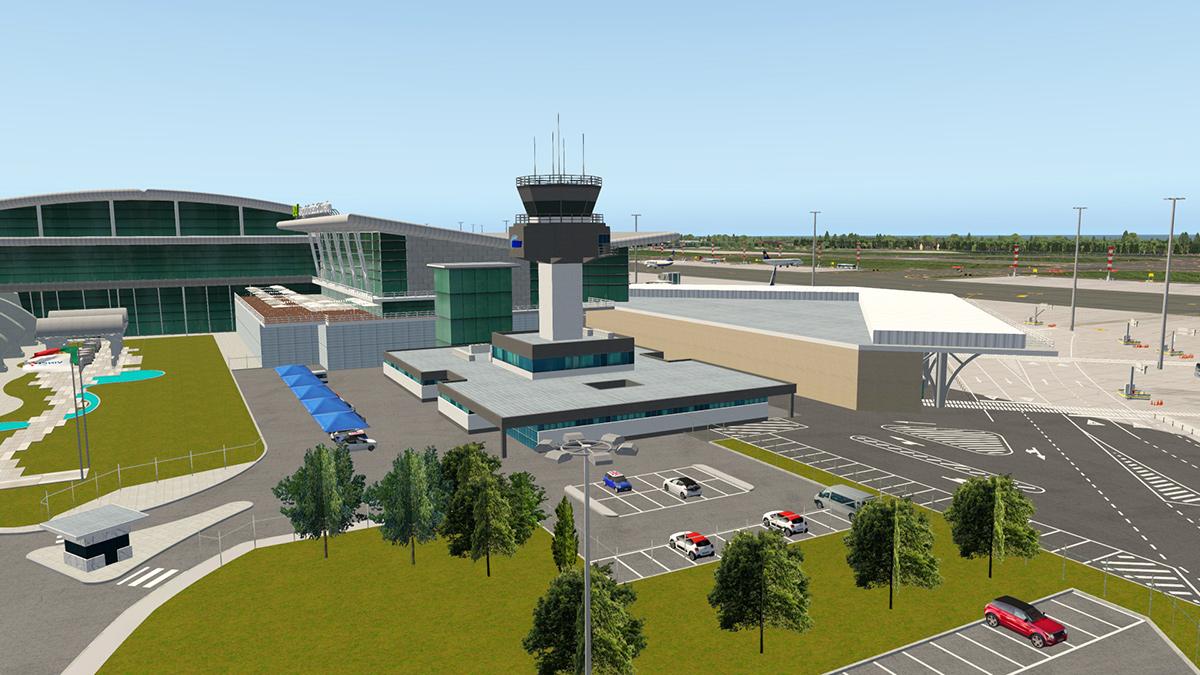
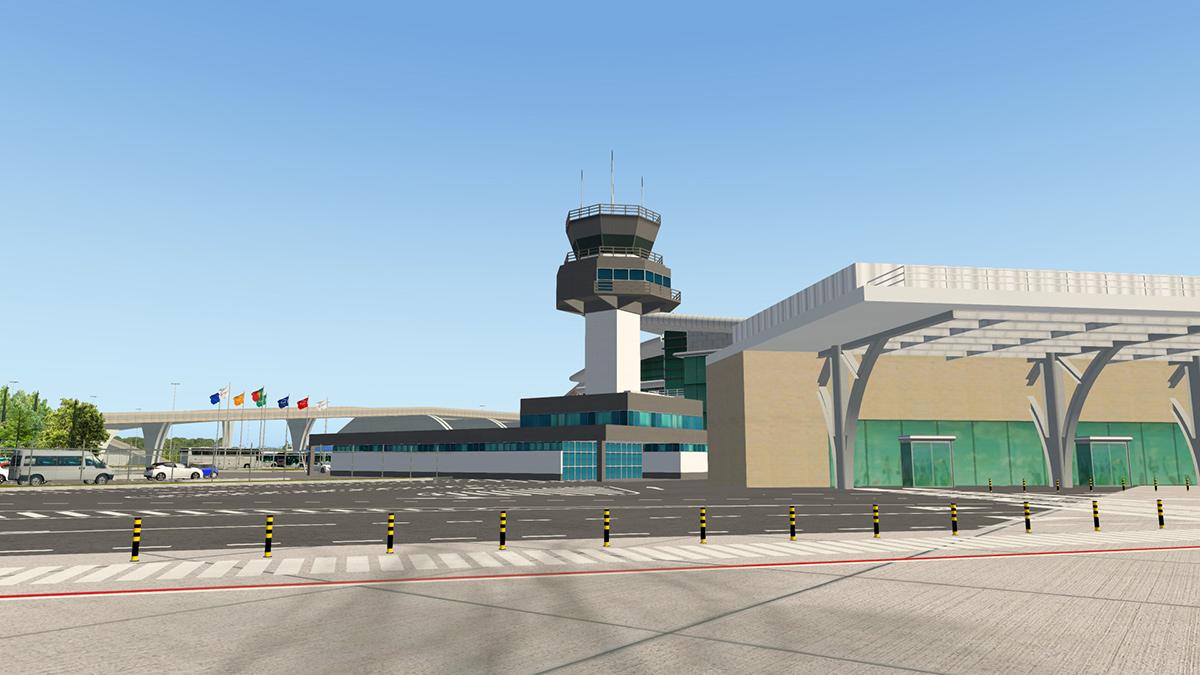
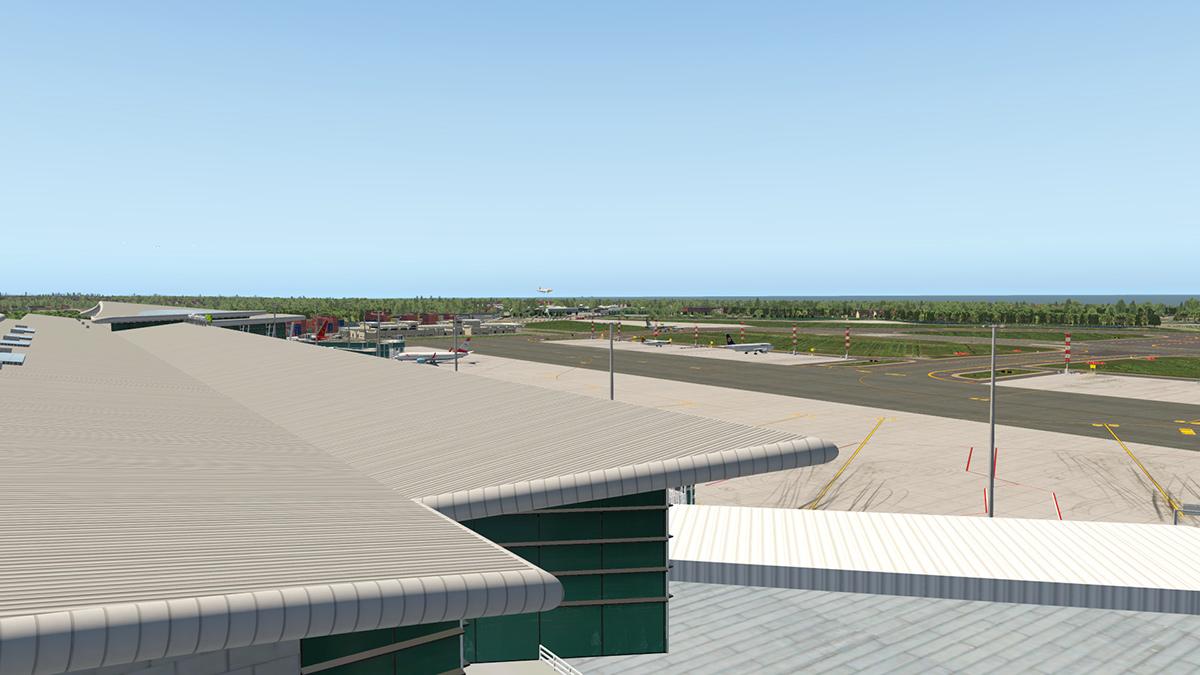
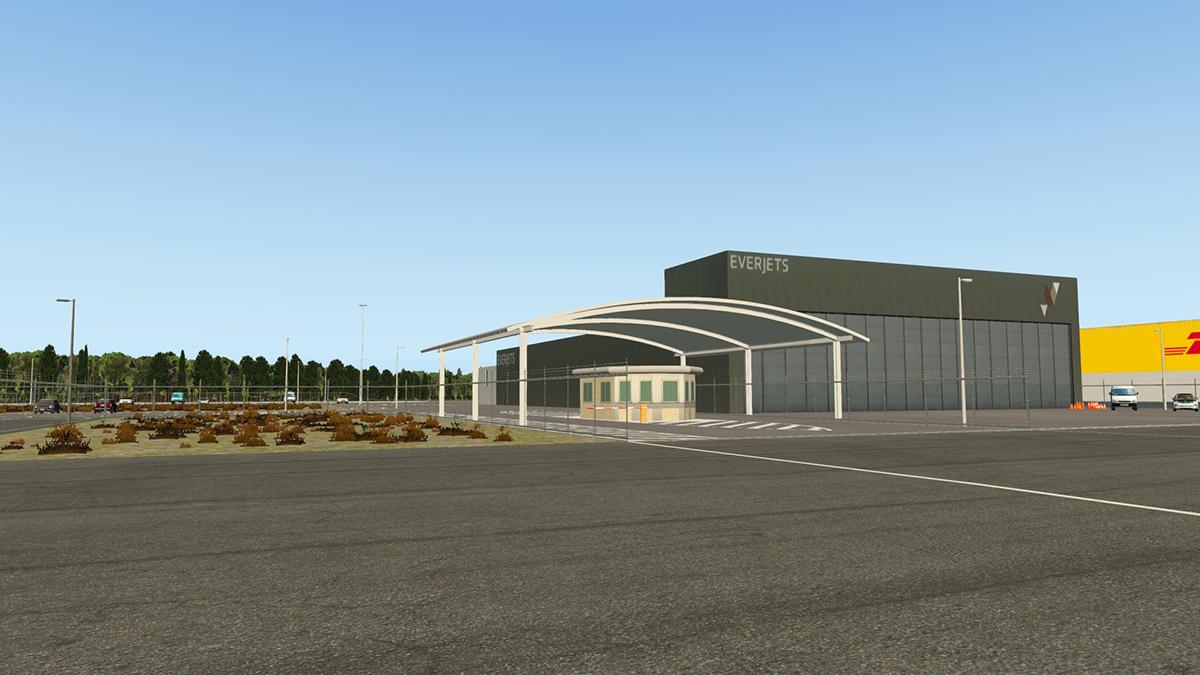
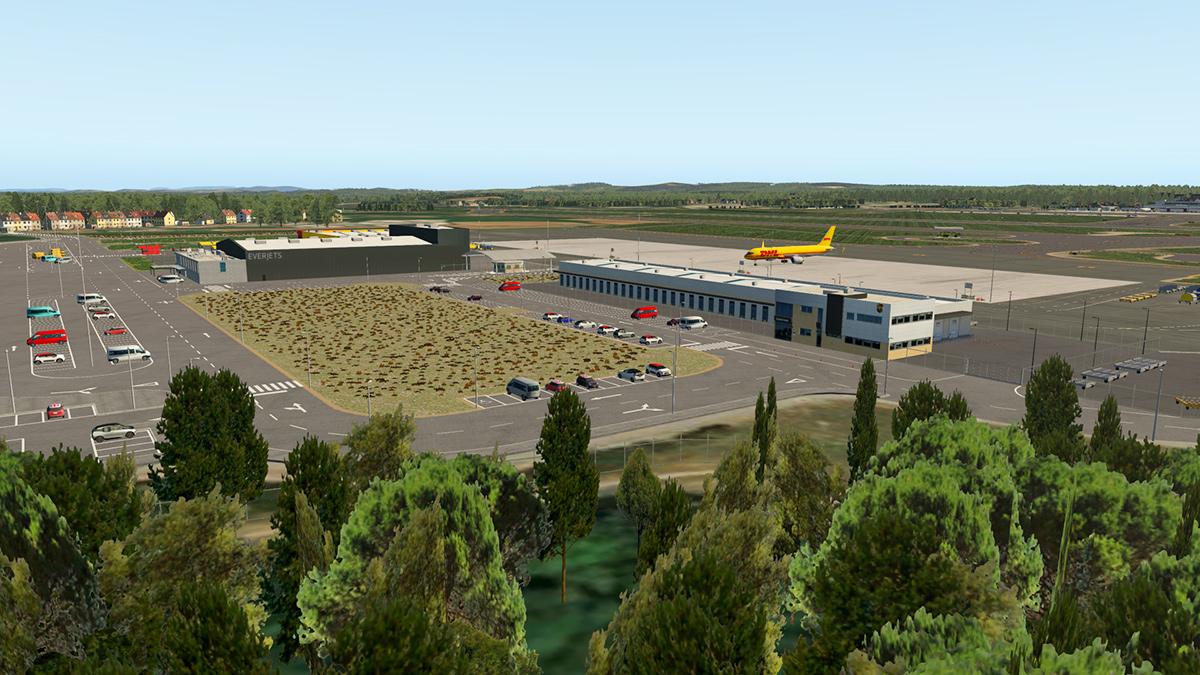
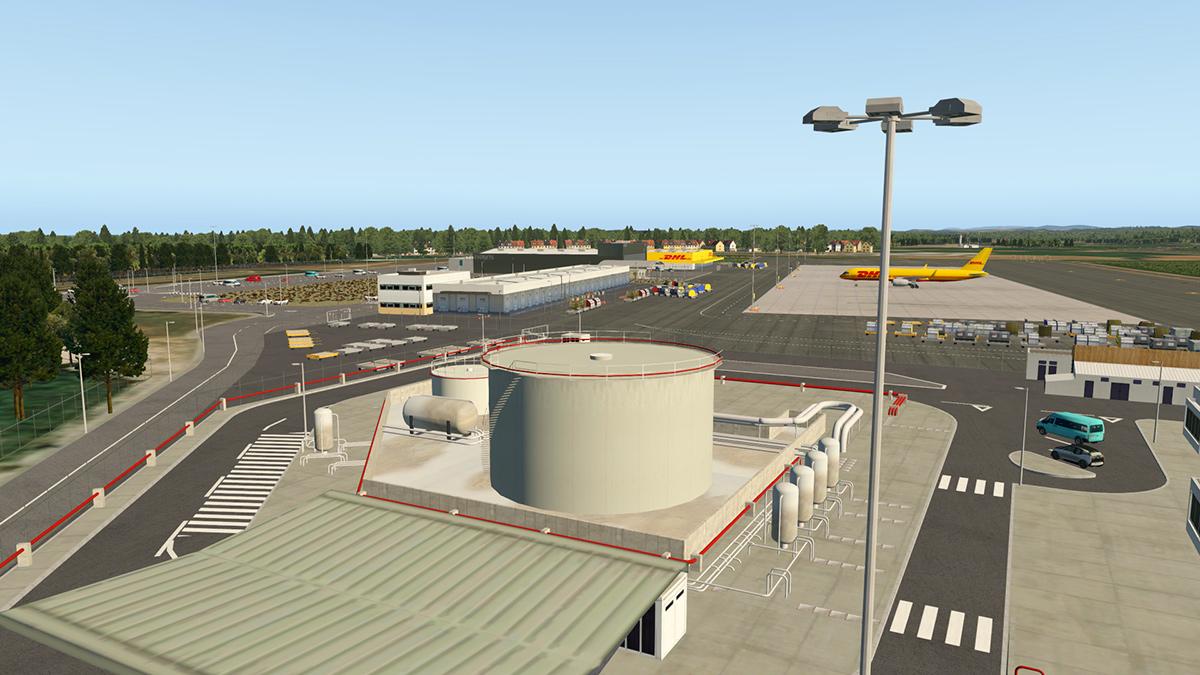
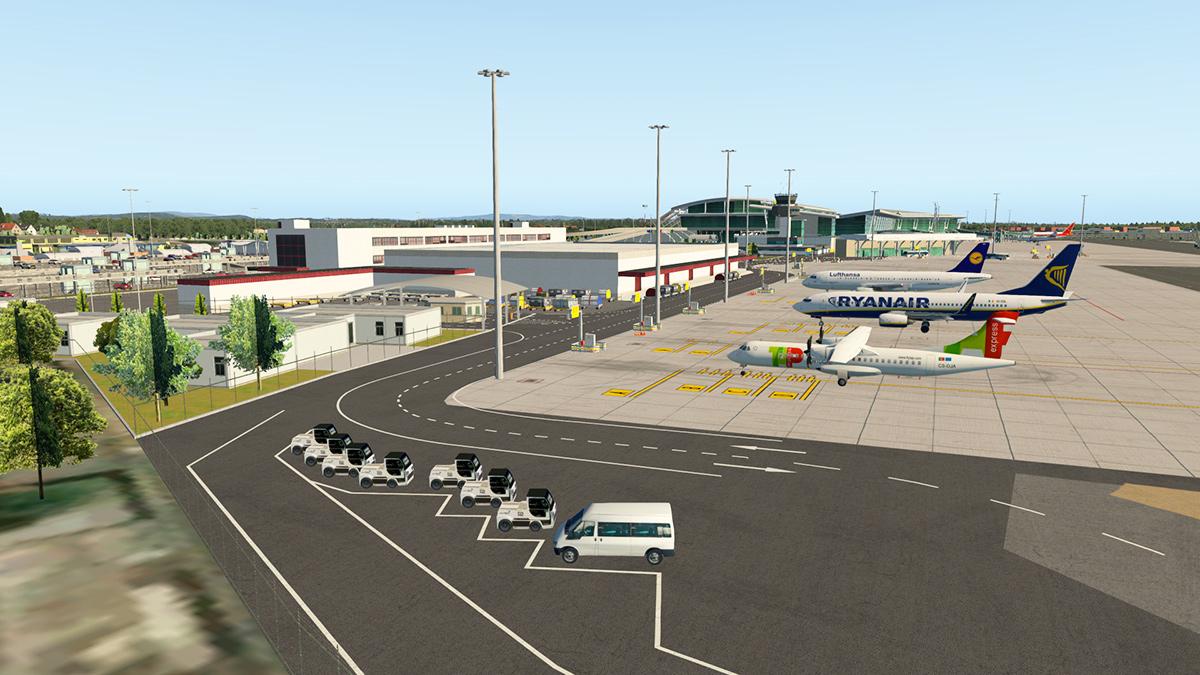
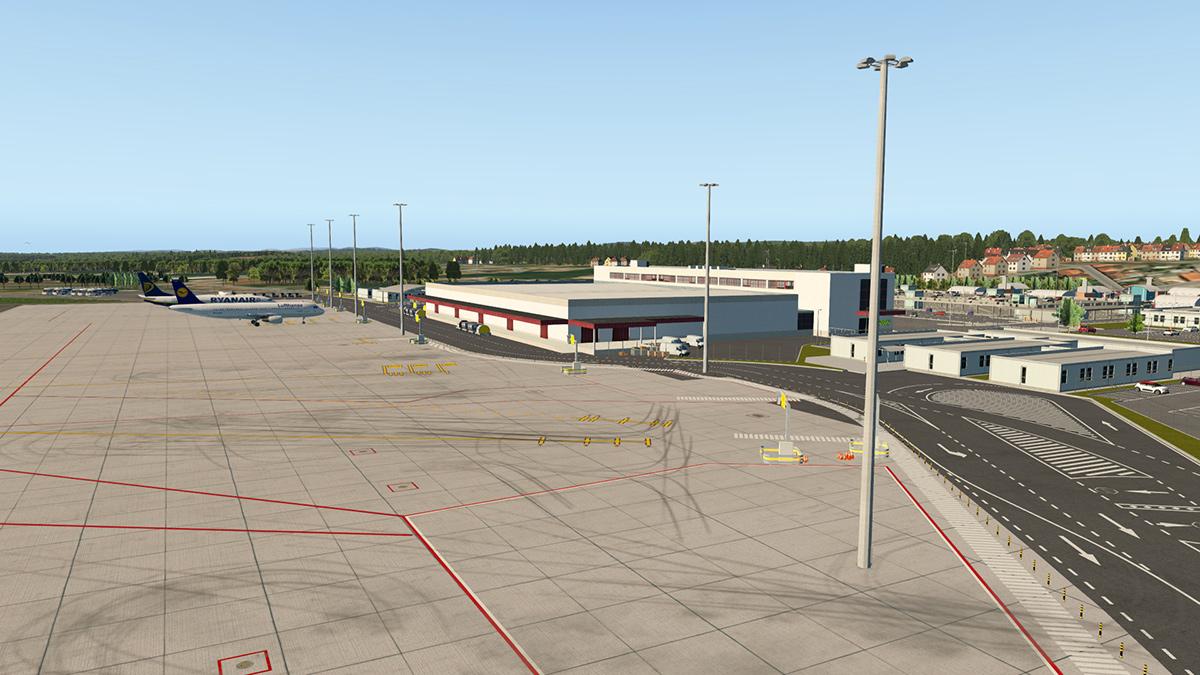
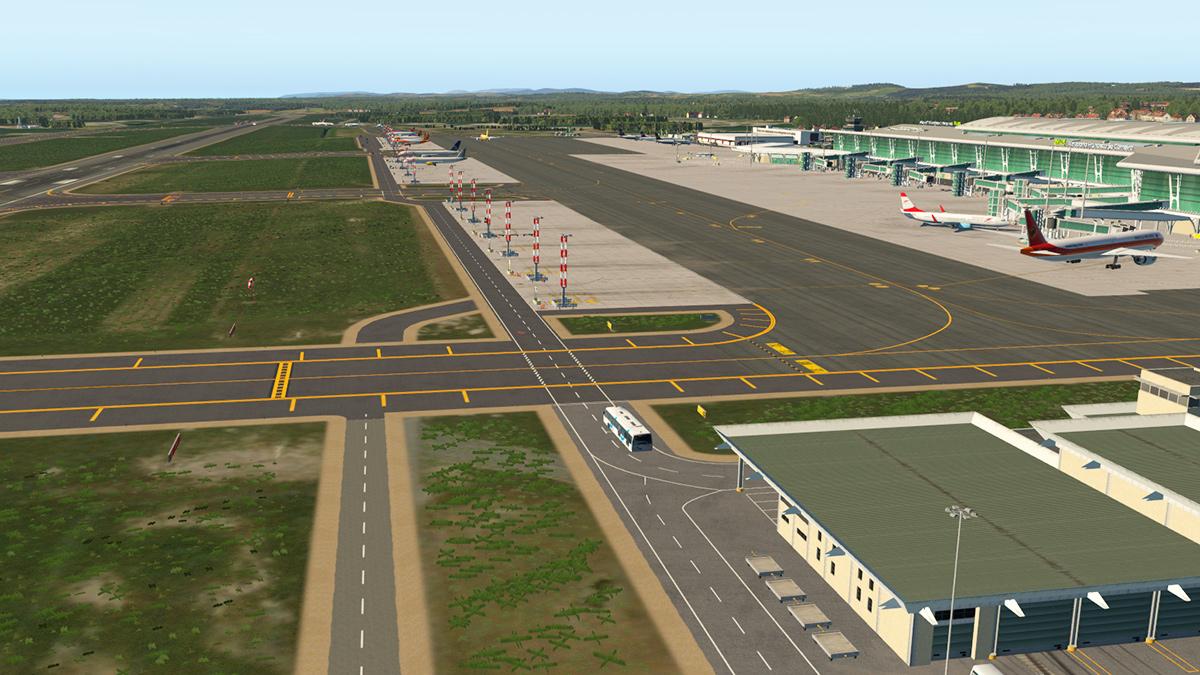
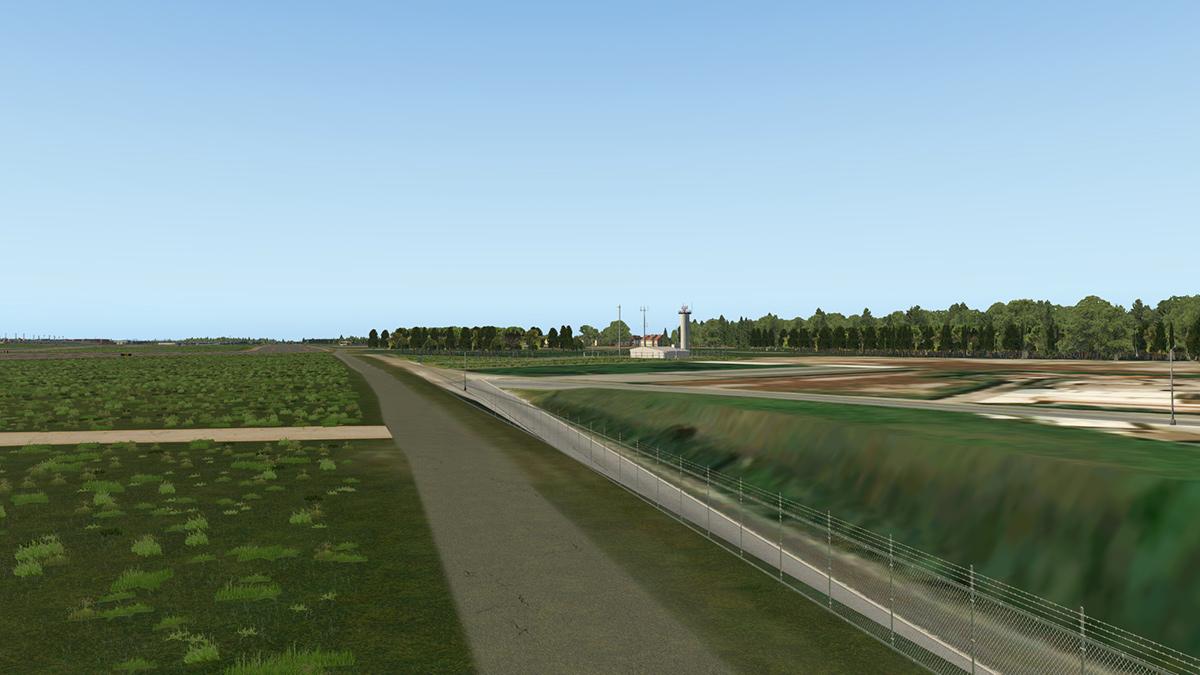
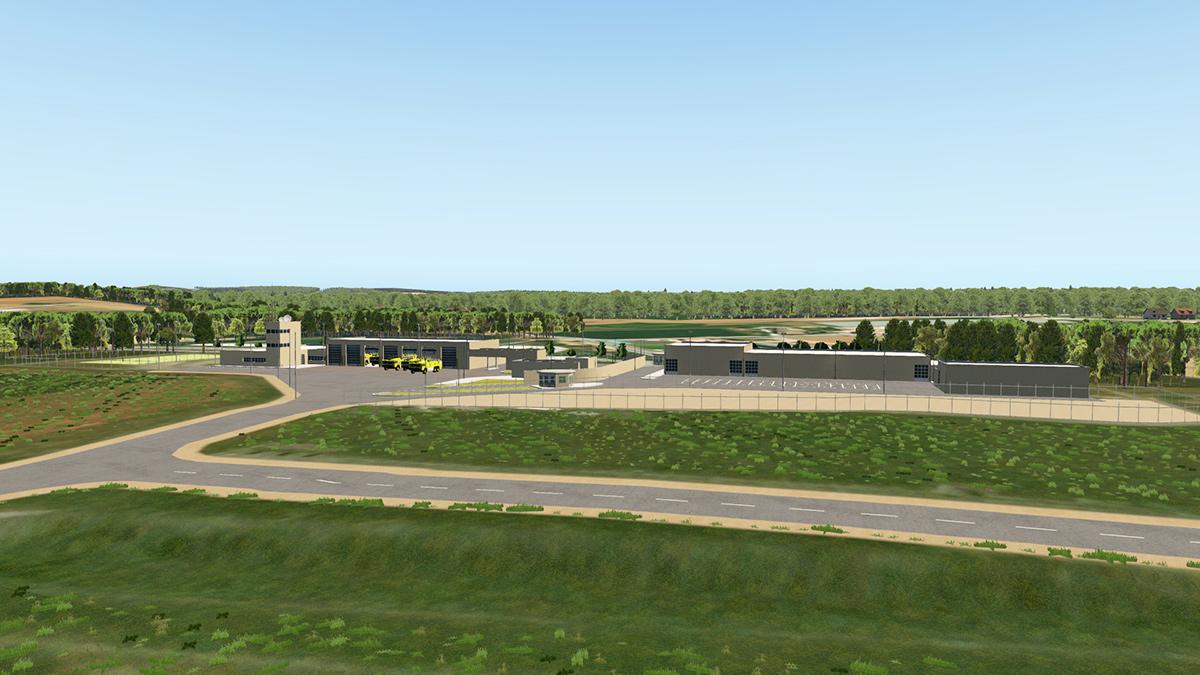
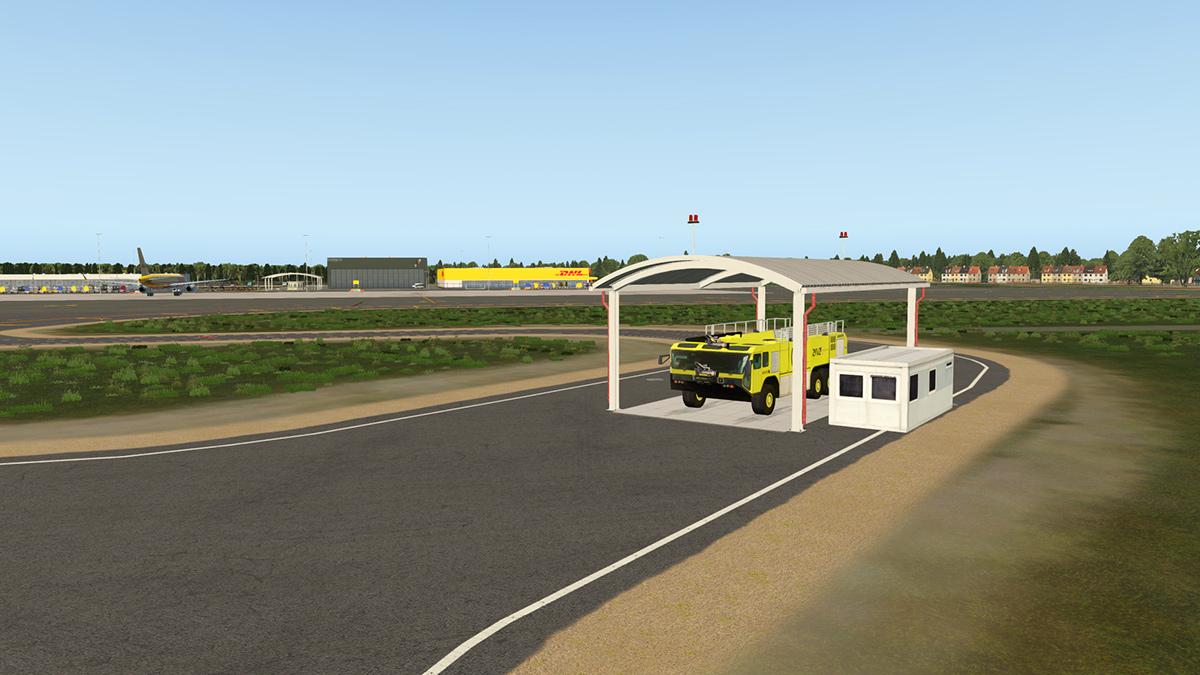
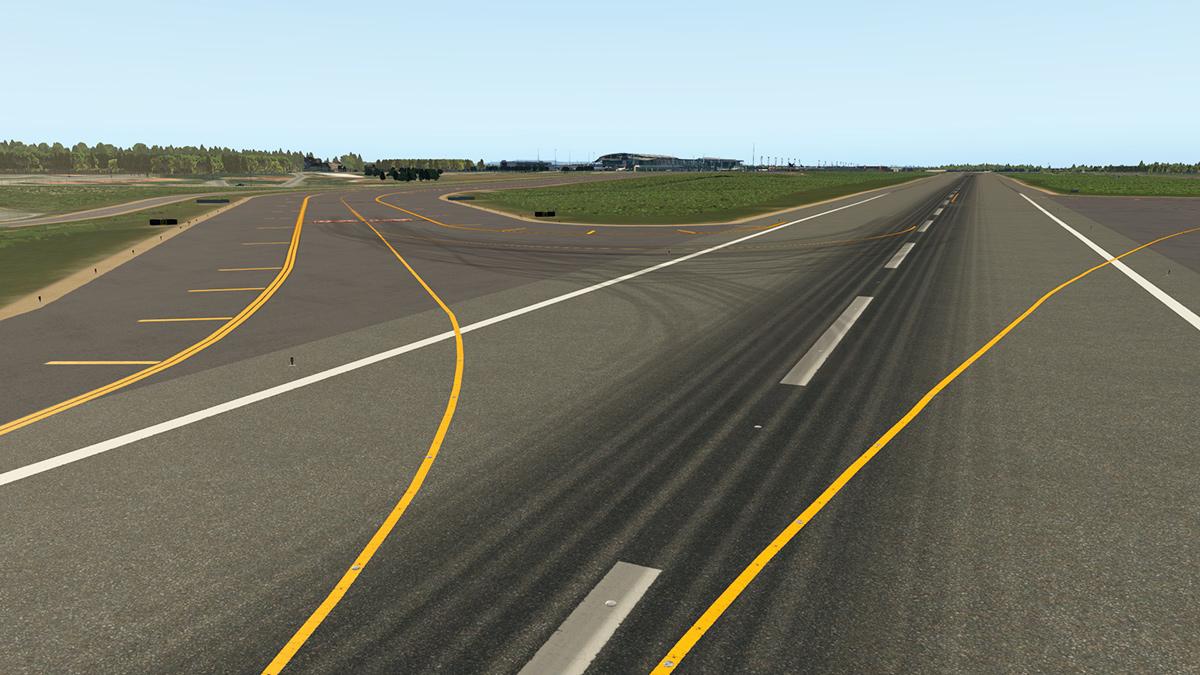
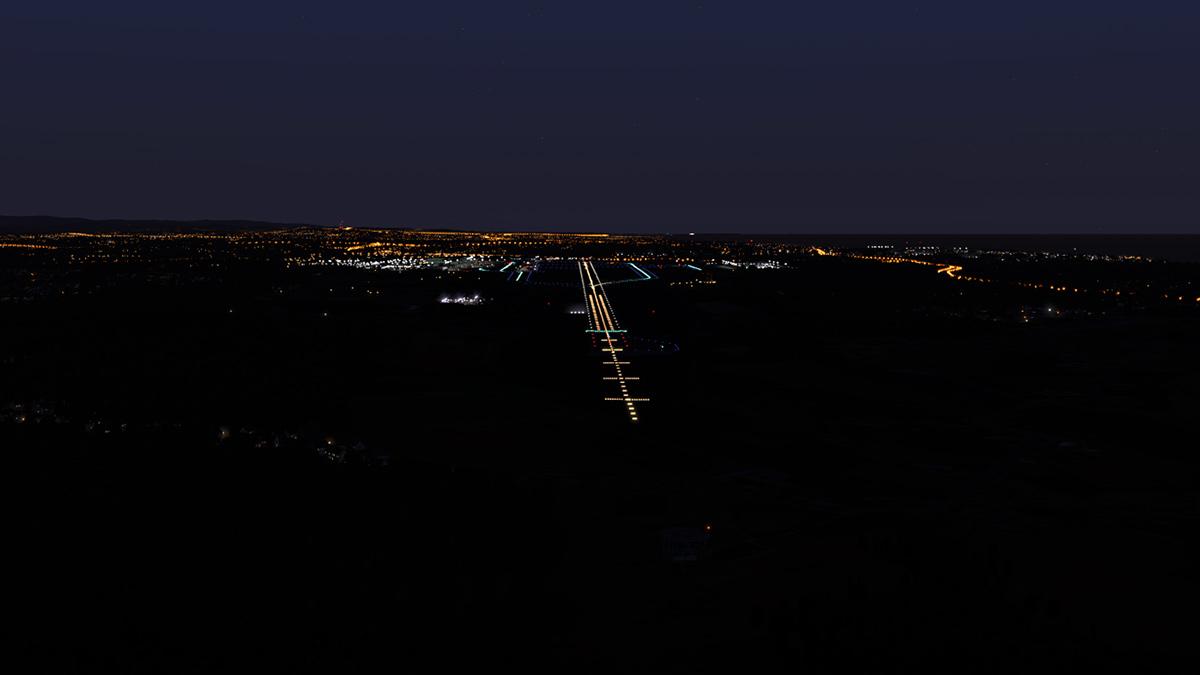
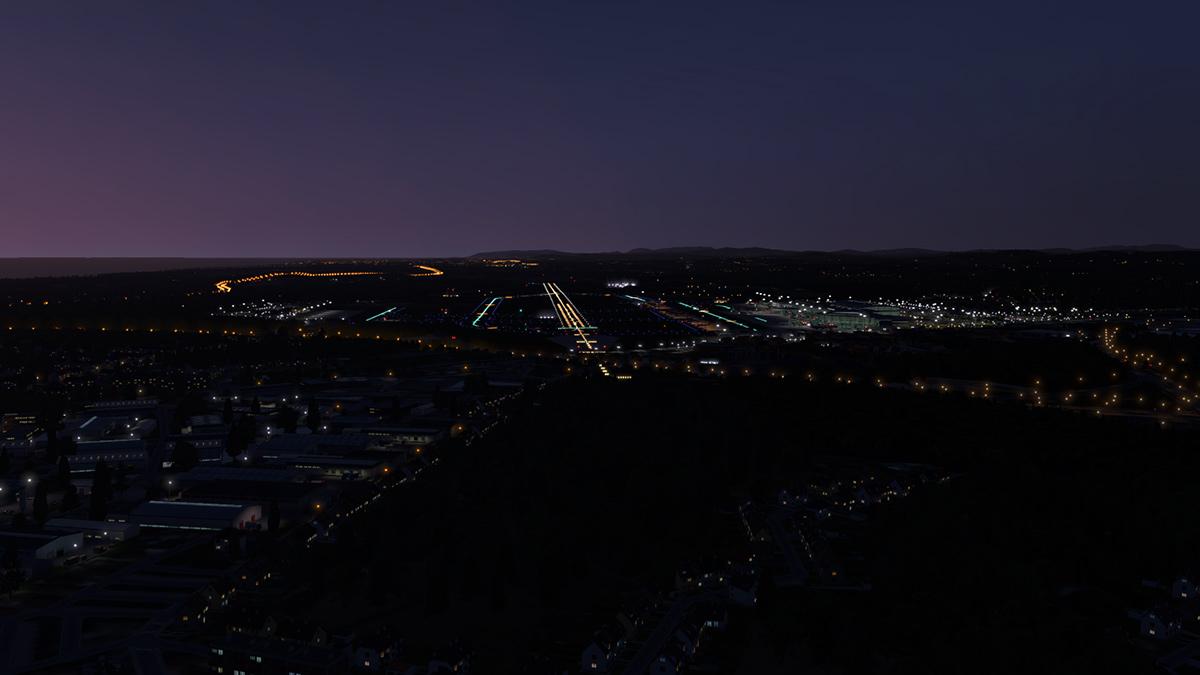
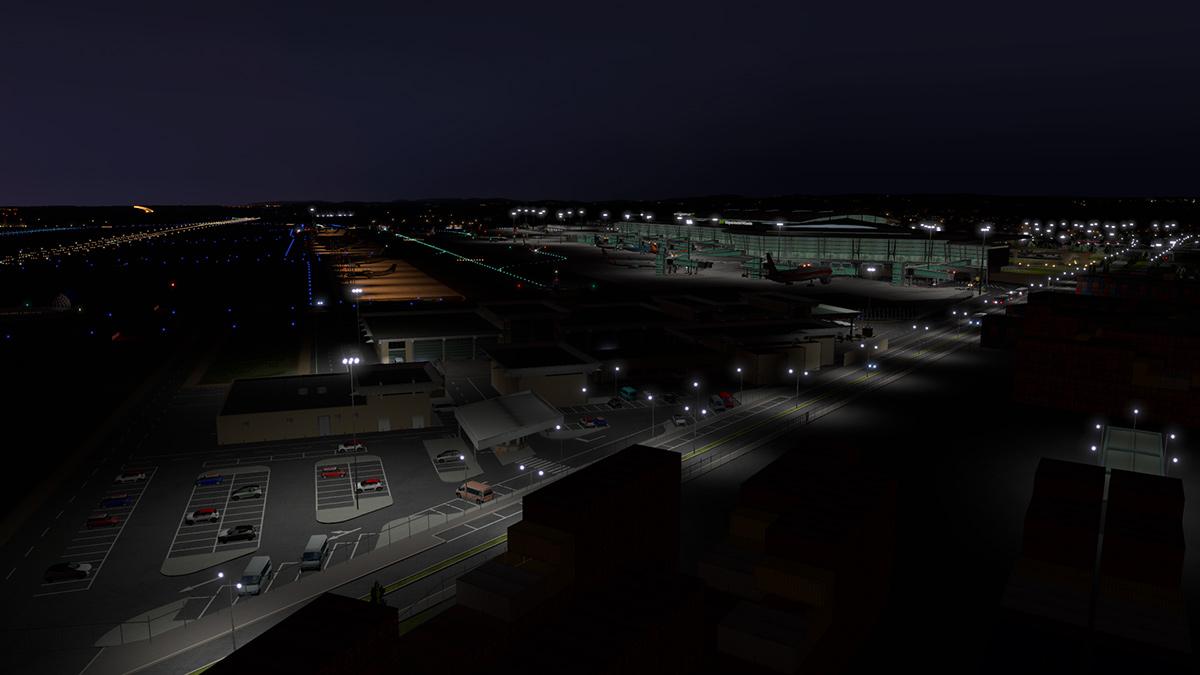
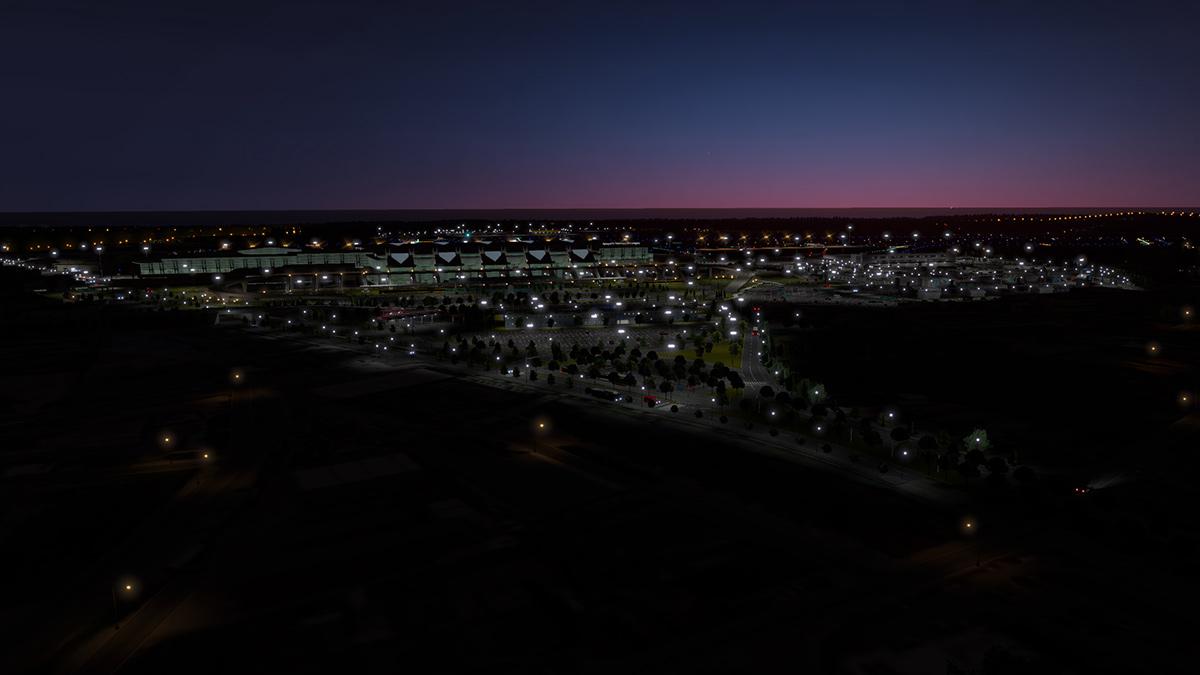
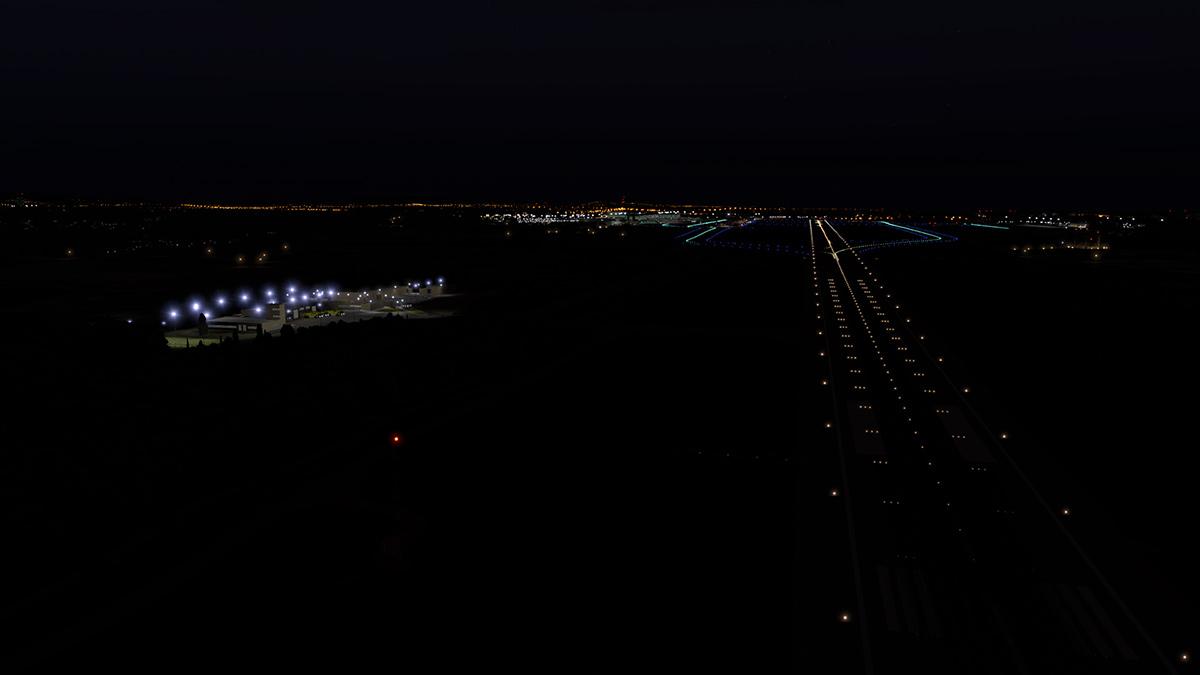
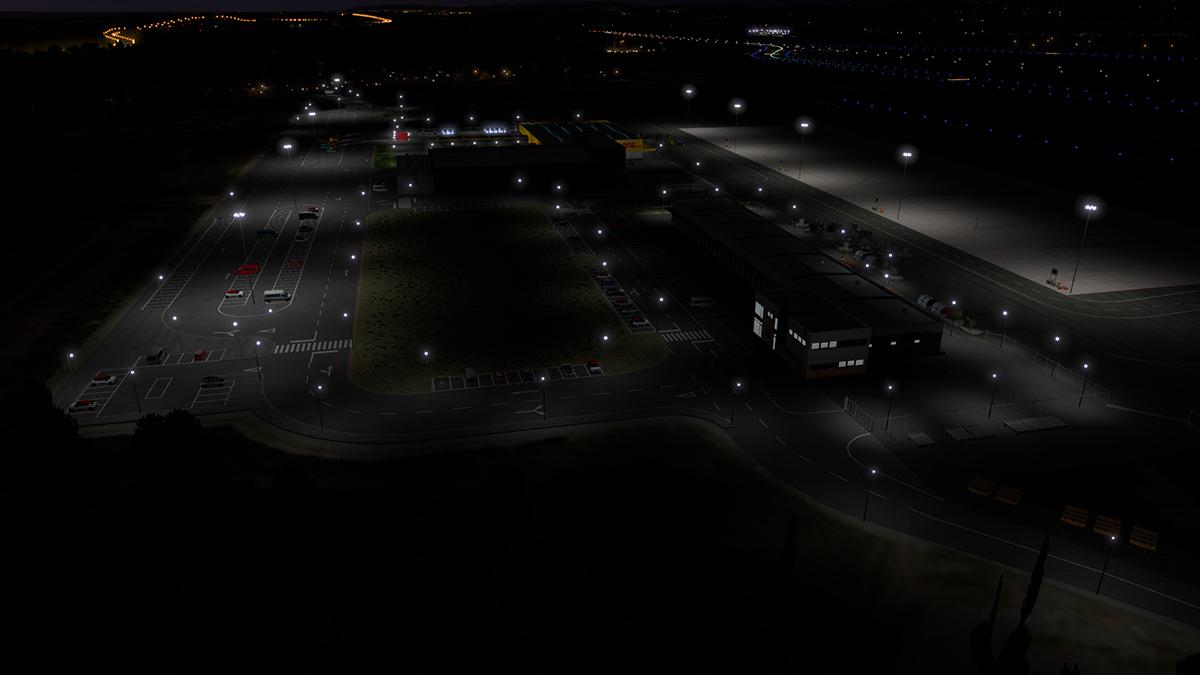
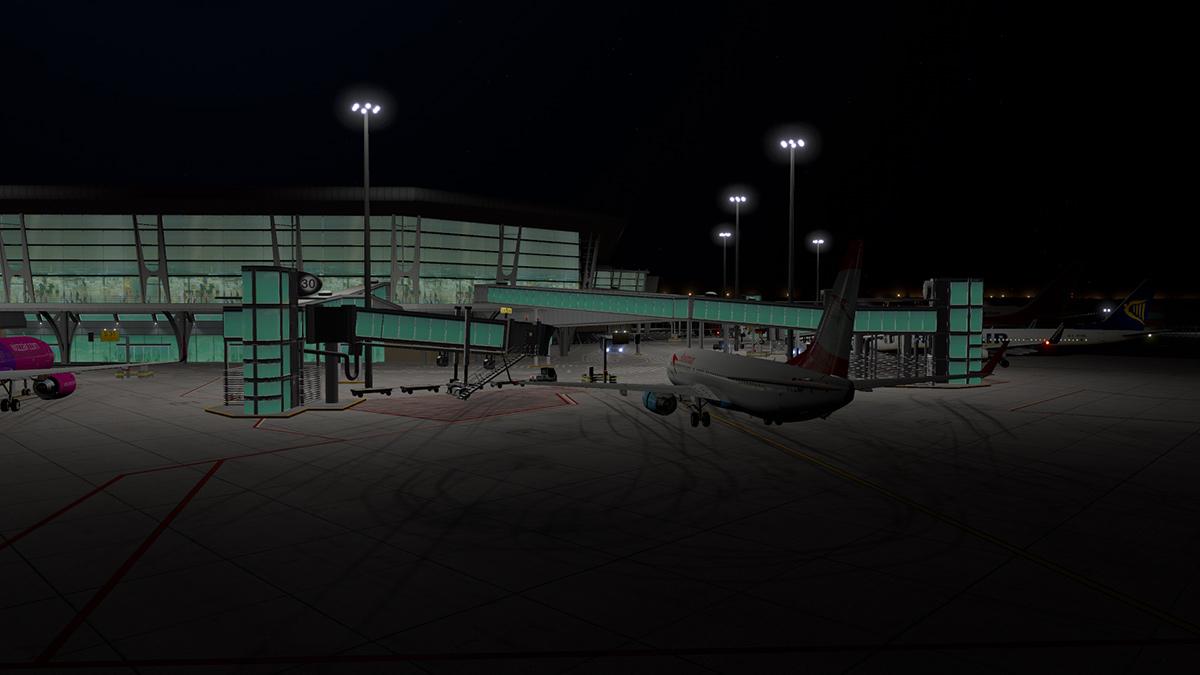
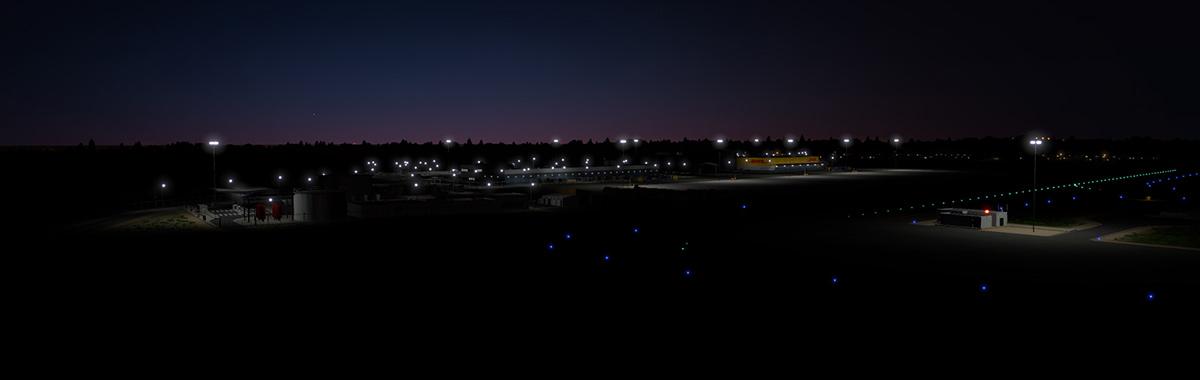
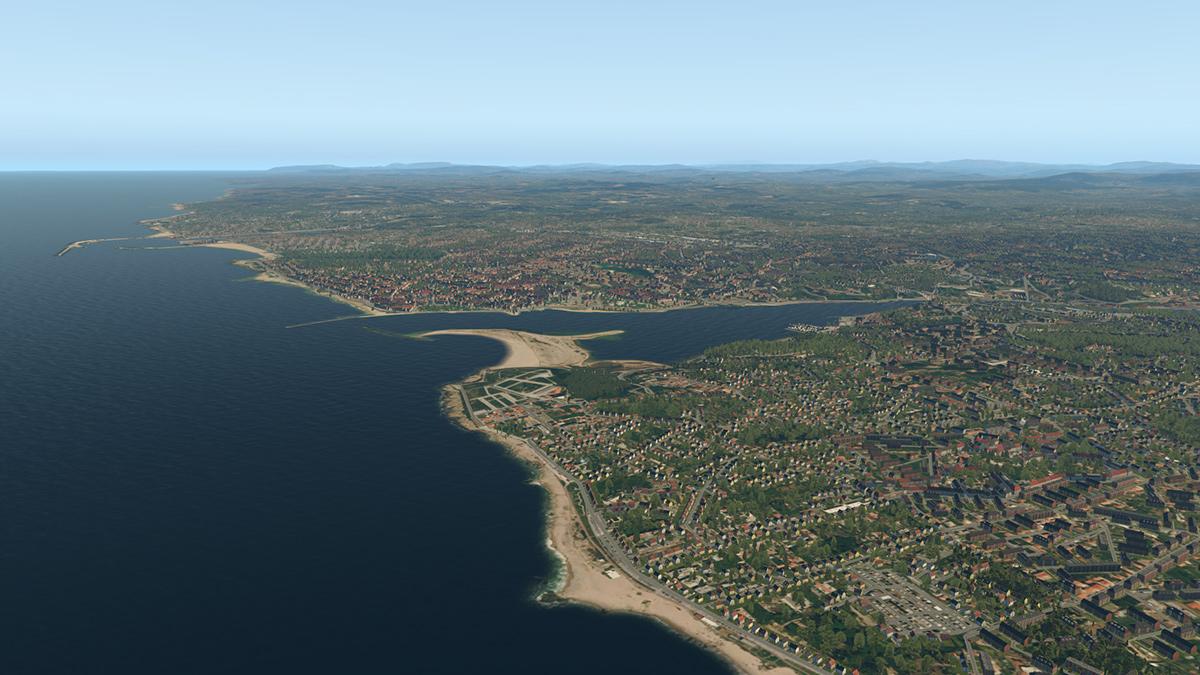
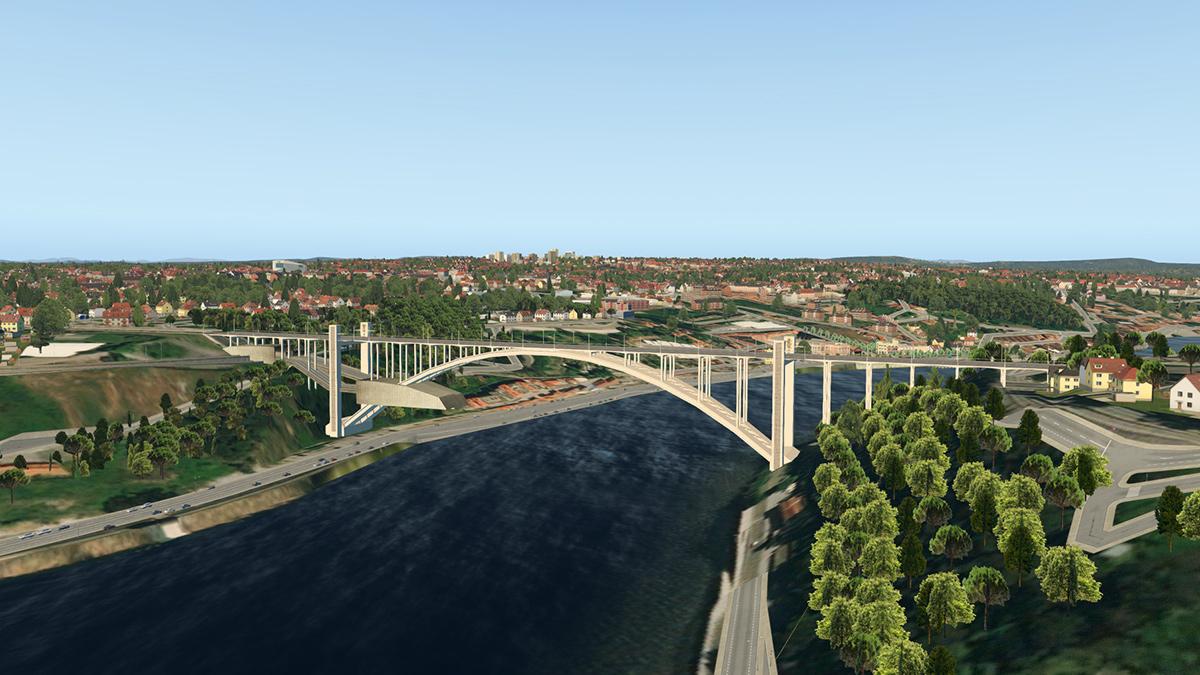
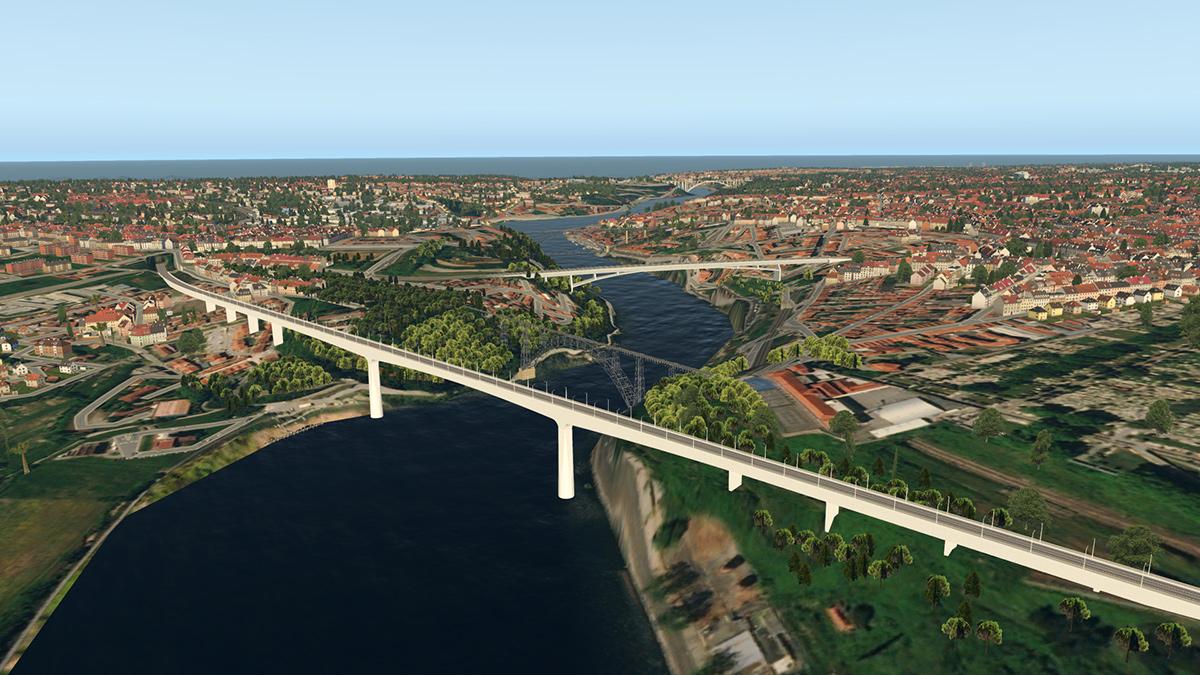
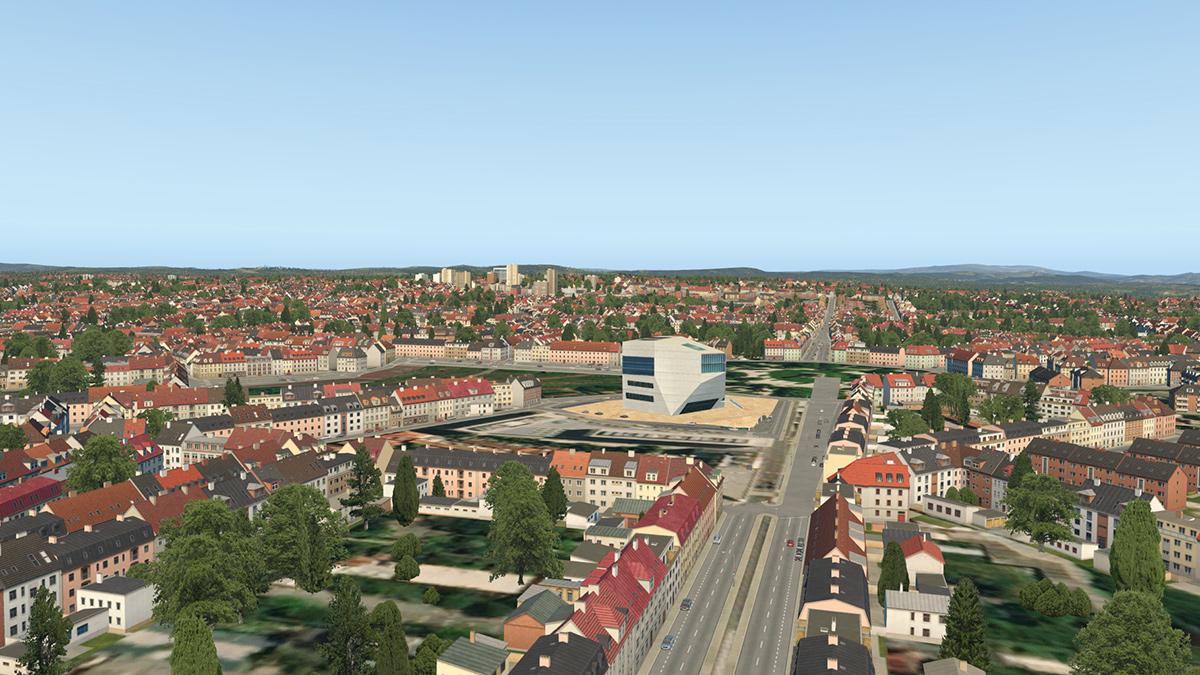
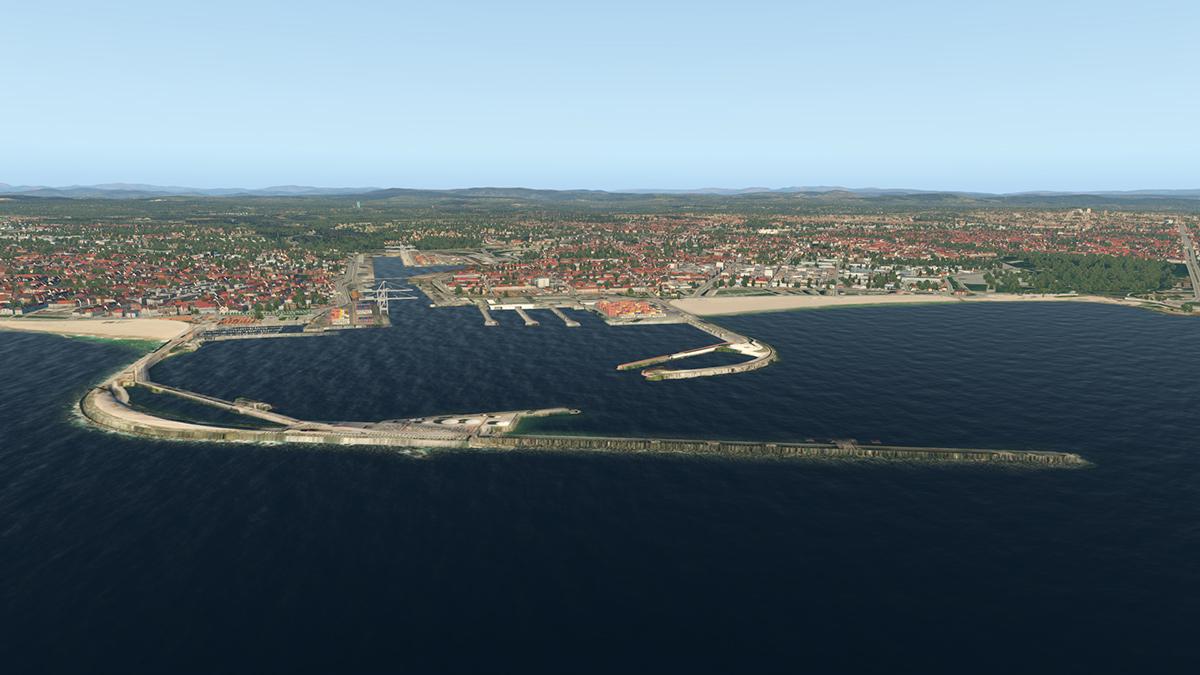
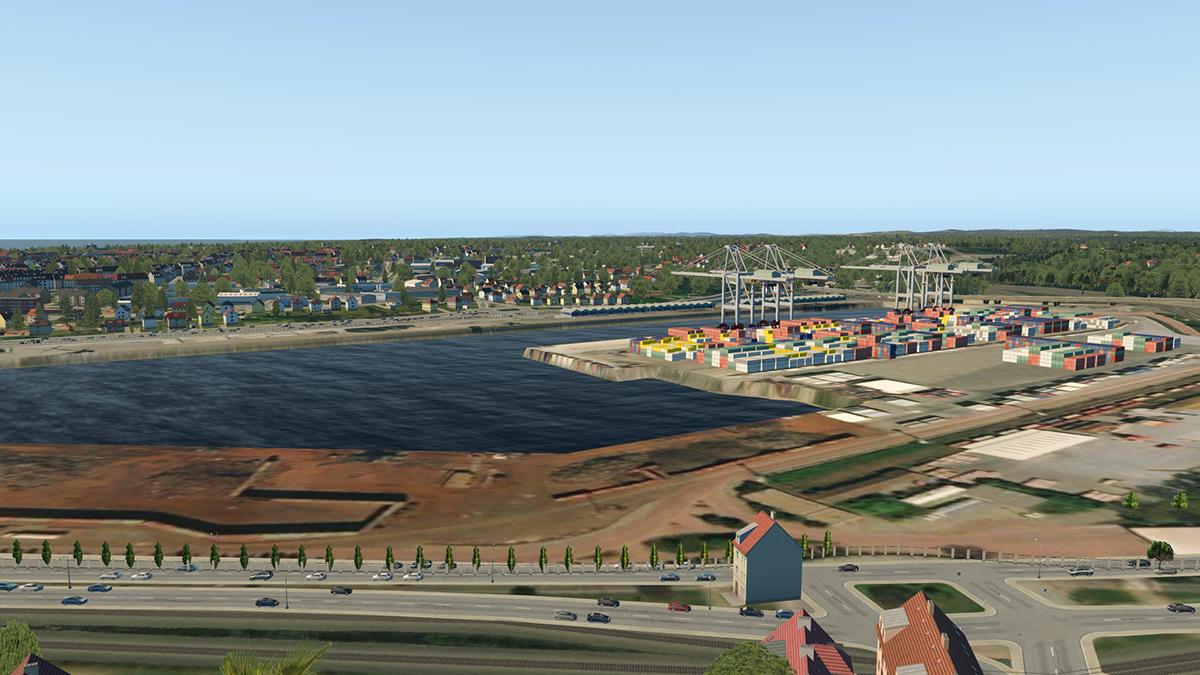
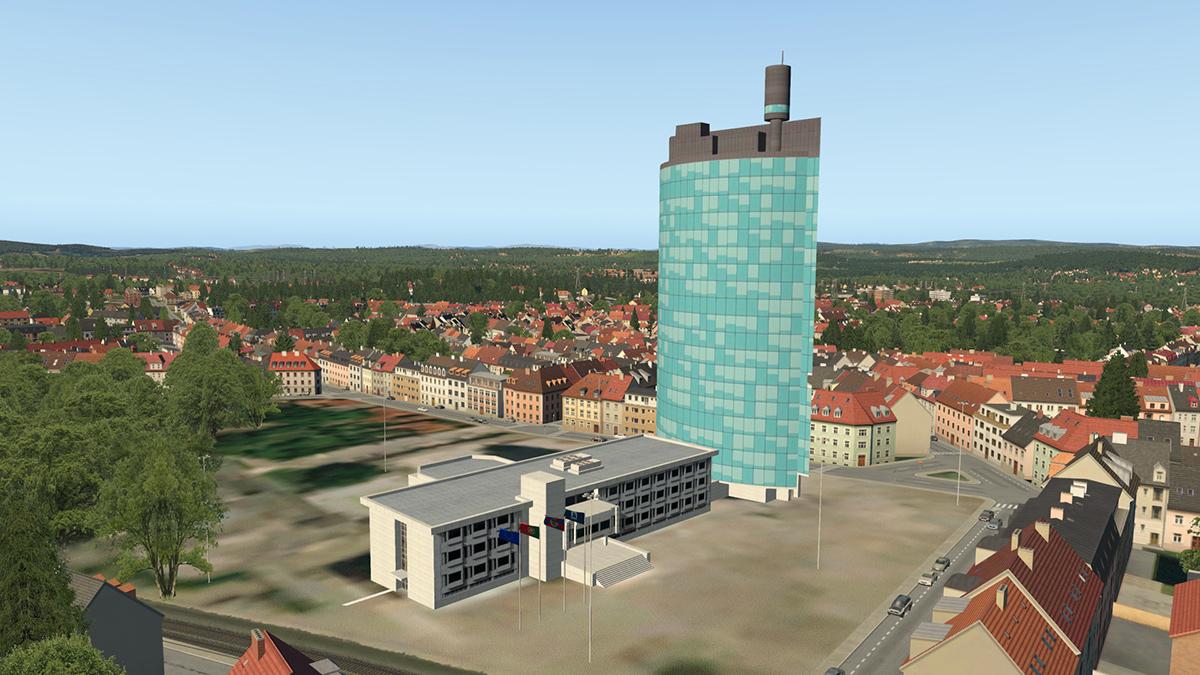
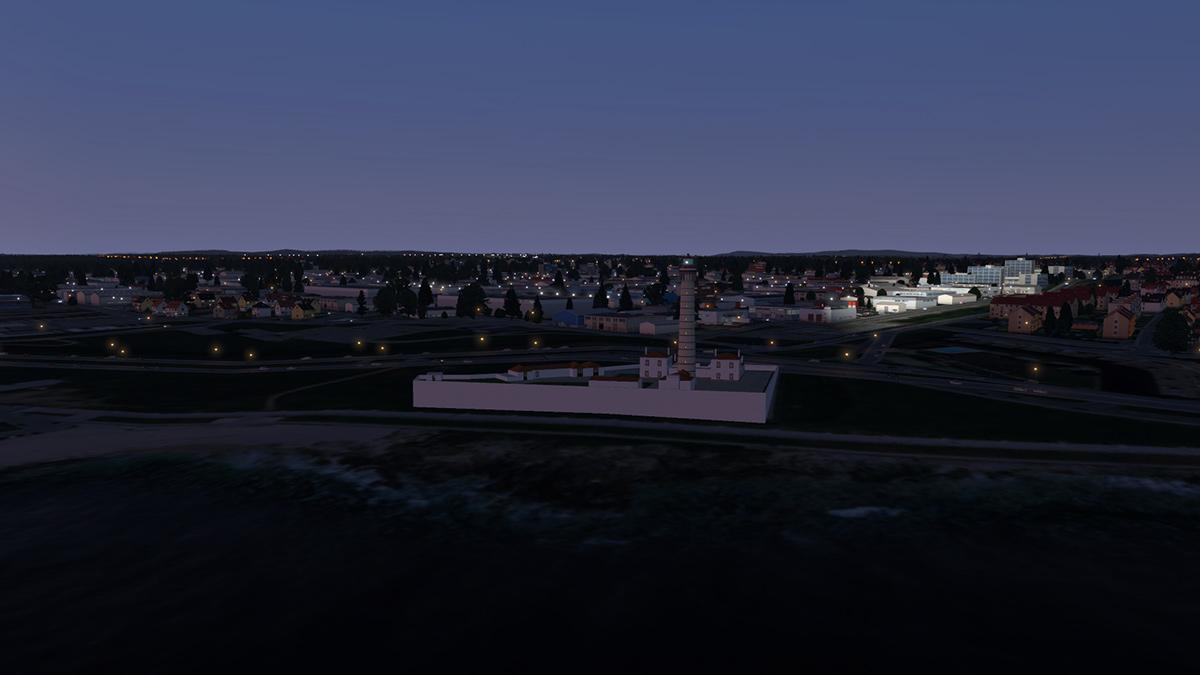
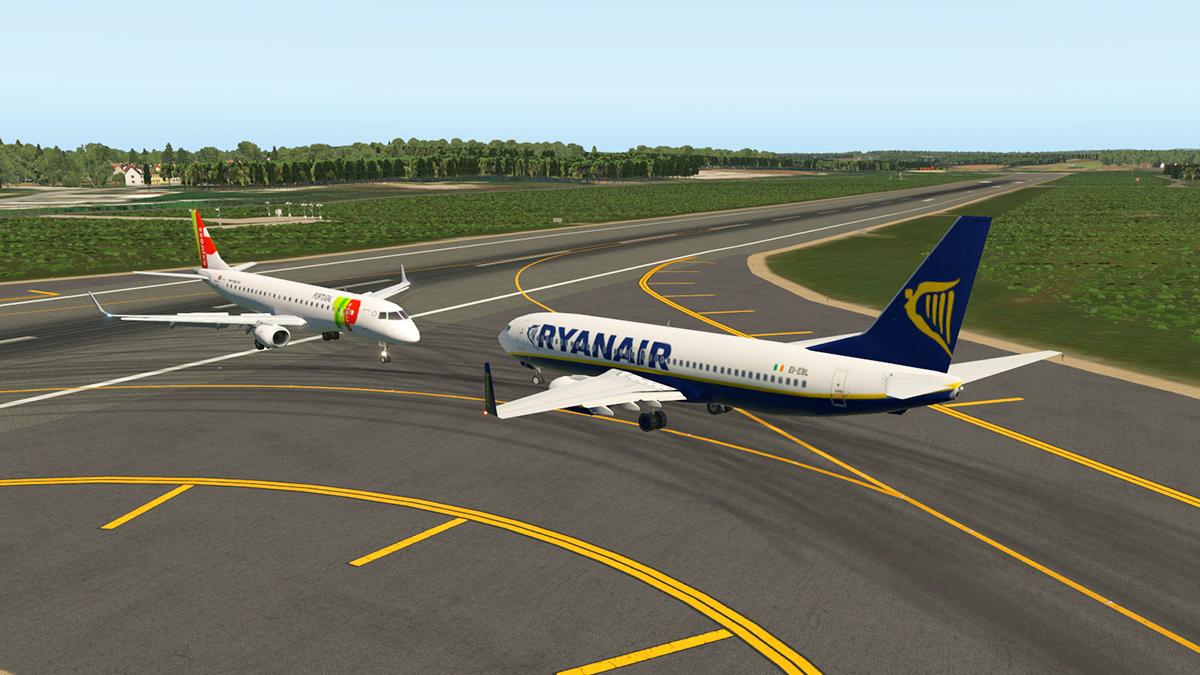
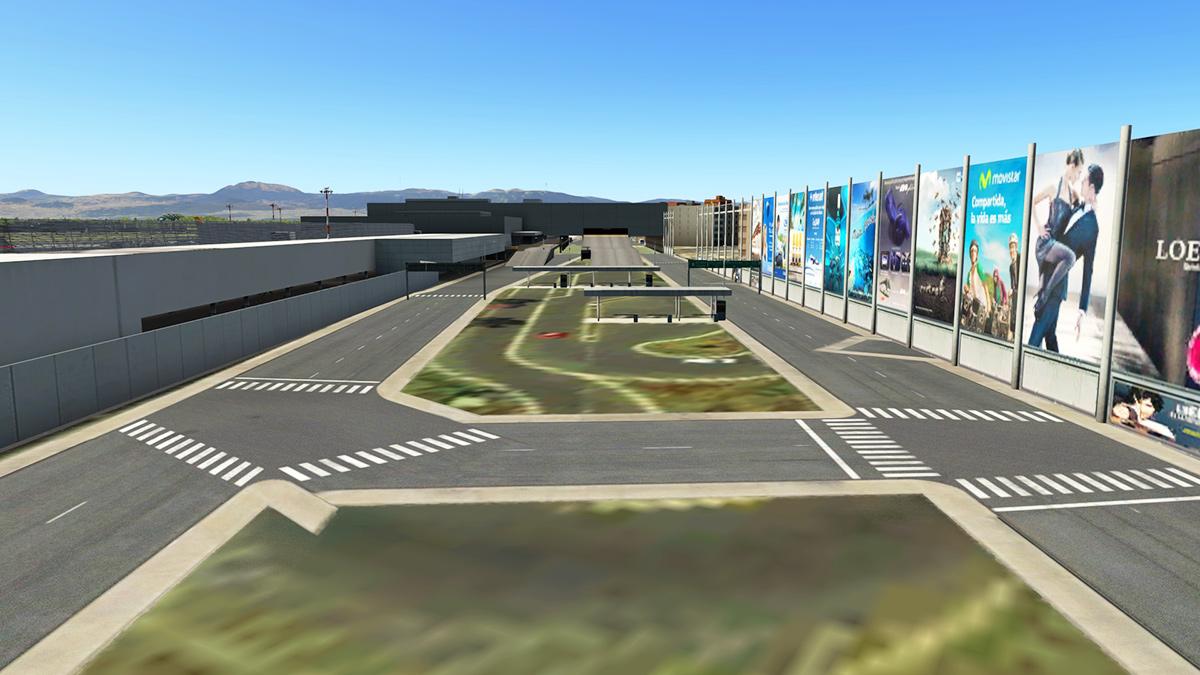
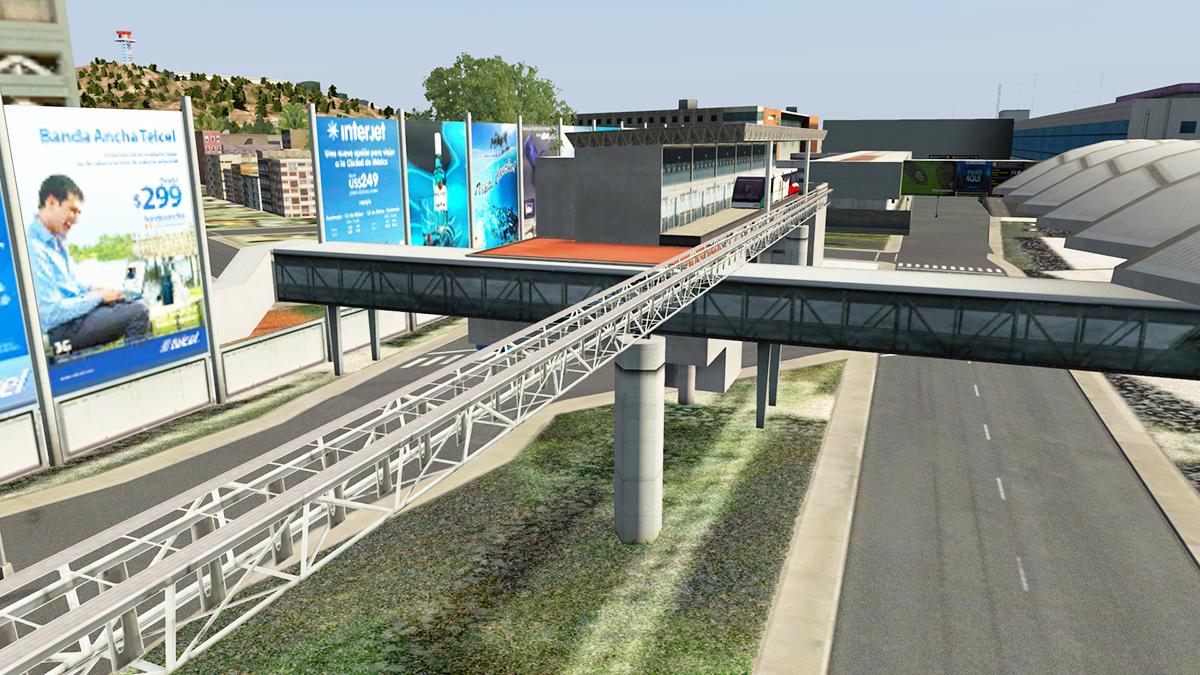
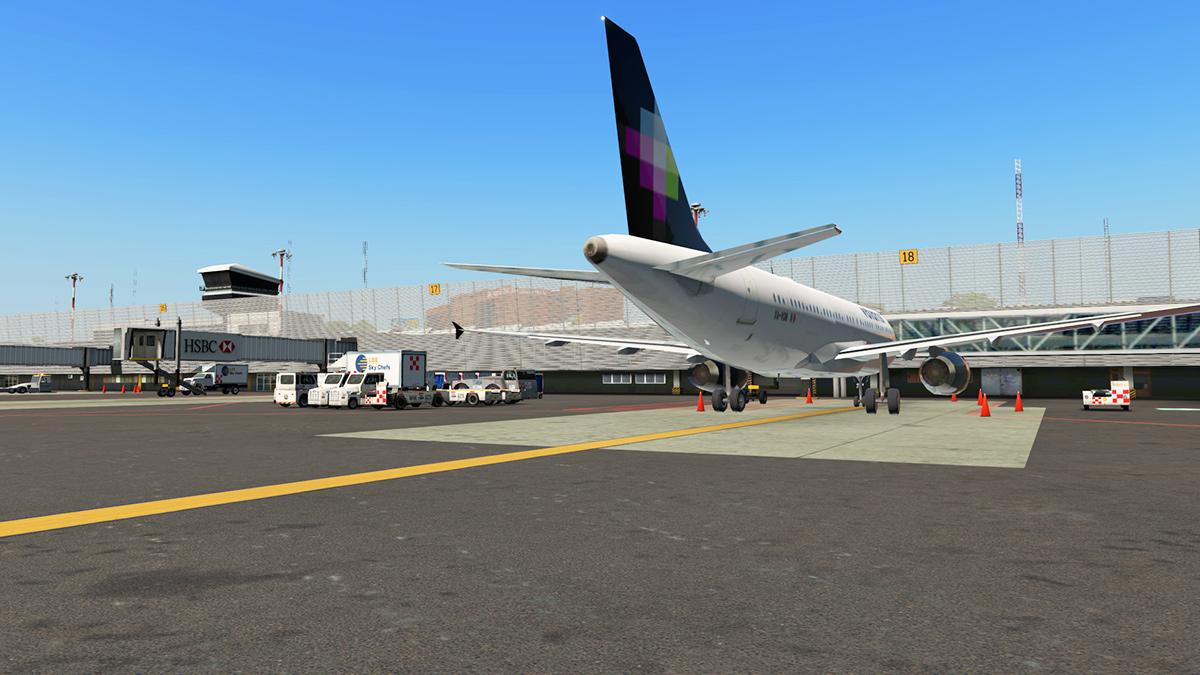
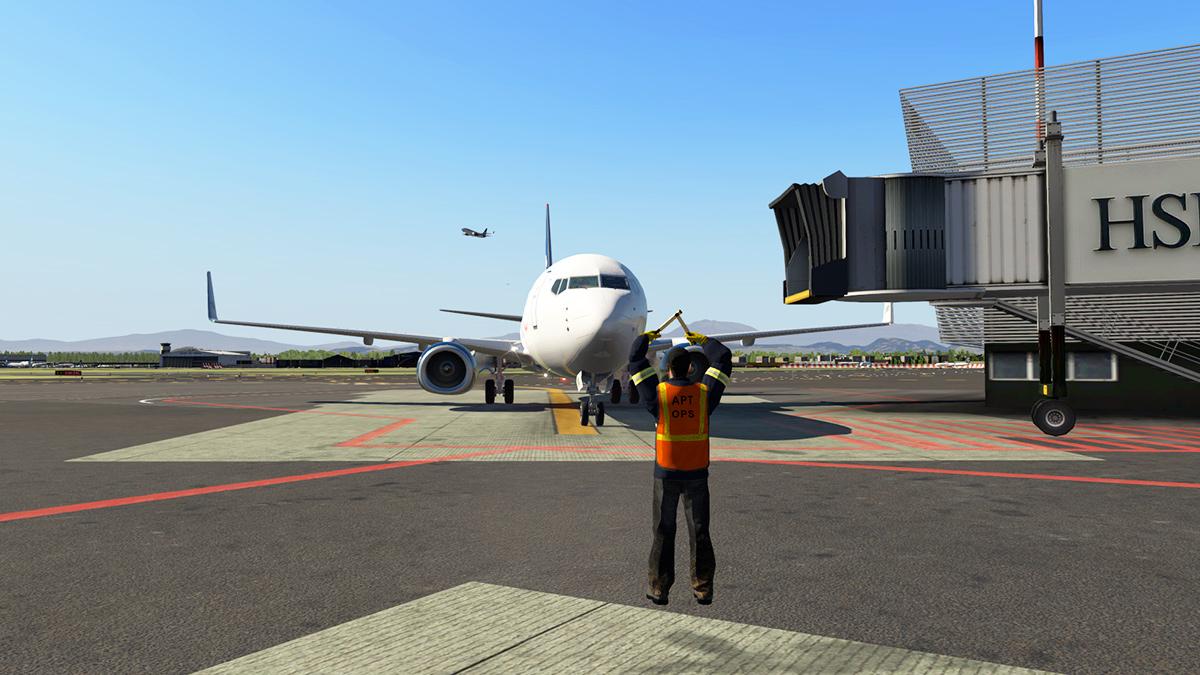
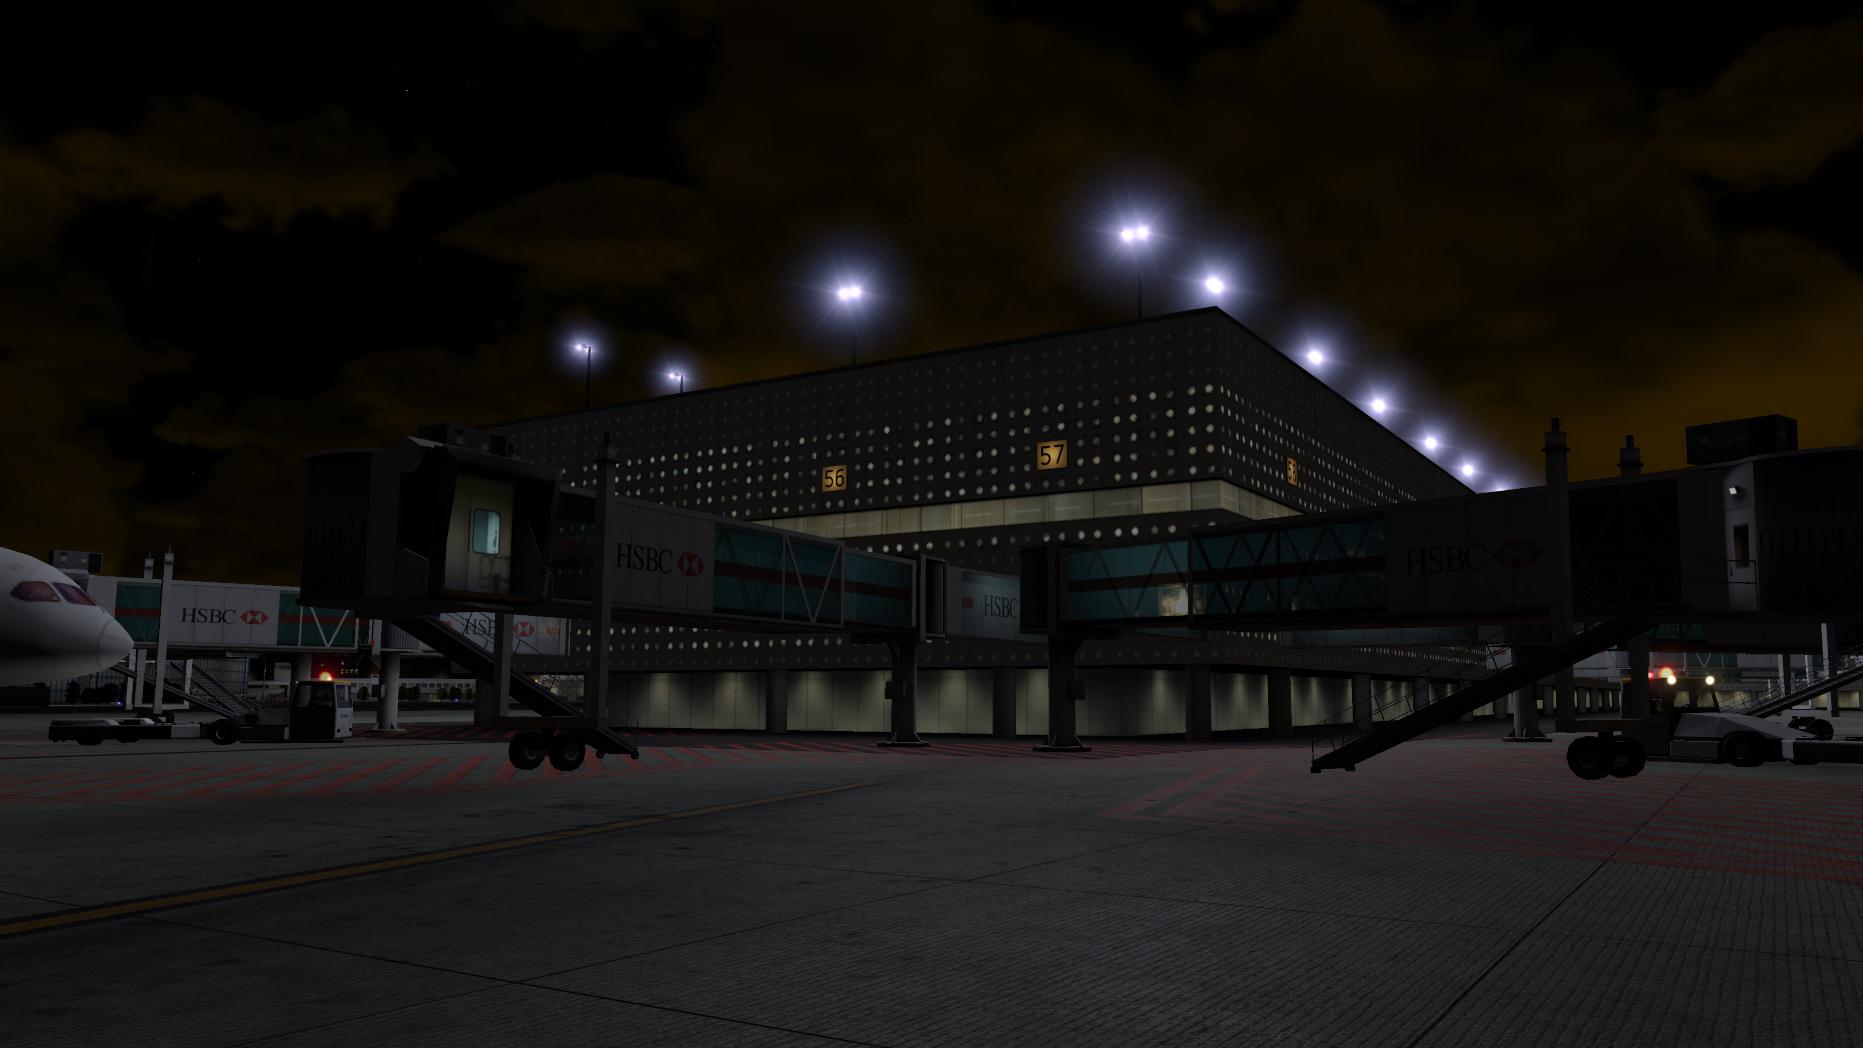
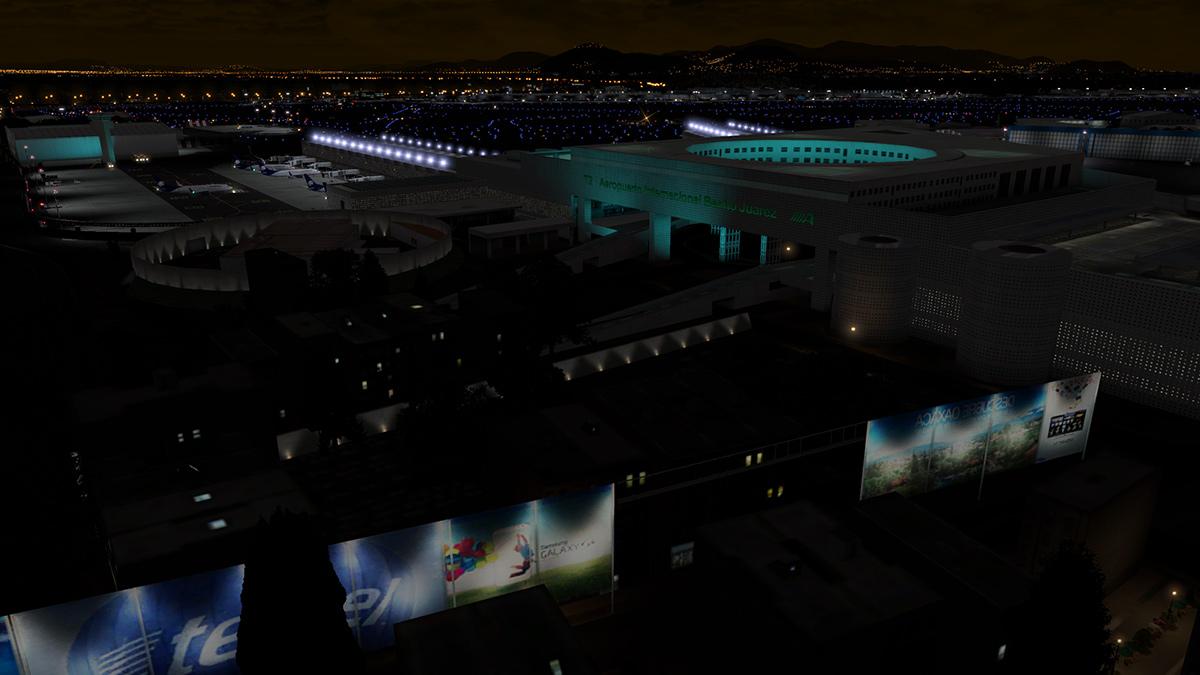
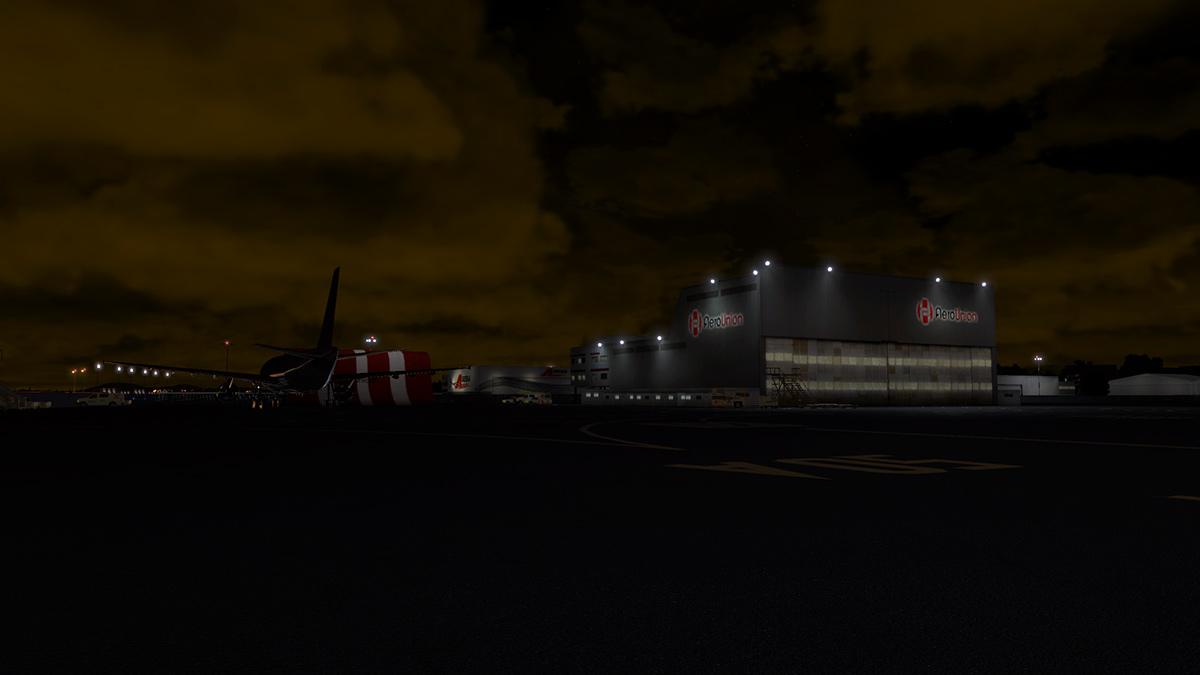
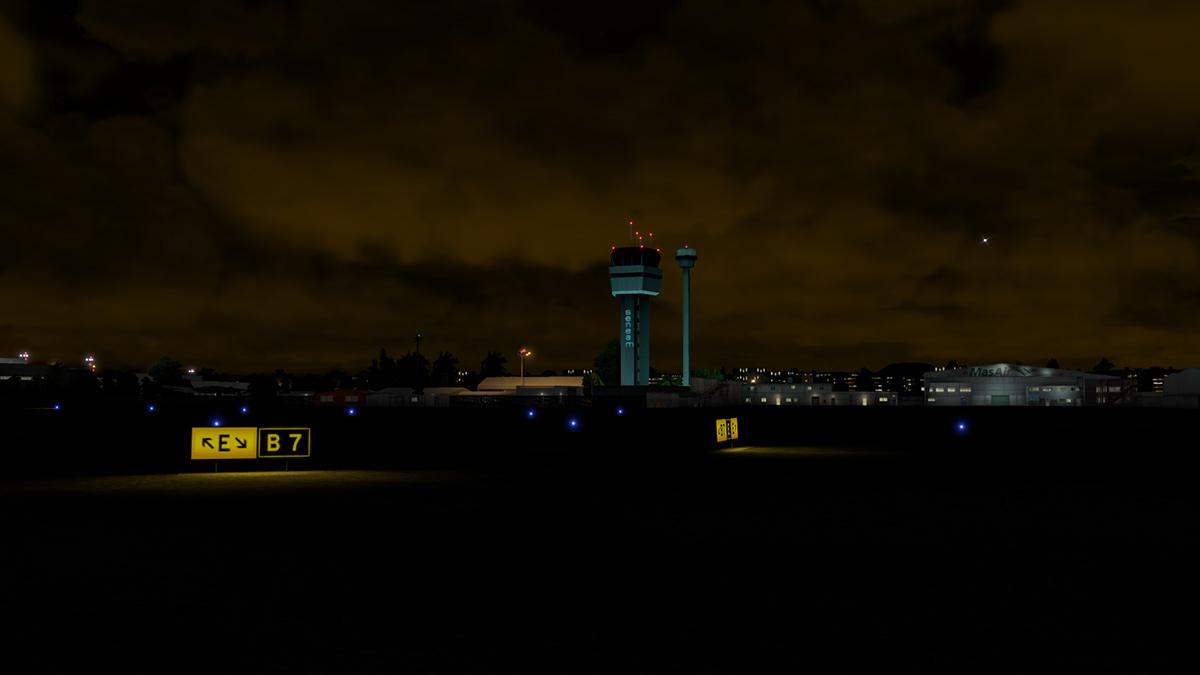
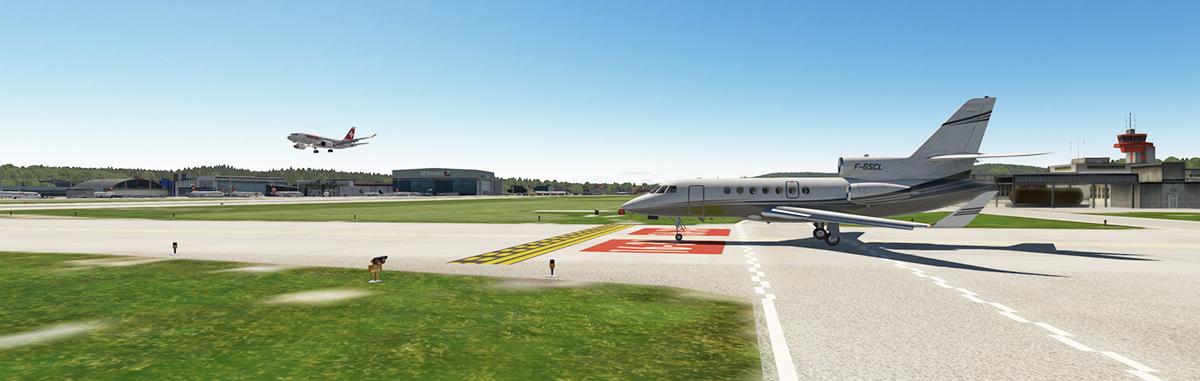
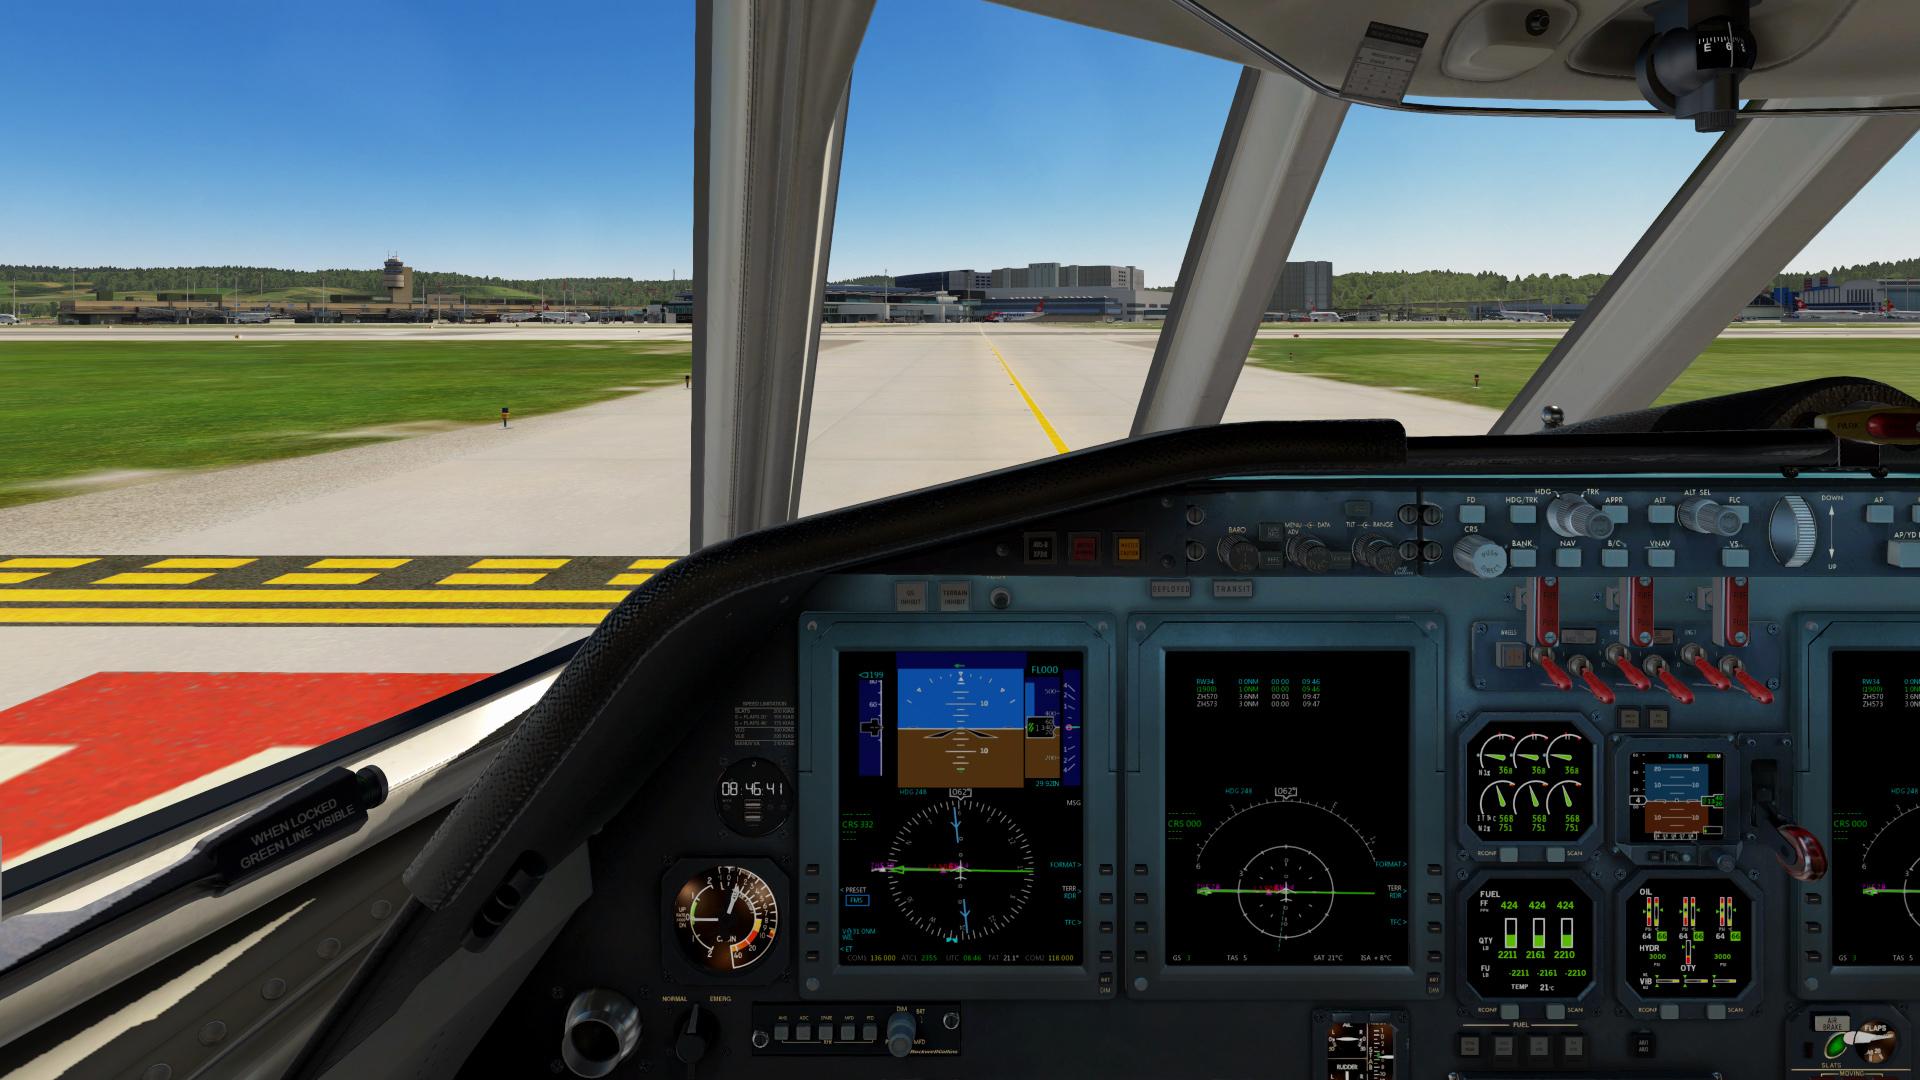
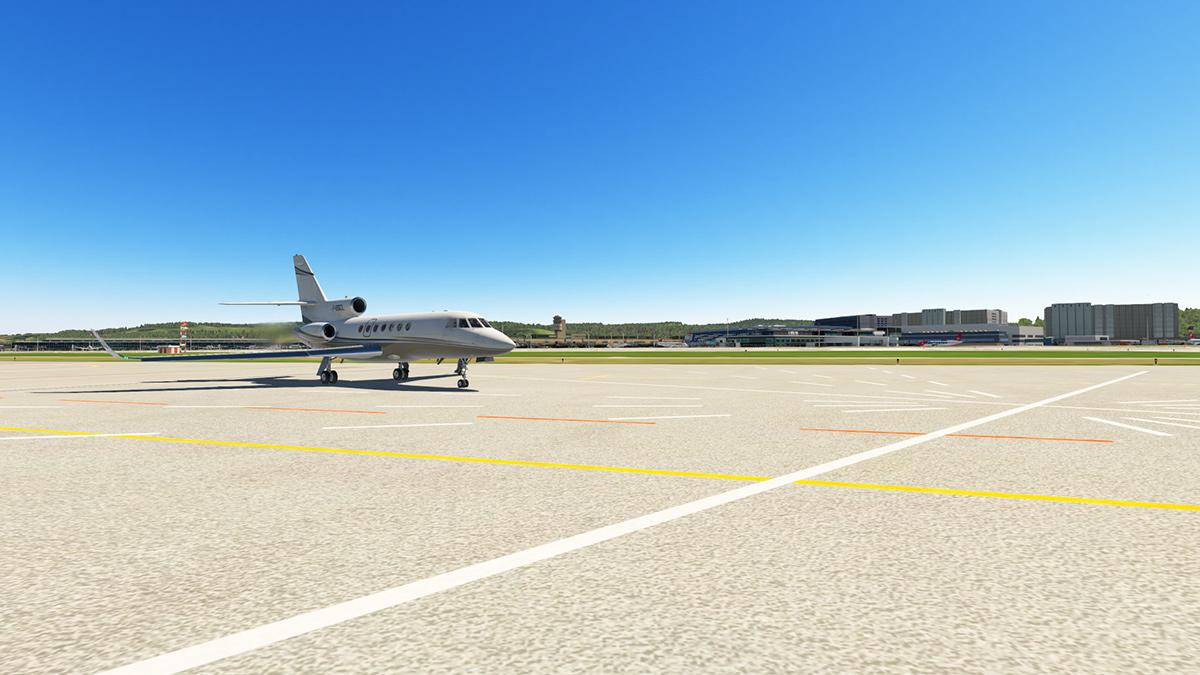
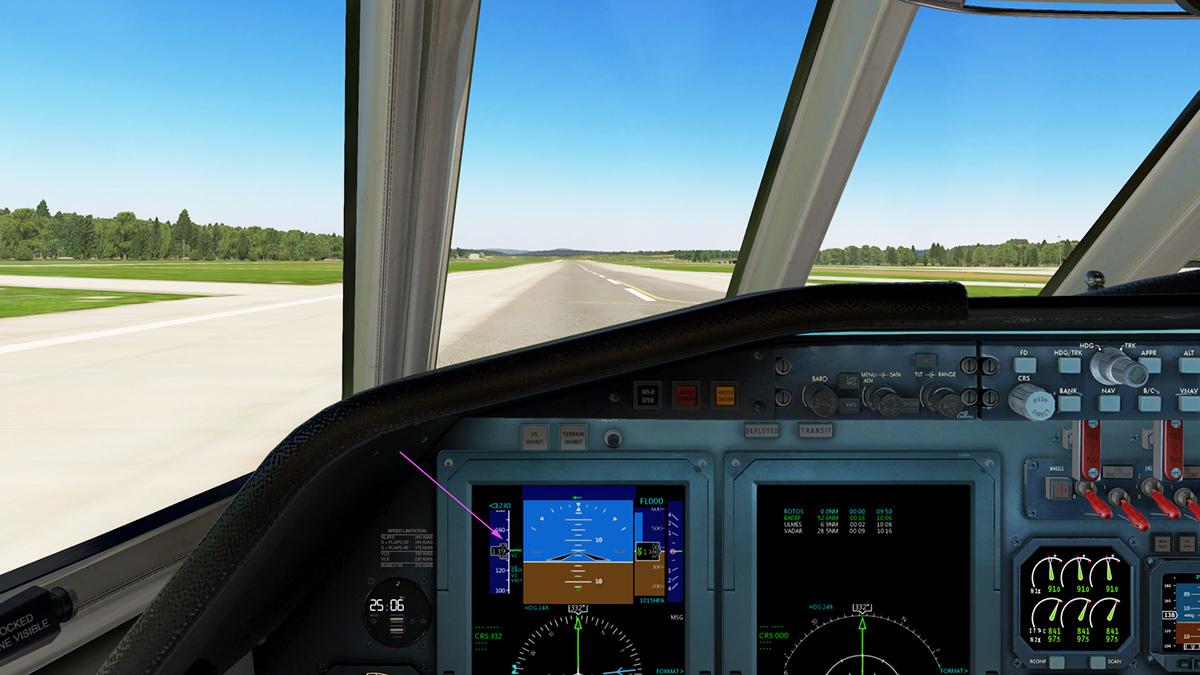
Scenery Review : LPPR - Porto Airport Portugal by Area77 Simulations For some reason western Spain has not been on my route radar, eastern and even southern Spain yes, but not the Atlantic side unless I was flying over and out to South America or Miami, Florida, why that is I don't know but I rarely crossed Spain as a country. But I love exploring somewhere new. Porto is known in English traditionally as Oporto, is the second-largest city in Portugal after Lisbon and one of Iberian Peninsula's major urban areas. The city is famous for Port wine and the football team FC Porto. It has a population of 287,591 and the metropolitan area of Porto, which extends beyond the administrative limits of the city and has a population of 2.3 million (2011) in an area of 2,395 km2 (925 sq mi), making it the second-largest urban area in Portugal. Its combined Celtic-Latin name, Portus Cale, has been referred to as the origin of the name Portugal and as a significant port you could say that the city is the heart of Portugal, and the UNENCO has recongnised Porto's historic centre as a World Heritage Site. So tourism is a big part of the city's economy. Another new developer to X-Plane is Area77 Simulations, and they come with no FSX background, so this is their first scenery release with LPPR - Francisco Sá Carneiro Airport in Porto Francisco Sá Carneiro Airport Aeroporto Sá Carneiro IATA: OPO - ICAO: LPPR 17/35 - 3,480m (11,417ft) Asphalt Elevation AMSL 69 m / 226 ft Almost half the airport's area is taken up by just the finger single runway 17/35, so most of the airports terminals and facilities are positioned all on the southern end half. RWY 17 is also a turnaround area that requires a substantial taxi to the turnaround point and start runway hold point. The terminal design that was put into operation in 2006 is very good, as it is a very complex design, with external support structures and not internal support for maximum internal space, it is also a large terminal as well. However and this will be a theme throughout this review is that the modelling is very good, but the textures are a weak area and feel one dimensional. So overall close up it all comes across a bit modally, the developer has also left a lot of the modeling blank (no textures) and it is noticeable, shame because the modeling is actually very good, but you are missing that earthy realism, the bland glass textures don't help either, they are reflective but not dynamic in the visual sense. All airbridges S10 to S12 and S30 to 35 are all non-active with no docking animations (SAM or Marginal), which really should now be a prerequisite to any payware scenery, but there is some nice branded OPO bus and tug animations around the terminal for some action a fire truck that does the airport rounds and clutter is not very high on the stands, but there is a fair amount overall. Out front terminal stands S36 to S54 are all walk-on These average textures are again highlighted by the container port next to the terminal, as the colours are more pastel than hard tired and worn shipping containers. Oddly up close the container detail looks good, but not at a distance and as the site is directly on the RWY 35 Approach it is highly and even distracting noticeable. Landside detail is very good with well laid out carparks and car rental enclosures, but in the slightly outer areas airport boundary areas are some empty flat photoreal textures, and that aspect totally spoils the effect around the airport's landside areas, obviously it is the autogen boundaries being set too far out, but it is highly noticeable. There is a fair amount of infrastructure detail landside like service stations and hotels, the hotel noted as the Oporto Hotel is actually wrong, it is the Park Hotel, the Oporto is actually positioned further back on the N107, but it is not represented like it is on the map. Control Tower is small considering the age of the field updates, you would think an extra bit of height when building a new one would not go amiss, official charts note a lot of tower blind areas on the aprons, the tower however is nicely done with logos and the tower view is very good and realistic, there are a few obstructions, but they don't interfere with the actual runway approach views. Cargo LPPR is a very significant cargo hub for the Porto area, so there are two cargo areas, one the older one updated north of the terminal, and the other newer larger one is across the runways on the western side. Both are very good in detail with a lot of clutter and infrastructure, OPO airport management offices are part of the eastern cargo hub, and there is a large Everjets maintenance hangar and DHL facility on the western side with a large fuel depot. Stands S55 to S73 cover the east and used for LCC carrier parking as well as cargo, and stands T1 to T4 covers the west. Opposite the terminal and east cargo there is significant remote stand parking in three zones that covers S20 to 25, S40 to S43 and S60 to S66 parking Small details are set out around the airfield. There are two fire station areas with a small one just off Taxiway A1 and the main larger station to the east nearer the threshold of RWY 17. Right of threshold of RWY 17 there is a radar installation with a rotating animated radar tower, and the installation details are very good. Surprisingly runway, taxiway, concrete and apron textures are very good, nice depth, texture and detail. Particularly well done are the rubber tyre marks on the runways, taxiways and around the aircraft on the aprons... 3d grass is also well done and abundant right across most of the field, and field linage and signage are all excellent. Lighting LPPR's lighting was also another surprise as it is very good to excellent... .... approach to both runways is excellent with full taxiway lineage lighting. Terminal area is outstanding with a lot of standing lighting with the correct tones and overall feel. Carpark lighting is about perfect, and the full landside all feels very realistic and visually it is all very nice to look at... The night texture glass is not bad either in contrast to the day feel, but it still looks very early FSX. I really like the copper tones of the remote stands. it looks great visually, but the tower lighting lights only both sides of the aircraft but leaves the fuselage in the dark? so working out here on the remote ramps in the dark is not actually preferable. The western cargo area looks great and feels about right both air and land sides, but to note the larger of the two fire stations on the finals on the approach to RWY 17 feels very bright and even distracting for what is only really an operations area. Overall though the lighting effects are very good. Porto The visualization of Porto and the surrounding environs is excellent. Here the X-Plane autogen does an excellent job in recreating a visual spread of the city. Inserted VFR reference points help in creating the right aspect... ... all the Arrábida, Luiz I, Infante, D.ª Maria, S.João-e-Freixo bridges are all represented and look outstanding, however the autogen traffic ending intrudes badly on the Ponte da Arrábida and in many areas the autogen is cut short and exposing the photo textures. Leixões, Afurada-e-Freixo marinas are also represented, as is the bizarre shaped Casa da Música. The Port of Leixões is well represented with the port and docks all modelled, but the significant and iconic cruise terminal on the barrier sea wall is oddly missing? and some shipping would have been nice. All the coastline looks great and is blended in well at the end of the photo-textures, however the line of the end of the underlays does show as a darker to lighter scenery area and it is not blended in and noticeable on the RWY 17 approach. LPDA - Massarelos Heliport (LPDA) and Pedro Hispano Hospital (LPPH) have both been created and the heliport looks great positioned just past the Arrábida Bridge, another skyline note is the Town hall of Maia and the building is highly visible from the airport. The Lighthouse Leça da Palmeira is also represented and the revolving light works in blinding at night the neighbour hood and is very visible on the RWY 35 approach. WT3 : WorldTraffic ground route, Parking Defs and operations files are provided with the scenery. But the developers skills may have created the ATC routes, but is lacking in other areas, and especially in the airport flow network. Both the provided and a generated set of ground routes are a mess. To be fair LPPR's runway and taxiway layouts are complex, as you have a finger turnaround threshold and a noted incursion spot and a cross at the start of RWY 35. But with a correct flow traffic setup most if not all of the limitations could have been easily eliminated. The provided routes are actually the worst. They do taxi up the finger, but turn early, but then the aircraft takes off on the runways verge? Both have wrong flow directions in that the landing aircraft departs at taxiway H (RWY 17) directly into the departure path, a continued taxi to taxiway D or C would avoid this confrontation. The threshold to RWY 35 departures are another mess in that if any arrival aircraft is using the taxiway A (1,2 &3) it hits the departing aircraft on taxiway B, again a cross runway at taxiway H route would miss the pile up. The generation route aircraft take-off at the incursion spot, and does a short takeoff roll, but at least it looks more realistic, so both fail, but the GEN route is the best of the worst. Services All major European airlines fly to OPO, but the two LLC's EasyJet and RyanAir dominate, and TAP Portugal is based here. International is a lot of routes and services is seasonal including Canada, but Emirates (Dubai), Azul Brazil, TAAG Angola Airlines, Turkish Airlines and United Airlines all fly here. Azore and North African routes are also highly represented. DHL Aviation, Turkish Airlines Cargo and UPS Airlines cover cargo operations ______________________________________ Summary These newly developed sceneries contemplate consideration because they are just that in a new fresh developer creating a new scenery, that means hours of work and resources. In that context the LPPR - Porto Airport is very good and there is a lot of considerable detail and work in this scenery, so the basics are very good, like with most it is only in the finer areas that needs reflection and more skills. So from a reviewers point of view you can criticise but to the changes and not towards the hostile, it is a learning curve after all. But this is payware, you are paying money for the scenery, so you want a decent return on your investment. The modelling work in the scenery which is quite complex in areas like the large terminal is actually very good, and only let down by the average bland textures and the visually noticeable bland port containers, a lot of exposed 3d work sometimes works in the buildings features but overdone in many areas like all the apron/carpark lighting towers that require custom textures. Glass is PBR but still being quite bland looking does not help either, and as a noted UHD scenery it isn't, yes the phototextures are very good, but the other textures are not. Missing active airbridges are also a big factor on a scenery of this calibre, static jetways just don't cut it anymore with great and free animated options. Poor autogen boundaries also leaves blank areas that are visibly very noticeable, both at the airport and in Porto city itself, if it won't autofill then you have to fill it in yourself, unless it doesn't work. Provided WorldTraffic3 ground routes are awful, the home generated version is just as bad with either sets not having any decent traffic flows, yes it is a complicated layout, but still not that hard to set the right arrival and departure aircraft flows on the ATC routes. But there is a lot to like here, ground textures (surprisingly) are really good, as is the excellent night lighting, 3d grass and detail is very good with branded clutter. Excellent Porto autogen is supported well with great VFR visual items and the spread overall is very good except you can see the phototexture boundaries. So to the question and to invest in LPPR - Porto, overall yes, because the good is very good and yes I have seen far much worse on a debut scenery, secondly is that most of the areas that are average to the rest of the scenery can easily be updated without major changes to the overall scenery. So overall I really like the airport and it's surrounds and as an debut scenery it is an excellent effort, it just needs some adjustments around the edges to make it a perfect Portuguese destination. ______________________________________________________________________ Yes! LPPR - Porto Airport Portugal by Area77 Simulationsis Available from the X-Plane.Org Store here : LPPR - Porto Airport Portugal, Portugal Price is US$23.50 Features: Buildings around the airport such as warehouses, container park and car parks; Animated radar; Navigation station: Glideslope, ILS e DVOR/DME Oporto hotel Metro stations Airport freeway bridges and access Lighthouse in Leça da Palmeira, Matosinhos Pedro Hispano Hospital, Matosinhos Pedro Hispano Hospital Heliport Massarelos Heliport STCP Museum, Porto Vincci Hotel, Porto City bridges: Arrábida, Luiz I, Infante, D.ª Maria, S.João e Freixo Leixões seaport Leixões, Afurada e Freixo marinas Custom lighting Road traffic World Traffic Routes Custom mesh ______________________________________________________________________ Installation The download package is 879.40mb and there are five folders with one mesh and one roads to be inserted in your "Custom Scenery" Folder. LPPR - Francisco Sa Carneiro Airport - Porto - PORTUGAL LPPR - Mesh LPDA - Massarelos - Porto - PORTUGAL LPPH - Pedro Hispano - Porto - PORTUGAL LPPR - Roads Total scenery installation is a huge 1.92gb Documents: Manuals in English and Portuguese MANUAL_EN.pdf MANUAL_PT.pdf Requirements : X-Plane 11 Windows, Mac or Linux 4GB VRAM Minimum - 8GB+ VRAM Recommended Download Size: 880MB Current and Review version: 1.0 (Aug 3rd 2019) ______________________________________________________________________ Scenery Review by Stephen Dutton 13th August 2019 Copyright©2019: X-Plane Reviews Review System Specifications: Computer System: Windows - Intel Core i7 6700K CPU 4.00GHz / 64bit - 16 Gb single 1067 Mhz DDR4 2133 - GeForce GTX 980/SSE2 - Samsung Evo 1Tb SSD Software: - Windows 10 - X-Plane 10 Global ver 10.45 / Checked install in X-Plane11b6 Addons: Saitek x52 Pro system Joystick and Throttle : Sound - Bose Soundlink Mini : Headshake by SimCoders Plugins: WorldTraffic3 US$29.95 : Environment Engine v1.07 by xEnviro US$69.90 : Scenery or Aircraft - Boeing 738 by Laminar Research - Default with X-Plane11
-
Mini Review : Eurocopter AS350 B3+ : Service Pack 1
Stephen replied to Stephen's topic in Helicopter Reviews
This review is over 6 years old? so in noticing that you should have checked for current changes before purchase, there is currently a requirement to change the XPL for XP11, read this for fixes The Unofficial DreamFoil Creations AS350 B3+ XP10 in XP11 FAQ -
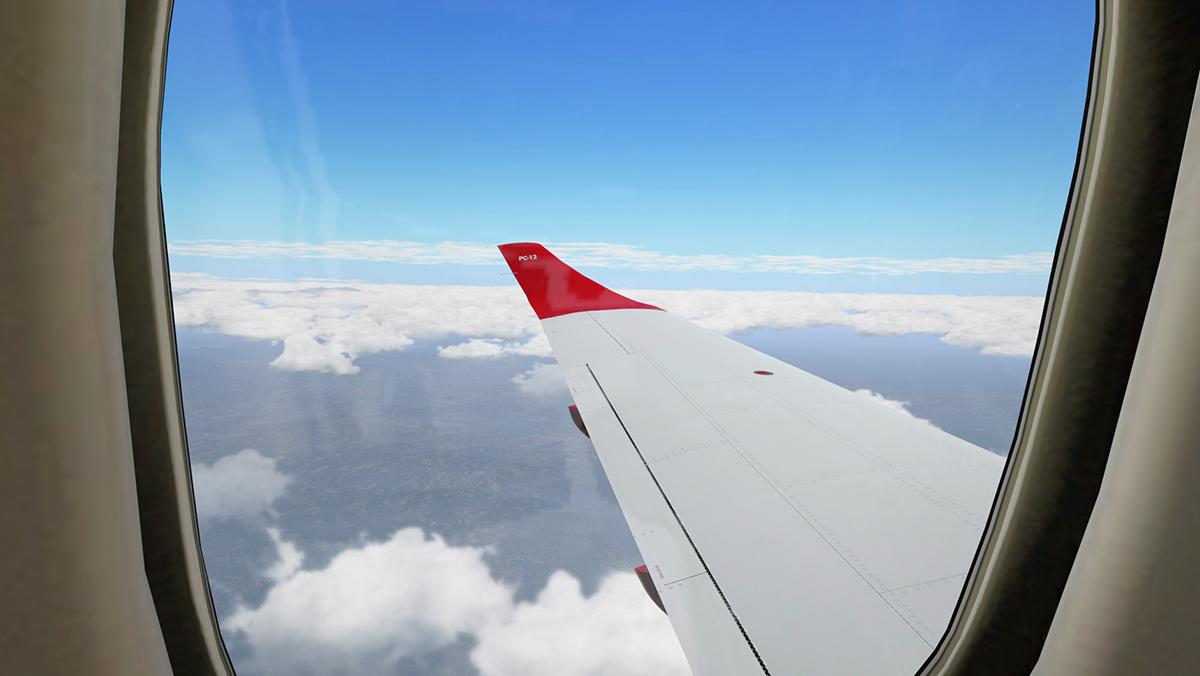
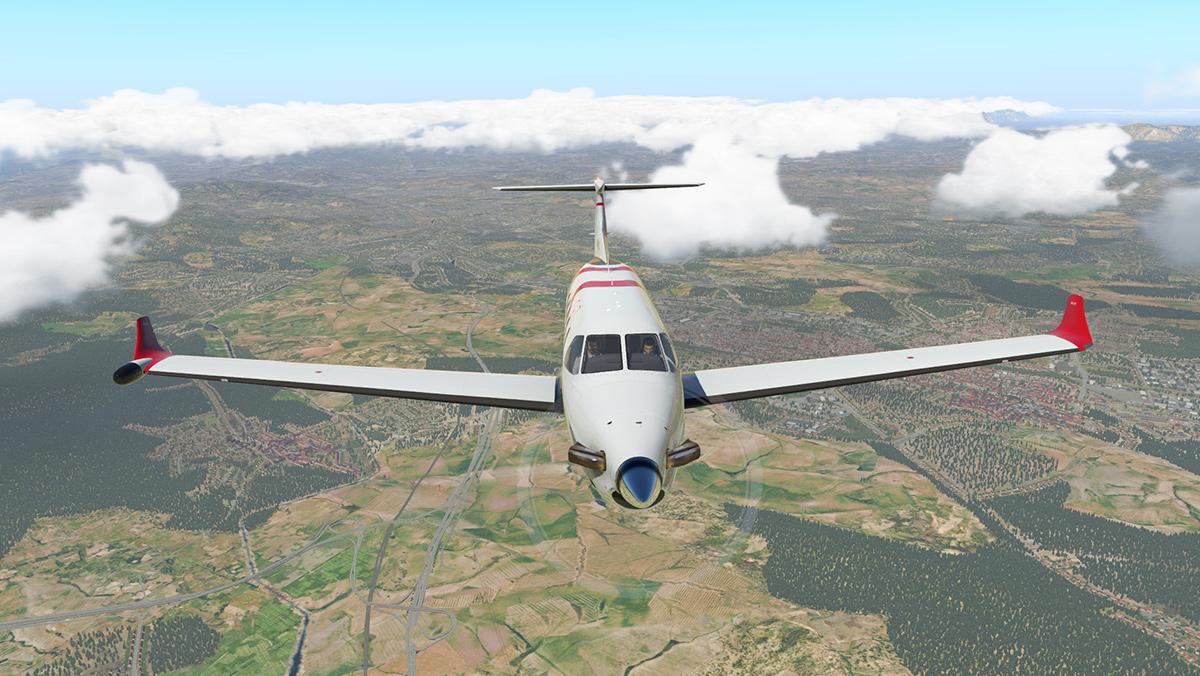
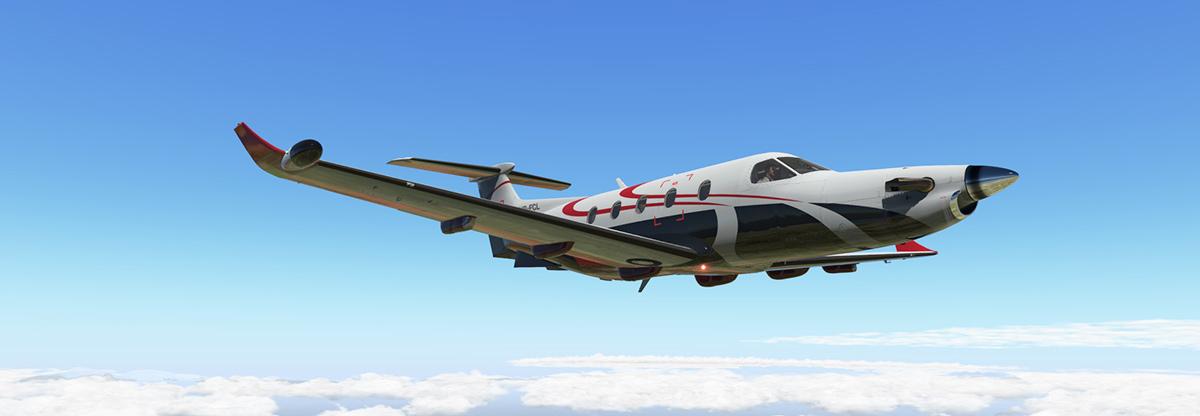
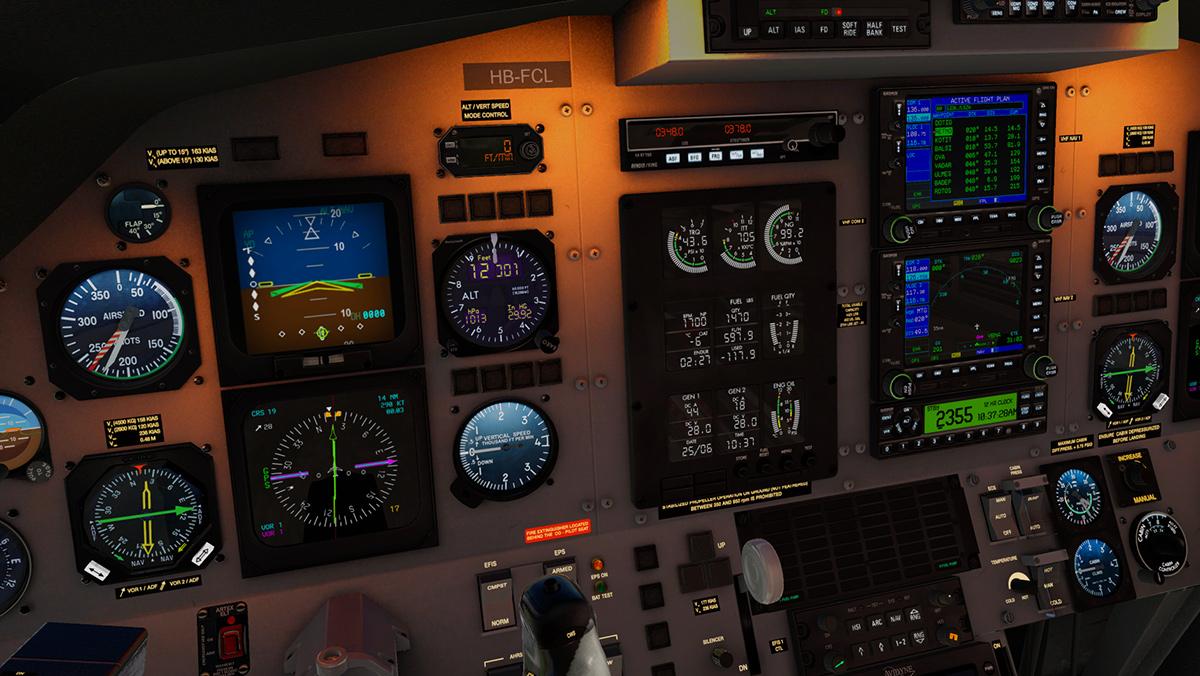
News! - Released : Flight Design CTLS by VSkyLabs This is the next new project released by VSkyLabs and it is a high-wing, tricycle, two seat light sport aircraft and part of the Flight Design CT series family. The CTLS is powered by a Rotax 912 ULS engine, and thanks to its design efficiency the CTLS is fast with a cruise speed of approximately 115 knots, spacious and capable for cross country flights, and can do a maximum range of up to 850 nautical miles. The VSkylab philosophy is that you purchase an ongoing project, so any aircraft you purchase is not fully completed and 100%, that is the deal you sign up for to get access to the aircraft, but this CTLS is certainly a far more a completed aircraft than most of the releases than from VSkyLabs in the past. Project Highlights: VSKYLABS 'Test-Pilot' Project: designed for use with X-Plane 11.30+ cutting edge Experimental flight model environment, featuring a superb flight dynamics with authentic performance and flight handling characteristics. Built for VR: development was tailored specifically for VR, and optimized for 2D usage. Engineered and designed as a default X-Plane aircraft (Like all VSKYLABS projects). The VSKYLABS projects are practically show-casing X-Plane, as they are stretching X-Plane default features, systems and flight model to its limits without any dependencies on complementary plugins or software...delivering a very robust simulation model, having maximum compatibility with the ever evolving X-Plane flight simulator. Perfect fit for beginner and expert pilots: The VSL CTLS is featuring the standard, basic CT VFR + night pack panel. The simple and clear analog gauges layout is perfect for beginner pilots. It is also featuring an enhanced panel, which is including the addition of a notebook-based glass PFD along with a Dynon style AP74 and HS34 (these are incorporated with simplified, yet functional features). Built-in Avitab Plugin Compatibility (AviTab plugin is not included). STMA Autoupdater plugin is included - all updates are being pushed smoothly without the need to re-download the entire base package (base package will be updated every once in a while to minimize the gap). Highly responsive VSKYLABS support forums: Professional discussions which results in incorporating users feedback into the on-going scheduled development plan. Real-pilots inputs (as well as sim-pilots feedback) are always welcome, and in practice sets the the VSKYLABS projects within solid, professional margins over time. The project is under constant maintenance and development - updates are free. Requirements X-Plane 11.30+ Windows, Mac or Linux 2Gb VRAM Minimum - 4Gb+ VRAM Recommended - 8Gb+ VRAM for VR Current version: 1.0 (Aug 8th 2019) The CTLS Project is now available from the X-Plane.OrgStore The VSKYLABS Flight Design CTLS Project is now available! from the X-Plane.Org Store here : VSKYLABS Flight Design CTLS Project Price is US$27.50 ______________________________________________________________________ vSkyLabs Aerospace Simulations has a full extensive website on all projects for updates and information including aircraft manuals available here: www vSkyLabs.com All VskyLabs projects are also available for purchase from the source developer here: VSKYLABS _____________________________________________________________________________________ Release notes by Stephen Dutton 9th August 2019 Copyright©2019: X-PlaneReviews (Disclaimer. All images and text in this review are the work and property of X-PlaneReviews, no sharing or copy of the content is allowed without consent from the author as per copyright conditions)
-
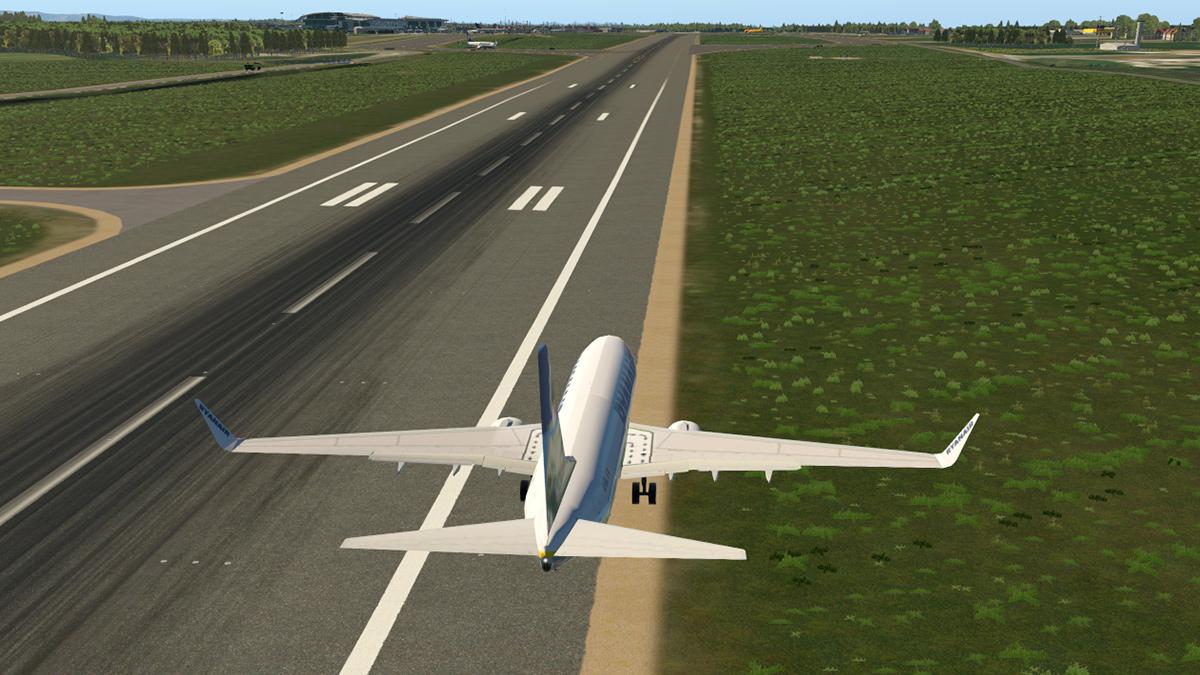
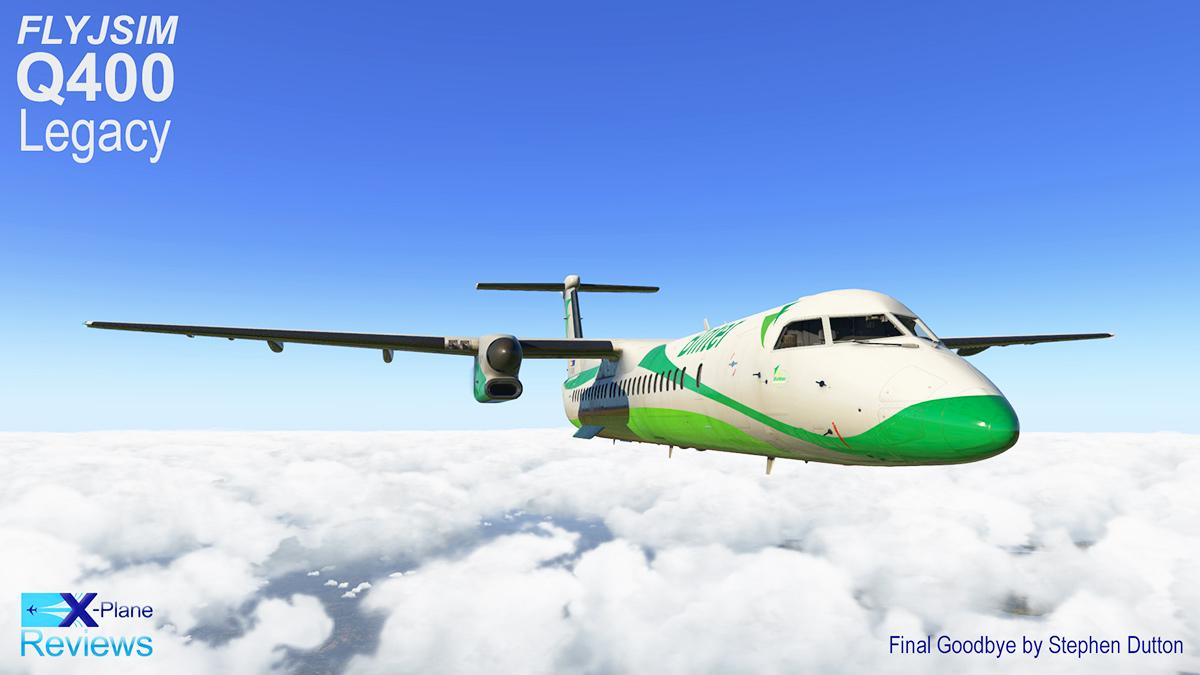
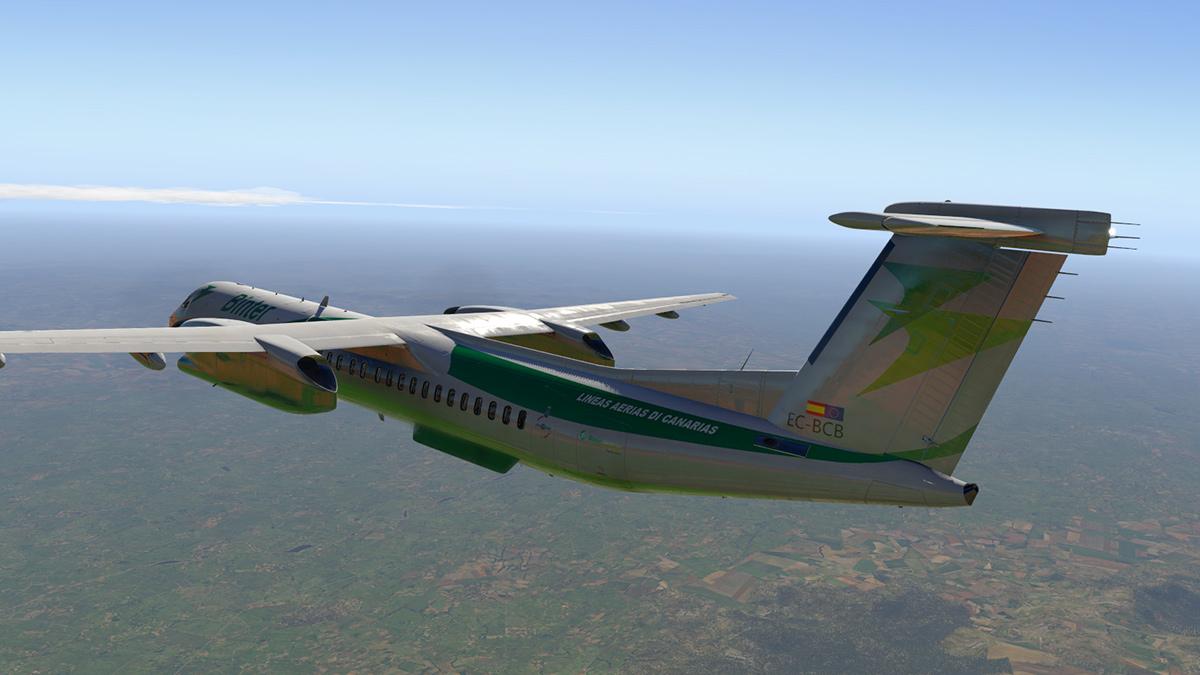
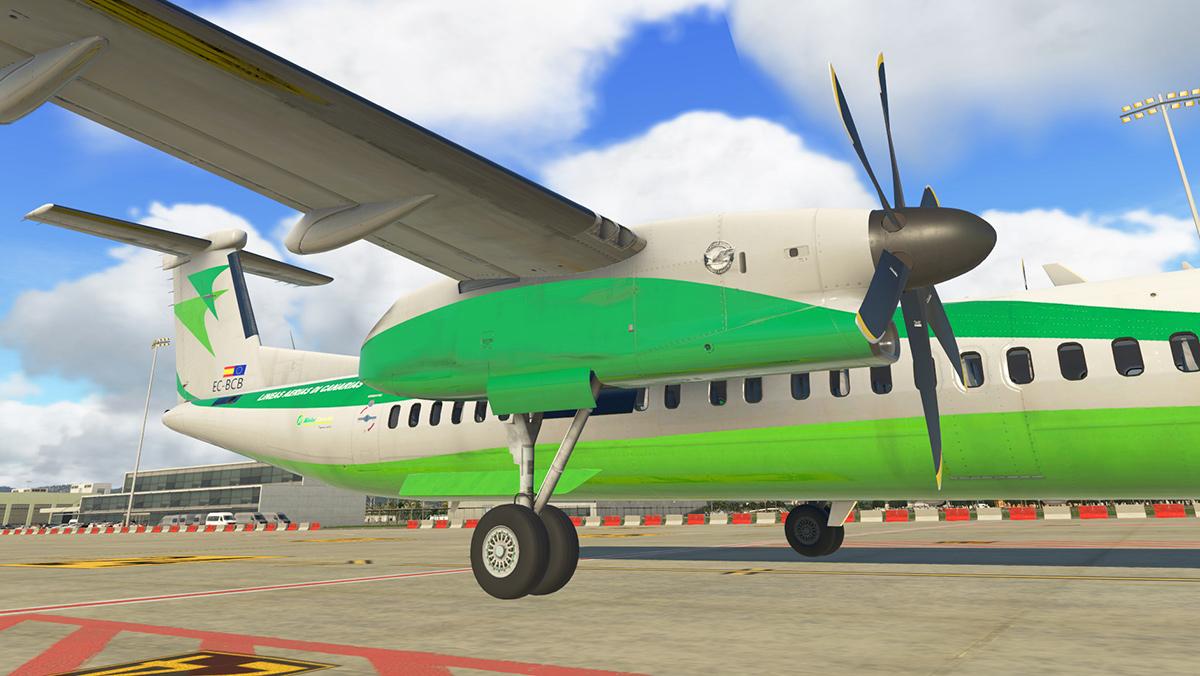
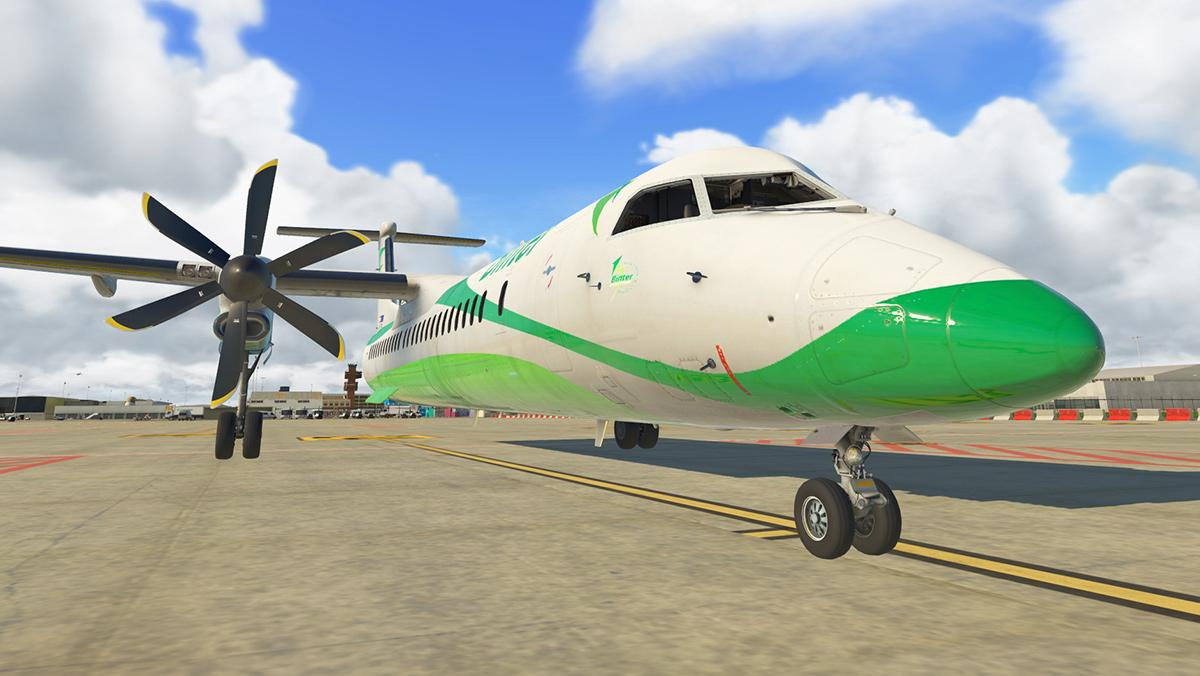
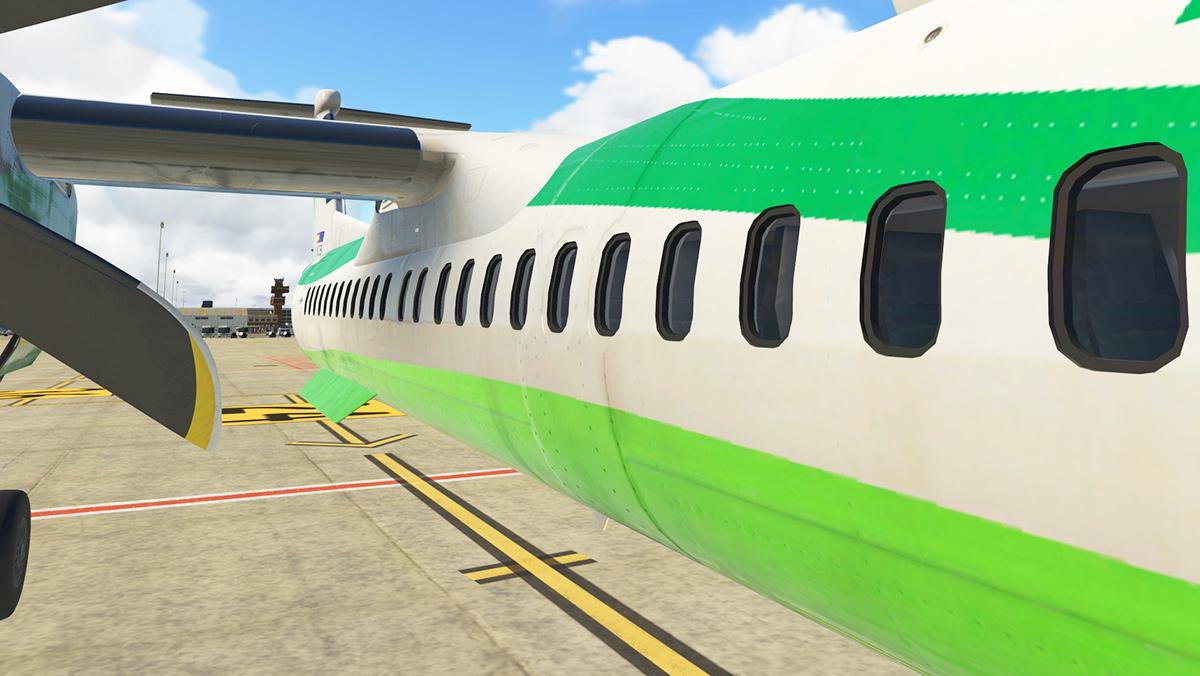
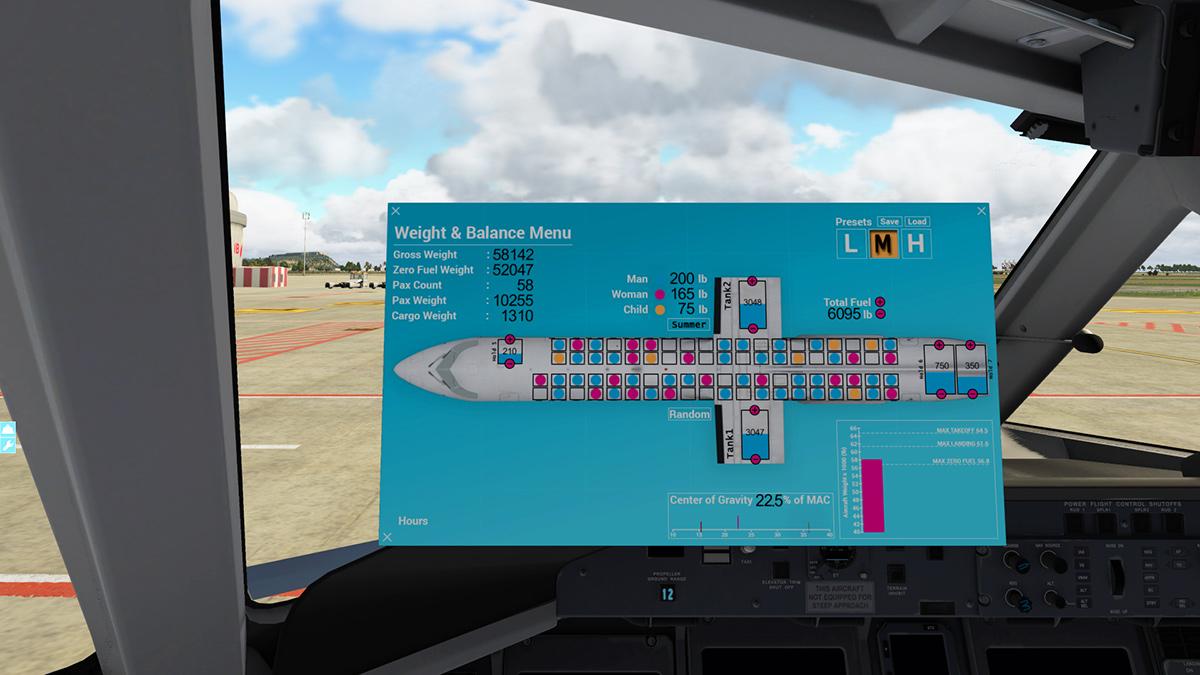
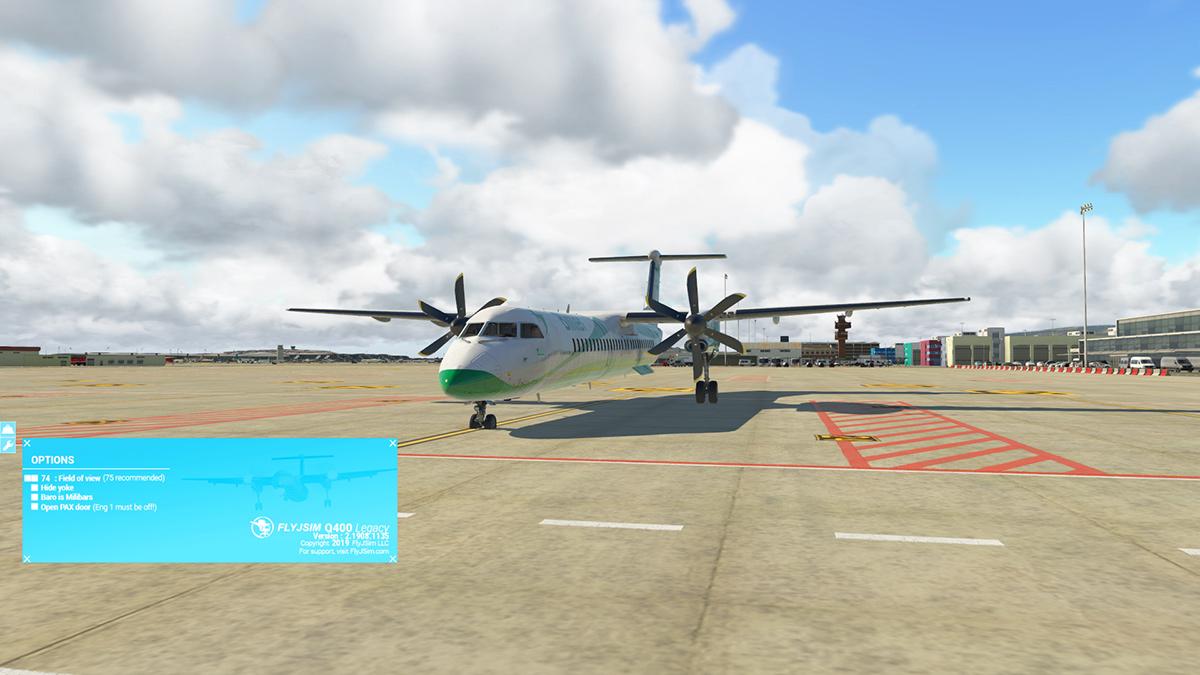
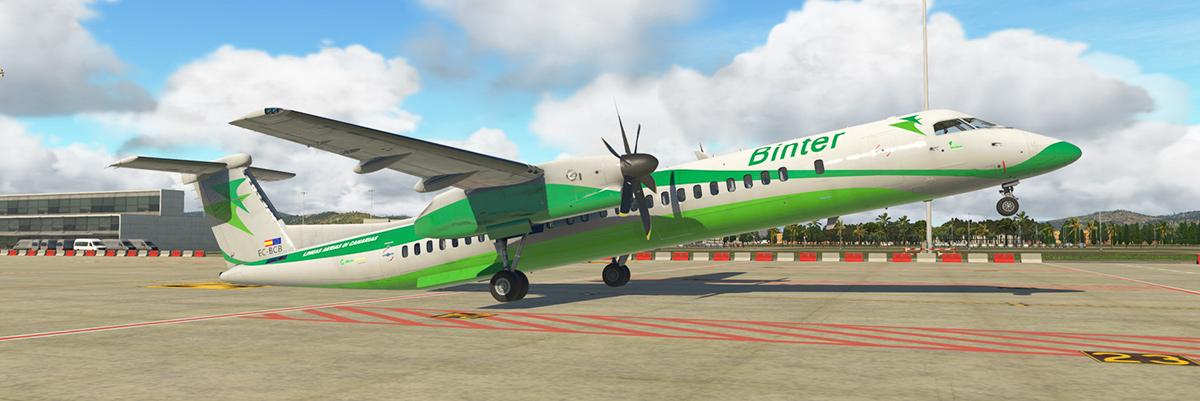
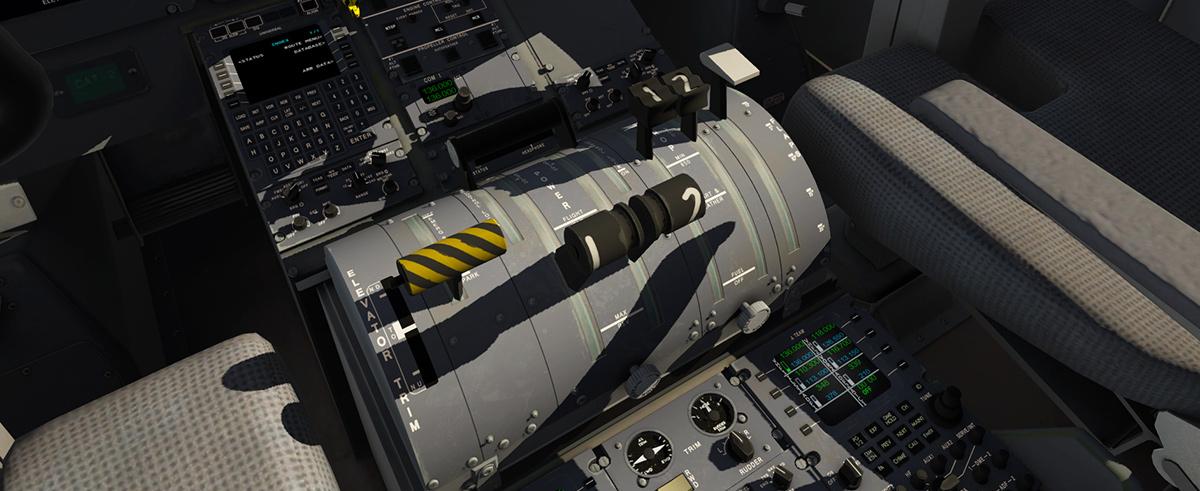
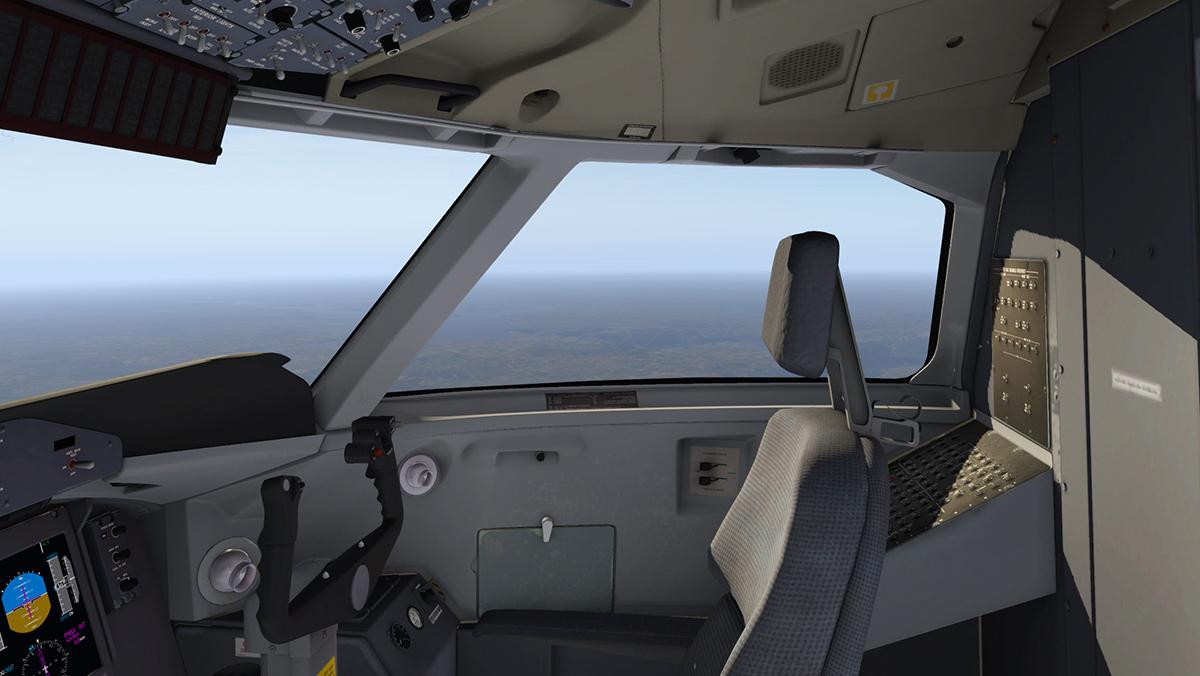
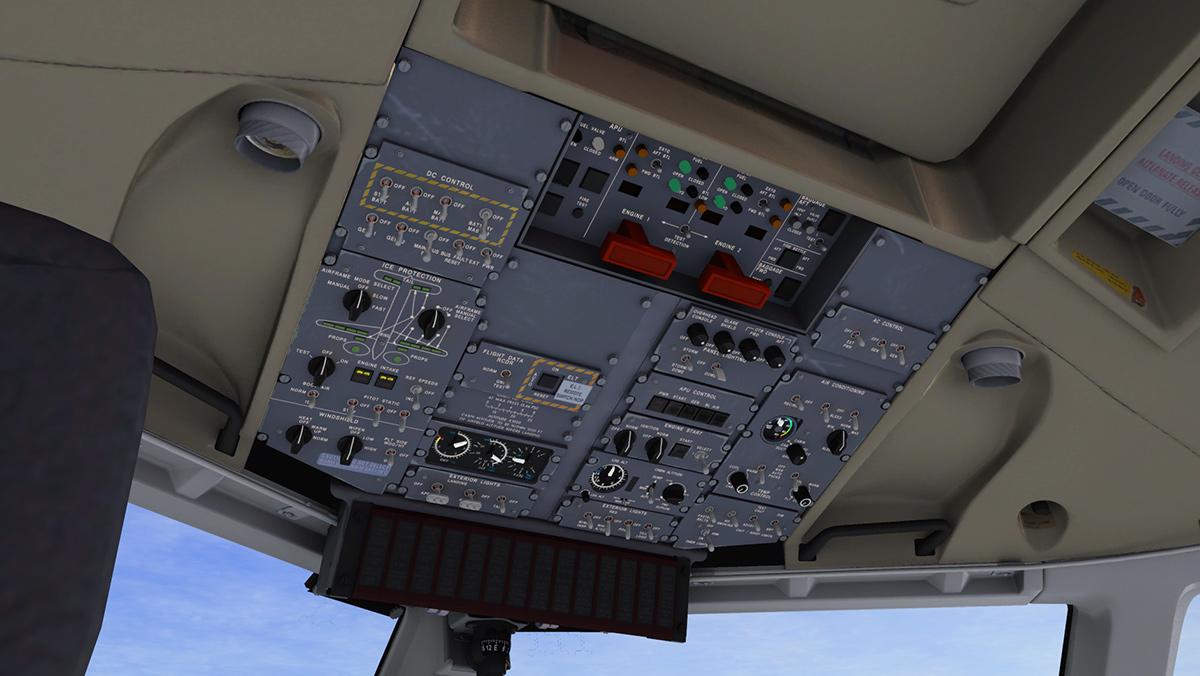
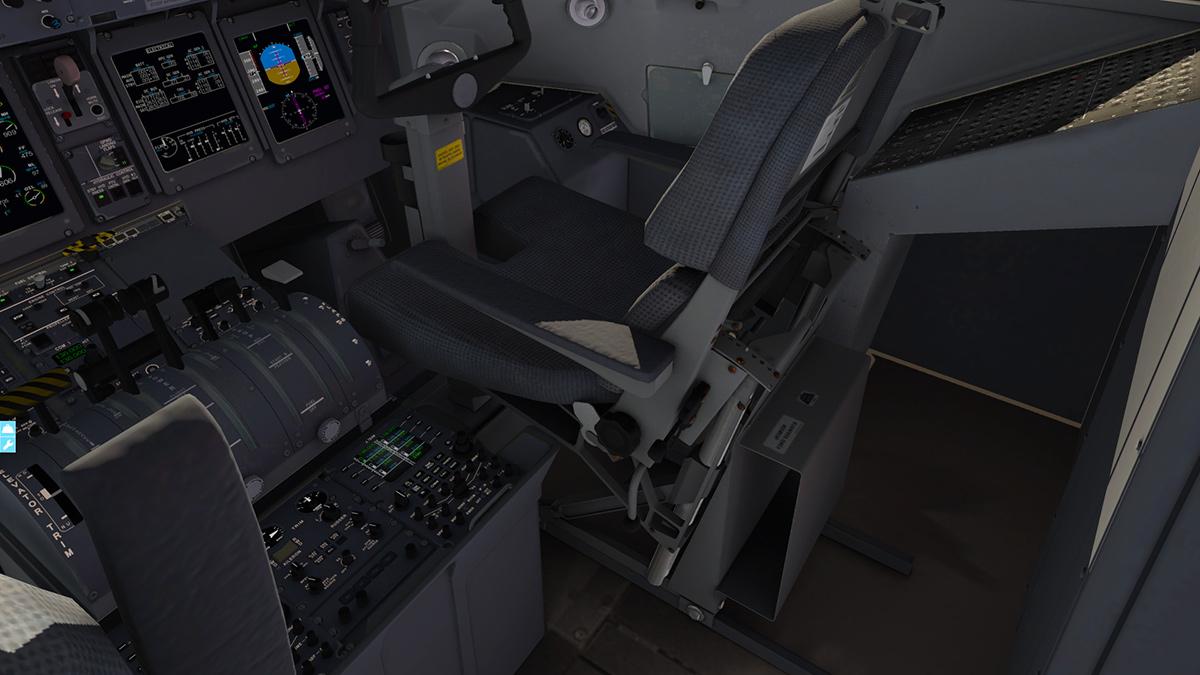
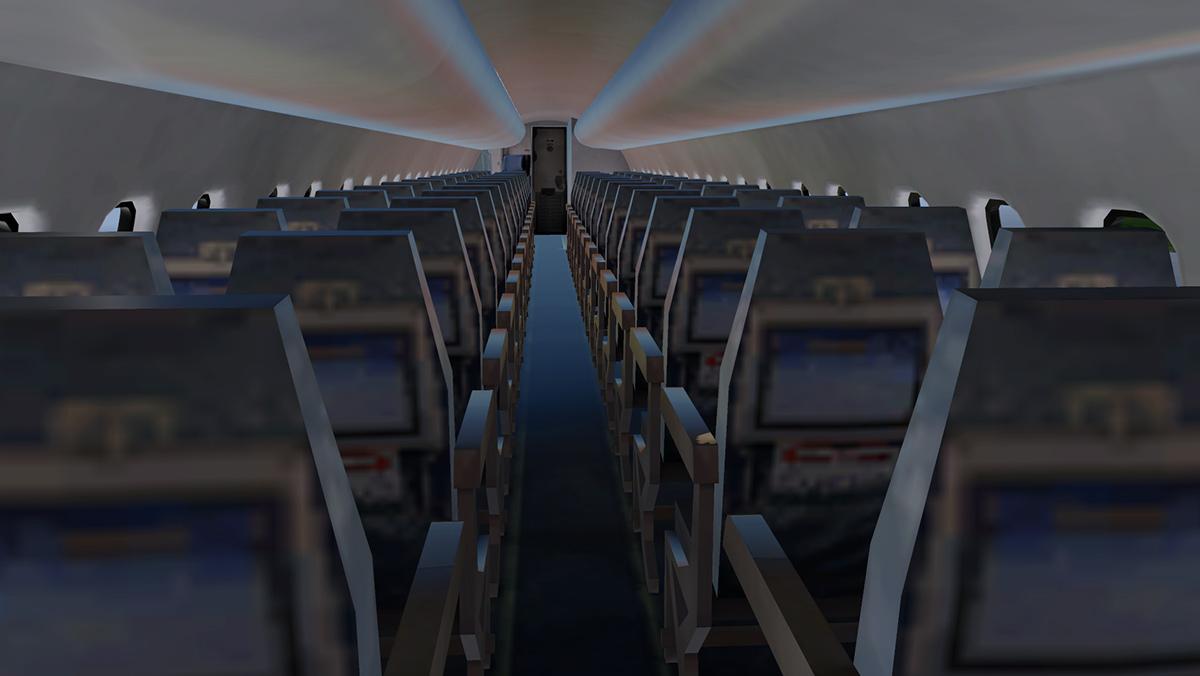
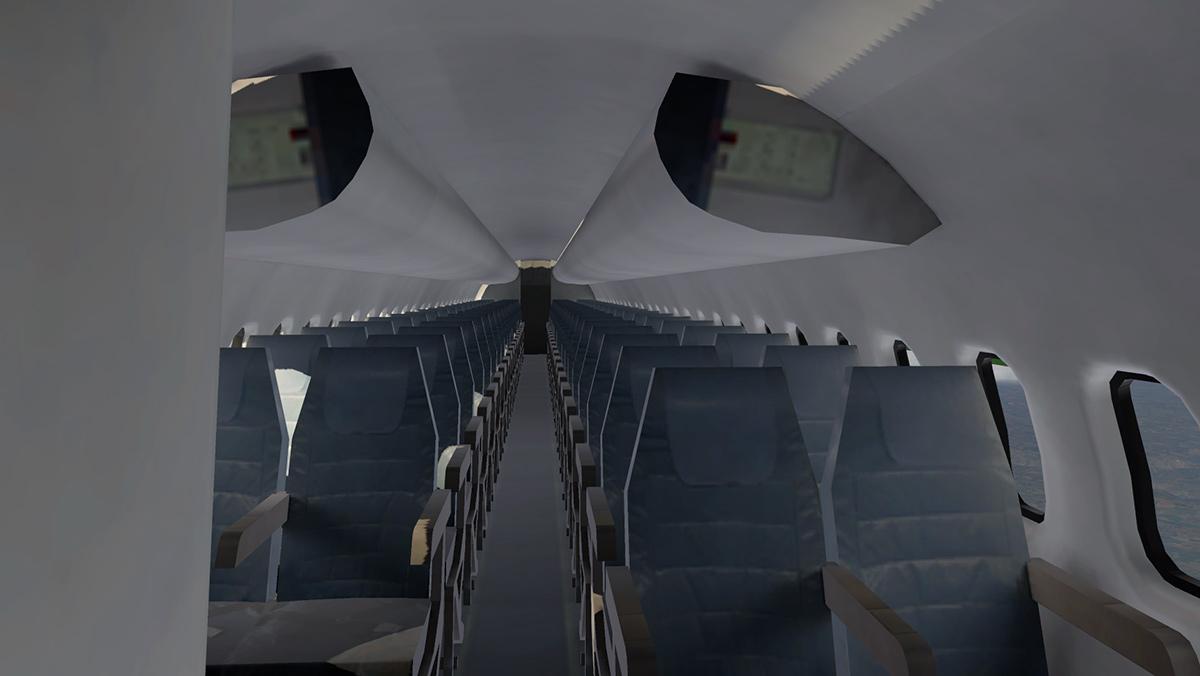
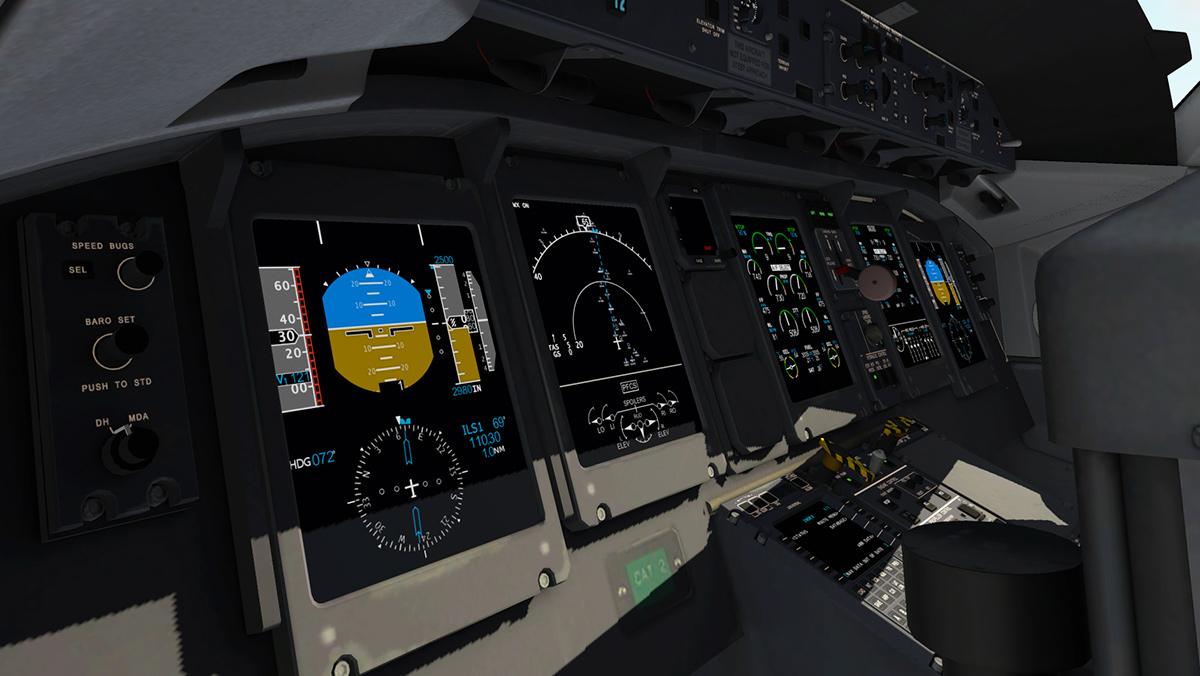
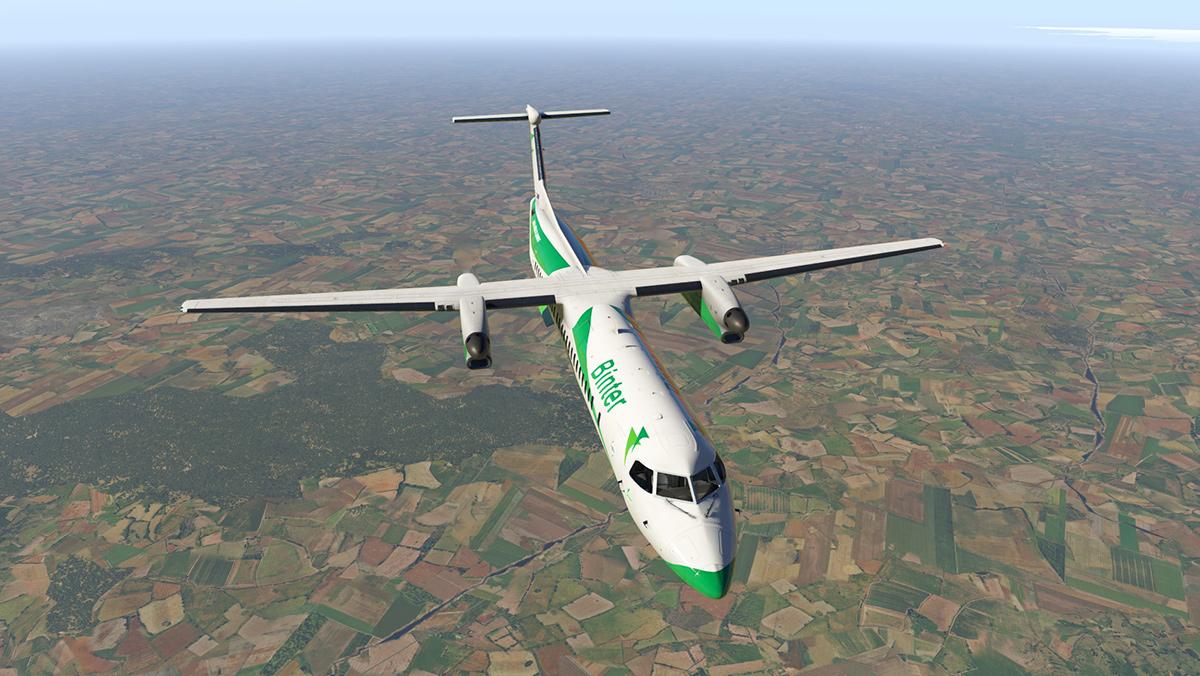
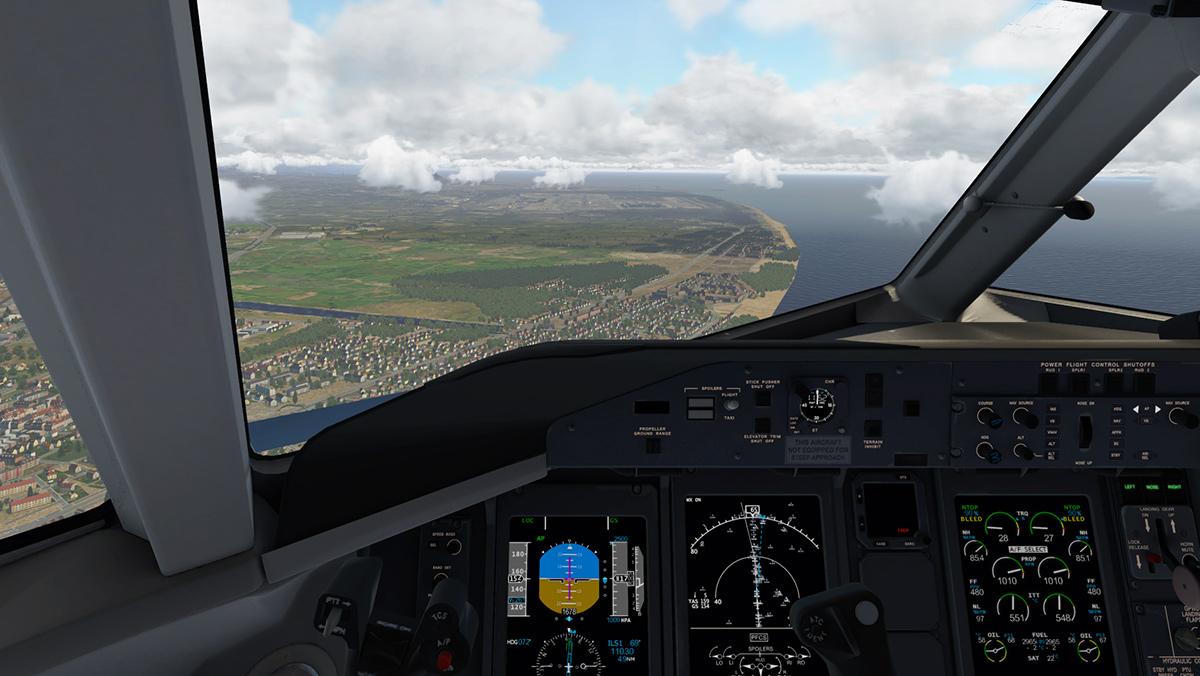
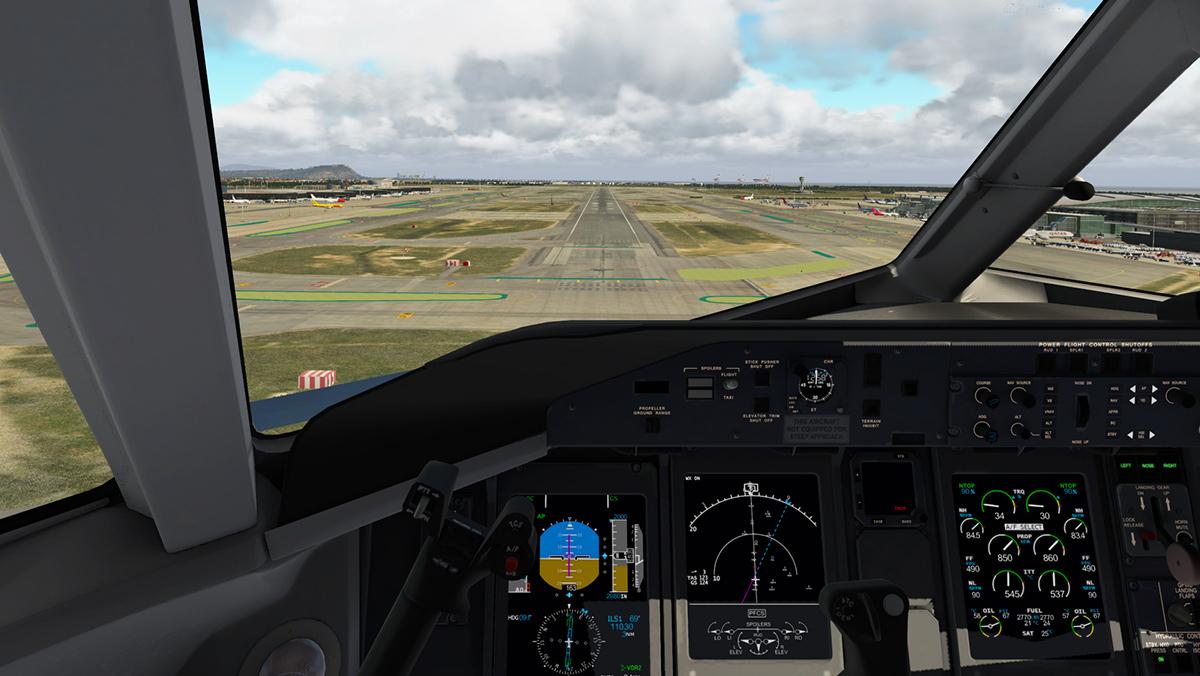
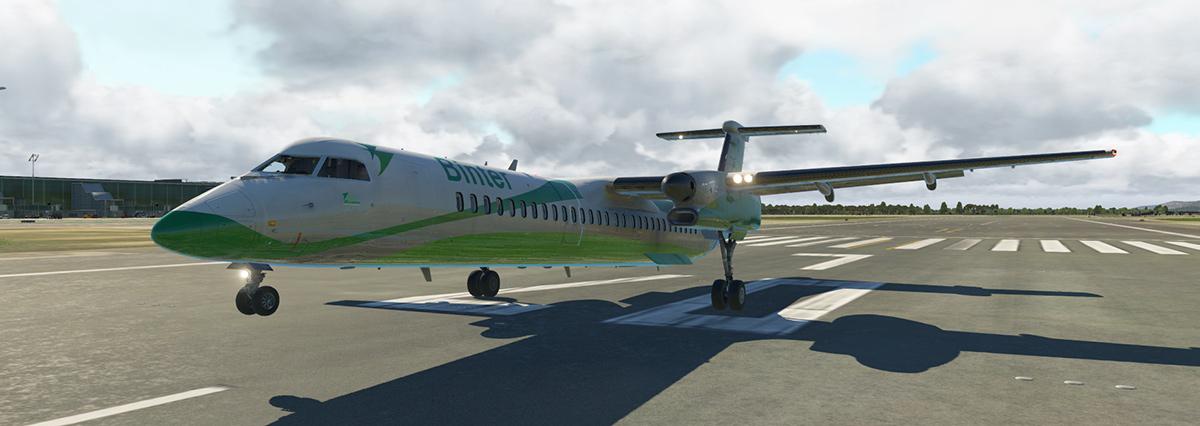
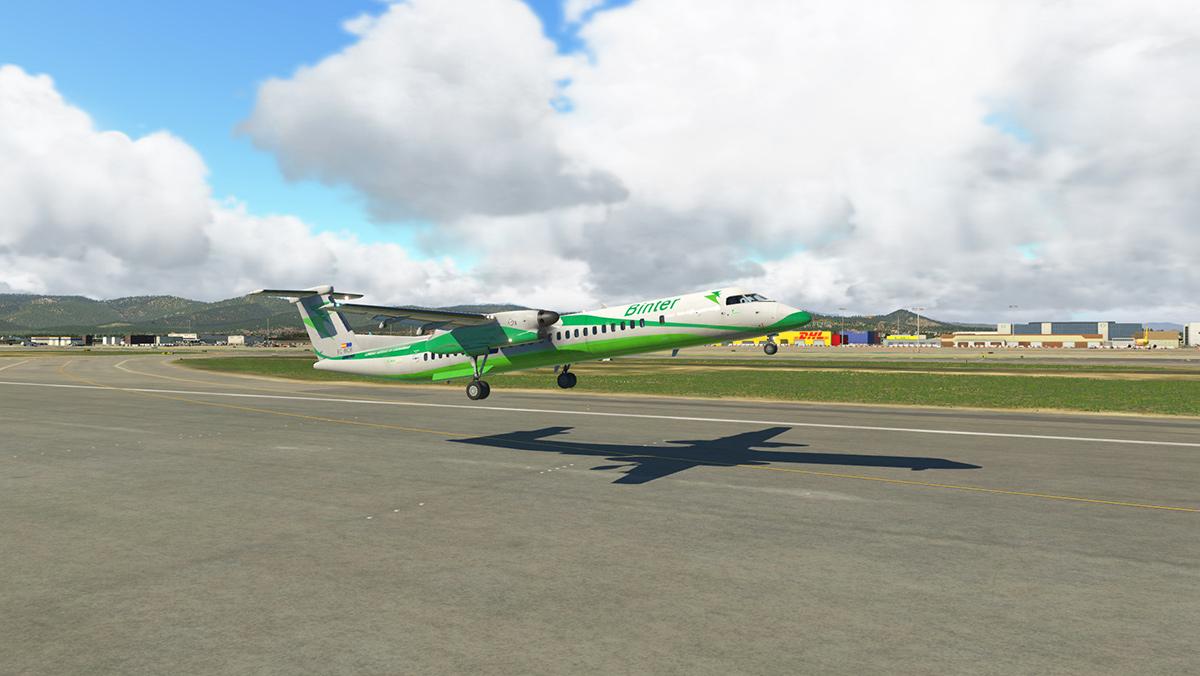
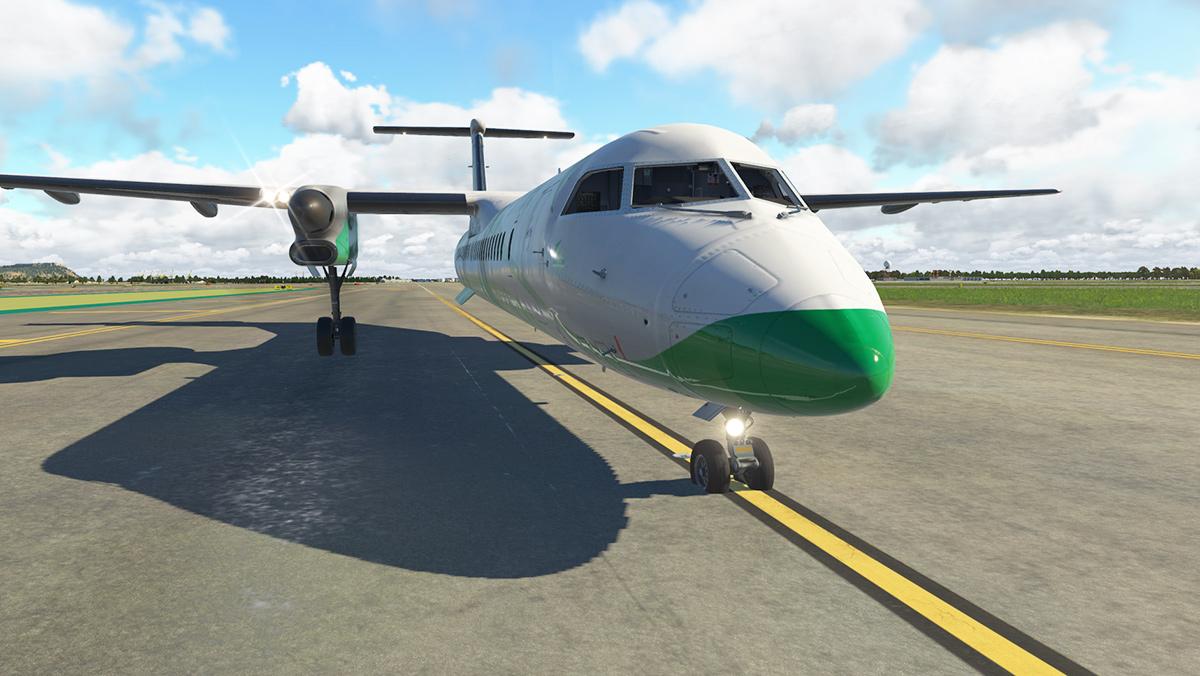
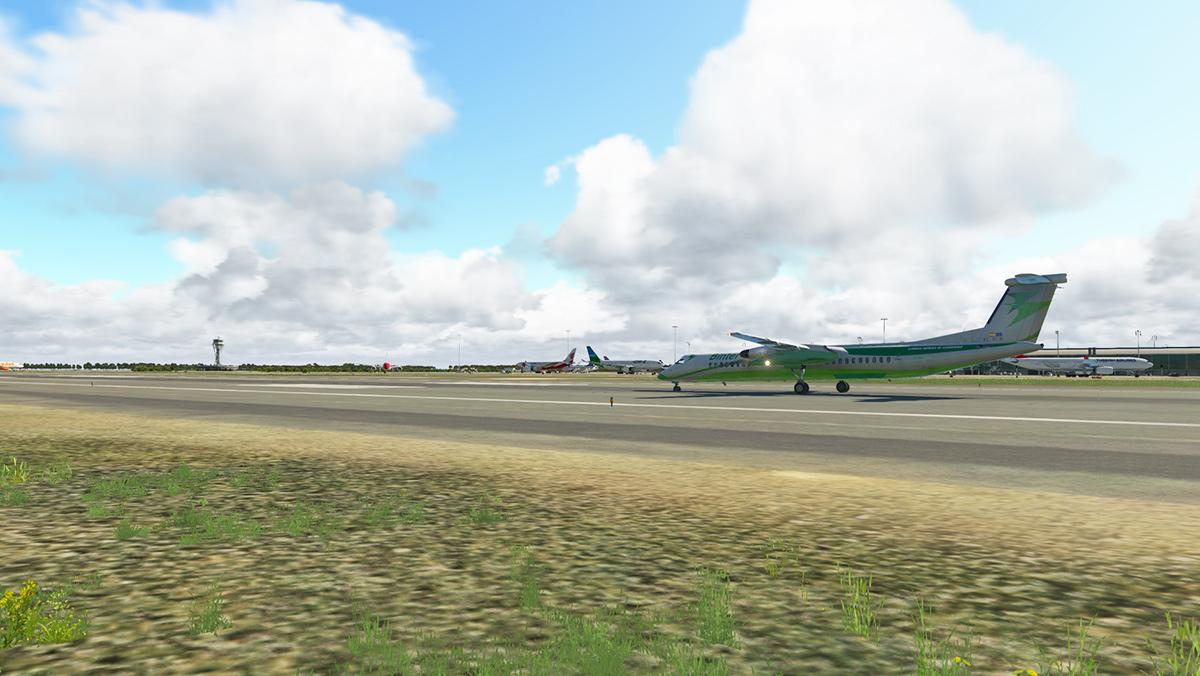
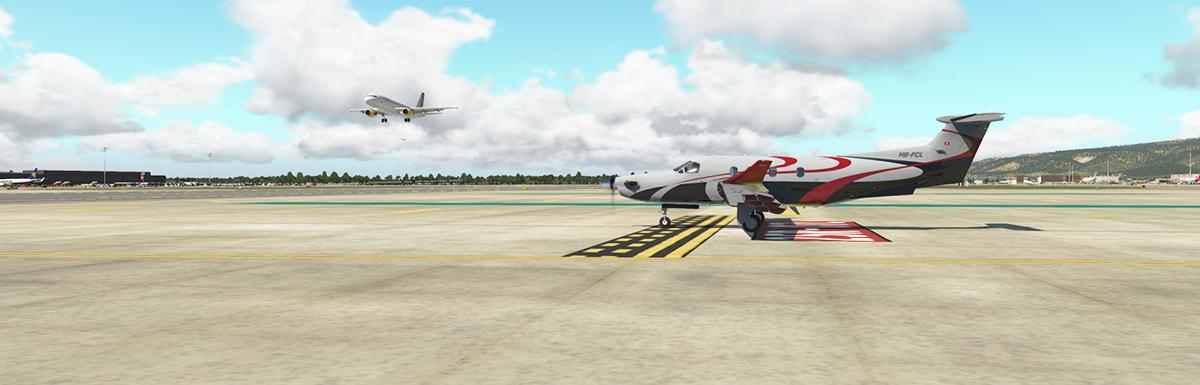
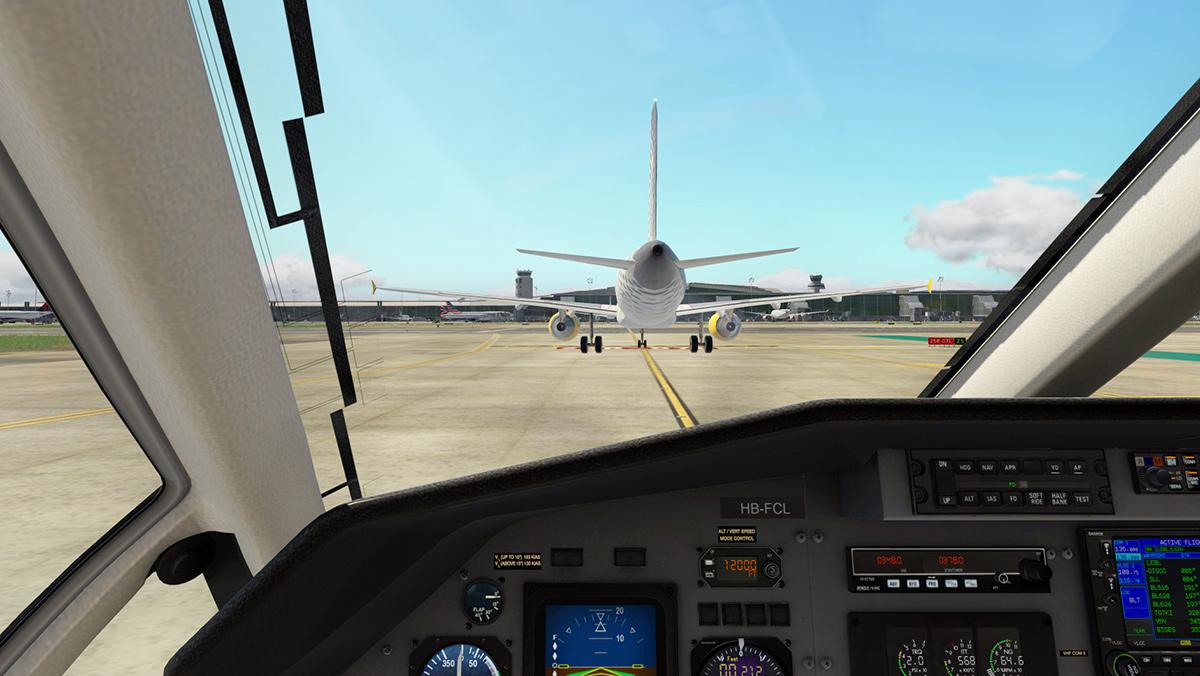
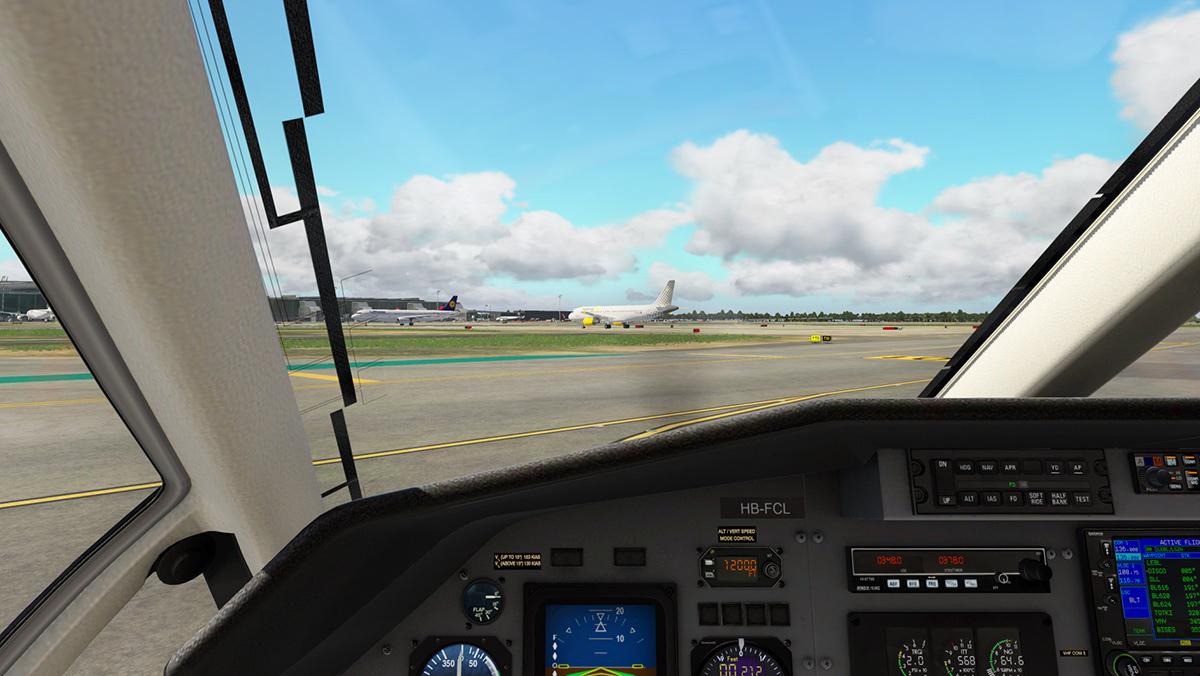
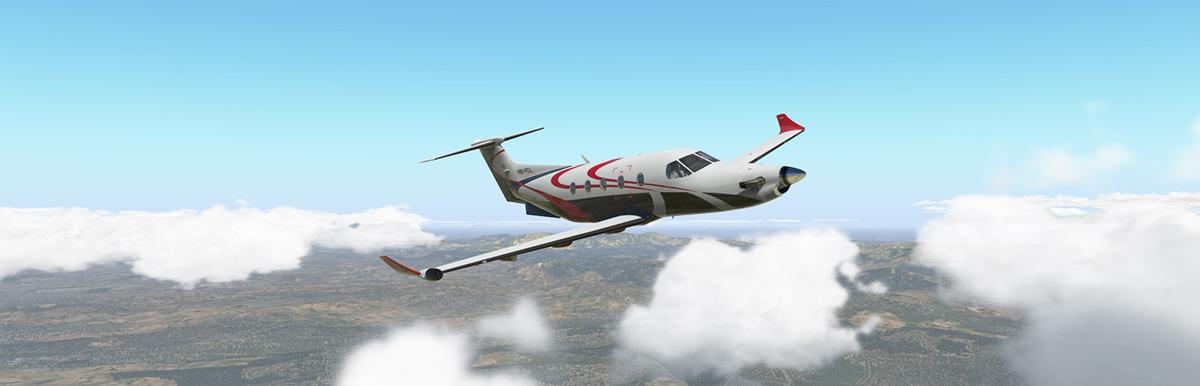
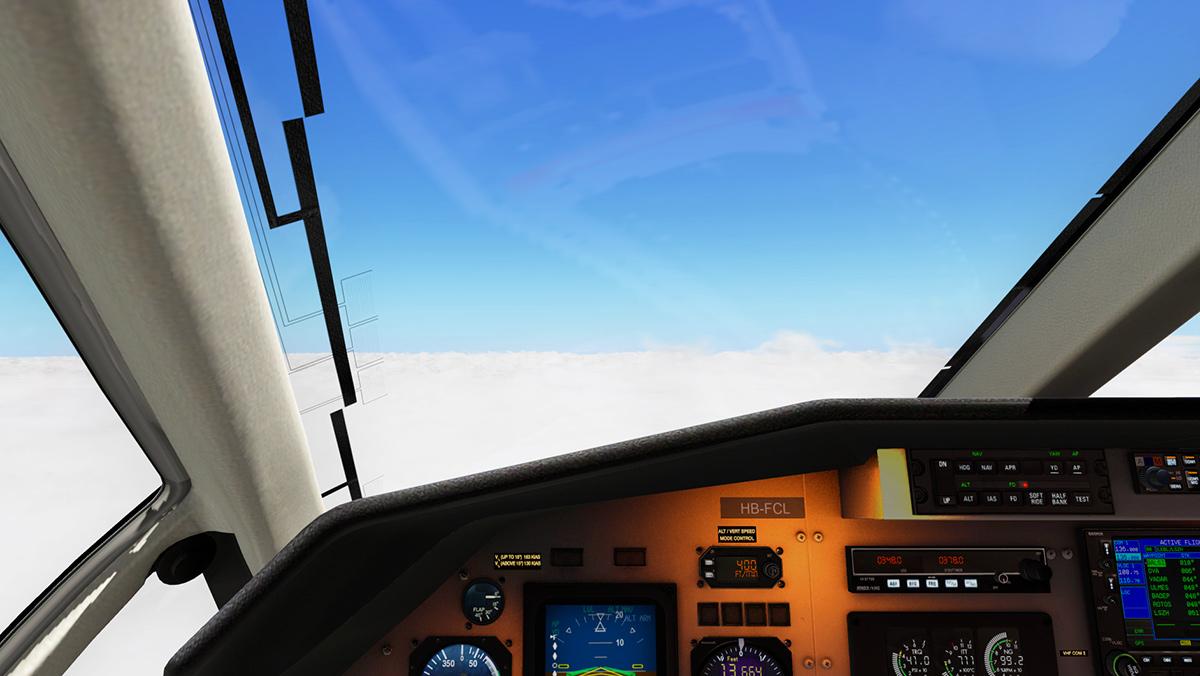
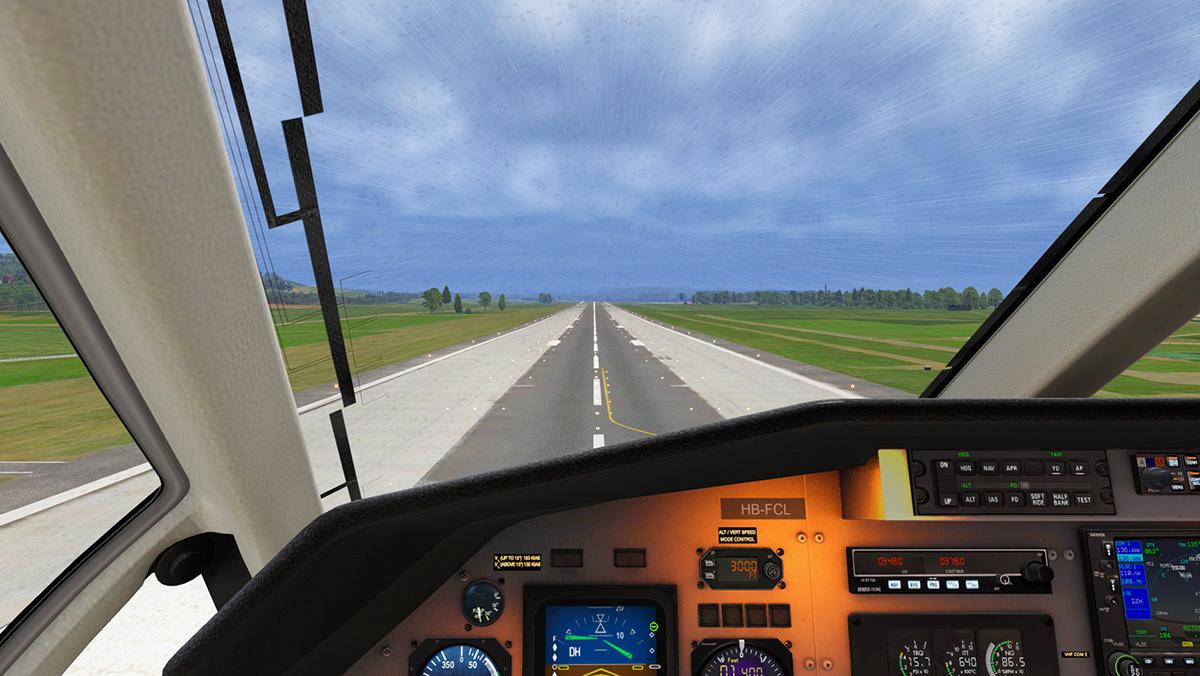
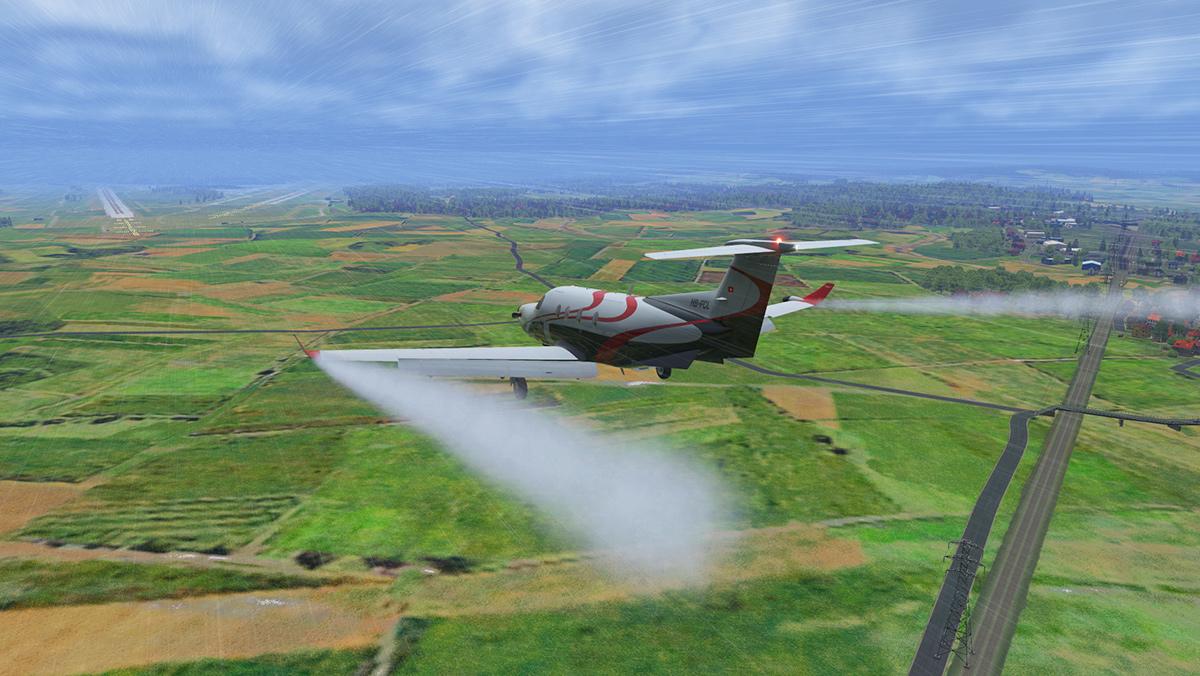
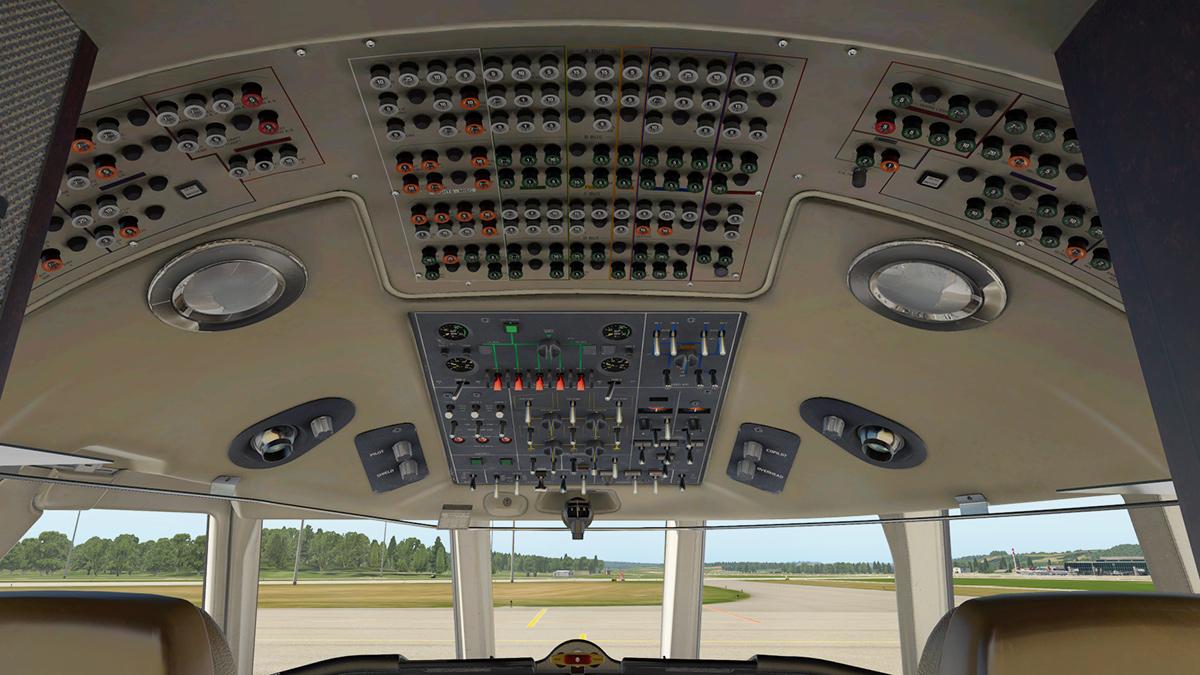
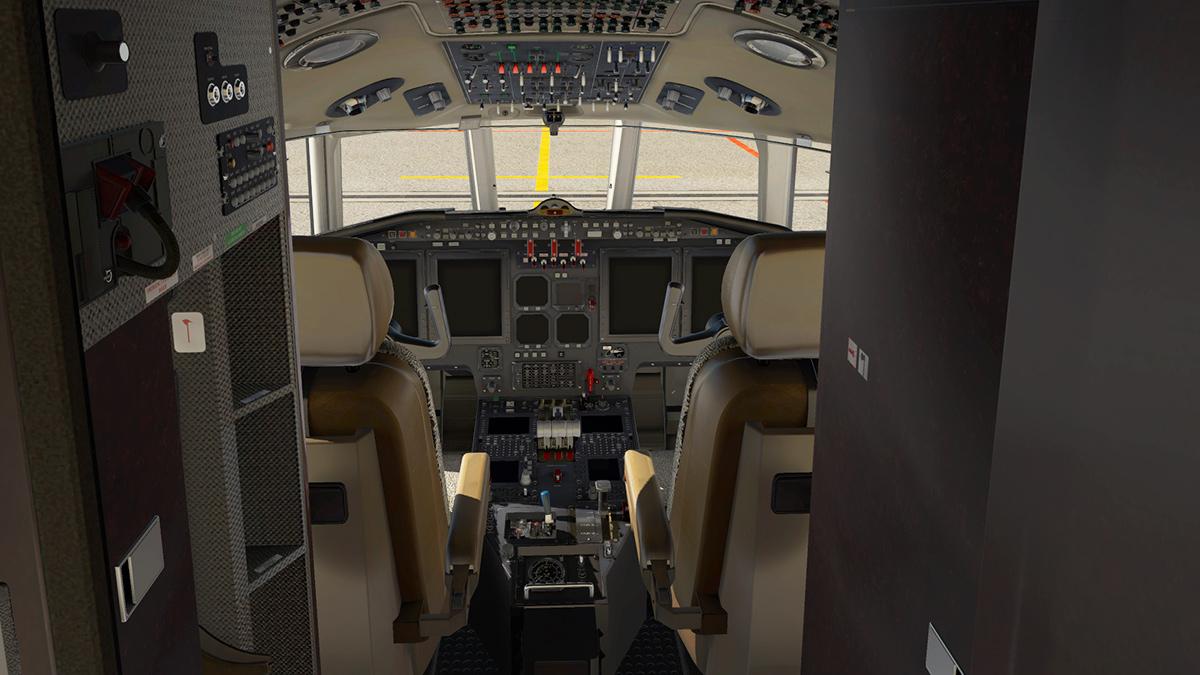
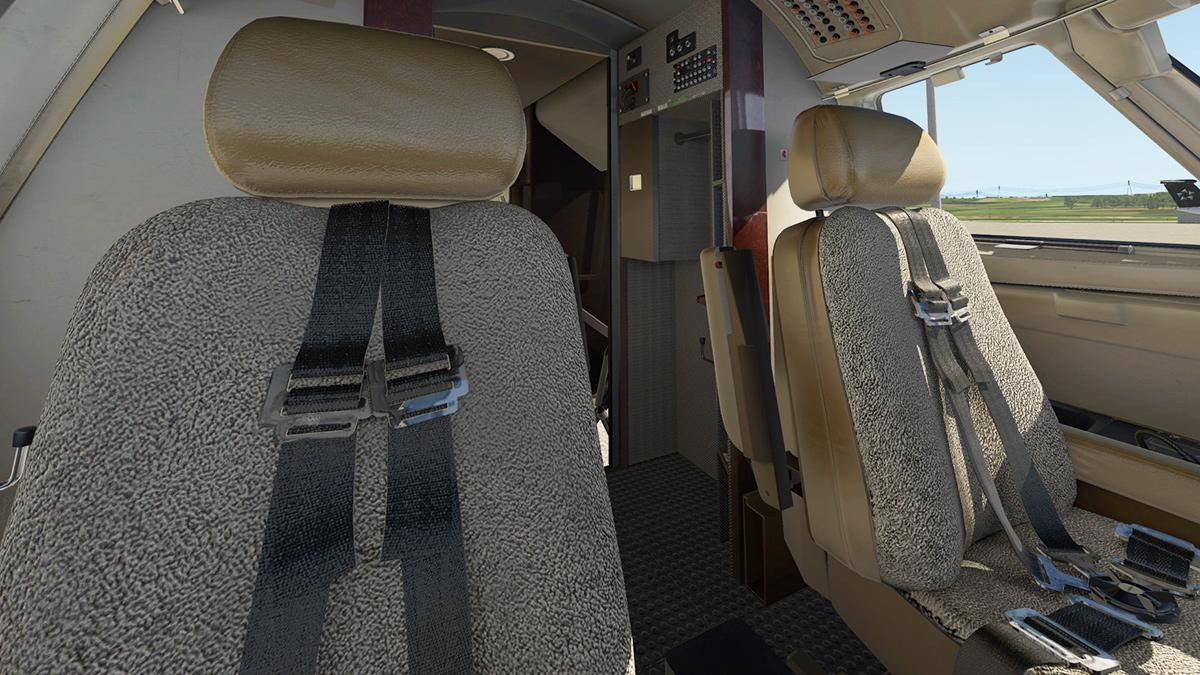
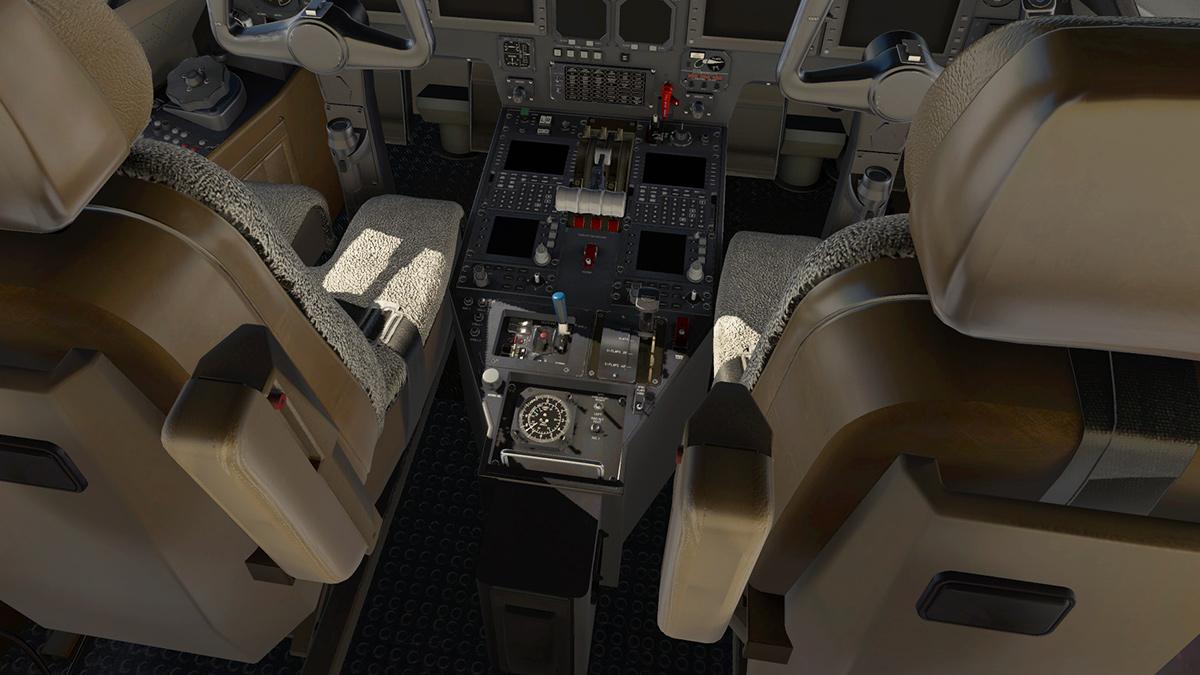
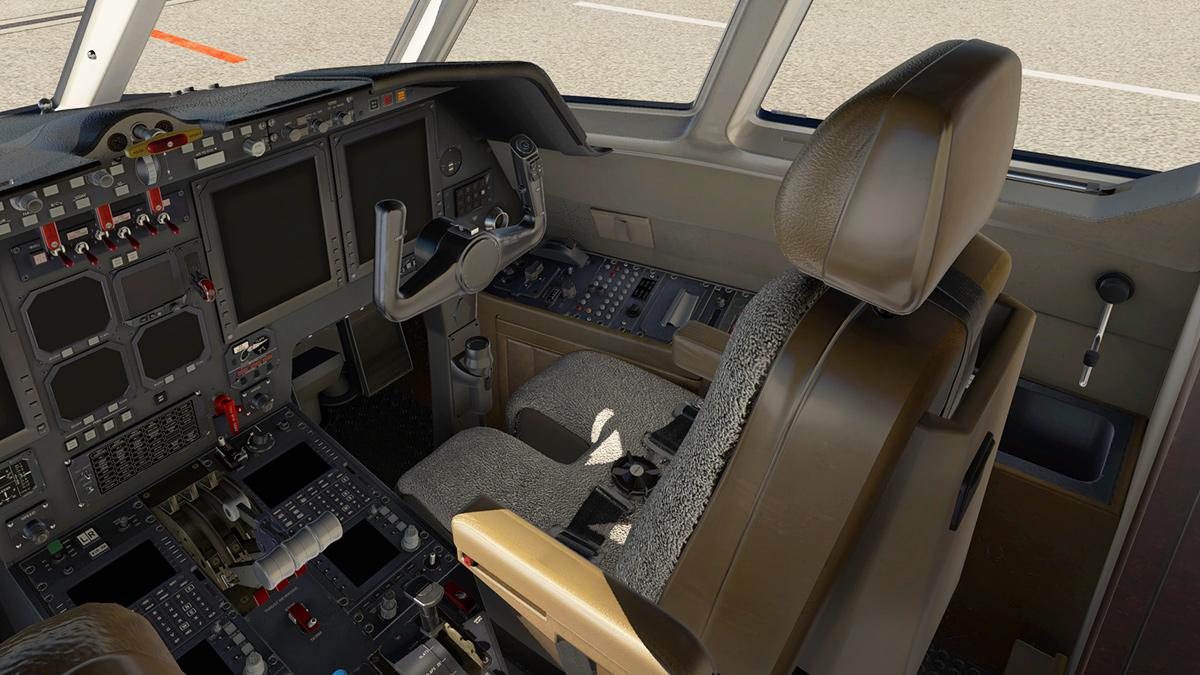
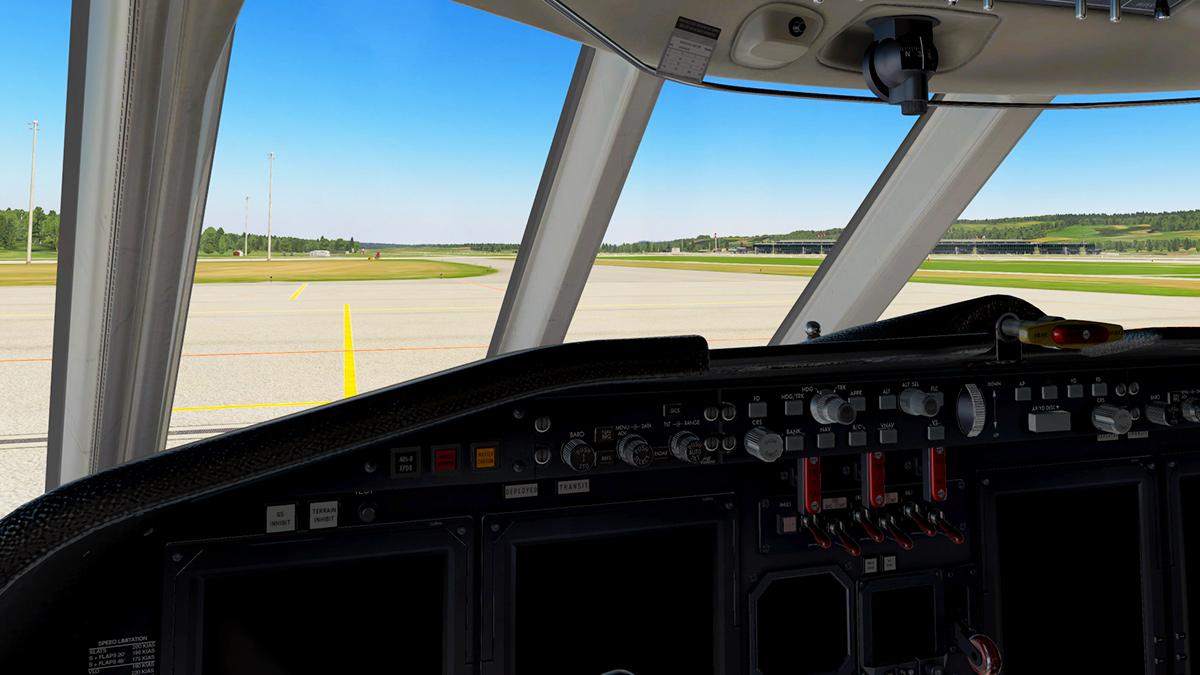
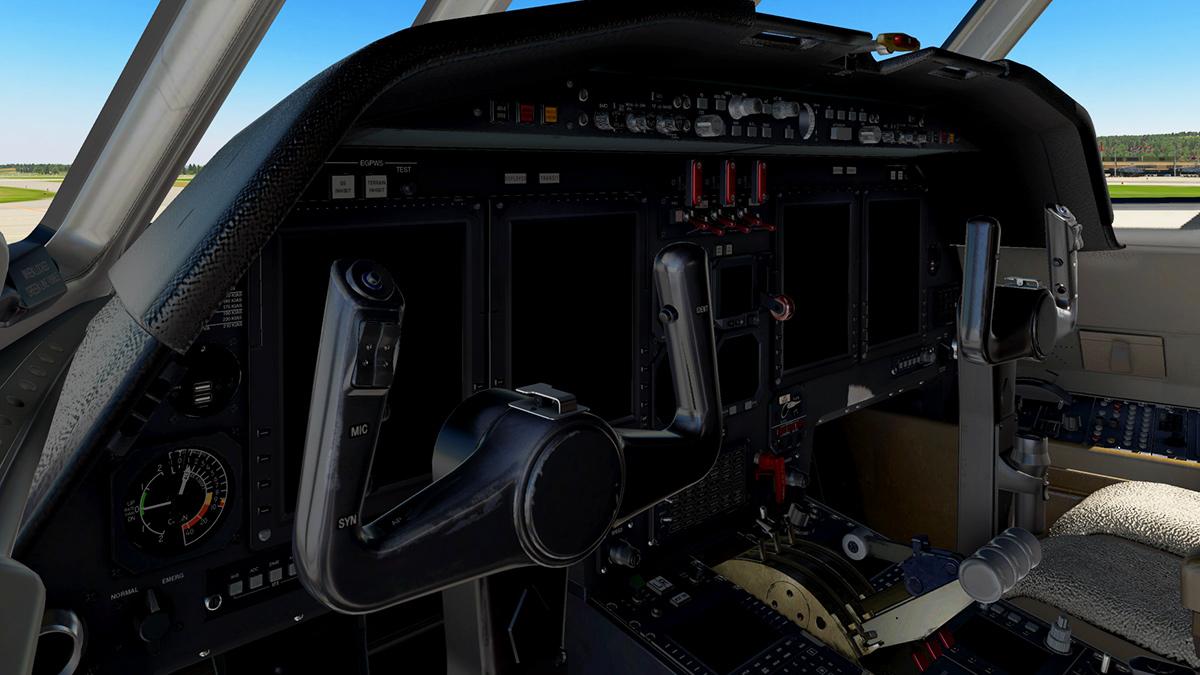
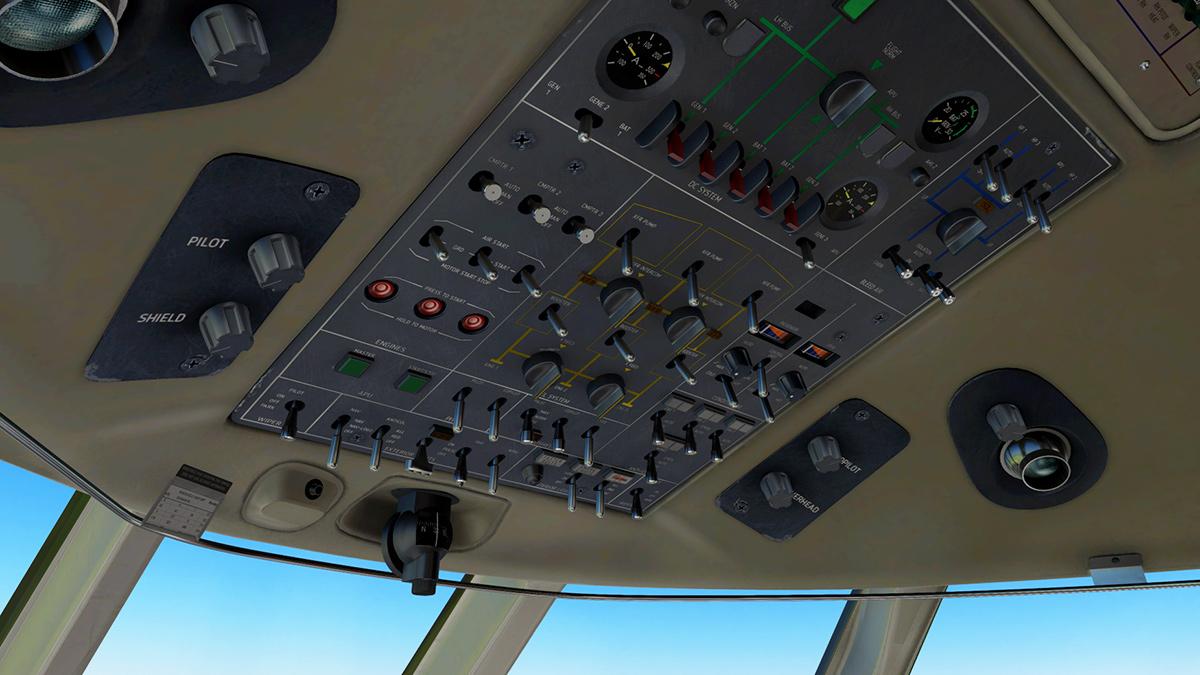
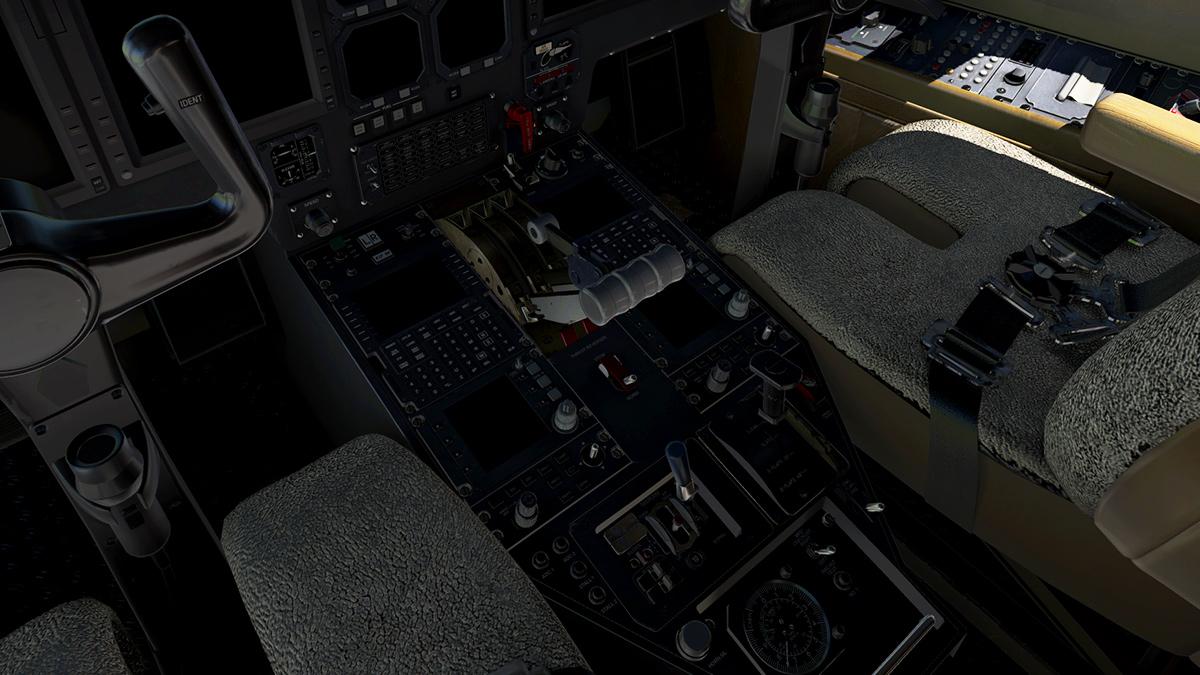
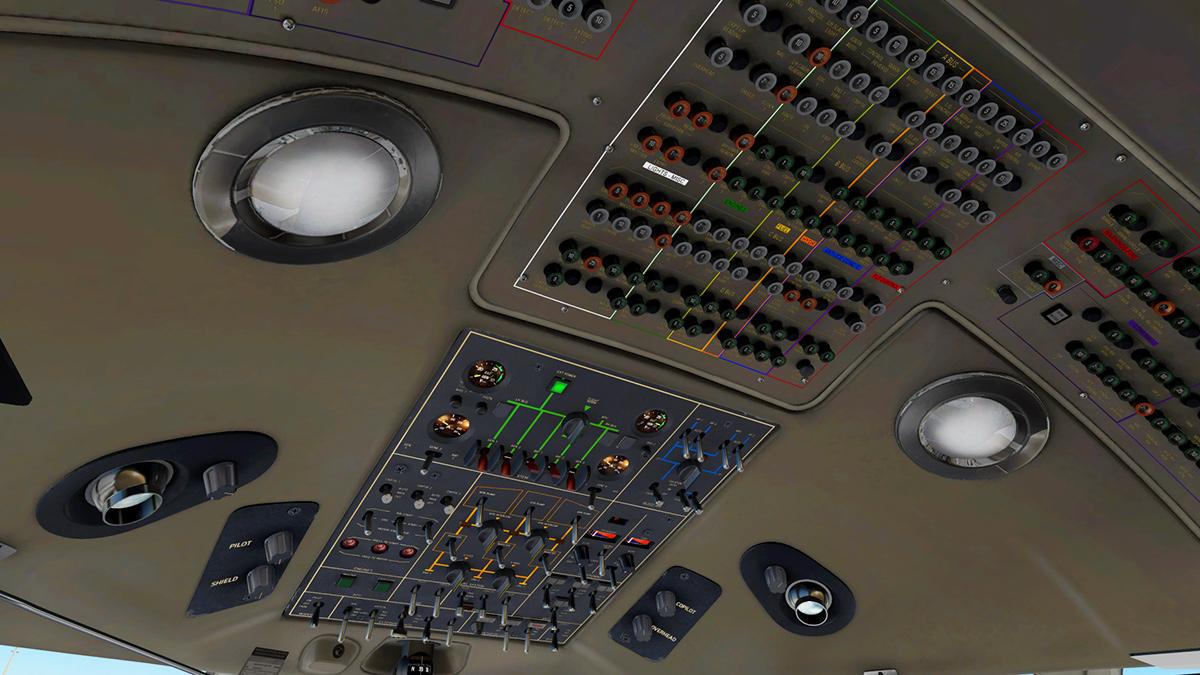
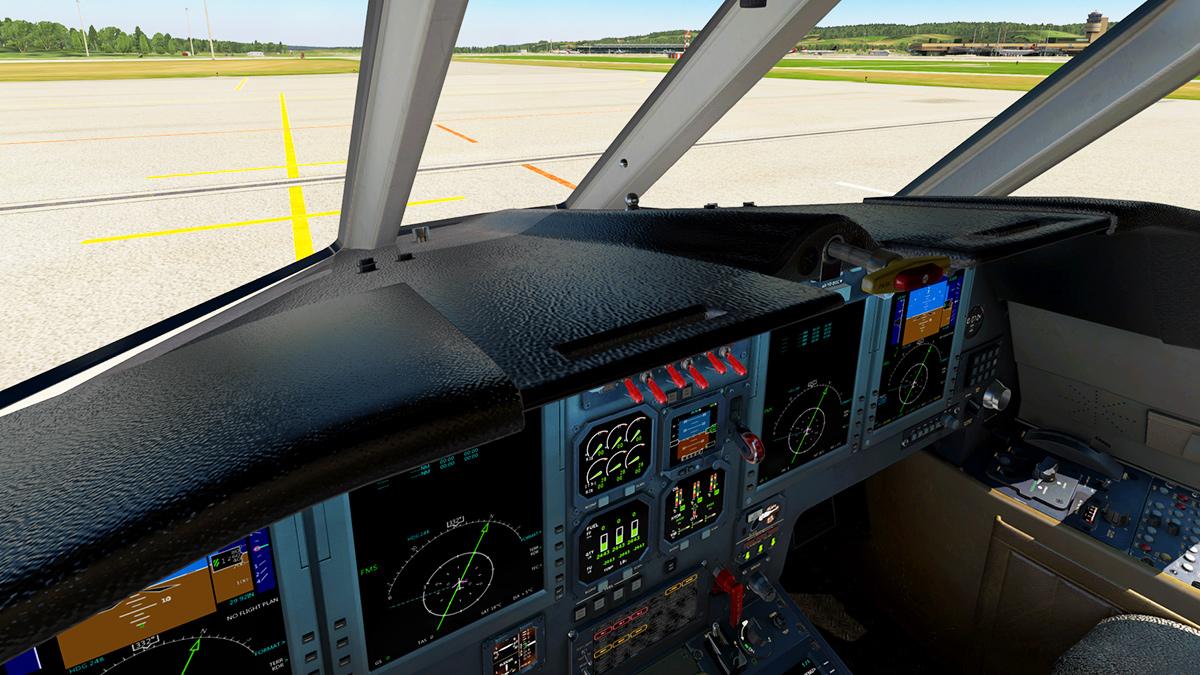
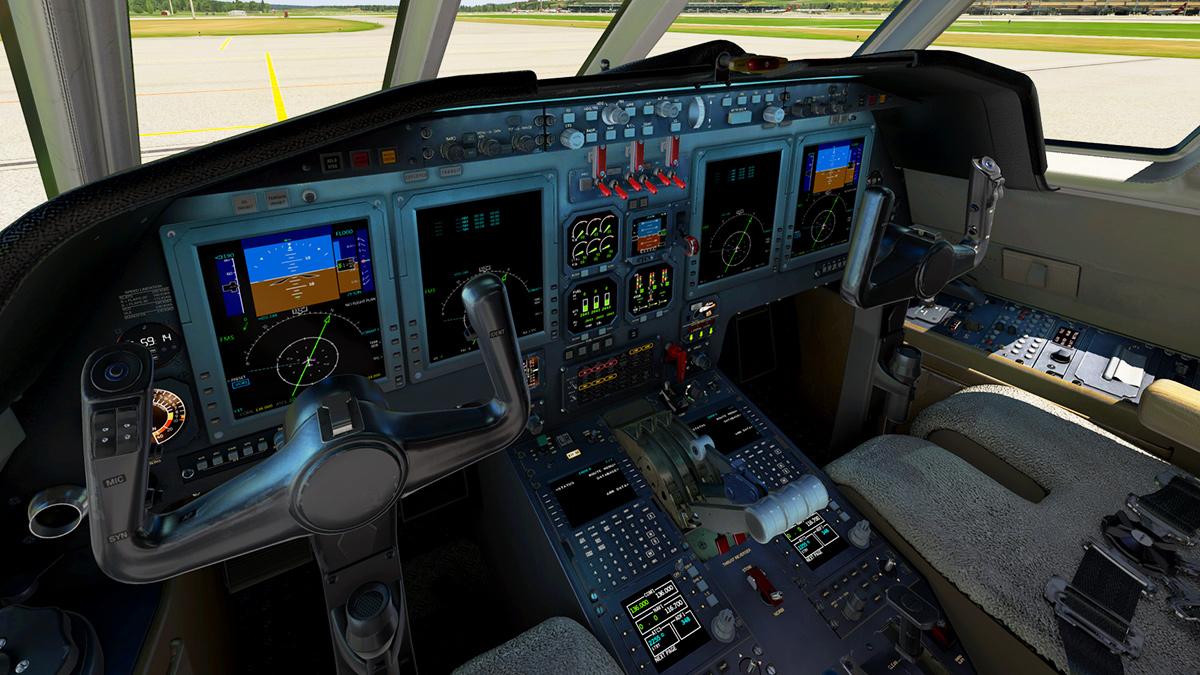
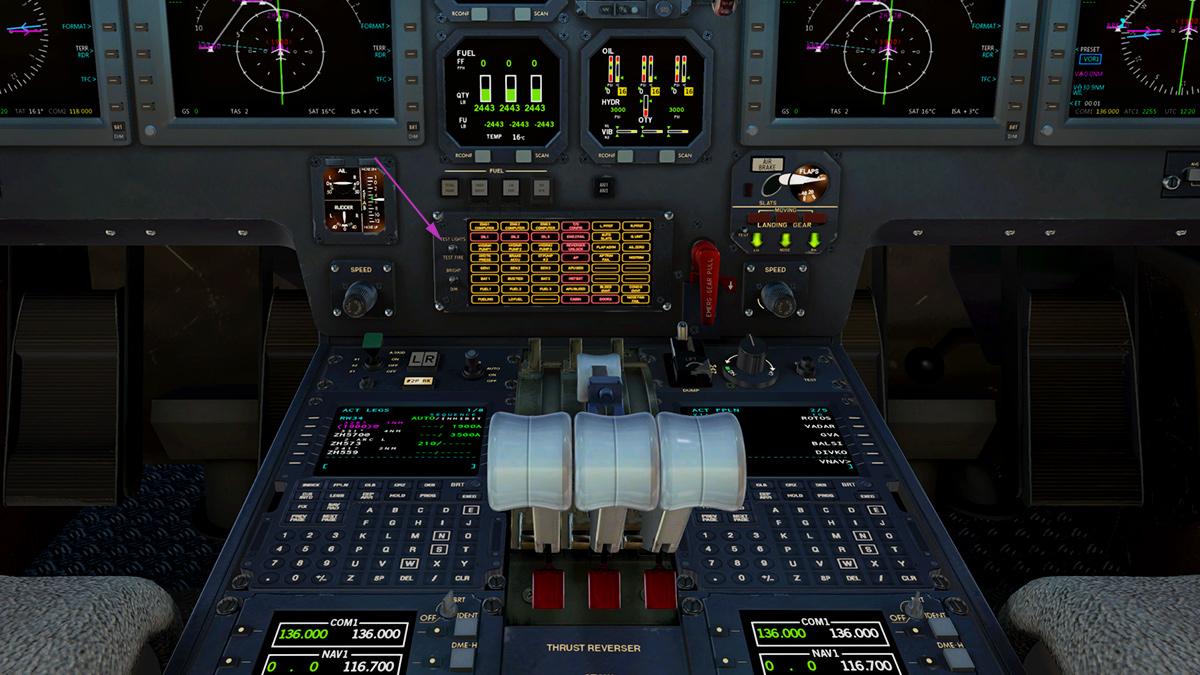
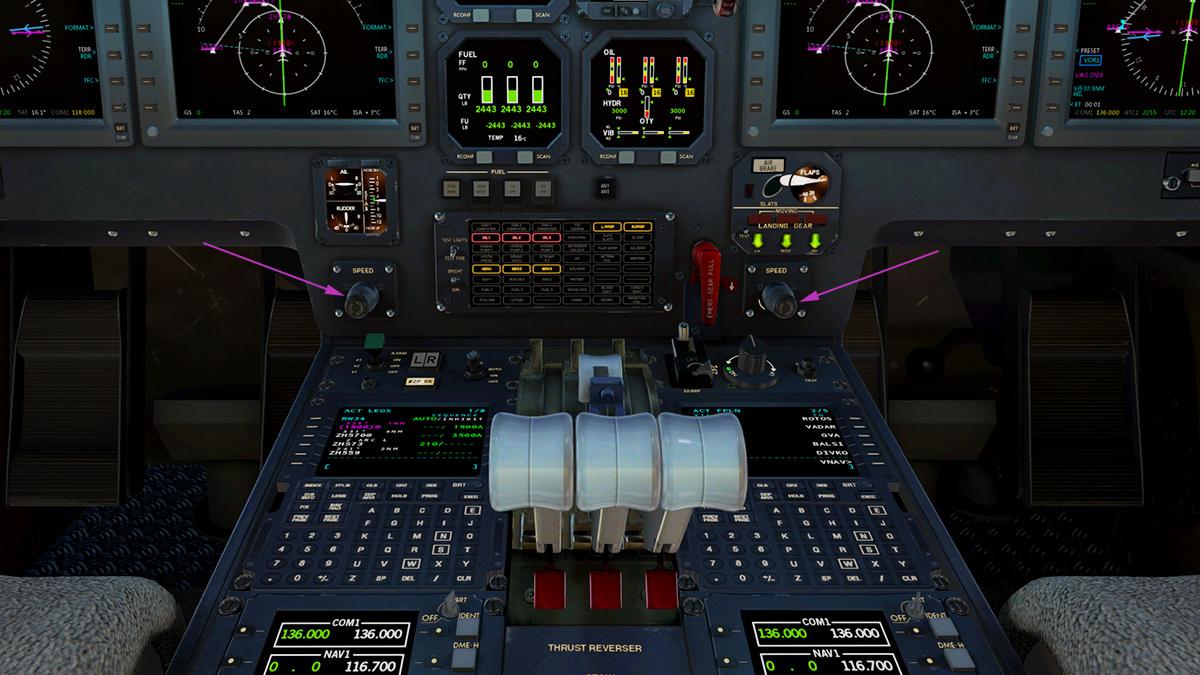
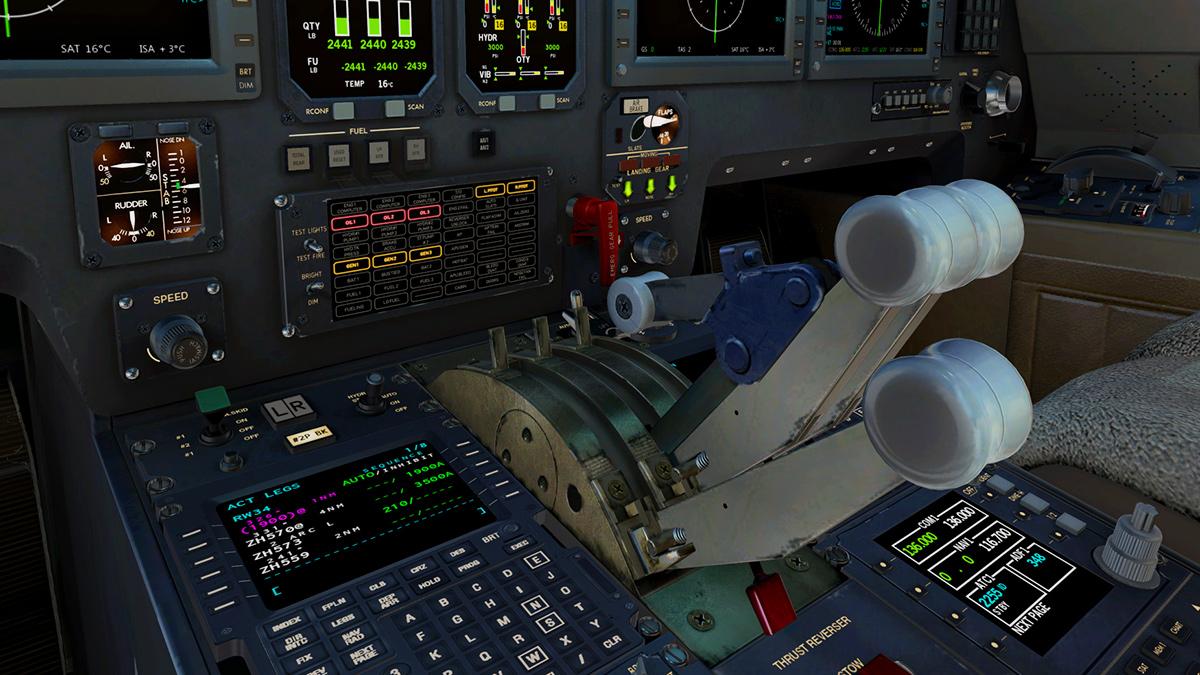
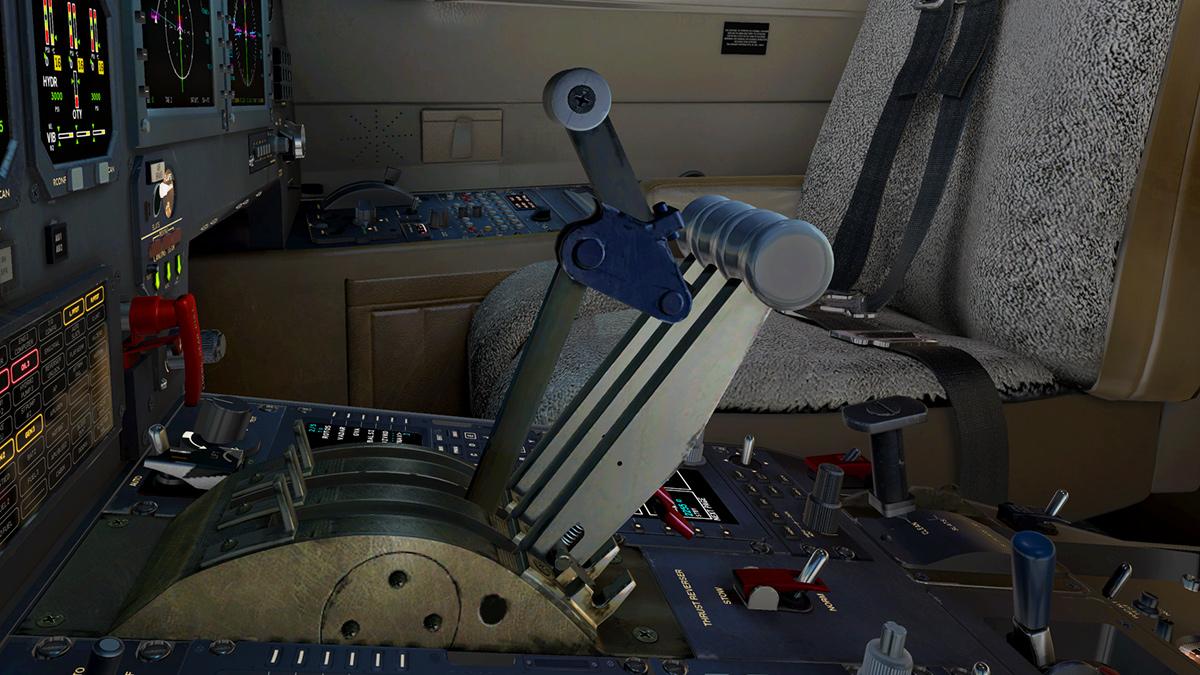
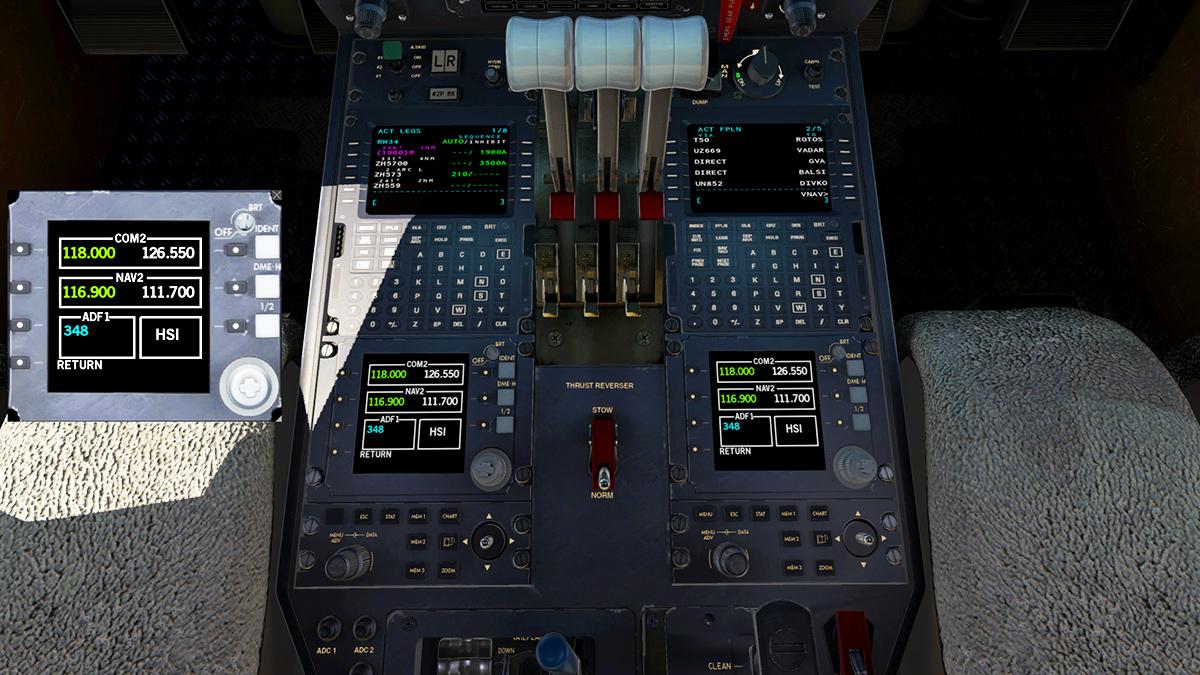
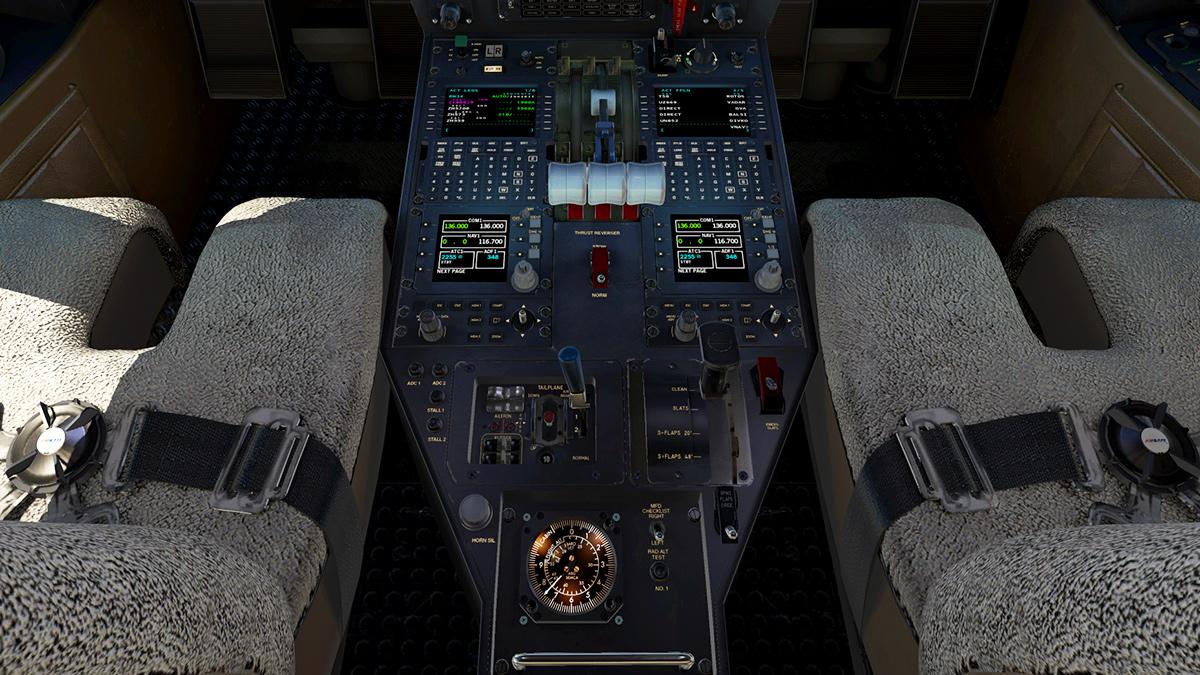
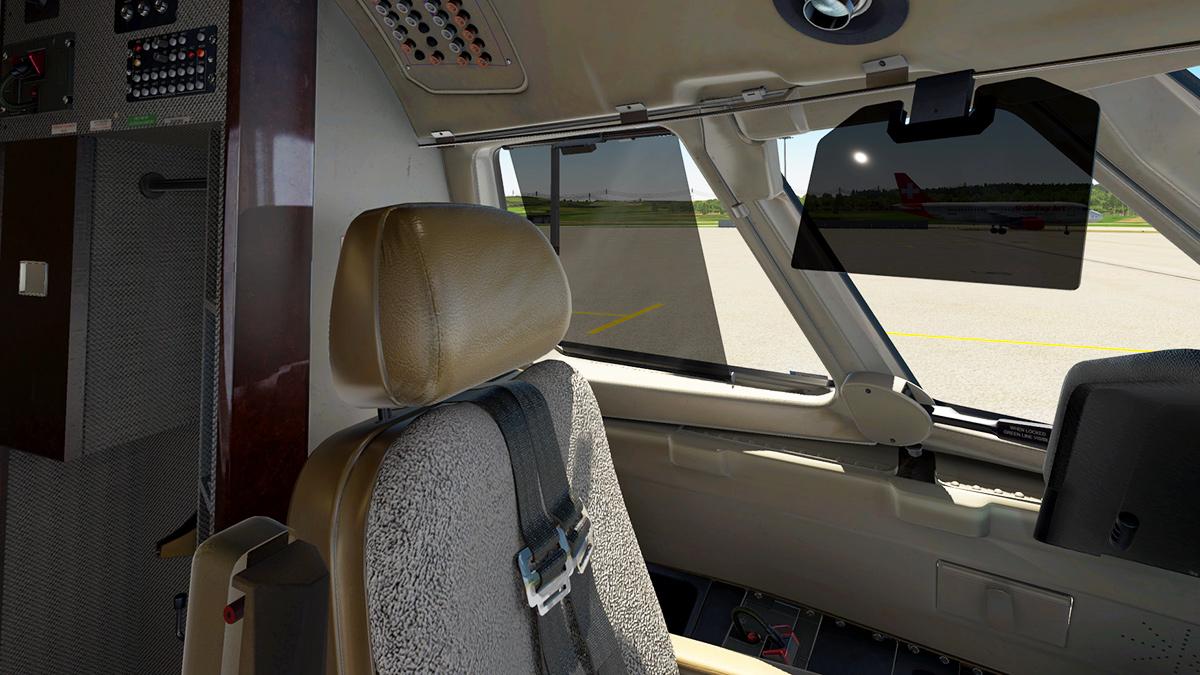
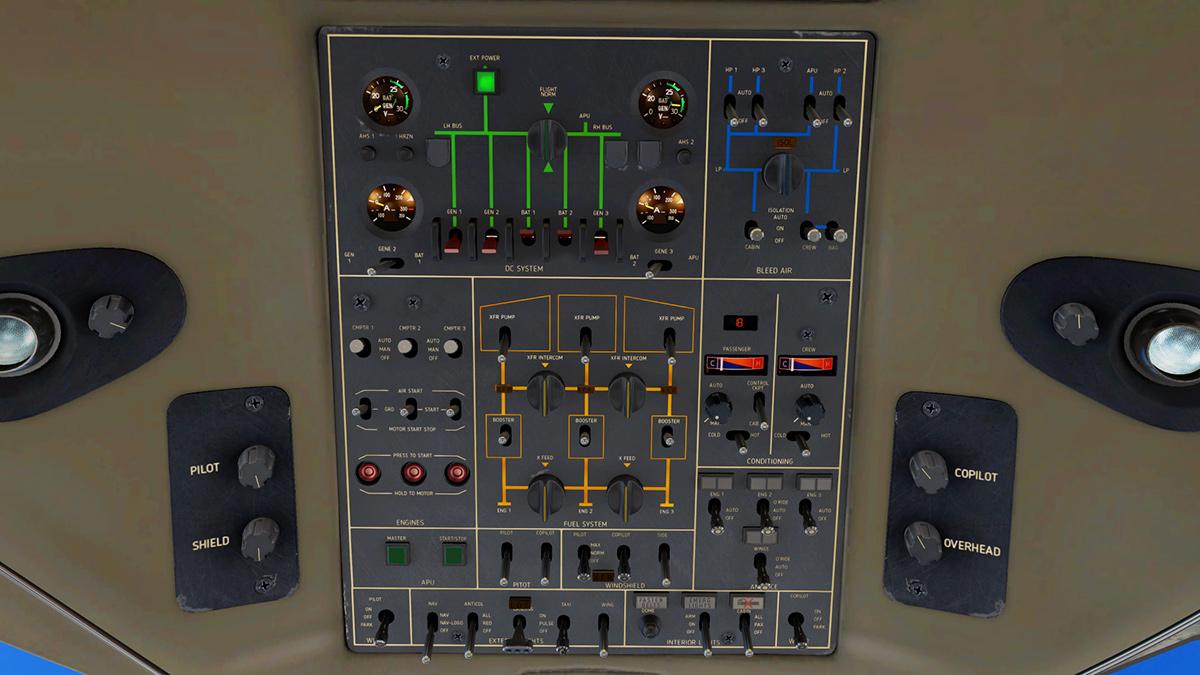
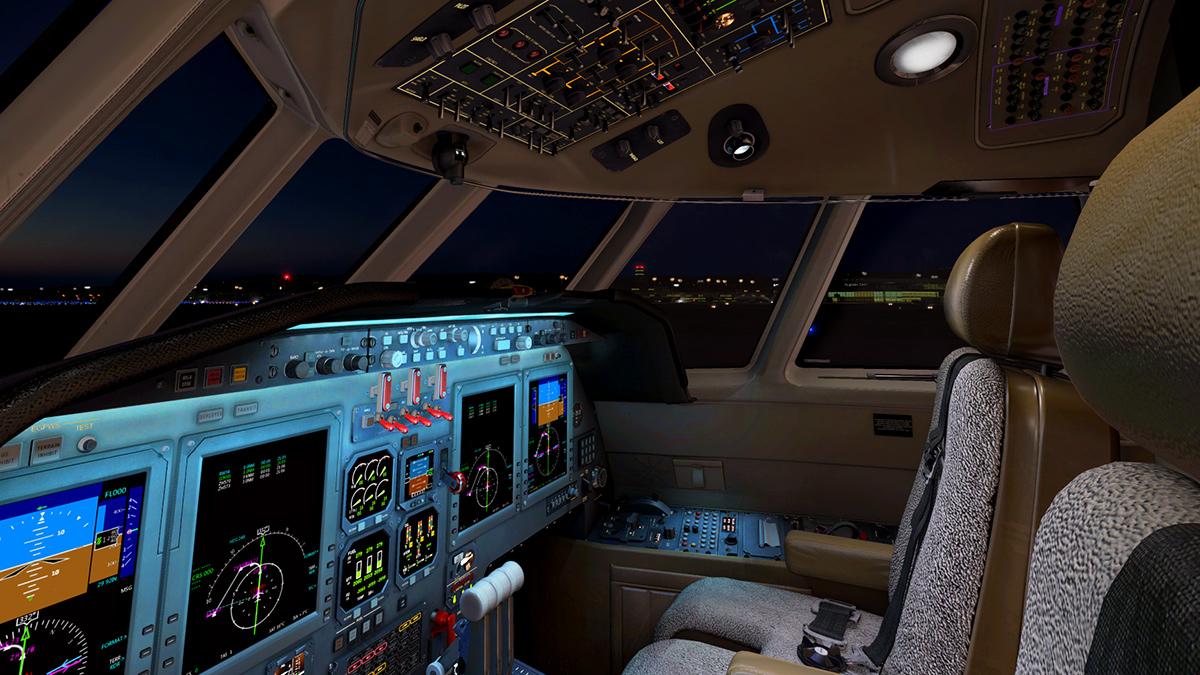
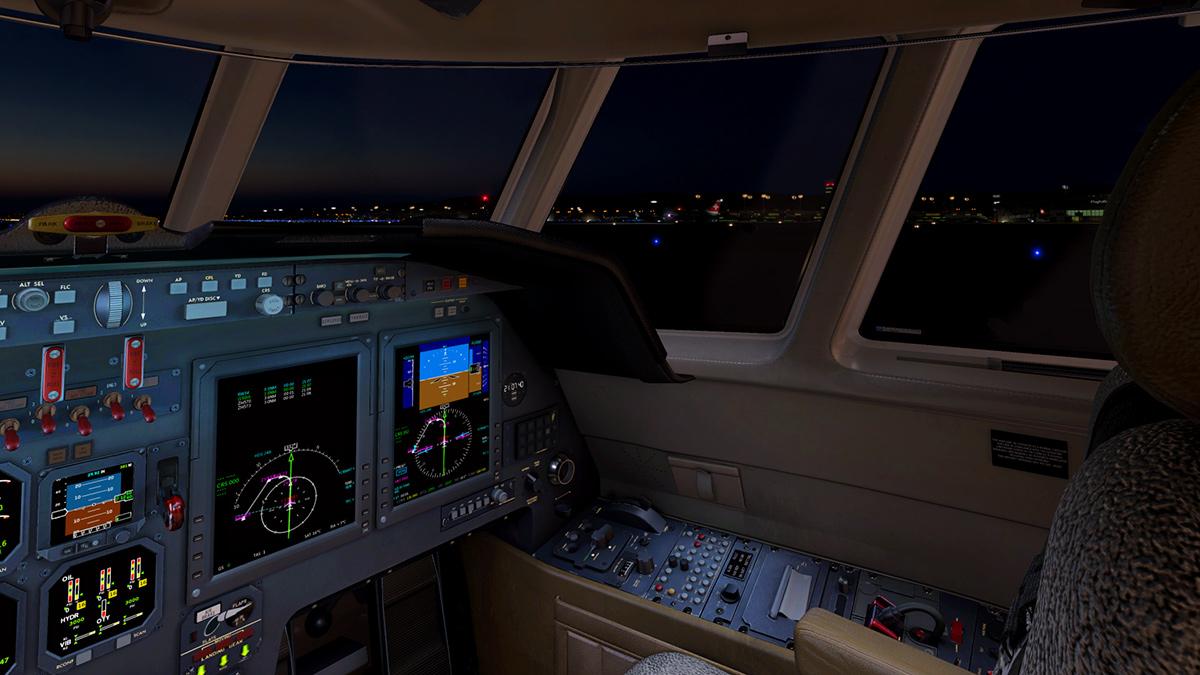
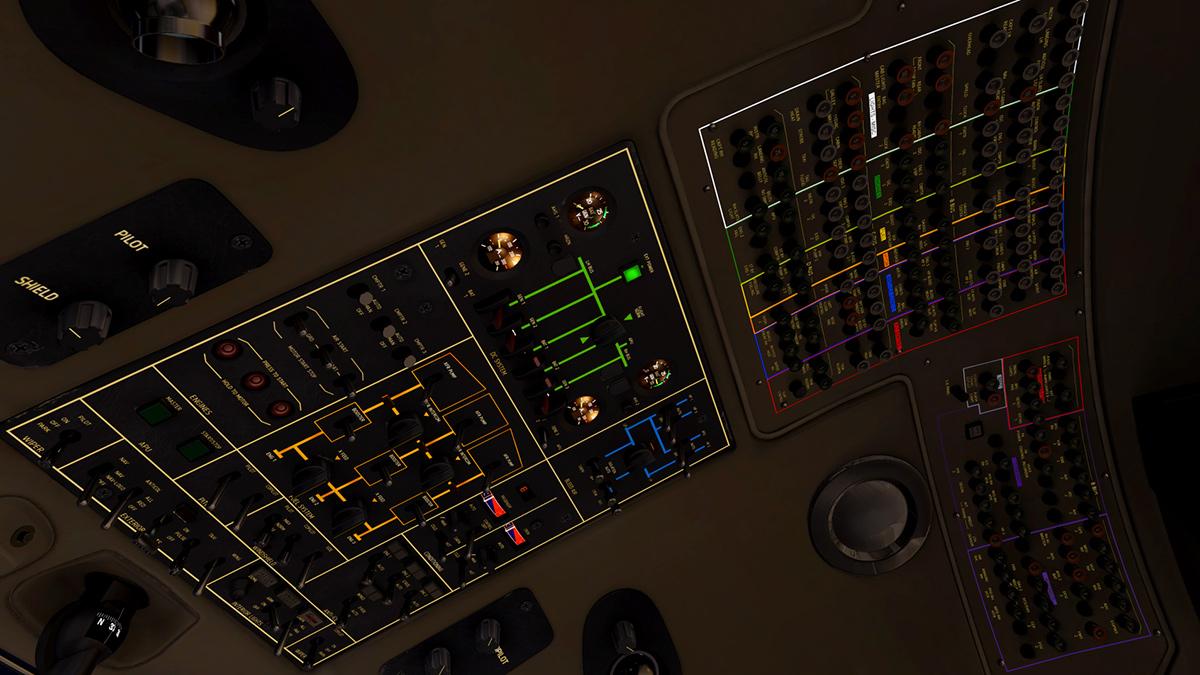
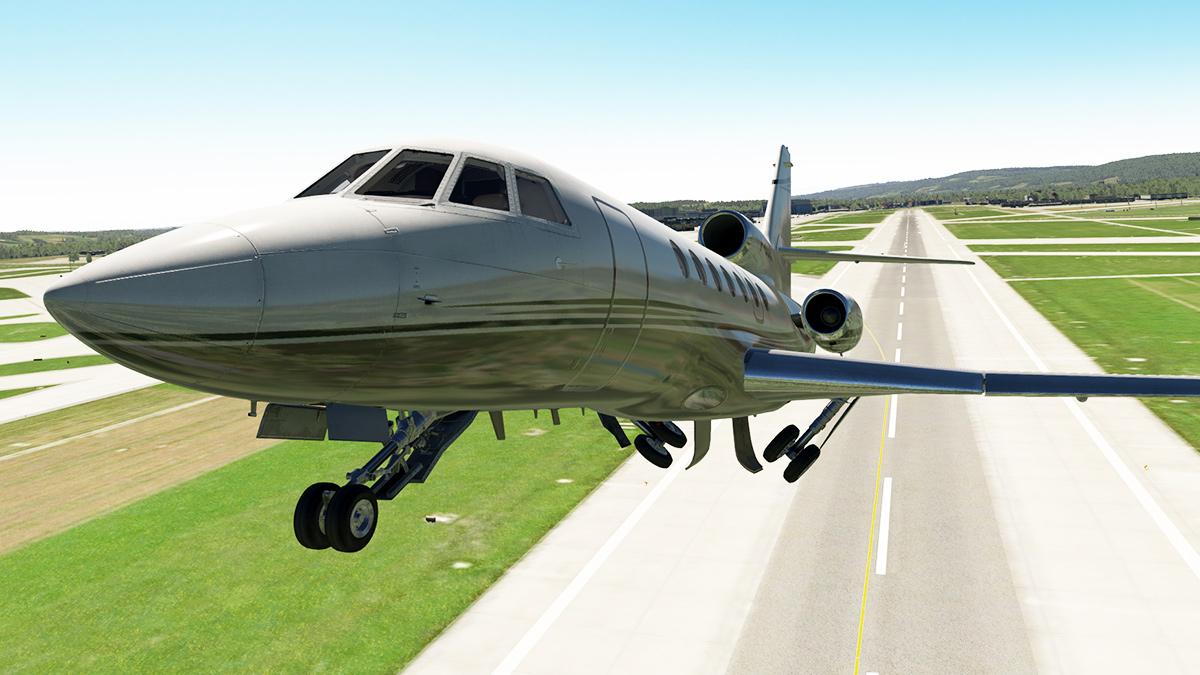
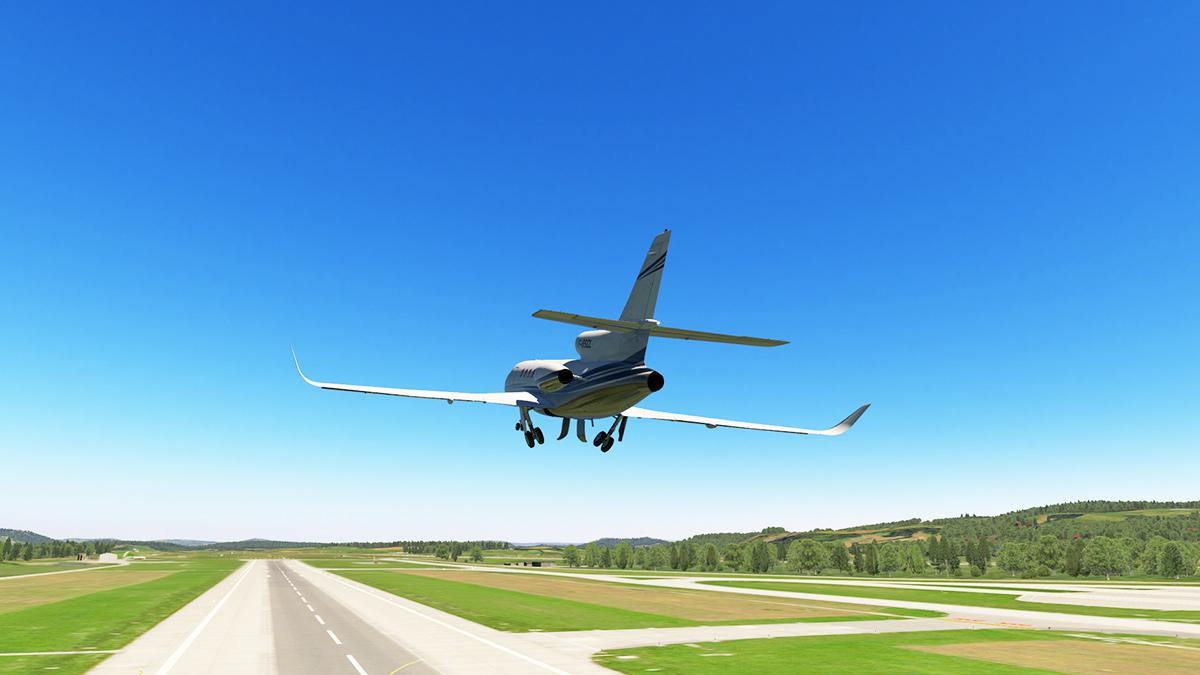
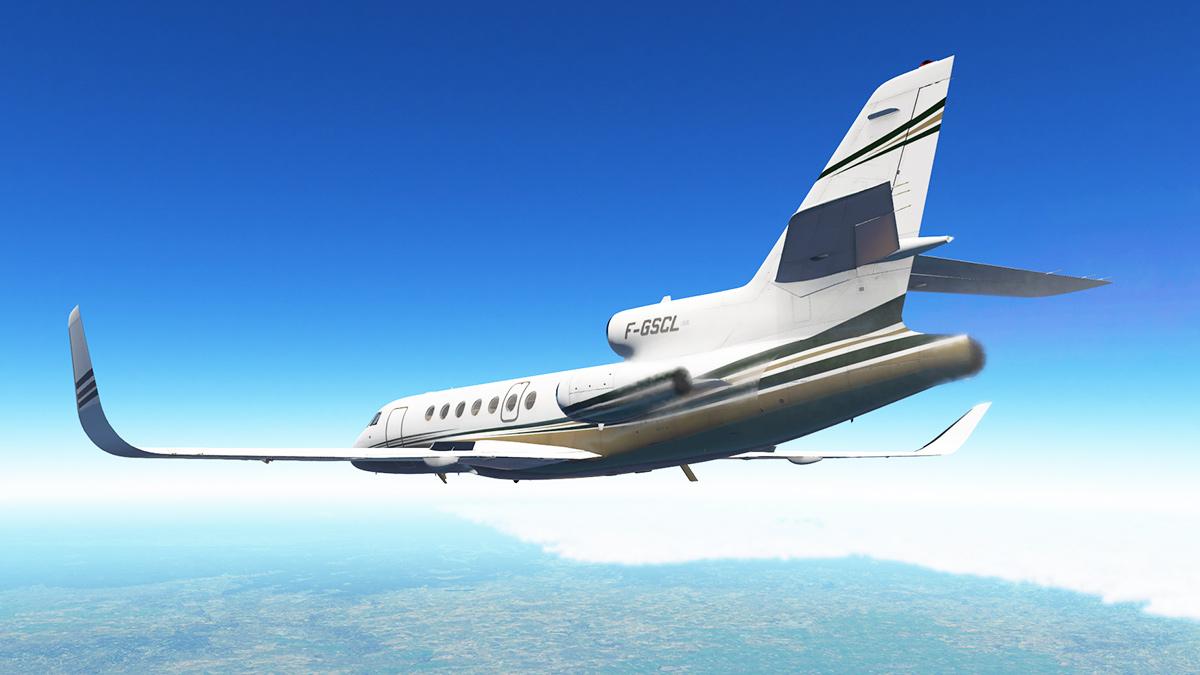
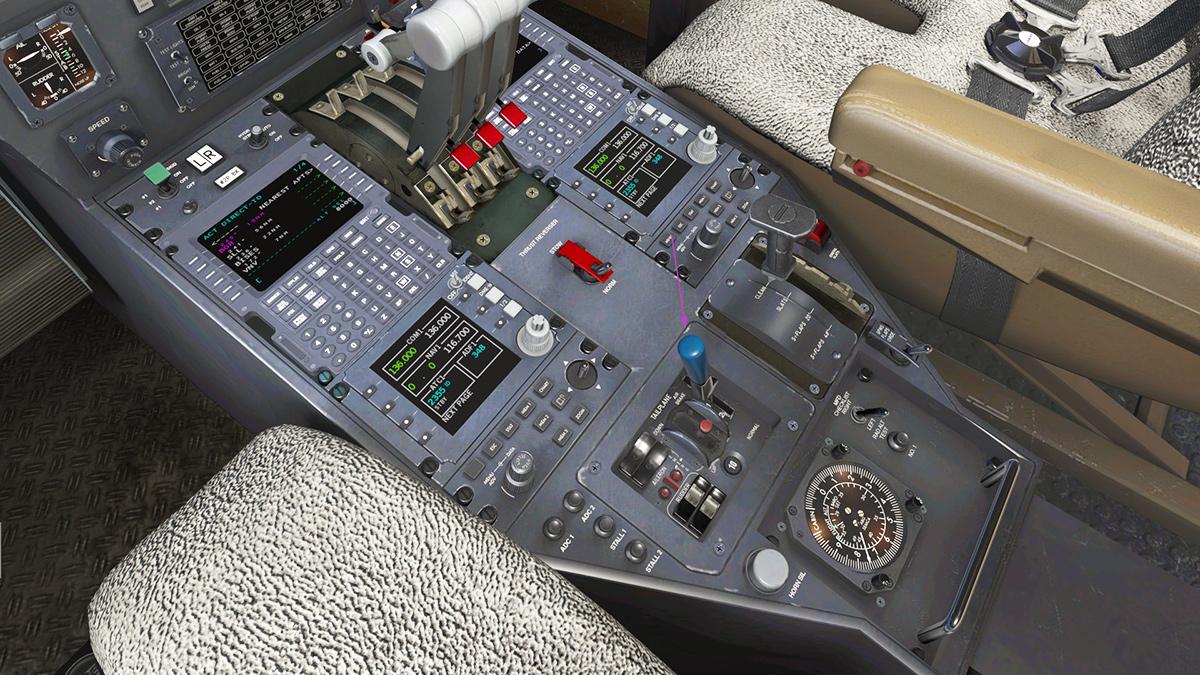
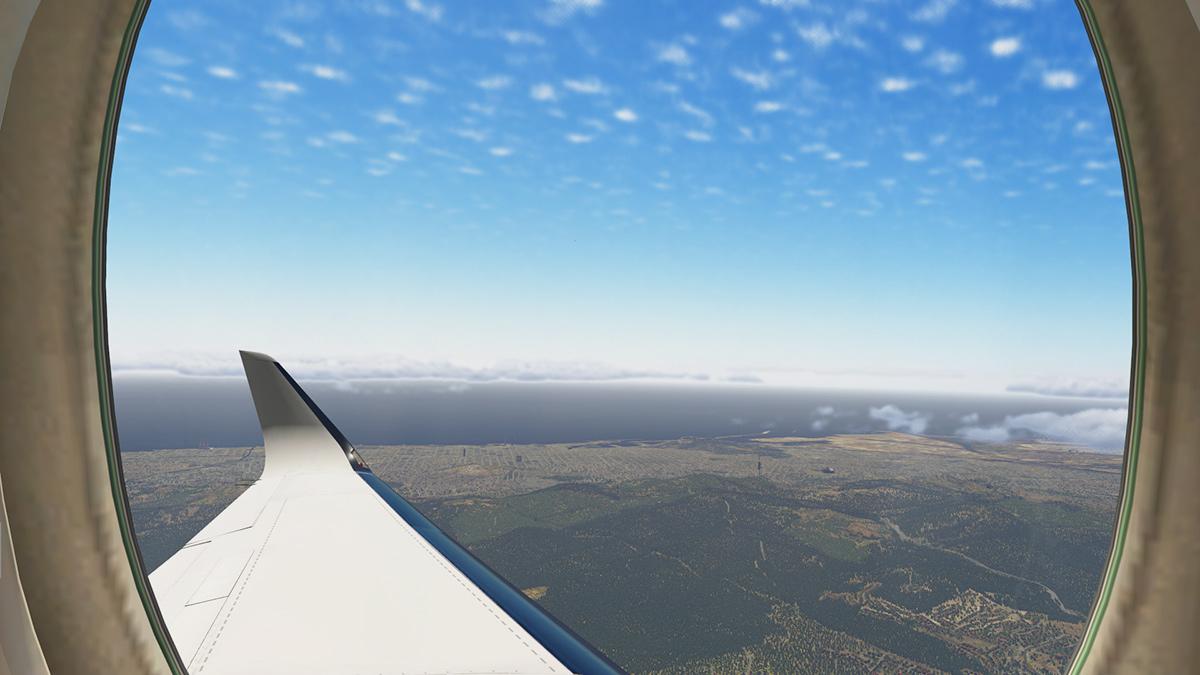
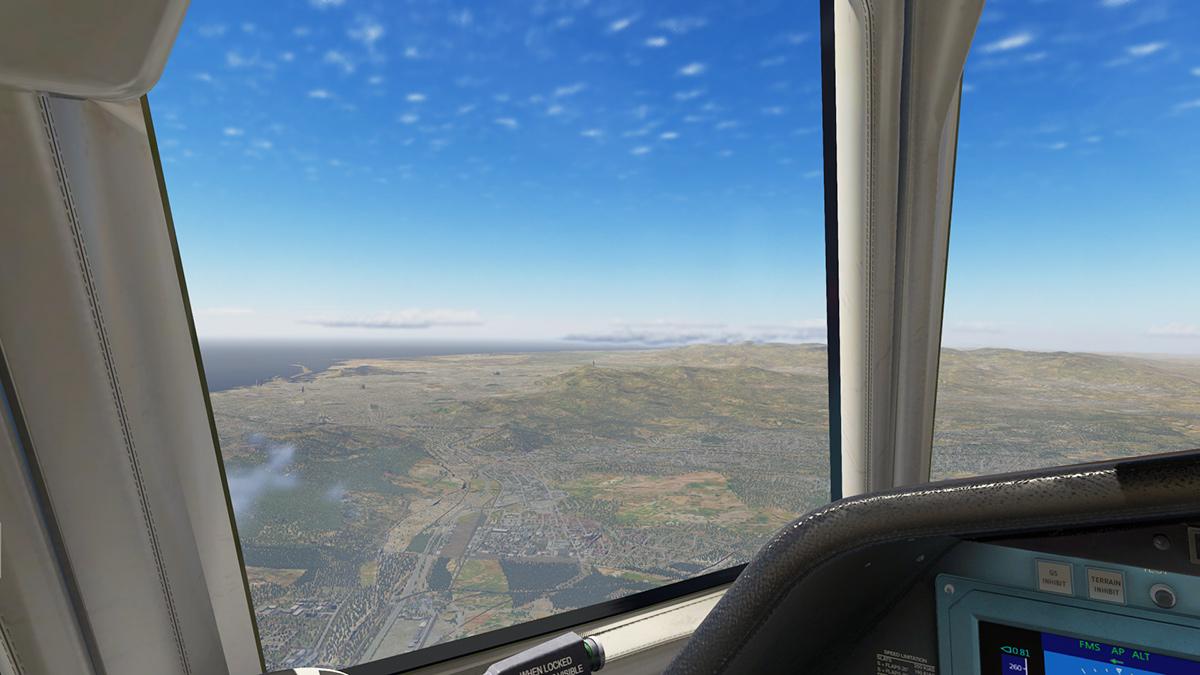
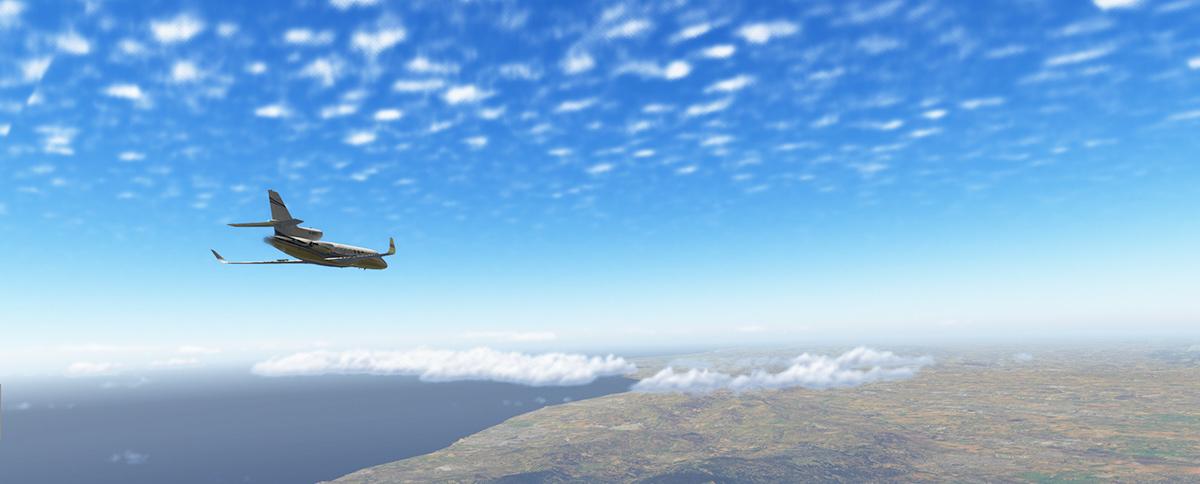
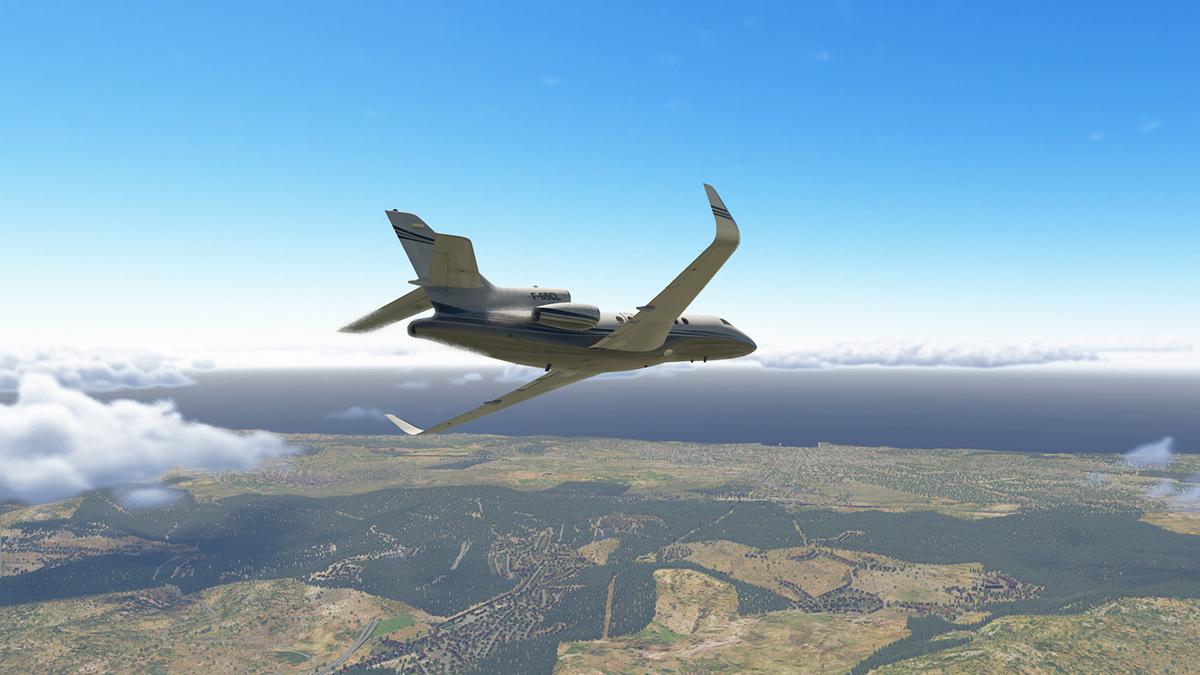
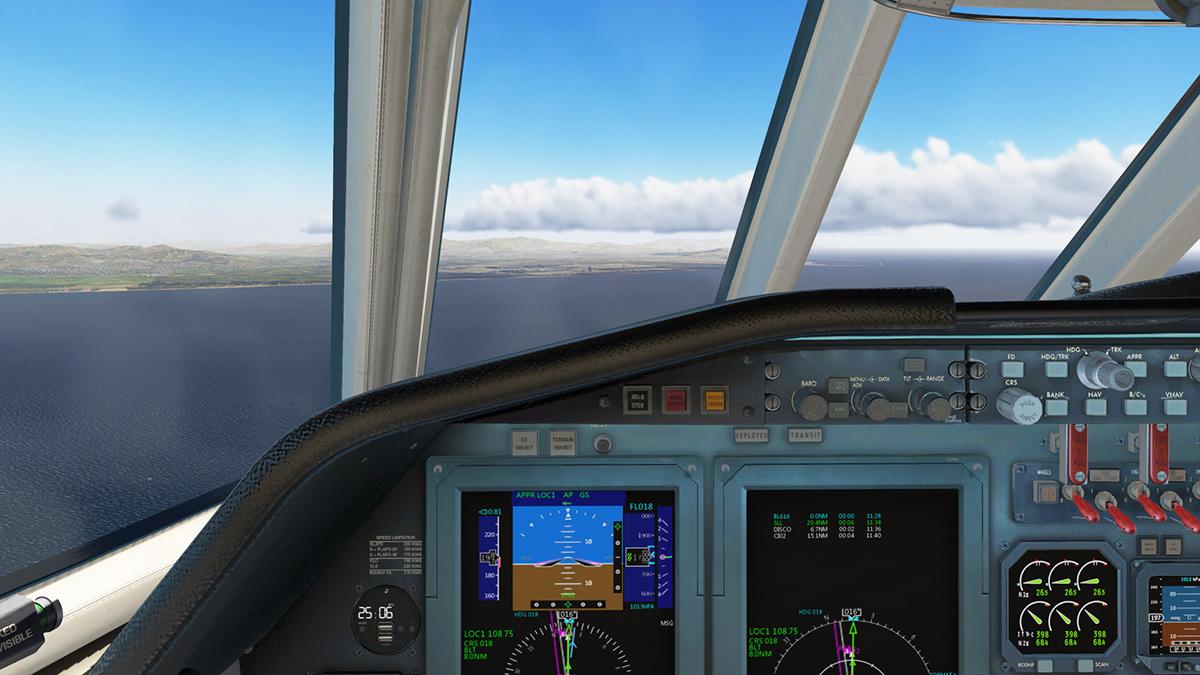
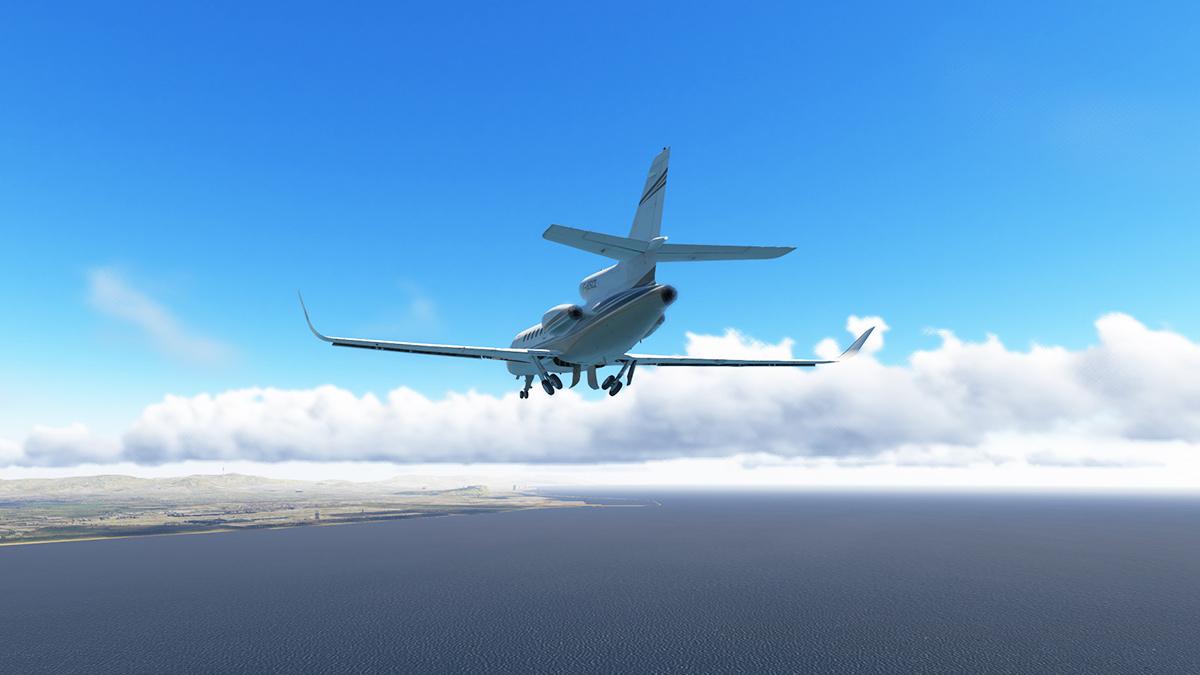
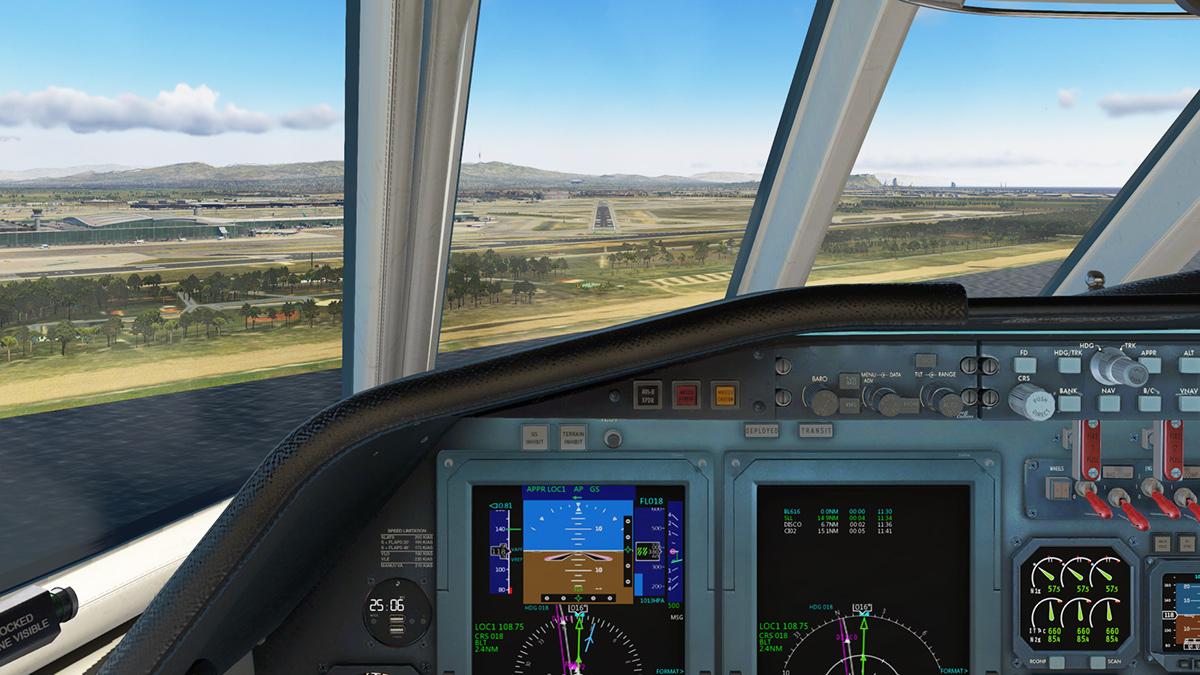
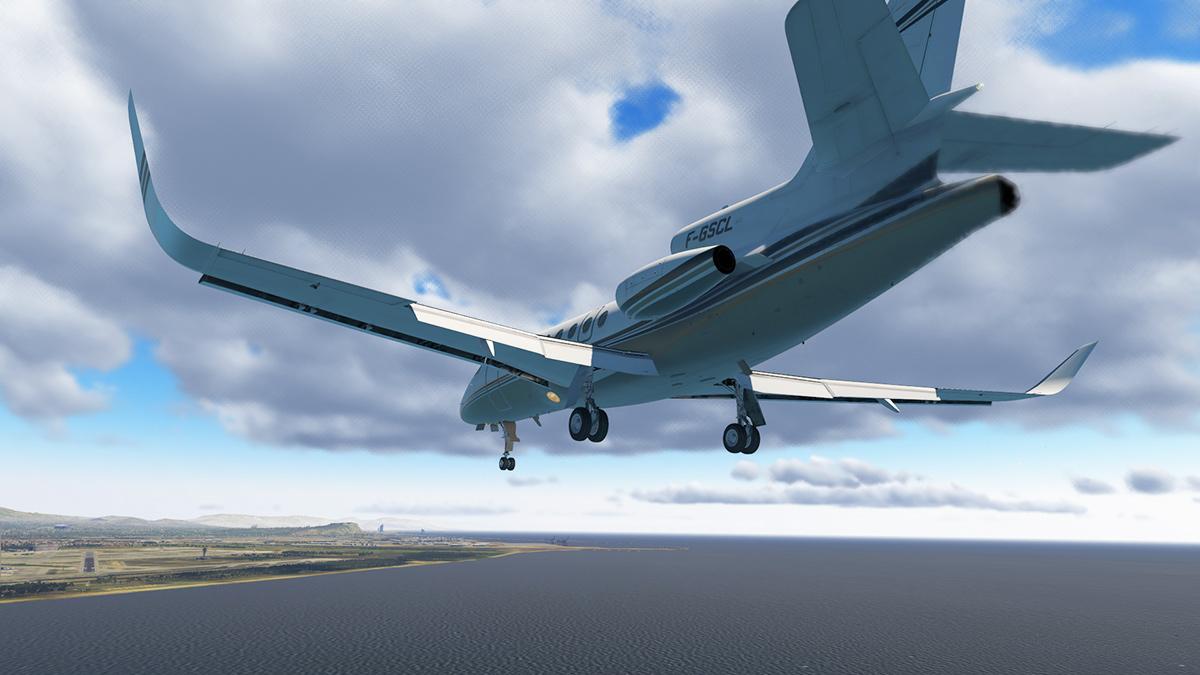
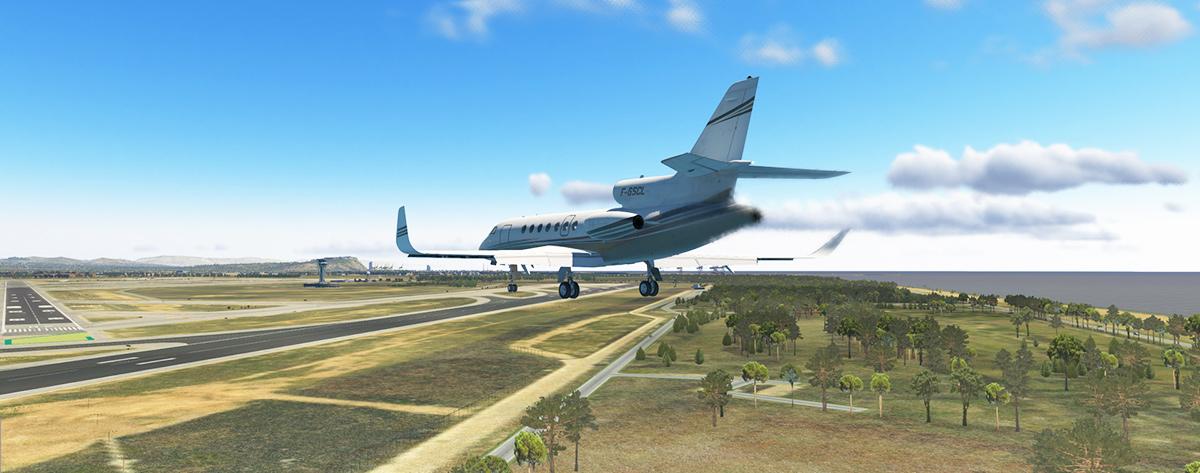
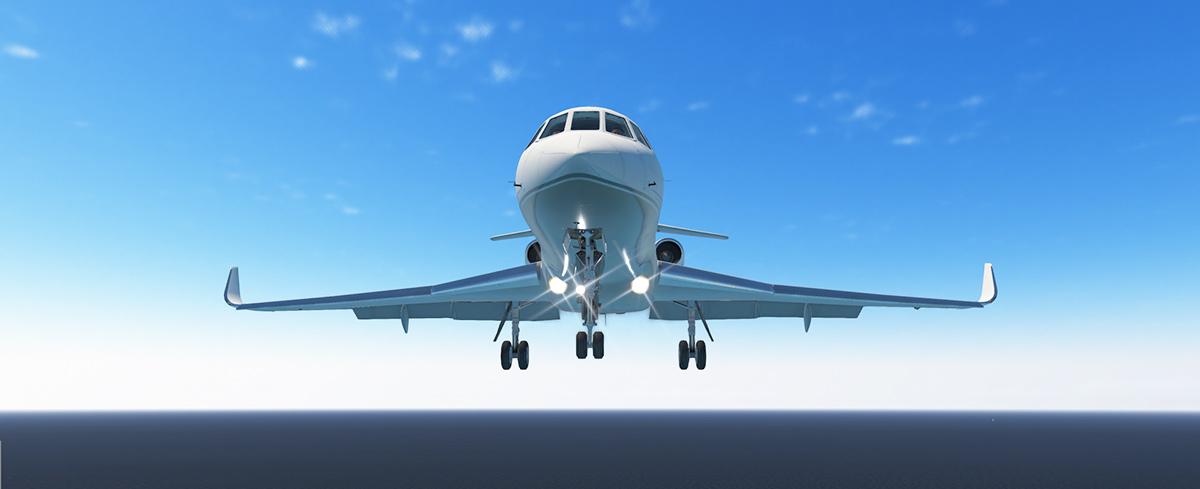
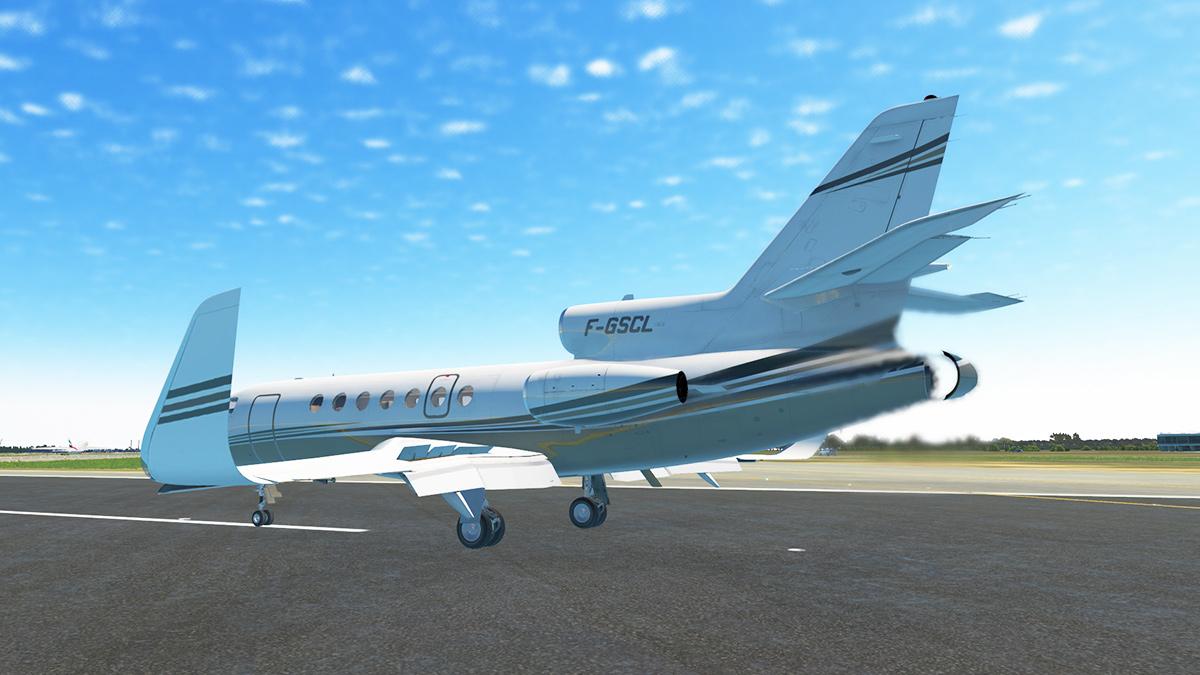
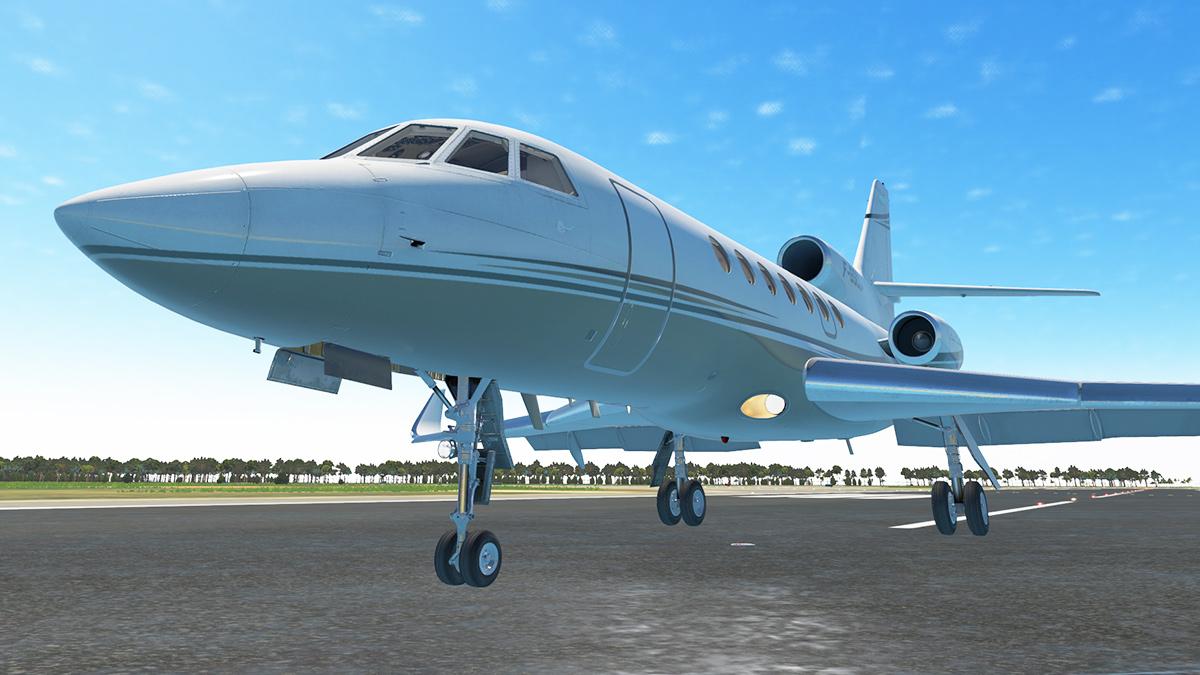
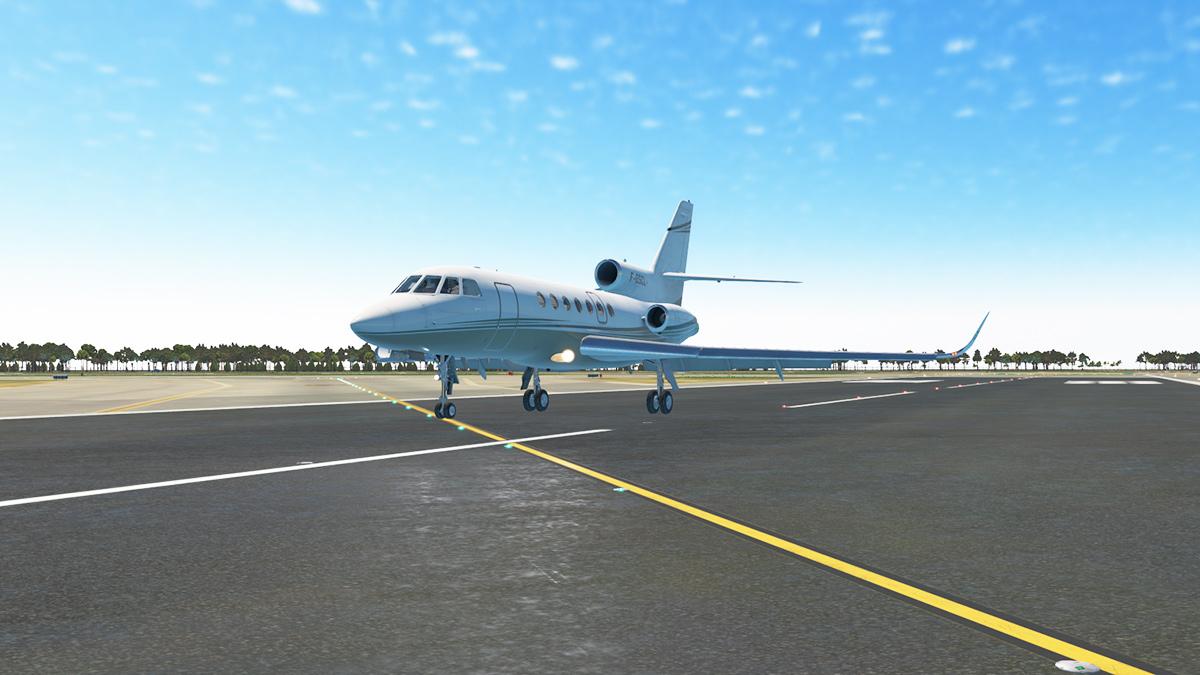
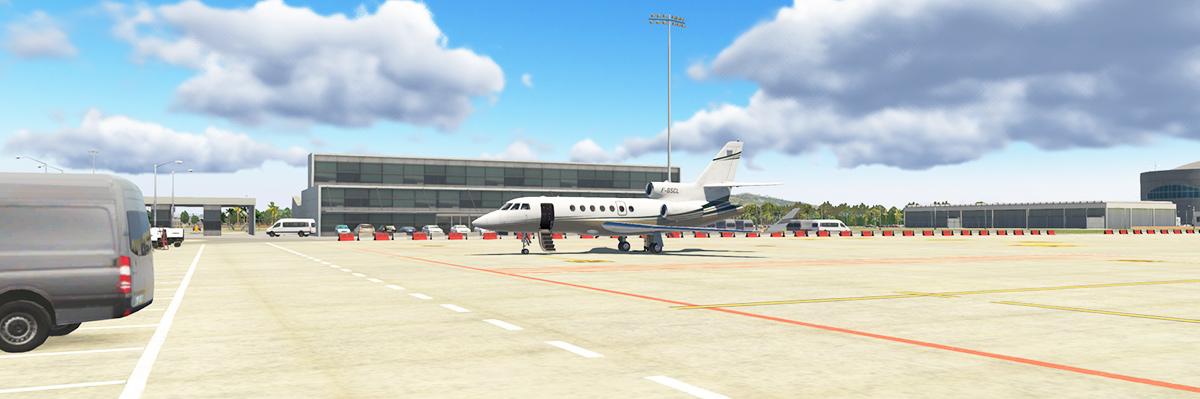
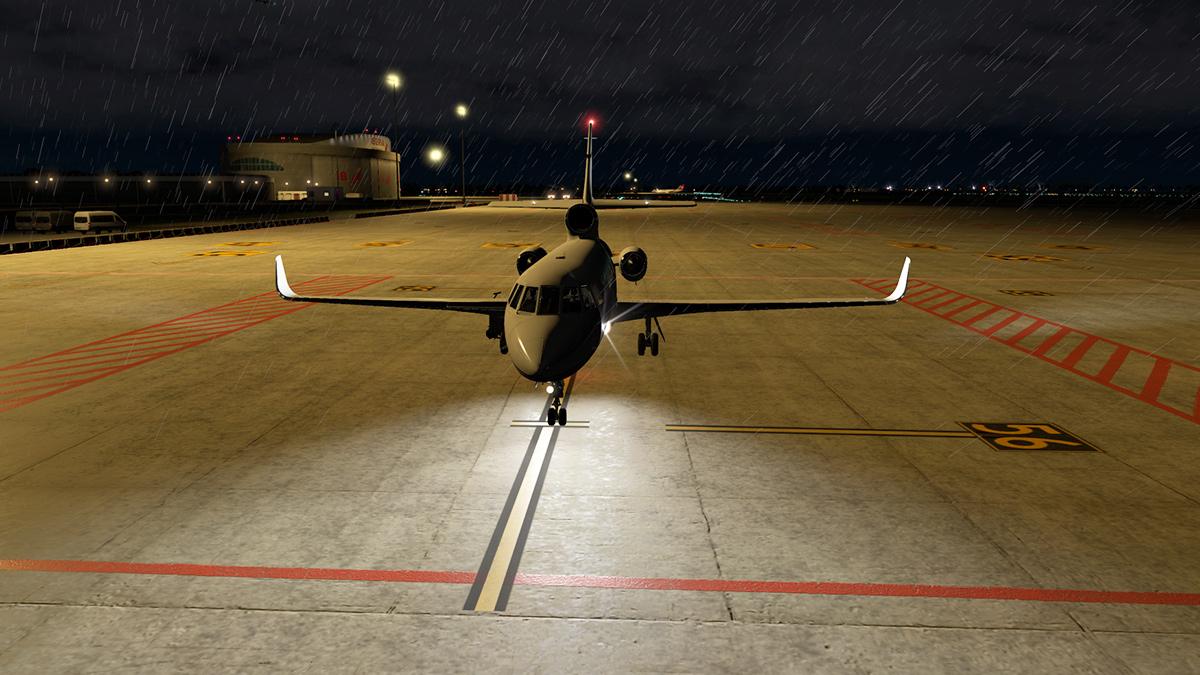
Aircraft Update : Dash 8 Q400 Legacy by FlyJSim It is not very often in reviewing that you actually have the chance to say goodbye to an aircraft, it is a bit like the retirement of the final flight of a design that has been the backbone of an airlines for years, and it is now happening with regularity with the retirements of aging MD-80 Series and Boeing 747-400 fleets. To note this De Havilland Canada Dash 8 Q Series is not being totally withdrawn by FlyJSim, as it will still be available to buy for X-Plane11 users and noted under the new "Legacy" moniker (from the XP11 label) to differentiate the version from the coming newer v2 Q4XP. So price wise you are going to get a good deal (currently around US$30) but to note as we shall see here it the aircraft is originally dated from 2012 and it is a full 10 Years since the commencement of the project and yes it has been well developed to keep up with the changes in that time of the surrounding simulator versions. The Dashy has weathered the years well... and in this new v2.19 Legacy version has now PBR or Physically Based Rendering textures as well. So the exterior textures now have a more believable glossiness and metalness effect and the Dash 8 shows it all off here very well. The hull and tail is now more highly reflective and note the particle effects that power out from the exhausts. Close up and the detail is still very good, with new NML's (normals) showing off the design. Those six-blade R408 propeller system propellers on the Bombardier Q400 incorporates an advanced swept blade design and optimized ARA-D/A airfoil and are still exceptionally well done here. Glass has been redone, but with no reflections, so it looks good, but could have been better. Menus have been updated to reflect the new Legacy name, both external and internal Weight & Balance menus are still here. The external is now quite simple, but the W & B menu is still one of the best out there (note the Summer and Winter weight setting). Q400's are extremely weight sensitive (most flights will require you to move seats for weight corrections in real life)... and that is highlighted here if you get the loading balance wrong... 25% of MAC is the best setting. But I will note the nosewheel now also sinks slightly into the ground... odd. The Dashy was always a tricky aircraft to fly and many users couldn't quite master it's quirky nature. For me I always found it not to bad, but it could be slightly frustrating the use and fly... just those small things that annoy you. The largest and still not fixed here is the throttle to mixture levers that are complicated to use.... so shut the Q400 down and it is hell to restart, if nigh impossible. Never fixed if the mixture levers are set to Fuel (cut) Off then you can't reset the throttle levers to idle, they need to click in again to restart, and in most cases only a full engine running restart will get the aircraft started? another issue is again the throttles and the built in beta (reverse) selection. Sometimes it works in beta mode, and sometimes it doesn't? (I use an external twin throttle Saitek system and the settings just don't like the unit) So throttle idle is somewhere, or where you sometimes have to guess... thrust reverse is like Quantum Mechanics, sometimes it works, sometimes it doesn't. Personally over the years these areas it has drove me batshit, but when it works the Dashy is a great aircraft. Cockpit detail is still extraordinary even after all these years, pure FlyJSim work of art, although a few of the switchgear items are now showing their age. New PBR reflections have lifted the cockpit to new heights, it can be gorgeous in here in the right lighting conditions, and yes the detail is almost ten years old, but it still feels as good as new. Main instrument PFD and MAP/NAV displays have been made brighter and sharper, and you notice the significant difference. The cabin however with no updates since the original release and really shows the original age, and it is not pretty back there. So for me it is the last flight of this original Q400 from LPPR - Porto to LEBL - Barcelona... ... in flight she feels as good as ever, the update has brought on some new dynamics with the newer current 11.35 flight model and with that comes some increased drag and better handling, and yes the aircraft does feel really nice (if balanced correctly). You will work hard at the controls in the Dashy, and it requires very fine throttle control to fly this of all X-Plane machines a very manual hands-on aircraft... .... speed and balance is everything, but get your balance right and the aircraft is extremely rewarding, but get it wrong and that nose can be so light. \ So you have to use your skills to the max and you will then get your high-five reward. My last landing in the Q400 Legacy? maybe, certainly for now, but it doesn't have to be your last ride in an X-Plane classic. It will be extremely interesting on the differences between the not so old and the new compare when the Q4XP arrives, and there is currently no arrival date yet for that aircraft... until then savior the legacy. Summary This is currently the last update v2.19 and a change of name to the "Legacy" for the Classic FlyJSim Q400 until the Q4XP version 2 arrives. The update brings in a lot of the latest X-Plane11.35 features to the aircraft, including better performance and a new flight model, PBR effects (glossy and reflective) and glass tweaks. The quirks including a difficult throttle/mixture and unreliable beta (reverse-thrust) are still as maddening to use as ever as is the engine start up from shutdown, and still also a very tricky aircraft to fly but ultimately very rewarding this Q400 is a long time in service aircraft and certainly deserves classic status from the simulator. Like with most and even the greatest of aircraft designs there comes a time the aircraft has to make way for the new. And so it is here for the FlyJSim Dash 8 Q400. For those that don't want to spend a huge amount of dollars, but want a quality and tried and true aircraft then this "Legacy" version will keep you very happy and test those skill levels on a the manual of manual flying by the fingertips aircraft, so there is great value to be had here. For me it will be interesting on how the newer Q4XP measures up to an original classic machine. ________________________________________________________ Yes! the Dash 8 Q400 Legacy by FlyJSim is available from the X-Plane.Org Store here : Dash 8 Q400 Legacy Price is US$30.00 Note make sure you have v2.19 when downloading, All previous purchasers can now update via your X-Plane.OrgStore Account Features *NEW* PBR Enabled Exterior Accurate Flight Characteristics Created from over 60 hours of flight tests with information from real world data and backed by actual Q400 pilots. Detailed Exterior Model Created from extensive research of hundreds of images and references. Everything from the airfoils used on the wings to actual tire sizes modeled with detail in mind. Includes a full set of high resolution textures including normal maps, specular maps, and night lighting. Highly Accurate 3D Cockpit Fly happy knowing what you are looking at really is to scale. 3D cockpit modeled from detailed Q400 data. Textures created from thousands of images taken of the interior. Detailed Interior & Exterior Night Light Be able to see the plane at night along with strobe and beacon lights that light up the fuselage. Cockpit lighting as well allows you to still see everything and enjoy flying in the dark. Custom Sounds Hear what the real Q400 sounds like. We have recorded real world Q400 sounds, including cockpit call-outs. The sounds alone add so much to the experience. Plugin enhanced: We use plugins to add more systems and features that would otherwise be impossible to be implemented if left to use the default X-Plane logic. Load & Balance Manager: A first in X-Plane, the Load & Balance Manager is a pop up screen which allows you to change the load-out and balance in real time. Pick from thousands of combinations of seating arrangement, cargo hold weights, and fuel amounts. See the Center of Gravity change as you load the aircraft differently and burn fuel in flight. Many Liveries available: V2.19 Changlog FlyJSim Dash 8 Q400 changelog v2.19.rtf ______________________________________________________________________ Update by Stephen Dutton 8th August 2019 Copyright©2019 : X-Plane Reviews (Disclaimer. All images and text in this review are the work and property of X-PlaneReviews, no sharing or copy of the content is allowed without consent from the author as per copyright conditions)
-
BSS will fix as soon as possible, so there is no need to panic...
-
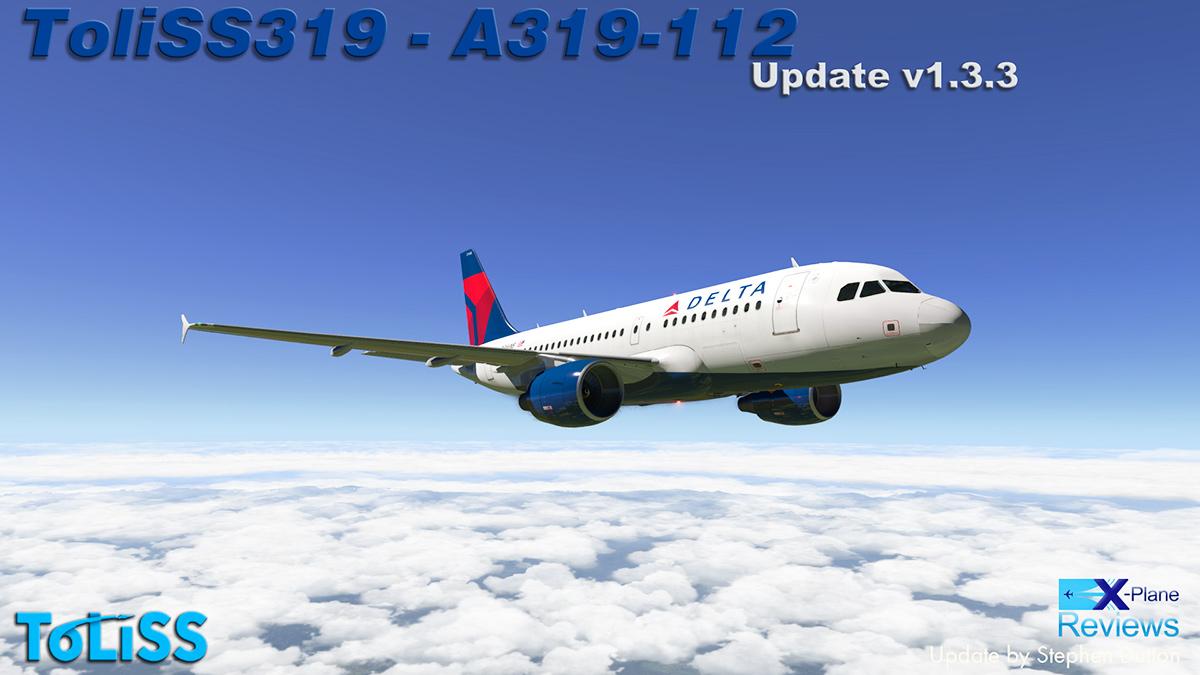
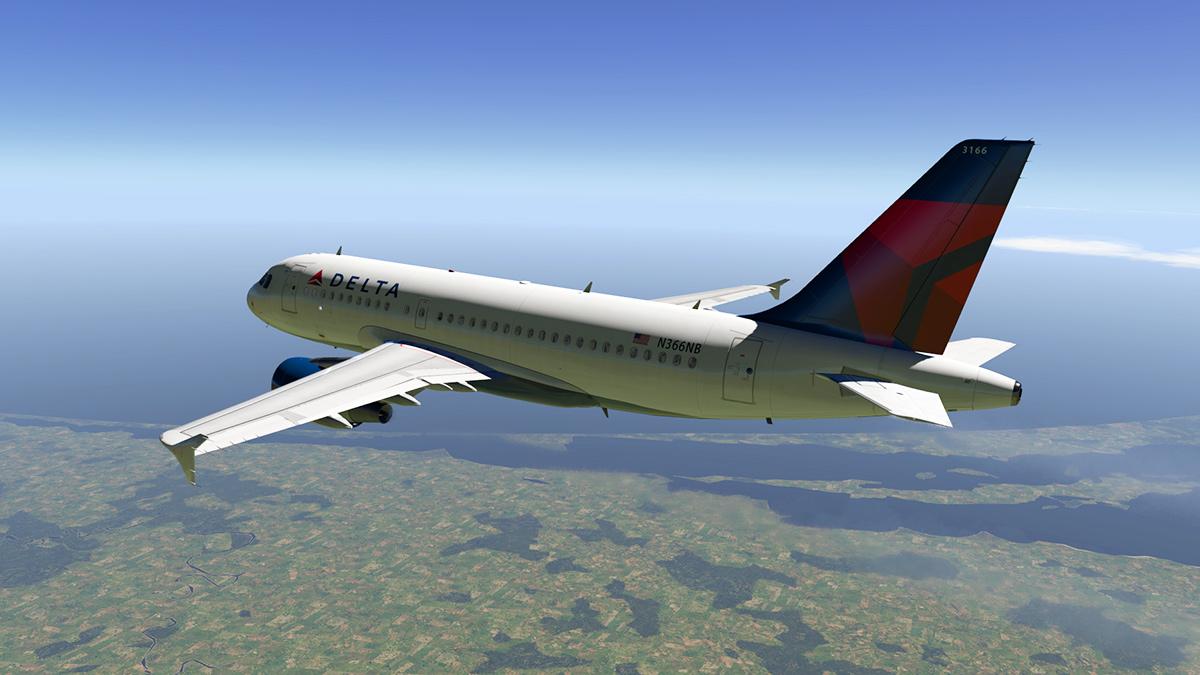
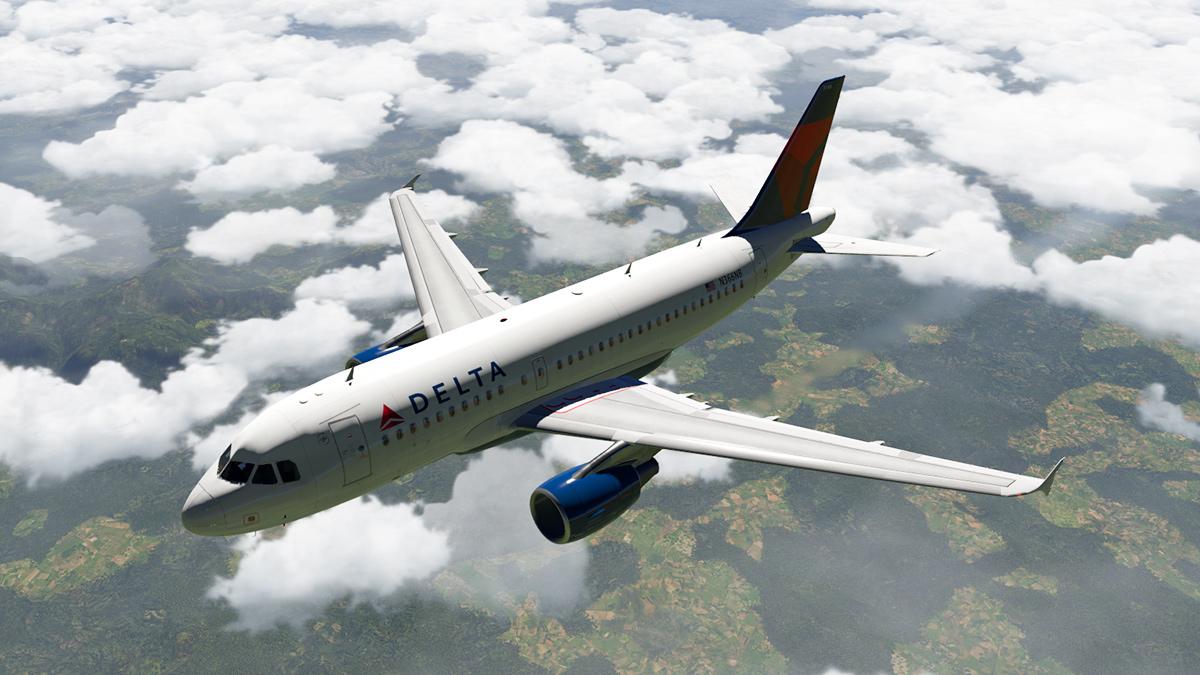
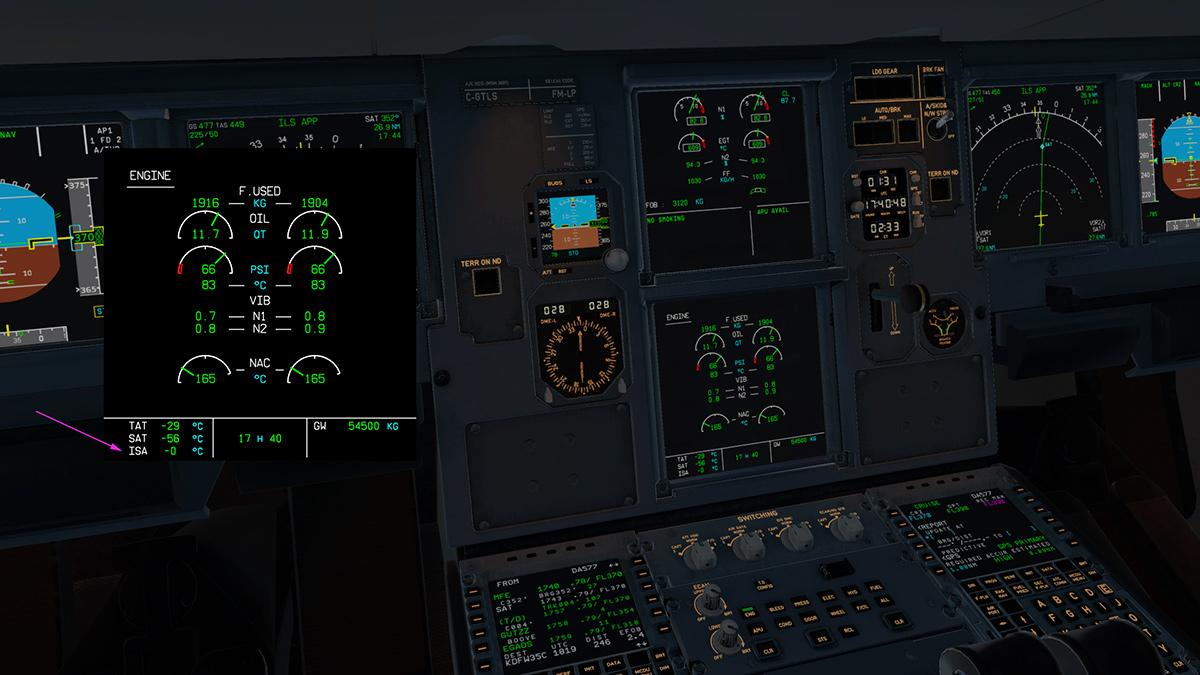
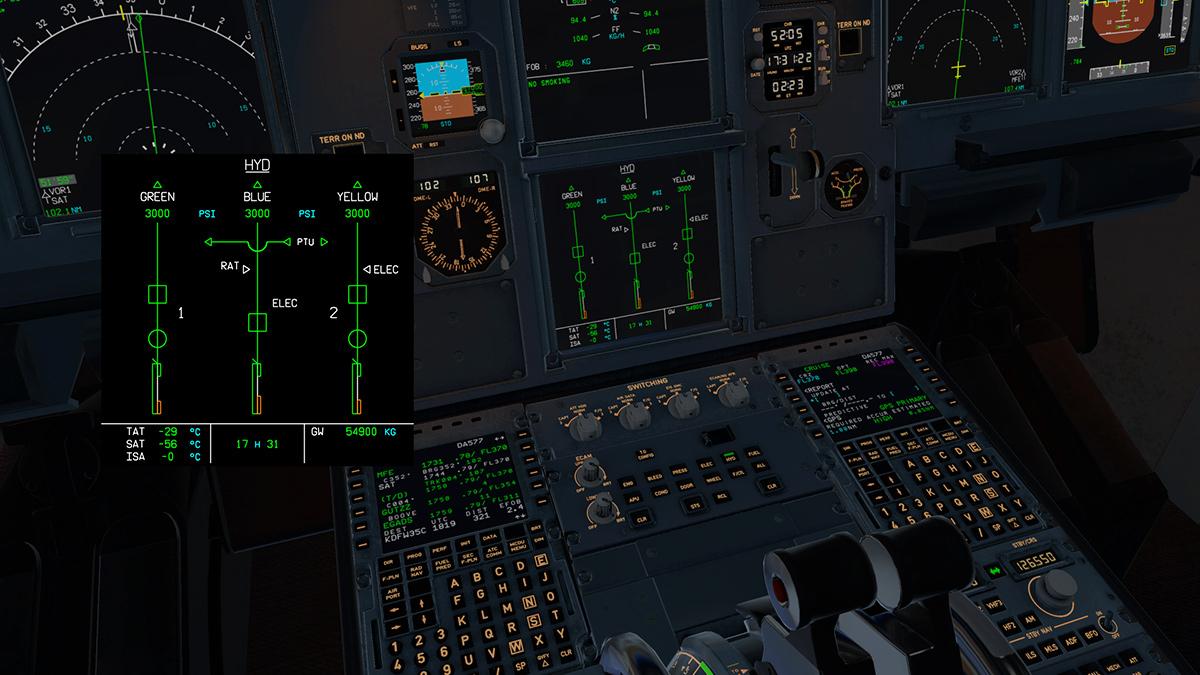
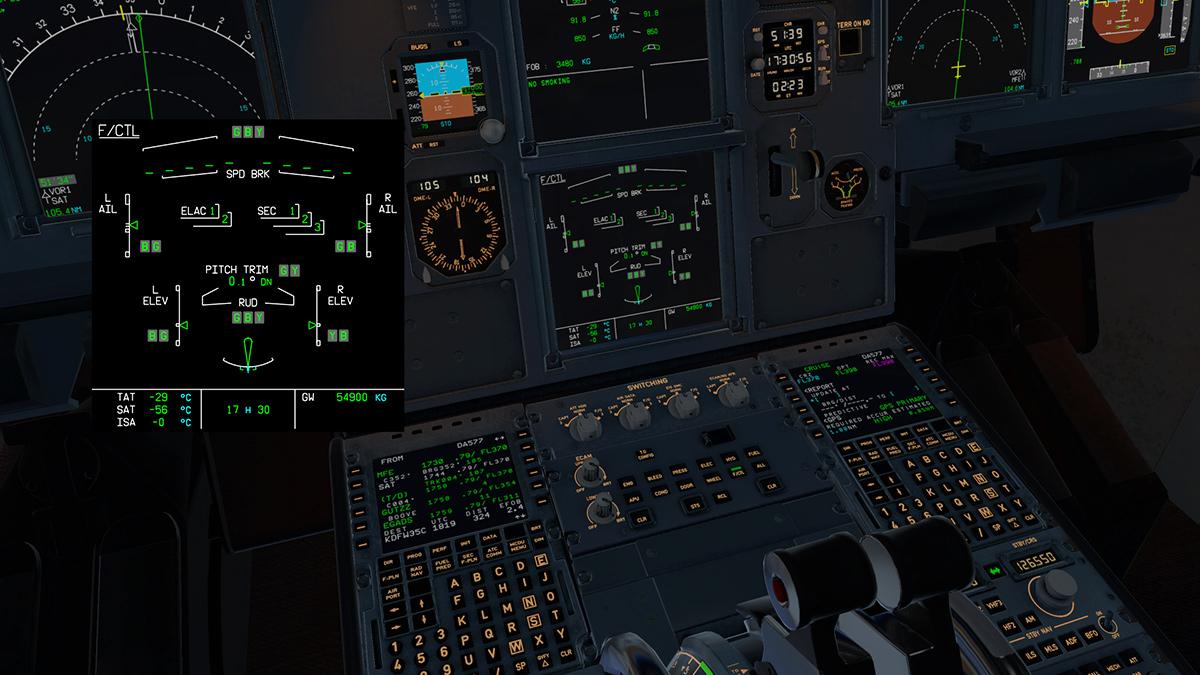
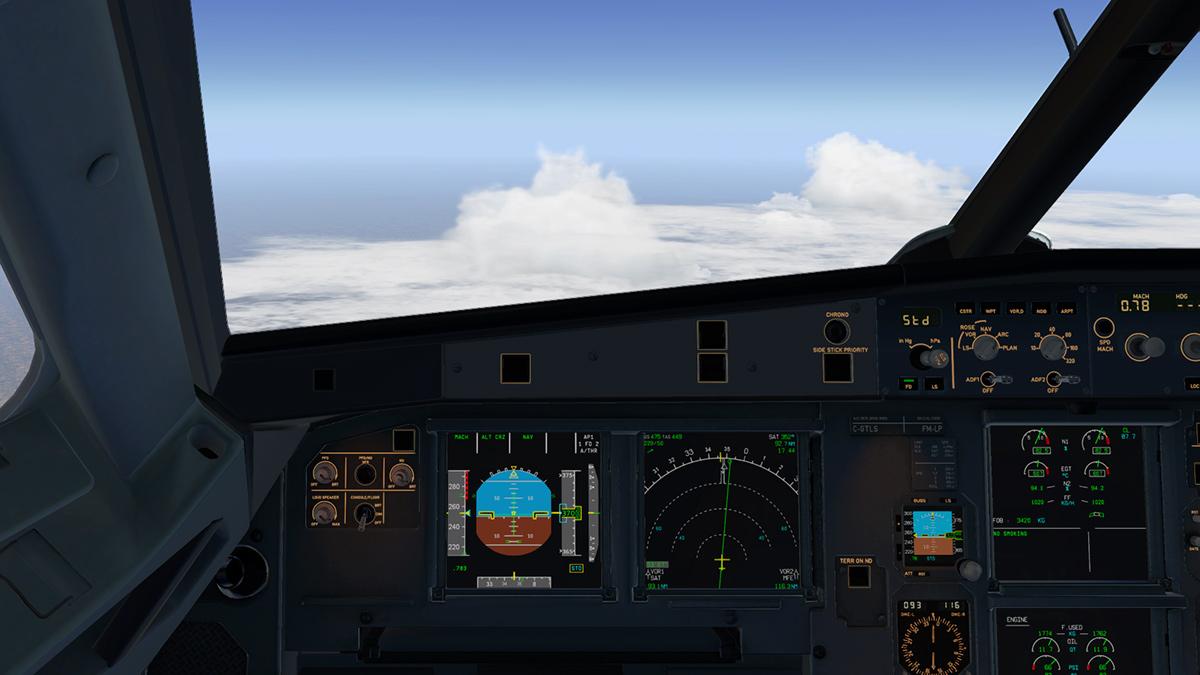
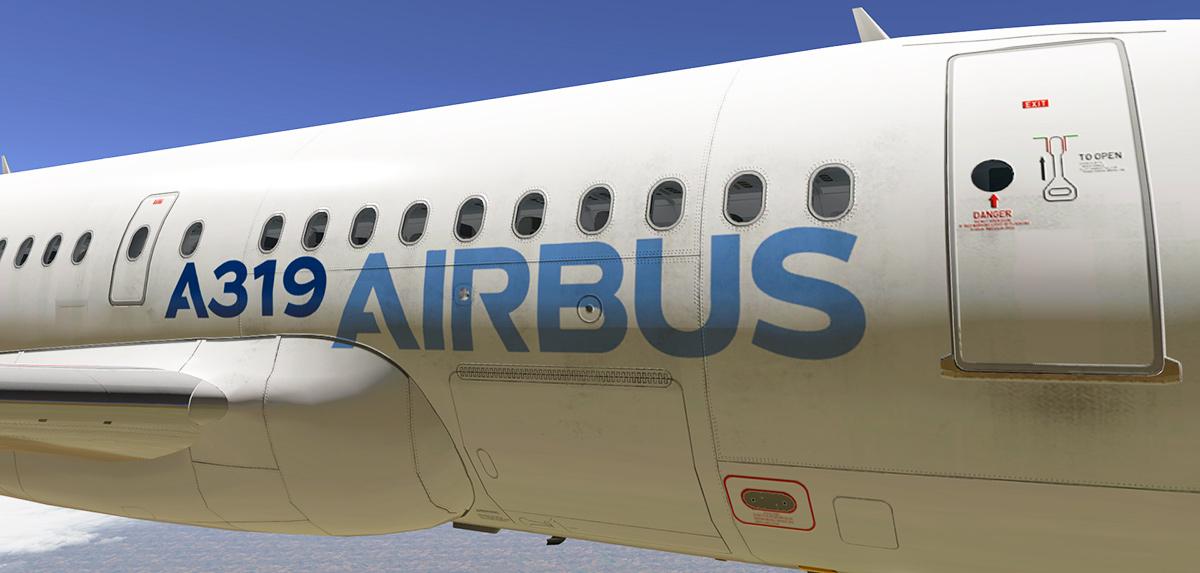
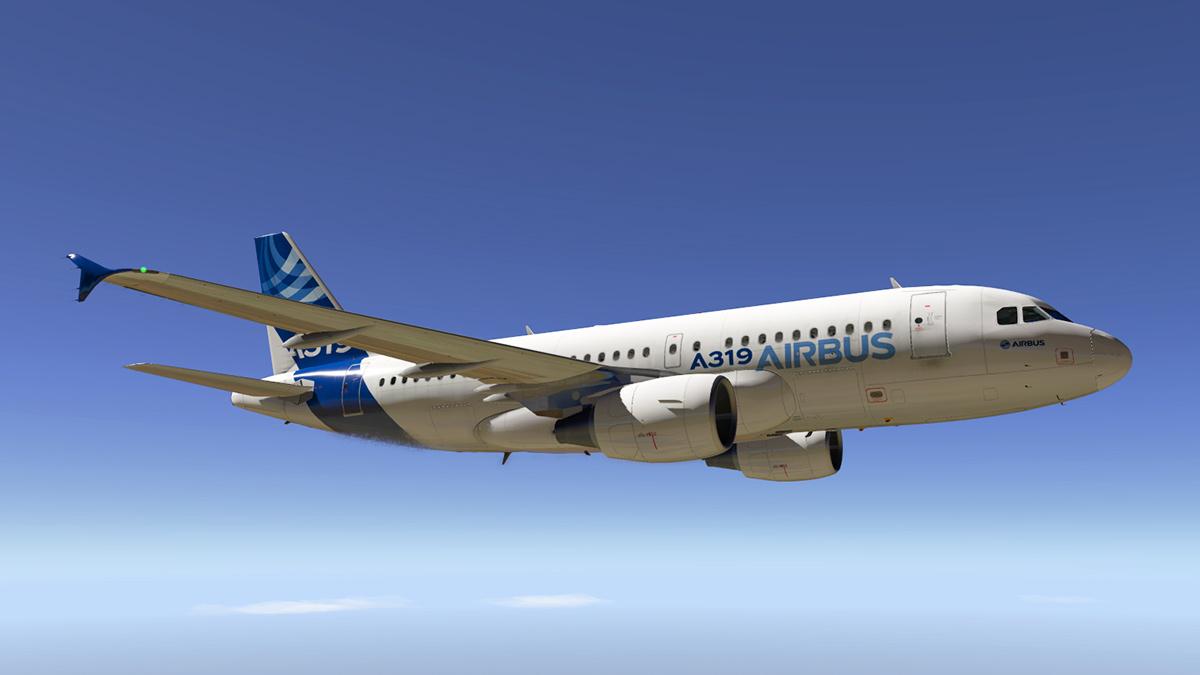
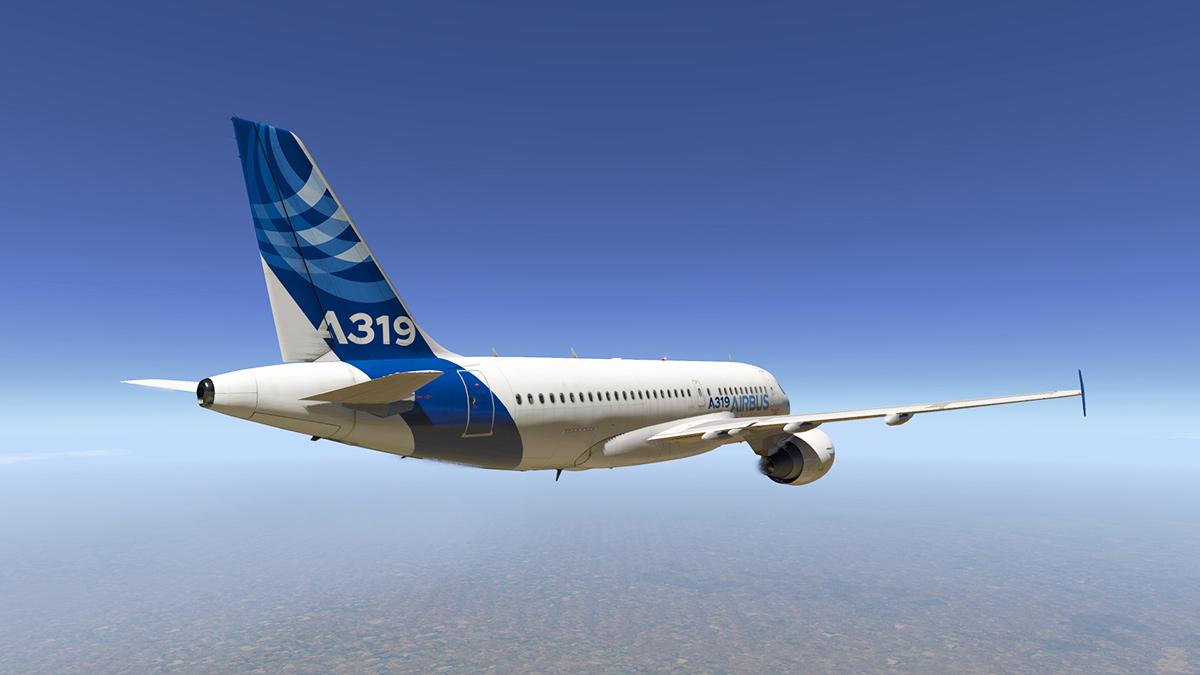
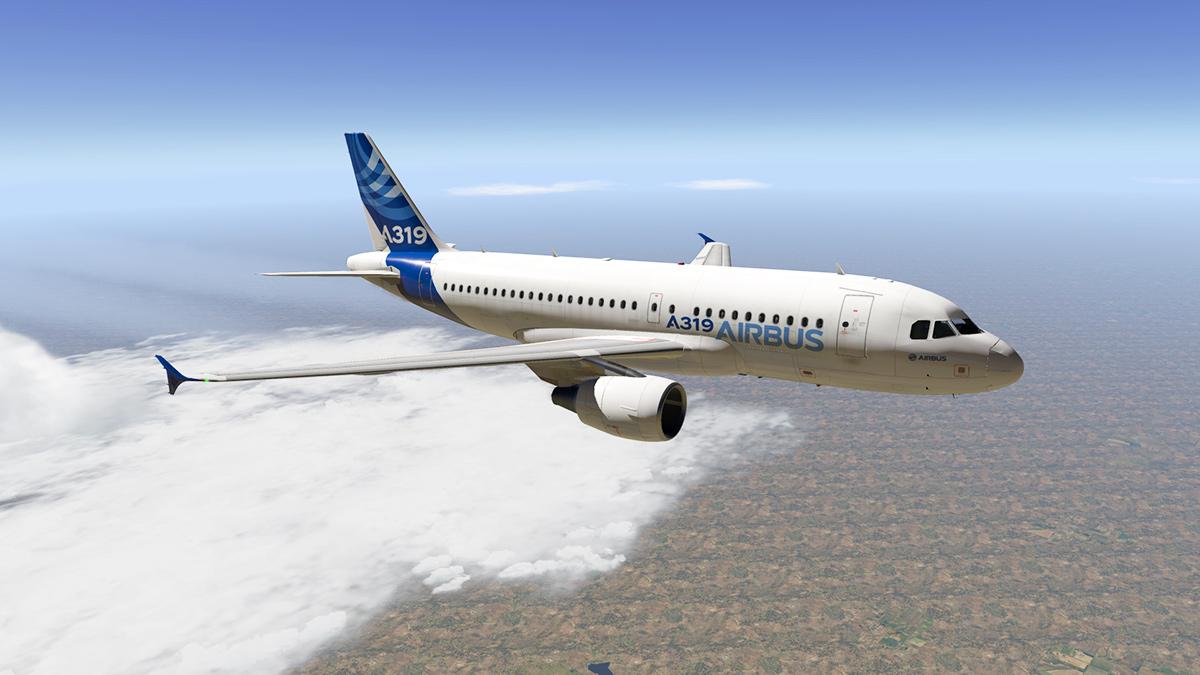
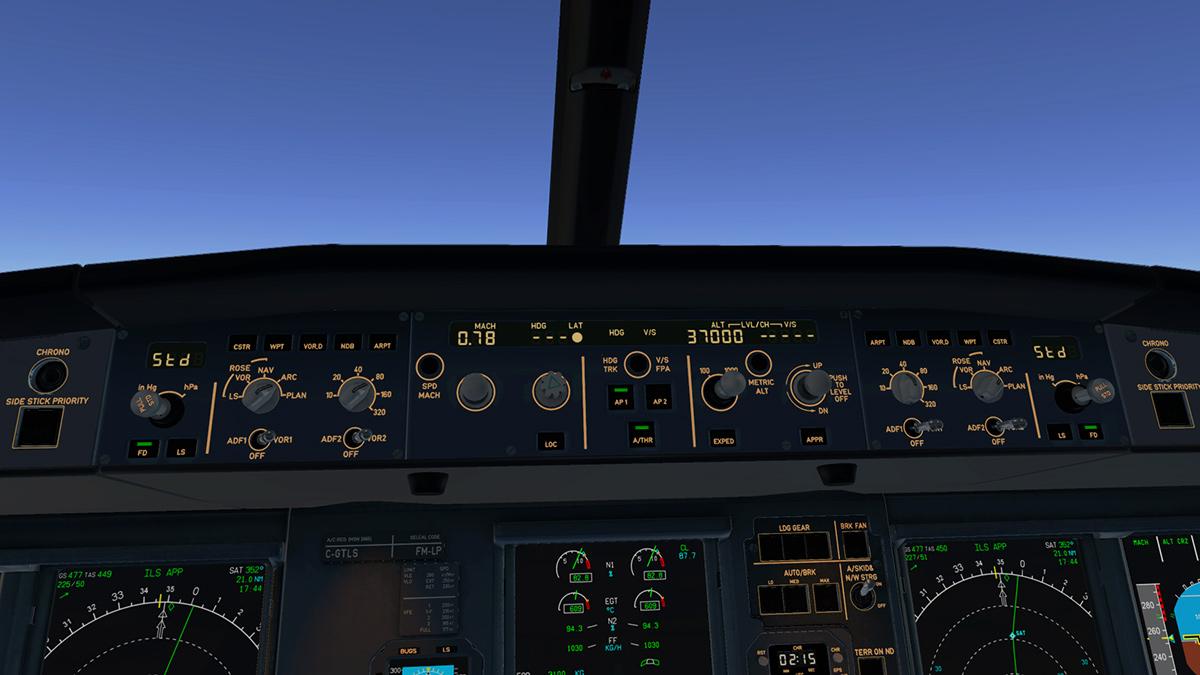
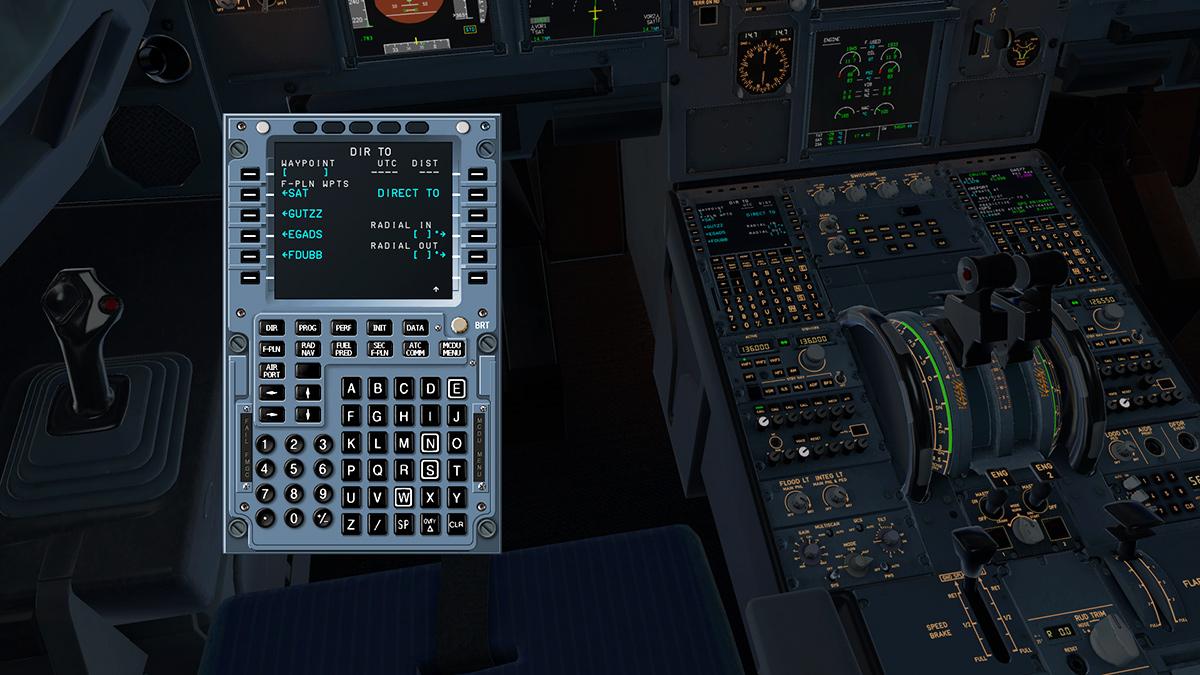
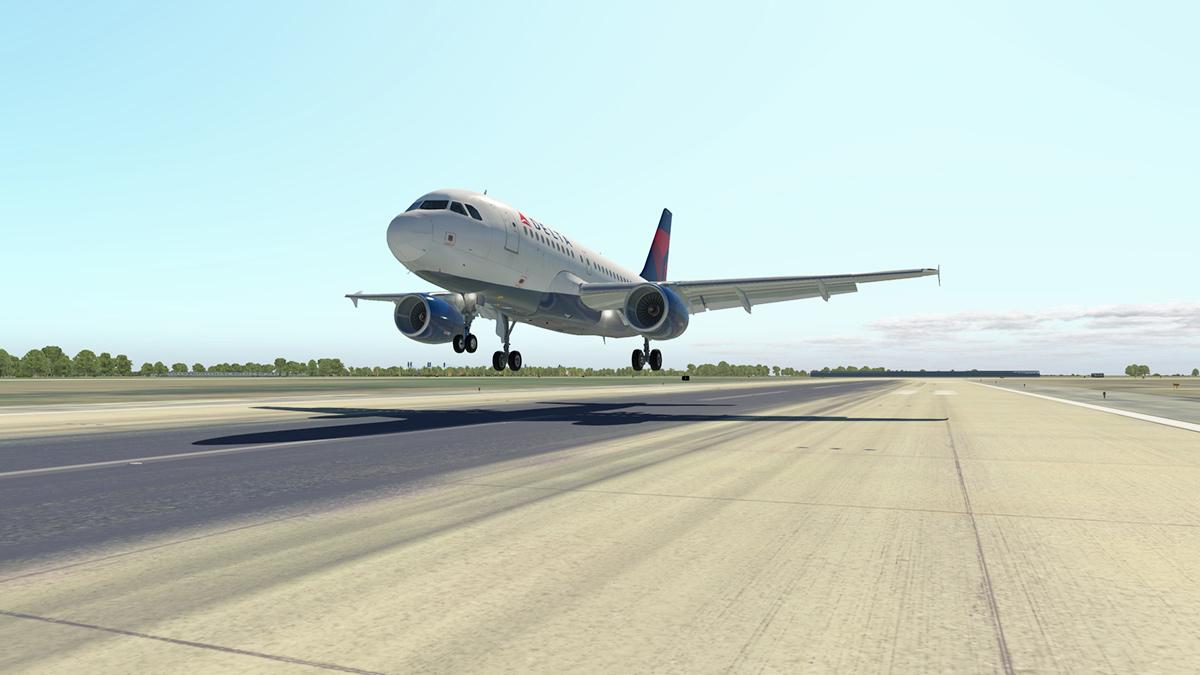
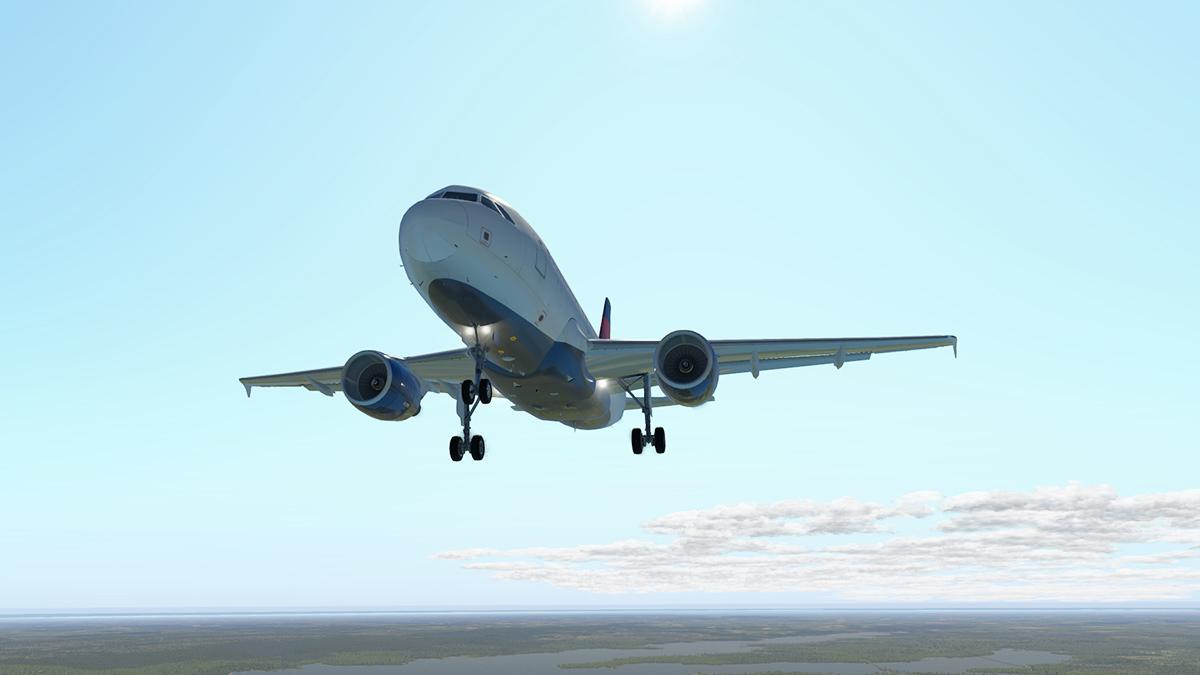
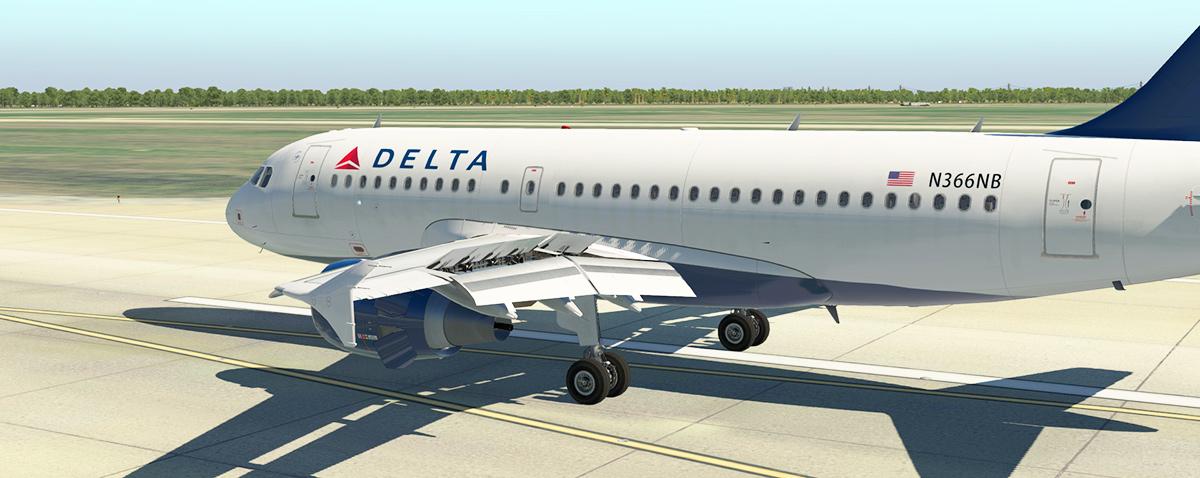
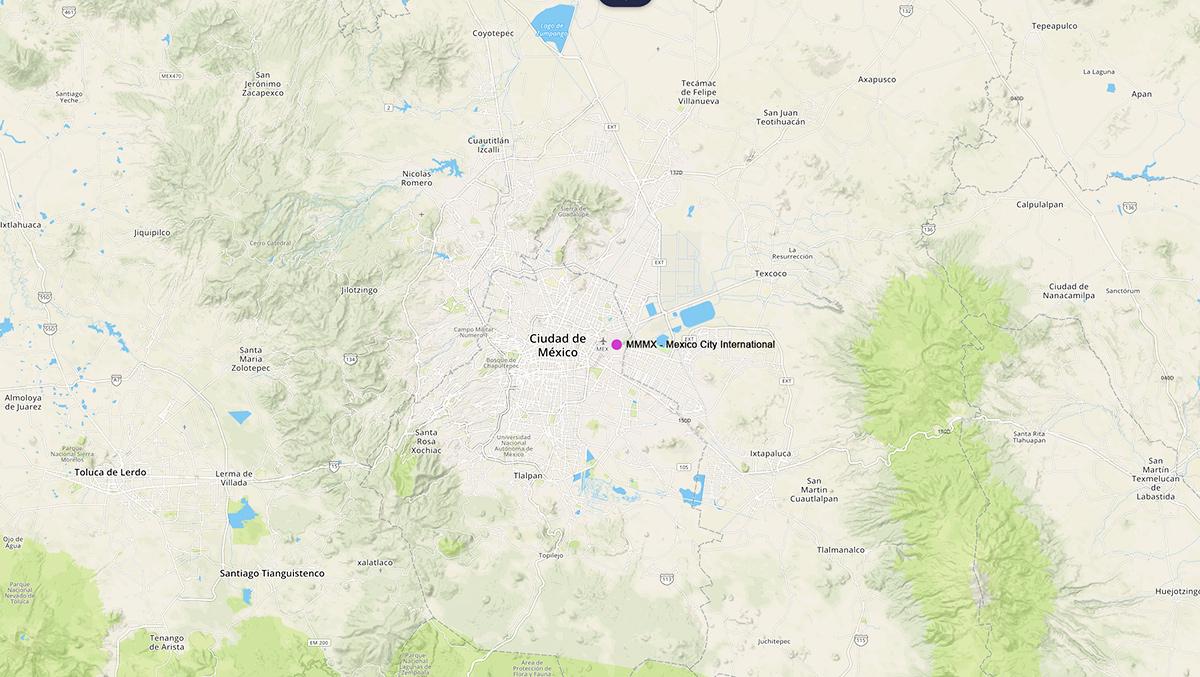
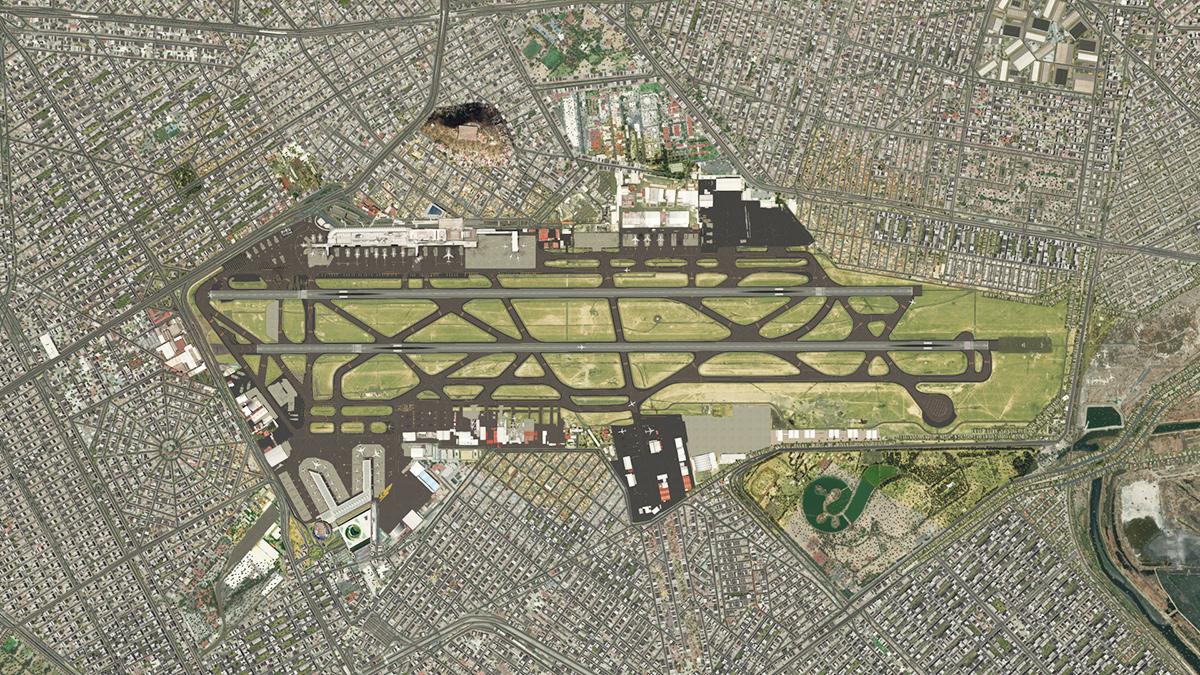
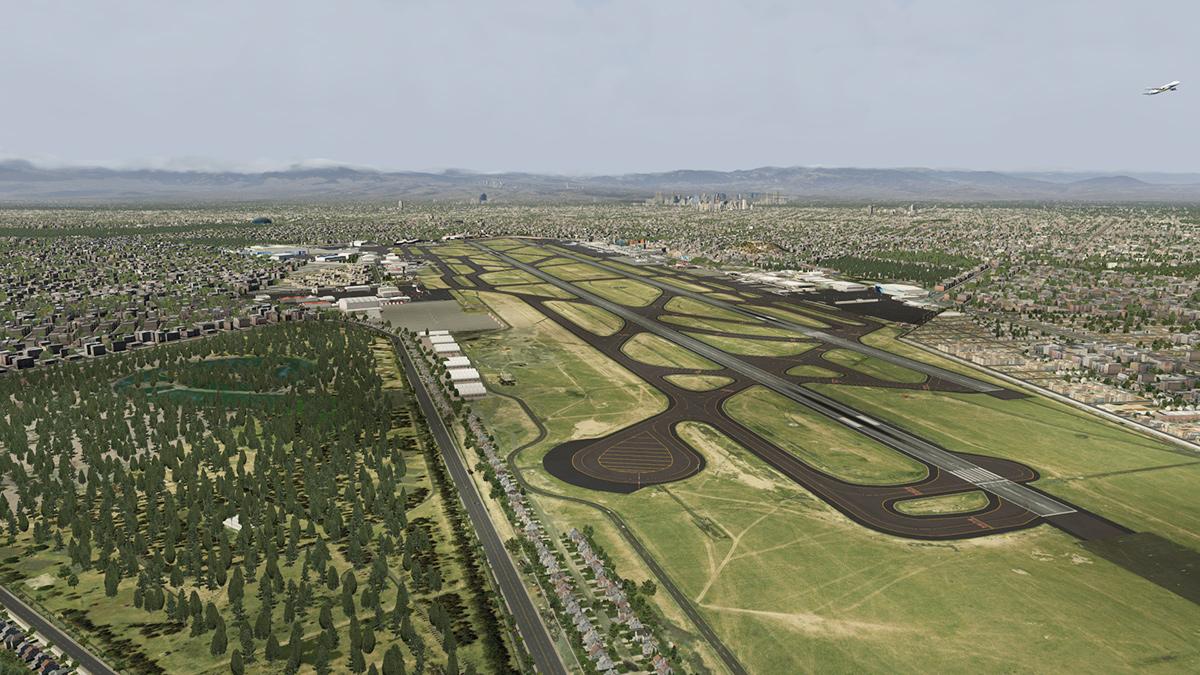
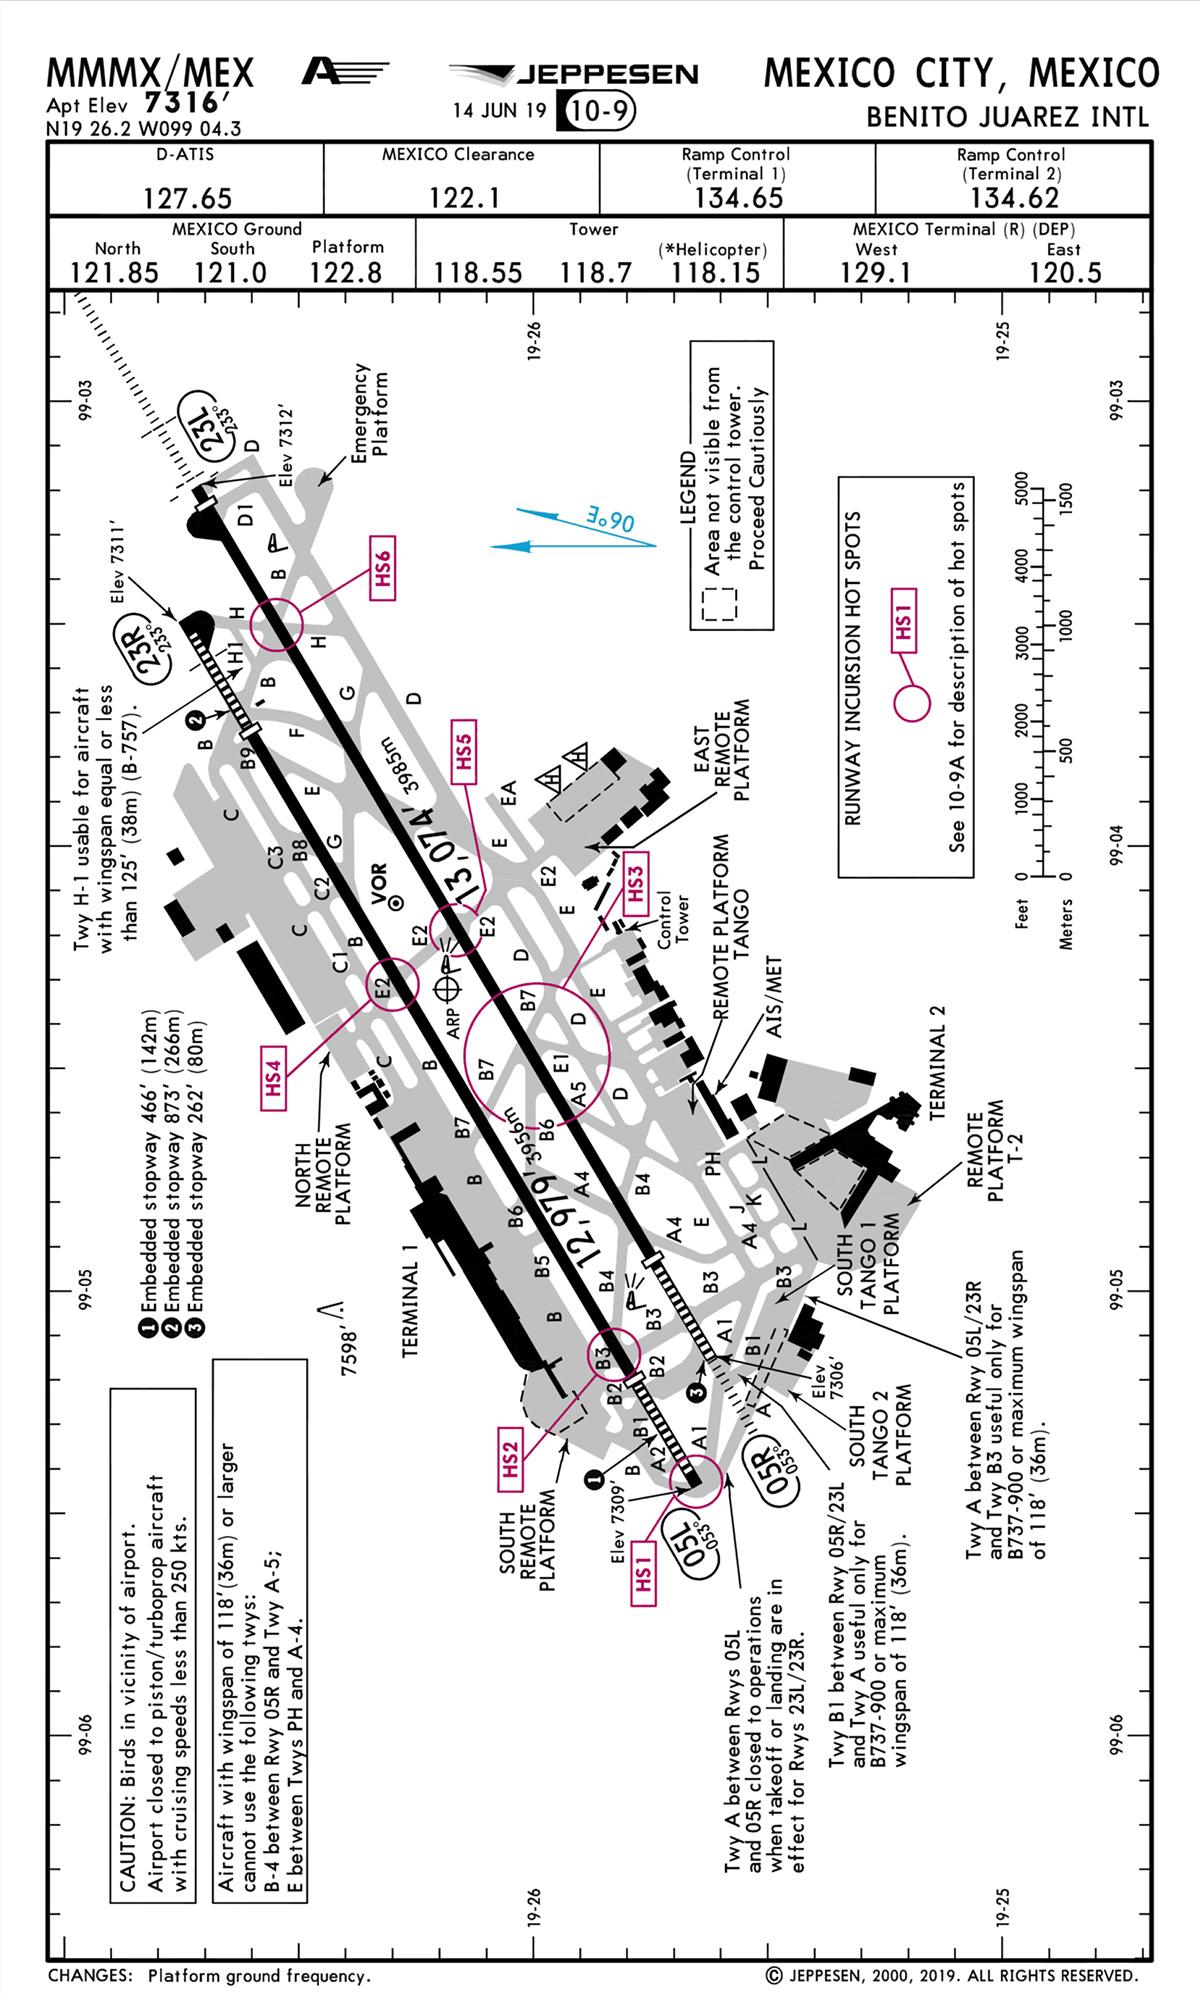
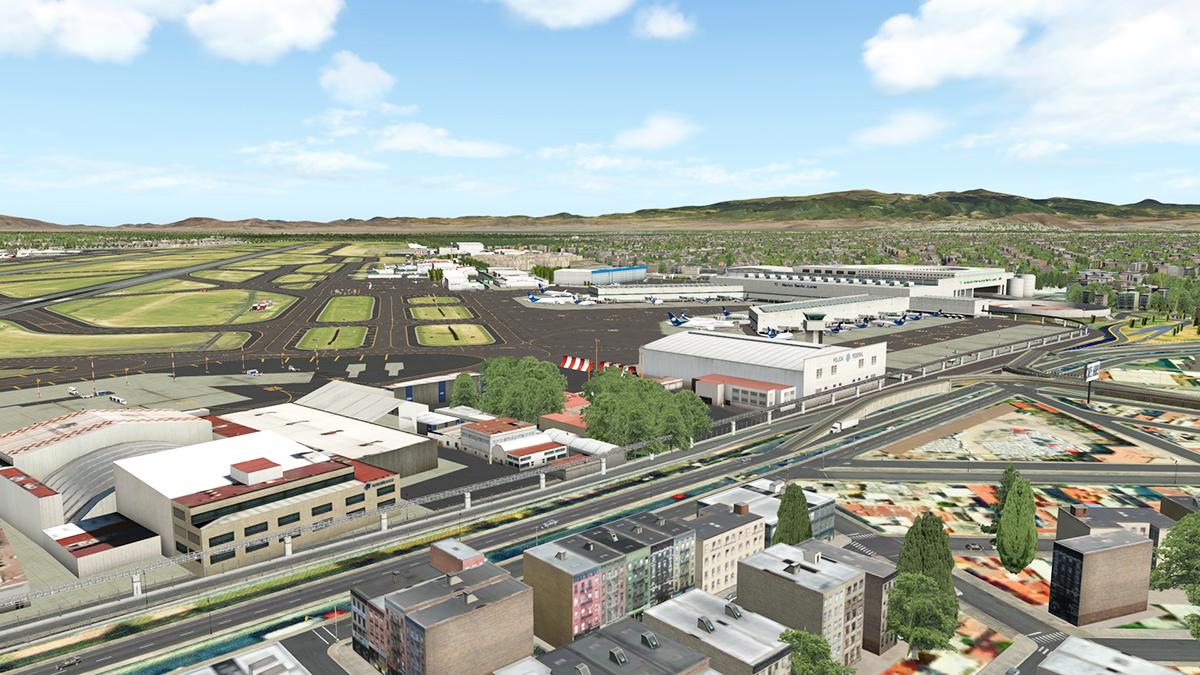
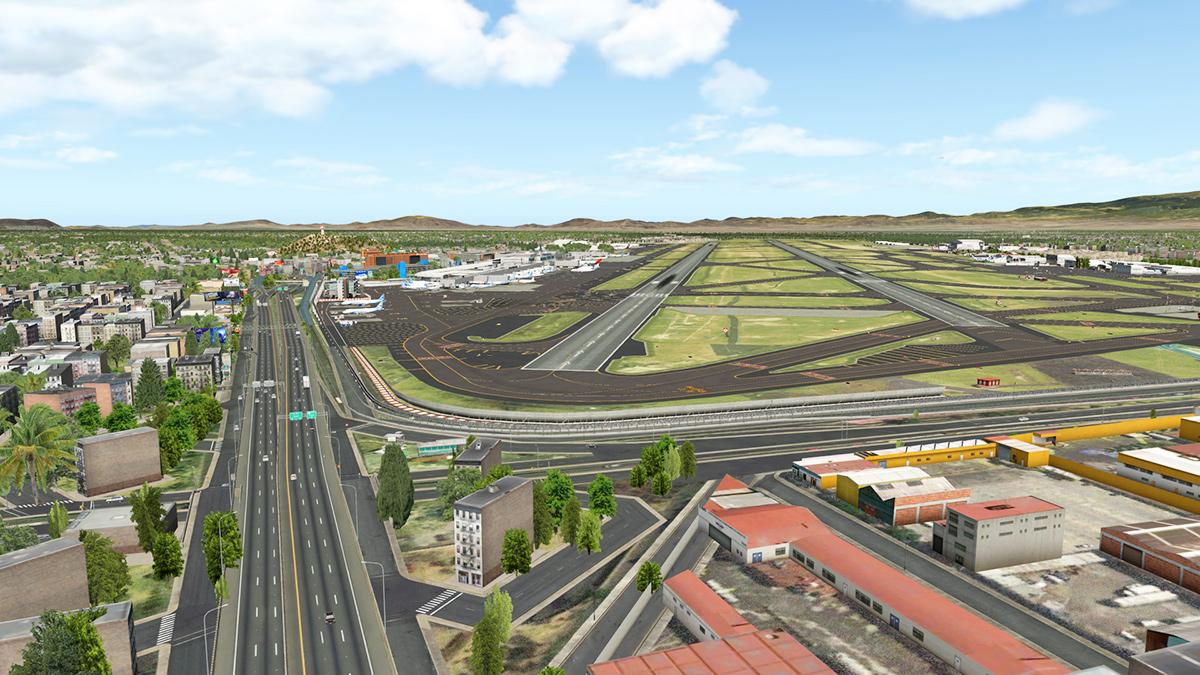
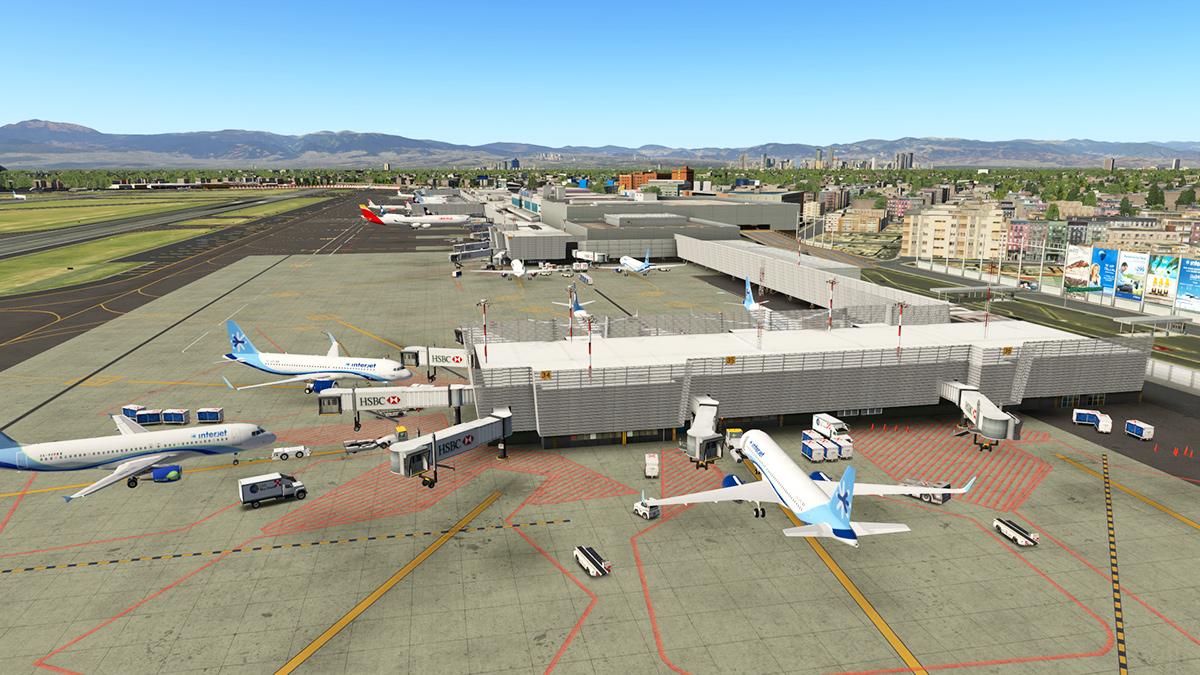
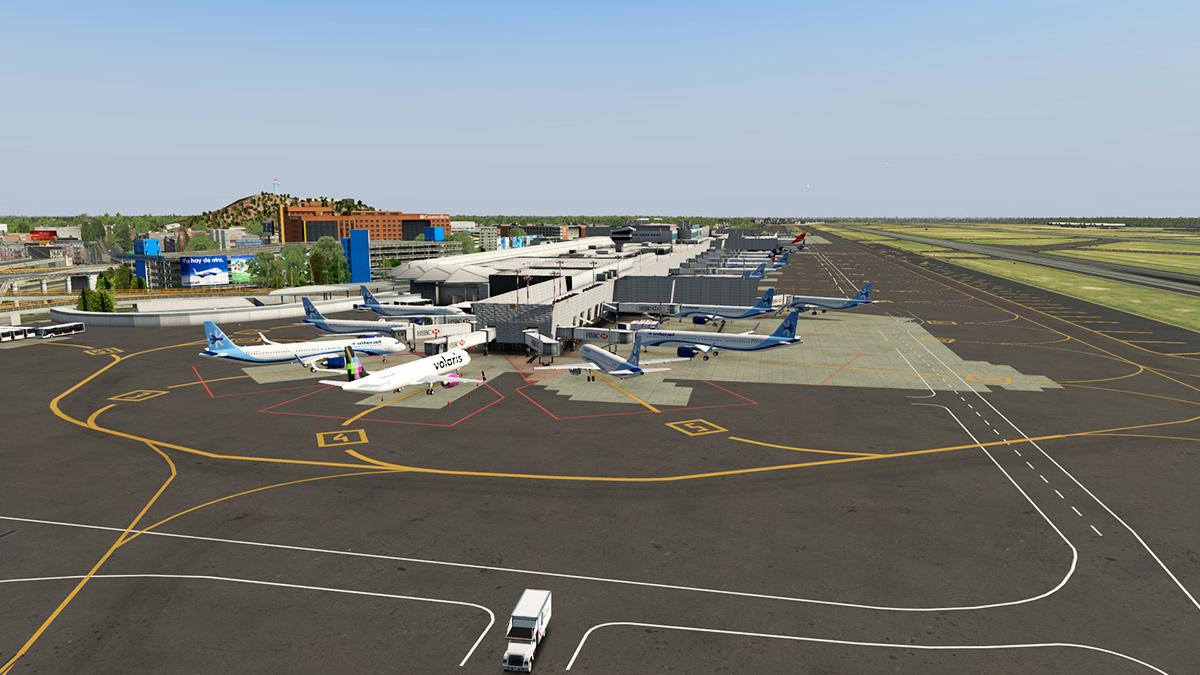
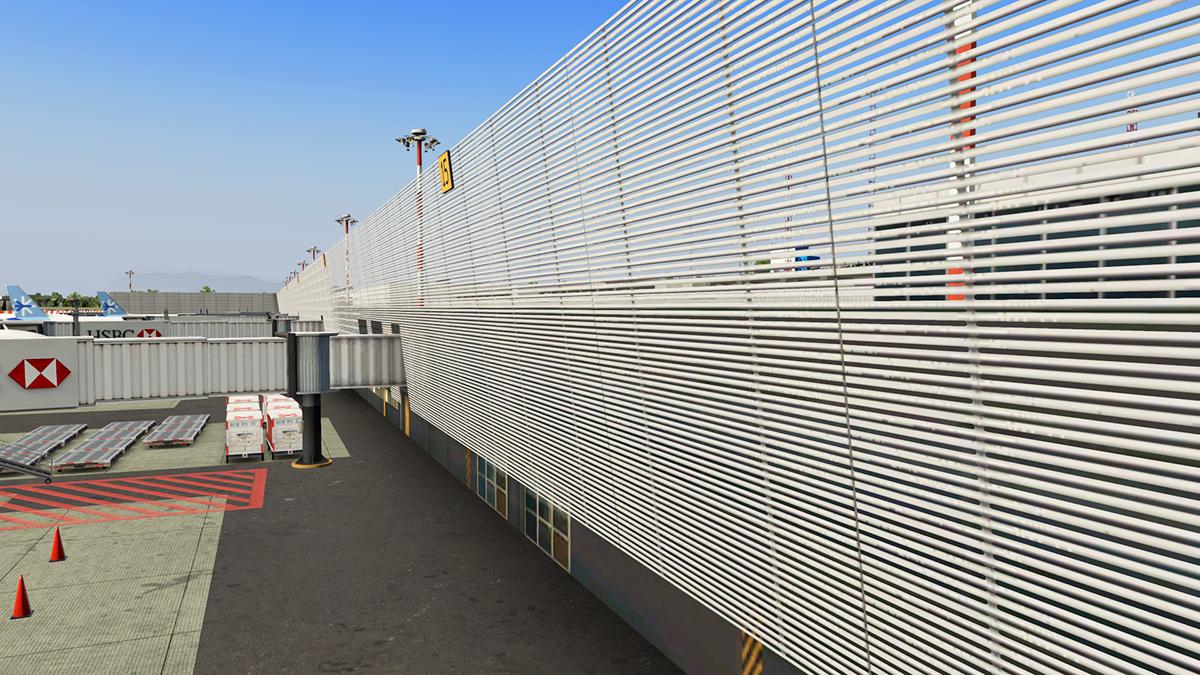
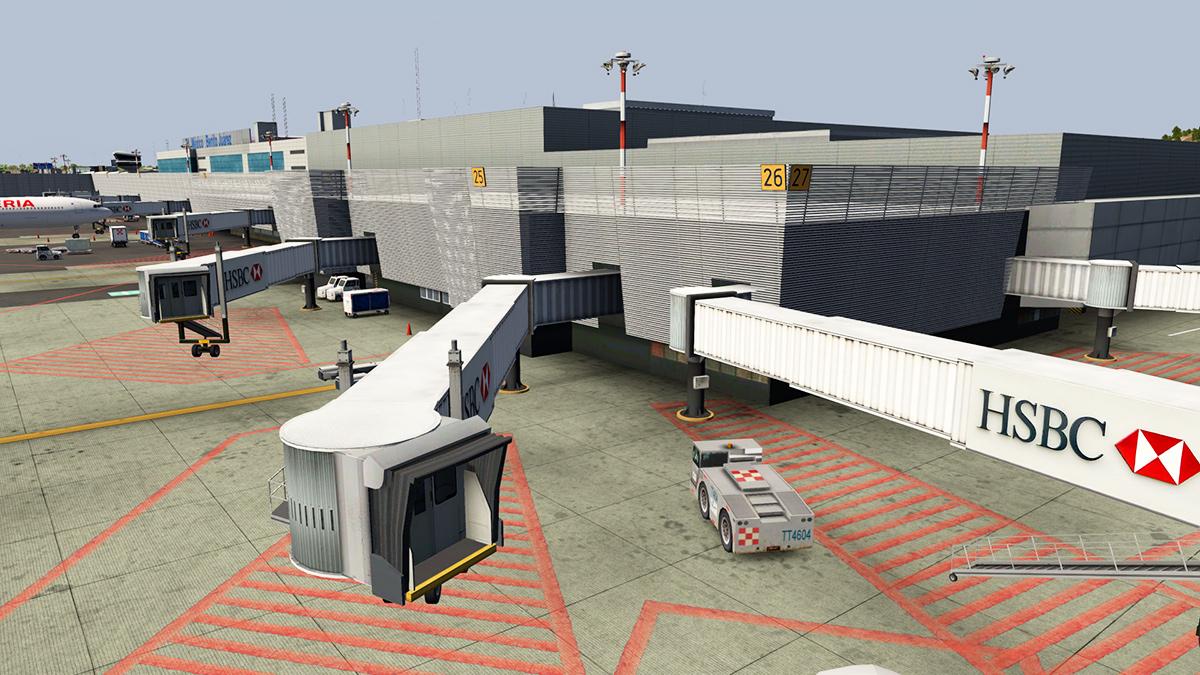
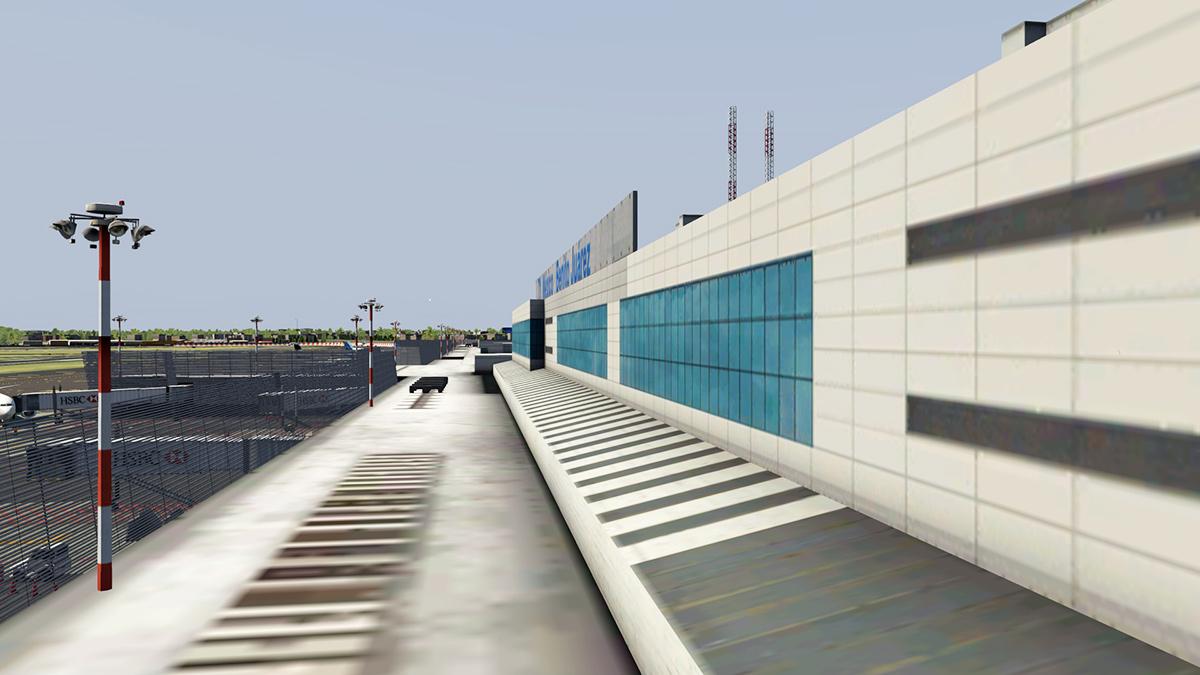
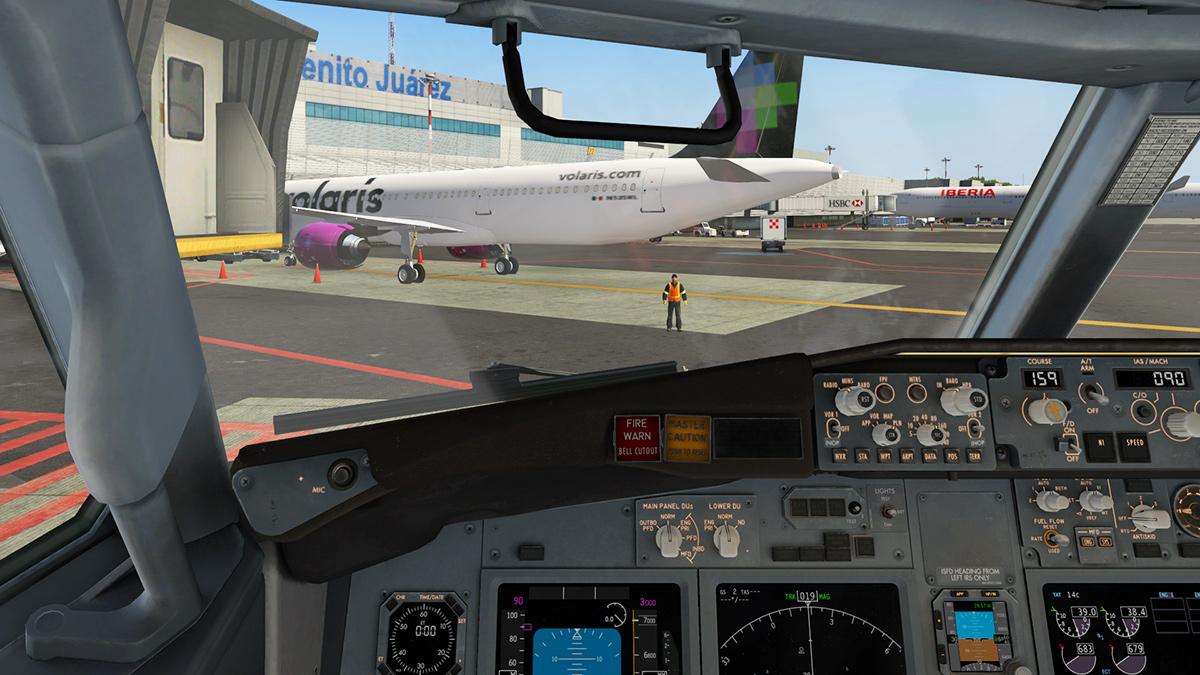
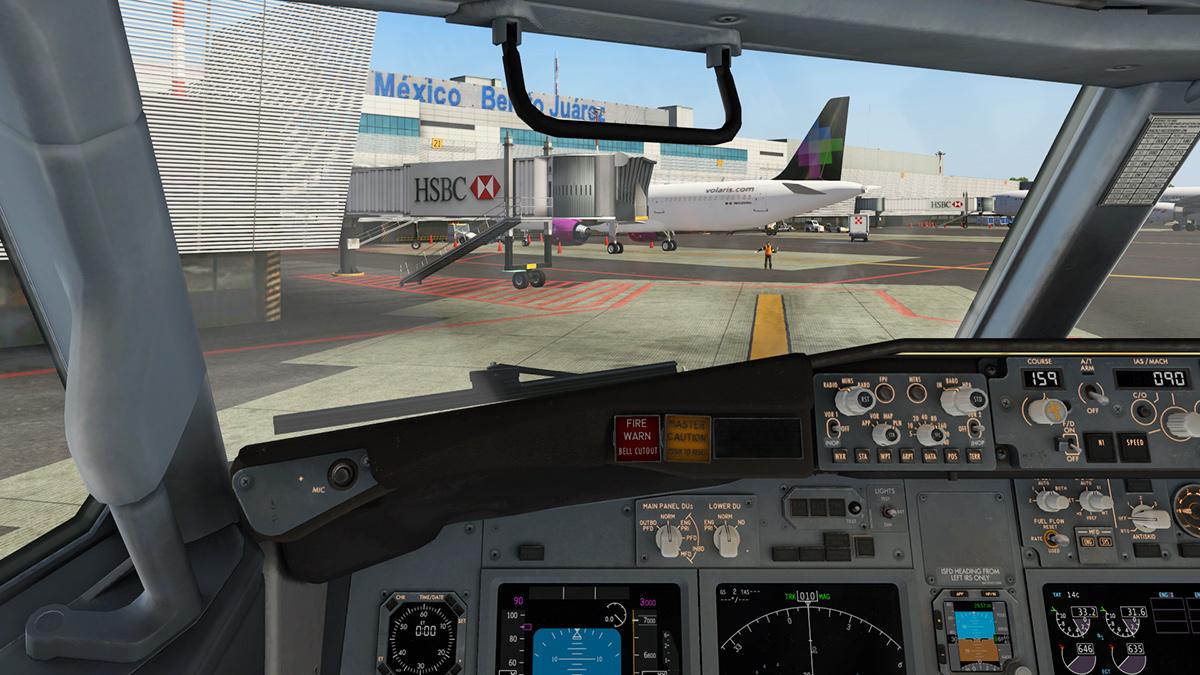
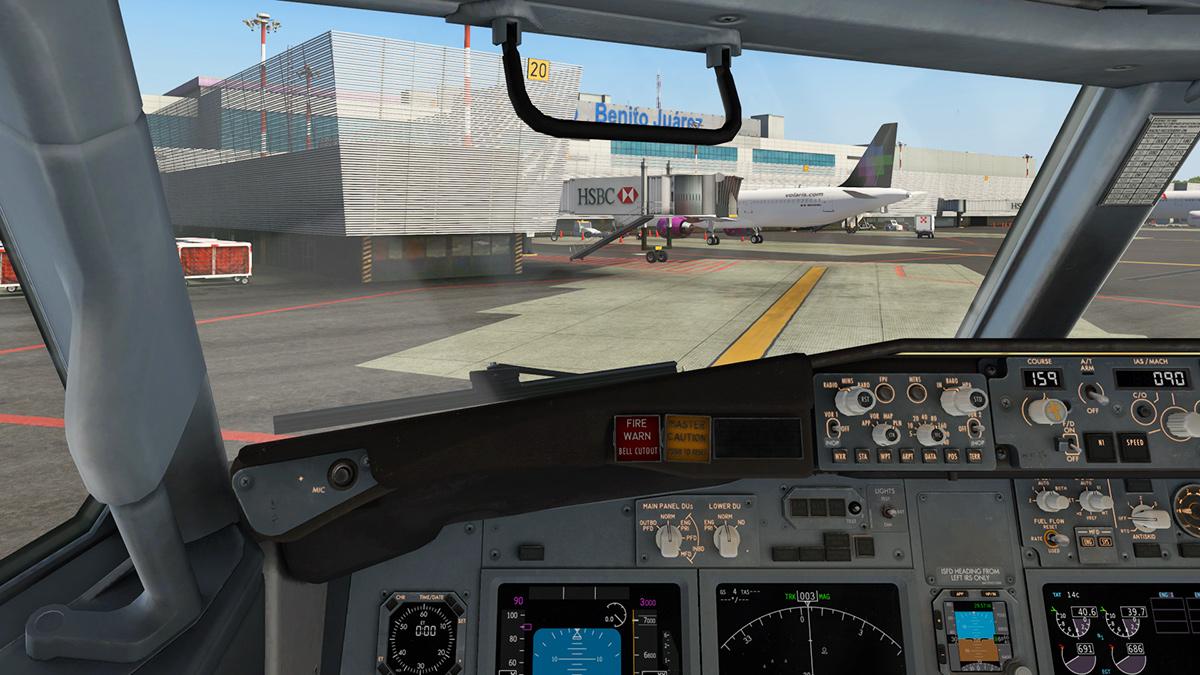
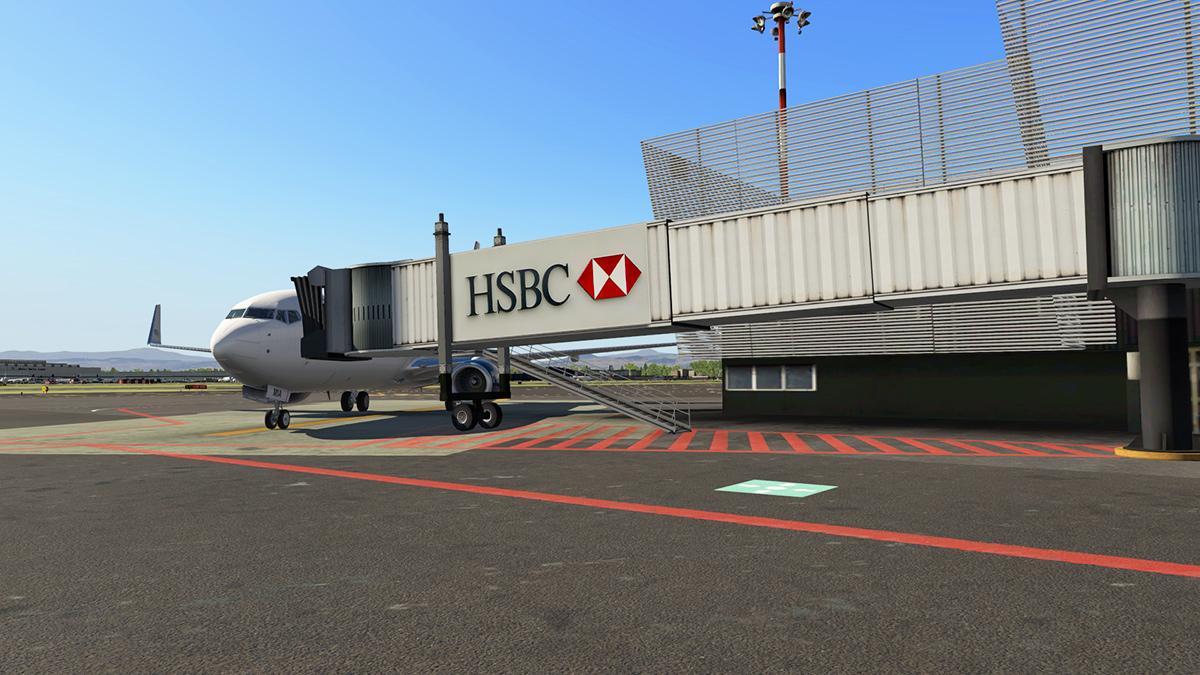
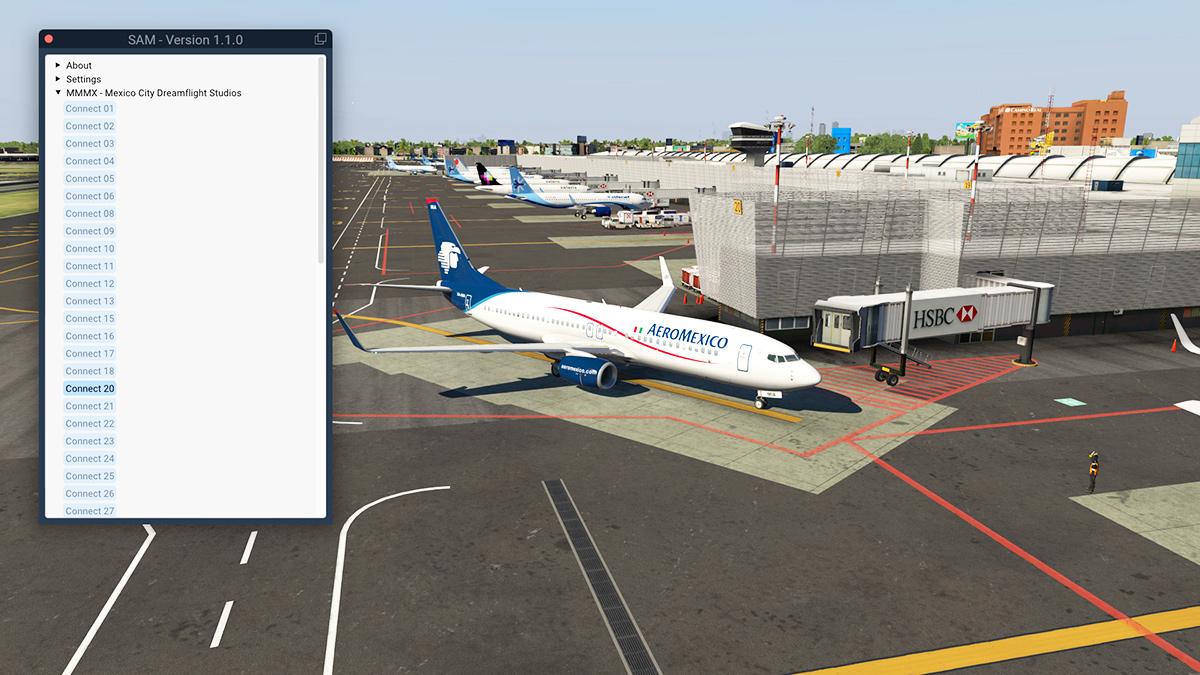
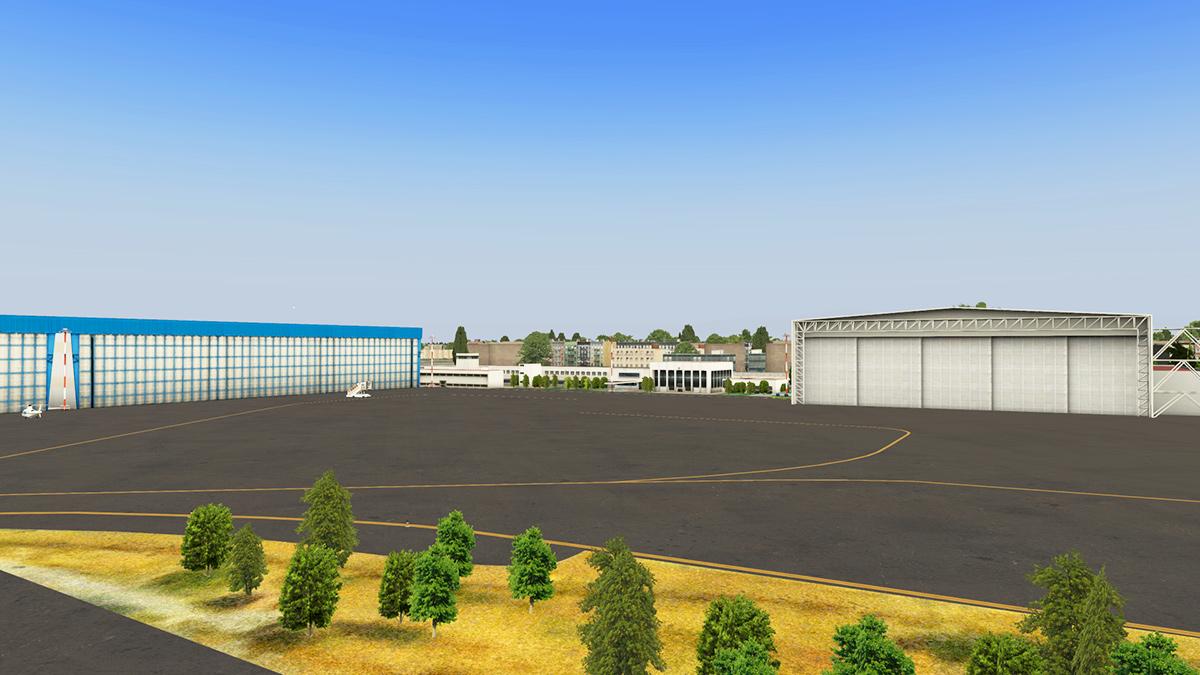
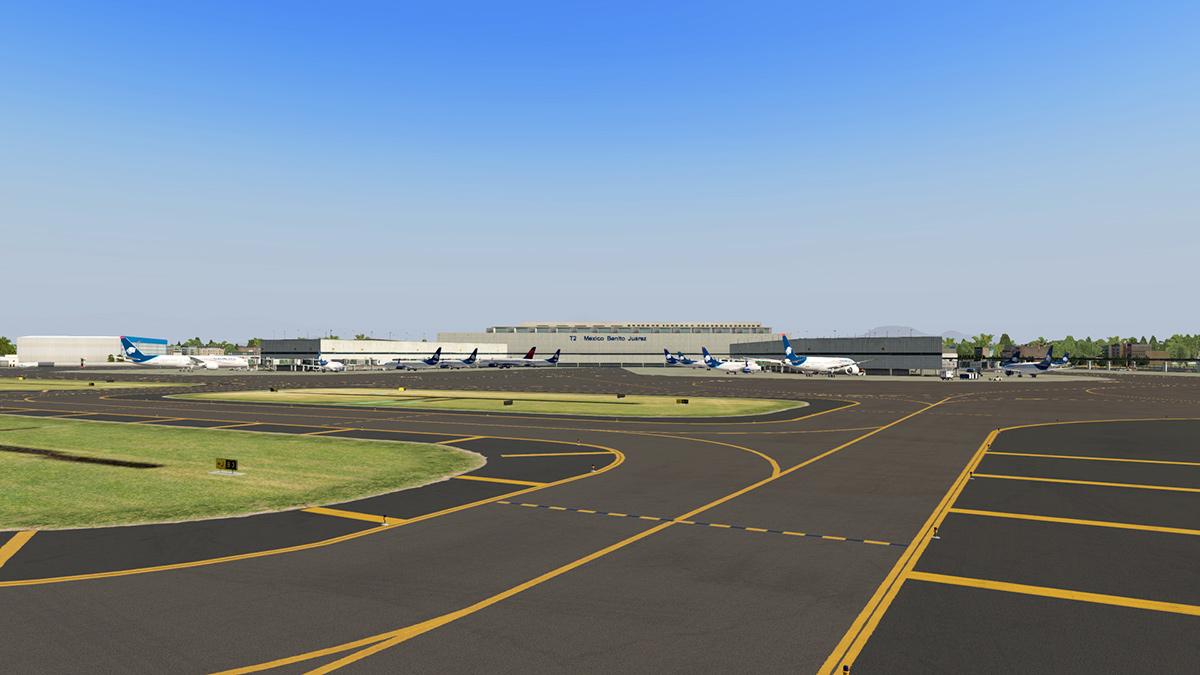
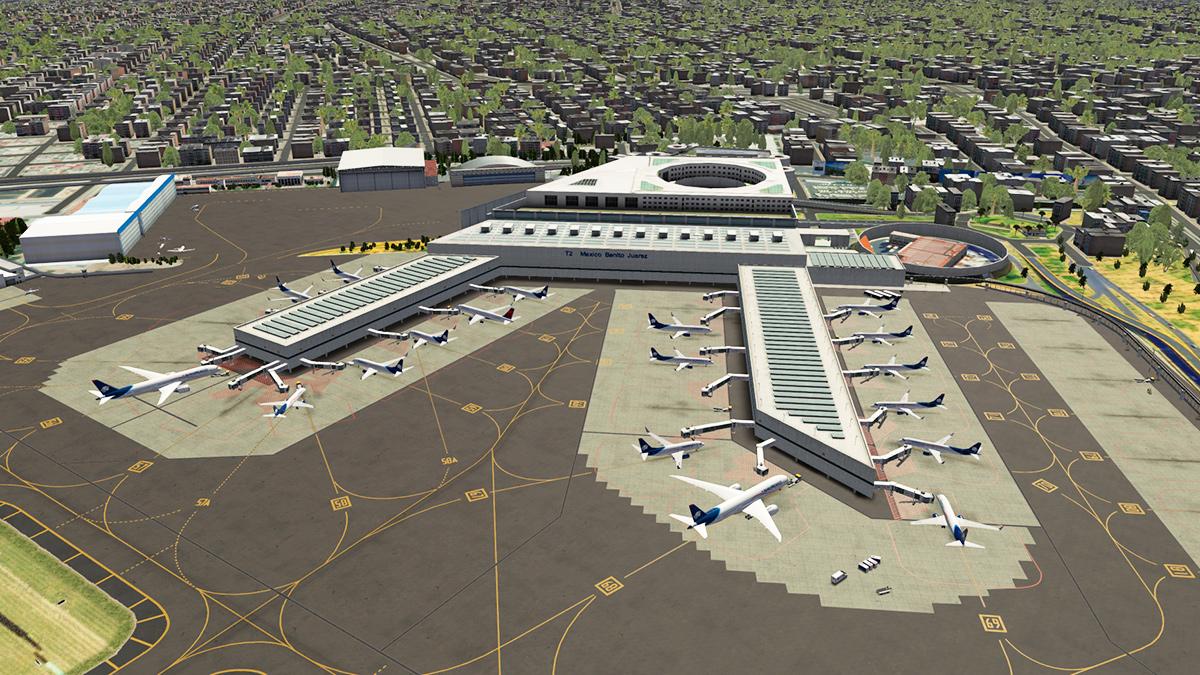
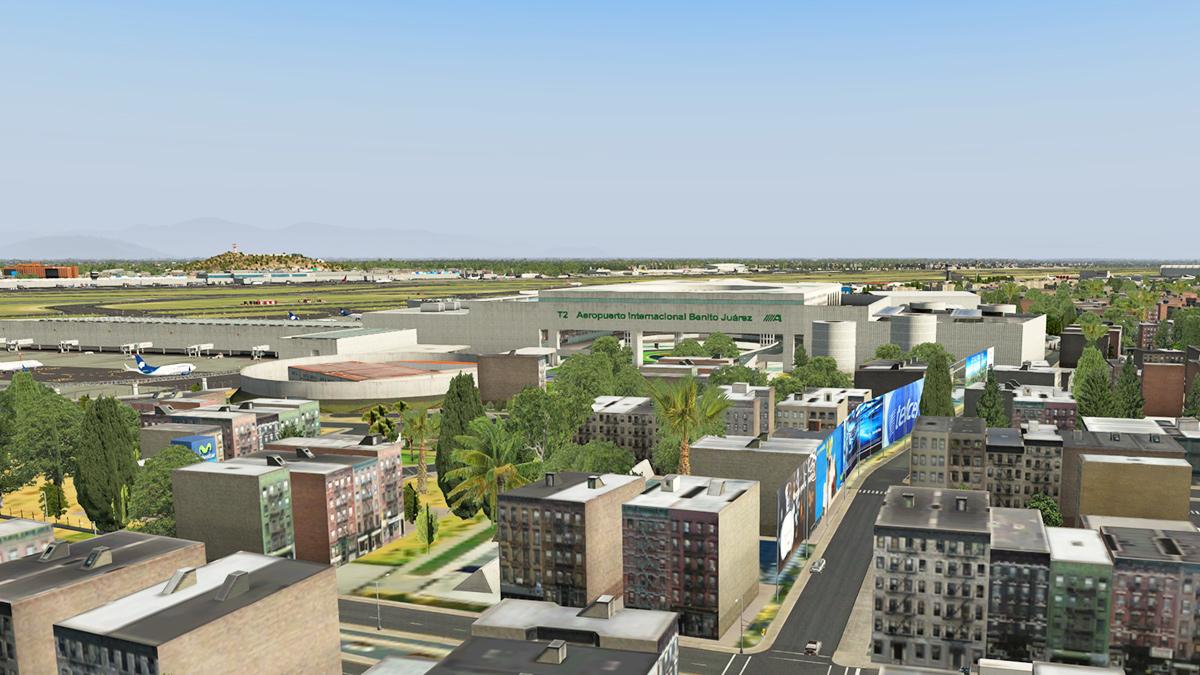
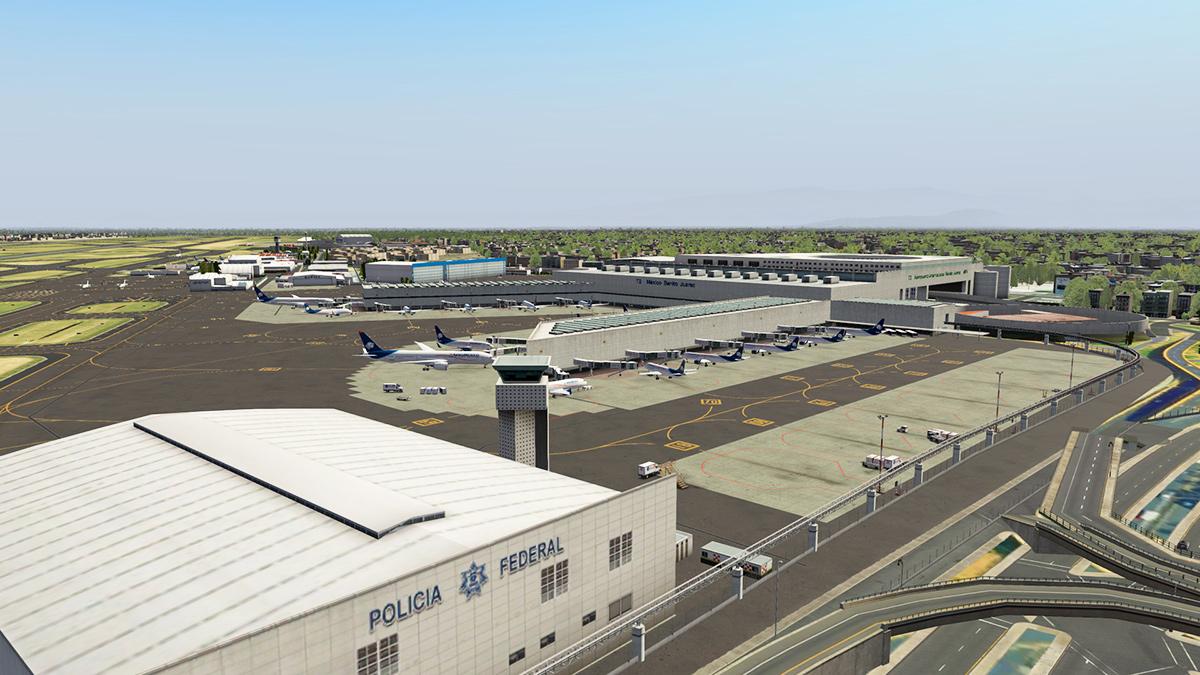
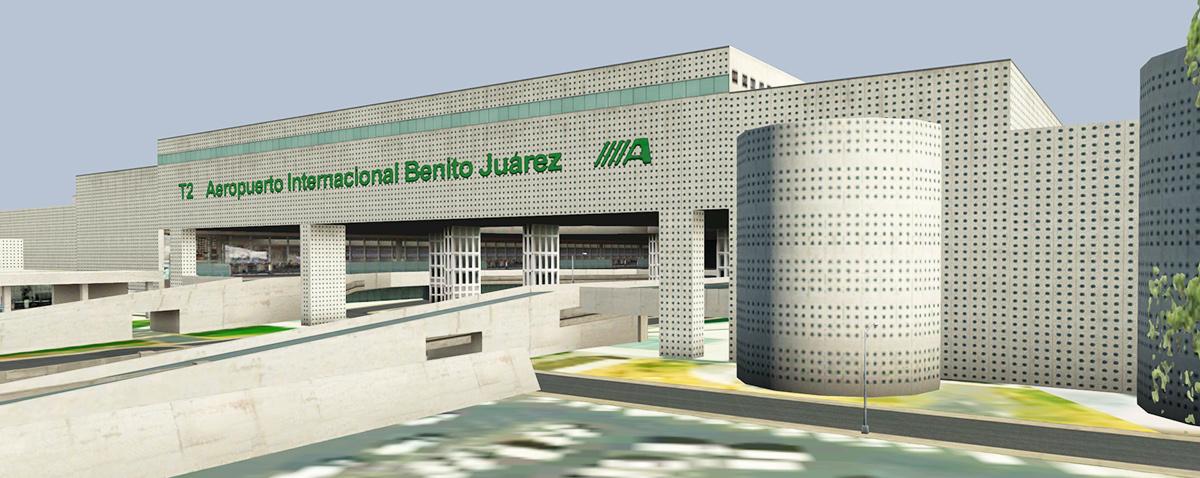
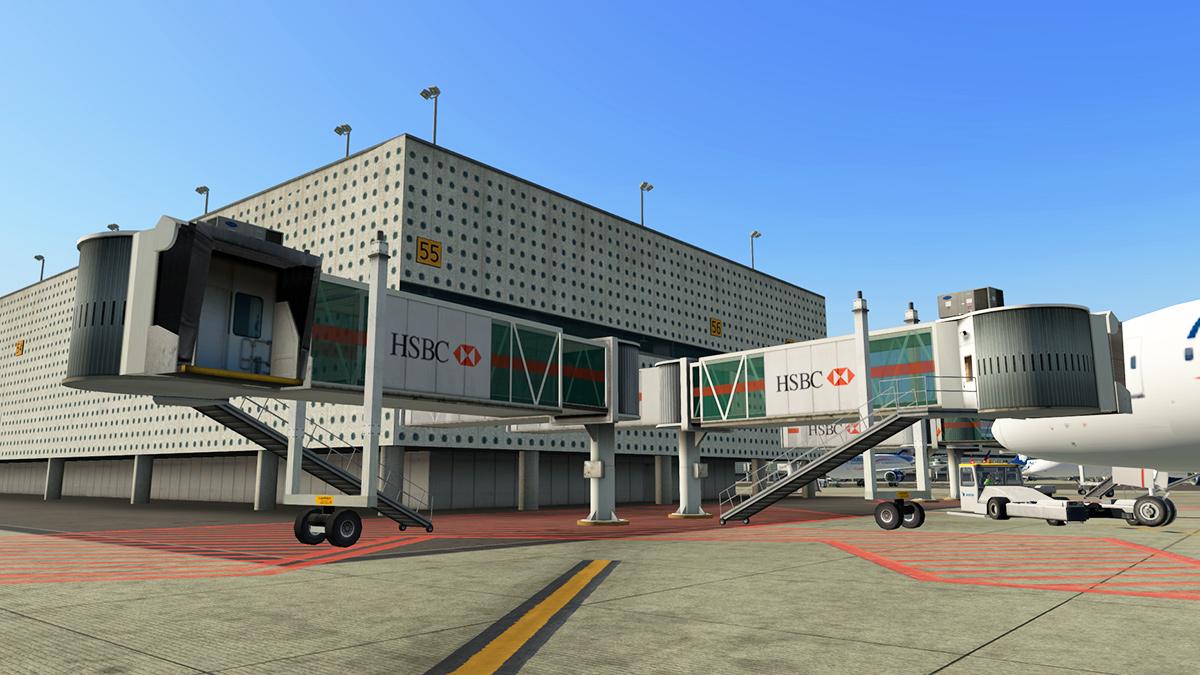
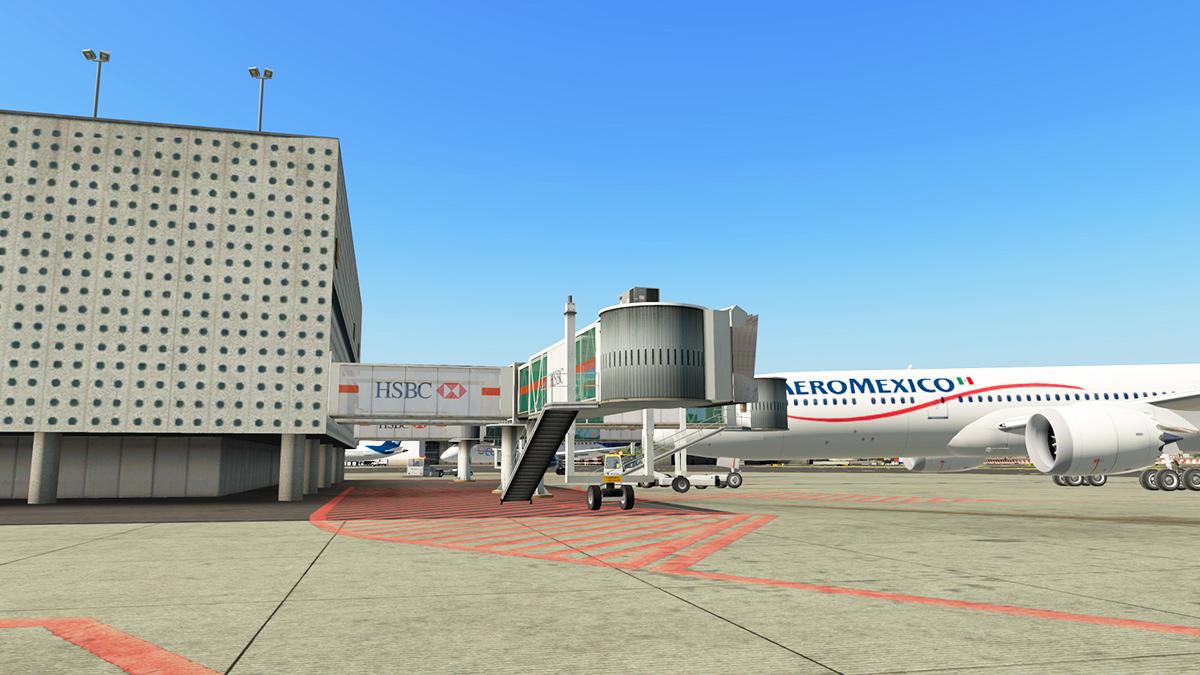
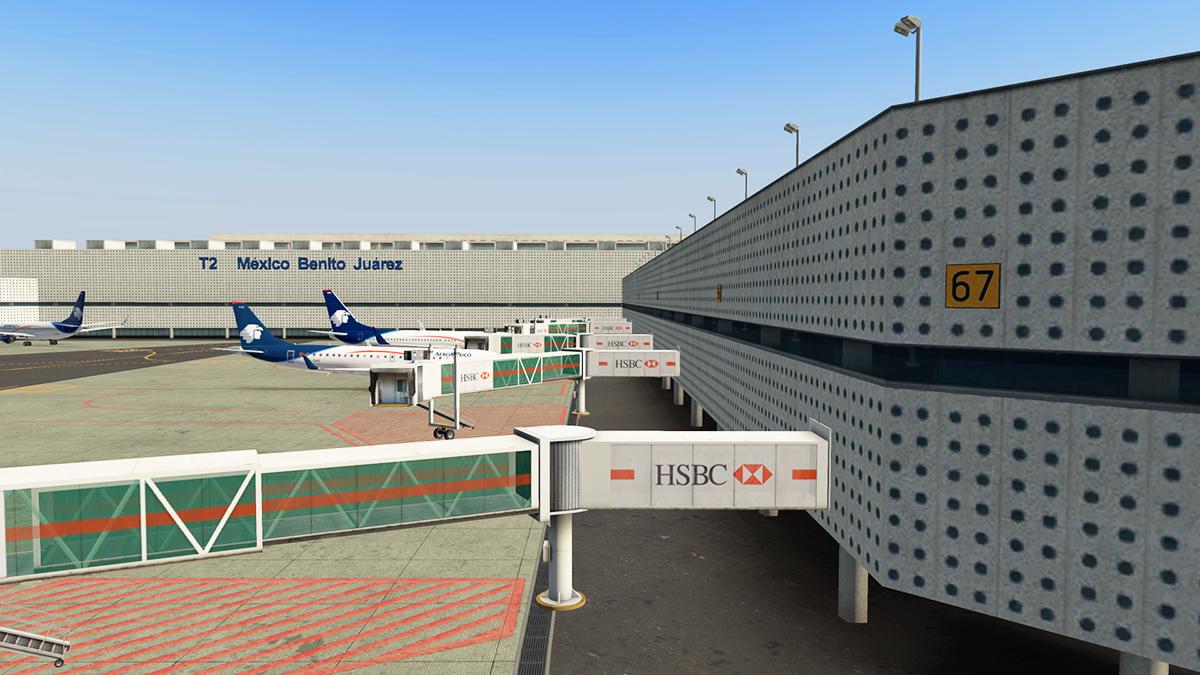
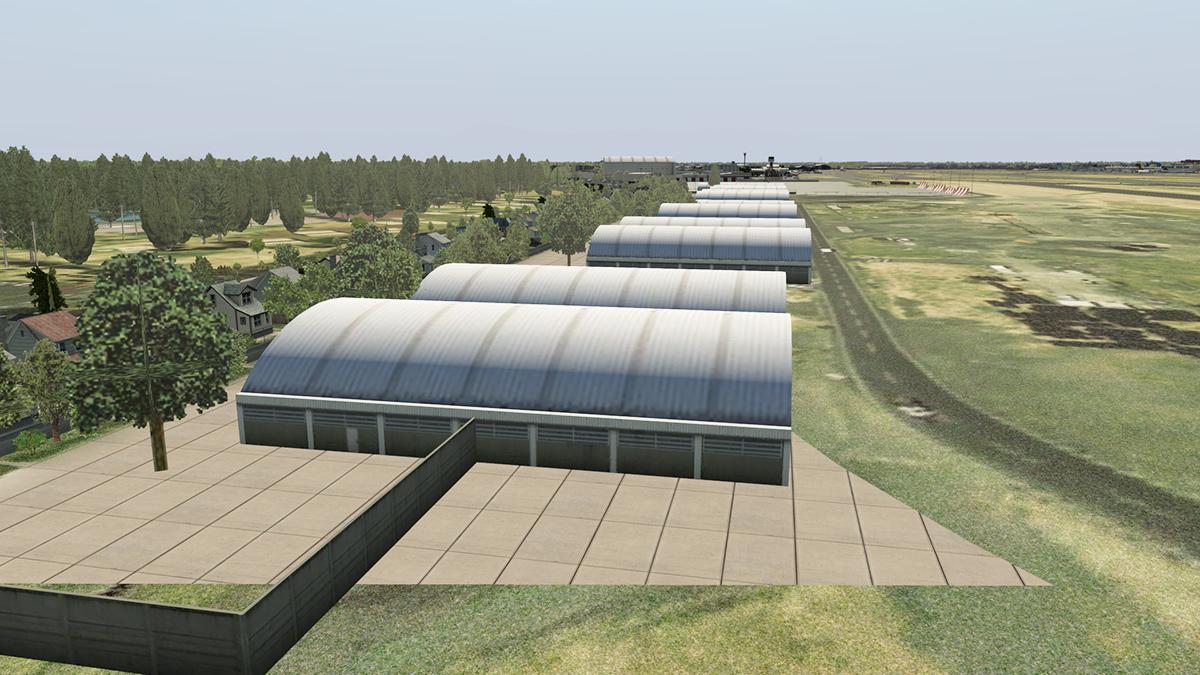
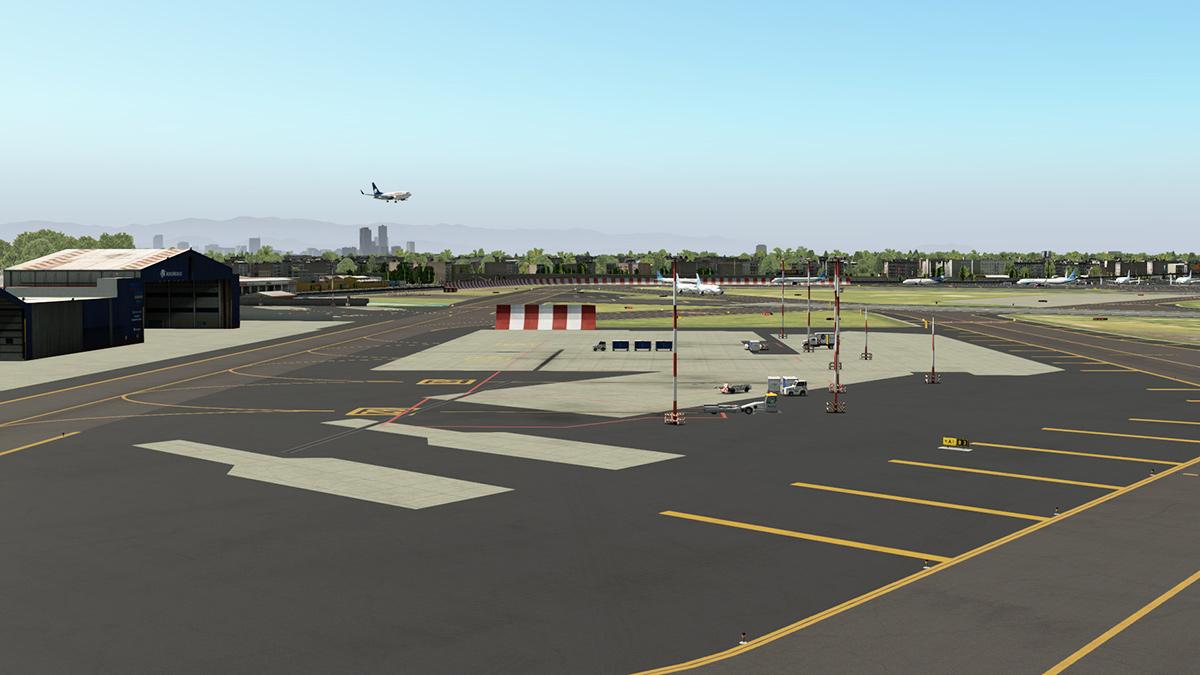
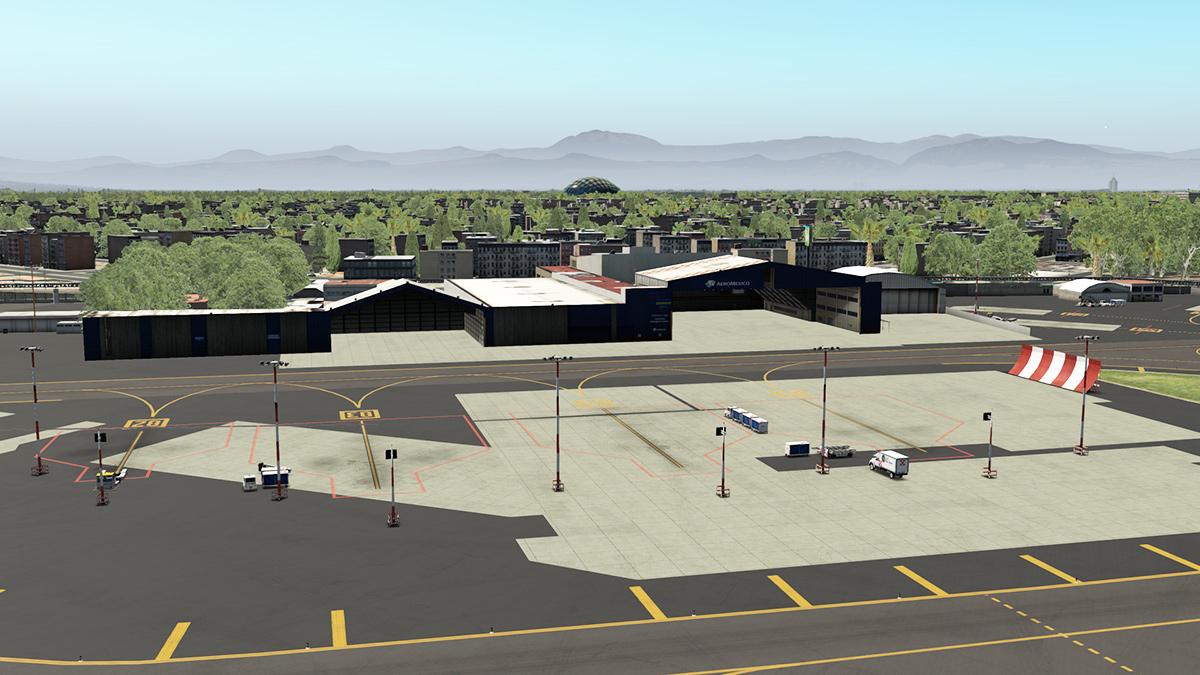
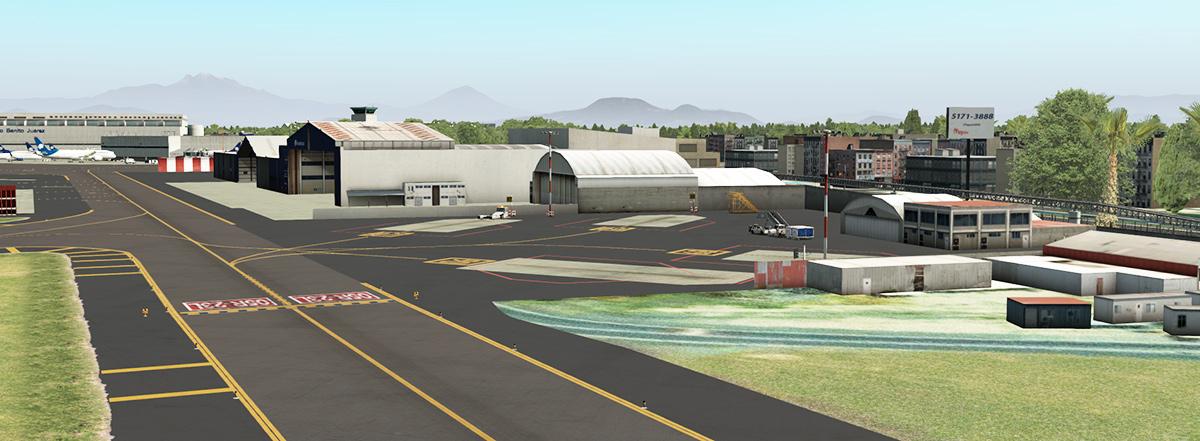
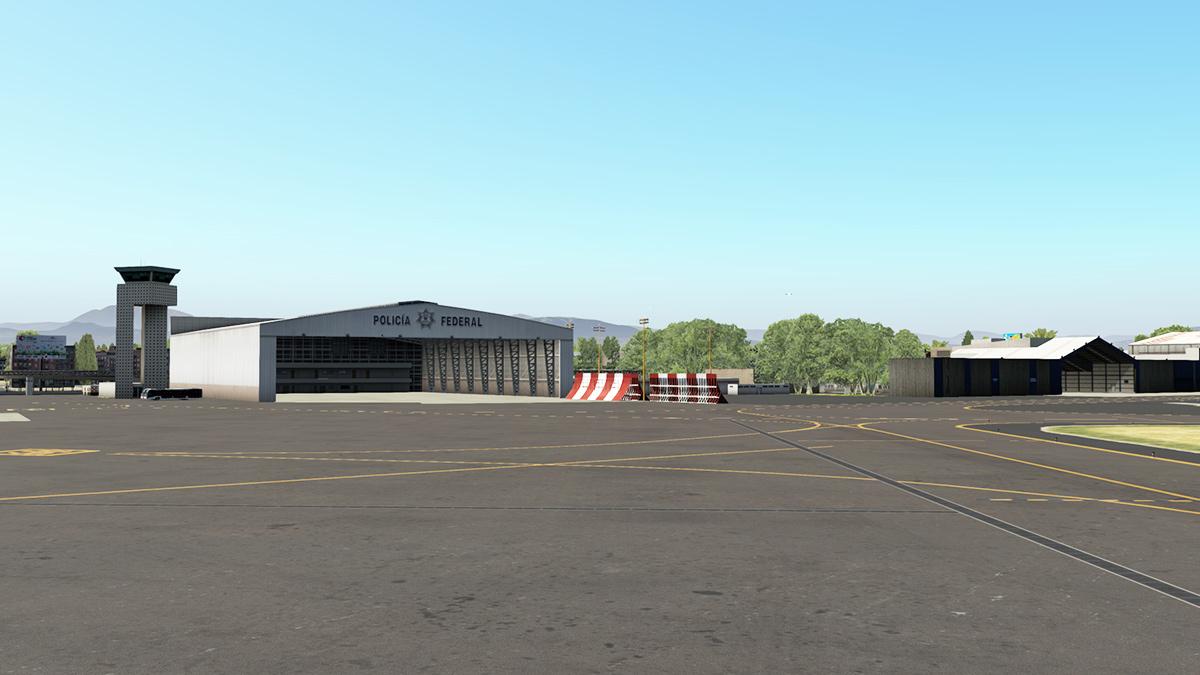
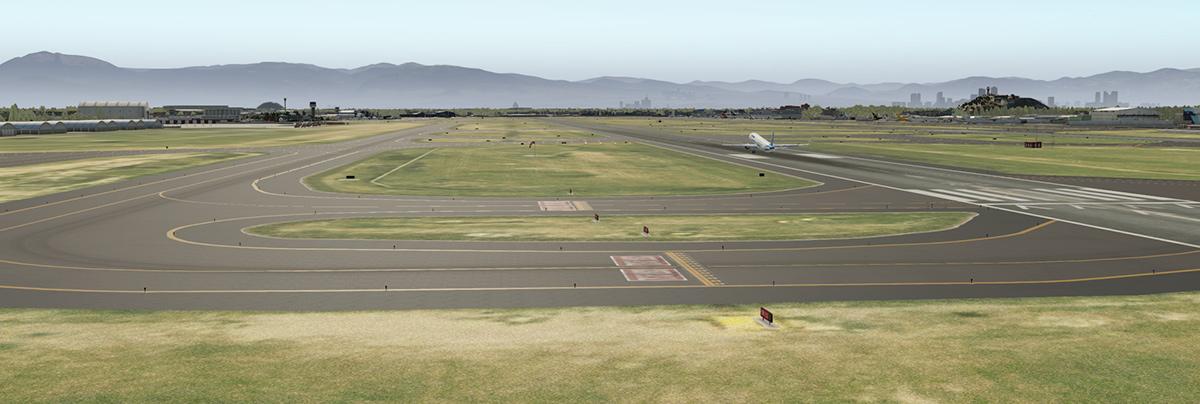
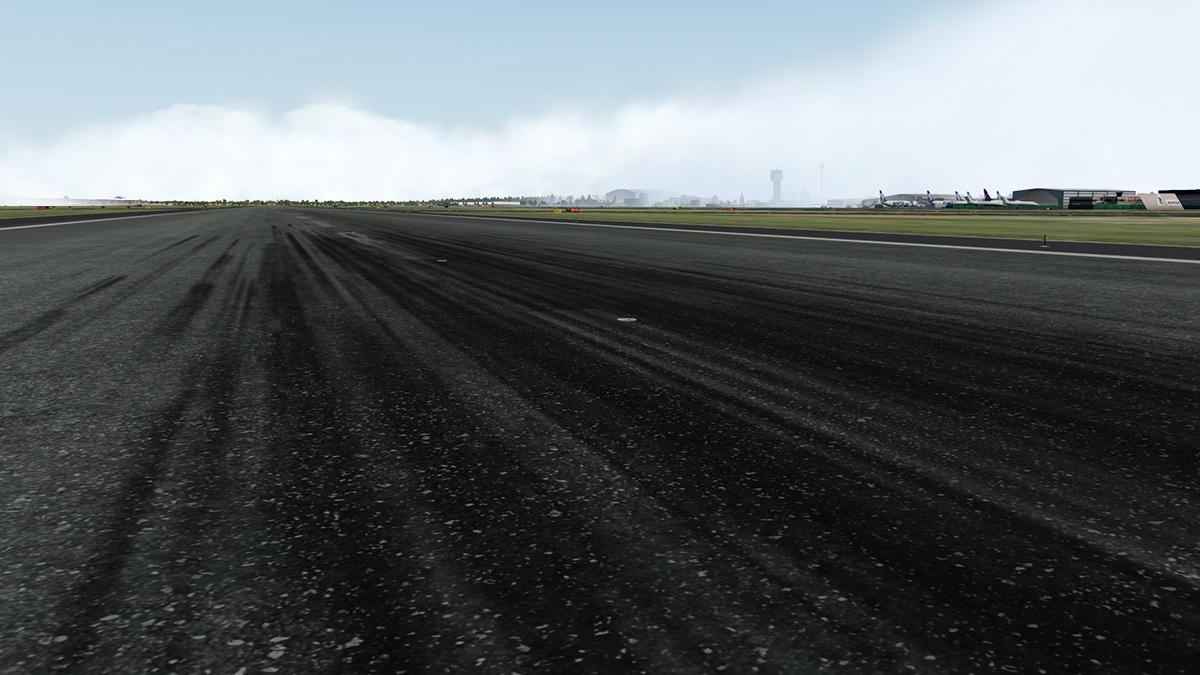
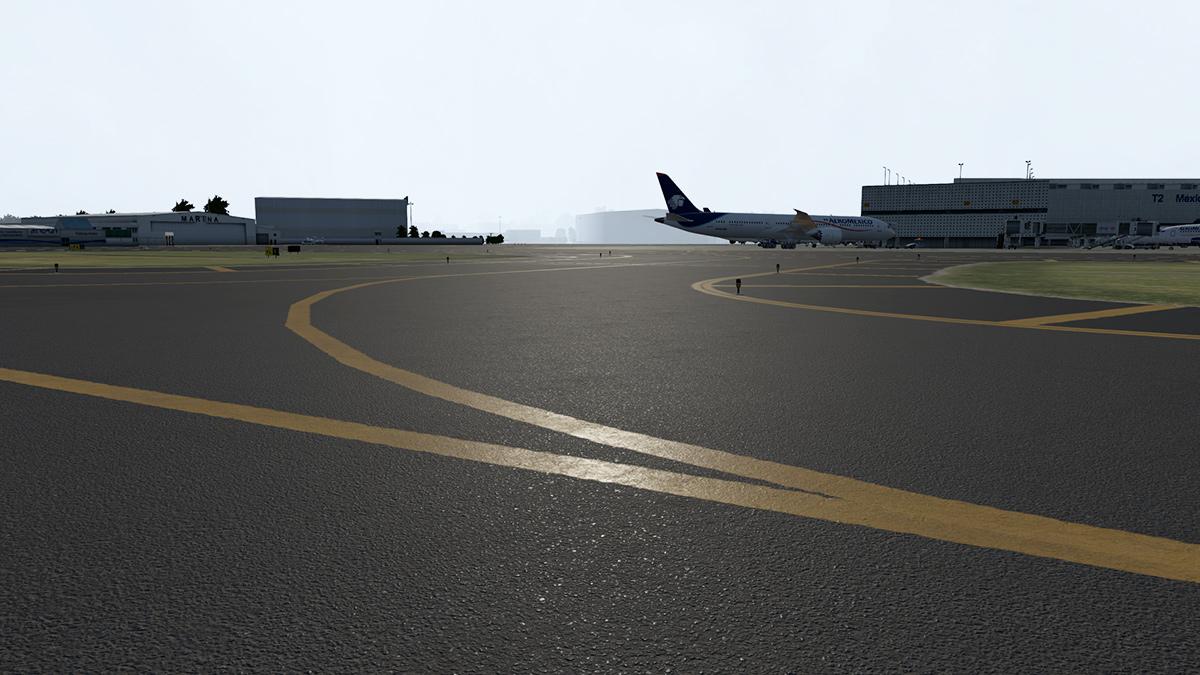
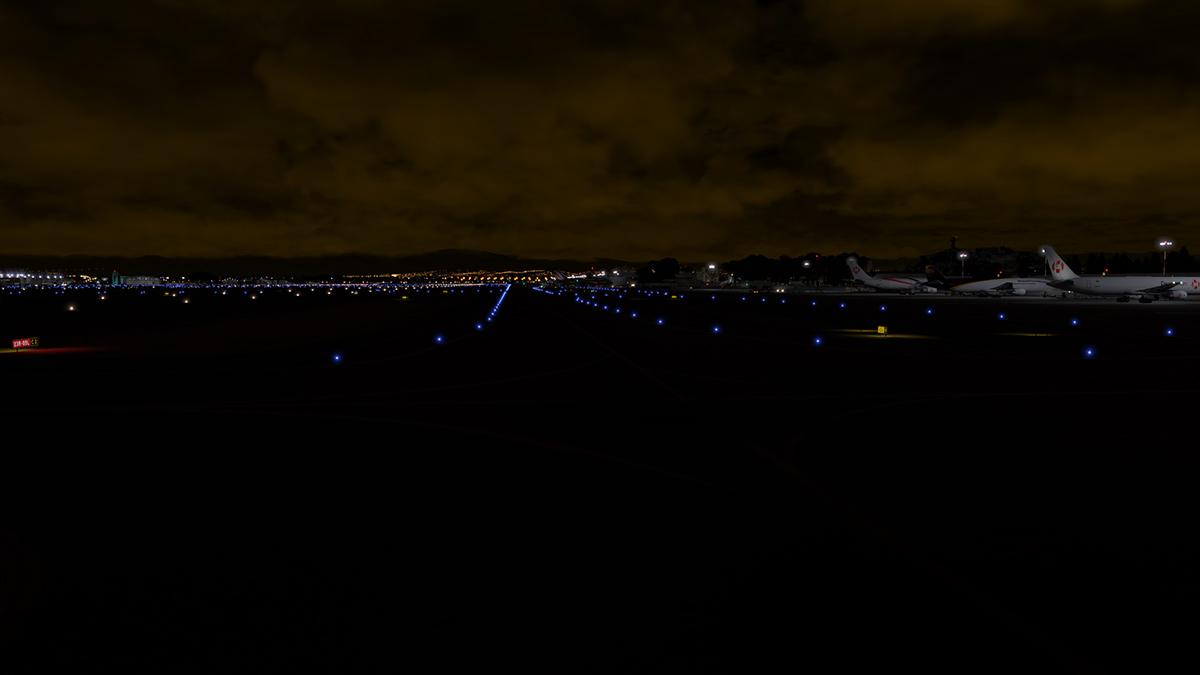
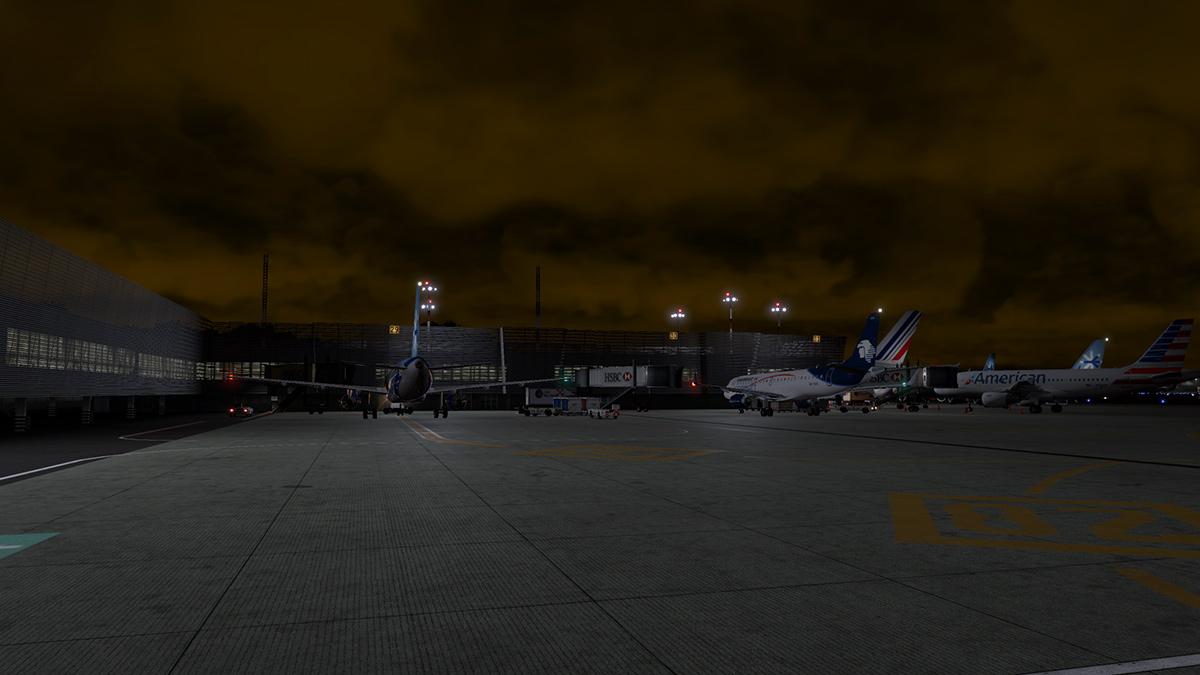
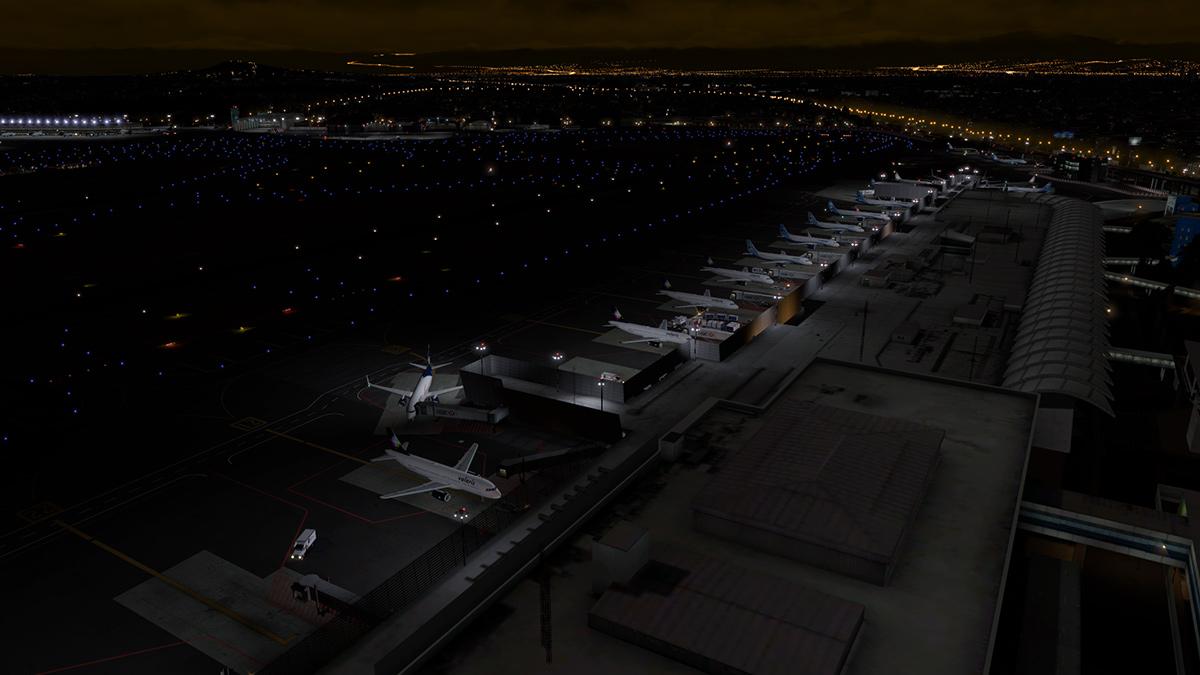
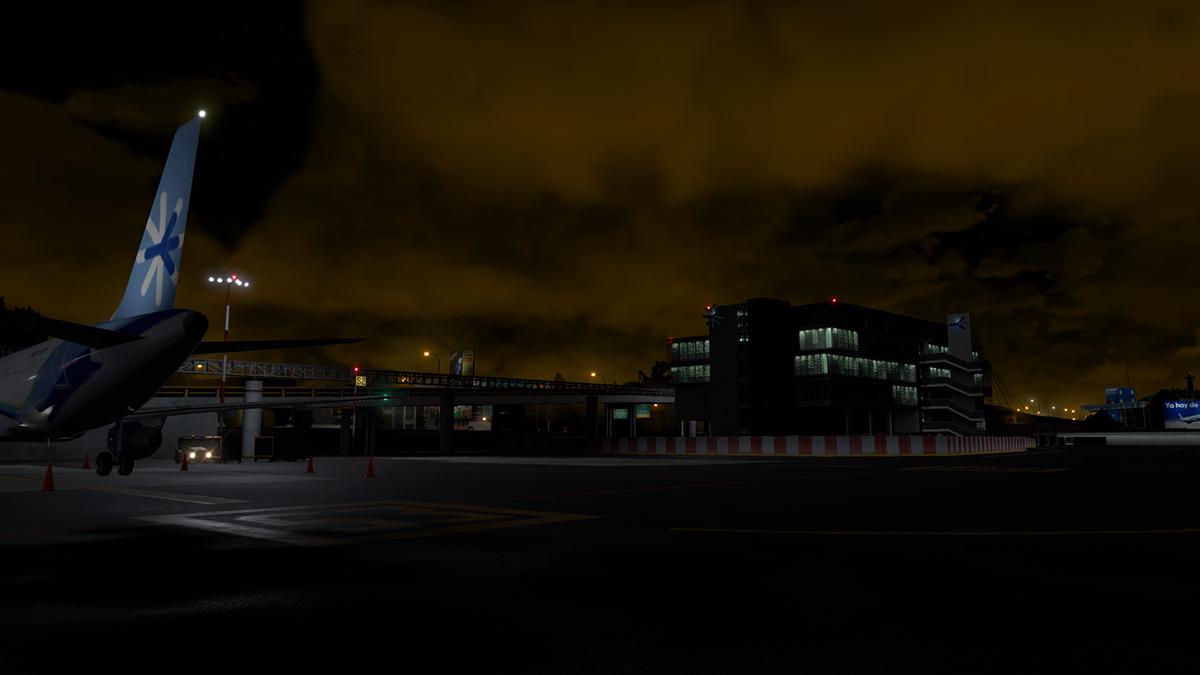
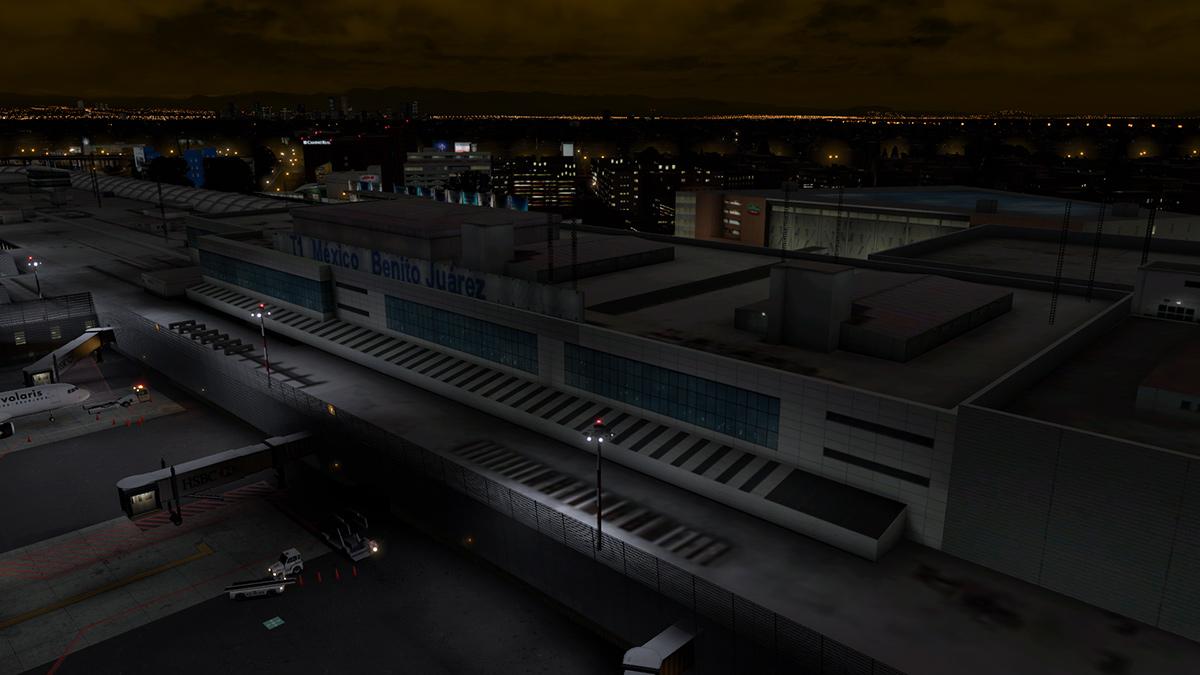
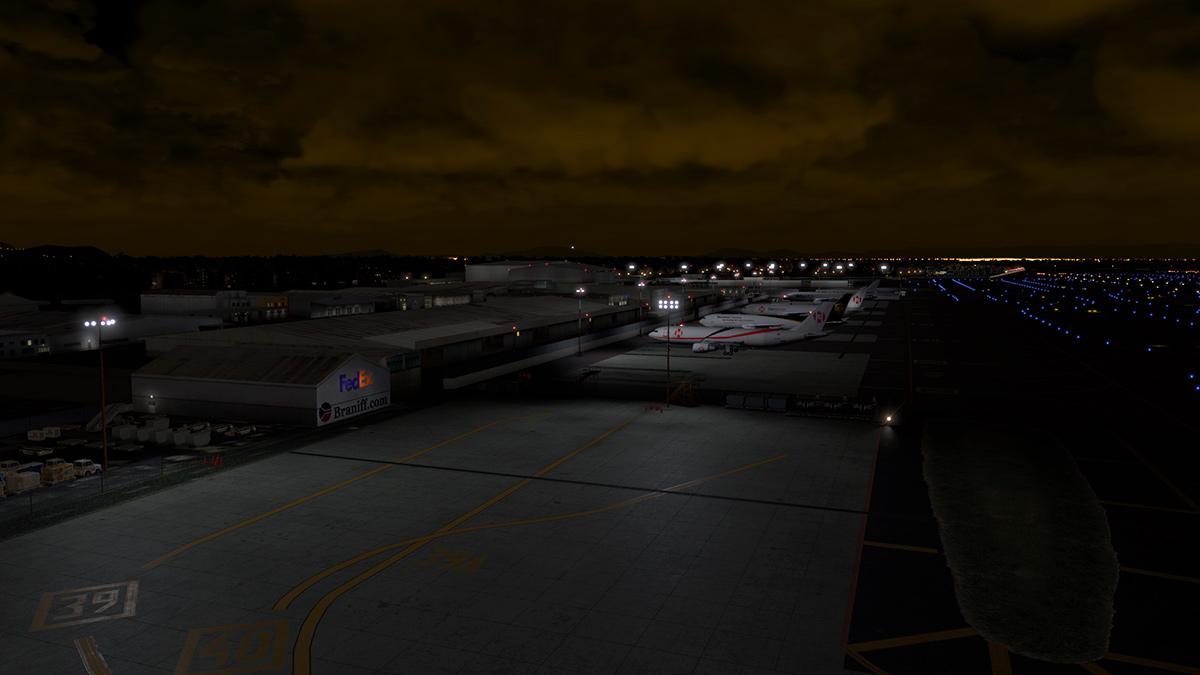
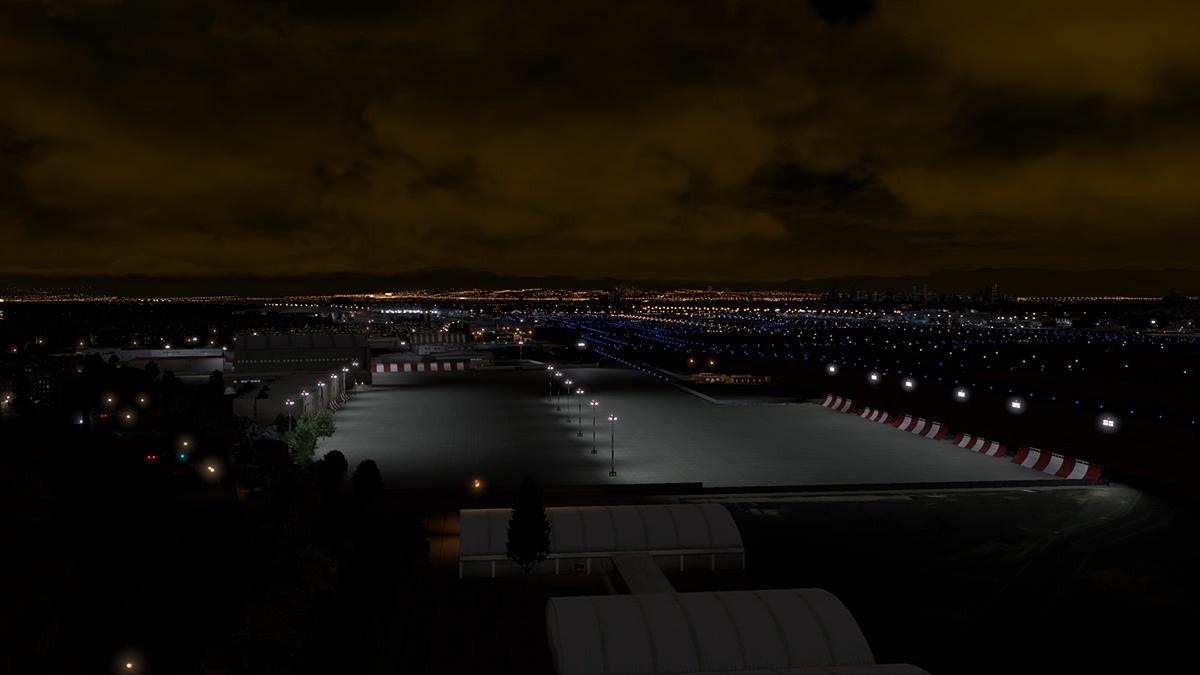
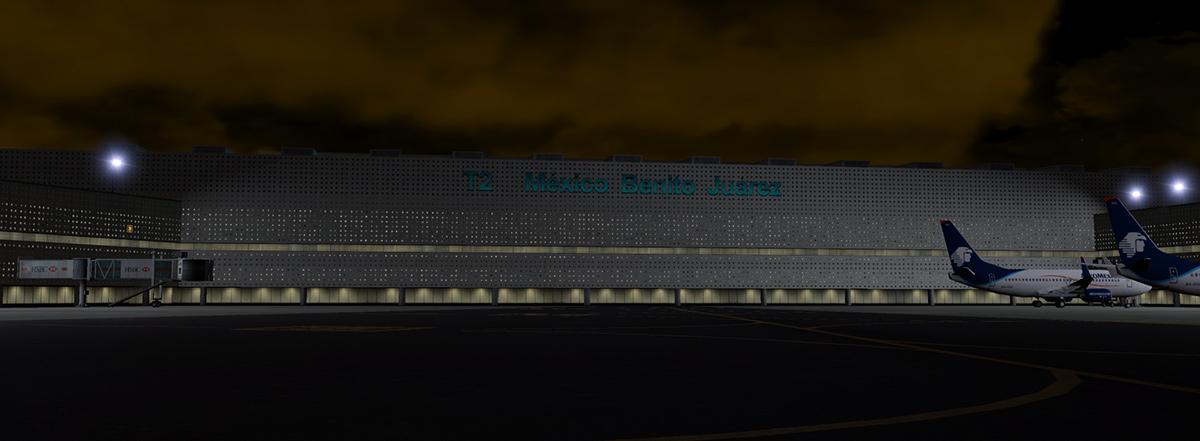
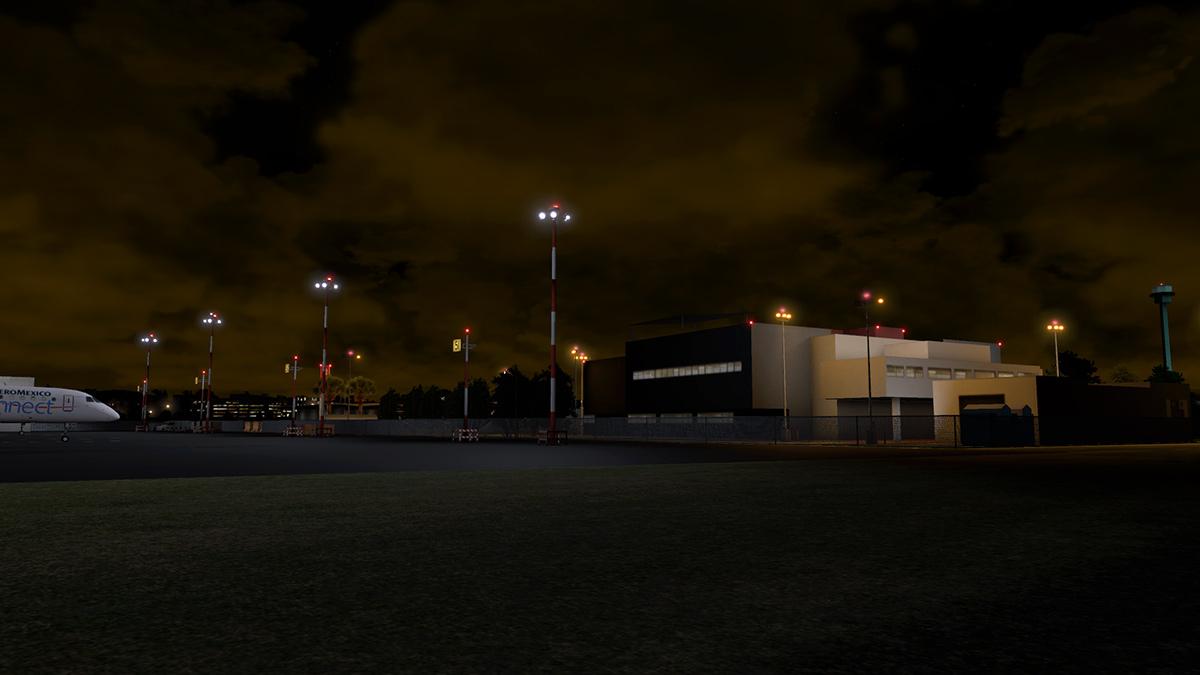
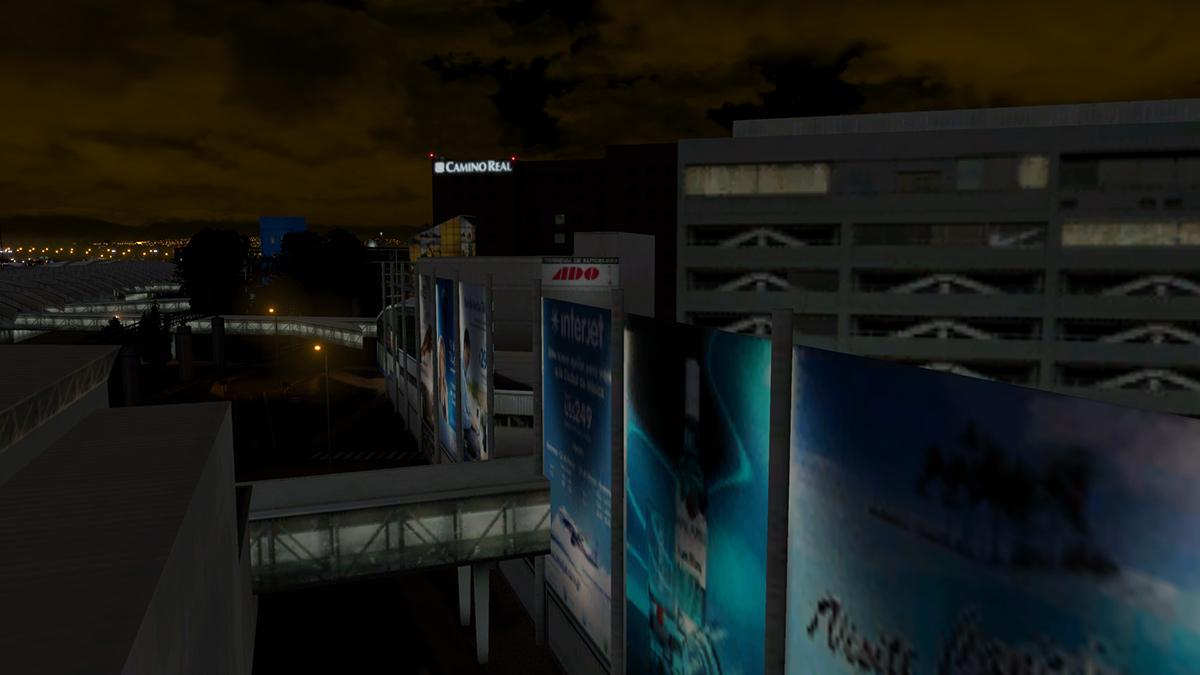
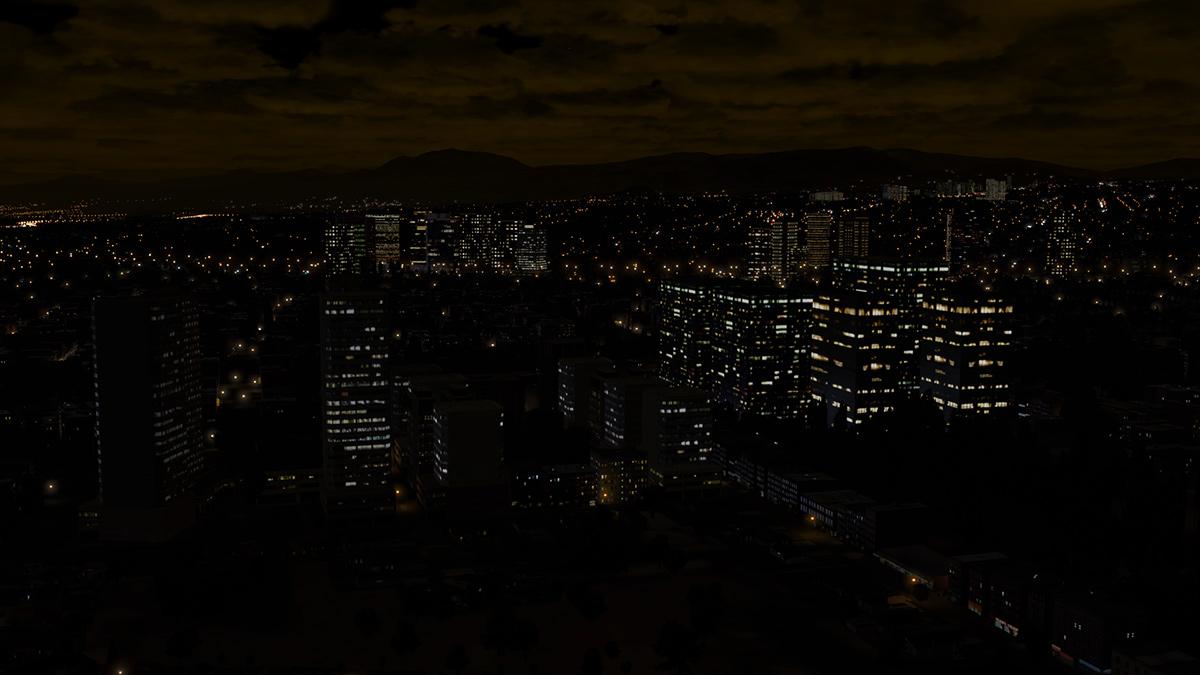
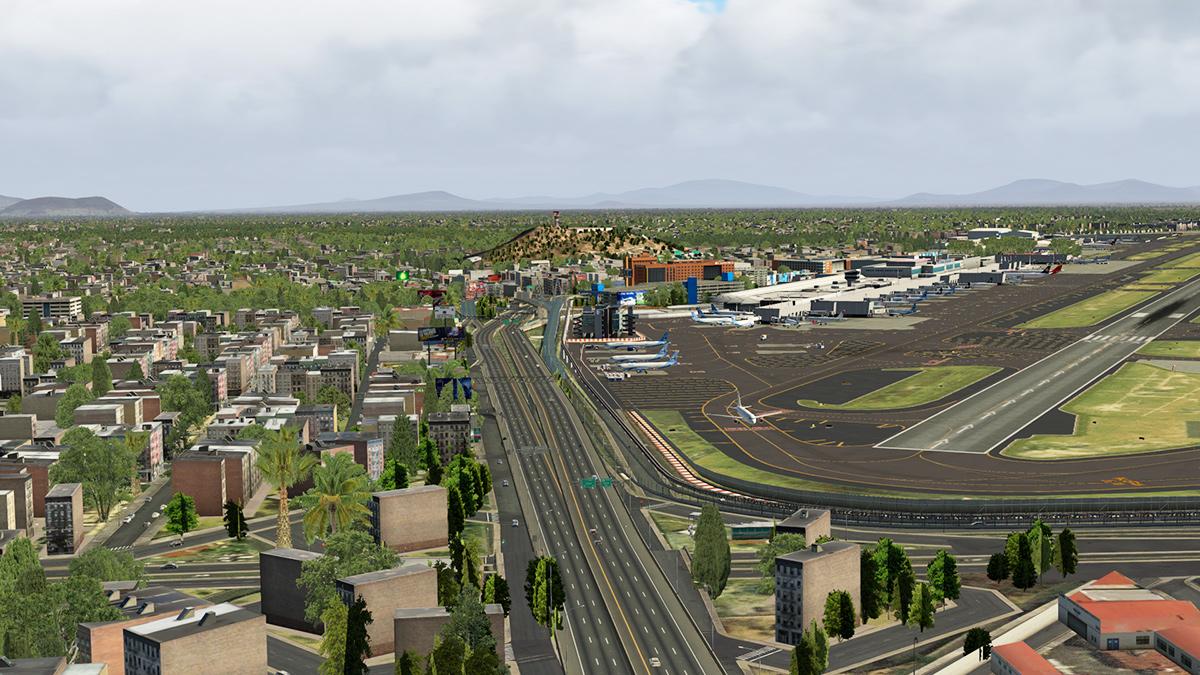
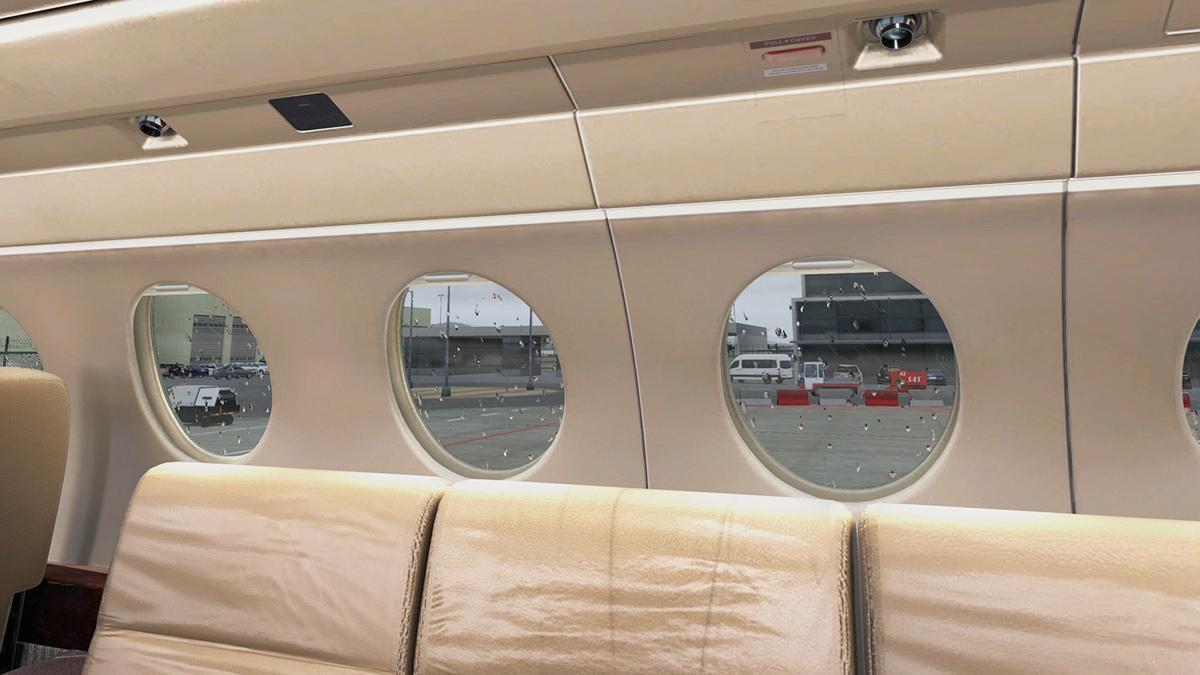
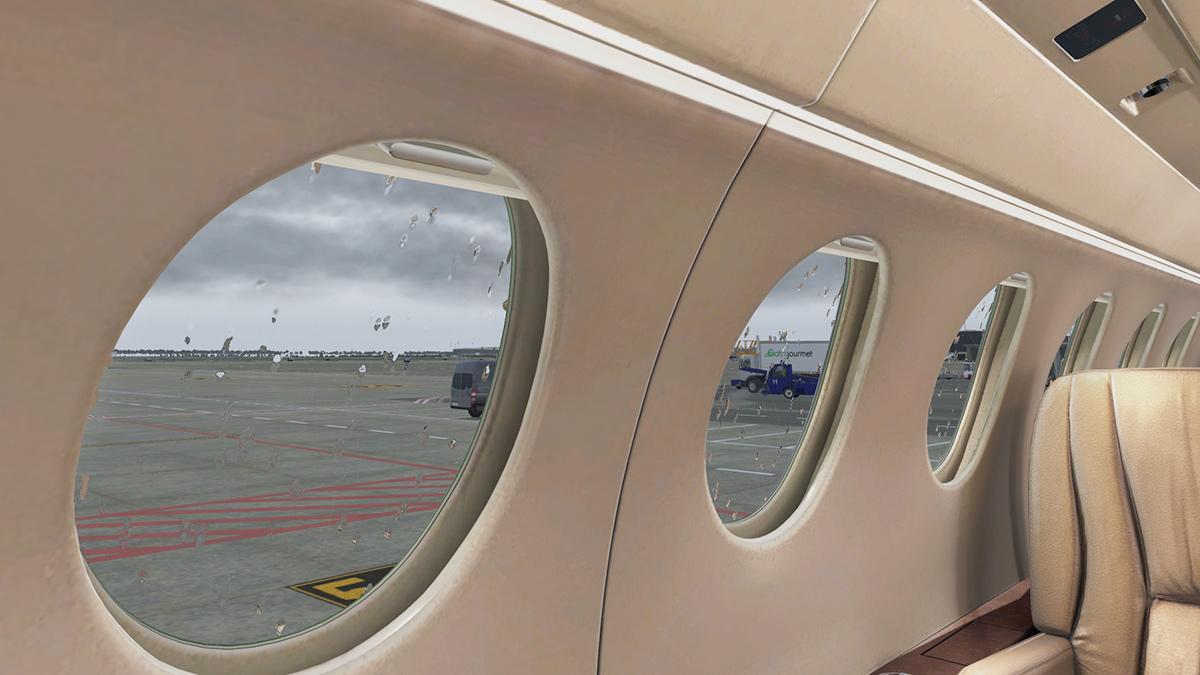
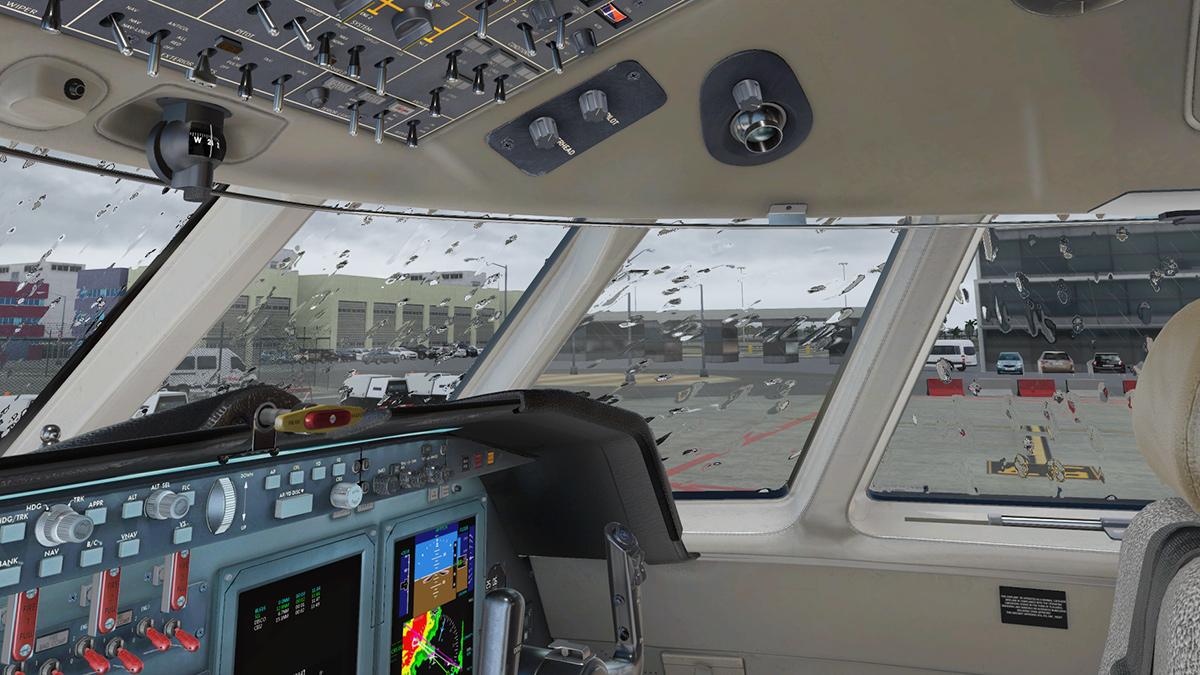
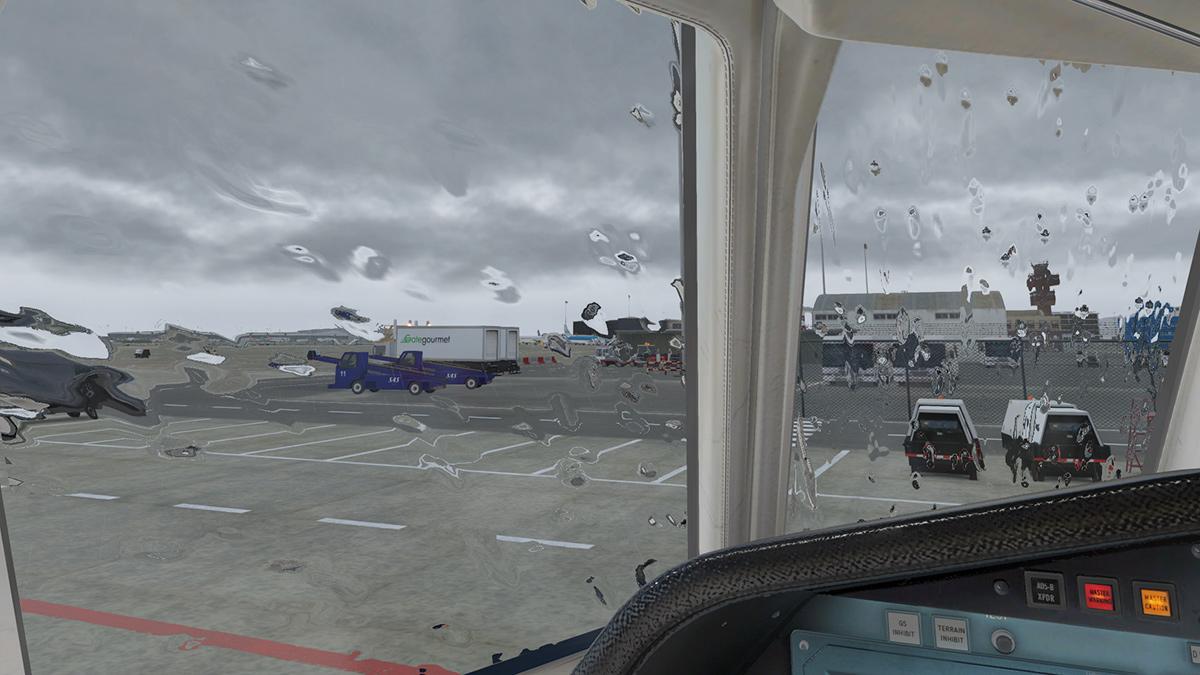
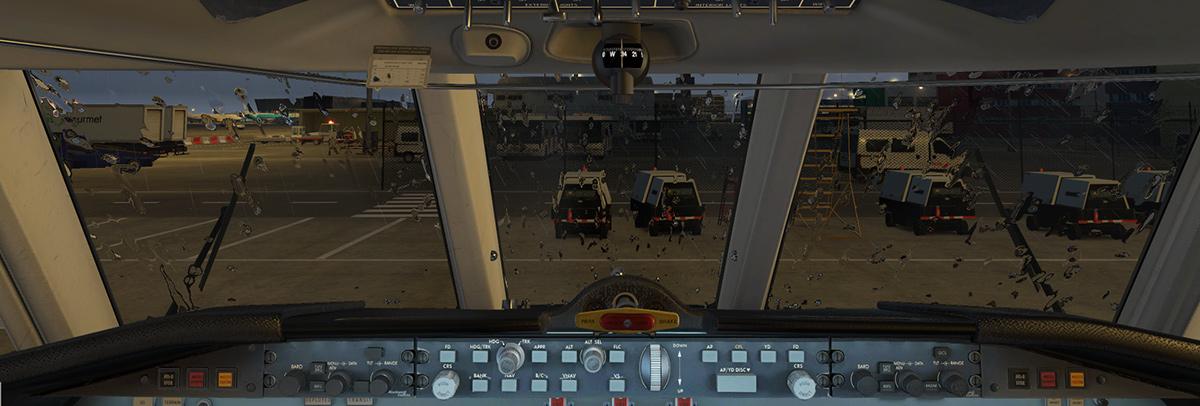
Aircraft Update : ToLiSS319 v1.3.3 by ToLiSS ToLiSS has again done a small update to their Airbus A319-112 in only just over three months since the last one. This is just an incremental touchup and nothing really significant in major changes, but that is not to say this is not a good update. A quick zoom from MMMX - Mexico City (my new, new) to KDFW - Dallas Fort Worth allowed me to checkout the details, as noted there is nothing here but nips and tucks and a lot is changed here to bring the aircraft up to the latest Airbus updates (remember that the ToLiss A319 is now an official product, so you get access to the current changes) There is better APU GEN representation on the APU SD page and Delta ISA temperature information to SD permanent data; TAT and SAT on SD now depend on data source availability. ECAM flap indication has been set with the same adjustments on the ECAM F/CTL + HYD page to match latest standard which are all just small but significant adjustments like with the Yaw trim reset that now goes all the way to zero, even if you release the push button and use any MCDU key interactions it will now all delay to be a constant 300ms, a small detail is this but one that gives you a more realistic feel with your interaction with the A319. There had been added new background lighting to displays, FCU digits, RMP frequencies, clock and so on, and yes the displays do look better, more sharper than I remember and sharper text and highlights, but overall even with all the significant lighting changes this year, you feel the PBR is not still doing as good as it should... in other words it is still darkish in here. MattDesigns have redone the "Official" Airbus A310 livery, but there is more going on here than just a new livery. The detail is far, far more realistic and dirty than the sometimes almost cartoonish feel to the original liveries, the normals (the bumps, raised lines, grooves) by Chris Tantow are now also far more pronounced and detailed. so it is really the next gen of quality liveries for the aircraft. There are SmartCopilot improvements by MaxWaldorf as well. FMGS initialization is now possible in flight using the DIRTO (Direct To) and subsequently noted "New Destination" choices. There is also an Improved Autopilot ALT* law, Alternate Law with no auto trim, means that you have to trim airplane manually or mostly keep the stick with a slight pushback pressure on the side-stick all the time until reaching desired altitude. ToLiSS has also added in Datarefs to set the door modes: AirbusFBW/PaxDoorModeArray and AirbusFBW/CargoDoorModeArray - 0: Closed, 1: Auto, 2: Open... I think this is for livery painters in setting the up the aircraft a certain way on loading, but anything that will switch off the auto as the default would certainly make me very happy. Flaps have had adjustments for a more realistic extension or retraction, just a fine tune, and on a RWY only approach, the FMGS adds a CF point 5NM before the runway as it should. Flare law has reworked based on new information, but it sort of floated more than what I am used to on the A319? better or worse... to be honest it caught me out, I will note that as a personal WIP, and a few more landings may prove the changes one way or the other? on landing you now get the maximum aileron deflection up when flaps/slats are fully extended. There is an improved landing gear ground contact noise... very nice it is, more so with the addon sound pack with more sounds for the spoiler lever, the brightness rheostats, avionics ventilation startup, electrical DC relays and the main engine sound volumes have all been reequalized. I personally really love now the inflight cruise hum, very realistic and makes routes far more pleasurable, and certainly a far cry from the earlier repetitive washing machine noises. Summary Another of the constant and quarterly updates from ToLiSS for their little Baby Bus the A319, all now of course Airbus official and a lot of the little changes here reflect the newly opened access to current Airbus standards. Those adjustments to the standards are all fine details, but like with the delay to be a constant 300ms interaction it makes the aircraft even more highly realistic, a new Airbus A319 livery and new normals show the way to a new era in a better external design and view. Better sounds and reequalized master sounds again lift the even the basic sounds towards a more better aural satisfaction. The only quirk are the new flare adjustments, in that has it took away a little of that perfect control in flare, that is still out there for debate for me. Yes it all just another nip and tuck, but over the year and already the changes for 2019 have been quite significant for this aircraft, smooth and sublime if you love Airbuses then this aircraft should be at your gate and ready to fly. ________________________________________________________ Yes! the ToLiSS319 (A319-122) v1.3.3 by ToLiSS is available from the X-Plane.Org Store here : ToLiss A319 Price is US$69.00 Note make sure you have v1.3.3 when downloading, All previous purchasers can now update via your X-Plane.OrgStore Account Both the LIbrain rain effects and Avitab pdf viewer plugins are required to use the new features. Also available is the internal IAE Sound Pack that can be purchased here: IAE Sound Pack for Toliss A319 Price is US$9.95 TSS IAE Sound Pack is activated by inserting the key activation code in the "ADDON" tab on the ToLiSS Interactive Simulation Control System panel V1.3.3 Changlog A319_v1_3_3_Changelog.rtf ______________________________________________________________________ Update by Stephen Dutton 6th August 2019 Copyright©2019 : X-Plane Reviews (Disclaimer. All images and text in this review are the work and property of X-PlaneReviews, no sharing or copy of the content is allowed without consent from the author as per copyright conditions)
-
Plugin Update : BetterPushback v0.47
Stephen replied to Stephen's topic in X-Plane Plugins and Simulator Addons
I found trying to work out which download was which on the dev site was simply nigh impossible, fine for coders, but absolutely confusing for everyone else, thanks for the link. -
X-Plane11 is not good with eGPU's as they are not really powerful enough or large enough for the work they have to do, personally I doubt X-Plane will ever support eGPU's
-
Scenery Upgrade : ELLX Luxembourg V2 by Just Sim
Stephen replied to Stephen's topic in Payware Airports and Scenery Reviews
Sounds like your "Runways follow Terrain Contours" are switched off? Menu/General... that aspect is noted in the review? -
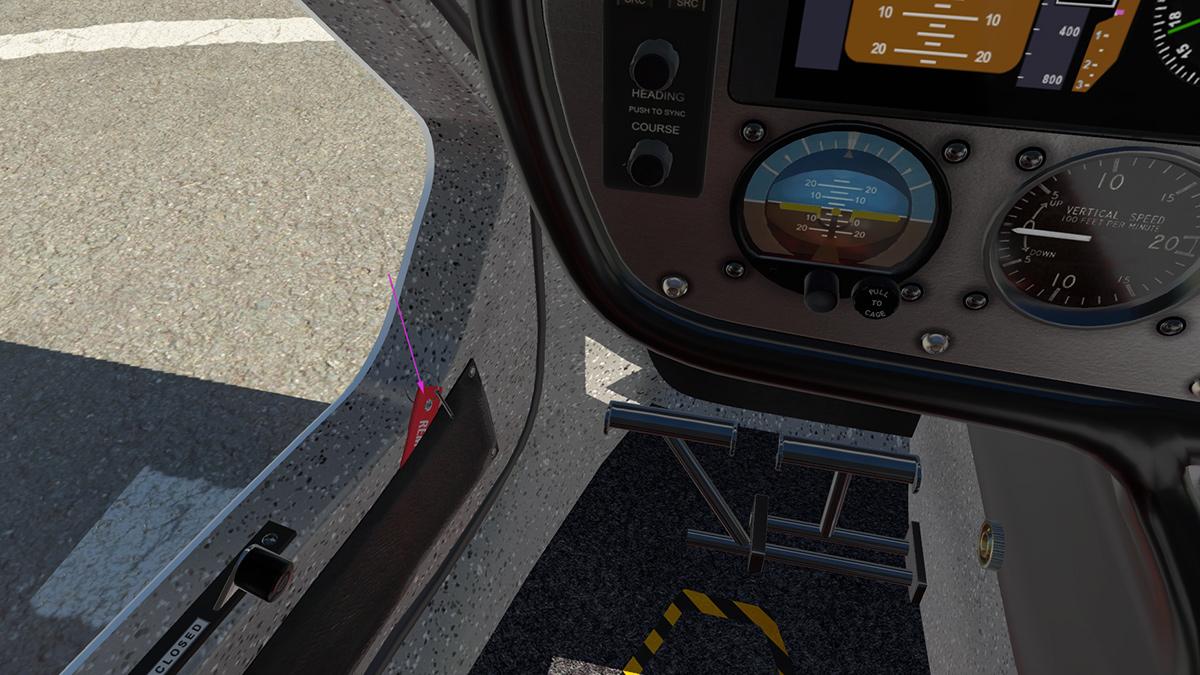
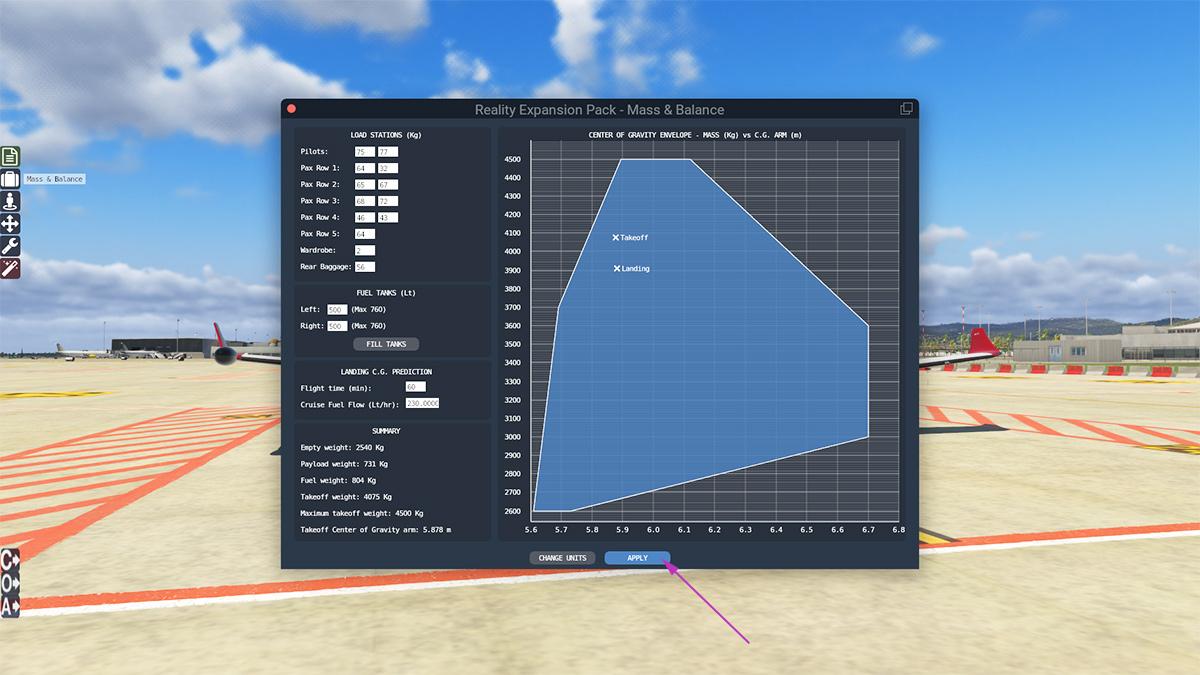
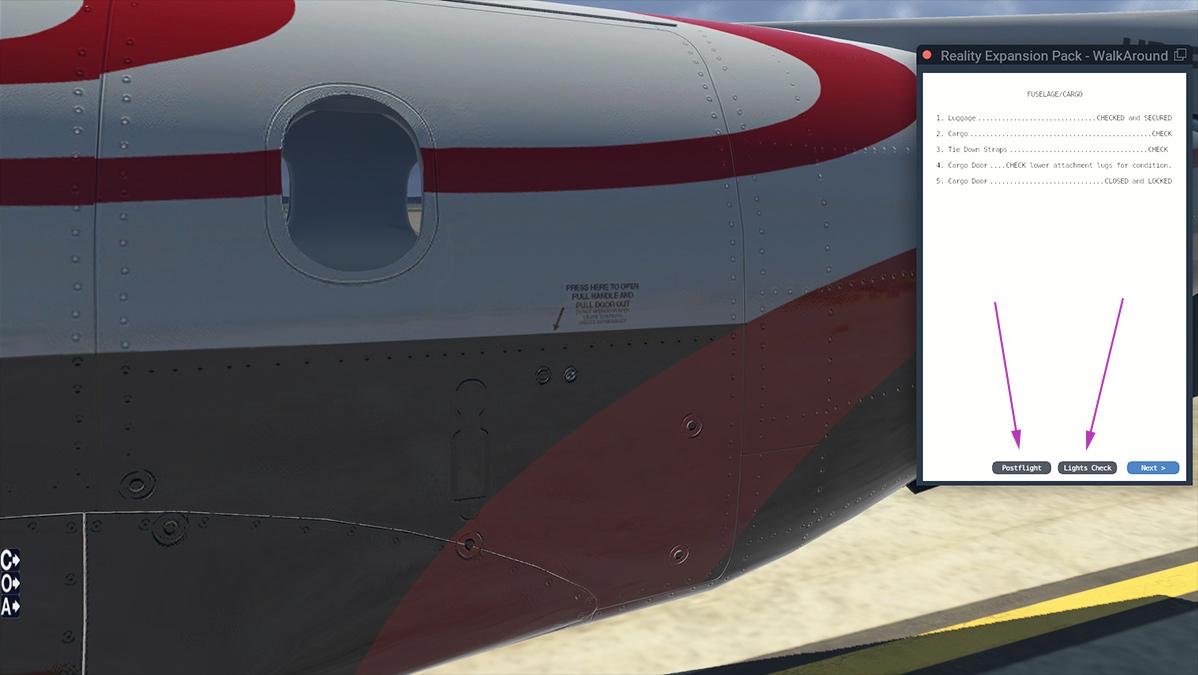
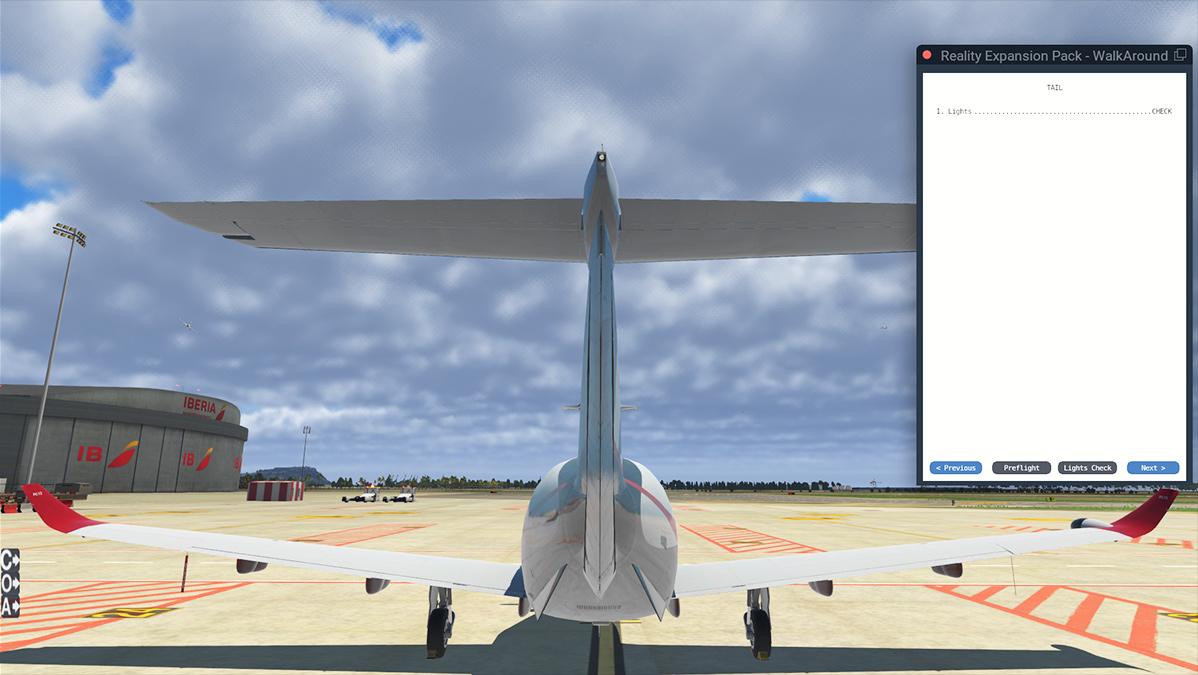
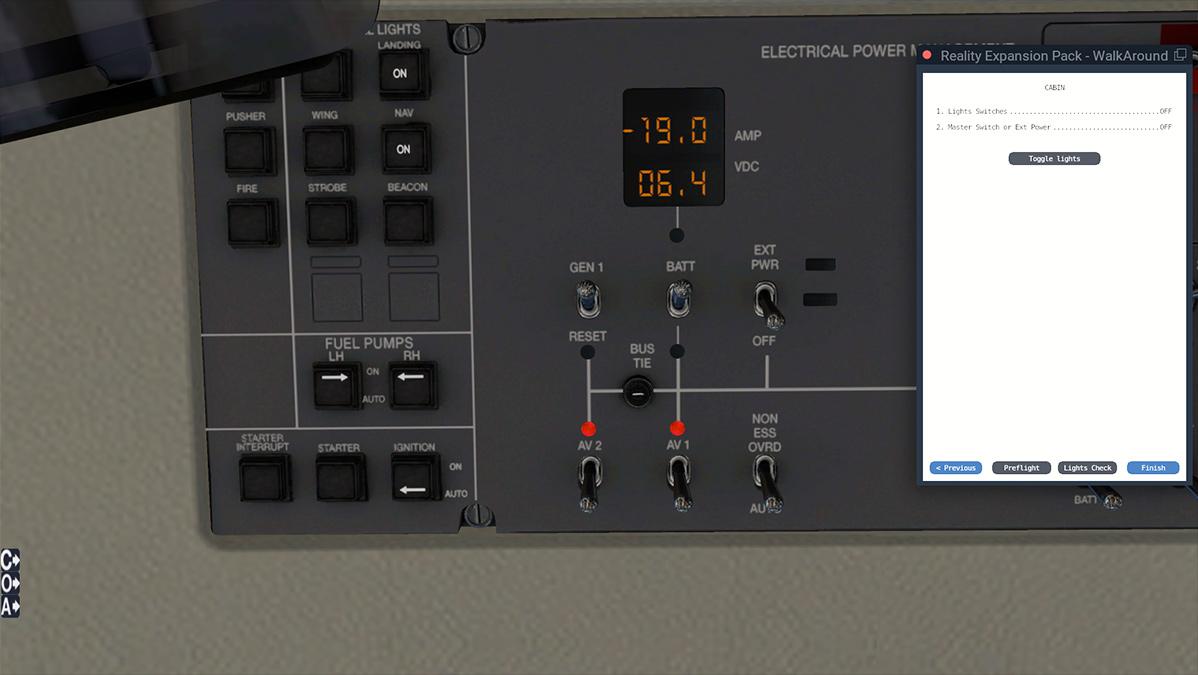
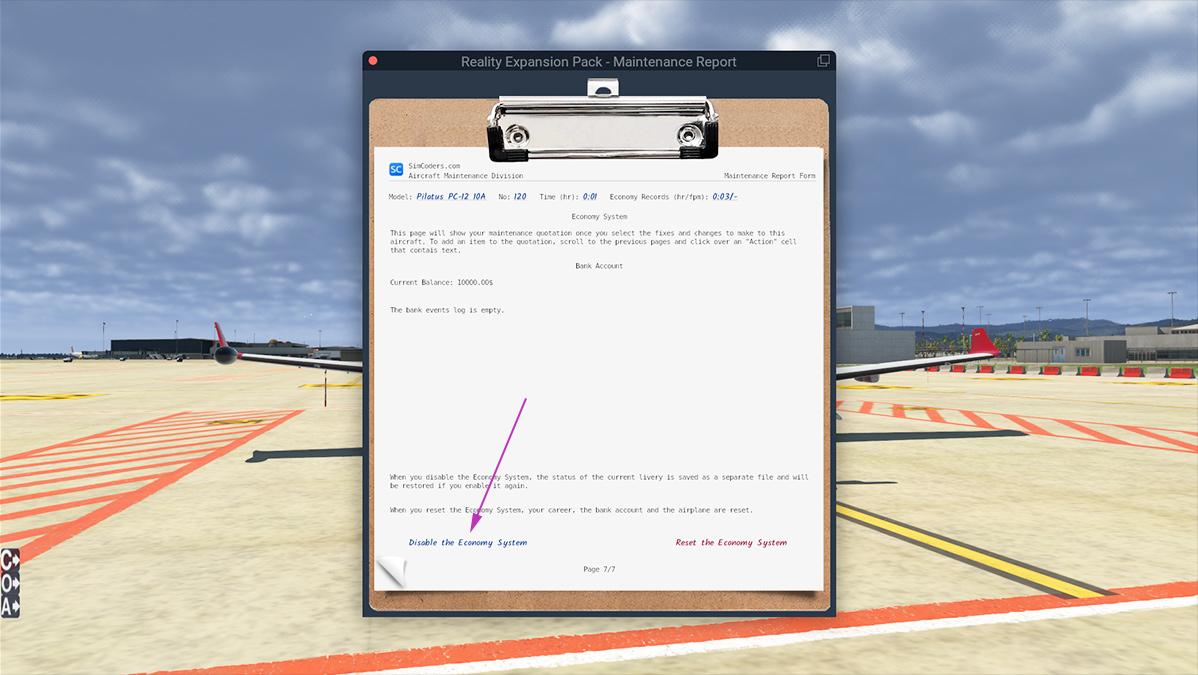
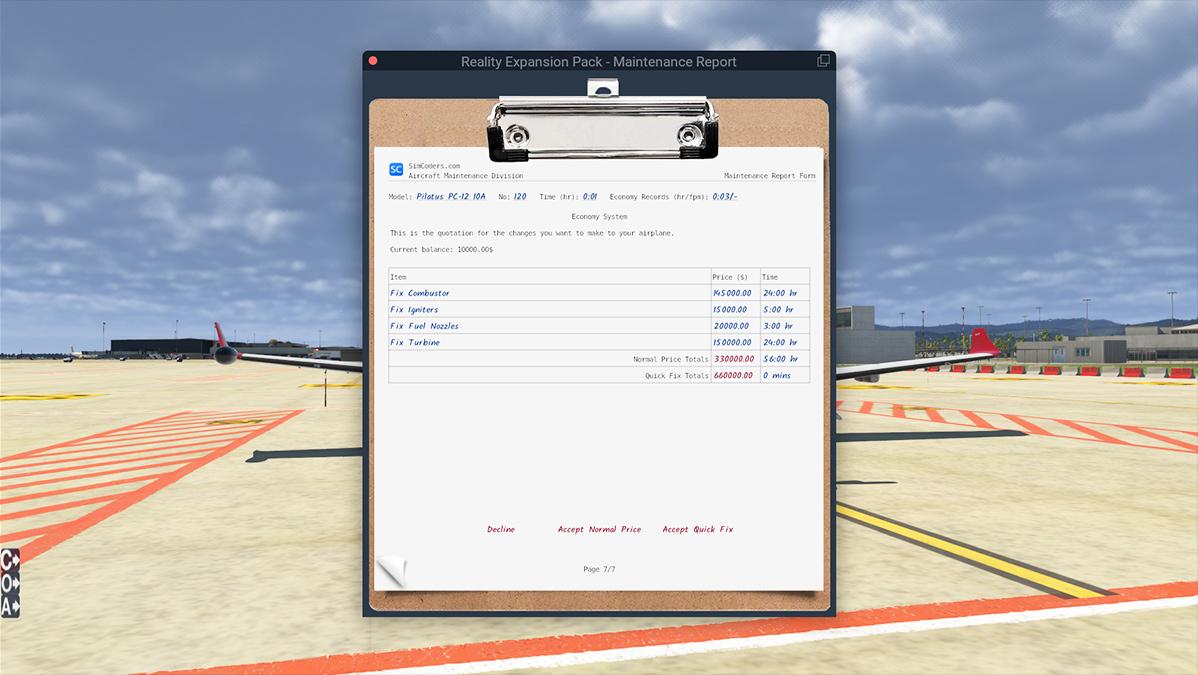
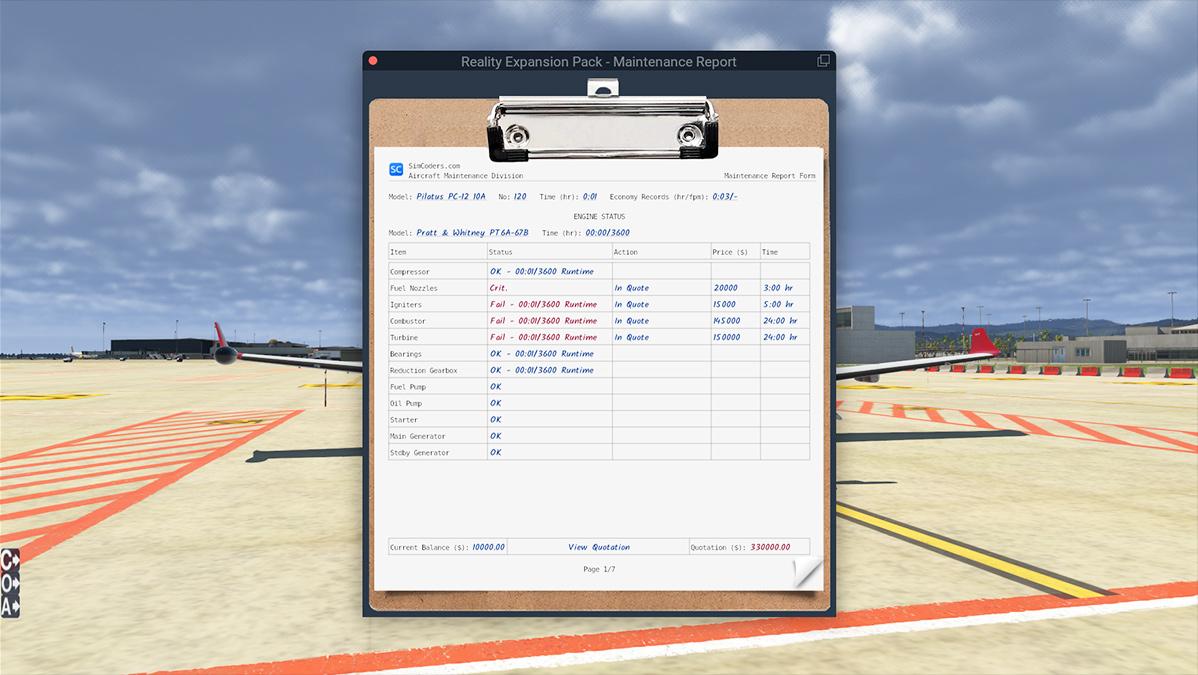
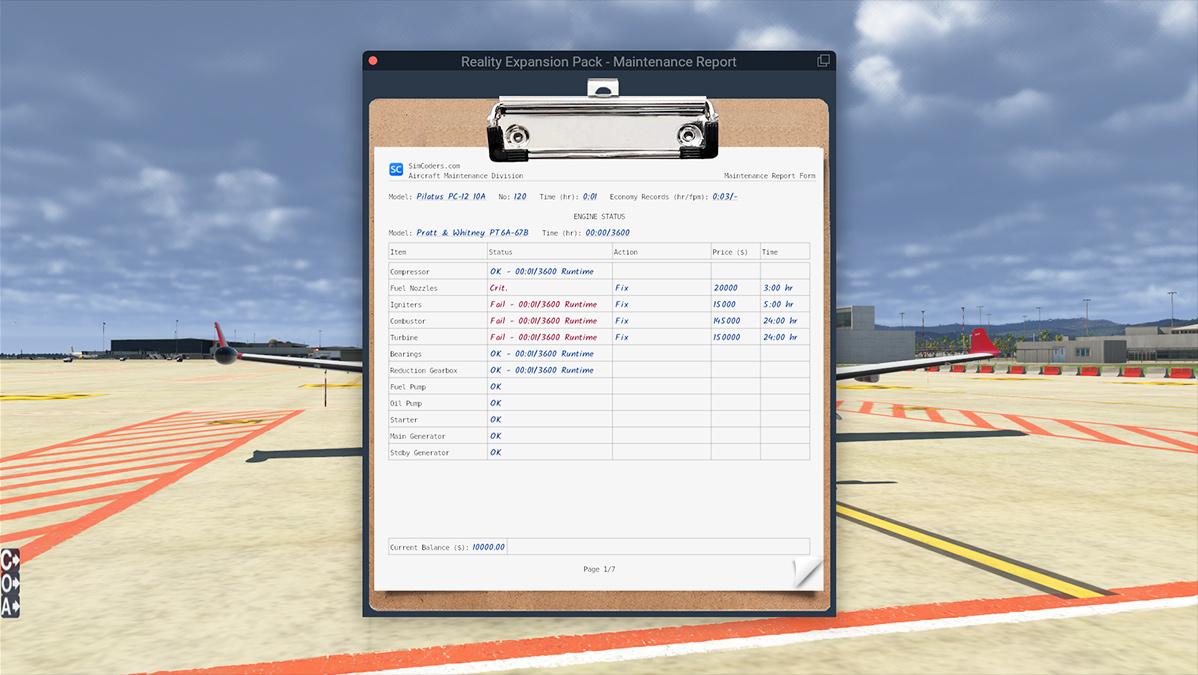
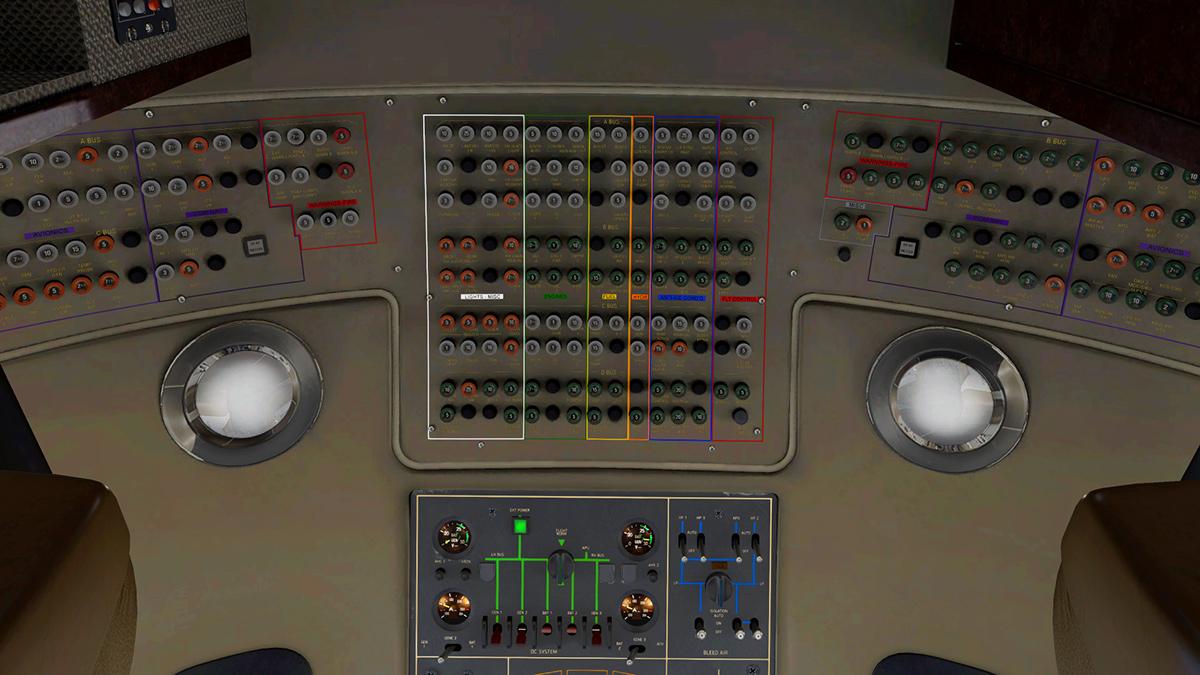
Behind the Screen : July 2019 First of all I will state my credentials. I do like ultimate realism in simulation. I do start many a simulation flight right at the start with a cold and dark set up although I do prefer the turnaround starting point. I go through every procedure, load in the route, the aircraft's preferences (fuel & weights) for the flight and then do the full palaver of using the airport vehicles to load in the luggage, fuel and passengers, the whole shebang... clearance, pushback and finally leave the departure airport. Enroute I follow SimBrief and Navigraph data to see how the aircraft is performing and cover the flight as professinally as possible... on landing I do the reverse in unloading the passengers and their luggage and then secure the aircraft, I even do a walk up and down the aisle to make sure the aircraft is empty (note a plugin is required to create after flight passenger mess for realism!), in other words I do the full monty of the flight, and now with my matured flying skills I will also do some simulation crisis management, with say an engine fire or environmental issue, it all is very well considered to get the full experience of flying an aircraft as close to the real environment as possible. In the GA environment I am still as considered in walking around the aircraft, setting up the correct fuel and passenger load where applicable and doing every nut and bolt of the flight, so I am the real deal, right... absolutely. But there are areas that was brought home to me lately and it happens often were as realism 101 is sometimes a step to far. If the developer goes too far in this realism do da it sometimes then turns more into extreme frustration, frustration to "agggghhhh" that buries the realism factor deep into a world of pain. If you can't access the aircraft or are not in control of important elements then there is the case that the quite honourable aims of the developer can get lost in the idea. So total absolute realism is great but only to a point. Some times this effect can be you. I have struggled with bleed systems that have left me exasperated to the point of throwing things, but that is okay if the systems are built like that as I have to figure that aspect out, delve into the manuals, work your way through the systems and get it right. So usually on complicated machines I make a diagram or take an image for next time (note... it would be good to have a plugin that remembers notes for in the cockpit of that aircraft, to bring up notes of the quirks of flying or starting the machine that you may forget?" to note the IXEG B732 and Rotate MD-88). Then there is Jack's beloved FJS Q400, lovely aircraft but an total absolute pain to start with the mixture lever do-dah, it never kicks in until I do and I start in throwing things around the room and it mostly requires a full aircraft restart with engines running which sort of spoils the whole realism 101 thing, I hope the v2.0 Dashy fixes this issue, if not I won't be happy as I won't put up with it all over again. The point is that if you want the full total immersion of changing spark plugs, oil and the full maintenance palaver then fine, good for you, and I know that these airworthy machines require a lot of attention, and so does my 28 year old car. But the issue is how many times do you actually change those spark plugs, and even on a tired, oily and battered machine... certainly not as often as the developers tend to confront you with, which is mostly every other flight or each flight. They then send you down a twisted long set of issues to get the machine airworthy, fine now and again, but when then with almost every flight can really start to get you seriously frustrated, and then they give you no reset or a quick fix way out of the maze... yes it is realism, and I GET that. So if I am pretty good at this simulation caper and I struggle, then god help the newly formed flier as they haven't got a hope in hell, worse is the fact with these aircraft are these non-accessible faults can create a large barrier in using and enjoying the aircraft, this factor is then to the disadvantage to the developer themselves, because if the aircraft is not accessible the you are not going to buy it, or worse buy it, and then throw it away and never fly it and swear never to buy another one of those developers products again. But when you do get say a fuel feed blockage FIVE times in two flights and you can't remove or adjust the realism factor then consider how many fuel blockages do you really get on an aircraft, yes it happens and maybe often in the wilds of Alaska with fuel taken from dirty drums, but not FIVE damn times in two flights... two times to change the oil, air filter, water in the fuel... la de da. in the end the aircraft got binned, enough was simply enough... to get to actually fly this wonderful even precious little aircraft was just simply too hard, the fun factor was totally ruined in frustration. I am not for a moment suggesting to make aircraft realism feature lite, but just accessible. If the user doesn't want the full on realism factor and just wants to fly the damn aircraft, then that should be an option... most developers do, do this but many don't. Again on mostly the study grade aircraft the faults are accessible and can be set according to your preferences, mostly in the fault activating in a period of time or situation like at a certain altitude, but more so if you want to use the "never" option it there for you. I always like the failure on the "hours" factor of breakdown. So the realism is a major factor, but if the aircraft is totally inaccessible to fly, then you are just defeating yourself. In the end it is the developer that actually loses here in less sales, and you try to tell them, but if they won't listen? In the month I also got a lot of comments from users noting that some aircraft and I will note the Magknight Boeing 787 as a case in point in that as a purchase it was and I quote "unfinished and missing items"... in reality you have to laugh, and yes I understand that paying $45 you would expect a pretty completed aircraft, is the Magknight aircraft current worth $45, no not really and you only have to look at that freeware low-res nose as a point in reference and so the developer is also being a bit cheeky here I think, but you are told that you are buying into the project as it is and have access to all the future upgrades, and as I have noted before that there will come to a point (unless the developer again increases the price) the value that is delivered should or will crossover the price point where you are getting the value to the money paid. That is the idea and the commitment, and as Magknight has delivered already a lot of updates then that is the case if going to be a fair deal. (if the developer moves the price-point far higher again it will be shit deal). The point is the developer is getting payments while still doing the work, where as usually you get paid after the work is completed with a few updates to clear up any last minute bugs, Colimata's Concorde is the same "pay now get later" deal, and to the "I want now" crowd it does sort of keep them happy in asking the same repetitive boring question "when will it be out?" but getting the half developed aircraft can also be very confronting as well, so you then get their "not worth the money" flagging so you can't win either way. Personally I don't like half developed product, especially when money is on the line (I wonder how many would be as glowing if they had to earlier actually pay for the Zibo B738) but it is certainly in payware territory now. The Concorde was a disappointment, it is absolutely nowhere close to being finished, but we are getting too many forward payment projects. You still need a certain line to be crossed in the development process for users to get value, but I find far to many projects again and again are released far too early in the process in the race to put some money in the bank, but they use the users "I want" factor to get around this aspect, then they have to face the "I'm disappointed" factor after. These signals are not good overall because as they say "shit sticks" and overall, the sales factor can be curtailed, so early release developers gain in early cash, but lose in overall long term sales as Seinfeld says "once it's out there, it is out there". X-Plane11 went final on version v11.35, which overall was quite painless and unless you get turned on by better fuel and bleed systems and a Collins 65 autopilot, but at least it won't be as devastating as the next coming v11.40 with all the life changing Vulkan/Metal deep throat, gut the system churn, obviously we are looking forward to that, not the gutting of the simulator, but the ongoing forward changes the new APIs will bring. Prepare for simulator meltdown around the end of the year. FlightFactor made their A320 Ultimate to v0.10.8 or final from the beta as well, but one look at the half rendered cabin shows this area is still a work in progress, and so is an added Flight Attendant Panel (FAP) to EFB, but not on the actual cabin wall which is still fake?, but please don't get the aircraft wrong, as with a now working weather radar, it is one of the best simulations in X-Plane11... immersion heaven. Surprisingly xEnviro put out an update in v1.11(very rare for them) and added in some new slider features, very good, but the update didn't fix the main cloud visual artifacts, and in heavy cloud formations your framerate plummets, but the blocky cloud formations felt better. Another bug is probably the biggest issue in that the METAR data keeps the X-Plane weather setting on "Damp" all the time and creates a mass of spray even in clear skies and 39º heat (Europe in the summer, who would have thought) when the engines are running, and I can't use that view for reviews, but I'm still persevering, but overall the unpredictability of the application is now making reviews hard work and somehow it is losing a bit of it's original feel to a more harsher environment that was so realistic at the start, it certainly feels better in many areas, but somehow also losing something in the process... if no more updates are forthcoming then my guess I will be again retreating and be back on v1.07 by the end of the month. This edition of "Behind the Screen" coincides with X-PlaneReviews 6th year of publications, We have been reviewing now since August 2013, and start into our 7th year of delivering quality reviews for the X-Plane simulator, time has flown by, but so have the enormous changes that have been under taken to X-Plane since that start date.... so again thank you for your support of the site and to all the people and their enormous contributions that make the world of X-Plane simulation possible. See you all next month Stephen Dutton 1st August 2019 Copyright©2019: X-Plane Reviews
-
Scenery Review : MMMX - Mexico City International by DreamFlight Studios There were areas in X-Plane that was seriously lacking in creating the "World Class" signature that is required for a really good simulator. X-Plane has everything in great aircraft, brilliant flying aerodynamics and excellent dynamic features. But even to a few years ago, even with the Global Airport initiative there was and still is to a point still some serious holes in the simulator wanting to be filled and mostly in scenery... airports for one and for any airport outside the US and Europe. X-Plane has done well lately in scenery releases, as now a few more FSX developers are now creating or converting their original scenery as well for X-Plane11, but as we have seen, many FSX success stories have not at all translated well to X-Plane, some work, but most are quite average to even horrible. So here comes DreamFlight and MMMX - Mexico City to X-Plane11, and will this conversion translate well to X-Plane, so we cross our fingers and hope it does work well, because to fill a large route hole in our American continents with the extremely high altitude positioned MEX it is a serious scenery we would all like use... first impressions are good... in fact they are very good. A good 90% of FSX sceneries fail badly in X-Plane because the developers try to enforce FSX details onto X-Plane dynamics, basic modeling is not the issue, as an object is still an object in any simulator, plus the X-Plane base layout (WED) is also very different from the way FSX is created. So the fundamental issues are how the developer can learn and use our tools in lighting, ATC routes, PBR reflections and ground effects in translation to the X-Plane simulator. Many FSX developers get around the issues by using X-Plane scenery developers, but the best can get snapped up by say Orbix and Aerosoft. However if you can master the X-Plane features then you can open up to a new and growing market and sell to users that are desperate for quality scenery. MMMX - Mexico City International Mexico City International Airport (Benito Juárez International Airport) is a bit of a challenge, as the airport with the surrounding city is positioned on a plateau at 7,316 ft / 2,230 m altitude. Think about that height for a moment, it is a small mountain in altitude, so aircraft engines and human bodies don't really work very well up this high, throw in smog and environmental issues and so fog (smog) and cloudy conditions are the normal, so it is no wonder it hosts in November of each year the festival of the Día de Muertos (Day of the Dead). If you want urban sprawl then Mexico city beats Los Angeles hands down. Mexico City spreads over the valley of Mexico, also called the valley of Anáhuac, a 9,560 km2 (3,691 sq mi) valley that lies at an average of 2,240 m (7,349 ft) above sea level. Originally it was a system of interconnected lakes occupied a large area of the valley, of which Lake Texcoco was the largest. Mexico City was built on the island of Tenochtitlan in the middle of the lake. And MMMX airport looks like a green lake in the middle of the huge urban sprawl. DreamFlight provides a lot of custom textures with two ZZ Orthos's and an overlay, this creates a custom and autogen spread that fills out this gigantic elevated valley from end to end, it is spectacular and it looks very realistic. Add in some Mexico City centre buildings and other business zones with custom tower buildings and it looks about the best Mexico City scene you will get. Yes you will have to adjust your render settings to fit it all in, but even at a texture quality setting of "High" you can still have all this and the airport come in under 4K or 3591mb as the textures are heavily but light framerate defined. But there is one quirk that we will need to sort out early on. Slightly north of the airport is a hill with a radar tower and building positioned on top... the problem is to make the hill not levitate above the ground you have to set the scenery (or X-Plane) to turn the setting off of ""Runways follow terrain contours" so the airport is positioned flat, and the airport then not to be able to adjust to the local contours of the ground. Now that is all very well, but I always keep my "follow terrain" contours switched on because you can't switch over contours mid-simulation. The issue makes for a big problem if you say fly from LAX, DFW even IAH (Houston). Because all of these and many more US airports require the "follow terrain" contours switched on because they use 3d bridges or the terrain as part of their features, in fact the MMMX scenery will be the odd one out in any simulation flying and for me that is a really big issue. UPDATED: A fix has been provided to stop the levitation with the the contours switched on. The details are provided in the attached text below and the fix is easy to cut & paste into the apt.dat file... the results are excellent. The review is still done in the context of the "follow terrain" contours switched off as the fix is a late adjustment. but the differences are negligible. As they say "back in business".. Mexico City International Airport Aeropuerto Internacional de la Ciudad de México IATA: MEX - ICAO: MMMX - LID: ME1 05R/23L - 3,900m (12,795ft) Asphalt 05L/23R3 - 3,952m (12,966ft) Asphalt 13/31 - 2,3007,546Asphalt (decommissioned) 5 Auxiliar - 7592,490Asphalt (decommissioned) Elevation AMSL - 7,316 ft / 2,230 m MMMX is currently structured around two long parallel runways 05R/23L and 05L/23R, with the older Terminal One to the northwest and the newer International Terminal Two set out in the south corner. Terminal One On July 8, 1943, the Official Gazette of the Federation published a decree that acknowledged Mexico City's Central Airport as an international airport, capable of managing international arrivals and departures of passengers and aircraft. Its first international route was to Los Angeles International Airport operated by Mexicana. Construction of Runway 05R-23L started six years later, as well as new facilities such as a platform, a terminal building, a control tower and offices for the authorities. The runway started its operations in 1951. On November 19, 1952, President Miguel Alemán opened the passenger terminal, which later became Terminal 1. 1980, the terminal was expanded to double its capacity, using a single large terminal rather than multiple terminals as in other airports. Ten years later in 1990, the mixed domestic/international gates were separated to increase the terminal's functionality, along with the separation of domestic and international check-in halls. Another expansion in 1994, with a new International Terminal building was ready and operational with more changes in 2001 that was called Module XI. This Module permitted eight new contact positions in the Airport Terminal, capable of receiving eight regular airplanes, two wide-body, or four narrow-body aircraft. Outwardly you see what you think is average non-textured building modeling, but on closer inspection it isn't anything at all like that. All the various different eras of terminals have been wrapped in a tall mesh fencing to create one seemless terminal complex. Gates 1 to 36 cover the main terminal. It is all extraordinarily well done and very realistic in the gate. All terminal details are very good as well, and with great aged detail... Glass here is not PBR reflective, but the windows are fine in context, detail is very, very good. Landside feels a bit basic and empty, and comes with no or few vehicles or any animations that don't help, a lot of the road networks don't match up either... the train is not positioned on the tracks and the tracks even finish abruptly. But the advertising signage is first rate. Clutter and ramp detail is very good, vehicles are noted as MAM and not MEX, but it is an insignificant detail. There is no ramp animated activity. A big feature here is the use of SAM - Scenery Animation Manager plugin (Plugin Required). MMMX has a lot of odd stand parking angles, so the use of the SAM is a huge advantage. Pull into the gate... .... and the gate Marshaller will guide you in, the flexibility of SAM can get around non-VDGS guidence operations and replace it with a Marshaller instead. Once in you activate the required gate, perfection and note the HSBC airbridge branding on all airbridges. There are a lot of remote stand areas, starting with "South Remote" on the south end of Terminal One with stands S1 - S8. Note the nice Interjet head office. "North Remote" is in two sections, one the south section is still part of the main terminal building but it is allocated for code F category aircraft, this includes the A380 on allocated stands 33A and 35A, the A380, B748 and AN-124 which also have restricted taxi routes. The second section covers Stands 37 - 40 which is a separate parking ramp and cargo overflow. Slightly north is the old and battered cargo terminal with seven stands 41 - 47, but two 41A and 46A are for code 4F Cargo (B748F) Far north is the large Mexicana MRO maintenance facility, the area here is very well represented and laid out with some nice support detail. Terminal Two In November 15, 2007, Terminal 2 was opened to replace a very moderate older Terminal Two set of buildings now crunched in between two huge hangars... The new modern terminal was built to significantly increase the airport's limited capacity. All SkyTeam members moved their operations to the new terminal, except Air France and KLM It was officially inaugurated in March 2008 and once the new road accesses and taxiways were finished. Again the terminal has a very distinctive facade and detail, and again it is all very well done... gates 52 - 74 are all covered with remote stands 75 - 81 noted on the T-2 remote. All airbridges are also SAM and Marshaller controlled, but the airbridge design is different to the Terminal One versions with a clear green glass insert. Oddly though there is very little terminal ground clutter at T2, so it can feel a little empty at the gates, a strange oversight because it is so easy to do? Southeast The southeast section of the airport that is along taxiway E is a humble jumble of hangers and maintenance areas with another domestic cargo area for Aeromexico, Aeromar... of which all are very well represented. Stand area is known as "Tango" and stands are numbered T1 - T9 with TA and TB to the right. There is a big mixture of new and old here, with huge modern hangars to just basic metal hangar shades. With the AVIACSA section it is well done with complex layout of different hangars and details, nice touch are the placed AVICSA parked static aircraft (as per the ground textures reflections) but there are also a lot of quality static aircraft to fill in the right areas. Control tower is a little basic in design, but more than workable, the high positioned radar behind adds into the view.... Tower view is correct in the field position, but set extremely high above the tower itself. So you can see all the approaches very well, but not at the realistic height. There is a small MASAir Cargo area here as well. Another set of GA hangars is next, with the AeroUnion maintenance hangar dominating the area, it is well done and note the really well made branded jetblast fence, and the zone is known as "East Remote". There are quite a few of these blast fences set out and positioned all around the scenery, all are well done and effective visually. Last in line is a new (at the airport) maintenance facility for AeroMexico... ... of which the hangar and detail is very well done. Far east are a row of storage buildings, with the emergency platform area which is also represented. South Tango Southwest is the South Tango zone by the threshold of RWY 05R, with the dominant building for the Federal Police (POLICIA FEDERAL). The area looks older than the rest of the airport and the hangars look like the original AeroMexico maintenance base buildings with a nice authentic period detail. There are two sets of remote parking stands here called Tango 1 for stands 82 -85 (above) which is wide open area but also a well detailed area, the second is Tango 2 (large image above) are remote stands 87 - 90. Ground textures All ground textures are excellent and well detailed with PBR reflections, very gritty and detailed. All surfaces are as per the real MMMX, newly laid areas (most surfaces) and the older concrete are all about as good as you need. DreamFlight note "Puddles" but I couldn't recreate the wet effect, if I can I will add it into the review. The airport has a very complex taxiway system, but the signage and lineage is perfect, but I do recommend the airport chart to find your way around. There is no field 3d grass and you notice it visibly here because the textures have a lot of flat detail the grass would cover over, 3d grass is really a requirement for this airport. There are other areas that the flat photo textures show through as well, the worse parts are on approach to RWY23R and it is where the autogen boundaries finish early, the flat images are very visible while taxiing in the airport because all are set on the boundaries of the airport perimeter and they are quite ugly and empty in areas. There are a few water textures that are quite FSX false as well, and they again standout badly on RWY23R or departure from 05L which gets the worst of the uglyness. Lighting Overall it looks like DreamFlight have mastered the dynamics of X-Plane's PBR lighting, but there are a few missed areas... In consideration MMMX looks excellent.... .... one big missing item though is the green centreline lighting, and unfortunately it is very noticeable, and hard it is finding your way around many areas of the airport in total darkness unless the aircraft has good turnoff lighting, a bad mistake? Terminal ramp and aprons are however lit very well, it is nice down here and a night arrival would give you a great experience... .... terminal window lighting is very good as well but most are hidden behind the mesh facade, but the main T1 terminal windows are however a bit dull and bland and the name is only sparsely lit, but the south remote Interjet offices are lovely. Terminal Two is excellent, with a green shade to the central building... the pinhole design looks excellent at night, but it also highlights the empty missing clutter spaces, overall though it is very, very nice over here. All aprons and areas are well illuminated and with great lit detail... .... drop down and spot lighting is excellent in making the hangars feel very realistic. Even the bland control tower looks nice at night bathing in a green glow. There is a lot of advertising signage around the airport and it is all very Mexican and outrageous, good in the daylight, brilliant at night. Mexico City business central area nd other custom Hi-Rise buildings are very good, and do the job well in creating a full city night panorama. WT3 : The scenery has no provided WorldTraffic3 ground routes, but the ATC routes are done and the scenery will generate a very good active layout. The taxiway and runway layout is complex, and there are the odd things that aircraft do, do like cut corners and sprint across the grass... but overall WT3 works very well here and on the whole you get a very busy realistic running MMMX airport. Services MMMX is a base and hub for: Aeromar Aeroméxico Aeroméxico Connect Interjet Magnicharters Volaris AeroUnion (cargo) LATAM Cargo México (cargo) And you will get a lot connecting international carriers, all the US majors use MEX, plus Air France, All Nippon, British Airways, Avianca, Emirates, KLM LATAM, Iberia, Chinese Southern, Lufthansa and Air Canada which are all frequent daily services. Summary For a first time FSX/P3D transition to X-Plane11 by DreamFlight Studios then this is a very good Mexico City scenery, currently it is certainly far and the best rendition of MEX for the simulator, as there is seriously a lot to like here with great and in parts brilliant detail and well created terminals and the airport infrastructure. Highlights are the excellent building mesh on Terminal One and the distinctive design of Terminal Two, great clutter on Terminal One however is missing on Terminal Two. All ground textures (PBR as well), lineage and signage is excellent, and the use of the SAM - Scenery Animation Manager plugin on all airbridges is a brilliant bonus, airbridges are designed and branded to match correctly to MEX. Scenery covers the full valley of Mexico, and delivers a huge autogen spread and custom Mexico City buildings. WT3 can be generated for MMMX ground routes and the results are a very active and busy airport. As with all FSX developer transitions there are a few quirks, not enough to distract you from how good this scenery is, but still in there. The one big issue was for me is the setting of "Terrain Contours" off to a flat base to keep a hovering hill in it's correct ground position, fly out of MEX to any US major airport or European destination and you are trapped the other end with the opposite contours problem... as MEX is the odd one out, and of course vise-versa... the fix is noted below. No green centreline lighting makes it hard work taxiing at night on the far reaches of the airport, an oversight there, and Landside is a bit empty with some crazy road structure. Areas where as the autogen meets the airports boundaries can be blank and exposing the average flat ground photo images and on approaches can be very distracting from an otherwise excellent scenery, and no 3d grass has the same effect over the textures of the inner field. Overall I love this excellent MEX and to a point a really well created MMMX has been a long time coming to the X-Plane simulator, however the contours usability was a big issue for me and now fixed I can absolutely recommend this MMMX - Mexico City scenery, brilliant! ______________________________________________________________________ Yes! MMMX - Mexico City International by DreamFlight Studios is Available from the X-Plane.Org Store here : MEXICO CITY AIRPORT XP11 Price is US$24.95 Features: Highly detailed objects and vehicles High quality ground textures Realistic Airport Surroundings Custom City Buildings Realistic runway/taxiway lights High resolution building textures Realistic night effects PBR textures Water puddles World Traffic 3 compatible Sam compatible (Plugin Required) FPS friendly ______________________________________________________________________ Installation The download package is huge at 3.68gb and there are four folders with three overlays in your "Custom Scenery" Folder. MMMX - Mexico City Dreamflight Studios (980mb) Y MMMX Overlay (14.4mb) ZZOrtho4XP_+19-100 (1.92gb) ZZOrtho4XP_+19-099 (1.78gb) Total scenery installation is a huge 4.76gb SAM - Scenery Animation Manager plugin is required and to be installed in your X-Plane Resources/Plugin folder This scenery can now be ONLY used in X-Plane11with this XP11 version MMMX Elevation fix, just cut & paste into the main MMMX apt.dat data via a text editor MMMX_Elevation fix.rtf Documents: One manual MMMX_Manual (4 pages) Requirements : X-Plane 11 Windows, Mac and Linux 4GB VRAM Minimum - 8GB+ VRAM Recommended Download Size: 3.7GB Current and Review version : 1.0 (July 28th 2019) ______________________________________________________________________ Scenery Review by Stephen Dutton 2nd August 2019 Copyright©2019: X-Plane Reviews Review System Specifications: Computer System: Windows - Intel Core i7 6700K CPU 4.00GHz / 64bit - 16 Gb single 1067 Mhz DDR4 2133 - GeForce GTX 980/SSE2 - Samsung Evo 1Tb SSD Software: - Windows 10 - X-Plane 10 Global ver 10.45 / Checked install in X-Plane11b6 Addons: Saitek x52 Pro system Joystick and Throttle : Sound - Bose Soundlink Mini : Headshake by SimCoders Plugins: WorldTraffic3 US$29.95 : Environment Engine v1.07 by xEnviro US$69.90 : Scenery Animation Manager plugin - Free Scenery or Aircraft - Boeing 738 by Laminar Research - Default with X-Plane11
-
Aircraft Review : Beechcraft 1900D HD Series by Carenado
Stephen replied to Stephen's topic in Airliners Reviews
select the view you want, then hold Ctrl + Windows keys together and select the number key you want... 7 is external, 4 pilots view, 1 lower instrument pilots view... 5 OHP, 2 throttles or lower console, 6 is usually entrance door, 3 autopilot and 0 is usually cabin view out on the rear of the wing... that is my keyboard standard layout 😊 -
Aircraft Review : Beechcraft 1900D HD Series by Carenado
Stephen replied to Stephen's topic in Airliners Reviews
I checked that out and the B1900D menu views work perfectly for me? I do notice the selections you are making are directly below the ones you need to select, are you in VR? or is your viewpoint is of the wrong angle... As a note I never use the menu selections, in every new aircraft I always set up my own views via the keyboard (numbers) to be all the same in every aircraft for continuity and ease of use... nice aircraft is this 😀 -
Aircraft Plugin Review : REP for Carenado PC-12 XP11 by SimCoders Simcoders have changed their focus back now to Carenado aircraft for their next REP or Reality Expansion Pack, this is the Pilatus PC-12 in it's XP11 guise... and a very nice choice it is. Powered by the powerful single Pratt & Whitney Canada PT6 turboprop engine (the PT6A-67B, 1200 shp), and the PC12 is certified for single-pilot IFR operations, and a great aircraft to use as a base for the expansion pack. A full review of the XP11 version of the Carenado PC-12 is here: Aircraft Review : Pilatus PC12 HD Series XP11 by Carenado SimCoders REP - Reality Expansion Packs The idea of these packs are to bring a bit more of the everyday running of a GA light aircraft to life. Basically if you have used one REP pack then they are all the same with just the aircraft they are attached to different. Simcoders have an installation notice in the package, to read the manual? In reality it is not hard to install, one folder called "REP" is installed into the aircraft's Plugins folder (not the X-Plane/resources/plugin folder) and the other files are just positioned in the aircraft's root or main folder. The REP plugin does however still show in the main X-Plane/Plugin menu when you drop it down from the header bar... and asks you to "Enable Package". This "Enable" is really an authorisation process and the licence key provided with your download is inserted into the pop-up panel and you then activate (internet connection is required) the plugin via the "Ok" key. When verified then the pop-up panel will note for you top reload the aircraft. I will always note to do a complete desktop start of X-Plane in these sort of aircraft restarts, this makes sure the full systems are reloaded (inline) correctly. When activated the REP menu then changes to a different menu format and you now have twelve separate items in: Settings Wear out to Check Fuel Price at Airport Show Checklists Show weight & balance Toggle walkaround mode Toggle tow mode Show maintenance report Engine autostart toggle static elements disable package About I have coloured the sections so you can note the different area separations because I am not going to go down the list in order. About: They like themselves do SimCoders.... Disable Package: The "Disable Package" option allows you to uninstall the REP package on the PC-12. Settings: REP "Settings" shows all your options available on the PC-12 There has been a lot of changes since the earlier REP packages and this shows here in the settings menu which is different from the earlier version but easier to use. In the earlier settings panel there was only six settings were as now there are twelve settings (up from the usual 3) that you can choose from: Enable the plane damages* Show Failure messages* Show tips Show side menu on mouse hover only Save and restore aircraft status between (flying) sessions Save and restore the windows (sic) positions between sessions Enable hypoxia effect (blackout) Roll axis drives ground steering Use US Customary* (originally noted as "use imperial or metric units") Wind sound level 0-100 Advanced Settings Use advanced steering Smooth brakes Use Carenado panel to control the static elements Tab Menu: There are six tabs to use on the left side of your screen and they match the same menu selections on the drop down menu. The six tabs to use on the left side of your screen, you can have then slightly present, or hide them completely with the settings option. And they are in order: Kneeboard Mass & Balance Walkaround Tow Maintenance Report Automatic Engine Start Kneeboard The "Kneeboard" has three pages of references: Normal Operations, Emergency Procedures and (Speed v) References. The kneeboard pop-up does have a quirk in annoyingly popping up all the time when you press a tab on other menu items, once or twice is fine, but then it gets constantly annoying coming up in your face. Mass & Balance The aircraft setup menu is very good. You have "Load Stations" for pilot & passenger weights, baggage weights and fuel weight (Fill) and all the settings are reflected on a graph of Mass and C.G. (Centre of Gravity). Loading the aircraft is quite easy with the panel filled in, when done you just press the "Apply" button to lock the settings in. You get a "Landing C.G. prediction in flight time and fuel flow and an aircraft summary of your weights in Empty, Payload, Fuel, Takeoff, Minimum Takeoff and Takeoff Centre of Gravity arm (which I think is runway length aim?). You can select from either kgs to lbs on the lower left tab. "Fill Tanks" will fill both fuel tanks to full, but here with the full tanks it puts me over the aircraft's weight limits and hence the red warning. Walkaround The "Walkaround" feature is very good and to a point the heart of the REP package. There are actually three walkaround modes... one for "Lights Check" and one for "Pre-Flight" and another for the later "PostFlight", but to the usual users of REP packages you will notice the walkaround aircraft diagram has been dropped. You can toggle all the light switches on or off by pressing the "Toggle Lights" tab and then use the "next" to go around the aircraft to check the aircraft's lighting with the tail beacon, both leading edge (navigation/strobe), all wing Landing lights and front wheel strut taxi light. The "Lights Check" starts and finishes with the OHP (OverheadPanel). "Pre-Flight" is the main Walkaround of the aircraft. In reality it is same feature here of all the REP packages from the start, but it is very good. Here you move externally around the aircraft via the same (Next) tab and can go back to the previous check point by pressing the "Previous" tab. Some points are cleverly animated in that by pressing the tab you can move (or test) the rear tailplane and rudder... the same can be done with the ailerons and flap flight control surfaces. Static elements can be added or removed like with both wing and tail tiedowns, chocks and pitot covers as you move around the aircraft. There are display gauges on the walkaround to note Tire Wear, Oil quantity and Condition (the lighter the oil colour the better the oil is)... The slight odd anomaly with older REP packages has been fixed with the static elements? If you loaded the older REP with engines running the chocks and static elements are still in place? And to remove them you had to shutdown the aircraft, and then do the full walkaround to the chocks, and then restart the engines to fly? Now there there is the tickbox in the settings to "Toggle static elements" ON or OFF, a nice fix like I recommended. Fuel Contamination (again the lighter the better) and pitot probe temperature. Static elements cover all probes and engine inlets. It is overall a very good Walkaround system, and the walkaround works in with the later tab of "Maintenance Report". The "PostFlight" runs the Walkaround again but sort of in reverse to close up and shutdown the aircraft and add in the various static elements, you can see as well any wear and tear the flight has taken on the aircraft. Tow The "Tow" feature is quite basic but works really well. Selecting "Tow" will put you on the front of the aircraft and then you use your joystick to move the aircraft in forwards, backwards and left and right.... just don't forget to unlock the park brake? Maintenance Report Like the Walkaround you can maintain the PC-12 with this feature... The maintenance clipboard is set out slightly different here for the Turboprop than the piston aircraft... systems are now grouped in like: Electrical System, Avionics, Instruments, Pressurisation Systems, Landing Gear and Braking Systems and Economy System. Areas that need attention are noted in RED and a click will do the job. There are seven pages in the report and it is quite comprehensive Last page "Economy System" has the option to activate the "F SEconomy" or the standard "Standalone System". So the maintenance feature is a pretty comprehensive report and gives you high access to the aircraft's functionality. If you select the "Standalone System" you go to a different sized clipboard with the repairs required... then you will get the bill shock! You have options to accept the "Normal" price or the "Quick Fix" price, either way you will need money in your account to fix the broken PC-12? or you can opt out via the "Disable the Economy System" There is a big connection here to the FSEconomy system, and so you have to be a part of the virtual money earning application to fix the aircraft. Automatic Engine Start There is realism and there is also the "drive you up the wall factor" and starting the engine in a REP pack was certainly in the latter category. But here we now have an automatic engine start feature, and it goes through the process of starting the single Pratt & Whitney Canada PT6 turboprop engine (the PT6A-67B, 1200 shp) engine and tells you via the banner bar on what part of the process is happening. There is still that realism factor, and it can be realistic or a pain depending on your mood. If all your maintenance is up to date and your account is now empty the aircraft will do the full start up procedure for you, and if you have any maintenance issues outstanding then you are going nowhere until you fix them. Wear out to: you have four options of aircraft wear; Brand New, Privately Owned (New), Privately Owned (Old) and Flying Club. Settings set the aircraft into one of the categories set out, but the Flying Club setting has the most hours and a tired aircraft. Aircraft has to totally shutdown to adjust the Wear settings. Check Fuel Price at Airport: This selection is again connected to the FSEconomy system to pay for your fuel. Realism 101 It is just not the external aspects of the PC-12 that are effected, but also so are the dynamics... There is also in the package Realistic taxi behavior, realistic stall speeds & behaviors, realistic climb speeds, realistic cruise speeds and better flying characteristics with the more (set) realistic Weight & Balance. These earlier Carenado's have an urgency to have too much power to taxi smoothly (or slowly) it was one of the real annoyances of these otherwise perfect aircraft. The high taxi speed has been nulled a little here with the new enhancements, but with the mixture set at idle and the throttle at idle you still have to use the brakes now and then to contain the speed, it is however far better than the jack rabbit feel of the none REP PC-12. The PC-12 has a different throttle mixture and built in propeller arrangement, and this custom package adjusts to that, so on ground idle, the first 30% of throttle directly controls the propeller pitch and does not increase NG at all and the custom propeller governor recreating all supported prop modes, the electric auto-feather included all now use the newer X-Plane11.30 governor features. Sounds in the earlier REP Packages were an advantage, but that feel is slightly nulled now as Laminar Research now uses the excellent FMOD 180º sound effects to well "great effect". Simcoders notes that the custom system highlights and is better than the default Carenado sounds, areas covered are Engine ignition, Engine pins, Engine exhausts effects and Fuel pumps, Electric Gyros, Avionics effects, Dynamic touch down, Dynamic ground roll and Dynamic wind. The problem with these sounds that they are good, but you have no control over their volumes except for the wind noise, overall I feel they are yes an improvement, but not a highly noticeable improvement over the now very good Carenado sources. Ditto the featured fuselage wind, landing gear wind and Independent touch down sounds that is used with the SimCoders "Headshaker Plugin", as these again were a great early set of features. But most users now have or use the XPRealistic Plugin that does the same thing but also better and more effectively. But that is not saying it is not a good set of features because they still add in a better dimension to otherwise what is a basic aircraft. Aircraft roll and takeoff sounds with the more "arrrrh, thump, thump" of the retracting gear is far better than the Carenado sounds, as is the wind noise, but you will need to take a little of the wind noise to be more realistic. If you are hard on your aircraft then the REP won't be kind to you? damages are and can be triggered by the pilot actions or poor piloting skills which is based on real world data and can target every system in the aircraft and this is all meant to teach you how to correctly manage the aircraft. You get the more realistic stall speeds & behavior, realistic climb speeds, realistic cruise speeds and realistic weight & balance and in flight you feel and see the differences, the PC-12 feels more relaxed and immersive than what I remember it was before. On release users didn't warm to this Carenado PC-12 aircraft very much and it sold quite slowly, personally I couldn't understand that as I really liked it from the first flight... the non-adjustable and sometimes glaring instrument lighting aside, it is a great PC-12... I think now more are warming to it and understanding more what a nice aircraft this really is... There is secondary fuel flow behavior, realistic lag and custom ITT evolution, correct fuel consumption with better and more realistic engine temperatures, these items are more noticeable on the PC-12's engine displays if you compare to the default version, and the numbers don't lie. Be careful on those landings? the landing gear can be damaged by hard landings and with over-speed operations and the the brakes and tires are damaged if not managed correctly and will have to be replaced... it is an expensive exercise while using the REP pack. Even when your flying day is over the REP will still be working on items like if you leave the power on then the battery will discharge unless you turn it off and that is even if you leave it switched on and close X-Plane? Start X-Plane up again and you will have a dead battery to contend with, just sit and watch the numbers and the battery goes dead very quickly. And that is with also all your current persistent aircraft wear and tear that is recorded and every single switch and lever position is restored when you reload the aircraft as is the the engine and oil temperature which are also restored basing on the time passed. In other words the aircraft is in exactly the same condition (or worse) when you come back to the aircraft for another flight and you certainly don't get a newly set aircraft to fly in, and overtime those hours and the wear and tear will add up in the Maintenance Report and will require attention. Summary What the Simcoder's REP or Reality Expansion Pack does is take a standard aircraft and then supercharges it and gives it a load of features and actions that are not available on the standard aircraft, they also fine tune the aircraft as well to be far more exact on the real machine's performance numbers And the REP does a really good job in this case with the PC-12 and it covers a huge multitude of areas in performance, wear and tear, damages to the aircraft and fluid use. The effects on your systems are also covered in every aircraft area from the electrical systems, Oxygen and mechanical wear and tear on wheels and tires, overall the system coverage is quite extensive and you will need to look after and maintain the aircraft to a certain standard if you want to fly it regularly just like well really a "real" aircraft. The REP has come a long way as well since the earlier versions that were just a little too invasive and made the aircraft just a little too realistic in that it got in the way of actually flying it. The better current menu management really helps here now as does the "auto" engine start up that helps in simply starting the engines, but there is the need for more control interaction as well in menu's, like with the custom sounds FS Economy is now heavily intergrated with the REP package but can be enabled/disabled on the fly, earn your virtual money to keep the PC-12 in the air with payment earned for maintenance and fuel. This REP package is certainly very comprehensive and it goes a long, long way in bringing the PC-12 to life and with far more features and actions than what the aircraft actually has when it comes from Carenado (which was pretty good then). I wasn't a big fan of the earlier REP packages, but this one here is now actually very good on the PC-12, and Simcoders have made the REP's more user friendly and not as invasive as their earlier packs. So if you like an immersive and realistic feel of running of your Carenado PC-12 to a higher more realistic degree, and yes this package does go very deep, then you will love this plugin. The REP-Reality Expansion Package is better than ever and lifts the Carenado aircraft into a more far complex and detailed aircraft for you to intergrate with... ______________________________________________________________________ Yes! the SimCoders Reality Expansion Pack for Carenado PC-12 is available from the X-Plane.Org Store here : Reality Expansion Pack for Carenado PC12 XP11 Price is US$19.99 The PC12 XP11 by Carenado is required for this add-on. It will not work on other aircraft Features: Ultra Realistic Flight & Ground Dynamics * Realistic stall speeds & behavior * Realistic climb speeds * Realistic cruise speeds * Realistic Weight & Balance * Realistic taxi behavior Complex Damages System * Triggered by the pilot actions * Based on real world data * Target every system in the aircraft * Meant to teach you how to correctly manage an airplane Economic System * Can be enabled/disabled on the fly * Earn virtual money when you fly * Use virtual money to buy fuel and do maintenance/repairs * Realistic fuel prices around the World * Fully compatible with FSEconomy. * More info at https://www.simcoders.com/reality-expansion-pack/economy Weight & Balance Tool * Load the airplane and check the C.G. and weight limits at takeoff and landing * The airplane behavior changes when the C.G. moves Popup Kneeboard * Complete normal operations checklist * Complete emergency operations checklist * Complete reference tables (speed, fuel consumption etc.) Simulation state saving * Every single switch and lever position is restored when you reload the aircraft * The battery may discharge if you leave it on and then close X-Plane * When X-Plane is launched, the engine and oil temperature are restored basing on the time passed Maintenance Hangar * Engine maintenance tab * Electrical systems maintenance tab * Landing gear, brakes & tires tab Interactive Walkaround * Cockpit checks * Lights checks * Aileron, rudder, elevator and flaps check * Tire check and choks removal * Pitot tube check * Engine cowl check Interactive towing * Push, pull and steer using the joystick * Towbar simulation Realistic PT-6 Engine Logic * Secondary fuel flow behavior * Realistic lag * Custom ITT evolution * Custom throttle dynamics (on ground idle, the first 30% of throttle directly controls the propeller pitch and does not increase NG at all) * Custom propeller governor recreating all supported prop modes, electric auto-feather included * Custom hot-start behavior (and damages) * Correct fuel consuption * Realistic startup procedure * Automatic startup procedure available to help newbies * Realistic engine temperatures * The engine parts are damaged if not managed correctly Stunning sounds * Fuselage wind sound * Landing gear wind * Independent touch down sounds Realistic Landing Gear * The landing gear is damaged by hard landings and overspeed operations * The brakes and tires are damaged if not managed correctly Electrical & Avionics System * Realistic Battery * The avionics are damaged if on when the engine starts/shuts down Native Virtual Reality Support * Complete support of new X-Plane SDK 3.0 * Menu visible in VR * Windows visible in VR Learn with the in-flight tips * A non invasive tip with a suggestion about the conduct of the flight is shown when you are not flying the airplane properly * A non invasive tip with a suggestion on how to recover the problem is shown when you damage the airplane Custom simulation of Hypoxia * Tunnel vision * Hard breathing Developed with love * Coded by real pilots * Very easy on FPS * Written in C++ with no compromises ______________________________________________________________________ Requirements : X-Plane 11 Important: The PC12 XP11 by Carenado is required for this add-on. It will not work on other aircraft Current and Review version: 4.21 (July 26th 2019) ______________________________________________________________________ Installation : Download is 16.3mb which is unzipped and is inserted to the Aircraft/Plugins folder and root folder. Key authorisation is required. Documentation : includes REP - User - Manual There is an Installation "read Me" but just notes to see the manual? ______________________________________________________________________ Plugin Review by Stephen Dutton 28th July 2019 Copyright©2019: X-Plane Reviews (Disclaimer. All images and text in this review are the work and property of X-PlaneReviews, no sharing or copy of the content is allowed without consent from the author as per copyright conditions) Review System Specifications: Computer System: Windows - Intel Core i7 6700K CPU 4.00GHz / 64bit - 16 Gb single 1067 Mhz DDR4 2133 - ASUS GeForce GTX 1080 8Gb - Samsung Evo 512gb SSD Software: - Windows 10 - X-Plane 11.20 Addons: Saitek x56 Rhino Pro system Joystick and Throttle : Sound - Bose Soundlink Mini Plugins: Environment Engine by xEnviro US$69.90 : XPRealistic Pro v1.0.9 effects US$19.95 : WorldTraffic 3.0 Plugin - US$29.95 Scenery or Aircraft - LSZH - Airport Zürich v2 by Aerosoft (X-Plane.OrgStore) US$27.99 - LEBL - Barcelona Airport XP11 by JustSim (X-Plane.OrgStore) US$21.00
-
Aircraft Review : Antonov An-2 by Red Eyes
Stephen replied to Stephen's topic in Classic Aircraft Reviews
The truth niky, I have absolutely no idea, I haven't flown the An-2 in years, don't have it in my set list either... you might have to ask on the .Org Forums -
Aircraft Review : Falcon 50EX by Carenado The Dassault Falcon family goes back to the early sixties with the release of the twin-engined Mystère 20, but with early deliveries set to Pan American it was marketed as the "Fan Jet Falcon" and the name stuck with a rename of Falcon 20 and it is under this guise that Pan American Business Jets Division placed orders for a combined total of 160 Falcon 20s. It was for it's time the Falcon 20 an exceptional aircraft with a 750 km/h (405 knots, 466 mph) cruise speed at 12,200m (40,000 ft) and a range of 3,350 km (1,808 naut mi, 2,080 mi). Obviously you are going to build on success, so the next step was for a more larger faster and longer range aircraft. To achieve this the aircraft that became known as the "Falcon 50" was to add another engine, and to make it a TriJet, and it came for the time of the mid-seventies the first of the really global transcontinental business jets, it was fast at Mach 0.86 (1,015 kph) at full speed, with a cruise set at 488 kn; 903 km/h (Mach 0.85) and a longer range of 5,695 km (3,075 nmi), but remember the FA50 is still an old design and three dated turbofans were not the most fuel efficient compared to current engines like on the Falcon 6x which can do 10,186 km (6,329 mi; 5,500 nmi) 5,100 nmi at Mach 0.85. The FA50 can still do the distance from London to New York, but you will get there almost on dry tanks... The fuselage cross section and capacity is similar to the FA20, but the FA50 had a far more advanced wing design and this aircraft is the 50ex version with the updated TFE731-40 engines Carenado Falcon 50ex It would have been hard to follow up the Carenado Cessna Citation S550 for mid-sized private jets, it was and still is a stunner of a aircraft for X-Plane11. So to follow that exceptional act then Carenado has to deliver an aircraft of the same quality and detail to at least match that standard, and that is a tough high target to achieve, and so that is the question we are asking here in this review, is the Falcon 50 in the same league. Falcons are very distinctive and very French in design, sharp nose with an late fifties cockpit window layout, straight fuselage with a low cross Caravelle style tail, the trijets are even more iconic, but the three engines do make the aircraft look a little rear heavy. But you are not going to deny that Carenado have not done an exceptional modelling design here, as this is a beautifully represented Falcon 50. Complex shapes are dealt with ease, you will find no sharp modelling corners, or lazy quick circles here, it is a well defined design in the ultra category, and so it should be in this price range, you pay for it, but at least here the Carenado delivers, note the nice leading edge lighting assembly, wing mapping (raised rivets and lines) and flap track housings. All undercarriage components are all really well detailed, not only the usual hydraulic piping and struts (main gear is a simple leg support with an attached hydraulic ram) but with smaller detail with clips, bolts and steel foundry shaped assemblies. Front wheel strut is excellent with high detailing including chrome hydraulic ram components. Internal wheel bays are well kitted out and detailed as well, all round perfection. Cockpit windows are late fifties - sixties style five window designs, very Falcon and visibly different from the more standard four glass design of the later Falcon 7X series. Note the small hidden wiper assemblies. A glass is Carenado perfection, front and side designs in quality, reflection and shapes. Fuselage shaping is also high in detail and the excellent paint reflections are of a very high caliber and all this comes with Carenado's dynamic reflections, realistic metal and dielectric materials... in other words it is very good. The central engine is the only one with a thrust-reverser, it is a clamshell design and in action it looks excellent in animation Menus Menu system is standard Carenado lower left screen three tabs, the three tabs can be mouse scroll hidden The three tabs are noted as: A ) is for the lovely authentic Collins Proline21 pop-up Autopilot panel, that this is quite screen filling large panel, but can thankfully be moved and scaled to a smaller size. C ) Is the standard Carenado ten preselected Views, Field of View and Volume panel. And O ) is the Options panel. The Proline21 Autopilot panel is different (larger) than the one on the Premier 1A, and it is quite large in default mode on your screen, it can of course be scaled HUGE, or very small, but scaling too small can make button actions hard to use. Options include Window and Instrument reflections. The static elements provided here are still very basic with only two cones, rear wheel chocks and flag/pitot covers and some nice "FA50ex" engine inlet covers, but you can only have all or nothing. The highly realistic pilot and co-pilot (and new) animated pilots in flight uniforms do disappear when you activate the static elements. left side is the main entrance door... there is also a nice well detailed "HOBART" GPU (Ground Power Unit). The livery Selector is now on the options panel than from usually the Carenado tab. You have the option of the original wing tip (square) or the newfangled high curved winglets, the superb winglets are an obvious choice. Cabin and cockpit Entrance to the Falcon 50 is via a single left hand forward door with built in stairs, it is animated either via the menu, or the handle internally (arrowed below)... design with nice chrome rail-handles is excellent, in v1.1 the animation has been slowed down a little for more realism, the door looks and moves now like real. Cabin fit-out is all dark woods and heavy leather, it is a very cigar lounge feel, four club seating forward, one single seat aft and a three seater settee to the right side and so that is a passenger seating layout of eight. Cabin fittings and details are excellent, with chrome highlights and highly soft looking cushions to hug... ... a nice touch are the two passenger screen monitors, both fixed, but look great... all the blinds are animated, but I found them a bit in areas overtouchy to use, but still a very nice to have. Odd for Carenado is that the tables don't fold out, more odd is they look like they are created that way and the folded up panels are also there positioned inside, but I couldn't get them work if they do? so I am going to say that they do actually work. There is a folding door to open to access the cockpit... .... to the left as you go in there is a pilot's storage area for books, jackets and other bits and pieces, note the dangerous looking axe? Top is the entrance lighting knob, and an audio panel that has two working knobs. First look into the cockpit is breathtaking, with such overwhelming quality and detail. Armrests flip up to get in to the seats, but you know it will still be a very tight fit. In the left seat and the glareshield overhang is huge, and really well done but it is all very black and dark with no power connected. First look forward reminds me of Concorde with the shield in the full up position. Pressing the EXT Power button with toggle the external GPU, and flick the main battery switches and the effect is "oh wow, oh wow" this is one nice cockpit in lighting and detail. The instrument panel lighting highlights the built in glareshield grab handles and the huge centre mounted park brake handle, very nice and the overhead panel turns into a rainbow of ergonomics... excellent! Instrument Panel Twin authentic yokes have built in electric trim and can be hidden. Yokes hidden then that exposes the four display Proline21 avionics system introduced on the Carenado Premier 1A... ... There are for both pilots a PFD (Primary Flight Display) and a MAP/NAV MFD (Multifunctional Display), both can be popped out but only the PFD and MFD two from either side... other central display panels will also pop-out includes , three engine parameters, backup Artificial Horizon, Fuel/Temp and hydraulics/ VIB N1 - N2 (engine vibration indication). The PFD has the standard glass cockpit layout of Speed and Altitude strips, Artificial Horizon, Vertical Speed and Rate of Turn built into the upper section, lower section has a built in Navigation and Map and COM1/ATC/UTC/TAT/COM2 strip at the bottom. MFD has Engine readouts top, route information lower and the same Navigation and Map layout lower with a GS/TAS/SAT/ISA strip at the bottom. Several points since the debut release of the Proline21, the PLAN function (arrowed right) now works (Yeah!) to see and layout your flight plan, and the text does not overlap. Unlike the Premier where as the DCP (Display Control Panel) which was set vertical between the displays, here on the FA50 it is set both sides up on the glareshield next to the autopilot... BARO, MENU/DATA, TILT/RANGE knobs. The default screen shows: FORMAT (ROSE/ARC/MAP), TERR/RDR, TFC and a PRESET (quick switch) setting on the left, you can adjust on the DCP panel via the "MENU/DATA" knob for either PFD or MFD, switching can be separate with ROSE in say the PFD and ARC in the MFD or vice versa. Selecting the "NAV/BRG" button will bring up the NAV SOURCE (FMS1/VOR1/VOR2) and Background (BGD) pointers for FMS/VOR1/ADF1 top and FMS1/VOR2 lower, again just select the required selection button and the select blue box band.... adjustment is again via the DCP MENU knob There are altogether three (pages) settings of References that can be accessed by repeatably pushing the Menu REFS knob. Pressing the RADAR button will bring up the TERR/RDR setting the same as in the menu option, the TERRAIN feels far better but is quite bright (Red or Blue) and can make the flying and navigation details hard to read, I probably wouldn't use it, except in the RDR - Radar mode. Overall this latest version of Carenado's ProLine21 system is certainly far less buggy, and more functions work than with the release version and expect the same fixes to be translated back over to the Premier 1A. ProLine21 Autopilot panel is excellent, standard layout and easy to use, and note the comprehensive engine fire panel for the three engines. Lower centre panel has Alieron, Rudder and Stabliser positions panel left and SLAT/FLAP positions right, in the middle is a comprehensive annunciator lighting panel, with test and bright and low light settings. To note the speed knobs (arrowed) for adjustment in the PFD. Three lever throttle assembly is a work of art, and seriously detailed, and note the working springs on the stop selection (arrowed below left), lift the red levers to shutdown the engines (switch off fuel flow).... as there are three levers you lose the versatility of a two lever operation with a throttle system (Saitek X56), so you have to lock them all together, shame but it is what it is.... .... single central thrust-reverser lever is again a work of animated art, and you have to understand how it works. X-Plane key setting "Toggle Thrust Reversers" with activate it, but to use it you then use your throttles... the reverser lever moves but the throttle levers stay in position, do the opposite to store the clamshells.... it is a work of art to use. Centre console has top left Anti-Skid, right cabin pressure adjustment with pressure dump (nicely done). The standard Laminar FMS panels and radios... radios can be tricky to set (Transponder is really tricky), so get used to setting the two page (COMM1/NAV1 - COMM2/NAV2, ADF and Transponder) settings on the ground before flying, if not you will struggle later, the radio also pops-out for ease of use. Note a second set of DCP panels. Rear centre console trim Aileron, Rudder and Stab adjustment switches and a really lovely Air Brake lever (arrowed)... right is the Flap adjuster: CLEAN - SLATS - S+FLAP 20º - S+FLAPS 48º, and the flap knob is gate animated to lift and click (very nice). Rear console is the cabin pressure dial There is another cabin pressure dial low left on the pilot's side on the instrument panel, and a clock above on each side. Side consoles have Gyro Align, radio selections and tiller (left), right is oxygen controls and a little OPEN - CLOSE lever (arrowed)? This will move the right side window blind forward for use or stow it away, very nice, but there is not one on the pilot's side (boo... ) but the left blind is still animated and can be used, both rear cockpit windows have animated blinds. OverHead Panel (OHP) is excellent, areas including Electrical, Fuel System, Bleed Air, Engines, Conditioning, Anti-Ice APU, Heating, Exterior and Interior lights are all colour coded, lighting knobs are each side... .... huge circuit breaker field is also colour coded, but none of the breakers are active. Note the really lovely styled overhead DOME lights. Lighting You were expecting the lighting to be good in the Falcon 50, and "boy" you are not disappointed... it is amazing. You have the two overhead DOME lights in the cockpit and two map lights that are highly adjustable, all the panel lighting is breathtaking. If you able to restrain yourself and tone it all down a little, it looks even better and more realistic... note the side spot light. No problems in finding that right lighting for the best takeoff or landing ambience, lovely in here.... roof ergonomic rainbow panels are... UNBELIEVEABLE! Cabin lighting is also exquisite, it is all really nice lighting... ... with main overhead track lighting and eight adjustable spot lights for individual seating positions, there are two overhead entrance lights as well. But there is a quirk? The main cabin lighting will only work with the DOME lighting in the cockpit? so to have the cabin lit in flight means the cockpit is brightly lit as well (fine in the day but annoying at night), the switch position is wrong because there is a three way switch position on the "cabin" lighting for OFF- PAX - ALL, this could be used to move the lighting away from the dome lighting, the adjuster for the lighting doesn't work either, so there is a real missed opportunity here to have it all. From the exterior viewpoint it is about as great as you would want it to be, the entrance night view is excellent. note the nice tail lighting. Flying the Falcon 50 At Zurich the FA50ex is all primed up with block fuel of just a slight over 3000kgs with a TOW 13662 kgs, the luxury cabin awaits the passengers, the route to Barcelona is really quite short at 551nm, but you will fly high (32.000ft) and fast at mach m80. You have a built in APU (Auxiliary Power Unit) but except for the one (arrowed) electrical gauge it is hard to tell it is running... Starting the engines is very easy, fuel-shut off set to throttle lever idle, set all the bleeds to Auto and then just press the engine start of which engine you want to start, I am still going right to left or Engine 2, 3 and then 1, you may want to start the central engine first... a red light on the engine start says it is in start up operation, then just watch the engine gauges do the work, it is all very Auto. The systems in Starter Logic, Fuel System, Bleed Air System, Avionics busses, Hydraulic Logic are all custom designed and highly realistic, but overall this is a very automatic aircraft to use system wise, so that makes it easy for early simulation users, wanting system depth, but not with all the palaver of working through deep system networks. It is very quiet in the cockpit, so you are a bit removed from the engine start up aurally, but externally it is very good with those 180º dynamic sounds, and three Honeywell TFE 731-40 turbofan engines, poring out 3,700 lbf (16.46 kN) thrust each is going to sound good isn't it... well yes, really good. Don't forget that you have full oxygen tanks as the FA50 uses the new Laminar oxygen system, very realistic. Slat operation is excellent, and you can override if you want to. A light fuel load and only three passengers means I am quite light, so the Falcon will move quite easily with a slight push of the throttles, the aircraft is very nice and easy to move on around on the ground. Power up and all that three engine thrust kicks in, and so you move.... engine particle effects are very good, all very hazy and thrusty. Throttles T/OFF markings are noted on the engine outputs to show where to set the throttles for the best thrust ratio and that works fine. As noted you can set all the speed Ref's (arrowed) and they are spot on, rotate v2 is around 140knts, but you feel it earlier as the nose wants to lift... .... so you have to be careful not to over rotate, then secondly keep that pitch in check as you climb out, it is not you will be fighting against the aircraft, but just don't let the pitch runway from your control... official rate of climb is 2,053 fpm, so 2000fpm is easily acceptable, but "wow can she climb". The gear retracts with a thud... and I love the way the front gear retracts forward, the animations on all gear assembles are excellent. Those central mounted speed knobs are very easy to use, but they are only for showing the speed selection only, there is no auto-thrust here, so the idea is to set your speed target and aim for it with the throttles. The FA 50 is quite nice in the air once the wings are cleaned up, but my gut says the flap extension made the aircraft pitchy, and a little bit loose on the centre, but once you get full clean control it is quite nice.... It is very, very easy to get two PFD certain selections mixed up... you can select a preset "FMS/NAV1/NAV2" from the PFD, but you may think this buttom selects the FMS, but it doesn't as it "PreSelects" not selects, so you maybe actually switching it out, when you want to switch it in, it was a mistake I didn't make on the Premier 1A, but somehow kept on doing so here? Note the fuel detail in FF (Fuel Flow), QTY (Quantity) and Fuel. You can say what you want, but the FA50 is a super nice looking aircraft in the air. Over the Alps at FL320 and you are soon at the south french coast, which the Mediterranean Sea then shows up on the radar, standard ceiling is FL490 14,936 m (49,000 ft), so you have a lot of altitude flexibility. You have the ProLine21 autopilot panel that pops-up, but I didn't really need it as the glareshield panel is quite easy to use and handy... so I never used it? Your fingers are just twitching to use that exquisite air-brake lever... go on I know you do, so a 2000fpm descent into Barcelona was an excellent excuse to twiddle with the lever, the air-brakes are tiny but effective. Approch into LEBL - Barcelona's RWY 02 is via BISBA STAR - BISB4N, but it didn't compute the route well on the FMS, so I added in a go around route that followed the STAR close enough via SLL - BISIS - TOTKI - BL620 - Approach. 6000ft was now slowly reducing to 3500ft as I turned at BISIS... ... and you have to love those splendid Falcon wing shapes against the water. You can cruise clean at 250knts, but then it is quite a fall to Slat speed of 200 knts, then again to 190knts for approach and S+20... ... Gear down, thunk, thunk and you are going for the lower landing approach speed, the marker Vrefs are there (arrowed), but you have to find your own points to avoid that steep nose down approach angle most business jets like, I found 116 knts to be ideal and flying nice and slow, but in also keeping the pitch in check.... Flaps at full 48º are slightly draggy, but you have a lot of power to play with, again you have to keep that nose in check on finals. Approach external lighting is good... central twin mounted landing lights and nose-wheel taxi. Wing (ice) lights are good as well with twin red beacons on the belly and tail, standard nav and strobe lights and the nice tail lighting (see below). Over the fence and I am again very aware of not letting that nose get too high on me, my gut says it will just sit there high in the air as the wheels touch, so my flare is very highly controlled, a bit of pitch to slow the aircraft, but not enough to lose the nosewheel... stall speed is 95knts. Nose is a touch up on contact, but it is almost a three point landing, and it feels like a very good landing inside... I'm happy with that. The single thrust-reverser is not that powerful, compared to the usual twins, but the operation is great to use (note the "Green Deployed" light) and it does slow the aircraft of which you will need 658 m / 2,159 ft roll-out. Air-brakes have to be activated manually, but certainly help in slowing down the aircraft... note that using the air-brakes on the ground activates more spoilers than the air-brake function. I will note it took me a few maybe three flights to really get the full feel of the Falcon 50, yes it is easy to use, and yes it is easy to sort for a flight, but you do need to get into a sort of flying groove with it, the first flights maybe even messy, but the more you fly the FA50 then the more confident and together you are with the aircraft. Librain water effects work here as well, they look great internally, but are a bit odd in showing through the fuselage externally... with Librain it is still a refinement process that you have to accept. But to note the wipers are small, and you get only a very small gap to find that runway in the wet and dark... that will test your skills. FA 50 wing and night lighting IS amazing... Liveries You get the usual blank white and six liveries. Three are European and three are US registered including the display aircraft N502EX. Quality of all are very good, but except for the hard coloured red and black aircraft the style is all very similar of wavy stripes Summary Nobody does these large business jets better than Carenado, the Citation S550 was a killer machine and this great Falcon 50ex is certainly on par with the earlier aircraft so it would be now hard to choose between them. The design and detailing in this aircraft is some of the best out there, it is sublime in what you get now for your money, in every area including sound it is simply outstanding. The Carenado ProLine21 is also improved and has had a few bug fixes as well, it is still not totally absolutely perfect yet, but it is now at least in the very good category, and note you can use the RealityXP GTN750 support (with 3D panel display support) in this aircraft and it is VR refined as well. Lighting is excellent inside and out. Systems including Starter Logic, Fuel System, Bleed Air System, Avionics busses, Hydraulic Logic are deep and all custom made for the aircraft, but there is a lot of auto-procedures to help with the ease of flying the machine, however it is still an aircraft to learn and fly and requires a few to many flights to really get proficient on the Falcon 50. Negatives, not many and just a very few bugs, like the tables are not animated (missed and will be fixed) , ProLine21 in areas still in development and the librain is still in need of refinement, the oddly connected cockpit and cabin lighting, and I will note the now standard Carenado menus do now feel outdated, and all circuit breakers are all hard. The review is full of words like... outstanding, excellent, exquisite and so yes this Falcon 50ex from Carenado is an amazing aircraft, and it is very well priced for all the ultra detail and systems that you get here. There is a sort of proud ownership that you get with these outstanding aircraft, you stand or sit inside there wondering how far simulation has come in the ultra detailing and sheer quality you now have available in X-Plane11, but here is a business jet to certainly savour and to enjoy in for your personal use for years to come. _______________________________ The Falcon 50EX by Carenado is now Available at the X-Plane.Org Store, and is available from Carenado directly as well: FA50 EX XPLANE 11 Priced at US$39.95 Features: High-end 4k PBR (Physically-based Rendering) graphics throughout, with ultra-realistic materials rendition (Dynamic reflections, realistic metal and dielectric materials, etc.) Fully customized in-depth annunciator logic/aural warning logic/throttle logic with functioning latches. Optimized for VR. Custom Proline21 avionics system, all featuring detachable pop-up windows Integrated FMS with detachable pop-up window (Laminar default) Custom Autopilot with detachable pop-up window Rain effect support* In-depth FMOD sound design implementation, including distance effects, realistic turbine reversal effects, etc. RealityXP GTN750 support (with 3D panel display support) Custom electrical system/Starter Logic/Fuel System/Bleed Air System/Avionics busses/Hydraulic Logic Extensive VR support Extensive HDR lighting with gimballed 3D lights and dynamically illuminated ice lights for amazing night lighting effects Includes pressurization and oxygen system End-user customizable via Manifest.json file. Goodway compatible Engine design optimized for XP11.30’s jet engine model Support for “librain” plugin (Requires separate plugin install) Librain support also includes visual ice effects on windows. Requirements X-Plane 11 Windows, Mac or Linux 4GB VRAM Minimum - 8GB VRAM+ Recommended Download Size: 580MB Current and Review Version : 1.1 (July 23rd 2019) Installation and documents: Download for the Falcon 50ex XP11 is 551 Mb and the unzipped file is deposited in the aircraft "General Aviation" X-Plane folder at 741.30 mb. Download the LIbrain rain effect plugin (add into the aircraft's plugin folder) Documentation: Huge amount of documentation, with ProLine21 introduction, Laminar FMS manual, Performance and reference tables. Carenado FA50EX Emergency Procedures.pdf Carenado FA50EX Normal Procedures.pdf Carenado FA50EX Performance Tables.pdf Carenado FA50EX References.pdf Carenado FA50EX Version History.rtf Carenado Proline 21_FA_50.pdf Carenado Recommended Joystick Settings XP11.pdf Carenado RTU Manual.pdf Credits.pdf Recommended settings XP11.pdf X-Plane FMS Manual.pdf Carenado Copyright.pdf ______________________________________________________________________ Aircraft Review by Stephen Dutton 26th July 2019 Copyright©2019 : X-Plane Reviews (Disclaimer. All images and text in this preview are the work and property of X-PlaneReviews, no sharing or copy of the content is allowed without consent from the author as per copyright conditions) Review System Specifications: Computer System: Windows - Intel Core i7 6700K CPU 4.00GHz / 64bit - 16 Gb single 1067 Mhz DDR4 2133 - ASUS GeForce GTX 1080 8Gb - Samsung Evo 512gb SSD Software: - Windows 10 - X-Plane 11.31 (v11.30 is required for this aircraft) Addons: Saitek x56 Rhino Pro system Joystick and Throttle : Sound - Bose Soundlink Mini Plugins: Environment Engine by xEnviro v1.11 US$69.90 : WorldTraffic 3.0 Plugin - US$29.95 : LIbrain rain effects - Free Scenery or Aircraft - LSZH - Airport Zürich v2 by Aerosoft (X-Plane.OrgStore) US$27.99 - LEBL - Barcelona Airport XP11 by JustSim (X-Plane.OrgStore) US$21.00
-
News! - Released! - DA42 Twin Star by Alabeo
Stephen replied to Stephen's topic in News! The latest developments in X-Plane
You will need the CARENADO G1000 DATABASE (which MUST BE INSTALLED) It is installed in the main root folder of X-Plane. -
Classic Aircraft : Rutan Model 61 Long - EZ by VSKYLABS
Stephen replied to Stephen's topic in Classic Aircraft Reviews
You have not ordered rudder pedals, but hopefully a YAW axis joystick. X-Plane will automatically adjust to default yaw on the joystick (which you should set when you add the stick to X-Plane) and fine tune, if you buy a rudder pedal set up later you can then add in the sequential braking feature... the rest is just practise -
Aircraft Update : Spectr-Aero SP-30 v1.2 by Mad Flight Studios Sometimes what looks like a casual review can turn out to be something special, and so it was with Mad Flight Studio's Spectr-Aero SP-30, which is a design originally of Canada's Zenith STOL CH 701. It is a very cute if noisy critter of an aircraft, and it comes about as close as a dramatic flying experience that you can get in X-Plane11 with the major plus of a huge feature list and exceptional interaction with the actual aircraft, it is a great if brilliant simulation. The full release review is here: Aircraft Review : Spectr-Aero SP-30 by Mad Flight Studio v1.2 A small quick bug fix update went out straight after the release for the SP-30, so here in this v1.2 update is a more wider set of fixes and adjustments. Rear shelf and parts of the cabin has had new textures and a redesign, it was pretty good before, but these changes are to reflect the real aircraft more. Notable is the instrument panel, which seems to have a more 3d textured feel than before, and yes I really like it. There has been added a new livery called "Experimental Green", which does make the aircraft feel a bit more modern, but it is quite bright and not really to my traditional tastes. The paintkit has been improved and updated as well. Ground drag has been adjusted as there was a bug in there, but it always felt fine to me, the SP-30 feels no different on the takeoff roll either. The right vent animation of which I will note as heat effects has also been made more realistic, as the efects certainly seem to be more visible than before. Use those lovely headphones and you will now have co-pilot interaction sounds, which is a nice new feature. A note is in that you have to set the language before you load in the aircraft (with a new download). Both English and Russian text (clipboard) and sound files are provided, but you have to insert them (change them) yourself as Russian is the set default language . Fuel quantity save is another area addressed. If you have read the release review you will know that I found the Spectr Aero an extraordinary aircraft and it came with some highly realistic features. But I also found because of these very immersive and clever features the SP-30 could also be confined to a certain type of user and not be a completely accessible simulation to a lot of mainstream flyers. The biggest issue was simply a save. With this simulation you have to manually load in fuel and chemicals, do servicing and maintenance, of which are all very immersive and fun. However the SP-30 is a temperamental critter that can be very hard to start, get the procedures right and fine, and away you go... but if you make a slight mistake or if that aircraft refuses to start then you are in trouble, you can fix it of course, but not by a menu or desktop restart of the aircraft... because if you do, then your loading, filling and all your hard work is wiped out on a simple restart, as you are now back at the aircraft's default settings. Do that routine five or ten times and you will simply walk away from the aircraft. I will note however on my first restart in a few months it started first time if I followed the startup procedure closely that is explained in the release review. So has the issue been fixed... well yes and no. If you select on the clipboard selection "Save" then the remaining fuel will be saved, plus all the other aircraft conditions, including any maintenance issues, so now yes you can reload from the desktop bacxk to the aircraft as you last left it.... But here it gets a little tricky, as if you select the "Don't save" tickbox when you reload you go back to the default settings, that is okay, but you also lose all your hard fuel loading efforts, so if you want a full fuel load you have to stop the engine, and reload manually all the fuel again... yada, yada, yada... there is a however a workaround in loading the SP-30 at the default settings with the engine going and then adjusting the fuel load via the X-Plane "Weights, Balance, & fuel" menu to get back to where you were. But this is where it really gets complicated... also selecting the "Don't save" tickbox should revert to the full default settings right, but no. With the "Don't save" checkbox selected the maintenance issues are still present? shouldn't they be cleared if you have selected a default or all systems and set to restart... not here, so you can't clear them? From the developers point of view this is the right approach, in fix the aircraft no matter what to fly, but this is simulation not a real world aircraft and for that full experience you have that option with the "Save" command. Worse you have no control over the maintenance options, so the developers can throw them at you any time they like, but five fuel blockages in two short flights is seriously frustrating if you can't default them, so I crashed, five times? Even if you fix the fault, takeoff and there it is again... so you are put into a no-win situation every time you fly the SP-30. Here is the point... with the "Save" option set on, then everything goes from one flight to the next in realism, but if you set the "Don't save" option you should reset EVERYTHING including the faults to zero at every startup position, and be able to fly if you don't want these realism options switched on, this aspect would open up the aircraft to far more users, because they can't enjoy this amazing aircraft for any period of time because the faults will always destroy your simulation... sometimes folks we JUST WANT TO FLY with no special features and just enjoy the aircraft, and as it is it is extremely frustrating if you have no control over the faults that are hard wired into the aircraft no matter what selection you choose. Summary This is a very nice but small v1.2 update to the Spectr Aero SP-30, and the machine has a huge amount of features and details, but is lacking in ease of use for the casual flyer, so overall it is not a very accessible aircraft to fly and enjoy consistently and in most cases I find myself shutting it down and walking away with frustration with inconsistencies. In the original release review and this update review the results are the same, the SP-30 is frustrating to use consistently because of very simple strategies in letting you fly either fully with the faults and features, or to be able to simply turn them off, and when you can't disable or adjust over sensitive maintenance issues it will impede the simulation to the point of walking away from an otherwise excellent aircraft. Covered here in this v1.2 update is some new textures and some modeling adjustments, a new livery in Experimental Green, new co-pilot sounds and a new "save" function. The strive to make an aircraft in total realism I can believe in and applaud, but when the over realism here starts to interfere with your simple flying aspects then the fun goes out of the simulation, with no complete resets or when the simple start up and fly aspects are minimised you are not going to spent an hour or so to simply get a few minutes flying to only crash again with a blocked fuel filter at a supposed default (totally cleared) setting, the aircraft is either reset to the default or it isn't and many fliers will revel in that aspect and no doubt that is the developers aims, but I want fun and not the constant frustration created here in my flying.... overall though this is a brilliant aircraft if you can work your way though its realism firewall. _______________________________ The Spectr-Aero SP-30 v1.2 by Mad Flight Studio is NOW available! from the X-Plane.Org Store here : Spectr-Aero SP-30 Priced at US$39.95 Main features: Dynamic model, handing characteristics, systems controlled and tested by real world pilots and engineers. Full 3D manual ground service propeller covers Pitot cover parking ties parking chocks control surface check fueling (gasoline and chemicals) fuel drain check outside engine heater chemical works equipment Full 3D manual engine service propeller manual rotation oil level check oil change oil filter change air filter change fuel filter change spark plugs change prop pitch selection (from service menu) a lot of failure repairs (from service menu) IFR flying adaptation GNS transponder slip and turn indicator navigation lights landing light cockpit light Realistic gauge operation Custom radiostation FL-760 (with AUX connection simulation) Custom fuel system Custom oil system Custom engine operation A lot of custom failures Custom shake and G-effect (compatible with TrackIR and view-effect plug-ins) Custom 3D sounds (over 170 real sounds) Custom windshield effects (rain, ice, mist) Custom particle effects Fully VR compatible (without additional plug-ins) High Quality PBR textures High accuracy interior and exterior 3D models High accuracy fully animated aircraft 3D ground service and general options menu Two Language manuals and aircraft menus (Russian/English) Two cockpit languages (Russian/English) Two gauge options (Metric/Imperial) Layered paintkit included Requirements X-Plane 11.30 and higher Windows, Mac OSX, Linux 64bit 2Gb VRAM Video Card (4GB+ VRAM Recommended) Current version and Review Version : 1.2 (19th July 2019) Installation and documents: Download for the Spectr-Aero SP-30 is 749.35mb and the unzipped file deposited in the aircraft "General Aviation" X-Plane folder at 1.30gb. Documentation: Manual (26 pages) is excellent and covers all aspects of servicing and flying the aircraft. Manuals are in both English and Russian as is the instrument and clipboard languages (note the clipboard language has to be changed manually via a supplied image file) SP-30_manual_En.pdf SP-30_manual_Ru.pdf Paintkit and the language pack is also supplied. Changelog v1.2 SP-30 changelog v1.2.txt ______________________________________________________________________ Update review by Stephen Dutton 25th July 2019 Copyright©2019 : X-Plane Reviews (Disclaimer. All images and text in this preview are the work and property of X-PlaneReviews, no sharing or copy of the content is allowed without consent from the author as per copyright conditions) Review System Specifications: Computer System: Windows - Intel Core i7 6700K CPU 4.00GHz / 64bit - 16 Gb single 1067 Mhz DDR4 2133 - ASUS GeForce GTX 1080 8Gb - Samsung Evo 512gb SSD Software: - Windows 10 - X-Plane 11.30 (v11.30 is required for this aircraft) Addons: Saitek x56 Rhino Pro system Joystick and Throttle : Sound - Bose Soundlink Mini Plugins: Environment Engine by xEnviro v1.10 US$69.90 : WorldTraffic 3.0 Plugin - US$29.95 Scenery or Aircraft - YBNA - Ballina Byron Gateway Airport 1.0 by Stricko 101 (X-Plane.Org) - Free
-
News! - Announcement : Fokker 50 by Carenado Carenado have announced that the Fokker 50 is in development and next for release in X-Plane11. This is not a big surprise as we knew the aircraft was on the table, but the announcement is a very nice to know anyway. The F50 will certainly be very welcome and if as detailed and featured as Carenado's lovely Saab 340A XP11 it will be a very good simulation of this very iconic aircraft... some nice images have been released on Carenado's facebook page. No feature details have yet been released, but the FSX/P3D version does have Flight1 GTN 750* integration so I would expect that, price on the FSX/P3D version is US$44.95 and that feels about right for X-Plane. Release date? a few weeks or early August would be my bet Images are courtesy of Carenado Announcement via Carenado's Facebook page ________________________________________ News by Stephen Dutton 22nd July 2019 Copyright©2019: X-Plane Reviews
-
Aircraft Update : Boeing 787-900 Aviator v1.3.0 by Magknight
Stephen replied to Stephen's topic in Airliners Reviews
The point of this B787 of being an open development has been made very clear, and highlighted in every review, so in this respect it is not a completed project and we all expect as much, the development has been extremely good over the period the aircraft has been noted as an "Aviator" product and we all support the project as such, you have not wasted your money, just not understood the project's guidelines and in time you will get the features you have paid for, for the future in respect check out the product before you purchase if you want a fully formed aircraft. -
Best (and quickest) way is via the Overlay Editor, I don't like them either, they are very poor quality... LSGG is overdue for an update.