Stephen
-
Posts
2733 -
Joined
-
Last visited
-
Days Won
354
Content Type
Profiles
Forums
Articles
Everything posted by Stephen
-
 News! - Plugin Released : RealView Next by HST Simulations Is it an upgrade or an update? HST have updated and renamed their RealView to RealView Next, but it is still a free update to earlier RealView purchasers, so that makes it an update. But the effect plugin has also been completely redeveloped to another more active level, and that makes it also an upgrade. RealView Next includes brand new movement technology, new camera immersion effects and more. Headshaking and effects are not new to get a more realism feel to your flying, hence the earlier "Headshaker" by SimCoders and the best one currently out there by XPRealistic Pro v2.0 by rk Apps, of which I personally use. Details noted of the new RealView Next New Motion Engine In the past, shaking worked according to a "harsh formula". The calculations were performed in a simplified mode, and the shaking was sharp. Many did not like this. In the new RealView Next, shaking works according to a "soft" formula. The new camera engine is able to process input in all directions, all directions are now independent, and the result of shaking each direction is calculated using an independent formula. The shaking is soft in all directions. Due to this, the effect of immersion in the real process has increased. We studied over one thousand POV (Point Of View) videos from the cockpit during takeoff, level flight and landing, and based on our own experience, we tuned our camera engine so that it would convey to you the exact sensations of what the pilot feels during the flight in all phases. This is the truly Real View. New Upgraded User Interface The updated user interface has received a new platform. Added soft animations when switching pages from one to another. The mechanism for saving settings has been improved. And also added a lot of new presets for aircraft. The interface just got better. New Effects Processing Module The new effects processing module provides precise reproduction of each effect depending on the phase of flight. Now the touch effect on takeoff will not play, and so on. All effects are played only when really needed. The new logic provides up to 99.9% accurate reproduction of real aerodynamic effects that affect viewing position, shaking and other effects. New Effects Preview Mode Just hold the slider! Now, in order to play the effect, you just need to hold down the slider, and the effect will be played at its apogee. This allows for more flexibility in customizing each effect. New Angular Acceleration Effects Yoke to the right - the view tilts to the right. Angular acceleration effects are back! Now these effects work much clearer, softer and more realistic. Simulated lateral acceleration will allow you to feel what a real pilot feels when turning to the side. The new RealView Next was created using a new technology of camera movement, exactly the same on which the new RealView Pro will be created. In the new RealView Next, available huge list of effects, included innovations regarding communication with the server, etc. For the first time, VR Mode became available. A lot of new presets for aircraft were added and more… A promotional video of RealView Next has also been hosted... The new effects list is quite comprehensive below. EFFECTS LIST: • Pitch General & Angular Axis; Controls view depends of aircraft pitch, view will be changed due increase of speed or pitch; • Horizon General & Angular Axis; Controls horizon angle depends of aircraft bank angle, view will be angled due aircraft angle position or control position; • Heading General & Angular Axis; Controls heading angle depends of aircraft heading, view will be changed due aircraft heading change or ground rolling; • G-Force Simualtion Module; Simulate all G-Forces with soft movements and realistic forces. You need try to land aircraft with Over G or try to pull yoke to yourself - you will feel the G-Force; • Static Camera Motion; Reflects ground surfaces in static camera mode. You will feel vibrations, shakings which reflected by gear in static. • 3D Spherical Camera Motion; Reflects ground surfaces in 3D spherical camera mode. You will feel the ground shakings which reflected by gears in 3D. Your view will softly reflect to it. • Longitude G-Force; When you set your thrust to takeoff, you will feel like you pulled into seat. When you push the brakes, you will feel like brakes tilt you. • Side G-Force; When you leaning your plane too much will push you into the corner of your seat and you will certainly feel it. • Ground Touchdown Effect; When you touch the ground, you will feel how your head beats if you land your plane too hard. If you plane will be landed softly - you will feel a light shake. • Overspeed Effect; When you accelerate a little too hard, the fuselage starts to vibrate from severe stress on it. You need to slow down, otherwise your plane may break down and collapse right in the air! • Landing Gear Effect; The best air brake? Correctly! Landing Gear. As you release and retract the landing gear, feel every vibration that a real person experiences while on the plane. • Engine Effect; Starting a rotary engine is always accompanied by vibrations in the cockpit - the pilots will tell you exactly! Feel every vibration from starting the engine. And if your engine is defective, feel the severe vibration and movement from the engine ahead of you! • Flaps Effect; The flaps are extended and retracted depending on the speed accompanied by vibration. Feel every vibration from your flaps as you retract and extend. • Stall Effect; If you are flying on an airplane and suddenly started to fall, you will understand this thanks to this effect. The intensifying lateral vibrations will not let you lie - you are stalled! • Speed Brakes Effect; The release and removal of the spoilers is always accompanied by a certain retraction into the seat and a slight vibration. This usually happens on every plane that sharply engages them. If you release the spoilers gently, or do not greatly affect the aerodynamic behavior of the aircraft, you will only feel a slight vibration across the cockpit panel. • Automatic View Centerize; Forward deflection can be automatically compensated at different speeds to the correct position. • Smart Zoom In a certain area, try turning the mouse wheel forward, you can get closer and zoom in on the area of the cockpit that you want. Did you do the manipulation? Came back by returning the wheel back. Smart zoom will help you with this. • Angular Accelerations; The yoke turns will be accurately compensated by angular accelerations. You will be able to fully experience the control of your aircraft. • Environmental Vibrations; RealView Next is deeply integrated with xAmbience Pro. You can feel each turbulence and air flow which can be properly inputed from xAmbience Pro Environmental Engine. • Engine Reverse Thrust; Feel reverse thrust of your engine by Longitude G-Force. Set it to full power and feel how your engine breaks you. The new realism engine is well worth checking out, and is now available from the X-Plane.OrgStore ____________________ Yes! RealView Next by HST Simulations is now available from the X-Plane.OrgStore RealView Next Price is US$19.95 Current RealView owners will find this new release ready for download in their Org Store Account as an update at no cost. Requirements X-Plane 11 Windows, Mac or Linux 4 GB VRAM Minimum - 8 GB+ VRAM Recommended Current version: 1.00r3 (March 1st 2021) ____________ News by Stephen Dutton 2nd March 2021 Copyright©2021: X-Plane Reviews (Disclaimer. All images and text in this review are the work and property of X-PlaneReviews, no sharing or copy of the content is allowed without consent from the author as per copyright conditions) All rights reserved.
-
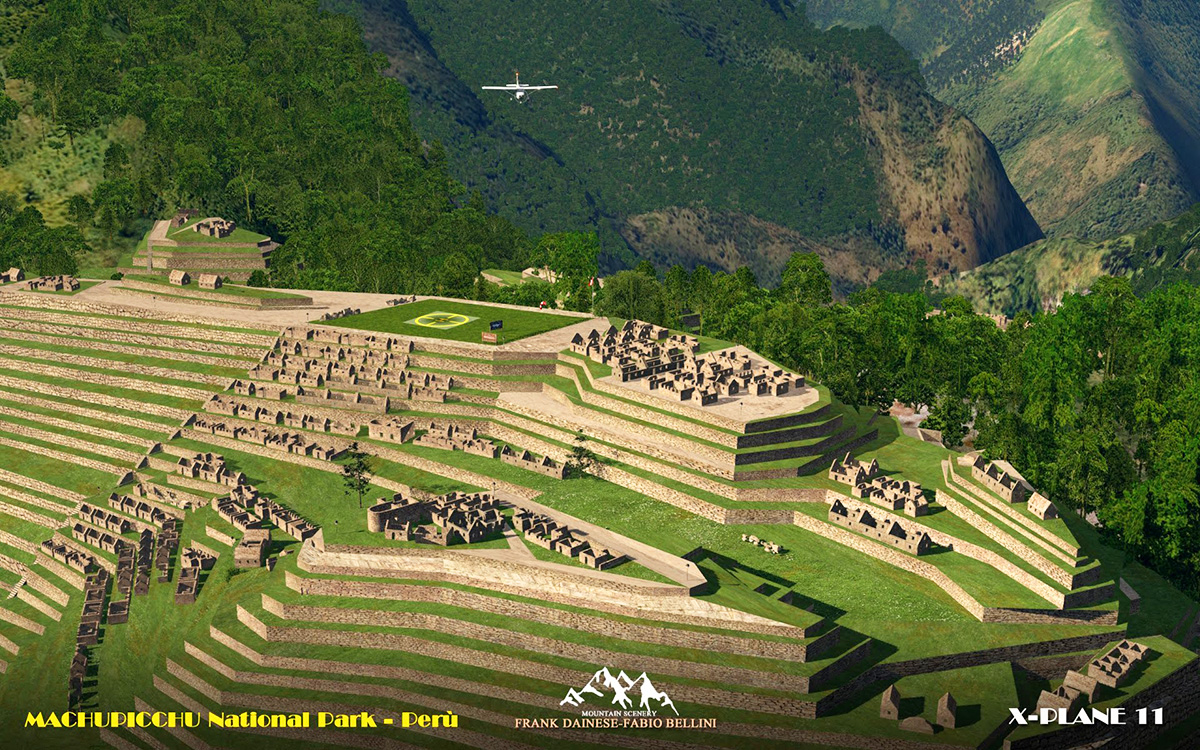
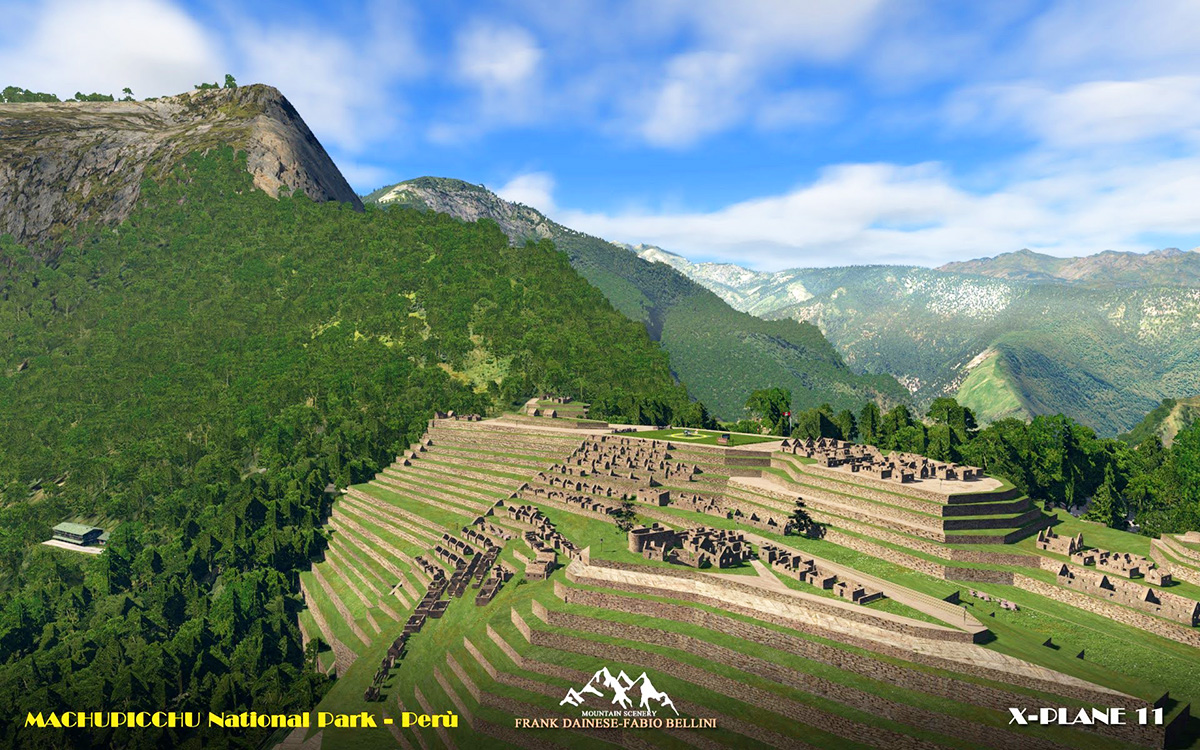
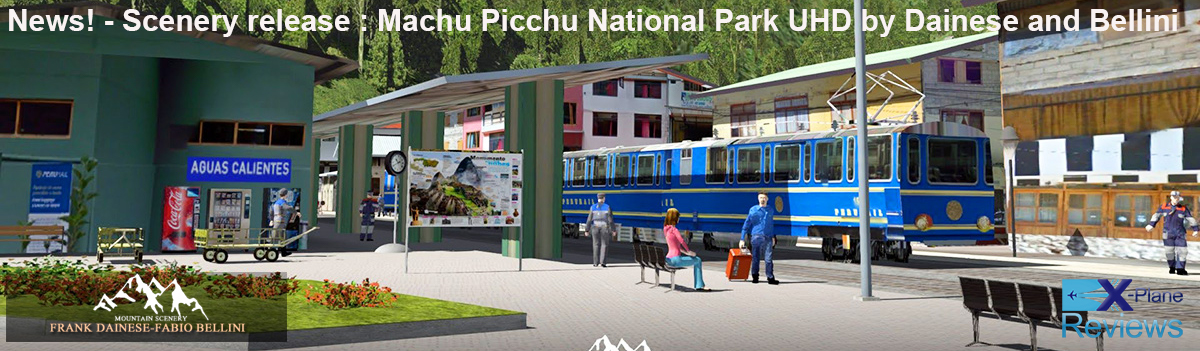
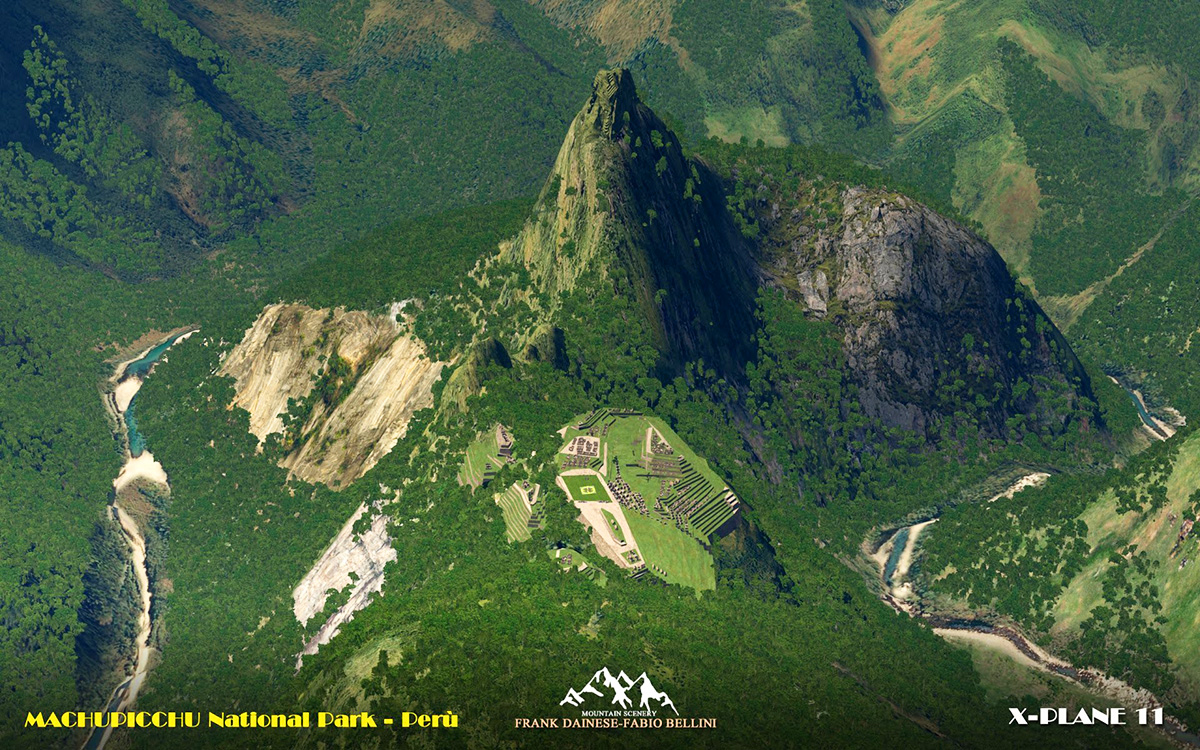
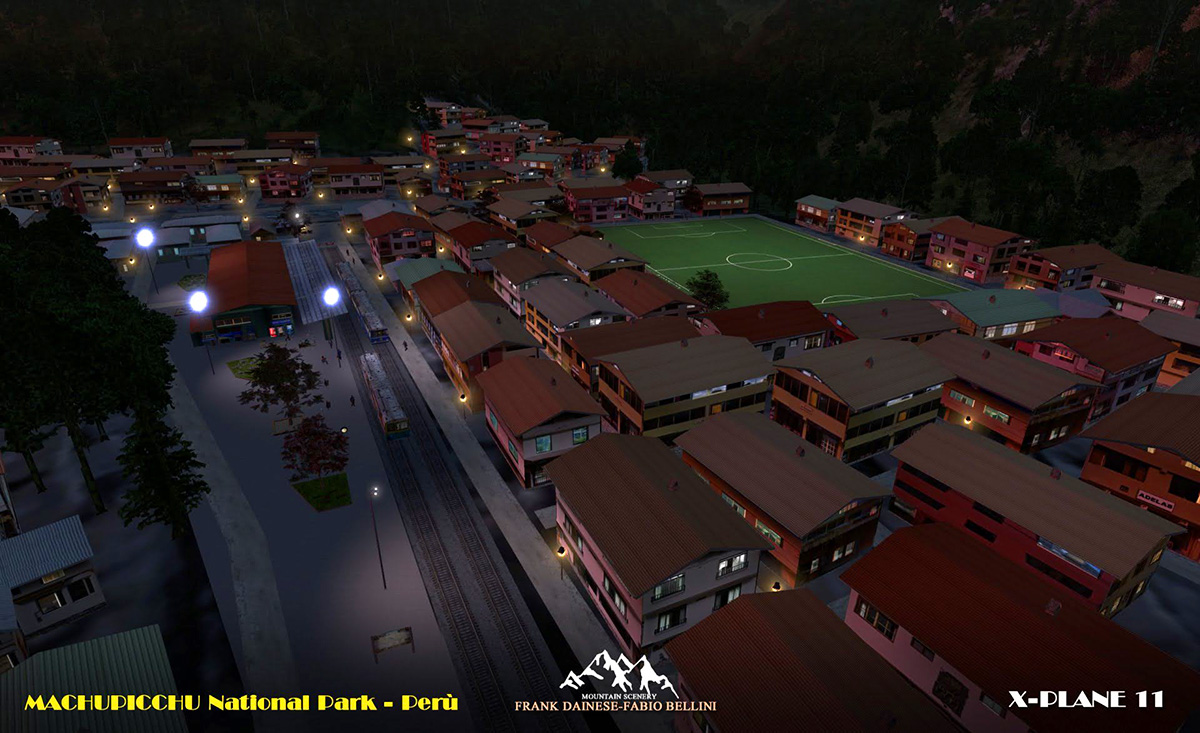
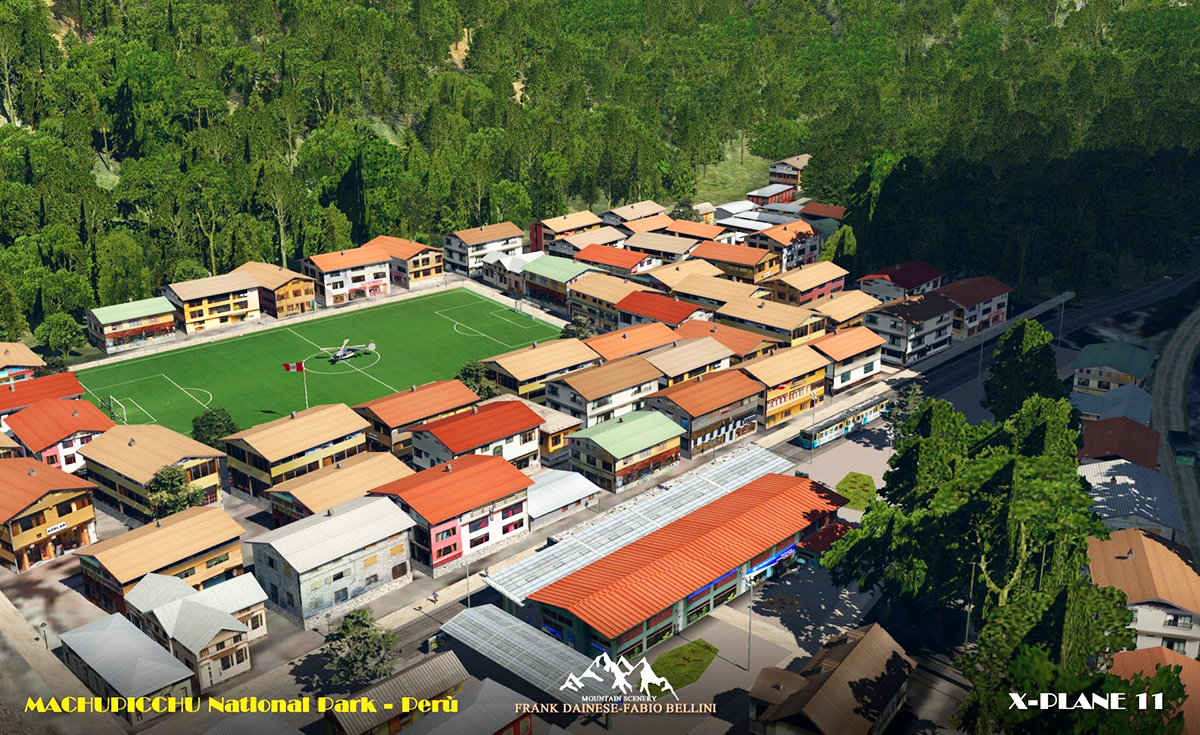
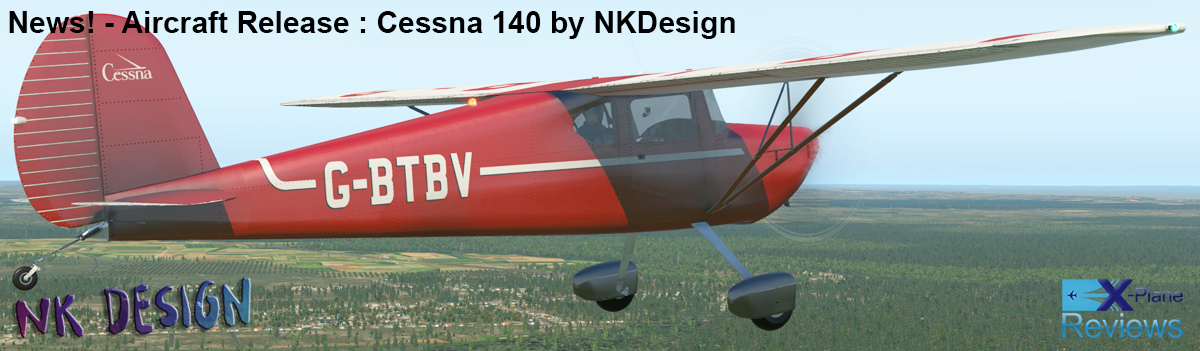
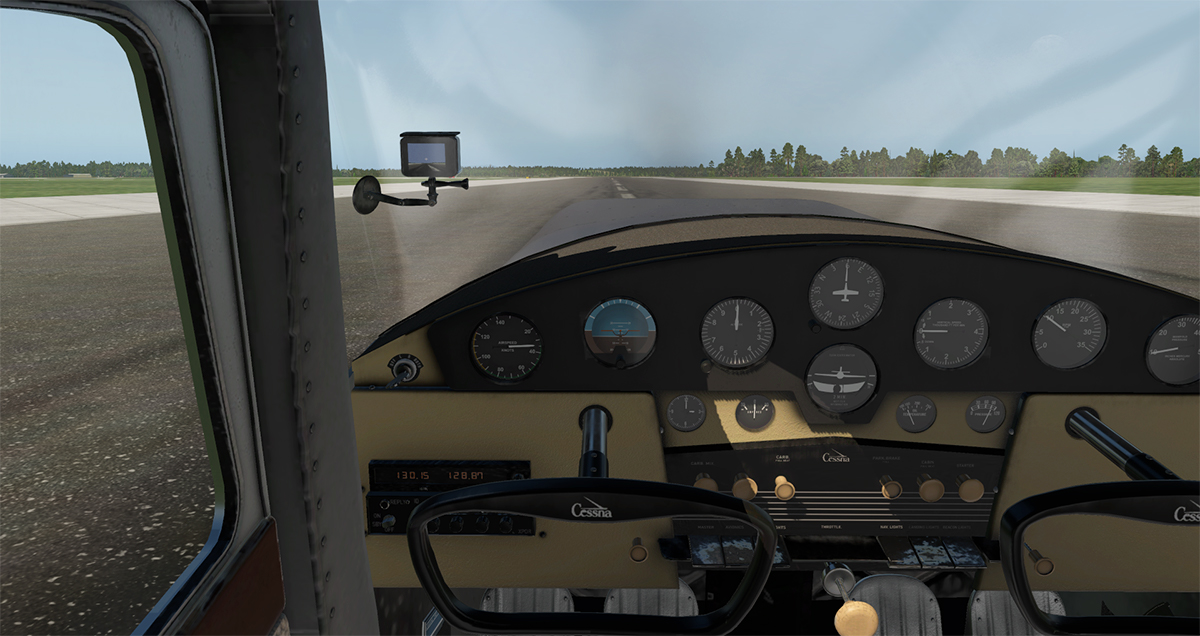
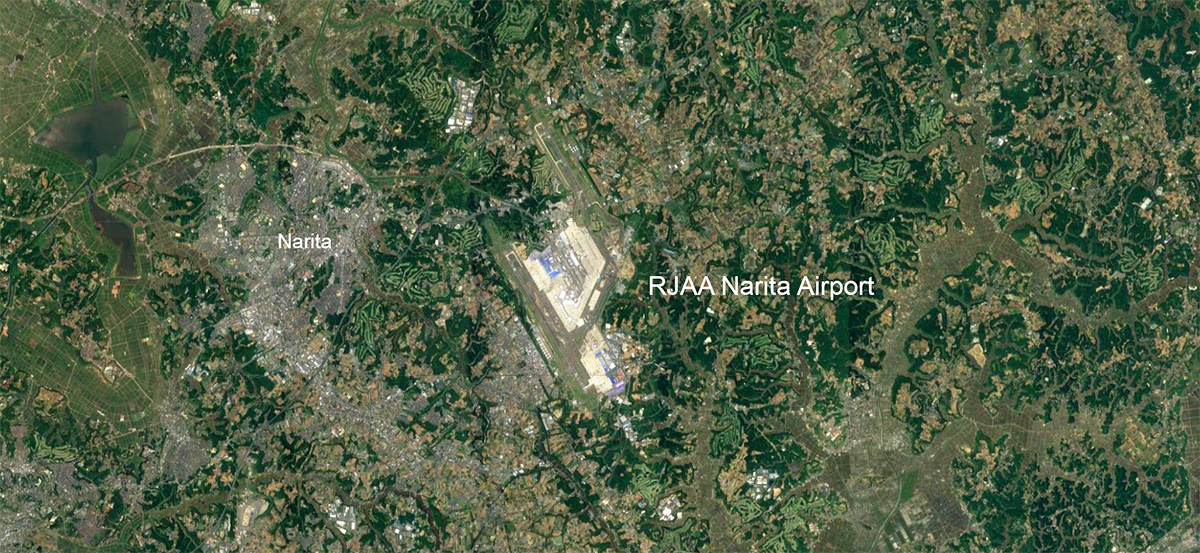
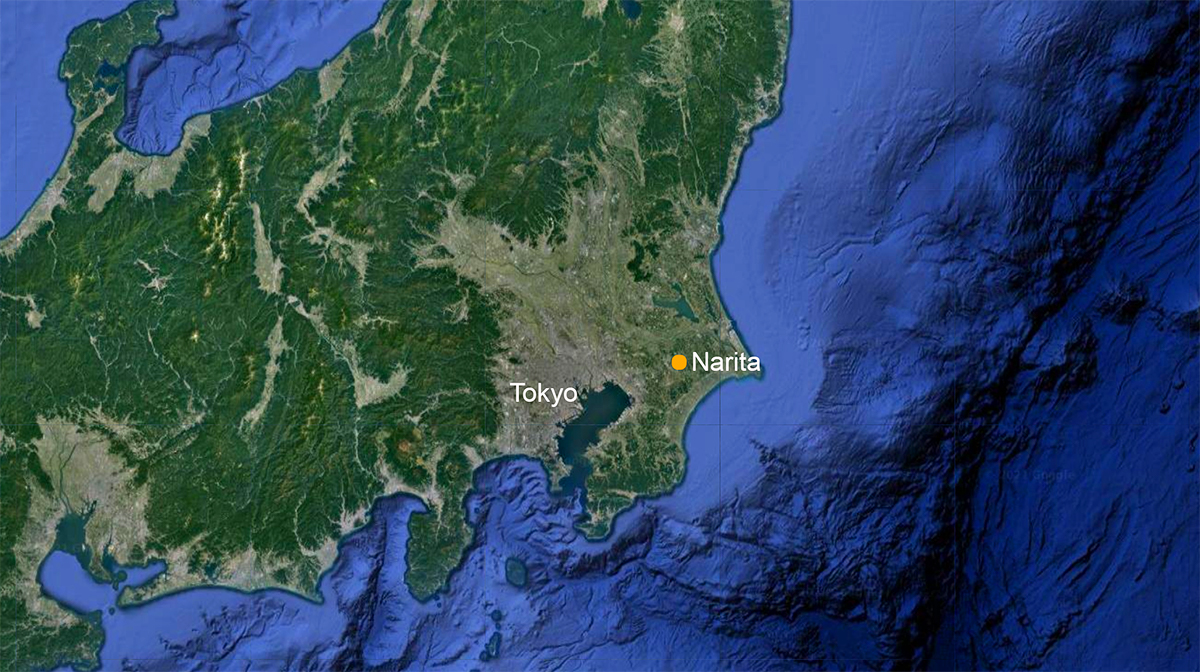
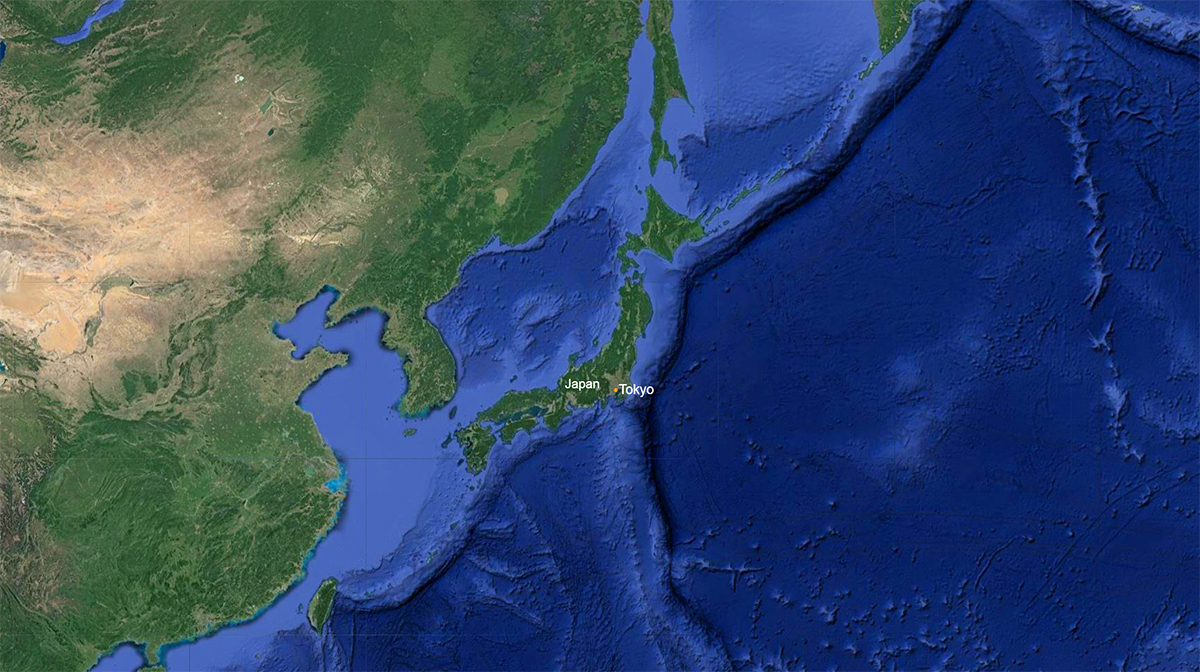
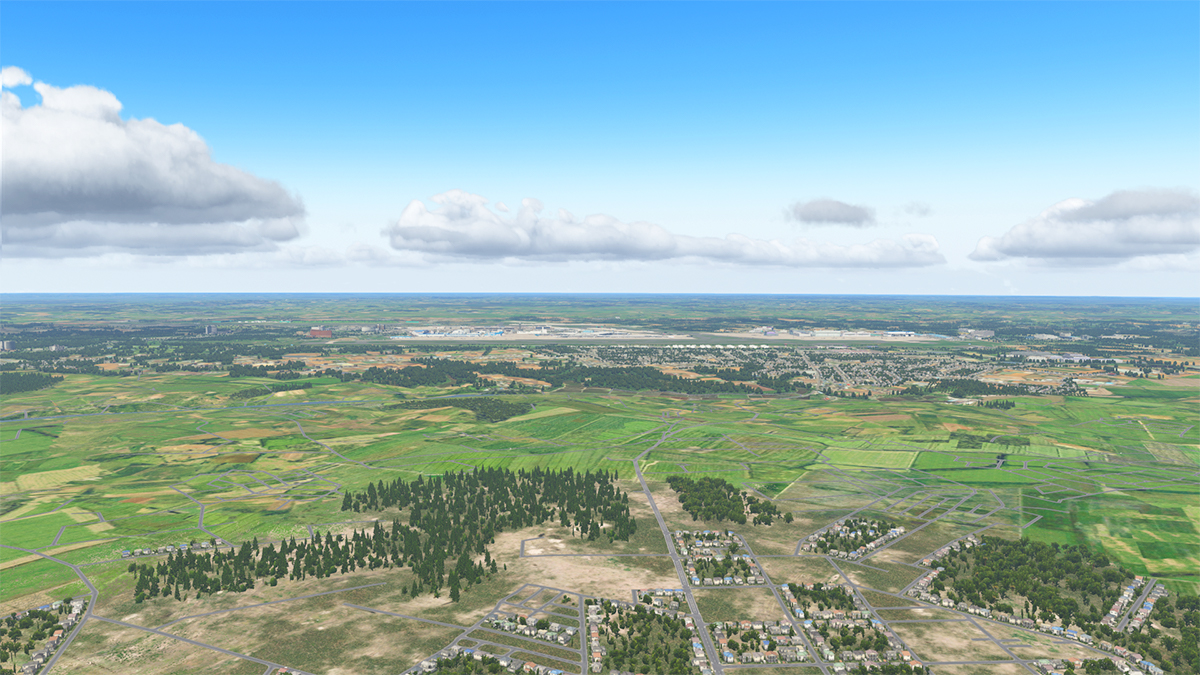
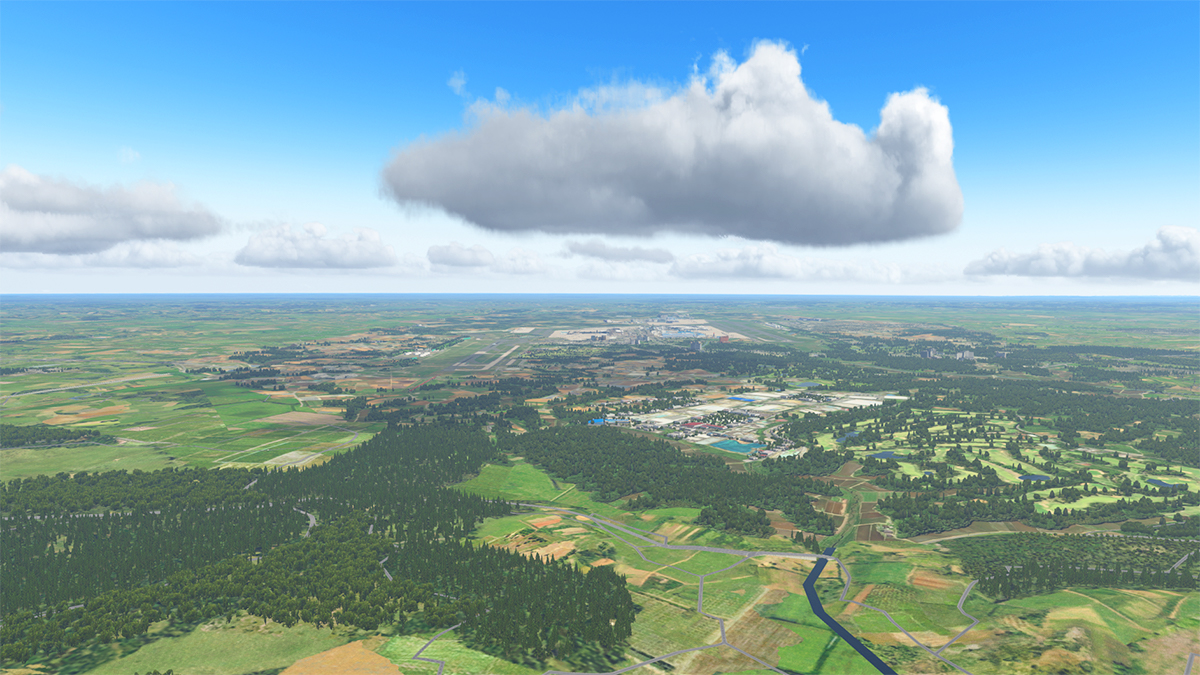
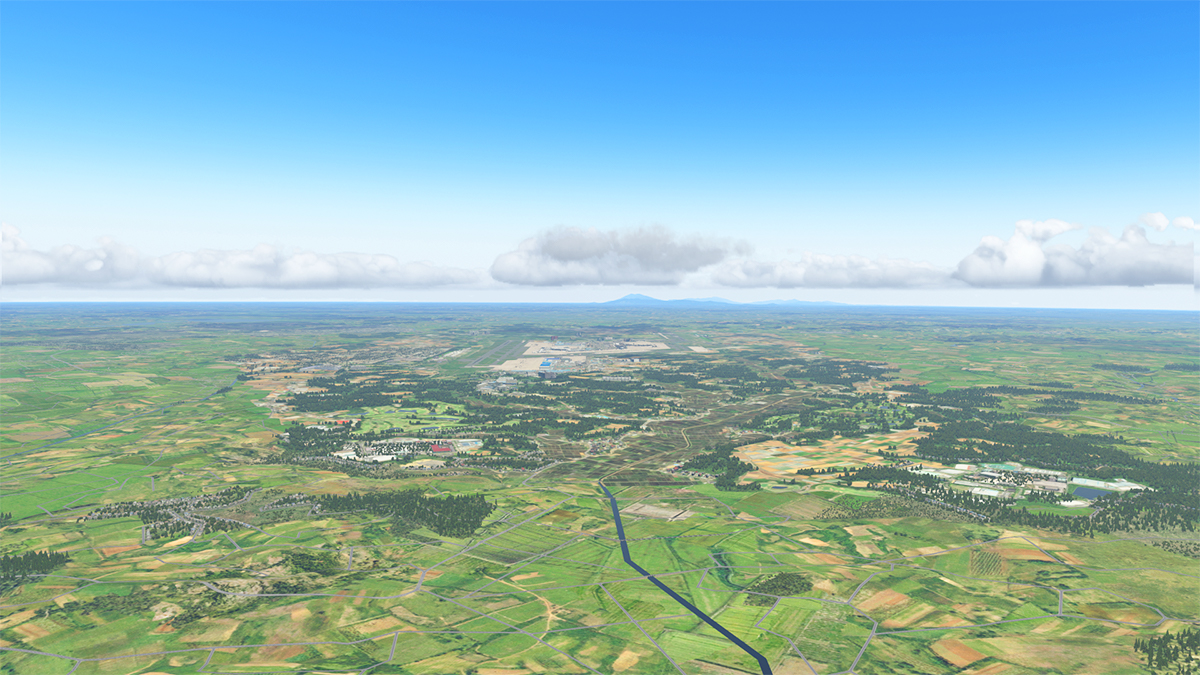
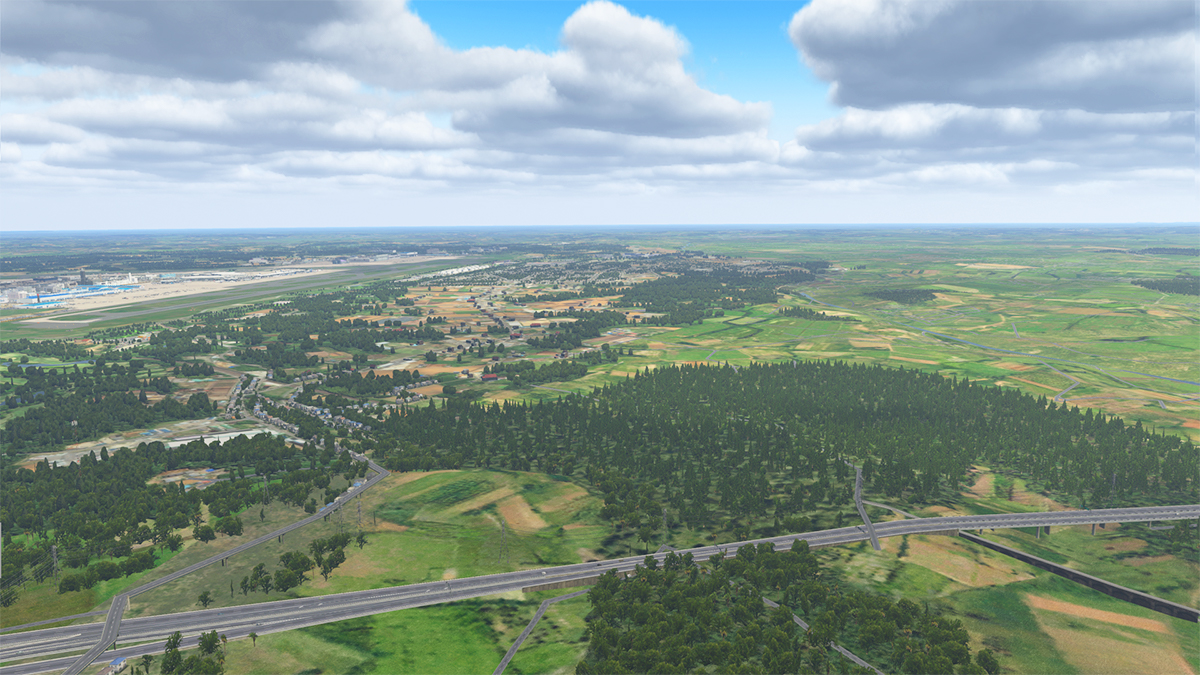
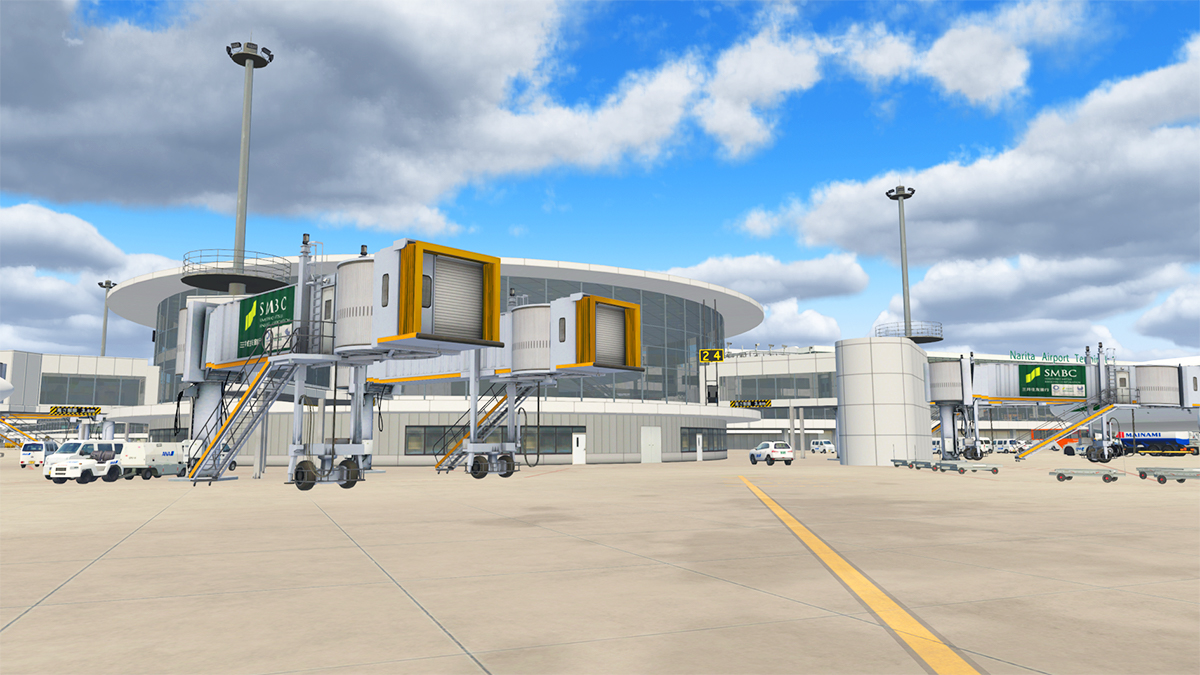
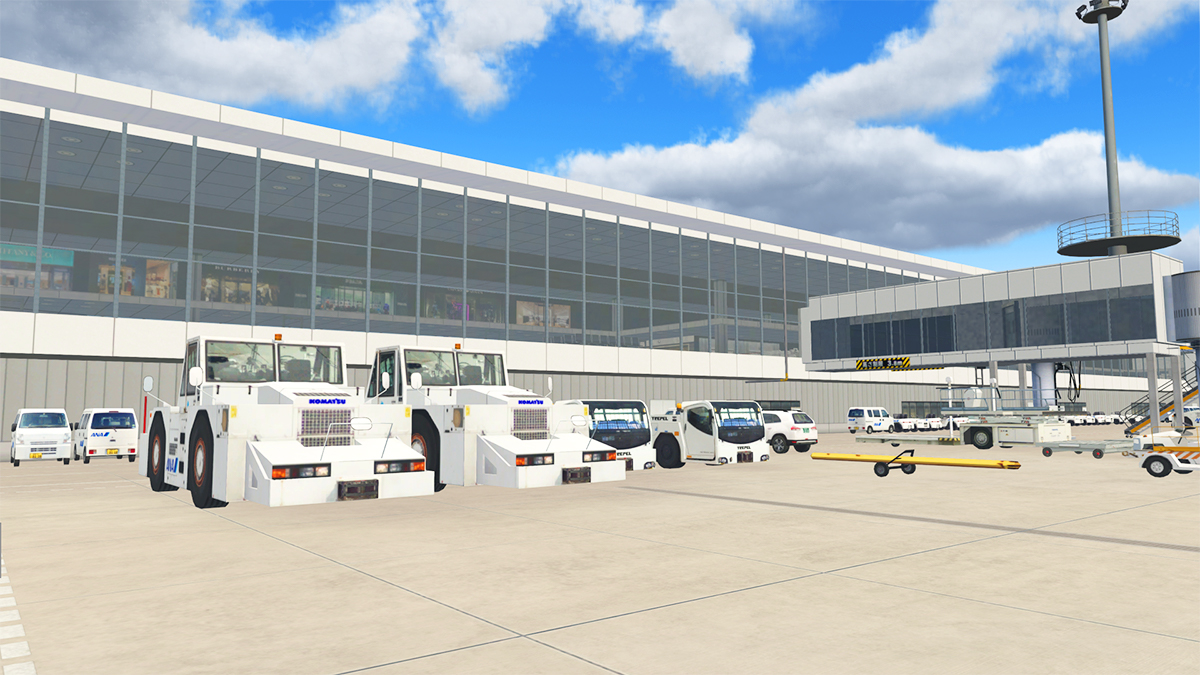
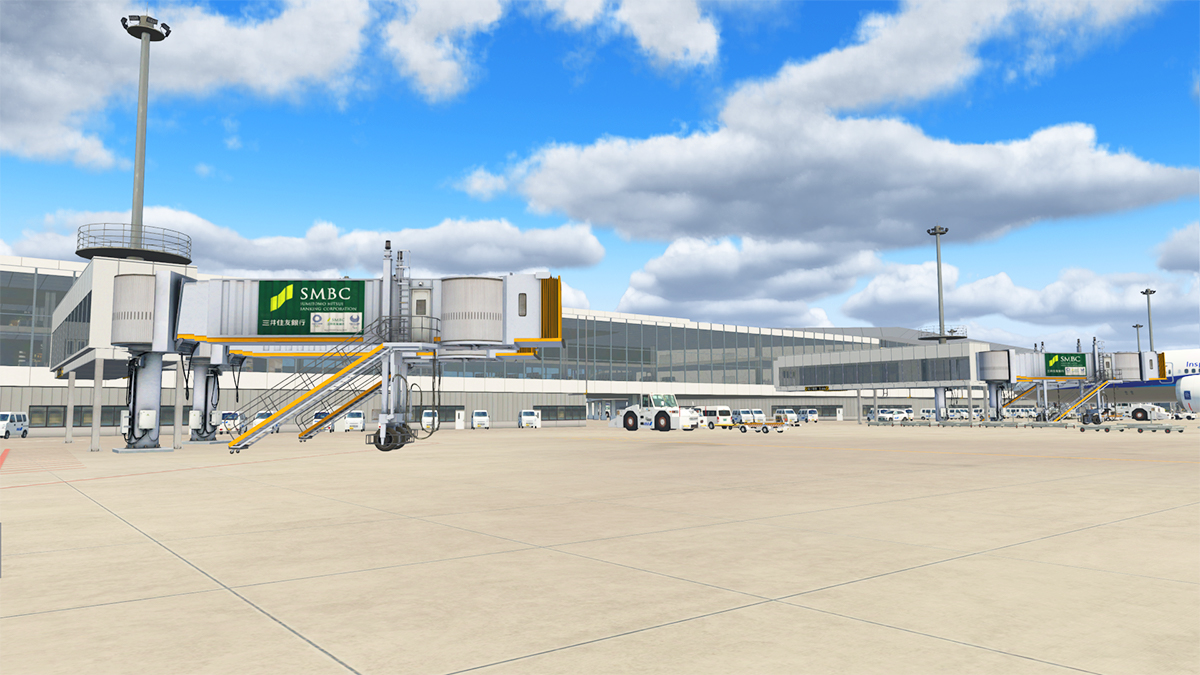
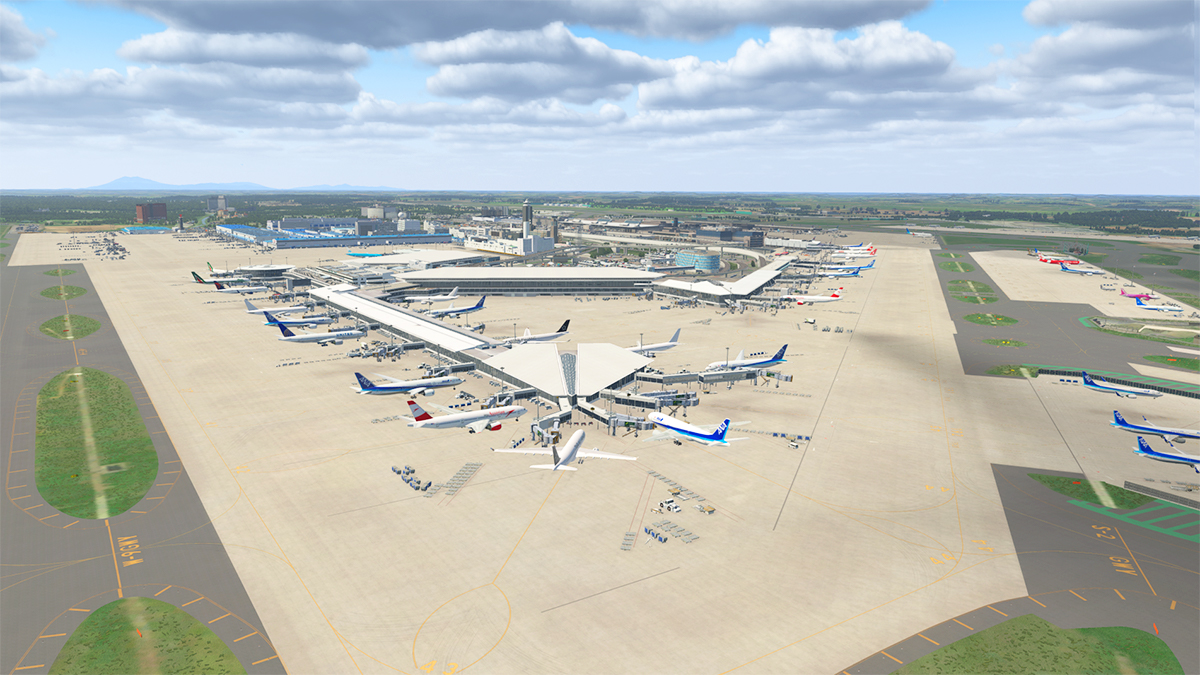
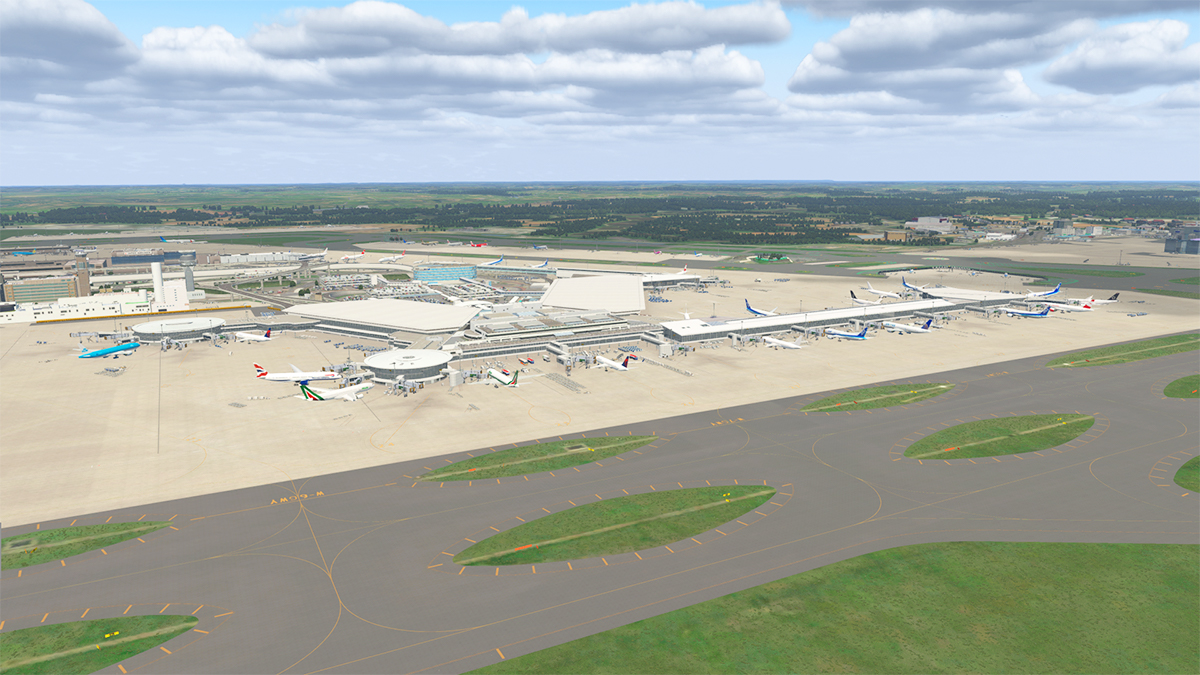
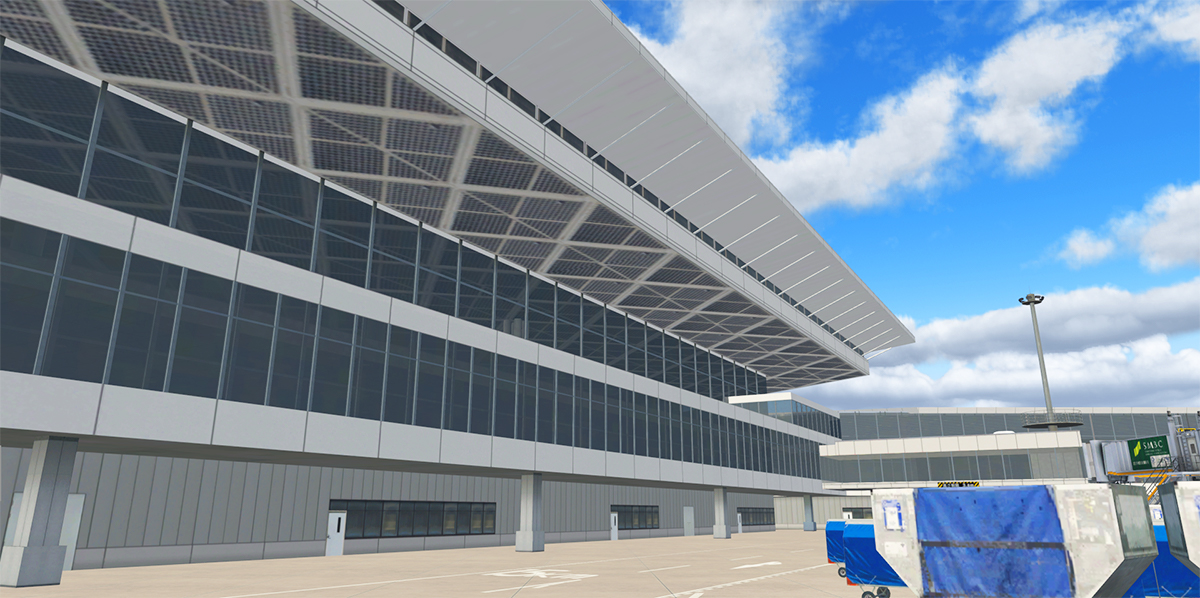
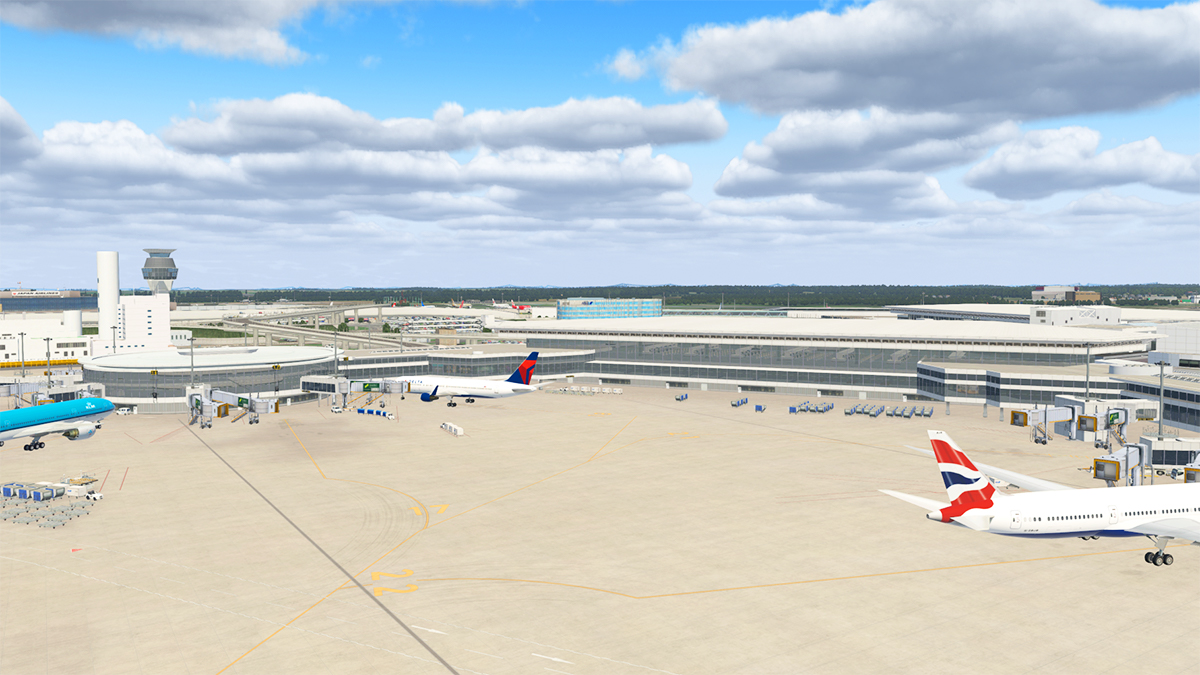
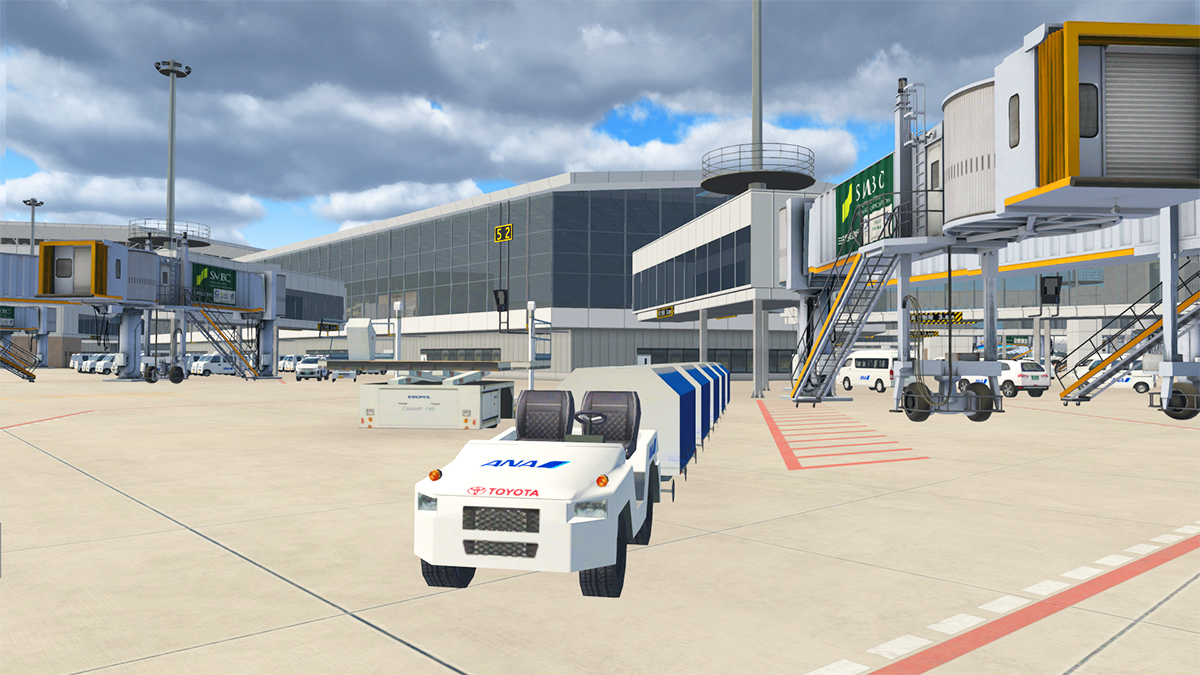
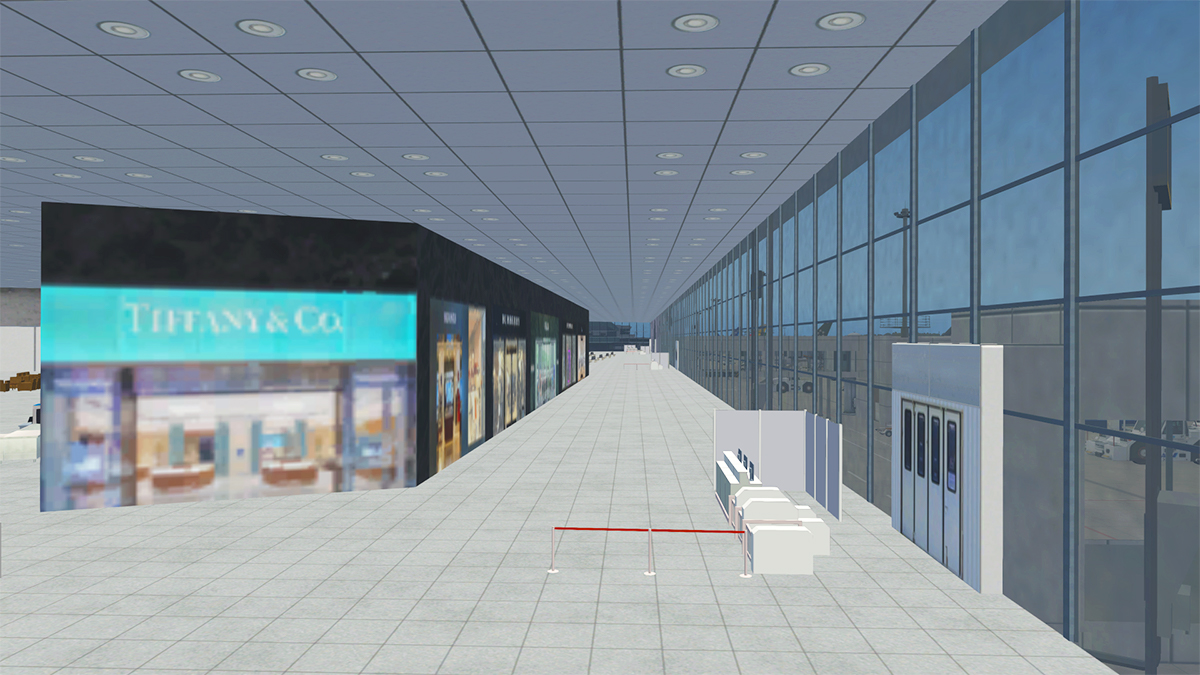
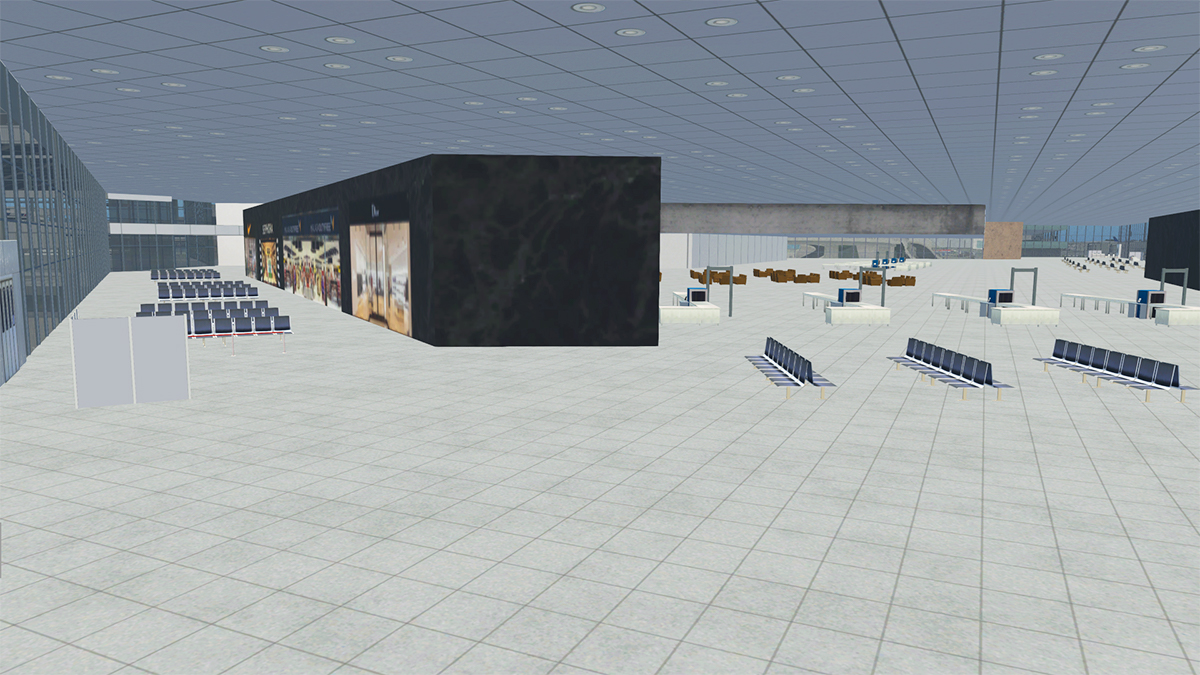
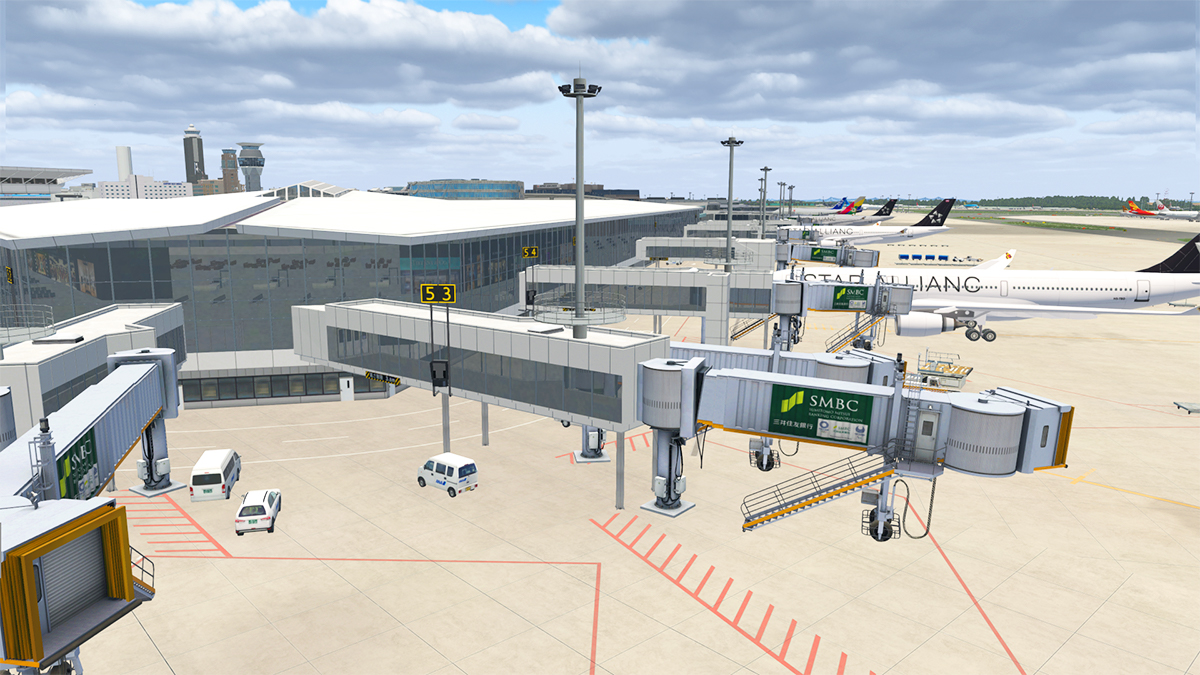
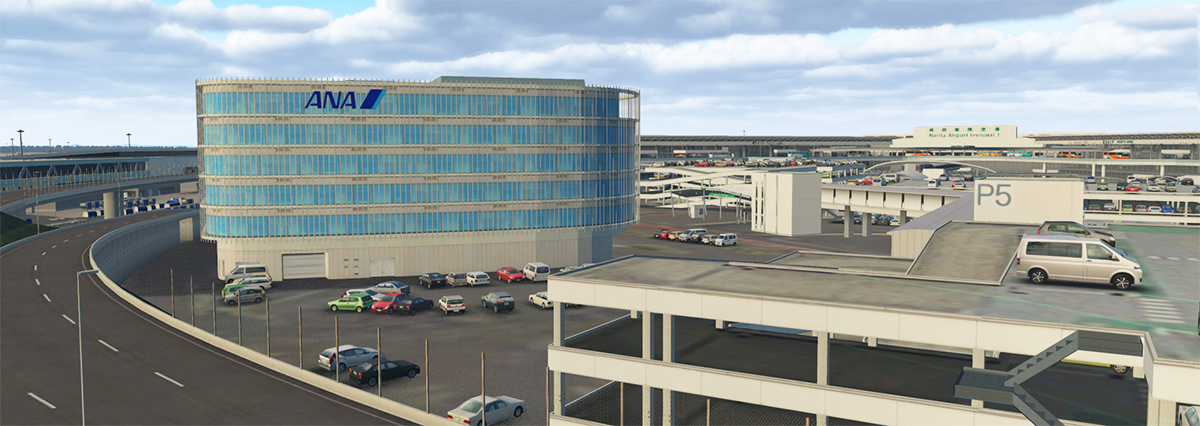
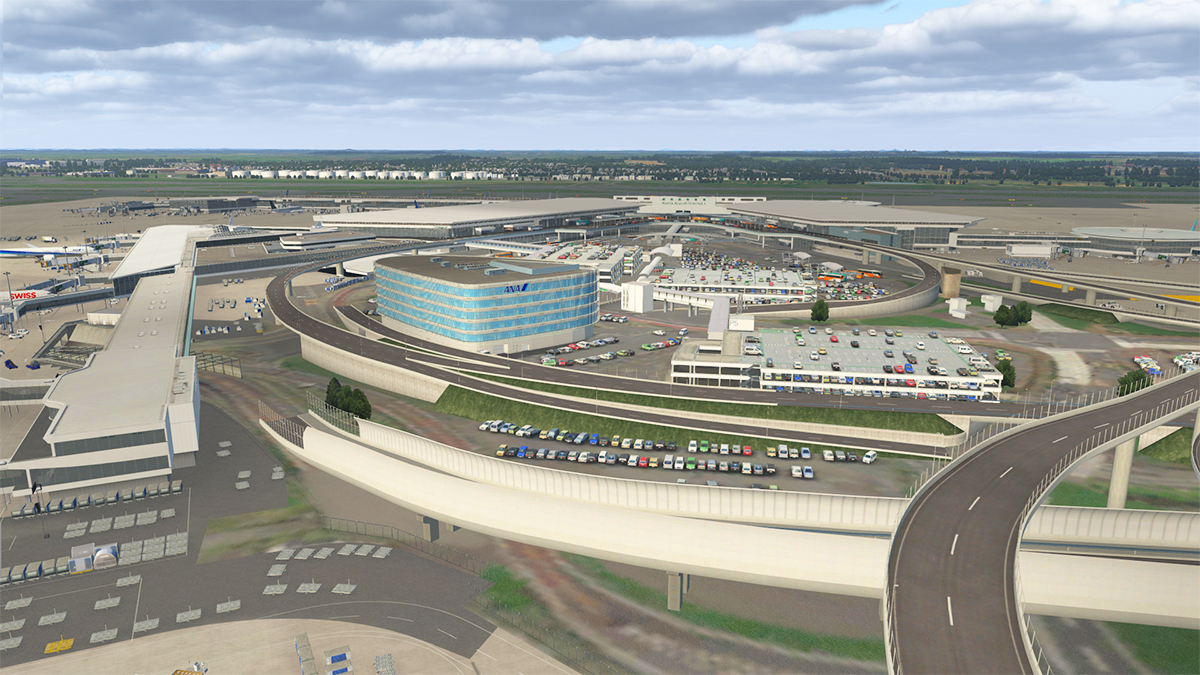
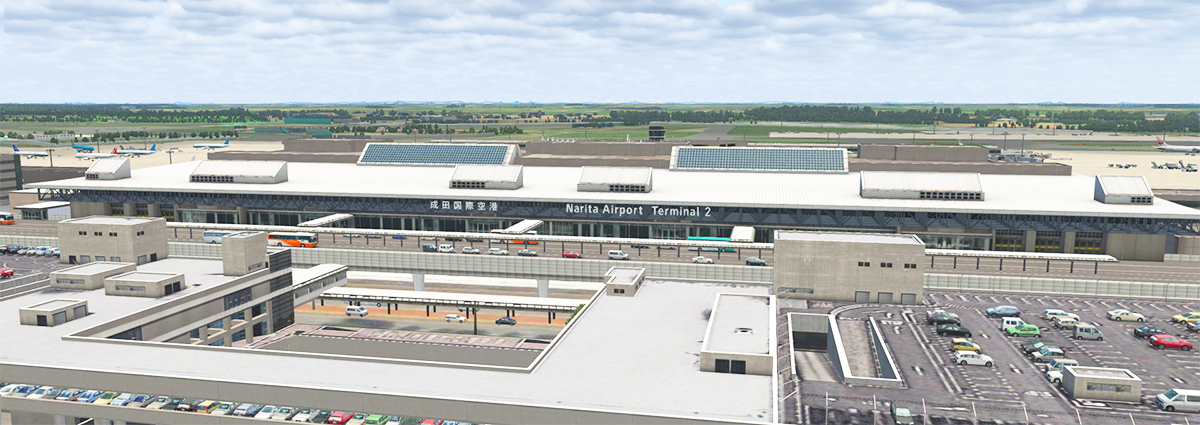
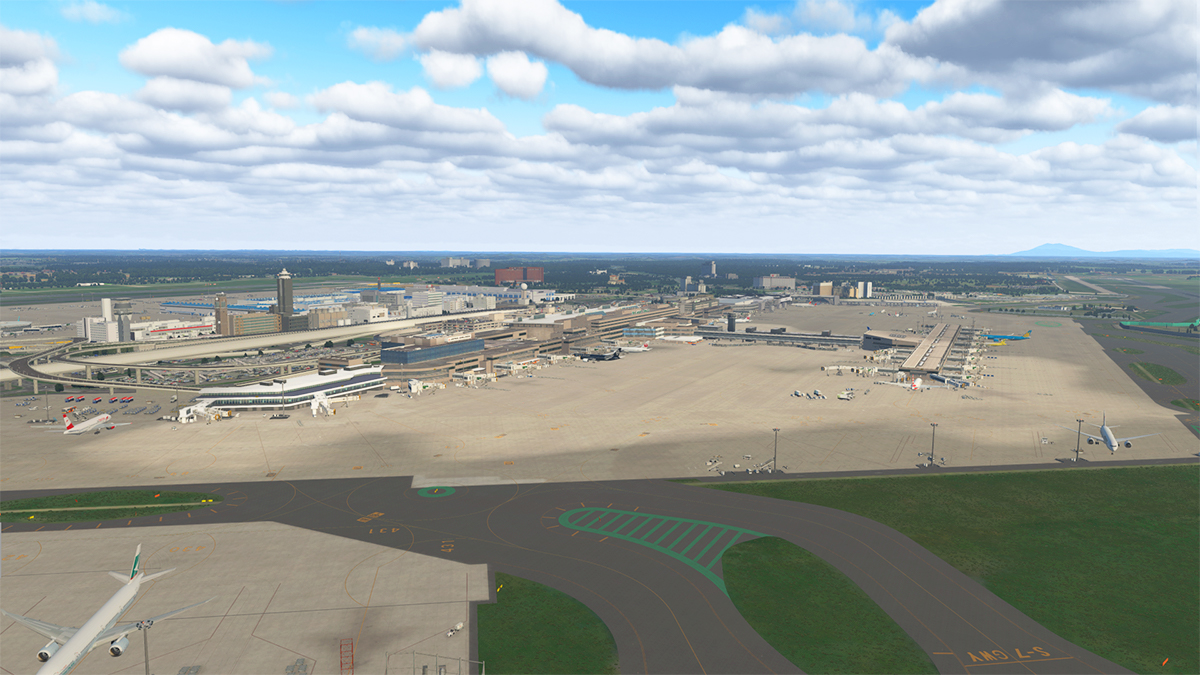
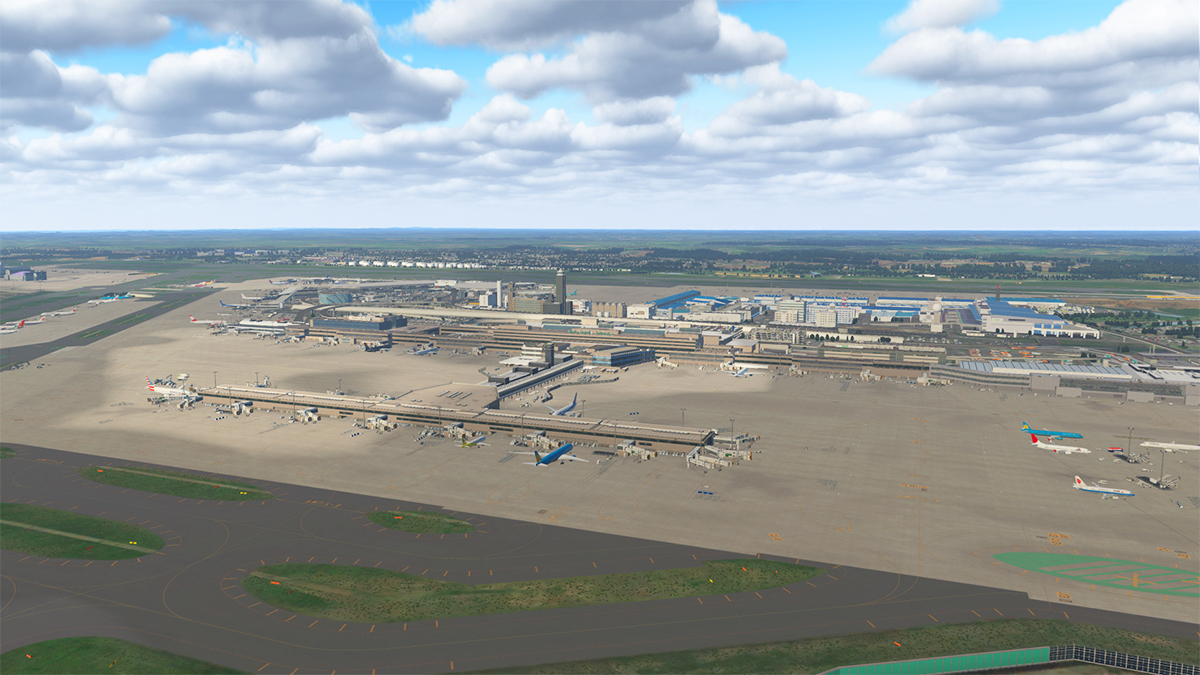
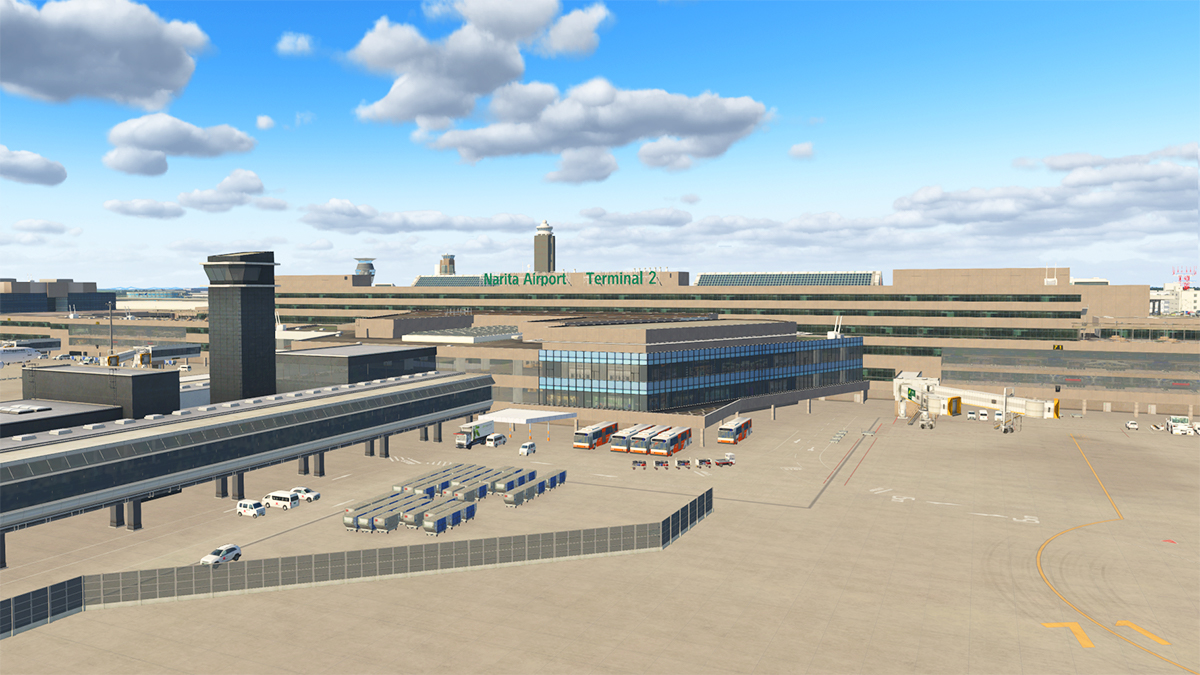
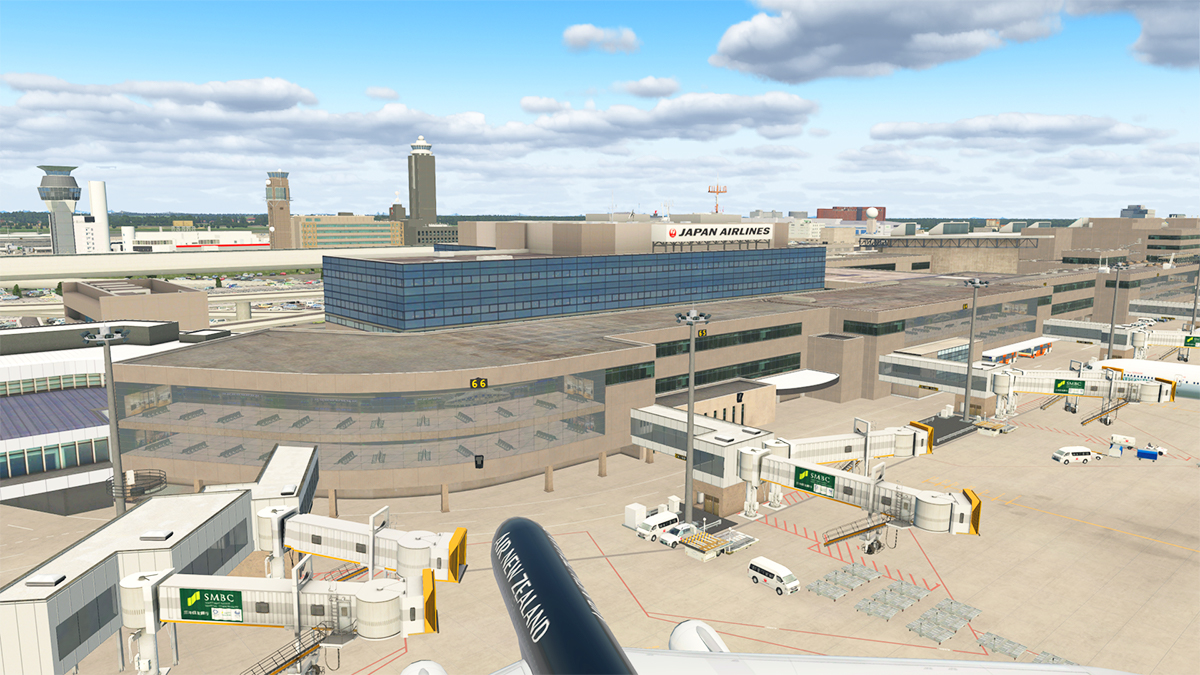
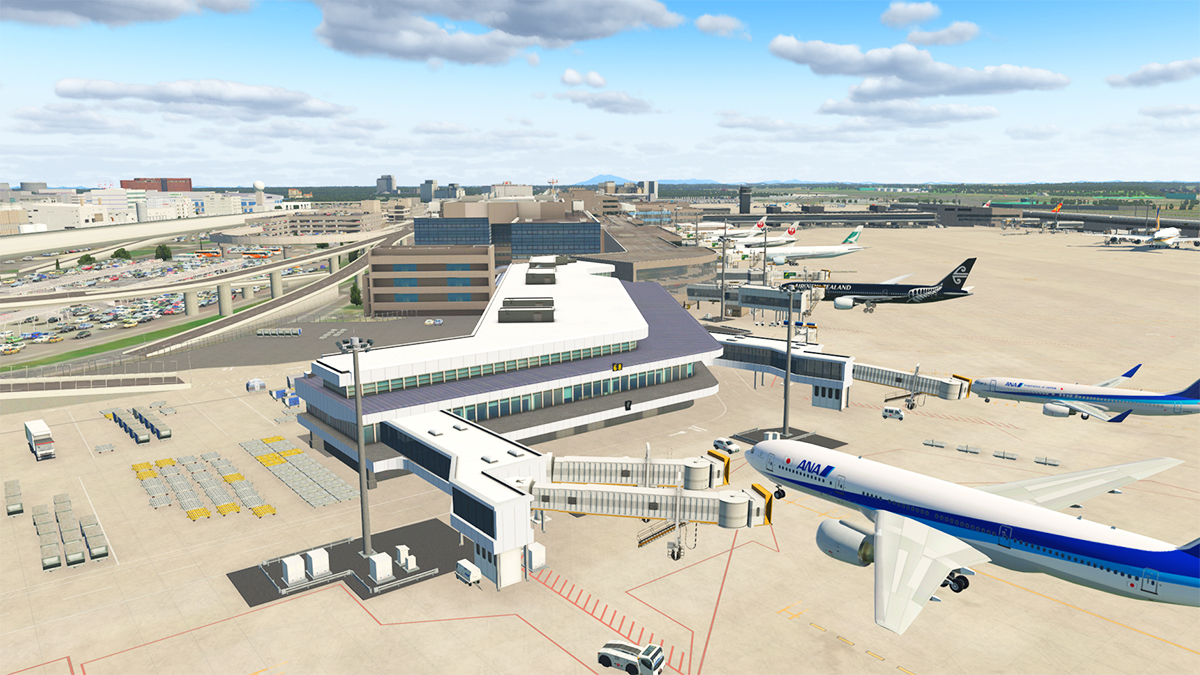
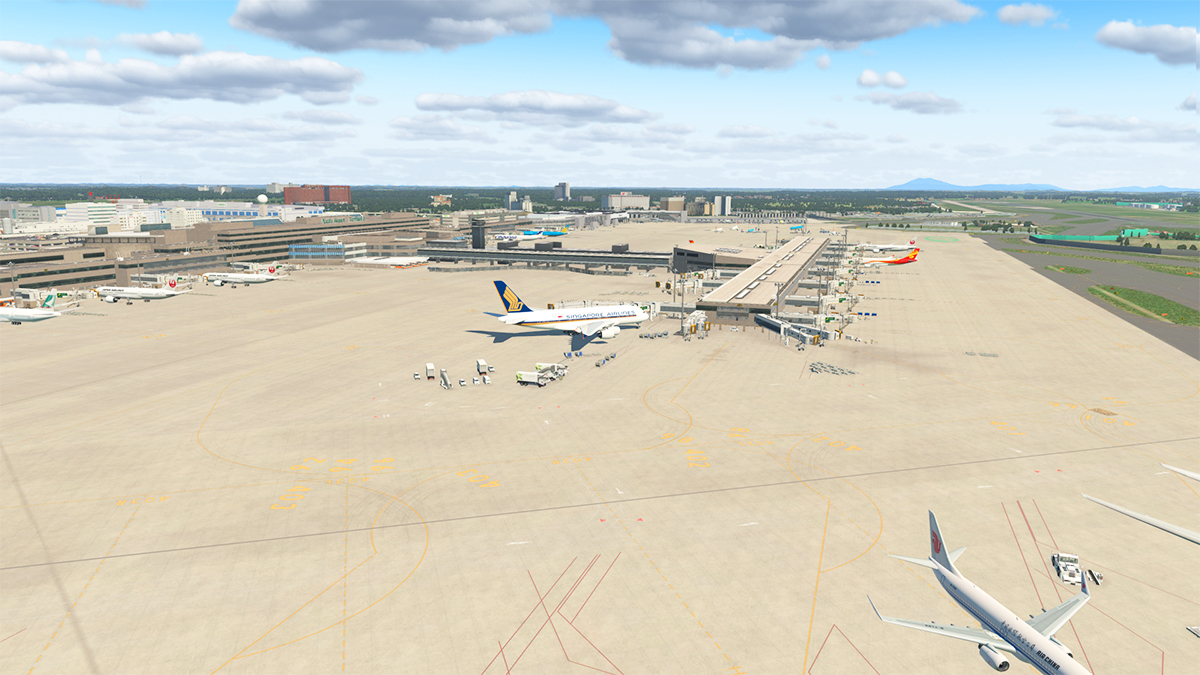
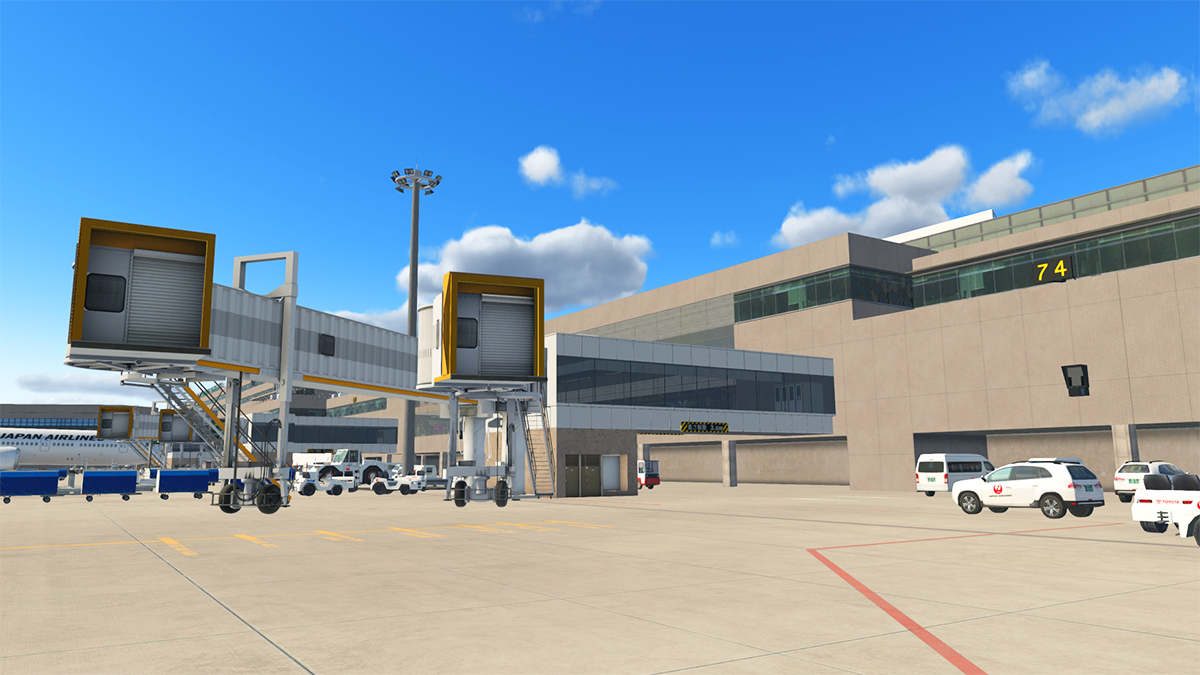
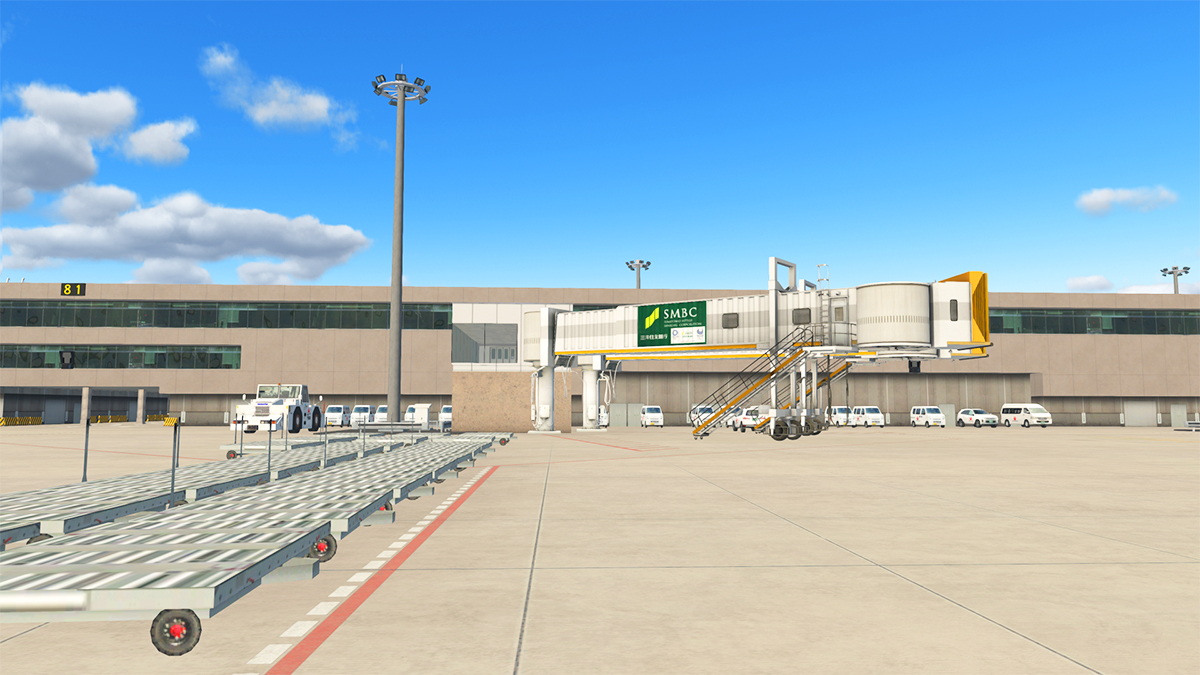
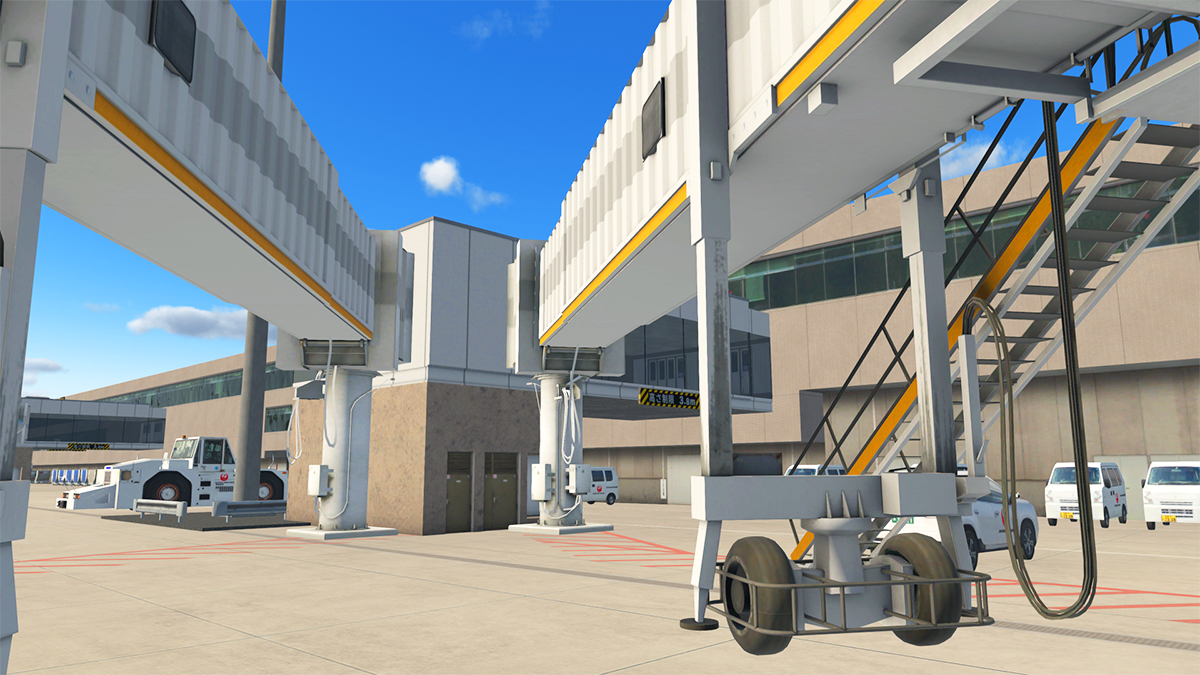
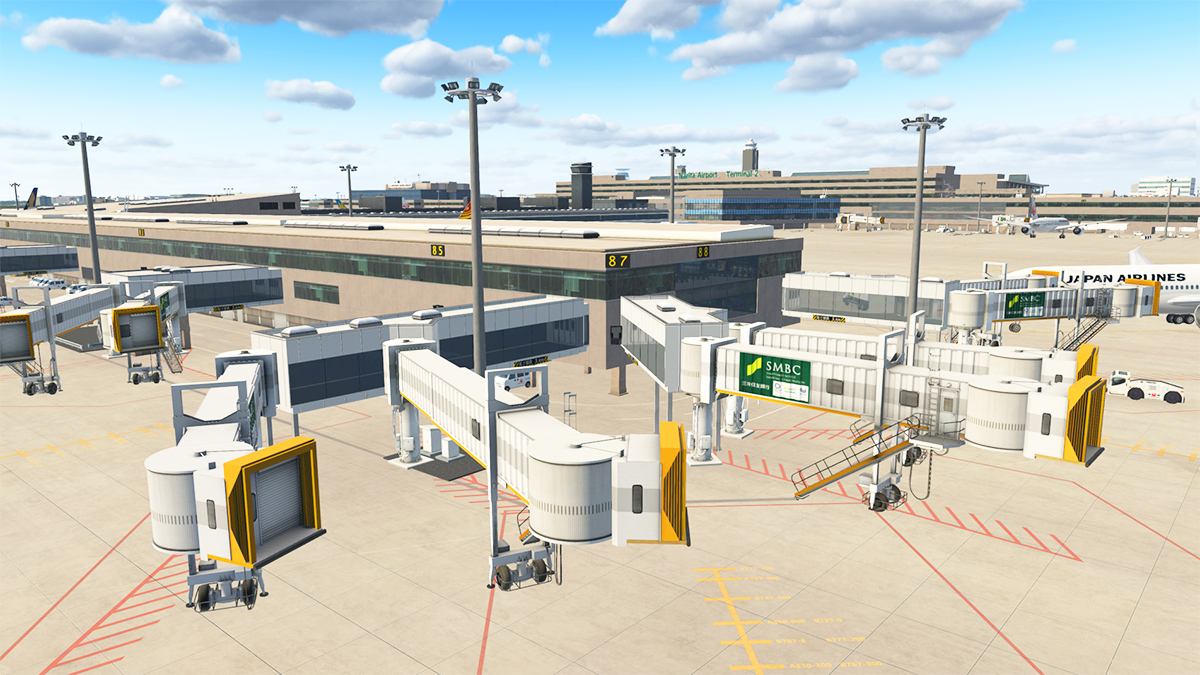
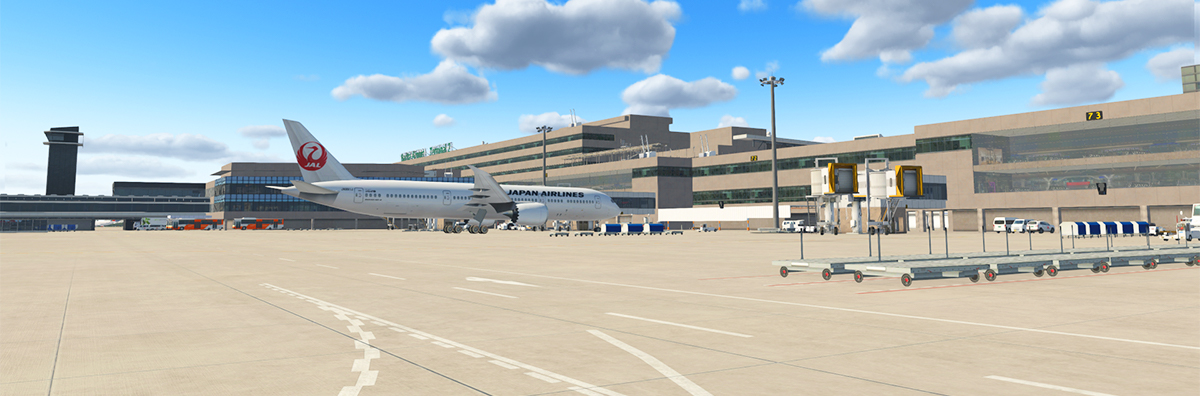
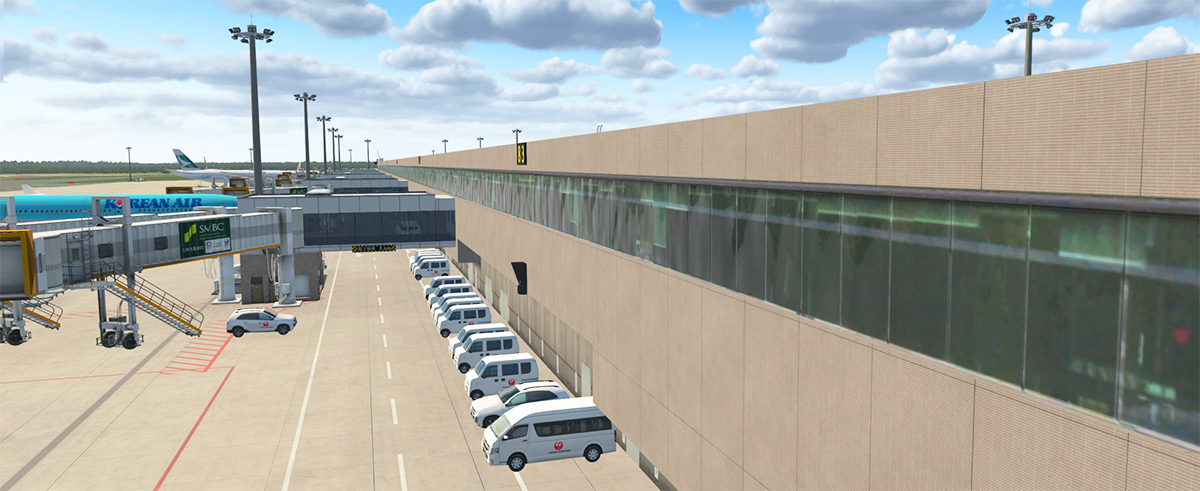
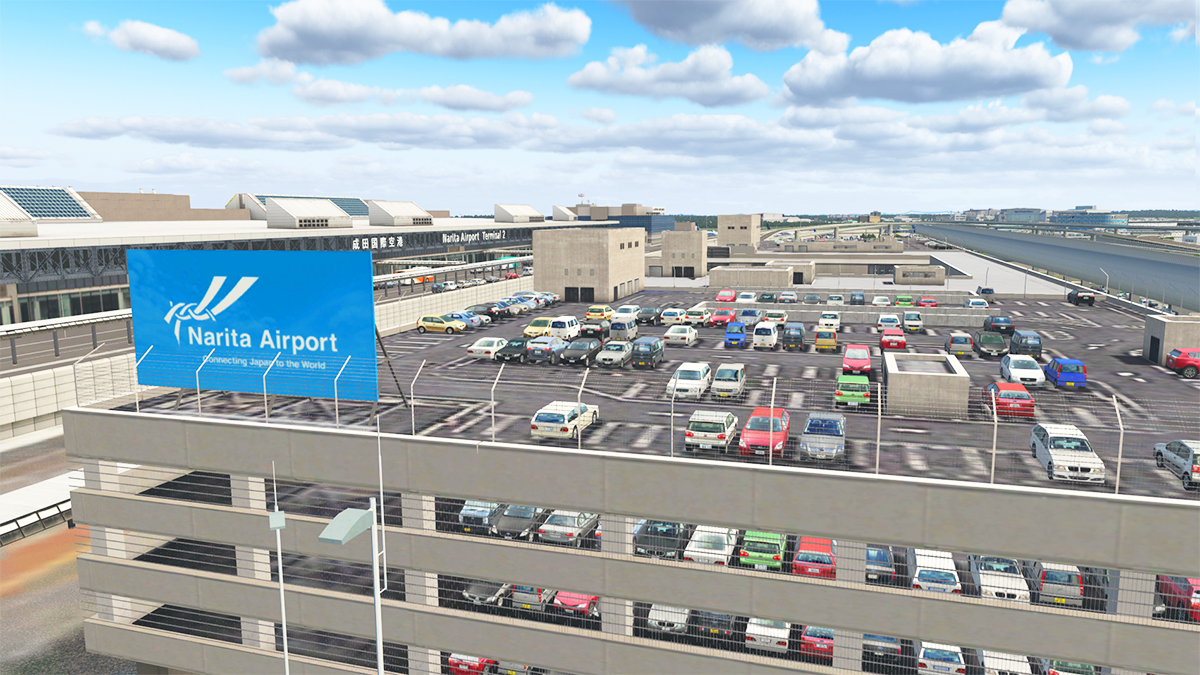
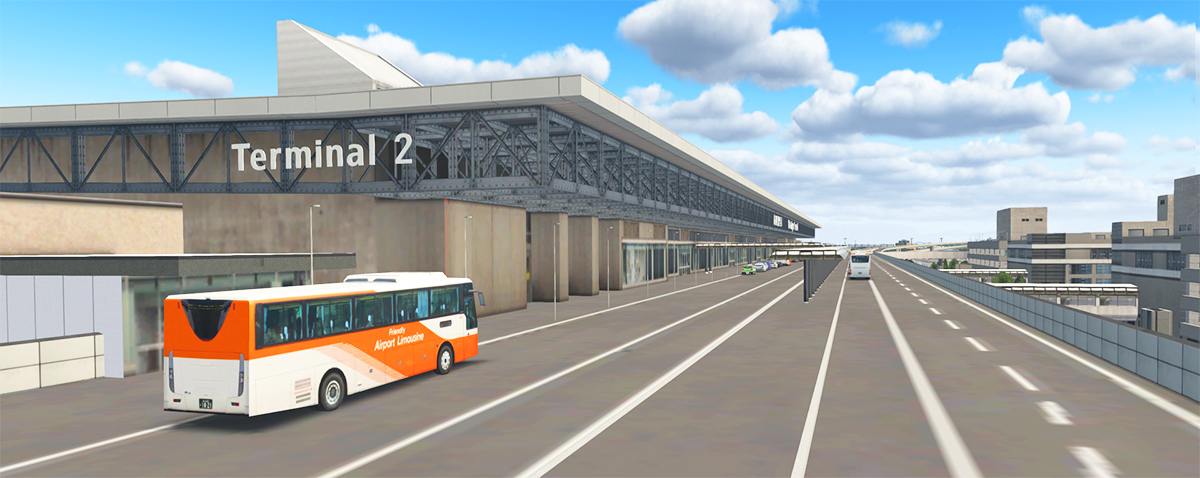
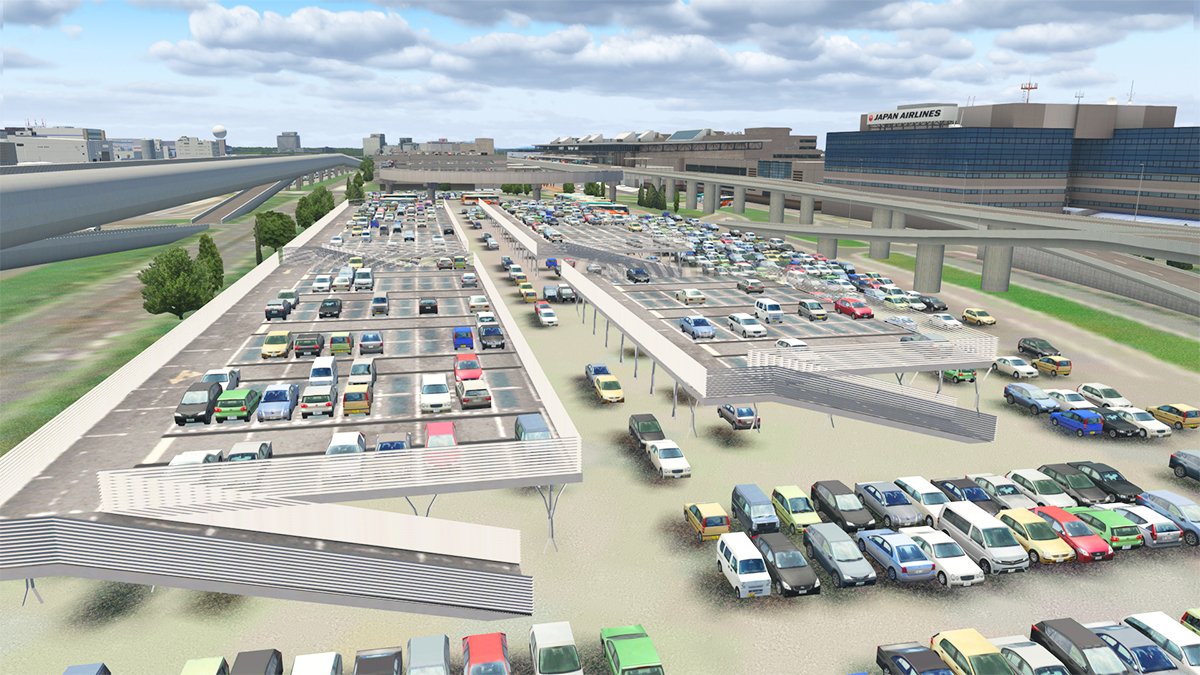
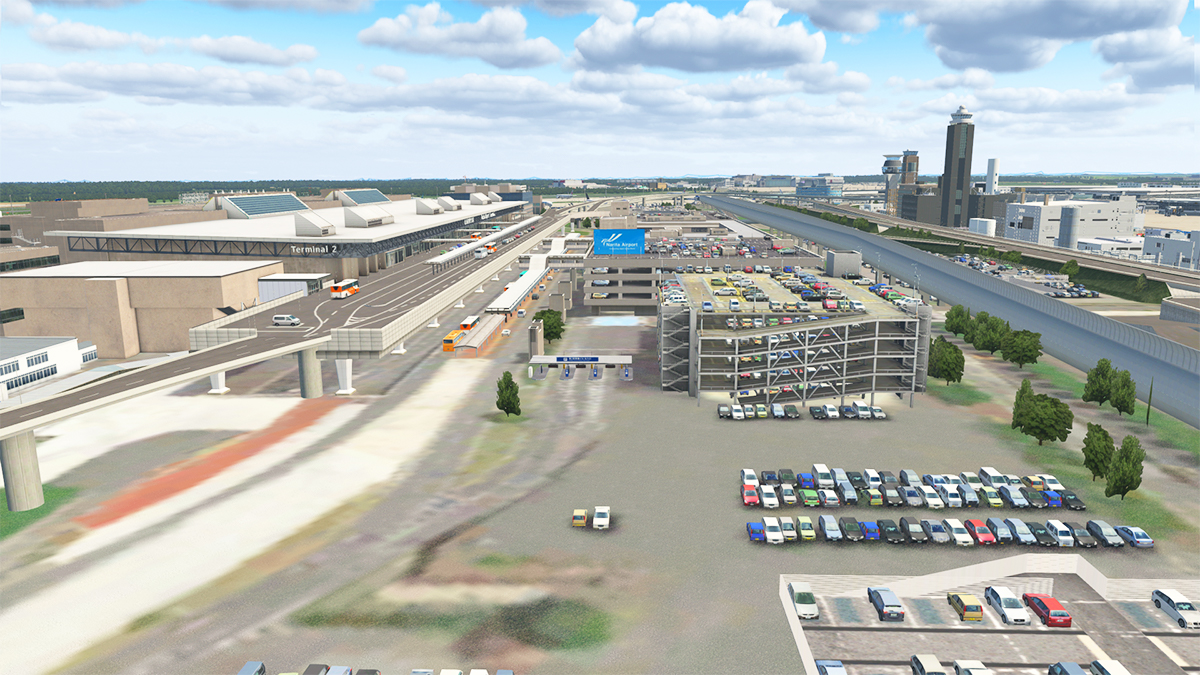
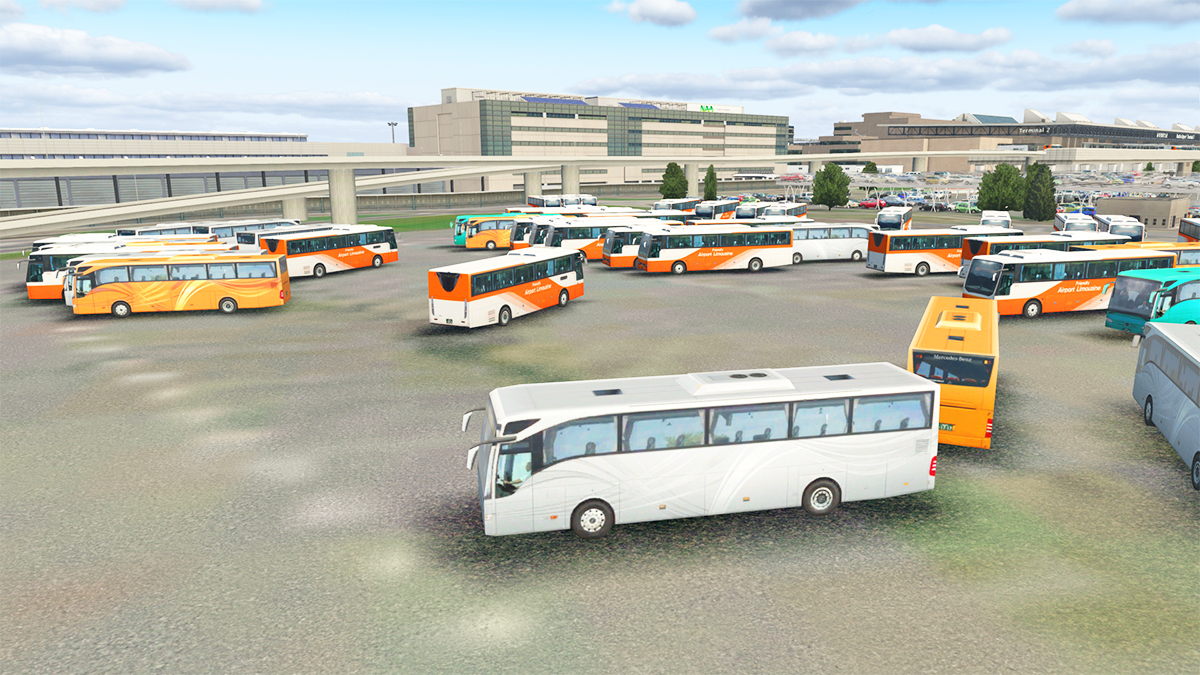
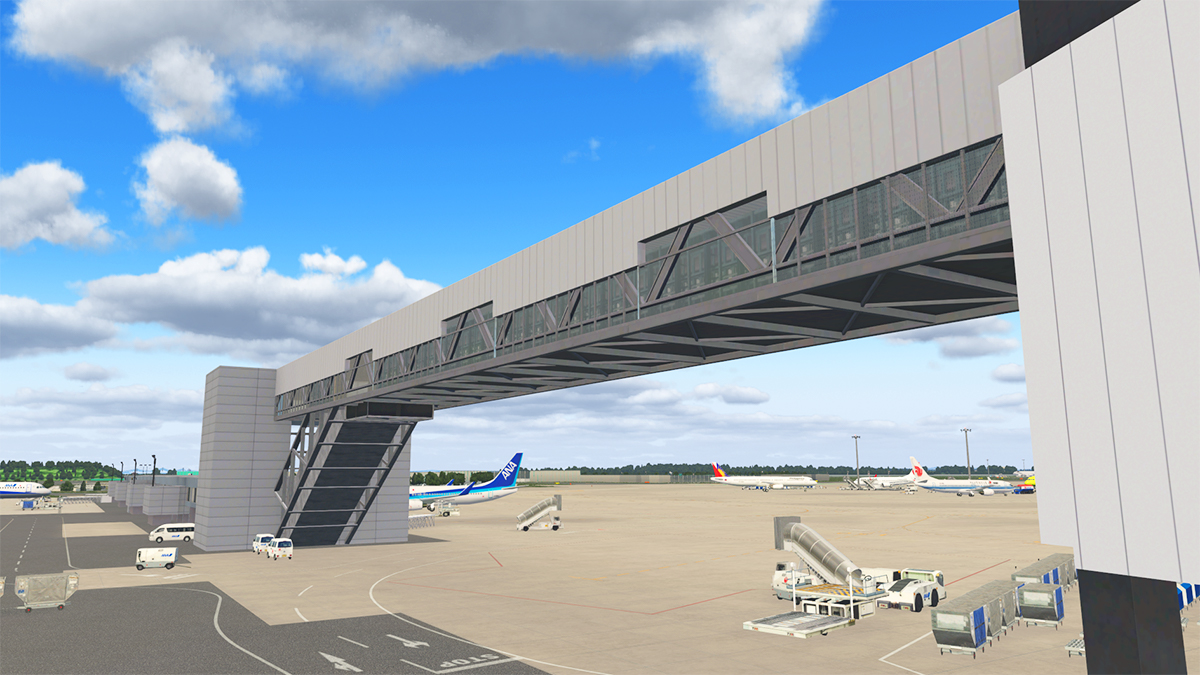
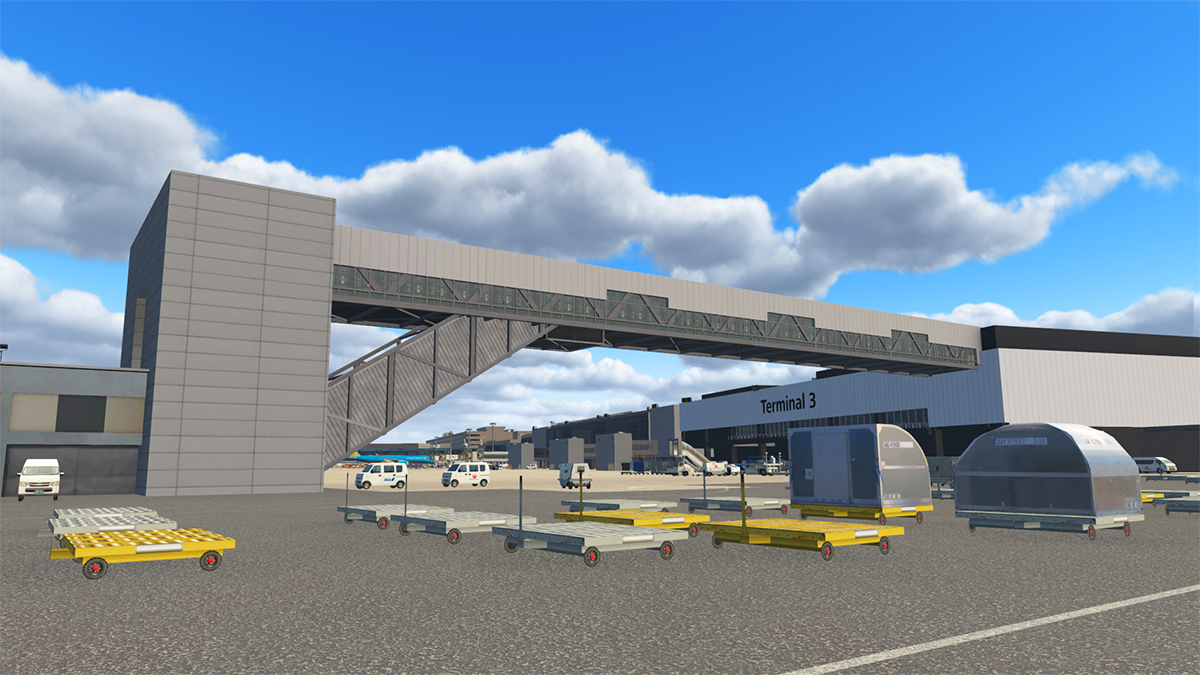
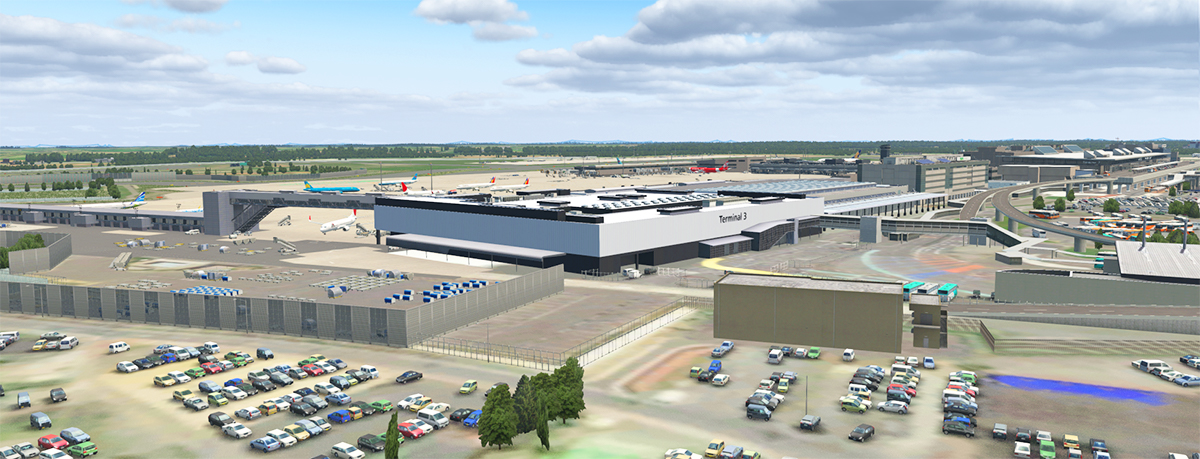
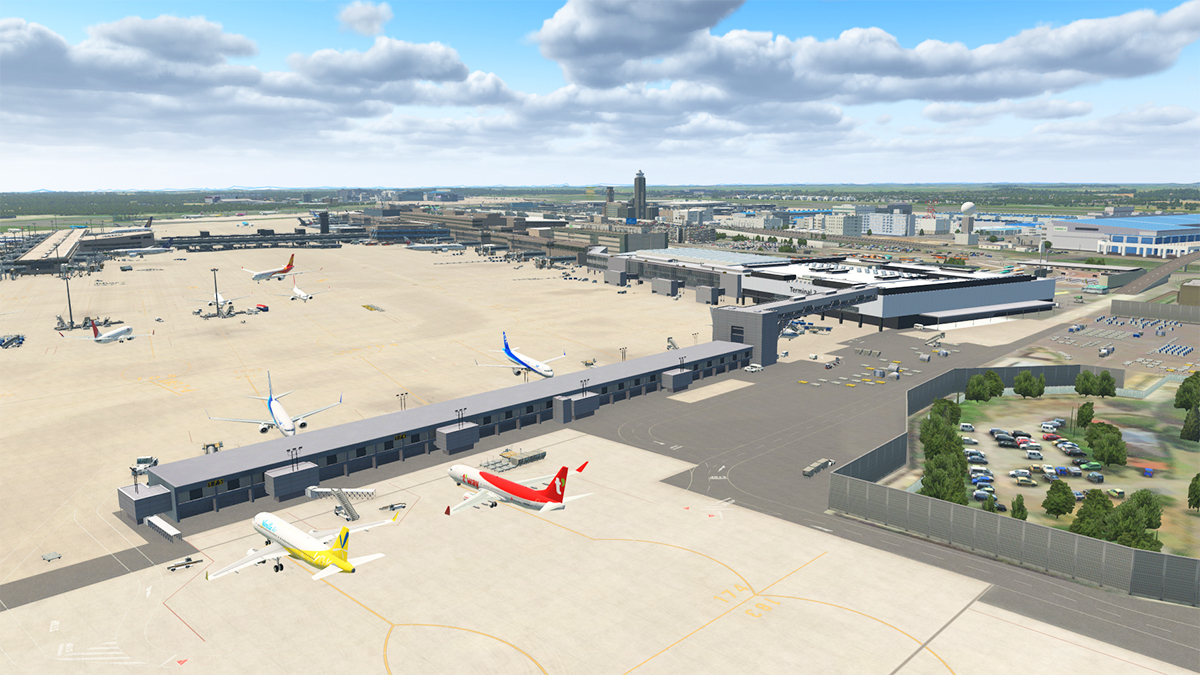
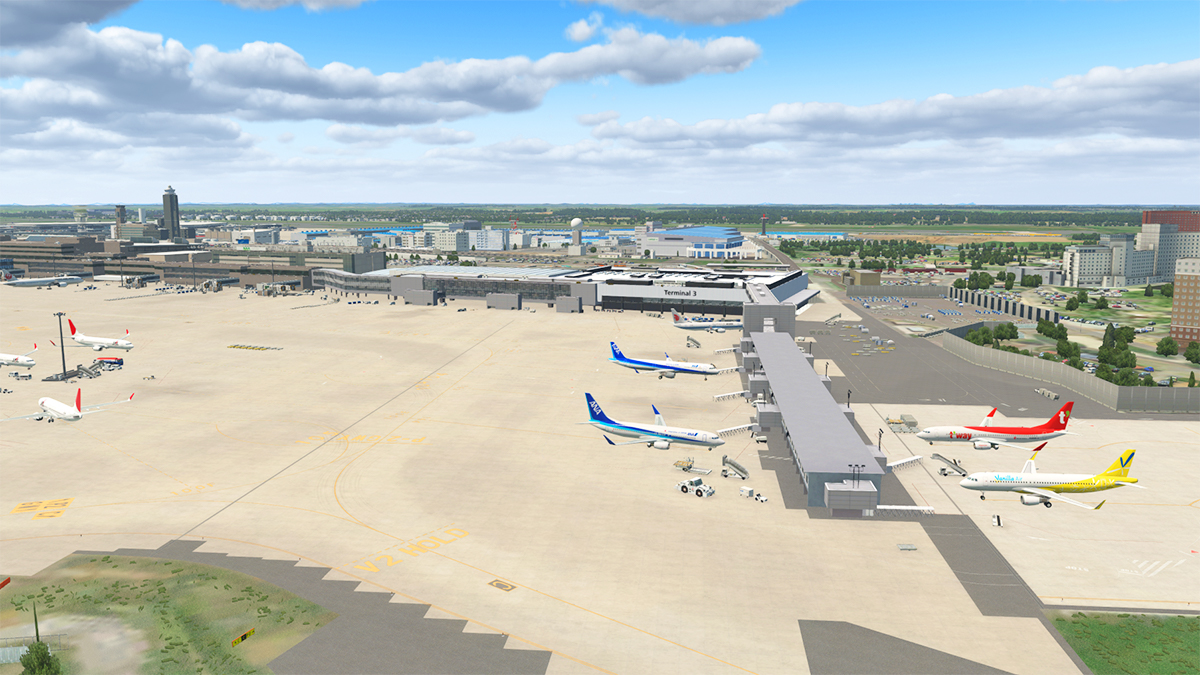
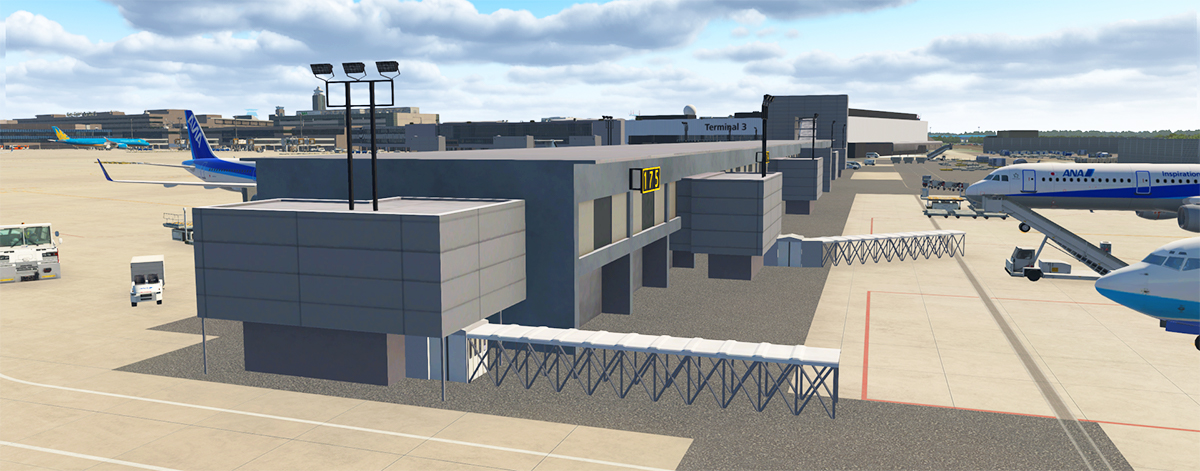
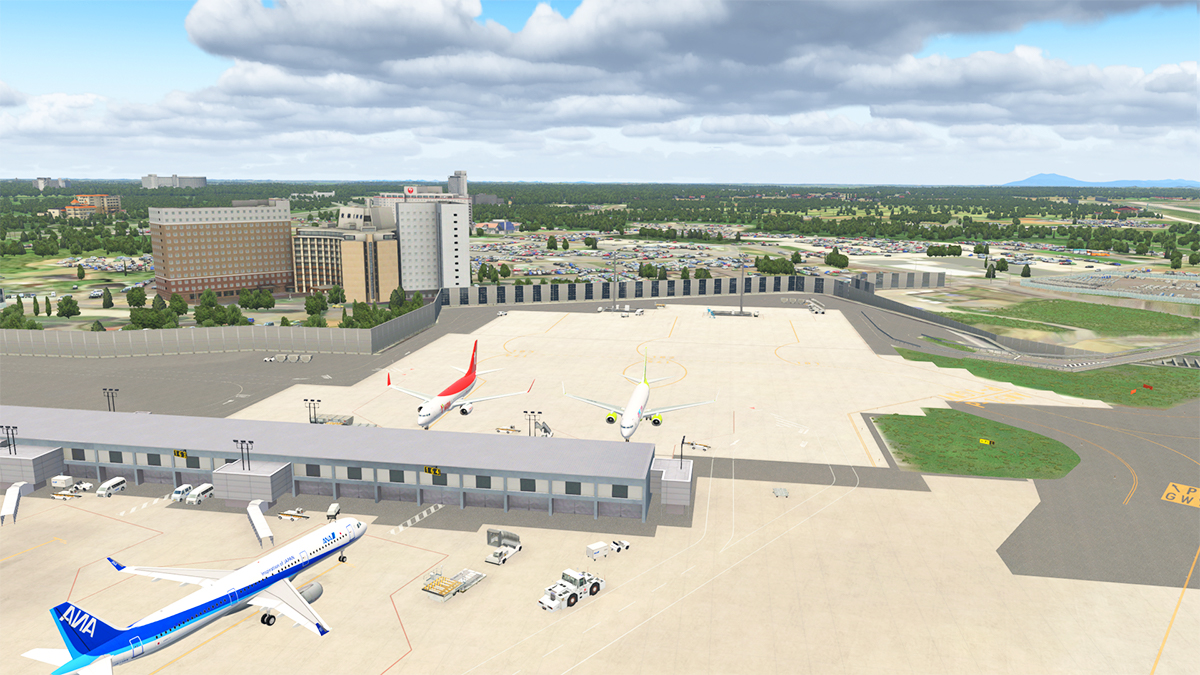
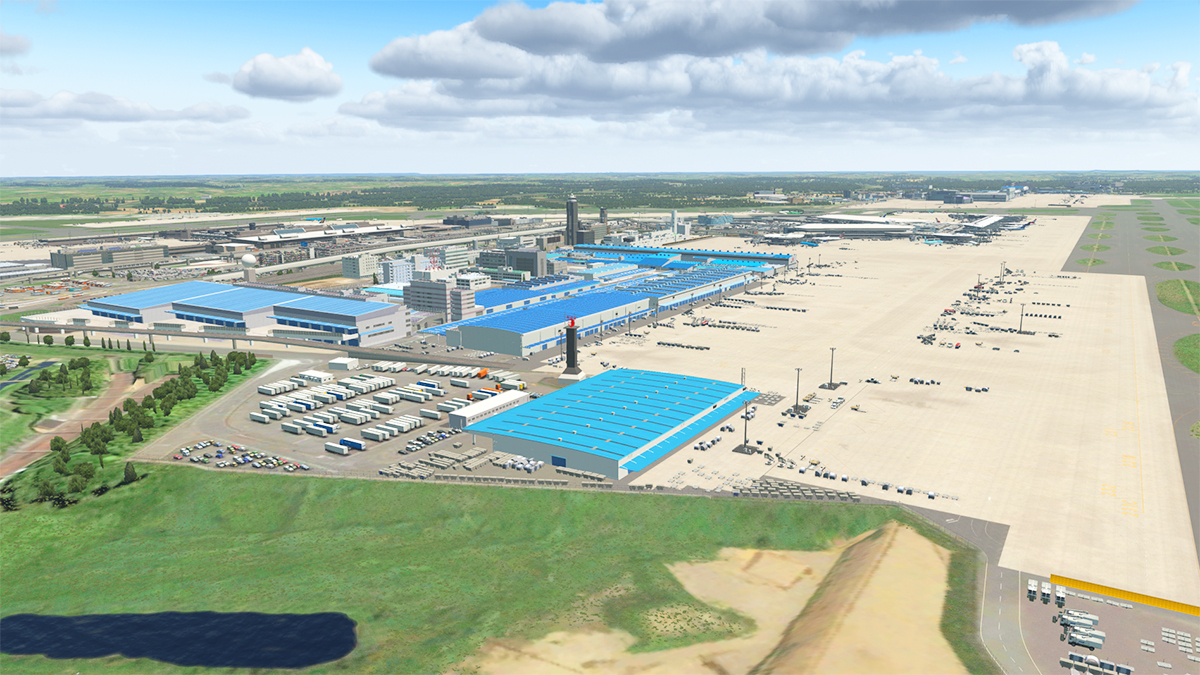
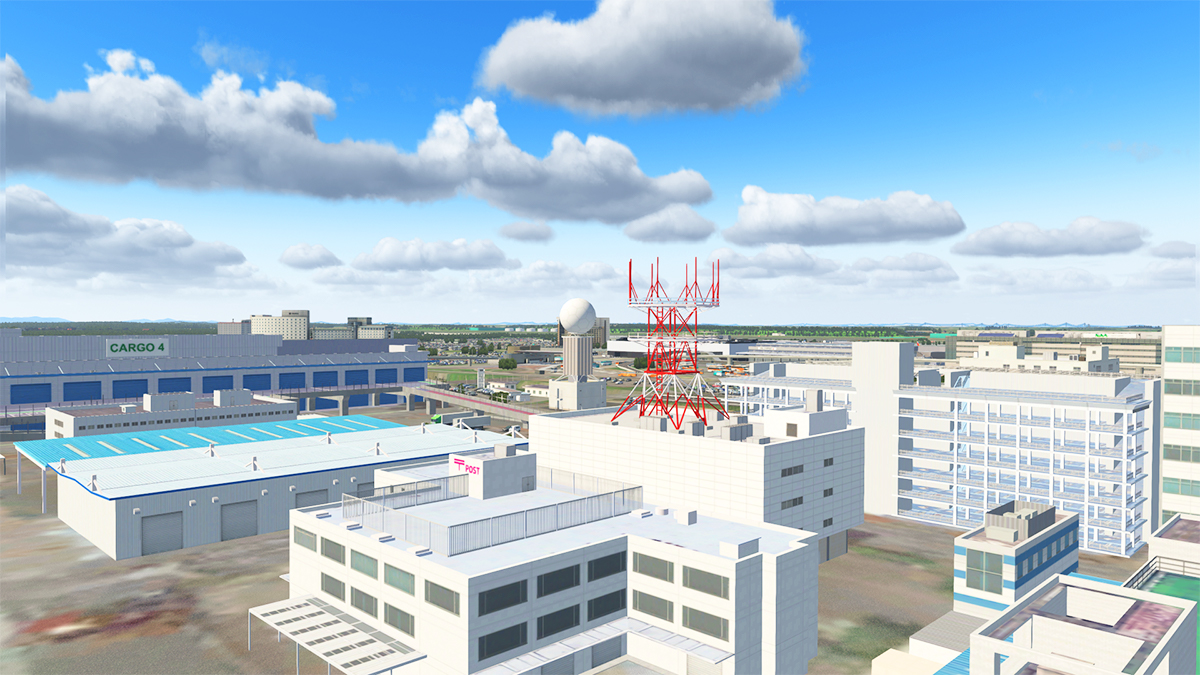
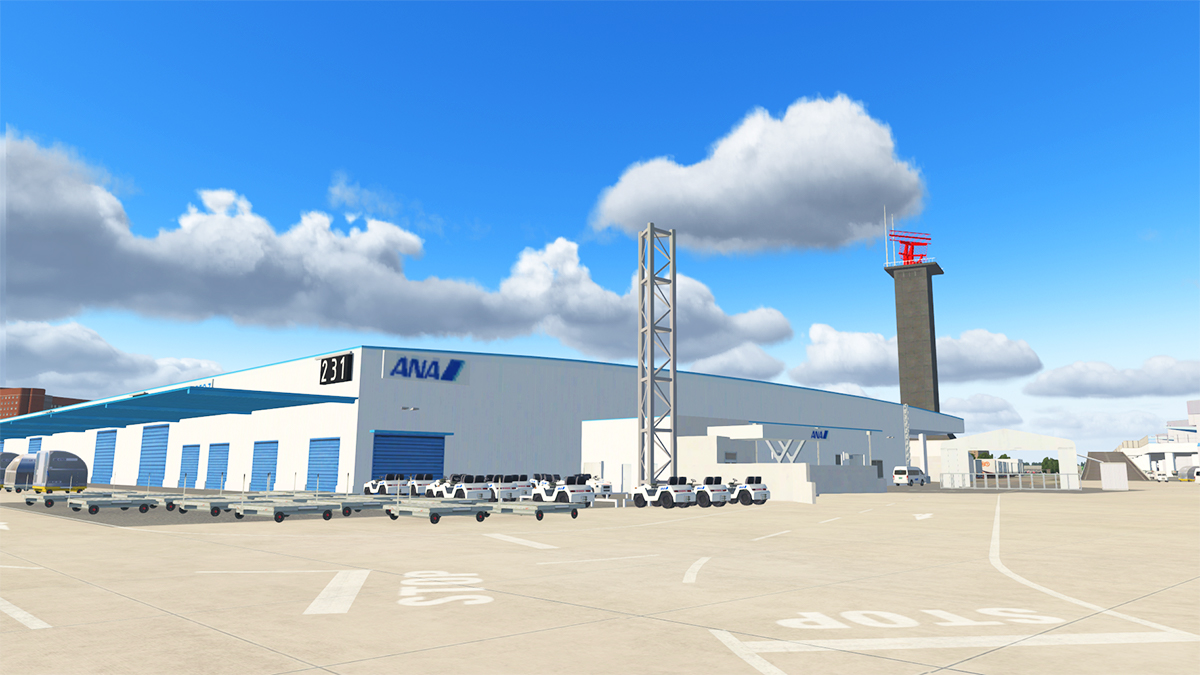
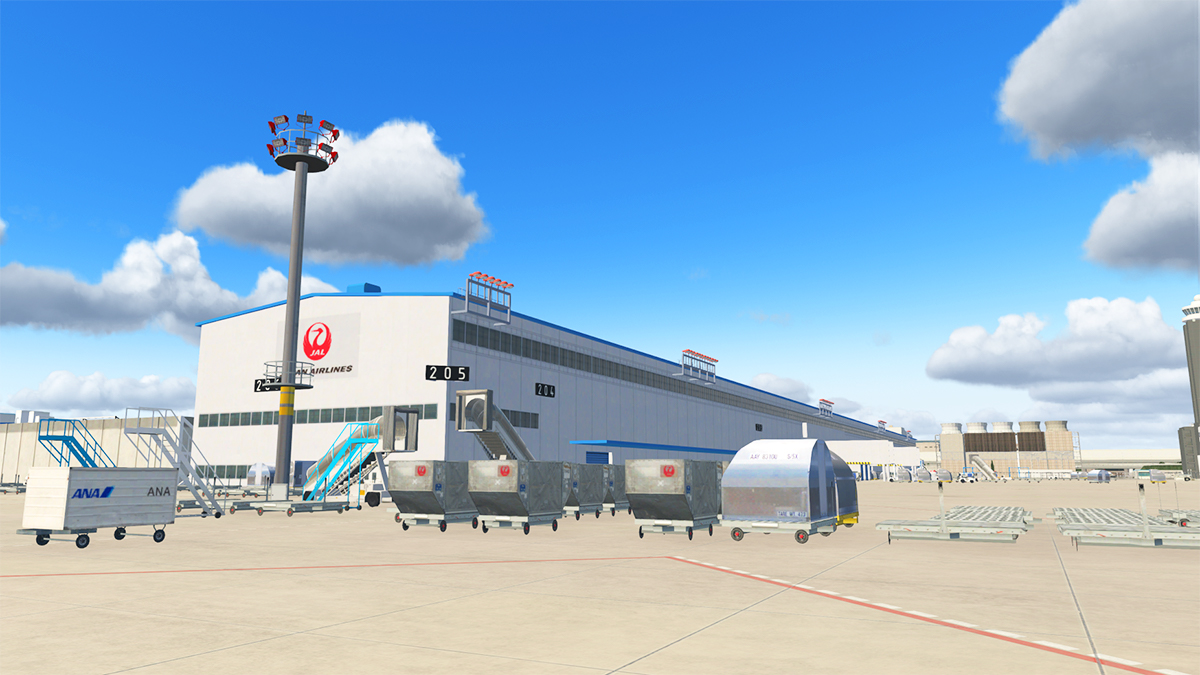
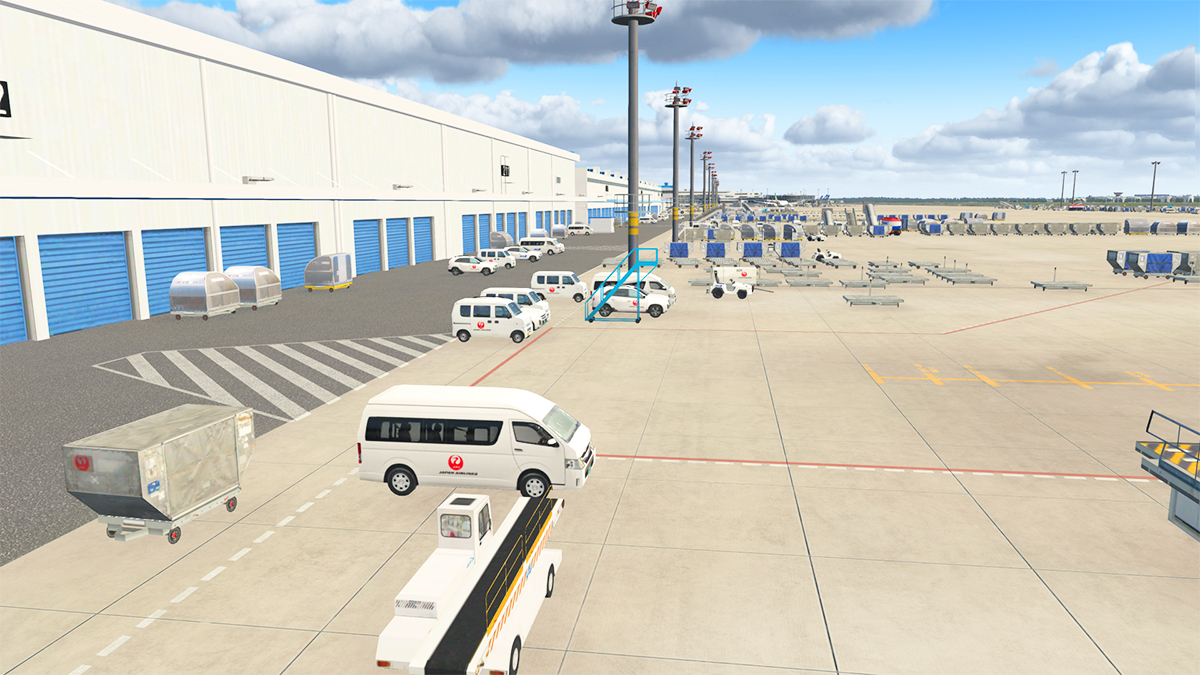
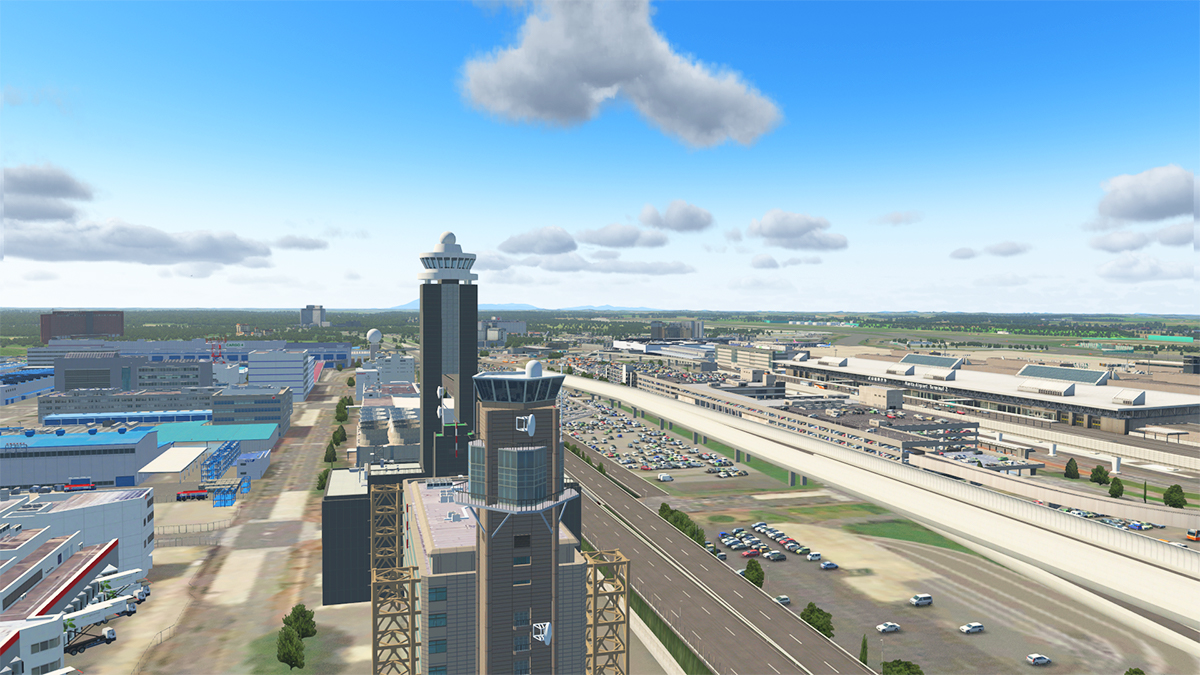
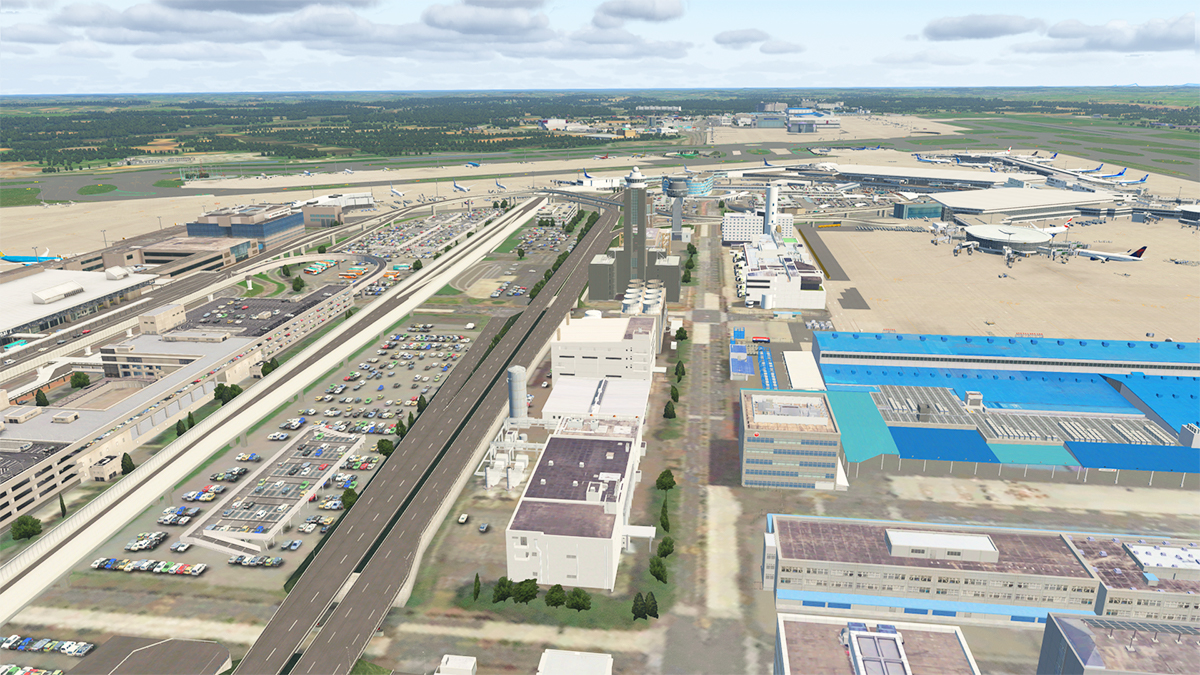
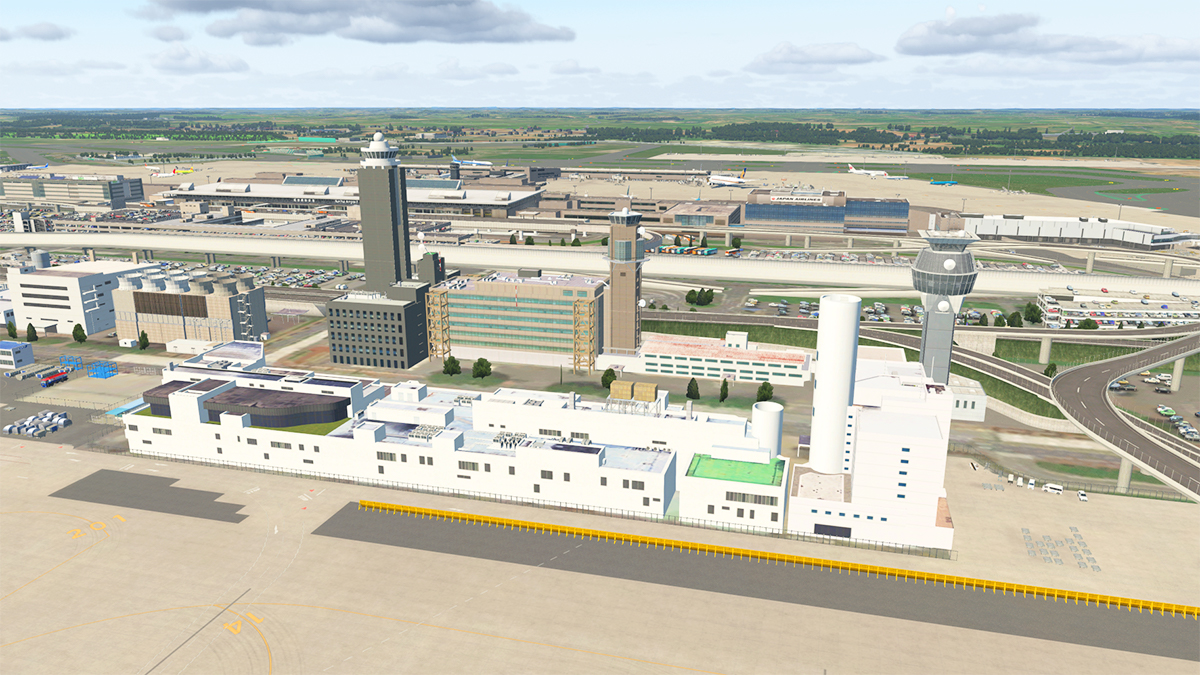
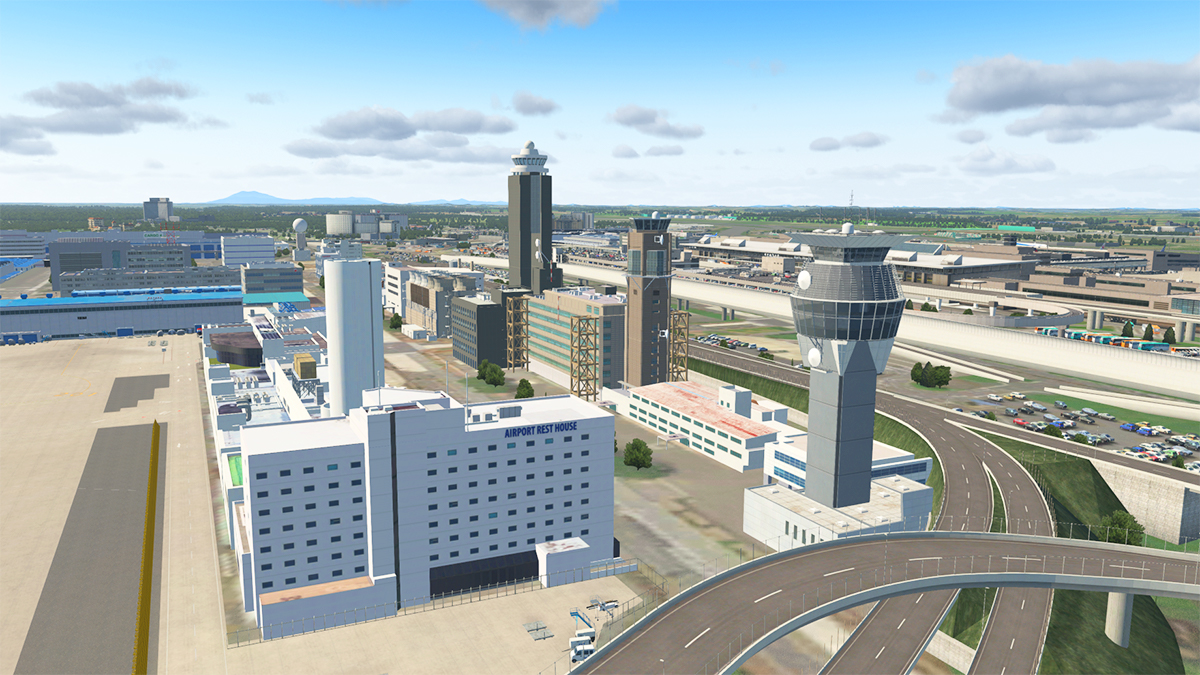
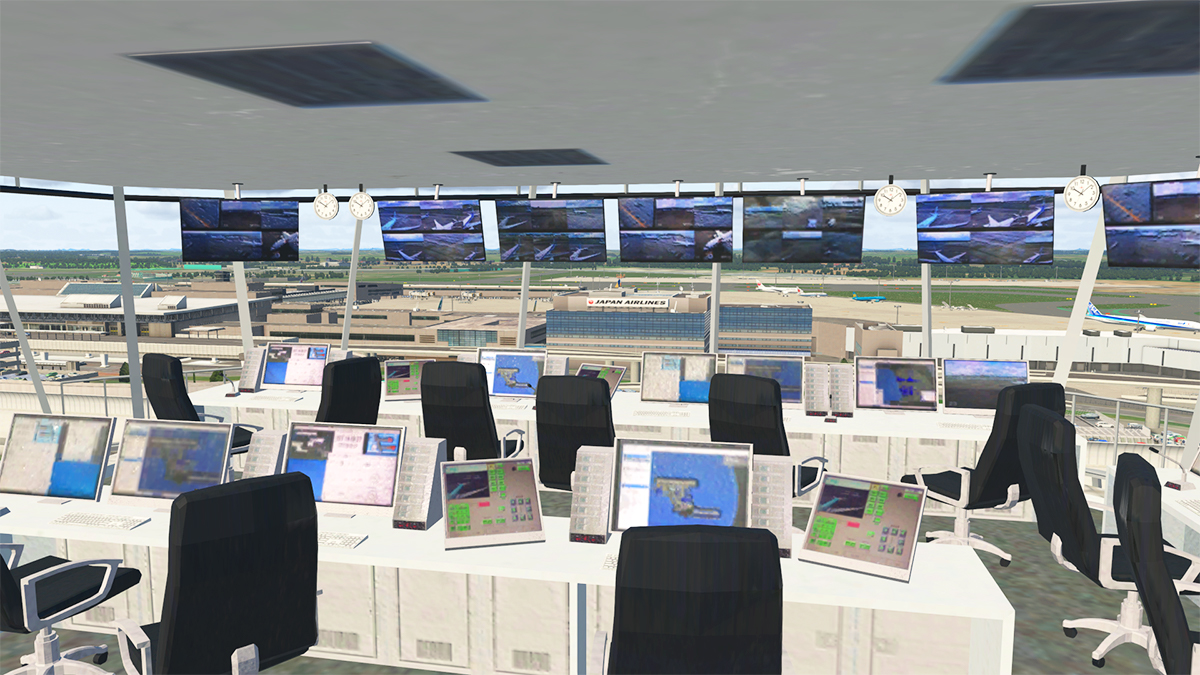
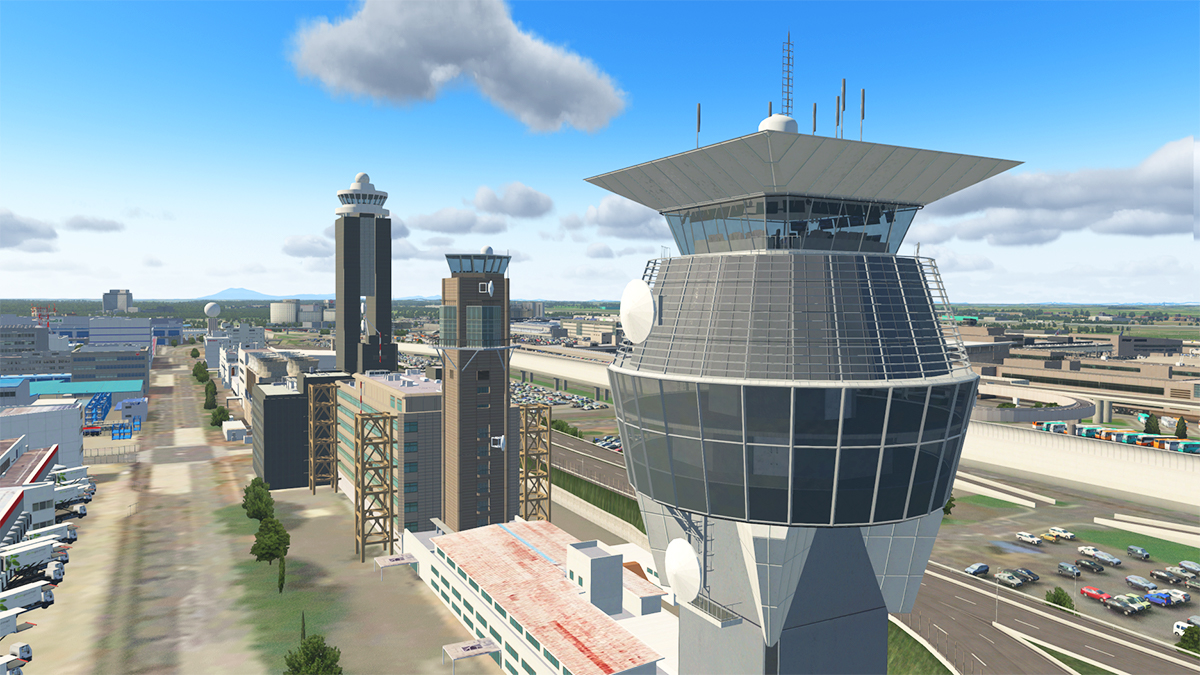
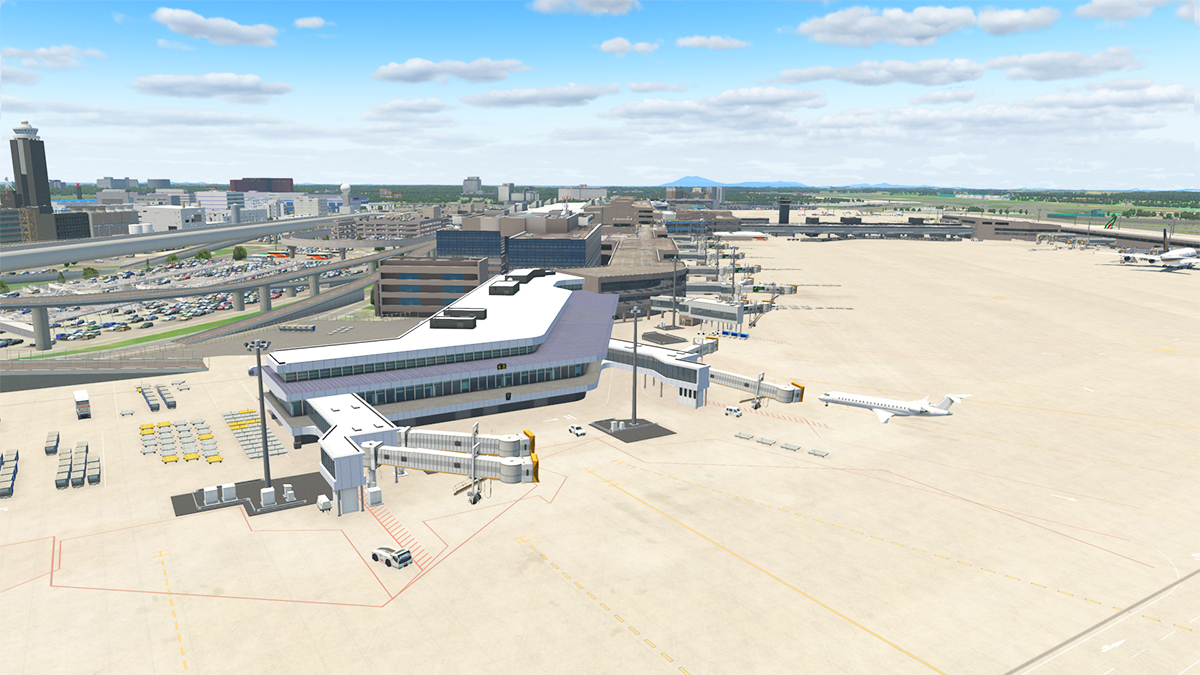
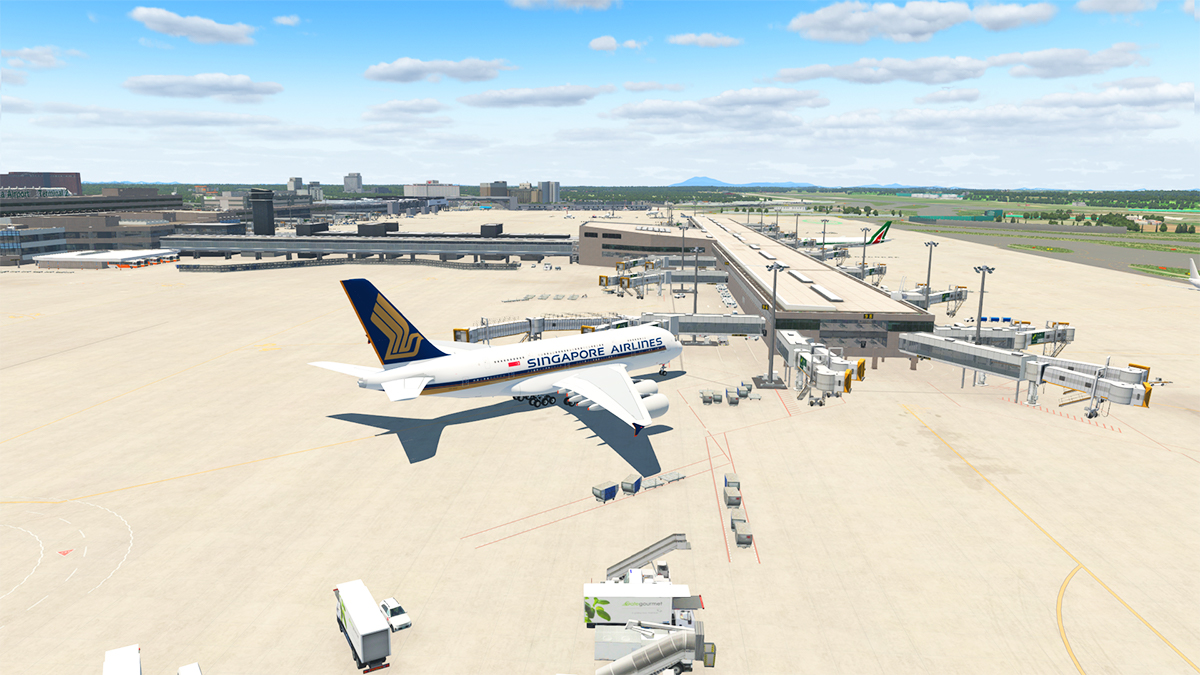
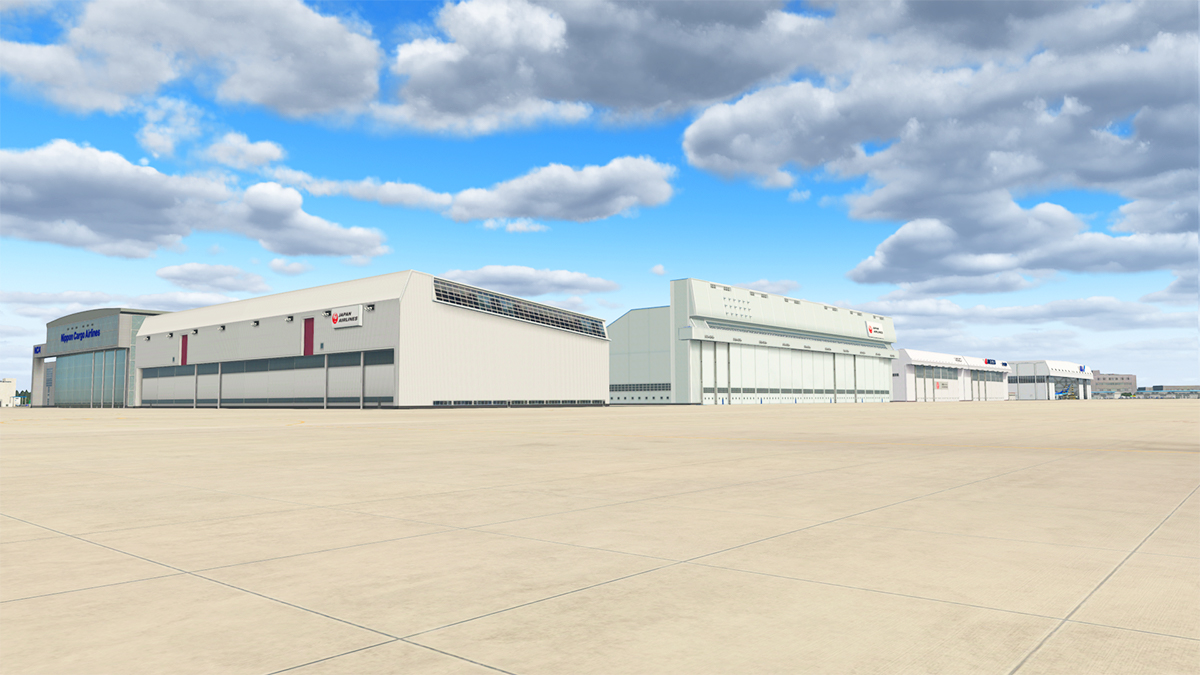
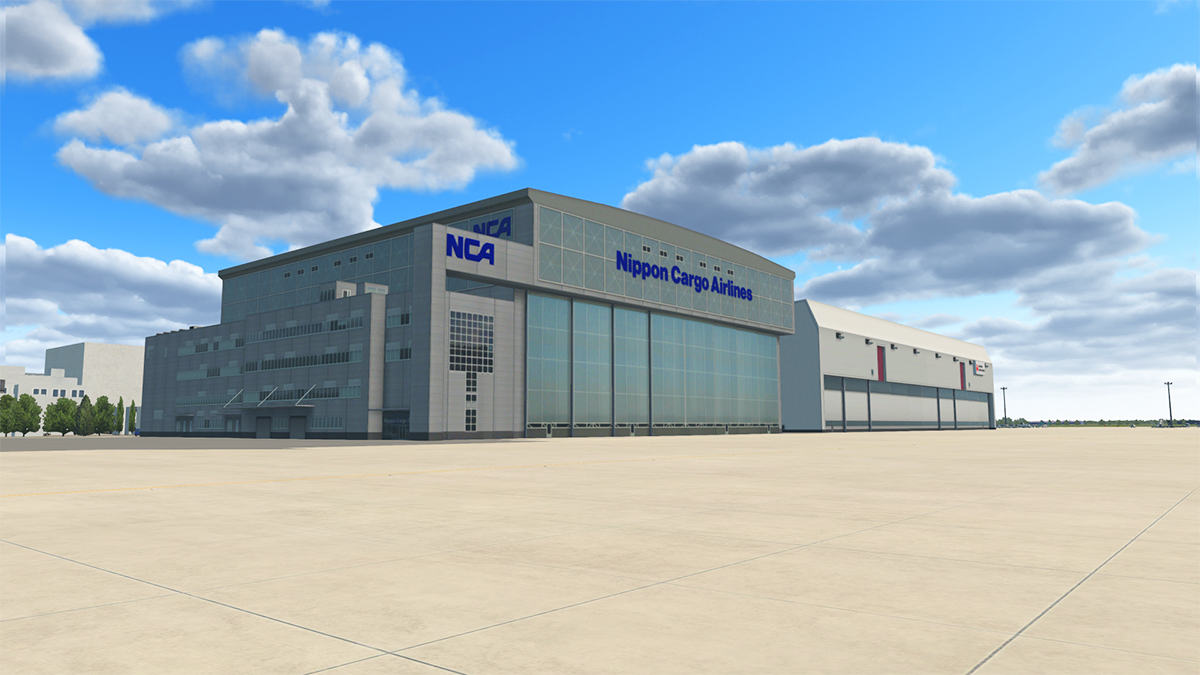
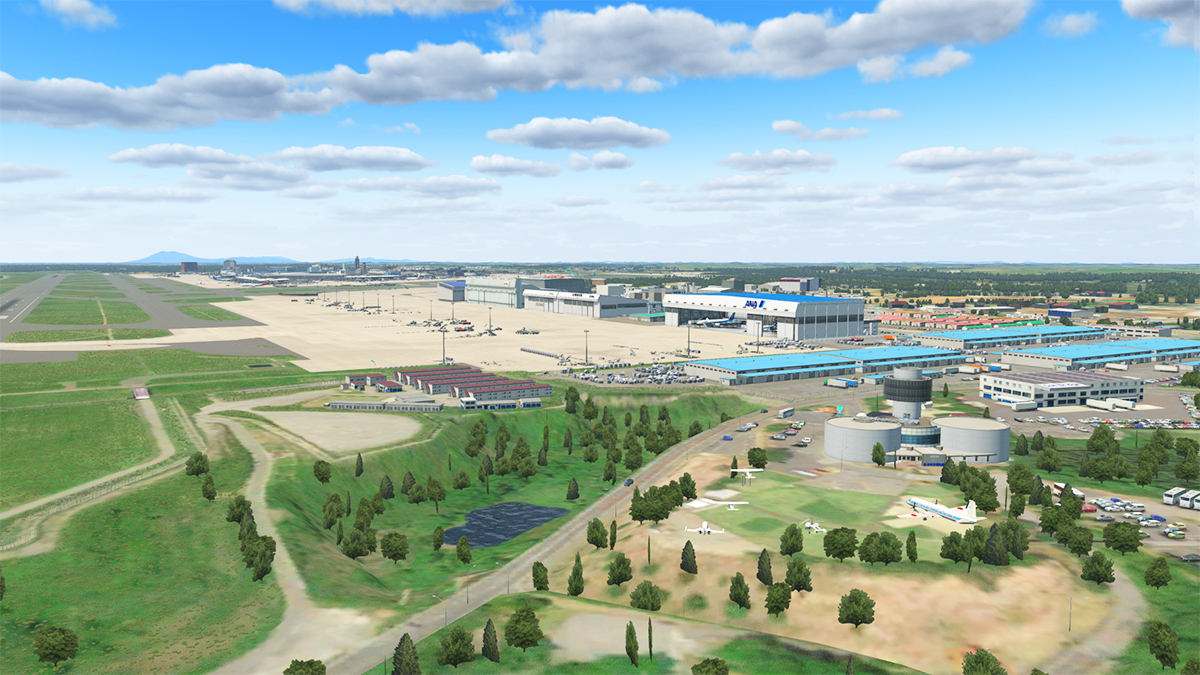
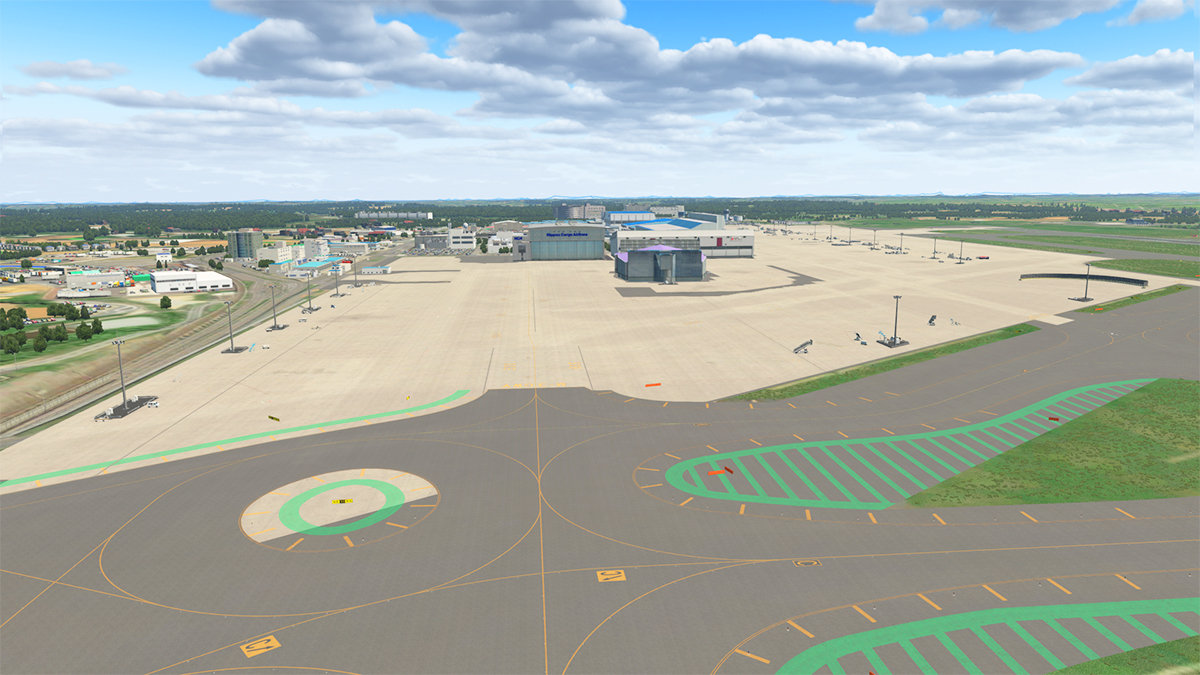
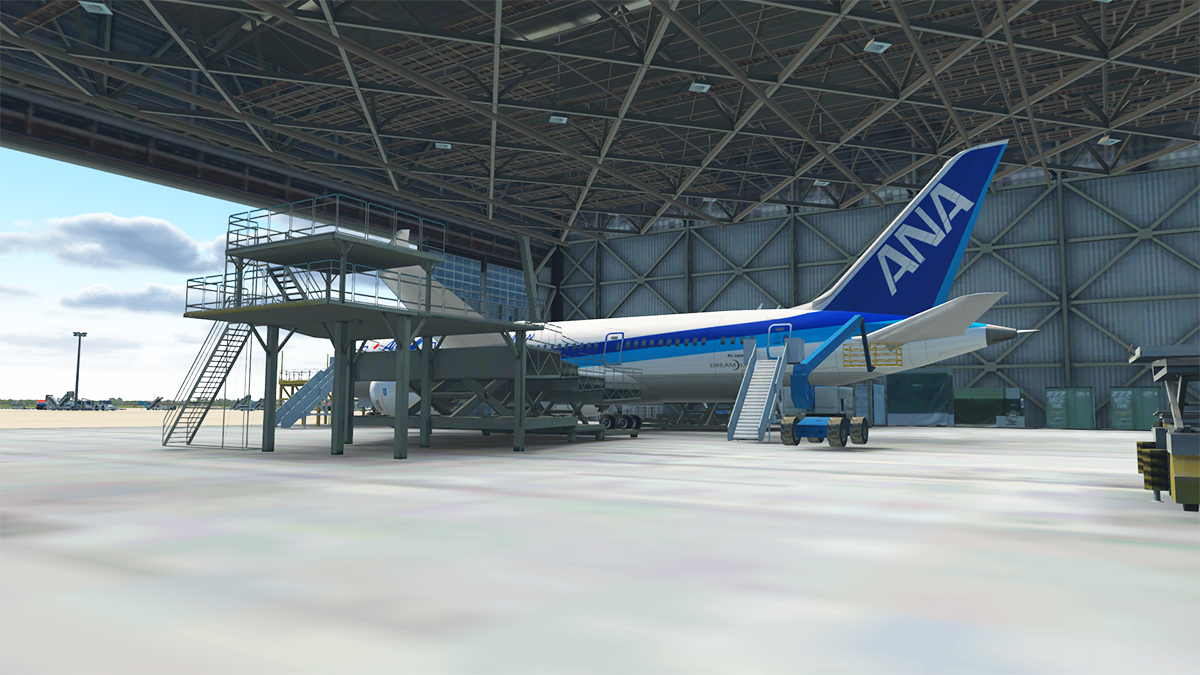
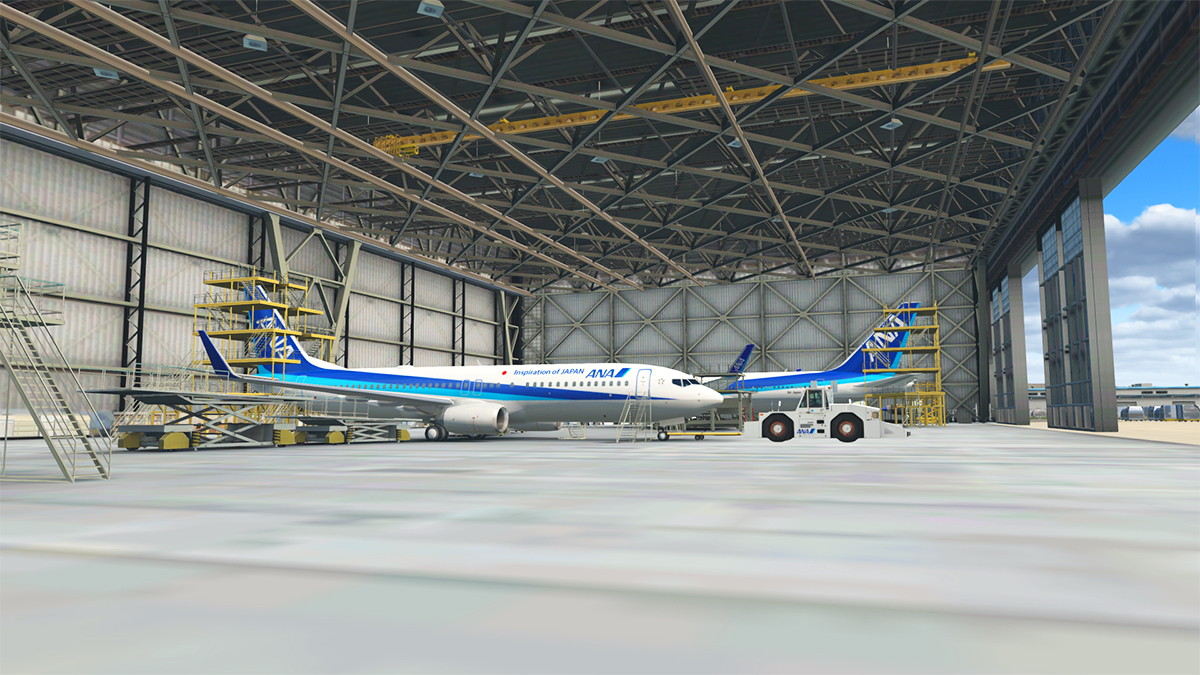
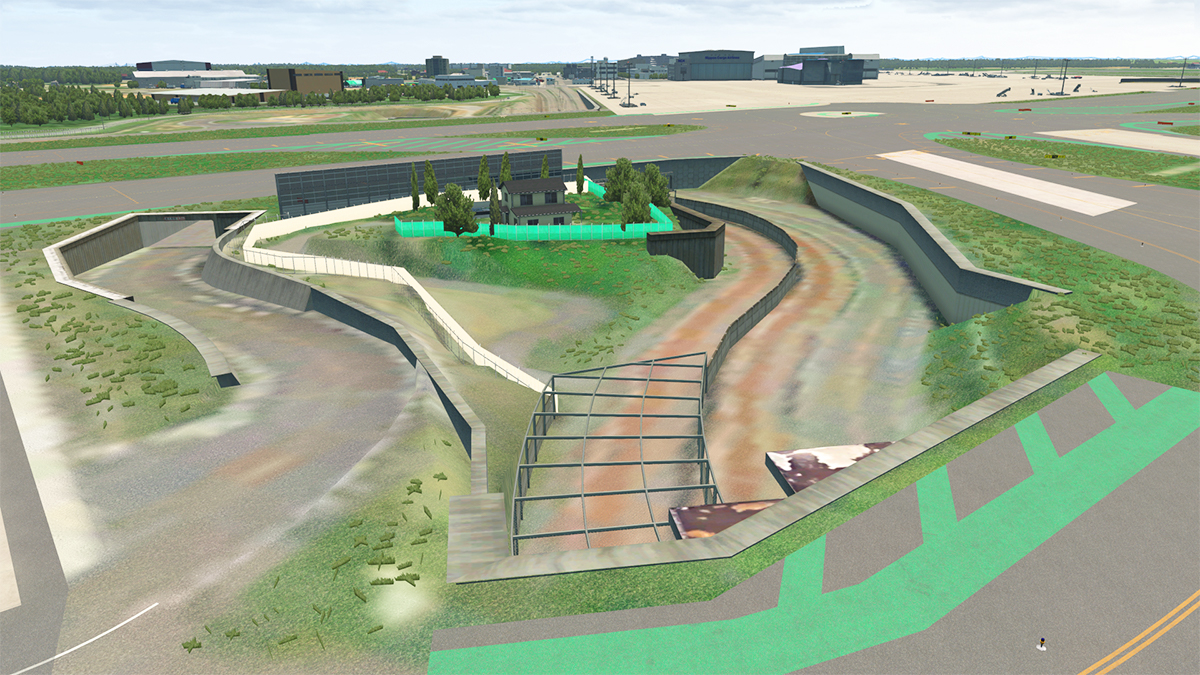
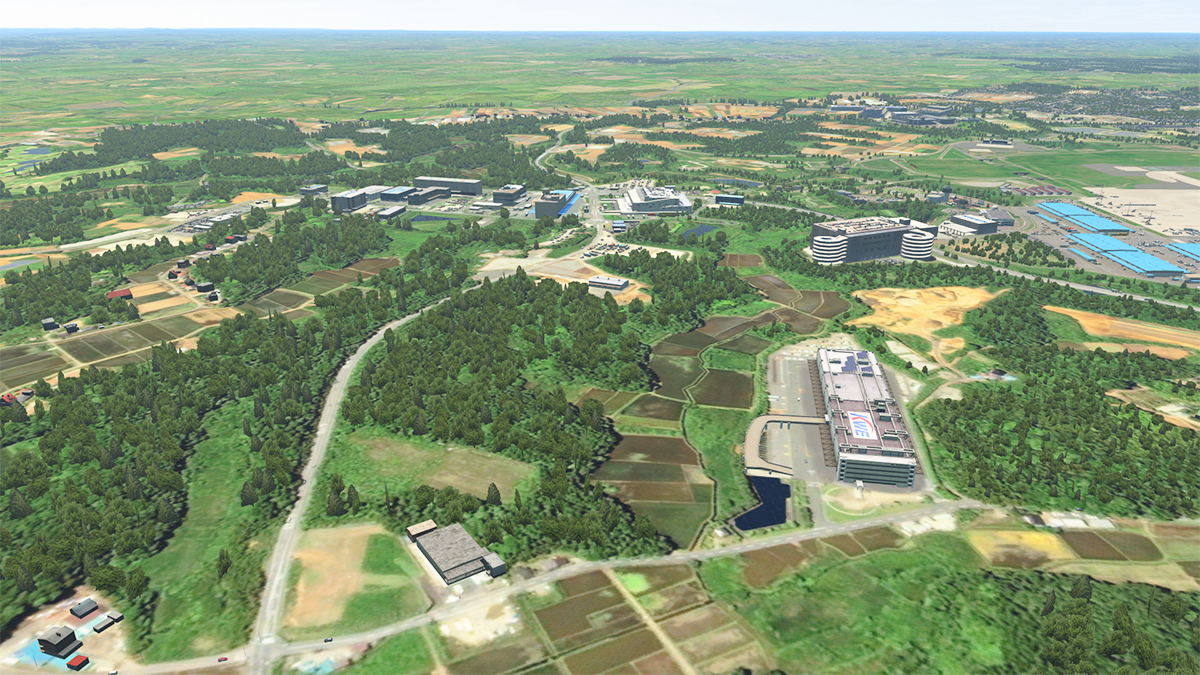
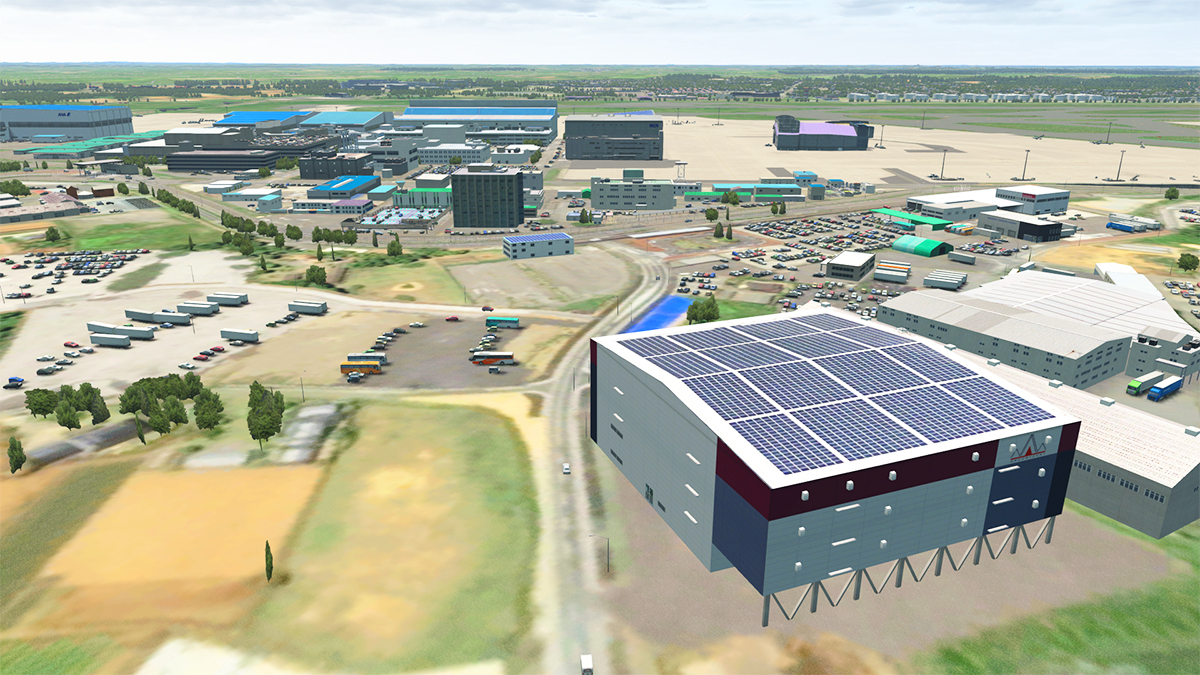
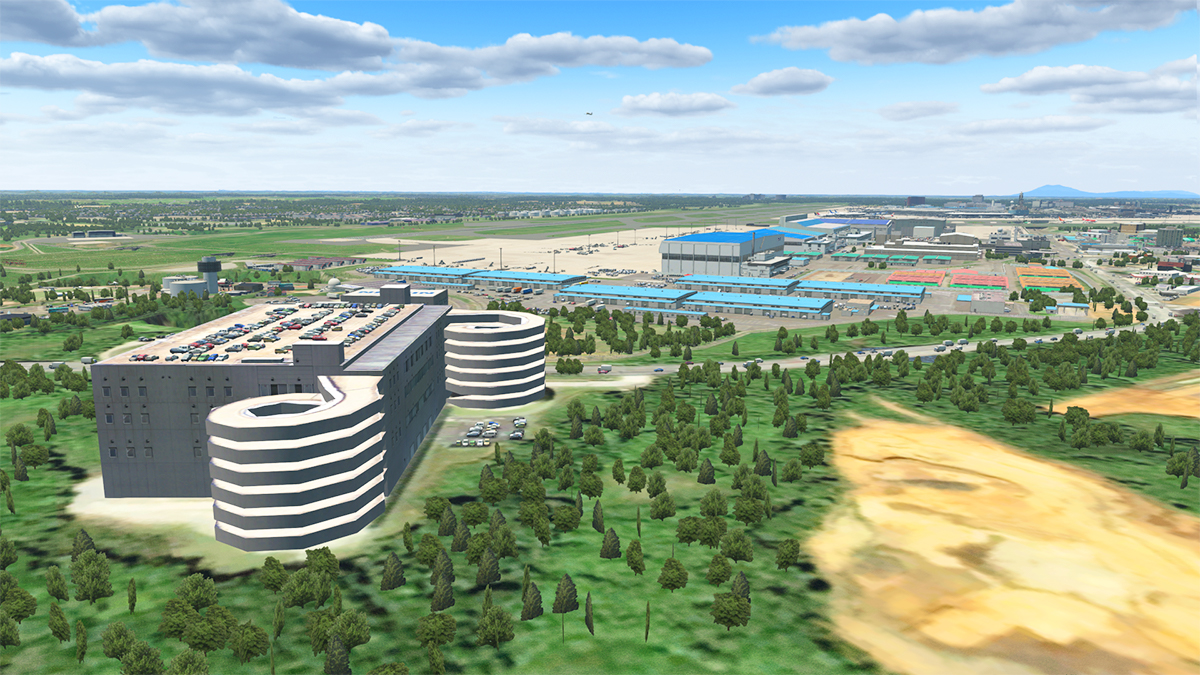
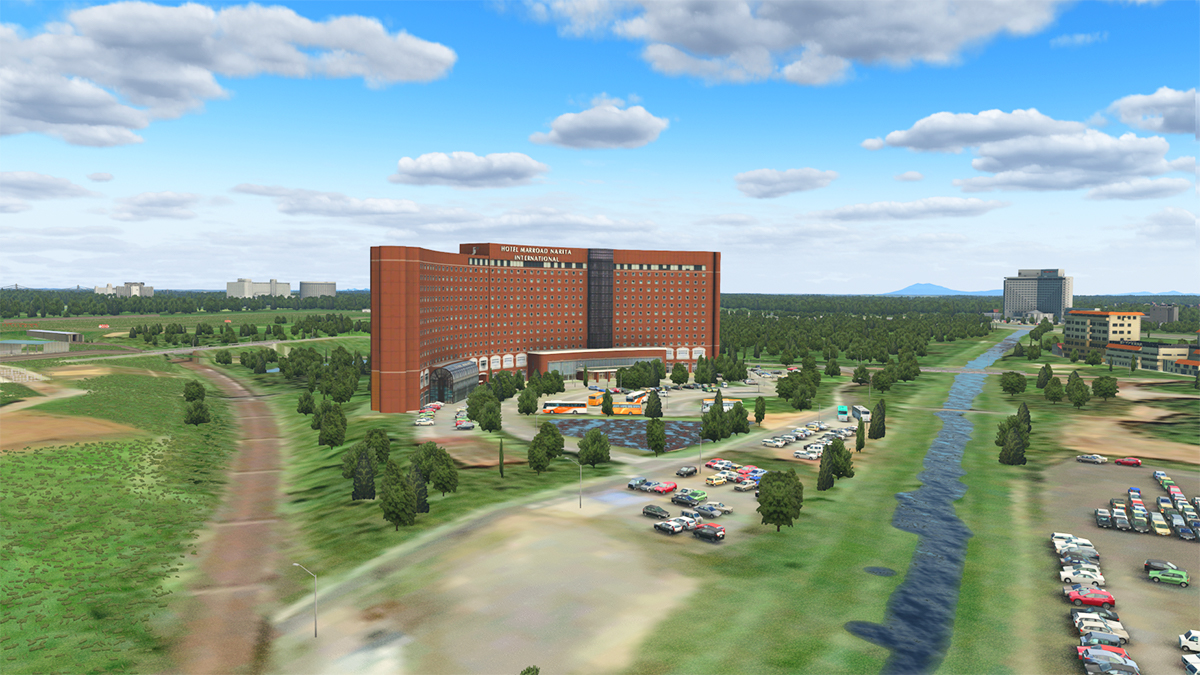
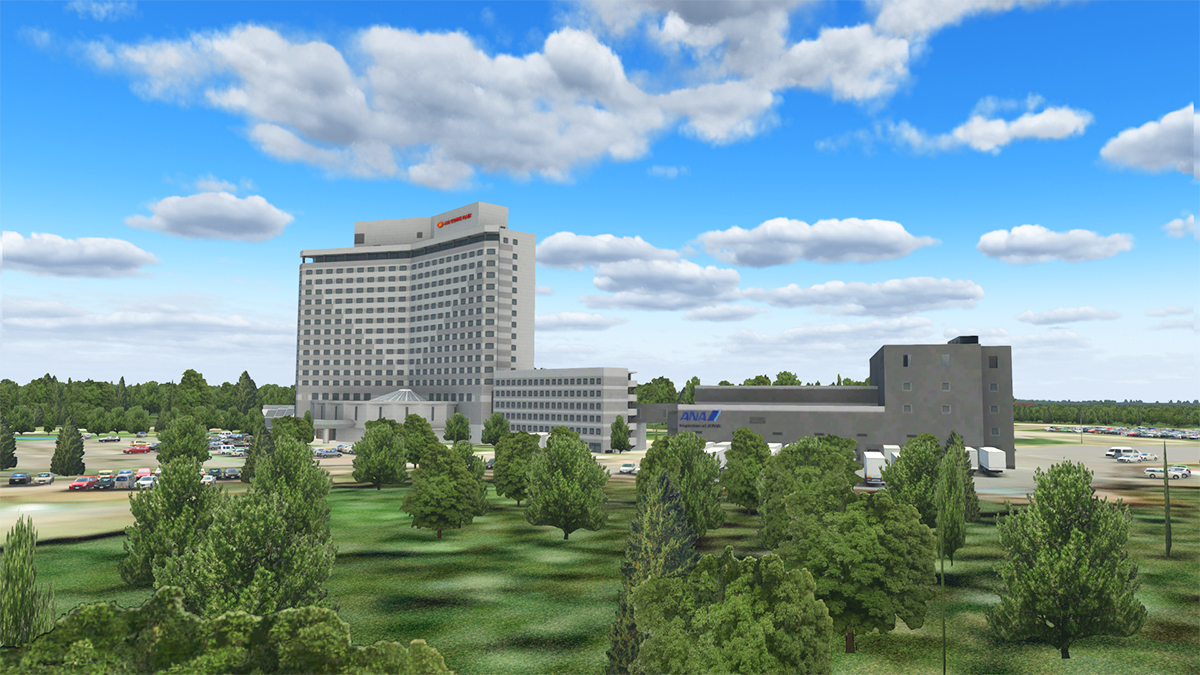
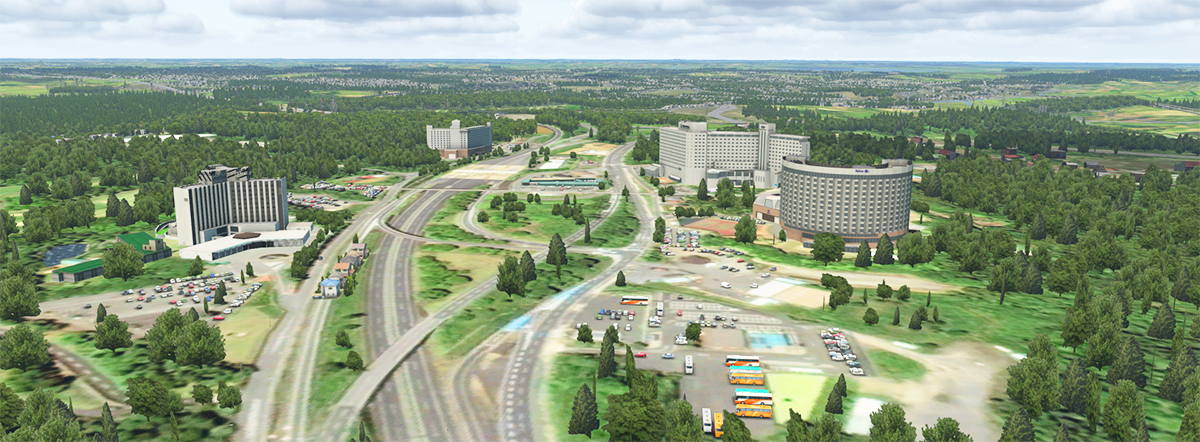
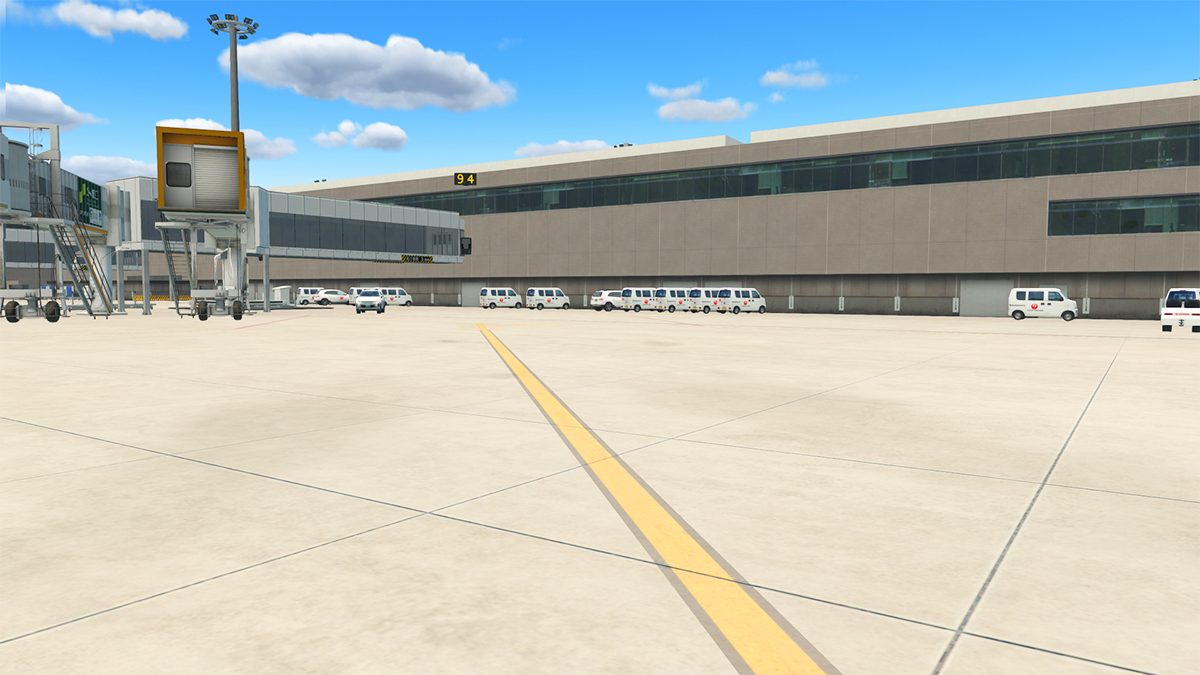
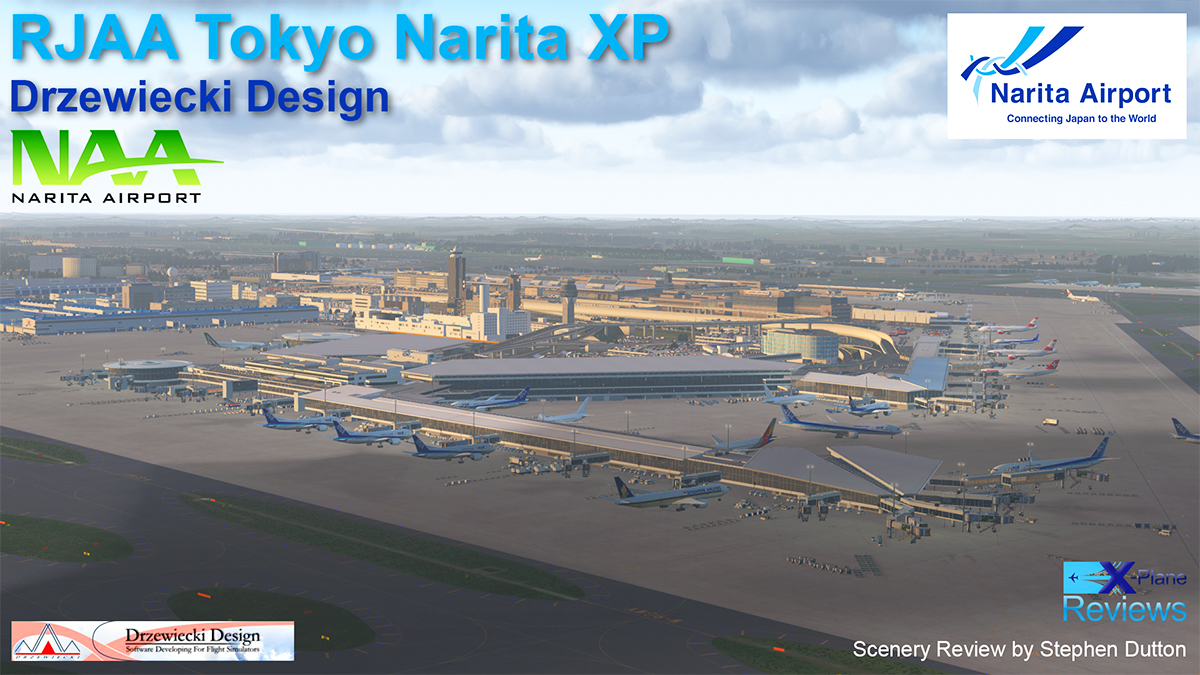
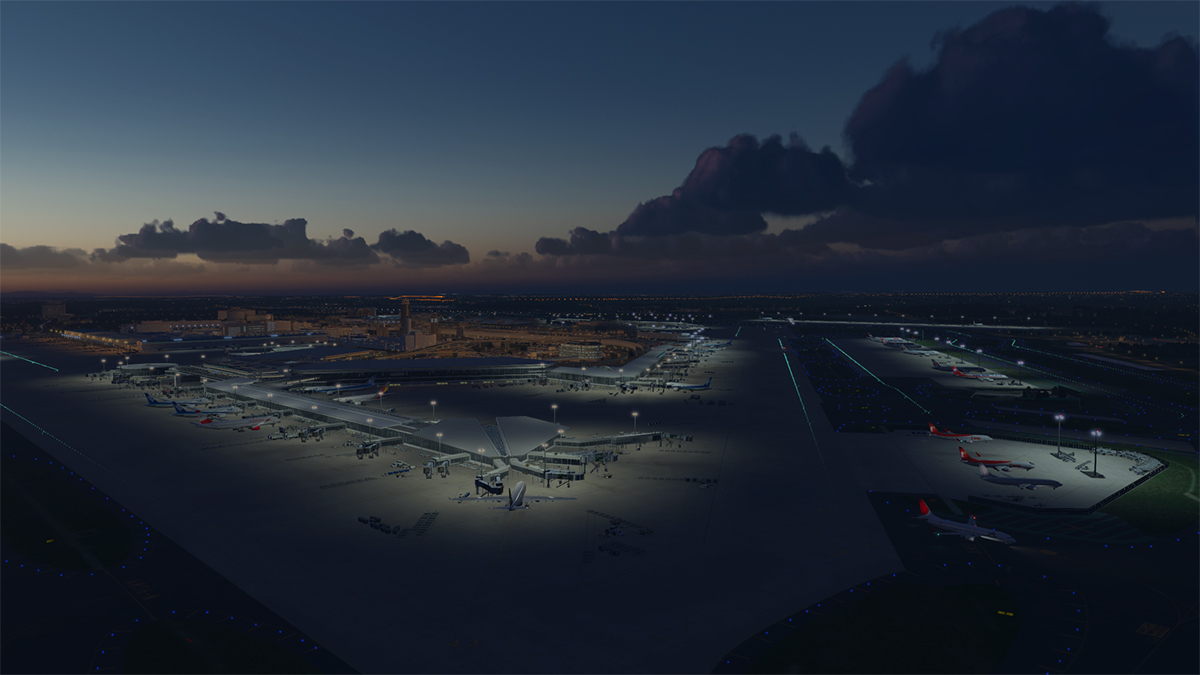
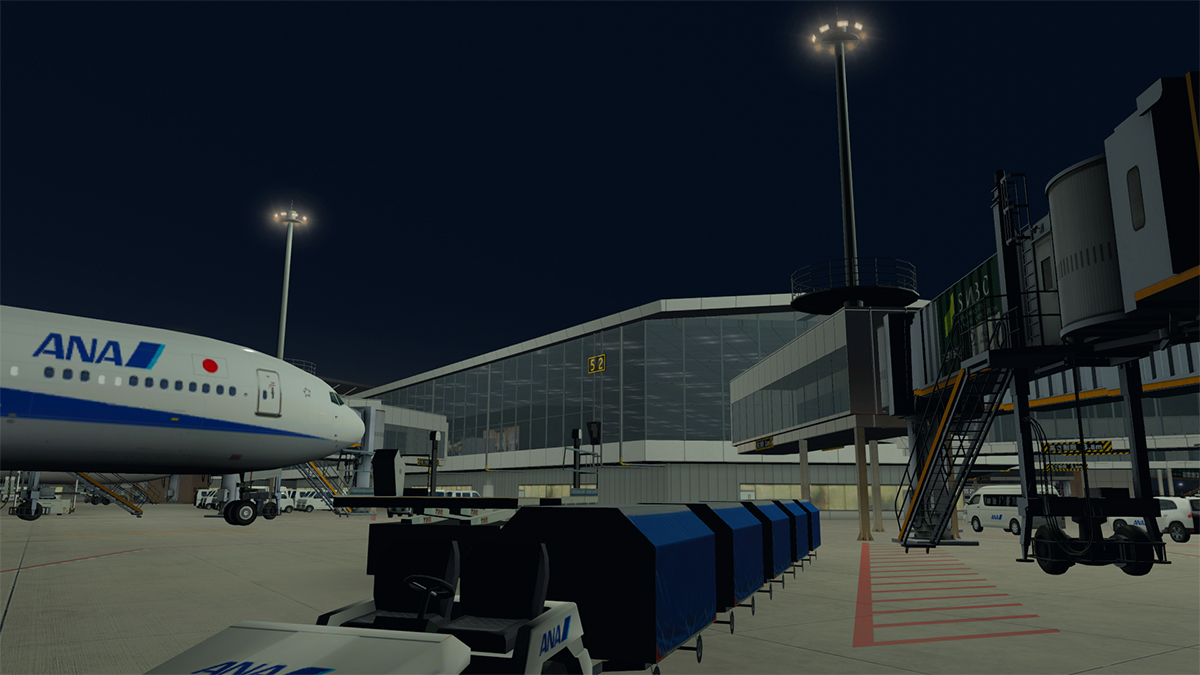
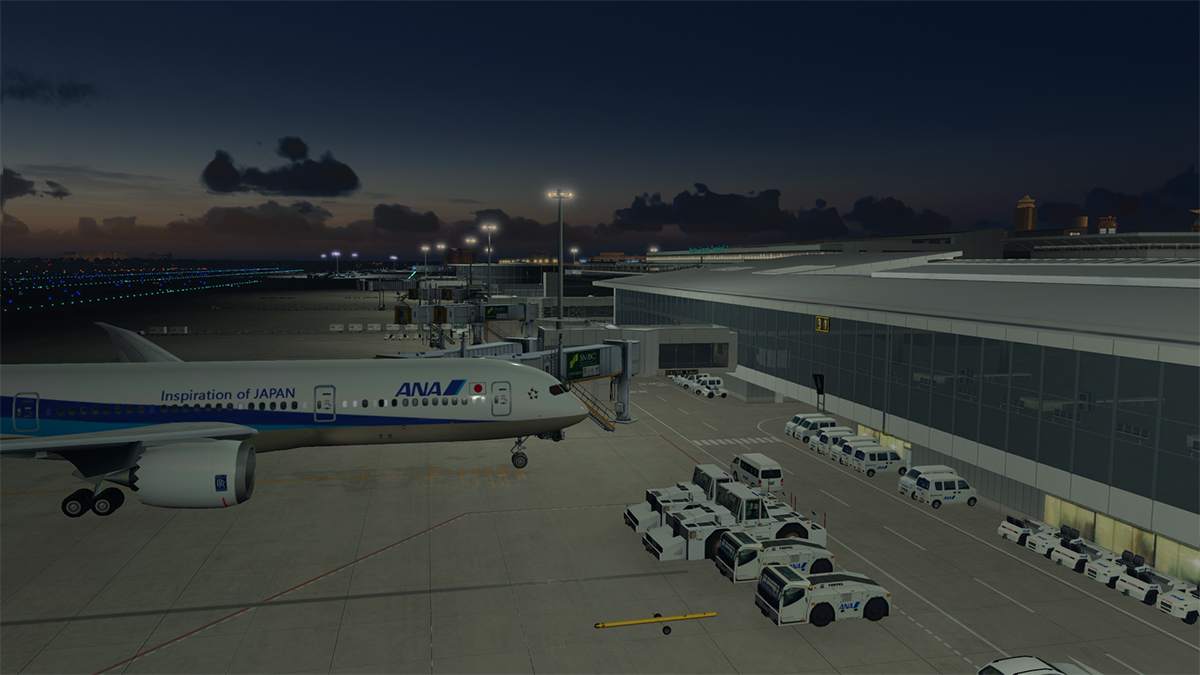
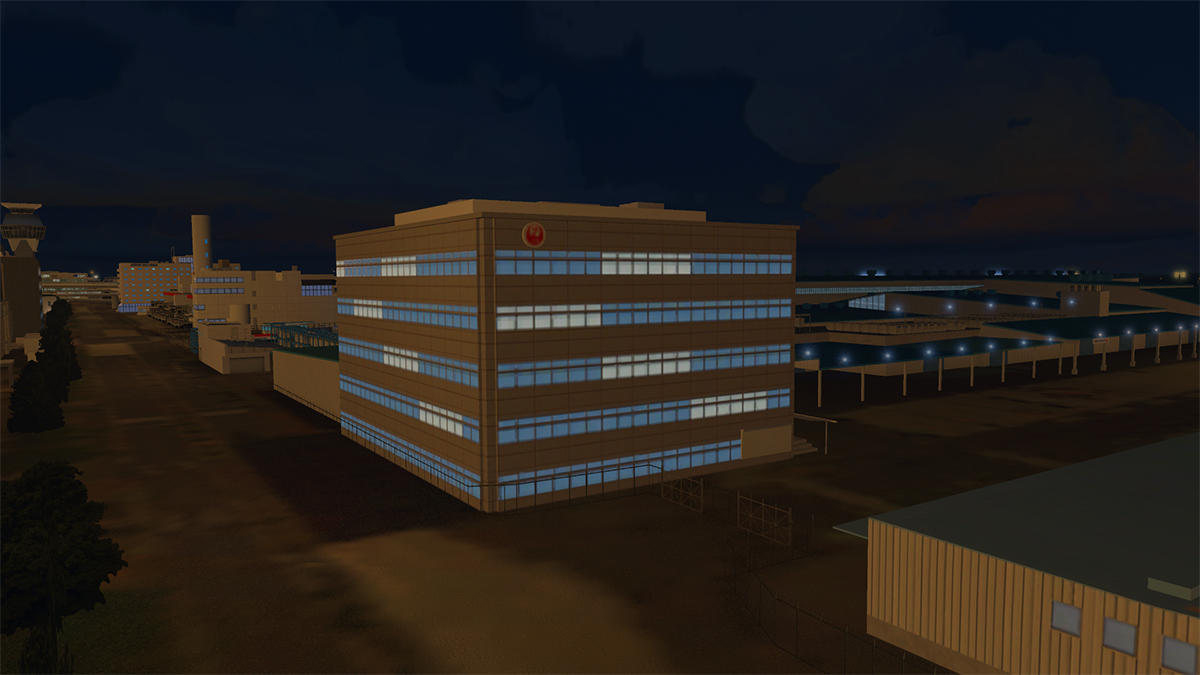
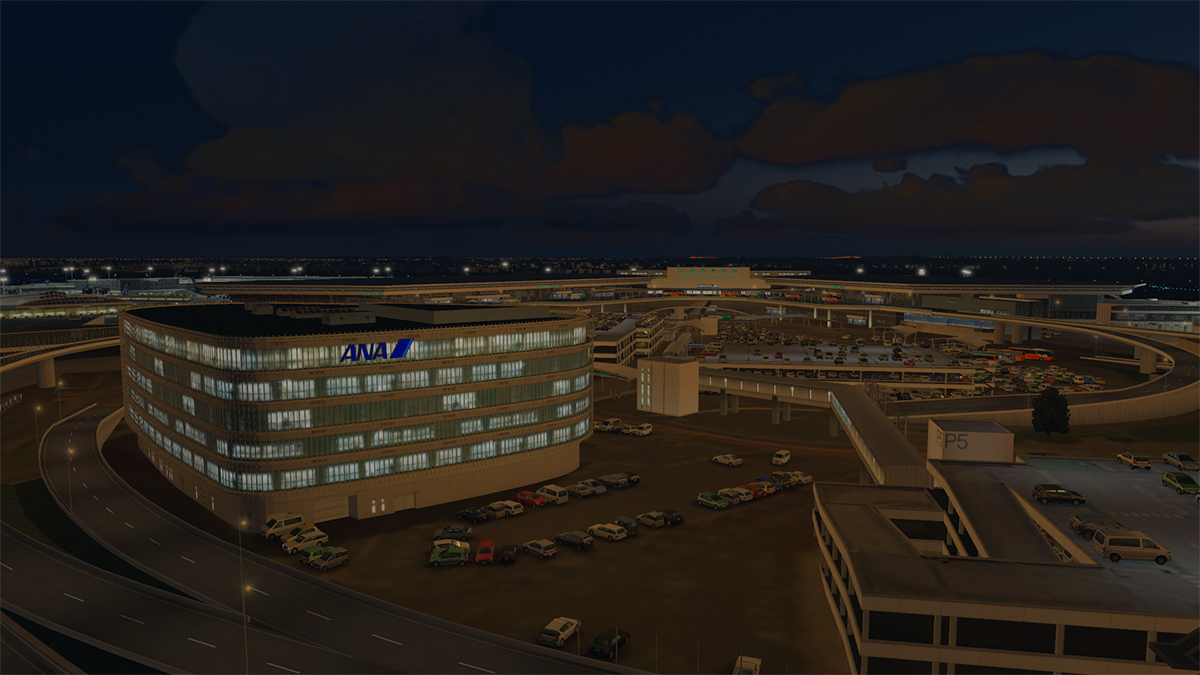
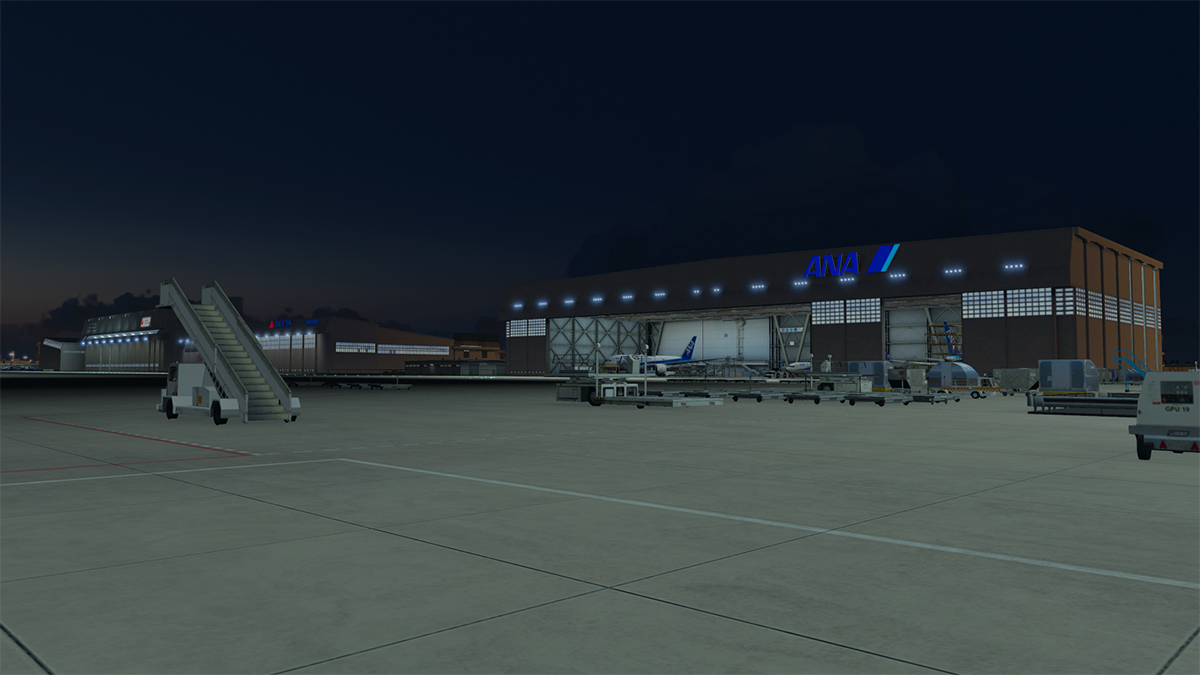
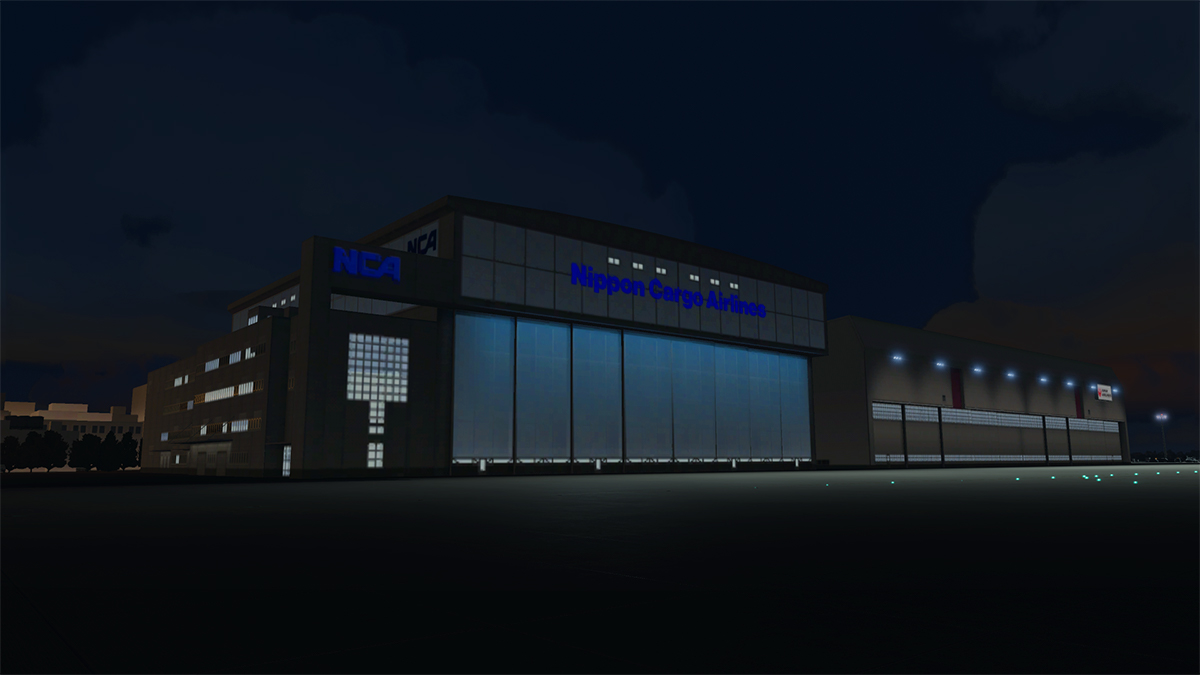
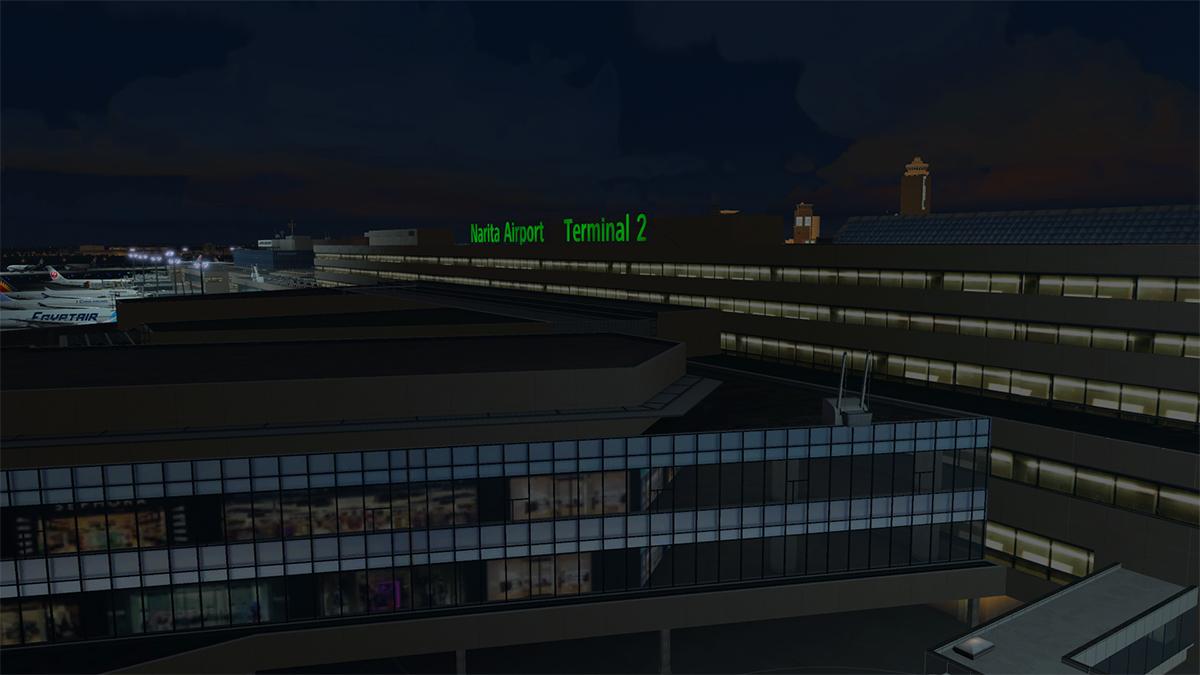
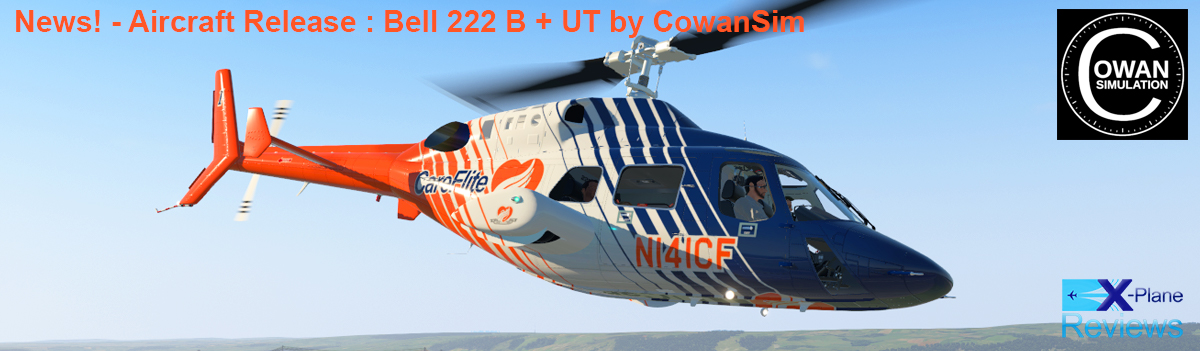
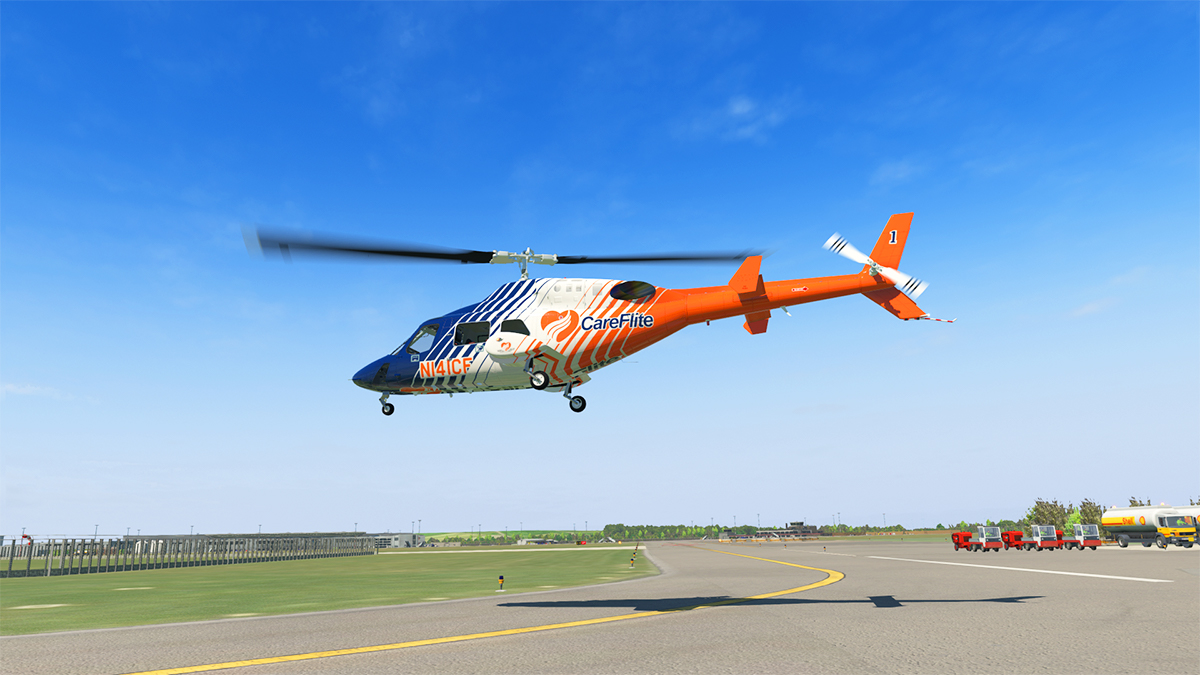
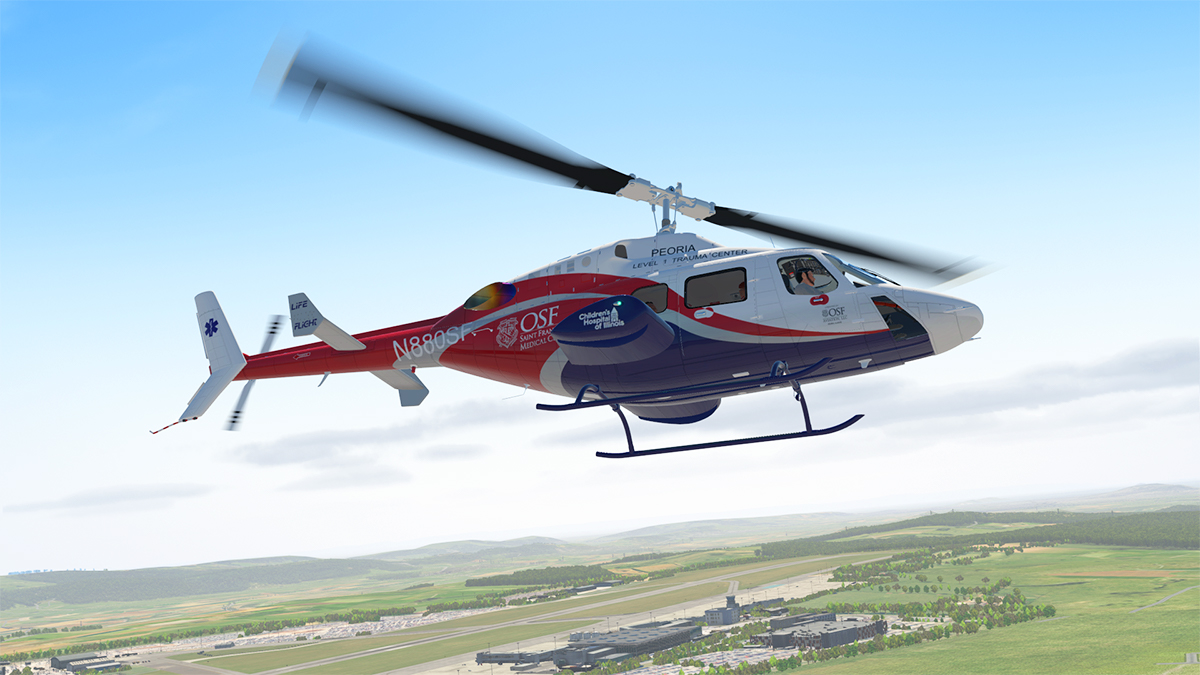
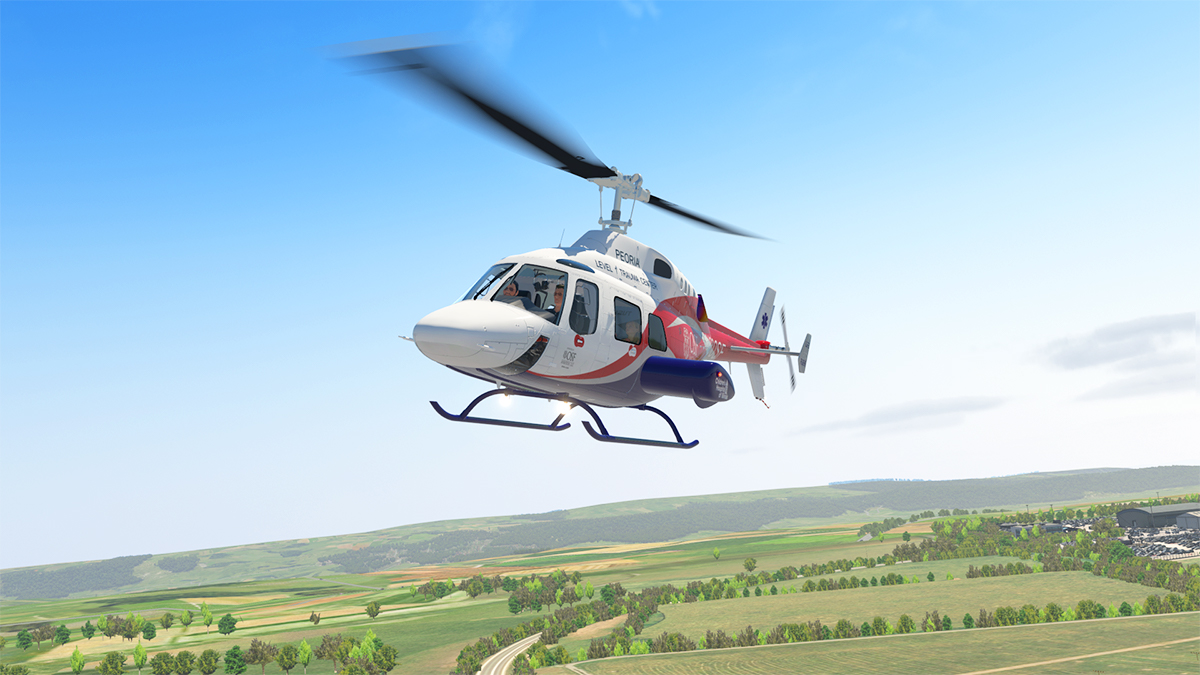
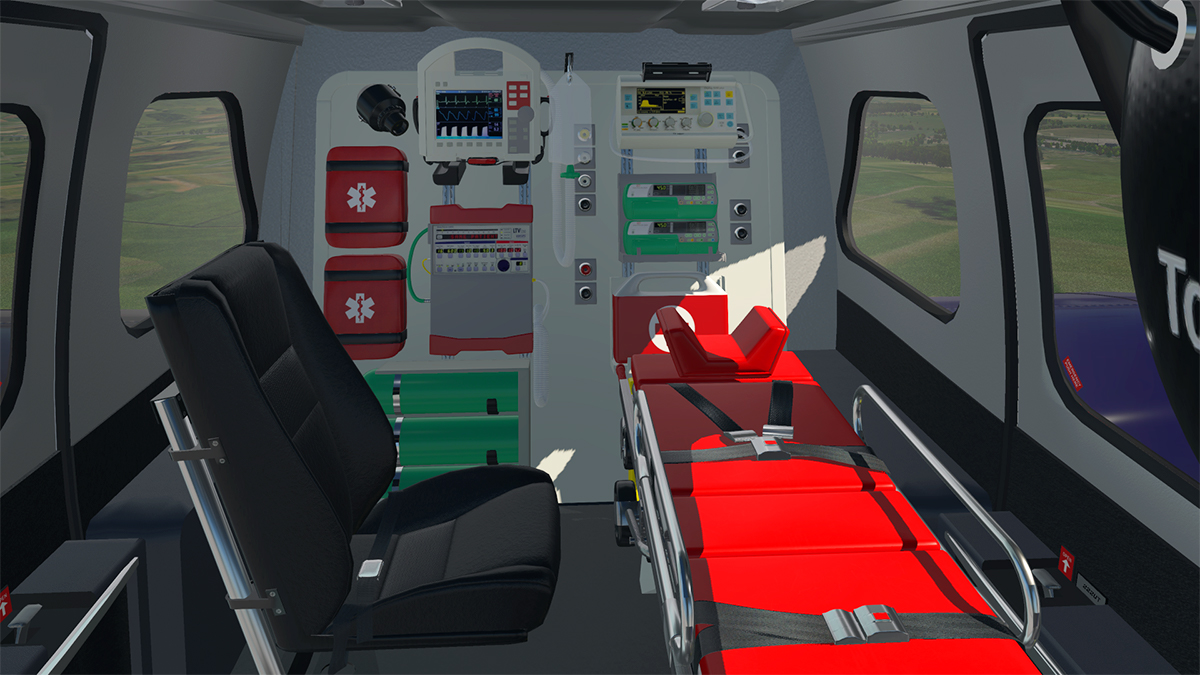
Behind the Screen : February 2021 In most past years X-Plane has come out of the box at the start of a New Year, in 2020 for instance I was already doing big reviews, even before I had restarted after the Christmas/NewYear break, head down... a New Year and a time to get on. Easter has now become the bigger purchasing period for X-Plane add-ons... the maths are simple, as with even Black Friday sales, most cash is focused on loved ones or spending up big over the holidays, not on simulation. Easter though is different, except for a few Easter Eggs, then you have the spare holiday break and more importantly a few free weeks to do nothing but fly in your favorite simulator, so why not buy yourself something new and shiny to fly or get a few new destinations to fly to. So over the last few years developers have not tried to crush in their last minute releases in to the Thanksgiving/Christmas period, but to now aim for the lucrative Easter sales, where you can ask full price and still get the sales, still do a discount after Easter and pick up more sales, but more importantly take your time refining the aircraft/scenery in the space of the New Year ready for Easter But in early 2021, the state of the X-Plane union is very quiet, very quiet. Yes there has been a few nice releases like Banff National Park, and Manchu Picchu, and a very nice RJAA Narita from Drzewiecki Design, but most of the 2021 new year has been focused on strangely helicopters, mostly you get one a year, but there has been almost none for a couple of years lately. I admit the JRX Design Gazelle is a 2020 mid-year release, but a slow period allowed me to cover the aircraft with a worthy review, same with the newly released and popular CowanSim B222, another interesting new developer for the helicopter genre. As you could guess my helicopter skills have improved enormously already this year, but I am ready to move on. There was a lot of serious indicators that the start of 2021 would be a blockbuster period of big releases for X-Plane, but in reality nothing actually happened? Now two months into the year and it is all still deadly silent? There are maybe a lot of external reasons, Covid 19, Weather (Northern Winter), No Money, or your life is messy because 2020 was a messy and unpredictable year throughout... Could Microsoft's new 2020 Simulator be having a major effect and taking the developers focus to the land of milk and honey and eternal riches. Not by the comments on the forums, the hard core users are still not buying the sales pitch, because the MS2020 is still feeling like a bad beta version, a few aircraft have popped up, but a fully functioning aircraft are not yet even close to being the sort of quality simulation that was advertised... but still the overwhelming majority of releases in 2021 has been the bucket loads of existing scenery for MS2020, Sour grapes! Well a little bit... if scenery developers had delivered the same sort of detailed cityscapes they are delivering currently for MS2020, for the X-Plane simulator, then how different would our world be, obviously the returns are not there with X-Plane, but it is a chicken and egg scenario, overall we obviously only got the scraps that they can actually deliver, FS developers never wanted to get behind the X-Plane simulator in the first place anyway, but still stole wholeheartedly from it's ideas. Laminar Research noted in their 2020 Christmas email, something about sharing all the new features coming to X-Plane early in the New Year, in other words... X-Plane12. Well two months into 2021 and the sim house is still quieter than a closed up Disneyland. Ziltch! Laminar even advertised for a new coding developer to join the team... great, but still no announcements. One thing I have always found is that when Laminar are deathly quiet, then they are working hard, being impatient is certainly not going to help any situation, but I still think we need to know where our simulator is going, in the face of the MS2020 onslaught, and then currently more so for the sake of X-Plane and Simulation in general. My guess is on the 2021 FlightSim Expo in San Diego in early June that is going to be a focus, but still I think an announcement is required before hand to see the balance between the Microsoft marketing overwhelming the picture well before the middle of the year comes around, people need to see choices, and currently Laminar is not even currently in the game (so to speak). In reviewing you need space to cover a large release, mostly four days with the current sort of extensive menus and feature lists, that will sometimes take up almost a week, so there are only a few very large releases you can cover in a month, the list out there are imminent large scale releases is now getting large, the secondary issue is that most simulation purchasers only have a certain budget to buy these big feature and expensive releases, they may absorb one, or even two $70-$80 products, but that would be the limit for most punters, no matter what other great projects are put on the table, so most users would have to choose between one or the other. Most certainly with time they will purchase the other releases, but once the immediate "Gotta Have" moment wears off, then they are then willing to wait for the sales, and that means then the developers lose that immediate release sales punch. So you will have to choose. and what will soon be on offer. The biggest attraction is certainly Just Flight and their Bae 146 Series (with refining by Thranda), it is not going to be a cheap package as the P3D version is priced at US$85.99, but you will get eight, yes 8 variants, plus a feature list you can dream of, there is a lot of functionality and detail to be had here, and in my mind this aircraft goes straight to the top of the list in desirability. Just Flight also announced last year their Vickers VC10, for X-Plane, but the trail has gone cold for a while, mostly because the Bae 146 is the priority release. This is another US$70 ($69.99 P3D) aircraft, but does not have the attraction of the Bae 146, as it is in reality a nostalgia aircraft, nice to have, but certainly not a high seller. There has been a lot of noises around X-Trident's Chinook CH-47F, as a lot of testing and refining has been going on lately, so the aircraft has to be close to release, and a big feature list does this aircraft have. The testing has shown what a brilliant aircraft this will be if it is up to the standard of their excellent AB412, the AB412 is priced at US$35.95, but expect the Chinook at around the US$50-$60 dollar mark, but it will be well worth the high investment. Q4XP, or the new Dash8 Q400 for X-Plane. This is from FlyJsim, whom created the original Q400 now called the "legacy" version, this aircraft is now actually 10 years old (how time flies). This completely new Q400 version is certainly going to be of a very high quality and detailed aircraft, and thankfully the FMC is a custom version modeled on the aircraft's OME Universal UNS-1e v1000, again it won't be cheap at around the Mid-60s dollar mark, but will be well worth the investment. Time has gone on a long way since any announcement with the aircraft, with the trail again going cold around August 2020. The Q4XP has to certainly be close to a beta or release phase after a nearly a three year development. Another aircraft that has had a very long lead development is the McDonnell Douglas MD-11, coming from Rotate. Development spoilers and videos pop-up every few months, but again the extensive lead time (May 2017) now has to be showing benefits. If the quality is as good as their MD-80, then this will be an exceptional simulation from Rotate. It won't be cheap either, with my estimation in the Mid-$70's to $90's price range, but again you will get great value, no information if the aircraft will be a package of the two variants of Passenger and Cargo together or as separate purchases. Aerobask are known for small modern composite aircraft. So the announcement of Dassault Aviation's Falcon 8X was a surprise. It is an official product, but also a very different type and scale aircraft than what Aerobask have done before, and a step up in the type of aircraft than they usually deliver. The price will be higher as well around the US$50 mark, but you will get quality detailing and authentic systems (FMS is custom), and Synthetic Vision for a good deal. The Falcon 8X was initially proposed for Q4 2020, so that release timeline has now certainly slipped, and the recent announcement of the release of the Embraer Phenom 300 - EMB-505 from Aerobask, will certainly push the Falcon 8X back down the list again, but for how long? Felis, Boeing 747-200 Classic is another project coming to fruition. Felis is know for his classic Russian aircraft, so a big American Boeing 747 is certainly a big departure from the past for him, but a Classic B747-200 has to be an interesting aircraft to relive the Jumbo's classic years when it was changing the airways and also the airlines in a significant way. Felis notes "I want to do a variant with fully analogue gauges with LTN72 or LTN92 INS. Probably will do AF1 variant also, as it was in 1970's", Engines modeled will be the P&W JT9D-7J version, the early ones that blew up, the -7J had a power output 48,650 lbf (216.4 kN) and was installed in the B742 from 1976. Price? The TU-144 was priced at US$45, so the Boeing 747-200 should be around the same price. Note that Just Sim has also announced a Boeing 747 Classic version for X-Plane in the 747-100 and -200 passenger variants and the 747-200F cargo variant. VFlyteAir have also been deathly quiet, which is not like them, as they usually release two aircraft a year, but one that is slipping way off the radar is Carenado, once highly prolific, their output has dropped to a trickle since the departure of Thranda, with nothing at all announced, or even updated for months. Looking further and into the second half of 2021, there are several projects also worth mentioning. The ToLiSS A340, is a great expectation of genuine long haul flying and another dimension to flying ToLiSS aircraft (Although the A321 NEO LR/XLR are medium range aircraft), the A340 is more of a real long range machine, I hope ToLiSS do a A330 as well. The biggest announcement for X-Plane in 2021 in a significant release is certainly the FlightFactor Boeing 787-9. Noted under the FF "Professional" series like their B757/B767, the Boeing 787 will be levels again in detail and of course deep systems, slated for Q3/Q4 later this year, it will be certainly the release of the year for X-Plane. A final note for 2021 goes to X-Crafts. They announced an all new remodel and design of their E-JETS Family, which will include all variants of the E170, E175, E190, E195, and Lineage 1000. Significant will be the inclusion of (finally) a real authentic Flight Management System (FMS), however X-Craft's mentions three FMS units. A new "authentic" FMS (yet to be named more specifically), the Tekton FMS, or the X-Plane default FMS. The same custom FMS will also be transferred into their current ERJ Family, and in so making that aircraft also much more authentic. Overall a lot of the above projects are already quite overdue, you can blame a lot of reasons why, and mostly on the Covid-19 situation, but there is no doubt that most of these projects in one form or another will be released in the late Q1, Q2 period, so there is a lot to look forward to and fly in all these high quality aircraft. Going Nowhere Time to "fess" up. Embarrassed but X-Plane can do that to you sometimes. I decided to do a service from BNE (Brisbane) to CNS (Cairns), Australia, in the updated FlightFactor/Airbus A320-214 Ultimate, to checkout if the nasty framerate issue has be fixed (It has). Restrictions of using both the FF A320 Ultimate and xEnviro both together means a big even huge downpull of your framerate, and no matter how light the rest of your simulation set is in the scenery. I manged to fly both earlier in the v1.14 xEnviro and A320 Ultimate settings, but it was a close call on the numbers before I slid down into the slideshow situation, overall I could use the aircraft if I picked the right airports that didn't put too much strain on the framerate. First up the new 1.1.19 version of the FF320 Ultimate and it felt like the old days and thankfully now with a lot more usable headroom. But here is the funny point... I set up the aircraft and pushed the Airbus back with the "BetterPushBack" tool, and everything was normal, until I rereleased the park brake and lifted the throttles a bit to move forward into a taxi speed. Nothing moved... more power and the Airbus was solid, and no matter how much power I applied to the engines, this Bus was going absolutely nowhere? I started checking out problems.... Flightfactor have a very sensitive fault system on the A320, so that was my first call, no it was turned off, then the X-Plane fault system and again it was clean? Brakes are also sensitive on the FF A320, so I rechecked them, about 30 times? nothing as the A320 was still solid as a rock? I was now seriously confused and was resetting everything and searching everywhere, but nothing worked? Time was clicking on and I was going nowhere, 20 minutes of head scratching and now even with a load of swear words, nothing was not making this Bus move. My earlier review had been of the Cessna 140, a sensitive little thing that required this taildragger steering by using your rudder pedals as toebrakes, I don't have rudder pedals yet (expensive in Australia), but tried to steer the C140 via a set toggle switch (C) on my X56 Rhino joystick (That was not very successful either), but the point was the braking response setting affected the A320 Ultimate to a big degree... I reset the settings both to "None" and the Bus finally moved, and with applause from the passengers as we were finally all going to Cairns Obviously you can set a "Profile" for a particular aircraft in X-Plane, but I never really use that as I go through with reviewing a lot of aircraft and need the basic default settings, the FFA320 Ultimate also uses the hands off CEF (Chromium Embedded Framework) system anyway so it is not reliable, but overall it was a fluke I found the problem, the real problem is that X-Plane requires a lot of very different settings to fly some very different aircraft (Taildragger to an Airbus A320), but for about thirty frustrating minutes I was simply going nowhere! See you all next month. Stephen Dutton 1st March 2021 Copyright©2021 X-Plane Reviews
-
News! - ToLiSS celebrates 3 Years
Stephen posted a topic in News! The latest developments in X-Plane
News! - ToLiSS celebrates 3 Years It was three years ago this week that ToLiss Simulation Solutions released their first aircraft in the sensational Airbus A319-122. X-PlaneReviews had, had an early access to the aircraft, it was not what the aircraft delivered in it's excellent reproduction of the Airbus philosophy that was outstanding, but more so the feel of the aircraft in it's basic flying form, I never forgot that first manual landing at Amsterdam's Schiphol airport, where I manhandled this fabulous aircraft on to the runway, it was and still is the most amazing heavy aircraft to fly in both automatic and manual modes. Another excellent Airbus in the longer form of the A321-231 followed last year, it's NEO (New Engine Option) version came just before Christmas 2020. All amazing simulations and congratulations have to be in order... But ToLiSS has been around and affecting X-Plane for a long time before they went global 3 years ago. Early projects included QPAC (QualityPark AviationCenter) project from 2013, and the FlightFactor Airbus A350 XWB, in fact most airbus projects (except for JARDesign) in X-Plane have usually had the ToLiSS magic touch, so they could be the maestro's of anything Airbus and it's systems in X-Plane. Two projects are current. First is the same NEO option as the A321 for the Airbus A319-122, and that is coming very soon. The second is another Airbus project in the Airbus A340, the four-engined version of the A330... With the passage of three years, this birthday announcement included a few more images on the progress of the aircraft details noted are; - The cockpit 3d model is completed - The cockpit texturing and animation is in progress - Exterior model is in progress - The systems simulation is in progress with initial performance and handling tuning completed - The target delivery date will be in the second half of 2021 And there was a big callout to Ekran Design, the official A340-600 3d modeling designer. You have to admit that above cockpit render is very nice, and four throttles to navigate. Release is noted Q3 or around the northern autumn. Both current ToLiSS available aircraft are currently offering 20% off on the A319 and A321. ____________________ Yes! both the Airbus A319-122 and Airbus A321-123 by ToLiSS is NOW available from the X-Plane.Org Store here : Airbus A319 by ToLiSS Price is US$69.00 On sale:$63.20 Airbus A321 by ToLiSS Price is US$79.00 On sale:$63.20 Announcement is here: X-Plane.Org Forums ____________________________ News by Stephen Dutton 1st March 2021 Copyright©2021 : X-Plane Reviews (Disclaimer. All images and text in this review are the work and property of X-PlaneReviews, no sharing or copy of the content is allowed without consent from the author as per copyright conditions) All rights reserved.
-
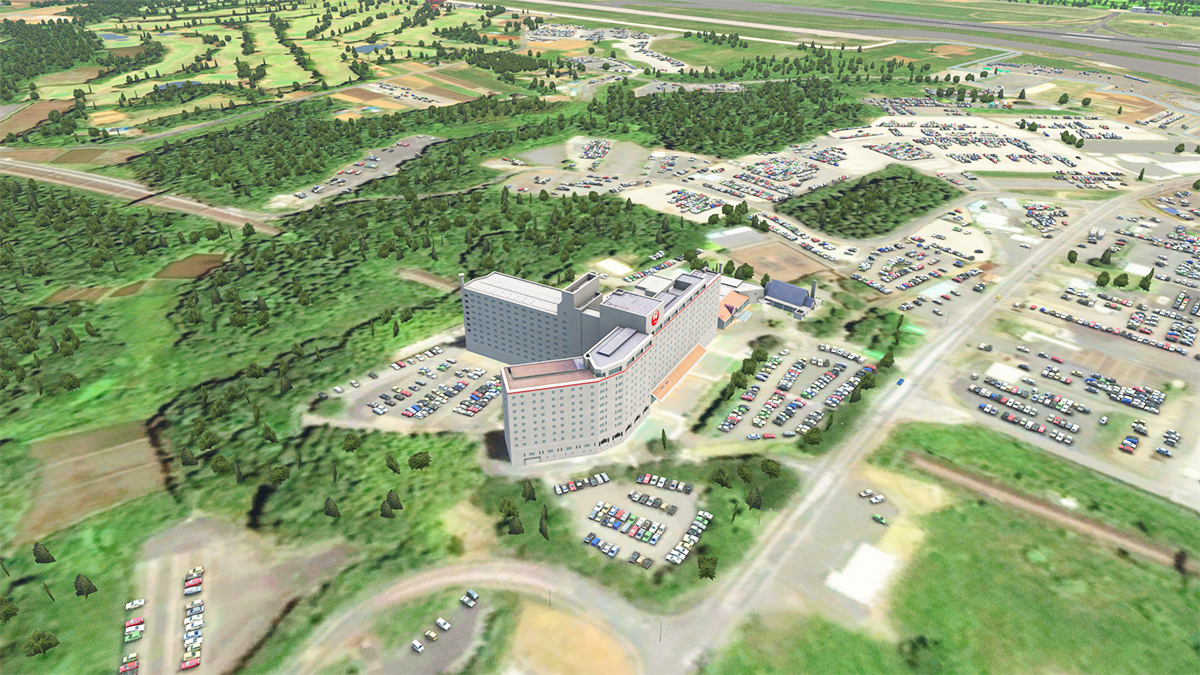
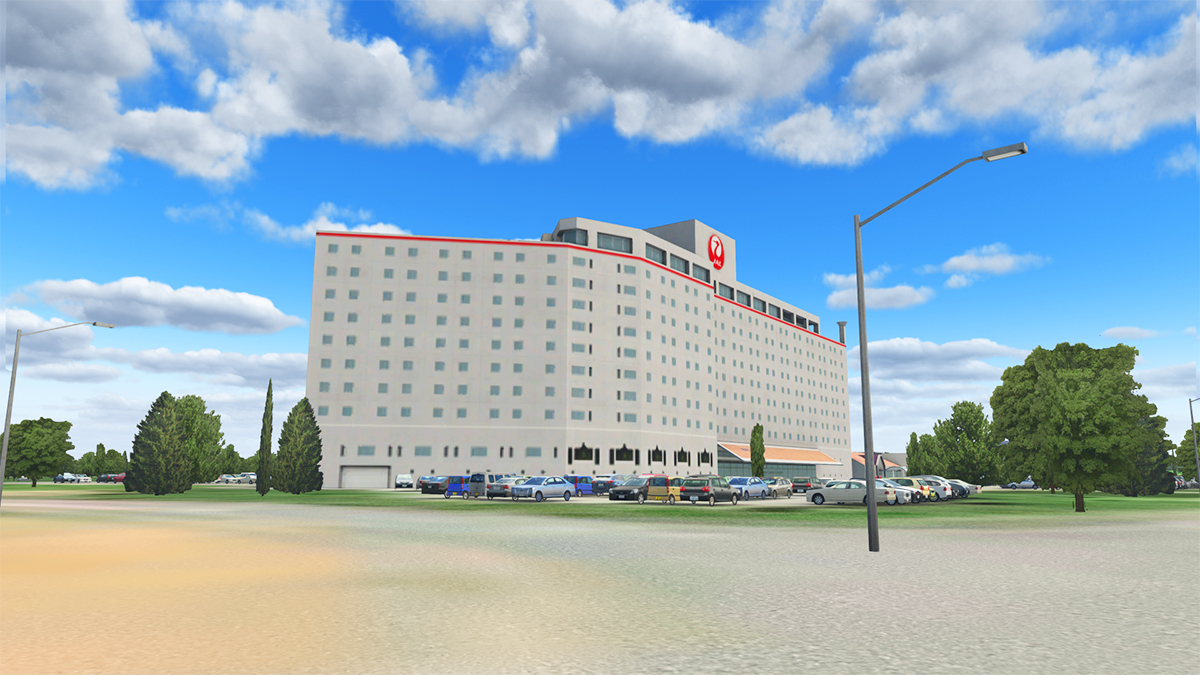
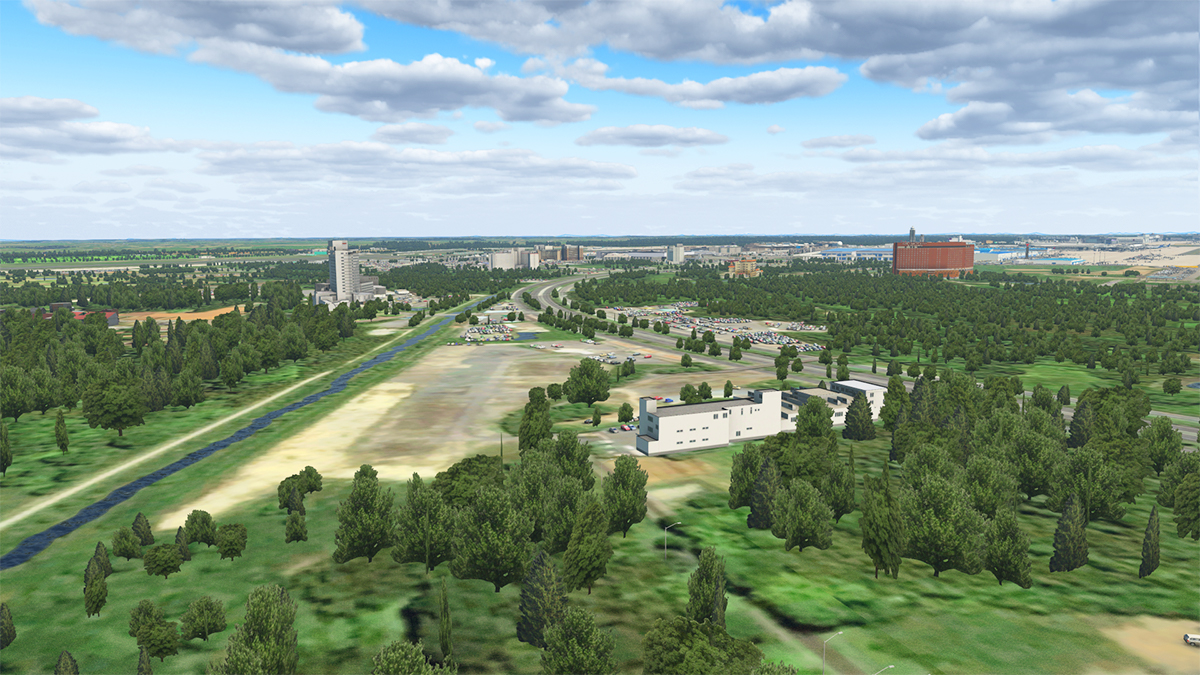
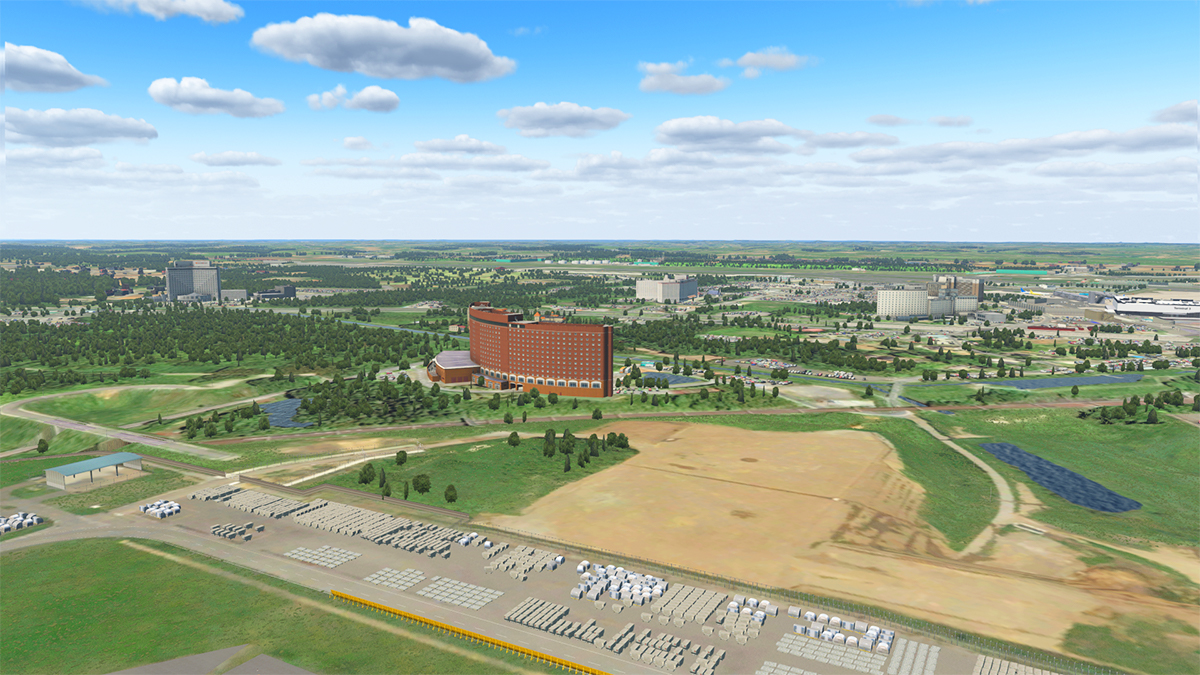
Airport Release : CYHZ - Halifax Stanfield International Airport by Airfield Canada A developer that is focused on Canadian scenery is Airfield Canada. Their first release was CYQY - J.A. Douglas McCurdy Sydney Airport (not to be confused with Sydney, NSW, Australia) and now here is their second major releases in CYHZ - Halifax Stanfield International Airport. Although in the same area geographical of Nova Scotia, Halifax Stanfield airfield was not part of the early transport trans-Atlantic stopping off points, like St Johns (CYYT), Gander (CYQX), Moncton (CYUM) and Sydney (CYQY), but it did have a significant part in the historic "Operation Yellow Ribbon" after the Federal Aviation Administration closed down U.S. airspace, after the 9/11 New York World Trade attacks. As part of the operation Halifax airport took in 47 flights, and more flights than any other Canadian airport involved in the clearing of the skies, carrying about 7,300 passengers. As an aviation facility it is still a major player as Halifax Stanfield is the 8th busiest airport in Canada by passenger traffic. It handled a total of 4,316,079 passengers in 2018 and 84,045 aircraft movements in 2017. It is a hub for Air Canada Express, Cougar Helicopters, Maritime Air Charter, PAL Airlines and SkyLink Express. Features 3D Models With over 150 highly-detailed custom buildings and objects, this airport was built from the ground up over two years from pure passion. It looks and feels like the real thing, with painstaking attention to measurements, materials, doors, windows, and other minor details. All buildings and objects feature PBR. Ground Textures Custom high-quality PBR ground textures and markings, including custom striated runway markings, hundreds of hand-placed lines and decals, and a weathered-look where applicable. Orthophotos cover the airport property and adjacent properties. Custom terrain The airport features a custom mesh developed by Maps2Xplane, with real-life terrain details included, such as the steep hills at the ends of the runways. A patch is included for those who prefer Ortho4XP Lighting At Airfield Canada, we love night flying, and our lighting for Halifax Stanfield is a reflection of that love. Every light on the airport property was placed manually and precisely. From the custom taxiway lights to the custom approach lights, your eyes will be pleased. Ground Vehicles Custom modelled and animated vehicles (with people) have been included for the airport property, such as tugs, baggage loaders, and catering trucks. Animations Optional custom animations have been included for all 12 custom aircraft jetways, 5 hangar doors, 2 types of windsocks, a radar antenna, nearby wind turbines, and custom a follow me truck - all of which require the SAM plugin. Seasons Optional spring, summer, autumn, winter, and deep winter seasons are supported through the SAM plugin. Simply select “deep winter” to show 3D snow piles and windrows. The scenery features a full custom mesh that has been developed by Maps2Xplane, custom modeled ground vehicles and extensive SAM Support, with animated airbridges, spring, summer, autumn, winter, and deep winter custom seasons, and animated hangars (SAM 2 is required) Images courtesy of Airfield Canada Airfield Canada's Facebook page is here ____________________________ Yes! CYHZ - Halifax Stanfield International Airport by Airfield Canada is now available from the X-Plane.OrgStore CYHZ - Halifax Stanfield International Airport Price is US$24.95 Requirements X-Plane 11 Windows, Mac or Linux 4GB VRAM Minimum - 8 GB+ VRAM Recommended Download Size: 5.6 GB Current version: 1.0 (February 28th 2021) ____________ News by Stephen Dutton 1st March 2021 Copyright©2021: X-Plane Reviews (Disclaimer. All images and text in this review are the work and property of X-PlaneReviews, no sharing or copy of the content is allowed without consent from the author as per copyright conditions) All rights reserved.
-
News! - Aircraft Announcement : Embraer Phenom 300 by Aerobask Aerobask have continued it's journey into light jet territory to announce that their next aircraft will be the Brazilian Embraer Phenom 300 - EMB-505,. Most pundits were expecting a Falcon 8X announcement, but instead we got another light jet like the already released Aerobask Epic Victory. On the Falcon 8X, Lionel “Yoyoz” Zamouth of Aerobask / Skunkcrafts still assured users that in the development of the Phenom 300 aircraft it has also actually benefited the larger Falcon 8X. The reason given for this was that the development allowed the developer to reduce VRAM usage in the Falcon 8X by roughly 1GB. But lets look at the HUGE feature list coming in the Phenom 300... Aerobask quality 3D model Detailed cockpit, cabin and exteriors Functional baggage, GPU and fuel doors 4K PBR textures 8 beautiful liveries out of the box White (for painters) and Lo-res liveries available through Aerobask website Smooth and VR-friendly manipulators High quality sounds full FMOD environment by Daniela Rodriguez Careri in-game volume control without pausing the sim Enhanced Laminar G1000 New Synthetic Vision technology by OscarPilote Laminar's GFC700 autopilot with popup Custom MFD engine parameters, with reversion mode on PFD. Optional mouse, scroll-wheel and dial-pad support for easy PFD data input Keyboard support for GCU478 and flight plan input Detailed ELEC, ANTI-ICE, FUEL and STATUS synoptic available through fictional buttons Custom detachable popups with fixed ratio and all optional features above Note: some of the optional features may need VR-mouse at the moment Deep system emulation Custom-coded Integrated Electronic Standby Instrument (IESI) Custom Current Speed Control (CSC) Working refueling panel Realistic engine startup procedure, electrical circuit and anti-ice functionalities Oxygen system for emergencies Functional breakers, with configurable reliability Other Avitab tablet, with integrated options panel Detachable and VR-friendly 2D options panel Preferences saved between flights And a video to cry over while having your breakfast... The aircraft will also come with the excellent feature of "Synthetic Vision" technology by OscarPilote, there is a video here to show you the Synthetic Vision in action, but on the Falcon 8X and not the Phenom 300. The G1000 three screen avionics are fully custom as well. Release of the Aerobask Phenom 300 is noted as "ETA is end of March - E meaning Estimated", but to be noted as before Easter 2021 No price was announced, but the Epic Victory was US$34.95, so expect the same price position, or around the US$40 mark. Announcement is here: X-Plane.Org Forums Video and images are courtesy of Aerobask ____________________________ News by Stephen Dutton 27th February 2021 Copyright©2021 : X-Plane Reviews (Disclaimer. All images and text in this review are the work and property of X-PlaneReviews, no sharing or copy of the content is allowed without consent from the author as per copyright conditions) All rights reserved.
-
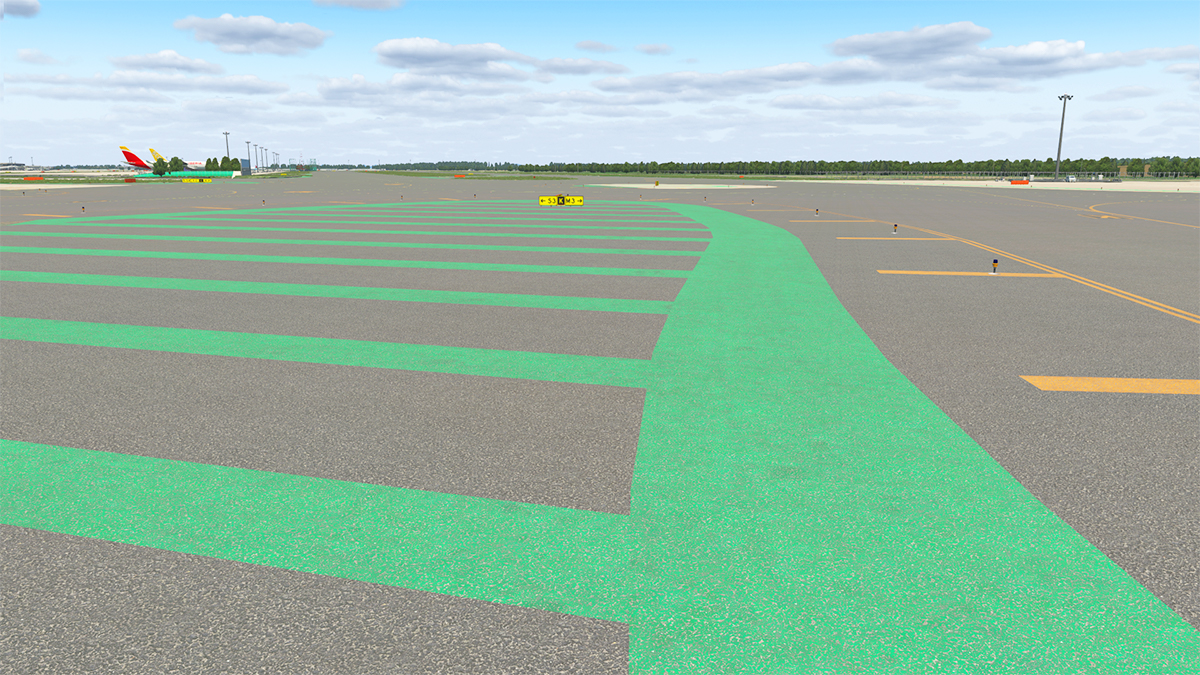
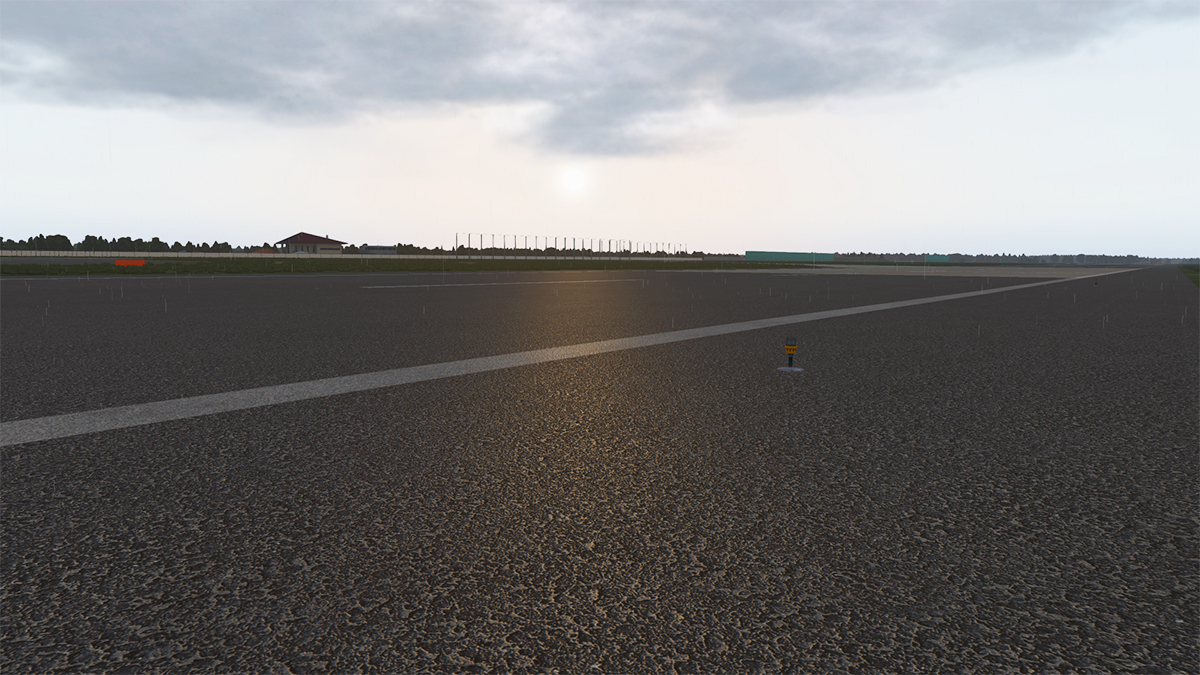
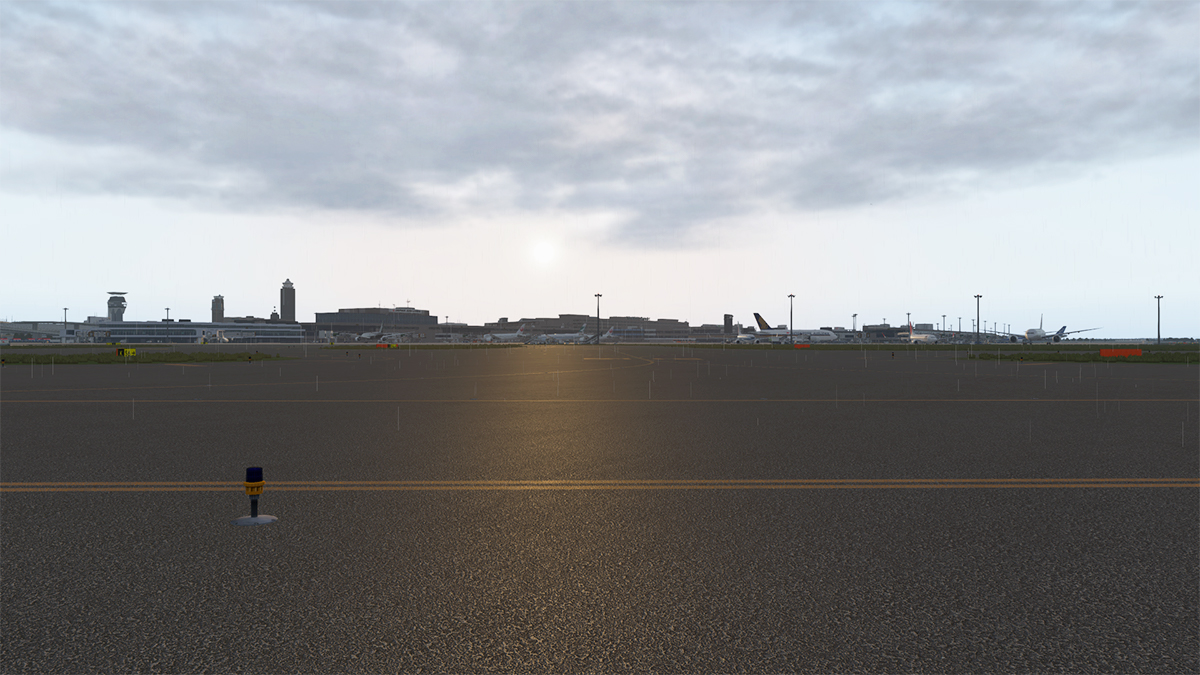
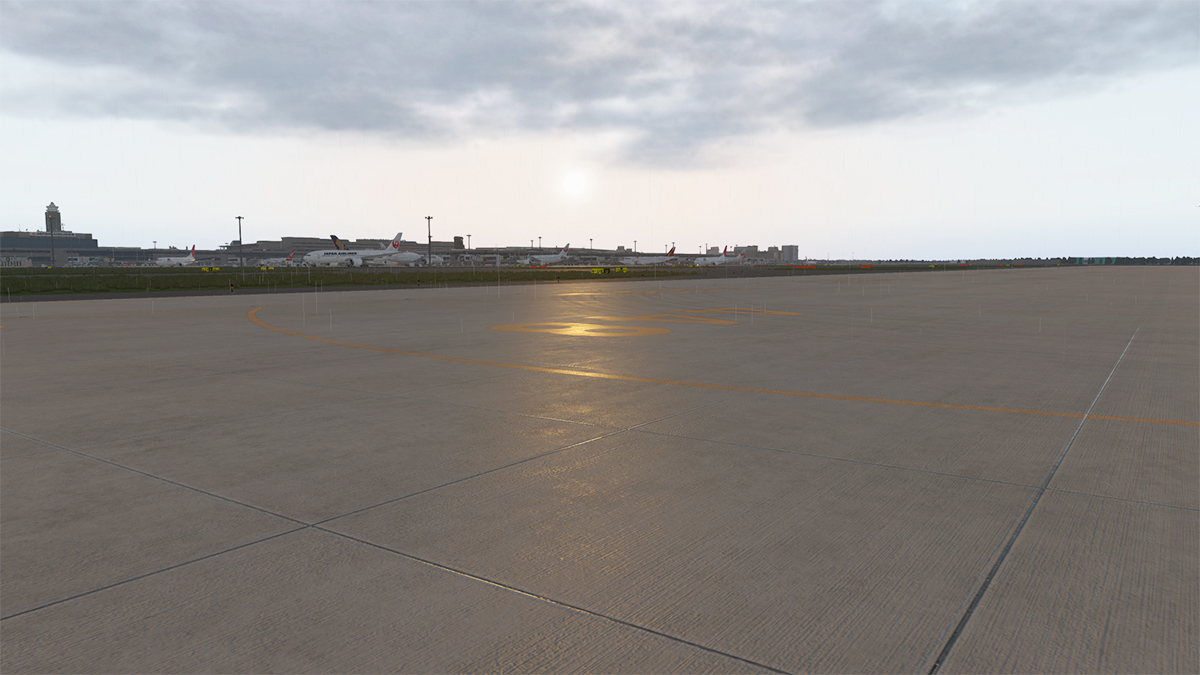
Upgrade Scenery Release : GCTS - Tenerife South - Reina Sofía Airport v2 by Digital Design JustSim released their first version of Tenerife South back in December 2018, and it had a few updates in, one still in Dec 2018 and another one in 2019, overall I wasn't that taken with the scenery, it was good as all JustSim scenery is, but it just didn't register enough for me to do a review or give the airport the exposure it really deserved. It is now back in an upgraded GCTS version v2 and the scenery has had a very though decent overhaul and revision. The Tenerife scenery has also rebranded under the Digital Design label, but it is in reality still a part of the JustSim stable of quality, but value focused sceneries. First there is supplied a few different options for the install of the GCTS - Tenerife scenery. First is the X-Plane default version (of which is reviewed here). Second is a ORBX TrueEarth Canary Islands option that intergrates the scenery with the ORBX Photo-Othro textures. The third option is to use the Spain UHDv2, Ultra High Definition Photoscenery that is free from the X-Plane.Org, but to note the full Spain UHD download is a walloping hard-drive smashing 424GB! GCTS - Tenerife South Airport v2 First impressions of GCTS - Tenerife v2 is impressive and light years better than the original v1 release. If you want to look hard over the scenery there are a lot of those original elements that have been moved over to this second upgraded version, the fuel tank depot for one, and there are a few others... but mostly it feels and looks far different and in a quality way. The biggest visual points are those scattered large blocks that cover the whole area of the scenery... ... these are netting covers that protect the Banana plantations, and about 9,000 hectares are dedicated to Banana cultivation in southern Tenerife, and the nets are used to catch the early fog, or the moisture is trapped to keep the fruit fresh and cool. Digital Design have done these nets structures very well... it would have been very easy to just have created 3d modeling blocks and just dumped them in the scenery, but up close the detail of the netting is well done, and the various farms are actually done differently, and more than just a one block does all approach, so the approach view is very realistic. Tenerife South Airport Aeropuerto de Tenerife Sur / Aeropuerto Internacional Reina Sofía Tenerife Sur / Reina Sofía Airport - GCTS IATA: TFS - ICAO: GCTS 07/25 - 3,200m (10,498ft) Asphalt Elevation AMSL 64 m / 209 ft There are two terminal buildings, and long main building, and a smaller LCC Terminal east. The main Terminal Tenerife South consists of a three-storey passenger terminal in a classic brick style. The Main level, Floor 0 (middle floor) contains all the check-in and service counters, the departure and arrival areas and the main baggage reclaim. The departures area features 34 boarding gates of which eight gates are equipped with Airbridges. While the upper floor 1 contains office space and transit corridors, the basement level - features the airside luggage belts and baggage service areas. Digital Design has completely remodeled the main terminal building with new High Resolution (Hi-Res) textures and PBR Materials, glass is also all new as well, and it is a green see-through tint. All the Airbridges are well modeled and also use the excellent SAM (Scenery Animation Manager ) system, to connect the bridges to the aircraft. G2, G4, G6 - J1, J3, J5, J7 and J8 cover the parking slots. Terminal interiors are also now modeled in v2, it is better than the usual, and quite a nice place to sit waiting. Gate and ramp detail is very good. Visible Ground floor is detailed with tables and baggage conveyor belt systems are also easily visible... ... busy, busy traffic animations are (SAS) default, but very well done and there is a lot of movement around the ramps and under the terminal buildings. Ramp clutter is also very good and many locally (Iberia) branded. Movement also comes from the animated Air-Conditioning plant fans feeding the Airbridges, a nice touch. Landside For once you are not faced with Lo-Res ground textures landside, but a fully detailed area... very good, and all this is with tons of nice fill detail. Nice tropical palm trees and flowers, as here it is a bright and colourful place for a getaway holiday, even the long-term carparking areas are shaded... nice. Buses are all locally Canary Shuttle and TransTenerife branded for detail. People and passengers are also placed nicely, but don't have a lot of detail. Control Tower The control tower is positioned at the end on the main terminal building, mid-apron. Detailing is very good, with detailed roof mounted aerials and admire the fantastic spiral stairway attached to the east side of the tower. Tower view is good, but a few of the aerials get in the way at certain angles, but both approaches do have a clear view. At the other end of the Main terminal and connected by a walkway is a small LCC (Low Cost Carrier) Terminal. GCTS is obviously a tourist focused facility, so a cheaper LCC terminal is a big requirement here... the smaller terminal is really well done with H38, H39, R40 parking stands, R47, H36, R45, H41, H44, R42 H43 are adjoining remote stands. LCC Terminal detail is excellent with wood trim and slatted detailed window blinds. Far east is a GA parking area with five stands AG1 to AG5, and behind a large open plan parking and service area. Note the nice rock wall set behind. All the way end to end of the aprons mid-field are 21 overflow stands for the seasonal services... E49 to E70, they also lead into the west side small cargo hub area. The cargo hub is well detailed with loads of clutter for a lot of realism, far west is the airport's services and administration area and a taxiway facing Fire Station. Two Fuel Depots cover the west rear, and a nice golf ball radar installation covers the rear of the east end, and note all the elevation changes in this scenery, which are all done very well, with the main runway elevated lower than the apron areas. Infrastructure There is a lot of infrastructure in the local flavour of the resorts around the the airport. Las Galletas, Oasis del Sur, Los Abrigos are all represented as is the San Miguel marina. Golf Courses and resorts are all represented and the coverage is very good and overall realistic. Autogen does a good job as well in filling in the other island blank areas... I do however recommend SFD Global, that does a better layout and feel of the Spanish heritage look, the default autogen is not bad, but SFD gives you a far better filler of content (below). Ground Textures The ground textures are some of the best I have seen in a fair while... great grain and the edges are stony and are quite realistic. Grain is very good, as is the asphalt detail... lineage is faded were required, and there is very nice rubber markings at heavy work load turning areas... ... but there is also a clever effect going on here as well. Get the right lighting conditions and the burnt-in ambient occlusion effect works brilliantly, but also those same rubber markings are still matt darker, giving off a really realistic runway wear effect... ... high marks here for the realism. 3d Grass is of the desert variety, and very good, but in a few areas that should have the 3d grass (i.e. outside the Firestation) would have benefited if used. Lighting Like everything in the scenery the lighting is also very good, but with a slight twist... The Landside lighting is far brighter than the Airside... Both 07/25 approaches have RAIL lighting, and visually very good (It needs to be because of the frequent fog conditions here), taxiway centreline is dual coloured (green/yellow) and navigation signage is fully ground reflective and very nice. Airport lighting is very realistic visually, and a nice place to arrive at in the wee hours. The debate here is not that the aprons are too dark, of which they are not, but if the airside terminals are. See through glass causes all sorts of problems, but most always come out on the dull side, as that is the case here also... ... it looks good, but internally you can see it is far too dark or dull, the developer is maybe having a foot in both camps and not winning in either... the terminal lighting needs to be more vibrant. Not so the terminal lighting Landside, as it is brilliantly bright over here, and looks good. The highlight is lovely lit Control Tower, it looks great from any rear view. Some areas though are lit up, without or just a few of any physical lighting elements, in the Fire Station/Admin area and some private properties they are just areas of light... ... and it feels a little bit artificial. Overall the airport lighting is top notch. The Infrastructure of Tenerife however is not great, blocky one coloured windows or simply poor lighting at all from the housing windows, does not make the area or the resorts around the airport light-up very well, and it is all pretty well dark on the western approach, overall the township lighting is pretty basic. ___________________ Summary Tenerife South - Reina Sofía Airport, is the largest airport on the Canary Islands, situated in the southern part of the island. The airport was inaugurated on 6 November 1978, by Queen Sofía of Spain, to whom the airport is dedicated. This scenery is an upgraded GCTS version v2 of the original JustSim Tenerife-South from 2018, and now GCTS is also rebranded Tenerife under the Digital Design banner, the scenery has had in the process a very though decent overhaul and revision. Note the scenery is upgraded, and it is not an update, but there is a very generous low upgrade cost from the original v1 of only $7.50, to install this vastly better v2 Tenerife. All the main elements here have been remodeled including the excellent long terminal building, it also now has internal detail as well which is very good. Ground textures are excellent and comes with burnt-in ambient occlusion and great rubber effects on the surfaces, surface grain is good as well. SAM support is also added, as is a lot of busy animations and twirling Air-Con fans and good clutter. Detail is very good, even Landside which is well detailed and realistic, but clutter is good Airside as well. Lighting is strong Landside, but weak in the see-through terminal glass, making the Airside aprons a bit darker. There is a lot of elevation changes in this scenery and even the feature of the main runway being lower than the terminal aprons, that adds in a bit of novelty. Local environs are also modeled with the local resorts being clearly very visible from the airport and on approaches. There is not a lot to fault here at Tenerife... just the noted dull internal lighting and township lighting which is all very basic, and few objects get in the way of the tower view... otherwise the whole scenery is pretty solid. Three options in the X-Plane default version, ORBX TrueEarth Canary Islands Photo-Othro textures, and the Spain UHDv2, Ultra High Definition Photoscenery are all provided to suit your particular tastes. JustSim and by definition Digital Design, always deliver excellent scenery at a value cost, and that is exactly what you get here at Tenerife v2. I love an airport I can instantly like and start adding in routes to accommodate in going or leaving from there... so any scenery that just wants to used has to be again great value, and overall that is what another Digital Design gem delivers, great value and a great destination. _____________________________________ Yes! GCTS - Tenerife South - Reina Sofía Airport v2 by DigitalDesign is now available from the X-Plane.OrgStore GCTS - Tenerife Airport v2 Price is US$20.00 Owners of Tenerife v1 can get this new version for only US$7.50. Please use the coupon code found in your original Tenerife invoice at the X-Plane.OrgStore Features V2: Compatibility ORBX TE Canary Islands Slope runway and taxiways according to the real runway profile Using New High Resolution textures Using PBR Materials New 3D Model Ground 3D Grass New Ground textures New marking and updated parking numbers according to the latest data Improve 3D Model Terminal Improve airport vehicles 3D models Interior modeling Added new buildings in the approach areas. Compatibility Spain UHDv2 WT3: WorldTraffic3 GroundRoutes are NOT provided but the scenery is compatible and extremely good, and Traffic Global also operates perfectly, Requirements: Windows, Mac or Linux 4 GB VRAM Minimum. 8 GB+ VRAM Recommended Download size: 2.5 GB Install and Review Version 2.0 (February 24th 2021) Installation Download scenery files required are in one zip folder download of 2.44GB (a big step up from the original v1 size of 840Mb) There are two folders of which are placed in the X-Plane Custom Scenery Folder in this .INI order "Mesh" must be sited below the main "GCTS Tenerife V2" folder). Digital Design GCTS Tenerife v2 Digital Design GCTS Tenerife v2 Mesh Total scenery install is: 2.28Gb Options include: Three photographic layouts with the X-Plane default version, ORBX TrueEarth Canary Islands Photo-Othro textures, and the Spain UHDv2, Ultra High Definition Photoscenery all provided. You just select the set of both Airport and Mesh choice to install. SAM Plugin - Scenery Animation Manager - Suite 2.0 is required for this scenery ShortFinal Global SFD plugin is highly recommended with this scenery. Documents Read Me only ______________________________________________ Scenery Review by Stephen Dutton 27th February 2021 Copyright©2021 : X-Plane Reviews (Disclaimer. All images and text in this review are the work and property of X-PlaneReviews, no sharing or copy of the content is allowed without consent from the author as per copyright conditions) All Rights Reserved Review System Specifications: Computer System: Windows - Intel Core i7 6700K CPU 4.00GHz / 64bit - 32 Gb single 1067 Mhz DDR4 2133 - ASUS GeForce GTX 1080 8Gb - Samsung Evo 1Tb SSD Software: - Windows 10 - X-Plane v11.51r3 Addons: Saitek x52 Pro system Joystick and Throttle : Sound - Bose Soundlink Mini : Scenery Animation Manager - Suite 2.0 - Free : Environment Engine by xEnviro US$69.90 Scenery or Aircraft - Default Boeing 737-800 by Laminar Research
-
Aircraft Review : CowanSim Bell 222B + UT You know when something special is going on when the X-Plane forums were buzzing. It was "CowanSim this" and "CowanSim that", and everyone was wanting something relating to the aircraft, more unusual was that is was a Helicopter, and in most instances helicopters don't usually create this sort of buzz, mostly because chopper pilots are a minority bunch and stay mostly within their own flight pal circles... so something must have been interesting to create a so much activity. This comes with the release from CowanSim a Bell 222, from the 222/230 family. The manufacture's success with the Bell 206, or JetRanger required a machine that was slightly bigger and more powerful, so the B222 is often referred to as the JetRangers sister. There was the later TwinRanger with two engines as a variant of the B206, but overall the whole machine needed to go up a size bigger from a five seater to a 6-8 seater, but you can at a push accommodate 10 as in a pilot and nine passengers in a B222. The 222B is the most common version with twin Lycoming LTS101-750C turbine engines putting out 684 shp (510 kW) power (the 222A used 620 shp (462 kW)). In this package is also the Bell 222UT, which is the 222B variant with skids, introduced in 1983, and the lack of retractable landing gear also allowed for the fitting larger auxiliary fuel tanks, and not to be confused with the B230 Utility, only 70 examples B222UT were ever built. Often noted as the “Triple Deuce”, or the 222 spoken as the “Two Twenty-two”. First visual impact is that the B222 has only twin main rotor blades of a stainless-steel-fiberglass construction, and rotor hub has elastomeric bearings, which are lubricant free. It was B230 that had the more powerful engines and a four-blade main rotor. In this review my focus is going to be only on the B222B version, as both aircraft are actually identical except for the skids vs wheeled variants. Modeling is very good, not exceptional, but well formed without any cheap modeling tricks. Mapping (raised points) is a little heavy, but the upper engine vents are really well done, as are the engine inlets. Overall though the aircraft is let down by the low-res liveries, you can easily see the jaggies along the edges. Glass is excellent. Nice curvature, tint, but also excellent reflections to opacity internally. Retractable wheel assemblies are a bit basic, the modeling is basic and there is no detailed textures or wear and tear, front wheel assemblely is just basic untextured modeling, very average. Rotorhead and Tailrotor Again the Rotorhead modeling is good, but not a really totally a realistic representation as it feels to small, and again you can see the modeling elements more than the real assembly. All the elements are here, tower, rods and mast, but the realism is indifferent. \ However the animations do work in Pitch and Bank... Tailrotor and yaw are better in design, and again the blades are active in operation. Menu The CowanSim Menu (CowanSim-222B) is selected as part of the main X-Plane menu top left of your screen... The list is quite comprehensive with twelve selections; Fully Automated Setup, Radio and GPS Panel Swap, RXP GTN750 Owner, Show Rotor Shadows, Remove all doors, Black Instrument Panel, Avitab Configuration, Pilots & Passengers, Enable Window Rain, Enable Medical Interior, Park & Secure Rotor and Set VR Head Position to Current Pos. There is also a VR (Virtual Reality) pop-up menu in the side pocket that mirrors the drop down menu. Note VR Position tools bottom left. Two items noted include the Tiedowns (Park and Secure Rotor) and the "Remove all doors". The rest of the menu selections we will cover while doing the Instruments and interior. The interior layout comes in two options (menu)... One is the default Executive four seat club arrangement... .... the second is an excellent Medical fit-out that is really well done, but missing is a utility six seat rear layout that would be used for oilrigs or general passenger flying, certainly this layout would have been good for the UT version as the executive layout looks odd in the UT variant. Seating again looks more modeled than realistic, and the leather too glossy to be authentic cowhide, but there are a few nice details like the seat inserts and nice pile carpets. All four doors open from the internal catches and the paperwork window hatch(s) also open. You can Show/Hide (Menu) pilots and passengers in the aircraft, not totally individually, but divided by the Passengers and the Co-Pilot. You can't set up set weights and baggage, as it is simply on or off. Quality of the people though is very good and very lifelike. But would I have liked a services uniform of a crew, well yes. Cockpit This Bell 222B is a mid-seventies design, but the cockpit and instrument panel looks like a more modern style in design and operation. Instrument panel is the most impressive aspects of the CowanSim B222, it is really well done with excellent instrument reflections, there are two options (Menu) in a Grey facia or an all Black facia. Power on and the panel is even more impressive, the Overhead (OHP) is also nicely done. Nice details include a really well done glareshield annunciator/warning panel, with dim and bright settings. And I really like the detailed green OHP switchware and buttons, note the yellow lever is not the rotor brake lever, but an air vent. Behind your heads are two headphones, if you click then, then the sounds lower in tone, but to be honest I like the sounds here at full volume. Headphone detail and the metal headbands are really well done. Like most instrument panels, if you section them off they are not as complicated as they look, this one is more interesting because there is not a centre pedestal for switchgear. Both sides of the panel in front of both pilots are the main flying Standard Six instruments, of; Artificial Horizon and a Heading Dial below, top left is the Airspeed Indicator and right the Altitude Indicator, below left is the backup Artificial Horizon and lower right is a V/S Vertical Speed dial, lower panel is left OBS Pointer, and right a RAD ALT (Radar Altimeter). The arrangement is slightly different on the left side of the panel, the Altimeter is shifted down a position and is replaced by an Engine Torque dial (Twin Engines), and on the left centre a Turn Coordinator replaces the backup Artificial Horizon. Both ends of the panel have a Davtron M803 digital Clock and Temp panel. Two main dials on the right pilot's side next to the S6 are the Rotor RPM and twin Torque Dial. Centre panel is dominated by engine readouts, Main (top to bottom for both engines); Gas generator speed (NG) RPM, MGT (torque indicator), Engine Oil Pressure/Temp, Hydraulic Oil Pressure/Temp. centre panel has three dials that cover the Fuel QTY (Quantity) total 188+48 US gal (710+182 L) there is also a third tank noted later, Ampreres, Oil pressure, below is the landing gear panel... one other large panel is the Flight Director Panel (Autopilot). Avionics include both COMM/NAV 1- COMM/NAV 2 Bendix/King KX 155, (noted Laminar/King?) Bendix King KR 87 ADF tuner and bottom a Bendix/King KT76. The avionics can be switched (Menu) with a Reality XP GTN 750/650 Touch optional avionics if you have that product, and also you can switch the avionics panels around with the same on the mini pedestal, with a GNS530/GNS430 combo setup, by just pressing the touch zone on the bottom of the avionics stack. Glaresheild has two Bendix/King KMA 24 selector units, and that very nice annunciator/warning panel. The "Agent Release" (RLSE) are the fire handles (switches) to smoother the burning engine, you "ARM" and then release via the centre switch. There is a (Third) Auxiliary Fuel tank and gauge in the right pilot's footwell, and I like the ID Plate in the left side. There is an "Avitab" feature (Menu) that is position down right from the pilot. The Avitab can be rotated from the landscape horizontal into the Portrait vertical position... ... there are also two sizes in "Small" and "Large" screen sizes. Flying the Cowansim B222 I was initially perplexed on why the CowanSim B222 was so popular, looking over the aircraft I can easily see why, it is a very easy aircraft to set up and fly, a lot of the usual systems here that are very automated, and you get helpers as well to make a transition to helicopters pretty easily, so obviously this is a very good helicopter to learn on if you want to give helicopter flying a go. The basics are still the basics for flying in these machines, but even in that aspect it is an easy aircraft to fly. Most of your controls including the throttle system is grouped on the collective head... ... understanding how the throttle system works is probably the hardest thing to use here... it is mostly automated, but you unlock it via the IDLE STOP release switch (arrowed above right), and it is tricky to use as you don't really know if it is locked or unlocked? You have to Rotate (the throttles) to idle stop position, then activate IDLE STOP release switch then open throttles. Then rotate back again to IDLE STOP, and then activate IDLE STOP release switch... confusing? well it is until you work it out, in reality the throttles are locked, then you have to release them again to feed in the fuel, the Fuel switches are on the OHP. More switches turn on the external lights and beacons, and internal instrument and interior lighting... you prime the fuel, then hit the engine starter buttons mid-panel. In the startup procedure you adjust throttles open, then when running, back to idle, finally you turn on each BUS (Intcon) for each engine, and turn off both primer pumps... the B222 then slowly comes into life. There is a cheat option... CowanSim provide a full (automated) procedure (Menu) that goes right though the startup procedure, and very good it is... a run through a few times with the supplied checklist, and you will pretty well have the procedure sorted. It is far better to use the inbuilt option than the manual, as the manual is pretty lacking in detailed instructions, even the instrument layouts and details are not even represented and here you need to find things, like locating the rotor brake which is hidden behind the right pilot's seat, the manual should be far better in this aspect. It took me a fair while to work out the throttle system, but basically it is fully automatic, but you have to unlock it and then INC (Increase) the throttle to the line for full power, it then sets it's own throttle setting ready for takeoff. Sounds of the B222 are impressively good, internally and externally... sound set was developed with the X-Plane FMOD system. And the sounds and animations work together with visual rotor-speed vibrational feedback, rattling, shaking and dynamic blade slap and rain effects if you have them selected. Collective up and the twin-blades bite... I found it was easy to find the centre of the yaw for tail control, even while giving more bite to collective, hover then was also easy, if the B222 did lean slightly left to be easily corrected, notable that this action is correct. Normal hover position is slightly pitch up or nose up, but I found after the very tricky Gazelle, the B222 is very nice and a facile handing machine in this crucial point of flight, "Putty in your hands" is the words that comes to mind, and I am not a dedicated Helicopter pilot. Yaw or turning in the hover was also sweet, add a bit of collective you can easily transition to forward flight. You can gain height and speed easily and you feel very much in control, without serious effort to control the machine, that is not to say you don't get some nice feedback to your flying, as that effect is also very good. I am following an old flightplan, of which I rarely use flightplans while flying choppers, but this time I wanted to see the autopilot in action. So I flew up to my required altitude (4,000ft) at the required 1,730 ft/min (8.79 m/s) and locked the B222 in... first the flightplan only works on the upper GNS530, and the selection switch is upper right on the panel (arrowed). The autopilot system is a bit of a mixture in use, in reality all it does is hold your current heading, speed and altitude. I tried to change altitude with the V/S option, but it didn't really work because there is no V/S setting (wheel) to change your V/S height?, you can set the required altitude and the ALT setting goes to "ARM", but how do you adjust it?... I tried the collective and too a point it adjusts the height, but 200 fpm either way is the limit, but good for any small altitude changes, but for bigger changes I couldn't work it out? except for taking manual control and adjusting the height and speed manually, and then locking it back in when done, the same for descending. CowanSim do provide an action autopilot outline in the manual, but not on how to actually use the system? They say it is automatic in the set rate of climb, but how do you do that? The system also restricts the speed to around 98 knts, so you can't go faster or slower unless you trigger the alarms. But once set at altitude, speed and NAV or Heading the B222 will cruise there all day. I also found I had a "Wobble"? At first I thought it was a heavy gusty winds on the aircraft, but checking the weather and everything it was still there even in set calm conditions, not that... then I set the "Auto Trim" on the collective and the wobble went away, and the flight was smooth from then on... CowanSim recommend to set the standard trim on the top hat again on the collective for trim control, I have mine set on on the keyboard, but that is the same thing for the same actions. Powering along now the B222 cockpit is a very nice place to be, sounds are again as noted are excellent, with great blade slap if you push the aircraft too far out of it's parameters. I do like the twin GNS530/430 arrangement on the facia, more than set down on the mini pedestal, you can set one up as the map and the other as your flightplan. The flightplan was from South Florida KRSW to Daytona Beach KDAB, but I was going to Lakeland KLAL, so at the turn (ROGAN) I set the heading off the flightplan... One thing that I needed was the VOR Needle? I think every helicopter should have a VOR neeedle for direction finding. You do have an OBS, but it only works off flight plan (VOR2 selected), and in reality you use the Heading dial "Horizontal Situation Indicator" or HSI instead of the OBS (they are connected here)... ... compensation in that there is a VOR2 readout below the Heading Dial, but a dedicated VOR pointer here was sorely missed. Performance; 200B has a Max Speed of 135 kt (155 mph, 250 km/h), 200B also has a service ceiling of 15,800 ft (4,816 m), and a range of 486 nmi (559 mi, 900 km). One note is that in certain lighting conditions (low light) the (mostly lower) curved window reflections are too strong and actually quite bad, and to the point of heeding your progress, I didn't like them at all, and neither could I turn them off? Arriving at Lakeland and I am low at 800ft and flying still fast, the best way to flying helicopters... Transitioning from fast forward flight known as Effective Translational Lift (ETL), the B222 can balloon if you don't get the speed and descent right, I did it slightly here on this approach, but quickly and easily arrested the gain. 30/30 approach and it looks good, the B222 nudges forward, not to fast and not to slow to arrest the speed into a hover... ... the Lakeland Terminal looks large in the windows with this slight nose-up hover position. The bonus is that you can hold that hover steady, unless you do something erratic, then you can descend easily to the apron, no drifting or last minute rotorwash to throw your nice landing into turmoil, don't get me wrong in that the feel of both effects are still there, but control is far easier here than with most helicopters at this vital landing phase. Once parked on the ground, to kill the engines then just, flick the "IDLE STOP" to each engine and cut the fuel, in time the rotors will swing to a stop. Lighting The lighting on the B222 overall is basic, There is adjustment for each side of the panel (Captain & Pilot) and centre instruments, but it is all quite dull, certainly the green highlight lighting is not powerful enough to be really effective here, which is shame. There is separate adjustments for the mini-console and very good OHD lighting... ... and there is a built in Dome cabin light up here as well, you touch to use. On the right side overhead is a red swivel light, that is again highly ineffective, and hard to use? Cabin lighting is however very good, but not adjustable. There is also a separate Seatbelt/No Smoking illumination sign... but the EXIT signs don't light up. External lighting is Navigation and top and lower tail beacons (Anti-Collision), and the two underbody landing lights are blobby and quite nasty in being so unrefined. Liveries There are 21 liveries including an all White, Air Wolf (80's TV Series), most American Medical units, Police Units, Coast Guard and a few military versions... Helisimmer livery is really nice. Blue and White stripe is default. The liveries are the same for both the 200B and 200UT variants. Most are really good, but close-up shows the Low-Resolution base of detail, shame because there is a lot of great work here, that deserves better. Both a GIMP and Photoshop paintkit is available. ___________________ Summary This is the twin-engined Bell 222, in the "B" version and a separate UT (UTlity) variant, with the UT variant having the skids and the "B" variant having the retractable undercarriage. It is the larger twin-engine version of the unique Bell 206, or JetRanger, and created in the Mid-70's In context this is a first time developer, so you have to give them a little space to improve, and overall this a very impressive debut, the CowanSim B222 is a great and modern feel Helicopter that is very automated and nice to fly, so certainly aimed at anyone that wants to try their hands (and feet) at vertical flying, also helicopters are scarce in any simulator and to have any machine released is always a good thing. The instrument panel is very good, but a lot of the modeling here is average, it is passable in context, as the machine overall looks very, very nice and certainly in the air, but in this category you are expecting fine detailing and Hi-Res quality textures (liveries), in that area the aircraft is a little wanting, certainly on the important areas like the rotor head assembly and the cabin is quite average in clunky glossy detailing, instrument panel lighting is average and you have blobbly landing lights. There is a no weight, baggage and fuel menu either. Personal preferences include a six seater cabin arrangement and a VOR pointer dial. Sounds are excellent, and also very realistic with effective blade slap, and the (exhaust) partical effects are good as well, and overall this 200B is nice and feels realistic in all phases of it's flying. So as to fly, the B200 is very, very good, once you workout the automated throttle and trim system, this is an aircraft that pretty well anyone can learn to fly on, but wanting also is a decent manual, another serious requirement here to point out the instruments and how the use (the throttle) and the Autopilot systems? They note there are a zillion you tube videos by CowanSim, but we still need the basic information with the aircraft for new users to learn the systems and on how to access the controls to get the best out of the machine, again a Payware requirement. Most I think in time will be rectified and part of the developer learning process. There are separate packages for the "B" and "UT" variants, and a combined twin B+UT package, the singles are good value, but the twin package is really the same aircraft with skids on it, and not much else to differentiate between the two variants maybe one should have been the Medivac/Utlity and the 222B being the passenger, with two choices of cabins... that aspect is debatable. Overall this an excellent machine that covers the Professional and the Learner aspects of flying helicopters, you still however need skills to fly helicopters, but this is one of the easier ones as an introduction, you can see why it became very quickly very popular because the aircraft is very accessible, and it delivers a lot for a value investment... Highly Recommended. _______________________________ Yes! the Bell 222B + UT by CowanSim is NOW available from the X-Plane.Org Store here : CowanSim 222B Price is US$24.95 CowanSim 222UT Price is US$24.95 CowanSim 222B+UT Price is US$39.95 Features 222B+UT This package includes both variants: The 222B The 222UT Realistic Flight Dynamics Tested by real world helicopter pilots while being developed. The model has an authentic feeling while exploring the virtual world, thanks to the pilots and Laminar Research for developing a fantastic flight sim. 4k Physically Based Rendering Textures 4k PBR textures, or physically based rendering, provides the ability for very realistic lighting that mimics the flow of light in the real world. This model takes full advantage of X-Plane’s lighting with dynamic reflections and materials. Custom 3D Modeled Instruments Everyone loves a detailed and realistic looking cockpit. After all, that is where we spend most of our time in the sim, flying! The 3D instruments were developed to a high standard and are fully functional, with extensive custom coding to make it as realistic as possible. A Nice Cozy Cabin Sit back and relax in the cozy rear cabin and enjoy replays of your flight from a passenger’s perspective! Was it as comfortable and smooth as you thought it was from the pilot seat? This is especially interesting in VR and landing replays are the best. Paint Kit & Liveries Each model comes with 20 liveries and we also included a detailed paint kit. The kit is provided in both GIMP and Adobe® Photoshop® formats. A UV map layer included in each file allows for easy and accurate repaints. Vibrant and Detailed Night Lighting X-Plane has wonderful night lighting. The 222 project aimed to have plenty of lights, inside and out, making night flights possible. From the landing lights to the cabin lighting, these helicopters really stand out at night. There’s also a fully functional searchlight that is controlled on the collective in the cockpit or can be mapped to your hardware controls. Animation & Sound Thousands of lines of custom code make up animations and systems. The fully immersive sound set was developed with FMOD. Sounds and animations work together with visual rotor-speed vibrational feedback, rattling, shaking and dynamic blade slap, rain effects and more. Reality XP GTN 750 Integration The Reality XP GTN 750 is fully integrated into the cockpit. This was released with the very first update since it was requested by many simmers. Reality XP GTN 750 Touch is the genuine simulated device used by flight simulation enthusiasts navigating the virtual skies as well as real world pilots for familiarization with the device. This add-on is a payware add-on and you can purchase it here: Reality XP Also Included Luxury & Medical Interiors FMOD sound pack Window Rain Effects Compatible with X-Plane 11.50’s Vulkan API Compatible with Virtual Reality AviTab Integration RXP GTN 750 Integration Customizable Panel Configurations Realistic Flight Dynamics Tested by Real Pilots 4K PBR Textures Custom 3D instruments Passenger Cabin Modeled 20 Liveries Vibrant and Detailed Night Lighting Blade Slap and Vibrations xLua for Systems and Animation SASL v3 for Custom Plugins Requirements X-Plane 11 Windows, Mac or Linux 4 GB VRAM Minimum - 8GB+ VRAM Recommended Download Size: 531 MB Current and Review Version: 1.0 (4th February 2021) _______________________________________________________________________ Installation and documents: Separate downloads are required for both the 523Mb (222B) and 519Mb (222UT) and both aircraft are deposited in the "Helicopter" X-Plane folder. Documents supplied are: CHECKLISTS - START-UP.pdf MANUAL.pdf Manual is half completed with no instrument references or just basic system references, checklist is very good. ______________________________________________________________________ Aircraft Review by Stephen Dutton 24th February 2021 Copyright©2021 : X-Plane Reviews (Disclaimer. All images and text in this preview are the work and property of X-PlaneReviews, no sharing or copy of the content is allowed without consent from the author as per copyright conditions) All rights reserved Review System Specifications: Computer System: Windows - Intel Core i7 6700K CPU 4.00GHz / 64bit -32 Gb single 1067 Mhz DDR4 2133 - ASUS GeForce GTX 1080 8Gb - Samsung Evo 1TB SSD Software: - Windows 10 - X-Plane 11.52 Plugins: Traffic Global - JustFlight-Traffic (X-Plane.OrgStore) US$52.99 : Global SFD plugin US$30.00 : Environment Engine by xEnviro US$69.90 Scenery or Aircraft - KRSW - Southwest Florida International Airport by Aerosoft (X-Plane.OrgStore) US$24.95 - KLAL - Lakeland Linder Regional Airport 1.0 by Nicolas (Airport by NAPS) - (X-Plane.Org) - Free
-
Aircraft Update Review : Cessna 140 v1.1 by NKDesign
Stephen replied to Stephen's topic in Classic Aircraft Reviews
This comment has been moved to the updated review Medellinexpat There’s already a v1.1 out which is meant to fix several issues. Given the review it might not be the last update. One has to question the testing on the original release. What some developers miss is that few releases are lucky enough to get a second review. The review of the initial release is likely to be read by many potential purchasers not just now but in the future. -
News! - Updated : Airbus A320 Ultimate v1.1.9 by FlightFactor FlightFactor.Aero have released the update v1.1.9 to their A320-214. (This post replaces the v1.1.17 beta release). The v1.1.19 release is the formal release and takes the aircraft out of the beta version, but between the beta and the formal release there have been no extra changes or revisions. There was an announcement a few weeks ago that FlightFactor were doing some optimisation on the aircraft's Flight Management System to recover the severe lost framerate when Vulkan was introduced to X-Plane11.50, it was around 7fr to 10fr, which made the aircraft a little framerate heavy and a bit draggy in moving around in the viewpoints (i.e. the cockpit). A flight over the weekend (YBBN-YBCS) resulted in quite an improvement in framerate and smoothness... The v1.1.9 changelog is small... Changelog 1.1.9 Improvements: * some performance optimization * panel hotkeys now are optional in EFB Fixes: * fixed axis curves input * SpeedBrake binded key fix * arming SpeedBrake in VR * fixed crash after clicking HOLD button on point just before PPOS * get rid of artifacts when using RainEffect on OpenGL A post also noted from Flightfactor that more improvements to the A320U are also coming to the MCDU and ND systems and the "Fix Info" systems, but no details were noted. In other FlightFactor news, the developer asked on the X-Plane.Org Forums, of what the users wanted in future features on the A230U, Obviously the NEO Engine option, and CEO of the IAE powerplant are the top of any list... personally I just want the cabin finished? To update then currently use the X-Updater.jar (in your A320U Aircraft folder) and switch off the beta tickbox to get the new v1.1.19 version download. The FightFactor A320-214 Ultimate is also now available from the X-Plane.OrgStore ______________________________________________________________________ Yes! the Airbus A320-214 Ultimate by FlightFactor Aero is NOW available from the X-Plane.Org Store here : Airbus A320-214 Ultimate Price is US$$89.95 Custom Flight model Flight developed by professional to mimic the real aircraft Precise aerodynamic model with unique features like transonic effects, hi speed stall etc Specific engine model with realistic performance and dynamics More than 10,000 simulated objects like computers, sensors, units, data buses, busbars, relays, etc. with its own logic and behavior Simulation of data exchange in ARINC data protocol between aircraft computers with precision loss and delays High-Definition Model Hi-quality and realistic interior and exterior visual model Hi-quality and realistic sound pack with hundreds of sounds from the real aircraft Hi-quality display graphics (4K panel) Unique rain effects Fast access popup panel system Precise aerodynamical model with unique features like transonic effects, hi speed stall etc Specific engine model with realistic performance and dynamics More than 10,000 simulated objects like computers, sensors, units, data buses, busbars, relays, etc. with its own logic and behavior Simulation of data exchange in ARINC data protocol between aircraft computers with precision loss and delays. Realistic simulation of transition effects, self-tests and other real aircraft undocumented features Physically based implementation of electric, hydraulic, fuel and pneumatic systems with realistic responses and state transitions Precise flight management system with full profile predictions and modes of operation Autopilot, indistinguishable from real aircraft, with all modes, transition effects and undocumented features X-Updater The model come with the X-Updater for easy update of your aircraft. The X-Updater will easily update your aircraft to the latest version without having to re-download the entire file. Requirements: OS: Windows (64 bit) or Mac 10.11 (or higher) Processor (x86-64 Intel or AMD): 4-cores Intel Core I5-8400 or AMD Ryzen 5 2500X Video Card: GeForce GTX 970 or AMD Radeon RX 580 with 4 GB VRAM (8 GB recomended) RAM: 8 GB (16 GB highly recommended) Disk Space: 2 GB Version 1.1.9 (22nd Feb 2021) (Disclaimer. All images and text in this review are the work and property of X-PlaneReviews, no sharing or copy of the content is allowed without consent from the author as per copyright conditions) All rights reserved.
-
News! - Upgraded Scenery Release : Tenerife South Airport v2 by Digital Design Your filter was in full use... I looked at JustSim's GCTS-Tenerife 2018 scenery and thought it was not worth the review, rare really because I really like JustSim's scenery and they rarely do a dud, but I didn't like it, so I didn't recommend the scenery. Since that initial release, the scenery has had two upgrades (v1.1 and v1.1a) that has smoothed out a lot of the original imperfections. Part of JustSim's original team have been rebranded as Digital Design, and slowly the developer has been refining their older products to meet the high quality of their newer releases, like the excellent EGGP Liverpool John Lennon Airport, of which I was seriously impressed with and Lyon-Saint Exupéry Airport of which is on my "to do list". So this new release of Tenerife South is an upgrade and not an update, that means it is a completely new version (V2) and so to upgrade you have repurchase the airport and the noted cost is only €7 to do the upgrade, which is an extremely small penalty to pay to get a serious upgrade of the scenery. €20.40 will be the full purchase price of Tenerife South Airport v2. Features and changes to the new v2 version is as follows Compatibility Orbx TE Canary Islands Slope runway and taxiways according to the real runway profile Using New High-Resolution textures Using PBR Materials New 3D Model Ground 3D Grass New Ground textures New marking and updated parking numbers according to the latest data Improve 3D Model Terminal Improve airport vehicles 3D models Interior modelling Added new buildings in the approach areas. Images courtesy of Digital Design Digital Design's Facebook page is here ____________________________ Yes! GCTS - Tenerife South - Reina Sofía Airport v2 by DigitalDesign is now available from the X-Plane.OrgStore GCTS - Tenerife Airport v2 Price is US$20.00 Owners of Tenerife v1 can get this new version for only US$7.50. Please use the coupon code found in your original Tenerife invoice at the X-Plane.OrgStore ____________ News by Stephen Dutton 22nd February 2021 Copyright©2021: X-Plane Reviews (Disclaimer. All images and text in this review are the work and property of X-PlaneReviews, no sharing or copy of the content is allowed without consent from the author as per copyright conditions) All rights reserved.
-
News! - Scenery Announcement : KMEM Memphis by Axonos Axonos have announced their next X-Plane release in KMEM Memphis, Tenn. Memphis International MEM is in reality three distinct airports in one, the Commercial, Military (164th Airlift Wing) and Memphis is also the main base and mainstay hub for FedEx Express domestic and international services, the FedEx facility totally dominates the northern boundary of the airport. This Axonos scenery is actually the second announcement of Memphis as Nimbus Simulation had also announced the scenery last year after their Dulles-Washington, to the same X-Plane adage of none for years and years, then a load of choice of the same thing... but Axonos (formally Just Asia), seriously surprised me with their outstanding YPPH-Perth International late 2020, so I am expecting big things from this KMEM-Memphis, the feature list is exciting as well... SAM Jetways & ground traffic Stunning custom HDR night lighting Over 200+ custom objects placed around the airport Detailed 3D modelling and texturing Custom underground highways Compatible with Justflight traffic and World Traffic 3 Memphis International Airport has been developed to the highest standard and with no detail spared, featuring crisp color-balanced custom aerial imagery, custom underground highways as well as various other techniques that bring Memphis International airport alive A few teaser images were also released with the announcement No release date or price for Axonos Memphis KMEM was noted in the announcement, but a video trailer is announced as coming soon, I would note as before Easter. Yes personally I have wanted a decent Memphis MEM for years (and years) and now finally X-Plane is getting a choice of this significant hub. Images courtesy of Axonos Facebook page is here ____________________________ News by Stephen Dutton 22nd February 2021 Copyright©2021: X-Plane Reviews (Disclaimer. All images and text in this review are the work and property of X-PlaneReviews, no sharing or copy of the content is allowed without consent from the author as per copyright conditions) All rights reserved.
-
News! - Scenery Release : Airport Split XP by Aerosoft Although branded Aerosoft, this is a new scenery from Stairport Sceneries and PadLabs, in another convert of a ESP Product for X-Plane, this release is LDSP Split Airport, in Croatia. Split Airport is also known as Resnik Airport, it is the international airport serving the city of Split, Croatia. It is located 19 km (12 mi) from Split, on the west side of Kaštela Bay, in the town of Kaštela, and extending into the adjacent town of Trogir. In 2019, the airport was the second busiest airport in Croatia after Zagreb Airport handling 3.3 million passengers. It is a major destination for leisure flights during the European summer holiday season and an important focus city for Croatia Airlines that offers flights to European cities such as Frankfurt, London and Paris. Features: Airport Split (LDSP), "Resnik seaport Croatia" (LDSR) and the military base "Divulje" (LDHD) with its helipad airport New terminal building and parking (based on 2020) Photo realistic textures Realistic rendering of the buildings and objects on the complete airport HD ground textures including PBR Custom HDR night lighting Custom static aircrafts Custom approach lighting Animated jetways/marshaller (SAM plugin required) Custom service vehicles (SAM AirportVehicles required) Seasonal textures (SAM plugin required) Custom runway slope and mesh (Ortho4XP patch included) Compatible with default AI Traffic and World Traffic 3 At US$17.99 this scenery is great value, SAM Support as well! Images courtesy of Aerosoft _________________________ Yes! Airport Split XP by Aerosoft is Now Available from the X-Plane.Org Store here : Airport Split XP by Aerosoft Price is US$17.99 Required: X-Plane 11 Windows, Mac or Linux 4 GB VRAM Minimum - 8 GB+ VRAM Recommended Download Size: 3.3 GB Current Version: 1.0 (February 18th 2021) ____________________________ News by Stephen Dutton 19th February 2021 Copyright©2021: X-Plane Reviews (Disclaimer. All images and text in this review are the work and property of X-PlaneReviews, no sharing or copy of the content is allowed without consent from the author as per copyright conditions) All Rights Reserved
-
Aircraft Update Review : Cessna 140 v1.1 by NKDesign
Stephen replied to Stephen's topic in Classic Aircraft Reviews
This comment has been moved to the updated review olderndirt A very considerate review. This one is marginal payware and, having owned one, consider it incomplete. In today's market you have to be above average. Attached is a shot of my 1946 C140 - rag wing (the later ones had metal). Note the axle extension mod to alleviate the tipover tendency. Almost forgot - a glaring error on the fuselage. There is no line between wings across the fuselage. Wings are bolted to the fuselage with a gap for fuel lines, wiring and cables. Each gap is covered with a screw on fairing.
-
Aircraft Update Review : Cessna 140 v1.1 by NKDesign The Cessna 120, 140, and 140A series, are single-engine, two-seat, conventional landing gear (tailwheel), light general aviation aircraft that were first produced post-war WW2 in 1946. Production ended in 1951, and was succeeded in 1959 by the Cessna 150, a similar two-seat trainer which introduced tricycle gear. Combined production of the 120, 140, and 140A was 7,664 units in five years. The Cessna 140 was originally equipped with a Continental C-85-12 or C-85-12F horizontally opposed, air-cooled, four-cylinder piston engine of 85 hp (63 kW). The Continental C-90-12F or C-90-14F of 90 hp (67 kW) was optional, as was the 108 hp (81 kW) Lycoming O-235-C1 engine, an aftermarket installation authorized in the type certificate. This later model had a metal fuselage and fabric wings with metal control surfaces. This is NKDesign's second release for X-Plane after the first being a scenery in; EGKA - Shoreham - Brighton City Airport by NKdesign Note. Since the release of this aircraft, NKdesign have put out a comperhensive update in v1.1, to cover a wide array of if issues that were present on the original release... So this release review has been amended to incorporate the changes, the initial review has been noted were the changes have been implemented. The full v1.1 Changelog is noted at the foot of the review. Cessna 140 At first glance the C140 looks well done, but there is that sort of model aircraft feel about the design. The C140 does have a very basic construction design, the panels are basic as are the fittings, well done here, but overall you could say the modeling is more than competent, but not outstanding, but the mapping of the rivets are very well done. I'm in two minds about the very thin twin-bladed propeller. This is the C140, not the C140A that had only one support strut per wing, here you get the full piping framework to strengthen the wing solid, but makes downward visibility slightly harder, the C140A also had the more angled forward front landing gear to stop the aircraft tilting forward, so you have to be very careful not to go nose over end on landing in this C140. Rudder and rear elevators are well done but a bit flat (modeling wise) on the trailing edges. Rear tail-wheel was originally stiff with no option to lock it to the rudder yaw or rotate, but now moves, but still with free castoring. Glass is very good, with a nice deep mottled effect that looks aged, and it all has great reflections... Canvas wings don't look or feel to have that canvas on spar authentic shaping, it's good but I have seen this canvas curvature realism done far better than here, the wing is a bit shapeless to be totally authentic to the post-war design. The twin doors can be opened via the handles internally, and externally if you can find the clickspot... the cabin is SMALL, really tight. It is a tight squeeze in here and not a lot of cabin detailing either as the seats and textures are basic... forward instrument panel is also BASIC and plain as well. Instrument Panel Simple instrument panel is trainer easy. All the main flying instruments are mainly set out horizontally right across the panel. You can click to hide both the nice Cessna branded rectangle yokes. And you can have the choice of either dark red or grey facias Left to right across the panel is first the; Key Switch (magnetos), Airspeed (either both Knots or MPH), Artificial Horizon, Altitude meter. Centre panel two instruments are stacked together with the Heading Dial top, and the Turn Coordinator set below. Then a Vertical Speed (V/S) dial, RPM dial and finally far right is the Manifold Pressure gauge. Mid-Panel are four gauges to cover (LtoR); Clock, Amperes, Oil Temperature and Oil Pressure. Below are six push/pull knobs that cover (LtoR); Carburettor Mixture, Cabin Heat, Carburettor Heat, Parking Brake, Cabin Heat and Engine Starter. Lower panel are six piano key switches for (LtoR); Master (Battery), Avionics, Strobe Lights, Navigation Lights, Landing Lights and Beacon Lights. The big knob centre lower panel is the Throttle. Avionics are simple upper NAV1 Radio and lower a Transponder. There is a Fuel Cock/Selector on the floor right and a nice Trim wheel, and behind is a one slot handle Flap selection 30º... .... if you select the right seat headphones it deadens the sound. Each Fuel Gauge is built into the forward wing (34kg per wing and with a total 95 Litres). Notes in v1.1 that the Trim Wheel now spins the correct way and the headphones are far more lower in volume when you use them... ... if you select the Sunglasses (arrowed above) in the right lower pocket it will dim the current light. Menu The is a basic VR (Virtual Reality) pop-up Menu, sitting in the left side lower pocket. It is a notebook style design with from the top options for... Airspeed MPH or Knots, The mentioned Red or Grey facia... An Orpog? which shows the X-Plane outside (aircraft view) attached to the left side of the window... ... and the choices of Wheel Fairings and Chocks. Lighting There is no interior lighting including the instrument panel. Externally it is basic with the three Navigation lights, a roof red Beacon and twin-left leading edge landing lights. Flying the Cessna 140 The 140 is HARD to start, just getting the throttle position right and with the Mixture to full rich (anything less and the engine won't run?), and hope the engine will catch, in the end I gave up and used the X-Plane restart (Developer Menu) to start the engine to just fly. Developer notes that the best way to start the C140 is to set; "mixture all the way in, pull the starter and bring the throttle to 25%, which is effectively your idle. you want to keep the RPM above the "5" on the gauge otherwise it'll crack out', So I tried that and it worked. The thing you have to note is that the throttle knob starts around as noted around 25% for idle, but 35% is you main taxiing range and 85%-95% is your usual cruise throttle position, so the knob feels more in and the power range closer to the panel than usual. The throttle position has to be kept well open until the Continental C-85 has warmed up enough to lower the RPM. You need total control of the lower speed throttle, because if not the aircraft will just twirl around itself quite madly... In the v1.1 update you get far more tailwheel and rudder control, and it makes a big difference, not perfect as any loose tailwheelers usually are, but now if you get the throttle power low enough and you can point the C140 in some sort of direction and finally get onto the taxiway, as long as you keep the taxi speed very low, and not do any bursts of power as the C140 will still easily fling you around... ... v1.1 Update changes do make a difference, as I was able to taxi on the taxiway and then taxi up the runway overrun to the runway itself, as long as you keep the speed low you can keep control, so it is a slow taxi to any runway... Developer notes; slider "got your key/button set to "Brakes regular effort" for both the left and right brake otherwise you will also flip over - with that also being said you don't need more than a slight tap on the brake", I however I don't have rudder pedals and can't assign to a left and right toe brake? I got around that by setting my X/Y access toggleknob on my X56 Rhino Joystick, not a perfect solution but it worked in this case. Note that this braking effect only works on a slider control. One bonus at this point is that the engine has warmed up enough to get a low more manageable RPM... and it does give you more control on your direction... I (finally) made it to the grass runway 31, but adding in the power even slightly is still quite skillful to keep the C140 straight with such a small rudder to control the airflow... If the tail goes, it goes in a nasty way... but now the C140 is more controllable in a taildragger fashion, the trick is to get the line up correct, get the aircraft moving slowly, then just hit the throttle full in... Once that tail lifts you then have the aerodynamic control you need, and can adjust your direction far easier... A problem, is that there is no instrument lighting, and so it is very hard to read the instruments inside this very dark cockpit, it may be authentic, but it is annoying. I am now bounding along the runway at a fast rate, and I will need to get to around 70 Mph until the wing bites the air, a slight pull back on the yoke and I am flying! Rate of climb is 680 ft/min (3.5 m/s) or to be safe around 500fpm, and the C140 will gain height and speed slowly... Once in the air the particle effects seem quite heavy, as I stream smoke behind me... the wheels will also rotate consistently unless you do a tap of the brakes. v1.1, unlike a few days ago I am far more relaxed and in control this time around, the C140 feels far, far better in flight and even really enjoyable, were as before I didn't like it at all. ... tricky earlier also was setting the trim. Again this time I was able to set my trim and level out far easier. You have to set your wanted power setting at the altitude (2,000ft) that you have arrived at, but then trim the aircraft to those settings and she will stay nice and level... the earlier rear elevators now seem far more relaxed than the earlier extreme up position(below), and it feels like that the same in the aircraft This is a very, very different experience than I had before on the earlier release, the C140 feels and is a nice little aircraft to fly and control, not absolutely perfect as we shall see, but certainly a big stride forward. .... originally I found the sounds very intermittent, in v1.1 that problem has gone away and the aircraft sounds are now very good. The sounds are in a 3D FMOD Soundscape, and are authentic recordings of a real Continental O-200 that are affected dynamically by the camera position. Performance is a Maximum speed of 125 mph (201 km/h, 109 kn), a Cruise speed of around 105 mph (169 km/h, 91 kn) with a never exceed speed of 140 mph (230 km/h, 120 kn), and a Range of around 450 mi (720 km, 390 nmi). The Service ceiling is quite high at 15,500 ft (4,700 m). The trimming keeps the C140 level, but you still have to constantly adjust the rudder and bank angles to go forward and keep the wings level, a nervous aircraft? not really but you are aware of the lightness of the airframe in the elements, so in this aspect you are very busy flying the machine in the direction you want to go, relax and you will easily find yourself turning slowly away from your heading. Again originally if you had pitched down the nose even a little and then the speed went off the clock and very fast or away from you. Now in v1.1 I found if the C140 was trimmed correctly, all you had to do was reduce the power and the aircraft would descend nicely, as it should do... more power and the nose lifts. So you now have more control. Of course you could pitch the nose down manually, but then with the pull of gravity, the speed would (should) increase very fast, the rule is really here, is to descend as slowly as you would have when climbing to altitude. Because of not being able to arrest in the excessive speed before, this v1.1 approach was this time far more calmer and controlled... ... easily I slipped under the 60 Mph range, but still dropped the Flaps to arrest the speed down to 45 Mph, so, so much better is this approach! Passing over the rail-bridge going into Shoreham's (EGKA) Rwy 31, I was still perfectly aligned in the approach, but as I got nearer, I started to drift left, and I of course corrected with the rudder, except it didn't correct barely at all? full left rudder and I was still drifting left? ... finally but too late the rudder started to bite, however I was committed to the landing... ... so I had to touch down way left of the centreline. My thoughts looking back was that the rudder just didn't respond to my actions, it felt dead back there... v1.1 notes that the rudder authority has been tweeked for taxiing, but it needs more aerodynamically, you feel (as I felt even on the original release) that the tail has no power, I earlier put that down to a small tail design, but I now think it is a setting, but maybe one that could be flown around if skilled enough, but overall I would like more yaw control. I finally coaxed the C140 back onto the runway, only to lose it again in a last minute twirl off the runway again.... challenging little bugger isn't it? Don't get me wrong though. This flight was years different than the few I did a few days ago, overall I am starting to warm to the aircraft, it is certainly a test of your flying skills, but I still feel it needs a few more dynamic refinements, and then it will be a pretty good aircraft. Liveries There is one Blank (A paintkit is provided) and Five custom liveries, all are pretty good and nicely detailed. Summary NKDesign for their last release was a scenery with EGKA - Shoreham in the UK. Here it is the Classic Cessna 140 (not the usual (C140A), a twin-seater high wing monoplane, powered by 85 hp (63 kW) Continental C-85 engine. Modeling is quite good, but not what you really require in a classic historic detailing machine with canvas wings. In this class you need ultra detailing to bring out the authenticity of the detail of the period. Glass is very good as is the rivet mapping, but overall it is all just very good and and not exceptional. Lighting externally is basic with none internally. Interior is basic, as is the instrument panel layout. There is a pop-up VR style menu but it is a very basic one page notebook. This is an updated review v1.1 from the earlier release review, and the changes with the update are quite significant on the way the aircraft now taxis and flies, so we have to sum up in accordance to these changes. Yes the Cessna 140 is a nice little if challenging to fly aircraft, the yaw control however still feels far too weak in taxiing and flying, and it doesn't respond well to your movements Sounds originally intermittent are now far better, no panel lighting (if authentic), makes it very hard to read the instruments, Particle Effects are a bit heavy, better internal details and more internal quality would also be a nice bonus. More helpful notes and aids would help the in getting more out of the simulation. That is the question here. The fliers that want to master the machine will obviously see the C140 is a challenging aircraft to master, but already it is far better than in it's release version... so any change here, no matter how small can make a real difference, Overall I think the C140 is an interesting and highly challenging aircraft to fly really well, understand it's eccentricities and it will seriously reward you, a bit like flying helicopters. it will be interesting to fly it again after a few more updates, and if the changes are as noticeable as this v1.1 update was, then the NKdesign Cessna 140 could become a firm favorite to enjoy and experience. ______________________ The Cessna 140 by NKDesign is NOW available! from the X-Plane.Org Store here : Cessna 140 Your Price: $20.00 Features: Authentic Replica of the Cessna 140 High quality 3D model 4K Textures used throughout Aircraft makes full use of PBR material rendering, and this varies by livery Interactive Features Menu for swapping in/out various visuals and items; Add Fairings, Chocks or even a working action camera if you see fit! Wearable sunglasses and headset that can be seen on the pilot Six liveries included Paint kit included Immersive 3D FMOD Soundscape A complete FMOD soundpack, including authentic recordings of the Continental O-200 that are affected by camera directionality Wearable headset affects the audio around you when worn; muffled sound, static when turned on etc Multiple sounds used for single switches/levers, meaning manipulators will rarely sound the same Convincing interior atmosphere that will change based on various conditions VR Friendly Model is FPS optimised Ultra HD 4K Gauges makes for easy reading ’Physical’ notebook serves as options menu for ergonomic convenience Requirements X-Plane 11 Windows, Mac or Linux 4 GB VRAM Minimum, 8 GB VRAM recommended Download Size: 919 MB Current and Review version: 1.1 (February 16th 2021) Documentation : includes a very basic 7 page manual... C140 Documentation Version 1.1 (February 16th 2021) -Headset now muffles audio more -Headset will now quieten the outside ambience even when outside - effectively acting as an ambience sound toggle -Fixed manifold pressure gauge not working -Fixed trim wheel spinning the wrong way -Wheels no longer float -Adjusted glass shine -Tweaked tailwheel behaviour - movement should now look more natural -Greater rudder authority when taxiing -Tweaked engine behaviour _____________________________________________ Review by Stephen Dutton 18th February 2021 Copyright©2021 : X-Plane Reviews (Disclaimer. All images and text in this review are the work and property of X-PlaneReviews, no sharing or copy of the content is allowed without consent from the author as per copyright conditions) All Rights Reserved. Review System Specifications: Computer System: Windows - Intel Core i7 6700K CPU 4.00GHz / 64bit - 16 Gb single 1067 Mhz DDR4 2133 - ASUS GeForce GTX 1080 8Gb - Samsung Evo 1Tb SSD Software: - Windows 10 - X-Plane 11.51) Addons: Saitek x52 Pro system Joystick and Throttle : Sound - Bose Soundlink Mini/Yamaha Speakers Plugins: : XPRealistic Pro v2 effects US$19.95 (highly recommended with the C140) : Environment Engine by xEnviro US$69.90 Scenery or Aircraft - EGKA - Shoreham Brighton City Airport by NKdesign (X-Plane.OrgStore) US$15.00
-
Seriously, you should know this one... Thranda Design (Dan Klaue) does all the Just Flight X-Plane conversions. Obviously the avionics in X-Plane will be different. If you do get the eight different variants, and the cargo does have a full cargo feature, with JF quality, it has to be pretty good value for your money, size is not the consideration here, the feature list and the quality is.
-
News! - Previews : Just Flight Bae146 Professional for X-Plane Just Flight via their facebook page have shown off some more spoiler images of their coming Bae 146 Series aircraft. The images cover the Bae 146 features including: AviTab (EFB) integration – a popular freeware EFB. Cockpit night lighting. Avionics/systems progress, e.g. VSI/TCAS Brake temperature indicator WXR New animations such as variable pilot and jump-seat positions, and cabin doors/stairs (with 2D control panel). Passenger cabin/galley area. There is also an interesting shot of the Menu Door system, which looks different from the usual Just Flight Menu system, and the unique split tail 146 airbrakes... fuselage detail looks excellent. All three variants of the -100, -200 and -300 are included in the package and noted on the P3D product page is also the (Cargo) 146-200QC, 146-200QT and 146-300QT and the two Military variants of CC.Mk2 and CC.Mk3 as part of the package. But the Bae 146 Professional will also be the most expensive Just Flight product yet for X-Plane, as the Prepar3D version of this aircraft is available from the Just Flight store at $84.99, so expect the same when released. That release was noted 'sometime next month is the current target but that's not a guarantee'. I personally can't wait... but another month of waiting! A must have... Images courtesy of Just Flight Fackbook page is here ____________________________ (Disclaimer. All images and text in this review are the work and property of X-PlaneReviews, no sharing or copy of the content is allowed without consent from the author as per copyright conditions) All rights reserved.
-
Scenery Review : Machu Picchu National Park UHD by Dainese and Bellini Up in the darkest deepest Paddington Bear country there is an astounding 15th-century Inca citadel, located in the Eastern Cordillera of southern Peru. This is Machu Picchu and it was declared a Peruvian Historic Sanctuary in 1981 and a UNESCO World Heritage Site in 1983. Machu Picchu is located on a 2,430-metre (7,970 ft) mountain ridge in the Machupicchu District within the Urubamba Province above the Sacred Valley, which is 80 kilometres (50 mi) northwest of Cuzco. The Urubamba River flows past it or around the site, cutting through the Cordillera and creating a canyon with a tropical mountain climate. Most archaeologists believe that Machu Picchu was constructed as an estate for the Inca emperor Pachacuti (1438–1472). Often mistakenly referred to as the "Lost City of the Incas", it is however the most familiar icon of Inca civilization. The Incas built the estate around 1450 but abandoned it a century later at the time of the Spanish conquest. Although known locally, it was not known to the Spanish during the colonial period and remained totally unknown to the outside world until American historian Hiram Bingham brought it to international attention in 1911. The Inca Empire (Quechua: Tawantinsuyu, lit. "four parts together" are also known as the Incan Empire and the Inka Empire, was the largest empire in pre-Columbian America. The administrative, political and military center of the empire was in the city of Cusco, Peru. The Inca civilization arose from the Peruvian highlands sometime in the early 13th century (1438–1533), and it's last stronghold was conquered by the Spanish in 1572. Machu Picchu National Park UHD by Dainese and Bellini Only a month after their last impressive release of Banff National Park UHD. Frank Dainese and Fabio Bellini have again turned their talents to South America, but this time to Peru. If they are not anything lately then Dainese and Bellini are extremely prolific. Again this is another interesting release, and focused around the three sites of Aguas Calientes, which is the main tourist entrance to Machu Picchu, the Machu Picchu site itself, and Santa Teresa to the upper west, where there is an (virtual) grass landing strip and H-Pad. The Machu Picchu site is quite hard to see, but you can (slightly) see the well blended in areas of the custom textures to the default X-Plane surrounding textures, that highlights the scenery... overall the visual aspect is perfectly done. So our review today will start at Aguas Calientes, fly up and around the main Machu Picchu site and then fly on to Santa Teresa. Aguas Calientes This valley village of Aguas Calientes is very easy to locate... just look out for the large football (Soccer) ground, nothing stops football I suppose, even up here in deepest Peru. The Football field is also a H-Pad (HLPAC [H]) Aguas Calientes is in meaning "hot waters" or "hot springs". It was originally settled by a few farm families in 1901, the settlement was transformed into a busy railway worker's camp called Maquinachayoq (possibly from Quechua makina (a borrowing from Spanish máquina) machine / locomotive, train,[5] -cha, -yuq suffixes, "the one with a little machine, locomotive or train", Makinachayuq) during the construction of the railroad through there in the late 1920s. The town was the central hub for worker lodging and their equipment until the railway was completed in 1931. Obviously Aguas Calientes took off after the railroad opened in 1931 with foreign tourists started arriving to visit the Machu Picchu ruins. It came into existence because enterprising individuals set up businesses serving the tourists, primarily restaurants and small hotels. Not luxurious, and not expensive. Those who wanted luxury and whom could afford it stayed at the luxury hotel up by the ruins themselves. The highlight iofthe scenery is of course the central Machupicchu Railway Station... Machupicchu serves as a terminal for the PeruRail and the Inca Rail passenger train service from Cusco. Trains serve locals and tourists arriving from Cusco and Ollantaytambo to visit Machu Picchu. A sheltered souvenir market is adjacent to the train station. Avenue Pachacutec is the main and only thoroughfare of the town, connecting the baths to the town's main square. There are no cars in the town, as there is no road access. The Machupicchu Railway Station is really well done in creating a visual experience of being here, but the building textures are a little bit too low-res, and a bit blurry to be really and totally authentic, but that is the Dainese and Bellini style in keeping framerate light, most buildings are in the same box with graphic texture style, and if you are familiar with these sceneries, then you know the sort of visual aspect that you get from Dainese and Bellini, there is a nice semi-detail feel to everything, but overall it works very well from a sort of VFR perspective. The rest of the village is done in the same style, it is well done and includes the Parroquia Virgen del Carmen Church, but the main square of the Plaza Manco Capac is not represented. Follow the Urubamba River is basically the rule, but it is very easy to fly out and go down the wrong valley... You are already at 6800ft above sea level, and X-Trident's Bell AB412 is already struggling in the thin air... so it is up and to the left or to the west. The Urubamba valley is already tight, but you have to climb, as Machu Picchu is 6 kilometres (3.7 mi) away or about a 1.5 hours walk (which most tourists do), set at an altitude of 2,430 metres (7,970 ft)... so you basically fly up the more vertical than distance to the ruins. There is only this one short valley separating Aguas Calientes from the ruins. I had always thought that getting to Machu Picchu was a long arduous trek up from Cusco, that took several days or even a week to climb up there... I have seen footage of celebrities and guides, out of breath, climbing up steep trails, steeped in sweat and backpacks... yes there is a winding trail up to the Machu Picchu ruins called "Aguas Calientes Trail", but it is but only a short walk from a nice cosy hotel, so the reality as depicted here is quite different from the arduous trek to the "Lost City of the Incas" that they would have you believe... in fact there is also the "Hiram Bingham road", and a regular bus service to get up there! Flying almost directly west you easily see the winding (Aguas Calientes) trail up the mountainside... ... and one turn past the valley and there it is, the ruins of "Machu Picchu", or the backside of it. These steps are the "Cultivations Terraces", in fact all this eastern southern side is the industrial part of the complex. Significant is "Hauyna Picchu" the amazing mountain formation at the head of the ruins, and the detail of the formation by Dainese and Bellini here is exceptional, you see and really feel the shape and detail of the tall thin rock sculpture. Huayna Picchu is 2,693 metres (8,835 ft) above sea level, or about 260 metres (850 ft) higher than Machu Picchu. The Incas built a trail up the side of the Huayna Picchu and built temples and terraces on its top called the "Stairway to the Gods", mostly used by a high priest and his virgins. You do a complete 180º route around "Hauyna Picchu" following the set below Urubamba River, and then to see the ruins from the western aspect... ... the flying has to be tight, the turns sharp, and you are now at nearly 9,000 ft in altitude. And there is a H-Pad (called HLMPC [H] Machu Picchu Area archeologica) set centre of the ruins for you to land on. The approach to HLMPC is quite tricky? It is very windy up here so high, worse on the eastern side of the H-PAD there is a row of trees, a tall flagpole and a windsock... oh and a "Welcome to Machu Picchu" sign! The H-PAD approach is far easier from the west than the east, as that would be the usual normal approach path. I feel I am landing the wrong way around... not very professional, but a good landing is still a good landing in my books. Once up here you feel like you are on top of the world, and you are at almost at 8,000ft. Machu Picchu Machu Picchu was built in the classical Inca style, with polished dry-stone walls. Its three primary structures are the Intihuatana, the Temple of the Sun, and the Room of the Three Windows. Most of the outlying buildings have been reconstructed in order to give tourists a better idea of how they originally appeared. By 1976, 30% of Machu Picchu had been restored and the restoration continues. Huayna Picchu (within the citadel) is the main site and the entrance to the central area. If you are looking for an authentic look around of these interesting ruins, then this scenery is not it... it is a sort of visualised version. Oddly the H-PAD covers the main area were all the most significant buildings of the site are centrally placed? (in the 1980s a large rock from Machu Picchu's central plaza was moved to a different location to create a helicopter landing zone, but not here as depicted). Most notably sited in this central area is the significant Royal Palace and the very important Temple of the Sun... The temple has two trapezoidal windows, one facing 65°, called the "Solstice Window", and the other facing 132° is called the "Qullqa Window". The northwest edge of the rock platform points out the Solstice Window to within 2º of the 15th century June solstice rising Sun. .... the Central Plaza is sort of represented, and there is the space to include the "Room of the Three Windows", but they are all just normal houses instead of one larger one and a few outbuildings. Both the important Intihuatana stone, and Sacred Rock of Machu Picchu, are both represented, but both of the real stones are "Rock" singular not "Rocks" plural, as here they are both in the scenery created out of stones and not of one large single stone. Intihuatana is literally an instrument or place to "tie up the sun", often expressed in English as "The Hitching Post of the Sun". The Sacred Rock is postioned to view the Sacred River, set below this rock would be an altar, a central and important element in an area of worship, destined for the worship of the Apu”Yanantin“, not only would the Inca Civilization have a high knowledge of the cosmos, because for the cultures that have it at all timese, cosmology was a conception of the world, as to show where all beings lived. Information available describes human sacrifices at Machu Picchu, though many sacrifices were never given a proper burial, and their skeletal remains succumbed to the elements. However, there is solid evidence that retainers were sacrificed to accompany a deceased noble in the afterlife. Animal, liquid and dirt sacrifices to the gods were very common, and made at the Altar of the Condor. The tradition is upheld by members of the New Age Andean religion. Machu Picchu use was as a royal estate, it is estimated that about 750 people lived there, with most serving as support staff (yanaconas, yana who lived there permanently). Though the estate belonged to Pachacutec, religious specialists and temporary specialized workers (mayocs) also lived there as well, most likely for the ruler's well-being and enjoyment. During the harsher season, staff dropped down to around a hundred servants and a few religious specialists to focus on just the maintenance alone. There is a Sanctuary Lodge, called the Belmond Hotel accommodation, looking over the Sacred River (but to be noted as a Hotel would be pushing it as it looks more like a hostel with a good view). Santa Teresa Time to fly on... Leaving Machu Picchu you notice the excellent detailing of the rock formations below the ruins... a very distinctive Dainese and Bellini quality. You can easily see the areas that have the custom ortho-textures, as the detailed valley floors and water courses, easily they are very different from the X-Plane default textures... .... the textures look good even if they are Low-Res from altitude or close down with there with the rocky water beds. There are also custom placed buildings to bring out a sort of 3d effect from the flat images. The valley flying is very tight, and made worse in that you are now having to descend quickly deep down into the V, off to the side there are great valley views. Leaving behind now the elevated Machu Picchu, you then turn and descend down a long valley towards Santa Teresa, in time the town appears on your right by another left valley entrance. Finally you are over Santa Teresa, known as "the back door to Machu Picchu", Santa Teresa attracts budget tourists hoping to save a few soles. There are other worthwhile attractions based here, namely the Cocalmayo hot springs and the Cola de Mono zipline, both on the outskirts of the town... and another football field. The Iglesia Evangélica Menonita church is represented, but the town square and tall (six stories stands out here) building is missing, the large shed complex on the north side is also missing, so Santa Teresa is not really totally a VFR visual representation? The XLPMH "MachuPicchu Airport" is set too the left and slightly down a side valley... XLPMH has one long grass runway 33/51 at 5700ft altitude, so even in the final phase you are going almost flying vertically down from 9,000 ft at Machu Picchu, and down to this far lower elevation. There is also a H-Pad HLPMH [H] also at MachuPicchu Airport, placed at the far east of the airport by the Rwy 51 threshold. It is not very hard to get into the HLPMH [H] Pad, but obviously only from the runway side. I do like the 3d grass wildflowers around the pad, as it makes for a nice arrival. Final approach and a 180º turn around to land... There is a rusted out hangar and two buildings as part of the airport, and two static light aircraft to fill out the scene, overall very nice. I didn't try either 33/51 approach in a light aircraft (STOL would be my choice) but Rwy 51 would be a far, far easier way in than the rock wall compromised Rwy 33 Approach. The Santa Teresa Football field could also be used as another interesting H-PAD. Lighting The lighting in the Machu Picchu scenery is the usual that you expect from Dainese and Bellini, in an alpine village feel, or valley settlement. Aguas Calientes has the housing lighting and the street lights, the only bright area is the lit football field. Around the Railway Station it has the only focused lighting, but it looks and feels very nice in a soft glow, and bright clock face. The Machu Picchu ruins only has the sporadic street lights amongest the ruins, but the "MachuPicchu" entrance sign is well and truly colourfully lit up nicely, the H-PAD is also well lit. Santa Teresa is very similar to Aguas Calientes, with even the same brightly lit football field MachuPicchu Airport has a few building lights and area lighting, but the grass runway has only a set of green (taxiway) lights down the centre, and no runway boundary lighting. ICAO Noted Airports and H Pads There is one Runway and three H Pads in the scenery, and provided are: XLPMH MachuPicchu Airport HLPMH [H] Machu_Picchu Heliport HLPAC [H] Aguas Calientes HLMPC [H] Machu_Picchu Area archeologica XLPMH MachuPicchu Airport A grass runway 33/51 with tricky approaches, Rwy 33 is far worse than Rwy 51... only the centreline strip lighting at night. HLPMH [H] Machu_Picchu Heliport As part of MachuPicchu Airport and positioned on the far eastern side by the Rwy 51 Threshold, H-PAD is very clear, but approach only from across the runway is possible. HLPAC [H] Aguas Calientes Situated on the centre of the Aguas Calientes football field, it is an easy approach from all sides. Note there is no windsock! HLMPC [H] Machu Picchu Area archeologica THis H-PAD is a large pad, situated directly in the centre of the Macgu Picchu ruins, on the east side there are a few obstacles, in a Flagpole, Windsock and a row of trees, however the pad is quite large and so you can easily manoeuvre around the obstacles. _____________________ Summary Set high, Machu Picchu is located on a 2,430-metre (7,970 ft) mountain ridge by the Urubamba River in Peru. This area is sometimes noted as the "lost city of the Incas" or a familiar icon of Inca civilization. A famous tourist attraction Machu Picchu is both a cultural and natural UNESCO World Heritage Site. And this Machu Picchu scenery is the next mountain scenery from Frank Dainese and Fabio Bellini, both mountain scenery specialists for the X-Plane simulator. The scenery is centred around three areas; Aguas Calientes, which is the main tourist entrance to Machu Picchu, the Machu Picchu site itself, and Santa Teresa to the upper west. And there is one airport and three landing H-PADs as part of the scenery. Focus of any Dainese and Bellini is the natural versions of the landscapes, and mountain formations, in that aspect the scenery here is excellent, with the depiction of the Inca ruins set at the centre of the scenery. The custom photo-textures are extremely well blended in with the surrounding X-Plane default textures, and all the mountain formations are all photogragically recreated... what you get a real total 3d perspective of this famous area in Peru. The Inca ruins however are not recreated in detail, but a sort of visualised version of how they are represented. It is good but not exact to realism, the same can be said of Santa Teresa and Aguas Calientes, but the famous Railway Station is well recreated. By Dainese and Bellini standards it is a small scenery package, but still full of detail... only real comment is that I think that some more real recreation of custom objects of the town and village, and certainly of the Machu Picchu ruins could have been added in for a more of a VFR perspective on the size of the scenery, in areas it is just a little too generic and certainly around the ruins... Otherwise it is very good. Extremely difficult to do, These excellent representations of iconic mountain areas of the world are for exploration, sightseeing or just plain exploring... and you could throw in a bit of geography as well. All are very highly detailed of the areas they represent and the mountain ranges are of course the stars and the focal point of the scenery packages. Hugely popular and yes I seriously love these amazing and hugely detailed and now extensive sceneries that can change your perspective of iconic mountain areas and allow them to come to life in your simulation world, in this case it is the Inca Machu Picchu National Park, it comes... Highly recommended. ____________________________________________ Yes! The Machu Picchu National Park UHD by Frank Dainese and Fabio Bellini is NOW available from the X-Plane.Org Store here : Machu Picchu National Park UHD Price Is US$19.95 Features: included in the degree -14 -073. The whole territory was reconstructed on a photographic basis. The village (Aguas Calientes,S.Teresa) are reproduced with typical buildings, hotels, residences ... All the vegetation has been mapped and reproduced in 3D. 1 Airport grass-runways in S.Teresa distreect 3 heliports at the respective tourist sites and archaeological site. Reconstructed with 3D models the area archaeological (INKAS) with 4K textures processed from photos. This scenery is only suitable for VFR flight, only with a "visual flight". ICAO codes: XLPMH MachuPicchu Aiport HLPMH [H] Machu_Picchu Heliport HLMPC [H] Machu_Picchu Area archeologica HLPAC [H] Aguas Calientes WT3/Traffic Global: Your joking of course! no, you are on your own out here Requirements X-Plane 11 Windows, Mac or Linux 4GB VRAM Minimum - 8GB+ VRAM Recommended Download Size: 174 MB Release and Review version 1.0 (12th February 2021) Installation Download scenery file size is download 174mb and with the full installation installed in your custom scenery folder as there are only two install folders, that need to set in the order below in the provided .INI File... the mesh (XMesh) has to be set below the main scenery folders. MachuPicchu XMesh_MachuPicchu Total scenery installation (MachuPicchu) : 411.80mb Documents One manual with notes ______________________________________________________________________ Scenery Review by Stephen Dutton 17th February 2021 Copyright©2021 : X-Plane Reviews (Disclaimer. All images and text in this review are the work and property of X-PlaneReviews, no sharing or copy of the content is allowed without consent from the author as per copyright conditions) Review System Specifications: Computer System: Windows - Intel Core i7 6700K CPU 4.00GHz / 64bit - 32 Gb single 1067 Mhz DDR4 2133 - ASUS GeForce GTX 1080 8Gb - Samsung Evo 512gb SSD Software: - Windows 10 - X-Plane v11.51 Addons: Saitek x52 Pro system Joystick and Throttle : Sound - Bose Soundlink Mini Plugins: Environment Engine by xEnviro US$69.90 Scenery or Aircraft - Bell 412 XP11 by X-Trident (X-Plane.OrgStore) - US$35.95
-
Translation: I cannot find the T / C and T / D indications. In addition, the aircraft (FMC) assumes neither speed nor altitude when descending. FlightFactor are doing a (beta) test update now on that problem... an updated release should come soon.
-
News! - Updated : Tromso XP v1.3 by Aerosoft Aerosoft have updated to Version 1.3, the largest airport in Northern Norway in Tromsø Airport Langnes. Created by Jo Erlend Sund and Stairport Sceneries the scenery depicts an extremely detailed recreation of Tromsø Airport on the island Tromsøya as well as its surroundings. The changelog is extremely short, with only three changes, but still extremely important to keep the airport current and to fix a couple of X-Plane11.50 related issues. Version 1.3 (February 11th 2021) Updated GroundTraffic plugin Renamed runway 01/19 to 18/36 Fixed runway displacement Is you already currently own Aerosoft's Tromso XP, then go to your X-Plane.OrgStore account and download the new updated version for free. _________________________ Yes! Tromso XP by Aerosoft is Now Available from the X-Plane.Org Store here : Tromso XP by Aerosoft Price is US$19.99 Features: Highly detailed representation of Tromsø Airport (ICAO: ENTC, IATA: TOS) High-resolution ground image for the airport boundary Large photo scenery coverage of the surrounding area (121 km² / 50cm/pixel) Animated Jetways (AutoGate plug-in required) Several custom buildings covering the surrounding area Highly detailed building textures with baked shadows Realistic night time effects and custom XPlane lightning Highly detailed terminal interior Custom static aircraft included 3D grass implemented World Traffic 3 compatible (custom files included) Required: X-Plane 11 Windows, Mac or Linux 4 GB VRAM Minimum - 8 GB+ VRAM Recommended Download Size: 1Gb Current version: Version 1.3 (February 11th 2021) ____________________________ News by Stephen Dutton 13th February 2021 Copyright©2021: X-Plane Reviews (Disclaimer. All images and text in this review are the work and property of X-PlaneReviews, no sharing or copy of the content is allowed without consent from the author as per copyright conditions)
-
News! - Scenery release : Machu Picchu National Park UHD by Dainese and Bellini Frank Dainese and Fabio Bellini have now released another epic scenery and this one is totally different again... Machu Picchu National Park in Peru. Machu Picchu is a 15th-century Inca citadel, located in the Eastern Cordillera of southern Peru, on a 2,430-metre (7,970 ft) mountain ridge. It is located in the Machupicchu District within Urubamba Province above the Sacred Valley, which is 80 kilometres (50 mi) northwest of Cuzco. The Urubamba River flows past it, cutting through the Cordillera and creating a canyon with a tropical mountain climate. Yes an Instagrammers dream destination... The location is universally known for its impressive and original ruins, and it is the third largest archaeological site in the world. Features: included in the degree -14 -073. The whole territory was reconstructed on a photographic basis. The village (Aguas Calientes,S.Teresa) are reproduced with typical buildings, hotels, residences ... All the vegetation has been mapped and reproduced in 3D. 1 Airport grass-runways in S.Teresa distreect 3 heliports at the respective tourist sites and archaeological site. Reconstructed with 3D models the area archaeological (INKAS) with 4K textures processed from photos. This scenery is only suitable for VFR flight, only with a "visual flight". ICAO codes: XLPMH MachuPicchu Aiport HLPMH [H] Machu_Picchu Heliport HLMPC [H] Machu_Picchu Area archeologica HLPAC [H] Aguas Calientes There is as noted one Airfield and three H-Pads included with this scenery. Images are courtesy of Frank Dainese and Fabio Bellini _________________________ Yes! the Machu Picchu National Park UHD by Dainese and Bellini is NOW available from the X-Plane.Org Store here : Machu Picchu National Park UHD Price is US$19.95 (US$3 off) Requirements: X-Plane 11 Windows, Mac or Linux 4GB VRAM Minimum - 8GB+ VRAM Recommended Download Size: 174 MB Version 1.0 (Feb 2021) (Disclaimer. All images and text in this review are the work and property of X-PlaneReviews, no sharing or copy of the content is allowed without consent from the author as per copyright conditions) All rights reserved.
-
News! - Aircraft Release : Cessna 140 by NKDesign Out of blue comes a nice little tiddler aircraft from NKDesign... the Cessna 140. The Cessna 120, 140, and 140A, are single-engine, two-seat, conventional landing gear (tailwheel), light general aviation aircraft that was first produced in 1946, immediately following the end of World War II. Production ended in 1951, and was succeeded in 1959 by the Cessna 150, a similar two-seat trainer which introduced tricycle gear. Combined production of the 120, 140, and 140A was built 7,664 units over five years. The Cessna 140 was originally equipped with a Continental C-85-12 or C-85-12F horizontally opposed, air-cooled, four-cylinder piston engine of 85 hp (63 kW). The Continental C-90-12F or C-90-14F of 90 hp (67 kW) was optional, as was the 108 hp (81 kW) Lycoming O-235-C1 engine, an aftermarket installation authorized in the type certificate. This model had a metal fuselage and fabric wings with metal control surfaces. The larger Cessna 170 was a four-seat 140 with a more powerful engine. Features Authentic Replica of the Cessna 140 High quality 3D model 4K Textures used throughout Aircraft makes full use of PBR material rendering, and this varies by livery Interactive Features Menu for swapping in/out various visuals and items; Add Fairings, Chocks or even a working action camera if you see fit! Wearable sunglasses and headset that can be seen on the pilot Six liveries included Paint kit included Immersive 3D FMOD Soundscape A complete FMOD soundpack, including authentic recordings of the Continental O-200 that are affected by camera directionality Wearable headset affects the audio around you when worn; muffled sound, static when turned on etc Multiple sounds used for single switches/levers, meaning manipulators will rarely sound the same Convincing interior atmosphere that will change based on various conditions VR Friendly Model is FPS optimised Ultra HD 4K Gauges makes for easy reading ’Physical’ notebook serves as options menu for ergonomic convenience The Cessan 140 is now available from the X-Plane.OrgStore... Images are courtesy of NKDesign _________________________ Yes! the Cessna 140 by NKDesign is NOW available from the X-Plane.Org Store here : Cessna 140 Price is US$20.00 Requirements: X-Plane 11 Windows, Mac or Linux 4 GB VRAM Minimum, 8 GB VRAM recommended Download Size: 919 MB Current version: 1.0 (February 11th 2021) (Disclaimer. All images and text in this review are the work and property of X-PlaneReviews, no sharing or copy of the content is allowed without consent from the author as per copyright conditions) All rights reserved.
-
News! - Updated : Embraer A-29 v3.4 by BFDG Brazilian Flightsim Development Group (BFDG) has updated the BFDG Embraer A-29 "Super Tucano" for X-Plane 11 to version v3.4. The Tucano is a light attack aircraft and trainer from Brazil, and this Embraer A-29 is the "Super Tucano" variant. Changelog to v3.4 is quite comprehensive, with a completely new model, mapping, panel textures, lighting and night textures... new flight Dynamics are also in the new version. Version 3.4 Changelog -Compatibility update for X-Plane 11.50+ -One unique pack for the A-29 (A29B as default, A-29A config through BFDG Menu) -New engine modelling -New flight dynamics -New panel textures -New liveries -New cockpit lights and night textures for all liveries -3D adjustments and texture corrections on the external model, bombs, missiles, and drop tanks -PFD, MFD and DED Keyboard buttons are no longer additive and ordered, new functionalities added to DED screens -X-Plane X1000 GPS installed, -New fuselage and normal mapping -New 3D internal/external sounds BDFG have noted that the sister aircraft the Embraer AT-27 Tucano, is having the same update and is coming soon, our review is; Aircraft Review : Embraer AT-27 Tucano by Brazilian FlightSim Development Group If you already own the Embraer A-29 "Super Tucano", you can go to your X-Plane.OrgStore account and update for free... Images are courtesy of Brazilian Flightsim Development Group _________________________ Yes! the updated Embraer A-29 v3.4 by BFDG is NOW available from the X-Plane.Org Store here : Embraer A-29 Price is US$27.95 2 models included Embraer A-29A Embraer A29B Requirements: X-Plane 11 Windows, Mac or Linux 4 GB VRAM Minimum - 8 GB+ VRAM Recommended Download Size: 250 MB Version 3.4 (Feb 2021) (Disclaimer. All images and text in this review are the work and property of X-PlaneReviews, no sharing or copy of the content is allowed without consent from the author as per copyright conditions) All rights reserved.
-
News! - Released : EINN Shannon Airport by Boundless Simulations Boundless have released a significant Western Ireland airport in EINN Shannon. The airport is significant because it has the longest runway in Ireland of 3199m, which allowed EINN it to be designated as an alternate landing site for the now retired American Space Shuttle. It was also a stopover and immigration point for the BA1/BA2 London City to New York shuttle service with a converted BA Airbus A318. Feature list is long... Features Accurate taxiway, runway & Apron networks HD, photorealistic PBR apron, taxiway & runway textures HD custom Buildings Photorealistic sea & water Recoloured water in surrounding area (more naturally brown in the estuary rather than default blue) Terminal interiors modeled Crisp HD, orthophoto base, carefully sharpened and recoloured for best results Full night lighting 3D Grass at airport Custom streetlights / apron lighting Brand new HD Static GA aircraft Fully compatible with traffic Global & WT3 Boundless HD Trees / forests - colour matched to the ortho below, includes many colour variations / tree types Thousands of custom objects manually placed for best results High level of airport detail PBR textures used with airport buildings and many custom objects Full airport fencing accurately placed Animated custom road traffic Animated custom airport vehicles (Shannon Airport vans, custom fire engines etc) Excellent FPS Various open hangars Designed with AutoGate compatibility (animated jetways / guidance systems / marshallers) All nearby buildings, e.g. car rentals, Shannon Golf Club Shannon business Park included, with both default and custom buildings placed accurately Nearby areas covered with our custom night lighting First impressions of EINN-Shannon are extremely good, a must have. _________________________ Yes! EINN Shannon Airport by Boundless Simulations is Now Available from the X-Plane.Org Store here : EINN - Shannon Airport Price is US$23.99 Required: Windows, Mac or Linux 4 GB VRAM Minimum - 8 GB+ VRAM Recommended Download Size: 700 MB Current version: 1.0 (February 6th 2021) ____________________________ News by Stephen Dutton 8th February 2021 Copyright©2021: X-Plane Reviews (Disclaimer. All images and text in this review are the work and property of X-PlaneReviews, no sharing or copy of the content is allowed without consent from the author as per copyright conditions)
-
Scenery Review : RJAA Tokyo-Narita XP by Drzewiecki Design With living in Australia, you want more exciting routes that fit in with your more local perspective. Europe or even the United States are a long way away from this Pacific based area, so the choices of interesting routes out here are limited. Asia is thankfully now starting to appeal to X-Plane users, which are all still very European and US centric in their flying, but there is a lot to explore out here, and the location differences available are exciting as well. So Japan appeals in many ways. For one it is a link between Europe and America on both sides in a long haul perspective, China (does Hong Kong still count?), Singapore, Malaysia, Australia and even New Zealand are all within medium haul distances. And the main entrance port for Japan and into Tokyo is the huge modern airport at Narita, which is located 40 miles (64 kilometers) distance from the central of Tokyo City, Japan's Capital. The Polish Developer studio of Drzewiecki Designs, has over the last few years concentrated more on CityScape style projects, like New York City, Seattle, Washington than just their original singular airport sceneries, but here we are with a rendition of Tokyo's main international gateway in Narita-Tokyo, RJAA. Prior to the opening of Narita Airport, Tokyo International Airport, then Haneda Airport was the main international airport in Japan. Haneda, which is located on Tokyo Bay, is however close to many densely populated residential and industrial areas, and began to suffer from over capacity and noise issues in the early 1960s as jet aircraft became common. The Japanese transport ministry commissioned a study of alternative airport locations in 1963, and in 1965 selected a plan to build a five-runway airport in the village of Tomisato. Around 1966, a group of local residents combined with student activists and left-wing political parties formed a popular resistance group known as the Sanrizuka-Shibayama Union to oppose the new Airport, which remained active until fracturing in 1983 and started originally a protest activity called the "Sanrizuka Struggle". The Zengakuren radical student union then began sending students to Narita to help the local farmers. And during Eminent domain, three policemen were killed by activists. Takenaka Corporation constructed the first terminal building, which was completed in 1972 on the original site in that was to become "New Tokyo International Airport" an airport created in serving the Greater Tokyo Area of Japan. It is located approximately 60 kilometers (37 mi) east of central Tokyo in Narita, Chiba. The first runway took several more years due to the constant fights with the Union and the sympathizers, who occupied several pieces of land necessary to complete the runway and also temporarily built large towers in the runway's path. The runway was completed and the airport was scheduled to open on March 30, 1978, but this plan was again disrupted when, on March 26, 1978, a group of protestors broke into the control tower and destroyed much of its equipment, causing about $500,000 in damage and delaying the opening until May 20 1978. On November 26, 1986, the airport authority began work on Phase II, a new terminal and runway north of the airport's original main runway. To avoid the problems that plagued the first phase, the Minister of Transport promised in 1991 that the expansion would not involve expropriation. Terminal 2 opened on December 4, 1992, at a cost of $1.36 billion. The new terminal had approximately 1.5 times the space of the older terminal, but its anti-congestion benefits were delayed because of the need to close and renovate much of the older terminal. The airport's land situation also meant that the taxiway to the new terminal was one-way for much of its length, and that taxi times between the terminal and runway were up to 30 minutes. The Runway B (16L/34R) opened on April 17, 2002, in time for the World Cup events held in Korea and Japan that year. However, its final length of 2,180 m (7,152 ft), much shorter than its original plan length of 2,500 m (8,202 ft), left it too short to accommodate Boeing 747s. The runway was further impeded by a three-story concrete building in the path of its taxiway, which the Union had constructed in 1966, forcing the taxiway to bend inward towards the runway. Runway B was later then extended northward to 2,500 meters (8,202 ft) on October 22, 2009, The building remained in place until August 2011, when authorities finally removed it under a court order. Beginning on October 20, 2011, the airport was then approved to allow simultaneous landings and take-offs from the A and B runways. The approval allowed the airport to increase annual take offs from 220,000 to 235,000 and increase hourly departure capacity from 32 to 46. The parallel runways are positioned 2.5 km (1.6 mi) apart. RJAA Tokyo-Narita You can see the boundary line between the ortho-photo layout images and the X-Plane default textures, but overall you really have to look for the edges, as it is blended in quite nicely. Narita International Airport 成田国際空港 Narita Kokusai Kūkō IATA: NRT - ICAO: RJAA - WMO: 47686 16R/34L - 4,000m (13,123ft) Asphalt 16L/34R - 2,500m (8,202ft) Asphalt Elevation AMSL 41 m / 135 ft Terminal 1 Terminal 1 uses a satellite terminal design divided into a North Wing, Central Building, and a South Wing. Two circular satellites, Satellite 1 (gates 11–18) and Satellite 2 (gates 21–24), are connected to the North Wing. Satellites 3 and 4 (gates 26–38 and gates 41-47) compose a linear concourse connected to the Central Building. Satellite 5 (gates 51-58) is connected to the South Wing. The terminal building has a floorspace of 463,000 m2 (4,980,000 sq ft) and is equipped with 40 Airbridge gates. Terminal 1 is mostly used by ANA. A side note is that Narita was among the first airports in the world to align its terminals around the three major international airline alliances. Since 2006, the airport has arranged for SkyTeam carriers to use the North Wing of Terminal 1, Star Alliance carriers to use the South Wing of Terminal 1, and Oneworld carriers to use Terminal 2. Modeling by Drzewiecki Design is simply excellent, but you will need your Texture Quality set to Maximum to get the full impact, one step down at the High setting does create a "Slight" blur with the textures, but again nothing to significantly impact the scenery in detail. The RJAA scenery uses the SAM (Scenery Animation Manager) system with both animated Airbridges and Marshallers, and to great effect here with the also SMBC advertising on all the airbridges which are custom designed to suit Narita-Tokyo. Clutter is exceptional and mostly ANA branded Terminal 1 and Japan Airlines Terminal 2 with local bus and fuel tankers, there are also animated traffic vehicles moving around, but mostly all animations are the default SAS. Glass is very good and reflective. Drzewiecki Design have gone in the see-through route, and the aspect see-through can work or not, but here the glass is nicely tinted (grey) and thankfully looks realistic, internally the terminals are recreated, basic, but good. Terminal 1 landside is very good, most of the ground detail is hidden by the flyover connecting roadways, but the detail and carparks are excellent. Highlight is the really lovely ANA administration building, that is really well reproduced here. Personal Note: I will add into the review that I have personally transited Narita-Tokyo, but only through Terminal 2, and with one over-night stay in a JAL Hotel, so my thoughts are of this transit are relevant here. Terminal 2 Narita's Terminal 2, opened in 1992, is divided into a main building and T shape satellite, both of which are designed around linear concourses. The two were originally connected by the Terminal 2 Shuttle System, which was designed by Japan Otis Elevator and was the first cable-driven people mover in Japan. A since then a new walkway between the main and the satellite buildings began operation on September 27, 2013, and the shuttle system was discontinued. Terminal 2 can handle large aircraft like the A380 (operated by Emirates) and Boeing 747-8. Terminal 2 has an area of 391,000 m2 (4,210,000 sq ft) and has 32 Airbridge boarding gates. Terminal 2 is mostly used by Japan Airlines. Terminal 2 is a huge layout, and Drzewiecki have done a sensational job here of recreating the huge amount of various elements that make up this massive terminal complex. Importantly Drzewiecki really gets that Japanese feel into the scenery, and the airbridge custom detail is exceptional (all of course active). The T satellite section does not have any internal aspects, but the perfect outer facade and green glass windows are perfection, and exactly like I remember the terminal. Terminal 2 Landside is also really good, granted the Lo-Res ground textures are more noticeable here, but the sheer volume of detail, covers over most of the weaknesses. Highlight is the excellent girder construction of the terminal itself... ... carparks are well developed as is the colourful buspark. The Narita Airport administration building is also very well reproduced here. There are six main stands that can park an A380 (B748) at Terminal 2 (there are other parking areas that also cover the Code E parking), these stands are 96-66/67/68 Airbridges and 410/411 can be used as static parking stands. There are specific rules in runway use (16R/34L) and nominated taxiway limit routes, the 20-9Q1 chart is required. Terminal 3 Narita's Terminal 3, is a terminal for low-cost carriers (LCC) that opened on April 8, 2015. It is located 500m north and connected to Terminal 2, and constructed where a cargo building used to sit, and the terminal has a capacity of 50,000 flights per year. The new terminal incorporates several cost-cutting measures, including using decals instead of lighted directional signs and using outdoor gates and airstairs instead of jet bridges, which are all intended to reduce facility costs for airlines and their passengers by around 40% on international flights and 15% on domestic flights. Taisei Corporation was awarded a ¥11.2 billion contract to build the terminal in January 2013. The airport also constructed a new LCC apron to the north of the terminal, with five additional parking slots for Airbus A320 and similarly sized aircraft. If flying domestic Japan, then this terminal is perfect parking for your turbo-prop or short-haul airliner. Highlight is the excellent, raised bridge walkway, between the terminal and the walkon/walkoff gates. Cargo RJAA's cargo facility is huge... certainly a great destination to aim for. If you are like me, I love realism after a long flight, and a great cargo facility in realism is as important as the passenger aspect, and Narita, certainly delivers here. The cargo facility is not hard to find with it's distinctive blue roofing design, tons of parking to choose from (warehouse or stands), and the well branded clutter detail is again first rate... Two nice highlights here, is the animated field radar, and the VOR tower mid-complex. The visual feel of the VOR tower is very Tokyo or Japanese... love it. There are two remote stand areas, one is opposite Terminal 1 southeast (Stands 422-431) and the other, very remote opposite Terminal 2 far southeast (Stands 441-450), Stand 421 is also available but it is a A320/B737 size. Personal note; on arrival at Narita I remember the 422-431 stands having sitting parked a large number of Northeast Boeing 747-300s, so you trundled past one 747 after another huge 747, it was an overwhelming sight I never forgot and an unforgettable arrival at RJAA and my first taste of a mega airport.. I have never seen so many B747s packed into one airport, and that includes Sydney. Control Towers There are a lot of towers at RJAA Narita. Three (yes three), main field towers plus the various ramp towers. The central complex between the two major terminals, here houses a lot of the airport's infrastructure, for power generation and air-conditioning, plus those three control towers. Again here the detail is excellent, with these are all very detailed buildings that fill in the area and create a very realistic overview. The highest tower however is not the main field tower, as that is the medium bulky one with the set "Tower View" (which is good)... ... the external tower detail is exceptional, great framework and perfect glass. The internal tower area is also detailed, and the field view from inside here can keep you happy for hours! Narita Maintenance South of Terminal One is a large maintenance area, with six major maintenance hangars and a large engine test bay facility. In order there is NCA (Nippon Cargo Airlines), two hangars for Japan Airlines, AGP Corporation, Delta Techops... ... and ANA. The ANA hangar doors are open to reveal an internal maintenance scenerio, and the detail is simply excellent and worth an internal walk-around. Note the impressive internal roof structure. Infrastucture All around the Maintenance base area, there is a lot of well done infrastructure, and the object count and detail done here is very good... .... sneaky is the Drzewiecki logo on the side of one of buildings, but they get away with it. There are a few low gradient areas for airport access, the poor resolution (it is supposed to be a road) is noticeable, but overall the ground cutouts work very well. Infrastucture Hotels One area that really impressed me was the significant amount of Hotels that are rendered into the scenery. These mostly airline run properties are positioned mostly on the northeast side of RJAA between the two runways... .... I was very excited to find the Hotel Nikko Narita (JAL) of where I stayed overnight, and the reproduction is fantastic, in exactly the way I remember the area. There are altogether nine hotels represented here including; Toyoko Inn Narita Airport Honkan, Toyoko Inn Narita Airport Shinkan and it's extension, Narita Tobu Hotel Airport, Marroad International Hotel Narita, ANA Crowne Plaza Narita, Hilton Tokyo Narita, Hotel MYSTAYS Premier Narita, Narita Gateway Hotel and the Narita View Hotel. Ground textures The ground textures overall are excellent, but a bit generic, but very good in texture detail. Lineage is faded in nicely to match and looks realistic. Apron and ramp areas however are a bit light on the grunge, oil and markings... some more dirt depth could have been added in. There is 3d grass, but the strip version and not any flowers, but any grass effects is better than no grass at all, so passable. The runway/taxiway edges are very clean and straight and not at all very authentic. PBR reflective (wet) active textures and burnt-in ambient occlusion effects are good as well in bringing out the surface stone work... ... but overall the surface variations are as noted a bit samey and generic, passable. Lighting Narita's lighting is fine overall, but there is no super detail. Approach lighting and Navigation lighting is good, but not outstanding with no Navigation signage reflections. There is two tone lighting to separate the Airside and Landside areas, and it looks good from the air and from on the ground. The apron and ramp areas are well lit, and feel good. Transparent glass can be a problem at night, it is thankfully fine here at RJAA, but also balanced on that realistic line, overall it is all very good. Landside lighting is basically average. There is not a lot of carpark or area lighting detail, worse is that some office window lighting is really average, or could be noted as cheap and quick... ... so in parts the airside areas feel a bit dead at night, or dull. Terminal 2 however is quite nice... overall a bit more creativity would have helped in these nondescript areas. Maintenance is again a highlight at night... all the hangars are nicely lit and branded, again the standout is the amazing ANA hangar. ________________________ Summary Haneda Airport, located on Tokyo Bay, was positioned close and into densely populated residential and industrial areas and was in so was heavily constricted for any expansion in the Japanese capital of Tokyo. So a new green field airport was proposed for Narita, Chiba. local residents combined with student activists and left-wing political parties formed a popular resistance group known as the Sanrizuka-Shibayama Union to Oppose the Airport, that was set to be 40 Miles or (64 kilometers) distance from central Tokyo City. The fight was nasty and went on for years, but finally construction began in 1972 and the airport was finally opened (after another major delay) in May 1978. Today Narita-Tokyo is Japan's premier international gateway, a sprawling and mega airport with it's two parallel runways that are set 2.5 km (1.6 mi) apart. From an X-Plane perspective it extends outward the options of flying in a very unused area. Narita is perfect for Trans Asia and Pacific routes, a central star on the opposite side of the world. And here the Polish Developer studio of Drzewiecki Design has created a resonating destination, that is just perfect for a visit. RJAA Narita is a huge airport, that is dominated by two massive terminals in Terminal 1 and Terminal 2, a third smaller Terminal 3 which is a LCC or domestic facility. As a modeling sensation, this DD scenery of Narita-Tokyo is just simply excellent, as there is excellent modeling and a huge custom object count to create a perfect rendition of this exceptional airport. Terminals have see-through glass and internal halls, and the SAM (plugin) action is available on every airbridge. Detail overall is quite perfect on both Airside and Landside, with excellent locally branded clutter, of which there is a huge amount of vehicles and ramp detailing. Other highly noted features is the excellent Cargo area, Maintenance area and the fully realised infrastucture of support buildings and the extensive detail and high number of Airport Hotels. Negatives overall are few at Narita, but some lighting landside is a bit average, as is the detail of the runway and taxiway edges... but that is all. Exceptional is the only way to describe Drzewiecki Design's RJAA Narita-Tokyo scenery, it covers every aspect of what you need in a custom, high quality and detailed airport. A perfect destination, and a great airport to arrive at, after any flight across the Pacific or Asia, and a simply great way to expand out your X-Plane experience. When leaving Narita. The ground crew will form up in a row and white gloved, wave you goodbye and say "Sayonara", a beautiful expression of the Japanese culture and expression, but here you need to say "Kon'nichiwa" or hello to a fabulous quality scenery... Highly Recommended and a 5 Star scenery _____________________________________ Yes! RJAA Tokyo-Narita XP by Drzewiecki Design is now available from the X-Plane.Org Store here : RJAA Tokyo Narita XP Price is US$24.00 Feature List: High quality model of RJAA Narita airport in Tokyo, with extensive details throughout the whole airport Performance-friendly interior modeling at terminal buildings, control towers, and some hangars Optional static aircraft, advanced lighting, extensive mesh design with precise runway vertical profiles, PBR materials, significant orthophoto coverage Animated jetways, VGDS, marshallers, custom animated vehicles (using the SAM plugin) WT3: WorldTraffic3 GroundRoutes are not provided and Traffic Global operates perfectly. Requirements: X-Plane 11 Windows, Mac 4 GB VRAM Video Card - 8 GB+ VRAM highly Recommended Download size: 1 GB Current and Review version: 1.0 (January 31st 2021) Installation the RJAA scenery is installed by the developers installer, as an executable program, the download size is 957.10mb RJAA Tokyo Narita XP Windows v1.0.exe Install (INI) order is: DD RJAA Tokyo Narita XP Documents (921kb) DD RJAA Tokyo Narita XP Z Terrain (33.3mb) DD RJAA Tokyo Narita XP (3.14Gb) DD RJAA A Tokyo Narita XP Roads (59.8Mb) Total scenery install is: 3.23Gb SAM Plugin - Scenery Animation Manager - Suite 2.0 is required for this scenery ShortFinal Global SFD plugin is highly recommended with this scenery. Documents Three install manuals in English, Polish and Russian, One basic manual in English with history and notes (3 pages) Mac and Linux manual install - English.pdf Mac and Linux manual install - Polish.pdf Mac and Linux manual install - Russian.pdf RJAA Tokyo Narita XP Manual.pdf ___________________________________________ Scenery Review by Stephen Dutton 9th February 2021 Copyright©2021 : X-Plane Reviews (Disclaimer. All images and text in this review are the work and property of X-PlaneReviews, no sharing or copy of the content is allowed without consent from the author as per copyright conditions) Review System Specifications: Computer System: Windows - Intel Core i7 6700K CPU 4.00GHz / 64bit - 32 Gb single 1067 Mhz DDR4 2133 - ASUS GeForce GTX 1080 8Gb - Samsung Evo 1Tb SSD Software: - Windows 10 - X-Plane v11.50r3 Addons: Saitek x52 Pro system Joystick and Throttle : Sound - Bose Soundlink Mini Plugins: Traffic Global - JustFlight-Traffic (X-Plane.OrgStore) US$52.99 : Global SFD plugin US$30.00 : Scenery Animation Manager - Suite 2.0 - Free : Environment Engine by xEnviro US$69.90 Scenery or Aircraft - Default Boeing 737-800 by Laminar Research
-
Aircraft Release : Bell 222 B + UT by CowanSimulations This aircraft which has been very quickly, become very popular, and it is now available from the X-Plane.OrgStore, noted as the CowanSim 222, it is available in both the 222B and the 222UT variants, or you can purchase both aircraft in a single package. The B222 Bells come with a huge list of features: Luxury & Medical Interiors FMOD sound pack Window Rain Effects Compatible with X-Plane 11.50’s Vulkan API Compatible with Virtual Reality AviTab Integration RXP GTN 750 Integration Customizable Panel Configurations Realistic Flight Dynamics Tested by Real Pilots 4K PBR Textures Custom 3D instruments Passenger Cabin Modeled 20 Liveries Vibrant and Detailed Night Lighting Blade Slap and Vibrations xLua for Systems and Animation SASL v3 for Custom Plugins The aircraft has been tested by real world helicopter pilots while being developed, and the model has an authentic feeling while exploring the virtual world. B222B B222 UT Initial impressions are that the B222 is very easy to fly (anti-torque), so if you want to learn to fly helicopters then these aircraft are a good first choice. Highly Recommended. ____________________________________ Yes! the Bell 222 B + UT by CowanSim is NOW available from the X-Plane.Org Store here : CowanSim 222 B Price is US$24.95 CowanSim 222 UT Price is US$24.95 CowanSim 222 B + UT Price is US$39.95 Requirements: X-Plane 11 Windows, Mac or Linux 4 GB VRAM Minimum - 8GB+ VRAM Recommended Download Size: 531 MB (Per Aircraft) (Disclaimer. All images and text in this review are the work and property of X-PlaneReviews, no sharing or copy of the content is allowed without consent from the author as per copyright conditions)


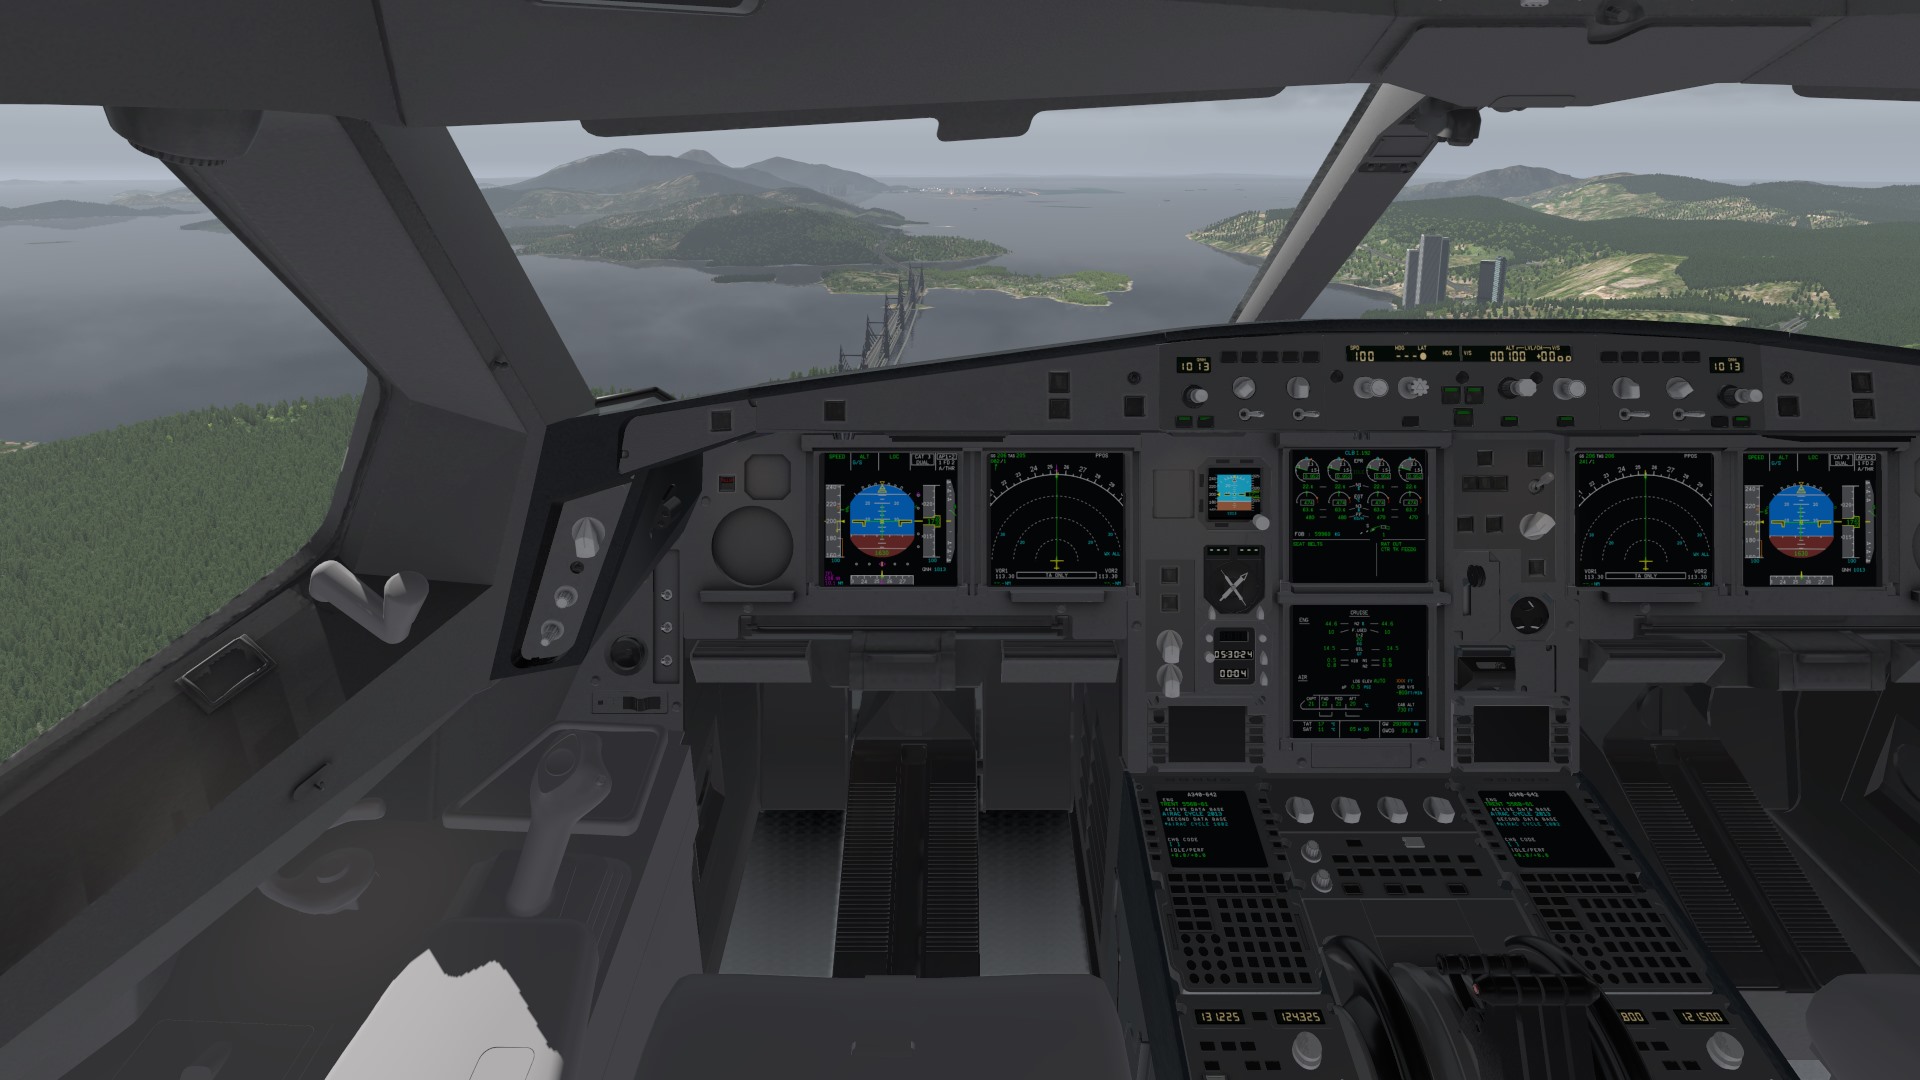


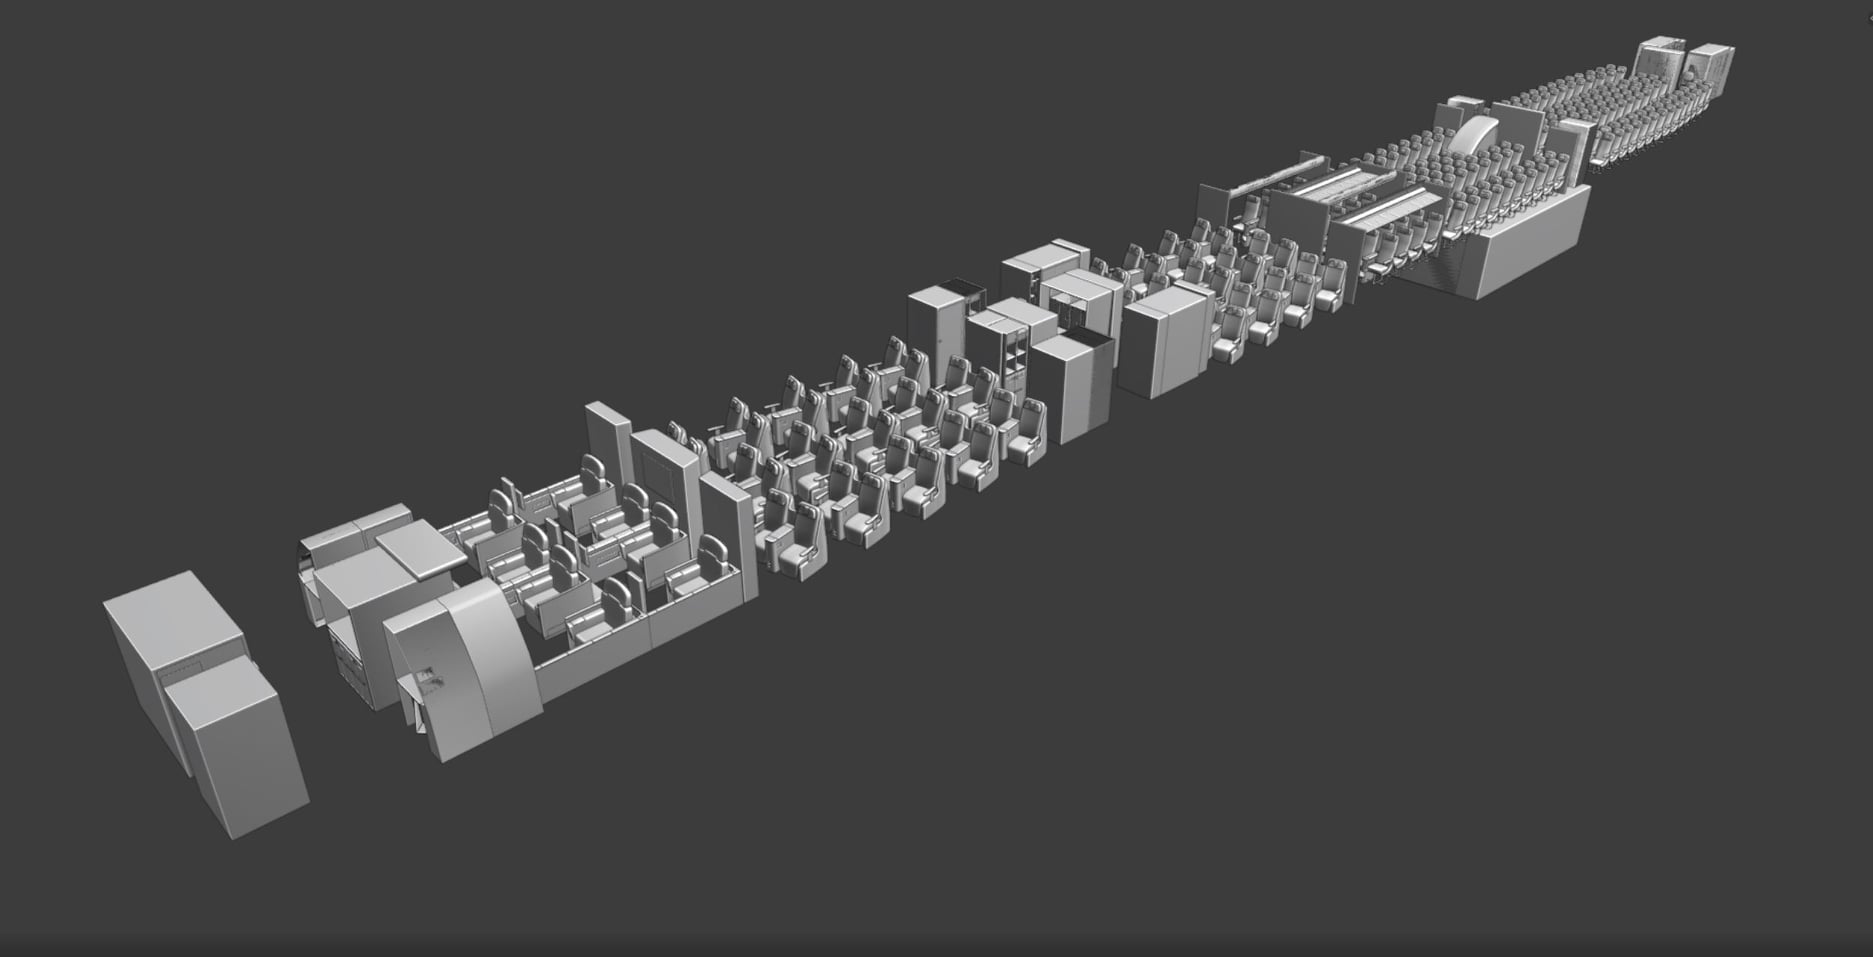

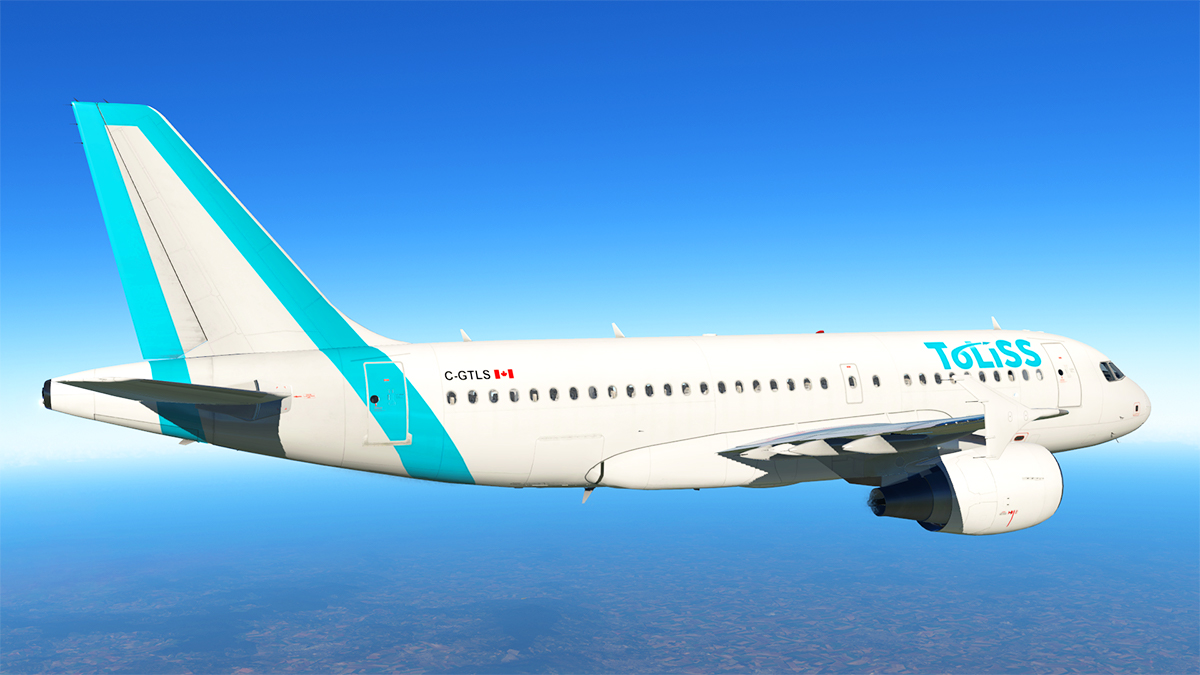
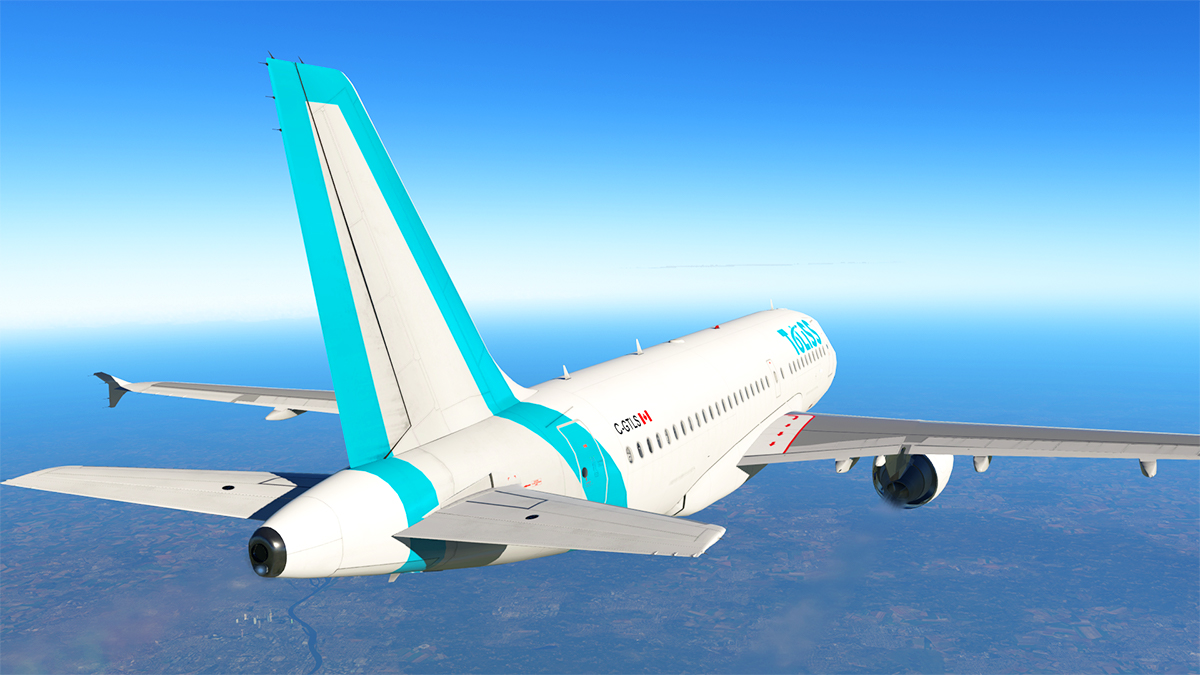
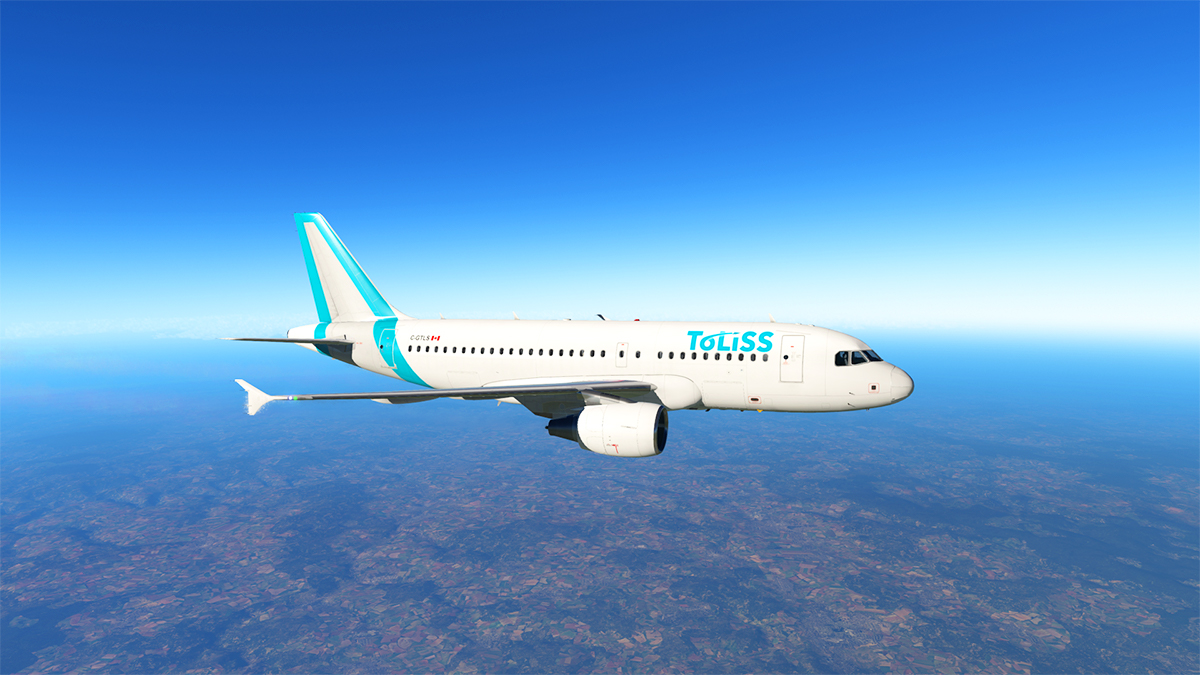
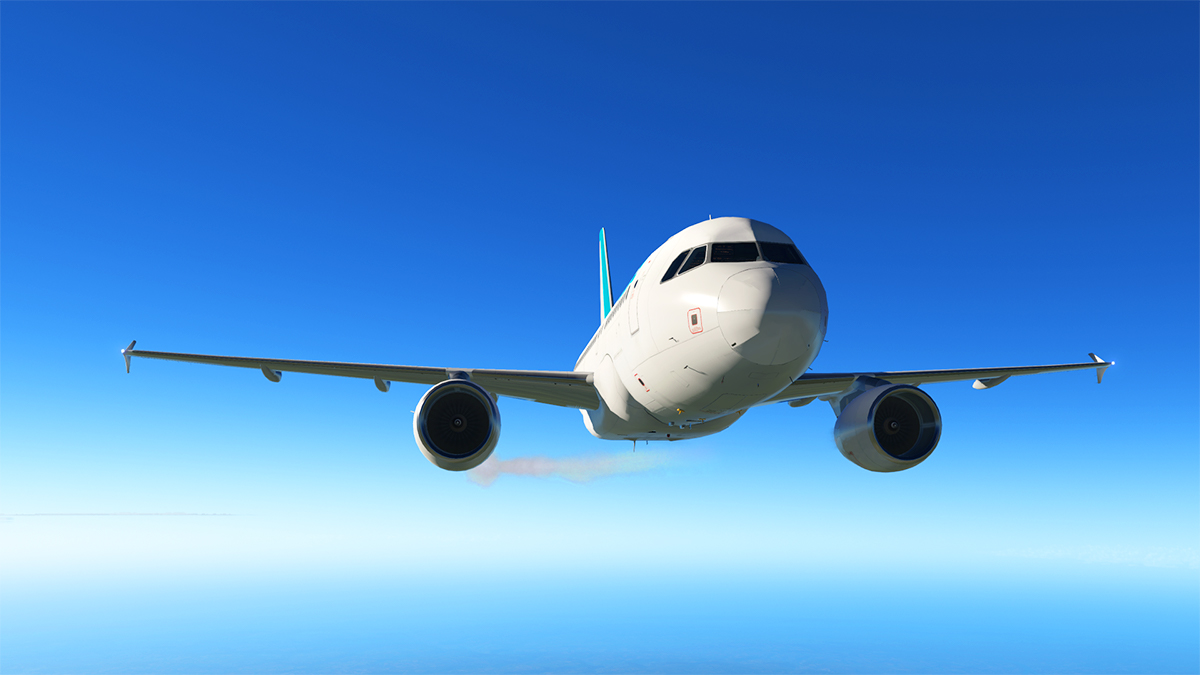

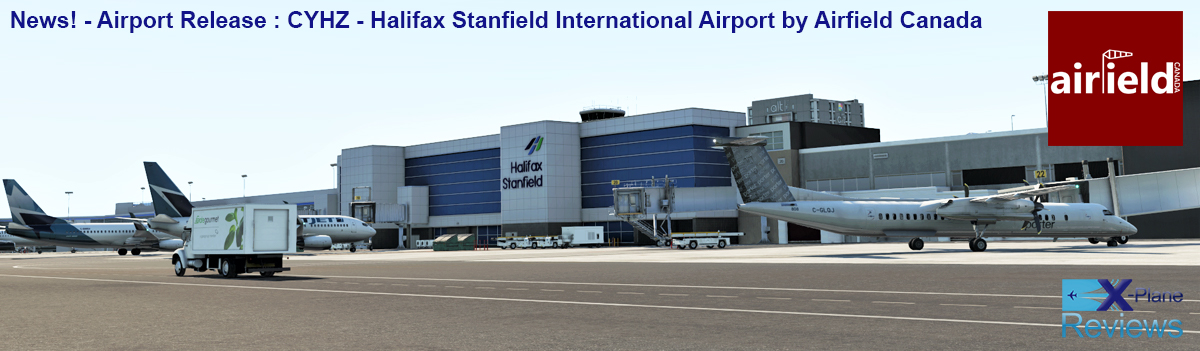
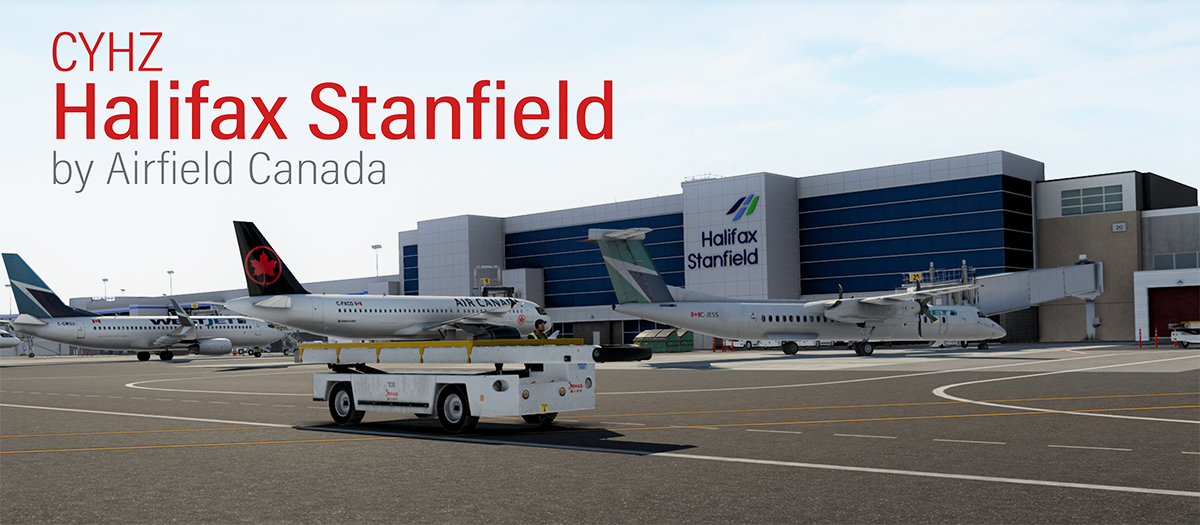
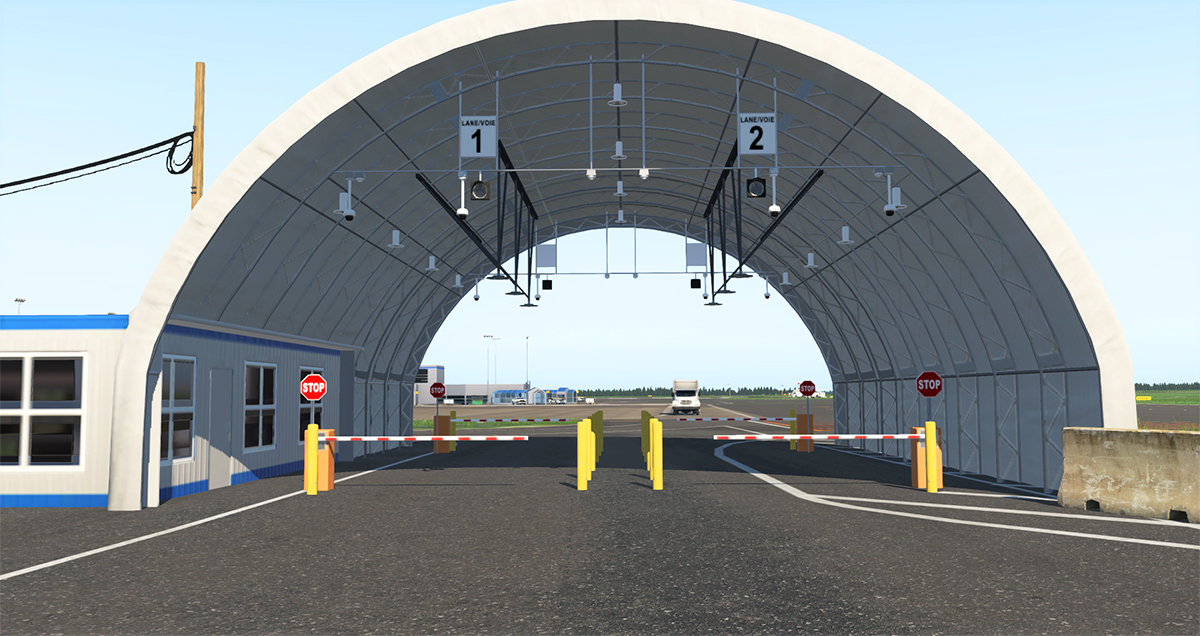
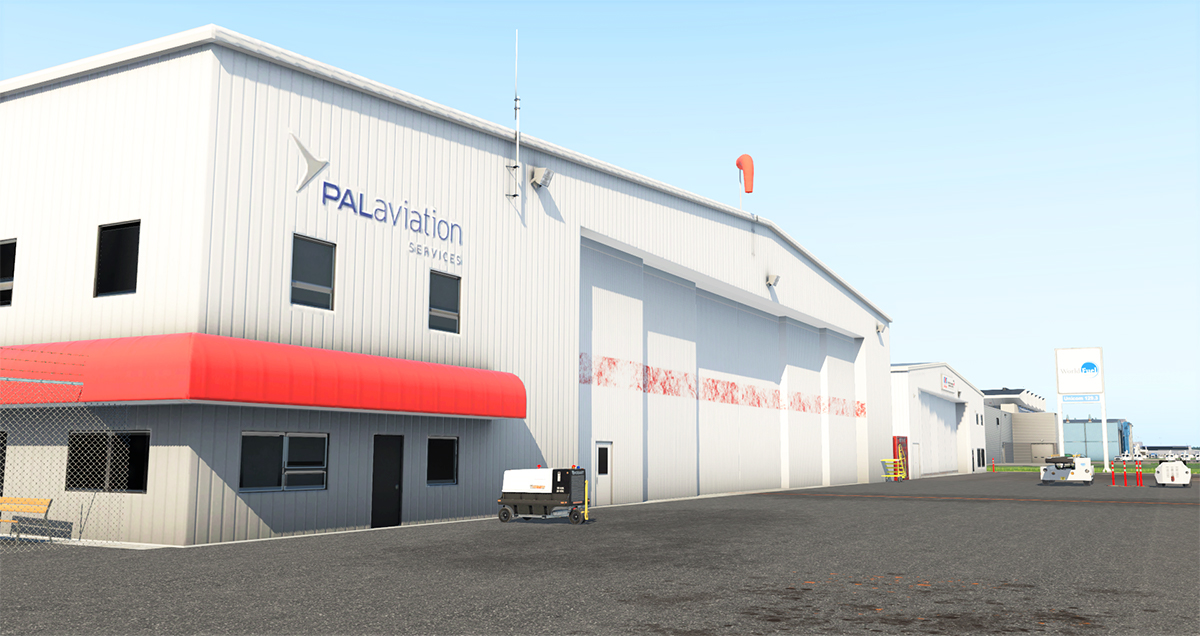
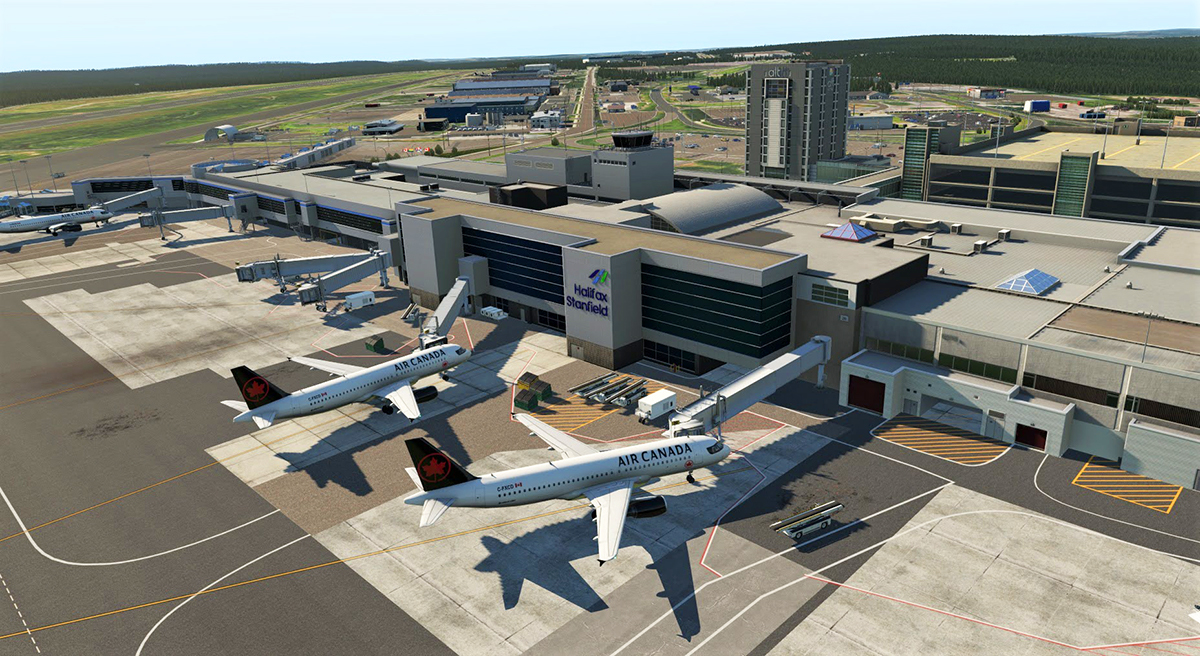


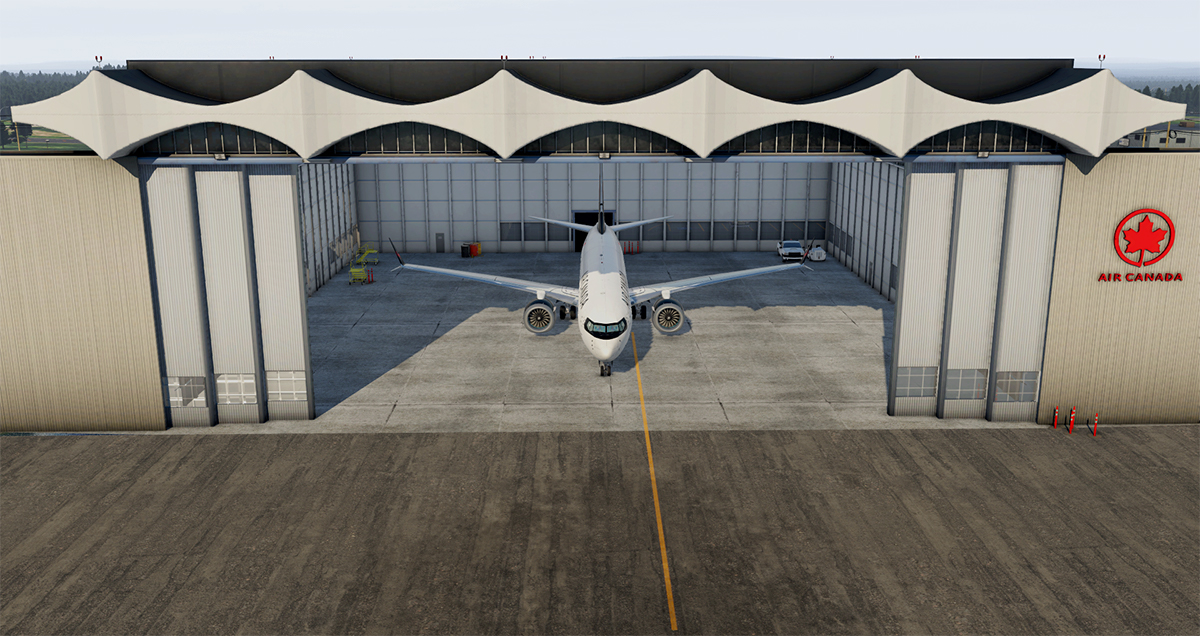
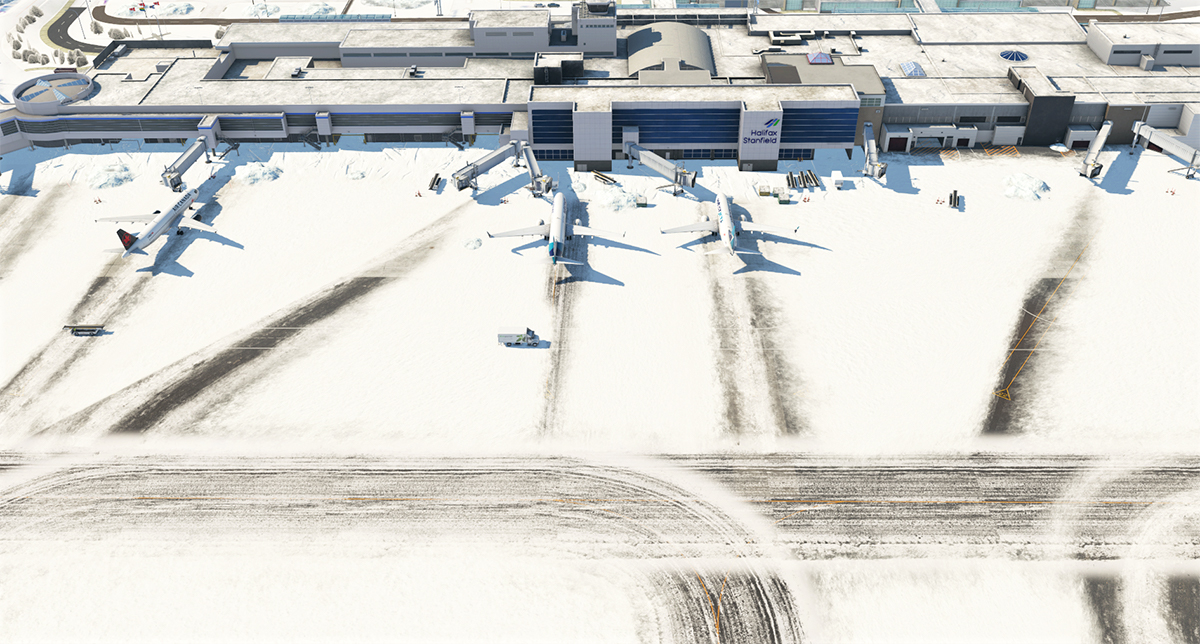
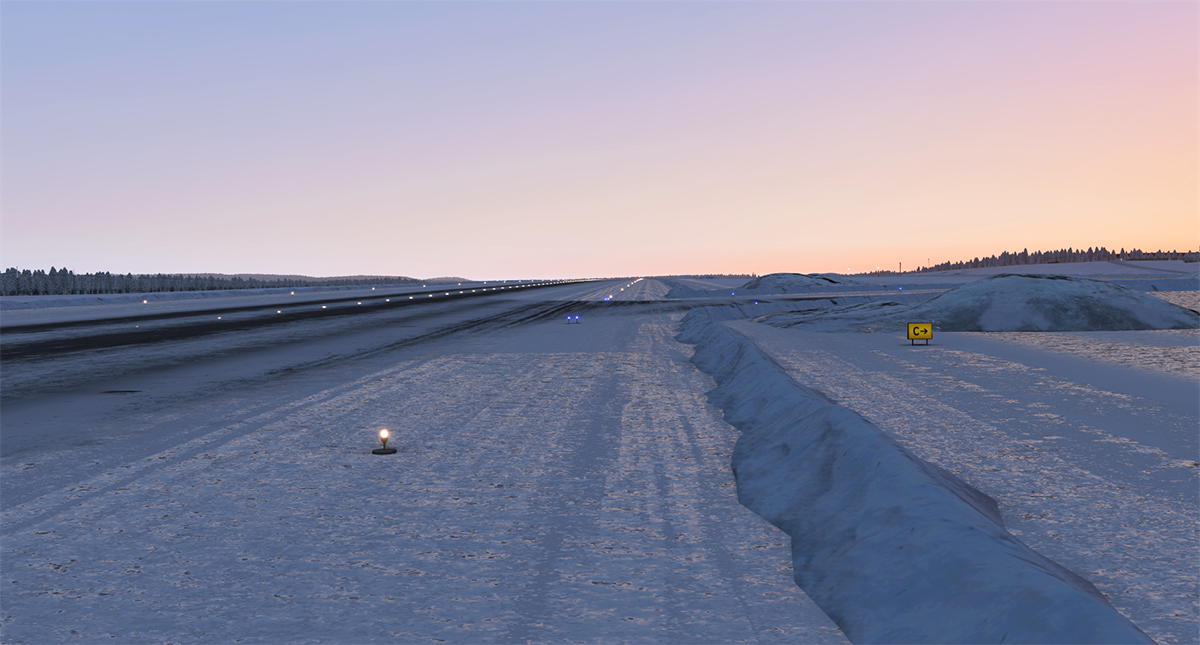
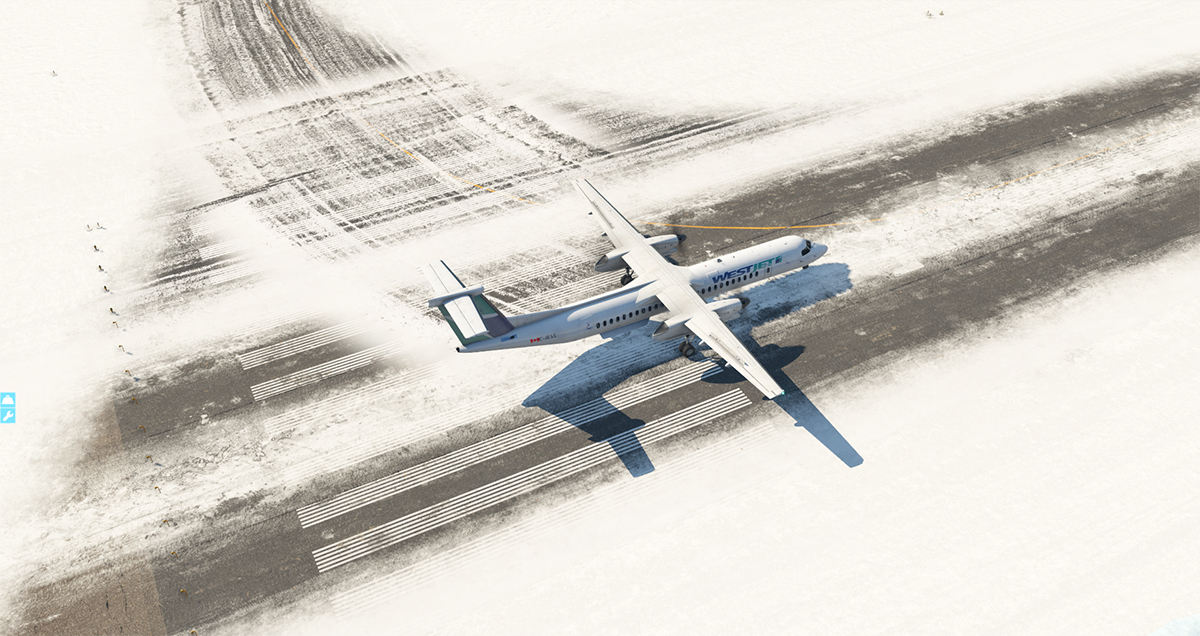
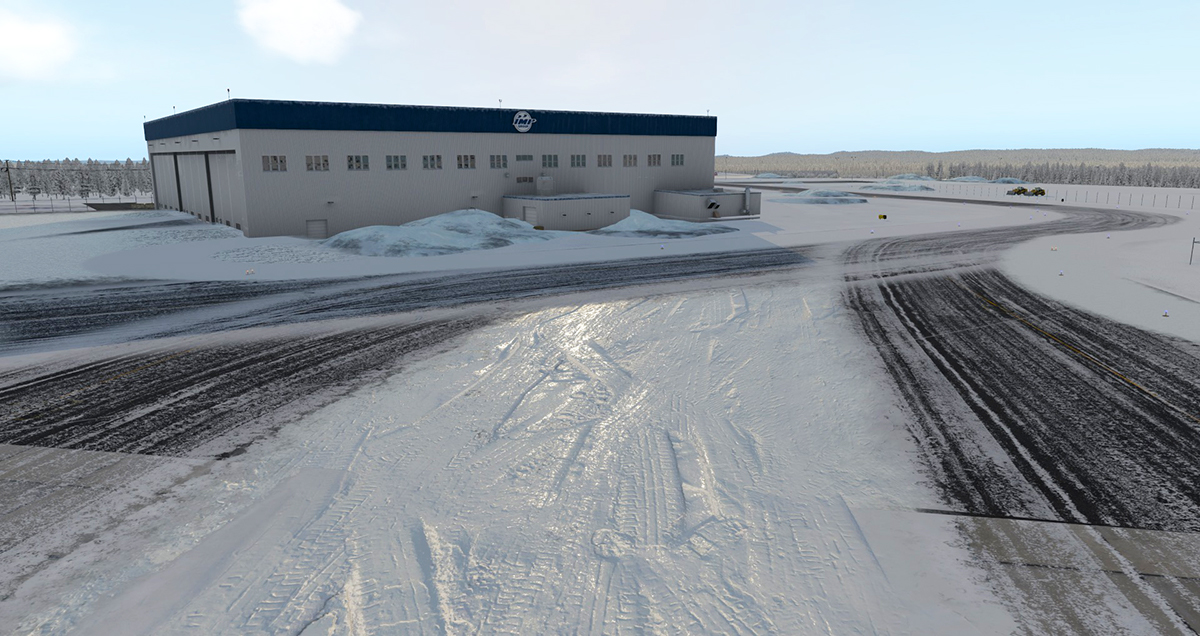
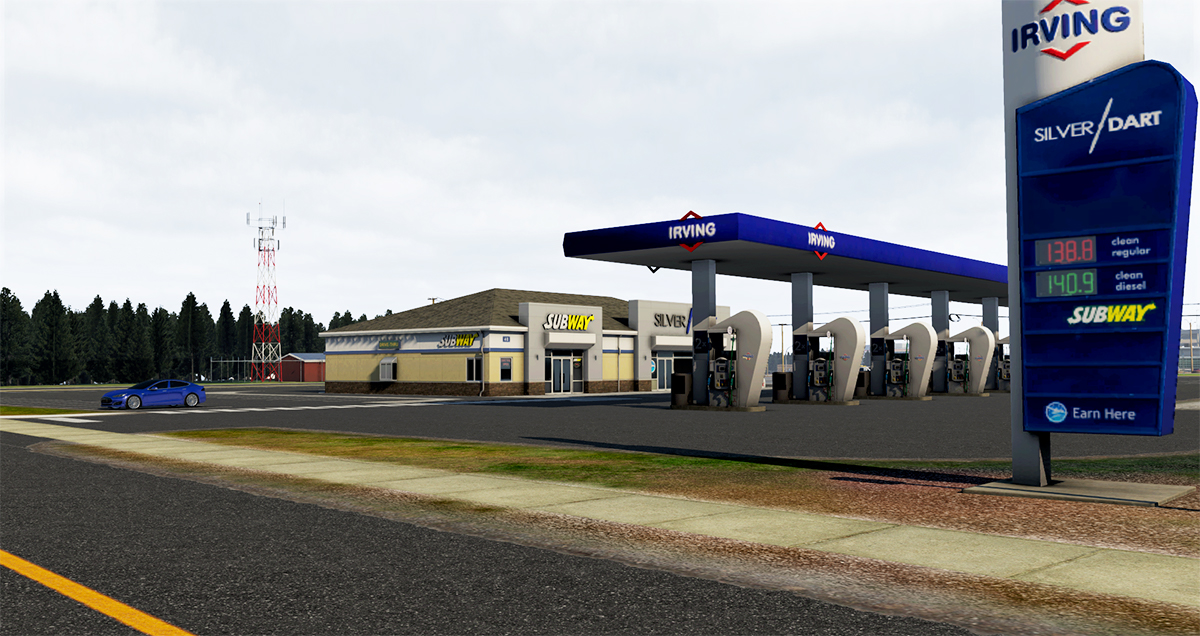
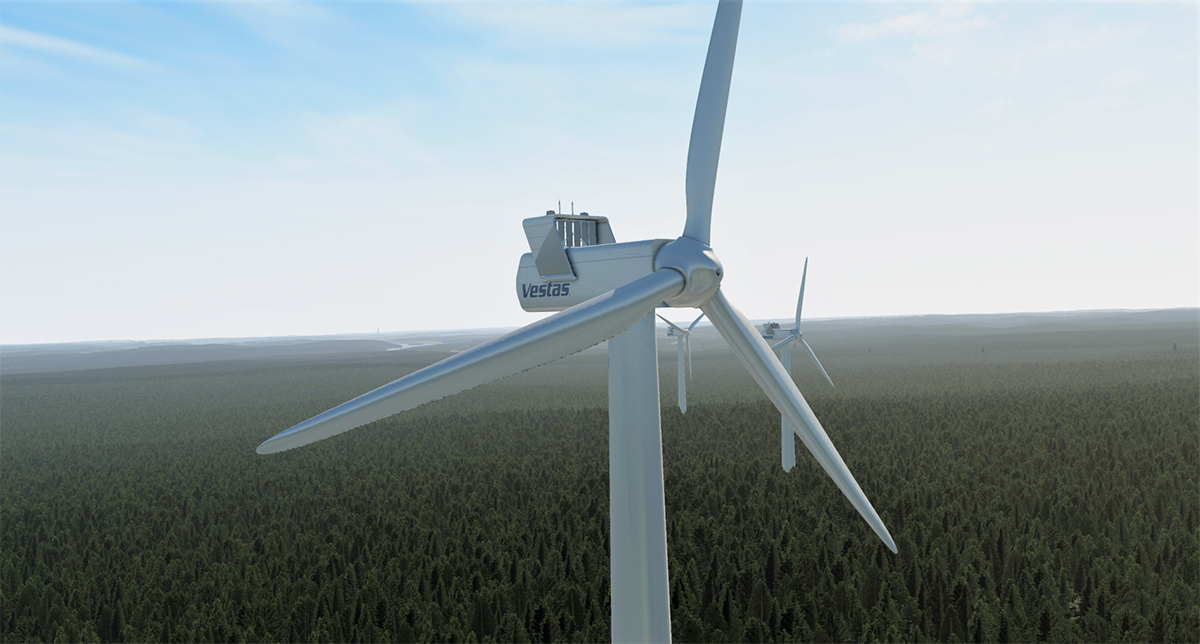

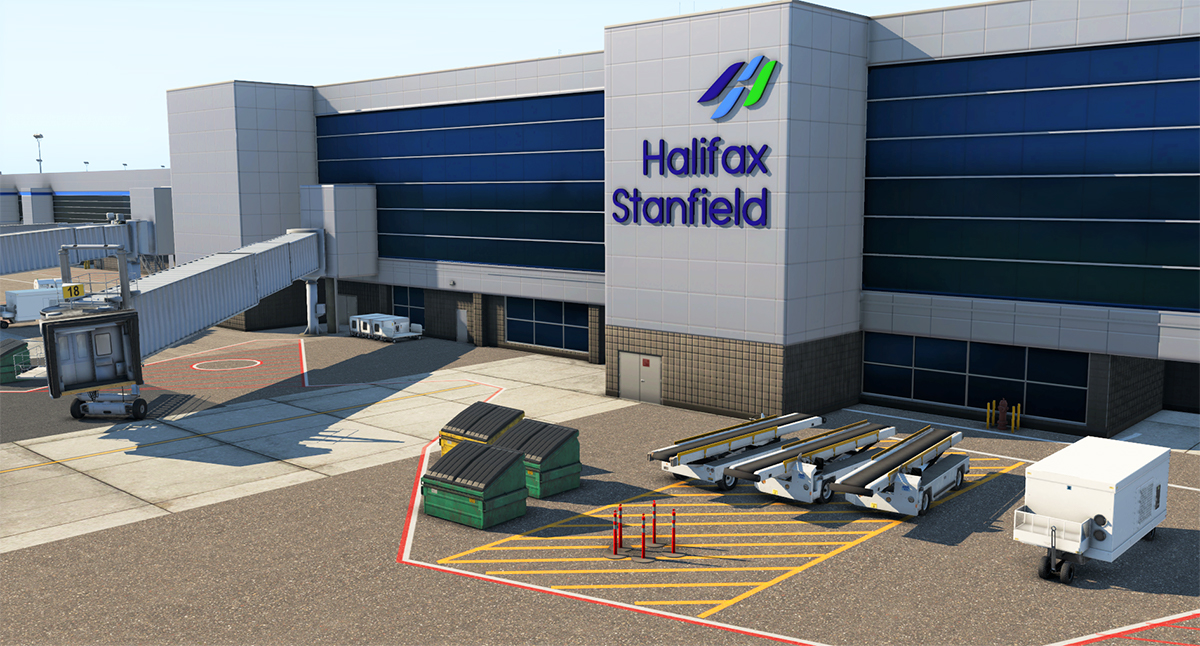
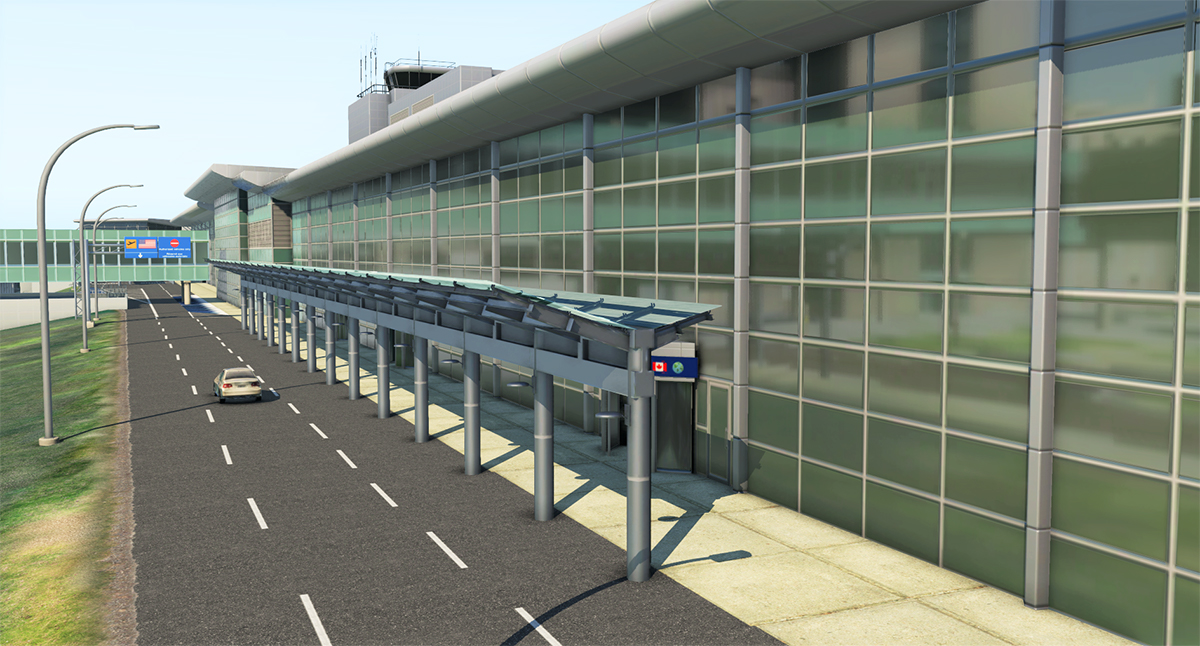
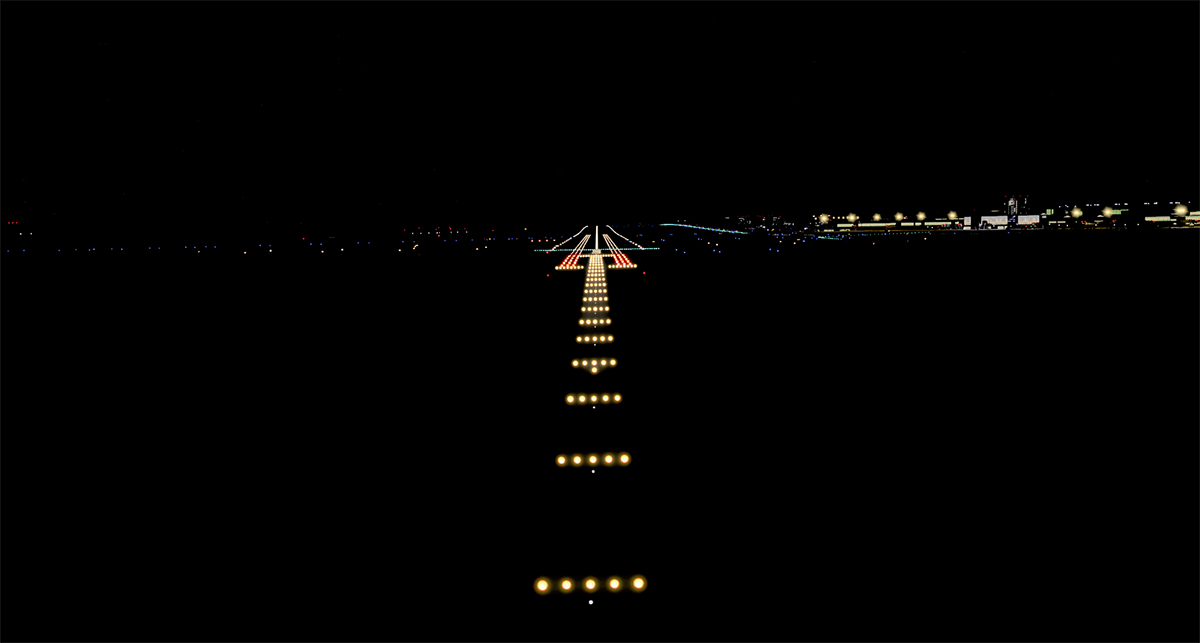
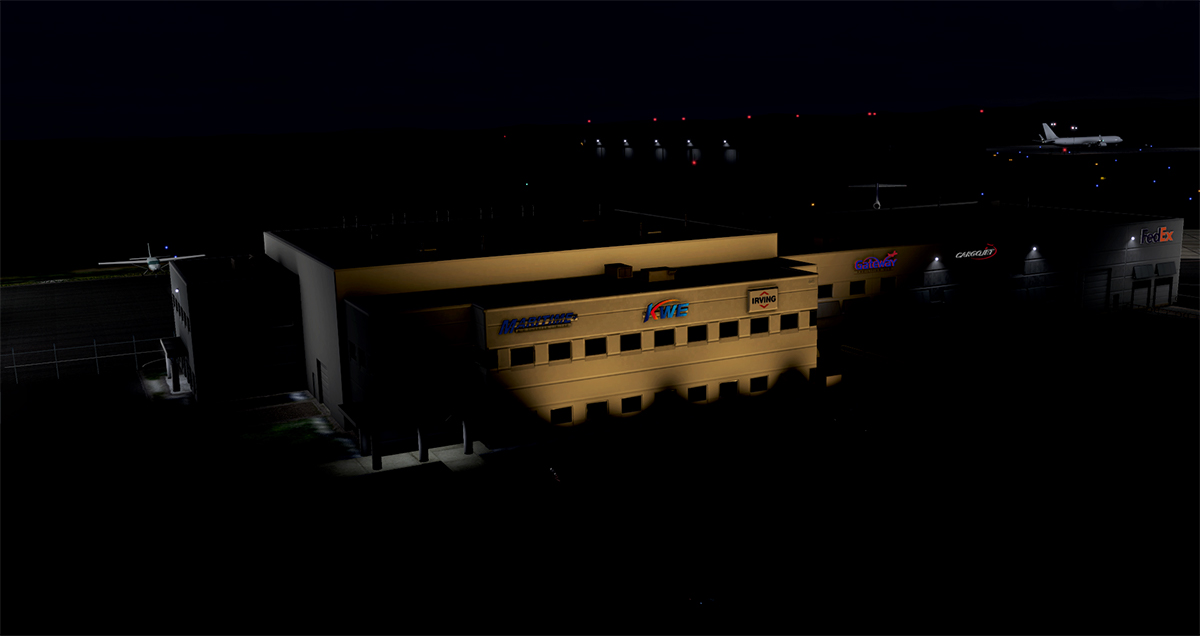
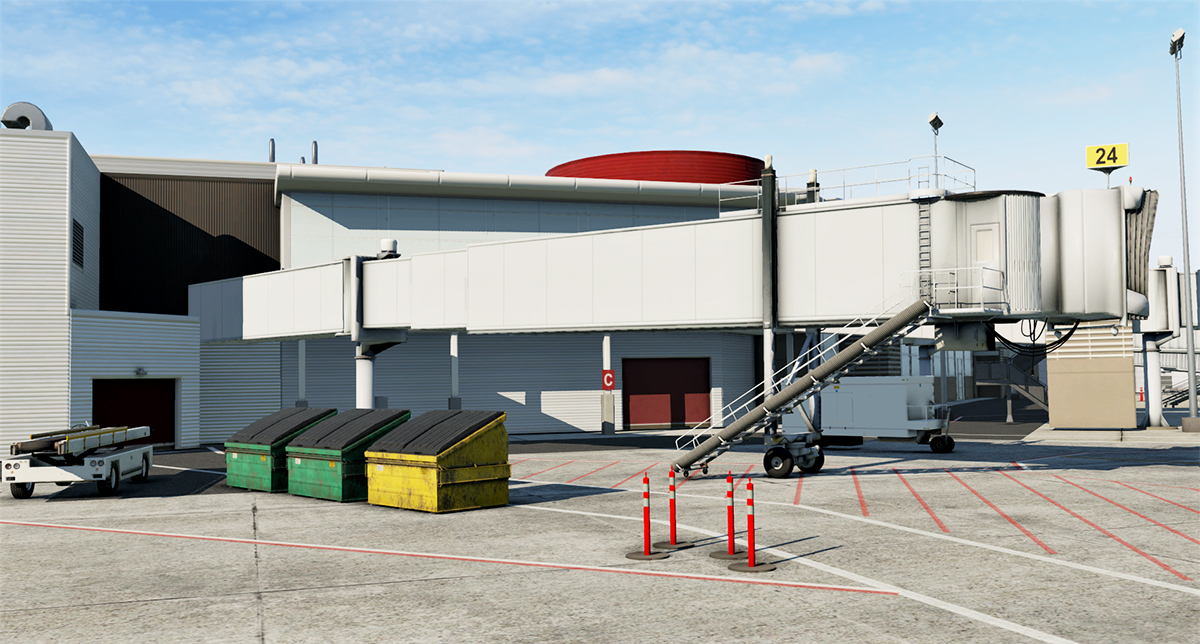
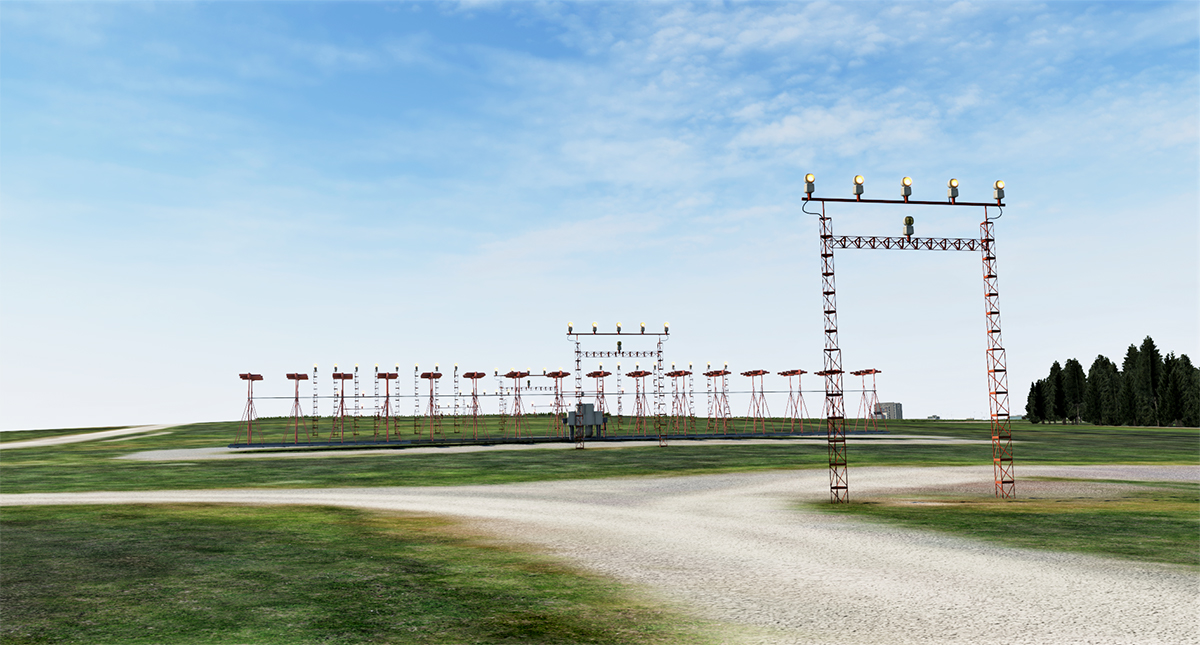
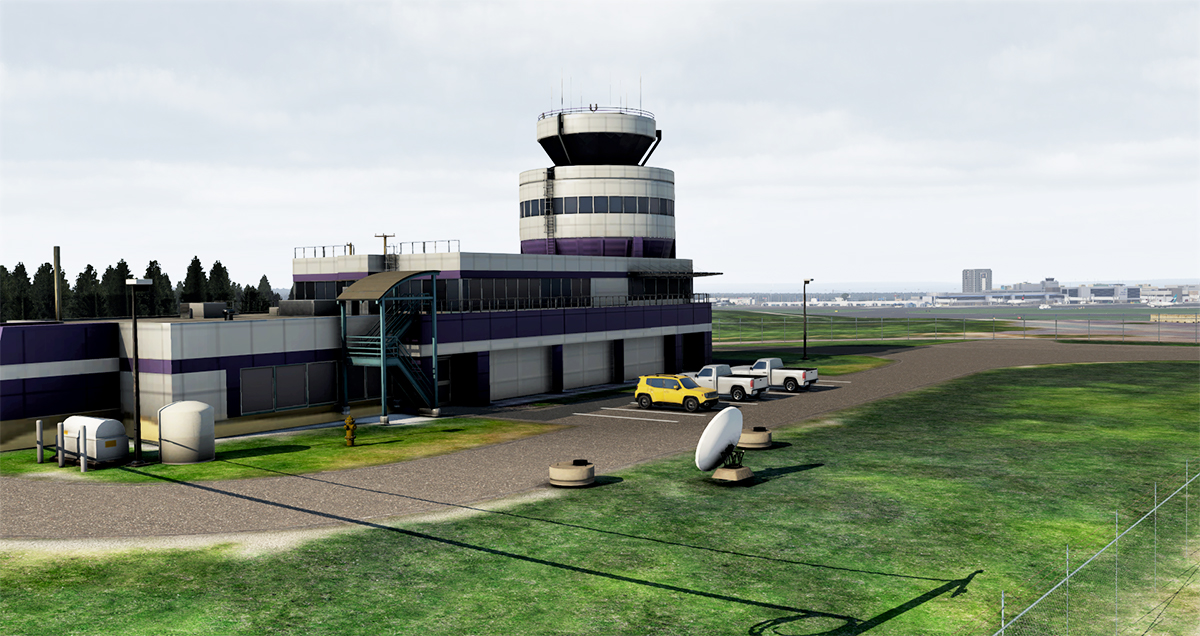
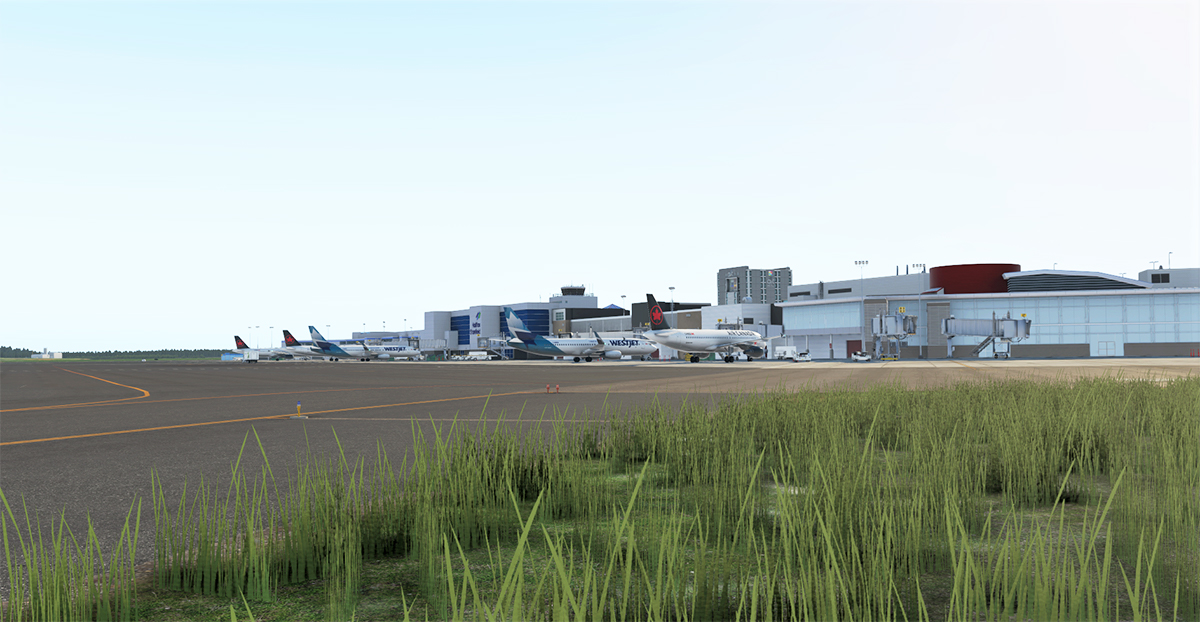
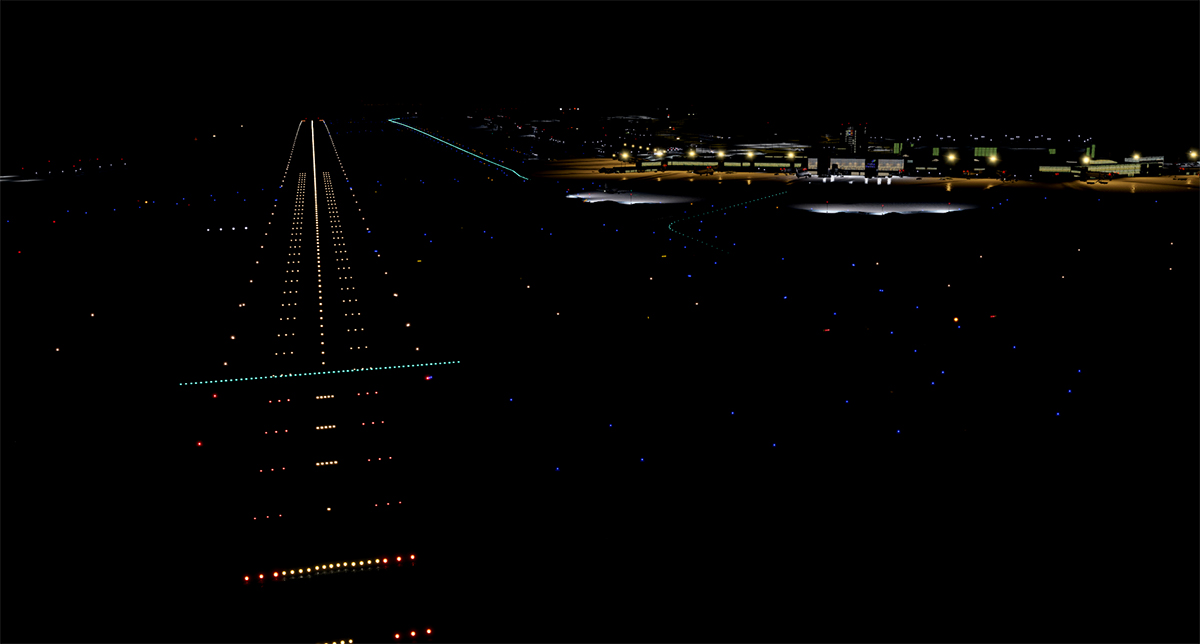
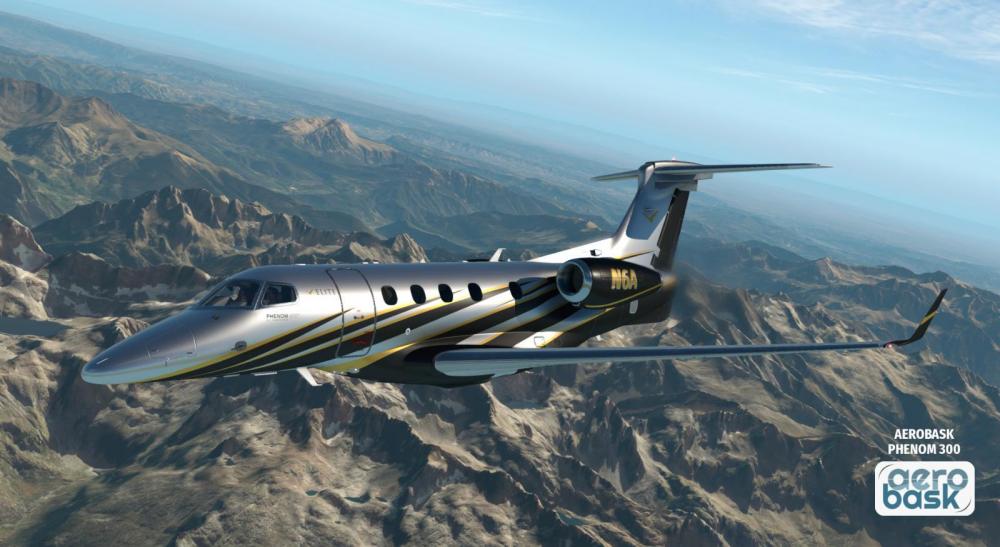
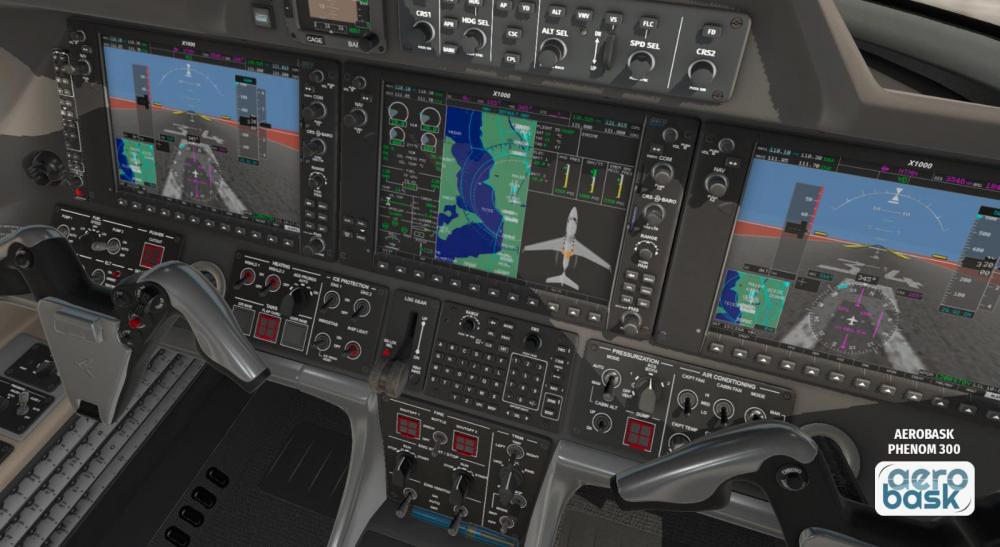


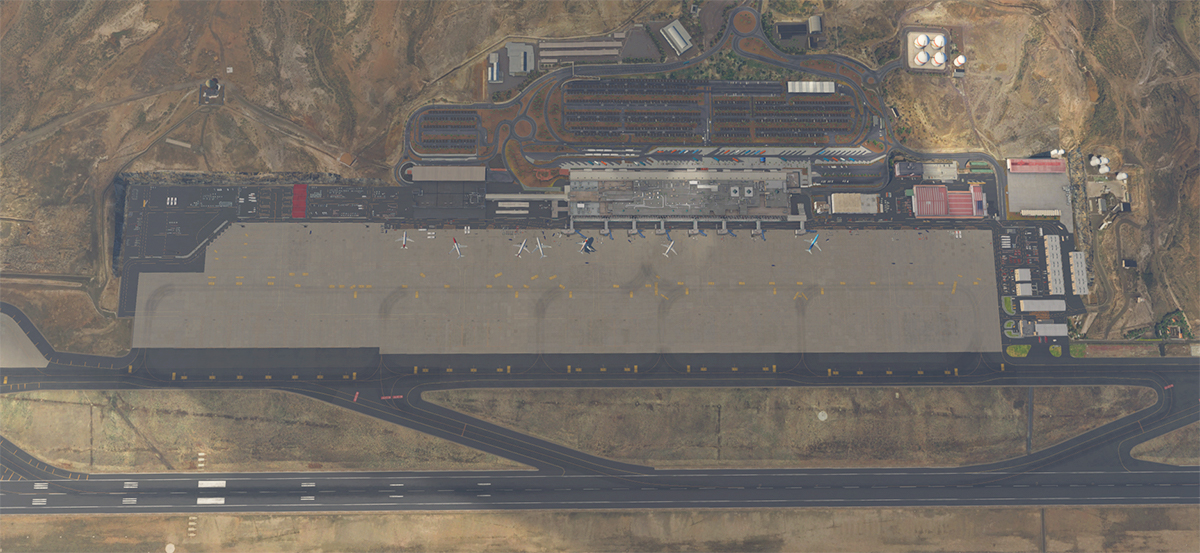


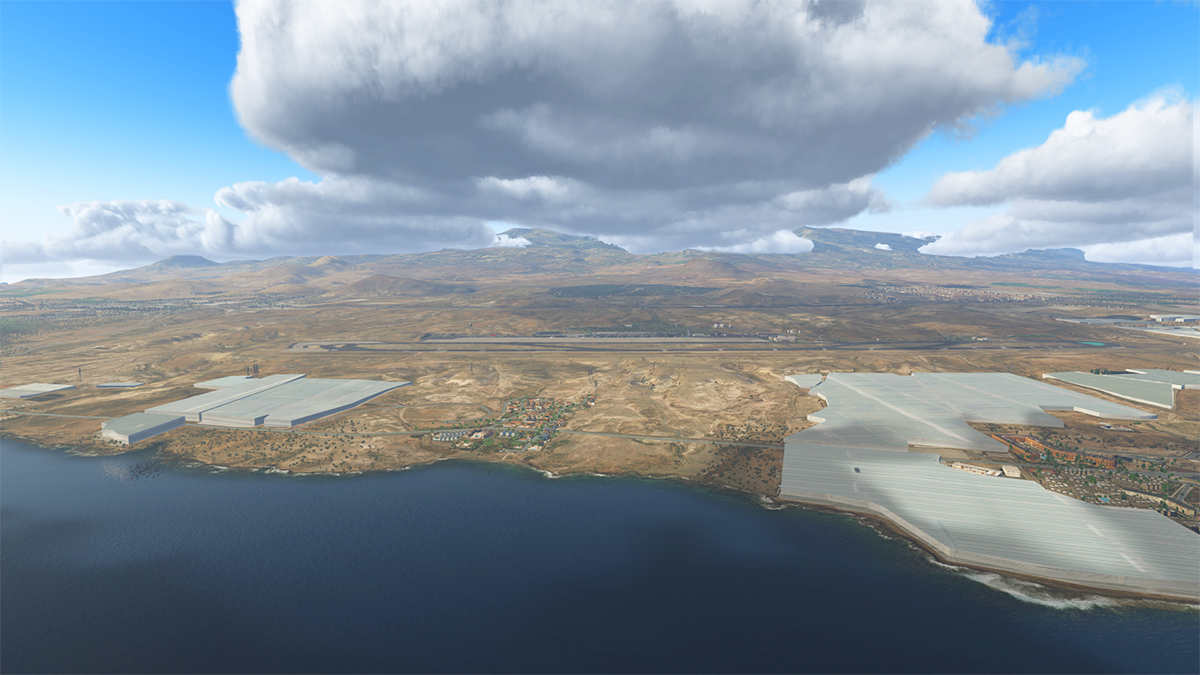
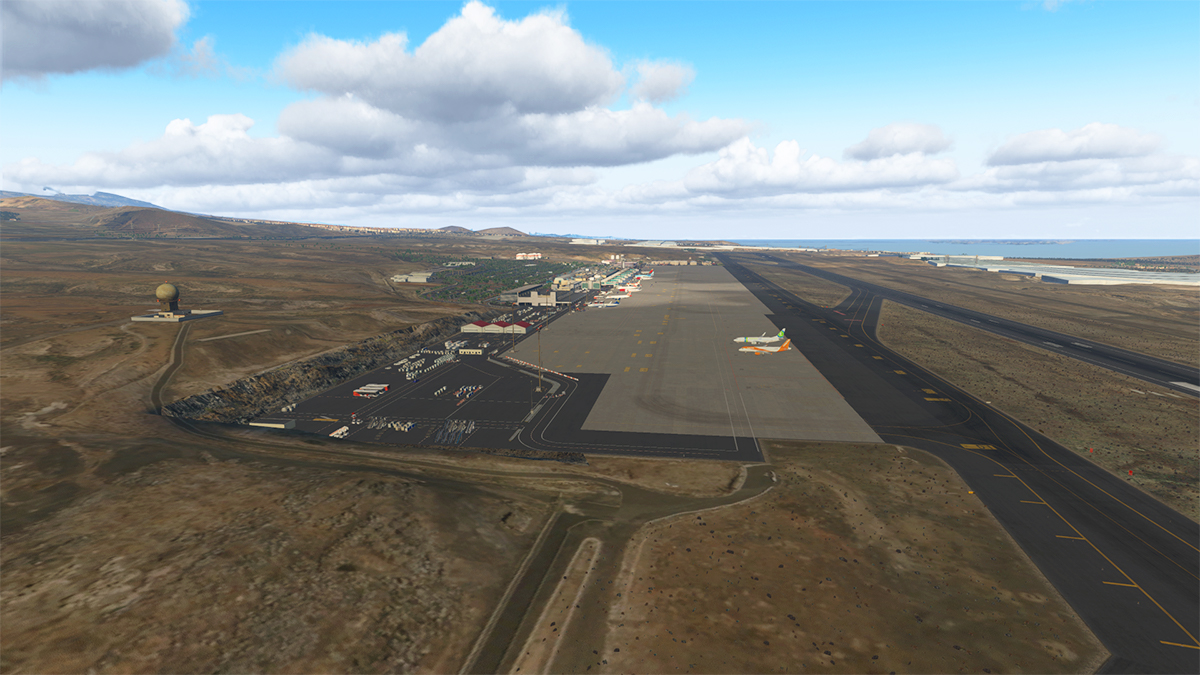
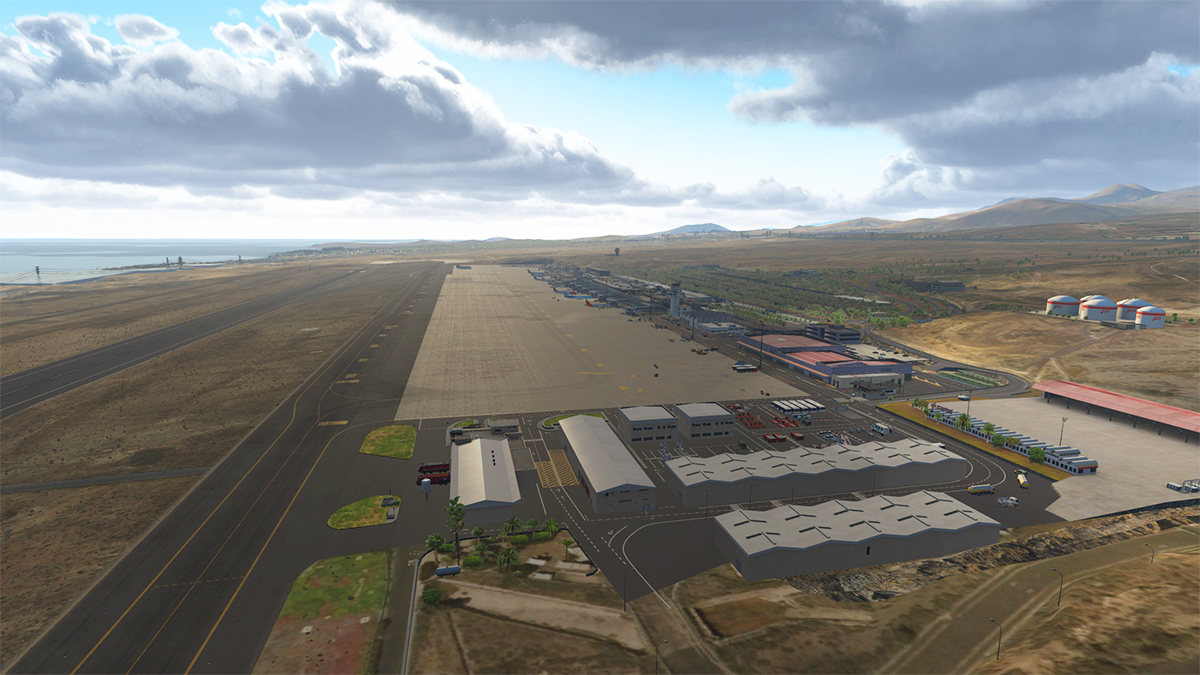
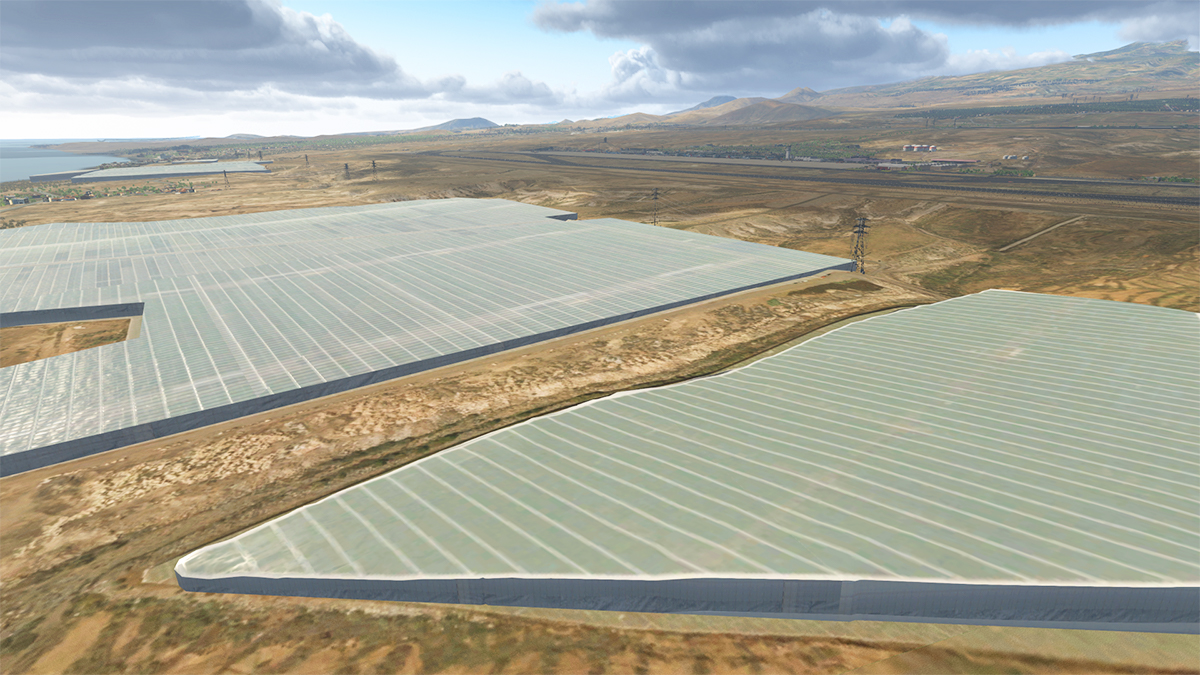


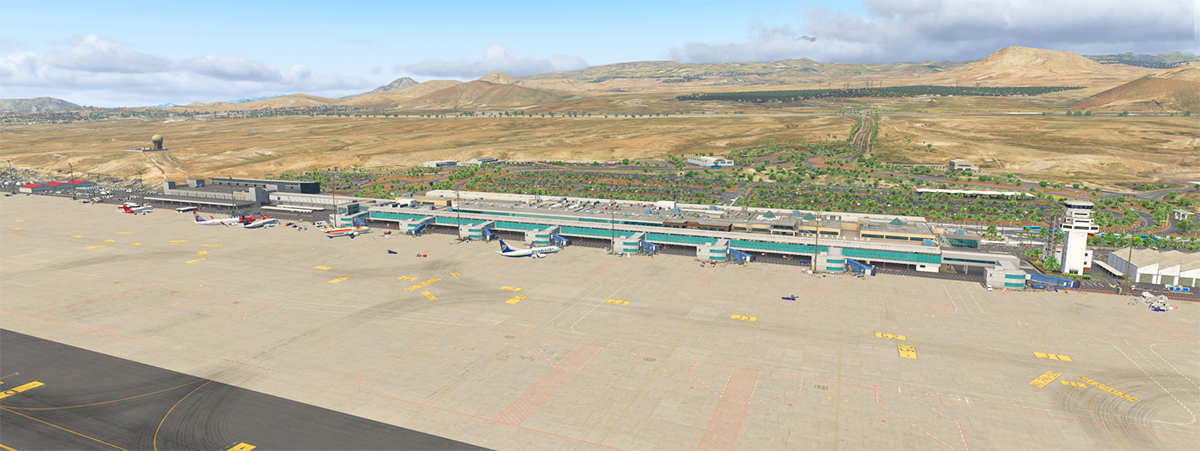
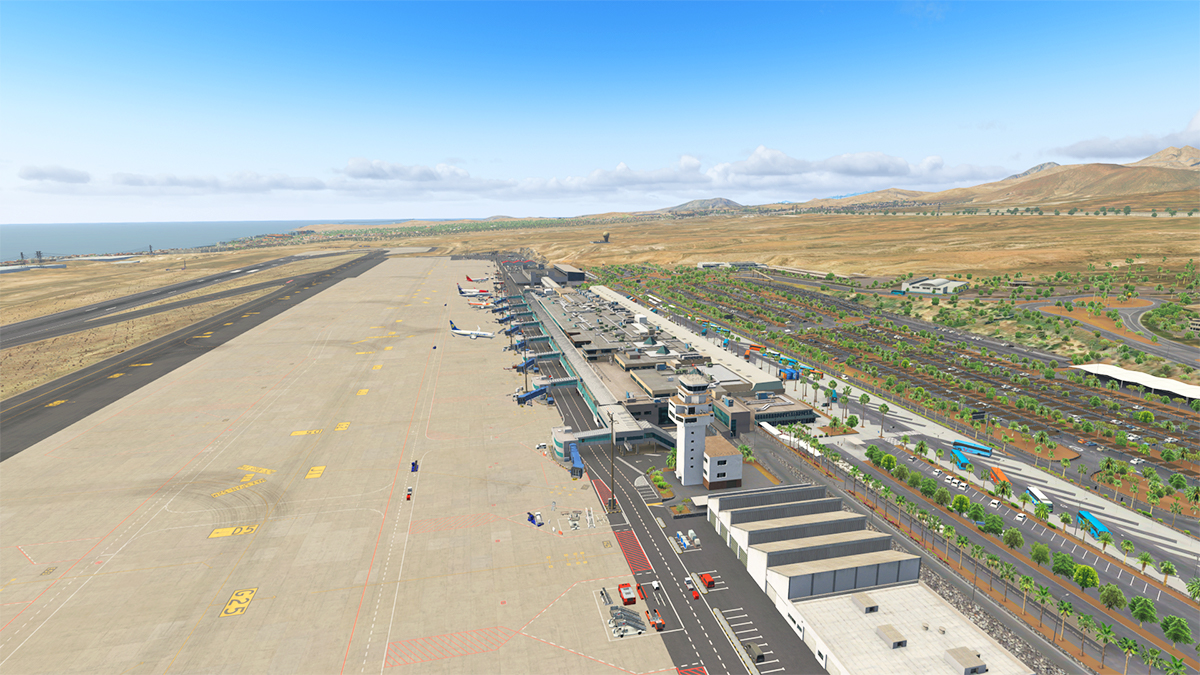
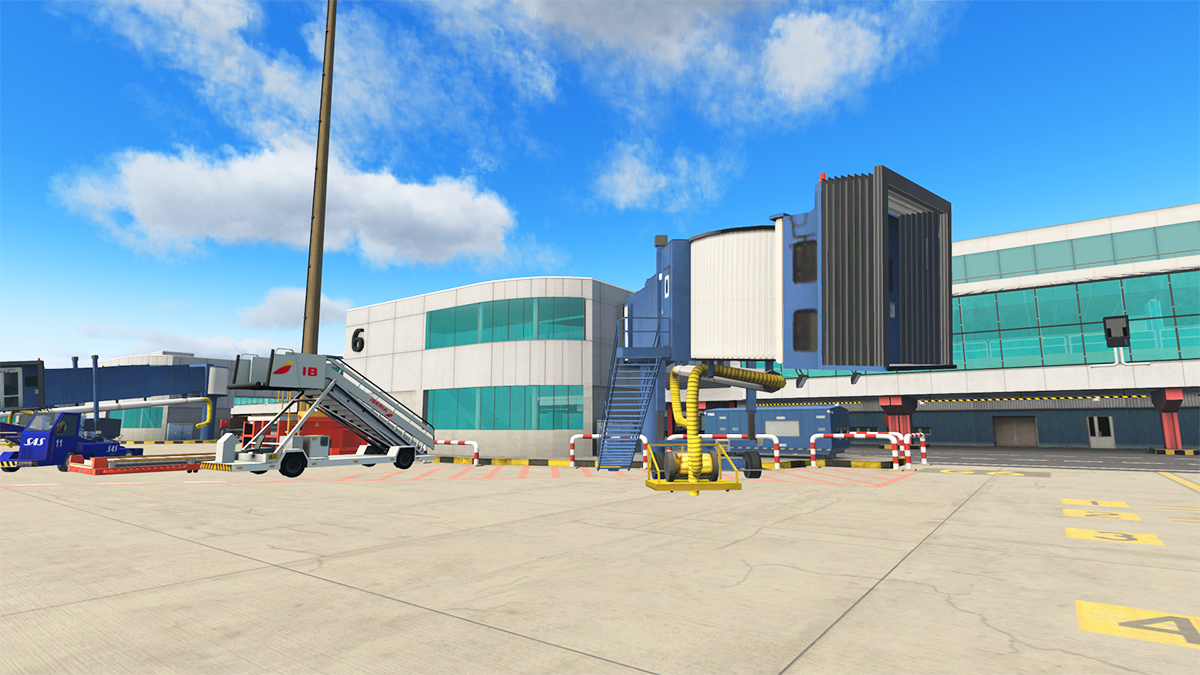
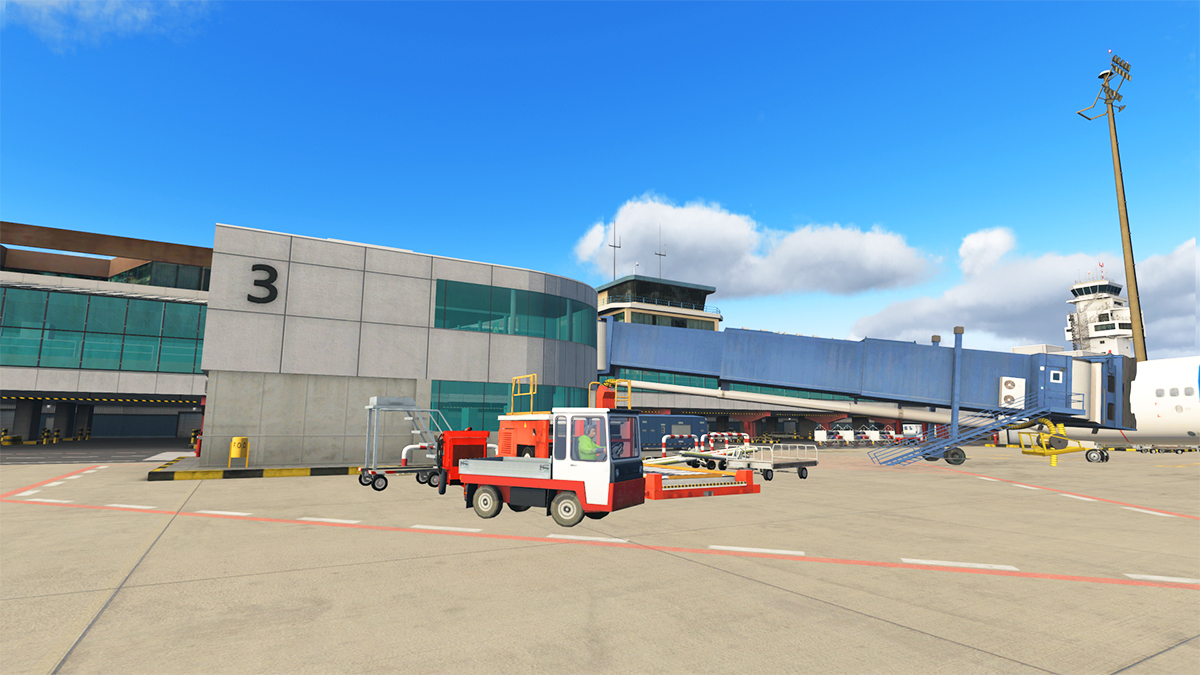
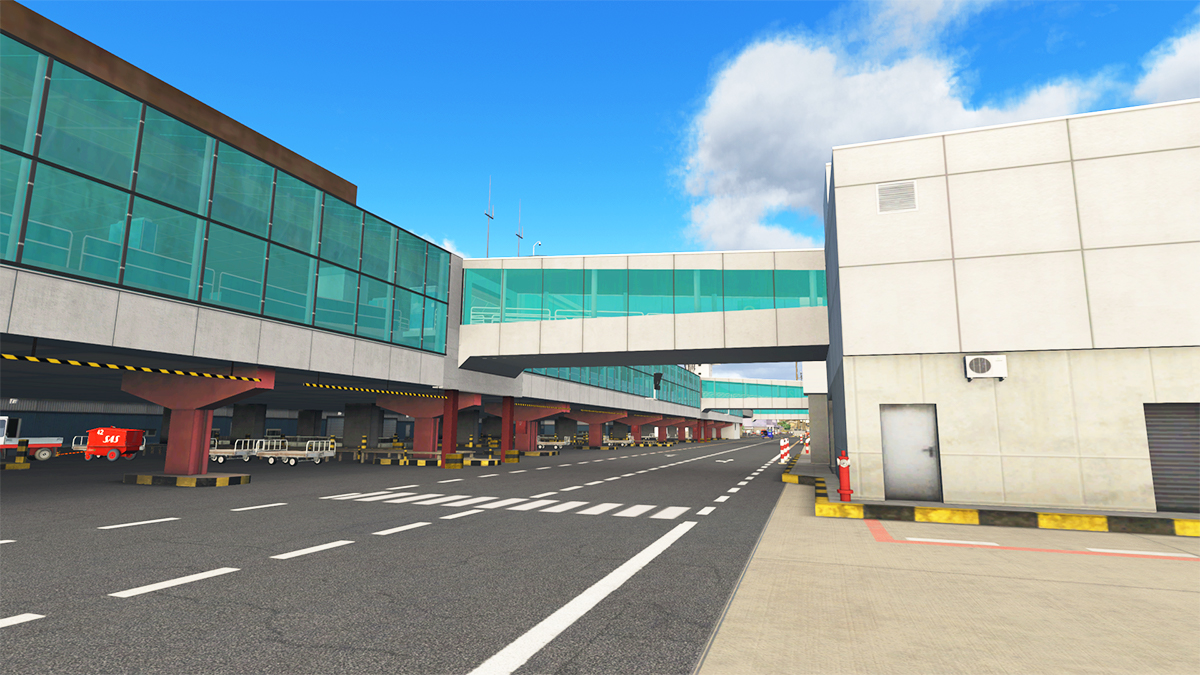
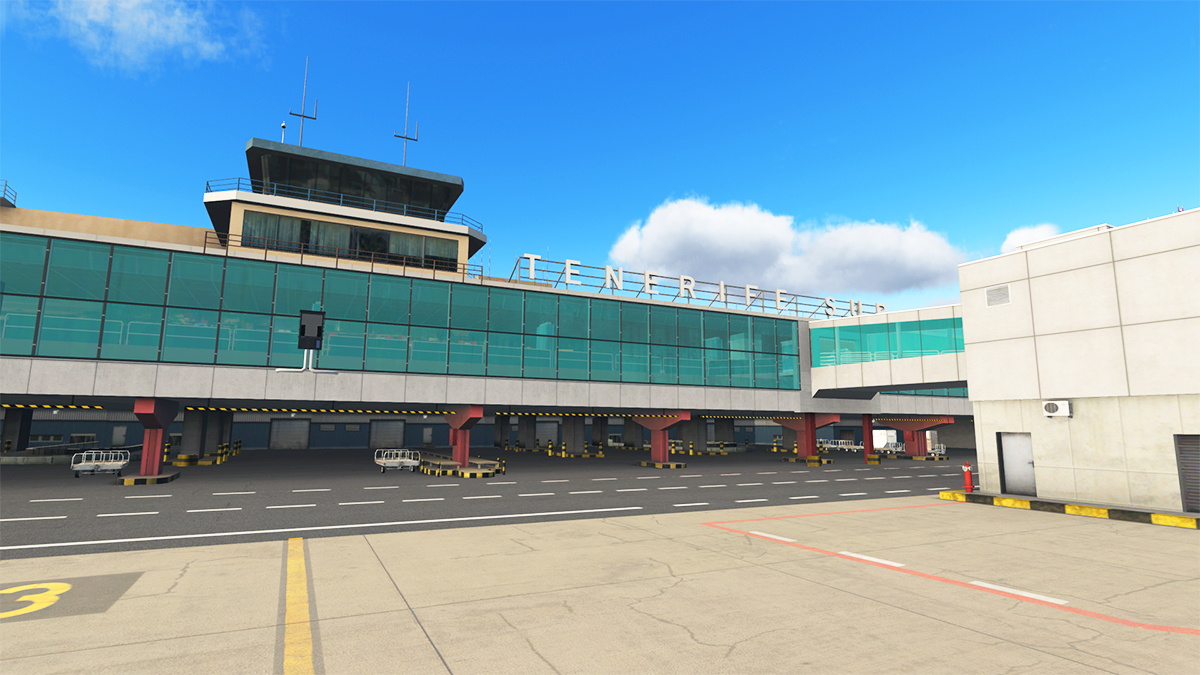
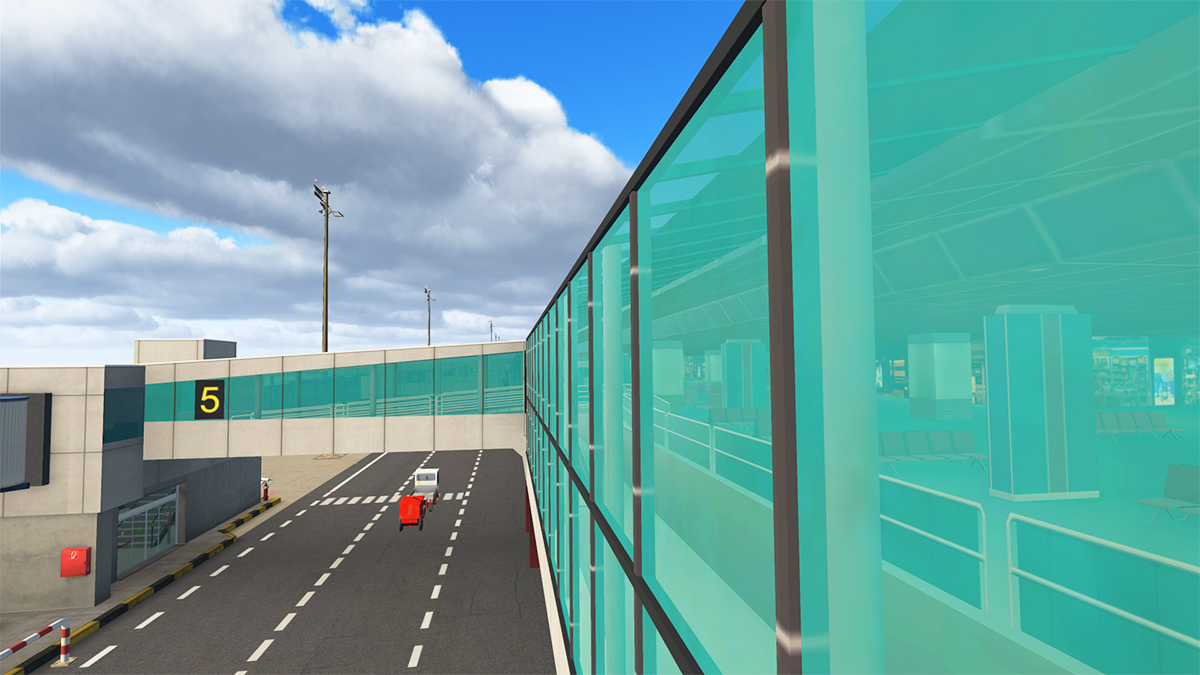
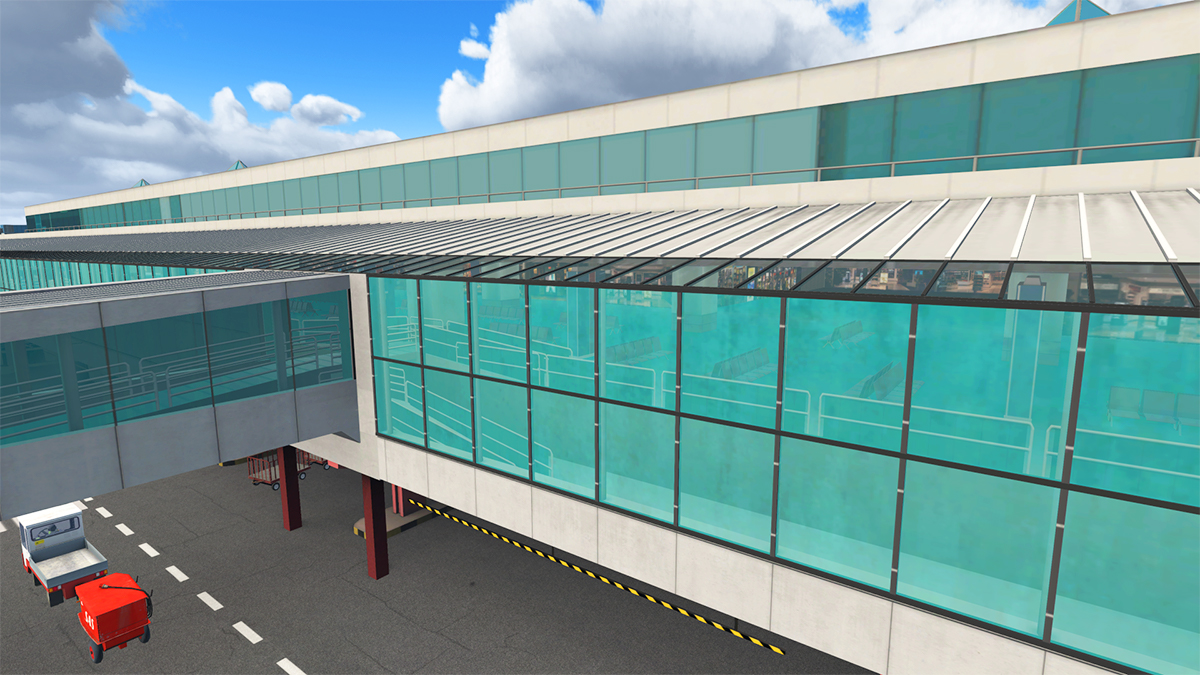

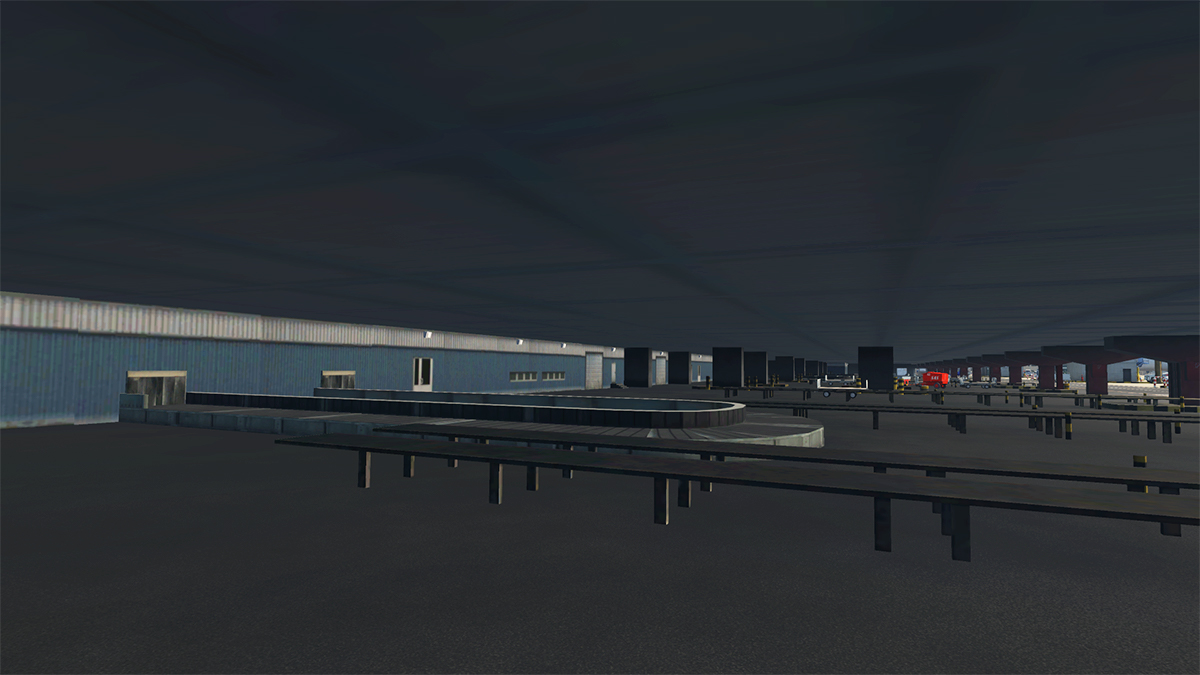
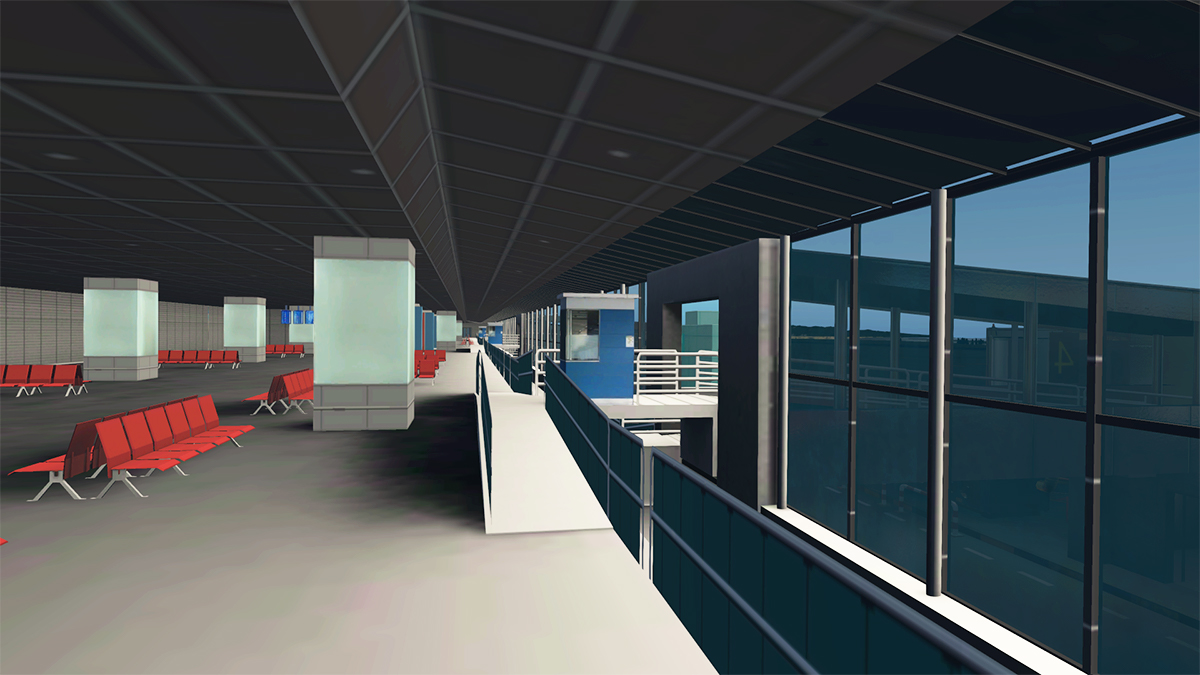
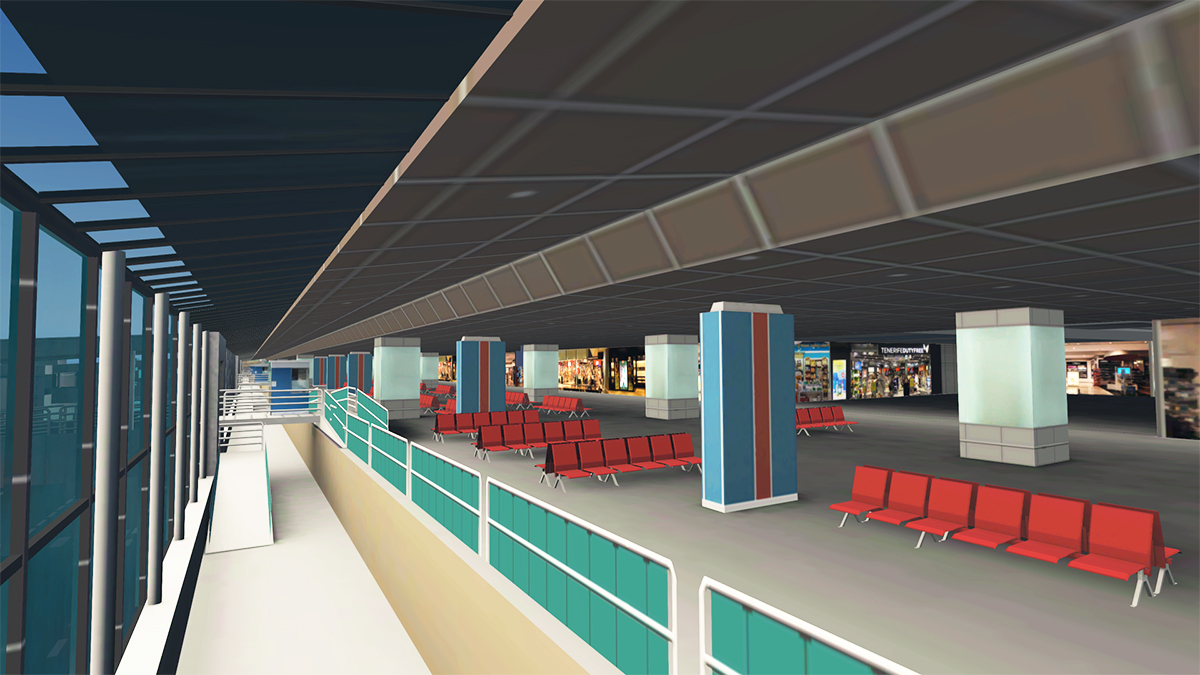
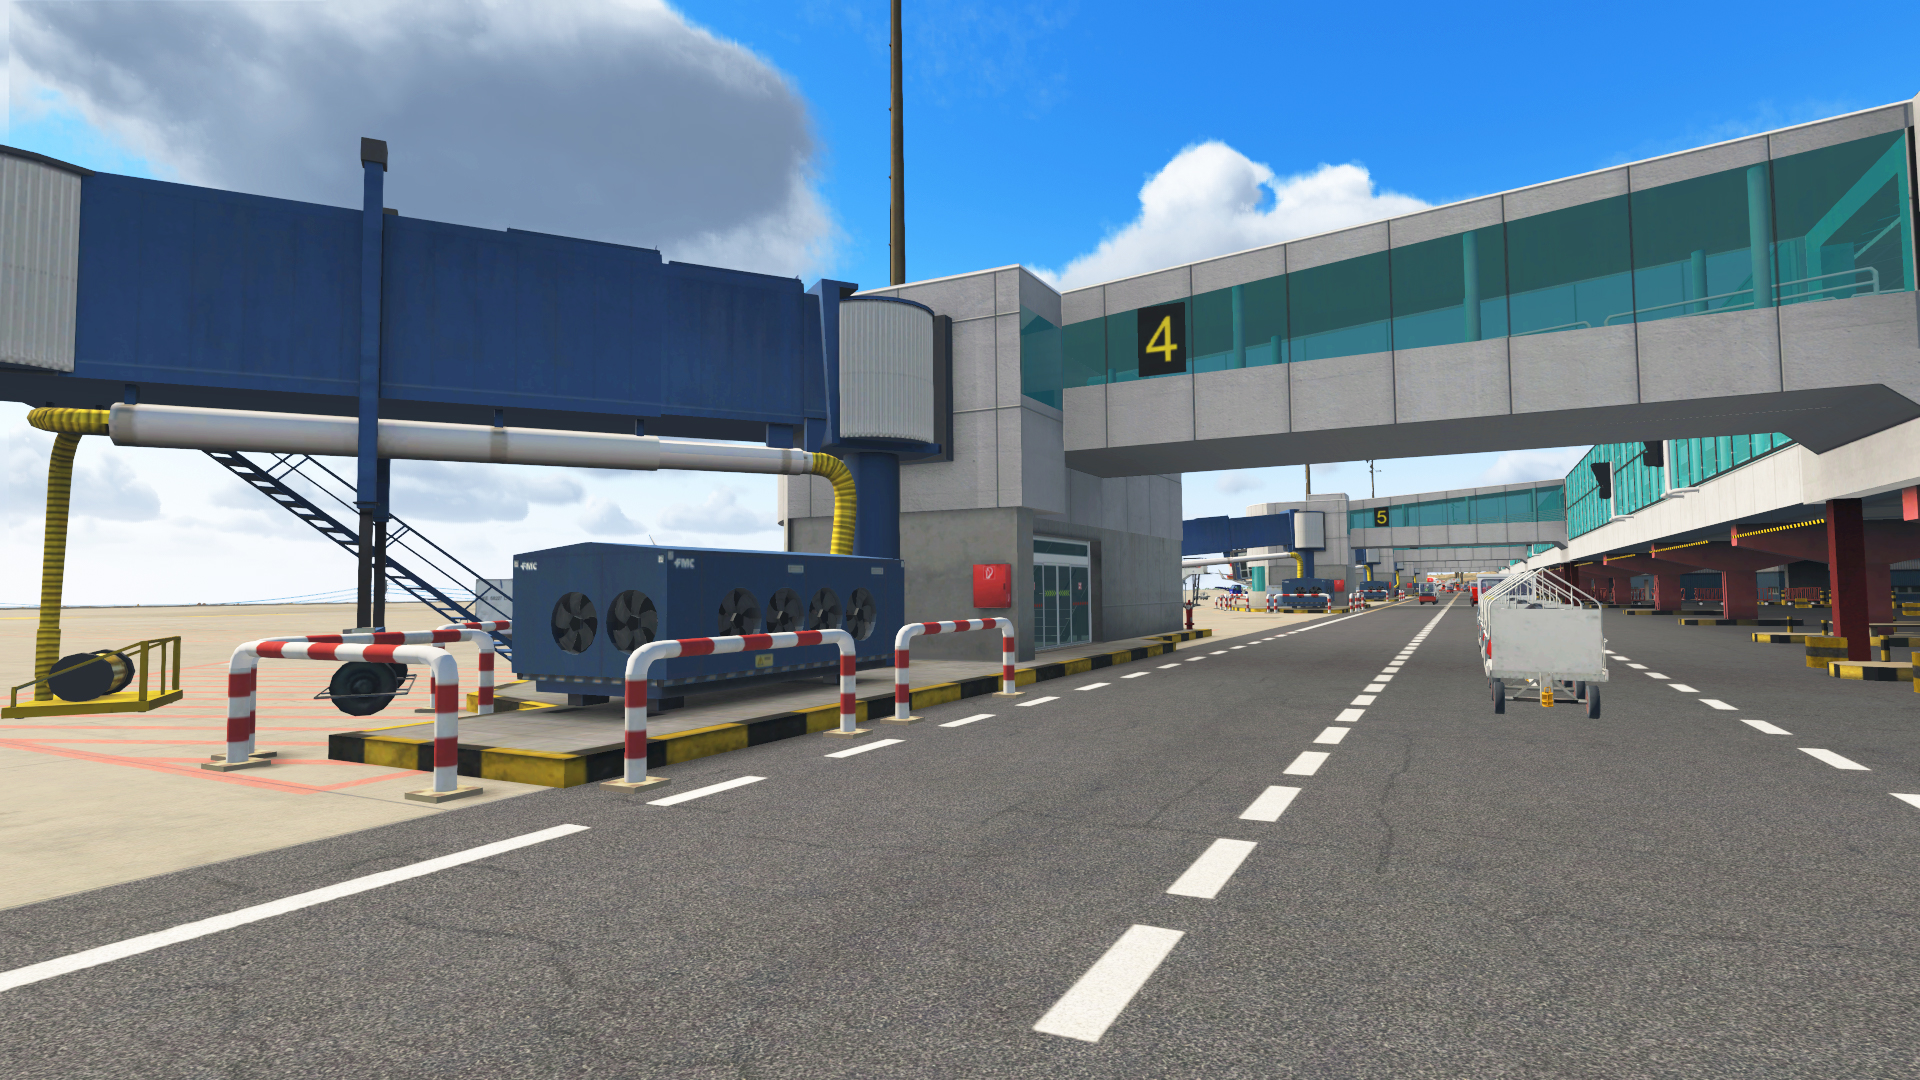
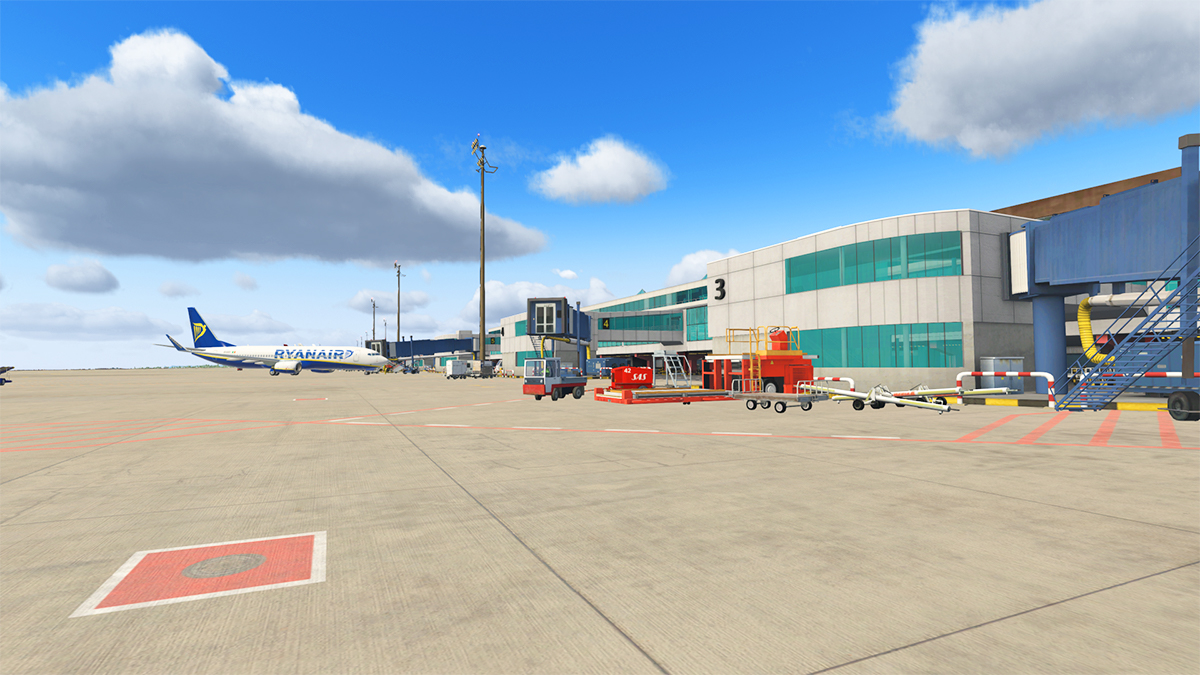
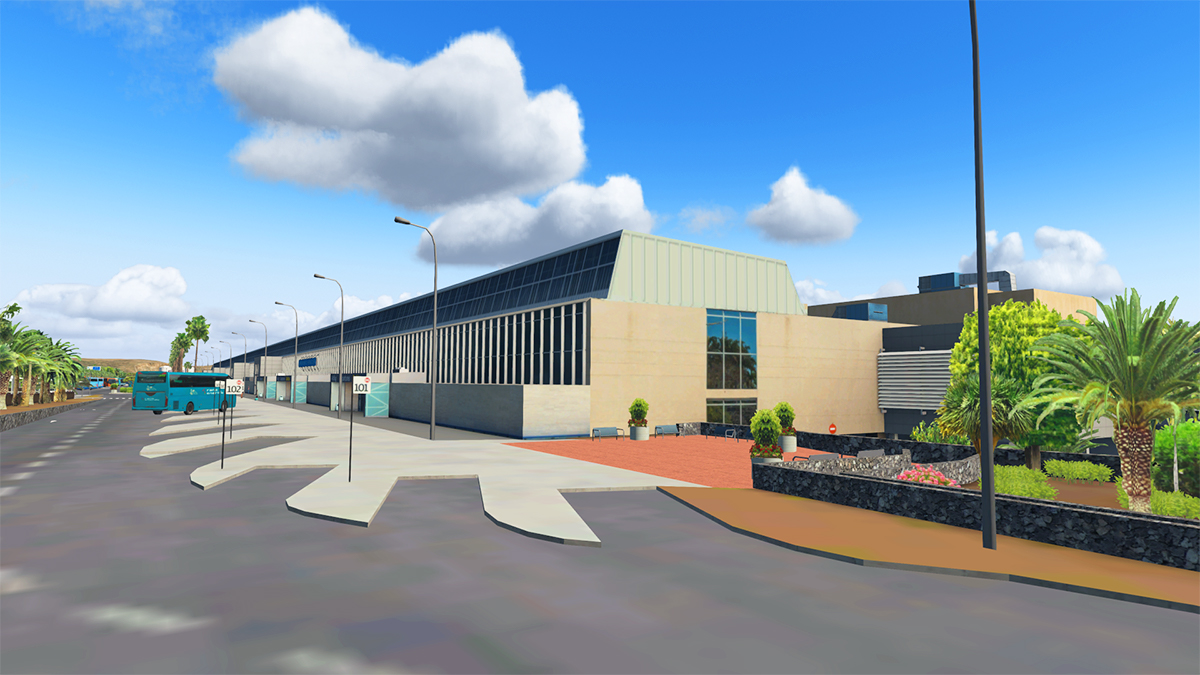

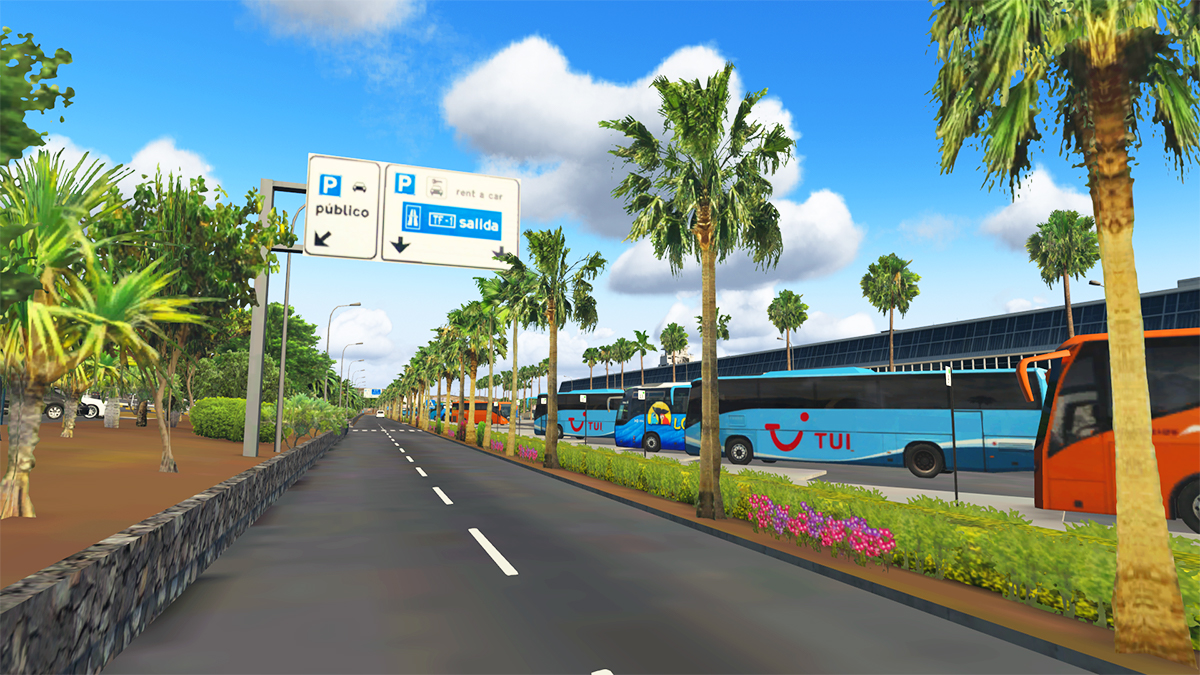
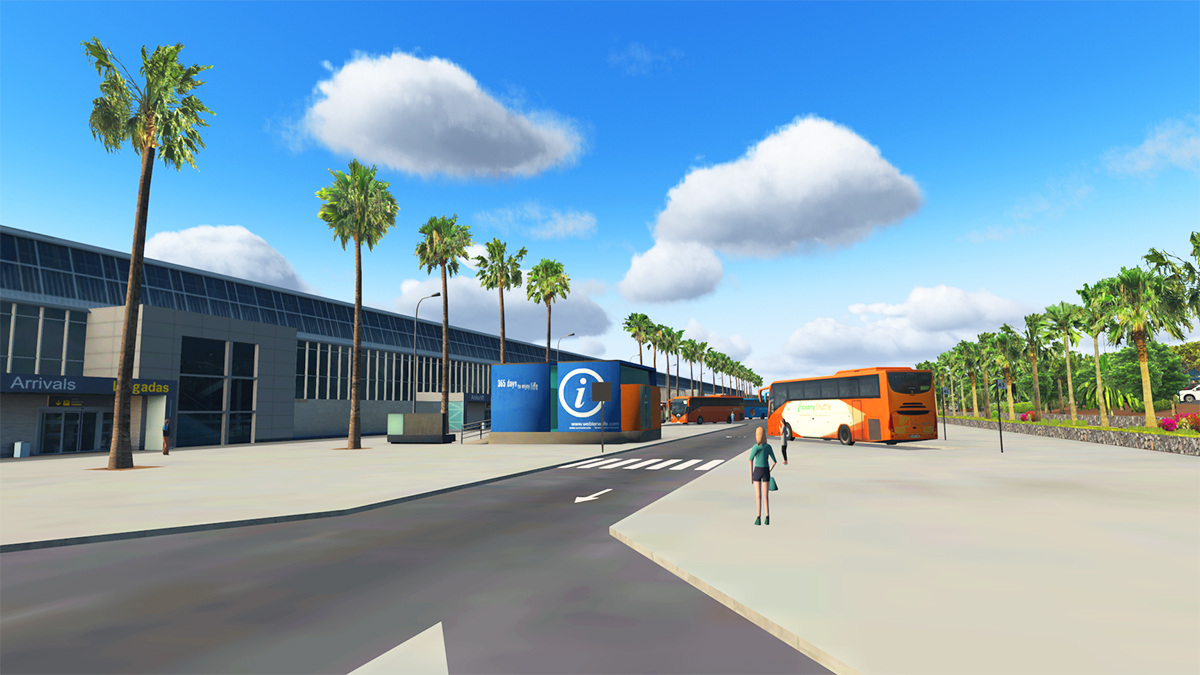
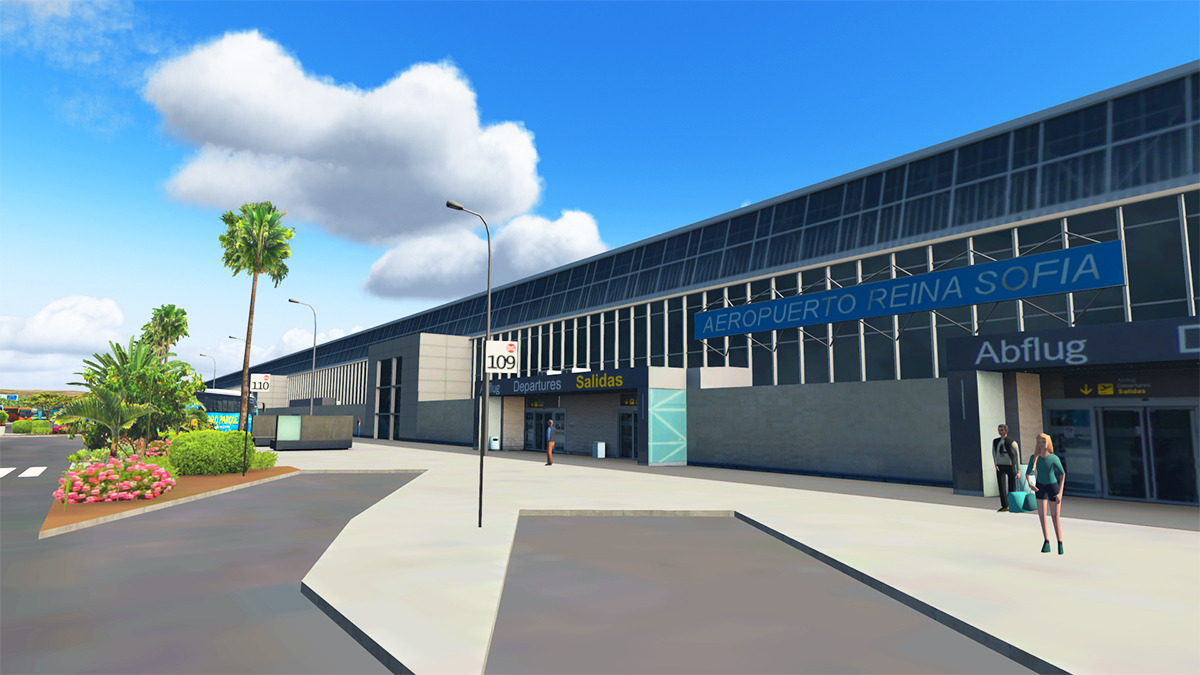
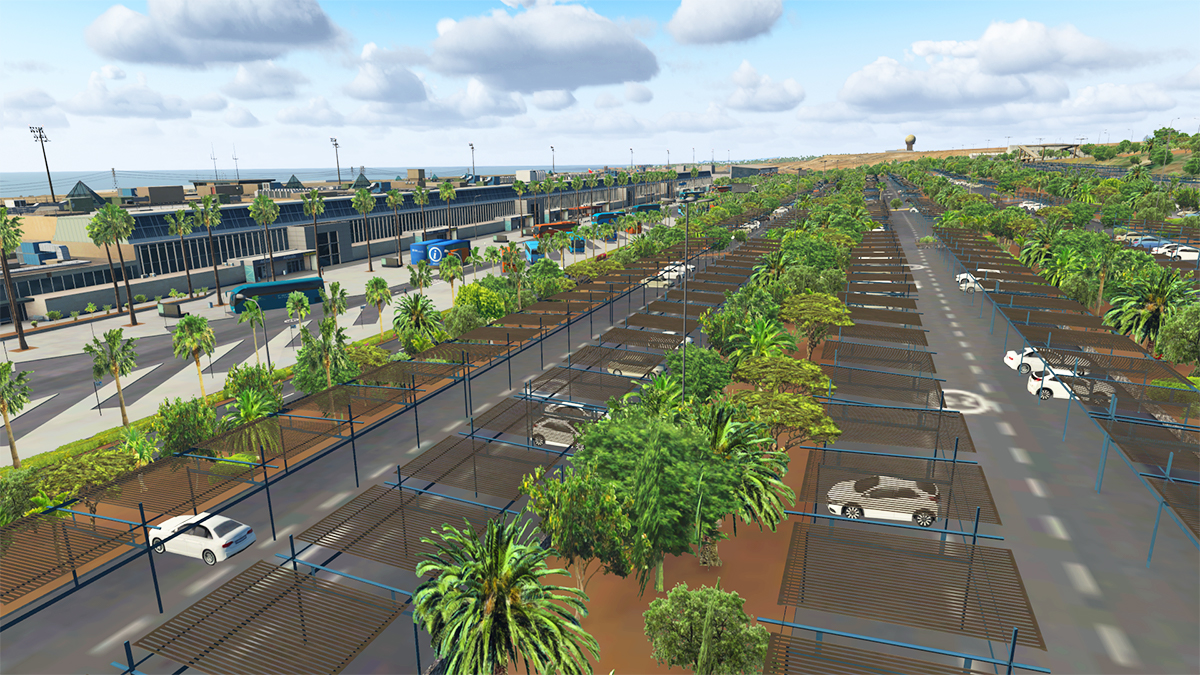
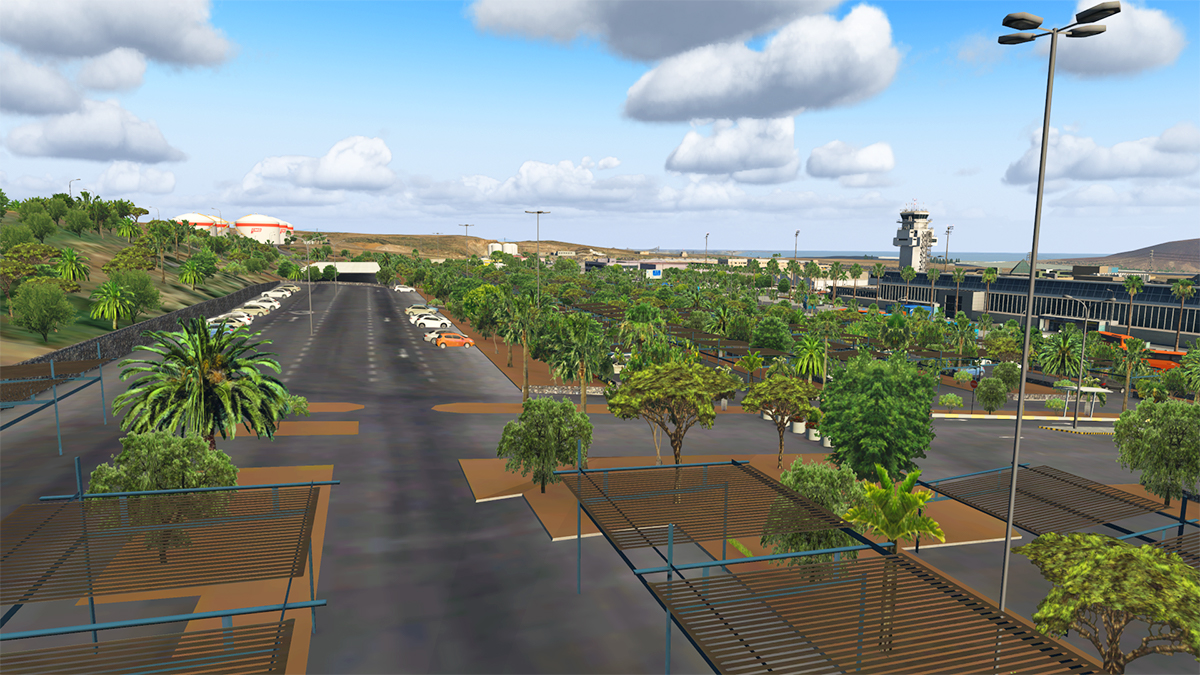
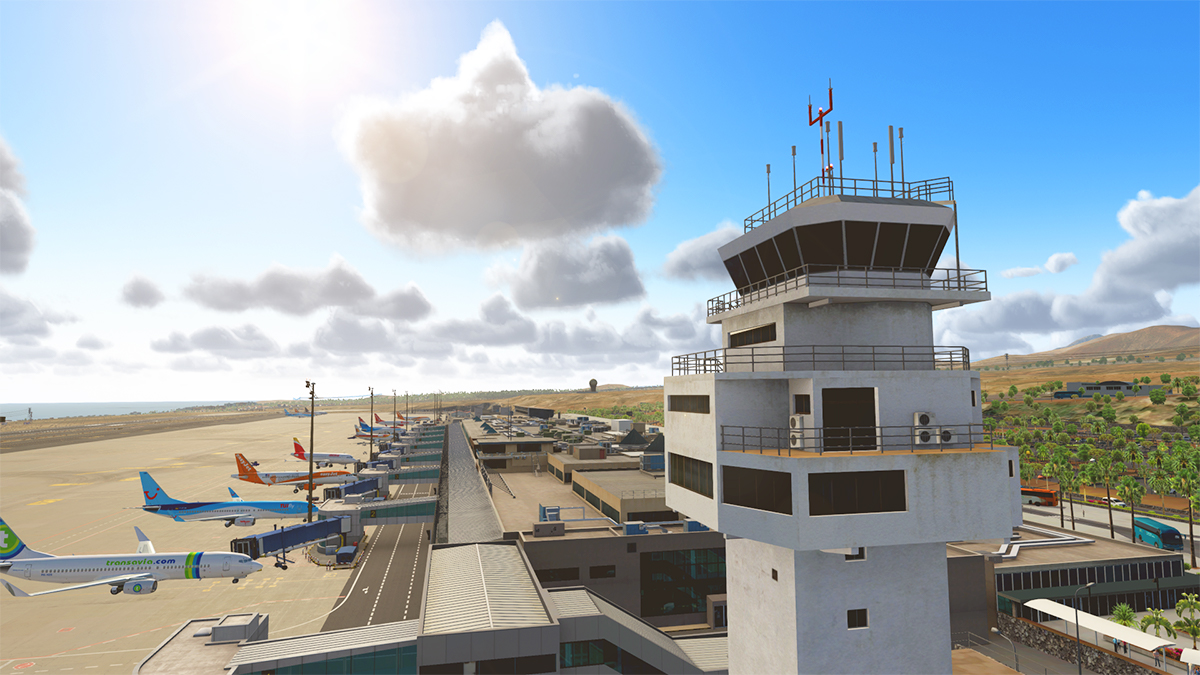
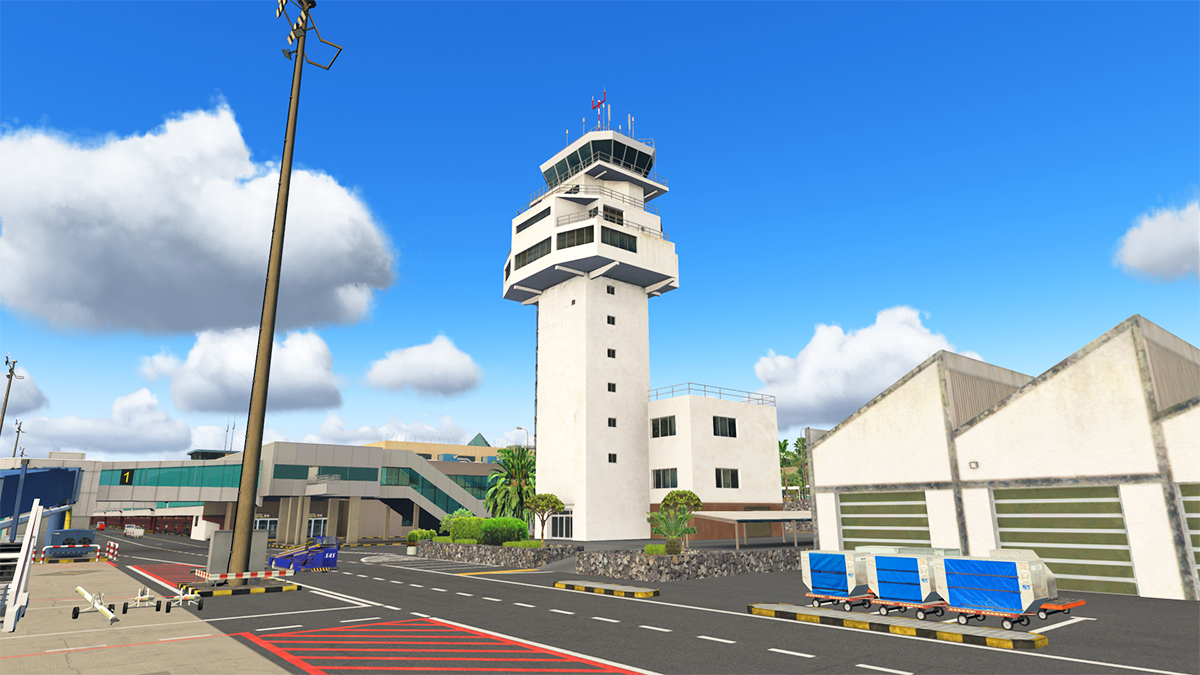
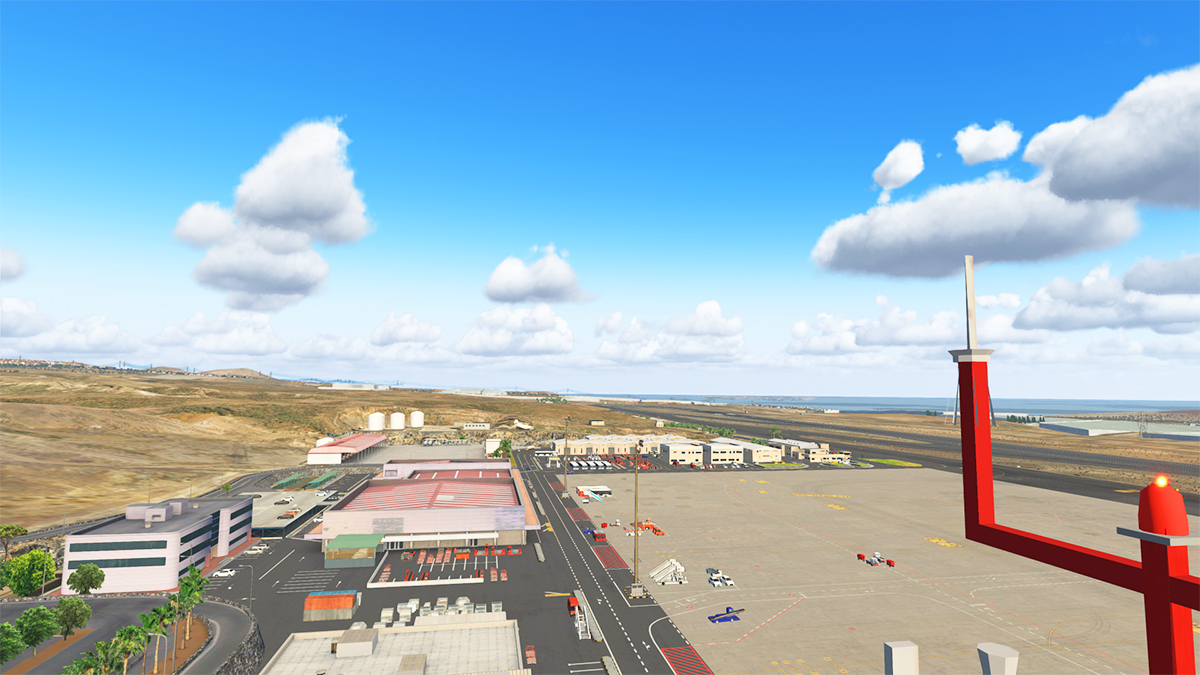

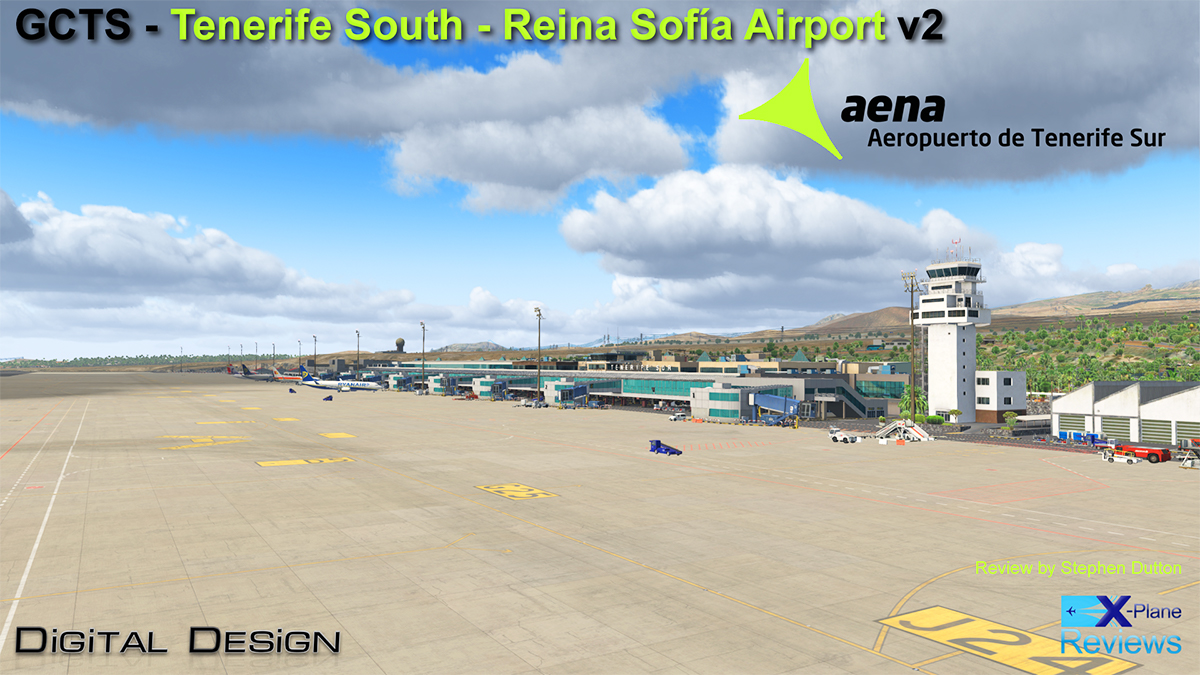
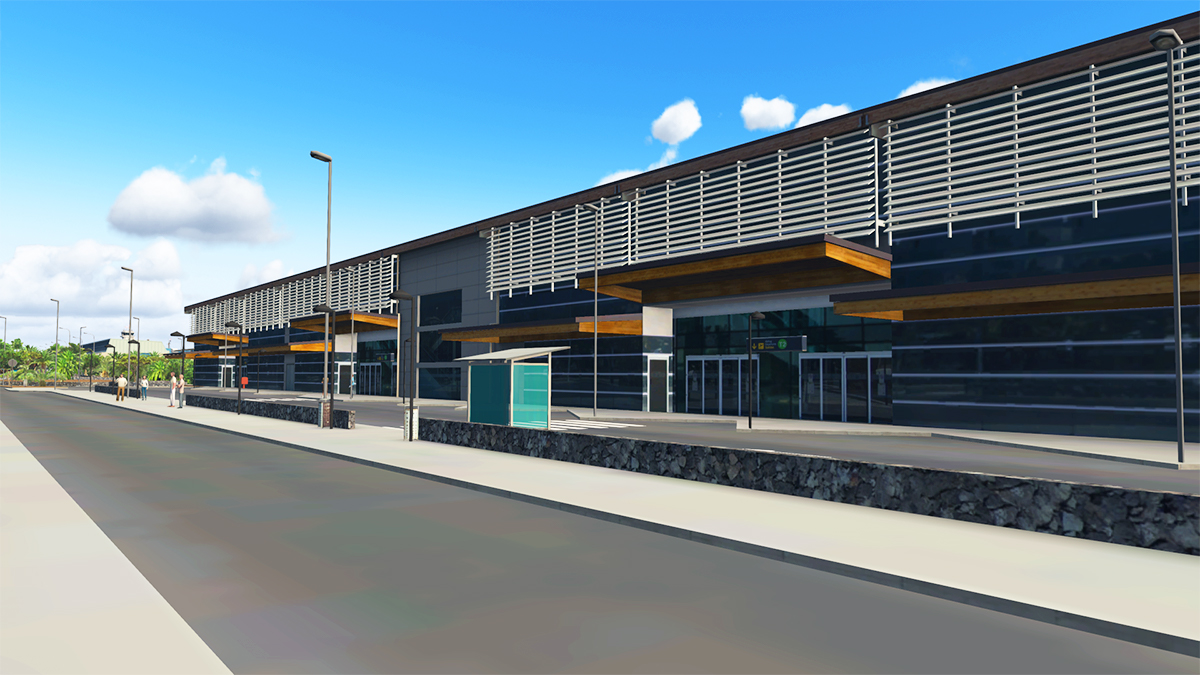
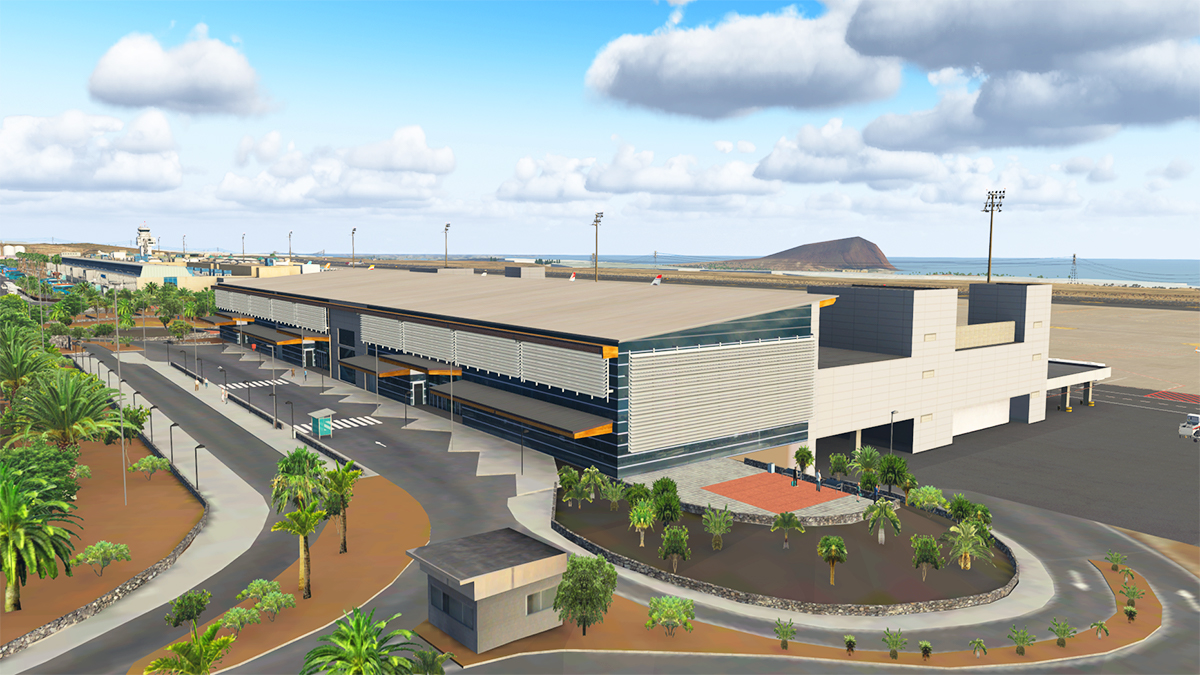

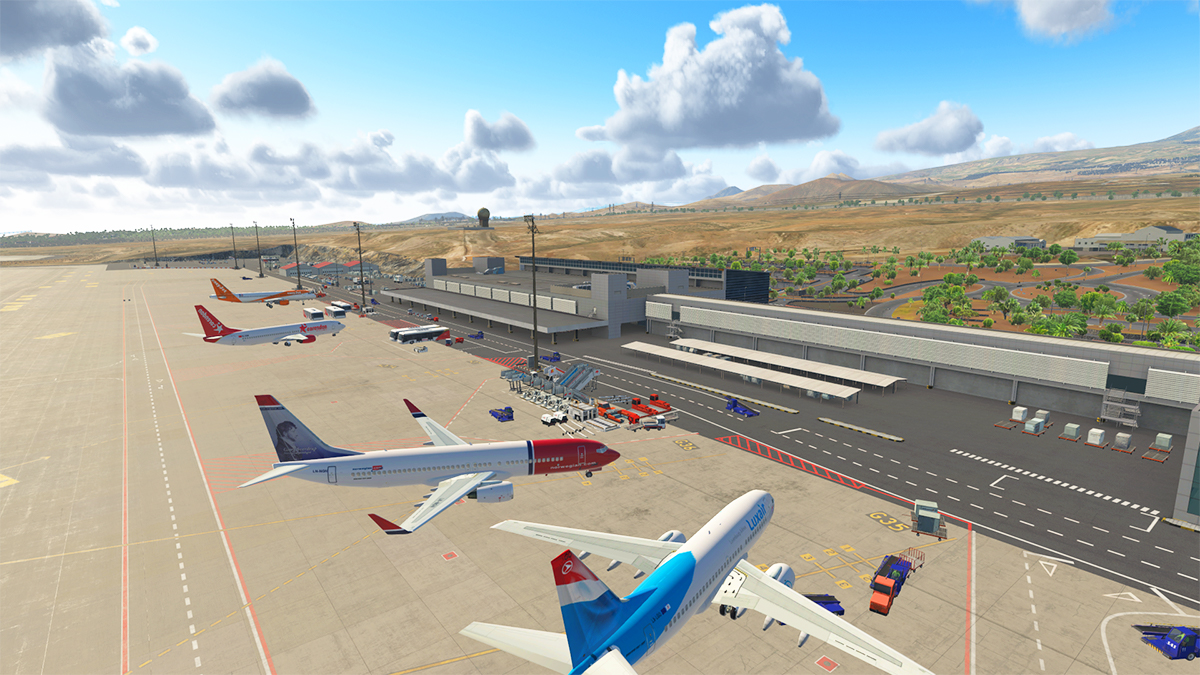

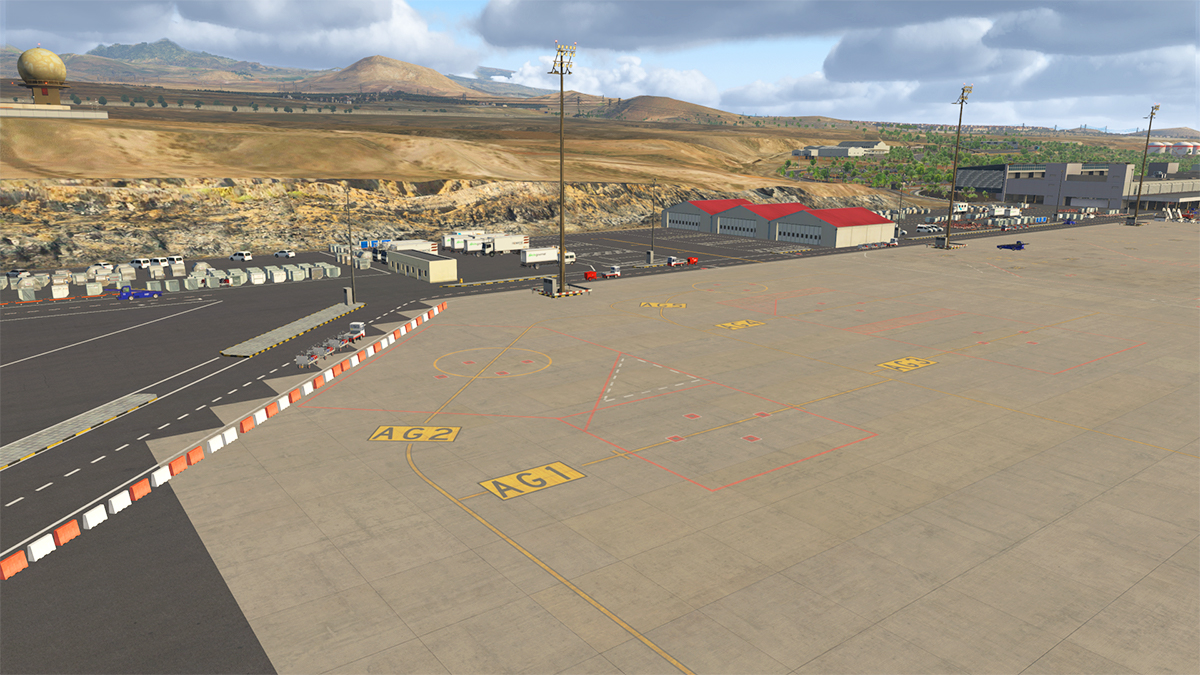
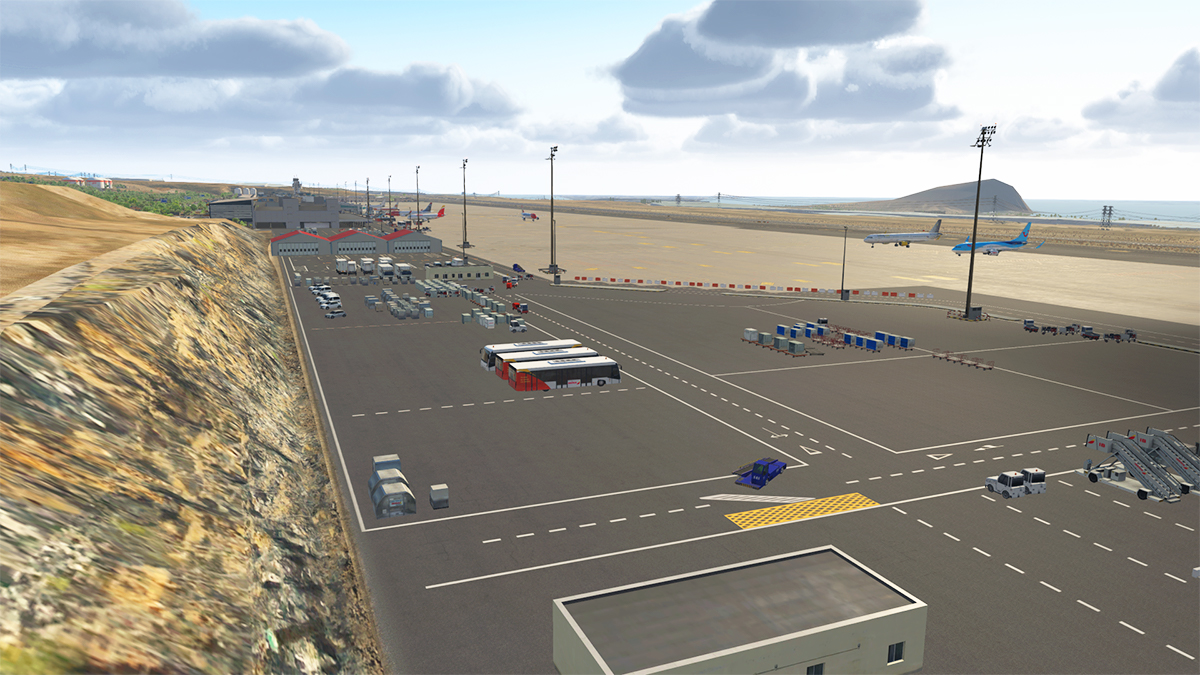
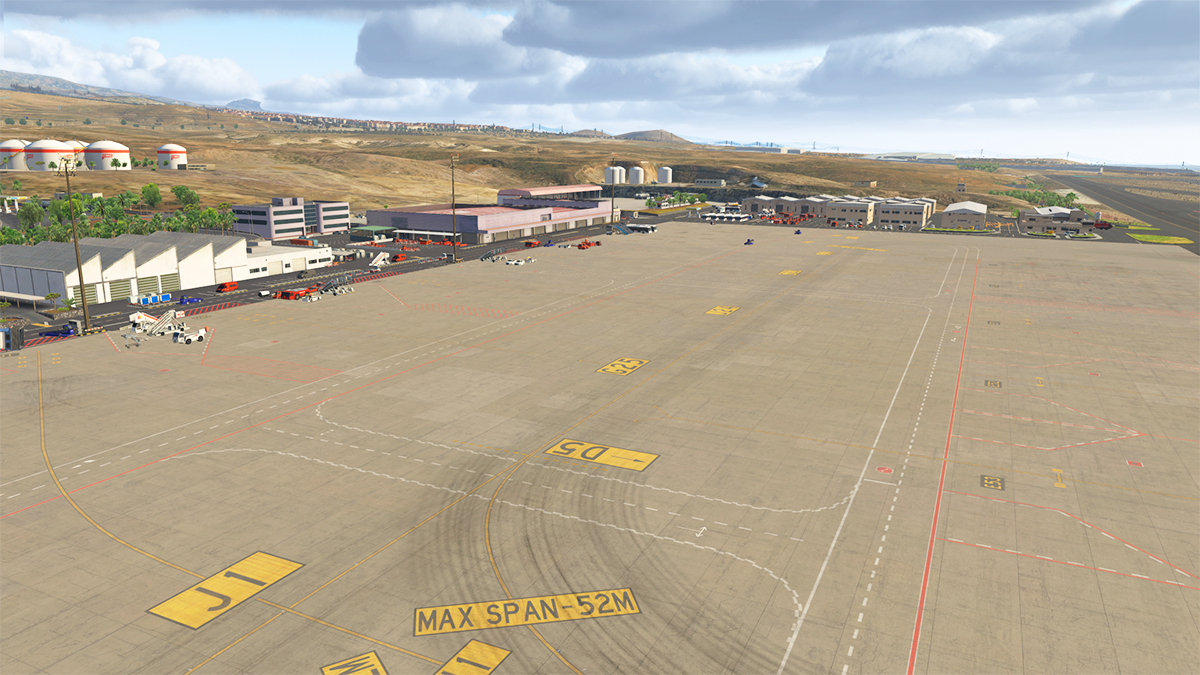

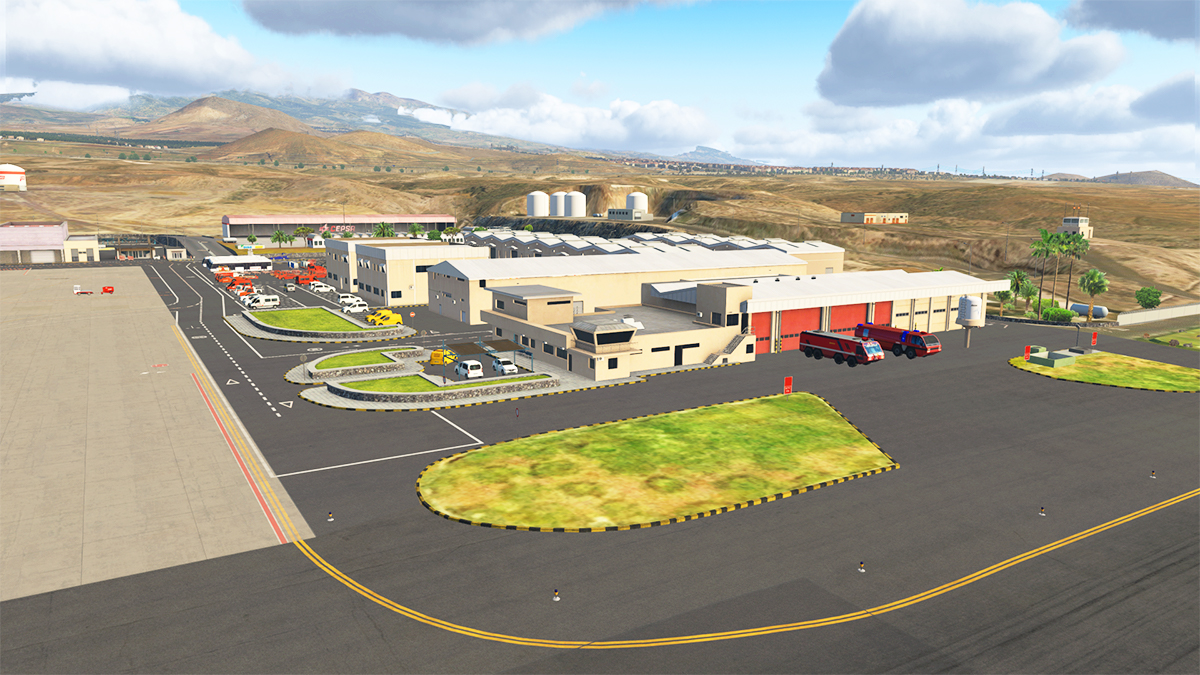
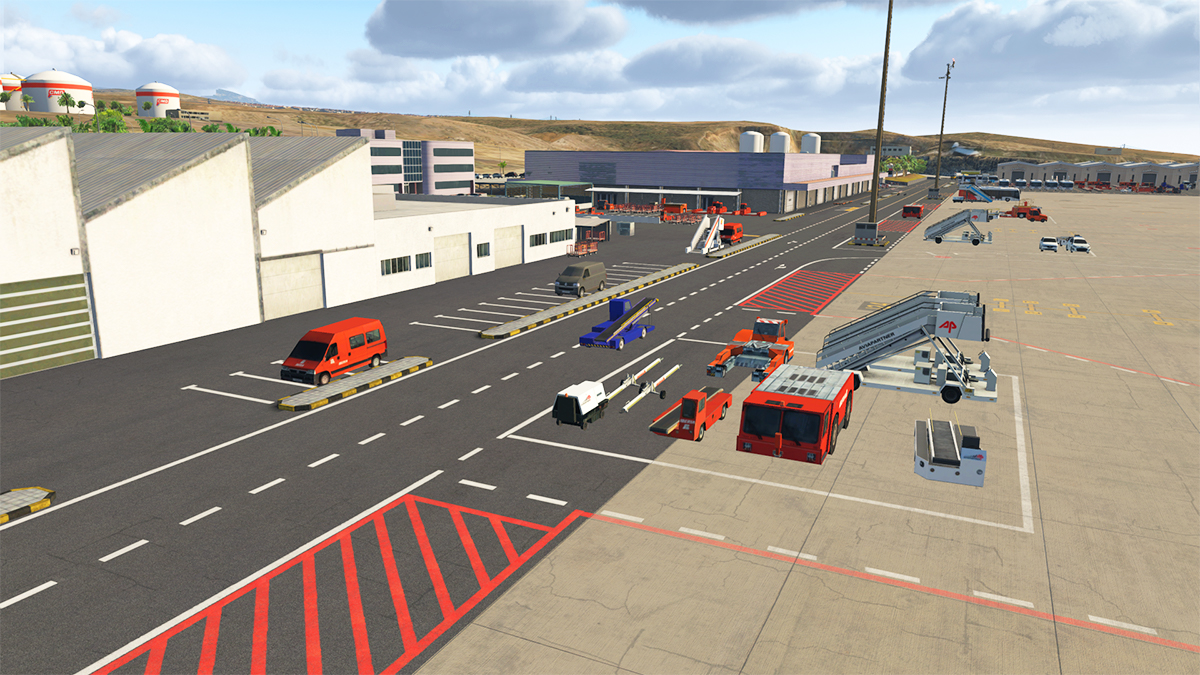
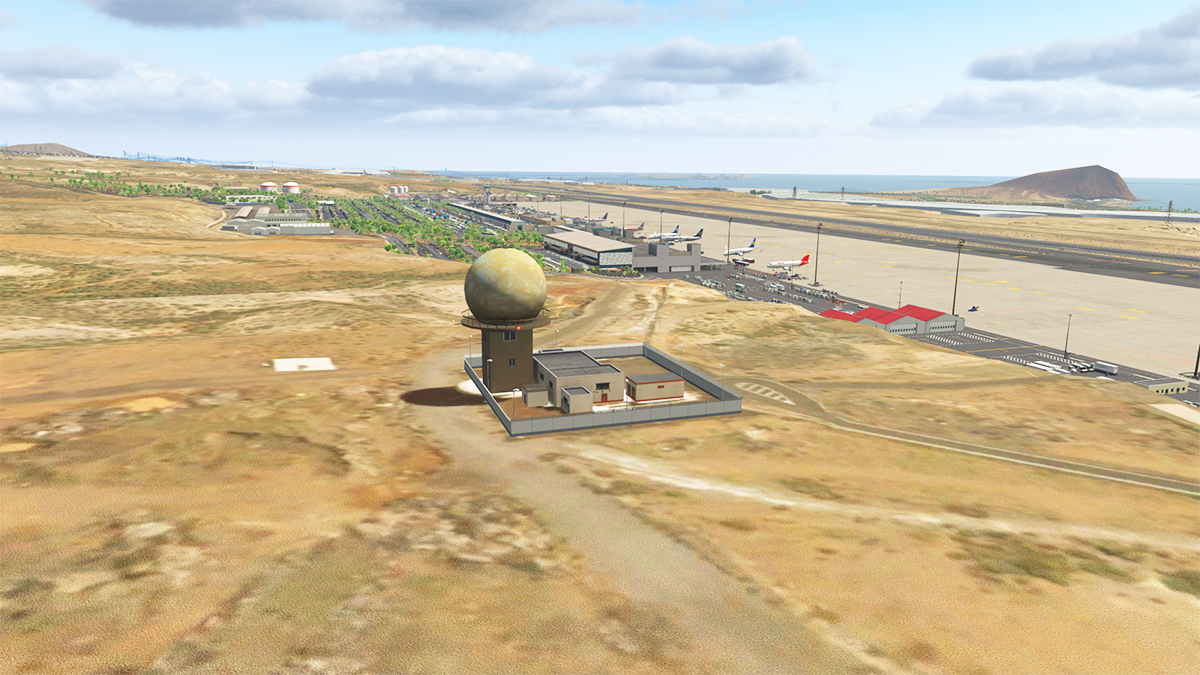
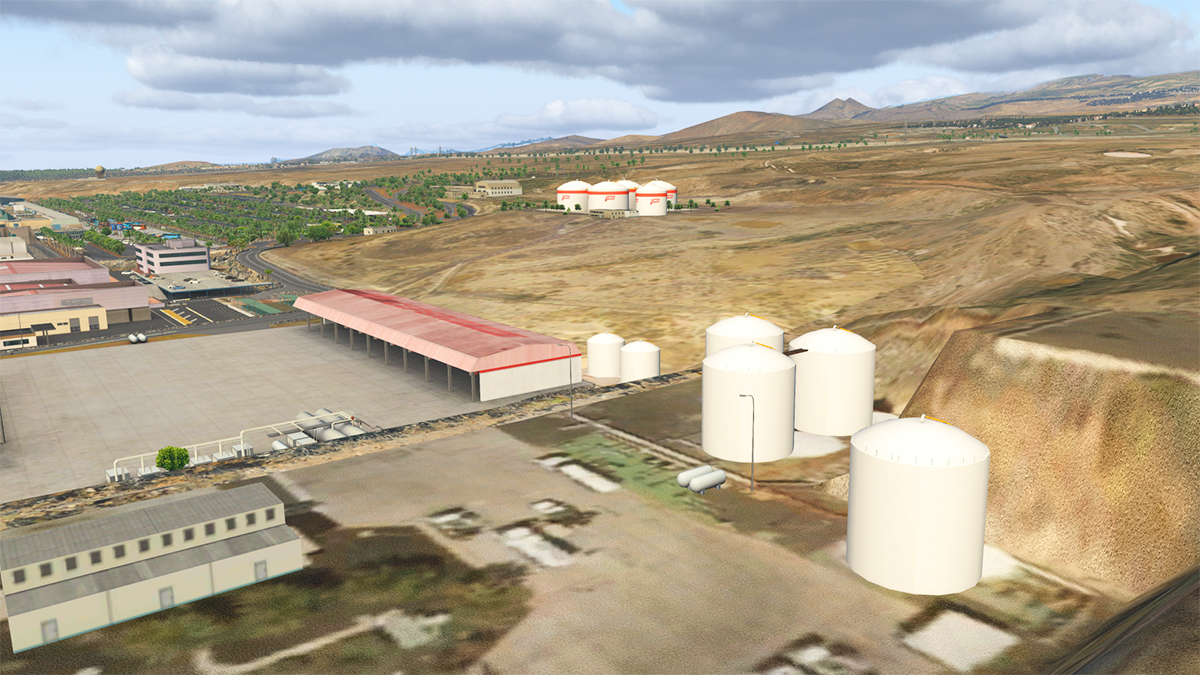
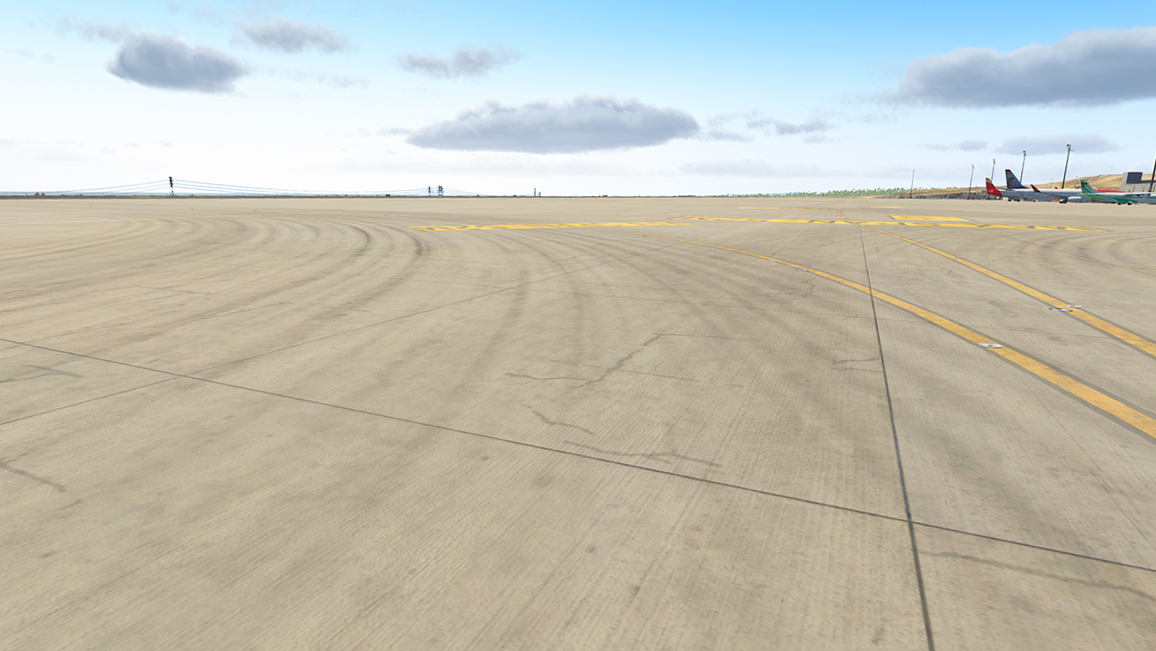
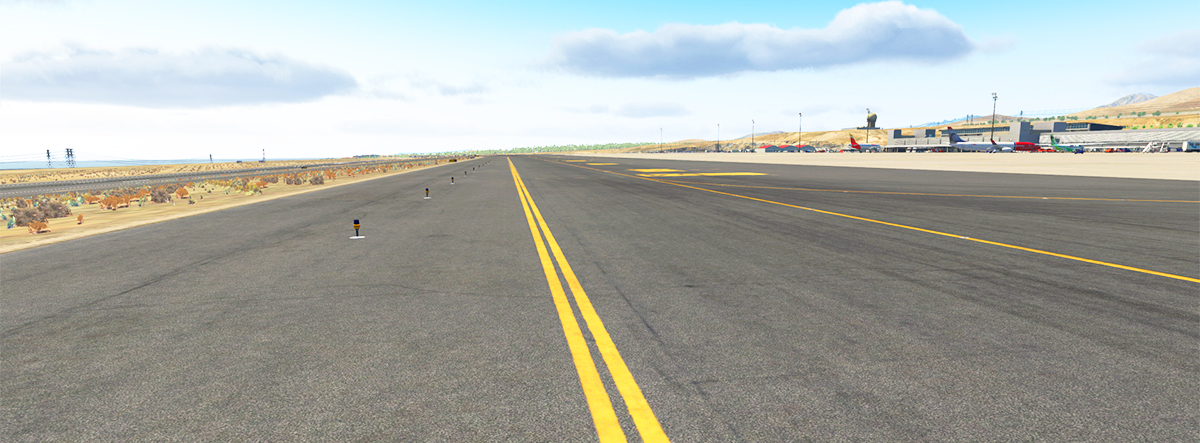


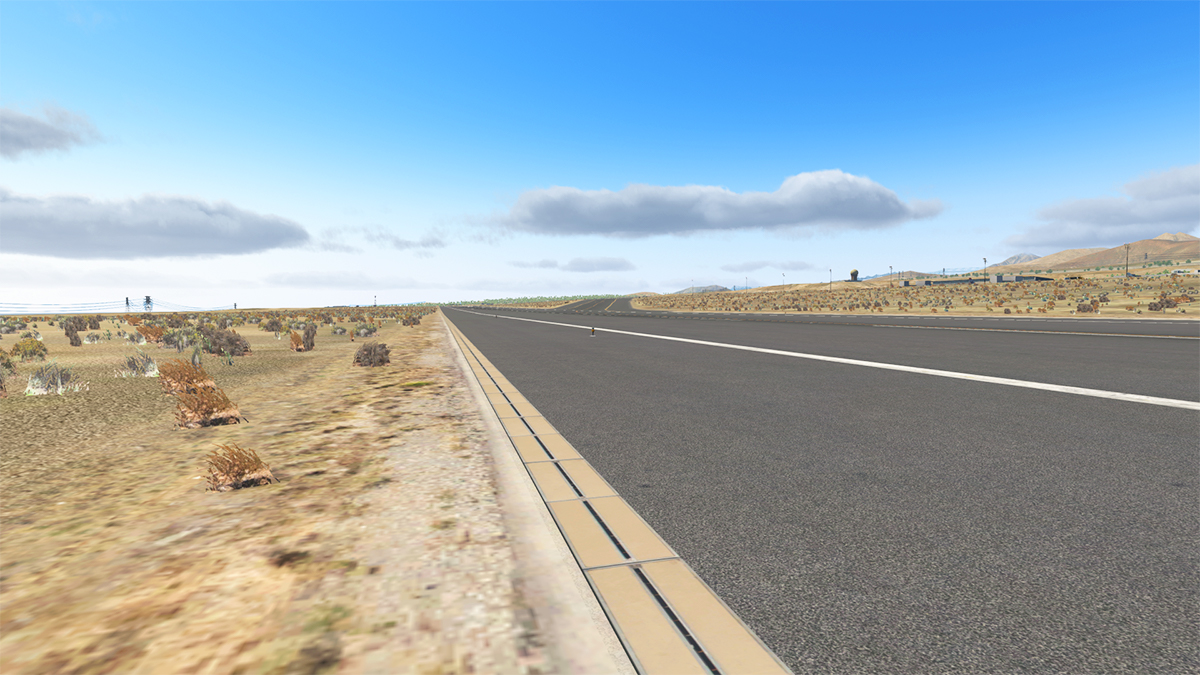

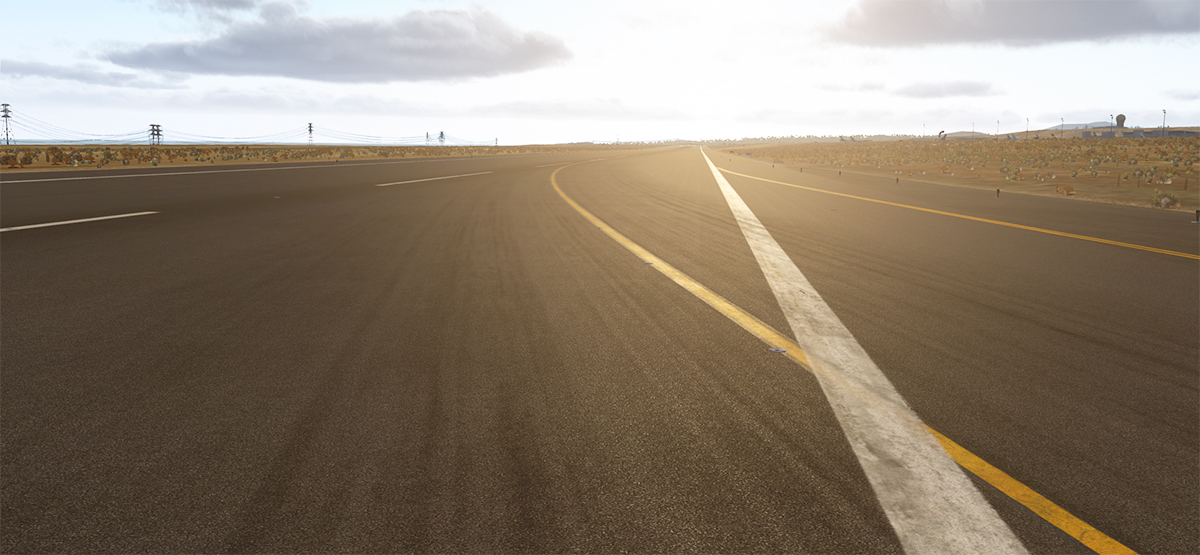
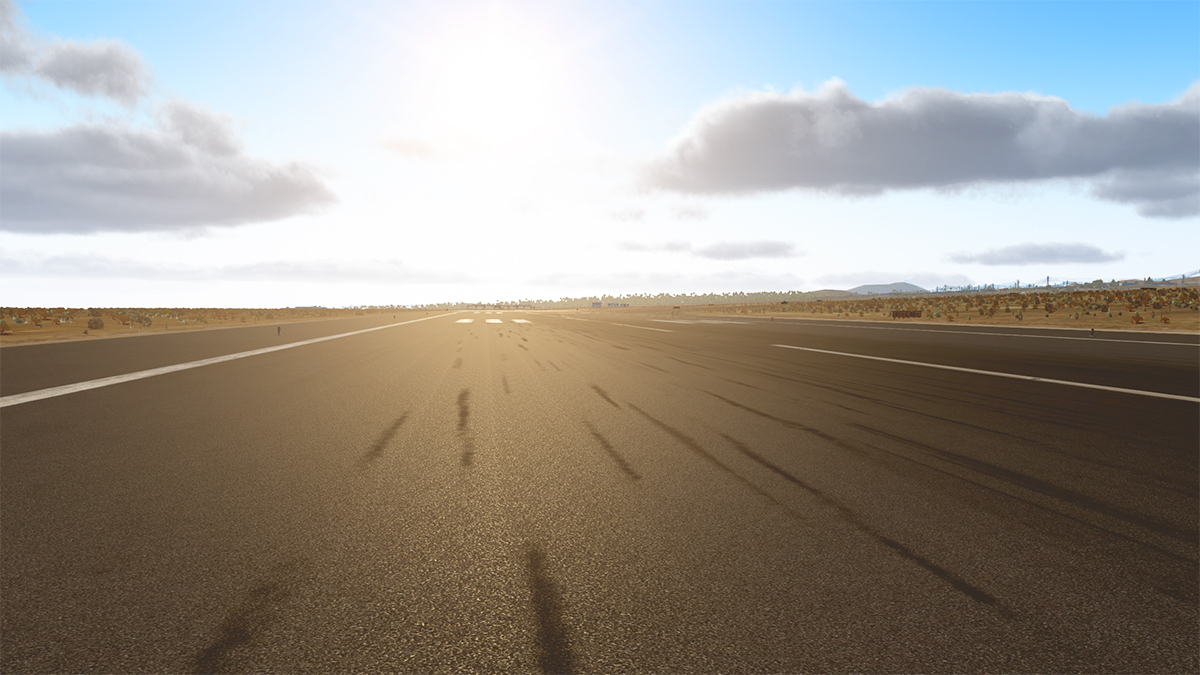
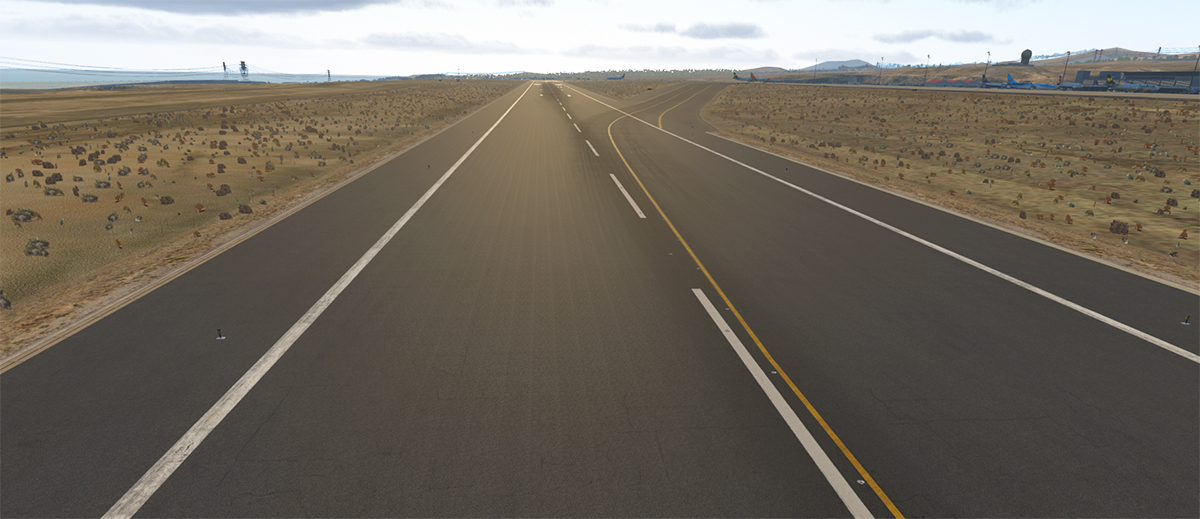

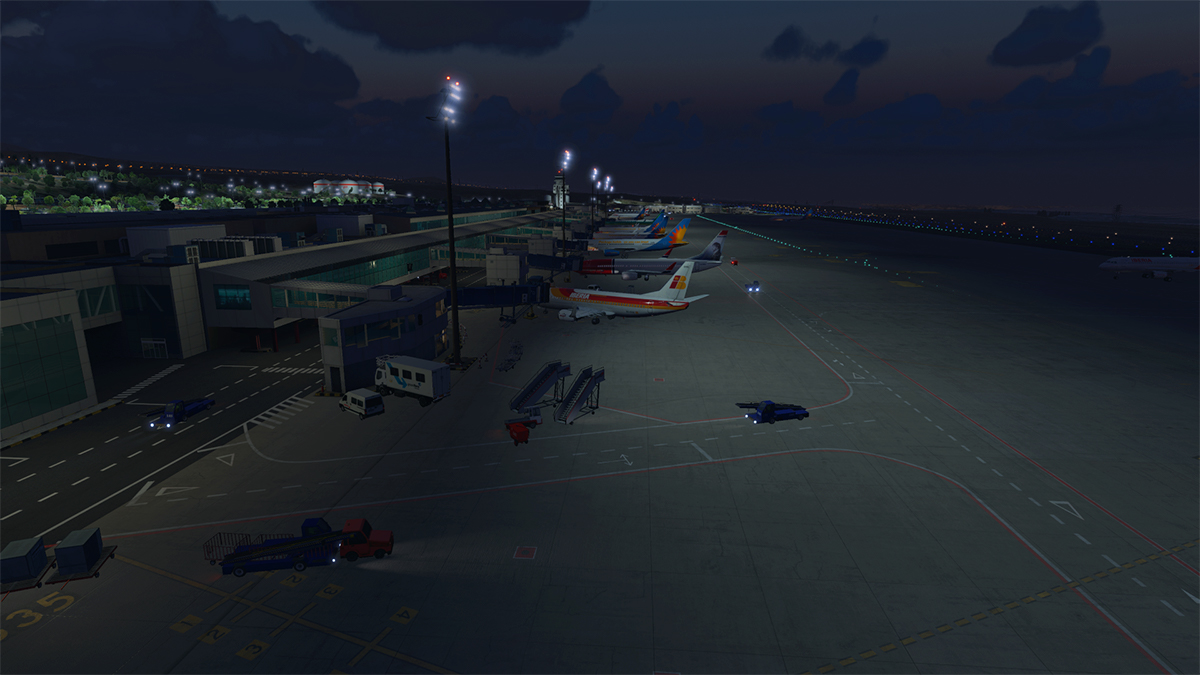
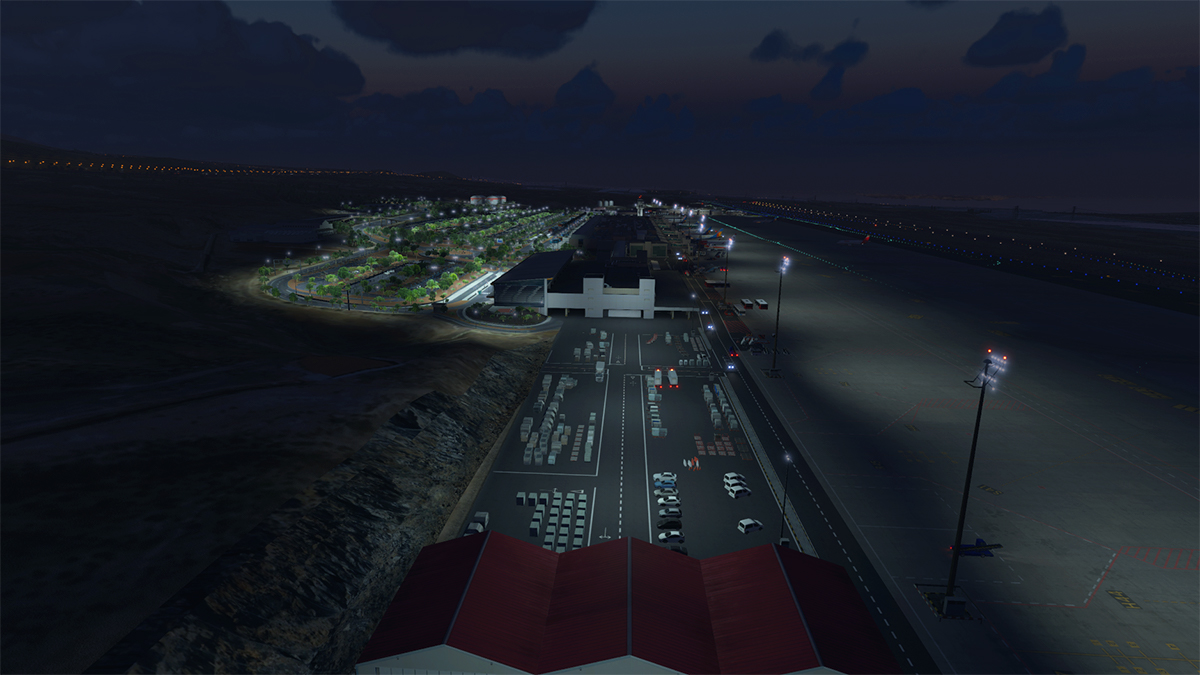

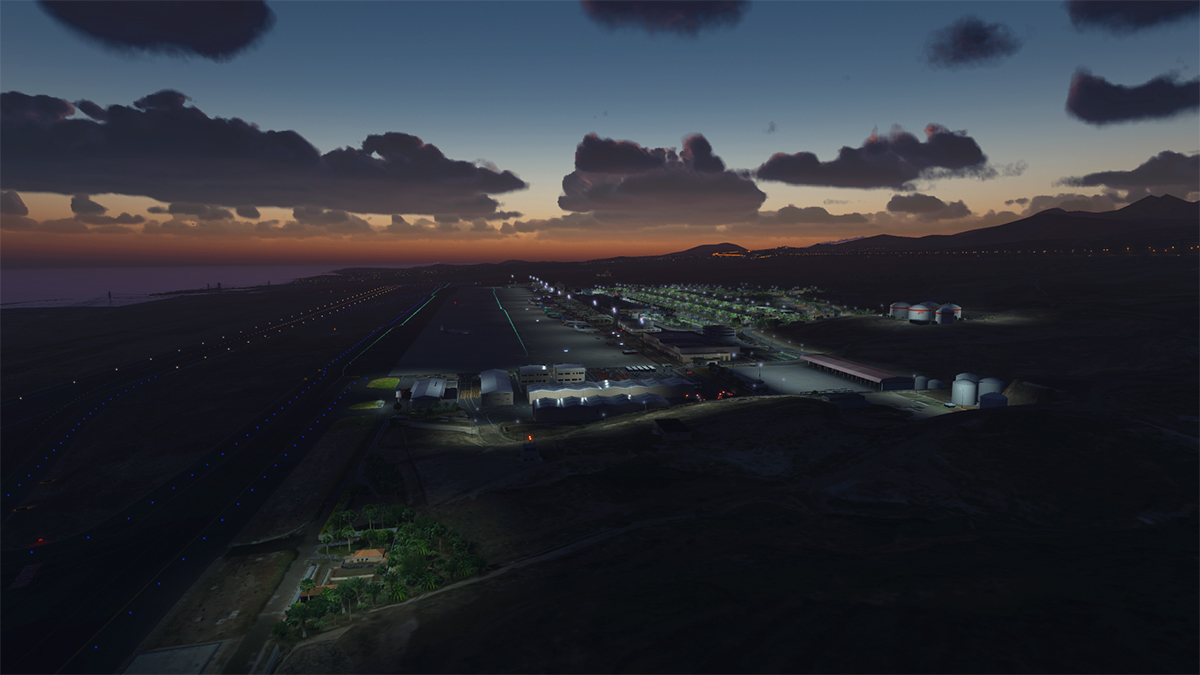
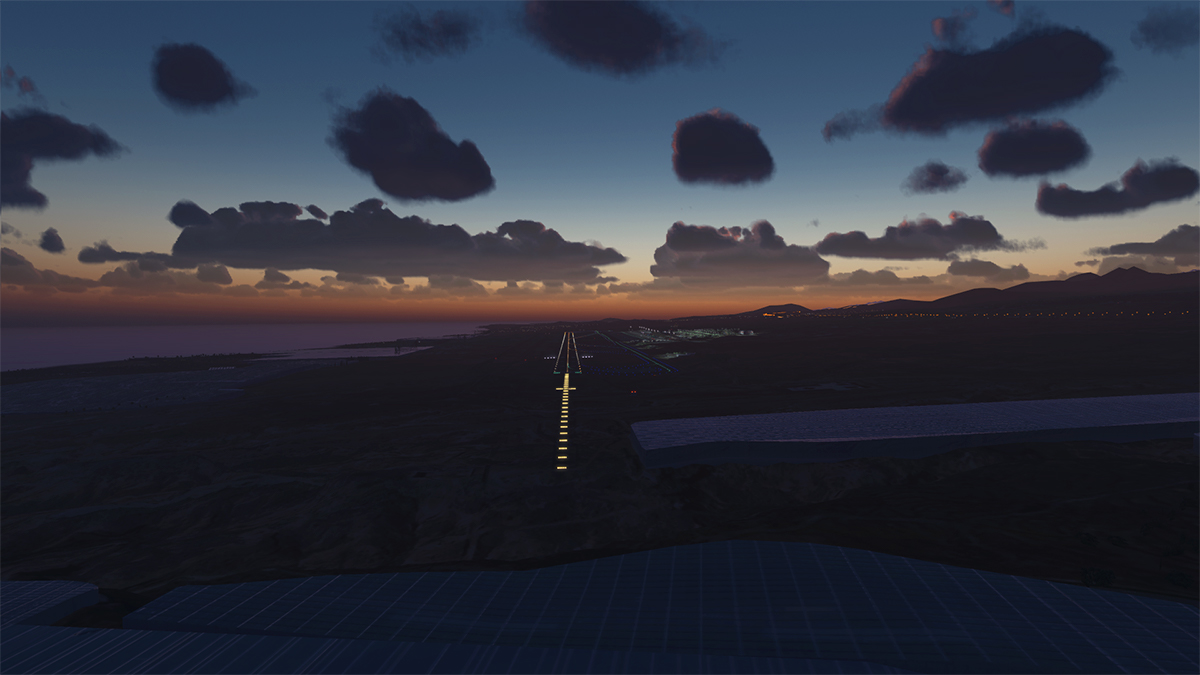
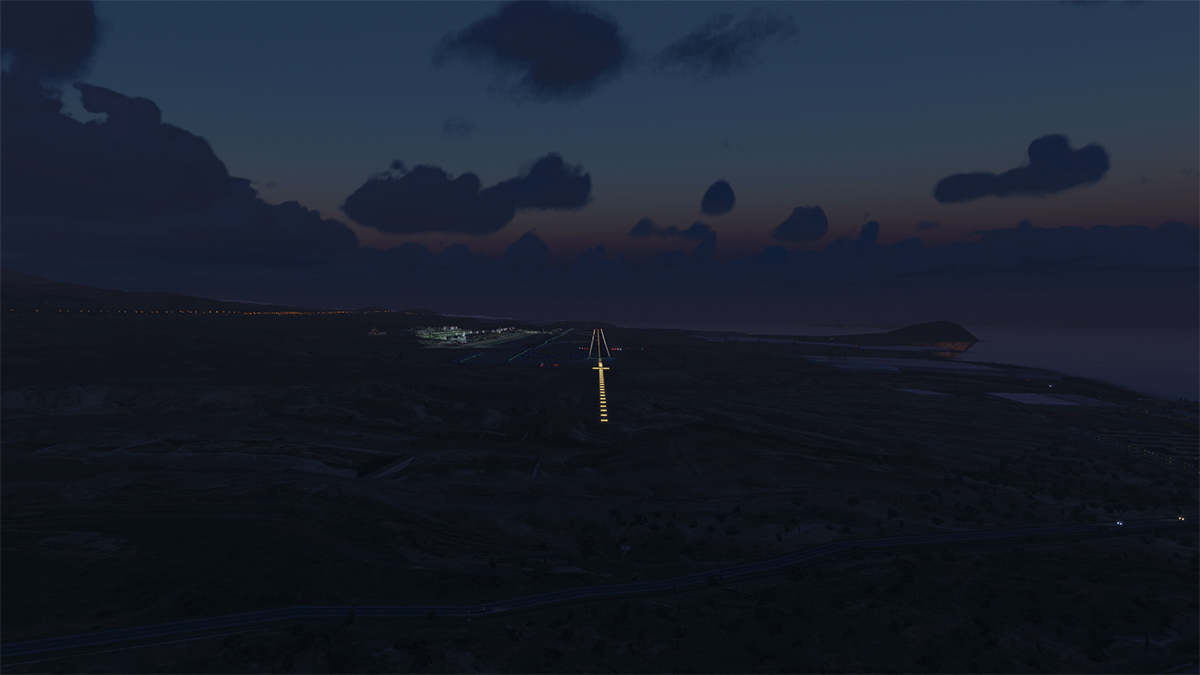
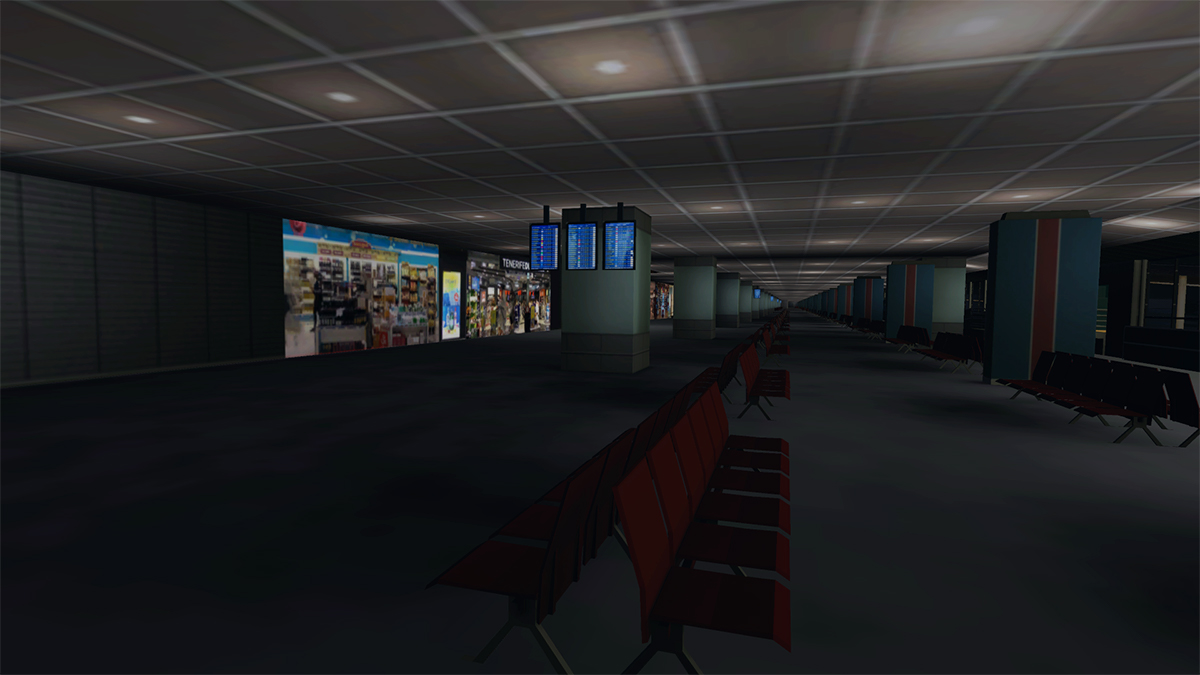

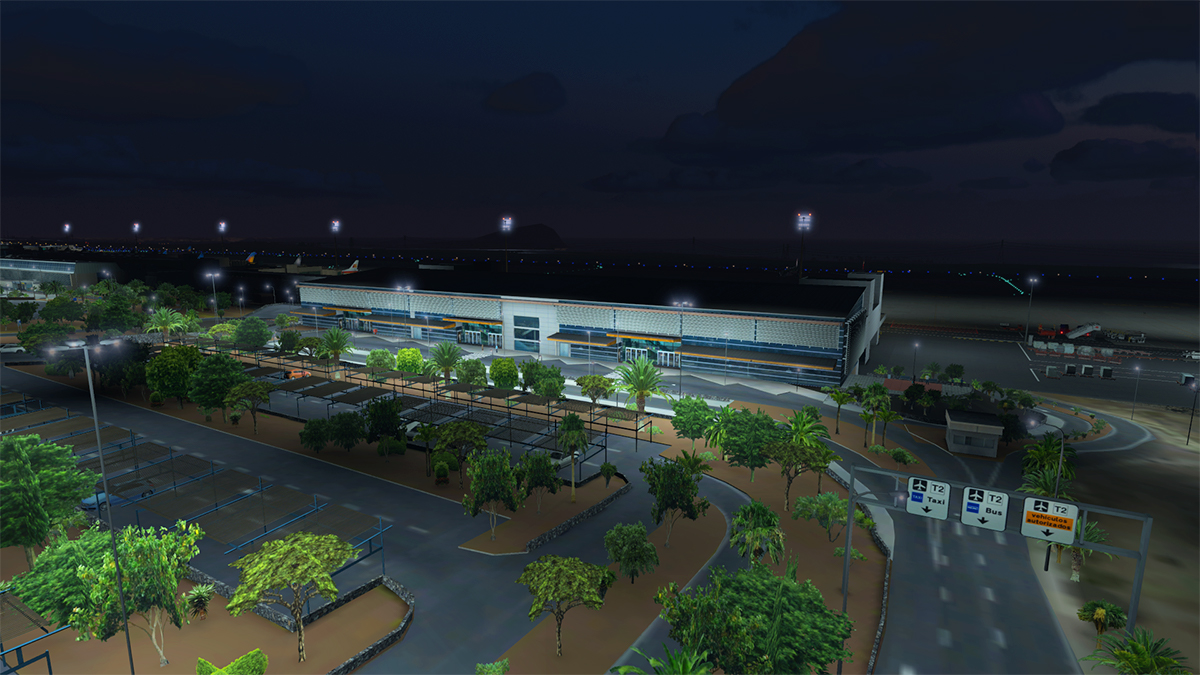
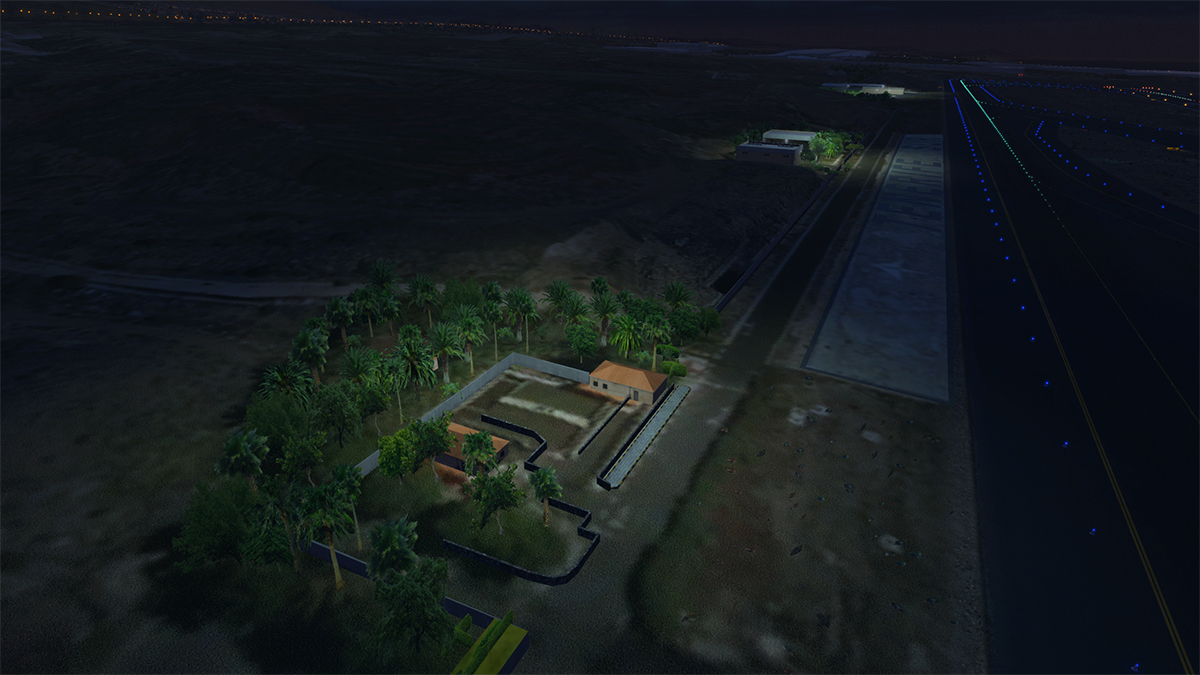
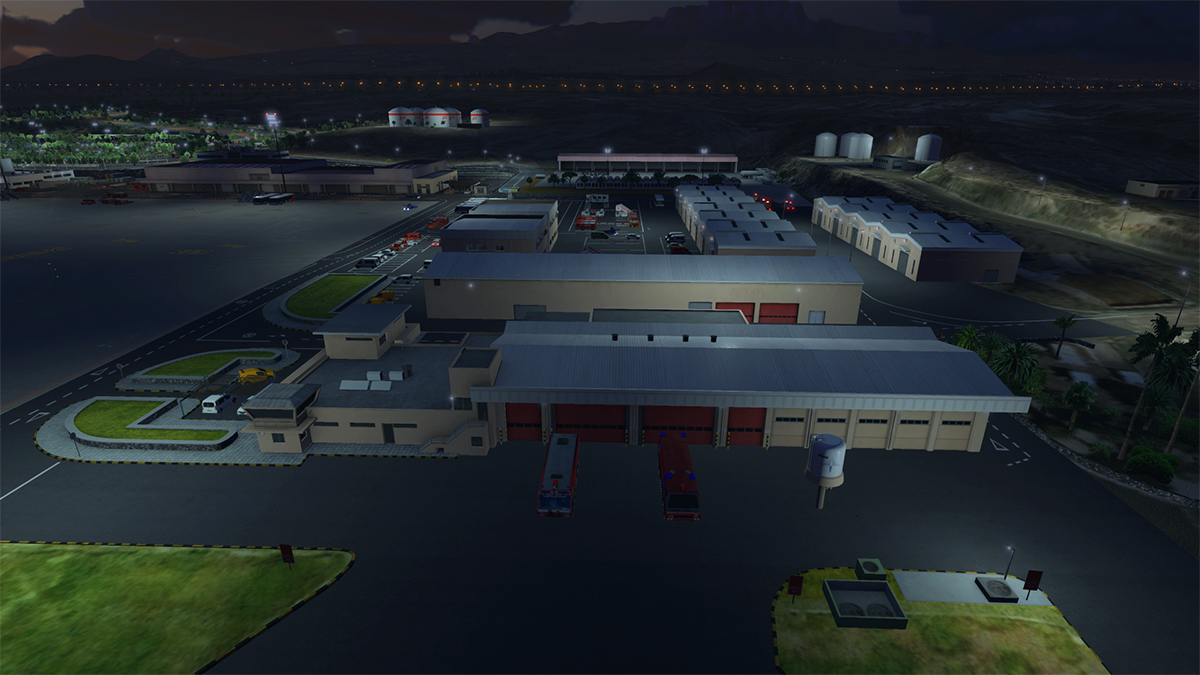
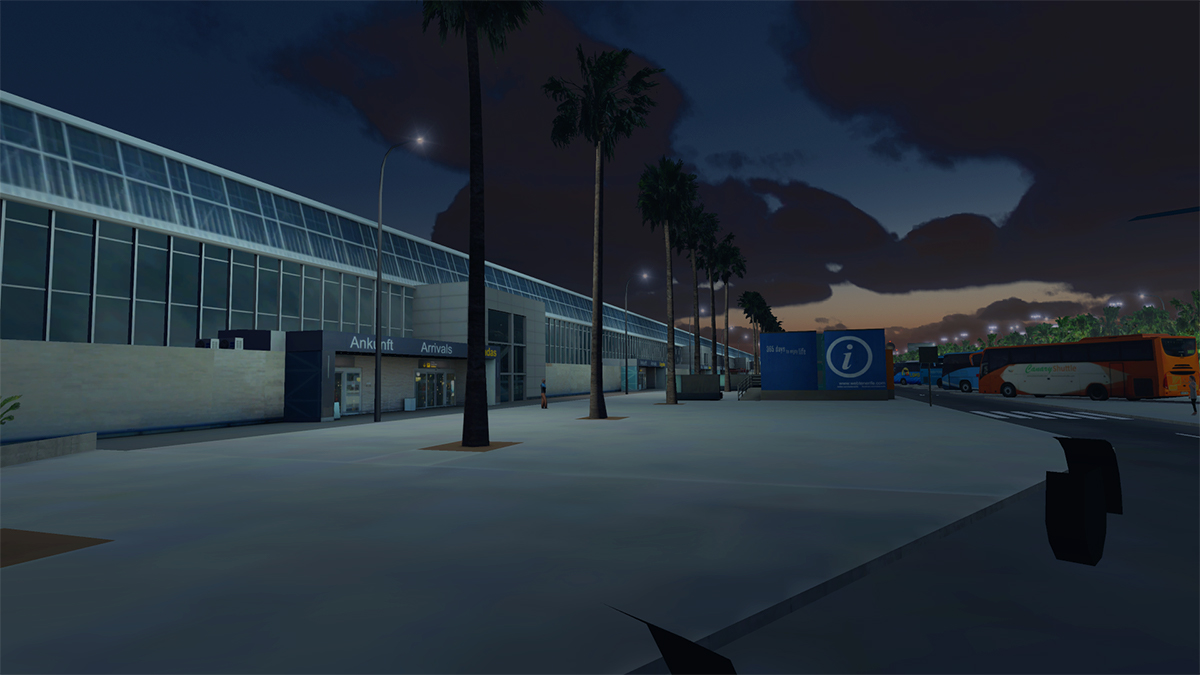
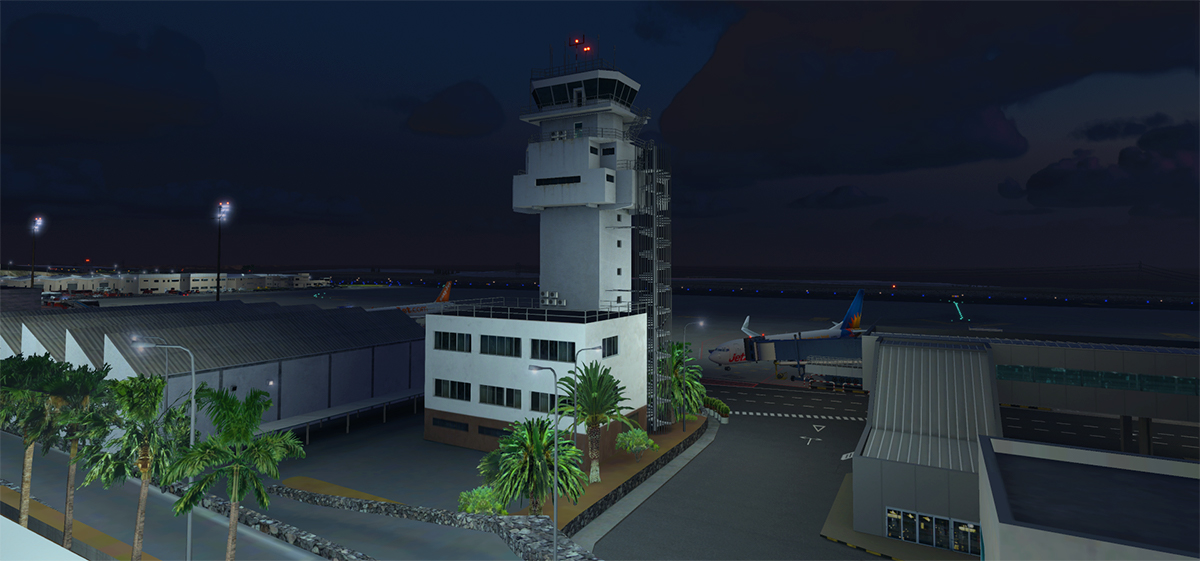
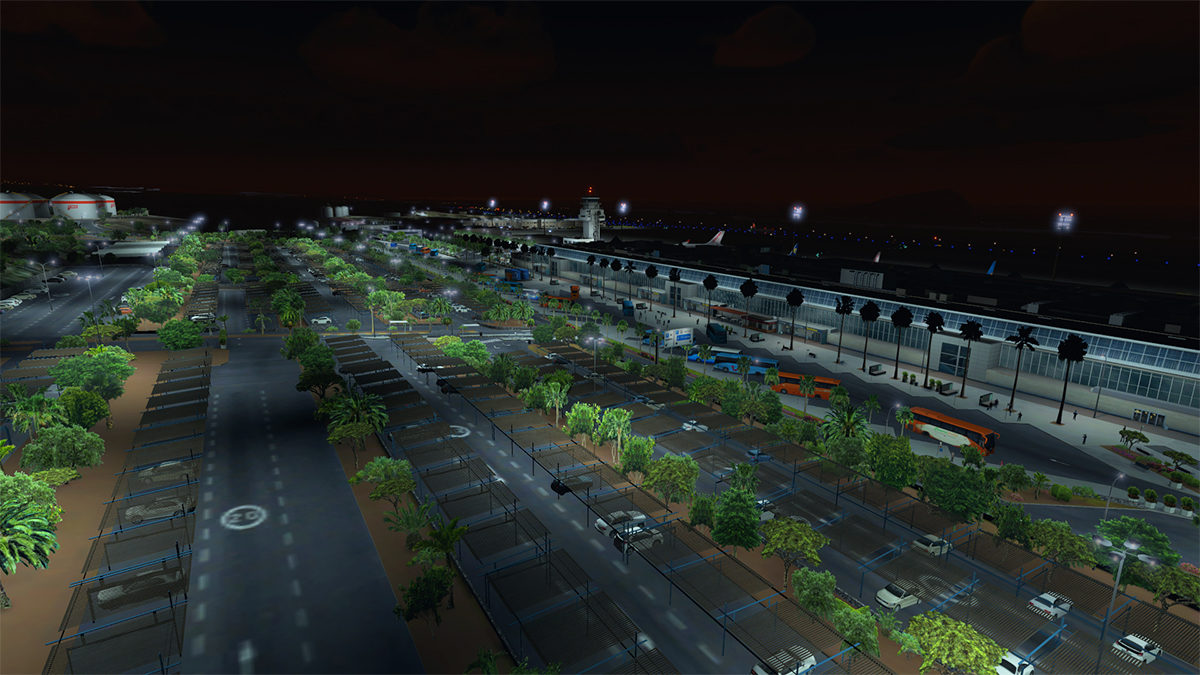
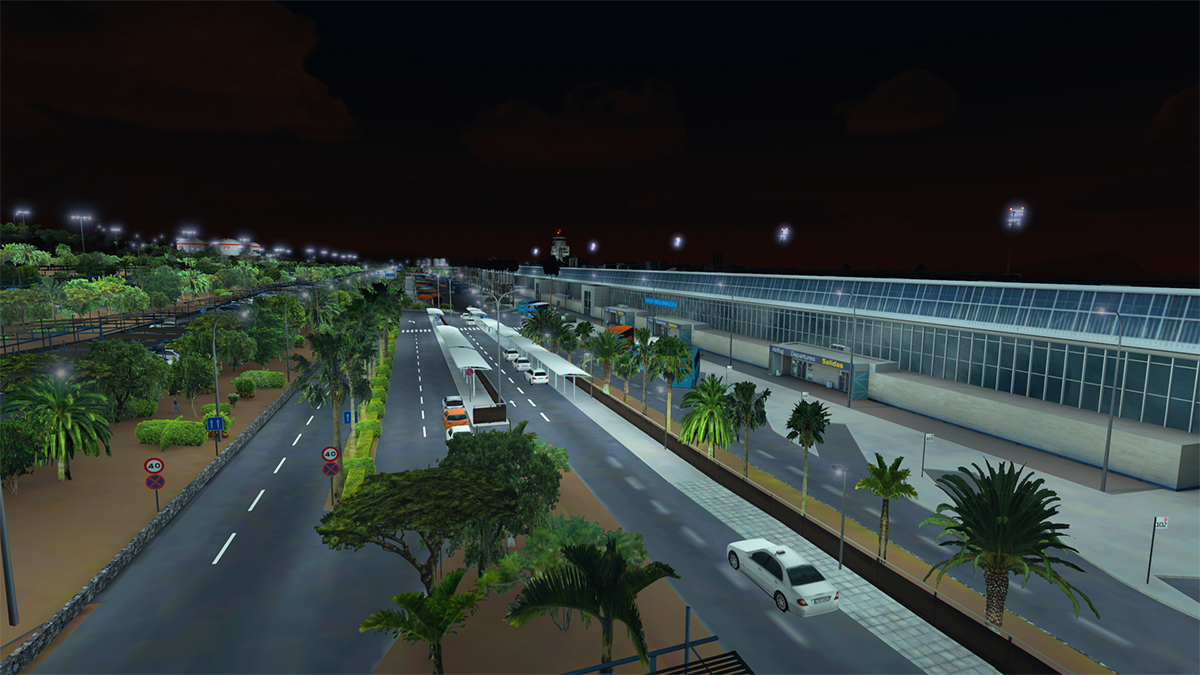
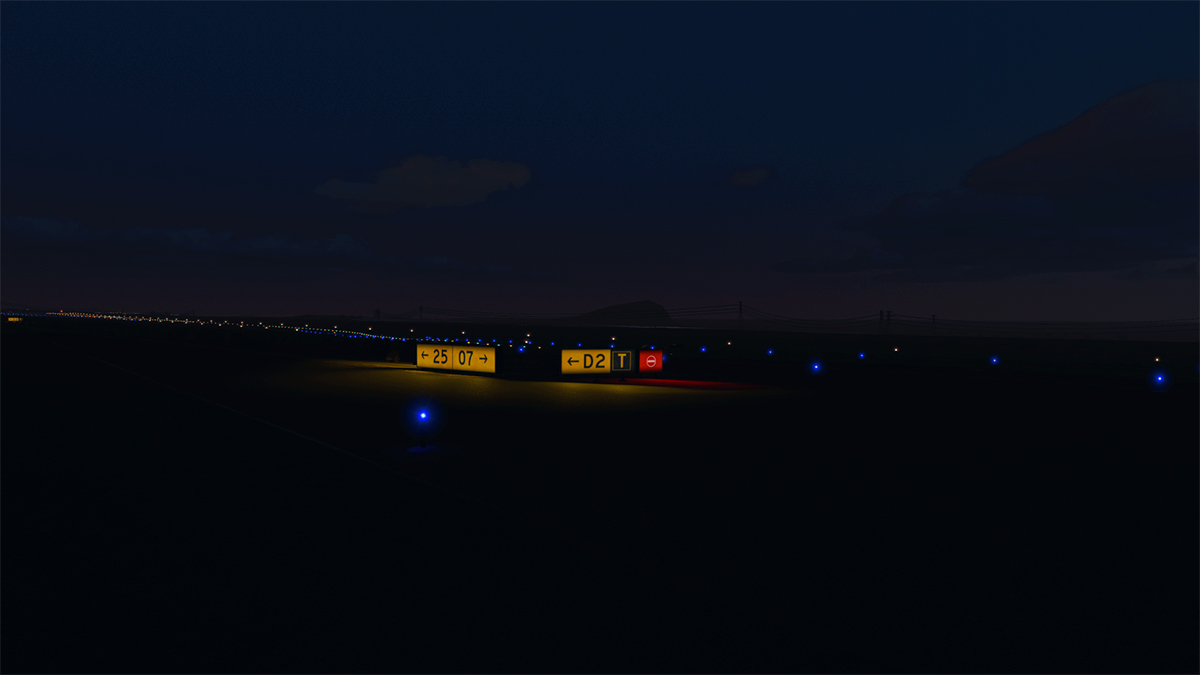
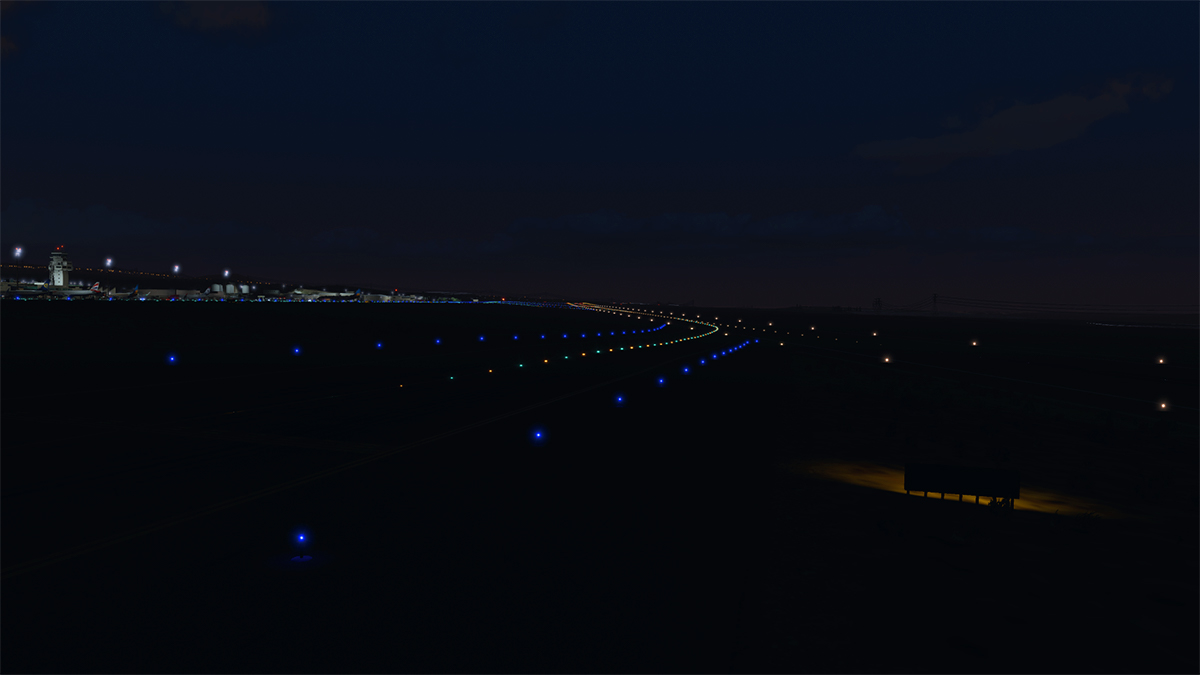
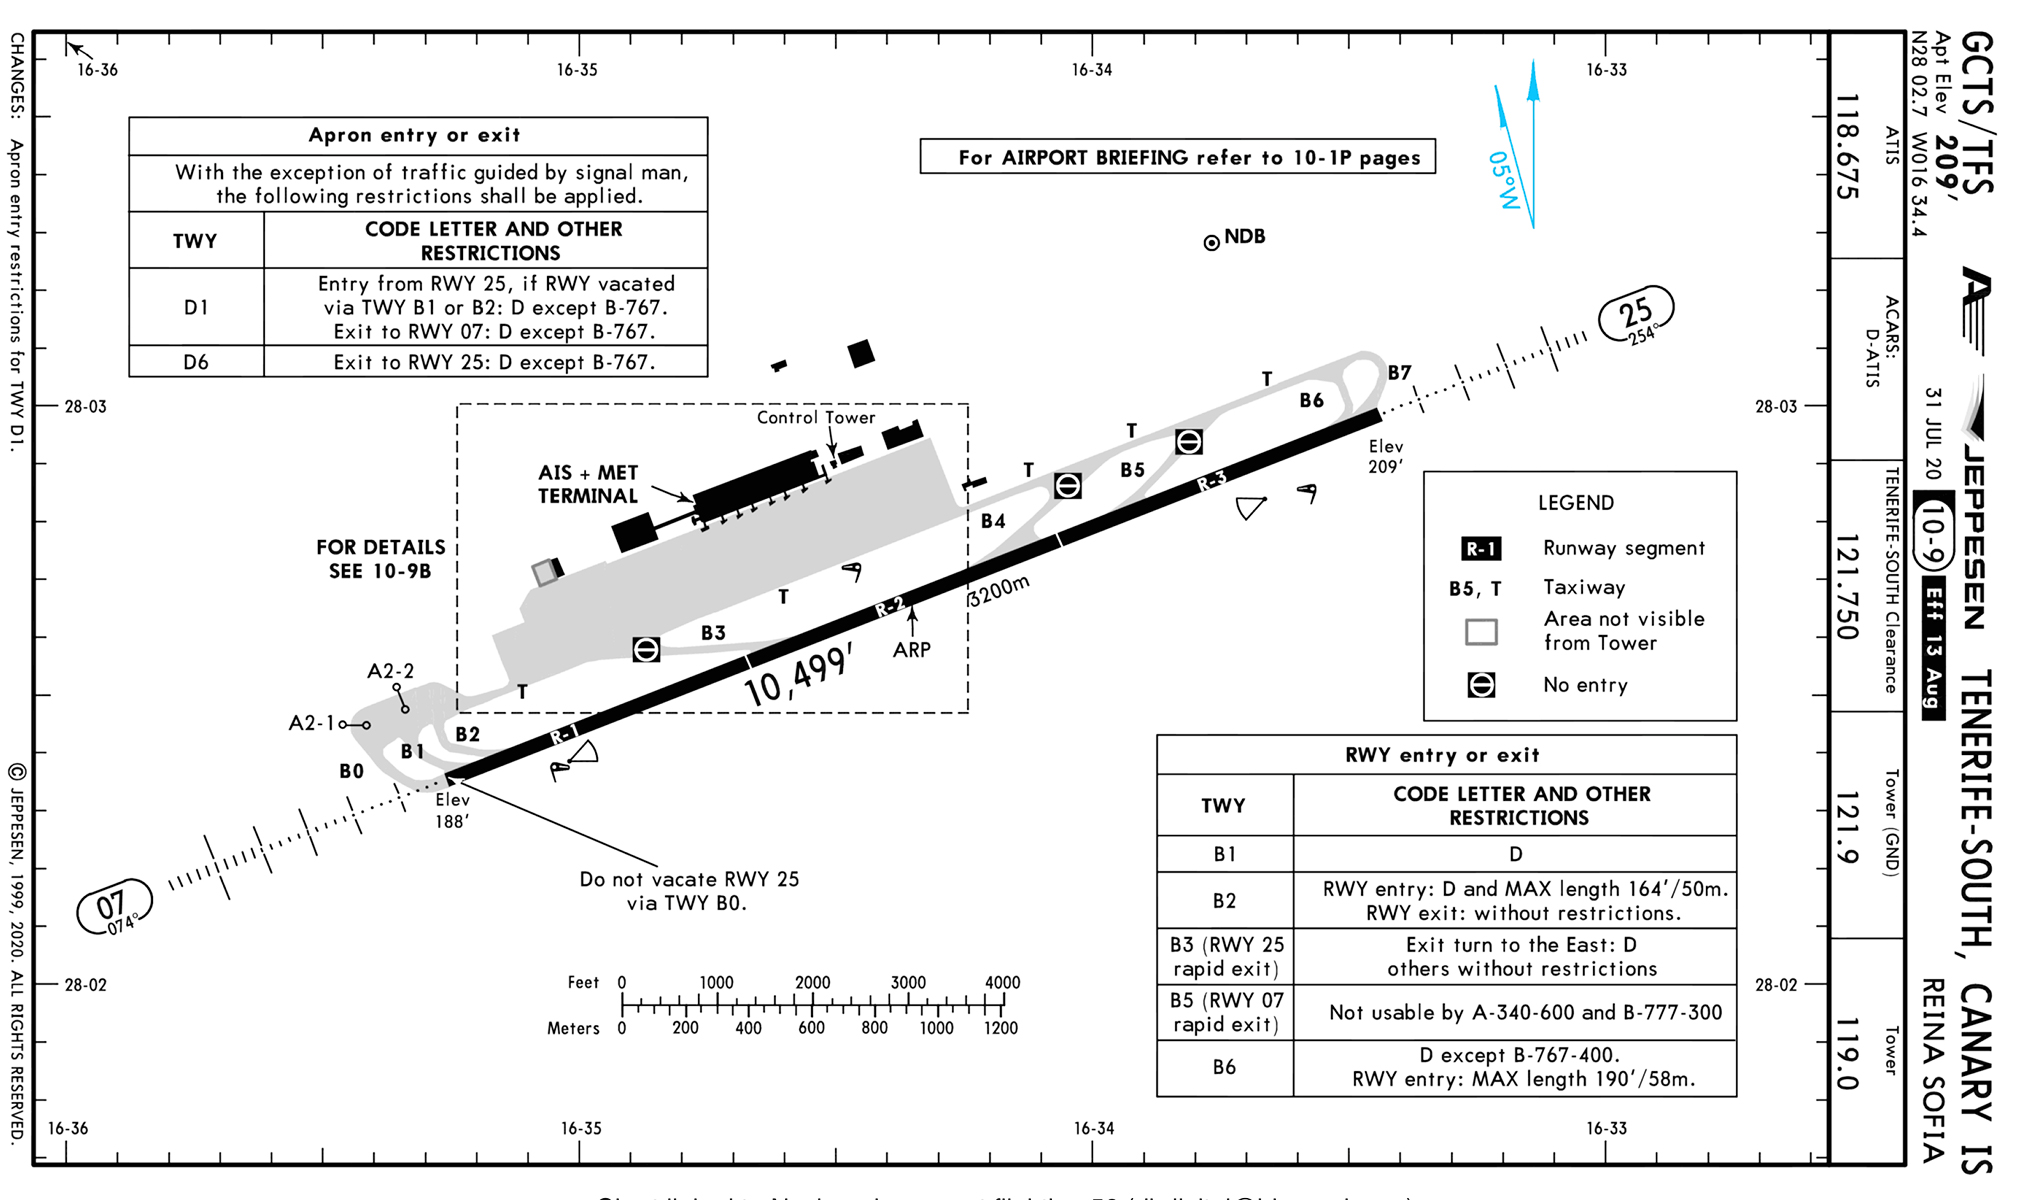

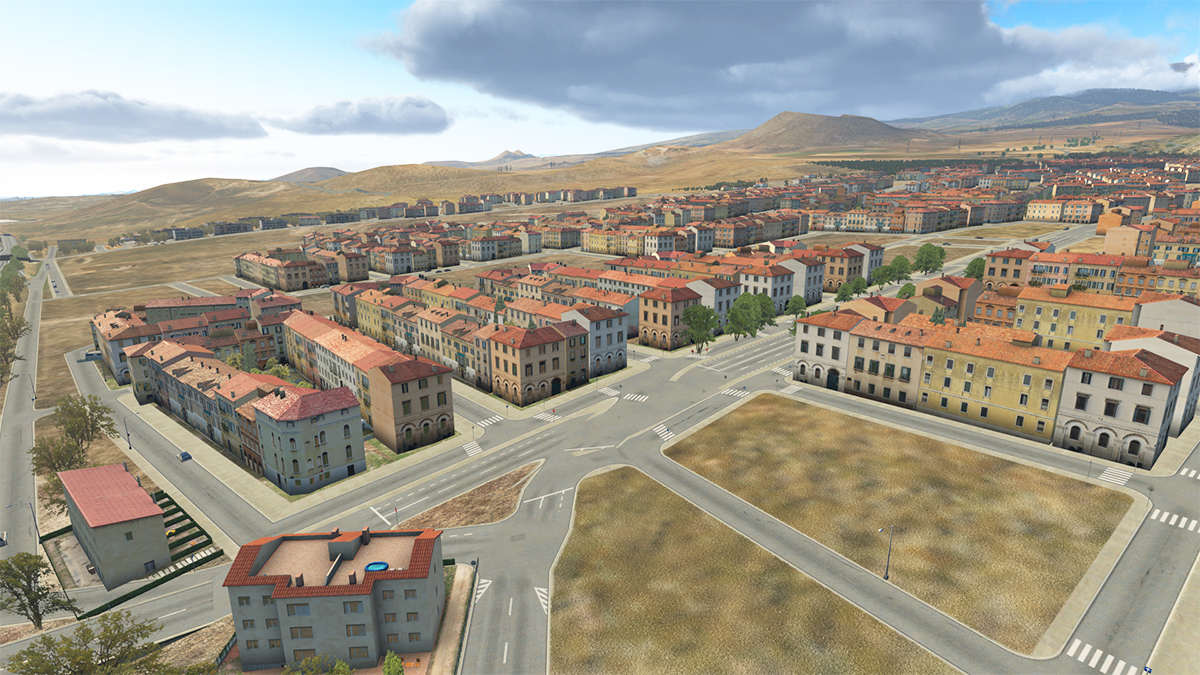
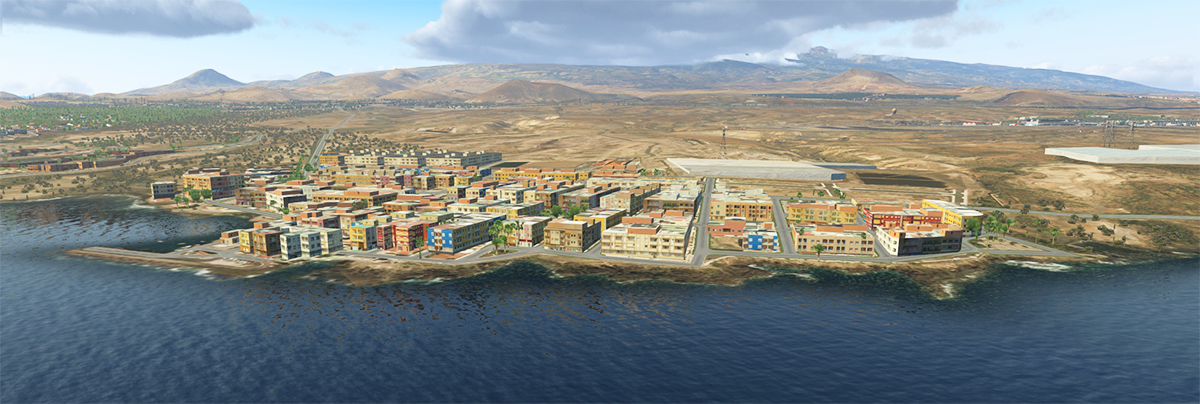
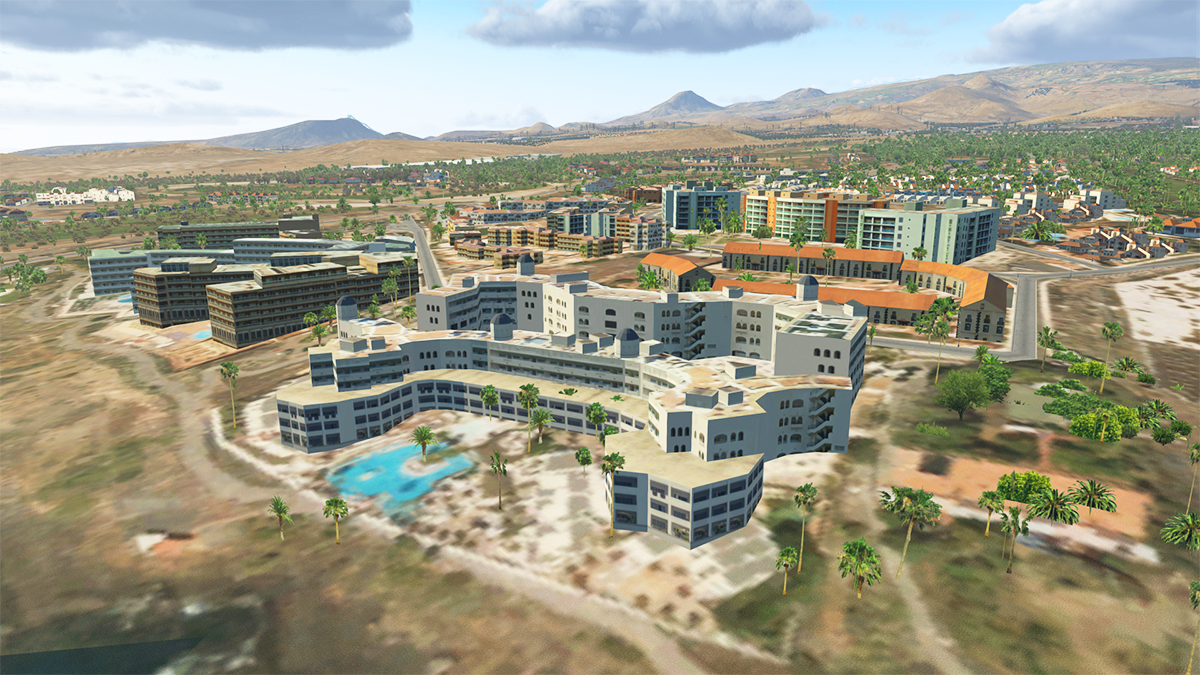

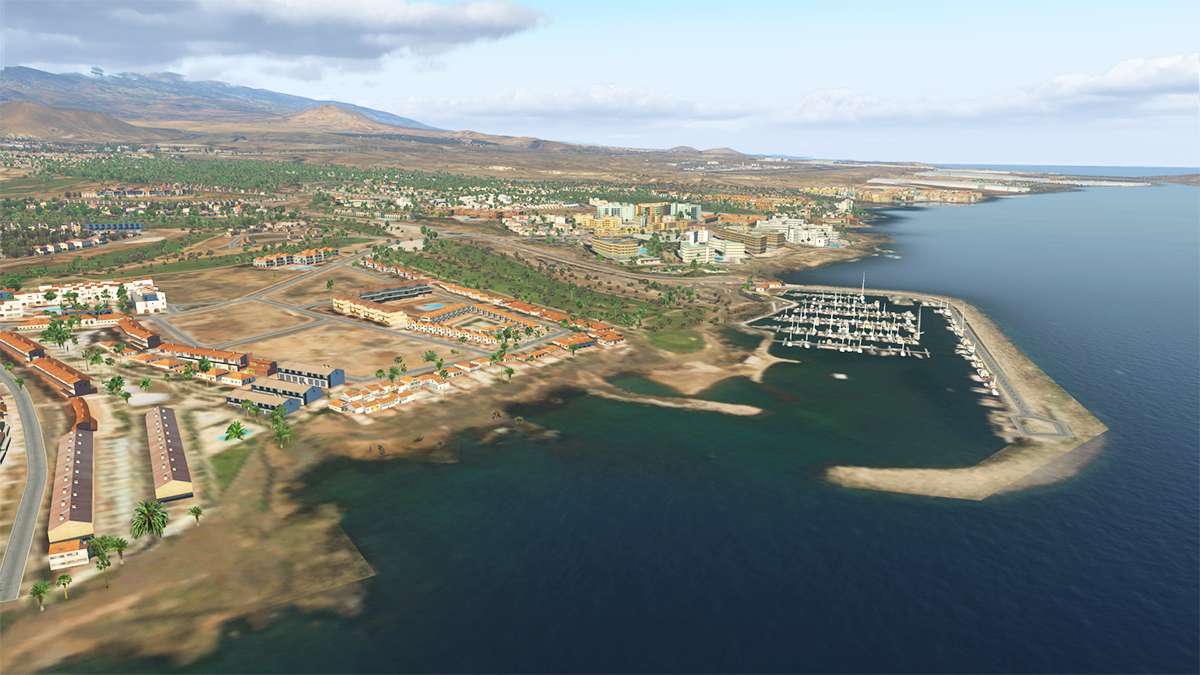
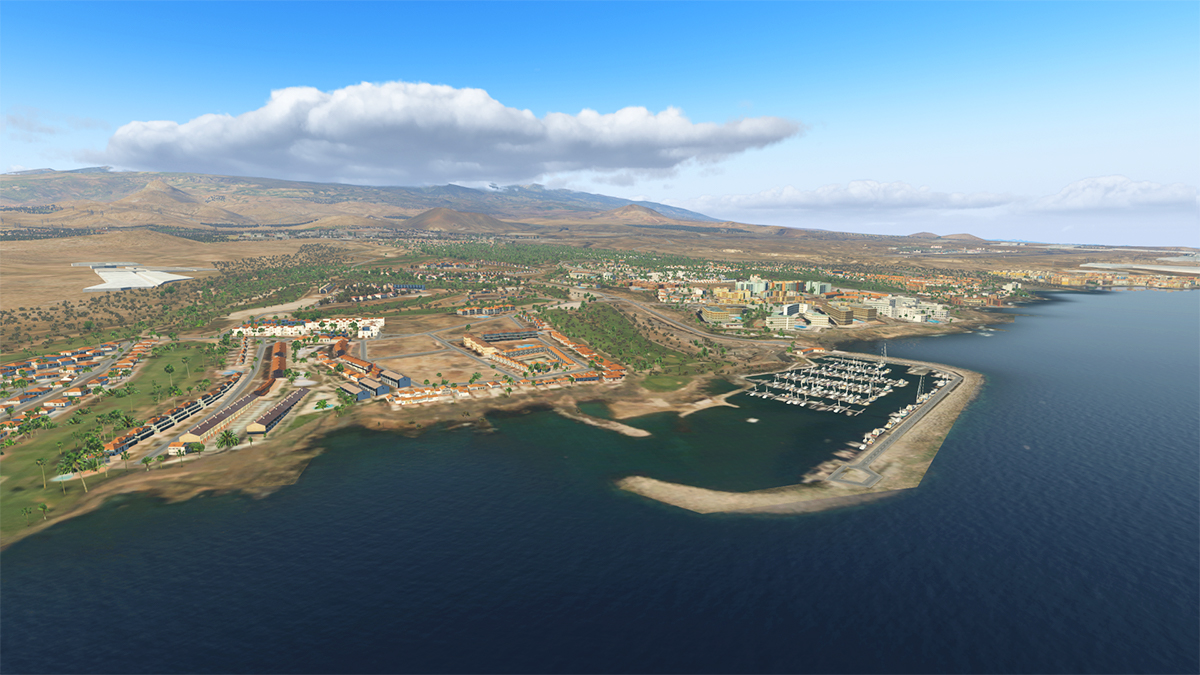
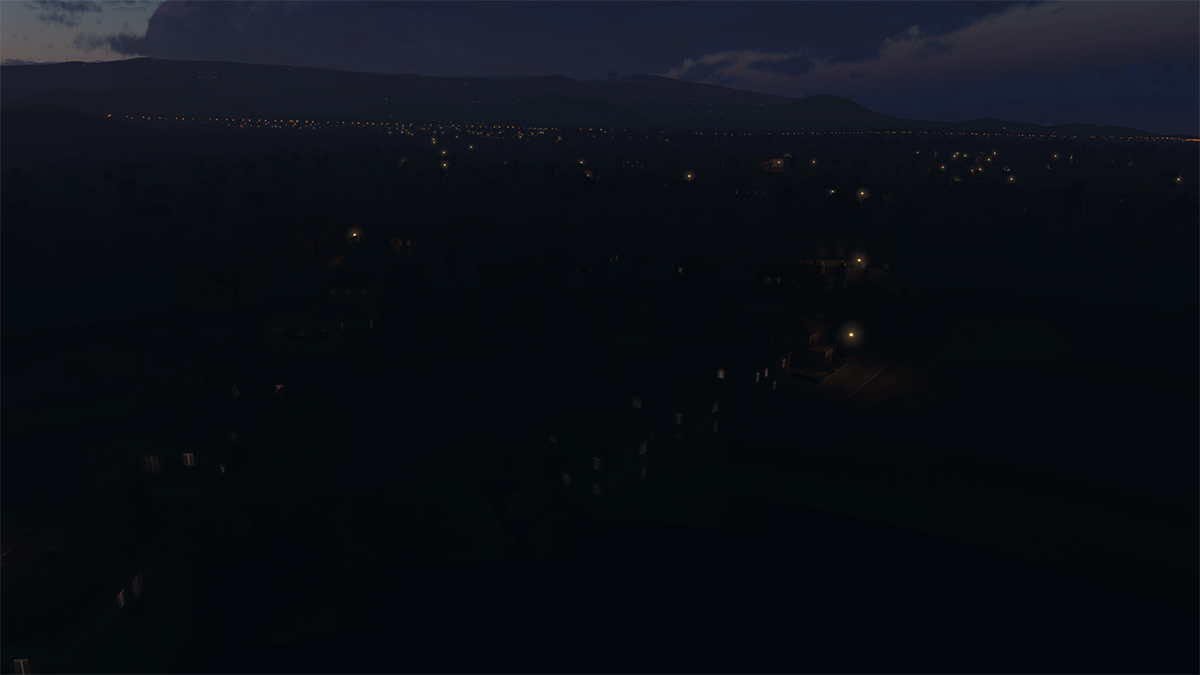

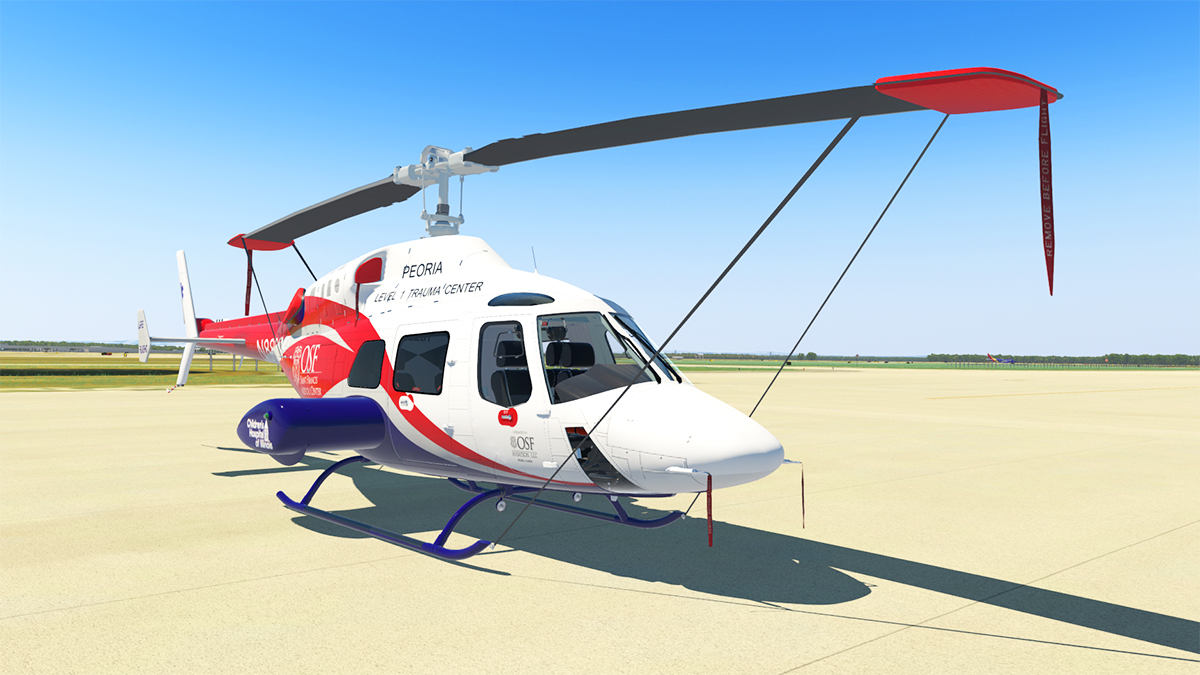
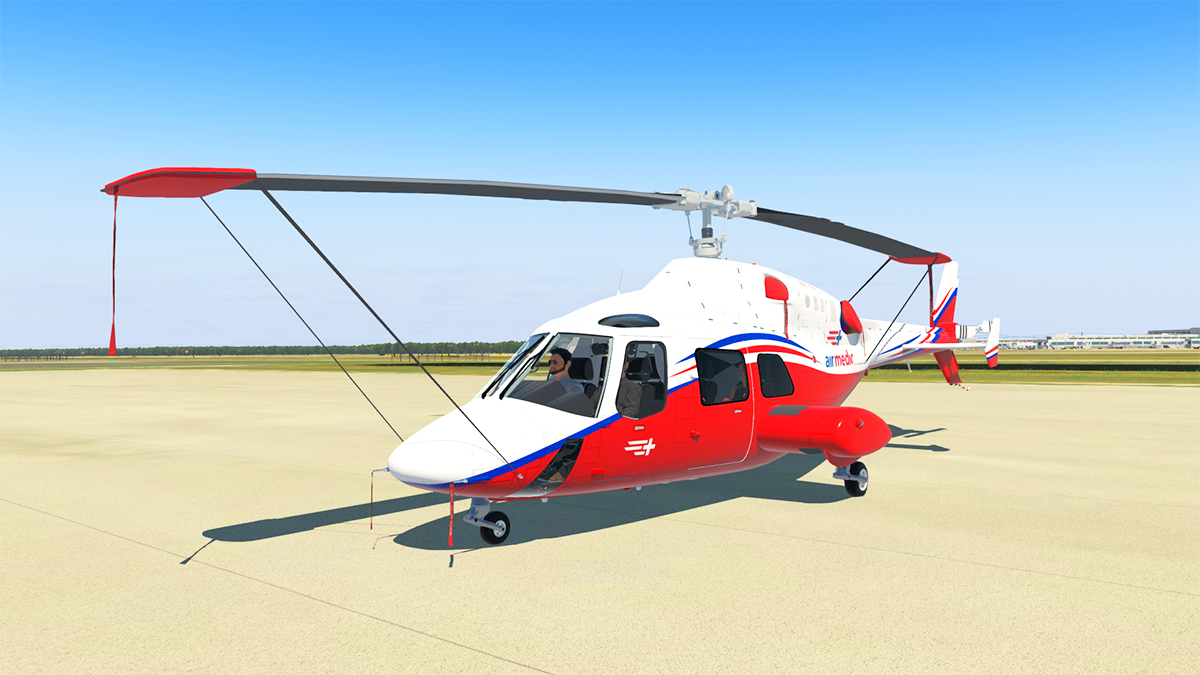

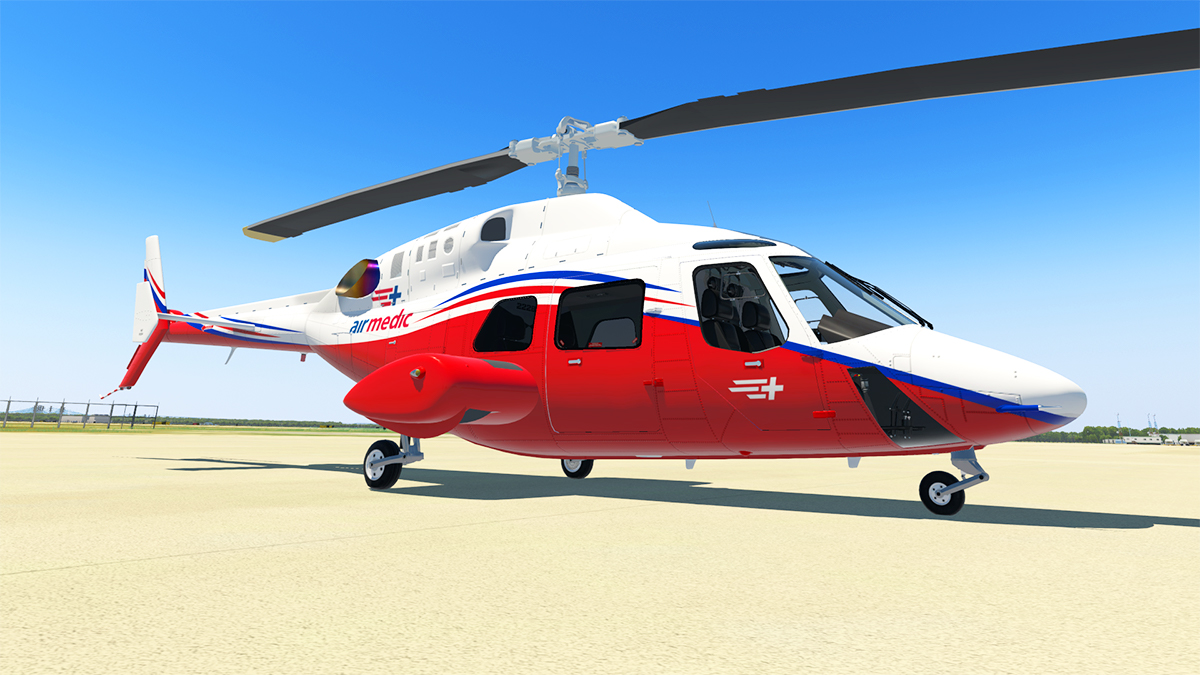


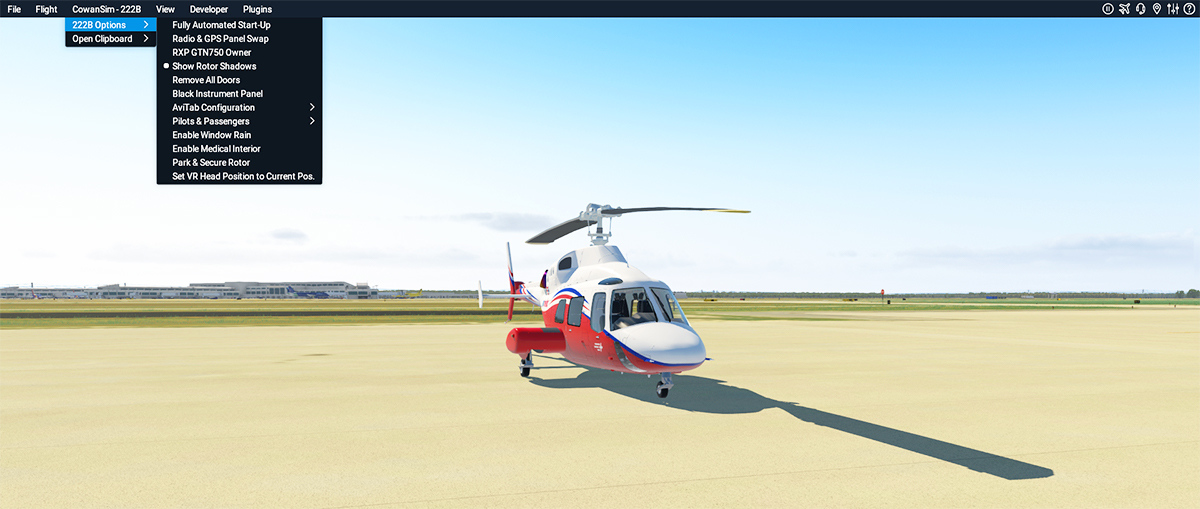
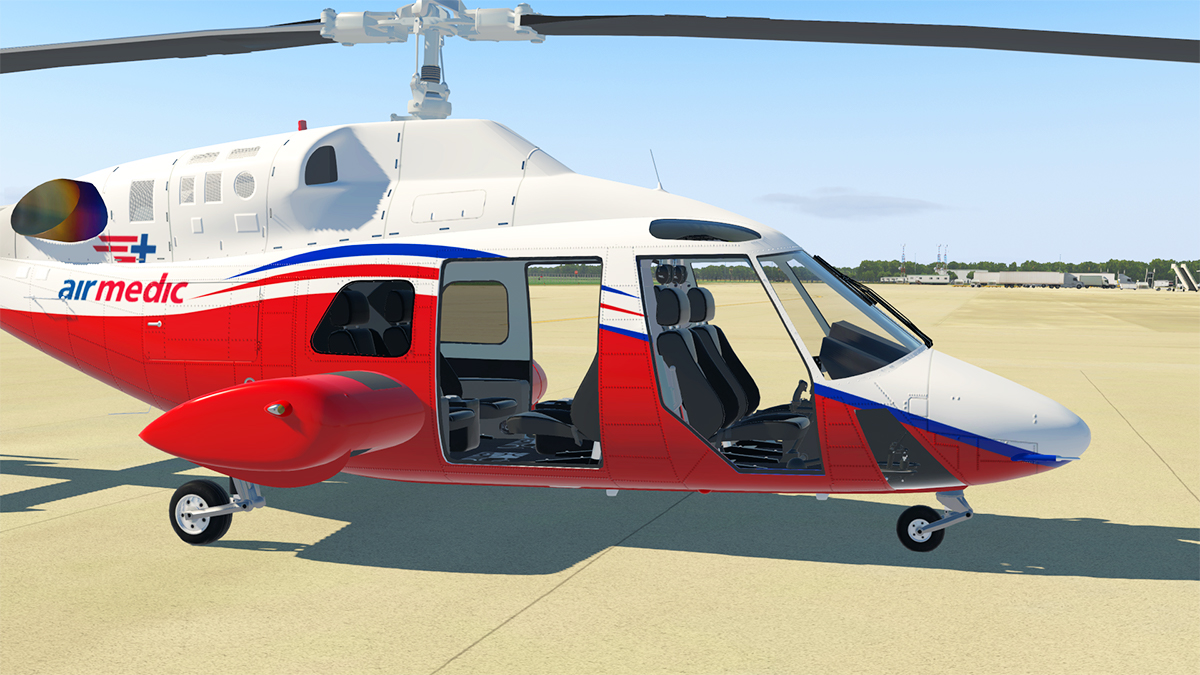
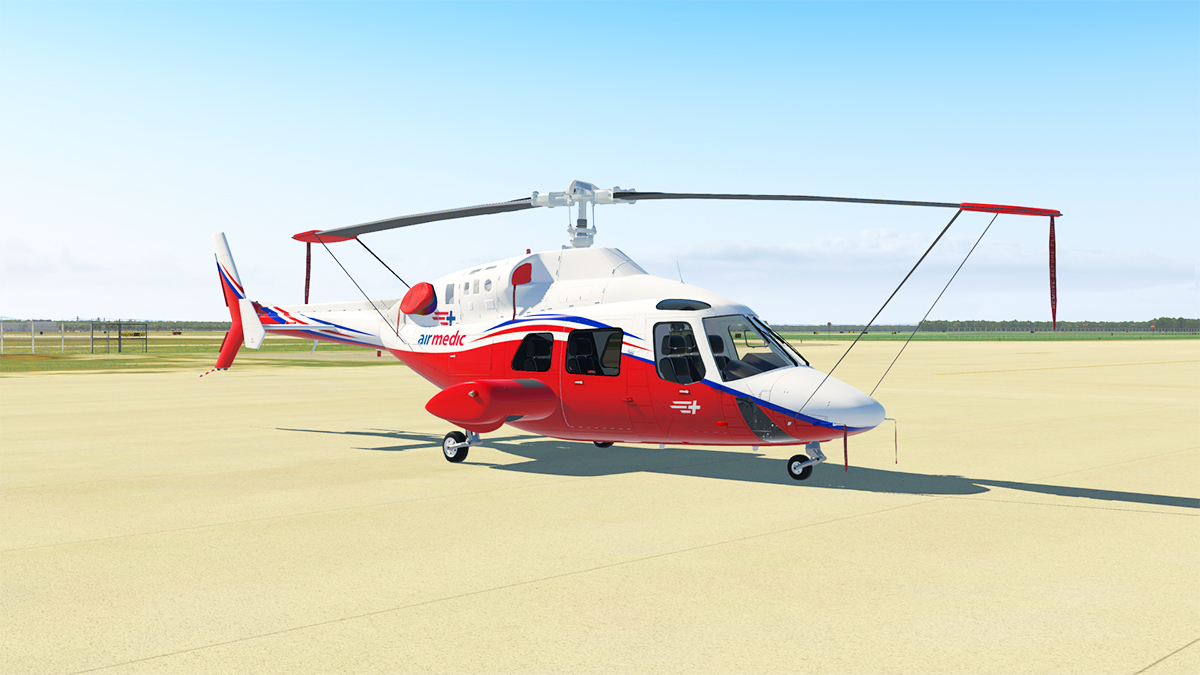


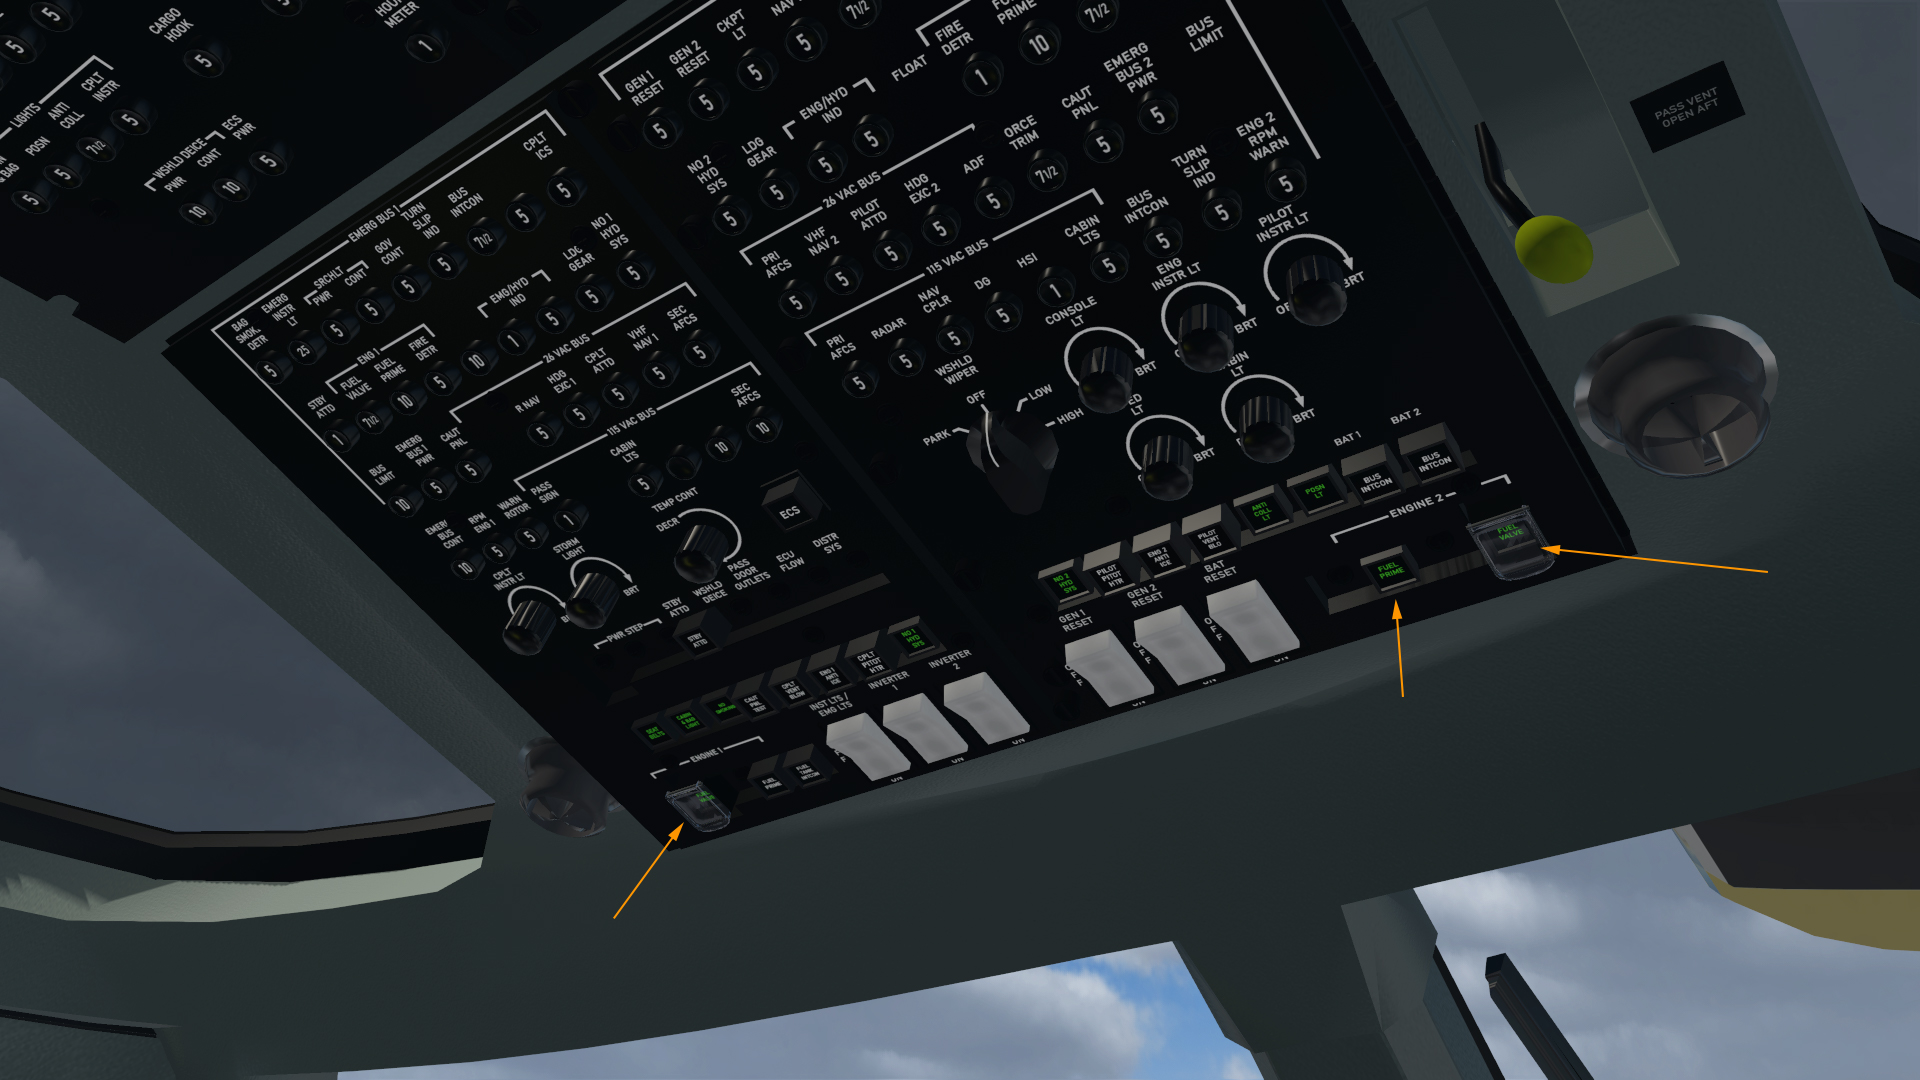
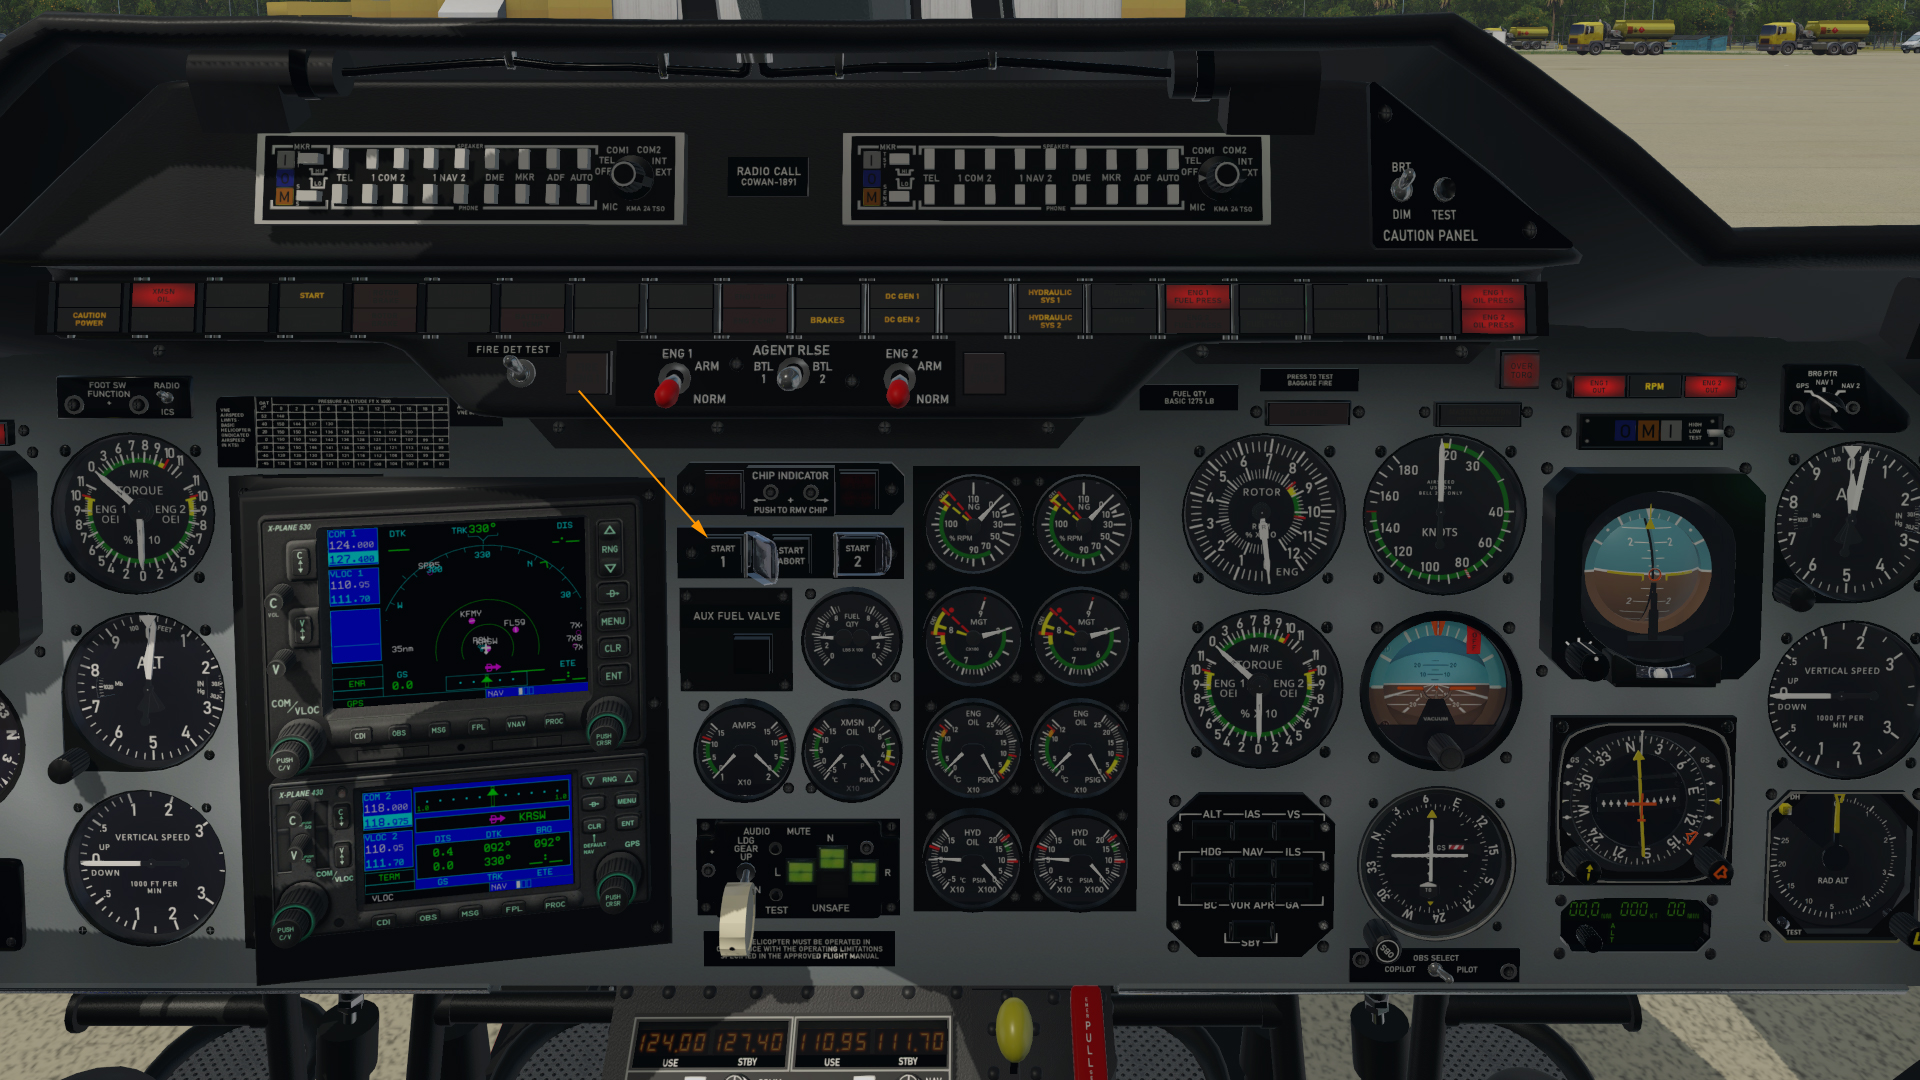
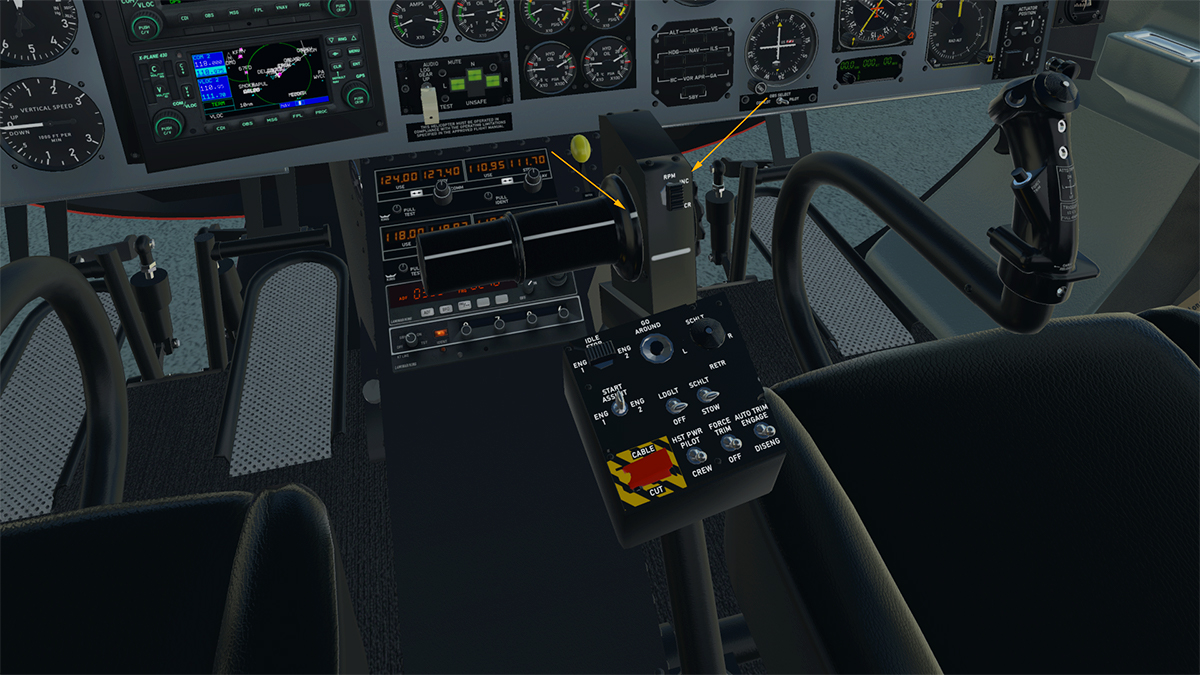
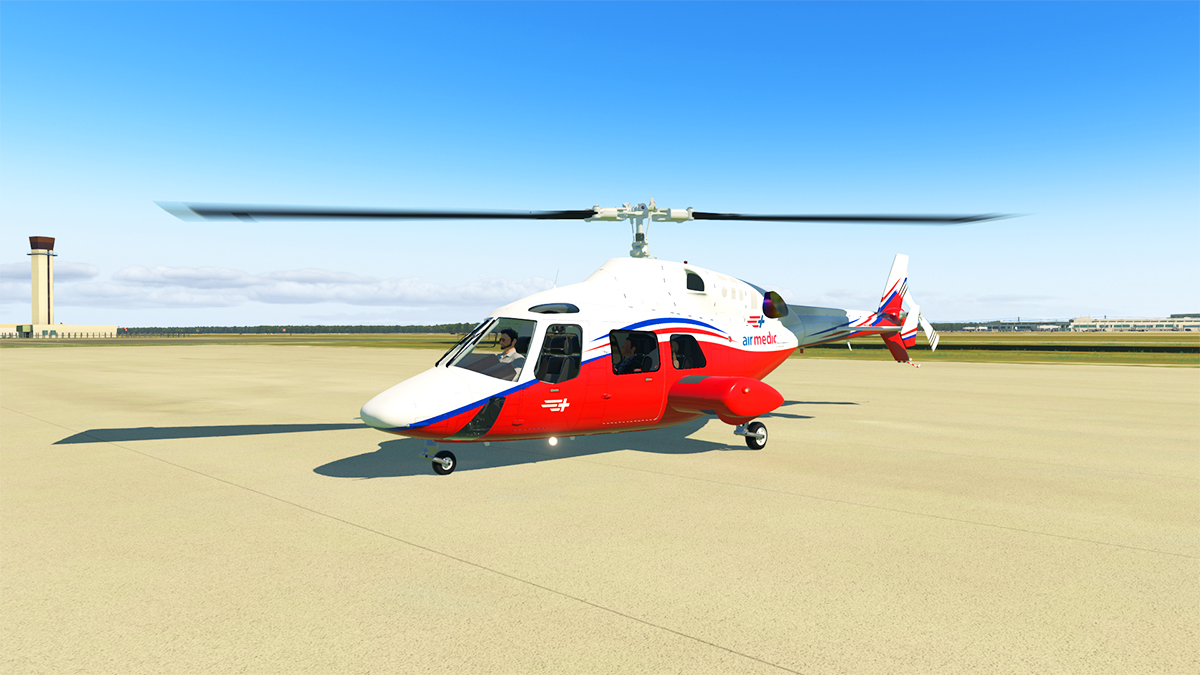


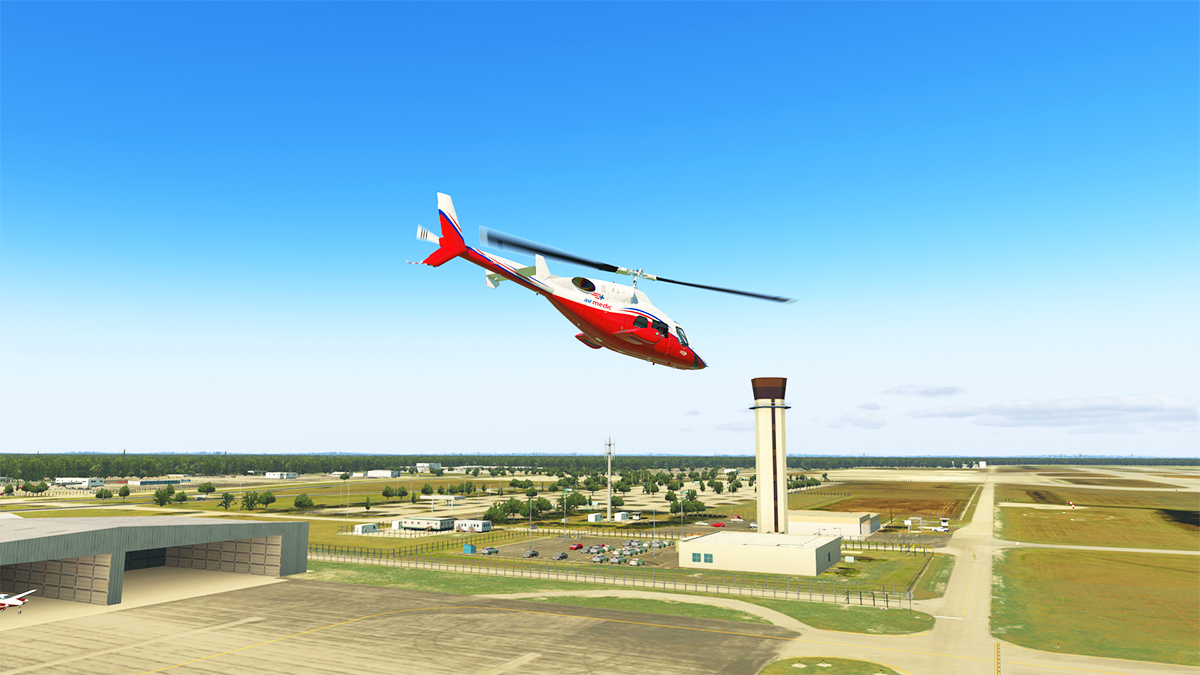
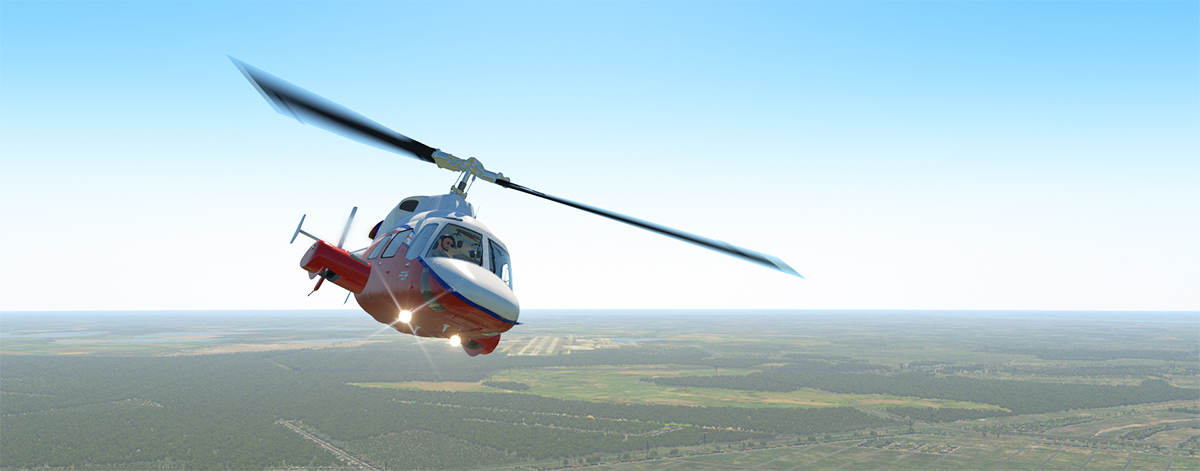

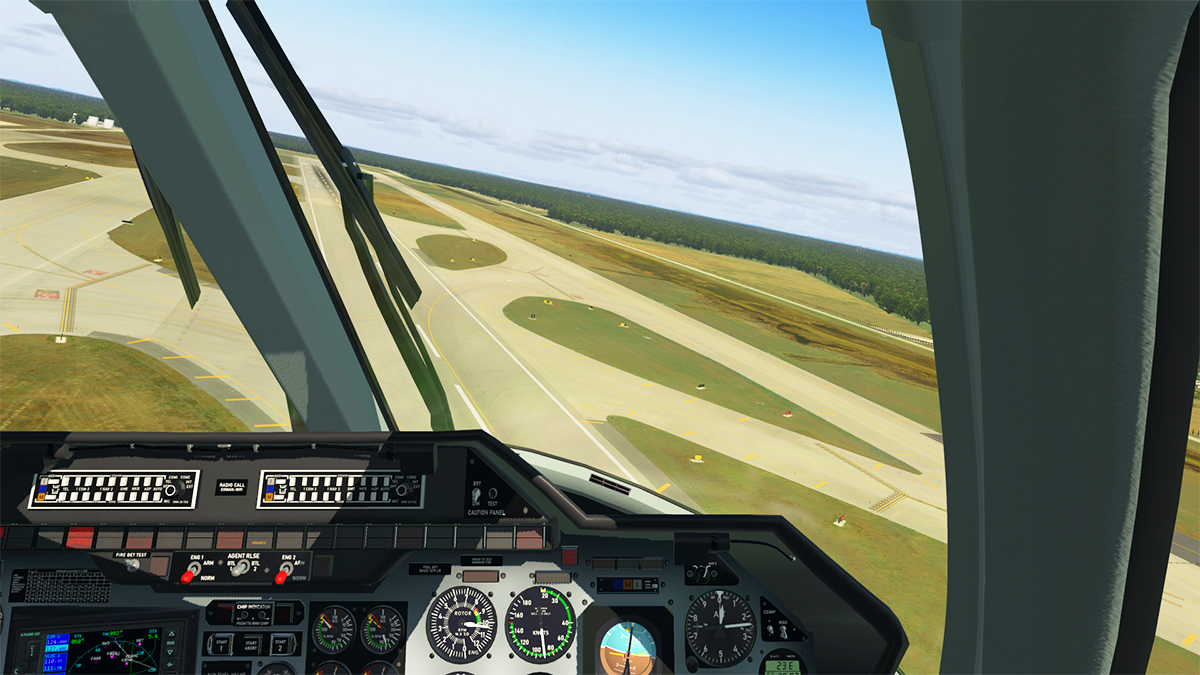
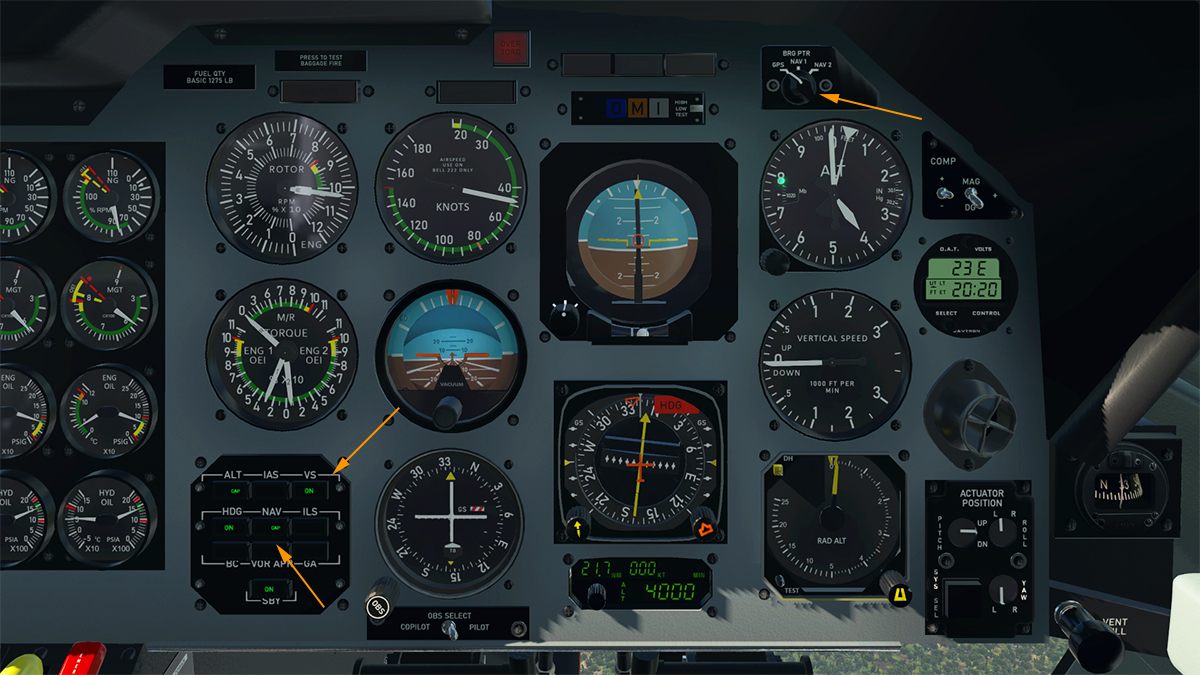

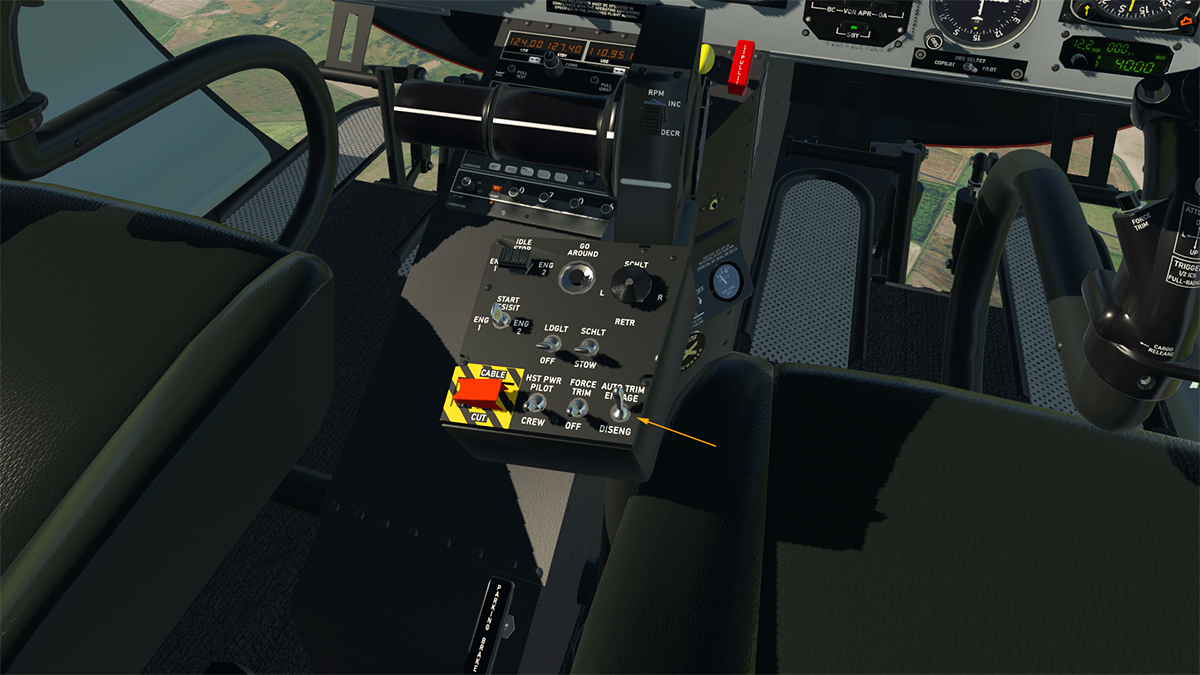

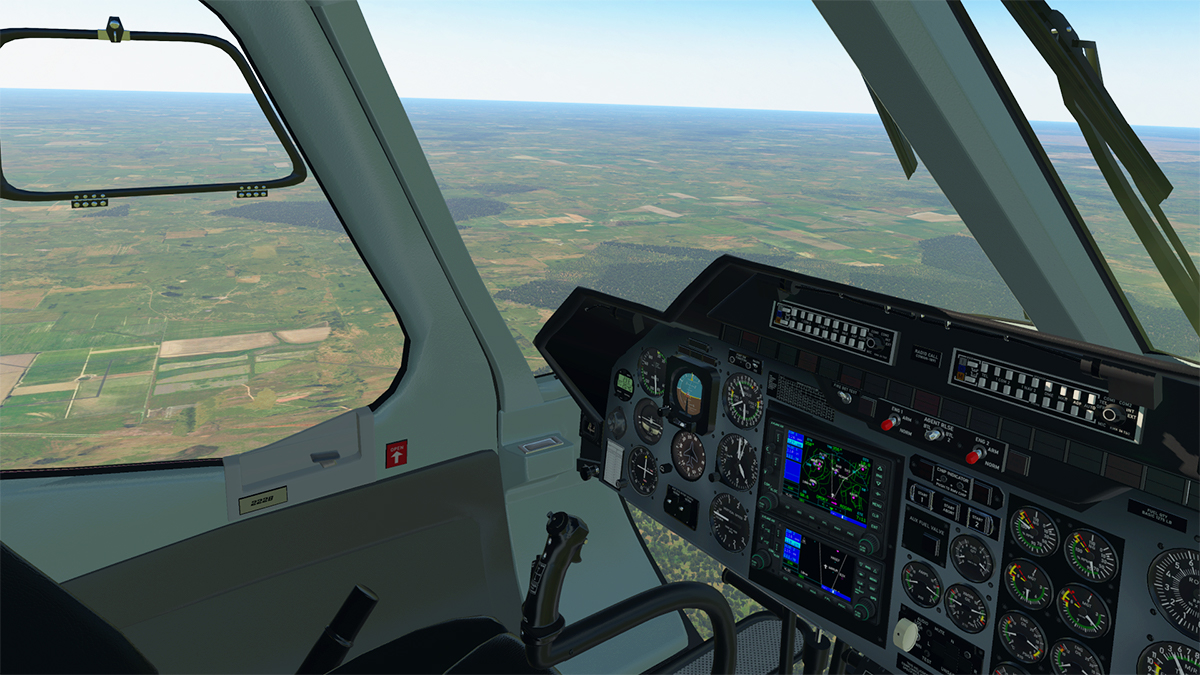
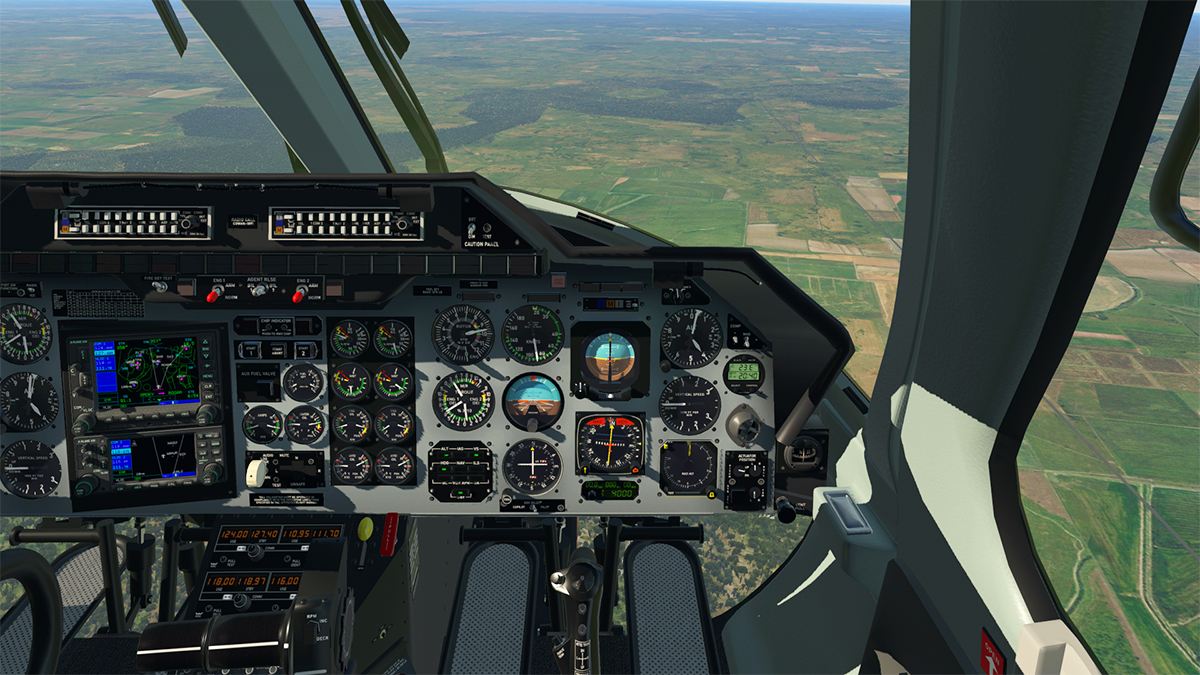
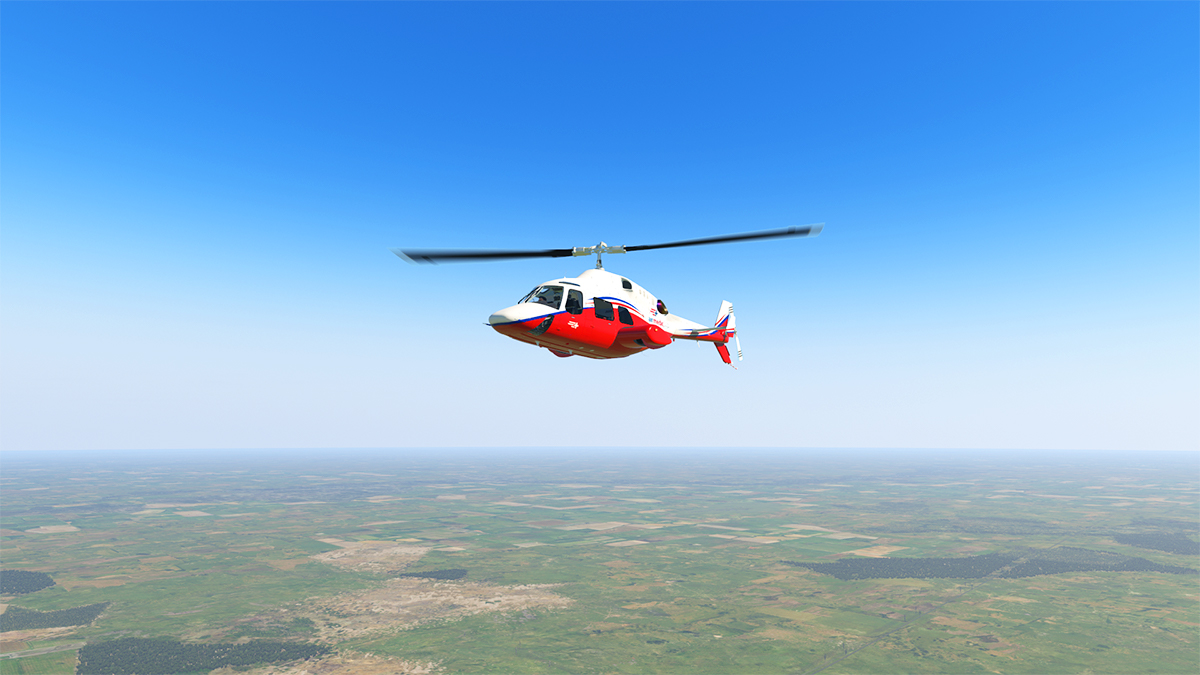
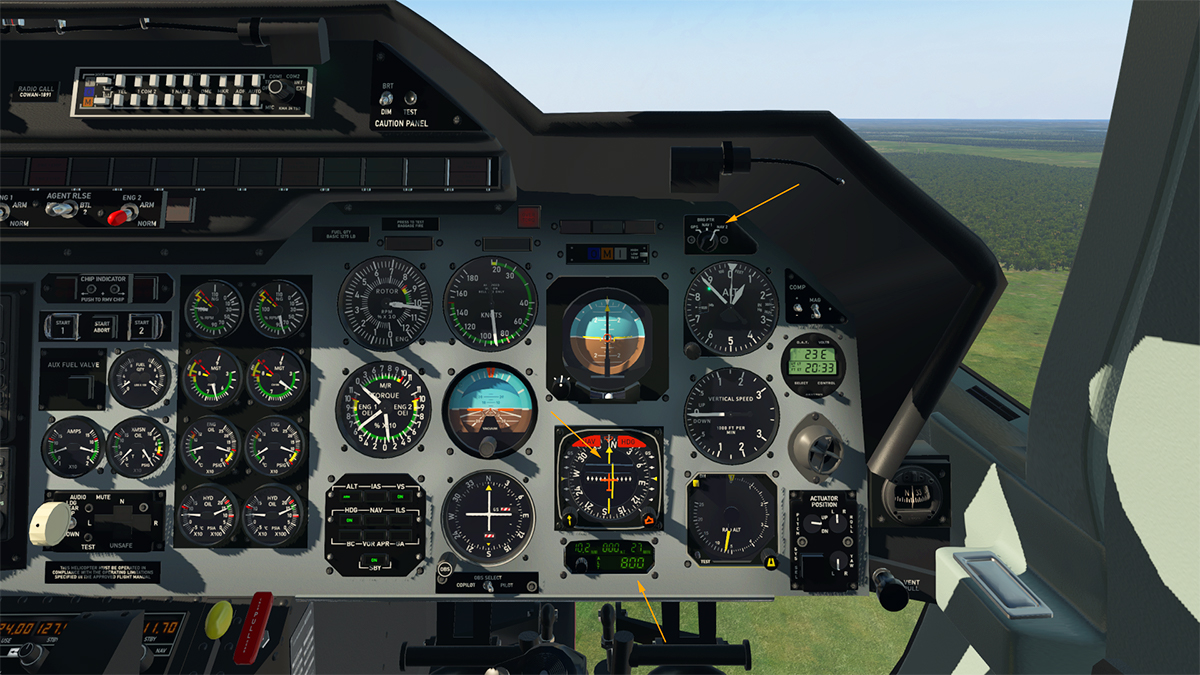
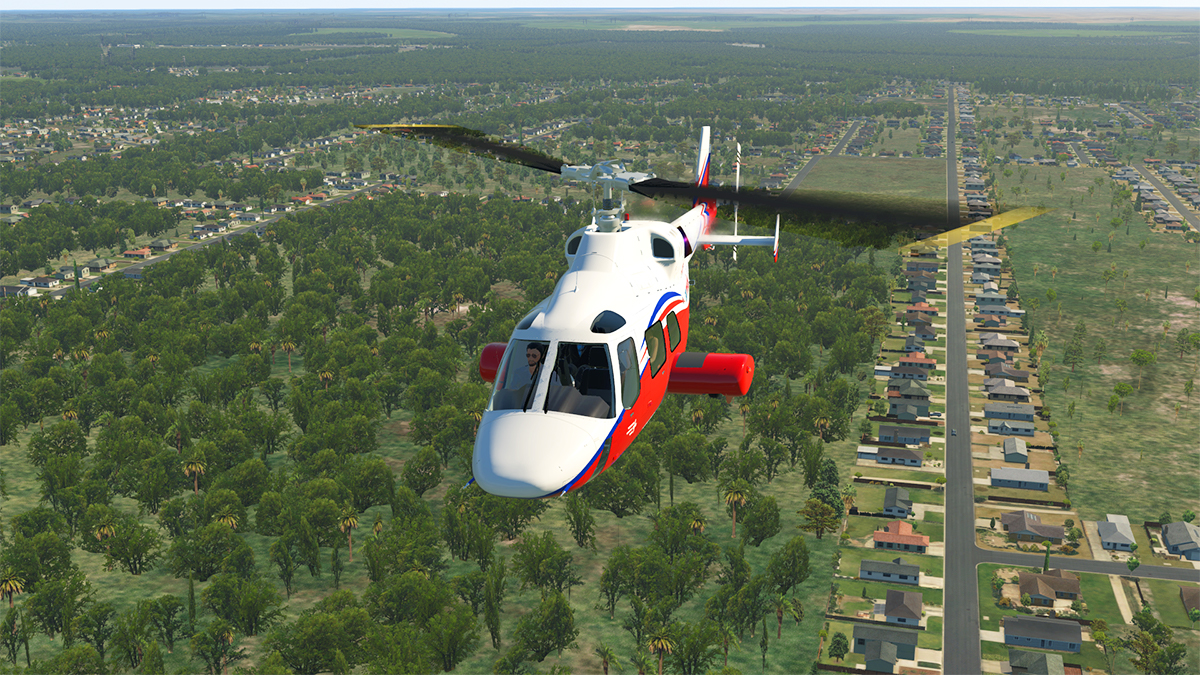
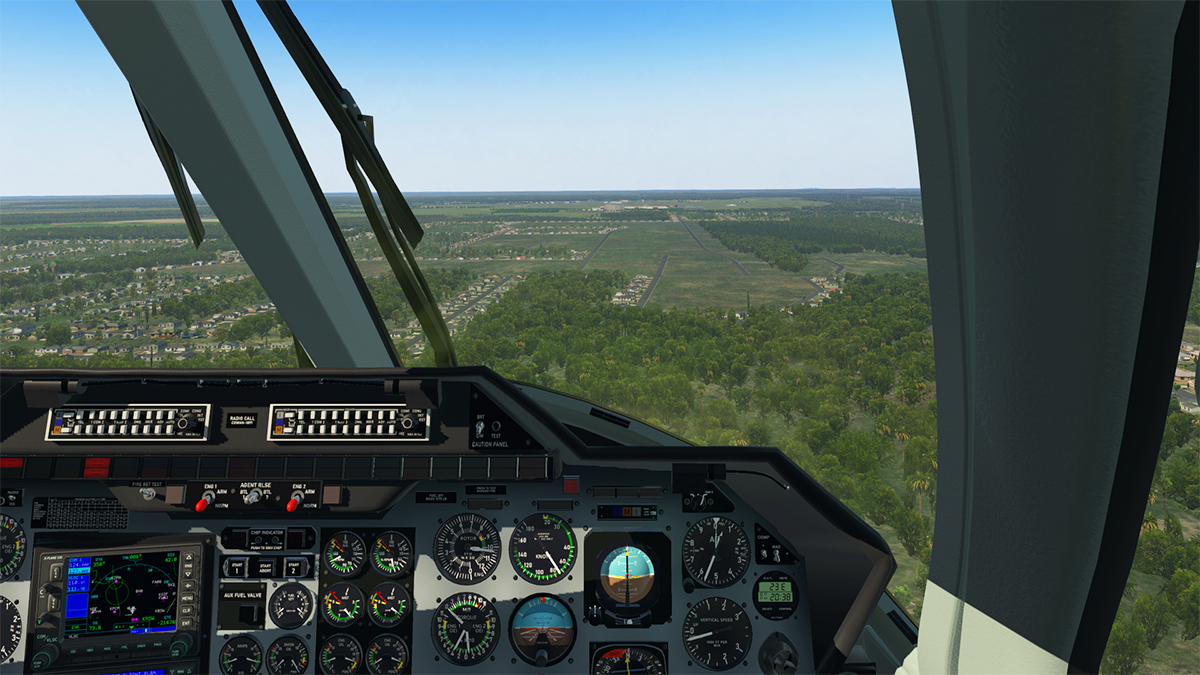
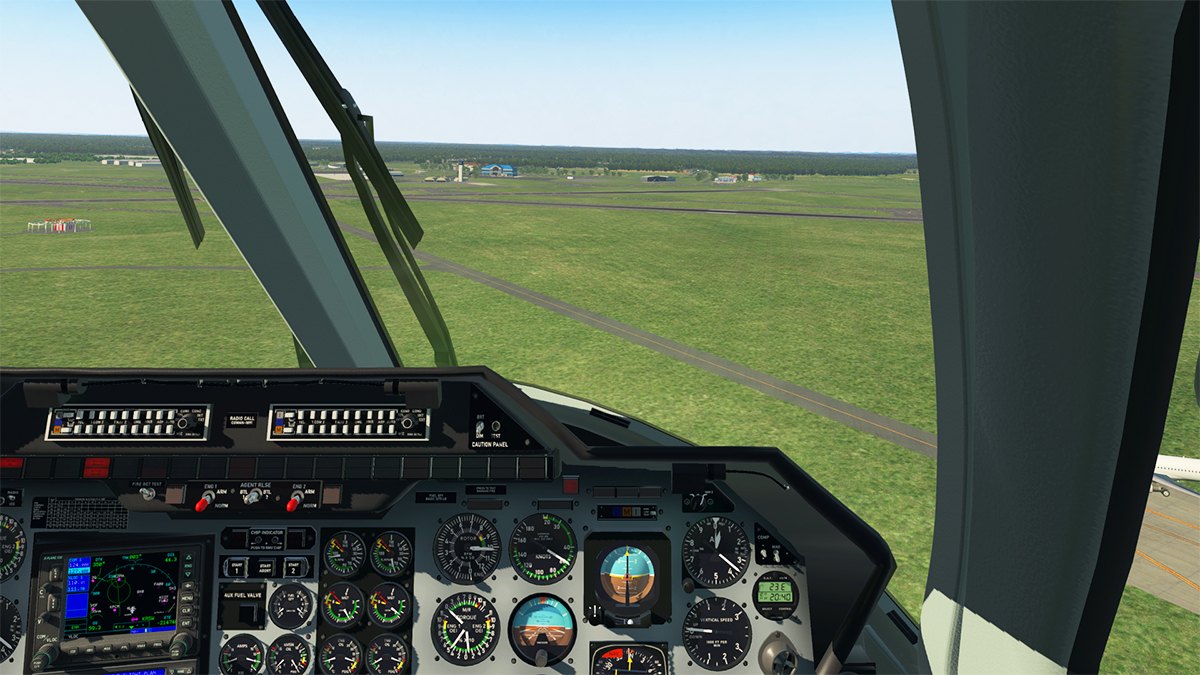


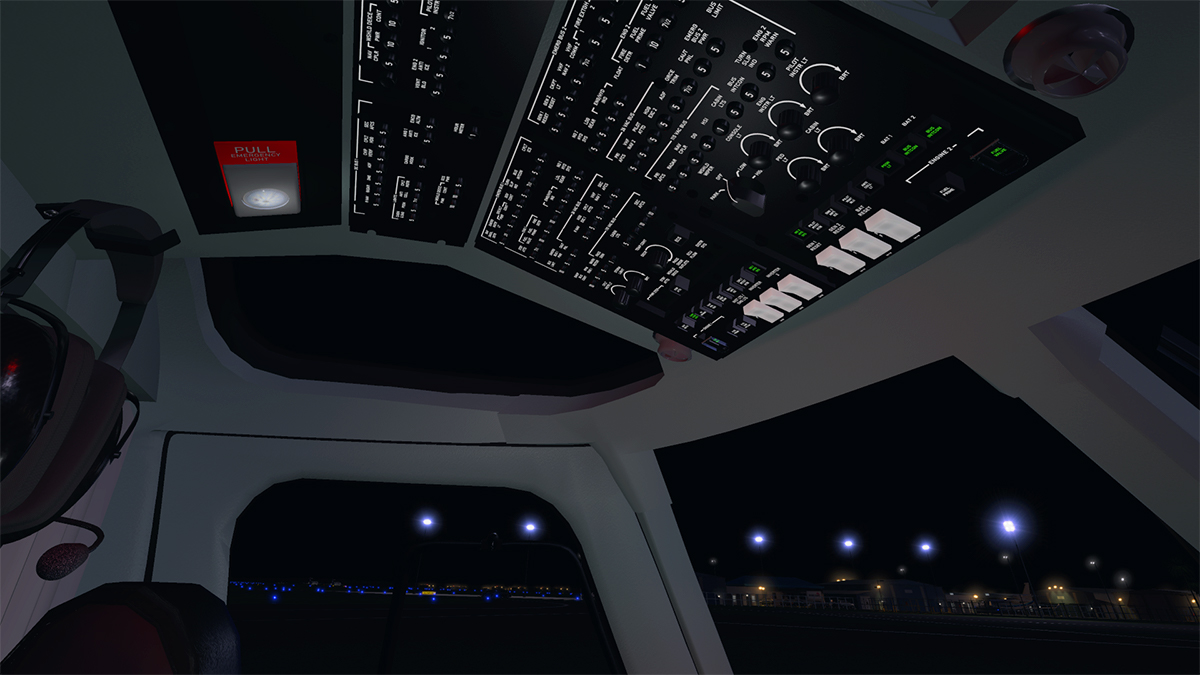
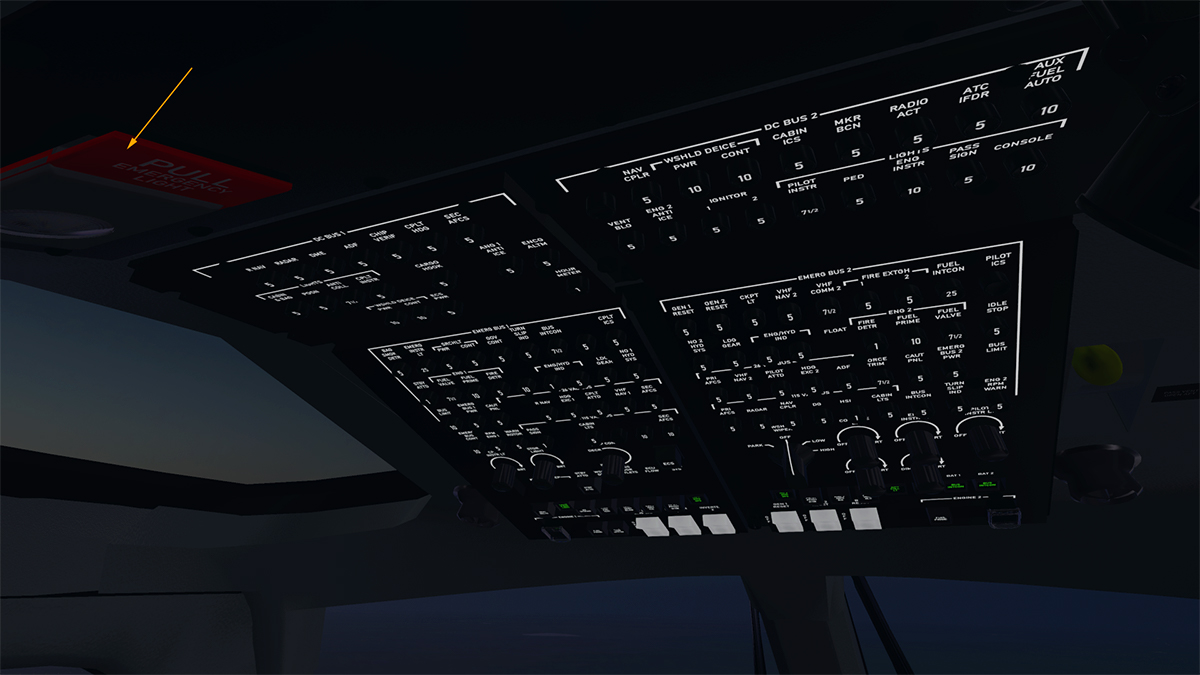
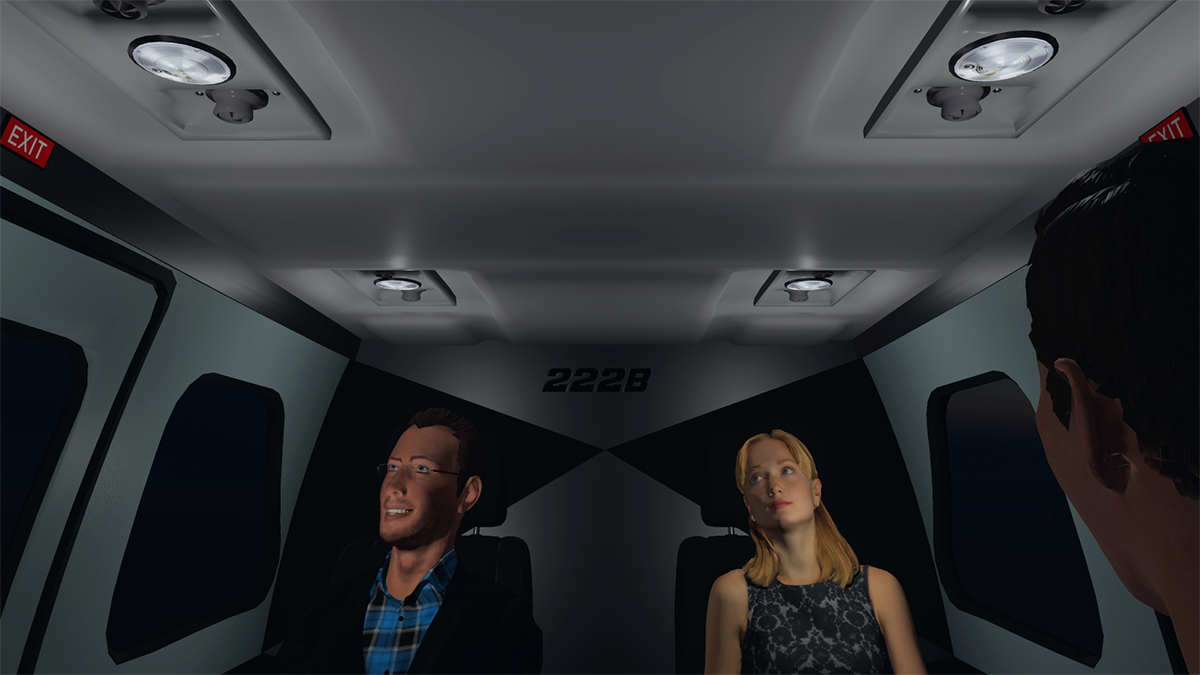
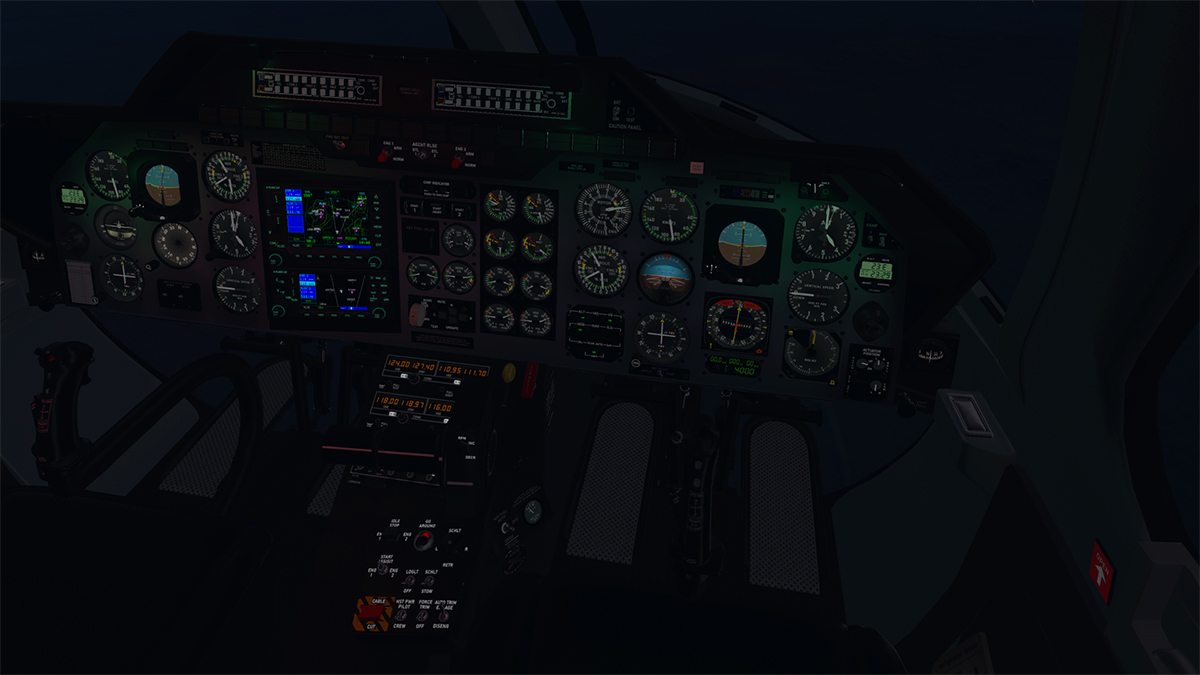


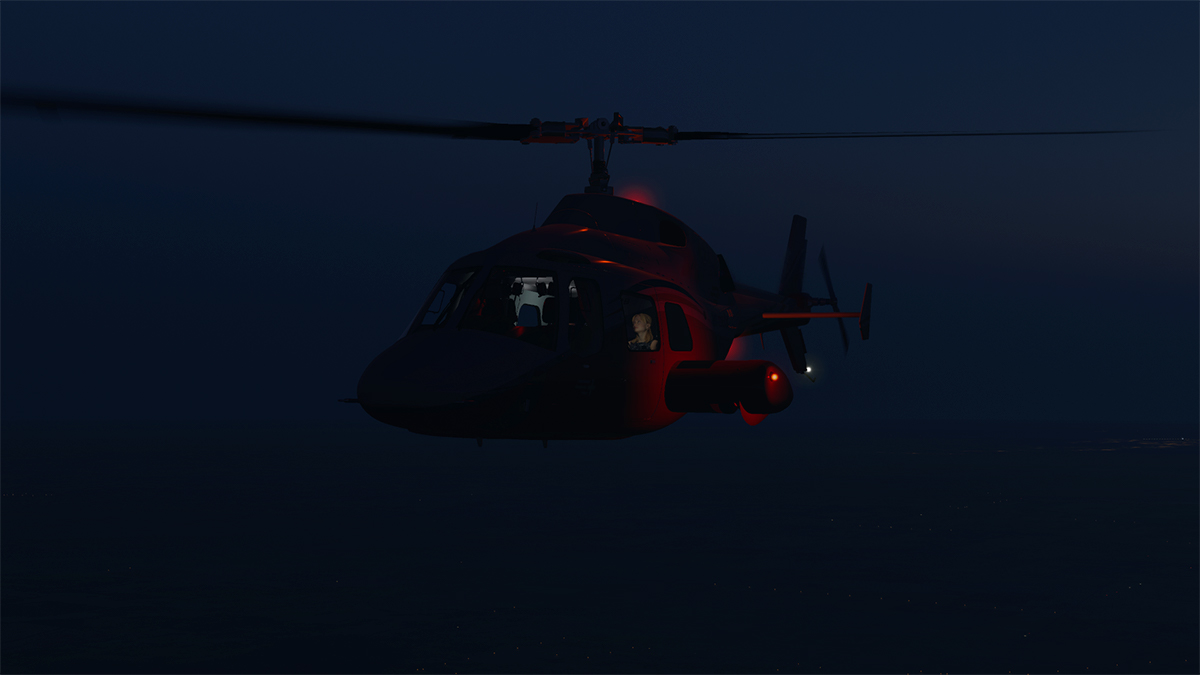
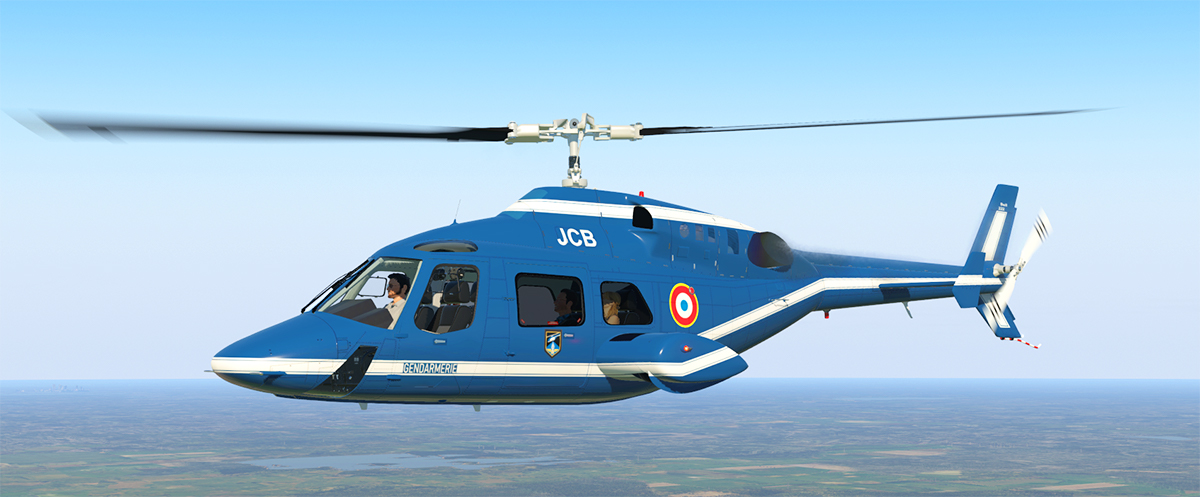
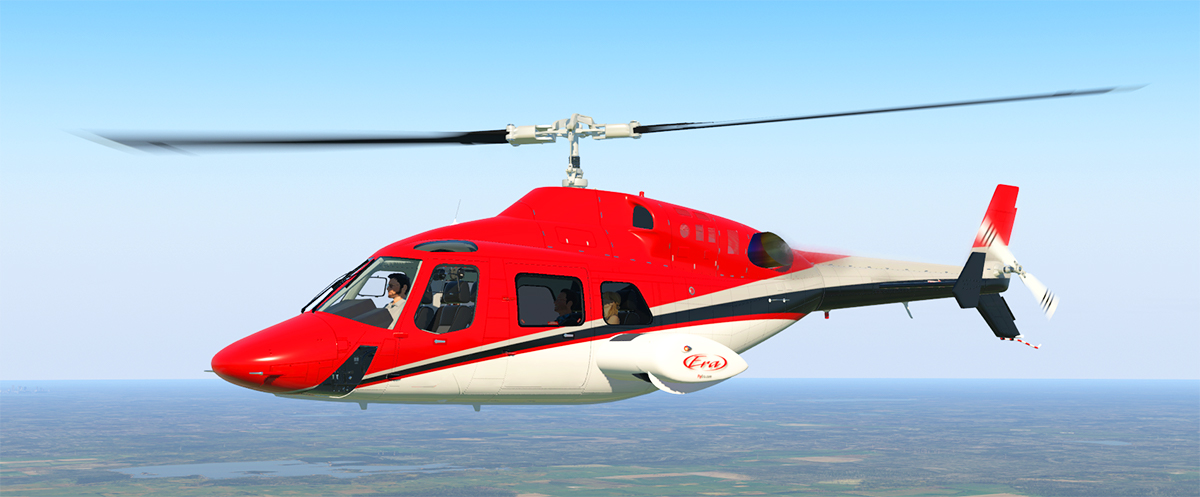
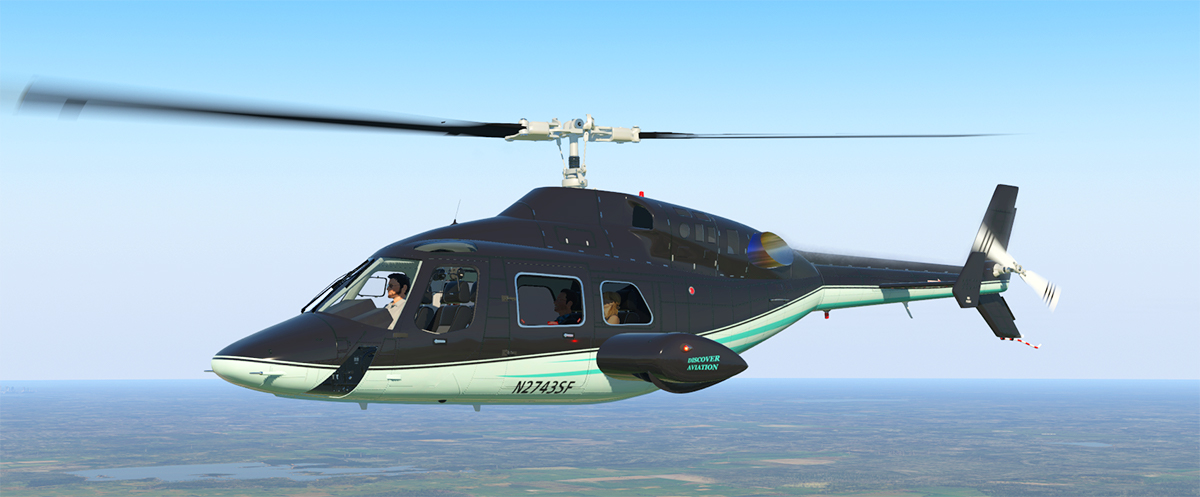
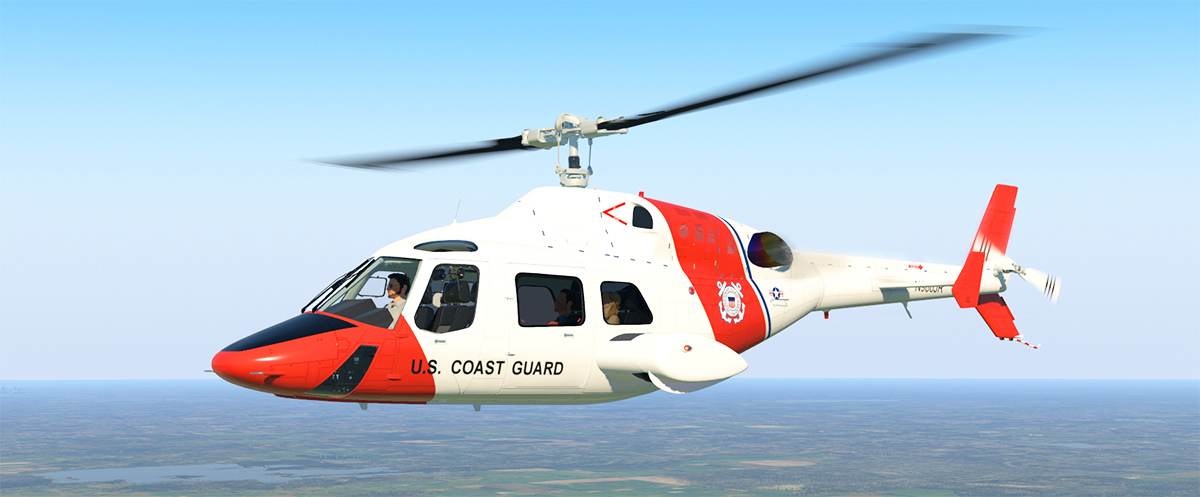
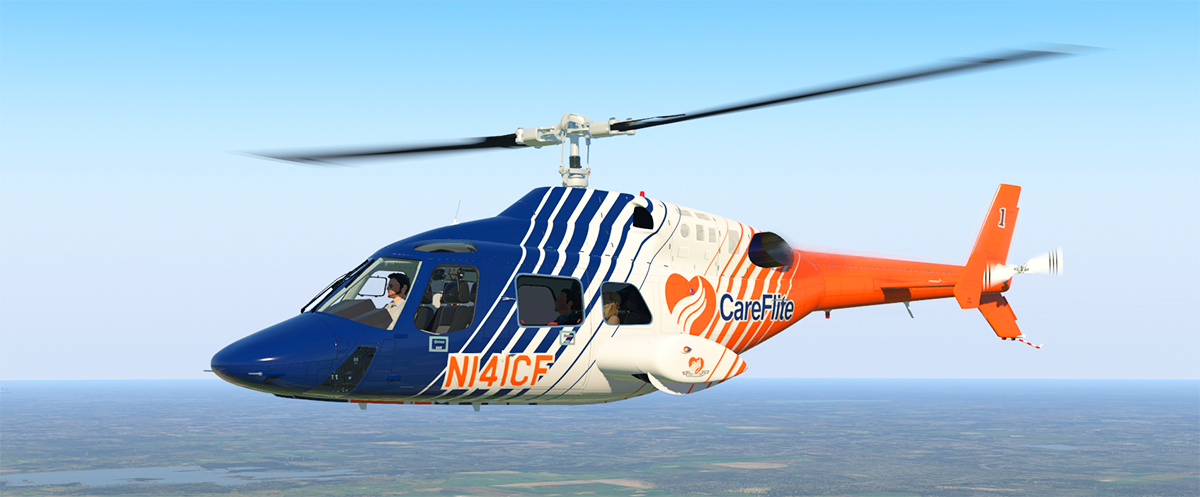
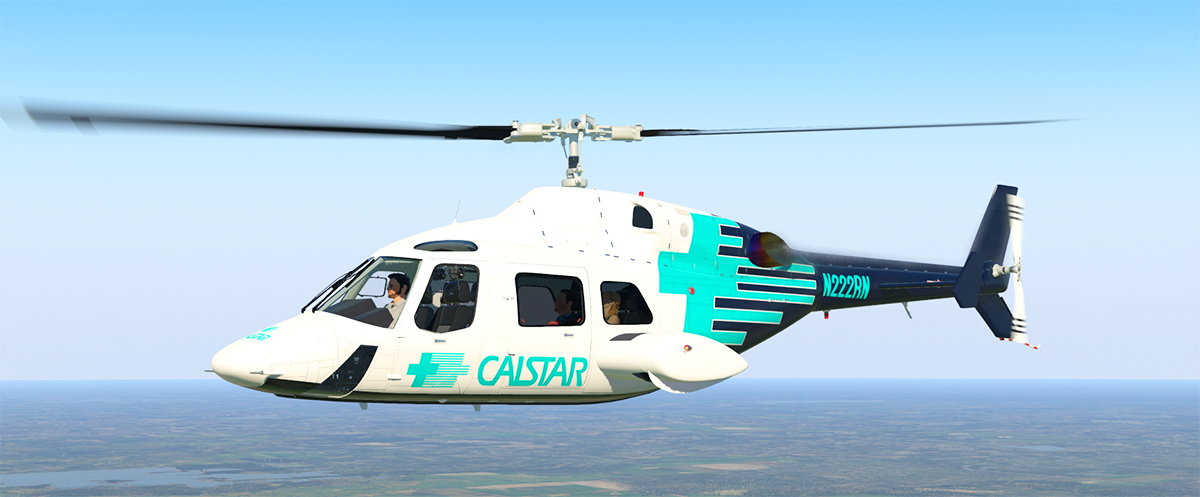
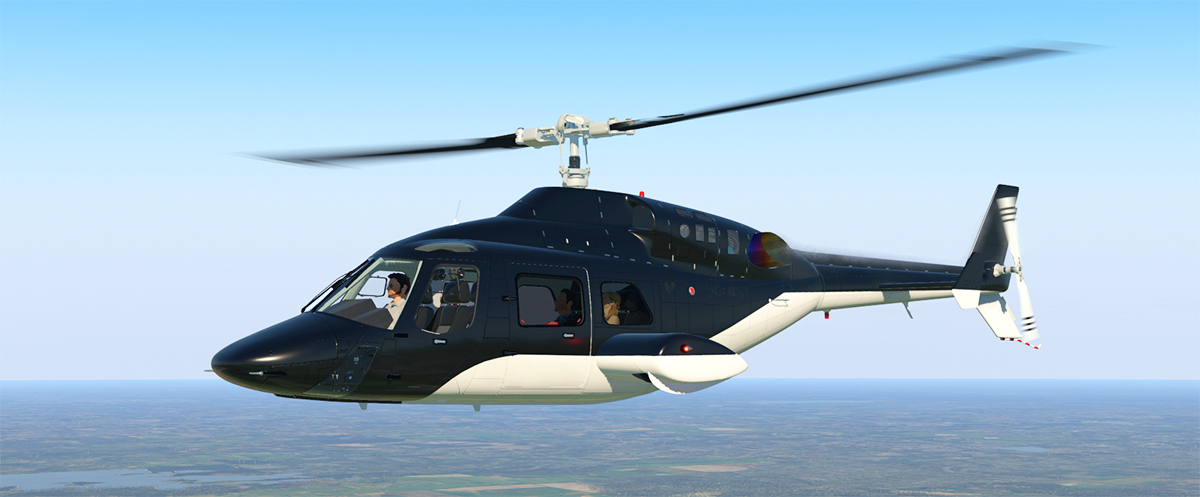
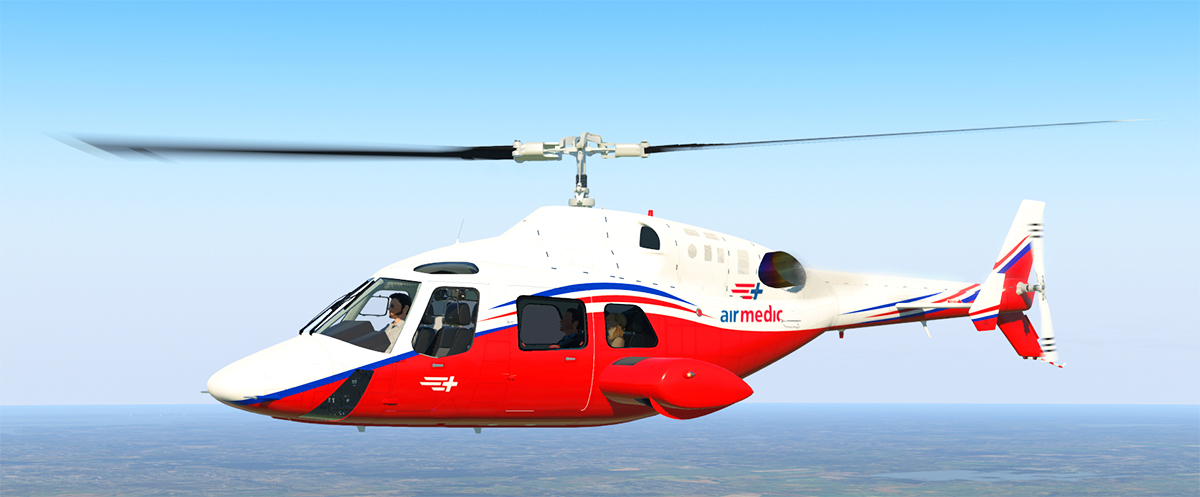
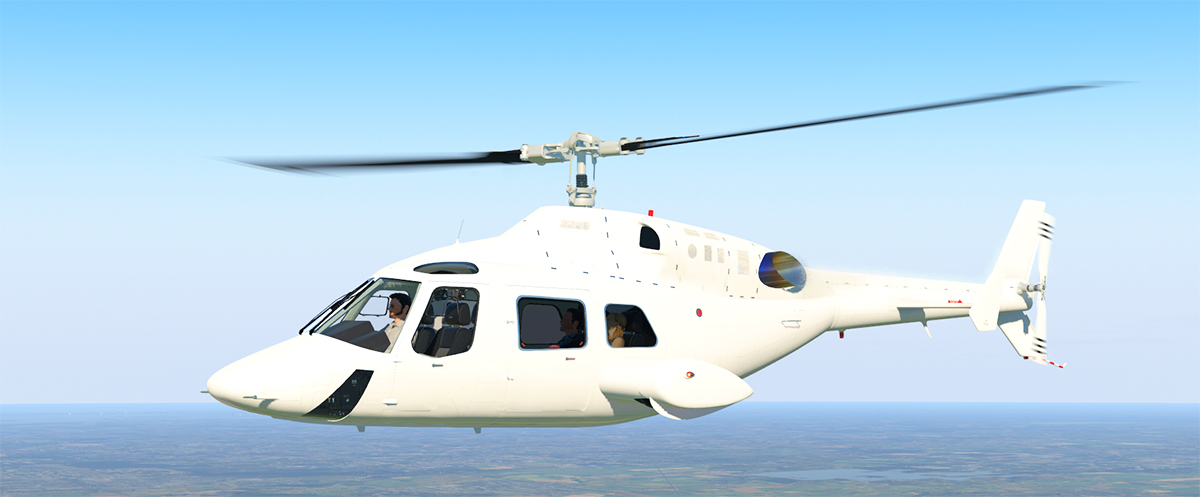


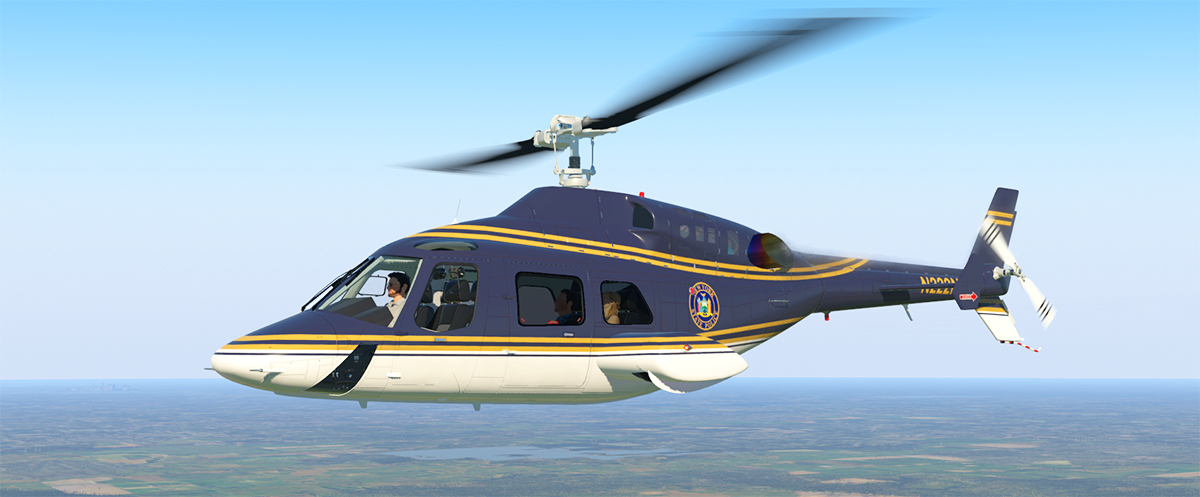

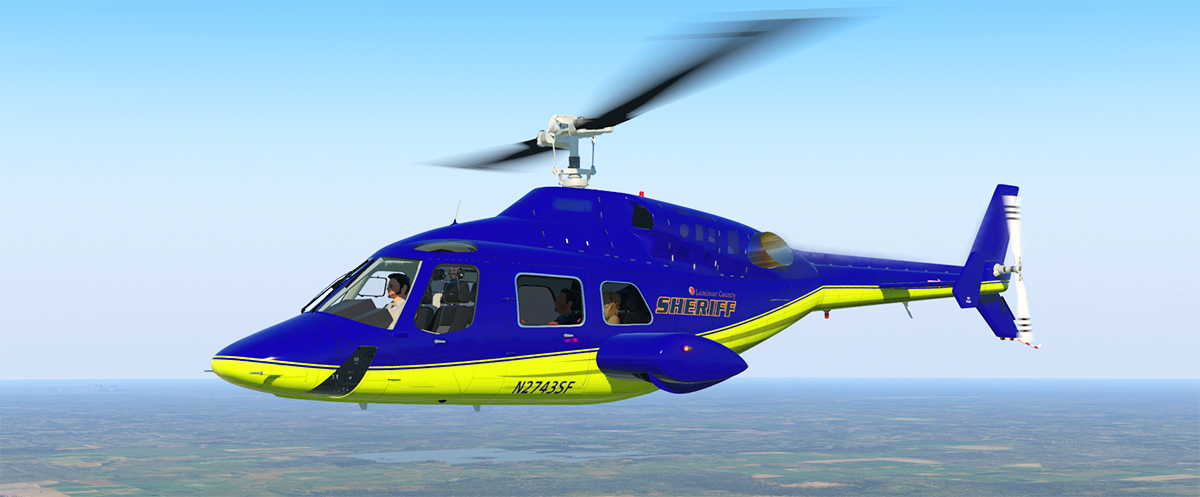
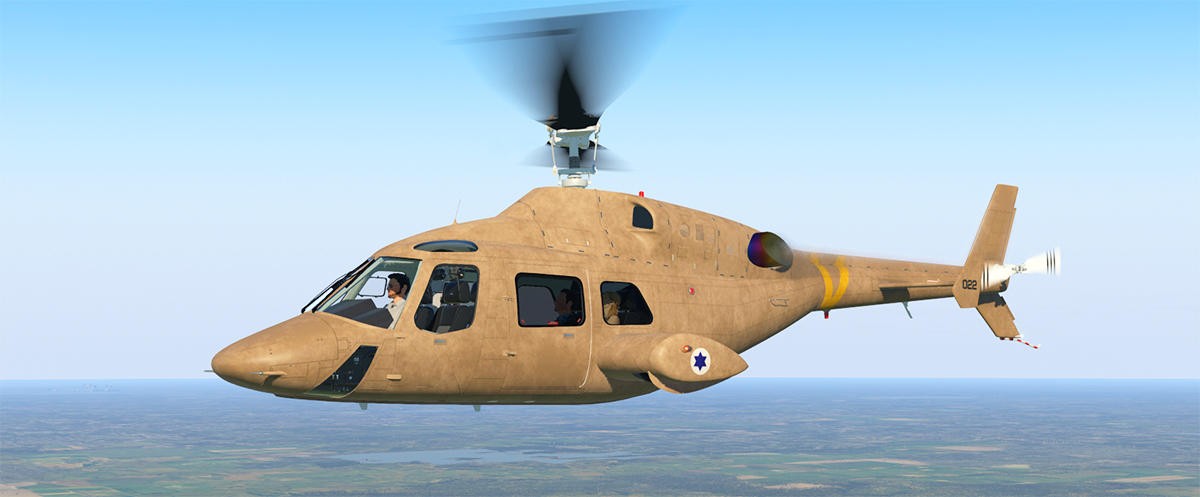

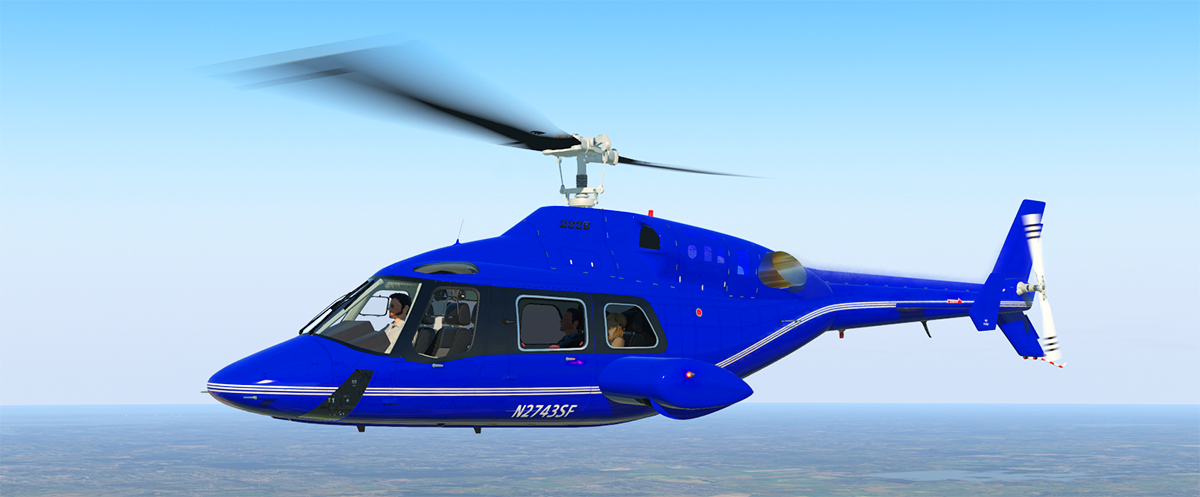

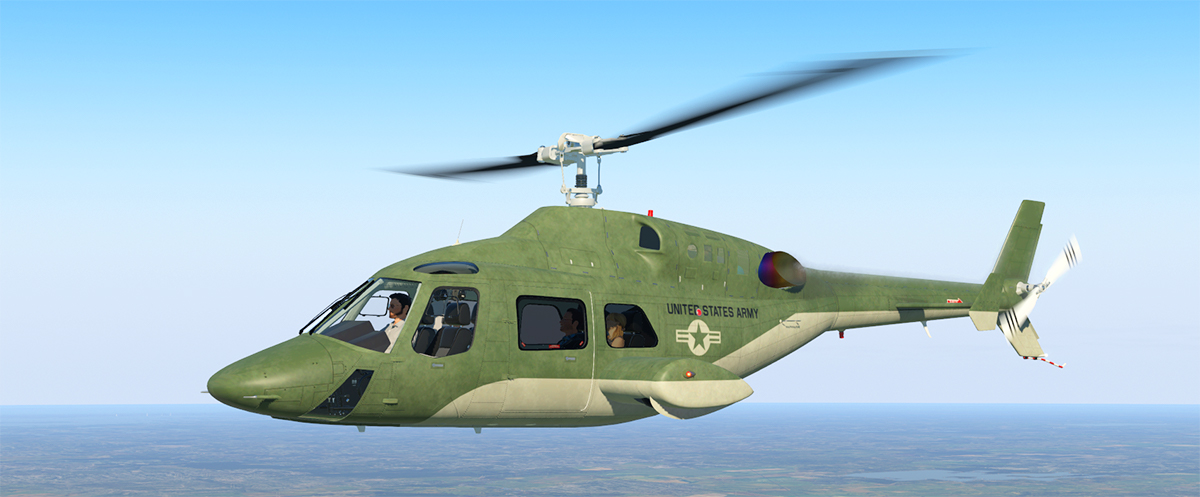
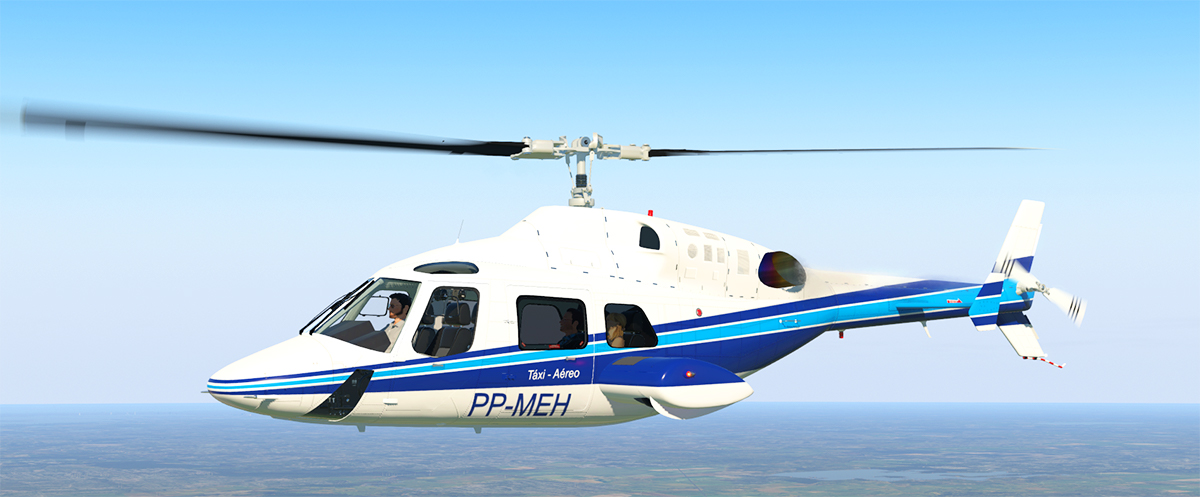
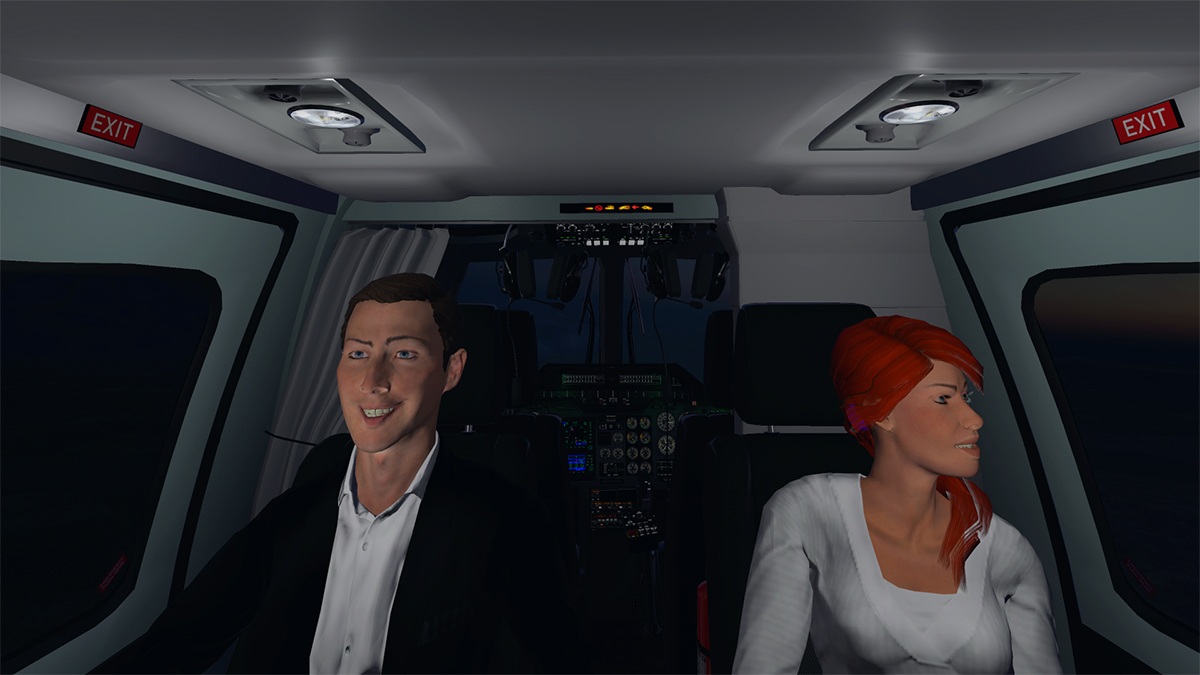
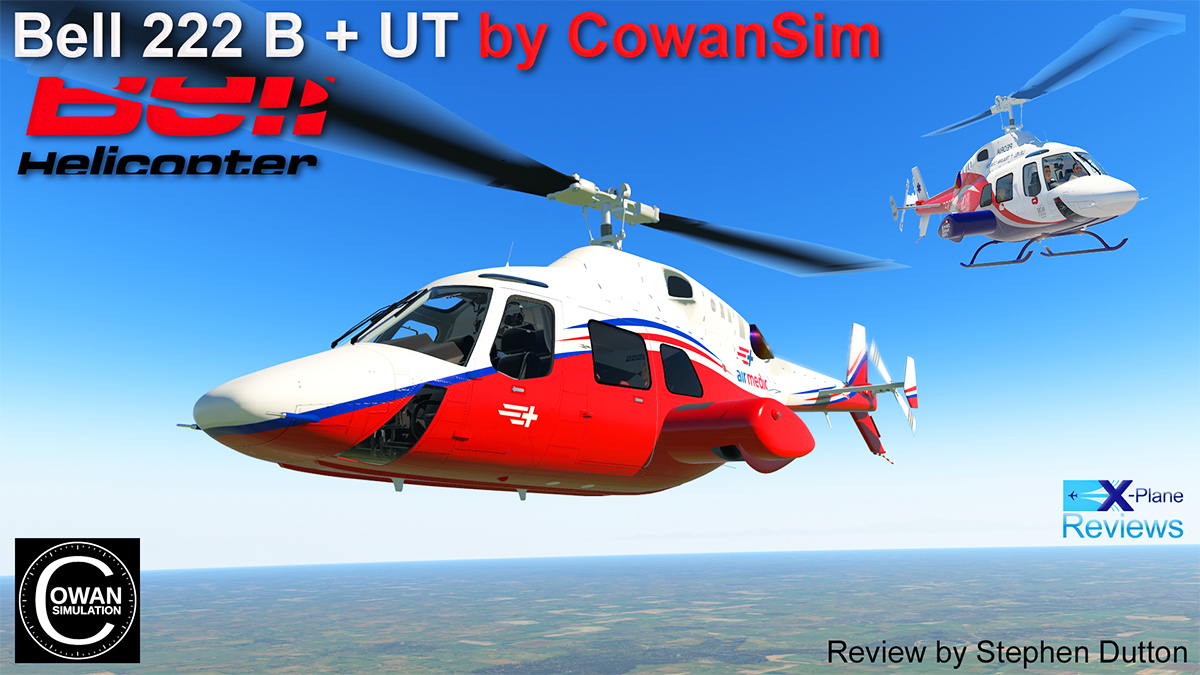


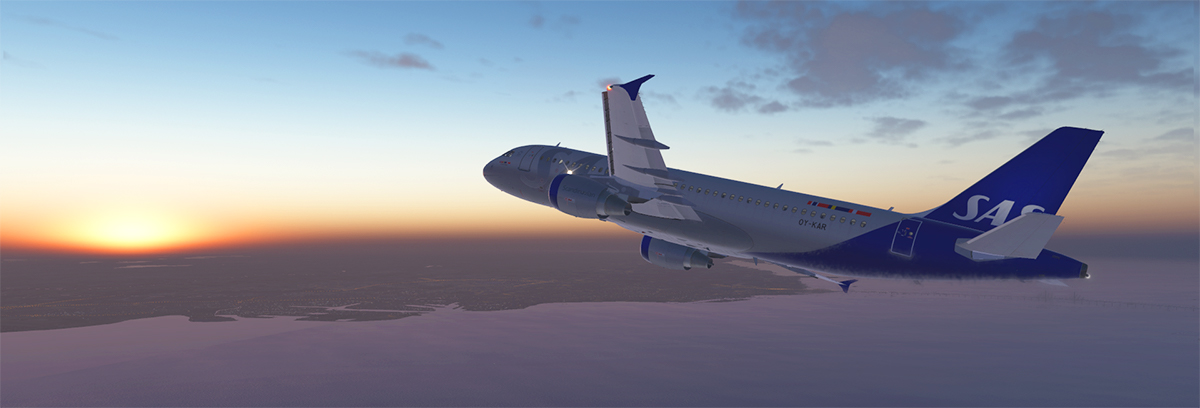
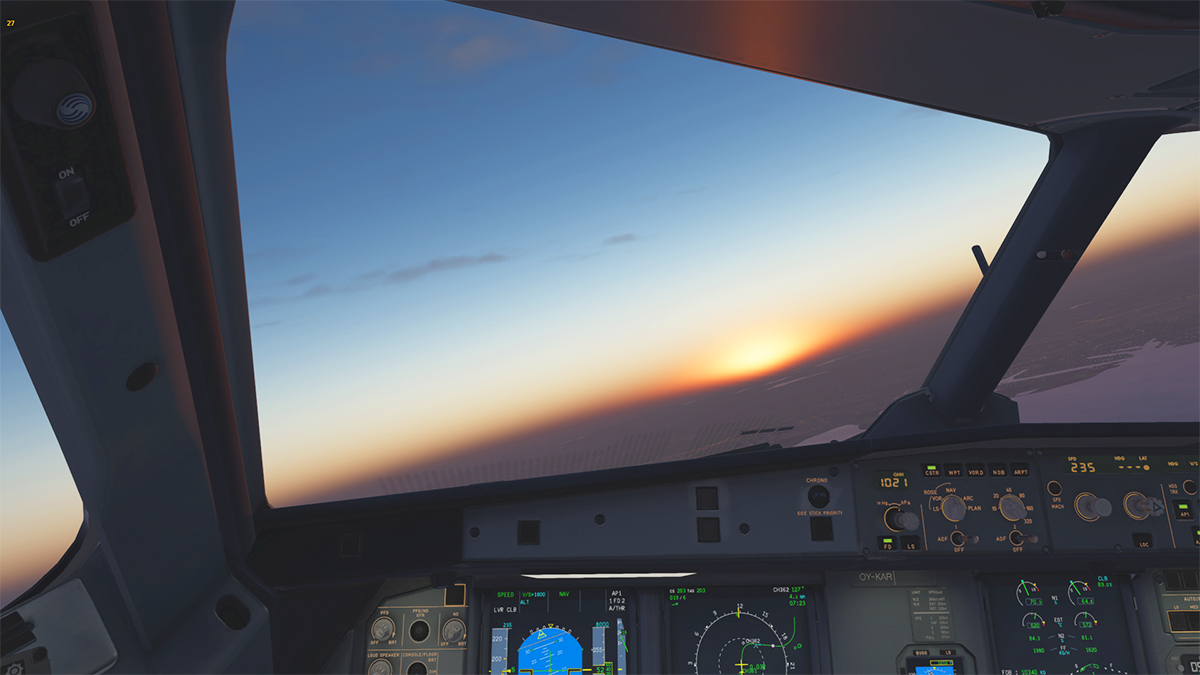


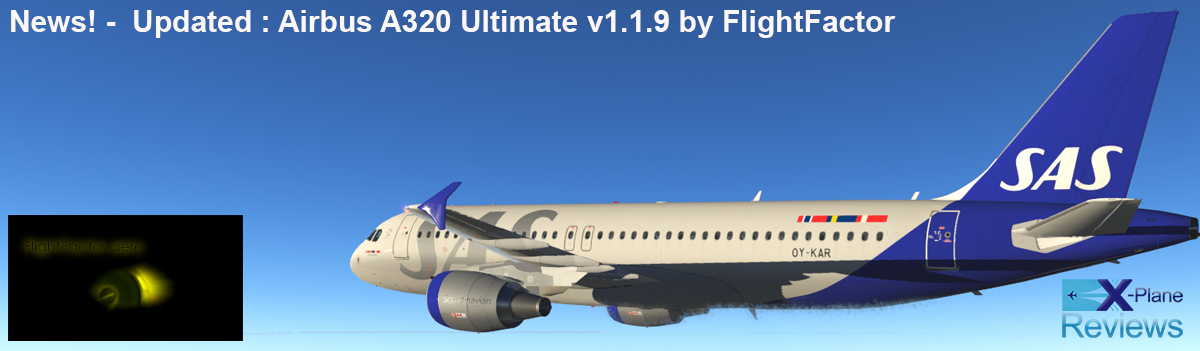
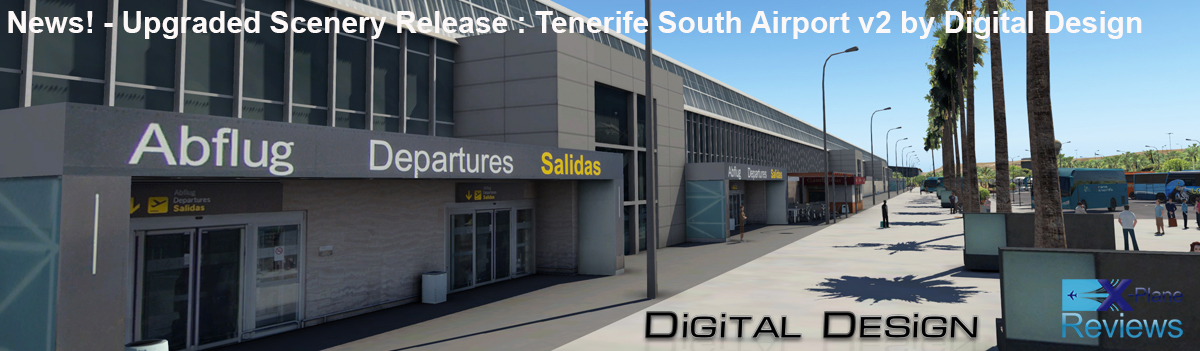
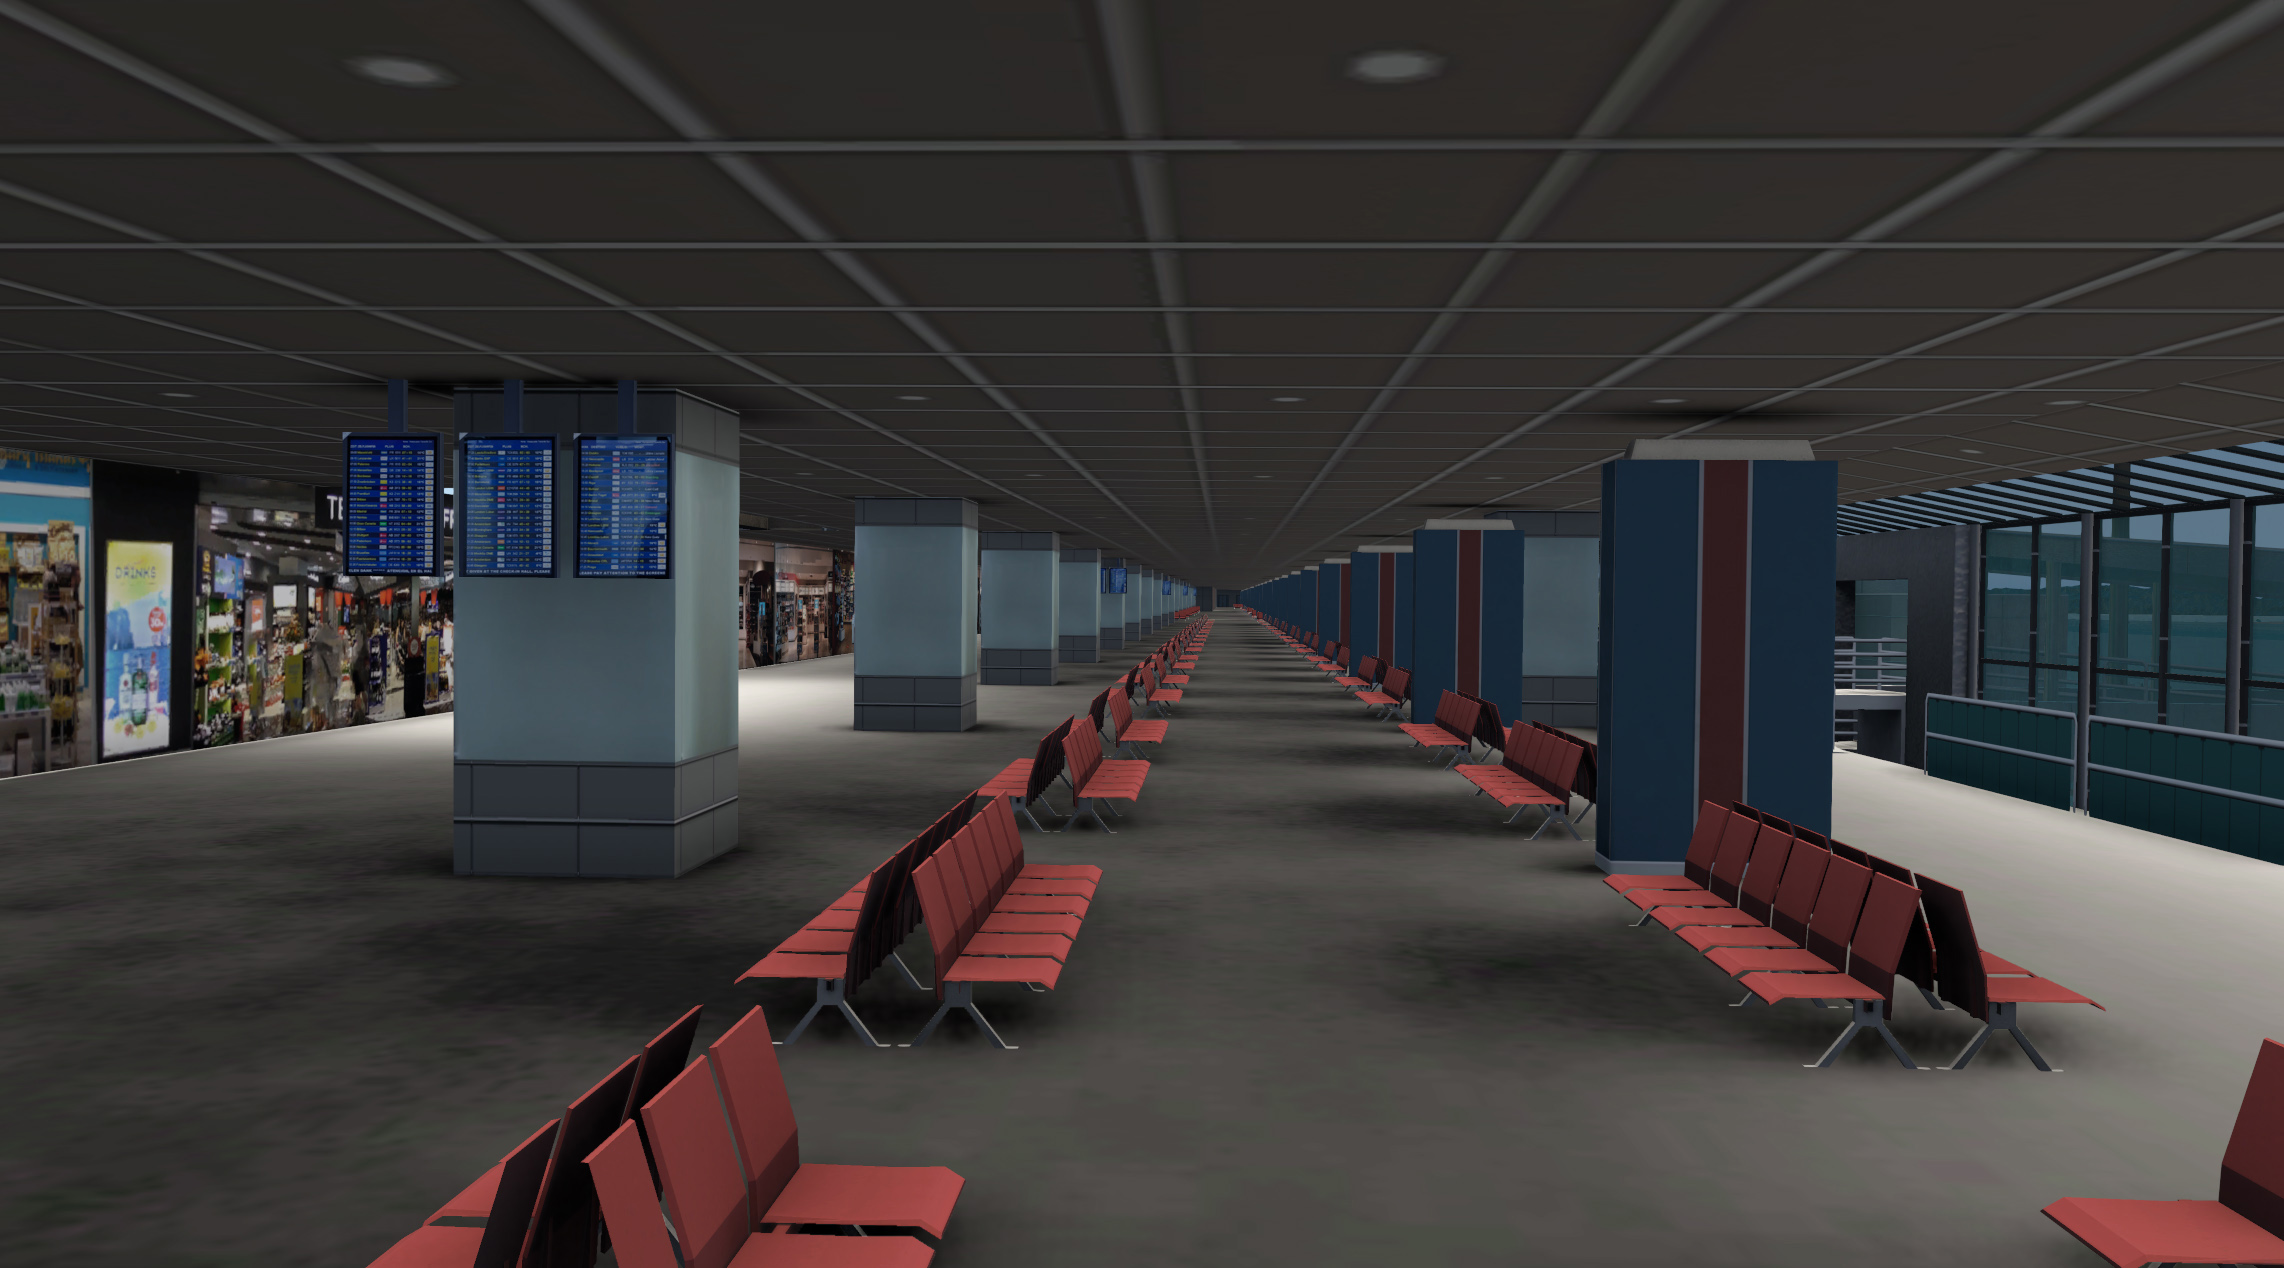
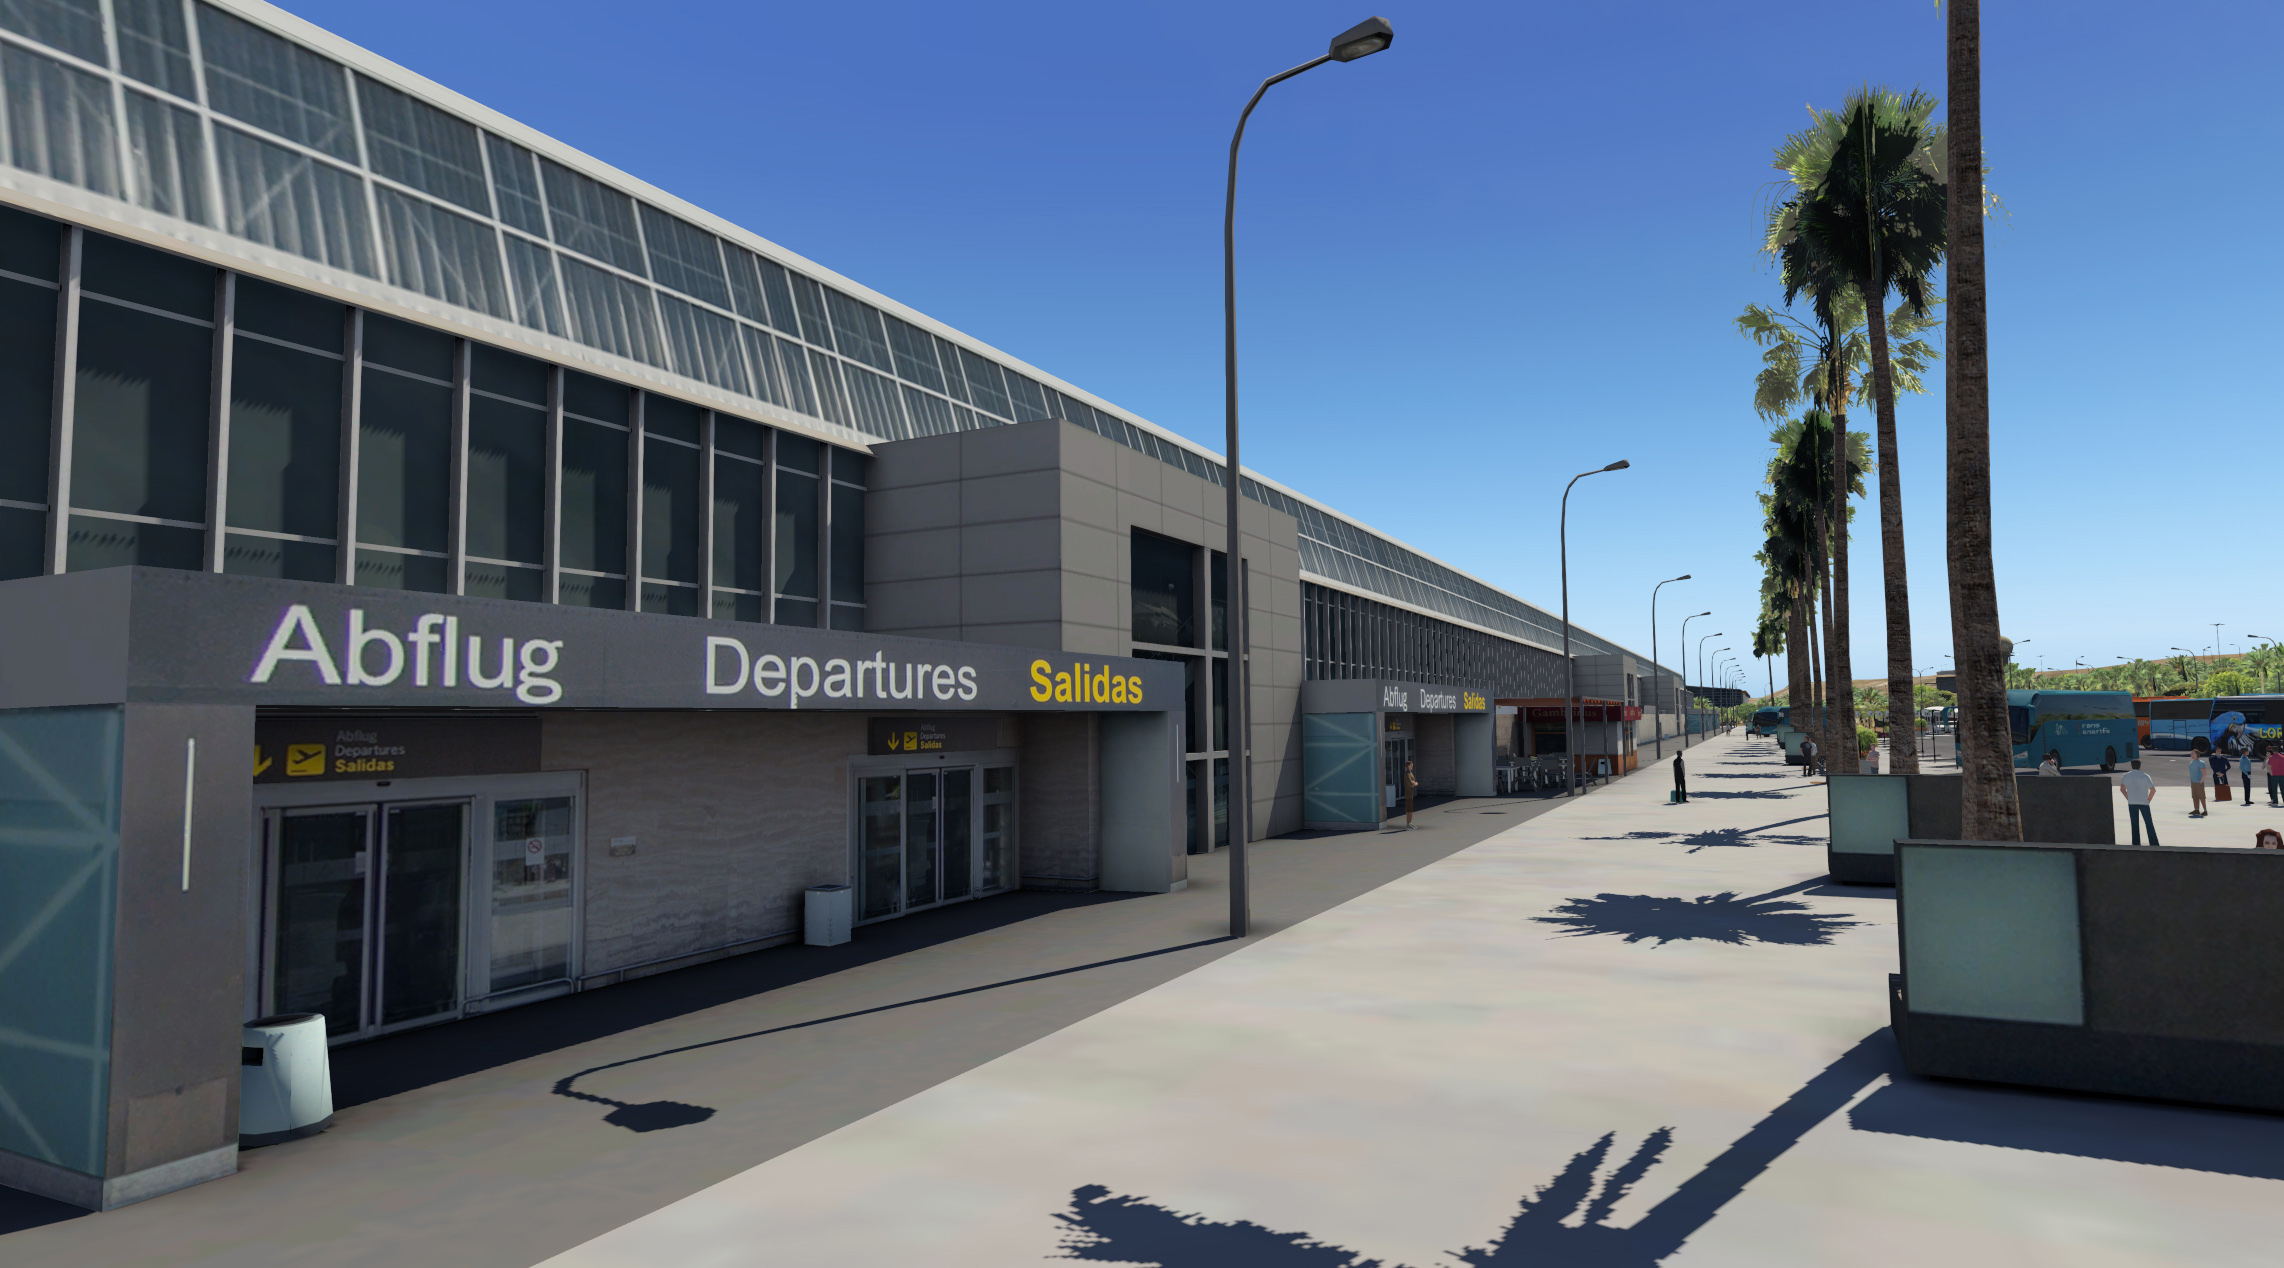

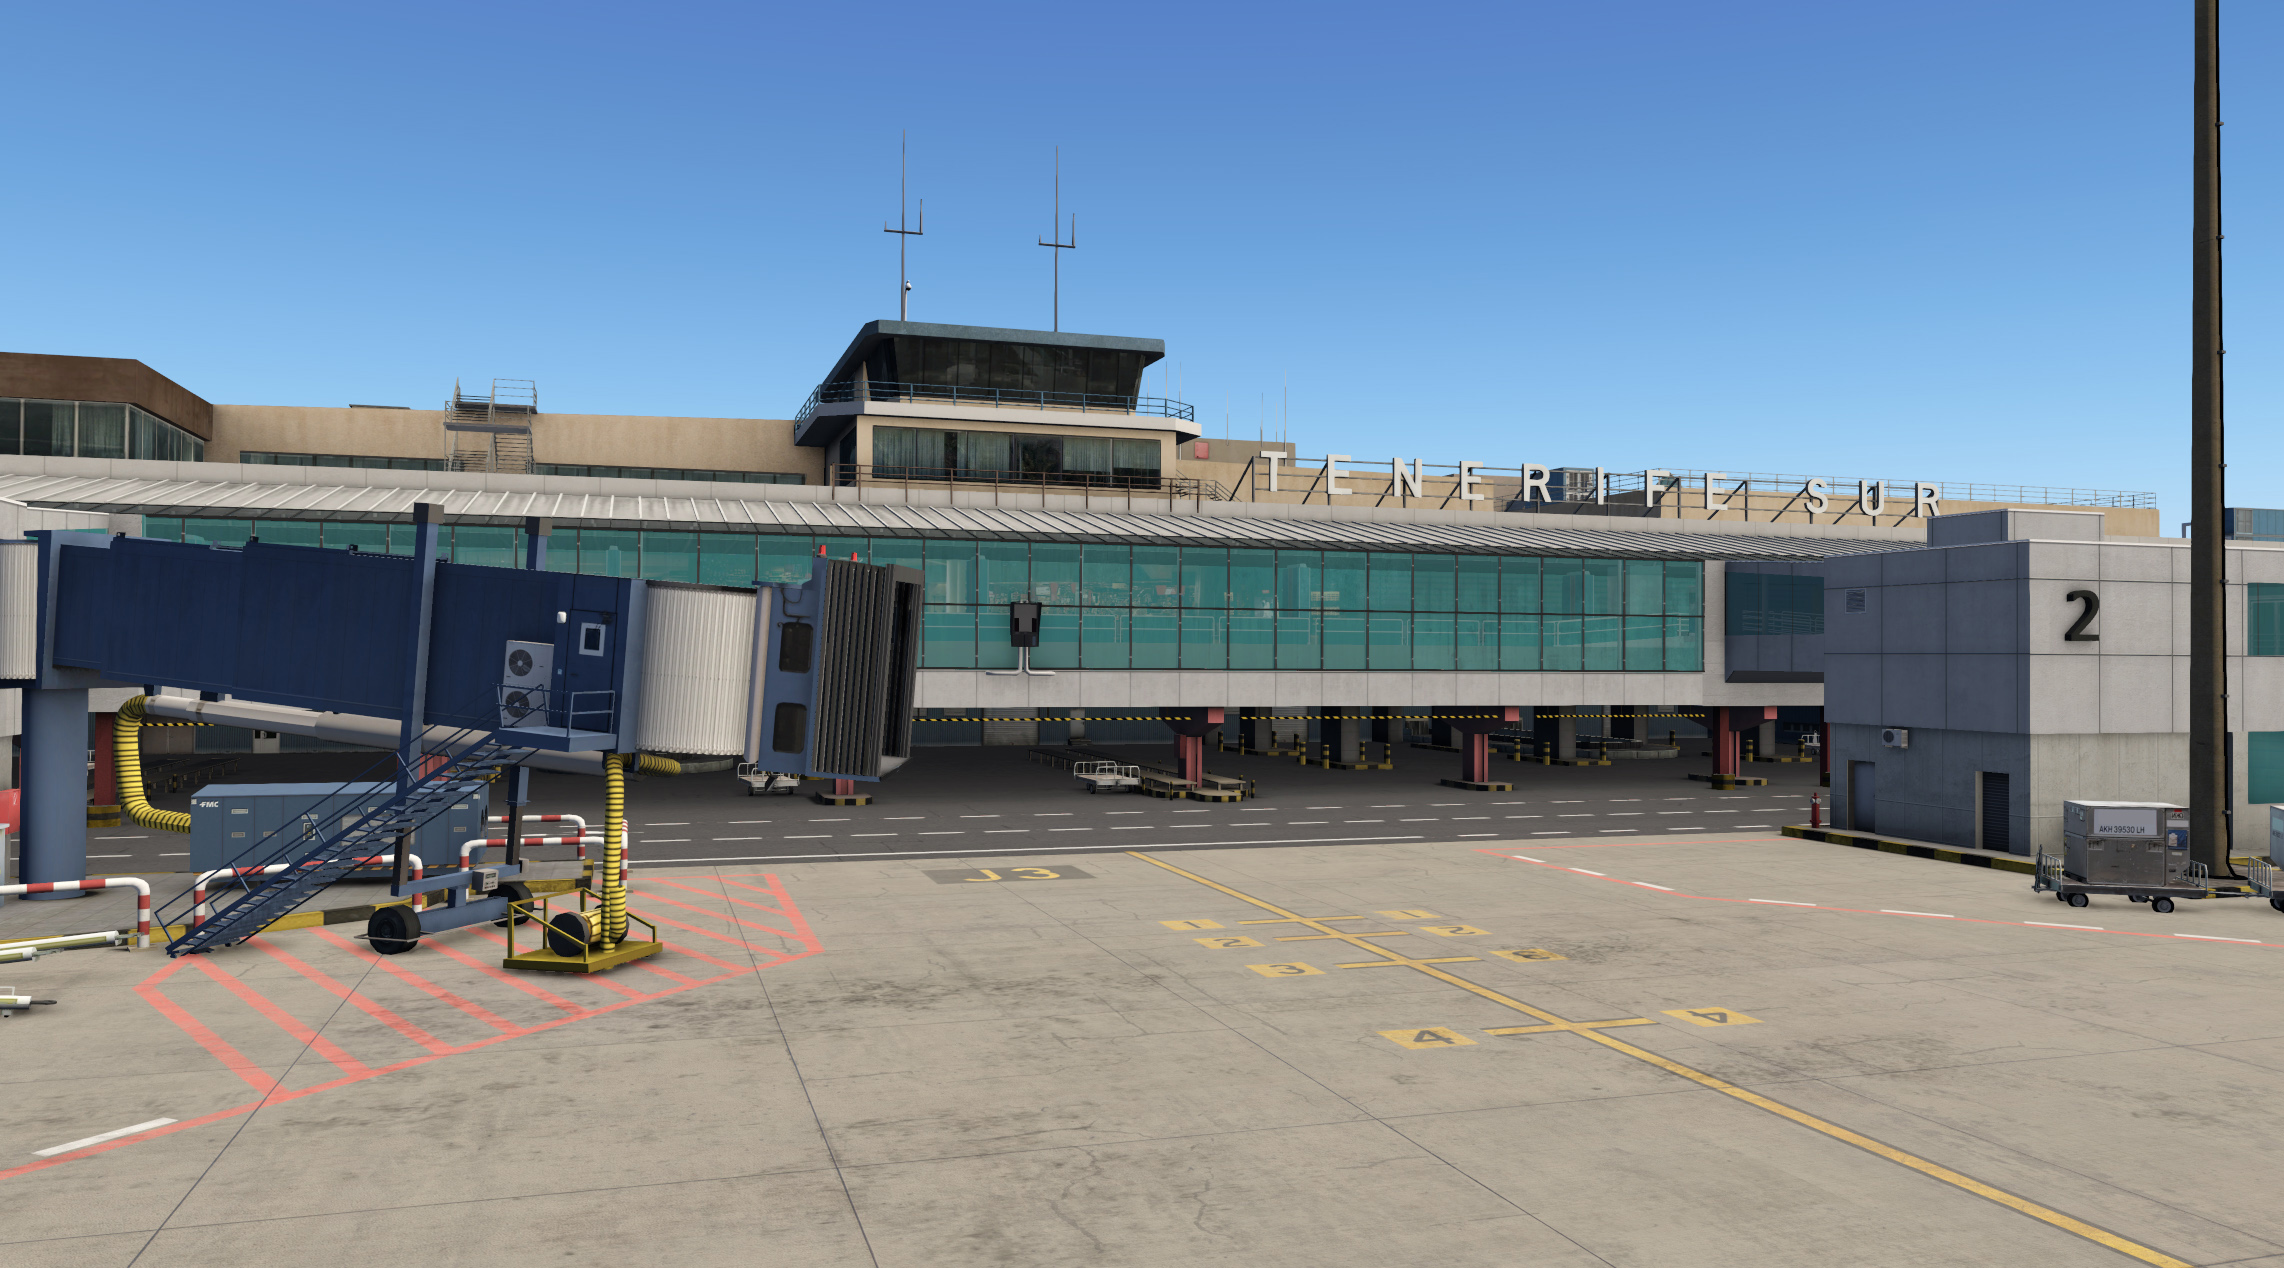
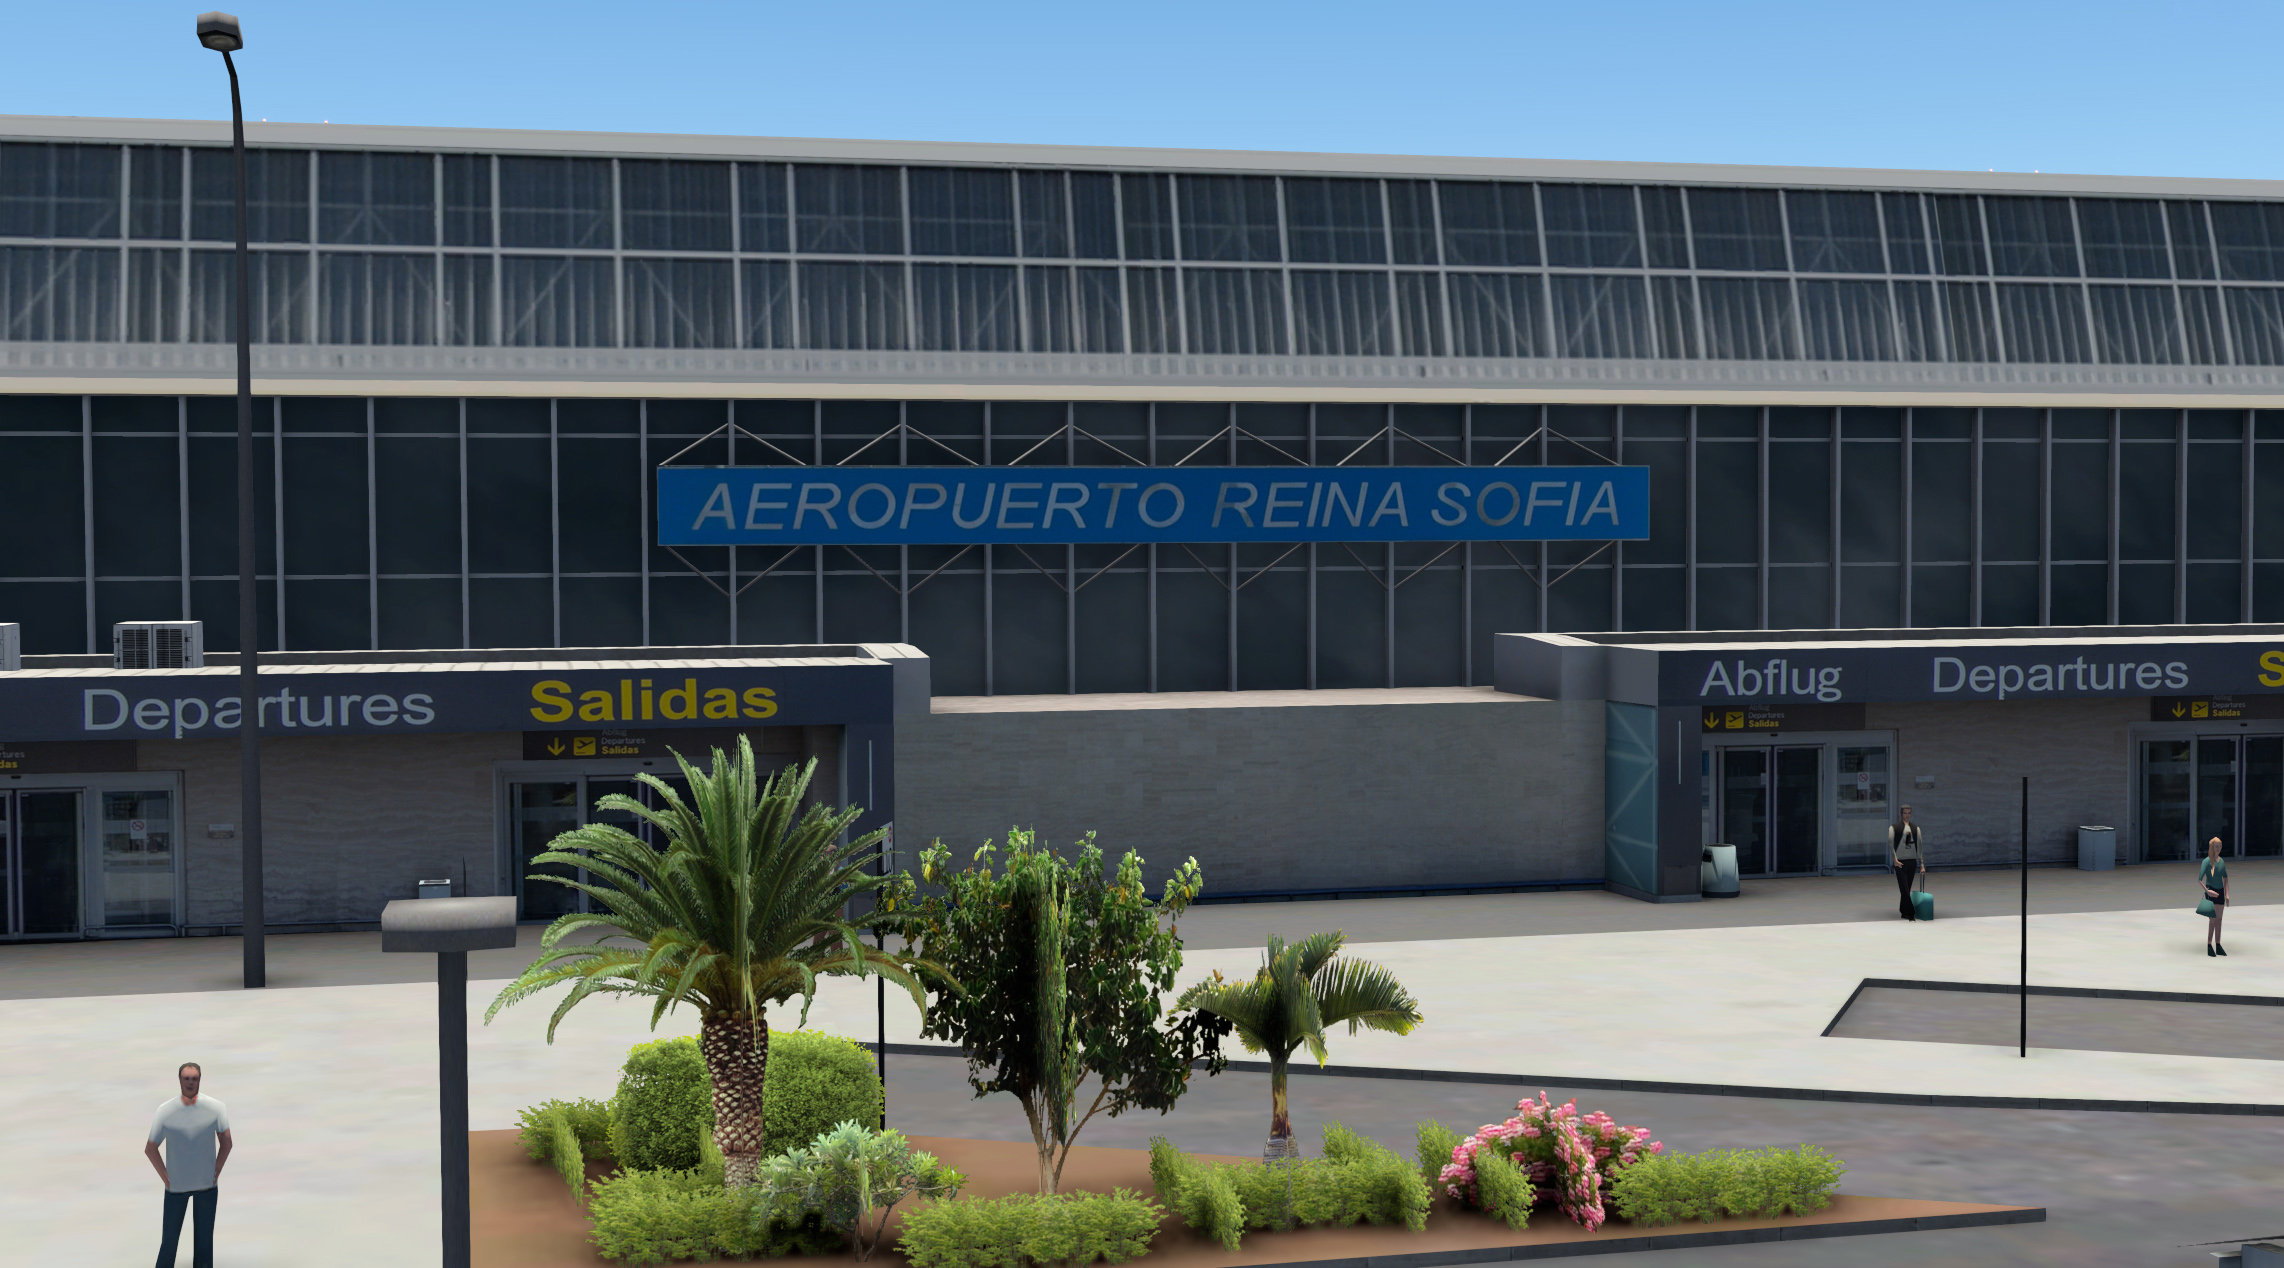

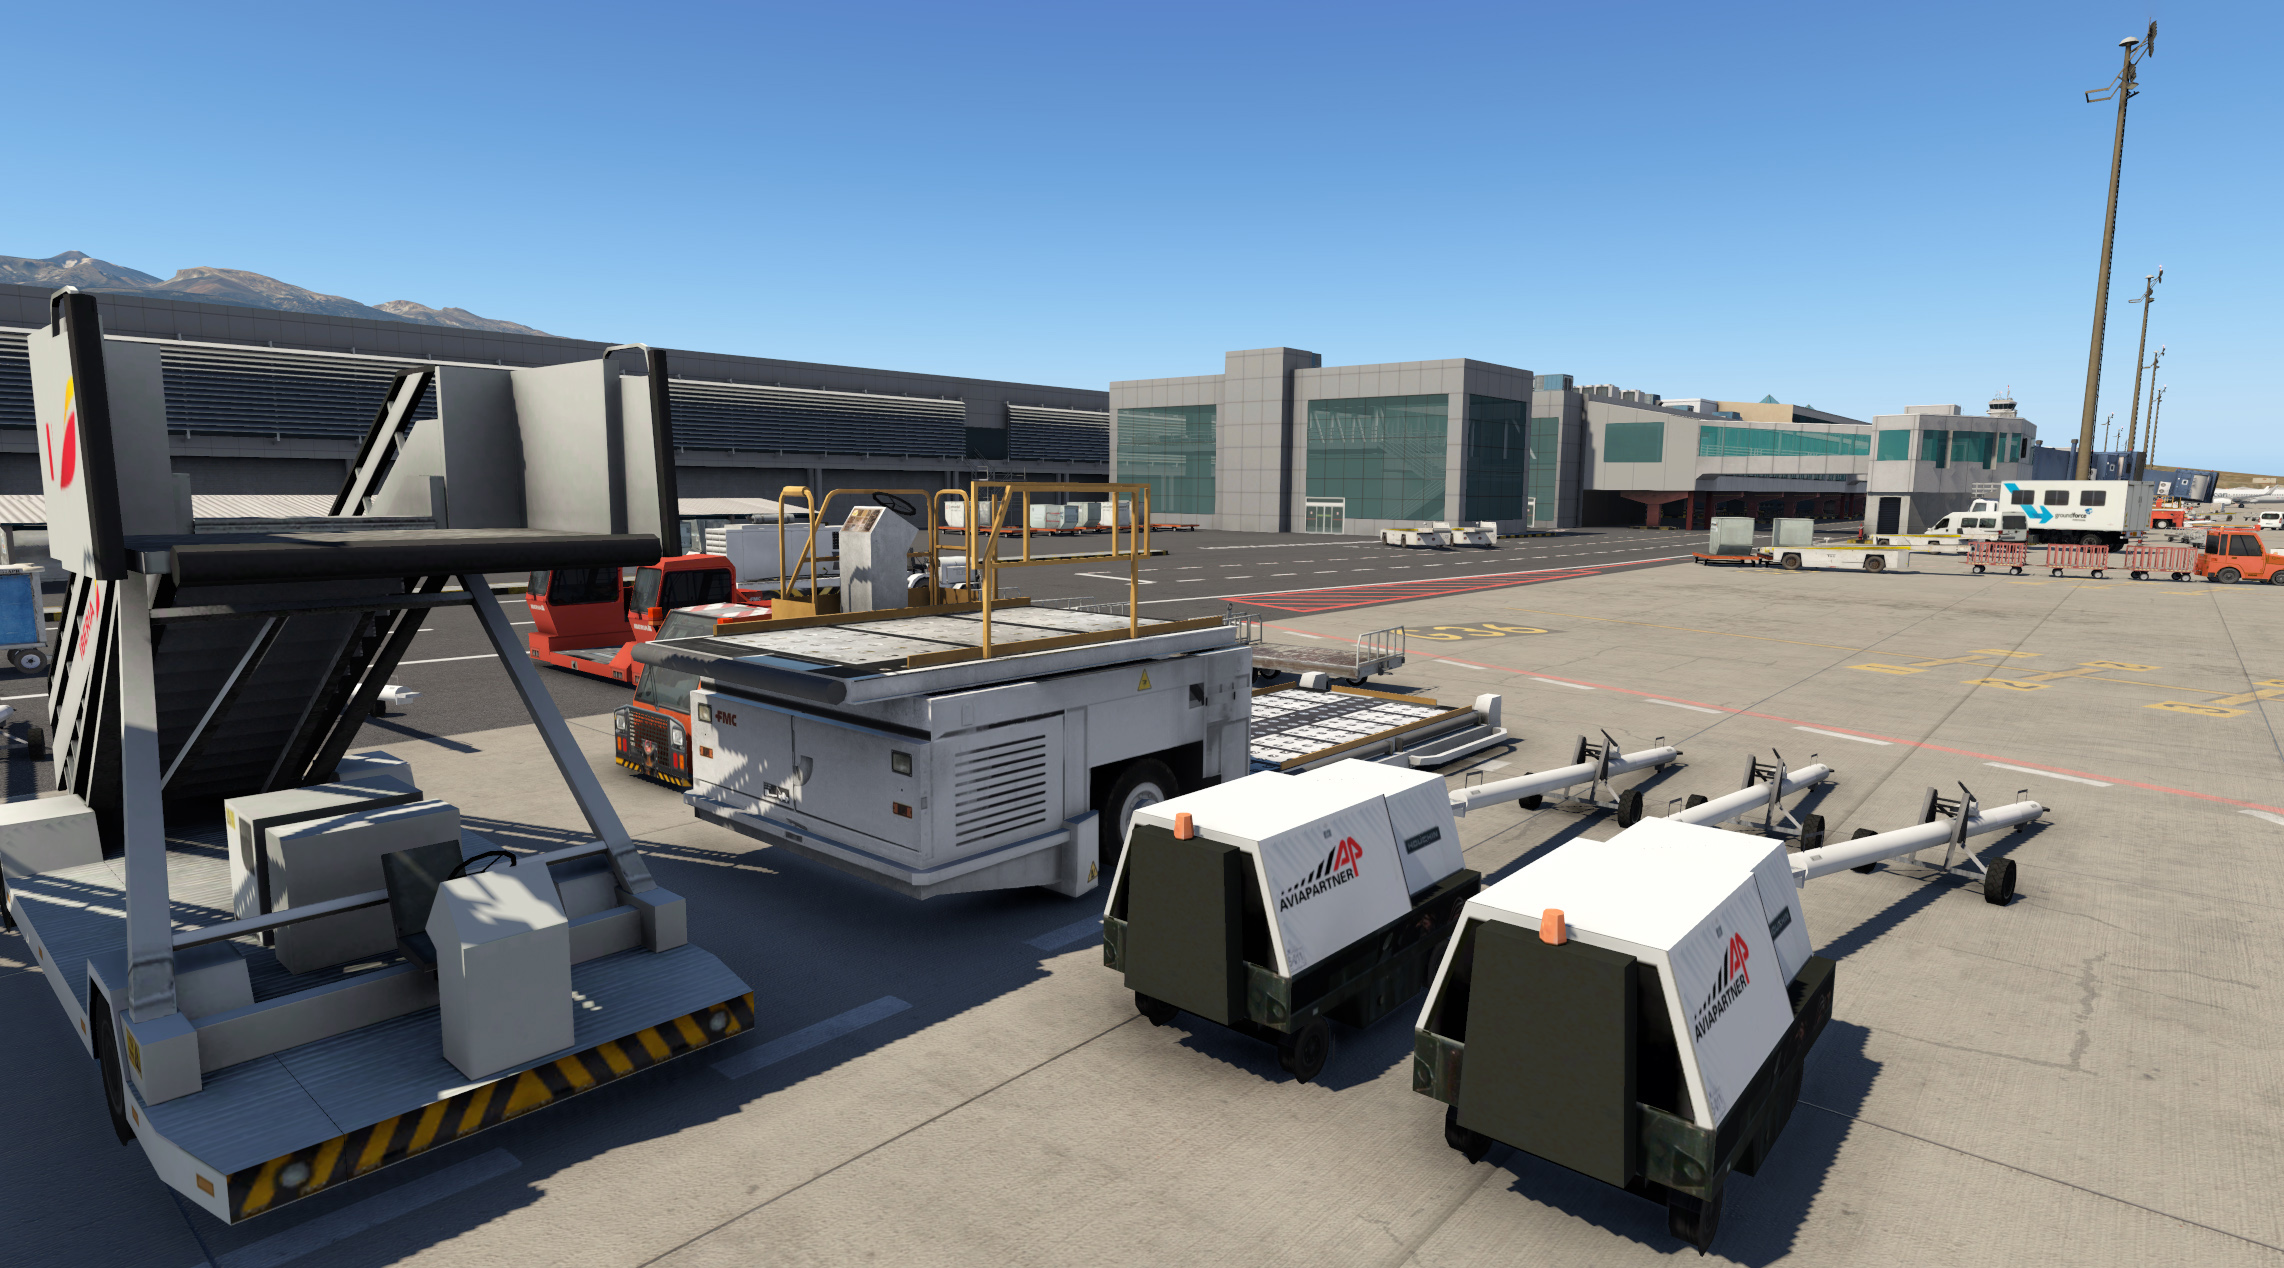
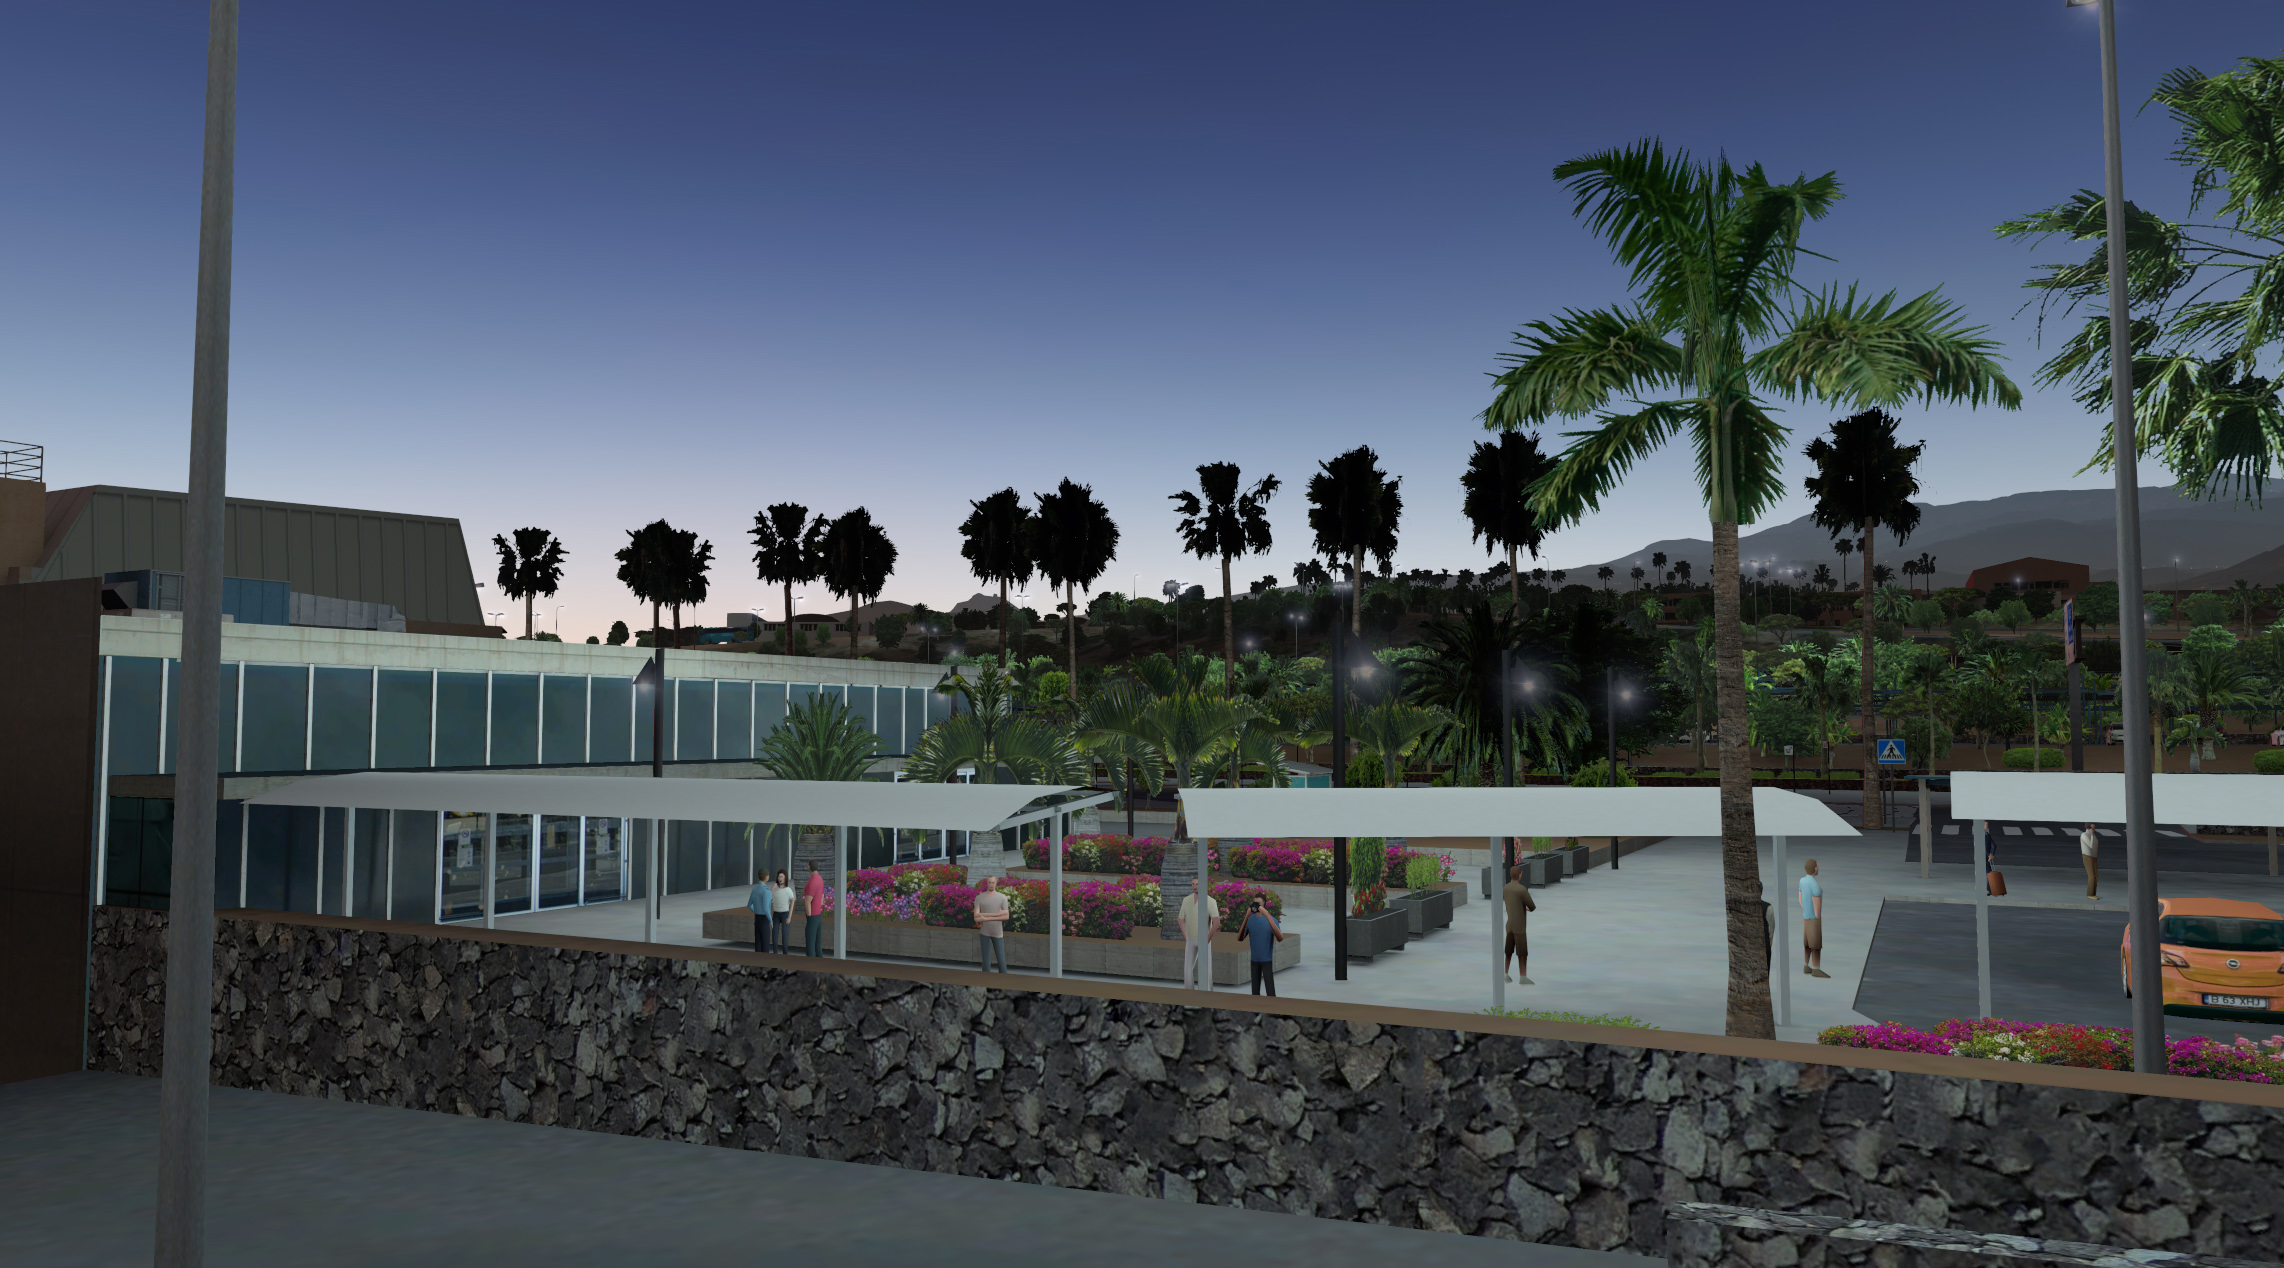


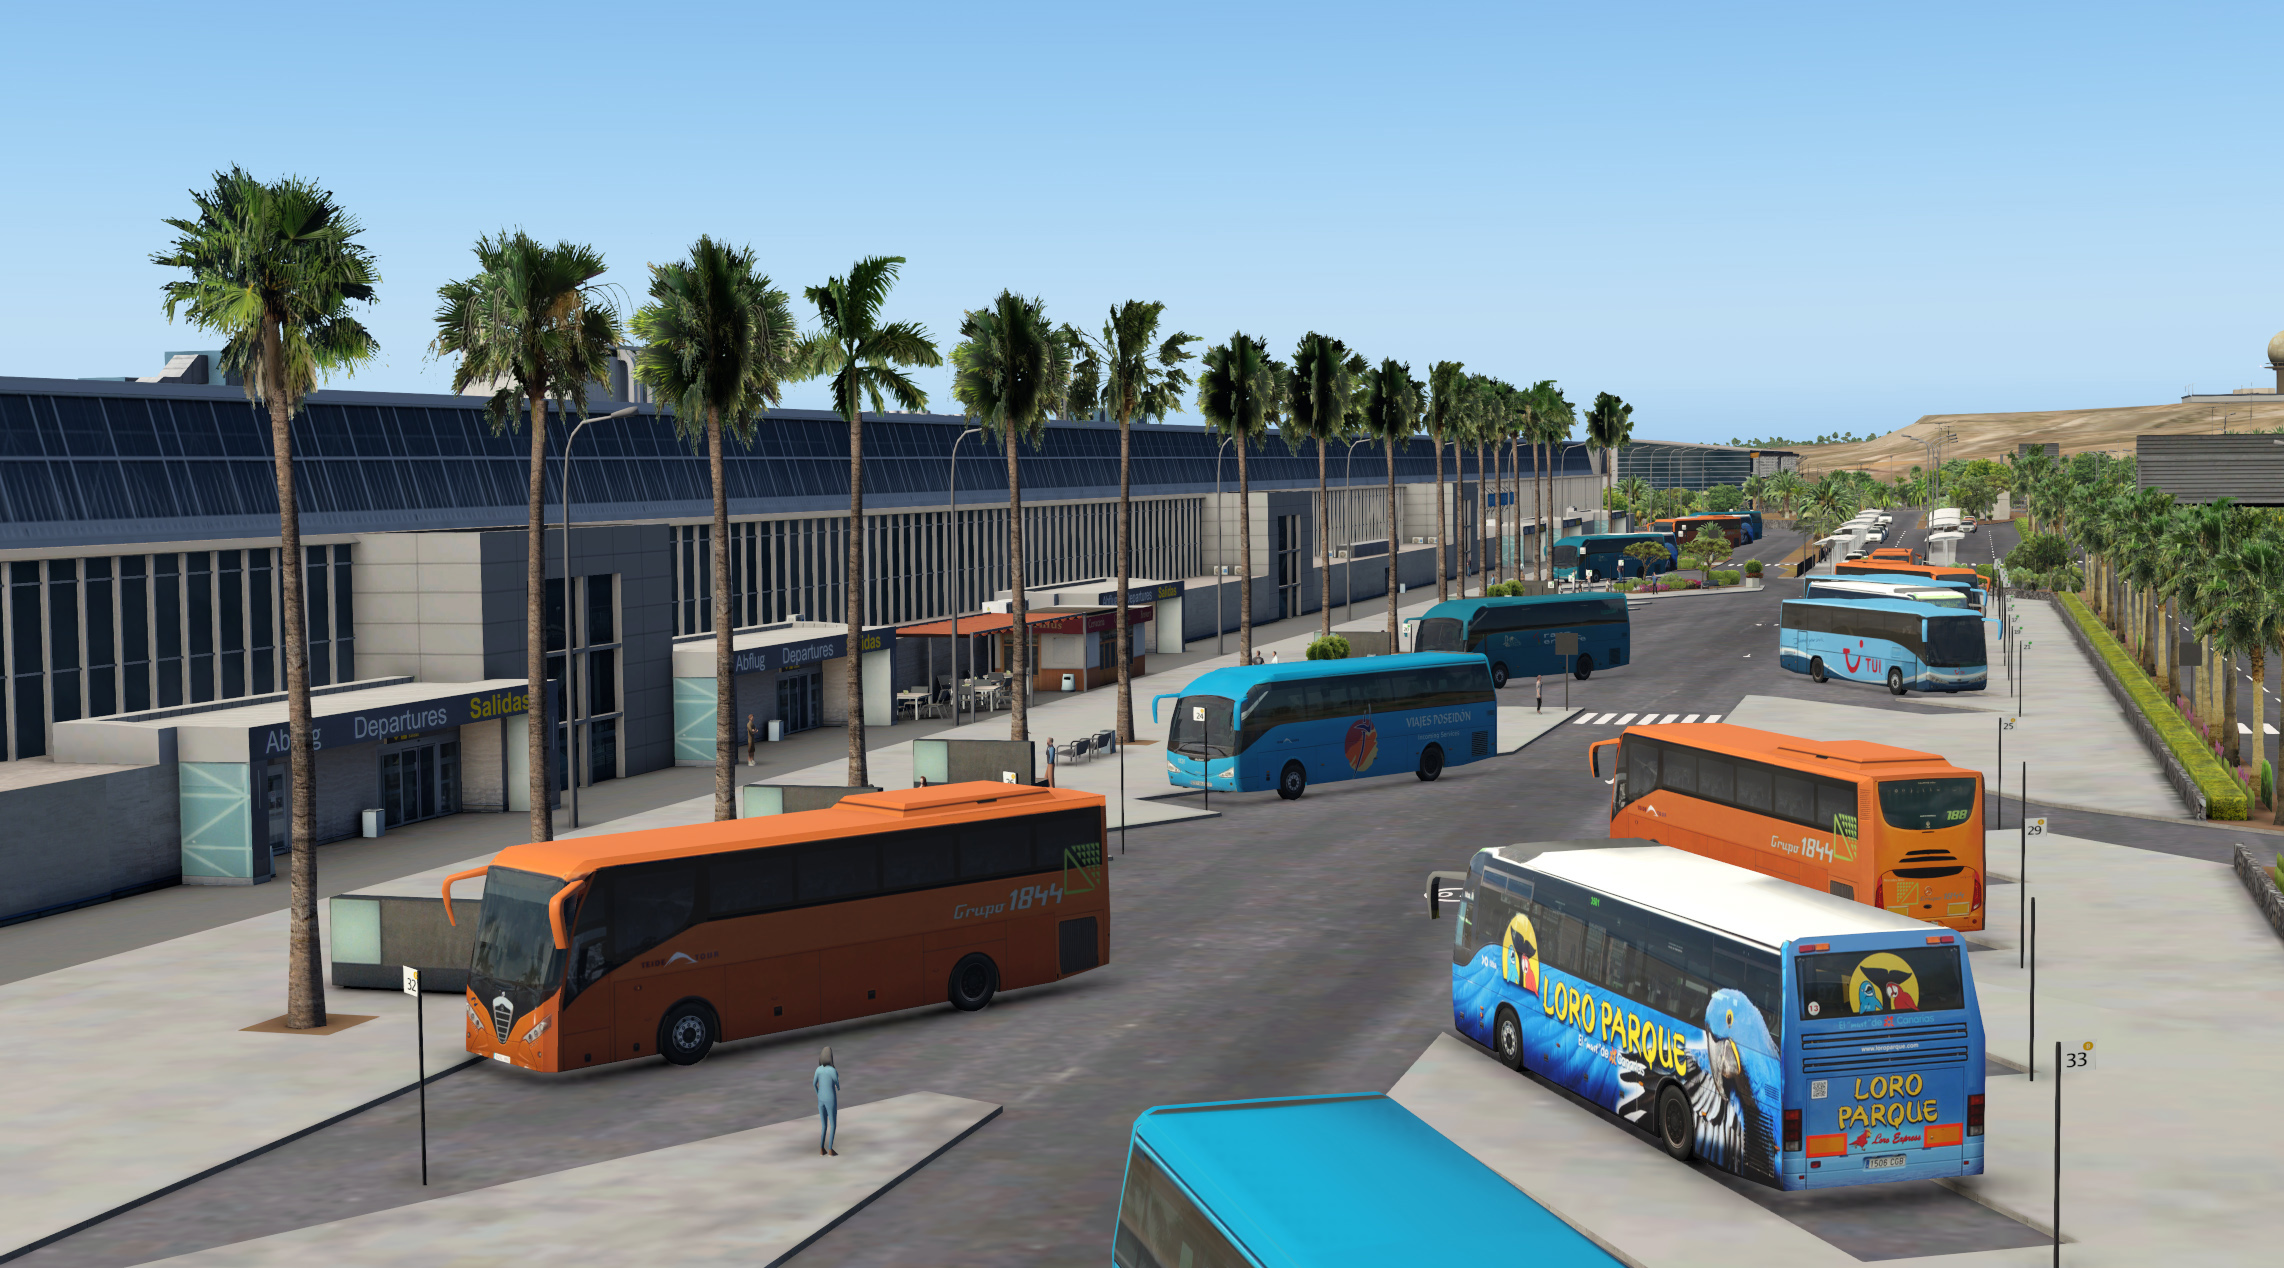
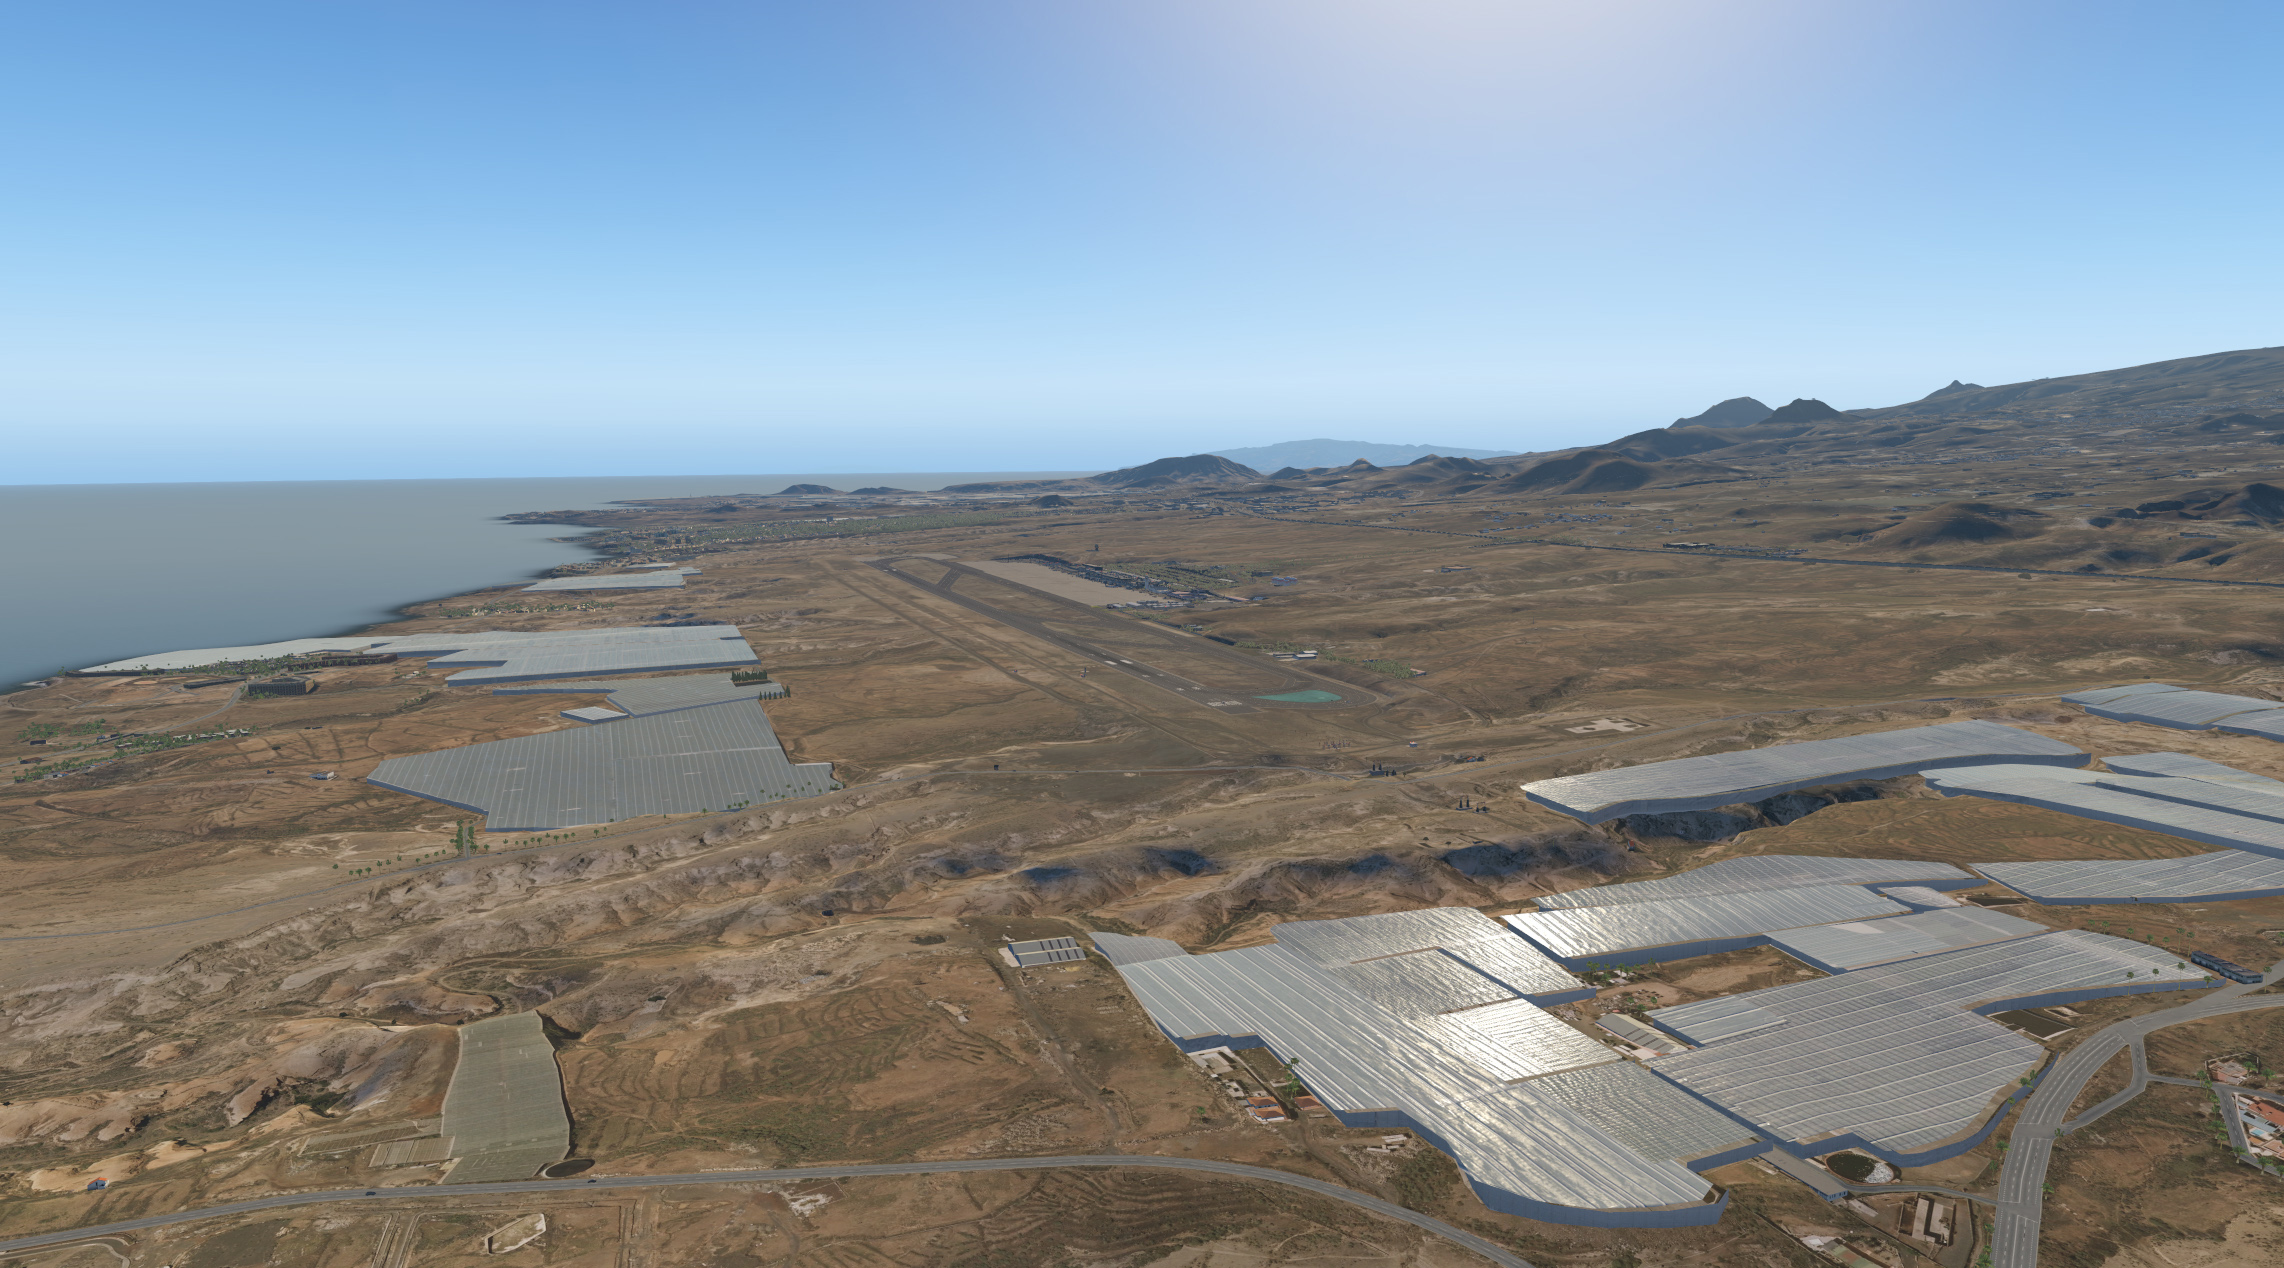
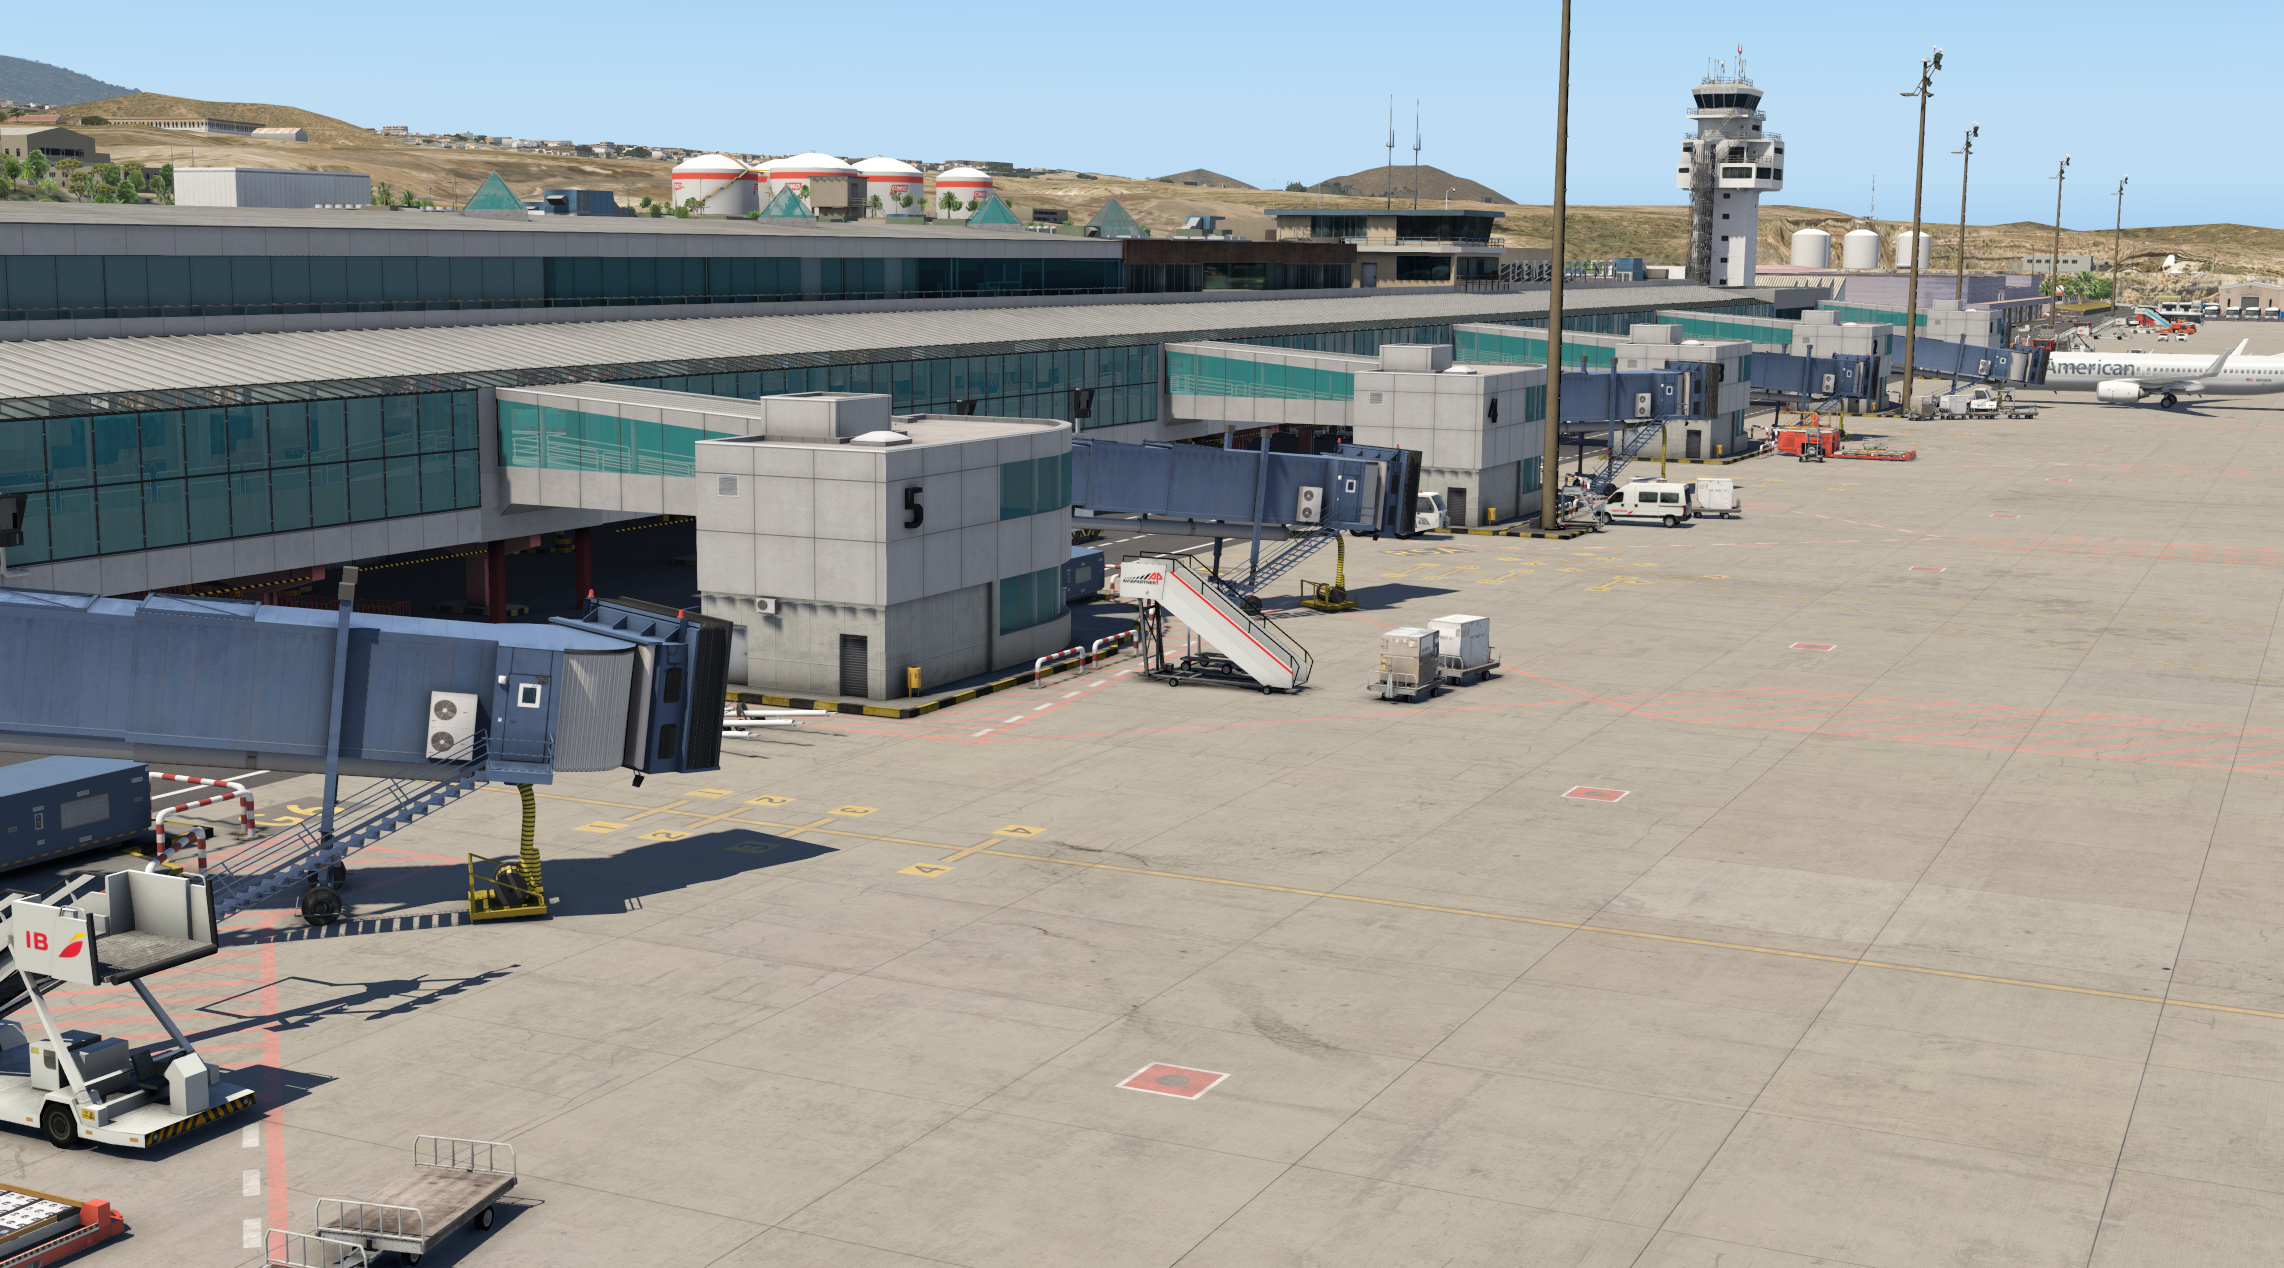
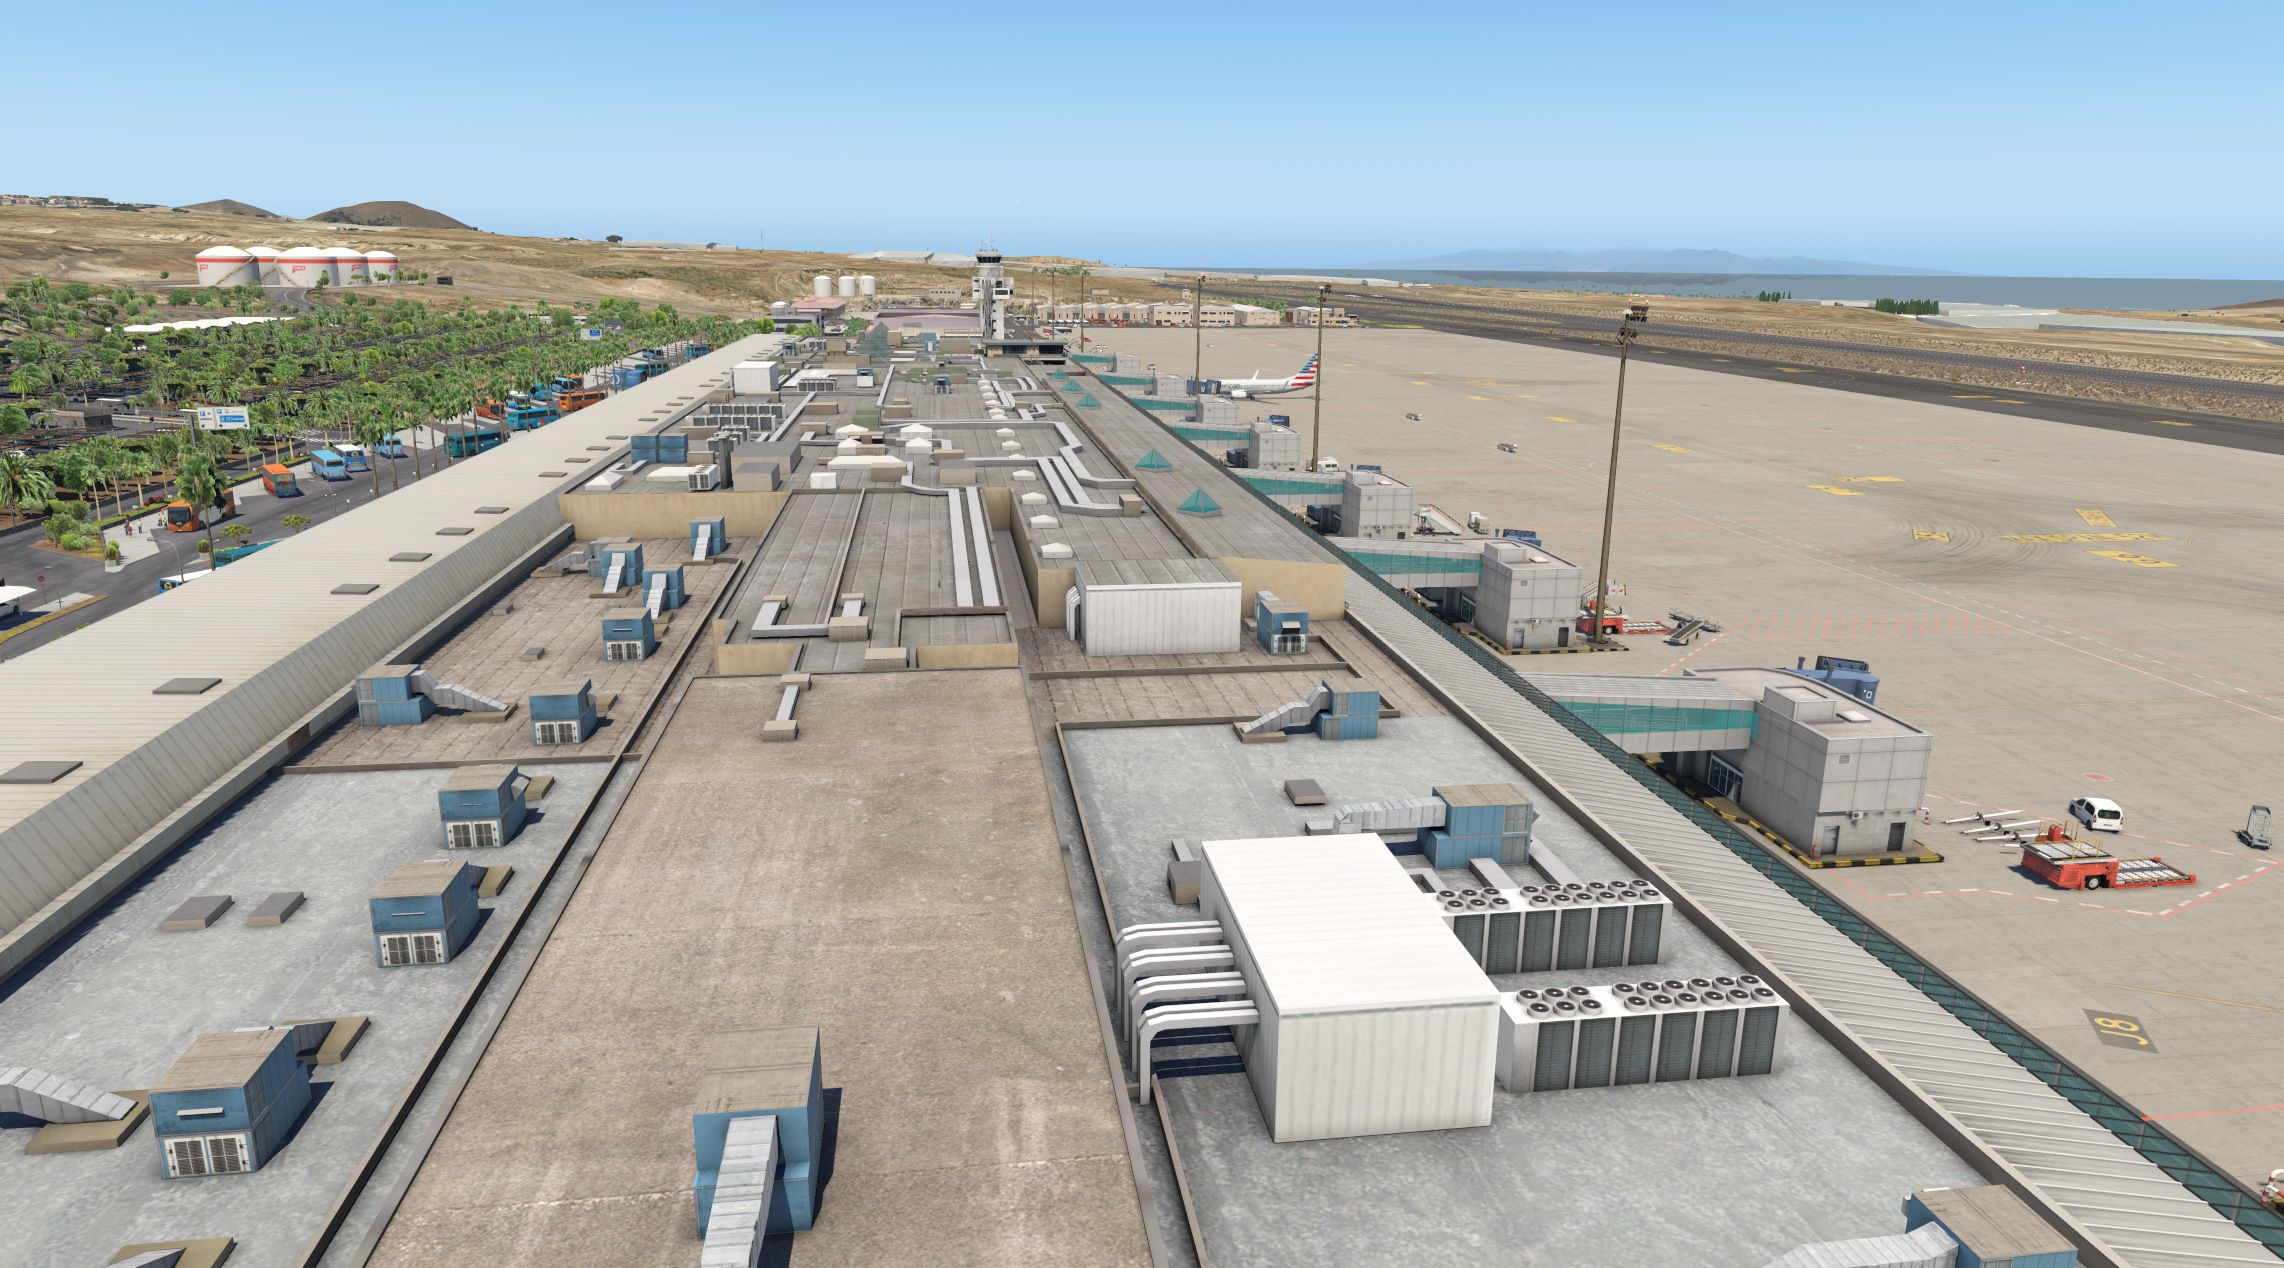

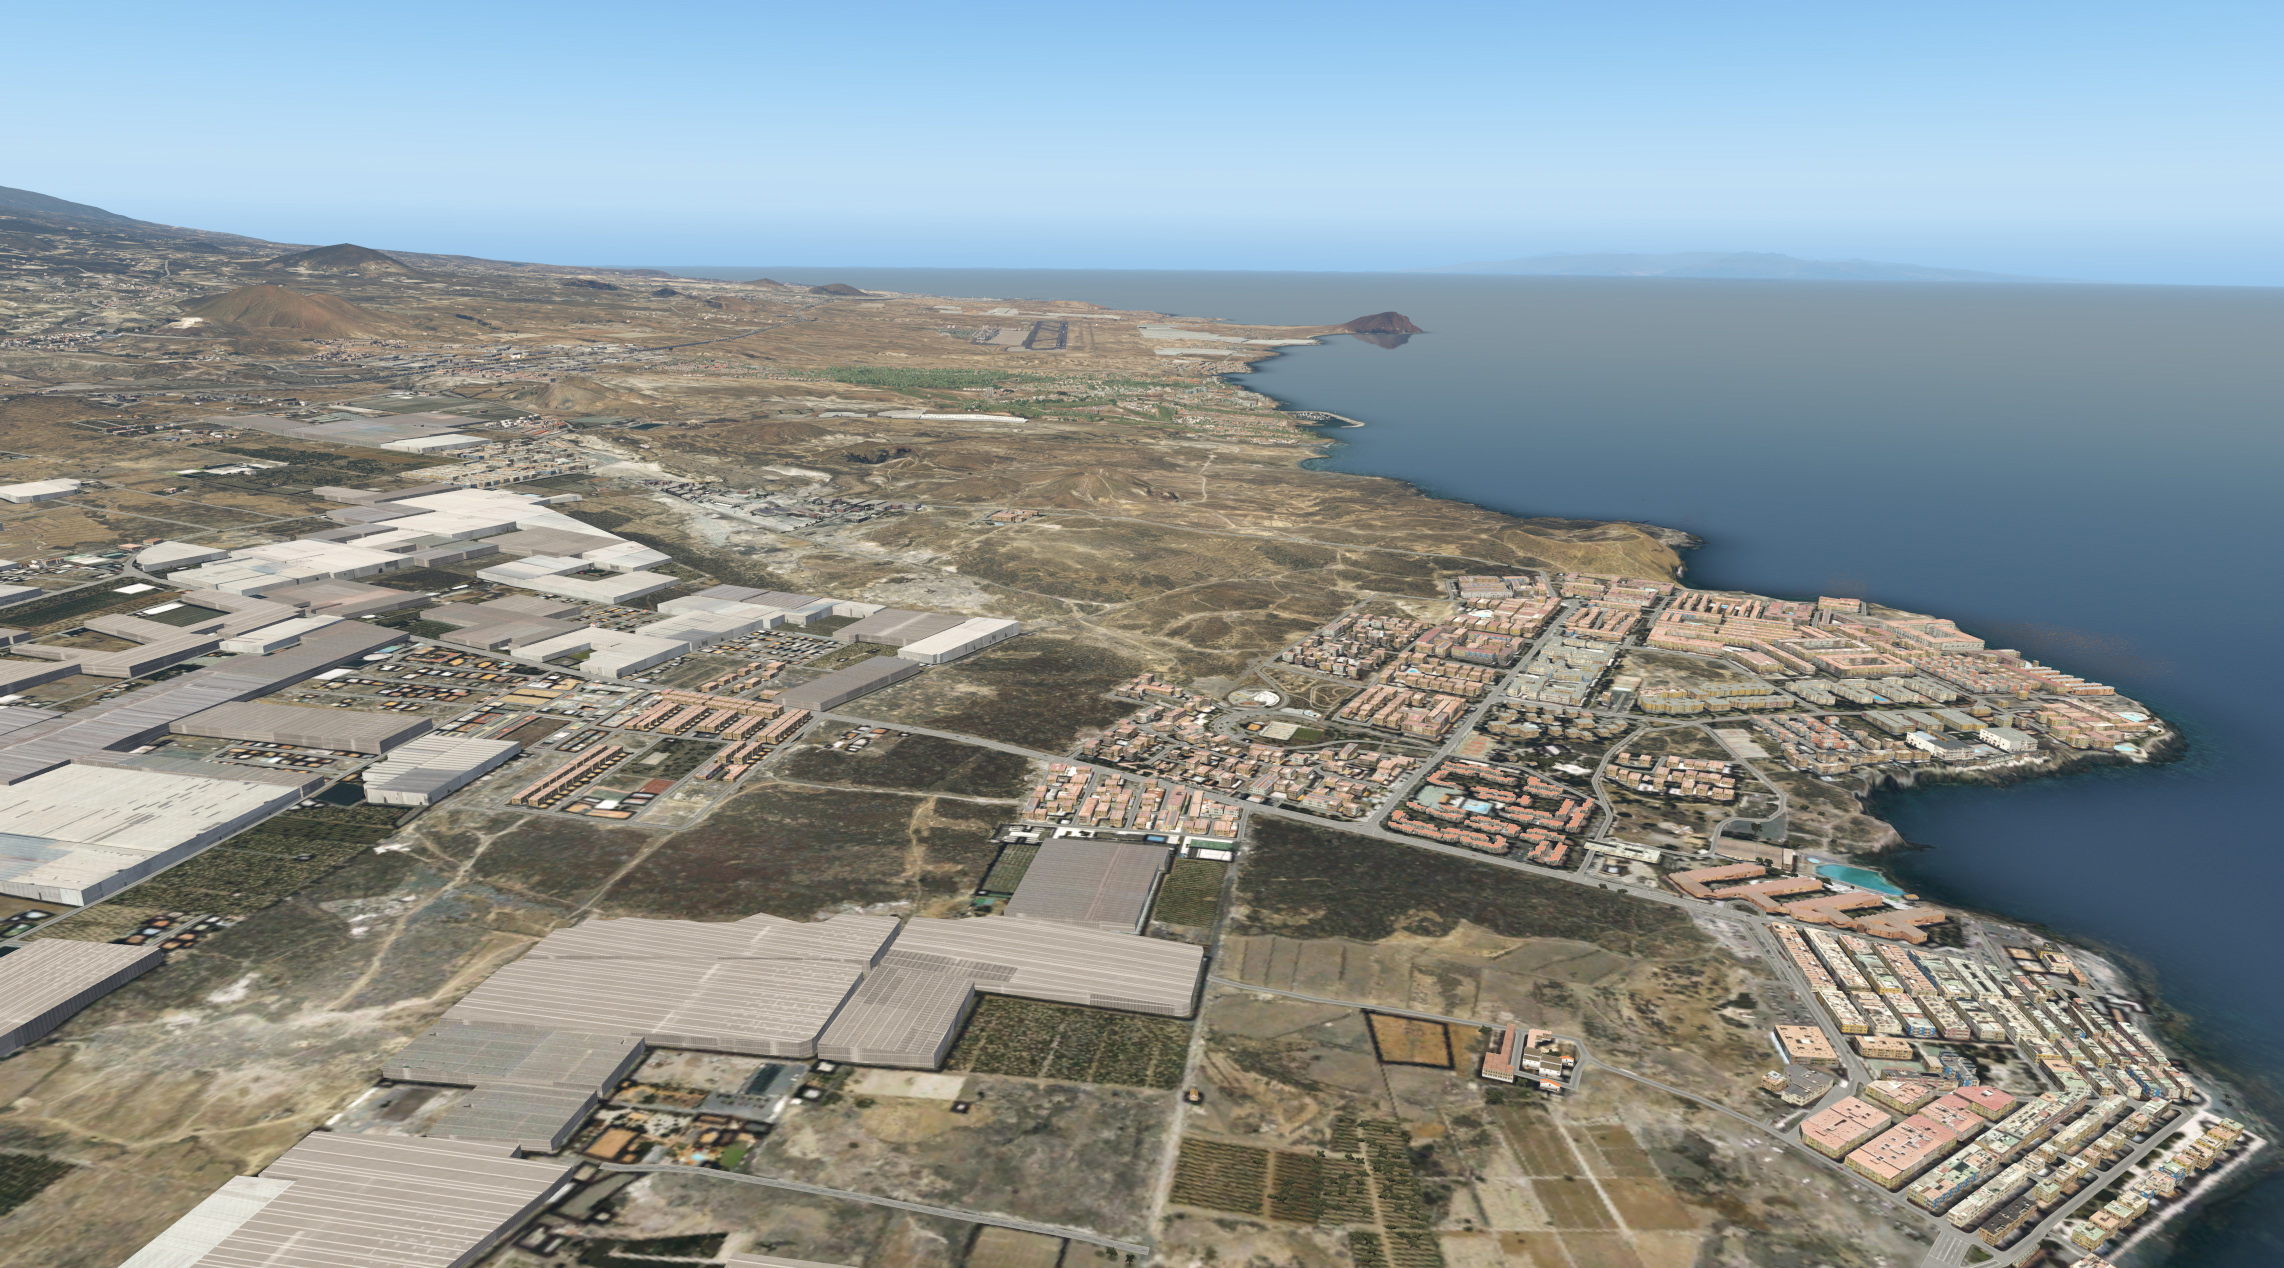
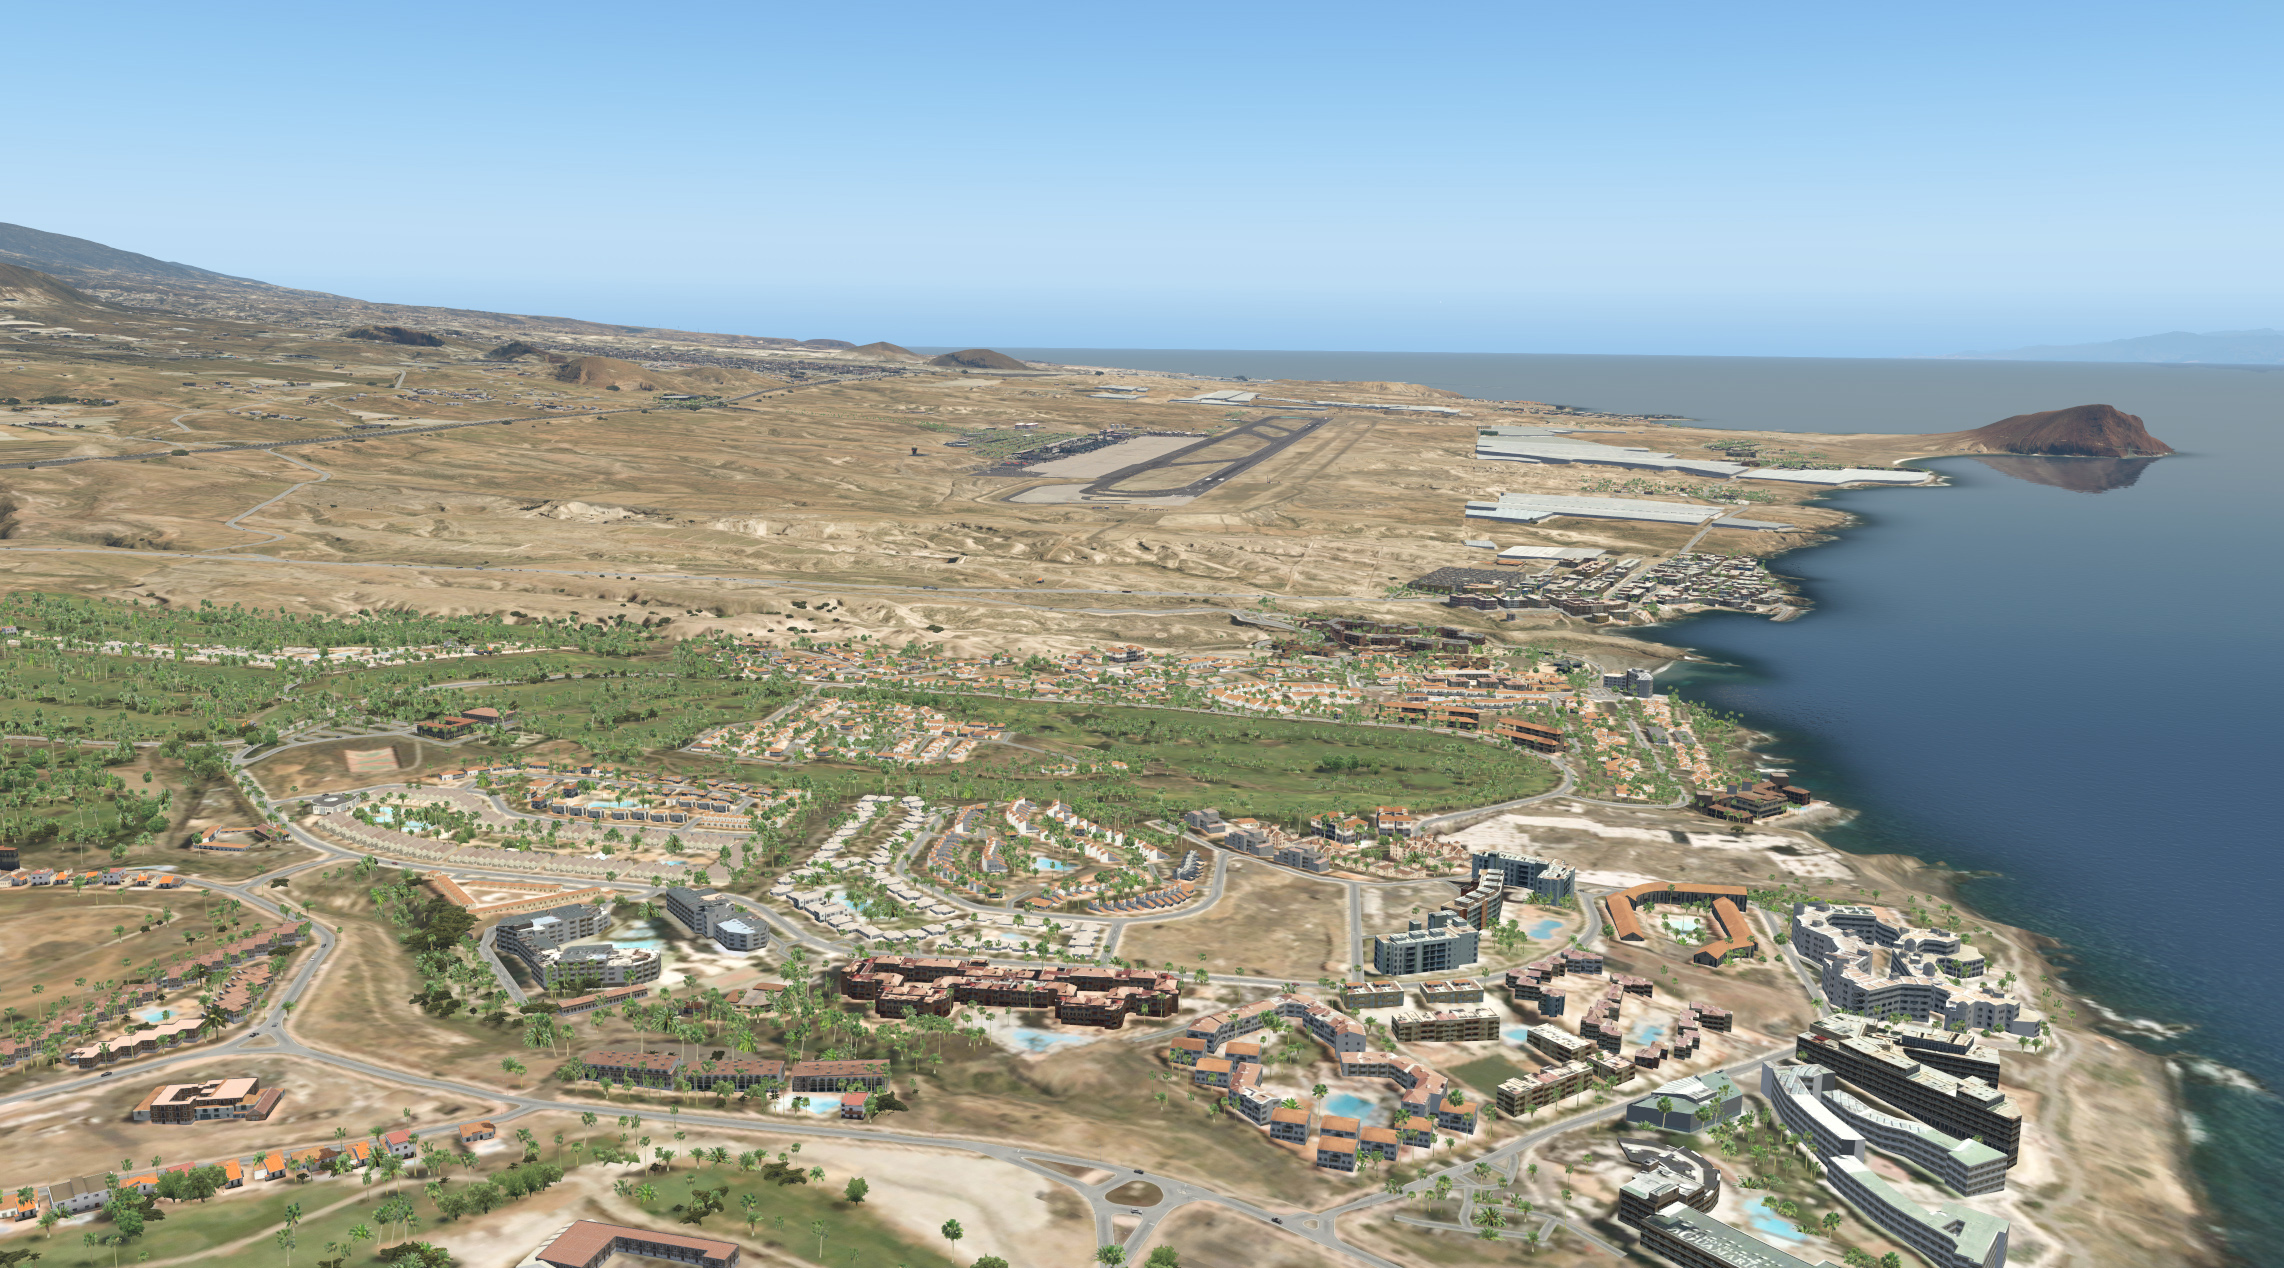
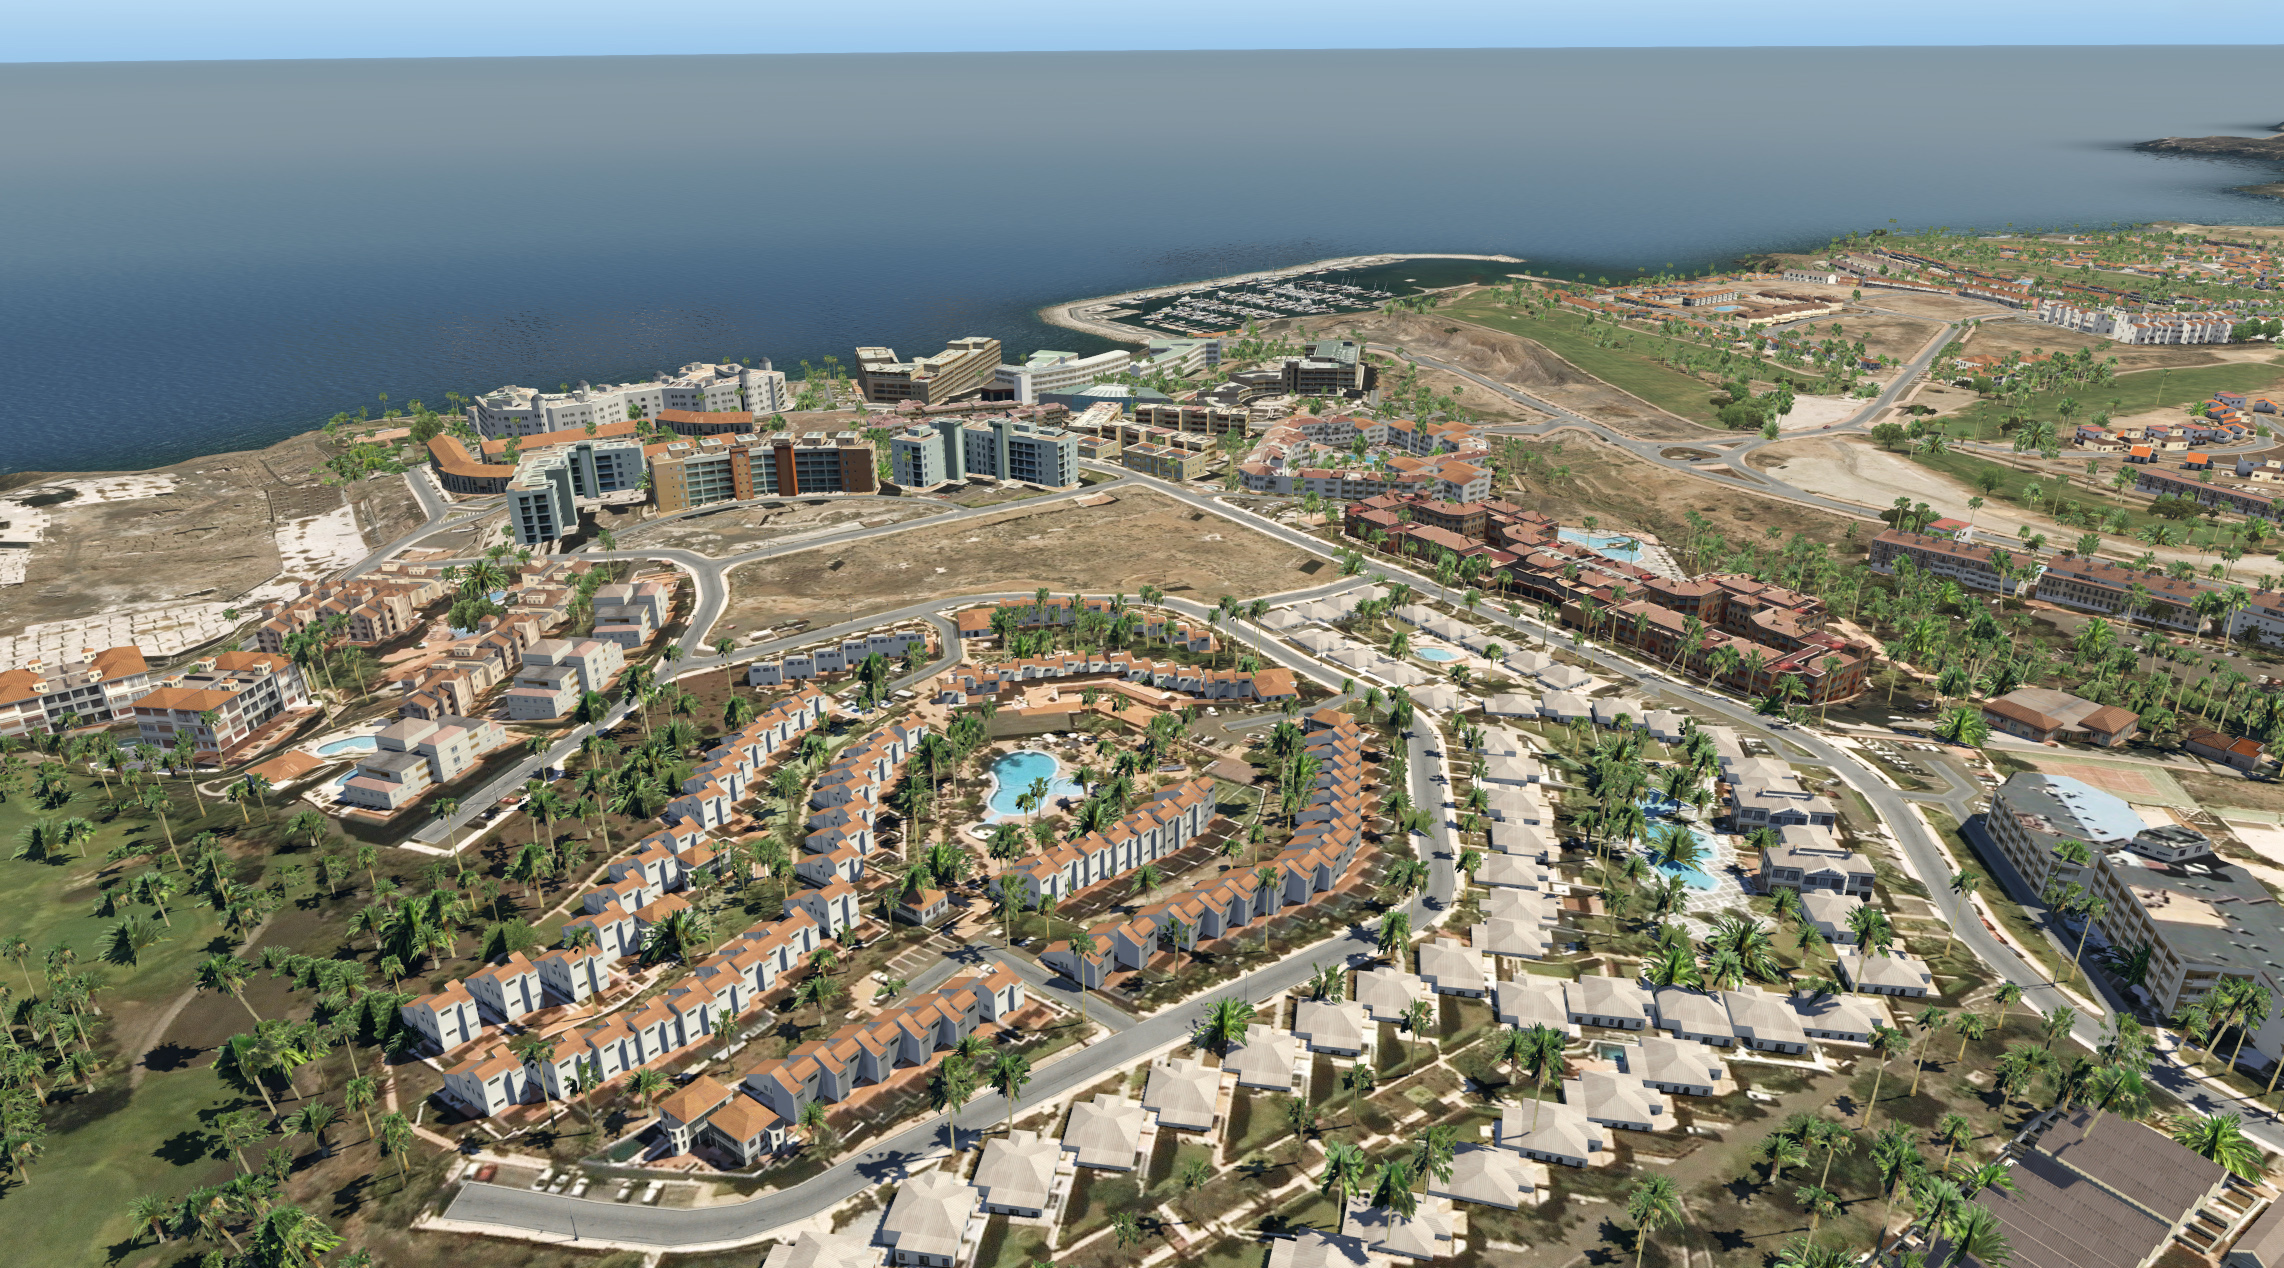


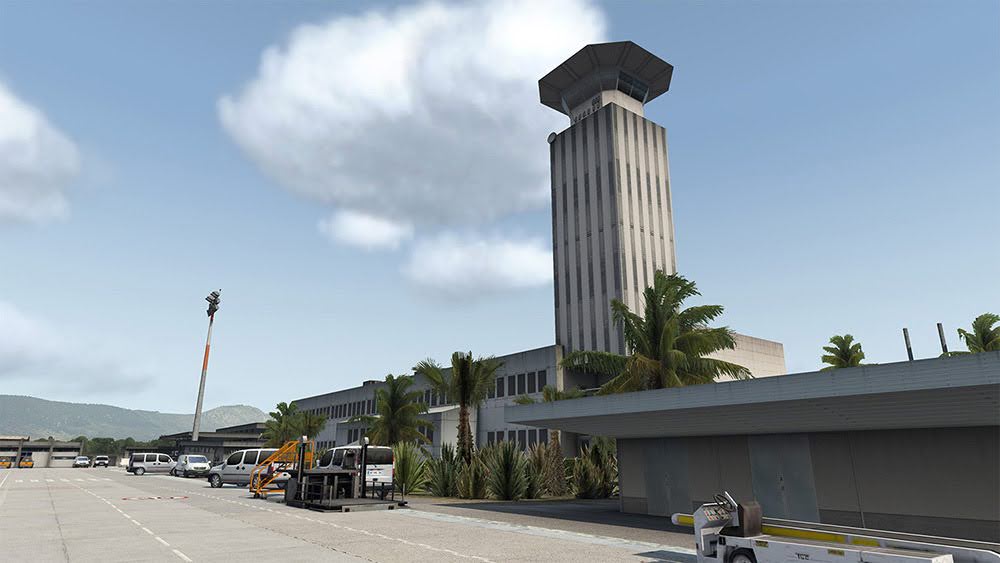

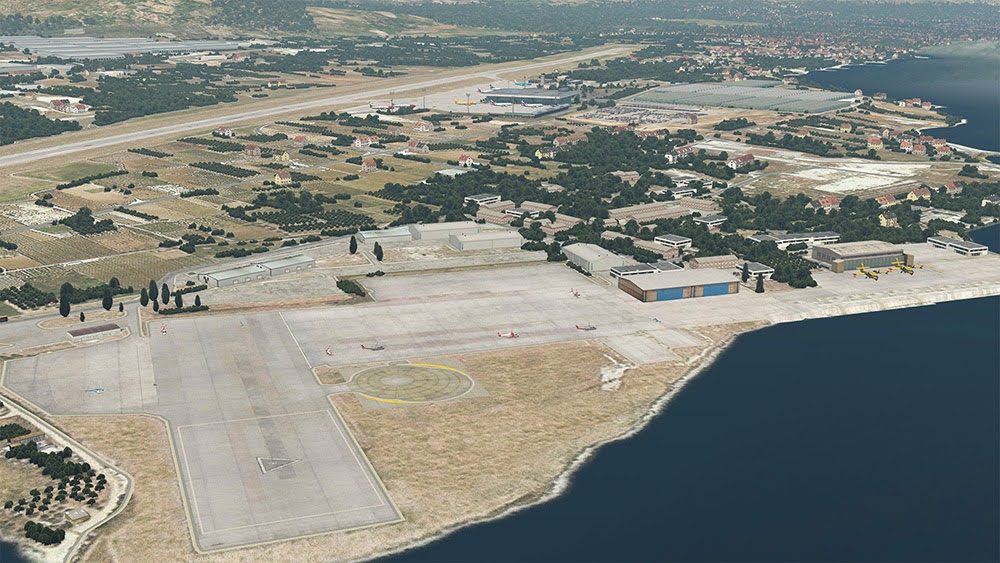
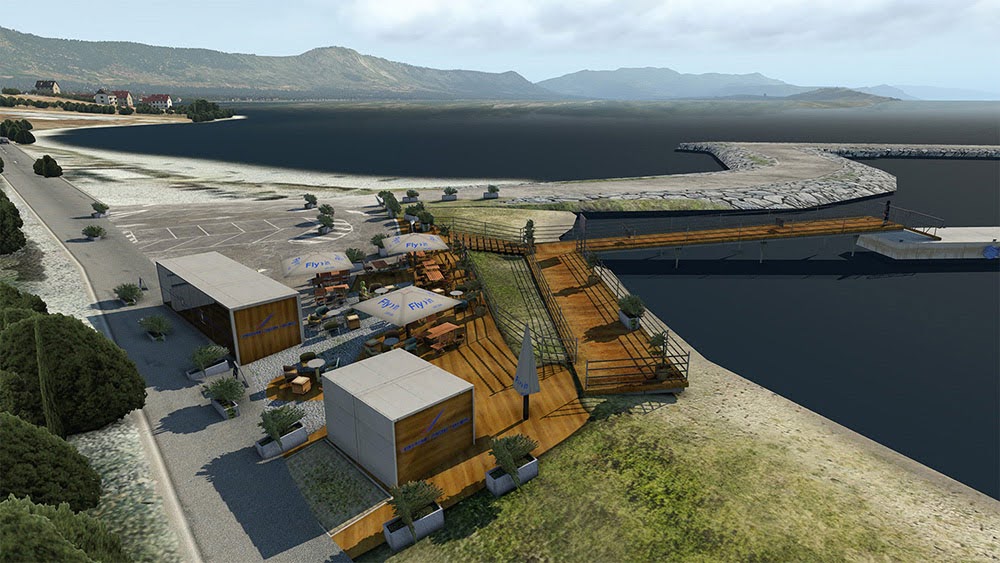
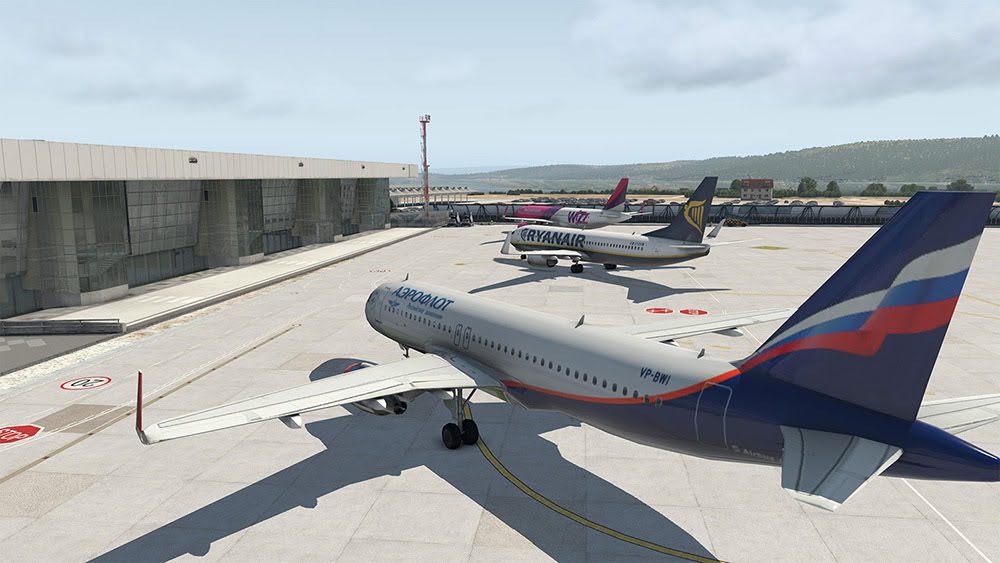
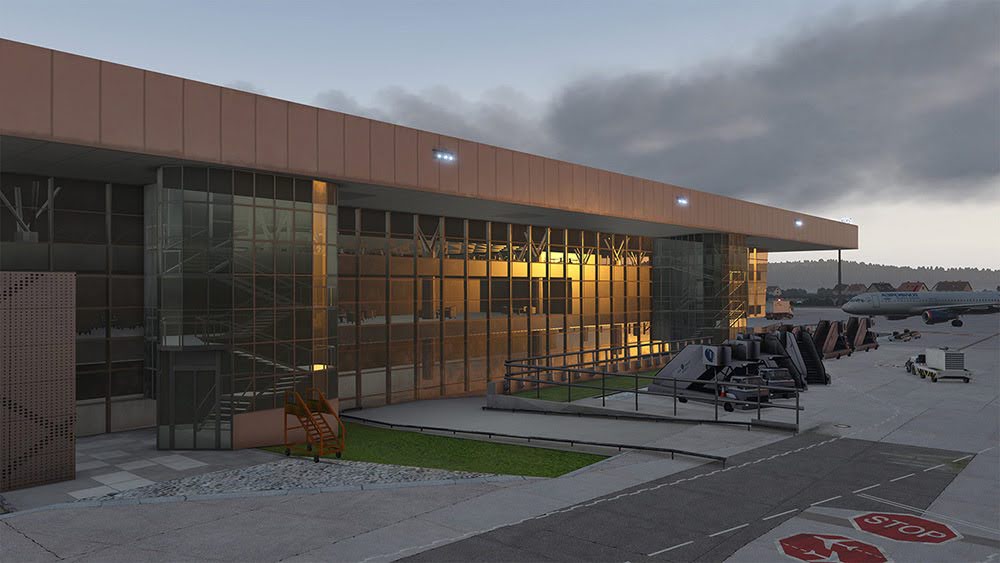
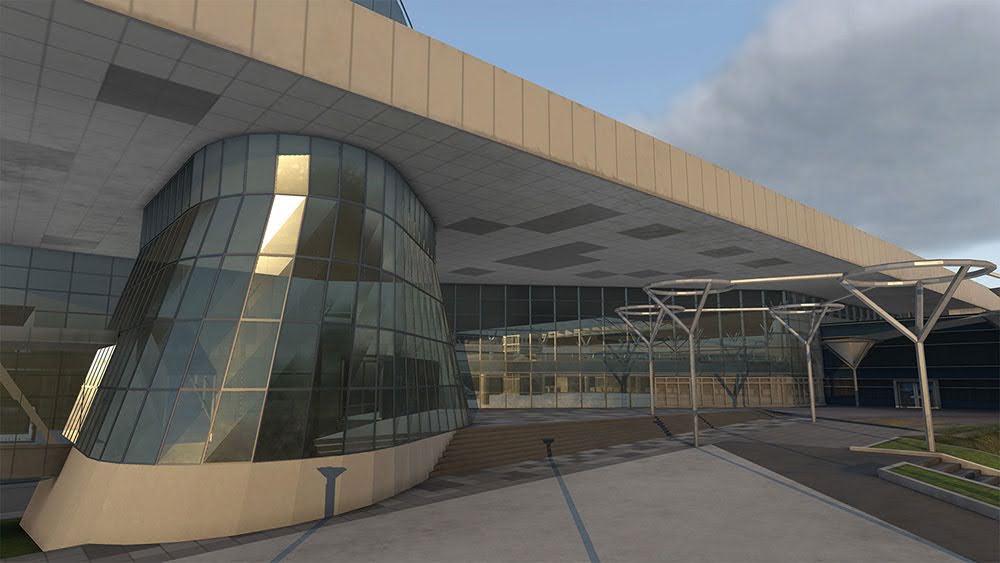
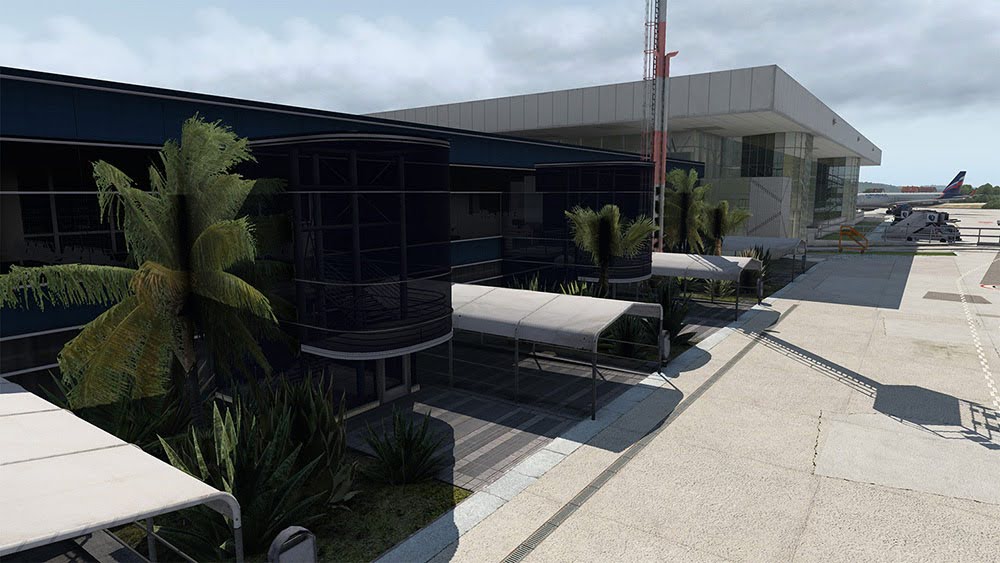
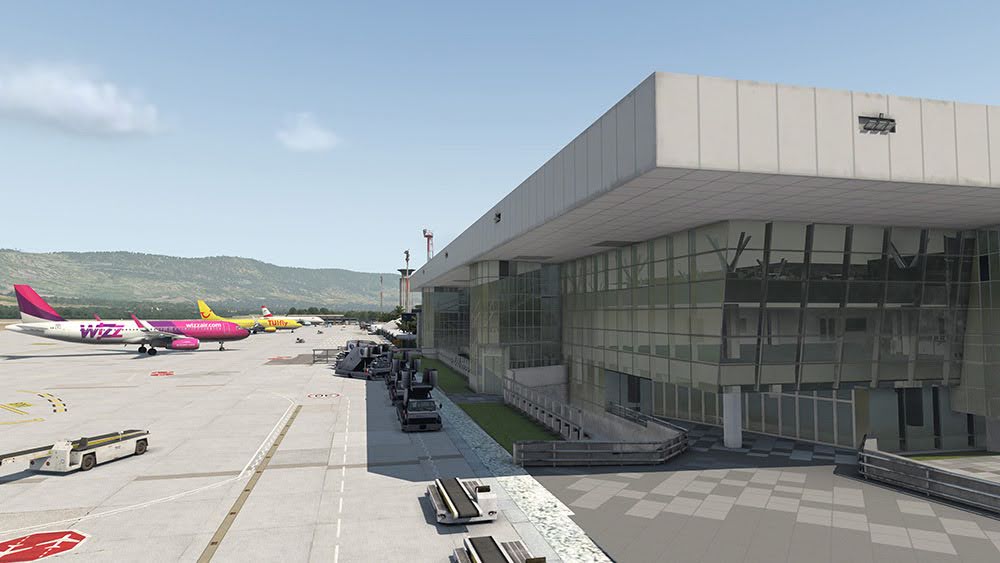
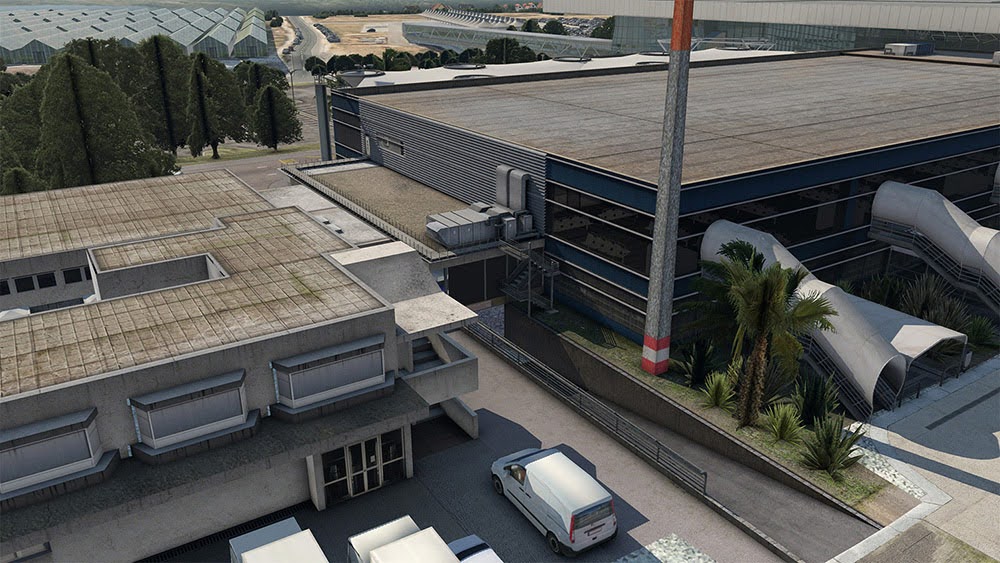
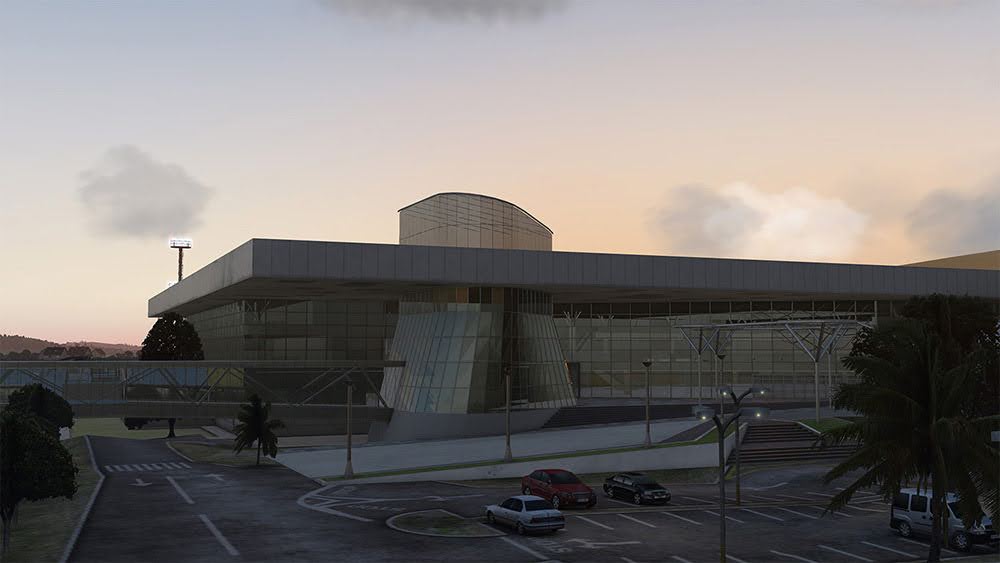
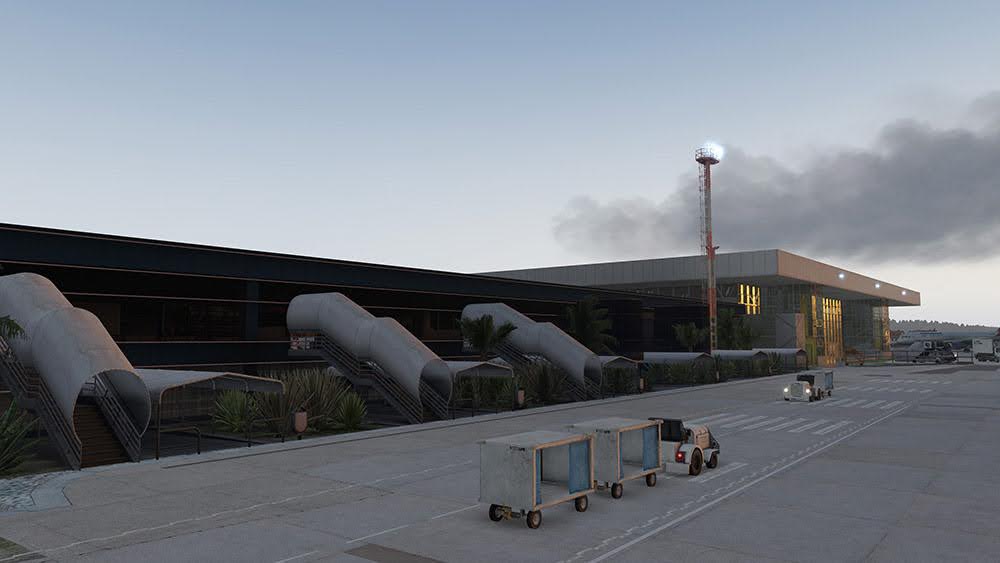
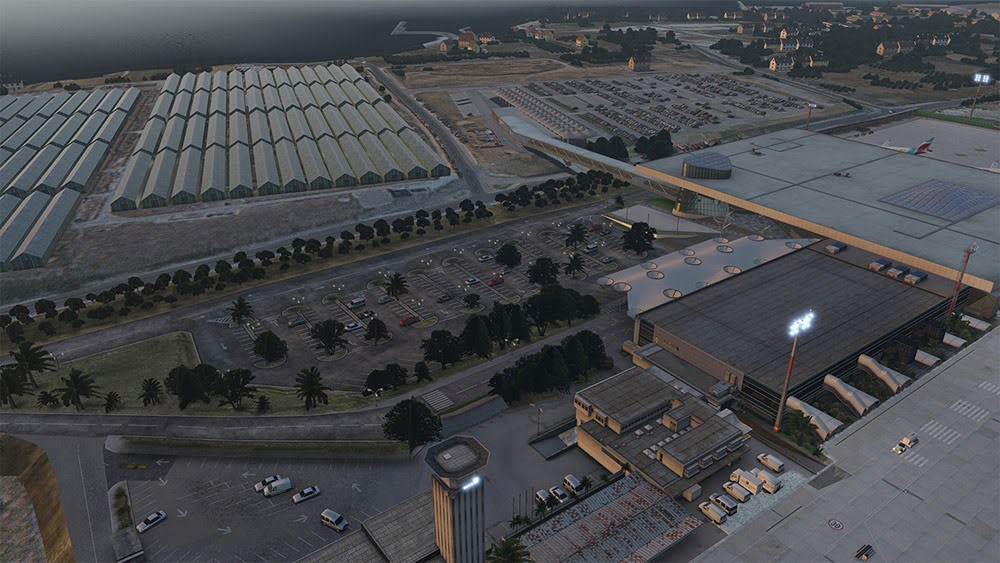
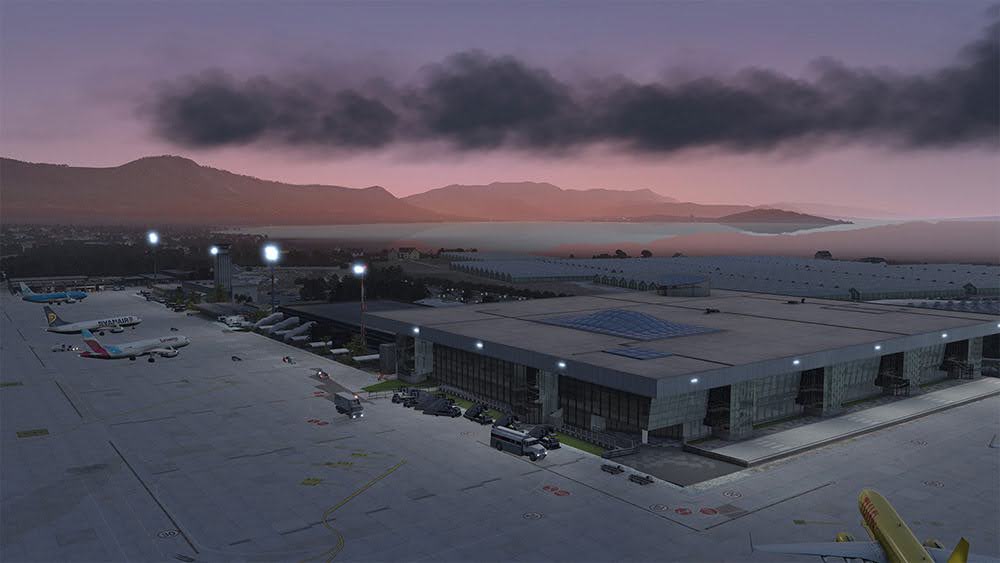
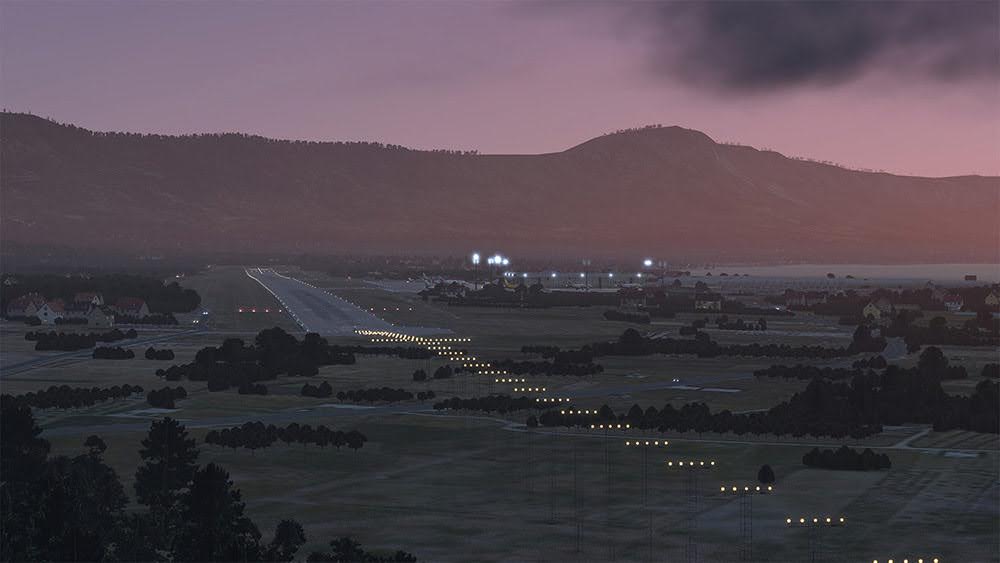
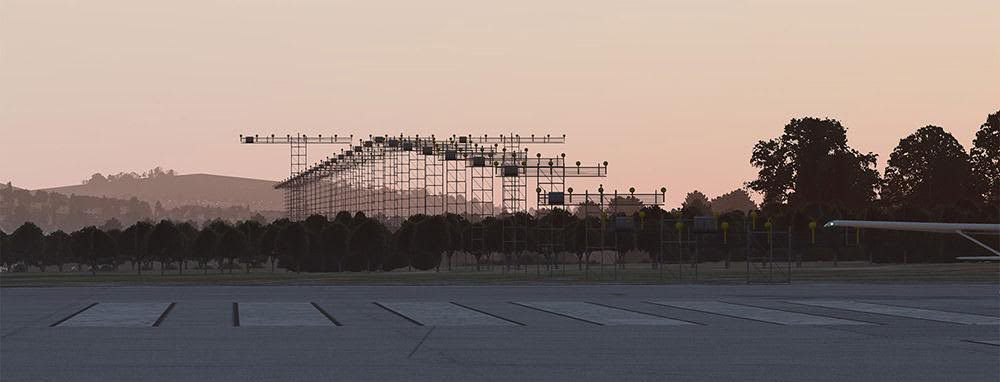
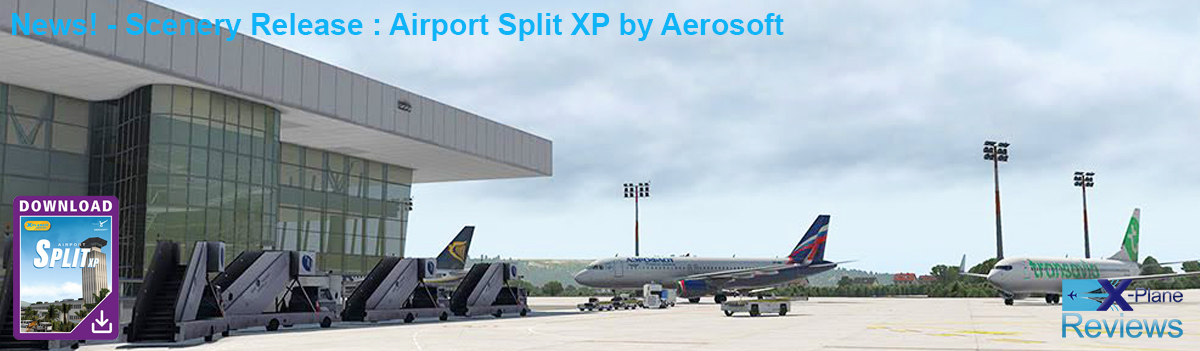


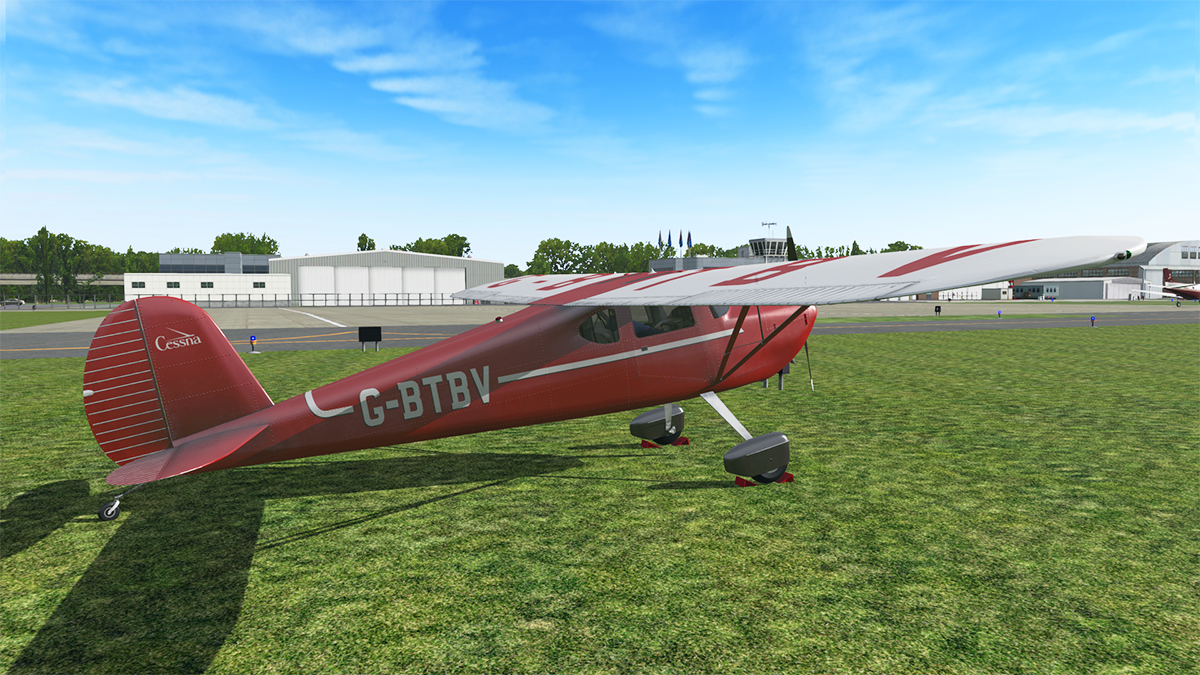


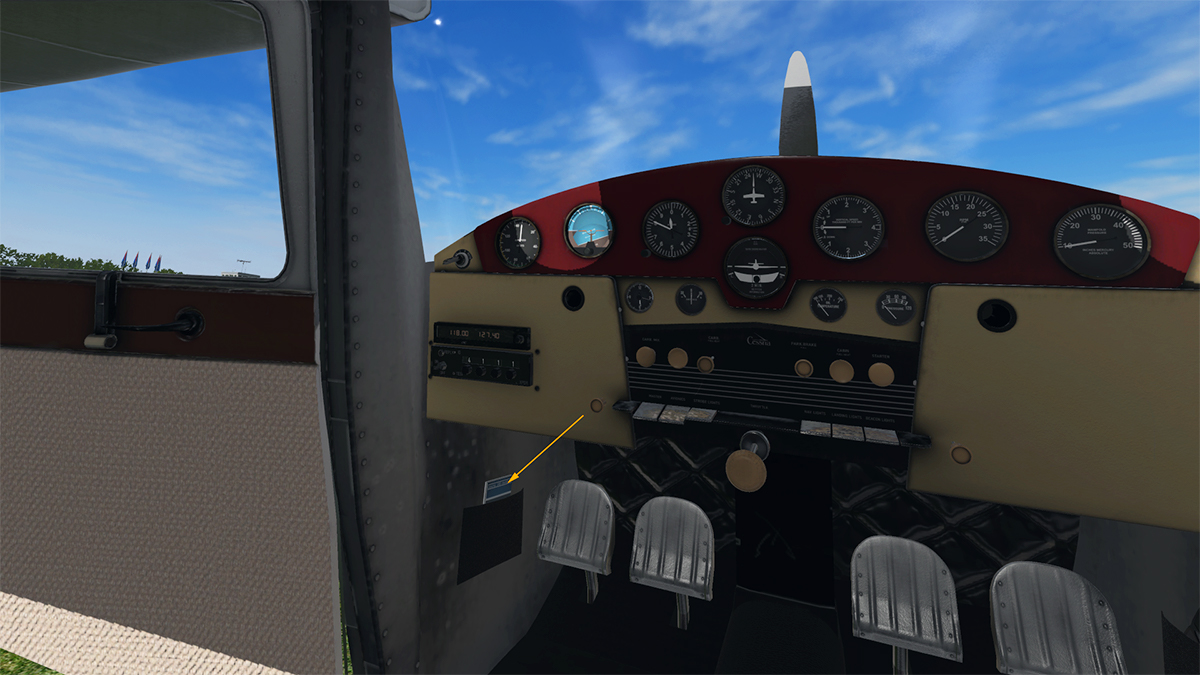
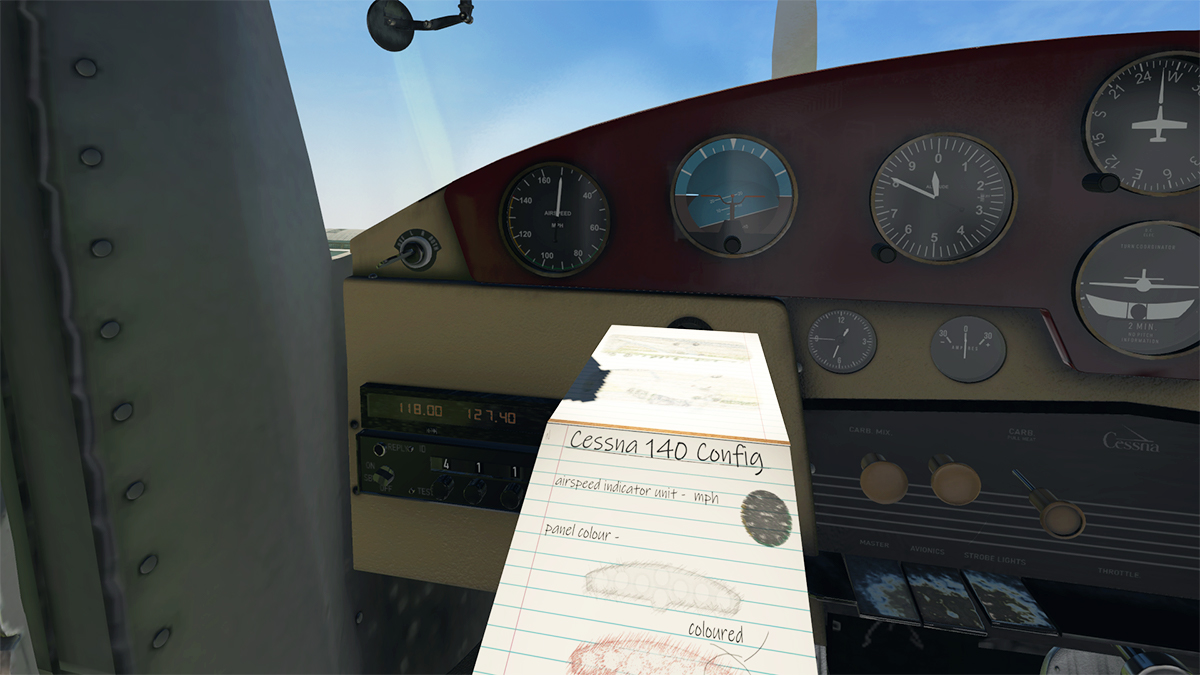
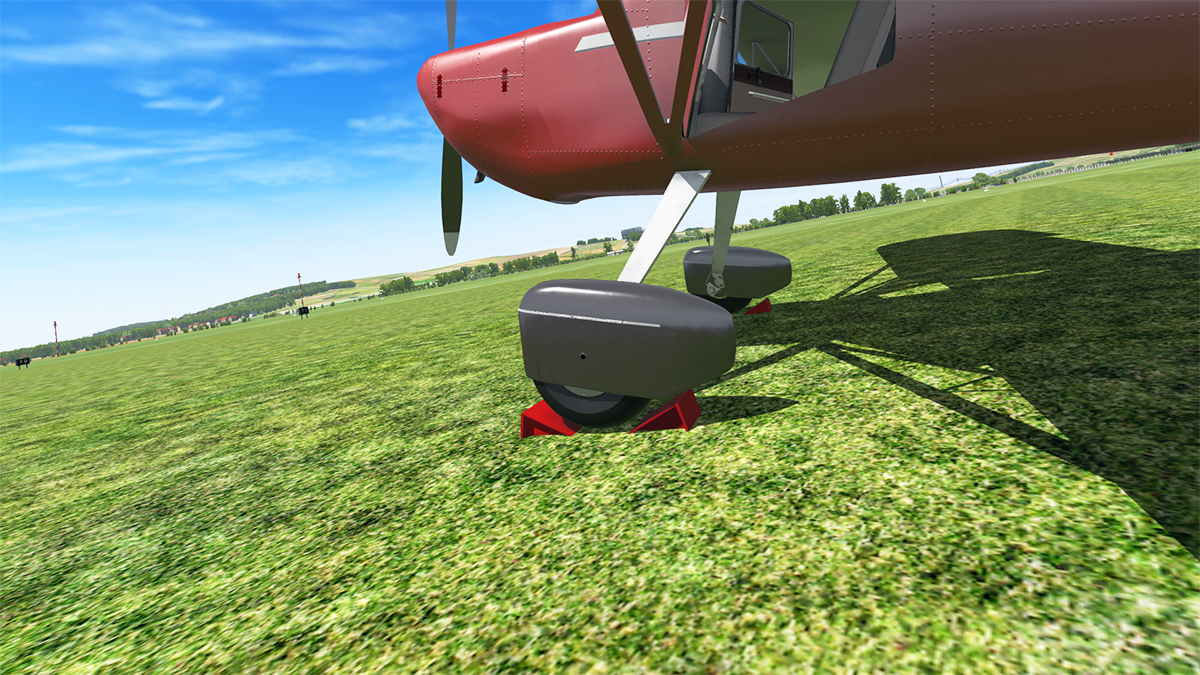
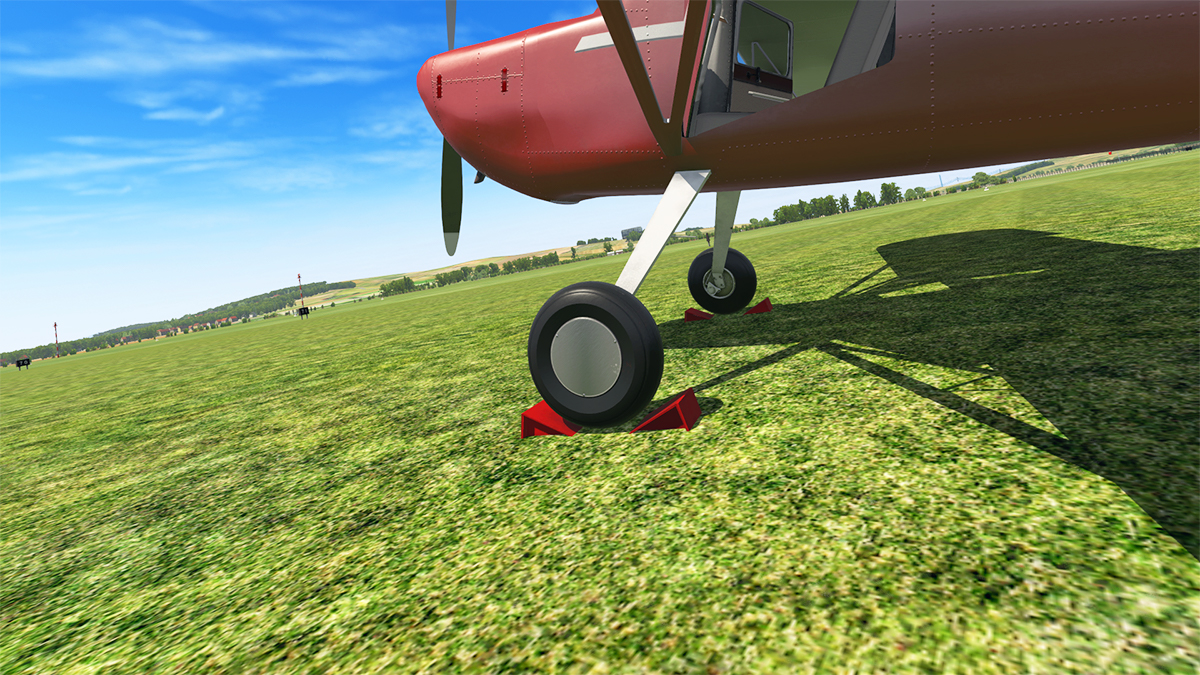
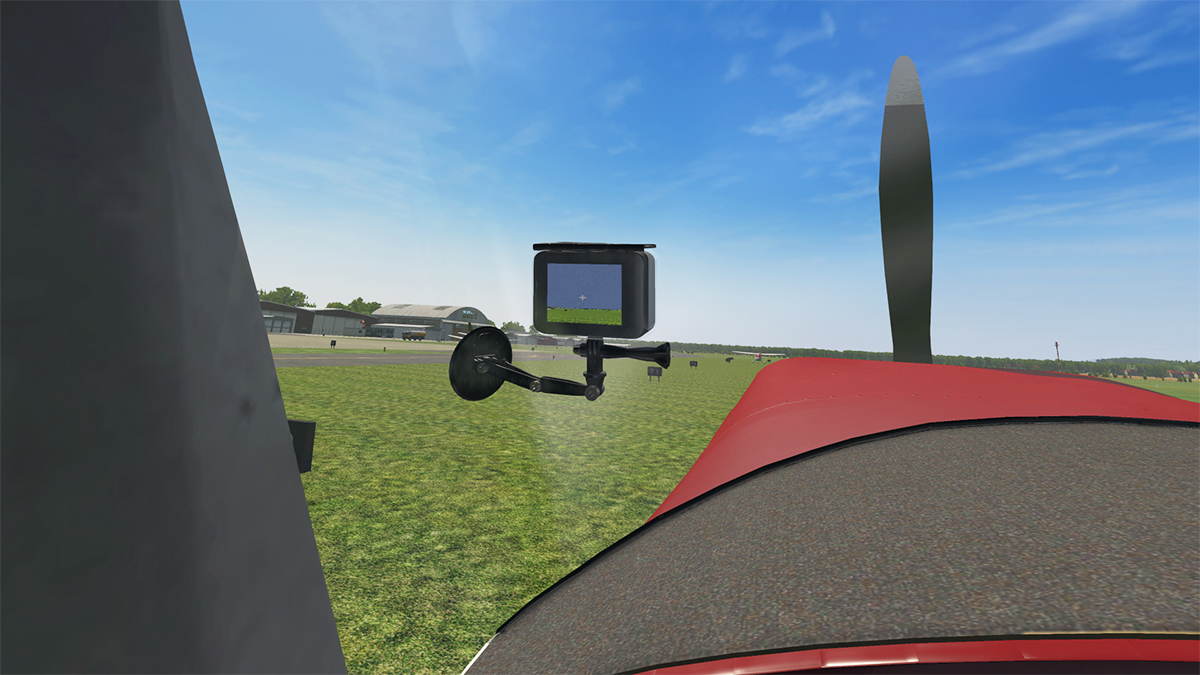


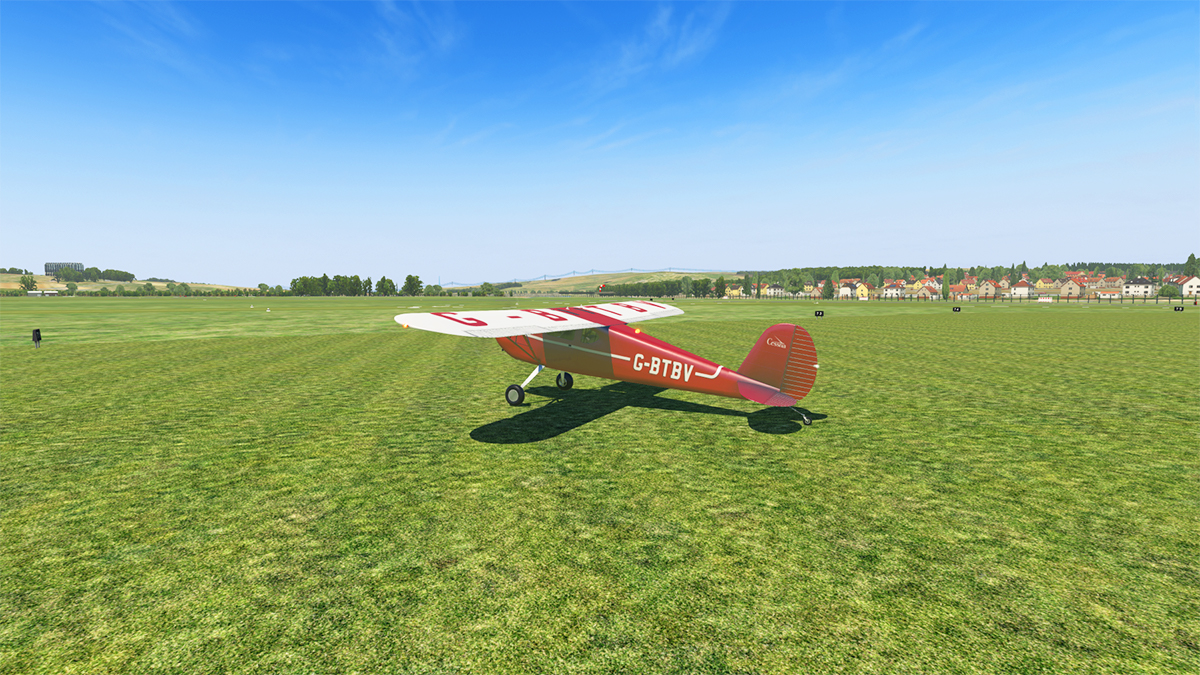
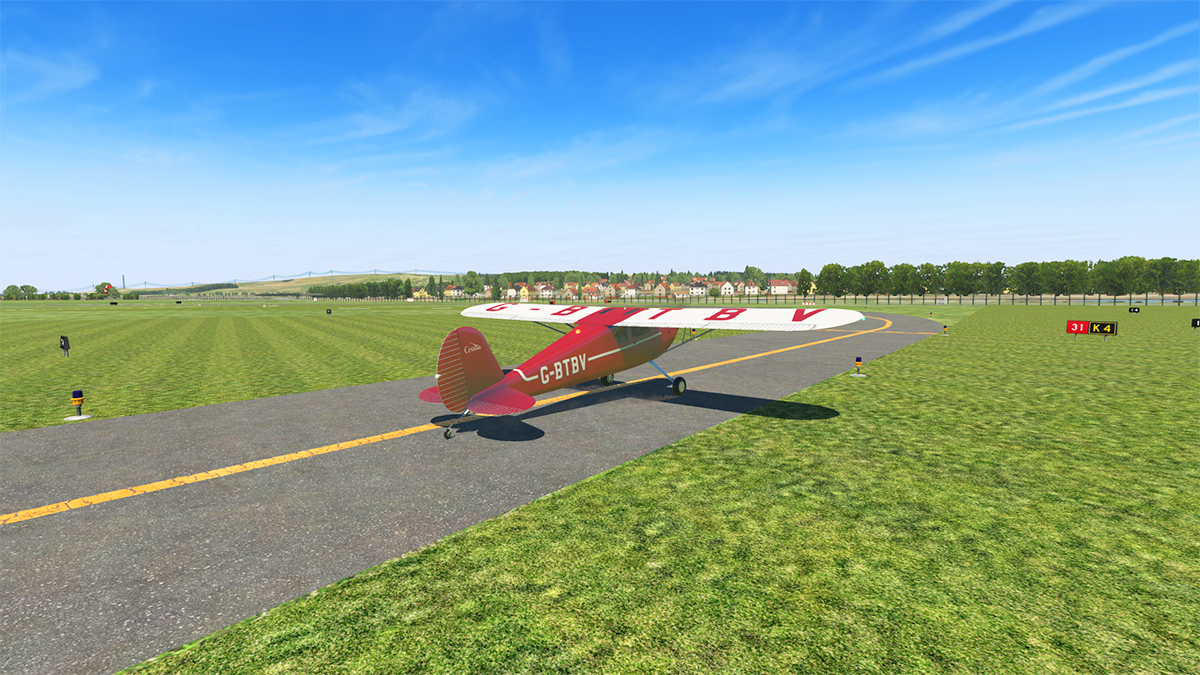

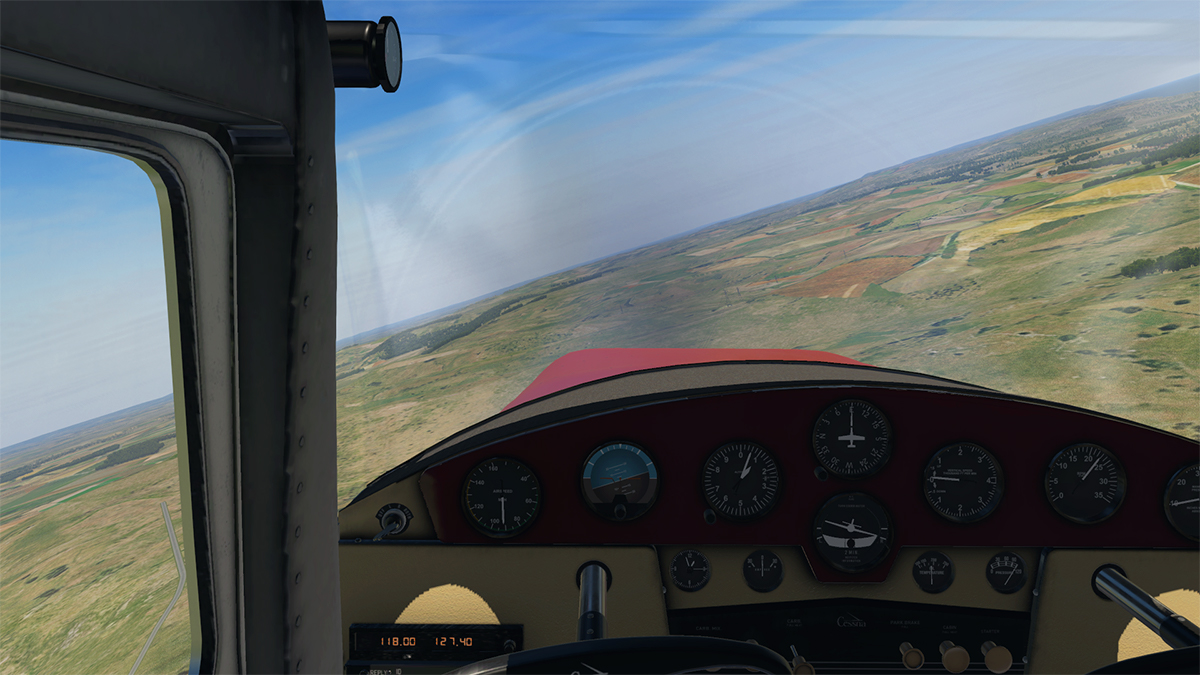


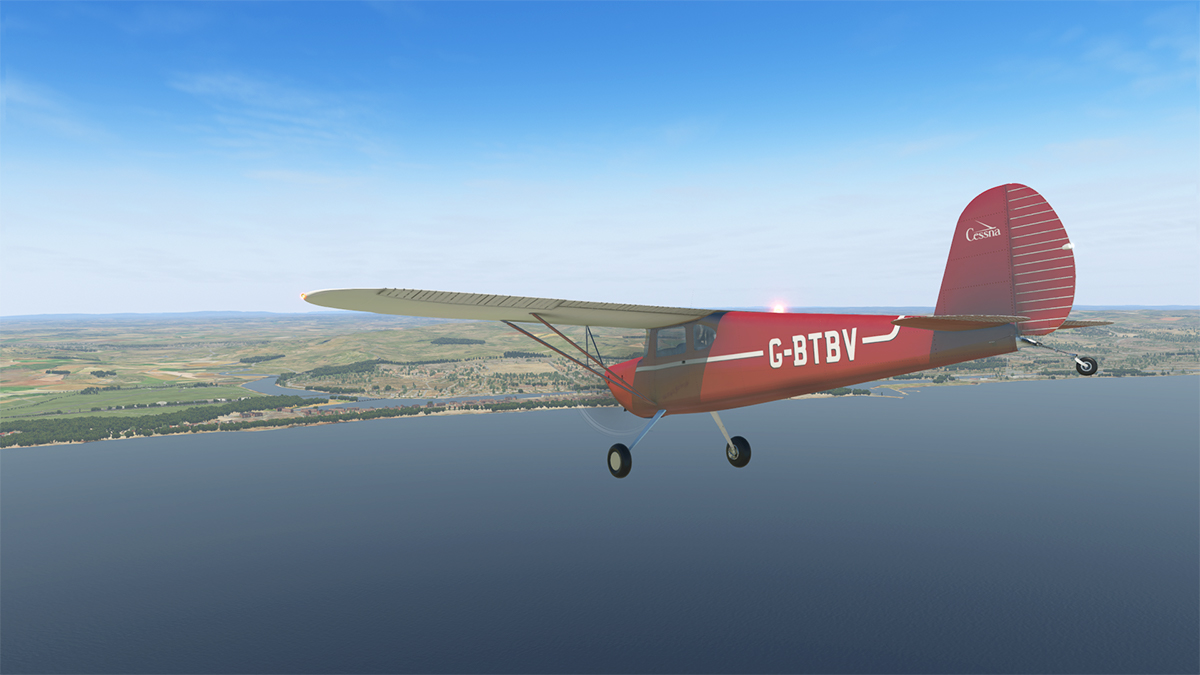
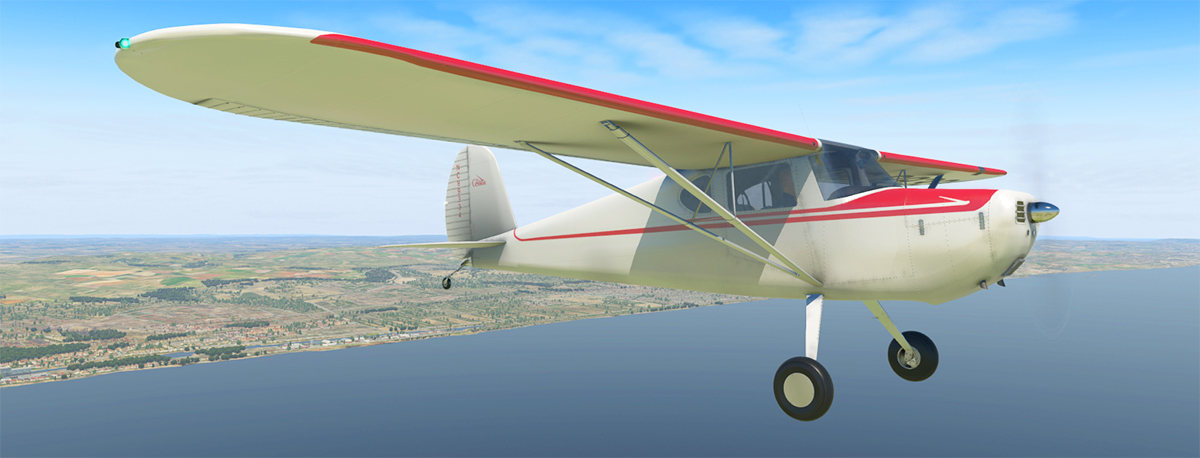

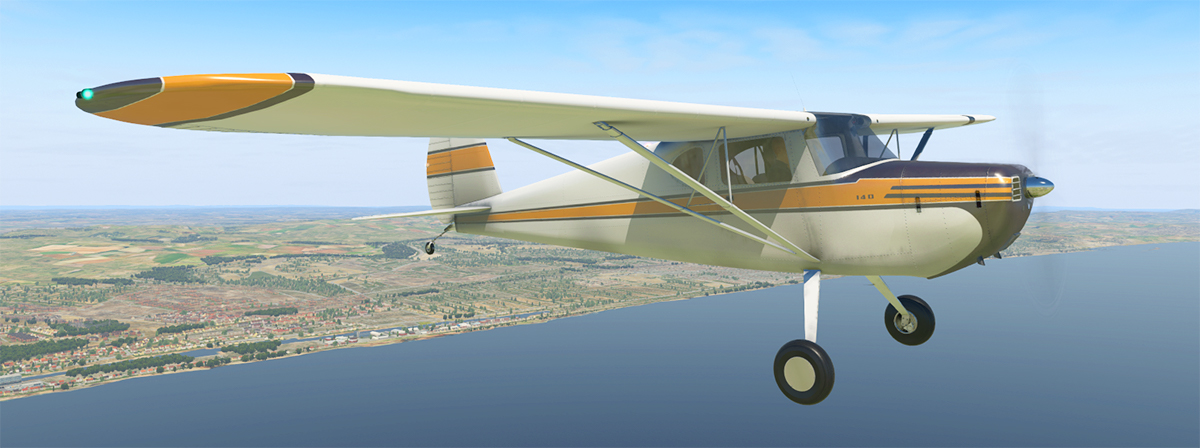


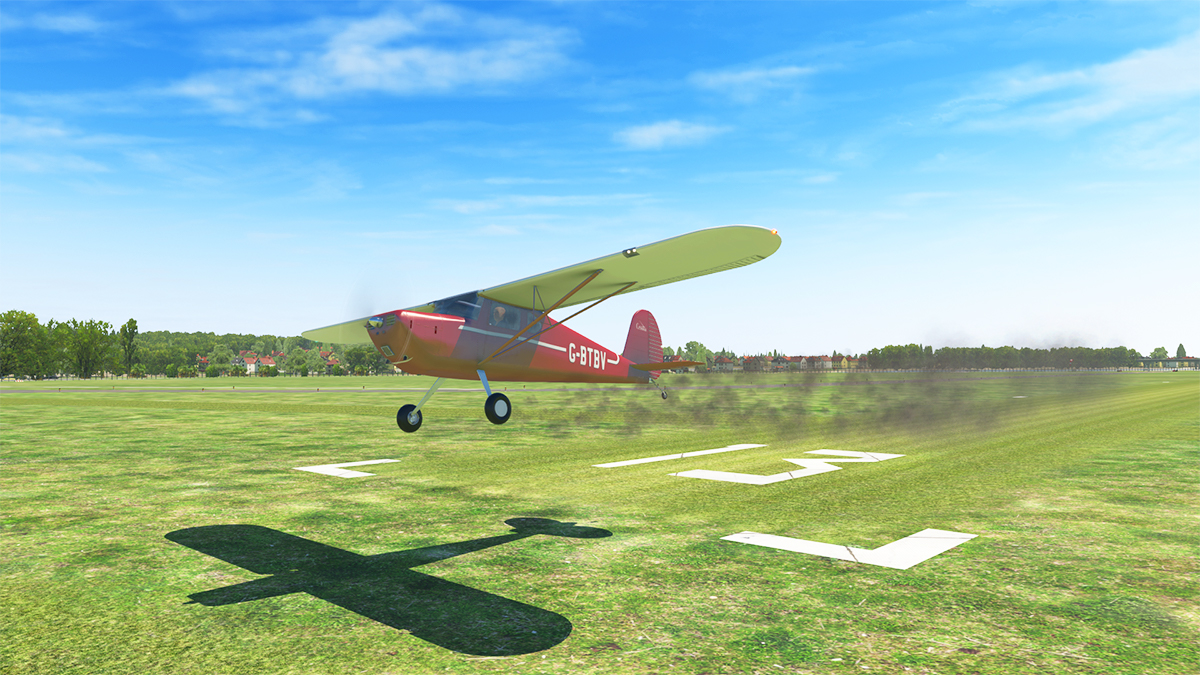
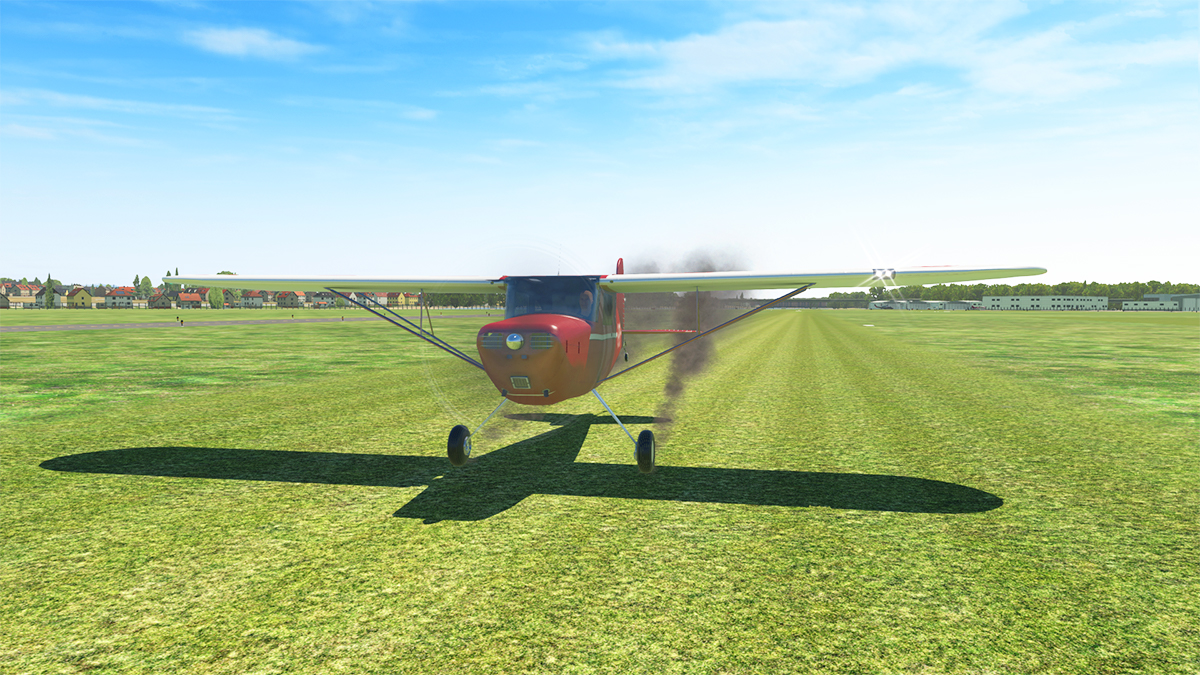
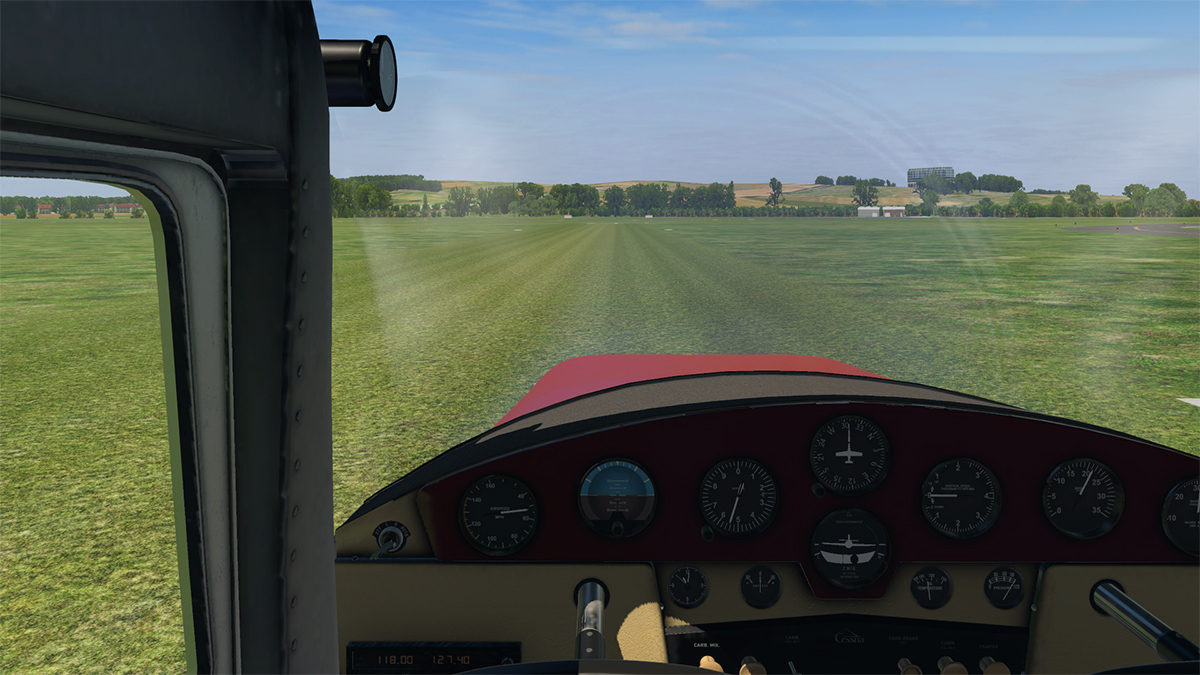
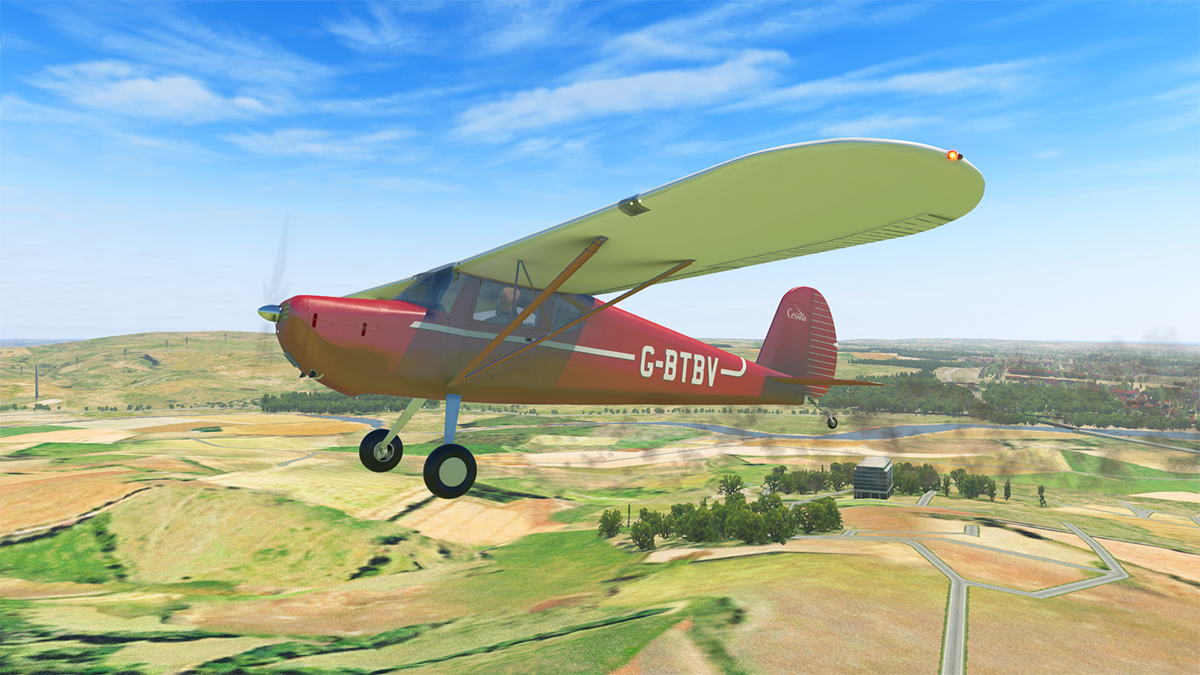


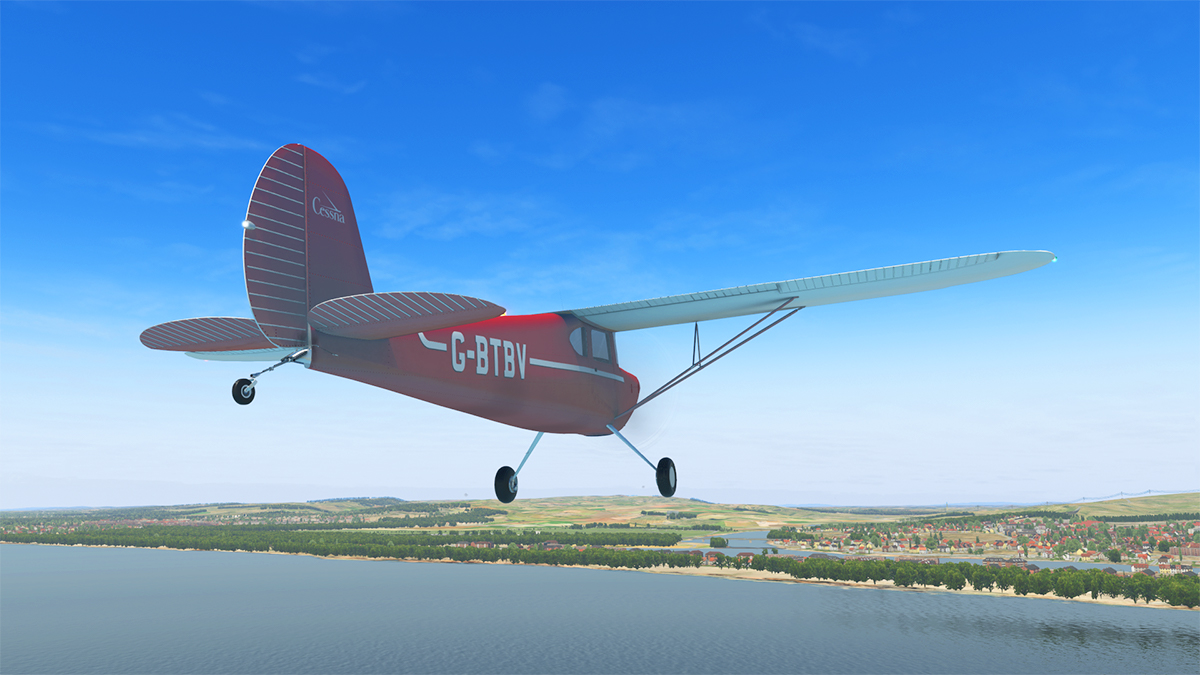
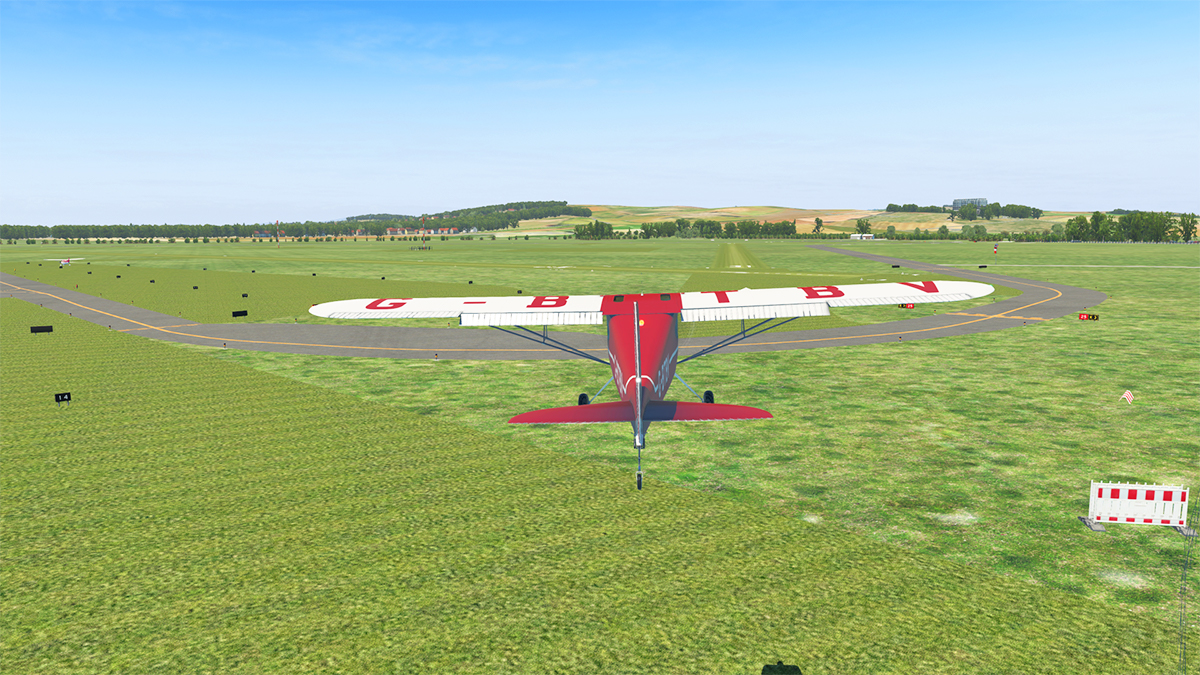
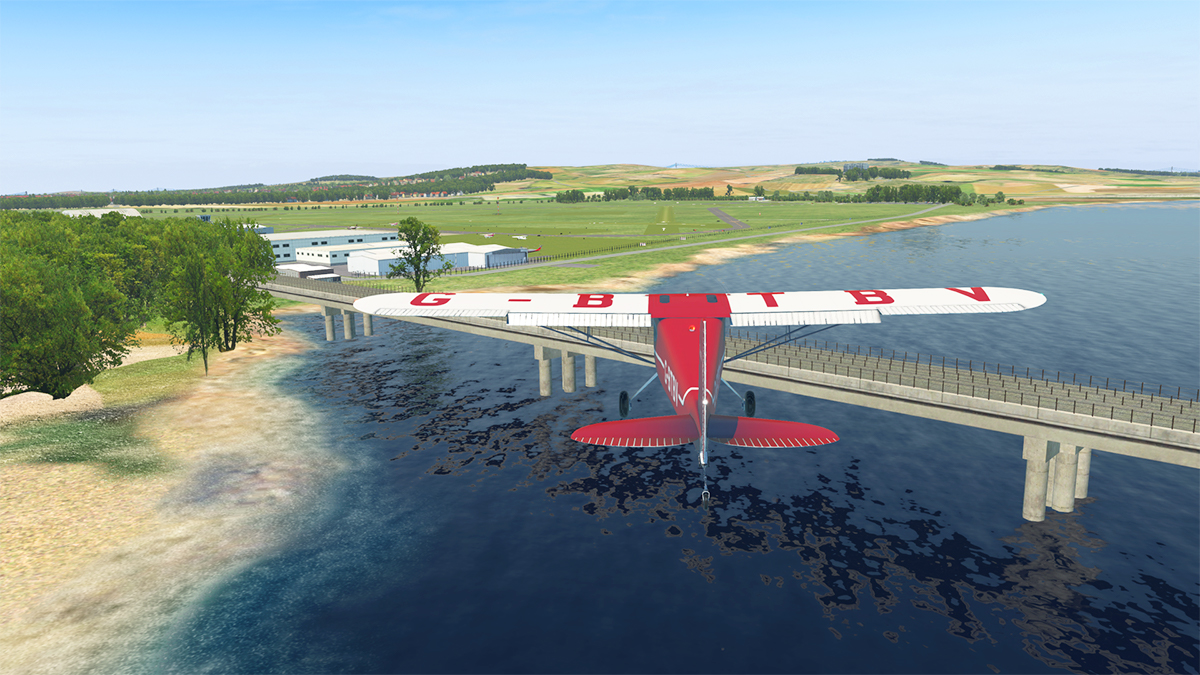
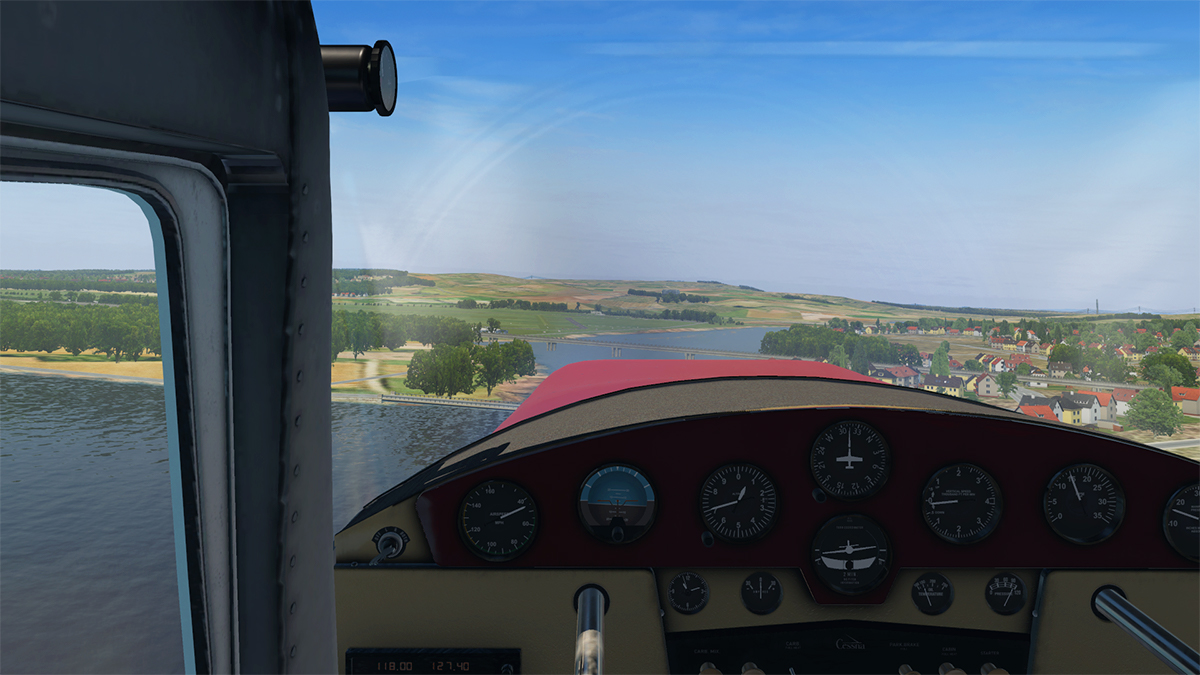


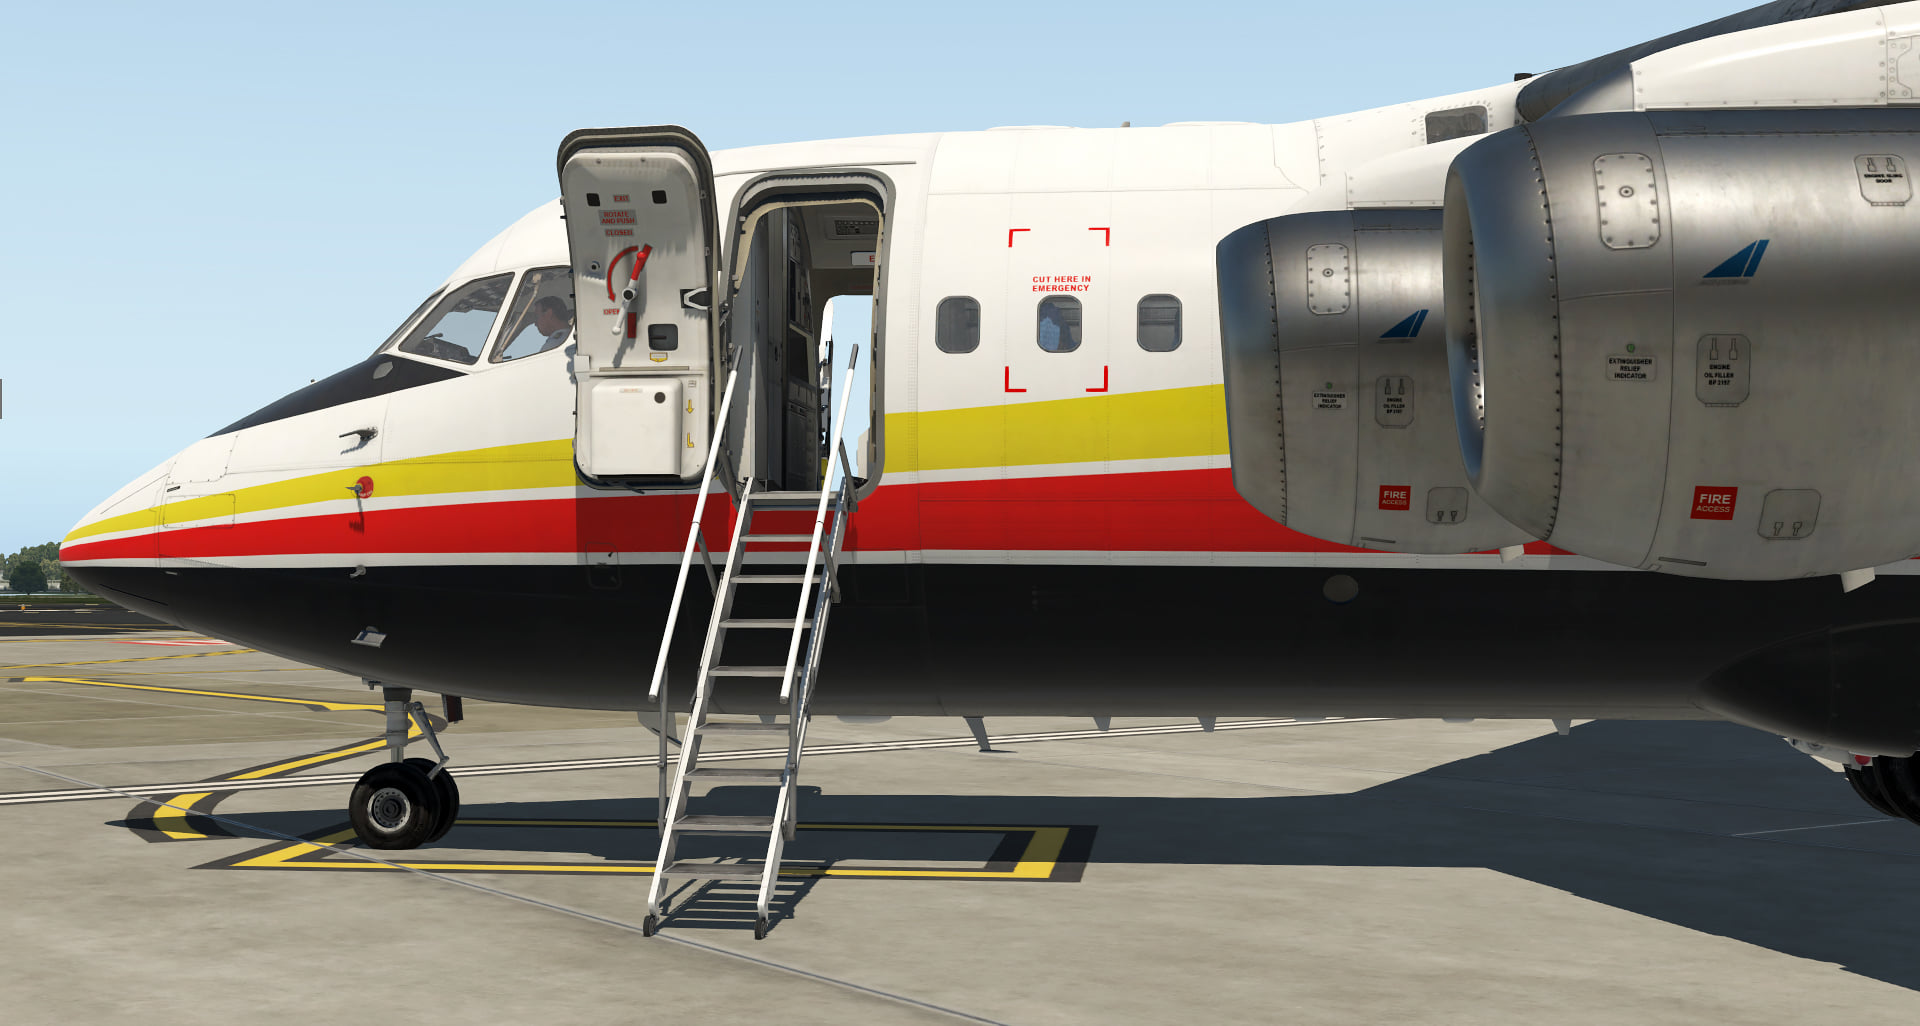

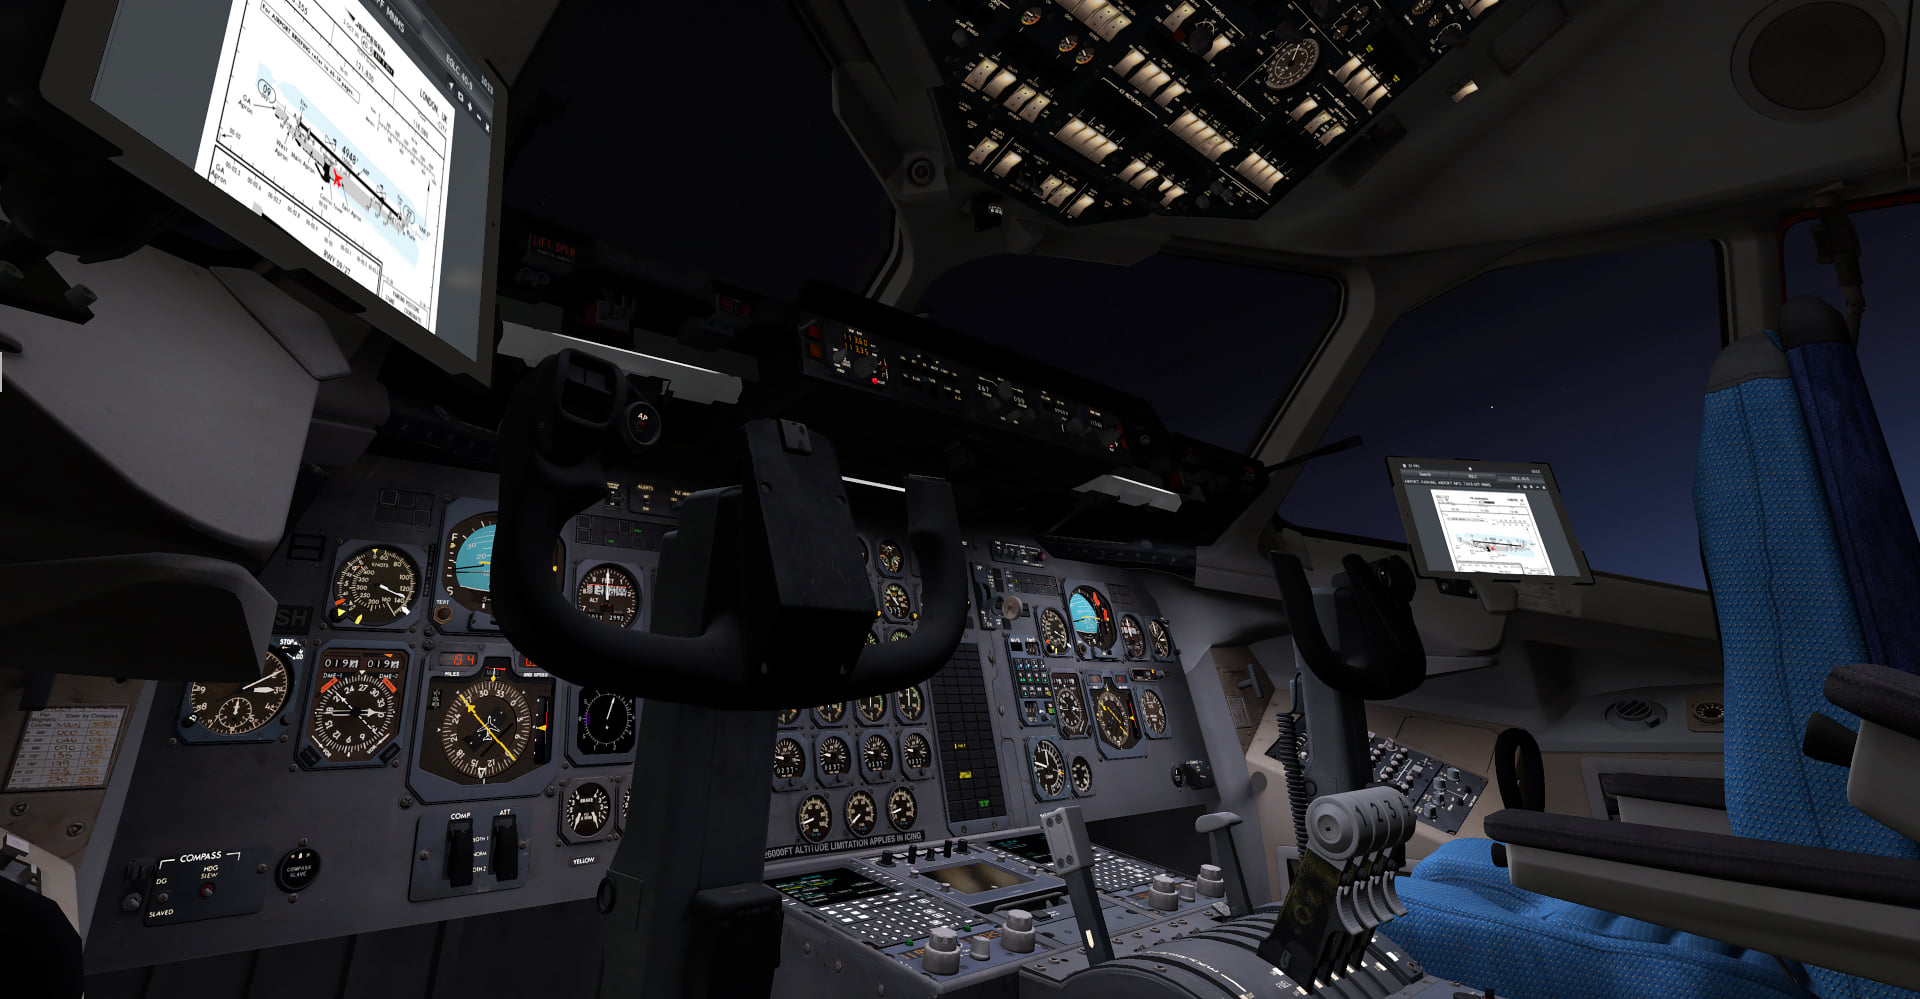
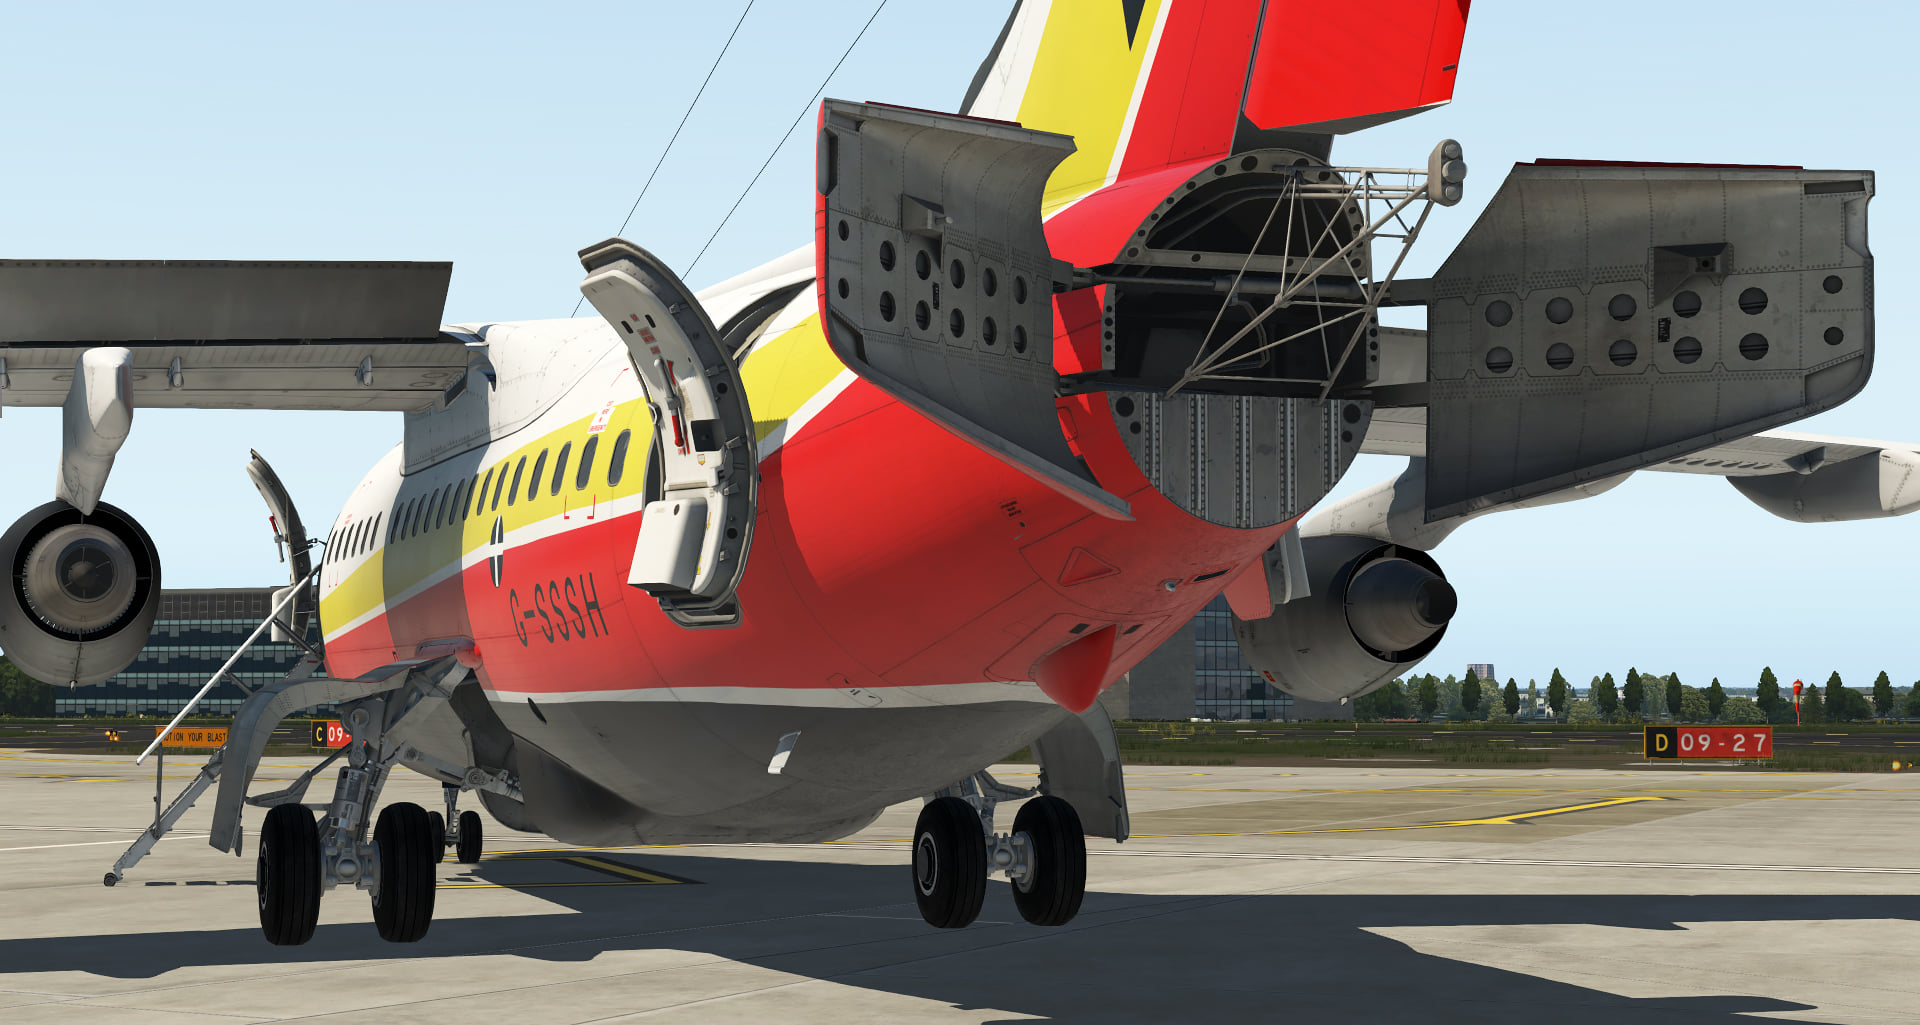
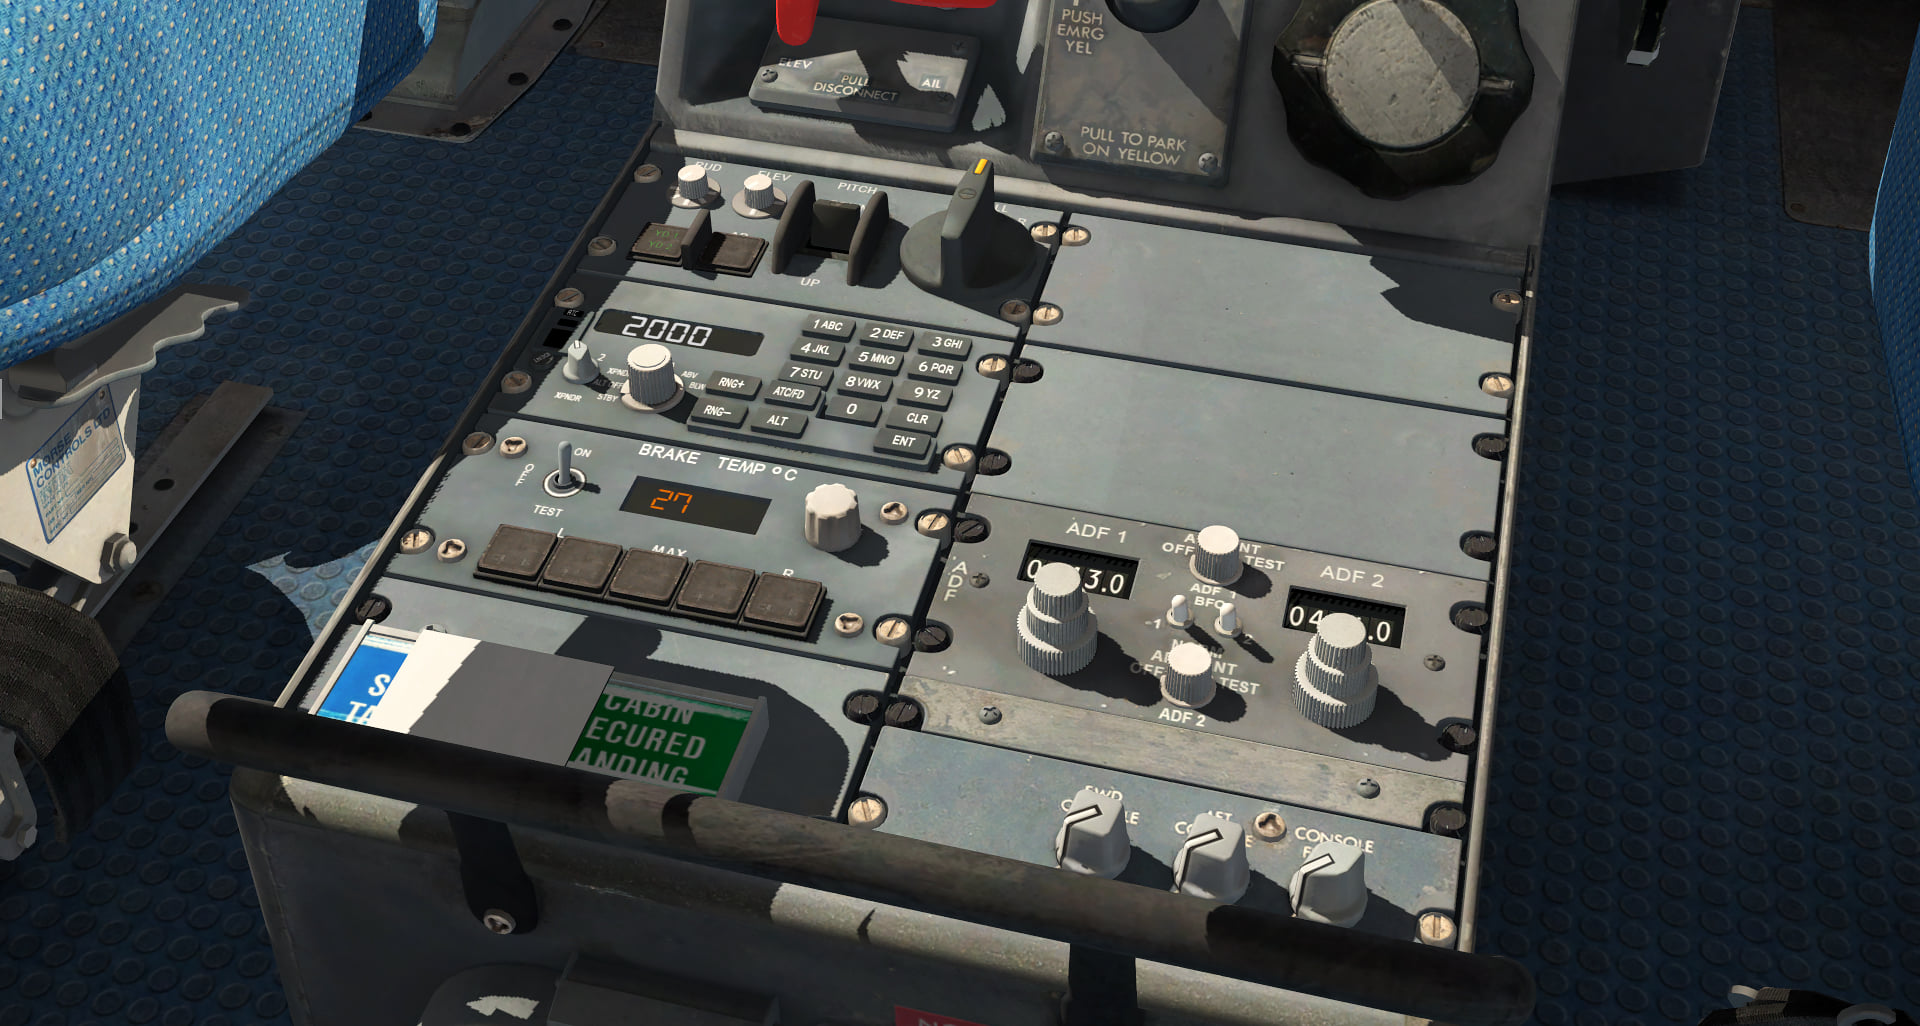
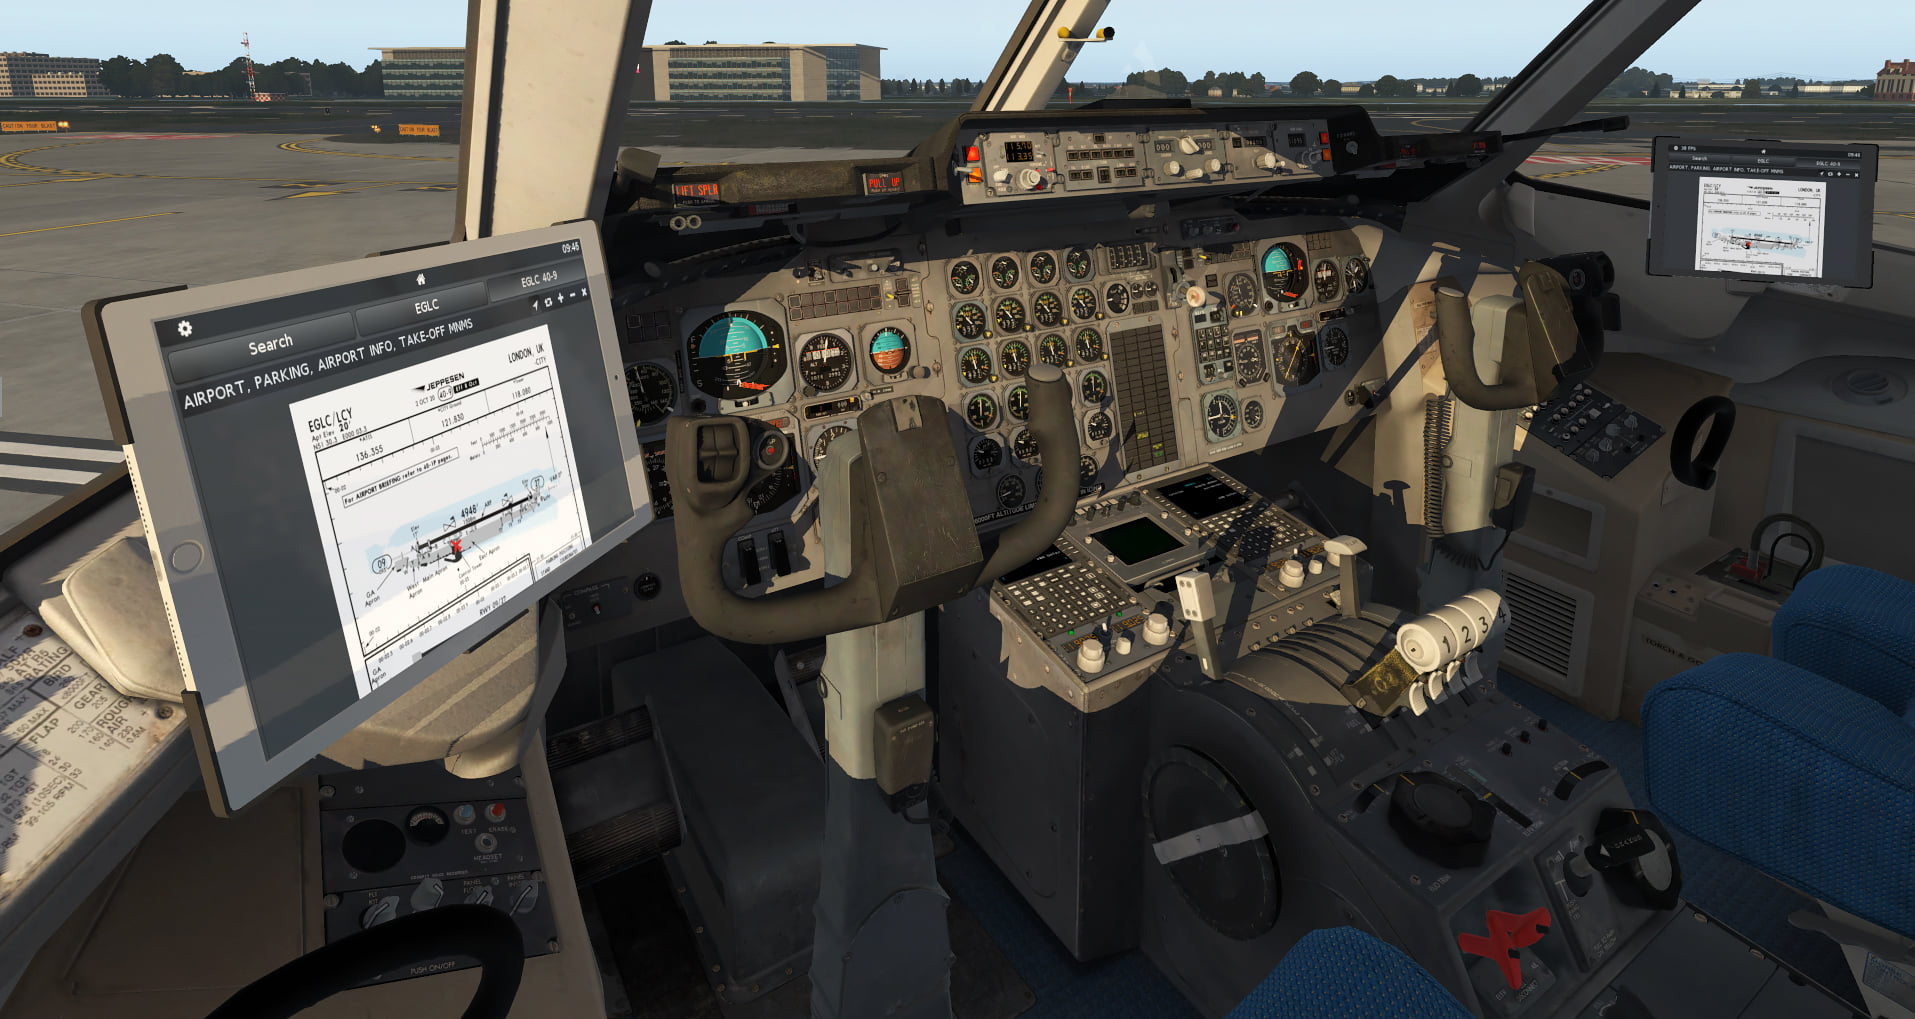
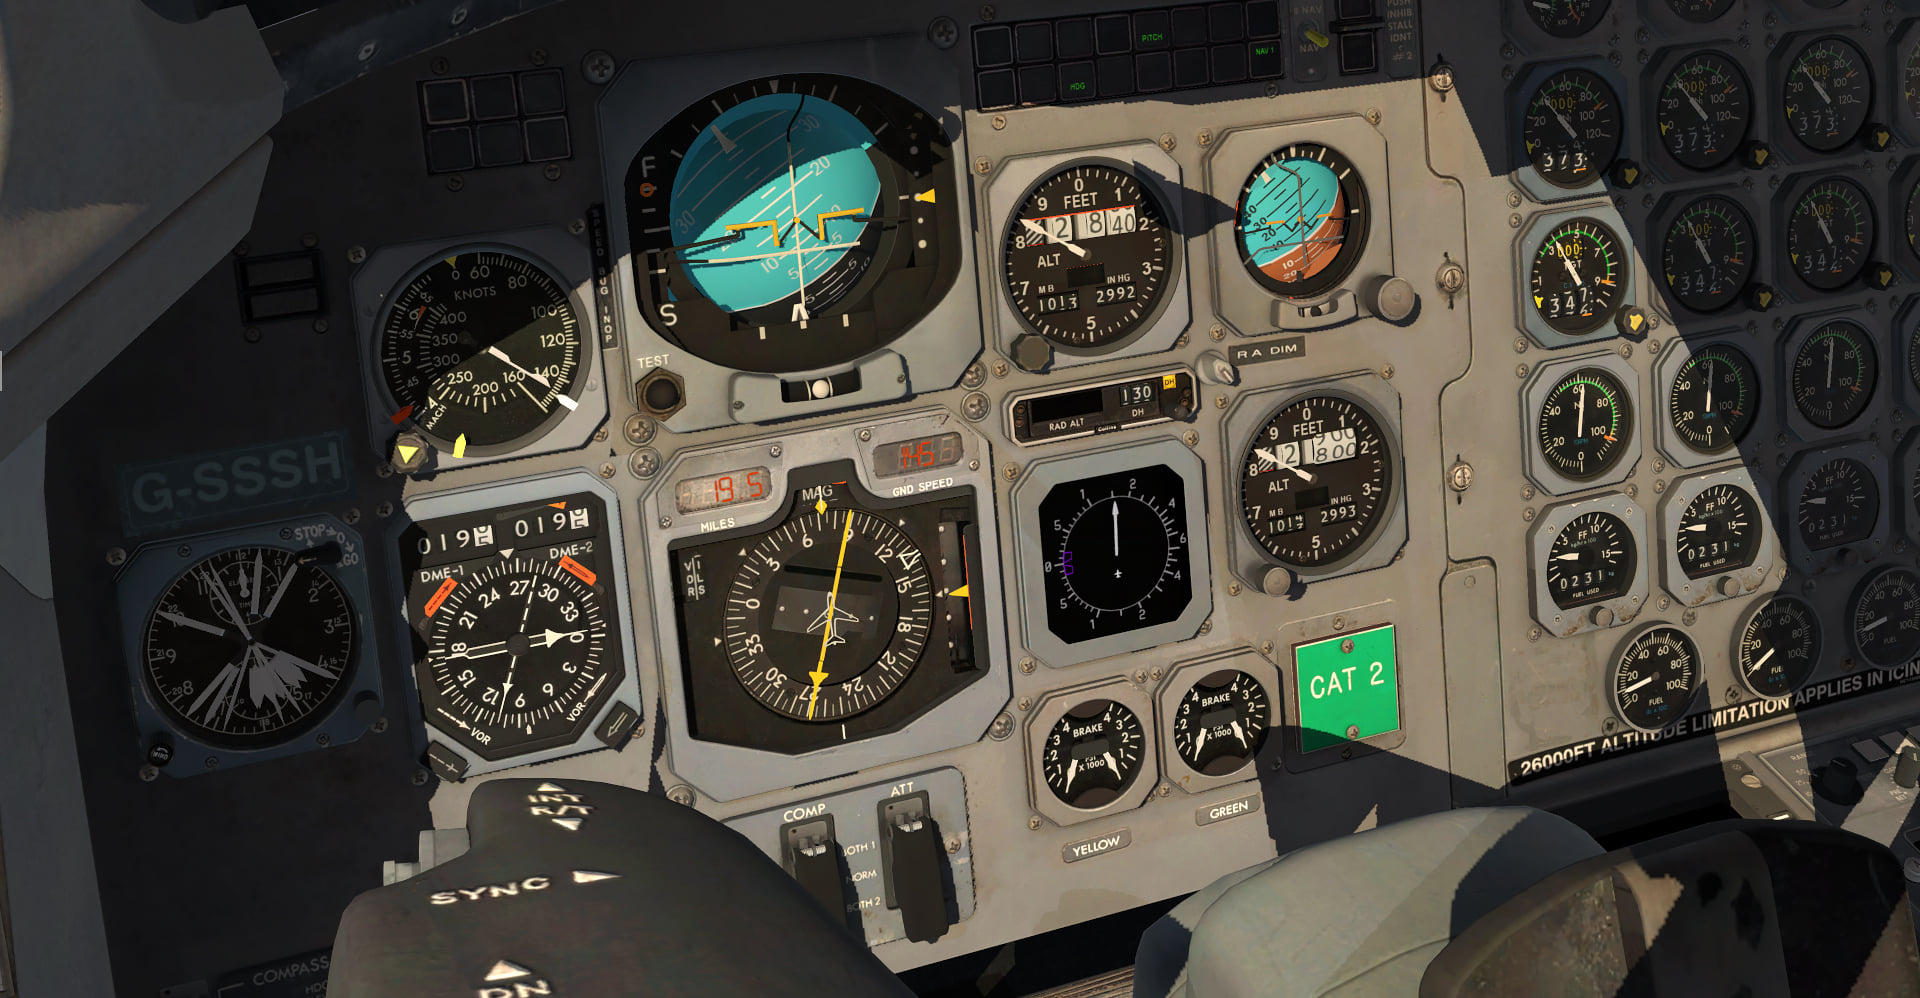
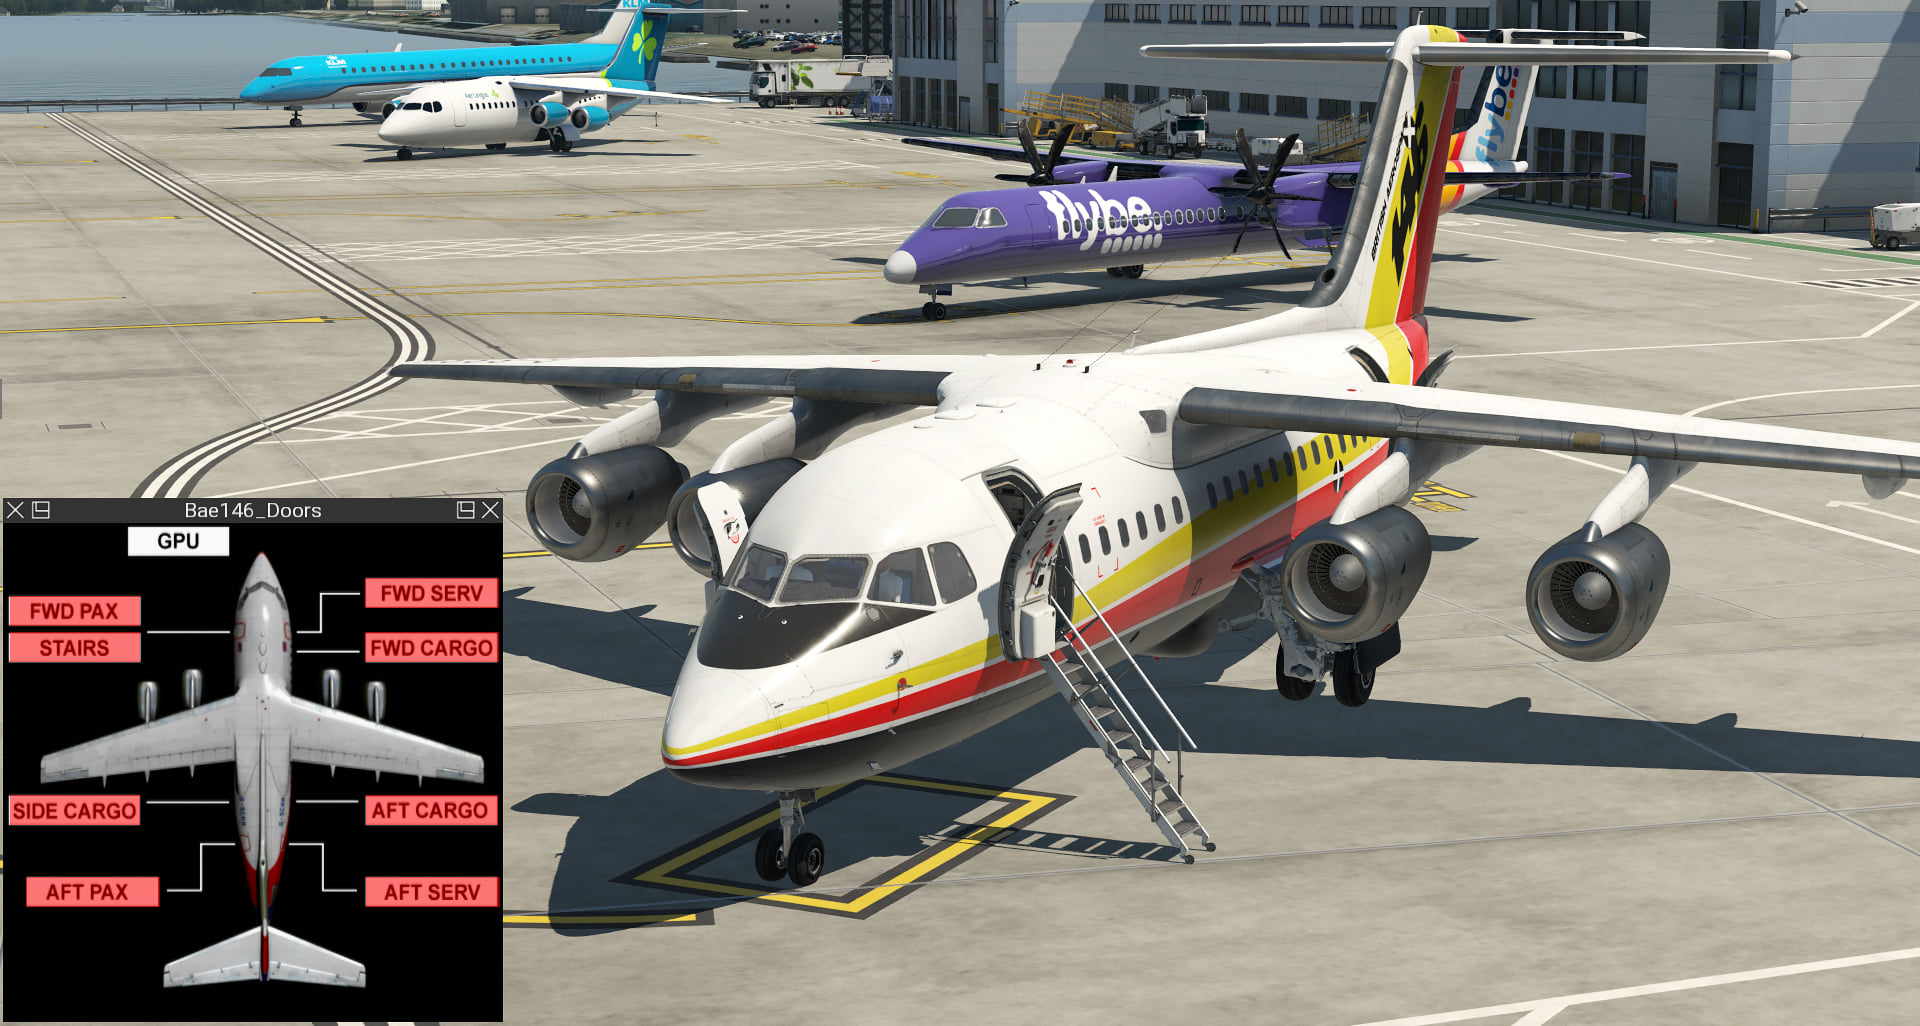


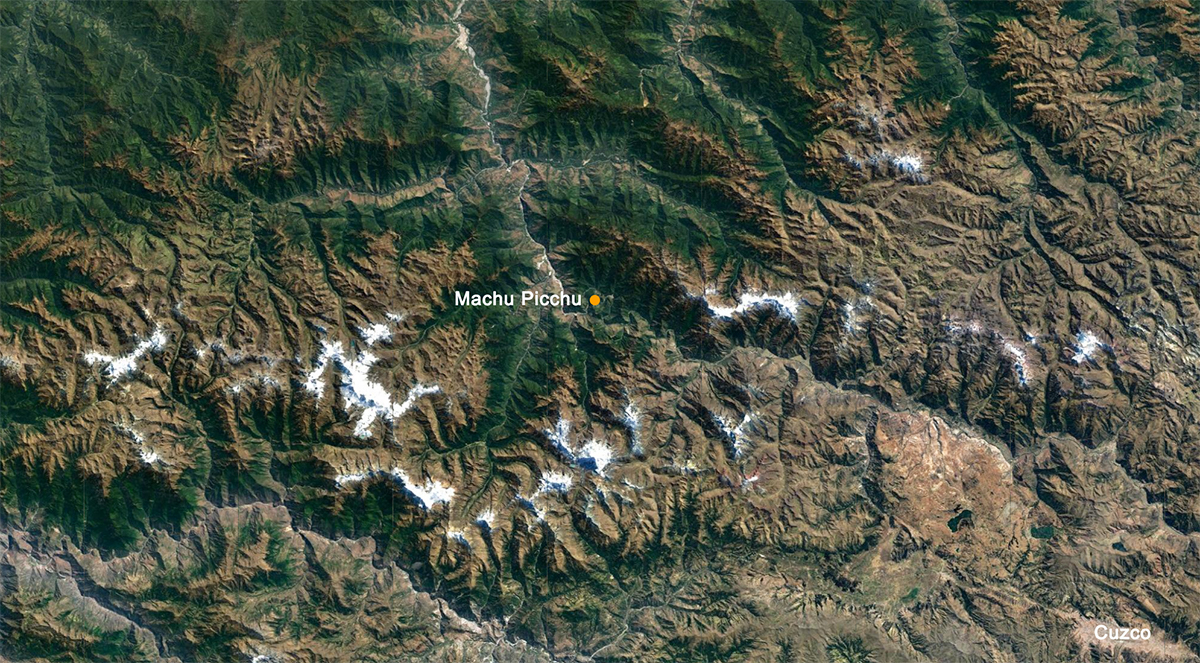
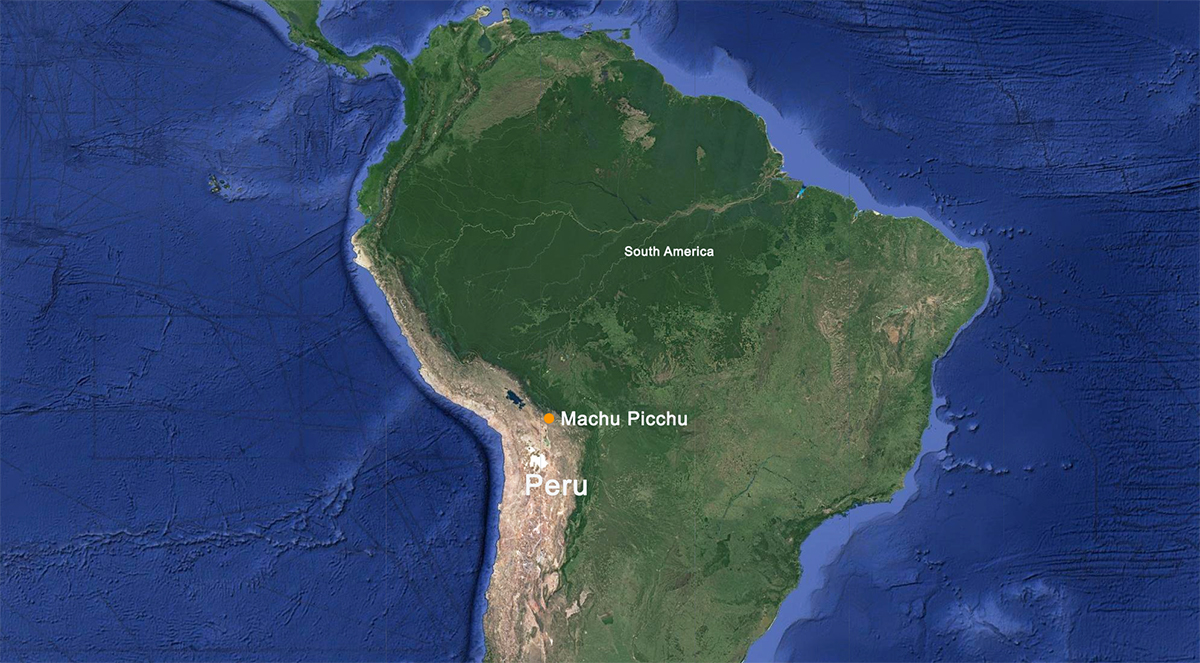

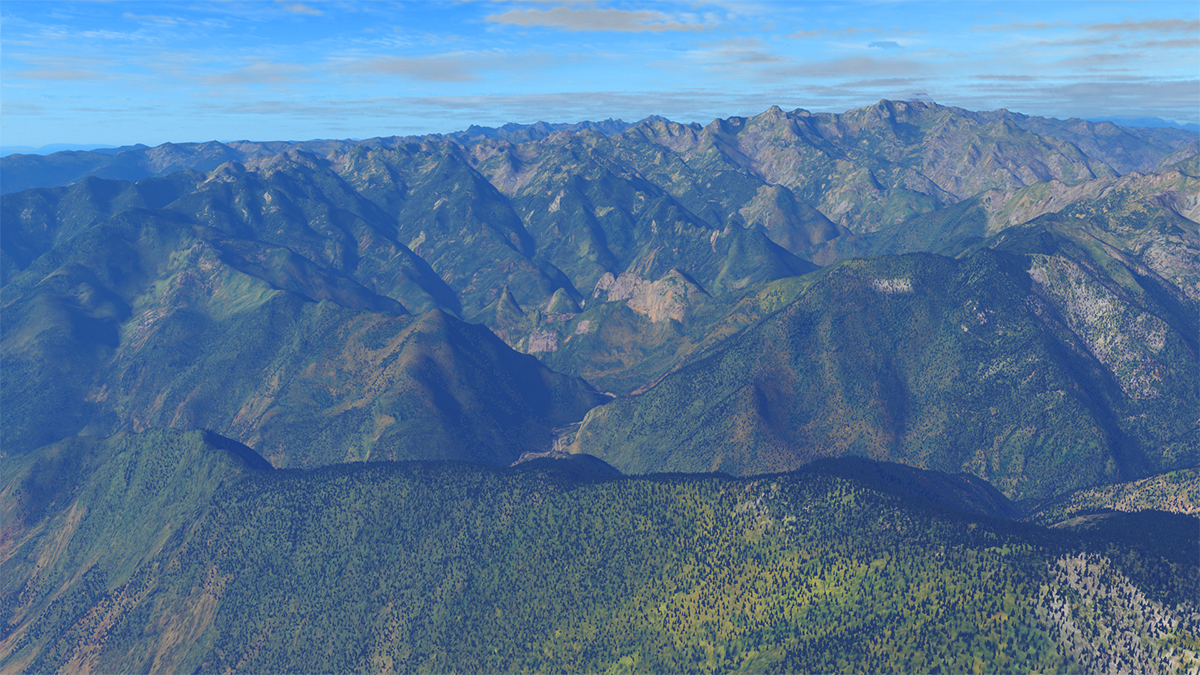


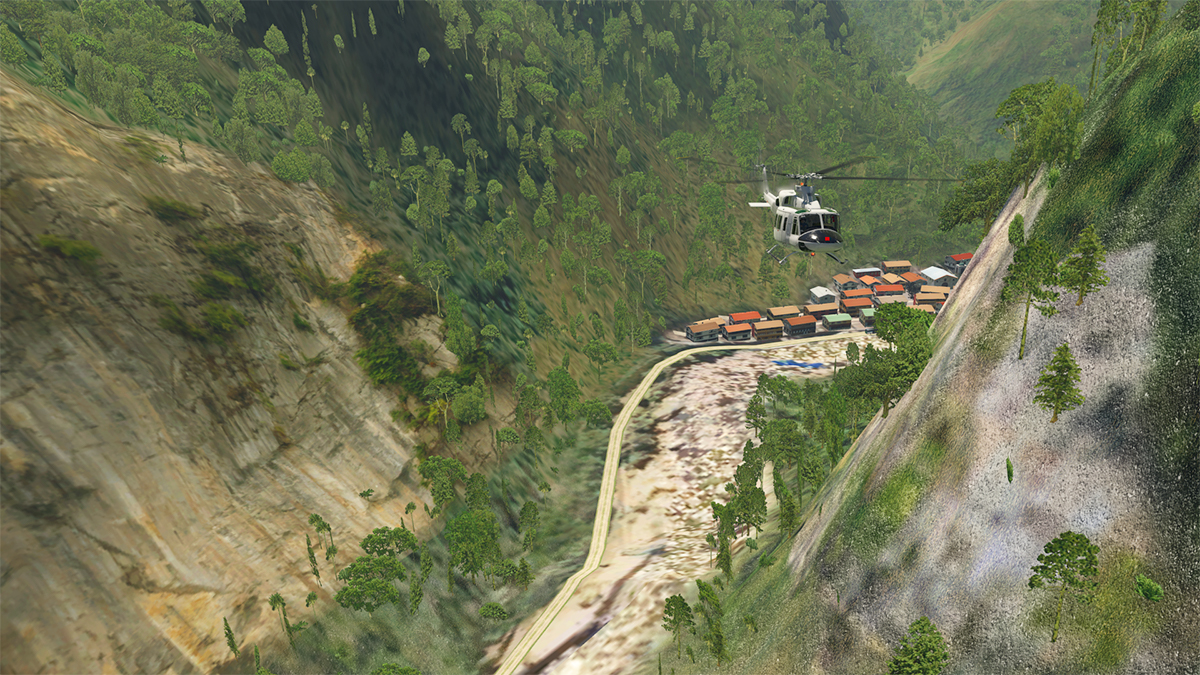
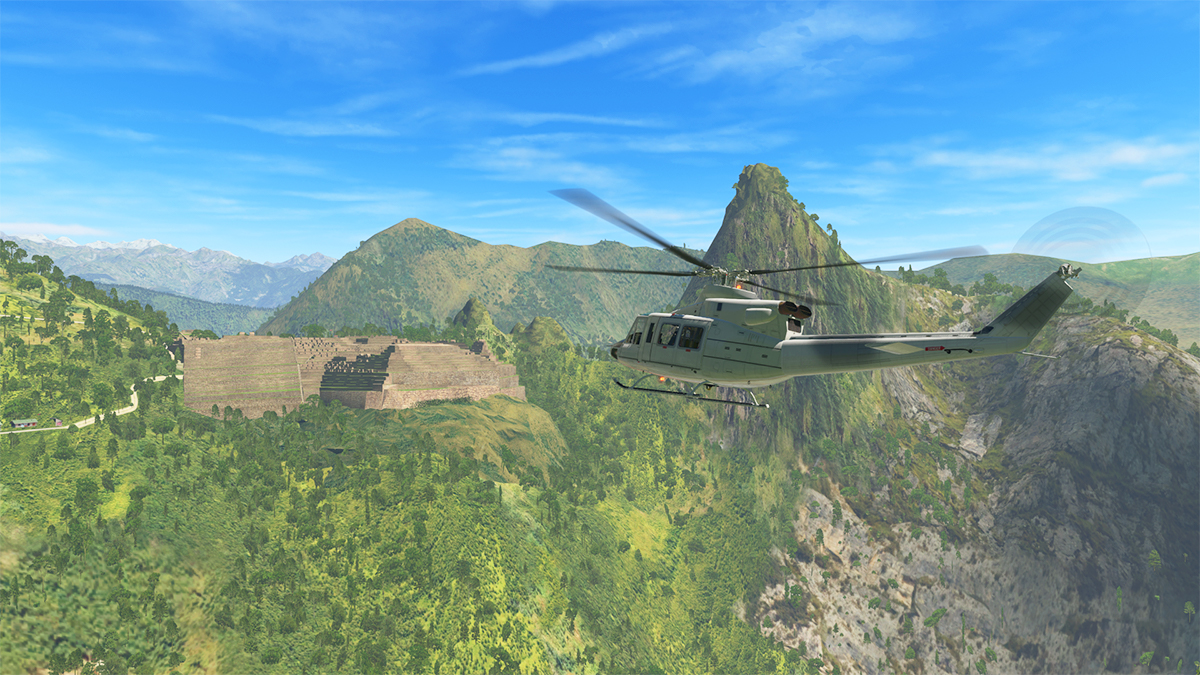

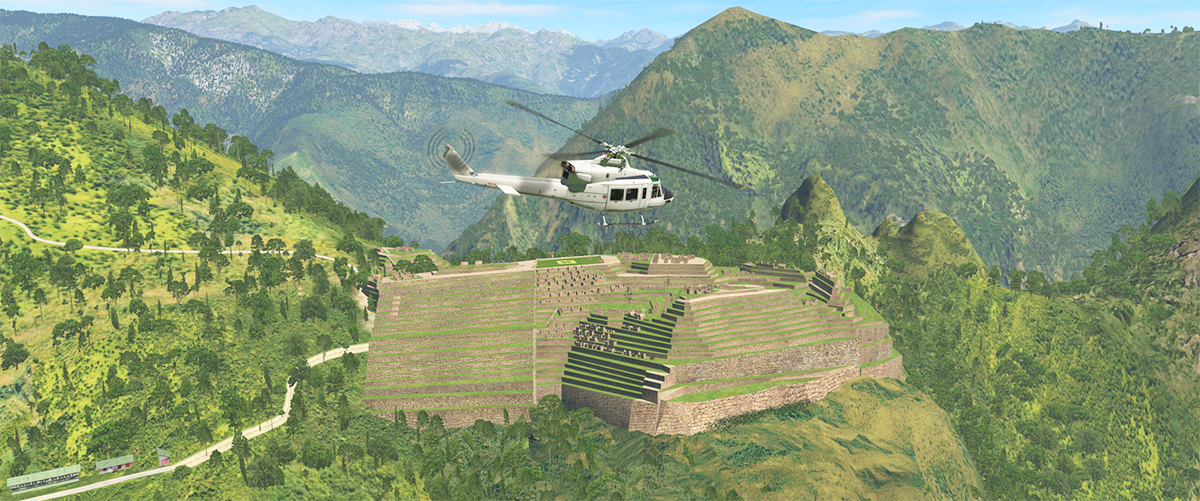
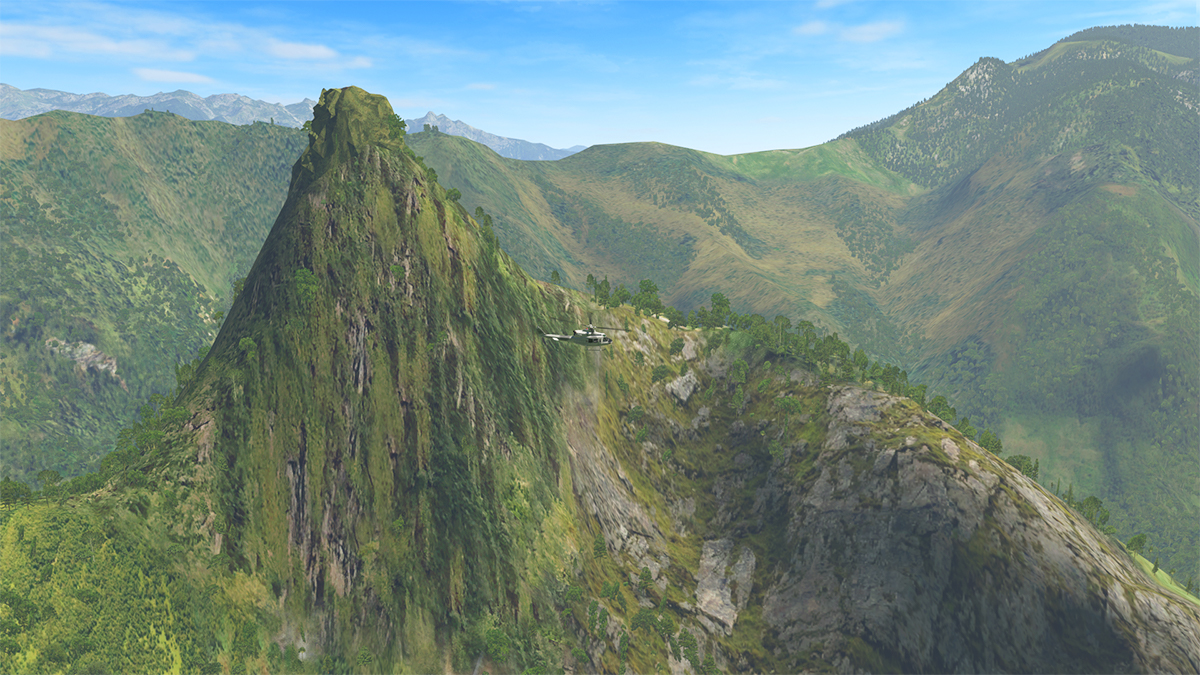
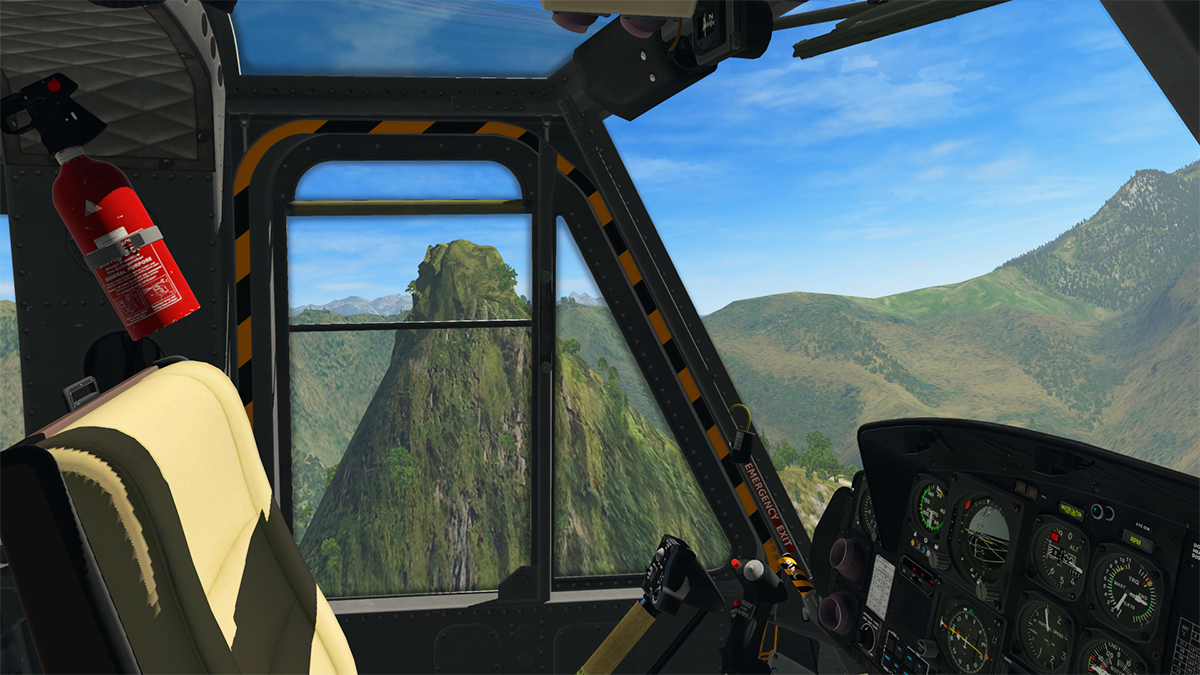
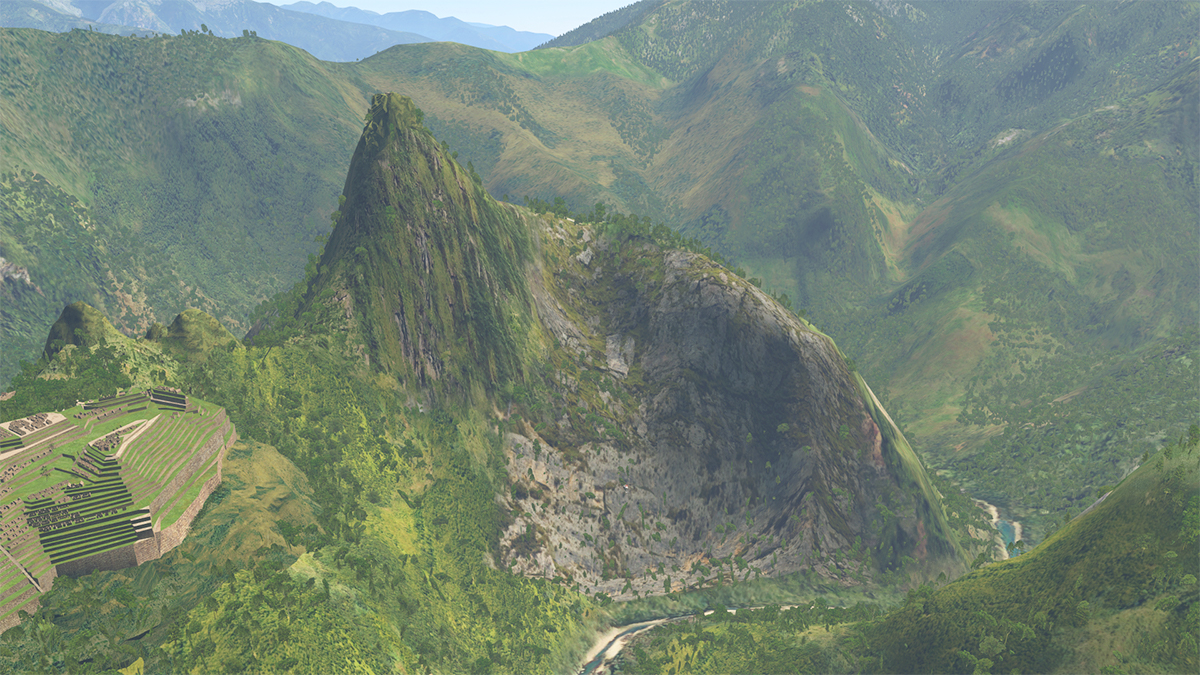


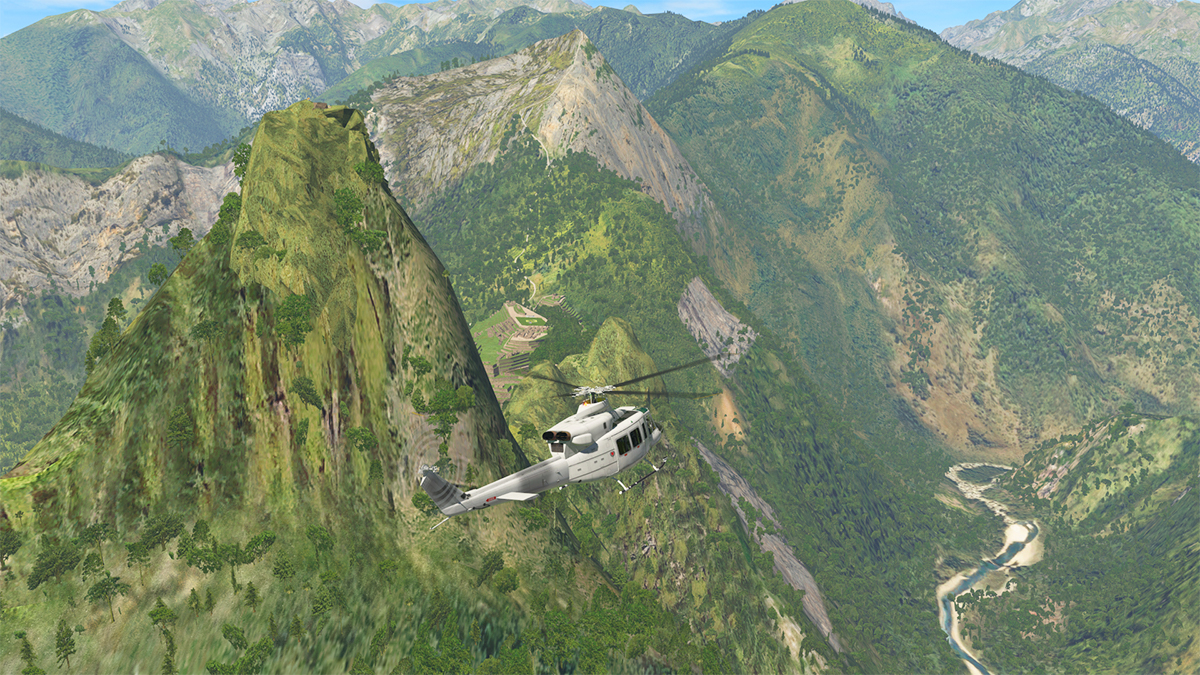
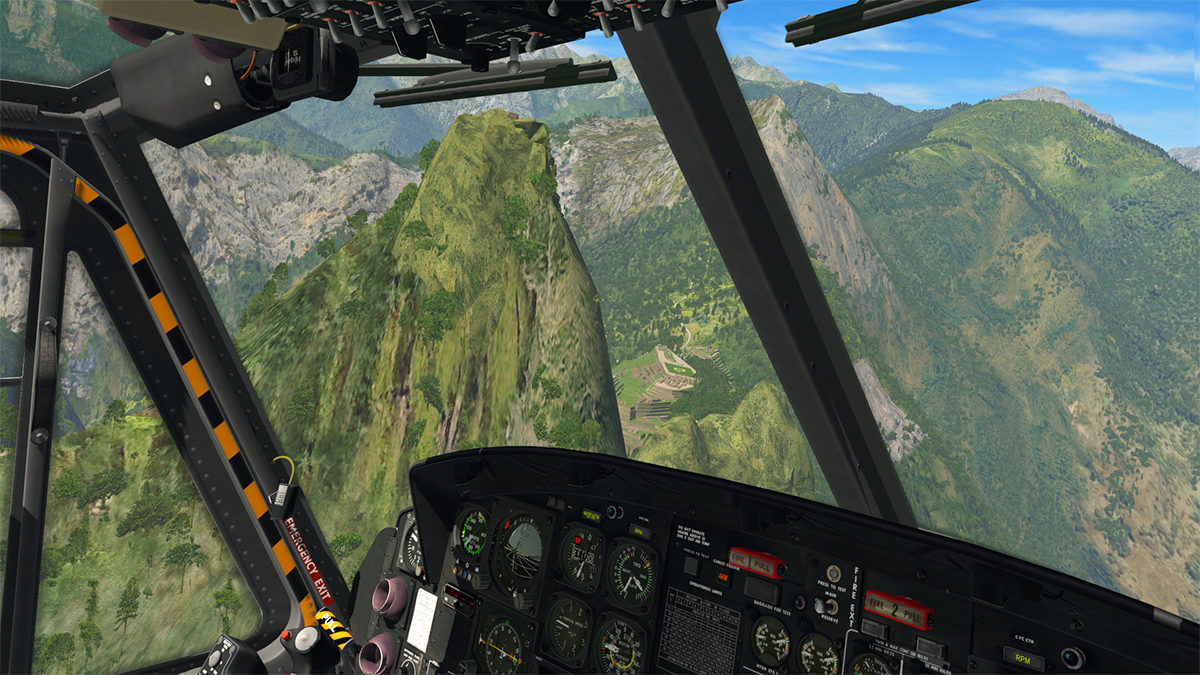
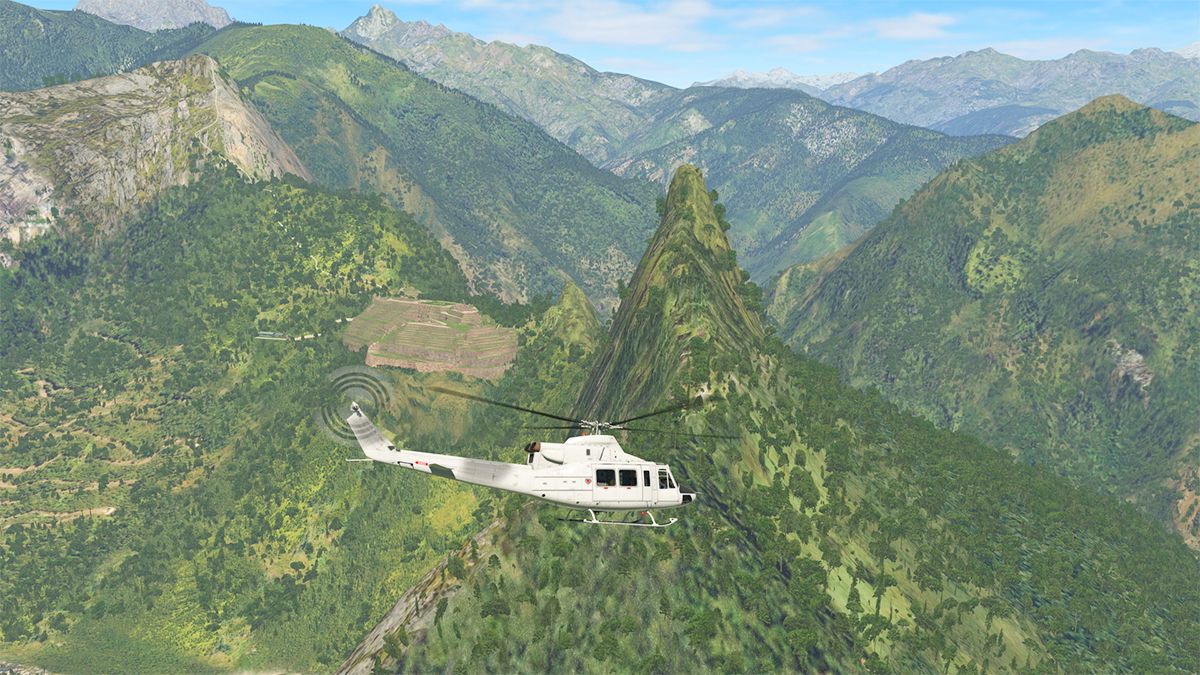

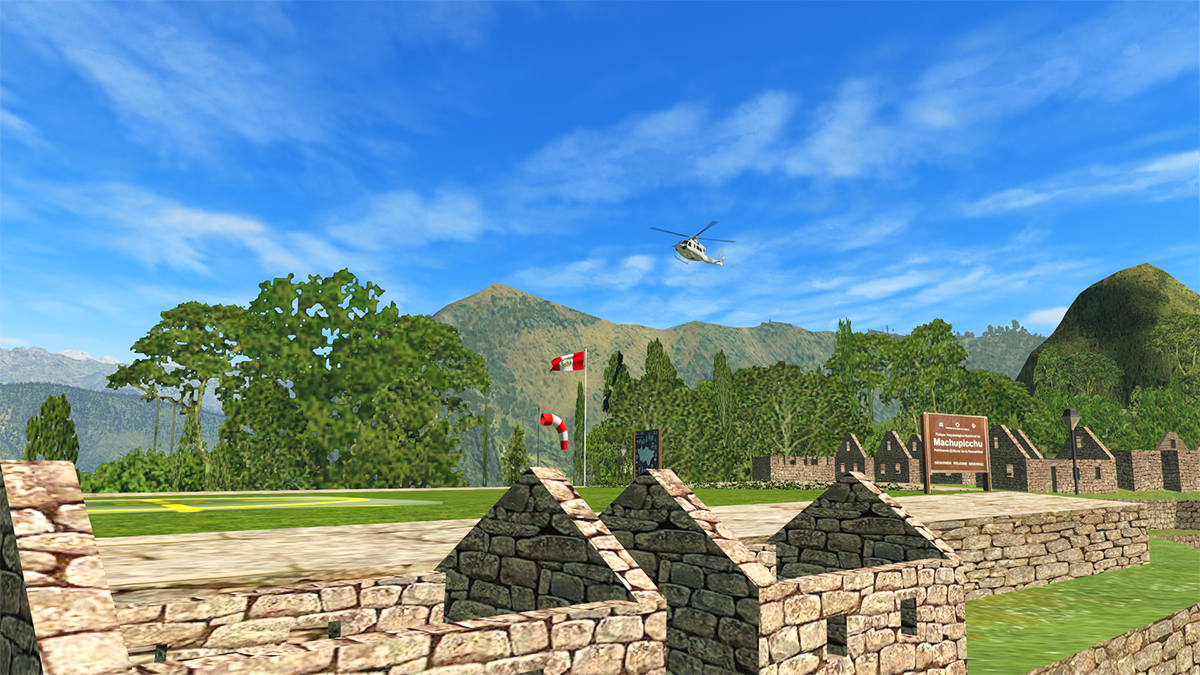
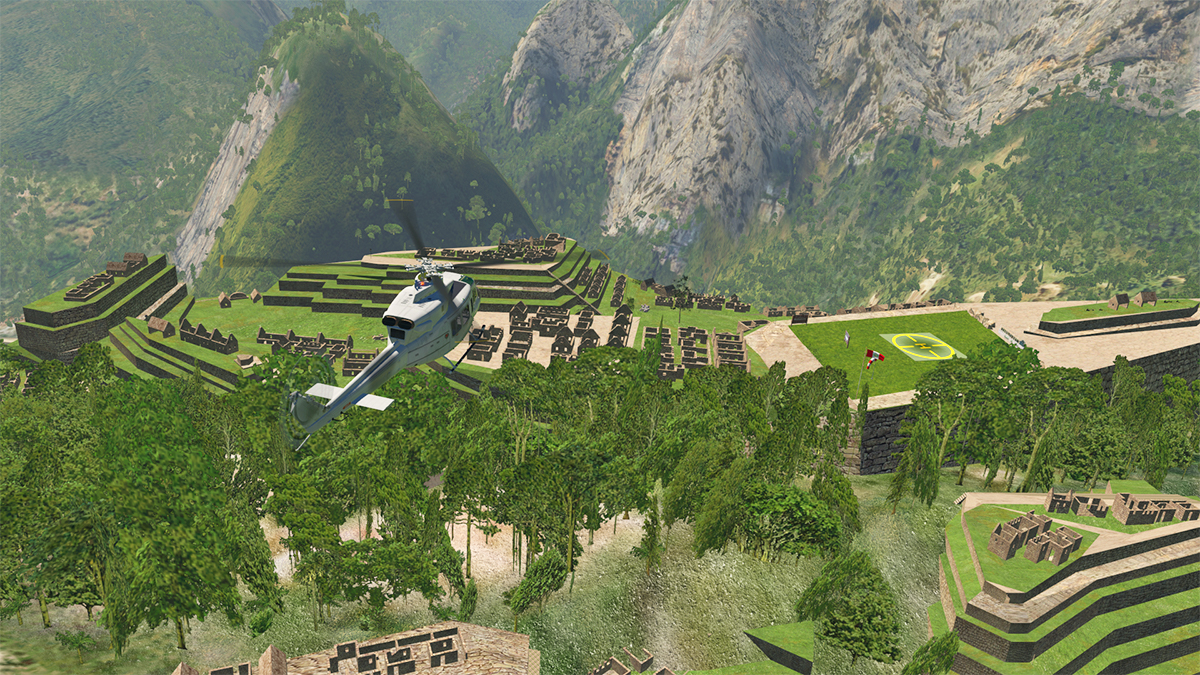
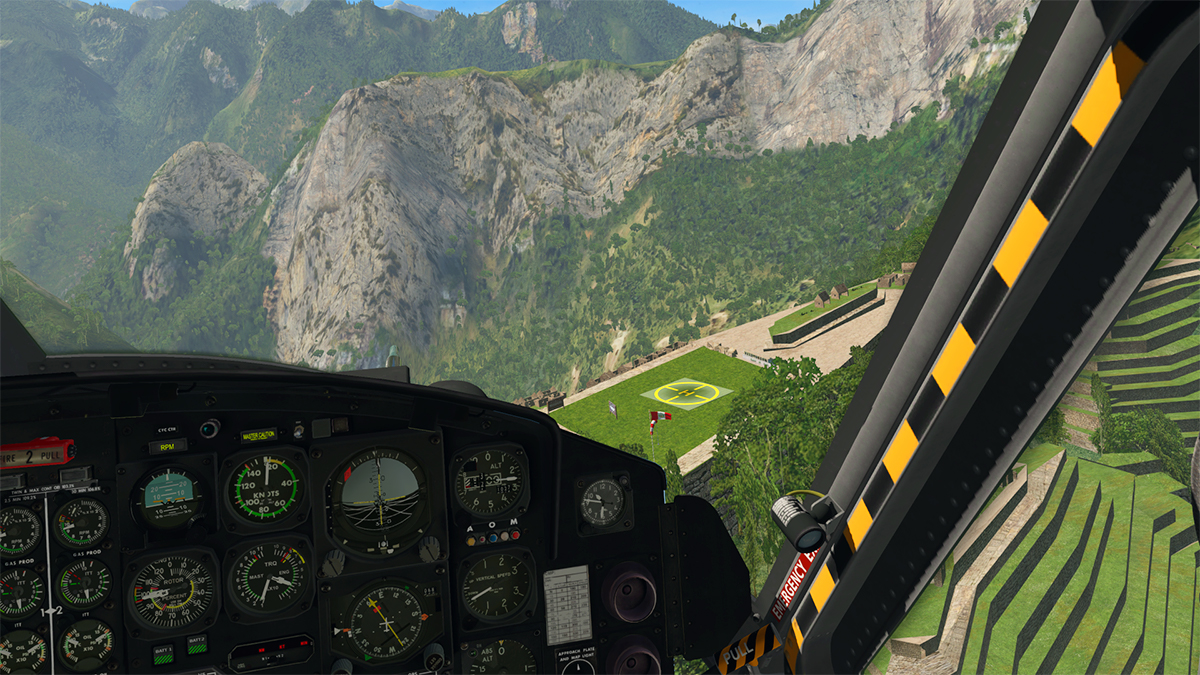


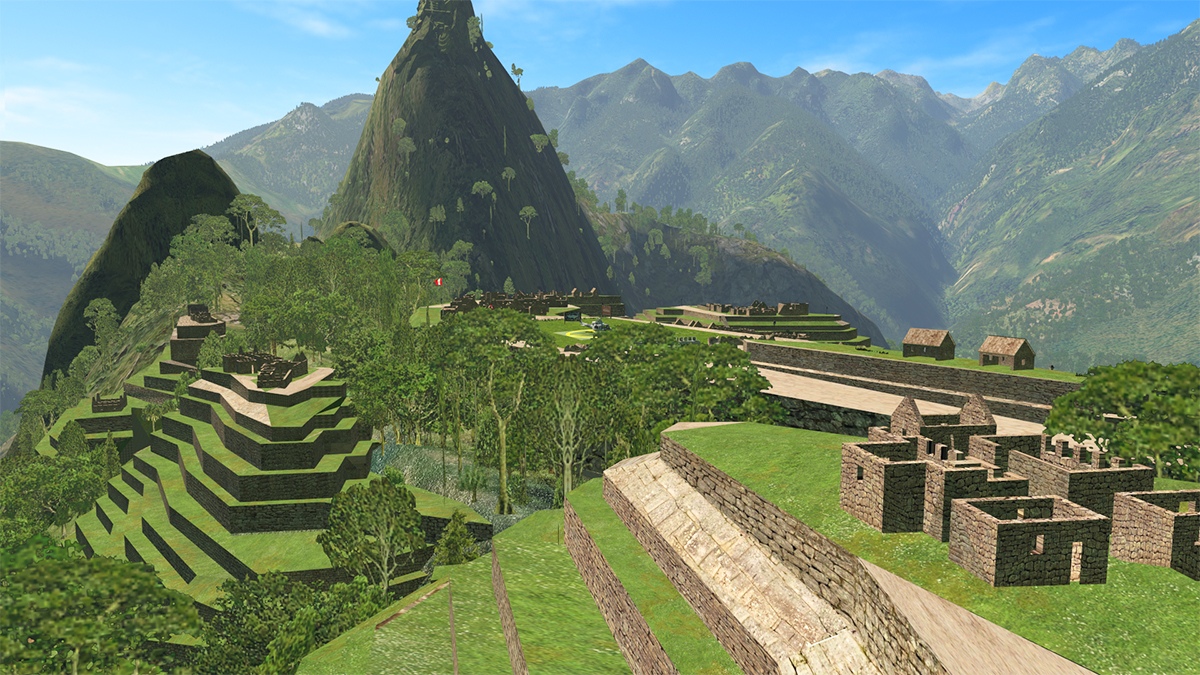
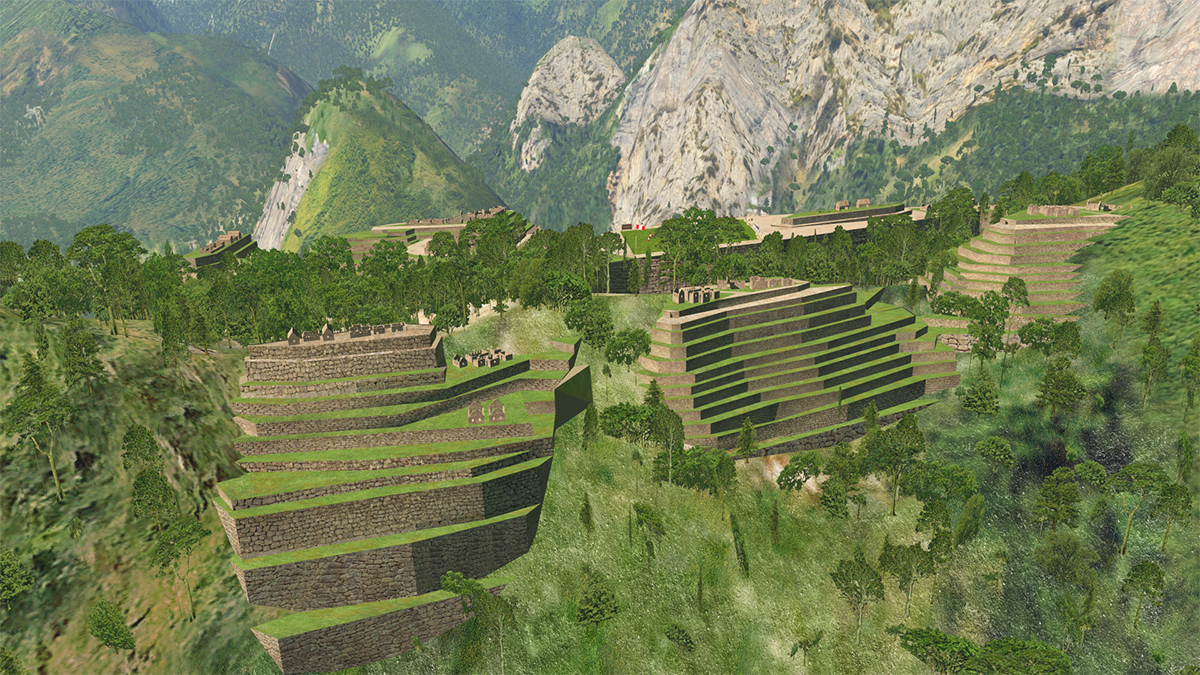

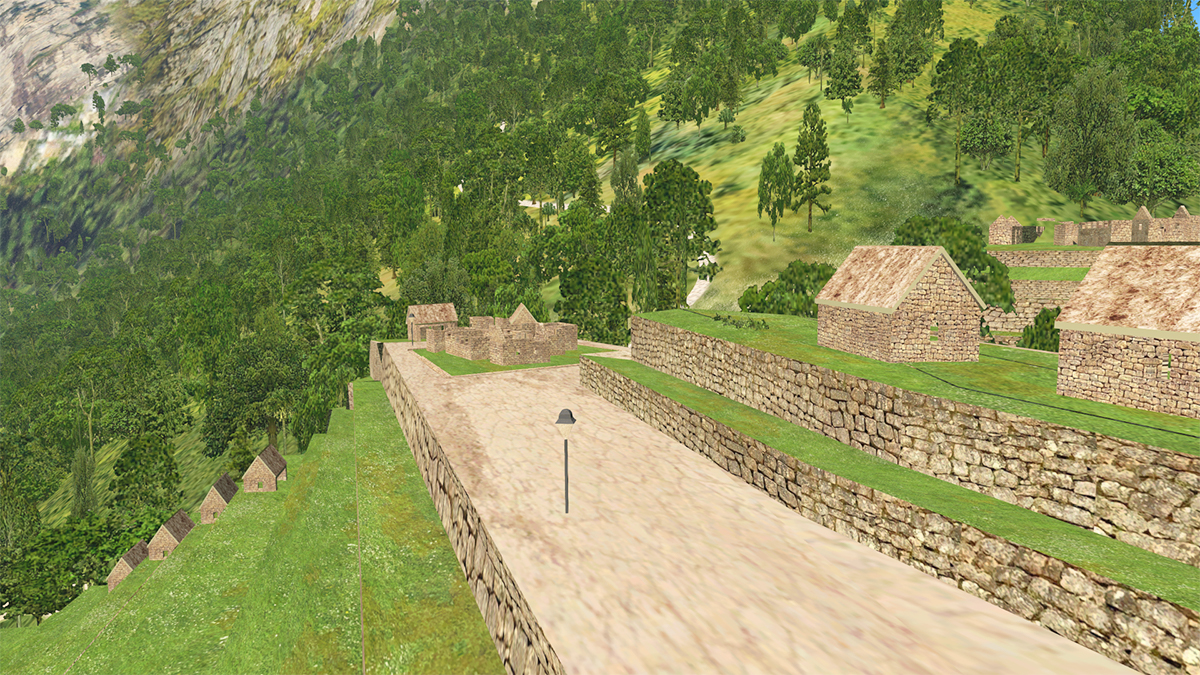


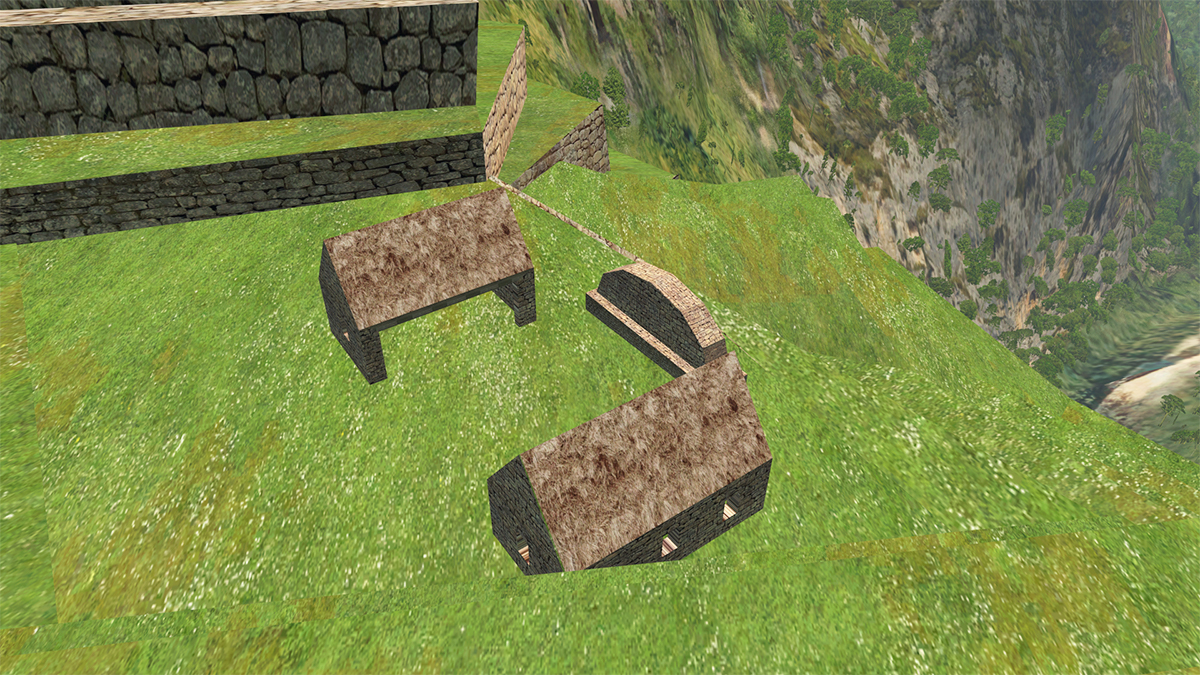

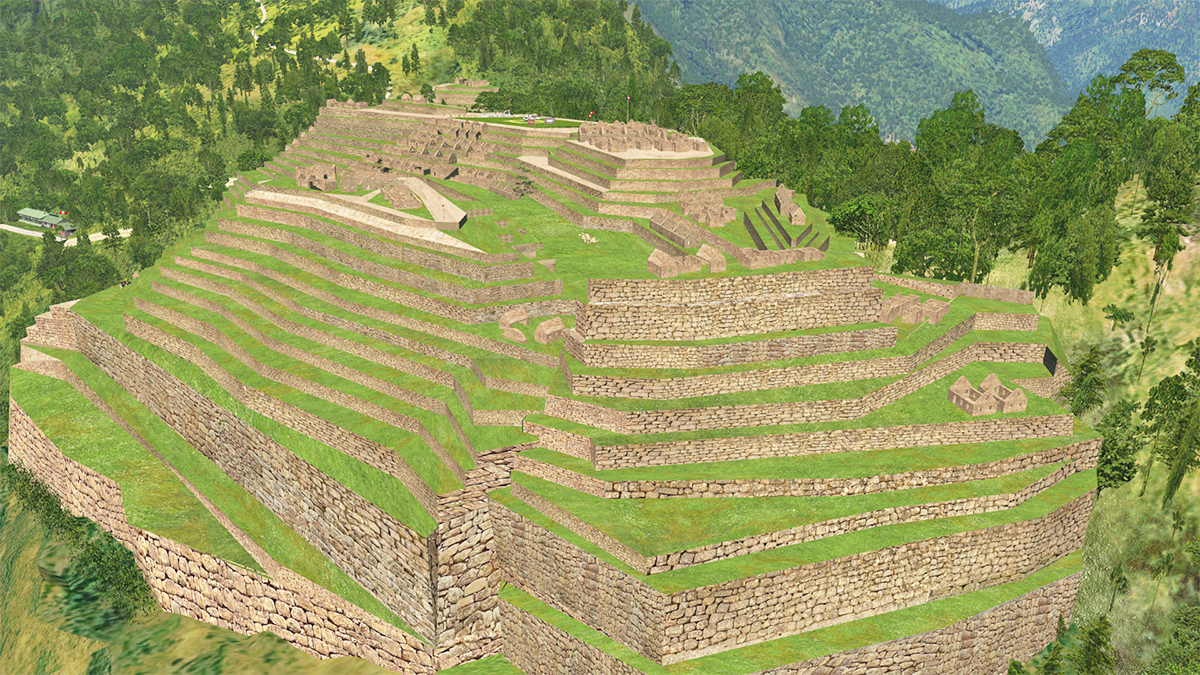
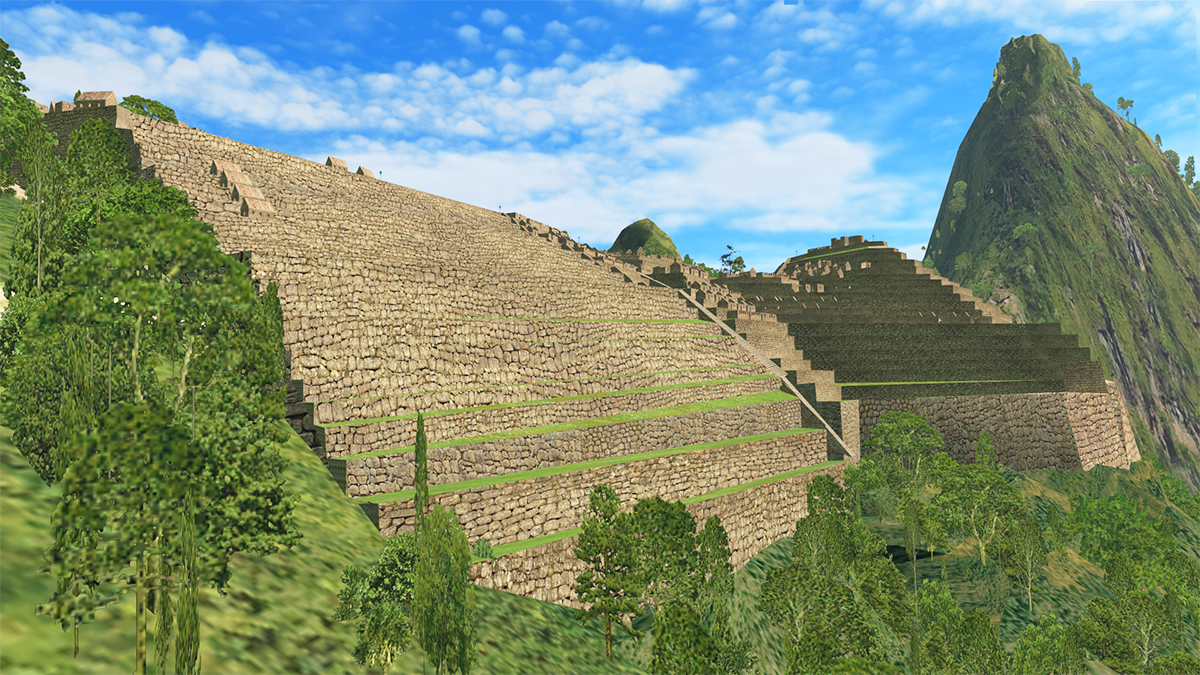
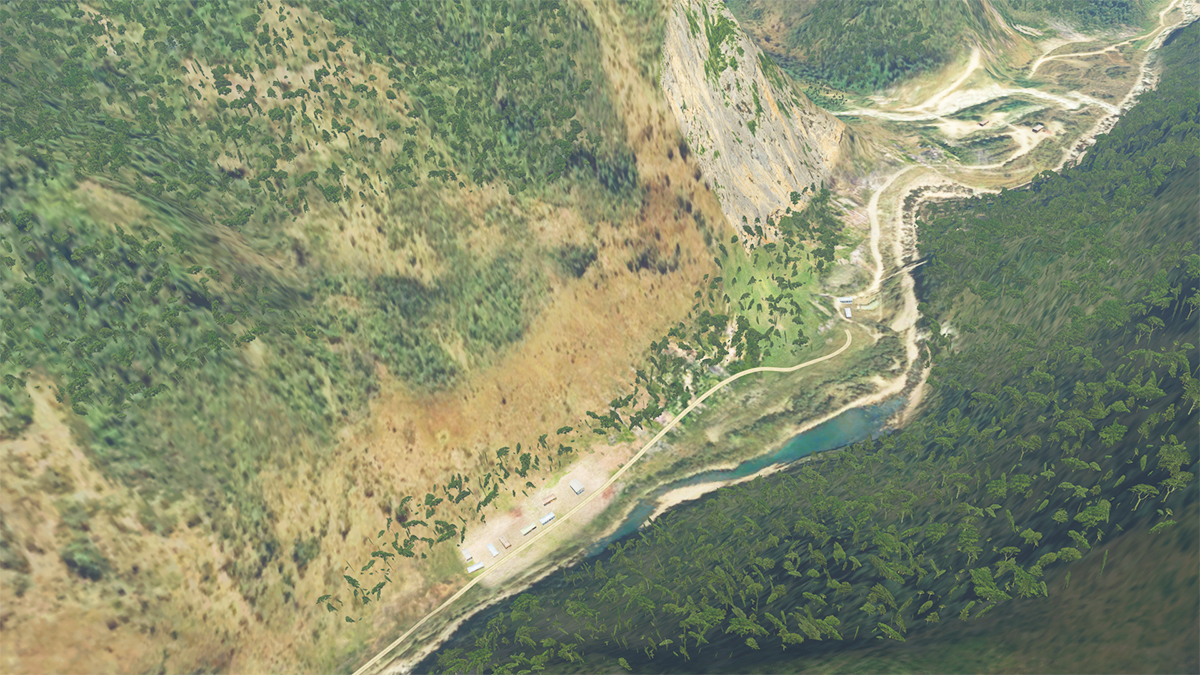
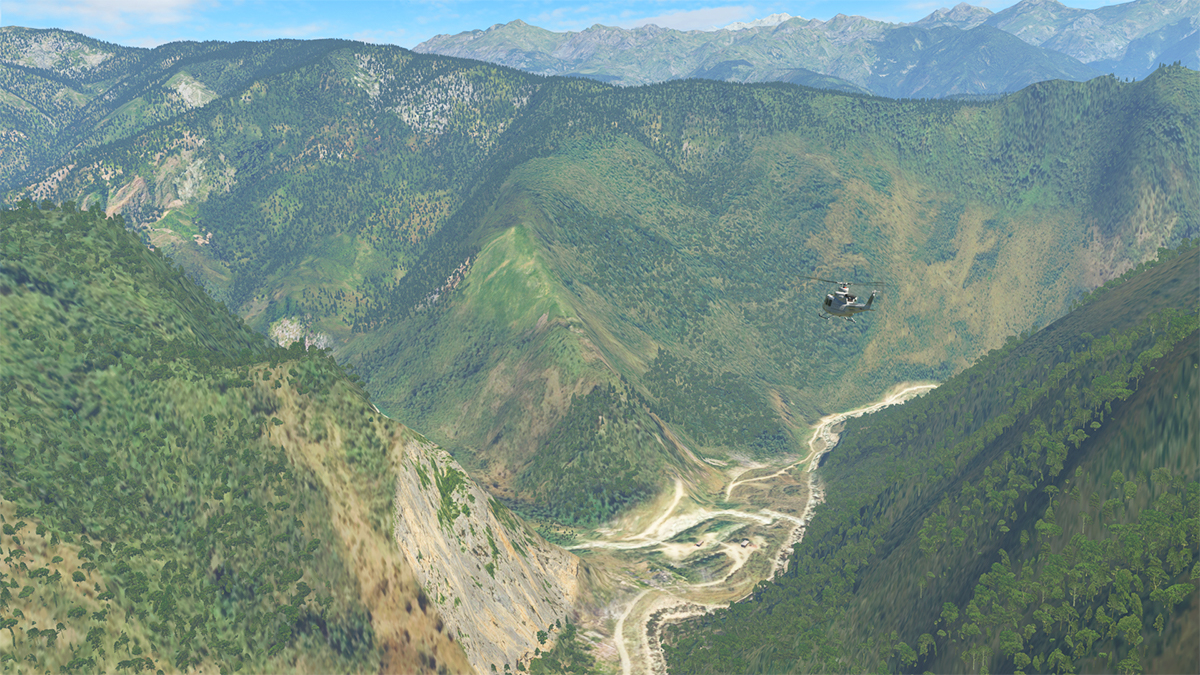
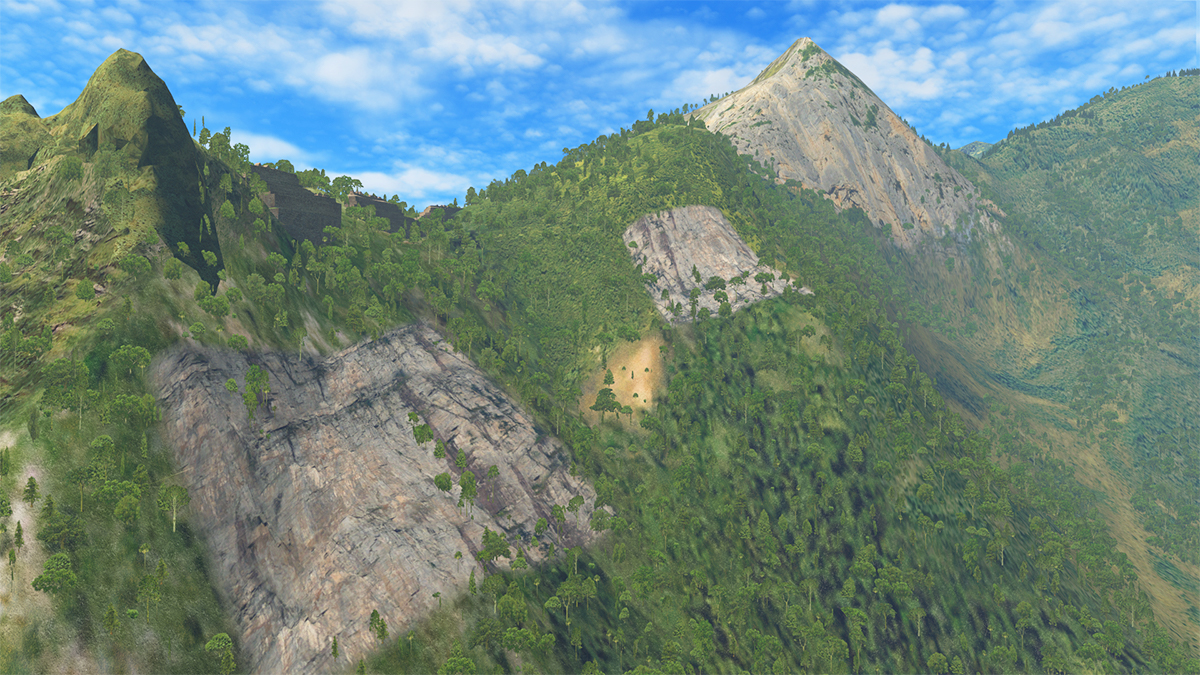
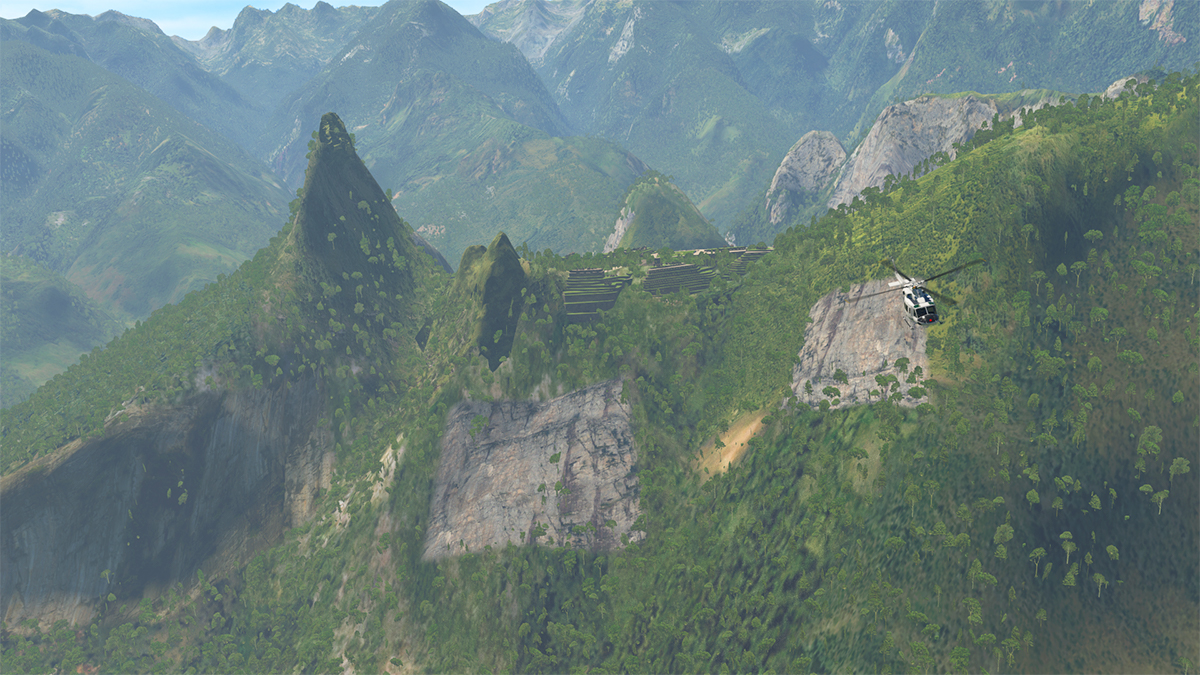
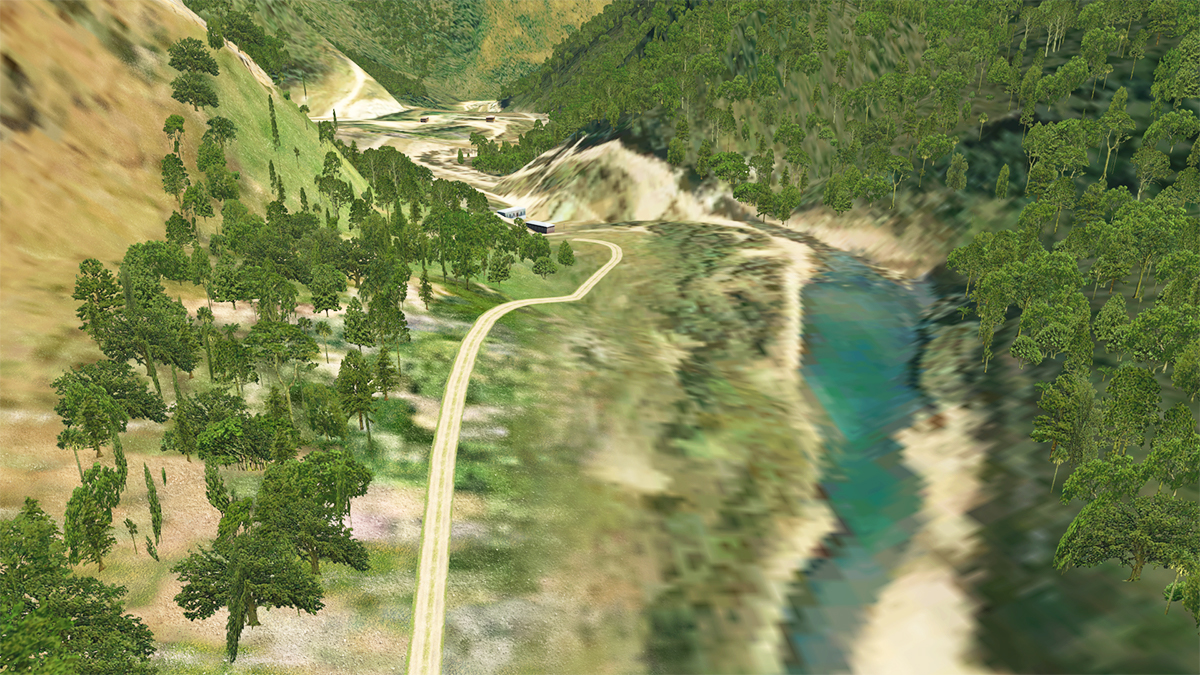
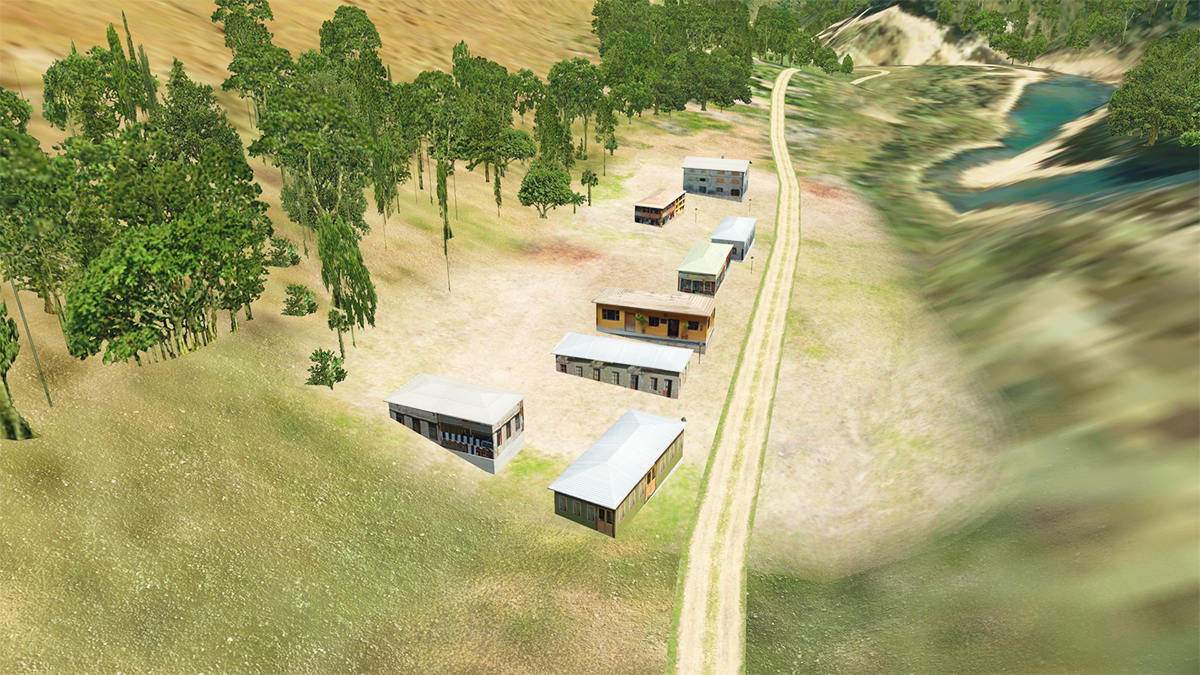


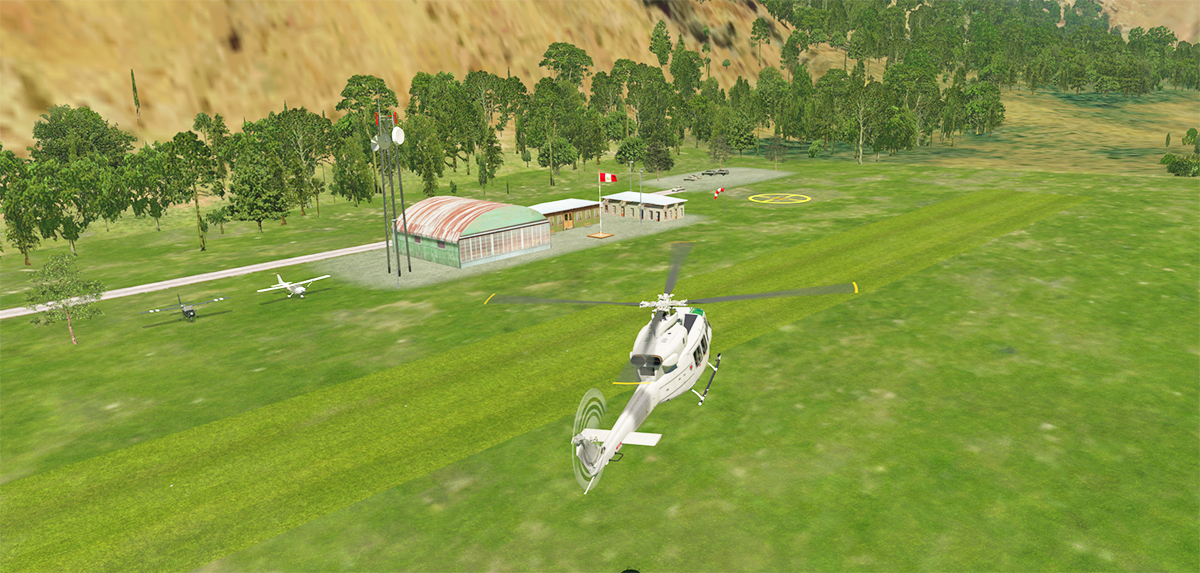
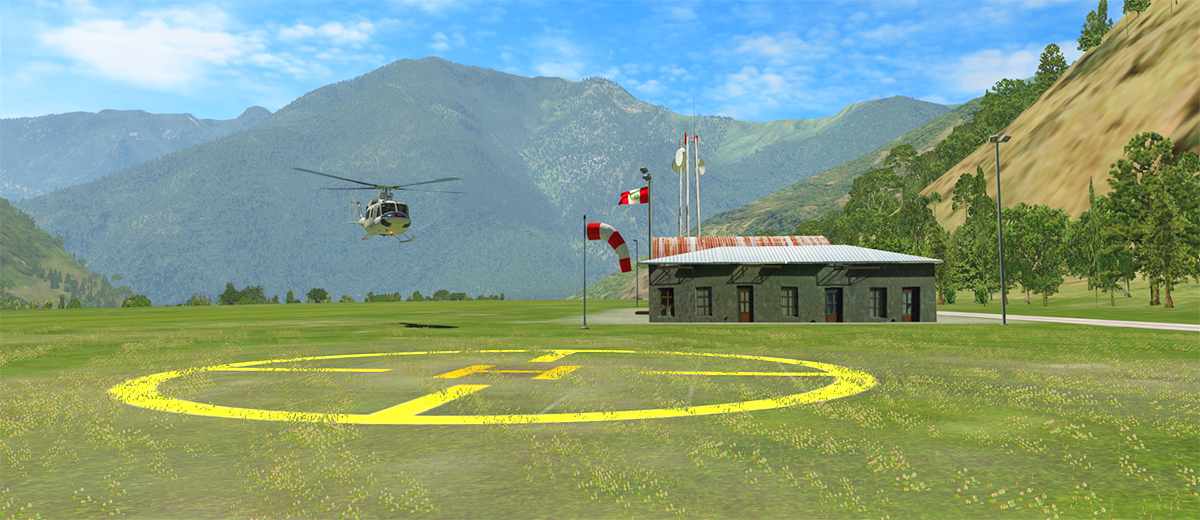


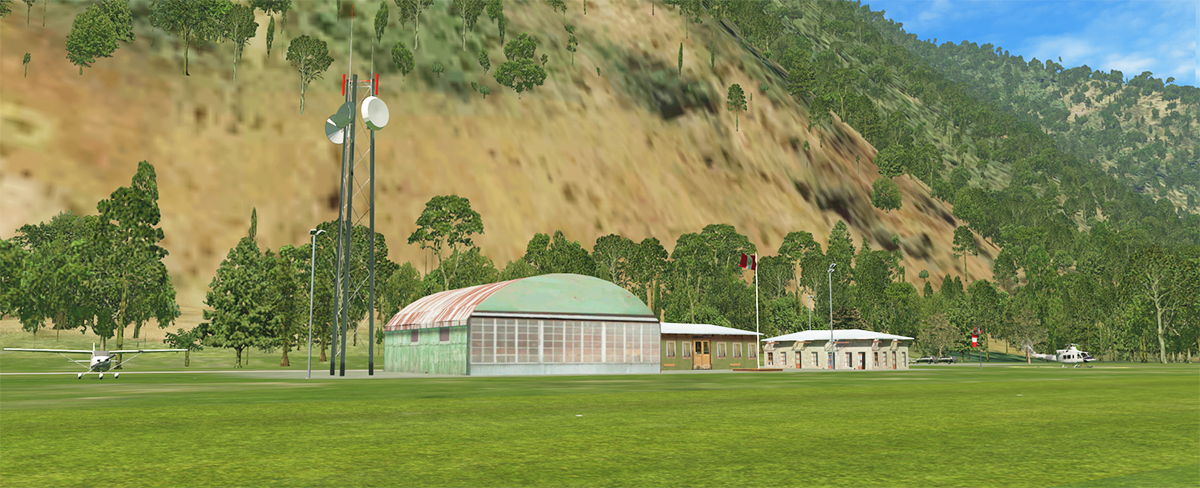
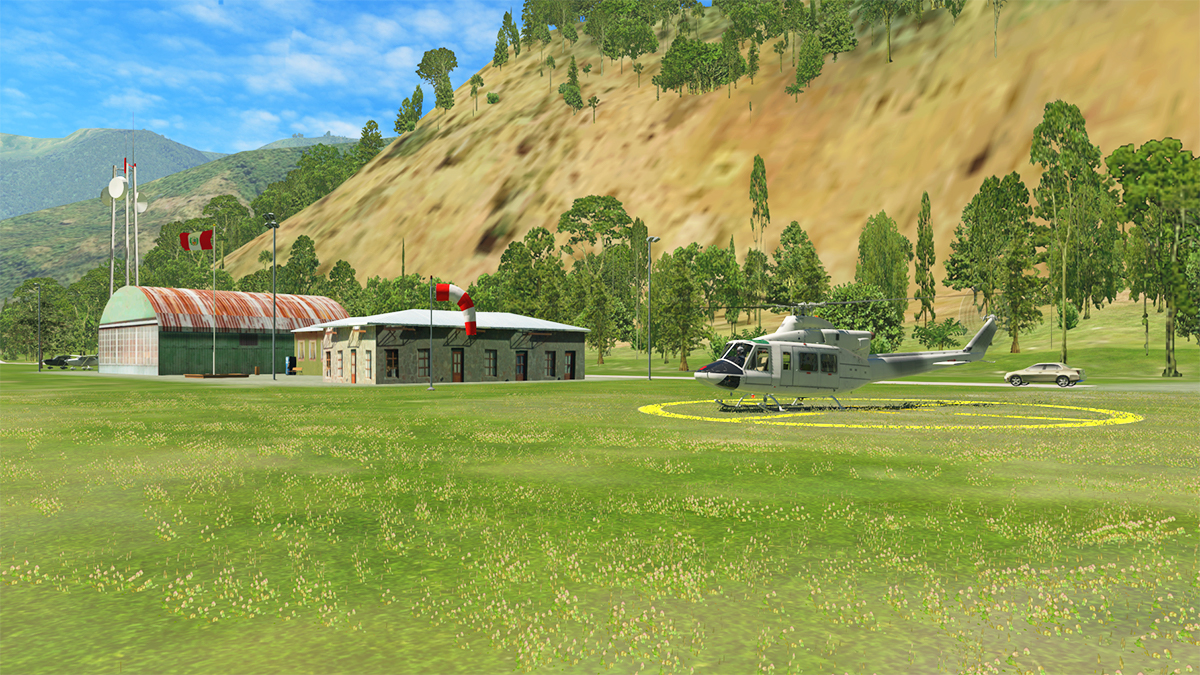


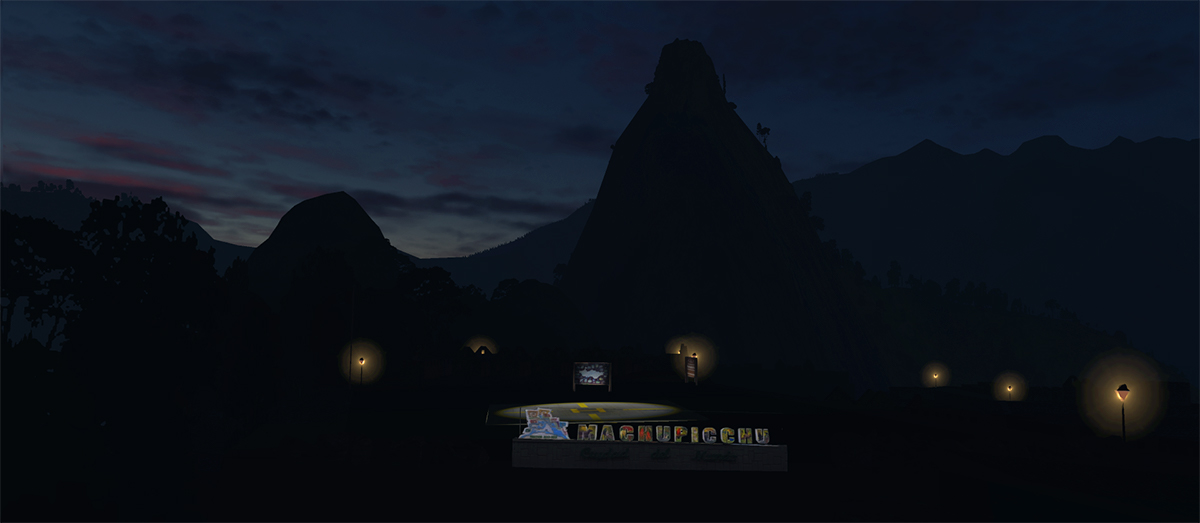

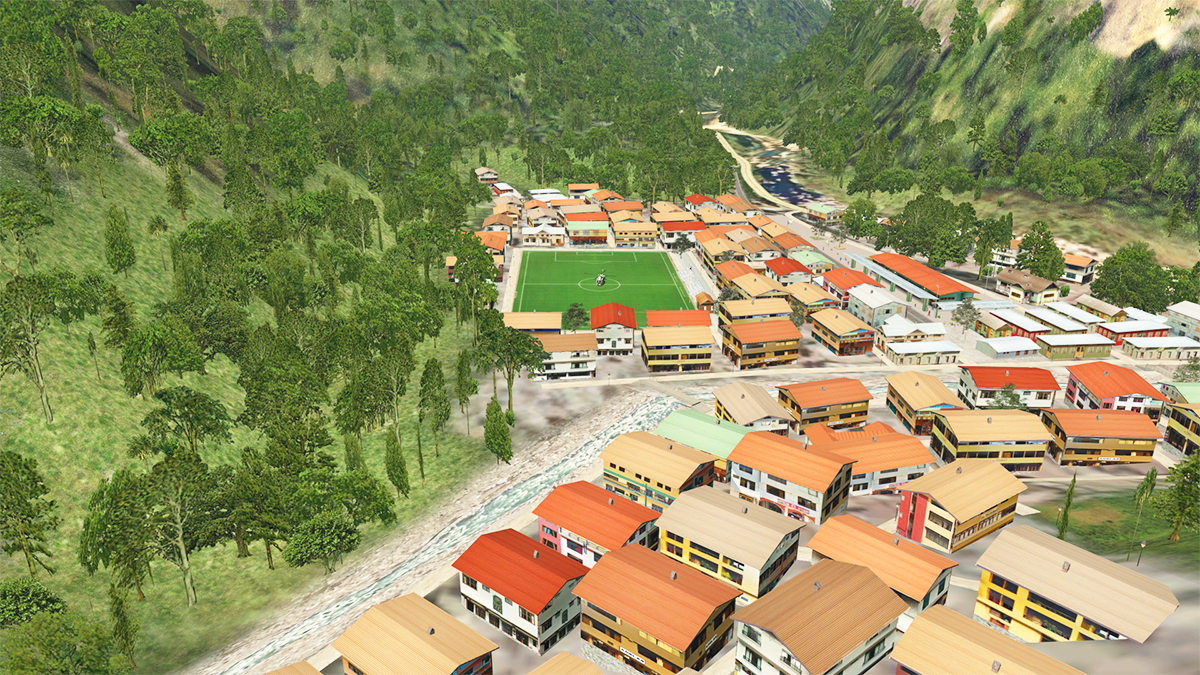
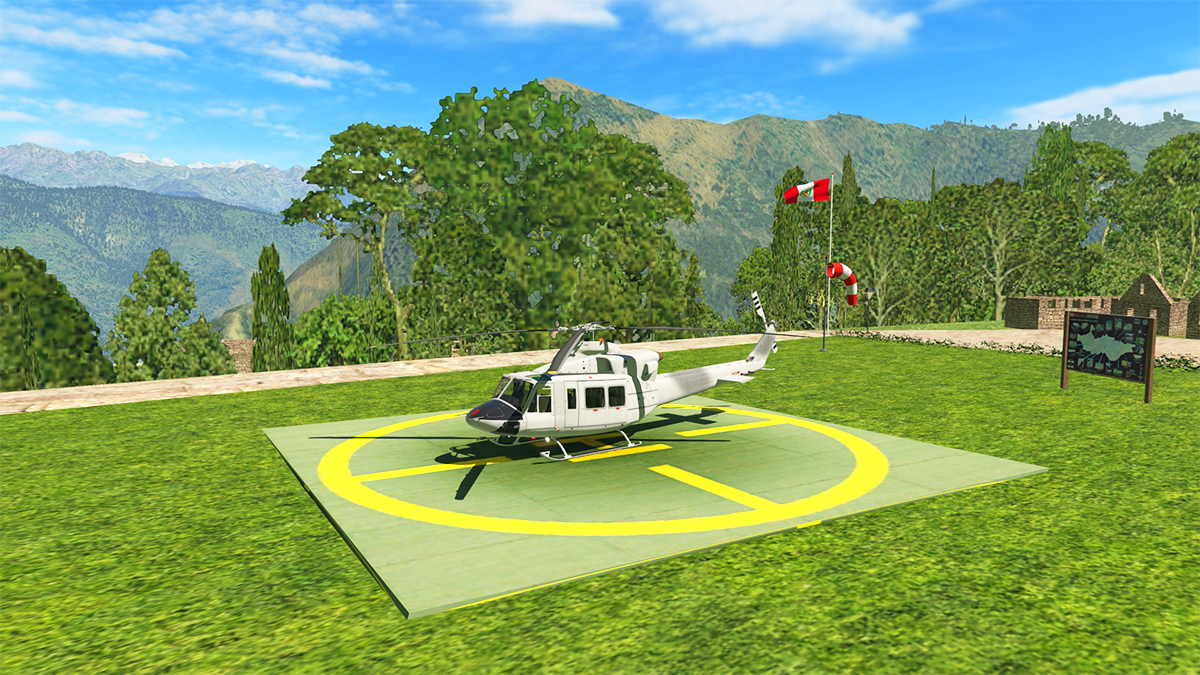
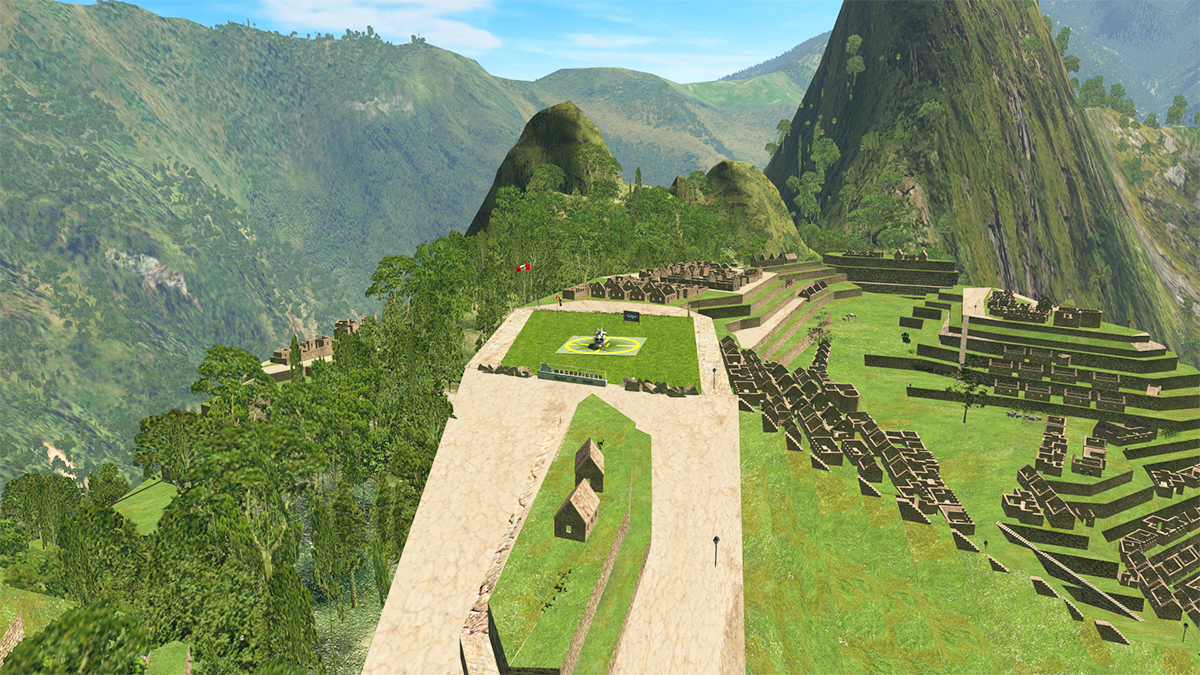
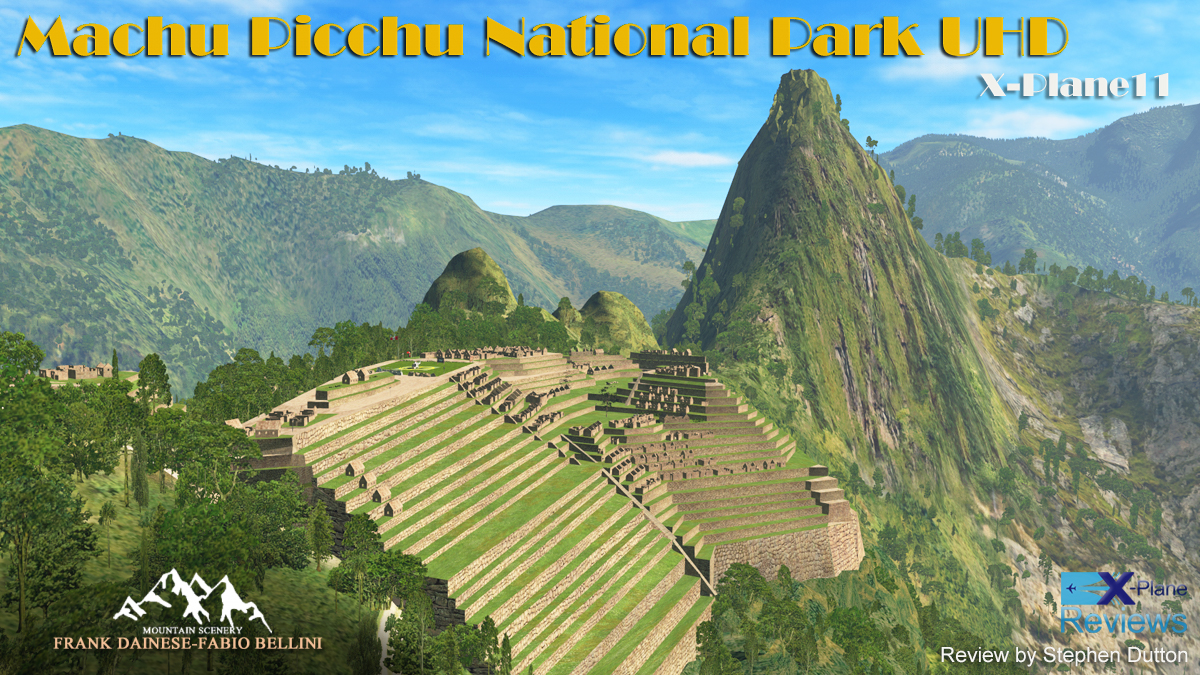
.jpg.07cc4b7bfffd774df60bb009565458ac.jpg)
.jpg.166743902c8511d25bac3ae861a19be3.jpg)
.jpg.1a4defe12758a961a966b81e138ae471.jpg)
.jpg.e61760afd6aab1b2045fb74ec0f182f7.jpg)
.jpg.f8ad1cbbbc66249a7dc7576ba0b37603.jpg)
.jpg.8e7c3e2af995d4062918d1f5c8fdd9e0.jpg)
.jpg.3830d6827cdbc5addb571bbd0bbcbed9.jpg)
.jpg.0e4389932335e8d93c7990dd2ee54de4.jpg)
.jpg.b0ed6f4cfd5d9482177d9be64c8fa7a5.jpg)
.jpg.8d9bebde0acafe6bf22ed592463c64b5.jpg)
.jpg.8d1ba0450edd83de486084cff5f305a5.jpg)
.jpg.e737d86da372729d65c4fad735b08de3.jpg)
.jpg.9817b035f23ffd660299aa4c0f177119.jpg)