Stephen
-
Posts
2740 -
Joined
-
Last visited
-
Days Won
360
Content Type
Profiles
Forums
Articles
Everything posted by Stephen
-
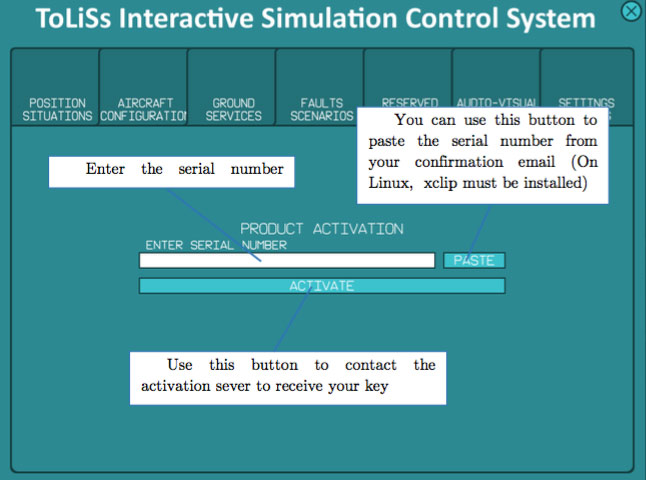
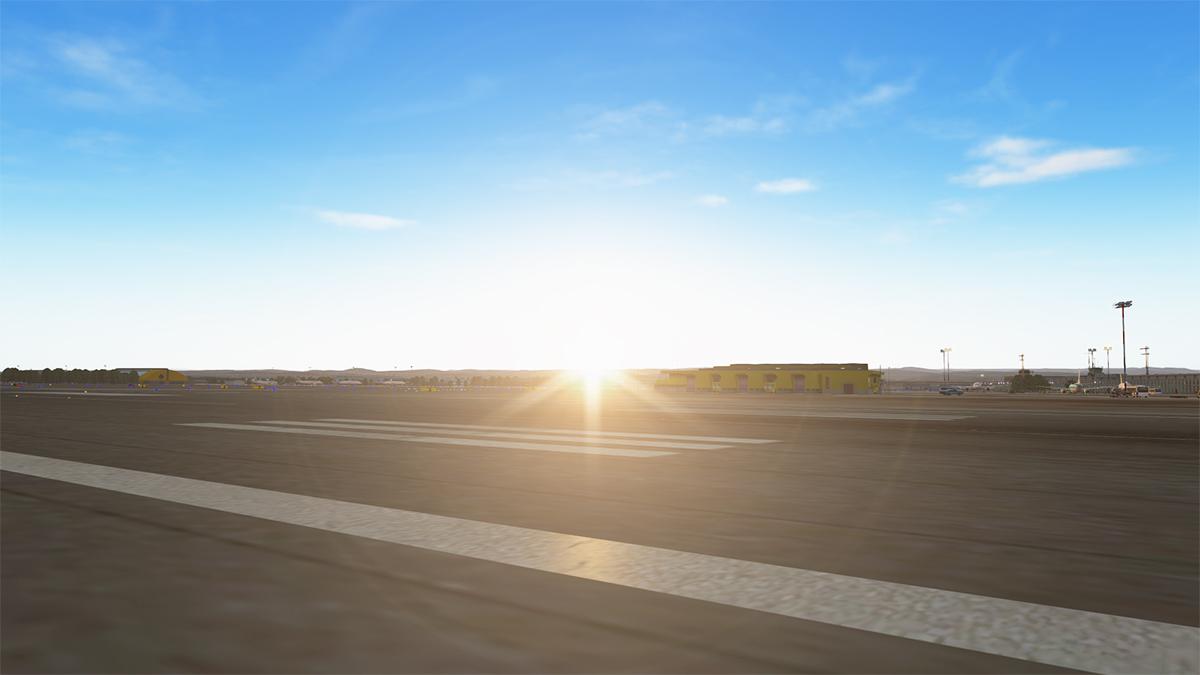
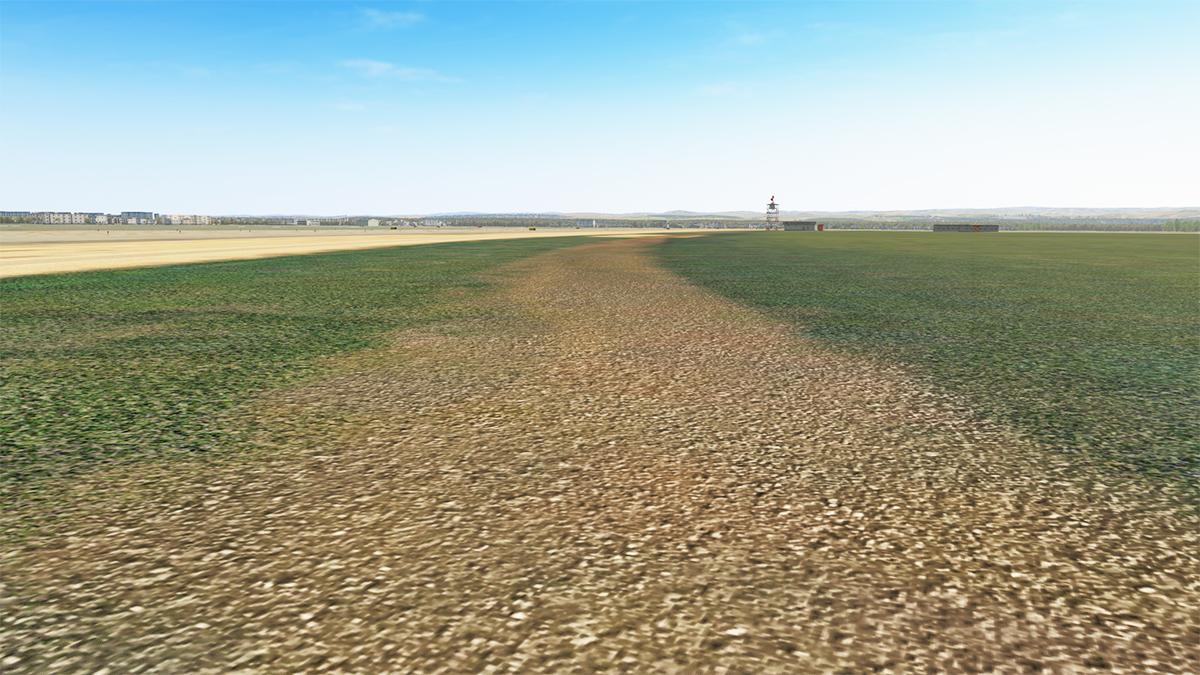
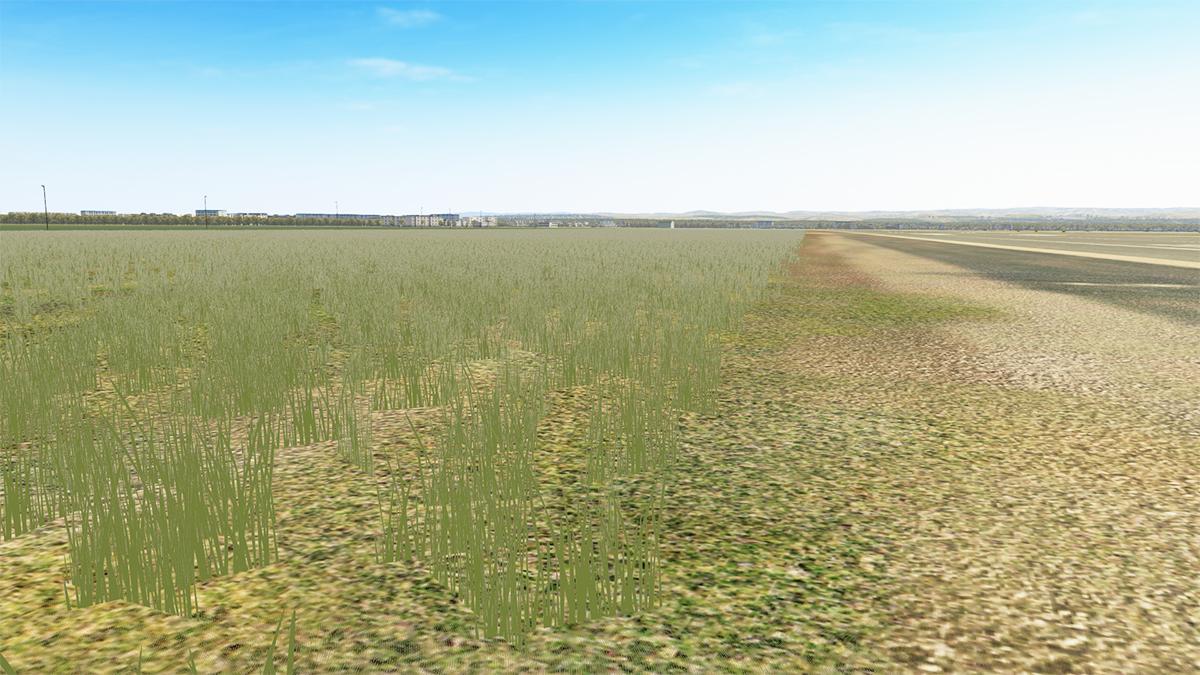
Aircraft Review : NHRacer by NHAdrian FutureTech is coming. The dream of flying cars and the conceivability of "Blade Runner" Spinners is of science fiction. But the advent of Drones, even if on currently a small scale are creating a revolution. Now suddenly we have Uber and others already prophesying the futuristic notions, that yes even in a few years we will all be simply flying around up there as Deckards. There is a big difference between a "Flying Car" and a Drone. Flying cars have actual wings or rotor blades (Gyrocopter) and travel on normal roads, but can fly. Drones are altogether different, not even a helicopter, but are multi-bladed lifting machines and there is a big difference in being called a Multicopter. My personal take on this is that with any futuristic speculation, there has to be an element of realism or realistic expectations on these hundreds of Multicopters twirling fast around above your heads. For one regulation would be required. As humans can't even drive sensibly on roads, never mind letting us all loose in the air, and then there is the high noise factor, as they are called "Drones" for a noisy reason. Then the biggest variable is the weather... Drones can easily fly in calm controlled conditions, but not within the usual changeable weather patterns... however I do think that passenger drones will become reality, and will one day shuttle you from point A to Point B, but I doubt (unless homemade) you will park one in your garage. X-Plane in Laminar Research has however noted that Drone aircraft will be part of the future of the Simulator. Again I find this category very exciting, and there is now also a category now set out in the "Flight Configuration" menu ready for the coming onslaught, called "VTOL". In reality X-Plane has already, and to point, to the core of the simulator's ideal to do experimental aircraft in the Simulator, so this is not a completely new area to us. But it is acknowledging the coming realisation of the new category in aviation, and that aspect is again very exciting. NHRacer by NHAdrian This Multicopter by NHAdrian of Let L-200D Morava fame is still more in the "experimental aircraft" category than a real world machine. But it does create a sort of insight on how these aircraft will fly and the feel of flying them in the future. The NHRacer looks like a bathtub with six pylons connected, or more a airborne Bobsled in it's racer guise... The bobsled... sorry fuselage has six pylons attached with twin-blade propellers, but only the two central pylons rotate... .... this action creates the "Yaw" movement of the aircraft as the four other blades are fixed. The directions are created in say the pitch action by tilting your Multicopter forward and titling backwards and in the same manner as rolling left or right. By adjusting the pitch, your drone will sag down in the front causing it to go forward, or sag down in the back causing it to go backwards. So there is no rotor head or collective movement adjustment like you find on a helicopter. The pylon detail is very good, with an exposed 40kW motor on each pylon with a built in Navigation lighting. Blades are composite carbon fibre weaves that look very and highly realistic. Carbon Fibre weaves are also used on the four leg stands (not the usual helicopter skids). Under a panel at the rear there is the Electrical recharge socket, just press the socket to instantly recharge the NHRacer's batteries... I would have liked an external charger and cable with both the same instant recharge or slow recharge options. There are also four landing lights built into the shark like nose. The Pilot (Racer?) is animated with the excellent head movements and with both left (throttle), right (joystick) arm movements... Your view though is constrained as being placed within the pilot's helmet, and there is the optional (hotspot) to hide this helmet effect or to move to a full screen view directly above the left throttle lever. You can hide the pilot also via a hotspot on the right leg (but not from the external view). Instrument Panel The instrument panel is basic, but very interesting from an aviation point of view... in fact there are only three instruments that are primary aircraft instruments on the panel. The big centre left switch is the main power switch, and turning it on will start up a lot of system checks, including left a Garmin G5 AH (Artificial Horizion) that is more like a fully Integrated Standby Flight Display (ISFD). The "Garmin" logo comes up on startup. Far right is the NHAdrian Flight Controller status display, that also has a great test and startup procedure. Turn on the avionics and then two large display screens start up with the COM device (radio) to the right. The left large display is the Electric Drive Management System (EDMS), and the right display is the Battery Data Management System (BDMS). Final large instrument centre left lower is the Davtron M850 Chronometer. The four centre switches cover MASTER (Power), AVIONICS, NAV (Navigation) LIGHT and LANDING LIGHT. Below is the three setting FLIGHT MODE SELECTOR with ACROBATIC, STABILIZED and ALTITUDE HOLD modes. There are five (working) Circuit Breakers far left and a Main ARMING power switch far right. In reality it is the motors start/stop switch under the red cover. Finally lower right are the ACRO MODE RATES that adjust the ROLL, PITCH and YAW rates. These adjustments allow you to adjust maximum rotating rate in either the Roll, Pitch and Yaw directions for maximum roll control input. STABILIZED left mode banking limit will also adjust the roll and pitch control inputs to be scaled to this banking range. There is a Samsung branded AviTab Tablet, that can be accessed via a hotspot on the far left main circuit breaker module. Flying the NHRacer Starting up the NHRacer is almost a joke... all power on and ready, just flip up the Red ARMED cover and flip up the switch, and instantly all six blades are in action.... Sounds are very fast twirly blade noises, but very realistic (the only other sounds are wind noises). To fly just advance the throttle (could it be called a throttle here, or a power stick?) and up you go! The aircraft is very stable, you go up and down within the same space, movements in any direction are minute, just teeny-weeny adjustments on the joystick is all that is required to move in the direction you want to go. So the question is, is the Multicopter like flying a helicopter? Well yes and no. Like a helicopter you still adjust the directions via small input movements, and there is still the side-slip feel... but the unlike a rotor based aircraft the platform is extremely stable... hovering in a chopper is a challenge, but here it is a complete doddle. So in reality anyone should easily fly the NHRacer. As a side note I did set up my external throttle lever in the reverse direction to get the same feel as flying in a helicopter (collective), the throttle setting the other way around messed up my flying brain. The power of each motor is shown in the EDMS, and note how very quickly the power usage creates a very real "Range Anxiety" feeling, as you can't fly too far away from base, or for long. Range or time flying is noted around 10-15 minutes only with today’s Li-HV battery cells. Huge fun is just spinning or Yawing on an axis, but don't get carried away and start twirling around too fast or you will lose the Multicopter, said the same for just pulling the power down too quickly, as the plummet to the ground is quick and quite deathly... You can't be aggressive here like in a helicopter. To move forward fast you can drop the nose and wind up the collective and the chopper will move forward and quickly... try that with a multicopter and it just sorta stalls, as the blades don't move in a thrust vectoring way (or to pitch or roll into the direction you action). So a slight dip of the nose is far more effective, and you will very quickly gain speed... secondly there is no front or back... the Multicopter will go as fast sideways as forwards, even fast straight backwards if you are brave enough. The trick here is in the need to use the yaw to keep the nose pointing forwards in the right direction. So the Multicopter is very, very easy to fly, but be aware if it goes wrong, it goes really wrong in a big way. So you fly it like flying a flat wide pancake, keeping it level and smooth in the air. 5º nose down is the most effective (same going backwards!). Move the stick to the right and the aircraft will roll, but will not actually bank to the right, but instead only tilt? To get a change of direction then you bring the yaw in, and a bit more power to push you in the direction you want to go. It is a little tricky as all aircraft have a central balance point (CofG) that you fly around, but not in the Multicopter? There are the three different flying modes... STABILIZED is the the default and the standard setting for basic flying. AEROBATIC changes the behavior In the flight controller system allows the roll/pitch/yaw input controls in the desired rotation rate which can now be adjusted (scaled) with the appropriate knobs. The more command input the more rotational rate applies. The throttle behavior is linear in this flight mode, the center throttle position is about the hover throttle required. Inverted maneuvers are also available in this flight mode like loop and roll, although continuous inverted flight is not possible because of always positive throttle direction. ALTITUDE HOLD FLIGHT MODE will simply hold your current altitude, so it is a sort of Autopilot function... ... in the HOLD mode you have to be careful not to adjust your throttle position to much, as the hold mode will not move around much, but your power will. So when you come back into the default STABILIZED mode the aircraft will suddenly jump or revert to the new power setting. Flight controller display also gives you feedback on the actual state of the Flight Controller (FC) system. It shows information on the bootup procedure. FC screen has different background colors depending on the actual current state of the system; Blue – system startup, green – system ready, red – error status Lighting There are only two lighting adjustments available for the Instruments, one knob that adjusts the instrument brightness, and another knob that adjusts the panel LED light strip under the glareshield. Overall the panel lighting is excellent. External lighting has a navigation light on each pylon (Four forward green, and two rear red), and four very weak "Landing Lights" in the nose. Again your descent has to be controlled. Pitching your nose down like in a helicopter won't simply lower your altitude, it is a combination of lower lift thrust and angling the NR Racer to deliver a realistic descent rate, note the increasing or decreasing "Range Anxiety". Drag of course can slow you down, but the Multicopter is so very slippery in the air, in being very light and aerodynamic. That a slight yaw can help to takeaway the streamlined nose on approach, so you have to approach the field carefully, and yawing to keep the vehicle straight. Control can be tricky, not helicopter tricky but different tricky... the inputs to move forwards, slow down and adjust are the same in a way to a helicopter, but you have a more flat lift aspect, so your platform overall is far more stable... still very small movements in any direction helps. 7 Min of lift remaining and I go into the below 30% yellow warning zone... "Gulp". So you have to be in a "Cool" mindset, don't panic, but fly the machine.... .... Interesting is that you can fly the Racer in spaces that you would never ever consider in a Helicopter, better still you can hover totally in control, then maneuver around that situation without fear and adjust your position with precision. Be very aware of the X-Plane boundary... it will grab you and pull you down very violently and quickly, so a lift adjustment is required to hold the slow rate of descent when going through the boundary... and slow, slow going down is very good, unless you want that "pit of your stomach" falling feeling. Touch of a hover slightly above the ground is a worthwhile idea, then control the final lowering to touchdown. The Racer does give you so much control, and it is far easier than it looks. You are of course supposed to push the envelope, I am just flying the Multicopter around, and not mastering the extreme dynamics or as the name suggests... racing. But I doubt any racing or course flying would give you very long, before the power supply starts to go into critical red mode... so keep it tight and fast. Supplied are object elements to create you own racing course in WED, provided are six Flags and six Gates to fly around. Emergency Parachute We know your power can sort of deflate rather quickly. So what if to say, your at 5400ft above planet earth, and your numbers are not looking real good? Certain death awaits! Well thankfully the NHRacer has a safety tool built in, with a parachute situated just rear of the pilot... ... there is a pull lever under the instrument panel that releases a lifesaving parachute from the rear bay... boom! and the six electric engines all immediately also stop at the same time. Nicely done are the support cables from the NHRacer to a central bracket, then to the extended cables upwards to the bright red&white parachute. From 4500ft it is a long slow way down, but safe. Landing is with a "Thump"... but worse is the very long walk back to the airfield. Liveries There are eight funky liveries, including three camouflage, some very carnival, Mighty 8 and a bold red racer. There is also a blank white (default) and a painkit to create your own racing design. Summary A new aviation category is now being born out of the unexpected success of Drones. VTOL, or multi-bladed lifting machines are not really a helicopter or an aircraft per-se, but a completely new dimension to flying. Multicopters, do have some areas in common with helicopters, in being mostly vertical flight machines. But there are also significant differences in the way you fly these a more sturdy fixed propeller machines, only the Yaw axis is manoeuvrable in a dynamic sense. NHAdrian in context has created a sort of flying bobsled, a machine to race through a created race course... that is in itself a very exciting aspect of this machine drone. But the really interesting area is on how you learn and fly this exciting coming of age (and a neighbourhood) near you drone style machine... and very interesting concept, and to learn it is. NHAdrian has certainly given you all the fundamentals to create a very realistic machine to understand and even to enjoy immensely the future of local airspace flying. The design presented here is clever, with highly realistic instrument and the correct details to understand these machines. Modeling is straightforward but excellent, and highly detailed for the realistic element. Negatives are few, but an external recharger would be nice, to hide the always present pilot, and very weak landing lights would all benefit in future changes. There is no doubt that over the next few years this new VTOL category will blow open with loads of interesting and exciting machines. This NHRacer is one of the first quality ones to surface and excellent to explore this new and exciting dimension. _______________________________ Yes! the NHRacer by NHAdrian is NOW available from the X-Plane.Org Store here : NH Racer - Manned Racing Multicopter Price is US$19.99 Product features Custom flight controller system with multiple flight modes using X-Plane’s experimental flight model as base Realistic engine, ESC and battery model incl. temperatures, battery curve, etc. Custom avionics Permanently stored user settings Realistic BRS system Realistic prop stalling effect Visual + audio “Helmet” effect Full FMOD sound package 4K high-definition PBR textures 8 stunning liveries incl. 4 exclusive liveries by PWDT Full VR compatible Detailed flight manual included Complete paint kit for livery creators Racetrack elements for scenery builders Requirements X-Plane 11 Windows, Mac or Linux 4GB VRAM Minimum - 8GB+ VRAM Recommended Download Size: 1 GB Current and Review Version : 1.0 (November 5th 2021) NHRacer uses a custom flight controller system that stabilizes the multicopter during flight, working together with X-Plane’s own flight model, therefore at least stable 30 fps is mandatory! If you plan to do lot of acrobatic flights, 45+ fps is recommended. _____________________________ Installation and documents: Download is 1.02gb and the aircraft is deposited in the "General Aviation" X-Plane folder. Installed Aircraft is 1.03Gb Documents supplied are: NHRacer_Users_Manual.pdf Supplied are: RACETRACK elements (6 Flags-6 Gates) PAINTKIT Designed by NHAdrian - Popular Freeware developer and co-designer of the L-200 Morava Support forum for the NH Racer _____________________________ Aircraft Review by Stephen Dutton 17th November 2021 Copyright©2021: X-Plane Reviews Review System Specifications: Computer System: Windows - Intel Core i7 6700K CPU 4.00GHz / 64bit -32 Gb single 1067 Mhz DDR4 2133 - ASUS GeForce GTX 1080 8Gb - Samsung Evo 1TB SSD - Sound : Yamaha Speakers YST-M200SP Software: - Windows 10 - X-Plane 11.55 Plugins: Global SFD plugin US$30.00 : Environment Engine by xEnviro US$69.90 : RK Apps XPRealistic v2 - US$34.99 Scenery or Aircraft- EGGD - Bristol International Definitive by Pilot+Plus (X-Plane.OrgStore) - US$25.95 (Disclaimer. All images and text in this review are the work and property of X-PlaneReviews, no sharing or copy of the content is allowed without consent from the author as per copyright conditions) All Rights Reserved

-
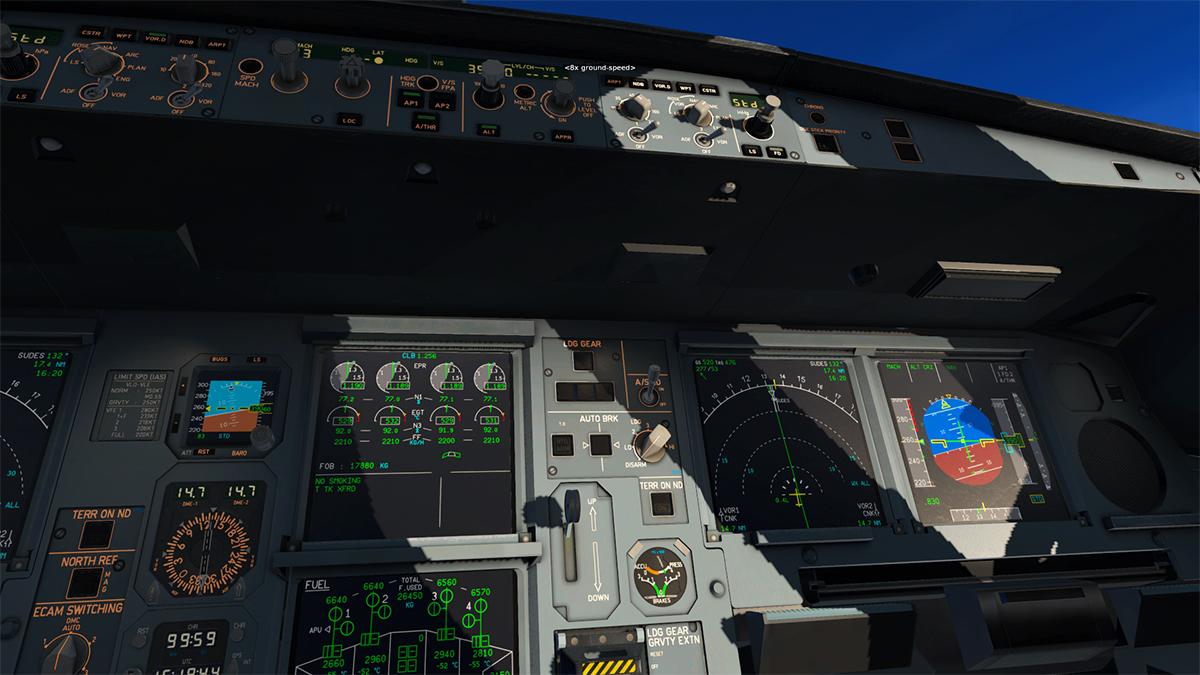
The Q4Xp is a difficult aircraft to relate to on fps and resources. And this aspect has been wildly talked about on the forums. Here is why it is odd? My system sees no real framerate change from most of the same sort of Hi-Def aircraft, so I run around 35frs on average, however friend users with powerhouse computers are seeing a 50% drop in performance? That does not make sense... My feeling that that there is a power leakage in the plugin, so any real base line performance is not currently available, that is hard for purchasers of course, but I think the 50% drop in performance is abnormal and will be fixed. My advice is don't be too greedy with the graphic settings and you will be fine.
-
It was noted as Librain... however I think the misquote was Libradio? I'll check it out... as noted Librain will be default in XP12 anyway.
-
Behind the Screen : October 2021 About mid-October the X-Plane world finally started to move. A few then a double developer blog entrees appeared and we finally got a realistic glimpse of X-Plane12. Finally it seems that Laminar Research had a running version on their computers, how much depth in the version was still unknown. But the main aspect was that the vital important components where now actually running together. Important is the weather. Environmental effects is the really hard area to get right in a simulator, in fact no one has really got it all right. It is just too complicated, too complex to get completely realistic. You may get one aspect, say the actually look and feel of the clouds and shaders. But then you can't actively move it around as a real weather system which is constantly evolving from one state to another. The MSFS version is like this, in being very accurate visually, but not dynamically. Although ten years ago the basic three tier X-Plane weather system was back then very good, but looks totally bland today. Laminar Research have asked a lot of themselves into delivering X-Plane12 in creating a very different type of weather system. On the surface it certainly looks good, but at this stage not exceptional in a few areas. but under the flashy front, is very clever coding at work. First the system does away (finally) with place cards, or art based tools to go fully mathematical. To the abomination of all the shader repeaters out there. So there will thankfully in XP12 be no more shader tools or packagers that give you even worse over looking deep blue skies and those odd sunset colours. The maths also allows for the new environmental engine will work in a 4 dimensional space and most cloud types are covered, as art is only effective in a 2 dimensional space. One big advantage over mathematical systems is that because they are not pushing around all those art cards, is that the weather will be far more framerate friendly. Not weather lite, so to speak because the weather is still going to be too big and too complex not to use up a lot of your processing power, and that aspect is also important. Before the weather was very dependent on your Graphic Card, the bigger the better. But in X-Plane12 it will move all those complex calculations to the processor. Add in the photometric renderer calculations and it starts to get interesting. Again a mathematical model will create realism by using actual real world light levels (specified in real physical units) in its internal calculations, again in discarding the art aspects, and better for us is that the extremely dark cockpits and light/dark line jaggies will disappear and be replaced by something far more in lighting terms of a more realistic nature, or at least a perfect realism of our own world and it's lighting conditions in a simulator. Again it is important to note that if you play a video game the skies and weather are not actually dynamic, but it is just there so it looks good. That is why it does look so good, but those aspects don't work in a dynamic simulator. In reality for all the extreme quality graphics that they give you visually, then dynamically video games are not really very cutting edge. But the weather in X-Plane12 will be extremely cutting edge technology. That is two aspects, but the third is a new environmental system that has still another dynamic. X-Plane12 will use the NOAA Grib Models to forecast the weather globally to make sure the weather changes are smooth and seamless when flying. The system couples four separate models (atmosphere, ocean model, land/soil model, and sea ice) that all work together to accurately depict and forecast weather conditions, the local METARs are however not forgotten, but now overlaid the Grib data to create a more realistic model by combining the two elements. So you will have soon all these three areas working together... the visual, the lighting and the global dynamic elements, and all combined together into a single processing mode. There will be some missing elements at first, as this is ground breaking tech, and just getting it all working together as a chorus will be a huge feat in itself, the fine tuning will come later. But working it does seem to be, and a very big reason to get very excited. Important to note was that Laminar noted (most forum comments are all around the technical specifications required for X-Plane12). That Laminar did not buy or use any more updated or more recently purchased computers to build and run X-Plane12. Translated that means what computer you now run X-Plane10 on, will also run X-Plane11. But here is the cache. If you have a weak processor, then you are still going to struggle but in a different way, so hence my need to update my 7 Series processors for something more powerful. (I was due for an upgrade anyway). Important that your processor choice is also a good one. Not only to process the very different elements of X-Plane12, but to have the options later to do multi-threading as well. As we know X-Plane is currently a single big processing hole, that will change as we get deeper into X-Plane12's run. Multi-threading will become more and more important to use these new current 12 and 16 core processors to their maximum advantage. That is the trick of Vulkan/Metal. Certainly with the option to process the various aspects of the environmental system, but you can see where this is all going for older computers, mostly to the tip. So you can see the big picture and the huge wall Laminar have had to climb. Not only in installing Vulkan/Metal, but in now also taking the huge advantages of these APIs benefits, as noted OpenGL will be gone in X-Plane12, and you can now easily see why. As we get closer to X-Plane12's release, another aspect I have mentioned before will be the loss of main favorite aircraft in your virtual hangers... I only see a fraction current aircraft being updated to XP12, most X-Plane10 era aircraft will be finally vintage. Carenado will be the big test, in with the departure of Daniel Klaue, the old custodian of Carenado aircraft. Will the 50 odd aircraft in the Carenado cache be actually updated. Currently I doubt it, but the cull will still be very wide. If even if to the point that you may have to rebuild up your virtual hangers with a far less but fresher fleet. Another interesting aspect that came out of the Laminar bunker lately was the realignment of the mesh. Ben Supnic asked for some preferences on the mesh order, in wanting to relocate the (in some cases) the mass collection of overlay scenery packages, or put more lightly the addon custom photographic textures. In reality if you have a significant large collection of these (mostly Orbx) packages, you would have an instant photographic world a'la MSFS. The weakness is the non photo-covered areas of the far weaker default mesh. The idea is to create a more resource based sub-folder to hold these mesh files, in that they are currently overwhelming the already totally overwhelmed Custom Scenery folder. The trick is in the scenery loading order, so the photo mesh is positioned correctly in the right place, in place below the scenery folder and above the default base mesh, benefits would be a far quicker loading speed and no cross-referencing with other resources in default or custom. Is it a quick and even cheeky way to counter the MSFS onslaught of photographic imagery. "Hey Presto" and you have an instant photographic world! It is however an interesting take on the idea, and one that would have Orbx shares going through the roof. Interesting though is that it might bring some of the lost scenery developers back to X-Plane if it could deliver a more realistic world, even if it is against Austin Meyer's personal preferences. My guess this new feature even in a raw form may even be included in the X-Plane12 release. The problems still remain though... flat photographic plates at ground level, and the sheer storage volume and bank balance required to acquire them. But we are not looking at an instant all round fix here but one that covers the issue over the X-Plane12 run. One thing that has emerged over the last few weeks, is that the X-Plane12 environment is really, really good, and exciting (Finally). It has took sometime to get here obviously, but the signs are finally looking good. And yes even I had my doubts this time around. As we get closer to the end of the year, one thing does stand out. No matter what the world threw at the X-Plane Simulator, A pandemic, Microsoft and a brand new simulator, loss of peoples income and even work... and even yes Climate Change. X-Plane not only survived, but even flourished throughout the whole series and sets of events... now we finally have X-Plane12 also to look forward to. But keep your expectations low on the beta release. The beta will be basic, to just run only. It will be only later that the layers of features will be added in or refined, like with any new simulator version release. And expect some jolts as well, change can be jarring, and you can lose as much as gain going forward initially, but the benefits will be huge, and very exciting. I'm still punching for a American Thanksgiving 2021 beta release, if not, then certainly the early first quarter of 2022... we will all know by the time of the next "Beyond the Screen" edition in December if that 2021 release has happened... Excited, now you should be. Yes I'm late again with the October edition, but big, big October aircraft releases needed to be covered first! Stephen Dutton 9th November 2021 Copyright©2021 X-Plane Reviews
-
 NEWS! - Scenery Released : Airport Menorca XP by Aerosoft The popular holiday island Menorca is now available for X-Plane 11 via developers Sim-wings and Windsock Simulation, and branded under the Aerosoft Banner. The Menorca scenery features dynamic lighting and satellite imagery covering the entire island, with the ground markings, markings and lighting which are also are up to date, as well as the state of development of Menorca Airport of 2016. Highly detailed, animated jetways are implemented using SAM. The mesh was also adapted in the airport area in order to remain as closes as possible to reality. An Ortho4XP patch is also included to match the mesh. Features: Airport Menorca with all buildings and service facilities High-resolution satellite images (ca. 0.5 m/px) covering the whole island Autogen buildings and vegetation for the entire aerial image area Numerous static vehicles like buses, baggage carts, etc. Detailed animated jetway models (using SAM plug-in) Detailed ground markings Dynamic lighting Custom Mesh (Ortho4XP patch included) Compatible with default AI Traffic and World Traffic 3 It is important note is that now you also have to use the new "Aerosoft One" application to install and manage your Aerosoft X-Plane scenery installations (You also have to create an account if you don't have one). It will also install the latest SAM v3.0 plugin as well. Images are courtesy of Aerosoft ______________________________________ Yes! the Airport Menorca XP by Aerosoft is now available from the X-Plane.Org Store here : Airport Menorca XP Price is US$23.99 Requirements X-Plane 11 Windows, Mac or Linux 4 GB VRAM Minimum - 8 GB+ VRAM Recommended Installation via Aerosoft One necessary Current Version : 1.0 (November 3rd 2021) ___________________________ News by Stephen Dutton 6th November 2021 Copyright©2021: X-Plane Reviews (Disclaimer. All images and text in this review are the work and property of X-PlaneReviews, no sharing or copy of the content is allowed without consent from the author as per copyright conditions) All Rights Reserved
-
NEWS! - Aircraft Update : PA-28-181 Piper Archer III v4.0 by AeroSphere Originally released in August, 2017. Aeroshpere have completely redeveloped their PA-28-181 Piper Archer III with new reflective maps for the whole aircraft inside and out, and a completely new interior with adjustments to flight model. It is a very comprehensive upgrade. The Archer III was taken from the Cherokee line and sports a carbureted Lycoming O-360-A4M with 180HP at 2700 RPM with a fixed pitch prop. AeroSphere’s Archer was created using the Pilot Information Manual to fully encapsulate an accurate flight model for X-Plane 11 and 10. Update includes; • New nose and spinner • New landing gear/tires and strut assemblies • New interior with new textures • New chairs and seat supports with new textures • New normal maps and liveries • New reflective maps for the whole aircraft, including inside and out • Updated the flight model • Added cockpit support for a better VR experience such as yoke click regions and hotspots Two Archer models included! G1000 Variant Steam Gauge variant Features Designed for X-Plane 11 4 HD (4096 x 4096) liveries with a plain white texture that can be used for custom paint schemes. Steam gauge trainer cockpit model to help pilots in the training environment with required instruments for IFR. Garmin 1000 for G1000 variant G530 and 430 for steam gauge variant All gauges are 3D Detailed flight model and interactive 3D virtual cockpit with animated knobs, buttons etc. cabin door, storm window and rear baggage compartment door. Toggle button to remove/display yoke Compatible with HDR and normal lighting effects Many textures taken from the actual aircraft Custom sounds compatible with X-Plane 11 VR hotspots FMOD sounds Removable wheel pants (click on wheel strut to remove) All Images are courtesy of Aerosphere Simulations ________________________________________ The PA-28-181 Piper Archer III by AeroSphere is now available from the X-Plane.OrgStore!... Here: PA-28-181 Piper Archer III Price is US$24.95 Requirements X-Plane 11 Windows, Mac or Linux 4 Gb VRAM Minimum. 8 GB+ VRAM Recommended Current version: 4.0 (November 3rd 2021) ________________ News by Stephen Dutton 6th November 2021 Copyright©2021: X-Plane Reviews Disclaimer. All images and text in this review are the work and property of X-PlaneReviews, no sharing or copy of the content is allowed without consent from the author as per copyright conditions) All Right Reserved.
-
Debatable... for real life atmosphere xEnviro is simply sensational, kills XP10. But it is buggy, heavy on framerate, extremely unreliable, poor METAR updates, and poor developer service, and the annoying no save of current conditions... For the high price no, but X-Plane12 should soon give you the same without all the heavy drawbacks, I would wait for XP12 and put your money there...
-
Ah... you forgot X-Plane12! That is the really big one...
-
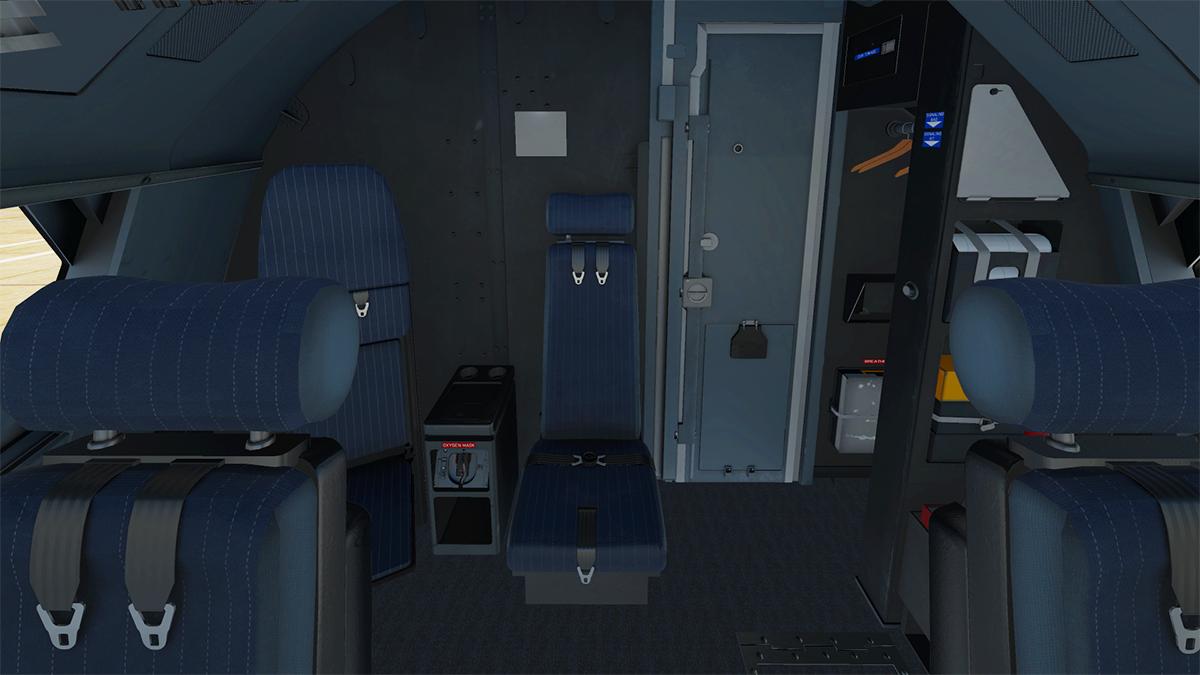
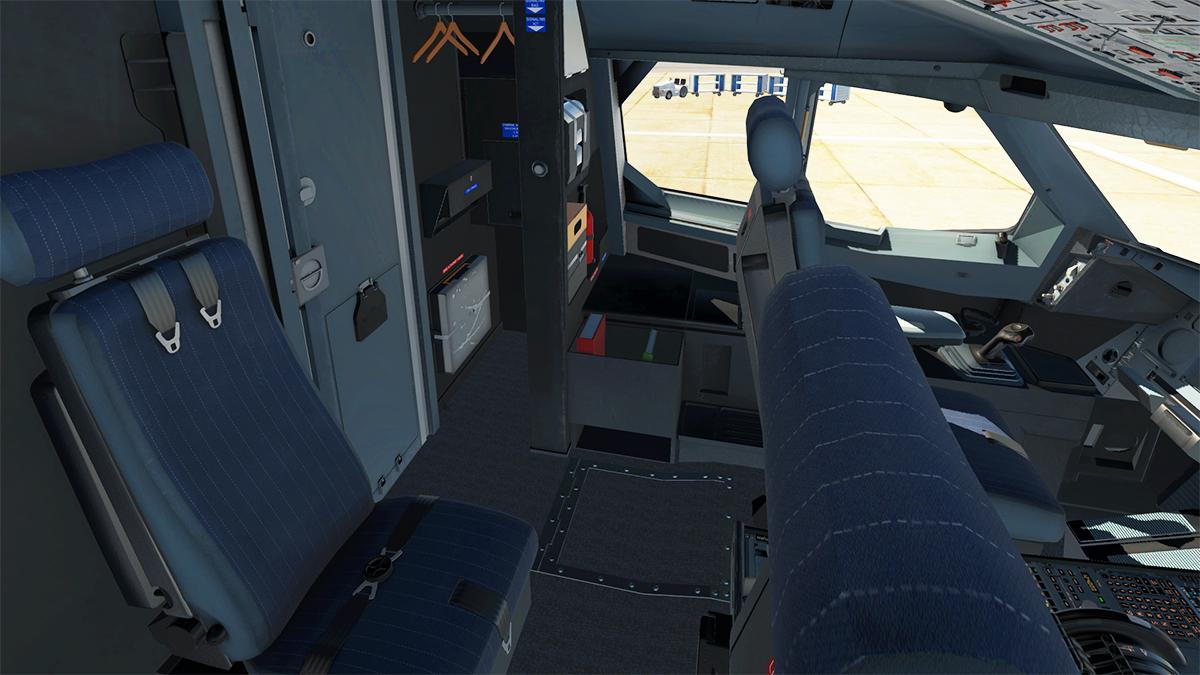
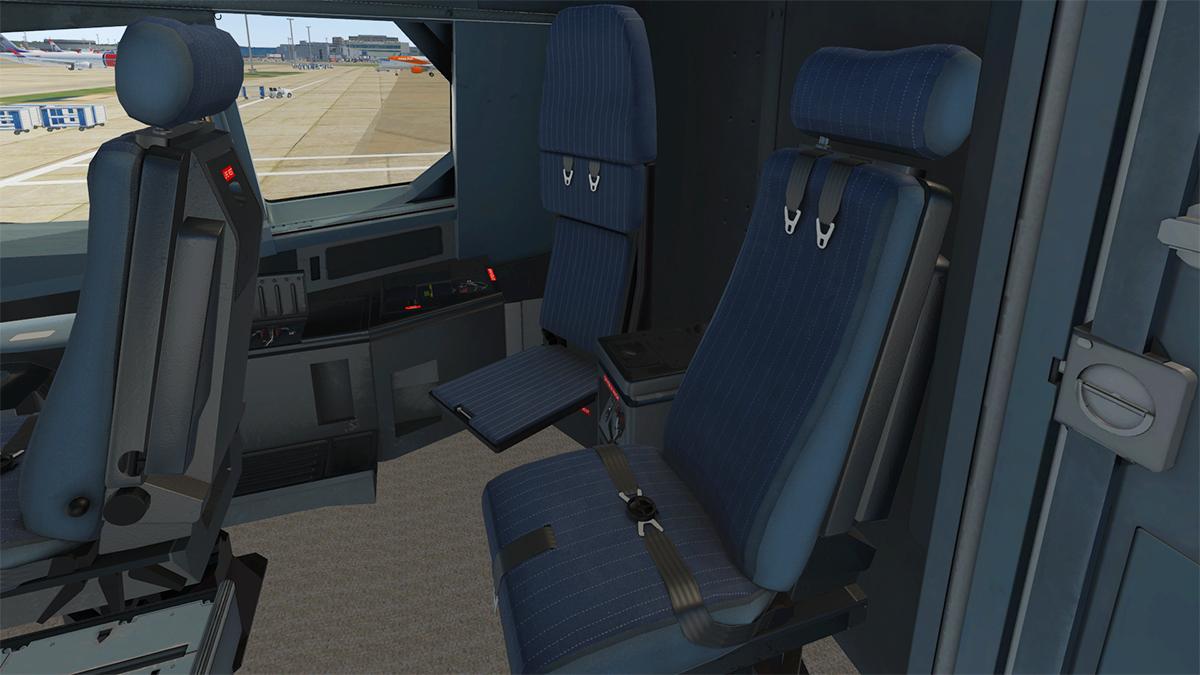
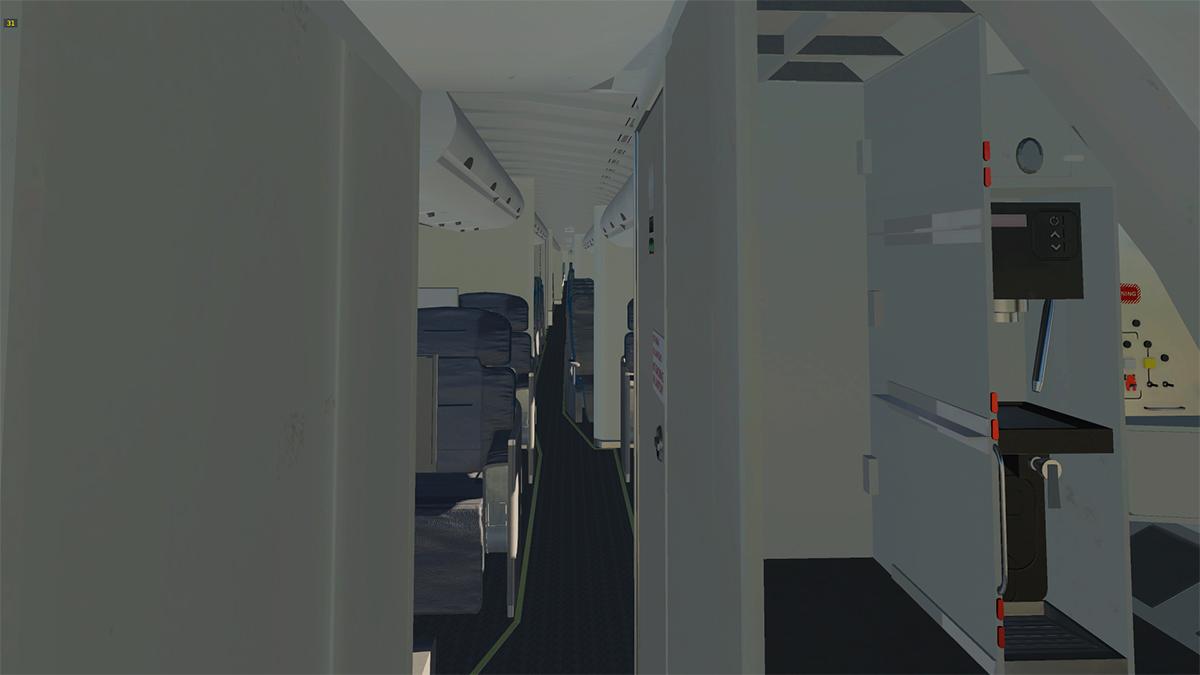
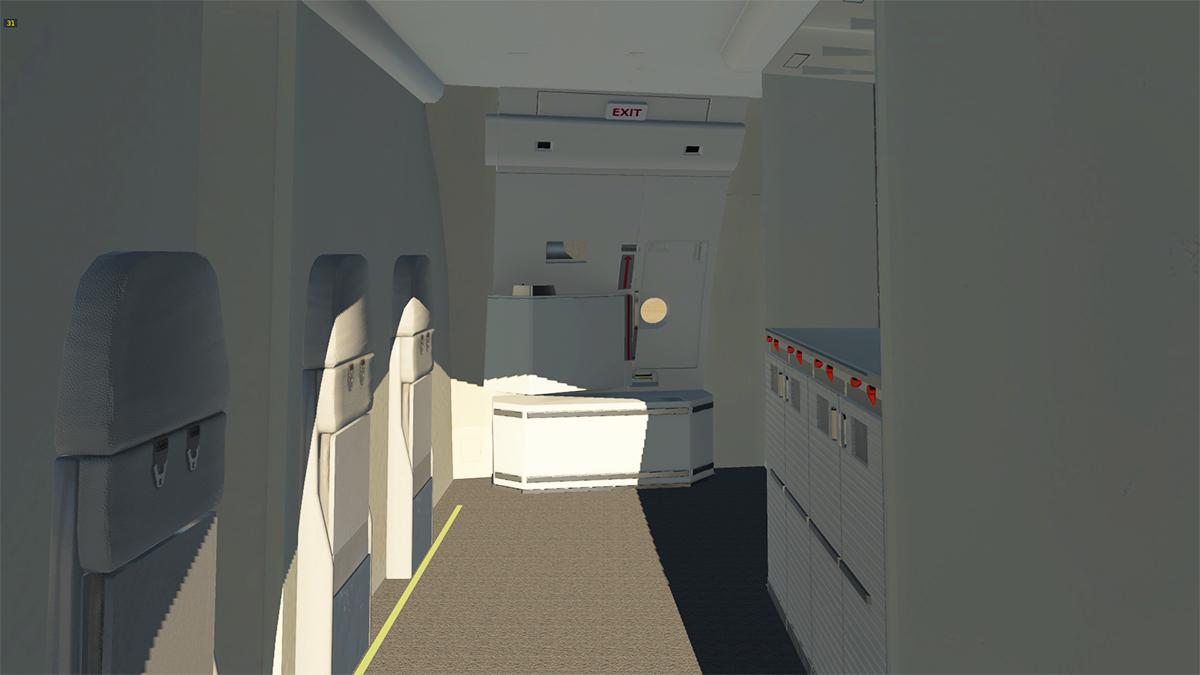
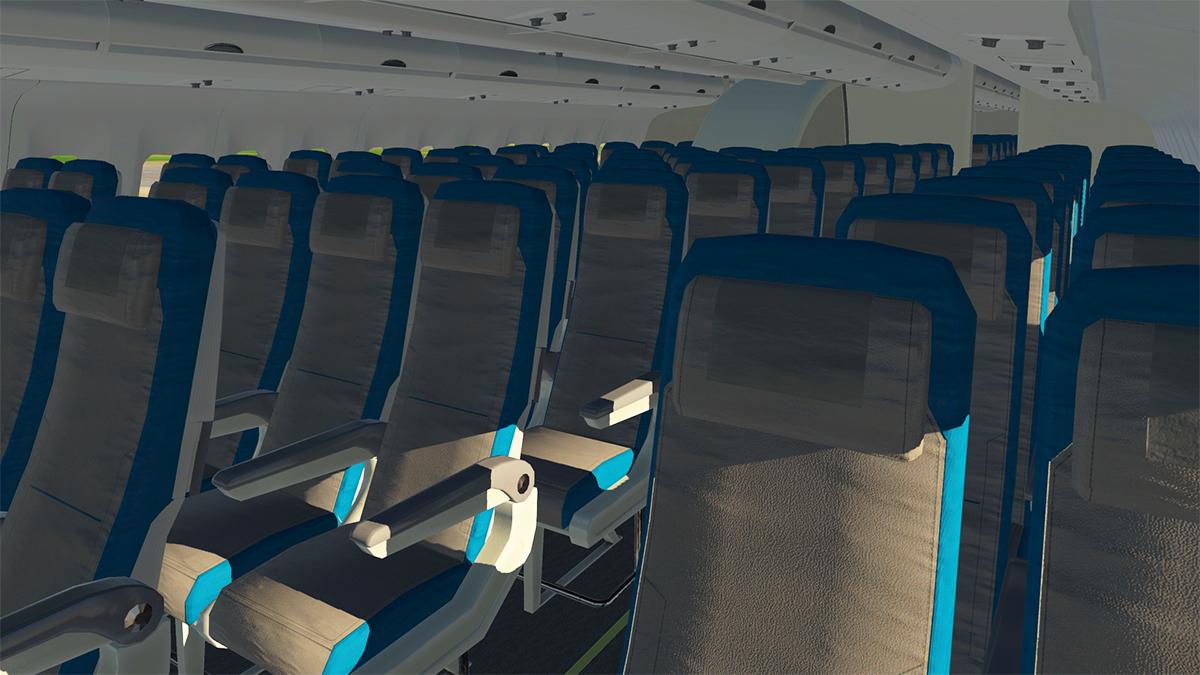
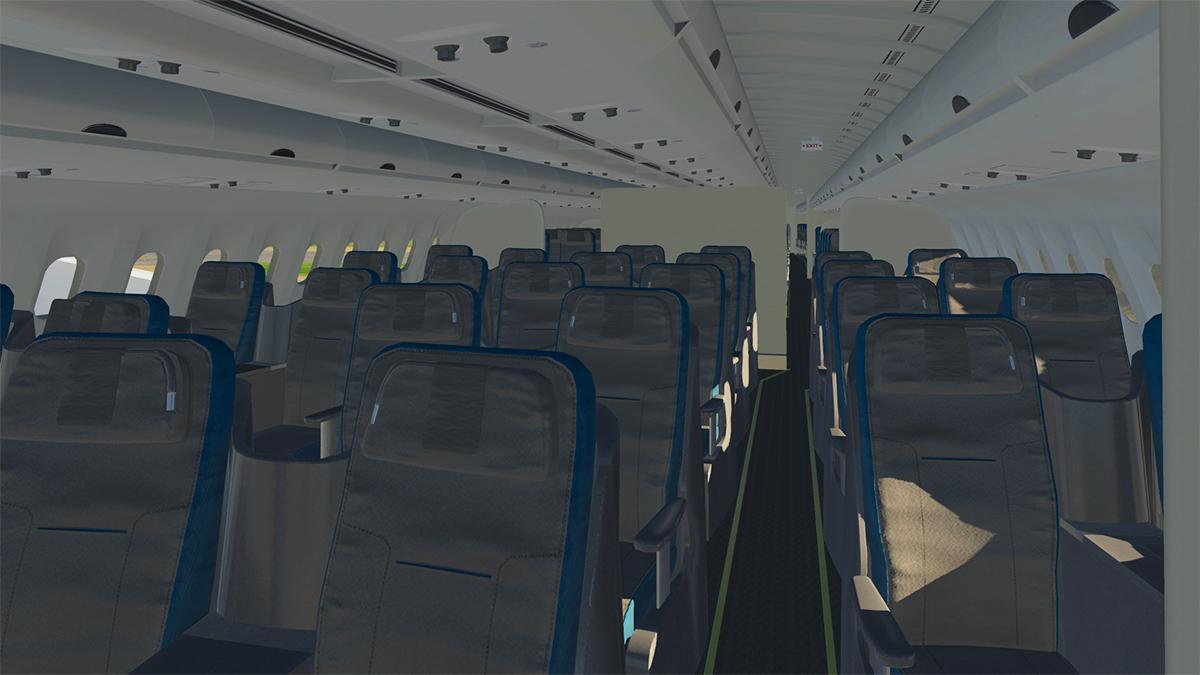
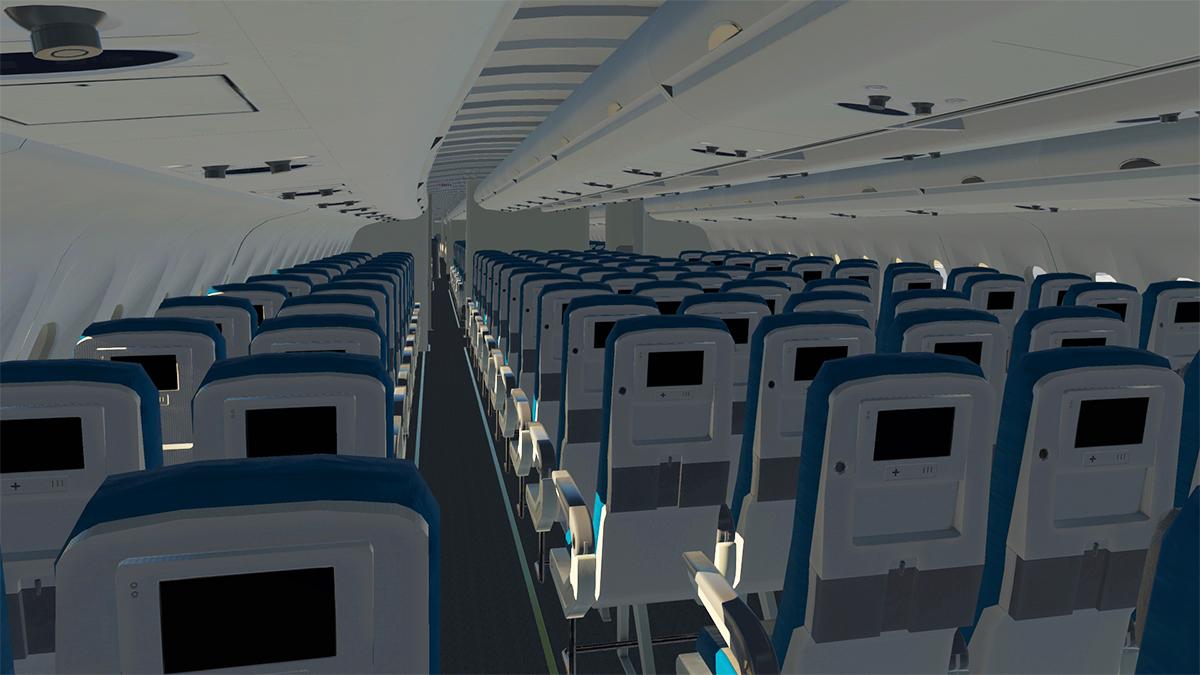
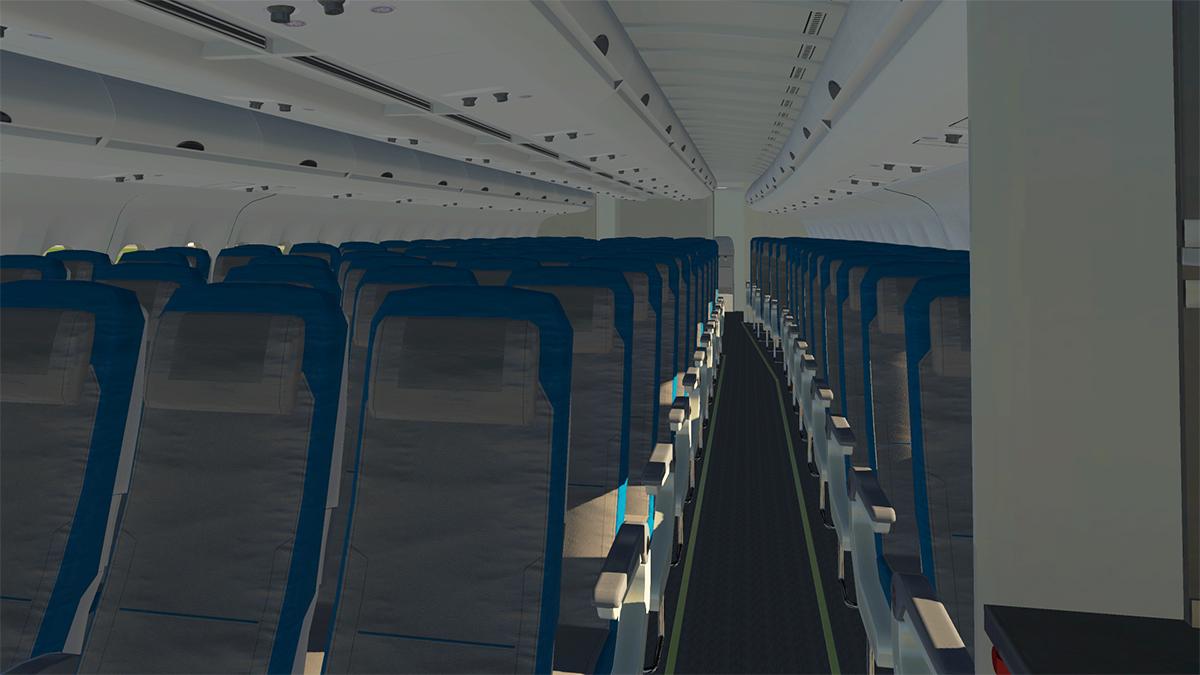
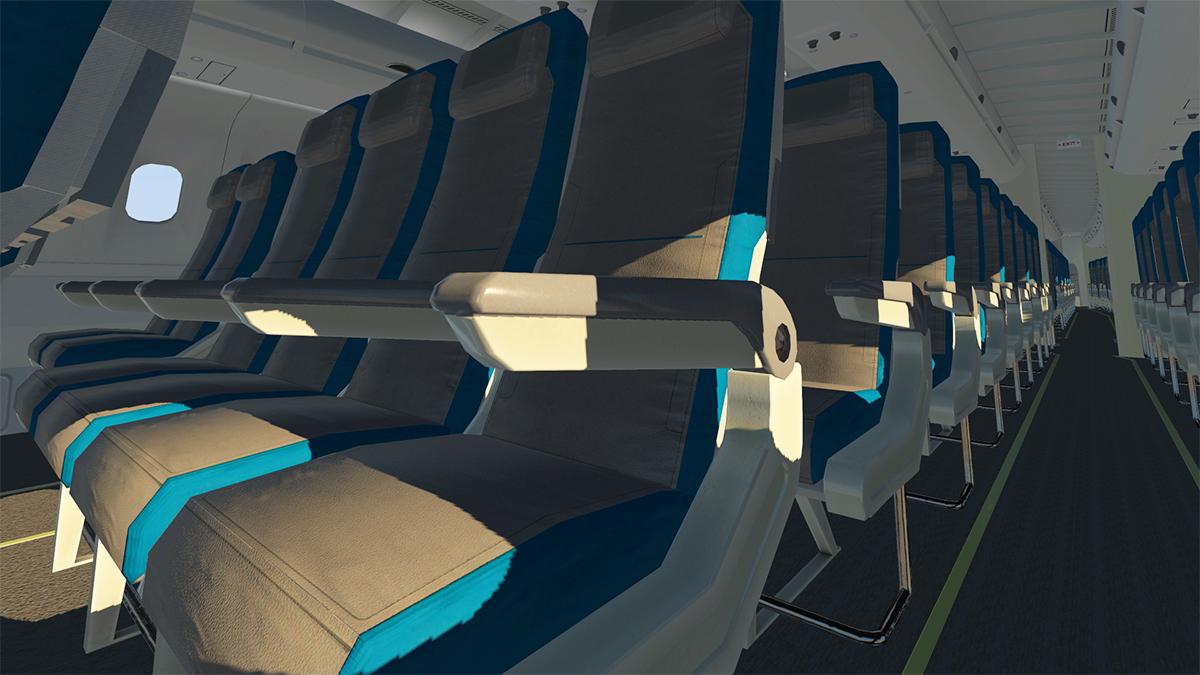
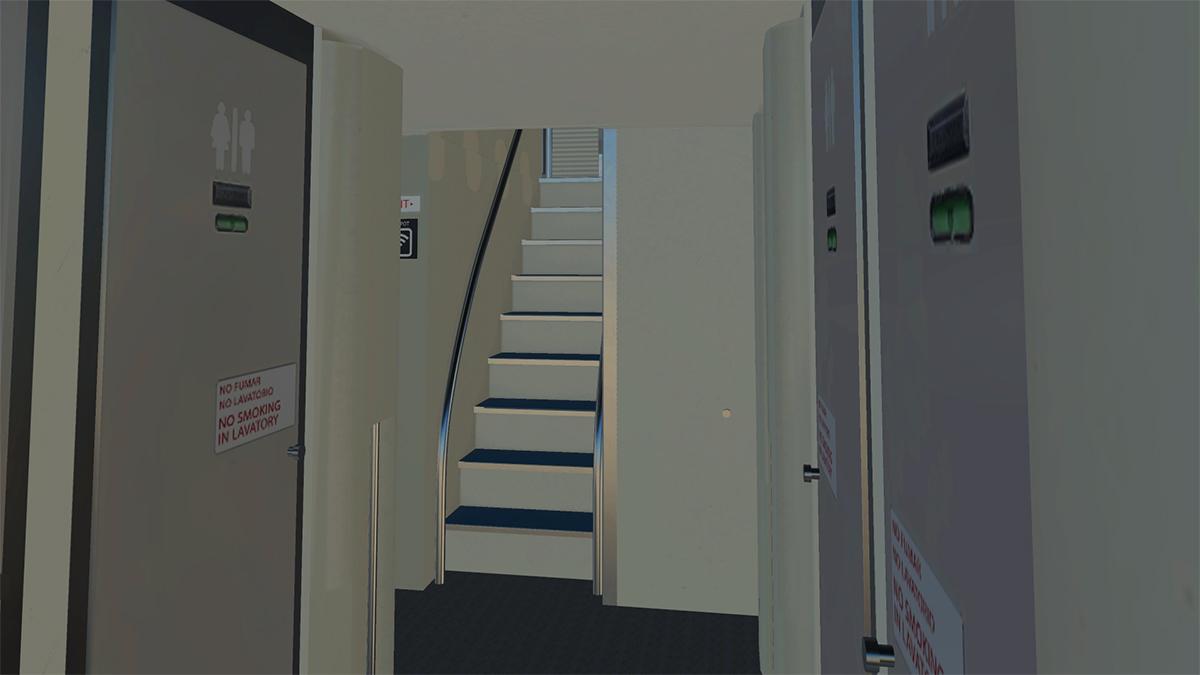
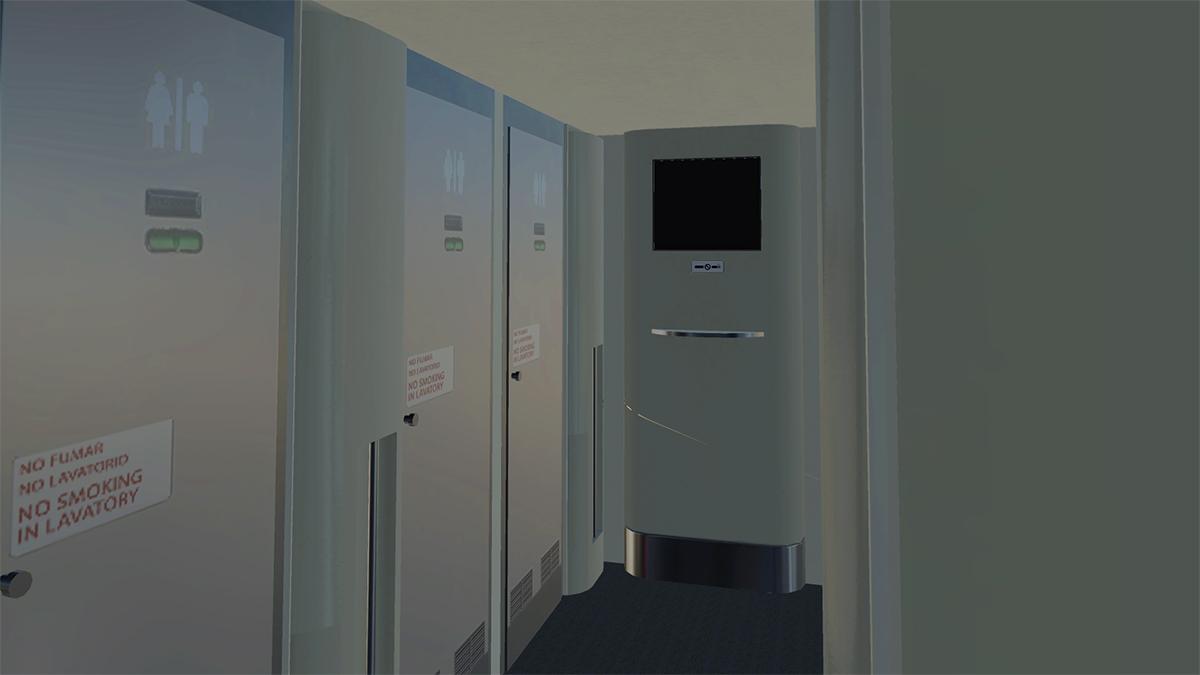
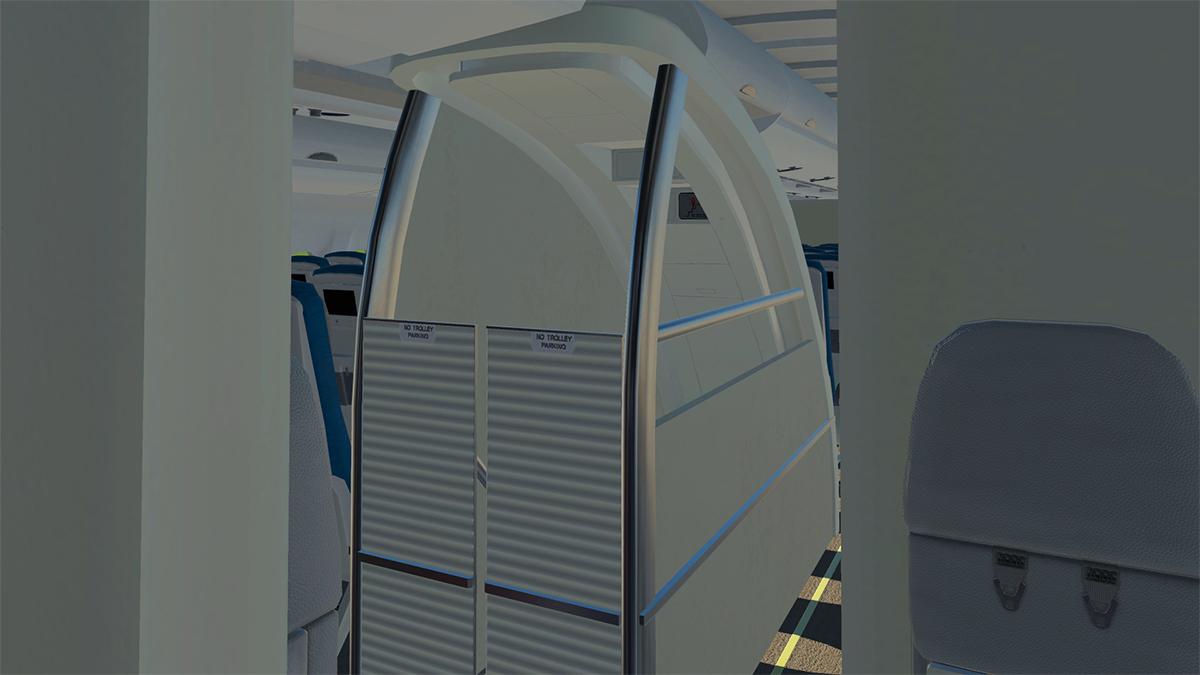
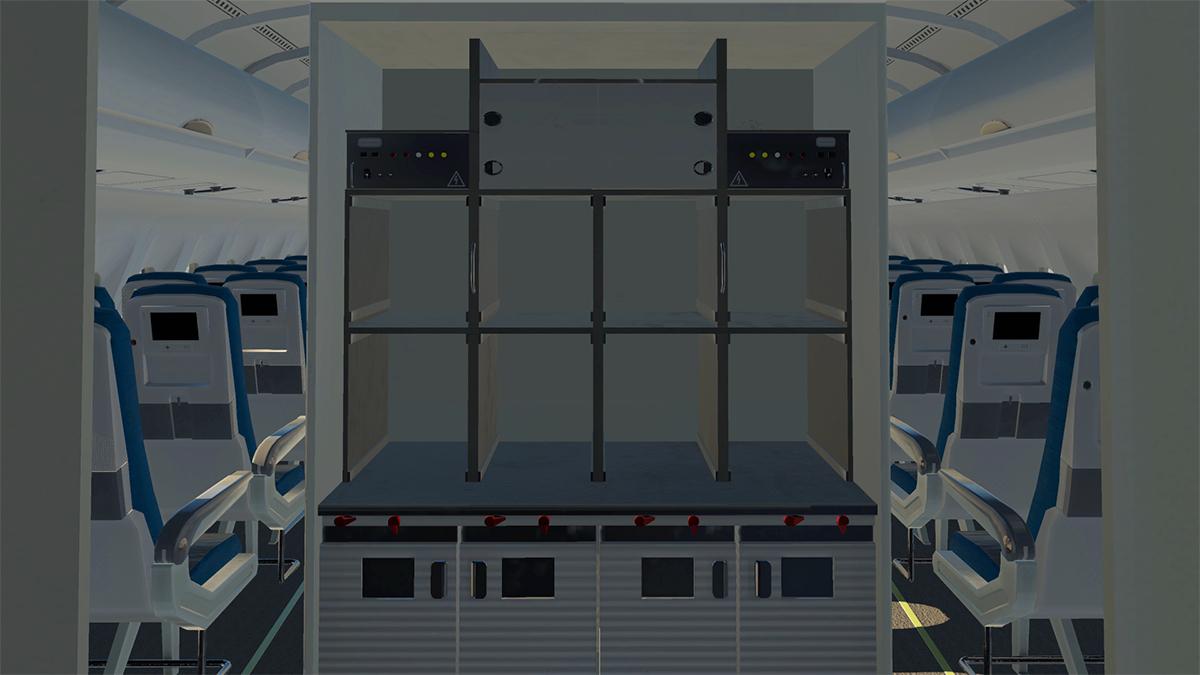
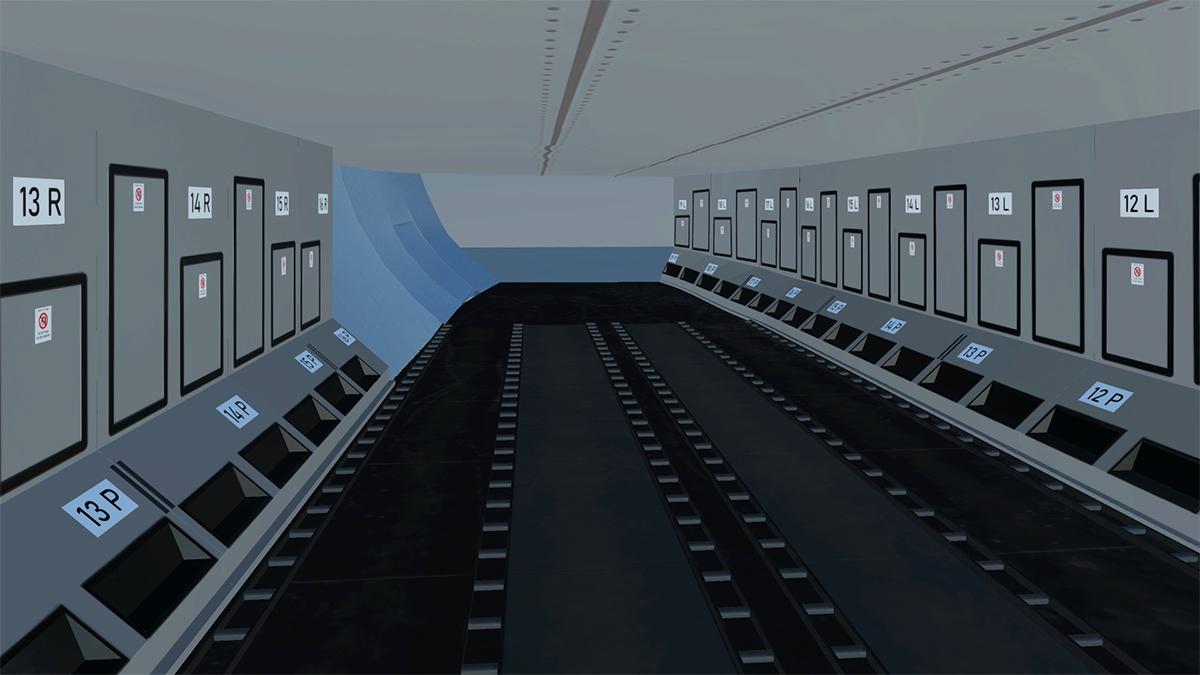
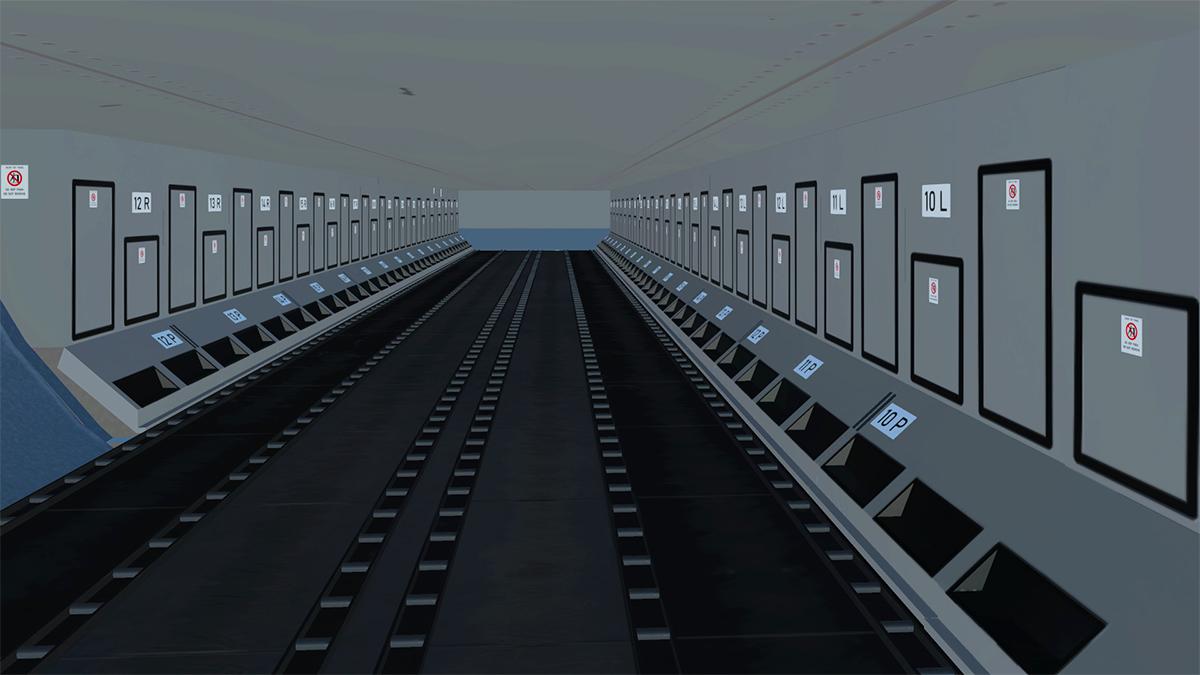
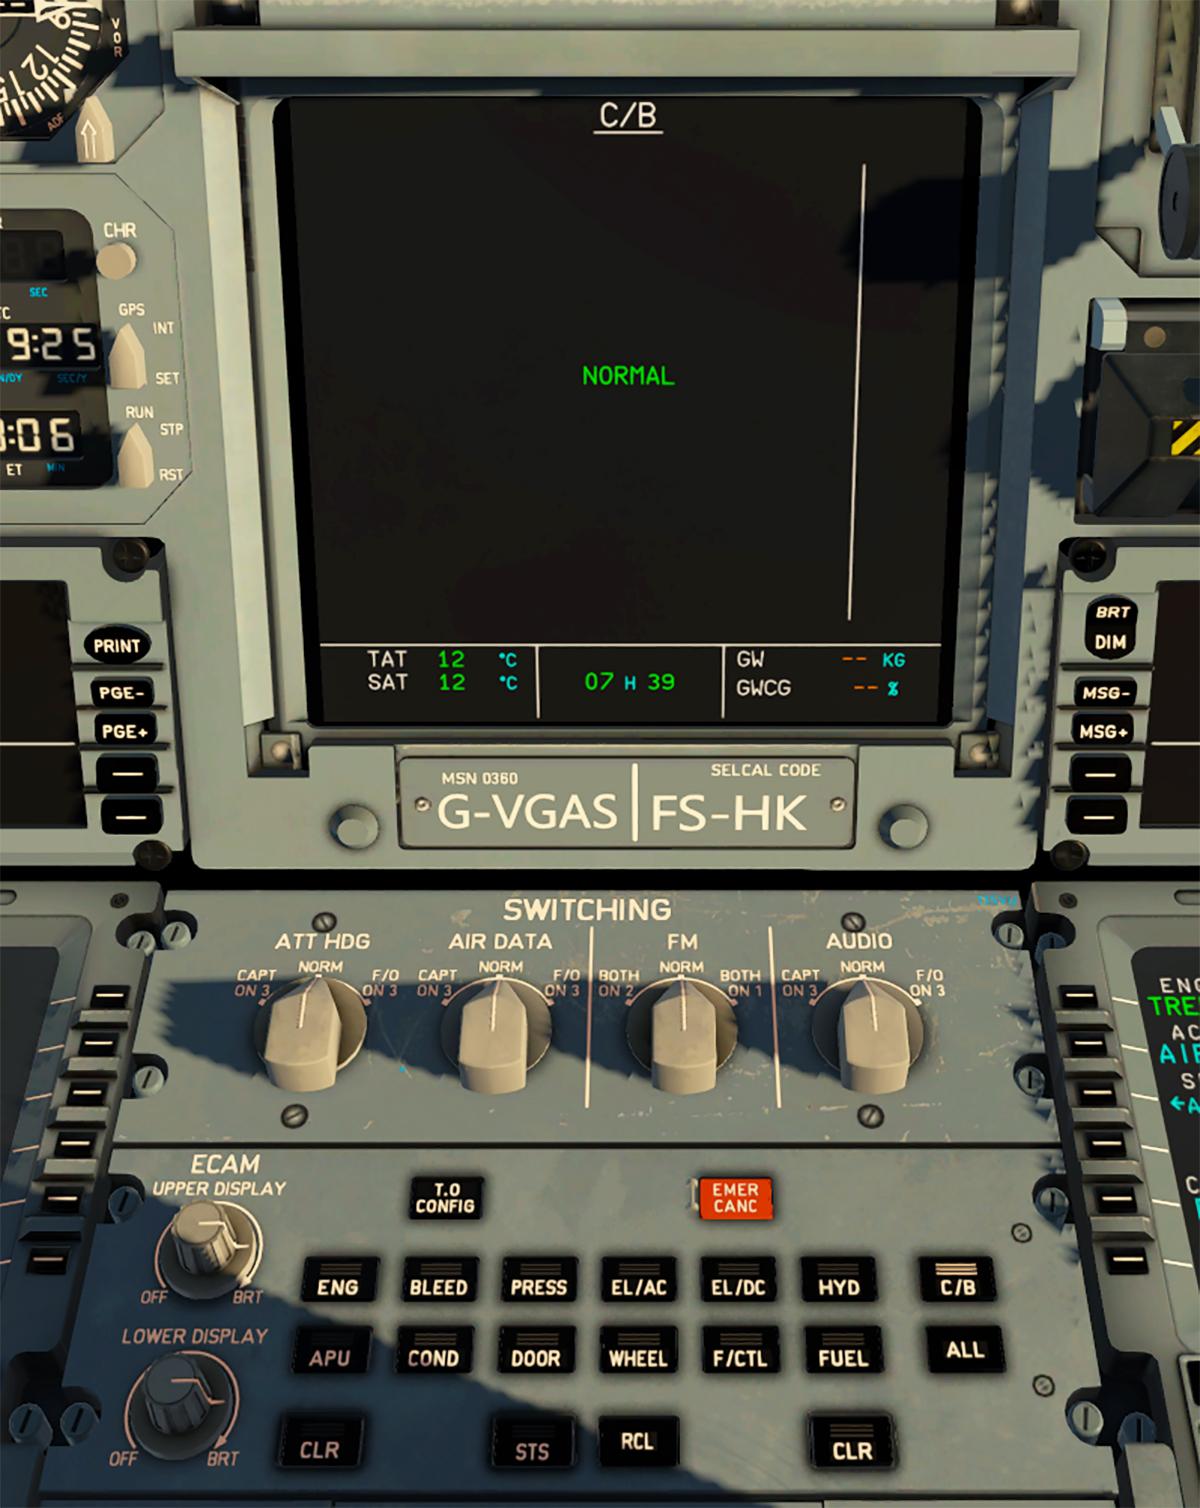
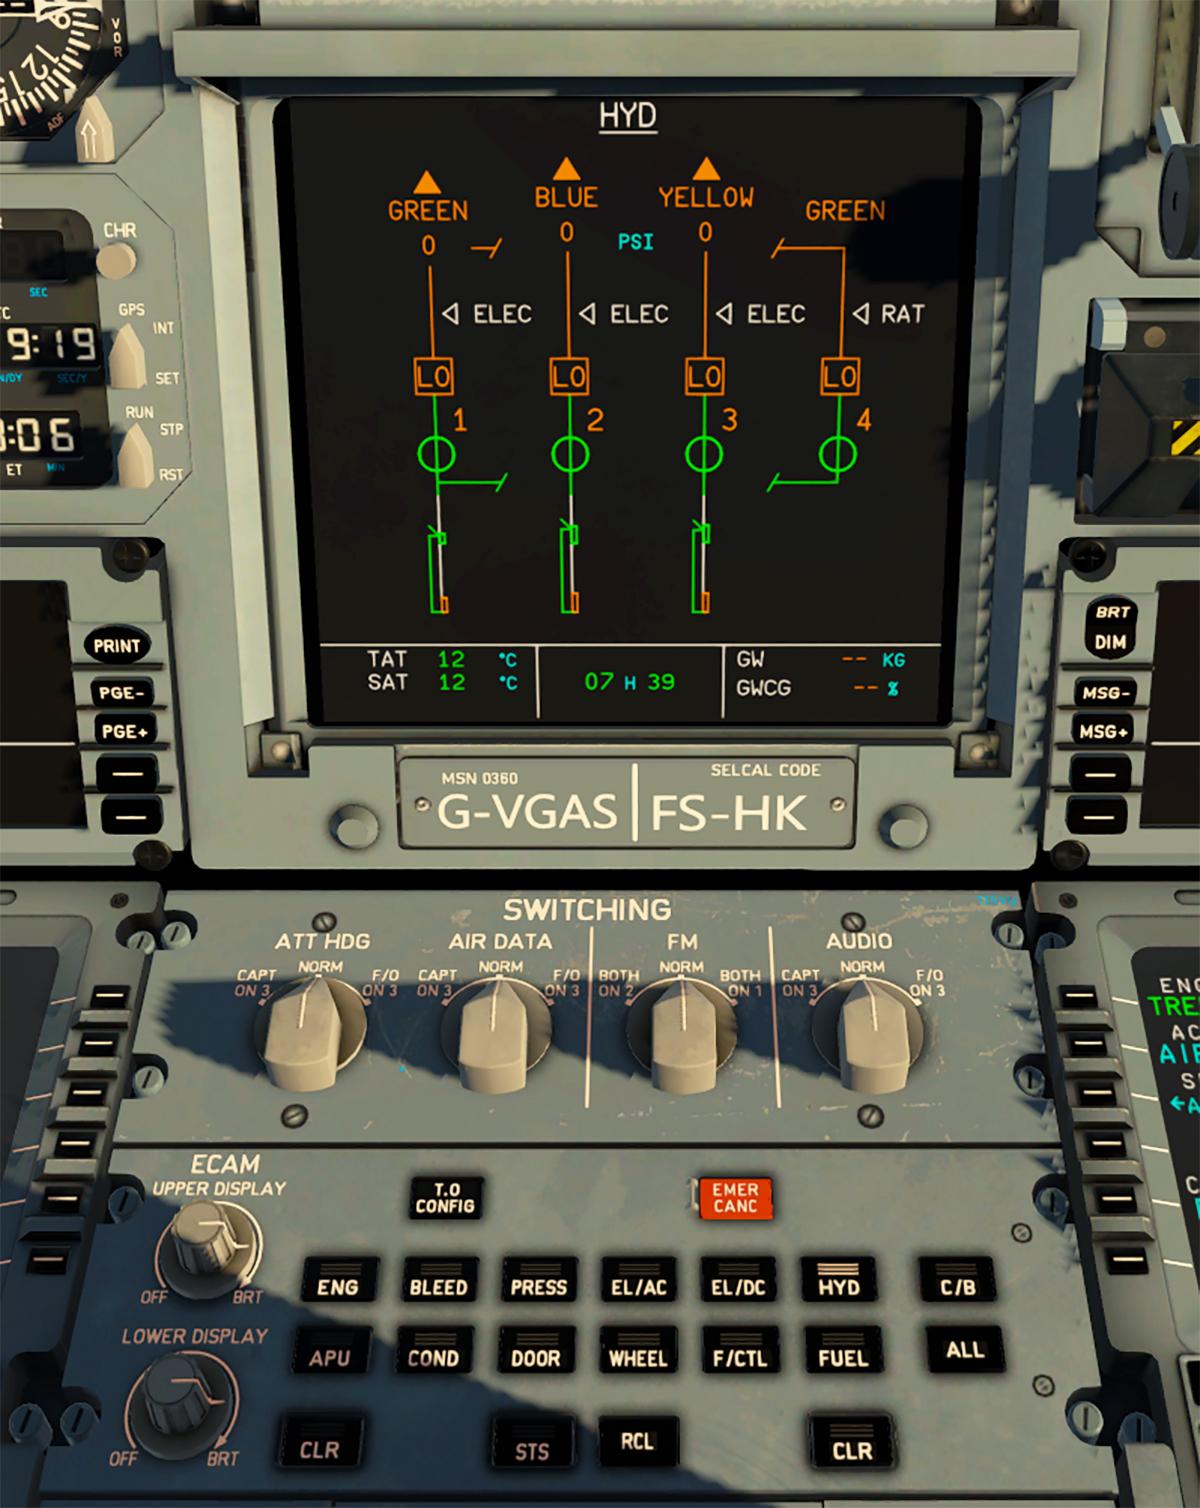
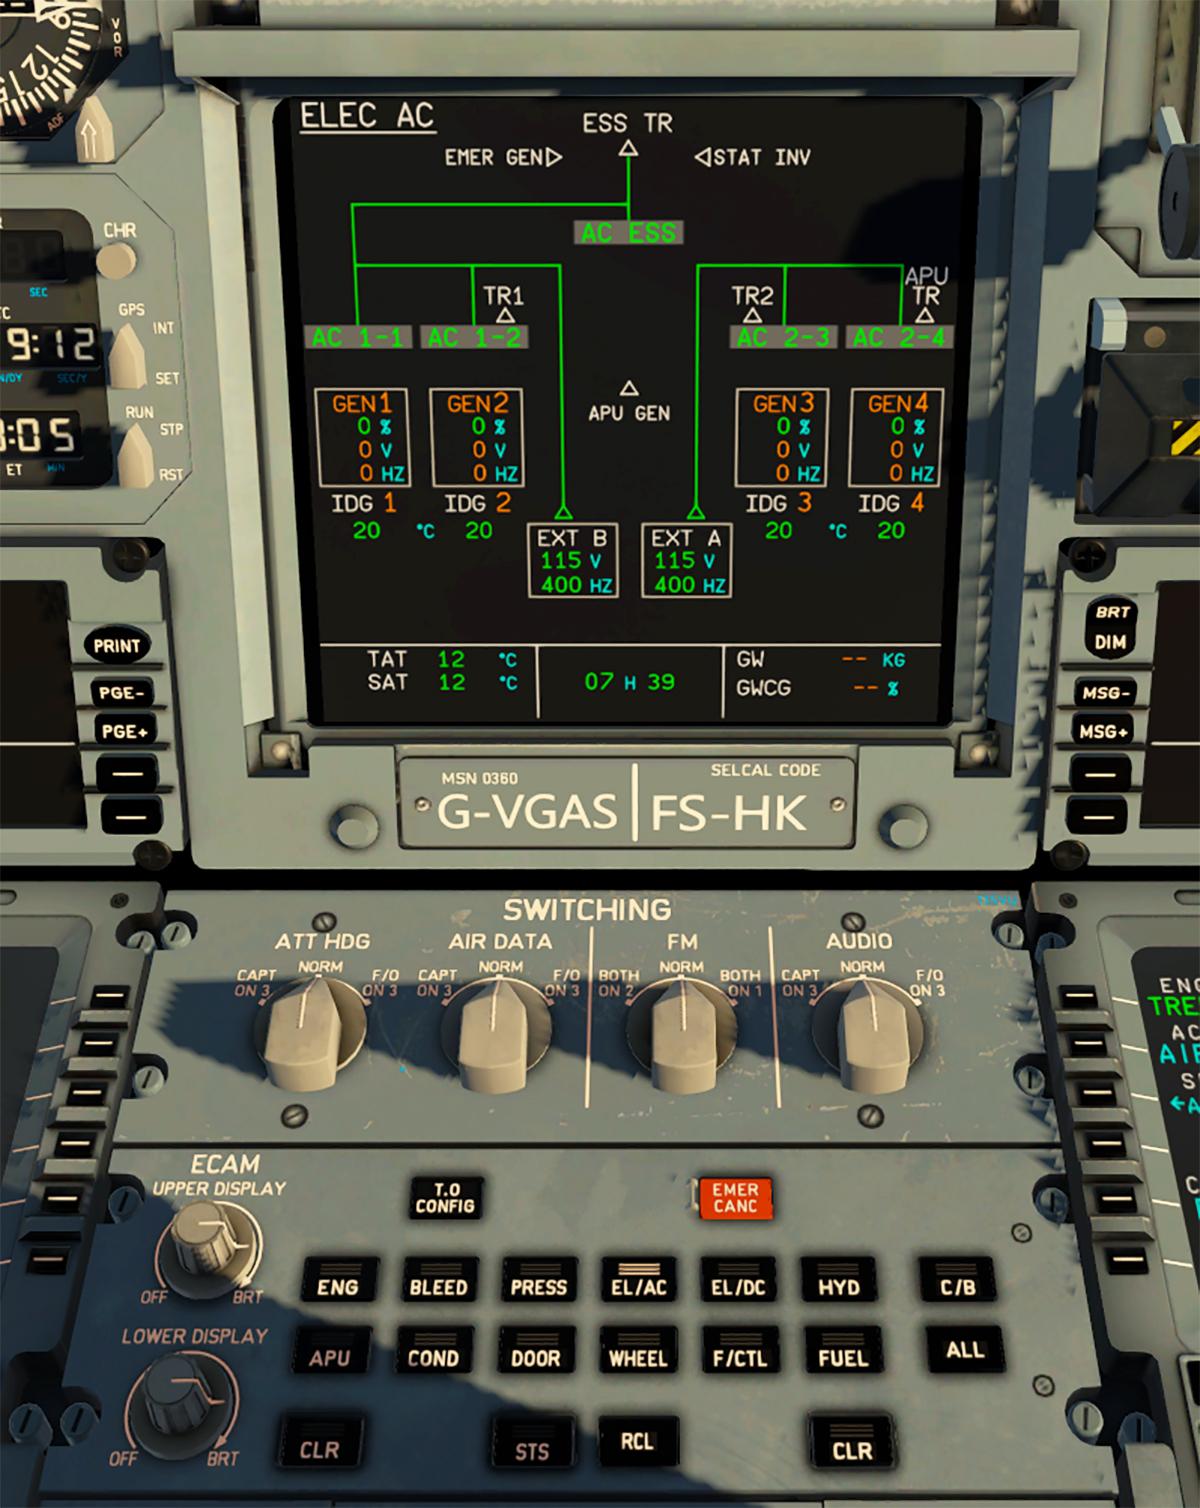
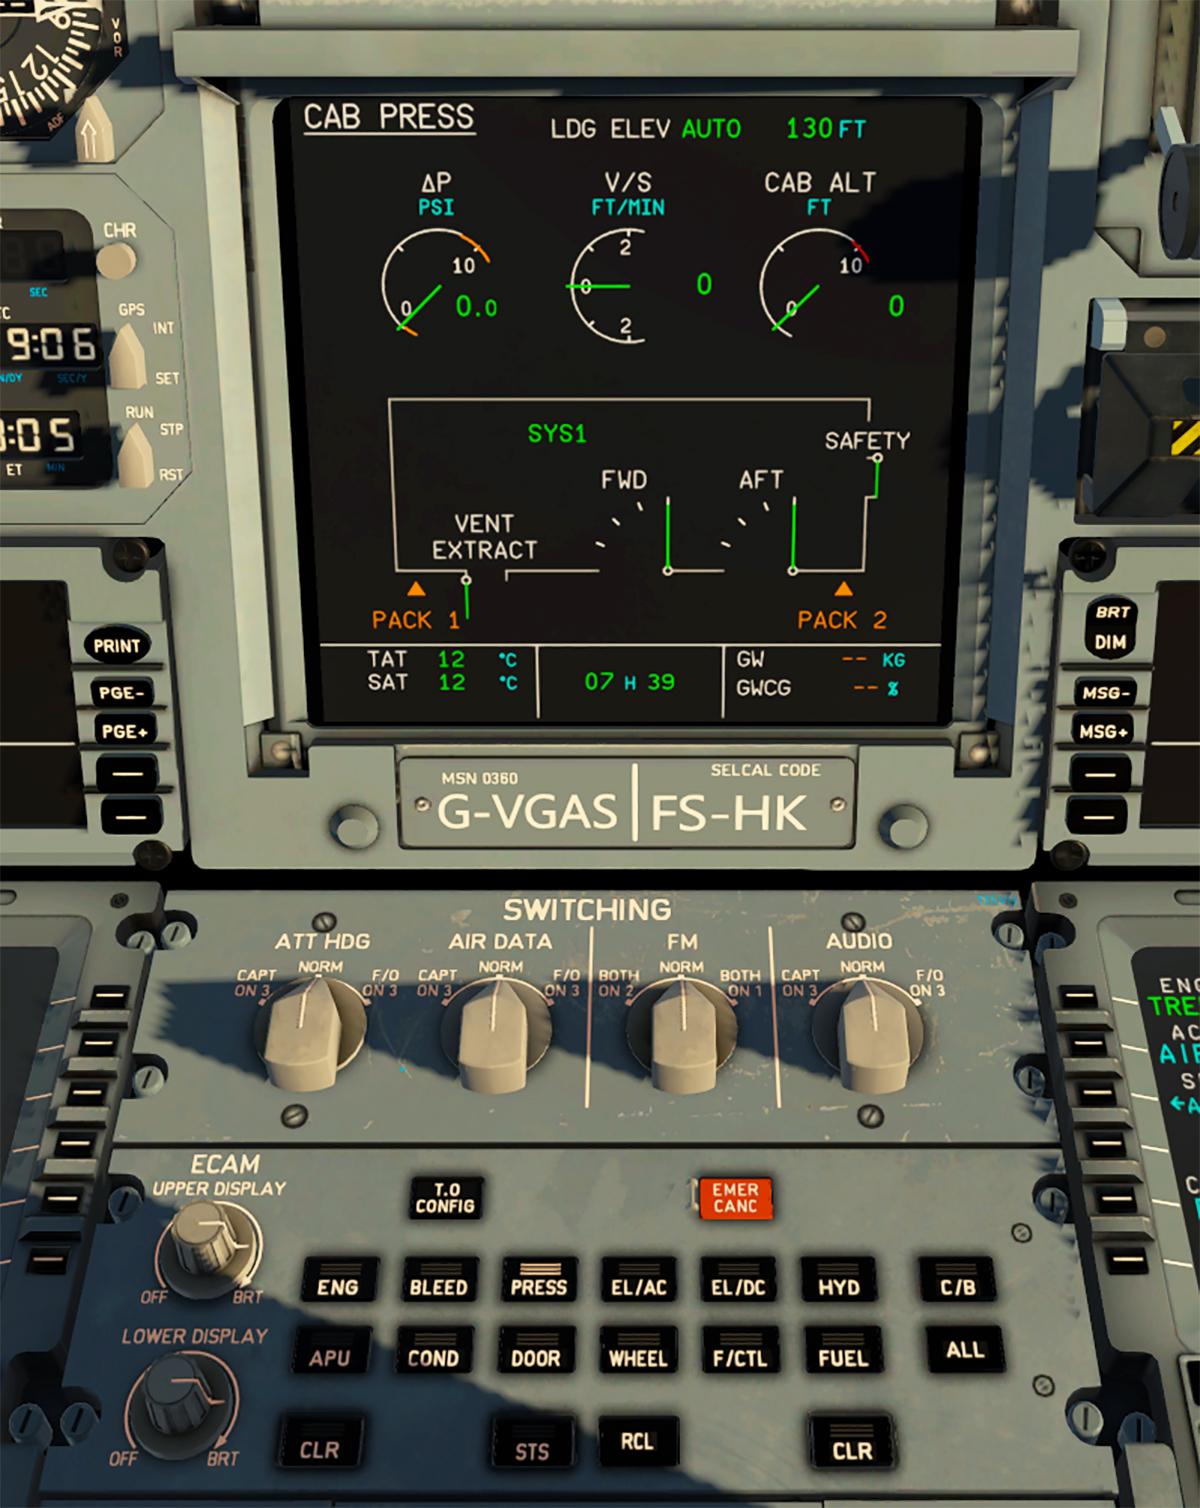
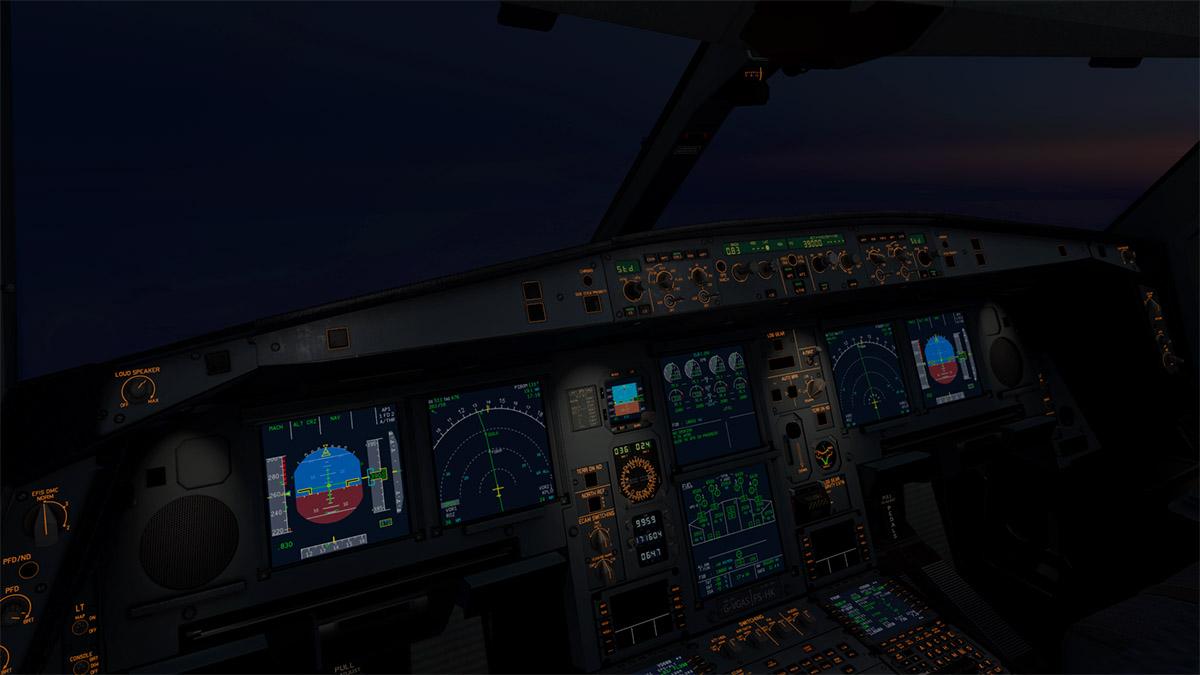
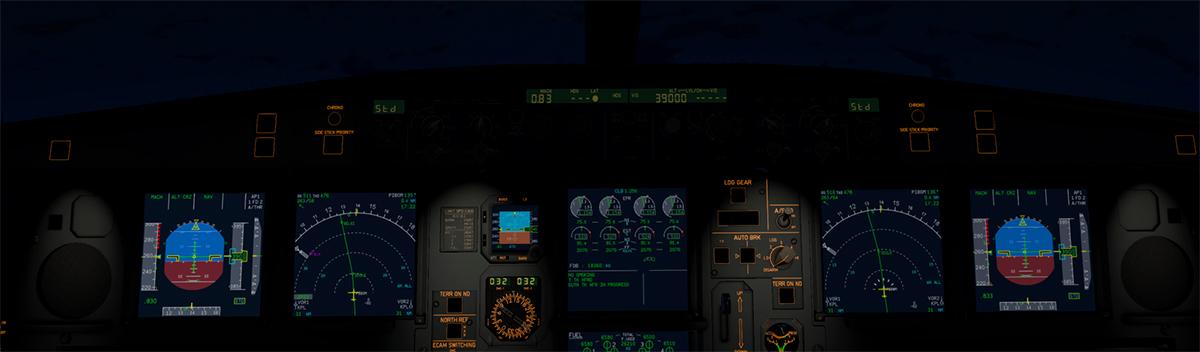
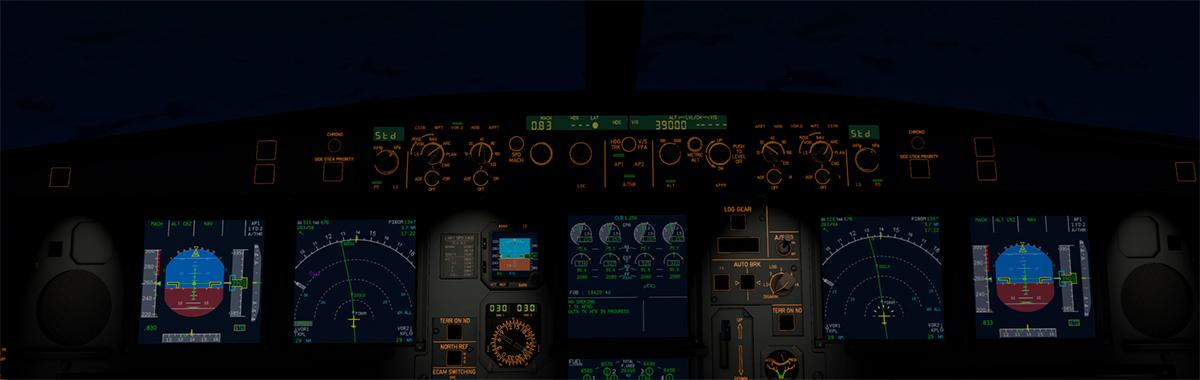
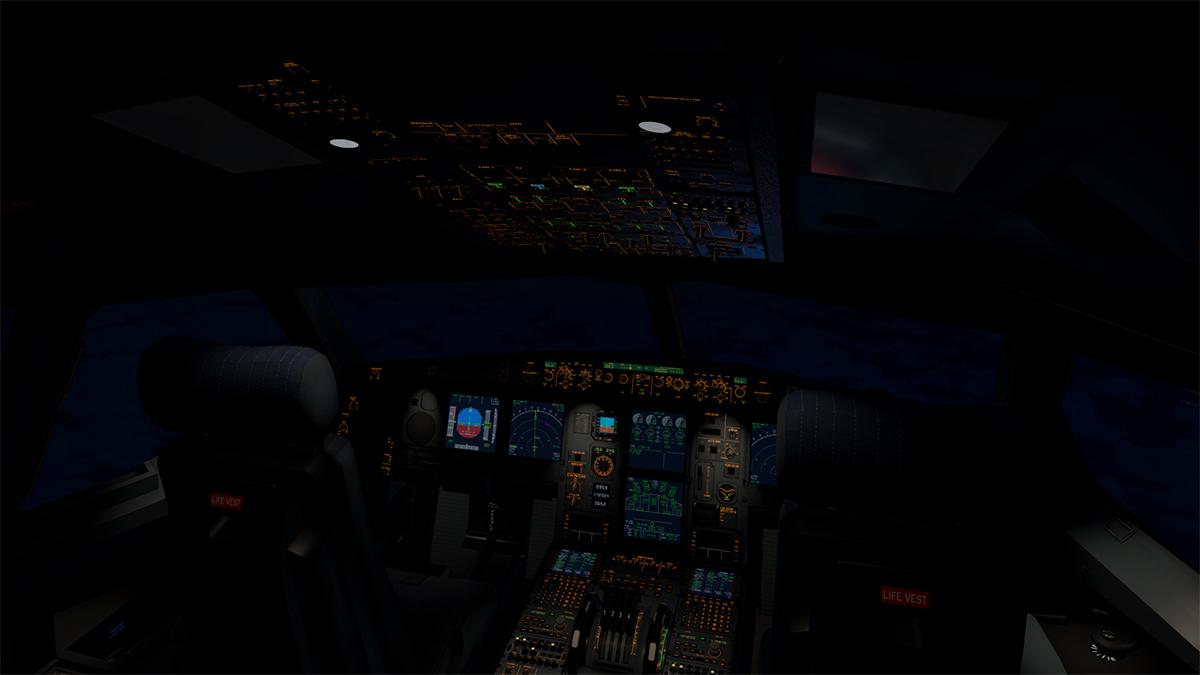
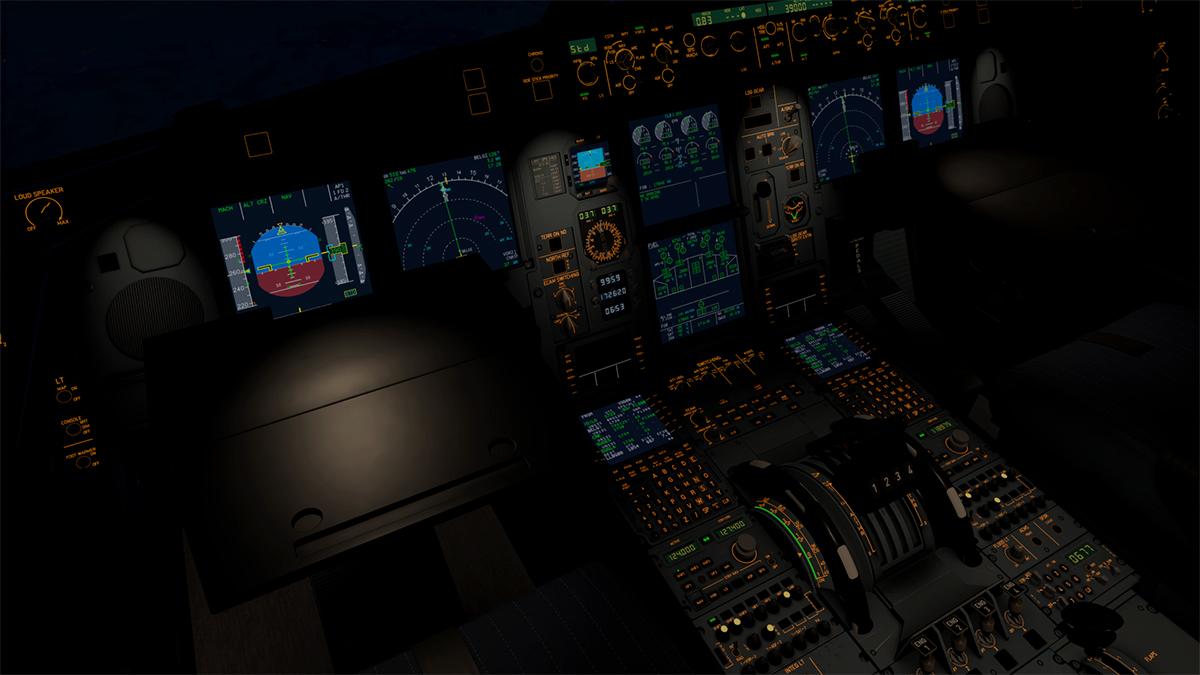
NEWS! - Aircraft Released : DHC-8 Q400 Q4XP by FlyJSim FlyJSim have after over three years in development released their new v2 of the De Havilland Canada DHC-8 Q400. Also in originally releasing the original "Legacy" Q400 for the X-Plane Simulator, here is it's successor... and bigger and better in every area. The Q4XP comes with exceptional 3d modeling, 4K textures inside and out, and a fully custom UNS-1Ew flight management system. The feature list is huge, and so is the quality; Incredible Aircraft Model We have always had a great 3d model, but for the Q4XP we went above and beyond to bring you the best visual experience we can. Get up close and personal with this intricately detailed Q400 model complete with 4k PBR texture throughout. Explore the fully functional aircraft cabin. Sun in your eyes? Close the window shade. Load your bag into the overhead bins. If you’re hungry, have some food using the tray tables. Board the aircraft through the cabin doors. Explore the luggage compartments through the dedicated loading doors. Load up food and drinks through the service door in the galley. Control the cabin with the Flight attendant control panel. Set the lighting to your taste, see what the cabin temperature is, check the status of the NVS system. The Flight Deck We set off to make the most accurately modeled and textured aircraft cabin we have ever created. Your new office is beautifully and accurately modeled and textured. Explore the exquisite detail of the flight deck and all the equipment inside. The controls are detailed and animated, just like the real aircraft. Enjoy the brand new intuitive prop and power controls, ensuring you have realistic and convenient control of your engines. Just like the real plane, all switches and buttons work and move just like they should. Our Famous detailed Lighting Returns We have always had a passion to get the lighting authentic and aesthetically pleasing, and we have created a beautiful night environment both inside and outside the aircraft: The Dome, Storm, and all flight deck lighting work and can be customized to your taste with the brightness knobs. Dim or brighten all flight deck displays, including the UNS. Your jump-seater even has their very own reading light The Cabin is lit with full overhead lighting and sidewall lighting with realistic flicker controlled by the flight attendant panel. Fasten Seatbelt and No Smoking lighting work just like the real aircraft It’s safe to board at night with the air-stair door lit just like the real aircraft Cargo compartment and service areas are properly lit so your ground team can load and service the aircraft, no matter the time of day All exterior lighting, including the taxi, flare, landing, wing, navigation, and tail lights illuminate not just your aircraft but the surrounding environment. The dual-functioning anti-collision/strobe switch lets you distinguish between ground operations and flight operations, just like the real plane The UNS-1Ew Flight Management System For the first time in X-Plane, we’ve created an accurate rendition of the UNS-1Ew FMS, its unique way of managing your flight plan, its lists & unique menu system, and the interaction between the two units: Full procedure compliance: fly in and out of any IFR airport, no matter how complex the SID, STAR, or approach. RNAV, RNP, curved legs, you name it! Includes simulation of the FMS heading mode: follow vectors to final without ever disconnecting LNAV True-to-life route rendition of the flight plan on the MFD map Like in the real plane, the two FMS units must have their routes and fuel data synchronized manually through the crossfill simulation Create holding patterns using the UNS-1’s graphical holding definition page Geometric VNAV support The UNS-1 doesn’t know about your plane’s performance — remember to cross check your fuel usage! 2D pop up and direct keyboard entry support Aircraft Systems The Electrical system is the backbone of the rest of the aircraft’s systems. The following Electrical systems are modeled in detail: DC and AC control panels MFD electrical display DC and DC Power systems, including batteries, busses, TRUs, ECPU, and starter generators APU power External DC power Circuit breaker panel Flight controls and hydraulics are an integral part of the flight experience. The following are simulated in detail: All flight control surfaces (Ailerons, Geared tab, Ground adjustment tab, Spoilers, Flaps, Elevator, Fore and Aft rudder) Primary Flight Control Display on the MFD Flap and Hydraulic display on the MFD Rudder pedals with adjustment and brake animation Trim control panels and trim system Hydraulic push-off switches Yaw damper Roll and Pitch Disconnect Flight/Taxi switch Gust lock Stall protection system Hydraulic power distribution: Standby AC pump operation PTU operation Alternate hydraulic system Pneumatic, bleed air, ice protection system simulated including: Bleed air control panel Environmental control system with optional FA panel operation temperature control Air conditioning panel Air distribution Pressurization indication and control panel Fwd safety valve selector Avionics cooling Ice protection panel De-ice system and components, including boot inflation Aircraft deice pressure indicator Pilot and copilot wipers Ice detection system Indicating and Recording systems include: EFIS brightness control and authentic boot-up sequence. EFIS & ESID control panels Index control panel AHRS control panel Clock systems EFIS display manual reversion and display unit failures. Central Warning System Warning tone generator Stall protection system ADC and ARHS system Fire Protection, for the “unlikely” event of a fire, will allow you to put it out. The fire protection panel along with the fire tests and fire suppression is simulated. Fuel System, including all tanks and valves. We have also simulated aux pumps and fuel transfer and well as the MFD fuel page. Autopilot: The Flight Guidance Control panel is your home for the auto flight system in the Q400, and everything here is simulated. Radios : The unique radios of the Q400 comes with two Audio and Radio Control Display Units, ARCDU’s to tune your com, nav, adf, and atc radios all in one unit. We additionally support channel tune mode for saving your most used frequencies. The JPad Every plane these days needs an EFB to make it complete. The JPad is our solution to the UI and menus used in the past. You will have access to a 3d tablet in the flight deck or as a 2d pop-up. The Features here are only the start of what we have planned to come for the JPad, but already you have several things you can do: Always stay up today with notifications of patches right on the JPad home screen. Patch notes are also available to be read in sim. See your aircraft statistics per livery, including total flight and engine hours, and how many passengers you have carried. Set yourself as Captain, and your friend as First Officer, your weights will be included in the operating weight of the aircraft. Load and service your plane using the Payload Manager. You will be able to enter your desired flight load and watch your passengers and baggage load and even check boarding passes for each passenger from the Payload Status page. Keep track of the status of your flight using the built-in checklists, never miss a switch or a setting again! Configure the aircraft to your liking with the onboard settings menu. These include selecting loading state, your role as captain or first officer, weight and baro unit selection, and baro syncing and much more. If you feel like not having a 3d tablet, you can hide it on the fly with a click-spot on the forward suction cup. 3rd Party Integrations Automatically have your pushback truck called for you once you are done loading with support for Better-Pushback Plugin: Better Pushback Plugin : (https://github.com/skiselkov/BetterPushbackC/releases) SAM and Autogate supported. Compatible with Honeycomb flight control hardware, we handle the default commands assigned so you can just plug and play. Works with Pilot Edge, VATSIM. Autopudater via Skunkcraft Updater The Q4XP is simply great value as well, as you are getting a US$100 quality aircraft for a release price of US$79.95 To note there is NO offer of an “upgrade” price for Q400 Legacy owners. This is all new aircraft, in every single absolute detail. A X-PlaneReviews MEGA Review of the Q4XP is coming soon... ___________________________ Yes! the DHC-8 Q400 Q4XP by FlyJSim is now available from the X-Plane.Org Store here : FlyJSim Q4XP Price is US$79.95 Requirements X-Plane 11 Support for X-Plane 11 and X-Plane 12 when available Windows, Mac or Linux 4 GB VRAM Minimum - 8 GB+ VRAM Recommended Download Size: 1.5 GB Current version: 1.02 (October 30th 2021) ___________________________ News by Stephen Dutton 31st October 2021 Copyright©2021: X-Plane Reviews (Disclaimer. All images and text in this review are the work and property of X-PlaneReviews, no sharing or copy of the content is allowed without consent from the author as per copyright conditions) All Rights Reserved
-
Well thanks, coming from AirbusMan, that is very complimentary!
-
"Yes" the scenery is now available to purchase, but I have not looked it over yet? But both Maps2Xplane and Cami are extremely good.
-
Aircraft Review : Q4XP by FlyJSim In August 2019, FlyJSim signed off their original development of the De Havilland Canada DHC-8 Q400, by giving it a "Legacy" title as it was an aircraft that is originally dated back from 2012. No doubt it was a really great simulation and has flown countless hours in simulations worldwide, it was also a personal favorite of mine as the Dash8 (Dashy) is very close to my life in flying on the aircraft many numerous times (mostly Qantaslink and even FlyBe)... another attraction is that propeller regional aircraft are also extremely popular as simulations, with their short routes and multiple sectors in one day flying, final plus is that the aircraft can also be very rewarding to fly, that is a certainty in the Dash8's case with it's T-Tail configuration and unforgiving flying characteristics, so master the Dash8, and you will go straight to the top of the class in skill and honours. From FlyJSim's perspective it was actually far easier to totally redo the Dash8-Q400, than try to modernise the current (Legacy) Q400 version, so the announcement was made that the all new aircraft would be called the Q4XP and v2, and that moniker has stuck. But another aspect was in a way that FlyJSim had also cornered themselves into a very, if extremely high expectation with the new v2 design. Their Boeing TwinJet 737 had already set out a higher (If even an absurd) level of detail and quality, and the new Q4XP had to not only match that expected level, but even to deliver more, or even vastly more to keep the leadership of quality and features title in the X-Plane Simulator. That aspect can create even an unrealistic or even unattainable expectation, so the biggest question to be asked in this review is, "How much better is the Q4XP". Simulation at this level is about making serious decisions. An aircraft in this category like the FlyJSim Q4XP is a serious investment, they are not cheap, so it is a decision made not only on the feature list and the quality... but really on how you will use the aircraft. My belief is that value comes in anything that you use, even a very expensive car is not worth anything unless you actually use it, and something as your phone has far more personal value because you use the tool everyday, even every hour (minutes?). So your first decision with the Q4XP, is on how much will I use the aircraft? A few flights a month is just simply throwing away your money, as the aircraft actually demands consistent flying, not only in monetary terms, but in the demands the aircraft will make on your skills. So you are not just purchasing the FlyJSim Q4XP, you are also making a serious commitment to it.... and that is where it's biggest overall value comes from. First point to make is that the Legacy version was very good to begin with, it was always a very detailed and quality aircraft to look at, and outwardly the two aircraft do look very much the same, but the huge jump in quality is certainly built in here. Hi-Res 4K textures and combined with the fused built in lighting effects of PBR (Physically Based Rendering) reflections... get in close and the Hi Res quality simply blows you away. Modeling has become an art form, but it is in the real minute detail that really wins the contest. Yes rivets can be nicely aligned, but without the correct shape and size they look unrealistic, but here it is total perfection... and the detail is absolutely "Staggering", and yes I used that word before in the FJS TwinJet review, but it is, even more amazing in the absolute detail here as well. To a point we have become even very tedious in the way we even expect a certain level of detail... we usually get it as well (certainly at this extreme level), but then that makes everything else just blur into each other. "blah, blah, yeah it's good", but do we really consider on how REALLY good we do now get in this sort of intimate detail that now presented before us. Yes we are paying for this, but it is also a miracle of what can now actually be achieved in simulation now before our eyes. It is a moment to quietly savor and totally admire.... but more so here, as it is a masterclass of extreme detail. The Q400 comes with a Pratt&Whitney PW150A with a maximum continuous rating of 5071 SHP (3782 kW), although the engine is actually capable of up to 7000 SHP. Has a 3 stage axial low pressure compressor instead of the centrifugal NL unit on other variants. It also sports the larger, six-bladed 13.5 ft (4.1 m) Dowty R408 propeller that spins at slower rates of 1,020 rpm at takeoff and 850 rpm at cruise speeds. The Dowtys have both been perfectly modeled here and come with the automatically adjustable pitch (and reverse thrust). Aerodynamic surfaces are excellent, each wing profile is exact by the required standards. Notable are the flap tracks, not one, but four to cover each side of the engines, incredibly well detailed. Undercarriage Excellent gear detail we are again used to now, as everything is focused on the gear assemblies, but more so here. The long-legged main gear is so exposed, that to do the modeling badly, is to ruin the whole Dash experience... but not to worry? there is again some exemplary talent to see here from FlyJSim. The great feel here is in the way FJS has done the brilliant texturing... you see the original grey paintwork, but later overlaid with a sort or wear and grittyness that says "hardworking" in service aircraft. Perfection, oh.. and the assemblies, strut, and hydraulic piping and their connections are pretty well brilliant and flexible as well. Up in the wheel well, you get the same feel of exceptional detail, note the amazing hydraulic rams, and it is just as dirty up there as you would expect. Strut labels are also easily readable, and the tyre rubber is lovely in a reflective sidewall and dry tread. Note watch the gear in action on landing to see the flexible hoses and rams in great animation. Nosegear is also complex and highly detailed... the single taxi light and hydraulic piping is simply "off the planet" in amazing detail... Most developers highlight the tyre manufacturer's name (here Dunlop), but to create the tyre's construction detail is something else again... the wheel rims are not too bad either. Everything comes across over as photographic, not modeled, and that is the whole point in extreme realism in a simulator. Glass At first glance the glass looks quite transparent? but move into the correct lighting conditions and the glass comes alive with wear, tear and rainbows. These dirt elements are also highly visible internally as well (you want to consistently wipe the windows of the dirt), so it is all very authentic. Librain is included, but XP12 will have the rain effects built in anyway. Cabin windows are also exemplary... brilliant reflections show off the wear and glass materials, with the larger inner circular, highlighting the outer window... again totally realism 101. Doors There are five doors that can be opened on the Q4XP. Front Left Stairs, Rear Left Stairs, Forward Right Baggage and Right Rear Stairs, plus the very large Cargo Door. It is not so much the doors can be opened, but the insane detail of not only the door opening action, but the animations as well... Not only do the door handles pull out and turn (External and internal), but the modeling around the door frame on the aircraft and the door construction itself is mindboggling, note the lower door flap that opens with the open door(s).... Compartments are fully fitted out (beautifully) but nicely worn after years of abuse... there are four ways to open the doors, directly, by key commands (recommended) and the JPad. There is also an auto mode of which we will see later. Cabin The FlyJSim TwinJet 737 cabin was a groundbreaker in detail and functionality... still the best in X-Plane (The Carenado S430 was a great runner up). So you are expecting a lot from FJS again this time around... fortunately FlyJSim deliver again, if now even taking the title of the best airline cabin in X-Plane. You feel this cabin, and well before you even get inside it! First though admire the front left stairs.... close up detail is again astounding, no door on a shell here, the full door construction is very well presented. The view we all love.... boarding! Inside this cabin is looong. It is 61 ft 8 in/18.80 m long with a capacity of 78 passengers plus crew (Four- two Flight Deck and two Cabin) Interesting as you board is the Cabin Control Panel... up high to the right? We will come back to this panel in flight. There is in front of you a "Crew Only" area, but it opens for us to reveal the forward baggage compartment "your kidding me... right!"). There is another door by the other side of the baggage compartment... the toilet "no way"? But yes... toilets are not uncommon in X-Plane... but this one is amazing? Once in you can lock the door behind you, to do your "ahm business".... for the Women (can you say that now?) you can have the seat down, for us males we know that Women get shitty about leaving the seat up, so you can do that here if you want to.... ... the coup de grâce is that you can also set a key command to yes... "flush the toilet!". you gotta laugh man. I'm reviewing toilets no less? The personal view inside the toilet is very tight, but highly authentic from personal experience. I have mostly sat at 2A, and the view from the same seat is simply photographic... The seat design, complex materials with folds are excellent, the front row seats are designed separately from the bulk of the seating... There was a lot of toys to play with on the FlyJSim TwinJet 737, and here on the Q4XP you get get another brilliant toybox to play with. All seats have animated drop down trays, with the front row seats the trays that come out of the armrests (as they should). Window blinds are adjustable, and all the luggage bins open as well... Only again is that there is no global (open)close on the multitude of items... close one window shade or open a luggage bin, then they have to be all reopened or closed again individually, and it is no easy if tedious task on the long barreled airliner? Rear seat detail is again extremely realistic "did I put my used Coke can down there"? You finally get to the rear of the cabin. Note the extreme detail of the inner rear left door (and right side), it is amazing, plus the folded up rear stairs. The rear crew member's Jumpseat can be turn out ready for takeoff (or landing)... Galley is simply supreme, metal heating boxes, blue metal carts and all held in by their red catches... perfect. Cockpit A great as the cabin is (if even brilliant), it is through that tight door it is the real reason we purchase these aircraft. Oddly the first view inside looks if even extremely familiar? It should do, because we have spent a lot of time in the Q400 Legacy's cockpit, it sorta "feels like home", but now with a major home makeover. This is an interesting point to make... The FlyJSim Dash Q400 is so familiar, so in your first instances everything can be very, very deceiving in here. The Q4XP is really like a Russian babushka doll, on the surface it is all very much the same, but you can open it up and reveal another layer, then another, and another... It is only when you go back to the earlier Legacy Q400 that you then realise the huge steps forward that have been taken with the Q4XP. Like with most, to convey the sort of extreme detail you have in this Q400 cockpit is to focus on the small stuff. Rear wall left... here there is a large Circuit Breaker (Fuses) panel (there is one on the right as well). Note the rivet heads on the bulkhead, sublime... the wear and age on the circuit breaker panels, excellent... The coffee cup, yes a coffee cup, but a dirty sipped coffee cup at that, that would not go out of place on my desk? Circuit Breakers that actually work... ALL OF THEM. Go lower to the seat, and it is not just any construction of a flight chair, but EVERY SINGLE COMPONENT including the copper screws to hold all of the assembly together, it is just astounding detail? Molded trim is sensational, including the rear radio panel, and note the excellent roof trim molds, they also look and feel as original in being photographic real, and these are not photographs here, but created detailed modeling, but you couldn't actually tell the difference... do we now have another extreme level in detail, absolutely yes. Carpet is tired and actually beautifully disgusting!. There is even a rubbish or throwaway container box built into the floor for all those used coffee cups. There are more extreme molded panels surround the "Emergency" cockpit hatch, and yes you can remove it, but only by moving the catch, and then separately pulling the hatch downwards and on to the floor, the reverse motions are then required to refit the hatch. The two pilot chairs are perfection, not only in the construction as noted, but the three element seating The seating cloth material is very authentic and has a nice weave to it as well. And all the armrests (four) can be moved up or down. You can get quite obsessive with on how much detail you can put into simulation these days, but never in all my days have I seen anything quite like this Q4XP. JPAD (Menu) The aircraft's menu is accessed by a Tablet or JPad which is situated on the left and right side windows in a portrait mode (the same angle as used on a real Q400), you access them by pressing the Hotspot (Suction cups) on the lower windows, or by using the X-Plane MENU/PLUGINS/FJS Q4XP dropdown menu which puts the JPad on a separate moveable (and scalable) window (for Home Cockpit builders). There are four Icon tabs; Q (HOME), PAYLOAD, CHECKLISTS and SETTINGS. Q-HOME : There are three sections on the Q - HOME page, VER (Version), AIRCRAFT and PAYLOAD. The HOME page is mostly a summary of the setup of the aircraft. VER (Version) shows you your current aircraft build and Patch (Update) notes, which can be updated via the SkunkCrafts Updater plugin (In the MENU/PLUGINS). AIRCRAFT : The Aircraft page is a summary of the aircraft, including details of the CREW, AIRPLANE (Airline, Rego, SELCAL and Year built) and great AIRFRAME data (Hours, Flight Count...). Notable is that you can actually change the data in the Crew/Airframe data, and the input can be directly done via your keyboard... a JPad icon shows in the lower left corner (arrowed above right), to say you are now in the keyboard mode. To be able to change these data details is excellent, I loved the personalisation of the aircraft to your own needs. The PAYLOAD option can be accessed via both the HOME page and the PAYLOAD page, as they are one and the same. PAYLOAD : The page displays the aircraft's currant STATUS. With PAYLOAD INFO/, STATE, and some options in "Connect/Disconnect GPU", "Auto connect GPU", "Board using both doors", "Call Pushback" once loaded and "Fuel Before Loading Pax" options. You don't have a dedicated Ground Elements menu as a most of the actions on the ground are automatic... Once you have arrived and parked, three states have to occur (Park Brake - Landing Taxi Lights off - Both props at less then 350 RPM), then the (ground crew) will add chocks to the wheels, and put out cones around the propellers... Once the props have stopped turning, then the front door will open, and then the rear door and stairs if you have selected that option (Board using both doors). You can control all the doors via the visual aircraft profile (or set Key Commands), but you can't turn off the auto option. The rear stairs can be quite awkward to select, and has to be activated after the opening the door, just make sure you have the right (Aft Airstairs) signal. The excellent GPU (Ground Power Unit) can be selected automatically (Auto connect GPU) or added in manually if you want to stay on the internal APU (Auxiliary Power Unit) while on the ground, the same three states are required to addon the GPU in auto mode. Now it is time to LOAD the aircraft via the SELECT LOAD button. This brings up a loading data sheet on how the aircraft is loaded with Passengers, Cargo and Fuel... ... Weights can be set in either Kgs or Imperial units (arrowed above left). There are general loading choices via Icons, that show Empty, Qtr, Half, 3 Qtr and Full loads. Or you can also input all the loading data manually via your keyboard, and if you are overweight, the RAMP WEIGHT will turn RED. When done you can do a LOAD SUMMARY, that will show you a LOADING SHEET, with a C.G% M.A.C graph. Happy then press the CONFIRM LOAD button to lock the data in. Now you can START LOADING the aircraft, but note the option right to "Fuel Before Loading Pax" option. In other words the aircraft refueling will be done, before the passengers are loaded onto the aircraft, and that does add in a significant extra time on the ramp? Another option is to do a FAST LOAD, which loads the above load data instantly... Now the fun starts! The Fuel cart will first appear and then the cart is connected to the ramp tank, and a stand appears (arrowed below right)... and then both the grounding cable and then the large fuel hose are connected to the aircraft... ... when all done the refueling then takes place, and the refueling amount (and weights) are shown on the PAYLOAD/STATUS page plus the time it takes to refuel the aircraft. The reverse procedure when the refueling is completed is now done. Now the loading of the passengers and their baggage starts, first if the doors including the cargo door are closed they will now open, and extend the stairs. Then the boarding sequence starts... it does take time to cover all the boarding sequences at around 19 minutes... when done the aircraft will now close all the doors... .... and then takes away the cones, chocks and everything except the GPU as you require it to start the aircraft (unless you have chosen not to via the options). Now loaded you are cleared for an "Engine Start". If you wish, you can check each of the passengers "Boarding Pass", with a Name, Age, Sex and Seat No. When completed you can then add the roof back on to the aircraft or toggle the internal or external areas. Bags and Weights can also be checked by moving the mouse over the cargo areas. You can select the (Better)PushBack truck to come immediately, but I found it far to quick in locking up to the aircraft, so I just did it the usual manual way... you can also connect the GPU immediately automatically on landing, but again I like the manual control better. Obviously the whole unloading procedure is reversed on landing, and it is quite exceptional in operation, but it does take the manual control of all these elements out of your hands... for some that could be a problem, for me though it works very well and takes a lot of the loading work out of your hands, plus in timing it is extremely realistic. CHECKLISTS : The "Checklist" tab shows you the checklist options. Then each checklist sequence.... in a deeper explanation of each check item, you can press the "Show More Info" tag, and each checklist item is explained in detail... again brilliant, but there is no "Auto" check list procedure (yet anyway). SETTINGS : The SETTINGS page is for global setting on the aircraft... -Engines Off State : Three options are available for; Cold & Dark, Long Turn (around) and Short Turn (around). Actually there are four states of start... Cold&Dark is just that in everything off. Long Turn is like overnight in operating on GPU, with batteries off. Short Turn is GPU connected, or APU running, as in a state as if you just changed crew during a turnaround. Final option is if you click the X-Plane "Engines Running" checkbox, the plane will load as ready for takeoff. -Your Role : Three options for; Captain, 1st Officer or Auto. You can set this to Captain for the left seat, 1st Officer for right, seat, or if set to auto the simulation will try to determine which seat you are in by the position of your camera. -KGS/Lbs : Global selection of kilograms or lbs -Baro Units : use IN or HPA as the units for all three barometers -Baro Sync : use either IN or HPA as the units for all three barometers. -Seasonal Weights : This options sets which base weights the payload system will be using to estimate the load on the LOAD DATA page of the payload system. With changes for Winter, Spring, Summer, Fall or Auto. -JPad Location : This option sets which side of the cockpit, if any to display the JPad tablet... Left shows the JPad only on the left side, Right shows the JPad on the right side, Both will have all the JPads displayed or None in no JPads displayed in the cockpit. -Yokes : Show or Hide (A key command can set this action as well) -ClipBoards : The Yokes also have these little clip boards, which can be hidden independently from the yokes. -Steering Axis : Three options in TILLER - YAW - ROLL This option give you the choice of these three options to control the steering, in just the Tiller (manual) operation, Yaw were as the nosewheel moves with the rudder, or Roll were as the nosewheel turns with the side Roll movements. (Note... this option was originally labeled "Yaw Axis as Tiller", and the idea didn't work very well at all, so it was changed back to the basic Tiller-Yaw-Roll Commands.) -Control Display : The control display will help you to keep informed and teach you about the correct power selection on the Q400. You have three options. -Always On - it will always be on screen. -Fade Away - it will appear momentarally when either running into a gate, holding a command to go through a gate, entering the rating area, or being at the top of the EMR area. -Off - The control display will never appears. __________________ Instrument Panel Power on is via the DC Panel upper far left on the OverHead Panel (OHP). (GPU is connected to power the aircraft). The Dash-8 Q400 uses a Honeywell electronic flight instrumentation system (EFIS) with five displays. And the startup sequences are simply excellent... You can have the power connected, but the five pack instrument displays will still be blank? The displays have to physically all turned on separately... this is done via each side EFIS Control Panel in two knobs (per screen, each side). The displays will act like real cathode ray tubes in sync on, then do a self test "T" and go through a series of startup lighting procedures... it is all simply brilliant! Note that you also have to turn on the central Standby COM unit as well? All screens can be actually active, but will still need the brightness turned up to actually see them. The central MFD (Multifunction Display) is switched on via the knob on the rear separate EIS panel called Engine and System Integrated Display Control Panel. The display control panel (EIS Control) is situated on the rear of the pedestal along with the excellent Radio layout and Trim Panels. Each display panel can be moved to another display and then further changed in four options; PFD (Primary Flight Display), NAV (Navigation), SYS (Systems) and ENG (Engine), The opposite is set on the other pilot's position as shown here. You can also switch displays on each flying side, while the central display is for the main Engine details. Notable TRQ (Torque), PROP RPM, ITT (Interstage Turbine Temperature) as main, and sub categories include; NH (High-Pressure%), FF (Fuel Flow), NL (Low Pressure%), OIL Temp and Pressure and FUEL capacity... and SAT (Static Air Temperature). We are extremely familiar with the PFD. It has the Speed and Altitude ribbons, with a rate of turn above the Artificial Horizon. Right is the V/S Vertical Speed indicator, and the built in ILS bands and Baro. Set below is a HSI (Horizontal Situation Indicator), with built in Heading, Course, ILS Freq, and VOR1 and VOR 2 indicators. MFD or MAP/NAV (Navigation) Display is to the right, with the MAP/NAV set upper and the PFCS (Primary Flight Controls) indicator lower. Be aware the FMS1 frequency shown is for the NAV only, it does not change on the NAV SOURCE to VOR 1 (ILS), VOR 2 or same FMS1 if you adjust the frequency. Notable is the separate Integrated Standby Flight Display (ISFD), upper right. Two panels cover (Centre right) the Landing Gear, GPWS Landing Flap control (Ground Proximity Warnings), and Flap 35 Approach, with lower the Hydraulic Control Panel... ... lower on the front pedestal is from top; FUEL CONTROL, ENGINE CONTROL and PROPELLER CONTROL Panels. Automatic Flight Control System (AFCS), is to all Legacy Dash 8 flyers already very familiar, and in reality it is not at all different here in layout or operation. Both Timers at each side are independent, but otherwise the Course, Heading, NAV Source, Altitude are all the same as are the central selector buttons. Spoiler FLIGHT - TAXI selector works exactly the same as well. OverHead Panel also looks like the Legacy, but in fact it is far more highly detailed and intricate. Still spit into four rows with the huge FIRE Panel top centre dominating... DC Electrical and Ice-Protection are far left row, with AC Electrical, AIR-CON/BLEEDS, SIGNS far right row. Centre Right top are the PANEL LIGHTING, APU CONTROL and ENGINE START panels. Centre lower-middle are the PRESSURISATION panels and front lower are the EXTERIOR LIGHTS panels. The Caution Warning Panel (CWP) is HUGE, 14x6 set alerts and Warnings that can be tested, as can the (Advisory) on the full OHP and FIRE sections. Another nice feature, is that you can set your rudder pedals in distance via the turning handle mid-floor, wind the handle untill you find the correct perfect position! __________________ UNS-1Ew Flight Management System There have been attempts to bring the Universal UNS-1 Flight Management System to X-Plane, but certainly not as authentic or as in-depth as this FlyJSim system. This is the first installation of the UN-1 that I have used, and it has created by a leading coder Amy Parent. It is very, very authentic, and again sets the bar in X-Plane amongst other simulators in recreating real world systems for Simulator users at a high quality level. First important thing to note, is that the UNS-1Ew is a separate system for each side, the units are not connected in any way, and both sides (with a few XFILL helpers built in) are required to be programmed as a system completely and separately. On turning the Management System on... each system then first goes through a full self test, and that can take a few minutes, then the system's author shows a copyright screen... Left side up and currently running, and now the right side sets itself up, again the same self-test procedure, and when done you have to "Accept" the current FMC version by key LK5 to lock in the current GPS position (EKCH-Copenhagen). Both systems have pop-out windowed panels for ease of use, and they can moved around the screen but not scaled. The input system is via numbers, and not with actual direct input (except for waypoints), once understood it is a very easy system to use... The current airport EKCH is now shown at the top of the FPL (Flightplan) selection. There is a side menu by pressing again the ON/OFF/DIM button... this brings up a unit menu for Screen BRIGHT(ness) or DIM, CANCEL, DISPLAY or OFF... OFF turns the whole unit off, so you will need to do another self-test to get back to your current situation... ... DISPLAY will adjust the unit screen up or down to your preference, and CANCEL will take you back to the home screen. Flightplaning To create a route is actually easy... the current position is already set 1 EKCH. To enter the Departure data, you press the MENU button, that brings up the Menu list including both the DEPART (Departure) and ARRIVAL options. Press LK4 to select DEPART. Which then displays the options of your departure runways. I'm using 22R so that is No.5 on the LIST, so 5 is inputted into the runway box LK2, and ENTER is then pressed to activate the departure runway... then the available SIDs (Standard Instrument Departure) options will show... again my SID is LANG1C, or No.7... ... then press ENTER to actvate. I have no TRANSITIONS, so I just press ENTER to input, and the Departure detail is complete. Get used to inputting the numbers, and it is very easy if very quick to use. Now the FPL shows the departure waypoints... .... and you can scroll through the waypoints via using the PREV or NEXT buttons. Entering (DCT) waypoints is easy. Just select the next key below the last waypoint and directly add in the ICAO waypoint code (DEGUL), then press ENTER. There is check if it is the correct waypoint and it's coordinates. If again correct then press ACCEPT to insert the waypoint... easy. Airways are just as easy... Select the next waypoint, then press LIST to bring up the option lists of the various NAVAIDS available... AIRWAYS option is RK2 on the right. Input your preferred AIRWAY (No.1) and press ENTER, then the termination waypoint from the list (No.2 EEL)... then press ENTER to lock in the airway.... again very easy. Other NAVAID options available on the LIST page include; AIRPORTS, NDB, INT, VOR and GAP. You can of course delete any waypoints directly by just selecting it directly.. or use the same on the LIST page. *GAPS* can be inserted into the flightplan to break up the waypoint sequence, if not required then they can in the LIST page also be deleted DEL again. Now I add in both the intermediate flightplan waypoints and their airways as per my SimBrief routing. Now for the ARRIVAL data... select MENU and this time select ARRIVE RK4. The ARRIVE airport is ICAO EGCC (Manchester) so that is inputted directly RK1, and the UNS-1 shows you if this is the correct airport, if yes then again press ACCEPT. Then inputted are the runway (05L), STAR (Standard Terminal Arrival Route) ROSU1F... then the type of APPR (Approach) No.5 ILS/D 05L As you know, I like to adjust my approaches to a custom flightplan.... So deleting the set arrival route, with a custom approach route via CROFT, KOLID, EKLAD and NOKIN and then into 05L was extremely easy. You can see the route on the MFD via pressing the FORMAT button on the EFIS Control Panel (Pedestal) to the corresponding MFD side. Obviously you can SAVE, DELETE and RELOAD Flightplans on the MENU page. And that is the flightplan completed. Holding patterns using the UNS-1 are also available, as are RNAV, Geometric VNAV, RNP and Curved Legs options. We will look at DTO (DIRECT TO) in flight. There is a PREF (Performance) page, but you don't fill in any data. The only other area to fill in is on the FUEL page. FUEL DATA There is no auto fill-in from the JPad to insert in the Fuel data, but you only have to add in the PAX number, CARGO and actual FUEL load, and then the optional; ALTERNATE, HOLD and EXTRA fuel data for the Fuel Reserves. XFILL Once you have only done the Flightplan data for the left FMS unit. To transfer the flightplan there is the XFILL FPL on the MENU page. This will cross reference the flightplan to the other FMS unit. (Just make sure you don't mix them up, as they are on the opposite unit). Same with the FUEL page, when completed in filling out the fuel data, then press MENU and fill in the fuel amount... then press the XFILL button to again transfer the data to the other FMS unit. It may look a bit complicated, but the UNS-1Ew Flight Management System is extremely easy to use, you will be filling it in like a Pro very quickly. __________________ Flying the Q4XP by FlyJSim So we are loaded (Passengers, Cargo and Fuel) and are ready for flight... First impressions are the extremely familiar as with the Legacy, the same forward view and my nemesis... the same throttle quadrant. The Q400's throttle quadrant is a very workmanlike, very rugged... tough, something you would find more on a farming machine than an aircraft. Left to right is first the Trim setting, then the Parking Brake handle. The twin throttle levers themselves are quite petite, compared to the huge CONTROL LOCK handle behind. Then there are the twin PROP/FUEL (Lean-Rich) and Fuel Cut-Off levers and finally far right is the Flap lever 0º-5º-10º-15º-35º. But don't make no mistake as the quadrant is beautifully done. So why do I hate it so much. The problem with the Legacy Quad, was that it was diabolical to use? There was a really annoying system, that switched the twin PROP/FUEL levers into an active mode with the twin throttle Flight/Idle position. This resulted in a non-fuel flow to the engines, and hence mostly sitting on the ramp for twenty minutes or so trying to make the throttles go live. It was never fixed... it was simply a "a Pain...." and ruined many a good simulation. Thankfully here that issue has been rectified, mostly by creating very distinct lock positions (the PROP/FUEL levers go up and lock back down into the gate... very nicely done) and the levers are now simply controlled by an up and down arrow manipulator (sigh of huge relief). Only one point to say is that the far right PROP/FUEL lever can be hidden and hard to move from the left pilot's position, as the manipulators get lost behind the right PROP/FUEL lever... so you have to physically move your visual view to adjust the lever, but I can live with that aspect. The Throttle gate to achieve the "Beta" reverse is another complex annoyance. The issue created was that the twin throttles had to be held on 30% position and not full back on the stop, and if you went back to the gate or missed the idle point, the props would of course go into reverse... In Flight! I hated it with a passion. There has been a significant change on the Q4XP, as the throttles now have detents or gates behind the throttle. You can see the layout via the pop-up "Control Display" (CD) right lower corner. Now the throttles (on my Saitek X56) sit at the correct full back position, but on the CD, there are two more detents to the rear that can still be accessed. First is the DISC (or Disconnect) which is like a pressing your clutch down in a car, but for propellers. The second detent is the REV (Reverse) of the propellers. There are a few key commands set up to go through the separate detents. One in the "Toggle Thrust Reversers", that works, but extremely slowly with four (yes four) separate clicks to go two detents back to reverse, and it moves extremely slowly with each detent movement? which is not great on landing and wanting the reversers straight away? then another four clicks to go back up to the IDLE position. FlyJSim do provide another key (I use my joystick trigger), in the Q4XP Commands called "Use to pass the gates on both Power Handles"... quite a mouthfull, but it does basically the same as the Toggle command, but a bit more quicker with the timings of the detent movements, it can still be (far) too slow (in trying to make the movements realistic), but overall after a little practise it does work, and give you effective reversers on landing. It does however need to be speeded up, just a little more to be realistically effective. So the PROP/FUEL and Throttle arrangements are certainly a huge step forward from the Legacy set up, not perfect, but better... leaving the CD on the screen on landing can help with knowing if first, the throttles are actually moving through the detents, and secondly in what position they the detents are currently in. While we are on the subject of pain. Of the huge feature list you get here, one vital important feature is missing... Global and Current saves. As noted above with the extensive loading of the Q4XP and the extensive programming of the UNS-1Ew, and with two separate units. If you restart the flight or want to reload the same flight (say the next day). Then the only way to do that is from total scratch? that is 20mins gone at the start of your simulation, just getting back to same ready to fly position as you were at before... add in a lot of current CTDs and it is a massive if wastefully time consuming. For myself, I have just come straight off the ToLiSS A340 review, which has that excellent Global and Current save system. My point is it makes the difference in wanting to do a regular simulation in the choice of aircraft for the day, the ready to go A340, or the backbreaking total reset of the Q4XP. Shut the forward door, and a call to BetterPushBack... Both PROP/FUEL levers are set to "START&FEATHER", but you only have to start one engine, usually the right side, BLEED OFF and select the No.1 Engine and hit the starter button... unlike the Legacy the PW150A starts up immediately. Now you get the feel of the first time of the redone sounds. The FMOD sound pack in the Q4XP is highly specialised, and provides a fully 3D positional experience. And you hear the change in treble and bass as you advance from minimum to maximum prop, subtle changes in the mixture are also highly noticeable, as are all the clicks and bumps on the switchgear. Sound is far better than the Legacy, and that was actually very good anyway. You have been doing simulation for ten years, but sometimes you can look like a complete absolute dummy.... I couldn't move the yoke(s) in a roll movement as it is locked, and I lost earlier a full fifteen minutes trying to unlock it? It was the huge "Control Lock" behind the throttles (Duh), then they came free. Note the excellent "Stick Shaker" situated behind the Yokes. To steer you also have to switch on the "STEERING" on the left panel by the Tiller (yaw by rudder is set on the Settings page). Notable is now the NAV page is filled on the FMS, as more data can be seen, but even more later from the UNS-1Ew. Important is that the Hydraulics are powered up? Power is taken from the engines to pressurise the hydraulics, but here it is critical that the pressures are powered up on the Braking Hydrualics, no pressure and then simply no braking effect... this aspect can easily and will totally ruin your day. The settings can be set on the Hydraulic Control panel and pressures are seen in the lower "HYD PRESS" of the right MFD. (And yes I had no braking effects, until I had worked it all out)... Once both engines are running, all the hydrualic lights should be active (STBY HYD/PTU CONTROL) and the all the HYD PRESS markers active and level. On all the Dash8s I have flown on, they only taxi on one engine (mostly to save fuel)... But as I reach the threshold of EKCH Rwy 22L, I start the No.1 (Left engine). When both running, the Bleed is switched back on and the APU is shutdown. Trim centre is set... You can't actually input any of the switches on the Yokes, but you can set the Commands to do so, so the Trim switches will work when you adjust the trim, as does the A/P DIS (disconnect) and TCS. Interesting is the Push-To-Talk (PTT) switch, as X-Plane 12 will come with a Push-To-Talk action! A vital need is to set the "AUTOFEATHER" centre ENGINE CONTROL for takeoff. This syncs the propellers for the maximum thrust required... But just as VITAL is that once airborne and leveled out is to turn the "AUTOFEATHER" back off! If you don't you will get a nasty engine failure further down the route, mostly as you start your descent. So many users did this simple mistake. Timer(s) going (yes you have to start both), PROP/Fuel levers are set to Rich (MAX), and up go the twin throttles... Basically the Dash8 wants to kill you! Both of those Dowty R408 propellers rotate to the right with both having 5071 SHP in doing so. So the Dash will pull strongly to the right, adjusting the throttles to match can help, but a firm hold of the yoke is required, the tricky part is on rotation as the Dash will also lean as it leaves the ground... so the Q400 is a bit of a handful. Speed Bugs can be set (left of the PFD) You feel the gear retraction... it is nosily in operation and locks up with with a load of clunks. The list of Dash 8 landing gear incidents would fill a book, the worse was the Scandinavian Airlines System Flight 1209, registration LN-RDK, that just like us, had taken off from Copenhagen Airport, Denmark, and after a second incident in Vilnius, SAS grounded its entire Q400 fleet consisting of 27 aircraft, and then a few hours later the manufacturer Bombardier Aerospace recommended that all Q400 aircraft with more than 10,000 flights stay grounded until further notice, this notice affecting about 60 of the 160 Q400 aircraft then in service worldwide. As a result, several hundred flights were cancelled around the world. Horizon Air grounded nineteen of its aircraft and Austrian Airlines grounded eight. The cause was corrosion inside actuators on 25 of 27 aircraft checked. Accordingly, SAS decided to continue the grounding of its Q400 fleet until all the affected parts were replaced, and gradually the Dash 8 fleets returned to the air. Once in a "Positive Climb" around 10º... when you turn on the Autopilot, the aircraft will go directly into a PITCH HOLD, WINGS LEVEL mode that keeps the Q400 in a set climb and straight heading, it takes away a lot of the workload instantly. If you need to adjust the V/S (Vertical Climb) then you can do so, or connect in the LNAV for the system to do the route navigation. Your only eyes are on the speed ribbon... there is no Auto-Thrust or engine mode helpers here, as speed adjustment is only through moving the throttles directly, and the speed will very quickly run away at any leveling out at any set Altitude if you don't contain it. Once in the air the UNS-1Ew gives you a lot of data, there are five pages of route and fuel data to absorb... You also have to move physically between the route pages on the FMC, if not the waypoints move on ahead without you (on both units). Behind you, you can drop the jumpseat for a third crew member in the cockpit, but it bars the door if you want to use the toilet. The average high speed cruise for the Q400 is around 300–360 kn/556–667 km/h, with a range of 1,100 nmi /2,040 km, and a ceiling of 27,000 ft / 8229 m. The trick of these regional turbo-props are their excellent economics, they are very cheap to run vs payload. Once you reach your cruising altitude and speed... you set the PROP/FUEL condition to MIN 850 to highlight the lean running nature of the aircraft. You can via the MENU, use the PPOS to WPT, display distance and time from present position to each flight plan waypoint. Another inflight tool is the DTO or DIRECT TO. It is there in If you want a direct course to another waypoint in you do a Direct-To to insert (change) the waypoint at the top of the route list. Easy use, you just fill in the required ICAO Waypoint and the UNS-1 will update the route list to take you DIRECTLY to the new inserted waypoint. Note the HOLDING waypoint selection is also set on this DTO menu page. Lighting Internal This year we are getting some excellent cockpit lighting, the Q4XP is absolutely no different in this respect. OHD, GLARE SHIELD, CTR (Pedestal) FWD&AFT are all adjusted via the PANEL LIGHTING on the OHD. Pilots side lighting is supplied by two knobs, one is above on the roof, and another MAP light is directly to left or right of each pilot. A third spotlight is positioned above the door entrance, again adjustable. DOME lighting is two selections, STORM and STORM/DOME on the OHP. Overall excellent, and the significant approach instrument lighting is also highly adjustable and comes with great external visibility. Cabin The cabin lighting is controlled by the brilliant "Cabin Control Panel" up right at the door entrance... You can not only set the cabin temperature in ºC or ºF, but "Warmer or Cooler", you can test the panel as well. Cabin lighting can have "Sidewall" (On/Off), or "OverHD" (On/Off) lighting, and extremely nice it is in here as well. Other area lighting includes... BOARDING, AIRSTAIR built into the stair steps and LAVATORY. Inside the toilet it is nicely lit, and so are the rear doors... but I couldn't find any galley lighting (It looks incomplete?) Signage lighting is also excellent, all the Seatbelt/No Smoking Signs work separately. "OCCUPIED" and "LAVATORY" and all the EXIT signs are perfect (EXIT signage only works in ON mode, ARM is just that in ARMED). Final note on the CCP is that you can turn on the NVS System, or The Noise and Vibration Suppression system (NVS), which is the Q in Quiet in Q400. Noise and vibration have always been a problem with turboprops, and so the "Quiet" uses an Ultra Electronics noise and vibration suppression (NVS) system. Microphones are concealed about the cabin send noise signals to a computer which also receives propeller speed information. The computer then signals tuned vibration absorbers mounted on fuselage frames. These absorbers generate vibrations to diminish the original resonance. Bombardier claims that NVS in the Q400 reduces the cabin noise levels to around 75dB- the same as in the CRJ jet cabin. External Again the Q4XP shines (pun intended) externally... ... there twin landing lights built into each wing... Anti-Collision can be in two selections RED (Ground) or WHITE (In the air). All Navigation lights are Red, Green and twin top tail lights... there are no wing strobes. The WING lights are set to cover inboard and outboard of the engines (Twin) and look excellent from the internal cabin view. There is also a single nosewheel light on the front gear that swivels in the direction the gear is pointing. Overall the Dash looks amazing at night and is highly and visibly realistic. Going up or coming down, you always felt the pitch within the Q400 aircraft with it's long barrel body... .... That is great attraction on flying in Turbo-Props, as they are far more athletic in the air, and you feel all of the changes of height, direction and the sheer thrill of flying in a machine far more. Manchester EGCC beckons. I'm going in the long way around via Liverpool, and into Rwy 05L. And I love this approach as it is always very interesting and realistic. The final turn to go directly into Rwy 05L is a V tight turn at NOKIN, so I set the Q4XP up early with a Flap setting of 10 and 170 knts... I am using the ILS approach to 05L. In most cases you would always land the Q400 manually, but I wanted to test something? Early flights on the Q4XP in the ILS approach cone, then caused severe weaving around the center line, not good and quite scary. That was updated in v1.02... has it been fixed? Just before the ILS beams I set Flap 15, and after the ILS contact, the speed goes down to 145 knts... you rarely use the full STOL capabilities of the Dash. So Flap 35 is again rarely used as 15 flap is enough. Speed control is absolutely vital. The Dash is a high T-Tail aircraft, and it is not an easy aircraft to fly on approach.... many users just don't like it (mostly because it fools them into a inert state). So with the combination of that severe propeller right thrust pull, then no or immediate loss of tail lift... .... on approach the Dash now REALLY wants to Kill you! The trick is speed, and getting it absolutely right, too low and the aircraft will sink you quickly into the ground... too high and the Q400 will float, and that speed fluctuates quite a lot, and this were your throttle skills come in, you want more power, but don't ask for too much... or you will go over your speed, and again in the opposite direction, think and move like a surgeon at a delicate part of the operation, just go slow and precise on the throttle movements... .... all the way down the slope the Q4XP felt solid, (I think the bug is fixed?), and puts me into a false sense of security. But 800 ft above the ground the Dash's tail starts to sway, small at first, then massively! I was ready for the twisting, so took control immediately. For most, in the same situation it would have been an easily calamity, or a full TOGA powered missed approach procedure. But I am used to the Dash's antics, so was able to correct and sort out the direction and get the Q400 to do a correct alignment to touchdown, obviously the bug is still there, I did the same approach later, but manually and it was a perfect landing. Again speed or thrust power is absolutely critical to get right on flying the Dash on finals. Now the sounds we really love... the reverse thrust power on FULL. Watch the blades twist and go from thick to thin then thick again as the reverse procedure is in action. No issues from the reverse gates, a couple of triggers and down they go, and the opposite way back to the higher idle position. Once at a taxi speed I shut down engine No.1, mostly you would do this on the taxiway, but the turnoff at onto Taxiway J is a bit twisty, so I am doing it earlier. Taxiway J-G4-G and into stand 55, my favorite parking stand at Manchester... then shutdown Once the nose taxilight goes out, then the chocks are placed at the front wheels (one at a time), then the cones around the props. When done, then the two front and rear doors open (your choice to open the rear door or not).... and I didn't even have to lift a finger! Press the "Start Unloading" button on the JPad STATUS page, and the aircraft starts unloading, you can of course do an instant unload if you want to... ... but it is only 5min 14secs to do the unloading anyway, notable is that the rear cargo door opens later, and waits until the baggage carts arrive before unloading the bags! You can check your weights usage, and the FMS will also show you your Flight times in; Takeoff, Landing and Fuel use. The Q4XP is certainly not an aircraft you don't just shut down quickly and move on from... you sit there and take the Q4XP all in, even in the fading light. Inviting you... wanting you to fly the Q4XP again, and again. Liveries There are 18 liveries and one blank. All are the same basically as the Legacy list. The Legacy also built up a huge list of 3rd party liveries, and you can expect the same wide variety for the Q4XP. Quality is 4K and Hi-Res with excellent detail. ______________________ Summary FlyJSim created the first De Havilland Canada DHC-8 Q400 in 2012. But that aircraft was relegated to a "Legacy" title a few years ago as FlyJSim announced an all new complete from the ground up version called the Q4XP. This is that all new Q4XP aircraft, and it comes with a huge expectations as a follow on from FlyJSim's last epic release of the Twinjet 737 and the aircraft has been over three years in development... yes you guessed right, we expect a lot. The level at this high Ultra quality in the X-Plane Simulator has reached a crescendo in the last few years, mainly because of the leap in quality of the FJS TwinJet. Can you actually go any higher, well if you could or can, then this Q4XP fills that category. But a note in Ultra High quality. It is easier to do in a General Aviation aircraft because of the size of the machine, but to scale up to a large transport aircraft is another and far more difficult challenge, but a massive challenge that FlyJSim was up to. We have mentioned Ultra Quality, but here you see it and feel it. External and Internal details are overwhelming in detail and right down to the small intimate detail of screws and rows and rows of working circuit breakers. The cockpit is per high realism, but the cabin details are also of the "blow your mind" category, plus a working toilet no less... Lighting is sensational both in the cockpit and in the cabin with a Cabin Control Panel with NVS System available. JPad is a great menu system, Loading&Weight, Payload Manager, Checklist and settings panel. But the system also allows for very realistic passenger and cargo load/unload scenario, with auto external placement of ground elements and door openings. But there is no built in AviTab. Sounds are also high quality and a leap better than the Legacy. With FMOD sound pack, and 3D positional axis experience, both in the cockpit and cabin. But there is no actual sound panel for adjustments. Systems are extreme in detail. Flight controls and hydraulics are very and highly specialised (Brakes don't work unless activated), Electrical includes DC and DC Power systems, including batteries, busses, TRUs, ECPU, and starter generators. Pneumatic, bleed air, ice protection system are all simulated. Full Indicating and Recording systems, Fire Systems and Fuel System, including all tanks and valves which are fully simulated. Highlight feature is the excellent The UNS-1Ew Flight Management System, a first for the X-Plane Simulator with True-to-life route rendition of the flight plan on the MFD map, two independent FMS units must have their routes and fuel data synchronized manually through the crossfill simulation (XFILL), holding patterns using the UNS-1’s graphical holding definition page and geometric VNAV support. Notable is the complexity, and a no global save system requires a complete rewrite of data and set up details of every flight that can become tiresome, ditto no global opening and closing of blinds and lockers, there is no AviTab (but available from the plugin folder), niggles with different 3rd party external Throttle and Joystick, No VR Support and updates that can be done via the SkunkCrafts Updater. Expectation was extremely high for the FlyJSim Q4XP, so does it deliver? Certainly yes, and in every single area and category. But this is also an extremely complex simulation, and the Dash Q400 has a reputation of being quite a handful in the air, and on the ground. It is a very, very hands on flying machine and that aspect has been thoroughly transposed into the simulation. Skill and dedication is required to get out of the aircraft the very deep qualities built into it, so like we mentioned... the Q4XP is not just another purchase, but an investment, not only in the aircraft, but in the time spent flying the machine thoroughly... so no "Flybynighters" need to apply here... the Q4XP is for the serious minded of the simulation pilot's out there. Once intergrated... you will be flying currently the overall best simulation in the X-Plane Simulator. it is overwhelmingly that good. Obviously Highly Recommended... and to all the really serious fliers out there. _________________________________ Yes! the Q4XP by FlyJSim is NOW available from the X-Plane.Org Store here : Q4XP by FlyJSim Price is US$79.95 Features Incredible Aircraft Model We have always had a great 3d model, but for the Q4XP we went above and beyond to bring you the best visual experience we can. Get up close and personal with this intricately detailed Q400 model complete with 4k PBR texture throughout. Explore the fully functional aircraft cabin. Sun in your eyes? Close the window shade. Load your bag into the overhead bins. If you’re hungry, have some food using the tray tables. Board the aircraft through the cabin doors. Explore the luggage compartments through the dedicated loading doors. Load up food and drinks through the service door in the galley. Control the cabin with the Flight attendant control panel. Set the lighting to your taste, see what the cabin temperature is, check the status of the NVS system. The Flight Deck We set off to make the most accurately modeled and textured aircraft cabin we have ever created. Your new office is beautifully and accurately modeled and textured. Explore the exquisite detail of the flight deck and all the equipment inside. The controls are detailed and animated, just like the real aircraft. Enjoy the brand new intuitive prop and power controls, ensuring you have realistic and convenient control of your engines. Just like the real plane, all switches and buttons work and move just like they should. Our Famous detailed Lighting Returns We have always had a passion to get the lighting authentic and aesthetically pleasing, and we have created a beautiful night environment both inside and outside the aircraft: The Dome, Storm, and all flight deck lighting work and can be customized to your taste with the brightness knobs. Dim or brighten all flight deck displays, including the UNS. Your jump-seater even has their very own reading light The Cabin is lit with full overhead lighting and sidewall lighting with realistic flicker controlled by the flight attendant panel. Fasten Seatbelt and No Smoking lighting work just like the real aircraft It’s safe to board at night with the air-stair door lit just like the real aircraft Cargo compartment and service areas are properly lit so your ground team can load and service the aircraft, no matter the time of day All exterior lighting, including the taxi, flare, landing, wing, navigation, and tail lights illuminate not just your aircraft but the surrounding environment. The dual-functioning anti-collision/strobe switch lets you distinguish between ground operations and flight operations, just like the real plane The UNS-1Ew Flight Management System For the first time in X-Plane, we’ve created an accurate rendition of the UNS-1Ew FMS, its unique way of managing your flight plan, its lists & unique menu system, and the interaction between the two units: Full procedure compliance: fly in and out of any IFR airport, no matter how complex the SID, STAR, or approach. RNAV, RNP, curved legs, you name it! Includes simulation of the FMS heading mode: follow vectors to final without ever disconnecting LNAV True-to-life route rendition of the flight plan on the MFD map Like in the real plane, the two FMS units must have their routes and fuel data synchronized manually through the crossfill simulation Create holding patterns using the UNS-1’s graphical holding definition page Geometric VNAV support The UNS-1 doesn’t know about your plane’s performance — remember to cross check your fuel usage! 2D pop up and direct keyboard entry support Aircraft Systems The Electrical system is the backbone of the rest of the aircraft’s systems. The following Electrical systems are modeled in detail: DC and AC control panels MFD electrical display DC and DC Power systems, including batteries, busses, TRUs, ECPU, and starter generators APU power External DC power Circuit breaker panel Flight controls and hydraulics are an integral part of the flight experience. The following are simulated in detail: All flight control surfaces (Ailerons, Geared tab, Ground adjustment tab, Spoilers, Flaps, Elevator, Fore and Aft rudder) Primary Flight Control Display on the MFD Flap and Hydraulic display on the MFD Rudder pedals with adjustment and brake animation Trim control panels and trim system Hydraulic push-off switches Yaw damper Roll and Pitch Disconnect Flight/Taxi switch Gust lock Stall protection system Hydraulic power distribution: Standby AC pump operation PTU operation Alternate hydraulic system Pneumatic, bleed air, ice protection system simulated including: Bleed air control panel Environmental control system with optional FA panel operation temperature control Air conditioning panel Air distribution Pressurization indication and control panel Fwd safety valve selector Avionics cooling Ice protection panel De-ice system and components, including boot inflation Aircraft deice pressure indicator Pilot and copilot wipers Ice detection system Indicating and Recording systems include: EFIS brightness control and authentic boot-up sequence. EFIS & ESID control panels Index control panel AHRS control panel Clock systems EFIS display manual reversion and display unit failures. Central Warning System Warning tone generator Stall protection system ADC and ARHS system Fire Protection, for the “unlikely” event of a fire, will allow you to put it out. The fire protection panel along with the fire tests and fire suppression is simulated. Fuel System, including all tanks and valves. We have also simulated aux pumps and fuel transfer and well as the MFD fuel page. Autopilot: The Flight Guidance Control panel is your home for the auto flight system in the Q400, and everything here is simulated. Radios : The unique radios of the Q400 comes with two Audio and Radio Control Display Units, ARCDU’s to tune your com, nav, adf, and atc radios all in one unit. We additionally support channel tune mode for saving your most used frequencies. Sounds A Q400 wouldn’t be complete without the iconic roar of the twin turboprop engines, and we’ve gone to great lengths to re-create this experience for you audiophiles. Continuing from the success of the 732 Twinjet, FlyJSim has developed an accurate and immersive FMOD sound pack, which provides a fully 3D positional experience. Hear the change in treble and bass as you advance from minimum to maximum prop, or the subtle nuances as you pass through each power range (including beta range sounds) Sounds are completely dynamic. Every switch, knob and click is fully replicated and randomized. Aural attention sounds, wheel rattles and cabin doors all create the most immersive experience in any X-Plane aircraft. Animations With this release, FlyJSim is proud to release a new and improved animation system. With the goal of a more immersive experience, each switch, lever, knob, and anything you can select will animation smoothing from one position to the next. This small addition adds to the overall feel of the simulation. On top of that, you will find we have animated almost everything we could. The JPad Every plane these days needs an EFB to make it complete. The JPad is our solution to the UI and menus used in the past. You will have access to a 3d tablet in the flight deck or as a 2d pop-up. The Features here are only the start of what we have planned to come for the JPad, but already you have several things you can do: Always stay up today with notifications of patches right on the JPad home screen. Patch notes are also available to be read in sim. See your aircraft statistics per livery, including total flight and engine hours, and how many passengers you have carried. Set yourself as Captain, and your friend as First Officer, your weights will be included in the operating weight of the aircraft. Load and service your plane using the Payload Manager. You will be able to enter your desired flight load and watch your passengers and baggage load and even check boarding passes for each passenger from the Payload Status page. Keep track of the status of your flight using the built-in checklists, never miss a switch or a setting again! Configure the aircraft to your liking with the onboard settings menu. These include selecting loading state, your role as captain or first officer, weight and baro unit selection, and baro syncing and much more. If you feel like not having a 3d tablet, you can hide it on the fly with a click-spot on the forward suction cup. Requirements X-Plane 11 Support for X-Plane 11 and X-Plane 12 when available Windows, Mac or Linux 4 GB VRAM Minimum - 8 GB+ VRAM Recommended Download Size: 1.5 GB Current and REview version: 1.04 (November 3rd 2021) Installation Download of the Q4XP is 1.44Gb and it is installed in your Airliner Folder as a 4.01Gb folder. Activation is via the standard authentication Key. Auto-updater by Skunkcraft is Included for any updates and changes Documents There are Three Manuals Included with the package. All are extensive and well laid out with great details including detailed instructions to program the UNS-1. Note the main "Manual" is a URL or online, and is updated frequently to reflect any changes. Q4XP Manual.url Q4XP_FMS_Taskbook.pdf Q4XP_Tutorial.pdf _____________________ Aircraft Review Updated by Stephen Dutton 19th November 2021 Copyright©2021: X-Plane Reviews Review System Specifications: Computer System: Windows - Intel Core i7 6700K CPU 4.00GHz / 64bit -32 Gb single 1067 Mhz DDR4 2133 - ASUS GeForce GTX 1080 8Gb - Samsung Evo 1TB SSD - Sound : Yamaha Speakers YST-M200SP Software: - Windows 10 - X-Plane 11.55 Plugins: Global SFD plugin US$30.00 : Environment Engine by xEnviro US$69.90 : RK Apps XPRealistic v2 - US$34.99 Scenery or Aircraft - EKCH - FlyTampa Copenhagen XP (X-Plane.OrgStore) - US$31.00 - EGCC - Manchester Airport XP10 by Aerosoft (X-Plane.OrgStore) - Sorry not currently for sale (Disclaimer. All images and text in this review are the work and property of X-PlaneReviews, no sharing or copy of the content is allowed without consent from the author as per copyright conditions) All Rights Reserved
-
NEWS! - Scenery Released - Saint Croix XP by Aerosoft There is a lot of scenery currently being released by Maps2Xplane and CDB (Renowned Cami De Bellis) Design, but branded under the Aerosoft banner. This one is a small island in the Caribbean Sea... Saint Croix. As per usual for Maps2Xplane (of Faroe Island fame) in that there is a full custom Photo-Terrain-Mesh covering of Saint Croix and of all the surrounding islets, with also a custom overlay of the scenery in Vegetation, Road Networks and Autogen Buildings. Saint Croix is an island in the Caribbean Sea, and a county and constituent district of the United States Virgin Islands (USVI), an unincorporated territory of the United States. St. Croix is the largest of the islands in the territory. However the capital, Charlotte Amalie, is located on St. Thomas. The island's highest point is Mount Eagle, at 355 meters (1,165 ft). St. Croix's nickname is "Twin City", for its two towns, Frederiksted on the western end and Christiansted on the northeast part of the island. Henry E. Rohlsen Airport (TISX) is a public airport located six miles (10 km) southwest of Christiansted. The airport is named after Henry E. Rohlsen, a St. Croix native who was one of the Tuskegee Airmen during World War II. It is a small international airport that hosts mainly inter-Caribbean flights. The airport, which was a hub for Aero Virgin Islands in the 1970s and 1980s, has the capability to receive jets up to the size of the Boeing 747s. Prior to 1996 the airport was known as "Alexander Hamilton International Airport", and was renamed that same year. Features: Highly detailed rendition of Henry E. Rohlsen Airport on Saint Croix Accurate models of terminals, hangars and other buildings and objects Custom ground textures, taxiway signage, static aircraft and vehicles Detailed ground markings based on recent airport diagrams and charts Realistically sloped terrain profile for the runway and entire airport Custom Photo-Terrain-Mesh covering Saint Croix and surrounding islets Custom Overlay-Scenery: Vegetation, Road Network and Autogen Buildings Renditions of Christiansted and Frederiksted incl. selected landmarks Rendition of the Christiansted Seaplane Base incl. selected buildings Images are courtesy of Aerosoft ______________________________________ Yes! the Saint Croix XP by Aerosoft is now available from the X-Plane.Org Store here : Saint Croix XP Price is US$24.95 Requirements X-Plane 11 Windows, Mac or Linux 4 GB VRAM Minimum - 8 GB+ VRAM Recommended Current Version : 1.0 (October 27th 2021) ___________________________ News by Stephen Dutton 29th October 2021 Copyright©2021: X-Plane Reviews (Disclaimer. All images and text in this review are the work and property of X-PlaneReviews, no sharing or copy of the content is allowed without consent from the author as per copyright conditions) All Rights Reserved
-
NEWS! - Scenery Released : LBBG - Burgas Airport by Chudoba Design Released only days after Chudoba Design's LKPR - Václav Havel Airport in Prague, Czech Republic. Here is another sweet destination, but this time in Bulgaria. Burgas and cities nearby are some of the most visited places in Bulgaria, and also by the black sea. It used to be a holiday destination popular among Soviet block countries. Burgas used to be a kingdom for TU-154 with a variety of airlines. Now you would find here almost any medium-size aircraft type, mostly with the same airlines as before. It is home to European Charter airline, Bulgaria air and Balkan Holidays. Burgas used to have an old terminal, therefore there was build a new one, similar to Varna. Features: PBR Textures Custom buildings and objects night texture for terminal curved groundpoly custom orthophoto custom mesh Ortho4XP compatibility Images are courtesy of Chudoba Design __________________ Yes!... LBBG - Burgas Airport by Chudoba Design is Available from the X-Plane.Org Store here : LBBG - Burgas Airport Price is US$12.49 Requirements X-Plane 11 Windows, Mac or Linux 4 GB VRAM Minimum - 8 GB VRAM Recommended Download Size: 816 MB Current Version : 1.0 (October 25th 2021) ___________________________ News by Stephen Dutton 27th October 2021 Copyright©2021: X-Plane Reviews (Disclaimer. All images and text in this review are the work and property of X-PlaneReviews, no sharing or copy of the content is allowed without consent from the author as per copyright conditions) All Rights Reserved
-
NEWS! - Scenery Released : LKPR - Václav Havel Airport Prague by Chudoba Design Prague, capital city of the Czech Republic, is bisected by the Vltava River and is nicknamed “the City of a Hundred Spires,”. So a significant city deserves a significant airport. Chudoba has now released the Václav Havel Airport for Prague in creating another great destination for the European shout haul specialists. At LKPR would mainly find Smartwings, Czech Airlines, Ryanair and newly formed Eurowings here. And from Prague, you can reach most cities in Europe and take long haul flights to America or even to some parts of Asia. Being their hometown airport, Chudoba has paid attention to every detail of the LKPR scenery. Features: Custom buildings and objects Custom ground with hand-crafted PBR textures Custom SAM jetways and docking system Detailed, custom PBR terminal buildings Animated Water Salute Accurate HDR lightning Custom HD orthophoto High level of detail Quick support team Detailed manual in English, Czech, and German Images are courtesy of Chudoba Design __________________ Yes!... LKPR - Václav Havel Airport Prague by Chudoba Design is Available from the X-Plane.Org Store here : LKPR - Václav Havel Airport Prague Price is US$29.99 Requirements X-Plane 11 Windows, Mac or Linux 4 GB VRAM Minimum - 8 GB VRAM Recommended Download Size: 2.3 GB Current Version : 1.0 (October 21st 2021) ___________________________ News by Stephen Dutton 27th October 2021 Copyright©2021: X-Plane Reviews (Disclaimer. All images and text in this review are the work and property of X-PlaneReviews, no sharing or copy of the content is allowed without consent from the author as per copyright conditions) All Rights Reserved
-
Yes sure... you can size the photo so it is small in the comments (load then double-click the image to change the size in the boxes), but will show the full size when clicked on.
-
NEWS! - Aircraft Released : Concorde FXP v2.0 by Colimata Colimata has released a seriously big upgrade to the Concorde FXP in v2.0. This is an upgrade folks, but for original purchasers the upgrade cost is only US$5, a cup of coffee's worth of great new features, and the list is Looong. Debatable is the fact that should this aircraft have been the original released version? but Colimata has taken the same development road that allows you access (at a price) during the early development phases, and with noted areas that are not finished, point taken that in this release the aircraft is in a now far, far more completed form than in the v1.0 version. So you can note v2 as completed, well to a certain high level, certainly yes. Point to make is that the aircraft is a balanced simulation that can satisfy both newcomers and the in-depth supersonic flying that is required at a study level, it caters for both users. There will be X-Plane 12 support for version 2.x. New feature list is very extensive (and value for your money) 3D COCKPIT Super detailed 3D cockpit Front panel, center panel, roof panel, side consoles, Engineering 4k cockpit textures including 100’s of texts and markings 2k alternative available to save VRAM Incredible level of interactivity More than 1000 click regions (switches, quick access areas, etc) 700+ custom lights for: Warning lamps Gorgeous, dimmable night lighting (Instruments, panels, consoles, floods, etc.) Exterior lights PRO or STANDARD complexity settings 3D Inertial Navigation System CIVA Route programming directly in the 3D cockpit Track / Groundspeed Heading / Drift angle XTK Track Position Waypoints Distance / Time Wind Waypoint change Interactive Engineering panel Automatic or manual trim fuel pumping EXTERNAL MODEL Accurate 3D model of the aircraft Opening passenger and cargo doors plus service panels Very detailed engines Including moving ramps, intake/spill doors Animated primary and secondary nozzles Engine cowl doors can be opened Mounted engines External 3D model of the Olympus 593 engine Detailed landing gear Many utility vehicles included (tankers, conveyors, catering, etc) Included pushback truck and functionality Full use of PBR Beautiful 4k textures including normal maps 2k version available to save VRAM FLIGHTMODEL PRO or STANDARD setting Refined subsonic and supersonic flight model Vortex Lift simulation Ground effect simulation Trim fuel imbalance force simulation Thrust simulation SOUND FMOD 3D sound Dozens and dozens of sound effects Audio advice from Copilot, Engineer, and Pilot A dozen different sound spaces Adjustable volumes IN ADDITION PRO or STANDARD complexity settings VR compatible Autopilot with 16+ functions Extensive Graphical User Interface with features like: Flight Preparation Aircraft management Virtual flight engineer Custom content GUI is fully scalable Dedicated Checklists window Quick Access GUI (Views, GUI, Checklists) 3D passenger cabin AviTab compatible 2 liveries included Many more free liveries available Paintkit available MANUALS Installation & Setup manual ‘10 essentials’ manual (91 pages) Full manual (403 pages, separate download) Cold & Dark startup guide (67 pages) Navigation tutorial (54 pages) Video tutorials on youtube.com/colimatavideos Concorde is a legend of aviation. It's timelessly sleek design is still extremely beautiful, and her capabilities are unmatched up to this date. This milestone in aviation history was developed and built in the ’60s of the last century, realising what was before considered the impossible: A supersonic passenger jet. All Images are courtesy of Colimata ________________________________________ The Pre-Release Concorde FXP by Colimata is now available from the X-Plane.OrgStore! for X-Plane11... Here: Concorde FXP v2.0 Price is US$54.95 Requirements X-Plane 11 Windows, Mac and Linux 4 GB VRAM Minimum - 8 GB+ VRAM Recommended Download Size: 600 MB Current version: 2.0 (October 19th 2021) (If you own Concorde v1, this version will be automatically discounted, no coupons required) ________________ News by Stephen Dutton 20th October 2021 Copyright©2021: X-Plane Reviews Disclaimer. All images and text in this review are the work and property of X-PlaneReviews, no sharing or copy of the content is allowed without consent from the author as per copyright conditions) All Right Reserved.
-
Aircraft Review : Airbus A340-600 by ToLiSS Any new aircraft release from ToLiSS is always a reason to celebrate, in a short period of years the developer has entrenched themselves into delivering extremely high quality Airbus aircraft and their systems. First release was the Airbus A319-122, then the larger A321-123. Then both aircraft came with NEO (New Engine Option) upgrades. In the background however was a far more ambitious project and certainly the largest Airbus yet from ToLiSS, the... Airbus A340-600. The Airbus A340, along with it's Twin-Engined sister design A330 was built to compete with the Boeing 777 in the 1990s, in reality the A330 is only used as a long-medium range aircraft (13,450 km / 7,250 nmi), along with the Boeing 777 (13,649 km/ 7,370 nmi ), were as the four-engined A340 can do a extremely long-range (16,670 km / 9,000 nmi) in -500 guise, the -600 version produced here by ToLiSS swaps range for payload, but can still do a significant 14,450 km / 7,800 nmi range, so you would expect the aircraft to be extremely popular on long distance hub to hub routes. But fate and the growing environmental concerns have reduced the demand for aircraft in this A380, B747, A340 capacity... overall it was the Boeing 777, with it's capacity, better efficiency and the lesser ETOPS restrictions that has ultimately slowed the A340 orders and finally removed the aircraft from services... it survives servicing currently only on the ultra long routes around the world, as the airlines are slowly reducing it's serviceable numbers, the Covid19 interaction didn't help the cause either. Thankfully there are still 60 A340-600s in service with six airlines worldwide, but the numbers are dwindling away fast. The A340 was the right aircraft at the right time, but the world itself changed around it, to defeat it. The A340-600 was stretched by 20–22 frames over the -300 to 75 m (246 ft) in length, making -600 at the time the longest Airbus built until the A380 a decade later, Internal layouts are in a 3-4 class arrangement of 320–370 seats, and the aircraft is powered by Three-shaft High Bypass Turbofan Rolls-Royce Trent 556s engines at 55,780–61,902 lbf thrust output, it is a derated engine, because there are four of them, and for efficiency and the reduced fuel consumption. The -600 also has a larger wing area 439.4m², to accommodate larger fuel tanks. The release from ToLiSS of the A340-600, also breaks new ground for the developer. For the first time the complete aircraft has been 100% created in-house, were as in the past the modeling and other various elements were exported out to 3rd party commissions (most notable was Roman Berezin of FlightFactor fame), some commissions still however are in use as Ekran Design, SamWise and SpeedM have all still been assigned. But the now internal aspect of almost everything in the process was to create a far more tighter control over the quality and a faster output, plus the addition of more features and detail. External Details As noted this Airbus is now a complete in house design, and to be honest the earlier ToLiSS aircraft were good and well modeled, but not in that so called upper quality area. So there are two important things to keep in mind here when reviewing this aircraft... This is their first internal modeling project, so there will be the odd issue and quality quirk, and two with the quality now being in house, quirky areas will and can be updated very quickly and resolved... that said, the first impressions of this A346 are extremely good. At 75.36 m / 247.24 ft the -600 is a loooong barrel style aircraft, I found the -500 version quite Boeing 707 in proportion, but the -600 just doesn't have that profile, but to more the Douglas DC-8-63/73 style. Shape and barrel are actually very good, but you do feel and even in areas you can see the drawn on lines, but closer in the detail and the NML normal mapping, or Dot3 bump mapping is really very good if even discrete, and the excellent (all) door(s) and external cabin window detail can highlight this excellent mapping in the right lighting conditions. Close inspection shows Lo-Res cockpit metal window surrounds, they look okay, but are a bit washed out/buzzy close up... but the glass is excellent, right colour and the right depth of thickness, the side cabin windows are very good as well. We were not very impressed by the NEO upgrade engine modeling on the ToLiSS A321, but these Rolls-Royce Trent 556s are excellent, lovely shape and great internal inlet and external pod detail... a marked step forward. A bit more wear and burn realism on the outlet cowlings would be nice though. Wings are very nice, with still only a few noticeable lines, but overall very nicely done with perfect tank under wing access plates. Airflow markings on the flaps is nice, and note the realistic drooping of all the aerodynamic surfaces when not hydraulically powered up... ... the wing tip detail is excellent, with the winglet that are well proportioned. Tail and rear elevators are really good as well, nicely detailed and formed... the point rear APU outlet looks a little too modeled and added on, and may require later a texture with some exhaust gas markings for more realism... but otherwise the rear is very good. The main gear and the famous A340 three bogie arrangement is perfectly realised here, and really well done... ... the gear strut assembly and components are very realistic and detailed, they look and feel real, but don't feel over worn or used heavily year on year... but still it is all is very nicely done. Strut labels are good (but reversed?), and the wheel well detail looks still a bit of WIP, with no attachments or internal box textures (photos?) if you go looking. The central middle strut is mostly hidden on the upper parts, but the lower bogie assembly is excellent, and certainly around the hydraulic piston and support arms. The massive hollow gear pins are all correctly modeled, with the wheel hub and realistic rubber tyres are also very well done. The complex nose-gear also delivers brilliantly, again all struts the and linkages are perfect, and the in-built TAXI and RUNWAY TURNOFF lighting are all very realistic. So overall (discounting the inner wheel-wells) all the gear is all excellent and delivers the gear realism you need on an aircraft of this calibre. Cabin Stepping aboard the ToLiSS A340 and you are overwhelmed by the greyness, with a lot of beige thrown in... There are as noted four classes... First, Business, Premium Economy and a huge Economy class... In the forward cabin there are eight First Class seats (in a Dark Grey) in a cubicle arrangement... ... next cabin is a thirty seat Business or Executive Class layout that blends into another thirty seat Premium Economy layout, and all are covered in Grey and Teal (ToLiSS livery) materials... ... then on it goes, cabin after cabin, and the of rows and rows of grey and teal seating in economy. Seat quality and design is actually very good, with some really lovely seating materials and high quality stitching... but it will be interesting of what the painters can do to recreate some authentic A340 cabins. Galleys are nicely detailed as well, but also feel slightly bland with the samey colouring used here. Using metal surfaces (and Trolley Carts?) or creating the more realistic workplace surfaces would probably make these areas come more alive... it is early days. Unique on the A340 is the lower (economy) floor toilets... the access is via some stairs rear to the lower floor, and it is really well done (note the nice shiny metal rails!), and great for an in flight explore. The A340 is supposed to have two subterranean areas, with a forward lower floor crew rest area and toilets as well... but I could find a forward area. Two more cabin notes... One is that all the seats have a built in (forward view) screen (Larger in First and Biz) to mimic the unique tail camera on the A340, which is great for watching landings! But at night all the screens turn into a nasty green? Thankfully you can turn the screens off on the OHP, via the "Landscape Camera" switch. A great touch is that both the overhead "No Smoking" and "Seatbelt" signs actually work... and can be set individually... nice. The main front and rear cargo holds are also textured in, but not in a highly detailed design, but still another nice to have. Cockpit It is what is through the cockpit door that really counts... first thought is the overwhelming 90s feel, as the cockpit material is the dark blue and white stitched stripe in design, first impressions are very good to the very impressed and I will call the look overall very professional. Over a period of time you really come to like being in here, important for 12+ hour flights. The rear has one rear seat, and one unfolded jumpseat, it feels nice in the rear... left rear is a wardrobe (with hangers) boxes for manuals, extinguisher and other various items, the modeling is good, but not in that higher Hi-Def realism in that there is a mixture of both Hi and Lo modeling elements. Front Captain and First Officer seats are really well done, nice materials and come with a nice hard shiny shell back, but the armrests are not animated, but at least they are positioned in the stored position as to not block-out the pedestal panels. All the Instrument Panel, Pedestal and Overhead Panel (OHP) have this lovely (Airbus) bluey-grey sheen, and that shows off the very nice PBR (Physical Based Rendering) effects to their maximum, it looks and feels oh so very realistic. But far more to the FlightFactor A320 feel than the JARDesign feel. So it is really not noticeable at first, but the quality of the instrument panel texture and knobbly feel is absolutely first rate when the lighting is at it's best... you feeeel this aircraft in it's top draw quality. Overall highlight is certainly the throttle quadrant, with it's four knobby throttles (rear reverser levers) and companion fuel switches... look closely and there is some very nice scratch work for wear and tear aging on all the panels. But I am not crazy about the external wipers, they look quite clunky from the internal viewpoint, and even distracting from the pilot's seat, the real A340 wipers do have the large attachment clasp, but not the large thick body it is attached to. Power and Alignment Power up with both Battery (BAT 1/BAT 2) and I am also using EXT (External) ground power and you have two "EXT A and EXT B" inputs available on the Overhead Panel. On power up I was surprised that only the left PFD (Primary Flight Display, and top ECAM (EWD) screen tested up first (40 Secs). And not the usual all instruments "Self Test" mode, so I checked that out with ToLiSS and here is the reply... "The Captain PFD and EWD get powered as soon as the batteries are on, whereas all other displays need to wait until AC power is applied. So the Captain PFD and EWD finish their self test much earlier." Fair enough... and it is the same with the ADIRS navigation alignment. When the left MAP/NAV display is already set (MAP alignment is also nearly complete). The right MAP/NAV display however still has to wait until the alignment process has been completed. Now the reason is that the ADIRU on alignment is now also susceptible to the small pressure sensor differences between the units, and in to also the more random switching of the sources for the PFDs, in so creating the non-same time visual display differences... ... so I again enquired about that aspect of the odd screen start up alignment as well... another ToLiSS reply. "Each ADIRU aligns on its own. ND1 uses data from ADIRU1 and ND2 from ADIRU2. Each of these will transition to HDG displayed as soon as it's own ADIRU is ready. As you do not switch them all on at the same time, the situation can happen that one display is already valid and the other one is not." end of debate. Once powered and aligned, the instrument panel is all Airbus... in a six panel T panel display arrangement, in all cases Airbus panels are extremely similar, the only concessions are the engine layouts on the two central ECAM (Electronic Centralized Aircraft Monitor) displays, in this case the four engine arrangement. Notable is the blank lower DCDU - Data Communication Display Units, ToLiSS says they will come soon in an update. Both left and right PFD (Primary Flight Displays) are the standardised layout. Speed and altitude ribbons, V/S indicator, rate of turn high and rotating bearing lower and the centralised Artifical Horizon, the display is bright and clear and adjustable for brightness. There is a really nice rich tone to the PFD display of which I like... MAP/Navigation Display is standard fair as well, Compass Heading top, GS (Ground Speed), Adjustable range and VOR 1 and VOR 2 left and right lower. ECAM is two displays with the E/WD (ECAM Warning Display) top and the various SD (System Display) modes lower... Every ECAM profile is available...ENG, BLEED, PRESS, EL/AC, EL/DC, HYD, C/B (Circuit-Breakers), APU, COND, DOOR, WHEEL, F/CTL, FUEL, and STS. All modes are accessible via the ECAM Control Panel below the SD display. Everything feels exaggerated on the SD screens and that is because everything in the A340 is duplicated by four, and then there is the extensive fuel tank layouts and the four (nose, two main and one central) and undercarriage arrangements, comparing this SD display to the A330 or A320 ECAM arrangements, the SD feels far more crammed and more complex than on the other Airbuses except for the other Four-Engined A380. It is a marvel on how much has been now inserted with these system modes and their high complex detail in Simulation... ToLiSS was one of the first custom developers with the QPAC A320 that delivered these early Airbus system modes, and this is now a serious deep dive of system functionality, it is also all very authentic to a study grade Airbus with here there is an active 30 warnings and with over 200 caution messages built in to the system.... we have come a very long way in only half a decade. All the display panels can be popped out (touching glass).. and easily scaled (with your mouse-scroll) for screen space or home cockpit builders. Over the years there has been also the many various manipulators to try to recreate the Airbus push-pull knob system, some were more successful than others. Here ToLiSS has done another take on how to manipulate the Autopilot control knobs. The half-moon manipulators turns the knob (scroll), but to Push-Pull you press the mouse and create a fist, then drag the fist either upwards or downwards to PUSH (drag up), or PULL (drag down)... It take a little getting used to, as all the Push-Pull movements are quite if very small, and you are not sure if you have done the required action. After a while however it does easily become second nature. Multi-Function Control and Display Units The two Multi-Function Control and Display Units (MCDU) are excellent, and better still are both separate individual units for both the Captain and First Officer. The left MCDU is set for the left (Captain) MAP/NAV display and the right MCDU is for the right side (F-Officer). The left MAP/NAV shown here is set in ARC mode.. and right MAP/NAV shown here is set in PLAN mode. The pop-out plate facias however are a far more brighter bluish tone than the installed pedestal Blue-Gray units, and to a point they don't really match up together very well. You can type directly into either MCDU, by pressing the panel facia, but if you however press the glass area it simply and quickly disappear? and so it is very easy to point yourself into the wrong area and lose the unit... touching the MCDU glass on the pedestal units is the way to pop-out the units, all like the same with the PFD, NAV/MAP and ECAM Displays. Ease of use of inserting flightplans and the editing of the flightplan on the MCDU is simply excellent, it is obviously an all Airbus dialogue and layout, but it isn't hard at all to master. But be aware that you should understand the data you are inserting into the system get the correct flight profile out of the aircraft. Even small mistakes can do weird things to these very complicated machines, as we are at a study level here and the aircraft reacts only to the correctly inputted data in that aspect. Thankfully ToLiSS provides you with the most critical data required on the Menu. INIT pages 1 & 2 (INIT FUEL PREDICTION) can be inserted (arrowed below left) and the required data (ZFW/ZFWCG) and (BLOCK) data is important... ... this can relate to the separate "FUEL PRED" page, which is very good in it's in-flight fuel prediction detail. Notable is "SEC F-PLN" or secondary flightplan (above left) than can be copied (COPY ACTIVE) from the main flightplan and can then be changed and used to create a different departure or arrival route. SID/STAR and airways support also a fully custom and supporting a FMGS backbone of all A424 leg types (Arc, course or heading to intercept, Radius to Fix and Holdings). Also a note... on the TAKE OFF (Performance) (upper right arrowed) phase the FLEX TO TEMP input has to inserted as an "F" in front of the Flex Temperature to get accepted (i.e. F41). So very Flexible, detailed, the A340's MCDU, Flight Management Guidance Computer (FMGC) is excellent in the A340 and very authentic to look at and access. Pedestal The pedestal is perfect... Radios top (each side) of the fully formed four Fuel Switches (they feel gorgeous), with Radar left and ATC (Transponder) right... Notable is that you will notice that there is a basic skeleton installed for the ATC Comm page, another feature of the upgraded ATC, coming in X-Plane12. .... lower are is the Speed Brake left and Flap lever right (again both beautifully modeled). Set centre is the standard Airbus engine start (Ignition) switch and the backup (Multipurpose) MCDU. Noted here are ACMS, CMS, SAT and ATSU options, and ToLiSS notes these will later become active on all three MCDU units with the Controller–pilot data link communications (CPDLC) link as a high priority, and I like the idea of a printout option, that creates a TXT file that you can print out externally. Bottom left of the pedestal is the cockpit door lock, main PARK BRAKE and RUDDER TRIM knob. Overhead Panel (OHP) The OHP is noted as a “single slope”. with the "Forward zone" for the most frequently used functions, i.e. - System controls, that are arranged in three main rows : - center row for engine-related systems, arranged in a logical way. - lateral rows for other systems. The Aft zone (top area), is not really used in flight, and is mainly for being a small maintenance panel corresponding to some maintenance controls. Notable is the complex fuel tank arrangement of six main tanks (Two tanks each Wing, Centre Tanks and the tail Trim tank), plus each has a "Vent" tank open to the elements. Engines also have four separate electrical generators adding into the complexity. Yes study is required if you want to go deeper into these elements. TISCS Menu The menu system or "ToLiSS Interactive Simulation Control System" is a bit long winded but it is shortened as TISCS, but it is an important if essential part of the system, so we will need to go through the TISCS first. I do recommend in setting up a key command input to bring the TISCS menu up, as you will access the TISCS a lot (I use "S" and the same TISCS menu key works for all the ToLiSS aircraft, A340, A319 and A321). There are seven TISCS tabs available covering: SITUATIONS A/C CONFIG, LOADING PERFO, GROUND SERVICES, FAULTS SCENERIOS, SOUND/ADDONS, JOYSTICK ACTIONS and GENERAL SETTINGS. The default is the "Ground Services" panel Situations A/C Config The "Config page" is used to set up the aircraft with two sections, "LOAD/SAVE SITUATIONS" and "AIRCRAFT CONFIGURATION" Load/Save Situations is an absolute gem of a tool, basically it is "Save" tool, but it saves EVERYTHING including the important MCDU settings and your full route (yes even the SIDs and STARs), and better still it gives you a backup "Auto-Saving" feature in case X-Plane does a nasty CTD (Crash to Desktop) or a freeze on you, all the saved files are held in the X-Plane Plugin's Folder and not in the A340 Aircraft folder... It is years better than any other save tool in X-Plane, as it is simply golden to set up or to have your aircraft ready at a certain state of "ready to Flight" or in certain flight position or situation. So if you just want to come back and just fly from a certain (takeoff) point, then you can simply save the aircraft ready to start that way... it is just simply brilliant. The Auto-Saving function can be set at save intervals from 1min to 30min, but 5min is the best or turned off. The saved situations can be "Filtered" to find certain saved situations (image below right) Aircraft Configuration section is different to the A319/A321 TISCS layouts. Gone (for now) are the engine configurations, and replaced by; HAS BRAKE FAN (Yes/Auto/No), USE WEIGHT VARIANT (Auto/Regular/HGW - High Gross Weight) and the use of IMPERIAL UNITS (or KGS) Lower is a new TISCS option to adjust the aircraft's performance relative to it's age (NEW to OLD), on the AIRCRAFT AGE and ENGINE AGE sliders. Note: all the A/C Configurations page settings have to be saved before use. Loading Perfo This tab covers the AIRCRAFT LOADING, BLOCK FUEL, CG-GW and TO-PERFORMANCE AIRCRAFT LOADING: This setting zone sets up the aircraft's payload for; Passengers, Passenger Distribution, FWD Cargo (Lbs/Kgs), Aft Cargo (Lbs/Kgs) and then you can apply the load settings to the A340. BLOCK FUEL: allows you to set the BLOCK (to BLOCK) Fuel amount (Lbs/Kgs) with a "QUICK REFUEL/DEFUEL". CG-GW: the diagram shows you via a graph the CG Limits (Centre of Gravity) and current CG position in three colours: Black TO (Takeoff) CG Limits, Blue FT (Flight) CG Limits and Red LDG (Landing) CG Limits. TO-PERFORMANCE: This is a calculator tool to find the TOGA (TakeOff/Go-Around) performance numbers... you set the (S/F) Flap Configuration (1+F) and the calculator will give you the V1, VR and V2 ref speeds (For input in the MCDU (PERF) TAKE OFF page). Plus the CG/THS and Flex Temp (F)... ... to use the TO-PERFORMANCE calculator though you have to set the Departure Airport and Runway in the MCDU before the TO-PER calculator will work? Other MCDU input data notes are in the left side "AIRCRAFT LOADING" Section, this includes the ZFW (Zero Fuel Weight), and ZFWCG (Zero Fuel Weight Centre of Gravity), they are both inputted on the INIT B PAGE (The BLOCK FUEL is also inputted on the same INIT B page). Ground Services This tab covers the external factors on the aircraft in; QUICK SERVICES, PUSH-BACK, ANIMATED SERVICES and AIRCRAFT DOORS QUICK SERVICES: provides options for "Ground Power" (Two units in POWER A and POWER B as noted on the OHP) and "HIGH and LOW PRESSURE AIR" which is there to start the engines and provide ventilation/air-conditioning while on the ground. There are no external physical units, But there is a built in PUSHBACK feature... PUSHBACK: is quite basic in look and to use in AUTO (Set distance and Rotation) or MANUAL modes. However I always use the excellent BetterPushBack Truck as an alternative. The ToliSS A340 has also been configured correctly for the BetterPushBack use, so it works extremely well here. Note in watching the pushback operation details on the ECAM SD "WHEEL" page! ANIMATED SERVICES: panel is not currently operational at this time, so there are no chock's, flags or engine covers... as ToLiSS notes that flying performance and systems are more of a priority than any addon features. AIRCRAFT DOORS: have three selections with Auto (default) Close and Open. The Auto setting will open the doors when the park brake is set and the engines are off. But they do have a tendency to be a bit uncontrollable in opening the aircraft, and you then have to (constantly and annoyingly) reset all the doors back to the "AUTO" preference state, and as this is default auto setting it will always switch back again and have the front left and the two cargo doors open every time you load up the aircraft? The Door Auto setting is my only really pet peeve with ToLiSS aircraft and now with eleven doors and hatches... but it has gotten better in the save department if you do a "Save" on the Config page. Faults Scenerios The A340 like the A319/A321 has a great failure system, or FAULT SCENERIOS. These failures can be set up on the TISCS Panel. You can ENABLE the RANDOM FAULTS feature and set the FLIGHT TIME FACTOR of LESS or MORE Flights. You have a total random setting that covers a wide range of 140 system faults, or you can set your own failure with the options including: NOW, AT TIME(set time in Seconds from now), AT IAS (Speed), AT ALT (set altitude) or RANDOM, and you can set as many failures as you like. My selection here is ELEC (Electrical)/BATT 2/AT ALTITUDE (You can also set the altitude for the failure), and the fault worked as set, second failure was FLT (Flight) CTRL (Control)/R OUTBD AIL JAM/RANDOM/FLIGHT or Flight Control-Right Outboard Aileron Jam-set at Random in Flight. All Faults can be deleted or changed at will. Sound/Addons SOUND SETTING: panel covers the aural areas of; Engine Volume, System Volume, Cockpit sounds, Environmental sounds, Ground Contact, Aural Alerts and External Volume. Doppler sound effects and 3D Sound Fading which is an option to switch off the sounds from the PTU (Power Transfer Unit) and Flaps in the cockpit. ADDONS: Currently there are no "Addon" options at this point in time. Notable is that the JOYSTICK ACTIONS that was situated on this "Sound" tab on the A319/A321 has been moved to it's own tab (Below). JOYSTICK CONFIGURATION: selections options cover the "Primary Joystick" FOUND, and the PRIMARY STICK DEADBAND margin selection. The control of NWS (NoseWheel Steering) has been changed to select the "JOYSTICK ROLL in No/Auto/Yes options, Enable Second Joystick (For custom setups like home built panels or for training) as it supports the use of two sidesticks (pilot and co-pilot side) again the FOUND option and another DEADBAND slider is available for the SECOND JOYSTICK. Tiller Assignment. Pedal Brakes Assignment with brake strength, Smart Park Brake, Allow Brake on One Pedal are all for optional Rudder Pedal addons with built in braking actions. THROTTLE CONFIGURATION: This is a brand new option on ToLiSS aircraft, but some actions have been reassigned. One moved here is the F1/F2 Toggle reversers (I use a joystick trigger!) option, and SMART THR LVER IDLE LOCK and REV ON SAME AXIS are both new options... with CL DETENT LOCATION (Interesting?) and MCT DETENT LOCATION are both here in having adjustment Sliders for throttle addon systems. ACTIONS: include "ADIRU Quick Alignment", and "Jump to next WPT (Waypoint)". "Auto-Pause " has four settings: OFF, ON WARNINGS, ON WARN + CAUT (Caution) and ON WARN/CAUT/TOD (Top of Descent). At these points the Auto-Pause will automatically pause the (X-Plane) simulation, say as if a master caution or master warning goes off. Again you have to save the Settings on the menu for any of them to be effective. General Settings The General Settings tab has five sections in: PRODUCT INFO, VISUAL SETTINGS, STARTUP BEHAVIOUR, USER INTERFACE and MISCELLANEOUS. PRODUCT INFO: (Information) covers the current (ToLiSS) Version and build number and LICENSE ID, or Authorisation. VISUAL SETTINGS: include new options in; WING FLEX STRENGTH, WING FLEX FROM GEAR BUMPS (Landing) and (PFD, MAP/NAV & ECAM) SCREEN BACKGROUND GLOW sliders. Display (Instrument) reflections has been changed to just a REMOVE SCREEN REFLECTIONS (On/Off) selection. SKI/RAIN Windshield (Librain) effects can only be used currently in Open GL, but expect this item to change significantly with the release of X-Plane12 in that Librain/Rain/Snow features will then be the built in default effects in the new X-Plane12 version. "REFRESH PDF EVERY X CYCLES" This is an option for the weak graphic card users, in that instead of the heavy use every cycle to refresh the system displays, you can set the cycles to be redrawn either every 2nd or 4th cycle. STARTUP BEHAVIOUR : sets the aircraft to a certain startup situation (known as Cold or Hot), options include: OVHD XP START SETTING. COLD START TYPE in COLD+DARK, EXT POWER (connected) and the really all on with APU+ADIRU ON. DEFAULT TO COPILOT SEAT (On/Off). DEFAULT BARO in either HPA or InHG. Finally you can set your own default "Transition Altitude" via a slider. USER INTERFACE: are options on how you interact with the aircraft. Options include: USE MOUSE WHEEL GESTURES, SYNC BARO SETTINGS (separate or aligned Baro settings), POPOUT WINDOWS FOR POPUPS and you can save your set, or save your POPUP CONFIGURATION (Cockpit builders) on Quit. MISCELLANEOUS: ILS AUTO ALIGN is a feature in that if the custom scenery that rotates the runway; for in these cases when the ILS and the runway are not aligned anymore. The ToLiSS A340 plugin thereby contains a feature that detects if there is such custom scenery installed and then automatically realigns the ILS in the internal database to the new runway heading. XPDR COMPATIBILITY MODE, is the use of different transponder modes. CACHE ROUTES ONLY ON STARTUP; a setting that prevents interruption when you enter your FROM/TO in the MCDU. If you enable this option, the plugin will only check your fms files once on startup. and the advantage is that you do not have interruptions when entering your FROM/TO, the disadvantage is: if you created the fms file for your flight plan AFTER loading the aircraft it won't find it. ENABLE AVITAB TABLET, The AviTab tablet is installed on the lower left of the Pilot and usable if you have the AviTab plugin set in your plugin folder. For those that have an Navigraph account the use of Navigraph maps and tools are also available in the A340. You can hide or show the Tablet via this switch. Again remember you have to save the Preferences and Default values for them on the MISCELLANEOUS Page for them to be effective and in some instances a restart is required to activate a setting. ____________________ Flying the ToLiSS Airbus A340-600 First thing to get into your head is just how long the -600 aircraft is... don't think like A330/A350 or even a Boeing B787 pilot, but be in like a A380 or B748 sized mind. Code F gates are the safest (A380/B748), The A346 is actually Code E, but you will need the extra space... ... repositioned the A346 at Gatwick (EGKK) and finding a stand large enough to cater for my size was far harder than it looked, and I still felt my tail was hanging out. There are no ground vehicles or service elements (yet), and being in a beta version there is no GHD (Ground Handling Deluxe) vehicle .set yet either, but no doubt these aspects will come very quickly (there already is a .set for the JARDesign A340). Wind changed on me... so I used the "Second Flightplan" option to copy my installed route, make it active and change it for use with the reassigned Rwy 26L and SID WIZA4M to DVR (Dover). So easy to do. Yes Second Flightplans are not new to X-Plane, but here it is very easy to copy and quickly adjust the route, and that the MCDU does the job so very neatly as well is really impressive. Second (Better)Pushback of the day, and I can now start the engines, APU is running, so BLEED ON and ENGINE START to IGN (Ignition) Engines are started in sequence, preferably with engine No. 1 first, that is in order to pressurise the blue hydraulic system, that pressure also supplies the parking brake accumulator. APU bleed does however also allow you to start two engines simultaneously. The preferred order of engine start is 1, 2, 3 then 4... easy... but get the engine start sequence wrong, as I did intentionally (Starting No.4 first) and you get a load of electronic warnings (Hydraulics) and it is not at all easy to rectify. The engine bleed model is very good in considering the bleed mass flow for the engine start, in other words each engine start is not an exact replica of each other, but adjusted to each engine for realism. Engine sequence startup sounds are very nice, and now a far cry from the early ToLiSS days, all sound packages now are of high quality and come with specialised custom effects. All powered up, flaps set (1+F) and lighting on, it is time to go and the clock is now running. Notable is the set (check) the TO-Config button to display the right configuration for takeoff, very easy to forget, so I make it a takeoff mantra... Gatwick is busy, always busy... so you really feel the size of the -600 here, and of where you can or can not go. I take Taxiways AN and A, that gives me more open space to turn the A346 onto the runway RESA as the overrun at the start of RWY 26L is very large. Chrono (Clock) running and you push all the four petit throttle levers forward to the takeoff point. There is nothing like the push of a "Heavy" to get your adrenaline running, BIG and HEAVY are two words I love in aviation and the A340 fills that aspect perfectly... .... my TOW (Total all up Weight) is 269585 kg, of that my fuel load is 44121 kg, and that means I am heavy with passengers, but with a flying time of just over 4 hours (4h:08m) I am heavy on payload, but lighter (on fuel) than when flying usually a very long haul route that this A346 is quite capable of. So the speed gathers rather quickly down RWY 26L... ... Rotate is 173 +10 knts, and the lift and "Positive Climb" is clean... and your away! Tilting gear now hangs in space, outboard bogies cant backwards, and the centre bogie cants forwards... retracting the gear comes with some great sounds of mechanical and wind noise, not so much in the cockpit forward, but great in the cabin (Cabin sounds do nicely change frequencies as you move around the or go to the more front or rear of the aircraft). 90º south follows the departure track of WIZA4M, then another 90º to MAY (Mayfield 117.90) then to DVR... ... ToLiSS aircraft are amazing physically to fly (yes you can actually fly an Airbus manually). As the words "Smooth" and "Fluid" that comes easily to mind, and the aircraft will respond perfectly to your actions. So flying tight 90º turns are perfect and clean. ToLiSS has certainly set the benchmark on how these "heavy" aircraft respond and feel to your input actions. Heading towards the Channel, it is time to settle down after takeoff and fly the route, first is a change of speed to 305 kts, then a climb up to 35,000 ft, at 2200 fpm, with a reduction around 28,000ft to 1200 fpm... various weights (heavier or lighter) can obviously alter this procedure and the climb to altitude, but the A346 takes it all in it's stride. Tanking already begins... the complicated fuel system will transfer fuel as required, as the fuel system includes inflight CG control by pumping fuel to and from the tail tank. There is also here fuel jettison, manual and automatic transfers between the different tanks, and across the from the outer wing tanks to the inner tanks, all these procedures are fully automatic and every tanking action is displayed on the E/DW display. Long haulers love their toys... Flip out work tables (yeah!) and pull down front window blinds are a super nice to have now in a ToLiSS aircraft, the side window shades however don't work (yet). Greta Thunberg would stamp her little feet and wave her little finger in the air... the A340 is a serious climate killer, with four engines all pumping out that nasty oxide, "who cares", this is a great if brilliant aircraft to transport you (virtually) around the world. The Airbus A340-600 looks simply brilliant powering through the sky at altitude. Quickly we are already approaching Frankfurt, with EDDF now sliding below at 47m on the clock... .... this point in my mind brings up the debate? Over the last few years, regularly now, we have had the same repeat inquiry on the .Org Forums. "What is the best aircraft for long haul"? To be honest X-Plane didn't deliver really good Long Haul aircraft... that is not totally absolutely true, but the best ones in the FlightFactor's Boeing 777 and Peter's A380 are now very old, very dated. The FF A350 is not bad (after the last update), but the Magknight B787 Dreamliner also still falls far short of it's potential. The JARDesign twins A330/A340 are actually not bad and I like them a lot, if you like their old styling design, and finally the two 747s by SSG and Felis (B742) are quite complicated machines to fly. So there are really no clear winners here. The problem is highlighted even more in that most of the users in asking this "Long Haul Airliner" question are also very new to long haul flying... ToLiSS aircraft are interesting in this regard. They are certainly study depth, as the avionics, systems and Airbus laws are very and highly refined and ToLiSS is the X-Plane master Guru of Airbus behaviours and systems. That also makes it interesting? Because the systems in here are so highly refined and detailed, then this ToLiSS and the A346 is actually very easy to fly, even to a point being an automatic machine to Boeing's more physically manual aspect. I'm not saying you don't still need to understand the A340's systems and the flying behaviours, because you do... but the A340 is quite an easy aircraft to learn on and to fly (very) long distances, and certainly if you are new to Airbus philosophy. Basically ToLiSS is doing the heavy lifting for you here, so the A346 aircraft is currently the No.1 choice if you want to do "Long Haul" flying and are new to the genre... but don't just pop in and fly it around all the time just on automatic, learn the systems, learn the Airbus philosophy, as the ToLiSS A346 is light on the top, but very deep down below. You can jump from waypoint-to-waypoint through the cruise phase, and by-pass the boring bits... to me this is an anathema in Long haul flying, as it is about the distance covered in real time and the numbers in feedback the aircraft gives you... but the impatient out there will jump ahead to do long haul in a short haul time period, the ToLiSS A340 allows you to do this and very well in this aspect, but it goes very much against my long haul personal coda. The longer lighting as the day moved onwards (going faster as I am flying East) showed off the excellent detail and lovely textures on the instrument panel... the more time you spend in here, the more you really love this A340 aircraft. You cruise around Mach 0.82 (470 kn; 871 km/h) at 35,000ft-39.000ft, but I found Mach 0.83 to be easily achieved with no loss of extra fuel consumption. Lighting Another ToLiSS weakness on the A319/A321 was the internal lighting, before it was okayish. ToLiSS is now more in control on what features and areas than they were before... but still to a point I approached the A346 lighting with some trepidation... ... but I wasn't at all disappointed, if in the very opposite and being very excited of all the lighting possibilities in the A340. All the lighting knobs work as per Airbus layouts... including (now) all the under panel four lighting knobs. The two inner knobs cover the Autopilot panel top displays and lower text instruments... The two outer knobs we will talk about in a moment... Above on are the three spots for the (Centre) Pedestal, and the two outer Reading lights... Plus there is a MAP Switch (and even Console switches) left and right of each PFD that lights up both of your side panels. Roll out your work tables and the two outer under panel knobs adjust the lighting for each left and right tray for your convenience! Using the standard seven; FLOOD LT (MAIN and PED), INTEG LT, PFD, ND and the two ECAM (upper/lower) knobs you can successfully adjust to any sort of lighting conditions you want... including (above right) my perfect cockpit dark and warm lit instrument panel for takeoff or landing, we will see this again in action on landing. Over head cockpit lighting is the standard Airbus three way CTL (main cockpit lighting switch) and the three way set STORM, BRT (Bright) and DIM selection. So the cockpit lighting in the overhead and the instrument panel selections is pretty well perfect... The cabin is a surprise as well! In the day the cabin felt a bit grey and bland, but at night it is excellent. In the external dark the cabin comes well and truly alive, and a very nice place to be it is as well. With better lighting the cabin detail also comes out far better, including the window side panels and overhead bins. Most in here is lovely window and centre strip lighting, it is very well done. As it got darker we can now also look at some of the external lighting... ... overall the exterior lighting is very, very good. There is nice star effects on the brighter lighting, and the cabin windows at night are very nice and not with the usual over bright cruise liner look. There are four (two each side) wing lights and they light up the wing and engines very nicely externally and from the cabin (for those who love their wing lighting effects), and the strobe lighting can be a bit blobby but work well in context.. Navigation lights are all basically similar in detail but again very good. Not keeping an eye on your instruments? The flightplan will alert you to important points if you forget to do them... here it was a "Decelerate" alert in missing my TOD (Top of Descent) marker for Tel Aviv? I was bit a apprehensive of (yet again) having to learn yet another manipulator system, but the ToLiSS idea is actually very good, the trick is just to remember your PUSH (drag up), or PULL (drag down) positions, but was very quickly using it like a pro... "just a bit of practise". I like the option, that when you have taken off... the TISCS "Loading INFO" page will then show you your destinations METAR information, a great tip in getting your airports air pressure and wind direction/strength inserted ready for landing. Below 6000ft, Airbus allows you now to switch on the tail light which is an automatic system anyway, so you don't have to physically switch it on/off manually, and very good it is... ... now I set up the cockpit lighting for landing, with most of the overhead lighting off, and the instruments modes set, the visual feel is subtle in your face with that perfect view out, I find it perfect! External lighting for landing is also very good... Main landing lights and the twin taxi-lights give you a great lighting spread (and I do like the cloud reflections from the lighting, as they are excellent here). 163 knts at full flap on finals and she feels good, ToLiSS aircraft are exceptional handing aircraft for manual landings, but be aware of the length of your long -600 tail as so you don't hit the runway rear first! The Autoland system is perfect, personally you could land almost hands off (the rudder inputs are important though) and the system will automatically guide you in... over the threshold of LLBG Ben Gurion's 08L and your almost there... a nice touch is that the cabin(s) darken for Takeoff/Landing, and I really like that aspect, and the view out is excellent. After three or four landings now, I am finding I'm coming in slightly too nose (pitch) high, not that bad... but something I need to work on? On the ground and I activate the reverse thrust of those fantastic Rolls-Royce Trent 556s, the reverser sounds are really excellent, they roar and blast into slowing you down... another point is I feel the braking (Auto BRK) feels a bit weak, I set it for "2" but I still have to use the brakes a lot to reach my turnoff point (tricky here at the end of 08L into taxiway E, as it is so easy to miss and go down RWY 03/21). There are still two more nose lights available in "RWY TURN OFF & CAMERA"... with all forward lighting on, and it is excellent to find your way around the field on the ground, as the beams in spread is very good and the light goes in were you are wanting to look. Assigned Gate D7 beckons, you have to be aware of the steering, as since the QPAC days then the ToLiSS aircraft nose steering is very authentic, but can also take it's time to turn, so you have to anticipate your turns perfectly, certainly here with the A346 as it is so long an aircraft. APU Available (started on the taxiway), and you power down the engines, again in reverse 4,3,2 and 1... look around and sigh! Good news is you get to do it all again tomorrow in this magnificent A340-600, just in going the other way. Liveries Provided are three official liveries (more may come yet if completed on time)... (Disclaimer): ToIISS notes that it is their policy in not to endorse brands or logos in being that Toliss is not licensed to use them, so the engine logos here are a GK (Gliding Kiwi) branded (Airbus however is officially licensed). I did personally however add in the RR logos to a livery to make the review more authentic to the real aircraft. And you will find most if not all 3rd party liveries will be also correctly branded. Painters have already produced a fair few A346 liveries... I will note I found a lot incorrectly titled and don't work correctly (I think the PaintKit is incorrectly labeled), but they are easy to fix if you have the time... in time everything will be corrected, but watch out for those missing winglet logos? Those already presented on the X-Plane.Org are excellent.... with Emirates, Lufthansa (Star Alliance), Virgin Atlantic and Swiss all great liveries. __________________ Summary This is the third aircraft release form ToLiSS after their extremely well received and very popular Airbus A319-122, and then the larger A321-123. Both aircraft then came with NEO (New Engine Option) upgrades. In the background however was a far more ambitious project and certainly the largest Airbus yet from ToLiSS, the... Airbus A340-600. The -600 is not the longest range of the Airbus A340 family, that accolade goes to the -500, but the A346 is the most versatile in both payload and range, sadly for four-engined aircraft have been on the decline around the world with their effenciency and environmental issues, but that should not take away anything from this extremely popular and really one of the great long-range aircraft. In the past the modeling and other various elements were of ToLiSS aircraft was exported to 3rd party commissions. But this A346 project was created totally 100% in house and this was to create a far more tighter control over the quality and a faster output, plus the addition of more features and detail. And the quality now ooozes out of this aircraft like none of the other ToLiSS aircraft before... it is not totally complete yet, as there are still a (very) few quirkes, but overall it is far higher and far better quality standard than any of the previous releases... much improved over the other aircraft is the internal lighting (exceptional now) and external lighting and the external modeling (mostly with the far better engines) is all of a far higher quality, working animated work tables and windows blinds are new features to ToLiSS aircraft. System and Airbus Philosophy (flight control laws) are coming from the best X-Plane developer there is, so the Fly-by-wire system here is not only extremely good in normal law and alternate law 1, alternate law 2 and direct law, but even close to perfection... plus they are some of the most natural flying Airbuses in simulation. Fuel system includes inflight CG control (excellent), ADIRU alignment (perfection), deep ECAM system with 30 warning and over 200 caution messages and a built in 140 system faults system that will either at a specific point in flight or randomly during a flight phases cause you issues. System wise this A340 is now the best X-Plane Airbus out there. Multi-Function Control and Display Units (MCDU) are excellent, and better still are both individual units for both the Captain and First Officer. These MCDUs are again top-notch with SID/STAR and airways support, VNAV guidance with TOC, TOD, Deceleration point, speed limits and full fuel prediction, Altitude and speed constraints and support for Go-Arounds and diversions, only thing I am not fussy about is the pop-up plates don't match or even feel like the same units installed, they are far too blue to the background grey in my eyes. The TISCS menu system or "ToLiSS Interactive Simulation Control System" is again also exceptional... it comes with lots of features including the best aircraft SAVE system in X-Plane no doubt (It just works beyond and beyond), aircraft setup and performance tools are also excellent as are the new packaged sounds, the auto door system however has even more doors to correct now than ever before? One other important aspect in the ToLiSS Airbus A340-600 that is worth understanding, is that it is a very flexible aircraft to learn on and fly... for the professional Airbus devotees out there, then they will revel in the complex systems and deep Airbus Philosophy... but that is not to say that newcomers to Long-Haul flying are not provided for here either, as this excellent A346 is so well developed. As that a new pilot to these (Heavy-Extremely long haul) aircraft can also fly the aircraft (and actually) quite easily get a lot of learning and enjoyment out of the machine, and that factor is remarkable in that everyone all along the whole scale here is catered for, and X-Plane has wanted of such an accessable aircraft in this category and capacity for a long time. We always expect brilliance from ToLiSS and any aircraft they develop... This Airbus A340-600 is a mastercraft of a machine, in detail and systems, there are a (very few) areas that are yet still to be covered or touched up, but with projects this size, that is to be expected, and ToLiSS deliver updates very quickly... But currently this is simply an exceptional release for the X-Plane Simulator, and on this very date the very first A340-300 took its maiden flight on 25th October 1991. We should be so lucky to receive the same in it's -600 guise all these years later... This Airbus A340-600 from ToLiSS is a brilliant Simulation, and simply packed absolutely to the top with features and is certainly a... "Highly Recommended Purchase". _________________________________ Yes! the Airbus A340-600 by ToLiSS is NOW available from the X-Plane.Org Store here : Airbus A340-600 by ToLiSS Price is US$89.99 Most accurate system functionality for any A340 aircraft in the flight simulation world Fully Featured Detailed FMGS: 3 independent MCDUs providing real life FMGS programming capability 2 independent autopilots SID/STAR and airways support in a fully custom FMGS backbone supporting all A424 leg types (Arc, course or heading to intercept, Radius to Fix, Holdings, etc.) Support for all approach types present in real life A340-600s, including GLS, ILS, LOC backcourse, etc. Full VNAV guidance with TOC, TOD, Deceleration point, speed limits, fuel prediction, etc. Altitude and speed constraints as the real aircraft deals with them Support for Go-Arounds and diversions Nav Aid autotuning Pilot item database, such as pilot fixes, pilot navaids etc. Flight plan saving via the Pilot routes page Equitime point computation and nearest airports page Accurate systems: Fly-by-wire system with reversion between normal law and alternate law 1, alternate law 2 and direct law as per real life logics. Hydraulic model for flight control actuators computing hydraulic flow through the actuators, the control surface hinge moment, maximum feasible deflection etc. This gives realistic surface floating angles if a control surface is lost due to combinations of hydraulic and computer faults. Quantitative hydraulic model considering the maximum hydraulic flows of the different pumps as a function of engine speed. This is most noticeable when flying on RAT or with wind milling engines Quantitative bleed model considering the bleed mass flow for engine start, wing anti-ice air conditioning packs etc. High fidelity fuel system including inflight CG control by pumping fuel to and from the tail tank, fuel jettison, manual and automatic transfers between the different tanks Detailled model of each ADIRU including alignment, small pressure sensor differences between the units, switching of sources for PFDs Fault injection system allowing to trigger over 140 system faults either at a specific point in flight or randomly during a flight phase Cockpit display system simulating the dependency of the displays on the Display management computers resulting in real life display limitations ECAM system with over 30 warning and over 200 caution messages including associated ECAM actions. 3d modelling Detailed 3d cockpit with animated switches Mouse gesture system for interaction with push-pull knobs emulating the motion on the knob with the mouse Detailed cockpit lighting with reading lights, console light, tray table lights etc. 4 class passenger cabin with underfloor lavatories and crew rest Custom particle effects for engine heat trail, Fuel jettison etc. Custom landing gear model for bogey touch down. Usability features Situation loading and saving. It is possible to save the flight at any point in time and resume it another day. This can also be used, e.g., to save the position just before approach and practice just the approach many times Autosaving allows recovering where you left off, should the X-Plane session end unexpectedly Jumping waypoint-to-waypoint through the cruise phase: Shorten your flight to focus on the more interesting parts as you like 4 different startup configuration from Cold and Dark to engines running and ready to go In-screen popup displays or use of x-plane windows for popups Adjustable Wingflex via a slider in the ISCS Possibility to turn the screen reflections on and off Auto-updater by Skunkcraft Included Requirements Support for X-Plane 11 and X-Plane 12 when available Windows, Mac or Linux 4 GB VRAM Minimum - 8 GB+ VRAM Recommended Download Size: 1.5GB Release and Review Version 1..0 (October 25th 2020) The AviTab Plugin IS required for this aircraft Installation Download of the Airbus A346 is 986mb and it is installed in your Airliner Folder as a 1.85Gb folder. On start up you will have an activation screen presented to enter your Serial Number (Key), and then press the "Activate" bar to authorise the aircraft. I recommend to totally restart the aircraft from your desktop to realign all your plugins and load the aircraft cleanly. There is extensive full instructions on how to set up the aircraft to your X-Plane settings (commands) and addons (Joysticks/Throttles) and other 3rd Party items in the "ToLiss_AirbusA340-600_SimulationManual". Auto-updater by Skunkcraft is Included for any updates and changes Documents There are Three Manuals Included with the package. All are extensive and well laid out with great details Aircraft manual, which is primarily intended as a reference after the tutorial has been completed. It provides a reference for standard operating procedures, as well as a more in- depth look into the different systems of the aircraft. Simulation manual : Describes installation, and setup of the model as well as usage of the “Interactive Simulation Control System”. Tutorial flight, which provides a step-by-step description of a complete flight from cold & dark to aircraft shut-down after landing. This is the best manual to learn flying the aircraft. ToLiss_AirbusA340-600_AircraftManual.pdf ToLiss_AirbusA340-600_SimulationManual.pdf ToLiss_AirbusA340-600_Tutorial _____________________ Aircraft Review by Stephen Dutton 25th October 2021 Copyright©2021: X-Plane Reviews Review System Specifications: Computer System: Windows - Intel Core i7 6700K CPU 4.00GHz / 64bit -32 Gb single 1067 Mhz DDR4 2133 - ASUS GeForce GTX 1080 8Gb - Samsung Evo 1TB SSD - Sound : Yamaha Speakers YST-M200SP Software: - Windows 10 - X-Plane 11.55 Plugins: Global SFD plugin US$30.00 : Environment Engine by xEnviro US$69.90 : RK Apps XPRealistic v2 - US$34.99 Scenery or Aircraft - EGKK - London Gatwick Airport v2 by Pilot+Plus (X-Plane.OrgStore) - US$21.00 - LLBG - Airport Ben Gurion XP by Aerosoft (X-Plane.OrgStore) - US$24.99 - Full review availble here: Scenery Review : LLBG - Airport Ben Gurion XP by Aerosoft (Disclaimer. All images and text in this review are the work and property of X-PlaneReviews, no sharing or copy of the content is allowed without consent from the author as per copyright conditions) All Rights Reserved
-
NEWS! - Laminar Research - X-Plane12 Documentation updated The first real notes on X-Plane 12 have been released by Laminar Research on their Developer Documentation page and very interesting reading it makes as well... Noted under "Tech Notes" it details all the new coming items to X-Plane12 that is accessed through the PlaneMaker Application... as a side note, Austin Meyers has also totally redone the PlaneMaker Application UI to bring it into the 2020's and the more modern X-Plane UI look and feel, and the new PM UI will probably be released along with X-Plane12. Areas covered in the new documentation includes: Navigation Display Scaling Radio altimeter sensor location and offset Weight & Balance and Load Stations Airframe and Tail Anti-Ice and De-Icing boots Stabilizer Trim and Servo Windshield ice and rain protection datarefs Hydraulic systems and flight controls Flight Control Splits Pilot and Copilot Flight Control Inputs Flight director and autothrottle datarefs Changes to Radio Navigation Autopilot navigation source reference Hydraulic gear systems These changes show all the new systems coming to X-Plane12, and are well worth studying for the details they contain, certainly they are noted only for developers, but you can also use the time to understand what new areas will be coming to the "Next Generation" of the Simulator... notable are three areas. Navigation Display Scaling, Weight & Balance and Load Stations and Changes to Radio Navigation. Navigation Display Scaling "Starting with X-Plane 12 it is possible to independently scale symbols and text of the navdisplay, and also change the relative locations of symbols and labels." Weight & Balance and Load Stations "Plane Maker 12 has a new tab "Payloads" in the weight & balance setup. This article explains how to configure them. Changes to Radio Navigation Changes have been made to standalone DME, TACAN stations, and WAAS reception. In addition, Glideslope can be selected off. A lot of the areas noted here in the released documentation was shown in the San Diego Expo presentation... the presentation of the "Systems" was by Philipp Ringler at around 27:39 in the video. FlightSimExpo: X-Plane 12 Announcement Overall the X-Plane12 changes look substantial, giving you more depth and systems available for not only the developers to take advantage of, but to use in the simulations, one final point to make, is that it looks like to implement these new systems, most aircraft will have to be updated to the new formats... 2022 is looking like a very long year of updates and changes? ____________________ News by Stephen Dutton 18th October 2021 Copyright©2021 : X-Plane Reviews (Disclaimer. All images and text in this review are the work and property of X-PlaneReviews, no sharing or copy of the content is allowed without consent from the author as per copyright conditions) All rights reserved.
-
Damn... I did it again, didn't I 😫
-
Aircraft Update : PZL 104 Wilga 2000 Dynamic Generation Series v1.1 by Thranda Whoa! That was seriously quick... usually the time from the initial release to the nice little extras is around two to three months, but weeks! Thank You very much, I'll take that one! And nice little extras they are as well. The Polish PZL 104 Wilga now comes with both a Float and Amphibious version of the aircraft. X-PlaneReviews covered the huge feature list and the details in our exclusive review here: Aircraft Review : PZL-104 Wilga 2000 by Thranda Design. Download this v1.1 update and install (replace?) the release version in your aircraft folder, and you will now get two (.acf) versions of the Wilga... One selection is the original wheeled "Wilga PZL 104", and the second is the new variant of the "Wilga PZL 104 Seaplane". Amphibious version There are two options with the "Seaplane", one is the "Amphibious" version and the other is the "Floats" version. We will look at the Amphibious version first. The land based Amphibious version, is excellent... if you have already most Thranda aircraft (DHC-2 Beaver, Pilatus PC-6 Turbo Porter) you would know the sort of design and quality that you would get with this option on the aircraft... the detail of the Floats and gear is of the usual high quality from Thranda... the days of front sticks and bland rudders are now well and truly behind us. Detail is right down to components and even the nuts and bolts of the detailing, plus the springs and screw levers set out on the rudder boards, and all the required and detailed (Warning) signage... they are really very well professionally modeled to perfection, right down to even the perfect riveting of the pontoons. Raising and lowering of both the undercarriage and the twin rudders is via controls in the cockpit. The Rudders are lowered and raised by a pulley system situated on the left window screen pillar, touch the ring and the pulleys goes down to the lower hook and that action lowers the rudders.... very simple but very effective. You can also raise and lower the Rudders via the pop-out MENU/MISC that is situated on the tab on the far left centre of your screen. Notable here, is that it is the same Menu option point to switch from the "Amphibious version" to the non-wheeled "Float version" lower left box. The undercarriage is retracted and lowered via a panel set centre instrument panel... the panel's lights can also be set to be bright or DIM, if flying at night. On the water the floats... "well float nice". You are certainly (obviously) sitting far higher up than in the wheeled version, but this aspect is more noticeable in such a small aircraft... the other point to make is power... ... the Wilga 2000 Textron Lycoming IO-540-K1D5 naturally-aspirated rated engine at 290 horsepower at 2,575 RPM is a powerful powerplant for an aircraft of it's size, but you are now also weighting it down with a huge platform and the pontoons sitting below you, so it takes out a lot of your speed and drag, both in the water and in the air... the Wilga is not sluggish by any means, but you more than feel the extra load you are carrying around. So the usual is required, a bit of flap (not too much because of flap drag), keep the nose up (heaven's... you don't want that pontoons to go under nose first), and at around 50 knts you should clear the water... once up retract the flaps and rudders for more forward and climb speed. In the air the Wilga looks really good, even and if actually better proportioned than with those usual bendy wheels out front. Floats version Like noted, you switch over to the clean float version via the MENU/MISC selection... again even without the undercarriage it shows off the nice lines of the floats, the high quality textures and built in PBR (Physical Based Rendering) looks and also gives you some very natural and nice reflections. Slew Mode With the Float and Amphibious versions now available, it also allows you to use the Thranda feature "Slew Mode"... this feature over-rides the X-Plane positioning and movement dynamics. It is accessed again on the MENU/AUDIO-SLEW panel far right. Basically you can control the heading (Delta) in degrees, and move the aircraft in any 2d direction via a cross-hair control... It is a cool little tool that is mostly used to dock or manoeuvre the aircraft into jetties or docking areas. But remember however to turn the Slew feature off when going back to X-Plane or using the replay mode... if not then you can then find yourself in Space! Elon Musk would be jealous... Liveries The Floats are all matched up to the same liveries as on the aircraft, giving the aircraft a completeness... no grey standardised pontoons here. Two other updates areas with the release of v1.1 includes : -Fixed strobe lights and improved nav light visualizations -Touched up some PBR graphics ________________ Summary Very quickly after their release of the Polish PZL 104 Wilga 2000 from Thranda Design, now comes the additions of both a Float and Amphibious versions of the aircraft. Usually released months later, these great new features have come at a quick clip to expand out the versatility of this great little aircraft, this also brings in the use of the great "Slew" tool that allows you to manoeuvre the aircraft into jetties or docking areas. Detail and quality is guaranteed, with top rate modeling and clever aircraft detail which is also and as usually totally excellent, and you can (again) also dynamically change the Dirt, Grunge, scratches and nicks externally and internally on the fly, so this lovely aircraft can be as clean or as dirty as you want. This Wilga is also part of the "Dynamic Generation Series", that allows a customised 3D instrument panels with 50 options, (Including Aspen EFD 1000, and support for RealityXP GTN750) and you can also "Create" your own liveries and the package includes the advanced custom flight dynamics tool "DynaFeel" This new feature option of Floats and and Amphibious version is also free! So all you have to do is redownload the aircraft from the X-Plane.OrgStore, or use the provided Skunkworks updater tool. If you are a regular user of Thranda Design aircraft, then you know already what a great deal and that the huge list of features provided are both excellent, for everyone else the PZL 104 Wilga 2000 comes obviously... Highly Recommended. ______________________________ Yes! the PZL-104 Wilga 2000 v1.1 by Thranda Design is NOW available from the X-Plane.Org Store here : Wilga PZL 104 Dynamic Generation Series Price is US$39.95 Now priced at US$34.95 Requirements X-Plane 11 Windows, Mac or Linux 4 GB VRAM Minimum. 8 GB+ VRAM Recommended Download Size: 1.3 GB Current and Update Review version 1.1 (October 13th 2021) The plane comes with an auto-updater _____________________ Update Review by Stephen Dutton 15th October 2021 Copyright©2021: X-Plane Reviews (Disclaimer. All images and text in this review are the work and property of X-PlaneReviews, no sharing or copy of the content is allowed without consent from the author as per copyright conditions) All Rights Reserved
-
News! - Aircraft Updated : BAe 146 Professional updated to v1.2.3 Just weeks after the significant update (v1.2.1) that included the UFMC (Universal Flight Management Computer) installation into the JustFlight BAe 146 Professional aircraft, here comes a quick follow up update in v1.2.3. Again the fixes focus on the newly installed UFMC, here is the v1.2.3 changelog... UFMC fixes: -RTE LEGS page number not updating -HDG mode does not work with FPLN loaded -Acceleration altitude missing from FMC. Added to Takeoff REF PAGE #2 -Level off at MCP altitude on GS. On GS engaged the Aircraft levelled off at MCP Altitude -Blocking MCP altitude on RNAV APP. At RNAV approach the MCP altitude was not possible to change -VS/IAS flickering on RNAV approach -IAN approach MCP altitude problem fixed -Distance readout and groundspeed not working after C&D start -Takeoff N1 value. Now N1 At takeoff match the Aircraft value -VNAV Altitude correct behaviour. RNAV mode fixes: -AP will be in RNAV mode if any of the HSI switchover switches (pilot or copilot) is in the RNAV position -LNAV and VNAV only works in RNAV mode -If VNAV or LNAV is engaged, if the HSI switchover is changed to NAV, VNAV and LNAV will disengage -When an RNAV approach is selected on the Approach PAGE, when close to the IAF waypoint, you have to press GS AP button to arm the RNAV approach. The status will change from White to green when it engages the approach. -When a VOR, LOC or GLS approach is selected, when close to the IAF Waypoint, you have to press GS AP button to arm the approach, GS and V/L will arm. Because these approaches uses V/L AP mode (need tune the proper navigation frequency) you have to change the switchover to NAV (both of them) to let the autopilot engage the V/L mode and perform the approach -For ILS approaches you have to change from RNAV to NAV to capture the LOC and GS path I highlighted the "HDG mode does not work with FPLN loaded" bug, because it was seriously annoying... When leaving the runway and moving over to the Autopilot, if you switched over to the "Heading" mode, you couldn't set the actual heading if you had a flightplan in place, this caused me all sorts of pain and anguish in wanting to connect into the flightplan downstream of the airport.... it is fixed thank god, "oh the time and the trauma that one caused". I like the detailed RNAV approaches, and here in v1.2.3 JustFlight have focused a lot of attention on that particular area, but to note that for ILS Approaches you still have to switchover from the RNAV mode to NAV mode to capture the ILS beams, as noted it is always best to read the manual in detail, as the aircraft has very detailed (authentic) systems to be worked through. A full overview of the UFMC Universal installation is here: Aircraft Update : BAe 146 Professional v1.2.1 by Just Flight I found the JustFlight British Aerospace 146 Professional a very detailed simulation, it is an aircraft that does require time and hours on the clock to get the very best return for the simulation, that is the deal... it won't come to you quickly, but that is also the attraction and shows how deep you can now go in X-Plane simulations. ___________________________________ Yes! the British Aerospace 146 Professional v1.2.3 by JustFlight is now available from the X-Plane.Org Store here : BAe146 Professional - JustFlight Price is US$74.99 Requirements X-Plane 11 Windows, Mac or Linux 4 GB VRAM Minimum - 8 GB VRAM Recommended Download Size: 3.8 GB Current Version: Version 1.2.3 (October 13th 2021) Note!, you can use the Skunkcrafts updater to update the aircraft to the latest version, or download the v1.2.3 update directly from your X-Plane.OrgStore account. ________________________________________ News Update by Stephen Dutton 15th October 2021 Copyright©2021: X-Plane Reviews Disclaimer. All images and text in this review are the work and property of X-PlaneReviews, no sharing or copy of the content is allowed without consent from the author as per copyright conditions) All Right Reserved.
-
NEWS! - Scenery Released : UHSI - Iturup airport, Russia by Xenomorph A new Russian scenery has been released by Xenomorph. But it is an interesting one? First is where do you think the scenery is placed? Well it would probably be nowhere of where you actually think it is, but on an island you would fly over and not think anything about. The fascinating thing here is that the airport is on Iturup Island (Sakhalin Oblast, Russia), but Ilturp Island is situated on the northern chain of Islands that sprout out of the very north of Hokkaido, of which is Japanese. In fact the airport is very easily accessible from Japan, and not so much from Russia itself, which makes it interesting to explore a new area of X-Plane. In fact on June 17, 2017, Iturup airport accepted a passenger flight from Japan for the first time. The airport is located near the villages of Kurilsk, the villages of Reidovo and Kitovoe, with which it is connected by a new highway with an asphalt surface. Once the airport accepted a Boeing 737-300 of the Aurora airline. Features Object models with high detail PBR textures Night lighting High quality vegetation orthophoto textures Notable is that also Xenomorph's UKOO - Odessa, Ukraine scenery has just had a major update to Version 1.07 (October 12th 2021), and is certainly well worth also checking out... The scenery is priced at a very low US$11, and well worth the money to explore this interesting area... check it out. Images are courtesy of Xenomorph __________________ Yes!... UHSI - Iturup airport, Russia by Xenomorph is Available from the X-Plane.Org Store here : UHSI - Iturup airport, Russia Price is US$11.00 Requirements X-Plane 11 Windows, Mac or Linux 4GB VRAM Minimum - 8GB+ VRAM Recommended Download Size: 566 MB Current version: v1. (October 12th 2021) ___________________________ News by Stephen Dutton 13th October 2021 Copyright©2021: X-Plane Reviews (Disclaimer. All images and text in this review are the work and property of X-PlaneReviews, no sharing or copy of the content is allowed without consent from the author as per copyright conditions) All Rights Reserved
-
Aircraft Release : Airbus A320-214 Ultimate by FlightFactor Aero
Stephen replied to Stephen's topic in Airliners Reviews
Yes, full capability... as in the real Airbus, very good it is as well. -
Scenery Review : LLBG - Airport Ben Gurion XP by Aerosoft I have never flown to Israel, flown over it at 40,000ft... but never actually landed there. X-Plane has been slowly migrating closer though. In the last few years a lot of Mediterranean ports have been popping up in Greece, Turkey and Cypress, but not actually in Israel itself... head of the eastern Mediterranean push has been Aerosoft, in fact in their last release was actuall Turkey with the mega LTFM Airport Istanbul XP which is basically in your own Israeli backyard. The Israeli release for X-Plane is a direct conversion of the PrePar3D David Rosenfeld creation. But still updated with the Terminal 3 and the old Terminal 1 buildings (expansion of Terminal 1, which has a new dedicated domestic flights terminal, and a major expansion of Terminal 3), the SAM (Scenery Animation Manager) plugin is also used to replace the SODE animated jetway system in P3D. An important note is that now you also have to use the new "Aerosoft One" application to install and manage your Aerosoft X-Plane scenery installations (You also have to create an account if you don't have one). It will also install the latest SAM v3.0 plugin as well... but it doesn't work correctly? I had to reinstall v2.0 to get the gates to (work and) line up correctly with the aircraft? Ben Gurion Airport is commonly known by its Hebrew acronym as Natbag (נתב״ג), and the airport is the main international airport of Israel and the busiest one in the country. The airport is located on the northern outskirts of the city of Lod, about 45 km (28 mi) northwest of Jerusalem and 20 km (12 mi) southeast of Tel Aviv. Originally named Lod Airport, it was renamed in 1973 after David Ben-Gurion, Israel's first Prime Minister. Notable is that here I am using the SFD (ShortFinal) Global object addon. It creates (in this case) Middle-Eastern bright white autogen to replace the American/European default autogen... and here it works brilliantly (The default autogen US look is below as a comparison), so it is a well worth considering addition. The airport began during the British Mandate for Palestine as an airstrip of two unpaved runways on the outskirts of the town of Lydda (now Lod), near the Templer colony of Wilhelma. It was built in 1934, largely at the urging of Airwork Services. The first passenger service at the new airport was the Misr Airwork route Cairo—Lydda—Nicosia, inaugurated on 3 August 1935. Subsequently, Misr flew via Lydda to Haifa and Baghdad. The first continental European airline with a regular service to Lydda was LOT Polish Airlines since 4 April 1937. Ben Gurion Airport נמל התעופה בן-גוריון مطار بن غوريون الدولي IATA: TLV - ICAO: LLBG 03/21 - 2,772m (9,094ft) Asphalt 08/26 - 4,062m (13,327ft) Asphalt 12/30 - 3,112m (10,210ft) Asphalt Elevation AMSL 134 ft / 41 m The airport layout is really in two separate areas, the newer Terminal 3 (28 October 2004) and the older original Terminal 1 (1958). Other areas are in Terminal 2 which was inaugurated in 1969, but later incorporated into Terminal 1... Also Terminal 4 was built in 1999, which was meant to handle the crowds expected in 2000, but it was never officially opened. Terminal 3 Terminal 3, which opened on 28 October 2004, replaced Terminal 1 as the main international gateway to and from Israel. The building was designed by Skidmore, Owings & Merrill (SOM) - Moshe Safdie & Associates - TRA (now Black and Veatch) and was designed as a linking structure with the Airside departure areas and gates in a central hub and concourse spoke arrangement. The hub (and the icon of the airport) is dominated by a rotunda, with an inverted dome on top, which is pierced by an oculus through which a waterfall flows down into forming a fountain into the open terminal and shopping area space below. Each Concourse is noted by a letter... B (Stands B2-B9), C (Stands C2-C9), D (Stands D2-D9) and E (Stands E2-E9) Concourse B Concourse C Concourse D Concourse E In reality each concourse and gate/airbridge layout is identical, so there are no differential points or areas to highlight. The only difference, is that Concourses B, C and D all have the covered logo "Bank Hapoalim" airbidges, were as E has the open glass airbidges, and note the excellent airbridge layout arrangements.... all airbridges are SAM - "Scenery Animation Manager "powered and active. All glass is excellent with lovely green tinted see though glass on the concourses. The interior is basic, but again well done visually from the external. All ground clutter is local, EL-AL and Israeli branded, and really well done... there are a few animated vehicles but they are certainly not overwhelming, but there is movement around the ramps. Landside The main arrival terminal is well done, and is connected to two large carparks by overhead walkways. Certainly not ultra detailed, the landside is a bit bland in an overall sandy stone colourless feel... the roads don't help in being photo based but not as washed out as most Aerosoft branded landsides, but a few dark coloured roadways and signage would have certainly helped in the visual department. Main terminal glass is not see-through, but it is still well done to be very realistic and match well in with the other area see-through glass installations (important). Part of the main Terminal 3 complex is the Ben Gurion Airport Air Traffic Control Tower which is an 18-story airport tower set at 100 meters height. A visually nice design the main tower has been nicely and perfectly recreated here. The control work area looks nice, but on closer inspection there are no internals, and you can still see the airport through the floor of the control room? The X-Plane tower view as per usual Aerosoft is not set correctly, but it is positioned away on the frame of a (working) radar tower? At TLV there are three towers altogether, the main one here and the two smaller ramp towers, one between C and D concourses, and one on the end of the unfinished Terminal 4 complex (both arrowed below). Terminal 1 The original Lod Airport Terminal, was closed in 2003 and then re-opened in 2007 as a VIP and domestic terminal following extensive renovations to cater for summer charter and low-cost flights. The older terminal area sits at the cross position at the threshold of runways of both RWY 03 and RWY 30, and both hold points can be accessed directly from the Terminal 1 aprons. The original classic building has been almost totally swallowed up by the larger new external structures, but the old control tower designates were it is positioned in context to the later extensions. The old walk on-walk off layout has been replaced by buses to ferry passengers out to the remote stands, notably Apron N (Stands N11-N24), Apron L (Stands L1-L6 with L4A,L4B and L5A) - note stands K1, K3 and K5 (wrongly numbered in the scenery?) are used with the EL-Al Maintenance area, and Apron J (Stands J1 - J13). Prominent is the VIP (Masada Lounge) and Elite (Fattal Terminal) building on the western end of the Terminal Complex. The EL-AL maintenance facility is very big, with one major maintenance hangar and two medium sized hangers and facilities, internal detail of the hangers is all very good and the hangers are highly usable. Cargo is not a big facility here at TLV (Swissaport Cargo), but just a few warehouses on the N Apron... the stands are incorrectly numbered in the B category, not the official chart N category, which shows the age of the original scenery. Notable that behind the Cargo centre on the main entrance to the Terminal 1 zone is the Memorial Monument to Khativa 8. Terminal 4 This terminal, built in 1999, and was meant to handle the crowds expected in 2000, but it was never officially opened. To date, it has only been used as a terminal for passengers arriving from Asia during the SARS epidemic. Another use for the terminal was for the memorial ceremonies upon the arrival of the casket of Col. Ilan Ramon after the Space Shuttle Columbia disaster in February 2003 and the arrival of Elhanan Tannenbaum and the caskets of 3 Israeli soldiers from Lebanon in January 2004. The apron is Apron EHS, but the designations are A (Stands A1-A9 with B options). Overall the modeling is excellent, and the form of the building in it's non-completed state is also very authentic, there is a powerplant facility at the rear of the Terminal. Parallel east on RWY 03/21 is Taxiway T that morphs into a remote stand area called V2, this adjoins another remote stand area V1, mostly both for aircraft long-term parking... the Yellow hanger is a very visual point of reference of the airfield, certainly for RWYs 03 and 21. To the far east of the field are several off airport Infrastructure zones... both are very good in giving the area a fill out the look and feel of the airport (which is basically the job of these Infrastructure style objects)... one area is situated directly behind the V1 and V2 aprons... .... and a lot of Infrastructure coverage is provided, however the orthophoto underlays runs out quite early and exposing the buildings to a blank textured area, and it is quite noticeable.... the second Infrastructure zone called the "Airport City Business Park" is positioned on the main entrance to the Terminal 1 zone, which includes the Avenue Conference Center, Hevel Modiin Cultural Hall, DHL and AT&T Israel with others which are all represented here... again however the orthophoto textures runs out early and that visual aspect is highly visible on the Rwy 30 approach. Lighting Overall the lighting looks good, but there is a lot of the original boring FlightSim window lighting that again shows the original age of the scenery. Areas were the X-Plane lighting has been added in is actually very good... and it is nice and bright down on the ramps, and the carparks are well lit in a lighter tone... ... however two areas do stand out. The Landside area in front of the arrival terminal is a black hole, odd because most areas including the inverted dome is nicely lit. Another annoyance is the control tower windows are lit, not brightly thank god, but still highly visible. Terminal 1 is again very early FlightSim in lighting, but the signage is good... ... Infrastructure lighting is basic, but the EL-AL hanger looks good especially with the well lit internal areas. Navigation signage is bright and clear, but not ground reflective. Ground Textures Textures are good, but are a bit Lo-Res, there is not that sharp detail, but a sort of slight blurriness that says "formulaic" more than detailed quality. Join lines are a but a bit too straight and harsh to be realistic, but overall you are not going to notice it all too much. Ditto the textures in wet reflection, the PBR is there, but not very active and reflections were very hard to create, with still a sort of flatness and no realistic concrete or asphalt grooves... passable again. The famous "Aerosoft Grass" is widely used, but some and mostly the inner areas are only pure textures, unfortunately you notice it? ATC Routes Not refined are the X-Plane ATC routes. (Global Traffic) the developers note; "The X-Plane Default AI Traffic is not supported", so aircraft are popping their tails up in the air, aircraft are appearing through buildings, and Cargo aircraft are sitting at passenger terminals and vice-versa? not at all very realistic! ___________________ Summary There are not many Israeli sceneries in X-Plane. Now Aerosoft has released Airport Ben Gurion XP, which is situated close to both Tel Aviv and Jerusalem, and it is the largest airport in Israel. This scenery is a conversion of the PrePar3D David Rosenfeld version. The airport is named after David Ben-Gurion, Israel's first Prime Minister and the Hebrew acronym as Natbag (נתב״ג). The airport is basically two areas in one with the new Terminal 3 and the older Terminal 1 complex now a LCC and VIP terminal. Modeling is very good, certainly the hub and concourse spoke Terminal 3, with the inverted dish as a central focus, glass is also exceptional with modeled interiors on the end of the spokes. SAM active airbridges are available at each terminal stands and all are nicely Israeli logoed or clear. All the auxiliary areas are well covered, with the semi-built Terminal 4, the EL-Al Maintenance area, Apron N Cargo area and all surrounding Infrastructure... detail wise the scenery is very good, and very well done. But the original FlightSim source material does show, being typical Aerosoft, as usual they miss the finer areas of X-Plane. Night Glass is and looks old, blank texture areas (some with placed objects on top). Ground textures are good but not exceptional, and the ATC routes are not at all refined. A lot of the stand lettering and numbering is also wrong to current ground charts. The SFD (ShortFinal) Global object addon is however highly recommended here at TLV. First time in Israel, and I really like what I see... this is a typical but very good Aerosoft scenery, yes a few FlightSim foibles do show through and they are noticeable, but overall this Tel Aviv scenery is well worth adding to your collection as an excellent destination from any European port... yes highly Recommended. ___________________________________ Yes! the LLBG - Airport Ben Gurion XP by Aerosoft is now available from the X-Plane.Org Store here : Airport Ben Gurion XP Price is US$24.99 Features: Accurate Terminal 3 and the old Terminal 1 buildings, Concourse, hangars, towers, and airport layout Dynamic Lighting Detailed animated jetway models (using SAM plug-in) Detailed ground markings High resolution (7cm-30cm pixel) photoreal ground textures Thousands of accurate hand-placed autogen objects Fully optimized for smooth simulation experience Requirements X-Plane 11 Windows, Mac or Linux 4 GB VRAM Minimum - 8 GB+ VRAM Recommended Current and Review Version : 1.0 (September 20th 2021) Installation and documents: Installation is via the NEW "Aerosoft One" application, account is required. Scenery uses an Alias (zero bytes) pointer file. Hard disk: 2 GB of free disk space is required, Installed version is 1.95Gb Aerosoft - LLBG Ben Gurion Airport SAM Plugin - Scenery Animation Manager - Suite 2.0 is required for this scenery (SAM Version 3 is available but it didn't work with the scenery?) Documents Manual is provided (20 Pages) in German and English. Manual is available in a pdf download though the Aerosoft One" application. Manual_BenGurion_XP_de-en_web ________________________________________ Scenery Review by Stephen Dutton 14th October 2021 Copyright©2021: X-Plane Reviews Disclaimer. All images and text in this review are the work and property of X-PlaneReviews, no sharing or copy of the content is allowed without consent from the author as per copyright conditions) All Right Reserved Review System Specifications: Computer System: Windows - Intel Core i7 6700K CPU 4.00GHz / 64bit -32 Gb single 1067 Mhz DDR4 2133 - ASUS GeForce GTX 1080 8Gb - Samsung Evo 1TB SSD Software: - Windows 10 - X-Plane v11.55 Addons: Saitek x52 Pro system Joystick and Throttle : Sound - Bose Soundlink Mini Plugins: Environment Engine by xEnviro US$69.90 : Traffic Global - JustFlight-Traffic (X-Plane.OrgStore) US$52.99 : Global SFD plugin US$30.00 : Scenery Animation Manager - Suite 2.0 - Free Scenery or Aircraft - None-

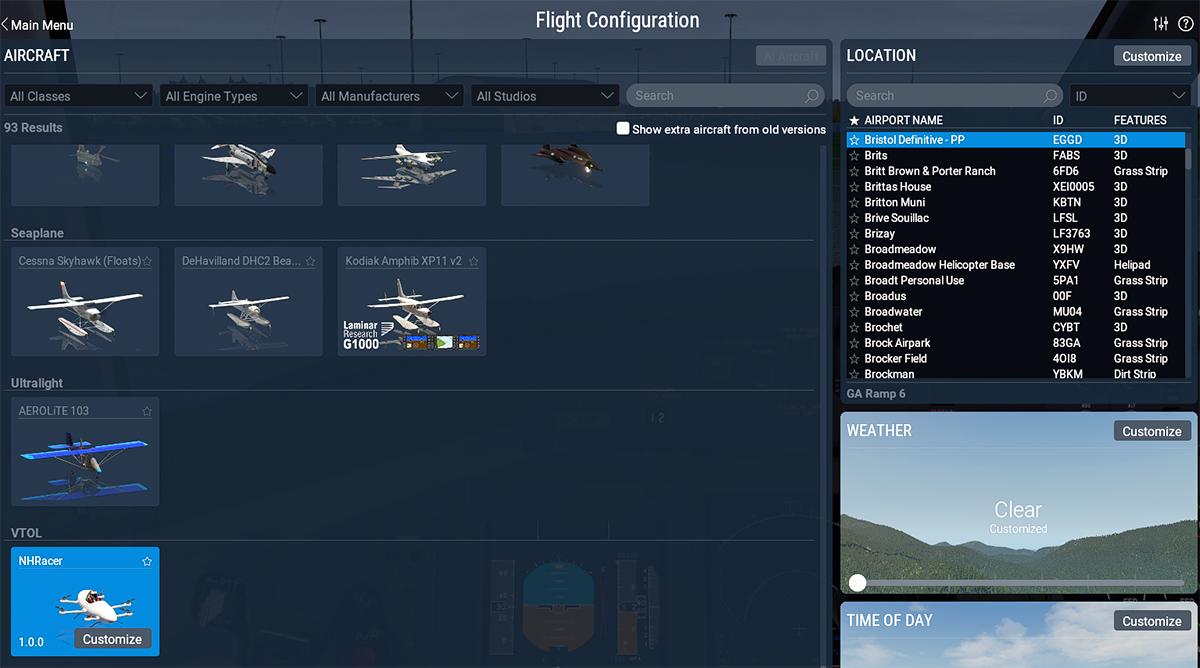
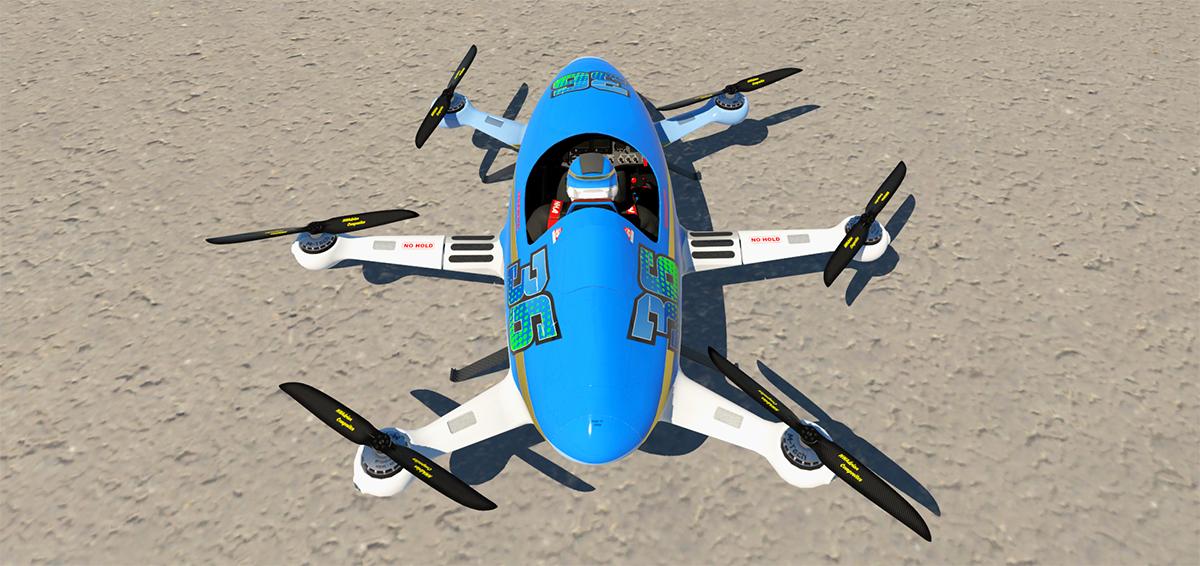
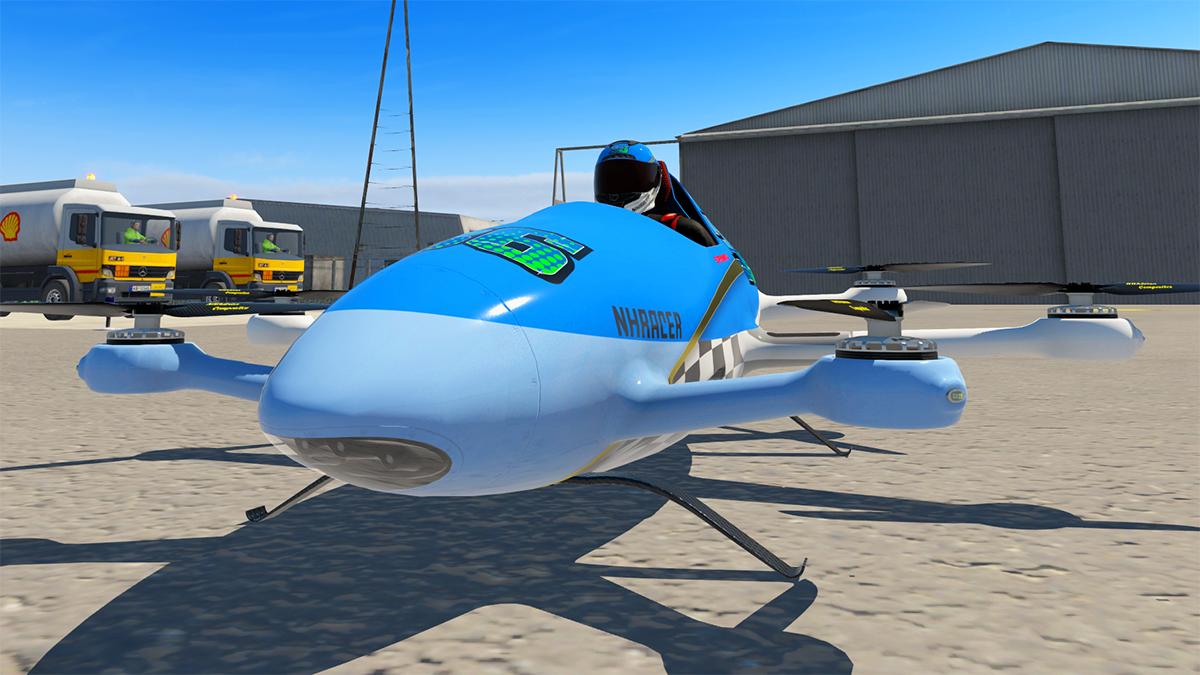
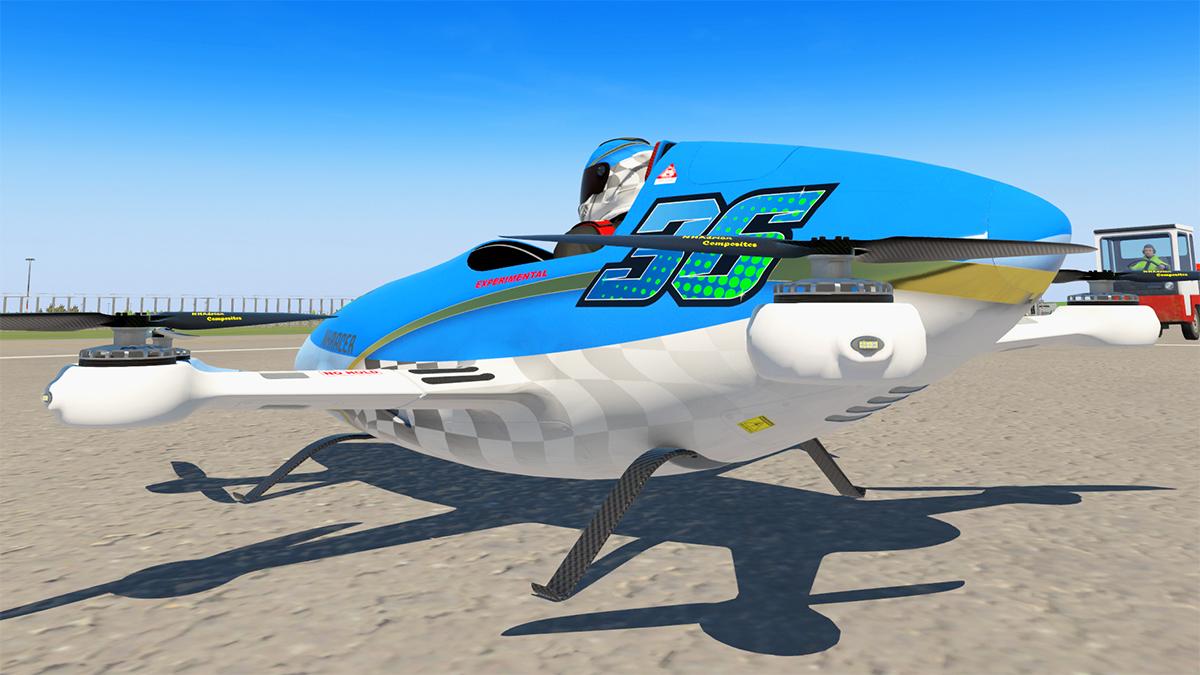

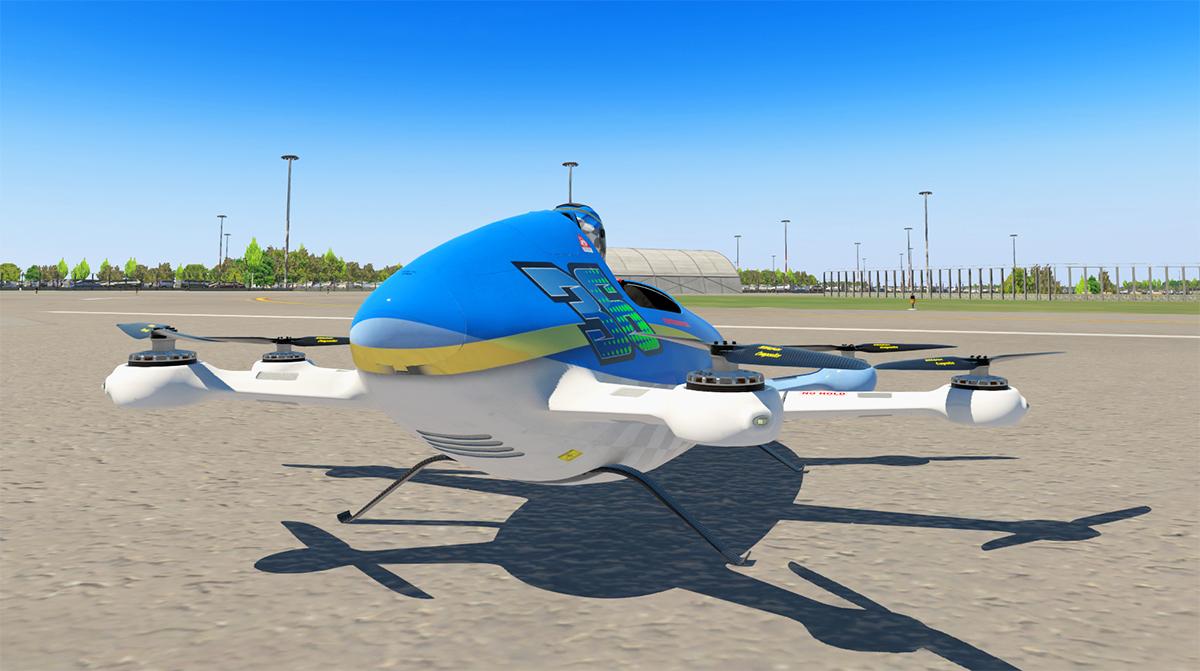
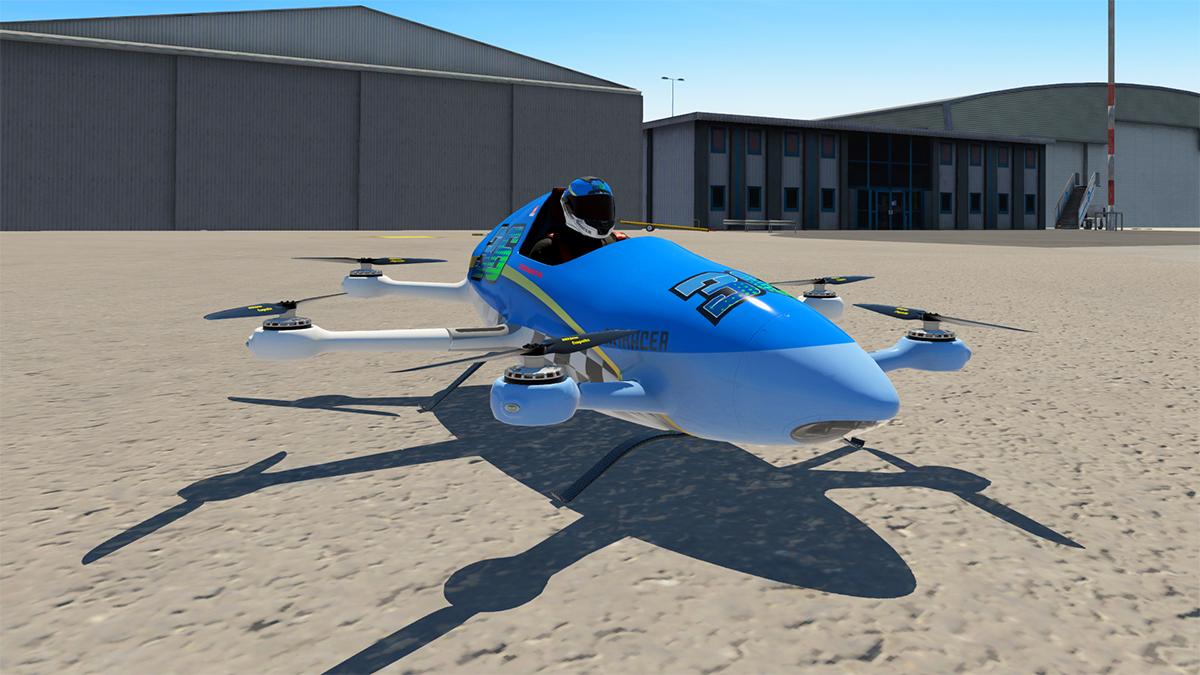


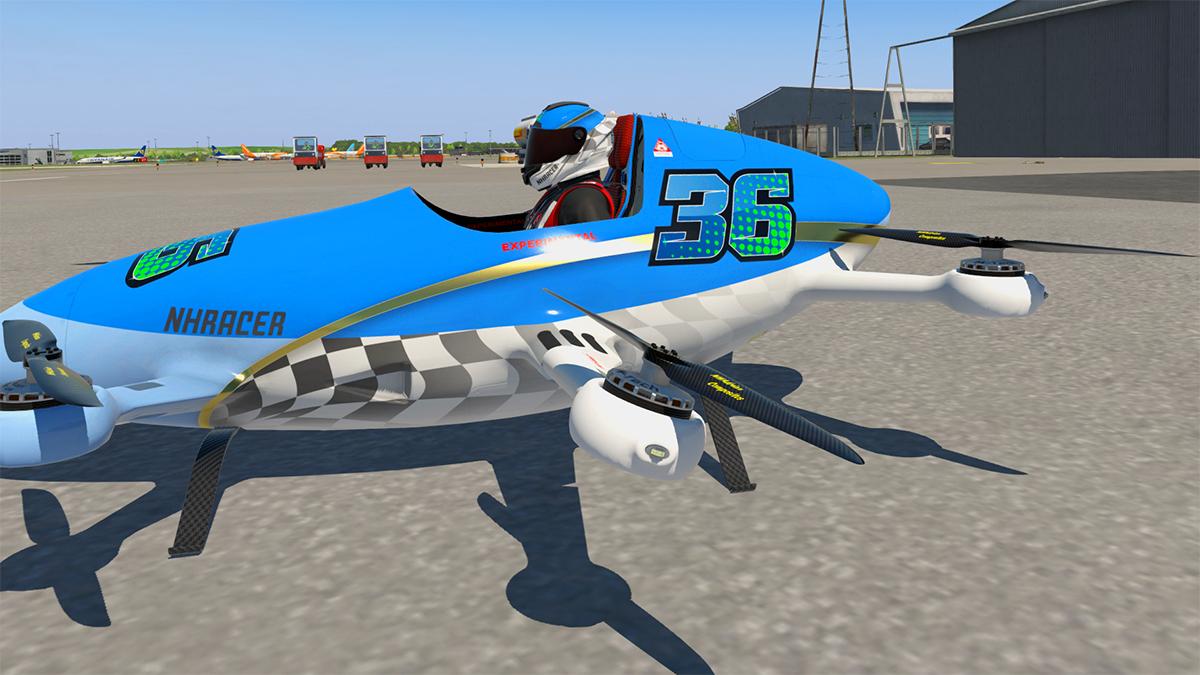

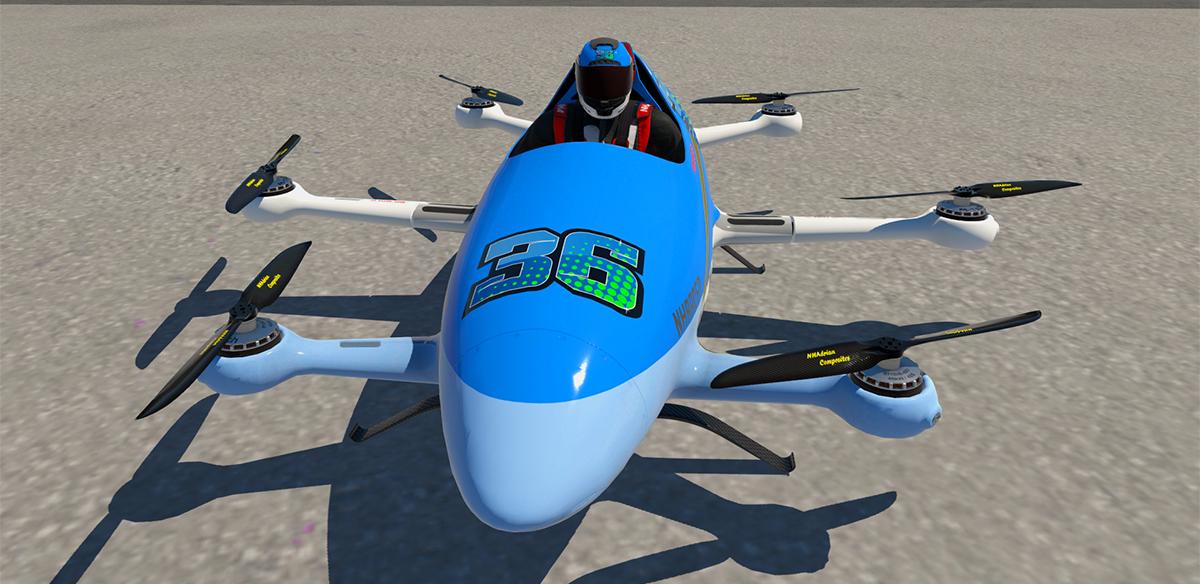
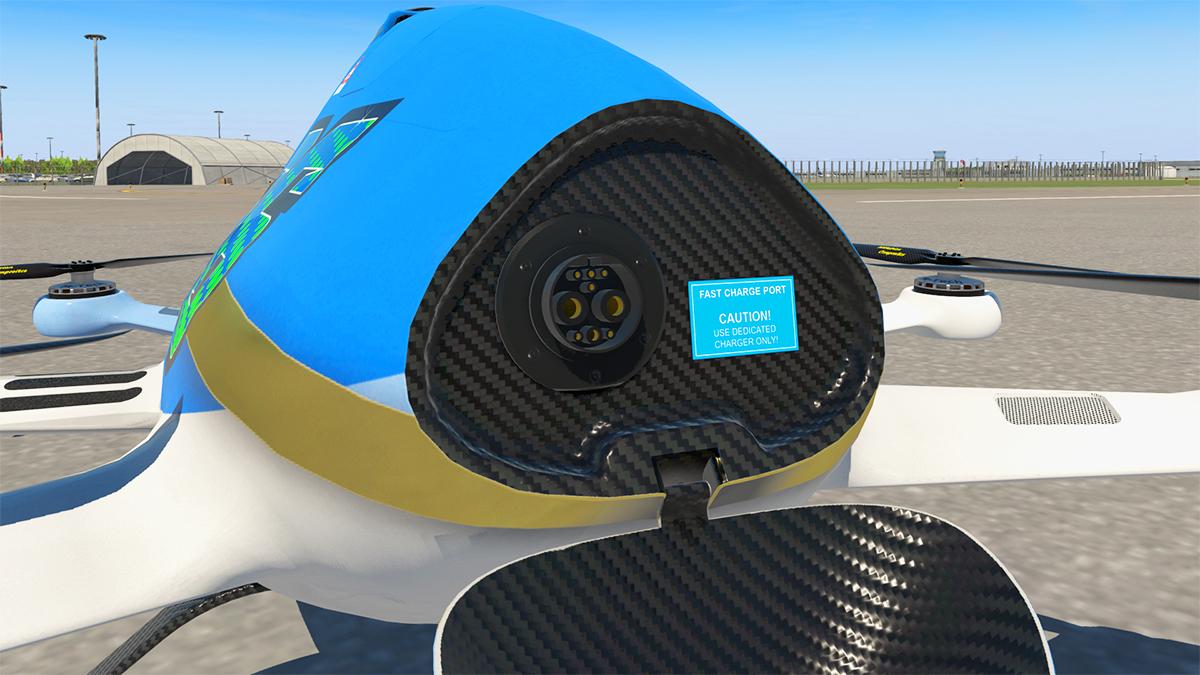

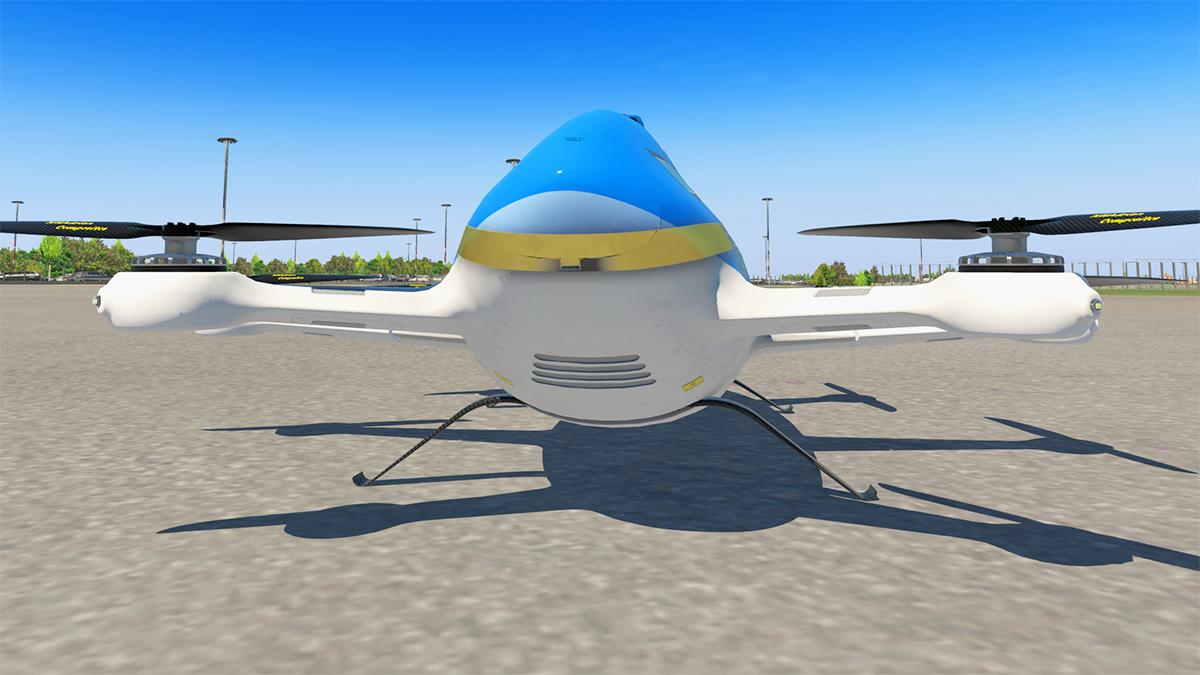
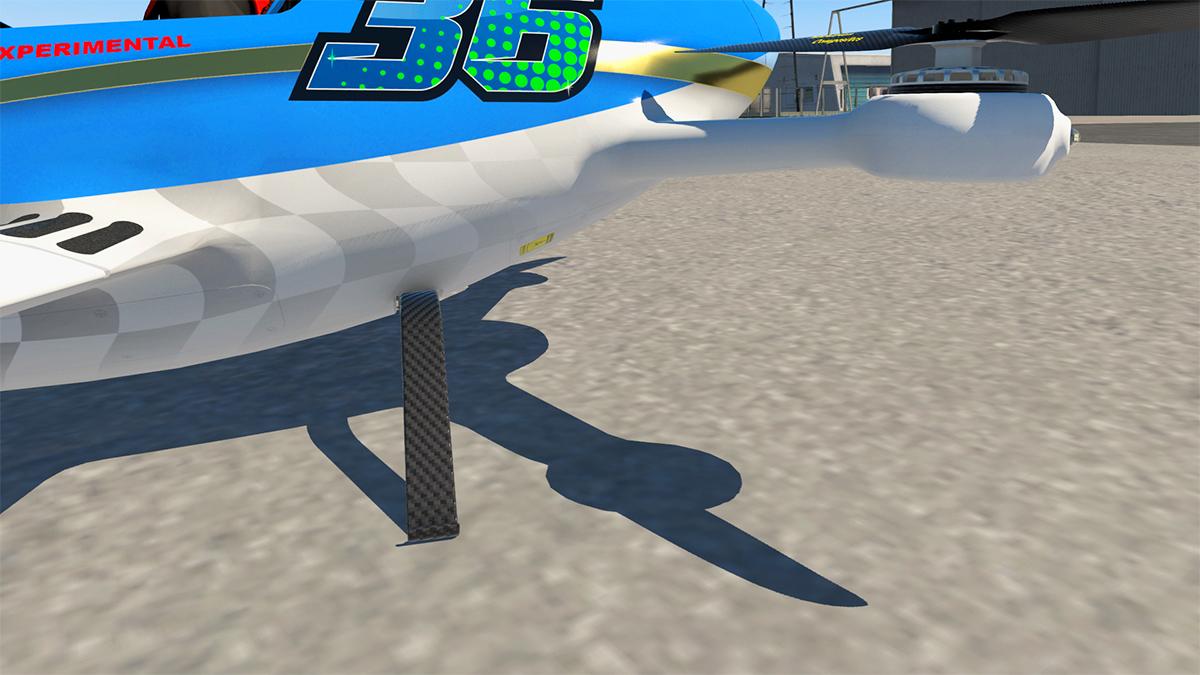
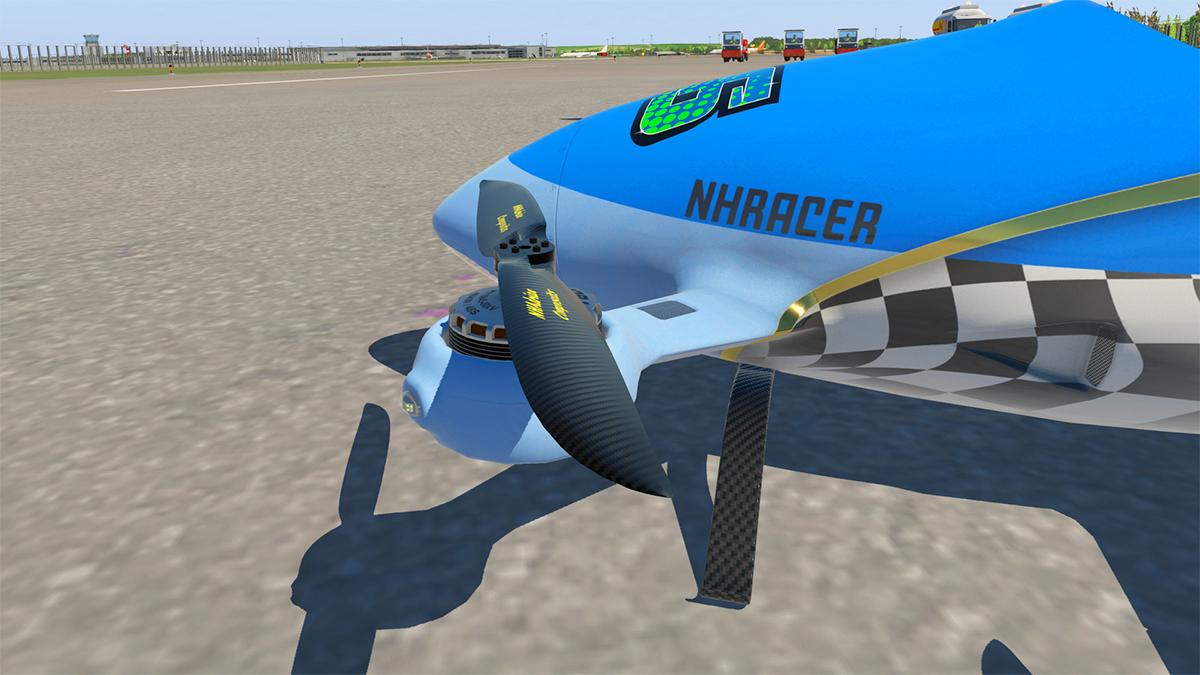
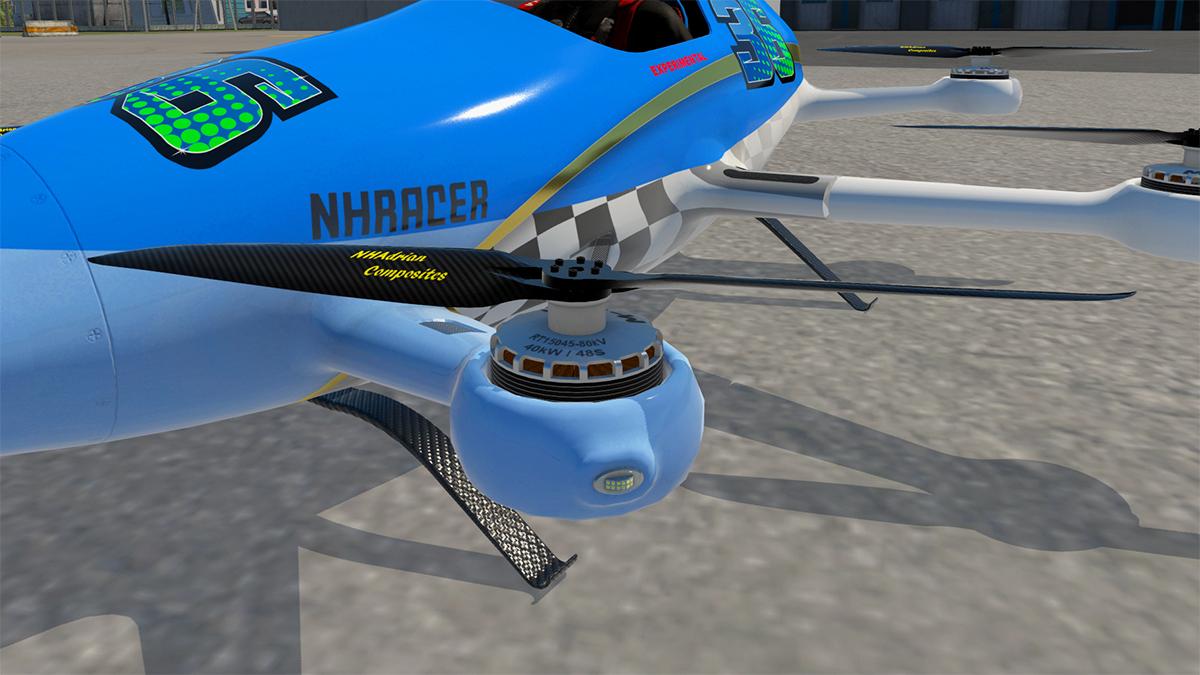


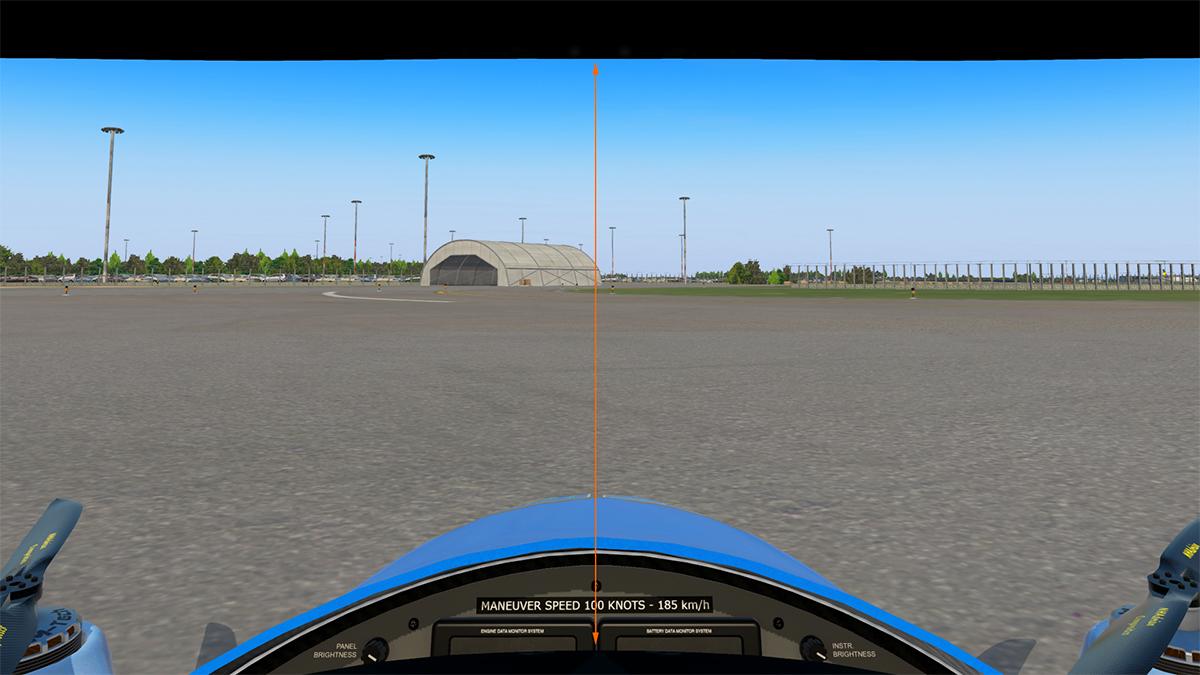
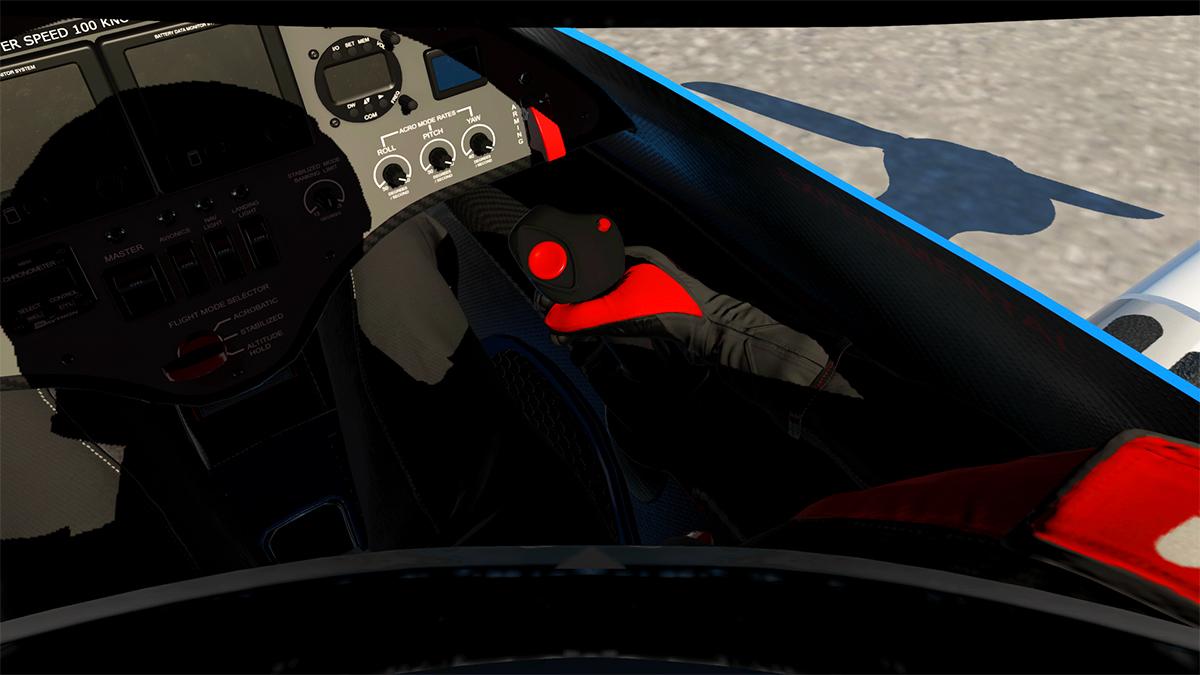
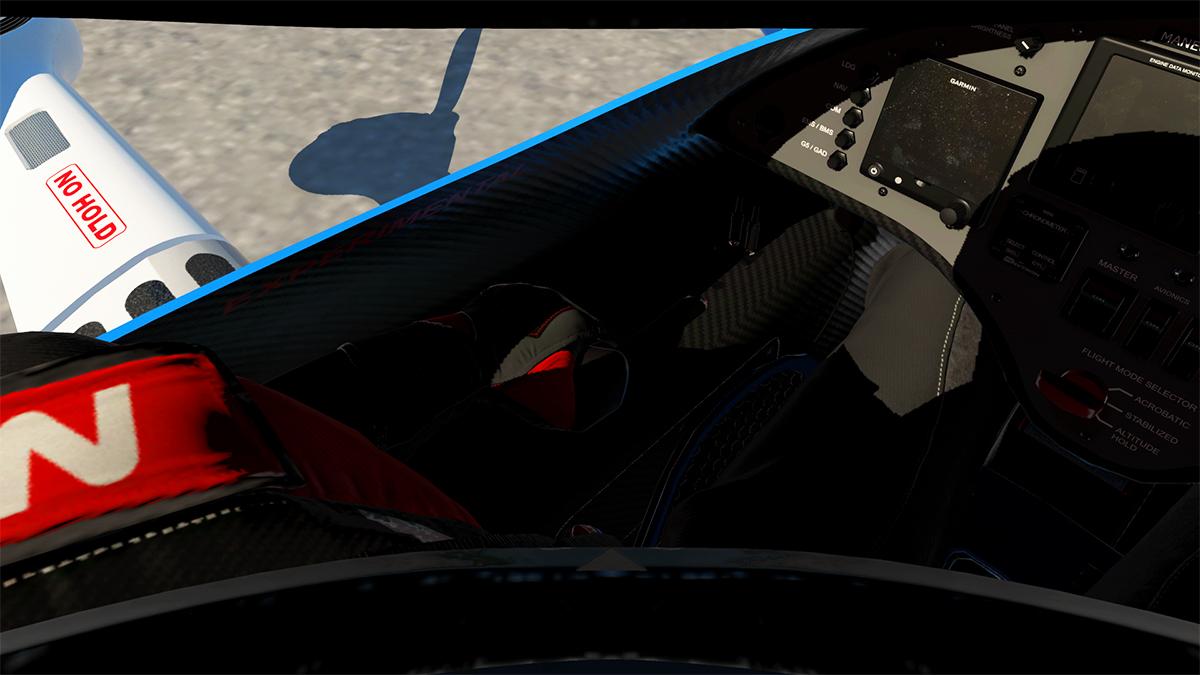
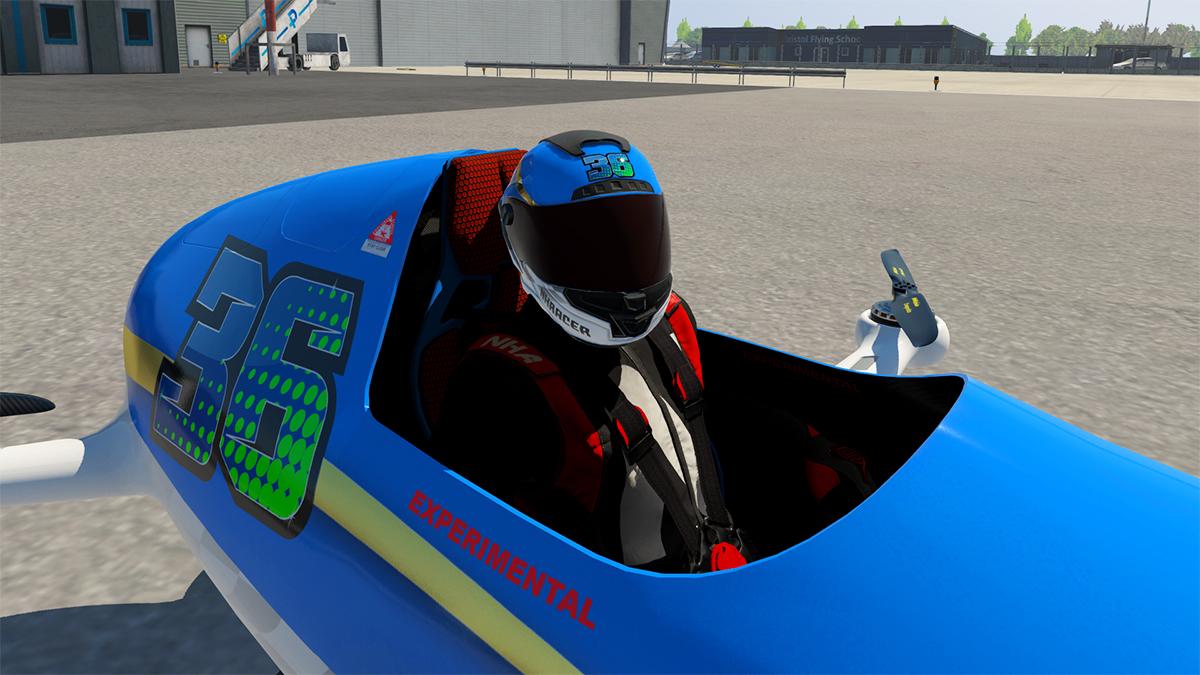
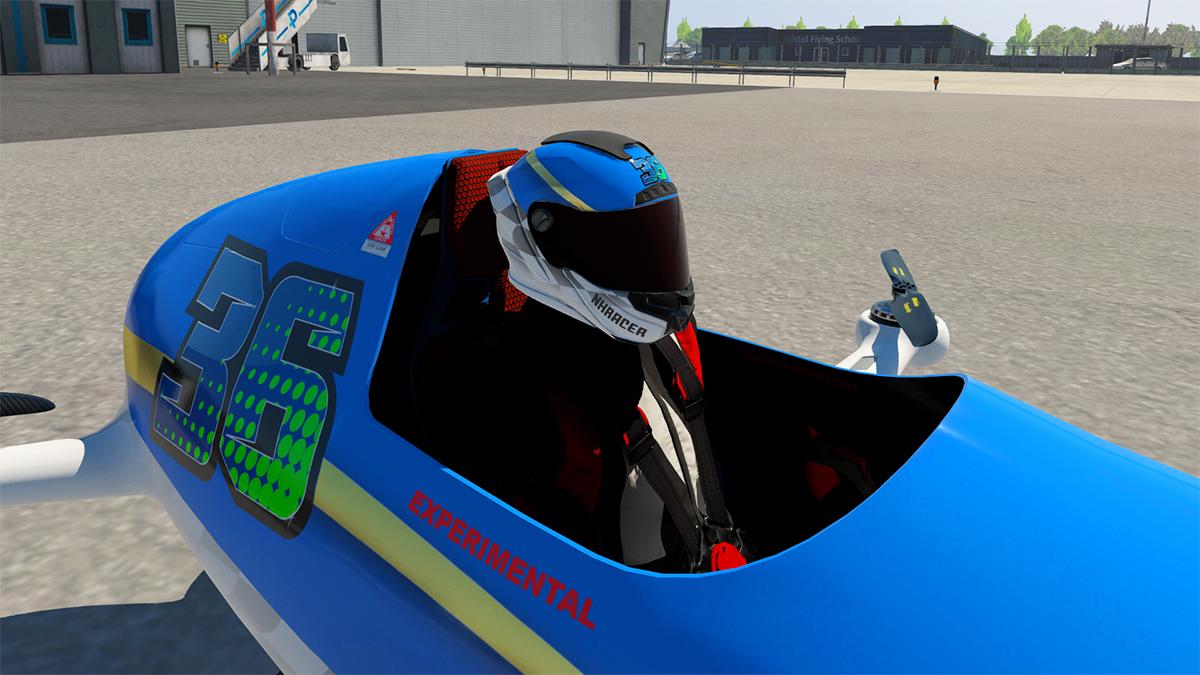
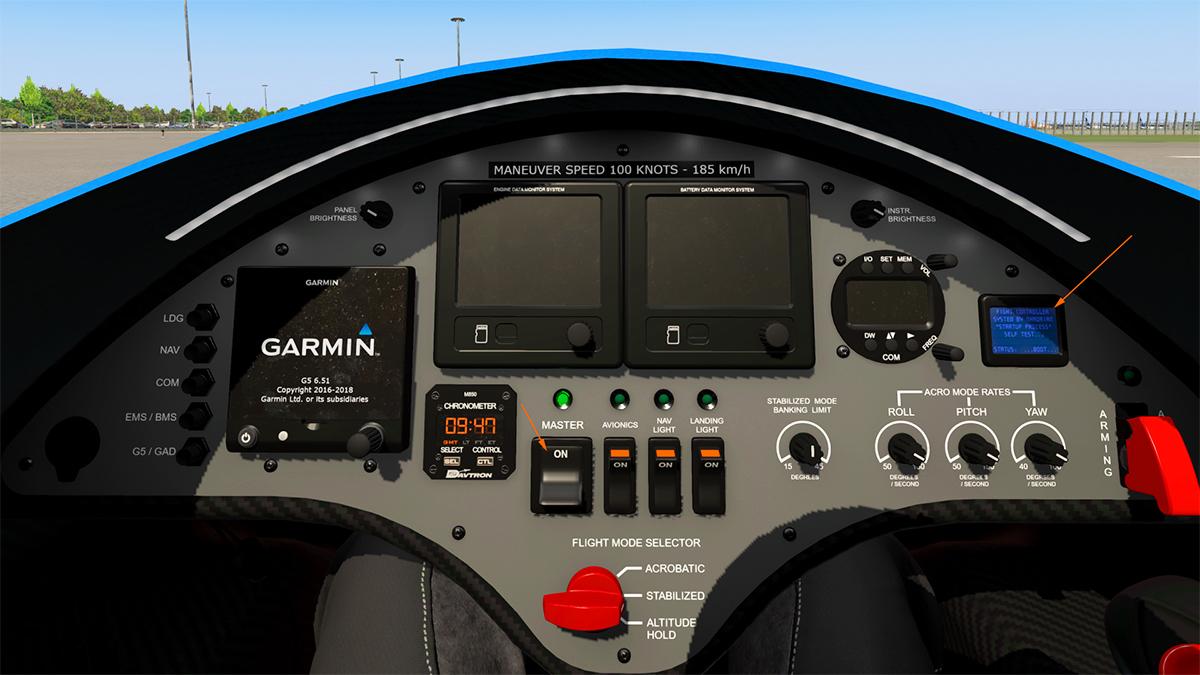
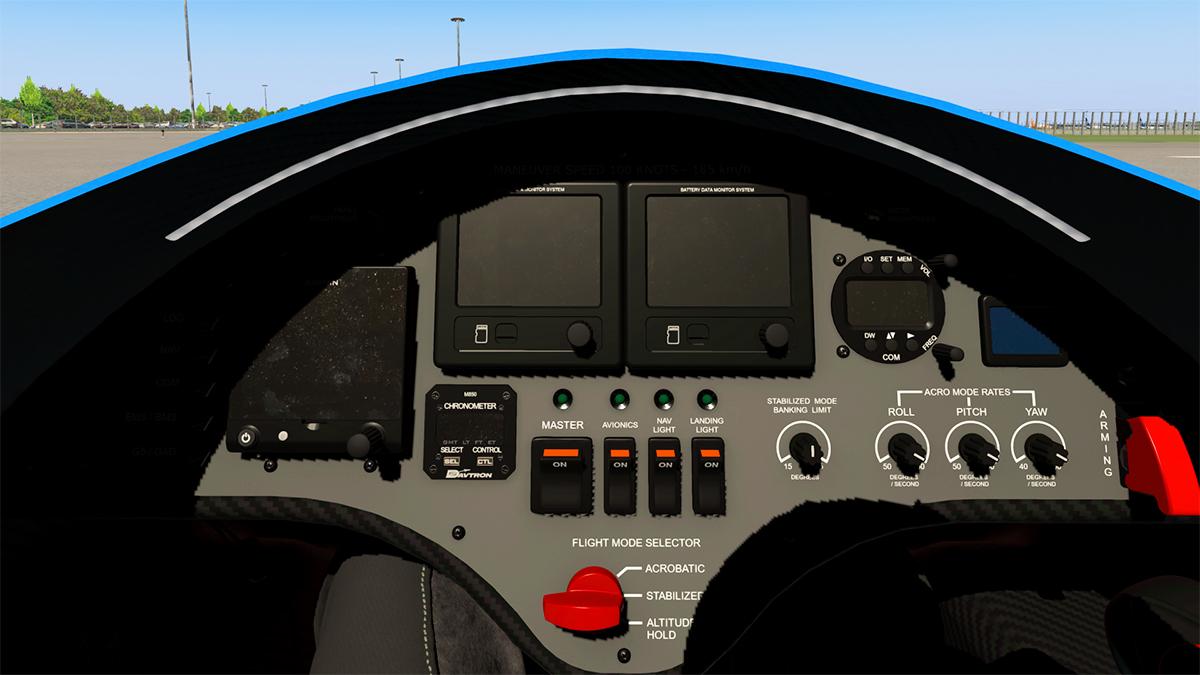
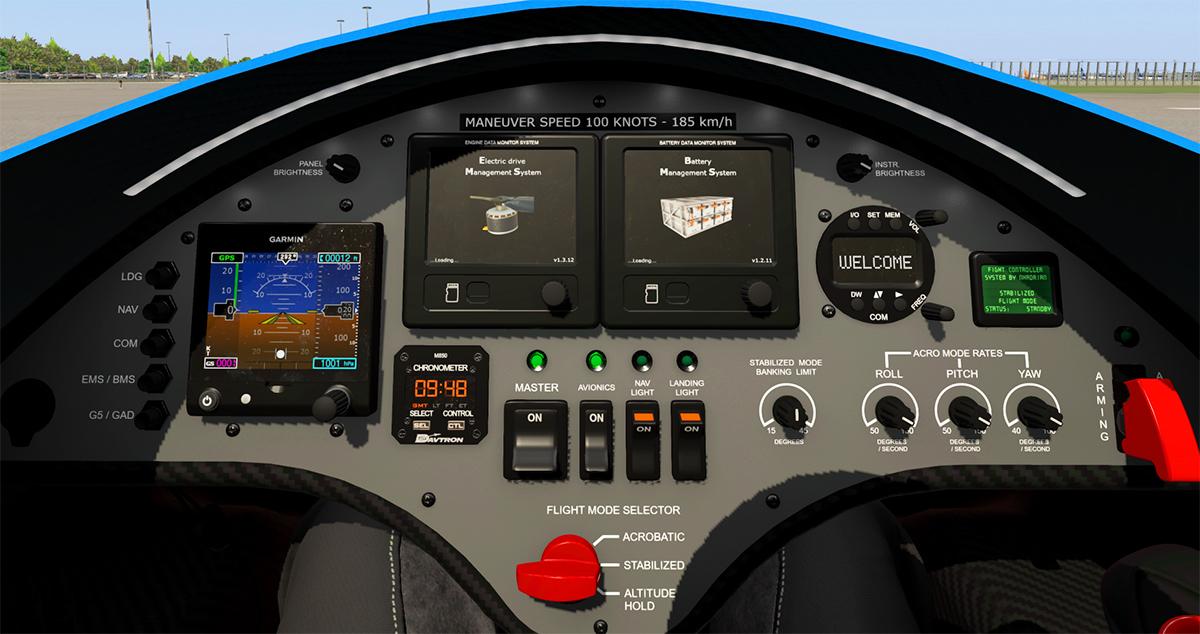
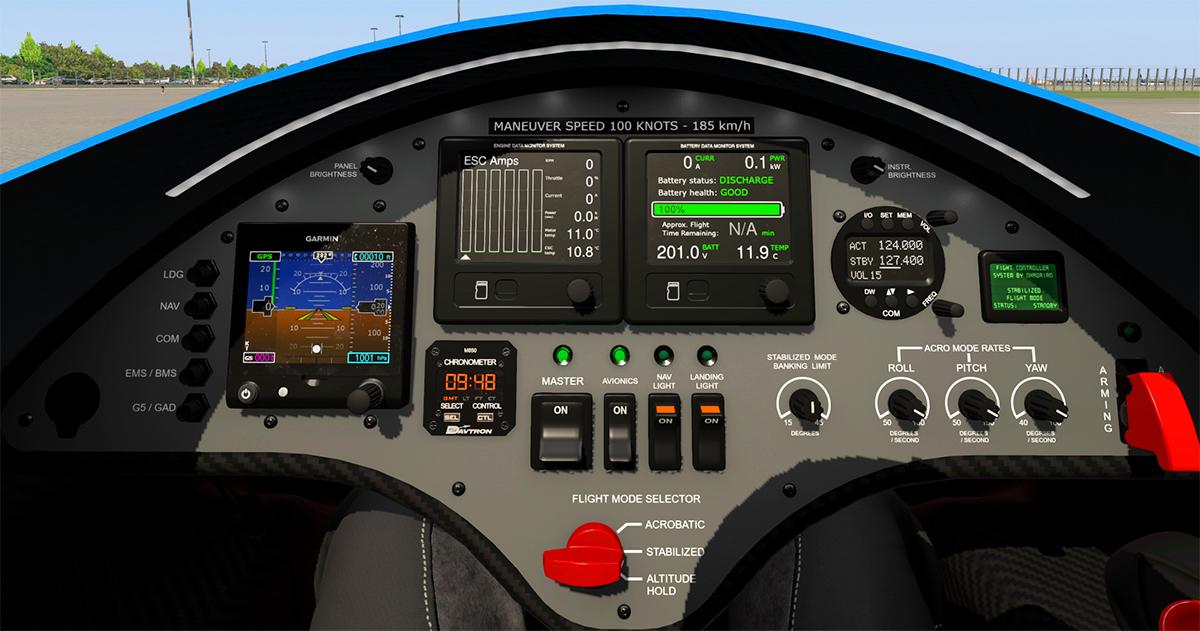
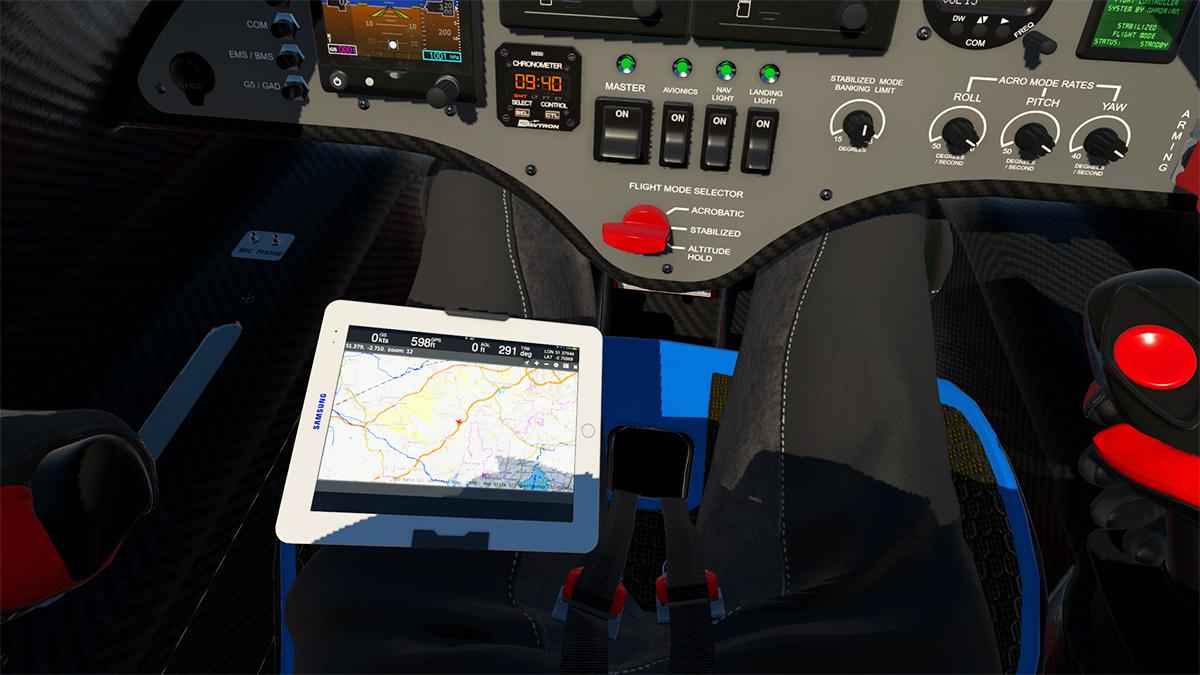

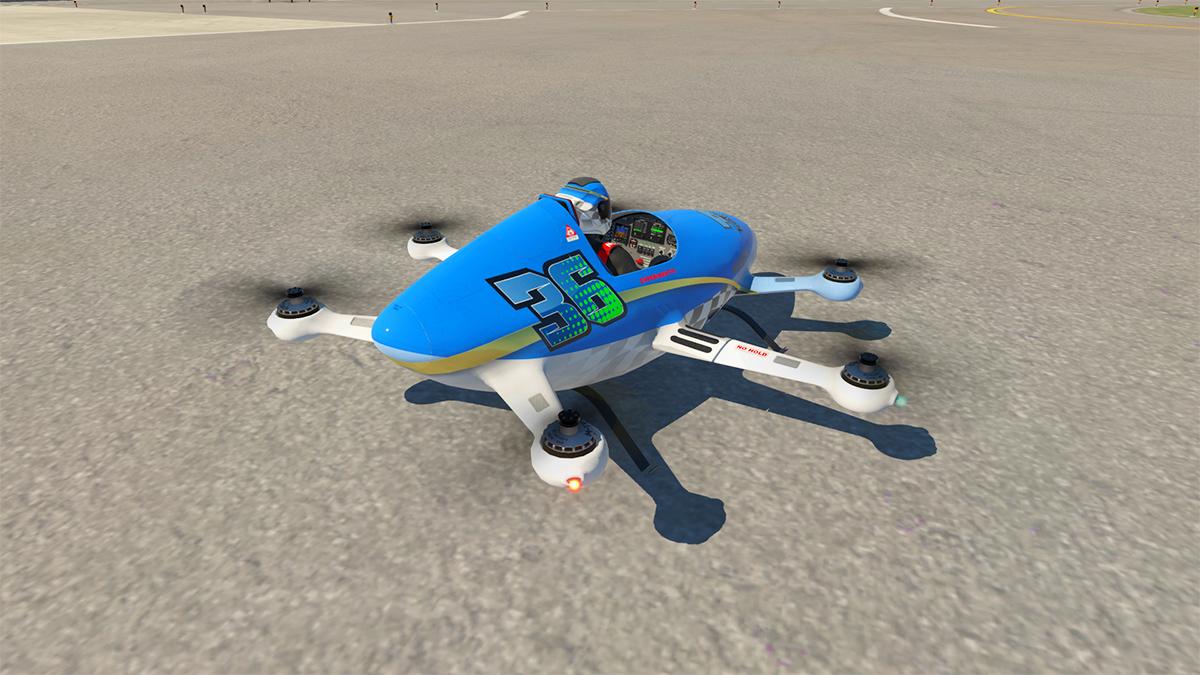

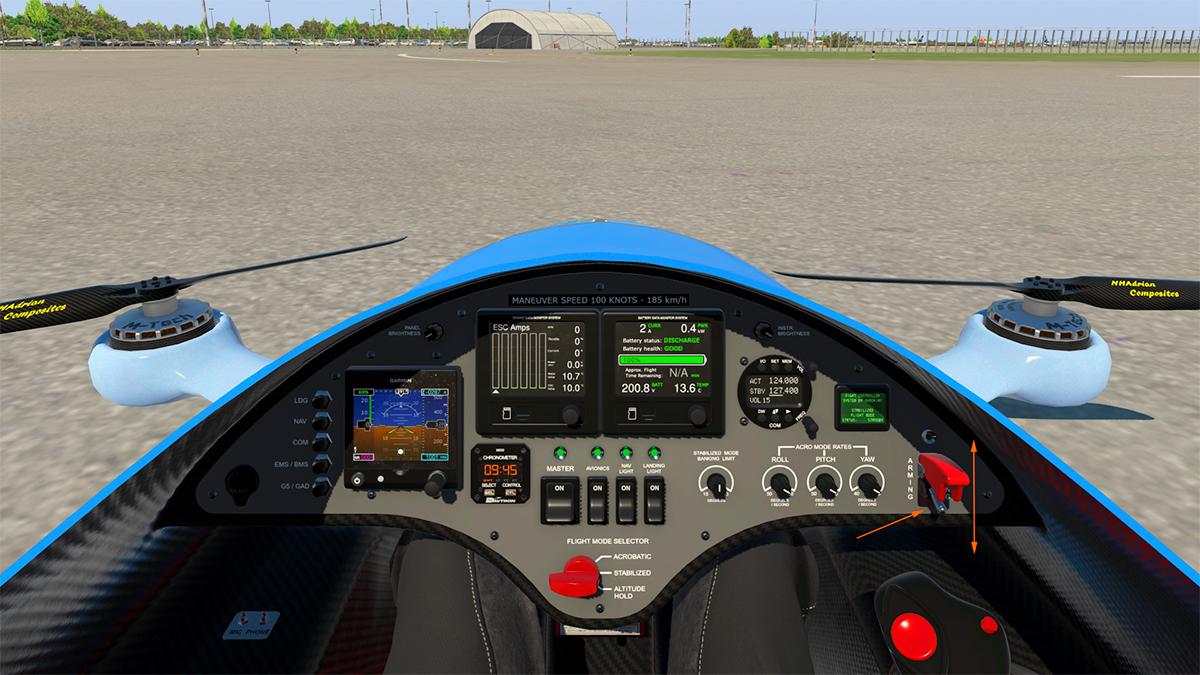
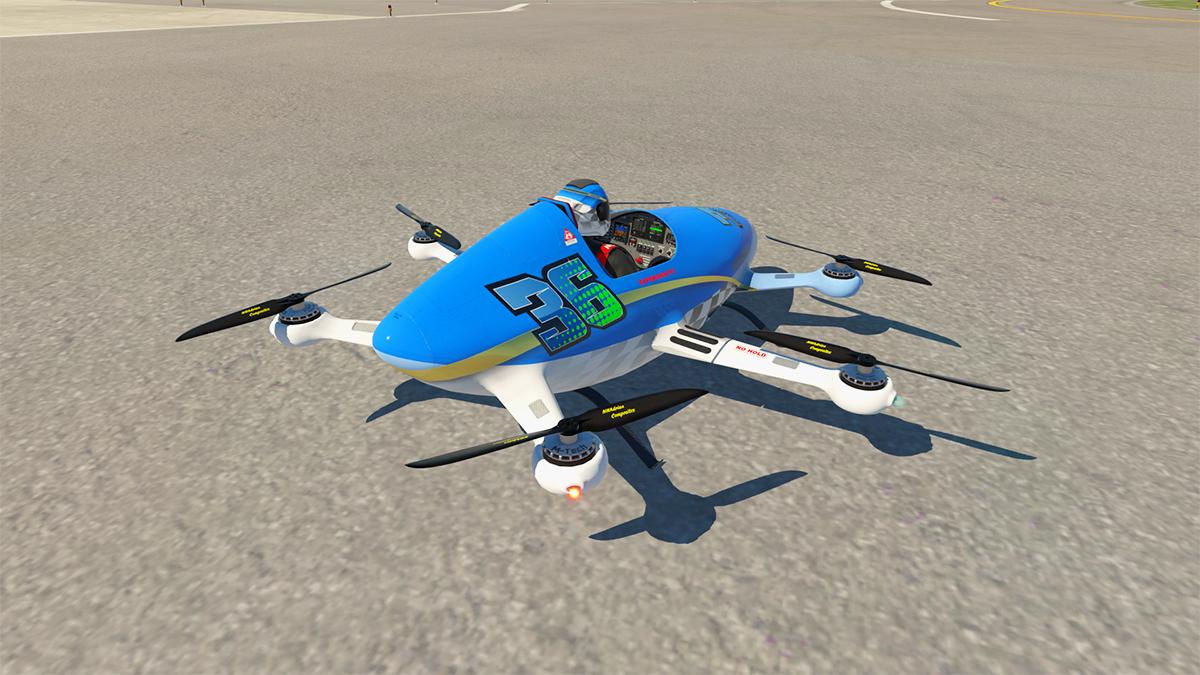
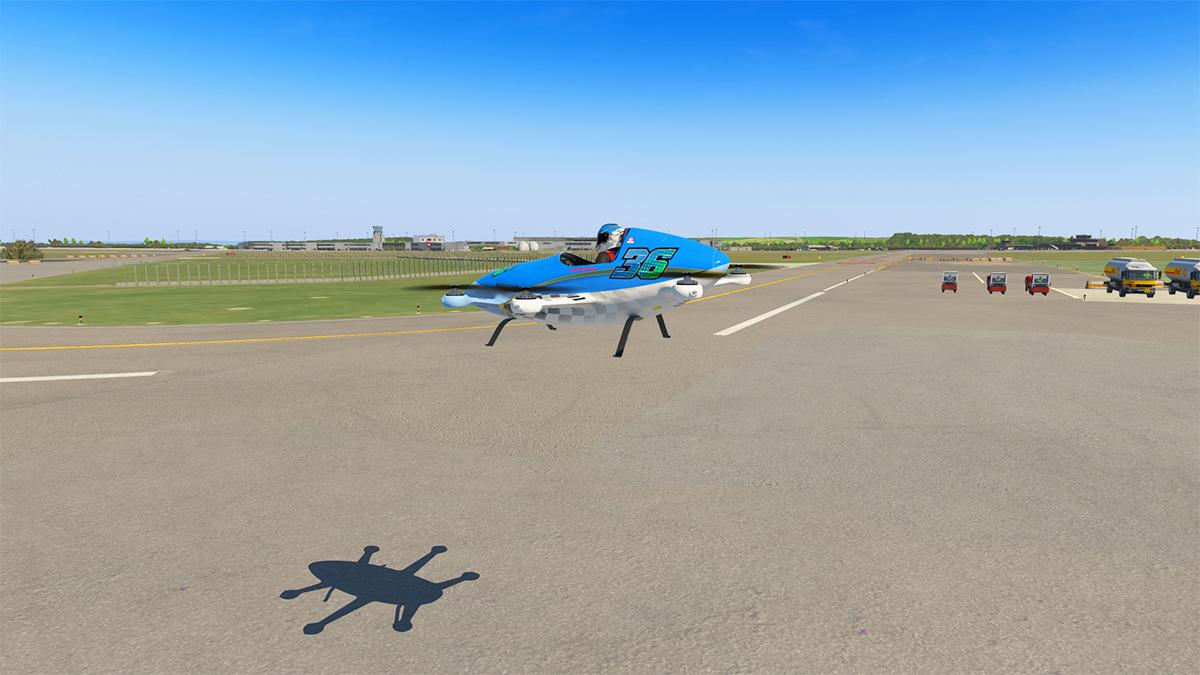
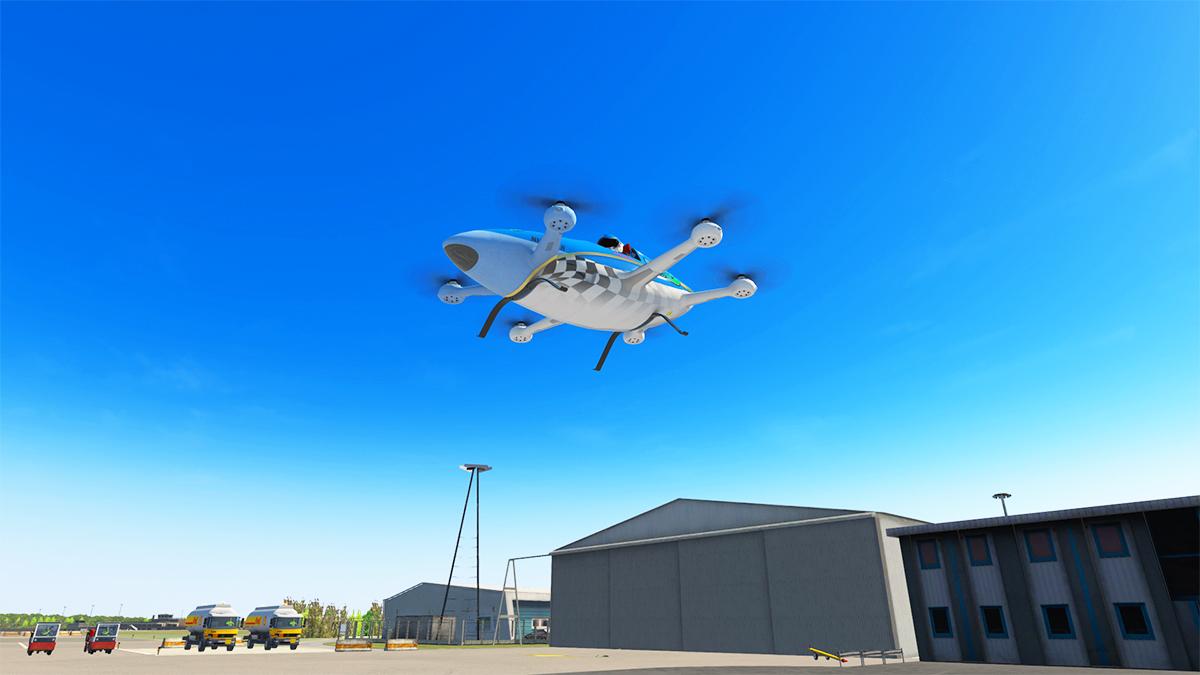

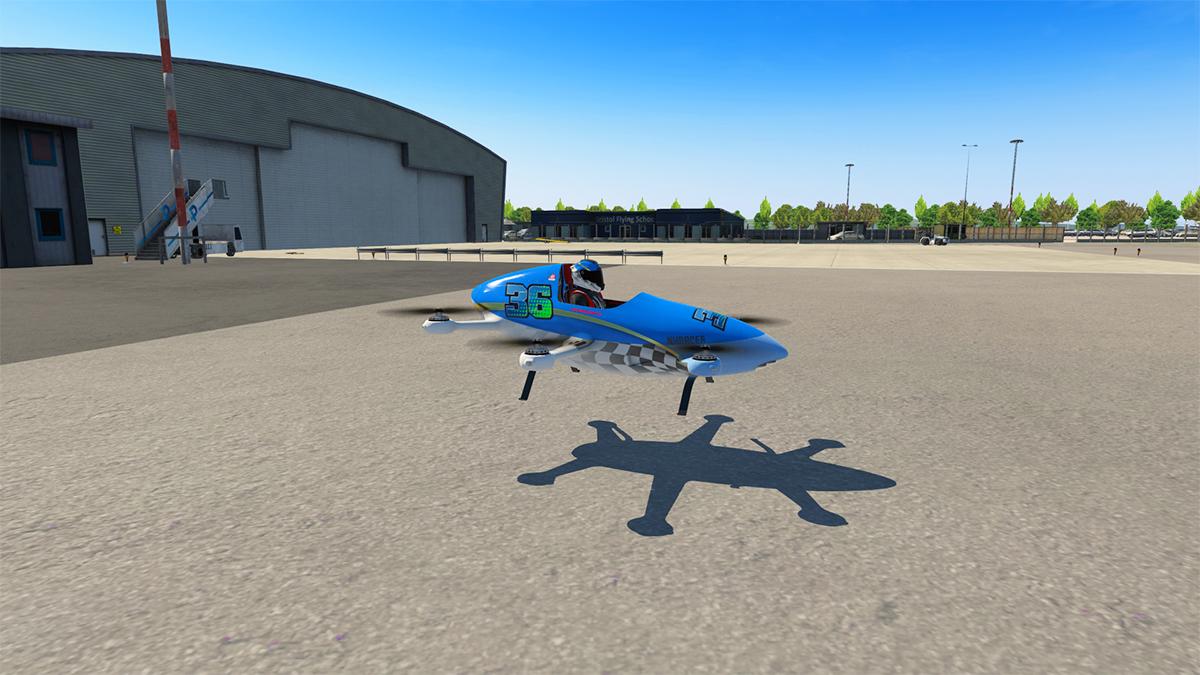


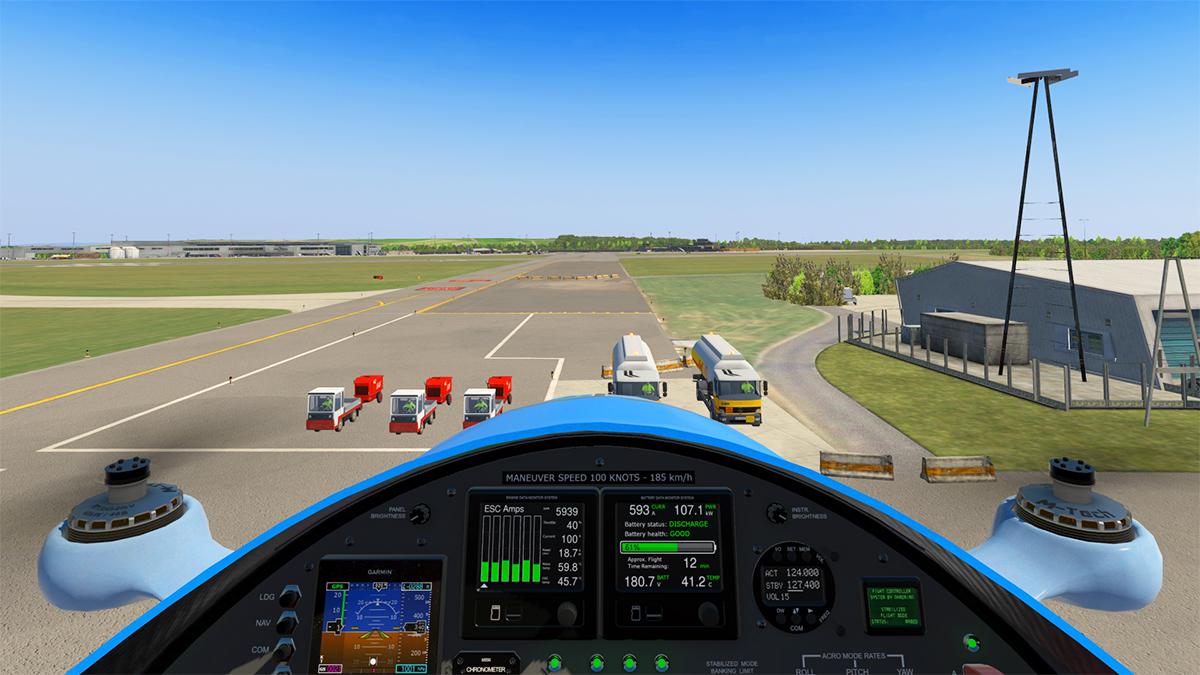
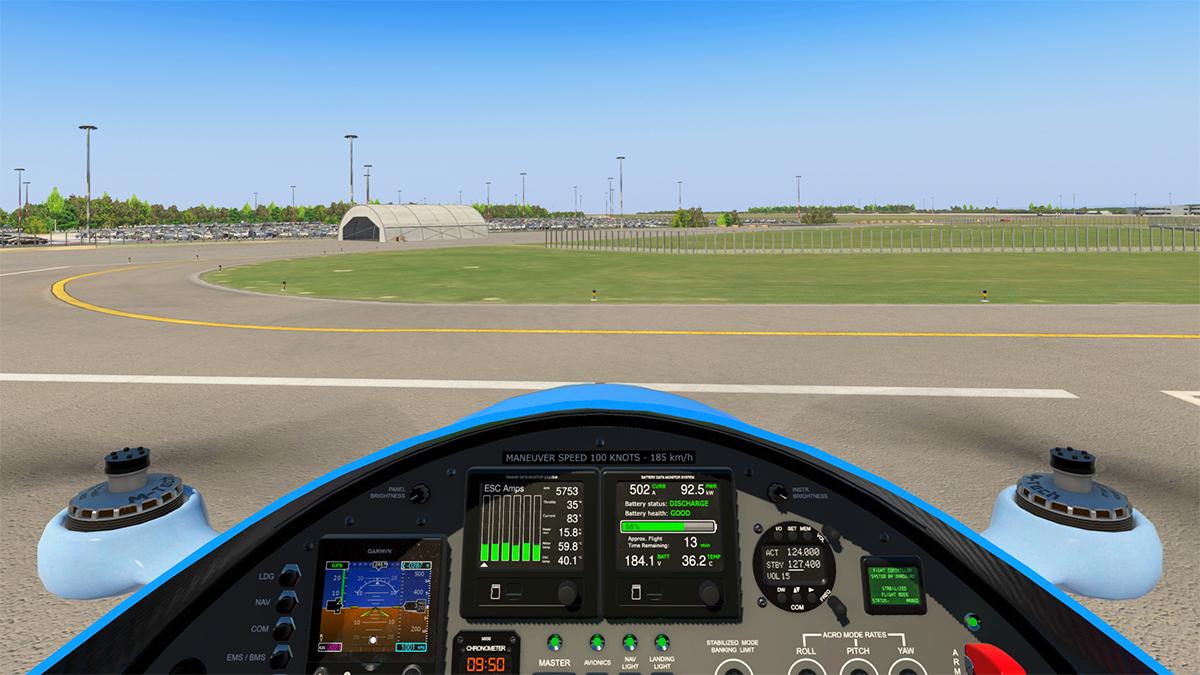
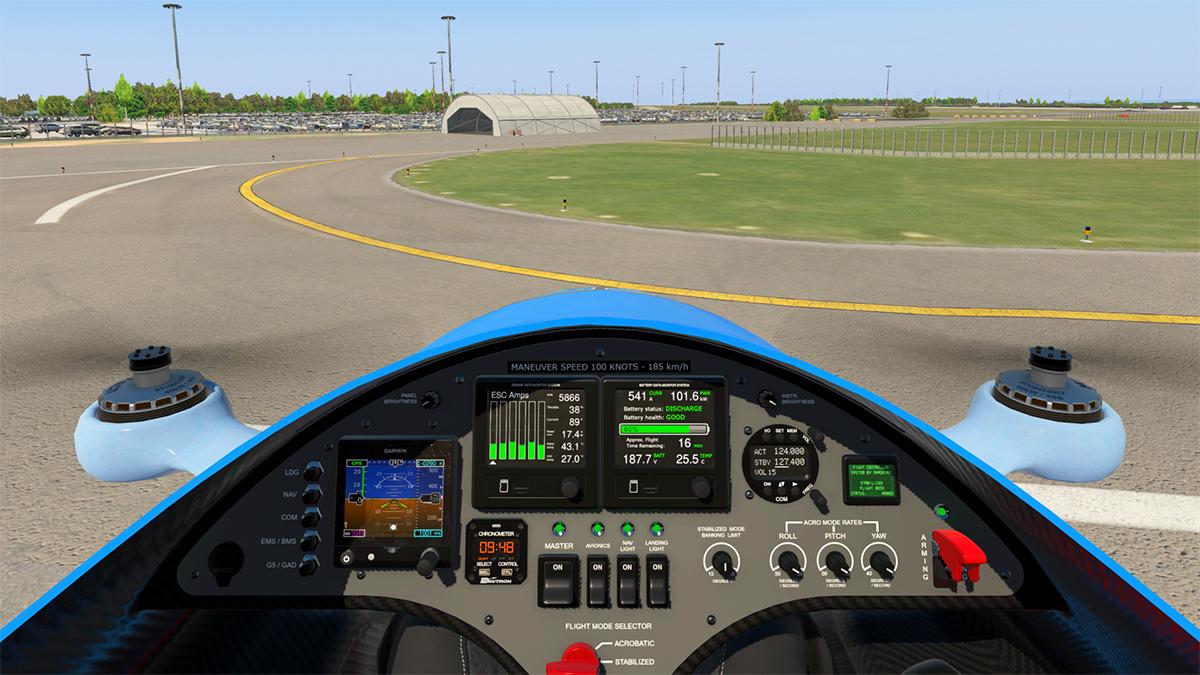
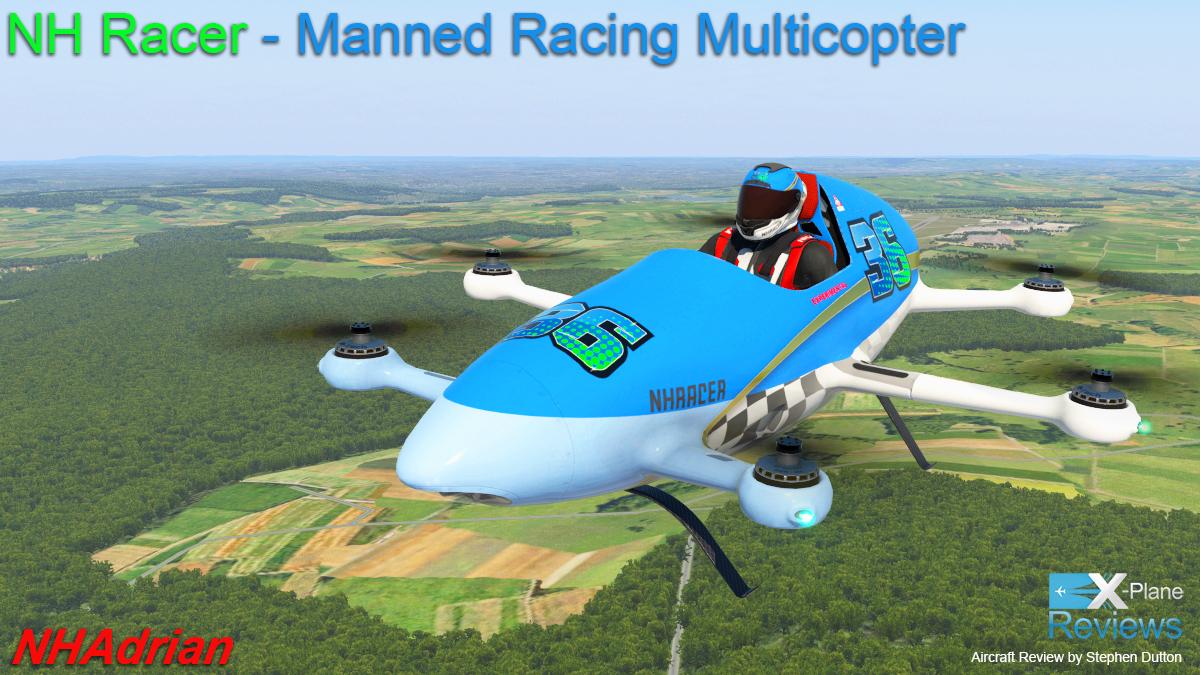

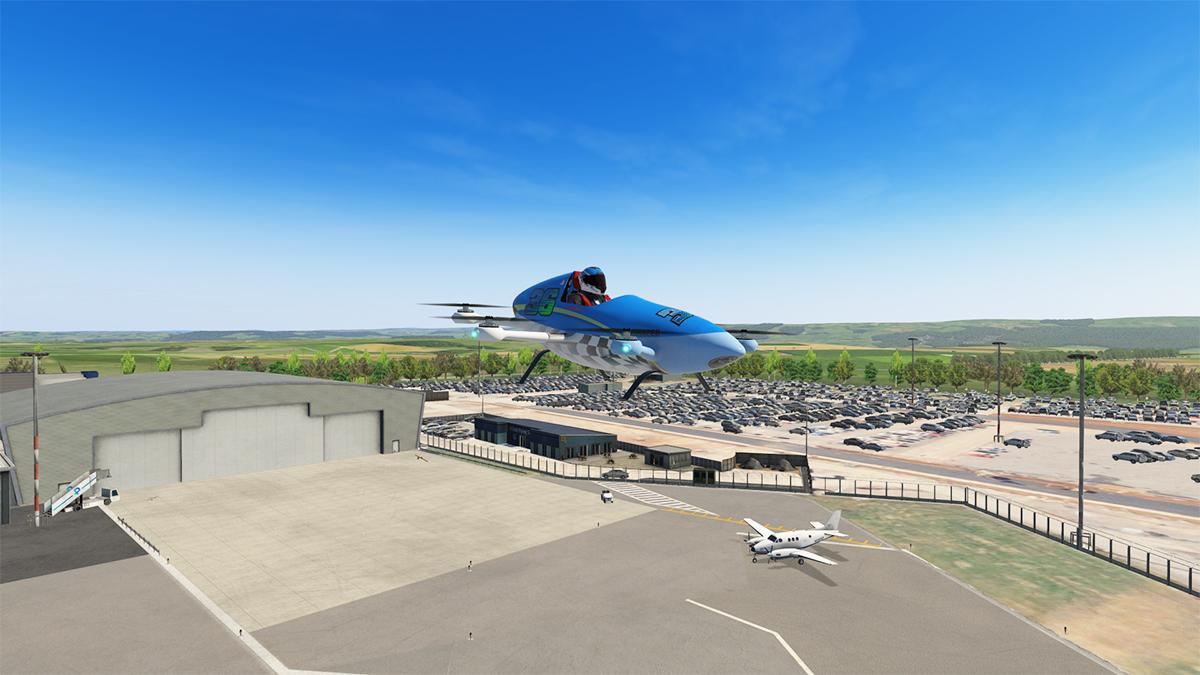
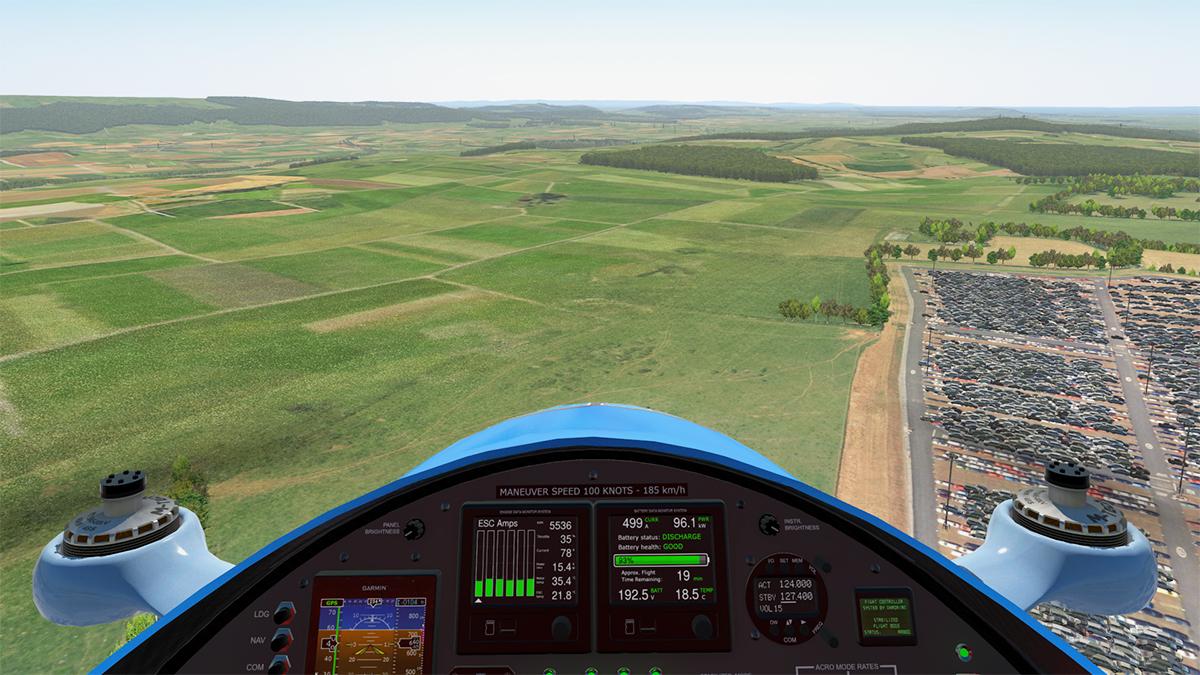


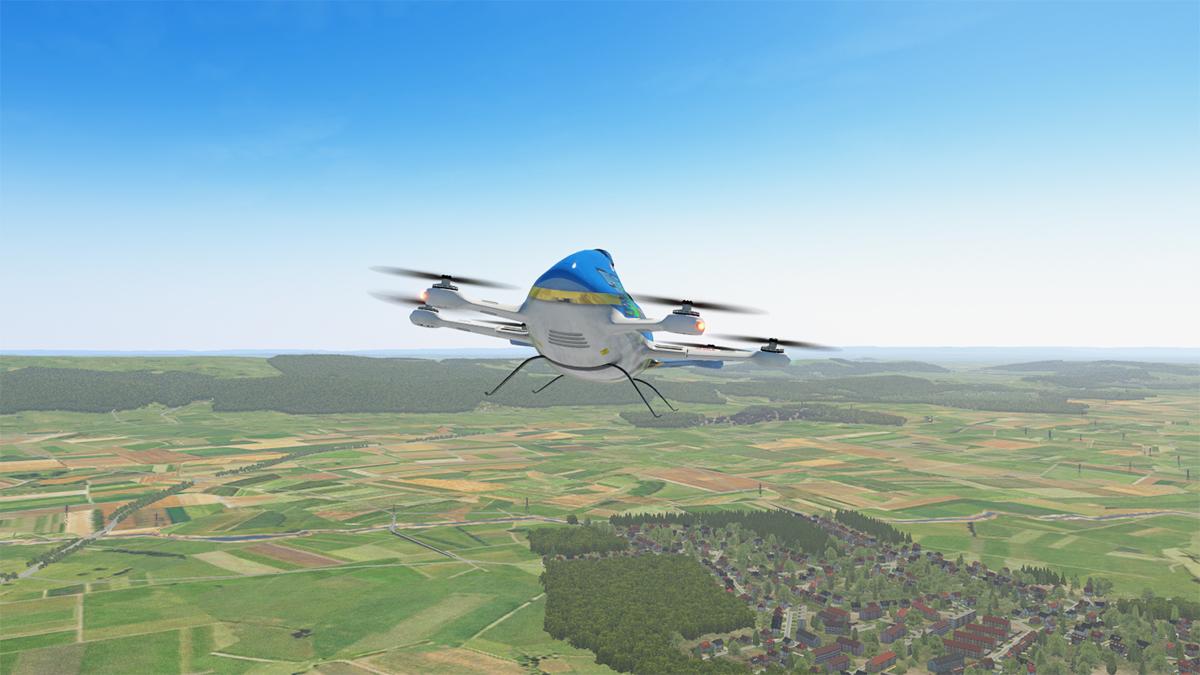
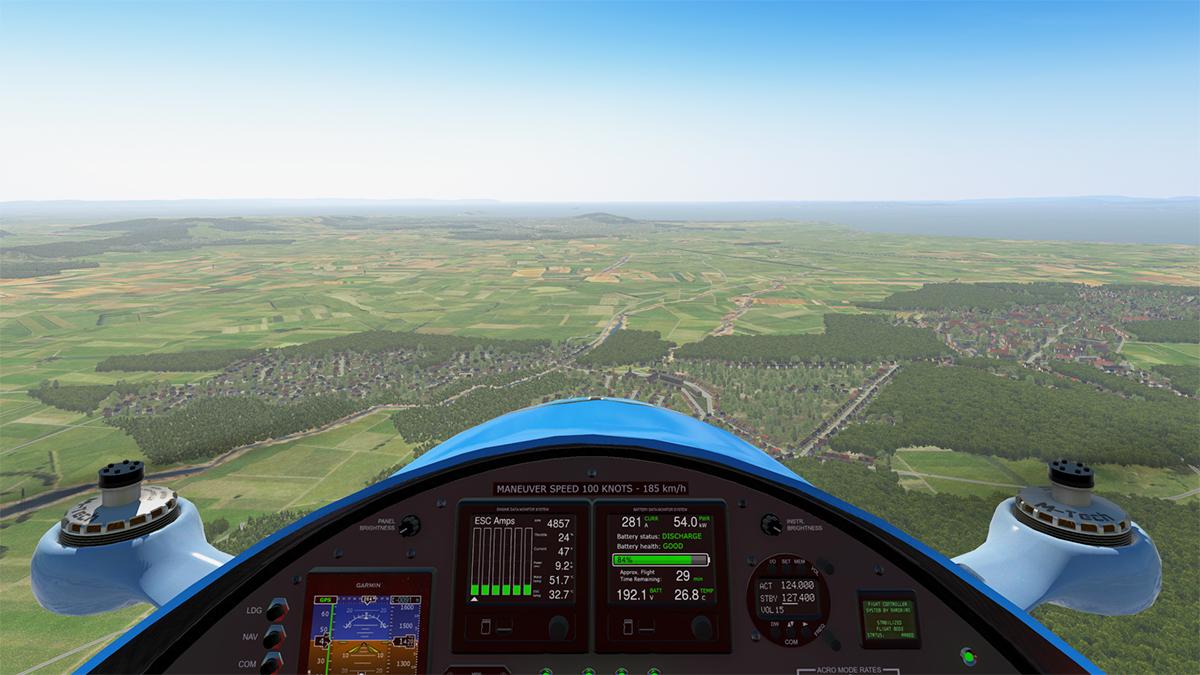
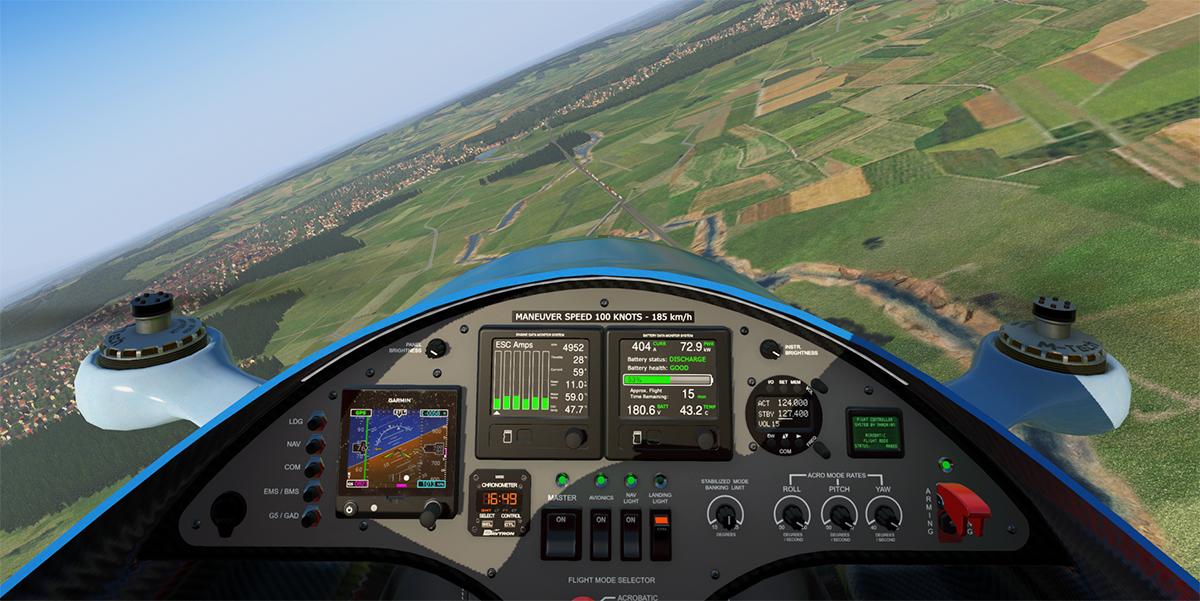
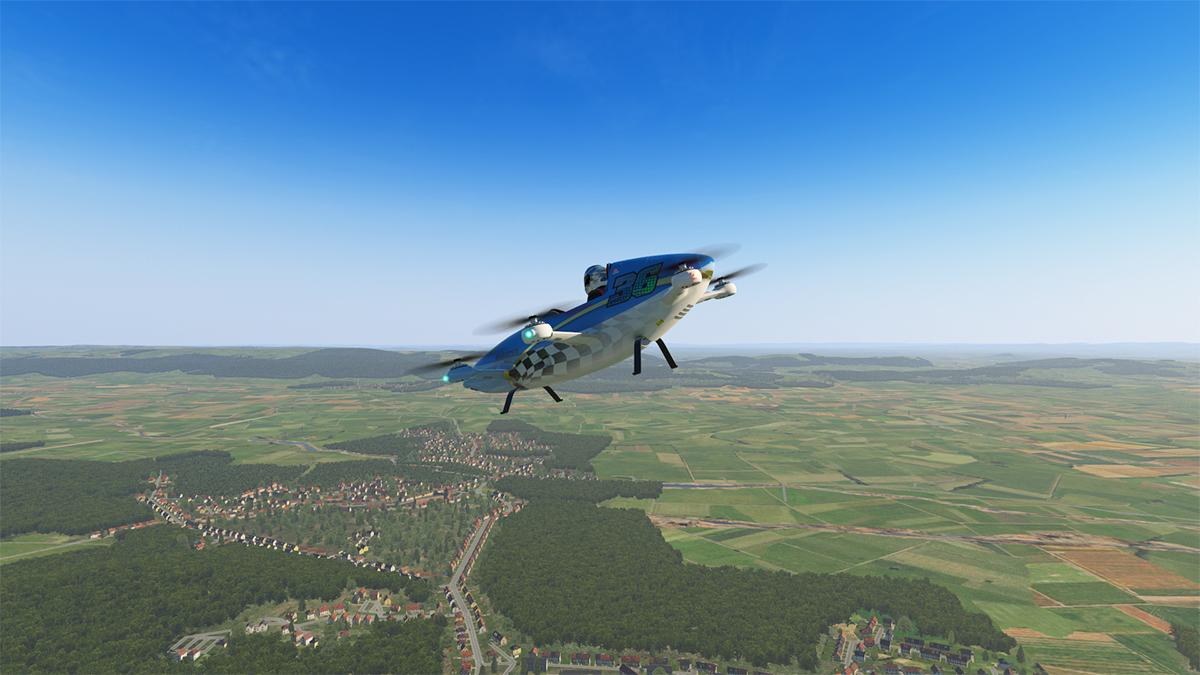

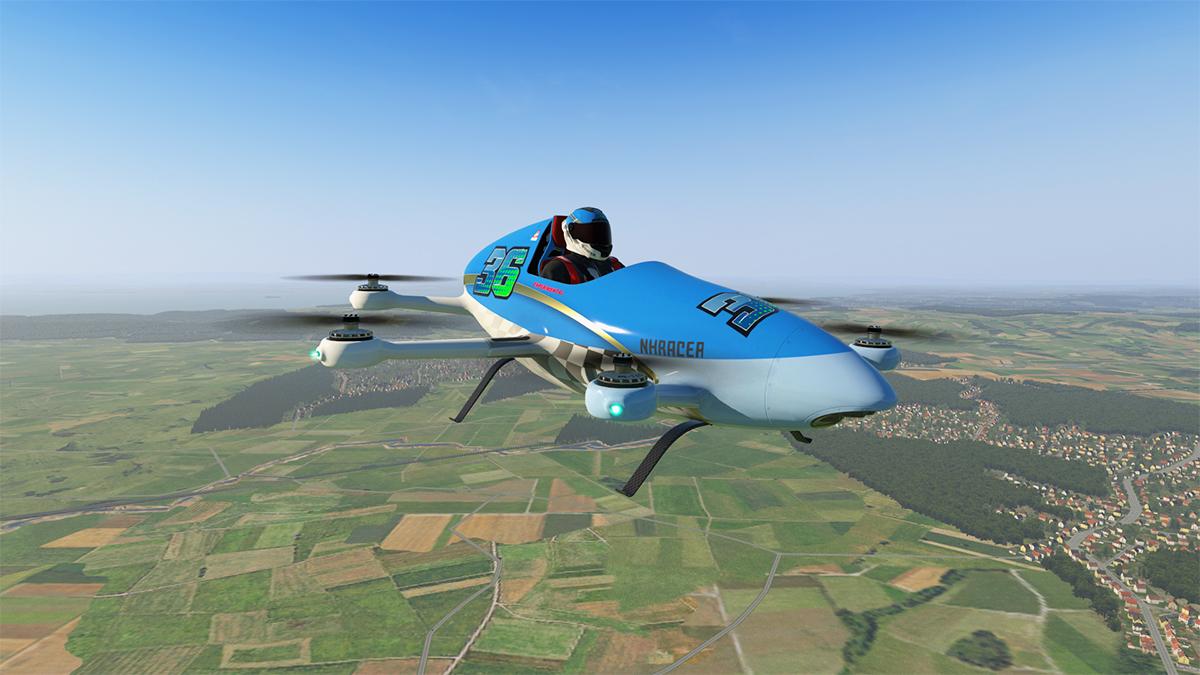


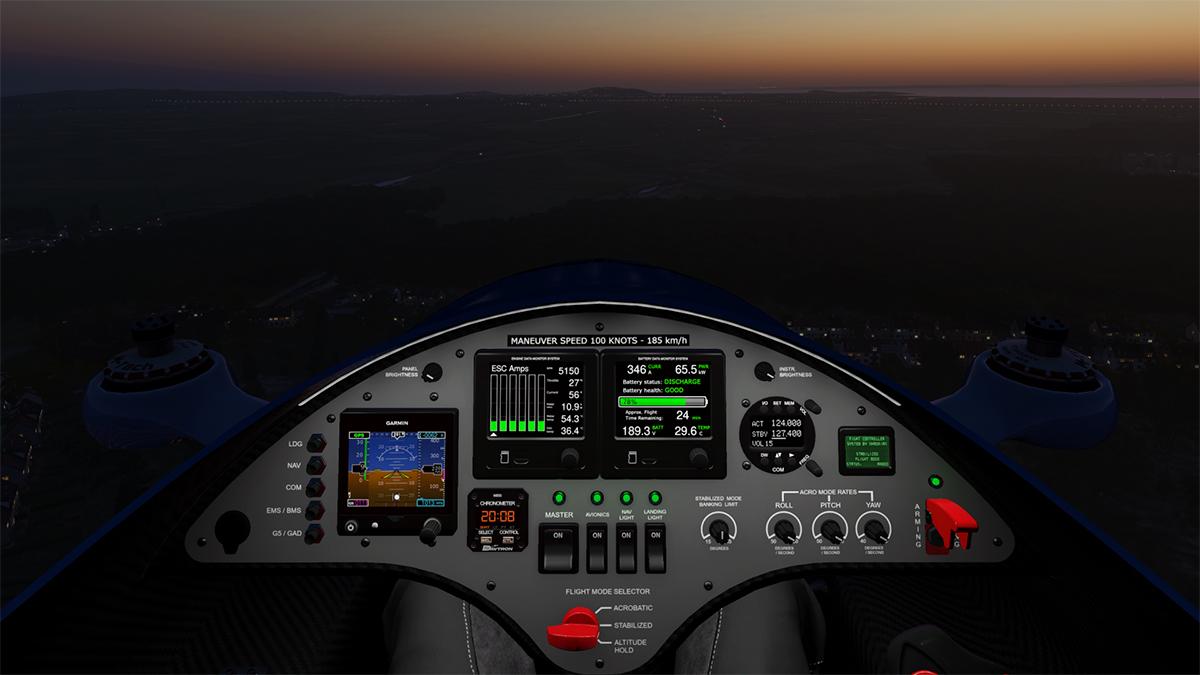


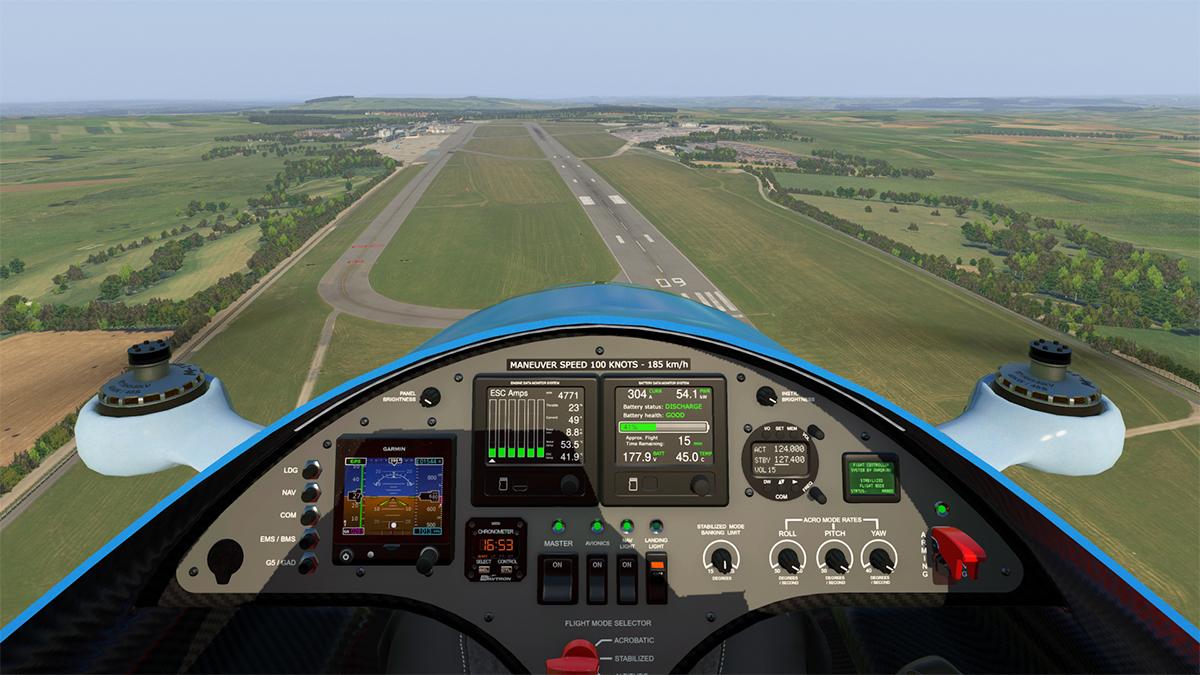
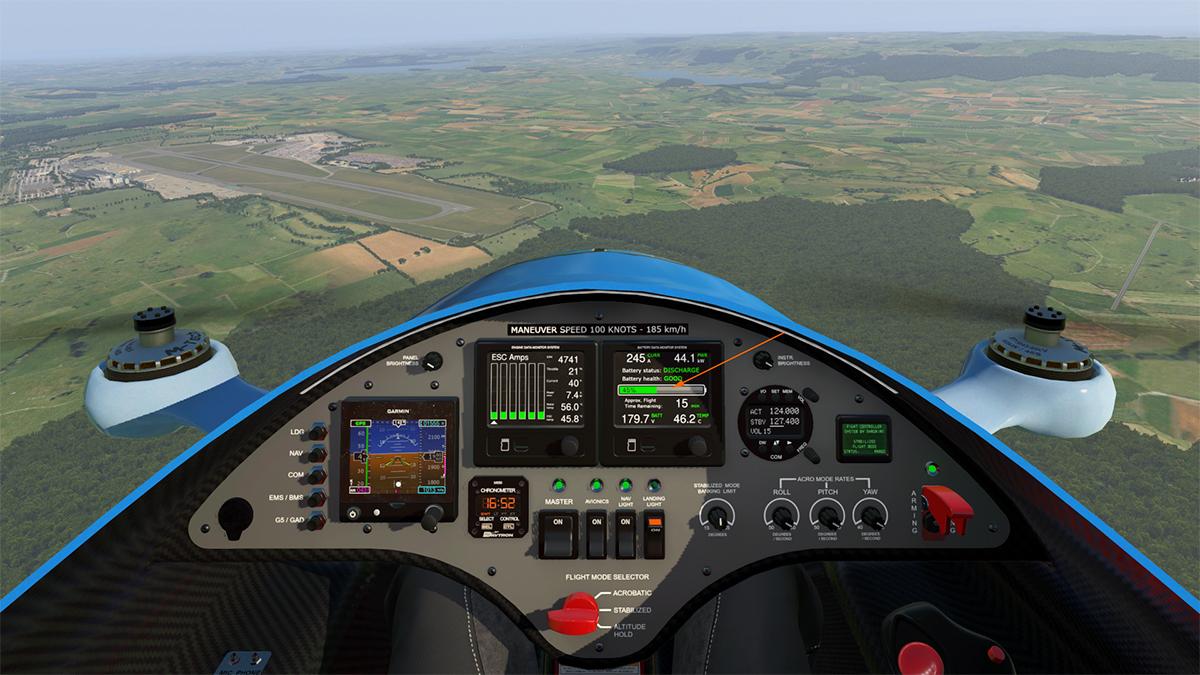

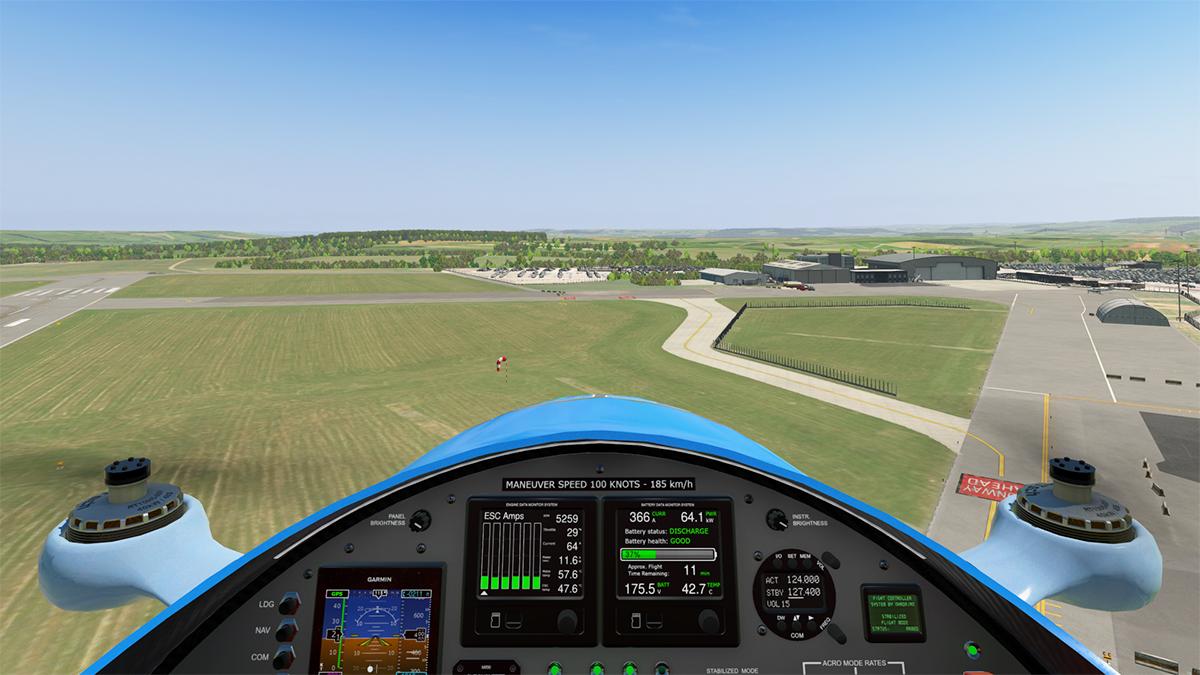

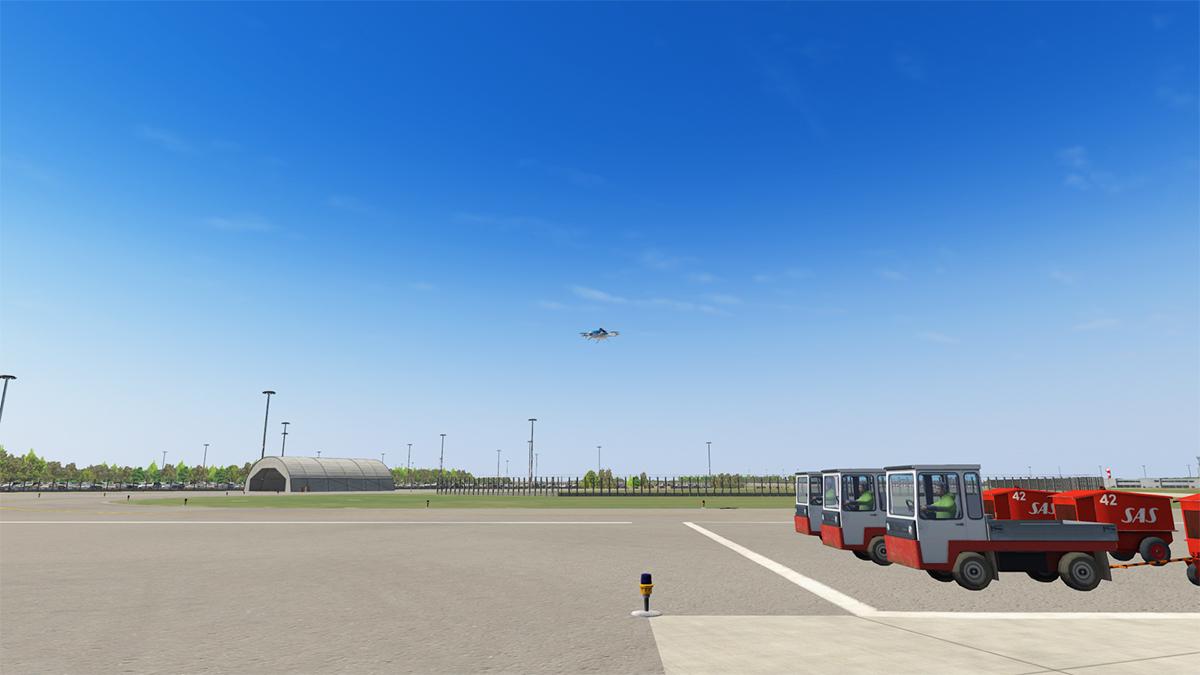

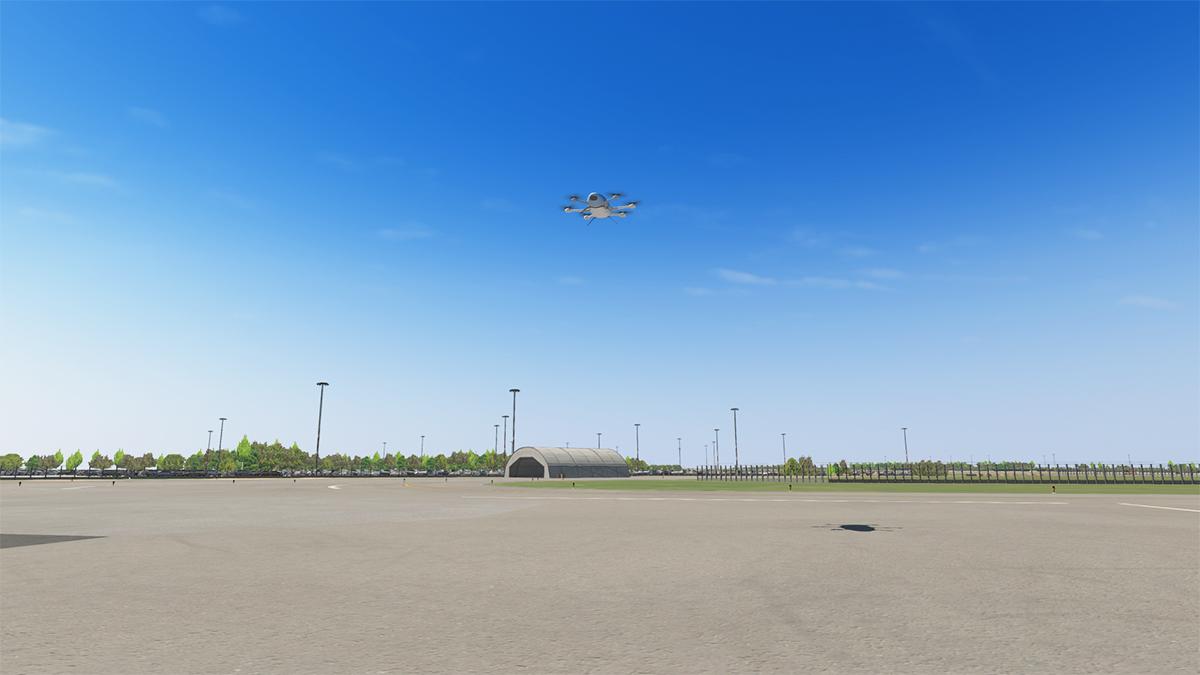
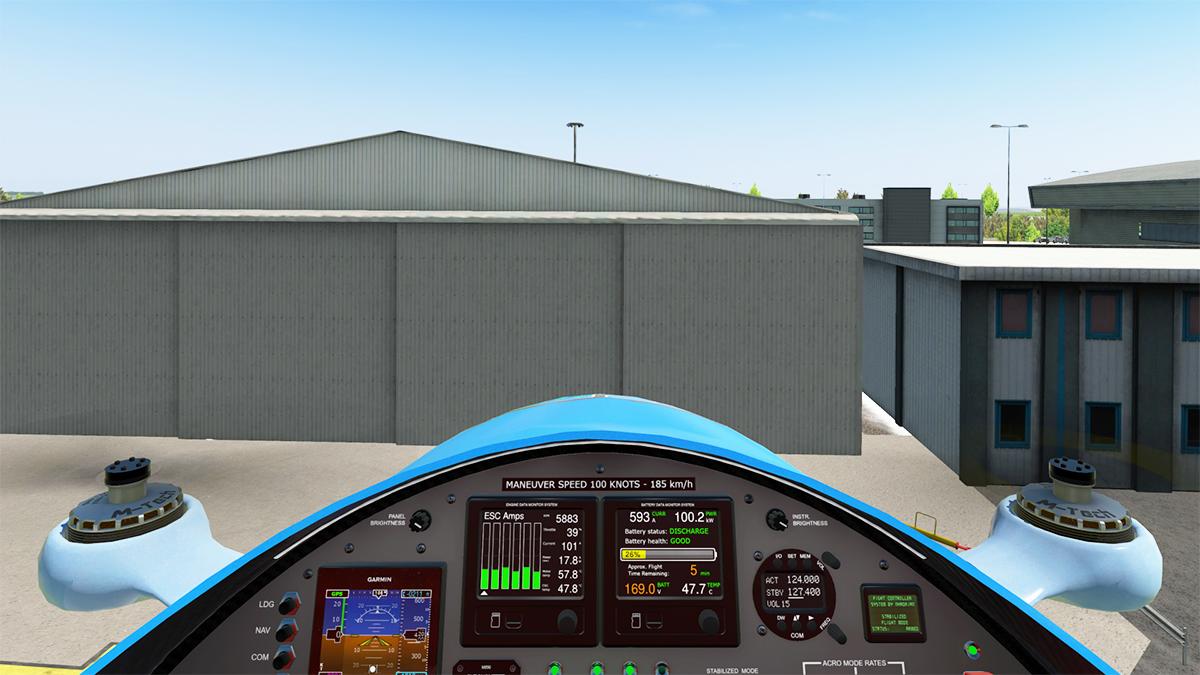

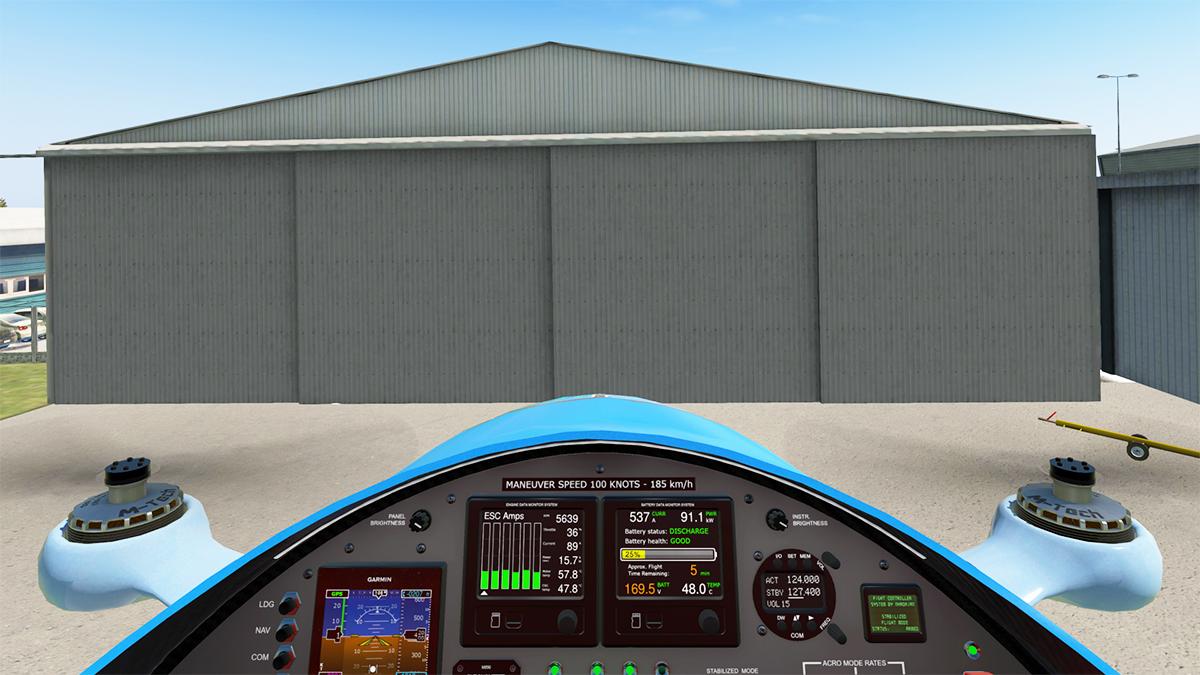
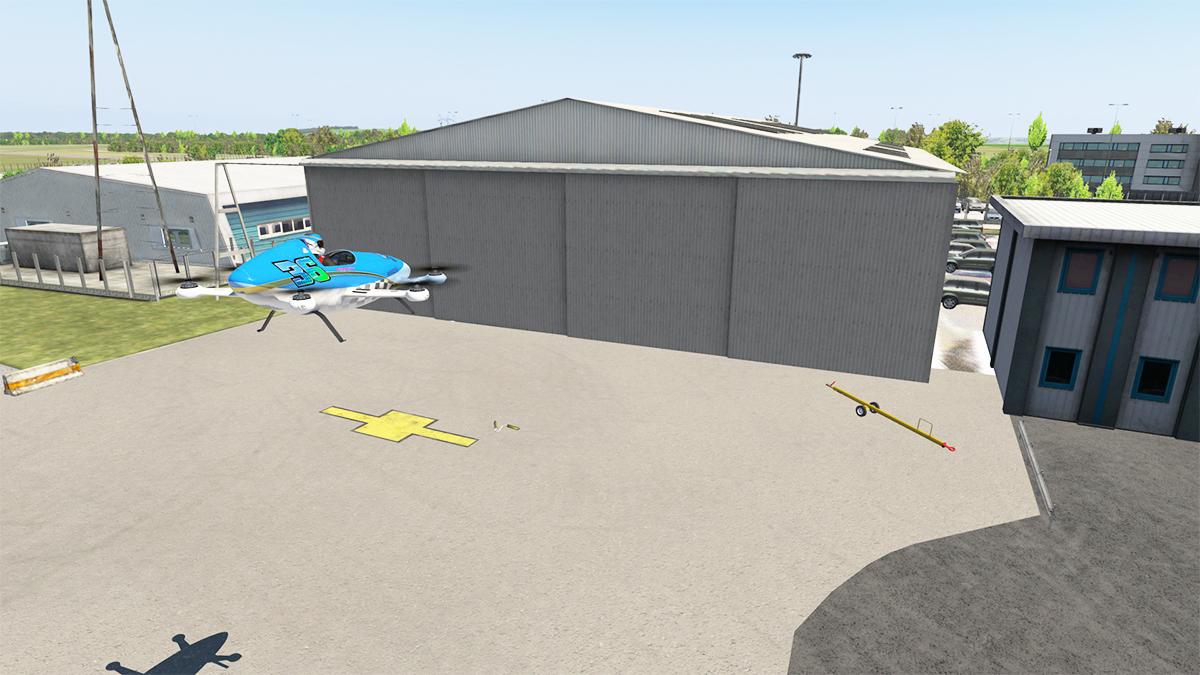
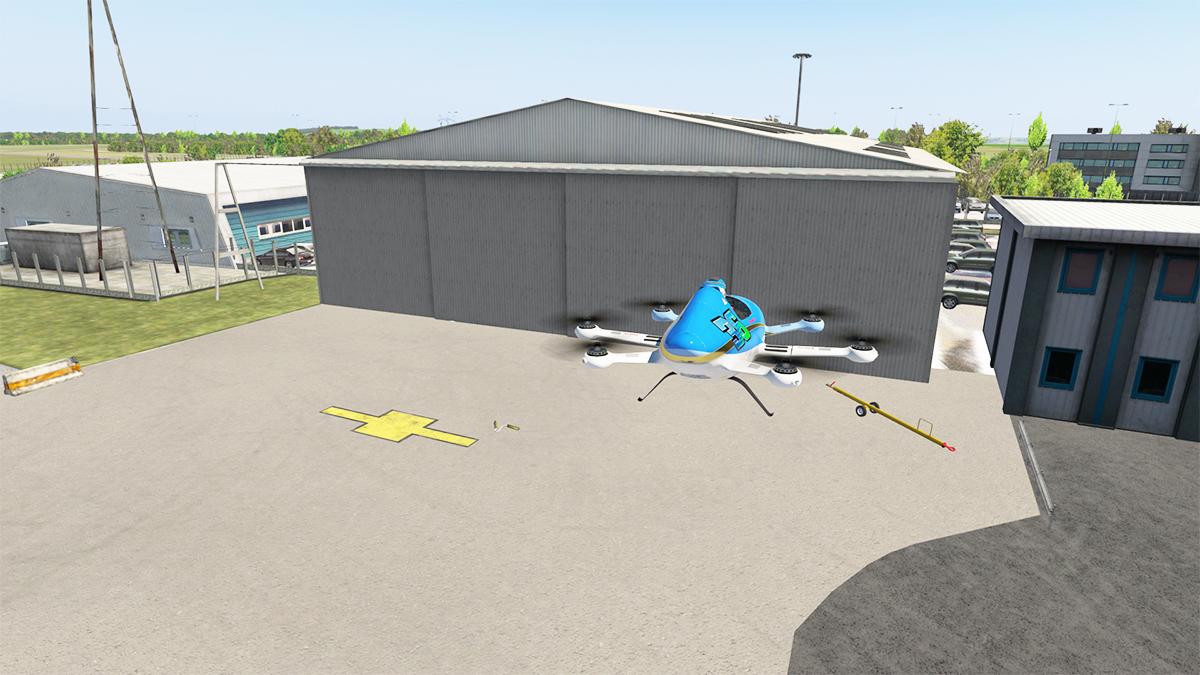
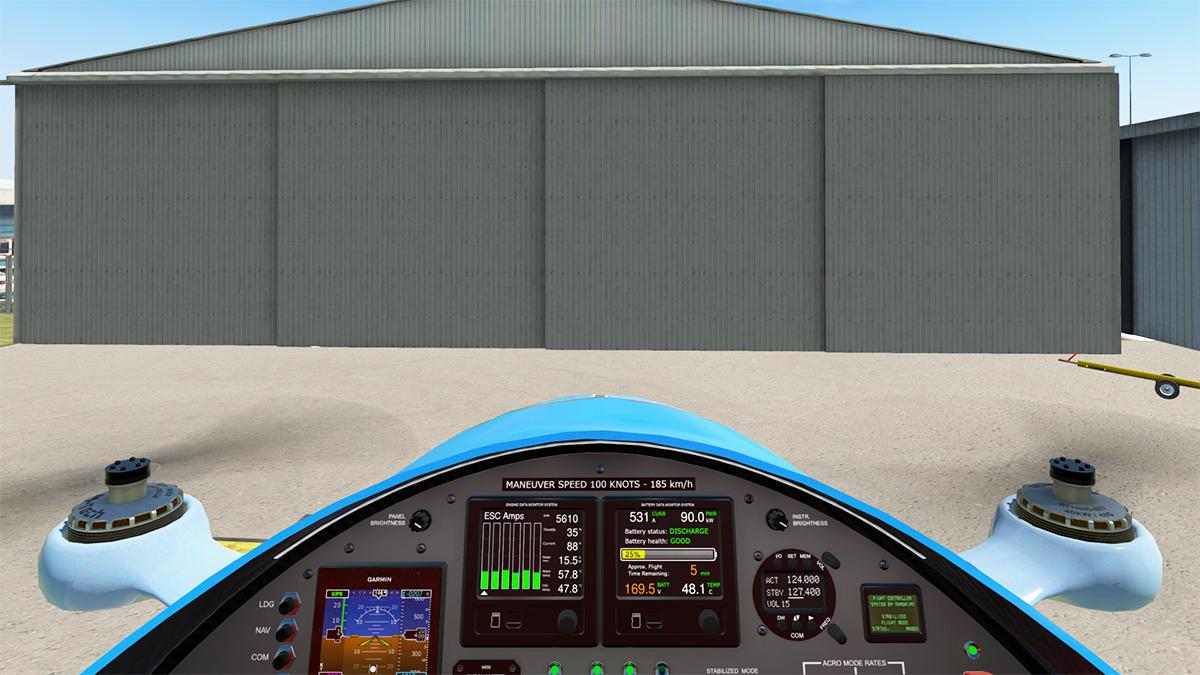

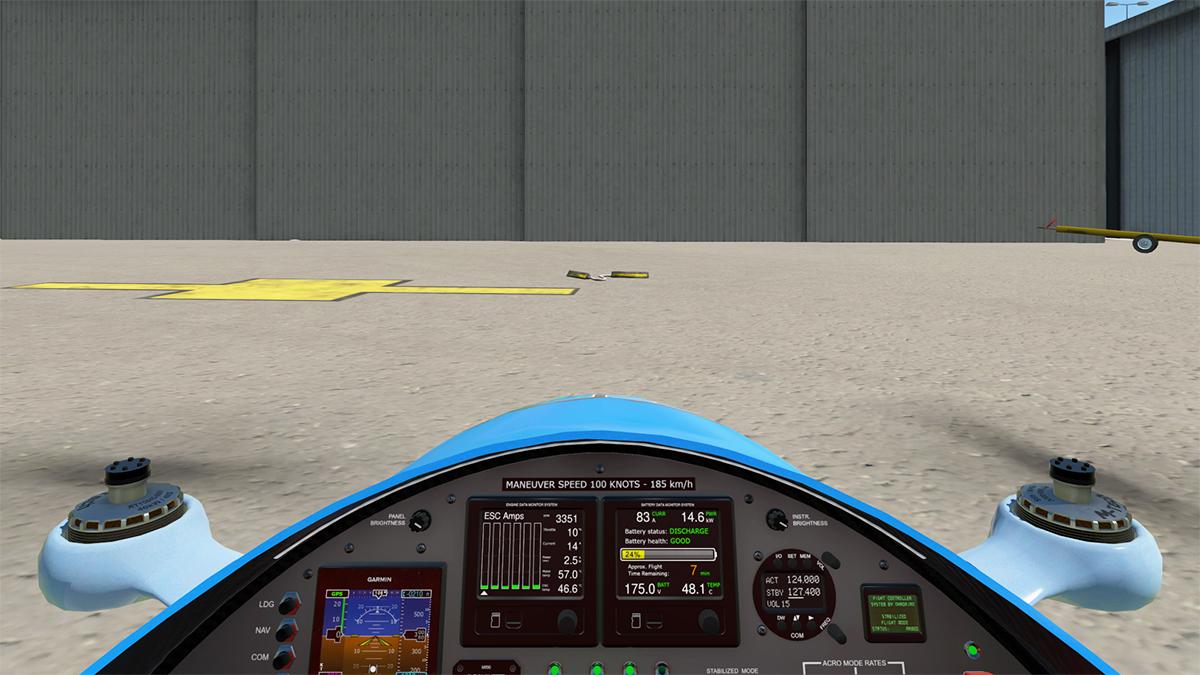

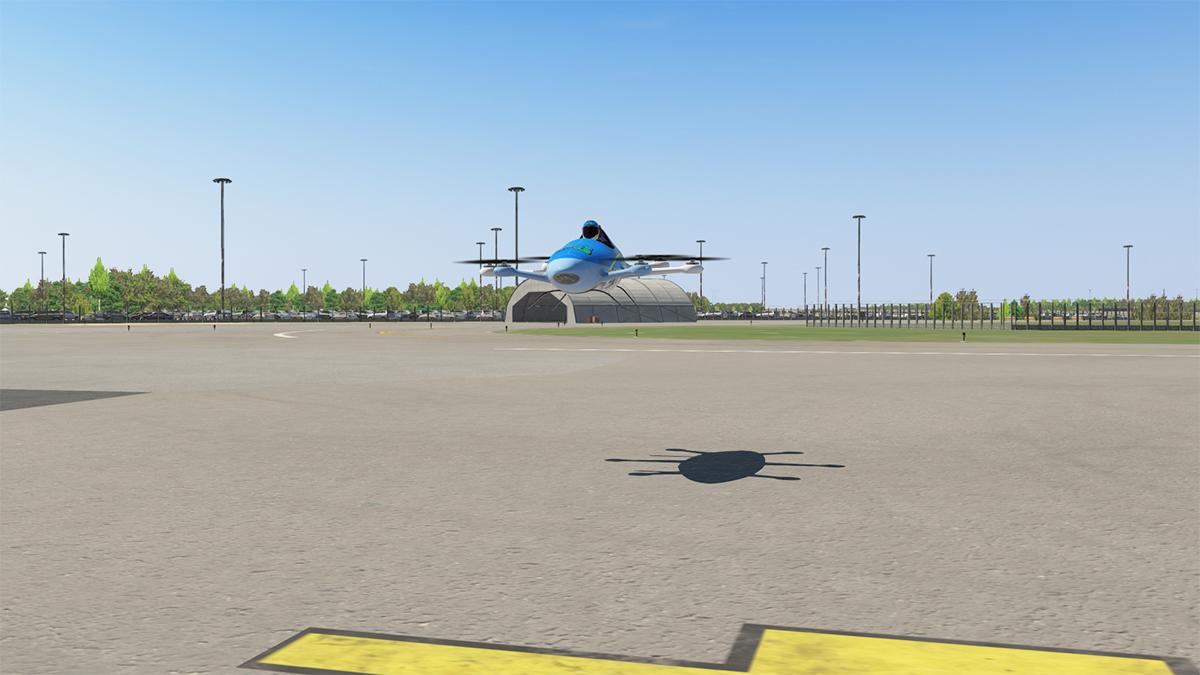
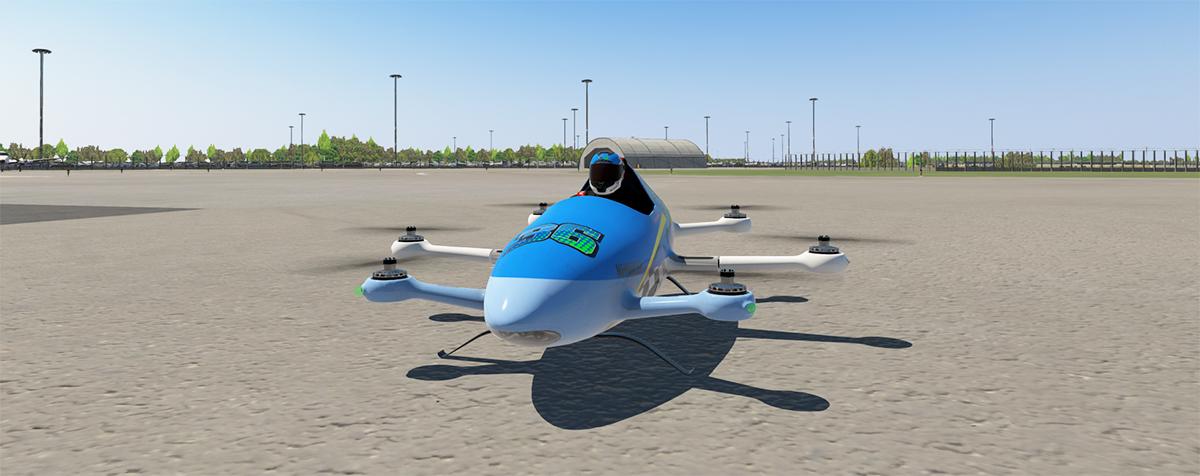

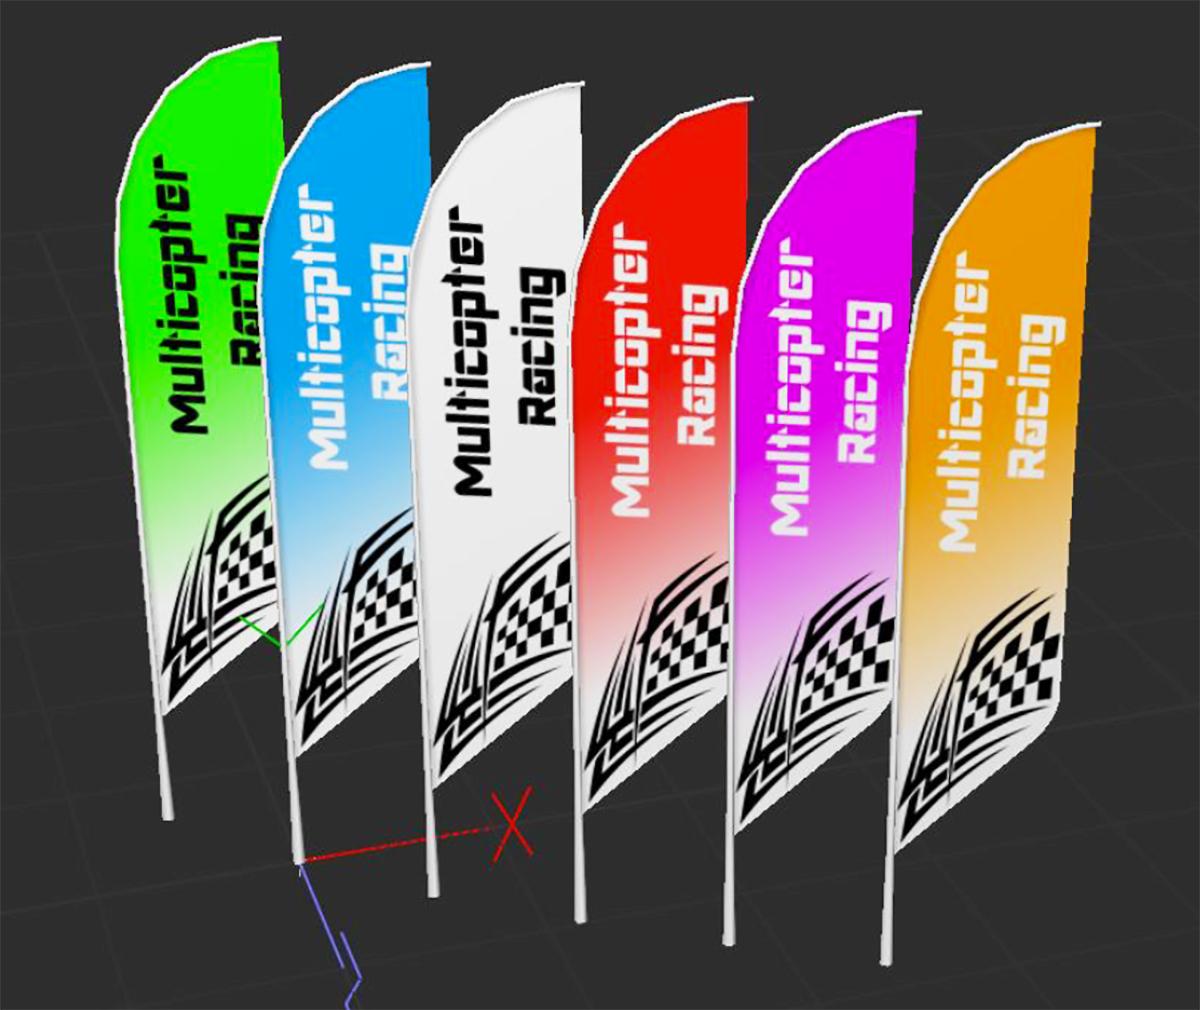
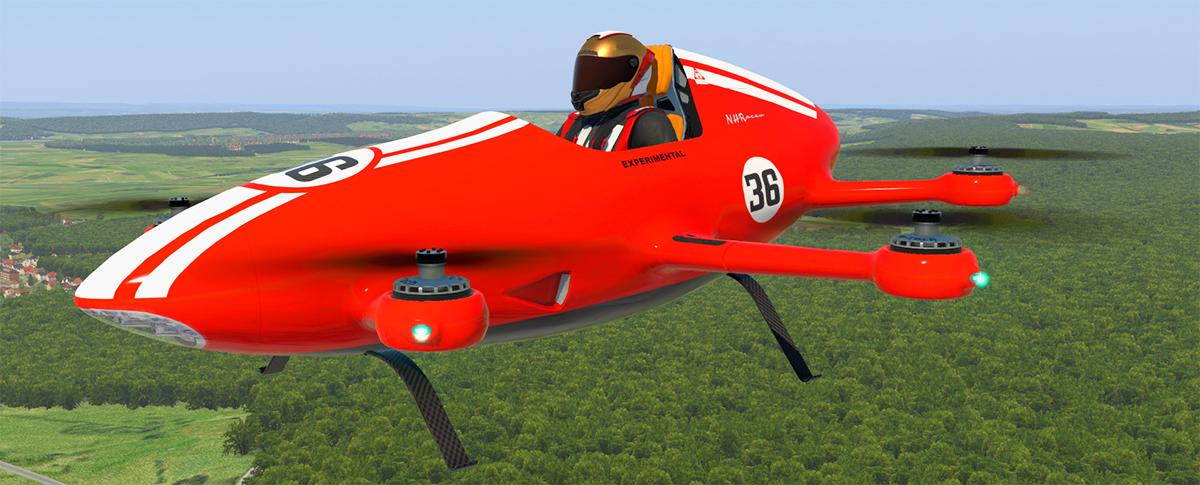

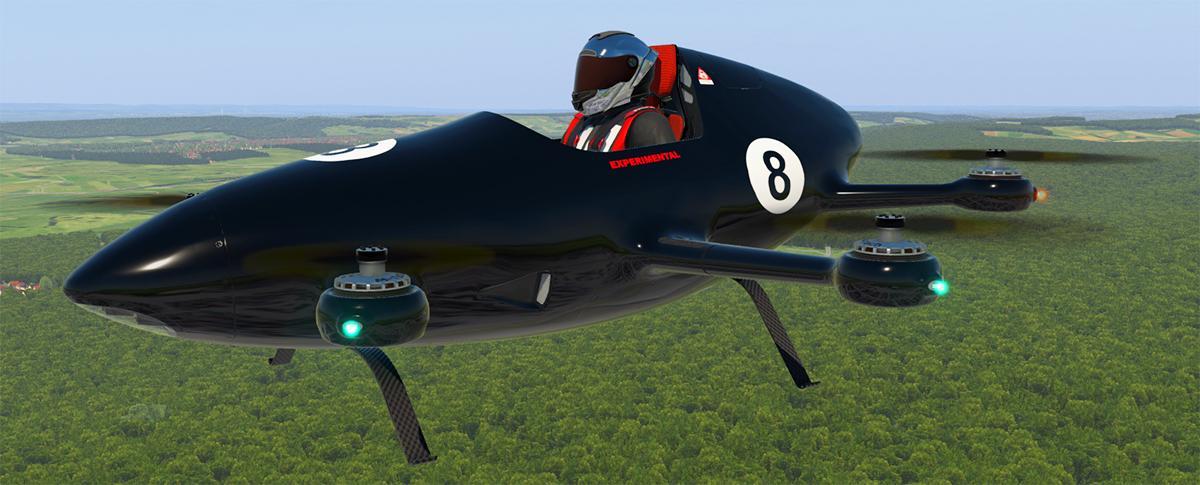
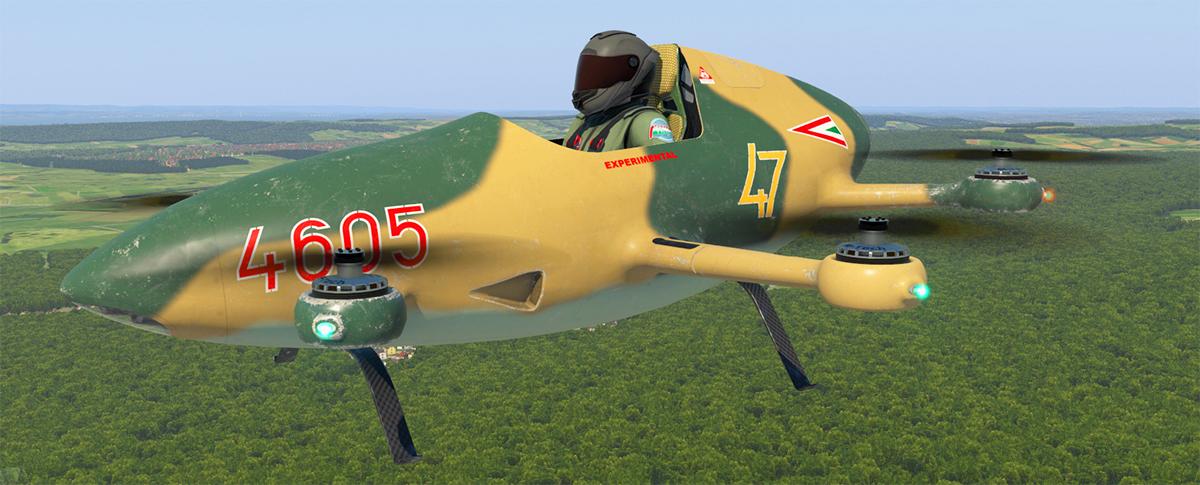
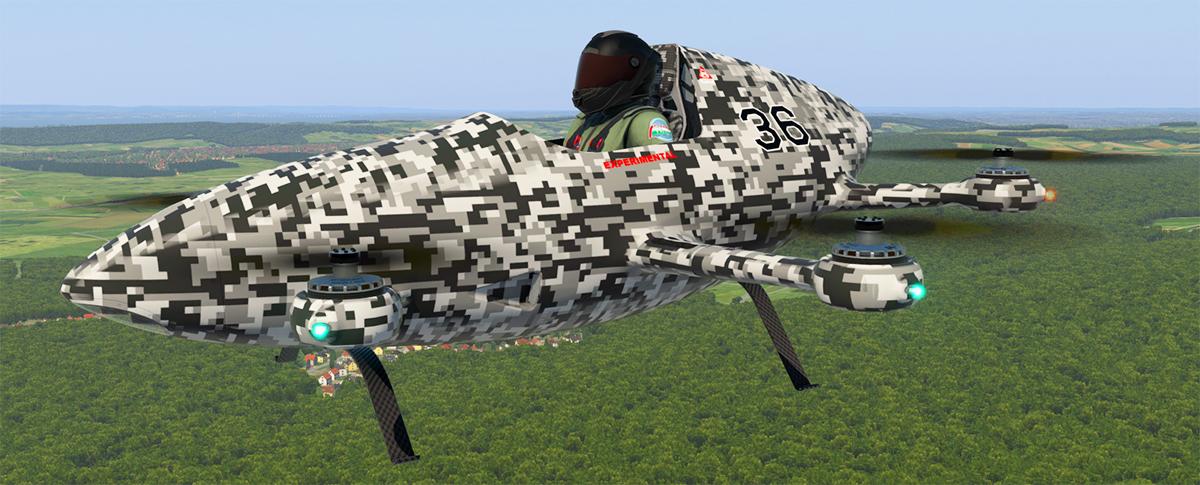
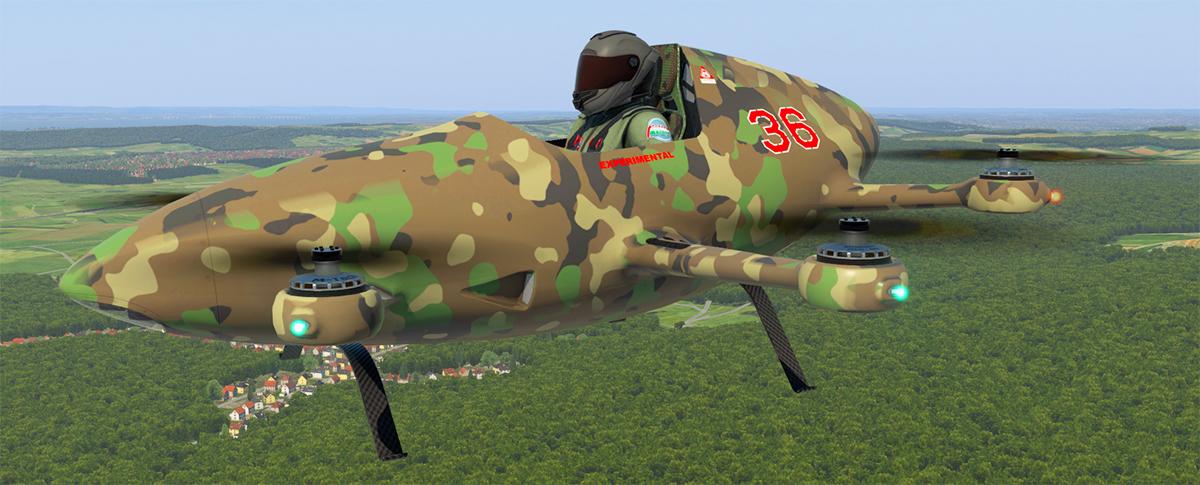
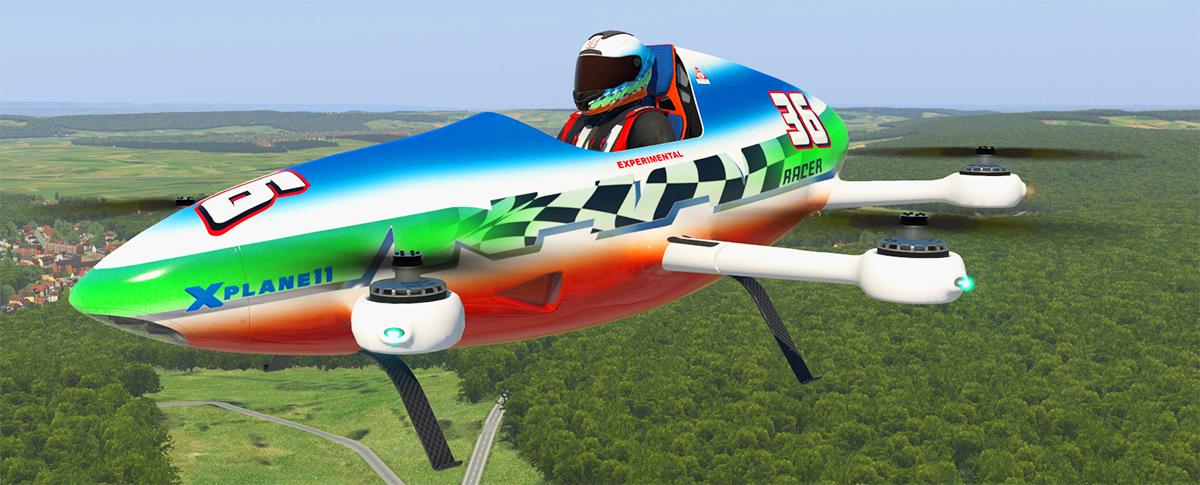


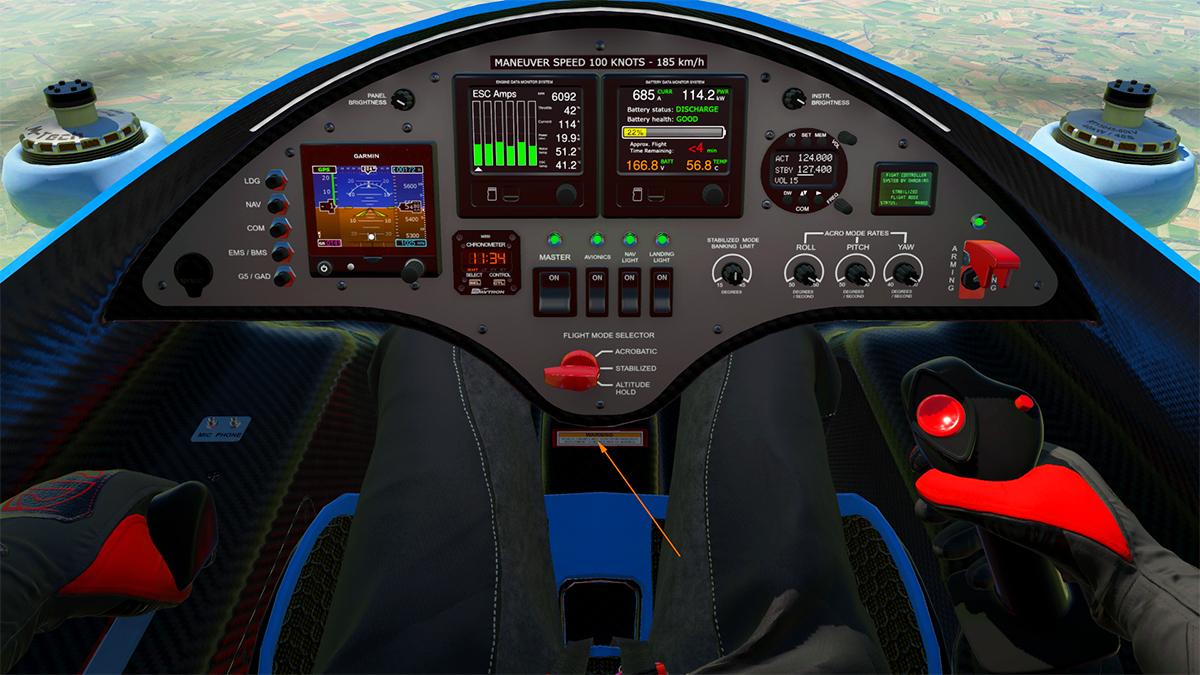
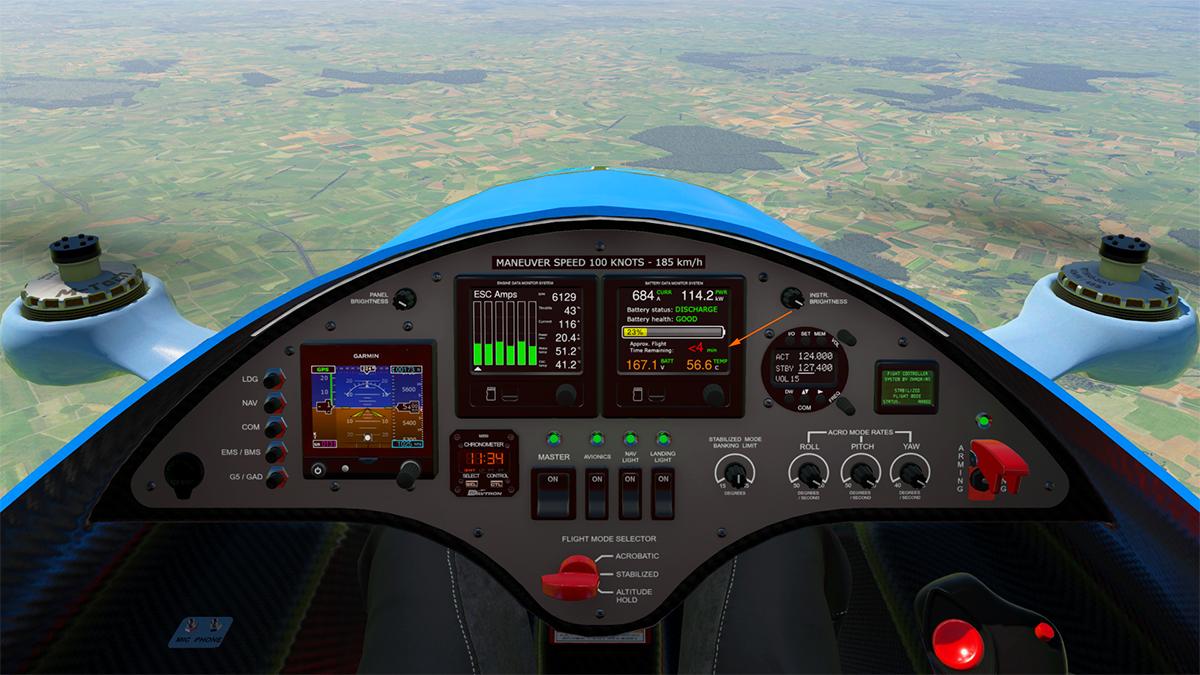
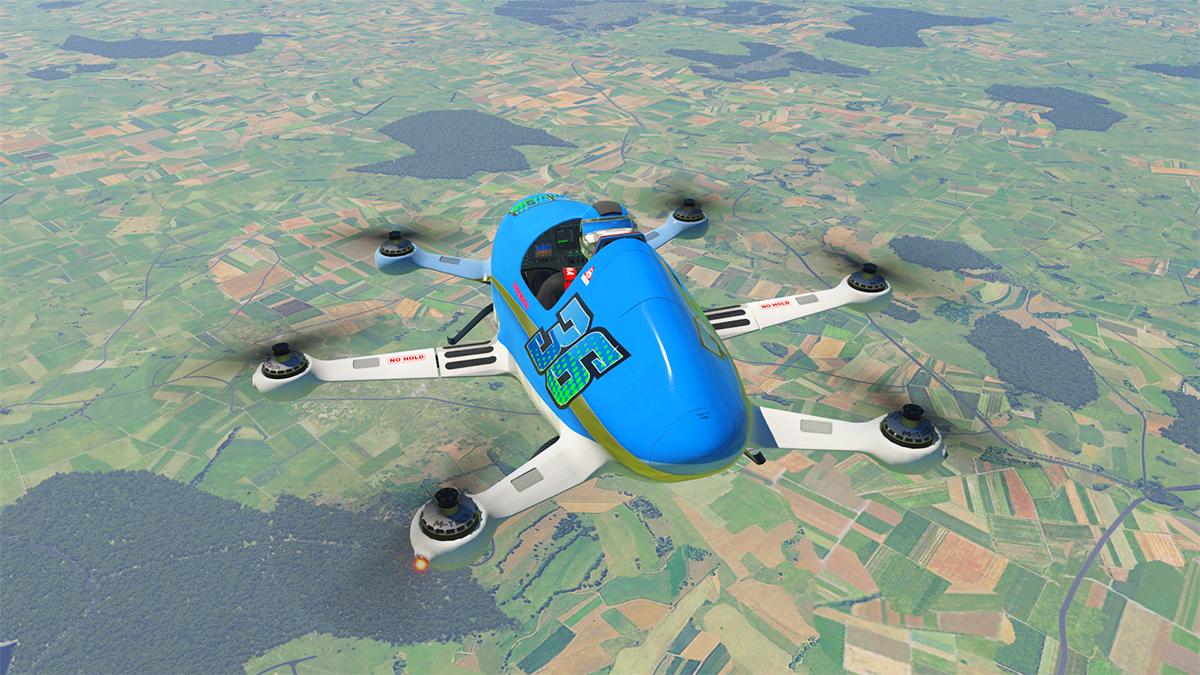
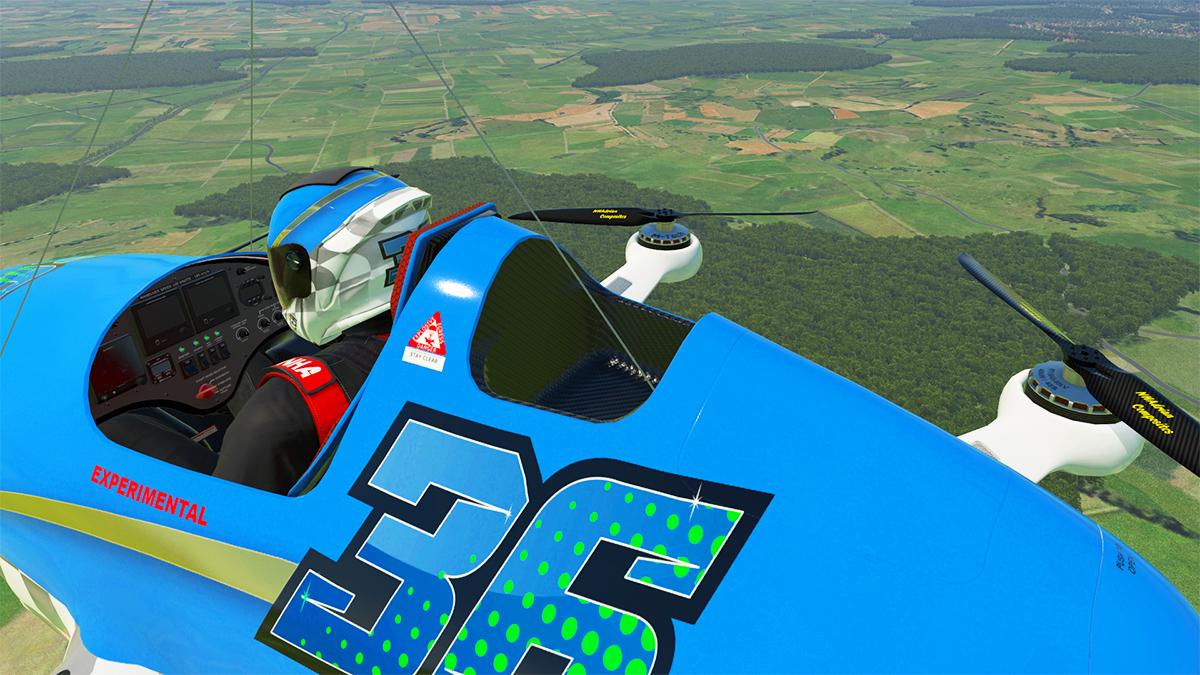
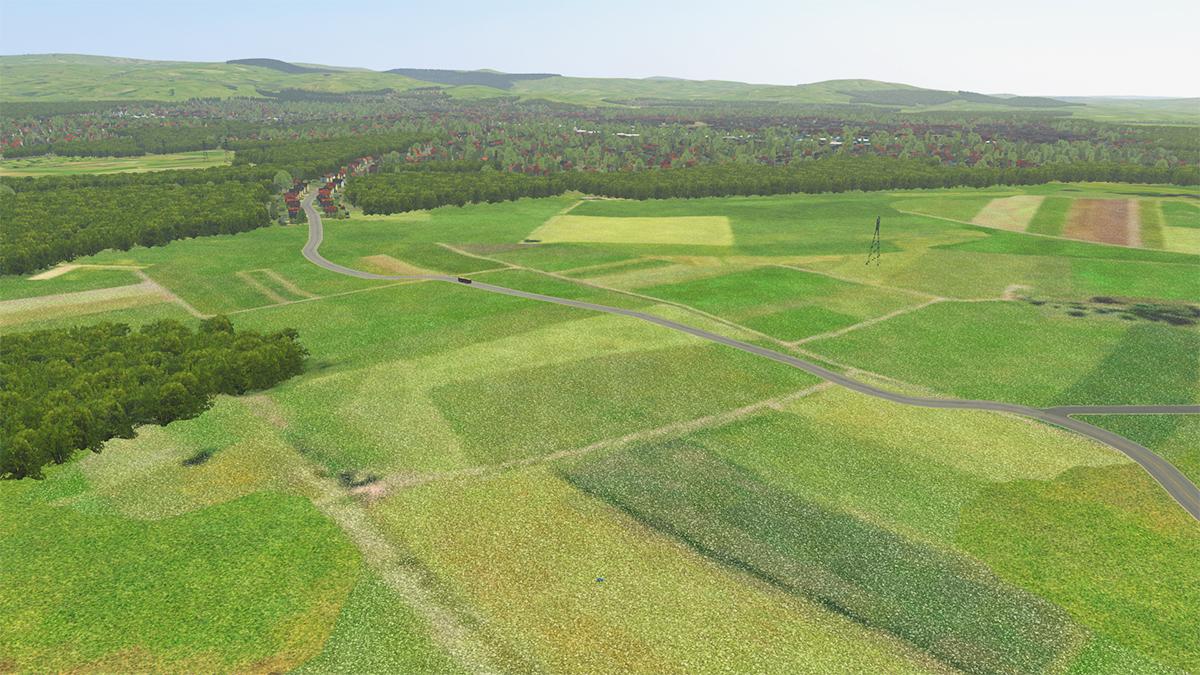
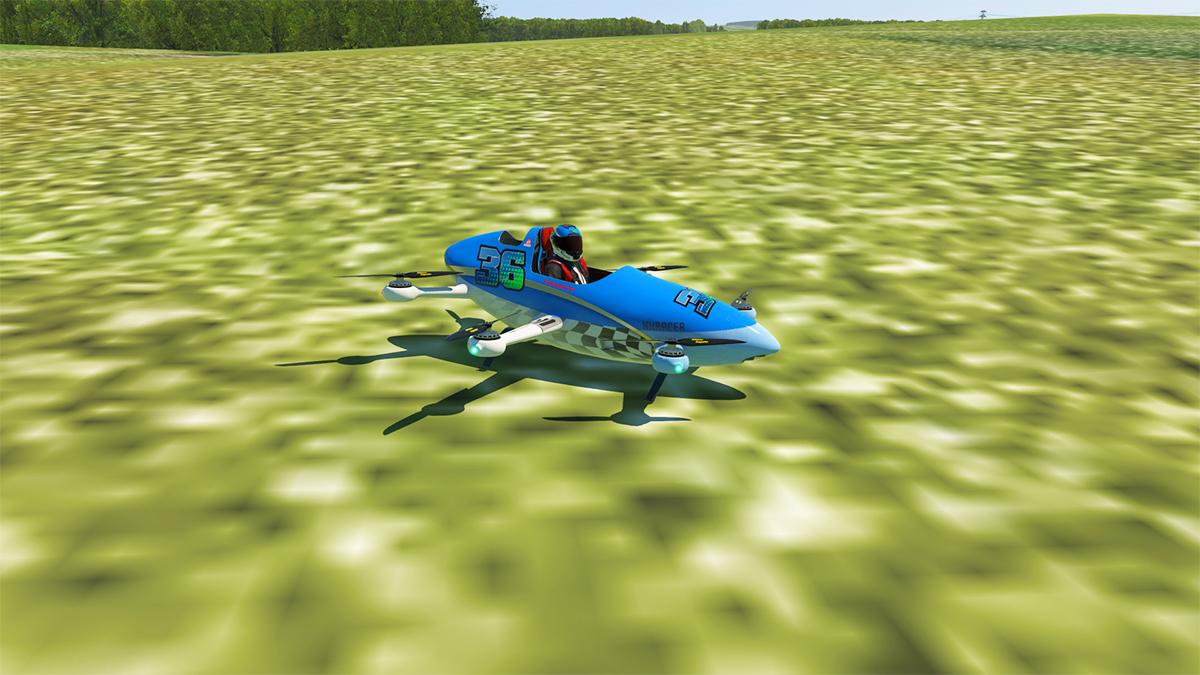
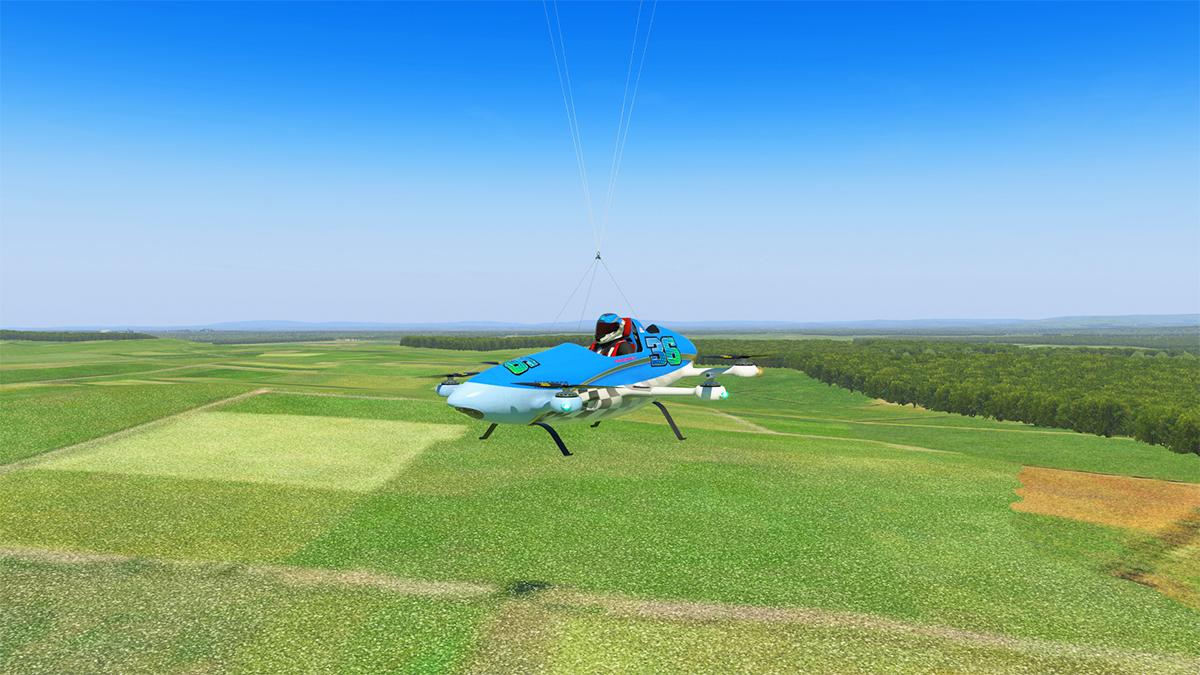


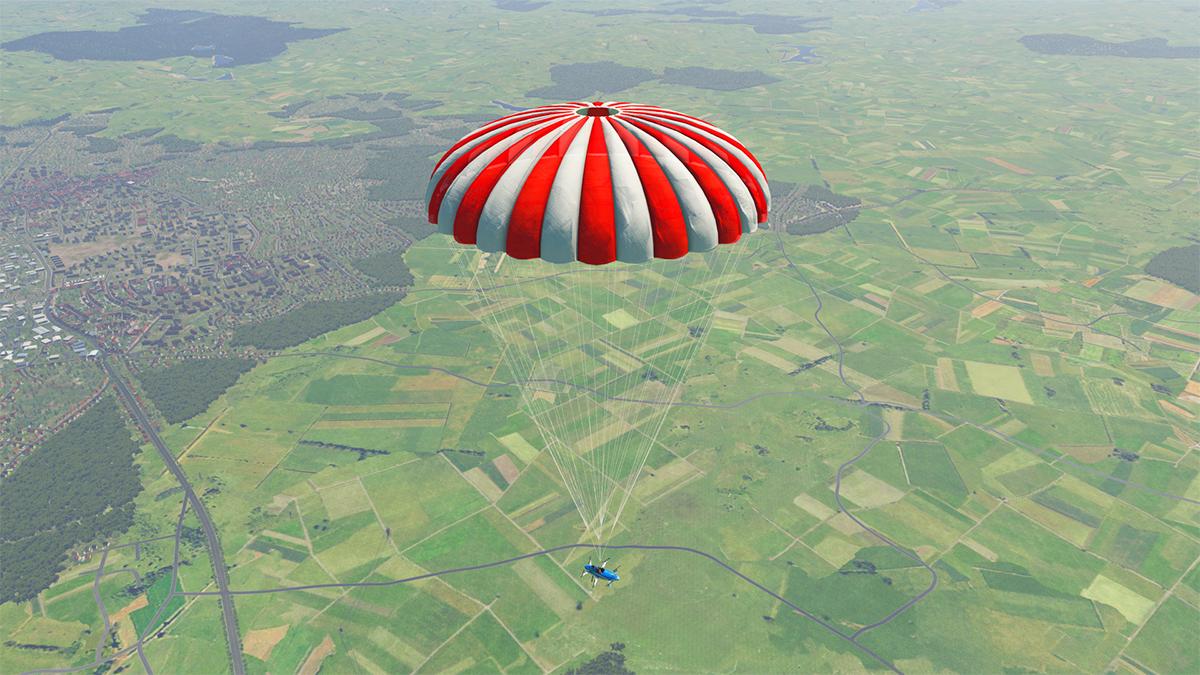


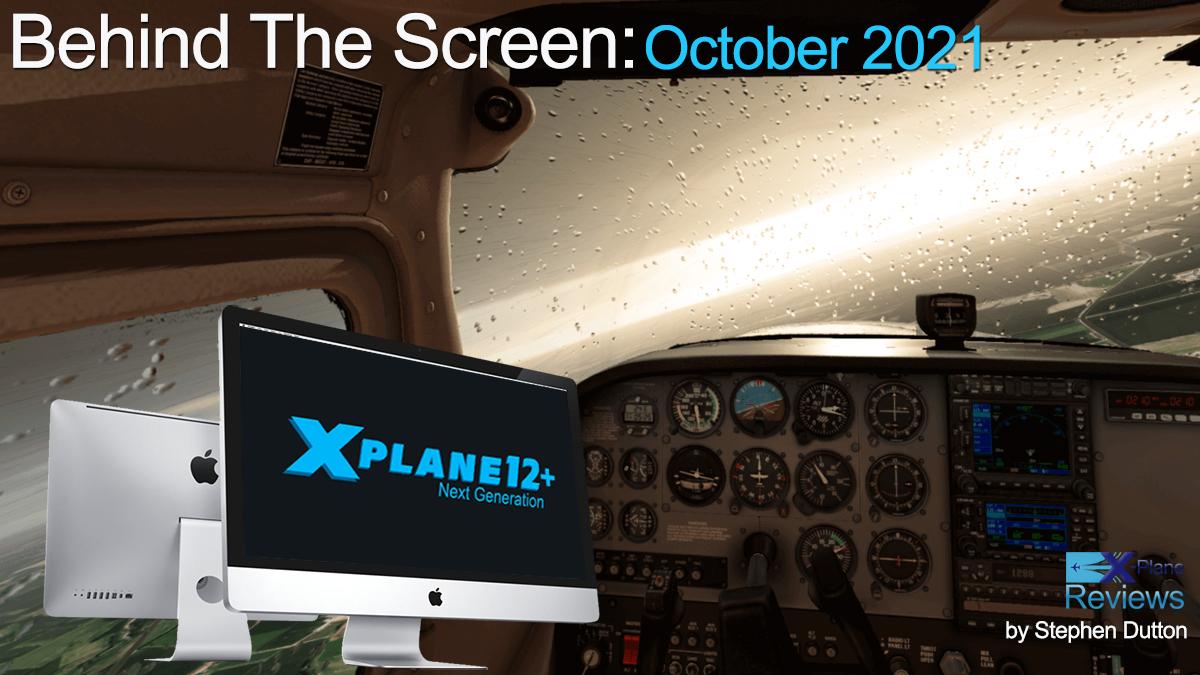


.jpg.dc1951d07c1a5182b848b7c393e41bbf.jpg)
.jpg.9a0815badfa1676f6984f76466b4c3a5.jpg)
.jpg.f81a5d07baa901ed83dd89a39031b1dc.jpg)
.jpg.e2440def763bc91ce4a7739d52af75a8.jpg)
.jpg.a2c4010ddb11e316a7e99570512c75d8.jpg)
.jpg.aa2a1466fd745a3c67c1a015aabde400.jpg)
.jpg.4fb8ecc8bd9afc81101333382017e4e3.jpg)
.jpg.0e22ffb8720327f0dc779ac16450437f.jpg)
.jpg.d6fc7aefd62da12579da622472b17825.jpg)
.jpg.374a598ac8bd0a42a88941e69fc5b7af.jpg)
.jpg.7739d2ee7821c2e015eefcd061b304d7.jpg)
.jpg.ee51354cac44e4e74e12e54657d33e8b.jpg)
.jpg.f97546b96d656b7c14c0e91e965671f7.jpg)
.jpg.206b5ee38ad3a34dff6c7ffc71f8ad47.jpg)
.jpg.30a95344e3d9ff0d6922c1d9f69c5482.jpg)
.jpg.c90d647a5d8b0c4ff4eb8b8b76828aff.jpg)
.jpg.bb378fa5760c8c8fc9f422fa1f438e0b.jpg)
.jpg.6bf650efc82af1906abe3a0af4f89317.jpg)
.jpg.1394e351ee8ac59925747a4677fbbfd2.jpg)
.jpg.56ba1335ec2761a19cb327816e2fe992.jpg)
.jpg.829f53ceaf6481f6736a0dd0f3f55858.jpg)
.jpg.3469536dbf618845b0788532adfc4592.jpg)
.jpg.49e32f17d1a6dd84914b80c221429f8d.jpg)
.jpg.1610d99ea378c6479e89c15cb4aa3c7e.jpg)
.jpg.a3a5c5474d7f8190ead36ef7657904be.jpg)
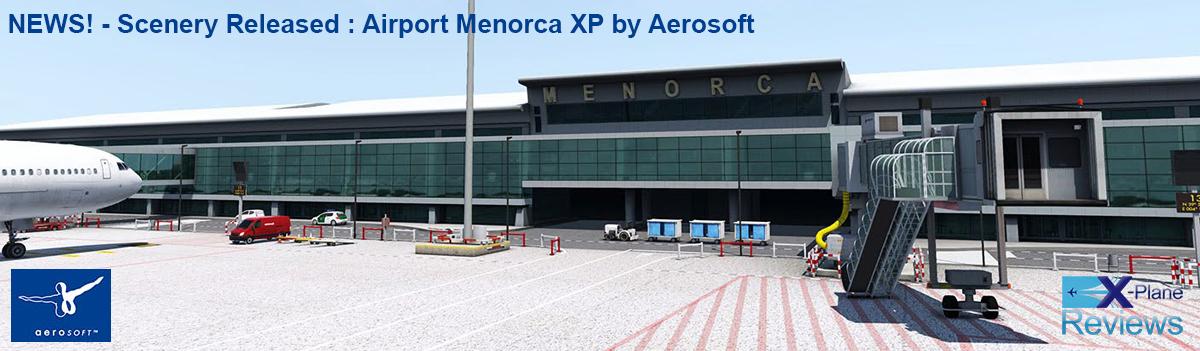


.jpg.5ff3ecb4aa765cd6f7dae6702f2377a6.jpg)
.jpg.43baf6ca9ad5f2cfbfd8f845db7c5b2b.jpg)
.jpg.be7c4980b98b252b76f1538d60539b5f.jpg)
.jpg.bea3aed9e1cd3228cc3b37aedefd8f09.jpg)
.jpg.bf9beddcd383cf53f3555390f4d377d5.jpg)
.jpg.d08f33e8d3372114d14c7c392581b8fb.jpg)
.jpg.bebab408723241e7b8873e276f324dbd.jpg)
.jpg.57505376b94fccdcd00f7b49561b1f97.jpg)
.jpg.b0743deb7449cbdc6b3fd25a004ae1bc.jpg)

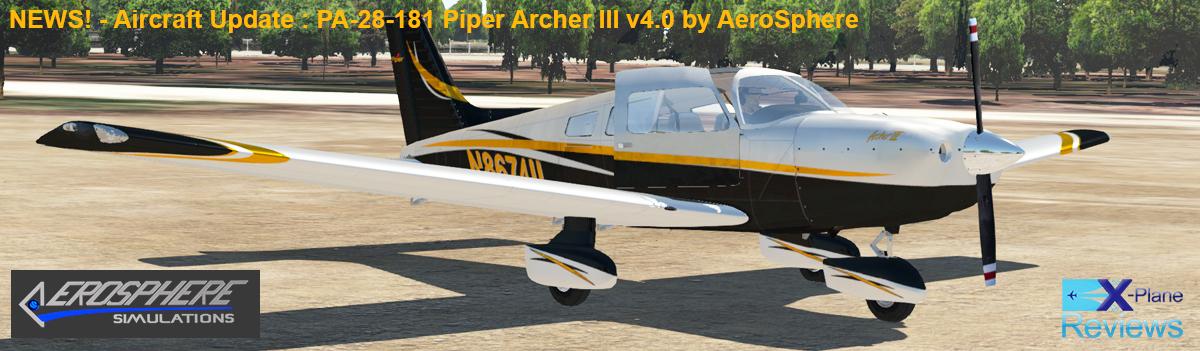

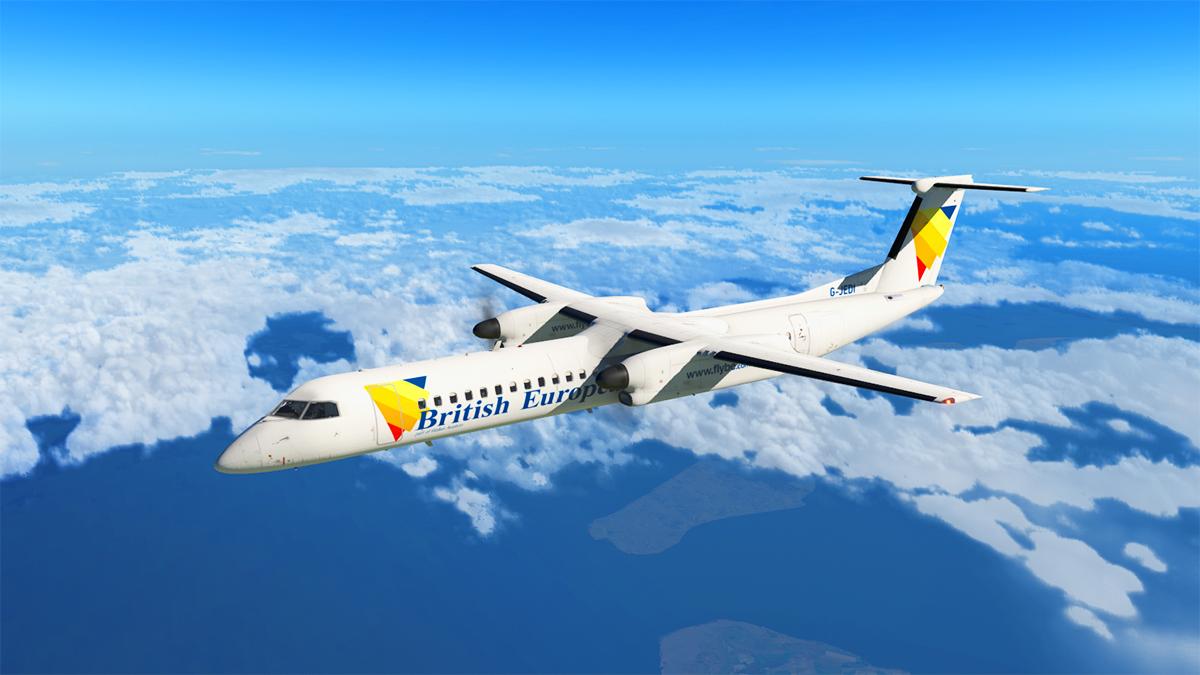


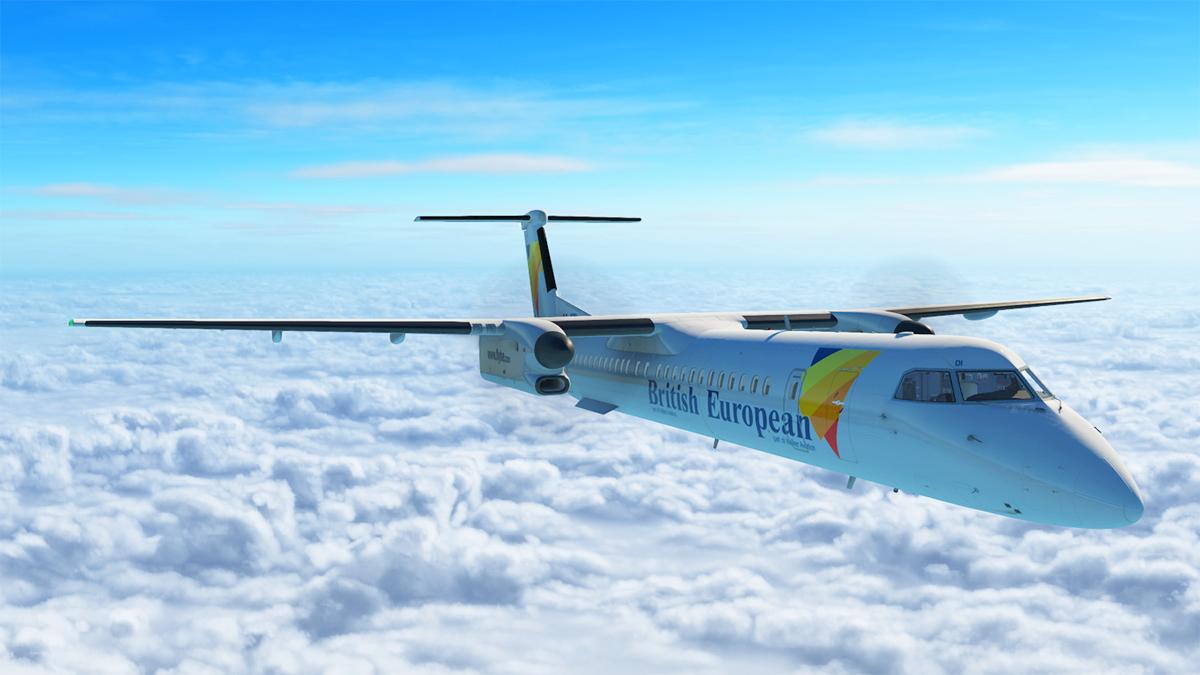


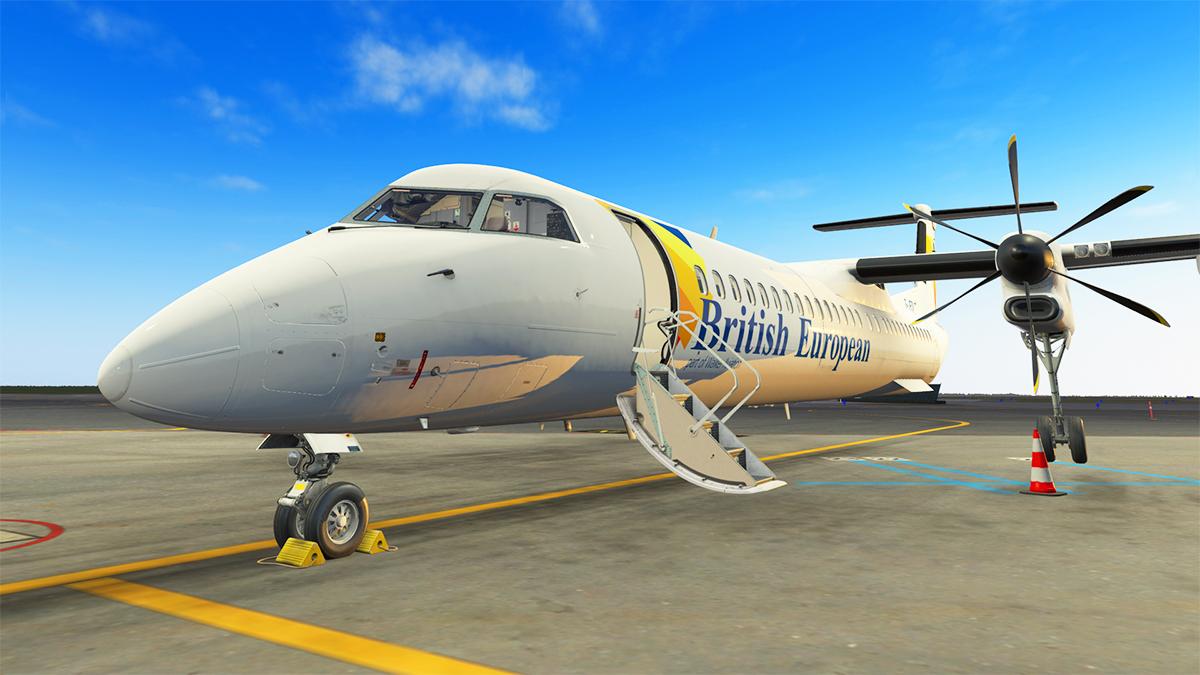
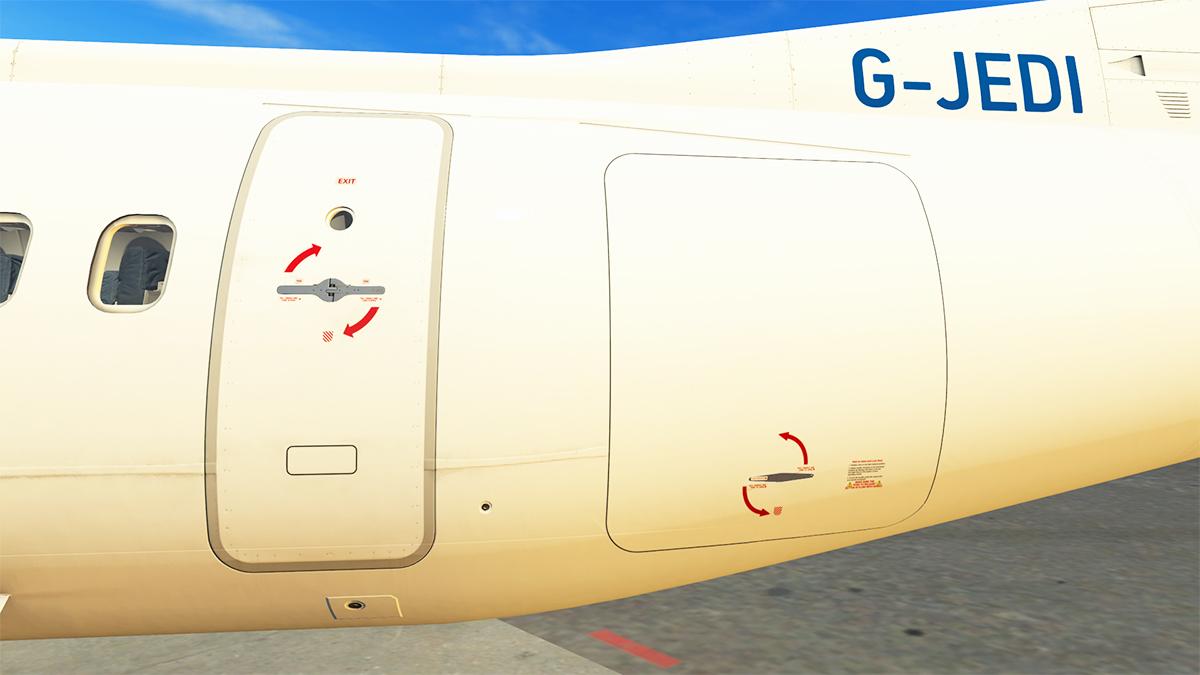
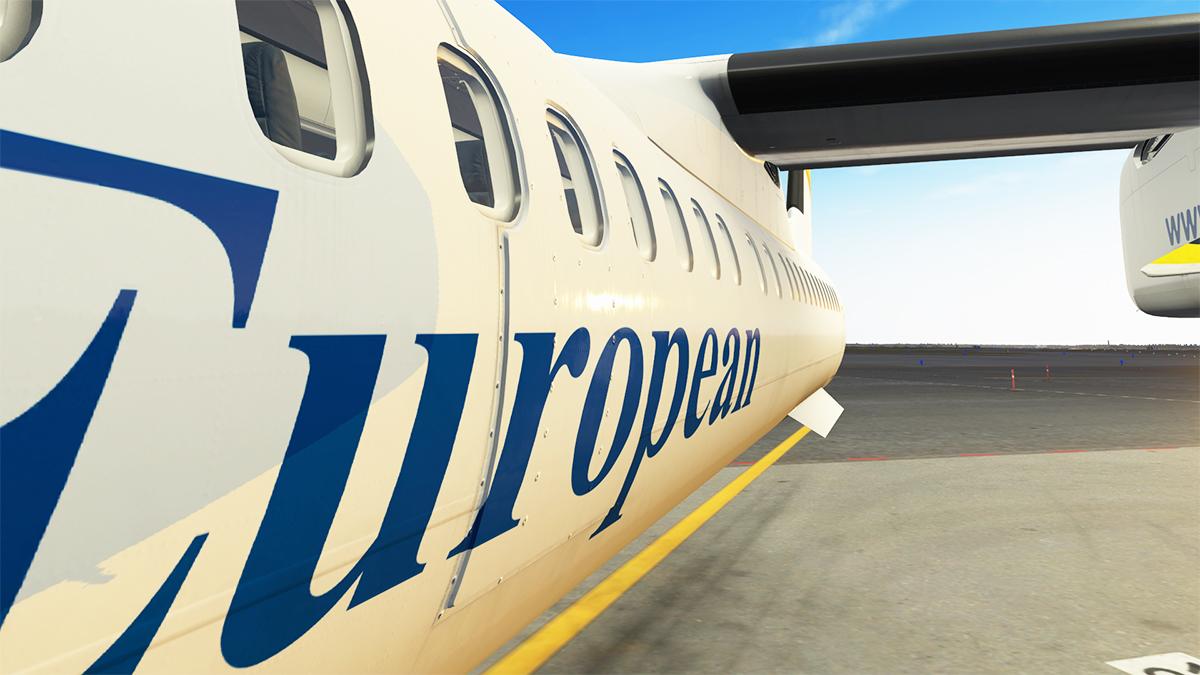
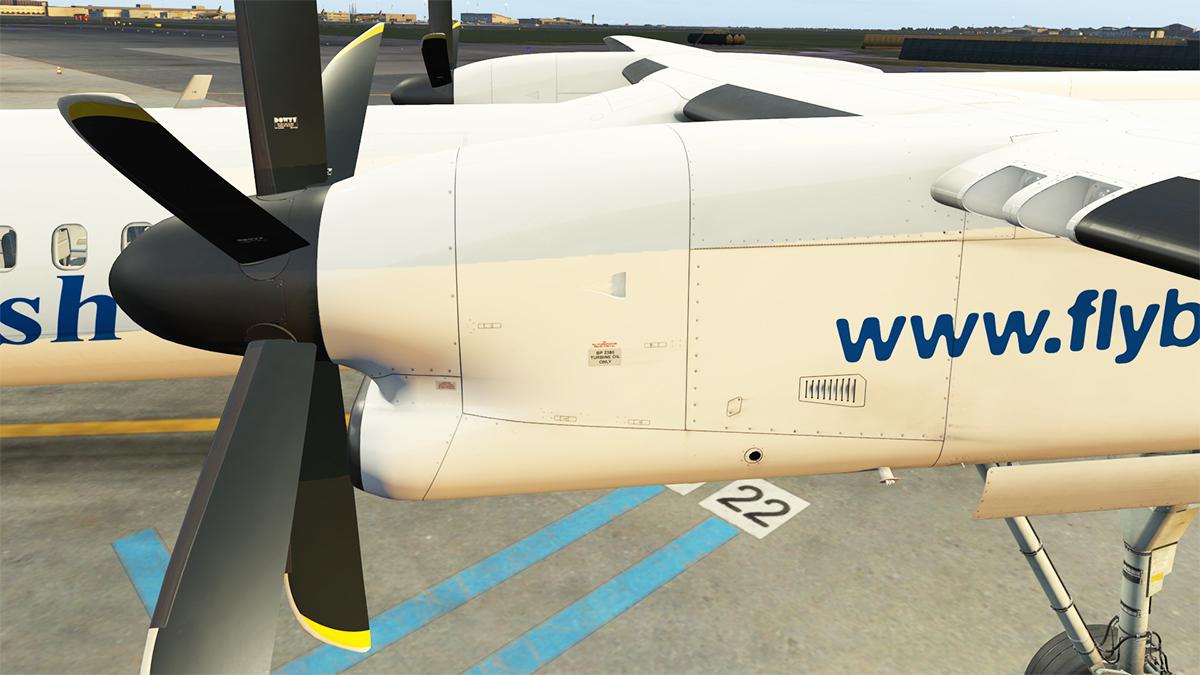

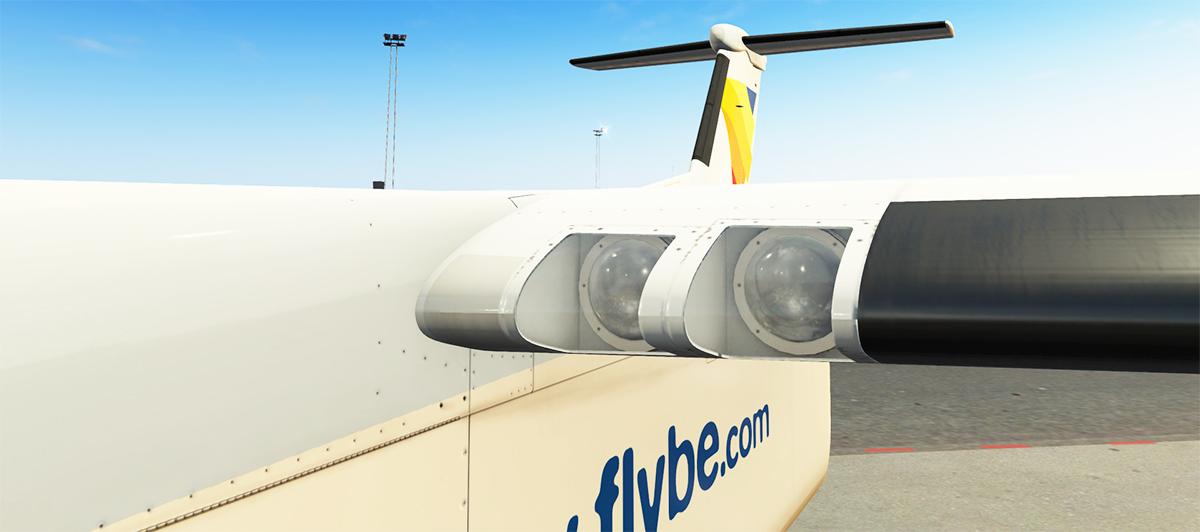
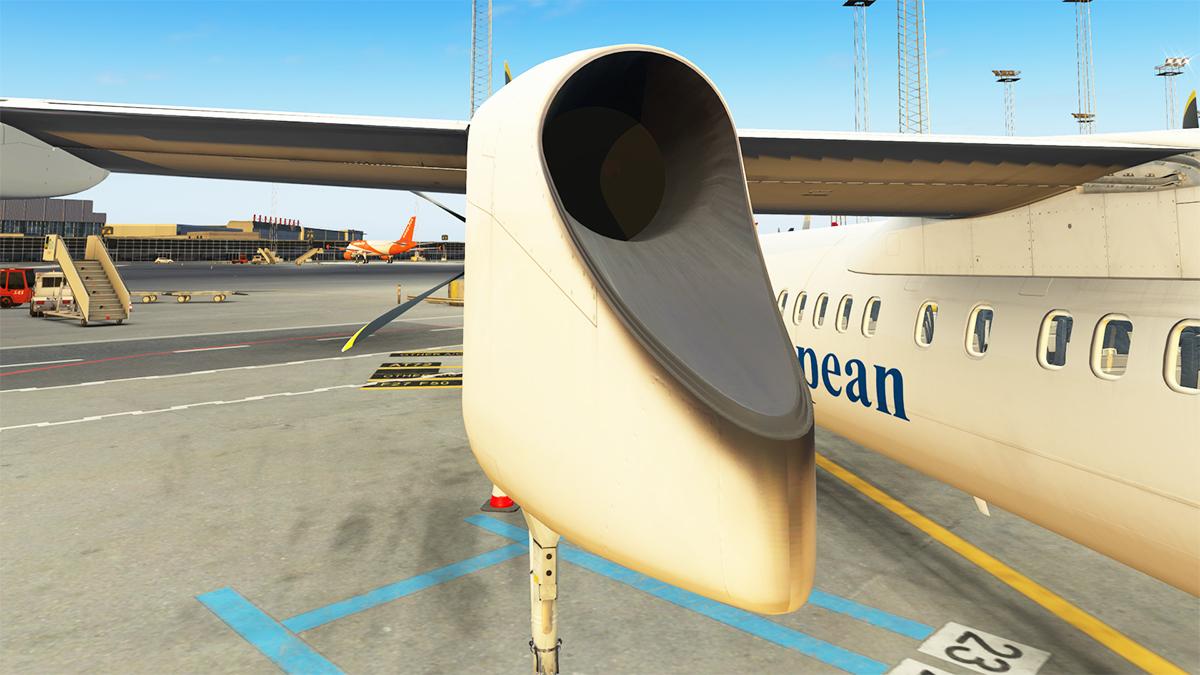
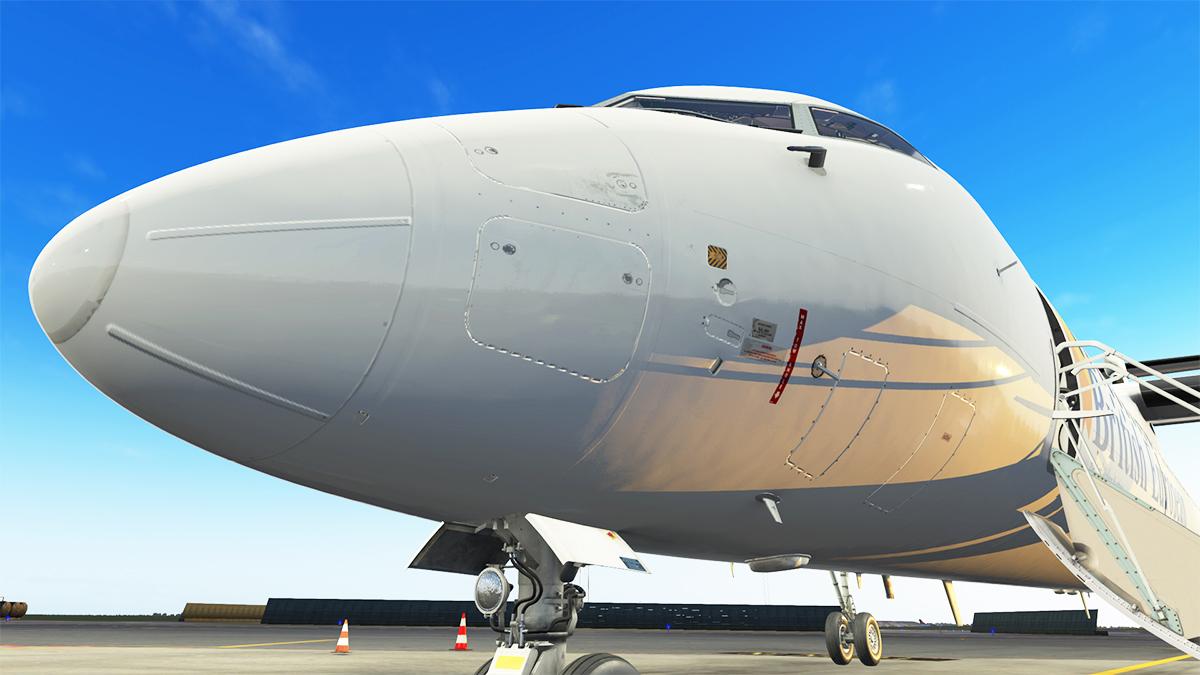

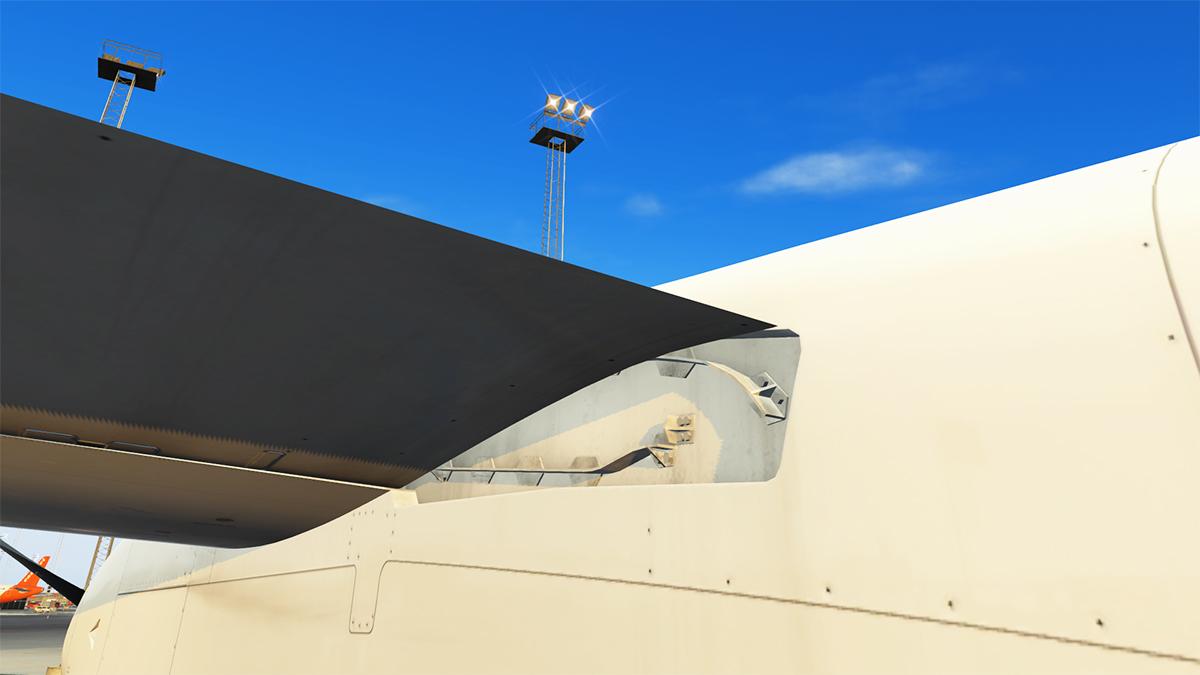
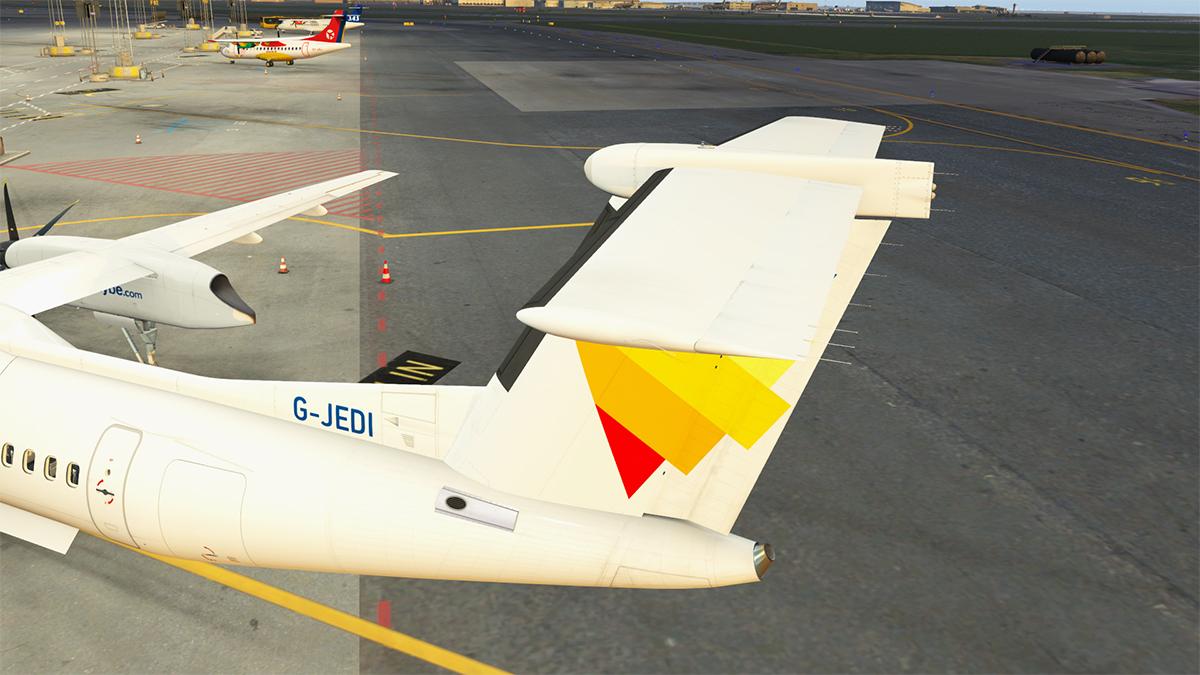
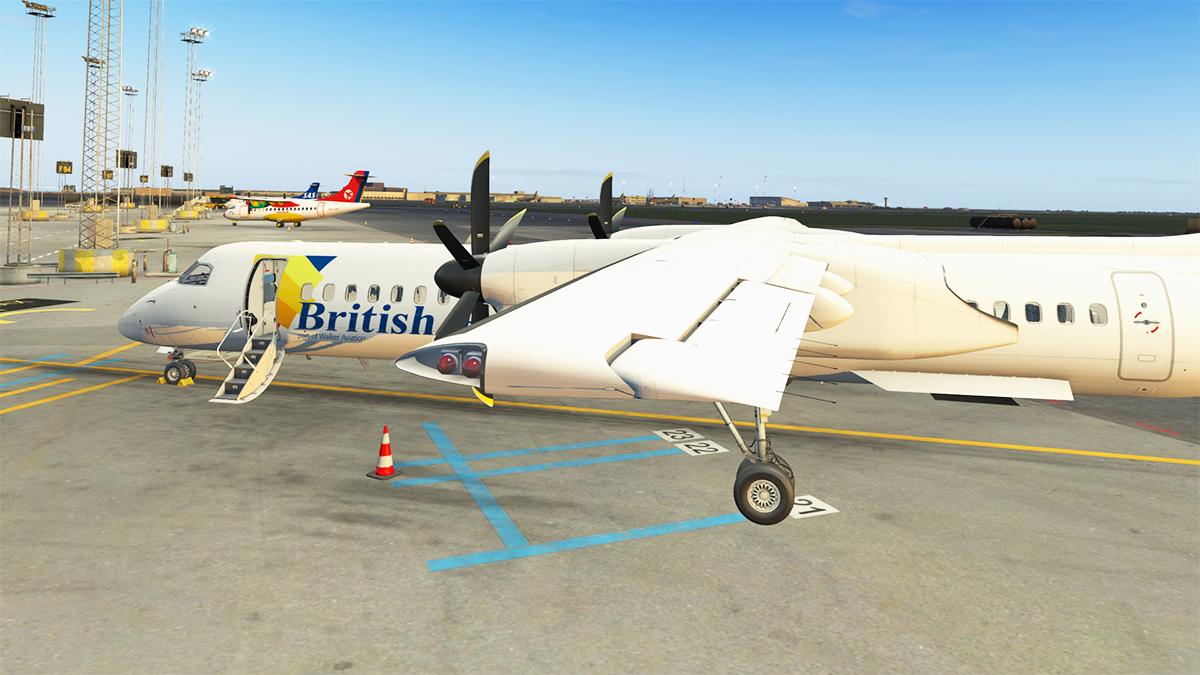
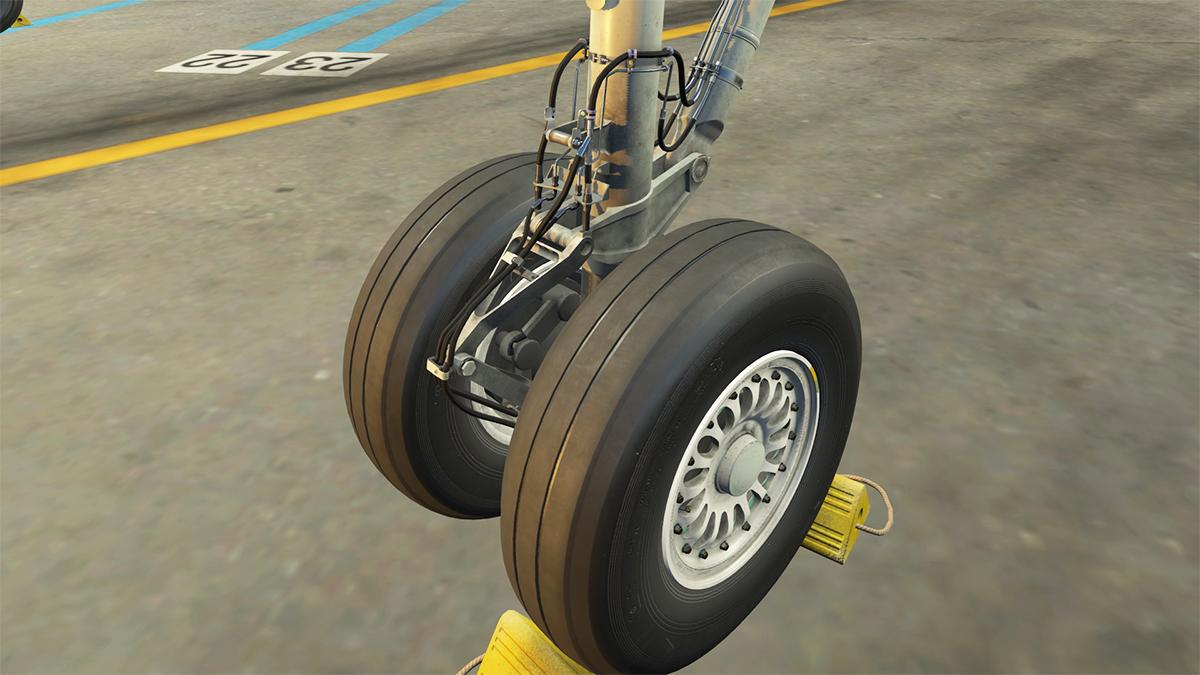
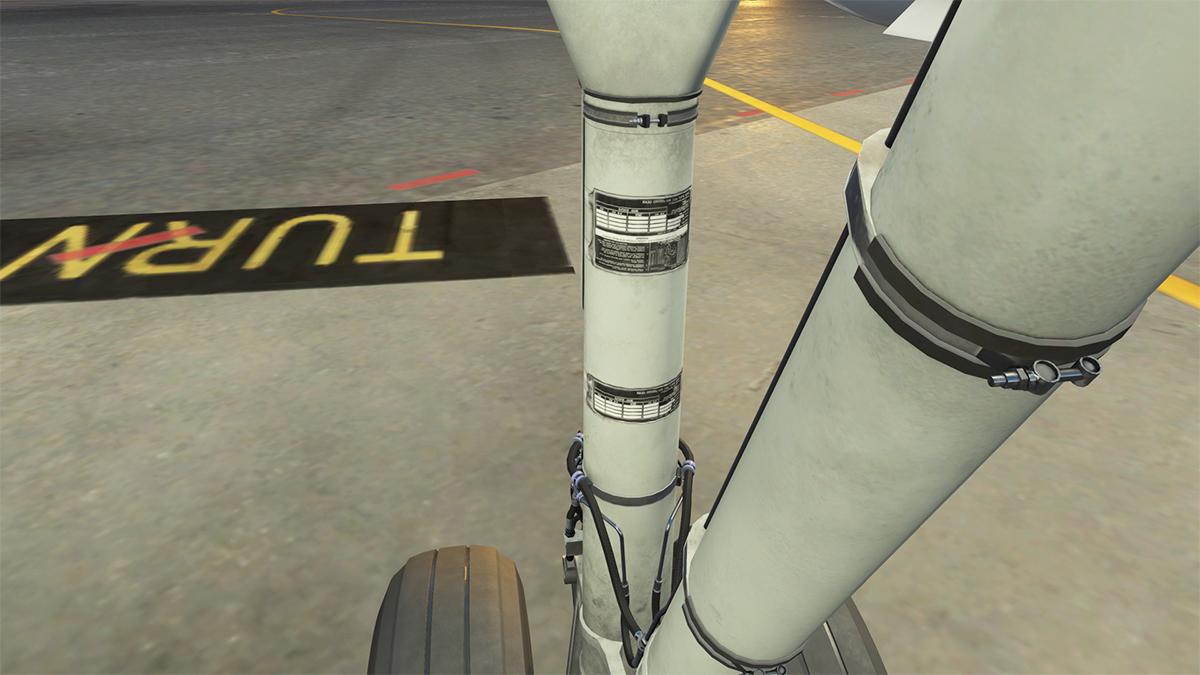


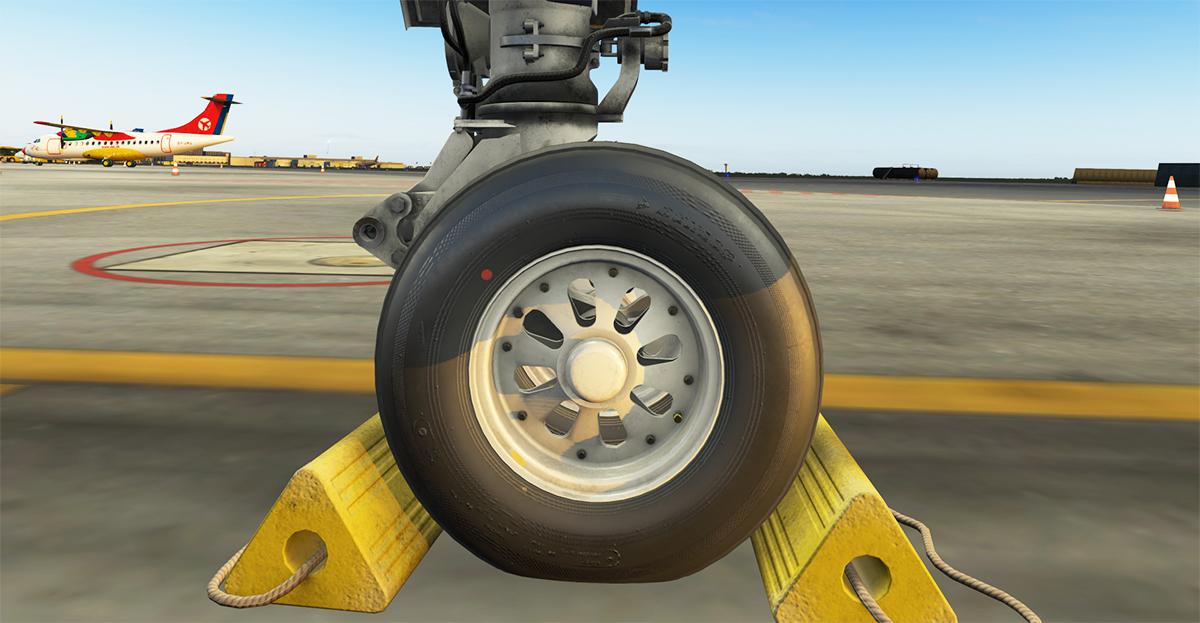

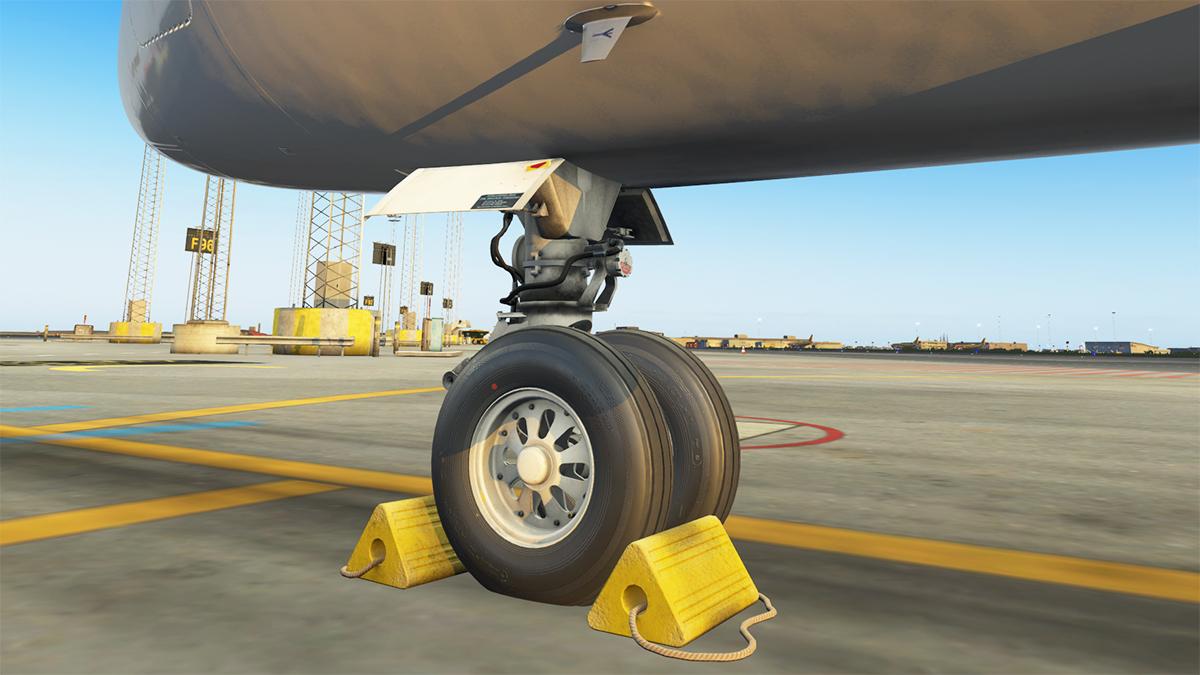
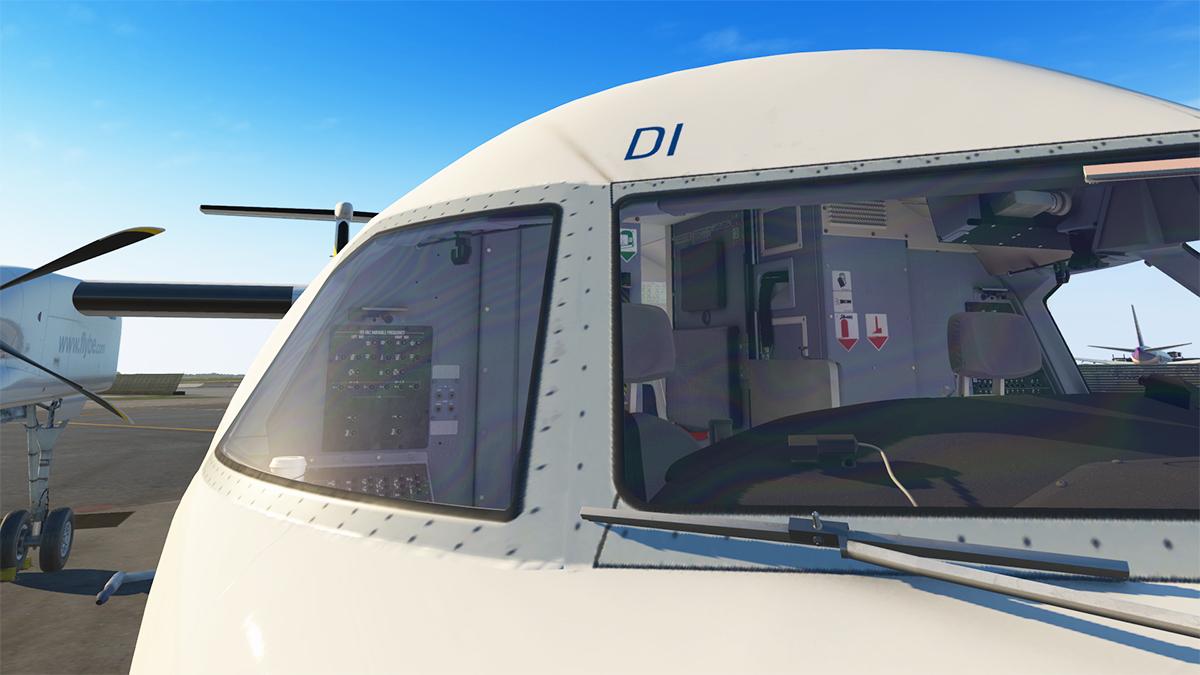
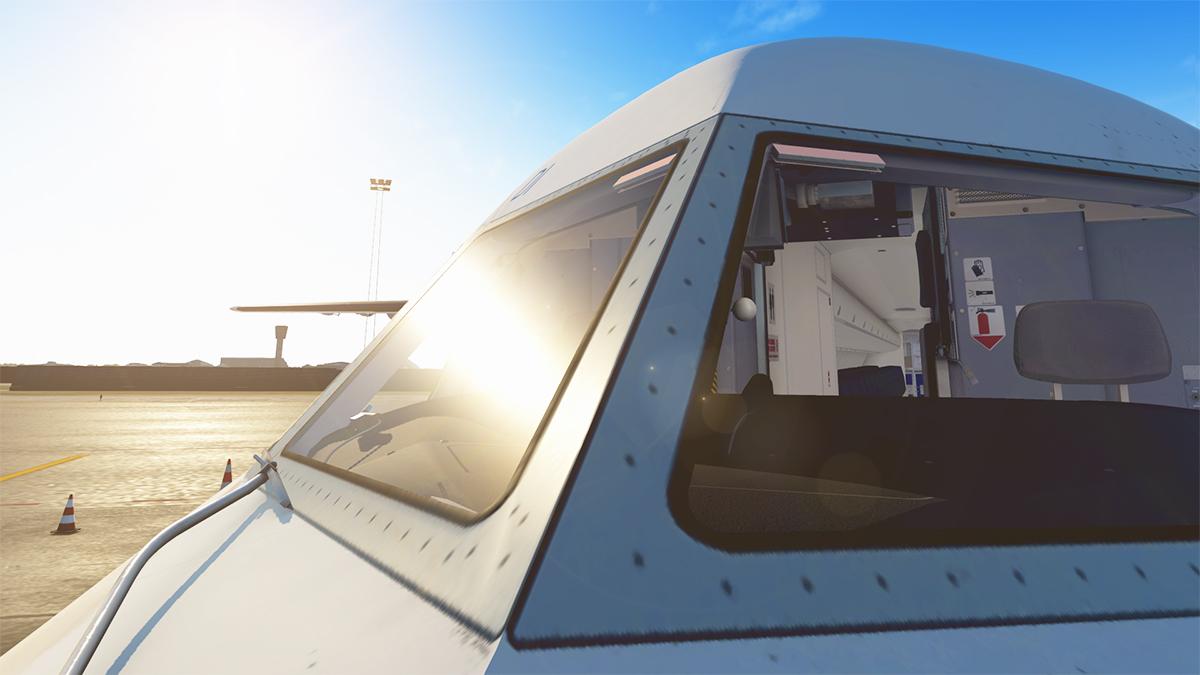

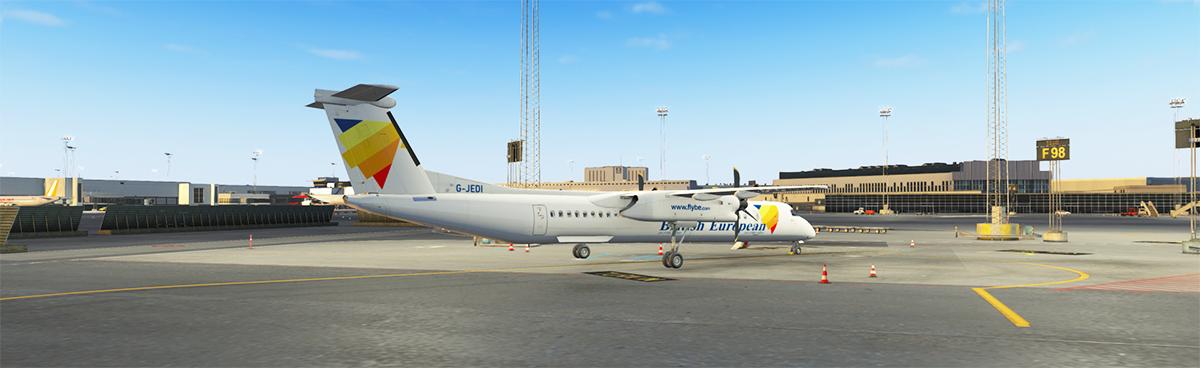
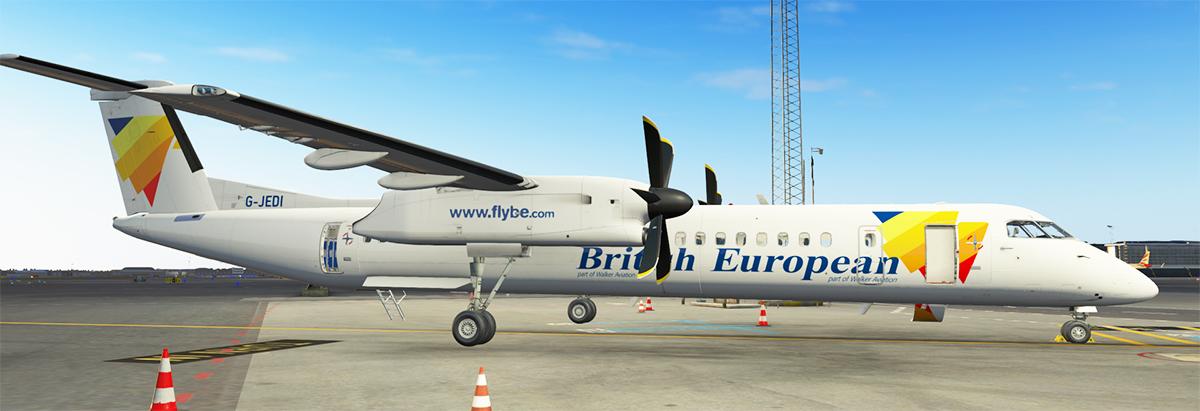

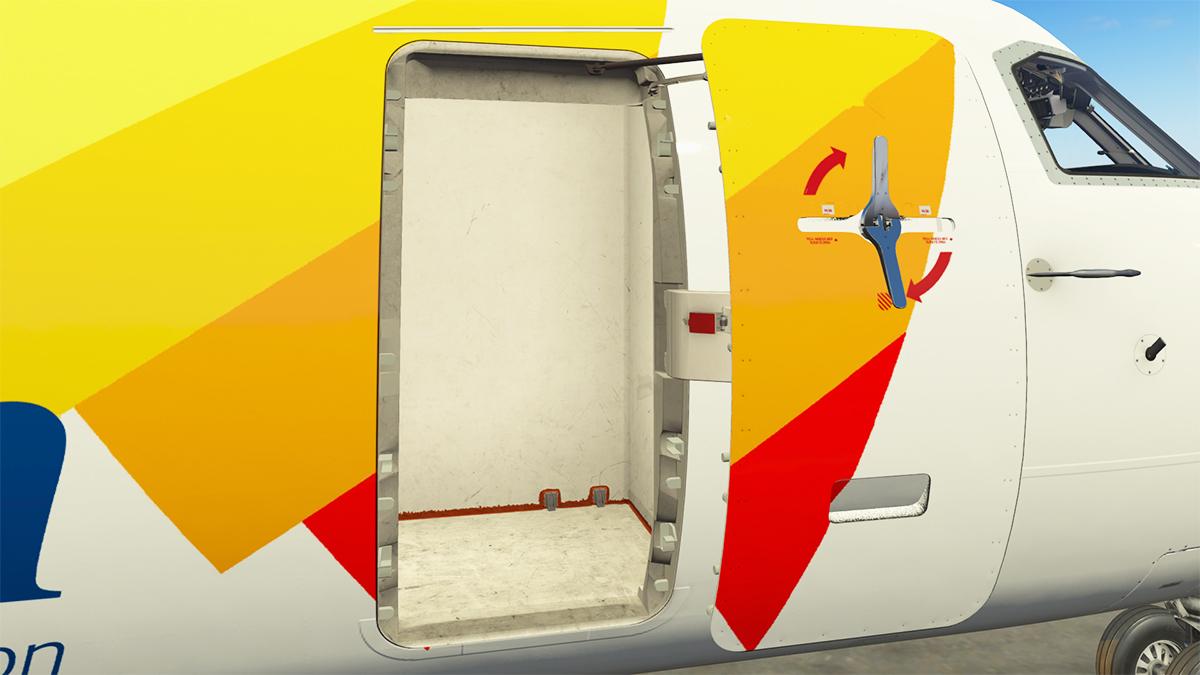
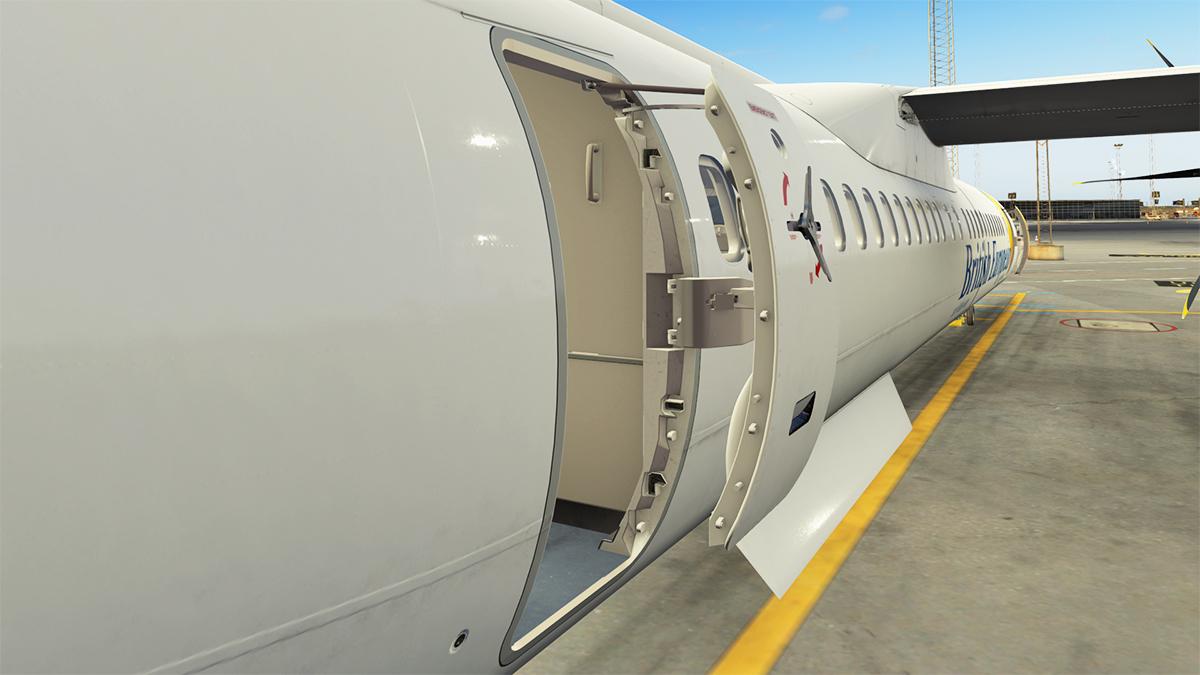
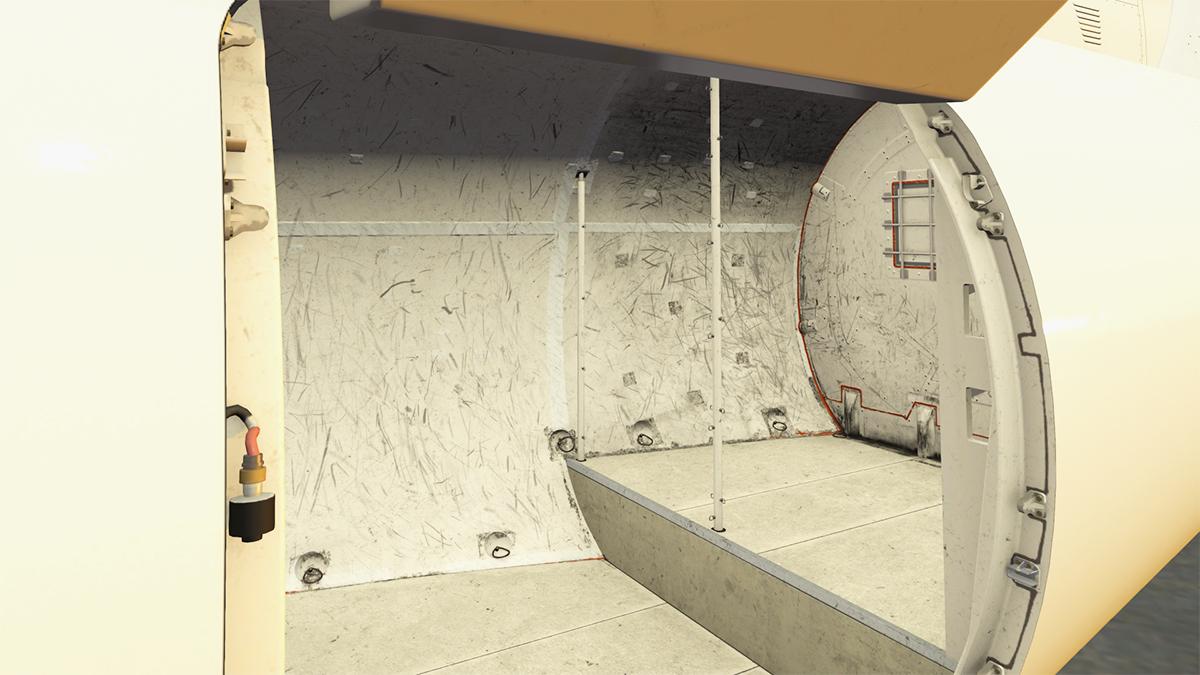
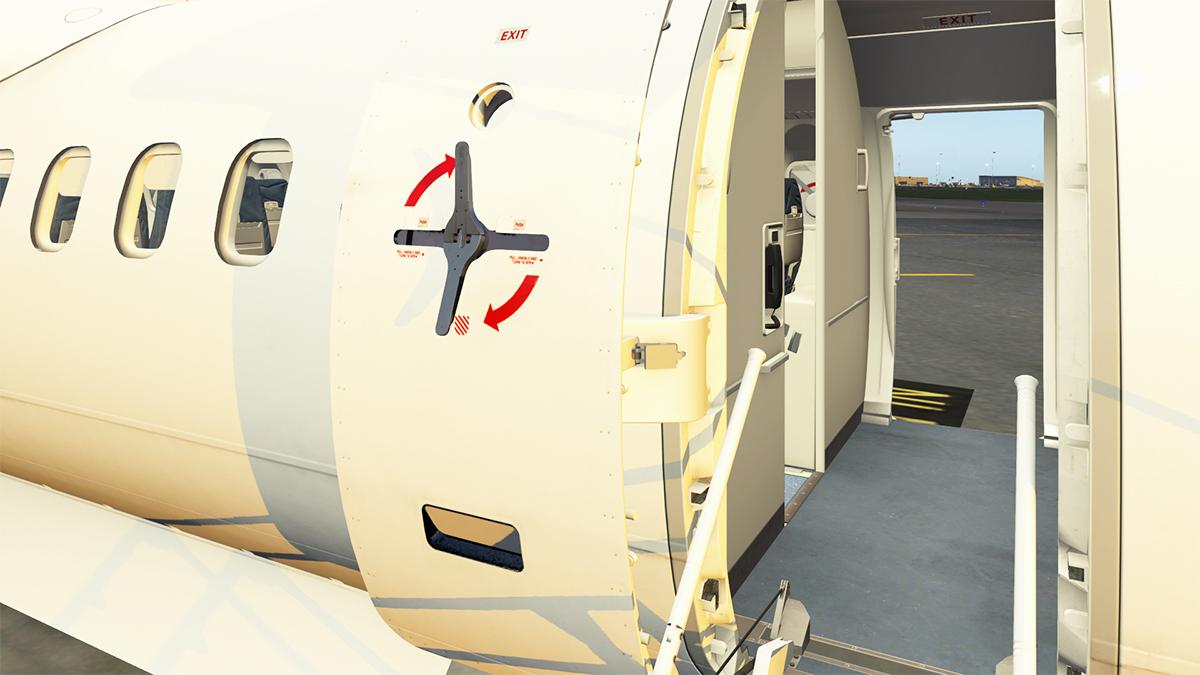
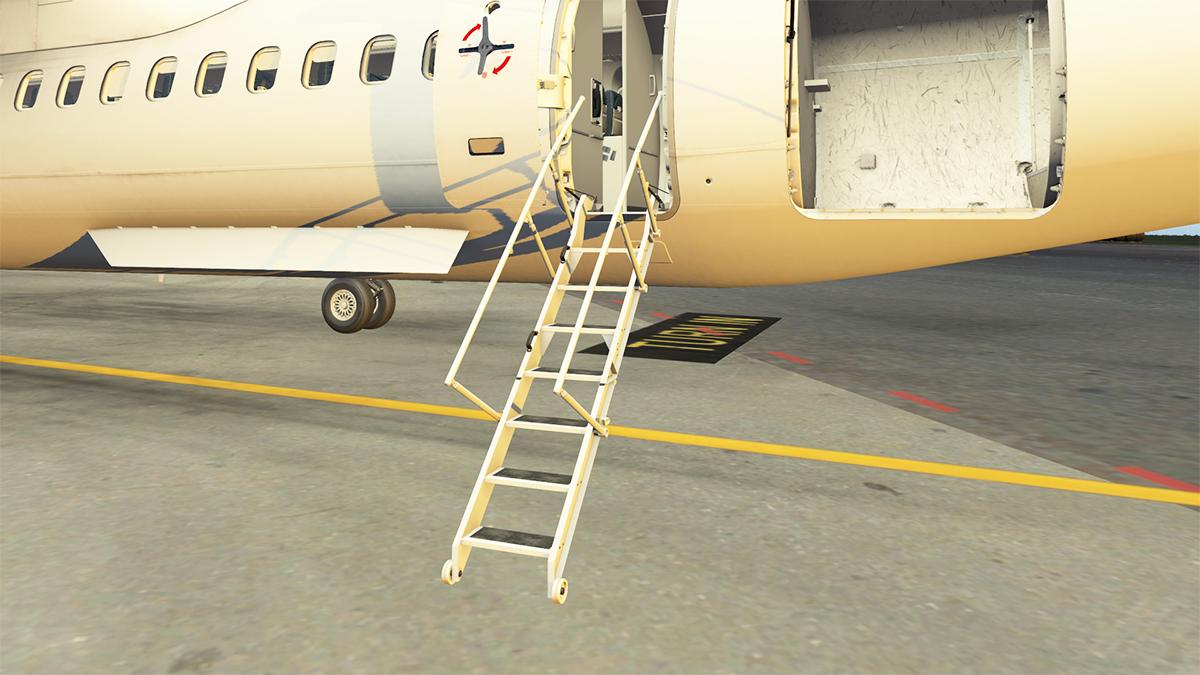
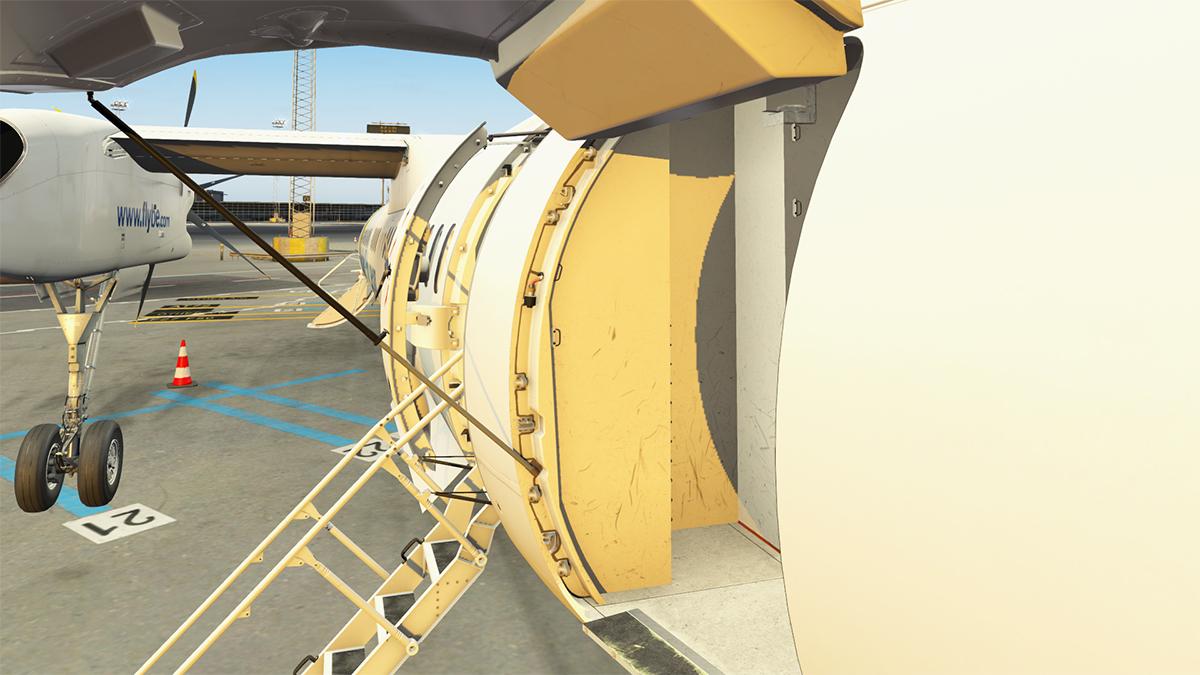

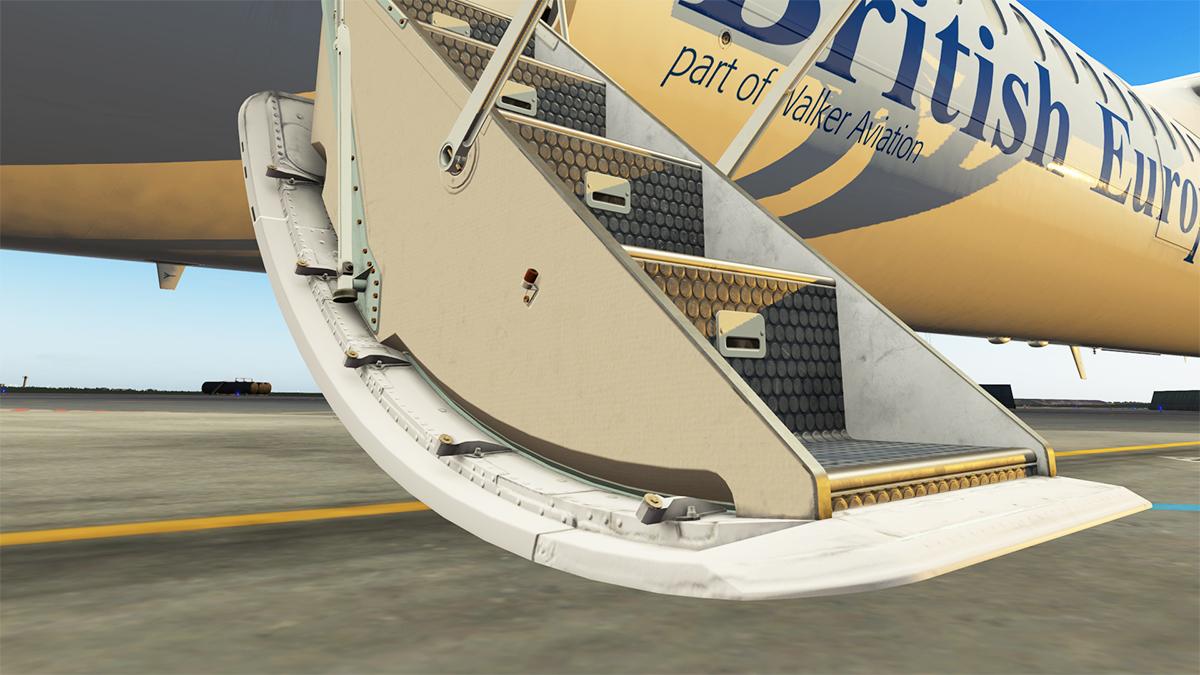
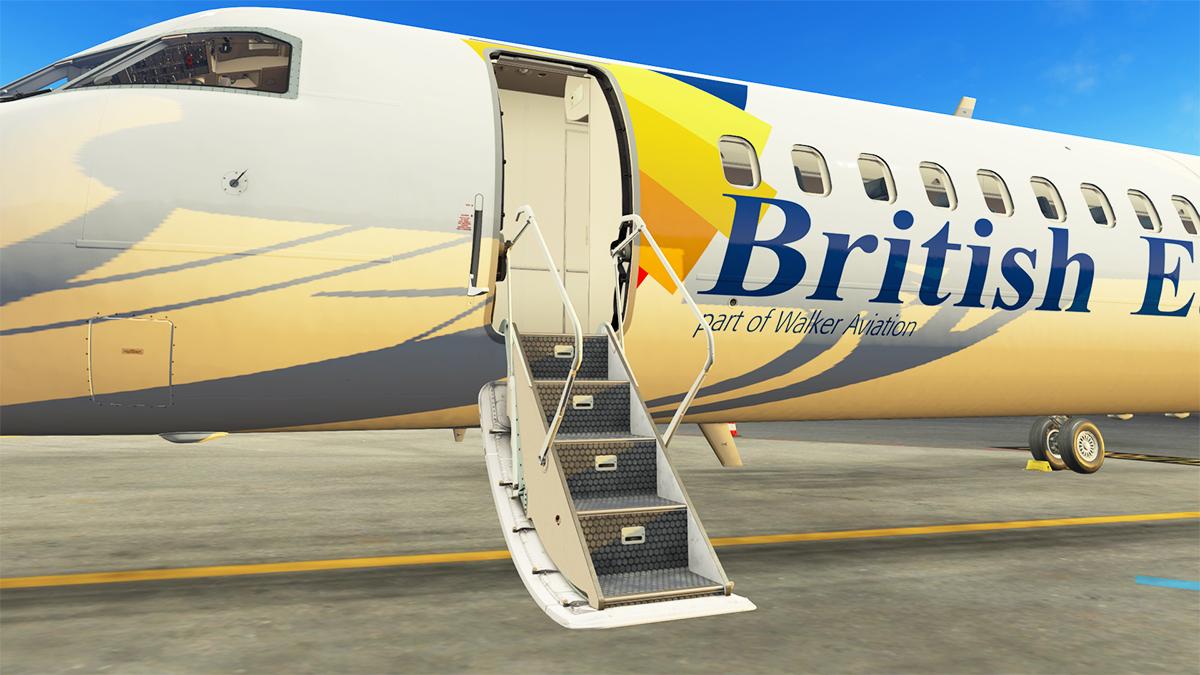

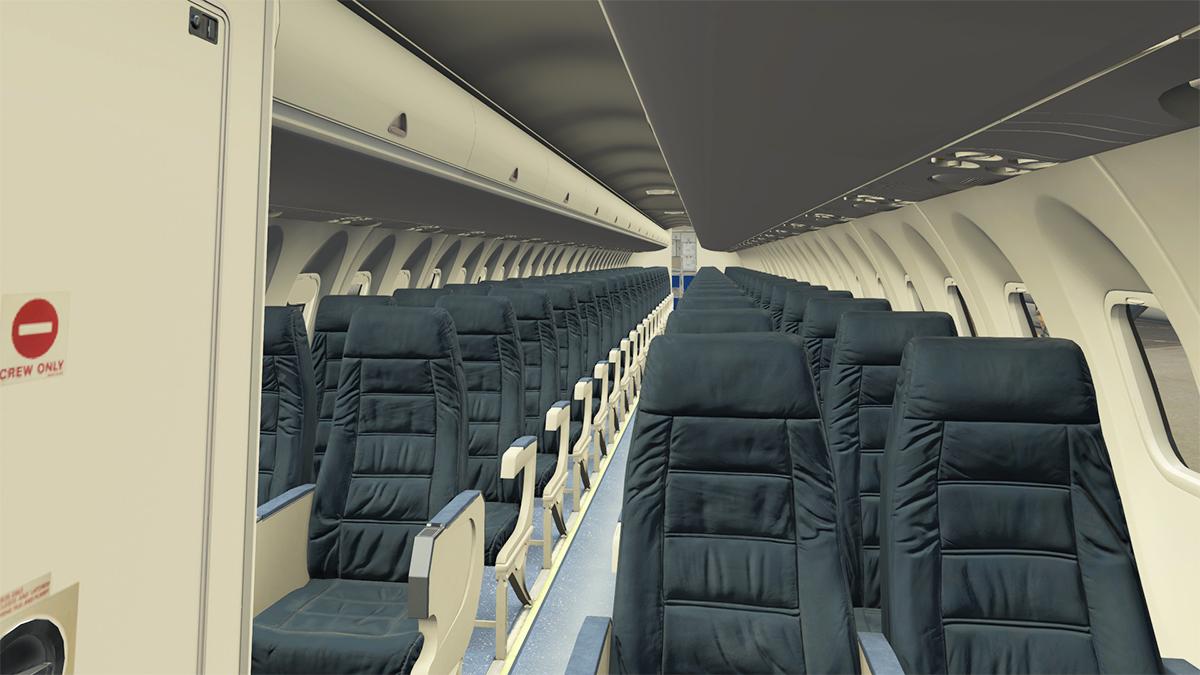

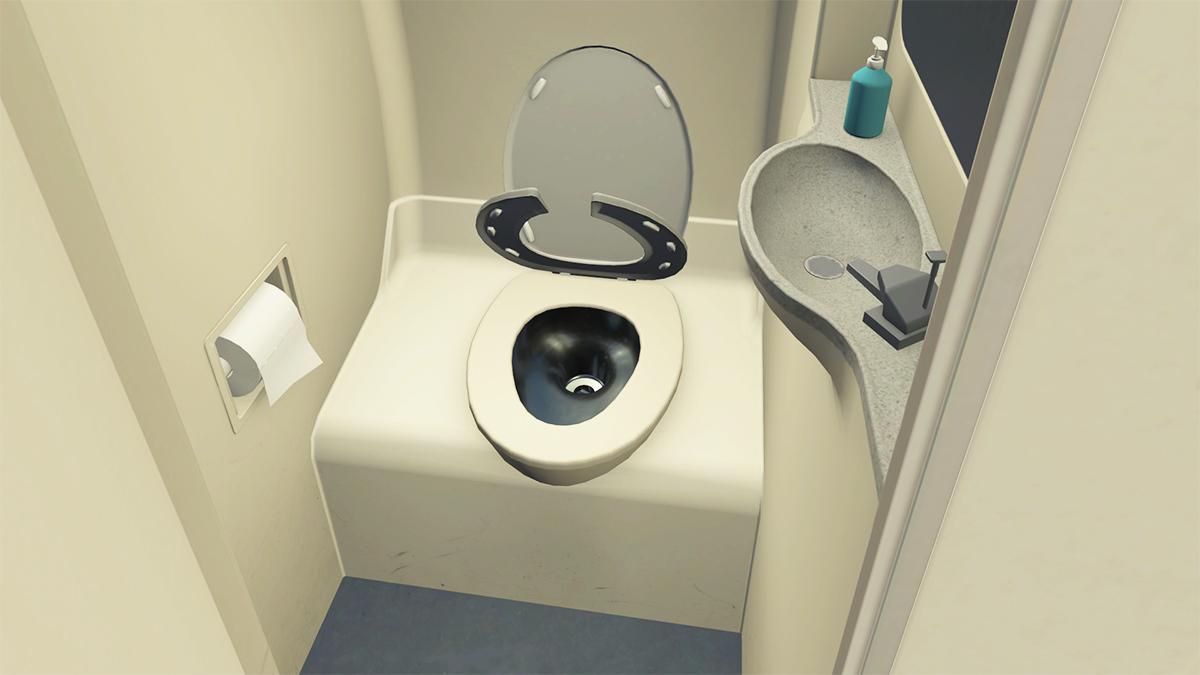

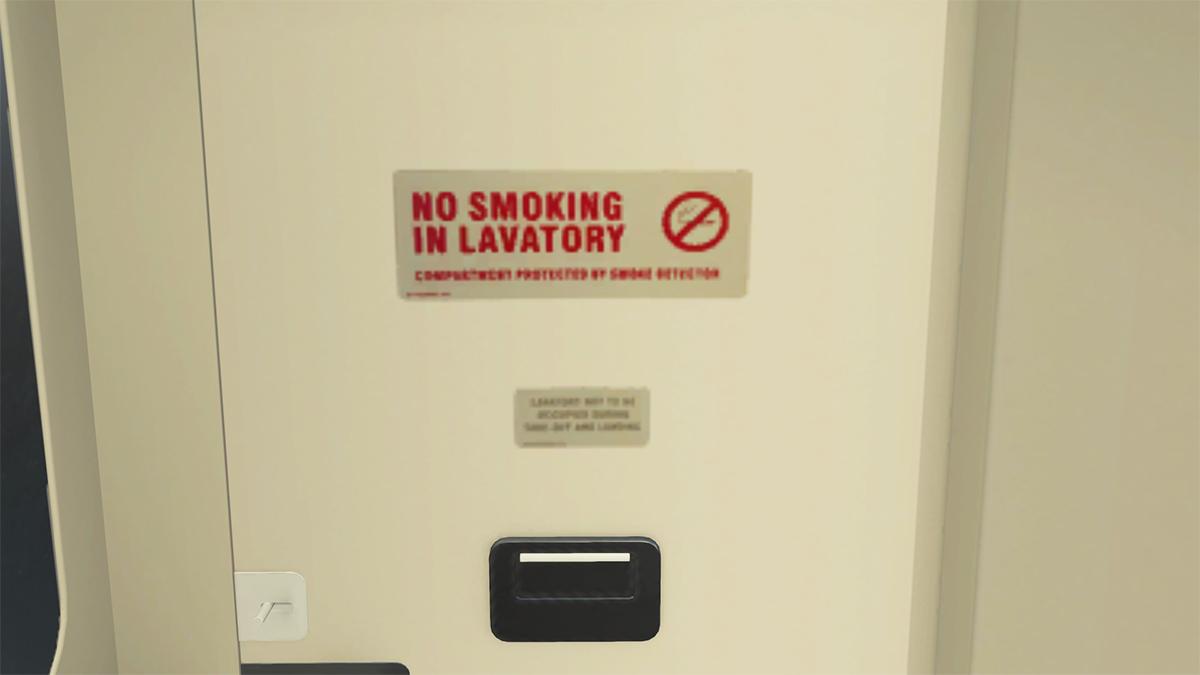
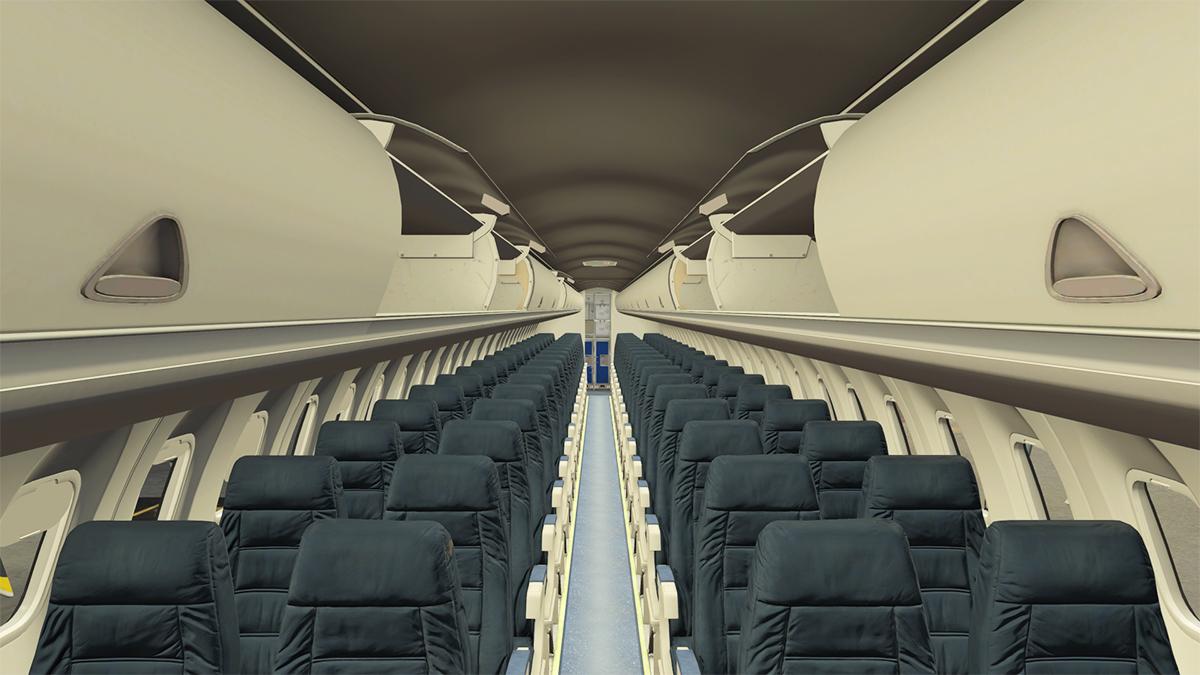
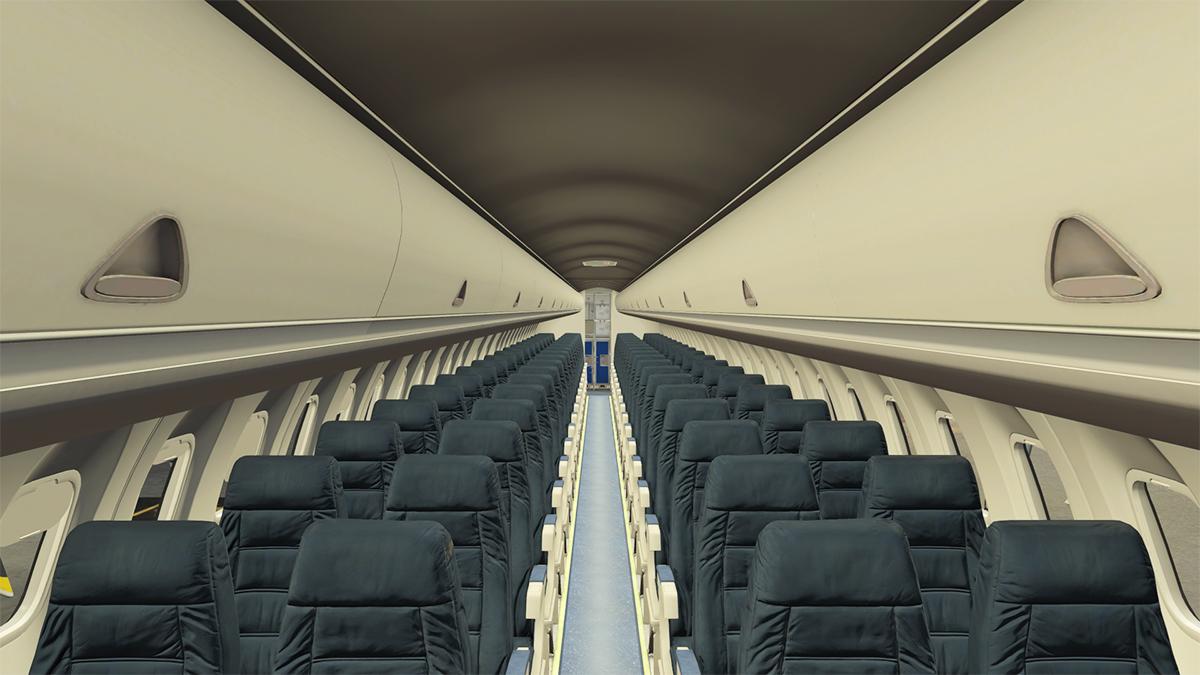
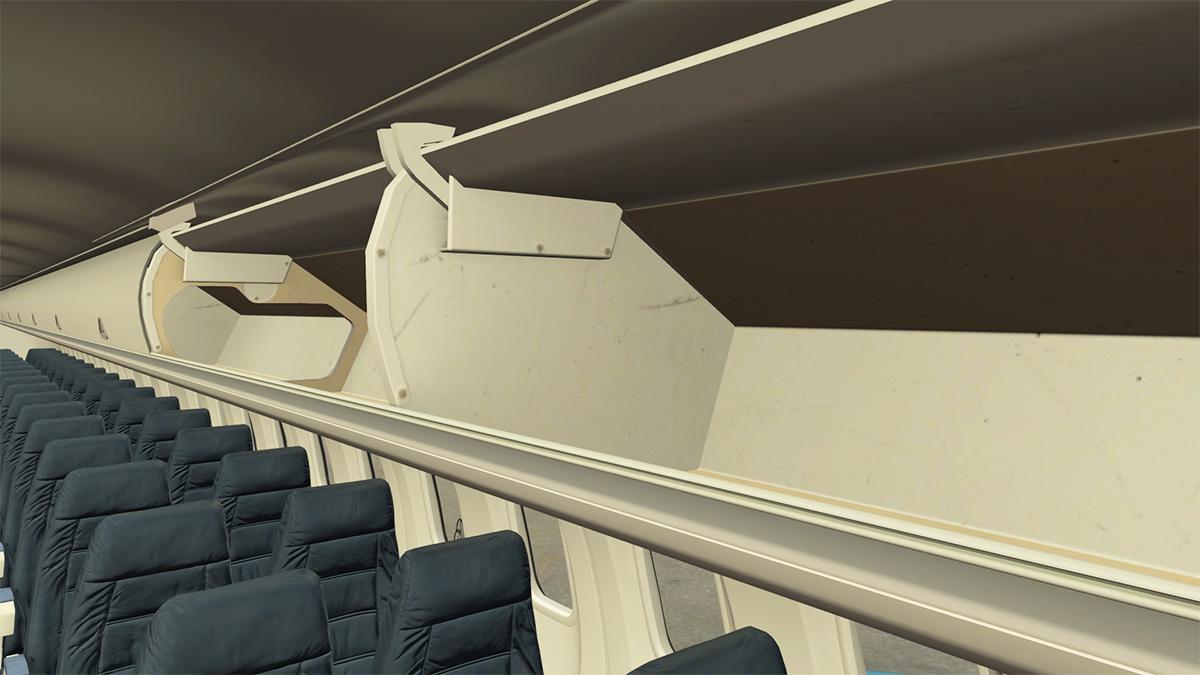
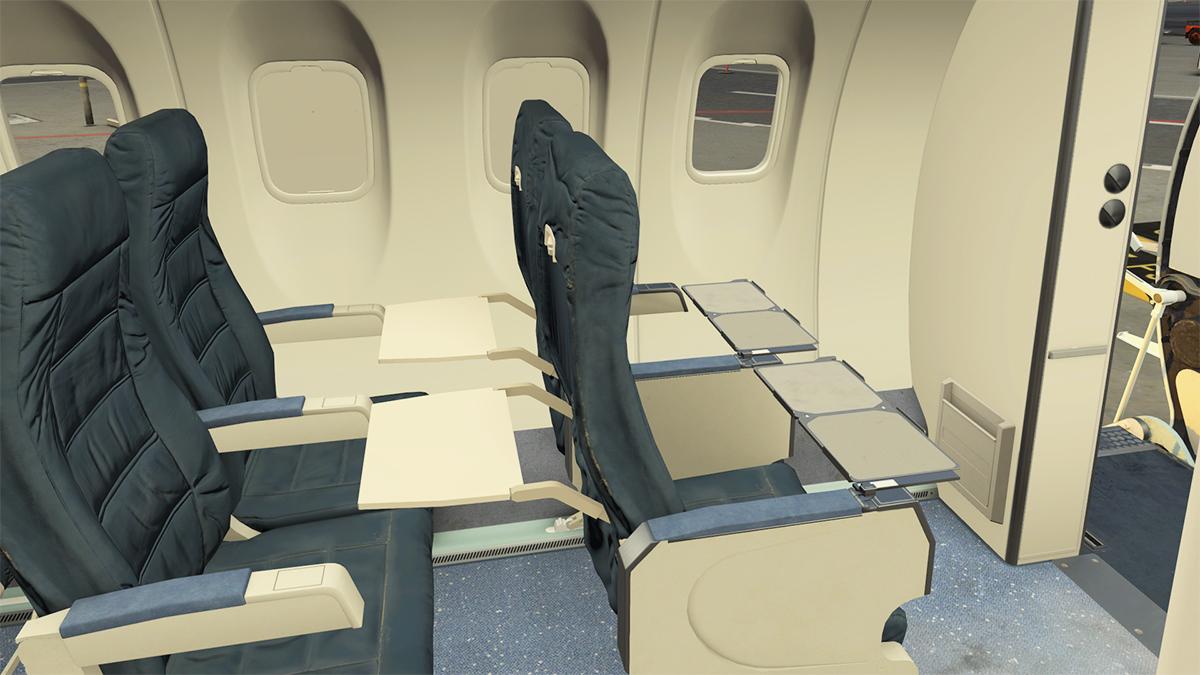
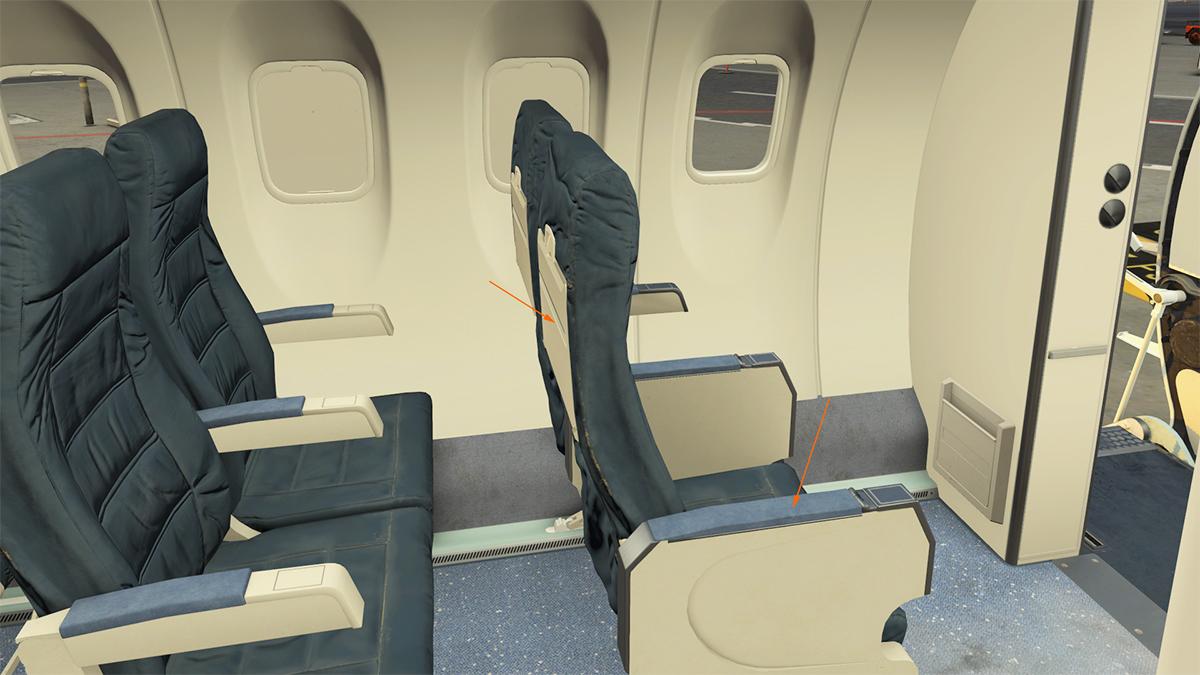
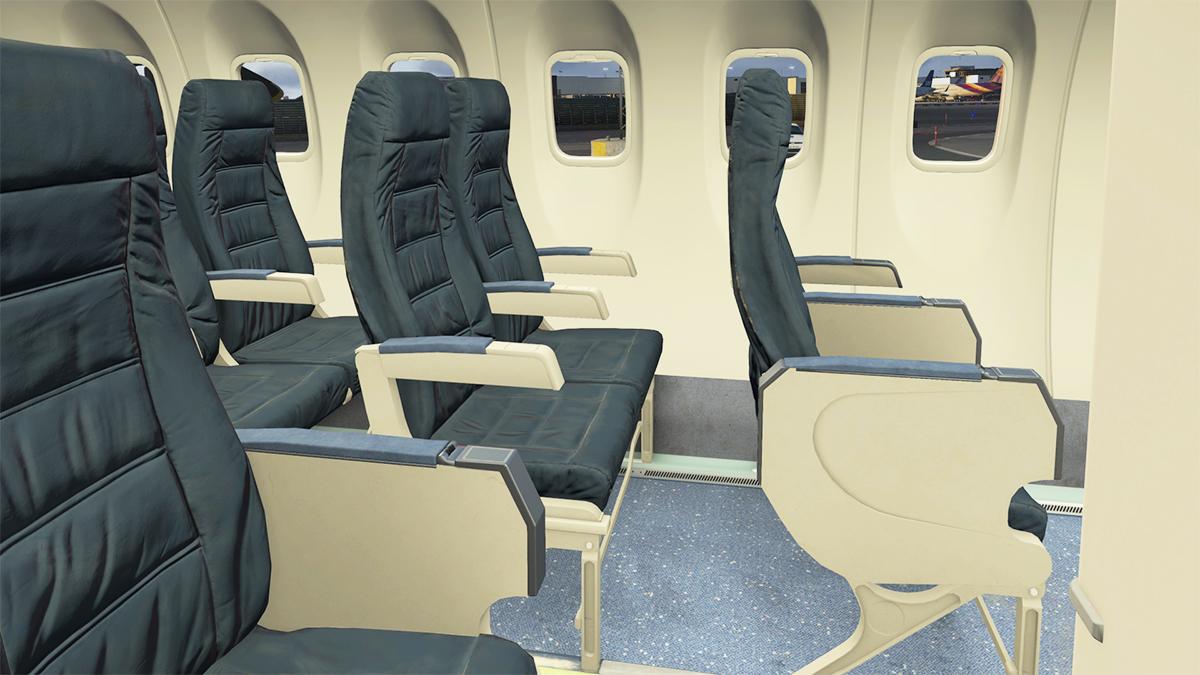

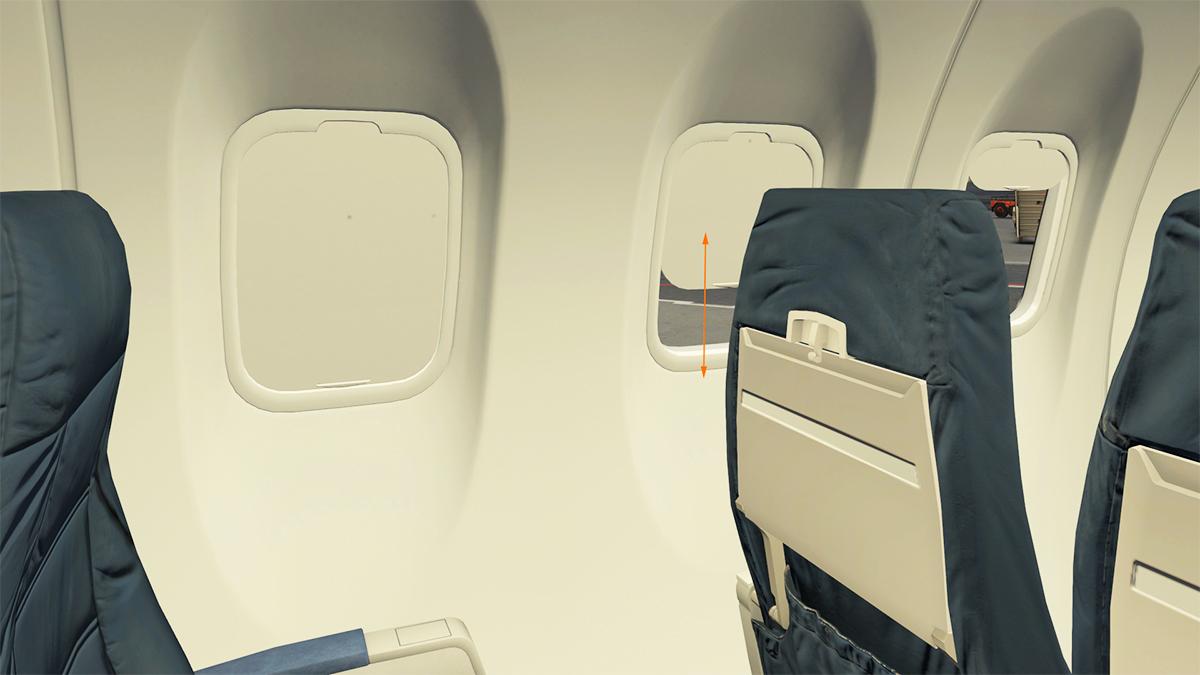
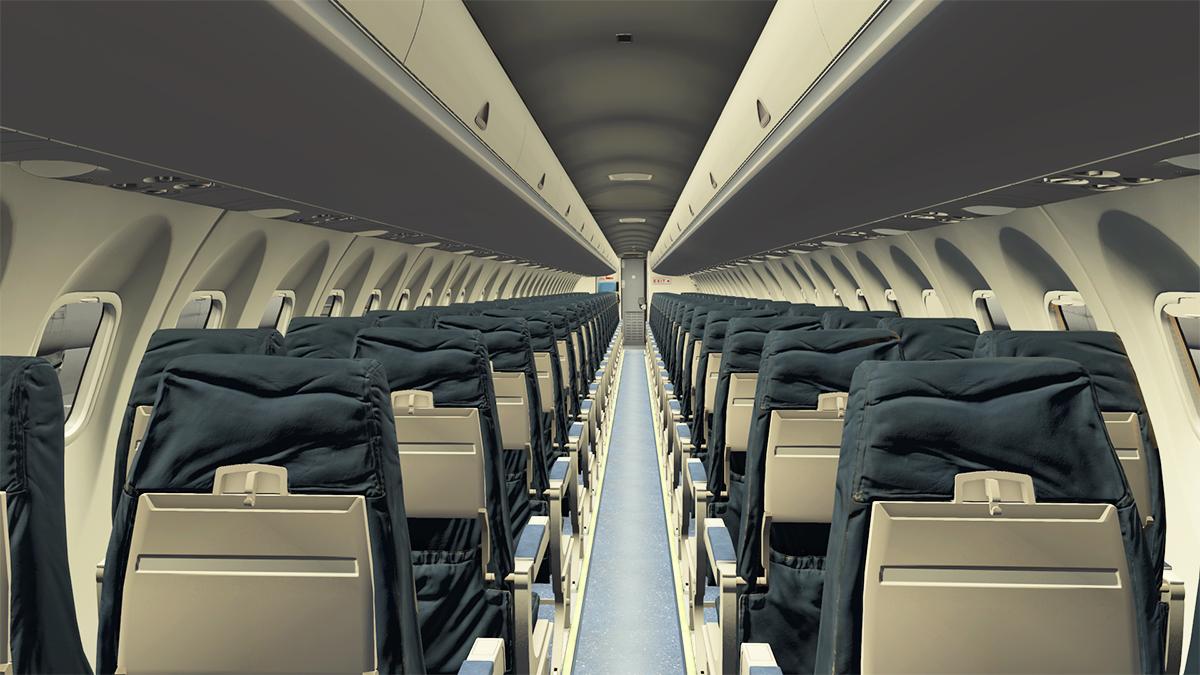

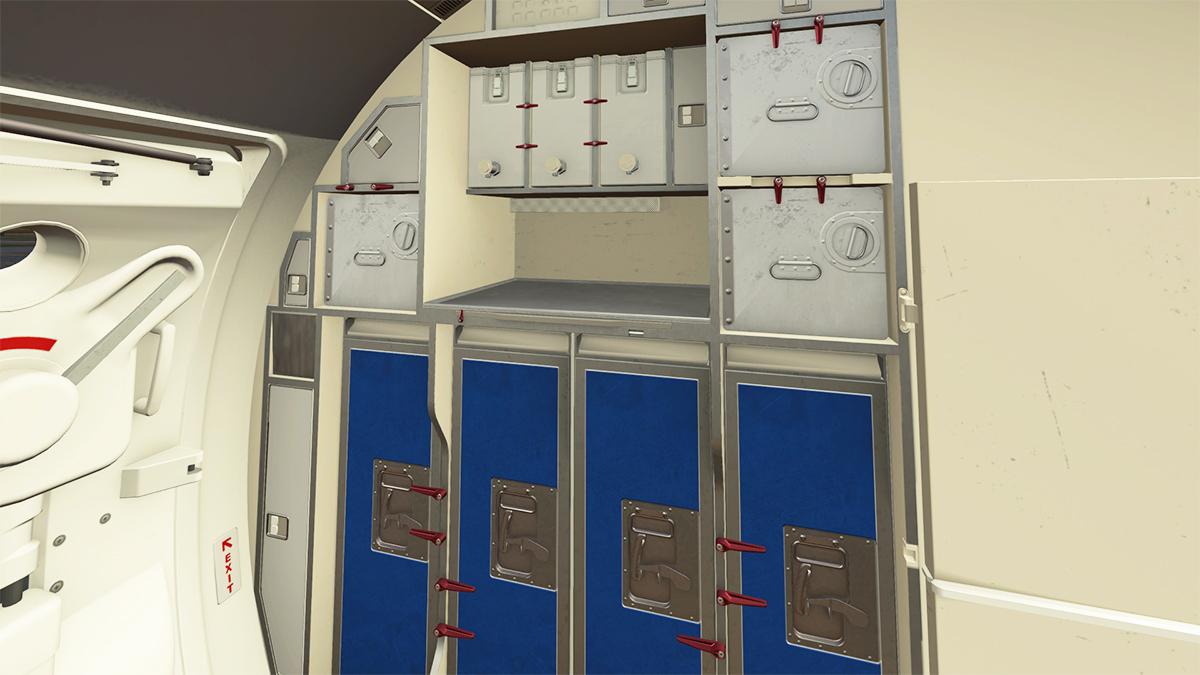
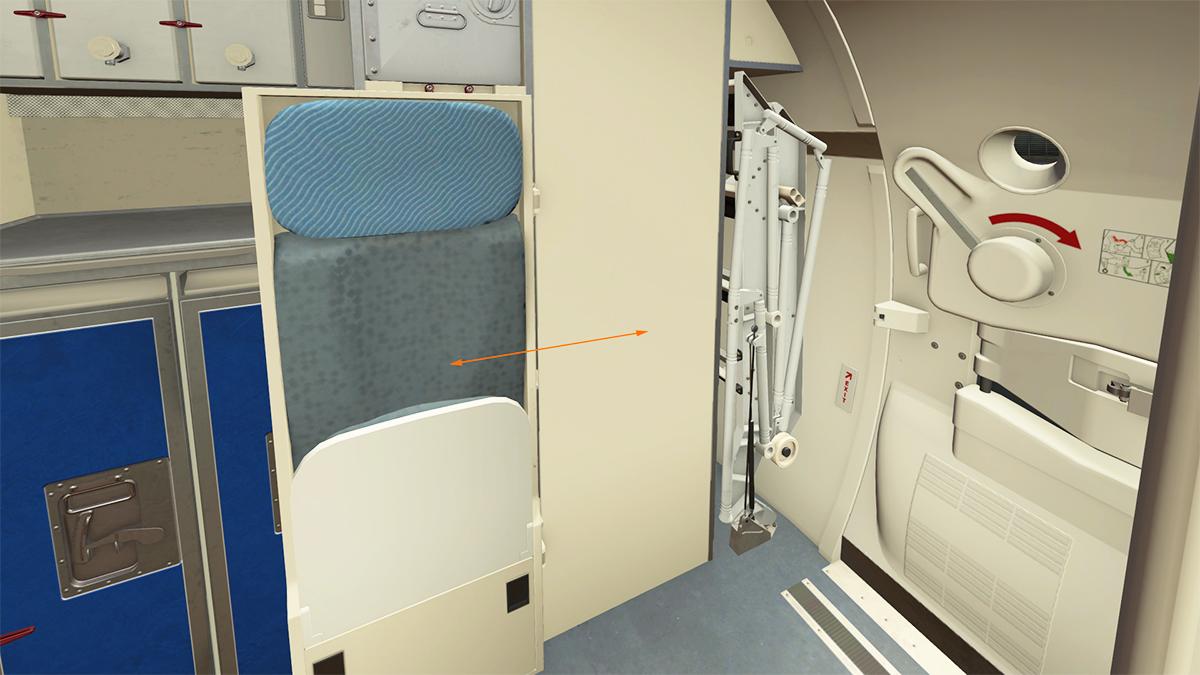
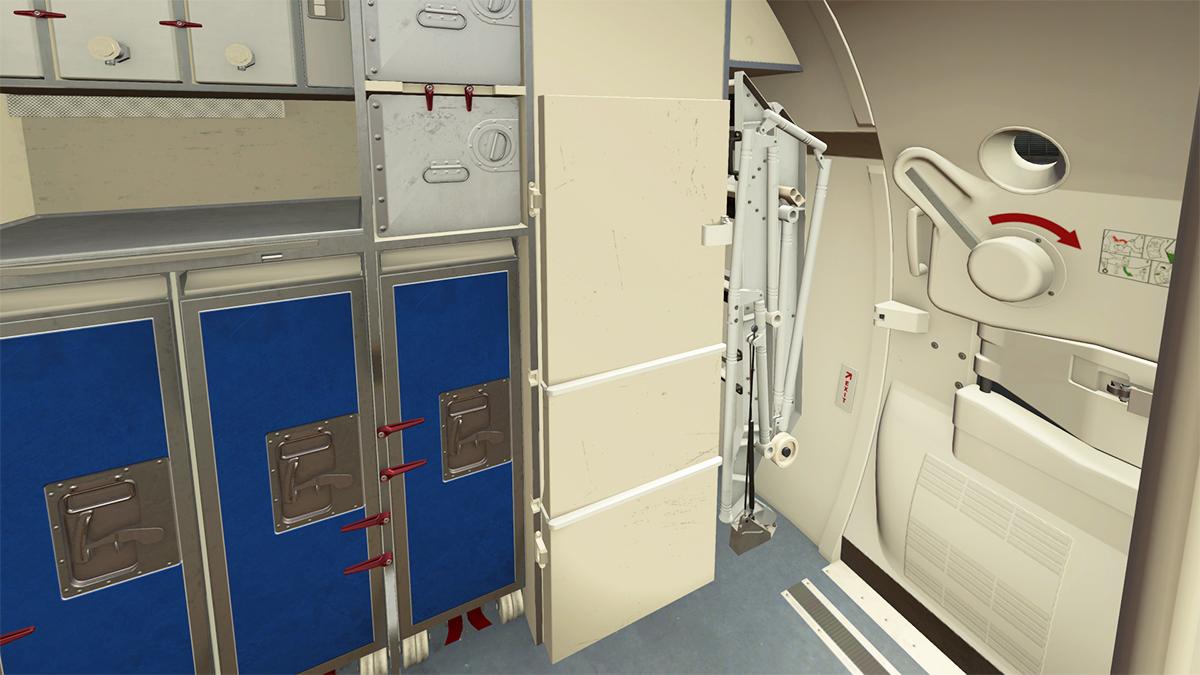
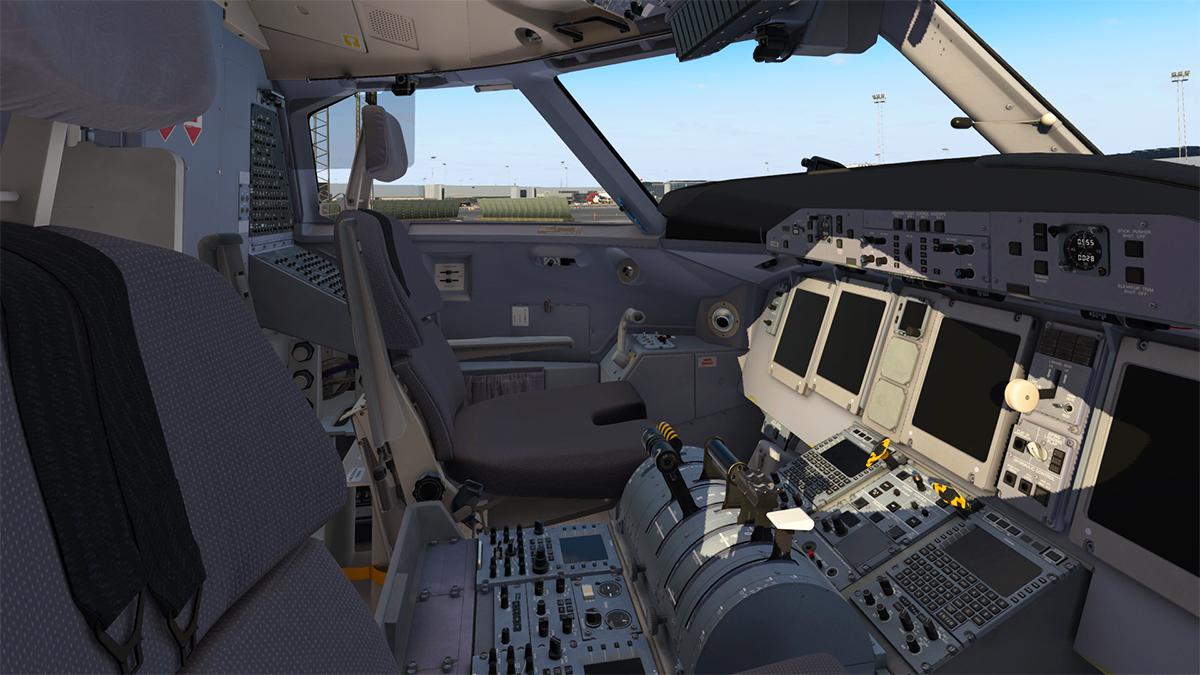
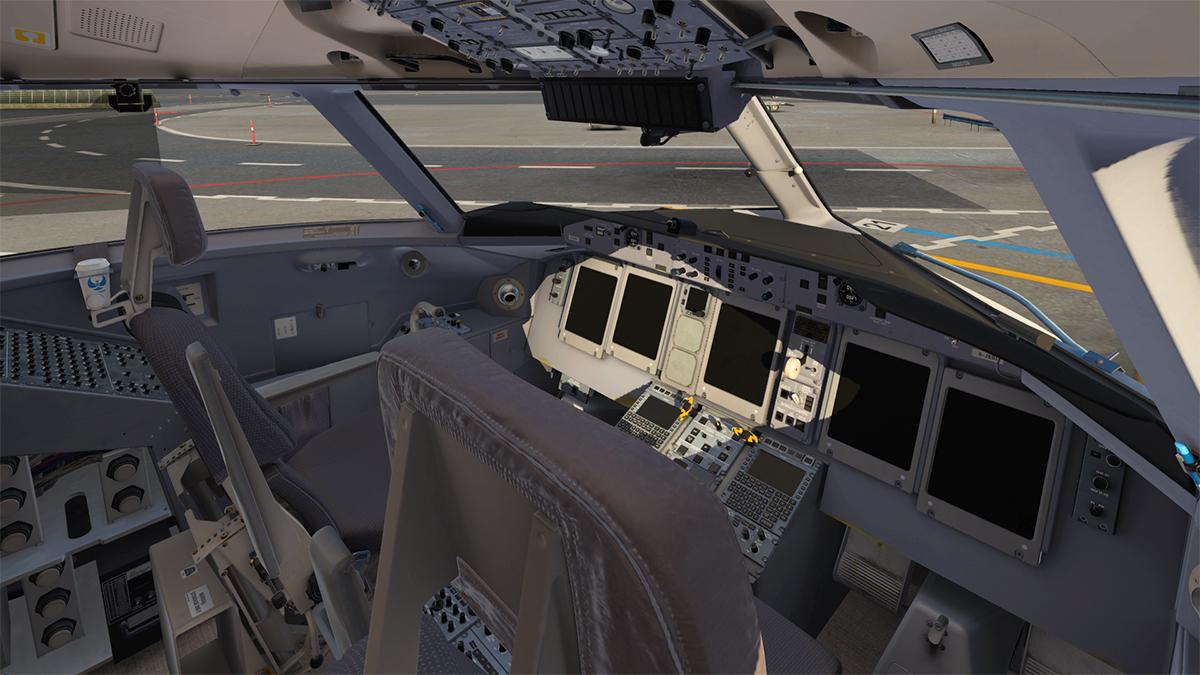
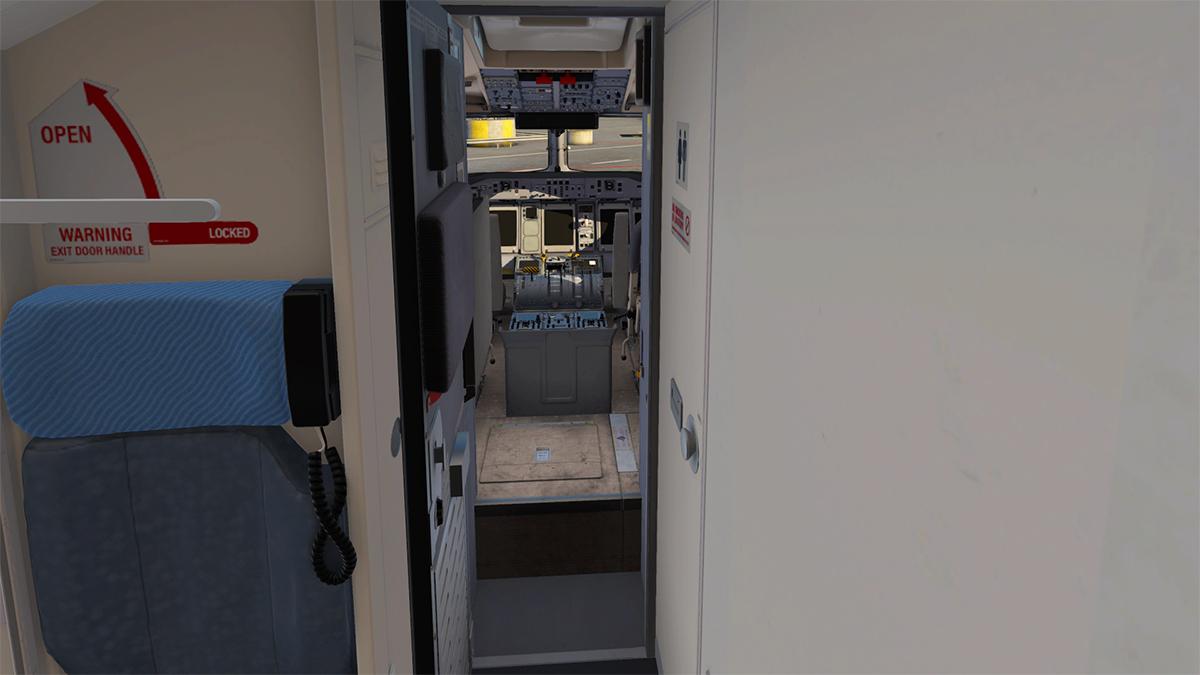
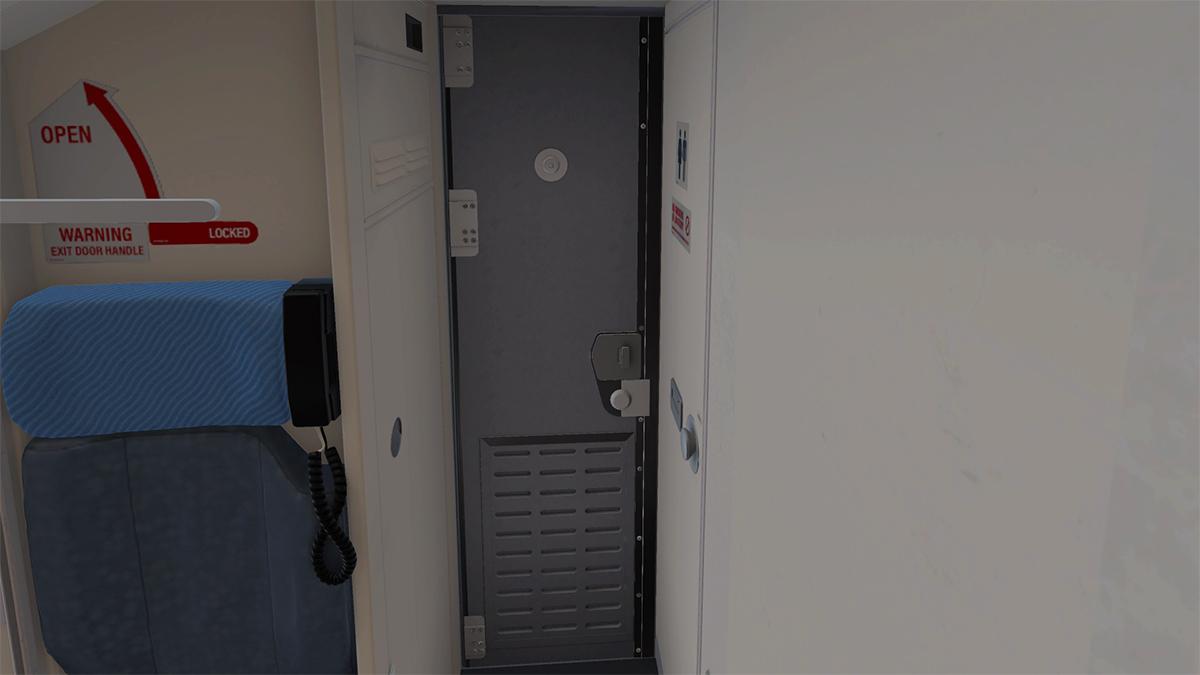

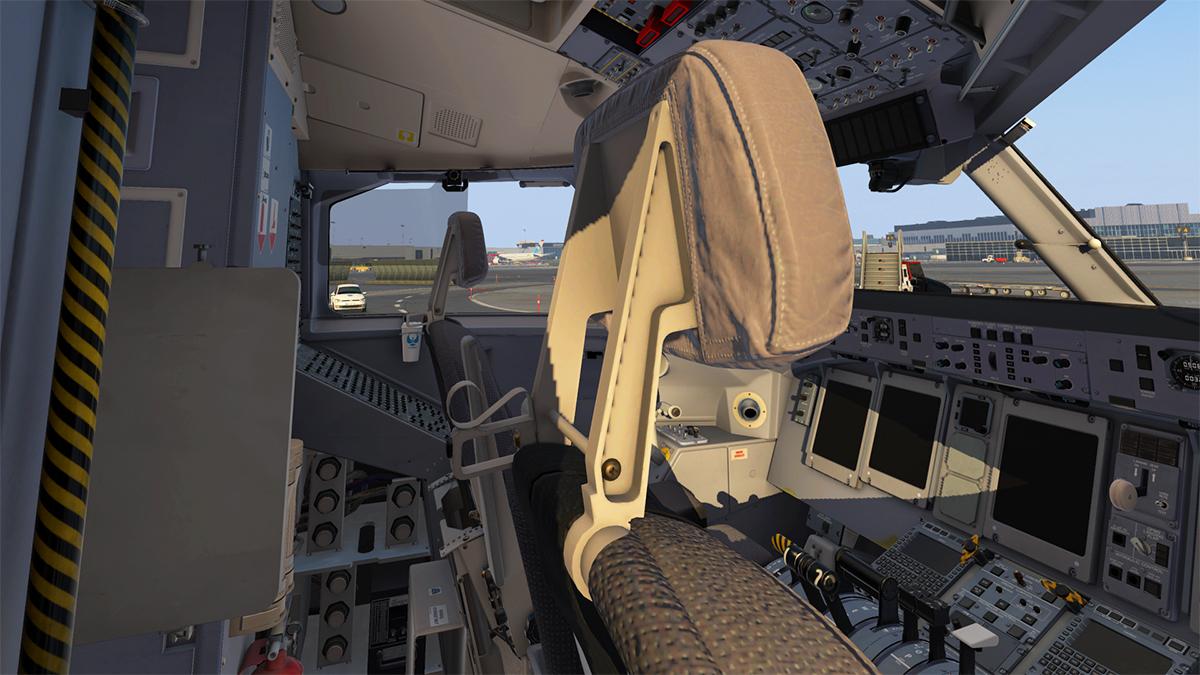
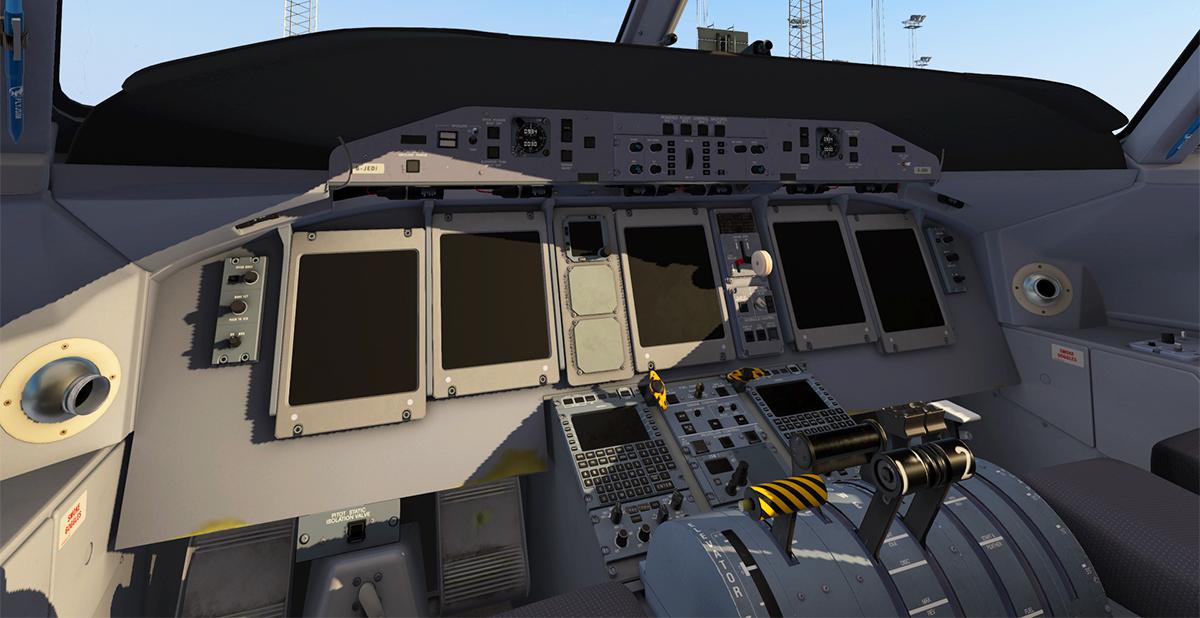
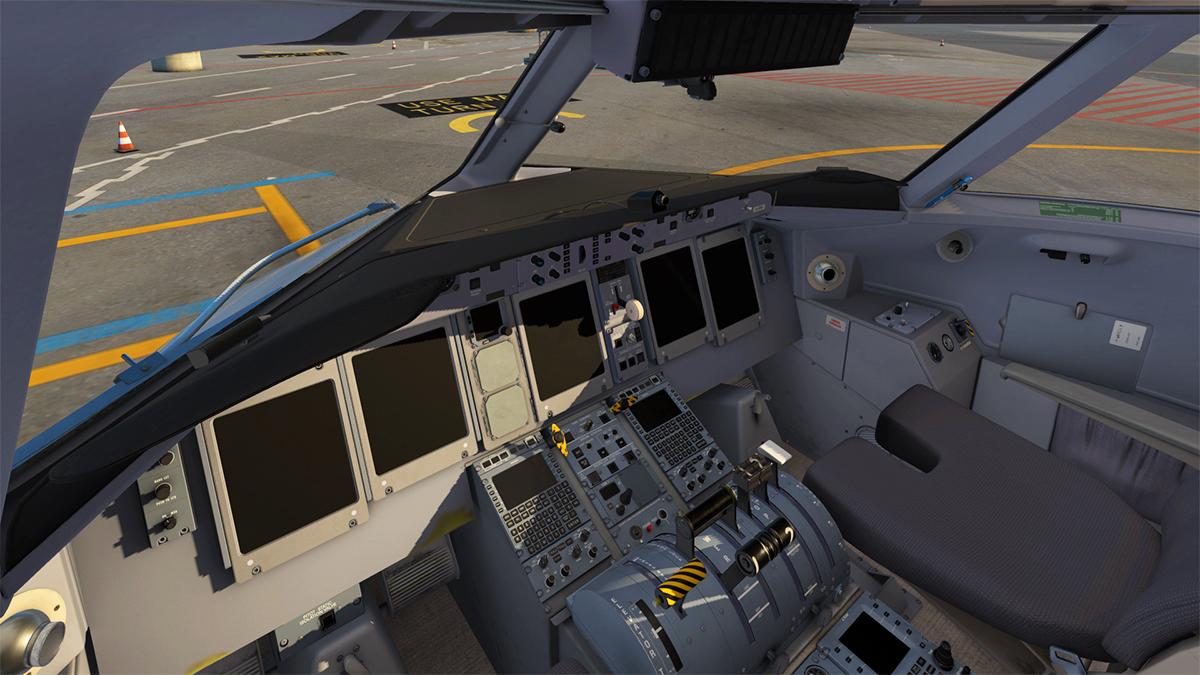


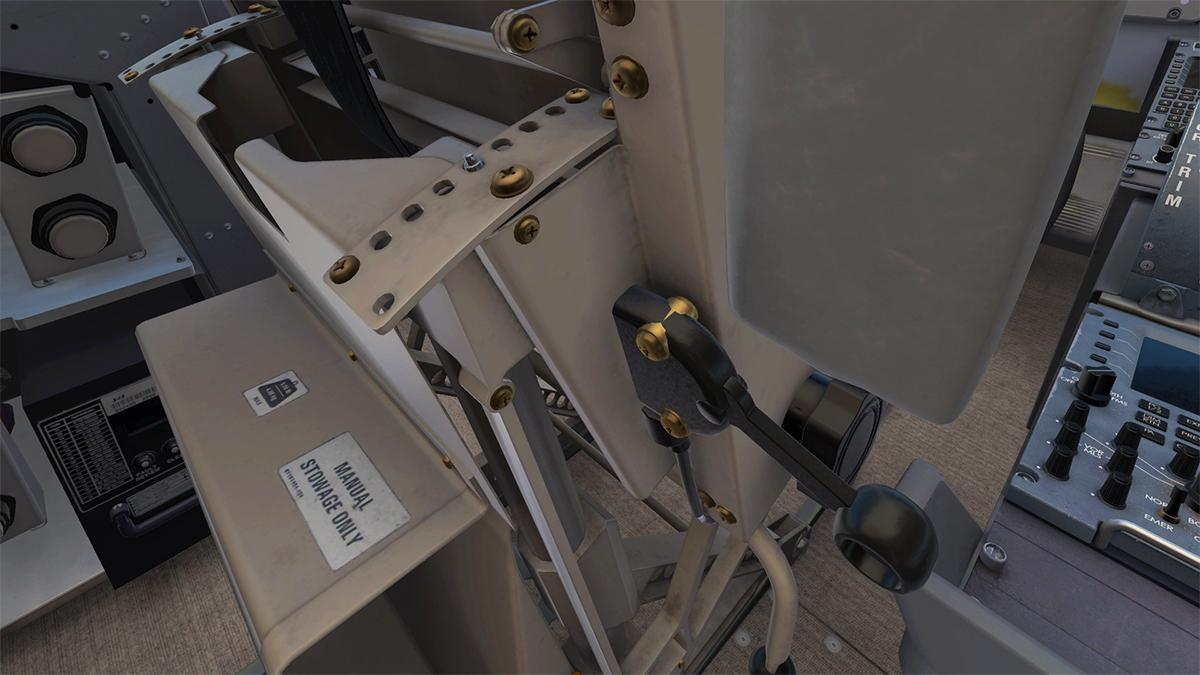
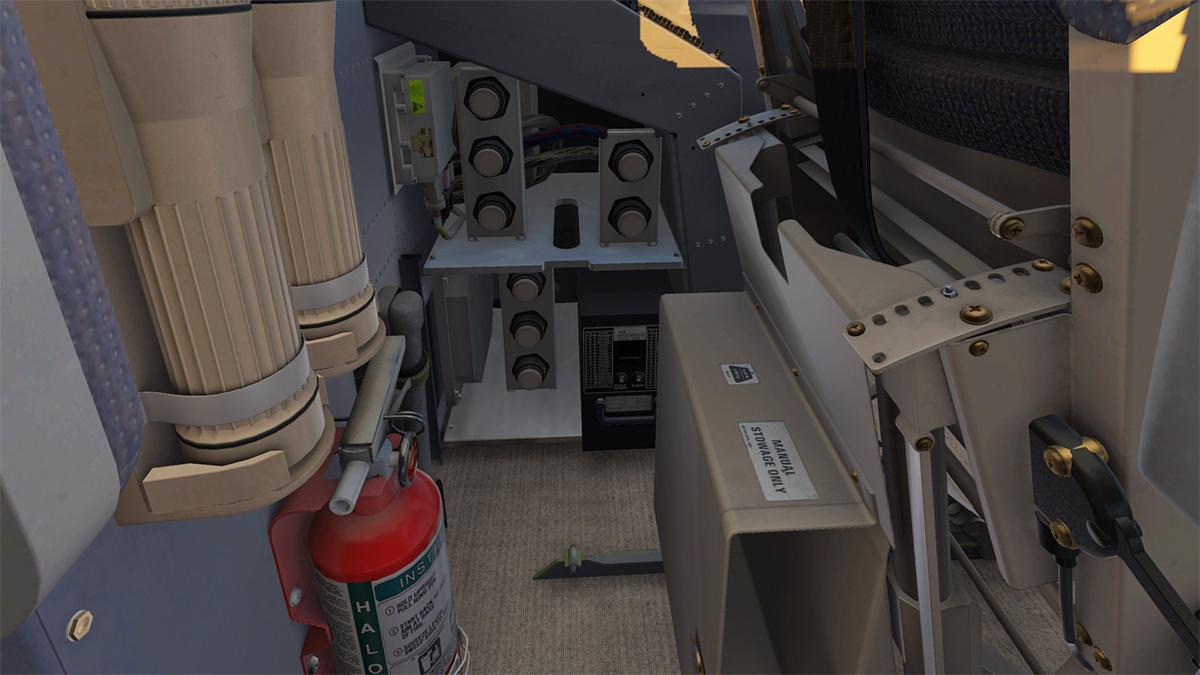
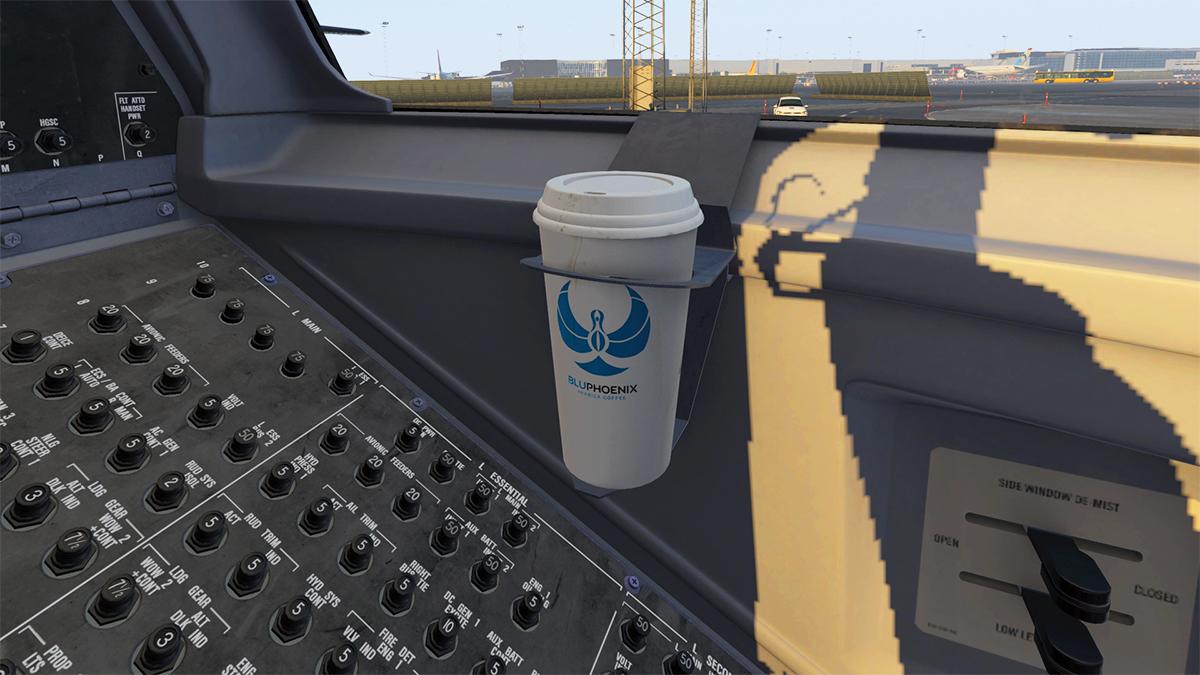
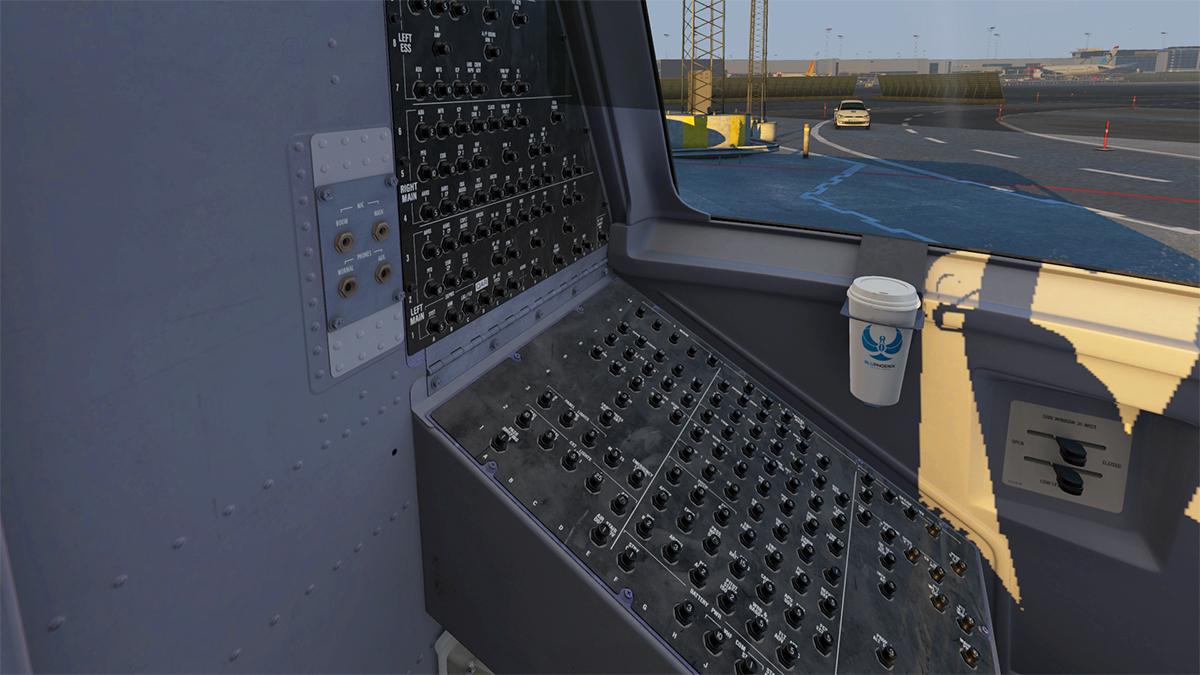

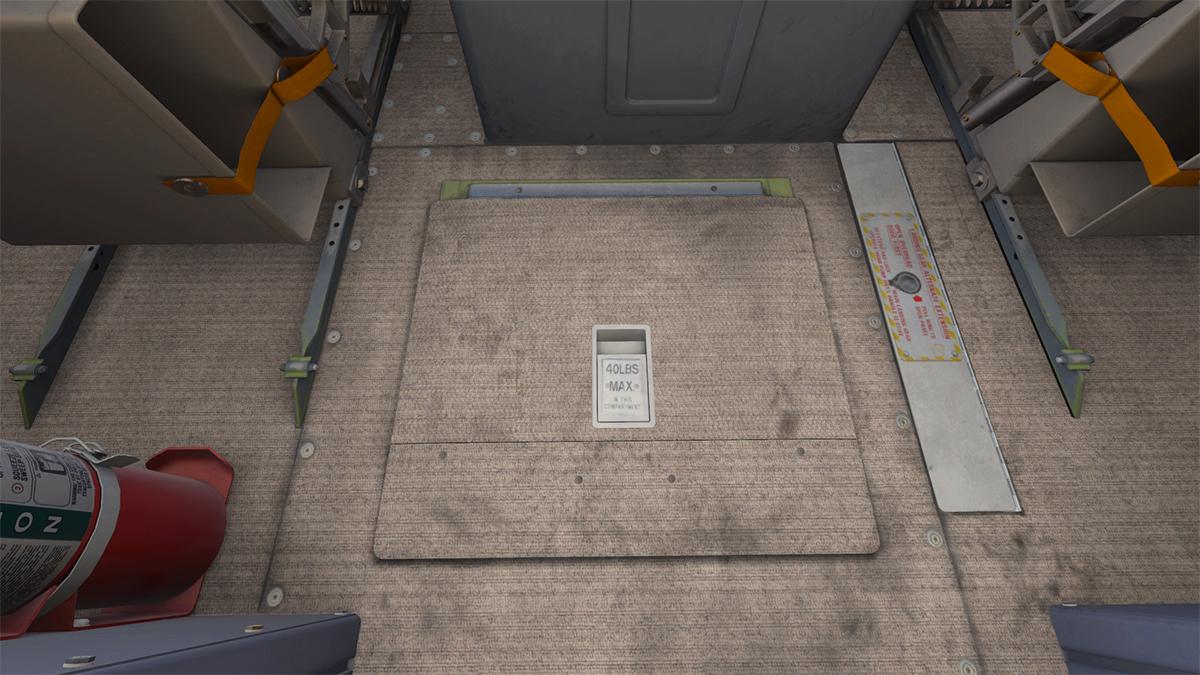
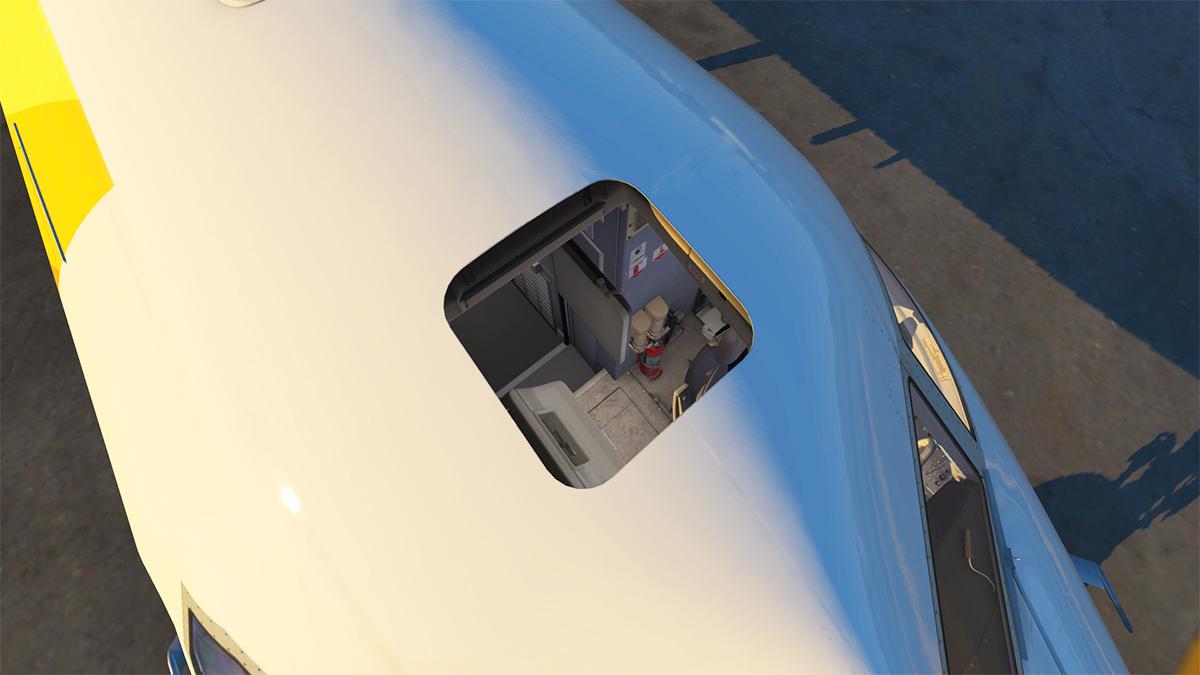


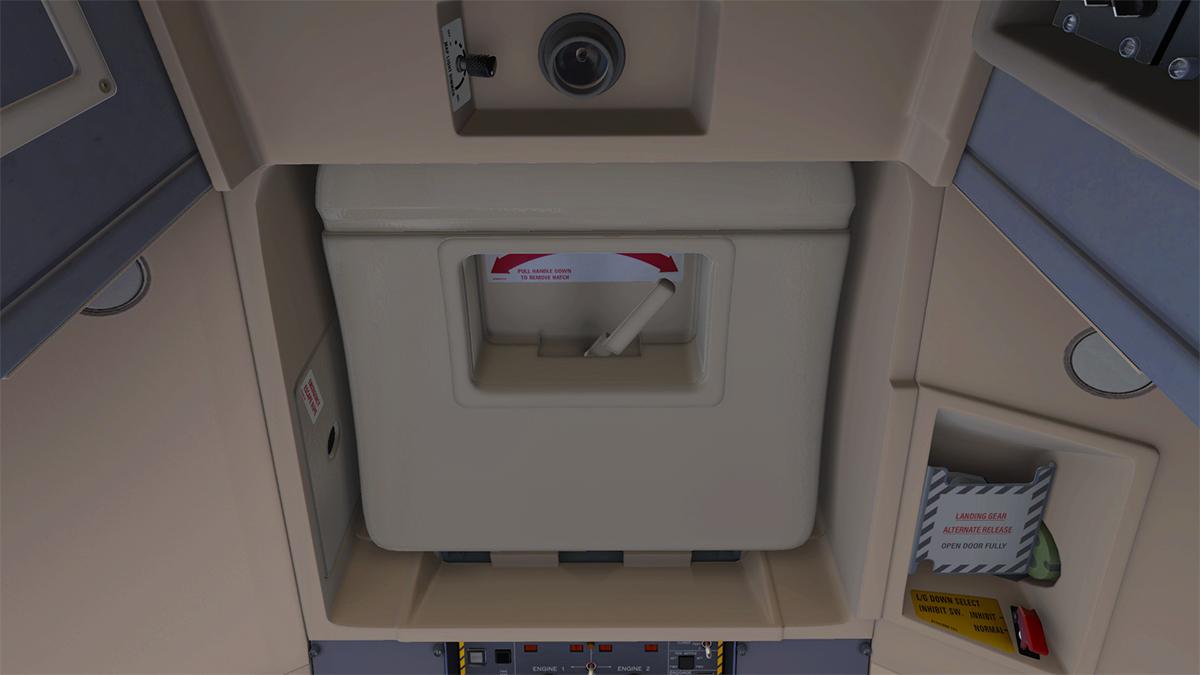
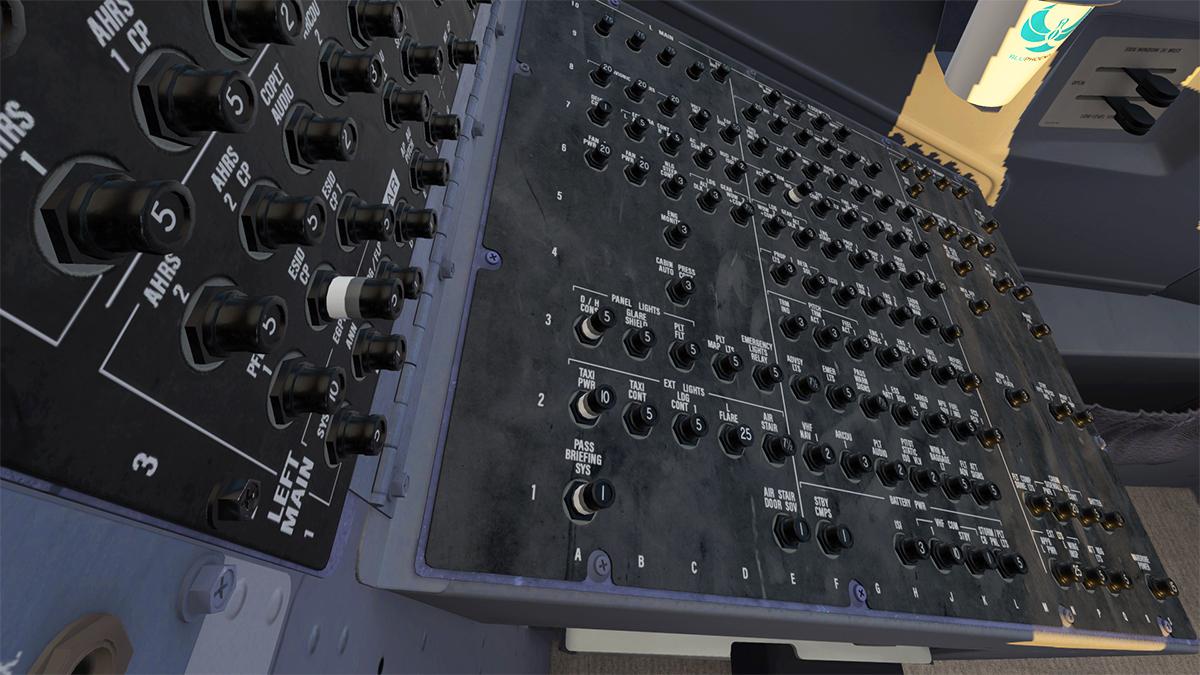
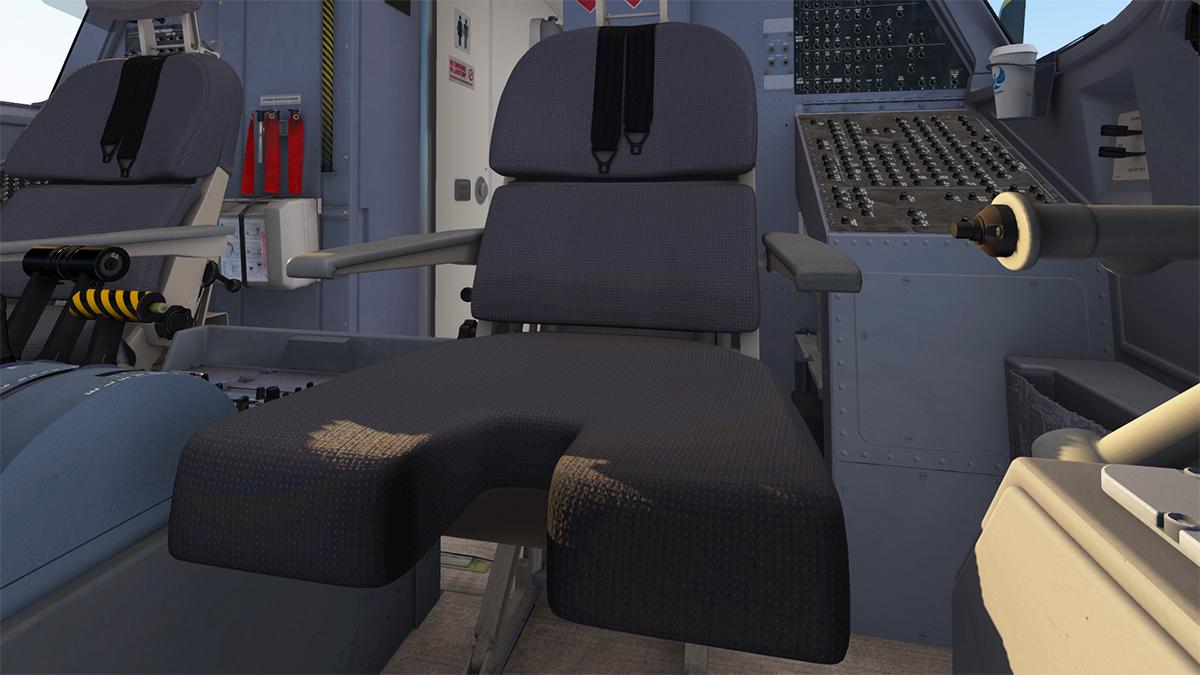
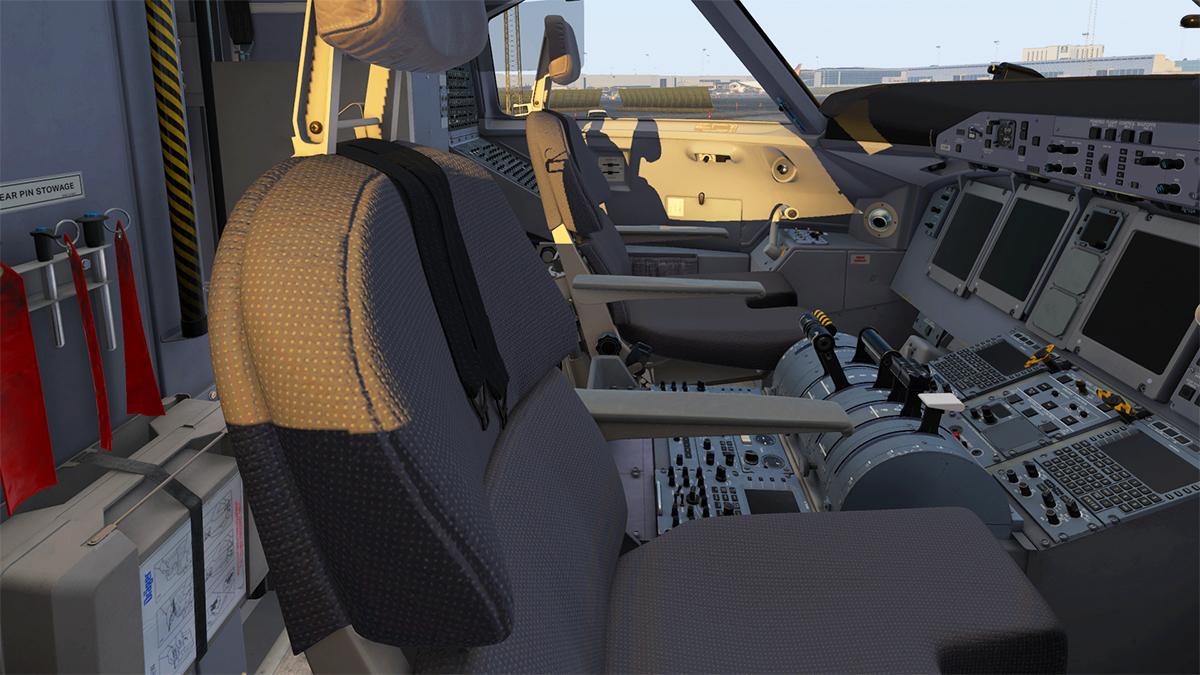
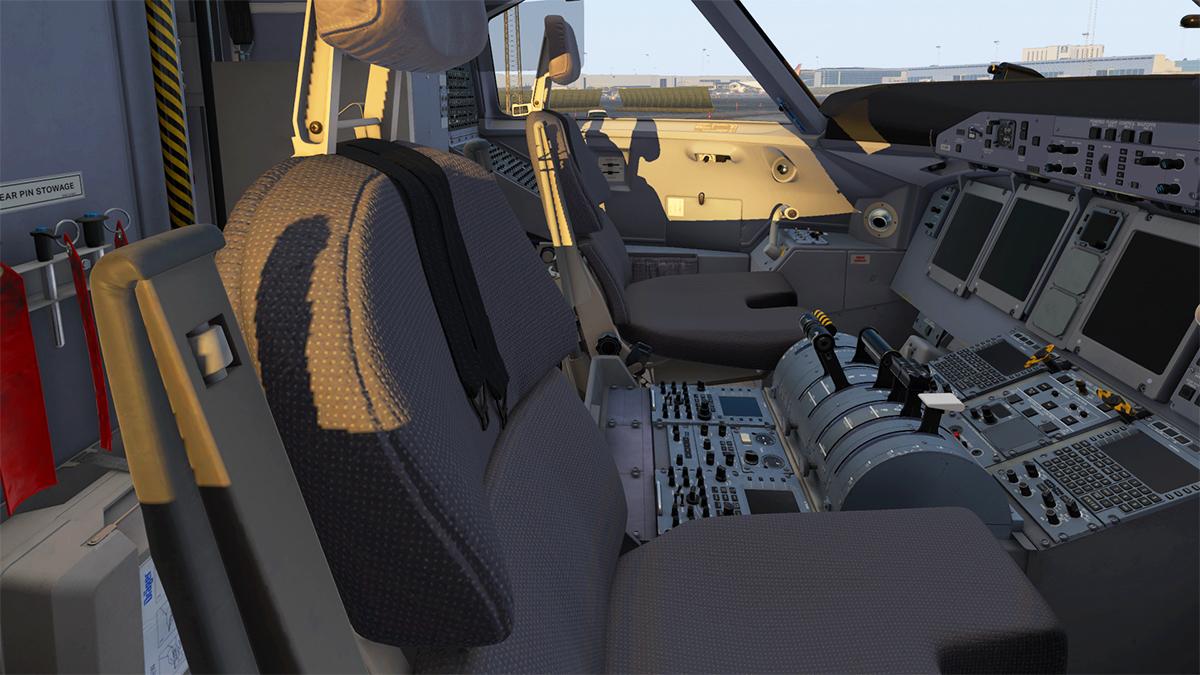
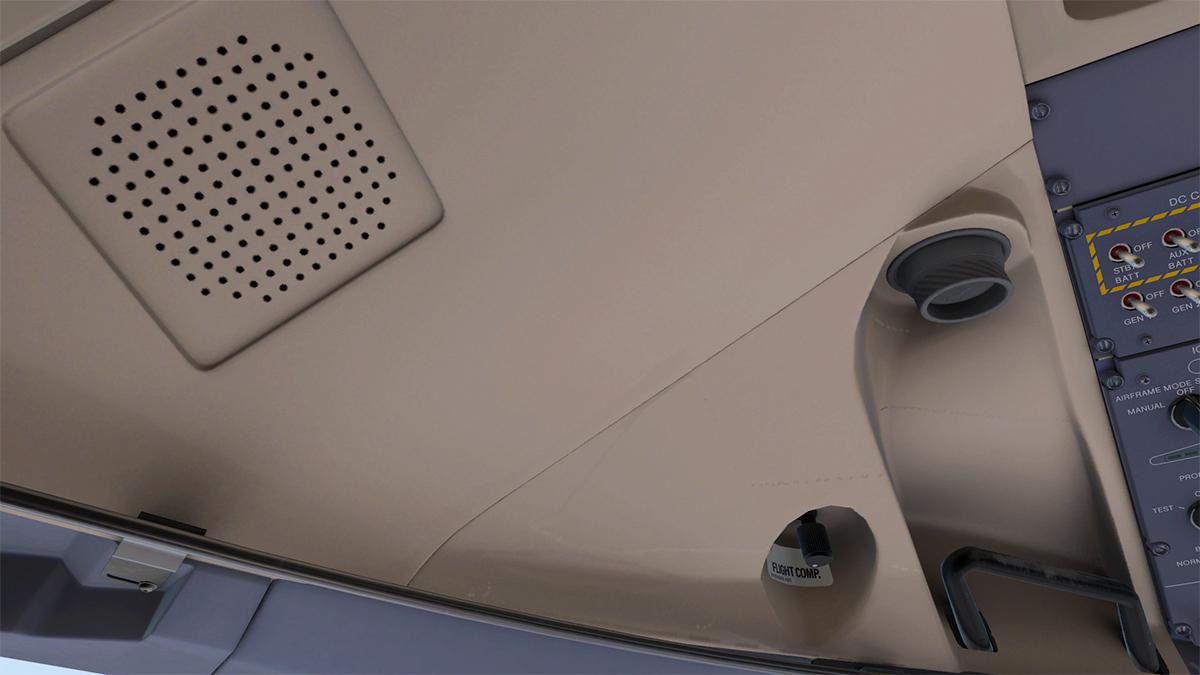
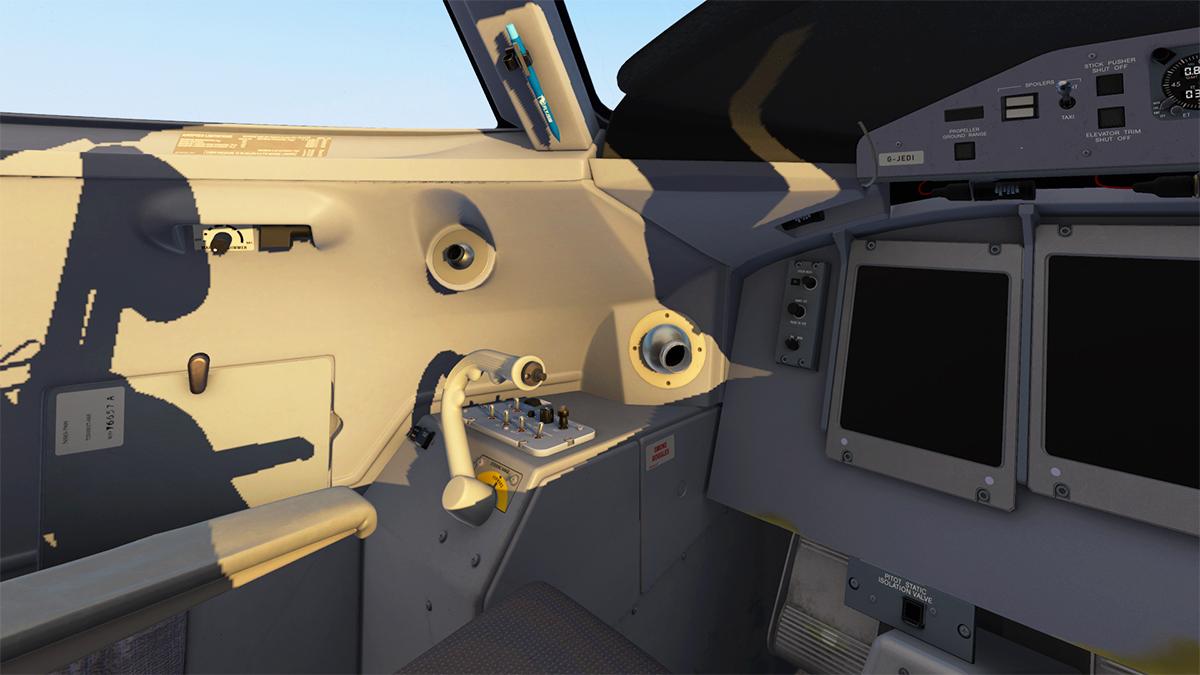
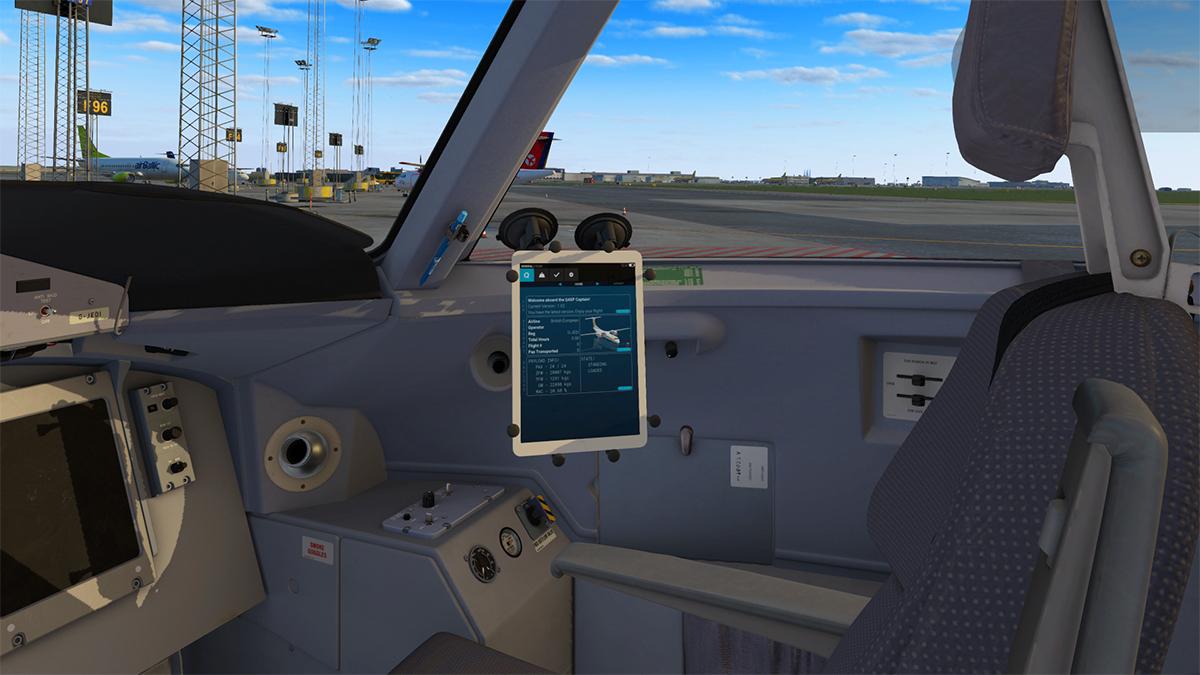
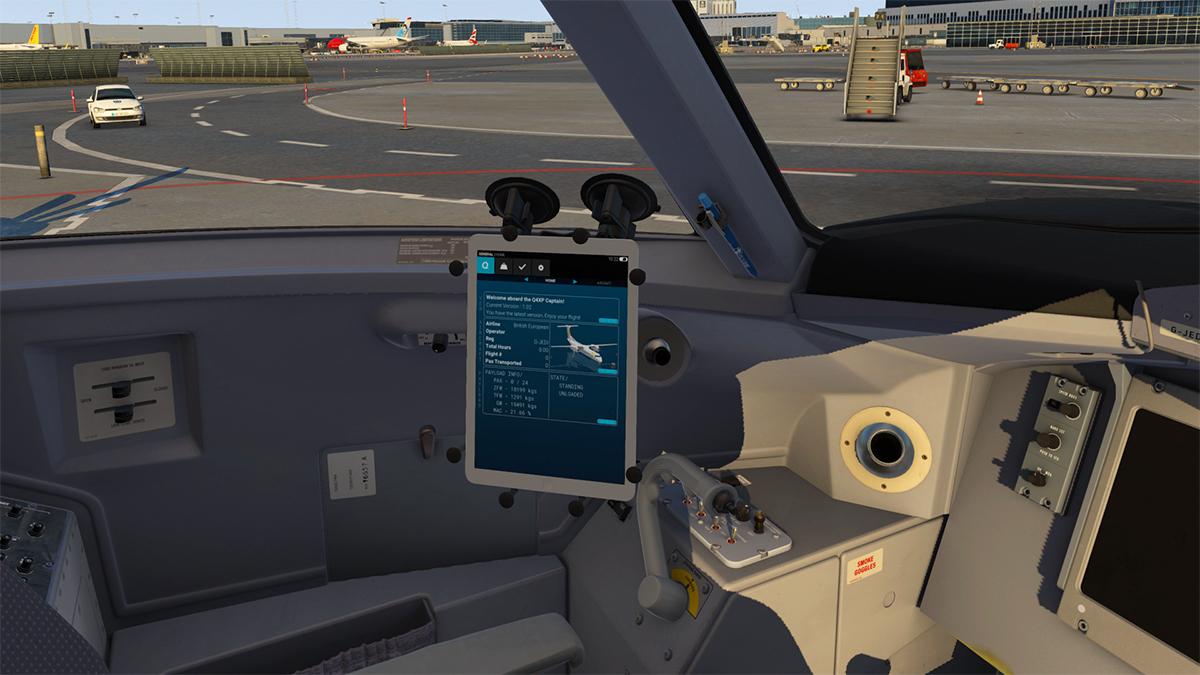
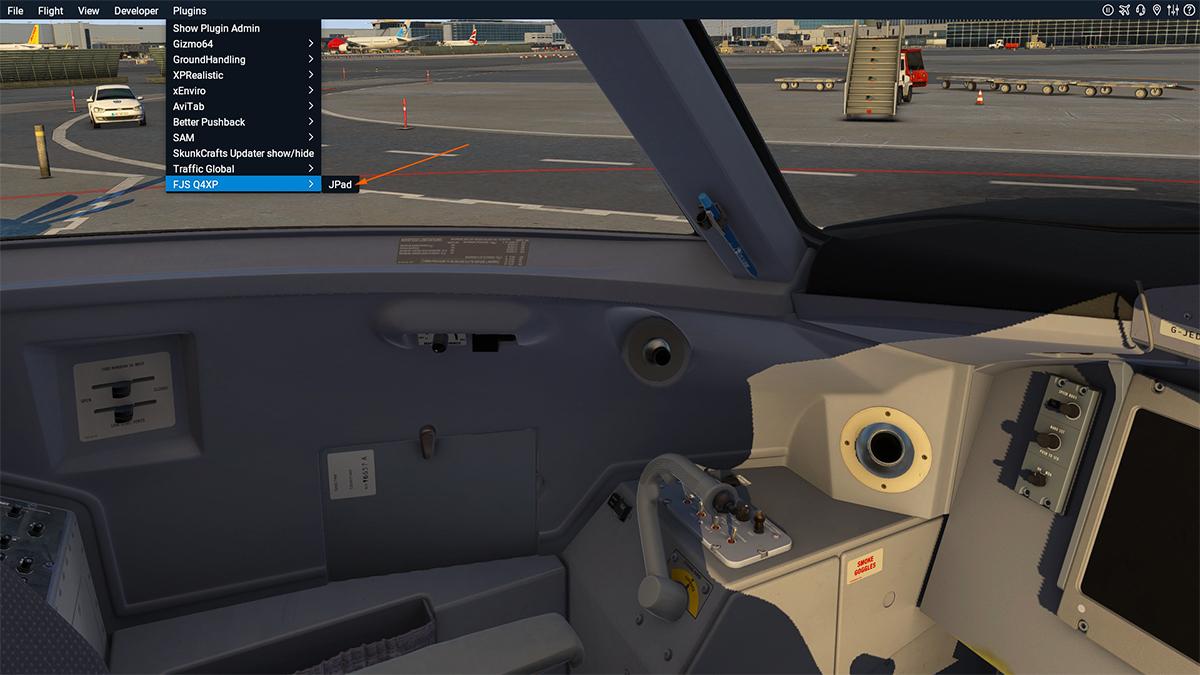
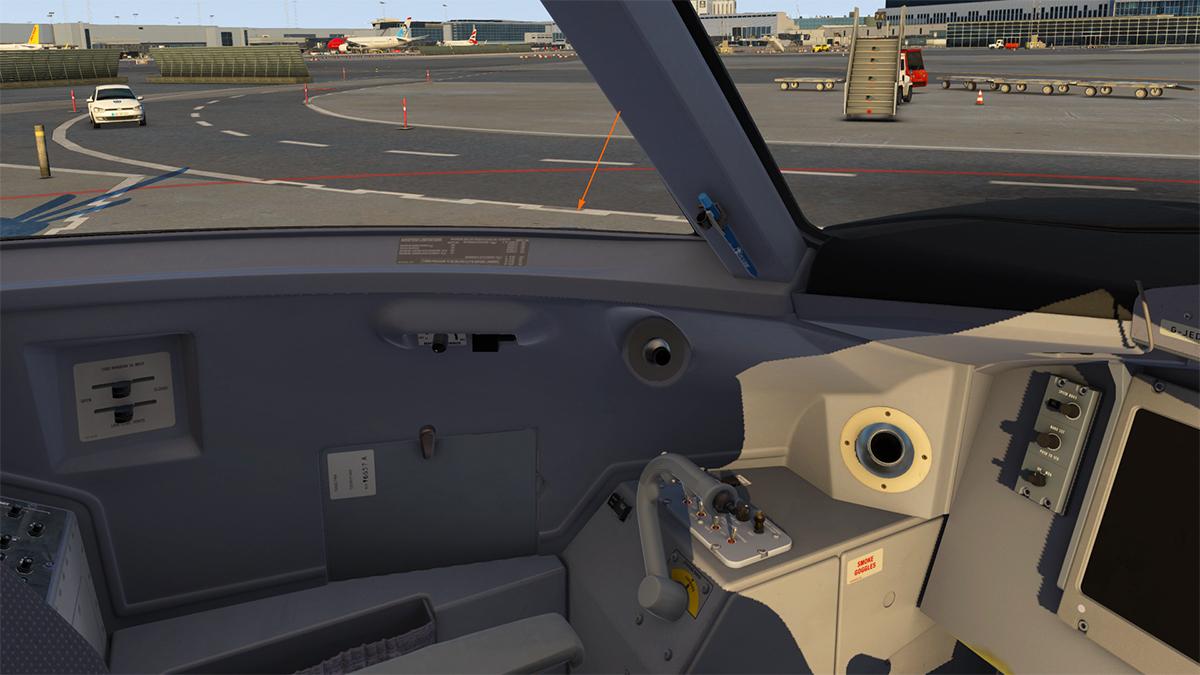
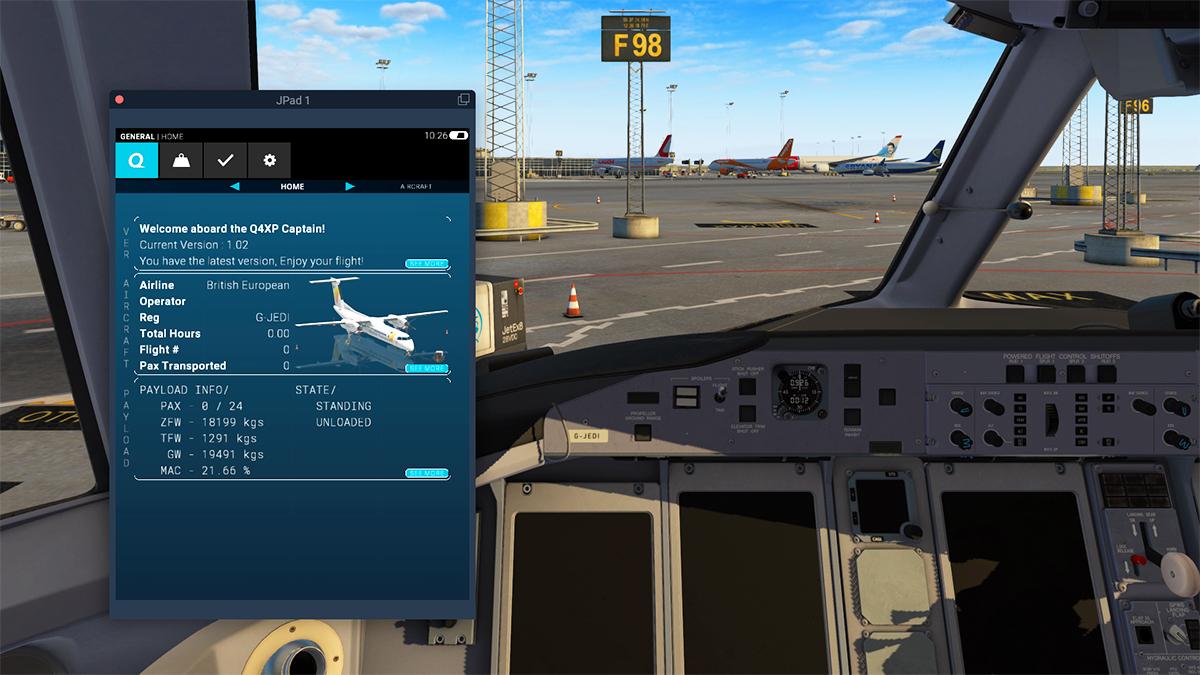
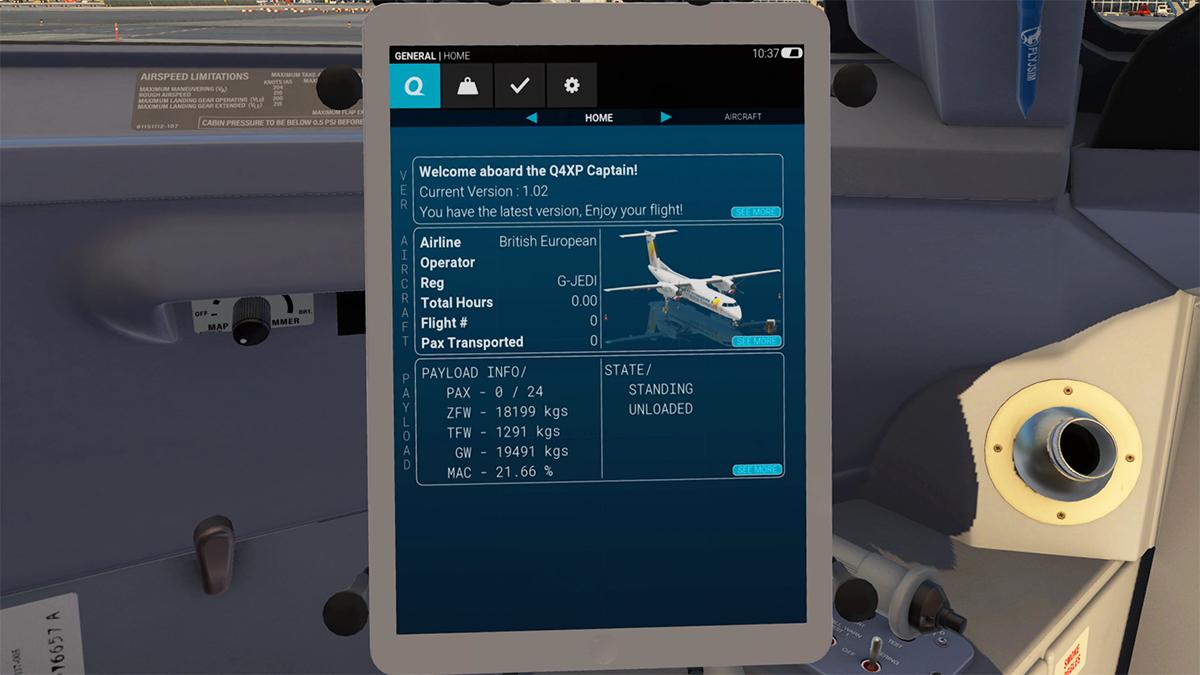
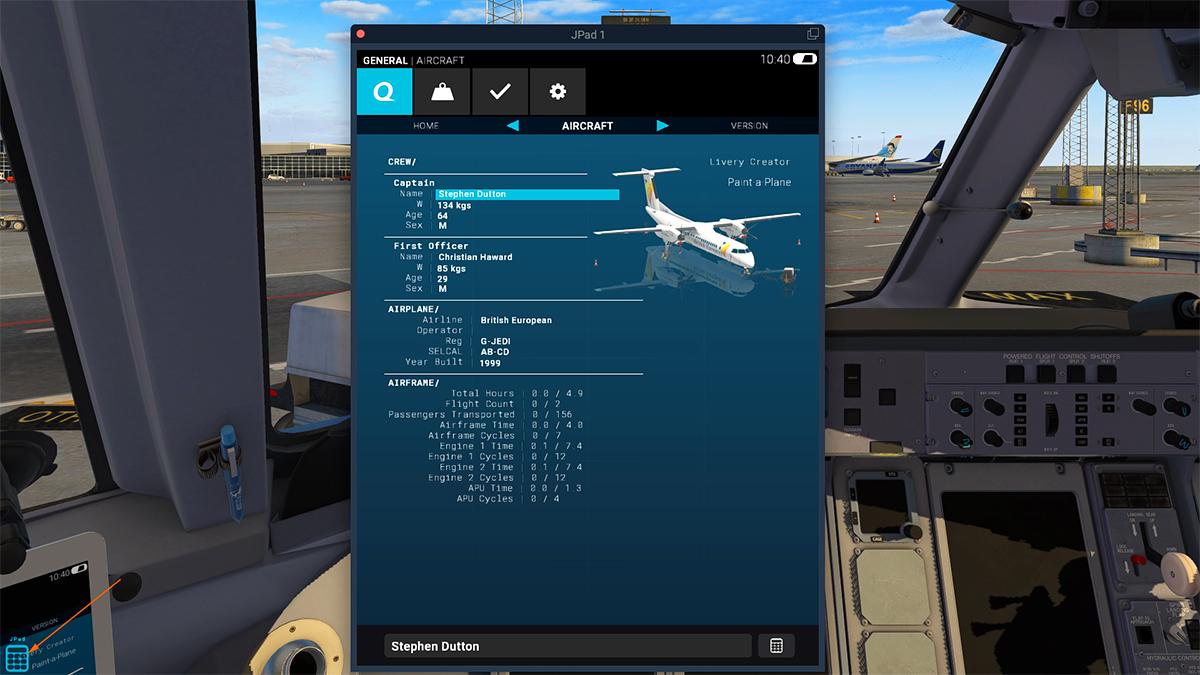
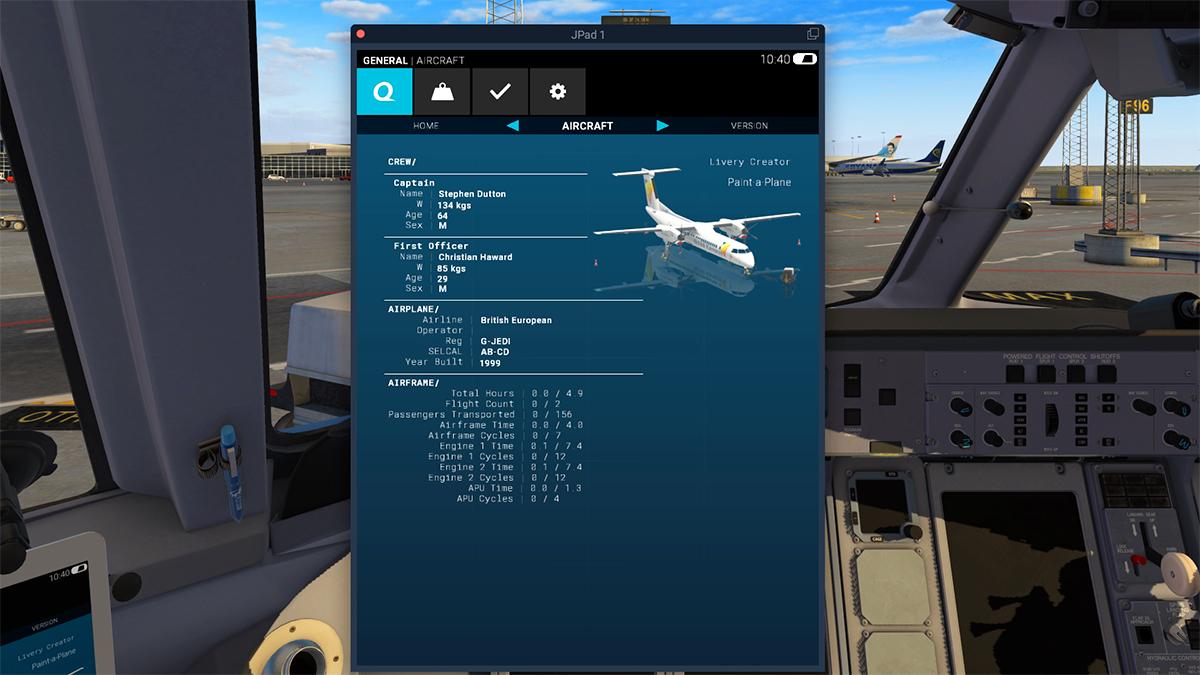
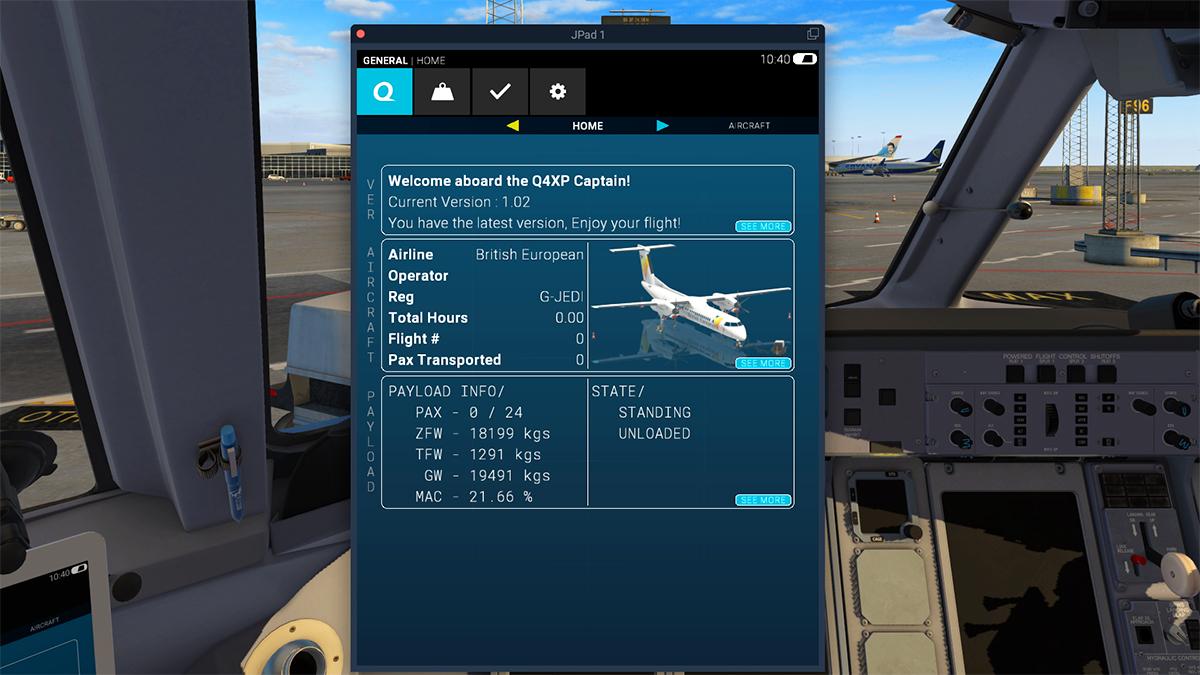

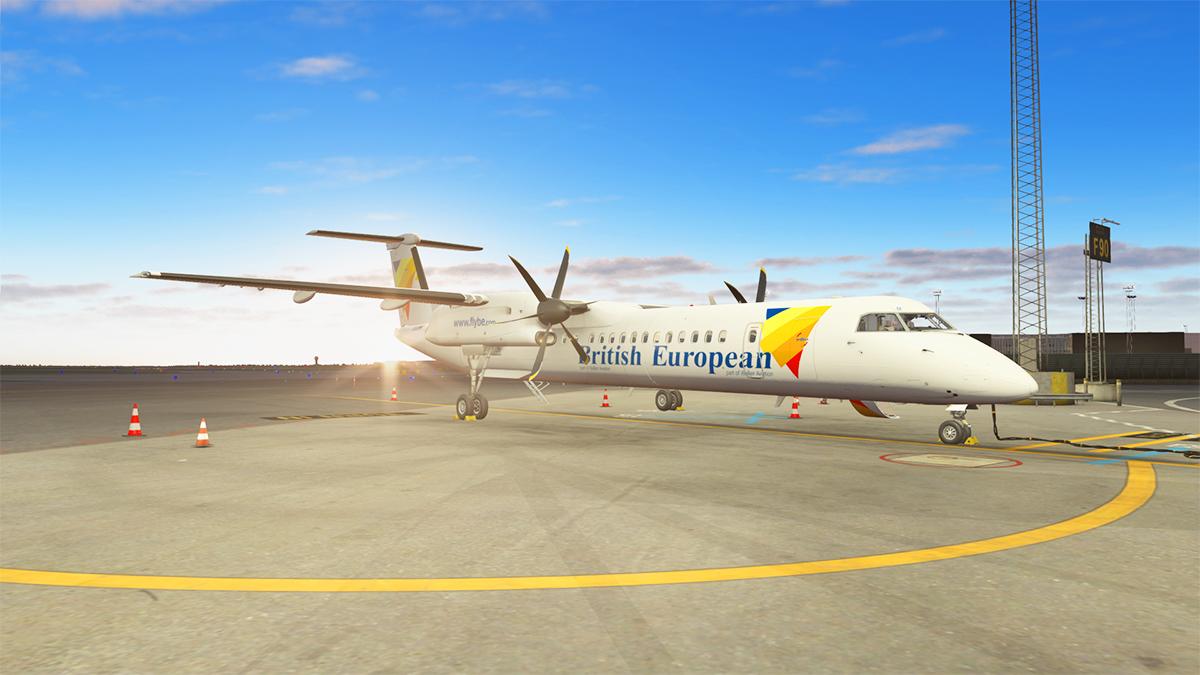
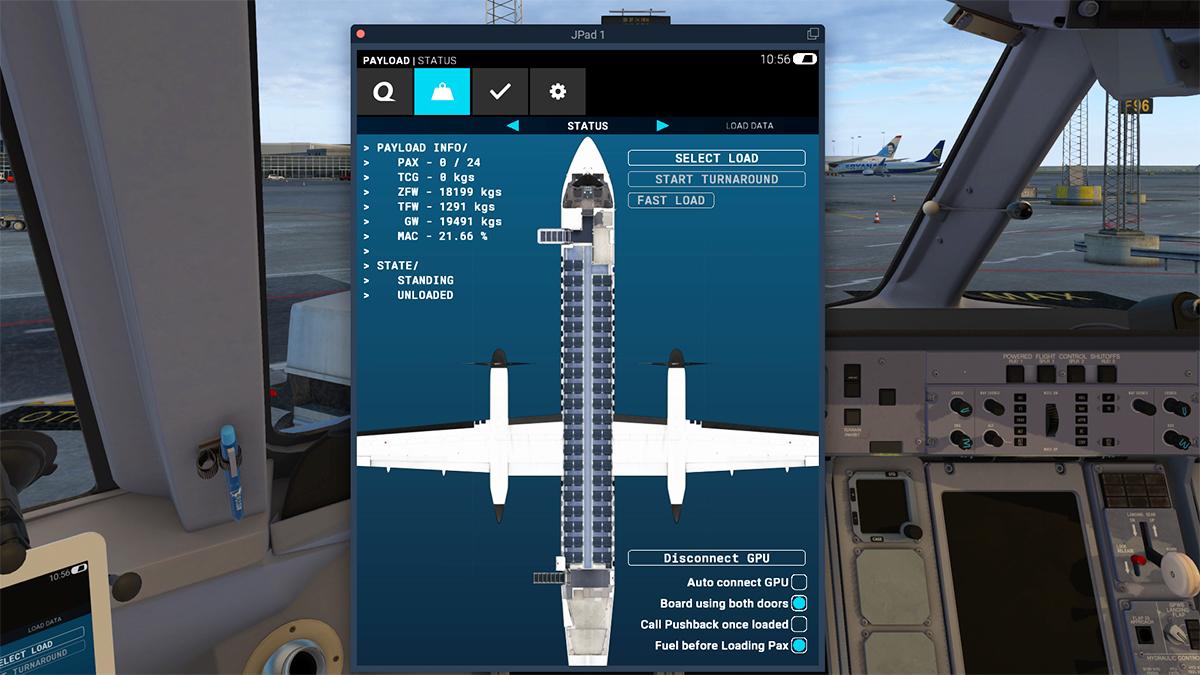

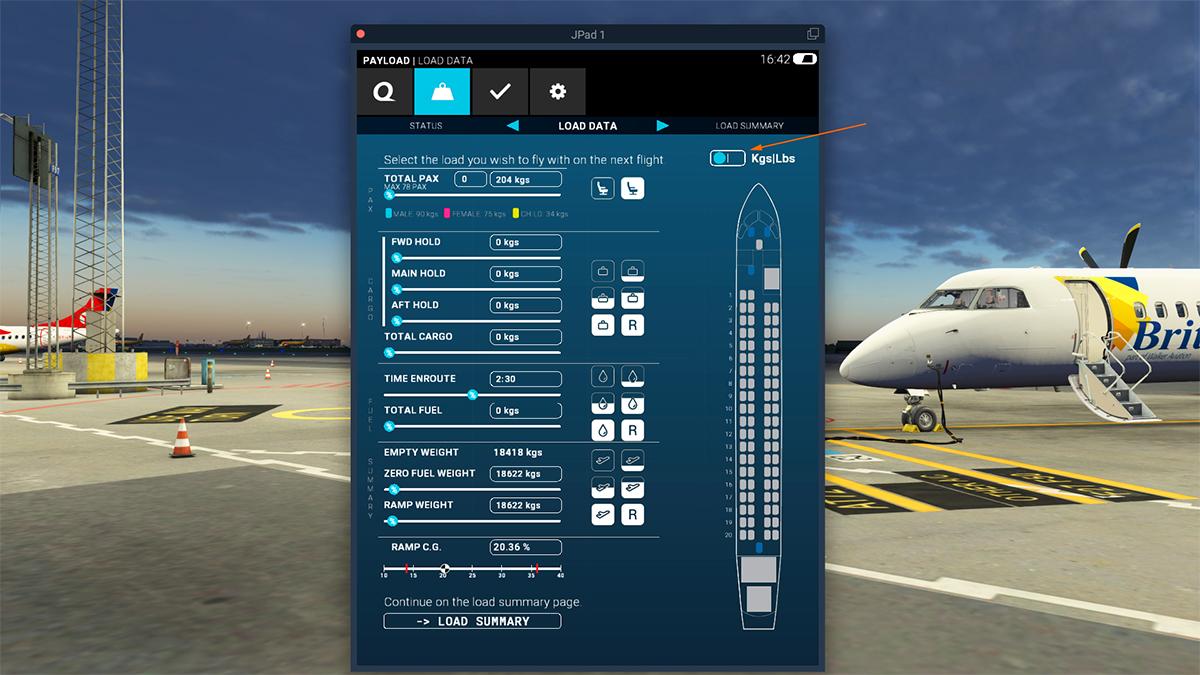
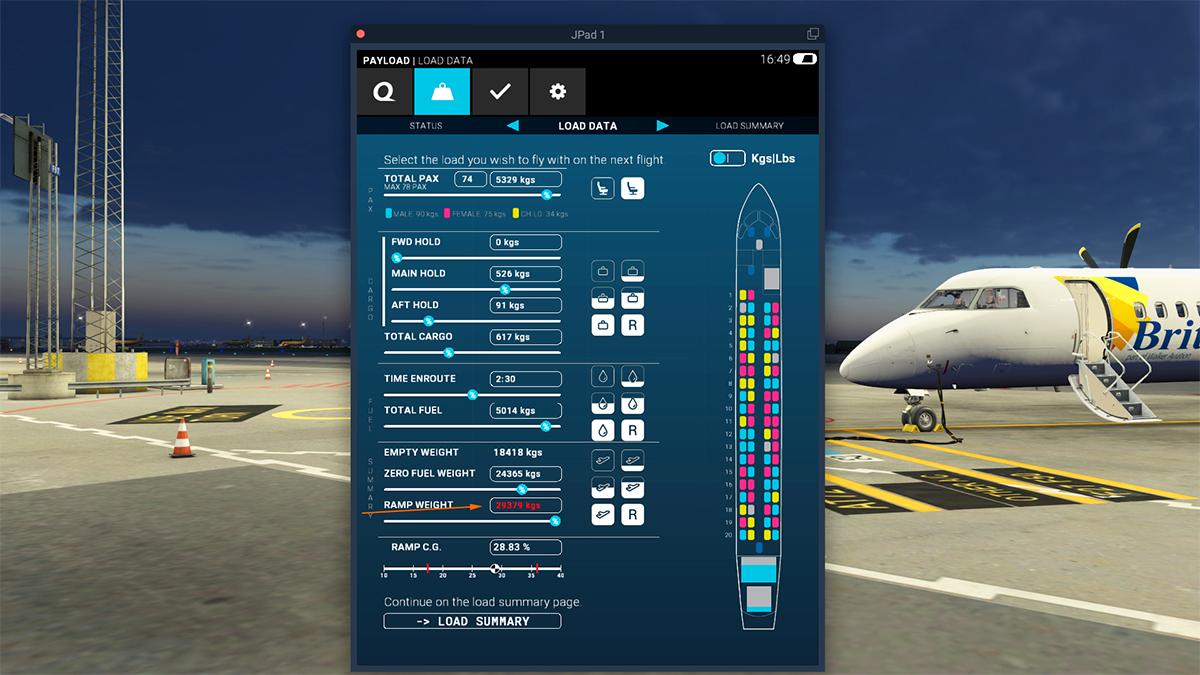
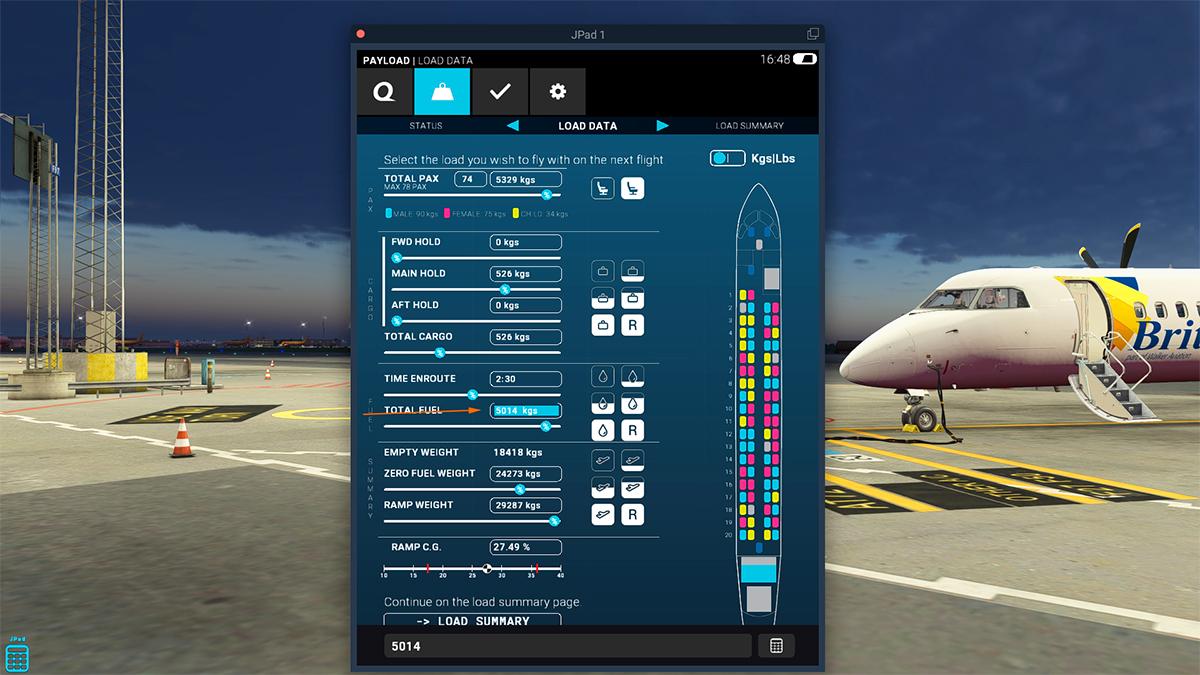
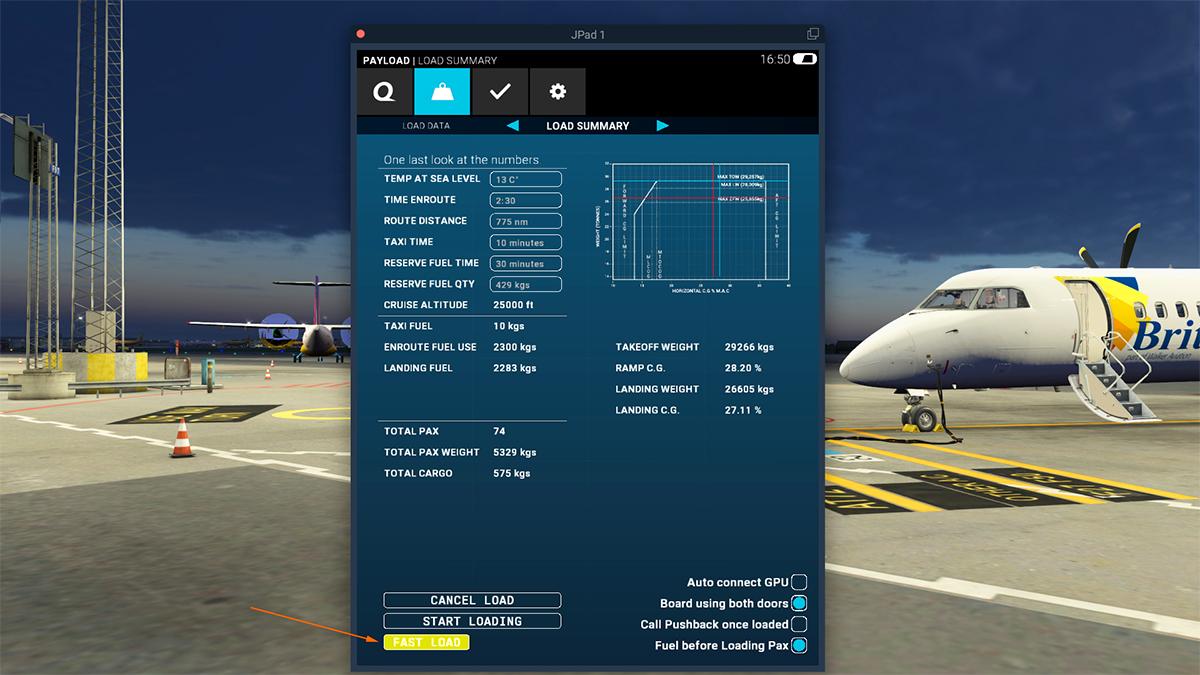


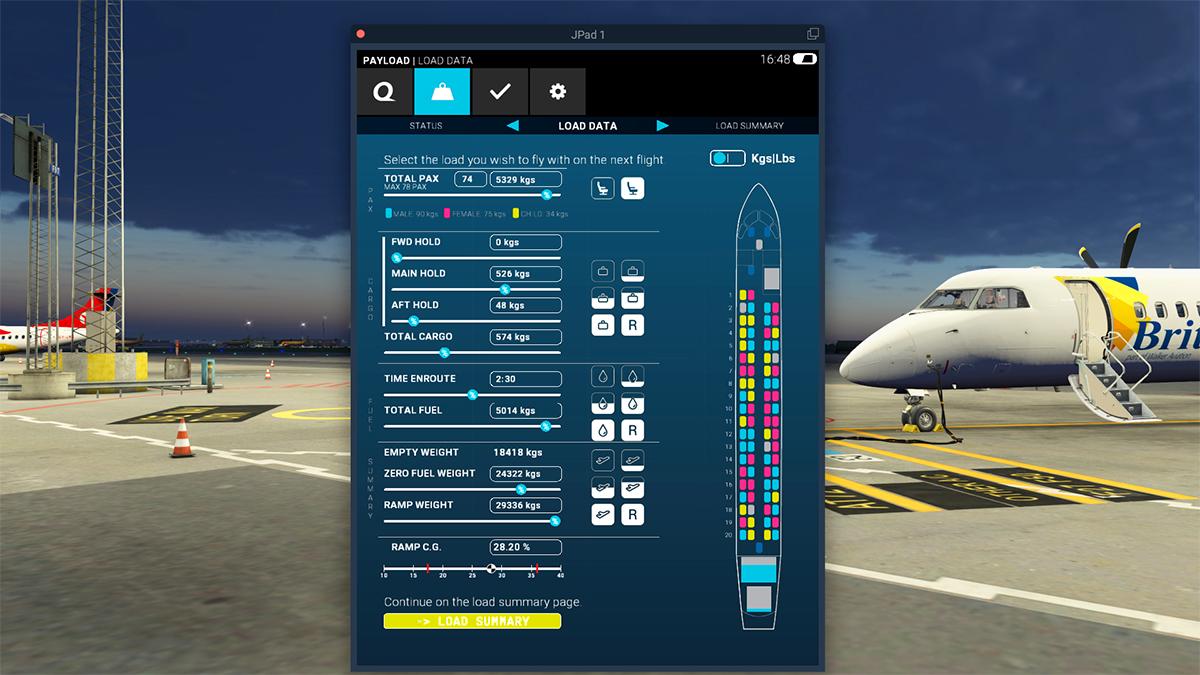
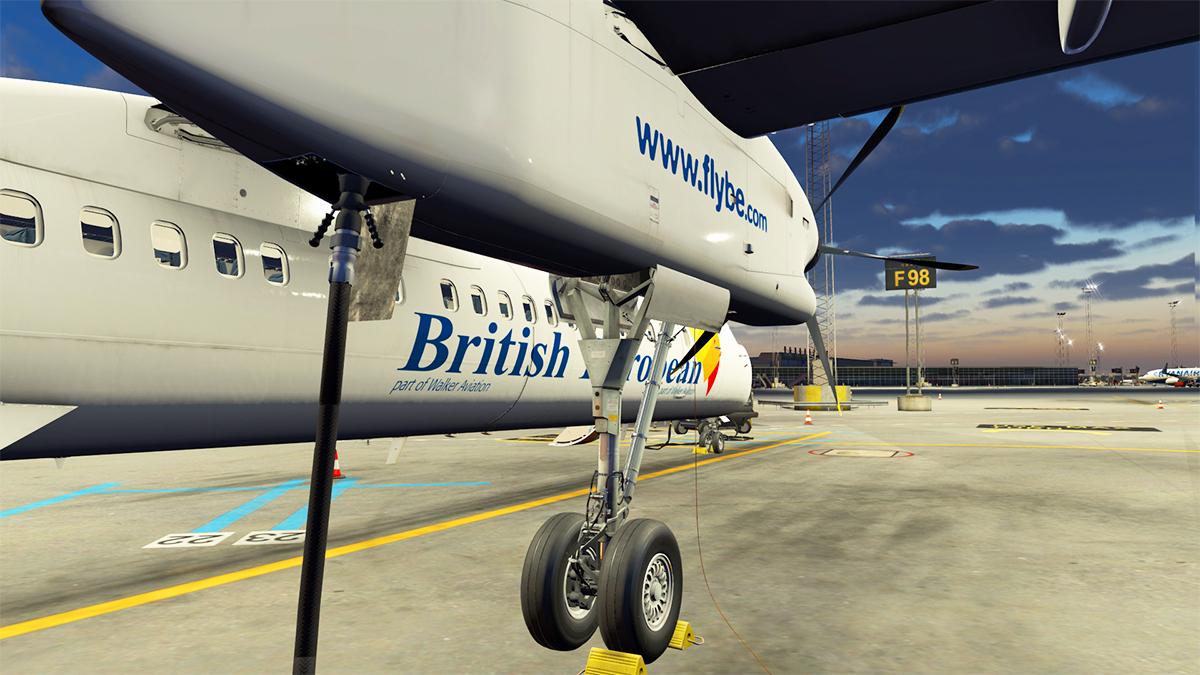
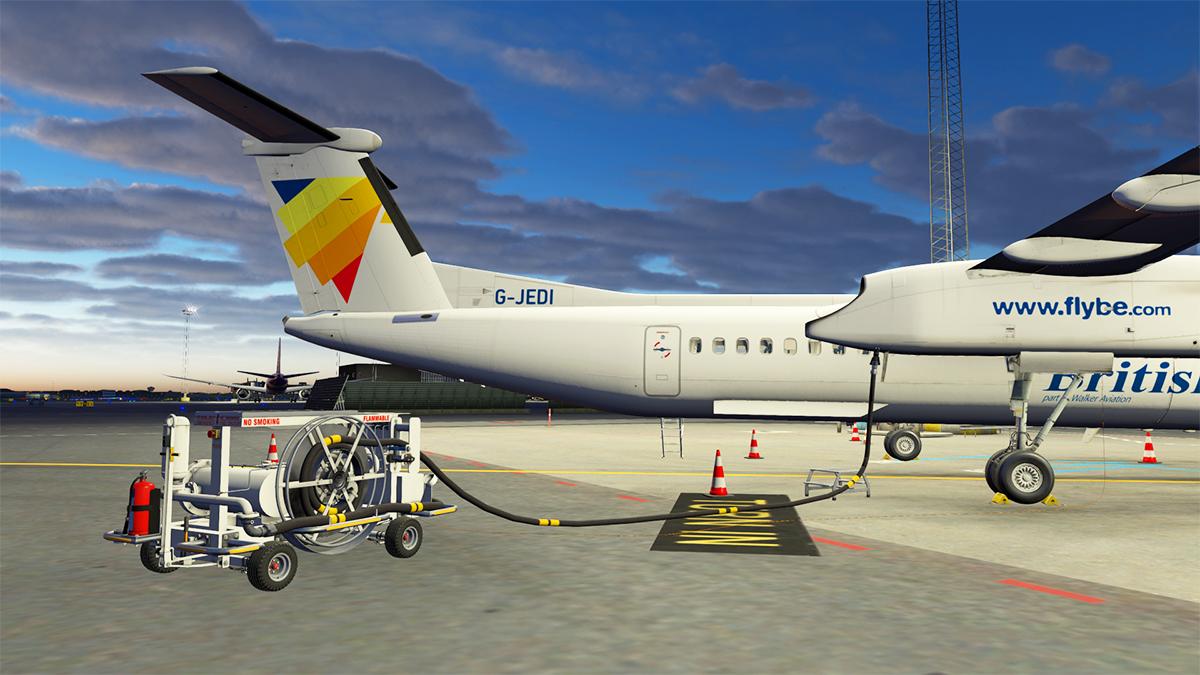

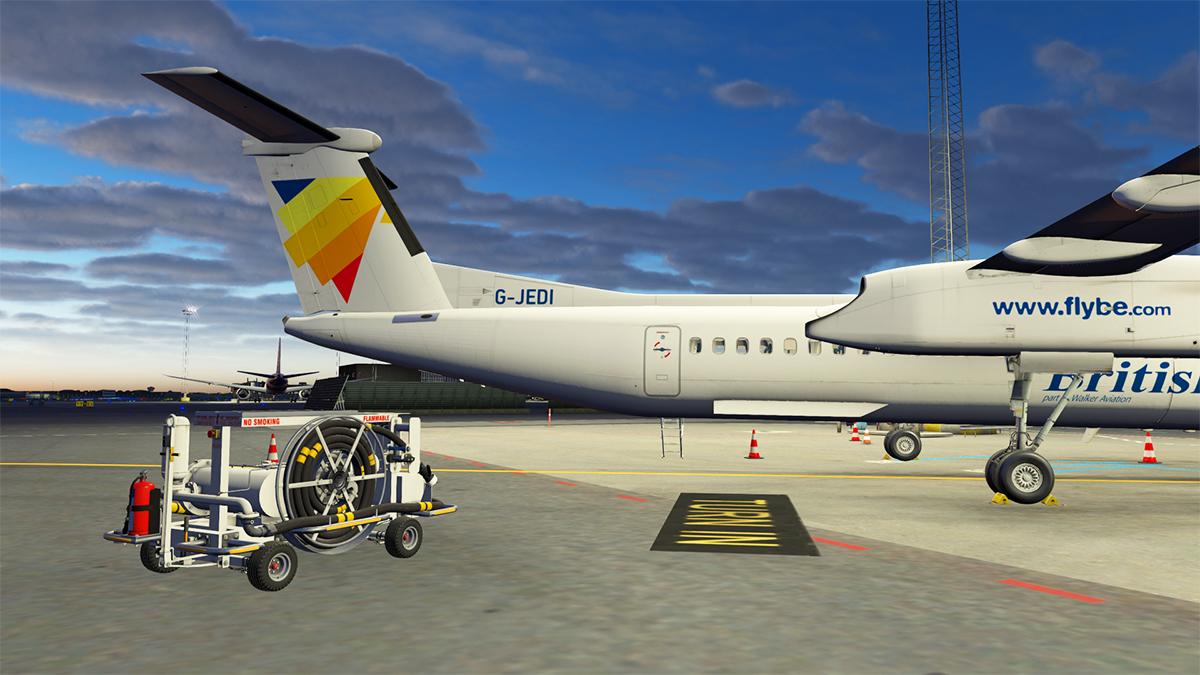

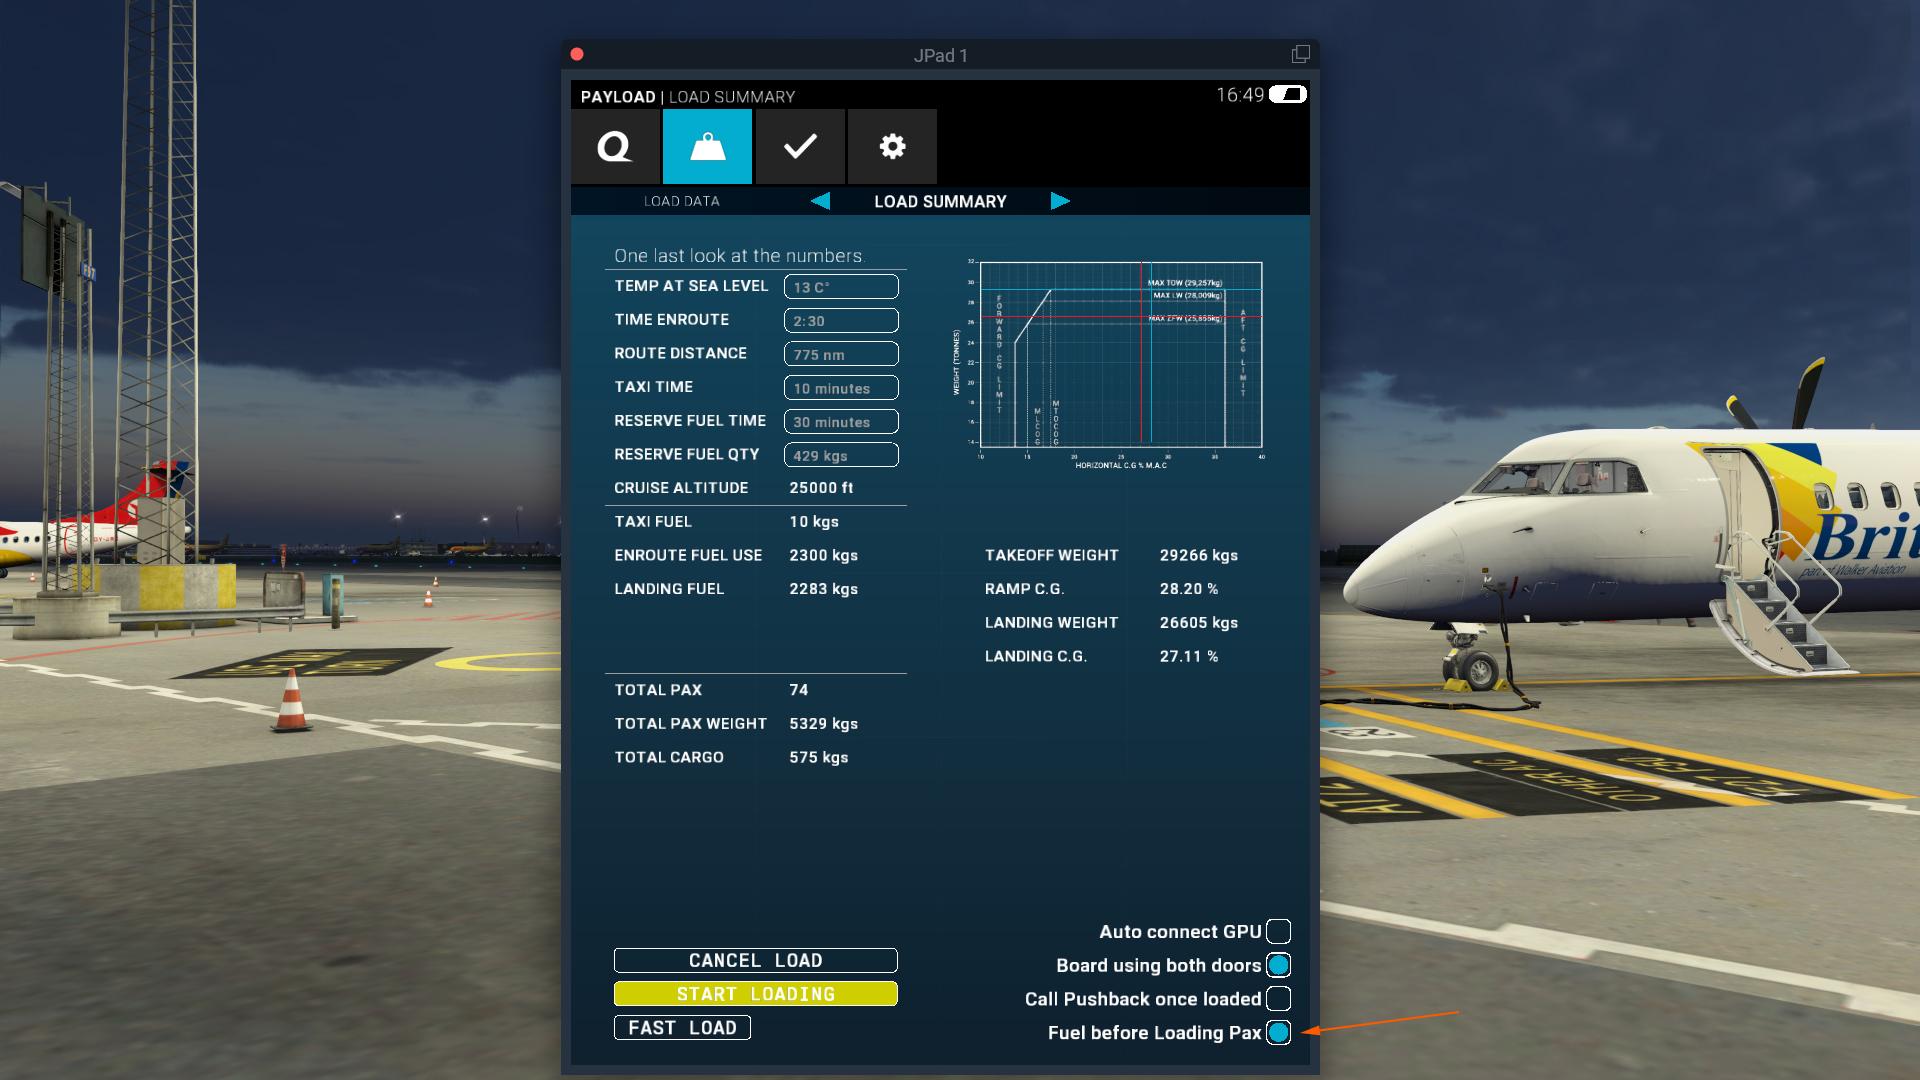
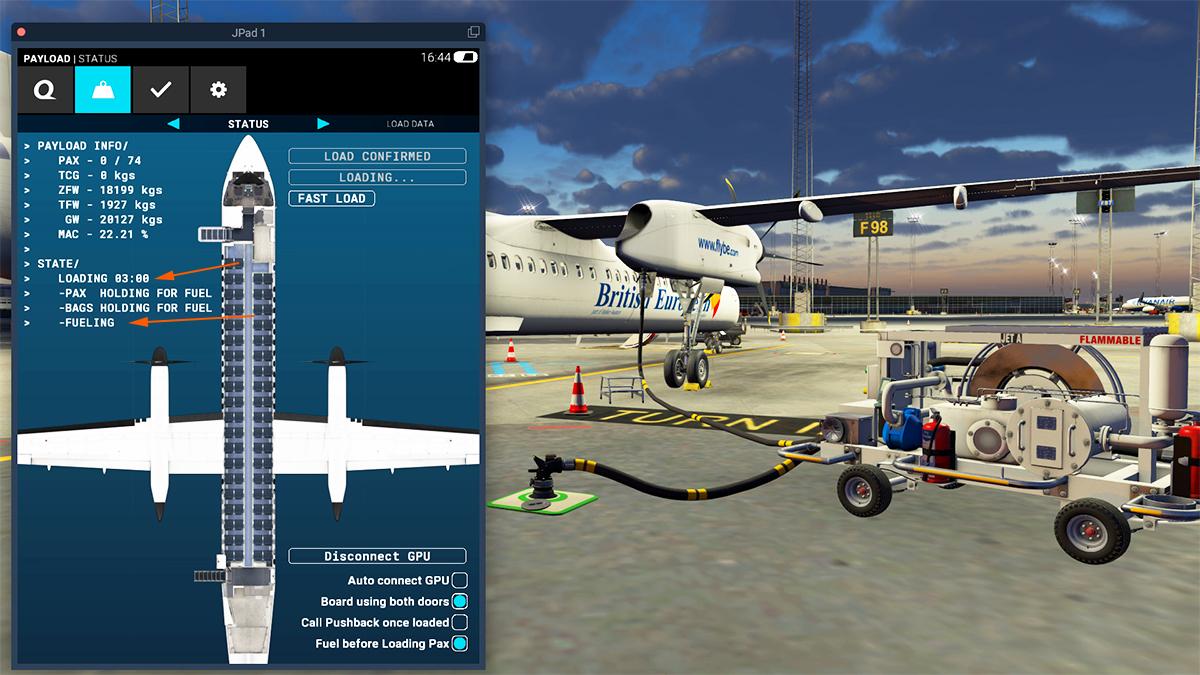

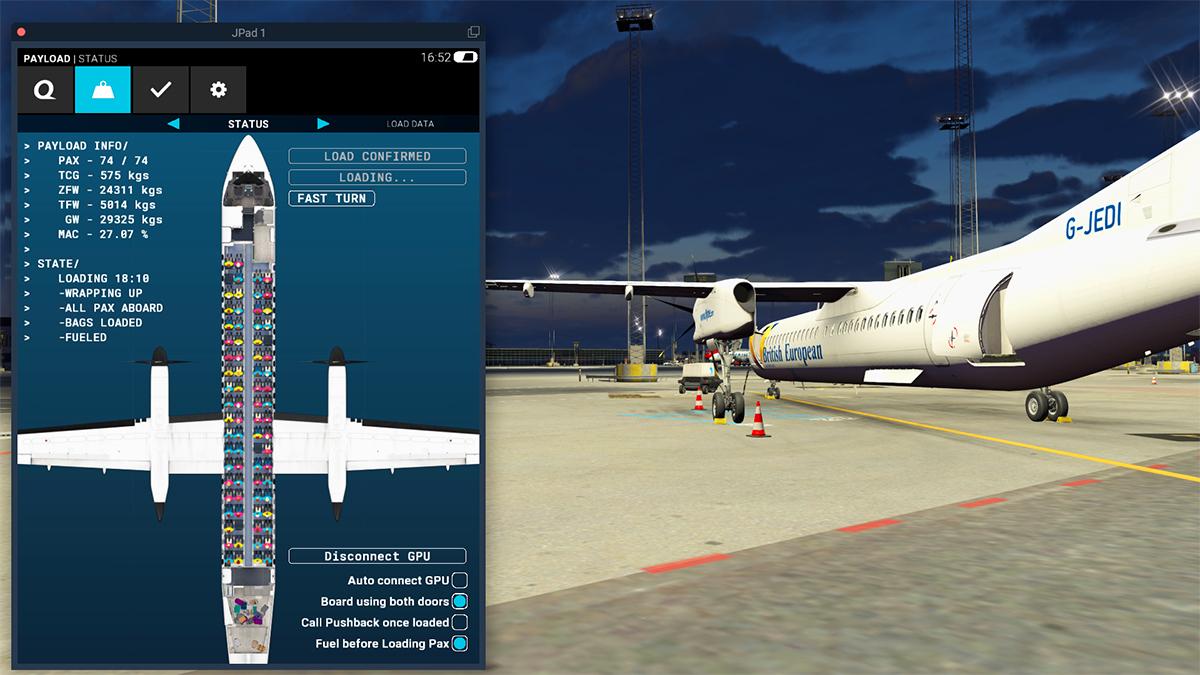
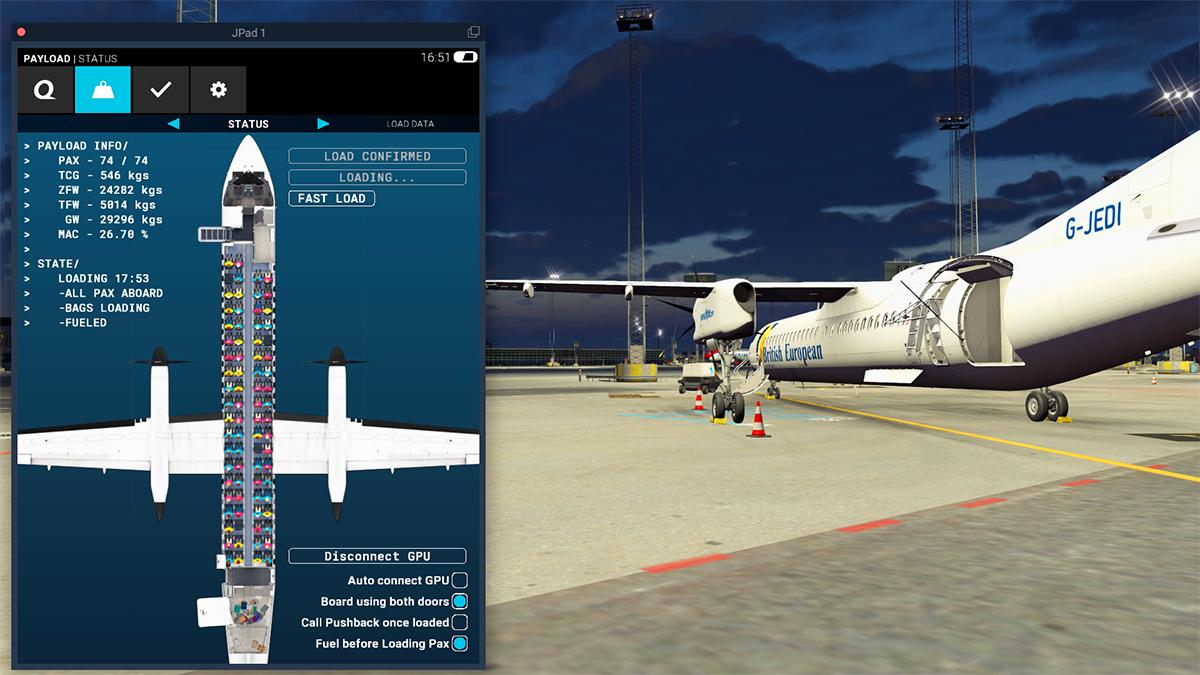
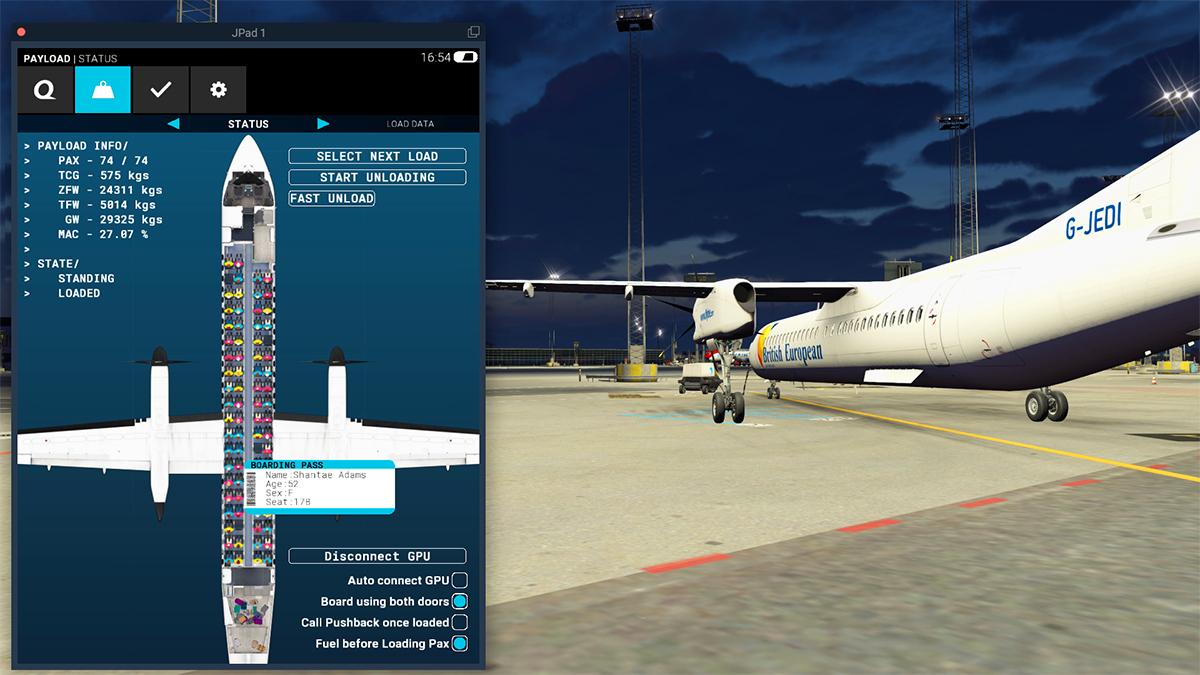
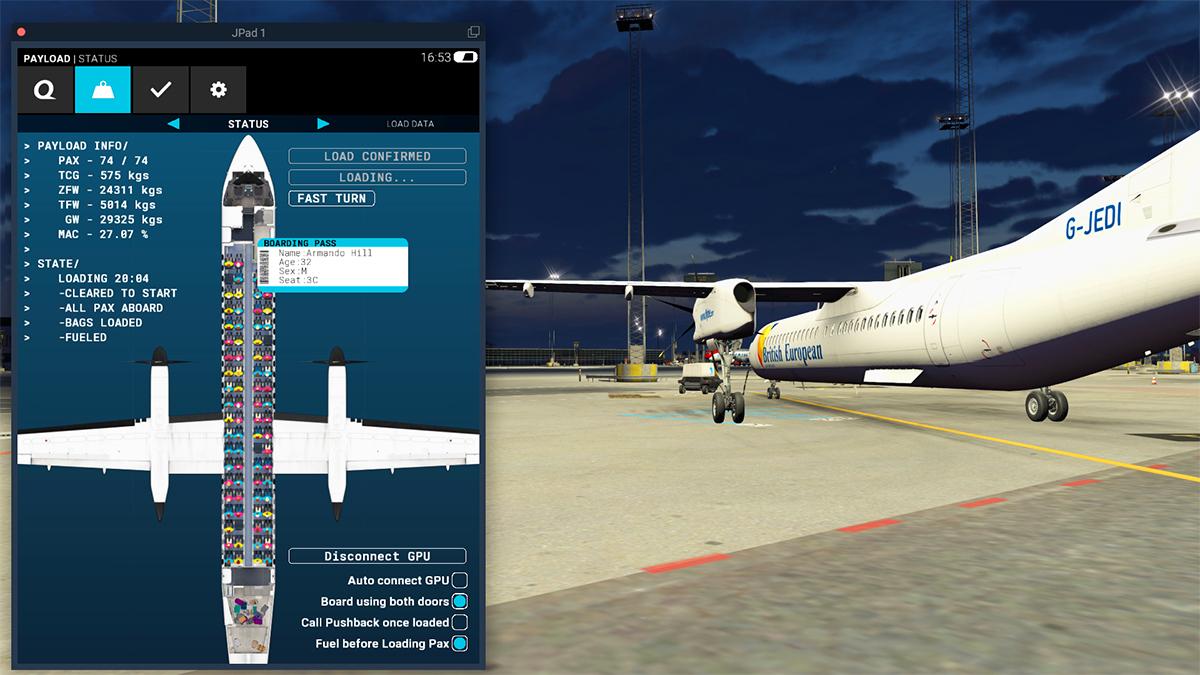

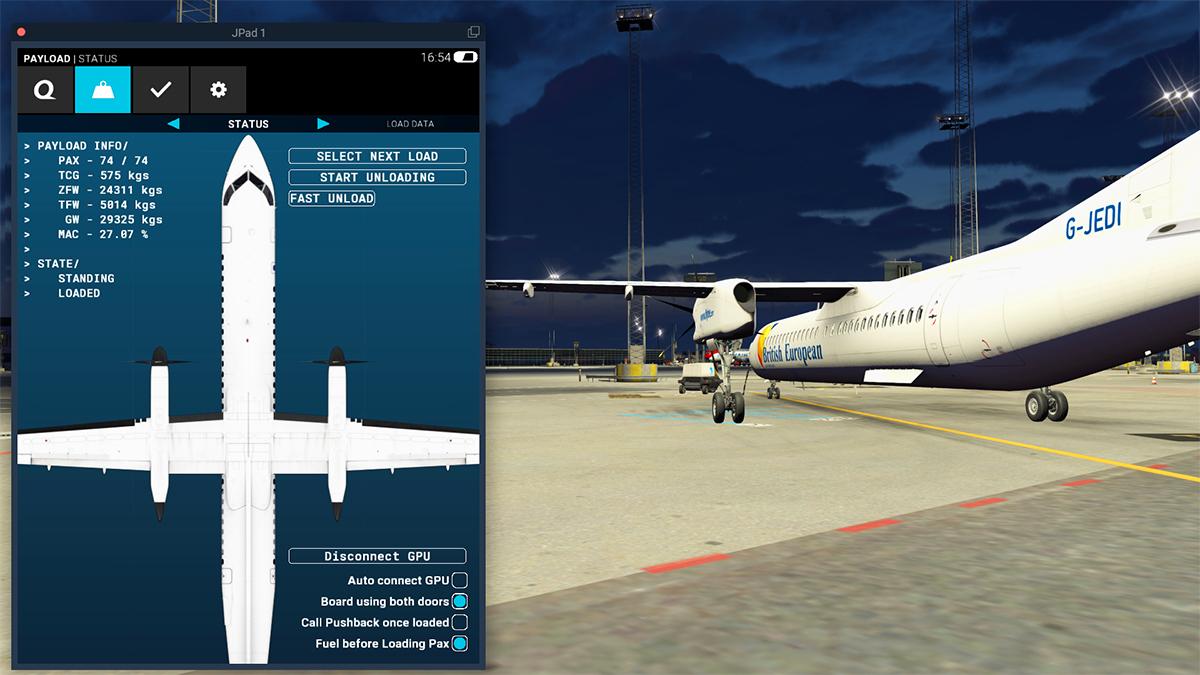
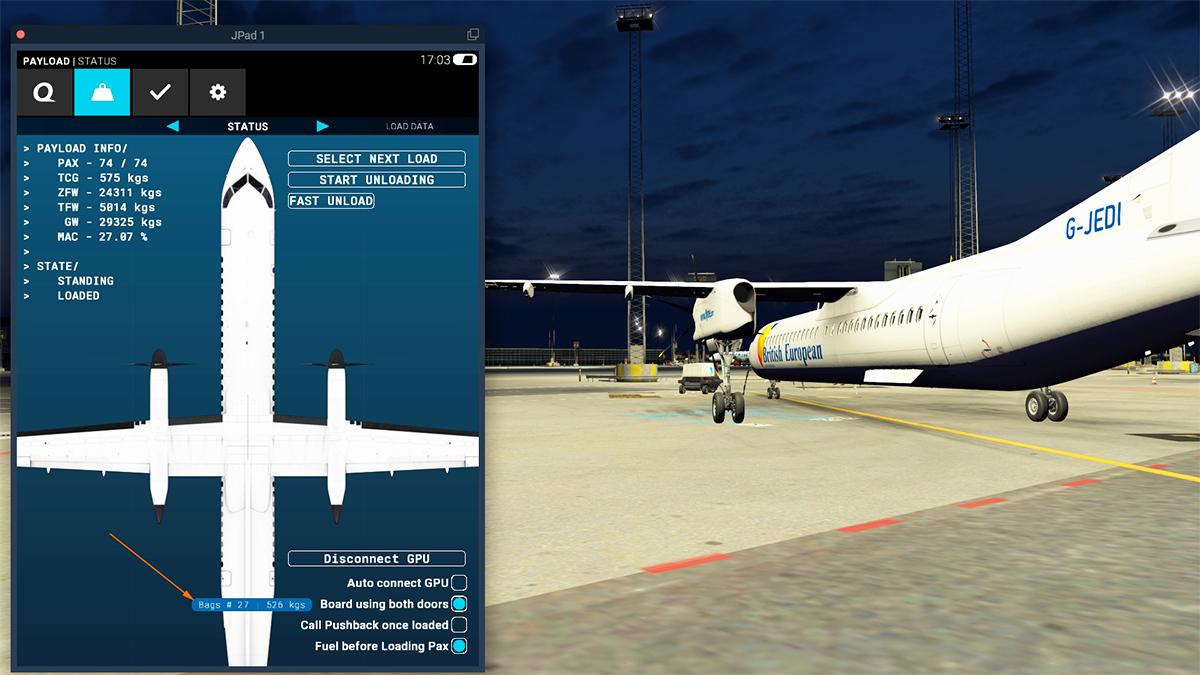

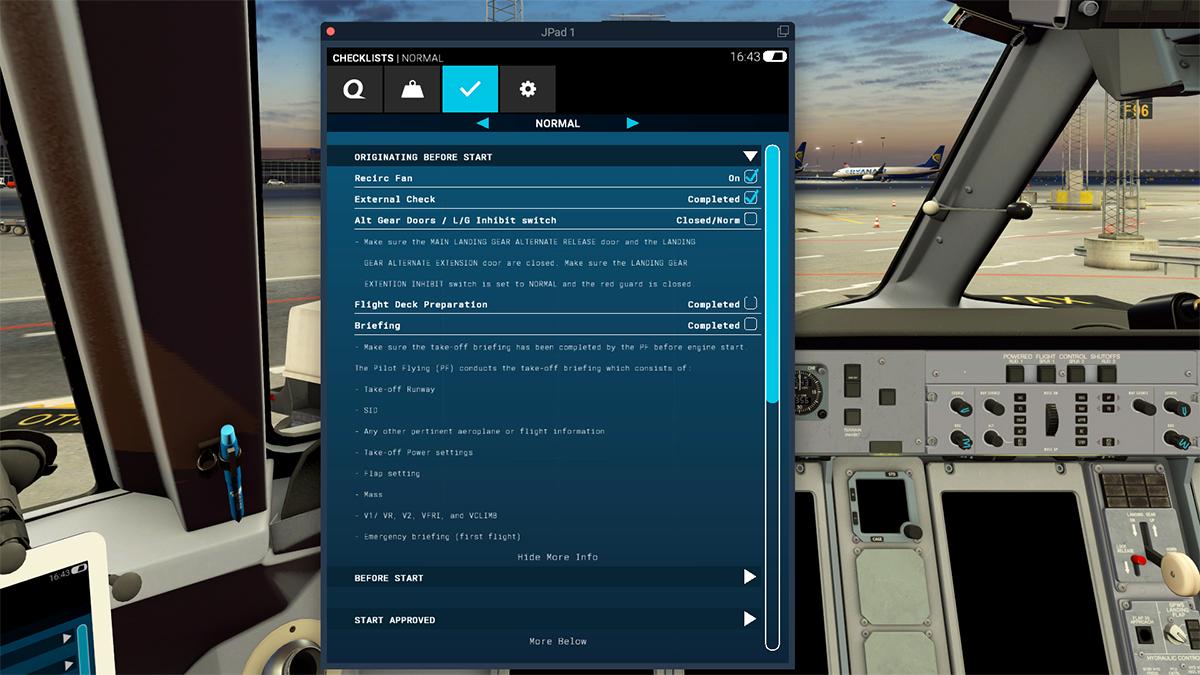
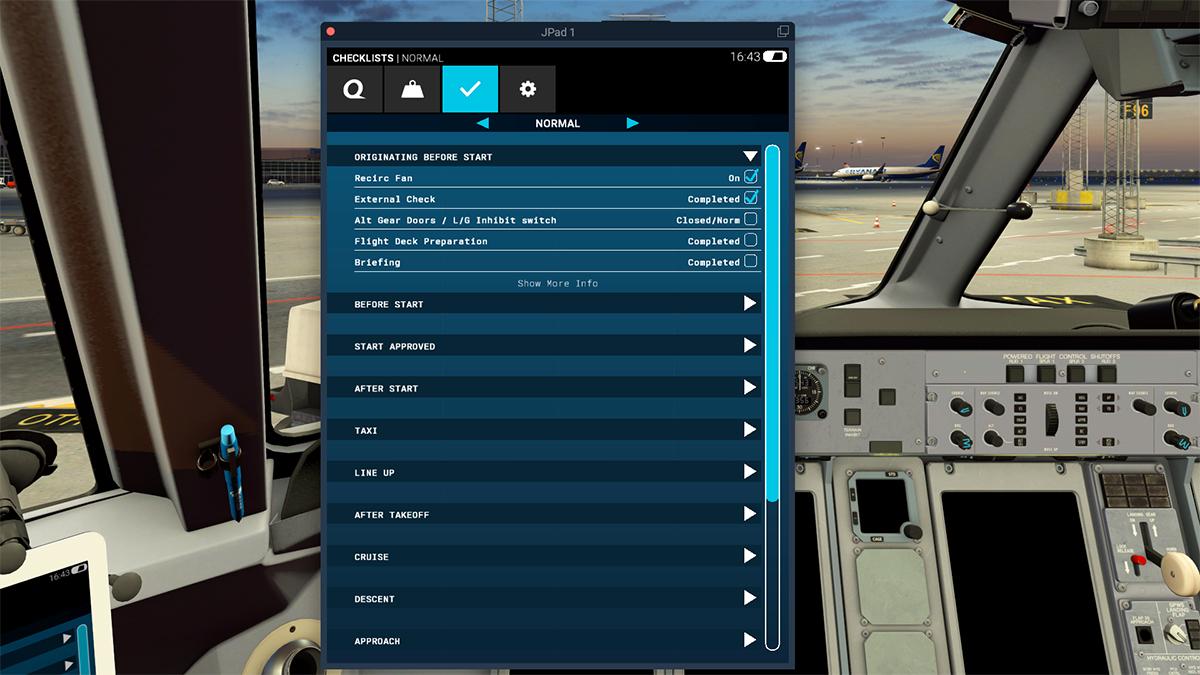
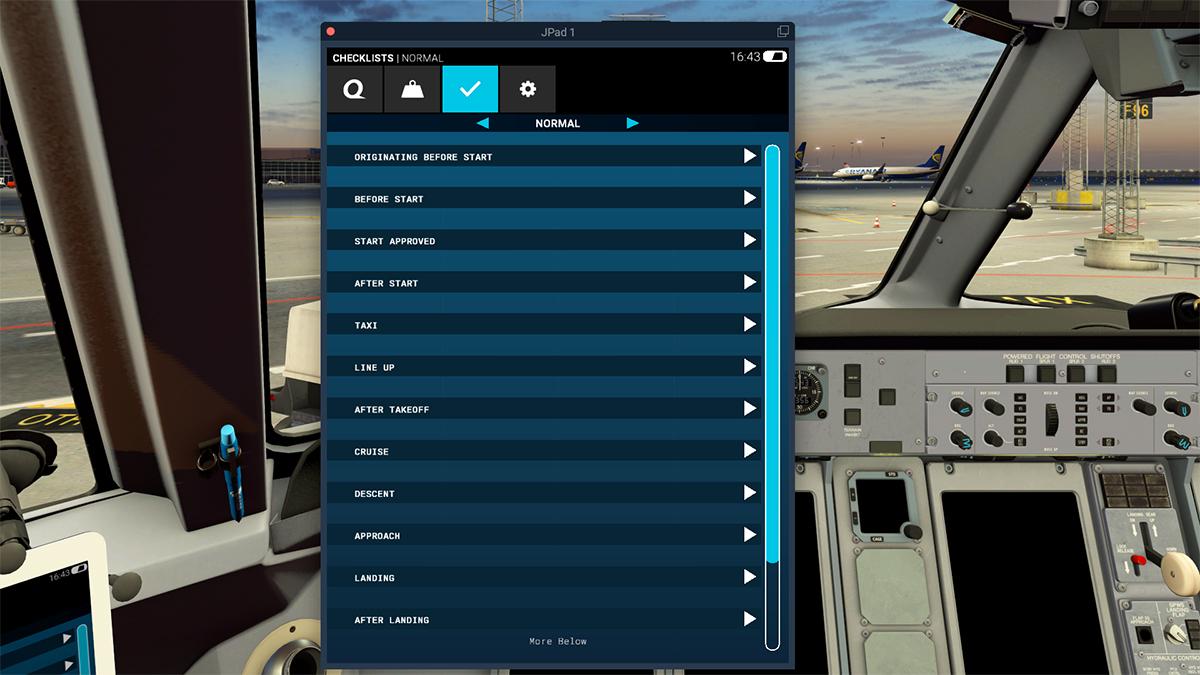

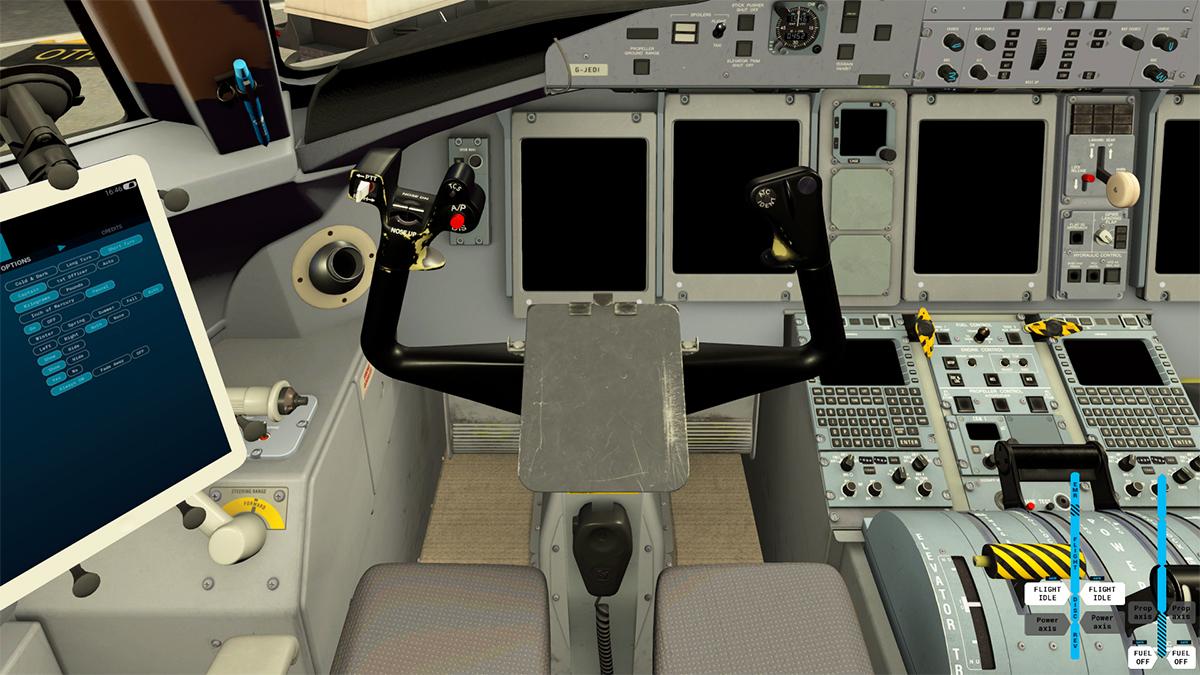
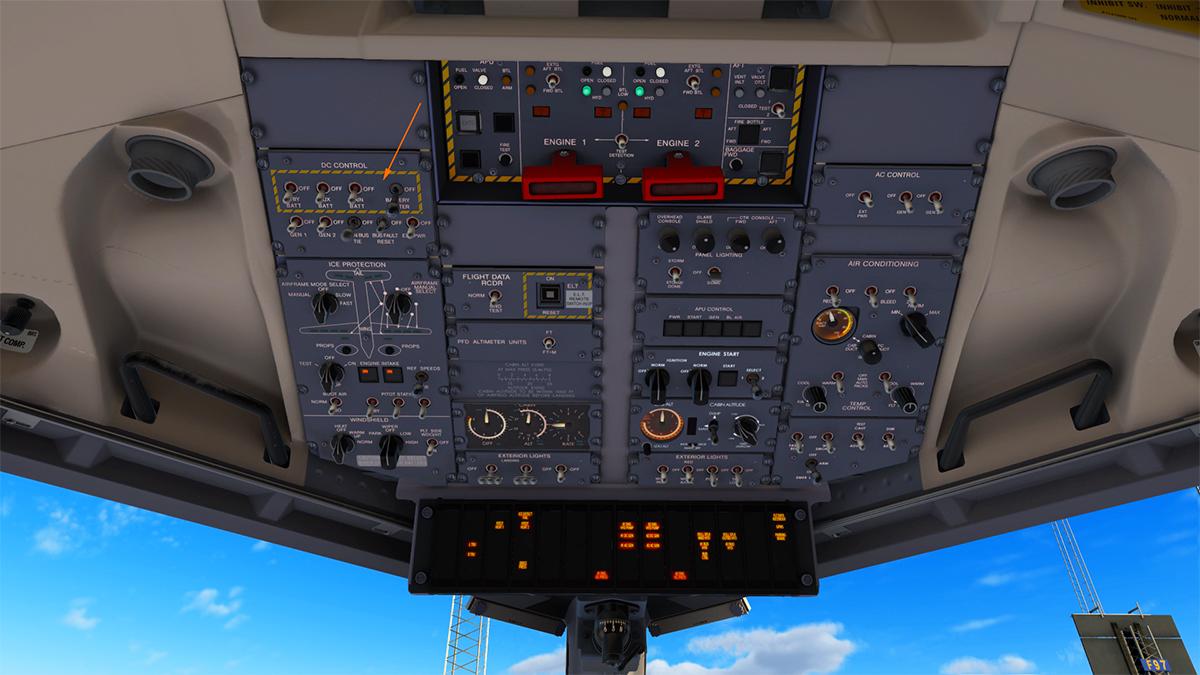
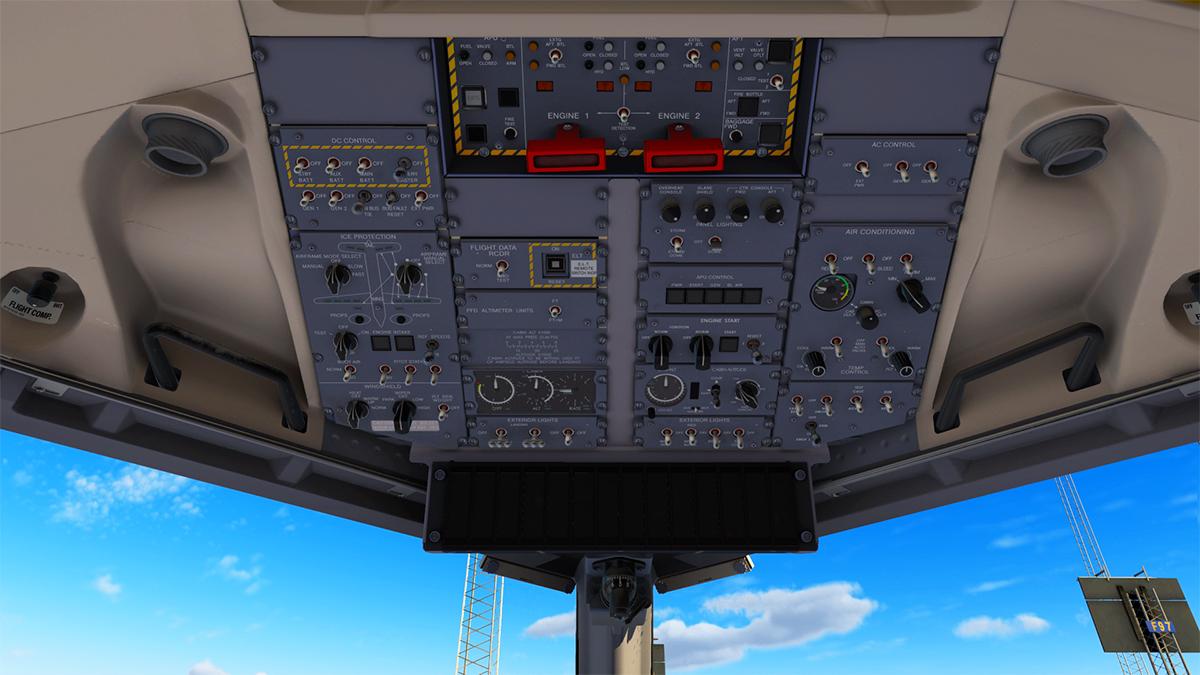
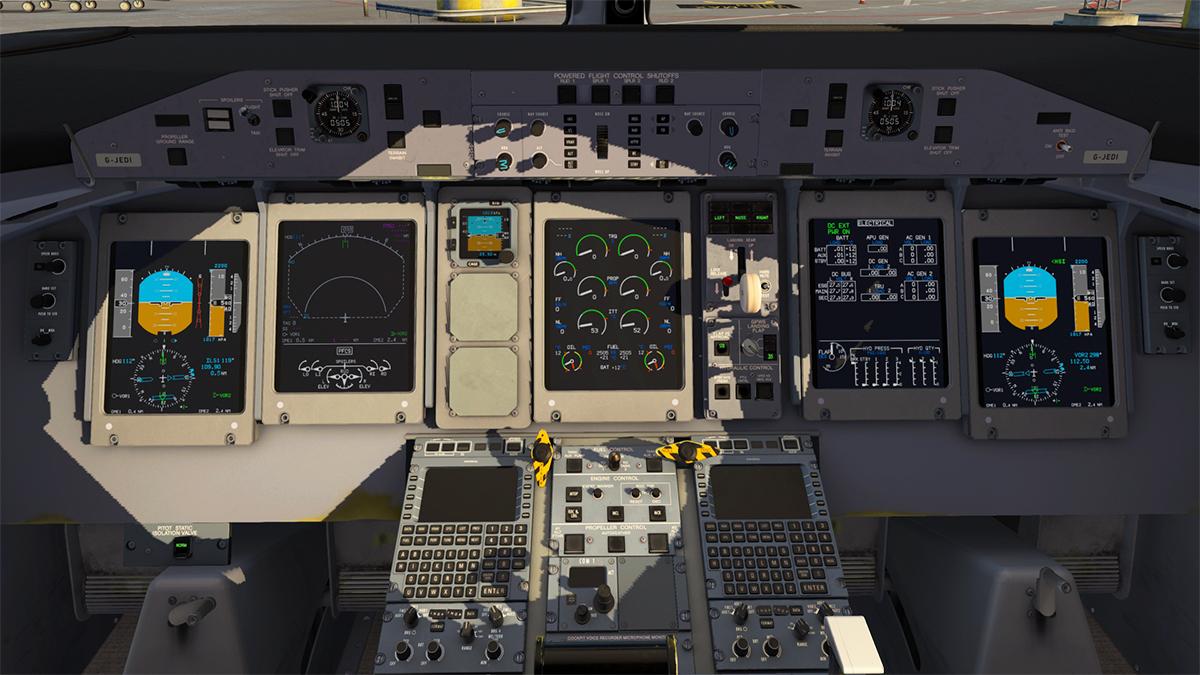

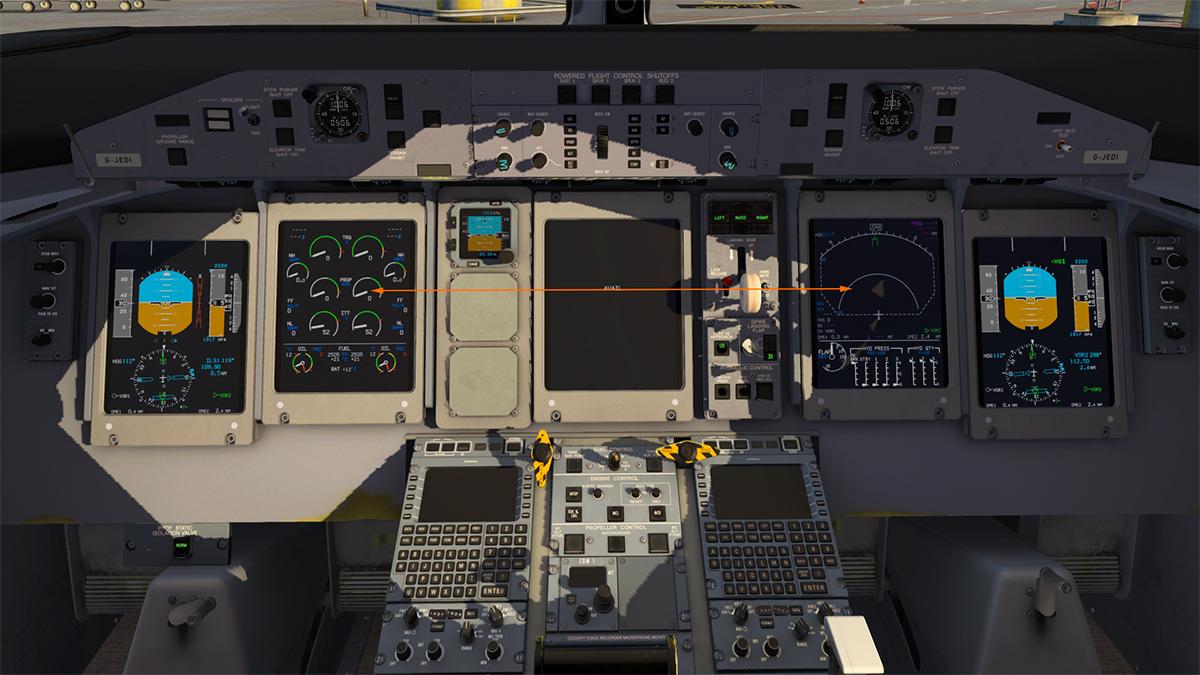


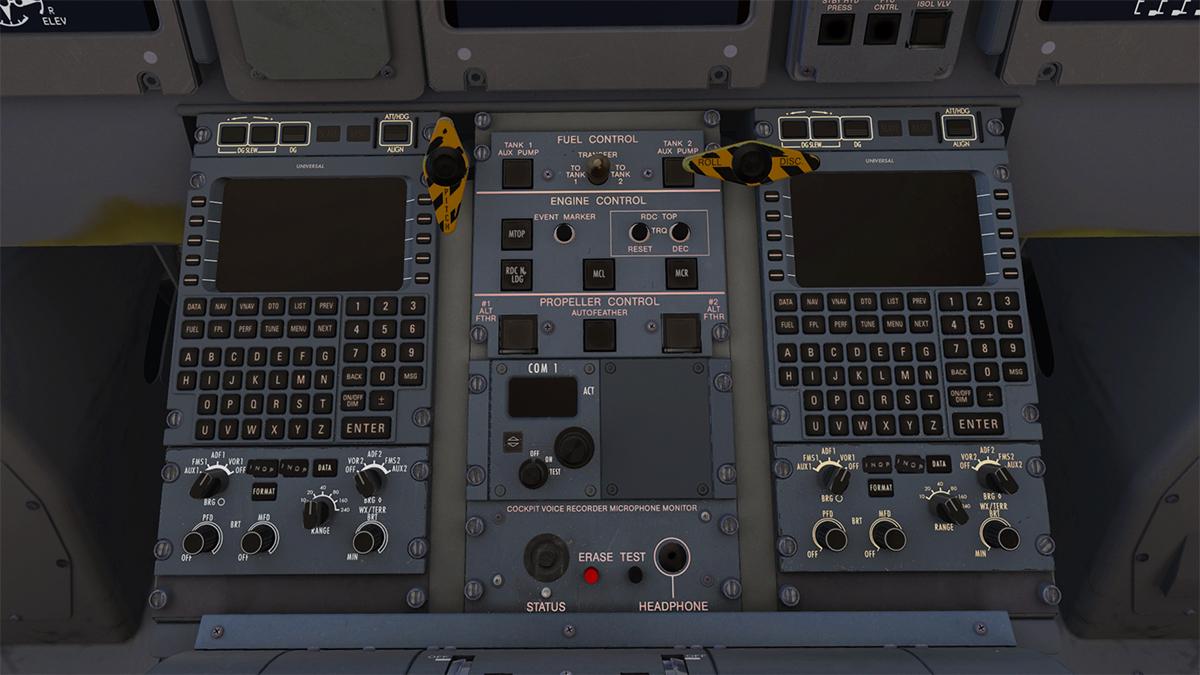
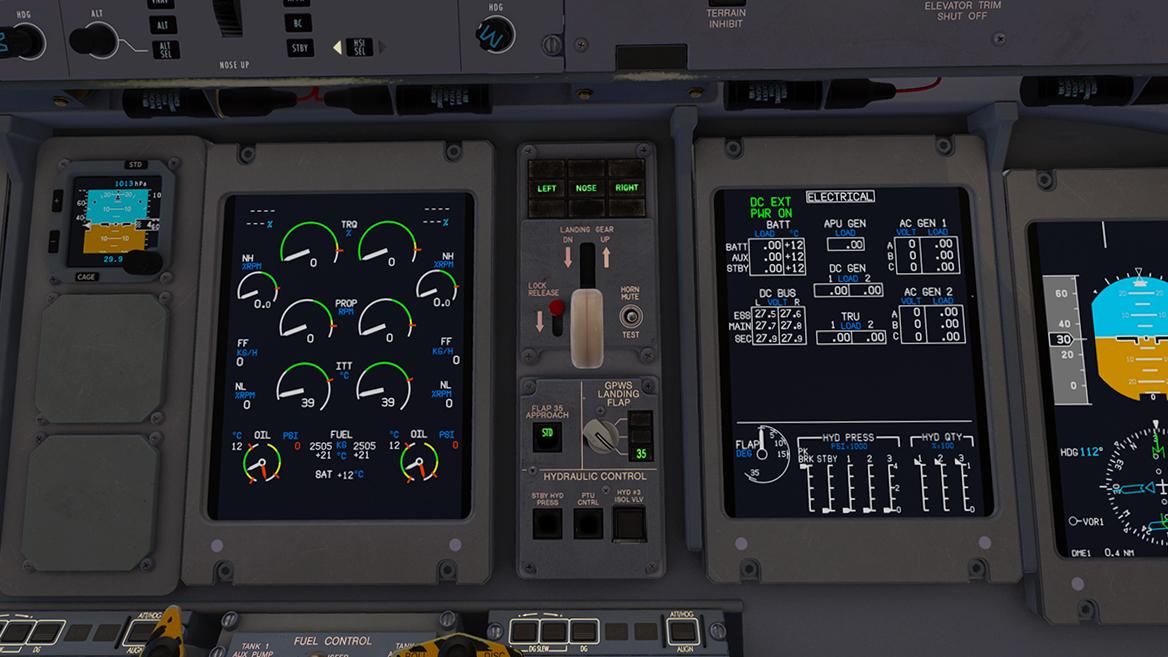
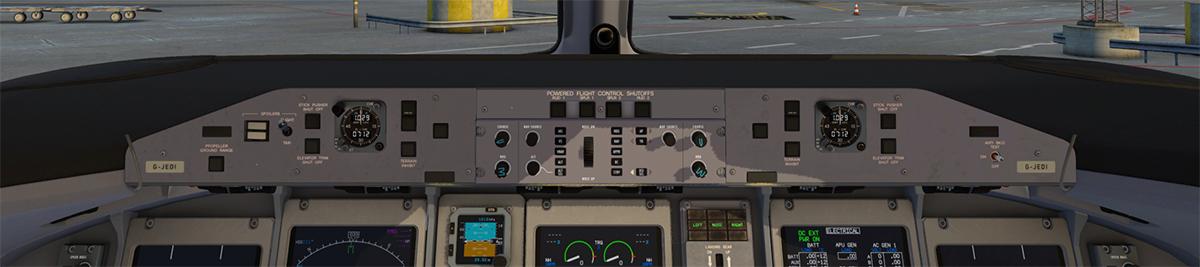
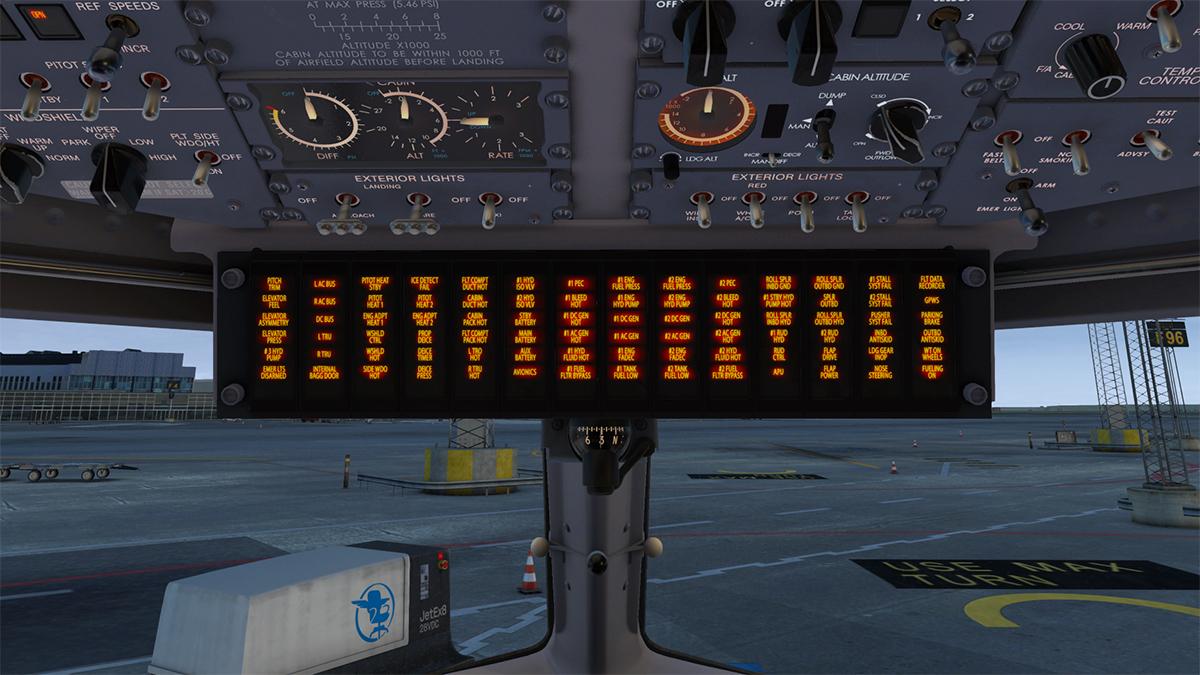

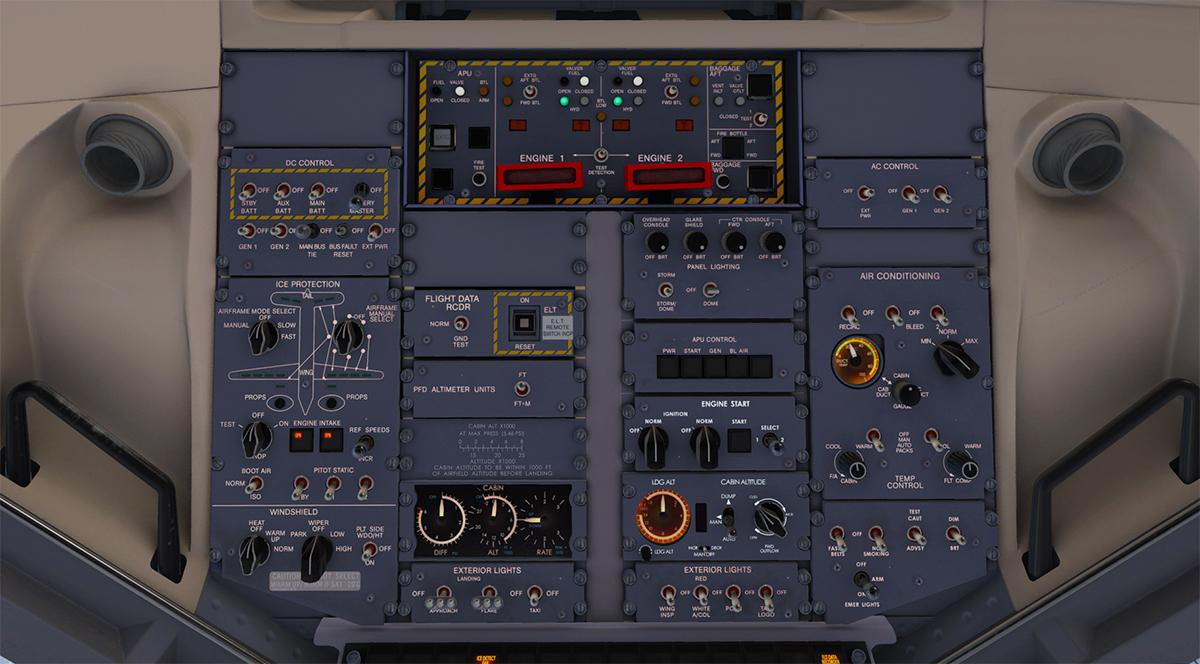
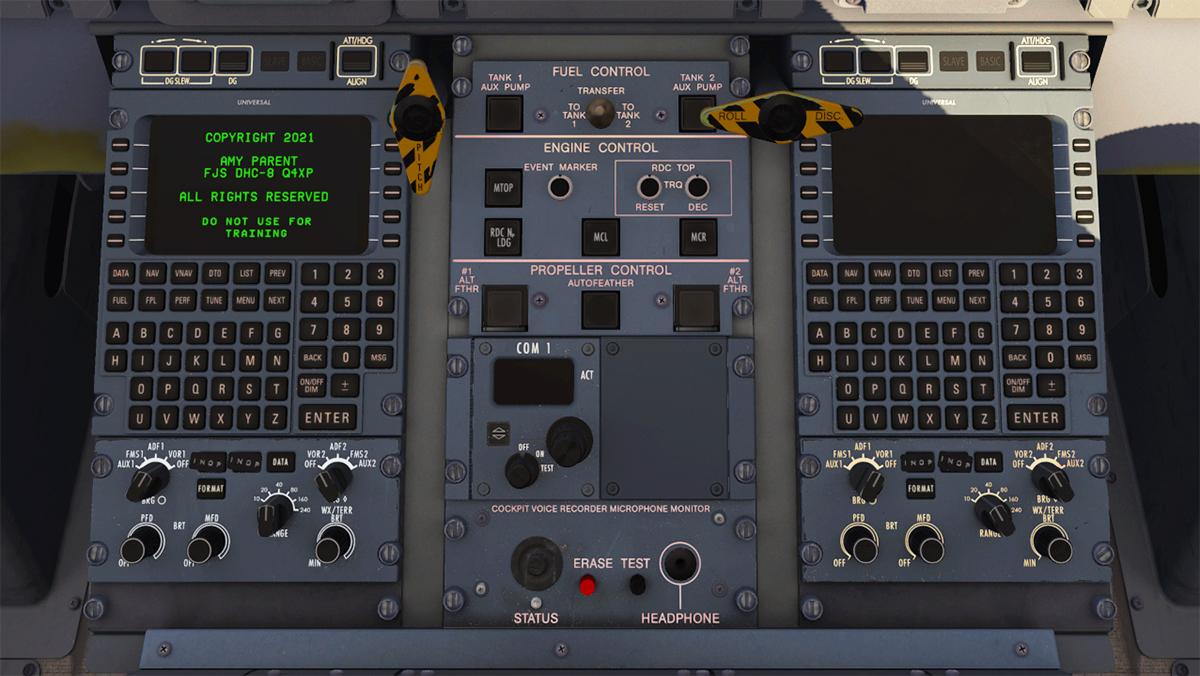
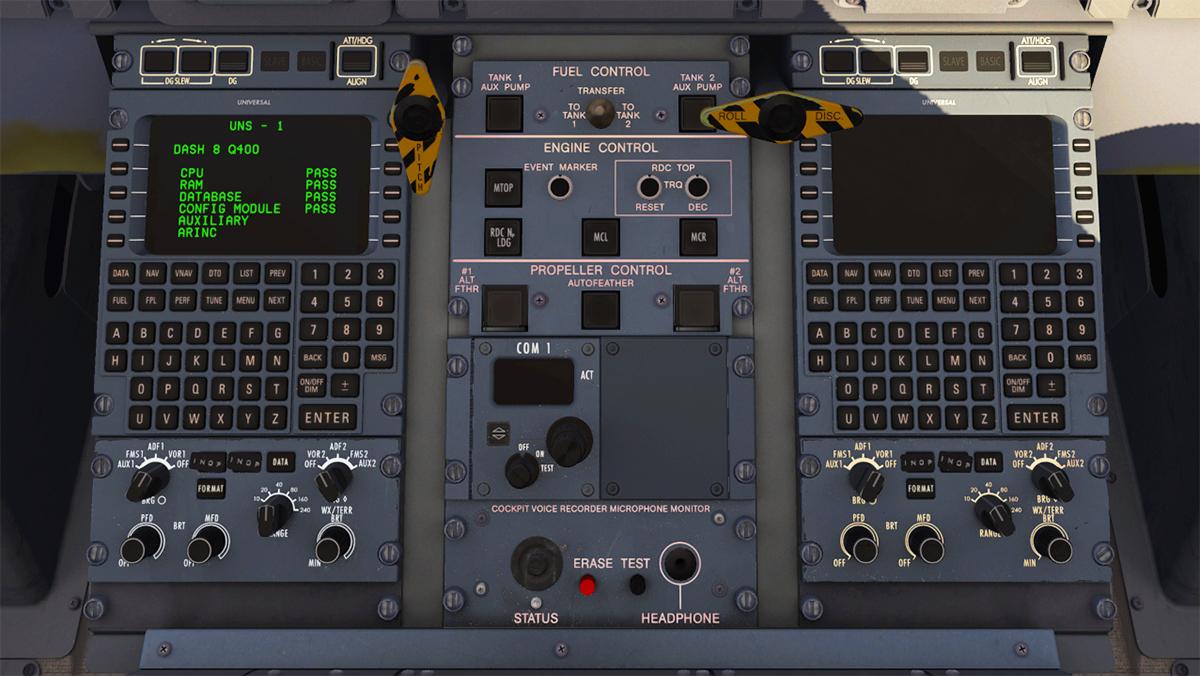
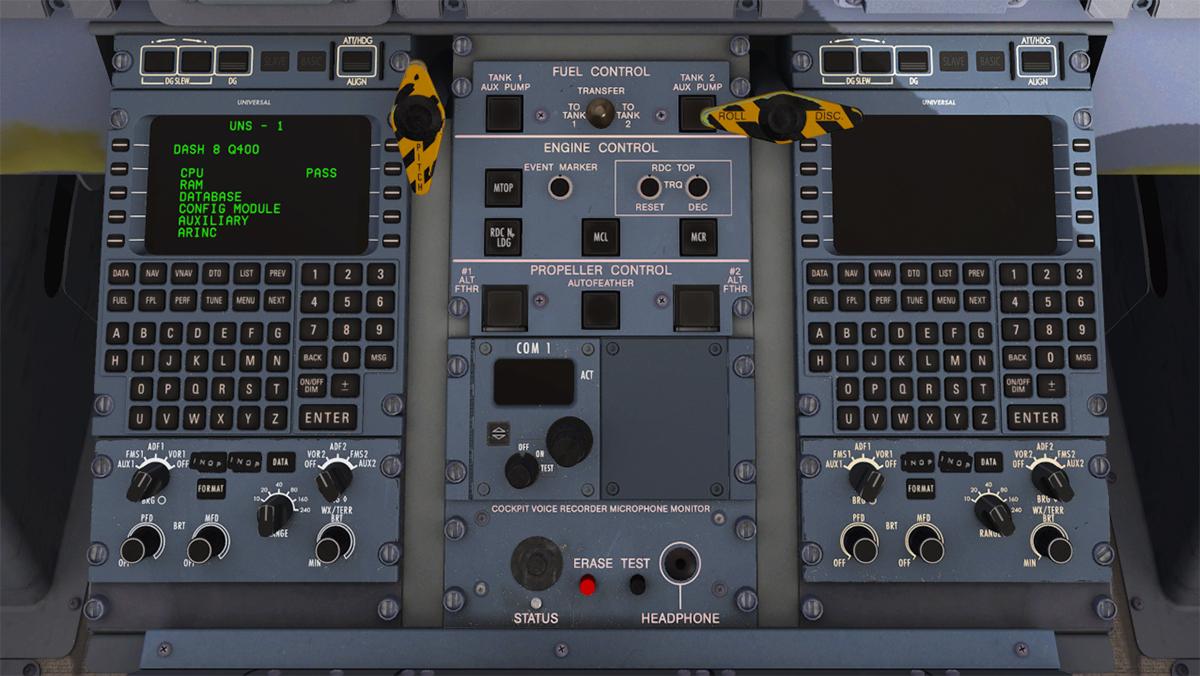
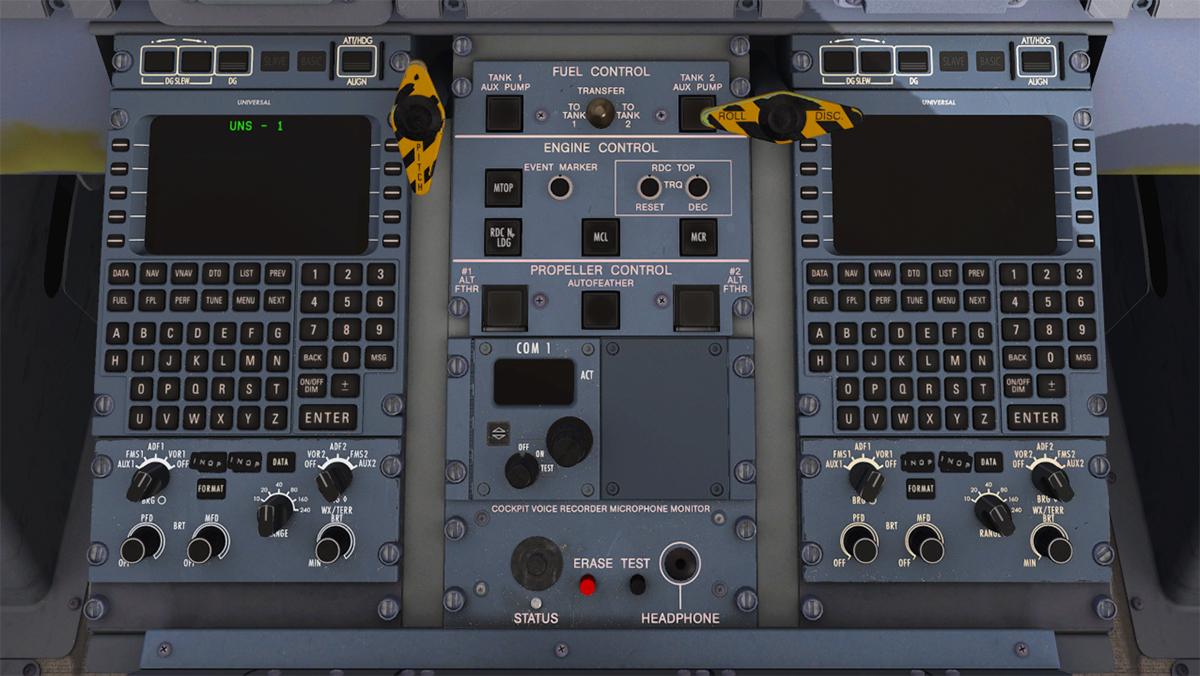

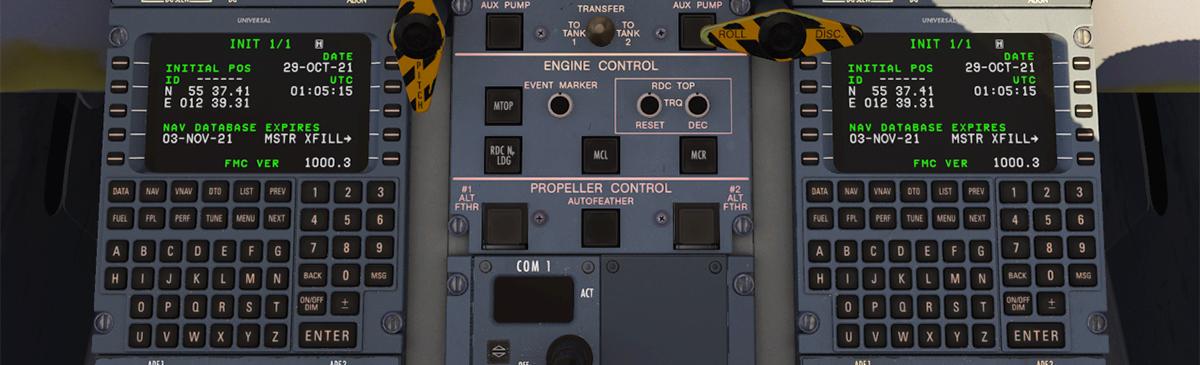
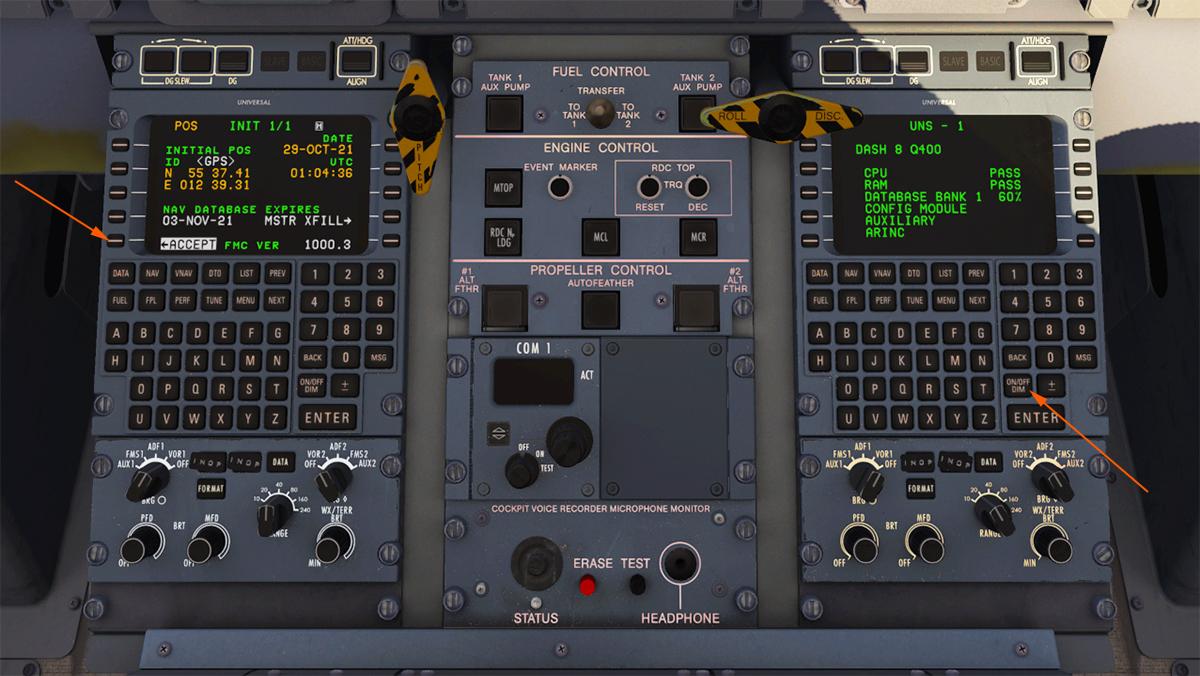

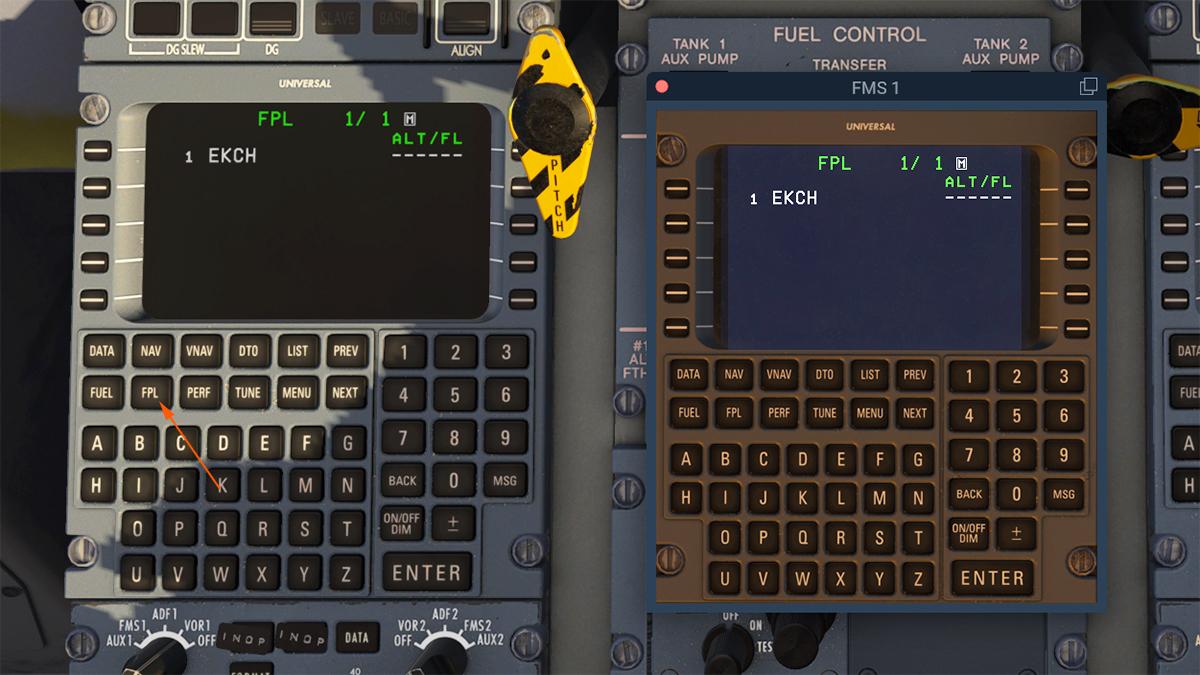


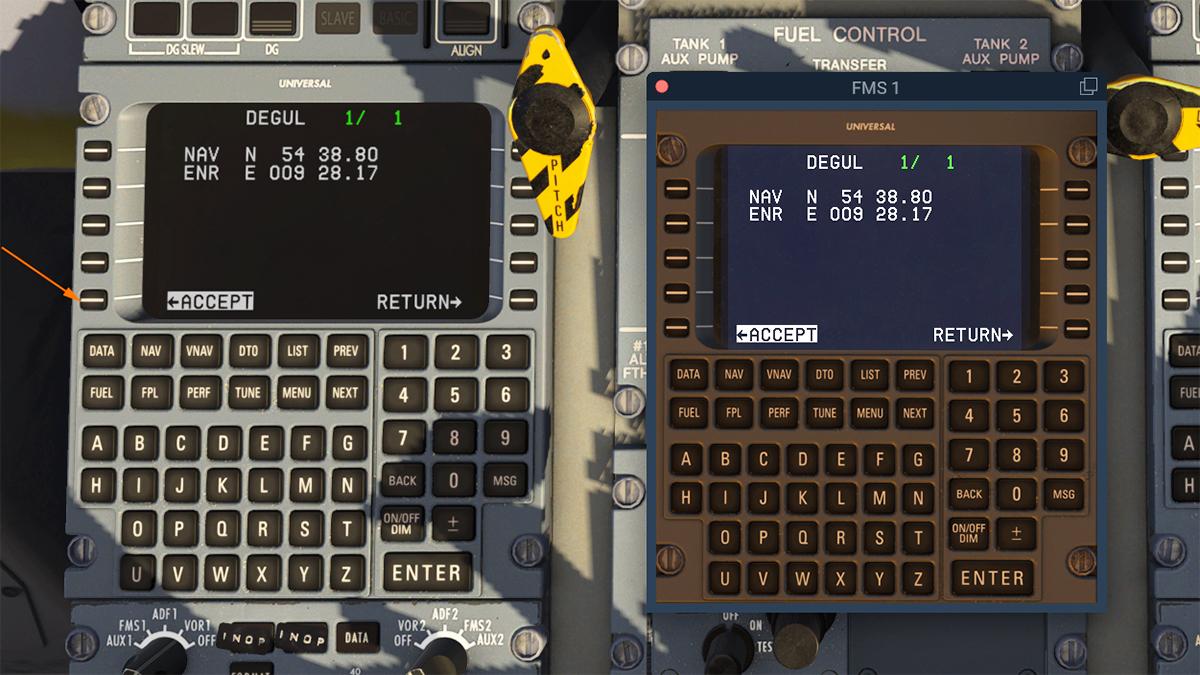


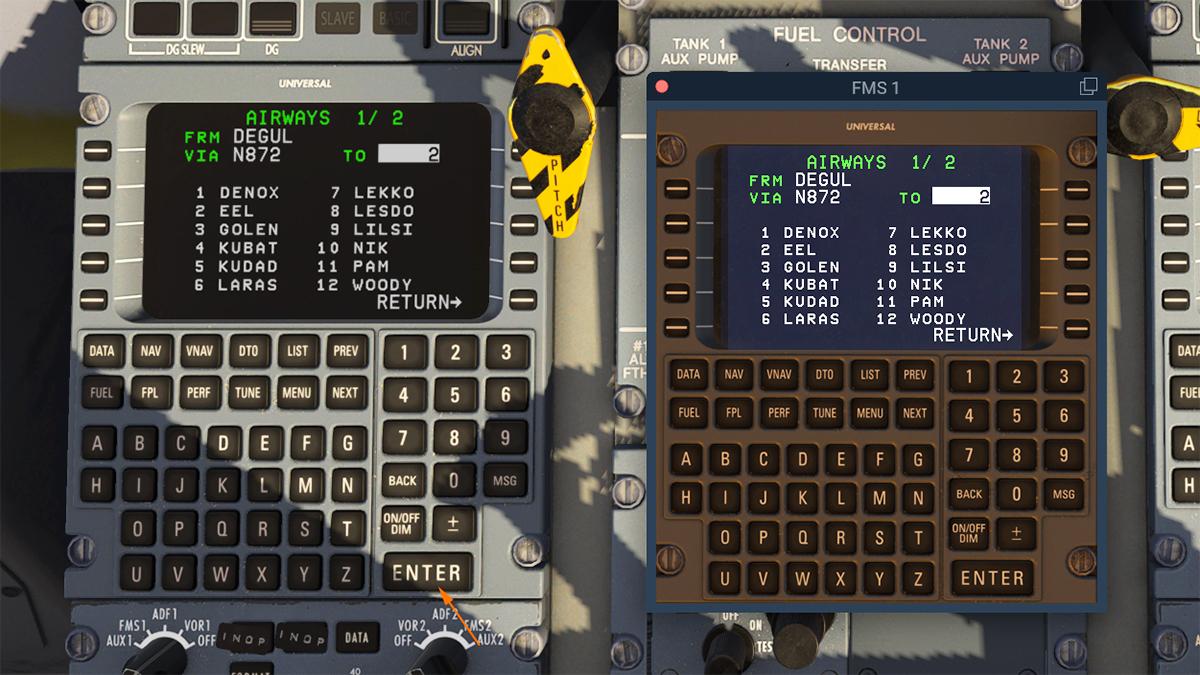

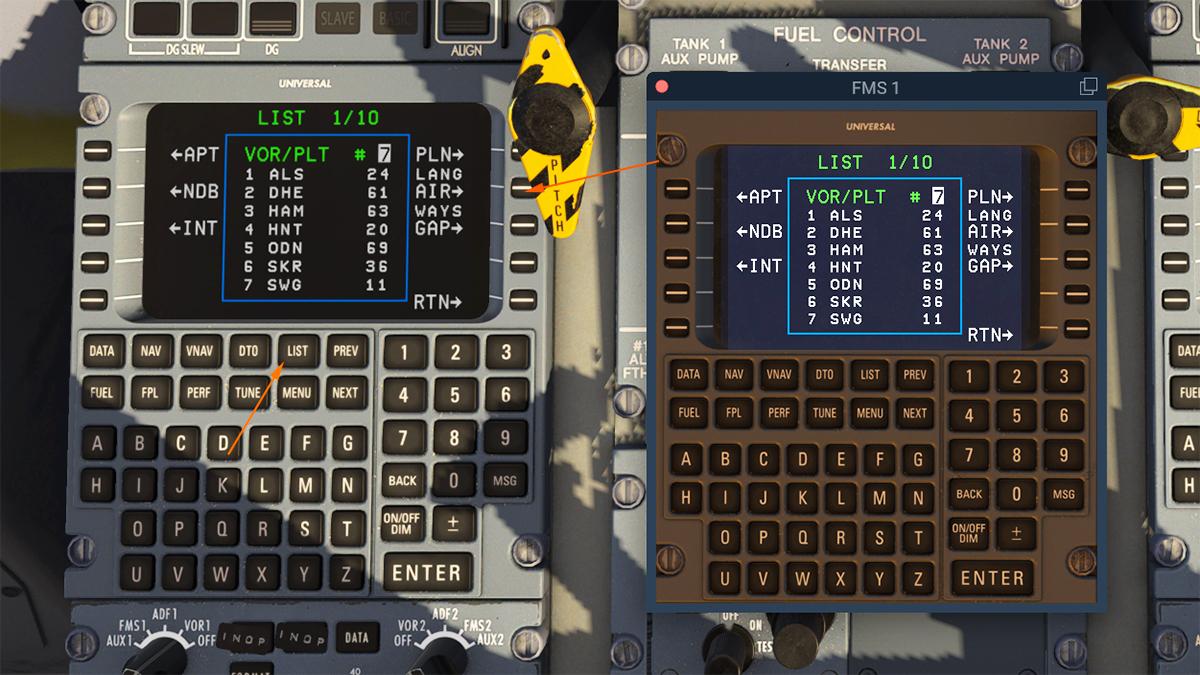
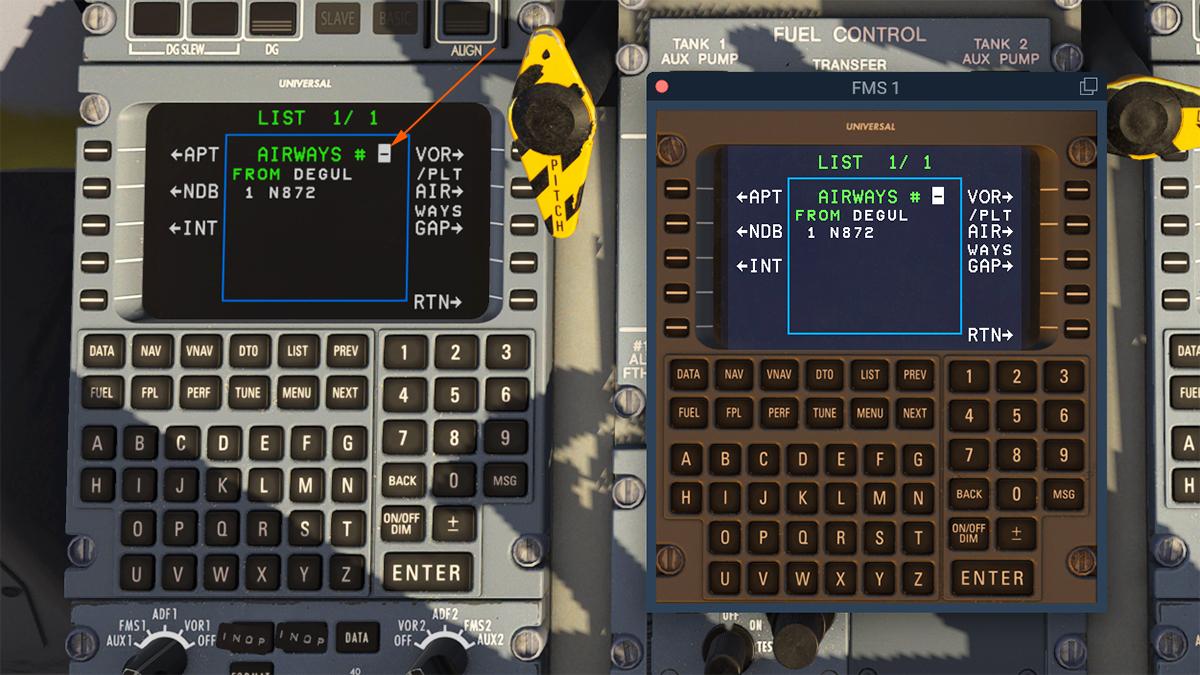


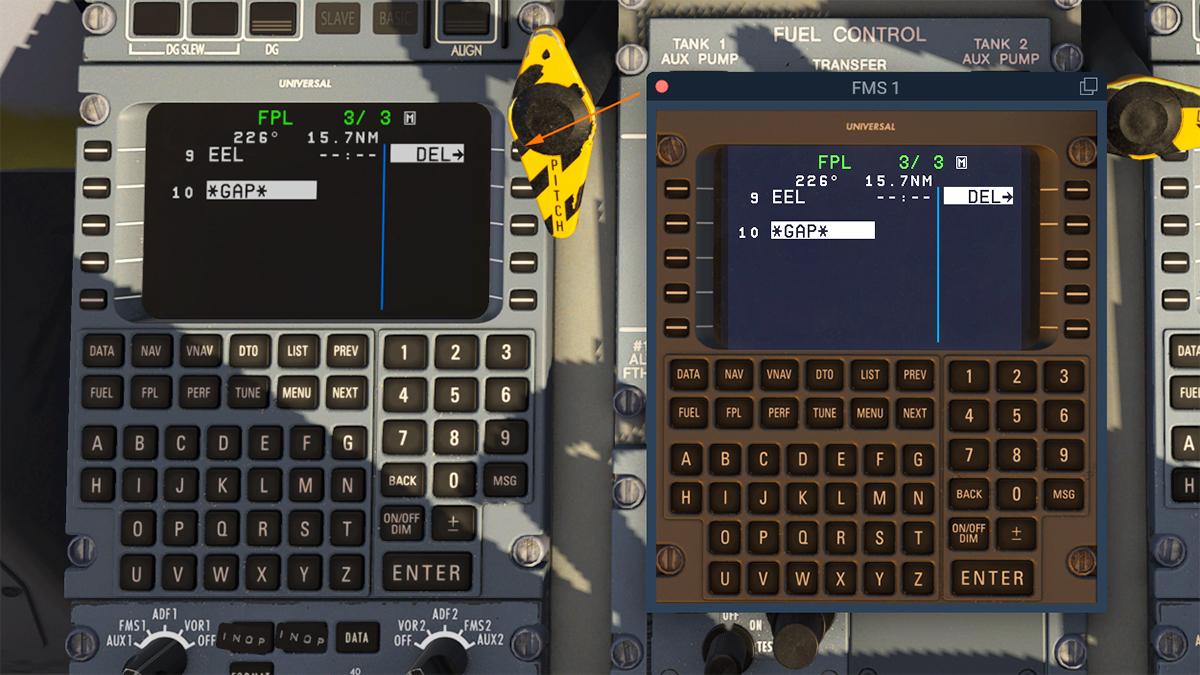
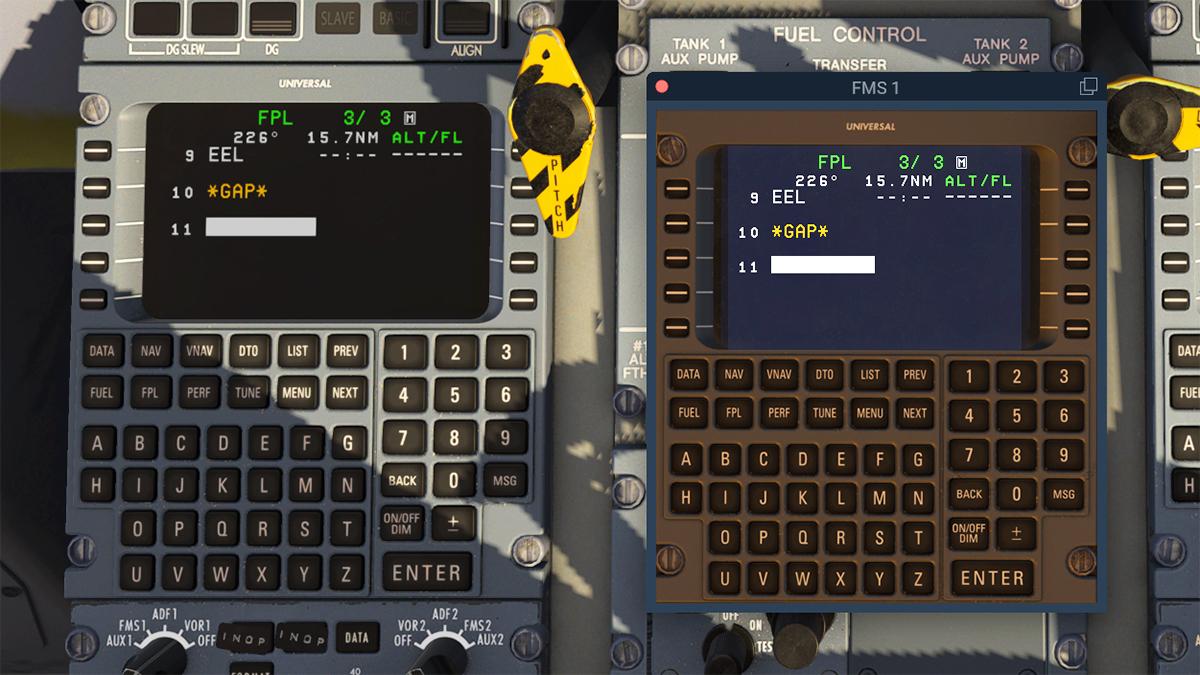


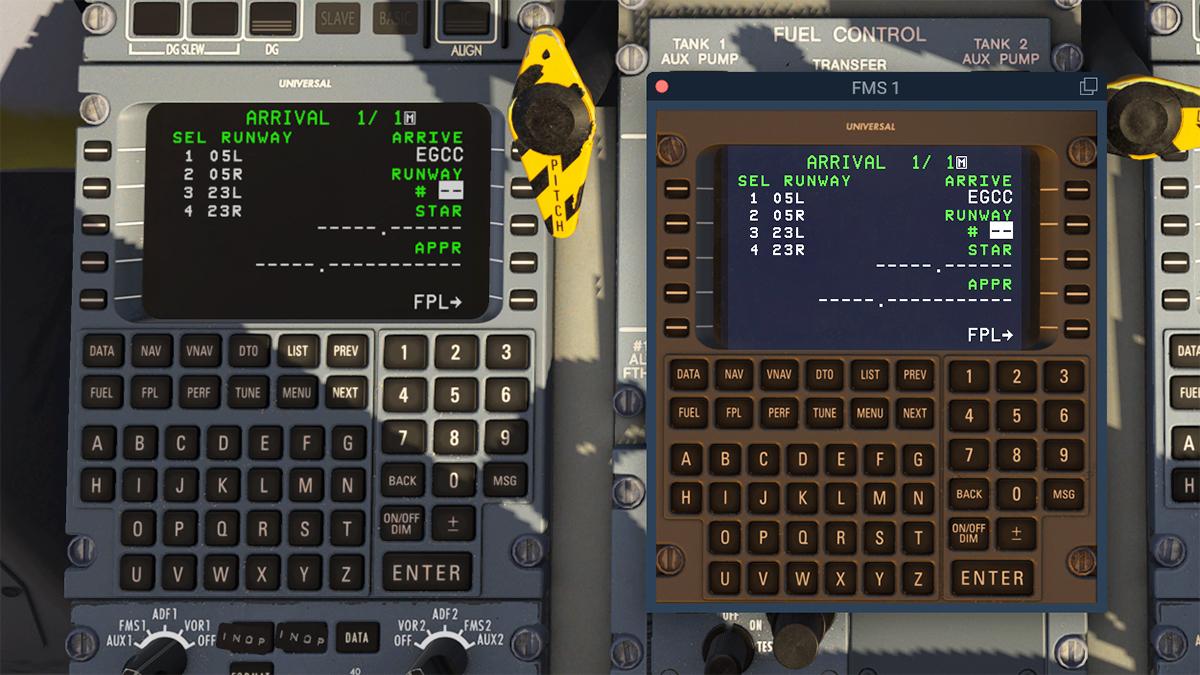

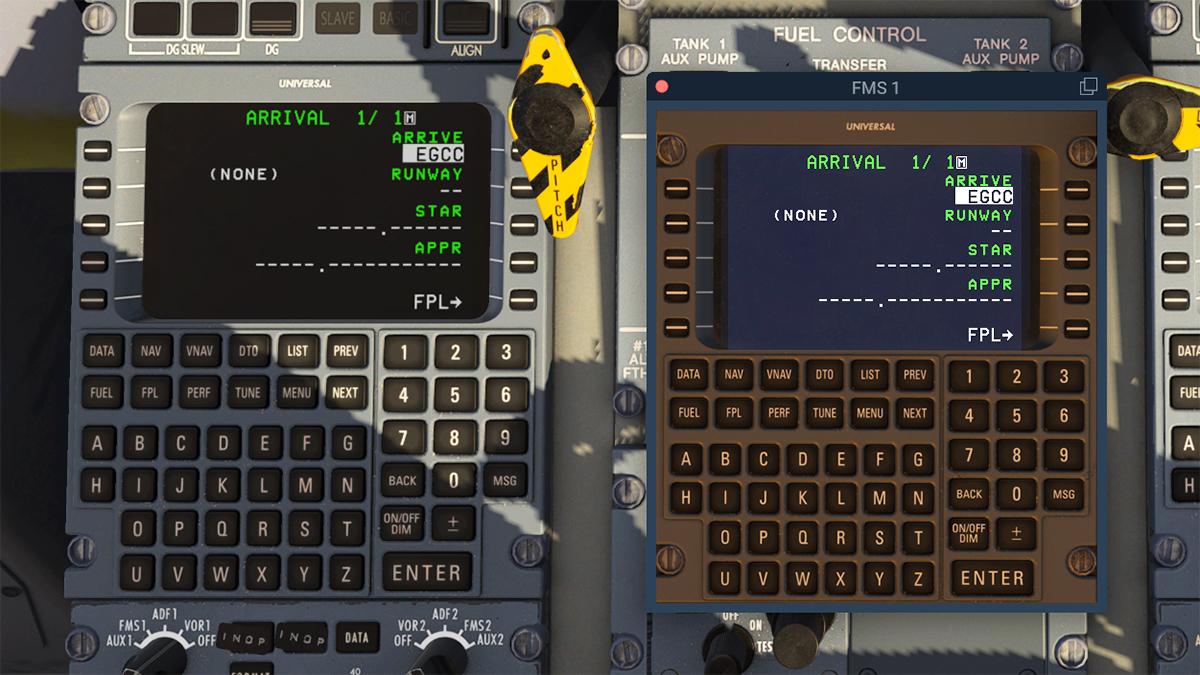
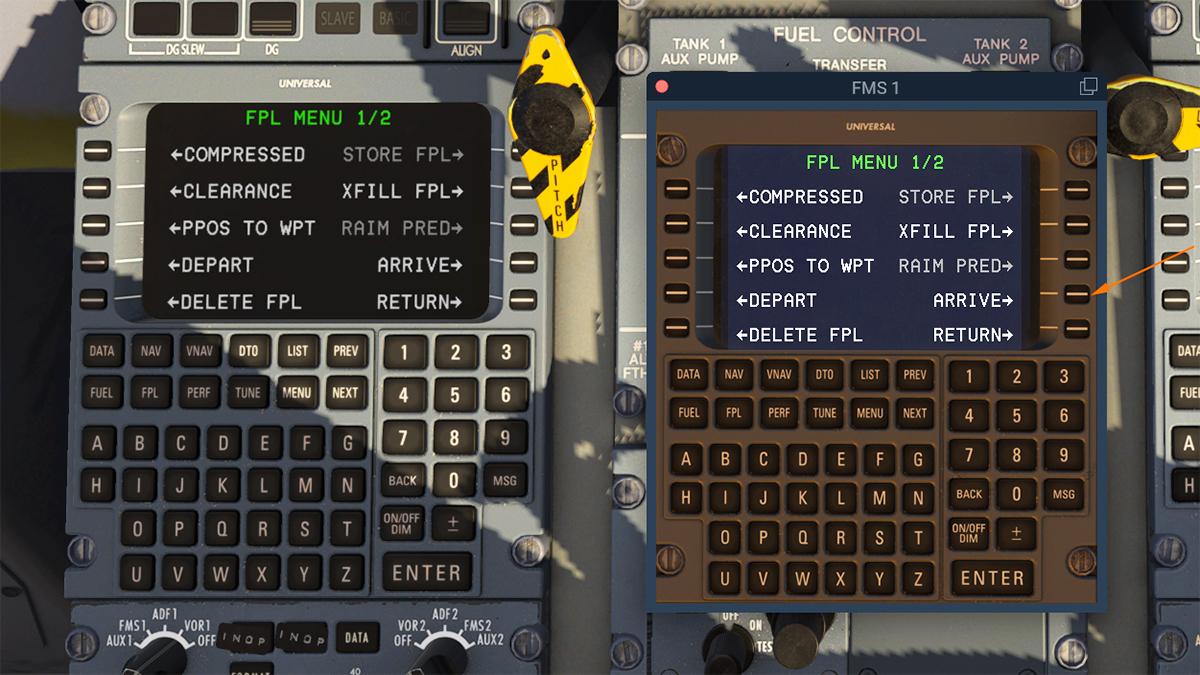

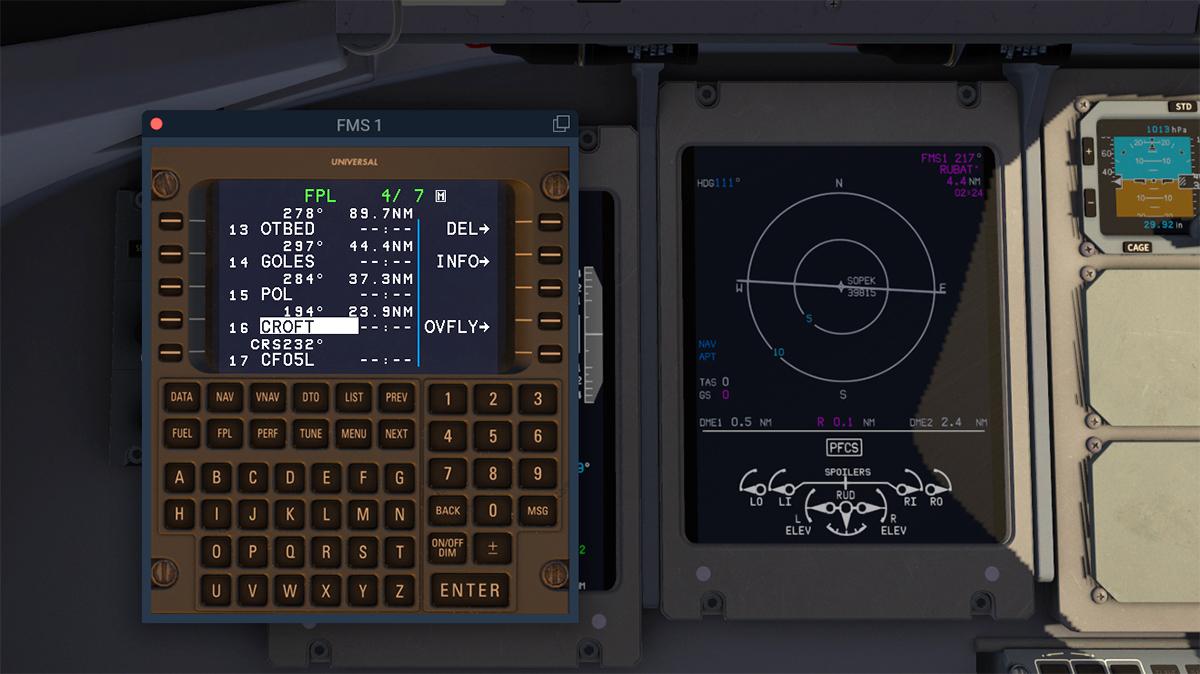
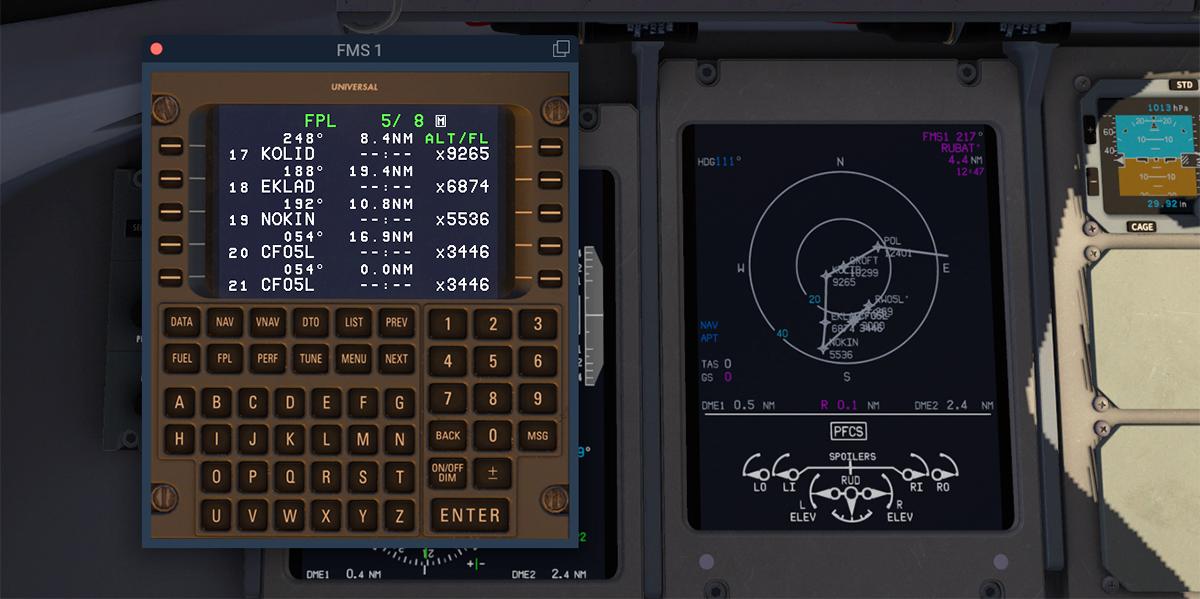

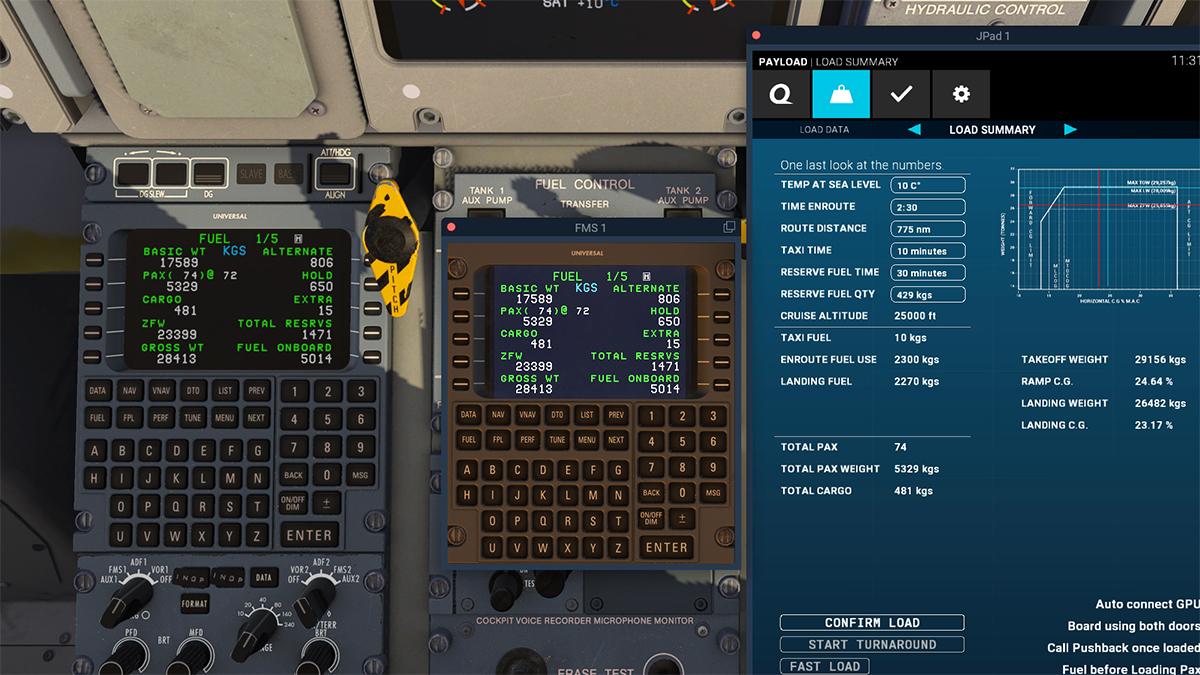
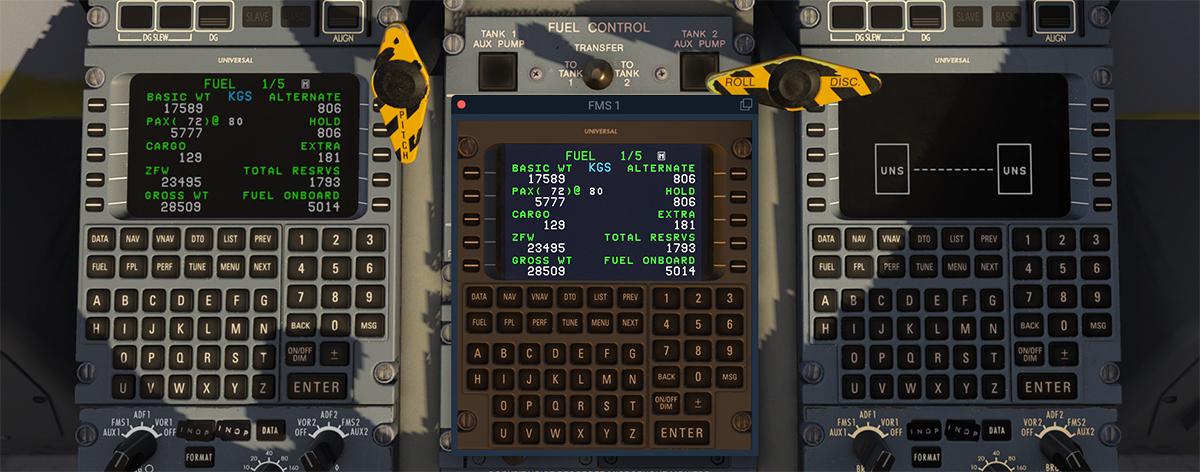
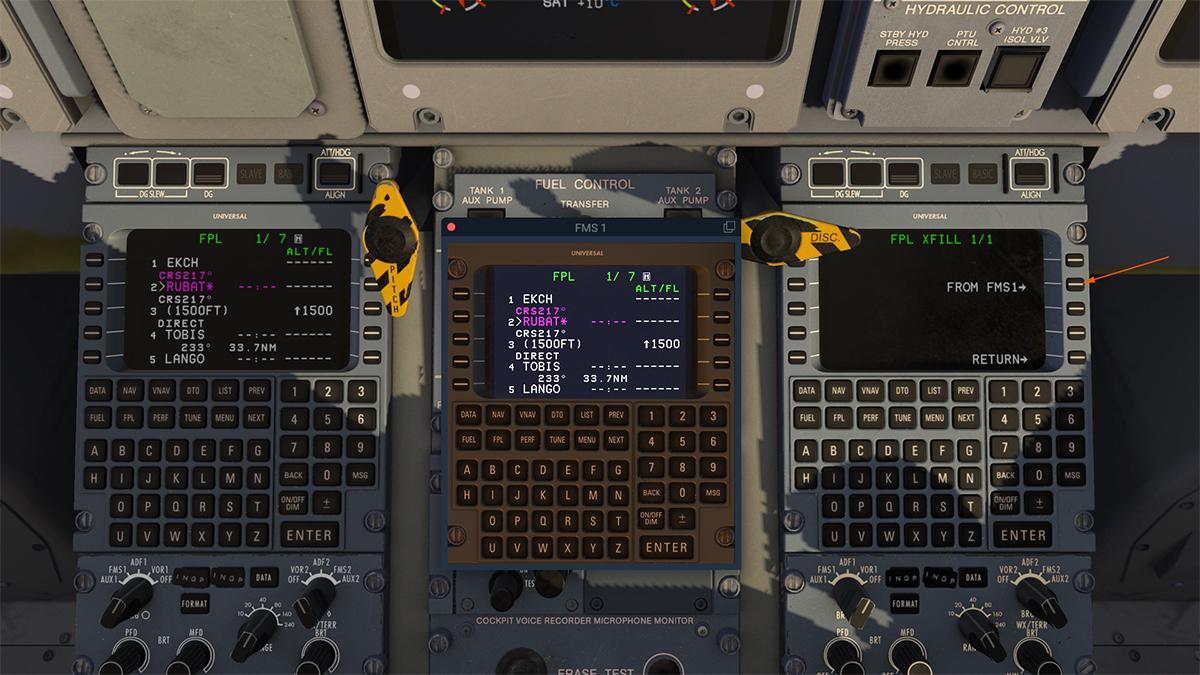

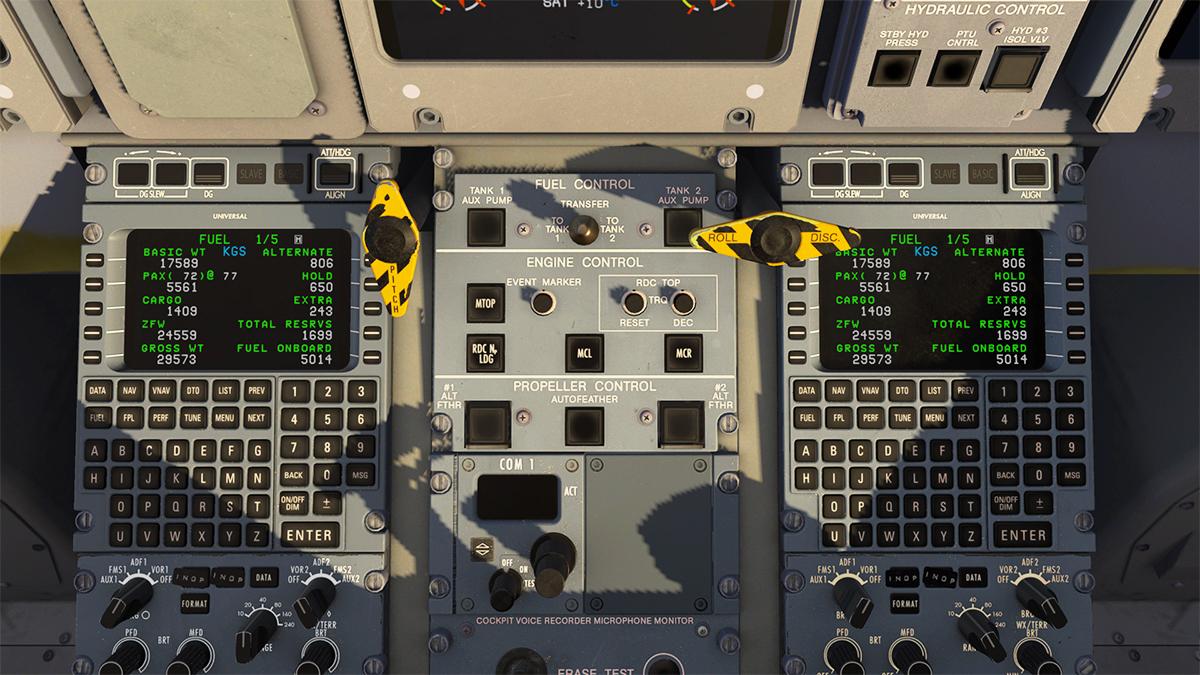
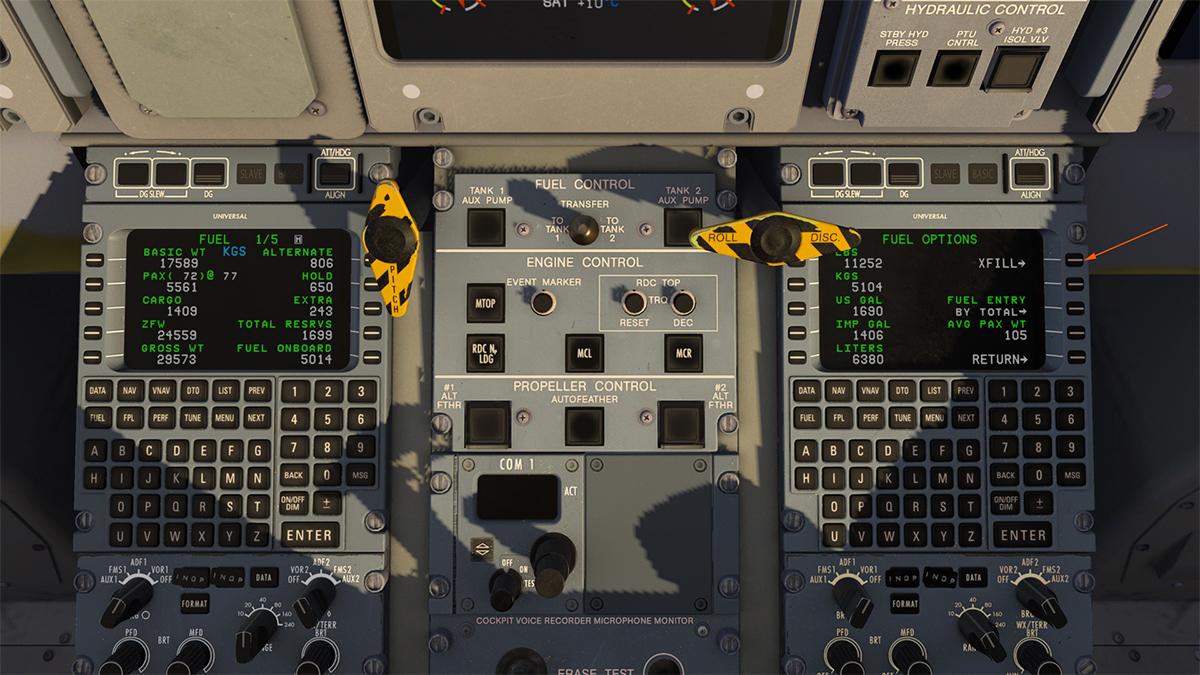
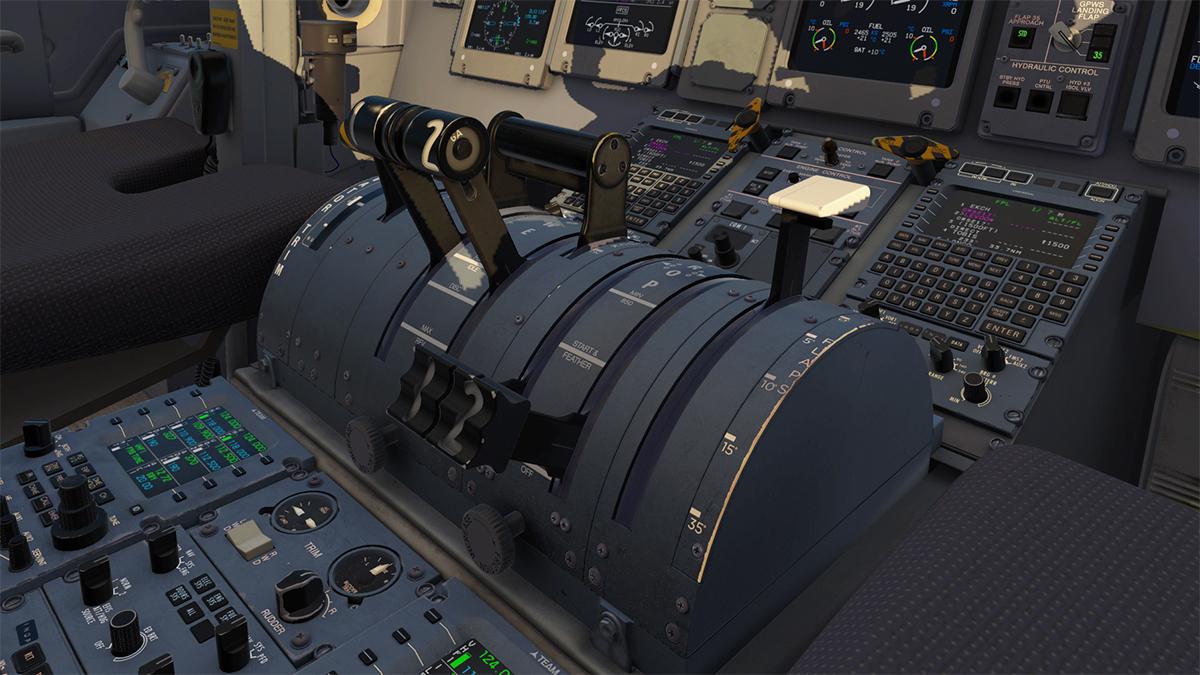
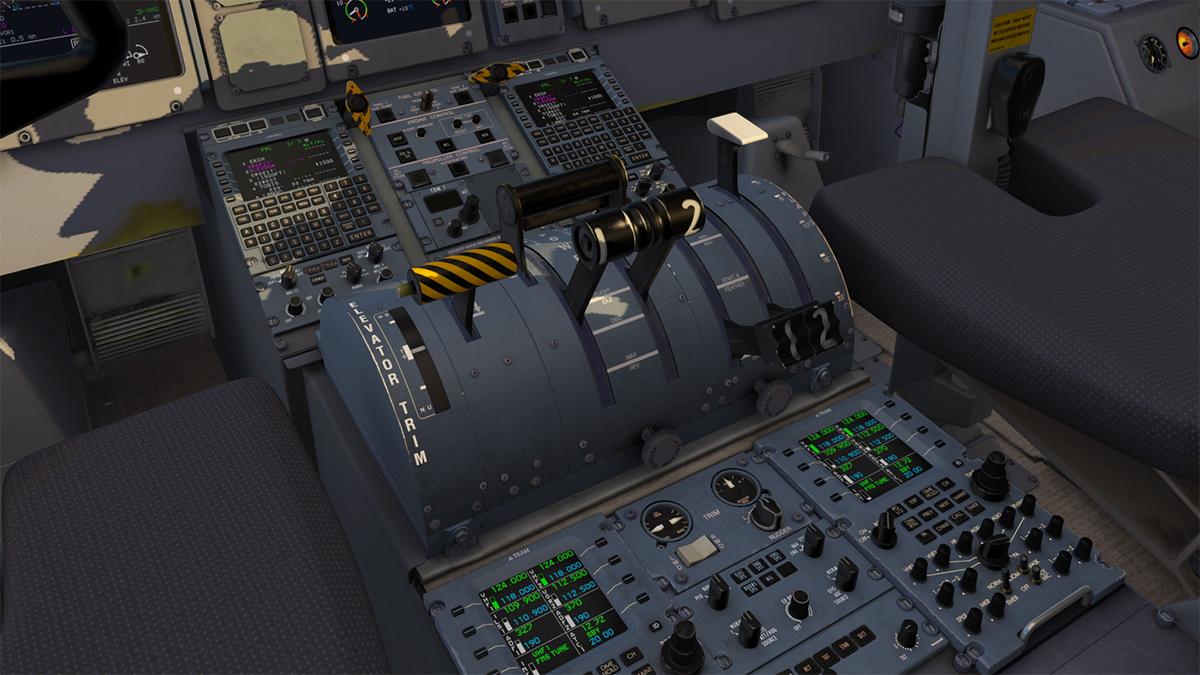
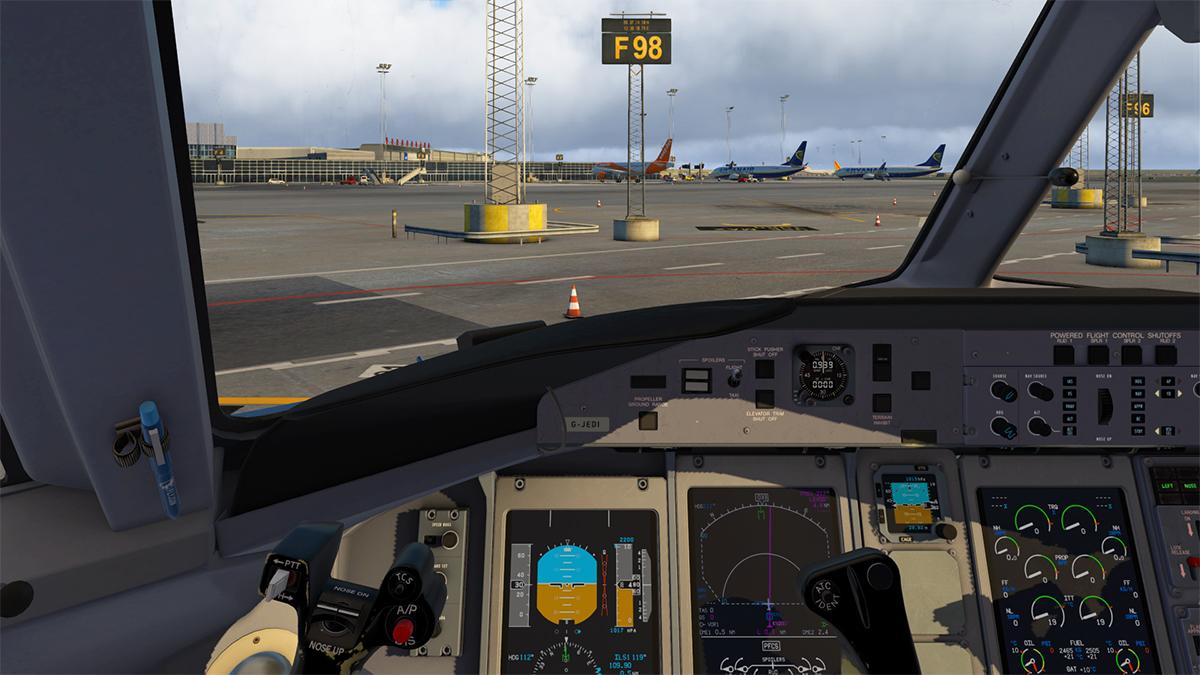
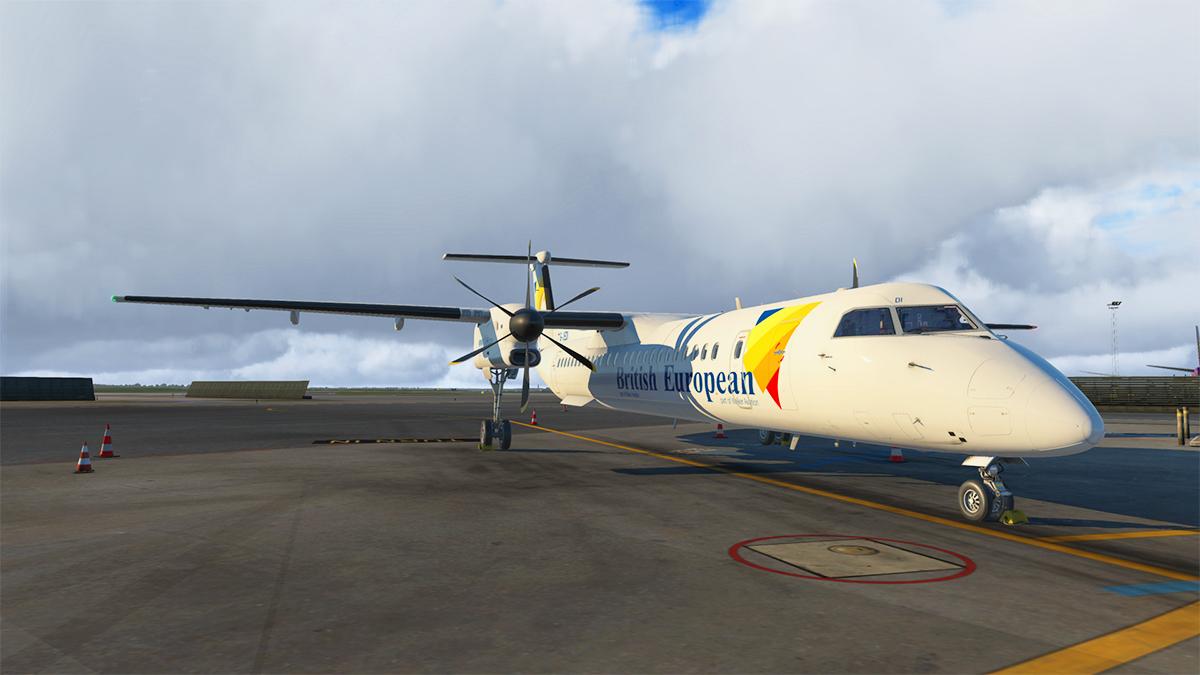
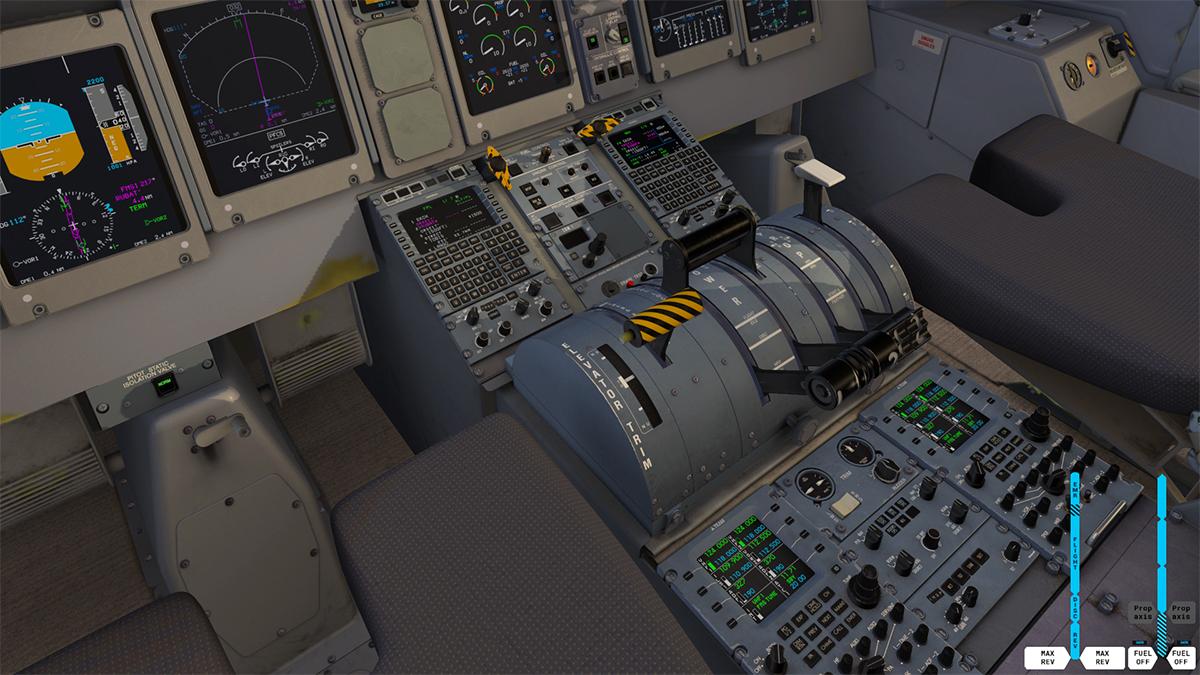

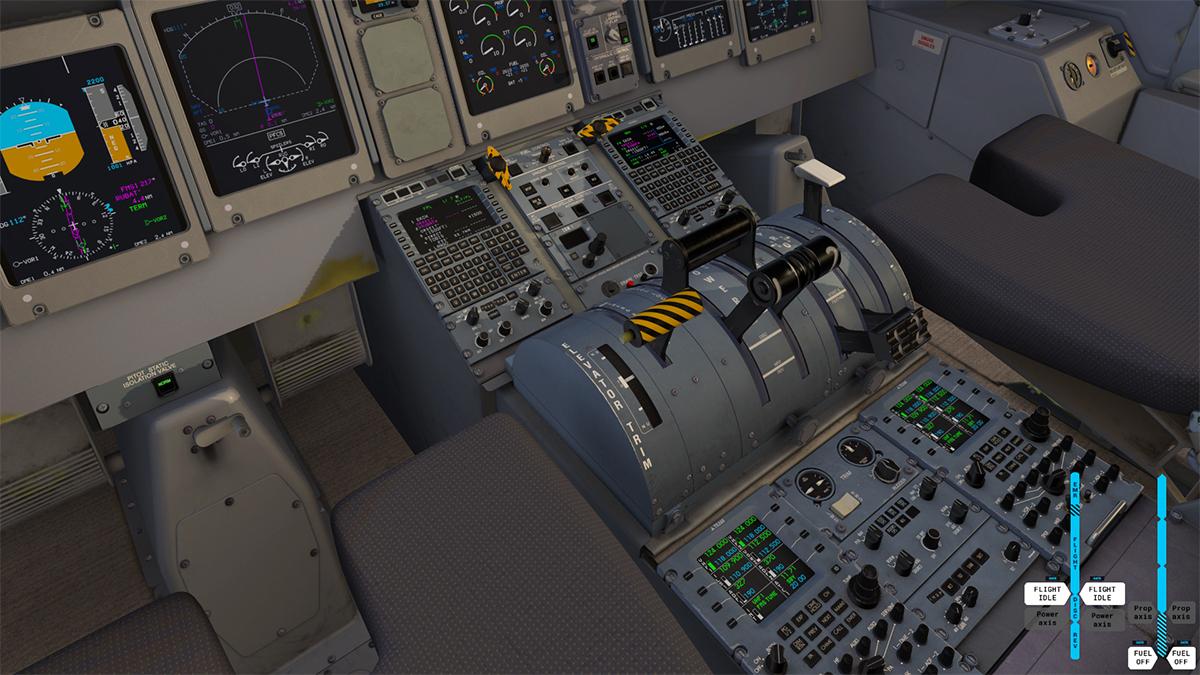
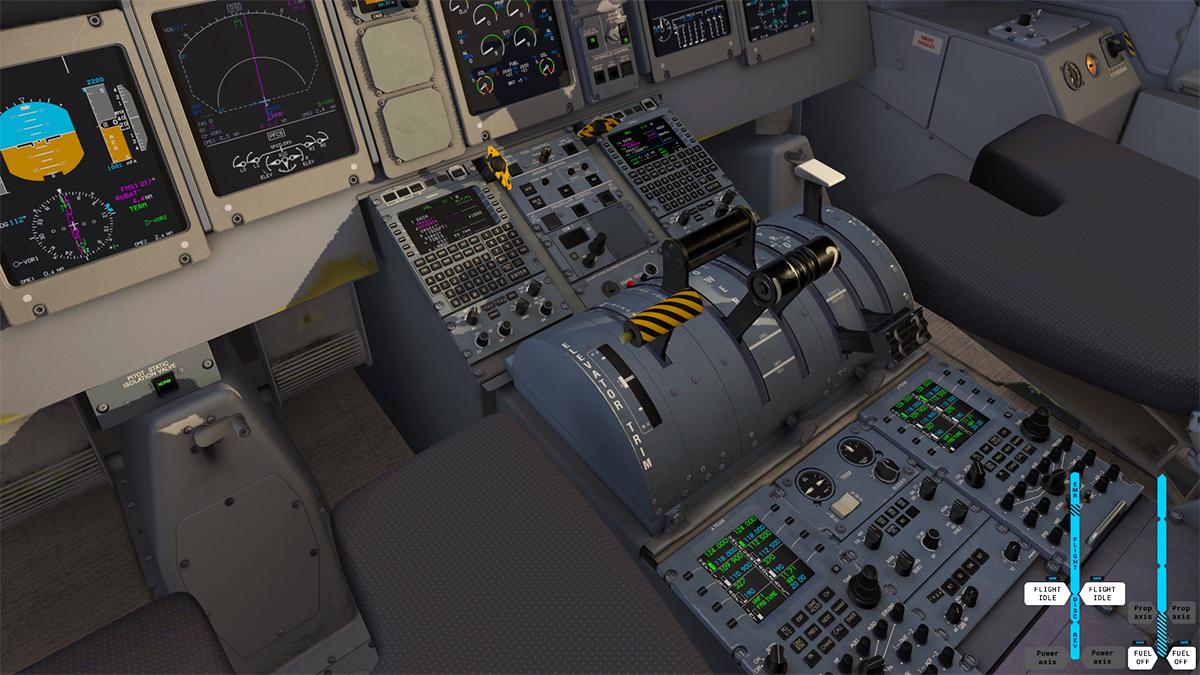
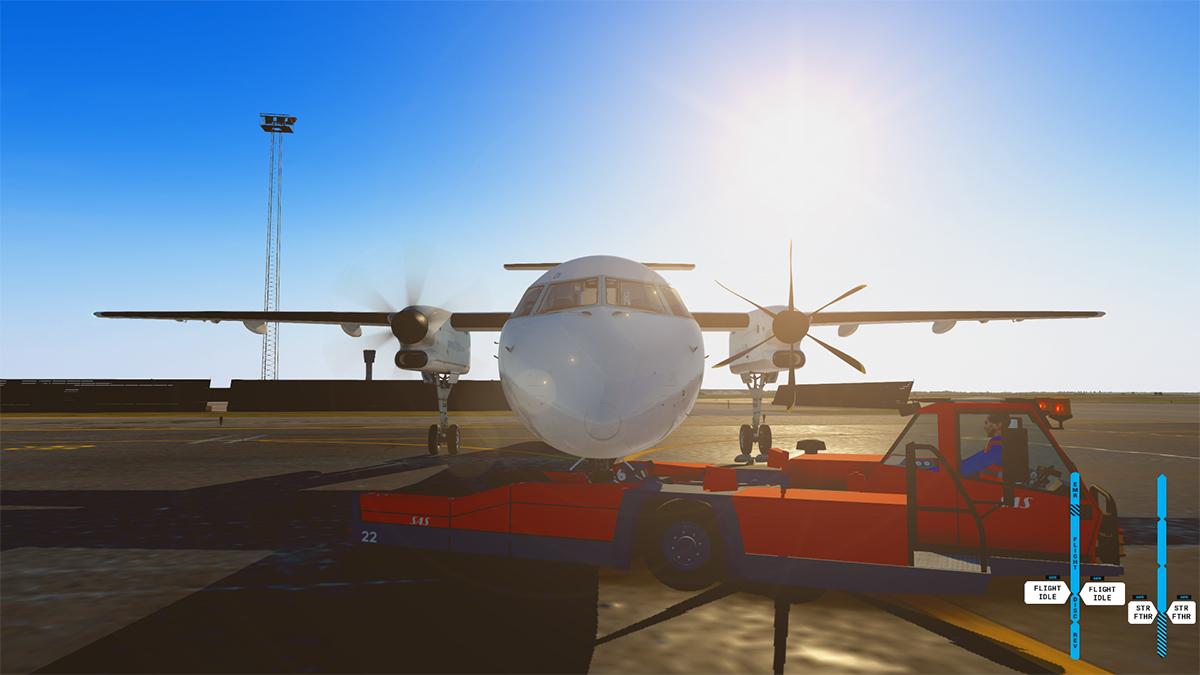
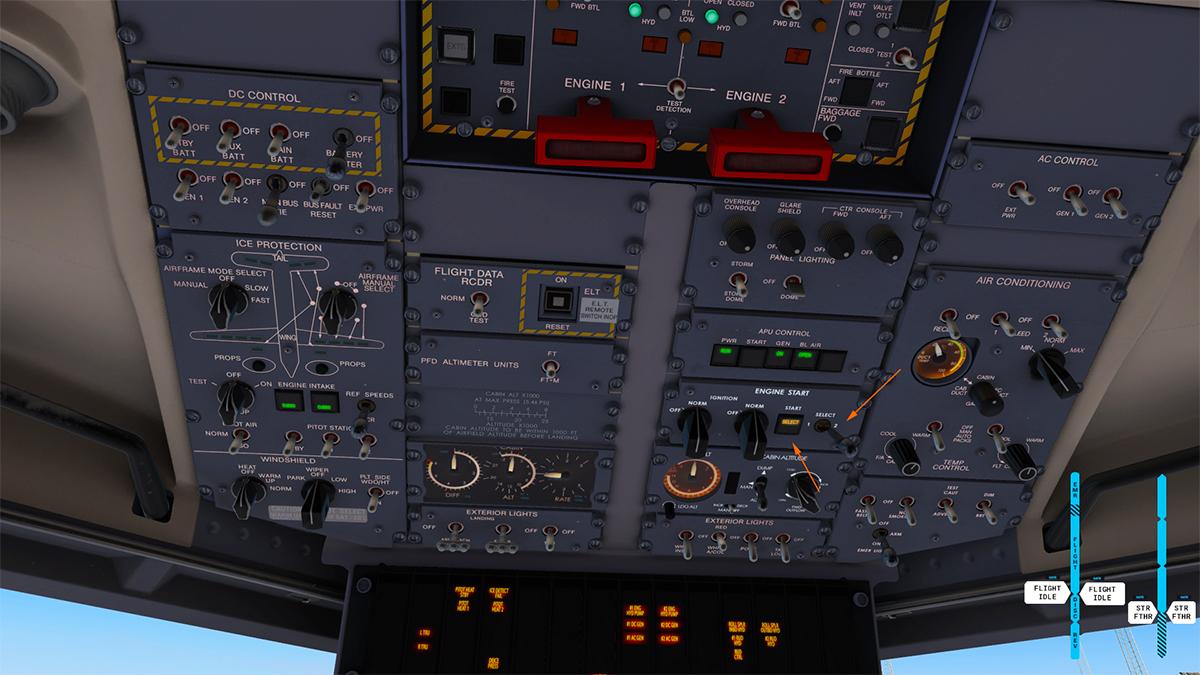
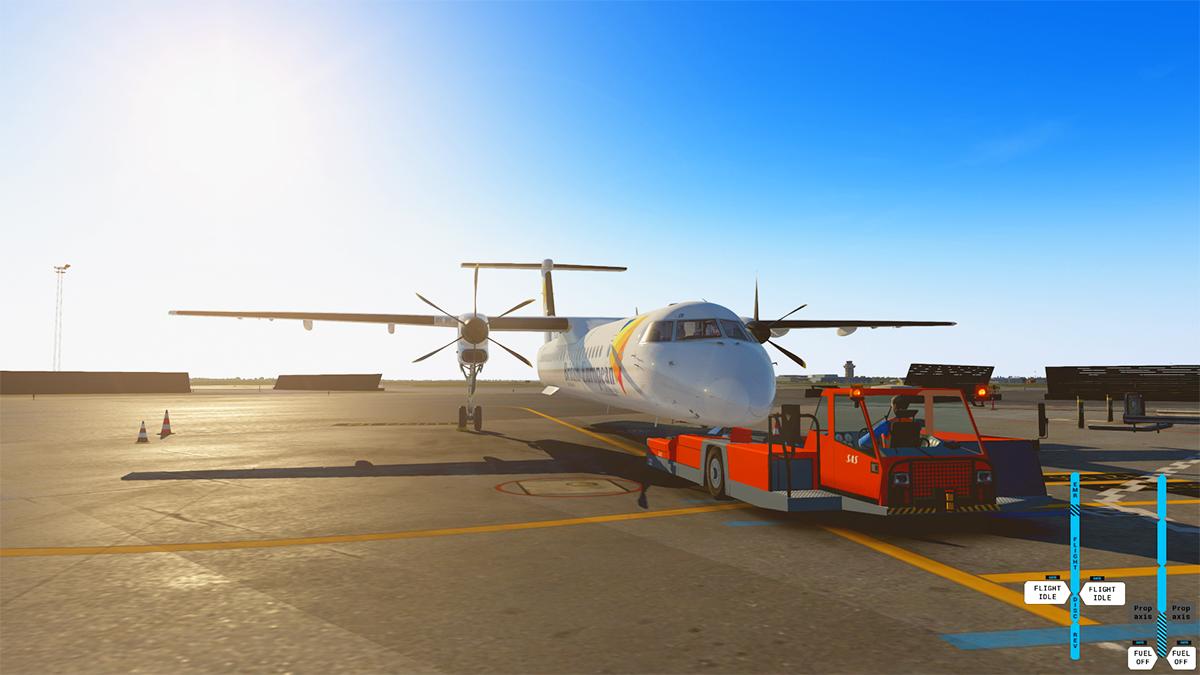
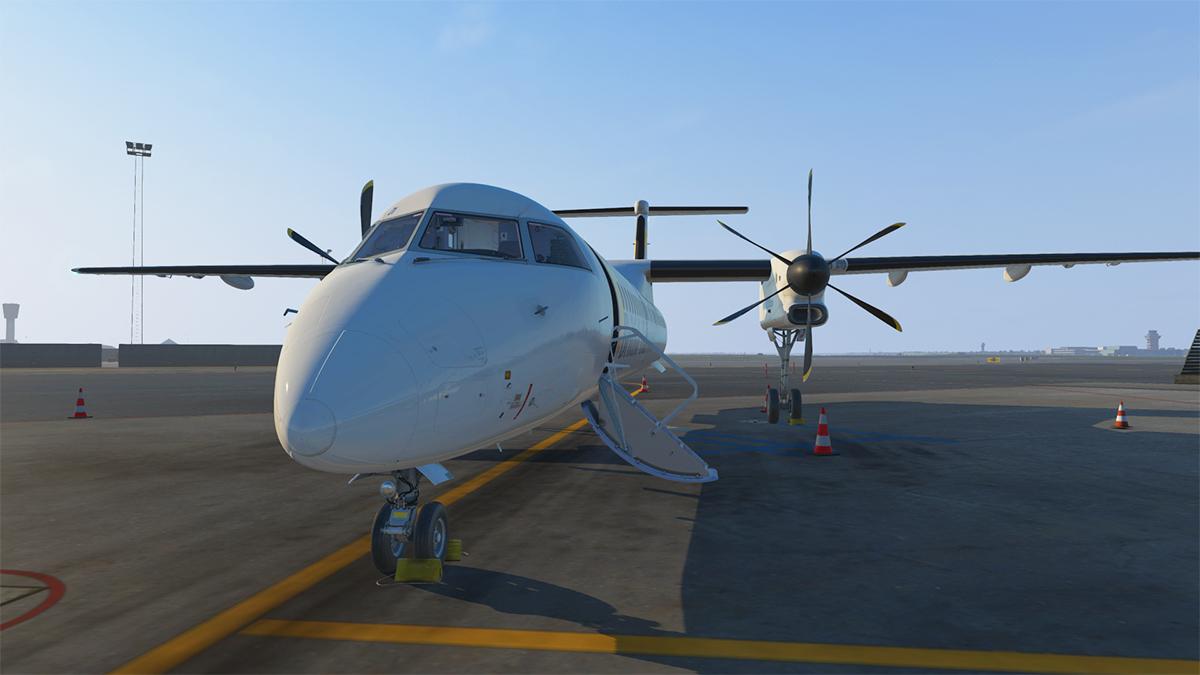


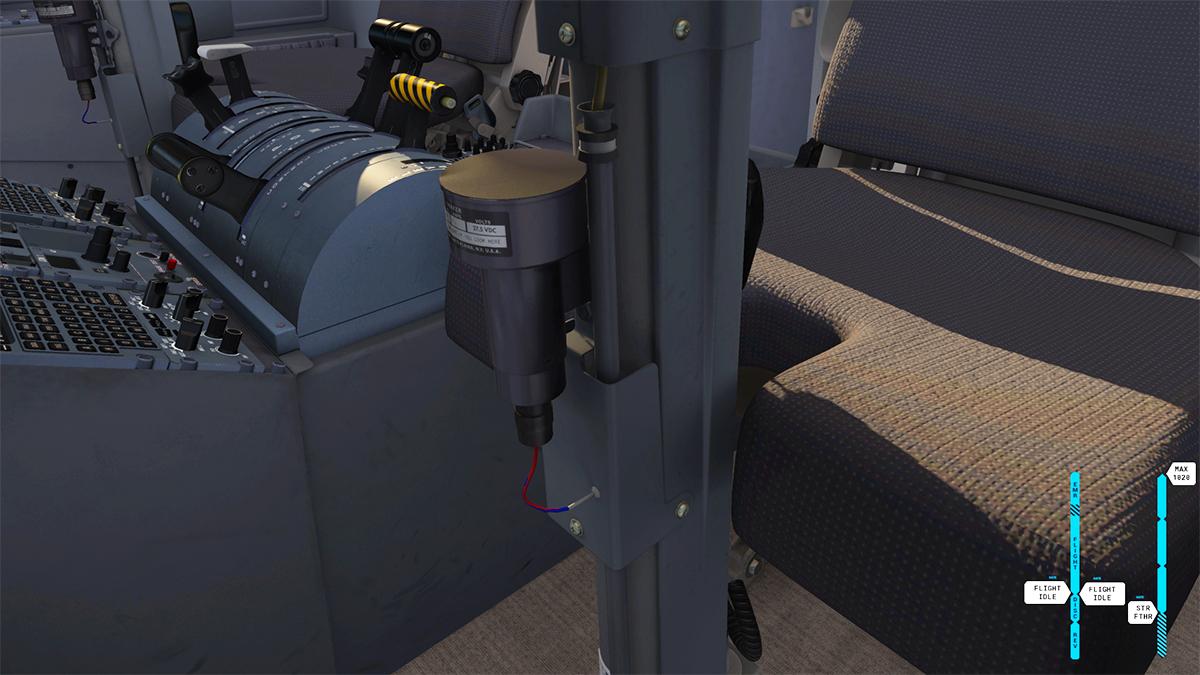
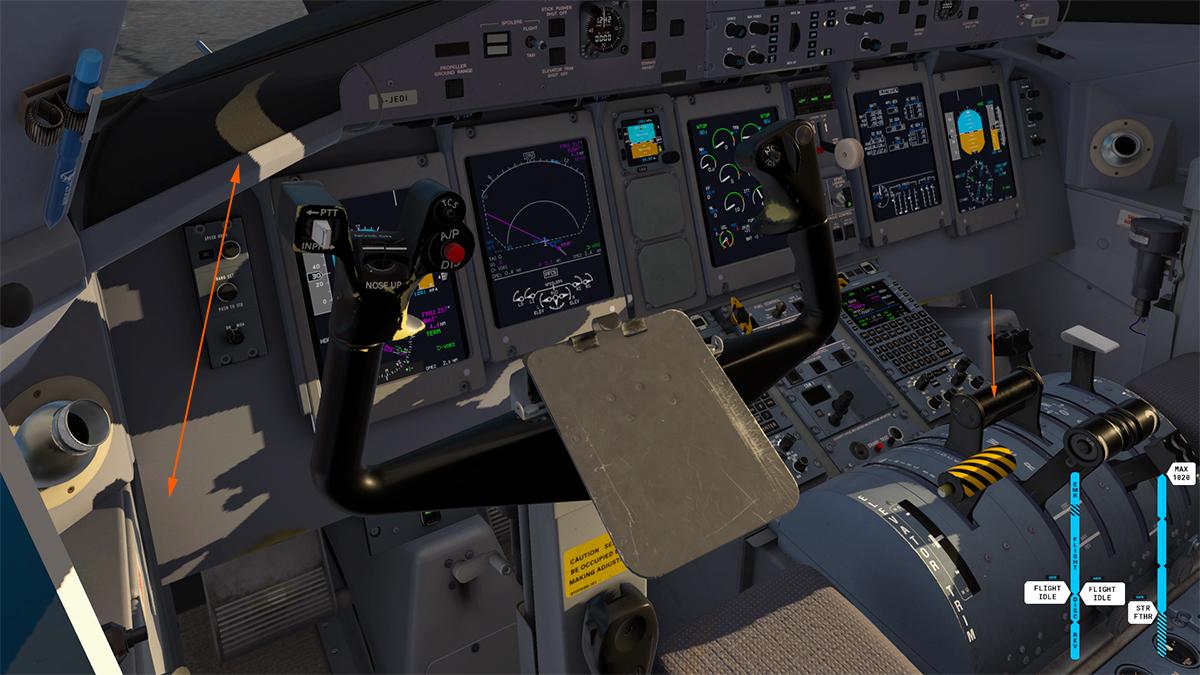

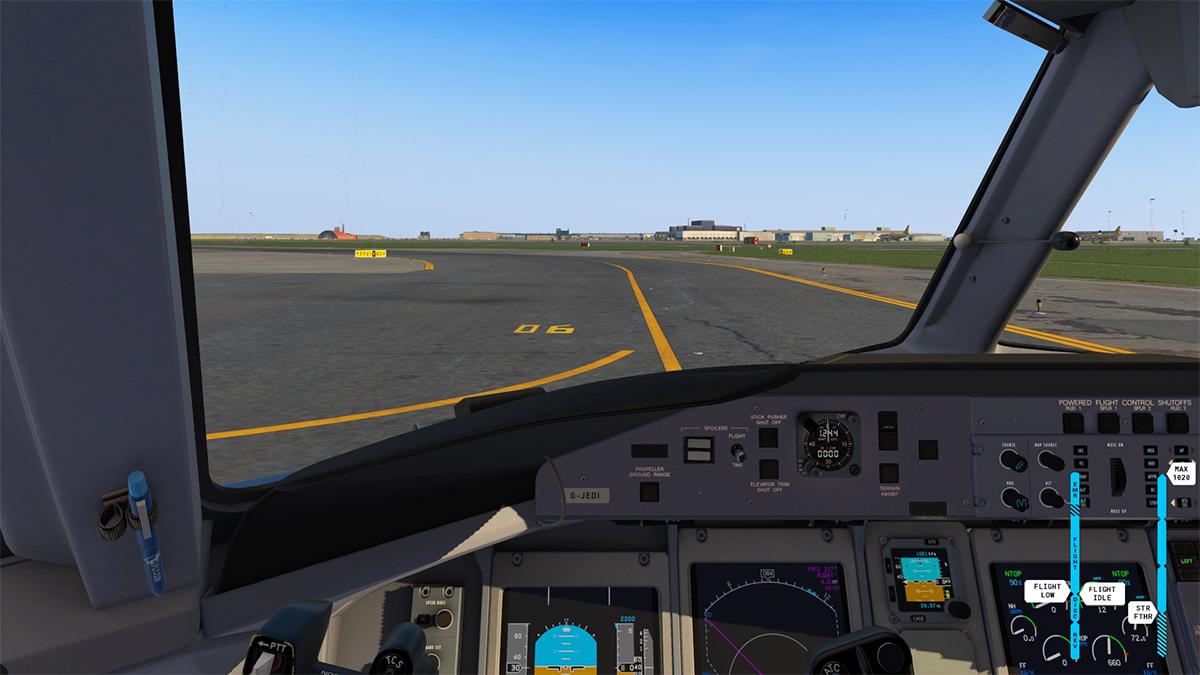

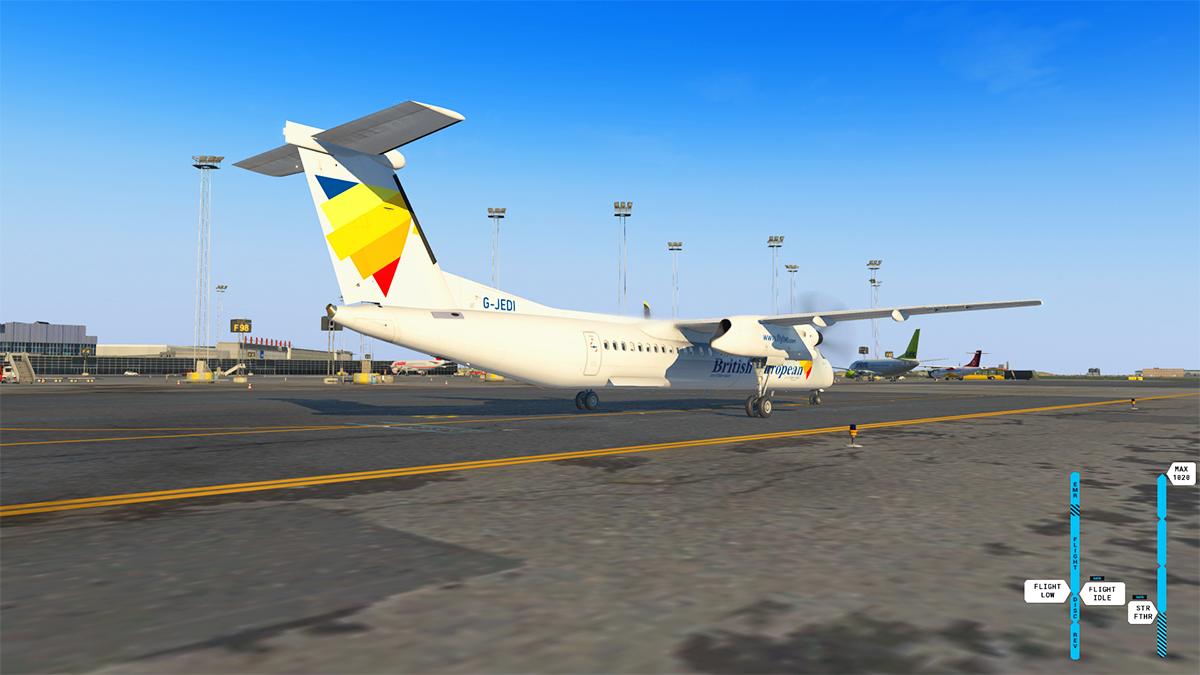
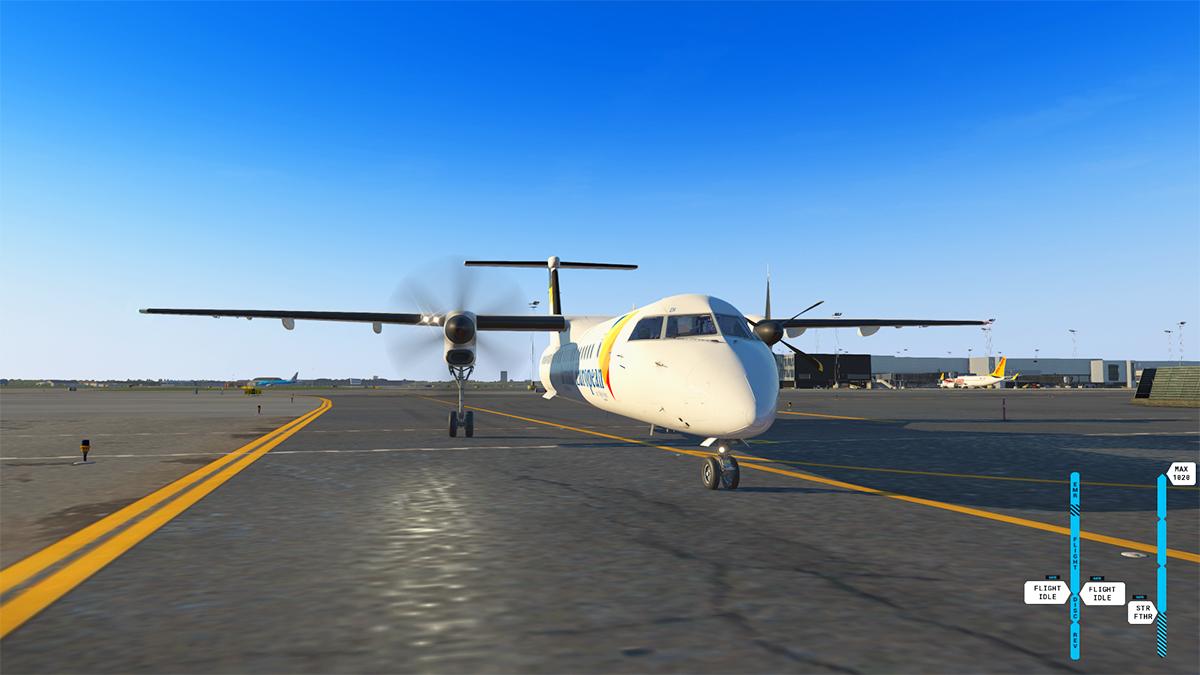
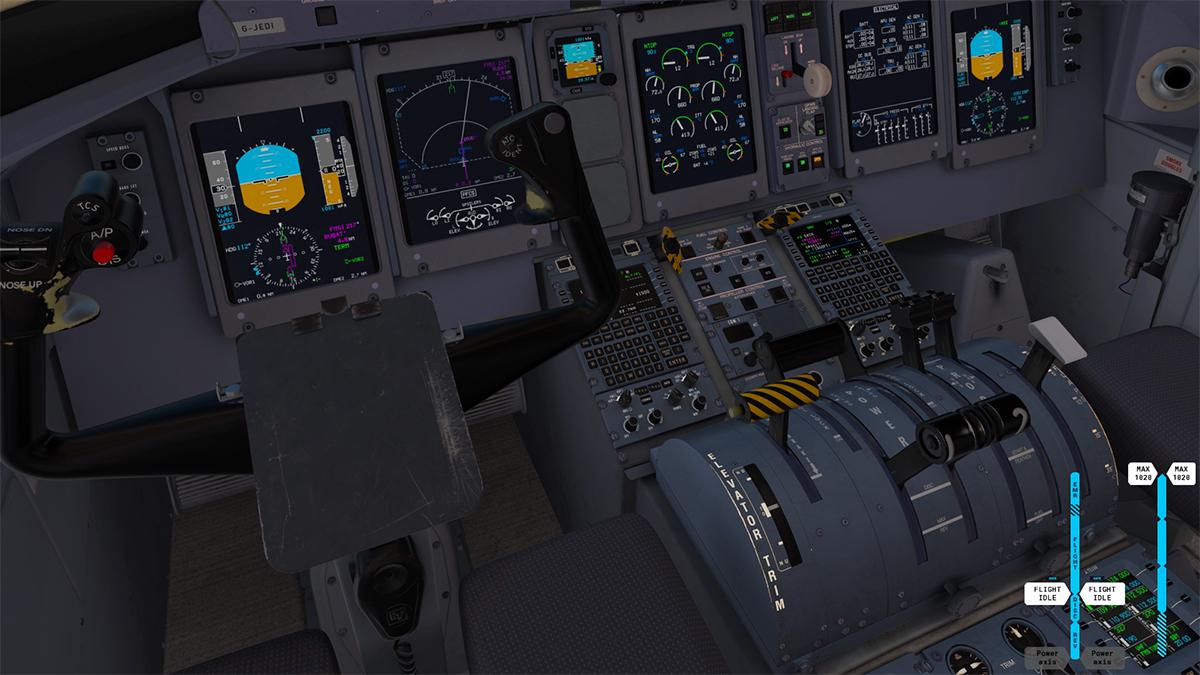
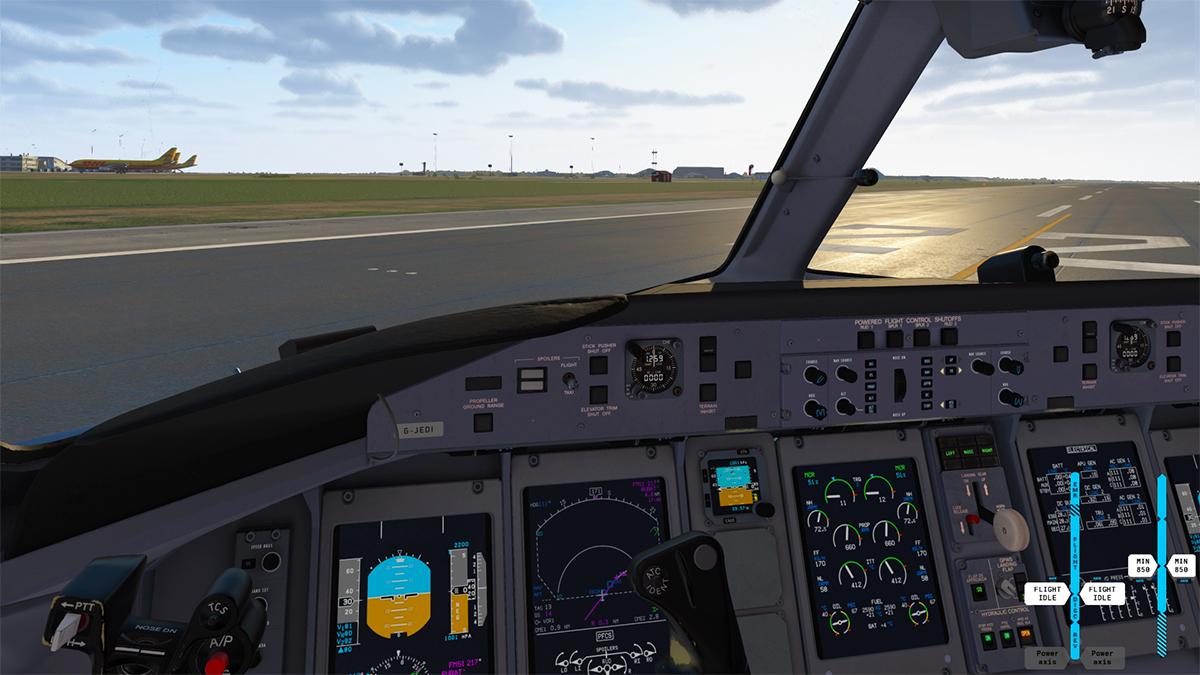
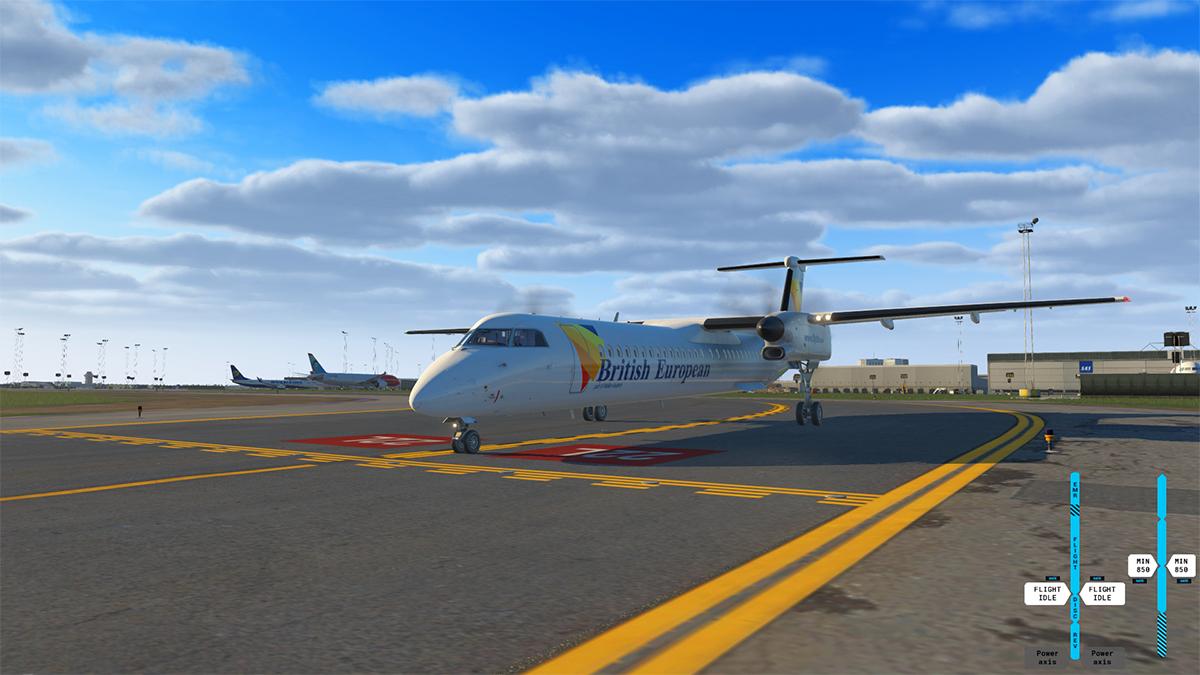
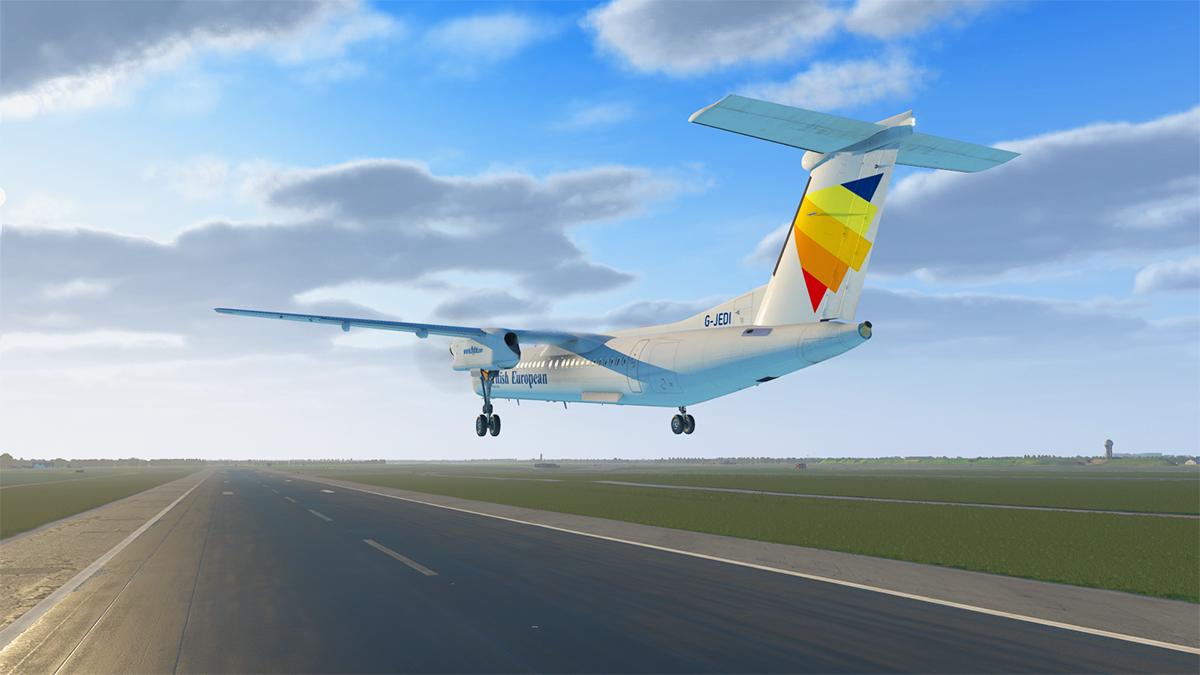
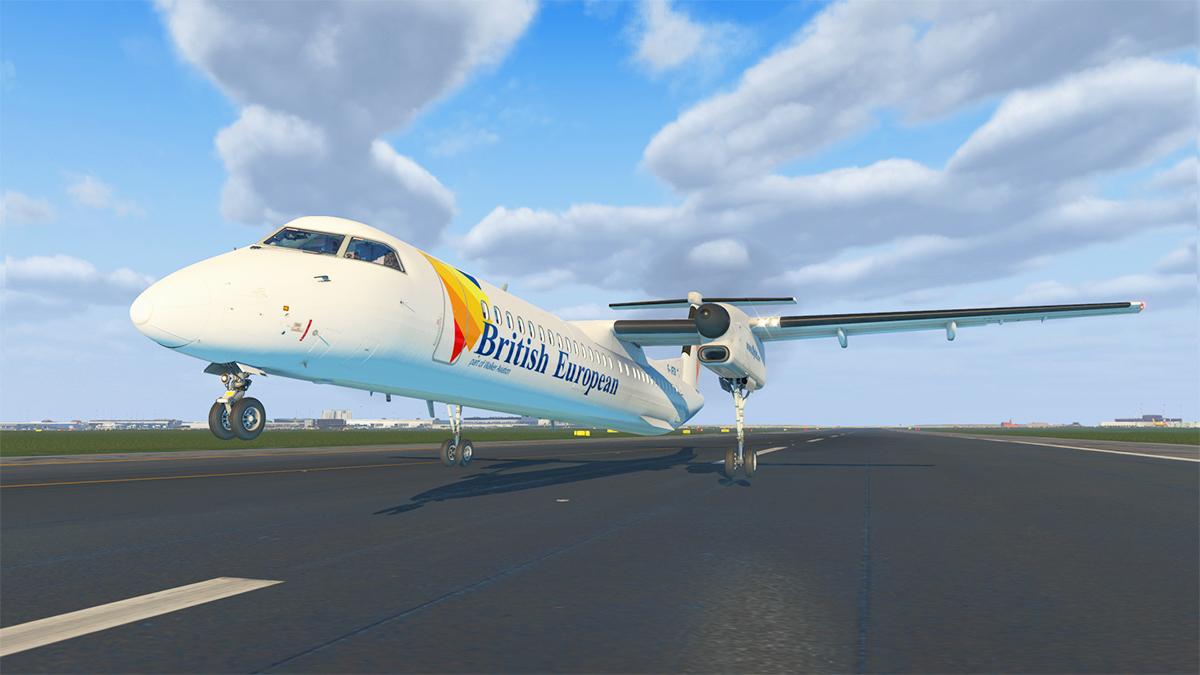
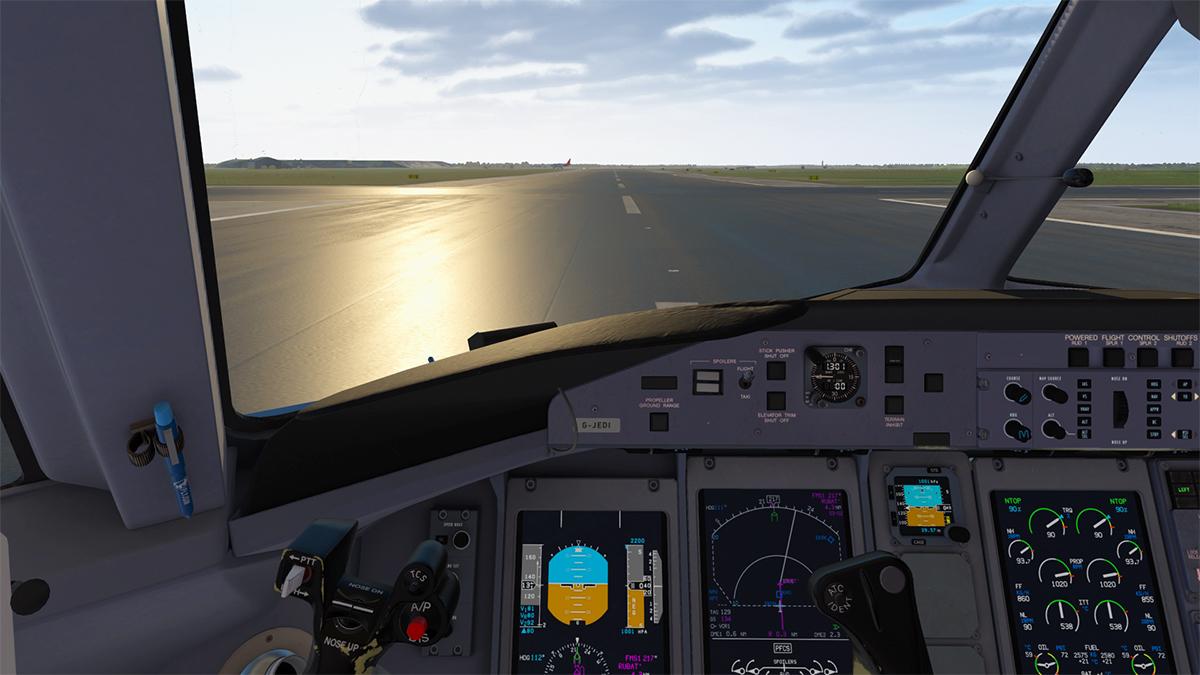

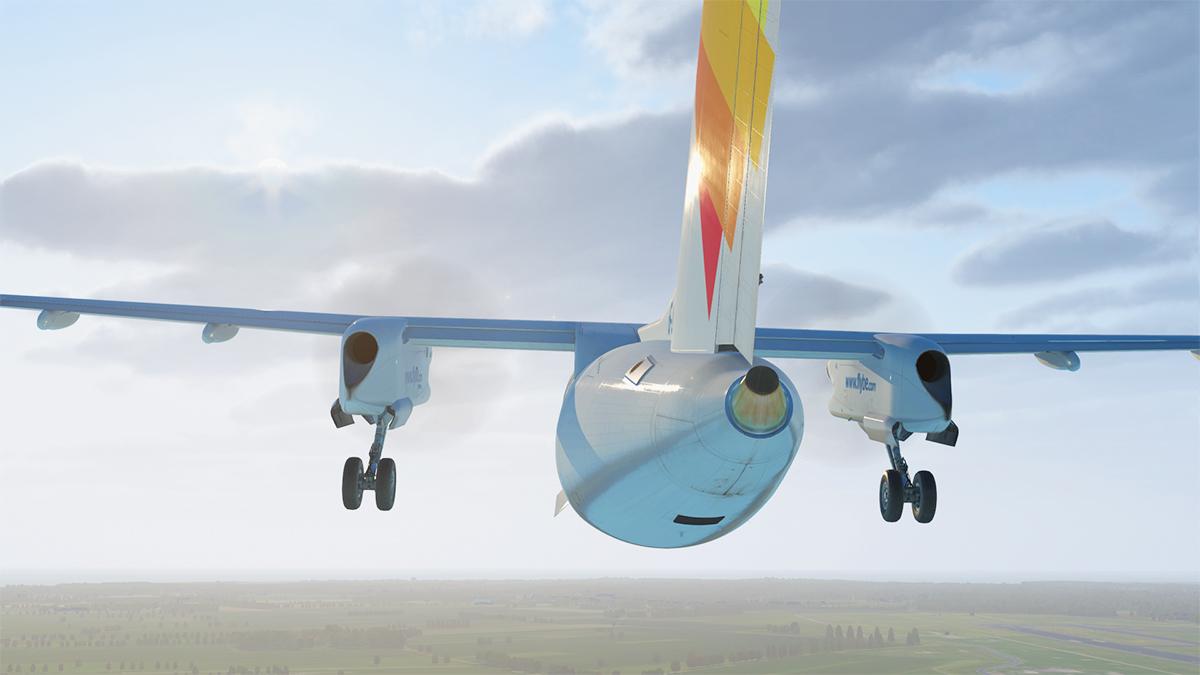


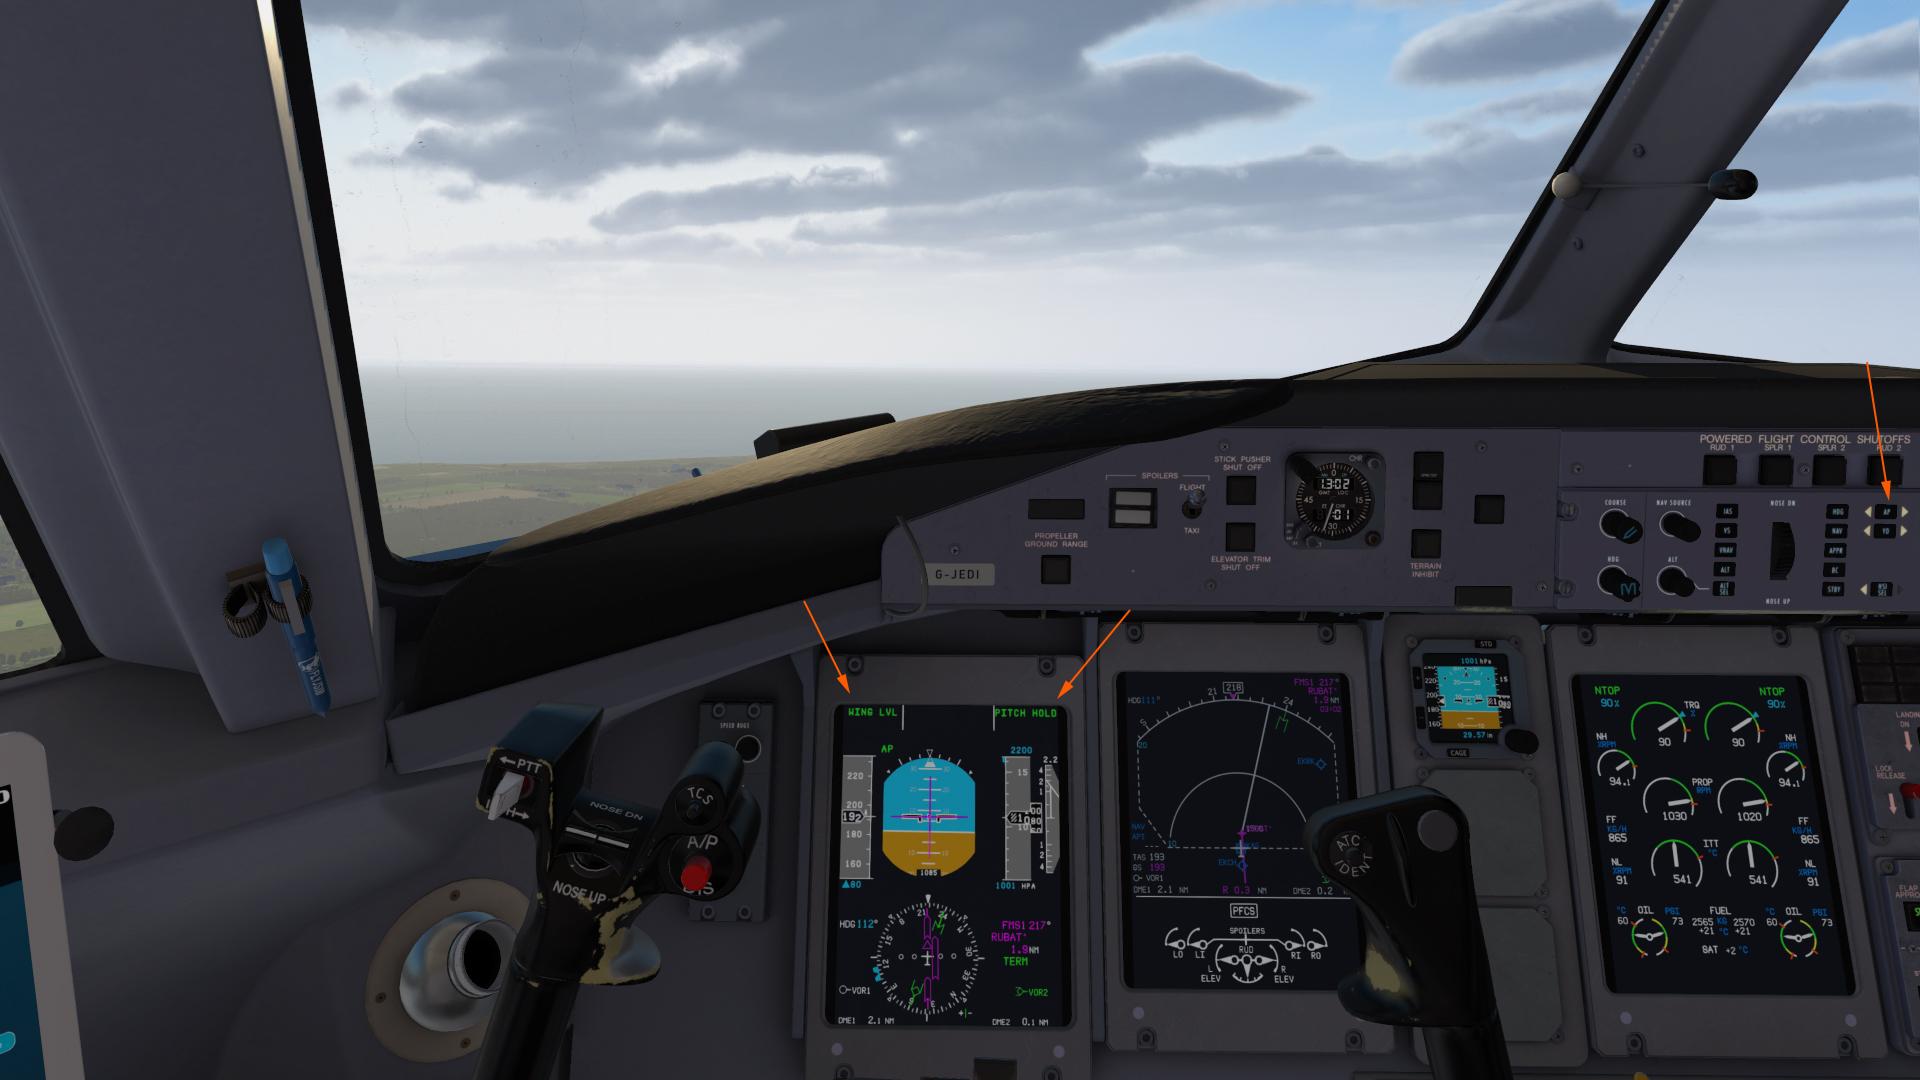
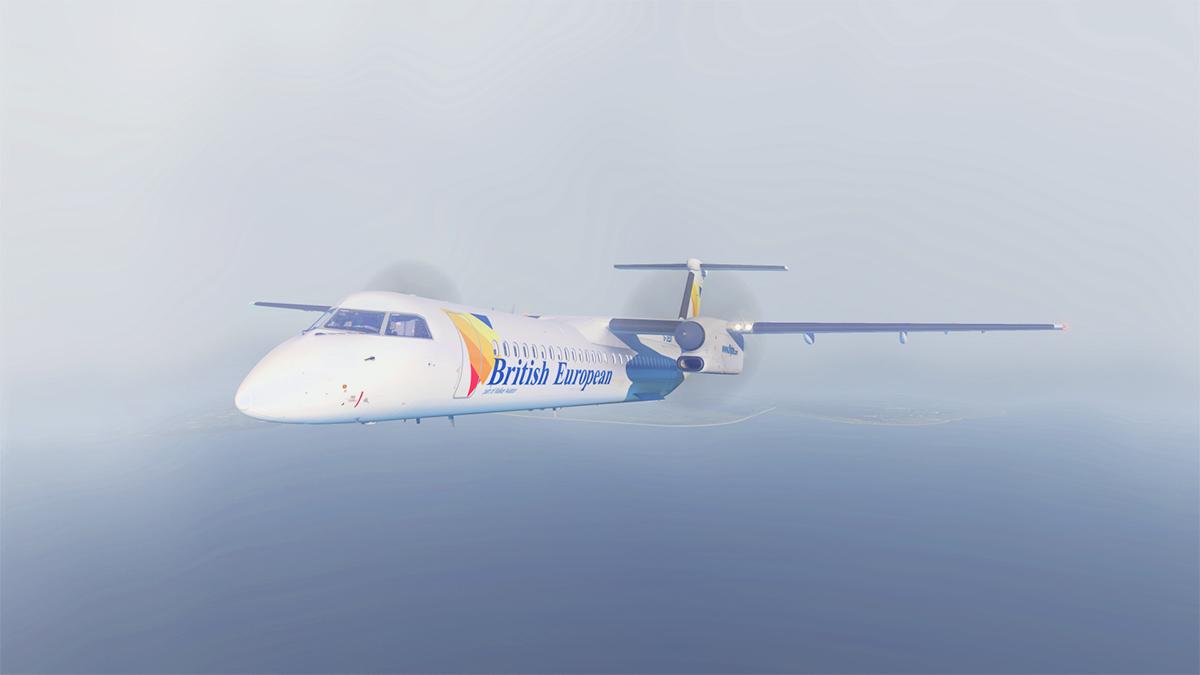


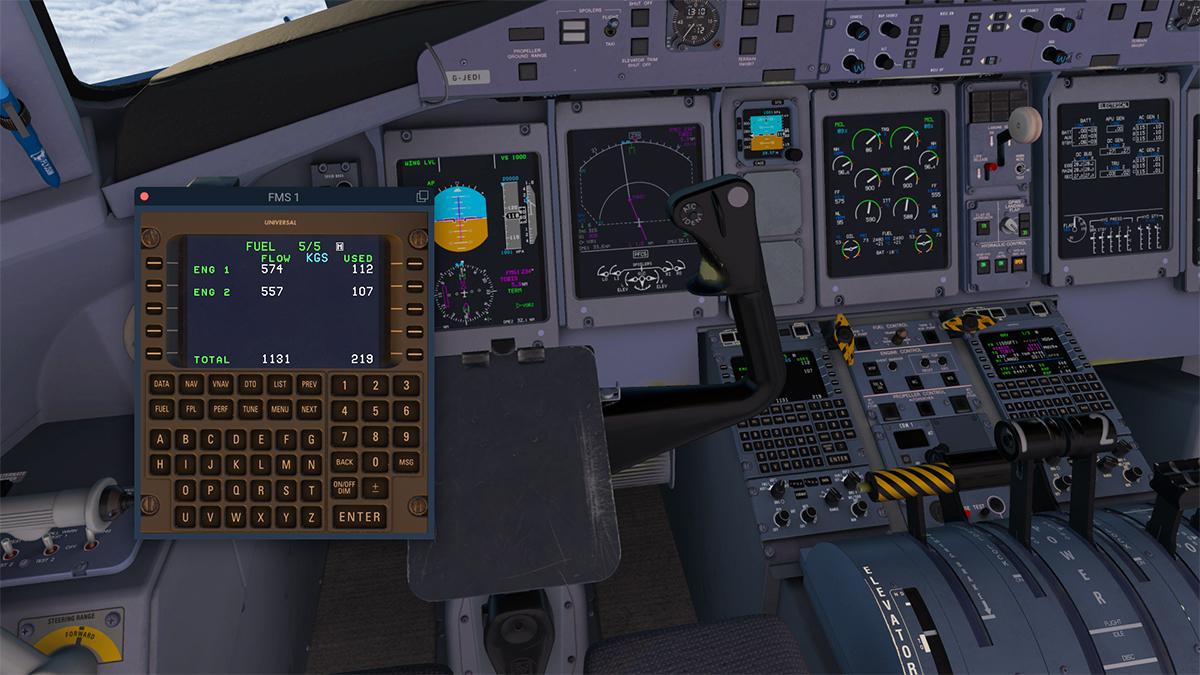


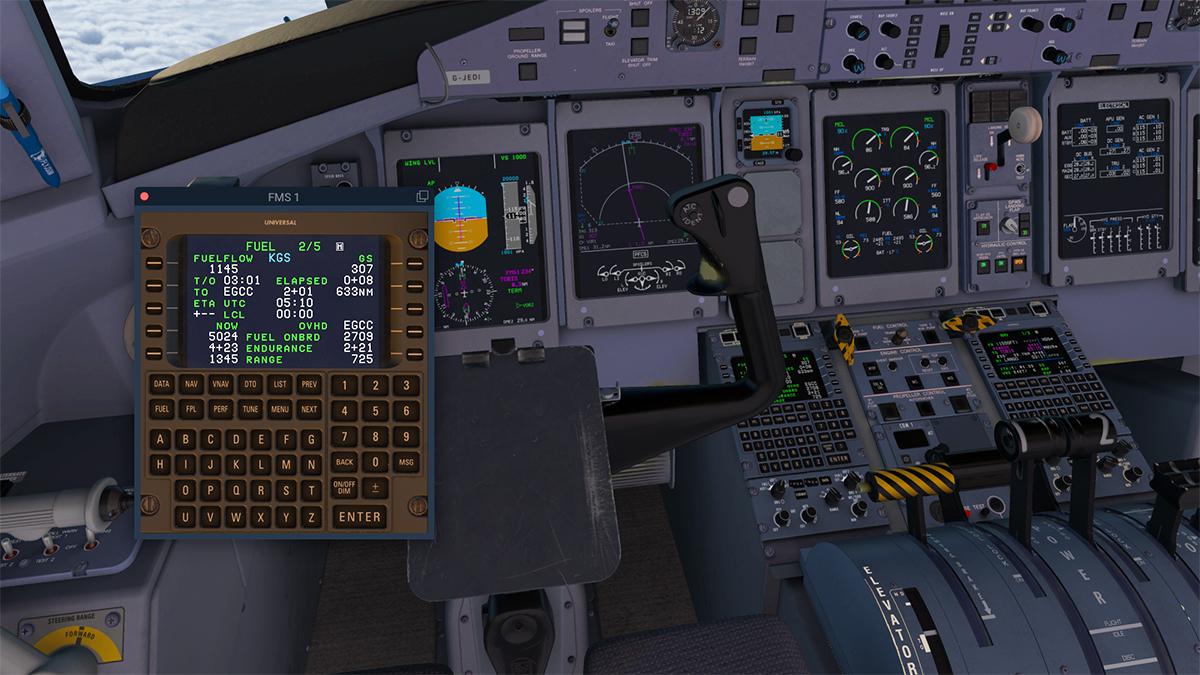

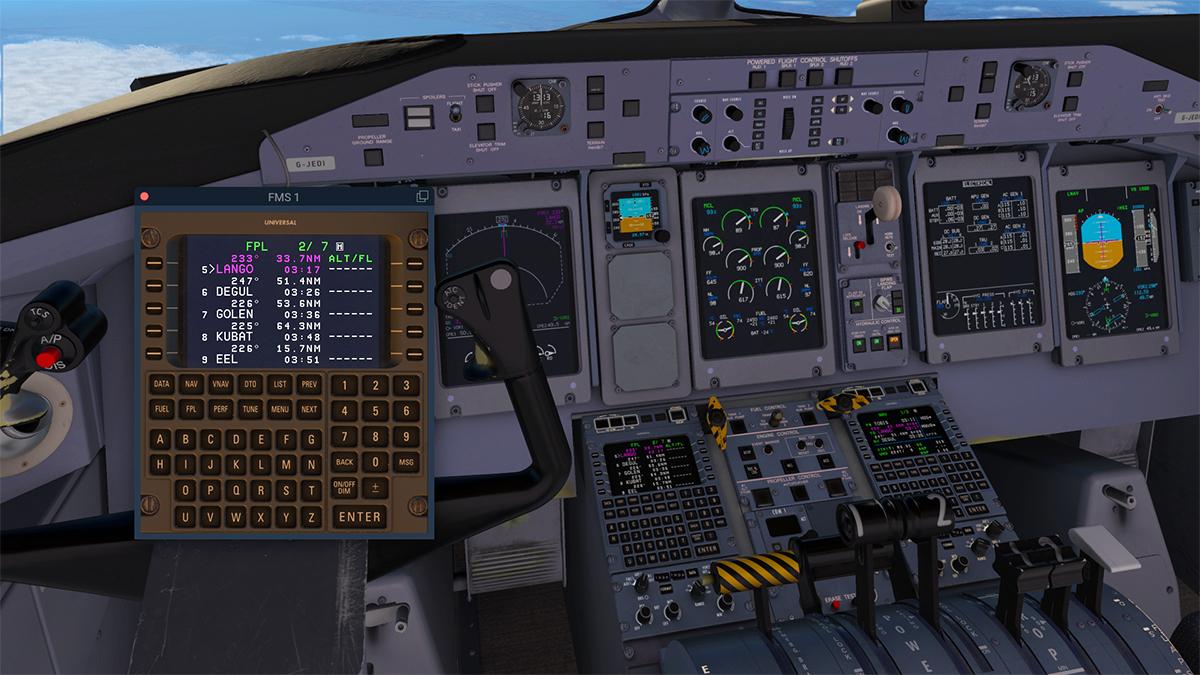
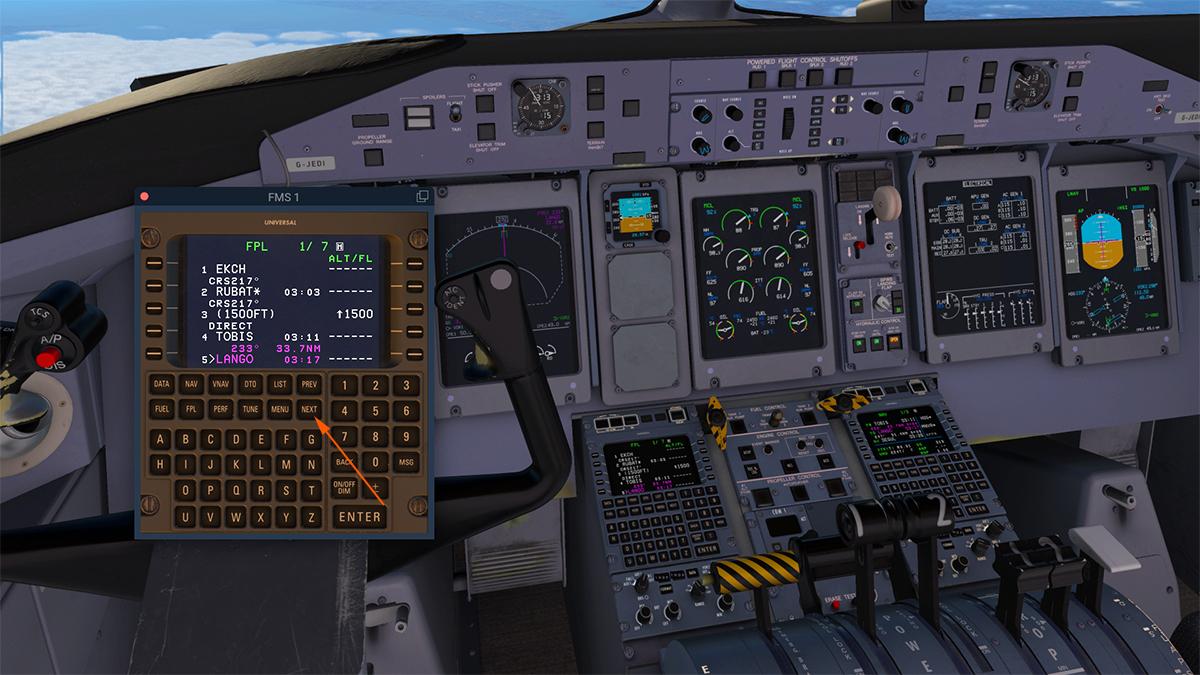
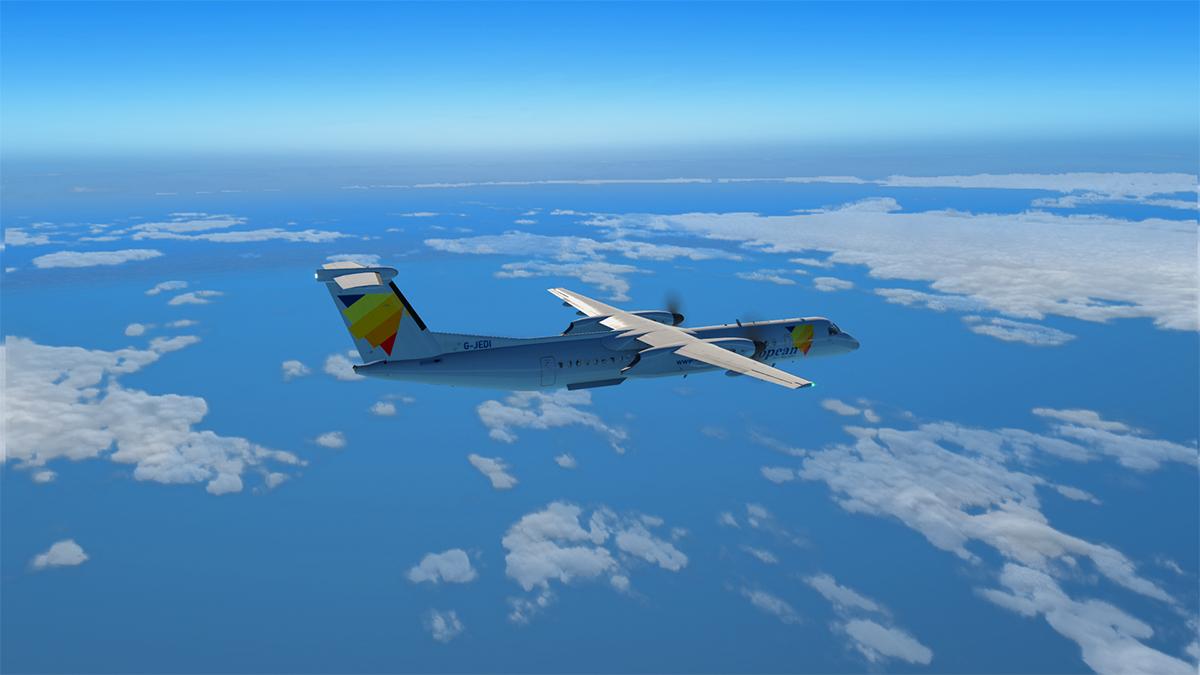
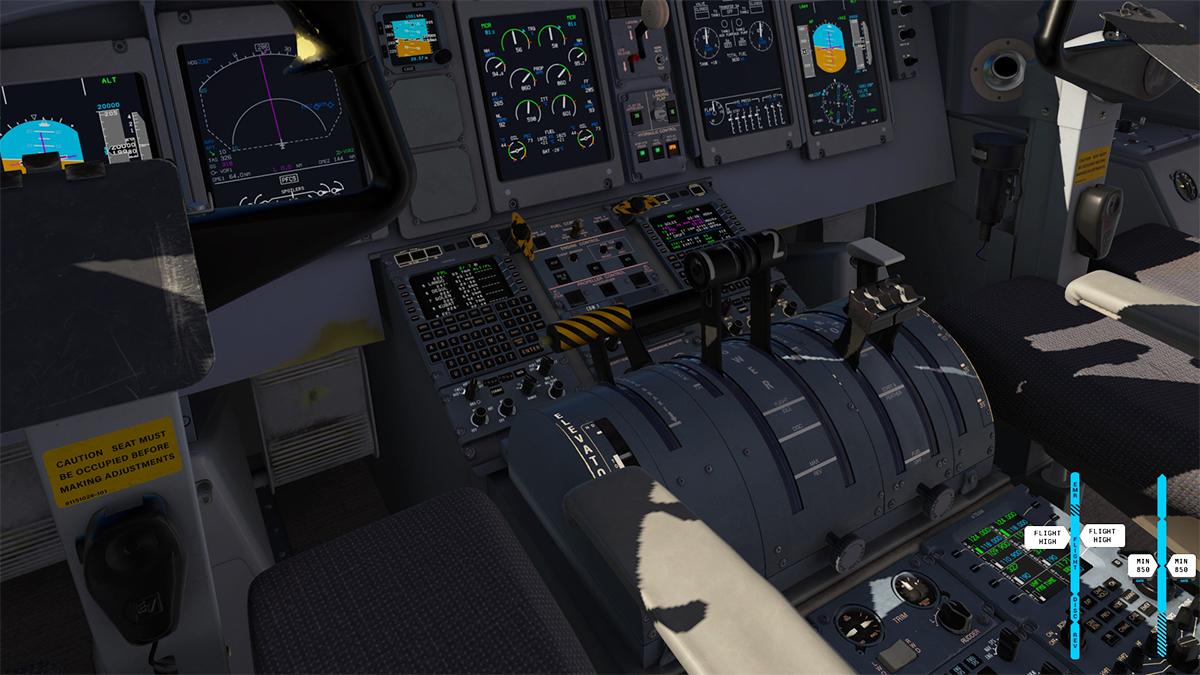
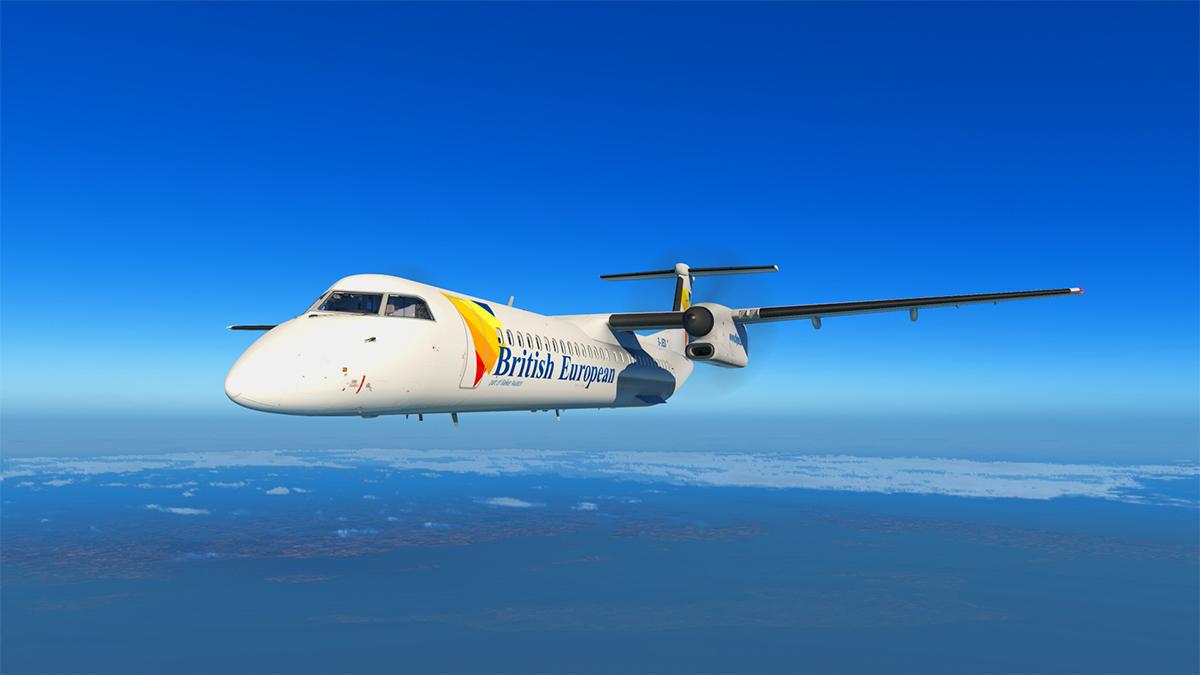

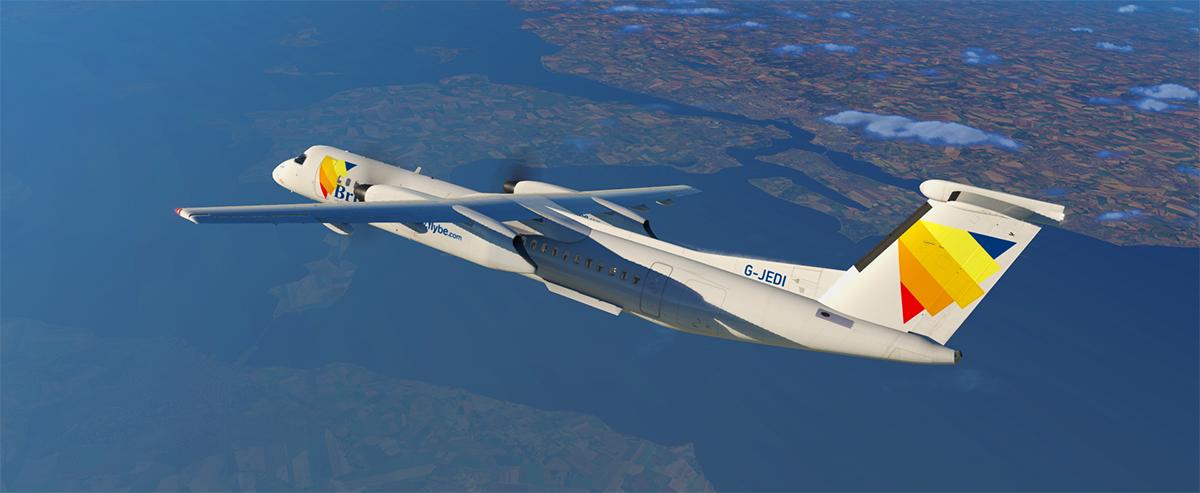
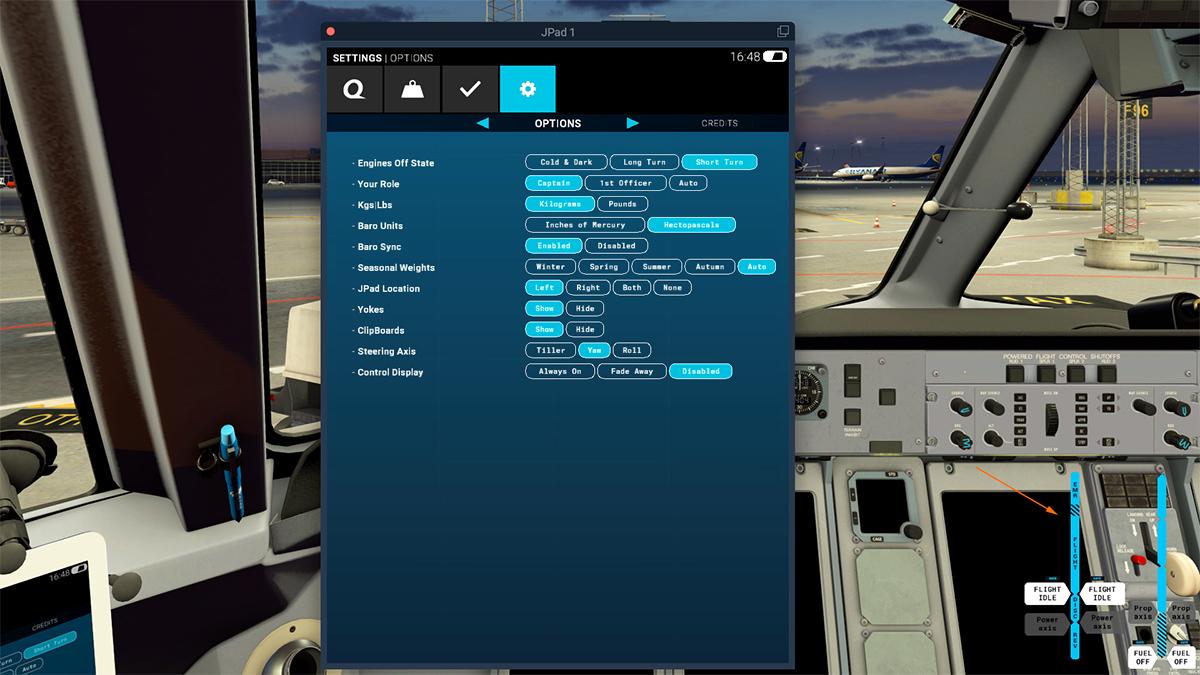

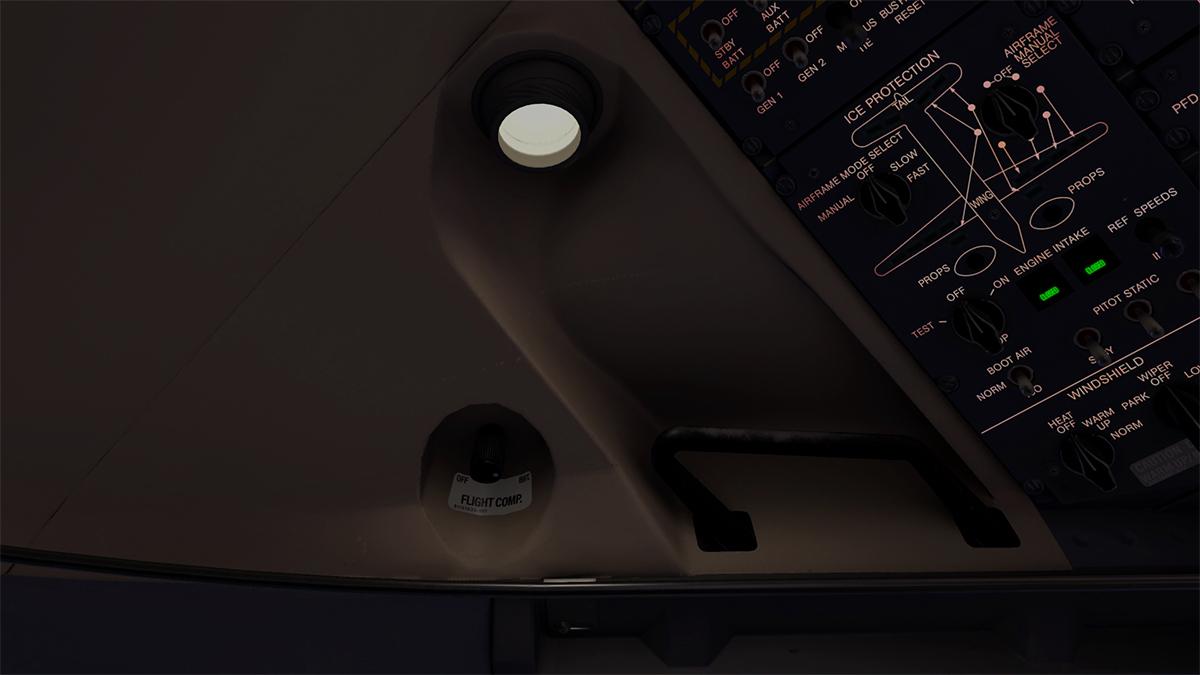

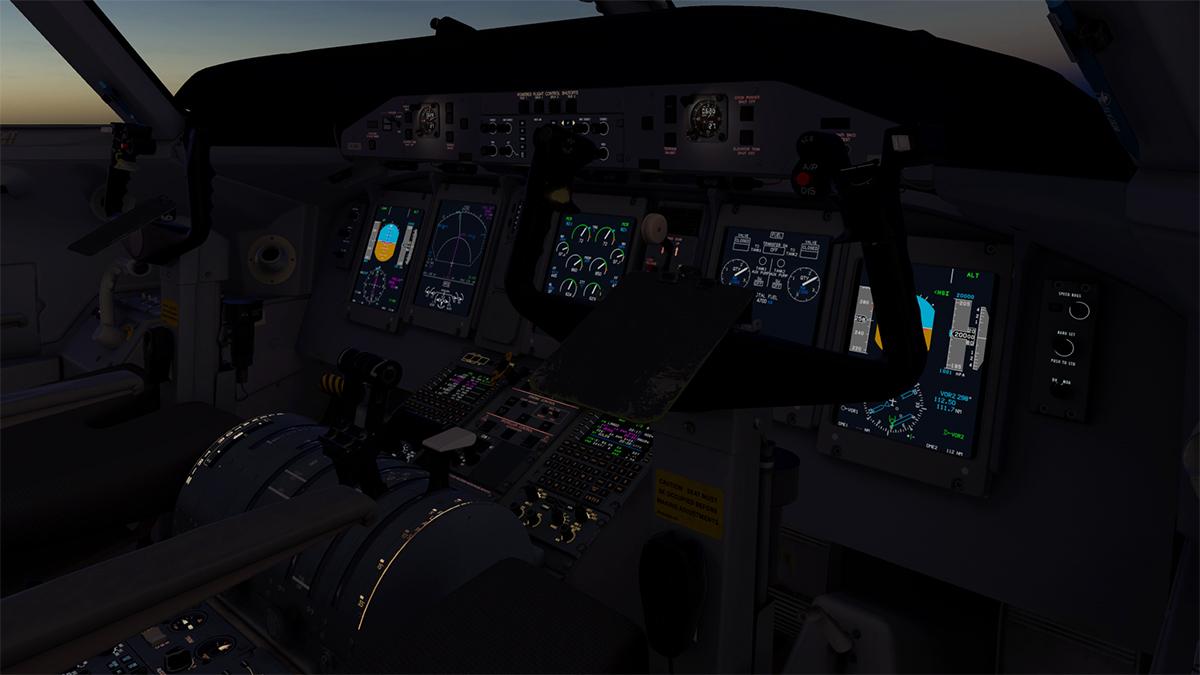
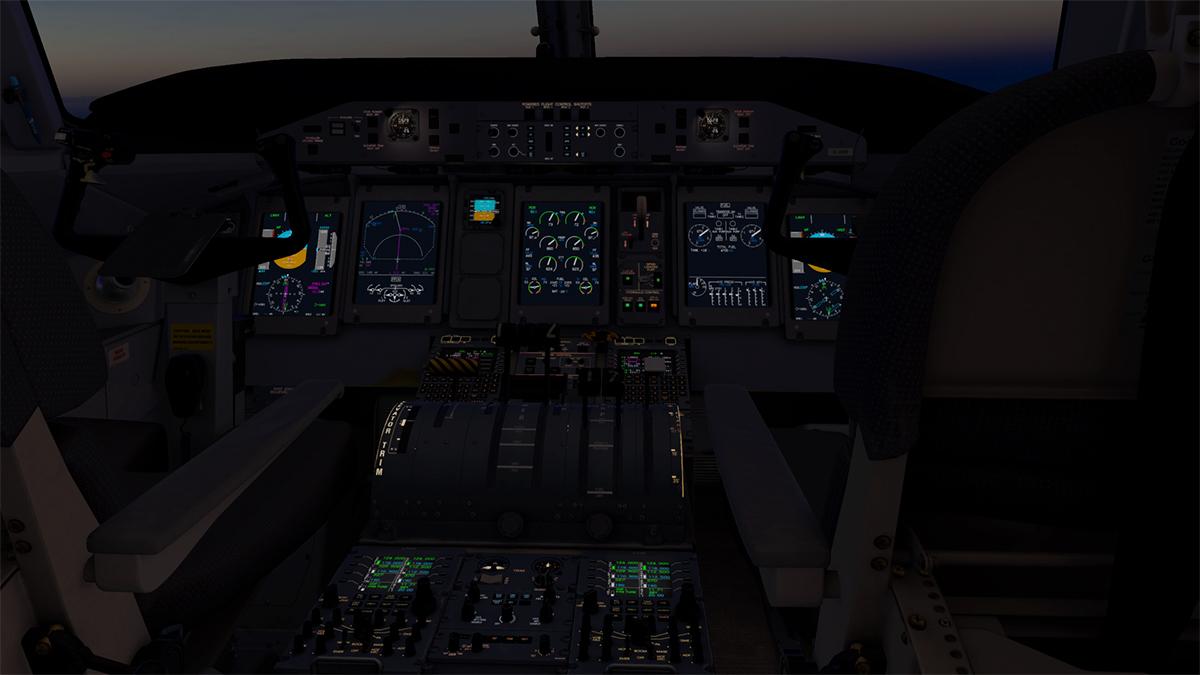


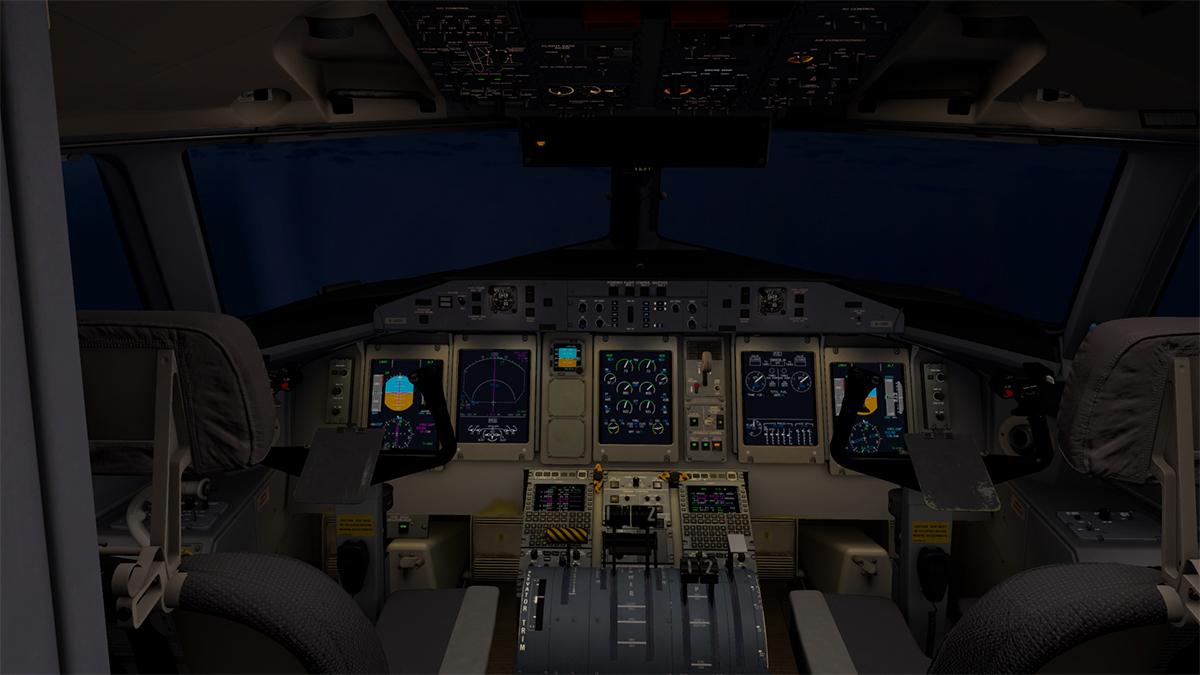

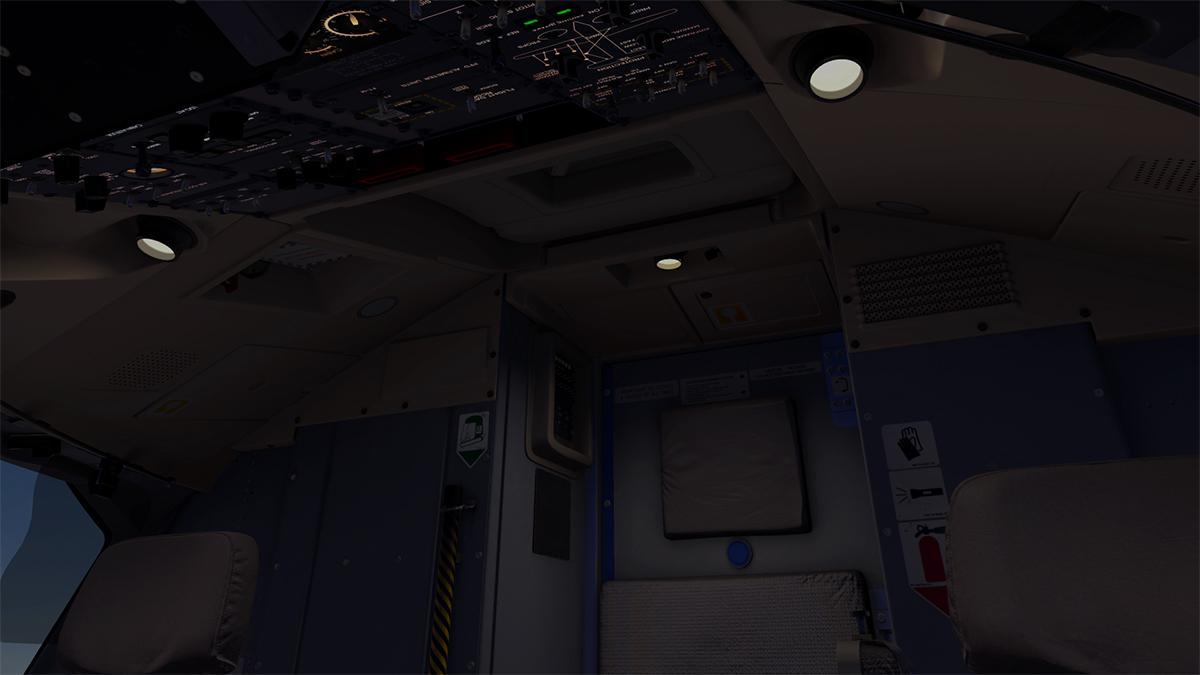
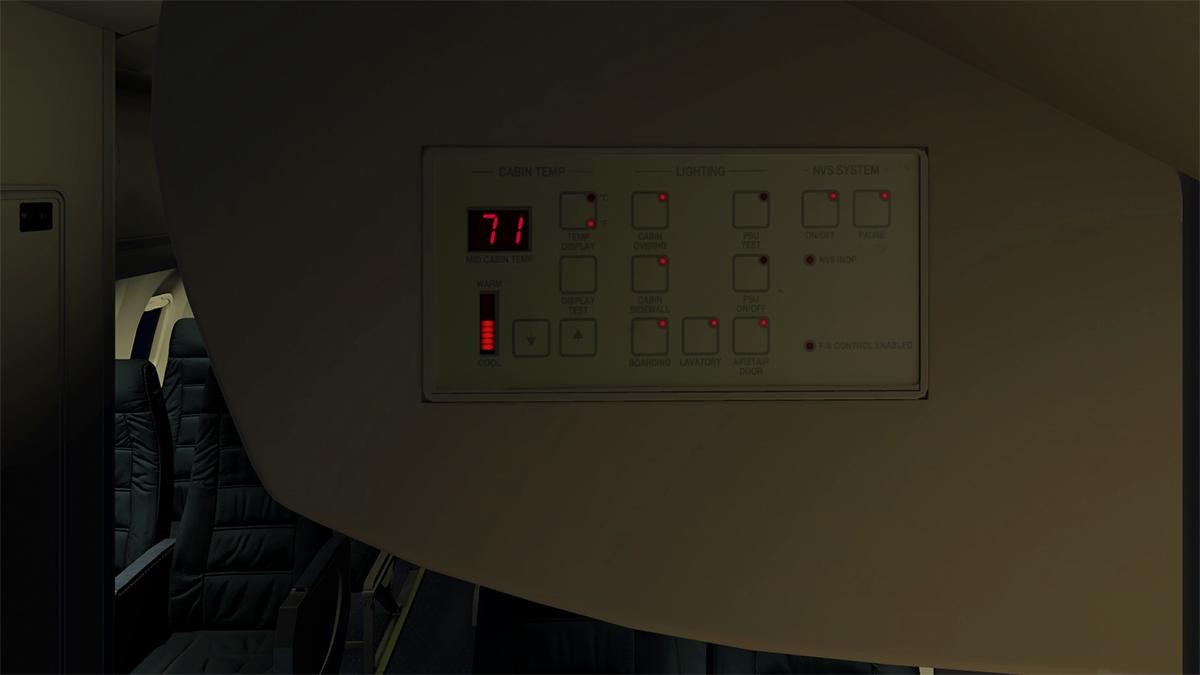

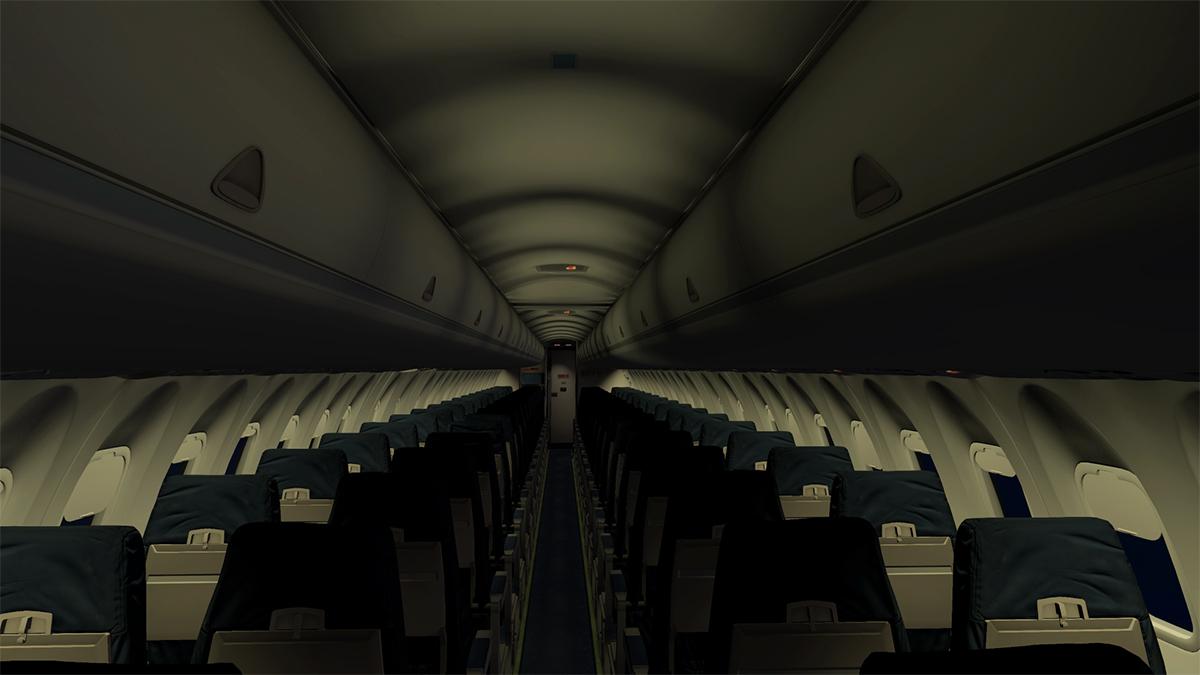
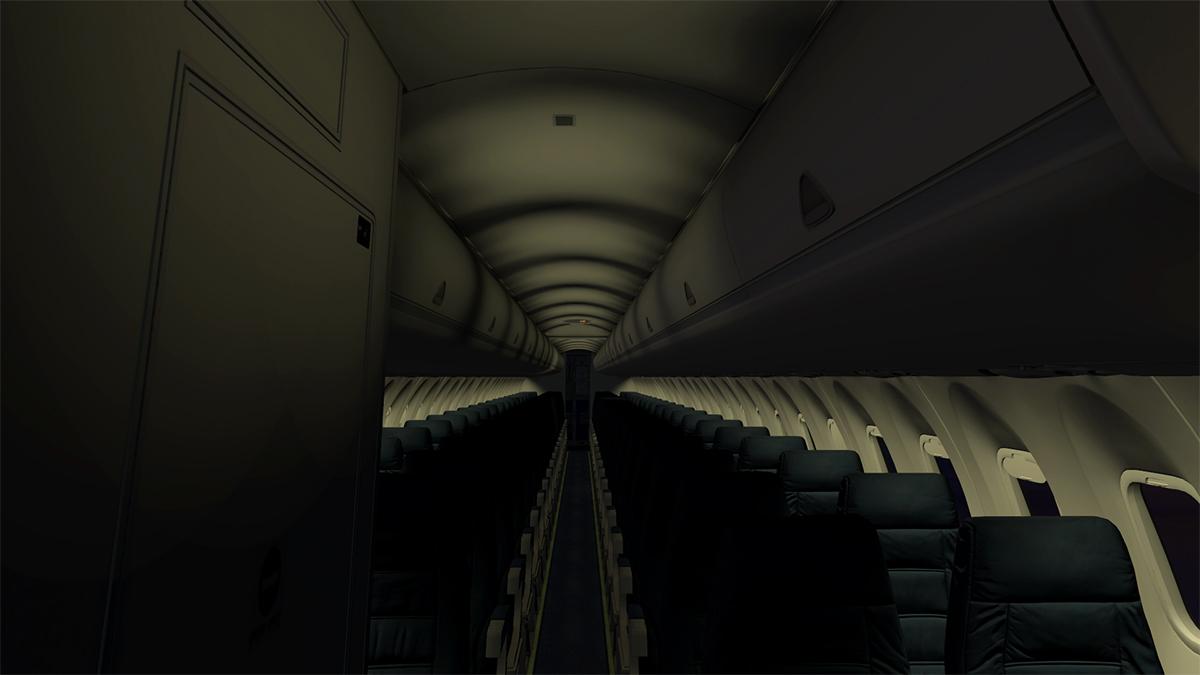
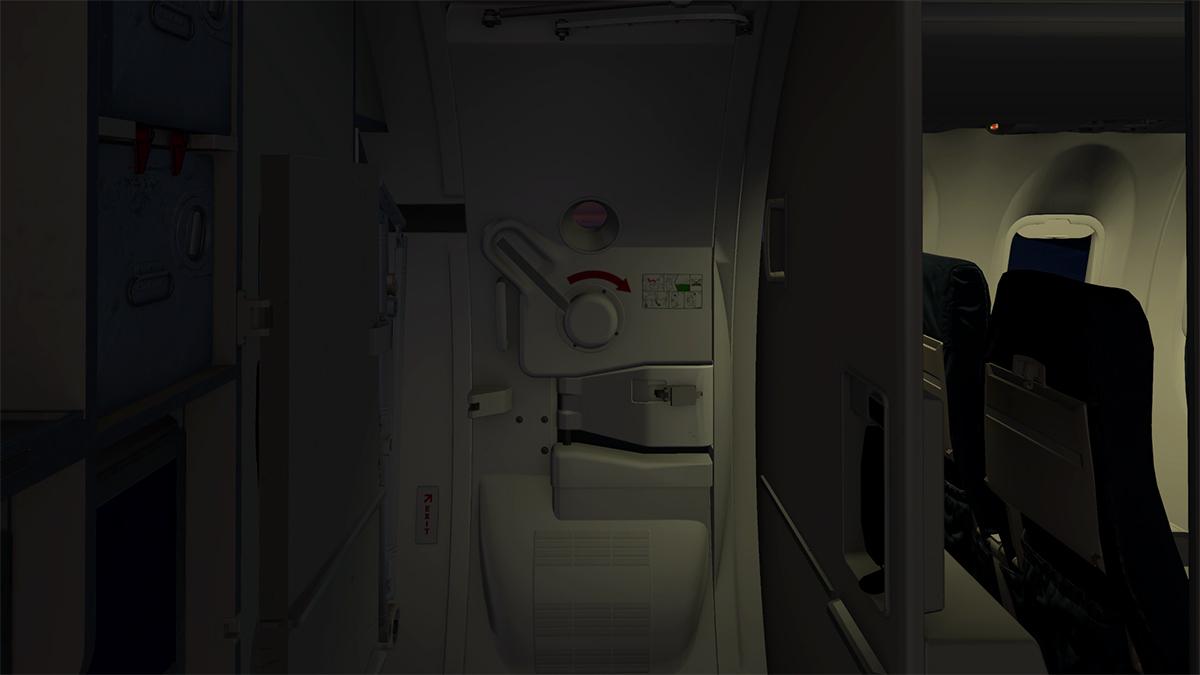
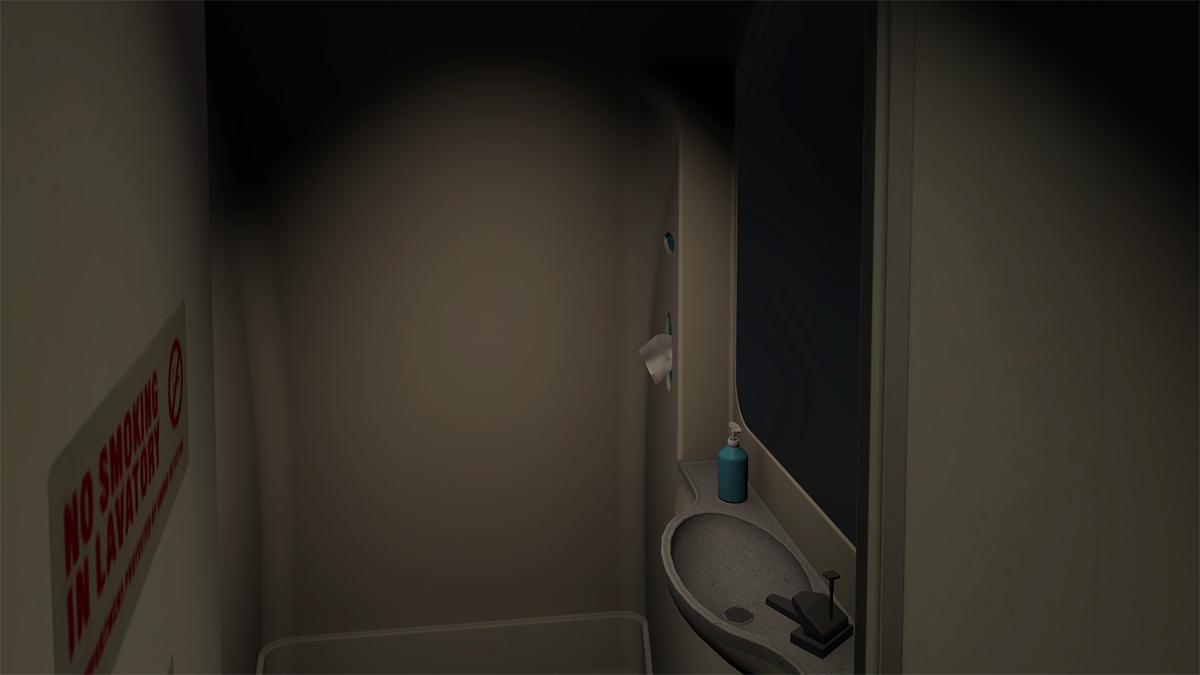
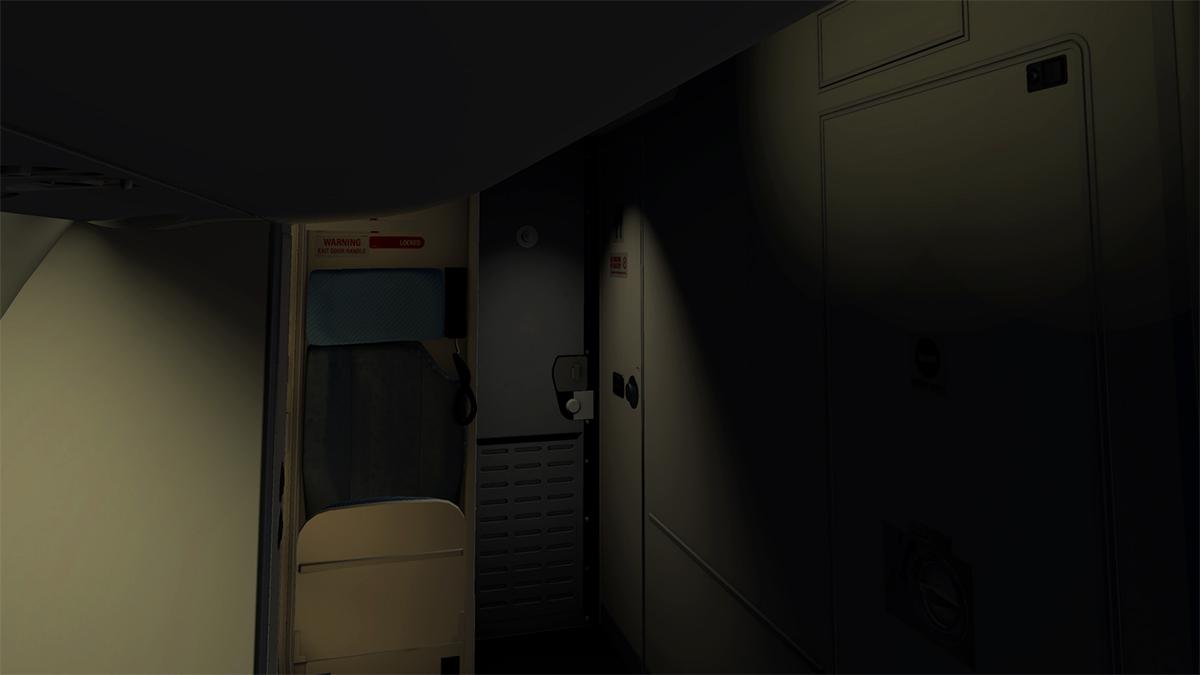
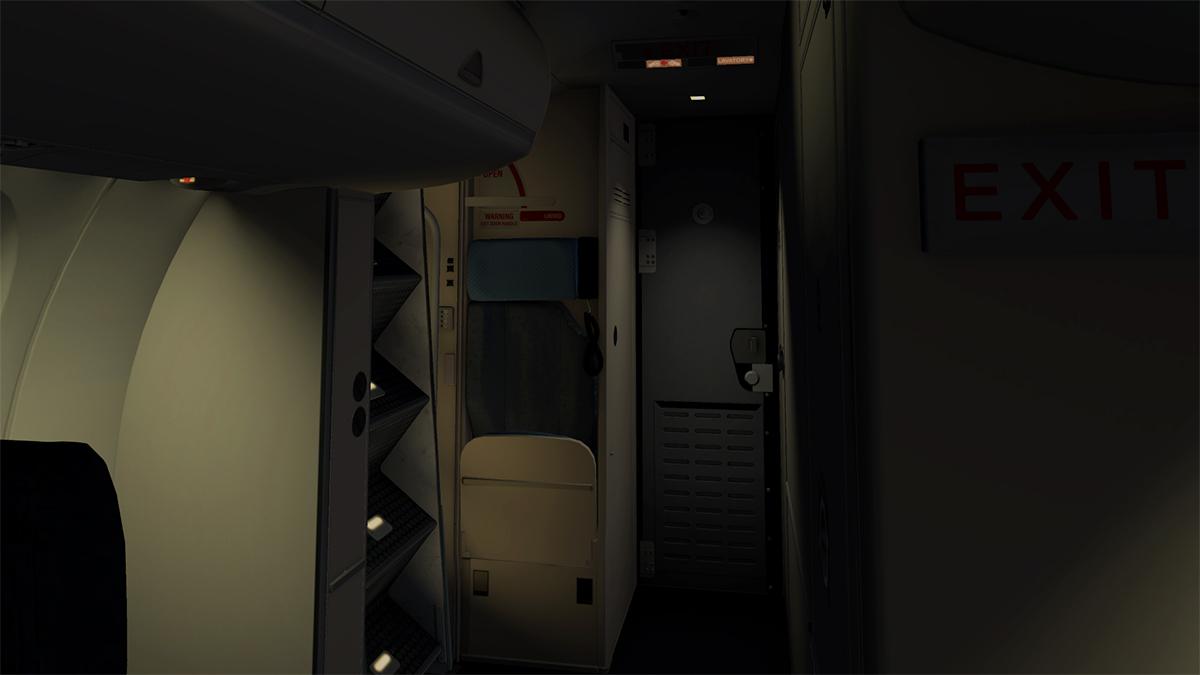
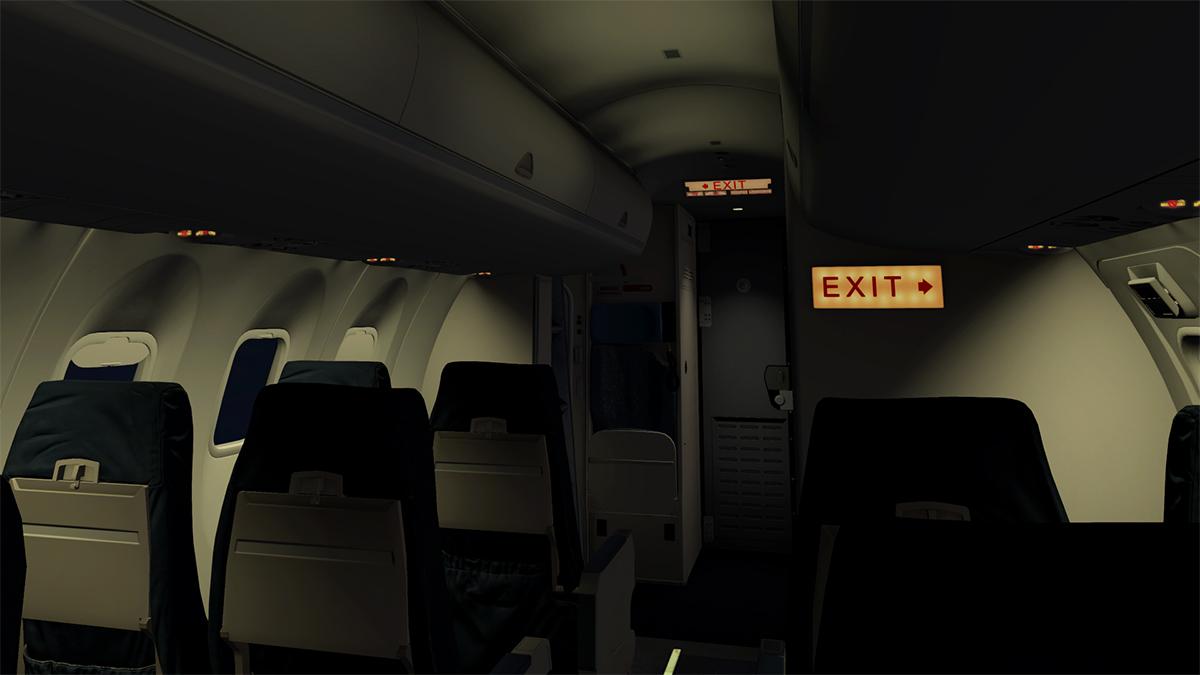
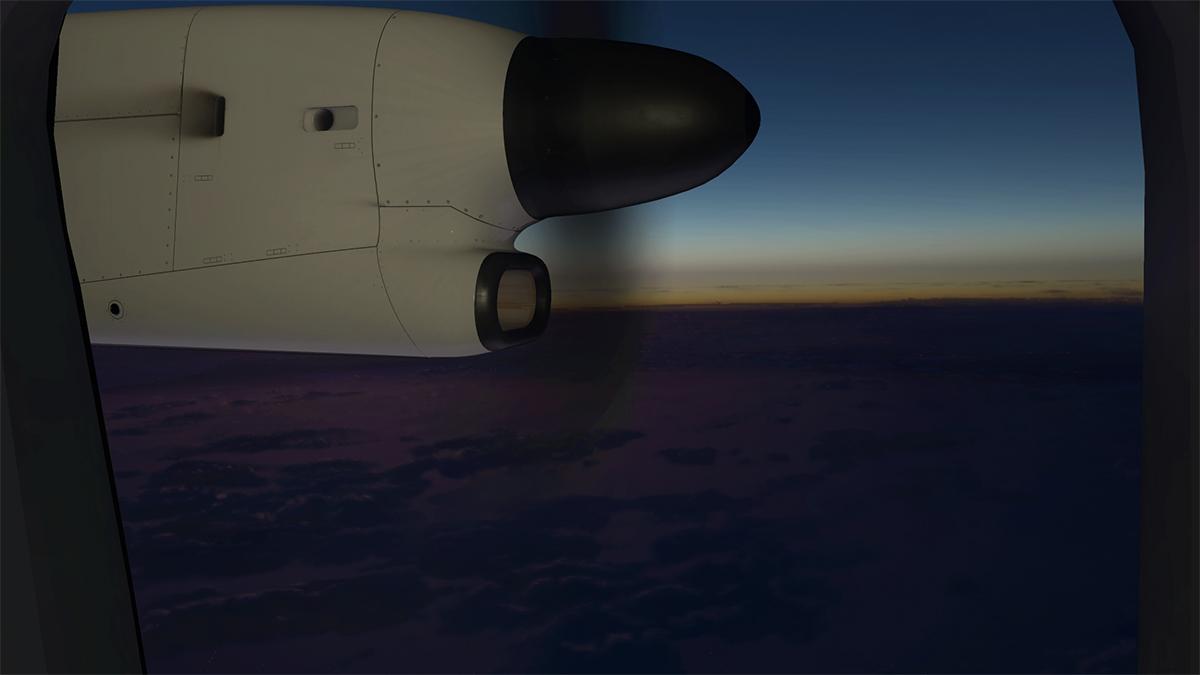
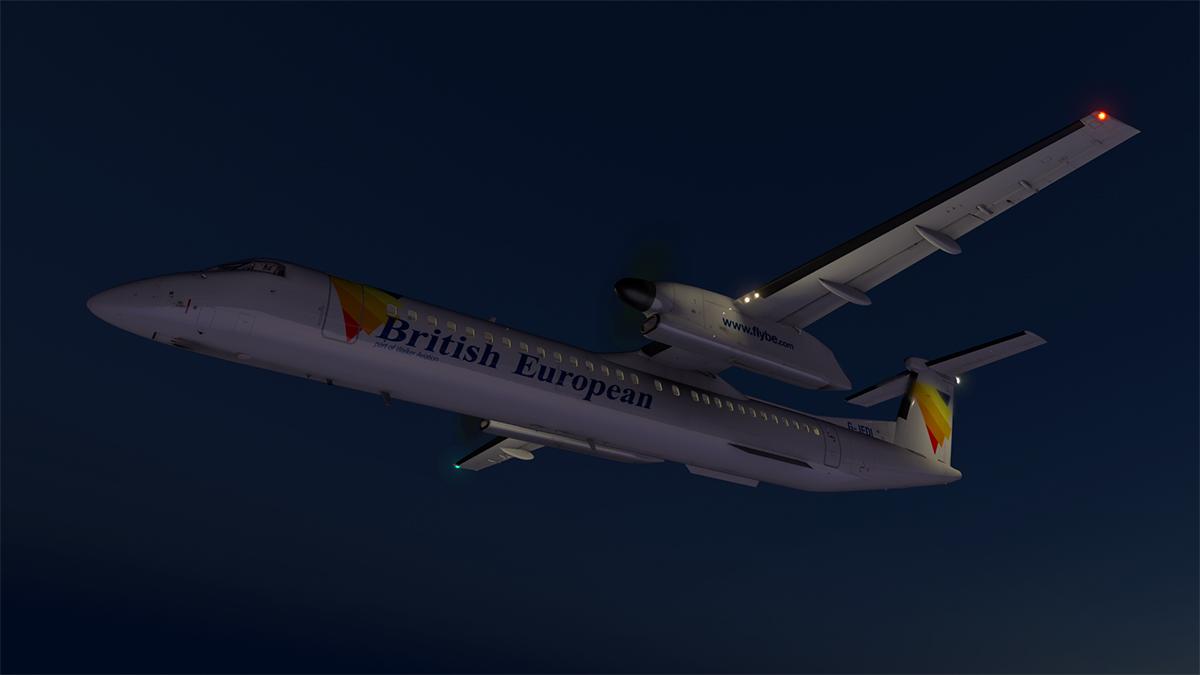

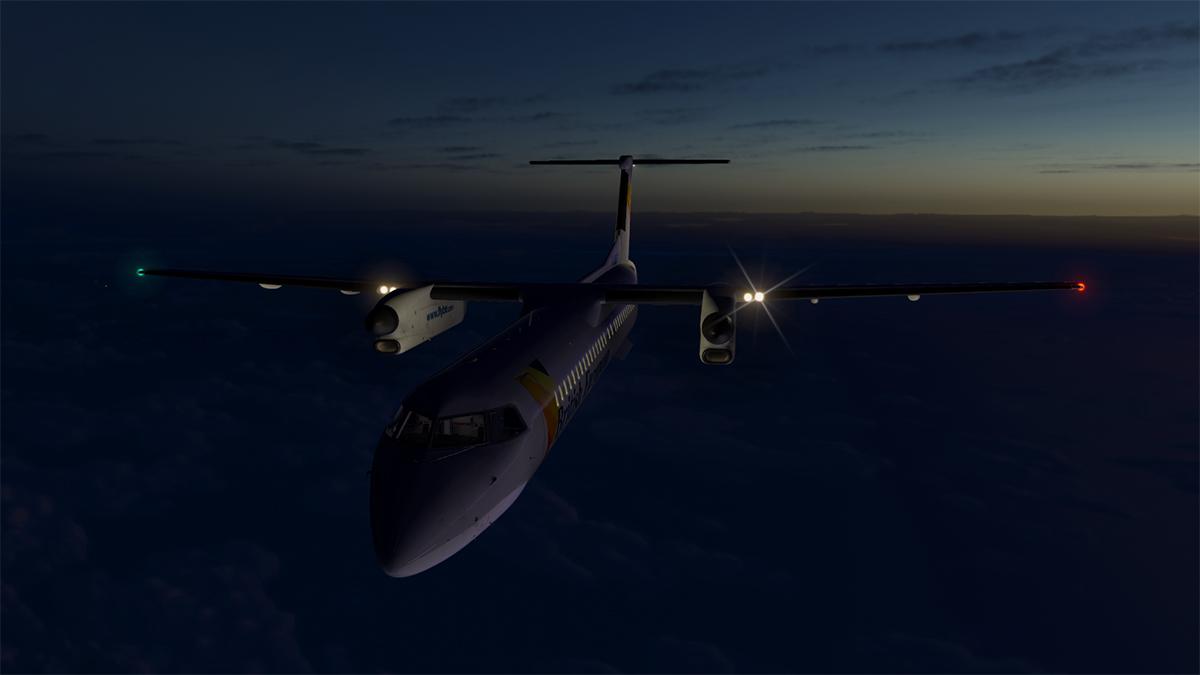
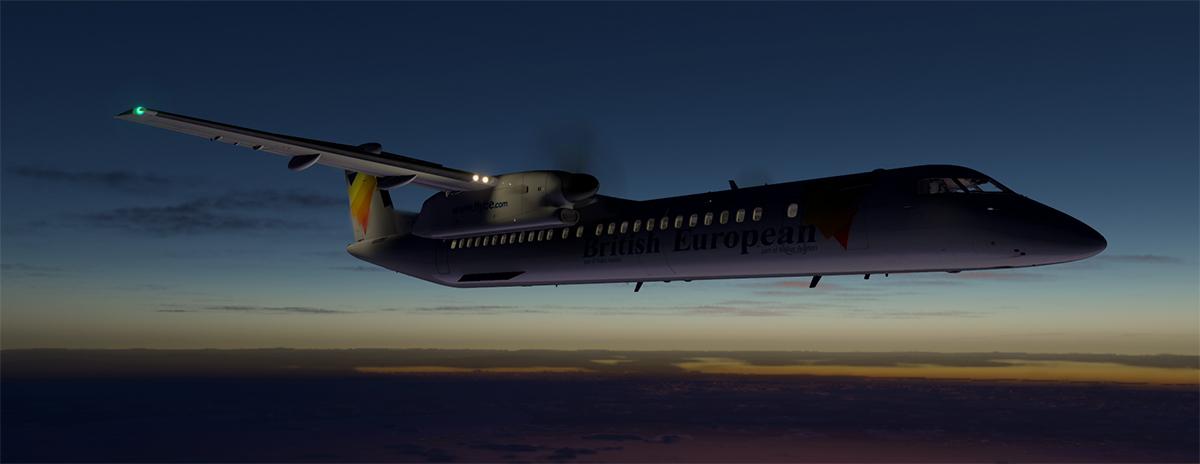
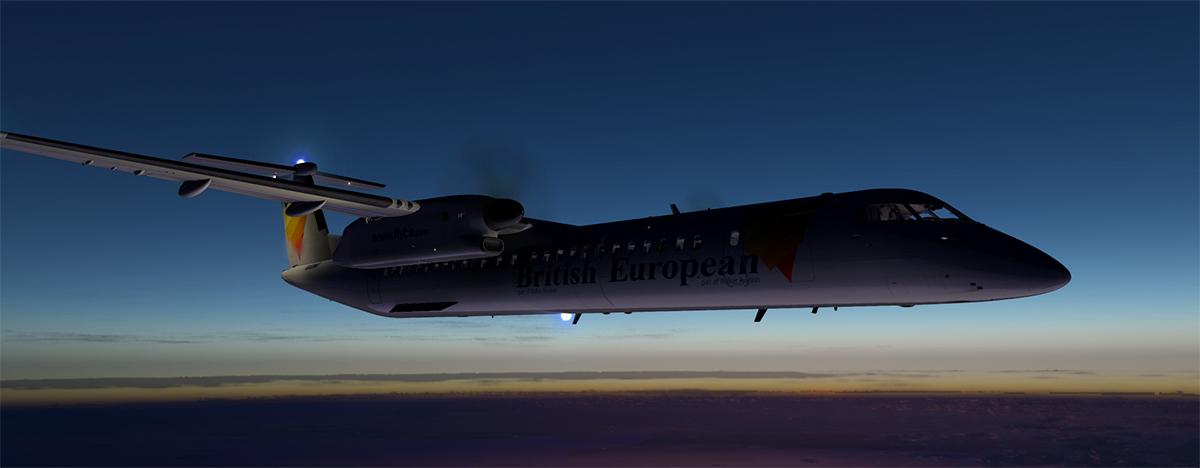

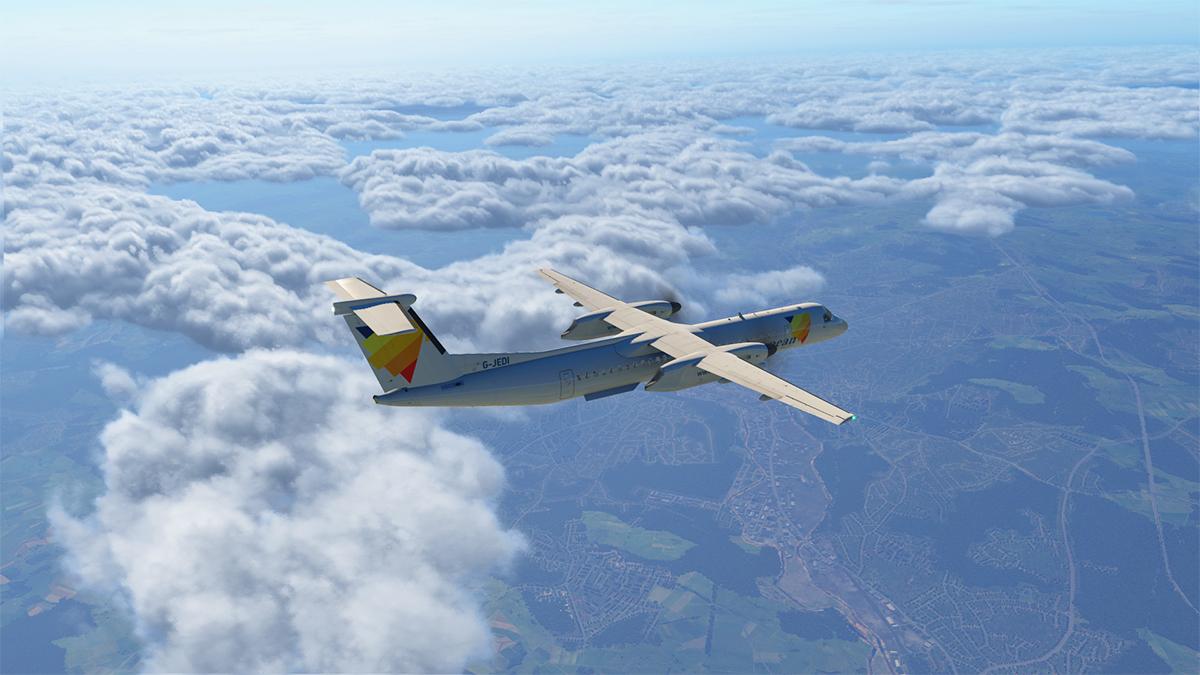

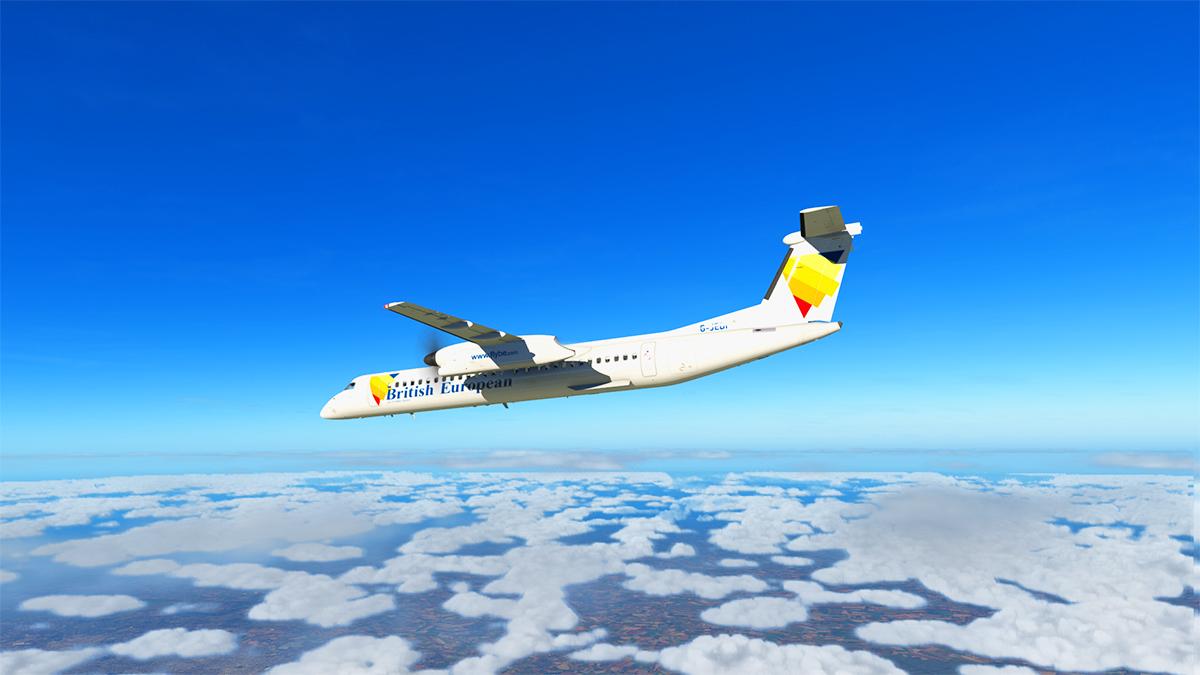
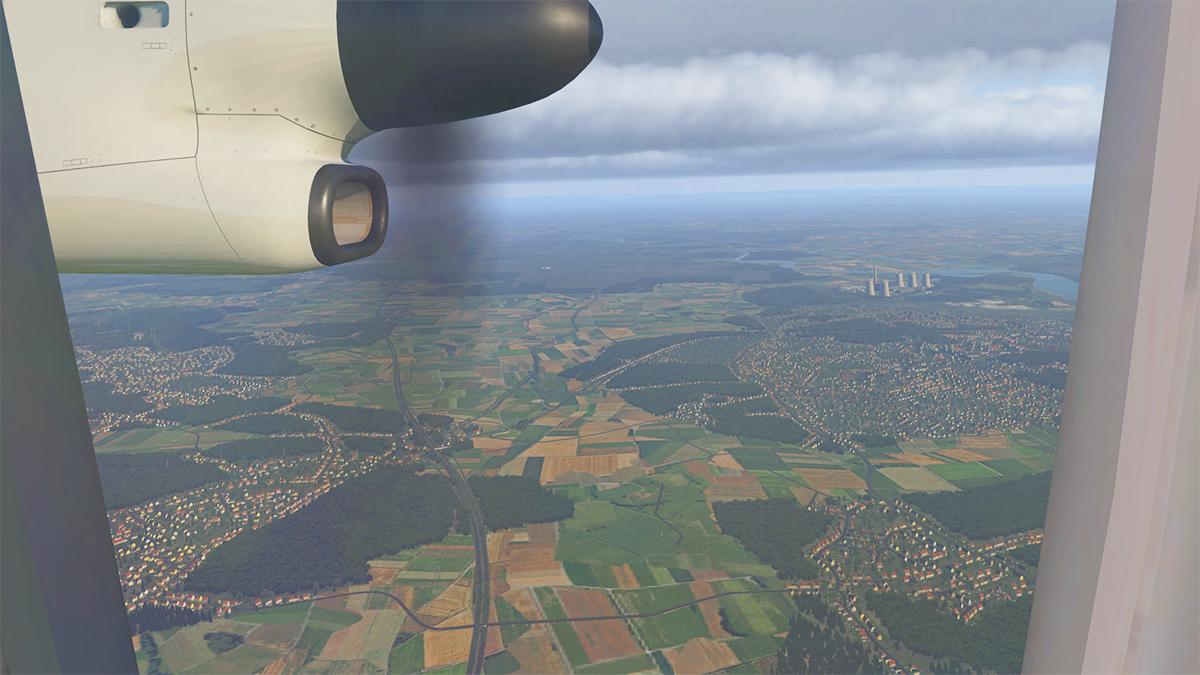

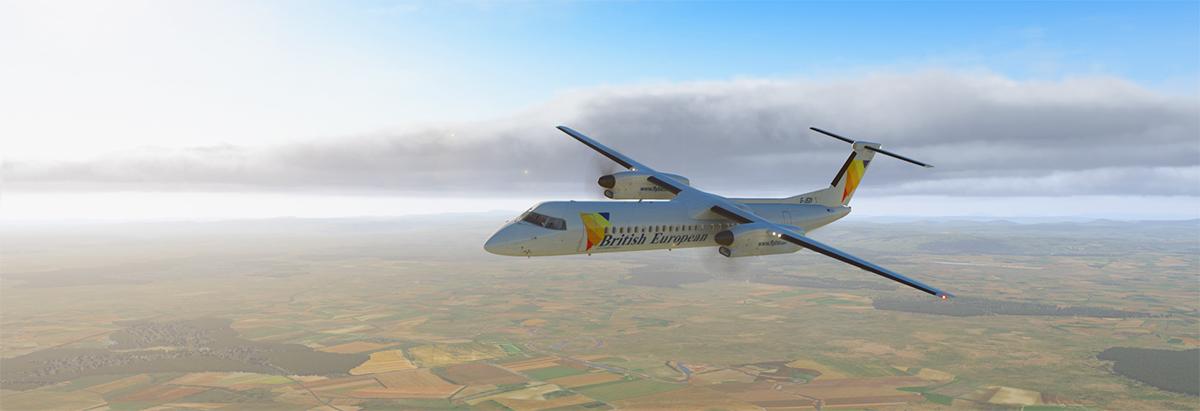

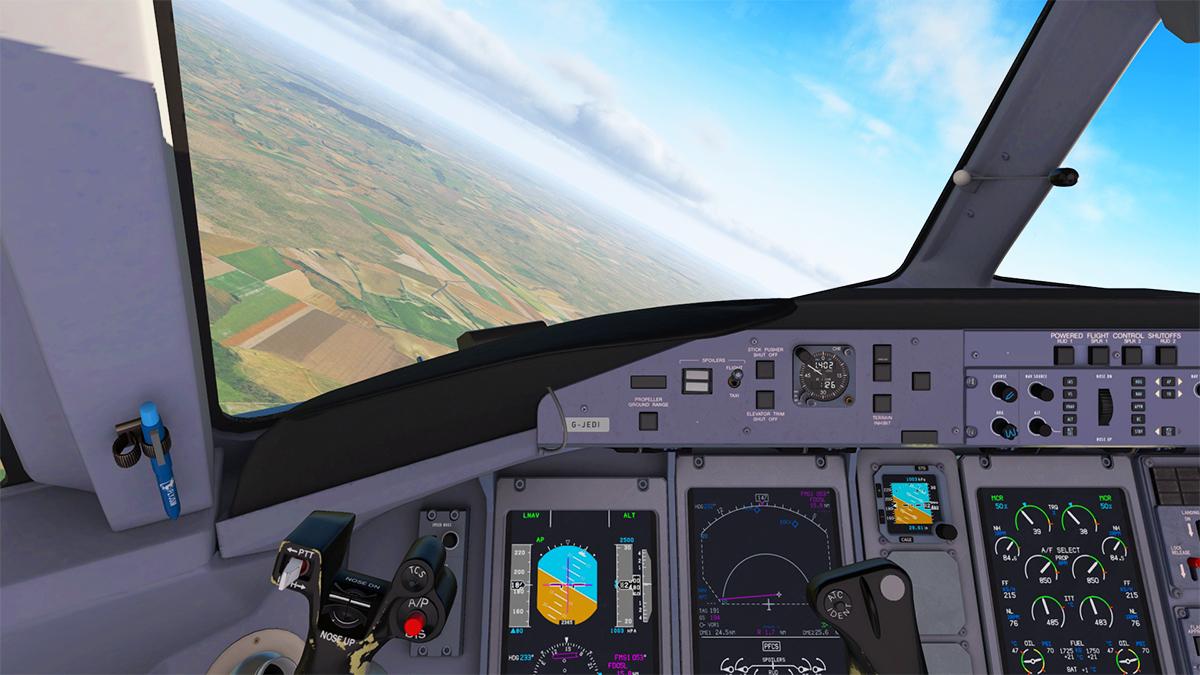
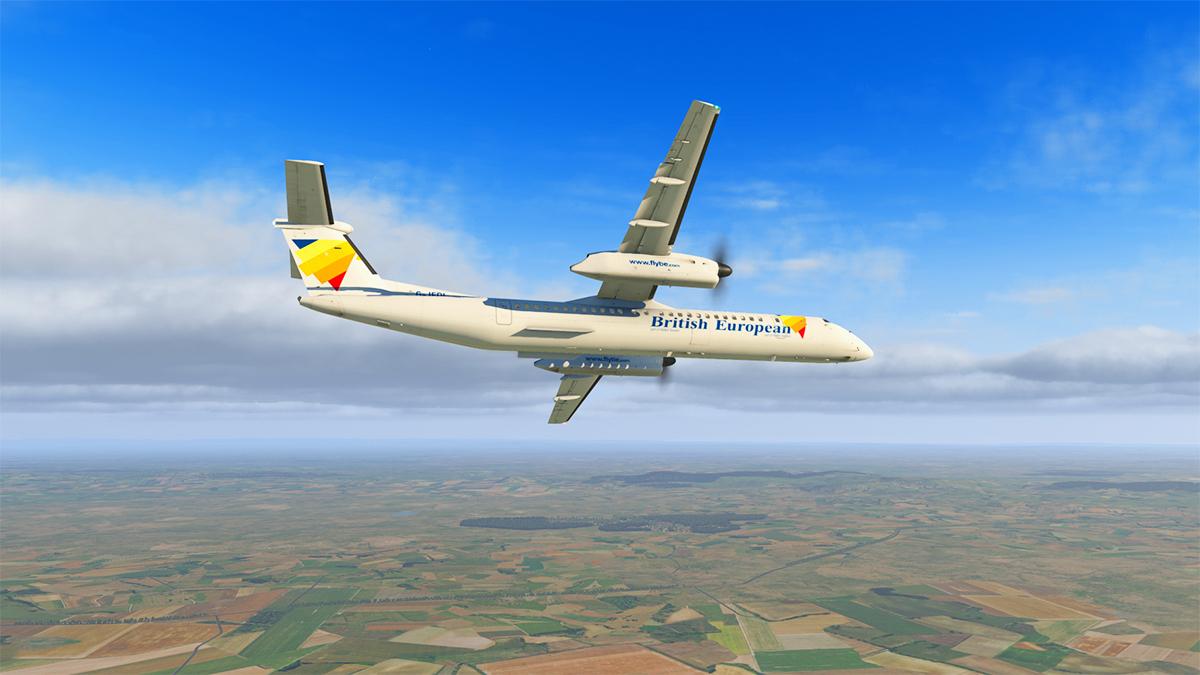
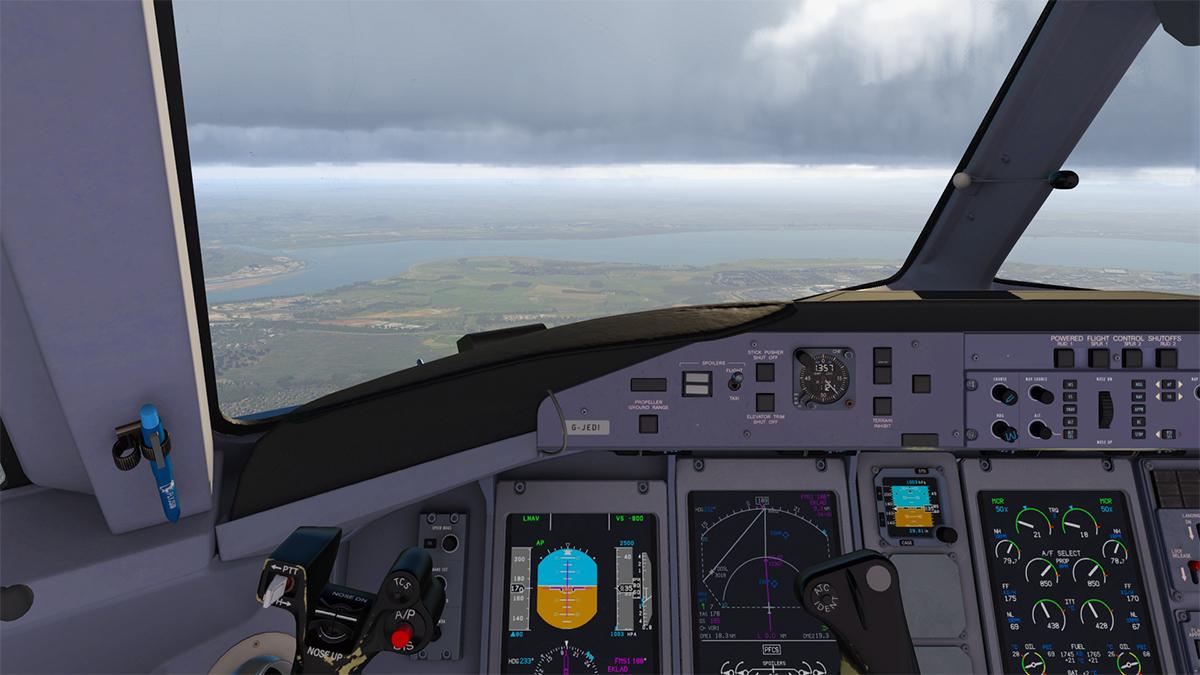
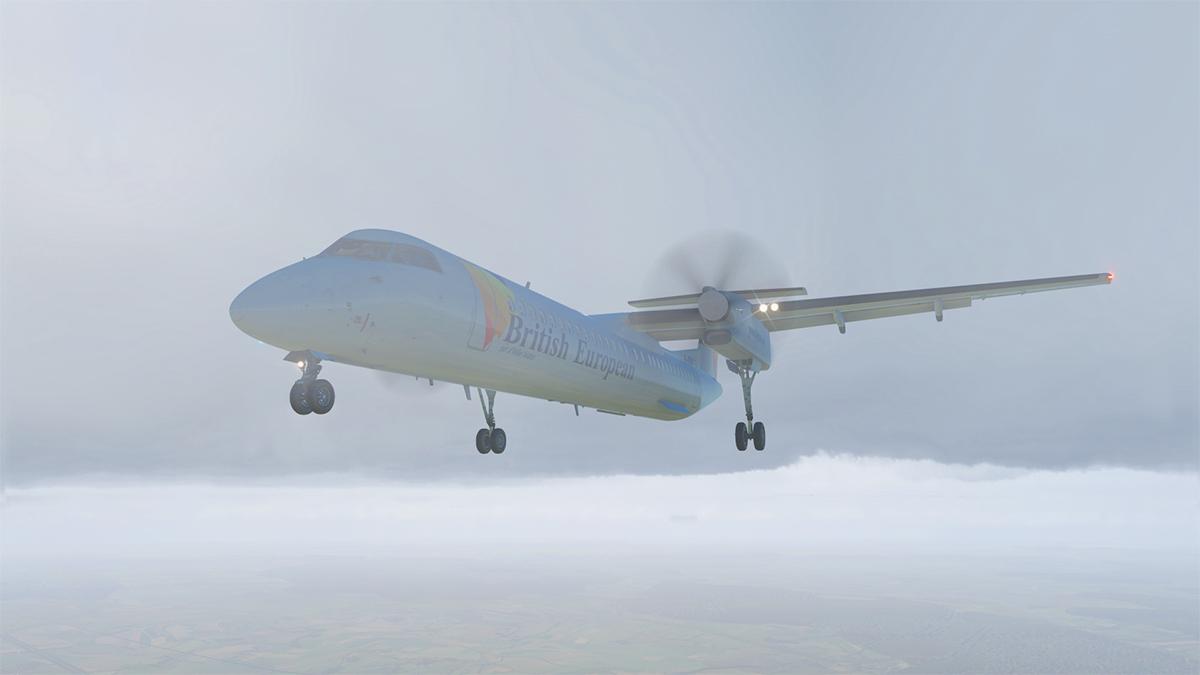
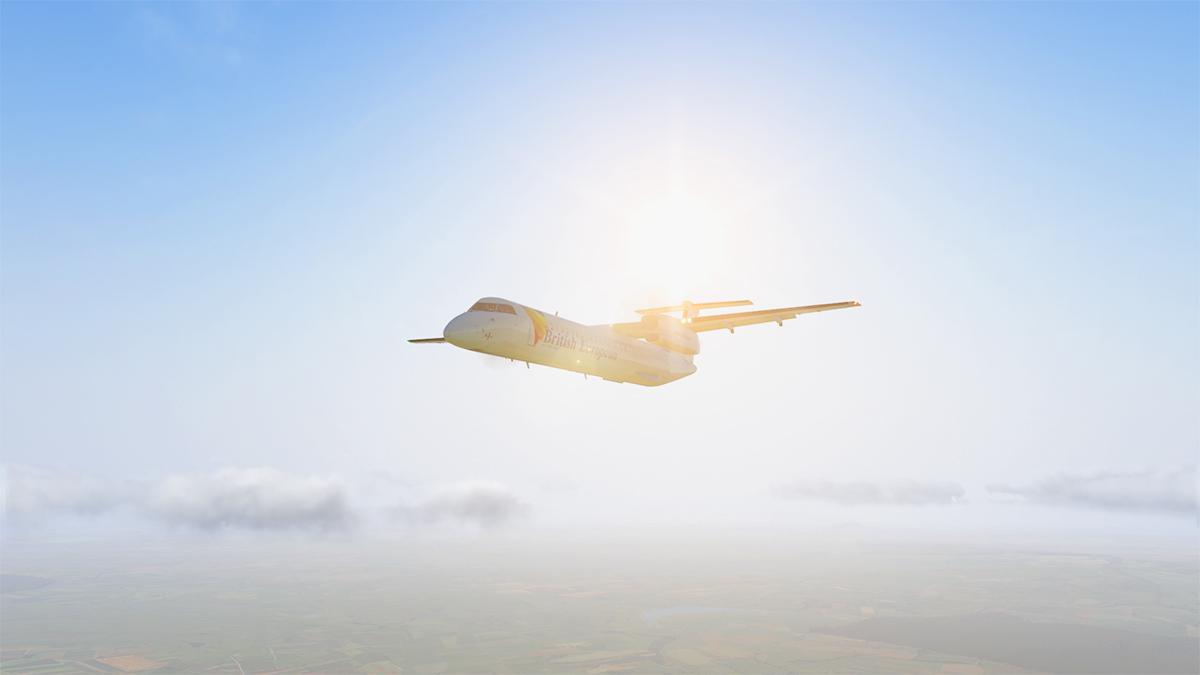
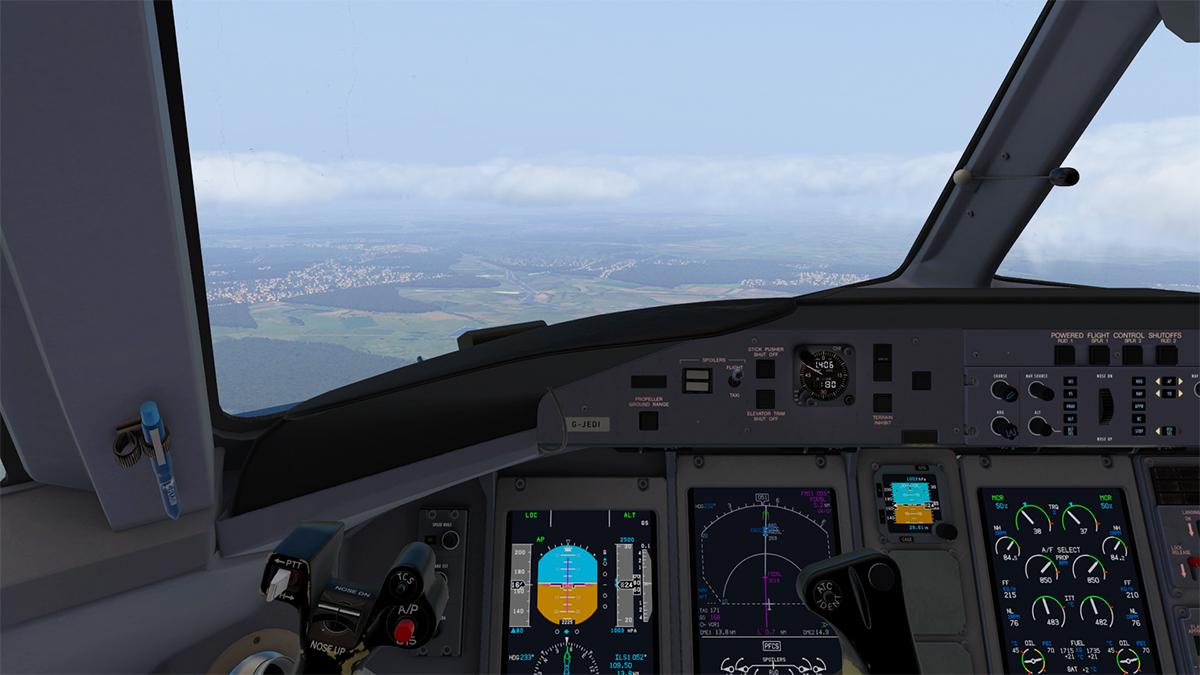
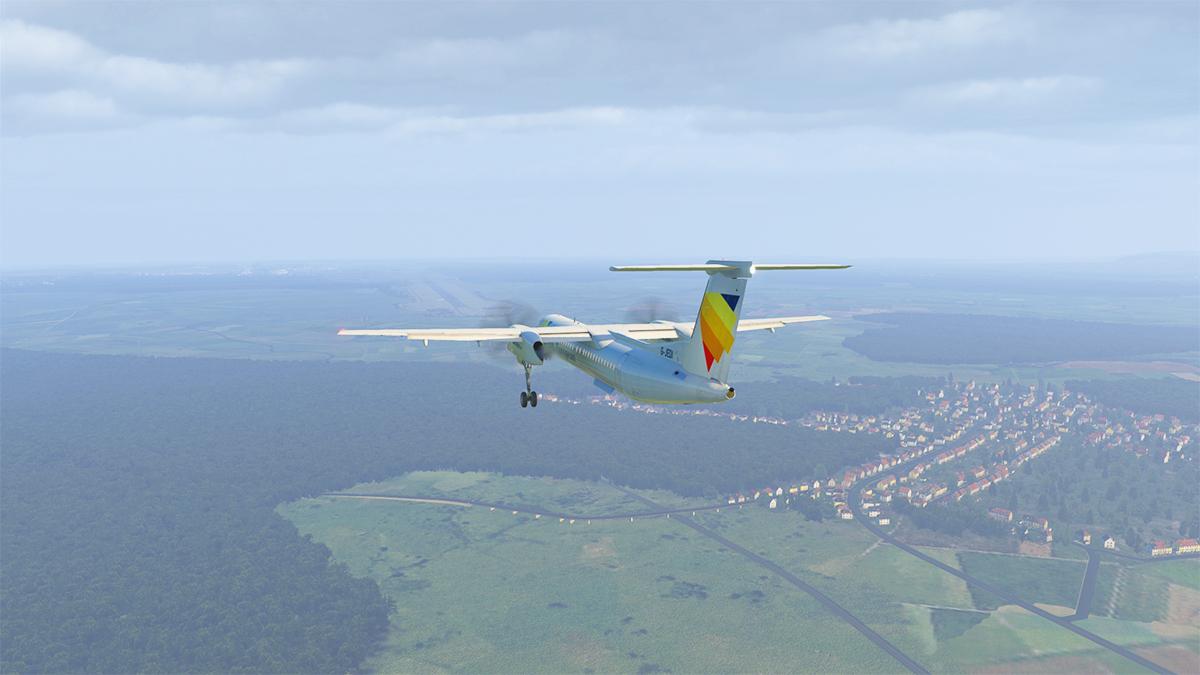
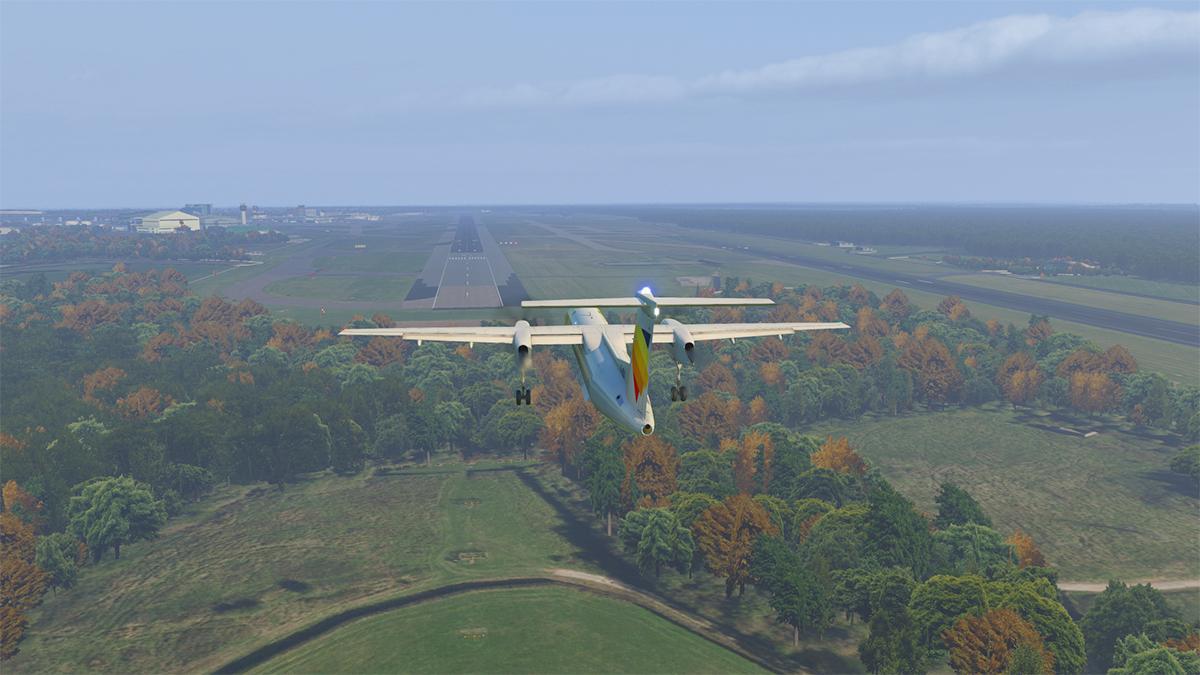
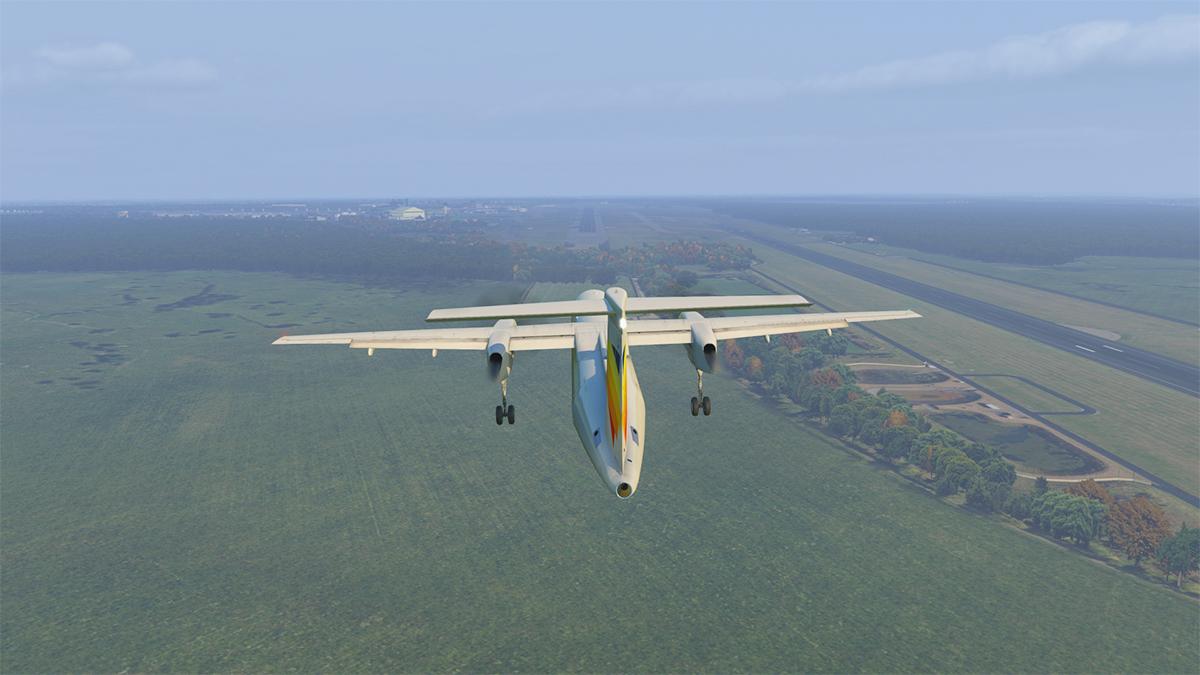

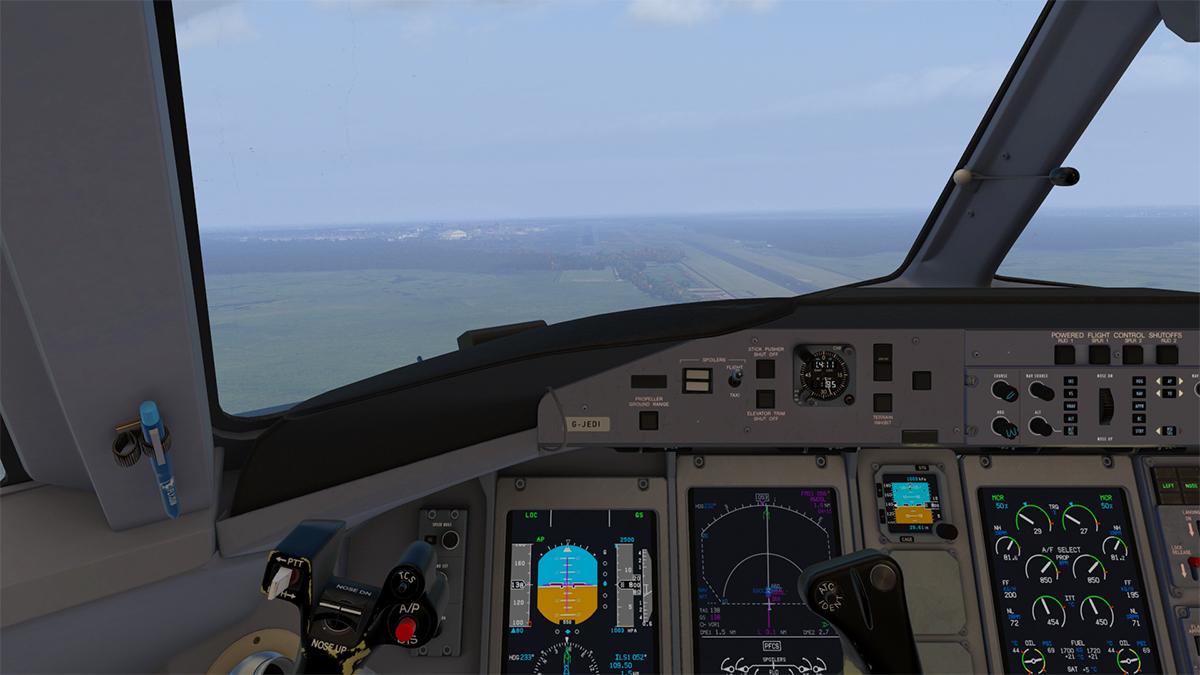

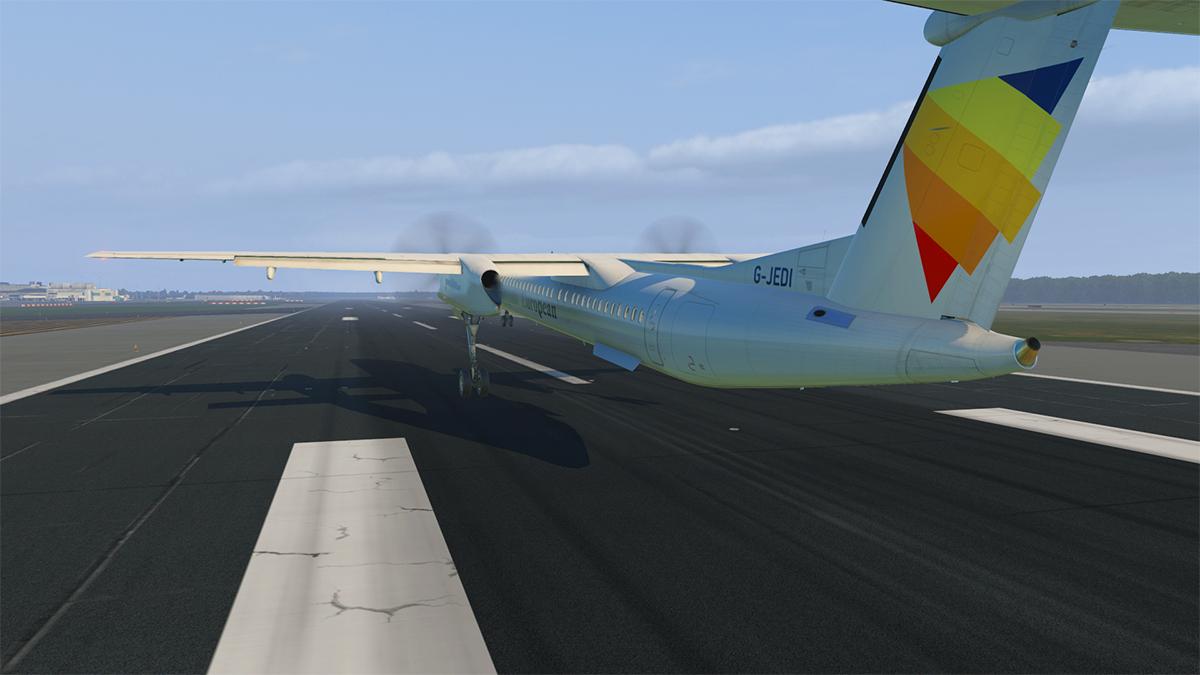
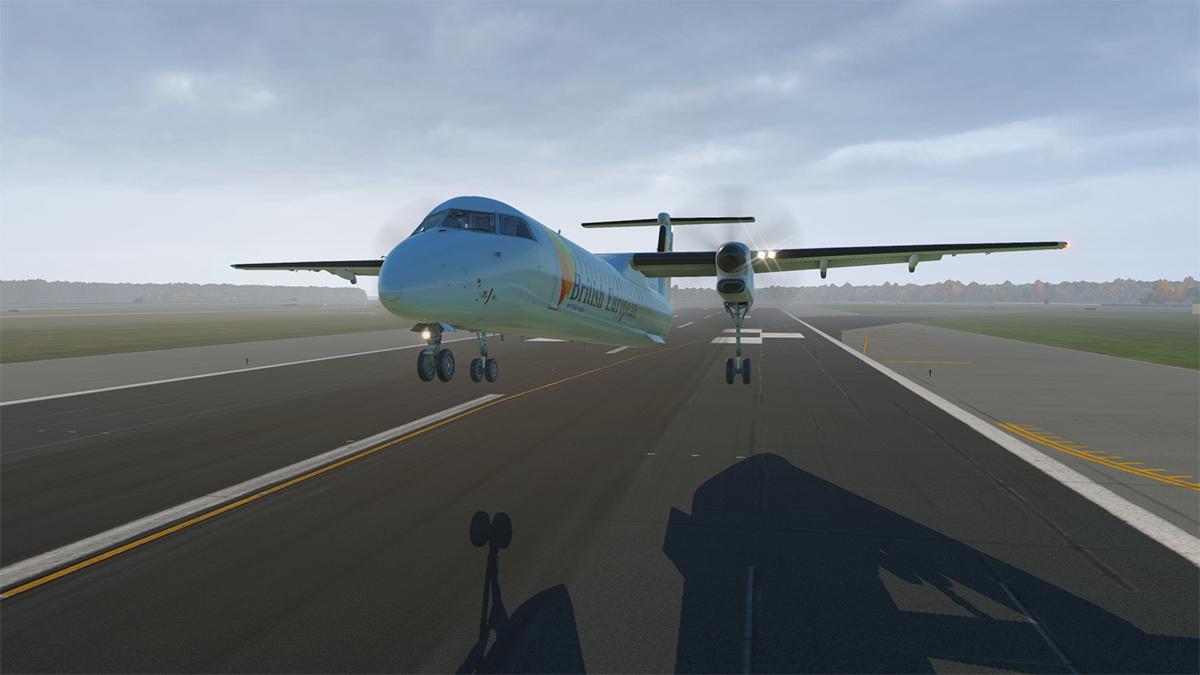
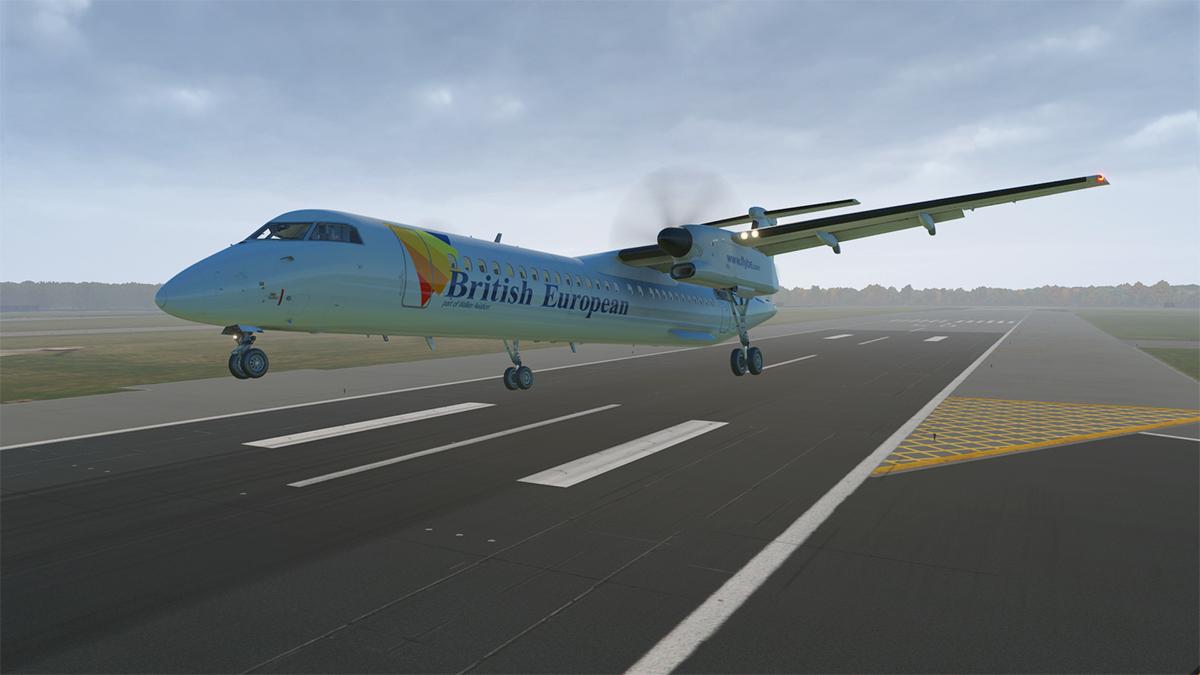
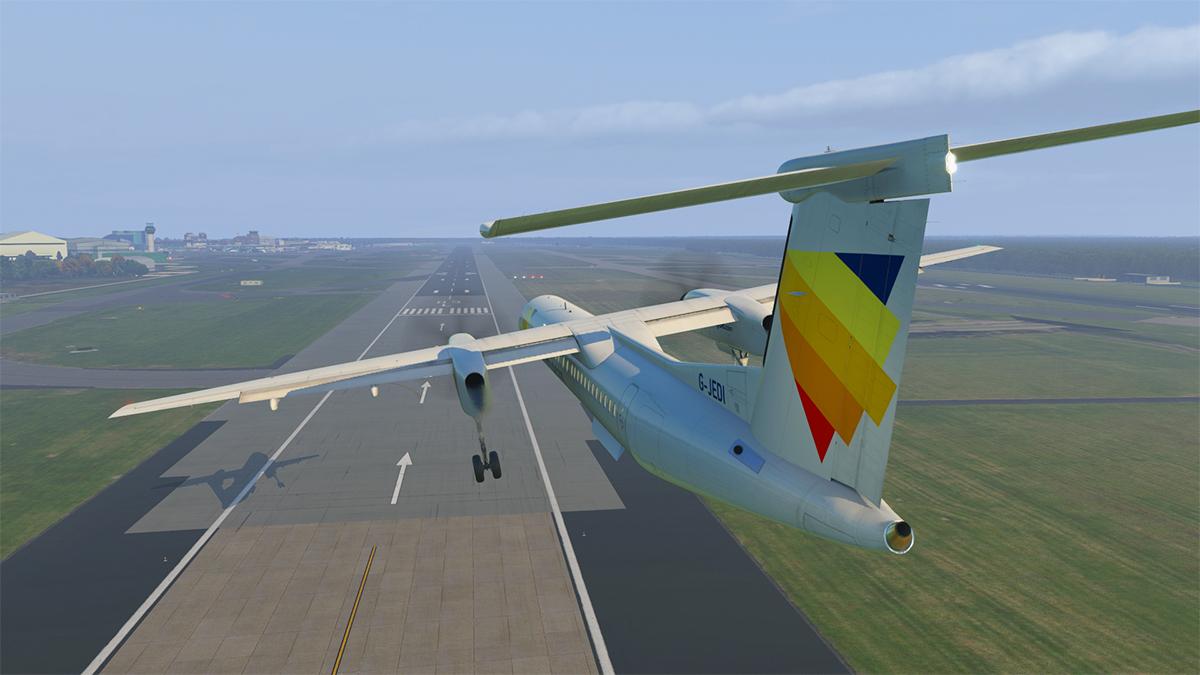
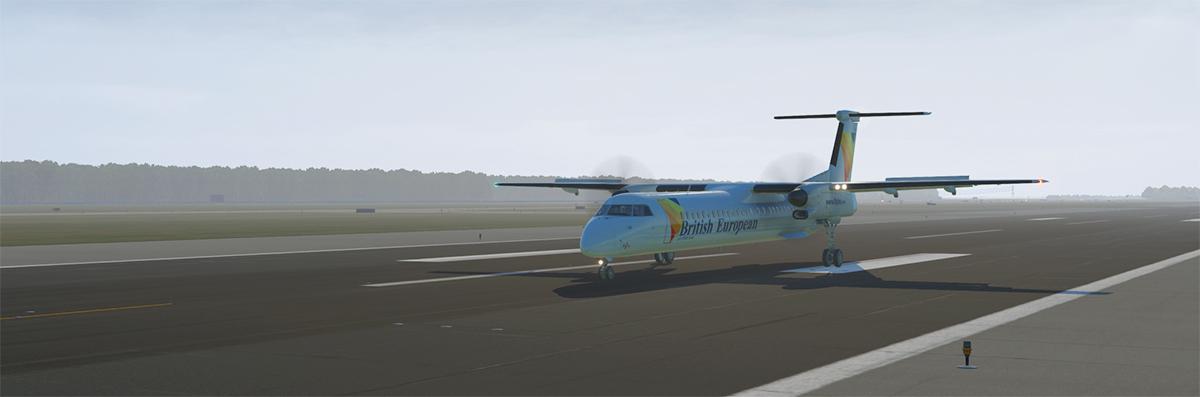

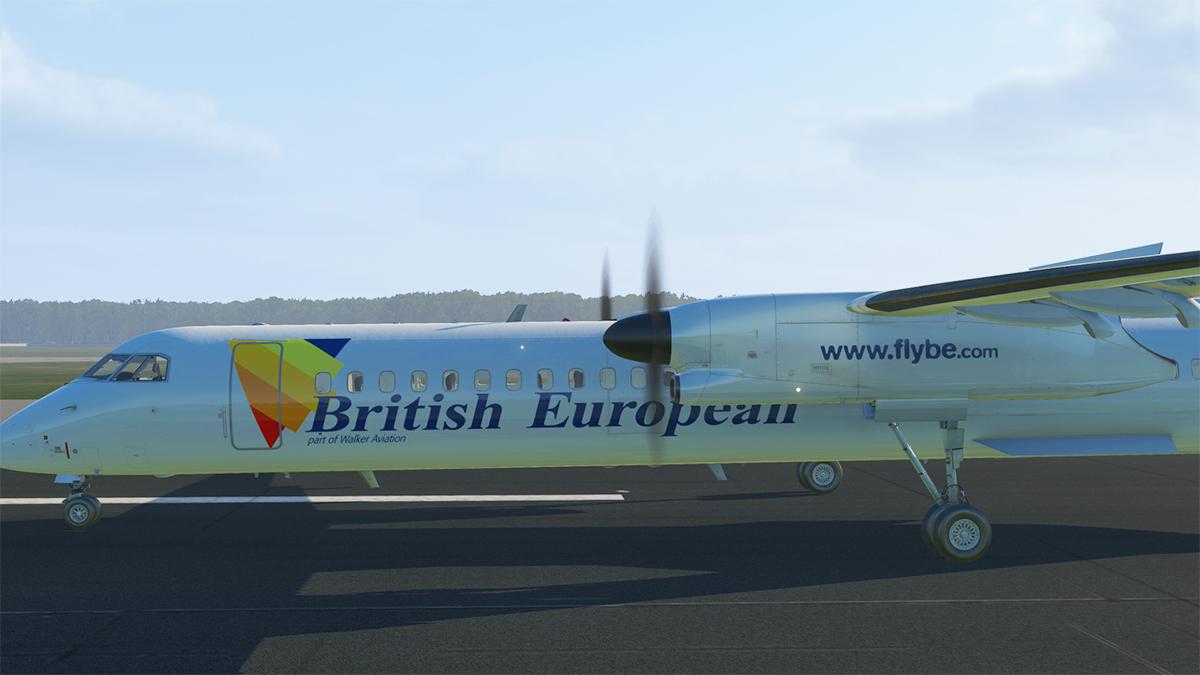

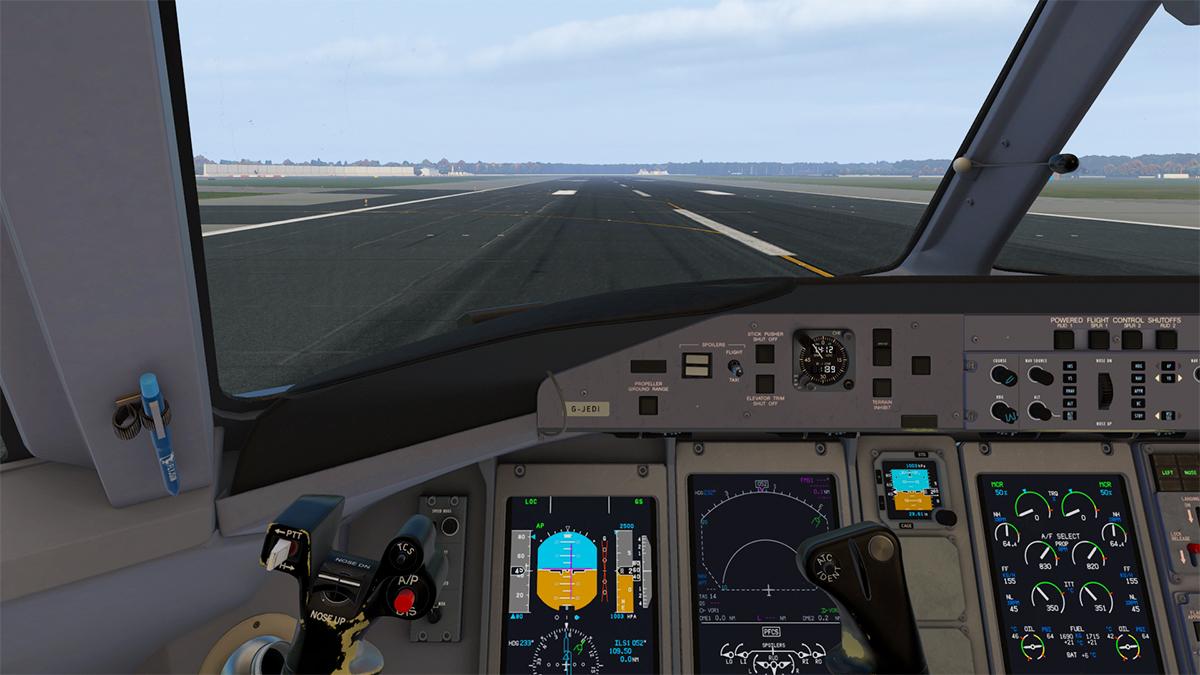

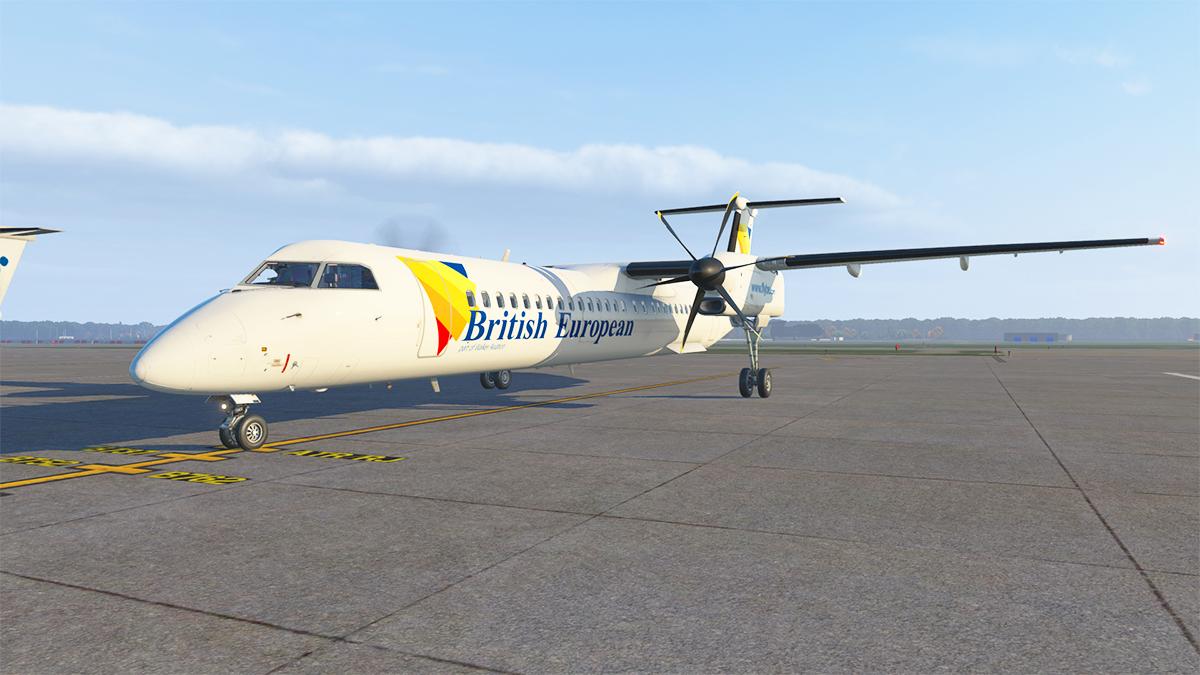

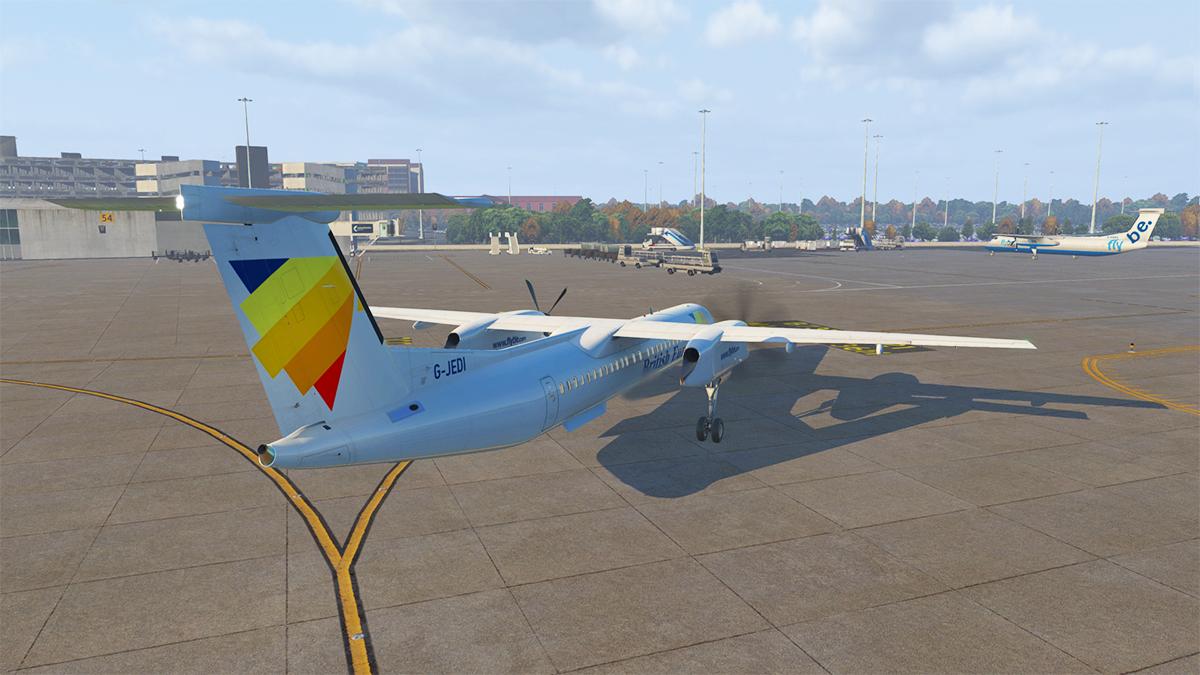
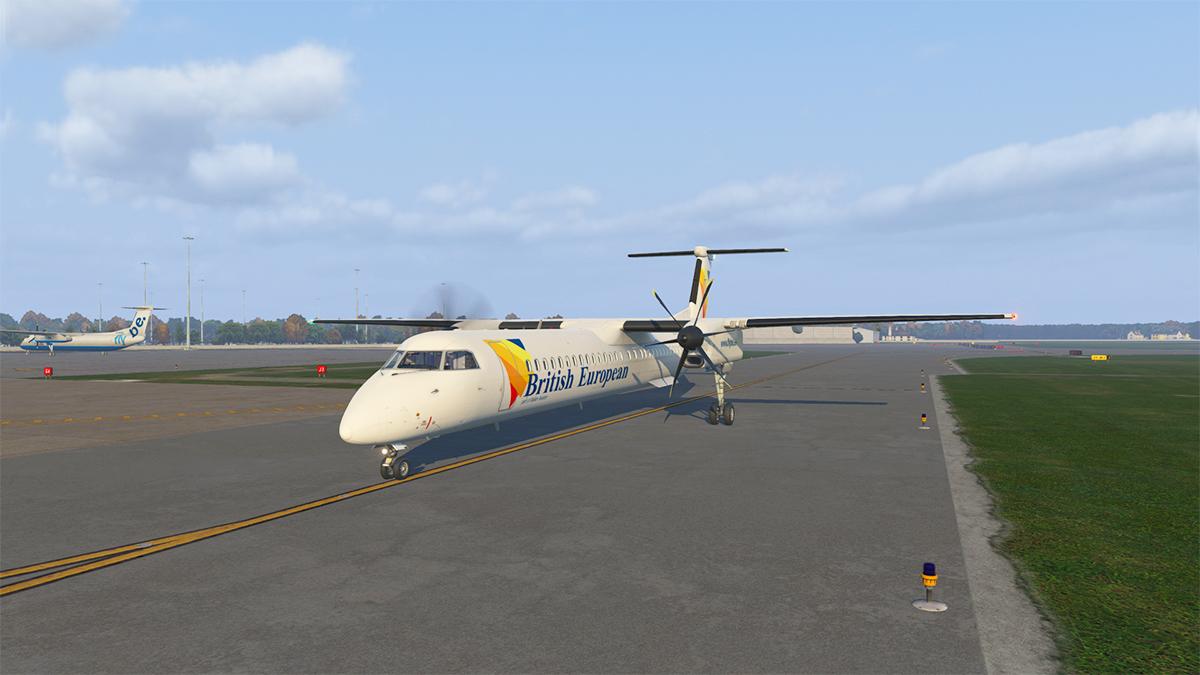
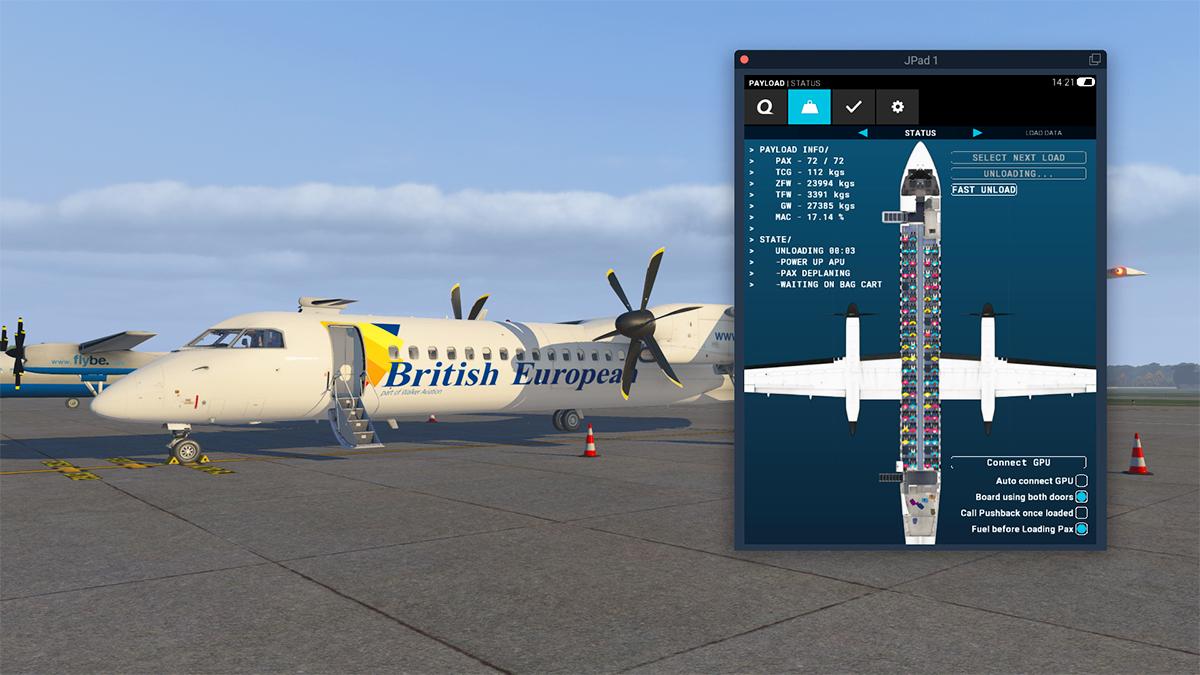
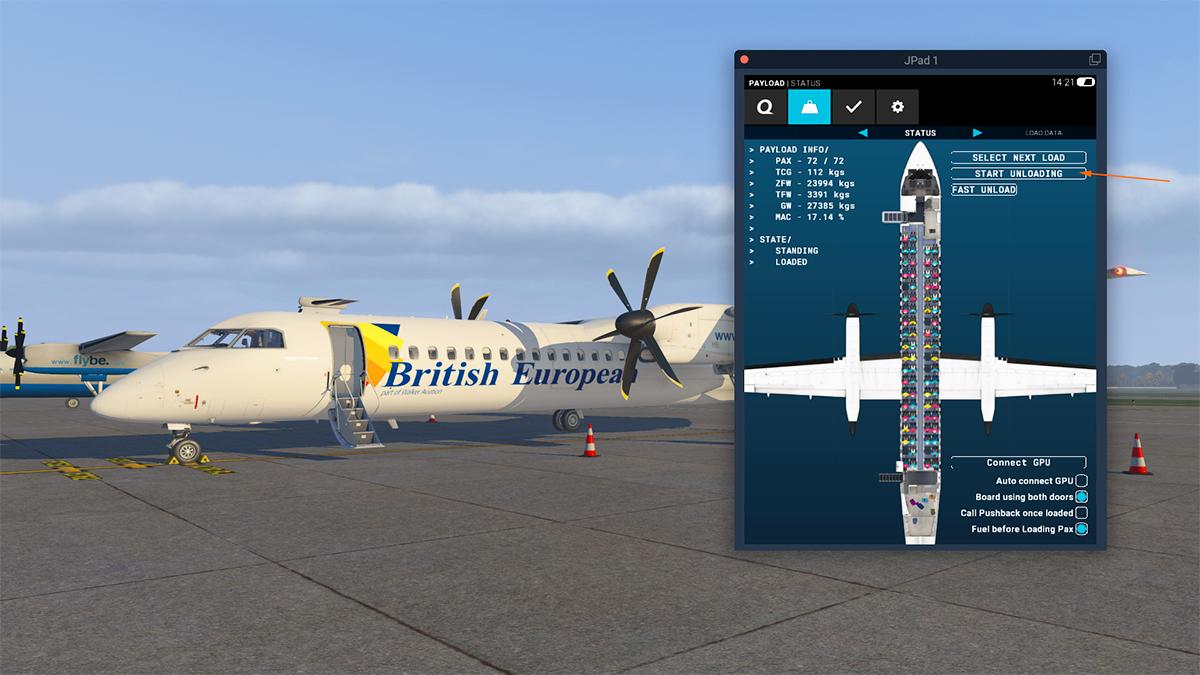
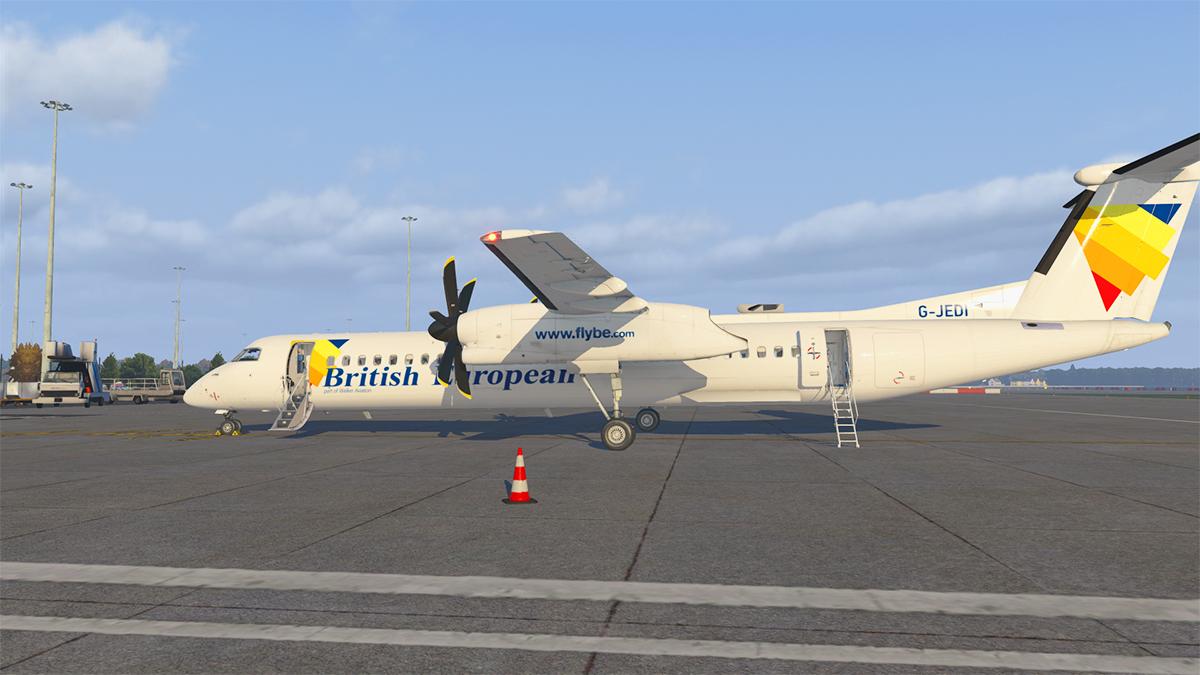
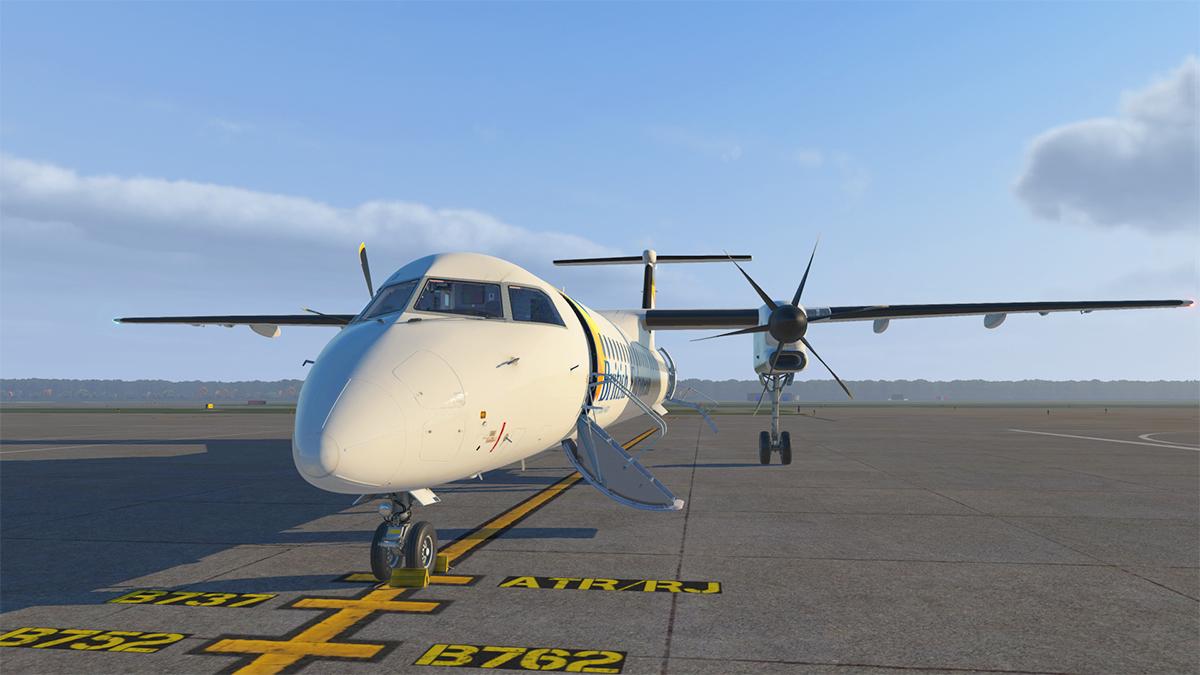
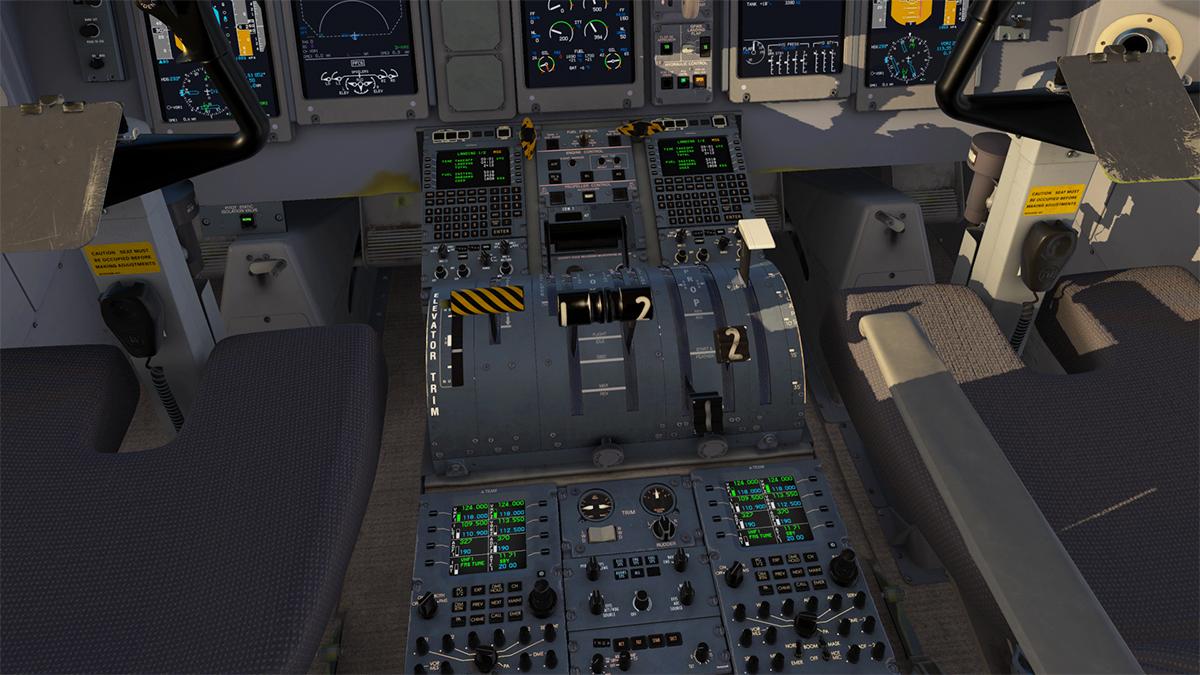
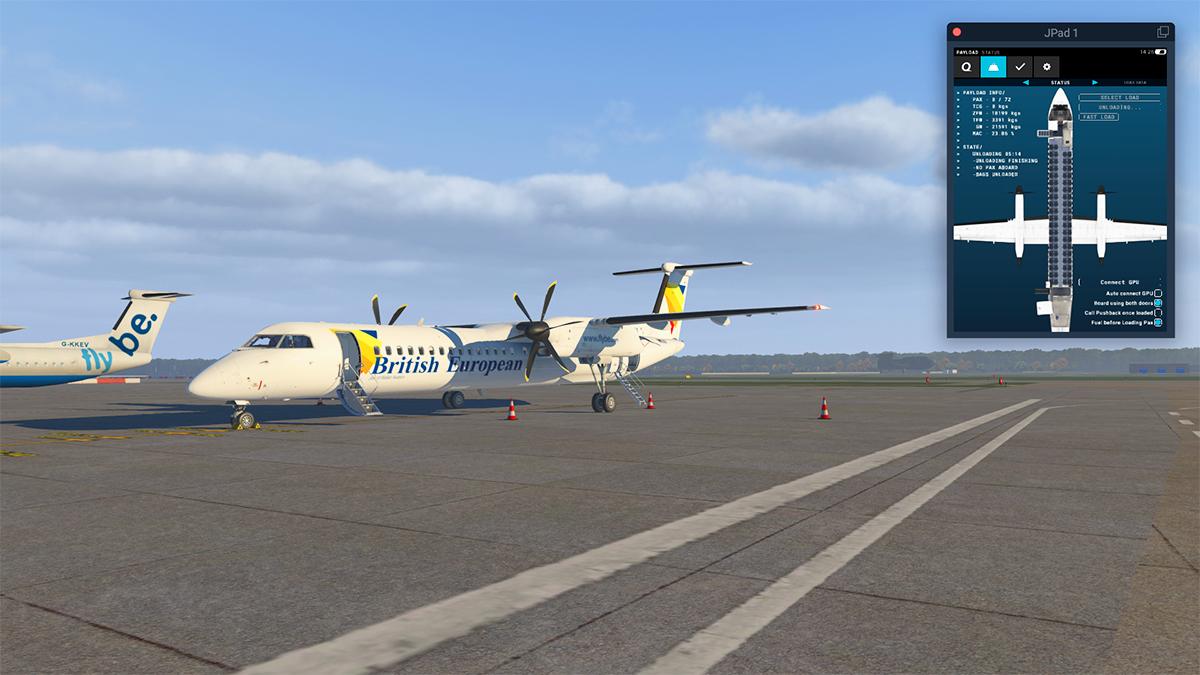
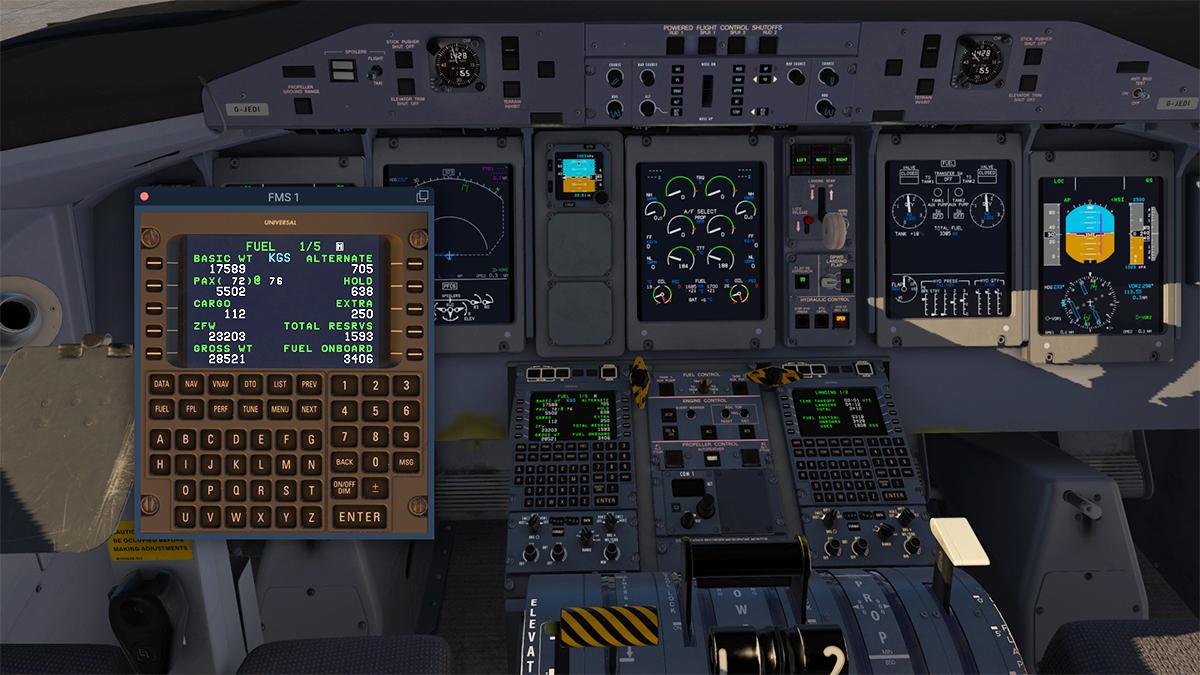
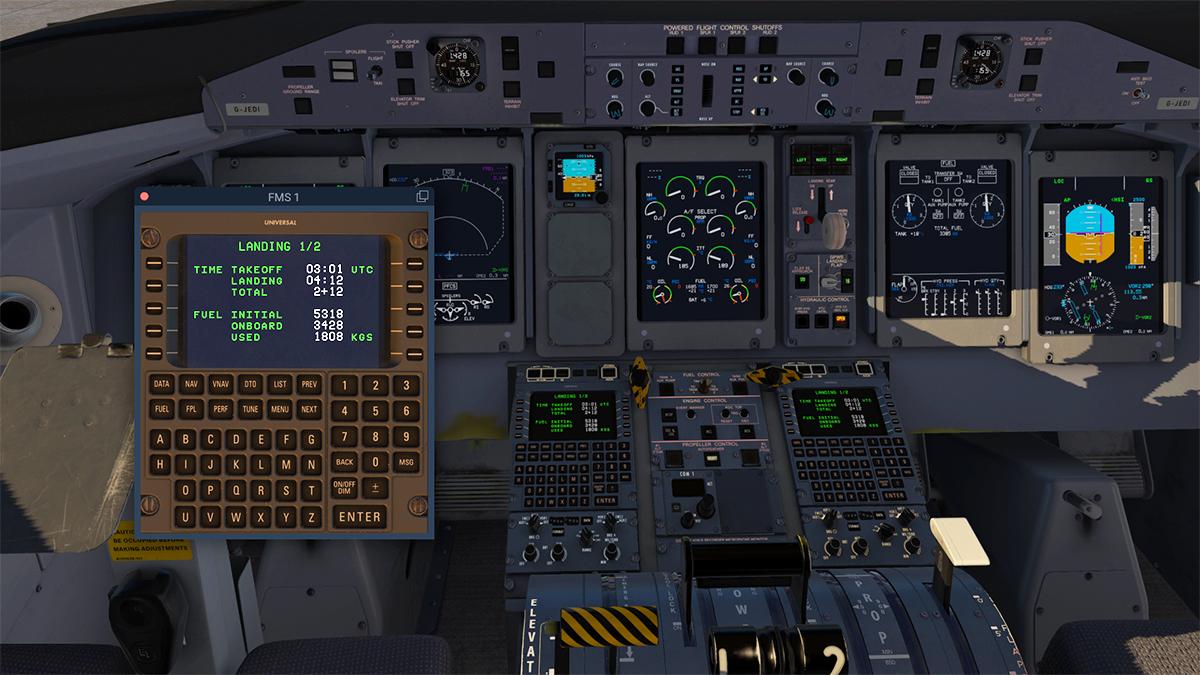

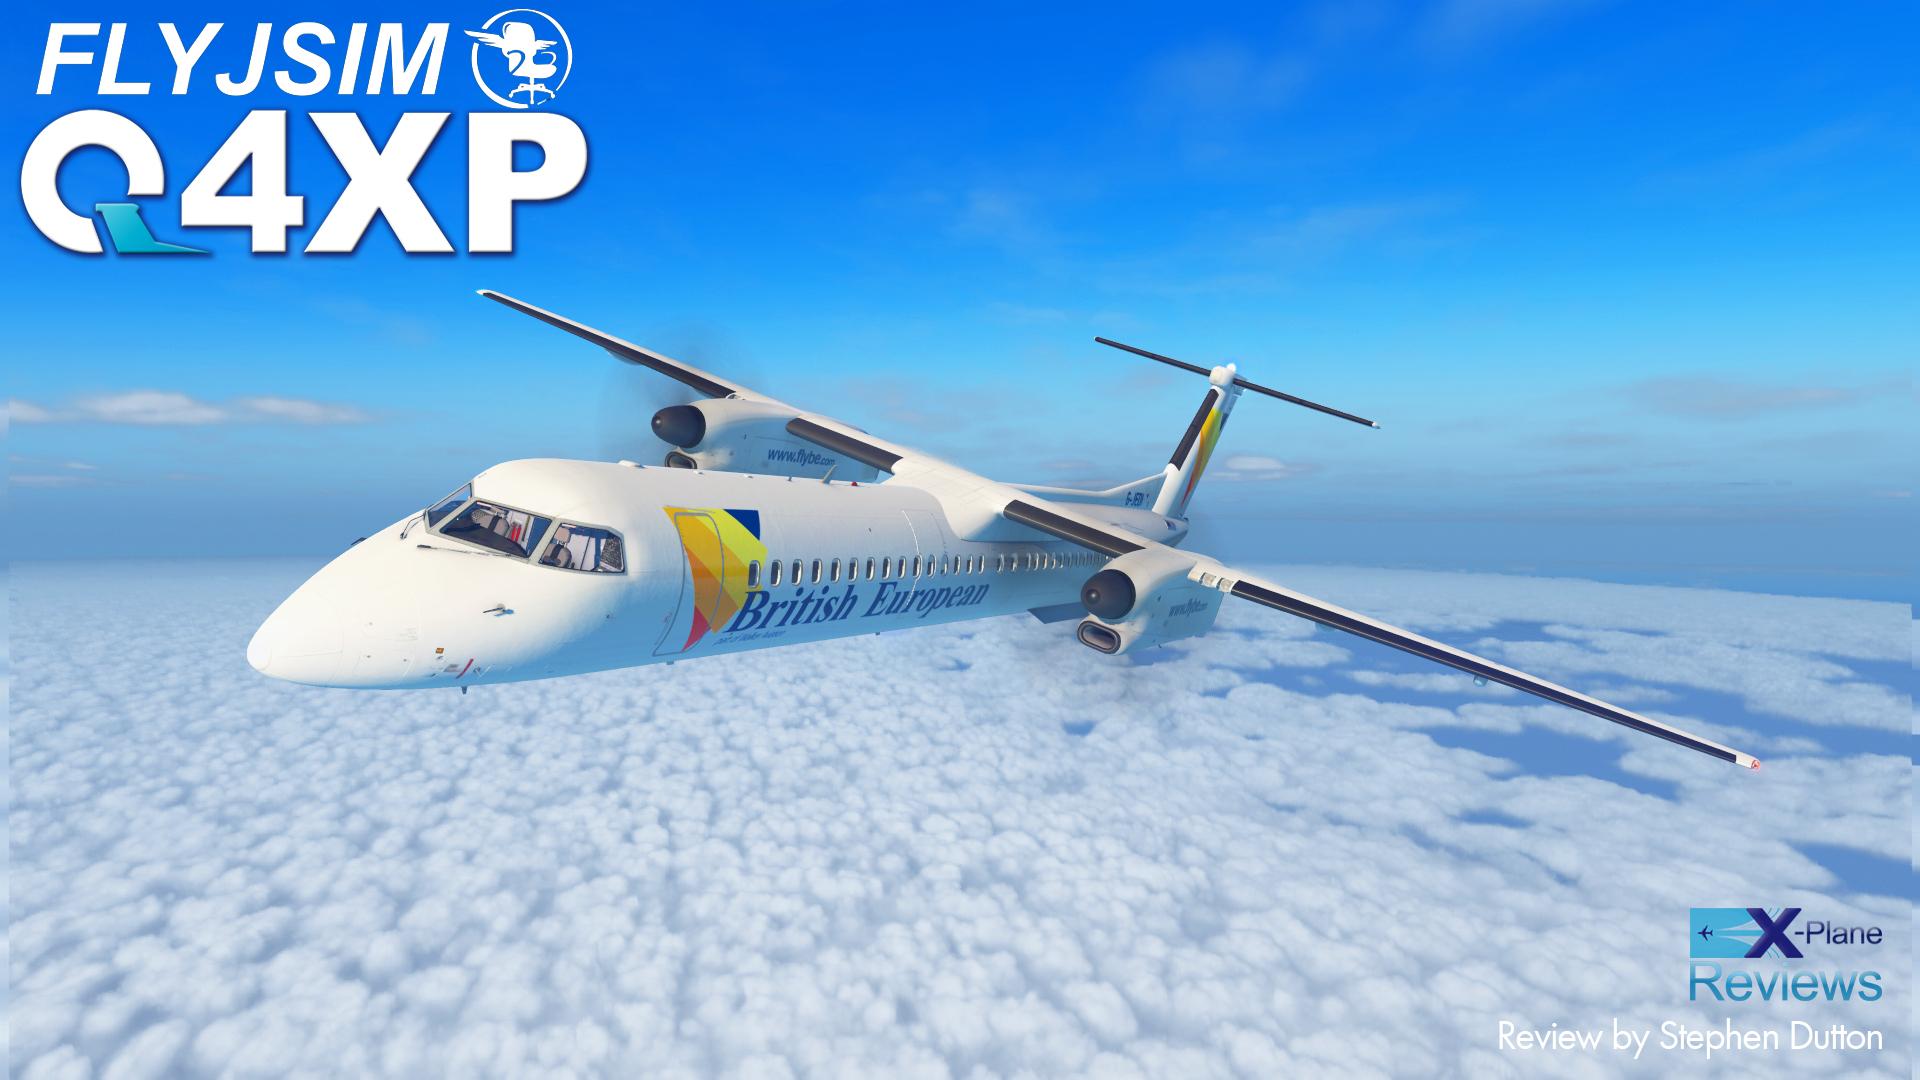
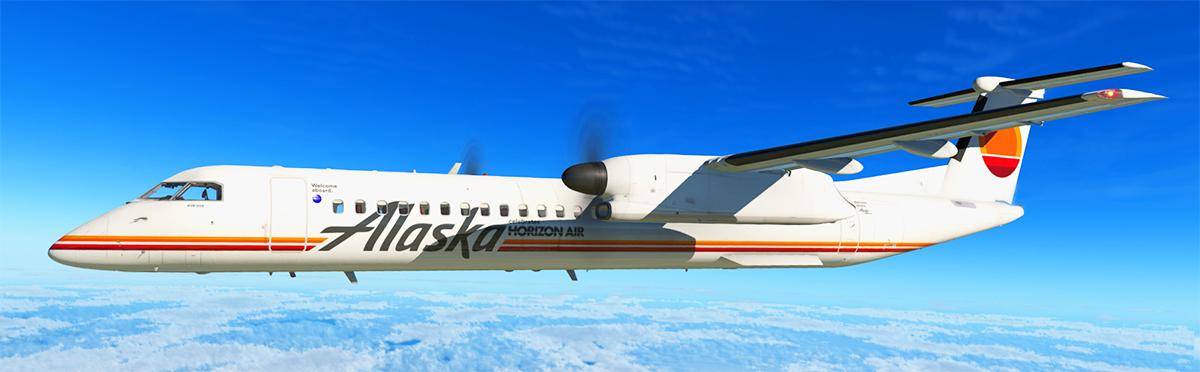
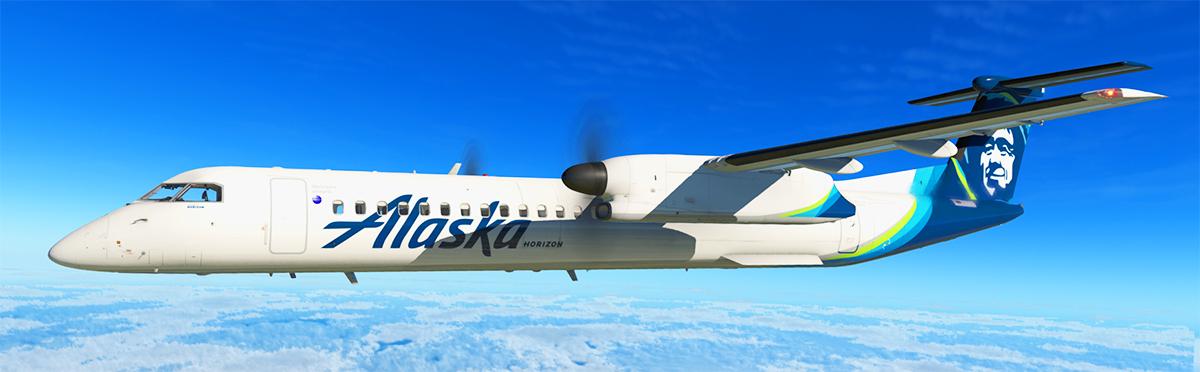
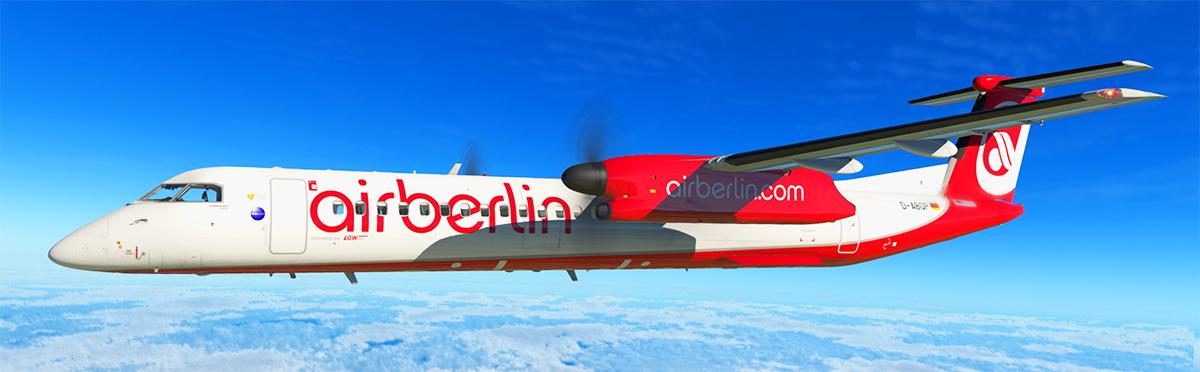

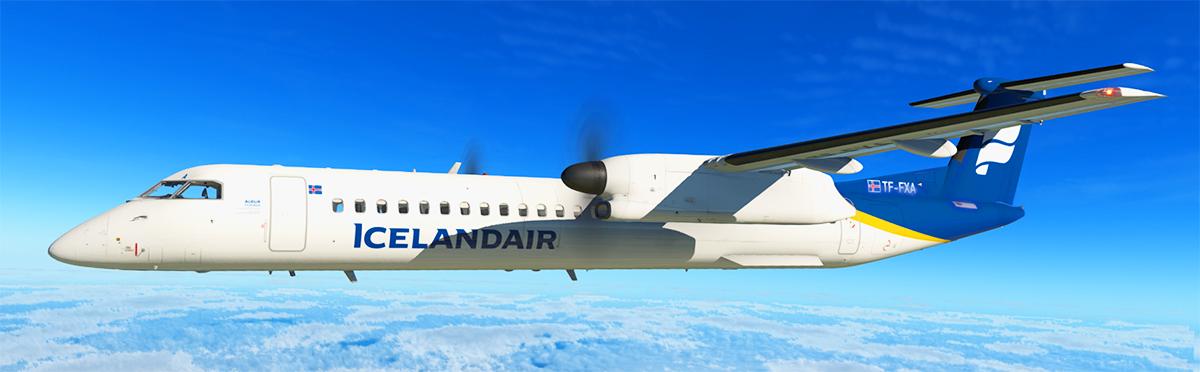
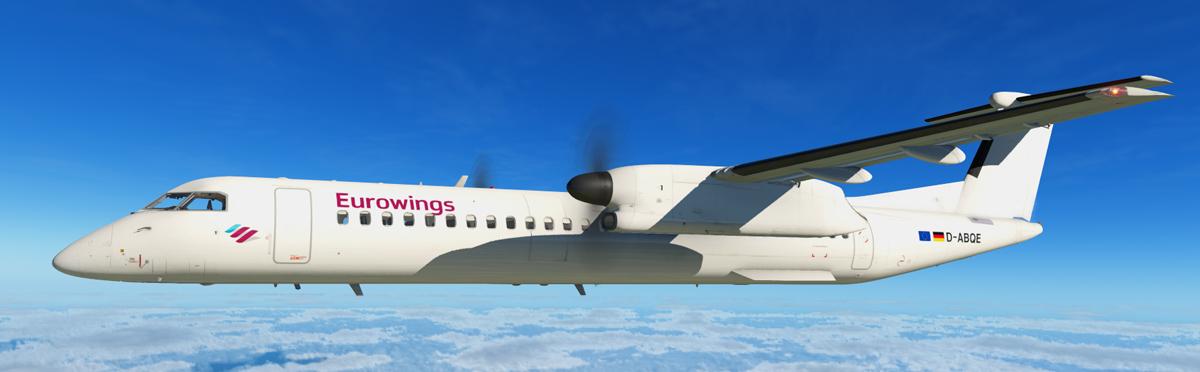
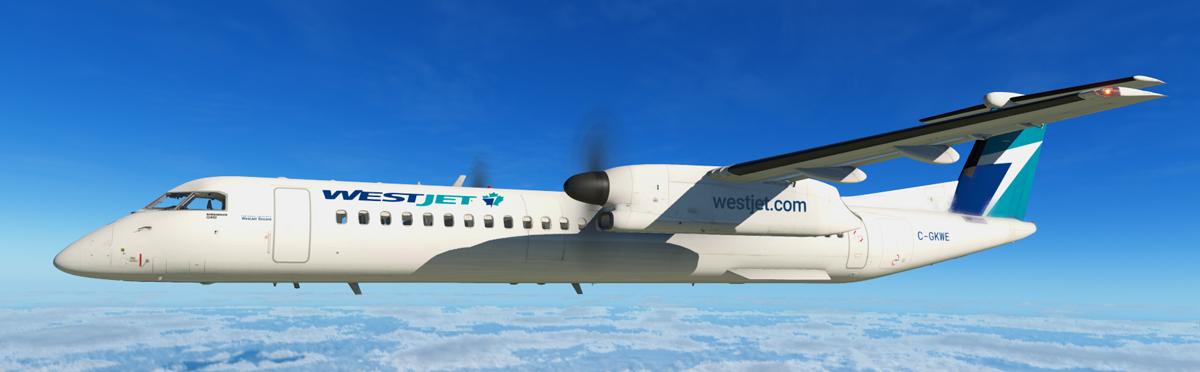
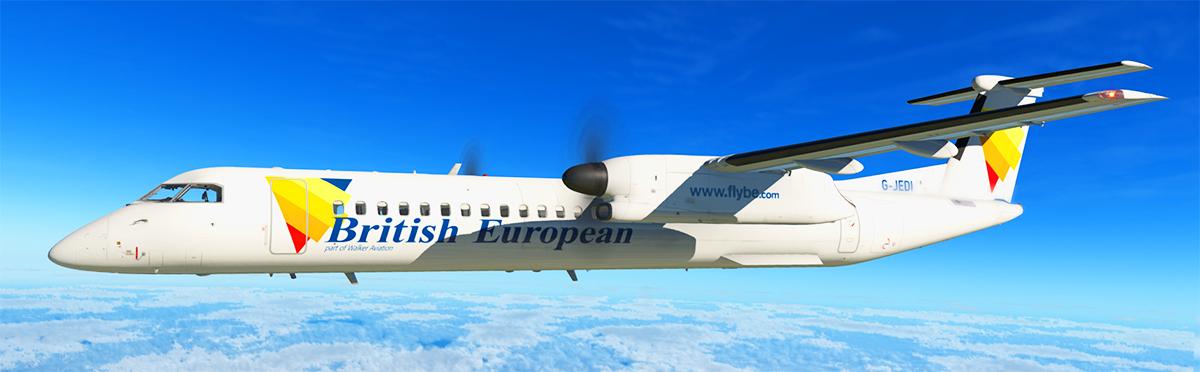
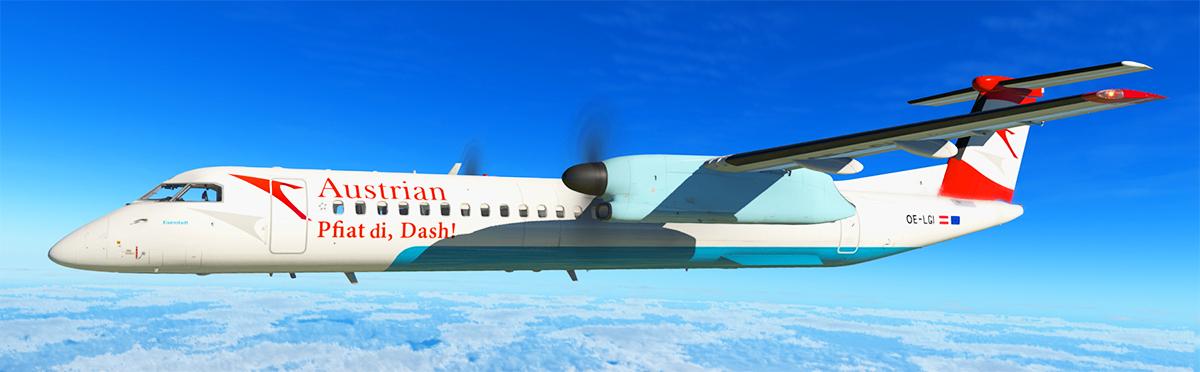


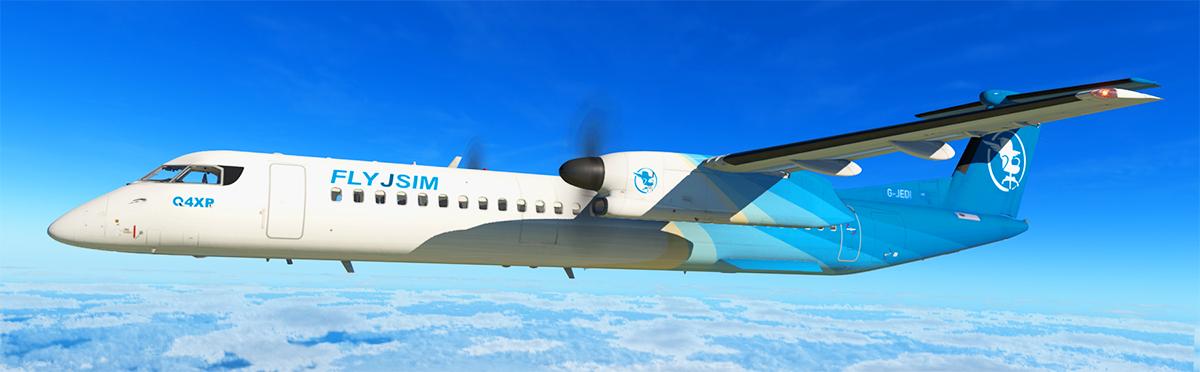
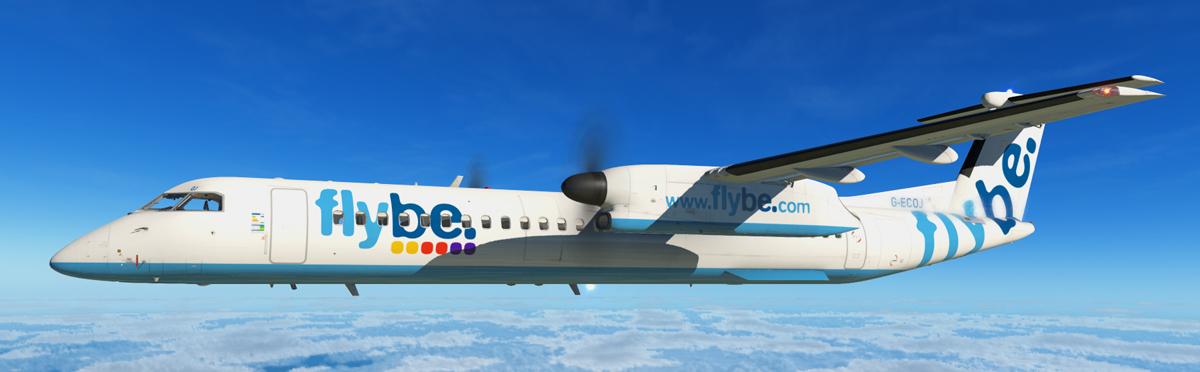


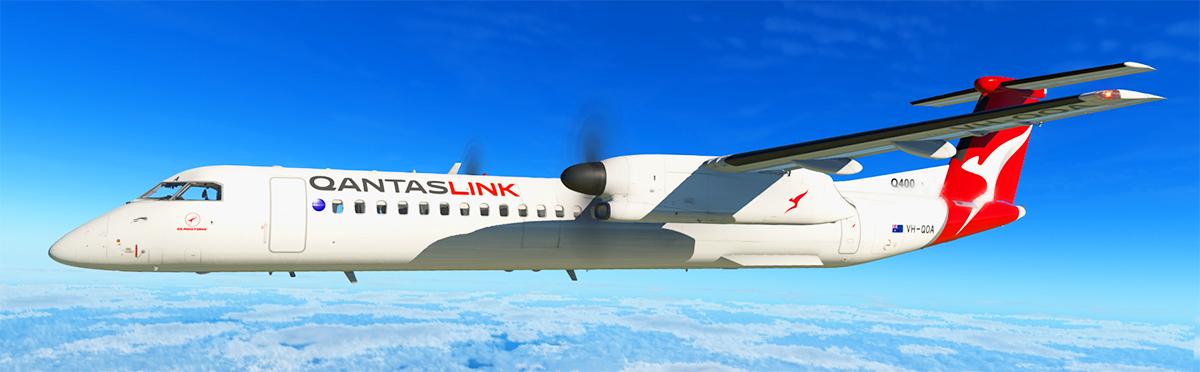

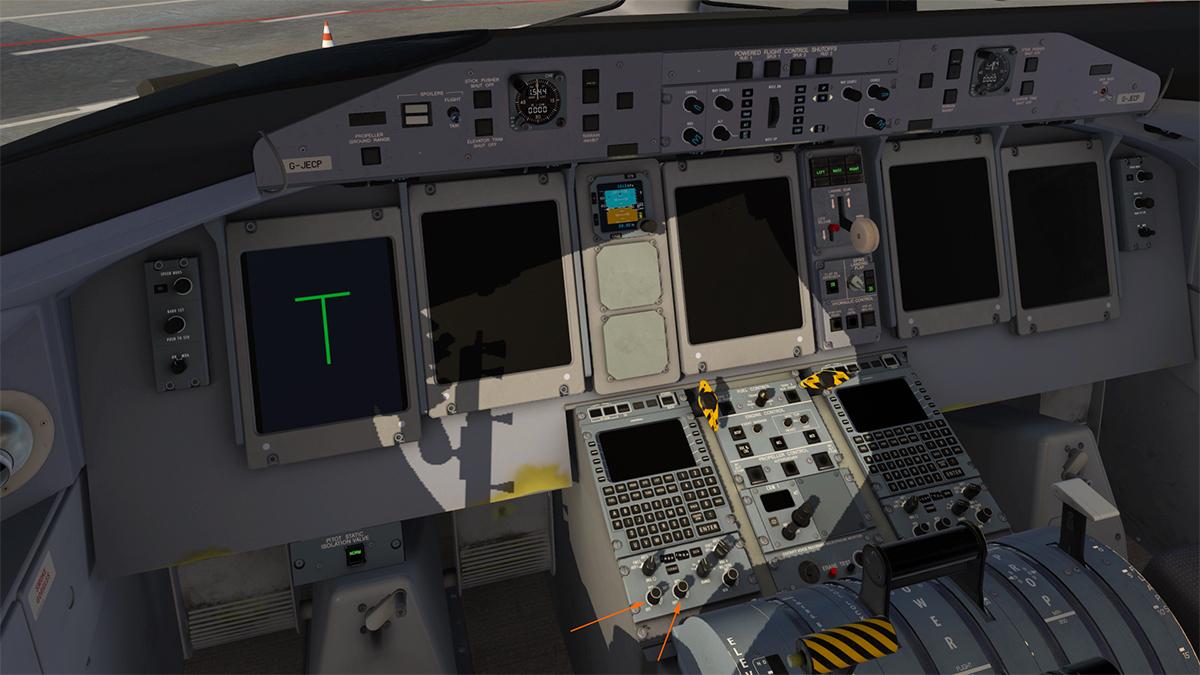
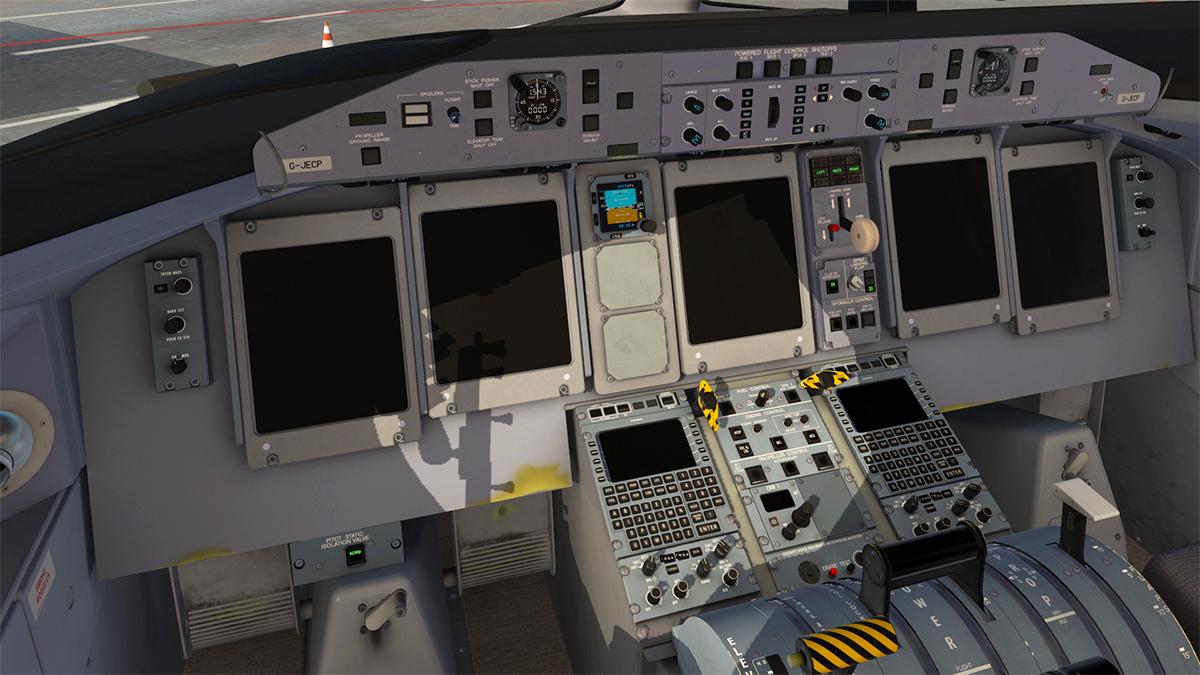
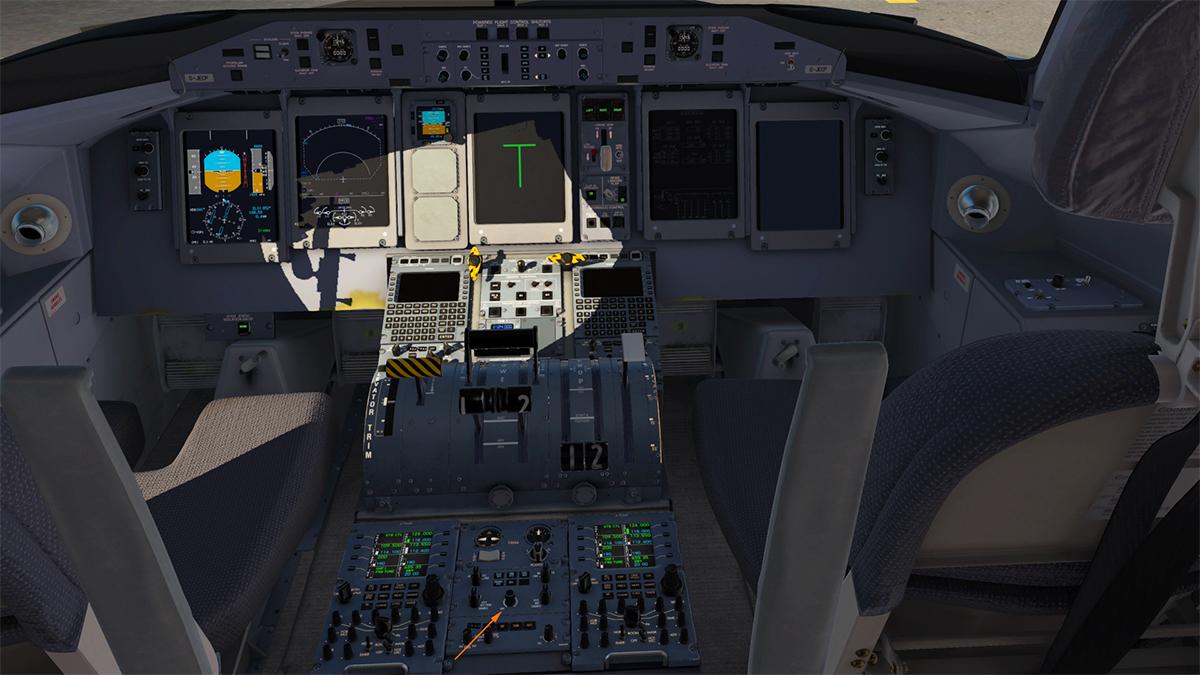
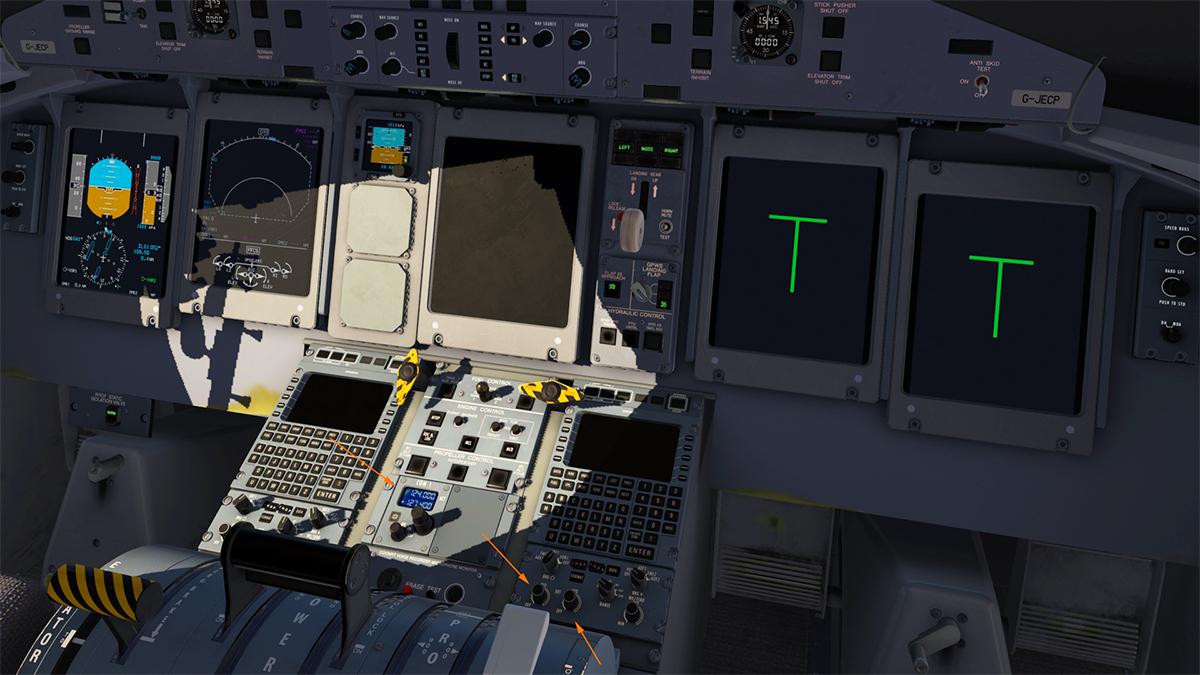
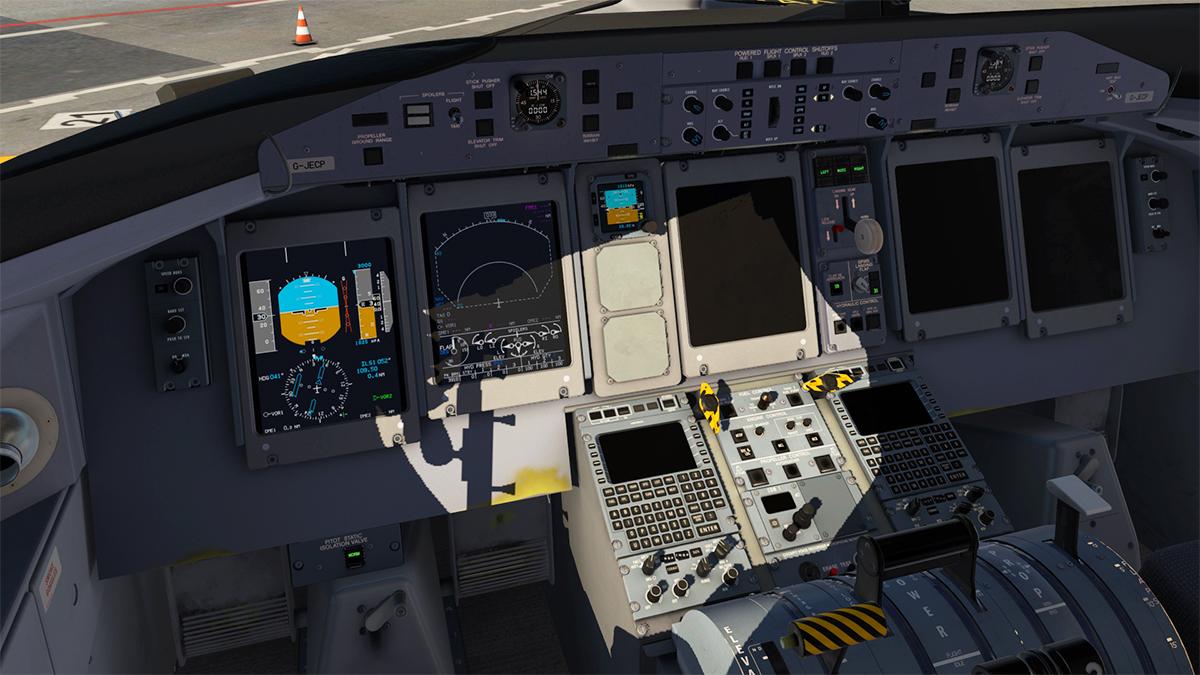
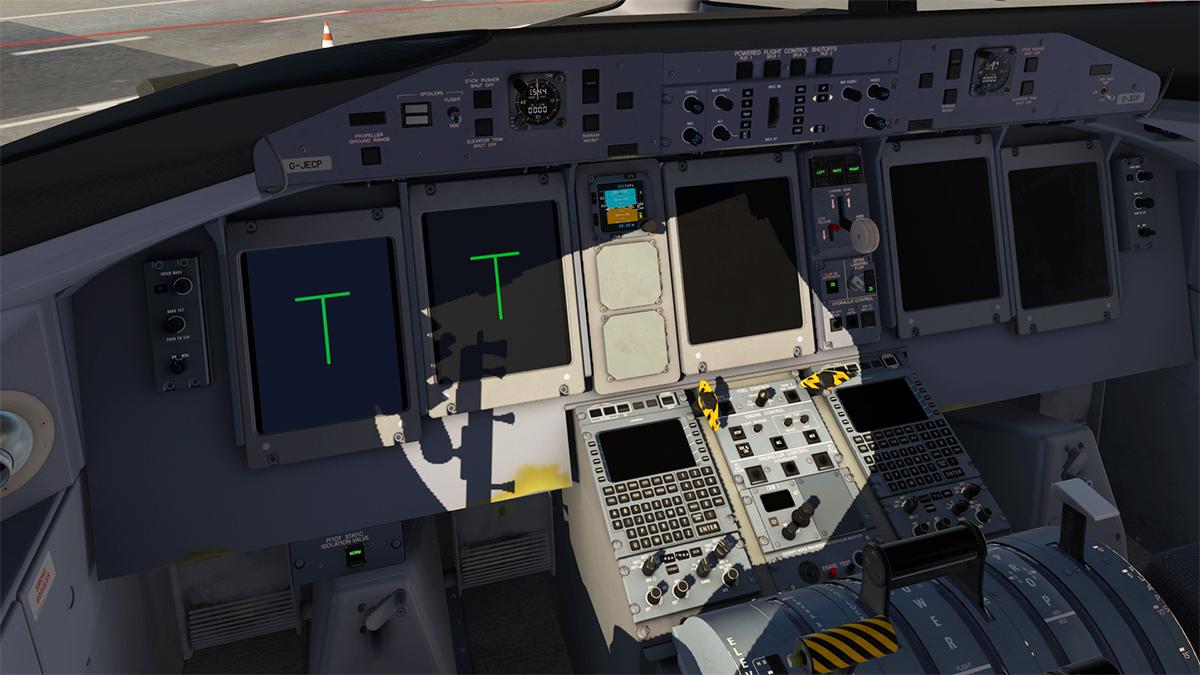
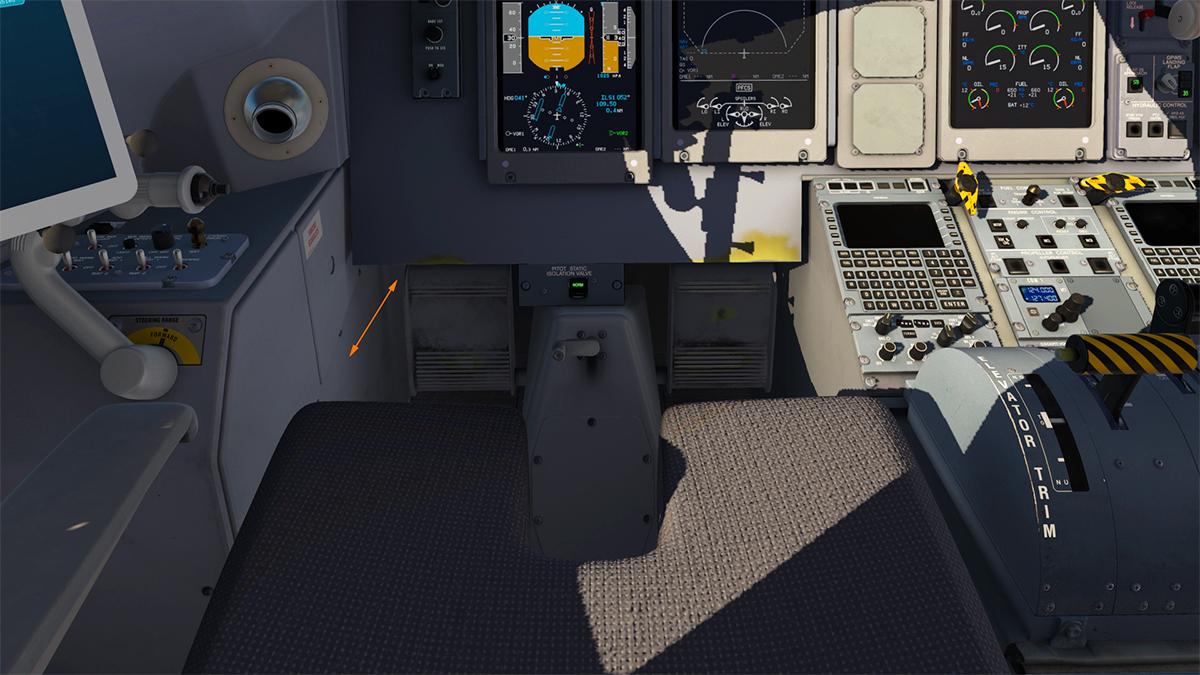
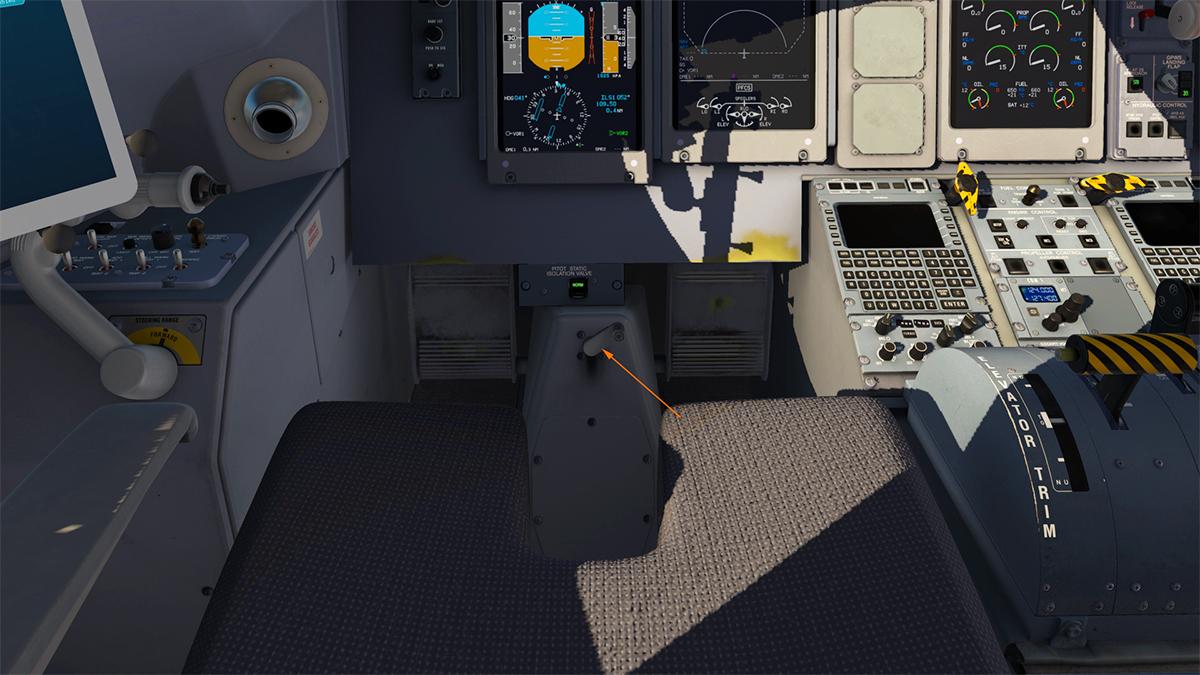
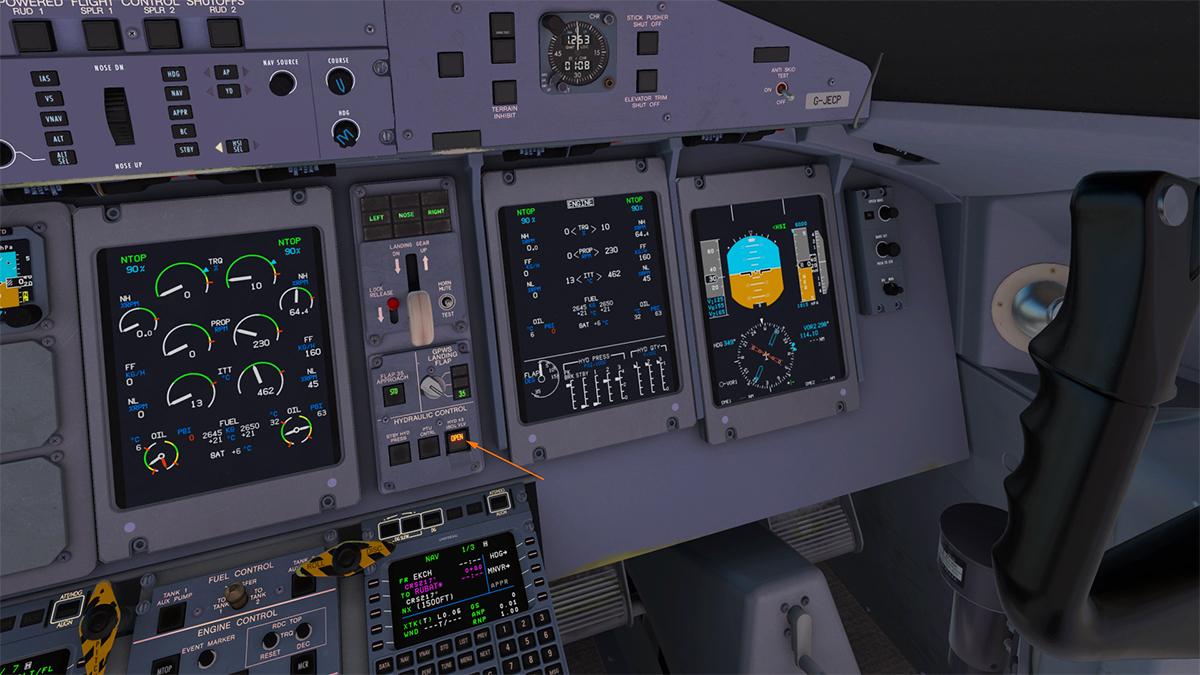
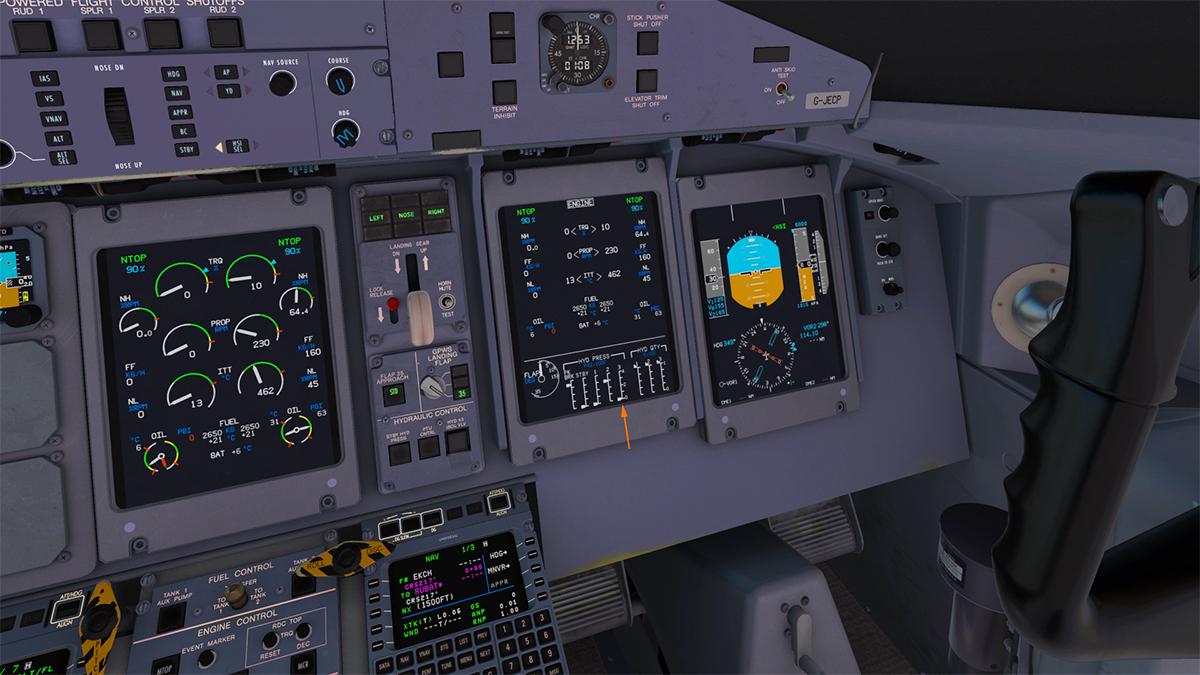
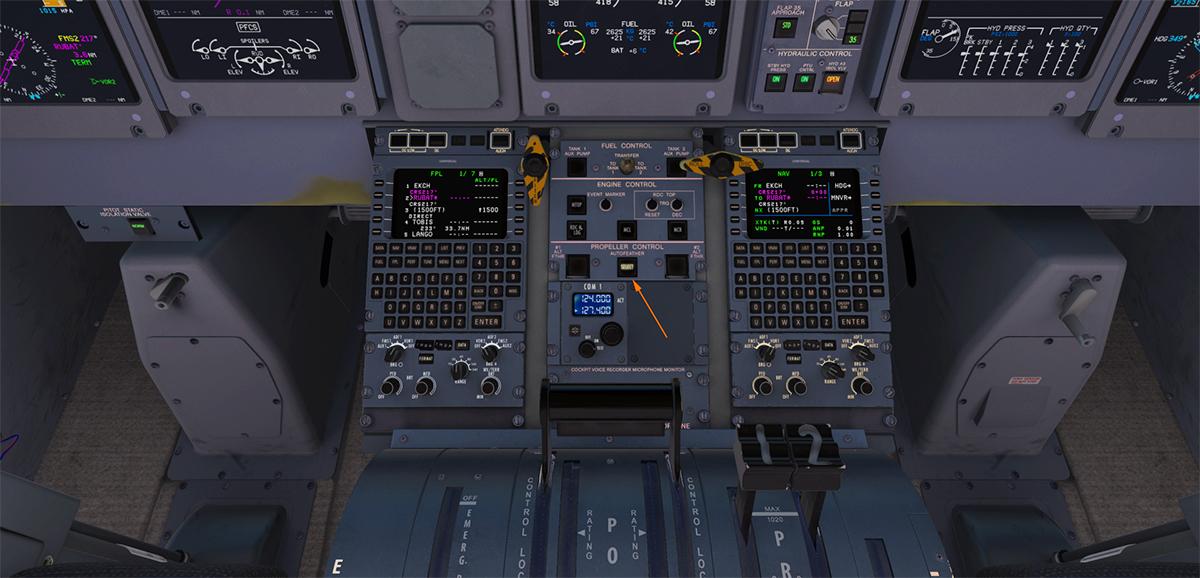
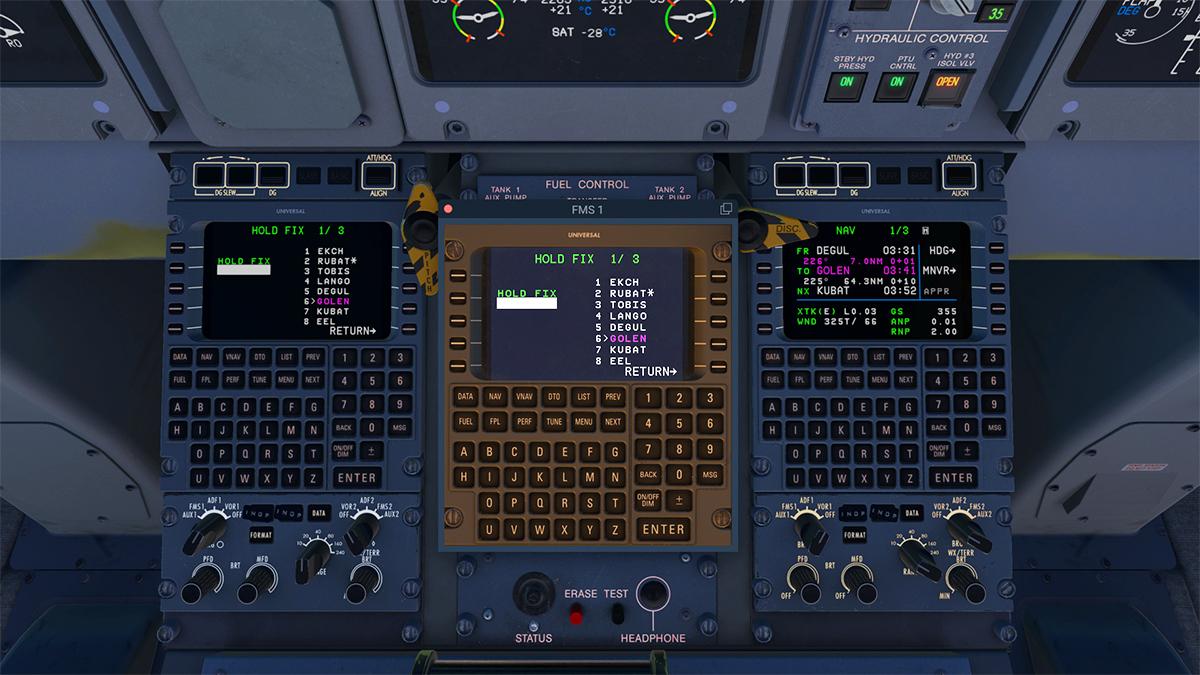
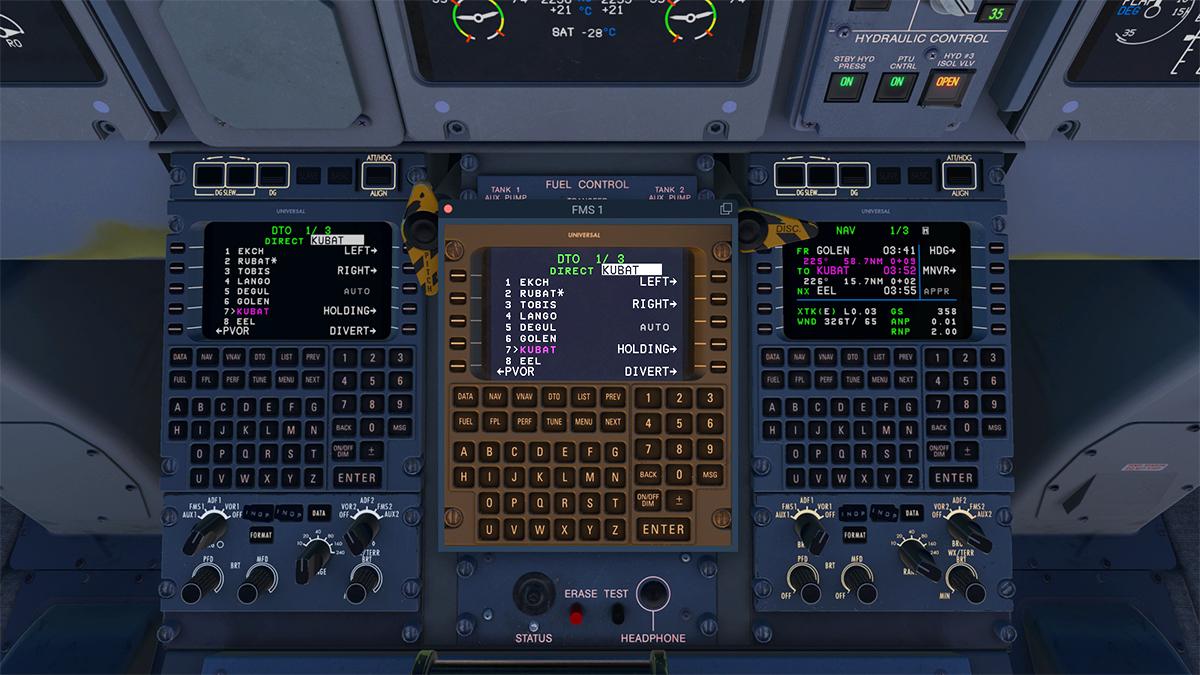

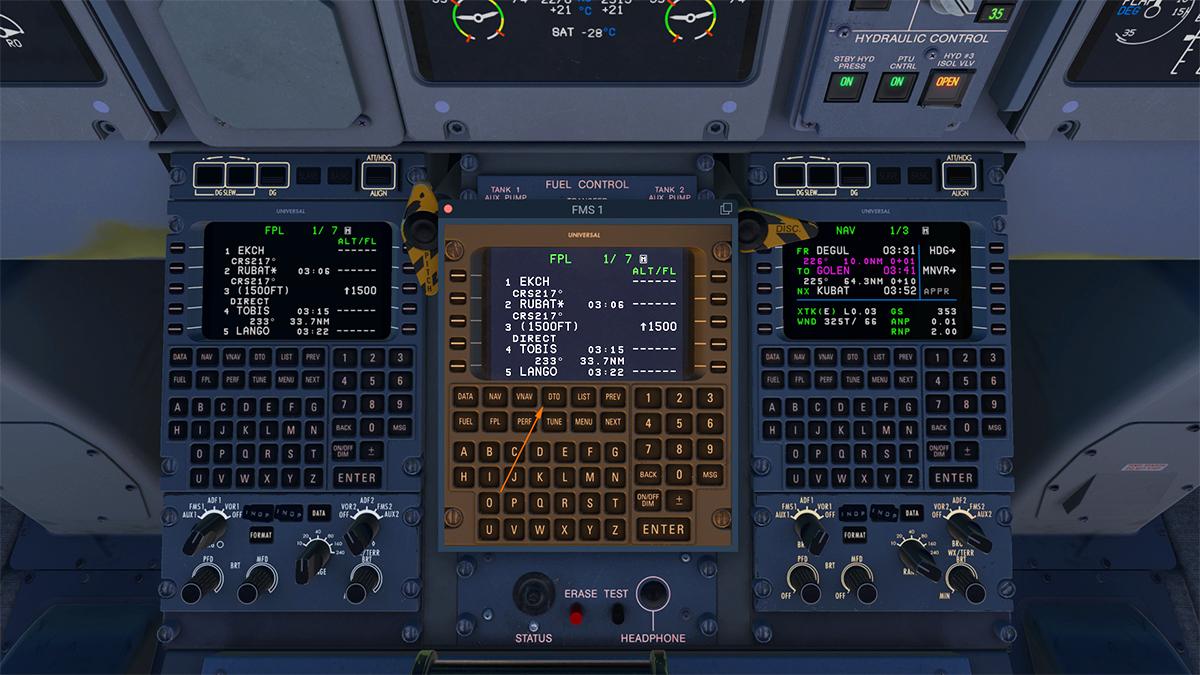

.jpg.e6895a27da14859ca65b7b09f054248f.jpg)
.jpg.ae3ef9ada1f84b7242a8aaad374e9dd1.jpg)
.jpg.e9e15b61251c708378cf517da0a0b2b7.jpg)
.jpg.19a47e7bb0a4328df71d43a289e58cca.jpg)
.jpg.27edc2ae8d5636f5be6e1e05ca5e1962.jpg)
.jpg.641b89efae19f5f30215da0468f50b3d.jpg)
.jpg.64775717a9a3c83e9c2fc67a63b796fe.jpg)
.jpg.ecc1baa341a1cd865ff6dceb403f9427.jpg)
.jpg.b2a938dff813400f1ffc9afc04f513cb.jpg)
.jpg.135e64d7e8d794a732011af62b0271e8.jpg)
.jpg.4ec6c88325f4a264deec5d283a45455c.jpg)
.jpg.20ead369b15e9aed98a31fc7fc54c538.jpg)
.jpg.f88768a40c675f29aaa76f183992f843.jpg)
.jpg.a451f3e9ae64a49341a7c7e866174b4c.jpg)
.jpg.6ee64a99b9ff46446ef1c308b316b7c3.jpg)