Stephen
-
Posts
2740 -
Joined
-
Last visited
-
Days Won
360
Content Type
Profiles
Forums
Articles
Everything posted by Stephen
-
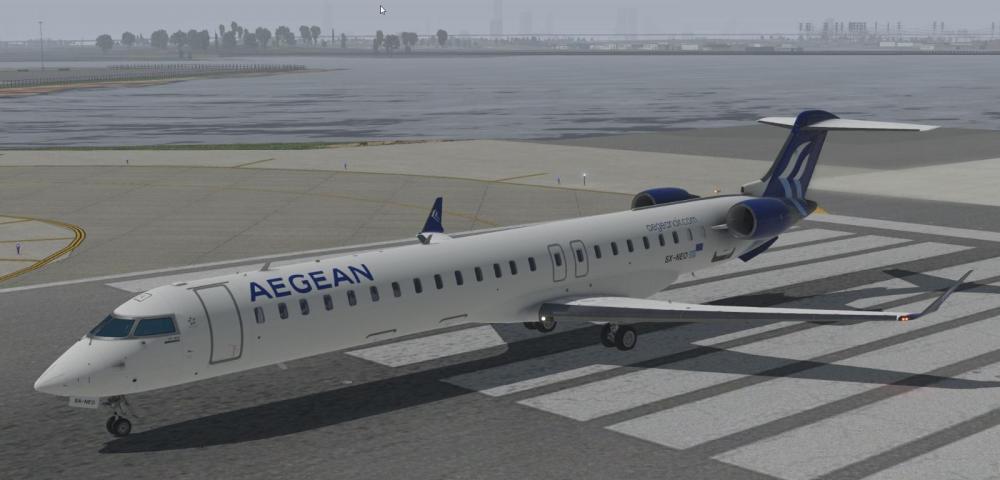
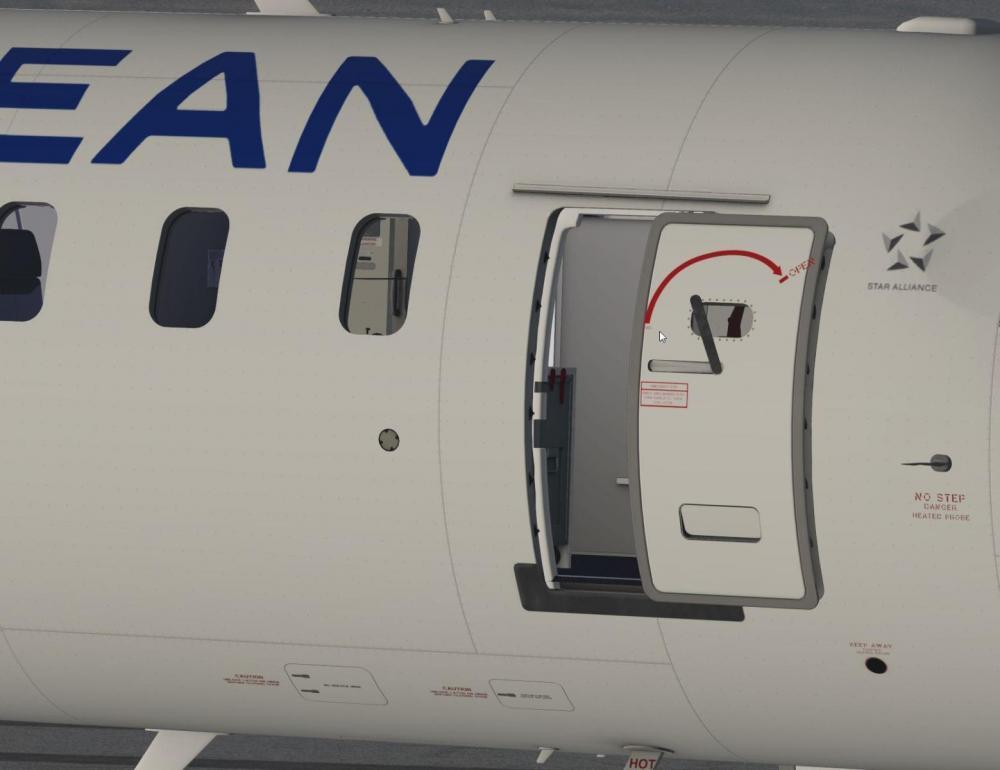
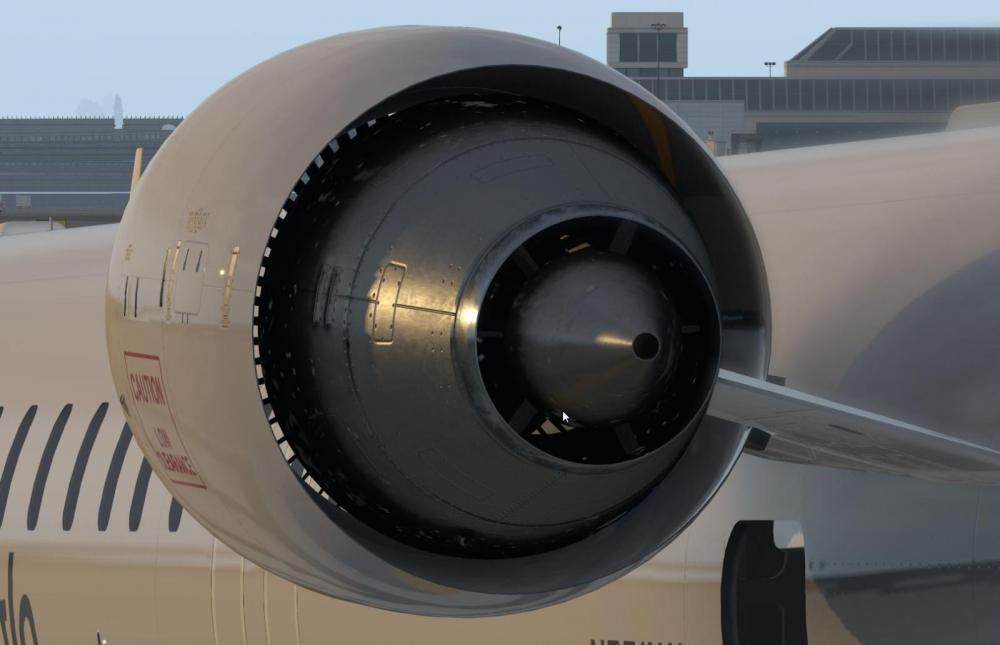
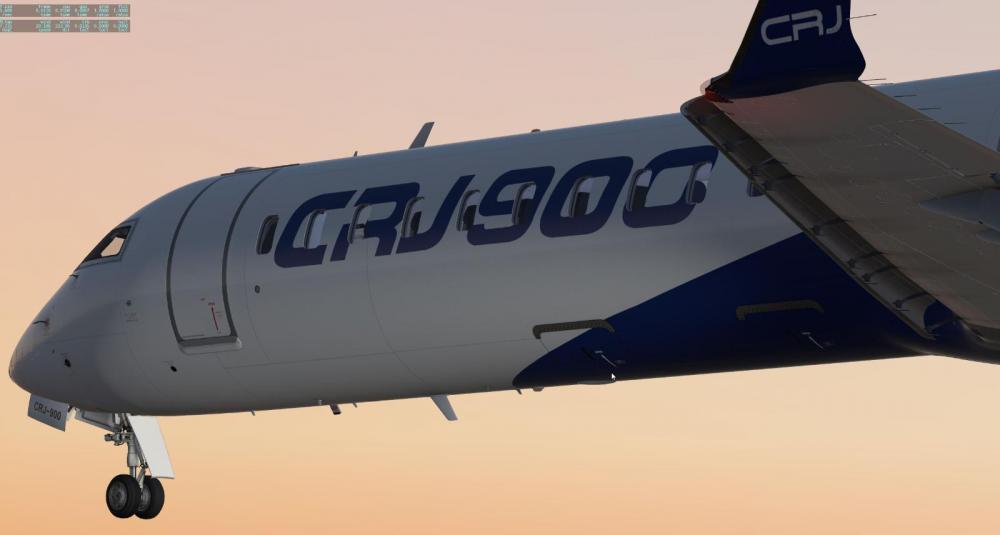
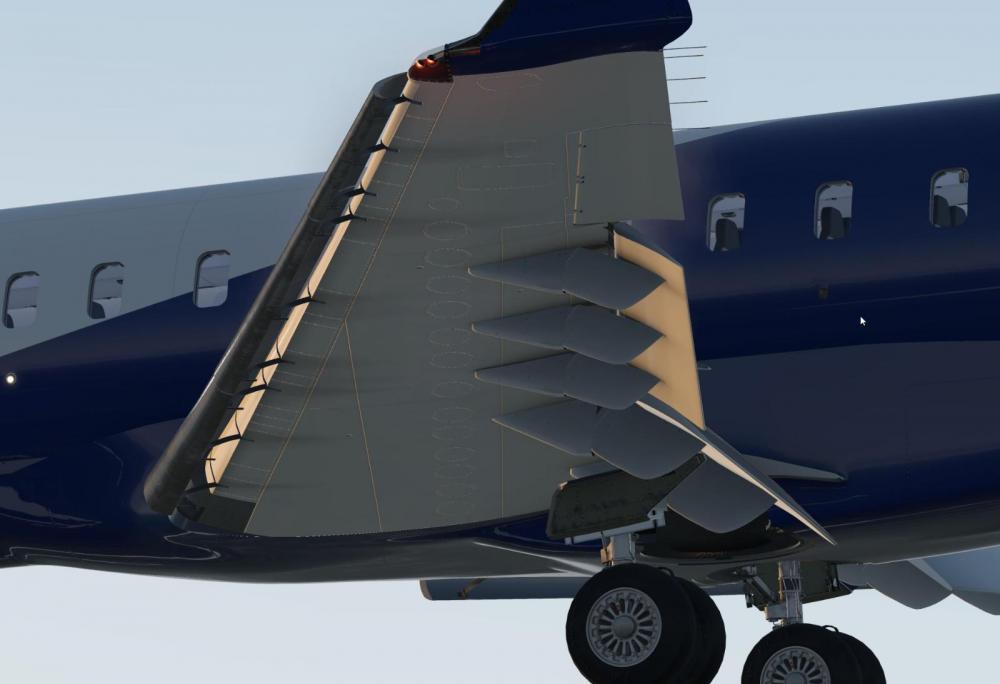
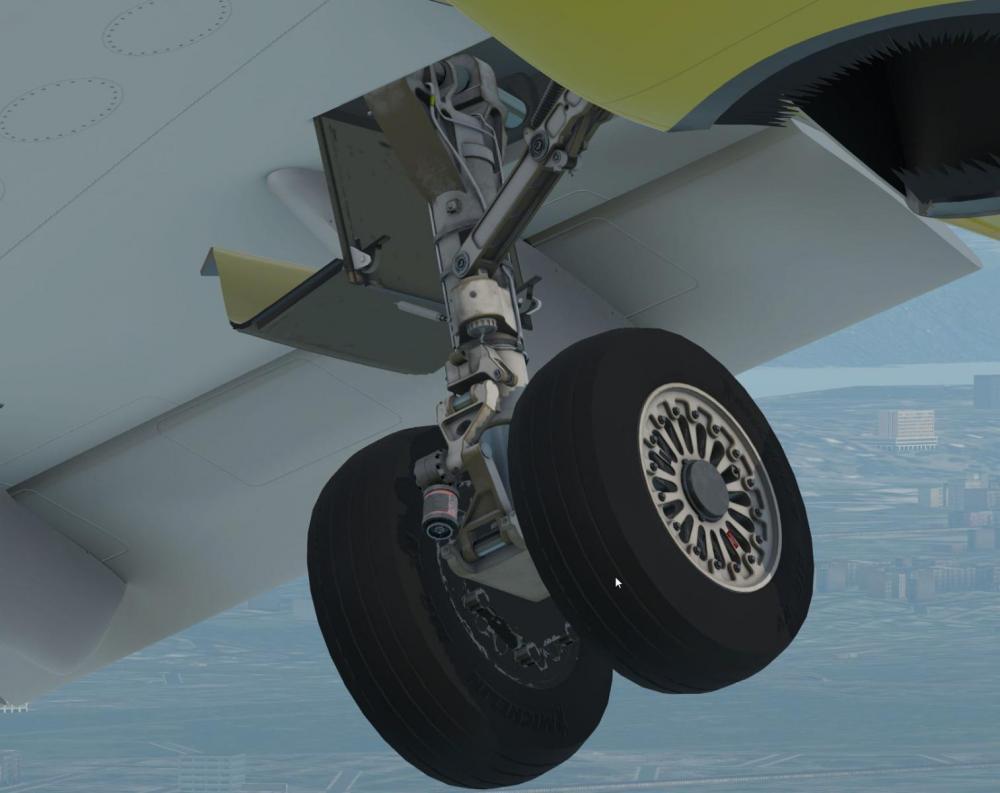
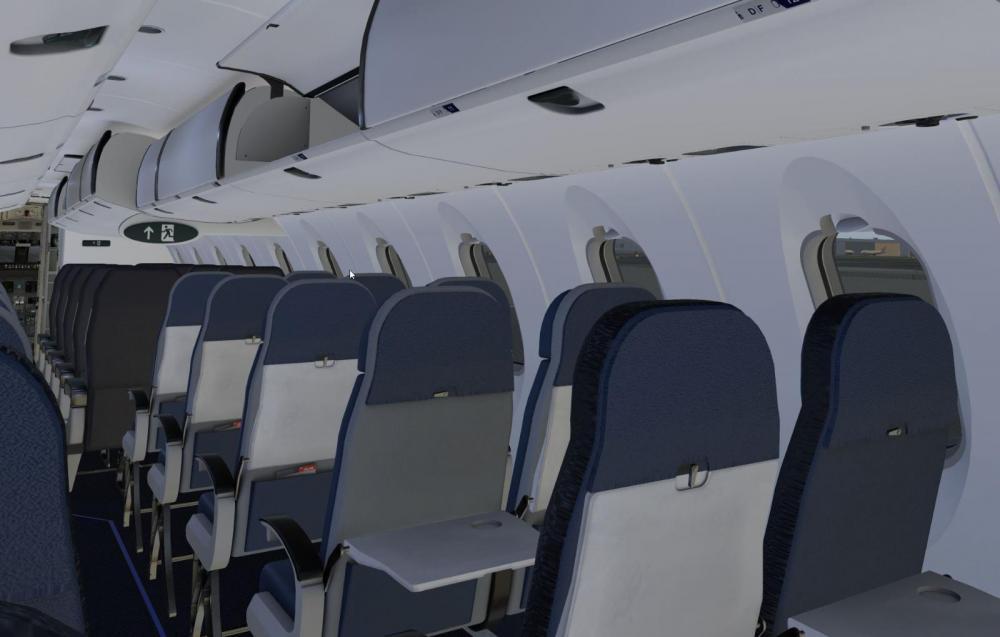
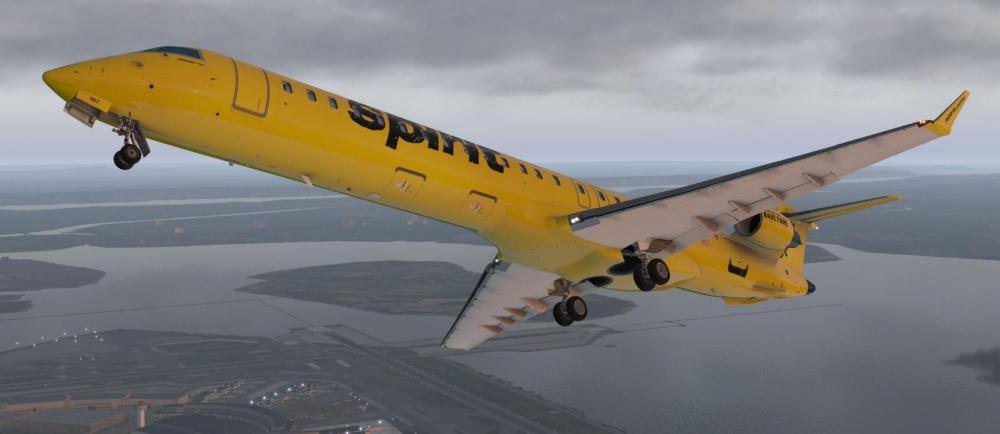
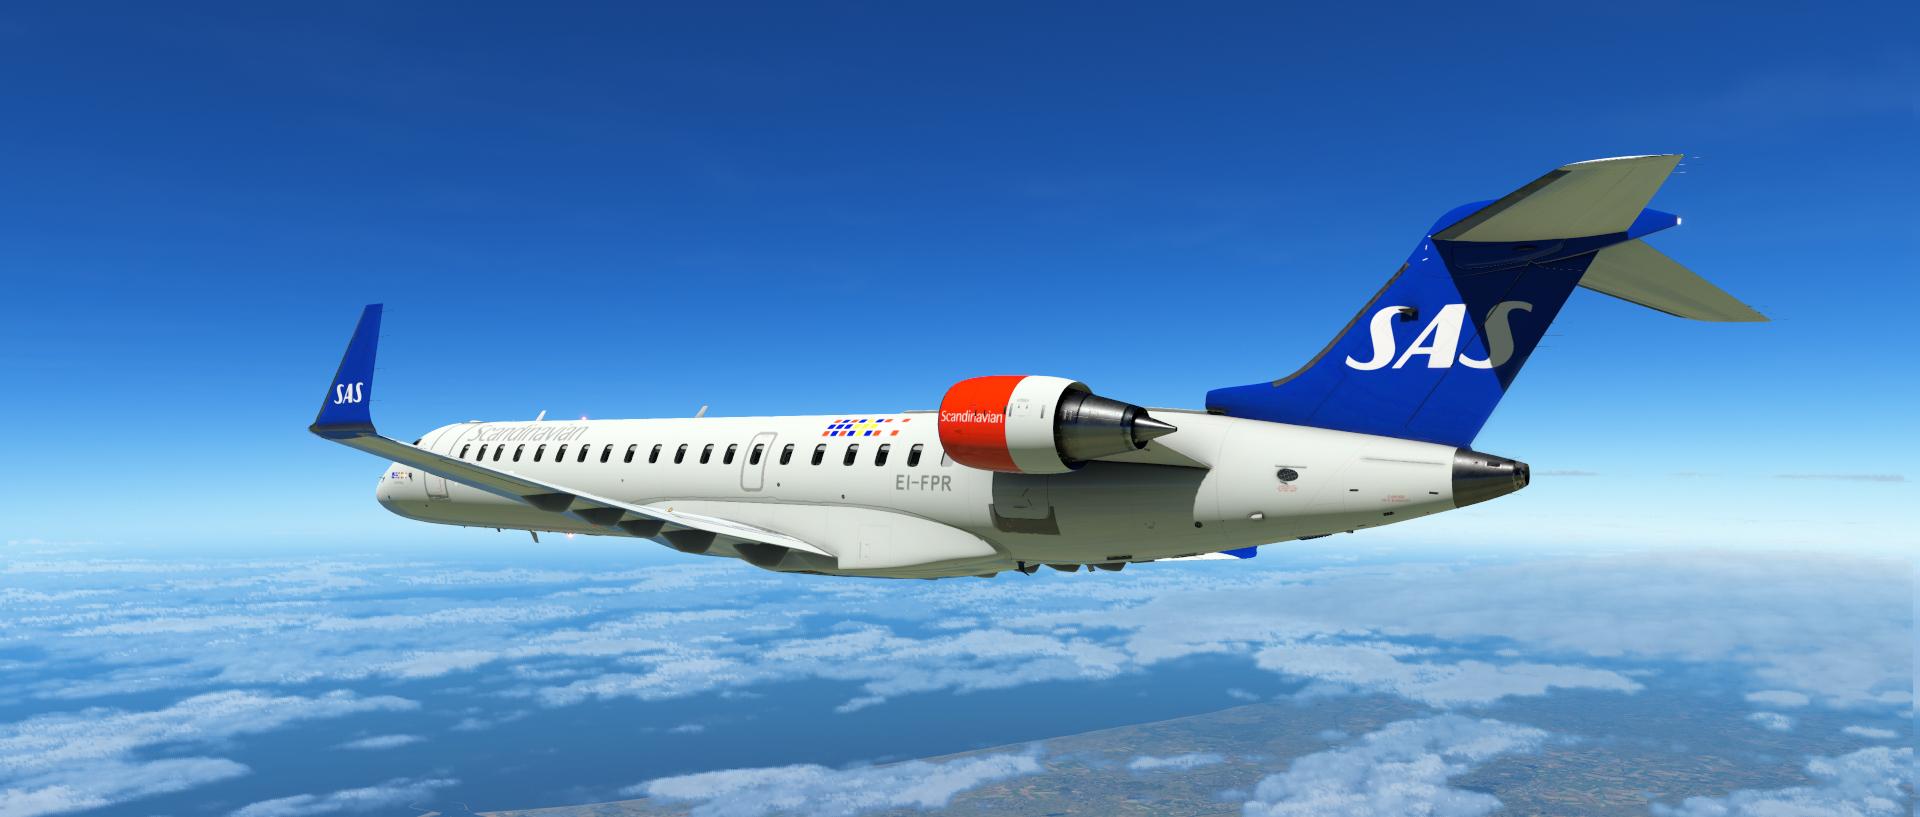
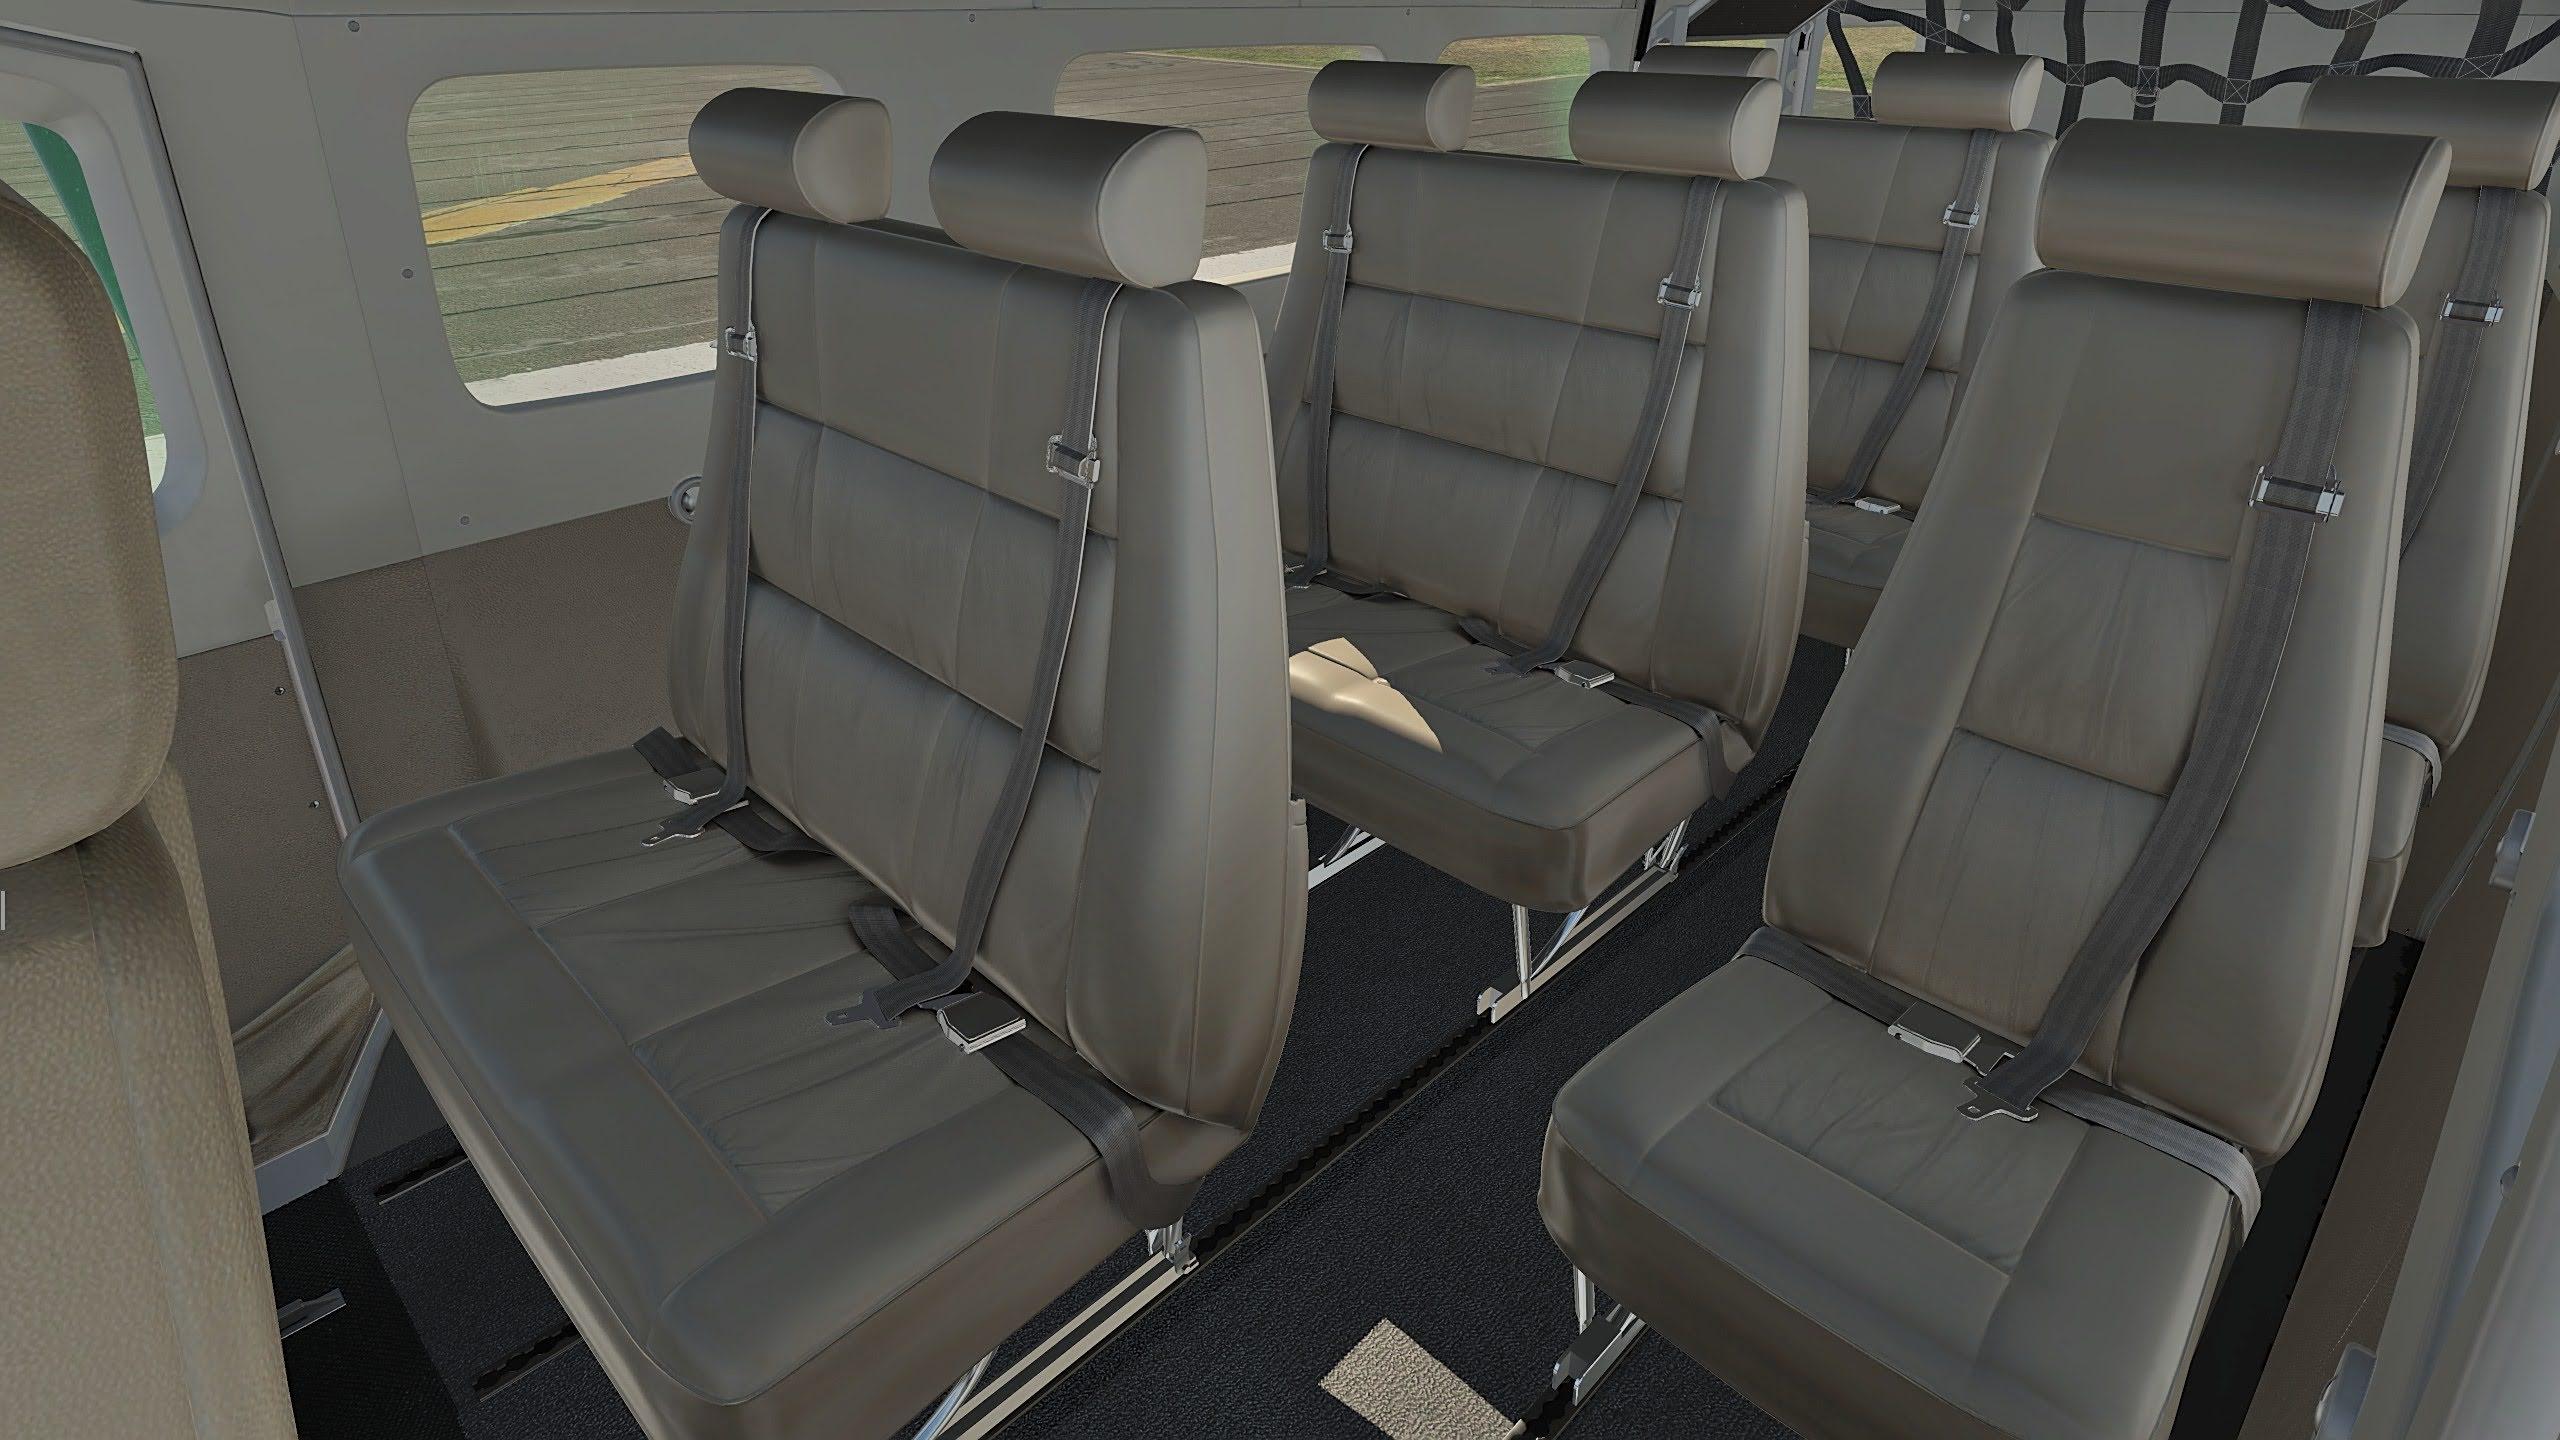
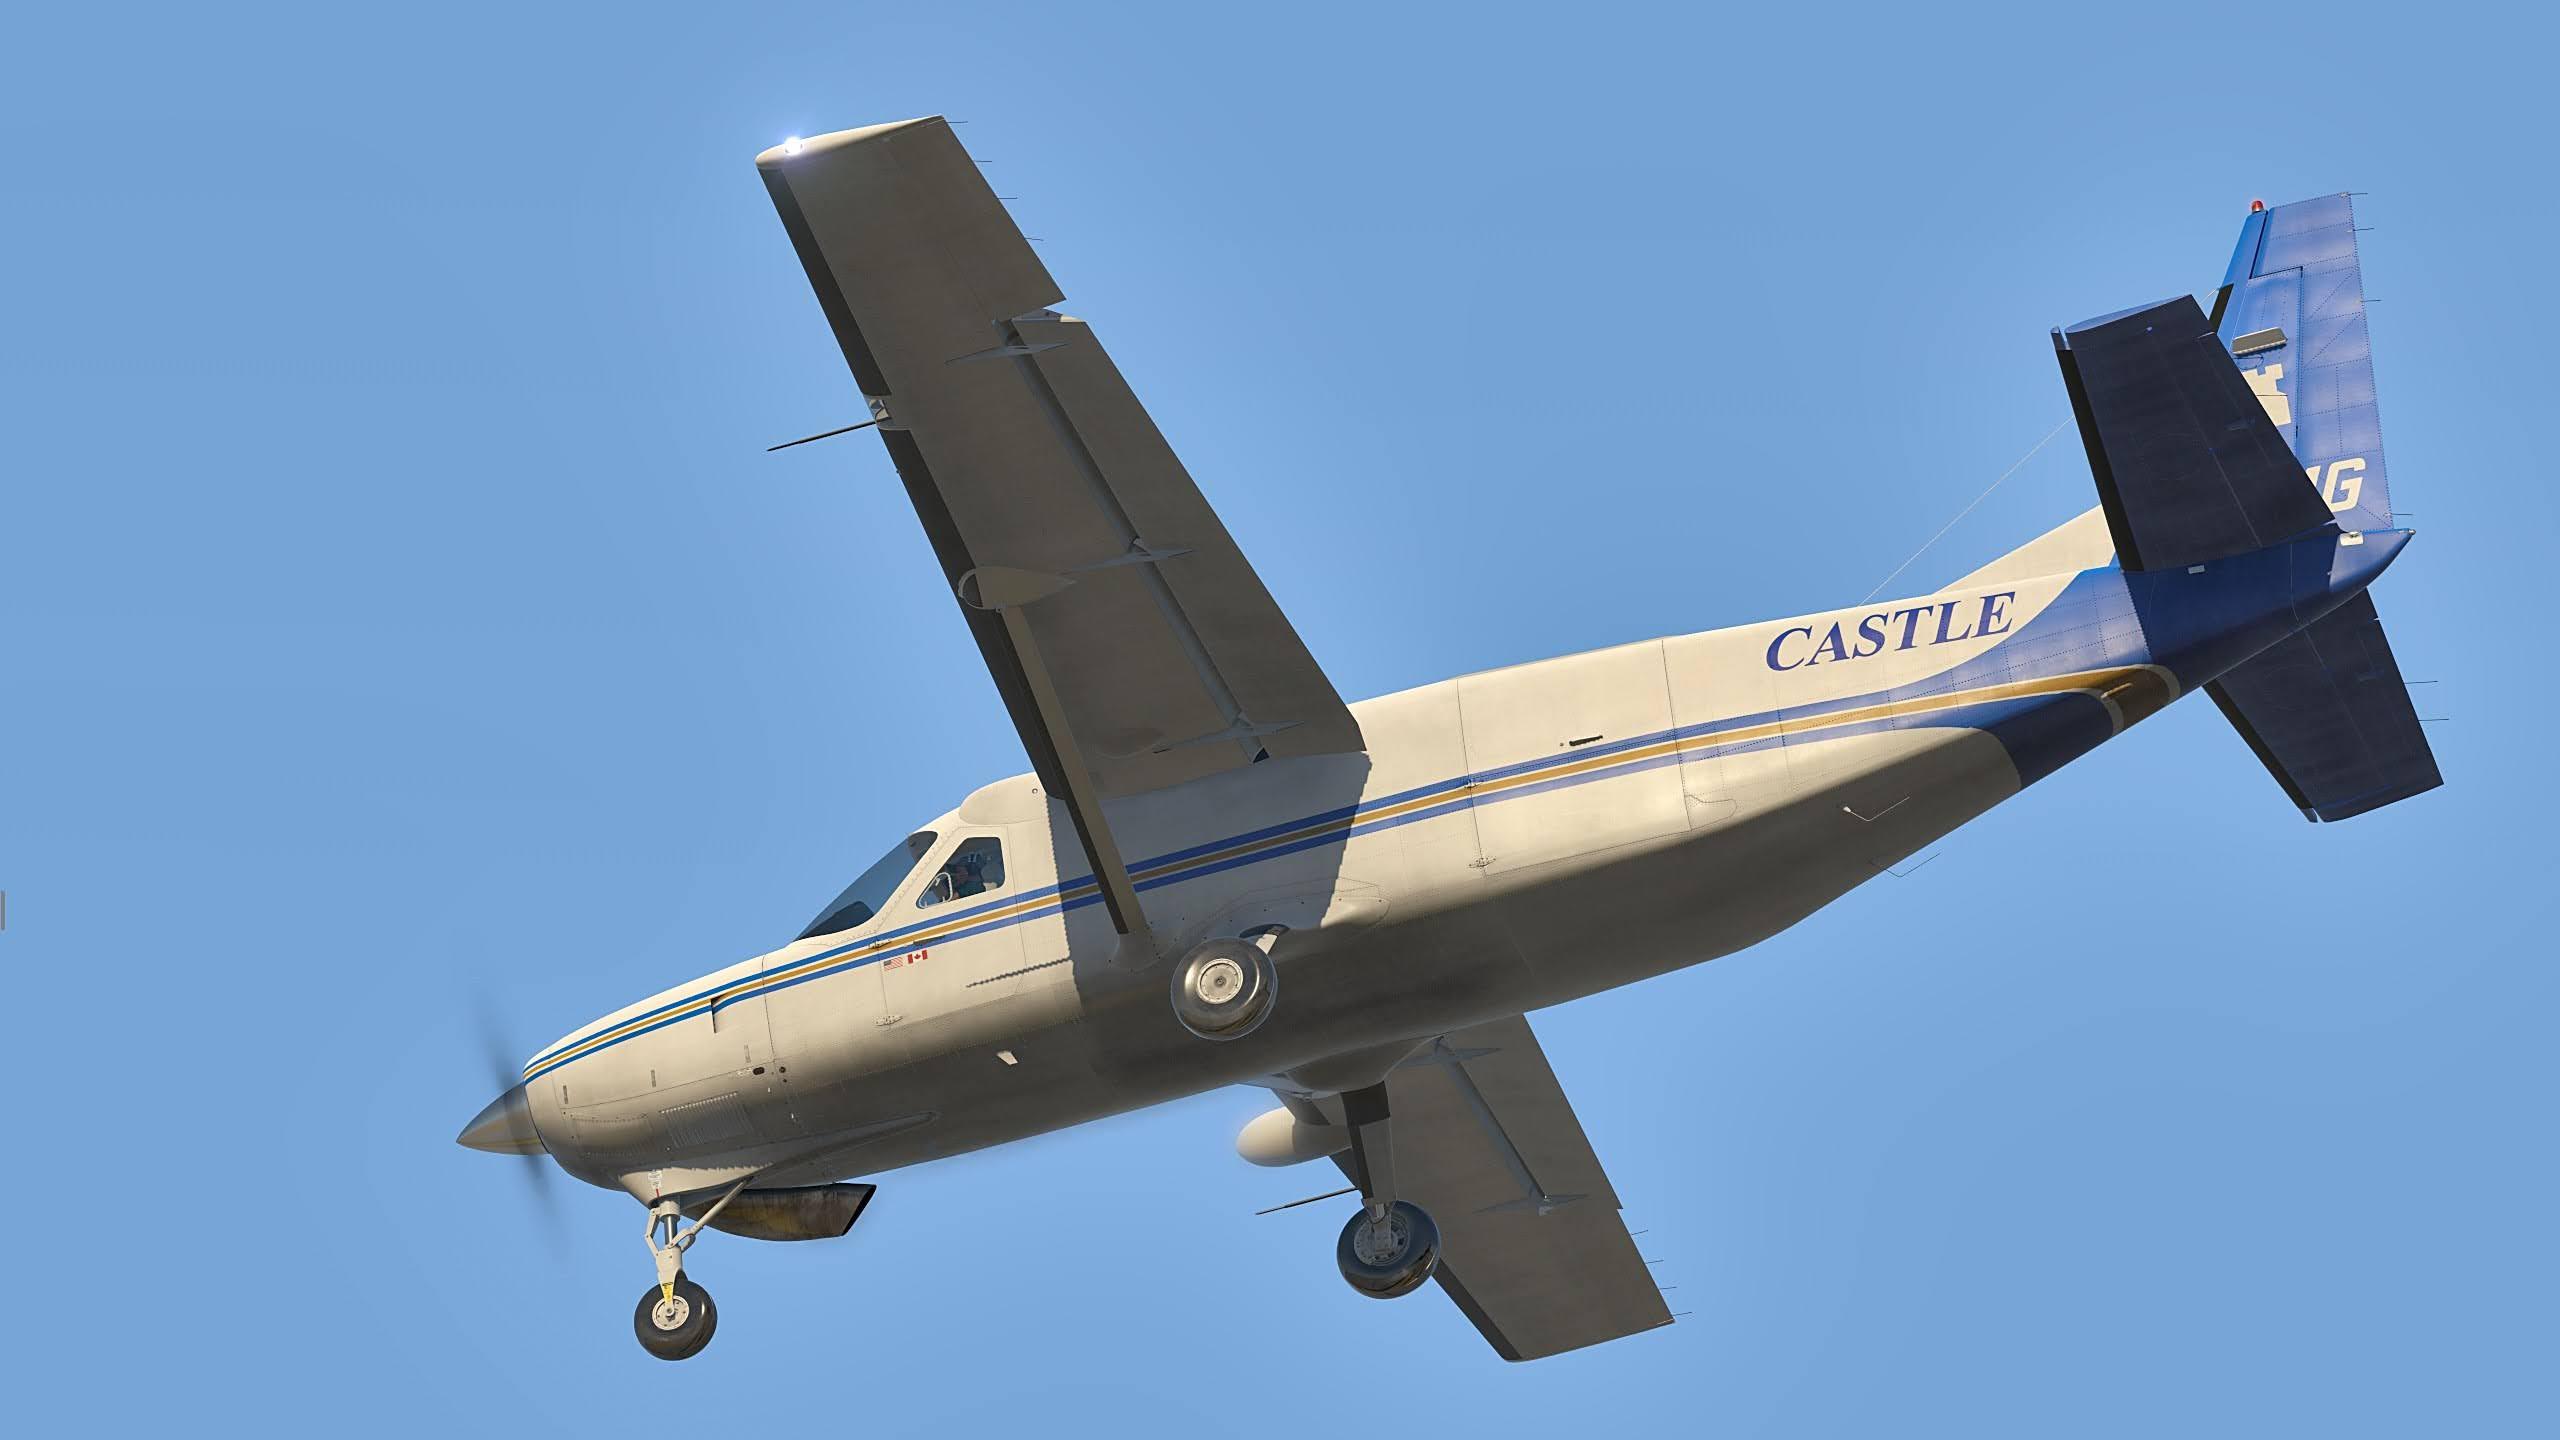
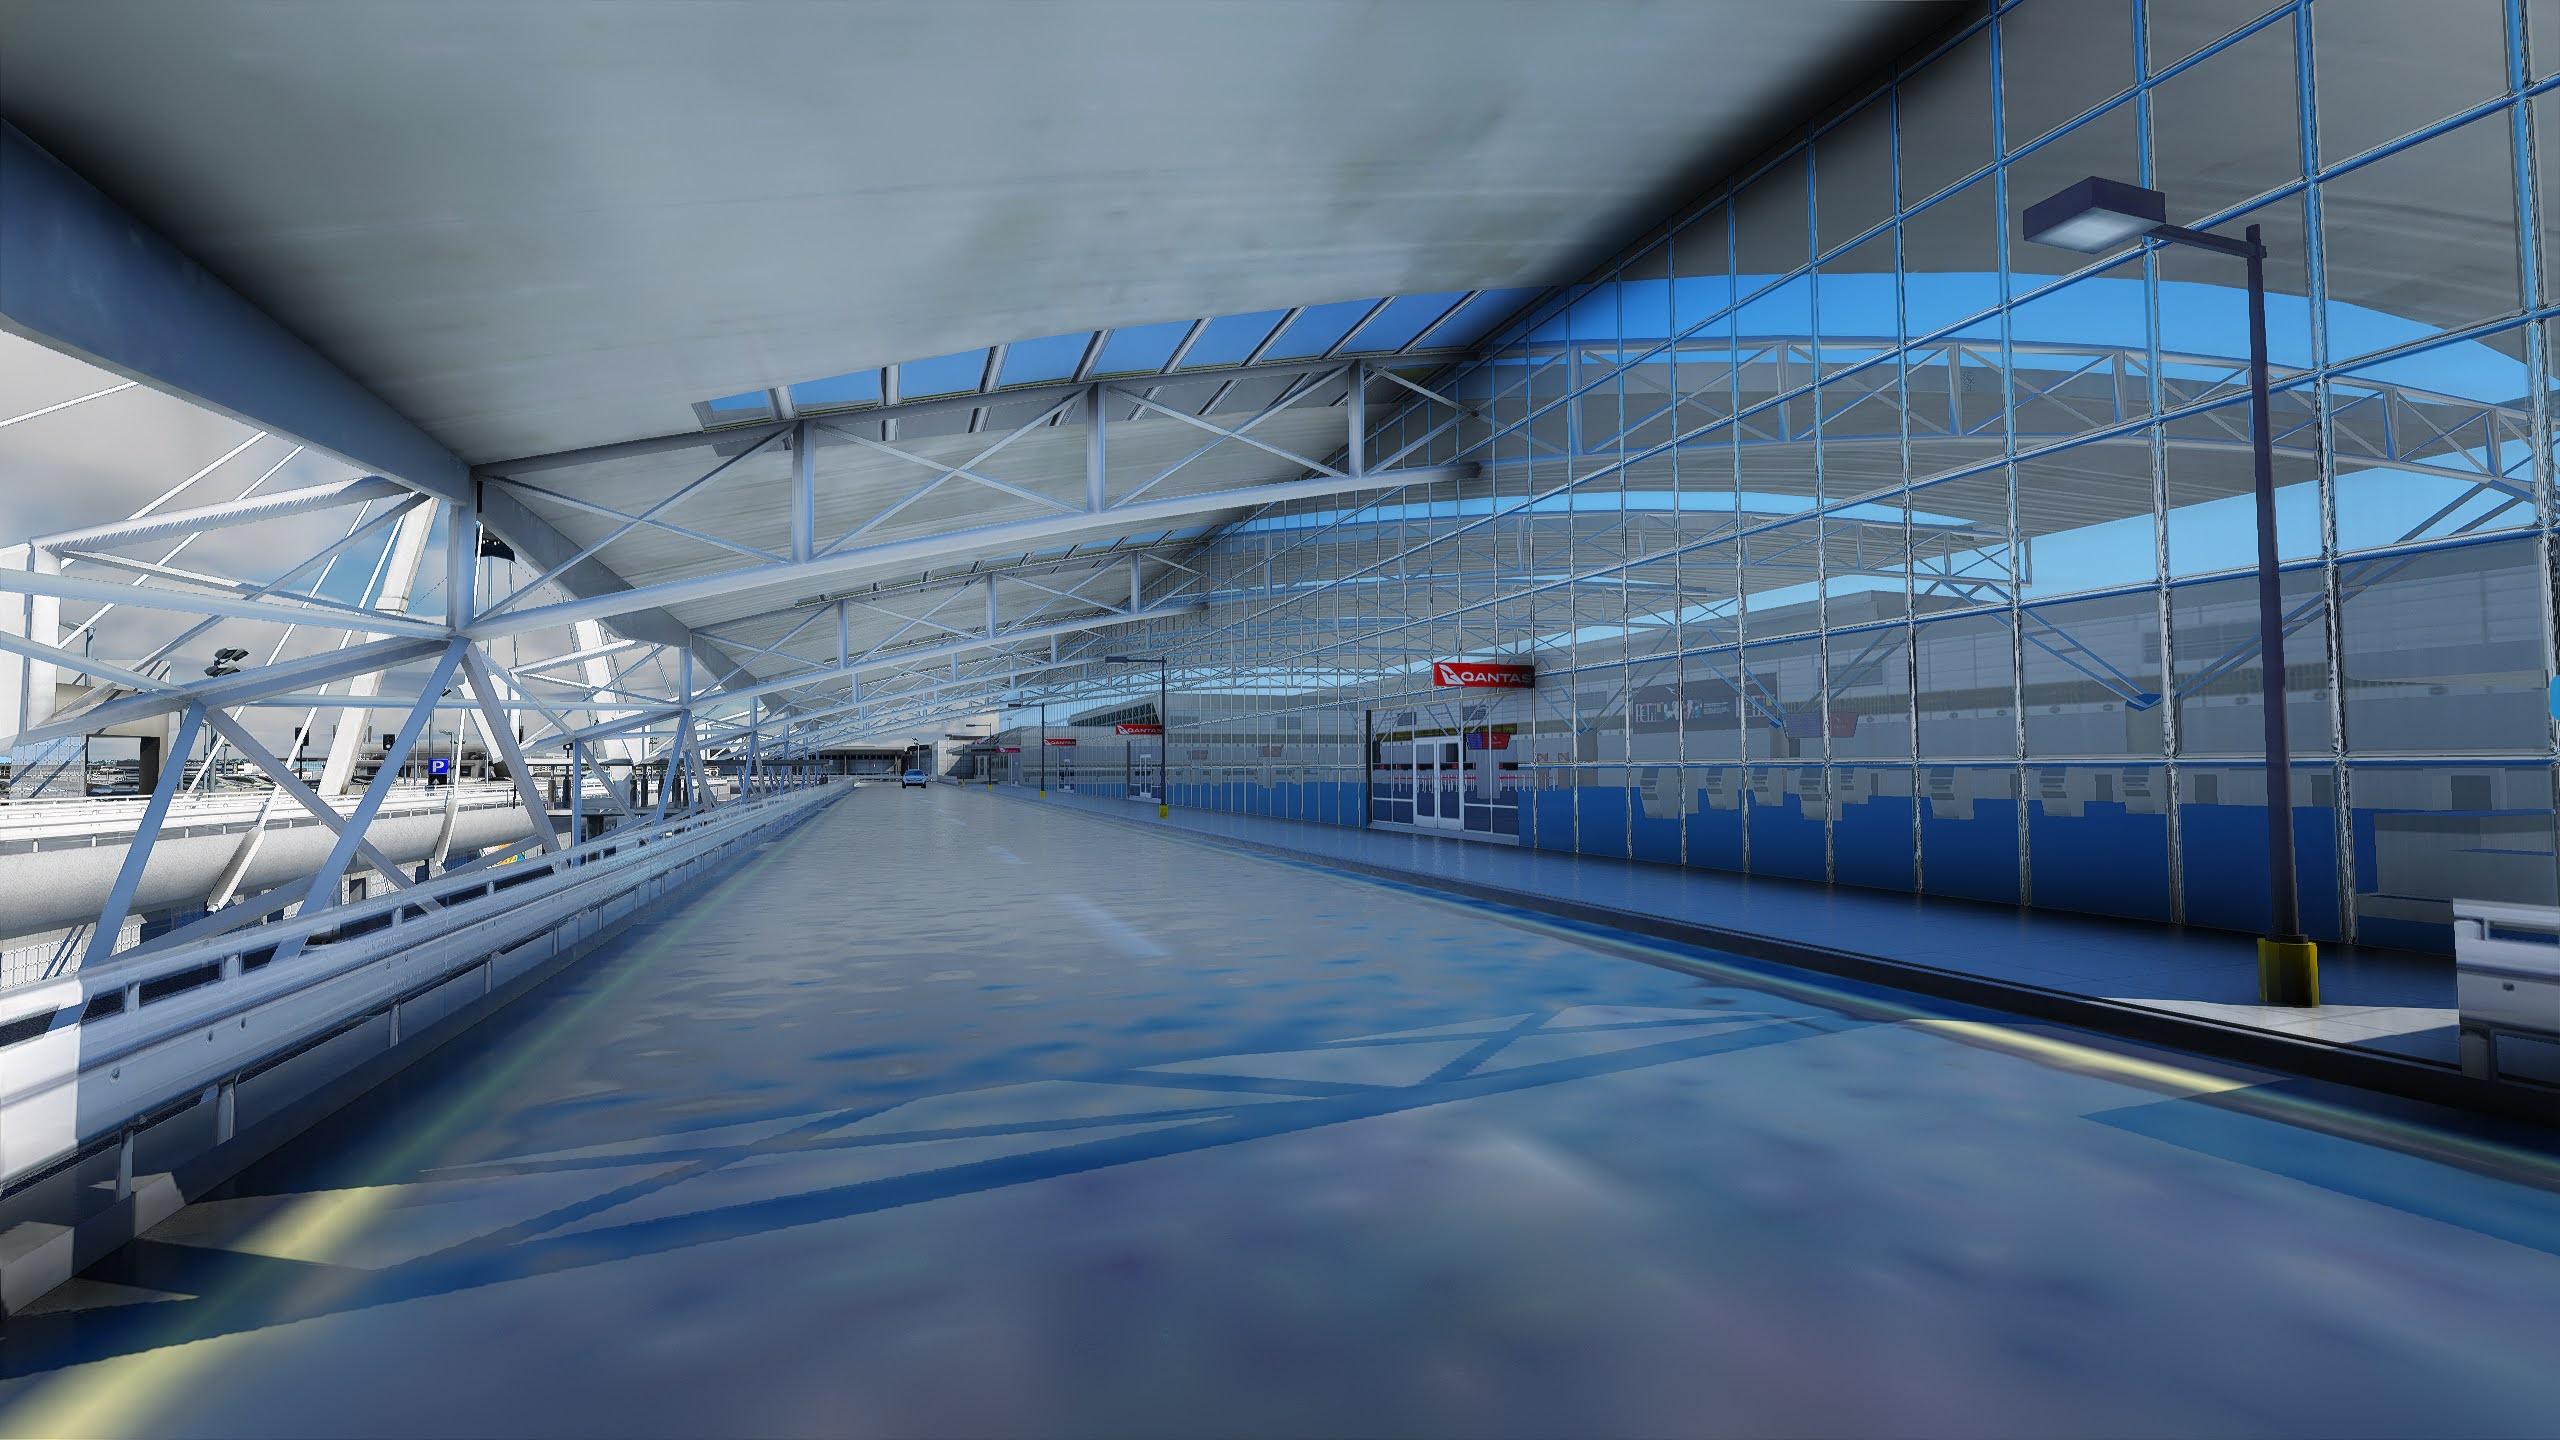
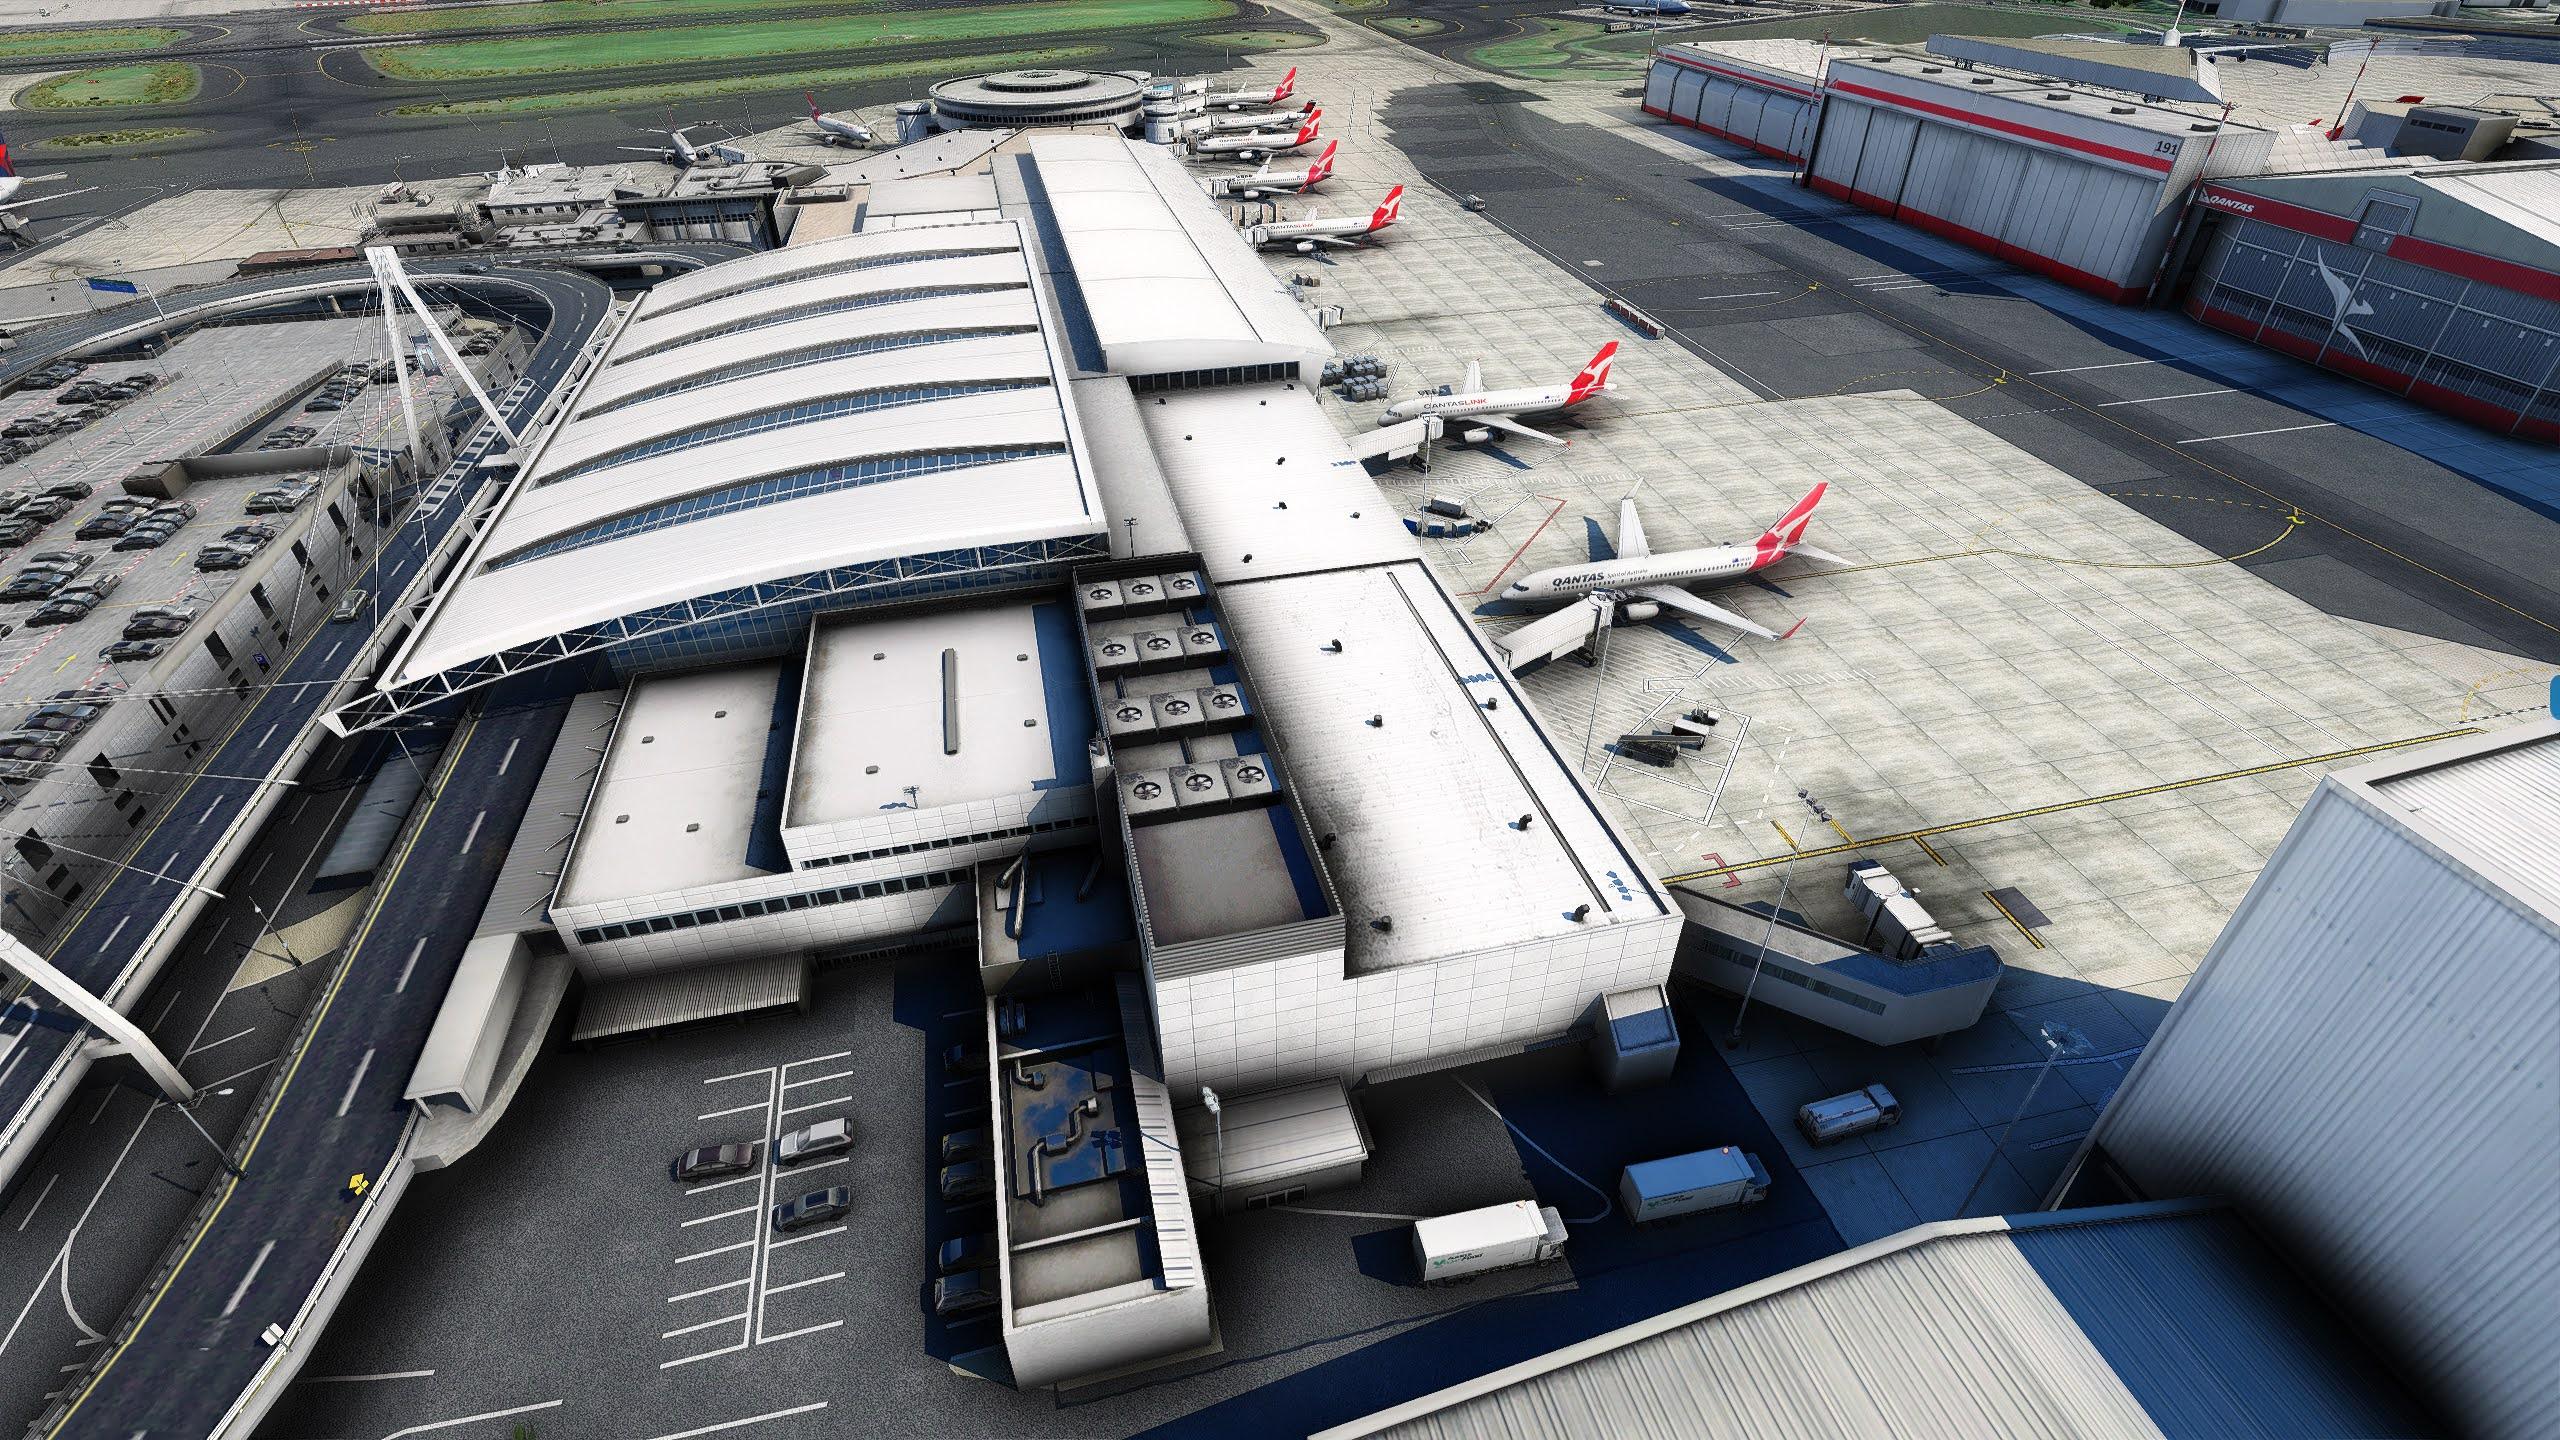
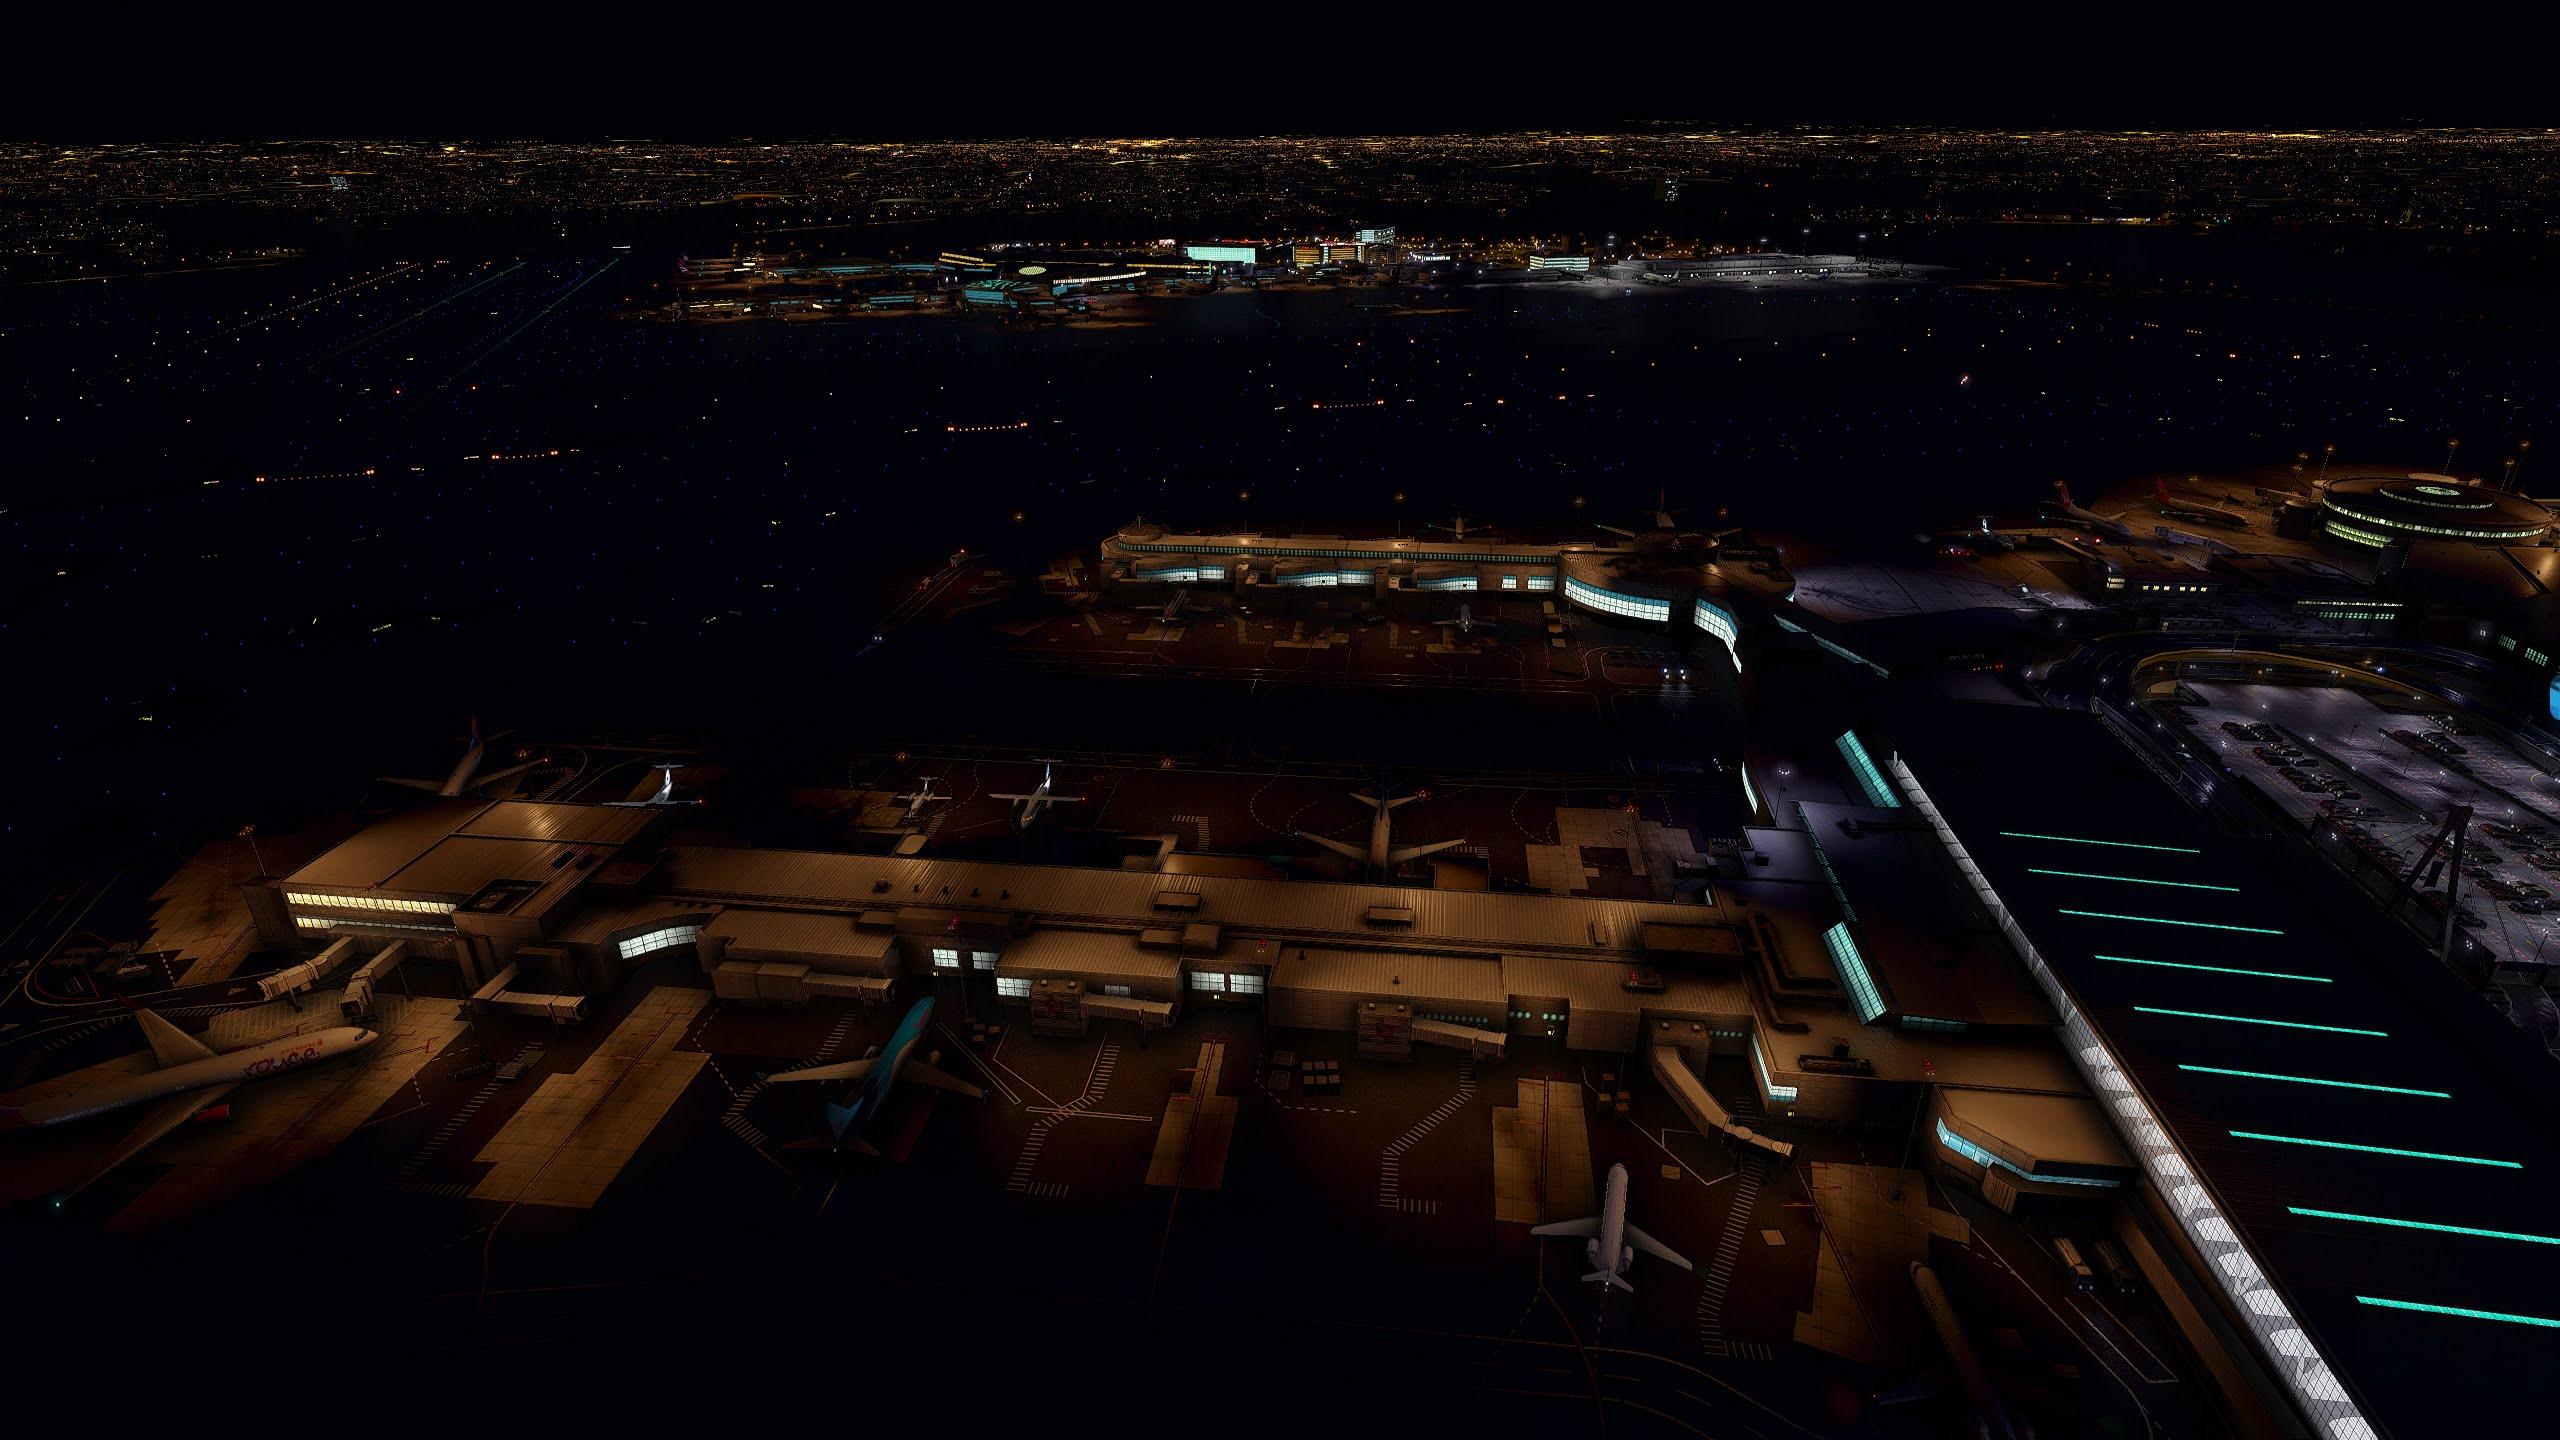
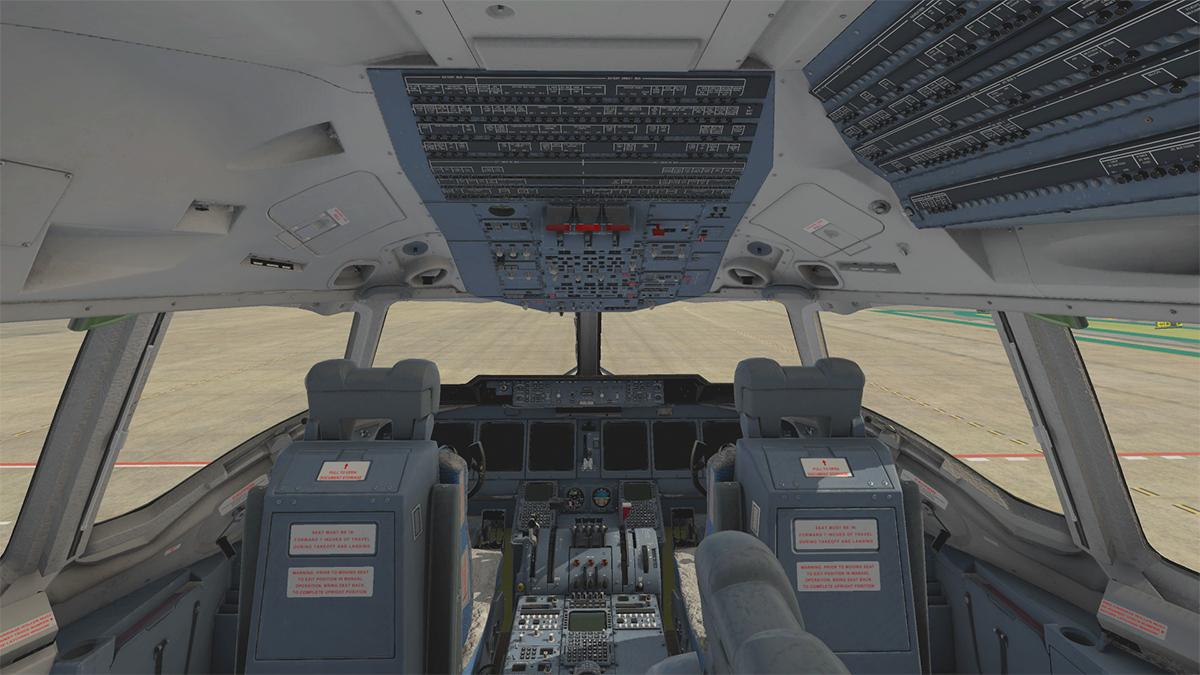
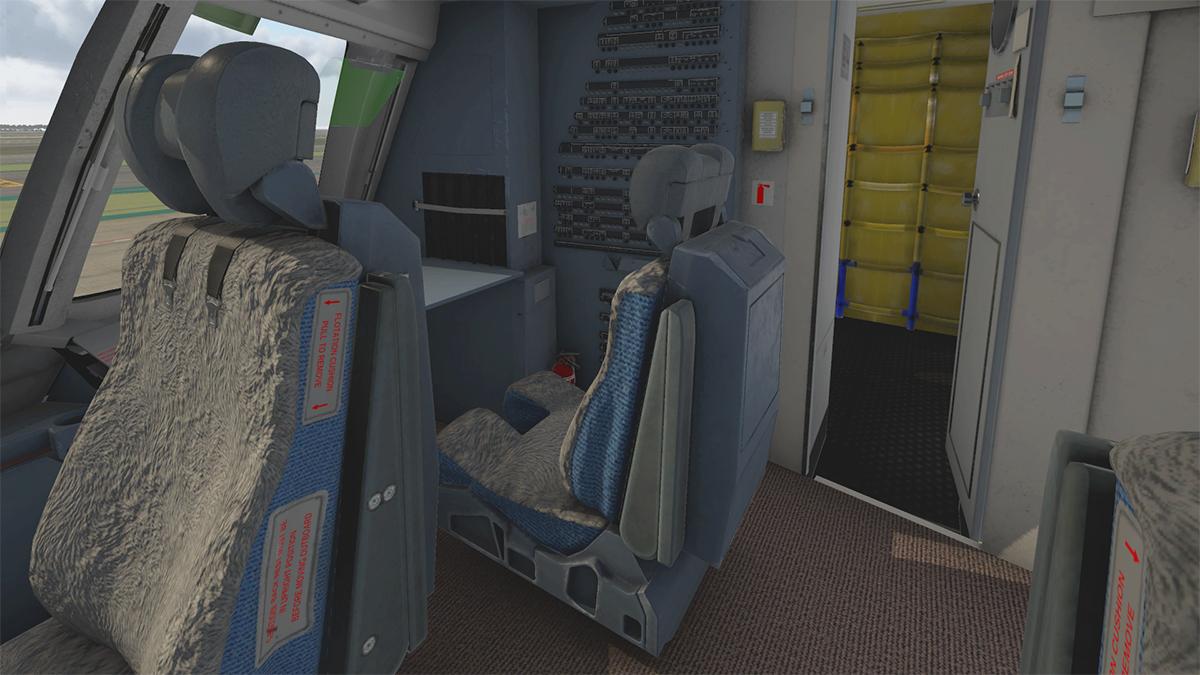
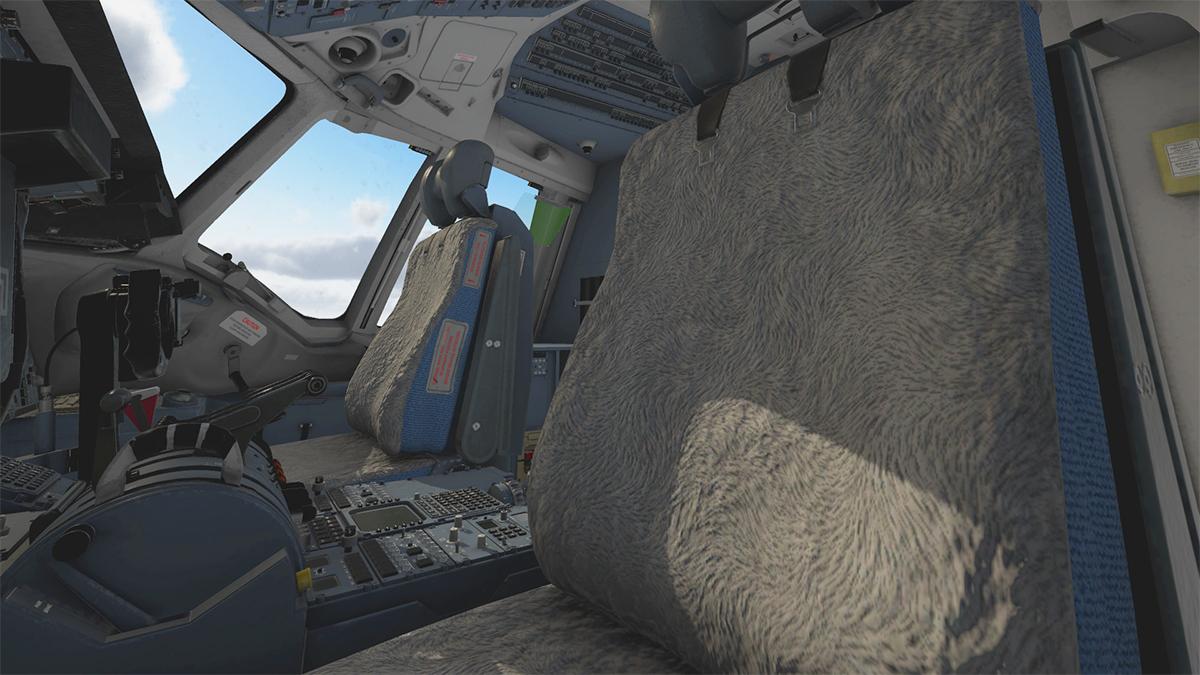
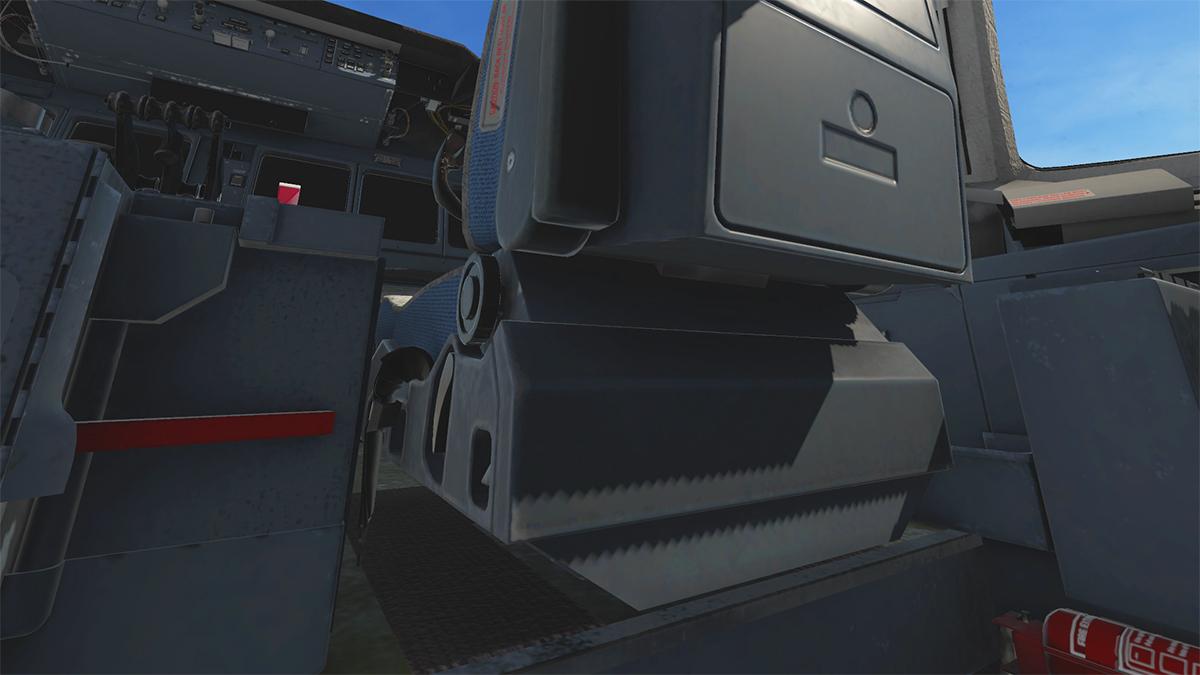
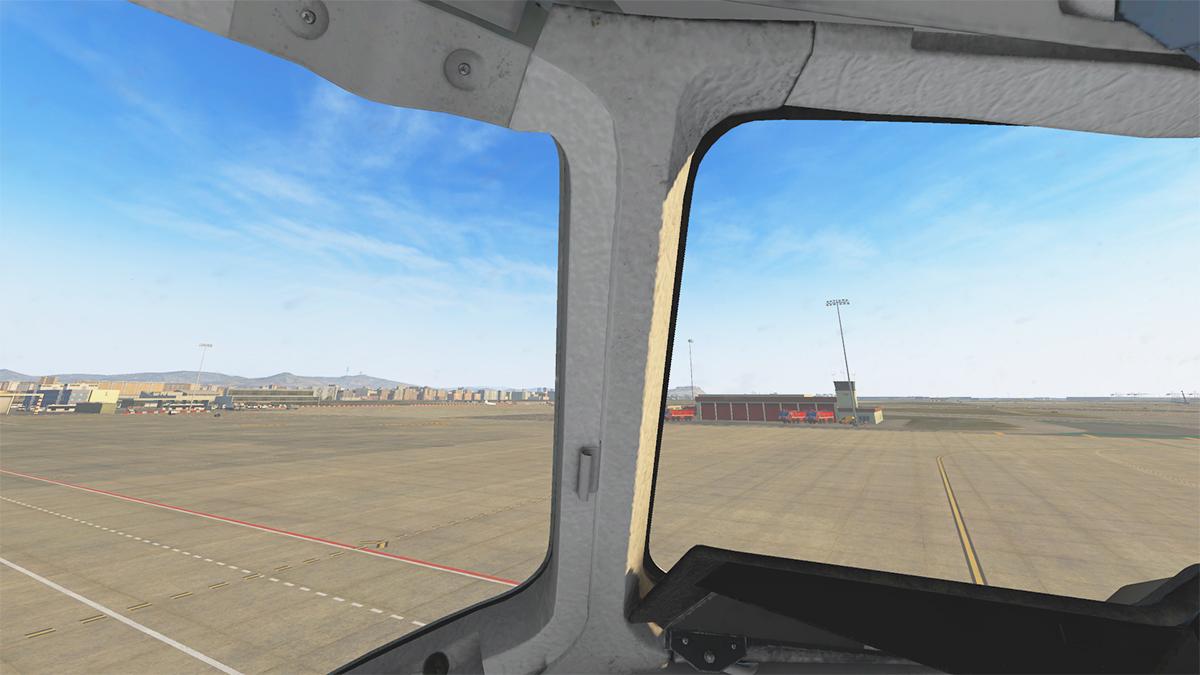
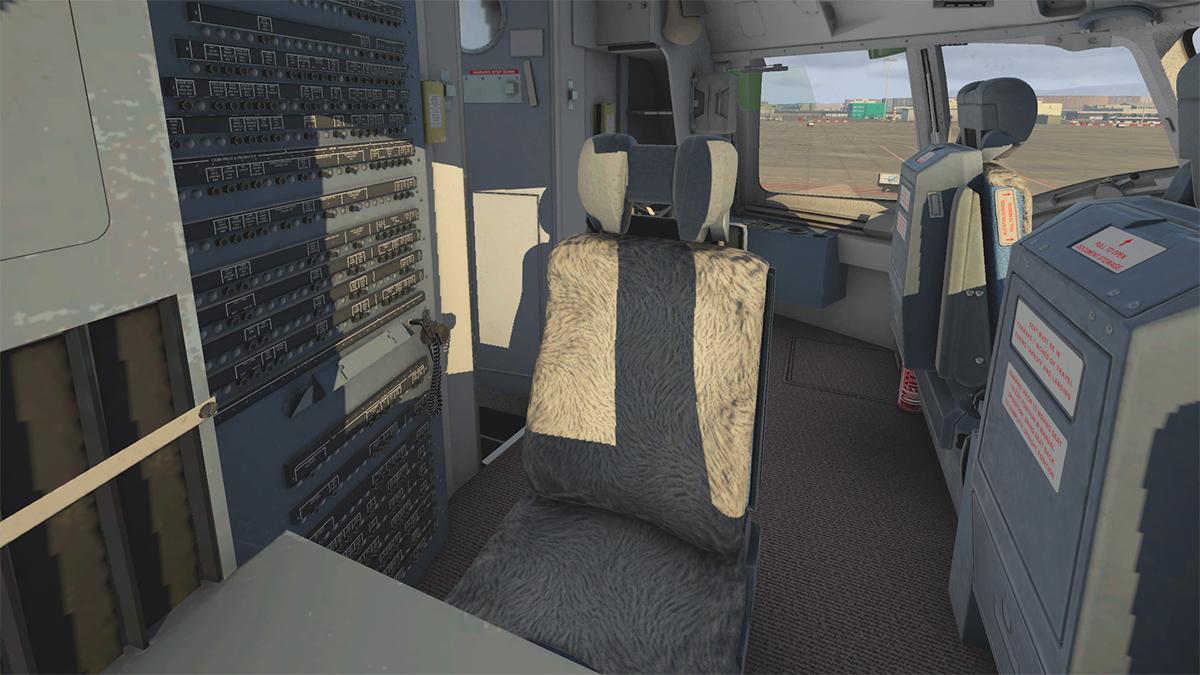
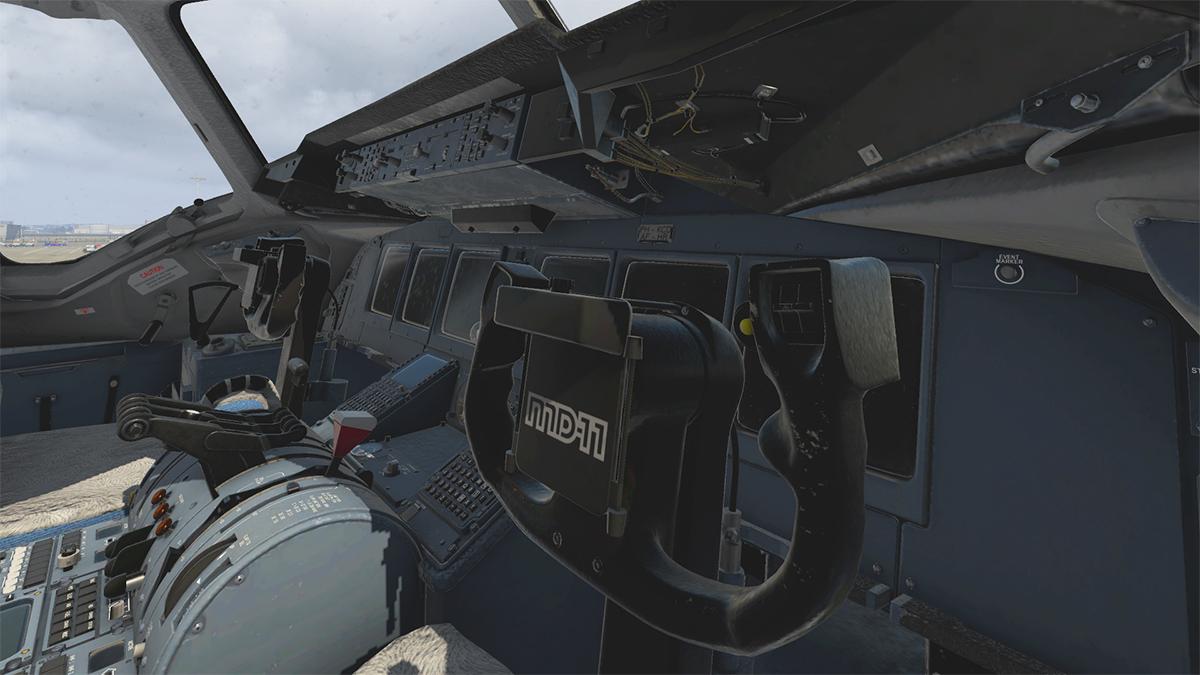
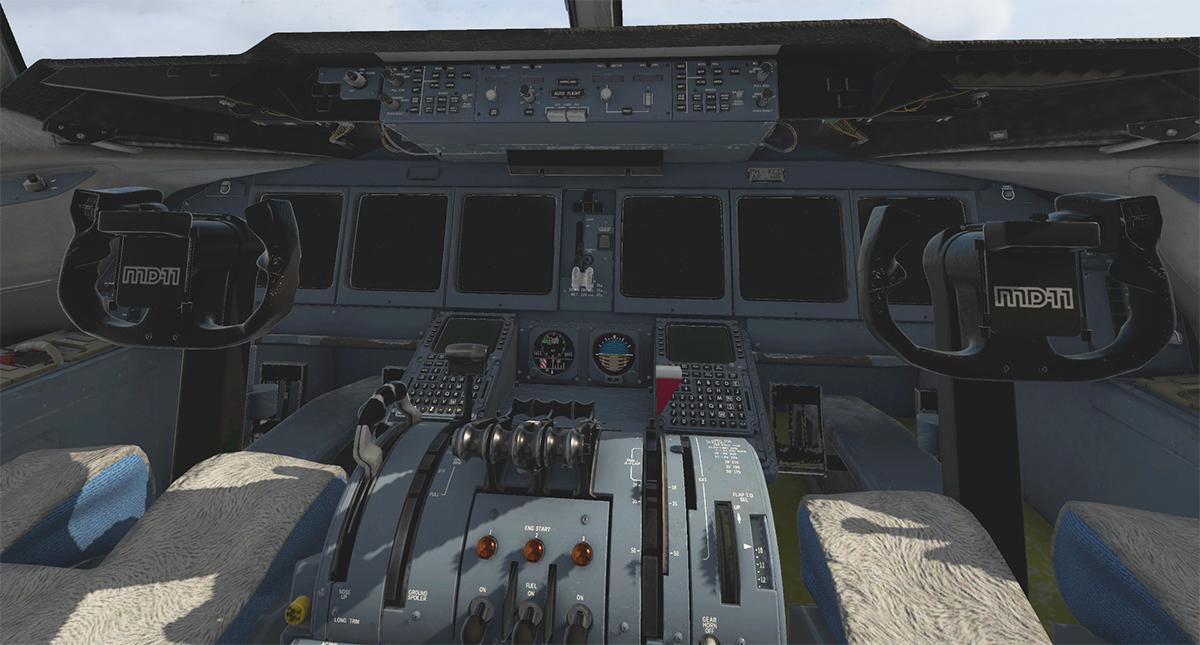
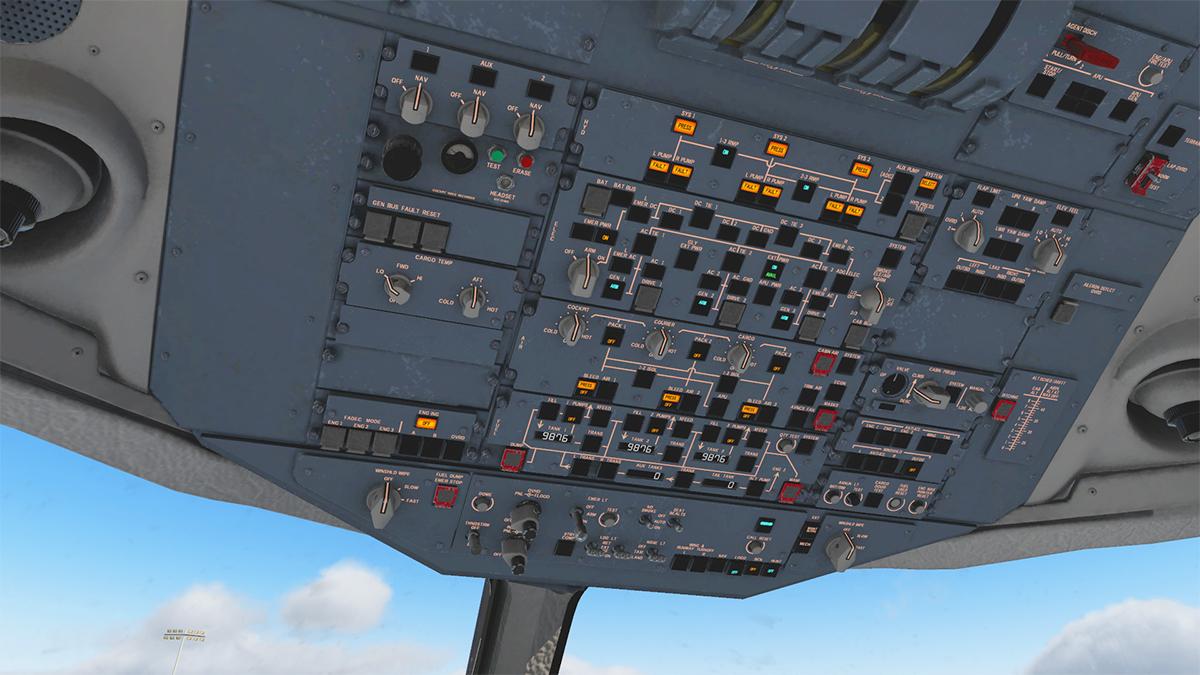
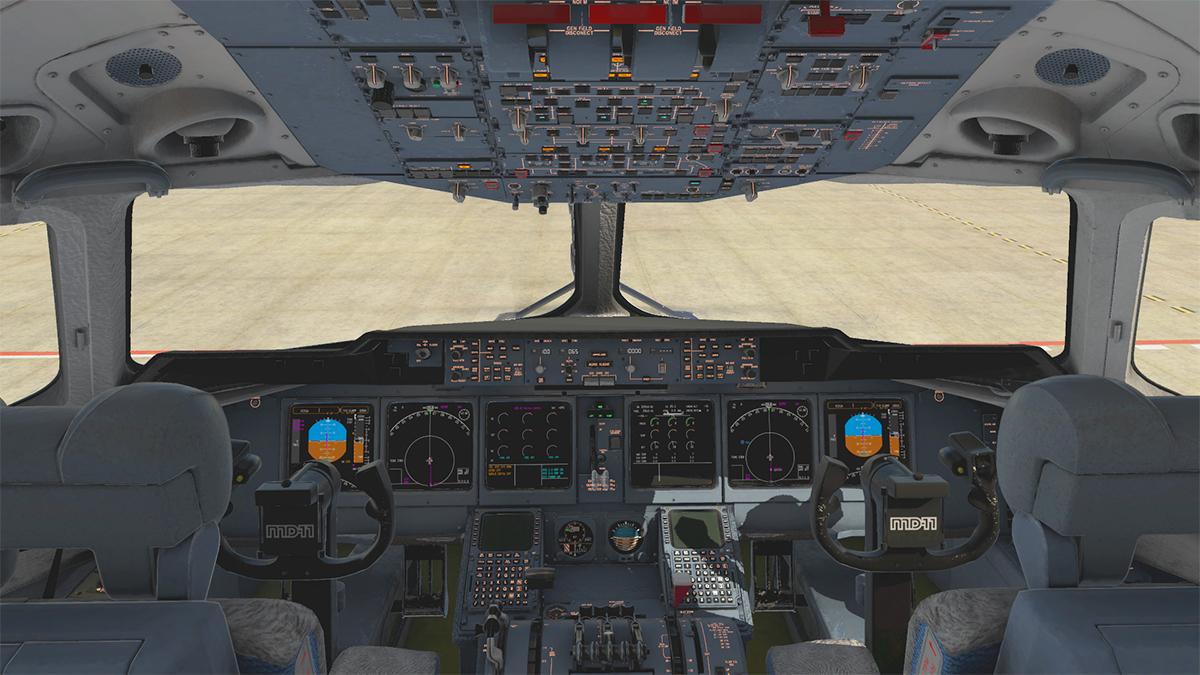
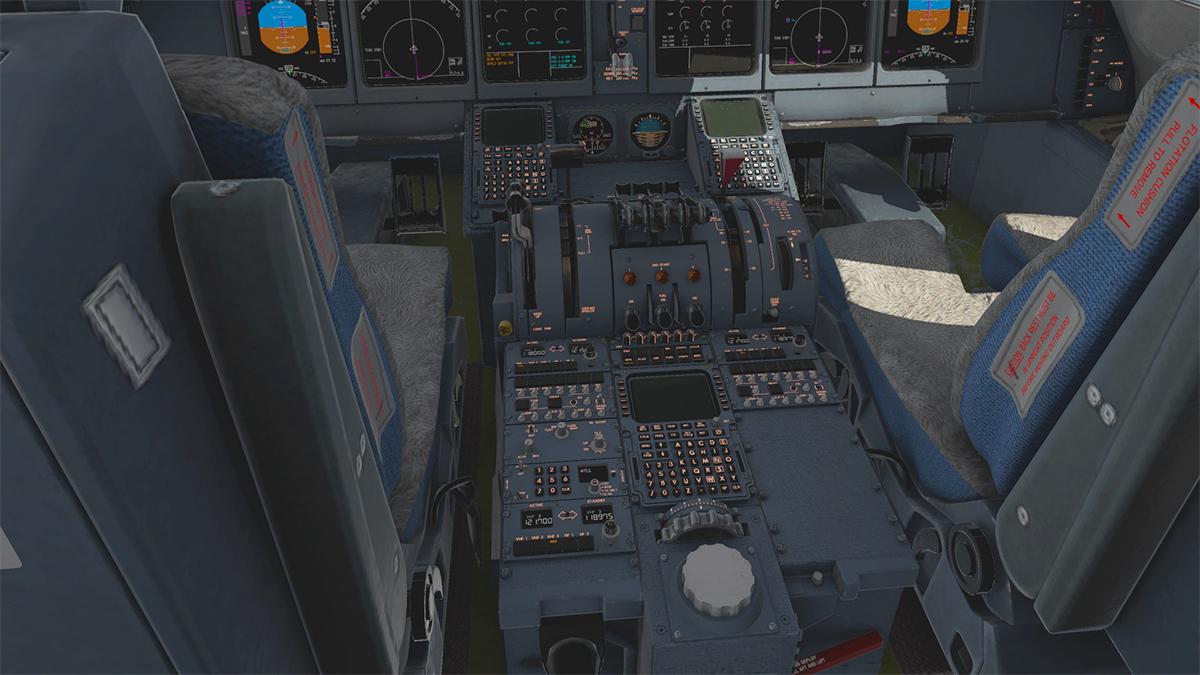
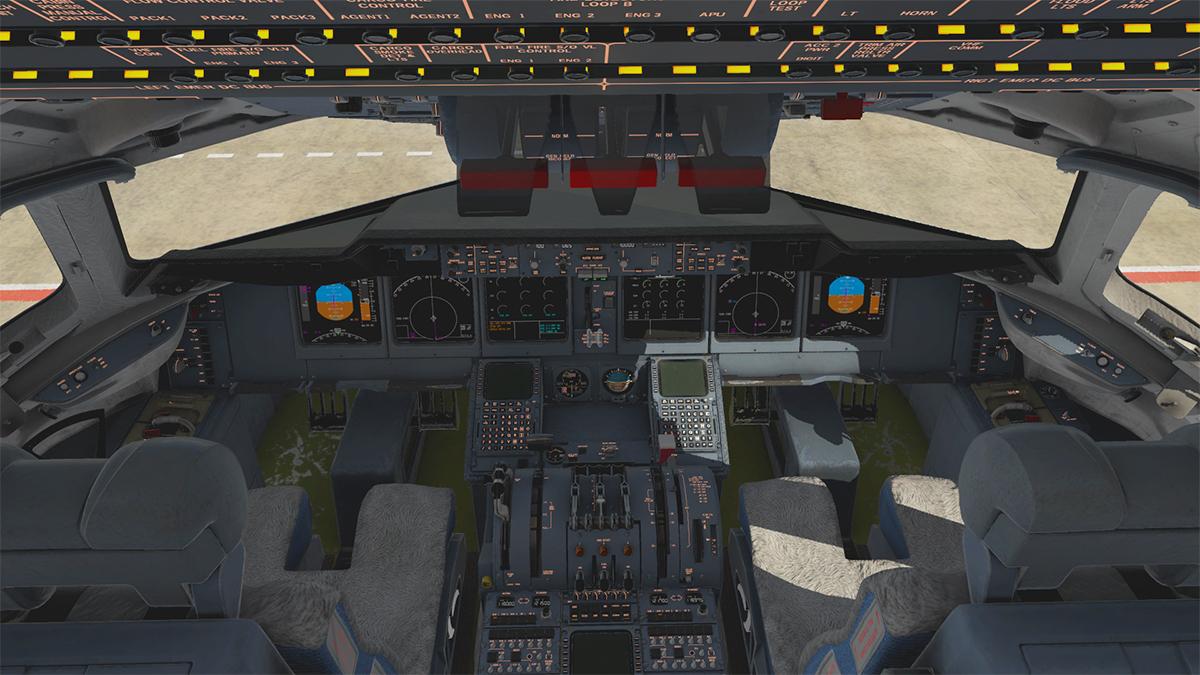
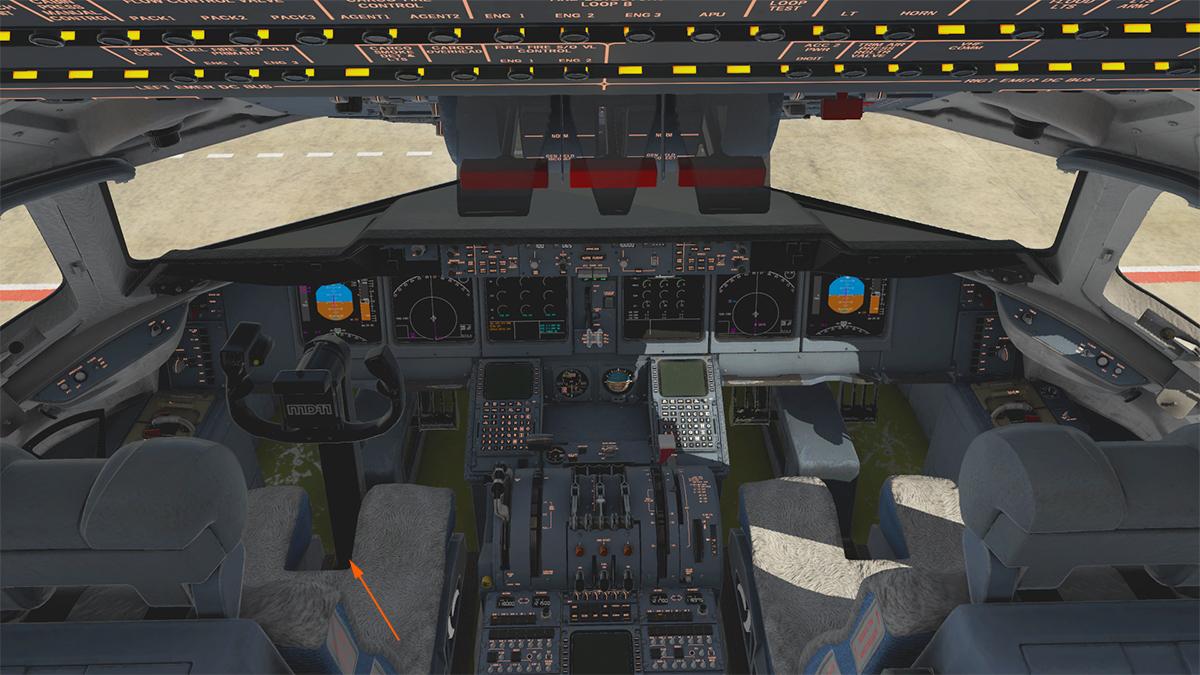
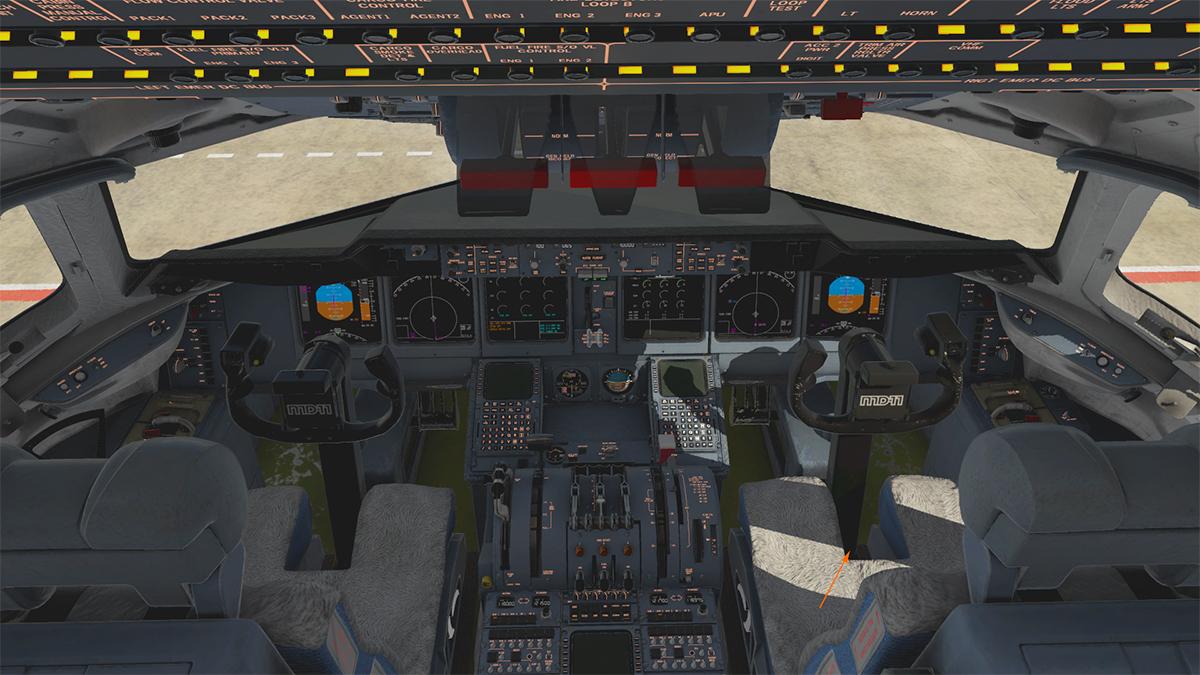
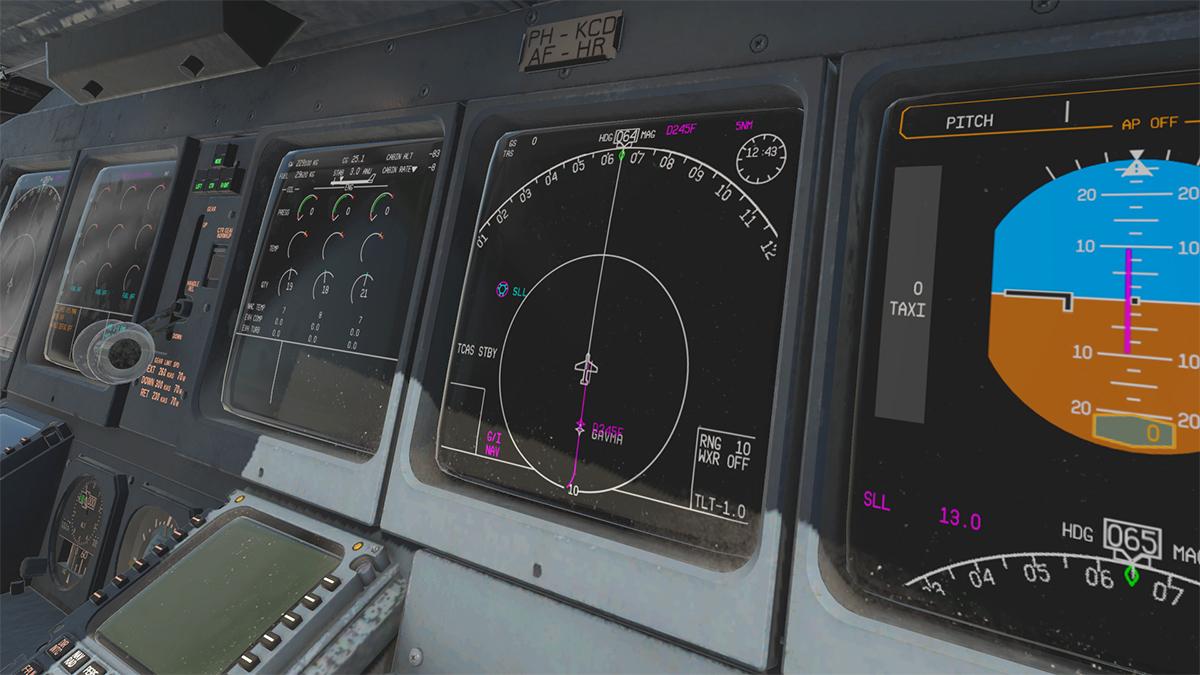
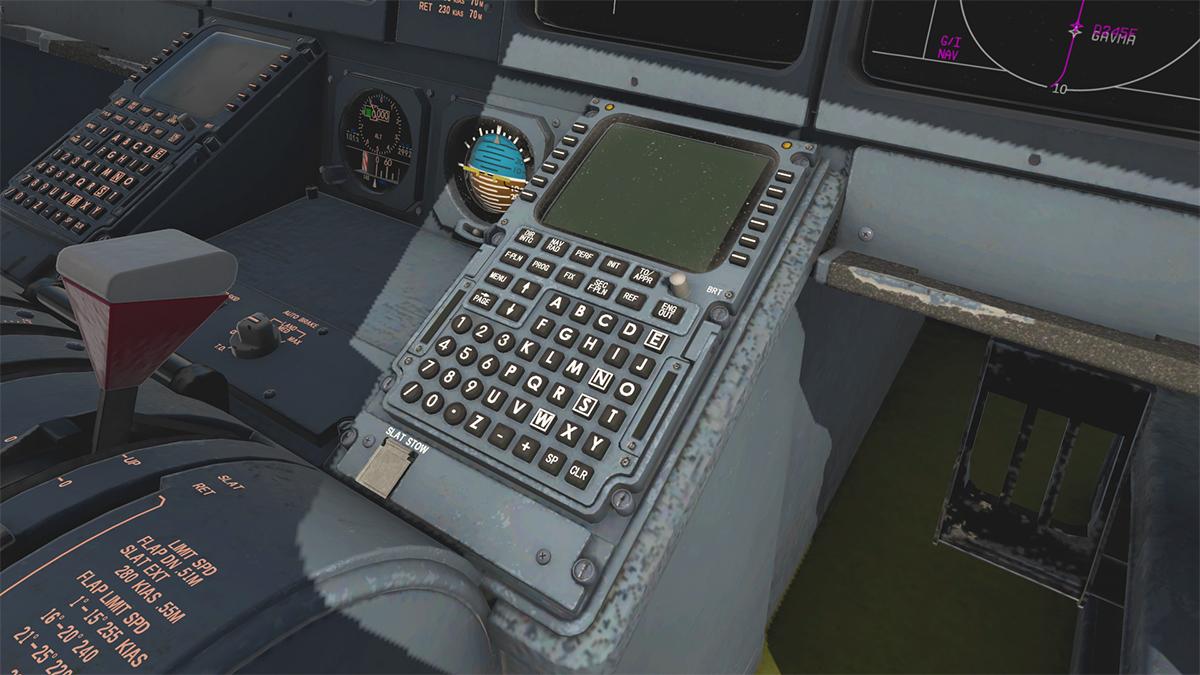
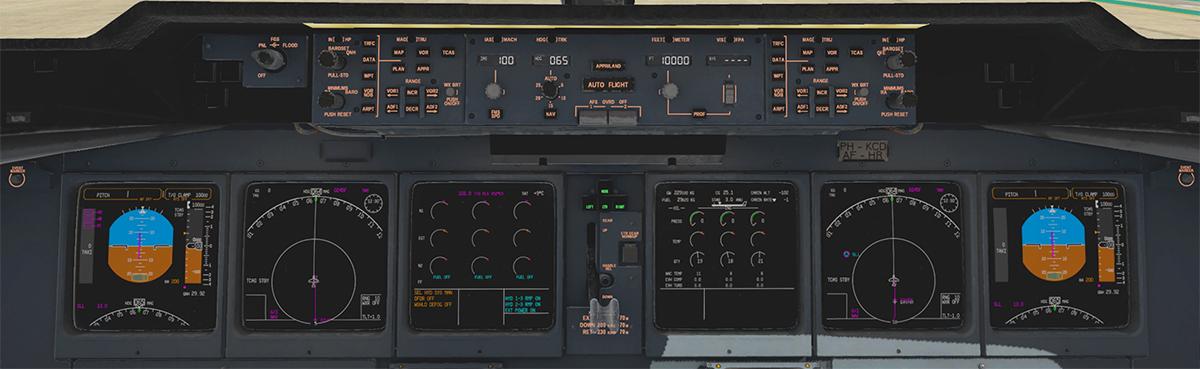
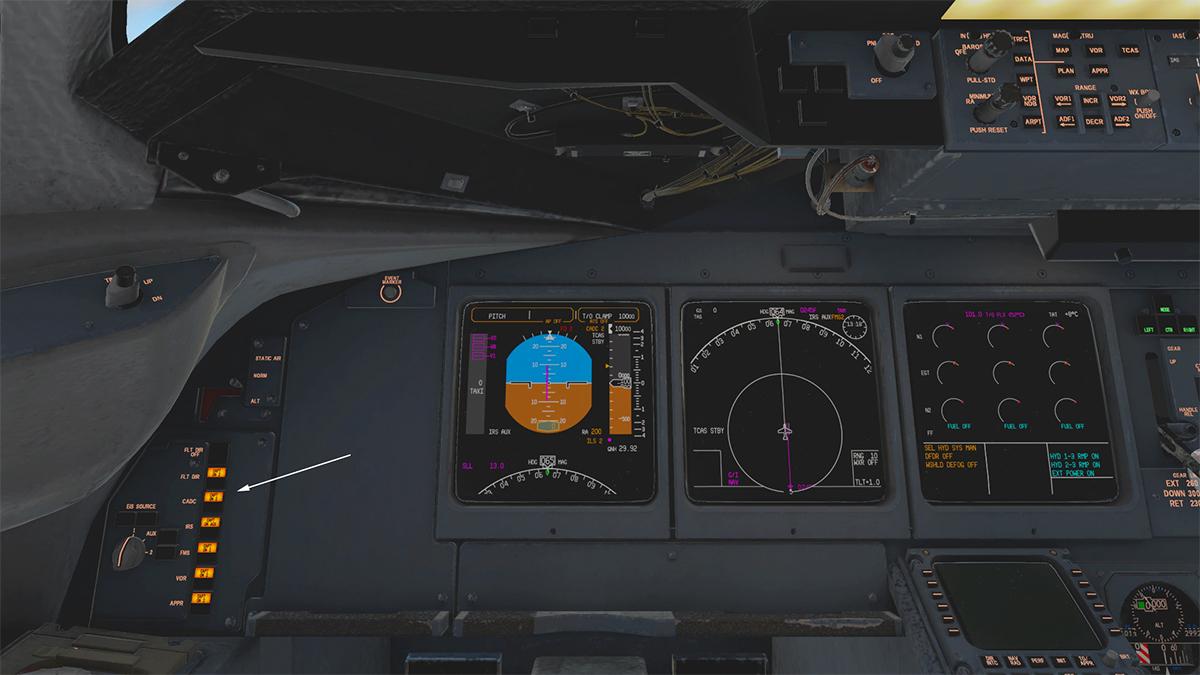
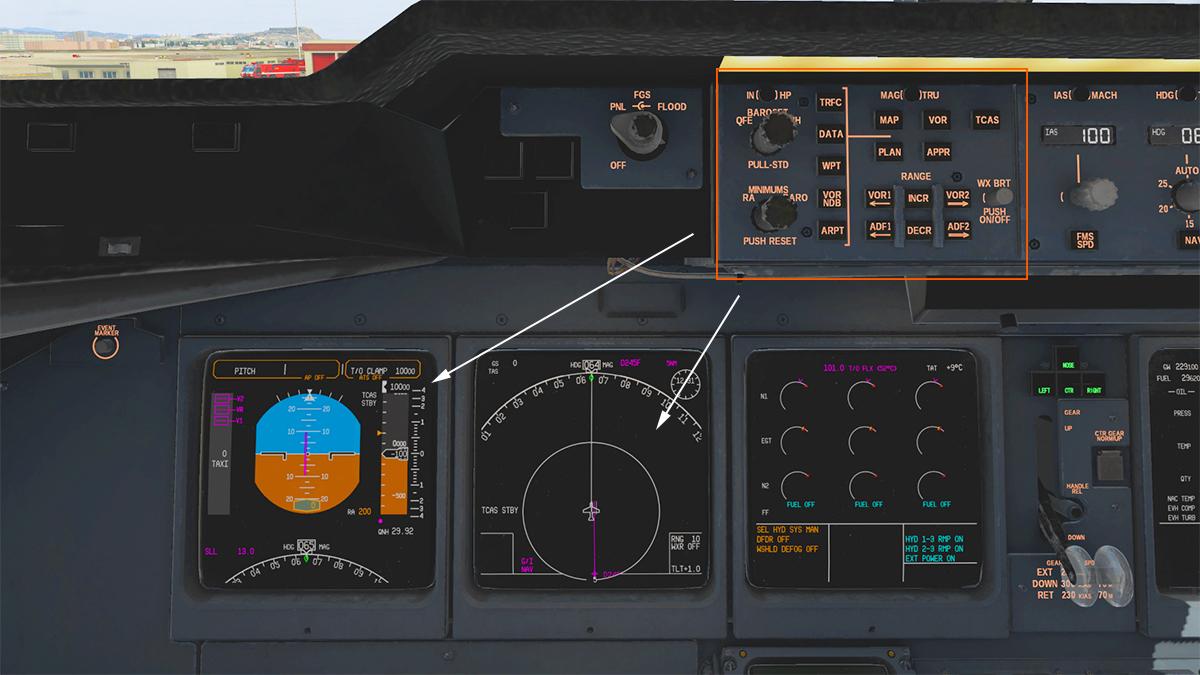
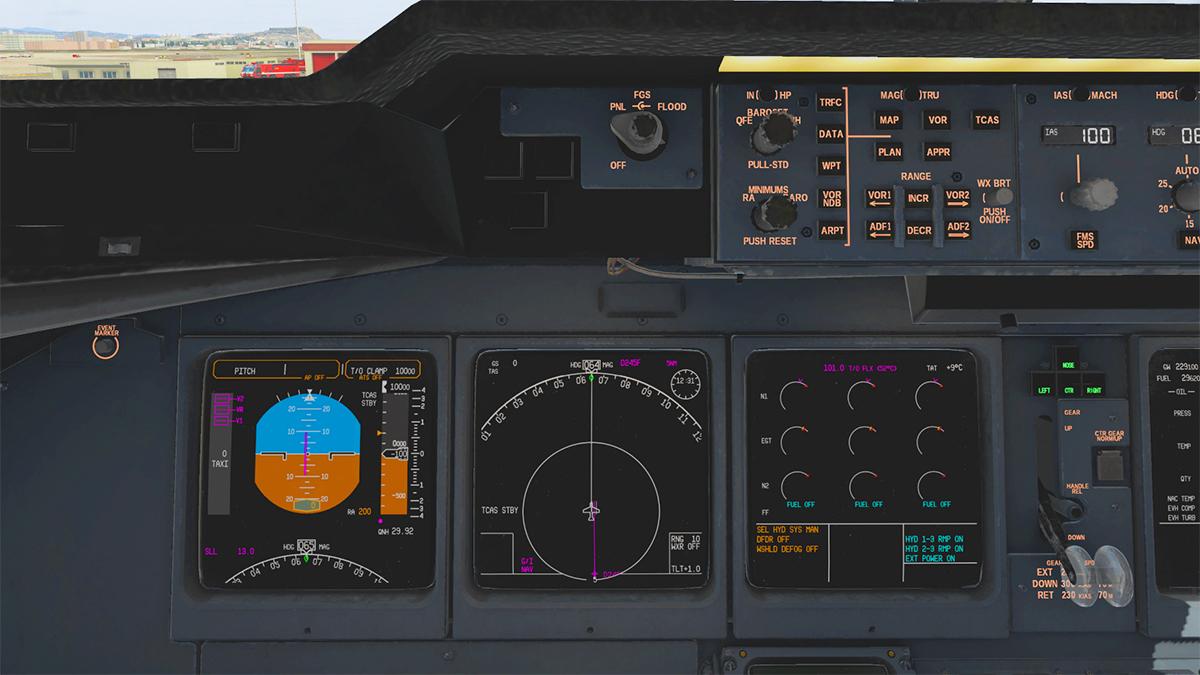
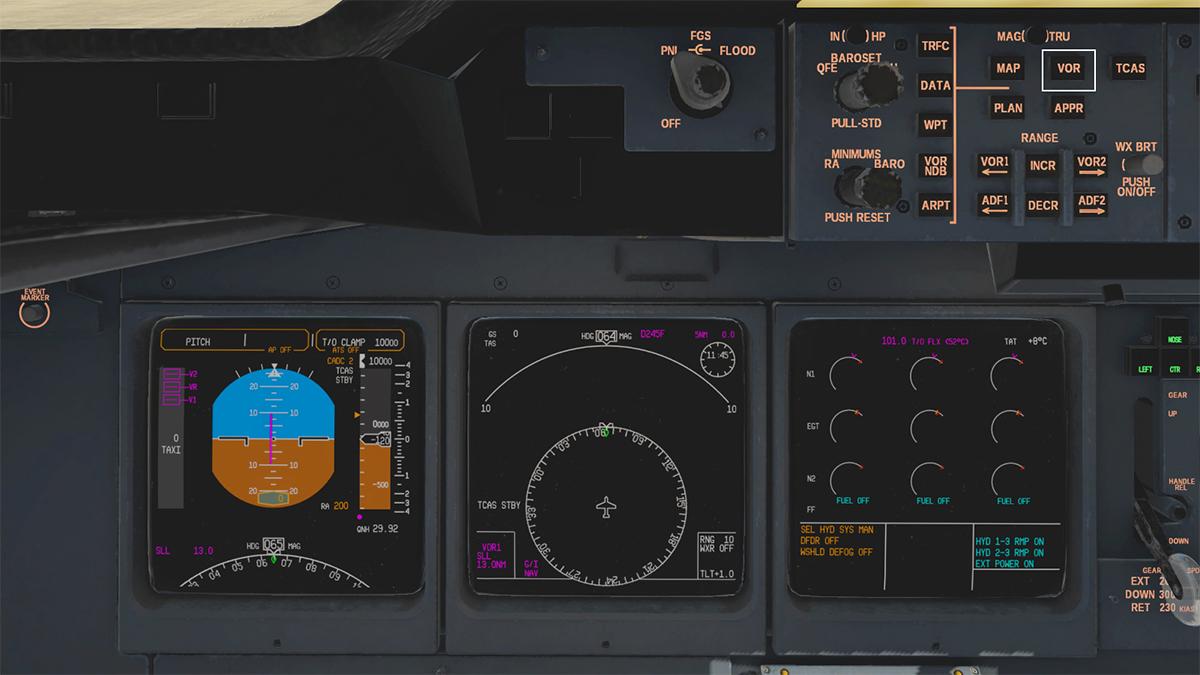
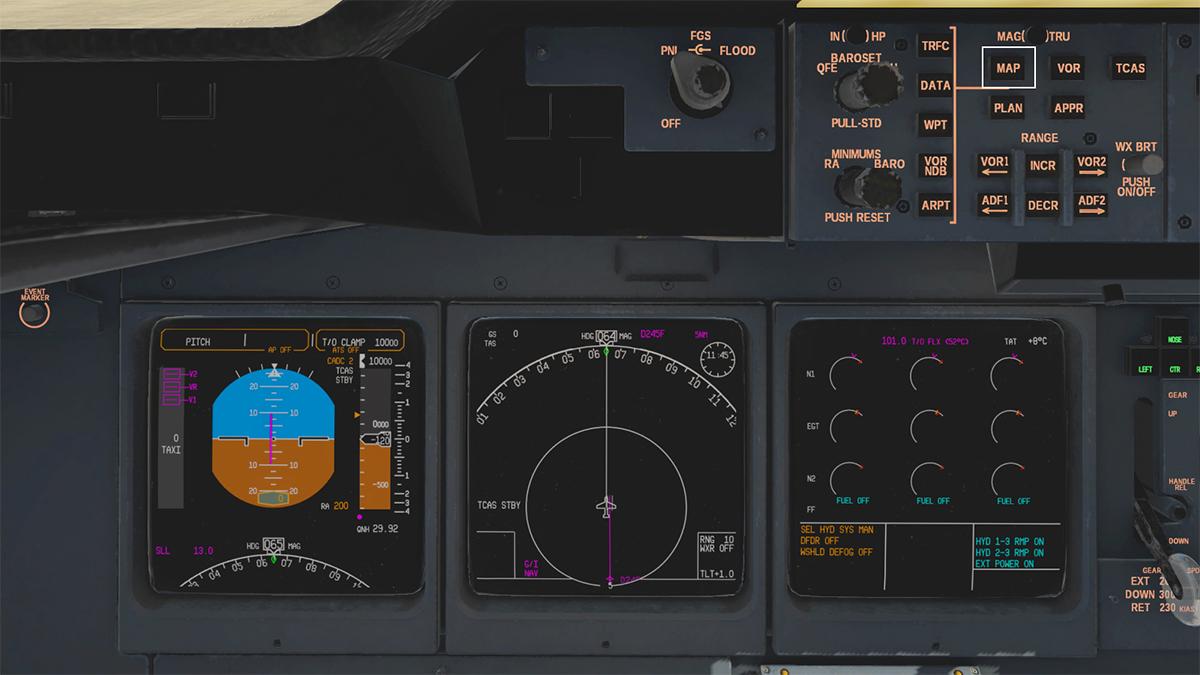
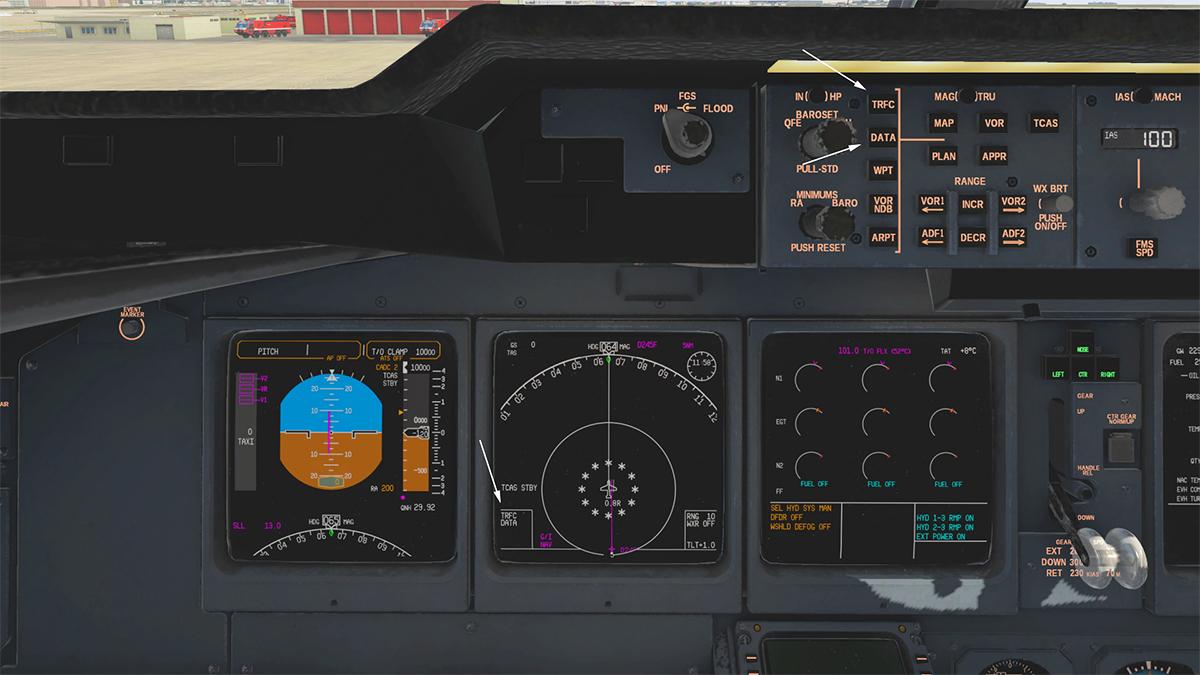
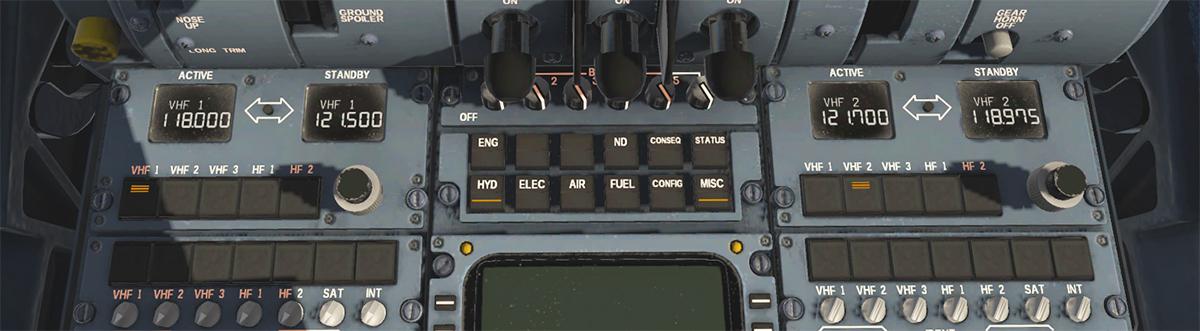
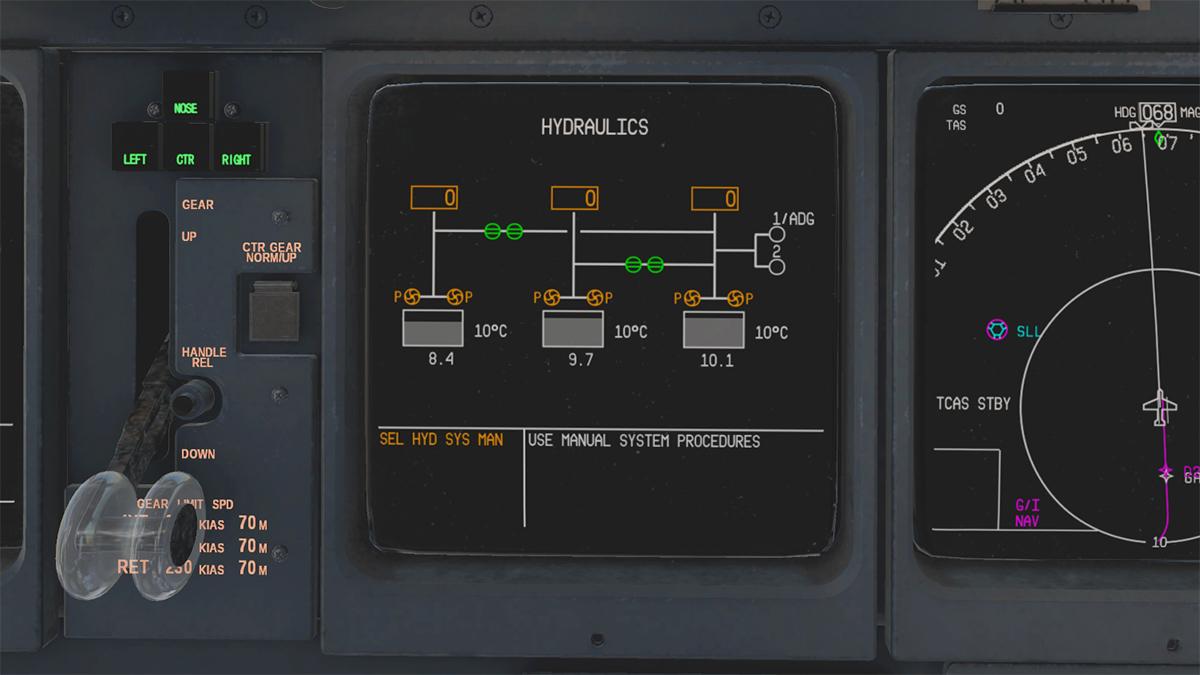
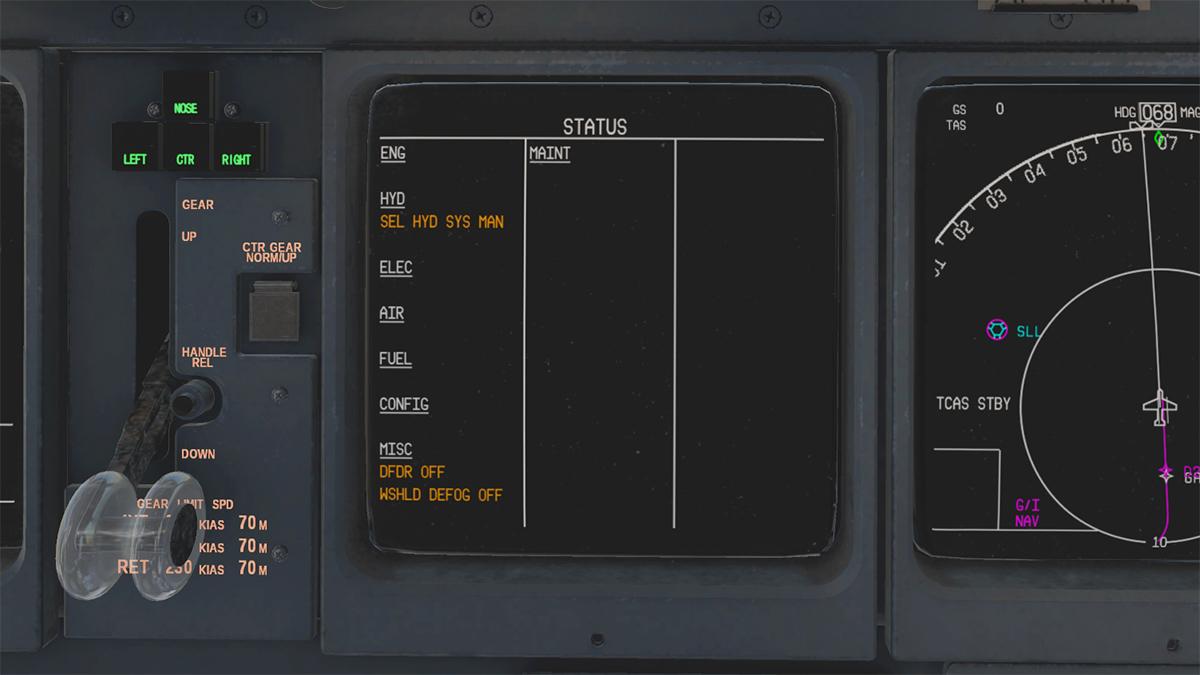
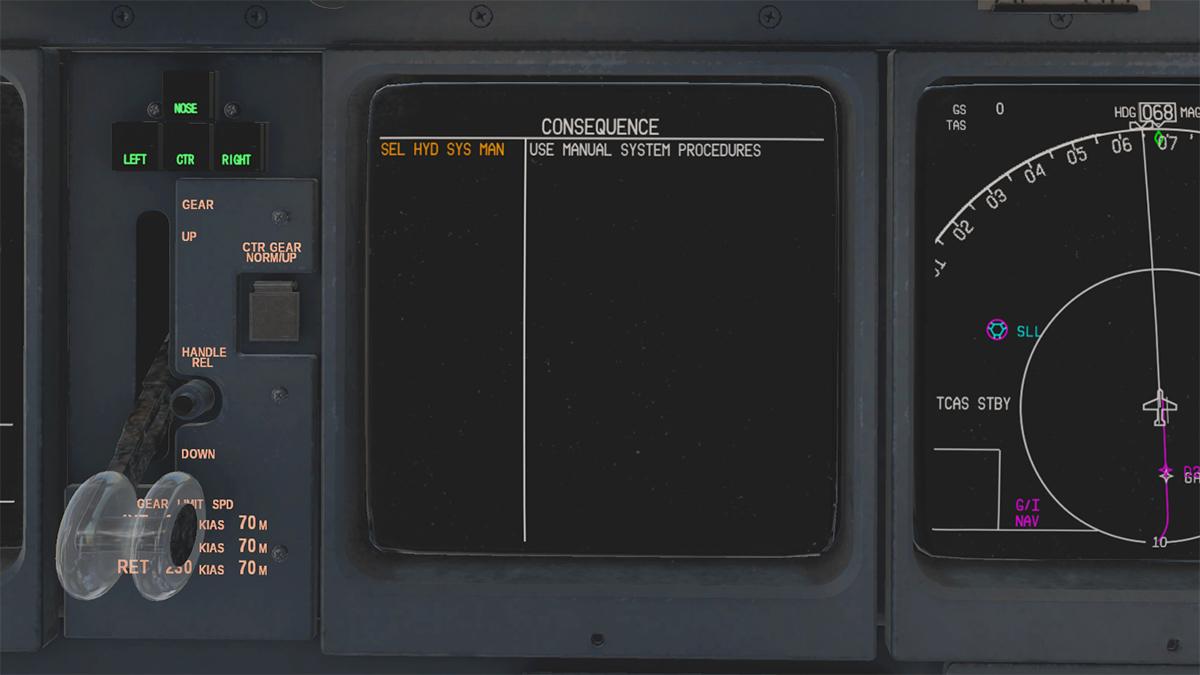
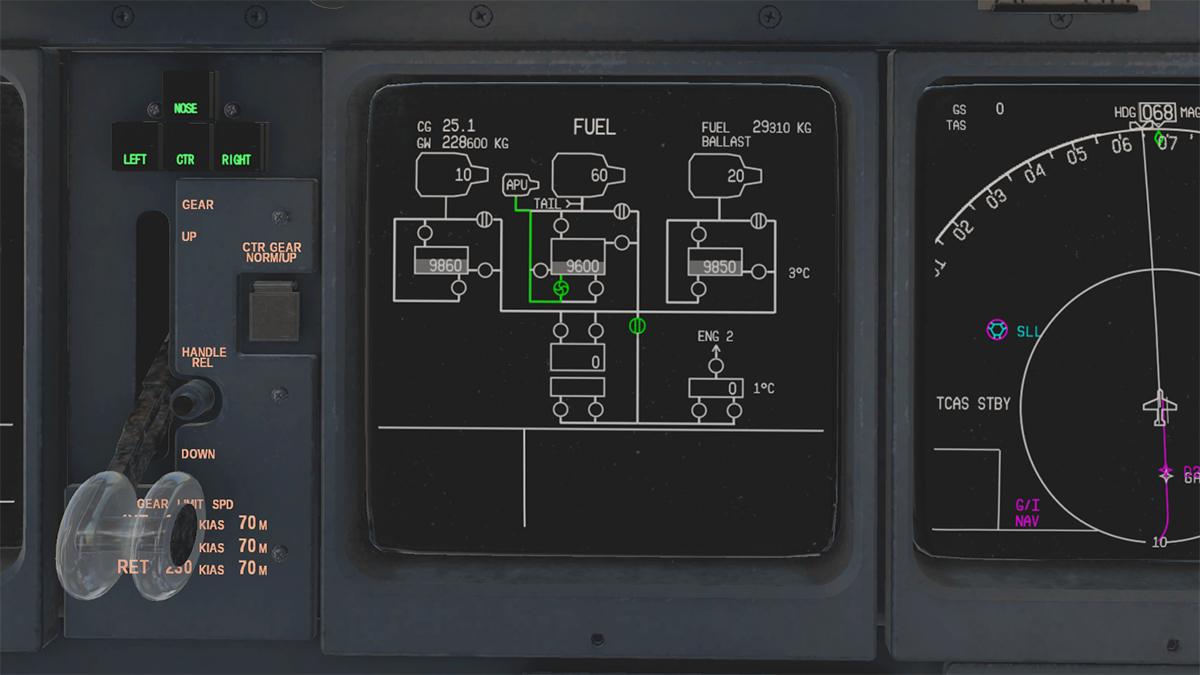
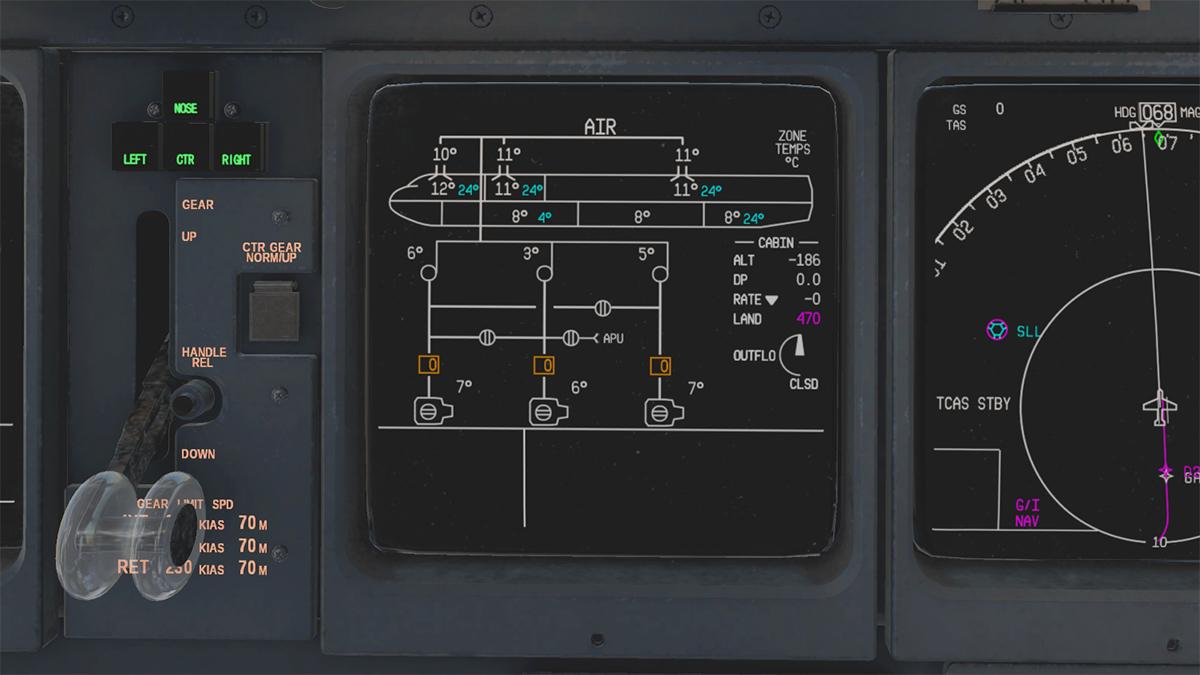
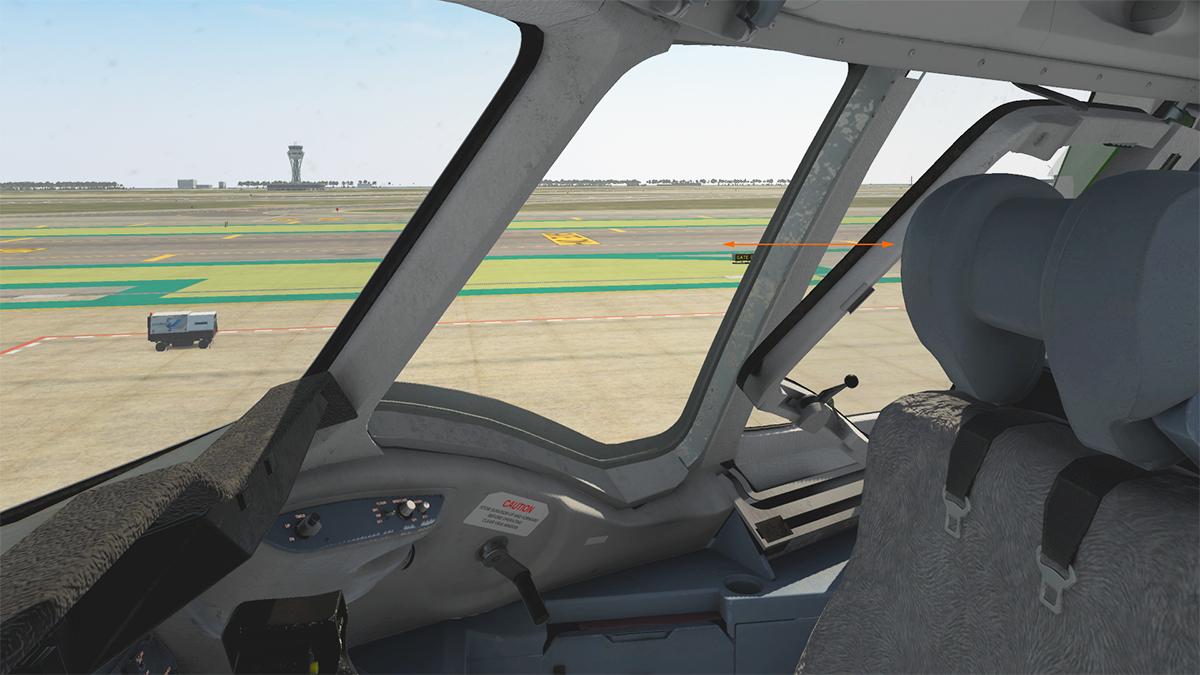
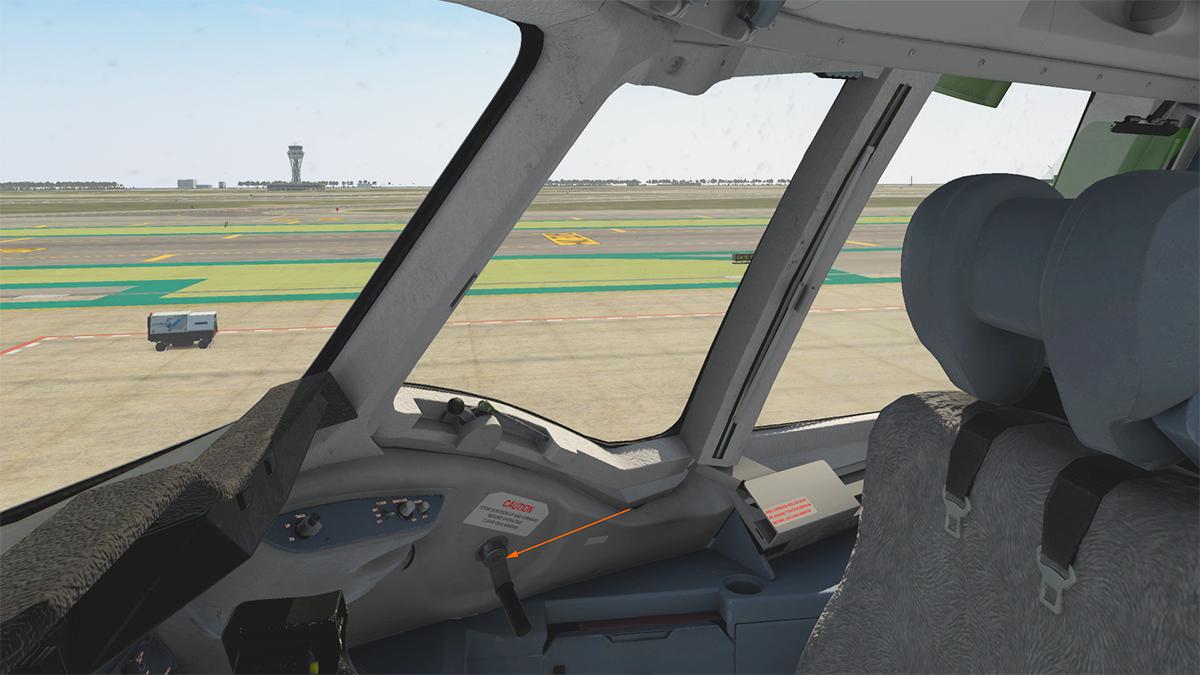
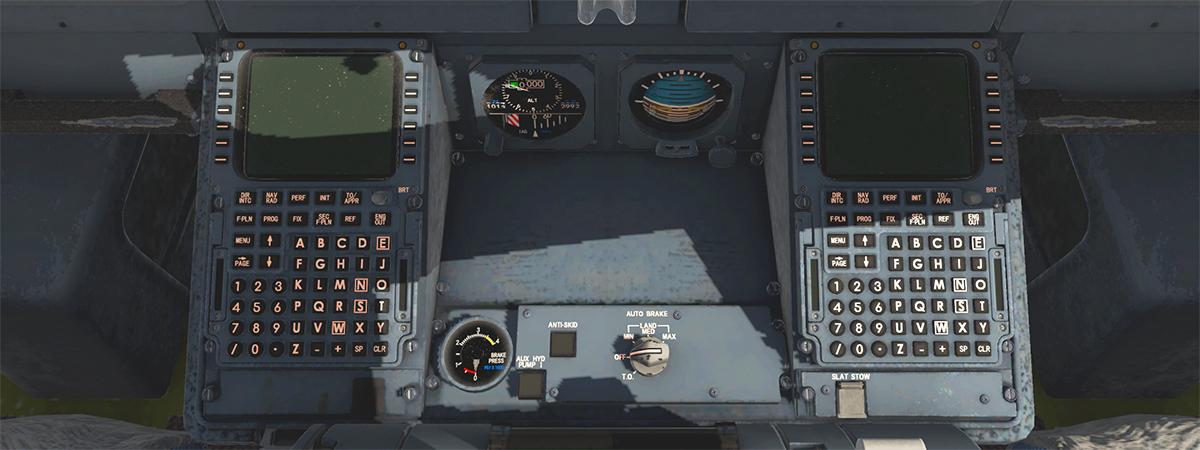
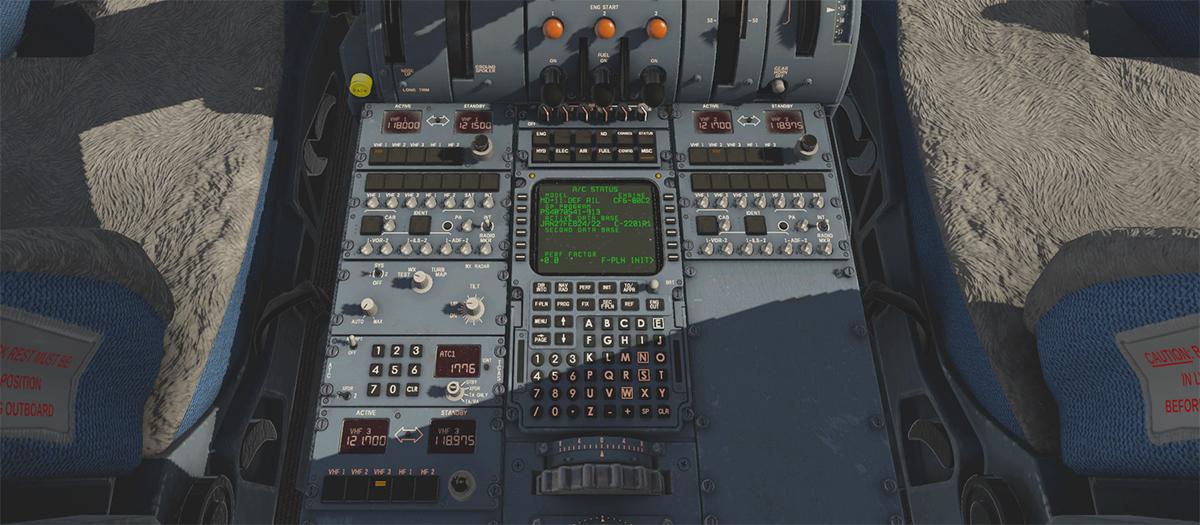
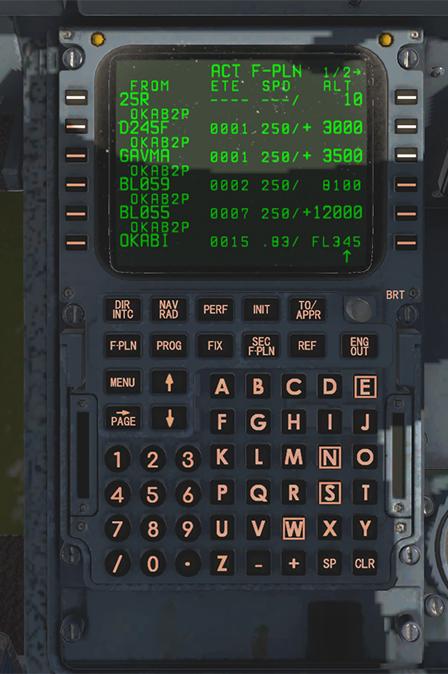
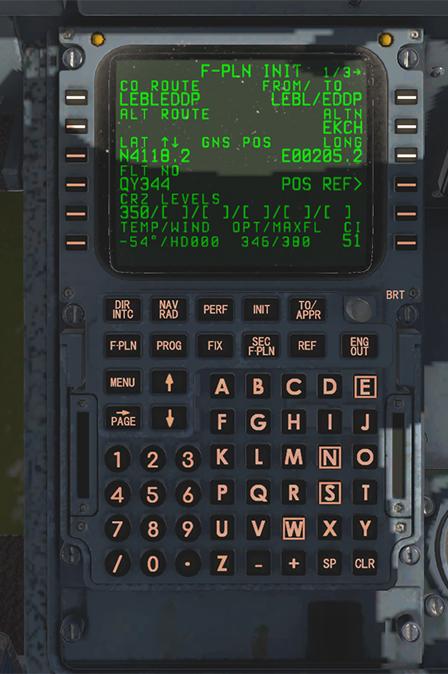
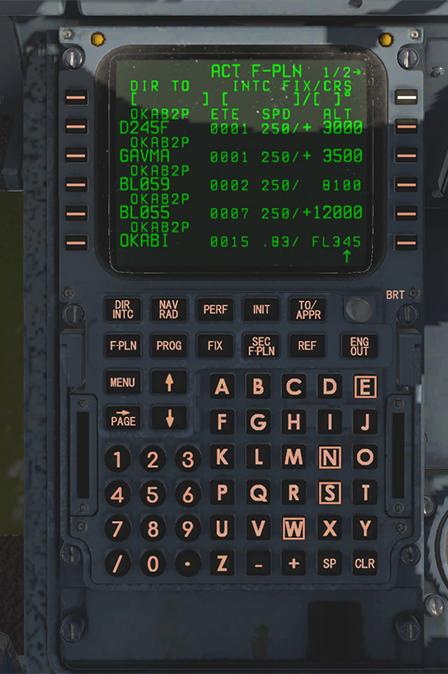
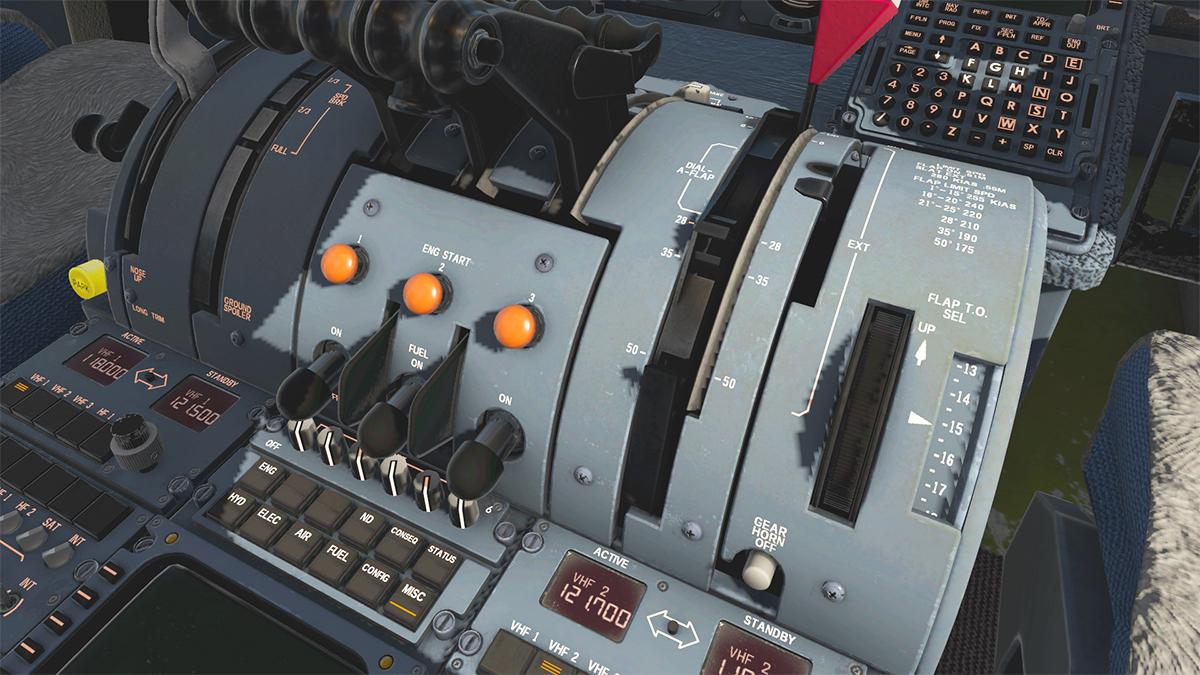
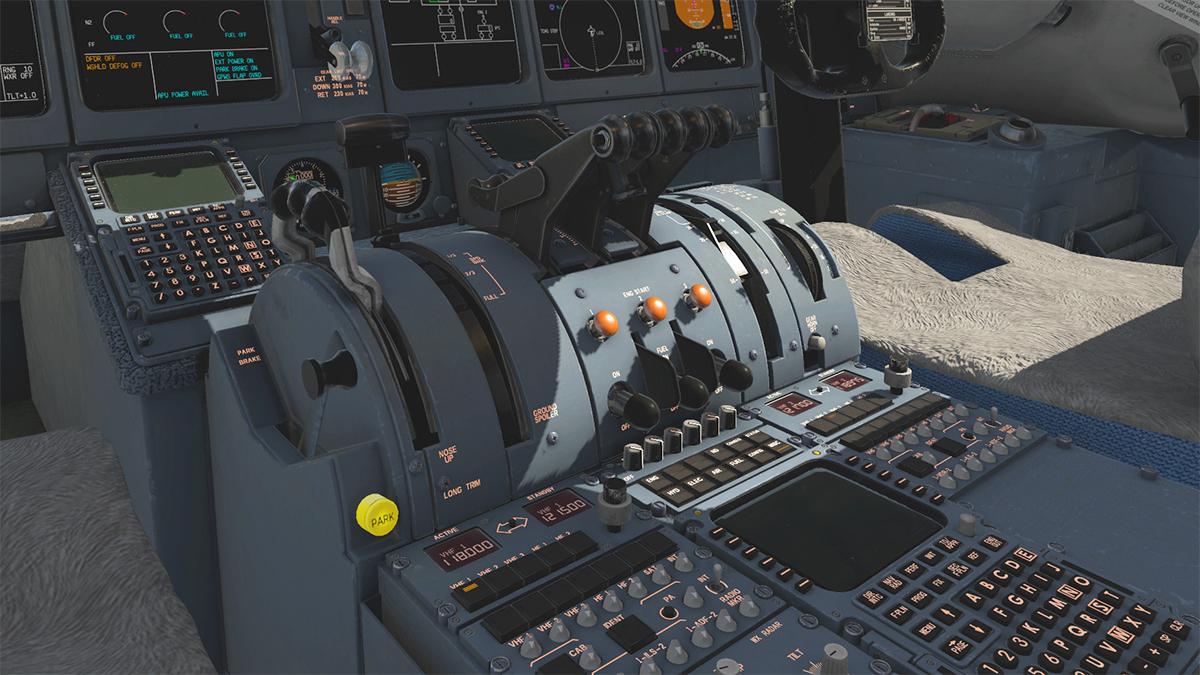
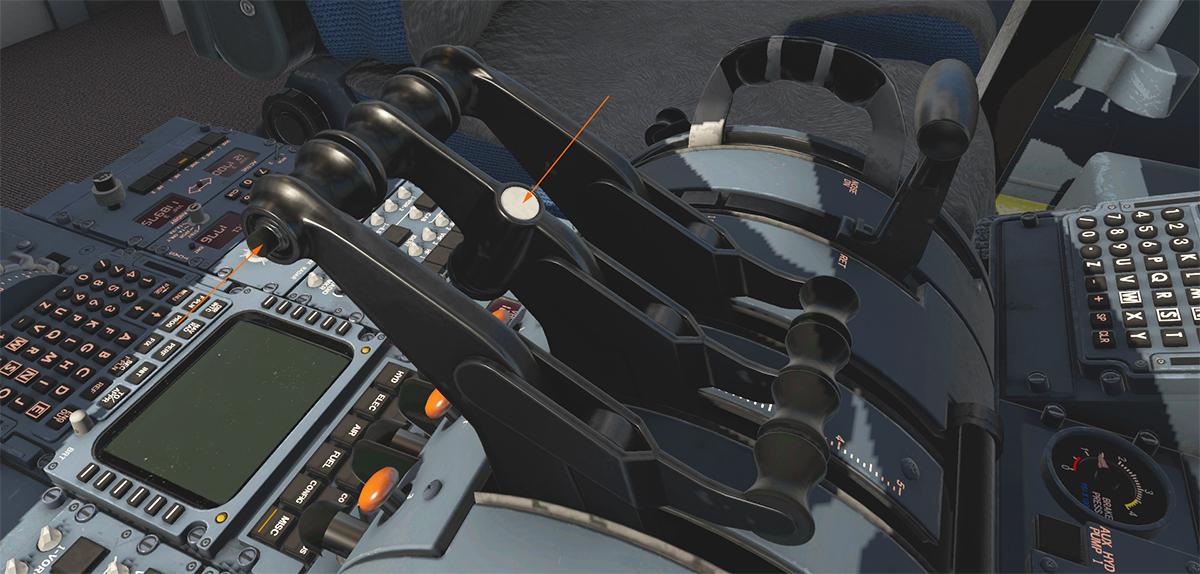
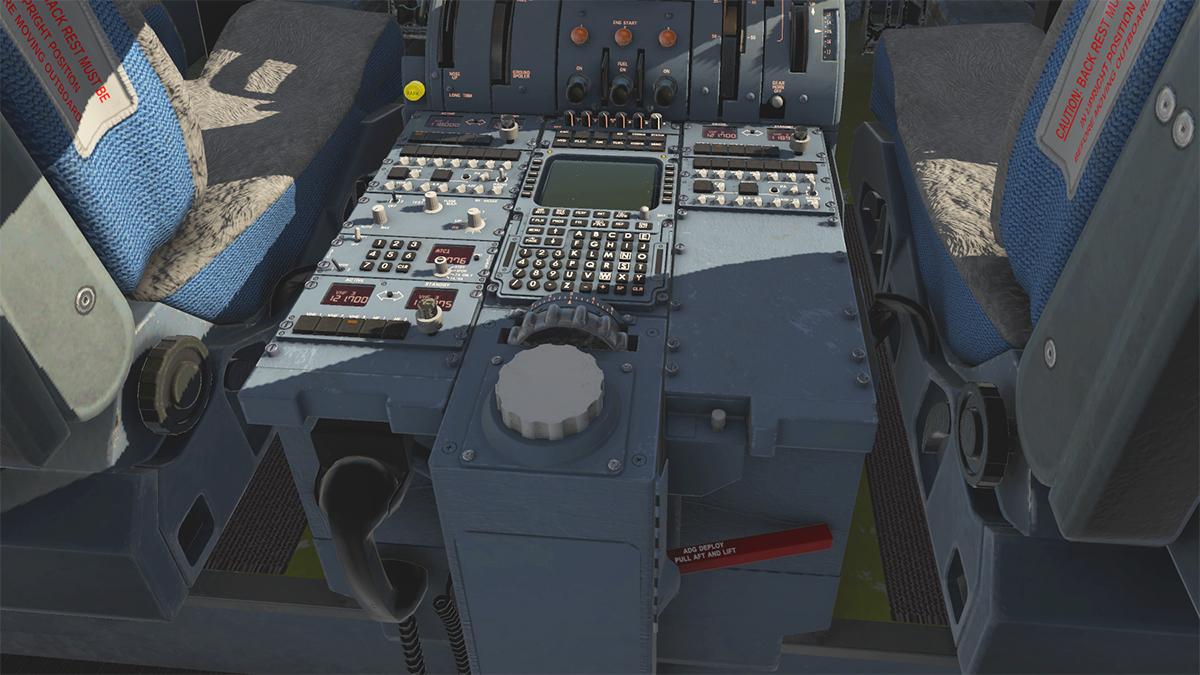
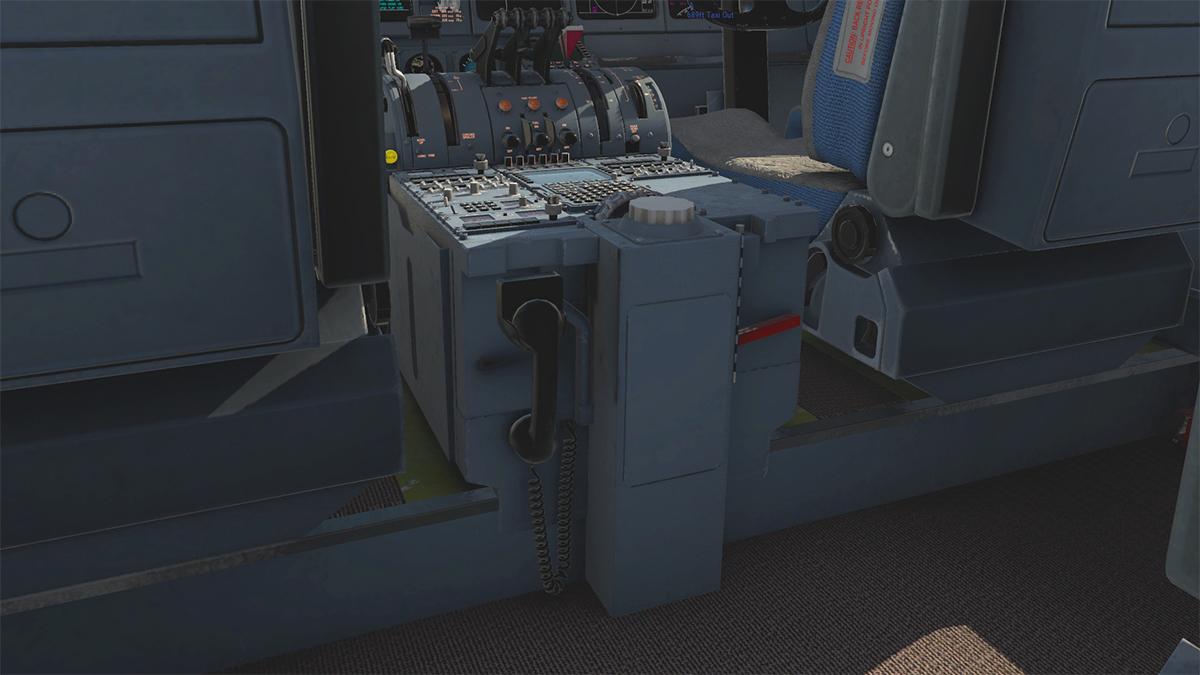
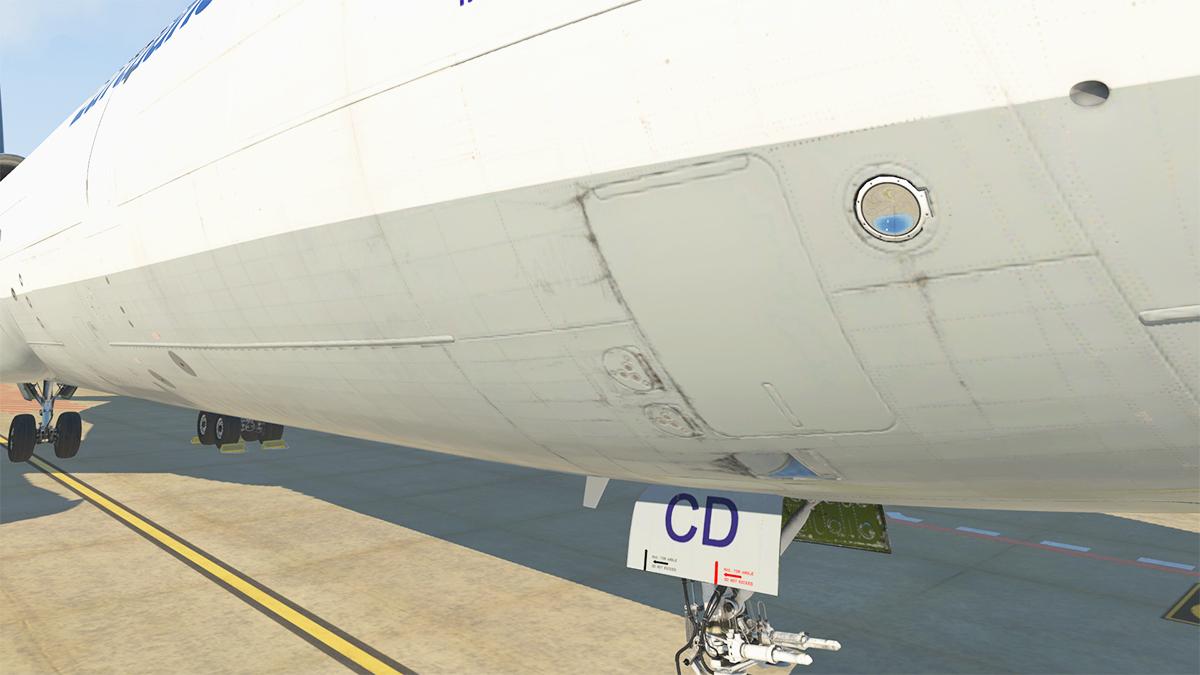
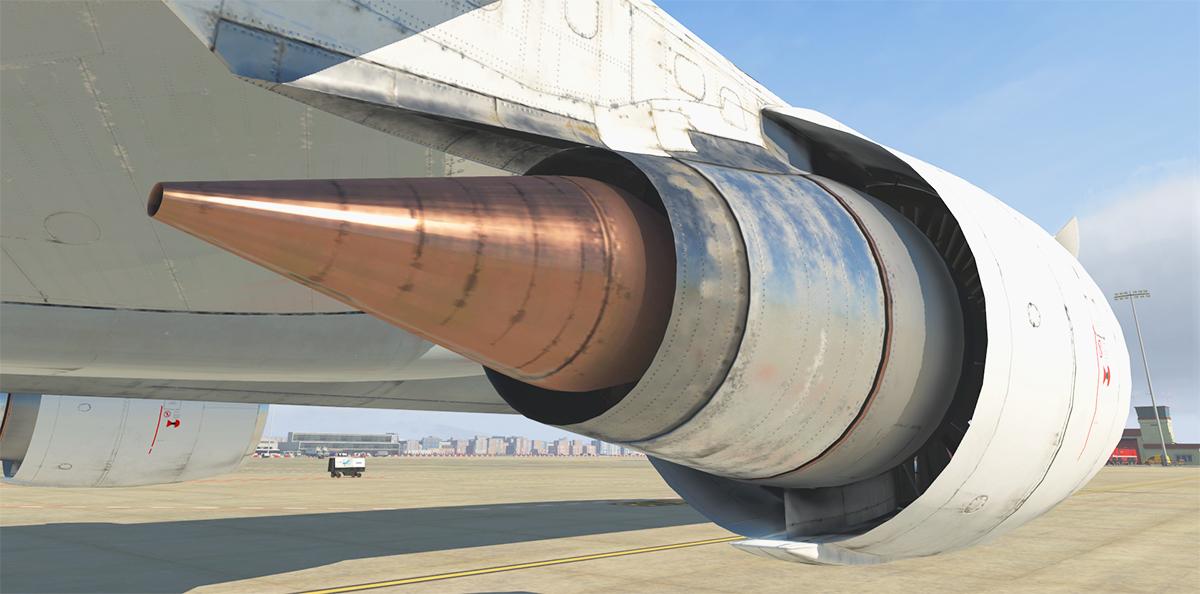
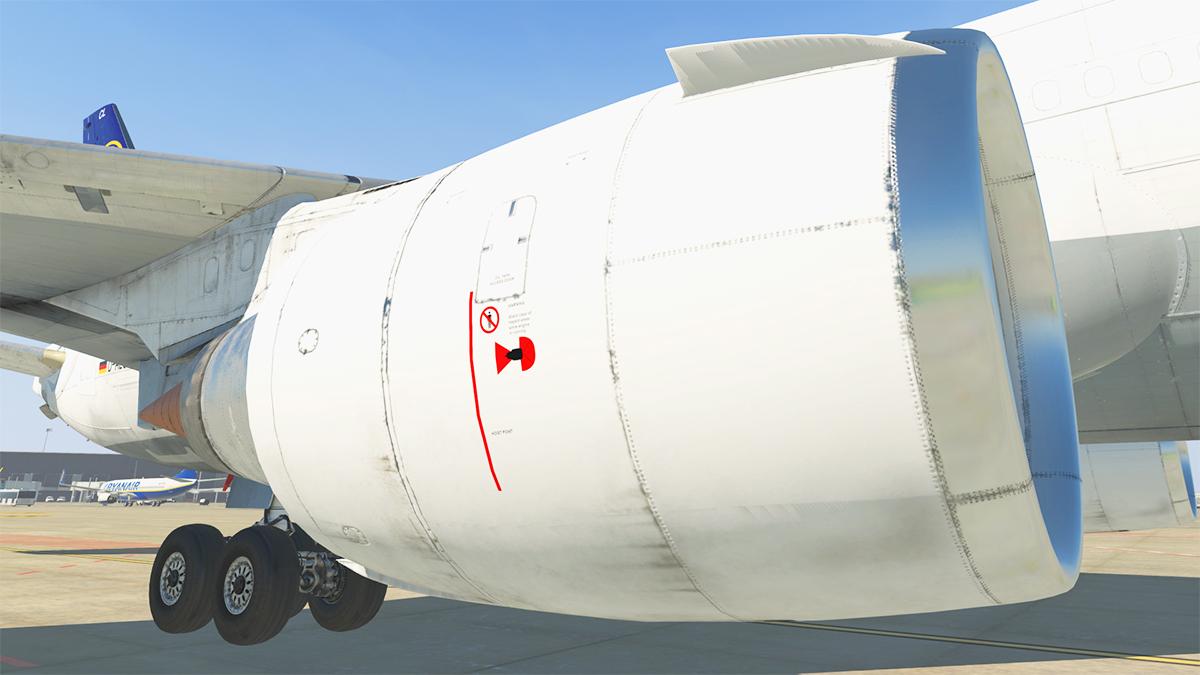
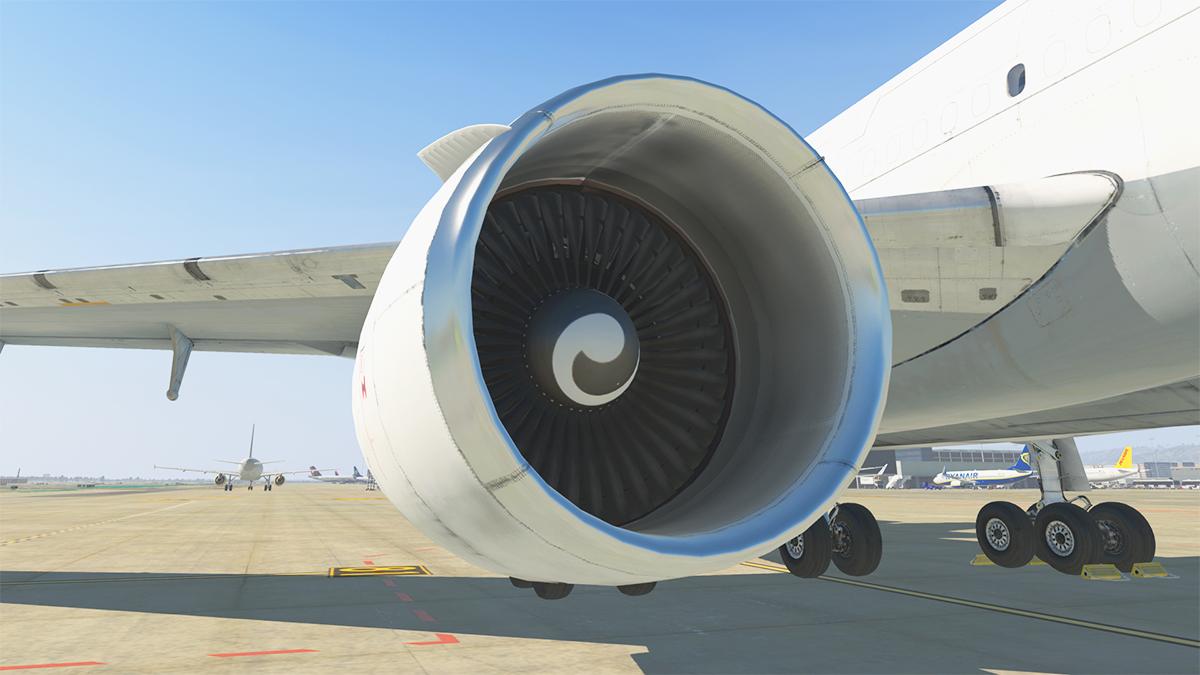
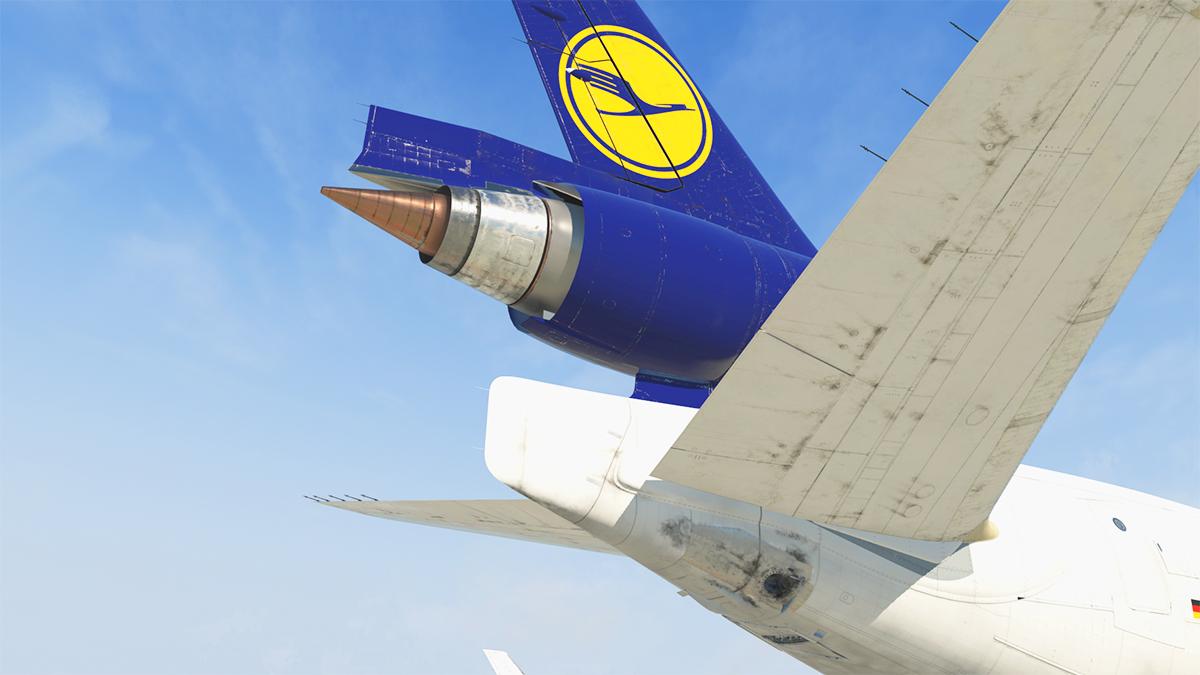
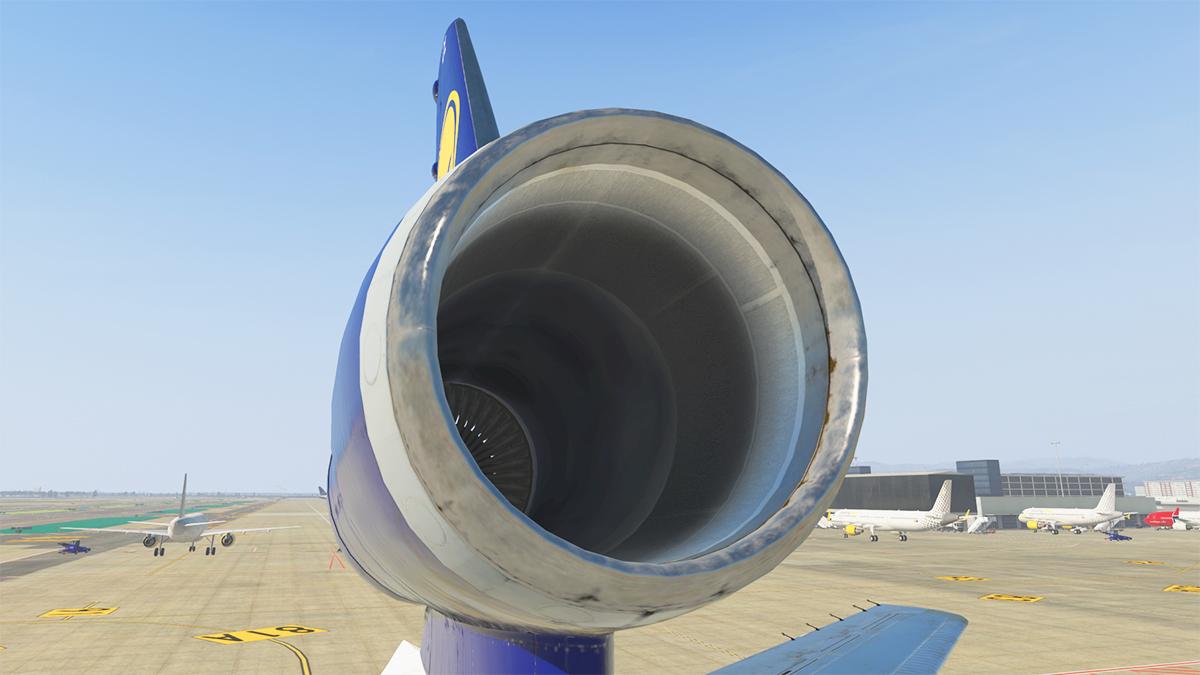
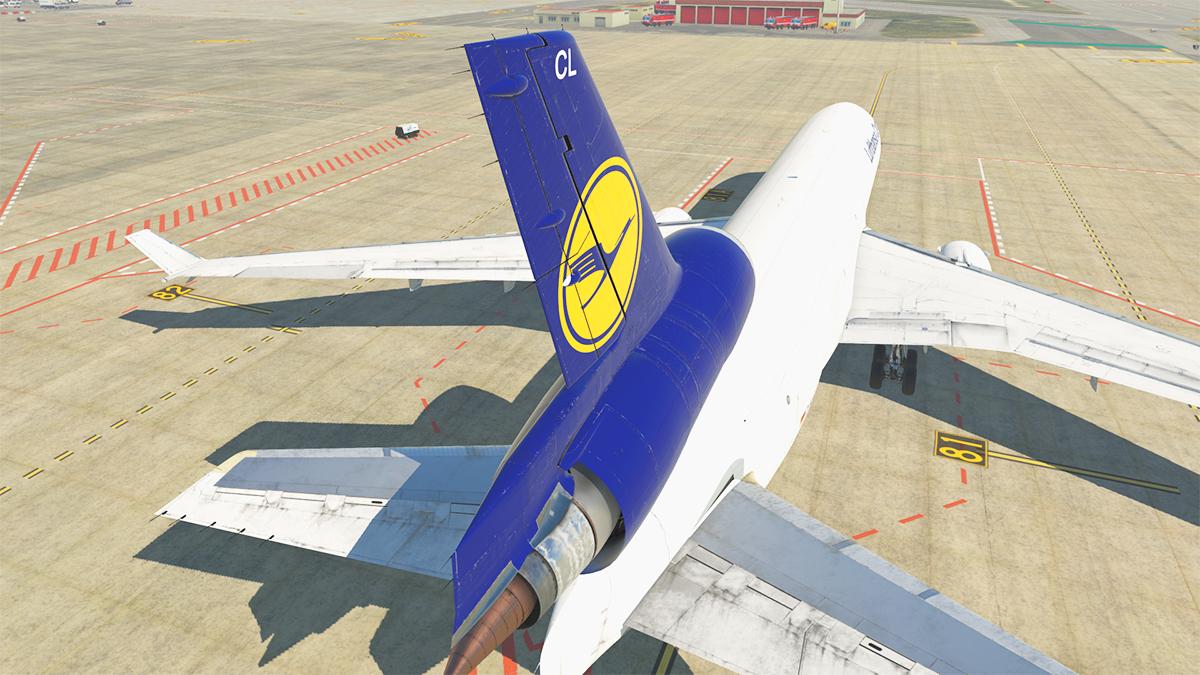
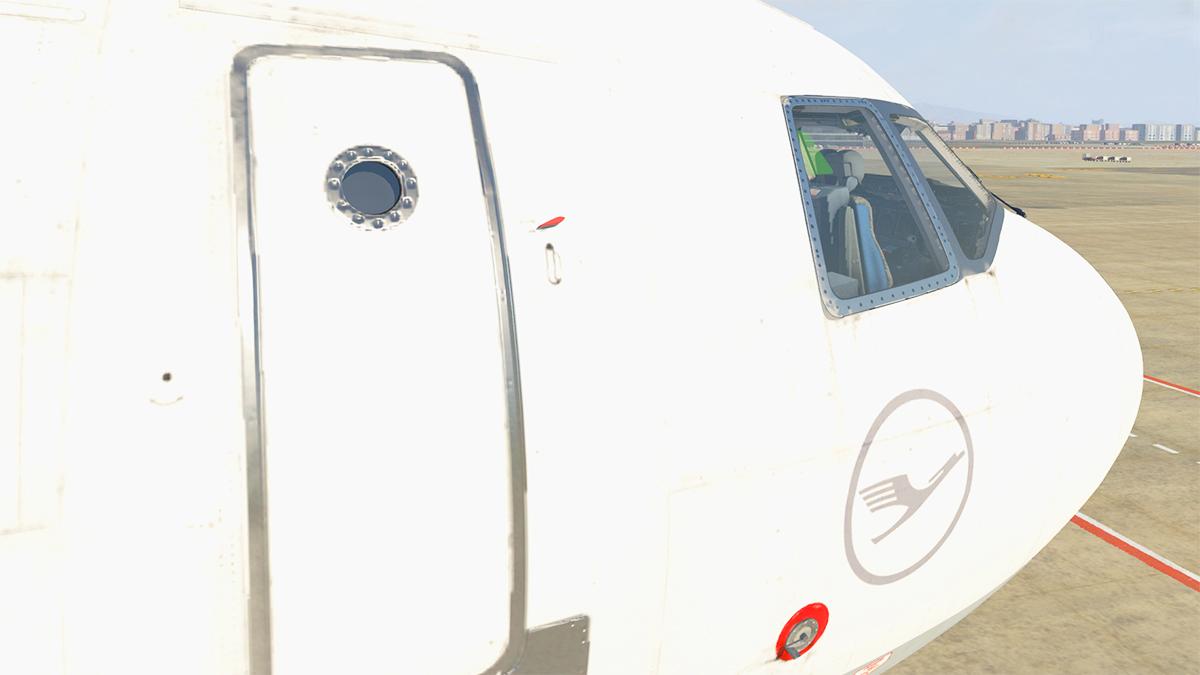
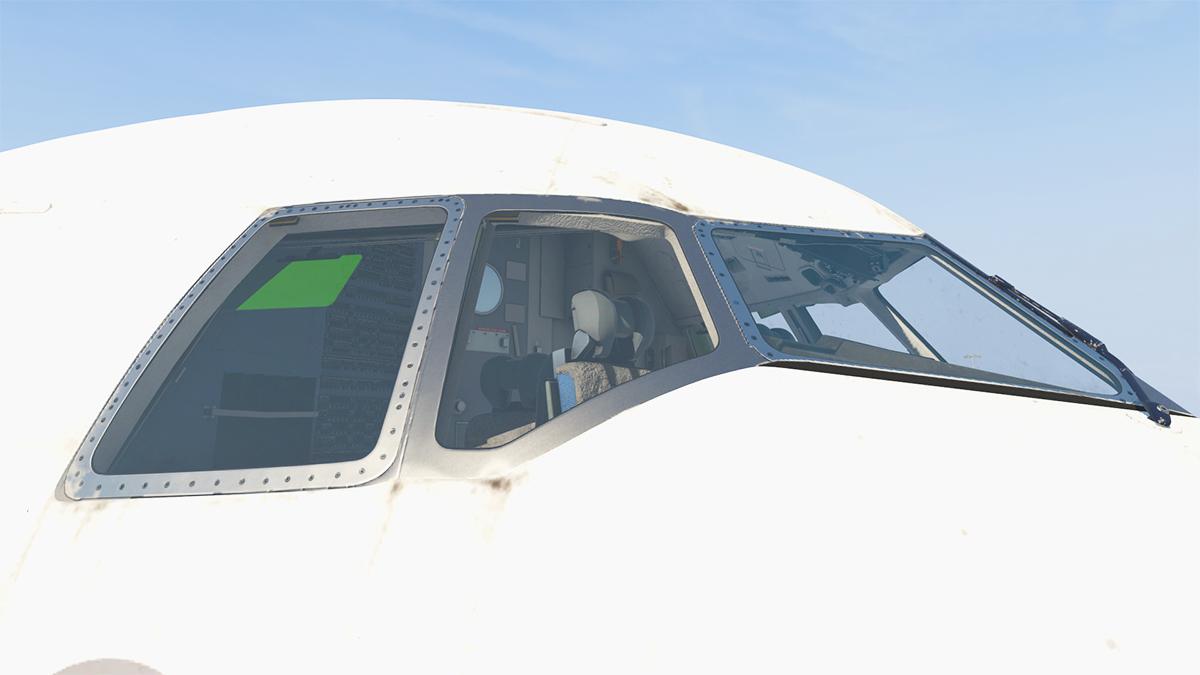
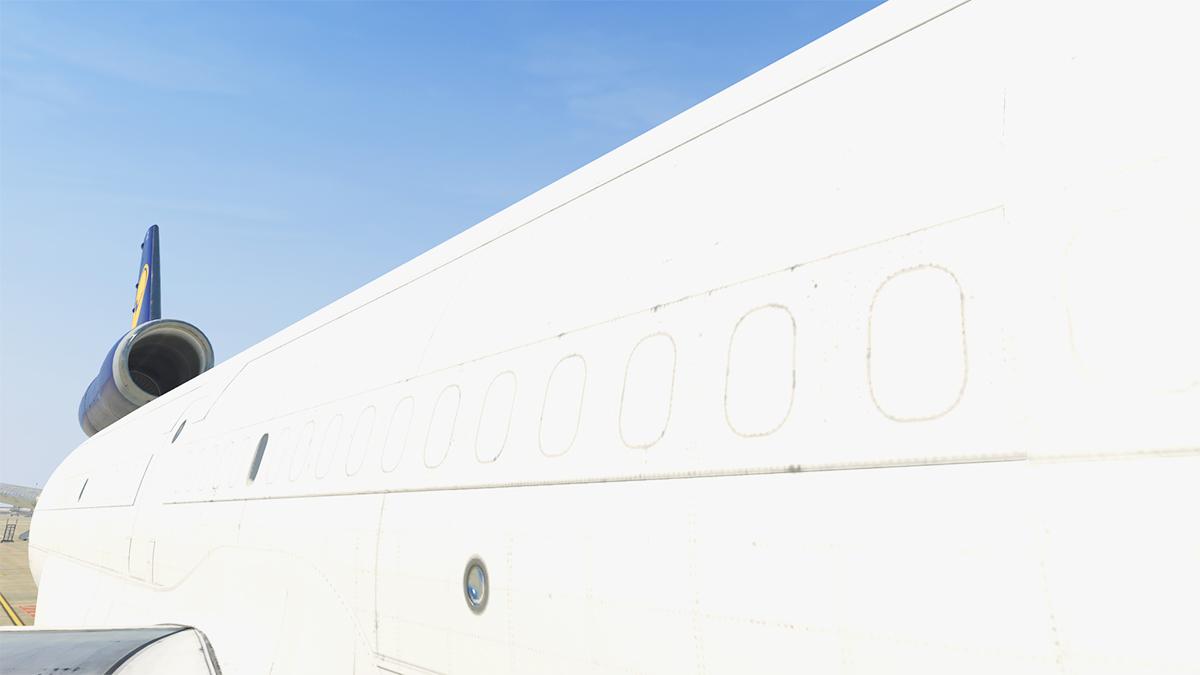
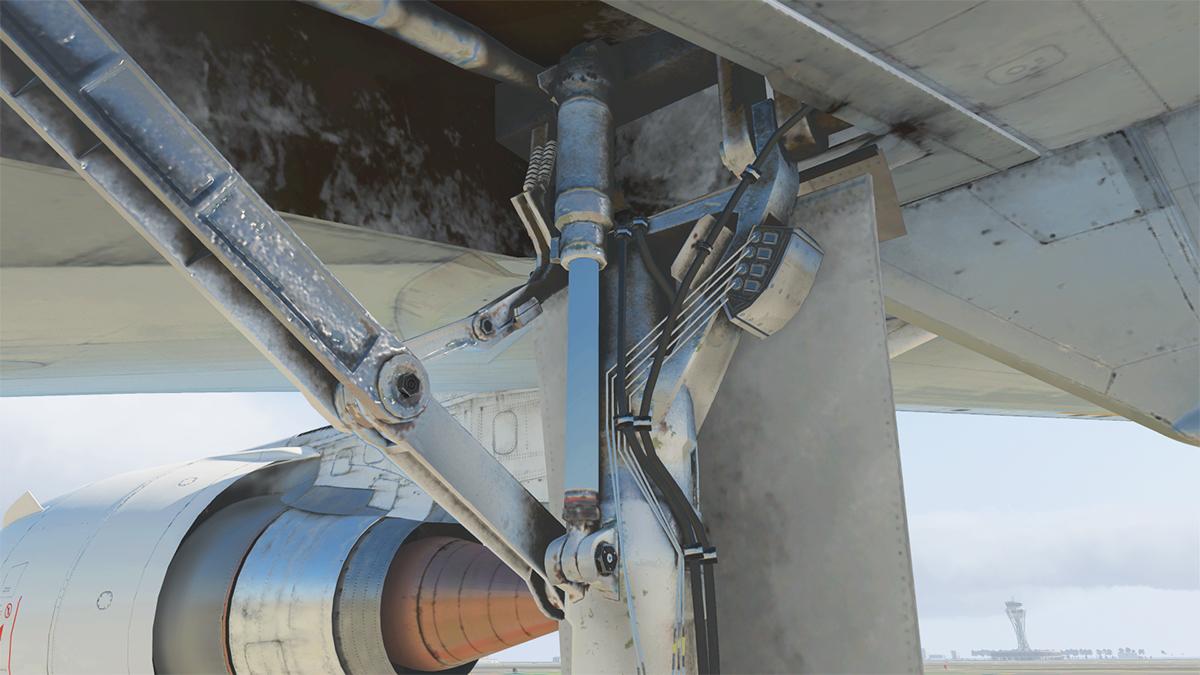
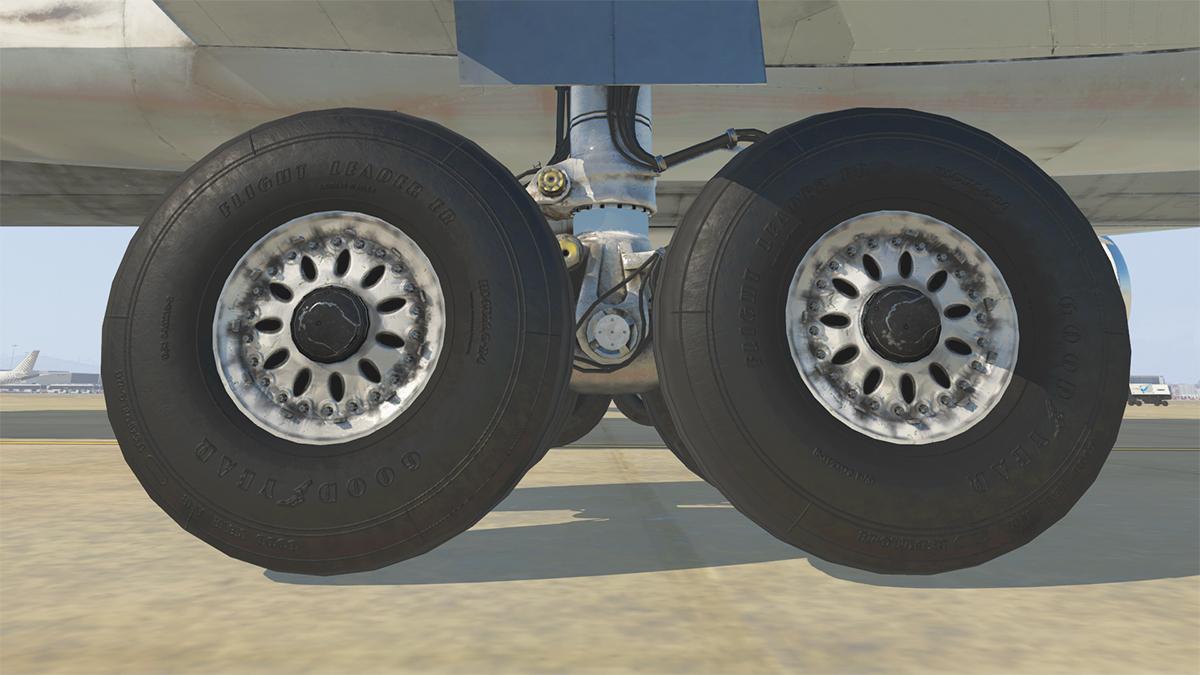
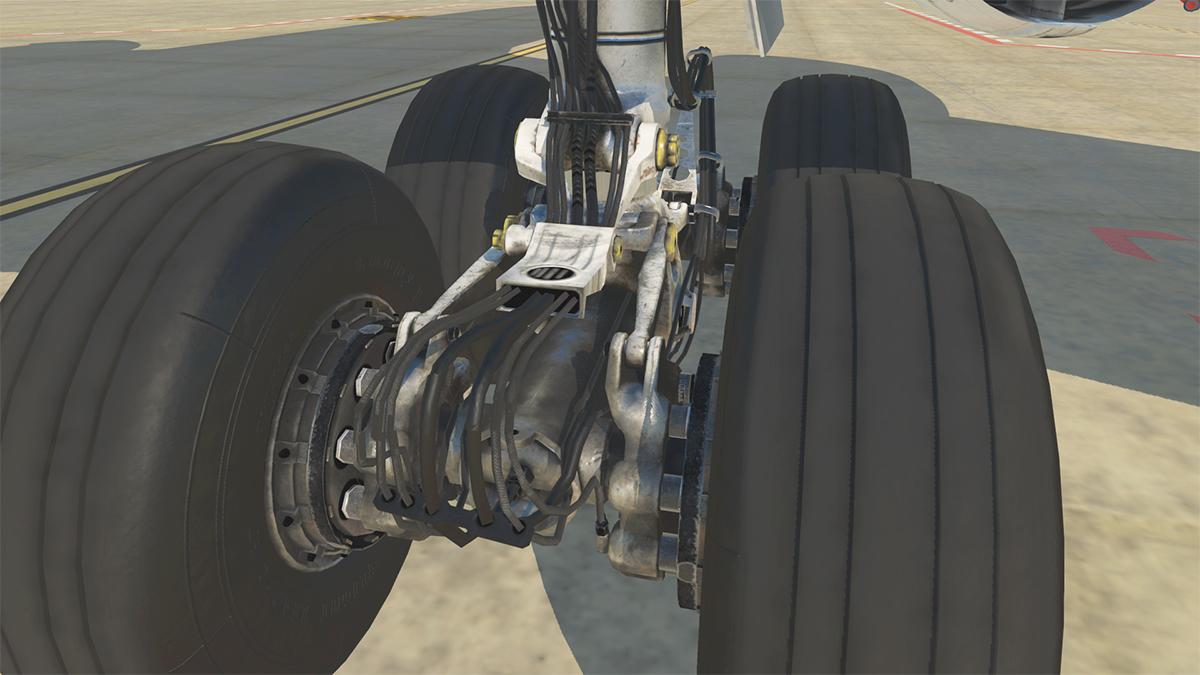
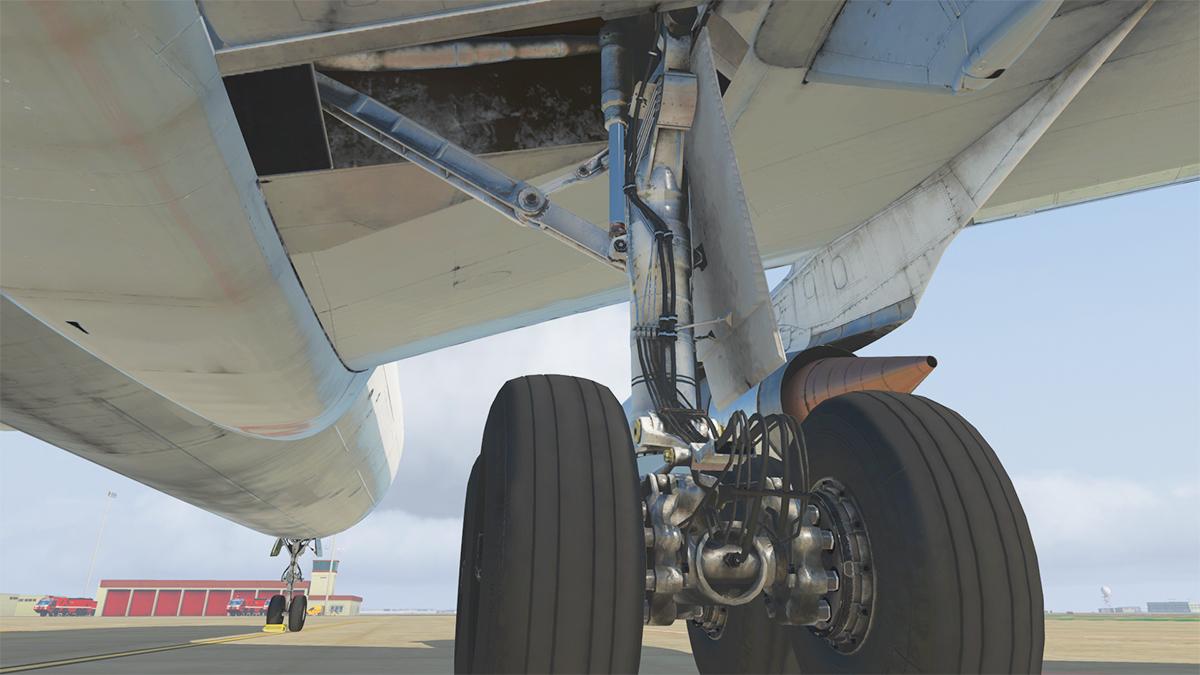
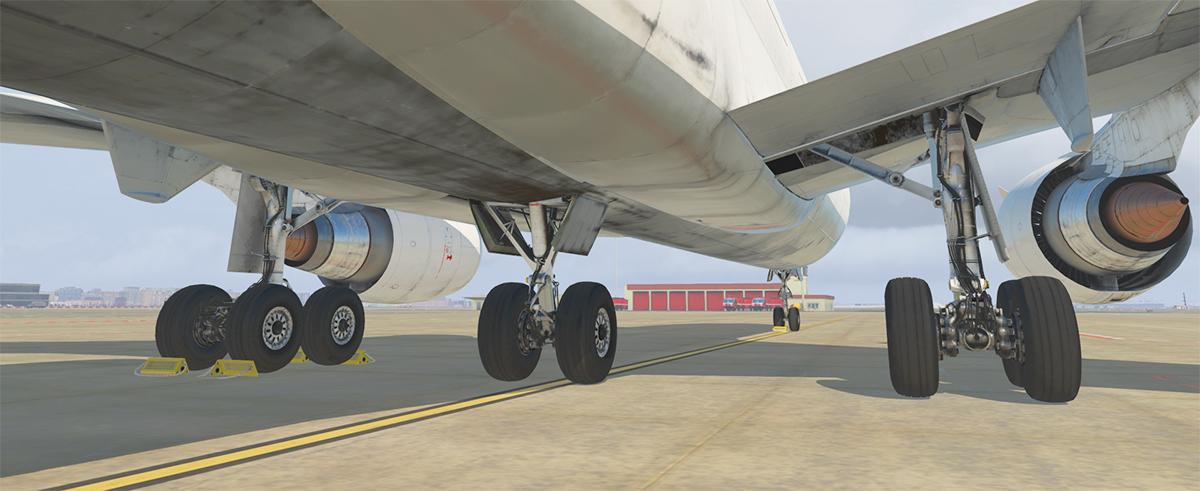
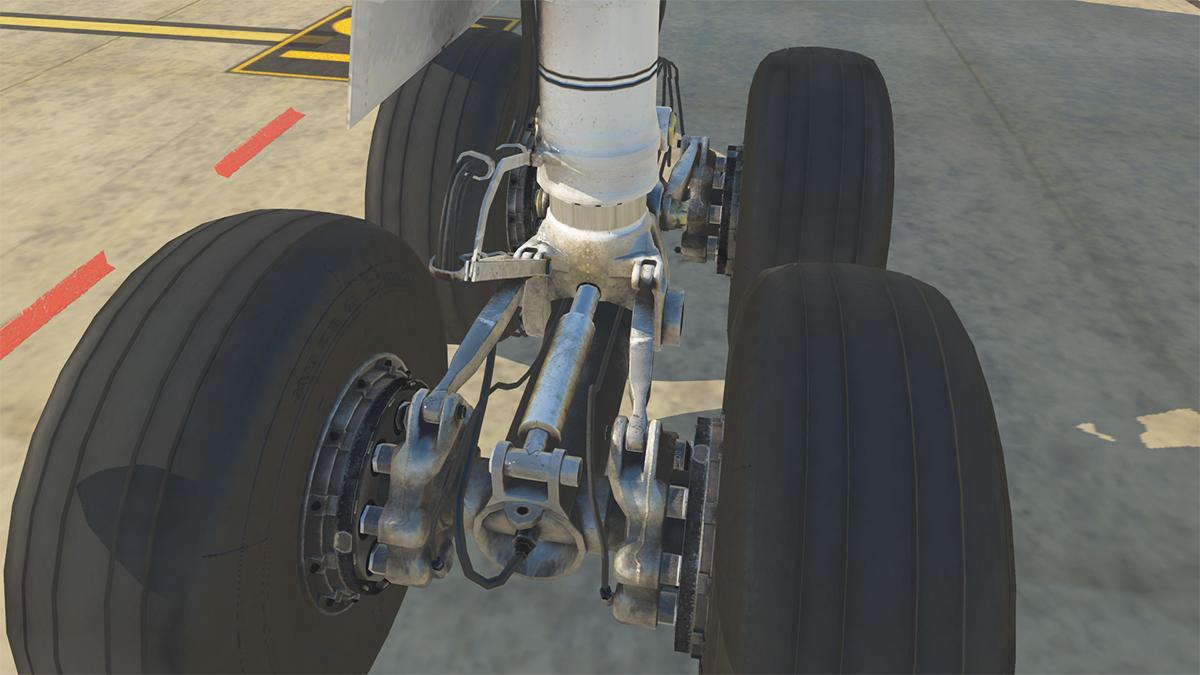
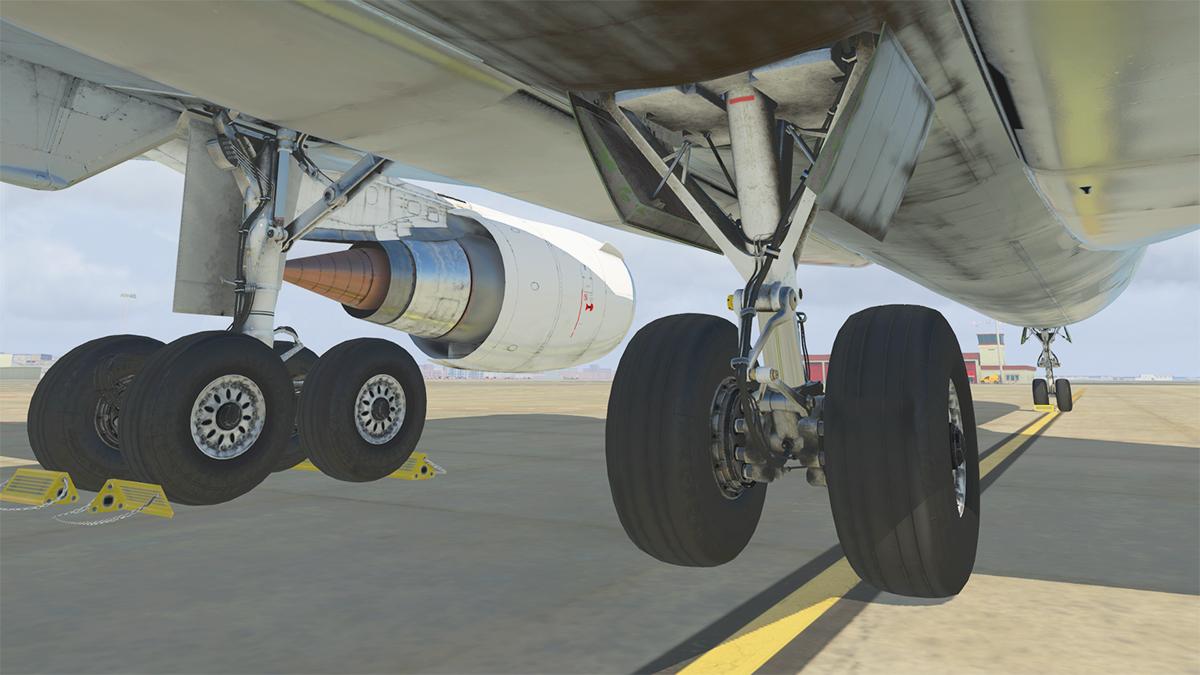
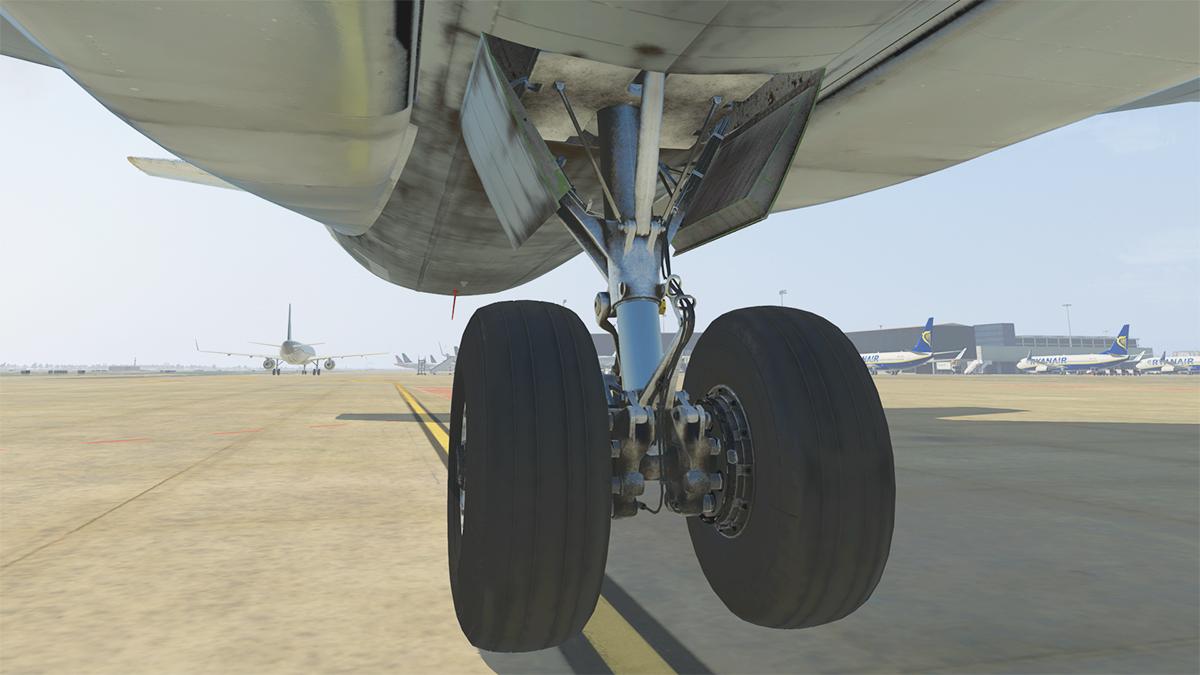
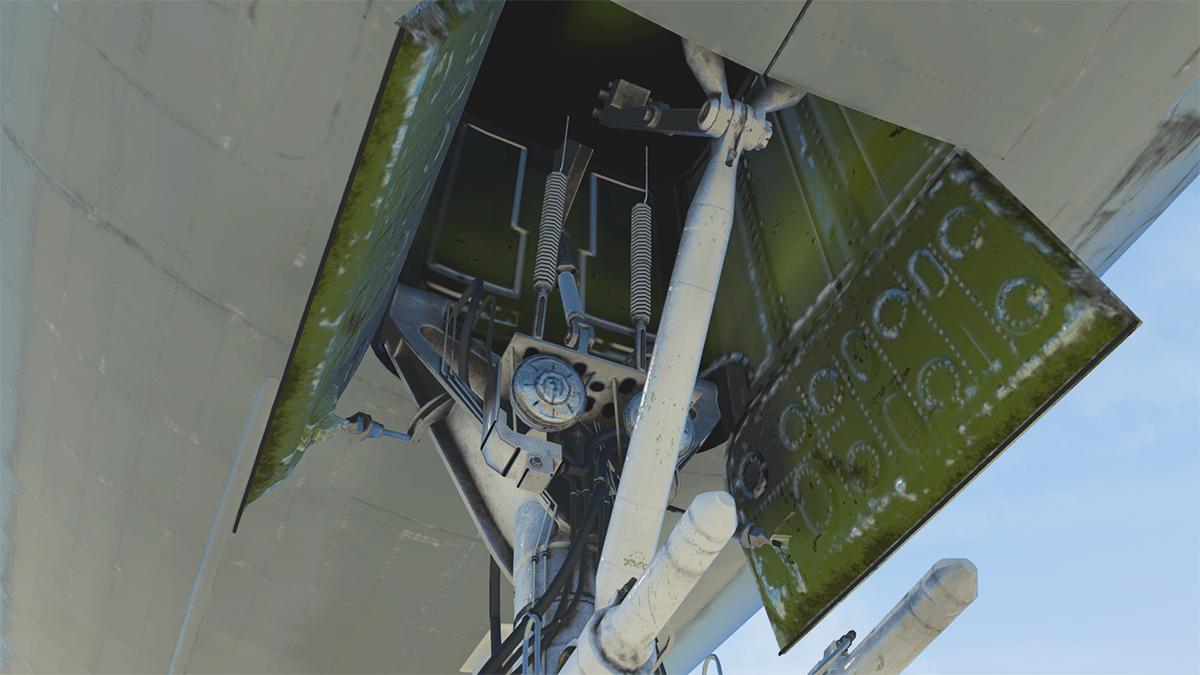
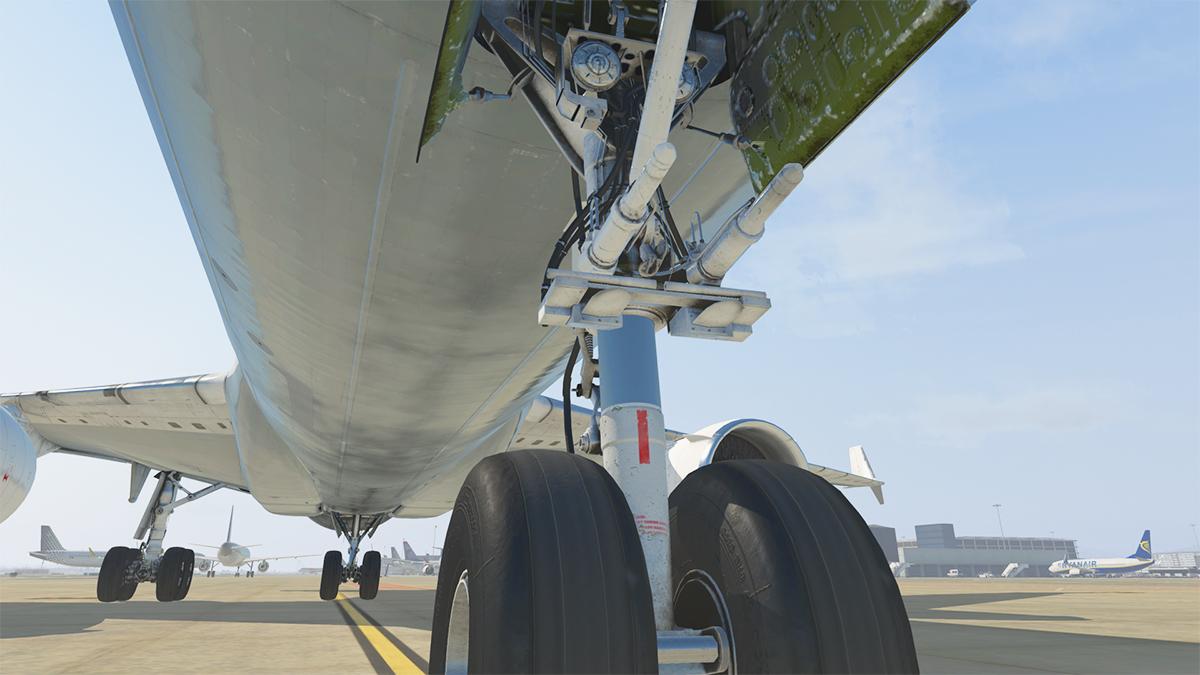
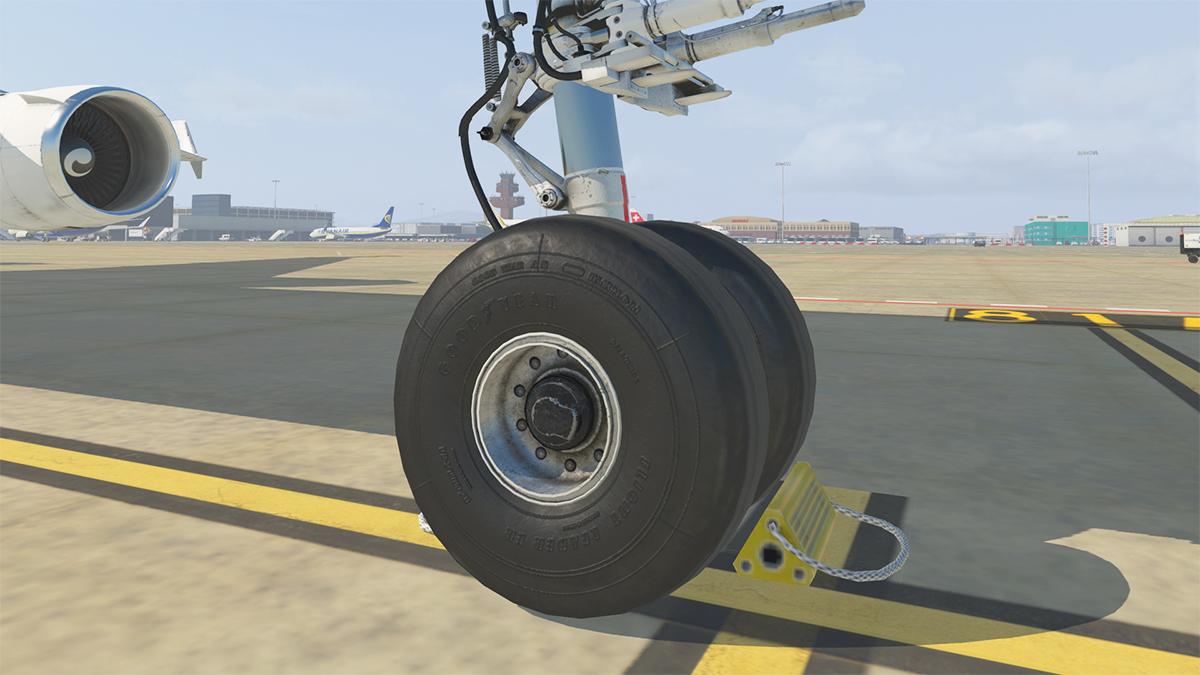
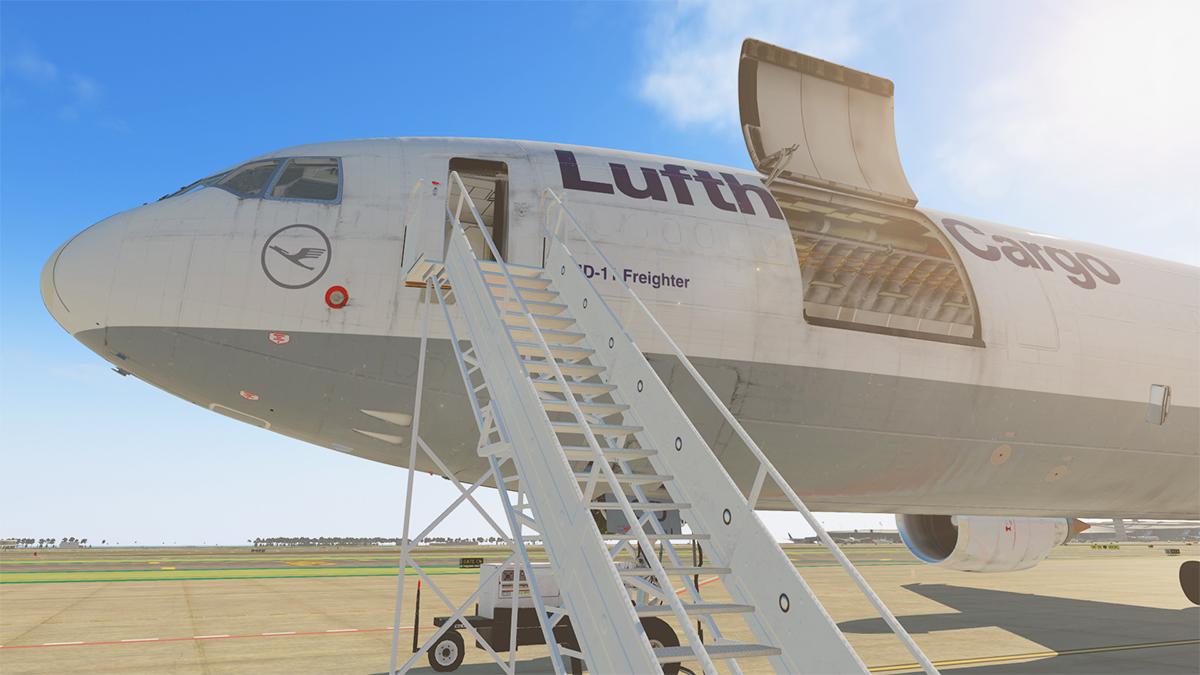
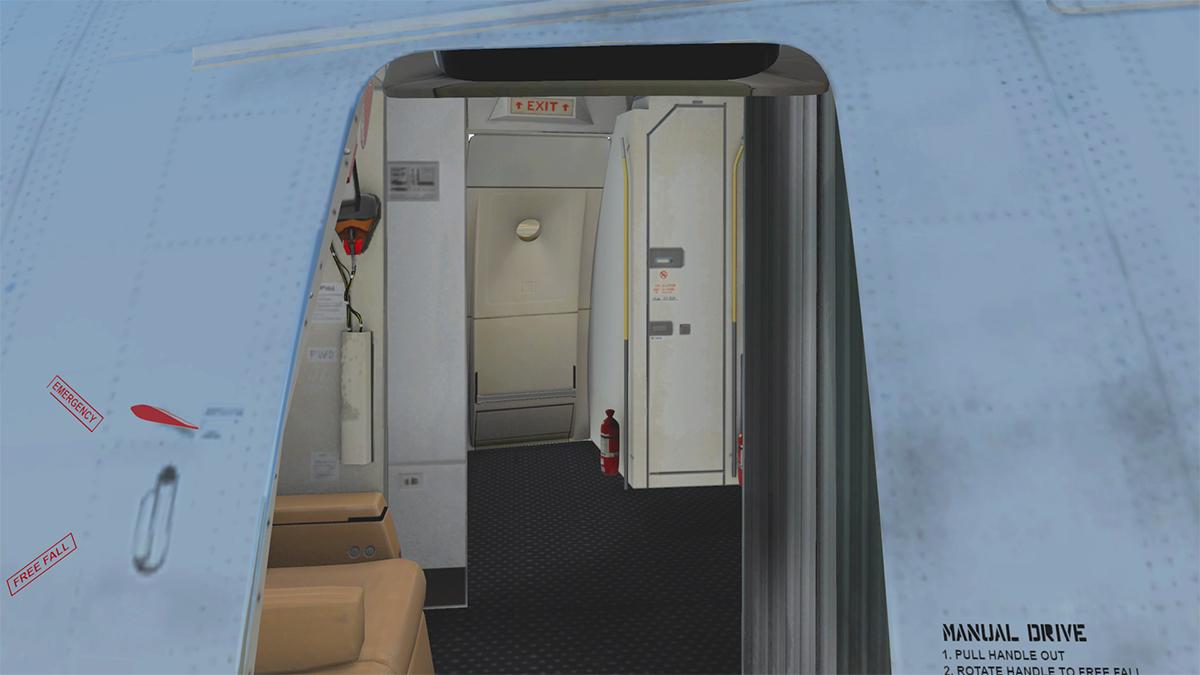
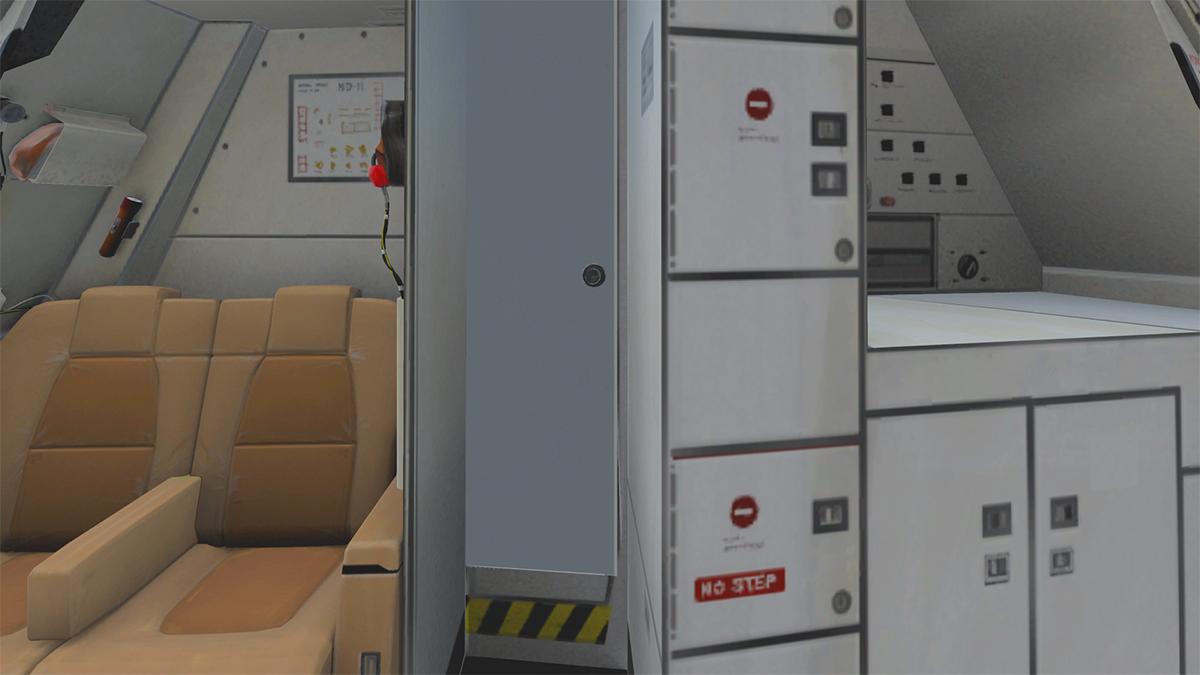
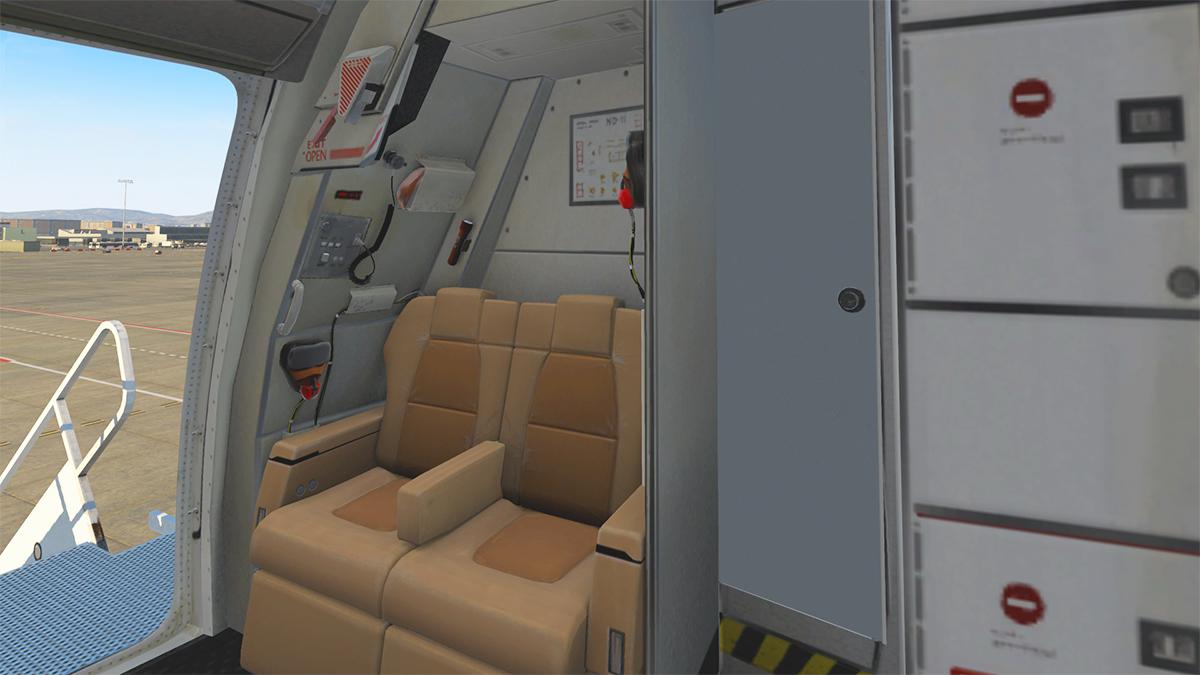
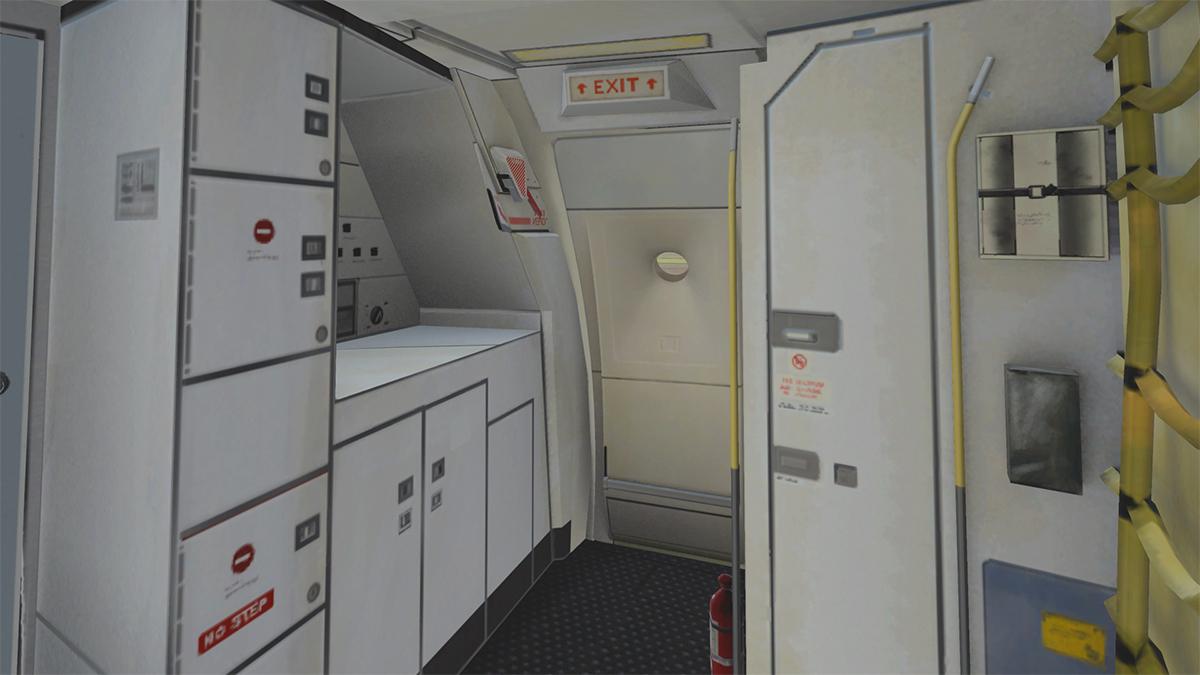
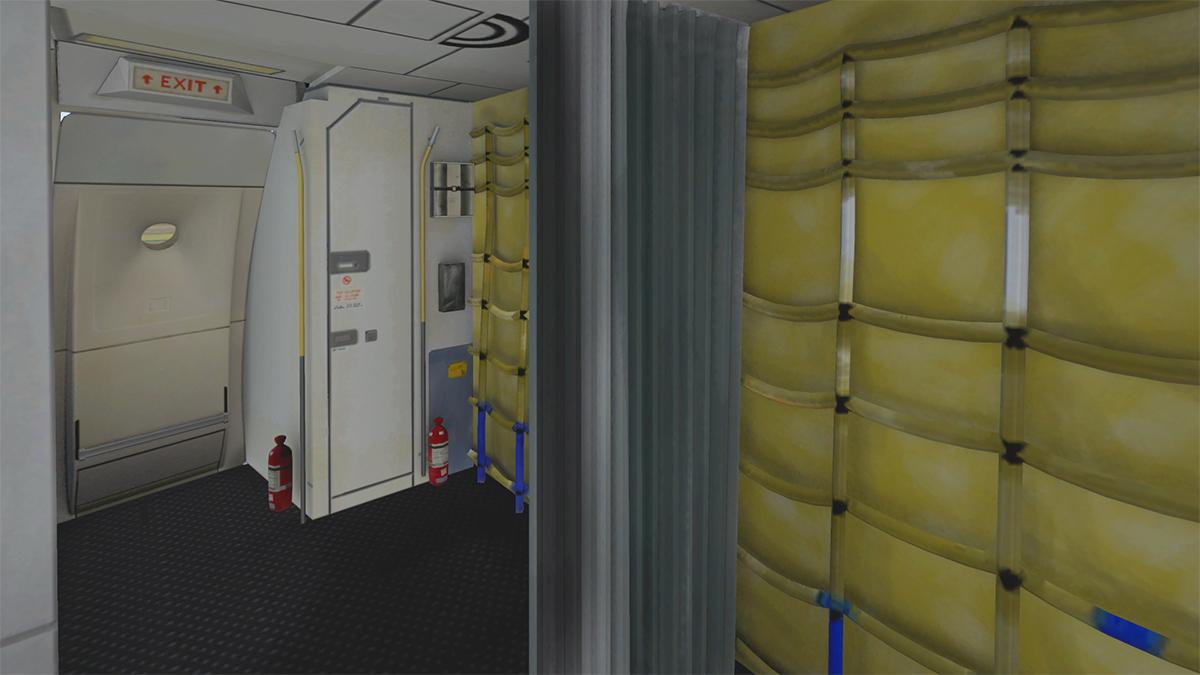
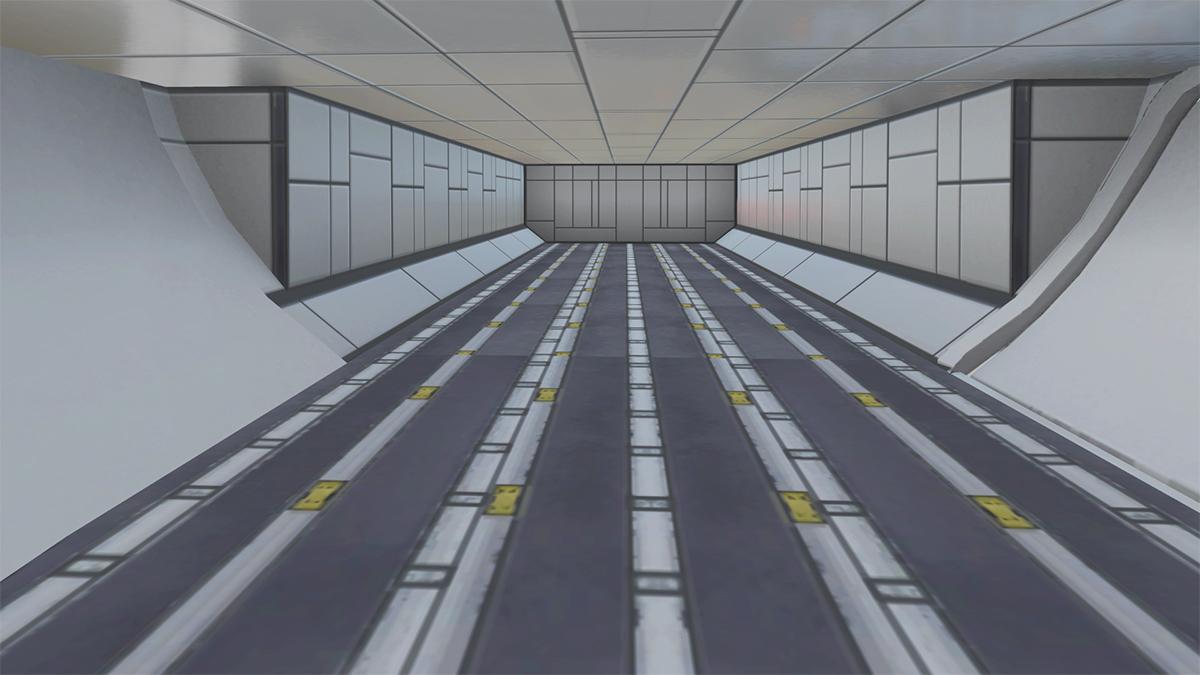
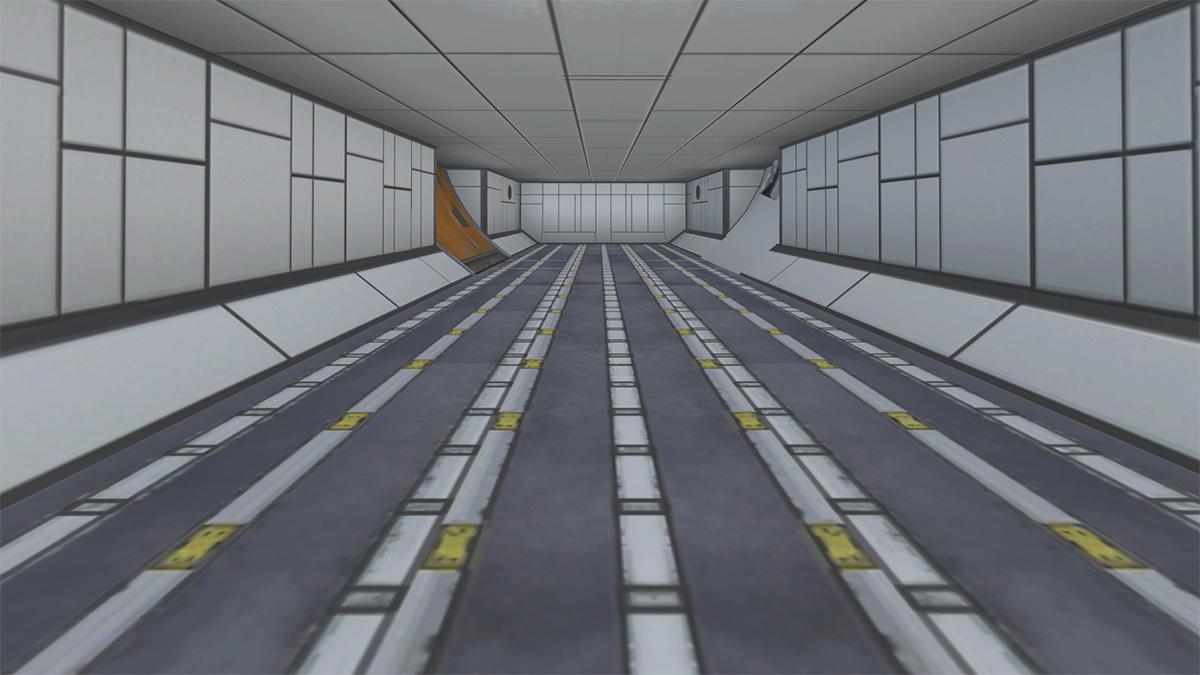
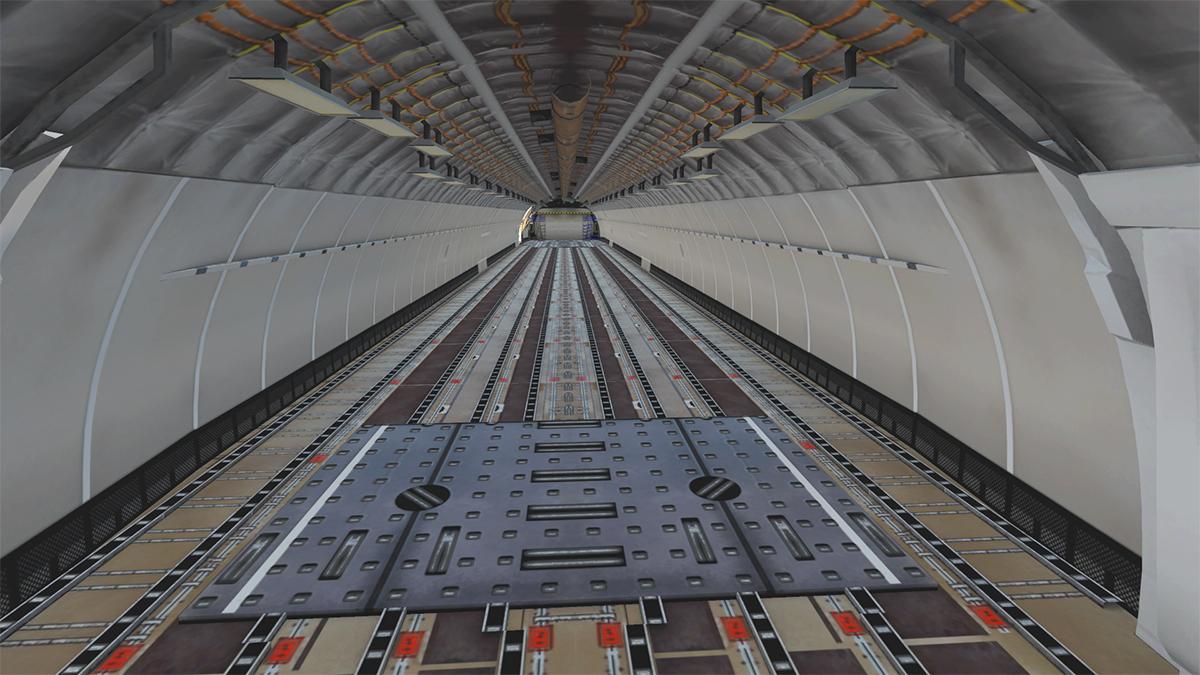
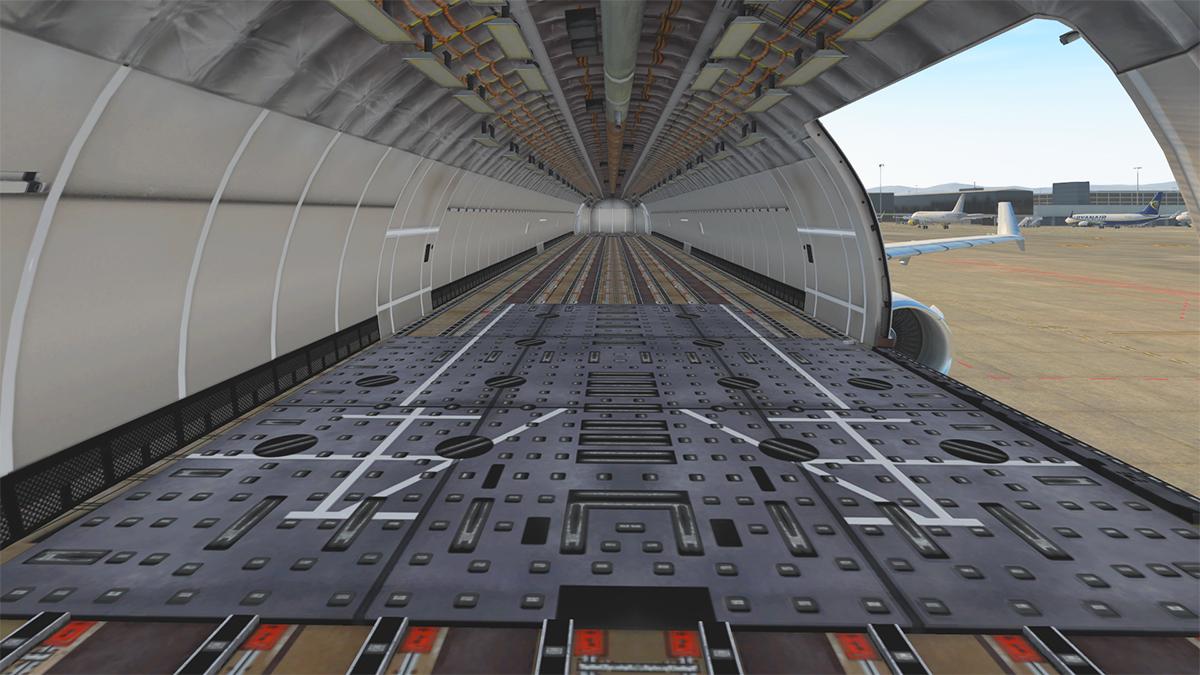
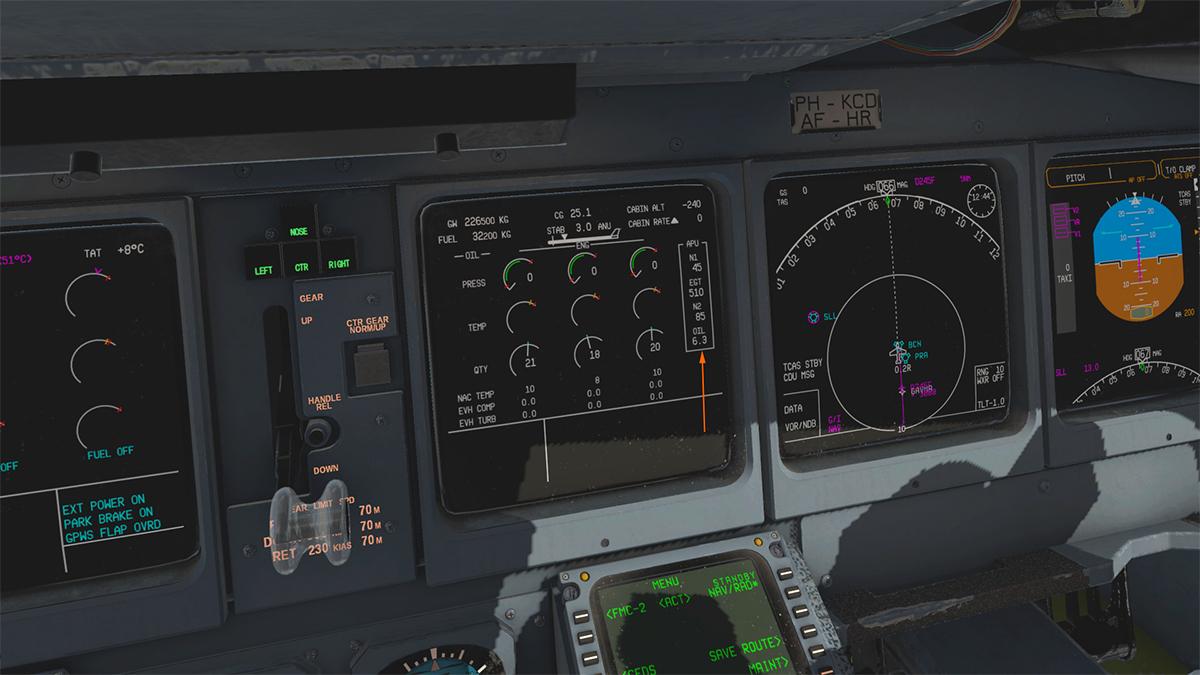
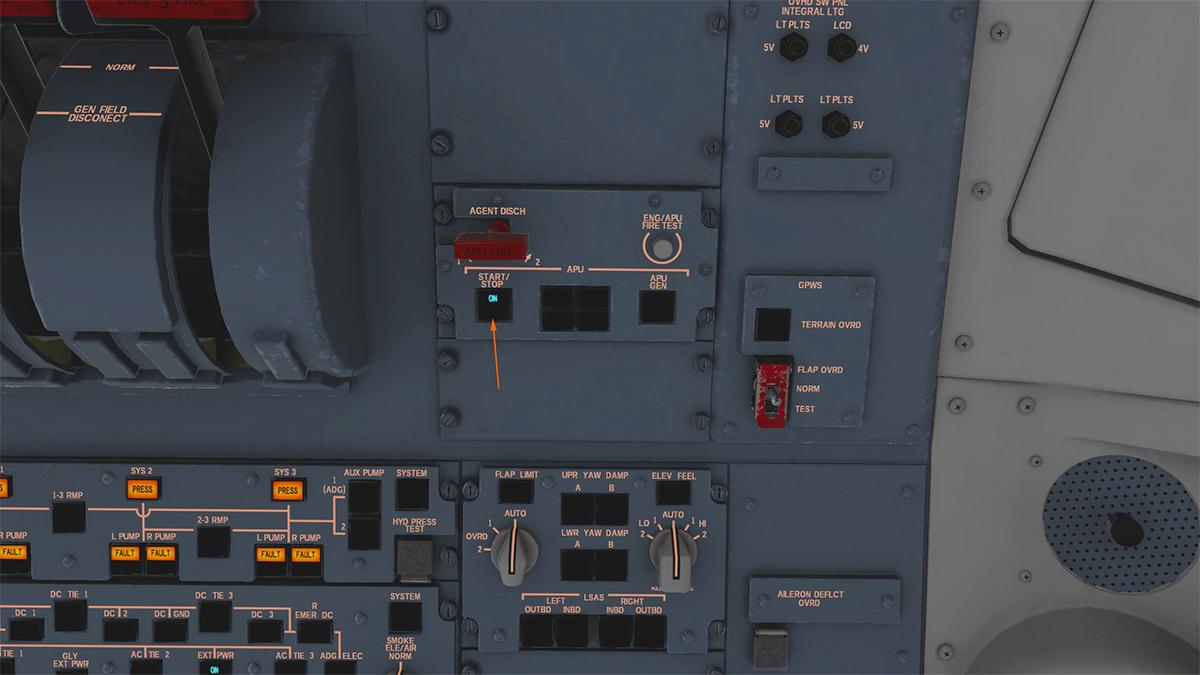
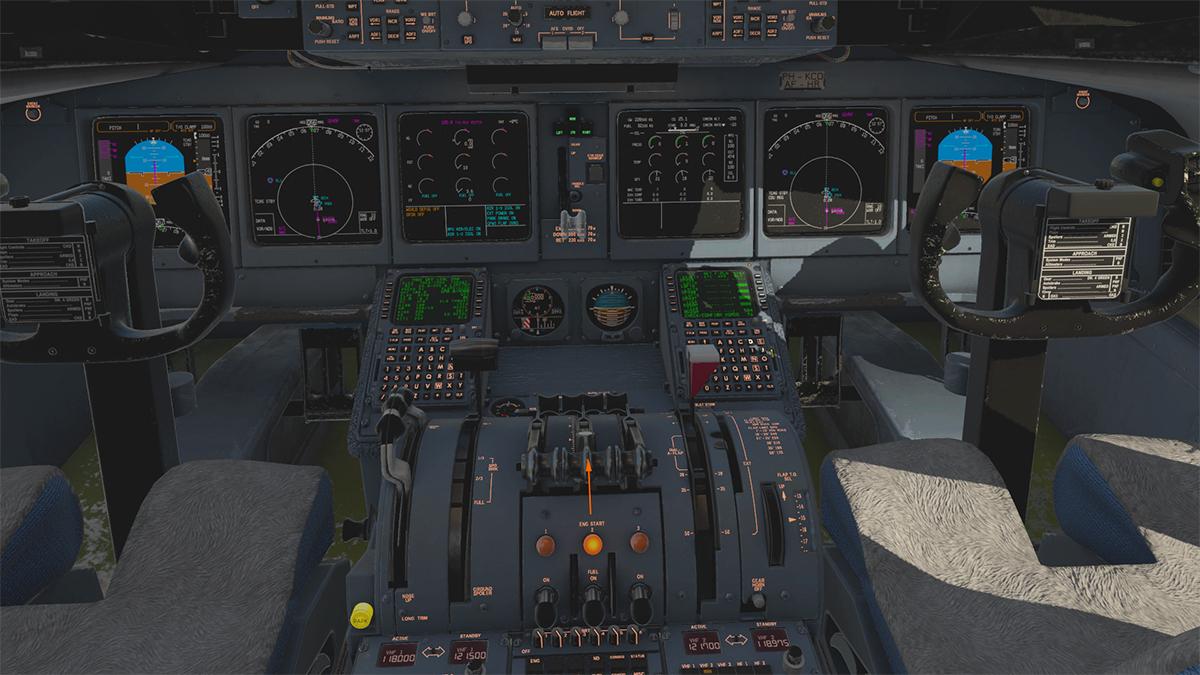
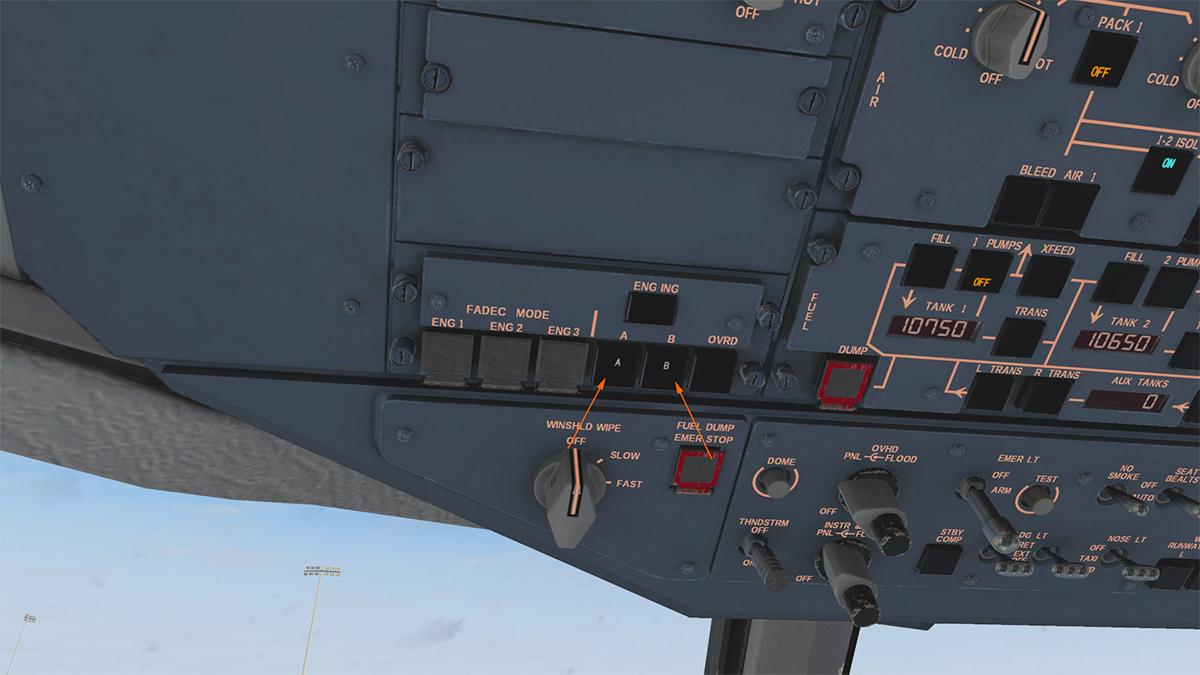
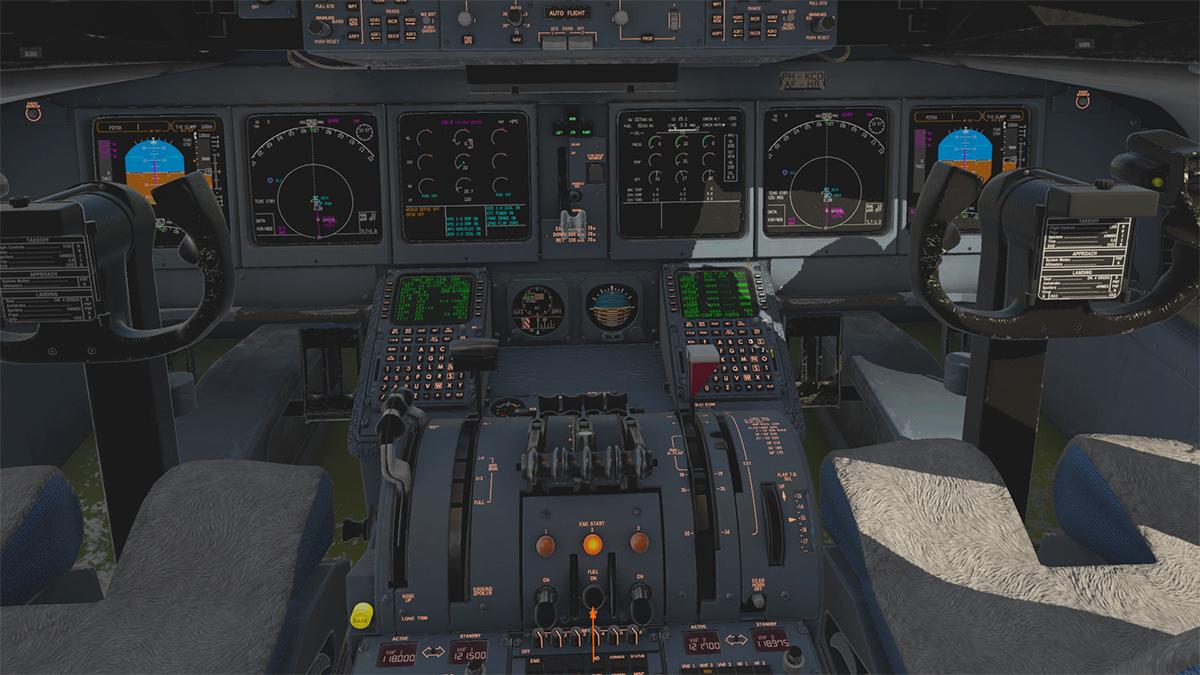
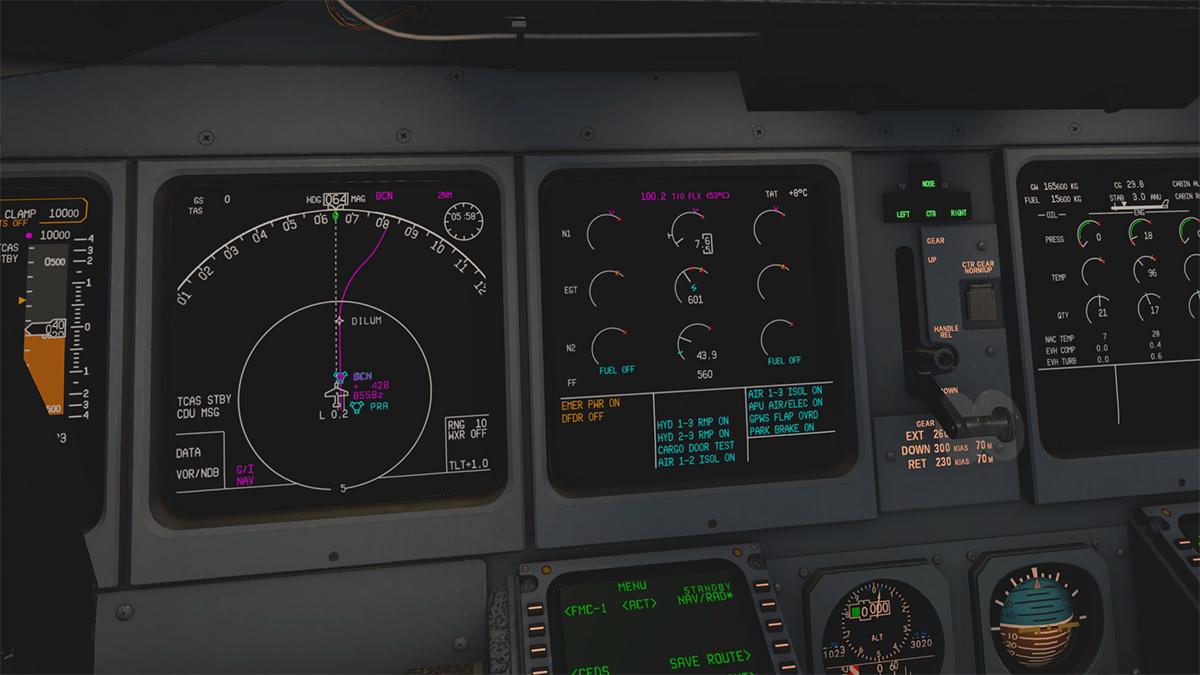
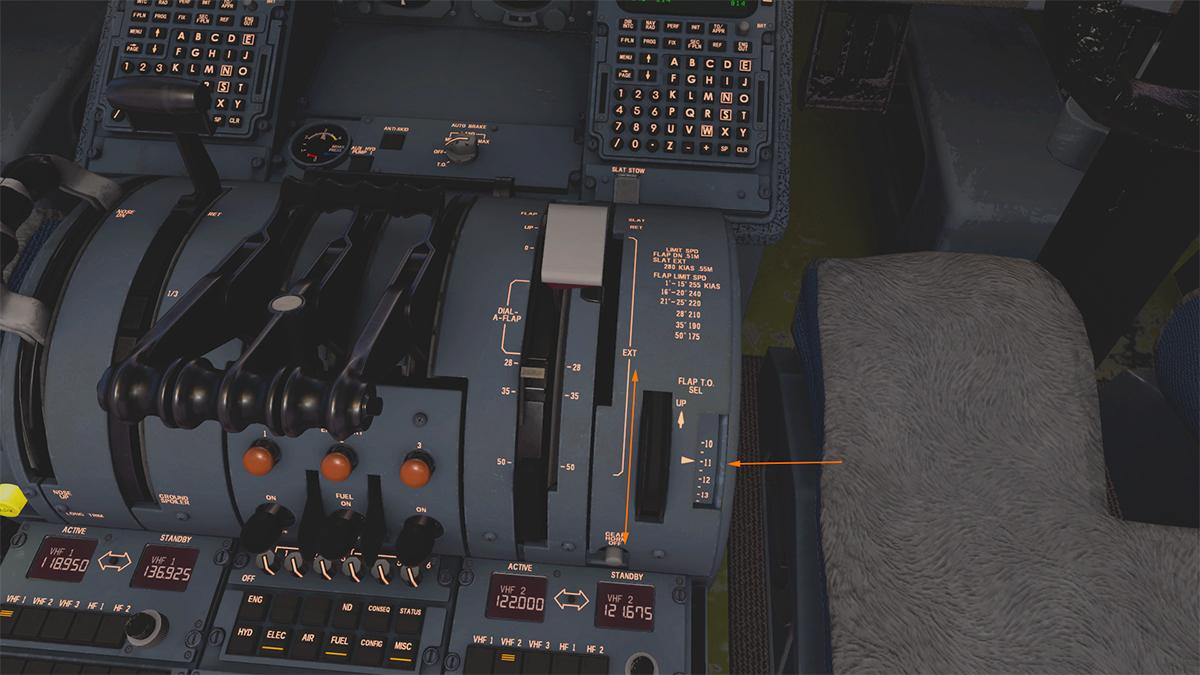
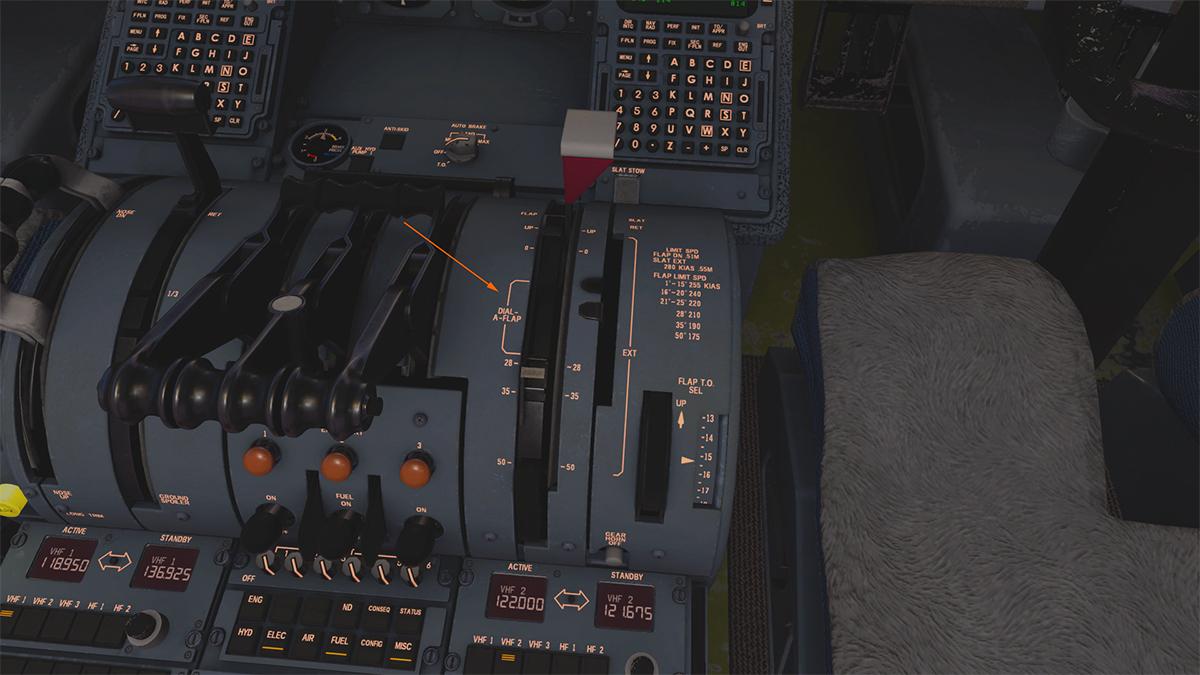
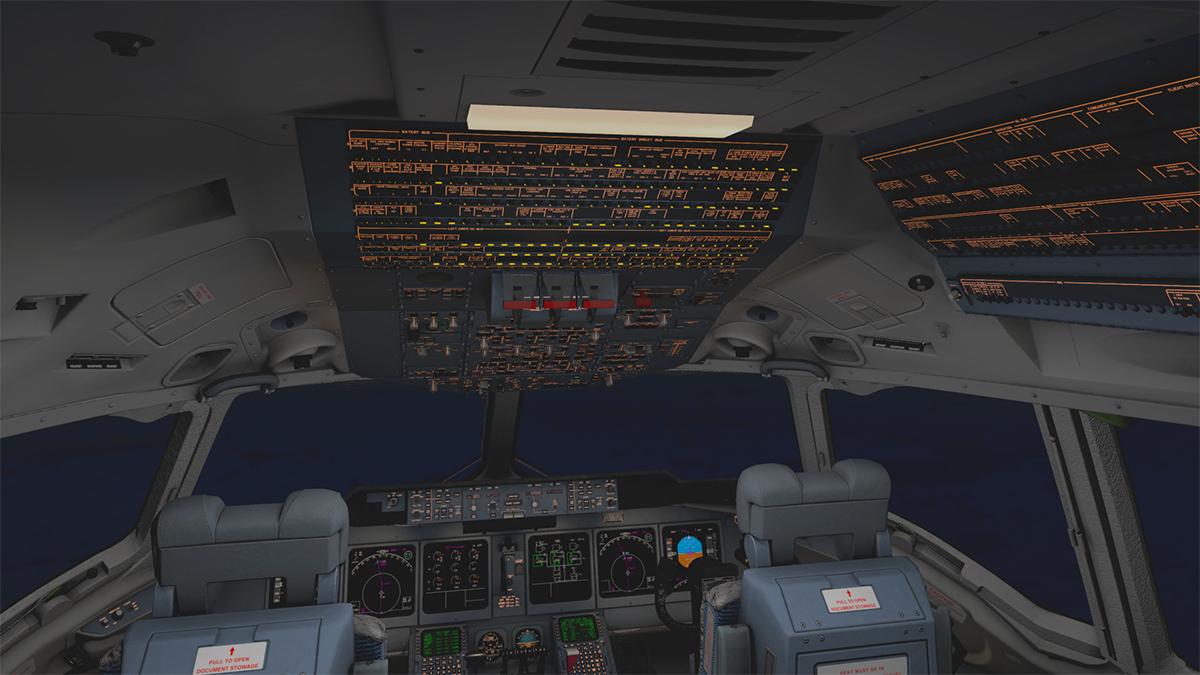
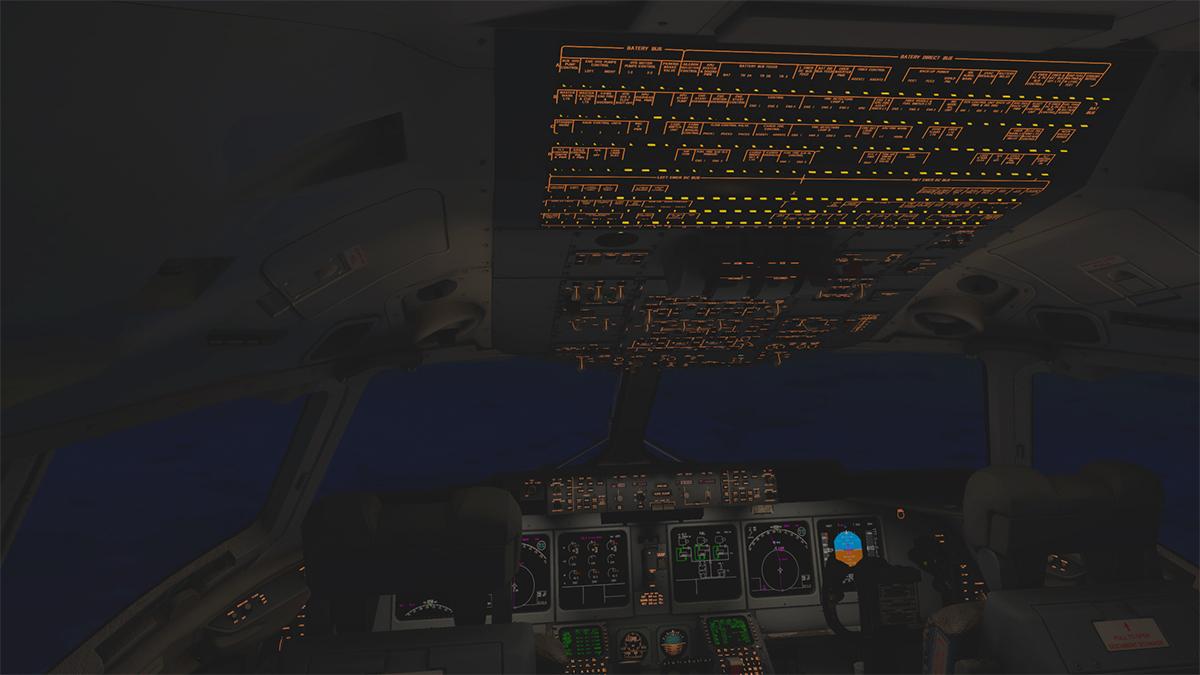
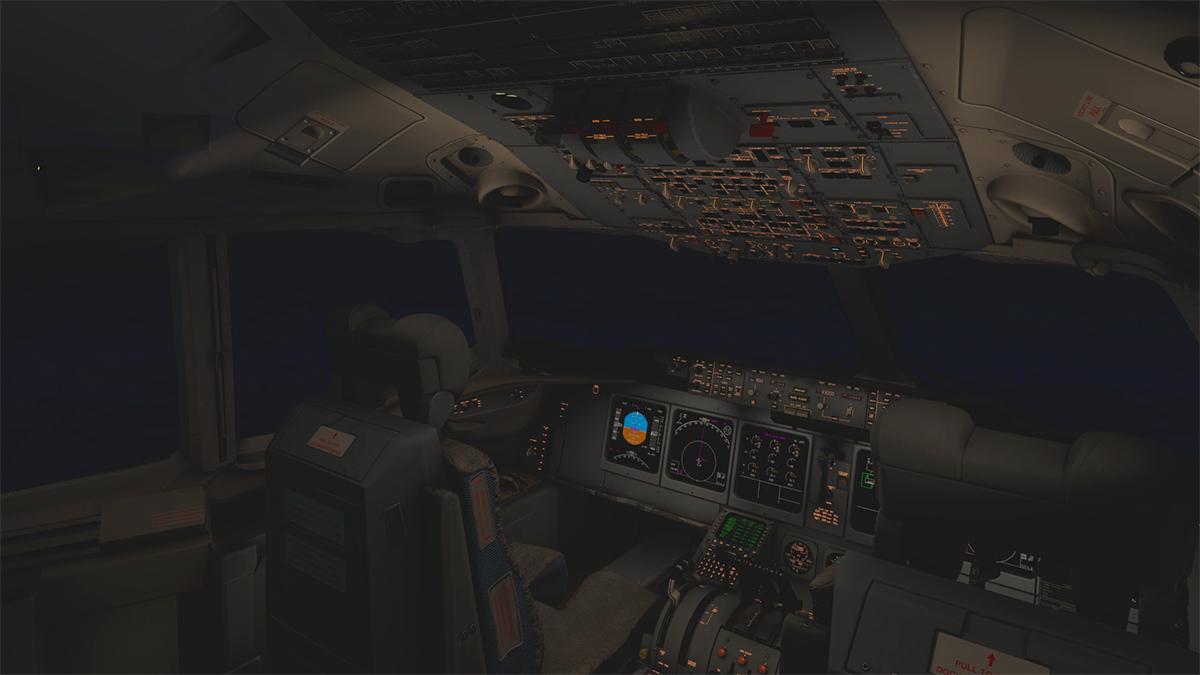
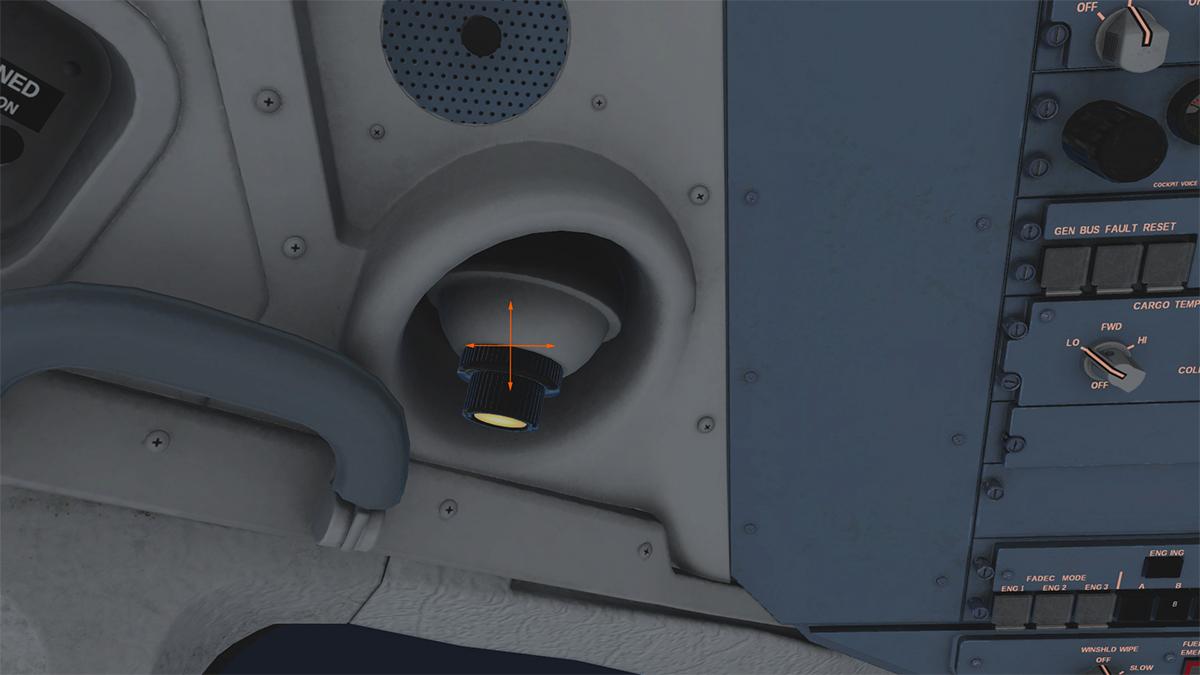
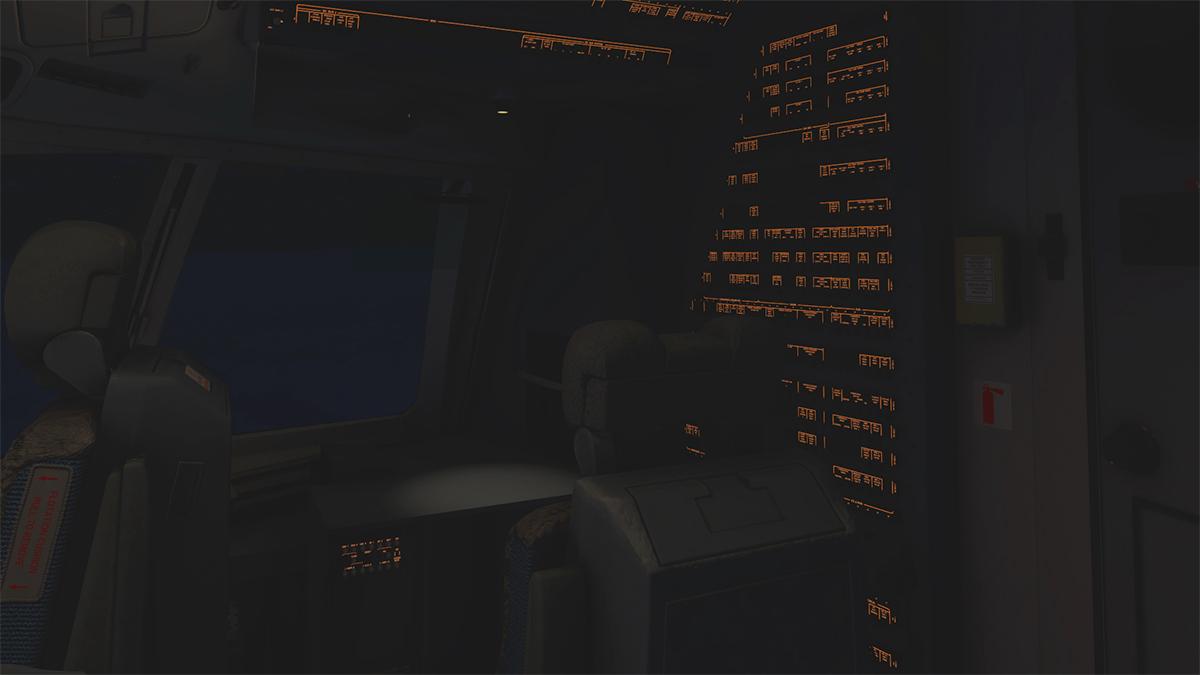
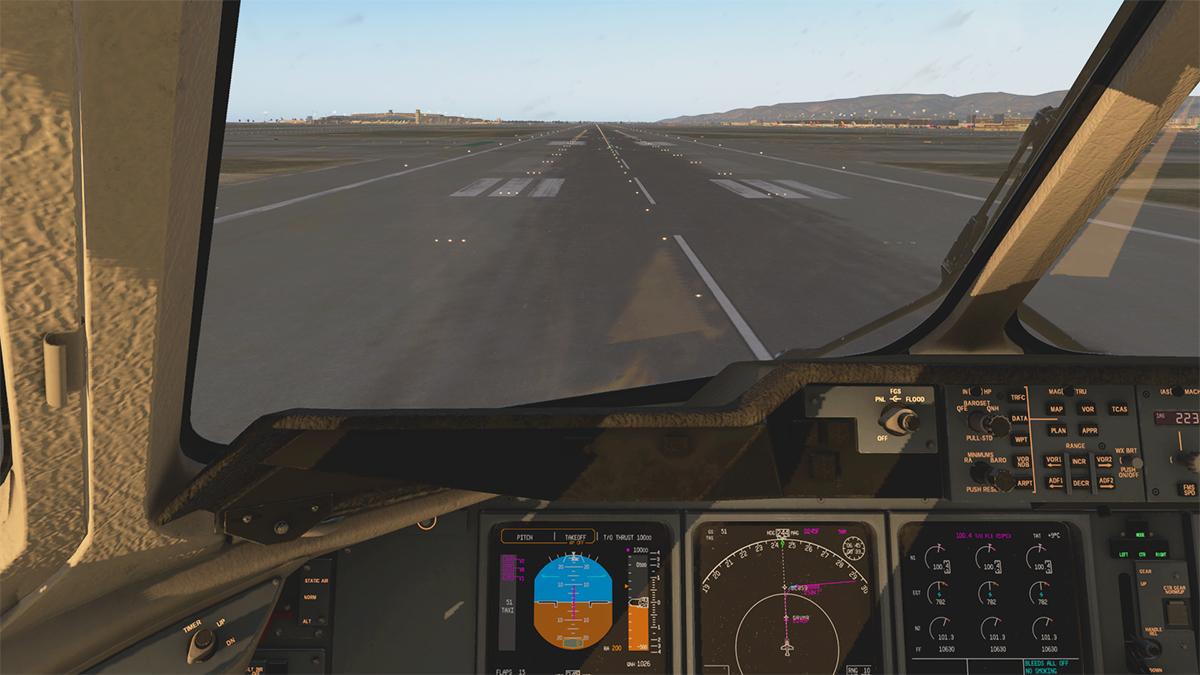
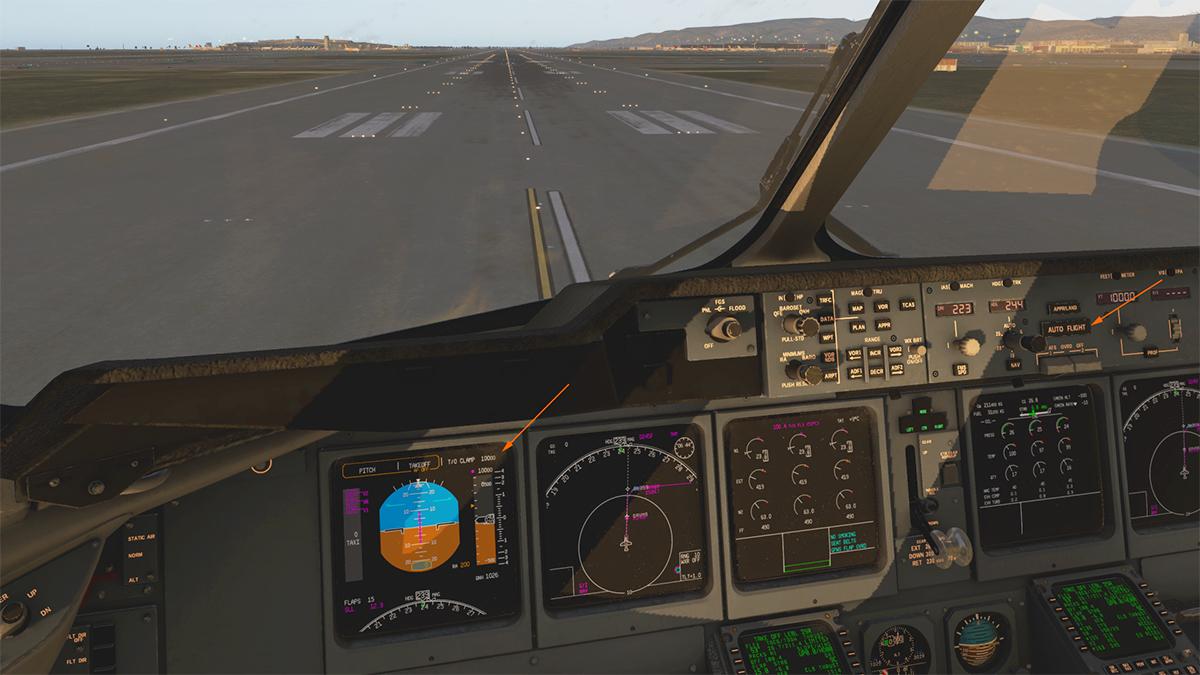
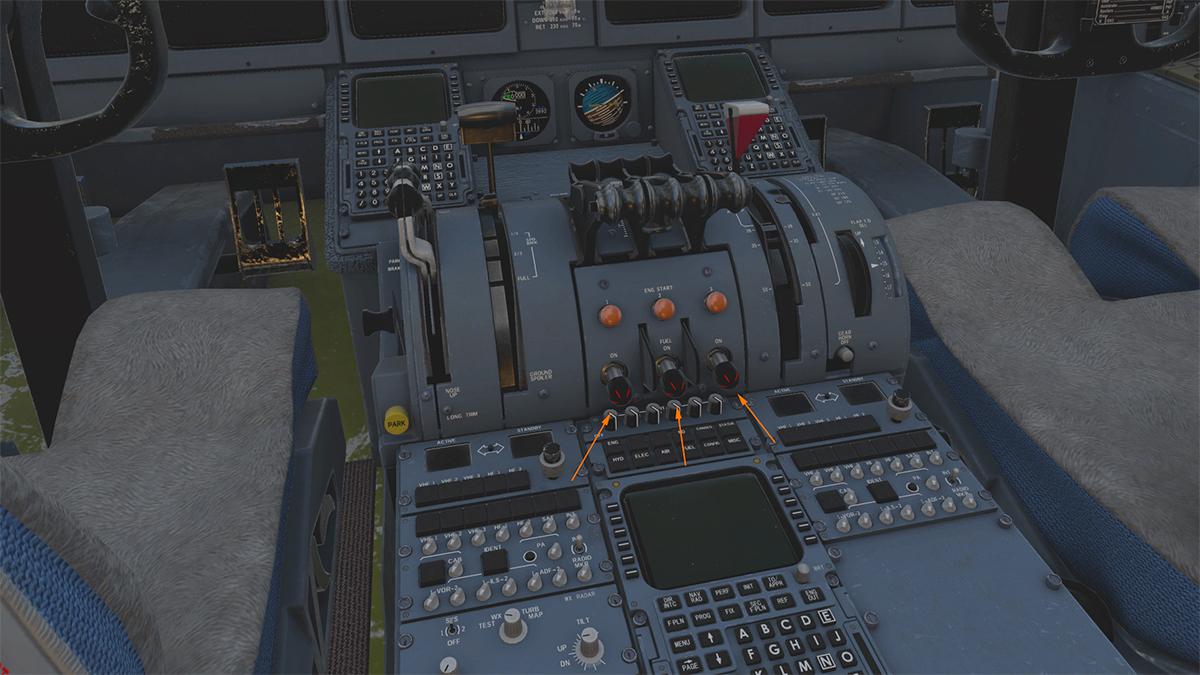
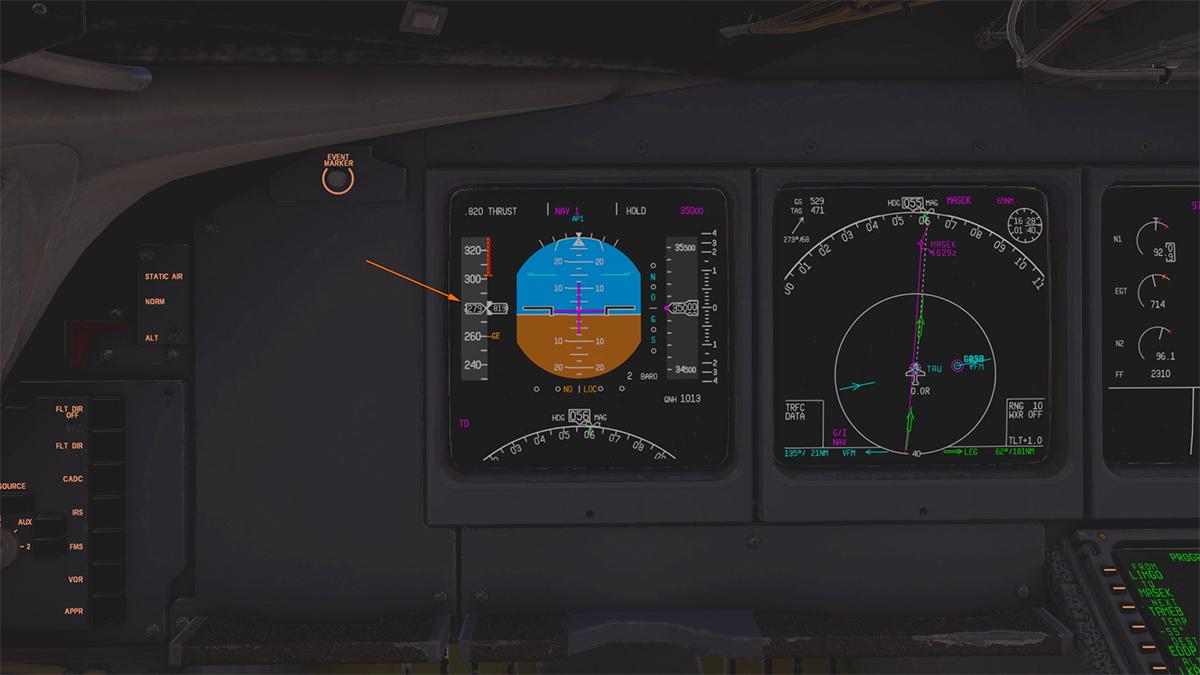
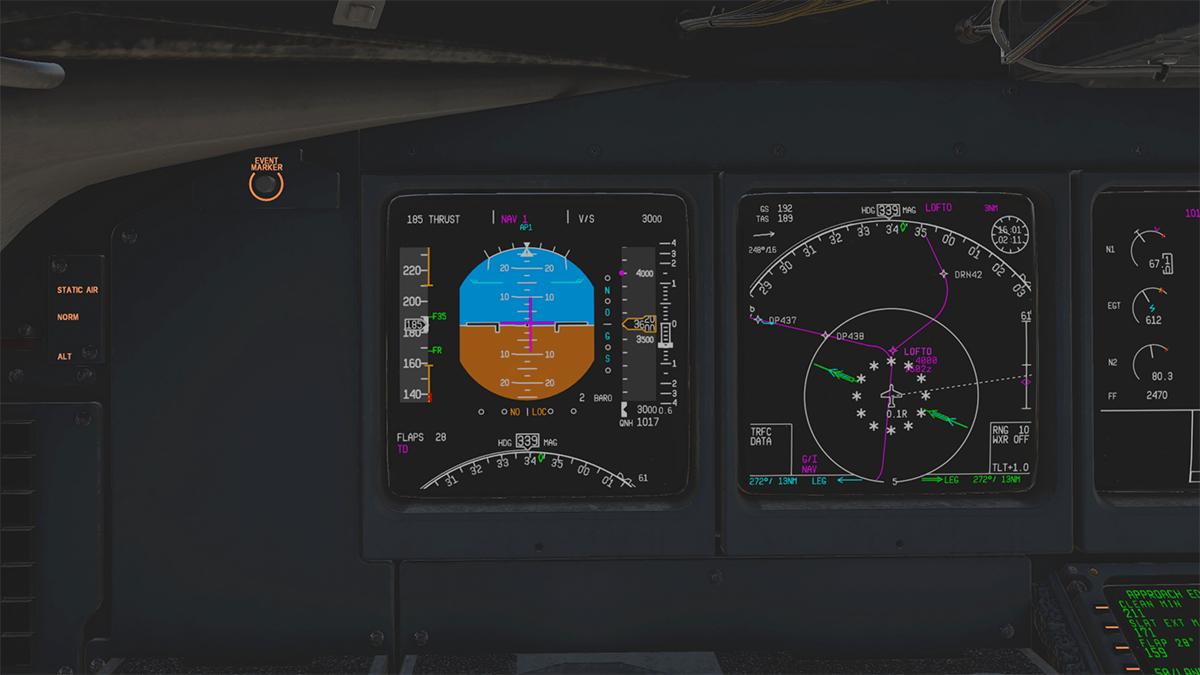
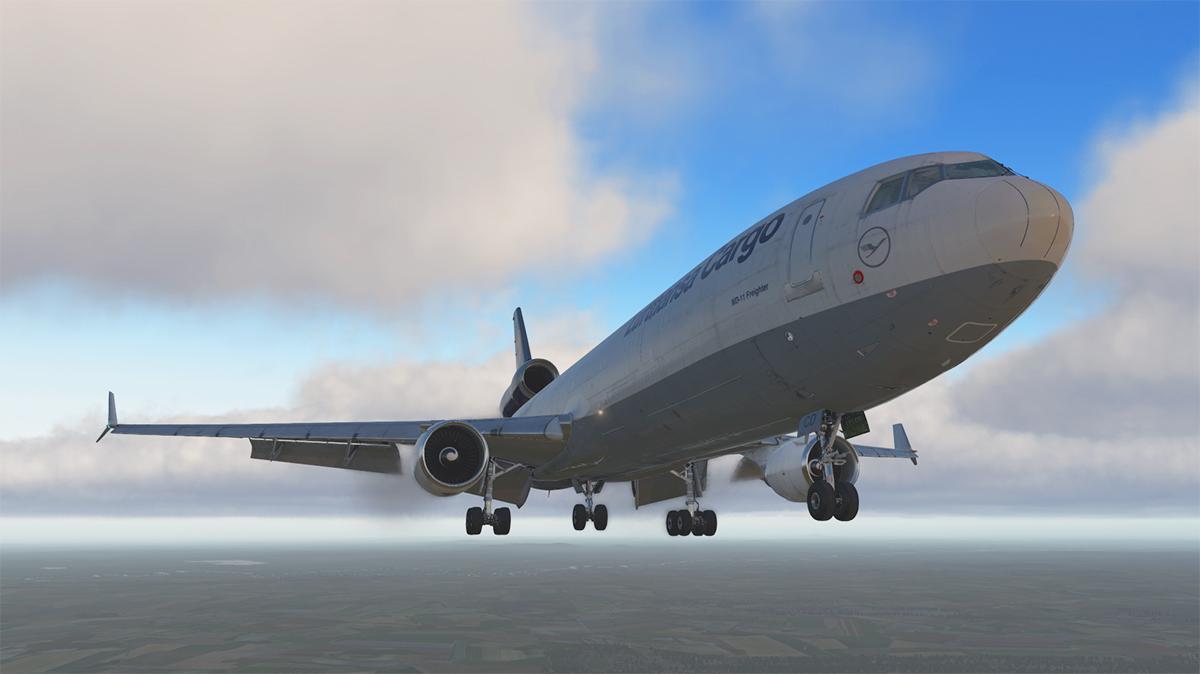
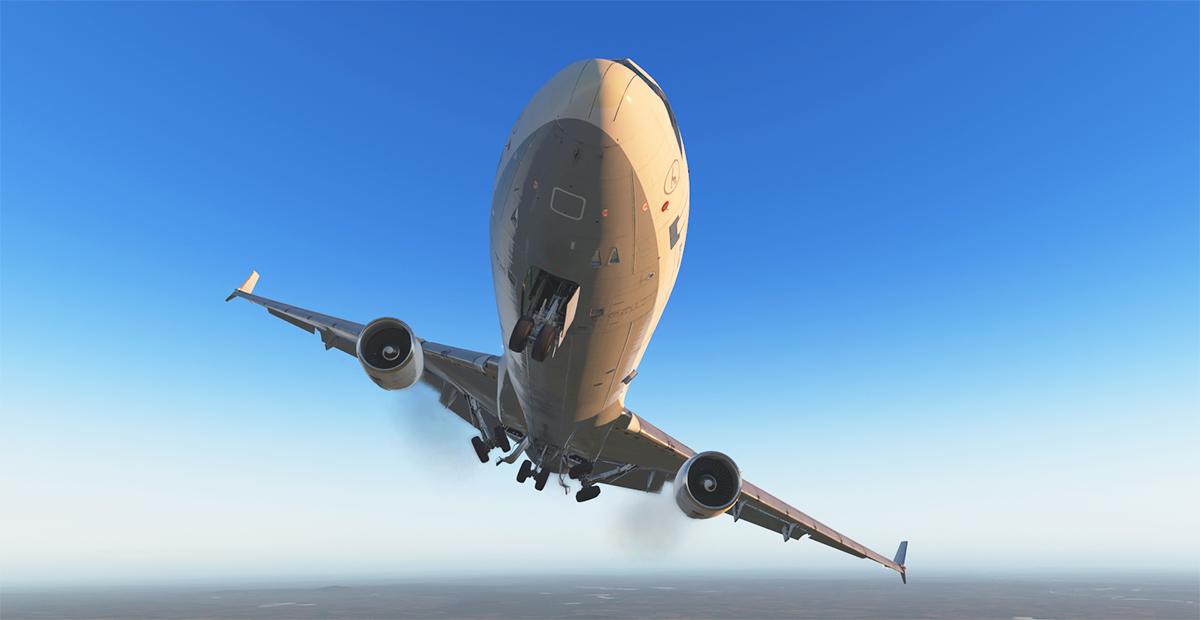
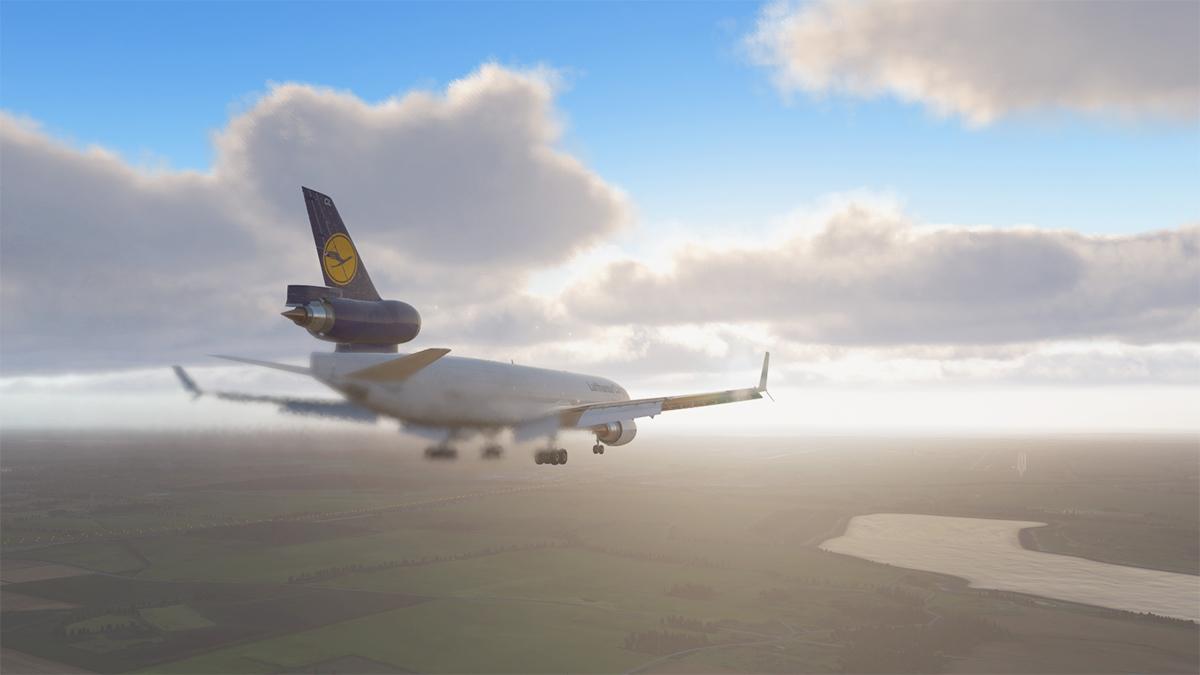
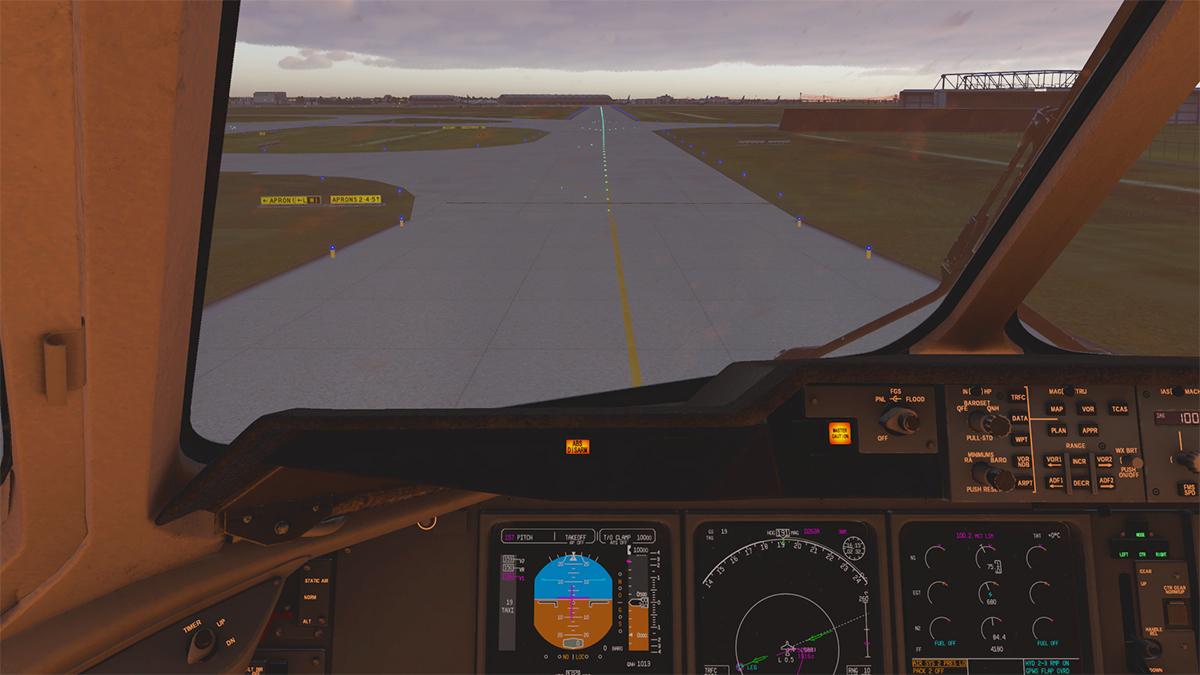
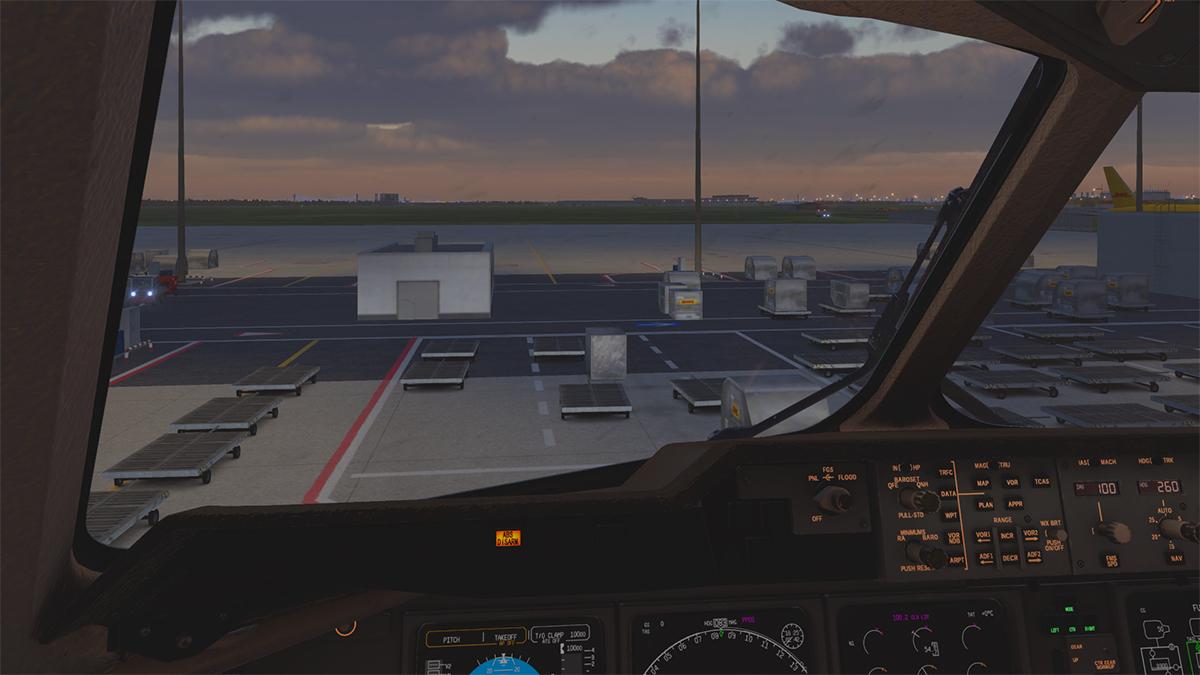
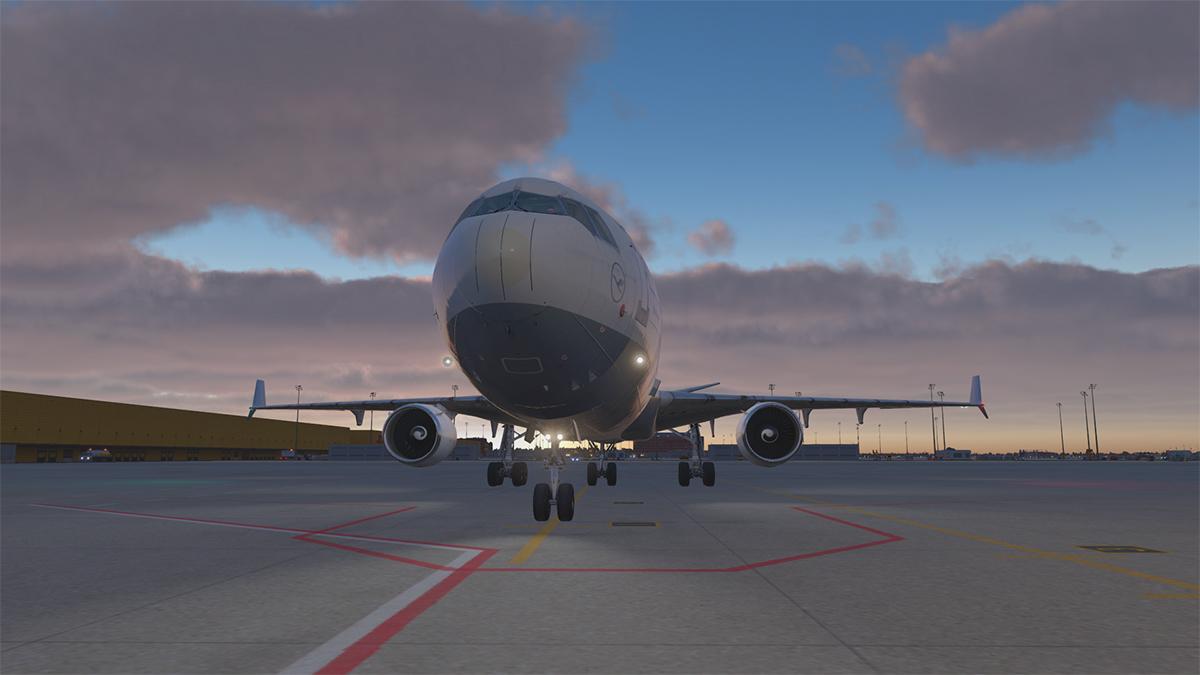
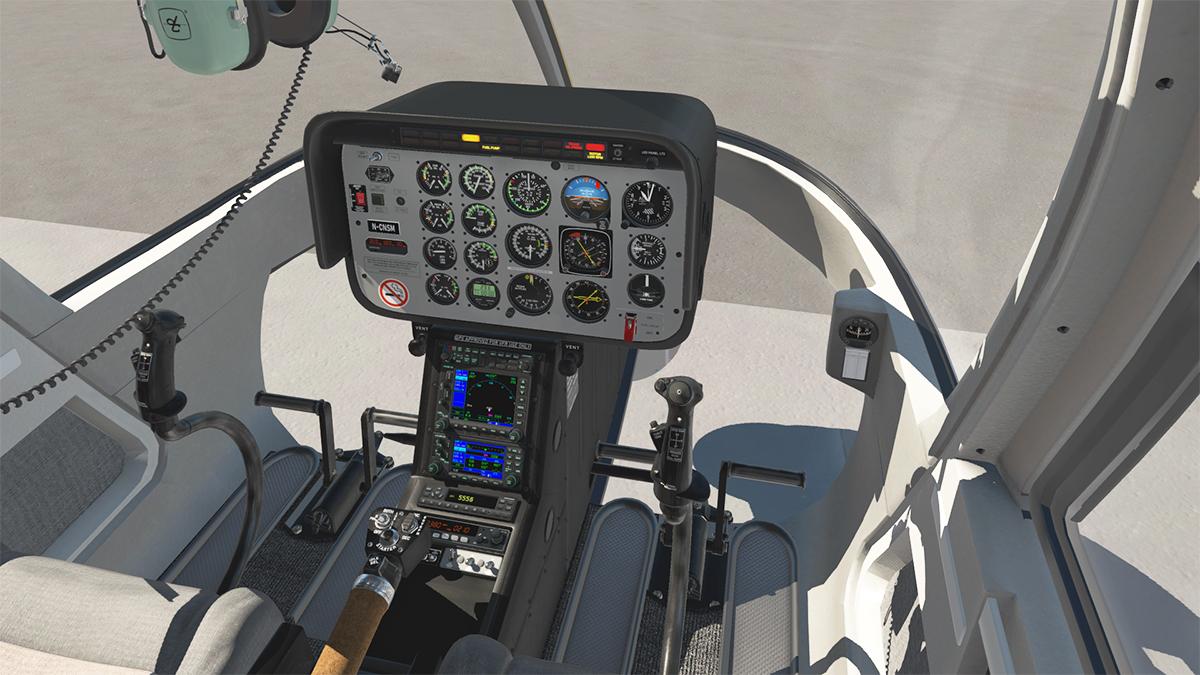
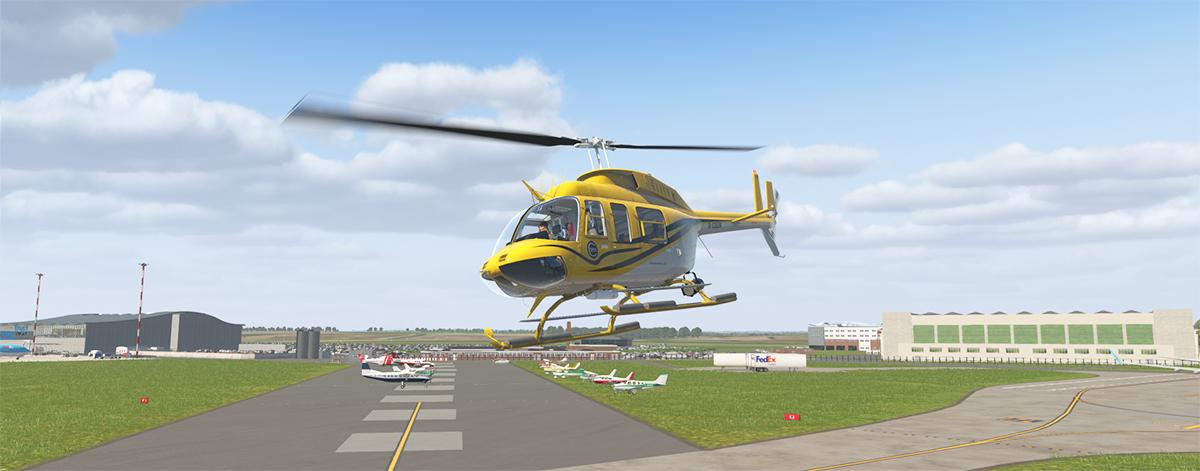
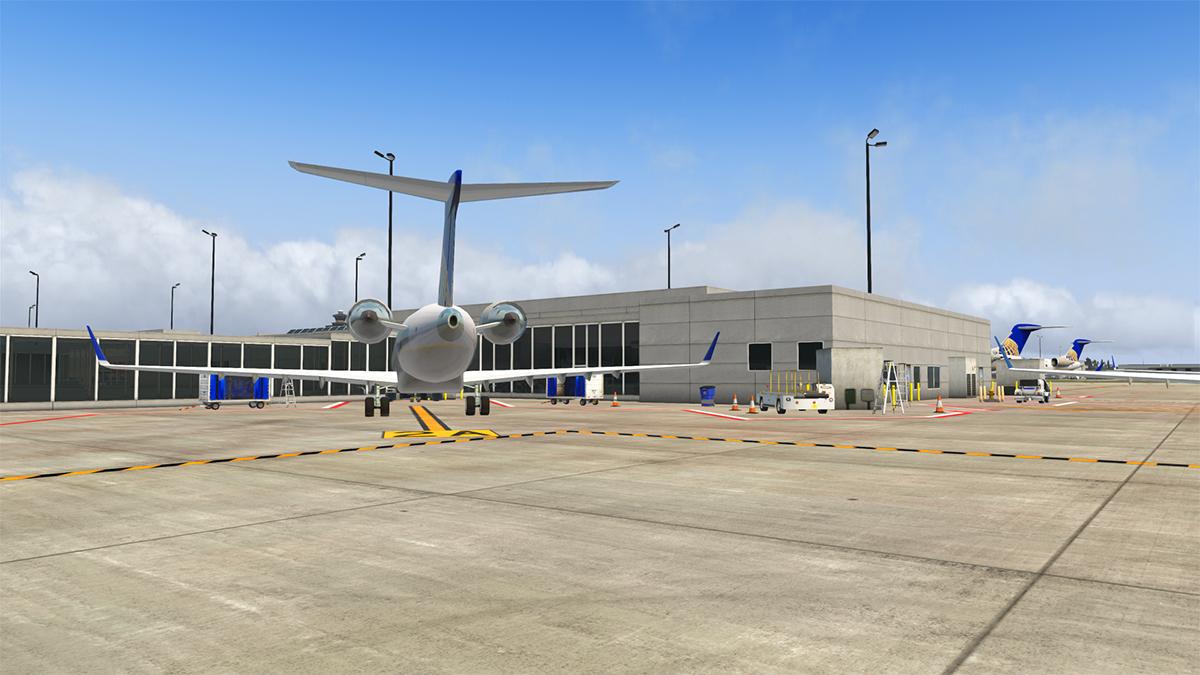
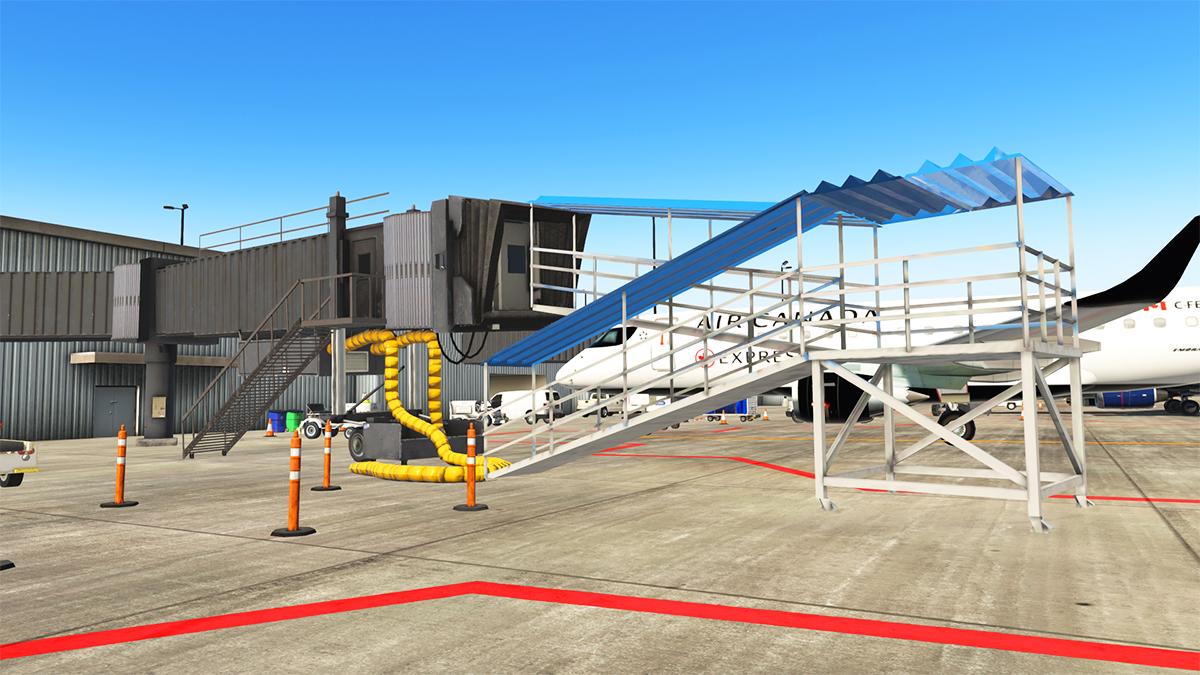
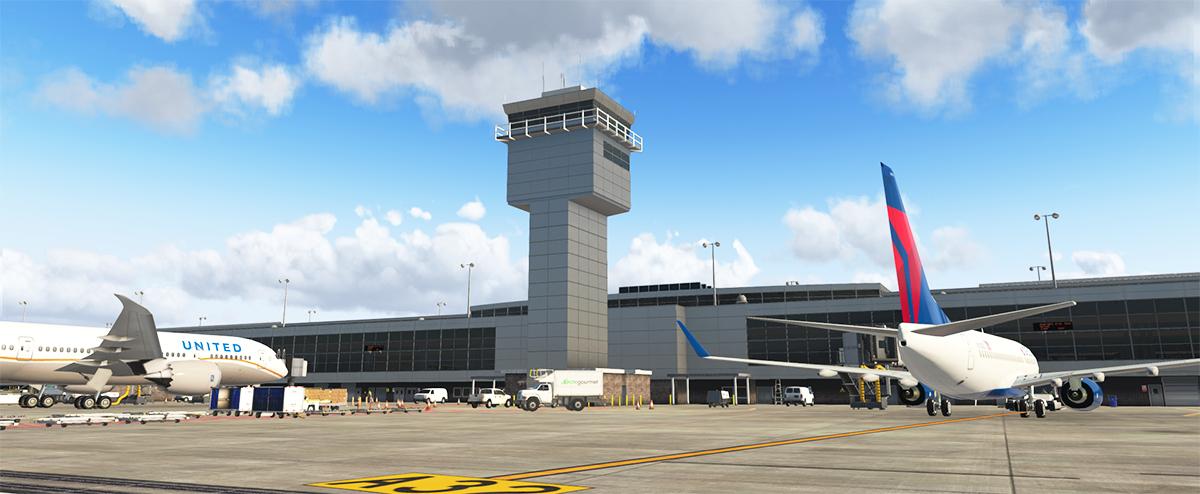
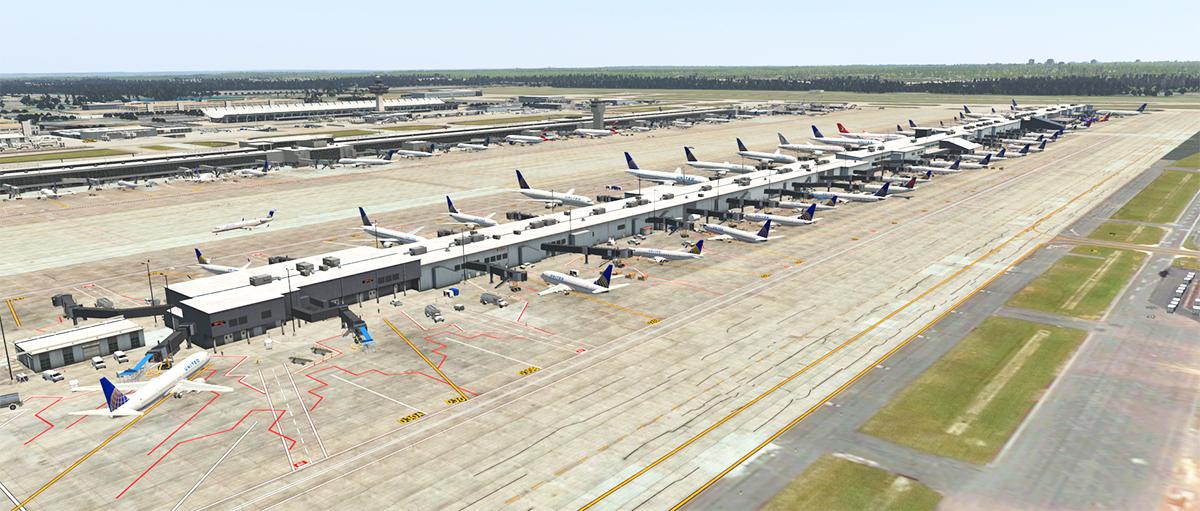
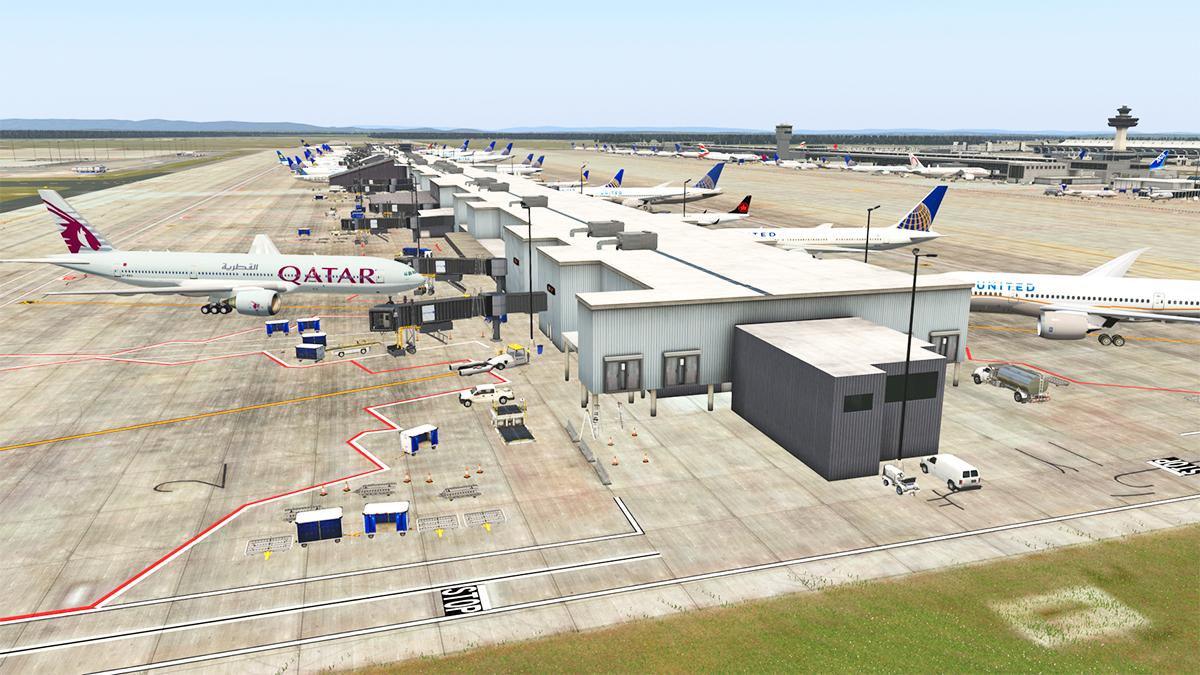
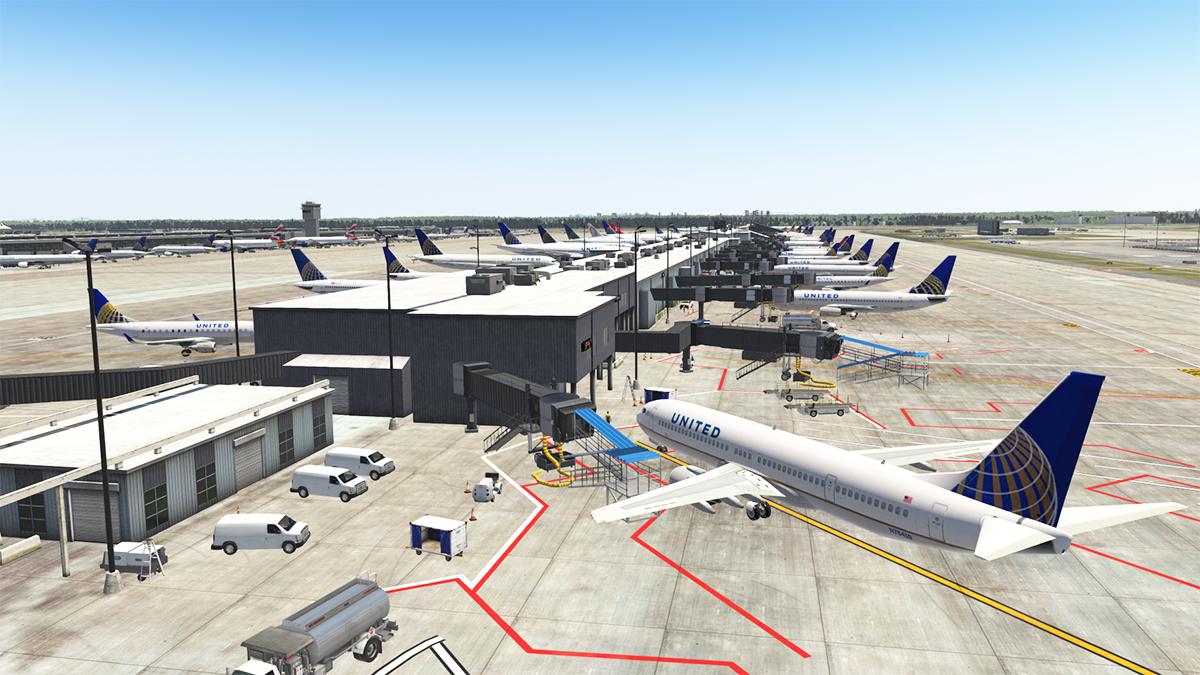
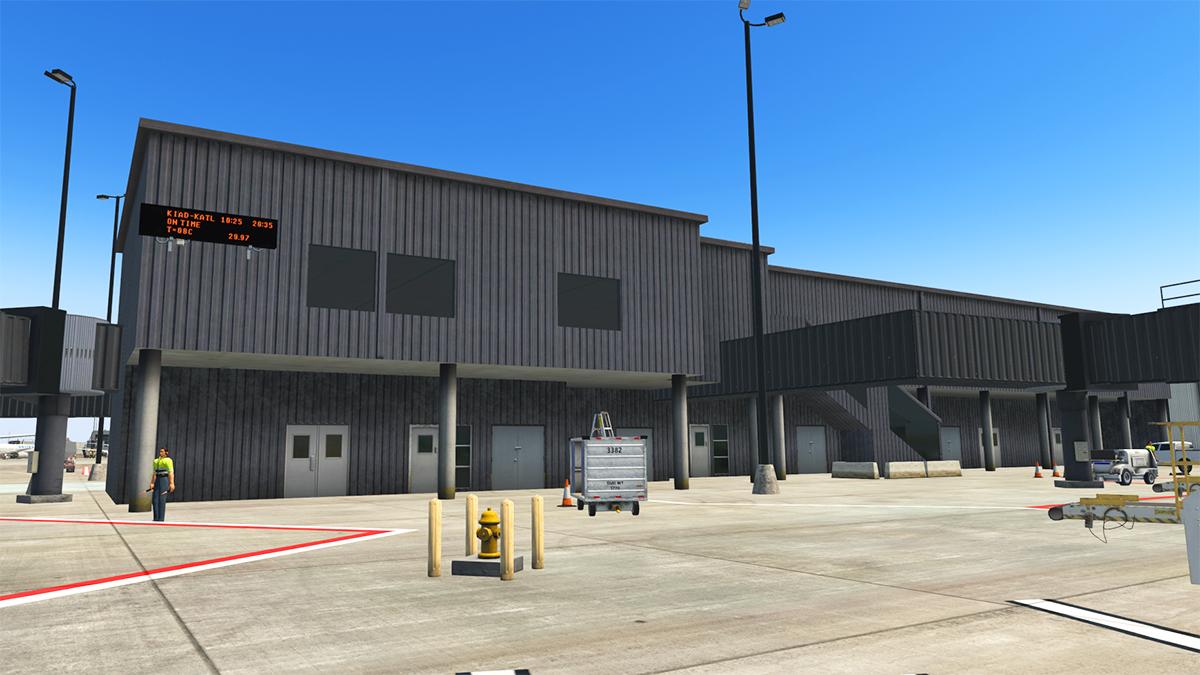
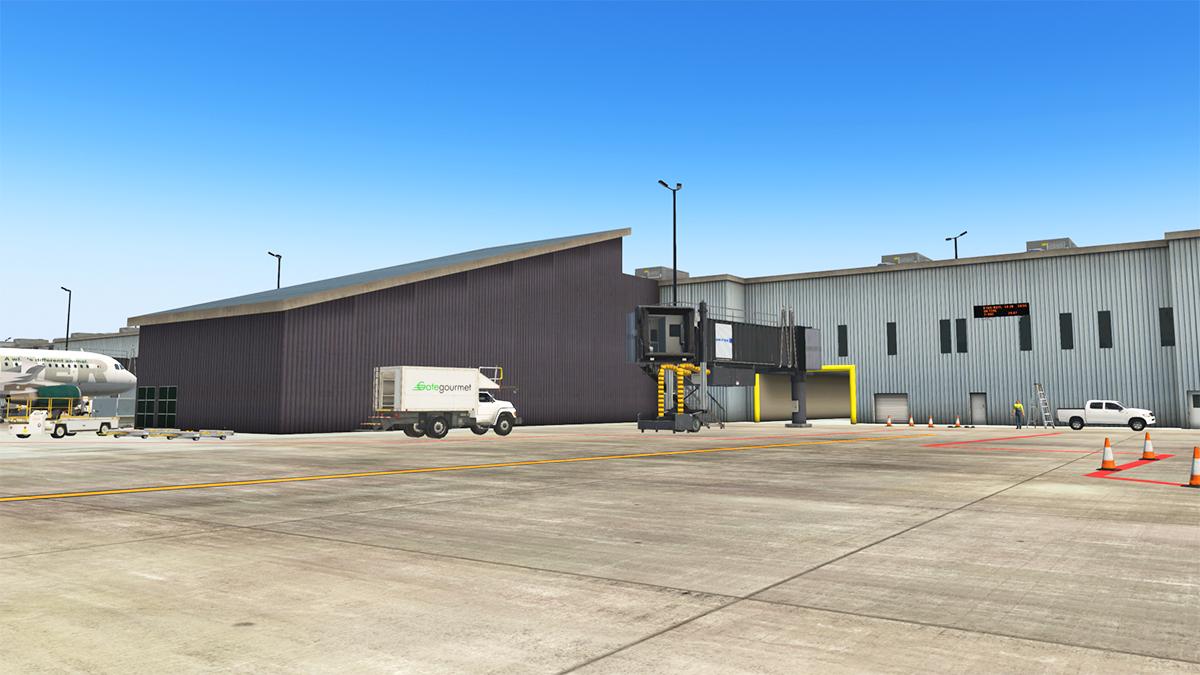
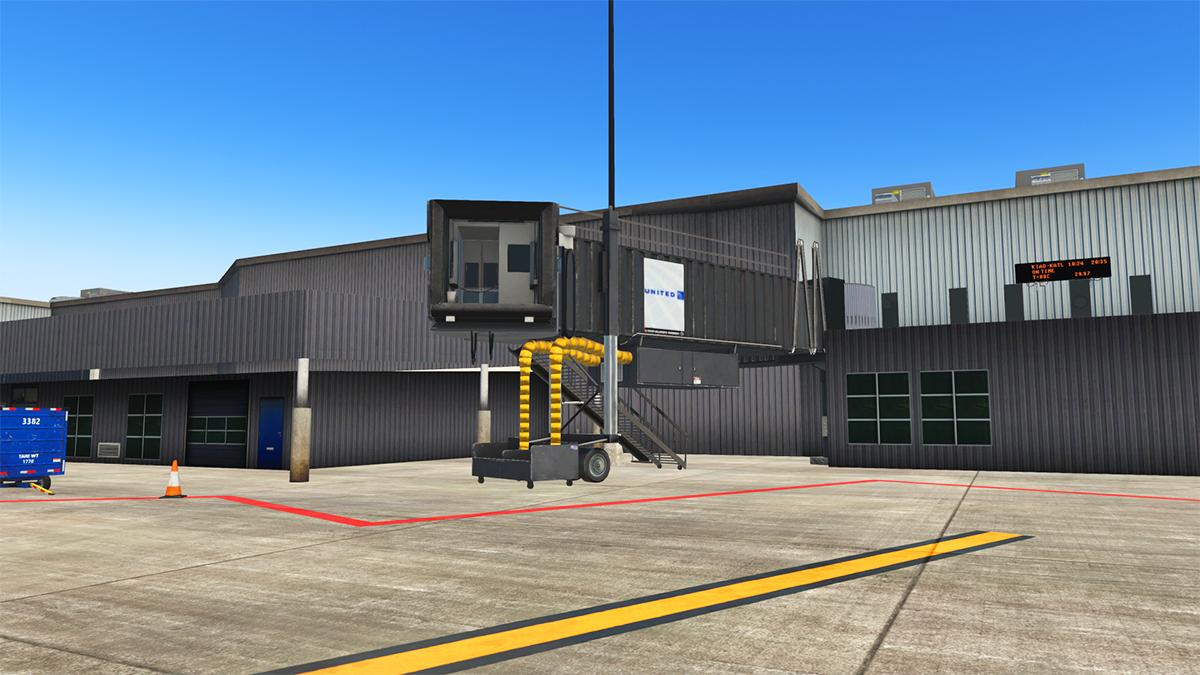
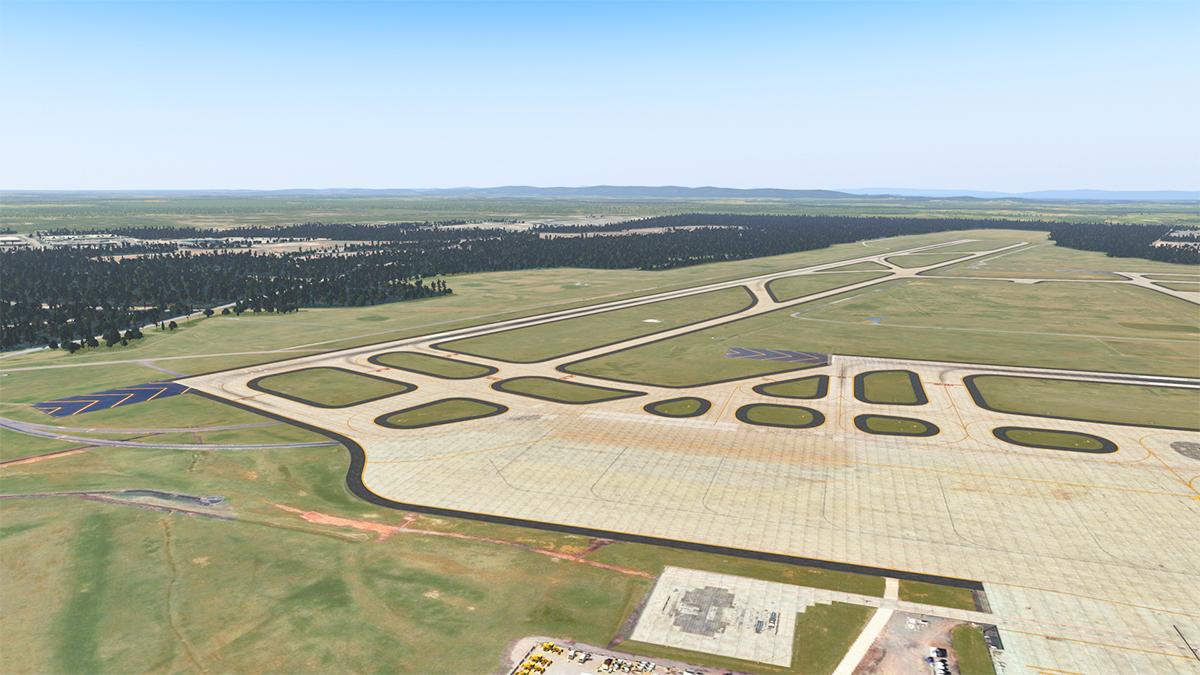
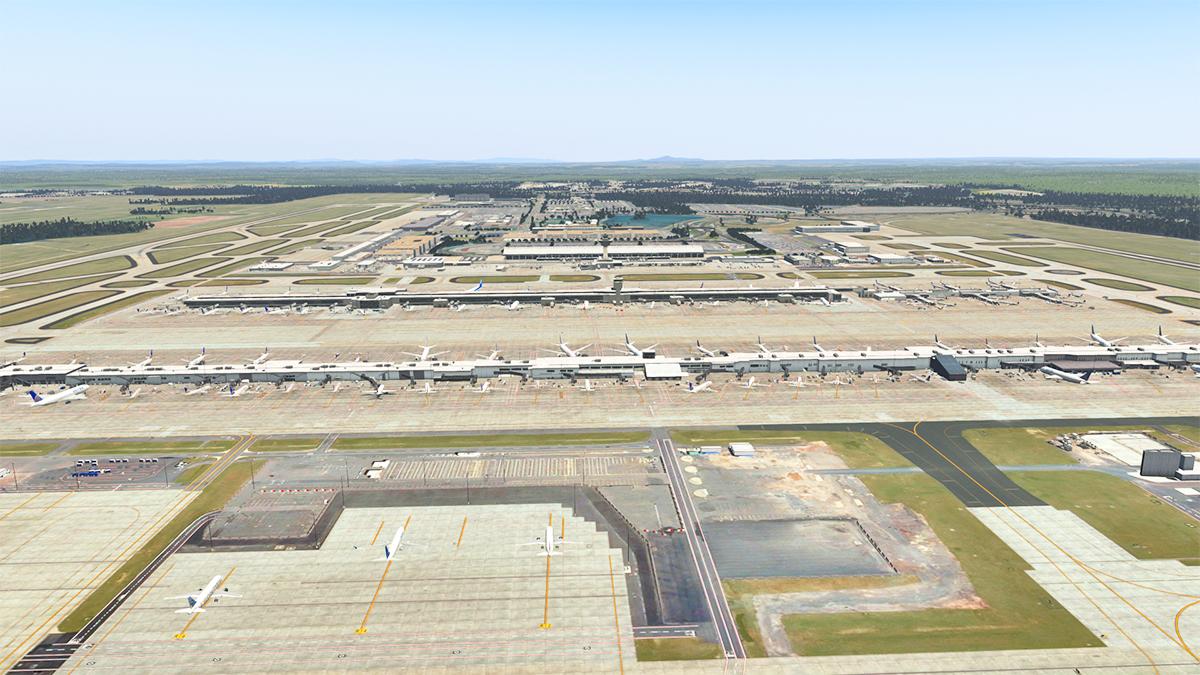
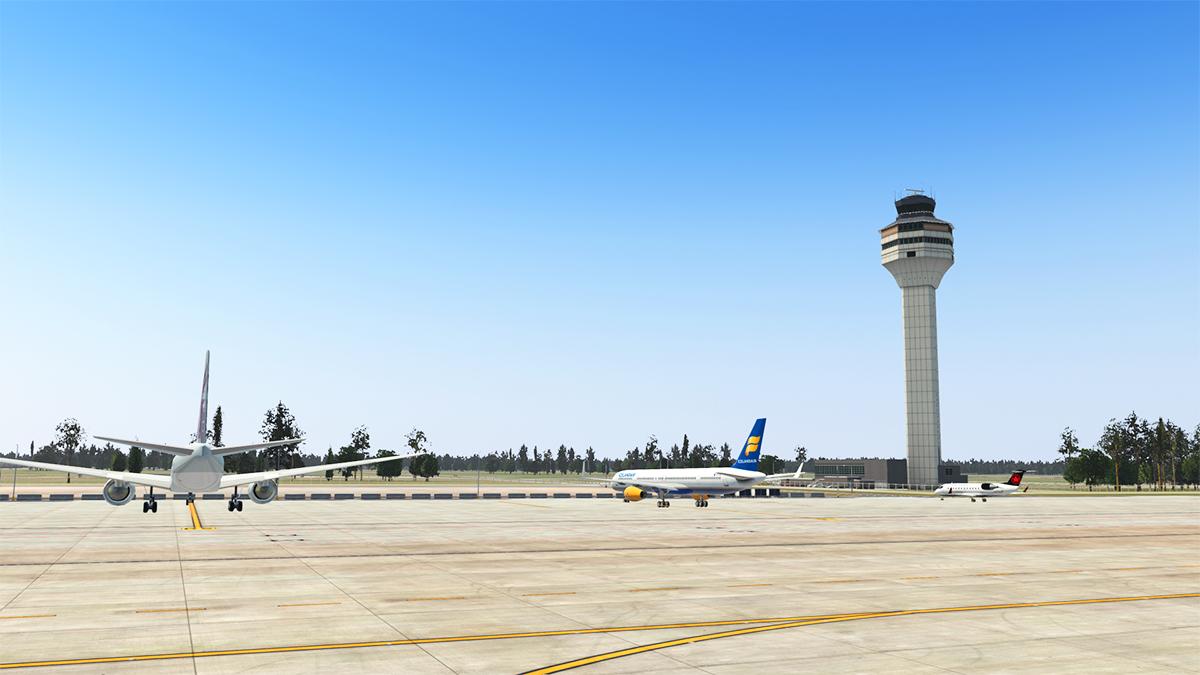
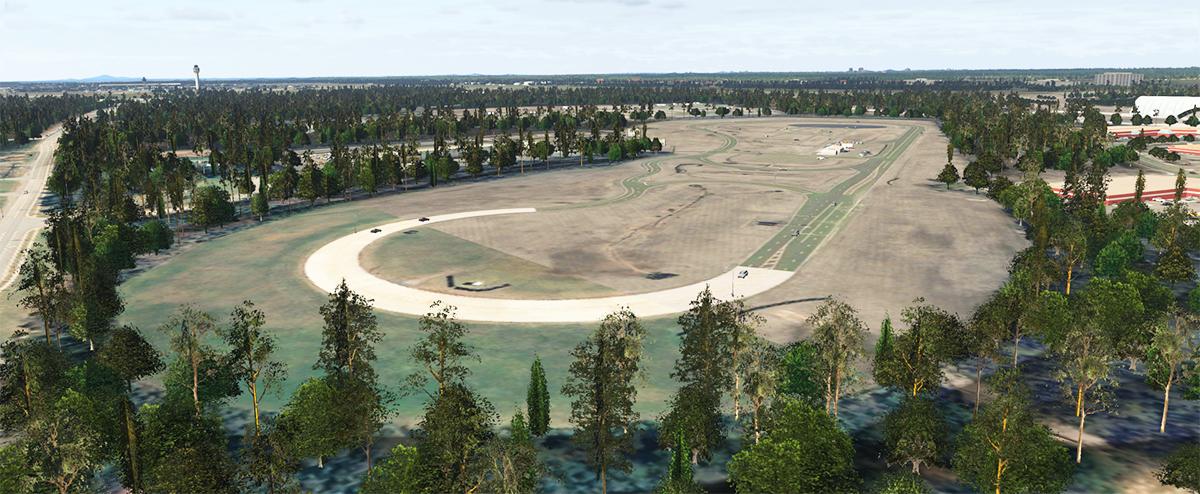
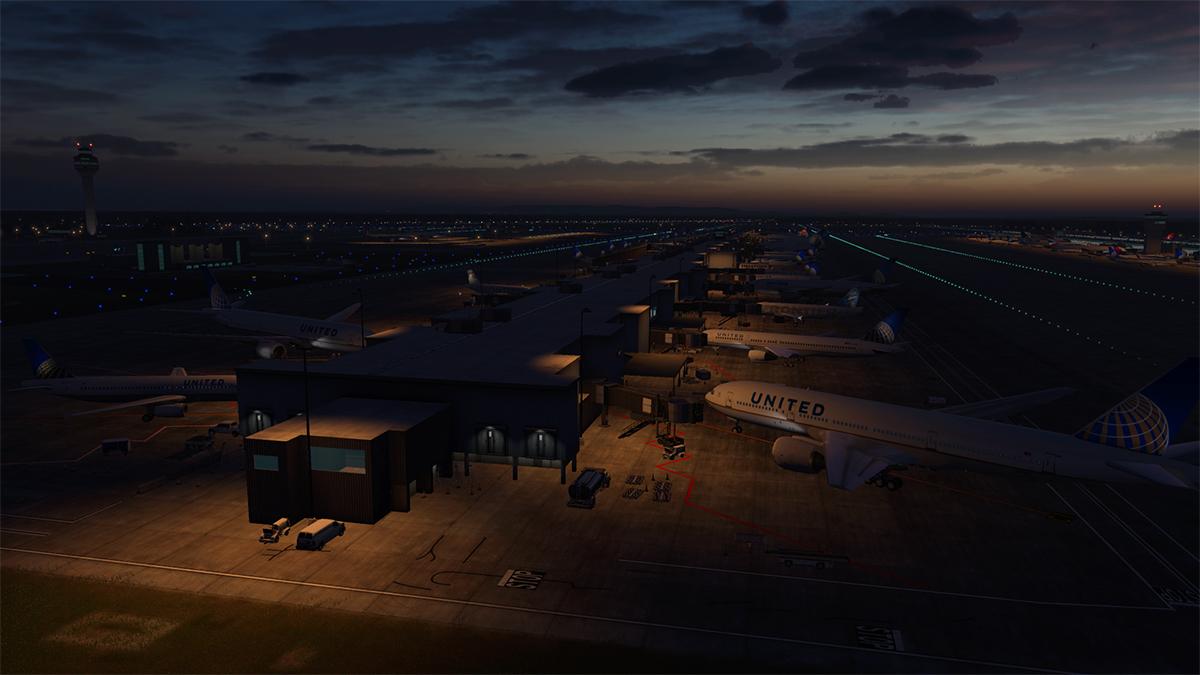
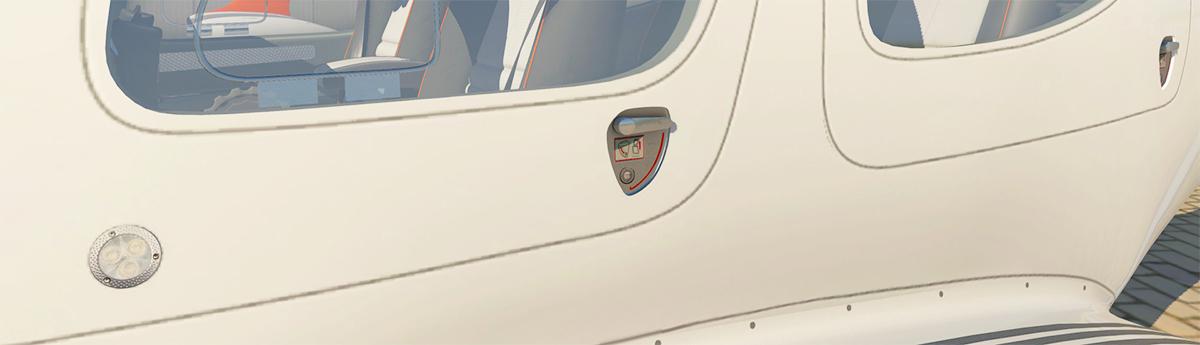
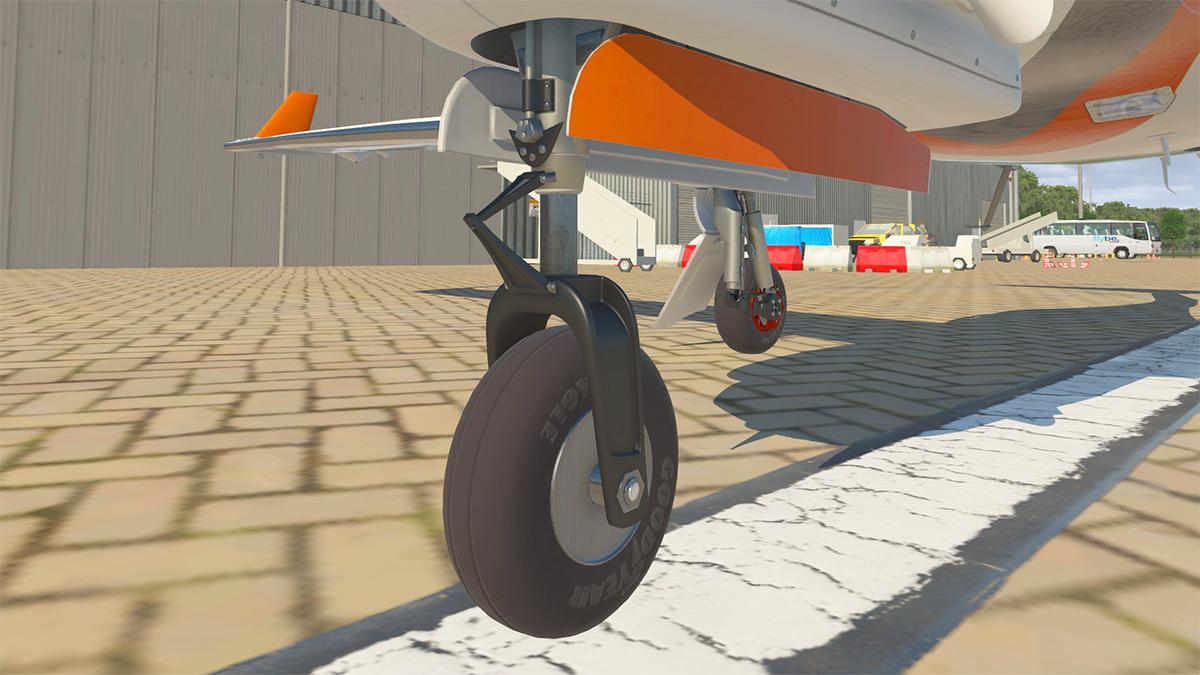
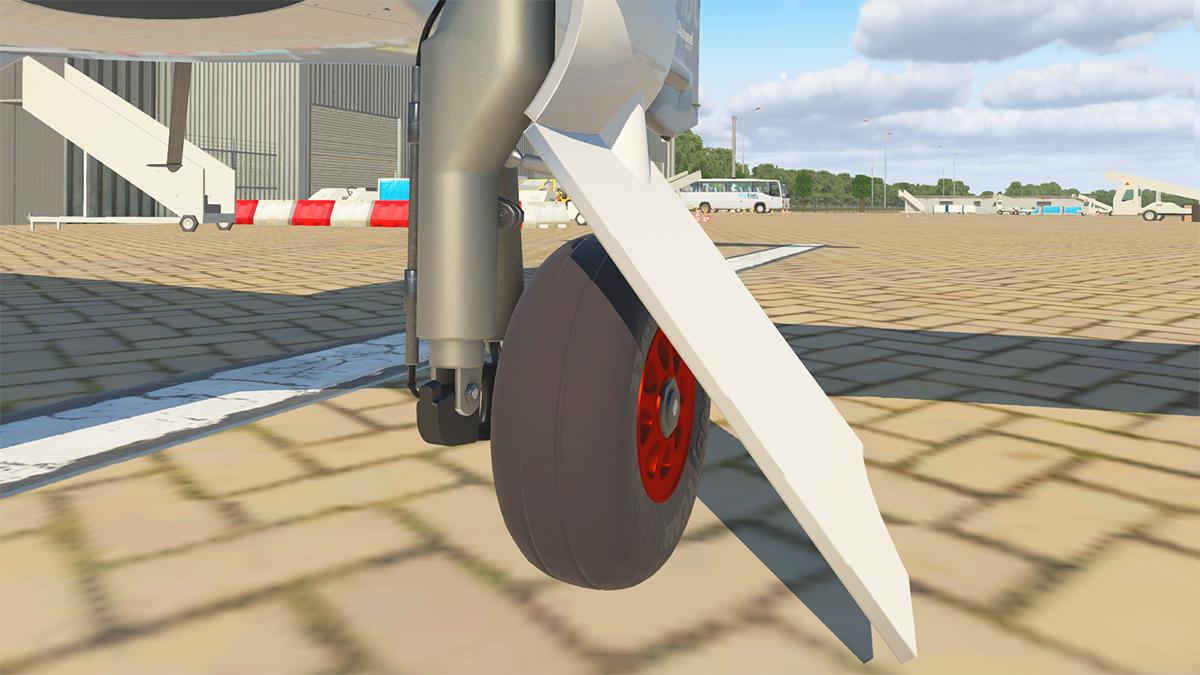
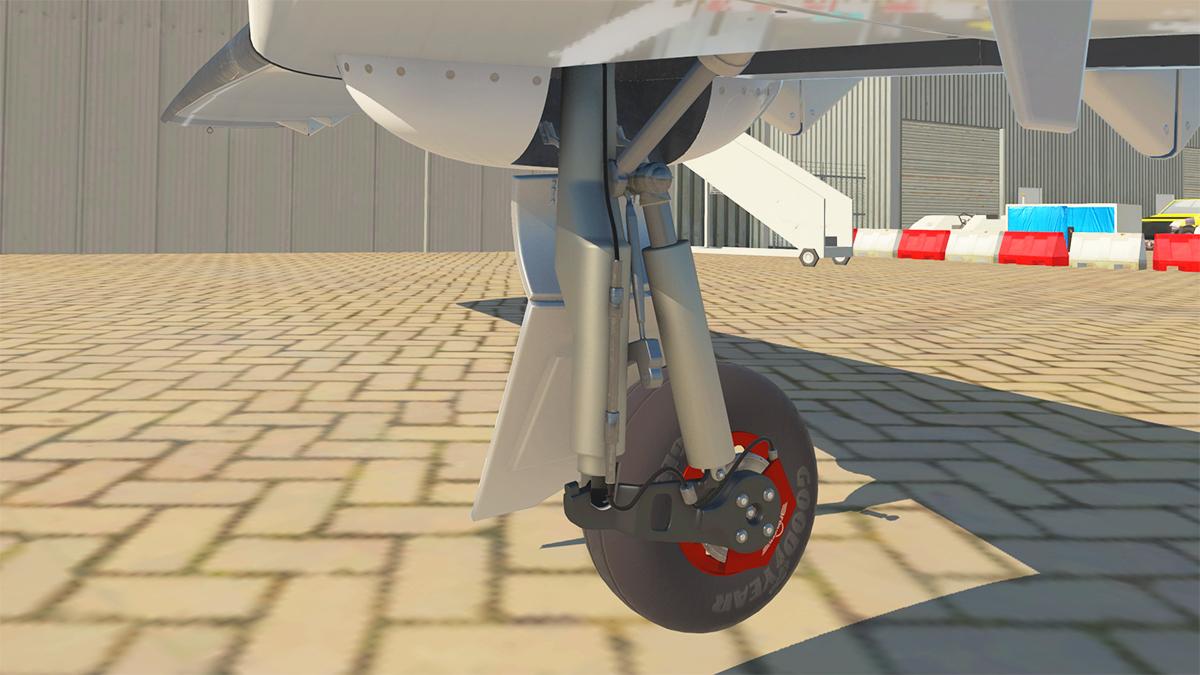
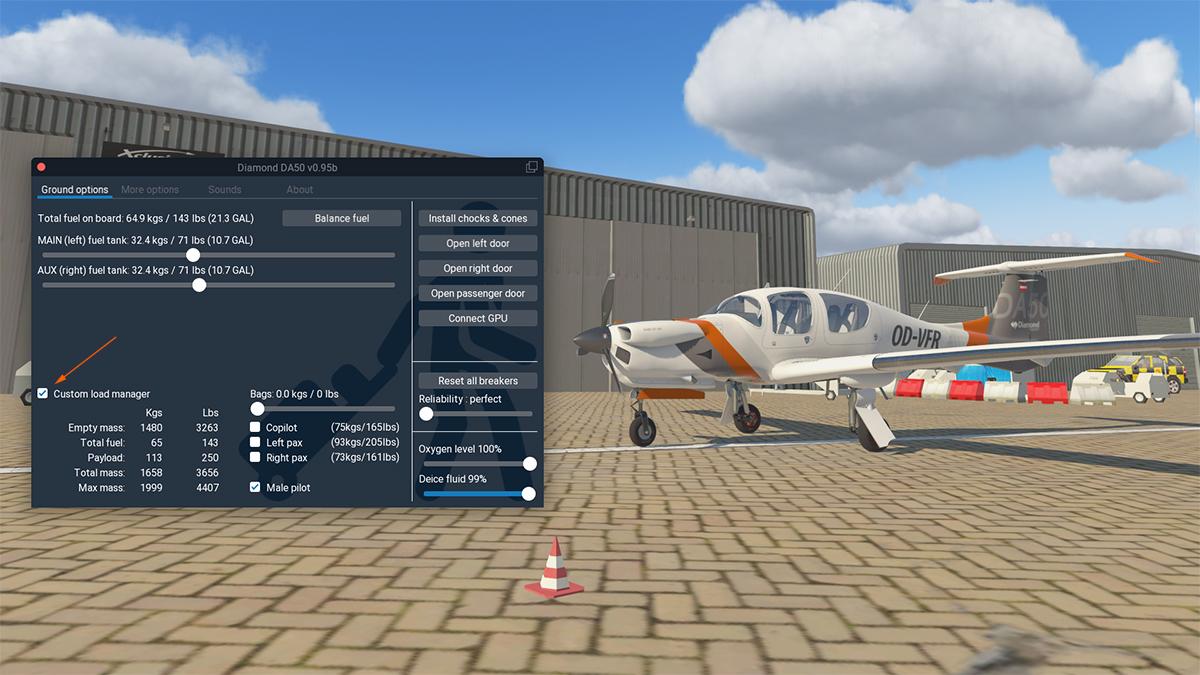
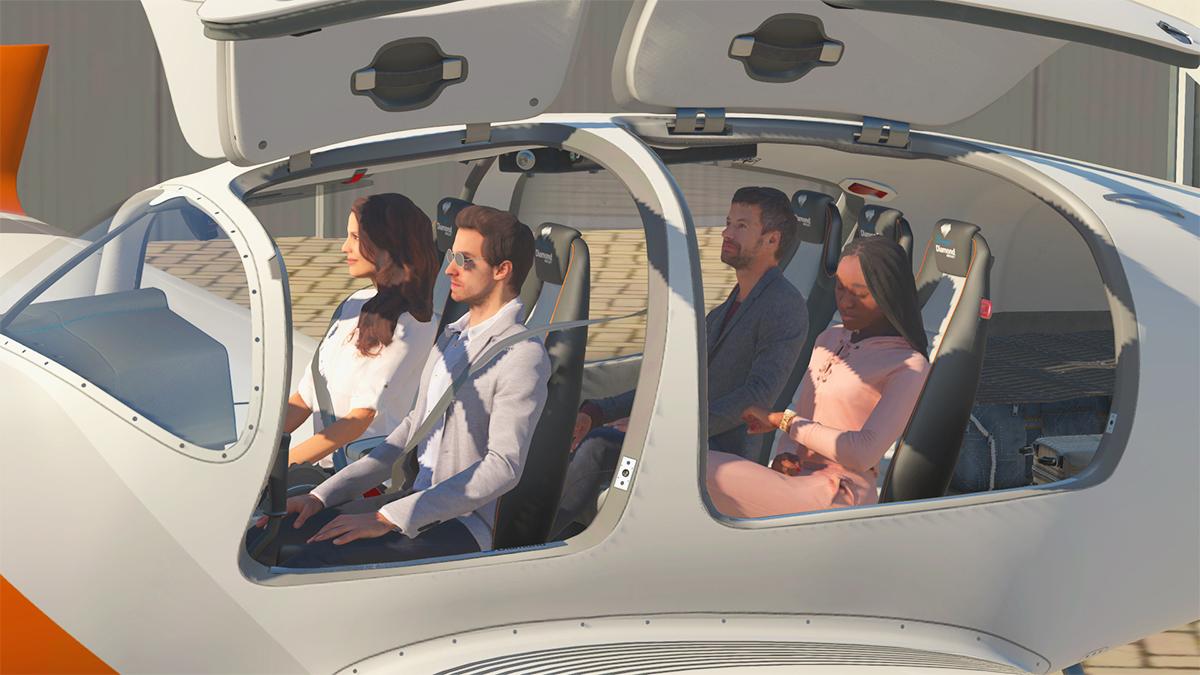
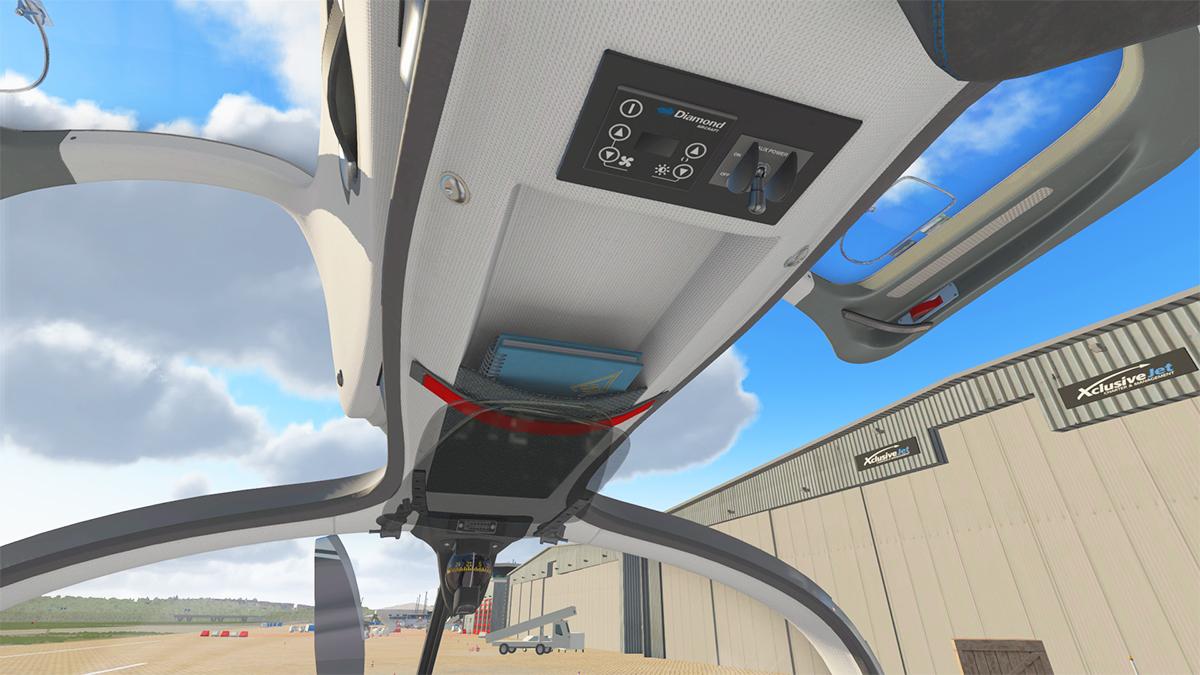
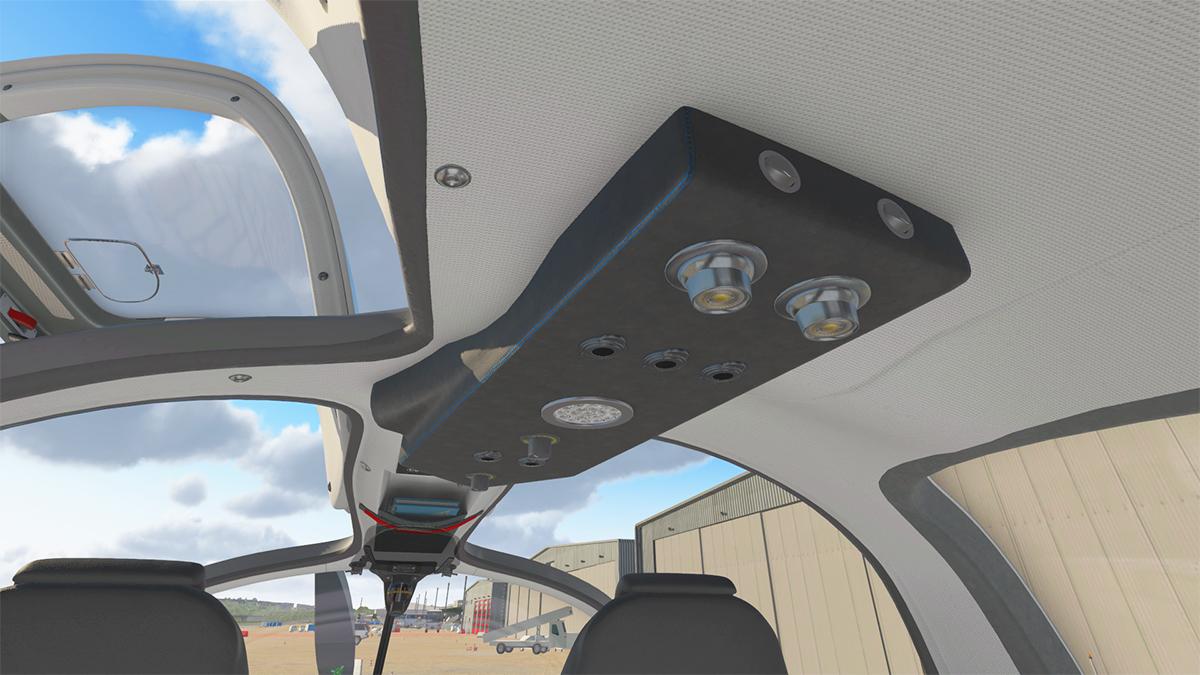
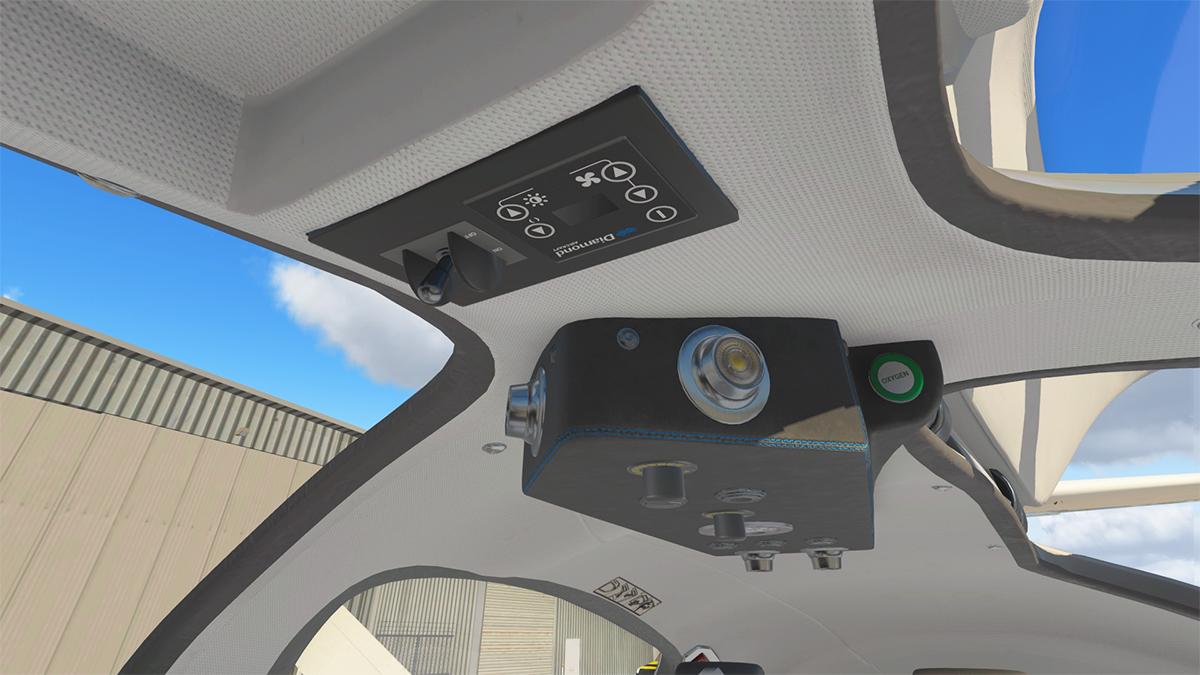
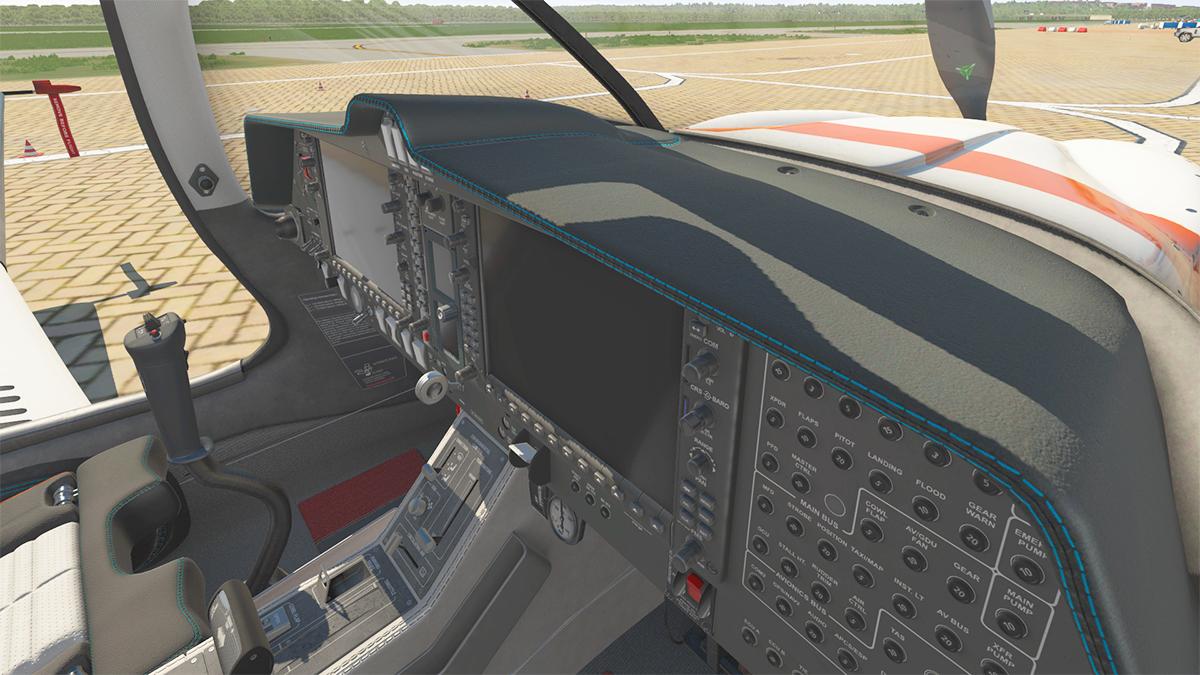
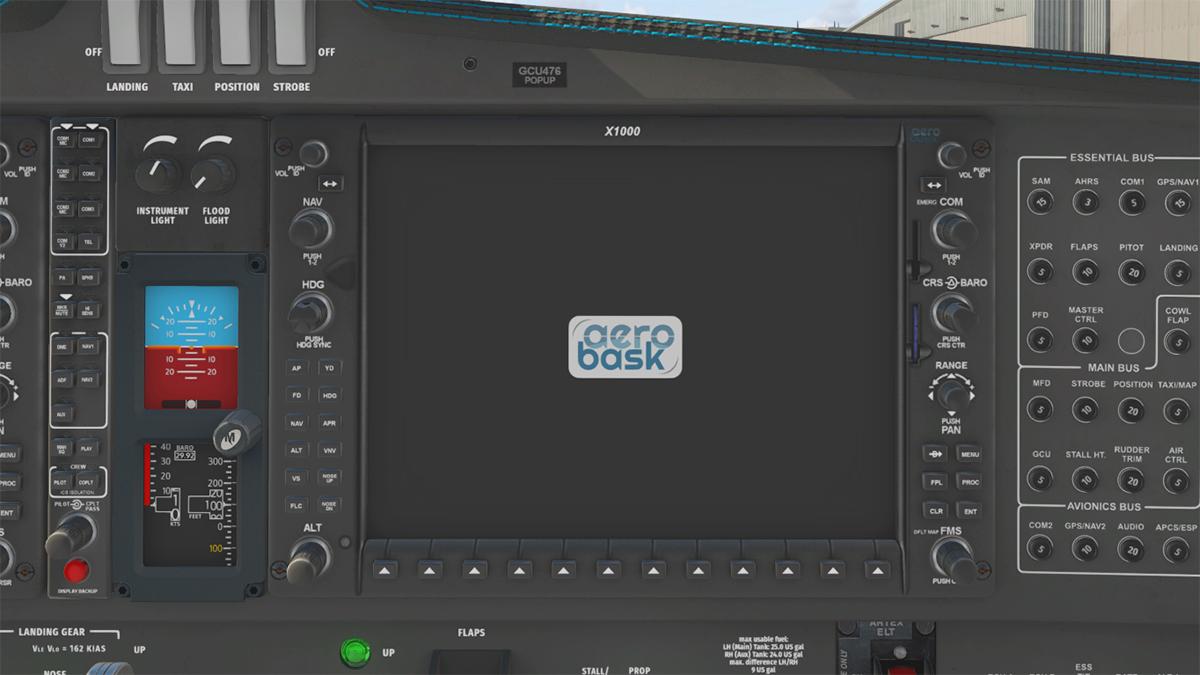
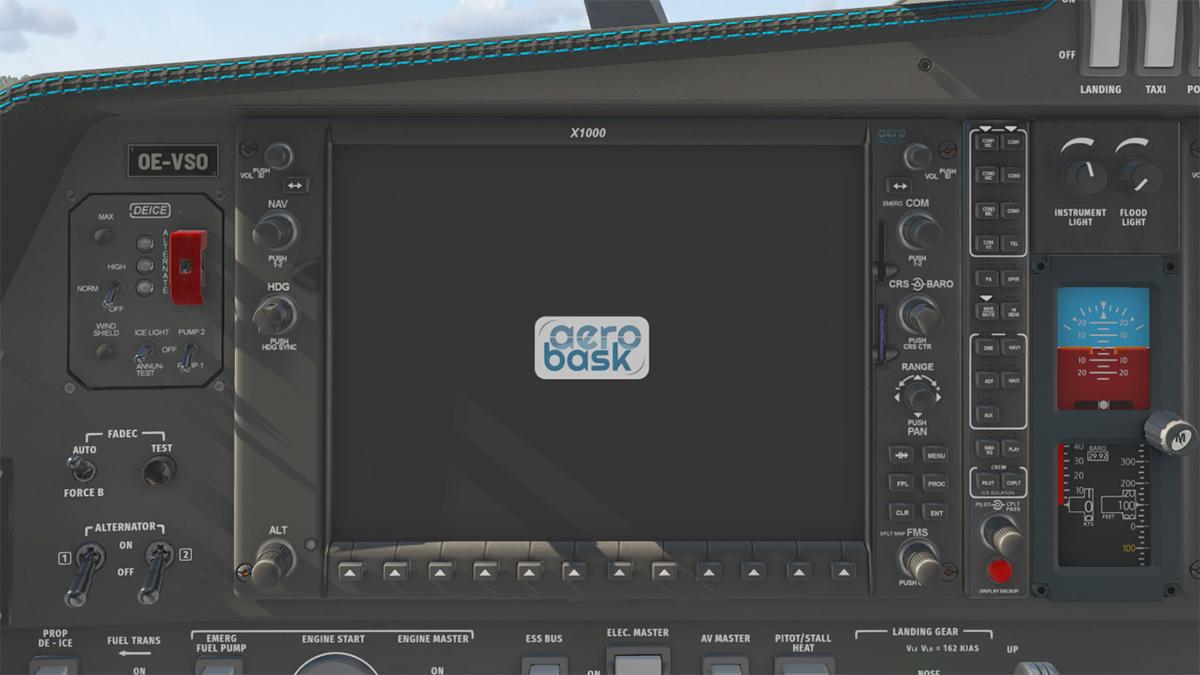
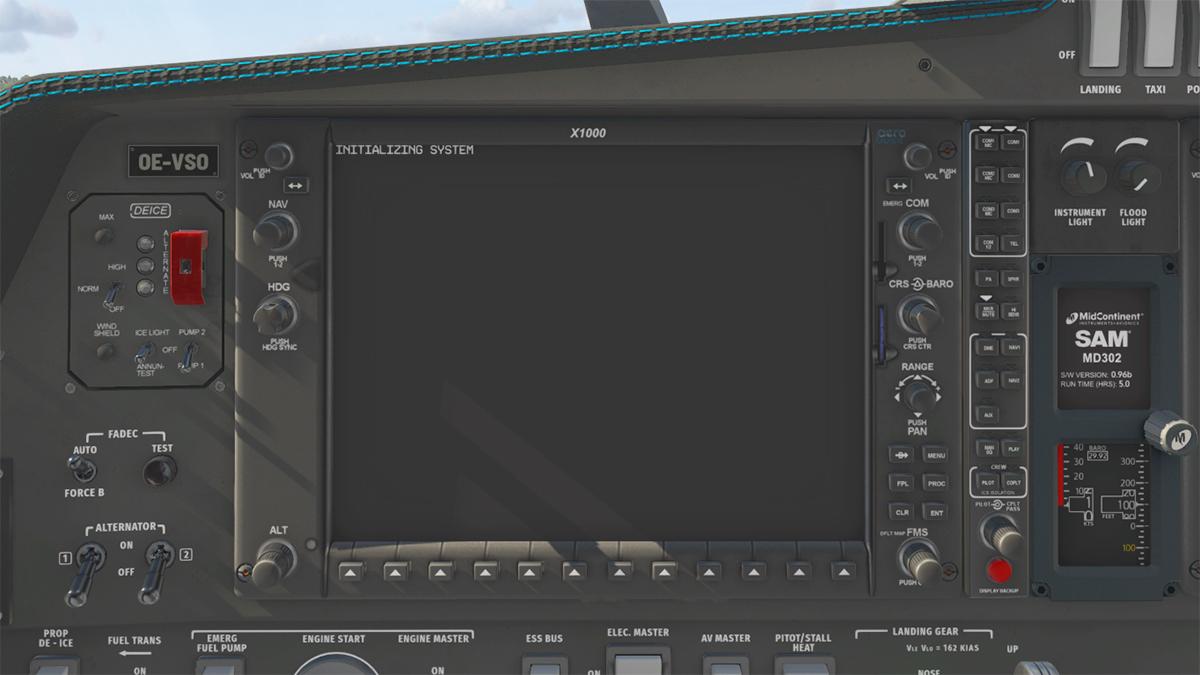
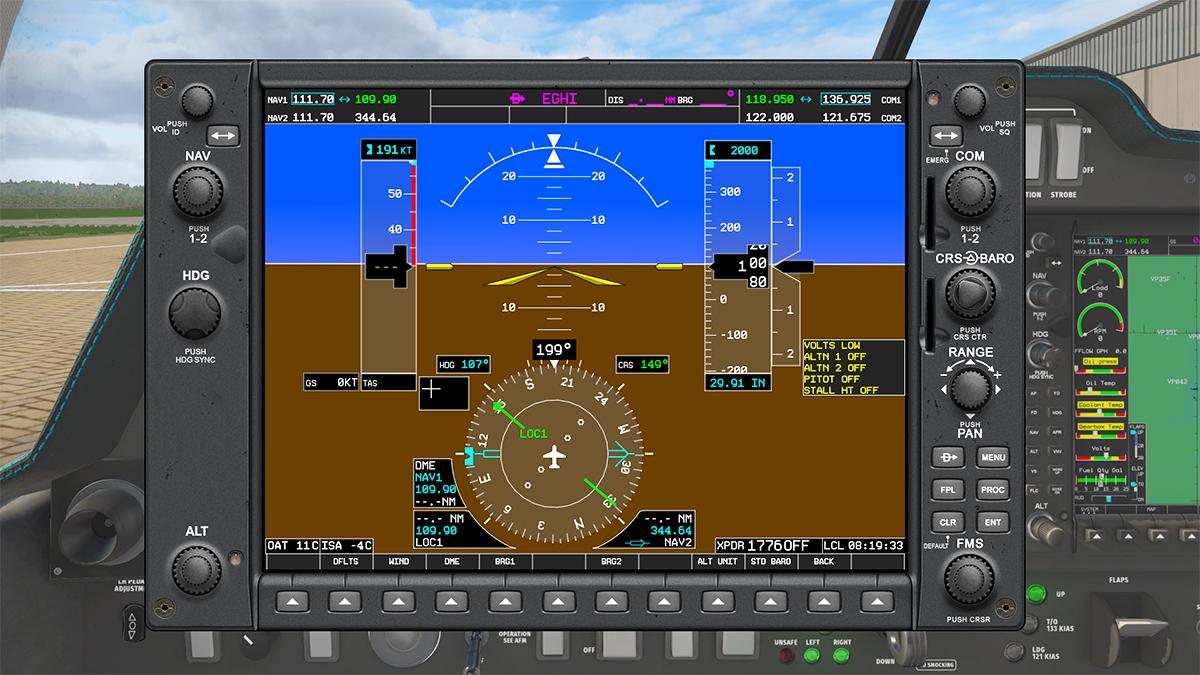
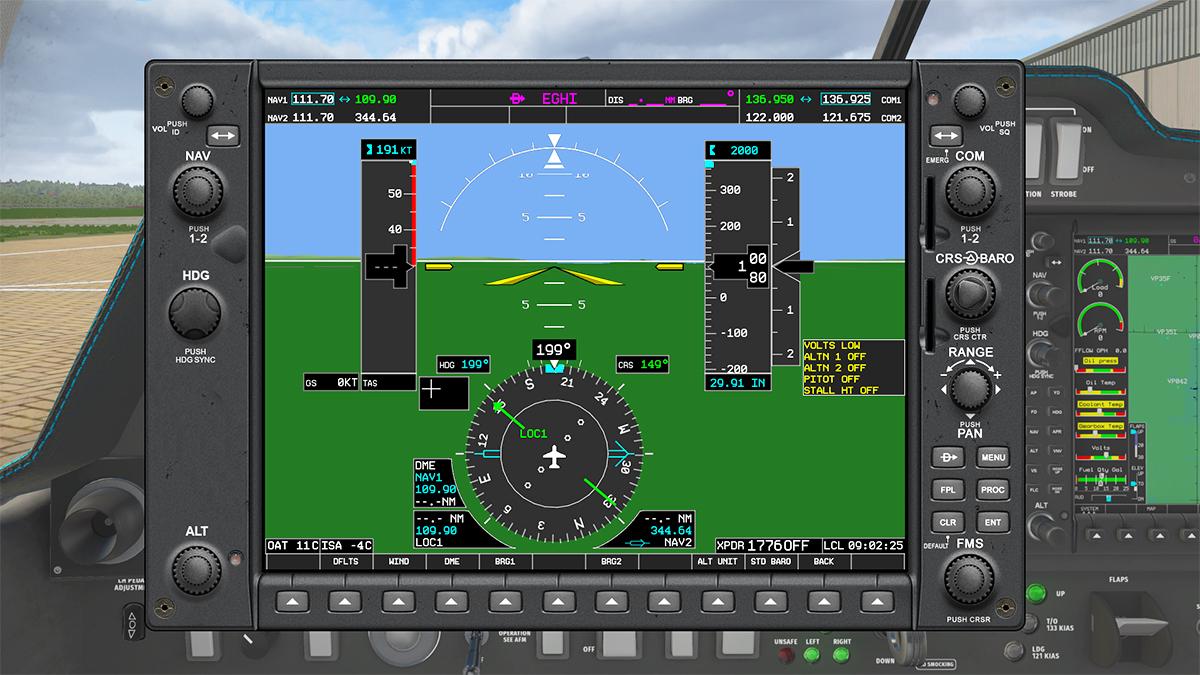
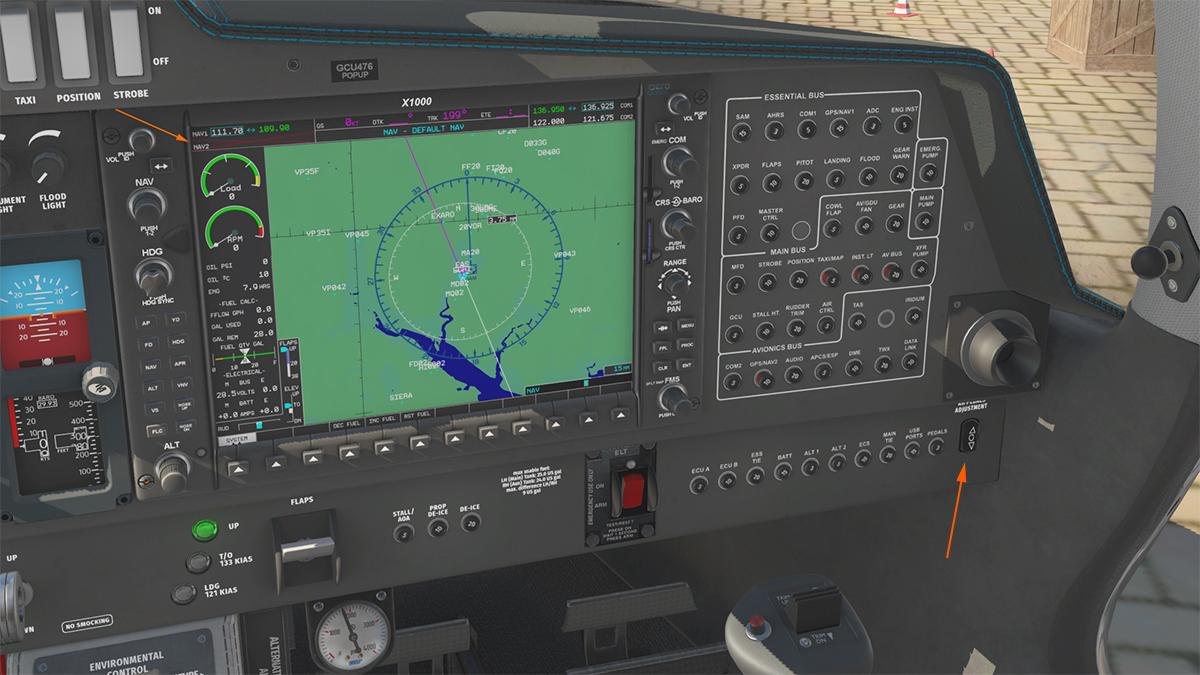
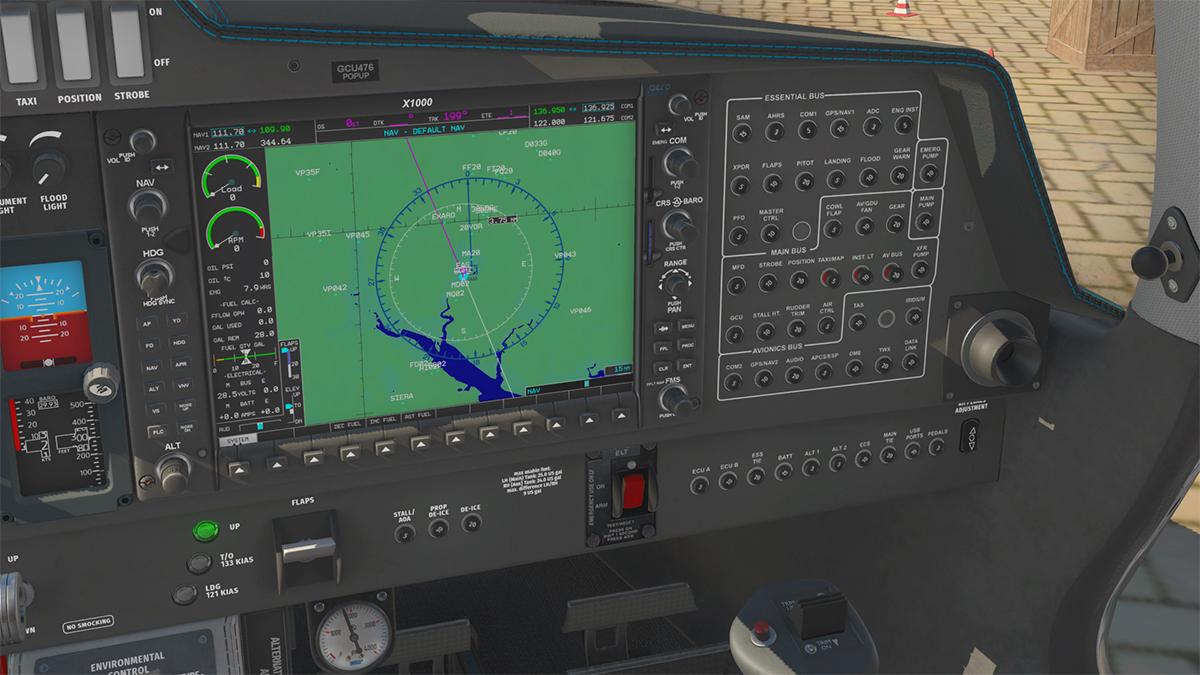
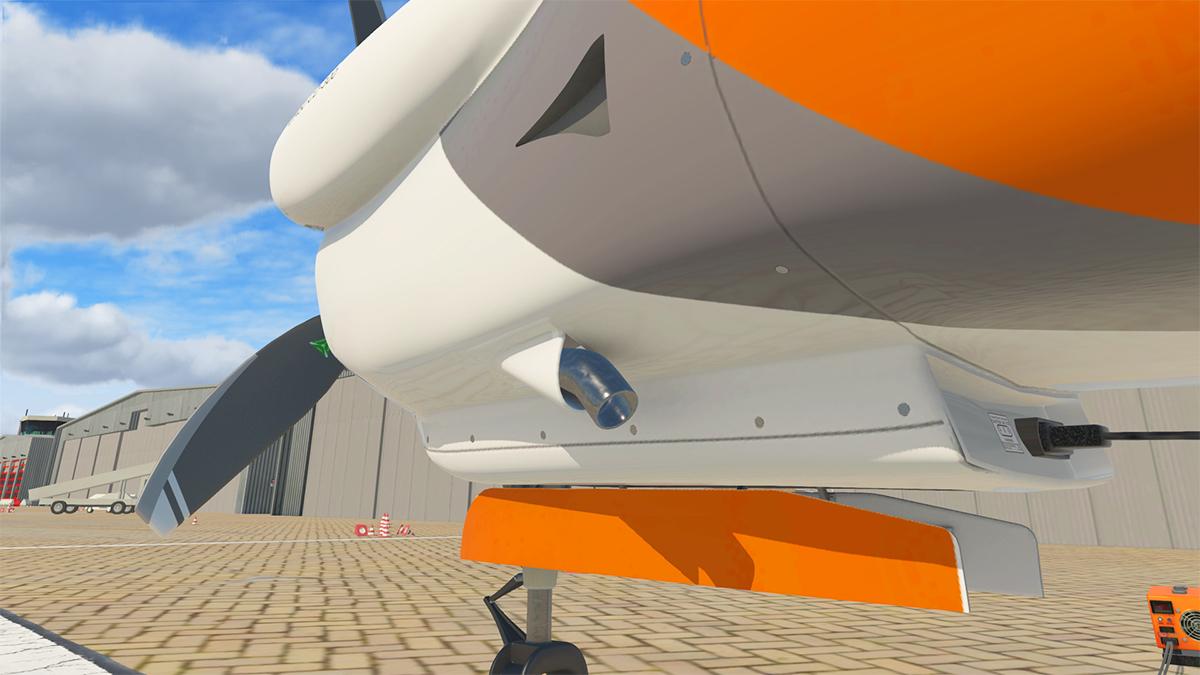
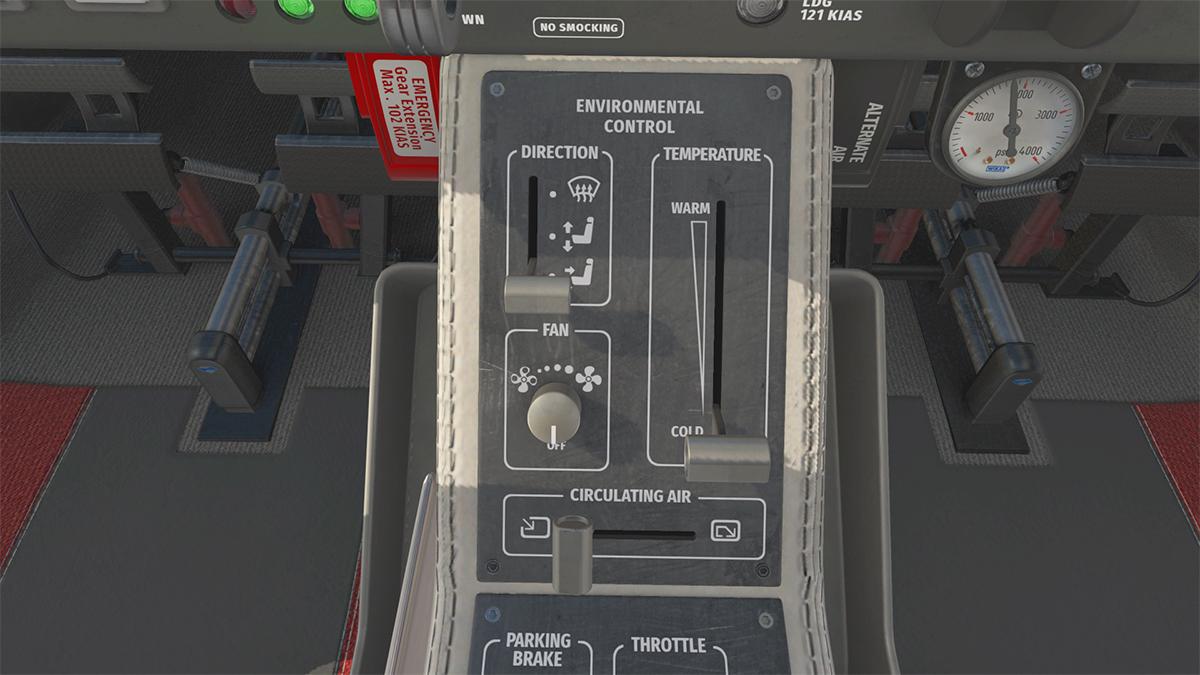
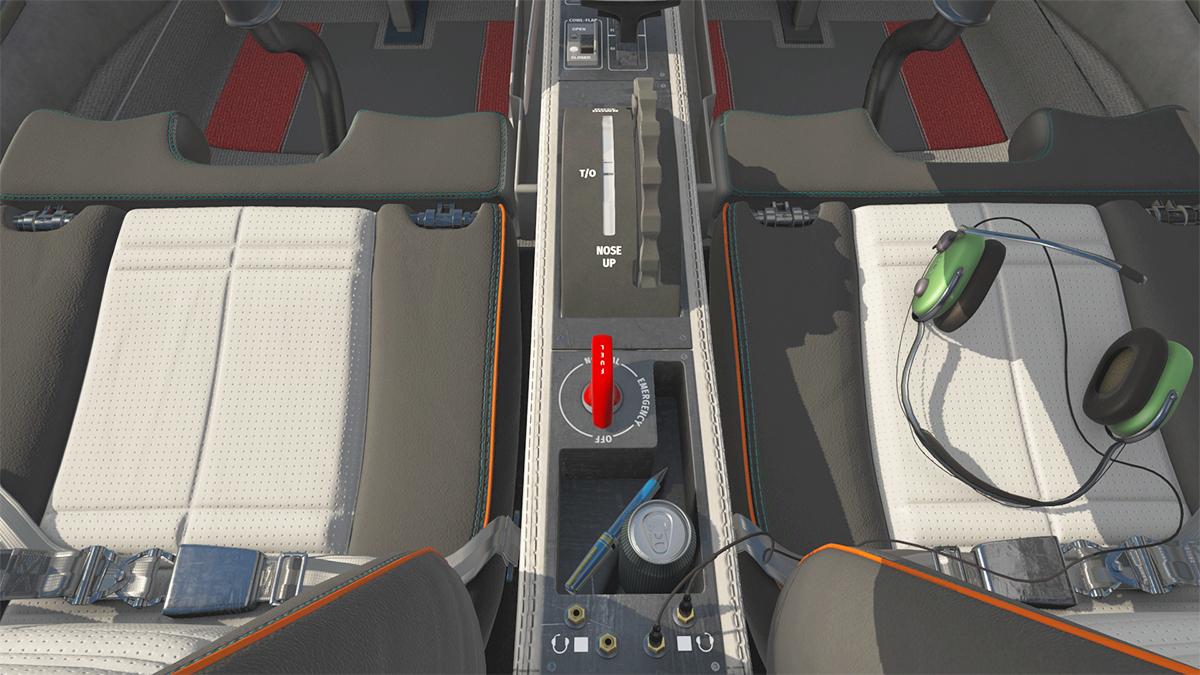
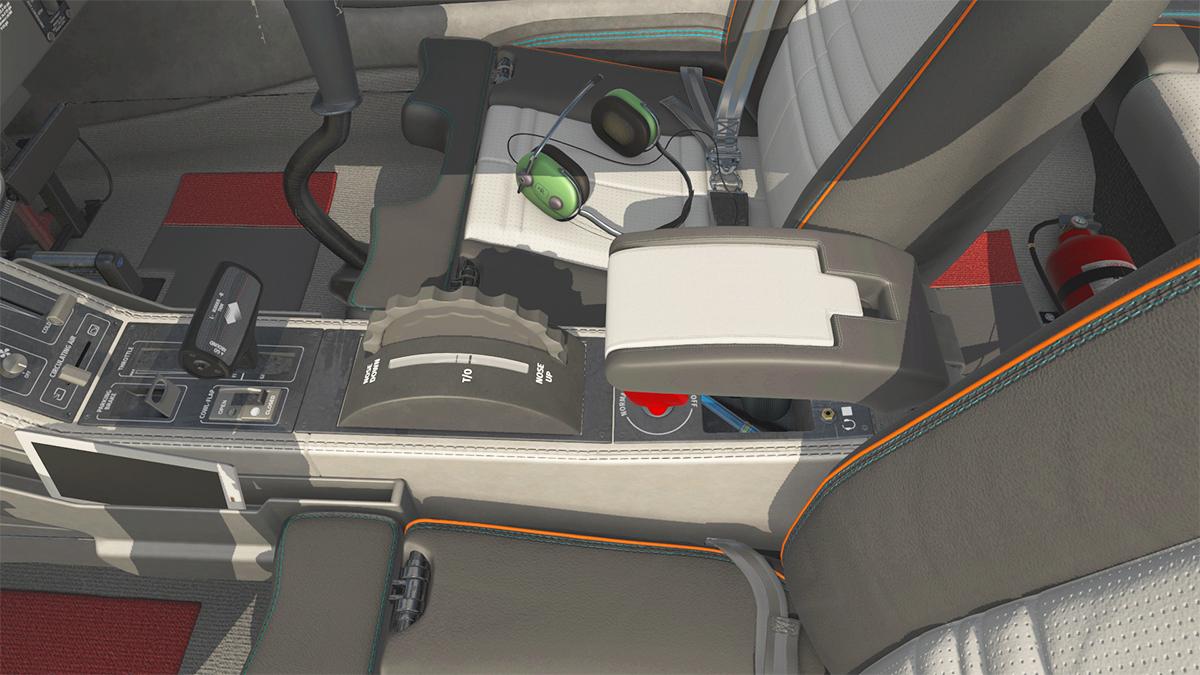
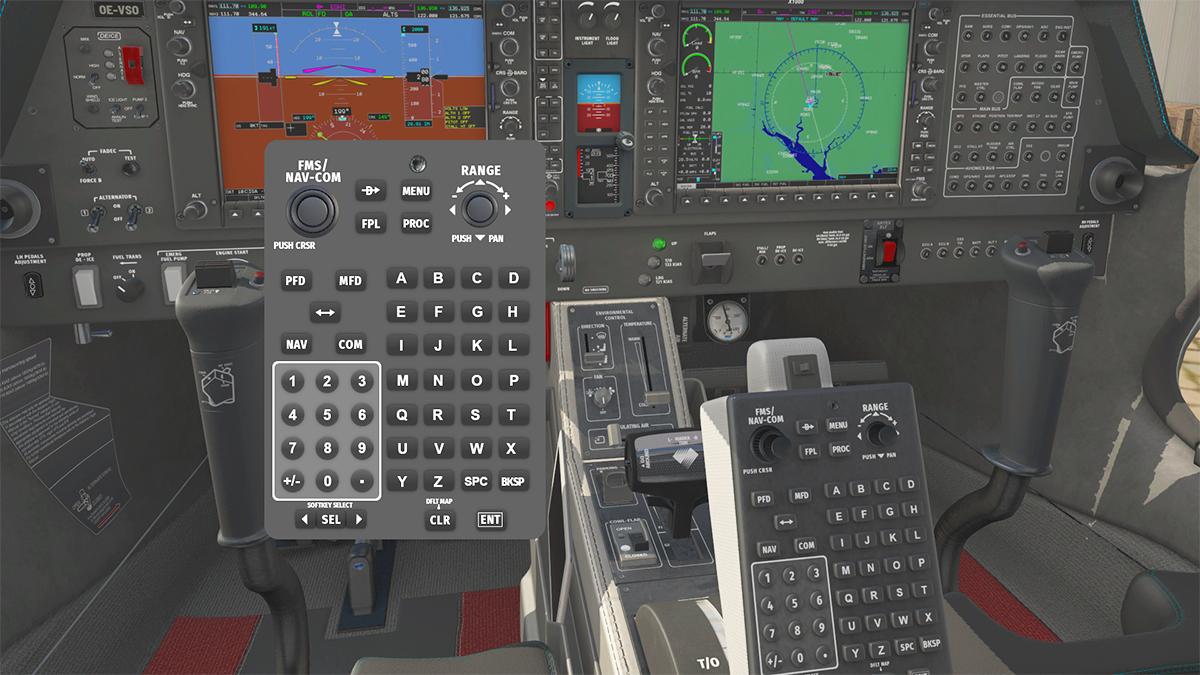
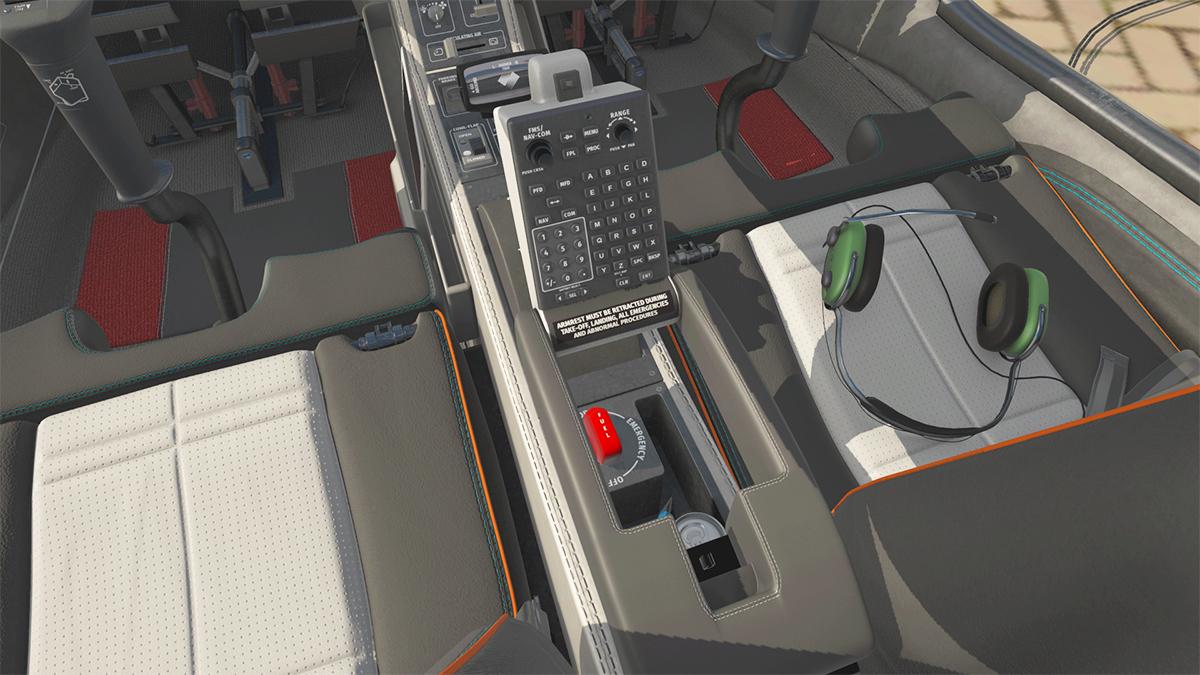
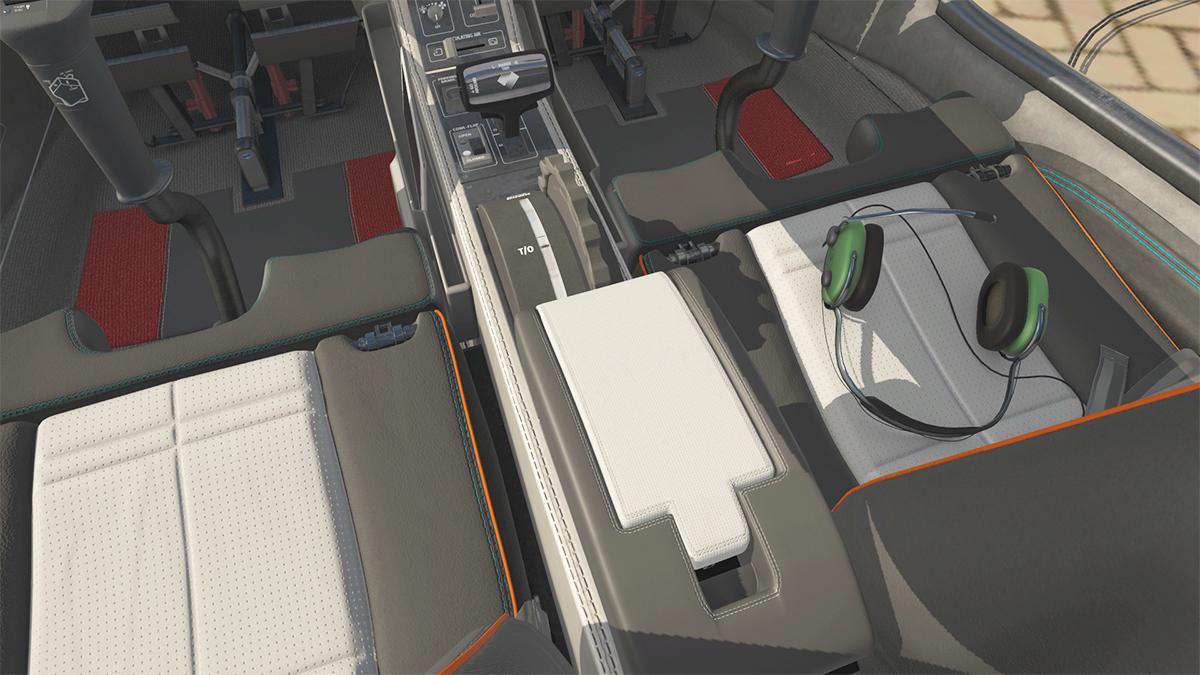
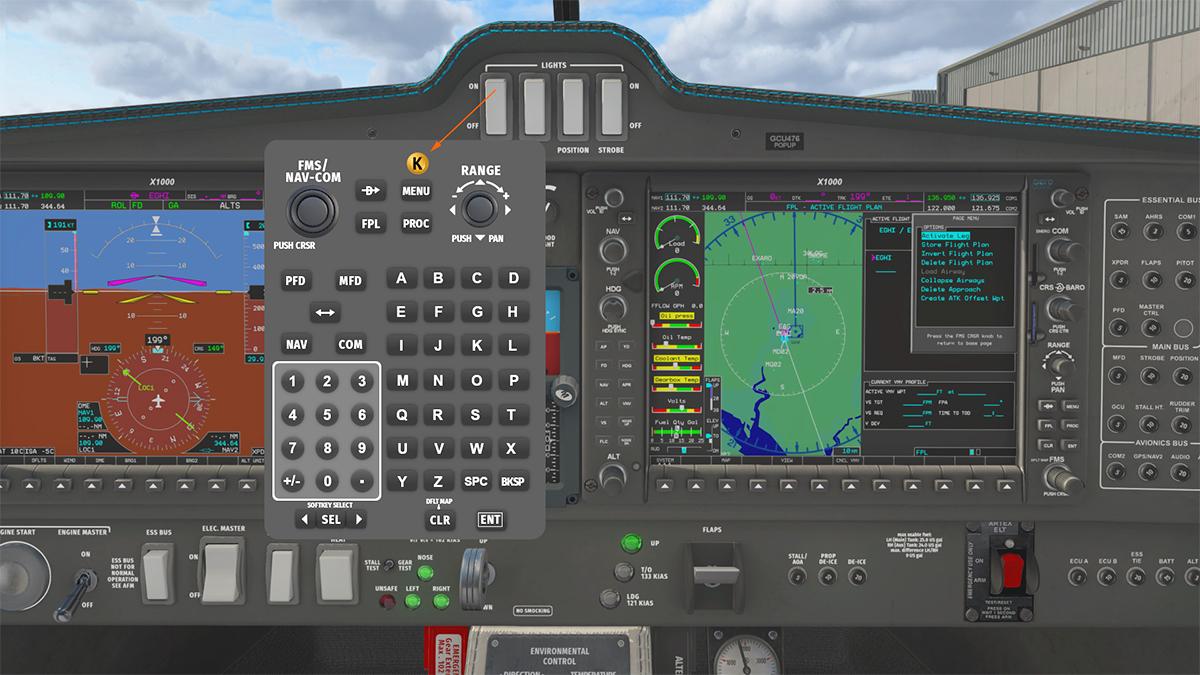
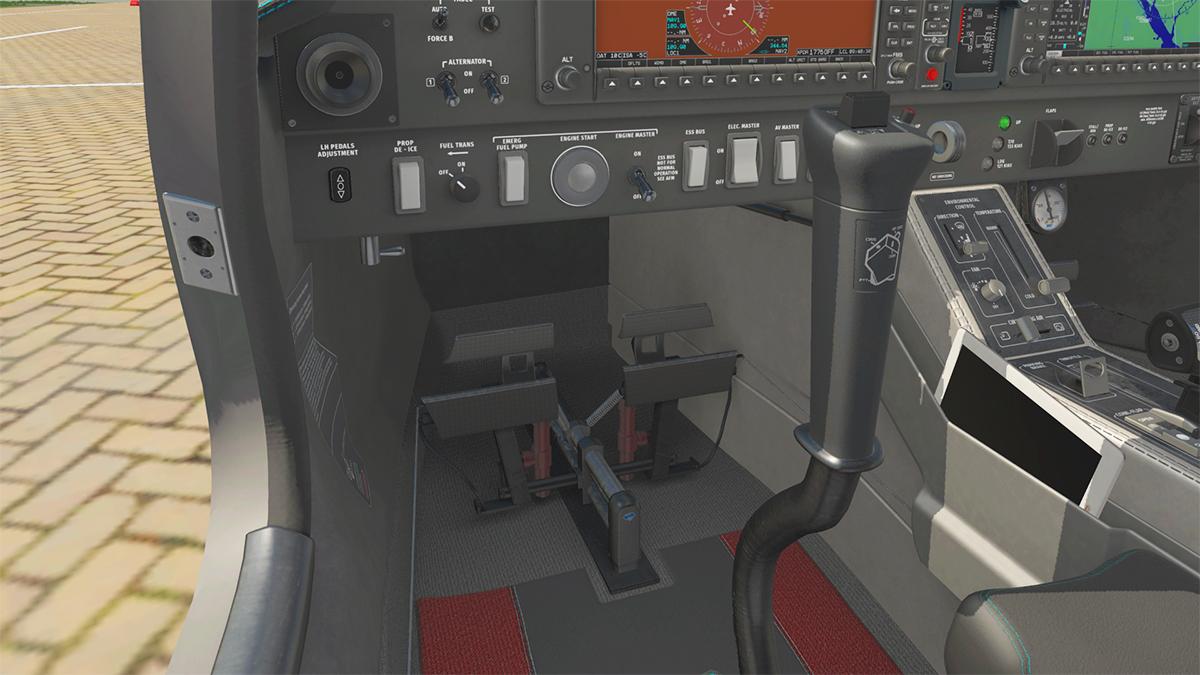
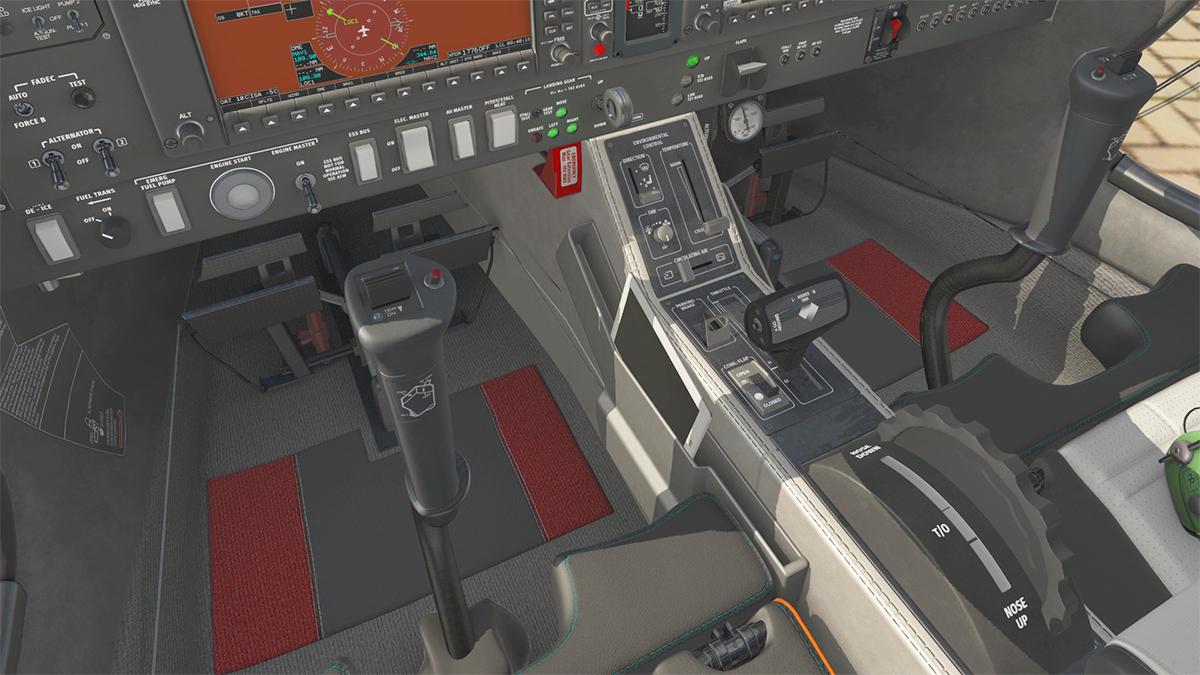
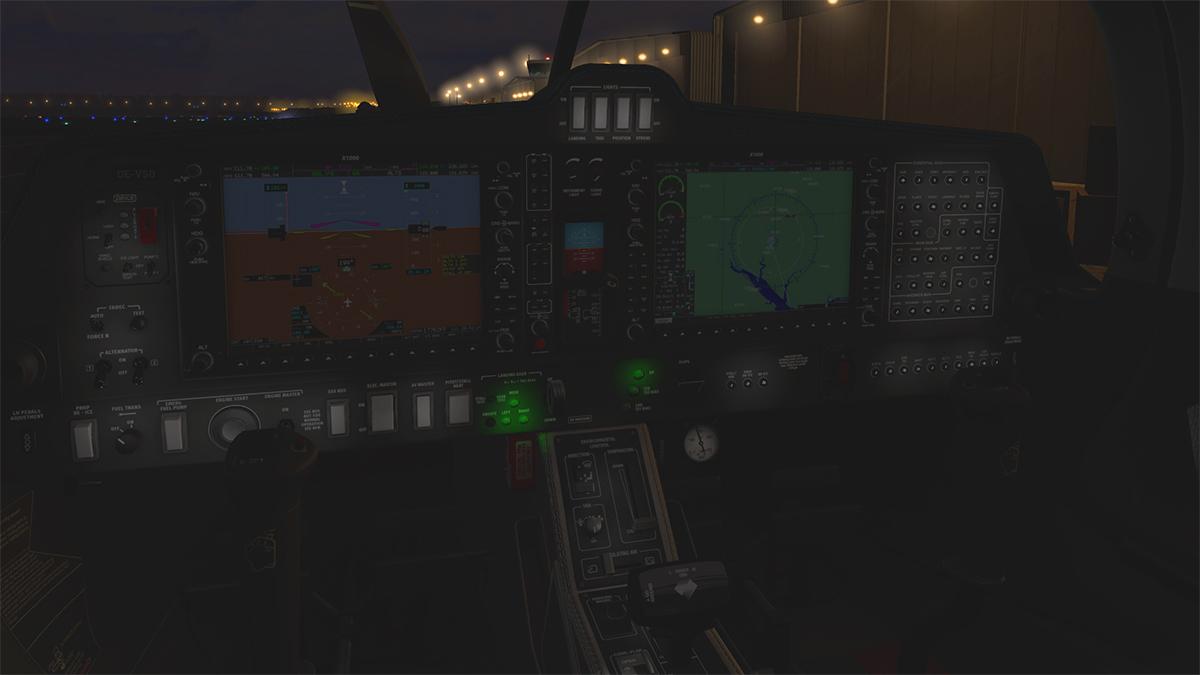
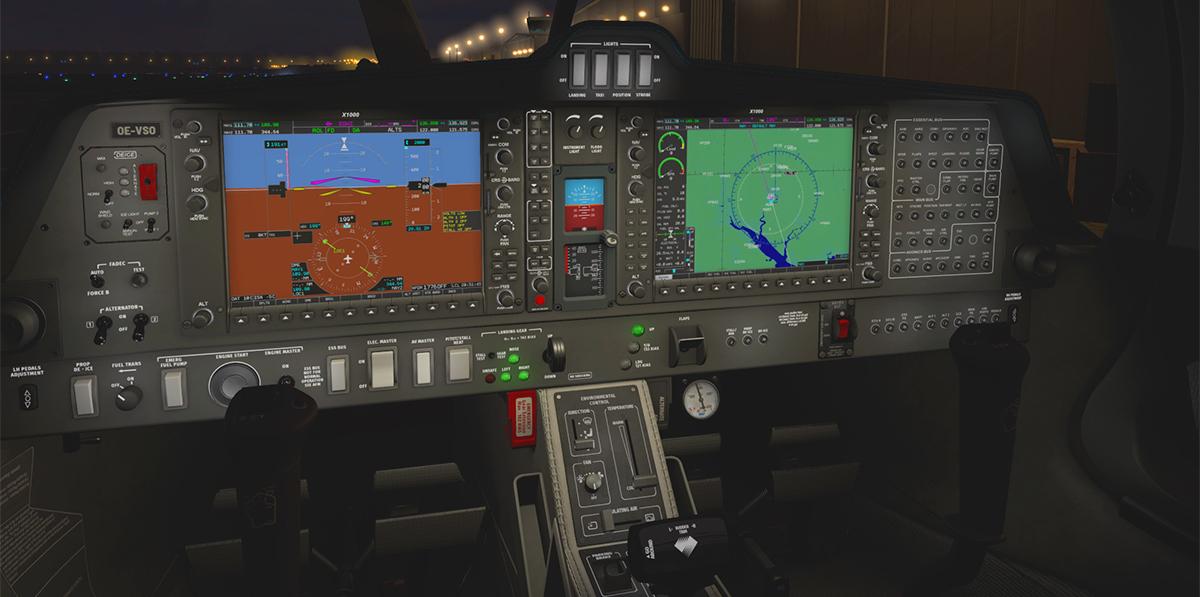
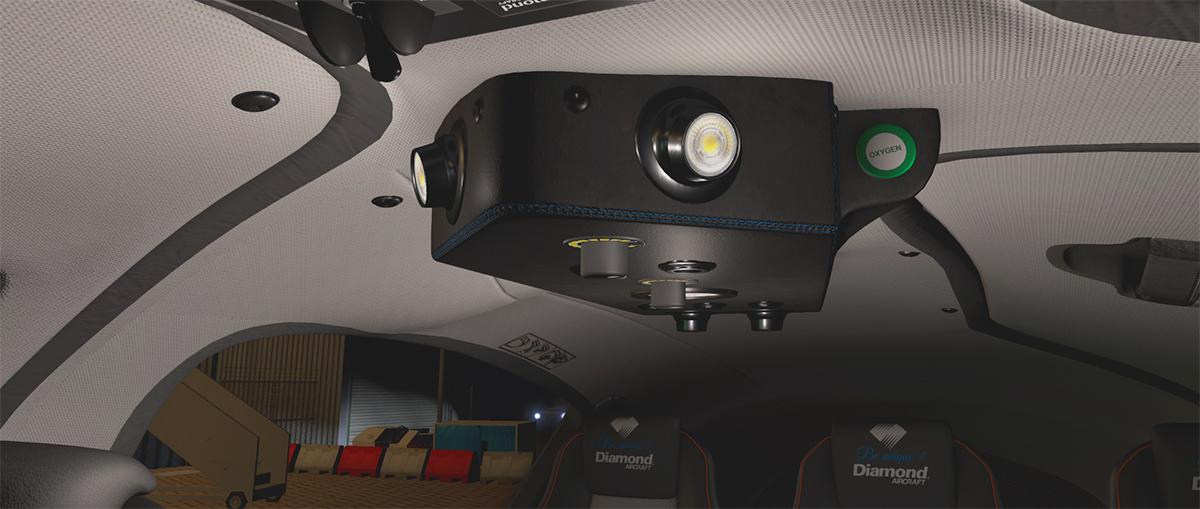
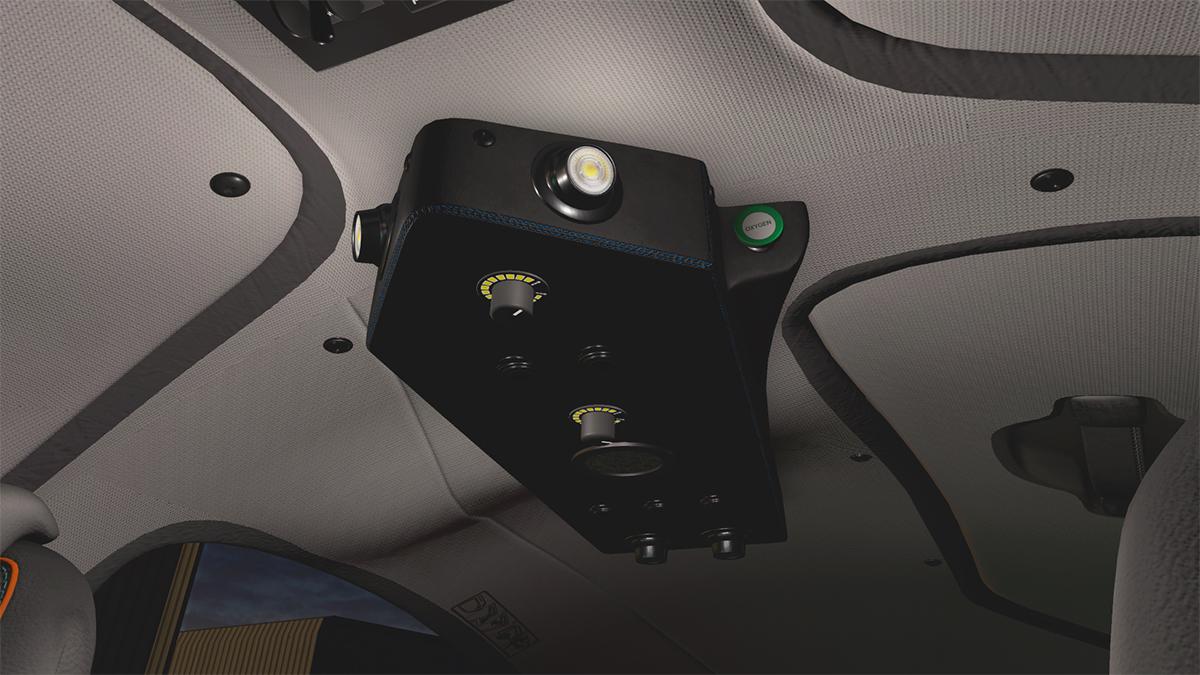
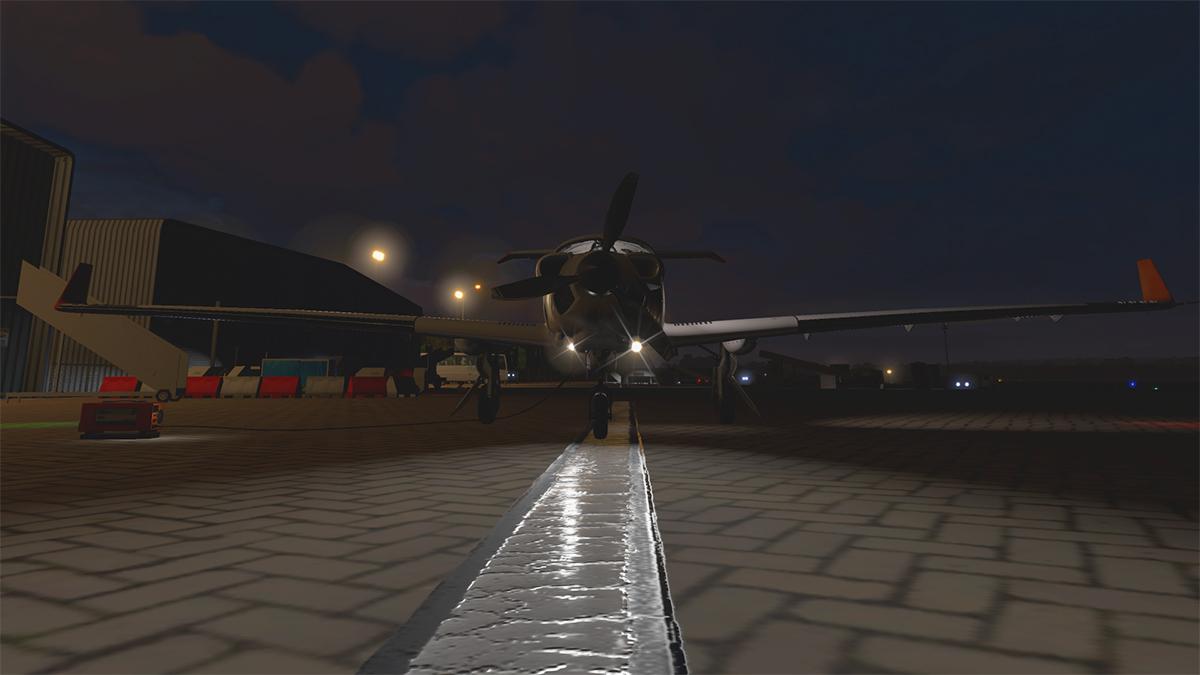
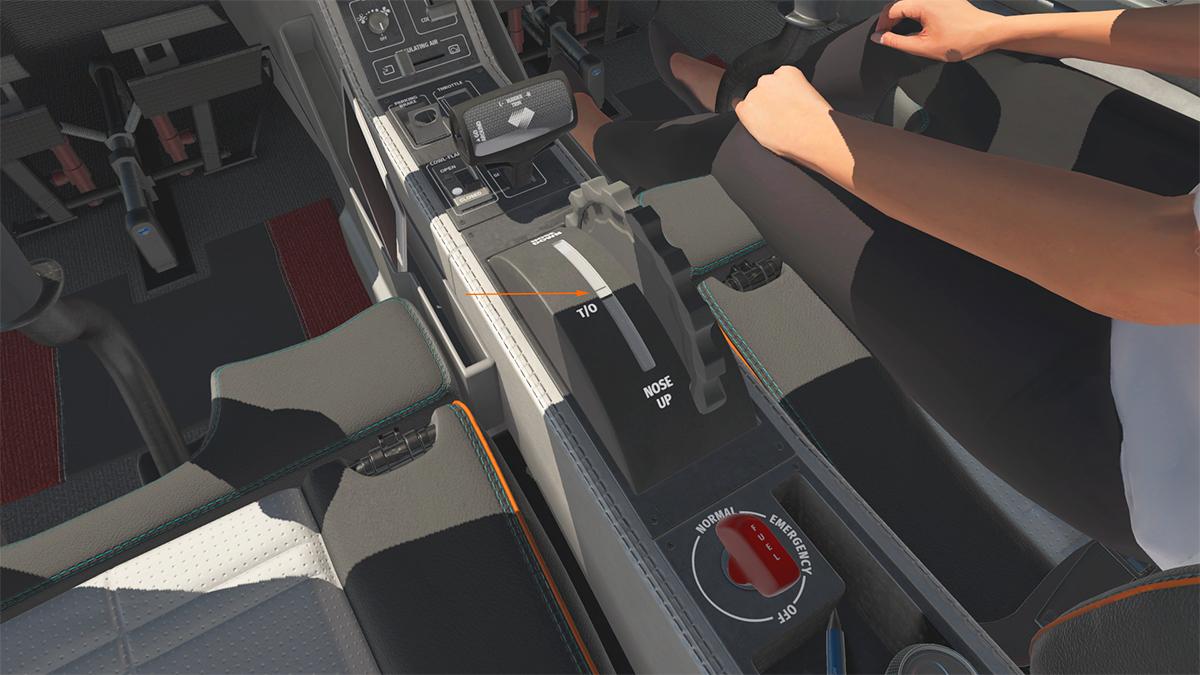
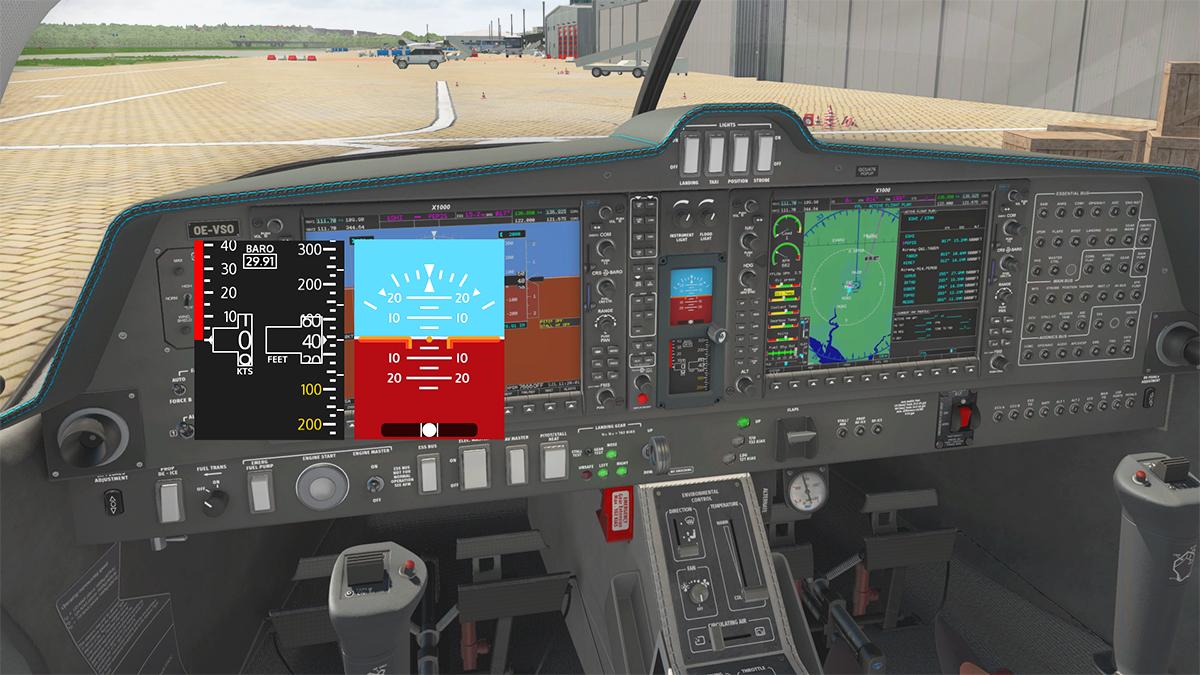
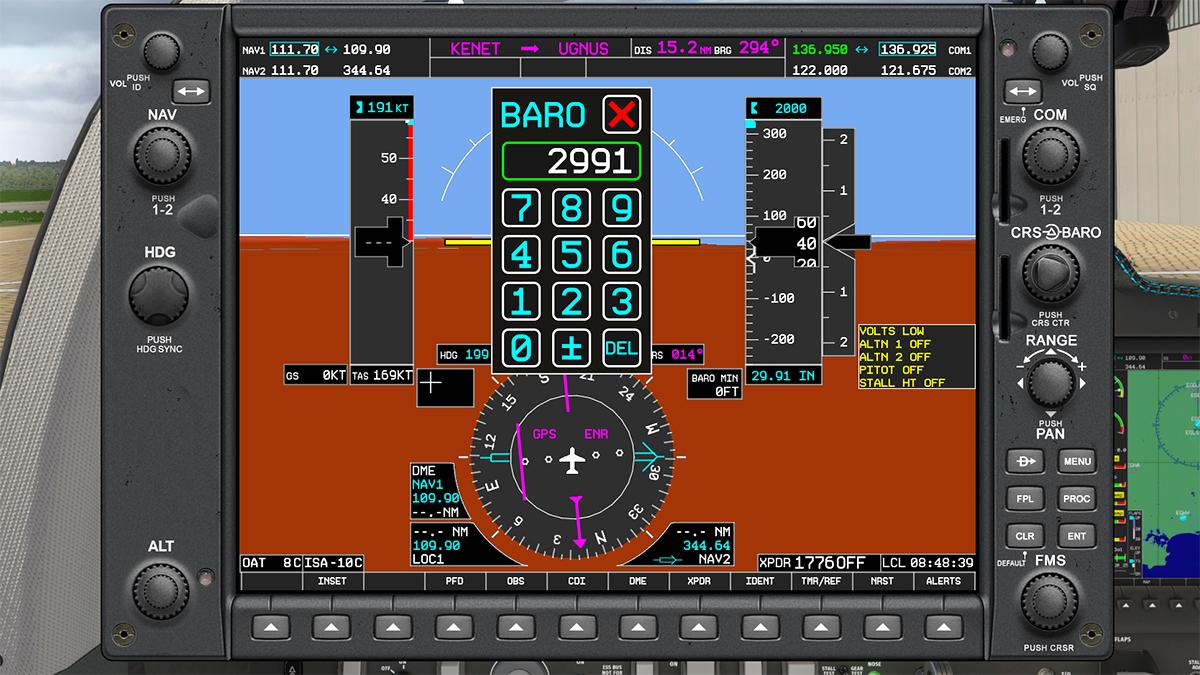
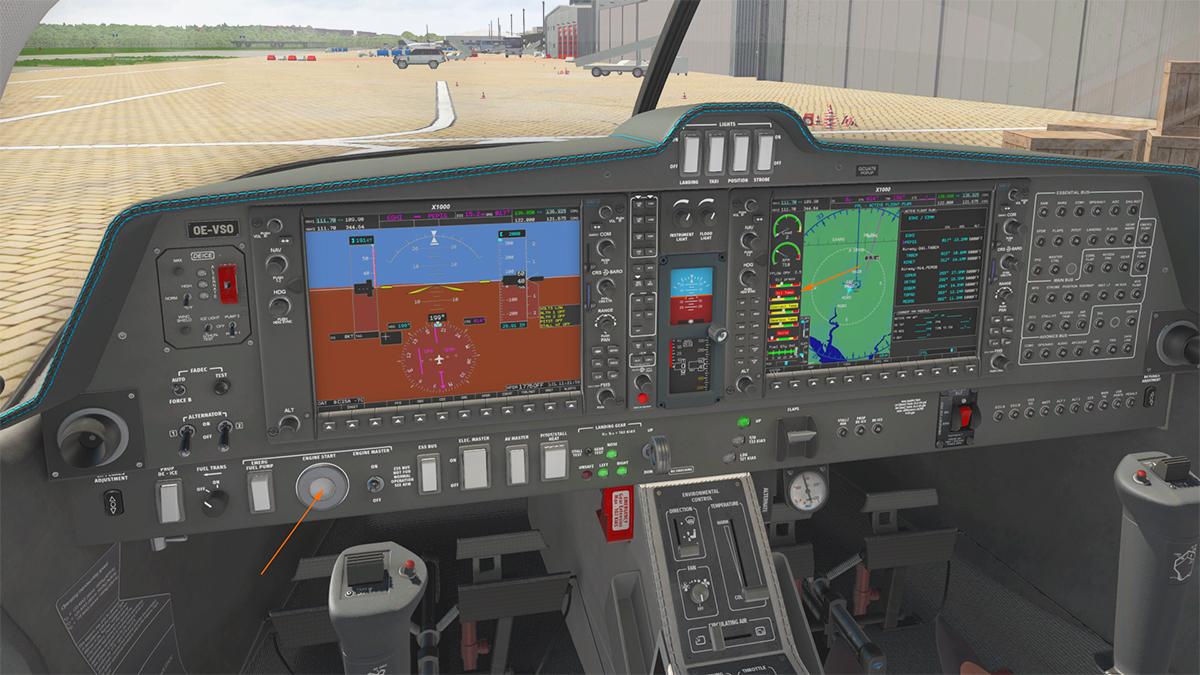
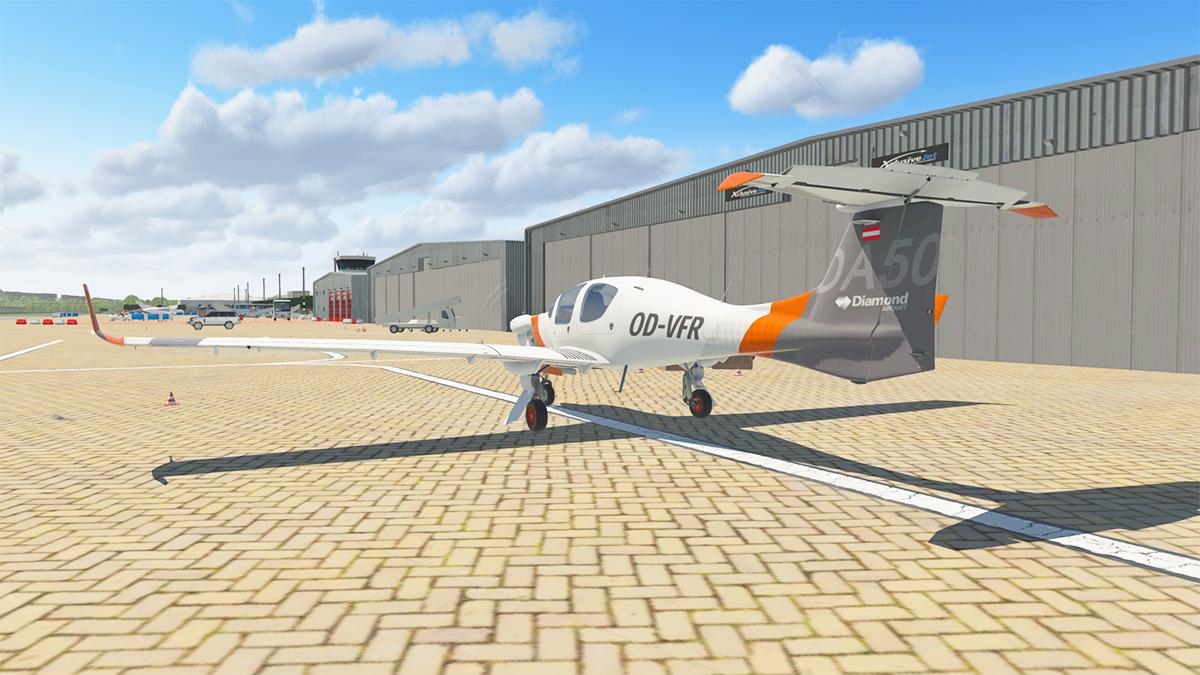
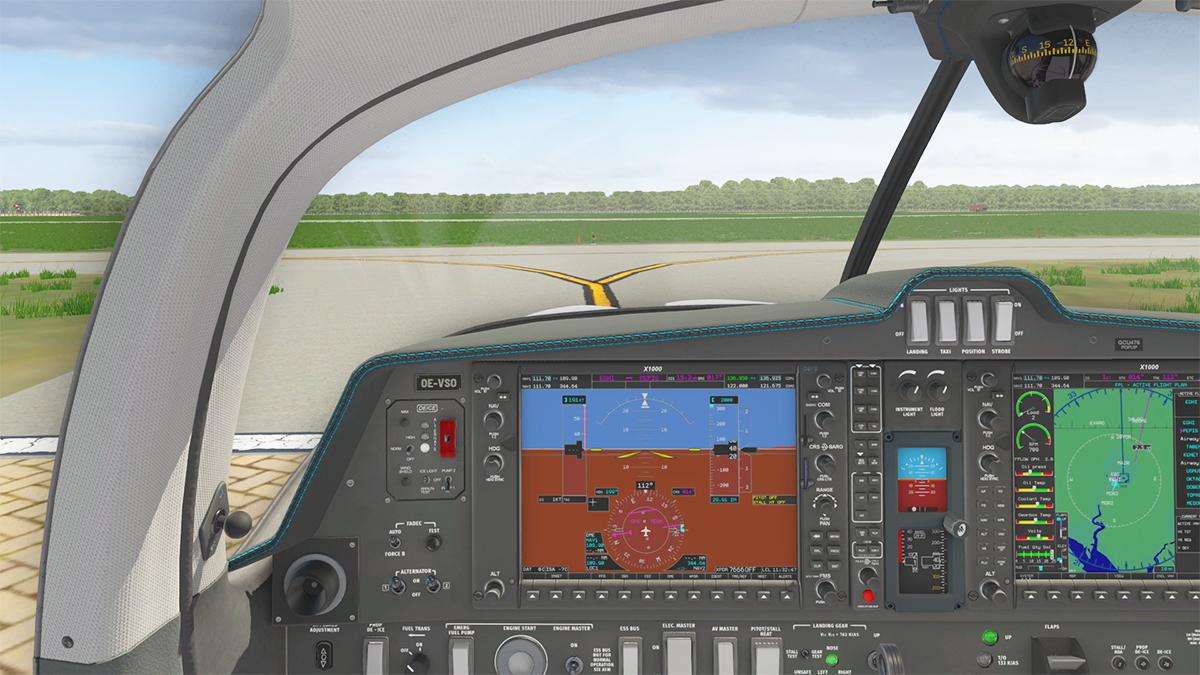
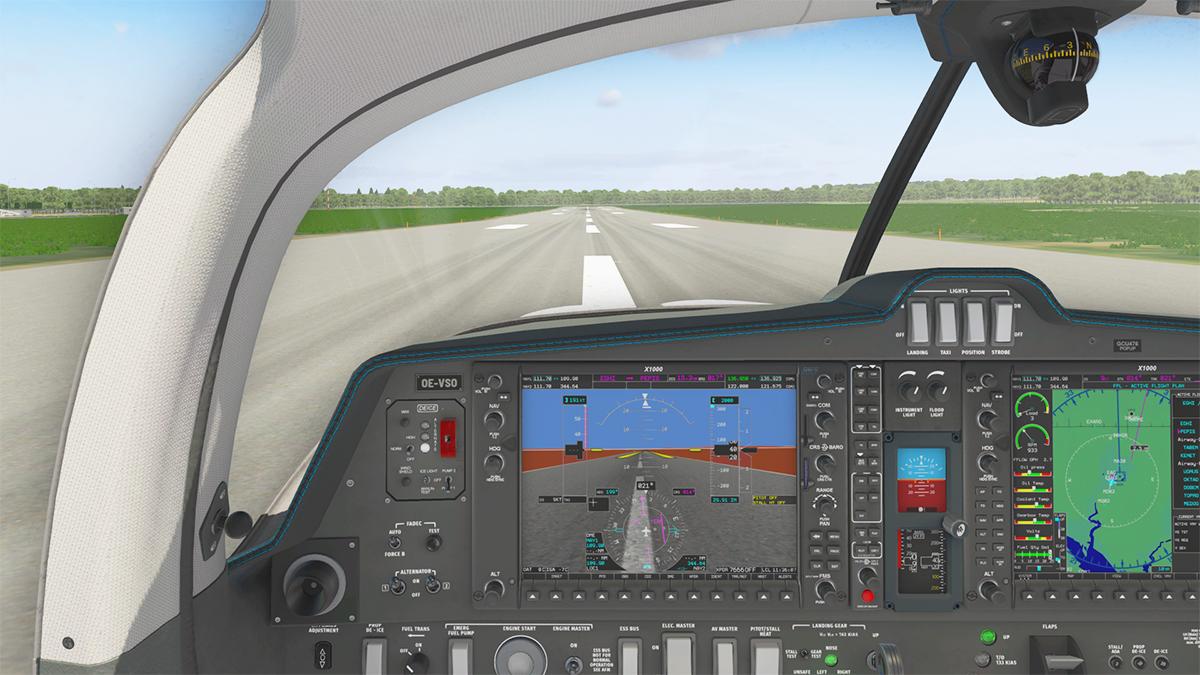
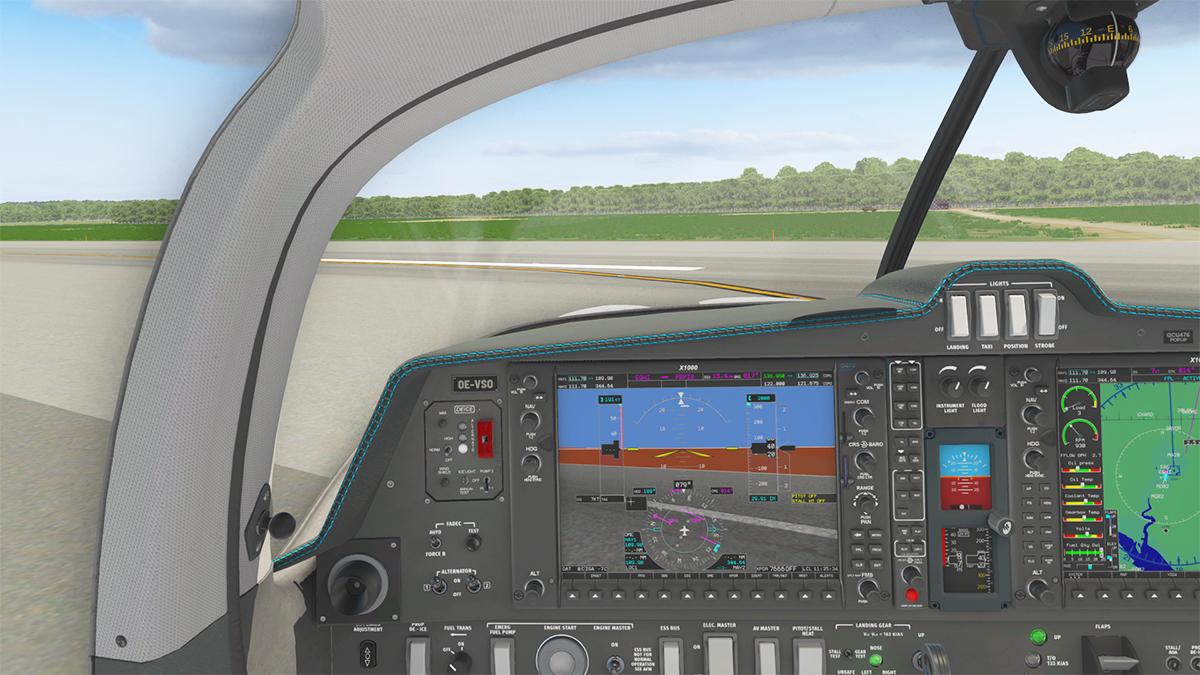
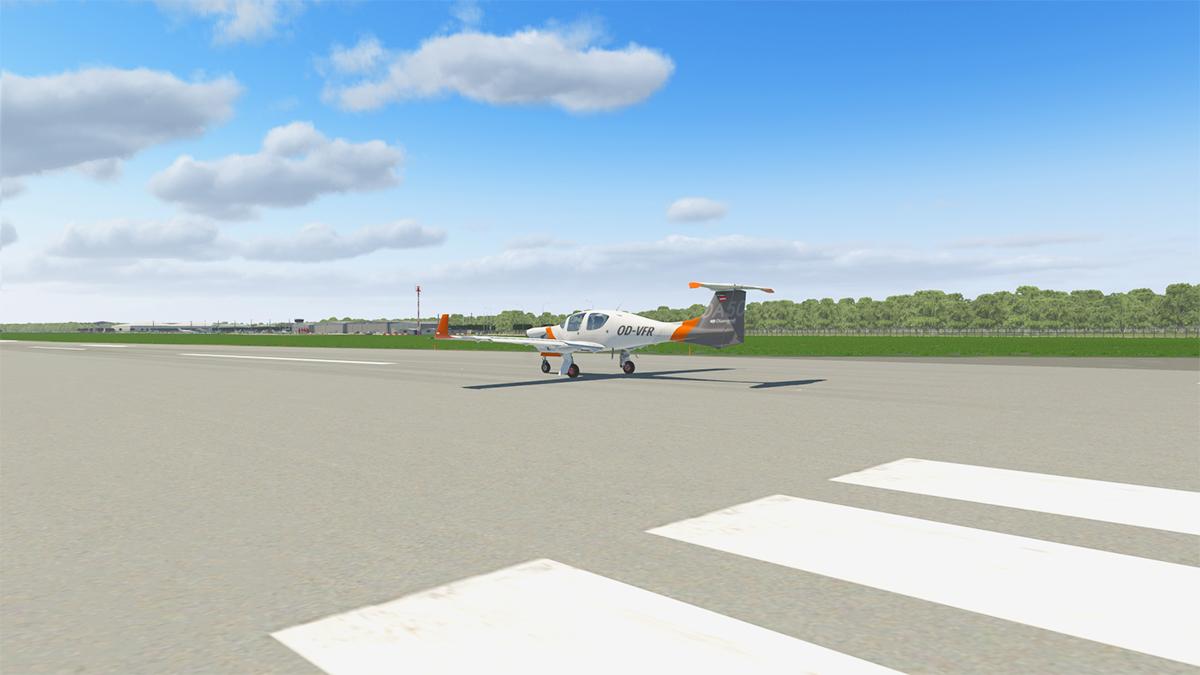
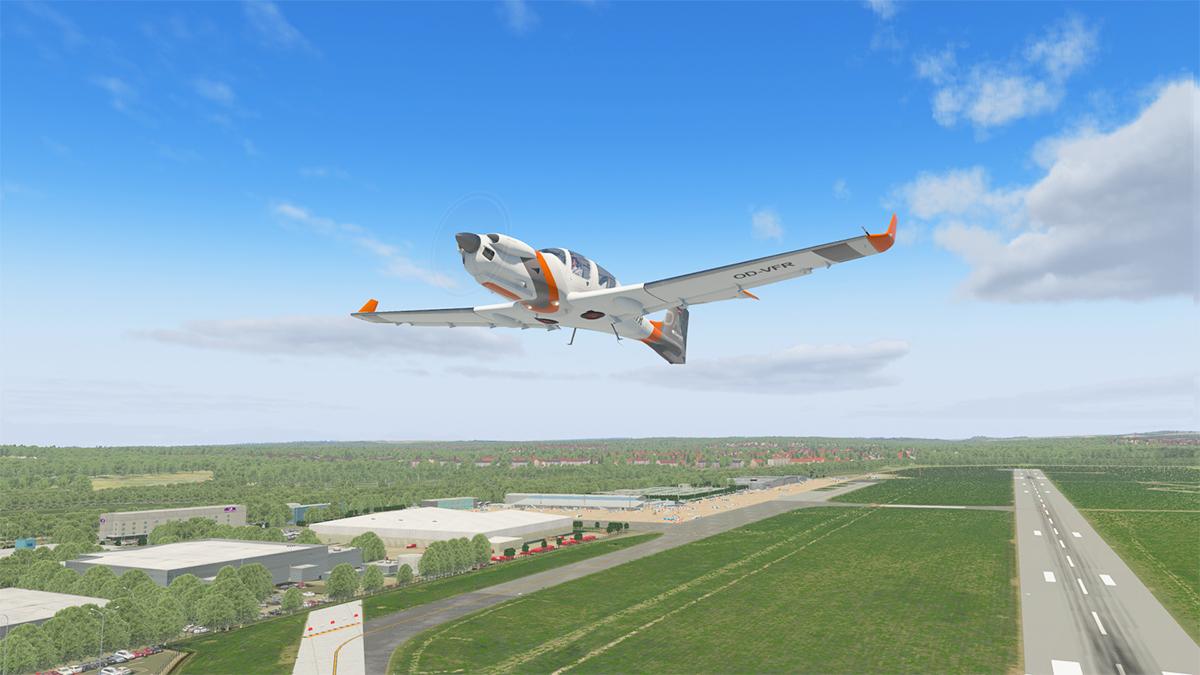
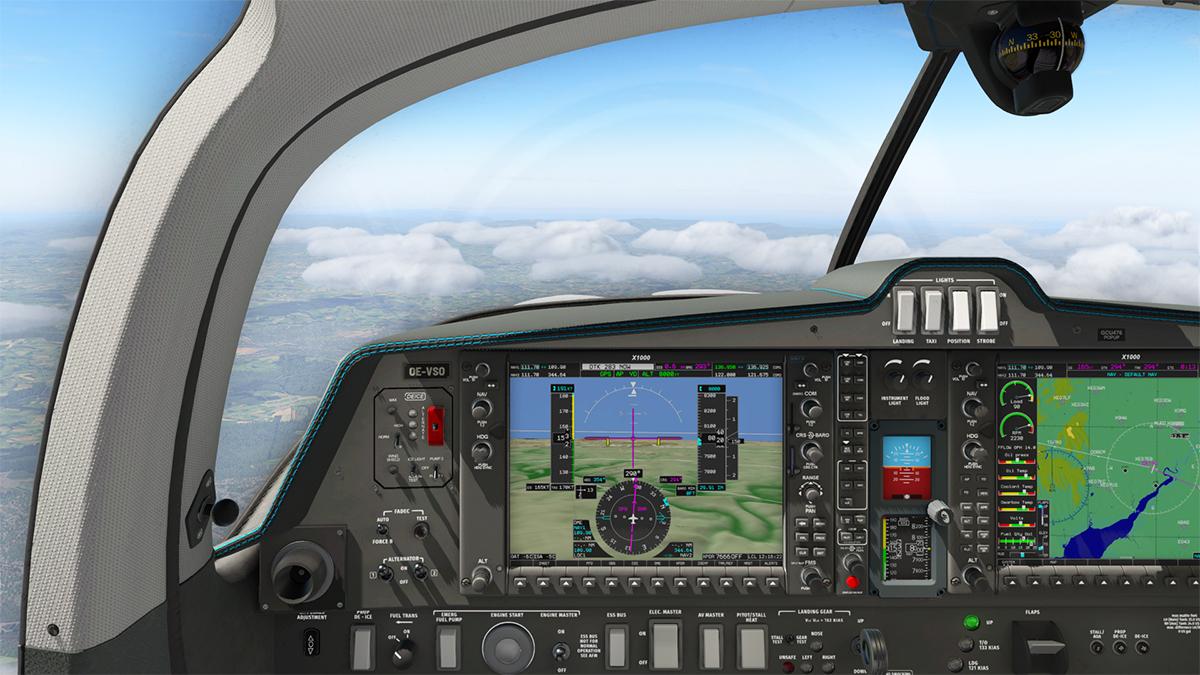
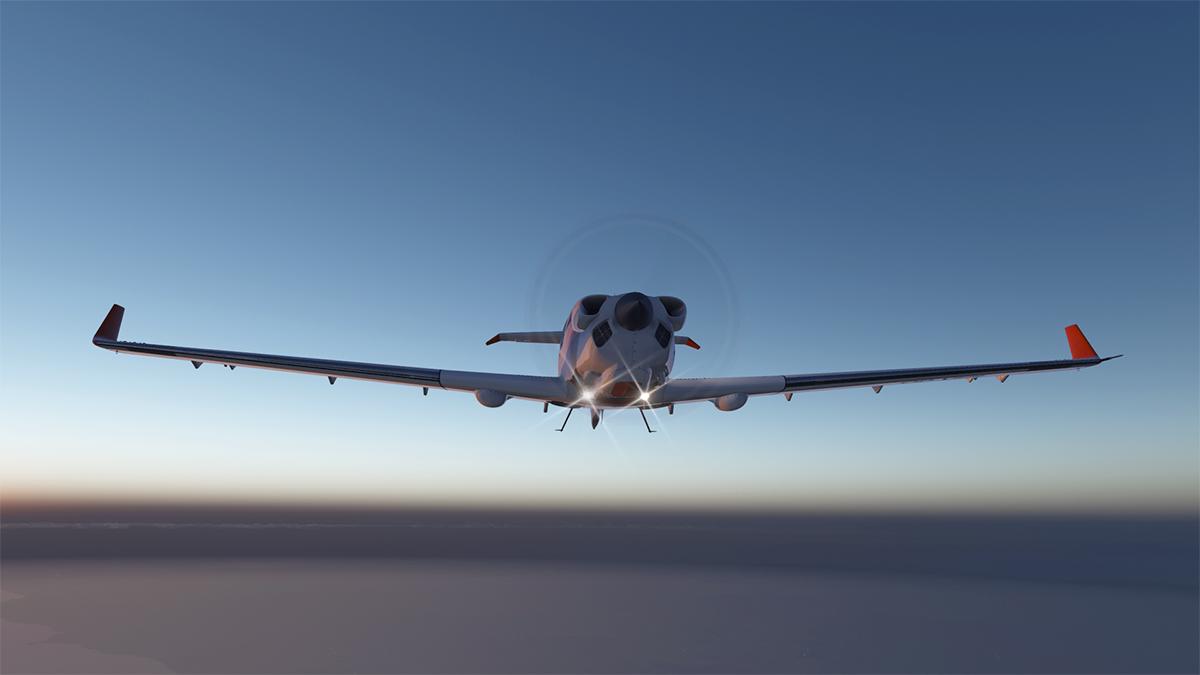
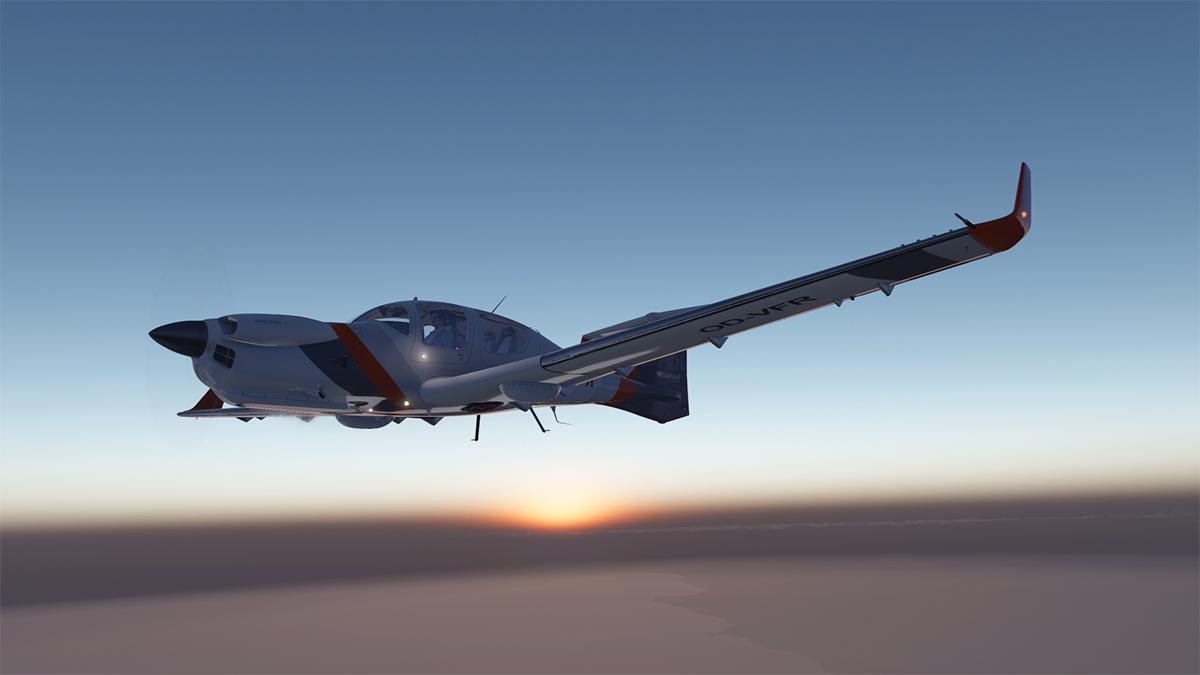
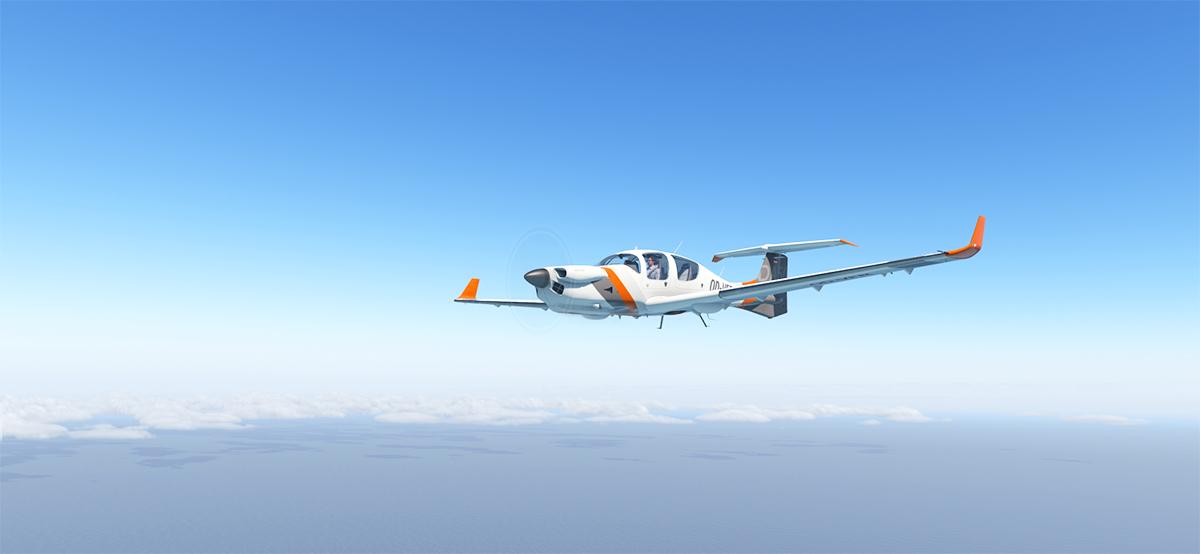
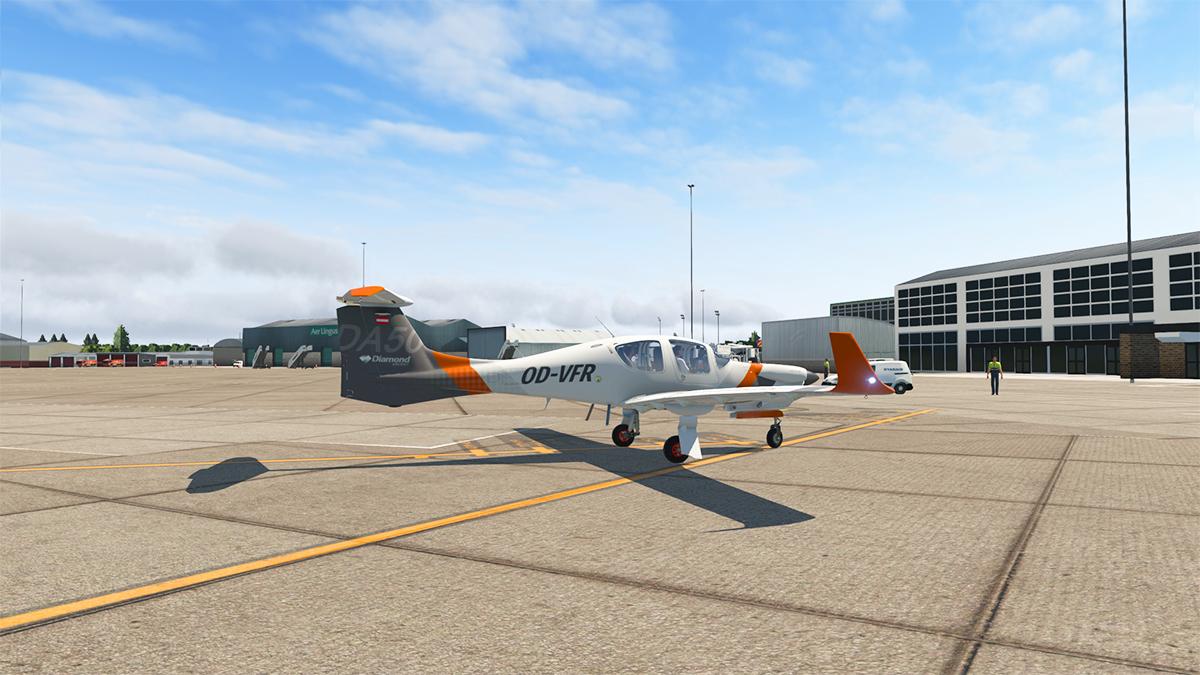
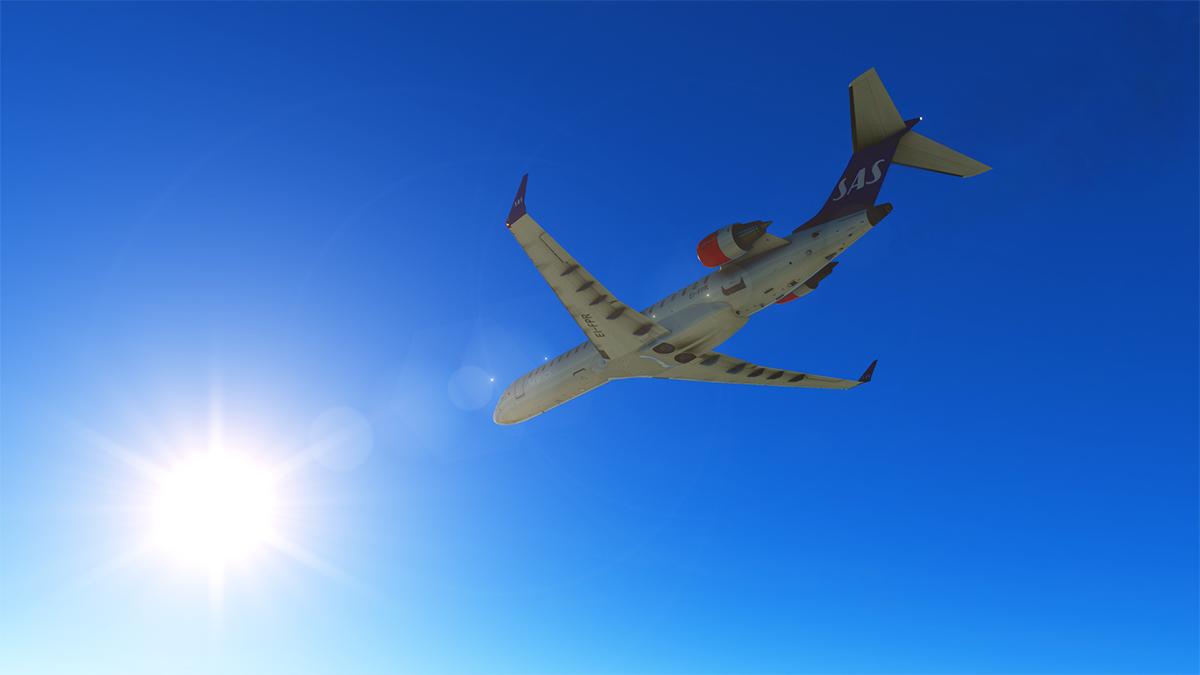
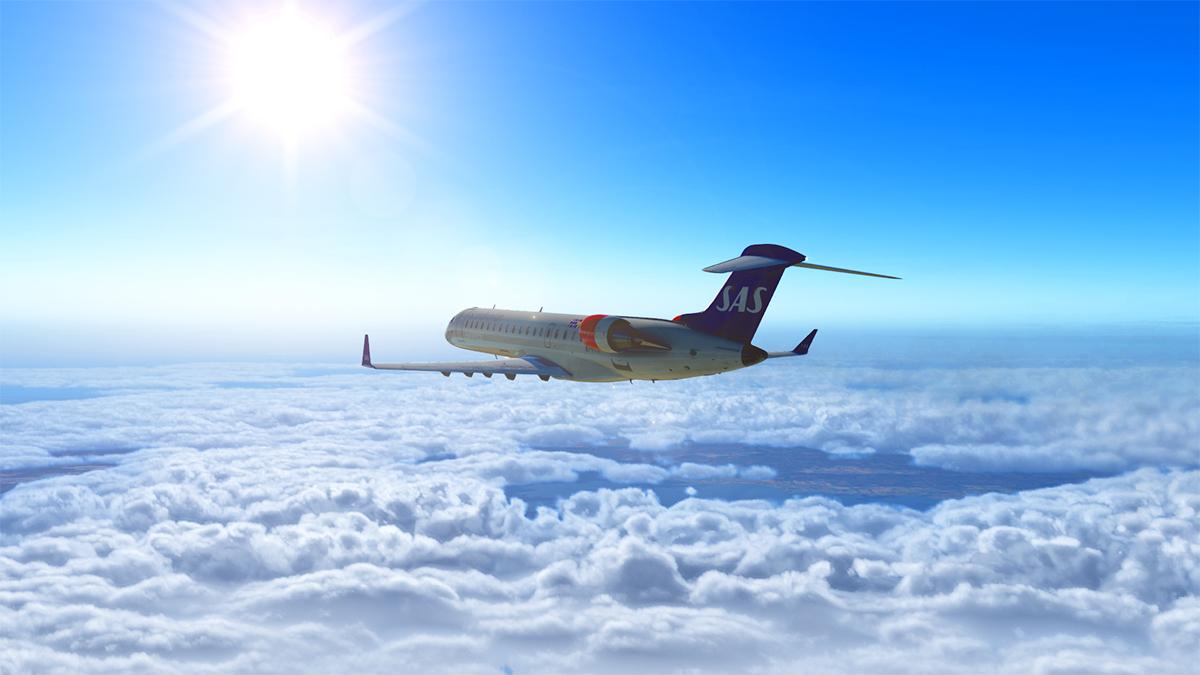
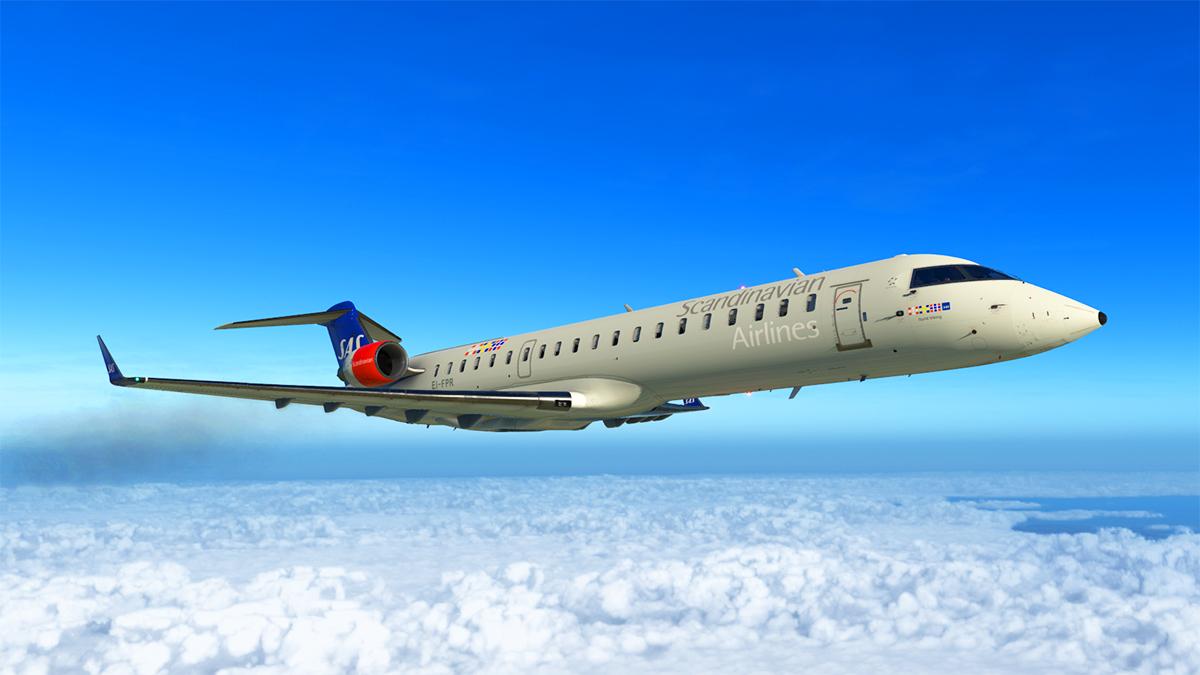
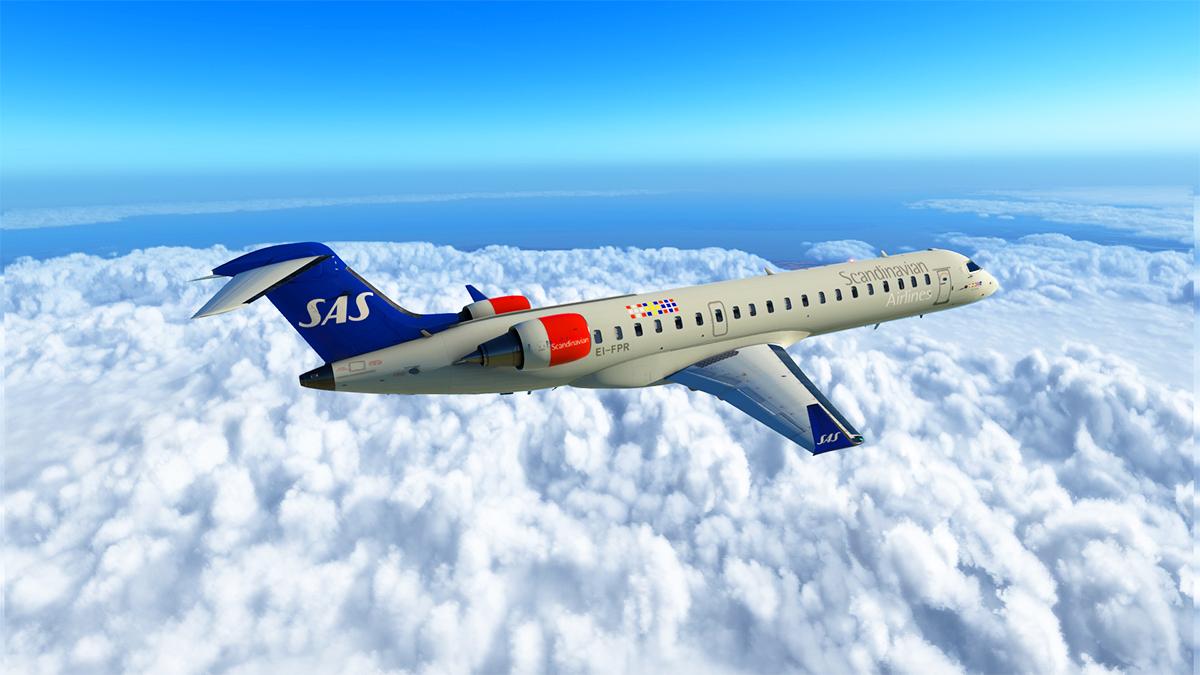
Aircraft Review : CRJ-900 by AD Simulations/Delta Wing At Christmas 2021, AD Simulations a new developer studio released their version of the CRJ-700 for the X-Plane Simulator. X-Plane has long needed these excellent regional jets, that grew out out Bombardier's already successful Private Jet Challenger range. Modeling and features are exceptional, all the better for the high value price of being under US$50, but being new and straight out of the box the aircraft's performance and it's flight characteristic areas was at the time a little lacking. The CRJ project had started earlier with Supercritical Simulations Group banner (SSG), but a breakup a year earlier saw the development teams all take off in all their own different directions, and that aspect showed a little on the development front on release. AD Simulations was then joined up with an old experienced X-Plane developer by the name of DeltaWing, and he quickly brought a lot of his developer talents to the aircraft to sort out the important better flight performance and give the aircraft the Kudos it really deserved, hence came the quick succession of those five updates since that late 2021 release to this late April date, and to bring the -700 aircraft to the successful product it now is, and all those aspects have been transferred directly to this newer release, so -900 should be good straight out of the box. That is a lot of story for just only a few months, but more was offered in that AD Simulations has now released the larger CRJ-900 (type certified as the CL-600-2024), and the even larger CRJ-1000 is also promised in the future. It is not hard to imagine if you already own the earlier CRJ-700, on what the -900 version has to offer. For basically it is the same aircraft, with just the bit longer 12ft twin plug longer fuselage than the CRJ-700 Series. The -900 however has the more up-rated General Electric CF34-8C5 powerplants with 14,510 lbf (64.5 kN) thrust each with APR. The earlier GE CF34-8C5B1 had only 13,790 lbf (61.3 kN) available. The seating capacity goes up as well to 76–90 seats compared to the -700 66 to 78 seating layout. Externally the -900 Series is very much in the same high quality modeling and the detail driven aspect as the earlier -700, no surprise there as they are only months, and not years apart in design and development. It is an odd business, the original design (in this case the -700) was proportioned correctly, but add in a plug or two and in making it longer, somehow makes the -900 look even more perfect, the CRJ-1000 will probably look a bit too over long and out of proportion, so it is a bit of a goldilocks thing of the -900 being or looking "Just right". The only area different externally from the -700 (besides the length) is that the winglets are taller and more raked, again nicely done here with that same excellent metal leading edge detail. Landing gear, GE CF34 Engine Pods, leading and rear edge wing quality and all that detail is still stupendous, the quality delivered here is certainly far better than some of the aircraft in the higher and far more expensive catagories, from this value price. Cockpit window tint, was and still is a bit too dark for me (other users are not crazy either), but it is well done, as are the side windows in quality and reflection. All doors, including the main left stairs, Twin mid-fuselage Baggage holds, Rear high Baggage hold and right side Service Door all open and are extremely well and are highly animated and detailed. Like the -700, don't go looking for the extreme features here, like you will get on the Q4XP. There are no static elements, loading animations, but there is a nice GPU (Ground Power unit). I expect the GHD plugin will as with -700 make up a lot of those missing elements, however the stair rails drop down for the use of an Airbridge. Cabin The biggest area of difference between the -700 and the -900 is in the cabin, not the obvious longer length, but in the slightly different feel and style inside. Business forward seats have a seat back blue pattern design that is really classy, and far, far better than the light tan in the -700 . The main economy section has another blue design, but cloth this time instead of the black vinyl seating that made the -700 cabin a bit dark, it all works extremely better in this cabin.... And I really like this cabin. On the -900 there has also been added in new cabin animations (I expect the -700 to get the same treatment in a future update?). The seatback trays can now be lowered (always a favorite of mine) via the tray catch and the so you can also lower the window blinds, however you have get very close to the shade to make it work, as they can't be one by one adjusted from a distance?. Overhead bins also now open as well (very nice) via the handles and the overhead panel detail is just sublime. With the CRJ-700 in it's 1.01 update there was a highly detailed and animated rear bathroom (See CRJ-700 Review). It's here in the -900 version as well, but I found a boundary layer didn't allow me inside like on the -700?. But it is there. With the extra length however of the -900 you also get an extra toilet forward, it is as detailed as the rear installation. With toilet flush, animated seating and clever door latches and closed door lighting. Handy to use just before landing than walking to the back of the aircraft. The front galley area was sensational on the -700. It is the same here (with a few new additions) in the -900... and it is a very highly realistic working area. Again both the rear and front crew jumpseats can be animated out for use. Lighting On the -700 the cabin lighting was two crude lighting adjustable knobs on the rear cockpit bulkhead, we always knew they were there just as a temporary fixup job. One of the main features on the CRJ-900 is the cabin lighting panel forward upper left. In fact there are two lighting panels, one for the Cabin and one for the Galley. With all the lighting switched off, you get this nice blue aisle emergency strip lighting, There are a few overhead central lights, but they are quite if very weak and non-adjustable which feels like a wasted opportunity? The emergency EXIT lights are on and look great.. There is "Door Assist", that lights up the entrance area, and the lights in the stairs (but again they are not very bright). The "Ceiling Lighting" which switches on the main reflective ceiling lighting, comes in two options "Full" and "Dim". But the "Dim" option is not that much lower than the "Full" option? Next you have the "Sidewall Lighting", that gives off a very blue "Atmosphere" style of lighting, again in "Full" and "Dim" modes. Combining both the "Ceiling" and "Sidewall" options with "Full" and "Dim" it can give you four different types of light pastel purple colour gradients... Last lighting option is the "Entrance Lighting", again in "Full" and "Dim" but again the contrast was not as wide or felt realistic between the settings. On the Galley Panel there is the "Galley Lights", again in "Full" and "Dim" modes... The ceiling Galley Lights and their reflections don't look very realistic or even plausible at all here, it feels like the wrong sort of idea for the lighting? You understand what the developer is trying to achieve, but it doesn't work at all in this context, mainly because the light reflected is the wrong tone of the light fittings, plus the lighting fittings are really awful and look just as horrible. Oddly the same idea worked so well in the -700, but not in here. Notable are the excellent "Potable Water System" lights, which are switchable on/off. There are "Reading Lights", Test and Reset (that all don't work) and "AFT ATT Reading Light" that I also couldn't see how it worked either or where the light(s) was... All the panel lights also don't light up to their setting (on/off) either. Turn on all the lighting options, and it does look really very effective... .... but overall the individual elements don't work separately enough to be totally realistic when used in their own context. And you lose those really nice down passenger seat lights that were in the -700, and to pick I liked the -700 cabin lighting more that the -900. So overall the lighting needs more far work to be really realistic and the tone needs to be... well "Toned down a bit". For currently it is feeling it is falling a little bit short of its potential or it could be still a WIP (Work in Progress), of which in non-working areas stand out as the main reason. A small note is that the boundaries are very tight in here, I have already noted the rear toilet, but also manoeuvring around the galley area and cockpit entrance was almost impossible, I didn't have that tight experience on the -700. Cockpit The cockpit is identical to the -700, so if you are used to that aircraft, then everything will be perfectly familiar here. Cross Crew Qualification (CCQ) or common type-rating between the three different sized CRJ's is minimal here, as that was focus of Bombardier's design brief. The cockpit looks and feels quite exceptional, because it is all so beautifully done, with just the right amount of wear and tear for ultimate realism. There was a full cockpit description in the CRJ-700 Review. So there is no reason here to double that aspect up... But there are some differences between the versions. All the switches now support new manipulators with Above/Below click for UP/DOWN movement and mouse wheel scroll, and they are certainly far better to use and sound (clicky) far better as well. One new feature noted was that there is now a display knob on all the displays. This will turn on/off each individual display and adjust the display's brightness, but it still didn't work in my current v1.0.1 version, but expect that functionality soon in an update. Tablet Menu AD SImulation's Menu system is still currently quite basic and again almost a replica of the -700. There is however now two tablets on each of the pilots side. And like the window blinds you can still move it left and right along a track for the right position that you personally like.... and the tablet can also be stowed downwards (via the top little stick). You turn the tablet on via the button hotspot, and if you press the AD Simulations logo you get the window pop-out option. There are SEVEN icon menu options. The first icon box is the default blank screen and not counted here.... in order; DOOR HANDLING, COCKPIT, PASSENGERS, (ICON not currently active?), FUEL LOAD, SETTINGS and INFO. DOOR HANDLING : There are four doors on the CRJ-900 that can be opened from the menu. Passenger Door (front left), Service Door (front right), Cargo Centre Door and the upper Aft Cargo door. COCKPIT : In the cockpit menu you can select to start up "COLD and DARK" or "READY to TAXI" or the aircraft completely shutdown or completely powered up and ready for flight. Missing again is the wanted state of "Turnaround", which remembers the last situation of the aircraft and an aircraft state option I mostly use? A lot of settings are kept to use from flight to flight, but not the important ones (Fuel, Passengers.... etc ). "USE EXTERNAL POWER" places a very nice and connected GPU (Ground Power Unit) outside to the right of the aircraft. PASSENGERS : You can load the amount of passengers via the central slider which is/was totally impossible to use. Thankfully rectified in v1.01 of the -700, AD Sim then gave you the option to input the passenger count directly... again a big improvement of a critical loading tool in the new aircraft, but there are still no Cargo or Payload options. FUEL LOAD : Unlike the early -700 version, you can now add in (thankfully) the Fuel numbers directly for each wing and the centre tank, and that input is shown in the lower right of the menu screen, this area can also be used directly to put in the "TOTAL FUEL WEIGHT" if you want a quick and easy option. Both Lbs and Kgs are available as your fuel load options via the INFO Page. What there is still missing however really is a quality BALANCE and FUEL page for both the PASSENGERS and FUEL weight inputs, as for what is shown here is still all very basic and the weights come with no Centre of Gravity graph or numbers like ZFW (Zero Fuel Weight). SETTINGS : The SETTINGS menu page has three menu selections; GLASSES, SOUNDS and MISC. GLASSES; changes the tint and reflection options for both the cockpit windows and displays. SOUNDS and MISC; The SOUNDS page gives you five sliders covering; EXTERIOR ENGINES, INTERIOR ENGINES, WIND EFFECT, WEATHER & EXT ENV (Environment) and finally Cockpit and Cabin (sounds). The sliders can again be tricky to use and mouse scrolling is the best way of using the sliders, otherwise the settings will jump to the wrong choice? MISC is the only menu option change between the -700 and the -900. Gone are the "FLY BY WIRE" or "SIMULATION" options, to be replaced by three new options of; PDF ARROW ATTITUDE INDICATOR, USER'S VIEW (Captain, First Officer or Observer) and if you use the Alpha Flight Controls Honeycomb Yoke, as it needed a separate input connection for the aircraft, the developer also noted to, "to turn on all avionics switches, otherwise it will not power the avionics". INFO : The menu "Information" page shows you your WEIGHT with Left Wing/Centre/Right Wing Fuel quantity, TOTAL FUEL, PASSENGERS and the TOTAL WEIGHT (TOW) lower. This will compute your Takeoff and Landing VRefs and STAB TRIM, and you can load these parameters directly into the system. You can also here change from Kg to Lbs. No doubt the Tablet Menu still has a lot lacking for such an important tool, for instance there is no AviTab intergration, which is a must have on and for aircraft of this category. Flying the CRJ-900 I am going to fly the same EKCH (Copenhagen) to EGLL (Heathrow) route as I did in the CRJ-700 and compare the differences. Time for pushback... I have never gelled to the fuel shutoff levers, got used to them, but never really loved them... no, not at all. You just don't feel that click, clacky switch feel, and you don't know if they are locked (down?) or up or not... really I still don't like them. Your also still stuck with the really laborious to set up and not very exact Laminar Default FMS, a poor PLAN Mode setting in the MAP/MFD does not help you no end either. AD SImulation's notes that a custom FMS is going to be done for all the Ad Simulations CRJ versions, the sooner the better. A late but welcome addition on the -700 and also now on the -900 is a working Clock/Chronometer, here it is finally nice to log your flying time. I tested the updated CRJ-700 in the v1.1.2 update just a week ago. Personally I was not over thrilled with the Tiller steering. The -700 wandered all over the taxiway, even without moving the tiller wheel? Here however I find the nosewheel far more better at staying and tracking to the centre line and far more to my liking, it is a marked improvement over the other aircraft... does the longer fuselage length help? Maybe, but it is certainly far better in tracking straight. Ready to go and the clock (is finally) running... Push up the throttles and "Boy" do you feel that extra thrust... yes I am in a bigger aircraft, yes I am a heavier weight, but the upgraded CF34-8C5s with thier 14,510 lbf (64.5 kN) of thrust will give you a right kick in the back, and your soon at the rotate speed of 181 knts. Calling out "Positive Climb", and your powering up very quickly... climb rate is the same 3500 fpm maximum, but on average you will initially still do the 3000 fpm, reducing down to 2300fpm at around 12,000ft... just like in the -700, but you get there faster. I am going to admit, I love the -900 version a lot, it feels the more balanced and comes with a better feeling in it's handling than the -700, that extra length make a whole lot of difference were it counts... that is behind the controls and the way the aircraft behaves in the air. The CRJ-900 looks nicer in the air as well... and you notice that extra length. The CRJ900 can cruise 8–10,000 ft higher with a slightly higher fuel burn and with an average true airspeed of 450–500 knots, which is a significant improvement over its predecessor. So altitudes of 40,000ft are easily acquired, full service ceiling is still 41,000 ft / 12,479 m. Today I am going for FL400, 40,000ft (via SimBrief) and the CRJ doesn't flinch at climbing hard up to that high altitude. First FL360, then steps of 1,000ft to to FL400, "Easy". Maximum speed is 0.82 Mach (470 kn, 871 km/h), actually slightly slower than the -700 at 0.825 Mach (473 kn, 876 km/h), but around 0.76m or 0.78m is your usual Cruise speed depending on the weight. Range is 1,553 NM / 2,876 km (LR)1,622 NM / 3,004 km. It is nice up here at FL400... Internal lighting is basically the same as the -700, in other words very if extremely good in the cockpit... The ten dropdown lights for the side panels and the centre main instrument panel are still glorious, and so are the two animated spotlights either side of the OHP Console, which are animated and adjustable... but they are still very hard to actually manoeuvre with your mouse (moving left to right is via your scroll). There is also the rear spotlight over the cockpit entrance. The DOME lighting only covers the front section of the cockpit lighting, very nice, but still quite dark for working inflight. If you want a brightly lit cockpit then the each far side LIGHTING panel gives you that per side lighting option and all very good is. The cabin is really to your taste, in the dark it looks a bit lurid, even at all the low "DIM" settings. Switching off the sidewall lighting does make it look and feel more realistically softer. Externally the bight tinted hues show as well, in creating a very bright cabin externally, otherwise all the external lighting is all very good in tail, wing, navigation, (nice) strobes and some great looking landing lights to complete the perfect detail. Time to go down... I will use most of the English Channel to descend from 40,000ft (FL400) to 6,000ft (FL60) as it is a long way down, so you need the space to descend, so my descent starts at IDRID, at a minus 2,300fpm. I can now assign the landing vRef speeds from the INFO part of the menu into the PFD for landing. What would London be without soft foggy cloudy conditions, it lives up to it's reputation... again. Coming into Heathrow from the west (Rwy 27R) is always a messy approach,it is a lot of fiddling and twisting to miss the central city part of London.. ... so it is always going to a full on manual approach, the FMS routing is too complicated to edit to get perfectly right. Get in the groove and it is a thrilling thing, but getting your speeds and flap settings done as early as possible is extremely important, in other words "get the aircraft sorted". In the final approach phase it is all about the speed, speed and speed, not dropping too fast or going in too slow, it is harder to do than what you think it is... ... 110 knts sounds slow, but it feels very fast in this aircraft. Steady, steady... you have to get the landing just right in the flare, and then the need to BANG the rear gear down HARD on to the runway, if you don't the thrust reversers won't engage. And you are also very aware of that higher longer nose than with the -700. the length is noticeable on turning as well and in the taxiing manoeuvres.... Welcome to London. Liveries There is not as many liveries with the CRJ-900 as there was with the CRJ-700 and also only a few odd different airline changes. So there is here only eleven to the seventeen provided with the former aircraft. But like with the -700 we are quite sure the painters will have a field day in providing most liveries that you will require for the -900 version. These like on the -700 are excellent. __________________ Summary Just a few months ago at Christmas 2021, AD Simulations released a Bombardier CRJ-700 for the X-Plane Simulator, now only in April 2022, along here comes the longer CRJ-900 version, and a CRJ-1000 is also promised coming later. The CRJ-900 is a 12 ft (Twin-Plugged) stretch of the CRJ-700, with a bigger seating capacity of 76–90 seats. It has the uprated CF34-8C5 powerplants as well to fly higher and in most aspects faster. The AD Simulations CRJ-700 was and is sensationally modeled and designed, and there is nothing lacking in that department here either. The cockpit and it's intricate details are almost exactly the same, except for a small change on the INFO page in the menu. Externally the modeling is totally superb, and highly detailed, but there are few ground features except for a GPU. A note that in the changes or extras It is in the rear cabin that we find the biggest differences between the two aircraft. The Seating design is different and nicely coloured, and far better than the darker -700 version, and you get a forward detailed toilet now as well as the one at the rear. You also get animated sliding window blinds, opening baggage lockers and drop down meal trays. There is now also two new lighting panels, one for the cabin and one for the galley. The lighting panels will give you lighting options including the "Atmosphere" look of a pastel purple flavour in "Full" or "Dim" modes, and the original roof grey colouring is still there if you prefer that style. The Galley lighting is not as successful and is far better on the -700, but the galley itself is excellent. A note that in the changes or extras installed in the -900, will also be developed into the -700 version as well, including the animated cabin fittings and lighting. I find the CRJ-900 a more sweeter aircraft to fly than the -700, it climbs faster as well, and I think the extra length is a major bonus and not ungainly at all... In other words I like it far more to fly than the CRJ-700. But my guess is that most users will purchase both aircraft anyway and enjoy not only the small differences, but the slightly different styles as well. As CRJ-700 customers can get the CRJ-900 for 30% off the CRJ-900 via a discount coupon. What you you don't get a lot of extra or features like you do with say FlyJSim and others, but then again this is a sub-US$50 aircraft and in a lower category, and for what you do get here it is simply brilliant value. Current users already are devoted to the AD Simulation's CRJ Series, and this -900 version just adds into the fun... Recommended. _____________________ Yes! the CRJ-900 by AD Simulations/Delta Wing is NOW available from the X-Plane.Org Store here : CRJ-900 Price is US$49.95 Features General Notes Basic Systems are programmed based on CRJ-900 aircraft. In subsequent updates we are making systems deeper and adding new ones. CRJ real life pilots and few simulator enthusiasts are helping us to develop and make them work properly Flight Control Panel knobs support fast scrolling via left mouse button press and hold and precise scrolling via mouse wheel scroll All switches now support new manipulators with Above/Below click for UP/DOWN movement and mouse wheel scroll Mode Control Panel SPEED and other modes simulate the real Autopilot modes on the CRJs. Implemented Electrical System Circuit Breakers are all animated and ready to perform certain actions accordingly to their function in future updates Tablet/EFB on Captain and FO sides Functional Audio Control Panel with lit buttons and animations Rectangular and Arrows Flight Director Command Bars as an Options Center Glareshield All Center Glareshield Knobs and Pushbuttons animated and functional Displays Displays are exceptionally crisp and with letters and symbols easily visible PFD Primary Flight Display Modeled and functioning exactly as real life counterpart MFD Multifunction Display can display following modes HSI The horizontal situation indicator shows the compass card with overlaid selectable navaids, bearing and course pointers NAV SECTOR Navigation display with compass card and a background map. The navigation display shows course pointer and deviation bar. VOR bearing and DME distance information is shown FMS MAP Flight Management System Map shows the track and waypoints programmed in the CDU (Control Display Unit). FMS MAP shows the aircraft heading. TCAS Traffic Alert and Collision Avoidance System investigates the air traffic control transponders of nearby airplanes and identifies and displays potential and predicted collision threats. FMS PLAN MAP shows programmed waypoints of the route. Shows north at the top of the display. Waypoints can be selected by using UP and DOWN arrows on CDU (Control Display Unit) RADAR- to be implemented in future versions EICAS (ENGINE INDICATION AND CREW ALERTING SYSTEM Displays. Following displays can be shown using ECP (EICAS CONTROL PANEL) PRI STAT ECS HYD ELEC (AC and DC) FUEL F/CTL A/ICE DOORS CAS (not implemented yet) MENU = UP + DN STEP PopUp Displays (movable, scalable able to be dragged to multiple monitors) Tablet/EFB Captain and FO PFD (Primary Flight Display) Captain and FO MFD (Multi Function Display) Primary EICAS Secondary EICAS Left and Right CDU (Control Display Unit) Skunkcraft Updater To be implemented in the future Cockpit and Cabin Lighting There is FULL lighting implemented, FLOOD, INTEGRATED and DISPLAYS with animated knobs and switches You can adjust the intensity of displays, panels and light in any combination you like In addition, CABIN LIGHTS and STAIR LIGHTS are also adjustable via corresponding switches in the back of the cockpit STERILE Cockpit Light working (visible from inside the cabin when cockpit door is closed) AD Simulations CRJ-900 Cabin is using the option called “Atmosphere”It provides Button to adjust DOOR ASSIST, CEILING, SIDEWALL and ENTRANCE Lights. Using combination of different lighting conditions creates different look You can adjust Cabin and Stairs lights using Buttons on the right wall looking toward cabin External Lighting FULL external lighting is available via animated corresponding switches Tablet/EFB and it's corresponding Pop Up DOOR HANDLING PASSENGERS LOAD FUEL LOAD SETTINGS (COLD AND DARK, READY TO TAXI, EXTERNAL POWER) INFO (Loading Take Off Speeds, Landing Speeds and take Off Trim) Sounds FMOD Custom sounds are implemented using FMOD Engine sounds Cockpit sounds: Avionics, Gyro, Relays, Fans (Packs), Controls (Buttons/switches, levers) Warning sounds: Take-off GPWS (Too Low Terrain, Too Low Gear, Too Low Flaps, Terrain Caution, Bank angle, Sink rate, Don’t-sink, Pull Up) Autopilot, Fire, Alerts Cabin sounds: Galley, Cooling Exterior sounds: Gear Roll/Touch, APU, GPU, Flaps, Hydraulic and Fuel Pumps, Wind drag, Packs Weather sounds: Wind, Rain, Thunder, Wind Gust (on the ground only) Cabin and Cockpit muffing effect caused by Cockpit Door closed/open Flight Model Flight model has been carefully adjusted to match the real life CRJ-900. Real life CRJ-200/700/900 pilots were involved in the process. Realistic wing flex Wing Flex has been modelled and adjusted for realistic aircraft behavior FMS FMS and it's Pop Up is customized as far as look but based on the Default X-Plane one. Note: Default XP FMC is based on the Collins FMS-4200 and CRJ is using that one, no Honeywell and Thales types. 3D Modeling and Textures Almost all maps are 4K High Resolution Exterior is modeled with all details existing in real aircraft. Pilots are visible in external views and turn their heads slightly to ward camera view Interior modeling has been made paying attention to details in the real life CRJ-900 cockpit. Cabin and Stairs have adjustable lighting, see above Liveries included in the package are listed below Aegean Airlines, American Eagle, CRJ, Delta, Horizon, IBEX Ana, Lufthansa, Scandinavian 1, Scandinavian 2, Spirit Unique Package Features Stairs Rails can be raised and lowered (per customer request) Cockpit shaders slide and rotate as you need them All Windows Shades, Overhead Bins and Seat Trays are animated and functional VR Compatibility Package is VR compatible but future enhancements will be added Requirements X-Plane 11 Windows, Mac or Linux 4 GB VRAM Minimum - 8 GB+ VRAM Recommended Download Size: 1.1 GB Current version: 1.0.1 (April 25th 2022) CRJ-700 customers can get the CRJ-900 for 30% off. Please find the discount coupon in the original CRJ-700 invoice at the store Installation Download of the CRJ-900 is 1.07GB and it is installed in your Airliner Folder as a 1.57Gb folder. Activation is via the standard authentication Key. There is no Auto-updater by Skunkcrafts for updates, so currently you have to redownload any updates via the X-Plane.OrgStore. Documents Provided are two documents Included with the package. A "QuickStart" Manual that covers the aircraft's layouts and systems, and a "Checklist" with Normal Procedures. A version changelog is also provided. CRJ-900 Changelog.txt AD_Sim_CRJ_Checklist.pdf CRJ-900_Quick_Start_Guide.pdf CRJ-900 Changelog.txt _____________________ Aircraft Review by Stephen Dutton 28th April 2022 Copyright©2022: X-Plane Reviews Review System Specifications: Computer System: Windows -S1700 Core i7 12700K 12 Core 3.60 GHz CPU / 64bit -32 Gb single 1067 Mhz DDR4 2133 - ASUS GeForce GTX 1080 8Gb - Samsung Evo M2 2TB SSD - Sound : Yamaha Speakers YST-M200SP Software: - Windows 10 - X-Plane 11.55 Plugins: Global SFD plugin US$30.00 : Environment Engine by xEnviro US$69.90 : RK Apps XPRealistic v2 - US$34.99 Scenery or Aircraft - EKCH - FlyTampa Copenhagen XP (X-Plane.OrgStore) - US$31.00 - EGLL - Airport London-Heathrow by Aerosoft (X-Plane.OrgStore) - US$29.95 (Disclaimer. All images and text in this review are the work and property of X-PlaneReviews, no sharing or copy of the content is allowed without consent from the author as per copyright conditions) All Rights Reserved

-
 NEWS! - Aircraft Released : CRJ-900 by AD Simulations AD Simulations have released another variant of their Bombardier CRJ series in the -900. The -900 is not the longest in the CRJ Series as that ticket goes to the -1000, of which AD Simulations notes could also be a release in the future as well. The CRJ-900 joins the earlier CRJ-700 that was released at Christmas 2021 with plenty of bugs and issues, those issues have been very well covered in the past few months, so hopefully this later -900 will be far more a coherent and capable release aircraft straight out of the box than the -700 version. From the outset, the -900 certainly looks more complete and better featured. The -900 version comes in at the same price as the -700 at US$49.95, but for current -700 purchasers the aircraft comes with a 30% discount (US$34.96), the discount discount coupon is available to be found in the original CRJ-700 invoice at the store. There are newer features on the -900 to make the differences to -700 version, these include that the CRJ900 is powered by the more powererful two FADEC equipped General Electric CF34-8C5 powerplants with 59.4 kN (13,400 lbf) thrust each with APR. The aircraft has also the longer winglets and a 12ft twin plug longer fuselage than the CRJ-700 Series, with an increased seating capacity of 76–90 seats compared to the -700 66 to 78 seating layout. The CRJ900 can cruise 8–10,000 ft higher with a slightly higher fuel burn and an average true airspeed of 450–500 knots, which is a significant improvement over its predecessor. Its maximum ground takeoff weight is 84,500 pounds. AD Simulations CRJ-900 Cabin is now using the new option called “Atmosphere”. This provides Button control to adjust DOOR ASSIST, CEILING, SIDEWALL and ENTRANCE Lights. Using a combination of the different lighting conditions this panel creates different cabin style lighting looks. Other new features include; Cabin and Stairs lighting using Buttons on the right wall looking towards the cabin, and all the Windows Shades, Overhead Bins and Seat Trays are now animated and functional. Full release notes are: General Notes Basic Systems are programmed based on CRJ-900 aircraft. In subsequent updates we are making systems deeper and adding new ones. CRJ real life pilots and few simulator enthusiasts are helping us to develop and make them work properly Flight Control Panel knobs support fast scrolling via left mouse button press and hold and precise scrolling via mouse wheel scroll All switches now support new manipulators with Above/Below click for UP/DOWN movement and mouse wheel scroll Mode Control Panel SPEED and other modes simulate the real Autopilot modes on the CRJs. Implemented Electrical System Circuit Breakers are all animated and ready to perform certain actions accordingly to their function in future updates Tablet/EFB on Captain and FO sides Functional Audio Control Panel with lit buttons and animations Rectangular and Arrows Flight Director Command Bars as an Options Center Glareshield All Center Glareshield Knobs and Pushbuttons animated and functional Displays Displays are exceptionally crisp and with letters and symbols easily visible PFD Primary Flight Display Modeled and functioning exactly as real life counterpart MFD Multifunction Display can display following modes HSI The horizontal situation indicator shows the compass card with overlaid selectable navaids, bearing and course pointers NAV SECTOR Navigation display with compass card and a background map. The navigation display shows course pointer and deviation bar. VOR bearing and DME distance information is shown FMS MAP Flight Management System Map shows the track and waypoints programmed in the CDU (Control Display Unit). FMS MAP shows the aircraft heading. TCAS Traffic Alert and Collision Avoidance System investigates the air traffic control transponders of nearby airplanes and identifies and displays potential and predicted collision threats. FMS PLAN MAP shows programmed waypoints of the route. Shows north at the top of the display. Waypoints can be selected by using UP and DOWN arrows on CDU (Control Display Unit) RADAR- to be implemented in future versions EICAS (ENGINE INDICATION AND CREW ALERTING SYSTEM Displays. Following displays can be shown using ECP (EICAS CONTROL PANEL) PRI STAT ECS HYD ELEC (AC and DC) FUEL F/CTL A/ICE DOORS CAS (not implemented yet) MENU = UP + DN STEP PopUp Displays (movable, scalable able to be dragged to multiple monitors) Tablet/EFB Captain and FO PFD (Primary Flight Display) Captain and FO MFD (Multi Function Display) Primary EICAS Secondary EICAS Left and Right CDU (Control Display Unit) Skunkcraft Updater To be implemented in the future Cockpit and Cabin Lighting There is FULL lighting implemented, FLOOD, INTEGRATED and DISPLAYS with animated knobs and switches You can adjust the intensity of displays, panels and light in any combination you like In addition, CABIN LIGHTS and STAIR LIGHTS are also adjustable via corresponding switches in the back of the cockpit STERILE Cockpit Light working (visible from inside the cabin when cockpit door is closed) AD Simulations CRJ-900 Cabin is using the option called “Atmosphere”It provides Button to adjust DOOR ASSIST, CEILING, SIDEWALL and ENTRANCE Lights. Using combination of different lighting conditions creates different look You can adjust Cabin and Stairs lights using Buttons on the right wall looking toward cabin External Lighting FULL external lighting is available via animated corresponding switches Tablet/EFB and it's corresponding Pop Up DOOR HANDLING PASSENGERS LOAD FUEL LOAD SETTINGS (COLD AND DARK, READY TO TAXI, EXTERNAL POWER) INFO (Loading Take Off Speeds, Landing Speeds and take Off Trim) Sounds FMOD Custom sounds are implemented using FMOD Engine sounds Cockpit sounds: Avionics, Gyro, Relays, Fans (Packs), Controls (Buttons/switches, levers) Warning sounds: Take-off GPWS (Too Low Terrain, Too Low Gear, Too Low Flaps, Terrain Caution, Bank angle, Sink rate, Don’t-sink, Pull Up) Autopilot, Fire, Alerts Cabin sounds: Galley, Cooling Exterior sounds: Gear Roll/Touch, APU, GPU, Flaps, Hydraulic and Fuel Pumps, Wind drag, Packs Weather sounds: Wind, Rain, Thunder, Wind Gust (on the ground only) Cabin and Cockpit muffing effect caused by Cockpit Door closed/open Flight Model Flight model has been carefully adjusted to match the real life CRJ-900. Real life CRJ-200/700/900 pilots were involved in the process. Realistic wing flex Wing Flex has been modelled and adjusted for realistic aircraft behavior FMS FMS and it's Pop Up is customized as far as look but based on the Default X-Plane one. Note: Default XP FMC is based on the Collins FMS-4200 and CRJ is using that one, no Honeywell and Thales types. 3D Modeling and Textures Almost all maps are 4K High Resolution Exterior is modeled with all details existing in real aircraft. Pilots are visible in external views and turn their heads slightly to ward camera view Interior modeling has been made paying attention to details in the real life CRJ-900 cockpit. Cabin and Stairs have adjustable lighting, see above Liveries included in the package are listed below Aegean Airlines, American Eagle, CRJ, Delta, Horizon, IBEX Ana, Lufthansa, Scandinavian 1, Scandinavian 2, Spirit Unique Package Features Stairs Rails can be raised and lowered (per customer request) Cockpit shaders slide and rotate as you need them All Windows Shades, Overhead Bins and Seat Trays are animated and functional VR Compatibility Package is VR compatible but future enhancements will be added -900 Images are courtesy of AD Simulations Designed by AD Simulation and Deltawing Simulations Support forum for the CRJ-900 _____________________ Yes! the CRJ-900 by AD Simulations/Delta Wing is NOW available from the X-Plane.Org Store here : CRJ-900 Price is US$49.95 Requirements X-Plane 11 Windows, Mac or Linux 4 GB VRAM Minimum - 8 GB+ VRAM Recommended Download Size: 1.1 GB Current version: 1.0 (April 24th 2022) CRJ-700 customers can get the CRJ-900 for 30% off. Please find the discount coupon in the original CRJ-700 invoice at the store ________________________________________ NEWS! by Stephen Dutton 25th April 2022 Copyright©2022: X-Plane Reviews Disclaimer. All images and text in this review are the work and property of X-PlaneReviews, no sharing or copy of the content is allowed without consent from the author as per copyright conditions) All Right Reserved
-
NEWS! - Plugin Updated : Mango Studios FF A350 sound pack v2 Manga Studios have updated their addon sound package for FlightFactor's A350 XWB to version v2. This is a significant update and adds in a whole new dimension to the soundscape of the aircraft. The FlightFactor Airbus A350 XWB has been an odd release from the FlightFactor developers. Notably there has been a profusion of updates from FlightFactor, but nothing that changed the odd core of the aircraft to a more well rounded design, the one sided flying position and the average cabin are now quite dated in this approach. Worse was the sounds... the original A350 XWB sounds were quite atrocious, awful beyond comprehension for a developer studio of this calibre. Droning and washing machine repetitive in flight soundscapes put me off flying the aircraft on a regular basis... it is still not on my usual rotation of aircraft in asking for my personal flying attention. Sadly to date BSS (Blue Star Sky) haven't done a sound pack either, like they have for the FlightFactor A320Ultimate (excellent), the FF B757, B767 and even the FF B777... So A350 XWB always seemed to miss out on everything from each developer. Mango Studio's however did do a sound pack for the FF A350 XWB in October 2020. It did make a huge difference, but still in reality it not also live up to the specialist requirements in sounds that is expected today from users. It felt basically rushed and did not have the aural depth required for the aircraft of this stature, so v1 was a step up, but not to high expected expectations required of an addon product. And the users were very unforgiving and vocal about that aspect. To a point they have a right to have a decent Airbus A350 XWB aircraft in the simulator. So here is version v2, and this is the new feature list to build on the original sound package. Exterior: Custom sounds for tires on touchdown effects Custom sounds for hydraulic pump effect Custom sounds for fuel pump effects Custom exterior rain effects Custom fuel truck, and GPU effects New, custom sounds for APU start/shutdown New, complete, and custom exterior sounds for the Rolls Royce Trent 1000 engines, which include: -New custom, exterior start-up/shut-down sound effects -New custom, exterior spool-up/spool down sound effects -New custom, exterior backblast, surround sound, and flyby sound effectsInterior: New custom EICAS button, switch, knob, rotary, and handle sound effects New custom FCU button, switch, and rotary sound effects New custom OVERHEAD button, button cover, knob, rotary, and switch sound effect New custom PEDESTAL button, button cover, handle, rotary, switch and throttle sound effect New custom cockpit system sound effects include: -Autopilot disengages and engages sound effects -Complete Cockpit electrical systems, blowers, batteries, and buses. -Ultra-realistic cockpit wiper system -Complete EGPWS warnings, including retard callouts, callouts from 2500ft to 10ft, and all those in between. -Complete Cockpit warnings, which include Autopilot disconnect warnings, triple-click sound effects after autopilot disconnection, seatbelt chimes, no-smoking chimes, and flight attendant chimes. New Custom, Complete, and ultra-realistic cockpit environment effects which include: -Cockpit landing gear effects such as gear extension, retraction, touchdown, rolling, and drag sound effects -Other effects, such as Cockpit Rumble, Cockpit Rain, Cockpit Rotation, Cockpit Wind, Flap Drag, Spoiler Drag, sound effects New Cabin Effects include: -New Air conditioning effect -New Cabin wind effect -Reworked Fuel pump system effect -Reworked Hydraulic pump system effect -New Flap sounds, from start to finish taking off a real A350- 2 individual sounds which vary in pitch for each wing. New, complete, and custom interior sounds for the Rolls Royce Trent 1000 engines, which include: -New custom, interior startup/shutdown sound effects -New custom, interior spool-up/spool-down sound effects -New custom, interior backblast, surround sound, and flyby sound effects So how will these new Mango sounds go to the hoards. Certainly they are far better than the original sound package, as the new list covers far more indepth details, but I still think the main RR Trent engine sounds could be a bit more of a higher quality, but then again I haven't spent a lot of hours on the airframe either to give a full warranted appraisal. Certainly these sounds are worlds away from the provided FlightFactor sound packs, for that aspect alone and for the popularity of the FF A350 XWB which is very high, it will be more than enough for the hoards to want this specialist sound pack in their A350 XWB. I am sure they will let all of us know in any real time soon. There is also an included optional folder, to get rid of the sometimes annoying stock FF A350 cabin sounds and a User-Friendly UI that helps you bring some more customization to your sound pack! For current purchasers the Mango Studios FF A350 sound pack, then v2 is now available to download for free from the X-Plane.OrgStore. Just go to your account and download the FF350 XWB v2. _________________________________ Yes! the Mango Studios FF A350 sound pack v2 is available from the X-Plane.Org Store here : Mango Studios FF A350 sound pack v2 Price is US$15.99 Requirements This is a Sound pack only. The Flight Factor A350 is required for this sound pack Download Size: 89MB Current version 2.0 (April 19th 2022) ________________ News by Stephen Dutton 22nd April 2022 Copyright©2022: X-Plane Reviews Disclaimer. All images and text in this review are the work and property of X-PlaneReviews, no sharing or copy of the content is allowed without consent from the author as per copyright conditions) All Right Reserved.
-
Aircraft Review : Cessna 208 Grand Caravan DGS series by Thranda Design The Cessna Caravan has been around since Mid-2012, as released back then by Carenado. So it is not an unfamiliar sight to the X-Plane Simulator and by far the most popular and successful aircraft that Carenado ever produced. The Cessna 208 Caravan is also and overwhelmingly the most popular utility aircraft ever produced by Cessna as well. The project was commenced on November 20, 1981, and the prototype first flew on December 9, 1982. The production model was certified by the FAA in October 1984 and its Cargomaster freighter variant was later developed specifically for FedEx. The 4 ft (1.2 m) longer 208B Super Cargomaster first flew in 1986 and was later developed into the passenger 208B Grand Caravan which is mostly known as the "Executive" version. First deliveries were in 1982 and the C208B aircraft is still in production with the current produced numbers of around 2,800 aircraft built. Although the original design of the Carenado Caravan was done in house, most if even all of the conversion to X-Plane and subsequent updates was done by Dan Klaue the renowned X-Plane developer, later formed into Thranda Design. So overall this brand new design of the Cessna Caravan has already had years of X-Plane development behind it both in the Carenado version and now with this fresh new design. The Cessna 208 is a high-wing braced cabin monoplane powered by a single Pratt & Whitney Canada PT6A turboprop in a tractor configuration. The cabin has room for nine passengers and two crew when used as a passenger aircraft with four doors: one for each crew member, and a airstair entrance door on the right side of the cabin and a large cargo door on the left. The basic 208 airframe has a fixed tricycle landing gear but can also be fitted with various types of landing gear and allowing the aircraft to operate in a wide variety of environments. Some common adaptations include floats with retractable landing gear on the Caravan Amphibian model, and skis. The roles for the caravan are huge and flexible; Sightseeing, Regional (hub &) Spoke, Skydiving, Executive VIP Transport, Medivac, Flight Training, Commuter Airlines, Air Cargo and Humanitarian Missions... and one C208 was even fitted with a Hellfire missiles, but sadly not an option on this aircraft. The 208B Grand Caravan is a 4 feet (1.2 m) stretch of the Caravan l, and both the shorter and longer variants are included in the package. Originally in 2012 the Carenado Caravan looked sensational (updated v2 Review), but over the last few years it became a little dated with not really having many changes over the years, extras or features (excluding the Super Cargomaster) were very low as well, so it had become a little tired. So the timing couldn't be more right, than right now, to get a more modern and bettered featured design of the Caravan aircraft. You were never going to be disappointed on quality and detail from Thranda, as they are already renowned for these aspects, in this light the 208B is simply excellent. Every rivet, panel, access panel, lighting detail and the excellent mesh air intakes are absolutely perfect... there is nothing to be picky about here at all, you just can't fault this sort of quality detailing. You can see how far we have come since 2012 by the reflections alone on the spinner and the lighting effects on the exterior panels. Glass is always a big deal to me, I want authentic thick glass with wear and tear, and I am not disappointed here either, it is all expertly done. A huge step forward is that unlike on the Carenado version, you also have opening forward panels to reveal a state of the art reproduction of the sensational Pratt & Whitney Canada PT6A, also still commanding is that huge horn style exhaust protruding from the lower right of the engine bay. Some how you always strangely missed this engine feature on the Carenado aircraft, but want no more. You always had a lot of fun with the Caravan on the ground, opening doors and loading in passengers and cargo, it was all part of the simulation. Here all the doors (can be opened inside or externally) are well done... the tight ladder entrance on the right and the swing door on the left, with the two pilot and co-pilot doors at the front with their drilled tall tight steps. Caravans come with an optional lower Cargo Pod, and so you have one here, with the same three opening bins on the left side, but you still can't open each of them individually, it is none or all three. Personally I don't fly the Caravan with the pod attached, I like the more pure look than the bulky heavy feel the pod gives to the aircraft... but then again it is a workhorse aircraft. CargoMaster There is a CargoMaster variant also included in the package, currently set with three liveries... FedEx, DHL and Castle... The same upper hatch and swing door is still on the left side, but the right side passenger door is removed. Internally the seating tracks on the floor are removed and replace with netting. If you want to convert a standard C208B to the Cargomaster, you just move the "Cargomaster.txt" file to the livery you want to change. Cabin Most 208B cabin configurations are twin seats right and a single chair left, or two rows of single seats with up to nine seats available. But you have far more options here, including removing of all the seats completely. Any seat can be made to disappear, and you are also able to move the seat forward and backwards on the floor tracks, and they are switchable from a single to a double seat... you can also have the seats facing forwards or rearwards to make up a club seating arrangement. The rear right single seat is hidden, so you have to make it appear later and place it by the closed door. At the rear you can have the choice of a cargo area and cover net, or a luxurious wide double seat. It is all very clever, but also a bit finicky to use, and so you can easily get the chairs all oddly blended together into each other, and you have to sort them out before each flight? There is a sort of reset as we shall see in the menu, but nothing like the Carenado's sets of seating layout plans, and you feel the need that this is still the overall quicker reset option. Cabin detail is not as heavy handed as the Carenado either which now looks quite bland and very dated, but that is a very good thing, as the detailing here interior wise is exceptional. The beautifully crafted chrome roof lighting and air vents are both fully animated, even down to the inner vent flow adjuster. All lights are LED. Cockpit You never seem to "Sit In" the Caravan, more like "Perch" yourself up on the high tall seats. Not a bad thing. The four armrests can be all folded back for ease of access, they are chunky and nice. Note the excellent wear (worn) dirt on the rear of the two chairs, all nice attention to detail. Both front pilot seats are really well done, but feel a little posh for a utility aircraft in leather. Under seat frame is all lovely steel and again very nicely replicated. That large heavily hooded instrument panel is also very familiar, but set here though in a dull grey, not the more modern Carenado white... ... the quality and detail is exceptionally high, it feels like a very professional panel to use. Left is the same Caravan tall electrical tower (box?)... .... centre is another tall familiar C208B item in the pedestal. With a large chunky trim wheel left, Emergency Power handle, Single T Throttle, Propeller, Fuel Conditioner and Flap selection levers all set on top. Front on is another large rudder trim wheel, Aileron Trim and the fuel cutoff. Note the nicely done metal plated floor, that gives the aircraft a workhorse feel. The short stubby yokes are excellent. They have authentic Caravan branding, active electric trim and working ATC call switch... ... you can hide one yoke or both individually, unlike the only both together on the Carenado, very nice. It is a Standard Caravan layout in the default mode, and all clock instruments. The usual but highly effective annunciator panel, also known in some aircraft as the Centralized Warning Panel (CWP) or the Caution Advisory Panel (CAP). The Caravan panel version is however one of the best (looking) and can be set to DAY or NIGHT brightness, and the engine readouts and gauges are all set out beside the CAP under the glareshield with the two Fuel Gauges (GALs) far right. (External) Lighting panel is below left, Anti-Ice Panel below and the Internal lighting panel lower left. Flying instruments are basically stock standard for each pilot, but in this aircraft they are not locked in as we shall see. Each vent positioned at the end of the instrument panel has two way animated vents, and the glovebox (far right lower) opens to reveal a nice photo of the Thranda Team. Menu Thranda's Menus are very feature rich and highly detailed. There is a popout TAB under the arrow, that can be (mouse) scrolled to hide it, that is if you don't like these sort of items crowding your screen (I don't). The Menu system includes the "Dynamic Generation Series" or DGS, a Thranda speciality feature that takes full advantage of X-Plane's flexibility for in-sim, real-time modifications. As noted the "Menu" Tab (arrow) is far left middle of your screen, this will activate the Pop-Out Menu... The Menu has seven menu tabs in; GENERAL, LIVERY, WEIGHT/BAL, CAMERA, AUDIO/SLEW, PANEL and MISC (Miscellaneous) Menu - General The menu "General" sections covers quite a lot of options, the layout is highly detailed and very comprehensive. General menu selections cover; Engine Mode Simplified, Electric Tug, Window and Instrument Panel Reflections on/off, Startup Running on/off, GPU on/off, Cargo Pod on/off, Chocks and Brakes on/off. Three selections placed right cover group items, but any one item can be also accessed via "Click Spots" and can be individually selected or hidden via the aircraft graphic. "ALL COVERS" will select engine inlet/outlet covers and pitot cover, "ALL TIE-DOWNS" for rear fuselage and wing tie-downs and "ALL DOORS" for both the cockpit doors and rear cabin doors. All EXT - External Lights can be switched on and off as can the ALL INT - Internal lights. The "Electric Tug" that can be used to move the aircraft around on the ground via your joystick (left,right-forward,backwards). Static Items include Engine Inlet covers, Pitot covers and Tie-Downs The "Engine Mode" feature toggles the engine realism between "Realistic" and "Simplified". In Simplified mode the engine will automatically limit the engine to remain below the maximum torque of 1,865 ft-lbs. In Realistic mode it will be up to the pilot to avoid exceeding the engine limitations. There is built in "Checklist" (lower right menu, arrowed). And very good it is, but here not in the the red, or checked green choices you used on the other Thranda aircraft, this checklist is just white text, but far better to read. You can have checklist pop-up or in a window mode and thankfully move it, and scale it even from the very small to the very large. The two lower arrows give navigation around the checklist pages. The action detail and hints in the lists are simply excellent, and the checklist is fully detailed from Pre-Flight to Shutdown. Menu - Liveries Second Menu option is "liveries", there are two options here with the first being "PAINTED LIVERIES". There are altogether 13 liveries or two blank and eleven designs (three are also cargo liveries), and all are of extremely high quality and creative flare. To note that a couple are very similar except for a different registration. Two liveries are "Dynamic" in resources (White)... another New feature is the (Quick) selection of Dirt (Ext) Externally, Scratches and Dirt (Int) Internally. Via three percentage selections you can adjust the amount of Dirt, Scratches and Dirt Int on the aircraft (0%-255%) and apply it instantly.So you can have either a pristine or a very grubby aircraft with just a twirl of the numbers. This can be applied to any of the liveries. Dynamic Liveries Not happy with any of those designs, then why not create your own livery! With their earlier releases of their Kodiak and with the PC-6 and PZL-104, then Thranda introduced a clever feature of a way to design your own livery. This is done by switching from PAINTED LIVERIES to DYNAMIC LIVERIES top. You have a menu to select on the right that can colour a certain part of the aircraft, like the Roof, Wing, Tail or Wing tips. Select which one you want and then adjust the RGB colours for that certain area, it looks hard but you can easily design a very nice livery in about twenty minutes... the selections of Dirt (Ext), Scratches and Dirt (Int). Metal(ness) and surface Rough(ness) can also be added or adjusted as seen earlier... When done you can "SAVE" or ADD the livery and then "APPLY" it to the aircraft. The conversion takes a few minutes, but the results are excellent, and in your own design... There are already 30 preselected selections in their various designs, all are very good, and like noted you can add your own version to the list. Menu - Weight/Bal The Caravan also has a great Weight and Balance menu. Lbs and Kgs which can be selected and changed via the toggle Lbs/Kgs (arrowed). The Cargo Pod can be added or removed via the toggle top centre. This then adds in the Cargo Pod weight options on the right. Fuel can be added and the amounts are then shown and are adjustable as well in the menu (above). Pilot, passengers and cargo can all be set for individual weights and all of the CofG (Centre of Gravity) parameters are all shown on a graph, go too far or too heavy and the CofG goes red. When done you can Save the Configuration and then later re-load it, or press Load to add in the set weights. Same for the Cargo Pod if attached, once the baggage weight goes above 19 Lbs (9kgs) the bags start to appear in the pod. But obviously there is a compromise? If you want a full passenger and baggage load, then you can't have full fuel tanks, as the excess weight takes you over the weight and the CofG limits. For six passengers (with maybe a bag thrown in) then can you have your full tanks and the range. Each seating area has another function box. This allows you to control the seating, not only in weight, but the seats themselves as we saw earlier. The left box selects the seat and the type of seat, in say a single or a double. The right box arrow shows the direction of the set, in front facing or rear facing, it is better to set up the aircraft configuration here than using the earlier HotSpots as it is more direct. If you don't put the seats in, but add in the weight to the area... then the seats are replaced by Cargo Crates, it is brilliantly done and the cabin can also be configured to carry both passengers and cargo together. In reality you can spend hours on trying out different configurations for your different flying roles. Adding in passenger weight gives you a pilot (Daniel Klaue) and in the co-pilot seat his wife, but there are no rear passengers, and both are nicely actively body and head animated to the controls. Note... if you turn off the aircraft's electrical power or add the chocks o the wheels, then they both disappear. Menu - Camera There is a camera feature under the menu "Camera" selection. The left side of the panel is the "Walkaround" views, just pick the dot viewpoint you want to see to rotate around the aircraft. To the right is the default views can be selected via a menu, or press the keypad to select the view. The FoV or Field of View is adjustable via a slider. Menu - Audio/Slew Sound can be adjusted via the sound menu. There are seven slider selections with: Master, Aircraft External, Aircraft Internal, CoPilot, Radios, Environmental and User Interface. One other sound setting is on the Flap panel... As noted, on the right and left of the panel you get the audio simulation of an active noise canceling headset, which is seen as wearing a headset. Sound quality is beyond excellent as it is a built in audio mixer, so you can individually control the audio channels in real-time, and you can adjust the volumes while hearing them play. Slew mode allows you to manually move the aircraft around in a disconnected X-Plane space. It functions by temporarily overriding the various aerodynamic and physical forces on the X-Plane settings, it is to allow the user to reposition the plane as desired. This feature is however highly touchy and it is mostly used with the floats option (not yet on the Caravan, but on the Thranda Beaver and PC-6). Menu - PANEL The sixth "PANEL" Tab option allows you to adjust or change the instruments and dials. Scroll the "Panel Preset" number (arrowed) to see the four preset layouts. Customising the panel to your own personal layout is just as easy. Just select the "3D EDIT PANEL MODE" (arrowed) that gives you access to all of the 53 individual instruments and avionic units... There some great options including Aspen EFD 1000, S-TEC 55x Autopilot, Angle of Attack gauge and so on... For those that find instruments are not to their liking in say, "I wish I could move that altitude meter just a bit more to the left", then here you can simply adjust that, or even swap the instruments around the panel to your liking, here I have swapped the NAV 2 pointer to the top, and the Autopilot Annunciator below the NAV 2 instrument.... because I can. You can even adjust the brightness of the instrument. When done I can "ADD" (or Duplicate) in a new "Preset", and then "SAVE" that new layout Preset (Preset 6/6). So basically you can start off with a completely blank instrument panel and then create your own unique or personal instrument layout if you have the time and patience... and you can have up to or save 14 different instrument layouts. It is however very important to restart X-Plane to lock in the new instrumentation layout before flying. Currently the optional "Panel Background" choice is only optional to the boring Steel Grey, but Thanda notes more panel colours and styles are coming in an update, I hope they put in the Carendo white panel, as I liked that facia design a lot and miss it's inclusion here. Panel features include; Bendix King KFC-225, and the noted Aspen EFD 1000, KR 87 ADF Radio, Garmin GMA 340, Garmin GTX325 Mode C Transponder, BendixKing IN-182A Weather Radar and the usual GNS 430/530 PS/Nav/Comm units. And there is a special 3d bezel for the insert of a RealityXp GTN 750 unit if you own that add on. The EFD 1000 which is a self-contained multifunction digital display that is divided into a Primary Flight Display (PFD) in the top half, and an Electric Horizontal Situation Indicator (EHSI) in the lower half. As EDF 1000 systems go it is not as highly featured with the GPSS, MAP, 360 and Menu functions all not simulated... all the lower NAV1/NAV2/GPS selections are however available, as is the TPS (Tapes) see/hide option with the MIN (Minimums) selectable as well. and the PFD can be reversed with the EHSI. The EFD 1000 here can be used with the KFC225 Autopilot. Highly notable and announced by Thranda is the coming soon option of a twin screen Garmin G1000 Avionics suite, which most modern Caravans now use. Menu - MISC The Misc (Miscellaneous) page is currently mostly under development... notes; COMING SOON - the C208 Expansion Pack, with Tundra Tyres and Mud Flaps, Executive Seats, Option for no De-Ice, Cargo Version, G1000 Version, Synthetic Vision and Amphibian (Floats) options. "DynaFeel" on the right is a system that dynamically adjusts the rate at which the controls deflect, based on airspeed and how much the control is deflected. This means the controls will feel light and responsive at low speeds and with small deflections, but will get progressively heavier as the airspeed increases. Links to both the Support Forums and to download the built-in Skunkcrafts Updater are also provided _____________________ Flying the Cessna Caravan One of my favorite flights in the (Carenado) C208B Caravan was from Launceston (YMLT) to Hobart (YMHB), but going the long way around via Nine Miles Beach and down the lower east coast of Tasmania, So I was itching to do it again. A sort of sightseeing plus passenger delivery flight in one. There are basically no waypoints on this route (there are very few anyway in Tasmania), so this was all headings and map work, but I know the route quite well anyway. I have a payload of 1,556 Lbs (706 Kgs), with six passengers and their bags, full all up weight was 7935 Lbs (3599 Kgs). Fuel was 261.4 Gal. I set the pitch trim a little nose down, I have a couple of heavey passengers and their bags swinging out in the rear. The Fuel switches are positioned overhead, and as there are only two (wing) tanks, overall there is 332 US gallons (1256.8 liters, 2224 lbs, or 1008.8 kg) for a total of usable Jet-A fuel available in the two tanks. On of the real highlights of the Carenado Caravan was starting that Pratt & Whitney Canada PT6A-114A, producing 675 SHP here. The startup sequence is full (FADEC) automatic, so all you do is throw the (start) switch... The turbine whine comes from deep inside the machine, then builds up consistently in whine and noise until the McCauley 3 bladed metal, constant speed, full feathering propellers starts to move. Sounds of this starting procedure is as good if not better than the Carenado version, so I'm very happy about that. And soon I have a clean annunciator panel, noting we are ready to go. Like a lot of Carendo aircraft their Caravan had a tendency to have too much power even set at throttle idle, unlatch the brakes you usually headed headlong straight into the scenery. Setting the mixture in the Idle setting here and with the letting go of the brakes, the Thranda Caravan will barely move (just a little), so taxiing is far more easier and wholly more realistic than the Carenado, it is a relief as well not to being always fighting the aircraft to make it slow down, or to continually fight the heavy forward thrust. So on the ground it is an easy aircraft with nice feel to manoeuvre around the airport layouts, I set the Flaps to 10º (0º-10º-20º-Full are all available flap selections). The NAV1/NAV2 pointers are not really usable out here, as there are no DME (Distance Measuring Equipment) or VOR waypoints until Hobart, so I'll use them later. I set the "Course" to 132º or the opposite direction directly from the YMLT departure Runway in 32L as a departure circuit guide. And we are ready to roll... Mixture to full rich, throttle up and off the brakes. The set weight under thrust feels perfect, so you quickly tune into the aircraft. Power builds very nicely until rotation around the 105 knts mark (flap 10º)... ... and climb-out is good around 120 knts and 8º pitch. Rate of Climb is 1,234 ft/min (6.27 m/s), but that depends on your weight, I feel even at the Rate of Climb limit you are pretty safe and will not lose any bleed of speed like here. Powering up out of Launceston, I am already loving the machine, sounds are deep down growling, with that faint turbo-whine on top... always loved the PT6A's sound and it is glorious here. Putting the flaps to retracted always brought a significant lowering of the nose, and so it does here, but it is easily corrected, once done the speed can now start to build faster to around 130 knts. You are always aware of the aircraft's handing on takeoff, but it is in that first turn that you get to grips with the machine, in how it reacts in the turn, how it turns, the feedback drumming into your brain and the back down to your physical commands reacting to the information. Pilots truly love the Caravan and I think I know why. It is not small in a General Aviation sense, so it does not feel too light or nervy, in the opposite the aircraft is not too big either to make it ponderous and heavyish, it has that sweet spot all to itself... the Caravan is just the perfectly sized aircraft. So the handing here is excellent in feedback and feel, and you are the master of the aircraft and not the other way around. Only blot on the landscape is that the nosewheel will always continue to rotate, even if you dab the brakes there is no action because the wheel is freewheeling with no brakes to slow the rotation. It looks good initially, but then you feel it should settle down from rotating later in the flight, it looks odd moving fast consistently even while flying slowly. Another 90º turn in the circuit puts you now going south with YMLT now to our right... still climbing. Up to our cruising altitude of 6,000 ft and I easily trimmed the aircraft out of the climb pitch, not onlt in pitch,, but in yaw as well... all the flying to this point has been in manual and I could have easily flown on the perfectly trimmed Caravan all the way to Hobart, but I wanted to check out the KFC 225 Autopilot. It is a nice bit of kit connected to the Aspen EFD 1000, and they work in nicely together... St Pauls Regional Reserve is to my right and surrounding it are two valleys, the northern one goes to St Mary's, and the southern route takes you to the coast over Royal George, and that is route I will take today. Sitting high and forward, means you view out is excellent, you can easily see the wings (for icing) as well... ... a slight turn to directly East and I head up the correct southern valley. Is it fair to comment when I am already a huge Caravan addict. But this is a far, far more better Caravan than the Carenado version beloved so much in the past. It feels and is far more modern, with better tools to use and everything in here works that you can touch. Take the Voltage selector left panel. Here you can select four different Voltages in; GEN (Generator), ALT (Alternating Current). BATT (Battery) and VOLT (Voltage). They all work as they should, and it is this sort of detail that gives you a more realistic and deeper simulation. As noted the Caravan is a brilliant commuter aircraft, really the best in it's class with really no competitors, so in this role you can't ask for anything better, and I am in my element here. The sounds are as noted to be already very good, but in the cruise there is a little repetitive droning, I got used to it, but think considering all the other perfect sonic areas it could be a little better. This engine feels like a real deep torquey tractor engine and you can run it hard at full throttle until the pressures start to show you that you should need back off a little, but that huge pull is there anytime you need it. Performance is very good depending on your configuration; Max speed is 186 knts (214 mph, 344 km/h) and Cruise Speed is around 159 knts (294 km/h) TAS, for a Range of 1,070 nmi (1,232 mi, 1,982 km), Because you have onboard oxygen the service ceiling is a high at 25,000 ft (7,600 m), but you would very rarely fly that high in this sort of aircraft. Lighting The Caravan's lighting is quite basic in theory. But well done to make it feel very authentic. Both the Taxi and Landing lights are both set into each wing, Navigation lights are simple red/green and a single white light in the tail, there is also a single beacon light on the tip of the tail, and the light touch LED strobes are perfect. The instrument panel lighting is again simplistic, but well adjusted via the four twin (x8) lighting knobs on the lower centre panel. The Caravan has indirect panel lighting and it looks gorgeous here. Left Front/Right Front instruments are separate, and you have Left Flood/Right Flood to cover the left Electrics panel (tower?) and the right hand side. Lower Panel (Pedestal), Overhead, Engine Instruments and Radios all have their own adjustable lighting knobs. Provided are two pilot/reading ceiling lights that are adjustable, and a separate centre placed switchable adjustable light, the roof Fuel switchers are also nicely back lit. As with most lighting today, you can adjust all the lighting down to just the instruments for takeoff or landings, again it looks great even in this basic lighting setting. In the Cabin, there is a "Cabin" switch, that switches on a light above the passenger door and a light left mid-cabin. The bonus is that there are eight (yes count them all) separate seating lights, and they are all fully adjustable. They take time to switch each on and adjust, then the same to turn them all off again with no global roof switch or set lighting preferences available, but it is all very well done. Externally the cabin lighting all looks extremely realistic as well... so the lighting overall is brilliant. Now we are getting well up and over Royal George and in the distance you can now see the Tasman Sea. To my right is my point of reference of the glorious Tasmanian Nine Miles Beach and the Freycinet Peninsula The non reference, non-photographic nature of the X-Plane textures does absolutely no justice at all to the area, in real life it is quite spectacular, but boring here. Now we are heading directly due south for Maria Island, which is again a spectacular National Park. You now have a choice? To get into Tiger Bay (the Derwent River estuary is further south), you can cut across the Marion Bay strip, or go around the full Tasman Peninsula (the famous Port Arthur Colony is on the southern part) and well worth the extra flight, if you have the time. I choose to cut over Marion Bay, reduce my speed and start to descend as I head into Tiger Bay, as YMHB airport can now be seen on my right. Both the VOR 1 and VOR 2 are now set on the EHSI, and so is the runway course 300º. There is no ILS into Hobart's Rwy 30, but there is one on the opposite Rwy 12 (109.90 IHB), so you can still use this Frequency as a guide on the approach into Rwy 30, which I did here. In this case it was a godsend, as the runway was hidden via the direct sunlight... Flaps at 20º, you do get a little flap balloon so you have to know your (or learn) speeds at each drop to smooth out each flap drop to get it perfect, in this way it does remind me very much of the Carenado approaches in the C208B in the same context. Speed is now under a 100 knts, and at 600 ft in the approach. "Full" Flap and your approach speed is now set at 80 knts, and it feels good. Throttle adjustment is nice to control the height, touch more and you hold the altitude, a touch less throttle and you slowly sink... personally I should have given myself slightly more runway as I know the Caravan's characteristics very well, 78 knts, should it be slightly slower?... well stall speed is 61 kn (70 mph, 113 km/h) calibrated air speed, so you do have a bit more movement there. ... I touch down a bit fast, but I have a great tool at my disposal, the C208B comes with significant reverse propeller thrust! Pull the throttle full rearwards and growl at that sound, it is glorious, and the speed quickly drops away. If you have the option, I would recommend using the foot pedal brakes to slow the aircraft, the regular braking action (set to my joystick pinky) is a bit weak, I get a lot more control and braking effort out of my foot pedals. During the last few years you had this horrible sinking feeling. The Carenado Caravan was now certainly feeling it's age, so what of flying it in the future, and in X-Plane12. Well that aspect has been well and truly fixed here and X-Plane12 will be supported when it is released. Even the winding down of the THAT Turbo-Prop engine feels so comforting... ... the Thranda Caravan delivers and easily eclipses the older aircraft, yes Dan Klaue has had his masterful hand over both of them, but here he is more free to add in a bit more (okay a lot more) of that outstanding Caravan magic. _________________ Summary We are no stranger to the Cessna Caravan in X-Plane. Carenado released a C208B way back in mid-2012, it later came with the longer Grand Caravan 4 feet (1.2 m) stretch Executive version and the CargoMaster variant. Over the decade it became the biggest seller and the most popular aircraft ever for Carenado in the X-Plane Simulator. But time marches on and in the last few years the Carenado version has felt very dated, and now out of tune with the current features of the simulator, the future of Carenado in X-Plane is very much in doubt as well. In that decade the Carenado fleet including the Caravan was managed by Dan Klaue, who later became Thranda Design. So here is Thranda's version of the C208B Caravan that has not only the original feel of the Carenado, but also comes with all the bells and whistles of a modern design, so this new version is certainly the best of both worlds, and will be supported in the coming new X-Plane version X-Plane12. Thanda has always lead the pack in design and features for the X-Plane Simulator, and all that energy is packed into any Thranda release, including this spectacular C208B Caravan. It comes with initially with all three variant's, the Standard Caravan, The Grand Caravan and the CargoMaster closed in version. There are both (clever) adaptable cabin seating and freight options, with the required lower Cargo Pod is also available. The Executive, Floats, Skis and Tundra Tyre versions with the G1000 Avionics will come later in an add on package. Thranda always comes with a high range of clever and unique features to give the user a lot of personal options. Known as "Dynamic Generation Series" or DGS, this is a Thranda speciality feature that takes full advantage of X-Plane's flexibility for in-sim, real-time modifications. Here you can change the actual livery to your own designs, but build the instrument panel to your own liking as well, including options of the Aspen EFD 1000 glass instrument and a special 3d bezel for the insert of a RealityXp GTN 750 unit if you own that add on. Detail and modeling quality is off the scale, certainly when compared to the older dated Carenado C208B, but it is the more intricate detailing (animated vents and lighting, and functional areas) that really makes this C208B really outstanding. Highlights are an exposed Pratt & Whitney Canada PT6A (under the cowling), great door arrangements, and lovely detailed interiors. Menu features including a very detailed weight&Balance menu with CofG graph, expansive static elements, checklists and a great sound menu. Negatives, your not going to find many as the aircraft is very well developed in the first place, so I will say niggles here. The complex rear seating/cargo feature sometimes has a mind of it's own, so it need a default setting to stop you laboriously having to reset everything back to normal on each flight. Sounds overall are dynamically excellent, but I can't tune into the cruise droning, it maybe authentic, but it feels to looped to me. The Cargo pod bins doors are all or nothing (like on the Carenado), and the extensive seat roof lighting is time consuming to switch all on then switch all off again with only a basic Global default switch setting, notable there is the All Internal lighting on/off, but a save to your lighting preferences would be nice. The missing white instrument panel from the Carenado version, I not particularly attracted to the dull slate grey, but there is a good chance it will be coming in "Executive" Pack. Also to be aware of the large 5Gb Download. The Cessna Caravan is a very unique aircraft, the perfect pilot's machine in not being too small, but also not too big and cumbersome either, it is the sweet spot of aircraft, hence it's huge popularity. Thranda Design have certainly done it justice here, with everything (and more) you would ever want of an almost perfect C208B Caravan. Priced well under the US$50 (US$44.95) it is brilliant value as well. For most it will be a brilliant replacement for an old beloved favorite, for the rest of us the new Thranda version of the C208B Caravan will be one of the best single-prop commuter aircraft in the X-Plane Simulator today, always a legend... this Thranda Caravan just elevates the C206B package to a whole new different higher, and a more modern level... Highly Recommended. _______________________________ Yes! the Cessna 208 Grand Caravan DGS series by Thranda Design is NOW available from the X-Plane.Org Store here: Cessna 208 Grand Caravan DGS series Price is US$44.95 Two Models in One - Both are included in this package C208 Caravan 675 C208 Grand Caravan Both planes come with passenger and cargo versions Special features: FULLY configurable 3D instrument panel. Over 50 instruments to choose from! (Including Aspen EFD 1000, and support for RealityXP GTN750) Move any instrument to any location on the panel, or even between pilot and copilot's panel! Comes with 4 panel presets, but can easily be expanded by moving instruments around, using a simple and intuitive interface. Save your own presets, and even share them with the community! Instruments can be moved in 3D directly, on a 2D pop-up preview window, or by numerical entry for precise placement. Realistic custom fuel system. GNS430 and 530 can be swapped out, but a restart of the plane is required, as 430s and 530s are mutually exclusive in terms of compatibility in X-Plane Dynamic livery editor (like in the Kodiak, the Beaver, the Wilga, and the Pilatus PC-6) Full PBR control! Create stunning metallic liveries, or matte, sand-blasted look in mere seconds! Additional control over dirt/grime, adjustable in real-time to dial in the exact desired amount of wear and tear. Create "virtual" liveries, based on two basic common design layouts, and assign any colour to any available paint segment. Quickly create preview of livery in real-time, using intuitive controls. Previews now include visualization of metallic materials and dirt overlays. Apply selected livery in real-time, right in the sim, without the need to even touch a 3rd party image editor! Option to change the tail number in real-time, or disable it altogether. (Enter a "space" instead of a callsign number to create a blank tail number.) Easily and quickly create dozens of paint schemes in-sim! Also supports 11 traditionally painted liveries, all visible in a convenient pre-selection preview window. Uses SkunkCrafts Updater. Option to participate in Beta program, via check box in SkunkCrafts Updater. Excellent hi-res PBR realistic materials, featuring true-to-life plate deformation and to-the-rivet precision. Fully modelled Pratt ^ Whitney PT6A-114A turboprop engine Feature-rich elegant fly-out menu with the following features: Realism settings for engine (simplified vs. realistic modes) Custom ITT logic, to get the startup ITT temperature right. Innovative electric tug, with in-panel controls to move forward/backward at the desired speed, and steer proportionally Control over chocks, individual tie-downs, covers, internal lights, external lights, etc. Option to enable/disable Cargo Pod, with realistically simulated weight, momentum, rotational inertia, and drag characteristics. Individually load weights in different sections of the Cargo Pod via the pop-up menu Option to start up running (all systems ready), or cold-and-dark, for realistic startup procedures. Control landing lights, strobes, beacon, and nav lights via pop-up window Detailed weight and balance manager with visual chart, individual passenger seat weight control, Lbs/KG unit toggle, CG control, external tank control, and the option to save and load configuration. Control individual seat positions, or hide them altogether, to create a hybrid passenger/cargo version. Multiple camera snap points, above and beyond what's available by default in X-Plane, so you can perform your walk around checks. Adjust your camera's Field of View without having to go to an X-plane menu, allowing for real-time adjustments. Audio mixer: individually control audio channels in real-time, so you can adjust volumes while hearing them play. Slew control: move your plane around the world, temporarily bypassing flight physics. Includes ground mode and air mode. Dynamic panel control page, with a separate view for the entire panel layout preview, or a per-instrument view, allowing for fine-tuning of instrument position, as well as copy-paste function to quickly replace instruments. Flight dynamics and systems: Detailed and accurate flight dynamics and weight and balance with the help of multiple real-world active Caravan pilots. This not only gives this aircraft the proper "feel", but also accurate takeoff, climb, cruise, and landing performance. The Caravan is a well-behaved airplane and a very stable IFR platform. Easy to fly, but extremely capable! The Caravan is equally comfortable at the world's busiest airports as well as back country dirt strips. Detailed fuel system, including the small reservoir tank and the fuel selector warning alarms. Extensively simulated electrical system, including the battery, avionics busses, generator, starter, external power, and standby alternator system. Tie-downs and chocks actually keep the plane from moving, even in high winds. Advanced FMOD-based sound system: High fidelity, multi-track sounds with smooth transitions and amazing atmospheric effects. Individual volume control over different aspects of the sound experience, adjustable in real-time (while listening to the sounds) Different sounds for front of plane than for back of plane Panning around the plane in exterior view yields awesome 3D audio effects, including "blade slapping" sound when view is perpendicular to prop Individual buttons and switches in the cockpit each have their own unique sound. Sounds actually give you clues as to what's happening under the hood Outside wind intensity is affected by slip and AoA. (The more the surface area of the fuselage is hit by oncoming wind, the louder the sounds Requirements X-Plane 11 Support for X-Plane 12 when available Windows, Mac or Linux 4 GB VRAM Minimum. 8 GB+ VRAM Recommended Download Size: 5 GB (yes, very large file) Current version 1.0.3 (April 13th 2022) ___________________________________ Installation and documents: download for the Thranda_C208_Caravan is 4.67Gb and the aircraft is deposited in the "General Aviation" X-Plane folder. Full Installation is 5.24Gb Documents supplied are: 208BG1000POH.pdf Caravan 675 Performance Charts.pdf Caravan Manual.pdf Changelog.txt G1000_CessnaCaravan_CockpitReferenceGuide.pdf Grand Caravan Performance Charts.pdf Thranda Graphics Settings XP11.pdf Thranda Joystick Settings.pdf X-Plane G430 Manual.pdf X-Plane G530 Manual.pdf There are a huge amount of Documentation provided here, not only for the Thranda C208B including performance charts, reference guides, but also X-Plane/hardware settings and custom and default avionics. All updates are via built-in Skunkcrafts Updater Support forum for the C208 Grand caravan by Thranda _____________________ Aircraft Review by Stephen Dutton 28th April 2022 Copyright©2022: X-Plane Reviews Review System Specifications: Computer System: Windows - S1700 Core i7 12700K 12 Core 3.60 GHz CPU / 64bit -32 Gb single 1067 Mhz DDR4 2133 - ASUS GeForce GTX 1080 8Gb - Samsung Evo M2 2TB SSD - Sound : Yamaha Speakers YST-M200SP Software: - Windows 10 - X-Plane 11.55 Plugins: Global SFD plugin US$30.00 : Environment Engine by xEnviro US$69.90 : RK Apps XPRealistic v2 - US$34.99 Scenery or Aircraft YMLT - Launceston, Australia 1.60 by CDG (X-Plane.Org) - Free YMHB - Hobart International Airport & YCBG Cambridge Aerodrome 1.0 by TDG (X-Plane.Org) - Free (Disclaimer. All images and text in this review are the work and property of X-PlaneReviews, no sharing or copy of the content is allowed without consent from the author as per copyright conditions) All Rights Reserved
-
NEWS! - Scenery Released : KONT - Ontario International Airport, California by VerticalSim It is very easy to get confused here, look at the title of Ontario and instantly you would think of Ontario, Canada? Right... wrong. This is Ontario "California" which is a city in the southwestern San Bernardino County, California, 35 miles (56 km) east of downtown Los Angeles and 23 miles (37 km) west of downtown San Bernardino, the county seat. This airport provides a beautiful scenic approach without all of the heavy traffic (and framerate kill) of LAX. Not only that, but KONT is also a serious major cargo hub on the West Coast in which to fly that brand new MD-11 & A300 (UPS & FedEx) aircraft. This is the second release of 2020 for VerticalSim, after KSYR - Syracuse Hancock International back in late February... Features New FedEx Ramp 2022 Airport Layout HDR Lighting PBR on nearly all materials Moving vehicle traffic Traffic AI Routing SAM Jetways Usage of LOD’s for optimization Cargo haulers love dedicated Cargo scenery, and this one at KONT is exceptional. A great addition to your cargo hauler network, and a nice quality scenery at that. The free SAM plugin is required for this airport to work. You can get it here SAM3 Suite. Images are courtesy of VerticalSim __________________ Yes!... KONT - Ontario International Airport, California by VerticalSim is now Available from the X-Plane.Org Store here : KONT - Ontario International Airport, California Price is US$24.99 Requirements X-Plane 11 Windows, Mac or Linux 4 GB VRAM Minimum - 8 GB+ VRAM Recommended SAM Plugin Required (free) Download Size: 1.7 GB Version 1.0 (April 8th 2022) ___________________________ News by Stephen Dutton 19th April 2022 Copyright©2022: X-Plane Reviews (Disclaimer. All images and text in this review are the work and property of X-PlaneReviews, no sharing or copy of the content is allowed without consent from the author as per copyright conditions) All Rights Reserved
-
NEWS! - Scenery Released : PAWD - Seward Airport, Alaska by NorthernSkyStudios NorthernSkyStudios are alternating between scenery based in the Hawaiian Islands and Alaska. In Hawaii the releases lately have covered PHMU - Waimea-Kohala, PHOG - Kahului and PHJH - Kapalua Airports. In Alaska the last release was so much a favorite of mine in that X-PlaneReviews quickly covered it in a review; PAEN - Kenai Municipal Airport, just west of Anchorage... It was a sensational bit of Alaska and well worth checking out if you like serious bush flying. PAWD - Seward Airport is directly on the other side of the same Kenai Peninsula (Dena'ina: Yaghenen) from Kenai, so it is another great destination and a focus destination of the same area. Seward is an incorporated home rule city in Alaska, United States. Located on Resurrection Bay, a fjord of the Gulf of Alaska on the Kenai Peninsula, Seward is situated on Alaska's southern coast, approximately 120 miles (190 km) by road from Alaska's largest city, Anchorage. Owing to its position at the southern terminus of the Alaska Railroad and the well-developed road links to Anchorage and the rest of the Kenai Peninsula, Seward is both a major northern end-port for several major cruise ship lines that host Alaskan cruises, such as Norwegian, Royal Caribbean, Holland America, and Celebrity Cruises, and a common destination for general Alaskan tourism. Huge glaciers flow from the Harding Icefield into the local coastal fjords and the township itself is surrounded by peaks, the adjoining fjords are also a whale and porpoise habitat. To the west, a trail leads to the summit of Mount Marathon (1,471 m). The Mount Marathon Race is a famous mountain race that is run every Fourth of July up the mountain. Features: The most detailed replica of airport buildings and vehicles High resolution ground textures / Custom runway textures High resolution building textures Handplaced custom autogen buildings and forest Compatible with X-Plane 11 features Custom mesh for the airport area (Ortho4XP) All materials created for full PBR Shading and occlusion (texture baking) effects on all airport buildings High-resolution building textures Custom orthophoto for the airport and surrounding areas World Traffic 3 compatible Compatible with with Ortho4XP and default mesh The optional Ortho4XP tile by NSS is large in size and a 2.26Gb download (a 1 Ortho4XP_patch is provided). So it covers a significant area around Seward, and well worth the download size. Priced at only US$14.00, that is great value for a high quality regional scenery, so it is a well worth addition to Kenai if you already have that NorthernSky Scenery. Highly recommended. Images are courtesy of NorthernSkyStudios _______________________________ The PAWD - Seward Airport, Alaska by NorthernSkyStudios is now available! from the X-Plane.Org Store PAWD - Seward Airport, Alaska Priced at US$14.00 Requirements X-Plane 11 Windows, Mac or Linux 4 GB VRAM Minimum - 8 GB+ VRAM Recommended Download Size: 1 GB Current version : 1.0 (April 4th 2022) ___________________________ News by Stephen Dutton 19th April 2022 Copyright©2022: X-Plane Reviews (Disclaimer. All images and text in this review are the work and property of X-PlaneReviews, no sharing or copy of the content is allowed without consent from the author as per copyright conditions) All Rights Reserved
-
Aircraft Updated : CRJ-700 v1.1.2 plus -900 Announcement by Ad Simulations AD Simulations have released an update to their CRJ-700 to Version 1.1.2. Again another significant update to making that five updates since the late 2021 aircraft release. Before we get into that... AD Simulations has also announced that coming soon will be the another variant of the CRJ with the -900 longer version of the aircraft. If the expected quality of the of the -900 version matches the -700 it will be very nice indeed. If it will be a standalone price or coming with a discount for current CRJ-700 owners (expected!), and no released date has been currently announced, but it will be another excellent addition to the long neglected CRJ range... images! I am the first to admit that although the modeling and features are first rate from AD SIm, the performance and some features (notably the EFB (Electronic Flight Bag)) which doubles as a Menu, is still below par for an aircraft of this quality brand. But a recent flight of the v1.1.2. update said it has already improved considerably with the consistent updates, but I didn't like the castor loose nosewheel at all (It is going to looked at), here is the full list of changes in v1.1.2. Changelog v1.1.2. Fixed Rudder Limiter working in flight making rudder inputs less drastic Added Option in Tablet for Honeycomb Bravo hardware throttles. When selected Spoilers will stay deployed Made All Displays brighter and added individual minimum brightness knobs to each corresponding display which allows all desirable displays brightness combinations Adjusted autopilot behavior for less aggressive engagement and disengagement of certain Flight Modes Enabled ILS Course adjustment (green needles now can be rotated) Enabled ILS Frequency to be set via both RTUs Redesigned Flight Model Roll behavior from being very unstable to very realistic, with and without Flaps and Gear deployed/retracted Adjusted Roll Trim Speed Fixed the Landing Elevation issue that didn't let users change the landing elevation and made adjustments to CABIN PRESSURE Panel Make Slats Display correct on EICAS Adjusted Autopilot disengage sensitivity Made V speeds being affected by Flaps Settings Fixed Steering Wheel Switch functionality Added magenta color on CDU POpUp Fixed Master Alarm On the initial power up CDU BRT little knobs are now operative CAS boxing logic fixed Fixed AC Electrical Power logic when both APU and ground power are available. Electrical system priority will prioritize the APU over the ground power Added Commands for Idle and Shutoff Detents Fixed Nose Gear Animation in sharp turns. The angle of the front wheel did not fit the turning radius of the plane causing the look like wheel was sliding over the ground Added Arrow on PFD indication State and Side of the Autopilot being ON Fixed Crackling Reversers Sounds Fixed messages appearing while using Thrust Reversers when engaging and disengaging thrust reversers LEFT/RIGHT REVERSER UNSAFE,UNLOCKED and INOP Adjusted Gear data for aircraft to properly sit on the ground Adjusted coefficients of friction for wheels for better ani-skidding behavior Fixed bug when wind is set to direction from 0, wind arrow number flashes between 0 and 36 Fixed Standby Compass Lighting behavior when without energy it could be set to DIM and ON being lit Fixed R and L WING A/I message on EICAS Fixed APU SOV OPEN status message present after APU start up Fixed L/R REV UNSAFE and L/R REV UNLOCKED EICAS messages appearing when the aircraft is on the ground and thrust reversers deployed Rudder “brick” on the PFD is now functional CABIN PRESS panels MAN ALT Switch initializes in the HOLD position now The v1.1.2 update could be called a refinement update, with lots (no loads) of fixes and tweeks to get the aircraft into a more robust role, the feel is certainly far better that I last remembered, but still a bit wobbly on a pointed stick in handling, but these sort of finer handling details take time... the more later -900 version will be a good comparison on how the combined refinements have come along. You shouldn't expect the same with the later released aircraft, it should be more well rounded on release. But overall the AD Sim CRJ-700 is starting to deliver on it's promise in this well priced under US$50 price bracket, The CRJ will certainly in the future be a staple of the sort of the quality aircraft required today by X-Plane Simulator users. Updates are only available from your account on the X-Plane.OrgStore and NOW available. Just log in to your X-Plane.OrgStore Account and download the new v1.1.2 version. -900 Images are courtesy of AD Simulations Designed by AD Simulation and Deltawing Simulations Support forum for the CRJ-700 _____________________ Yes! the CRJ-700 by AD Simulations/Delta Wing is NOW available from the X-Plane.Org Store here : CRJ-700 Price is US$49.95 Requirements X-Plane 11 Windows, Mac or Linux 4 GB VRAM Minimum - 8 GB+ VRAM Recommended Download Size: 893 MB Current version: 1.1.0 (10th March 2022) ________________________________________ NEWS! UPDATE by Stephen Dutton 19th April 2022 Copyright©2022: X-Plane Reviews Disclaimer. All images and text in this review are the work and property of X-PlaneReviews, no sharing or copy of the content is allowed without consent from the author as per copyright conditions) All Right Reserved
-
Aircraft Review : McDonnell Douglas MD-11 by Rotate
Stephen replied to Stephen's topic in Airliners Reviews
Igniters is really the wrong word to use here for the A & B channels are more of a electrical power supply. They have to be on the whole flight... we checked. -
NEWS! - Aircraft Updated : McDonnell Douglas MD-11 v1.1 by Rotate Rotate have released a v1.1 update to the their MD-11, an aircraft released only a week or so back. There is nothing really new in this update that wasn't presented in the HOTFIX released last week, this just makes the version v1.1 official. The v1.1 update covers Loss of speed during cruise. Power has been adjusted to tables for max weights and altitudes. - LNAV flight path is abandoned. Fixed a problem with waypoint/segment sequencing. (We are still working on some instances of this issue.) - LNAV winding flight path. Roll PID has been tuned for high speeds. (Still working on this issue.) - HDG guidance error when heading change crosses 360. - Brakes and tiller not working as expected with hardware controllers. (We have updated the manual regarding this issue: see chapter 12 in Rotate MD-11. Introduction & Product information.pdf.) - ILS CDI frozen in ND. - ILS courses are shown as true instead of magnetic in NAV RAD page. - Fixed an issue with Artificial Horizon. The update covers the loss of speed at altitude, or the performance limitations, and the continuing saga of the LNAV (which is still being worked on). Brakes and Tiller options have now been added into the "Options" menu page. But you can only have the hardware option (joystick yaw and rudder pedal toe braking) and not use the X-Plane COMMAND braking and tiller settings, or the other way around... Rotate are also still working on this problem as well. There are also still issues with Mac activations in preventing correct activation with: - macOS 10.13 High Sierra - macOS 10.14 Mojave - macOS 10.16 Big Sur (workaround) - macOS 12 Monterey (workaround) The following workaround is now working for most Big Sur users. I have personally done several block to block flights with the MD-11 "HOTFIX" version and the aircraft performed correctly, the only discomfort was the no COMMAND braking on my pinky trigger, but the pedal toebrakes still worked perfectly. I am still trying to get my head around the LNAV issue, because I don't get the problem? just slightly wide tight turns at altitude. I will note that the ILS Freq setting that is causing distress, but is not broken. But there are a few rules to follow to make it work correctly, so I will REPEAT them again here. Only insert the main ILS Freq number with no course number i.e. "108.35" and it should say If set correctly the ILS runway code (ILNW) - (LEIPZEG/HALLE Rwy 26R) for that ILS approach. Notable is that the system AUTOMATICALLY selects the ILS Frequency... so if you are too far away from your arrival airport there is a very good chance the system will select the wrong one? I found you had to be almost in the landing circuit to get the correct ILS Freq to appear in the NAV RAD selection. Notable also in the v1.1 update is that now ILS courses are shown as true instead of magnetic in NAV RAD page, so the selected "Course" degree should now also match your approach charts. Rotate also noted future ongoing work... "-Activation issues in OSX version. We are facing random crashes that are proving hard to fix. -LNAV calibration. -LOC only navaids (downwild ILS) cannot be tuned correctly. -Wrong ILS navaid is tuned in some cases during approach or it is tuned too late. -VNAV descent path We are investigating interactions with Active Sky plugin that may be causing our autopilot to malfunction." Obviously Rotate are looking into all the issues and creating fixes, so expect another update soon. There is no updater system with the MD-11, so to update to the new version v1.1 you have download the full version update from your account on the X-Plane.OrgStore. A full MEGA X-PlaneReviews review on the Rotate MD-11 is here : Aircraft Review : McDonnell Douglas MD-11 by Rotate _____________________ Yes! the McDonnell Douglas MD-11 by Rotate is currently available from the X-Plane.Org Store here : Rotate MD-11 Price is US$83.95 Requirements X-Plane 11 (Fully updated, non beta version) Support for X-Plane 12 when available Windows, Mac or Linux (read about Mac activation) 4 GB VRAM Minimum - 8 GB+ VRAM recommended Current version: 1.01 (April 3rd 2022) ________________ News by Stephen Dutton 4th April 2022 Copyright©2022: X-Plane Reviews Disclaimer. All images and text in this review are the work and property of X-PlaneReviews, no sharing or copy of the content is allowed without consent from the author as per copyright conditions) All Right Reserved.
-
NEWS! - Aircraft Updated : Q4XP v1.16 by FlyJSim FlyJSim have released an update of their Q4XP Dash Q400 to v1.16. Focus of the update is to add in TCAS integration to the Q4FMS plugin, in other words a working TCAS. The other focus in the update is on Improving the LNAV HDG intercept trip logic (reduces chances of overshoot), Transmission of LNAV submodes over avionics bus (LNAV HDG SEL, LNAV HDG INT) and overall Improved LNAV hold tracking (which seems to be common theme lately in X-Plane. Two other changes include a fixed issue with fuel display not displaying on the engine display, and the Fixed takeoff config switch not being spring loaded to off. The rest of the update includes bug fixes. Full v1.16 update changelog is here. NEW: TCAS - Add TCAS integration to Q4FMS plugin. ### SYSTEMS - Fixed issue with fuel display not displaying on the engine display. - Fixed takeoff config switch not being spring loaded to off. - Improve LNAV HDG intercept trip logic (reduces chances of overshoot). - Transmit LNAV submodes over avionics bus (LNAV HDG SEL, LNAV HDG INT). - Improve LNAV hold tracking. - Fix 0052/ARINC section & subsection not sent in crossfill packet. - Fix 0053/cursor not moving to next field on HOLD DEFN page. - Fix 0054/DTO page crashing with out-of-bounds leg indices. - Fix 0056/heading field on NAV HDG page not accepting 360 as valid entry. - Fix 0057/FMS causing crashes in replay by stopping FMS updates. - Fix 0065/Crash when engaging LOC BC autopilot with VOR tuned. - Fix 0068/Procedure turn courses are not normalised and cause assert fails. - Fix extra fuel not added into reserves on FUEL 1/5. - Fix true track procedure legs not parsed correctly. - Fix overfly flag not syncing between flight plan and nav legs. - Fix approach disarming when enabling HDG INCPT mode. - Fix End-Of-Approach gap sequencing without go around switch signal. Updates to Q4XP can be done via the built in Skunkworks updater (can be checked to in being the correct version via the JPAD - Q Home page) or reloading a full new version from the X-Plane.OrgStore. Go to your X-Plane.OrgStore account. A full MEGA review X-PlaneReviews of the release version of the Q4XP is available here: Aircraft Review : Q4XP by FlyJSim _________________________________ Yes! the Q4XP v1.16 by FlyJSim is available from the X-Plane.Org Store here : Q4XP by FlyJSim Price is US$79.95 Requirements X-Plane 11 Support for X-Plane 11 and X-Plane 12 when available Windows, Mac or Linux 4 GB VRAM Minimum - 8 GB+ VRAM Recommended Download Size: 1.5 GB Current version: 1.16 (April 2nd 2022) ________________ News by Stephen Dutton 4th April 2022 Copyright©2022: X-Plane Reviews Disclaimer. All images and text in this review are the work and property of X-PlaneReviews, no sharing or copy of the content is allowed without consent from the author as per copyright conditions) All Right Reserved.
-
NEWS! - Aircraft Released : 208 Cessna Caravan by Thranda Design Back in early February 2022, Thranda Design announced their next aircraft of being the C208 Cessna Caravan. Now the aircraft{s) have been released and just weeks out from Easter. The aircraft comes in two variants with the C208 Caravan 675 and the C208 Grand Caravan, and both planes come with passenger and cargo versions. All the aircraft also come with the Thranda feature of "Dynamic Generation Series". Thranda Design had in a previous life did the developer management of the Carenado 206B Caravan, so Thranda are not new to the design or the dynamics of the 206 Cessna Caravan. The feature list in being typical Thranda is HUGE! Special features: FULLY configurable 3D instrument panel. Over 50 instruments to choose from! (Including Aspen EFD 1000, and support for RealityXP GTN750) Move any instrument to any location on the panel, or even between pilot and copilot's panel! Comes with 4 panel presets, but can easily be expanded by moving instruments around, using a simple and intuitive interface. Save your own presets, and even share them with the community! Instruments can be moved in 3D directly, on a 2D pop-up preview window, or by numerical entry for precise placement. Realistic custom fuel system. GNS430 and 530 can be swapped out, but a restart of the plane is required, as 430s and 530s are mutually exclusive in terms of compatibility in X-Plane Dynamic livery editor (like in the Kodiak, the Beaver, the Wilga, and the Pilatus PC-6) Full PBR control! Create stunning metallic liveries, or matte, sand-blasted look in mere seconds! Additional control over dirt/grime, adjustable in real-time to dial in the exact desired amount of wear and tear. Create "virtual" liveries, based on two basic common design layouts, and assign any colour to any available paint segment. Quickly create preview of livery in real-time, using intuitive controls. Previews now include visualization of metallic materials and dirt overlays. Apply selected livery in real-time, right in the sim, without the need to even touch a 3rd party image editor! Option to change the tail number in real-time, or disable it altogether. (Enter a "space" instead of a callsign number to create a blank tail number.) Easily and quickly create dozens of paint schemes in-sim! Also supports 11 traditionally painted liveries, all visible in a convenient pre-selection preview window. Uses SkunkCrafts Updater. Option to participate in Beta program, via check box in SkunkCrafts Updater. Excellent hi-res PBR realistic materials, featuring true-to-life plate deformation and to-the-rivet precision. Fully modelled Pratt ^ Whitney PT6A-114A turboprop engine. Feature-rich elegant fly-out menu with the following features: Realism settings for engine (simplified vs. realistic modes) Custom ITT logic, to get the startup ITT temperature right. Innovative electric tug, with in-panel controls to move forward/backward at the desired speed, and steer proportionally Control over chocks, individual tie-downs, covers, internal lights, external lights, etc. Option to enable/disable Cargo Pod, with realistically simulated weight, momentum, rotational inertia, and drag characteristics. Individually load weights in different sections of the Cargo Pod via the pop-up menu Option to start up running (all systems ready), or cold-and-dark, for realistic startup procedures. Control landing lights, strobes, beacon, and nav lights via pop-up window Detailed weight and balance manager with visual chart, individual passenger seat weight control, Lbs/KG unit toggle, CG control, external tank control, and the option to save and load configuration. Control individual seat positions, or hide them altogether, to create a hybrid passenger/cargo version. Multiple camera snap points, above and beyond what's available by default in X-Plane, so you can perform your walk around checks. Adjust your camera's Field of View without having to go to an X-plane menu, allowing for real-time adjustments. Audio mixer: individually control audio channels in real-time, so you can adjust volumes while hearing them play. Slew control: move your plane around the world, temporarily bypassing flight physics. Includes ground mode and air mode. Dynamic panel control page, with a separate view for the entire panel layout preview, or a per-instrument view, allowing for fine-tuning of instrument position, as well as copy-paste function to quickly replace instruments. Flight dynamics and systems: Detailed and accurate flight dynamics and weight and balance with the help of multiple real-world active Caravan pilots. This not only gives this aircraft the proper "feel", but also accurate takeoff, climb, cruise, and landing performance. The Caravan is a well-behaved airplane and a very stable IFR platform. Easy to fly, but extremely capable! The Caravan is equally comfortable at the world's busiest airports as well as back country dirt strips. Detailed fuel system, including the small reservoir tank and the fuel selector warning alarms. Extensively simulated electrical system, including the battery, avionics busses, generator, starter, external power, and standby alternator system. Tie-downs and chocks actually keep the plane from moving, even in high winds. Advanced FMOD-based sound system: High fidelity, multi-track sounds with smooth transitions and amazing atmospheric effects. Individual volume control over different aspects of the sound experience, adjustable in real-time (while listening to the sounds) Different sounds for front of plane than for back of plane Panning around the plane in exterior view yields awesome 3D audio effects, including "blade slapping" sound when view is perpendicular to prop Individual buttons and switches in the cockpit each have their own unique sound. Sounds actually give you clues as to what's happening under the hood Outside wind intensity is affected by slip and AoA. (The more the surface area of the fuselage is hit by oncoming wind, the louder the sounds Passenger and Cargo options CargoMaster Dynamic Generation Series Developer Dan Klaue notes... "all the Thranda Dynamic Generation Series goodies... dynamic liveries, dynamic panels, dynamic dirt controls, DynaFeel flight dynamics enhancement, dynamically configurable for cargo, passenger, and executive version, and a whole lot more things that can be altered and configured without the need to restart the plane." Images are courtesy of Thranda Design Support forum for the C208 Grand caravan by Thranda ________________________________________ The Cessna 208 Grand Caravan DGS series by Thranda Design is now available from the X-Plane.OrgStore!... Here: Cessna 208 Grand Caravan DGS series Price is US$44.95 Requirements X-Plane 11 Support for X-Plane 12 when available Windows, Mac or Linux 4 GB VRAM Minimum. 8 GB+ VRAM Recommended Download Size: 5 GB (yes, very large file) Current version 1.0 (April 2nd 2022) ________________ News by Stephen Dutton 2nd April 2022 Copyright©2022: X-Plane Reviews Disclaimer. All images and text in this review are the work and property of X-PlaneReviews, no sharing or copy of the content is allowed without consent from the author as per copyright conditions) All Right Reserved.
-
Behind the Screen : March 2022 Back in my Behind the Screen January 2022 edition, I talked about upgrading my main X-Plane workhorse computer ready for X-Plane12. Now I am on the other side of the upgrade and the process has been very interesting. Everyone at sometime or the other are faced with this nasty dilemma, unless you are still flying X-Plane9 on a Windows 7 OS (and you would be surprised how many out there still are) the problem is you are going to be looking secretly at your bank balance account. Mostly the upgrade situation is created at a new X-Plane version release or realistically about every four years, however most of my changes have been forced upon me, for the late X-plane 10 and forthcoming X-Plane 11, I literally melted my Mac's graphic card (yes X-Plane can melt or burn out graphic cards). But I needed to also move up to a Windows based system anyway, because I could then access more (mostly plugins) applications that are created only for WIN based machines and that aspect was required for reviews. In being a decades old Apple acolyte. It was a significant moment to move to the opposition's or over to the medieval Microsoft system... I loathe WIN 7, still do compared to the elegant Mac OS. But since the messiah of Steve Job's moved on and died. I feel that Apple, although still makes great products, has moved away from the Job's "insanely great" products to Mr Cook's inventory leading leadership in replicating more of the same and adding on even more money in asking for the same glossed up products. In saying that I think the new line of M series processors are very good, but paying Aus$3,000 just to get one in a computer is criminal. Windows does give you one major advantage, separate or separated components. Buy a Mac and it is a locked box, even upgrading the memory is a major exercise, and even mostly all the memory is soldered directly on to the motherboard, a new graphic card... forget about that. So Windows does give you immense flexibility in upgrading components, and that saves you money. With a Mac, upgrading means usually a completely new computer, meaning expensive (now far more expensive). I have even come to love the Windows interface, in many areas it is now even better than the Mac OS, far better since Microsoft got rid of Steve Ballmer, and became a far more progressive company. It was a big deal for me not only to move to the Win OS, but also buy a Windows Surface laptop (No touch screen on any Apple laptops is another deal breaker). As noted in BtheS in January. The flexibility of components in a Windows box means I started my "Tick, Tock" system. Buying both major components in both a chip/motherboard, then also a graphic card is seriously expensive. You just can't afford both at the same time. I did my Graphic Card (Tick) update about three years ago to a Asus 8Gb VRAM board, to be honest it still runs very well, so it is not really ready for a overhaul (maybe next year when the prices are even closer to back in being some sort of realistic)... but my chip and board (Tock) was now getting seriously outdated and it showed via my mid-20s framerates. In reality I had put myself into a corner with the chip a Intel i7-6700K CPU, good in it's time, but coupled to a very budget Gigabyte motherboard, you felt the slowness and it's lack of features and slow buses. I also came to really hate that board (Gigabyte Z170-HD3). The Gigabyte board was another issue in that to upgrade to a new processor, you also have to replace the motherboard. So with not only with the daily dynamic realism of fighting low framerates, Microsoft also deemed my chip now too old for Windows 11, then add in then the coming requirements of X-Plane12, in that coming change a lot of the processing is moved from the graphic card over to main processor. I was faced with the inevitable, a major surgery of my computer if I wanted to gain the best from the coming (exciting) X-Plane12. The process was interesting and hopefully very helpful to other users facing the same situation. My system is totally X-Plane focused, I don't do anything else on the computer (not even games) on the Windows (site image and editing work is still all done on a 12 year old Mac). There is an immense (insane) amount of choice for users in upgrading their main components, but basically it all comes down to easy choices. I think actually the pandemic actually did me a favour, by making me wait longer to do this upgrade, and in that aspect I found myself at the front of a release of a step generation of new powerful processors (Intel 12th Gen). I did consider at first a AMD processor, but I found too many performance issues and stutters. I am sure AMD devotees will put me right on that matter, but I just was not comfortable with changing to AMD, but the 12th Gen Intel chips are a serious step up in power anyway. As you know I earlier went mad and only wanted only a top of the line Intel 12900KF, but installing this nuclear power station created a lot of problems and at a far higher cost (availability is also problem here as well). I do really thank a lot of users for their advice in comments, and yes I actually in the end used their advice, but overall the item that changed my mind was the video by Michael Brown on XForcePC, if you watch this video it will explain the differences between all the 12th Gen processors, and why the i7 is the pick of the bunch price wise to performance for X-Plane users. The Intel 12900KF is nearly a grand in X-Plane money (all prices here are in Aussie $), but the blowout was the things required to go with the chip to actually run it. I settled for a Intel S1700 Core i7 12700K 12 Core 3.60 GHz CPU (That can be overclocked to 5.0 GHz), it is the top processor of the i7 12th Gen range, it saved me $300 over the i9 12900K. The motherboard I selected was a ASUS S1700 ATX PRIME Z690-P WiFi DDR4. Debatable is the fact I didn't move up to DDR5 memory, but cost would have blown me out to an extra $500 for the DDR5 memory which not only currently expensive but also hard to get here. As a chip and board combination I think it is about perfect on features and price. I spent a bit more on the board for the features it provided, as the spectre of the budget Gigabyte board still looms badly over why I did that choice. In selecting any 12th Generation Intel chip, you hit what became the biggest debate of them all... cooling. Picking the chip/board was the really easy part, the hard part was picking a good cooler. I spent countless videos and going through tons of spec details for weeks in trying to choose anything to fix the cooling issue, it can get seriously expensive as well, even more than a motherboard. But the trick is to find the right cooler for your processor, in the end it came down to two, a Noctua or a Be Quiet! The Noctuas are expensive, but oddly it also looked horribly old fashioned (brown?) as well, but the cost as which was astronomical was the real deal breaker here, even if it was the best. My choice was the Be Quiet! Dark Rock Pro 4, still not cheap, but very good for the 12th Gen chips. That cooler choice then created another problem, it is such a huge massive cooler, a real monster of a thing? that when if installed in my case it would stick out right of the door with the glass panel also needed to be off to fit it inside. So I would need a new case or another extra expense above my carefully considered budget to accommodate just that XXXL cooler. My choice again was another Be Quite!, a Pure Base 500DX case, WIDE but it also came with modern ports including USB-C inputs, and some nice RGB fancy lighting effects, the only thing it was short of was USB ports? X-Plane uses a LOT of USB ports, three for the Saitek joystick, throttle and rudder pedal combo, then your keyboard, mouse and external storage? with only five USBs on the Pure Base case were simply not going to cut it, so I installed a Orico 7 Port USB 3.0 PCIe card as you can do that with a Windows box, and that fixed another issue, I also upgraded my power supply from a 750w to a 1000w pack, not really needed but a nice to have (it is second hand). The rebuild took a day, but a second day was required to reinstall and rebuild my Samsung 970 EVO Plus SSD 2TB - M.2 NVMe storage with X-Plane and all the other software required, including now a OS upgrade to Windows 11. And that completes my Windows system rebuild. My original self created quote for the upgraded system was around Aus$1,700 or US$1,300 ($1,271) with the (Tock) rebuild and choosing the i7 and not the i9 it came in at Aus$1,350 or nearly US$1000, even including the case and USB port extras, it was all up not bad for a load of extra performance, and a nice fancy case. So what did I get for my money. I was always jealous of users having 70fr to 100fr X-Plane power, but realistically I never expected that sort of headroom, 50fr, with hopefully 60fr was to me a good upgrade result. Realistically I gained 20fr, what was 25fr is now 45fr, 30fr is now 50fr. But that is not the whole story power wise. xEnviro is simply a major excessive power sapping application, the more power you seem to give it, the more it takes, and I have a lot of the settings set currently to be very economical, but still it is guzzling up 20fr... yes "twenty bloody frames" and also gives me slight stutters. In light weather it is not too bad, but in cloudy conditions it just sucks down the frame rate like no tomorrow, it is not a very efficient application? Switch it off and I have 60fr-70fr, but then looking at a very bland panorama. But if you want to, you can currently average it out at 45fr, X-Plane is still very snappy and with headroom to easily absorb even the heaviest aircraft (Felis B747-200) and heavy scenery (Barcelona). But other benefits are also very welcome, 60% faster X-Plane loading times are a really big boon to me in that I do a lot of restarts per review, and the computer in dealing with mundane tasks is extremely quick and far easier to use. Far quicker also are buses than with the Gigabyte board means that now big files can be moved around far, far more quicker (rebuilding X-Plane with 1Tb of data to move only took a hour, not hours). The processor and board upgrade was done with X-Plane12 in mind, and the main reason to upgrade at all. If X-Plane12 will take say an extra 10fr (by my estimation), then using it's default environmental benefits, I can then remove xEnviro, I should see a balance of 55fr to 60fr, with that I would be extremely happy to have done the upgrade. Certainly a (Tick) upgrade of the Graphic Card would give me more framerate and power, but that was not a consideration of this upgrade. When after running several flights, and pushing the new system we found it was not even breaking into a sweat. CPU numbers were around only 40ºC, motherboard temps around 31ºC while still running a flight at full throttle. I'm not usually a big fan of overclocking, but in this case it may be actually warranted to make the chip work a bit harder, so we are going to do a slight overclock and hopefully gain around another 10% performance. limits are 5.4 MHz for some P-cores and 5.1 MHz for all active P-cores. I am certainly not ever going to do that, but I think I want it to get itself off it's 2.6 MHz backside and do some more work. Those numbers also vindicated our cooling choice, the system has five fans (three in the cabinet and two on the Dark Rock Pro), but the system does not get even close to hot (or even warm) at all, not even feel any heat if you put your hand over the rear fans. Overall it was in this aspect a sensational upgrade. Simulation is one of the absolute most ferocious users of processor power, it demands far more than most games on the market. To make gains within a budget is very hard, but still a necessity to keep up with the constant changing demands of even more realism and complex aircraft. This was my upgrade story, I hope it helps in your decisions and choices in getting the best out of not only the current X-Plane version (11) but to be also ready for the next step in X-Plane12. See you all next month. Stephen Dutton 1st April 2022 Copyright©2022 X-Plane Reviews
-
Yes certainly go with the A340, it is the best Airbus simulation in performance and Airbus protocols, it is absolutely perfect for long haul services (probably the best at the moment), I really wish it had been the A330, but there you go... if ToLiSS did do a A350xwb that would be sensational, anything is possible, but the OIS (Onboard Information System) is extremely hard to do developer wise.
-
NEWS! - REP for Carenado PA31 Navajo by Simcoders Simcoders have released their next REP package for the Carenado PA31 Navajo. The idea of these Reality Expansion Pack REP packs are to bring a bit more of the everyday running of a GA light aircraft to life, and to also add in more functionality and extra features not found in the original package. Basically if you have used one REP pack then they are all the same with just the aircraft they are attached to in being different. The feature list included in the Navajo REP package is quite long and detailed... Features Code driven flight dynamics - Super smooth to fly, requires your attention all the time - Realistic takeoff, landing, cruise, and overall performance - Realistic roll speed at both high and low speeds - Realistic slow speed behavior Interactive Walkaround - Cockpit checks - Lights checks - Aileron, rudder, elevator, and flaps check - Tire check and choks removal - Tie-down removal - Pitot tube check - Engine cowl check Realistic onboard systems and procedures - Custom Kneeboard (in-sim) and PDF Normal and Emergency Checklists included - Custom Oxygen (O2) system - Custom vacuum system - Custom steering system Mass & Balance Tool - Load the airplane and check the C.G. and weight limits at takeoff and landing - The airplane behavior changes when the C.G. moves Complex Damages System - Triggered by the pilot actions - Based on real-world data - Target every system in the aircraft - Meant to teach how to correctly manage an airplane Simulation state saving - Every single switch and lever position is restored when you reload the aircraft - The battery may discharge if you leave it on and then close X-Plane - When X-Plane is launched, the engine and oil temperature are restored based on the time passed Economic System - Can be enabled/disabled on the fly - Earn virtual money when you fly - Use virtual money to buy fuel and do maintenance/repairs - Realistic fuel prices around the World - Fully compatible with FSEconomy - More info at https://www.simcoders.com/reality-expansion-pack/economy 100% Custom Piston Engine - The Lycoming TIO-540-A2C is modeled down to the smallest bolt and breathes air like a real engine - Realistic turbocharger behavior - Custom fuel pumps and fuel filter - Custom vacuum pumps - Realistic Oil System affected by Oil Viscosity. Choose the best oil grade for your kind of operation. - Spark plugs fouling. Change the spark plugs type in the maintenance report. - Working engine preheater - A custom algorithm simulates the fuel/air mixture and its combustion - Custom injection system simulation - It is possible to switch the default fuel injectors with balanced ones (provide better performance) - High fidelity power curve - Custom system failures - Realistic startup behavior and procedures - Automatic startup option for a quick start - Differencies in throttle, propeller, and mixture levers setting from left and right engine to achieve the same power make the simulation more realistic (engine differencies can be disabled in settings) Engine Preheater and Winterisation Kit - The engine may be warmed up upon start with the provided electrical heater - Once activated, the electrical heater runs even when you close the simulator Interactive towing - Push, pull and steer using the joystick - Towbar simulation Electrical & Avionics System - Realistic Battery behavior - The battery can be disconnected if the airplane is not used for some time - The avionics are damaged if on when the engine starts/shuts down Realistic Landing Gear - The landing gear is damaged by hard landings - The brakes and tires are damaged if not managed correctly Custom simulation of Hypoxia - Tunnel vision - Hard breathing Learn with the in-flight tips - A noninvasive tip with a suggestion about the conduct of the flight is shown when you are not flying the airplane properly - A noninvasive tip with a suggestion on how to recover the problem is shown when you damage the airplane Native Virtual Reality Support - Complete support of new X-Plane SDK 3.0 - Menu visible in VR - Windows visible in VR Developed with love - Coded by real pilots Automatic Updates - The airplane is constantly improved - Issues are quickly fixed Very easy on FPS - Written in C++ with no compromises Developed by Simcoders support forums for the REP PA31 Navajo Important: the Carenado PA31 NAVAJO HD SERIES XP11 is required for this add-on. It will not work on other aircraft Images are courtesy of Simcoders ________________________________________ The Reality Expansion Pack for Carenado PA31 Navajo by Simcoders is now available from the X-Plane.OrgStore!... Here: Reality Expansion Pack for Carenado PA31 Navajo Price is US$19.99 Requirements X-Plane 11 Important: the Carenado PA31 NAVAJO HD SERIES XP11 is required for this add-on. It will not work on other aircraft Current version: 4.6.1 (March 28th 2022) ________________ News by Stephen Dutton 29th March 2022 Copyright©2022: X-Plane Reviews Disclaimer. All images and text in this review are the work and property of X-PlaneReviews, no sharing or copy of the content is allowed without consent from the author as per copyright conditions) All Right Reserved.
-
NEWS! - Scenery Released - YSSY Sydney International Airport by TaiModels Here at X-PlaneReviews we don't promote anything that we haven't seen with our own eyes or tested, that way the users know what they are getting is value for money, so yes a lot of product does not get posted on this site. We feel of course for any developer wanting to get their product out there, but the level of quality to sell that product has to meet a certain quality criteria, or it will fail anyway... which brings us to TaiModels Obviously we applaud any developer creating simulation product, but most early releases of TaiModels scenery was quite awful, even amateurish, a lot of it was basic flat foundation and modeling on top, nightlighting was simply awful (colourful). A lot of users did buy this TAIModel scenery but mostly only as fillers, but overall to use good scenery you have to have a certain realistic representation of the airport and it's surrounding area. Which brings us to YSSY -Sydney International... when I saw it was by TAIModels I rolled my eyes, but seriously it is very good, certainly the best YSSY-Sydney I have seen, and well worth the money. Australia is currently very under-represented by decent quality scenery, with the only decent Aussie scenery currently being YPPH-Perth by Axonos, but now we do have a decent YSSY to add into the Oceanic collection. There are several features worth mentioning, it comes with 3d mesh or a flat base version (the 3D mesh adds in taxiway bridges) and the SAM Animation plugin, external autogen and vehicle animations are both provided, but no Port Botany. HDR and occlusion effects are also well done here, if a little to heavy in some areas. But overall this is a very good representation of Mascot and a huge step up in quality and detail from TAIModels. Features - 4k textures - Completed inside - High detail models - SAM animated jetways - High quality PBR textures on object and ground - High performance - Completed autogen around airport - Ground traffic plugins Domestic Terminals International Terminals Lighting SAM 3 Plugin is required for this scenery _______________________________ The YSSY - Sydney International Airport by TaiModels is NOW available! from the X-Plane.Org Store YSSY - Sydney International Airport Priced at US$28.00 Requirements X-Plane 11 Windows, Mac or Linux 4 GB VRAM Minimum - 8 GB+ VRAM Recommended Download Size: 1.5 GB Current version: 1.0 (March 27th 2022) ___________________________ News by Stephen Dutton 28th March 2022 Copyright©2022: X-Plane Reviews (Disclaimer. All images and text in this review are the work and property of X-PlaneReviews, no sharing or copy of the content is allowed without consent from the author as per copyright conditions) All Rights Reserved
-
NEWS! - Plugin Updated : WebFMC Pro v1.9.0 by Green Arc Studios Green Arc Studios have done a single digit update to their popular WebFMC Pro plugin. The update v1.9.0 is released basically only to cover the newly released Rotate MD-11 aircraft. Rotate MD-11 TripleCDU NEW! Notable is that all/dua/triple FMCs can be accessed from the WebFMC Pro plugin in the Rotate aircraft. The WebFMC is a plugin that allows you to use a FMC (Flight Management Computer) on an external screen via a web browser. That is an another computer or tablet. So it is a remote tool, but a very beneficial tool and even a powerful one in programming in route and performance data and following the set aircraft route in flight and in mirroring the aircraft's built in FMS (Flight Management System). Added into the functionality is a load of features in the use of the FMC on another screen. WebFMC Pro v1.9.0 Rotate MD-11 TripleCDU NEW! added option to scale without keeping aspect ratio improved going into screen only mode The full current complete list of supported aircraft / FMCs with WebFMC version 1.9.0 Default X-Plane # - FMC requires X-Plane 11.35+ A319 # by ToLiss A320 Ultimate # by FlightFactor A320 by Jar Design requires JD320 v3.4r1+ A321 # by ToLiss A330 by Jar Design requires JD330 v3.1r2+ A340 by Jar Design A340 # by ToLiss A350 XWB Advanced by FlightFactor - old style CDU only B737-300 # by IXEG B737-800 # Zibo Mod* 737NG # LevelUp B737-900U Ultimate #* B737-700U Ultimate #* EADT x737 with x737UFMC all variants; requires x737UFMC EADT x737 # - with Default FMC all variants B747-8 by SSG (VMAX) all variants; old v1.9.2+ and new v2.1+ B757v2 # by FlightFactor - all variants; requires 757 v2.2.13+ B767 # by FlightFactor - all variants; requires 767 v1.2.6+ B777 by FlightFactor - all variants CL650 # by HotStart CRJ-200 by JRollon Embraer E170 by SSG - requires v1.4+ Embraer E195 by SSG - requires v1.4+ ERJ Family # by X-Crafts MD-80 by Rotate requires MD-80 v1.42+ Q400 (Q4XP) # by FlyJSim - Requires v1.09 There are two versions available and the PRO version is now listed with an impressive 28 aircraft + Default X-Plane FMC, but three in the list of the Zibo Mod 737-800* and the 737-900ER/700* Ultimate are also available in the Free Demo version. Noted # aircraft are dual CDUs : # aircraft are Triple CDUs ____________________________________ Yes! WebFMC Pro v1.9.0 by Green Arc Studios is NOW AVAILABLE from the X-Plane.Org Store here : WebFMC Pro Price is US$19.99 The v1.9.0 update is free to previous purchasers of the plugin, go to your X-Plane.OrgStore account for the new version. Access CDU / FMC of select X-Plane 11 airplanes via any modern web browser running on your PC or mobile device over local network. Quick and easy access to the FMC Get easy access to the FMC: quickly edit the flightplan, monitor flight progress, set up your approach and do all the typical work of the pilot without having to move around in the cockpit, even if the plane doesn’t support FMC as a popup natively - on the same PC, or different monitor, tablet or phone - in fact you can use multiple displays at the same time! Make pilot tasks easy and comfortable Enjoy external views during cruise while monitoring flight progress on separate screen or take a quick look at your phone to verify calculated landing speed with just a glimpse of an eye during busy time on approach. Make flying complex SIDs / STARs easy as you can focus on the important flight parameters while having overview of the constraints all the time. Take your mobile to the kitchen as you cook a dinner during a long haul and never miss T/D again! Convenient to use Use physical keyboards on PC with extra keys such as Prev/Next page mapped to keyboard keys for easy access. WebFMC scales dynamically to fit any display or window size and can look as native app on mobiles by using browser's "Add to home screen" feature. The WebFMC plugin requires X-Plane 11 running 64-bit Windows 7 operating system or newer Mac OS 10.14.x (Mojave) Ubuntu Linux 16.04 LTS or 18.04 LTS (64-bit) Web Client The CDU can be displayed on any modern and up-to-date web browser with JavaScript support. We recommend the latest versions of Google Chrome on PC or Android and Safari on iOS. No internet connection required, remote device needs to be on the same local network as X-Plane PC. Support for WebSockets RFC 6455 standard is required which implies at least iOS version 6. _________________________________ NEWS! by Stephen Dutton 25th March 2022 Copyright©2022 : X-Plane Reviews (Disclaimer. All images and text in this review are the work and property of X-PlaneReviews, no sharing or copy of the content is allowed without consent from the author as per copyright conditions)
-
NEWS! - Announcement : MD-11 by Rotate released! The McDonnell Douglas MD-11 by Rotate has been released on 24th March 2022... price will be US$83.95. After four years in development, this mega airliner is now unleashed onto the X-Plane Simulation world. The aircraft is now available on the X-Plane.OrgStore! The X-Plane.OrgStore has released a pre-release video here, and very good it is... A MEGA review from X-PlaneReviews is also available here to get all the down and dirty details of this incredible aircraft... Aircraft Review : McDonnell Douglas MD-11 by Rotate _________________________ Yes! the McDonnell Douglas MD-11 by Rotate is now available from the X-Plane.Org Store here : Rotate MD-11 Price is US$83.95 News by Stephen Dutton 25th March 2022 Copyright©2022: X-Plane Reviews Disclaimer. All images and text in this review are the work and property of X-PlaneReviews, no sharing or copy of the content is allowed without consent from the author as per copyright conditions) All Right Reserved.
-
Aircraft Review : McDonnell Douglas MD-11 by Rotate Although created as passenger variant, the MD-11's biggest claim to fame or it's success is via it's continuing Cargo functionality. The McDonnell Douglas MD-11 came into being with a huge legacy haunting over the aircraft. The MD-11 is of course a derivative of the McDonnell Douglas DC-10. The culture within McDonnell Douglas towards the end of the reign of James Smith "Mac" McDonnell, moved away from their famous engineering prowess to being lead by sales and profit. This resulted in the cost savings on the design of the McDonnell Douglas DC-10 Series. As of September 2015, the DC-10 had been involved in 55 accidents and incidents, including 32 hull-loss accidents, with 1,261 occupant fatalities, The most ill-famed was the Turkish Airlines Fl 981 McDonnell Douglas DC-10 who operating the flight crashed into the Ermenonville Forest, outside Paris, killing all 346 people on board. The crash was also known as the Ermenonville air disaster. Flight 981 was the deadliest plane crash in aviation history until 27 March 1977 (Tenerife). The cause in the failure of the crash occurred when an incorrectly secured cargo door at the rear of the plane burst open and broke off, causing an explosive decompression that severed the critical cables necessary to control the aircraft. To maximize the working space within the cargo hold, the cargo doors opened outwards, making them vulnerable to being forced open at high altitudes under normal in-flight pressure. To prevent this, a special latching system was used that locked shut the doors under pressure when properly closed. To ensure the latches were properly positioned, a handle rotated on the outside of the door pressed small metal pins into the latches; if the latches were in an improper location the pins would not align and the handle would not close. In truth the problem haunted the aircraft for the rest of it's service life. Oddly the same culture at McDonnell Douglas then caused it to be merged with Boeing under the stewardship of Harry Stonecipher. And again the same noxious McDonnell Douglas culture of putting sales, profits and shareholders before engineering proffered deep into Boeing as well. And those aspects resulted lately with the costly issues of the 787 Dreamliner, the late development of the new 777X and the disaster of the Boeing 737 MAX program. In the middle of all this, was the McDonnell Douglas MD-11, and yet somehow the aircraft thrived and returned good service, to be basically to be seen now as the classic three engined aircraft of the period. If even spacing between the eras of the four-engined (B707/B747/A340) to the big-twins (B777, A350, B787). McDonnell Douglas had started to search for a DC-10 derivative as early as 1976. Two versions were considered then; a DC-10-10 with a fuselage stretch of 40 feet (12 m) and a DC-10-30 stretched by 30 feet (9.1 m). The latter version would have been capable of transporting up to 340 passengers in a multi-class configuration, or 277 passengers and their luggage over 5,300 nautical miles (9,800 km). At the same time, the manufacturer was seeking to reduce wing and engine drag on the trijet. Another version of the aircraft was also envisaged, the "DC-10 global", aimed to counter the risks of loss of orders for the DC-10-30 that the Boeing 747SP and its range were causing. The DC-10 global would have incorporated more fuel tanks. McDonnell Douglas was still convinced that a new derivative for the DC-10 was needed, as shown by the second-hand market for their Series 30 and the heavier DC-10-30ER version. Thus, in 1984 a new derivative aircraft version of the DC-10 was designated MD-11. From the very beginning, the MD-11X was conceived in two different versions. The MD-11X-10, based on a DC-10-30 airframe, offered a range of 6,500 nautical miles (12,000 km) with passengers. That first version would have had a maximum takeoff weight (MTOW) of 580,000 pounds (260,000 kg) and would have used CF6-80C2 or PW4000 engines. The MD-11X-20 was to have a longer fuselage, accommodating up to 331 passengers in a mixed-class layout, and a range of 6,000 nautical miles (11,000 km). On December 30, 1986, McDonnell Douglas launched the MD-11 with commitments for 52 firm orders and 40 options in three different versions (passenger, combi and freighter) from ten airlines (Alitalia, British Caledonian, Dragonair, Federal Express, Finnair, Korean Air, Scandinavian Airlines, Swissair, Thai Airways International, and VARIG) and two leasing companies (Guinness Peat Aviation and Mitsui). Orders from Dragonair, Scandinavian and UTA, and an undisclosed customer were canceled by 1988. The MD-11 however failed to meet its range and fuel burn targets. The last of the 200 aircraft was built in October 2000 after Boeing merged with MDC in 1997. Some early MD-11F freighters were built, but most of the MD-11's still flying are now mostly all converted early MD-11 passenger aircraft. The aircraft in this guise is a very attractive proposition to cargo operators, When compared to a 777F, the MD-11 can only be able to carry 81% of the same load capacity (534 vs. 653 cubic meters). However, the latter would also end up being far cheaper aircraft to purchase (even with the conversion costs) and more readily available when compared to the newer 777F. Currently Federal Express still fly 57 MD-11s, including "Jim Riedmeyer" the first MD-11 Built (48401 LN:447, First Flight 01/03/1990). Rotate MD-11 We are all very familiar with the McDonnell Douglas MD-80 from Rotate. Released on 9th Dec 2015, the MD-80 had a troubled introduction into the X-Plane Simulator. Top of the list was that Rotate as a developer back then was very green, add in also they being extremely ambitious in delivering such a complex airliner at the very first go. What did impress though was the speed and the sheer number of updates that followed in the next year (2016) to sort out the complex details and bugs. This is the sign of a good developer, with the excellent backup service and righting of the wrongs quickly.... By version v1.1 X-PlaneReviews picked up the aircraft in a state worth reviewing; Aircraft Update : McDonnell Douglas MD-88 v1.1 by Rotate (XPR did do a release preview also worth looking at). Over the years the MD-80 updates still came in thick and fast, and the aircraft is certainly in a very stable if now a slightly dated machine state. I put the Rotate MD-80 as one of my top ten aircraft, even as high as the fourth best. Yes it still has a few oddities in it's behavior, but as a simulation it is one of the most rewarding best. So how do you follow up that aircraft. Well with the McDonnell Douglas MD-11, or the bigger brother of the MD-90 Series. The aircraft has also been in development for four long years, and in context that is a very long development cycle... putting two and two together and your expectations are going to go through the roof... you are expecting a lot, and even far more than the MD-80 this time around. The result however is what I call interesting. Clarification: This review of the Rotate MD-11 was created under the Rotate Beta program, and not under a RC (Release Candidate), or release version of the aircraft, so there could be changes or even slight difference between this provided version and the final official aircraft, on current check of the latest beta version, I found there was no significant differences in the features or details provided here. The release version is the Cargo variant, which considering the very few MD-11 passenger versions flying around, it is the aircraft you would really desire anyway. There are no current notes from Rotate on if the passenger version will be developed, but on the original announcement Rotate said "It is planed (sic) to be distributed in both cargo and passengers flavors, and Rotate confirmed the passenger variant is still under consideration". When the Rotate MD-80 was released those fair few years ago. The aircraft had a very distinctive style. I called it "Ultra Realism", but a lot of users didn't like it, calling it overdone... but I simply adored it, and I still do. So would the MD-11 follow the same "Ultra Realism" route? Well it does, and again I totally and absolutely love it. Is the MD-11 an attractive aircraft? "Beauty is in the eye of the beholder". My angle is that "Form follows Function", and the MD-11 (DC-10) was created inside out, as the internals dictated what the external look and feel is all about, including mounting that centre middle engine way high above the tail, and the weight distribution that went with that configuration. One thing is very clear though, is that the MD-11 has a very unique presence, a different style and it is a very big aircraft. So the aircraft does create a very big footprint in the simulator, and that aspect then does also create the fear of the MD-11 being a framerate killer. I never seen or even feel that aspect at all here, as the Felis Boeing 742 released last year, as it was in being the same large footprint aircraft that certainly did push those boundaries very hard, if over them, but I certainly don't get the same feeling here at all, but then I'm not greedy with my graphic settings either, and I am also flying on an average system... my feeling is, if I can fly it well with no framerate intrusions then so should you. If you can't then it may be time to upgrade your computer specifications. Rotate aircraft promote the "wear and tear" or hard worked "in it's life" style of design. And not only is the whole intricate detail available here, but it is tired and worn as it should be... so that "Ultra Realism" is very apparent here. The MD-80 is like mentioned is a few years old now, and this sort of approach could be actually now deemed as old fashioned, but it is totally not... as it is perfect. A "walkaround" here turns into a journey of detail, a feast for the eyes, and you will never tire of looking at this aircraft. As there is always something new to discover and absorb. If you are a detail and texture junkie, then this MD-11 will put you in hospital with an obsessive overload. Every access plate, rib, panel are all here to explore, it is all incredible stuff, and in an age of simulation of incredible stuff to feast on. Engines mounted are three General Electric CF6-80C2D1F high-bypass turbofan engines, the same that is on the Boeing 747, rated at 52,200–61,960 lbf. The engine pod design is excellent as is the chrome inlet surround, inner fan and spinner. But the real "gobsmacking" detail is the outlet, note that amazing cooper cone, all the wear feel is realism 101, or even 150%, it is all just so good. The iconic DC10/MD11 tail arrangement is also excellent. Detail is incredible, again the outlet cone steals the show... It is quite scary on how far back the GE CF6 is mounted in the tail section. There is a very long inlet to the fan section, and the rear cone and bottom section are also hinged down to remove the engine from the aircraft. If there was not enough weight back here, then why not add in another jet engine, a small one mind you in the APU unit, lower tail. Note the huge APU exhaust outlet, again extremely well done. In reality there isn't much glass in the MD-11. The front cockpit windows are clear. I would have expected a green tint? maybe later in the options? Otherwise the window frames are excellent, with tons of detail and realism. This is a converted passenger aircraft to a freighter. So some great detail from Rotate are the window plugs along the fuselage, and they look really good and realistic in the shaping of the panels. two windows (per side) are left in for wing visual inspection, again highly realistic in detail. Like the DC-10, the MD-11 has a three bogie rear and a nosewheel unit for the landing gear arrangement. A lot of developers model and detail the gear assemblies very well, but they leave them clean, nice but not what you call realistic... here Rotate has done the "dirty" so to speak with not only the full assembly construction, links, hubs and supports and what have you, but covered them all in grime and brake dust... perfection, yes it all is. All the hydraulic lines are there as is also the nice tyre construction with great tyre highlighted detail. Middle support twin bogie is again brilliantly detailed, but the central hull placement means most of the internal section is hidden, very well done though again in quality and grubby detail. Nosegear is also highly detailed and authentic in detail. Here you can see right up into the gear bay, and the great detail is also noted internally... All linkages and assemblies are all highly modeled and detailed, The taxi and landing lights are positioned up very high on the struts on the MD-11. All the gear animations are first rate (and magnificent to watch) and note the forward gear doors that are connected directly to the nosegear struts. So all the external aspects are excellent, and certainly meets the high demands of the high quality we expect from Simulation today, in this aspect you certainly won't be disappointed. MENU The MD-80 didn't have detailed menus, well sort of. There was the Manual you opened that had a two page Fuel & Load and Ground Operations set of options, and the doors could be opened via the banner menu as well. With the MD-11 there is a dropdown X-Plane Banner Menu (Plugins) with two selections; AIRCRAFT MENU and ABOUT. AIRCRAFT MENU; has four tabs... Options, Load Manager, Ground Operations and Failures. ABOUT; Is the aircraft Version Number and Rotate Credits. OPTIONS; This is the aircraft Options page with Seven option choices; - Show Ambient temperatures In Celsius - Show Weight data in Kilograms (Or Lbs) - Show Fluid quantity in Litres (or Gallons) - Reduce IRU align time to 30 seconds (align now) - Default to HPa Barometer setting - Synchronise barometer setting Co-Pilot side - Use 8.33KHz spacing in VHF Radios Lower is the choice to; "Perform Maintenance tasks to all systems", and to note to "Save Options" choices bottom. Situations; Right side has five start "Situations"; - Cold & Dark - Parked with external power - Ready to start engines - Ready to taxi - Ready for departure All selections are very good, but there is no "Turnaround" option which is interesting. LOAD MANAGER; This is your aircraft set up page for Payload and CG (Centre of Gravity/%MAC) and Fuel Quantities, Weight & Balance and Total Weights. Top is the Total Payload and Payload CG settings in KG (Lbs) and %MAC. Then the Fuel Quantities in; Takeoff Fuel, Taxi Fuel, Ballast Tank(s), Ballast Fuel, and Trip Fuel. Notable is the Fuel loading settings as the interesting part is the aircraft balance setting. The MD-11 has extra AUX tanks for the TAIL TK (Tank), CTR (Centre) TK and the AUX UP TK, of which you can select to use. This can be very hard to set up, because the MD-11 aircraft is very, very sensitive to it's CG balance. The really hard part is that where do you get your "Ballast" fuel info from, certainly not from SimBrief, as it is not listed there. I set up a route (and not using the "Ballast" function), and somehow it just didn't work for me... Rotate notes that they are going to "Rethink" the fuel layout. Basically My attitude is to fill the main centre tanks then just adjust the AUX tanks automatically to fill to the amount of excess fuel required. You can "Extend Controls" (bottom left) of the Weight and Fuel Quantities to load the different Cargo Compartments, Upper and Lower decks... "Simple Controls" returns the menu back to normal size. On the Right is the "Weight & Balance (ZF-CG and TO-CG) graph to see your loading and takeoff limits (or limitations), and below is the Totals of the TOW (TakeOff Weight), ZFW (Zero Fuel Weight), TO-CG (TakeOff - Centre of Gravity) and ZF-CG (Weight and Trim) both %MAC. Finally bottom is the option to "Apply (set) load configutation to aircraft and FMS", This will transfer the set loading data directly into the aircraft (fuel and weight) and %MAC into the FMS. GROUND OPERATIONS; This tab allows you to use "Static Elements and to open and close the aircraft doors, with a few nice features as well. Ground Services; There are six selections for "Ground Services". They include; GPU (Ground Power Unit), which is very nice (you can also use the COMMAND Toggle "GPU_power_request_toggle" as well to activate the GPU). Wheel Choks (sic)... Wheel Chocks, Cockpit Stair, a very nice RF Door set of tall stairs, Fuel Service, Load Aircraft and a Push Back option (I would still use betterpushback). Menus right side are the multitude of door options "Cabin Doors" L/R in forward and rear fuselage doors. Cargo Deck Doors have four options... Cargo Main (LF top), Cargo Fwd (RF bottom), Cargo CTR (RR bottom) and Cargo Aft (LR bottom), the Cargo aft left door is very similar to the BULK door. The "Load Aircraft" feature is very similar to the INIBuilds loading feature... Select "Load Aircraft" from the menu and the Cargo door opens... then a truck turns up with four trolleys with containers and a very nice K Loader. One by one the containers are then loaded onto the aircraft... it is well done, and I really liked the way the tug and trolleys move up to unload themselves onto the K Loader... ... but you only load on those four containers, there are no more, then reopen the LF Cargo door and "poof!" they have all gone? So I will note the feature as a WIP (hopefully), will we have later more containers (and their weights) and then actually in keeping the load on the aircraft until you unload at the destination. So far it looks brilliant, but feels currently not finished, or even feasible for a cargo hauler. FAILURES; The "Failures" feature also feels a little underdeveloped? You get nine options in; APU, Air, Electrical, Engines, Fuel, Hydraulic, Instrumentation, Fire and Other. But the options are limited to only one in "Fail Now" of which will fail the choice option. It will "Fix Now" so you can quickly rectify the failure... but there are no timer or altitude failure options. Bonus is that there is a lot of failure options to choose from, as the lists are quite long and detailed, but I feel this is another area to be improved more later. One last note on the onscreen menu. It is a fixed screen menu with no scale or movement around the screen, that is making it a bit crowded when in use, but it is simple and well done to use. Cabin/Deck The view we all savour... going aboard. External view looks good, fuselage doors open upwards and inwards, à la Boeing 767. Behind the cockpit is the crew rest area with a small galley and two armchairs, it feels far more smaller here than the same on the Boeing 777... the detail in here is extremely Lo-Res and not a priority to the overall design, Rotate says all the rear textures are this way for good framerate processing, fair enough, but I feel there was enough framerate ceiling to easily do this area in a more Hi-Res feel and detail. Objects and text are blurred and it feels ten years older in here than with most current aircraft, than it should be. The current X-Plane obsession with toilets is also not used, the toilet door is firmly closed and unusable.... shame. It is the same with the upper and lower cargo decks... HUGE, but again very Lo-Res in detail for frameweight benefits... but nicely passable. The MD-11 cargo capacity is HUGE, there is so much spare meter space... you can see why these old jets are hard to replace, as they can carry so much capacity cargo. Cockpit (Office) The feel inside is very Rotate as well, I call it "Edgy Grungy", a lived in and worked in environment like within the Rotate MD-80. Certainly this it is not a refined interior, more like a cargo ship to an ocean liner. If I could name an aircraft it would be "Nostromo", after the Space-tug in the Alien Film. It is a workman like environment. The cockpit is set up for a three person crew, but the aircraft is only flown by the two forward pilots, the third is really just a loading officer or a relief pilot in the third seat. The three seats are bulky, and expertly modeled, love the authentic chunky headrests, and the molded document storage backing frame and the molded lower seat frame. Seat material is a blue wool fabric with large sheepskin covers to keep you comfortable on those long-hauls... sheepskin is extremely hard to do with hard modeling, but it looks realistic in here. You are instantly aware of the very heavy textures of the window frame moldings. First thoughts are that they have been a bit overdone or with poor awareness by Rotate, but they are perfectly authentic (I checked out the numerous MD-11 videos), they give the aircraft a more older feel of it's period than what it actually is. Like with the MD-80 the excellent detailing surrounding you is excellent. Notable is that the front side windows that are nicely animated. Turn the handle and the lock catch works, then the window winds backwards... nice! The MD-11 could only be an American aircraft. It has a big if huge cockpit, tons of space and chunky controls, like a big American car or truck, everything in here feels oversized or "LARGE with that". Pilots love the space and oversized windows, you sit up high and proud in the machine. Textures are extremely good (and nicely worn). You have a six display screen arrangement wide across the facia, there are three displays for each pilot... ... and you instantly want to grab and to feel those lovely chunky yokes. Radio button is built in, but the electric trim switches don't work? Power on via the single BAT (Battery) switch on the Overhead Panel (OHP) and the aircraft lights up like a Christmas Tree (I put the aircraft here on EXT PWR (External Power)) It looks complex... because it is. Well that is not entirely true. As the MD11 is again a transition machine from the older analog (clockwork) era to the current automated glass cockpits, the systems are spread out and visible like in the earlier aircraft, but not yet as totally automated as in the modern era. But it is an auto glass cockpit, just with a lot more buttons. Thankfully the systems are laid out in a point to future ergonomic layouts, and there is provided by Rotate an extremely comprehensive set of manuals (20 Manuals actually) covering almost every aspect of every system. So there is a lot to learn and study in here. First you can hide the yokes. You can click (hotspot) on either base of the yokes to make them disappear, so they are each independent of each other. A lot of users hate dirty displays... I am certainly not one of them. You get the lot here in; smudgy fingerprints, cornered dust, spittled glass, it is all lovely "dirty" realistic wear and tear... the total answer to "get a life" dirt haters, this is "real life stuff". Instrument Panel The six display layout is pretty easy to understand, per each side pilot they are called DU (Display Units). They consist of the outer PFD (Primary Flight Displays), middle ND (Navigation Display) and inner EAD. The EAD is split with the left display the PED (Primary Engine Display) and on the right the SD (Secondary Engine Display). Centre panel is the Gear lever and the four gear annunciator lights. Top is the "FGCP" or Flight Guidance Panel or Autopilot. The PFD is familiar, but it isn't? Using a lot of colour (mostly orange or amber) it is unusual to the eye, but the layout is extremely highly detailed here from Rotate (call it authentic if you like). From the off you have to understand the language used in the MD-11, it is modern in a way (very Airbus, or early Airbus), but again quirky in it's own way. Again study is certainly required to master the systems, or their quirks. Speed and Altitude tapes are left and right, with a complex V/S Vertical Speed built into the right tape. Autopilot and AutoThrust (A/THR) functions are top, with a compass heading at the bottom. Centre is the Artificial Horizon with a built in pitch markers and Rate of Turn markers. We will go through the banner command FMS (Flight Mode) Annunciator system later. Interesting is the side SISP (Source Input Select Panel). Here you have options for the PFD. FD (Flight Director) Off (Flight Director 1 is always on unless turned off), FD 2 (Flight Director 2), CADC (Central Air Data Computer), IRS (Selection allows normal IRS or Aux IRS sources). FMS (Switch between FMS 1 or FMS 2), VOR (Selection of VOR Source) and again APPR, in selecting ILS 1 or 2). Here the image below right shows the options activated. It is important to understand how the upper left and right glareshield ECP (Electronic Control Panel) or usually noted as "EFIS -Electronic Flight Instrument System" interacts with the display units... the ECP looks complicated but it is actually quite easy to use. Only the Baro, in SETTING, STD and MINIMUMS (both RA and BARO) are used in the PFD, the rest of the buttons are used for the ND (Navigation Display). Top is the Magnetic North or True North selection. Then five options for the ND display in; MAP, VOR, TCAS, PLAN and APPR. MAP options include TRFC (Traffic), DATA, WPT (Waypoint), VOR/NDB and ARPT (Airport) that are listed in the left lower box (ND Display) Here (above) are the first two options in TRFC and DATA that is shown (Data puts route and speed data on the screen). You can adjust the RANGE via the two central buttons INCR/DECR. Finally are the VOR and ADF Pointers. Selection will put the details and VOR direction into the MAP, ADF is not working here because there are so few now. Frequences are set in the FMS (Flight Management System) NAV/RAD page. Other notable points in the MAP display are the GS (Ground Speed) and TAS (True Airspeed), Waypoint and Distance, and finally a Clock/Timer. Both the PED (Primary Engine Display) and the right SD (Secondary Engine Display) both show the engine performance data, here shown are both situations in (top) the engines are cold and (lower) the engines are hot or running. PED; Three readouts cover the N1, EGT (Exhaust Gas Temperature) and N2, TAT is top right. Lower is a "Warning Panel" (ECAM) that shows four states of warnings and alerts; CYAN Level 0 (Informative), AMBER Level 1 (Caution) and 2 (Framed Caution) and the RED (Fire) Level 3. SD; The secondary display is more flexible. Again the engine readouts dominate, but the readouts are different in Oil Pressure, Oil Temperature and QTY (Quantity). Lower is the NAC TEMP, EVH COMP and TEMP readouts Banner holds the GW (Gross Weight, and Total FUEL, CG (Centre of Gravity), Cabin Alt and Rate are all shown across the top of SD display. Two important items are also shown here (arrowed). Top centre is the (very important) STAB Trim and the APU (Auxiliary Power Unit) N1, EGT, N2 and Oil readouts. The SD also has other page options... Set behind the Throttle quadrant is the SD control panel. On here are twelve buttons representing; ENG (Engine default), Blank, Blank, ND (Navigation Display - Not used), CONSEQ (Consequence), STATUS, HYD (Hydraulics), ELEC (Electrical), AIR (Air-Conditioning), FUEL, CONFIG (Configuration) and MISC (Miscellaneous). Flight Management Computer (MCDU) If you have used the MD-80 FMC then you should easily find your way around this FMC System, called here MCDU (Multipurpose Control Display Units). There is a lot more data involved, but the layout and the use is almost the same. Notable also like the MD-80 there are no pop-out (2d) panels, you go to the MCDU, it does not come to you? (all the flight displays don't pop-out either, which is bad news for home cockpit builders). Replication of the Honeywell Pegasus MCDUs is first rate, with two displays forward and one rear on the pedestal. The rear is of course for display only, but some of the basic pages work. The feeling here is that this unit could become active in the future, as certain active pages do pop-up and are active. Set between the two forward MCDUs are the backup Altimeter and Artificial Horizon, Auto Brake selector and the Brake Pressure gauge (that works). Brightness of the displays have to be all adjusted (like with the MD-80, you also update the Navigation Data in the same "nav-data" folder, so one Nav Data download can be used for both aircraft, but don't change the spelling of the folder, as it is different to the MD-80). INIT (Initial)page has three selections F-PLN, WEIGHT and FUEL. There is a lot of data to input here, but there is that helper fill in tool in the menu, data detail is very, very good. FLIGHTPLAN (F-PLN) input is very Airbus, and the route scrolls around like an Airbus MCDU screen, F/PLN has two pages, and wind input is added in later. Both T/C (Top of Climb) and T/D (Top of Descent) are both featured. TAKEOFF Preferences are highly detailed, But listed here under the TO/APPR key, note the "-STAB" balance setting with the selected Flap setting. PROGRESS (PROG) pages 1&2 are also excellent and well detailed. ECON (Economy) Pages are selected under the PERF Key... CLB (Climb), CRZ (Cruise) and DES (Descend) and are all covered DIR INTC (DIRECT TO)... There is a DIR-TO tool, but no HOLD function. The RADIO page is quite basic... note the input of the ILS/CRS (ILS/COURSE) Frequency which you have to input manually, highly notable is that you also have to insert the Frequency unusually to activate it which we again will cover later. Other option on the ILS is to just use the "LOC" (Lock) feature. VOR 1 and VOR 2 Frequencies are set in the banner. The MD-80 users will be nodding and saying "Yeah, yeah.. not to much different is it", but there is a lot of different detail or minute in this MCDU to study... a lot is straight forward, but still different, so be aware... and if you input wrong it has a huge effect on the flying (balance) of the aircraft. Overhead Panel (OHP) The Overhead Panel is complex? Three Engines makes for a lot of buttons and systems on one board. Thankfully ergonomics has taken place here to give you panel flow. The MD-11 was completely system redesigned to intergrate for two crew operation, were as the DC-10 had a Flight Engineer (and Panel) third crew member. A lot of the functions are very easily recognised, but there are a lot of buttons for side systems (Aux Pumps and so on) that are essential to the operations of the systems.... So study is obviously required to understand all the systems presented on the board.... This means, just pressing the buttons you think you need and then go flying will result in a major system failure, meaning then your going to ruin a very nice aircraft, so you can't be cocky bugger in here. Layout is column left (top down) panels; ADIRU (Air Data Inertial Reference Unit) Navigation, Cargo Temperature, FADAC (Full Authority Digital Engine (or electronics) Control)... Main centre column panels; HYD (Hydraulics), ELEC (Electrical), AIR (Air-Conditioning) bottom FUEL.... Right column panels; Service Panel, Cabin Press (Pressure), Anti-Ice, Test Panel. The chin bottom panel; Left/Right Wipers, OHP and Dome/Storm lighting, Instrument lighting knobs, EMER LT (Emergency Lighting), No Smoking/Seat Belt switches, Call Reset... External lighting (Landing/Nose), Wing/Turnoff Runway lights, NAV (Navigation), LOGO, BCN (Beacon) and HI-INT (Strobe) lights. Note a few switches in the lighting panel are opposites, off can be in or out on selection. It is clever in that the non-essential lights are in off, but the essential NAV, BCN and HI-INT are out off. Upper OHD is centre the three FIRE handles, TEST can be done far right with ENG/APU FIRE TEST button. CARGO FIRE panel is left, and the APU (Auxiliary Power Unit) panel is set right and quite high up (arrowed left below). The rest of the OHD is the Circuit Breaker (fuse) panel (non-working). All the panels (annunciators) can be tested, right down to the infamous cargo door (CARGO DOOR TEST) arrowed above. Throttle Quadrant The central Throttle Quadrant is simply a beautiful thing. Really well recreated for your pleasure... Far left is the Long Trim Handle, then the T-Bar (with working catch selector) SPD BRK (Speed Brakes). Those three sublime Throttle Handles have built in reverser handles, then the right hand Flap Selector with the DIAL-A-FLAP selection (more in the "Flying" section). Front of the quadrant are the three engine starter switches, with below the same corresponding fuel selectors. Notable on the throttle handles are three buttons... at each end throttle there is an A/THR (AutoThrust) disconnect button, and a centre (white) button is to kill the alarm. Pedestal The rear pedestal is really the radio panel. It has left-right VHF and HF 1-2 CPR Radios upper with the Audio Control Panel below, and the Weather WX Panel mid-left, then the Transponder panel below. Finally bottom left is a third VHF 3 Radio Panel. Both the manual roll and rudder trim wheels are centred rear. We have already covered the upper SD Control Panel and the centre MCDU. Setup and Testing System depth on this MD-11 is EXTREMELY deep, there is nothing on show here but total realism. If you want to understand the real depth of the systems I recommend to watch this real world video before attempting to use the aircraft; MD-11 COCKPIT SETUP The cross reference to the Rotate MD-11, and the parallels are freaky close. Highlights here are the non-instrument setup (cold start). Testing the different areas are excellent... you can test (as earlier noted) all the systems and panels, the fire systems are particularly good. As all of the FIRE/APU and Fuel switches can be tested and checked. When setting the inertial navigation system or INS, it will also test the above "CARGO FIRE" panel (quite correct), or it can be tested independently... Turn on the three INS switches and the system will align, it is slow(er) than most alignments, and if you want to check... ... the alignments, then they can be found under the REF button <POS REF then page 2 IRS/GNS POS... ... you can also test such items as the landing gear... push the gear lever down (on the ground of course), and the gear system will test itself, and it is all so brilliantly done. There are so many areas that are real world duplicated that obviously can't all be replicated in this review (unless you want to spend days reading it), so these items above are just a small preview. Flying the McDonnell Douglas MD-11 In most cases when you fly big "heavies" the operations are either in one or the other, in being say before the modern era (i.e... 60s or 70s), or the modern very automated cockpits of today's era. The MD-11 is neither or sort of both, as it is set at the crossroads between the different eras. Like noted it leans more towards a Airbus style operation than the Boeing manual aspect which is interesting as this is a very American style aircraft, so if you approach the aircraft in an Airbus manner, you will find it easier to operate. For once you will need to study the operations in here, because if not, it will confuse you into doing the wrong operation protocol... and you can't do that. Lets Start... Power is already on via the Main Battery Switch OHP... I'm on Ground Power so it is time to start the APU, the APU button is on the ELEC panel. (the APU panel is also way up on the right on the OHP, this is the main APU STOP/START (arrowed below left) that can also be used), then make sure the APU is starting up via the SD (Engine) display, no action then press the button again. Once the APU is up and running then press the APU BLEED (AIR PANEL middle right) to supply air and pressure to the aircraft systems. Two backup (AUX) Hydraulic pumps need to be on, plus the SYSTEM switch by them is also turned to MANUAL... APU running you can now switch over the internal power supply feed and shutdown the External Power (GPU). Next is setting up the Bleed from the APU to start the MD-11, so you press the two ISOL (Isolate) buttons, the system should switch again to MANUAL, but once activated it will go back to AUTO. Engine Ignition (or igniters) are on the left lower FADAC OHP, these are the A and B channels and MUST be kept switched on when the engines are running or for the whole flight, "Igniters" is really the wrong word here (although everyone refers to them in that aspect), they are power supply switches and switch them off and it will shutdown the engines... .... now we are ready to start the engines. The ENG START Switch (Yellow) is below each engine throttle, and to start the engine you switch it upwards. Engine start sequence is 2 (Middle), 1 (Left) and then 2 (Right). The centre engine powers the air-conditioning and other AUX systems, so it is started first. Note a lot of MD-11 pilots only start the No. 2 Engine for taxiing on the ground, but that depends on your weight and configuration... The start sequence will show soon with action on the N2 (No.2) engine display... ... the N2 percent% will rise until you reach 17% N2, then you switch in the Fuel with the FUEL (Flow) Switch below the ENG START Switch, it does take time to get to the 17% N2 threshold, so you have to be patient, and you can't start a second engine while the first start up procedure is in progress, it won't let you do that... so starting all the three engines can take time to do. The engine numbers should settle down around 25 N1, 431 EGT and 64.4 % N2. The ISOL and APU Bleeds should then automatically cancel once the engines are running (AUTO Mode), but if not then cancel them... you can now also shut down the APU (It takes forever, so don't go pushing the button again and again, and thinking it is not working?) Then you set the STAB Trim, the trim number is shown on the TO/APPR buttom on the FMS, and ignore the -(Minus) trim, as it is not required unlike on the Airbus, you set the Trim via the Long Trim handle (left throttle quadrant) or with the keyboard trim (recommended). Another unique feature on the MD-11 is the DIAL-A-FLAP System. This gives you quite a unique variation in the flap angle than on most heavy aircraft... Select Flap 10, which is shown on the Pilot's PFD (bottom left) and then "Dial" in the finer flap angle degree by using the adjustment wheel right of the flap handle, it can be adjusted from 10º to 25º flap, I selected 11º for Takeoff. The DIAL-A-FLAP can also be used also on the approach phase, obviously not on the actual approach phase, but coming into the circuit for landing and reducing speed... so you can tune the flap to the speed exactly, and then get the perfect circuit speed you require, this is a feature I REALLY like as it eliminates that huge drop from one flap degree position to another, adjusting the wheel as fine degrees can smooth it all out in the transitioning in the slowing down of the speeds. The MD-11 is a dot the i's and cross the T's sort of aircraft. So there are a LOT of parameters to set, and you will need to cover all of them, miss a setting and the aircraft just does not like it, and the MD-11 will usually tell you. STAB (Trim) is set here to 6.0, and Flap at 15.0º The TakeOff data (TO/APPR) is very good and highly detailed. Notable is that only TO Is available at takeoff, and the APPR data only later in the approach phase. Off the (Park) brake and we're rolling. As noted three engines will move you forward, so you will need to touch the brakes frequently to keep the taxi speed under control. I checked in just using (or being powered only by) the Middle-Engine, and that is about perfect. The MD-11 is a BIG aircraft, so you need to anticipate turns... the tiller does not seem to turn, then it does! so you have to find it's sweet spot to manoeuvre the aircraft professionally around the taxiways. You are also sitting way out in front of the nosegear, so another thing to be aware of in swinging around the tight taxiway bends. Most MD-11 pilots use their own seat base position as a bearing of where the nosegear position is set to on the turns and the aircraft positioning. The FMA banner display in the PFD can be at first very complicated. Any white bands means the system is not engaged, but ready in ARMED (showing values and modes). Red bands (warning) means a primary system is disengaged (A/P or A/THR), Amber bands means a failure in the system. No bands shown around the PFD banner data means it is in ACTIVATED mode. White also represents the FGCO (Flight Guidance) values and modes, Magenta represents the FMS (Flight Management) values and modes, green is for "Dual Autolands", and again Amber for failures. Set the Ground Spoiler to ARMED, by upping the T SPK BRK lever like on the MD-80, and the AUTO BRAKE to T.O. It is Important to ARM the AUTO FLIGHT (mid-FGCP button) the bigger lower one... and this sets the A/THR (Auto Thrust) to the T/O THRUST mode on the PFD. You can put the throttles full up... and the A/THR system will protect and keep the thrust to or within the T/O thrust limits. The MD-11 can be a bit of a handful as the speed builds, so you need skill here to hold the aircraft straight down the centreline, but it is very highly realistic.... ... as the speed builds the set speed bugs will now adjust correctly to their speed positions, after v2 is FR or the +10 marker to rotate the aircraft. Set the "Positive Climb" to around 10º, (depending on the T/O weight you can go as high as 15º) and gear UP... and watch the theatrics. This show alone is well worth the admission price. You press the same AUTO FLIGHT button again to activate the Autopilot, AP1 or AP2 to your option (usually AP1), then to lock in the route you press the NAV (NAV 1) button under the heading selector.... There is no V/S (Vertical Speed) button, so you just go straight to the right V/S wheel and you just select your climb rate (or descent rate), MAX rate of climb is impressive at 6000 fpm at low altitude, but you wouldn't do that with most load rates... 4300 fpm is normal with 3,000 fpm with a heavy load. It is very important to understand the knob operation logic... very, very Airbus, in fact it is mostly similar. Most knobs have the IN (AUTO) and OUT (MANUAL) operation like on Airbuses. So you click (arrow) up or down for each operation. The difference is that in an Airbus when you change say the airspeed via the Speed selector the engines will respond straight away and change the speed.... but in here the MD-11 operation is slightly different, and in the need of getting used to. Change the speed and you get an outlined marker... but the speed itself (unlike in the Airbus) it will not change until you activate it by clicking on the speed knob (arrow down/pull out), and only THEN will the engines will power up (or down) to the set speed selection... All the FGCP command knobs act the same way... Speed, Heading and Altitude, so you adjust then activate the action. This can all be a bit time consuming, certainly when adjusting the finer speeds of say when using the ILS Slope, but you will soon get used to it. Another point is that the A/THR has a lot of safeguards built in, if you want a certain speed (say m.83), but you are already at the operating limits, it won't change the speed from your current set speed (m.80). The system calculates the current weight, power and altitude requirements and then says "yes" or "no" to your command. When that changes (say burning off more more fuel, or a different flight level) then it will allow the change. This is shown on the PFD with the SE and GE as your limits, also the limit is shown on the banner of the ND (Navigation Display)... so you set your speed to the upper SE marker, then select the down arrow to change the speed... .... this is of course depending on the weight, and you are restricted in speed. I found at FL330 (33,000ft) I was restricted to m.80, at FL350 to m.82, but my guess in that go higher to FL360 to get your M.83 cruise speed. If you force your speed, then the marker will only quickly start to fall, and keep falling, so you have to be aware of this! If not your speed will fall off completely and not recover. The same SE and GE Markers also work in reverse, in noting your landing and flap speeds. The Rotate MD-11 is a sensational aircraft to fly. But also very (if extremely) demanding and even tiring with all the work you have to do in here. This is "Simulation" not "Gaming", and a deep study and working simulation at that. You won't cover all the details even in a few flights, but you can in time become very proficient in flying the "The Diva" or the "More Death 2", "Scud" (once you launched it, you were not sure were it was going to land) or the "Marriage-Divorce 11". all nicknames for the MD-11 for various reasons. Sounds are very, very good... there is a very nice cockpit hum with the various systems being used, turn on say the Air-Con and you hear the system being activated and audible, so the sound detail is deep. You are positioned very forward of the engines, so they aren't a big factor on the ground or in flight, but they are there and sound really good, both internally and externally. All sounds are of course FMOD and extensive (the aircraft even creaks and groans under loads) so you can't fault this aspect. The same sort of shouty alerts are in here as in the MD-80, and they can be annoying if even counterproductive of the reasons they are there for, mostly I ignore them. Speed is Mach 0.88 - Max, Mach 0.83 - Cruise (507 - 479kn; 940-886 km/h), with a range of 3,592 nmi (6,652 km) (Freighter, 6,725 nmi (12,455 km) Pass). Ceiling is 43,000ft. There are working blinds in the cockpit and very good they are... they will slide around from the rear, and you can adjust the angle of the blind as well in position... I really like good working blinds, and they are very good in here. Lighting The quality of the X-Plane cockpit lighting today is extremely good. The developers have lots of tools to deliver very realistic night lighting, that is more important here as the MD-11 is a Long Hauler aircraft, 10+ Hours flying is not unusual, and being a Cargo Hauler most of the flying is done overnight... So internal night lighting has to very easy on the eye and highly adaptable. And you are not disappointed here either in the MD-11. There are three adjustment knobs with insert knobs (six) for both indirect lighting and highlight (text) lighting. Two knobs on the OHP cover the OVHD (Overhead) and INSTRUMENT lighting, and the single adjustment knob left on the glareshield covers the GCP (Glareshield Control Panel)... The smaller knob on the INSTRUMENT lighting, adjusts the light left top of the OHP which shines directly onto the pedestal area of the cockpit. ... instruments are lit in both above the FGCP, and with the lower four instrument dropdown lights, very nice indeed it all is. There are adjustment knobs for lighting on the yokes, and nice they look as well in the darkened cockpit... There are also two overhead fully adjustable spotlights (click on the light to activate). There are also two (one for each pilot) "Briefcase" lights or side panel lights, and a one (click) spot light over the rear relief seat. The rear extensive circuit breaker panels have their own lighting adjustment, it is via a knob (arrowed above left) at the end of the wall panel. There are two switches on the OHP that can select both (THUNDER)STORM and DOME lighting The panel lighting can be adjusted right down to just the instruments, but I easily found a nice comfort lighting for the important takeoff and landing periods, or if you want that quiet night cockpit environment... overall excellent. Rear rest area has average down-lighting connected to the DOME button, but the main cargo deck has no lighting at all, shame? External The external lighting is also excellent... There are four forward landing lights, two set high on the nosegear and two that pop-out forward fuselage. The Turnoff Taxiway lighting is in the inner wings with the Wing/Ice lighting... .... you can check out the wings leading edge or trailing edge, via the two observation windows... there is also good tail-lighting. There are upper and lower fuselage beacons, navigation lights, and all are nicely tuned. There is no rear tail (white) navigation light but two white navigation lights each per rear wing tip, strobes are also well refined. Time to go down... Reducing speed to the minimum setting GE, the the V/S to (here) set to 1800fpm... Altitude target markers are installed as are the Climb and TOD (Top of Descent) markers, which are both nice tools to have in planning your ascent and descent... .... with the descent in progress you now get access to the APPR mode (TO/APPR). Here you can select either a 35º Flap or the full 50º Flap approach (or the other way around). All the required landing data is also now available, including the speed limits. Notable is that the MD-11 does not have a set landing speed/flap sequence. The flap required to the speed settings depends on the landing weight? So you will need to download and print out the MD-11 "Speed Tables" to get the correct speed settings for the landing. The landing weight is shown in the APPR page RK1. You will also get a "MSG" (Message) to "CHECK WEIGHTS" before landing to finalise the landing settings. I found the Rotate MD-80 quite tricky in the approach phase with the flaps? Setting the correct speed to the flap setting was awkward in that a lot of times you got it wrong, say in the "too fast" to the flap setting, in bringing the nose or getting a pitch down condition.... In the MD-11 is is far better as you have that DAIL-A-FLAP system to even out the flap angles, it works quite well. Into the circuit of EDDP Rwy 26R, Leipez-Halle, Germany... using GOXLI1V STAR approach. Thoughout all my earlier MD-11 flights, I just couldn't get the ILS (Frequency) to work? Then I found out the issue... Being a though pilot that I am, I filled out the ILS Frequency box on the NAV/RAD panel with the full frequency. In this case EDDP 26R "108.35/263" from the Navigraph Jeppesen chart... that is Freq 108.35 and course 263º, correct of course, but in here that is incorrect, as it does not work? The correct way to insert the ILS Freqency is just to ONLY insert the ILS Freq, or "108.35" and the system fills the rest in, including the wrong course degree? If set correctly you will see the ILS runway code (ILNW) in the section above the Rwy Frequency. I don't know if this set arrangement will continue in the future upgrades, personally I don't think so, but it is a situation to be aware of before landing. Another point is that make sure you do have the correct frequency inserted? I found a few times by setting the frequency early, it was the correct frequency, but set to the wrong Airport/ILS position... checking frequencies closer to your destination airport will correct the system to the right Airport/ILS. On the last turn to finals into Rwy 26R, I drop the extensive gear arrangement... I always drop the gear on the last turn into an runway as it feels and looks very dramatic... it gets the adrenalin going, heightening the senses, shifting in your seat, getting ready for the landing, and here in the MD-11 everything "sure is heightened", it is that sort of aircraft. MD-11 as we were told, had the fastest VAPP of any civilian airliner. At MGLW (Maximum Gross Landing Weight) it was known to be landing at around 168kts. That is fast and the stopping distance was always in need of being scrutinised carefully. Here is a video showing the differences in the landing speeds to a Boeing 757 (Yes I know the angle of the camera could change the perspective). Notable also is that the MD-11 handled very differently than it's forebear the DC-10, if the the same configuration of aircraft, but the DC-10 had far larger wings and in so landed far slower. I'm sitting at 175 knts, but in reality the MD-11 is certainly a gut sort of aircraft in this phase, it has that certain analog feel that you have to go on by instinct and not be totally focused on the numbers, which are obviously dictated by your weight and approach speeds. You will need to find that perfect balance by using both the hard numbers, but then adjusting the aircraft around them until it feels perfect right. You press the upper large centre APPR/LAND button centre FGCP to ARM the approach phase (as noted this also arms only the LOC if you selected that option) If you have activated the ILS Frequency correctly it will show lower left in the PFD with the set Flap degree, you can also now set the APPR screen in the ECP, for better approaches. Notable is the auto selection of "Single" or "Dual" landing (Land) selections (green banner top right PFD) , it will flash the selection it will use then LOC it in. Setting the (ground) Speed Brake is very tricky. It is used like the same in the MD-80, in clicking it upwards to ARM the system, but it is harder to reset back to normal (click down) than on the MD-80... the Captain's position and angle does not help either. Over the threshold and your "nervous" but in command, this is a lot of fast moving aircraft to put down and stop... Notable are the AP (AutoPilot) and A/THR (AutoThrust) disconnects, there is as noted in being disconnect buttons (Yoke and Throttle), but I recommend to set another key command (I used both my joystick and X52 Rhino Throttle). Both disconnects have an A & B disconnect, so one switch is not enough to cover both systems... the biggest note here is that the same commands also quietens the alarms once the disconnect activates, they can be seriously annoying if you can't shut them down... The same FMA banner legend is used in RED Off (Warning), AMBER is failure, WHITE is not engaged (but armed).... BLANK is Active. In landing again the MD-11 is like the Airbus, as there are landing modes, certainly the callouts are very good, with also "LAND and FLARE on the PFD... I was however seriously impressed on how I could just pitch the nose up nicely in the flare to touch the main gear down first. Some if a lot aircraft fight you in this flare phase, but the MD-11 is just simply brilliant here. Your down, but now you have to stop this fast running hulk of an aircraft... I find the AutoBrake a bit too heavy in even the MED setting, MIN is passable, but in a lot of cases I leave the Auto Brake off completely. Here the excellent Reverse Thrust on all three engines is very effective, with a loud powerful thrust that rubs off the speed very efficiently. Notable is that you only use the REV setting to activate the thrust reversers, don't touch or power up the throttles in this mode, as it has the opposite effect!... ... all this comes with light touches on the left and right (Pedal) brakes to keep the MD-11 nicely centred while slowing down... ... and soon you are back in taxi mode and using the tiller. .. again I recommend to turn off the No.1 & No.3 engines and just taxi on No.2, as it makes your life far easier in a moderate taxi speed, shown on the PFD, and then start the GPU ready. Welcome to Leipez-Halle. If you think that landing looked easy, then it took about a week to work out and perfect, this is one seriously complex but rewarding aircraft... but once you get it, it delivers MASSIVELY. Riding around EDDPs long taxiway network, I could only think of one thing "Where to go next", as the list I was creating in my head for the MD-11 was already getting huge... Trans-Atlantic, Anchorage, Singapore, Japan... "Whoo" this aircraft is going to be an absolute blast! Yes the Rotate MD-11 exceeds the expectations and then some, as it is also another level of Simulation, complex and demanding.... you do have to live up to the aircraft, expect to study and spend (a lot) of time working through it before mastering it... it is just EXCEPTIONAL! Liveries There are ten liveries with the Rotate MD-11 package... these include; Rotate House, AVIENT, EVA AIR Cargo, FedEx, Lufthansa Cargo, MartinAir Cargo, Shanghai Airlines Cargo, UPS Cargo Services, VARIG LOG (Logistics) and Western Global. Quality is all exceptional, and a painkit is provided. No DHL? Well DHL don't or didn't fly the MD-11. Summary The McDonnell Douglas MD-80 from Rotate that was released on 9th Dec 2015 had a troubled introduction into the X-Plane Simulator. But the developer very quickly resolved the release issues and the aircraft went on to be one of the best simulations in the X-Plane Simulator, I even put the Rotate MD-80 in my all favorite top ten (currently at No. 4). It is very iconic and deep simulation. This is the followup aircraft to the MD-80 from Rotate, in the McDonnell Douglas MD-11, the MD-11 is of course a derivative of the McDonnell Douglas DC-10. The Rotate aircraft has also had a very long gestation development period, in over four years, so we are expecting a lot, with the insane quality and the popular MD-80 are all aspects that also hover also over the project... it thankfully does not disappoint. This is a deep simulation, with all the systems and operations modelled (there are 20 system manuals alone). So the aircraft is extremely complex and requires study to anyone becoming proficient in using and flying the aircraft regularly. It also requires a lot of skill and system management to master the unique capabilities of this unique between eras TriJet. Modeling is exemplary, brilliant realism with dirt and grunge built in, which a Rotate speciality. Textures are also a extreme high quality, but not so in the crew rest and cargo decks to keep the aircraft within an average framerate balance, and the Lo-Res areas conflict with the excellent quality everywhere else. In reality this Lo-Res aspect is not required as the aircraft has currently no heavy passenger cabin or any heavy framerate details. Notable is that the passenger version is still stated to arrive, but not anytime soon. Sounds and internal and external lighting are also excellent, but again the crew rest area and cargo deck lighting could be better. Features include a good, but not exception Menu and options selections. A few areas again like the "Load Aircraft" feature is still looking like a WIP "Work in Progress", as does the options features on the menu. But you do have a nice GPU, Stairs, Chocks, Aircraft Refueling and all the doors can be independently opened. And the toilet (A current X-Plane fad) doesn't work or has been even included? (This is long haul?) Does the Rotate MD-11 live up to it's huge expectations... in context yes it does, even in areas it even totally exceeds them, there are however areas that still need fine tuning work, and bugs are to be expected on release as this is a very complex and detailed aircraft and simulation... but Rotate should cover those aspects quickly and professionally. Here is another landmark simulation aircraft for the X-Plane Simulator. X-Plane users seemingly to have to wait forever for these iconic aircraft, but again in this case it has been well worth the wait. Big, heavy, complex, demanding and seriously rewarding. The Rotate MD-11 is all of these things and more, in systems and it's depth of simulation, this is again another level of realism and can get extremely addictive... and it is absolutely another classic to enjoy most certainly... and certainly very and highly recommended to own and fly. _____________________ Yes! the McDonnell Douglas MD-11 by Rotate is currently available from the X-Plane.Org Store here : Rotate MD-11 Price is US$83.95 Features Realistic flight dynamics and performance In Depth system simulation All systems listed are simulated according to the specifications of the original model, with all redundancy relevant to the simulation and with both Automatic and Manual modes. Systems tests simulated Engine/APU Fire Test Annunciator Lights Test Cabin/Cargo Fire Test GPWS Test Hydraulic Pressure and Engine-Driven Pump Tests Oxygen Test TCAS Test Weather Radar Test Emergency Power Test Air Air conditioning Pressurization Cargo heating/ventilation Avionics cooling Air System Display Aural-Visual Warning EAD (Engine Alert Display) SD Alerts and Consequences Display SD Consequence Page SD Status Page SD Miscellaneous Page CAWS (Central Aural Warning System) GPWS (Ground Proximity Warning System) TCAS (Traffic alert and Collision Avoidance System) Weather Radar Automatic Flight Dual AFS (Auto Flight System), FD and ATS (Auto Throttle System) All FMA modes simulated Automatic ILS approach with dual/single Auto Land. LSAS (Longitudinal Stability Augmentation System) CWS (Control Wheel Steering) Yaw damper Automatic pitch trim Flap limiting Stall warning with Auto Slat Extend APU APU System, Indication and Control APU Automatic Shutdown APU Pneumatic System Communications VHF communications system Dual Head Communications Radio Panel Audio Control Panels Voice Recorder Panel Electrical AC power generation and distribution Integrated Drive Generator GCU (Generator Control Units) APU Generator ADG (Air Driven Generator) External Power AC Distribution (9 Buses) NBPT (Non Break Power Transfer) DC power 4 Transformer Rectifier Units DC Distribution (8 Buses) Battery and Battery Charger Emergency Power Electrical System Display Fire Protection Engine and APU Fire Detection and Extinguishing System. Cargo Fire Detection and Extinguishing System. Controls and Indications Flight Instruments Complete EIS (Electronic Indication System) Two independent ECPs (Electronic Control Panel) 6 Independent Display Units Navigation Display (MAP, PLAN, VOR, APPR and TCAS modes) Air Data Computer ATC Transponder Aircraft Clock, Timer and count-down Chronometer Standby Compass and Standby Attitude Indicator Standby Altimeter and Airspeed Indicator Source Input Select Panel Fuel Fuel System Controller Automatic Fuel Scheduling Fuel Transfer and Crossfeed Fuel Dump System Tail Fuel Management System Ballast Fuel Control Fuel System Display Hydraulics Hydraulic System Controller Reservoirs and Accumulators Engine and Electric Driven Pumps Reversible Motor Pumps Hydraulic Display Ice and Rain Protection Engine Anti-Ice Airfoil Anti-Ice (Wing and Tail) System Engine Cowl Anti-Ice System Air Data Heaters (Pitot, Static, TAT) Navigation FMS (Flight Management System) Simulated pages: A/C STATUS (2 pages) REF INDEX FLT-PLAN INIT WEIGHT INIT FUEL INIT PERFORMANCE CLB, CRZ & DES THRUST LIMITS FLIGHT PLAN (2 pages) VERTICAL/LATERAL REVISION DIRECT-TO PROGRESS TAKEOFF / APPROACH SID FROM STAR TO HOLD NAV RADIO FIX INFO NAVAID POS REF IRS/GNS CLOSEST AIRPORTS SENSOR STATUS DEFINED WAYPOINT LAT/LONG and P/B/D WAYPOINT WAYPOINT MENU MCDU Messages GNSS (Global Navigation Satellite System) LNAV/VNAV flightpath calculation Takeoff and Landing performance calculations (V-speeds) IRS (Inertial Reference System) VHF, DME, ADF and ILS Navigation Engines (General Electric CF6) FADEC (All regimes simulated) Custom engine model Primary Engine Display Secondary Engine Display More than 200 custom failures Dual cockpit Independent pilot and copilot controls and displays. Two independent MCDUs control two independent FMCs. Sources of instruments can be selected for pilot and copilot independently. All relevant systems have separate controllers for redundancy. Accurate 3D model and HD textures External objects and detailed animations Aircraft loading animations Cargo loader and cargo truck GPU Airstairs Cockpit window animation Cargo Doors Fully animated landing gears Winflex Engines reversers animation Aircraft Menu Options Situations (C&D, Taxi and Takeoff presets) Load Manager Ground Operations Failures Realistic 3D sounds Detailed sounds with real cockpit sources and FMOD dynamic effects 3D lights, including: Exterior lights Cockpit lights Panel lights Flood lights Dome light Reading lights Briefcase lights Floor lights Map lights Cabin lights 10 Liveries Rotate livery Avient Aviation EVA Air Cargo FedEx Lufthansa Cargo Martinair Cargo Shanghai Airlines Cargo UPS Varig Log Western Global Airlines White livery VR support Requirements X-Plane 11 (Fully updated, non beta version) Support for X-Plane 12 when available Windows, Mac or Linux 4 GB VRAM Minimum - 8 GB+ VRAM recommended Current version: 1.0 (March 24th) Installation Download of the MD-11 is 1.07Gb and it is installed in your Airliner Folder as a 1.87Gb folder. Activation is via the standard authentication Key. There is no Auto-updater by Skunkcrafts for updates, so currently you have to redownload any updates via the X-Plane.OrgStore. Designed by Rotate Support Forum at X-Plane.org or http://support.rotatesim.com/ Documents Provided are three sets of documents Included with the package. It is a serious comprehensive package of manuals and information, but well worth studying. Rotate MD-11. Introduction & Product information 1. Systems description 2. Limitations and checklists (Limitations and checklists) Rotate MD-11 Normal Checklists (Systems description) 1. MD-11 Systems description-Aircraft General.pdf 2. MD-11 Systems description-Air.pdf 3. MD-11 Systems description-Aural-Visual Warning.pdf 4. MD-11 Systems description-Automatic Flight.pdf 5. MD-11 Systems description-APU.pdf 6. MD-11 Systems description-Communications.pdf 7. MD-11 Systems description-Electrical.pdf 8. MD-11 Systems description-Emergency Equipment.pdf 9. MD-11 Systems description-Fire Protection.pdf 10. MD-11 Systems description-Flight Controls.pdf 11. MD-11 Systems description-Flight Instruments.pdf 12. MD-11 Systems description-Fuel.pdf 13. MD-11 Systems description-Hydraulics.pdf 14. MD-11 Systems description-Ice and Rain Protection.pdf 15. MD-11 Systems description-Lighting.pdf 16. MD-11 Systems description-Navigation.pdf 17. MD-11 Systems description-Engines.pdf 18. MD-11 Systems description-Doors.pdf 19. MD-11 Systems description-Landing Gear.pdf _____________________ Aircraft Review by Stephen Dutton 24th March 2022 Copyright©2022: X-Plane Reviews Review System Specifications: Computer System: Windows - Intel Core i7 6700K CPU 4.00GHz / 64bit -32 Gb single 1067 Mhz DDR4 2133 - ASUS GeForce GTX 1080 8Gb - Samsung Evo M2 2TB SSD - Sound : Yamaha Speakers YST-M200SP Software: - Windows 10 - X-Plane 11.55 Plugins: Global SFD plugin US$30.00 : Environment Engine by xEnviro US$69.90 : RK Apps XPRealistic v2 - US$34.99 Scenery or Aircraft - LEBL - Barcelona Airport XP11 by JustSim (X-Plane.OrgStore) - US$21.00 plus - Barcelona City by Logo Projects (X-Plane.OrgStore) - US$26.95 - EDDP - Leipzig/Halle International Airport by JustSim/Digital Design (X-Plane.OrgStore) - US$20.00 (Disclaimer. All images and text in this review are the work and property of X-PlaneReviews, no sharing or copy of the content is allowed without consent from the author as per copyright conditions) All Rights Reserved
-
Aircraft Review : CowanSim 206 L3 When the CowanSim 206L3 popped up I actually ignored it... done that? But then no update showed up either... very odd? But with a closer look at the title I noticed it said L3, and not B3? L3, "oh, it is a different version of the JetRanger", And so it is. The 206L LongRanger is a stretched variant of the original Bell 206 "JetRanger" with seating for seven. The fuselage is stretched a total of 30 inches (760 mm), and the variant adds in two rear-facing seats between the front and rear seats. Since 1975, Bell has produced more than 1,700 LongRangers across all the variant types. In 1981, a military version, the 206L TexasRanger was also released. The original 206L used an downrated Allison 250-C20B engine, and a series of model upgrades replaced this engine with more powerful versions; the 206L-1 used a 250-C28, and the 206L-3 and 206L-4 used the 250-C30P. I'm not going to redo or bore you with the absolute full details of the CowanSim B206, but just here highlight the details of this new variant. The full review of the earlier released CowanSim 206B3 is here if you want those details: Aircraft Review : CowanSim 206 B3 CowanSim 206 L3 First up in the differences between the two releases of 206B3 and the 206L3, is that there is only one texture version included. The 206B3 had both a 2K and a 4K texture packages to choose from, and here there is only the heavier 4K package available. To note that the CowanSim 206B3 did have an unusual aspect to the aircraft. It was not made perfectly to scale, or it is a little larger than the real sized aircraft, which is very odd, and very unusual in a flight simulator. The reason given was that the extra space, gave you a better perspective when flying in a VR (Virtual Reality) situation... by the look of this newer L3 LongRanger, it is again scaled in the same larger scale as the 206B3, and has not been reverted back to a true scale. The extra 30 inches (760 mm) is added in just behind the pilots. This on the right has a full panel and the same sized door as on the B3, on the left however the door is double-hinged, with both the door and extension being able to be opened (for a reason, as we will see later) wider. The B3 had a darker brown highlighted interior with black and light grey insert seating (below). The L3 has the same seats and layout but with instead grey and light brown insert seating with grey highlights. You could call it executive. Otherwise there are no other differences, but a very nice cabin it is. The menu options are still on the X-Plane banner menu "CowanSim-206L3"... and there are the same two dropdown options of the "206L3 Options" and the "Configuration Manager". There are only two new options on the menu list. One is the "HEMS" (Medical Version)... ... that puts a Doctor and woman positioned patient into the rear of the 206L3, and very well done it is, with the full sets medical equipment set out on the rear bulkhead. The second new menu option, is to put "Helmets on Pilots" for EVAC work, but oddly the pilots stay in civilian clothes and are not clothed in flightsuit overalls? The CineFlex system on the B3 is still also available on the L3, replacing the left rear facing seat... ... and access to all these features can also be done (for VR) via by the noted "Configuration Manager", also situated on the banner menu. From the pilot's seat the L3 feels exactly the same as the B3... nothing new or different here, or thankfully nothing new to learn in instrumentation either. And even if you have the optional plugin, the Reality XP GTN 750 can still be fully integrated into the cockpit. As you remember on the B3, you use the "Wing Sweep" X-Plane setting to control the twist throttle RPM on the collective. Flightcheck CowanSim 206L3 It feels almost exactly the same as the B3. You have more power available in 420 hp (310 kW) from the Allison 250-C30P, but also more weight to carry with the longer fuselage, so you sort of come out even. Still you feel the longer tail behind you, the LongRanger feels "Longer" and slightly different, but not by much. The L3 modifications include strengthened airframe structural components (including a new tailboom), improved transmission, upgraded engine for the L3, all of which result in a maximum gross weight increase of 300 pounds and the increased performance. Basically though the L3 still feels the same to fly, with the light touch, mild handling and forgiving nature of the 206B3. "Boom, boom" and your soon into the groove... the 206 is agile and for it's size, really fast, so your soon powering down the field. It very quickly all comes back fast, light touch on the controls, but "boy" you can move, fast and just "two hundred" above the ground with no effort... Sounds are as good as I remember them. The 206B3 had a big sound update just after the release of the 206 B3 in Version 1.1 (January 8th 2022). And they are same sounds in the package here as well, CowanSim note them as "The fully immersive sound set that was developed with FMOD" and very good they are, no qualms there. The gearbox whine sounds are excellent, and just as I remember them. I power around the end of Doncaster Sheffield Airport's (EGCN) runway 02 and head straight back up the other side and then head out towards Doncaster. The performance is the same as the L3 in a Rate of Climb of 1,350 ft/min (6.9 m/s), a Max speed of around 120 kn (140 mph, 220 km/h) and the never exceed speed is 130 kn (150 mph, 240 km/h), so you still get a lot of performance out of the same twin-blade, single turbine arrangement. The Range is 374 nmi (430 mi, 693 km) with a Service ceiling: 13,500 ft (4,100 m). I see-saw over the Doncaster rooftops at supreme fast speeds for ages and then I realise I need to be more serious and stop all this cop-chasing fun, so it it is time to head back to EGCN... There are the same passengers (and both pilots in the front) as in the L3, but the two forward seats are empty, there is so much space in here, that the LongRanger feels huge inside compared to the B3. .... EGCN and I take a long wide turn pass to reduce my height, speed and to approach the General Aviation area from the east. The 30/30 equation works very well here in 30 Knt's forward with a drop in height of 30 ft, it feels about right in the approach. Moving into the hover or transitioning from fast forward flight known as Effectively Translational Lift (ETL), the LongRanger was very, very smooth, and no severe power changes were necessary just exactly like the B3, however the tail feels a bit lighter. I feel I am using more cyclic backstick more than the B3 to arrest the forward speed and in the final move to hover over my landing target. The L3 is a little nervous, but it is nothing I can't control, as the upwash can be a little disconcerting as you get into the final touch zone, you feel you could lose the 206, so it takes a little nerve to pull off and to complete out the landing. And I'm down... and even slightly relieved that at the last minute it could have all gone awry, but you would soon get it down pat with a few practise runs. So the CowanSim B206 L3 is as impressive as the B3 and it also again can be flown by users with not the extreme skills that is sometimes required with these machines, and surprisingly even for a Helicopter in this Light-Heli category... as most in this classification can be very nervy and challenging machines to fly, but LongRanger, just like it's cousin, still finds that sweet spot in handling, control for great and easy (even enjoyable) flying. ___________ Liveries The CowanSim 206B3 had a gazzillion liveries, actually there was 58 Liveries! There are 19 liveries here for the L3, again all high-quality 4K extreme. They cover again pretty much everything with a focus on EVAC, Police, and Television versions. Yellow/Black is default (note there are two aircraft that have the same rego no. N-CNSM, the default yellow and a black livery? A Paintkit is also included for your personal designs. ____________ Summary Early in the year 2022, CowanSim released their version of the venerable Bell 206B3 or "JetRanger". Here is the variant of that aircraft in the 206L3 or the LongRanger, that puts a extra 30 inches (760 mm) extension into the airframe to create a more spacious cabin and ideal for MediVac missions. You could also call the L3 an "Executive" version of the shorter JetRanger. Overall here everything including all the features and the options on the CowanSim 206B3 are included in the L3 variant, the only real differences are the longer door (left), and side panel right, and two extra features include a Medical experience (stretcher and doctor) and helmets for the two forward pilots, but not flying overalls oddly. The new 19 liveries are a mixture of both old (B3) and new (L3) designs. Flying between the two are are nearly identical, but the L3 is a bit more lighter on the tail and feels actually longer than it is, otherwise with the exact same instrumentation, conversion is a breeze. The Reality XP GTN 750 can also still be fully integrated into the cockpit. The CowanSim 206L3 is sold as a separate aircraft and not part of the 206B3 package, so it is a new aircraft purchase to add in the LongRanger to your fleet... But if you had to choose, then the LongRanger has slightly more features than the B3. CowanSim's aircraft are always interesting machines to fly, as is this second Ranger in the LongRanger. The point could be made in that is it too docile in it's flight parameters? That aspect certainly helps wannabe Helicopter pilot's and this is certainly a great and simple aircraft to be introduced to vertical flight, I think it is slightly both ways, both in that the flight envelope is a not as highly technical as it should be, notable is the not to scale machine, both aircraft are slightly bigger than they should be. It's a CowanSim... overall you know what you buy when you purchase a CowanSim aircraft, and this Bell 206L-3 is another well designed and detailed CowanSim... Nice, again. _______________________________ Yes! the CowanSim 206 L3 is NOW available from the X-Plane.Org Store here: CowanSim 206 L3 Price is US$32.95 The 206L3 is a stretched version of the 206B3 with seating for 7 and a larger engine. Features: Free Future Updates Tested and Zeroed in by Real Pilots Several Commands for Mapping Hardware Remove Before Flight Accessories Hardware Throttle Config Pilots & Passengers Working Floats System Low & High Skid Versions Dynamic Weight Options Functional Spot Light Functional Spray Kit Functional Cineflex Camera 2K & 4K Versions FMOD Fully Dynamic Sound Pack Window Rain Effects Compatible with Vulkan API Virtual Reality Ready AviTab Integration RXP GTN 750 Integration Realistic Flight Dynamics 4K & 2K PBR Custom 3D instruments Detailed Night Lighting xLua for Systems and Animation SASL v3.12.1 for Custom Plugins Realistic Flight Dynamics This model has an authentic feeling while exploring the virtual world thanks to Laminar Research for developing a fantastic flight sim. 4k Physically Based Rendering Textures 4k PBR textures, or physically based rendering, provides the ability for very realistic lighting that mimics the flow of light in the real world. This model takes full advantage of X-Plane’s lighting with dynamic reflections and materials. Custom 3D Modeled Instruments Everyone loves a detailed and realistic looking cockpit. After all, that is where we spend most of our time in the sim, flying! The 3D instruments were developed to a high standard and are fully functional, with extensive custom coding to make it as realistic as possible. A Nice Cozy Cabin Sit back and relax in the cozy rear cabin and enjoy replays of your flight from a passenger’s perspective! Was it as comfortable and smooth as you thought it was from the pilot seat? This is especially interesting in VR and landing replays are the best. Paint Kit & Liveries Comes with several liveries and we also included a detailed paint kit. The kit is provided in both GIMP and Adobe® Photoshop® formats. A UV map layer included in each file allows for easy and accurate repaints. Vibrant and Detailed Night Lighting X-Plane has wonderful night lighting. The 206L3 project aimed to have plenty of lights, inside and out, making night flights possible. From the landing light to the cabin lighting, this helicopter really stands out at night. Animation & Sound Thousands of lines of custom code make up animations and systems. The fully immersive sound set was developed with FMOD. Sounds and animations work together with visual rotor-speed vibrational feedback, dynamic blade slap, rain effects and more. Reality XP GTN 750 Integration The Reality XP GTN 750 can be fully integrated into the cockpit. Reality XP GTN 750 Touch is the genuine simulated device used by flight simulation enthusiasts navigating the virtual skies as well as real world pilots for familiarization with the device. This add-on is a payware add-on and you can purchase it here: https://reality-xp.com/ Requirements X-Plane 11 Windows, Mac or Linux 4 GB VRAM Minimum - 8GB+ VRAM Recommended Download Size: 2 GB Current Version: 1.0 (March 18th 2022) ___________________________________ Installation and documents: download for the 206 L3 is 1.06Gb and the aircraft is deposited in the "Helicopter" X-Plane folder. Full Installation is 1.58Gb Documents supplied are: CHECKLISTS - START-UP - 206L3.pdf MANUAL-206L3.pdf Manual is half completed with no instrument references or just basic system references, but settings are well documented with a very good checklist that shows well intergrated startup and shutdown procedures. Support forum for all helicopters by CowanSim _____________________ Aircraft Review by Stephen Dutton 22nd March 2022 Copyright©2022: X-Plane Reviews Review System Specifications: Computer System: Windows - Intel Core i7 6700K CPU 4.00GHz / 64bit -32 Gb single 1067 Mhz DDR4 2133 - ASUS GeForce GTX 1080 8Gb - Samsung Evo M2 2TB SSD - Sound : Yamaha Speakers YST-M200SP Software: - Windows 10 - X-Plane 11.55 Plugins: Global SFD plugin US$30.00 : Environment Engine by xEnviro US$69.90 : RK Apps XPRealistic v2 - US$34.99 Scenery or Aircraft - EGCN - Doncaster Sheffield by Fly X (X-Plane.OrgStore) - US$17.99 (Disclaimer. All images and text in this review are the work and property of X-PlaneReviews, no sharing or copy of the content is allowed without consent from the author as per copyright conditions) All Rights Reserved
-
Scenery Review : KIAD - Washington Dulles International Airport by Nimbus Simulation Holes to fill? But some have taken years to fill, and for me this one has been a whole decade in filling in a major scenery hole. I see X-Plane as a giant place to fill in block by block, I call it "Building the X-Plane world one airport at a time". And throughout the years I have filled many, many of theses outsized holes with quality scenery, and they have given back in return many hours of pleasure, and have created some really great destinations to return to consistently. The scenery in question is KIAD or Washington Dulles International Airport, which has never had a decent replica scenery to use or visit. Many users will note a few freeware versions with one actually not too bad by Chris-flies, but has also been in constant updates and never really reached a sort of completion quality. But I also sort of have a repulsion to certain X-Plane default modeled terminals, so in reality nothing was going to beat a properly created payware version of "Dulles". Then a few years ago Nimbus Simulations announced their version of Dulles, and also mentioned MEM-Memphis in development at the same time. Things get in the way of life, like a killing pandemic and now even a bigger killing European war, major floods and even the odd climate change disasters, but here now KIAD is, and this is very high quality "Dulles" that we can all intergrate very nicely into our North American and global network from Nimbus... and now thankfully fly in and out of Washington DC. So was it worth the wait, the answer is yes, but in areas I slightly expected more considering the development considering the extended lead up time, but as a quality Nimbus scenery it ticks all the right boxes. Plugins First up is that with the actual scenery download, you also have to install also a downloadable plugin. This is placed into your X-Plane Plugin folder, and not only do you use it to authorize the scenery, but it is also required for a few special features. It is the same plugin that came with the Nimbus KATL - Atlanta scenery, but you will need the updated version for use with this KIAD airport. Swapping over or using the KATL version does work, but not completely, however the new plugin version works the other way around with KATL, so you still only need the one plugin for both the Nimbus Sceneries, just make sure it is the updated one. KIAD-Dulles is one of those mega spaced out airports that could only come from the United States. In it's layout it reminds me a little of KDEN, with four major runways, three set parallel in L (Left), C (Central) and R (Right), with an offset cross runway 12/30, and there is a little bit of KATL-Atlanta in here as well. The first views of Dulles is excellent, however the boundaries of the scenery are highlighted by the darker trees compared to the much more lighter default textures. For once I think it is the wrong way around here. The Default textures are now not living up to the better layout of the scenery, and in most cases it is usually the other way around. So it will be interesting to checkout this KIAD scenery in X-Plane12 with it's new trees feature. It also shows the ageing of the decade old default textures in X-Plane. From a distance however IAD fills in quite nicely as the default textures go darker. The Dulles field layout is actually pretty simple. Major huge terminal in the north and two massive long concourses in A/B and C/D, and all connected together by a Inter-terminal transportation system called the AeroTrain, an underground people mover which currently operates to all of the concourses except for concourse D, with passenger tunnels remaining to concourses A and B. The airport is also famous for it's mobile lounge (also known as "plane mates"), of which we will look at later. Washington Dulles International Airport IATA: IAD - ICAO: KIAD - FAA LID: IAD 01L/19R - 9,400ft (2,865m) - Concrete 01C/19C - 11,500ft (3,505m) - Concrete 01R/19L - 11,500ft (3,505m) Concrete 12/30 - 10,501 (3,201m) - Concrete 12R/30L - 10,500ft (3,200m) - Planned Elevation AMSL 313 ft / 95 m Before World War II, Hoover Field was the main commercial airport serving Washington, on the site now occupied by the Pentagon and its parking lots. It was replaced by Washington National Airport in 1941, a short distance sited southeast. After the war, in 1948, the Civil Aeronautics Administration began to consider sites for a second major airport to serve the nation's capital. Congress passed the Washington Airport Act in 1950 to provide funding for a new airport in the region. The initial CAA proposal in 1951 called for the airport to be built in Fairfax County near what is now Burke Lake Park, but protests from residents, as well as the rapid expansion of Washington's suburbs during the time, led to reconsideration of this plan. One competing plan called for the airport to be built in the Pender area of Fairfax County, while another called for the conversion of Andrews Air Force Base in Prince George's County, Maryland, into a commercial airport. The current site was finally selected by President Eisenhower in 1958; and the Dulles name was chosen by Eisenhower's aviation advisor Pete Quesada, who later served as the first head of the Federal Aviation Administration. Dulles was built over a lesser-known airport named Blue Ridge Airport, chartered in 1938 by the U.S. The airport was Loudoun County's first official airport consisting of two grass intersecting runways in the shape of an "X". The location of the former Blue Ridge Airport sits where the Dulles Air Freight complex and Washington Dulles Airport Marriott now sit today. A bit of trivia! Dulles originally used airport code DIA, the initials of Dulles International Airport. When handwritten, it was often misread as DCA, the code for Washington National Airport, so in 1968 the Dulles' code was changed to IAD. Focus is on that iconic massive terminal building... the main terminal was designed in 1958 by famed Finnish-American architect Eero Saarinen, and it is highly regarded for its graceful beauty, and is suggestive of flight. Saarinen was also famous for the TWA Flight Center, also known as the Trans World Flight Center, at New York City's John F. Kennedy International Airport (JFK) and even for the St Louis Gateway Arch. In the 1990s, the main terminal at Dulles was reconfigured to allow more space between the front of the building and the ticket counters. And additional structures at both ends of the main terminal more than doubled the structure's original length. The original terminal at Taiwan Taoyuan International Airport in Taoyuan, Taiwan, was also modeled after the Saarinen terminal at Dulles. And a stunning terminal it is... Nimbus has done a brilliant job here in reproducing one of the airport monuments in the United States, the flowing roof and sculptured tiers are excellent, originally the building was open to the elements and was later closed in with glass, a nice touch is the worn roof detail, is were the water has collected in the shallow. It is first rate... notable is the original control tower as part of the terminal complex on the airside of the terminal. Modern, even futuristic in it's day, now it is just part of the original complex. Concourses A and B All non-United flights operate out of these two concourses as well as some United Express flights. Concourse A (which has 47 gates) composes the eastern part of the closest midfield terminal building. It consists of a permanent ground-level set of gates designed for small planes and regional jets used by United Express, and several former Concourse B gates. The concourse is primarily used for international flights. Air France operates an airline lounge opposite gate A22, Etihad Airways operates a First and Business Class lounge across from gate A15, and Virgin Atlantic has a Clubhouse lounge across from gate A32. Concourse A's AeroTrain station is located about halfway through the concourse, between gates A6 and A14. Concourse B (which has 28 gates) composes the western half of the building. It is the first of the permanent elevated midfield concourses. Originally constructed in 1998 and designed by Skidmore, Owings & Merrill and Hellmuth, Obata and Kassabaum, the B concourse contained 20 gates. In 2003, 4 additional gates were added to concourse B, followed by a major 15-gate expansion in 2008. In addition to the AeroTrain station located between gates B51 and B62, Concourse B also has an underground walkway to connect it to the main terminal. Concourse B is used by some international carriers, and is also utilized by all non-United domestic and Canada flights. The facility also includes a British Airways Galleries lounge, a Lufthansa lounge divided into Senator and Business class sections located between gates B49 and B51, and a Turkish Airlines Lounge near gate B43. On the ramp the detail or clutter is very good, but not IAD or airline branded. Walkon/Walkoff detail is good, so you can use a lot of regional jet or prop aircraft with inbuilt stairs at KIAD... ... but at a lot of gates the default pushback trucks do override a lot of the gate parking. There are "Autogate" Airbidges, and they are well detailed here, and also some really great Airbridge covered ramp walkways which I really like. Centre concourse A/B has a prominent ramp tower, that is well intergrated into the concourse. However Nimbus Simulations are still using throughout their sceneries, the now very old (Marginal) "Autogate" system and not the usual standard more modern SAM system, this has caused a lot of howling from the patriots on the forums on "Isn't it about time Nimbus caught up with modern standards". To a point I agree, as here there are gate complexes that require double or even triple airbridge capacity, but the "Autogate" system does not allow for that? The Marginal system my be free, but now it is far more inferior. Terminal detail is excellent, as is the glass. Glass is worth talking about here, because Nimbus have always tried to create a very realistic glass because then do complete detailed internal concourse (and terminal areas). So they want you to see their excellent work. However it didn't really work either, because clear empty glass just does not look realistic. Their KMIA MIami was a good example of this... KATL-Atlanta was far better. But here at KIAD they have used a more dark tinted the glass (still see-though) and now it looks excellent. The nice aluminium cladding looks excellent with built in reflective effect and also compliments the nice glass. The plugin uses a nice feature that was premiered on the KATL-Atlanta scenery by Nimbus. Active gate signage... The tool is found in the X-Plane banner plugins folder and you select "Info Screen"... This brings up a pop-up to fill in your "Destination Airport" and "Departure Time" (just straight numbers and no colon) Then the gate information board will show the flight info of the route, current temperature, current time, destination airport and departure time. If the flight is ahead of the departure time the board will show "On Time", if the flight time has passed it will show "Delayed"... other information is also shown as required like "Caution Jet Blast" It is all very good. As noted Nimbus do fully detailed interiors and very well done they are, and also actually not that heavy on your framerate considering the detail presented here. Besides the well done interior, there are animated walkers, most are on their phones... but my favorites are the bag pullers, and these animated people can be seen through the external glass from certain gates and give off a very realistic tone and movement inside the concourses.... detailed gate areas are really well done as are the airport shops. The interiors are above Concourse A/B, lower Concourse C/D, but C/D is not really a glassy terminal, so not much can be seen externally... the interior of the main Saarinen reception terminal is also detailed. Before the Inter-terminal AeroTrain transportation system there was the mobile lounges (also known as "plane mates") that moved the passengers from the main northern terminal to the required gate or lounge for departure, the ones at Dulles where famous, or infamous which depended on if you liked them or loathed them. They have been very well replicated here as they are still used for Concourse D. and they had all been given names based on the postal abbreviations of the 50 states (USA), e.g., VA, MD, AK. Disappointing though is that the lounges are not animated? Even a few moving around would give Dulles gravitas... but not so. In fact there are no vehicle animations at all anywhere on the ramps and aprons, which again would have been nice. Concourses C and D Concourses C/D are solely used for United Airlines flights, as it functions as their hub at IAD. All mainline United flights and most United Express regional jet operations operate out of these concourses (some United Express flights use Concourse A). These concourses were constructed in 1983 and designed by Hellmuth, Obata and Kassabaum. The two concourses have 22 gates each, numbered C1–C28 and D1–D32, with odd-numbered gates on the north side of the building and even numbered gates on the south side. Concourse C composes the eastern half of the terminal and Concourse D composes the gates on the west half of the terminal. The C/D concourses were given a face lift in 2006 which included light fixture upgrades, new paint finishes, new ceiling grids and tiles, heating and air conditioning replacement, and complete restroom renovations. Concourse C also has a dedicated Federal Inspection Station located at ground level. International United flights not originating at an airport with US customs pre-clearance can directly deplane passengers via the jet bridge at Concourse C (as opposed to using plane mates to offload passengers). Once deplaned, arriving passengers are separated. Passengers terminating at Dulles take a mobile lounge that transports them to the International Arrivals Building, while connecting passengers continuing on another United flight go through U.S. Customs and Immigration at the FIS station on the ground level. Since this immigration facility is only for connecting passengers on United and other Star Alliance carriers, it has shorter lines and passengers do not have to re-clear security at the massive security checkpoints in the main terminal. A new and permanent C/D concourse (also called "Tier 2") are planned as part of the D2 Dulles Development Project. The new building is to include a three-level structure with 44 airline gates and similar amenities to Concourse B.The concourse plan includes a dedicated mezzanine corridor with moving sidewalks to serve international passengers. When built, it is planned that both terminals will be connected to the main terminal and other concourses via the AeroTrain. To that extent, the AeroTrain station at Concourse C was built at the location where the future Concourse C/D structure is proposed to be built, and is connected to the existing Concourse C via an underground walkway. Concourse C/D is older and feels it in it's higgledy-piggledy way, but I love these added on and more authentic past relic areas. The detail ramp level is excellent, with all the different complex areas working together, there is as noted not much glass here, but again that highlights the realism. If I am going to park at IAD, then it will be here. Control Tower Located south field is the new(ish) control tower The original Airport Traffic Control Tower (ATCT) at Dulles opened along with the Airport in 1962. Since then, there has been tremendous growth in the number of flights and airline gates. As new runways are built, a taller, and more centrally positioned tower provides views all around the Airport for the safe guidance of aircraft. The new tower is an adaptation of an FAA Standard and was designed so that it will not visually compete with Dulles' original ATCT, which is an integral element of the historically relevant design of Dulles' Main Terminal. For this reason, the original tower will not be removed or demolished. The tower was dedicated in 2007 and is 300 feet to cab level, and 325 feet at it's highest point. The ASDE-X radar system atop the tower was commissioned on April 1, 2008. Again very similar to the tower design at Atlanta, the tower design here is again well done and highly visiible on all approaches. Oddly the ASDE-X radar does not again rotate, and that fact is highly noticeable from every angle? Tower view however is totally excellent and well placed with no obstructions and with great views of all the approaches and runways. Below the main control tower is a large remote parking apron "R RAMP", there is second remote, remote parking area between the W3 and W4 taxiways set out between Runways 1L and 1C thresholds called "APRON W". There is an option included in the package to have Dulles without (Traffic Global/WT3) empty, or use the provided "STATIC" aircraft option. Cargo IAD Cargo is set west of the main terminal building on taxiway Z. There are two sections, OLD and NEW, with the newer larger warehouses set to the north, it quite a big cargo port, and any sized freighter should and can easily be catered for. Cargo ground clutter is non-branded, but very good and clustered. Warehouse detail is also perfect with the older worn metal iron sheeting on the OLD buildings and the more modern cladding on the NEW section. On the opposite side east is a non-branded maintenance area, and GA Section Terminal with Private Jet reception area, again non-branded. The U.S. Customs are housed in this building as well. Textures The field textures are very good, but don't have that gutted ribble effects that show real depth. There is a LOT of concrete here, but also a lot of nice variations in the concrete surfaces and textures with some good dirt and grime on the ramps with very nice discolourisation compared to the other wear areas, tar repairs are also quite noticeable and well done... so overall all the ground areas are very good and realistic. Burnt-in ambient occlusion effect laden textures are done here on all hard surfaces, and in the right lighting conditions again look very good, but I have seen better with more depth and feel. 3d grass is excellent, with nice full sways of spring flowers to gaze at on your arrival, there is nothing like good grass to fill in large blank field areas, it can make or break a good scenery. Lineage is strong, but not noticeably worn, just the hard lines. Environs Infrastructure landside and in the immediate environs of Dulles is very good... the building detail is very good and very varied in content, but not in the detail, or that detailed feel, and lot of the buildings are missing their branding as there is all the missing branded multitude of car rental zones and buildings... the entrance "Dulles Airport Pond" has been perfectly replicated and looks good. The airport's commercial infrastructure in the far north is well replicated as well, giving you a great feel and fill of the 19C and 19L approaches. To the far south you have the same quality of distant infrastructure detail as well... ... a lot of the buildings and represented required area infrasturcture well placed here, including the Fairfax Police Training Ground (track). All the Infrastructure is built on Lo-Res photo textures, there is not much detail and in areas the textures are a bit jaggy, but good fill in work by Nimbus has created an overall decent scene. Famous to any Dulles scenery is the inclusion of the the Steven F. Udvar-Hazy Center, also called the Udvar-Hazy Center, which is the Smithsonian National Air and Space Museum (NASM)'s annex at the Washington Dulles International Airport in the Chantilly area of Fairfax County, Virginia, United States. The museum holds numerous exhibits, including the Space Shuttle Discovery, the Enola Gay, and the Gemini 7 space capsule and an Air France Concorde F-BVFA. Note the connection taxiway to KIAD taxiway J by the 1R threshold. Lighting Overall the lighting at KIAD-Dulles is adequate. It does the job, but it is nothing really special. You see a lot of the default X-Plane lighting here, and mostly all in one tone, and only the iconic Terminal is nicely and brightly lit, but it does look very nice. The ramps are again only one tone and dull ones at that, and most of the rest is in down lighting. Both the (old) and new control towers have nice uplighting, that is effective. The concourse windows turn clear at night, and again look very good with all the internal action, a slight window tint though would have made them a bit more natural, but overall it is a nice to airport to arrive at, at night. _______________ Summary Nimbus Simulations have been a prolific scenery (and aircraft) developer for now over a decade for the X-Plane Simulator, latest releases in scenery have focused on America's more mega airports including KORD-O,Hare Chicago, KMIA Miami and KATL Atlanta. This release is of another major iconic hub is for America's capital state in Washington D.C, in Virginia... this is KIAD-Washington Dulles International Airport. Long wanted for the X-Plane Simulator, this Washington "Dulles" finally a creates great destination and hub airport to fill in an important connection on the eastern seaboard of the United States. Overall the scenery is excellent, with the important iconic Eero Saarinen terminal beautifully modeled, and both major A/B and C/D concourses also extremely well detailed and highly realistic. All have great detailed interiors with animated (walking) passengers and clever plugin powered gate information boards. Ground textures are also really good with ambient occlusion effects and excellent 3d grass... the famous Lounges or "plane mates" are also highly represented, but are not animated. Although highly innovative in many areas. KIAD and Nimbus also relies very heavily on default or older X-Plane features. It uses the now old Marginal "Autogates" system and not the newer SAM system, no field vehicle animations and the lighting is only the basic X-Plane tones and objects. I really like Nimbus sceneries and this is certainly a great addition to any collection, even now a complete point to point network of just Nimbus created airports. They also give great value to content and the quality of the work is excellent and highly detailed. But a step forward in airport branding, animations and certainly better autogate systems would move their work far higher into that high-quality area. For me "Dulles" will fill in a major hole in my East Coast American network, no doubt in the future that visits to KIAD and Washington will now get far more busier, and to cover more of the intergrated network within the States themselves, and that aspect alone makes the IAD scenery really valuable to my X-Plane experience. Those important aspects alone and with the quality of this IAD scenery makes it all for me a very worthwhile purchase... Highly Recommended. ___________________________________ Yes! the KIAD - Washington Dulles International Airport by Nimbus Simulation is now available from the X-Plane.Org Store here : KIAD - Washington Dulles International Airport Price is US$29.95 Features: High-Definition Airport Terminals with 3D interior and people HDR lights New 4K textures with PBR materials. Night lighting Ground textures with PBR materials High quality vehicles with PBR material 3D trees Parking lots full of cars Ground markings on each gate and runway Files for empty airport or static planes Animated Airport GroundTraffic (plugin by Marginal) AutoGate plugin with custom highly detailed jetways (plugin by Marginal) Animated people inside the terminals Information screens that shows time, pressure, temperature, destination airport, departure time, delay and the amount of delay People mover Detailed tarmac textures from up close or far out High quality new vehicles and miscellaneous objects Requirements X-Plane 11 Free Update to X-Plane 12 when available Windows, Mac or Linux 4 GB VRAM Minimum - 8 GB+ VRAM Recommended Download Size: 1.2 GB Current version: 1.0 (March 4th 2022) Installation and documents: IAD is download of 1.21Gb download that is translated into a 2.16Gb install in your Custom Scenery folder. Nimbus Simulation - KIAD - V1.0 Nimbus airports V1.1 (plugin) A companion download of the Nimbus Simulations PLUGIN is also required for this scenery, for authorisation and airport special features, the separate download is deposited in the X-Plane/Resources/Plugins folder. earth.nav.dat file files are included to switch the preference of either "NO STATIC PLANES" or "STATIC PLANES" options. Documents There is a "Read Me" page for installation and requirements ________________________________________ Scenery Review by Stephen Dutton 19th March 2022 Copyright©2022: X-Plane Reviews Disclaimer. All images and text in this review are the work and property of X-PlaneReviews, no sharing or copy of the content is allowed without consent from the author as per copyright conditions) All Right Reserved Review System Specifications: Computer System: Windows - Intel Core i7 6700K CPU 4.00GHz / 64bit -32 Gb single 1067 Mhz DDR4 2133 - ASUS GeForce GTX 1080 8Gb - Samsung Evo 1TB SSD Software: - Windows 10 - X-Plane v11.55 Addons: Saitek x52 Pro system Joystick and Throttle : Sound - Bose Soundlink Mini Plugins: Environment Engine by xEnviro US$69.90 : Traffic Global - JustFlight-Traffic (X-Plane.OrgStore) US$52.99 : Global SFD plugin US$30.00 Scenery or Aircraft - None-
-
NEWS! - Aircraft Released : CFM Shadow D-D by Jemma Simulations So what is a CFM Shadow?, well it is a two-seat ultralight class (called a microlight in the UK) aircraft with a pod and boom design. They were built as a kit or fully assembled by Cook Flying Machines (CFM). And nearly 400 of these aircraft were built from the early 1980’s through to the early 2000’s. All models of the Shadow were powered either by a Rotax two cylinder, two-stroke engine which was mounted behind the fuselage on an exposed framework. The earliest versions were powered by 40hp Rotax 447 and the later versions were powered by 65hp Rotax 582’s or a 80hp Rotax 912. This version of the aircraft is a model D-D (the second D for dual-control), and is powered by the Rotax 582. Features: Highly detailed and accurate 3D model Accurate flight model, flight tested by real world Shadow pilots 4K PBR textures 6 liveries Accurate start-up procedures with the unique "pull-start" cord in the cockpit. Fully functional "handheld" radio including VOR navigation, with VR friendly pop-up and multi-screen pop-out functions. Radio integrated with POSCON and xPilot plugins for online flying. All canopies operate and can be locked. Unlocked canopies will vibrate (and even open) in flight. Integrated Avitab Ultralights are interesting and fun aircraft to fly, slow and low is the game to get the best of the unusual arrangement... Images are courtesy of Jemma Simulations Designed by Jemma Simulations ________________________________________ The CFM Shadow D-D by Jemma Simulations is now available from the X-Plane.OrgStore!... Here: CFM Shadow D-D by Jemma Simulations Price is US$15.95 Requirements X-Plane 11 - Support for XP12 when available Windows, Mac or Linux 4 GB VRAM Minimum - 8 GB+ VRAM recommended Download Size: 240 MB Current version 1.0 (March 12th 2022) ________________ News by Stephen Dutton 15th March 2022 Copyright©2022: X-Plane Reviews Disclaimer. All images and text in this review are the work and property of X-PlaneReviews, no sharing or copy of the content is allowed without consent from the author as per copyright conditions) All Right Reserved.
-
Aircraft Review : Diamond DA-50RG by Aerobask It is hard to believe that it is nearly nine years since Harranssor burst onto the X-Plane Simulator scene with a freeware Eclipse 550 personal jet. The quality of that jet for a freeware was off the charts for the period, so it was also always a forward plan to release payware aircraft... that came with the Diamond DA-42 Twinstar in Mid-2013, and it set a archetype in the type of aircraft Aerobask, now a team set out to develop in X-Plane ever since. Notable is that Aerobask's future feature development is of the Falcon 8X, breaking the pattern of nearly a decade. That format set back then for Aerobask is of very modern carbon-fibre aircraft or light jet, (VLJ) with a particular association with the Diamond Aircraft of Austria. The DA-42 is now long gone, but Aerobask released a Diamond DA-62 in 2018. So here is a followup Diamond to the DA-62 in the Diamond DA-50 RG (the RG relates to the Retractable Gear version). There is currently only two DA-50's, First one was shown in 2006, and it made it's maiden flight on 4 April 2007. The project has been proposed to be powered by several different engine configurations, but was certified on 9 September 2020 with the Continental Aerospace Technologies CD-300 which is a geared, liquid-cooled, turbo-charged and jet-A1-fueled engine controlled by two redundant full FADEC systems. The original DA-50 had the FG or Fixed Gear configuration, the second this "RG" configuration. The DA-62 uses the very same fuselage as the DA-50 (Originally called the DA-52), but the DA-62 has two Austro AE300 Diesel engines burning Jet A fuel, so in some aspects it can be slightly confusing in their different configuations. The evolution from the American upright designs, say Cessna, Piper and Beechcraft is shown here in this smooth curvy and very aerodynamic aircraft. It is what a modern General Aviation aircraft should be. There is no doubting the quality from Aerobask, they were renowned for it from the start, so the detail oozes out of every external or internal area. You expect with the same fuselage that Aerobask would just copy the same to the single-engined aircraft from the twin, but that is not the absolute case here. There are of course a lot of similarities with the same instrument panel shape and decor, but everything including the front seats are completely different. Being a reviewer you are faced with other developers hard work. It is really good work as well, and you have to account for the time and effort put into creating these little replicas of real world aircraft... but how do you rate that level of quality? The problem is created by developers like Aerobask, because their work is so sublime, and the situation is as pro's they are "Bloody well" good at it, and it all shows in the intimate detail of their aircraft. Look at the mesh oil-cooler air intake, and the supreme shape of the main engine intake, it is just levels above of everyone else in this category, so you look at other developers work and say it is average, even if it very good... so Aerobask have created that ultra level of detail and quality that everyone should aspire too. Wing shape and feel is excellent as is the supreme shaping of the winglet, it looks like the real part it is, not a modeled part of the aircraft, and there is a difference. Leading edge ice buffers are also beautifully shaped, and the tail trim and the under elevator detail is excellent. A highlight is the 3-blade composite, electrically de- iced variable pitch propeller from MT Propeller. Glass is brilliant too. Glass is very hard to shape with these very bulbous curvy aircraft, and it has to look right, I mean look right to be this perfect or it would look out of place... and Aerobask get it spot on. If I am going to criticise, the window surround lines are a bit Lo-Res and jaggy at close inspection. But items like the door handle that look flat from a distance are excellent and 3d when observed at close quarters, with fine natural detail and logos. The gear is the same as the DA-62, the rears are trailing link and very well done, if a little factory fresh. The link components are individual in fine detail with the correctly crafted bolts holding the assemblies together, I like the fancy red wheels hubs which are deftly done.... .... the nosegear assembly is just as good with the upper brackets showing real detailing, notable is that the nosewheel is freewheeling and not steered on the real aircraft (steering is via the rudder pedal braking). Menu Before looking at the internal cabin... we will go through the menu. It is located in the banner X-Plane Plugin menu "Aerobask DA50RG Options show/hide" The pop-up card menu is very good and expanded out from past Aerobask card menus with tabs, of which there are four; Ground Options, More Options, Sounds and About. Ground Options Top left is the fuel settings. There are two tanks in MAIN (left), and AUX (Right) both of 73.1kg/24.0GAL capacity. And the Total fuel on board shown top. You can also reset the fuel balance via the "Balance Fuel" button. There are two selections with the lower left "Load Manager' or Weight&Balance. One choice is were you select manually, or you can use the slider to set the overall payload of the aircraft via the "Custom Load Manager" tickbox. Lower left are your weights in Kgs and Lbs, that cover; Empty Mass (or a non-fuel or loaded aircraft), Total Fuel, Payload, Total Mass and Max Mass (don't exceed weight). You load the aircraft via the right column of Bags (with a slider), Co-Pilot, Left (rear) Pax (Passenger), Right (rear) Pax. And you can select either a Male or Female pilot (good in this era of diversity). You have to find a balance between fuel load (meaning range) and payload, load in too much fuel, baggage or people and you get a "Red" and a "Total Mass overweight" warning. The weights (except for the payload, baggage or fuel) are fixed. Right top are the "Static Elements". These include; Chocks, Cones, pitot covers and a static towbar, there is also a GPU (Ground Power Unit). (also selectable internally). The GPU is a small hand unit, but very well done. Notable is that if the Static Elements are used, the pilot then disappears from inside the aircraft. There are two panels lower right. One covers the Breakers or Fuses. You can set the breaker failure or reliability to either; perfect, realistic, entertaining, challenging or can "Reset all breakers" to fixed. The secondary lower panel covers the aircraft's fluids, in the; Oxygen Level (0%-100%) and the De-ice Fluid (0%-100%) More Options Second tab covers the more detailed options available on the DA-50RG, it is quite a complex list of features and ideas. There are seven option choices on the left... Disable Instrument popups (for VR) Keep Instrument Popups inside screen Popup/popout brightness always full Free-caster nosewheel (realistic) (switched off it reverts to tiller control) Bezel-less MD302 (for cockpit builders) Enable (or disable) instrument reflections Enable (or disable) windshield reflections On the right side the list of options are for the G1000 avionics system of which there are eight selections... G1000: Show Ground speed on PFD next to TAS G1000: Show radar height below 2,500ft G1000: FLC mode does not synchronize AP speed G1000: Enable touchscreen features G1000: Disable bezels of popup/popout (again for cockpit builders) G1000: Keep aspect ratio of popup/popout G1000: Synthetic vision (experimental) When selecting the "Synthetic Vision" you get more options. These G1000 options we will cover later to see the options directly on the G1000 system. Sounds There are seven sound sliders; Master, Aircraft Exterior, Aircraft Interior, Copilot, Radios, Environmental and User Interface. You can Enable (or disable) sounds, and Enable (the) speech. About Here is listed the Aerobask development team, but version number is indicated in the popup menu title, and changelog.txt in the main folder. The menu can be moved around your screen, but not scaled... it is also accessible (or popup) via pressing the aircraft registration number on the instrument panel. Interior Aerobask's interior fitouts are always of the absolute highest quality in the X-Plane Simulator, always incredibly well done and detailed, with perfect realism, and again you are not disappointed here with the DA-50RG. Open those huge upward swinging doors and here is another amazing cabin, and it is different to the DA-62, certainly in the front seats. The decor theme here is dark grey with orange piping, and very, very light grey inserts, with a breathable dot material... ... and the "Diamond Aircraft" branding is everywhere, it is all so classy. In the rear it is a bench three seater thanks to that bulbous cabin mid-section, but in reality it is a two-seater back here or a child in the middle. Behind is the net covered baggage area. Seat shape and detailing is simply superb, with excellent casual placed seatbelts and the headphones that are thrown onto the seat. The DA-62 had interesting seats in that the side cushion supports were separate, here they are intergrated back into the seat base, but the separate thigh supports are still there, supported by the same lovely chrome brackets. It is a much more brighter cabin than the DA-62, with lighter tones than the earlier darker browns. Note the lovely finer blue seat stitching, it is used all around the seats and the instrument panel. The room mounted console is the same that is in the DA-62. It holds the internal lighting and ventilation controls. The right hand switch on the forward panel will connect and activate the external GPU as mentioned, and we will look at the lighting later. Forward are two folded neatly window blinds, that drop down when required. They however can't be adjusted in place to an angle, they just store themselves again if you touch them, but they are well done, above in the pocket is an aircraft log book. Instrument Panel The layout of the facia is almost the same as the DA-62, in almost I mean there are a few switches that are positioned differently, but otherwise you would slip in here and know exactly where everything is, if you have earlier flown the DA-62. Front and centre is the native Laminar Research G1000 twin panel avionics system, but it does have a lot of Aerobask custom features. Power up and you get the left PFD (Primary Flight Display) first "Initializing" the system, then the "Aerobask" logo. The system then goes into "reversionary" mode. This is all the primary instruments and engine parameters presented all on the single display, in this case the PFD. (If the PFD failed then the "reversionary" mode switches to the other MFD (Multi Functional Display). Switch on the "Avionics" (AV MASTER), then the right MFD, starts and goes through the same Initializing and logo procedures... ... then settles on the system info page that shows you your navdata database and credits. Press ENT or rightmost softkey to access the right side MFD display. It is all very good and detailed in these startup procedures, and you feel it is very professional in operation. Both displays popup (or out) and can be scaled and moved around the screen. You can of course hide the bezels for home cockpit builders via the menu. Both screens can be popped out via a hotspot on the centre banner logo (arrowed)... PFD (Primary Flight Display) is very good with the large Artificial Horizon dominating the screen with the Speed and Altitude (with built in Vertical Speed) tapes either side, Rate of turn and FD (Flight Director) are all present. Lower is the Heading rose with built in Heading, Wind (3 options), CRS (Course) DME, NAV 1, NAV 2 and OBS. There is the option to put a small map on the PFD but I never do (it makes the display too crowded). All Radio, Autopilot (AP) settings and data are across the top banner of the panel. Note the inbuilt warnings panel centre right. There is a custom tool to input values directly by touching the screen (i.e. clicking the values or using the mouse scroll wheel to adjust them). For example, for changing a radio frequency or here the heading, you can use the mouse scroll wheel, which is much easier than turning the knobs in the 3D cockpit. it has a small slider or ++ / -- tool to say which items can be manipulated. Synthetic Vision There is the "Synthetic Vision" tool that we mentioned earlier. There are three modes that can be selected from the "More Options" menu. The first is the standard default Laminar one with the blue top and dirty brown lower horizons. Then the "Topology Only", with a light blue (realistic) sky and green lower horizon, the final one is "Topology + Terrain" with the same light sky and brown lower horizon. An extra option selection is "Real Pitch Scale", With a Flight Director (FD) Cross-pointer and Sky Pointer instead of a roll pointer, both Topology and Topology + Terrain with pitch scales can be switched off or on are shown below. The Synthetic Vision by Oscar Pilote does not work very well in a hard stand position, so I will leave it set in the Topology + Terrain mode while flying. Other PFD settings lower menu include the HSI Rose and Tape transparency. There are three modes to choose from; Opaque, Medium and Full, to see the full Synthetic Vision display. The secondary MFD in a MAP/Navigation panel covers also all the (EIS) engine outputs which are in two versions with one visual and one in data. This is another custom panel by Aerobask. The colourful engine readouts cover are on page one; Manifold Pressure (Load) and RPM, Oil Pressure and Temp, Coolant Temp, Gearbox Temp, Volts and Fuel quantity for both tanks. and right the FLAPS position (UP-20º-38º) and ELEV (UP-TO-DN) adjustment, the rudder adjustment trim is on the bottom. System switch (data) covers the same LOAD and RPM top, Oil Temp and Pressure and Engine Hours, Fuel Calculations in FFLOW GPH (Gallons Per Hour), GAL (Used), REM (Remain) and can they be reset via the keys. Lower is the same Fuel quantity gauges and Electrical Bus Volts and Battery amps. Flaps and both Trims are also still shown. MD302 SAM® Mid-Panel is the MD302 SAM® or the "Standby Altitude Module" Basically is a standby instrument that "pops"out and the centre knob adjusts the Baro... .. but if you hold the same knob down for two or three seconds then a menu appears that covers In-fight configurable items that are... Altitude units in feet or meters, Barometer units either inHg or mbars, Attitude symbol in traditional or delta, Attitude mask on or off and Altitude trend bar in either on or off. There is a Quick-Doc manual provided that covers the instruments features and their use. Note: The SAM has to be set separately (i.e. Baro) than the main PFD as one adjustment does not cover all the instruments. Top mid-panel are the Instrument and Flood lighting knobs. Top glareshield are four external lighting switches for; LANDING, TAXI, POSITION (Navigation) and STROBE. One of the big features on the DA-50RG are the active circuit breakers. Demonstrated here is "popping" the GPS/NAV2 Breaker that crosses out the NAV2 display... Another great feature is the power adjustable rudder pedals for both the pilot and co-pilot that are moved by the switches on either side of the instrument panel (arrowed lower). Far Left upper on the facia is the changeable aircraft registration, with the nice De-Ice panel below. FADEC (Full Authority Digital Engine Control) switches with test option are set below, then below again are the 1&2 Alternator switches... lower knee panel are the main electrical and start, pitot heat switches/button. Landing gear central, Flap switch and indicators, ELT and more Circuit Breakers. Unlike the DA-62, the Air Pressure gauge is hung below on the right side, with on the left side the manual gear extension. Top centre console has the Environmental Control panel. Mid-console has the main single throttle level. The Diamond has a unique throttle/mixture (FADAC) system that controls both the fuel and power outputs, there is also a GO-AROUND (power) switch built in as well... Top left is the Park Brake, and lower is the Cowl-Flap switch... .... this opens and closes a cowling around the exhausts to cool the engine or smooth out in flight. Centre is a very nice large manual trim-wheel, and under the armrest is the three point NORMAL-EMERGENCY-OFF Fuel tank selector. A handy pen and a soft drink can (sorry no coffee cup in here). One of the primary features in the DA-50RG is the GCU447 (FMS Keypad) that is built into the centre armrest. It is a fully custom control pad for the MFD. It can also be popped out in a separate panel for home builders, or for ease of use. Pressing the “K” button on top the GCU will enable physical keyboard entry, like the “PFD Touch”. To resume normal keyboard, press again. Aerobask has also provided a GCU447 shortcut by pressing the "GCU476 POPUP" sticker on the panel. The GCU447 is very good, very easy to use, but you do lose all manipulator control of the aircraft when in the keyboard mode, so it is best used on the ground before flight if typing in data.... which is the general idea anyway. The twin flight sticks can't be hidden but that is no concern here as they don't at all cover the instrument panel. Beautifully done, with a built in trim switch and ATC mike, and admire the excellent twin plate rudder pedal design. There is a built in AviTab iPad (Plugin Required)... it is stored in the left side console holder, press to mount on the left side of the instrument panel. You can also press the knob attachment (AviTab) holder on the windscreen pillar to bring the AviTab up as well (plugin required). ________ Lighting Internal With the vast array of lighting options available in X-Plane. It is rare to get really bad cockpit lighting in simulation. But there is also the other extreme in getting it perfectly correct as well, in other words to reflect the real aircraft's environment. Aerobask are obviously very good in this aspect, and so it it is in here. Overall with the same cabin architecture as the DA-62 it is very similar, but the lighting in here certainly feels a bit more modern and adjustable than in the DA-62, which feels less dynamic. The two lighting knobs centre panel give you a lot of adjustment, so you can control the glare and brightness to your own particular preferences. Areas like the lower panel, circuit breakers and switch panels are all separately illuminated.... it is all very nice as well. The overhead console has a lot of lighting options built in... The two built in (large knobs) adjust (dim) the front two highly adjustable spot lights and a large centre-positioned cabin light... Two switches rear of the console switch on another two passenger adjustable spot lights, and with all the lighting switched on the cabin is very bright and well lit. The lighting all looks very effective externally. There is a left wing Ice spot-light built into the door, but to note the Ice panel system has to be active to use it. Under the fuselage there are two lights for the Landing and Taxi lighting. They do come through the fuselage at some angles like on the DA-62, but this is par normal as it is a X-Plane lighting bug, that was never rectified. Navigation lights are basic wingtip only with nice ground reflections, but there is no rotating beacon. Strobe lights are also nicely tuned. Flying the DA-50RG Setting up the Diamond is very easy. Programming the G1000 Flightplan is quick with the GCU447. Not completely true as I only used the GCU447 to adjust the flightplan from EGHI (Southampton,UK) to EINN (Shannon, IRL) on the GCU447, the rest was downloaded from SimBrief. But I always look at how you can adjust and edit, rather than the actual inputting in the first place. This is still the standard Laminar G1000 avionics, but the additional option of the GCU447 really does help in the Departure and Arrival edits. My payload is quite heavy at 4346 Lbs, and the flight distance to Shannon is 371 NM, so the tanks are brimming as well with 48.5 GAL (147.6 Kgs), SimBrief note I need 357 LBs of fuel, but that does not compute because the range of the DA-50RG is 1,389 km (863 mi, 750 nmi) incl. 30 min. reserve. So I am taking notes on this. As noted the Fuel selector is hidden under the arm rest... it is very easy to forget it with it positioned under here, and worse is that in flight you have to monitor and then switch tanks to keep the fuel balance correct, I put a small note on my monitor "Switch TANKS!" so I didn't forget. Like everything on the DA-50RG, the trim wheel is lovely to use. There is a Trim marker to set for T/O Takeoff, easy-peasy. Once the power is on, the avionics sorted and the fuel flowing... all you have to do is hit the big round button to start the CD-300. No setting of the mixtures or jiggling the throttle (or even moving the throttle lever), no priming the engine. All you do is just hit the button and the fully electronic FADAC management does all the work, and the Continental Aerospace Technologies jet fueled engine just bursts into life! You have to wait a short time though for the numbers to sort themselves out and settle down , there is a lot of red at first that slowly goes one on one all yellow, then you are ready to go... So starting the DA-50 is far easier than starting my own car... no easier. Setting the Baro is very easy as well with the pop-out tool, just use the keyboard to type it in and then press the actual Baro number in the number rectangle box to insert, ditto in don't forget to set the separate backup Baro on the MD302 SAM. The sounds are INCREDIBLE... from the moment the CD-300 catches you are in there... realism 101. There is so much feel low down, push the throttle up slightly and the tone changes to magnificent. But it is the wide range of sound variations that brings out the sheer realism of this engine... go external and the sounds are actually quite different from this perspective, as they are slightly muffled internally. The only problem is that the external sounds is they are also quite loud, no make that really loud, so the external slider goes way down to a third. You will never ever tire of this aircraft and the way it sounds. All these custom sounds were created by Laminar sound master Daniela Rodriguez Careri. Flaps to T/O and off goes the park brake, there is no aircraft movement until you add in a little power, perfect. Again what I like is throttle reaction on the ground. Throttle up slightly and you move, throttle to idle and you slow down or even stop... perfect, I mean how hard can it be to do things right like this, as you have to usually contend with runaway aircraft all the time on the brakes with too much power? Do I have a pet peeve with this aircraft, well there is one? As noted the nosegear is castered, but you can use the tiller to turn the aircraft (or choose not to via the menu). Both are not ideal for perfect taxiing... ... not even touching the tiller and the aircraft will weave around, even at slow speeds. Up the taxi speed a little and you can lose control. So you just try to find a speed to go straight and not lose any nasty movements, and any counteracting adjustment will just send you into a worse weaving and throwing and to be honest it is not at all very realistic. Any turns have to be very carefully done, just a touch on the tiller in the direction you want to go is enough to do even a tightish turn. The "Synthetic Vision" kicks in when we hit the runway, sadly it doesn't work with custom scenery, but that changes as soon you hit the default textures. At the turnaround on the end of EGHI's Rwy 06, I turn the DA-50RG, quite more easily this time as I adjusted to the system, not perfect but better. A last check of the checklist and everything is sound, so power up. To be honest I was not looking forward to taking off and losing a wayward aircraft, It was not easy and it took a lot of skill but I kept the DA-50 pretty much going in the right direction... once the rudder kicked it it of course got a lot easier... but tricky it is at the start of run. At 78 knts I could pull back on the stick. I'm heavy and I really felt the weight (that is very good), so I had to feel my way up and find the best climb rate (I used 10º). The second the wheels left the hard runway surface, they automatically retracted, nice... but don't get the takeoff wrong, or you will doing an embarrassing belly landing on the runway? The aircraft was a bit bloated in it's handling, but that is fine here and expected with the weight. I didn't even have to adjust the trim for the climb rate, recommended is 5.3 m/s (1,040 ft/min), but at this weight a little sluggish, so I came down to around 750 fpm, and that was really good. Flaps to UP. Now the "Synthetic Vision" starts to show some Topology, but not so much terrain as there is not much around Southampton. Now turning a whole 360º to go north, the Diamond is really lovely to fly, with great feel and movement to my commands, That weight is there, you feel it and use it... this is a very nice aircraft to pilot, a lot of fun as well and you easily find your groove. I trim back a little more for speed, but still want 600 fpm to climb up to my 8,000ft cruise altitude. You feel it is not as highly powered as the DA-62, but that is fine, as there is more than enough. Now the "Synthetic Vision" really comes alive as the English countryside is caught in it's gaze. I pick up my EGHI-EINN flightplan north of EGHI and everything is "Hunky Dory". And yes I am watching those fuel tanks! There is actually a pump system to level out the tanks called "FUEL TRANS", if you want to be lazy, but I can do this fuel monitoring stuff anyway. Your maximum speed in the DA-50RG is 335 km/h (208 mph, 181 kn) (ISA, 16,000 ft, 1,700 kg, MCP), with the already noted range of 1,389 km (863 mi, 750 nmi) incl. 30 min. reserve, and the FF or Fuel consumption at max range is 34.1 L/h (9 US gal/h official). You don't feel you are stuffed into a tight doghouse in the Diamond cabin.... It is bright and open in here with tons of space, the windows are extra large and go high up into the doors, so you even feel a little exposed, but it is a very nice way to fly! Approaching Wales and the terrain now shows on the "Synthetic Vision", you can of course clear most of the tapes and rose off the screen for almost a full synthetic screen... The Syn vision comes into it's own as I reach the Irish Sea. Outside there is a lot of light cloud cover, but the Syn Screen shows me the Welsh coast and my current position... It is very good. Less light brings out the quality of the aircraft in the nice curves and the shapes on the fuselage, that Aerobask extreme quality is built in here. You have to admit the Diamond is a brilliant modern general aviation aircraft. It has everything you need in power, space and speed. The Diamond does have windshield/instrument reflection effects and some nice wingflex, but notable is that rain and frost and other features will only be only be available with the coming X-Plane 12 aircraft version. The DA-50RG will also be X-Plane 12 compatible or updated on release of the new X-Plane version. I'm over the Irish coast at Wexford (STRUMBLE (STU) 113.10), and now heading towards Shannon. The STAR is TIPUR 2E approach, which you pick up at TIPUR. From there I step down by 2,000 ft steps from my cruise altitude as I enter the STAR, to do a final turn of 1,500ft. Soon I get my first glimpse of EINN Shannon on my right. The final turn is at ELPON the joint T point to finals of Rwy 06. Shannon is now directly ahead. The white flap band on the speed tape can be a little deceiving... as you can go to the first 20º flap selection below 133 Knts, not that I recommend it, as it is too fast... and the DA-50 will struggle to find it's balance in a pitching movement, I recommend go slower then put the flap down. The ILS 06 LOC (109.50 ISE) point is barely a few NM past the turn, but I am only using the beams for guidance, not for actual use, and marker point to begin my descent into the airport. Again nicely you can control the height by the throttle power, no stick pitch is required, steeper approaches however would need a little slight forward pitch.... The gear goes down at this ILS Threshold point as well. The gear noises internally are also very authentic, even brilliant as the three gear carriage locks into place. Descending I have to be careful as the Atlantic Ocean is pushing a steady breeze east, it pulls me (slightly) off centre, but it is very easily corrected, as the feel through the controls are very good in their feedback, certainly a pilot's aircraft. You can set directly the Baro MIN height aural warning directly, and it is very effective on finals... In the descent slope I slip down from a 100 odd knts (Flap 20º) to around 90 knts (Flap 30º) towards the absolute final "over the wall". You bleed the speed off until you get around 83 knts, then you touch down nicely... The gear here has more give than the earlier Aerobask stick style undercarriages, even supple, and to a point you have to watch that, if not you will bounce. Stall speed is 106 km/h (66 mph, 57 kn) or a round 60 knts in the landing configuration, I will admit is was a bit fast. The landing however was good, then trying to slow and not weave badly was not... the Diamond was a real handful? Finally I got some control and was surprised I was still on the runway hard stuff... ... like all of flying, I think it needs practice to get your landings really right in the DA-50RG, so practice is going to the order of the day. Now the long, long trek down Taxiway C and D to the terminal area, So I had to taxi at a slow pace to get there in one piece and not do any field excursions with the loose nosewheel.. The stop switch is the ENGINE MASTER switch left lower panel, so you shutdown (or select power) to the CD-300 via this switch. So some numbers... I covered a distance of 360.80 NM, and used 35.7 GAL (48.1 GAL T/O) of A1, with 12.3 GAL left in the tanks, with a FF of around 16 GAL per hour, so get your slide rulers out and compute that for your distance flying, it feels a bit high in fuel consumption for the range, because as noted it should be around FF 9 GALPH in cruise, the lowest I saw was 12 GALPH, but there you go. But this Aerobask is a considerable aircraft, incredible really for what you get for your money. But overall it feels so modern and so easily flyable... the Diamond DA-50RG is just a brilliant simulation. Notable is the change of the updater for Aerobask. The DA-62 had originally when released the STMA updater, then half-way through to date it changed to the Skunkcrafts updater, the DA-50RG however uses the Skunkcrafts Updater plugin, which is far better and more efficient, a good steady change there. Liveries The exceptional eight liveries are listed via their colours, OD-VFR Orange (grey) is default, then Gold, Grey, Purple, Yellow, Green, Blue and the only name livery in "The Black Knight. All are excellent with very good built in light diffusion effects and the metals/chrome are exceptional. A blank white is provided for painters. ____________________ Summary For over nine years now in the X-Plane Simulator, Aerobask have been developing high quality composite modern propeller and small (VLJ) light jets with a focus on the Diamond Aircraft from Austria. A few years ago Aerobask released the DA-62, a uniquely powered twin-engined aircraft. Here in this release is the single propellered CD-300 which is a geared, liquid-cooled, turbo-charged and jet-A1-fueled engine powered aircraft that could be noted as the sister aircraft to the DA-62RG, because they share the same fuselage and size. The RG moniker relates to the "Retractable Gear" version, the only other DA-50 in existence is the FG or "Fixed Gear" aircraft (the earlier prototype). Those who have already purchased or have flown an Aerobask aircraft will have no problems in knowing what they will get from this top-tier developer. Aerobask's quality and detail is second to none and again the DA-50RG is a supreme example of their highly coveted work. The aircraft in detail externally and internally is excellent, an almost photographic reproduction of the real aircraft. Details and quality is outstanding. The DA-50RG comes with a fully customised G1000 avionics system, MD302 SAM® or the "Standby Altitude Module", and a brilliantly intergated GCU447 (FMS Keypad). Full menus with static options, pilots and passengers and a very good Weight&Balance setup page (but no CG Graph). There are a lot of finer options for VR and Home based cockpits. Also included and a major feature is the Synthetic Vision by Oscar Pilote. This visual system on the Primary Flight Display can give you visual feedback in poor environmental conditions, it is noted currently as "experimental" but it works fine, except in custom scenery situations. FADAC engine controls are also included and very good they are, but the CD-300 sounds are simply glorious inside and out by Daniela Rodriguez Careri. The internal lighting is again glorious as is the basic external lighting. It is really hard to find anything in a negative slant with this superb aircraft. Troublesome though is the real world caster wheel on the nose. Even with the option to tiller the wheel it weaves badly in taxiing, taking off and landing... hard to master, you will have to find your own way of learning to fly and move around it's limitations. To note this is a Laminar Research tuning issue, as tillers can be extremely sensitive on even far bigger aircraft, but very notable here. Also notable is that Aerobask aircraft are highly developed when released, there is no later run of updates to correct faults here, the aircraft are usually perfect out of the box. In a package Aerobask delivers everything you want in a high quality aircraft with unique clever custom systems, and that is certainly the case here as well... better still everything comes in a competitively priced package below US$40. As a reviewer Aerobask aircraft are a dream to review, certainly there is a lot of custom options to cover, but in every other aspect they are some of the very best general aviation simulations available today... and for tomorrow in that fact. _____________________ The Diamond DA-50RG by Aerobask is available from the X-Plane.OrgStore!... Here: (release is noted as today 15th March 2022) Diamond DA50 RG Price is US$39.95 Requirements X-Plane 11 - Support for XP12 when available Windows, Mac or Linux 4 GB VRAM Minimum. 8 GB+ VRAM recommended Current version: 1.0 (March 15th 2022) Aerobask quality 3D model Fully functional virtual 3D cockpit, with smooth and VR-friendly manipulators. High quality 3D model with high resolution PBR textures (4K). Accurate flight model Flight model by X-Aerodynamics Enhanced Laminar G1000 --> Synthetic Vision technology by OscarPilote superb! Fully Integrated Laminar Garmin G1000 with custom EIS and annunciations Touch screen features for easy handling Systems Customized FADEC/ECU with test procedure. Simulated oxygen system. Simulated ice protection system. MD302: custom coded Standby Attitude Module. Fully functional breakers (configurable reliability). Other Smooth wingflex Windshield effects: reflections. Rain and frost only available with X-Plane 12 aircraft version. Visual icing effect on the wings. Many parameters saved between flights. Configurable pilots (male or female), passengers and luggage. High quality sounds Full FMOD environment by Daniela Rodriguez Careri Accurate doppler, distance attenuation and flyby effects. In-game volume control without pausing the sim Liveries 8 beautiful 4K liveries out of the box White (for painters) and additional liveries available through Aerobask website Installation and documents: download for the Aerobask DA-50RG is 830MB and is deposited in the "General Aviation" X-Plane folder. The AviTab plugin is also required to use this aircraft, and it is deposited in your X-Plane Plugins folder. Full Installation is 830Mb Documents supplied are: Install_Settings.pdf Avitab.pdf Quick-Doc MD302.pdf DA50 Performances.pdf DA50 Procedures.pdf Customized G1000.pdf DA50 AFM.pdf A full set of documents are provided, including detailed manuals for the MD302 and Laminar G1000. A quick setup and deeper system manual is also provided with Performance and (Checklist) Procedures. ________________ Aircraft Review by Stephen Dutton 15th March 2022 Copyright©2022: X-Plane Reviews Review System Specifications: Computer System: Windows - Intel Core i7 6700K CPU 4.00GHz / 64bit -32 Gb single 1067 Mhz DDR4 2133 - ASUS GeForce GTX 1080 8Gb - Samsung Evo M2 2TB SSD - Sound : Yamaha Speakers YST-M200SP Software: - Windows 10 - X-Plane 11.55 Plugins: Global SFD plugin US$30.00 : Environment Engine by xEnviro US$69.90 : RK Apps XPRealistic v2 - US$34.99 Scenery or Aircraft - EGHI - Southampton Airport by Pilot+Plus (X-Plane.OrgStore) - US$19.95 - EINN - Shannon Airport by Boundless (X-Plane.OrgStore) - US$23.99 Disclaimer. All images and text in this review are the work and property of X-PlaneReviews, no sharing or copy of the content is allowed without consent from the author as per copyright conditions) All Right Reserved.
-
NEWS! - UPDATED : CRJ-700 v1.1.0 by AD SImulations AD Simulations have announced another huge update to their CRJ-700 to v1.1.0. It is only early March and already there has been three significant updates (with this release) since the CRJ-700 aircraft was released at Christmas 2021. The first major (and needed) update was the extensive update v1.0.1 on December 20th 2021 And that updated release was incorporated into our X-PlaneReviews release review: Aircraft Review : CRJ-700 by AD Simulations/Delta Wing There was also a non-numbered HOT FIX on the 17th January 2022 Version 1.0.1 to cover the early changes by Delta Wing to the performance aspects of the CRJ-700 This third v1.1.0 release is even more focused on the systems and the aircraft's performance (early weakness areas), and it is quite a significant list in the changelog. Obviously Delta Wing is now having his presence felt in this side of the development of the aircraft, were as before the focus was more on the visual features (a better toilet?)... here is the full list. Changelog Version 1.1.0 10-March-2022 - Implementation of a custom Electrical System - Circuit Breakers are all animated and ready to perform certain actions accordingly to their function in future updates - Added Tablet/EFB on FO side - Clocks (GPS-Synchronized) now independent and functional on Captain and FO side - Added Functional Audio Control Panel with lit buttons and animations - Added Rectangular Flight Director Command Bar as an Option - VNAV page works now in FPLN page as well as in the VNAV Page - When AC power is established, screens light up in slower fashion in stead of just flicking on - Fixed Thrust Reversers activating without WOW (Weight on wheels) - Fixed message “ENGINE OVERSPEED” staying on all the time - Fixed ISOL OPEN message behavior - Disabled Thrust Reversers deployment in flight - Fixed Stair Rails behavior automatically raising after lowering - Adjusted Thrust Reversers Power - Fine-tuned throttle response, taxi is now very predictable and speed easy to manage - Fixed fuel calculation on MFD upon landing - Adjusted High/Low Resolution Objects in Plane maker - AP engage button now centered with the disengage bar - Adjusted Rudder Deflection and added Rudder Limiter action - Fixed Electrics synoptics page showing HZ/V with APU shut down - Adjusted DSPL knob on the center pedestal animation so it initializes in the full BRT position - Adjusted APU powering down time - Adjusted Autopilot so when selecting a different speed in CLB mode transition to new speed is smoother pitch wise - Fixed the WSHLD LH and RH switches behavior (ANTI-ICE panel) - Fixed Flaps retraction programming enabling Flap Annunciator shown on MFD when flaps set to 1 - Fixed Captain MFD Pop Up window so it resizes with the display content - Fixed behavior of the Speed tape for Leading Thousands of feet number - Adjusted Fuel Flow logic - Adjusted Flight Model to obtain proper N speeds with throttles in idle position - Fixed overlapping text on Captain CDU Pop Up - Fixed yellow manipulators shown in cockpit when “ Show Instrument Click Regions” Option was on - Adjusted calculated V speeds for Landing - Icons on Tablet now match the page preview - Removed FBW Option as real CRJ-700 does not have it - Fixed missing digit on STANBY INSTRUMENT Altimeter - Fixed Overlapping digits on HPA text - Fixed angled text for Waypoints names in FMS Popups - Fixed Flaps and Slats indicator behavior (indicator was disappearing immediately after Flaps 0 was selected and after landing with Flaps and Slats fully retracted would stay visible) - Added individual animated and functional BRT Knobs on both RTUs (radio Tunning Units) - Fixed EMER LTS OFF message with switch in the ARMED position - Enabled manual switch to MACH mode when in climbing mode - Fixed Gear and Flaps Indicator action on takeoff (it stays ON for 30 seconds now instead of going away instantly) - Fixed reversed direction of the Wind Arrow - Wind Arrow is now rotating when wind direction changes - Fixed number spacing (no overlapping) with winds over 100 kts - Altitude Capture logic fixed, ALTS CAP green and replaced with green ALTS - When flying certain heading and heading bug is moved more than 180 degrees, aircraft keeps turning in the initial direction instead of changing the heading after bug is moved over 180 degrees - Fixed Descend Speed text overlapping speed number on PFD - Fixed plugin crash when pressing BRG bottom button on FO side - Adjusted N2 spool for faster spool on engine start - Added USER’S VIEW Option in Tablet - Fixed Standby Compass switch logic - ADF1 and ADF2 now pointing to corresponding stations - VNAV button operative on both CDU Popups - Fixing Displays staying ON after COLD AND DARK start was used after READY TO TAXI start - Adjusted Ground Effect behavior - Fixed behavior of the Altitude Reach Indicator (banana) - Fixed behavior of the FIREX DET TEST Button - Fixed the decimal point in the DME on PFD overlapping with the digit to the left of decimal point - Make GPU disappear earlier when trying to taxi with GPU connected - Fixed Nose Steering switch behavior, now operational - Removed throttle detents on hardware throttles being twitchy, to be investigated in future updates - Fixed wing anti ice message staying ON after it is turned off - Added ability to add fuel balanced between tanks in wings instead of independently in each wing tank - Corrected APU Door logic and corresponding EICAS messages - Corrected MAIN BATT CHGR message behavior with engine running on idle That is a HUGE changelog, it will be interesting to see how the CRJ-700 matures now with the changes. Updates are only available from your account on the X-Plane.OrgStore and NOW available. Just log in to your X-Plane.OrgStore Account and download the new version. Designed by AD Simulation and Deltawing Simulations Support forum for the CRJ-700 _____________________ Yes! the CRJ-700 by AD Simulations/Delta Wing is NOW available from the X-Plane.Org Store here : CRJ-700 Price is US$49.95 Requirements X-Plane 11 Windows, Mac or Linux 4 GB VRAM Minimum - 8 GB+ VRAM Recommended Download Size: 893 MB Current version: 1.1.0 (10th March 2022) ________________________________________ NEWS! UPDATE by Stephen Dutton 9th March 2022 Copyright©2022: X-Plane Reviews Disclaimer. All images and text in this review are the work and property of X-PlaneReviews, no sharing or copy of the content is allowed without consent from the author as per copyright conditions) All Right Reserved
-
The Simcoders REP package is NOT included in the Thranda pack... you purchase and install it separately to the Thranda aircraft, it is not created by Thranda, but by Simcoders.


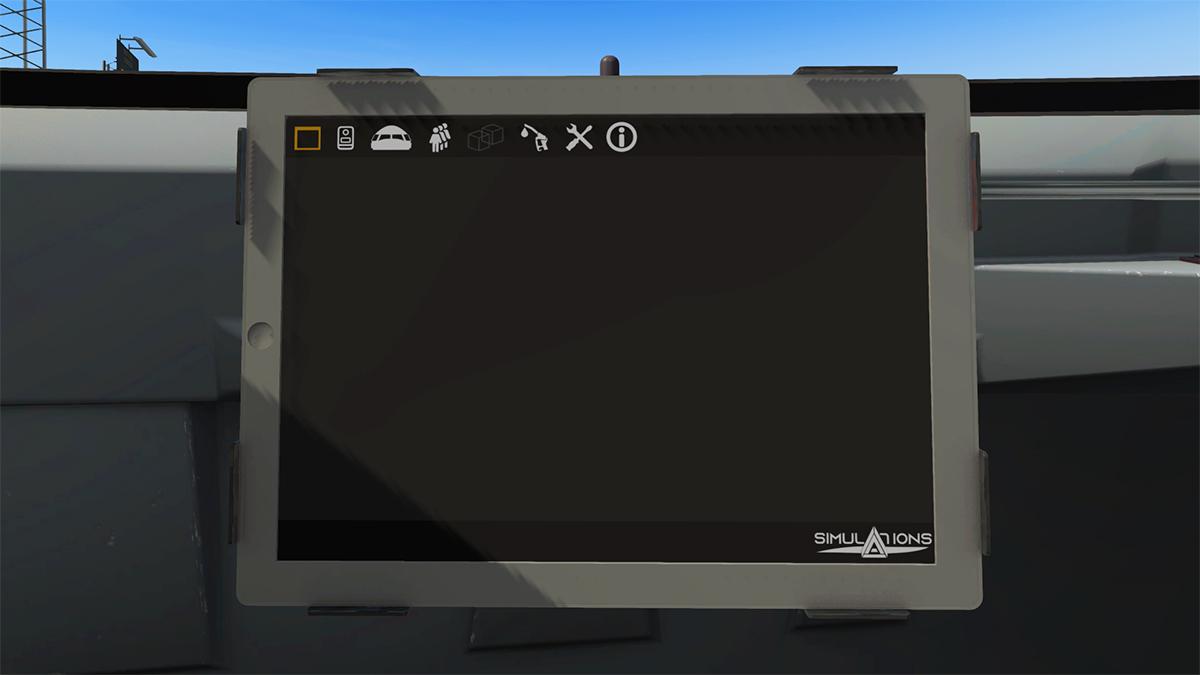


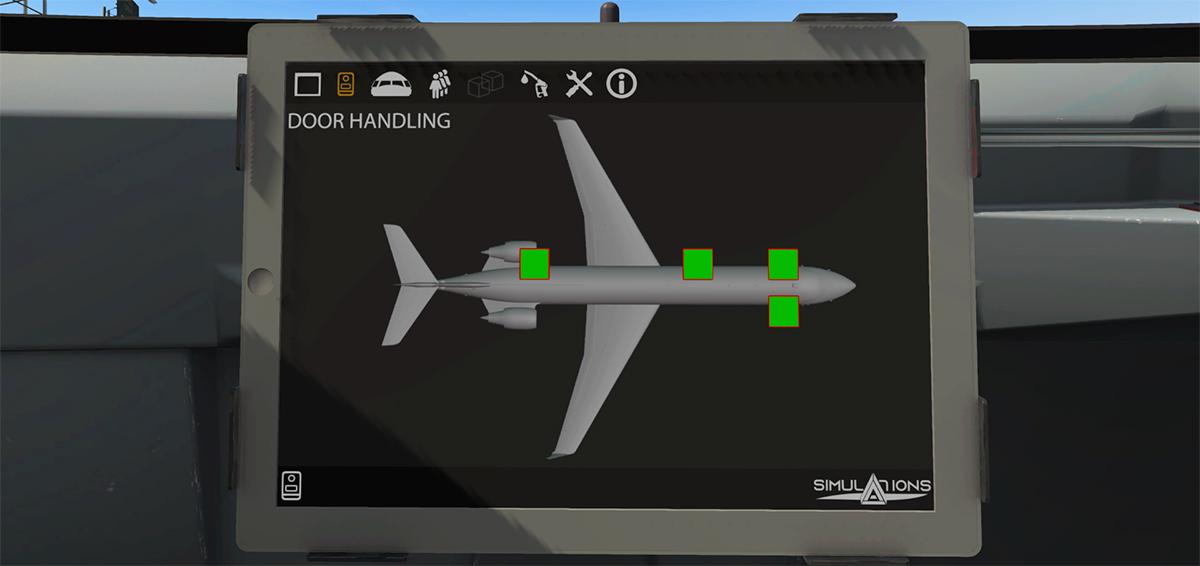
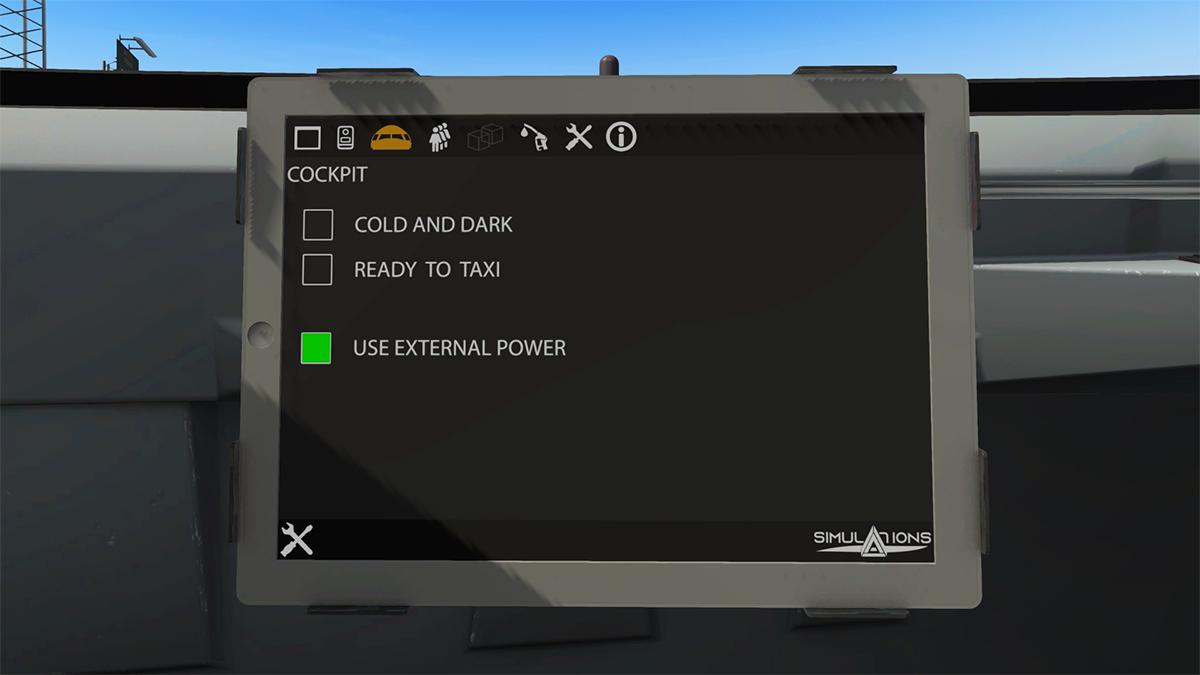
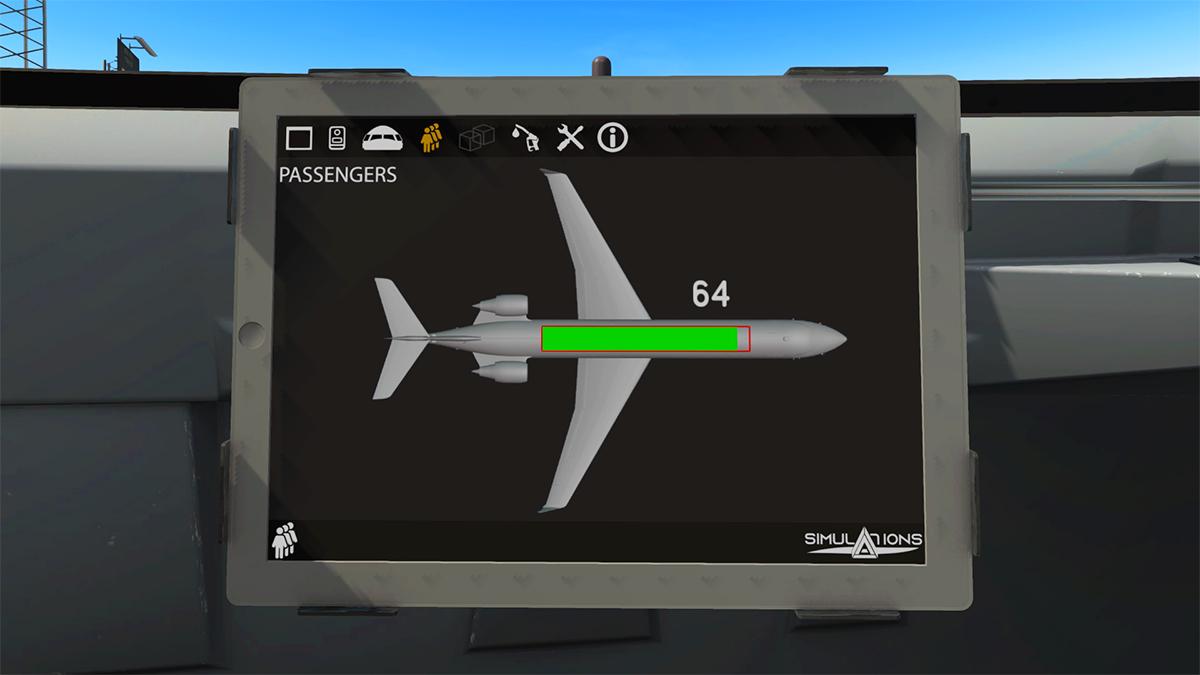
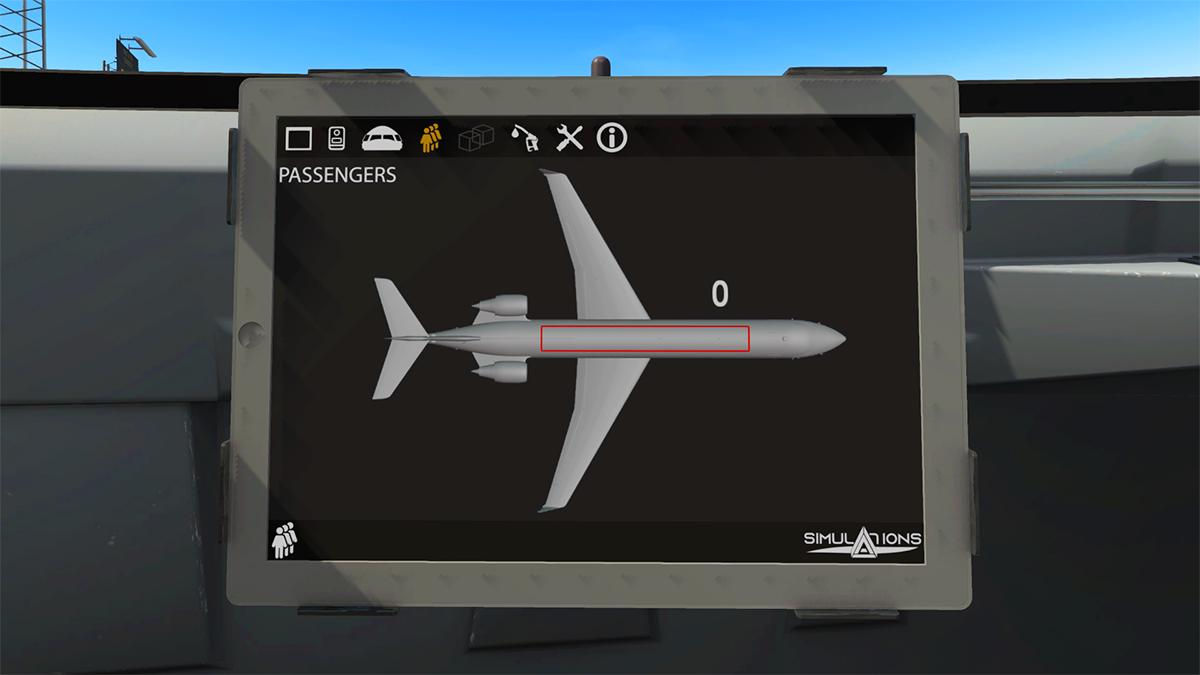
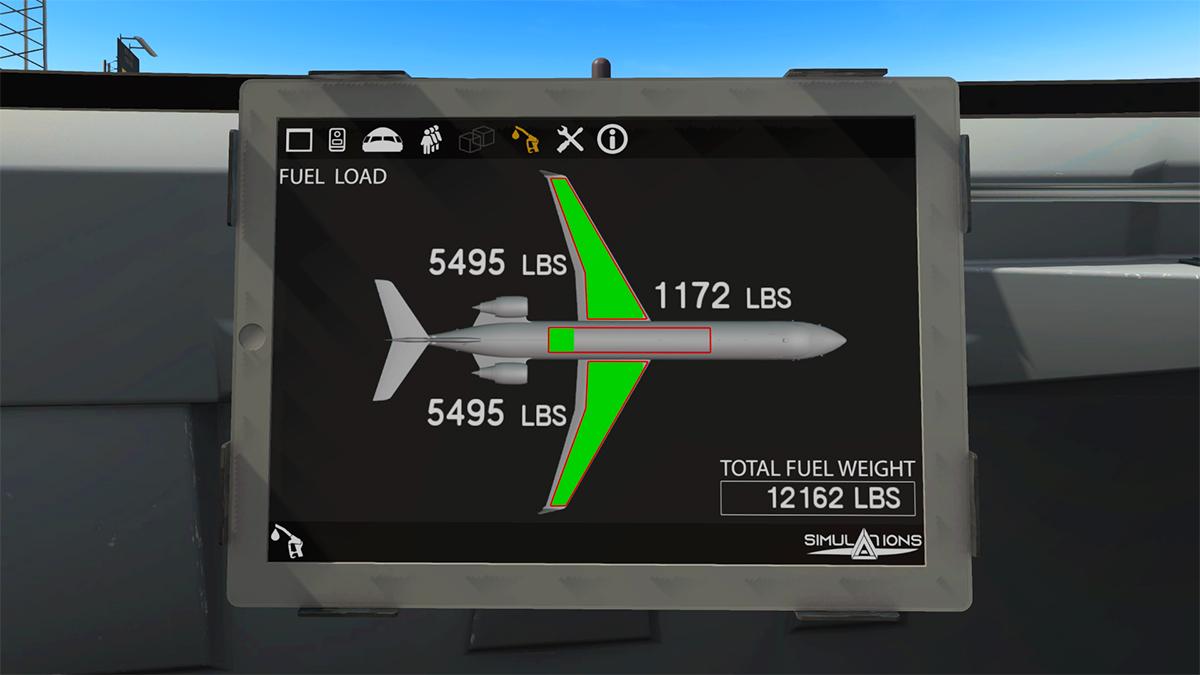
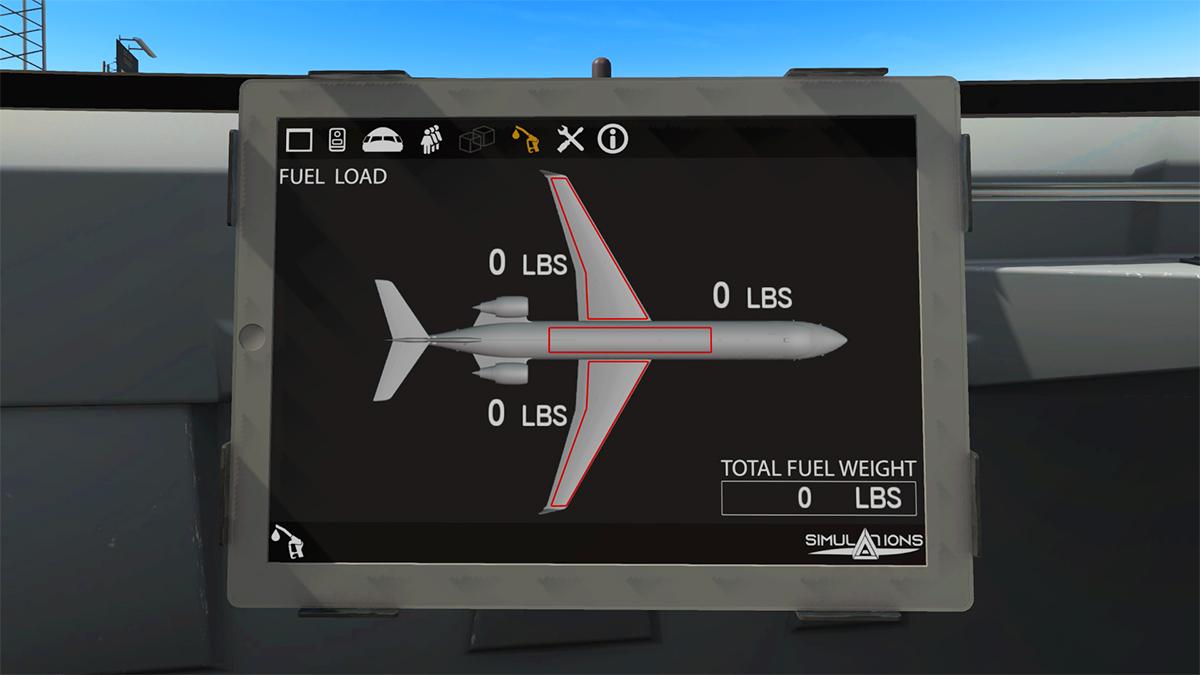
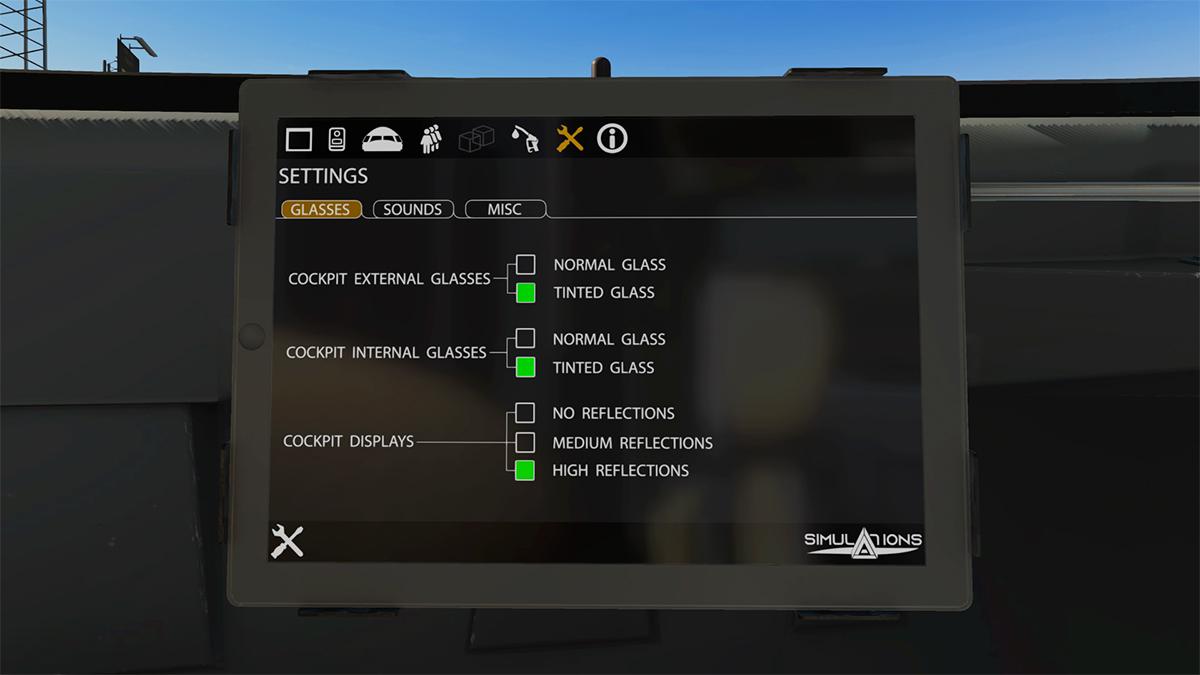
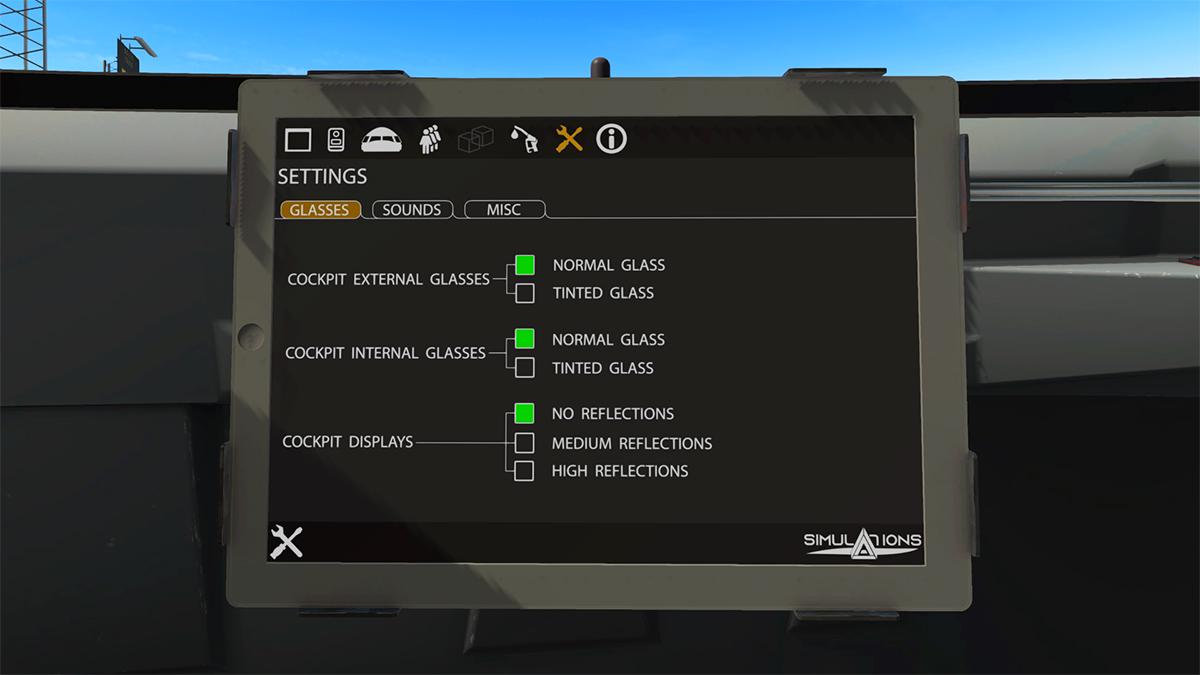
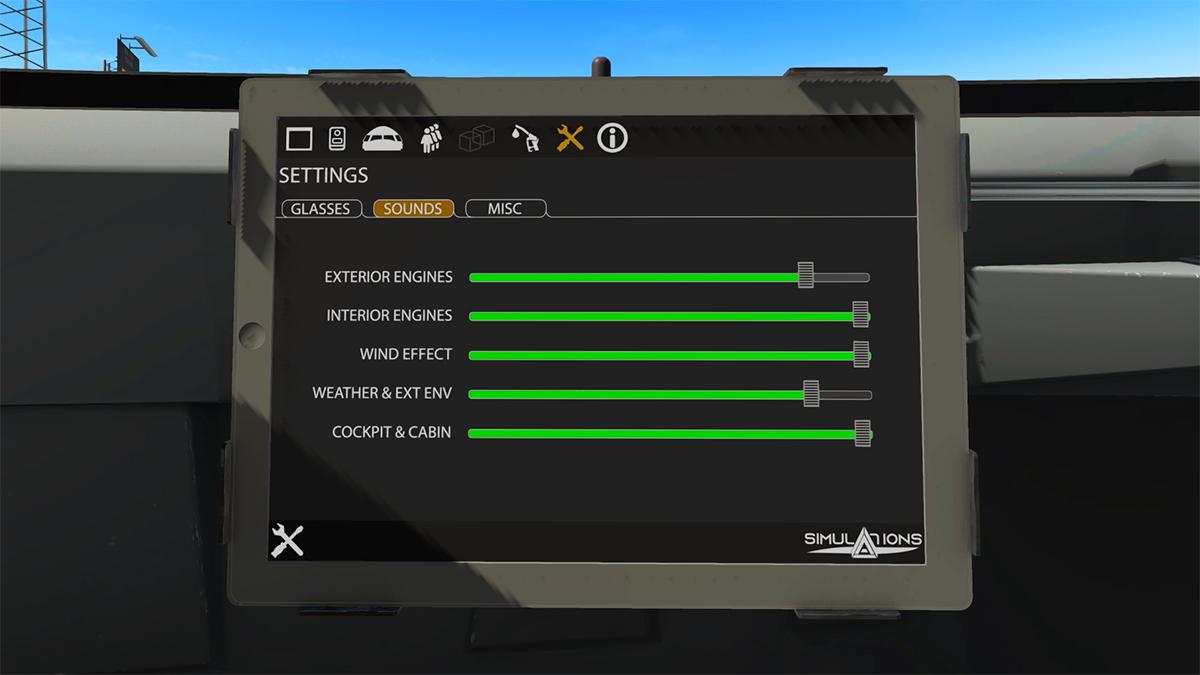
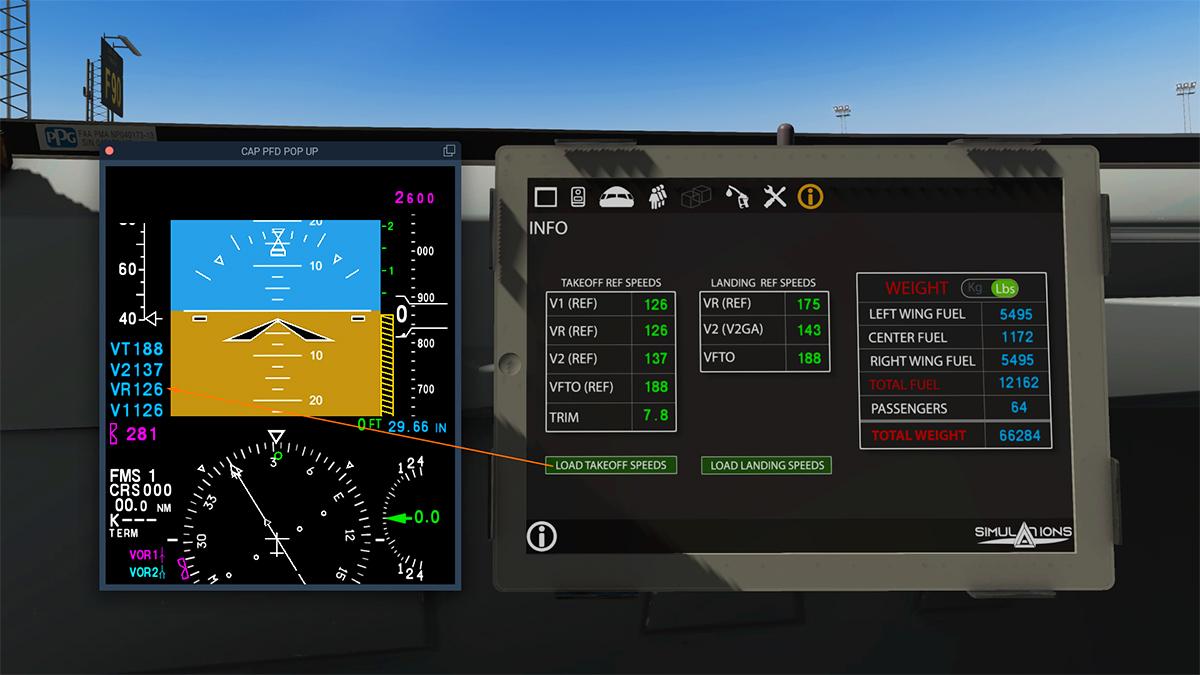
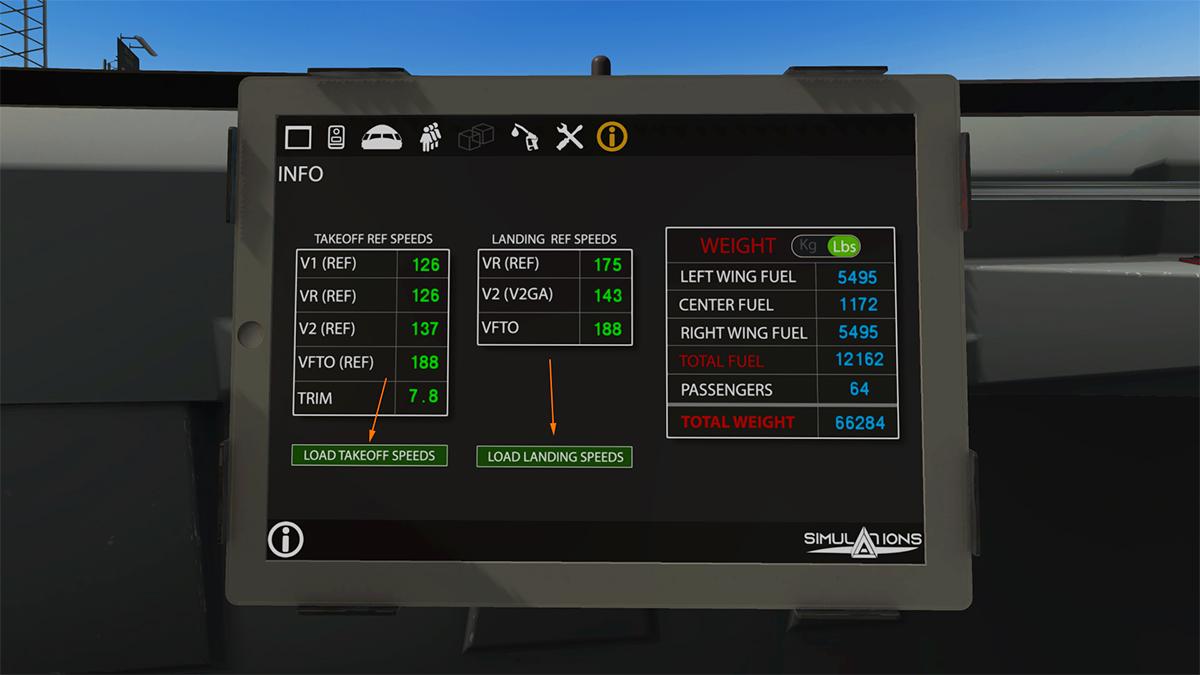


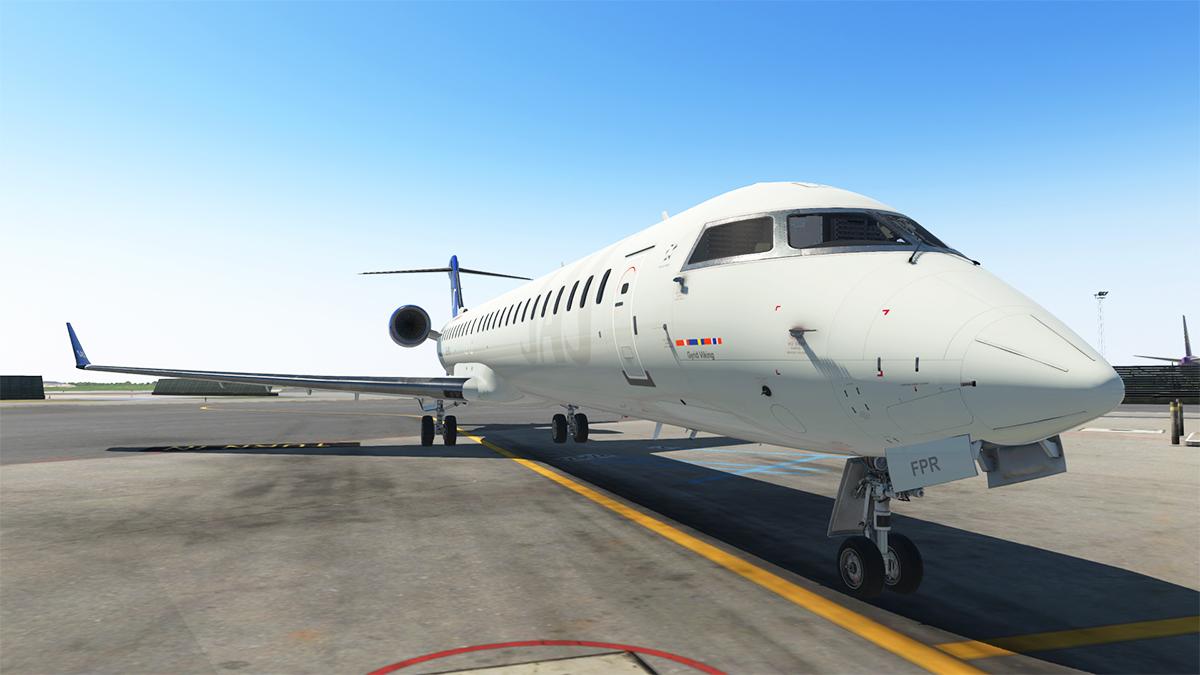
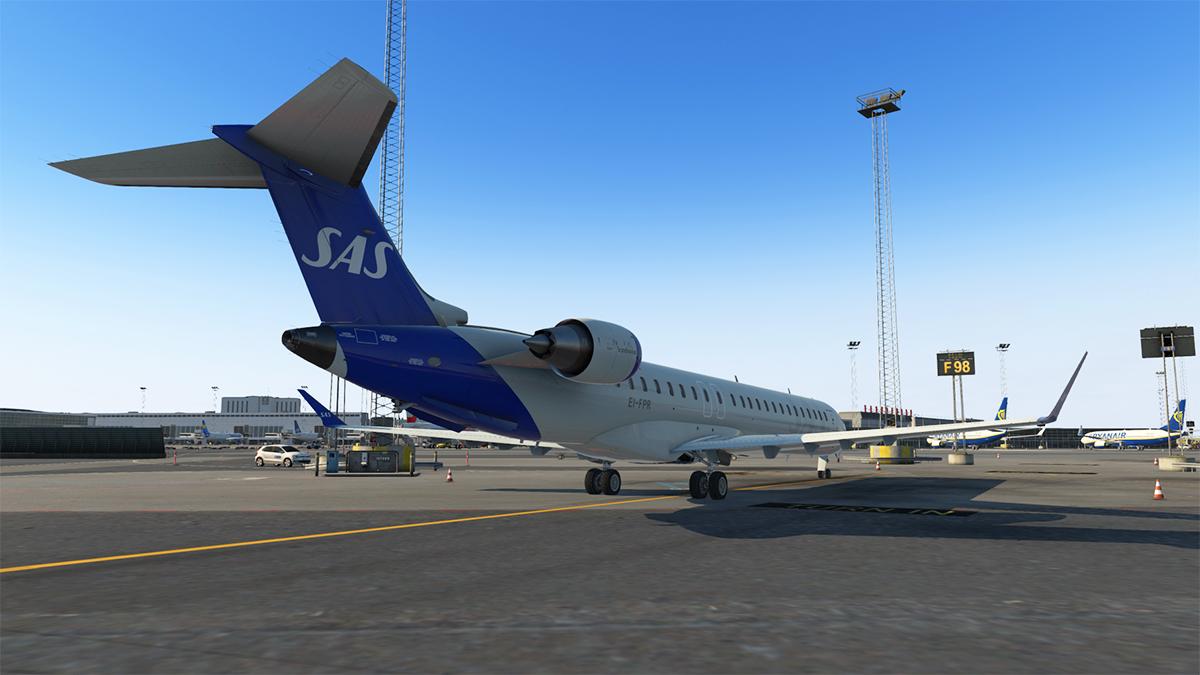
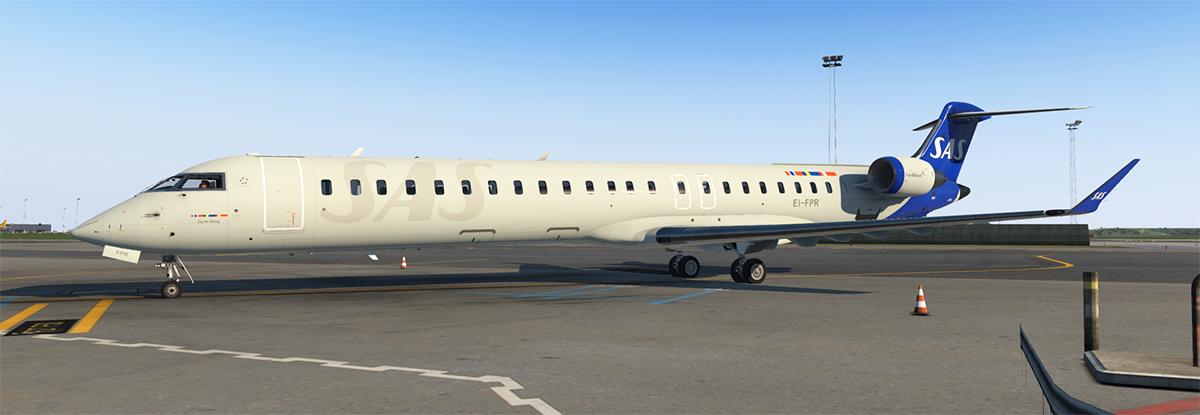
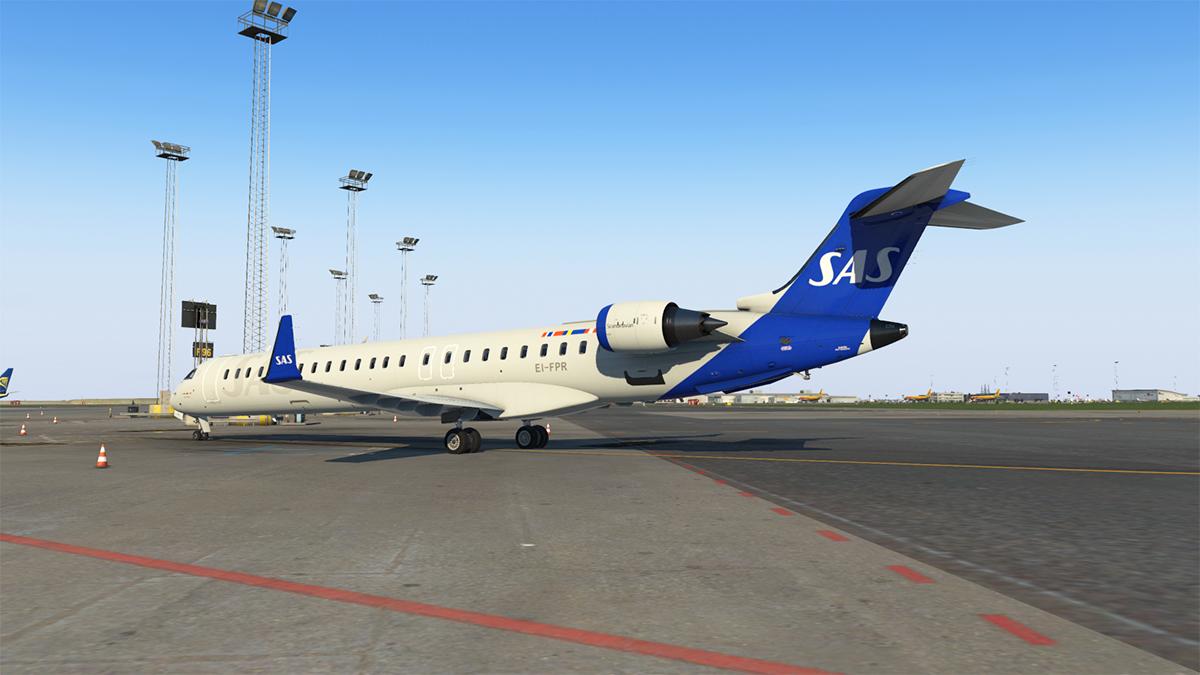

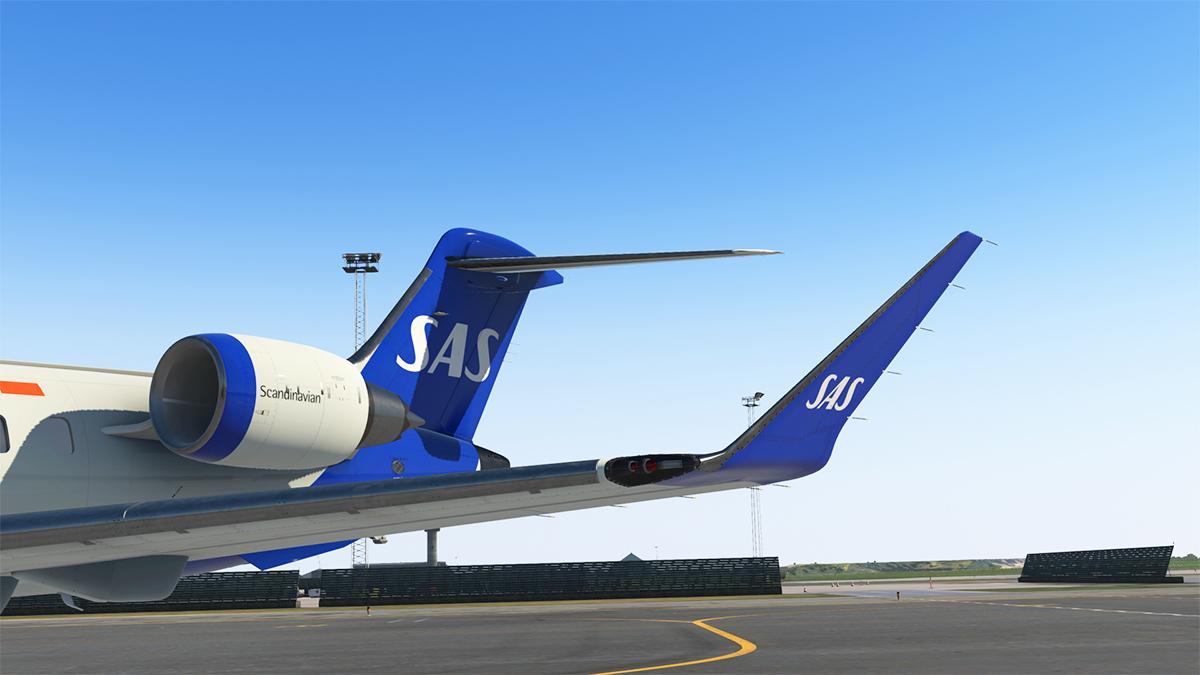

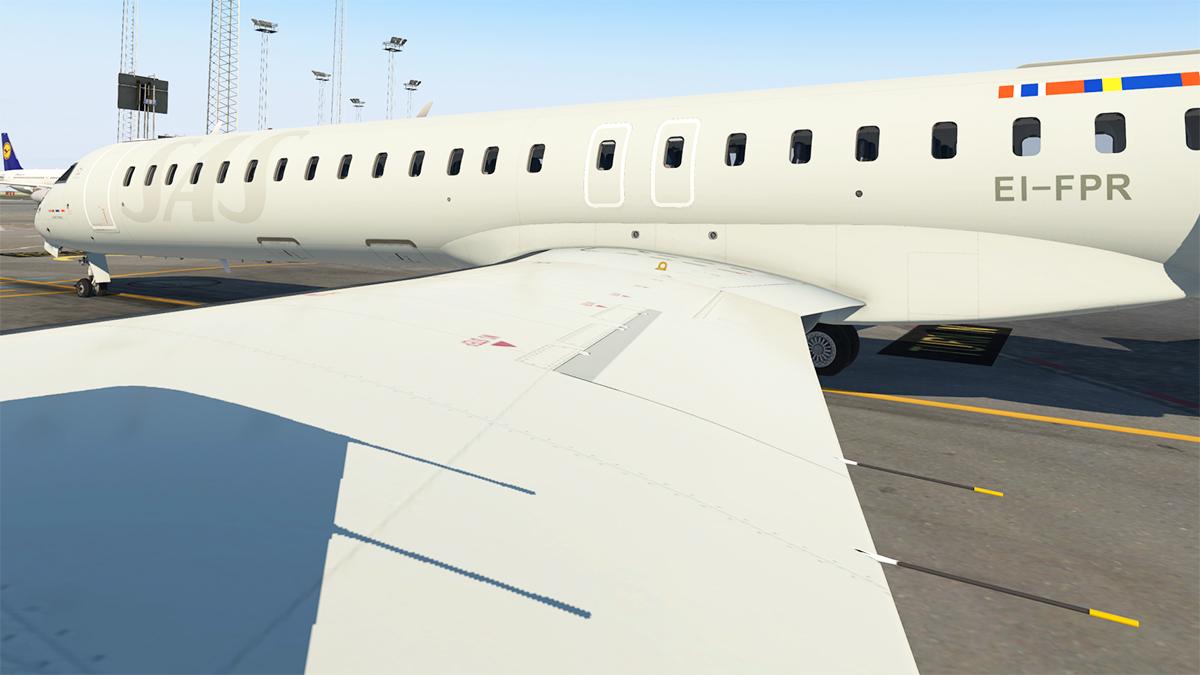
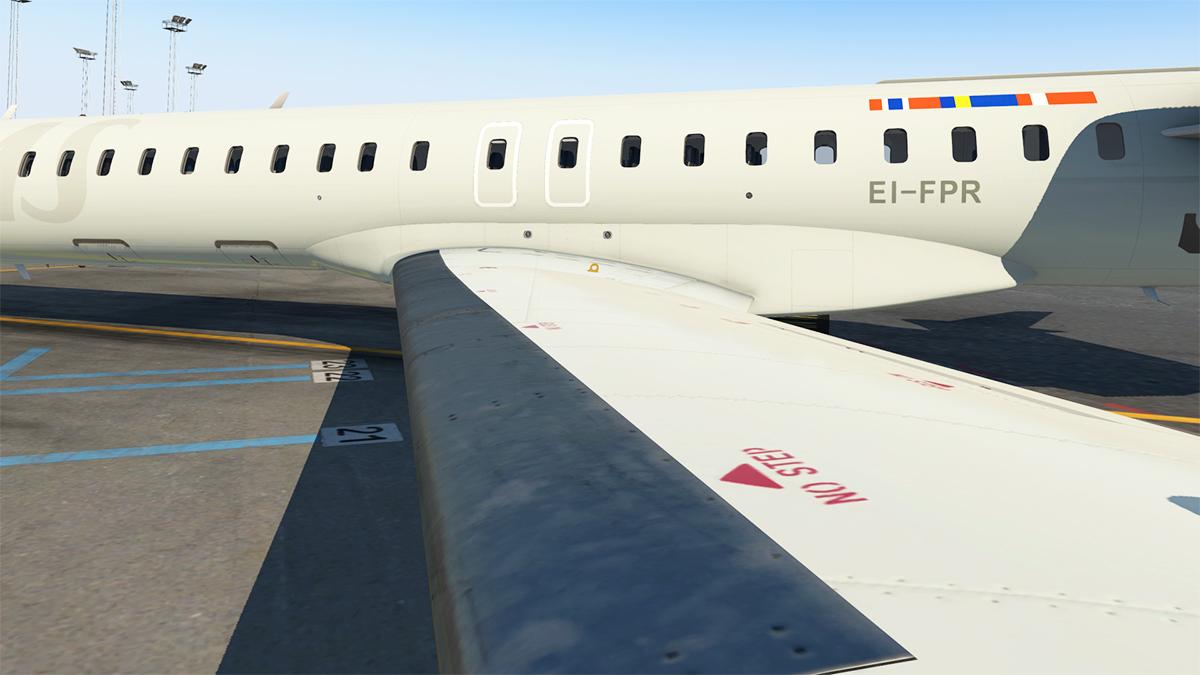

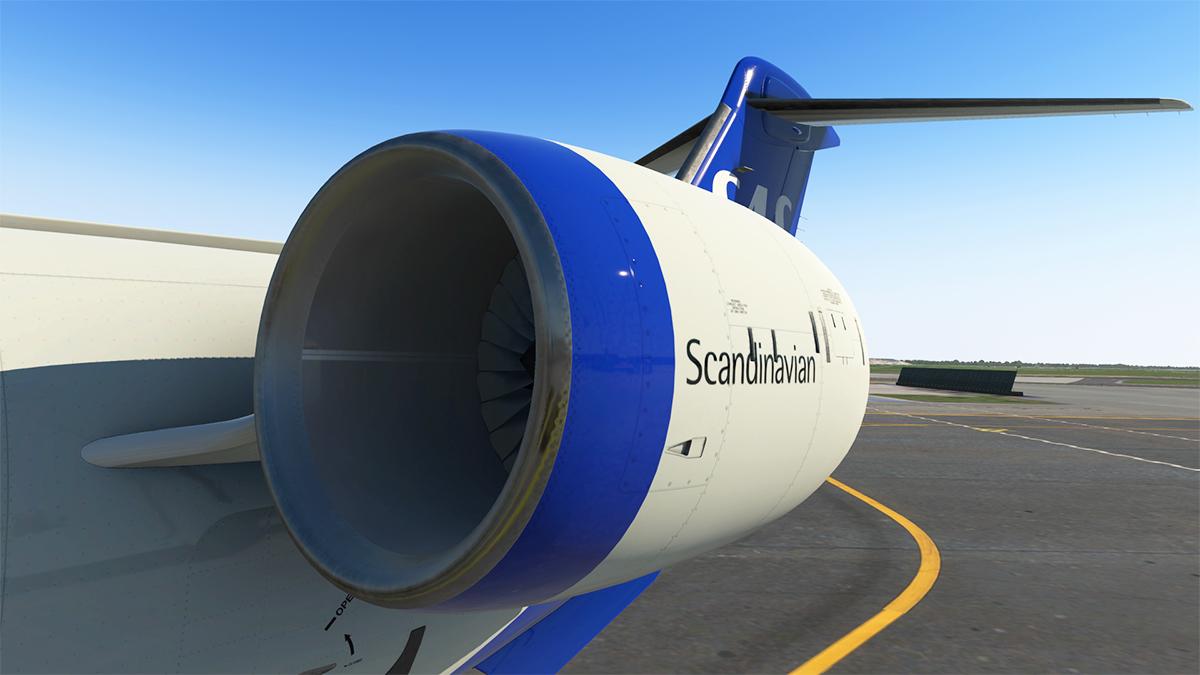
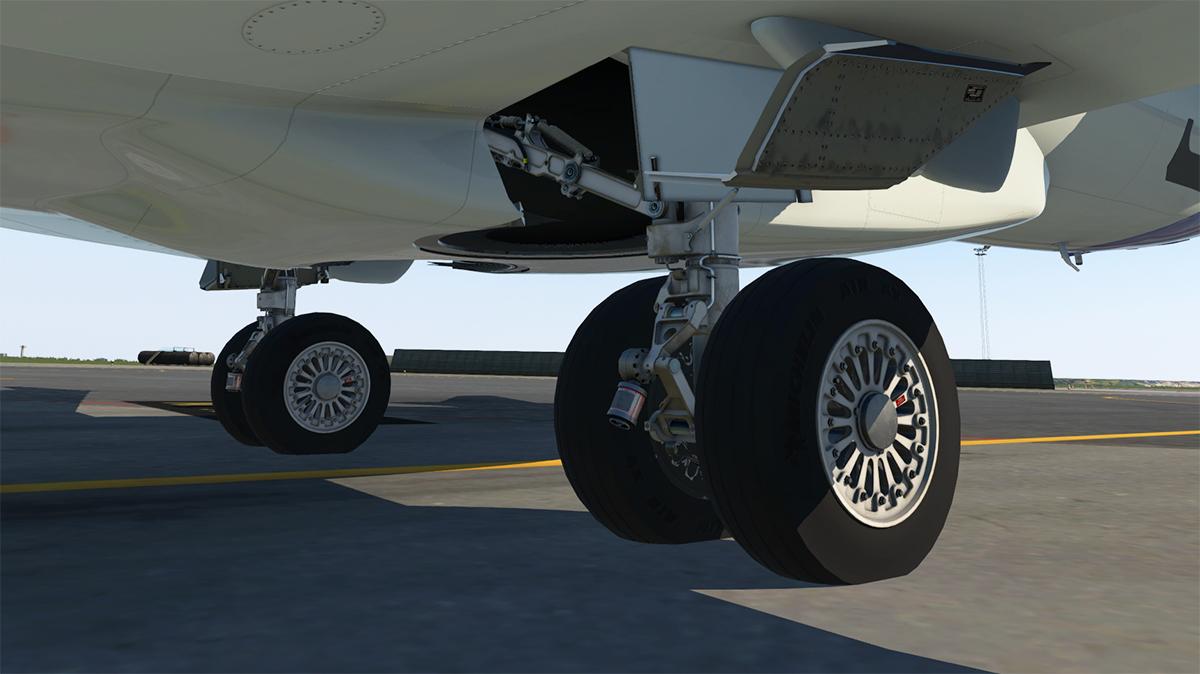

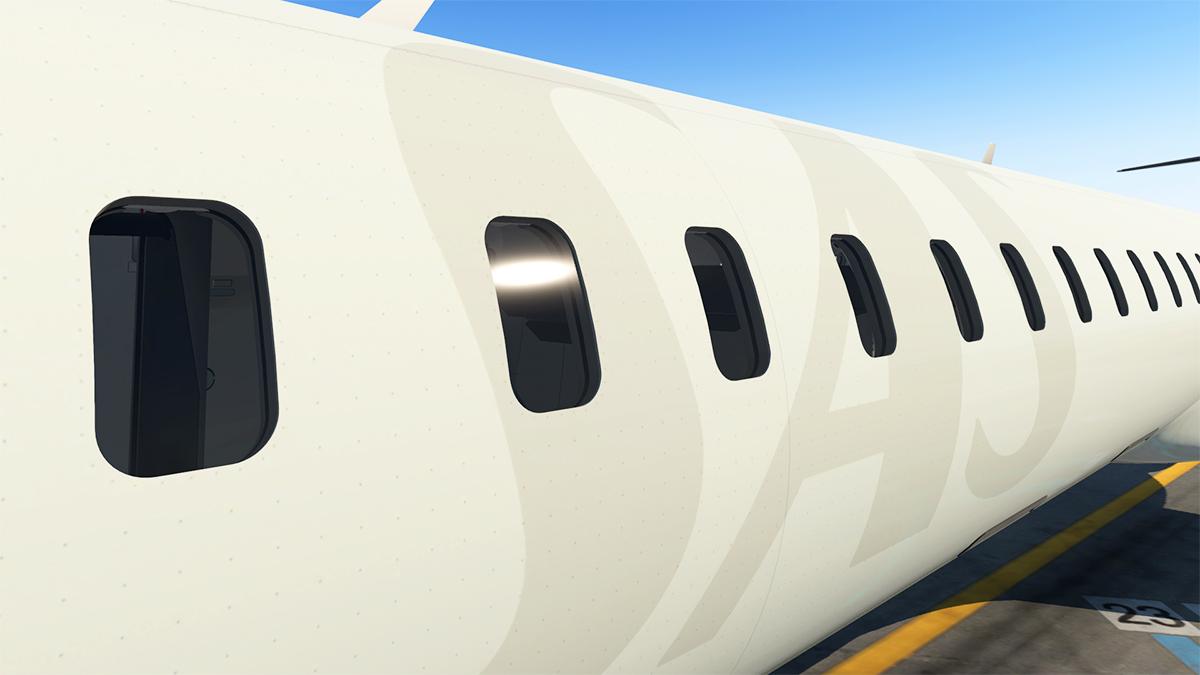
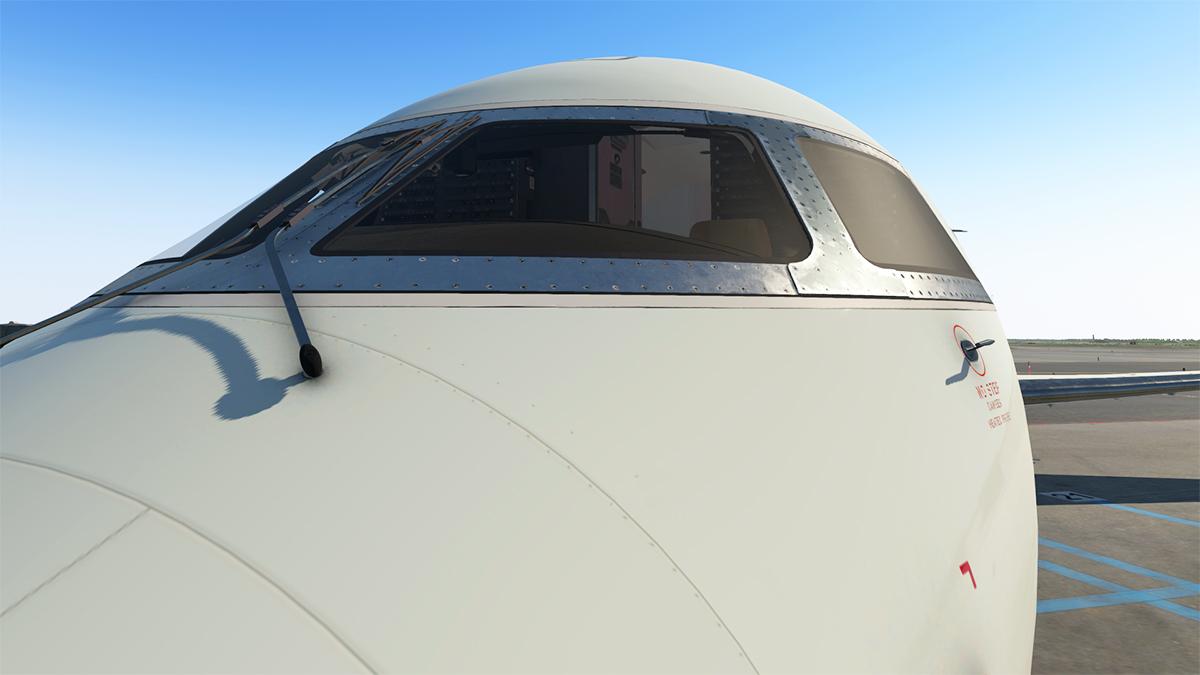

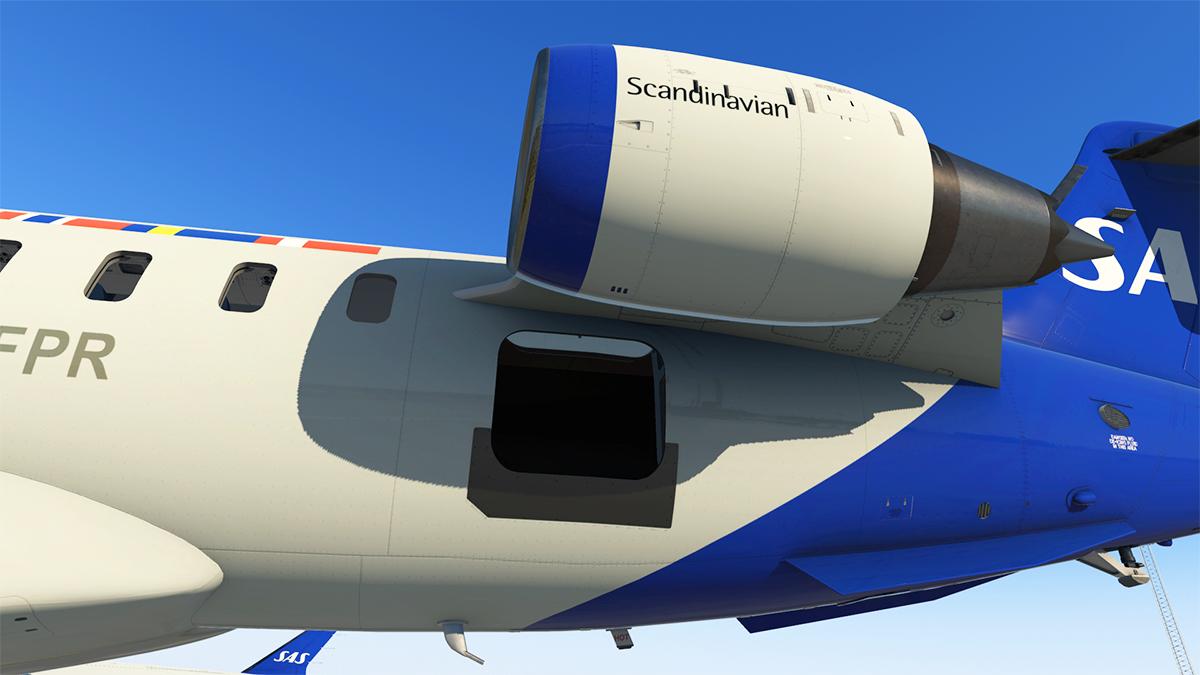
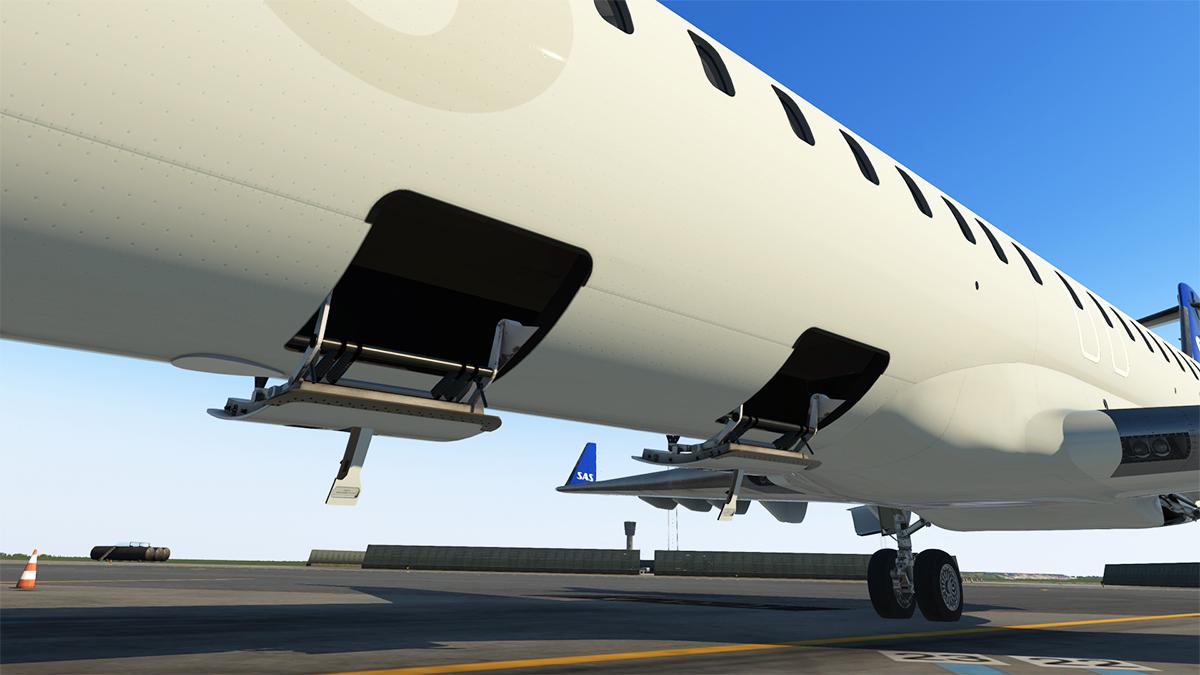
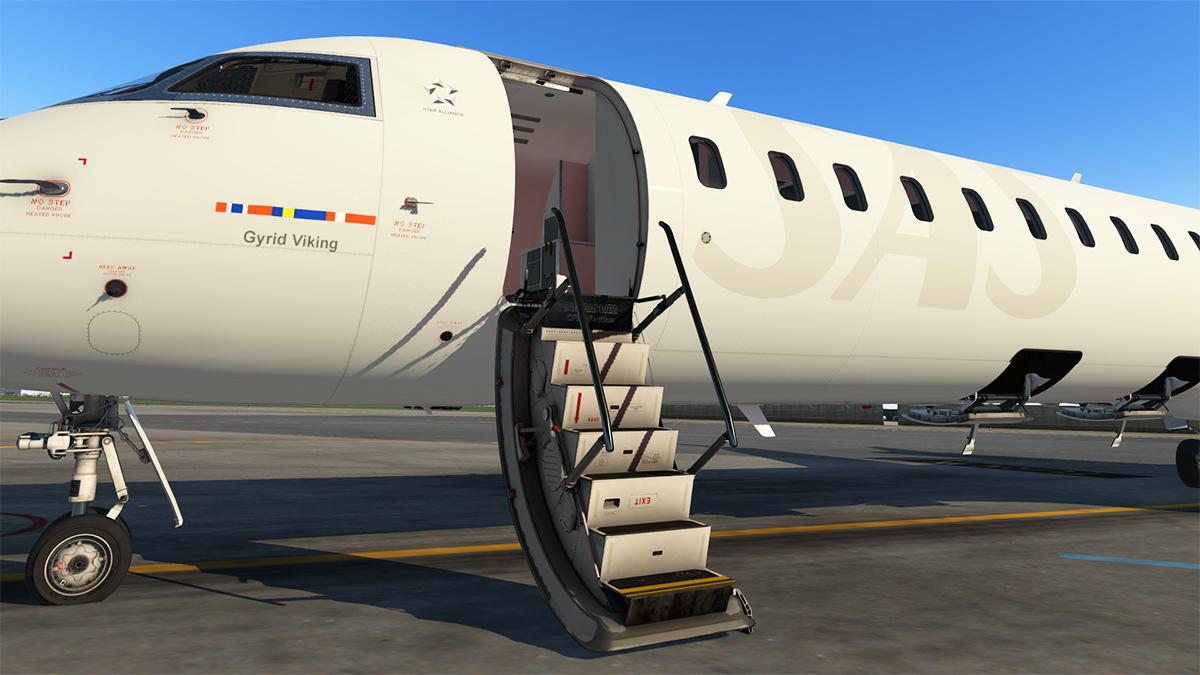
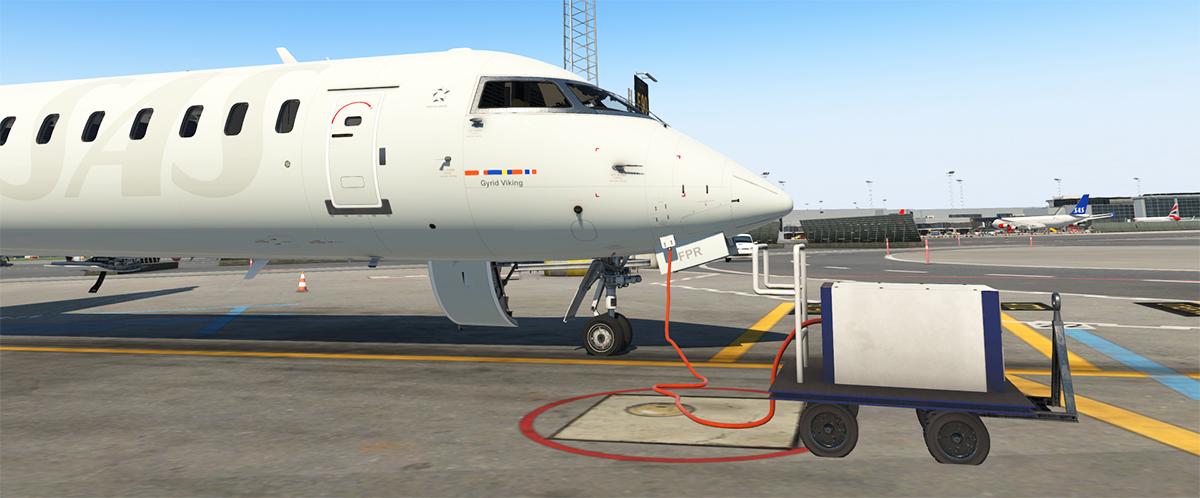

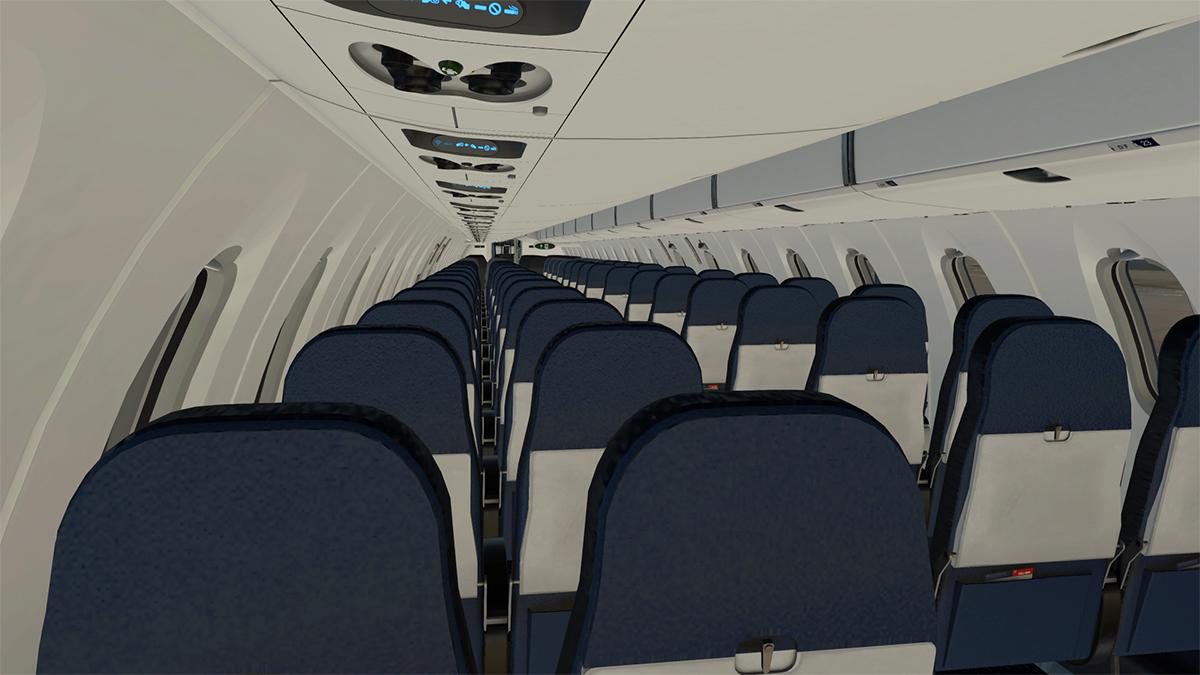
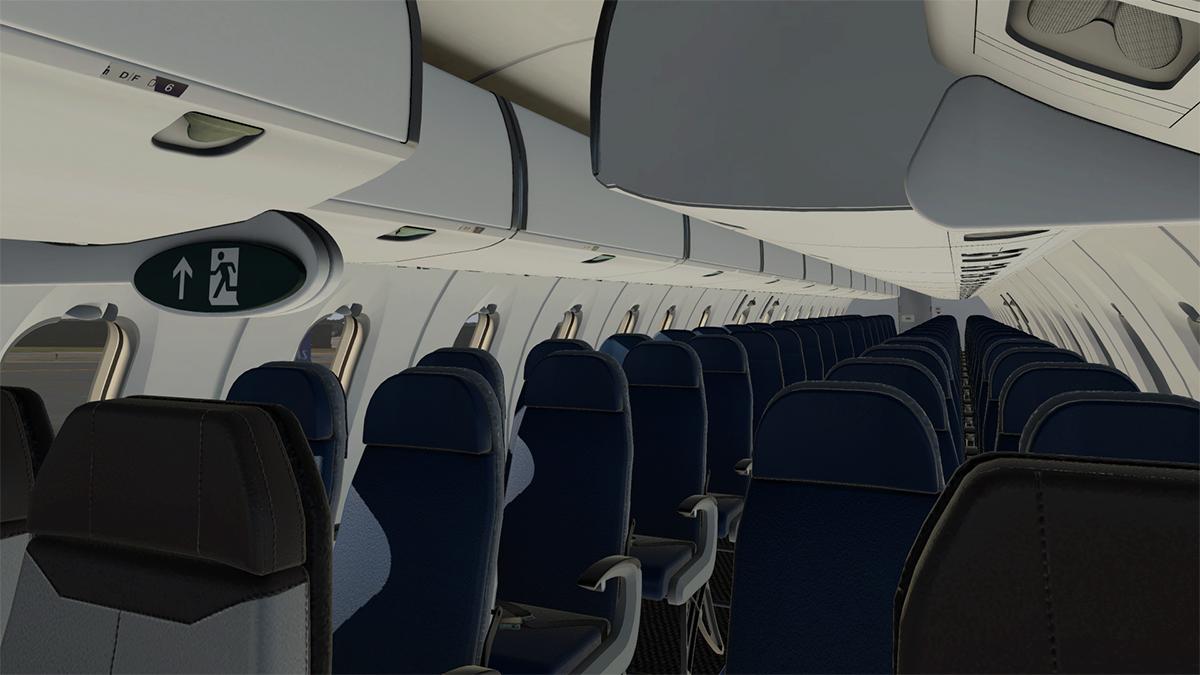
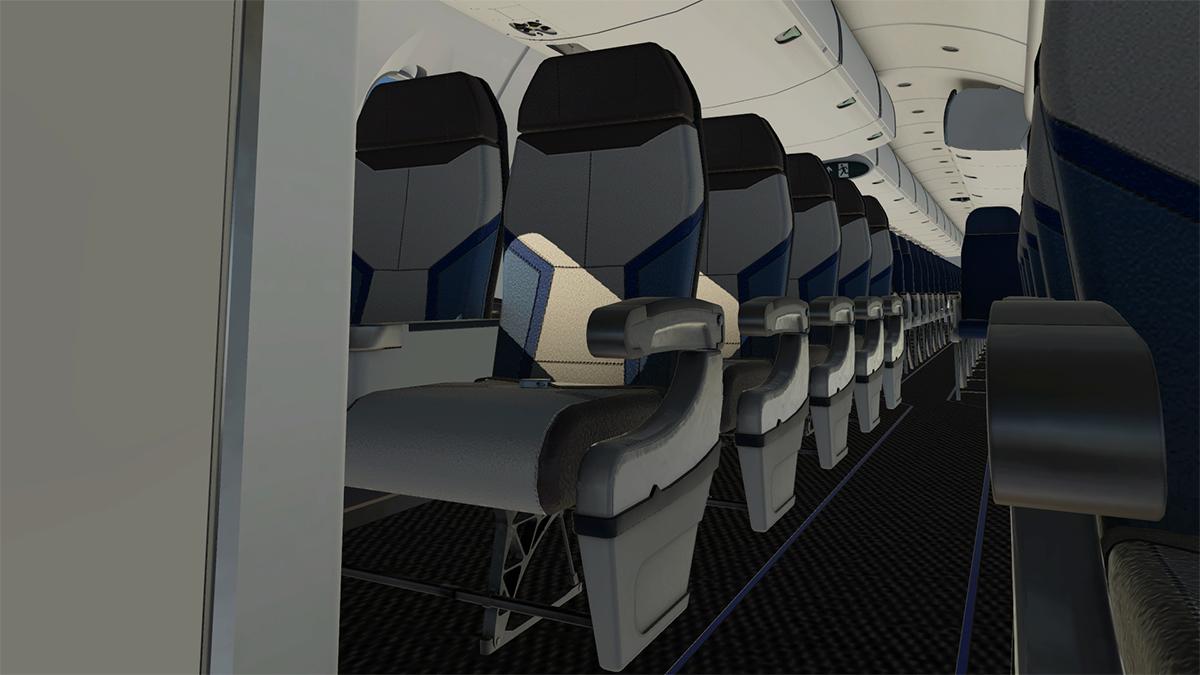
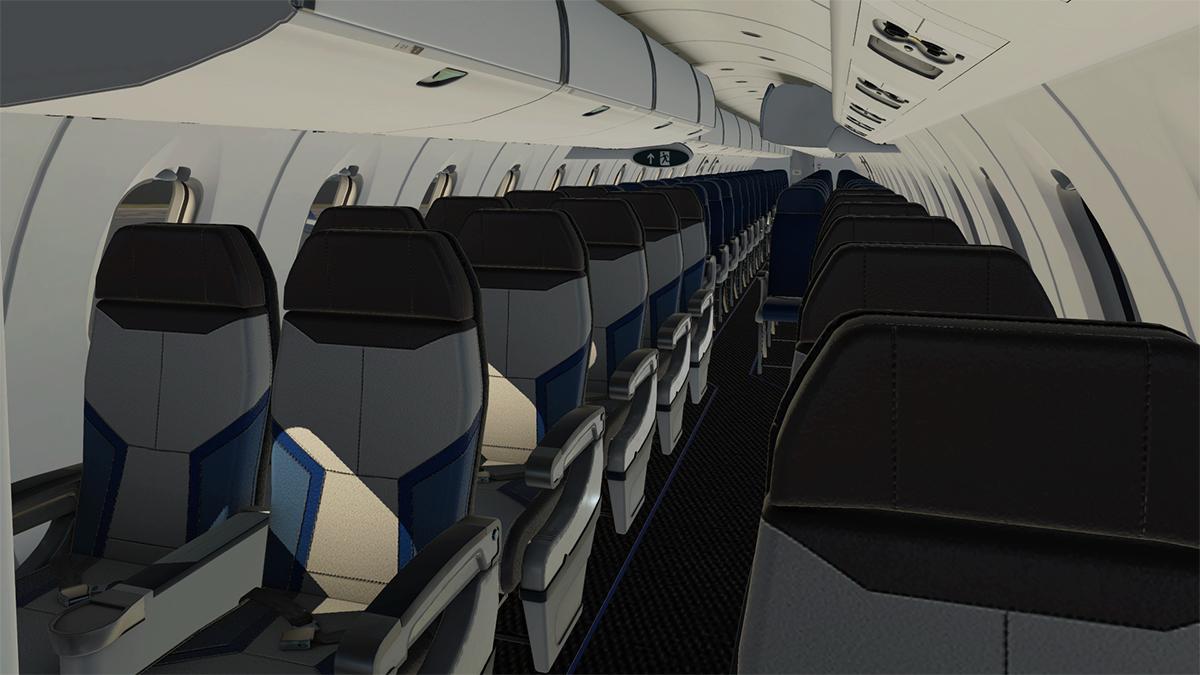
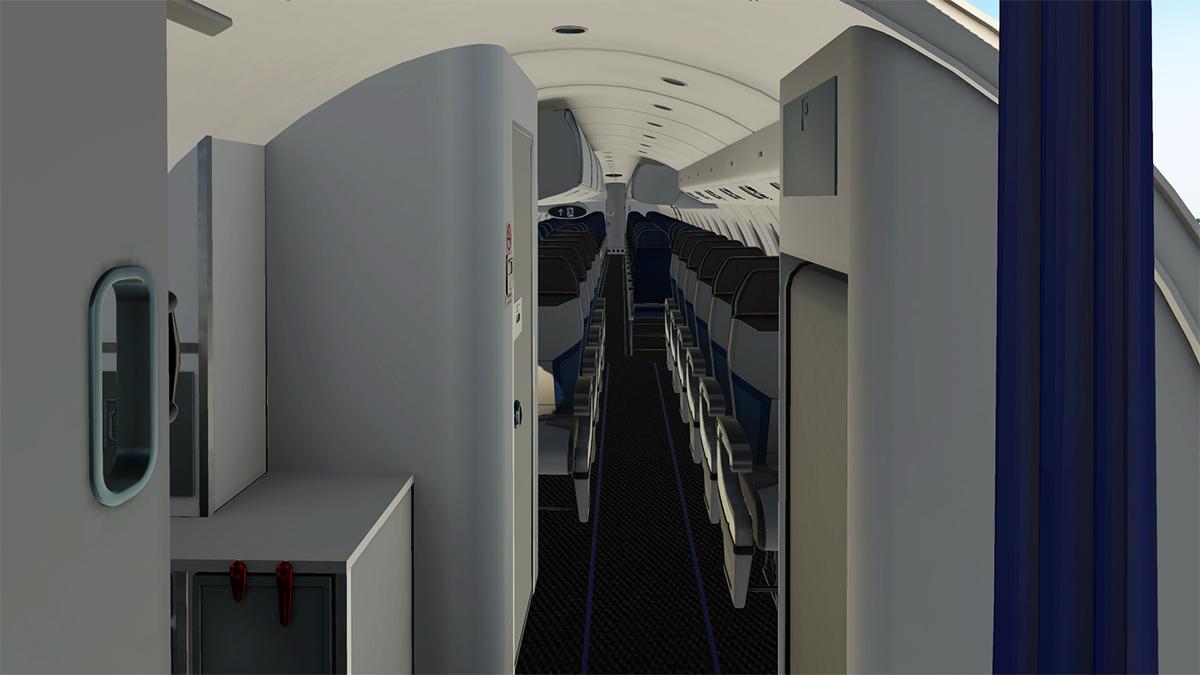
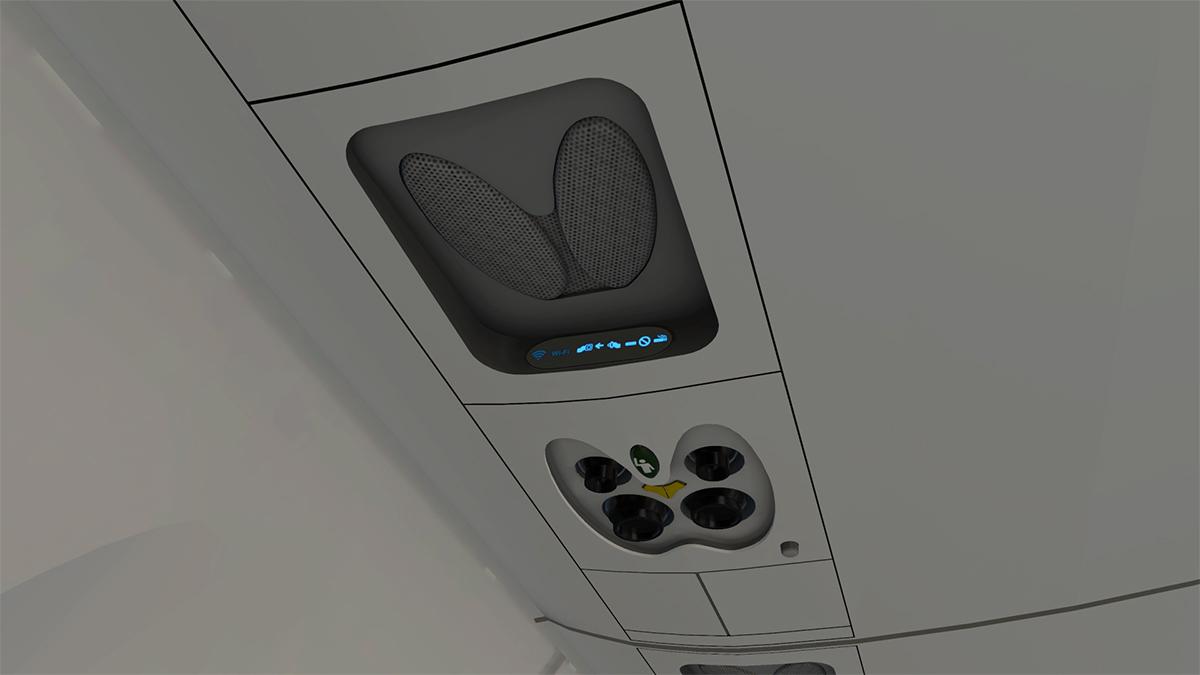
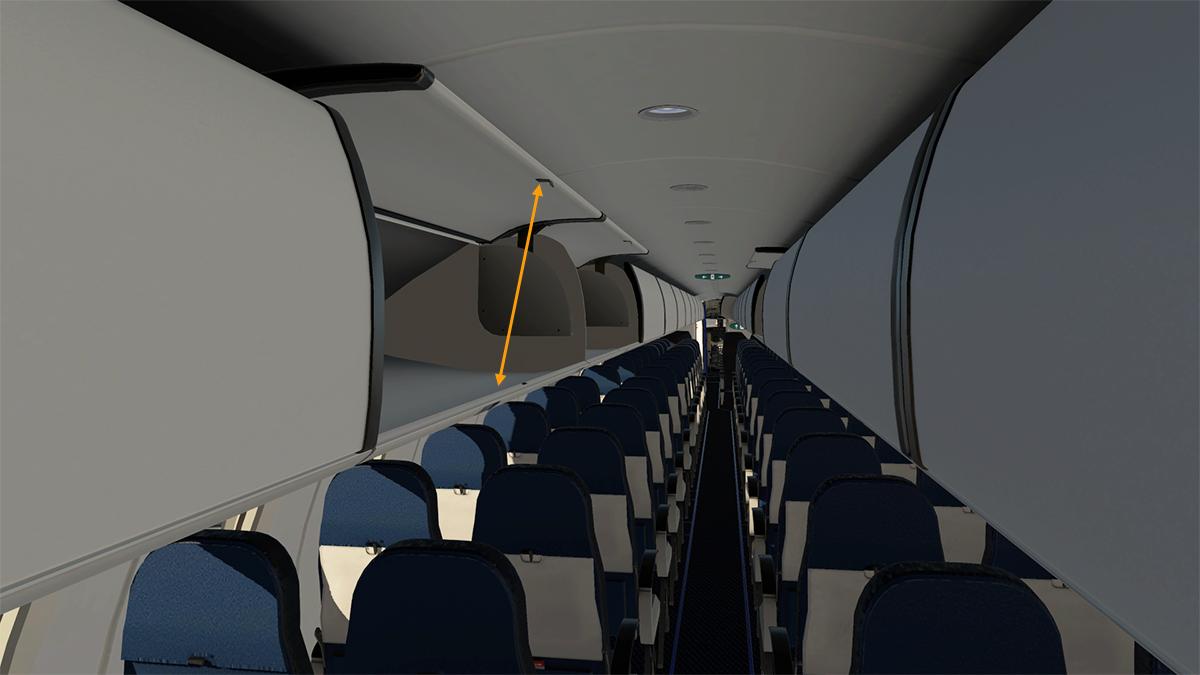
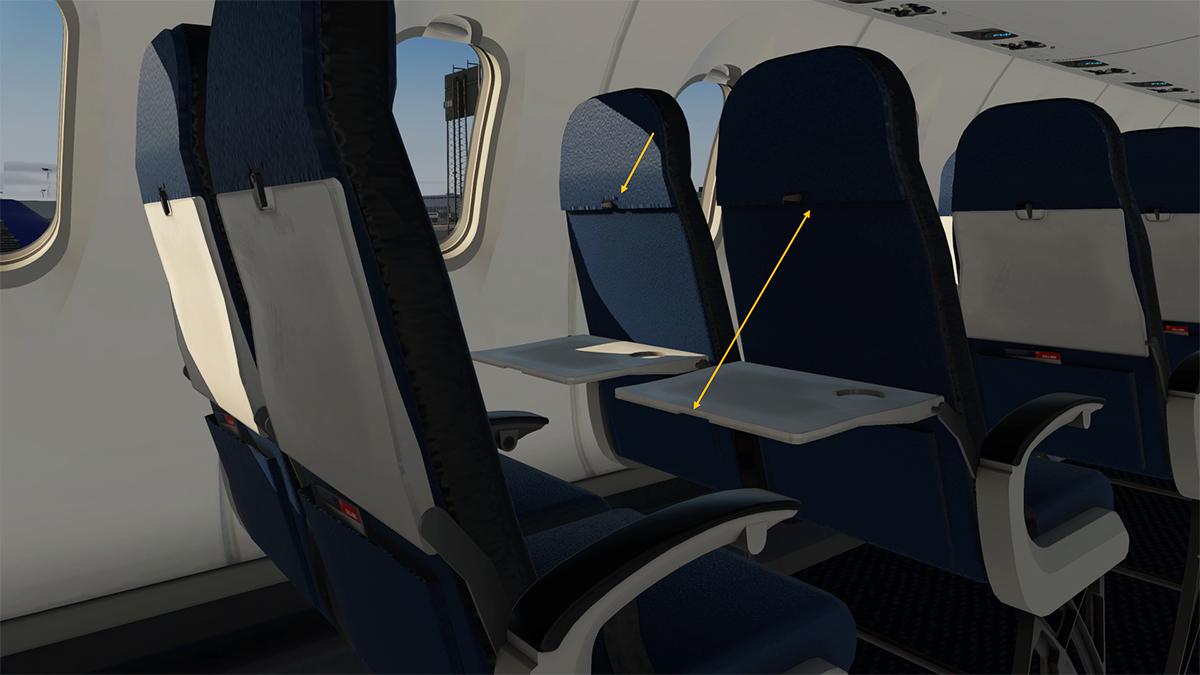
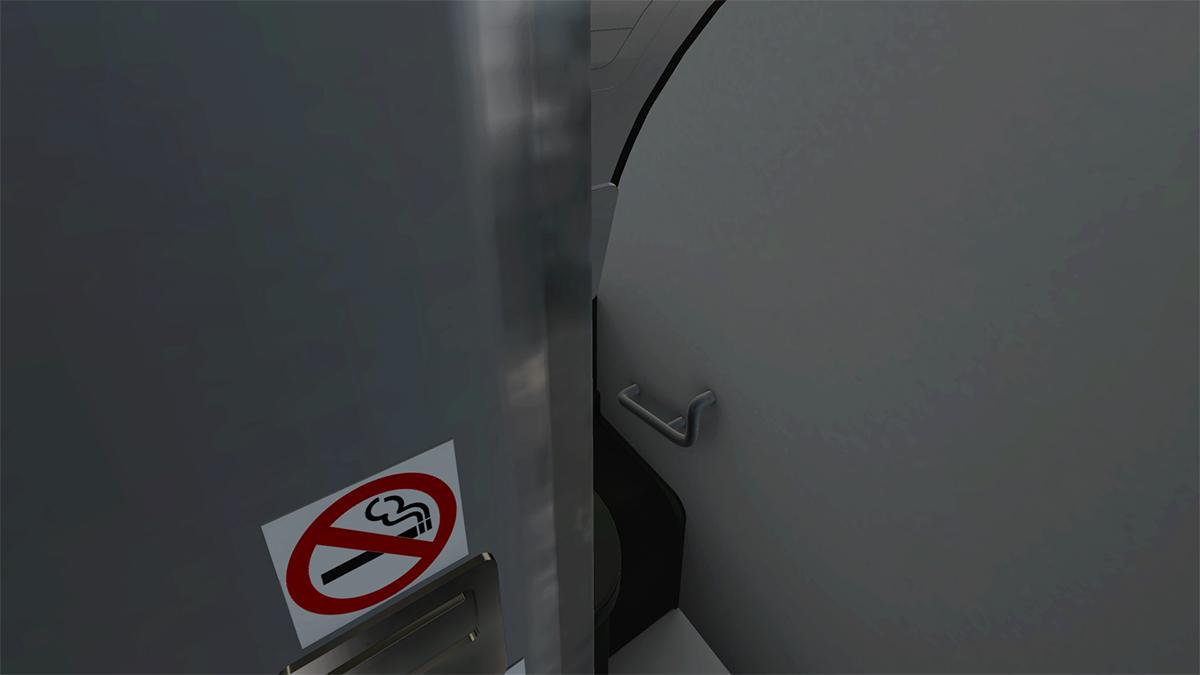

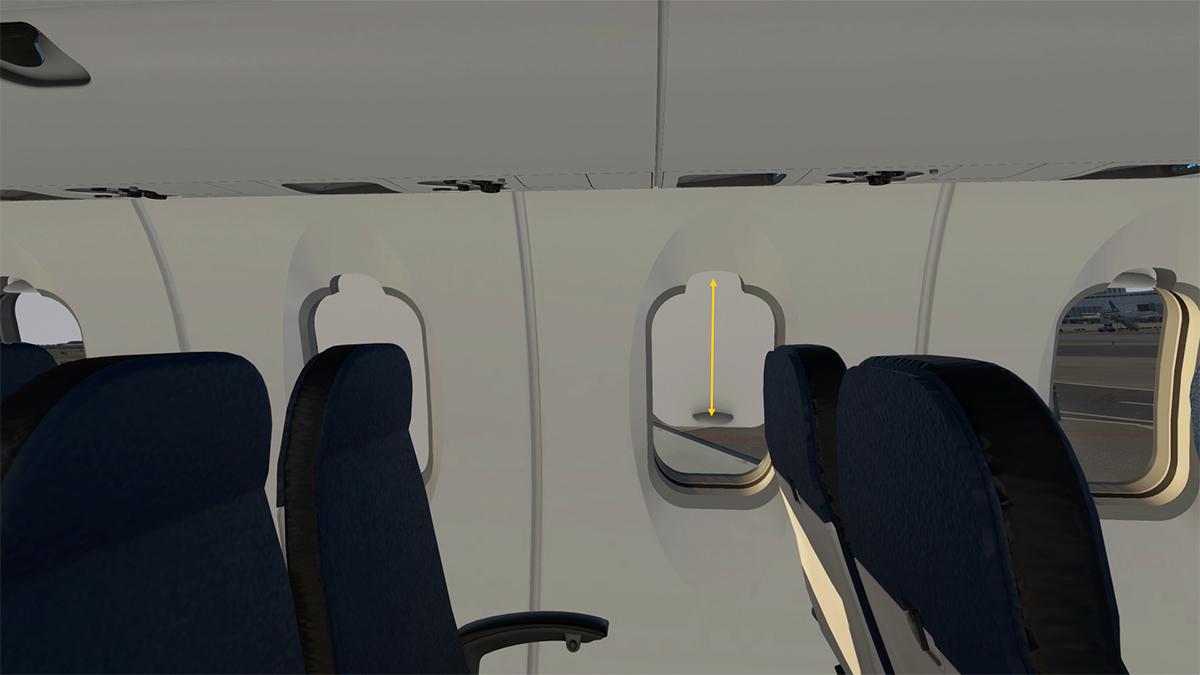
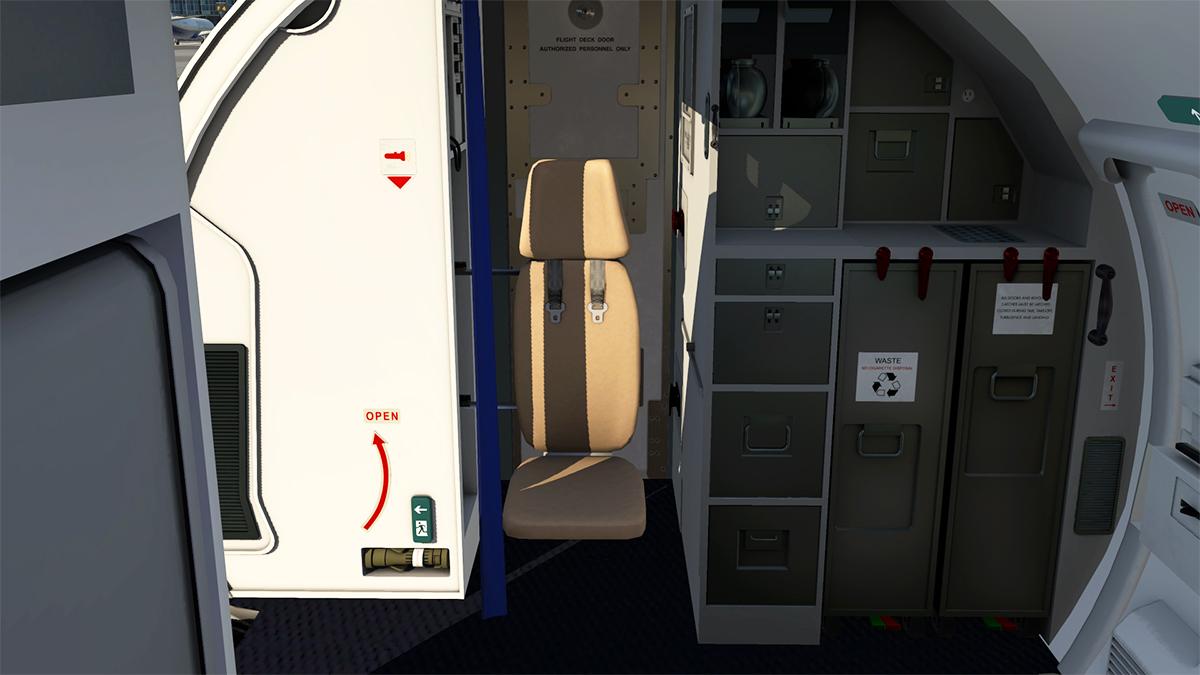


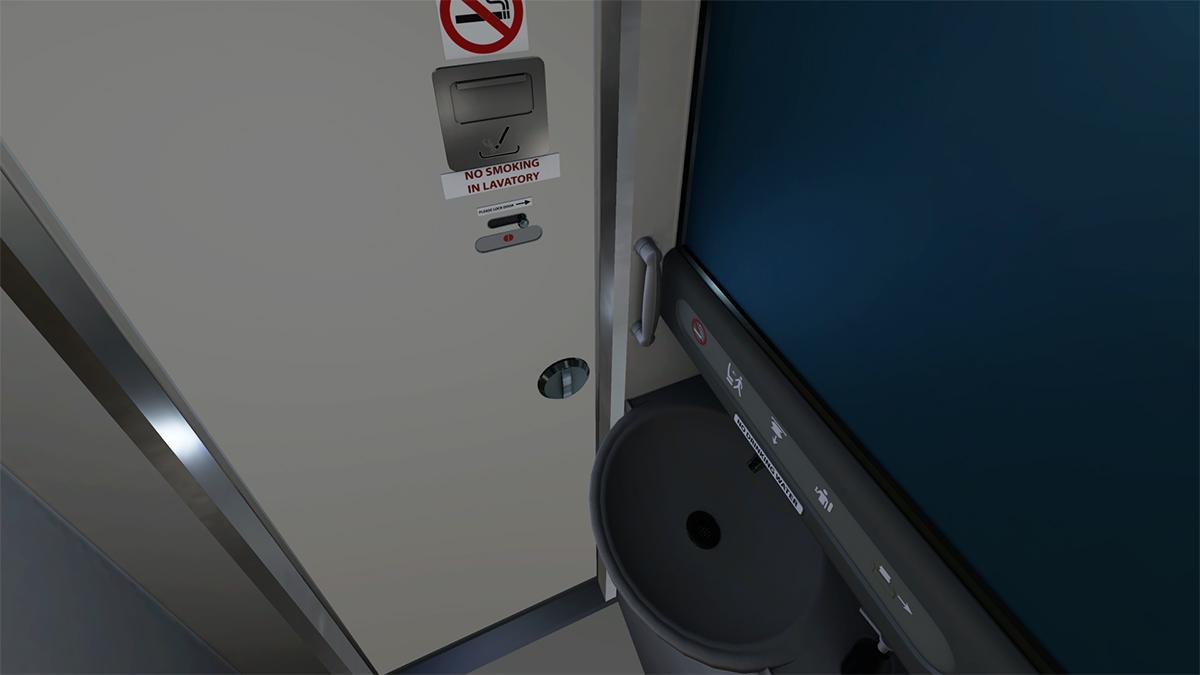
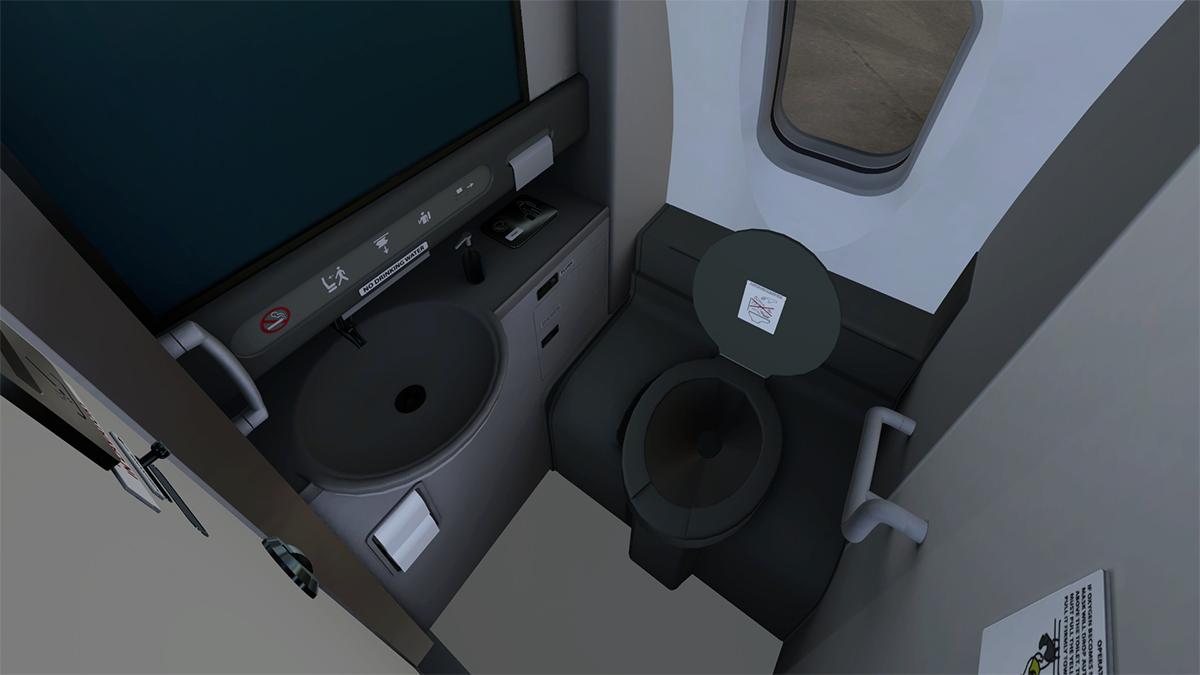
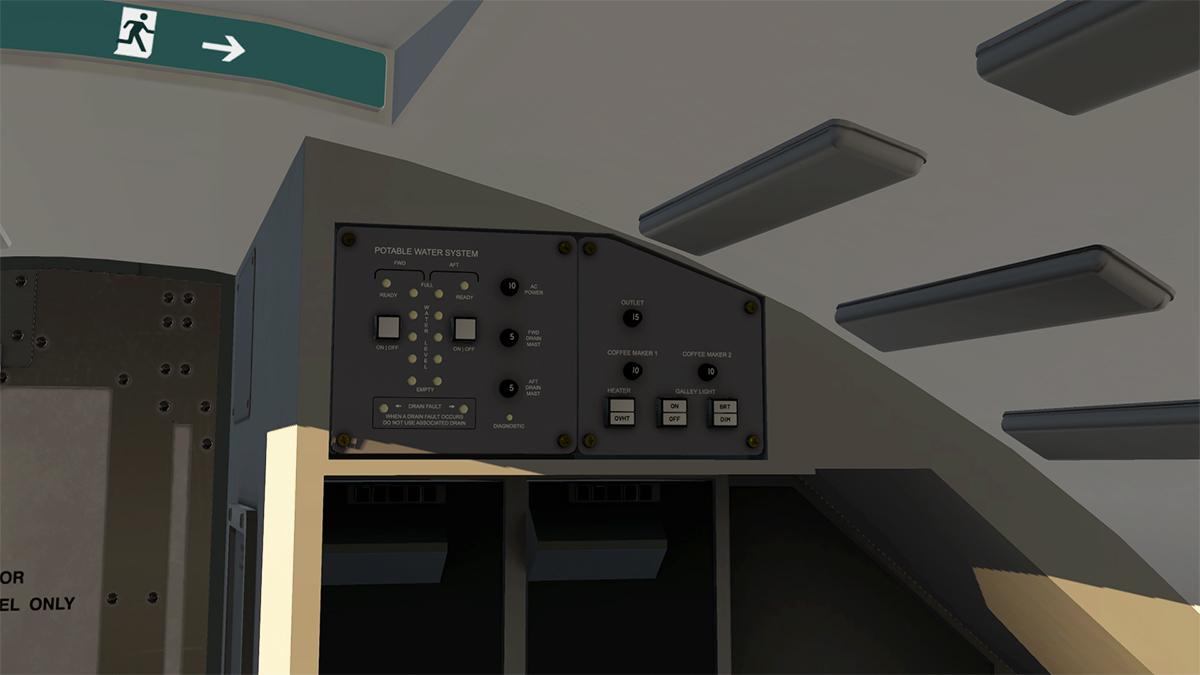
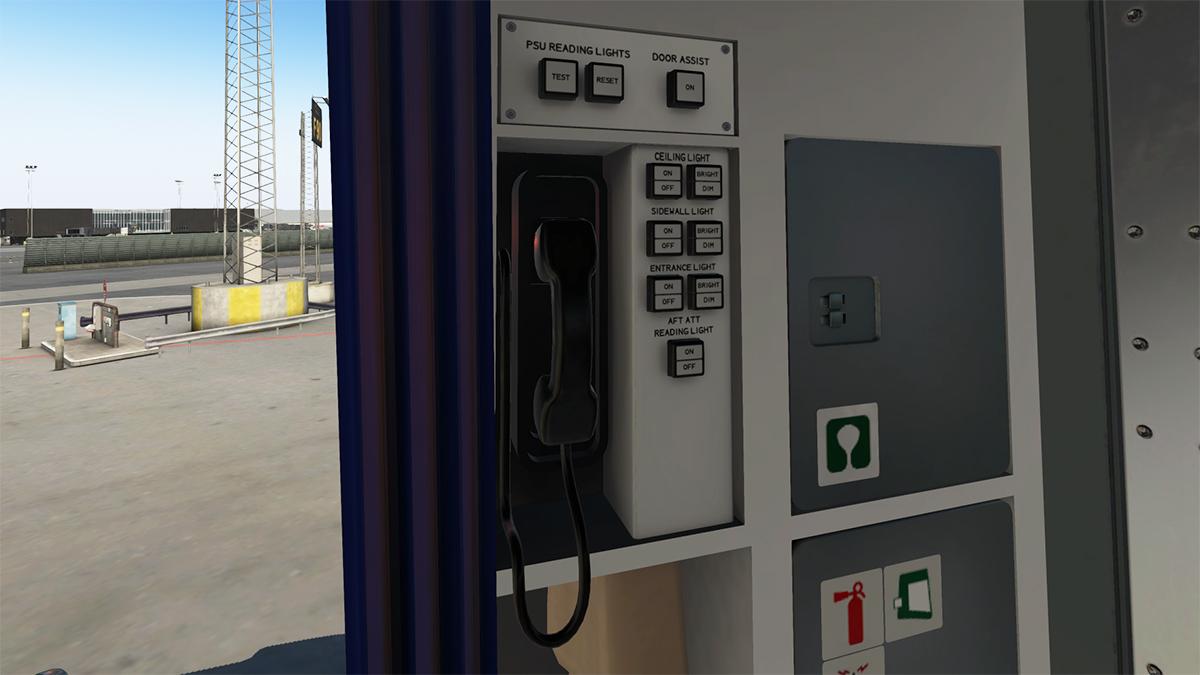
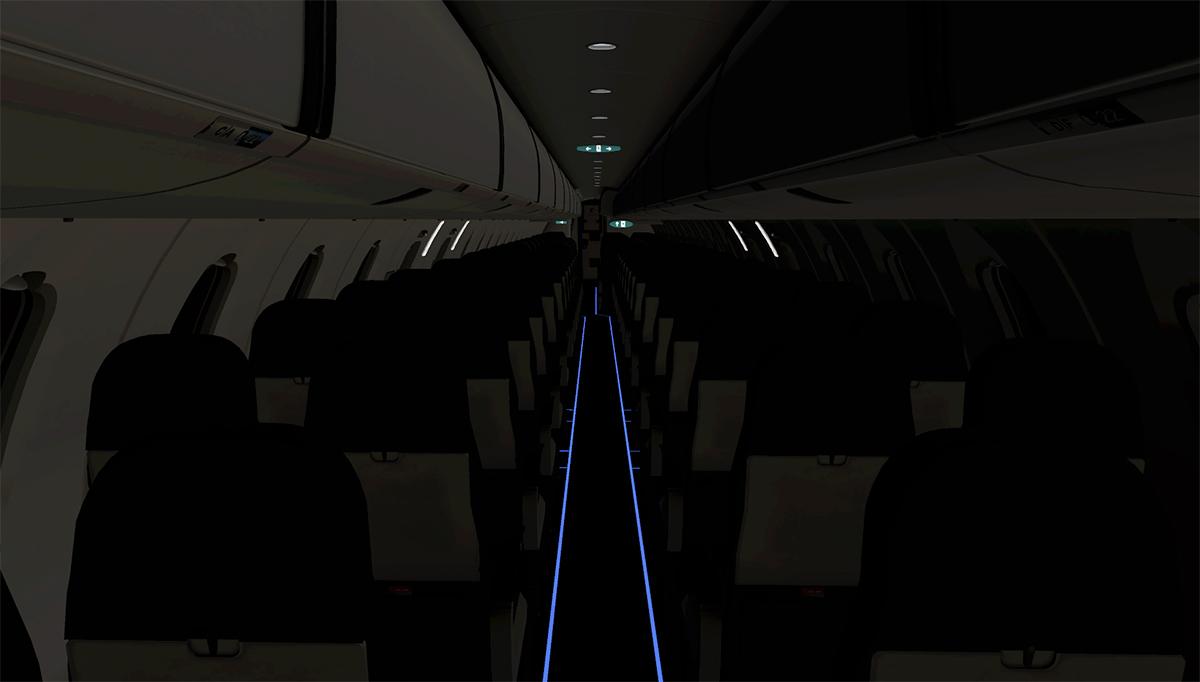

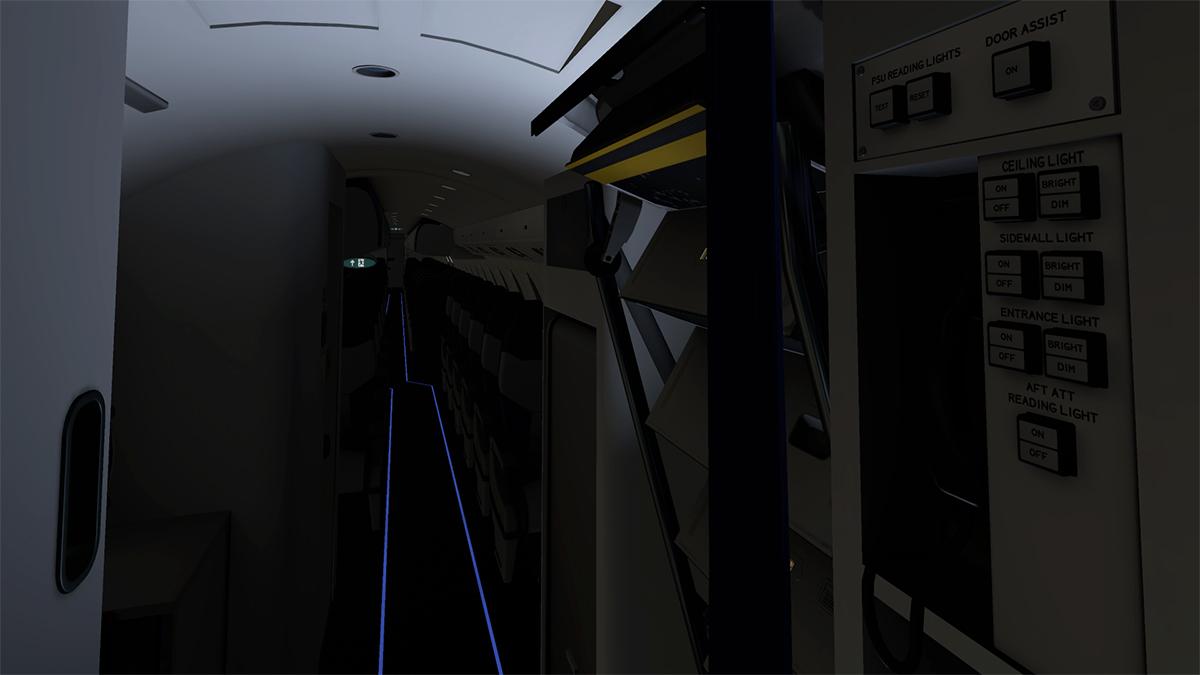
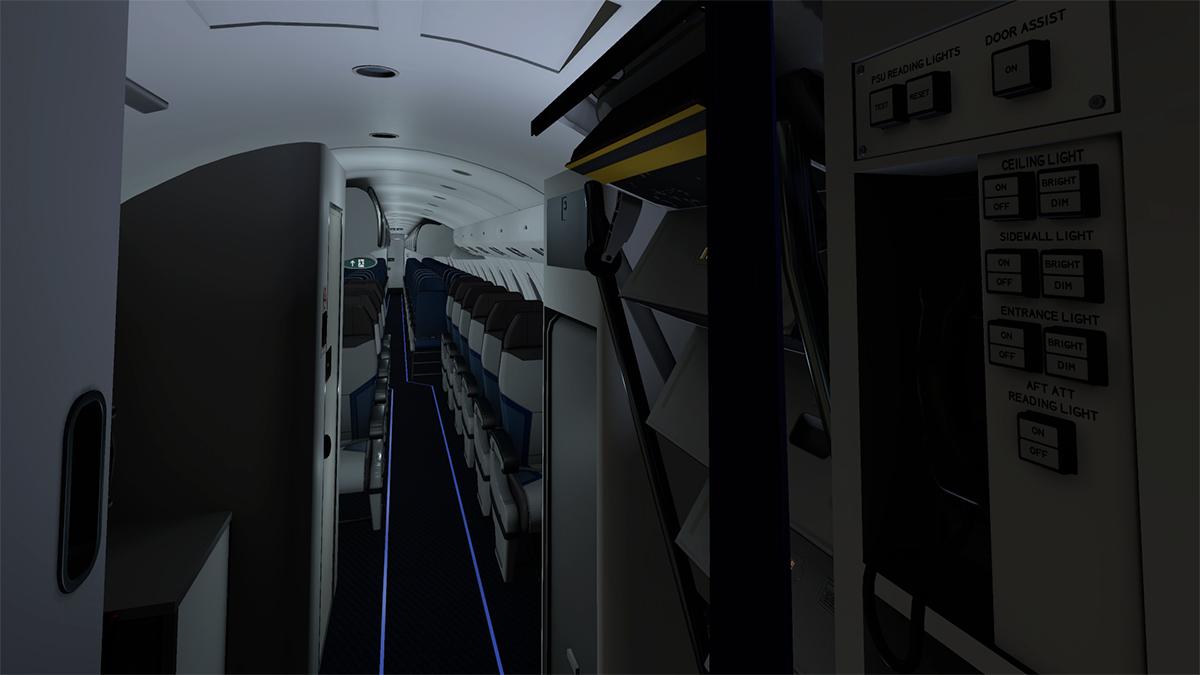
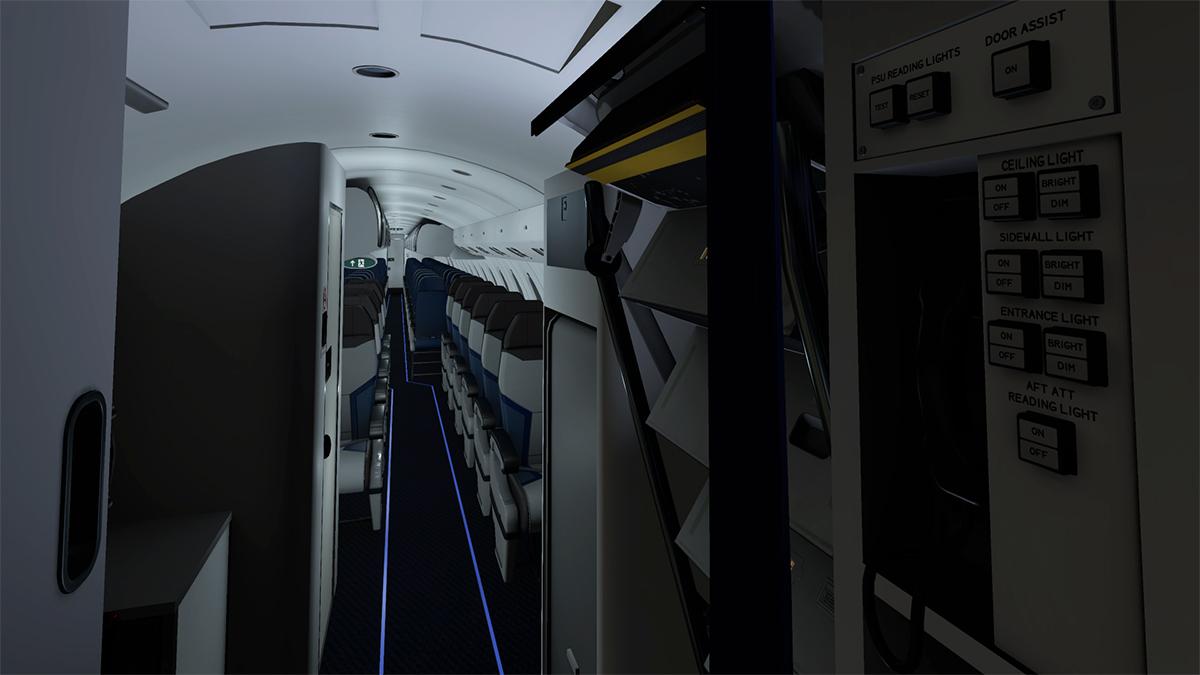
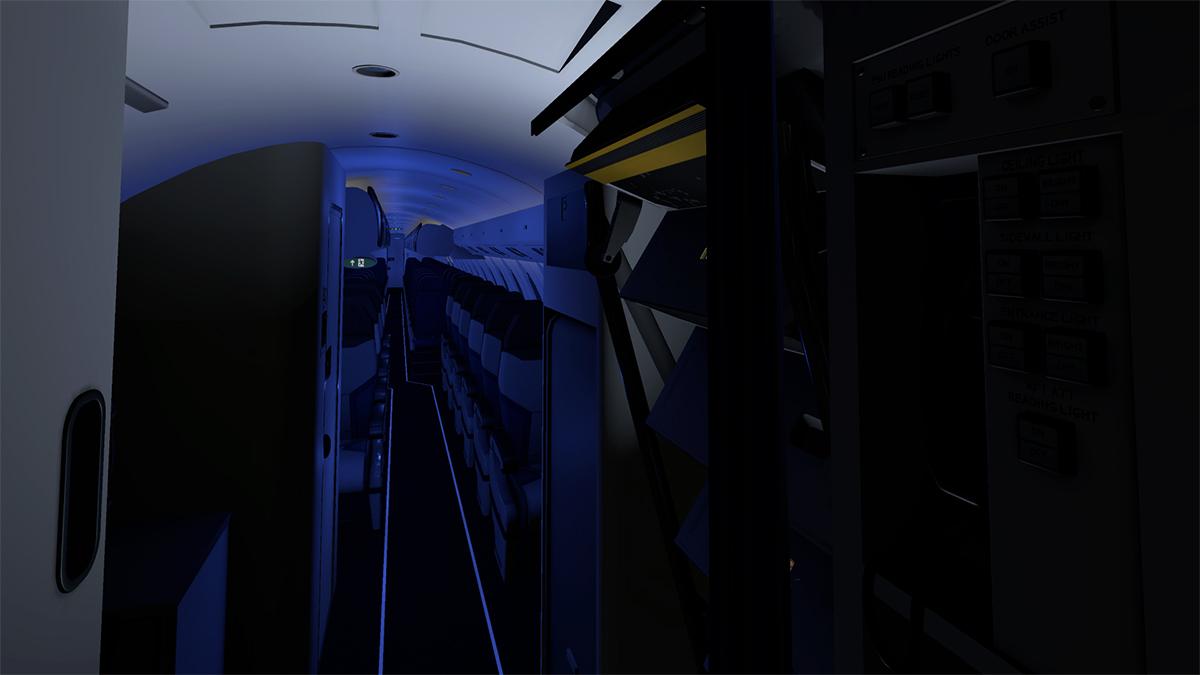

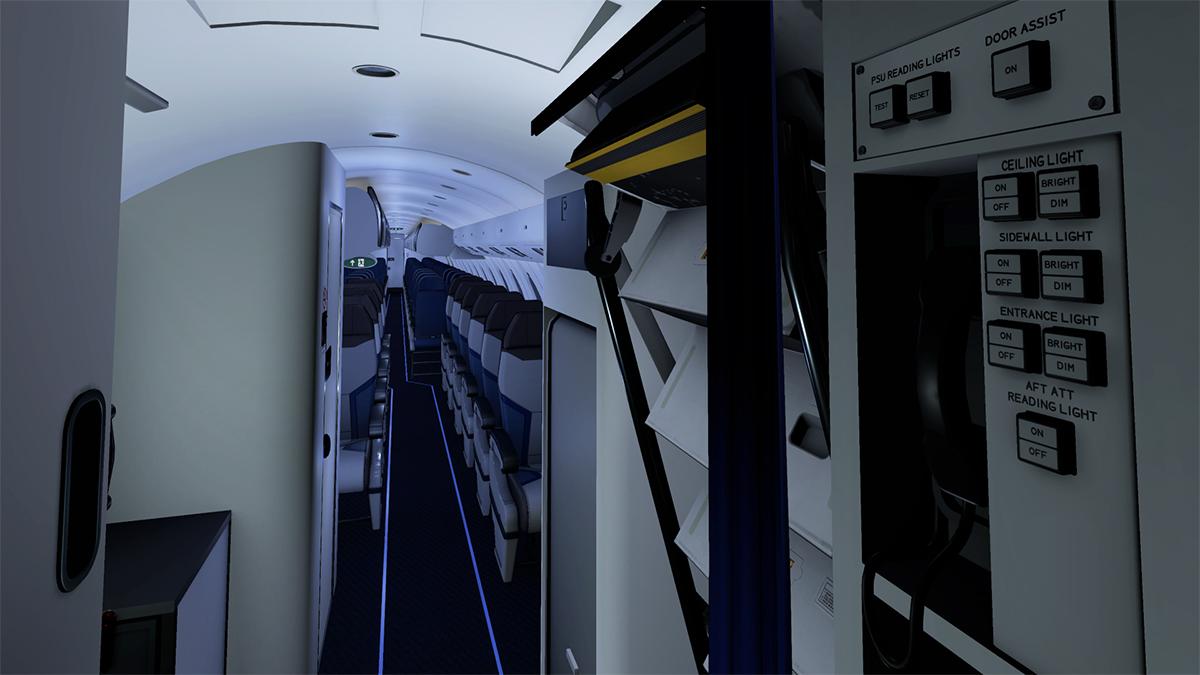
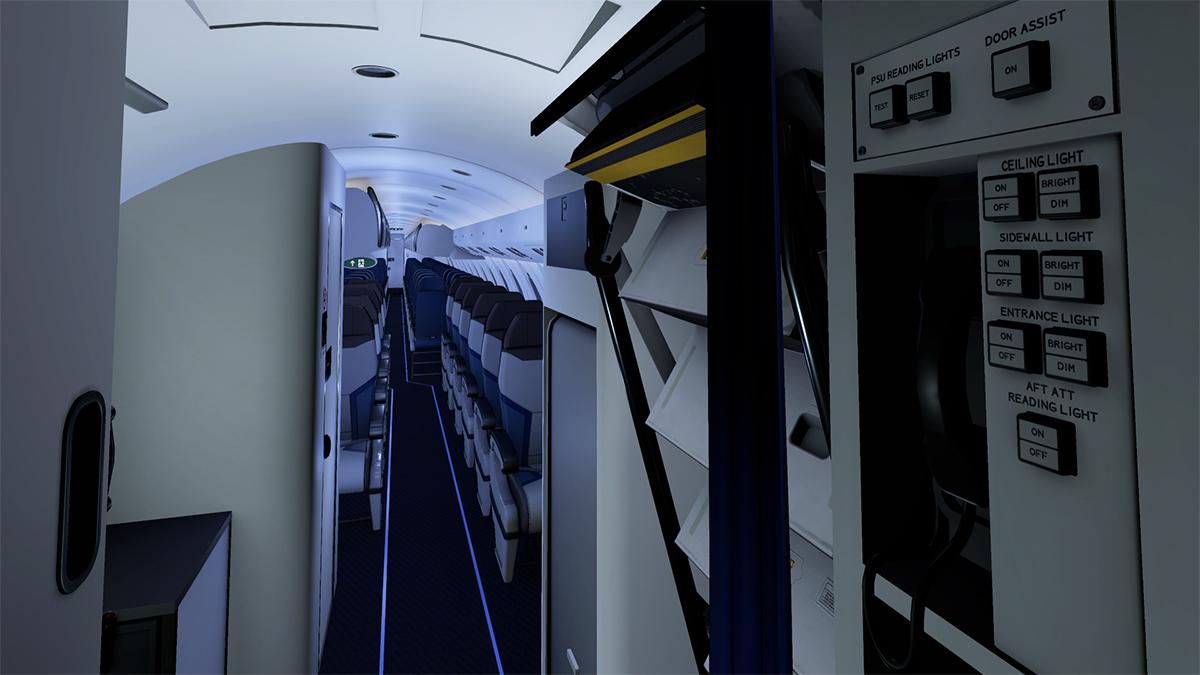
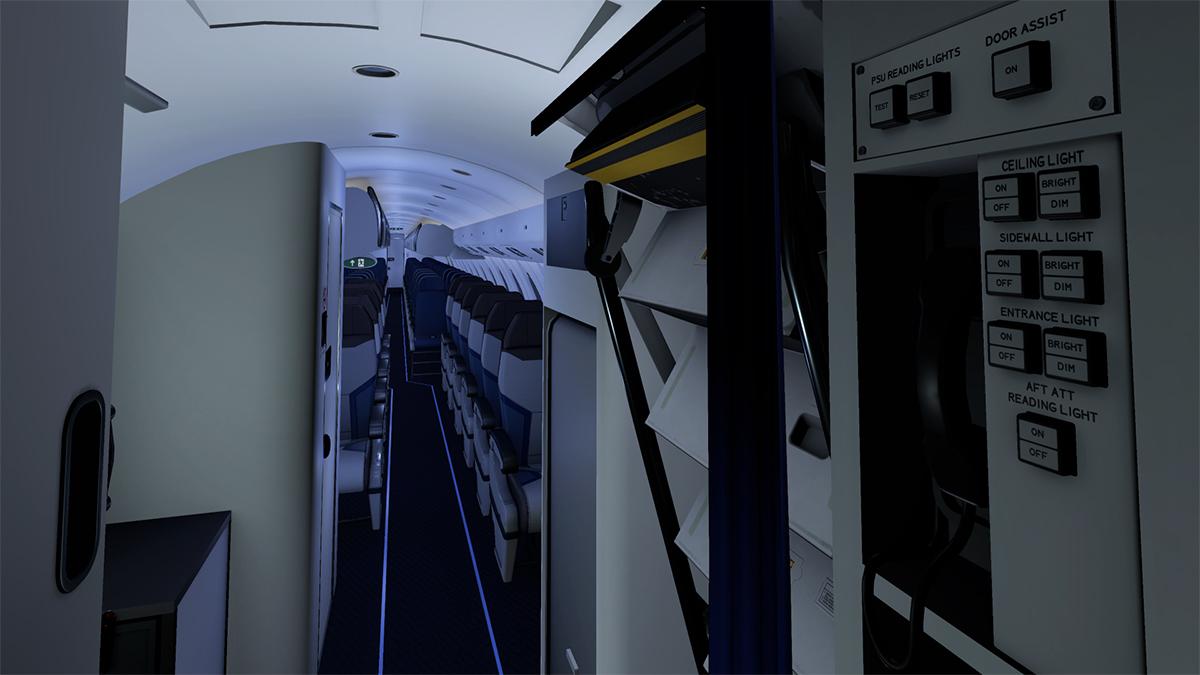
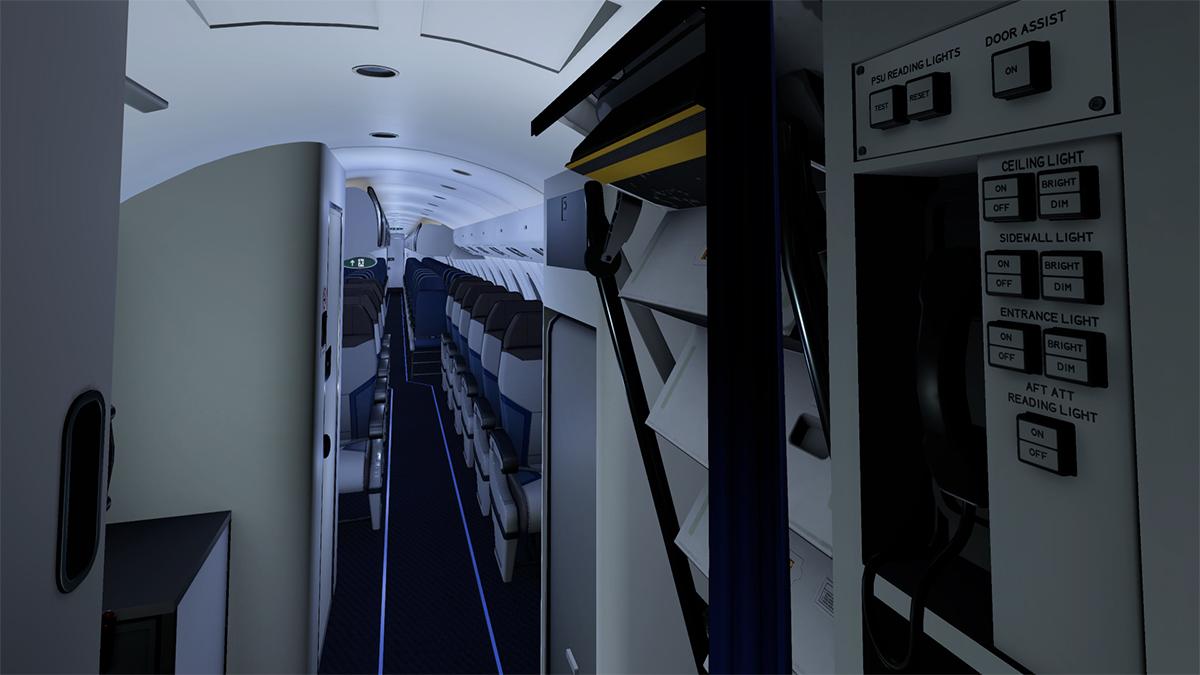

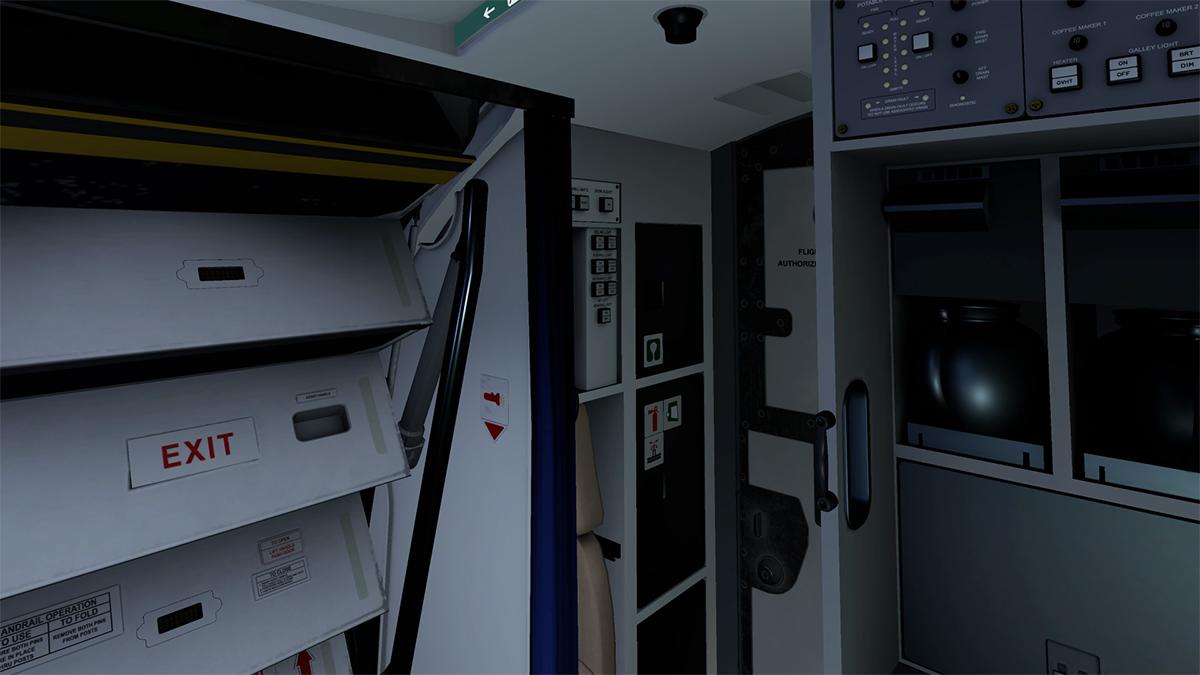
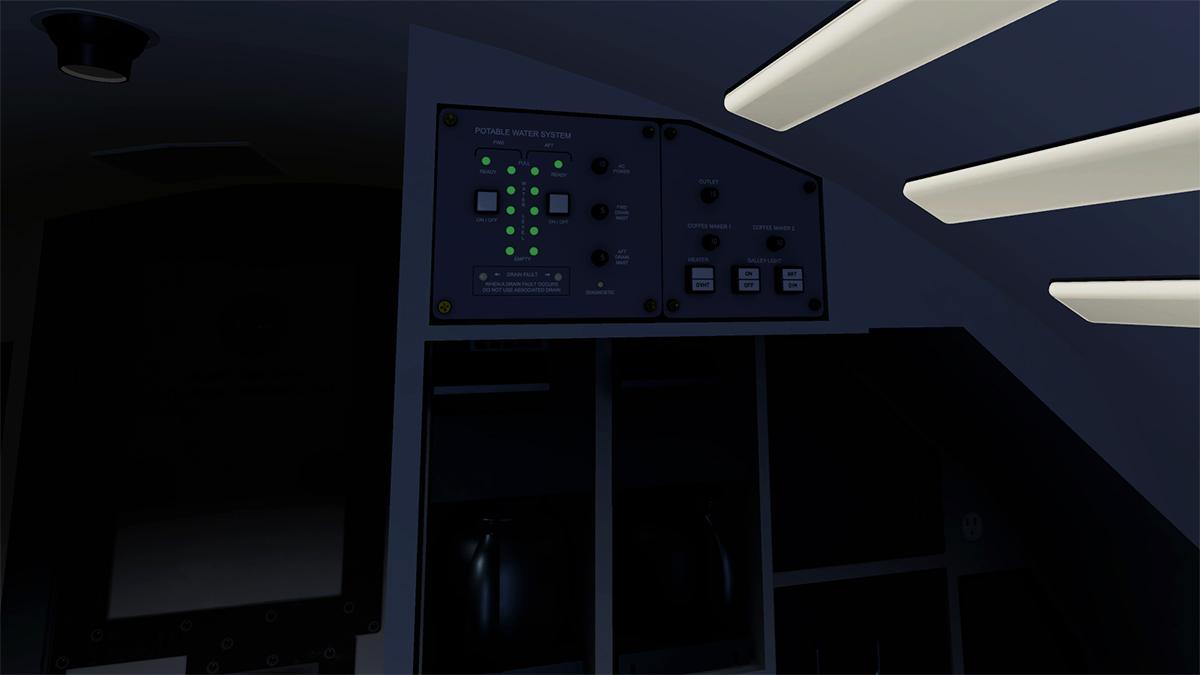
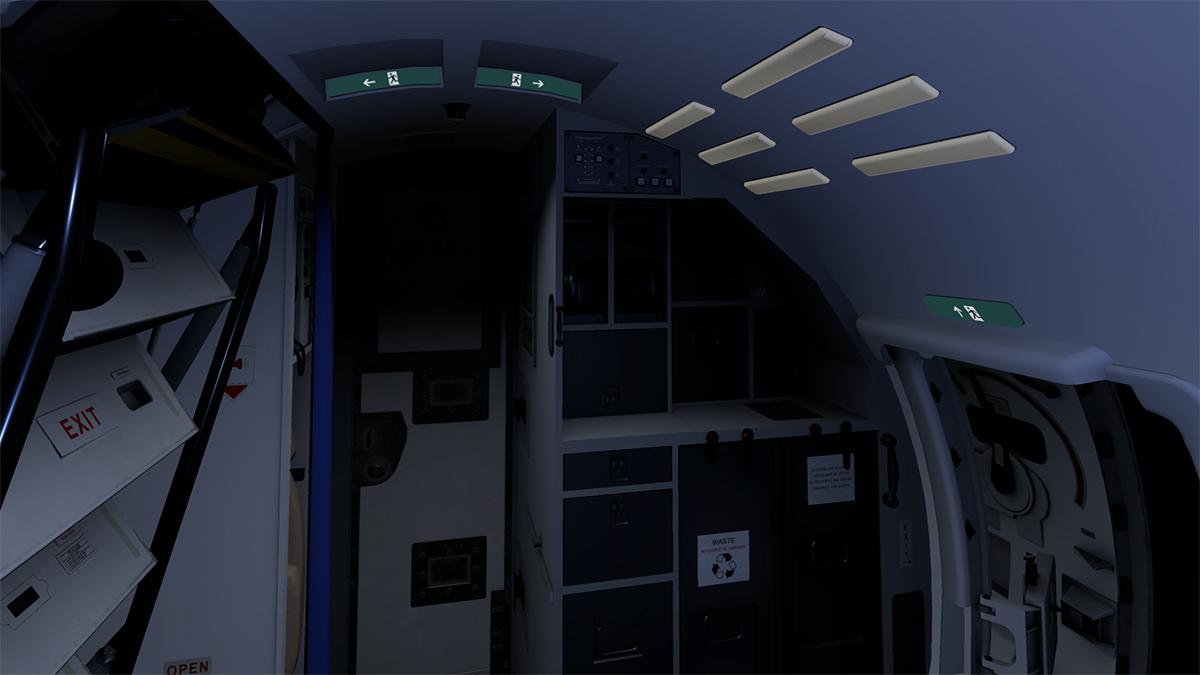

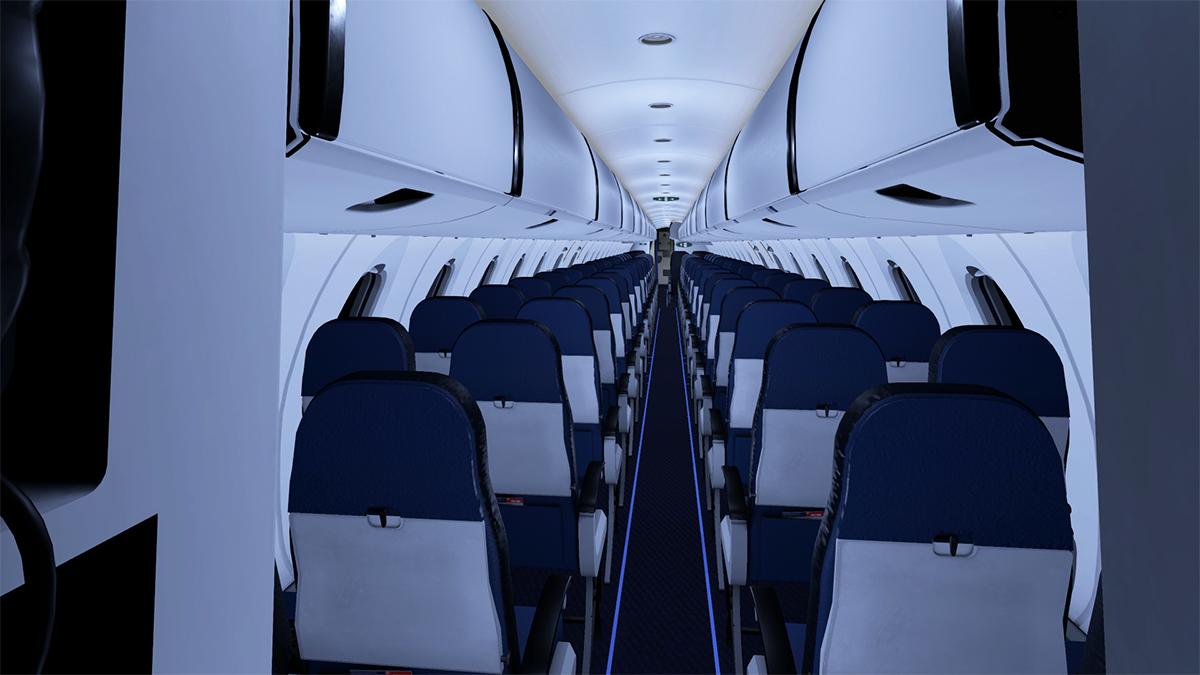
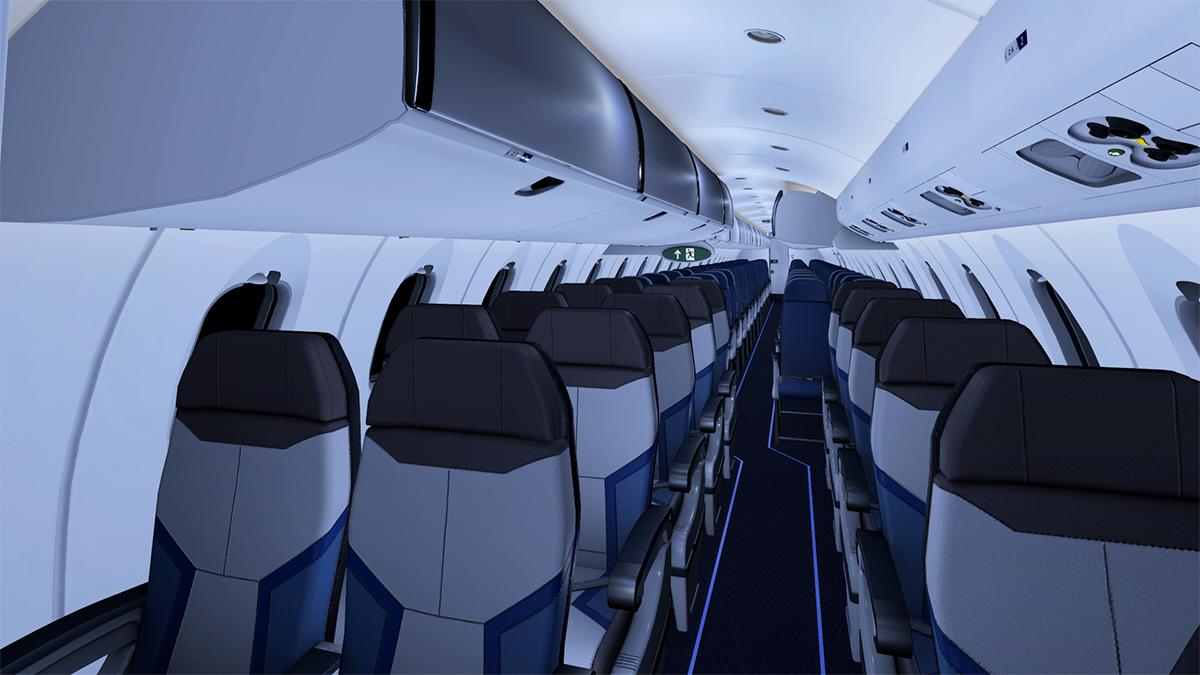
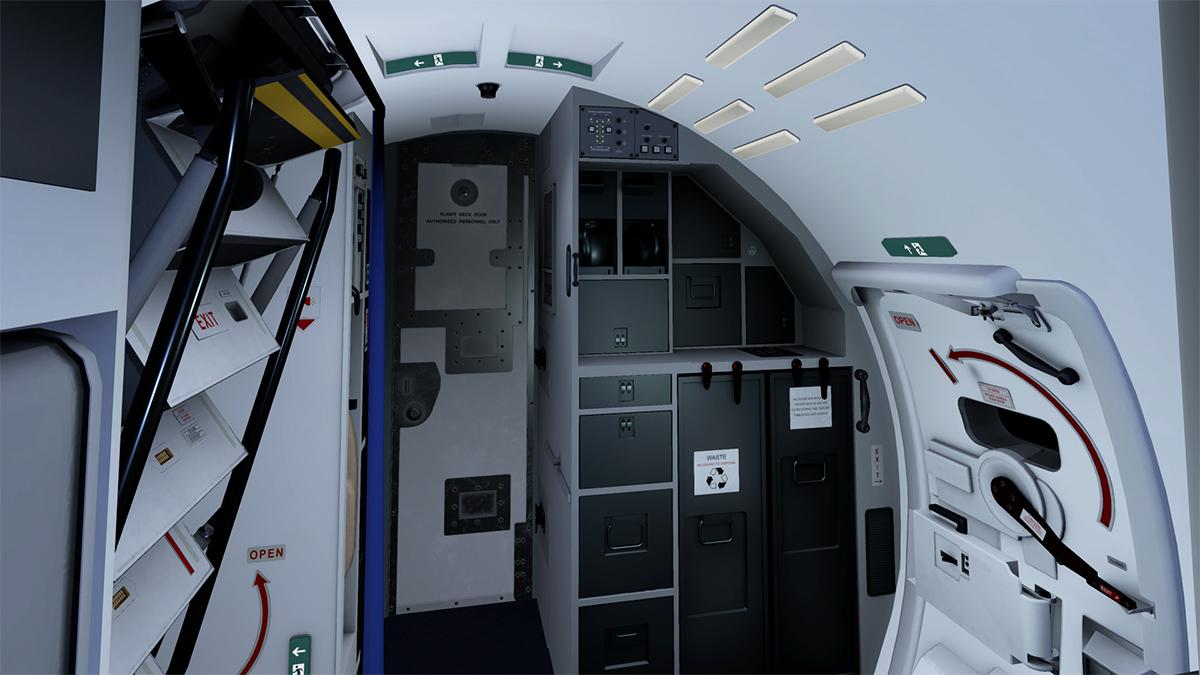
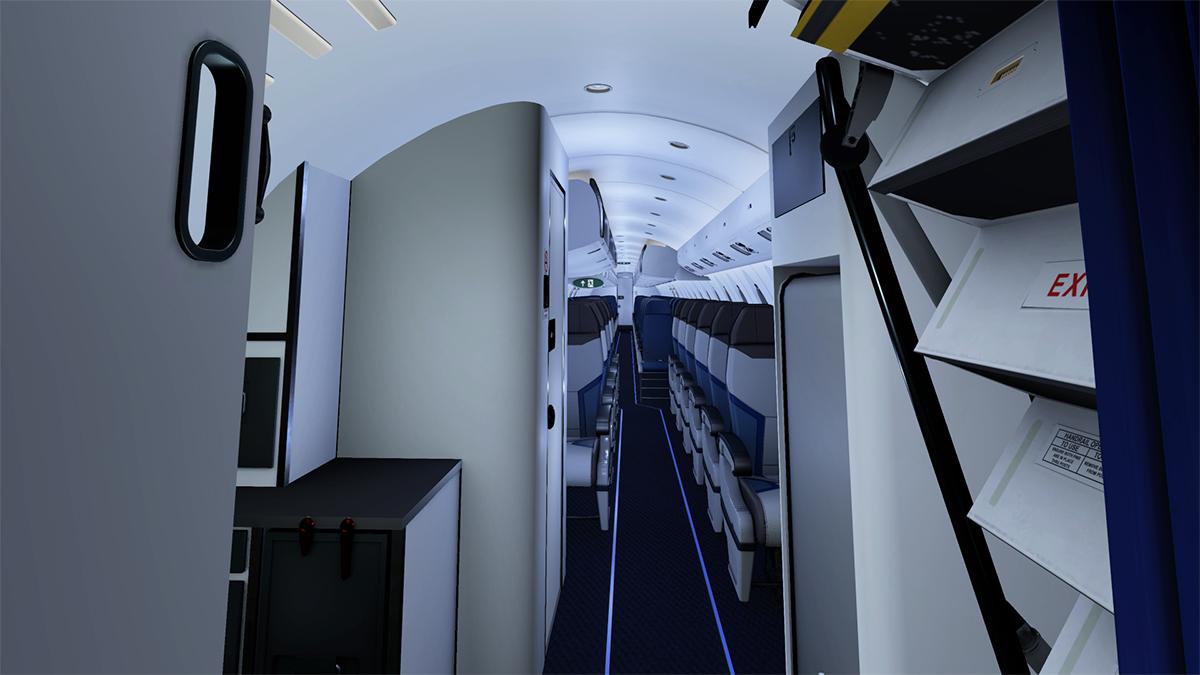
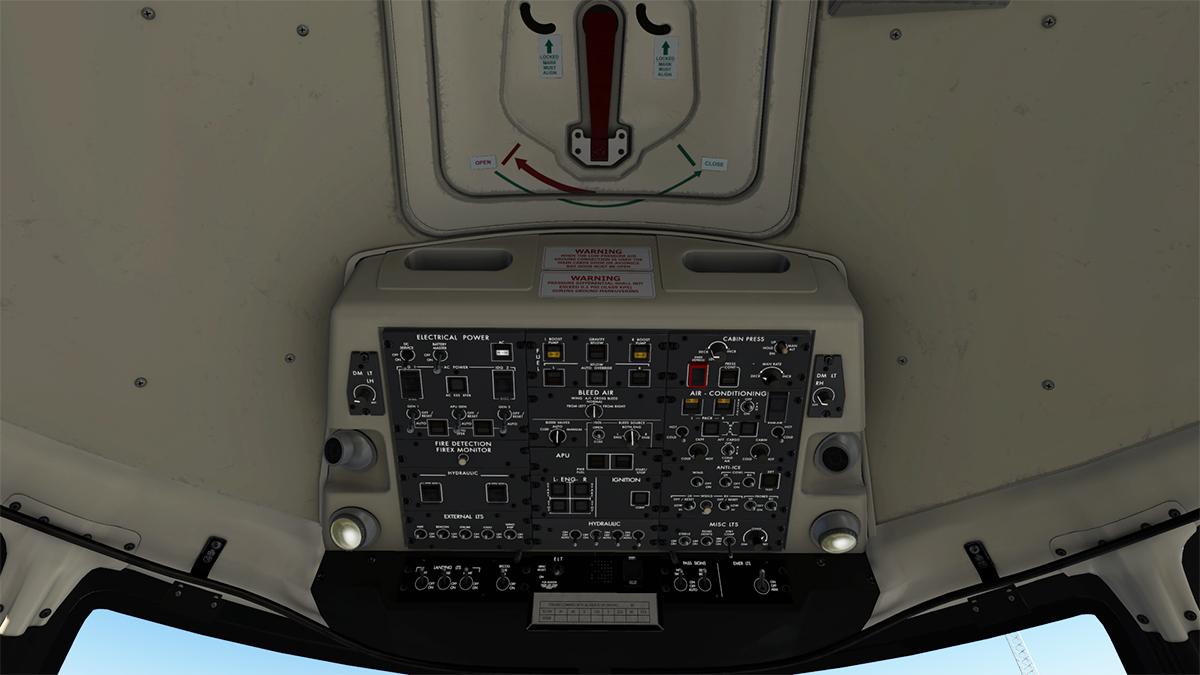
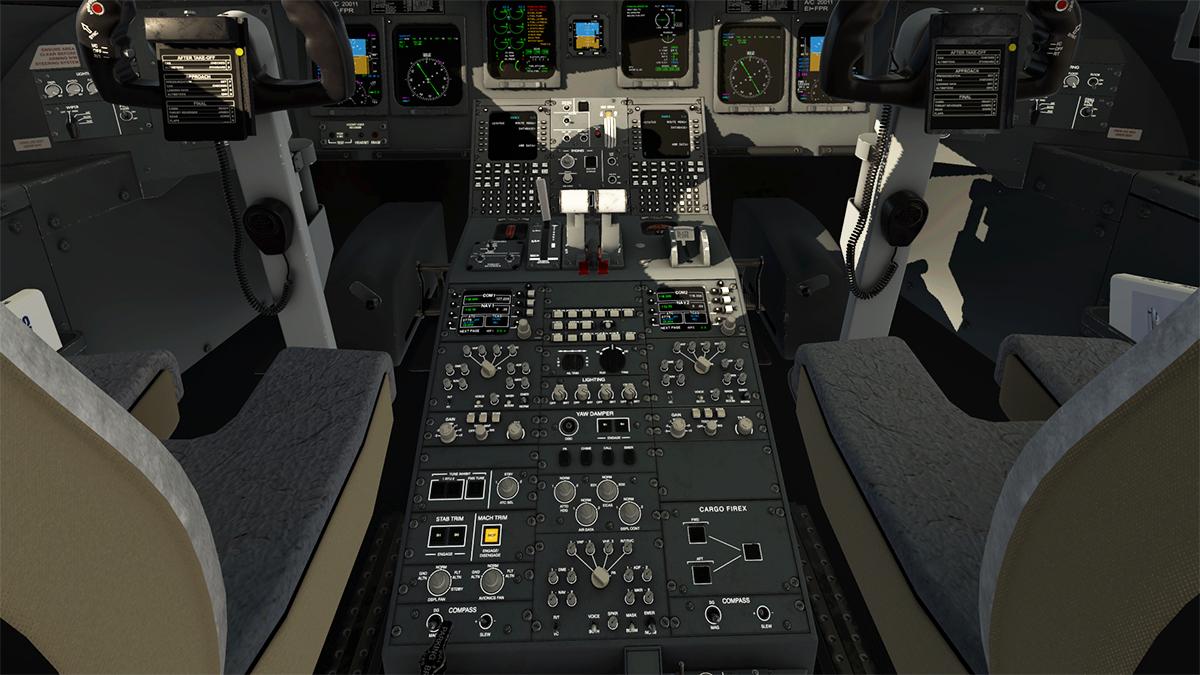


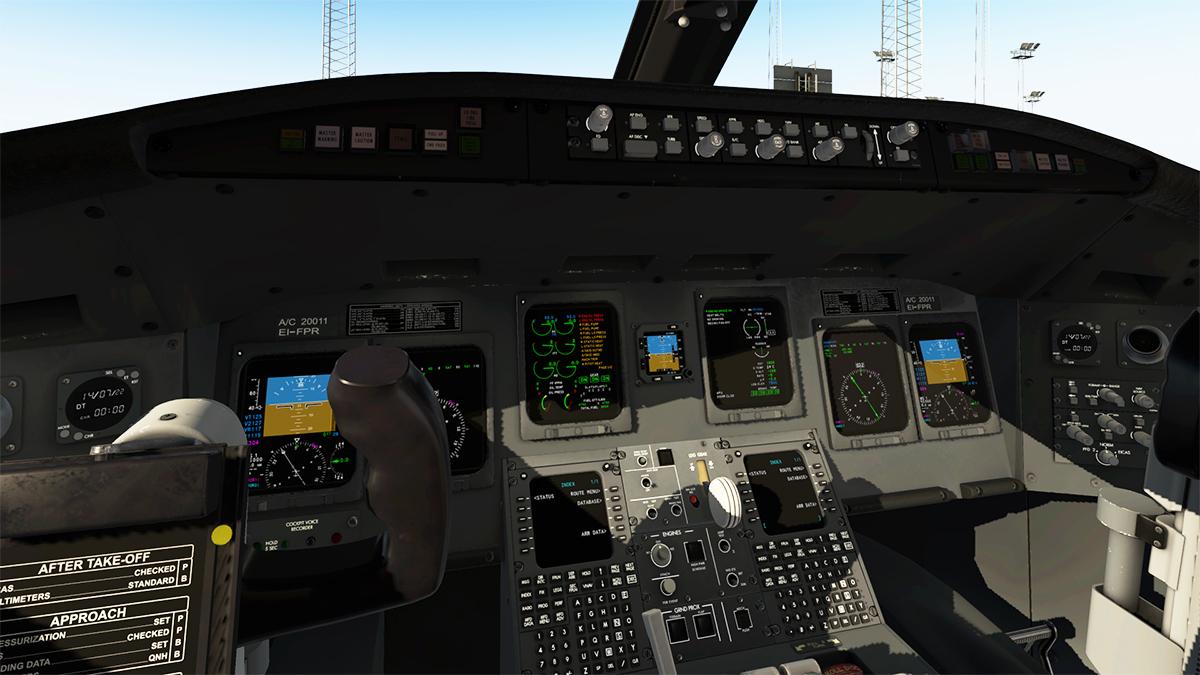
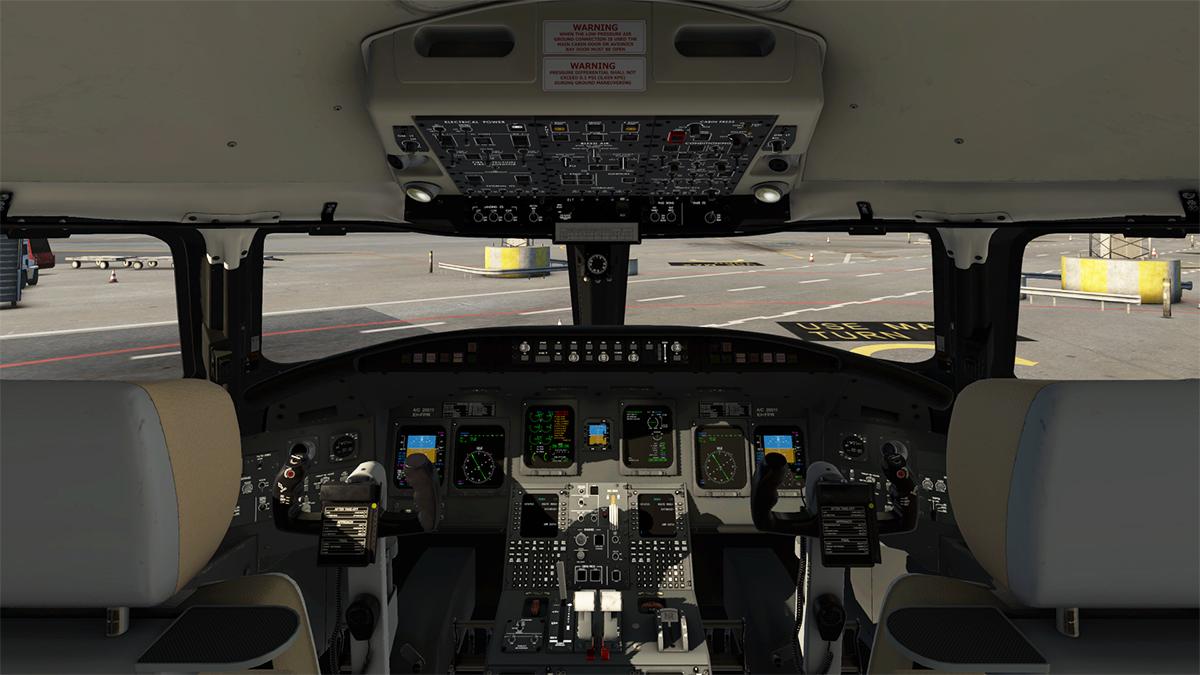
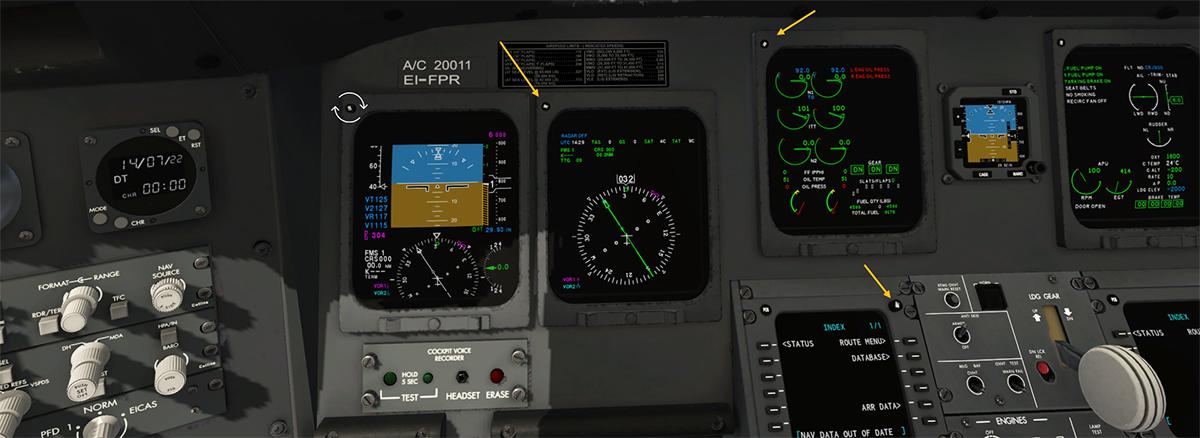

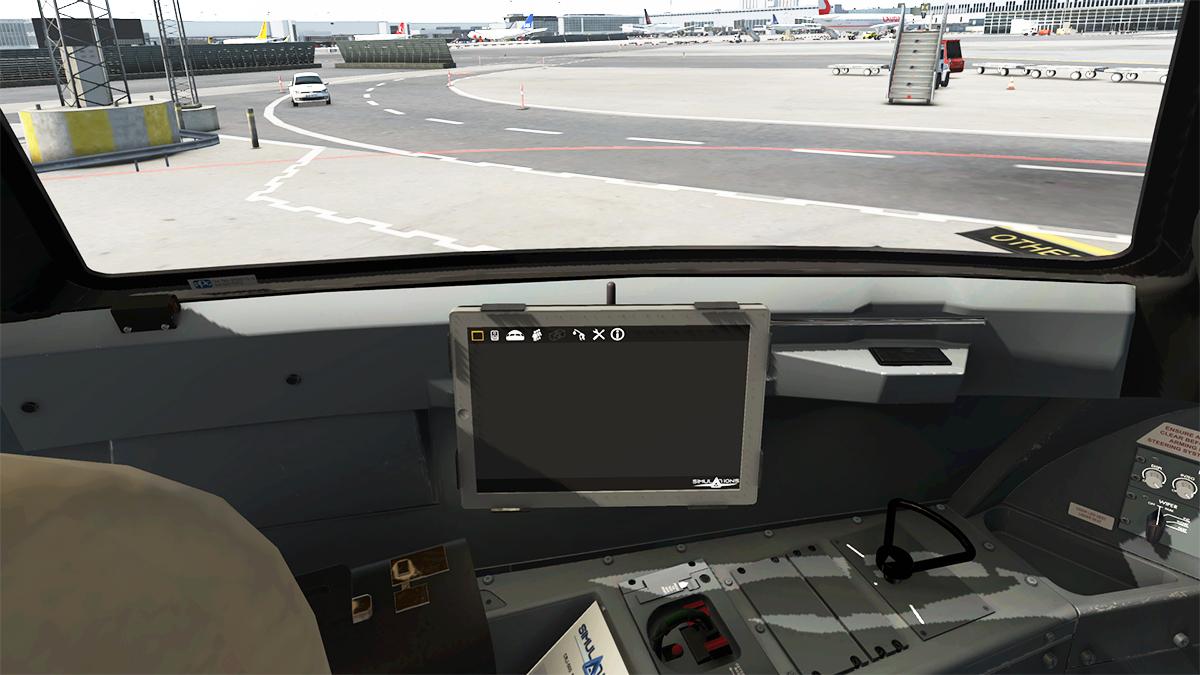
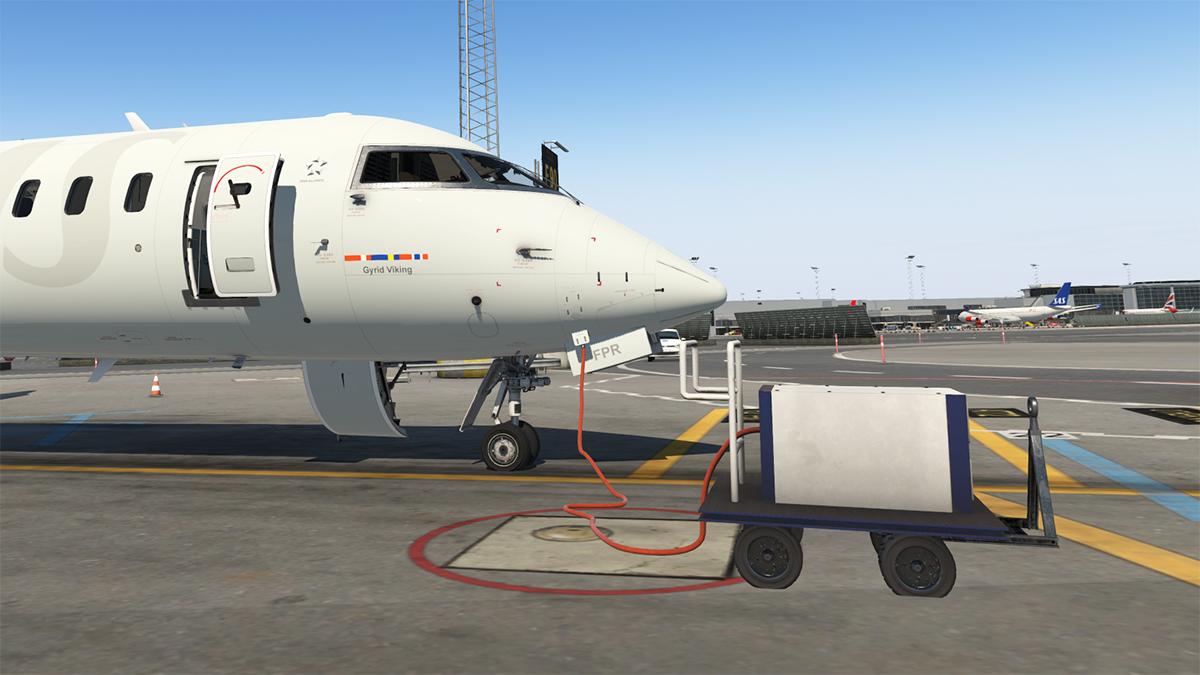
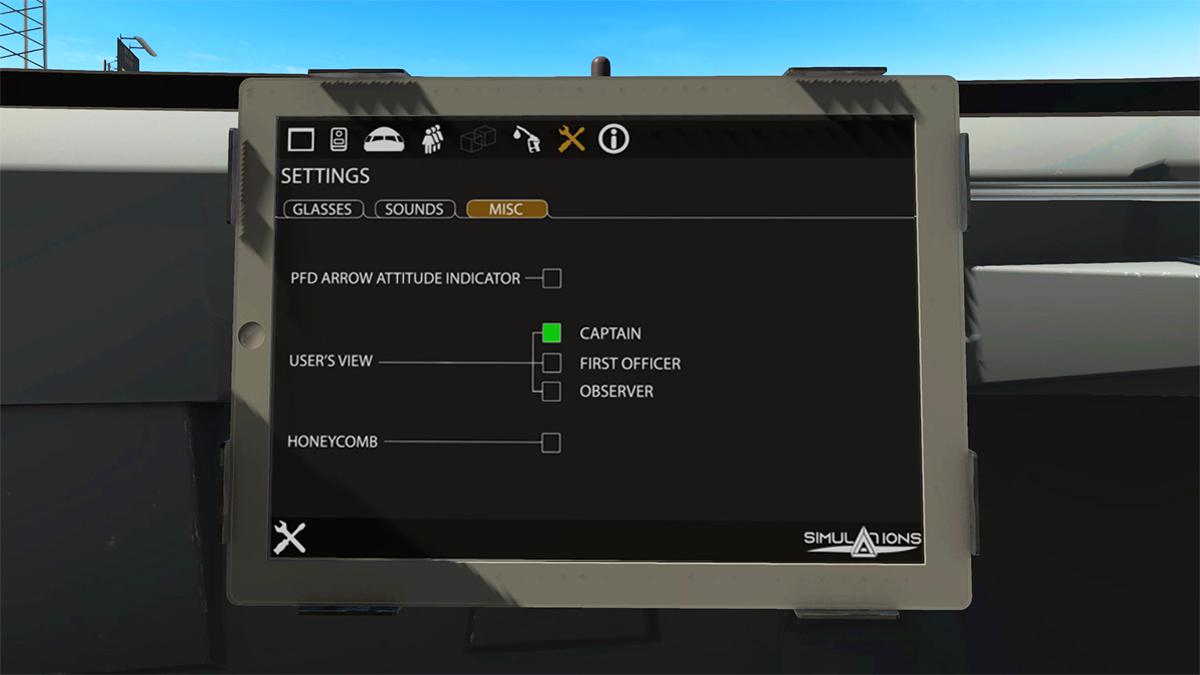
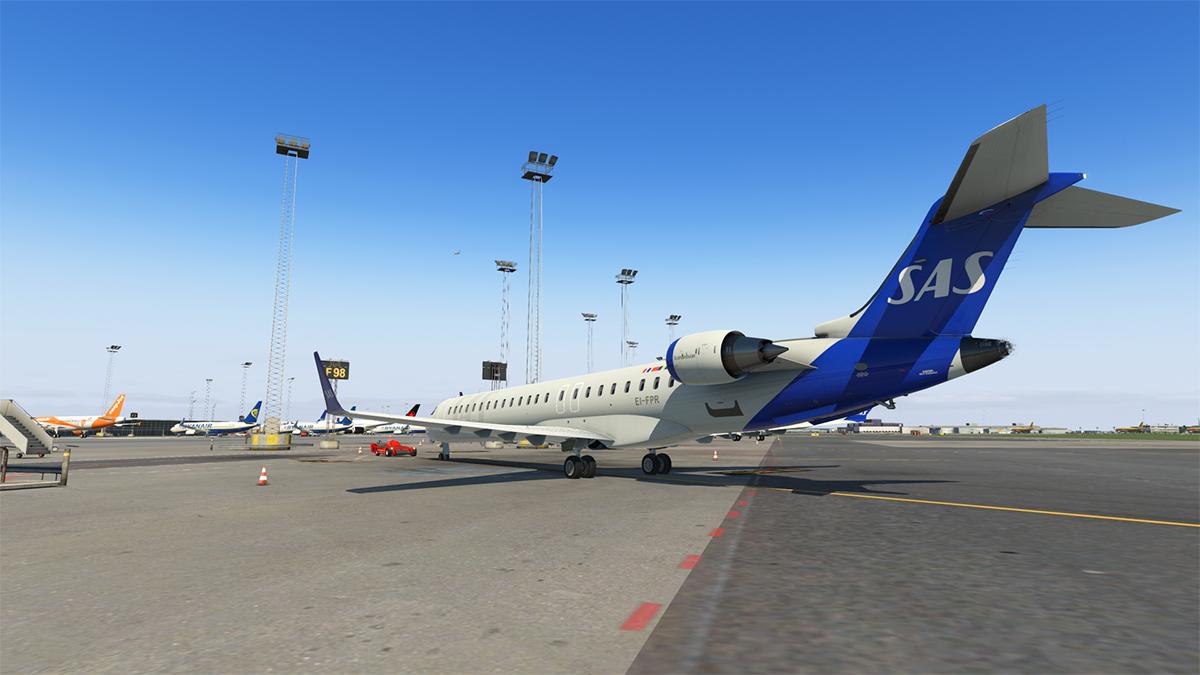

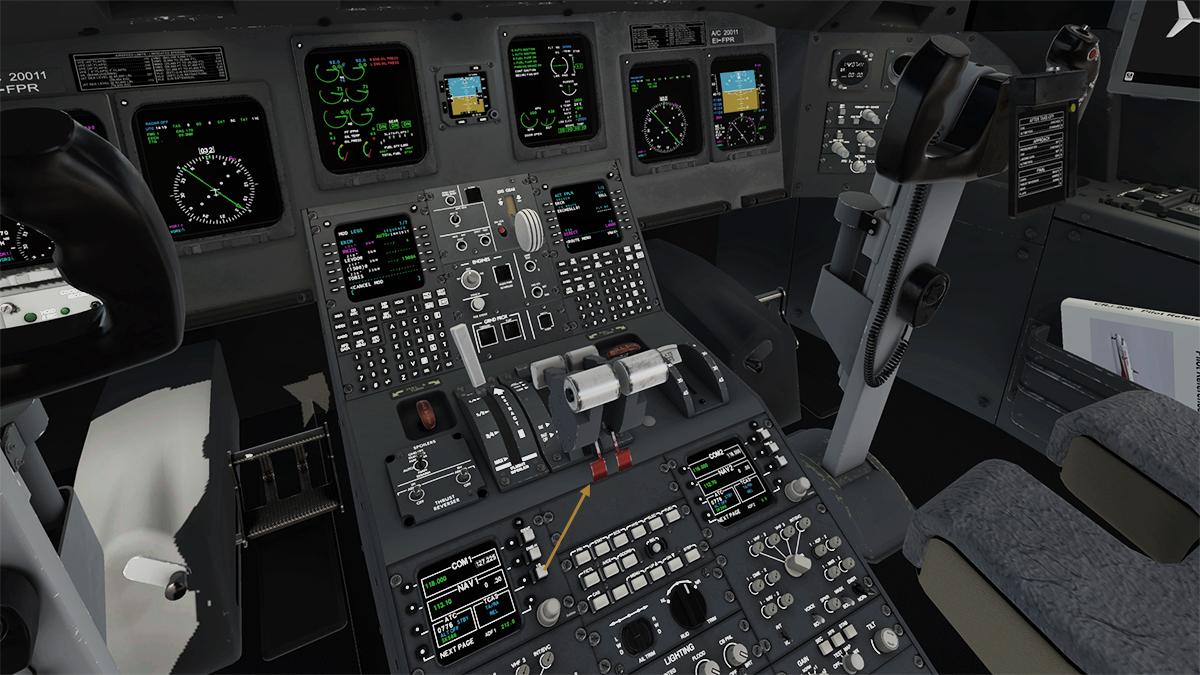
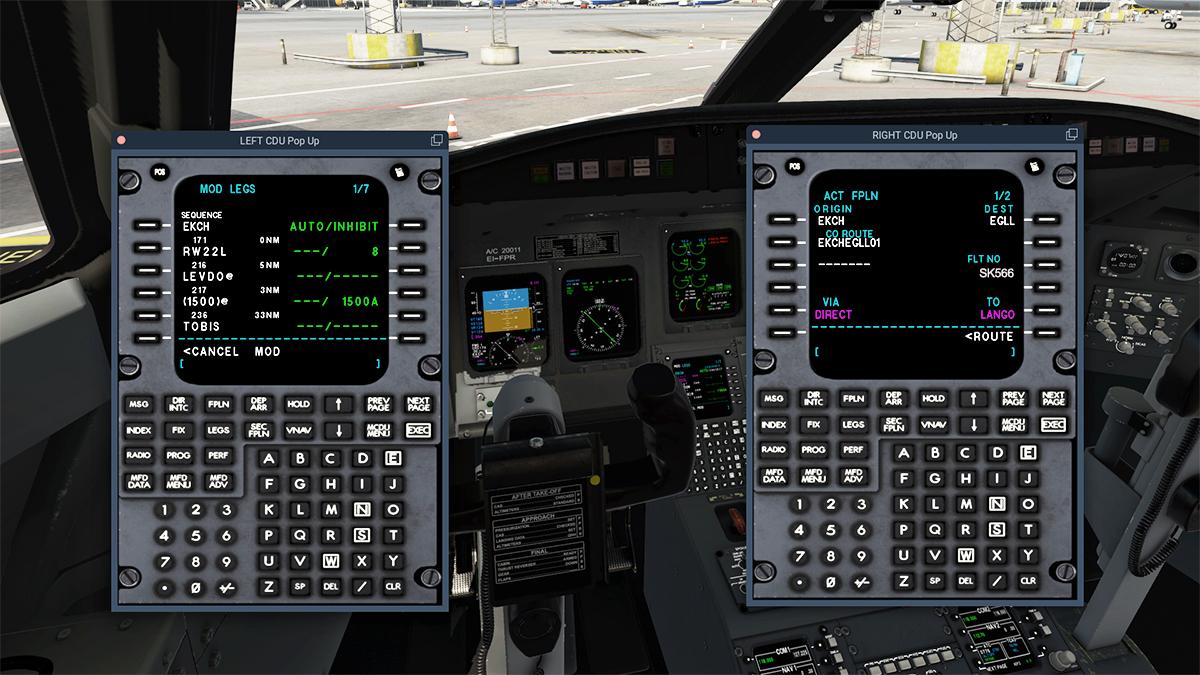
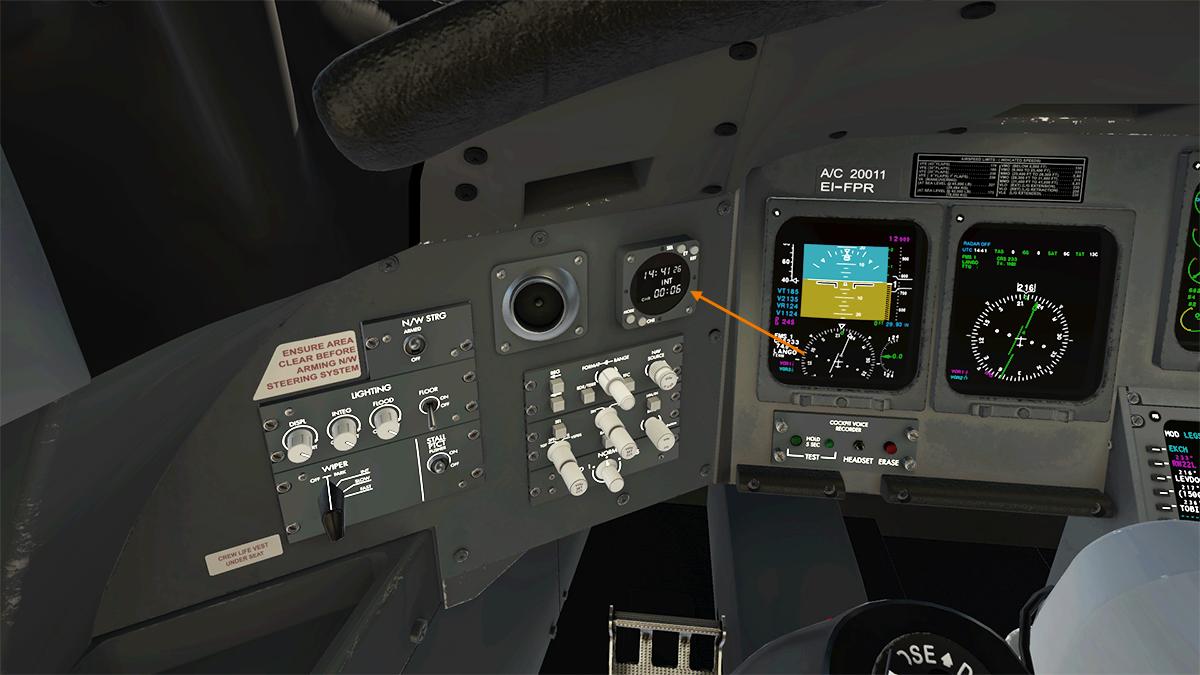
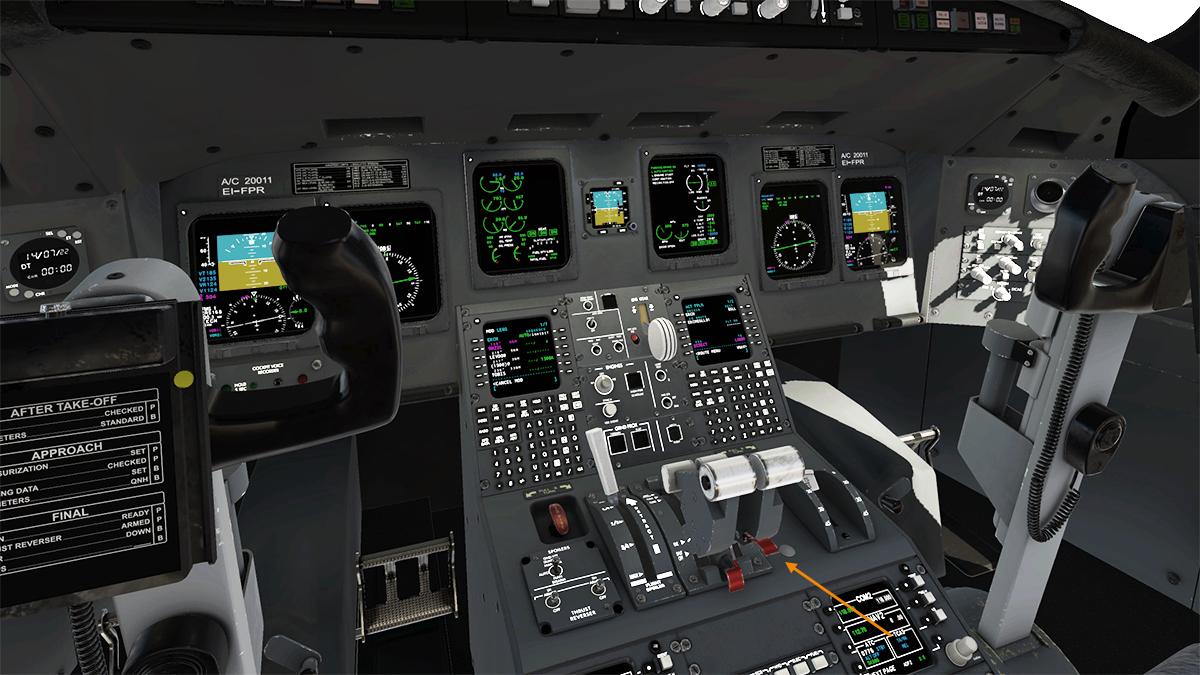
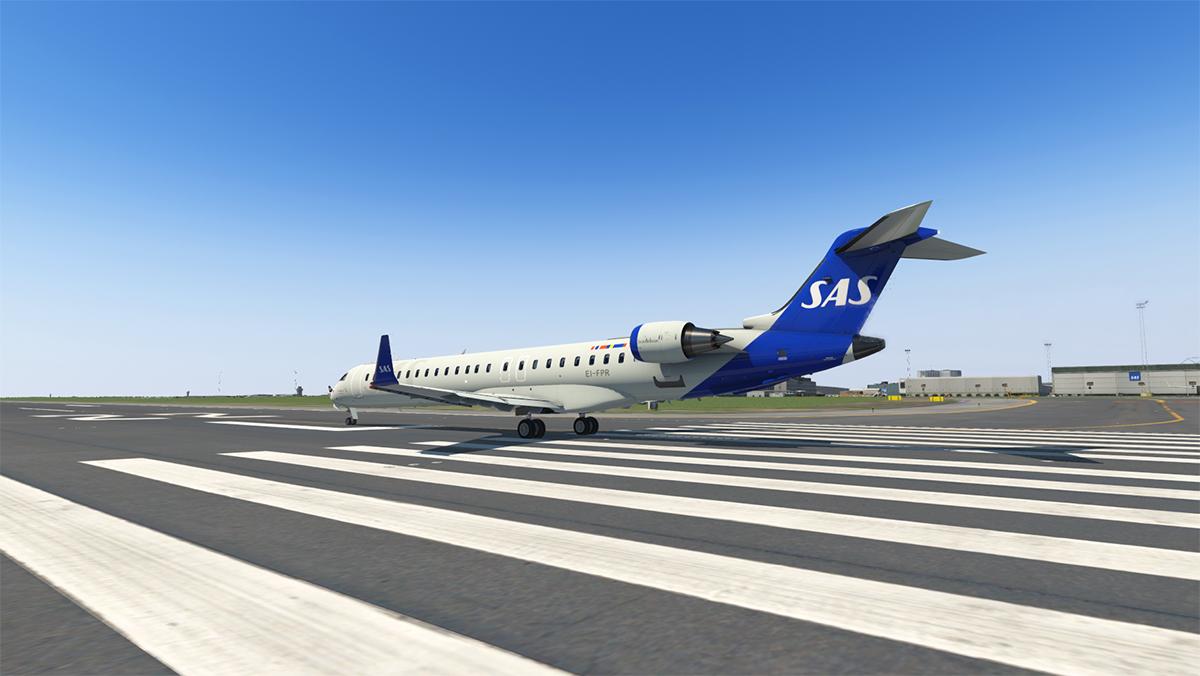
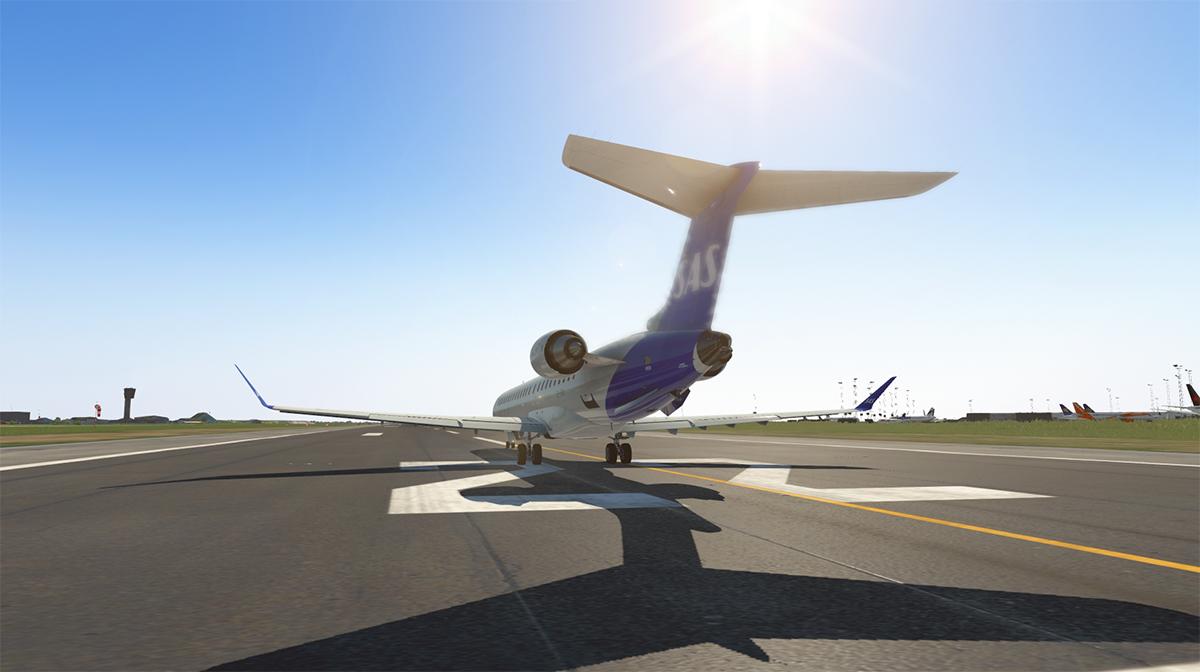
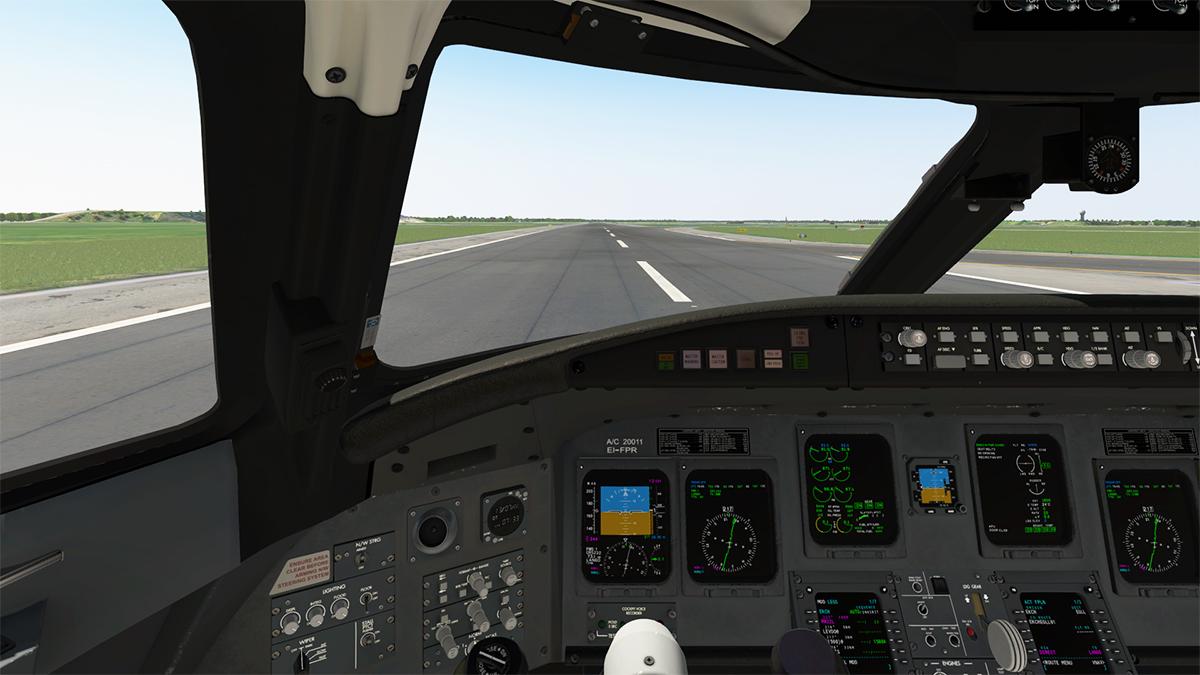
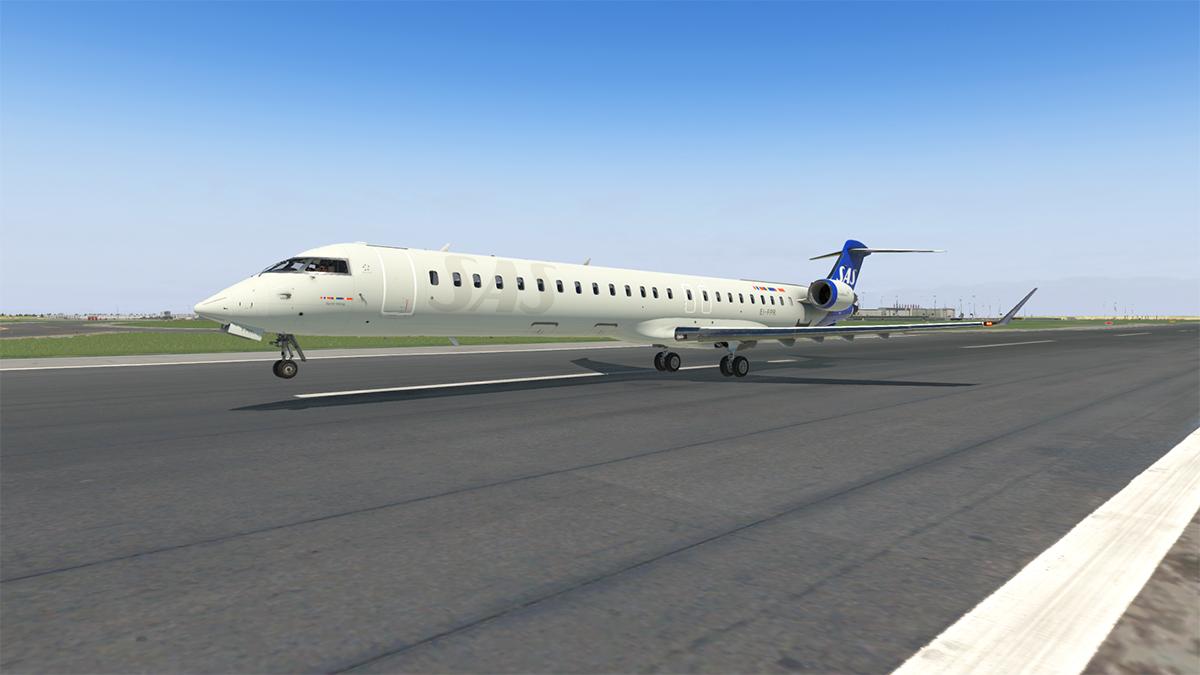
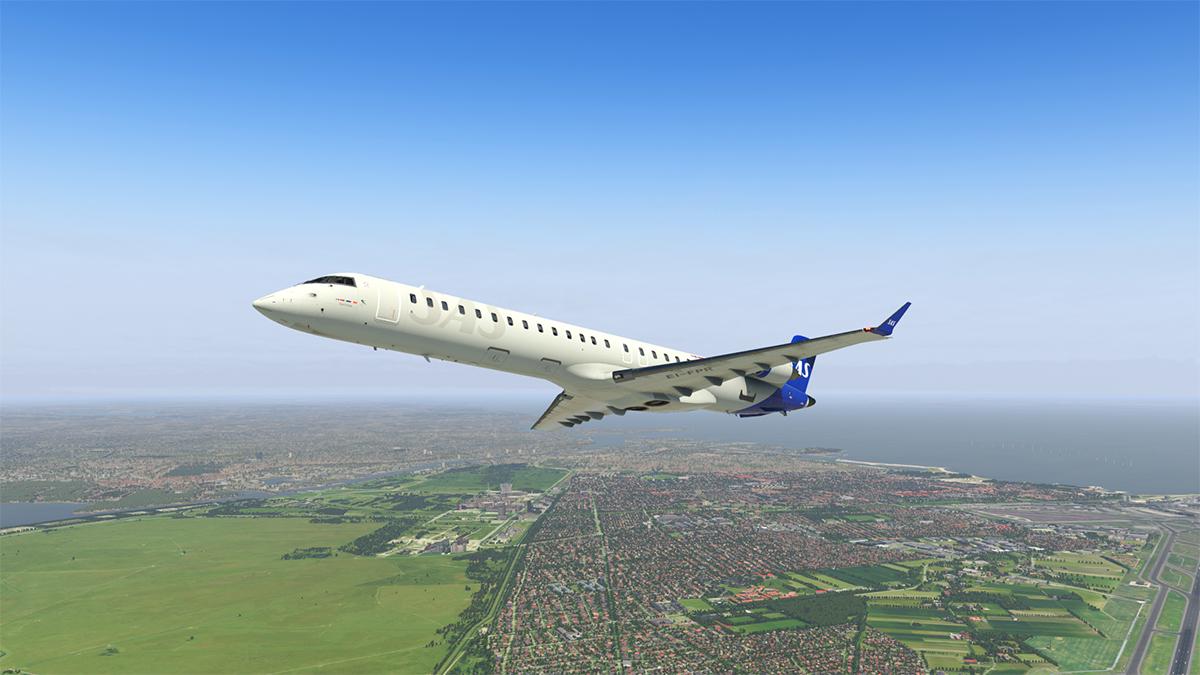
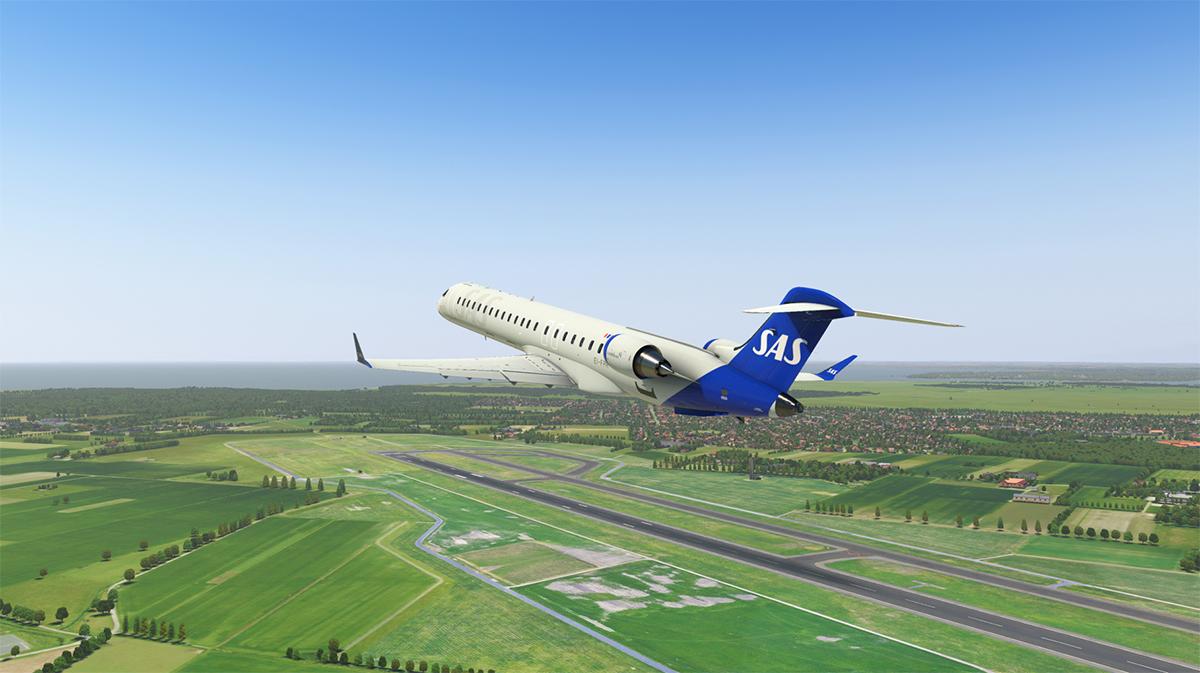
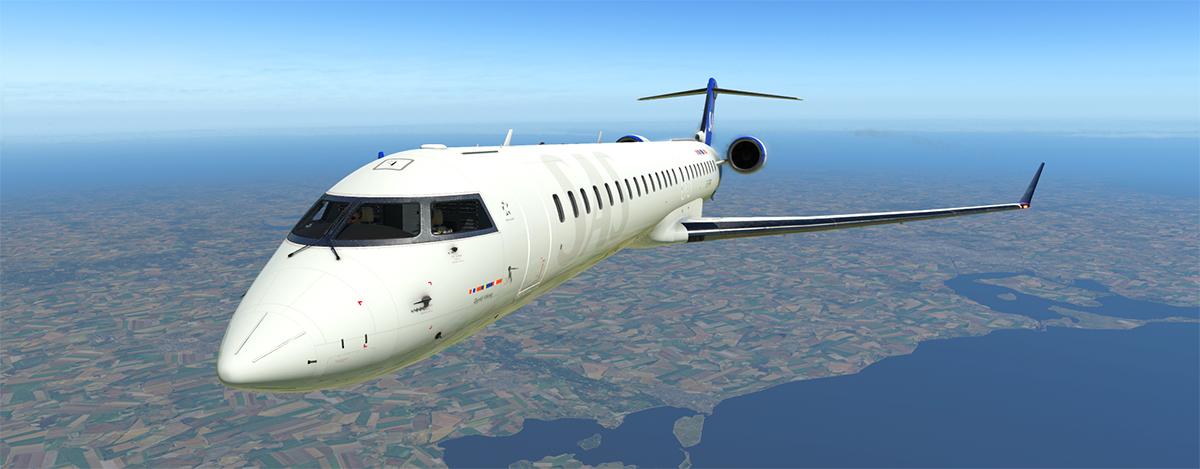
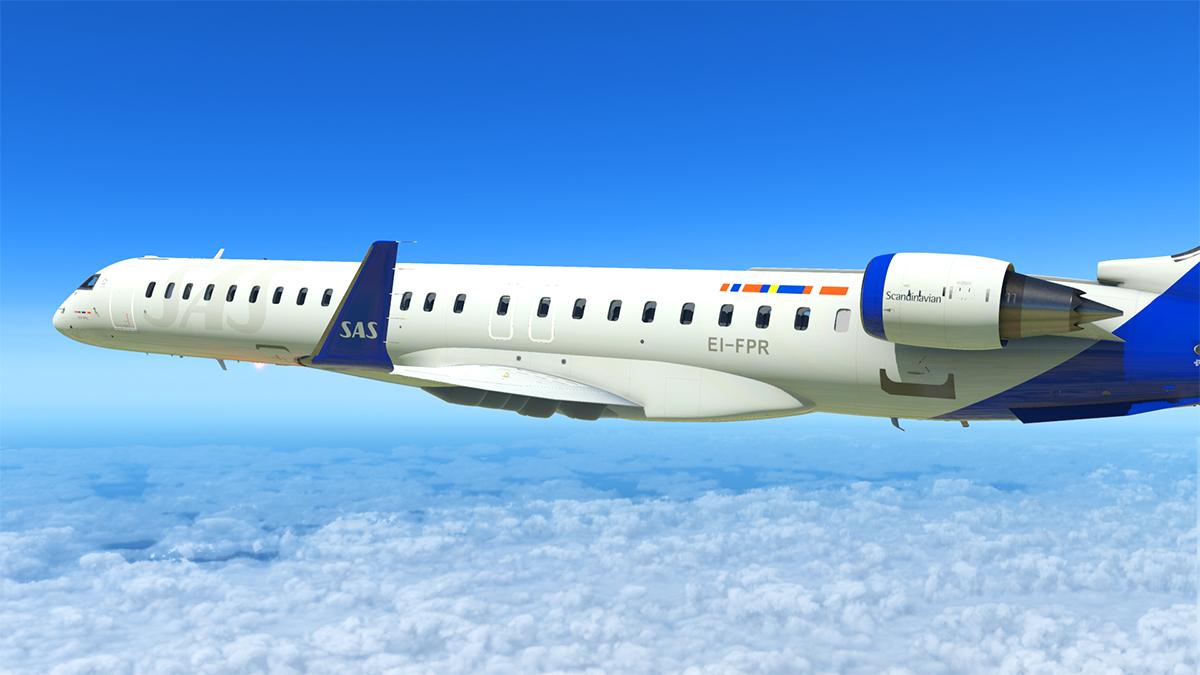

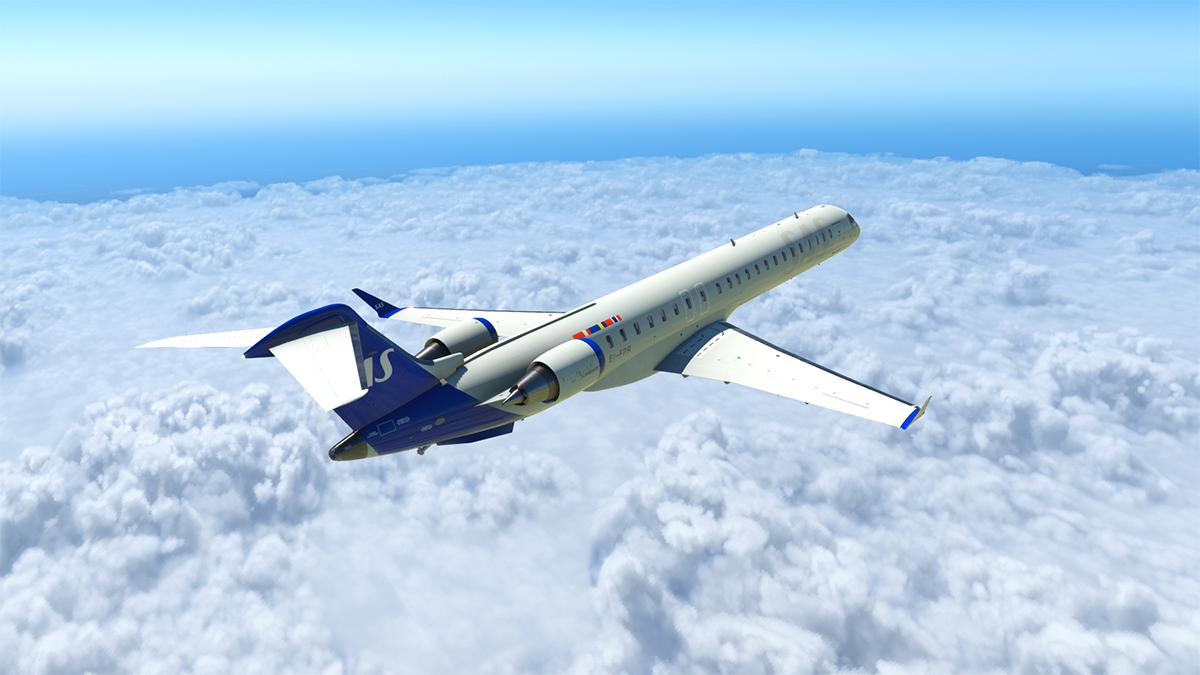

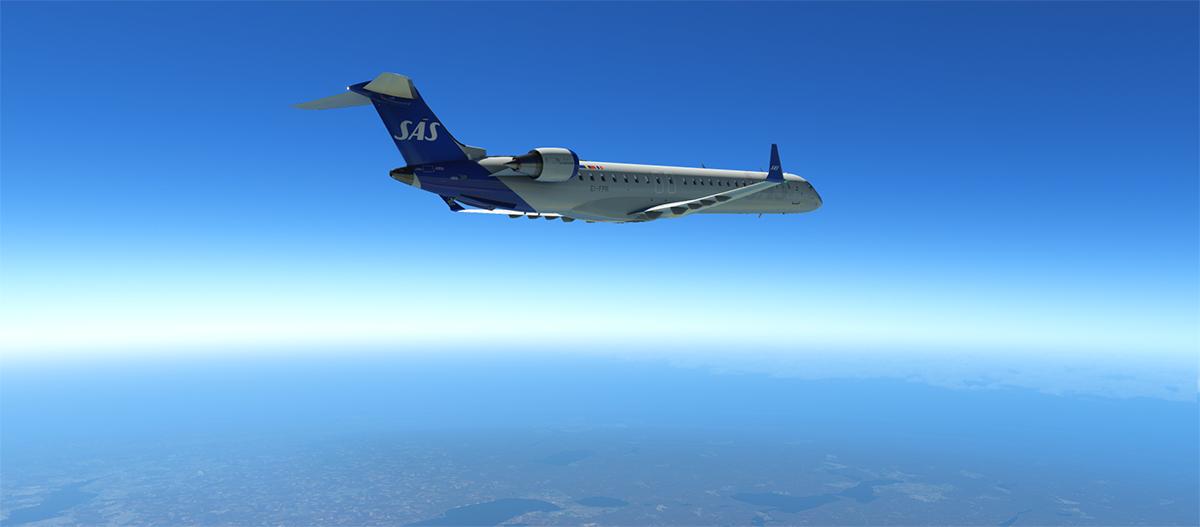
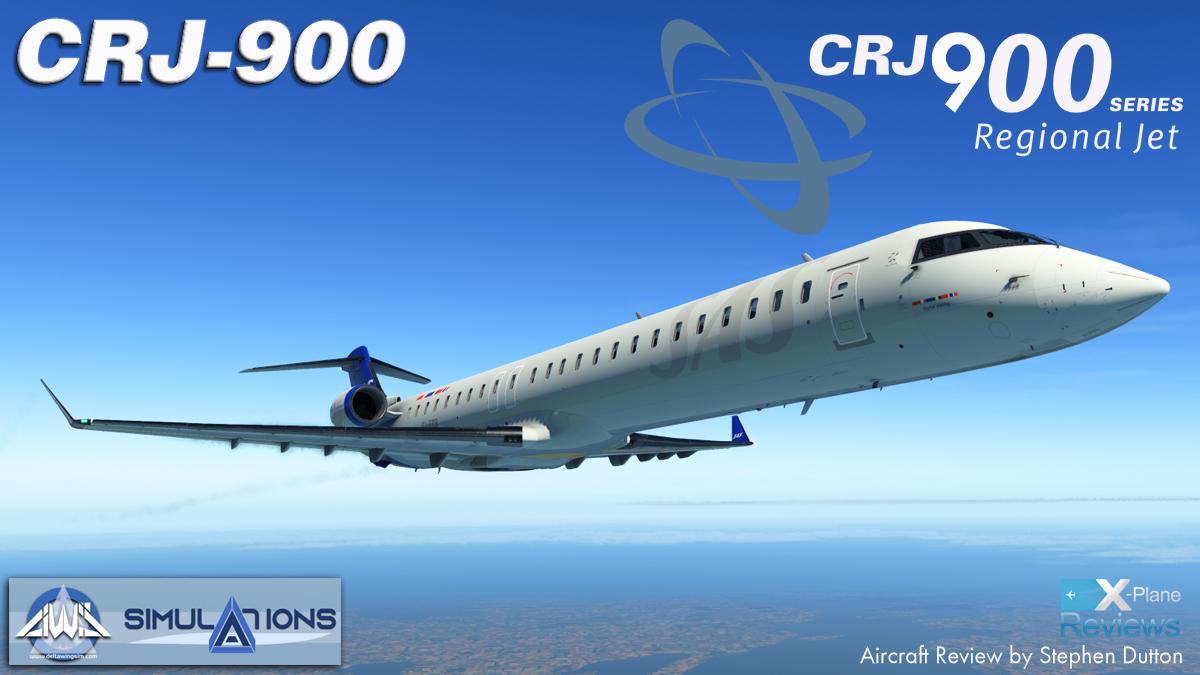
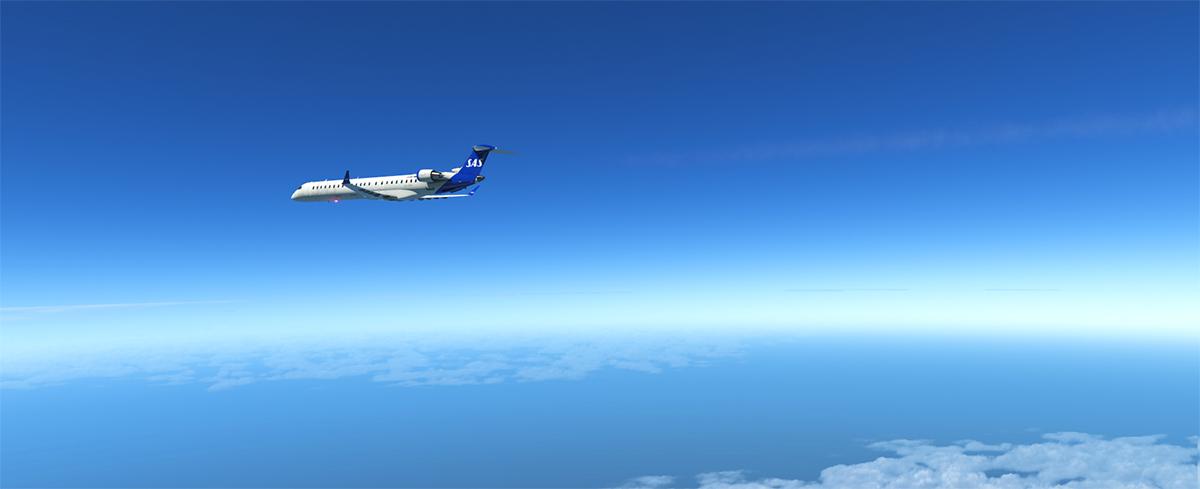
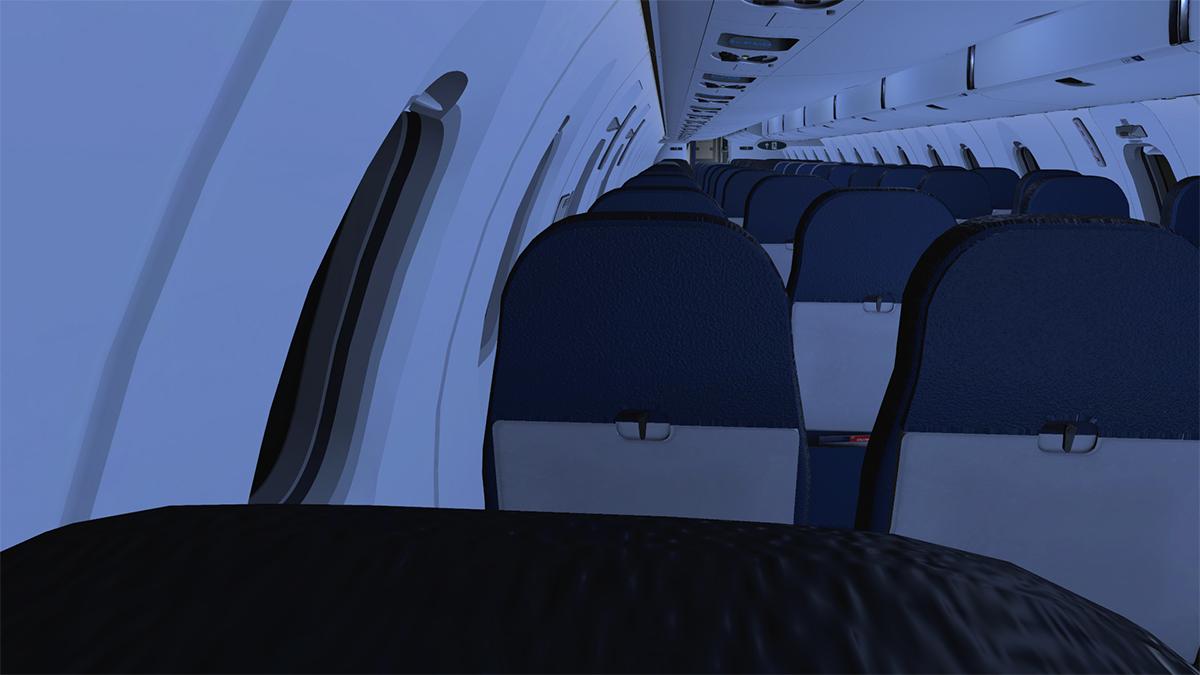
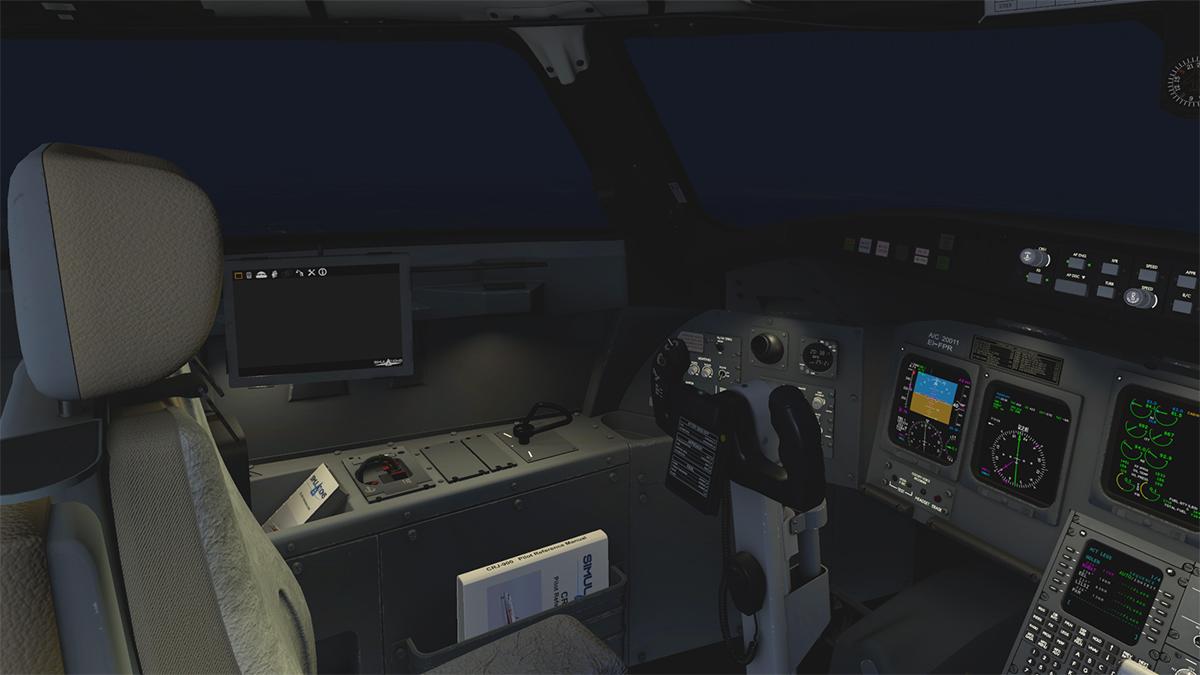

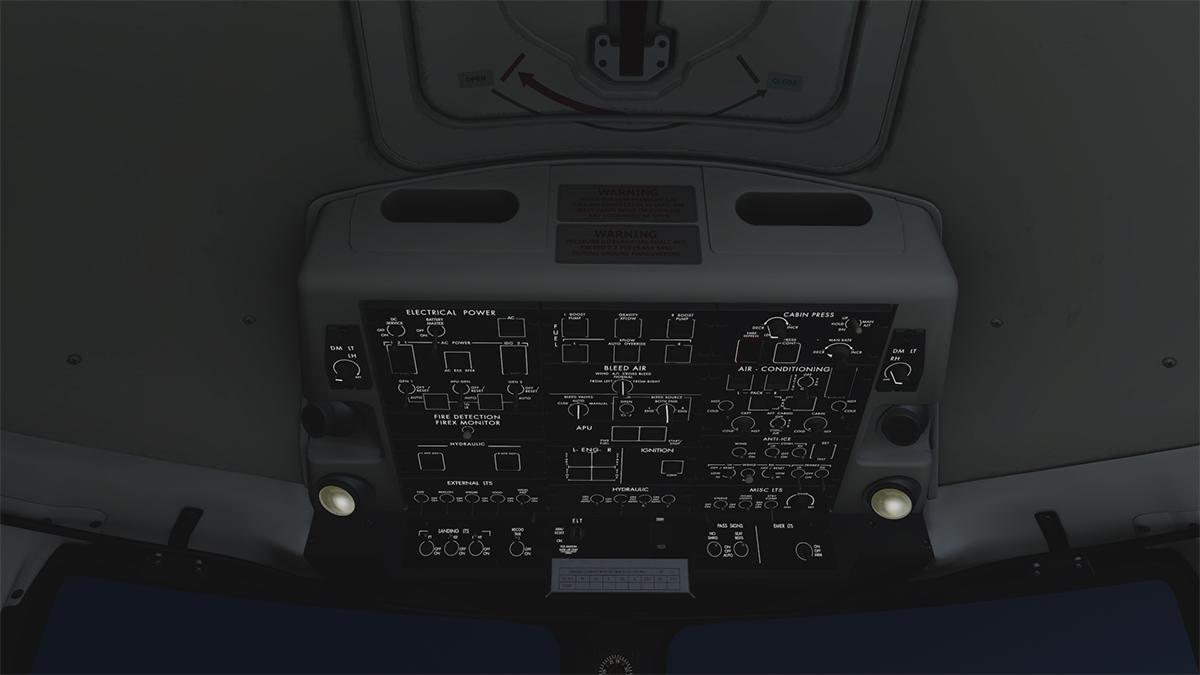

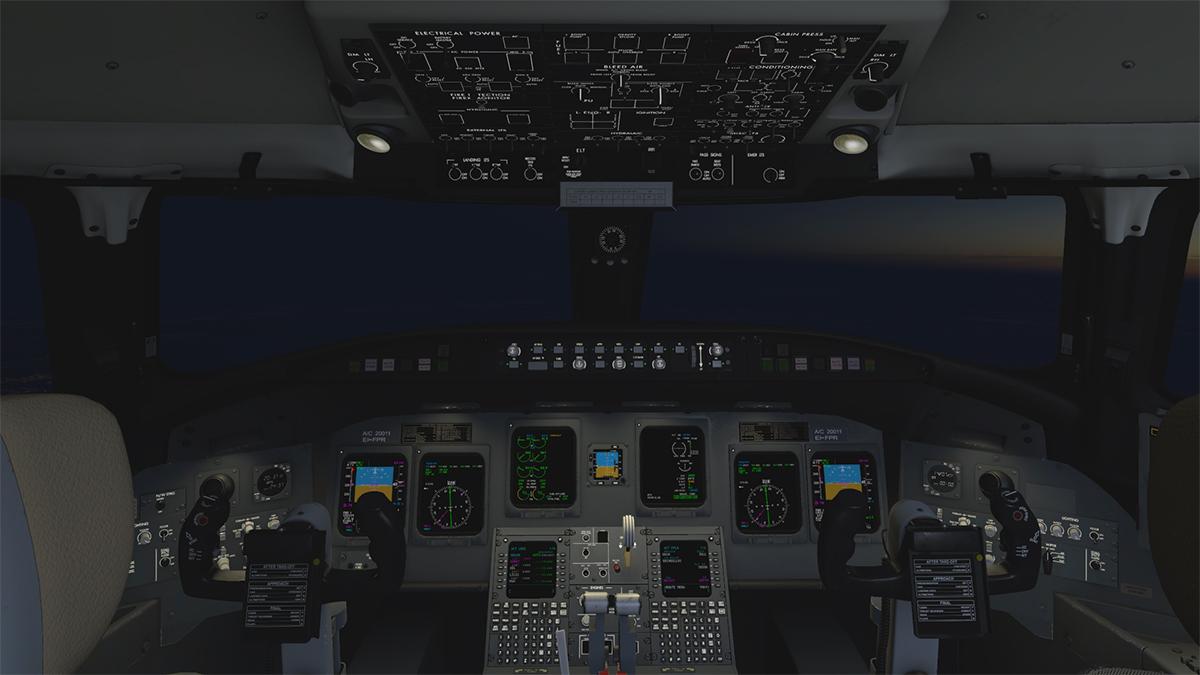


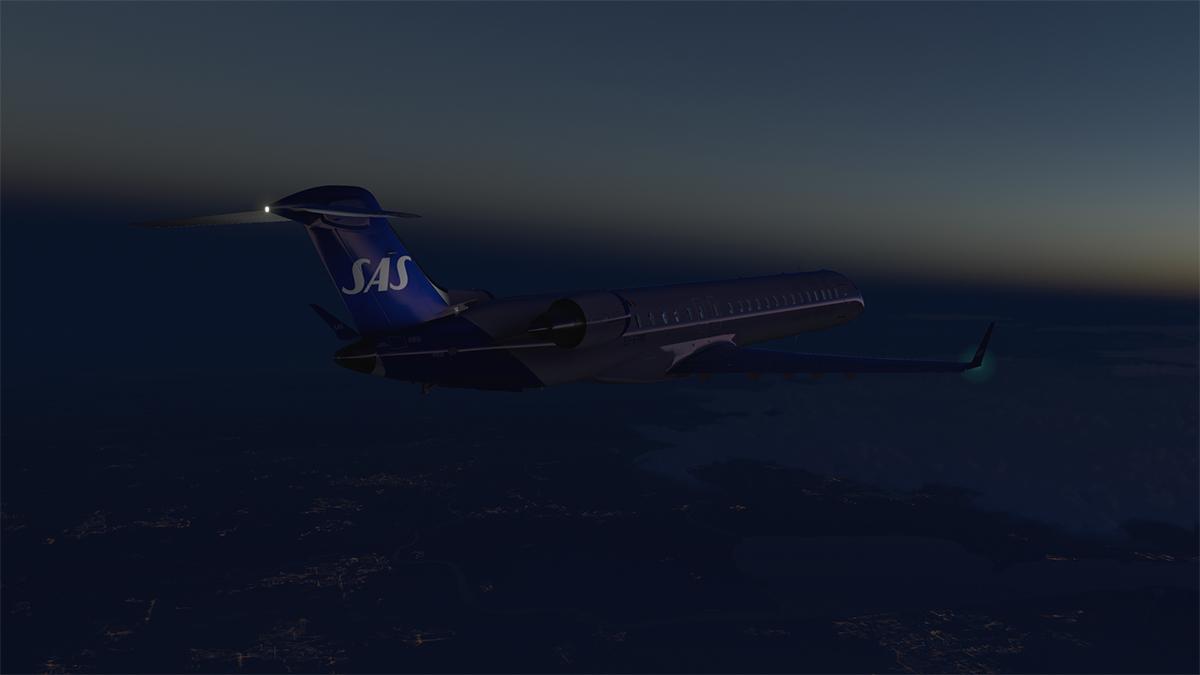
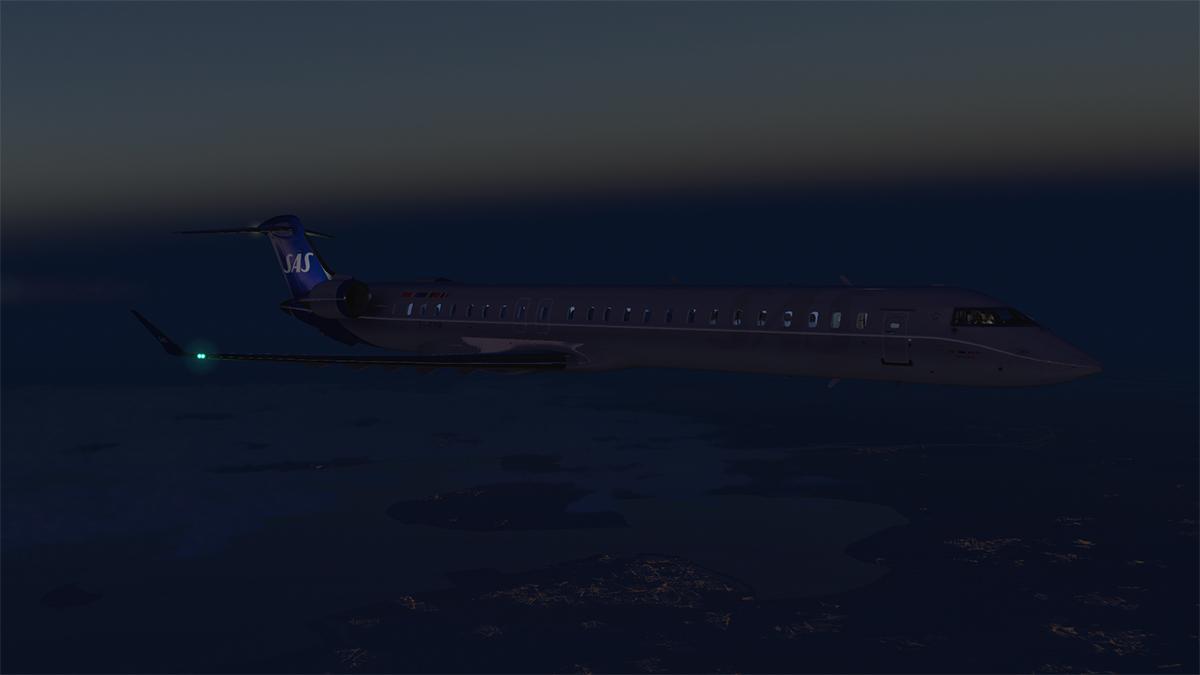
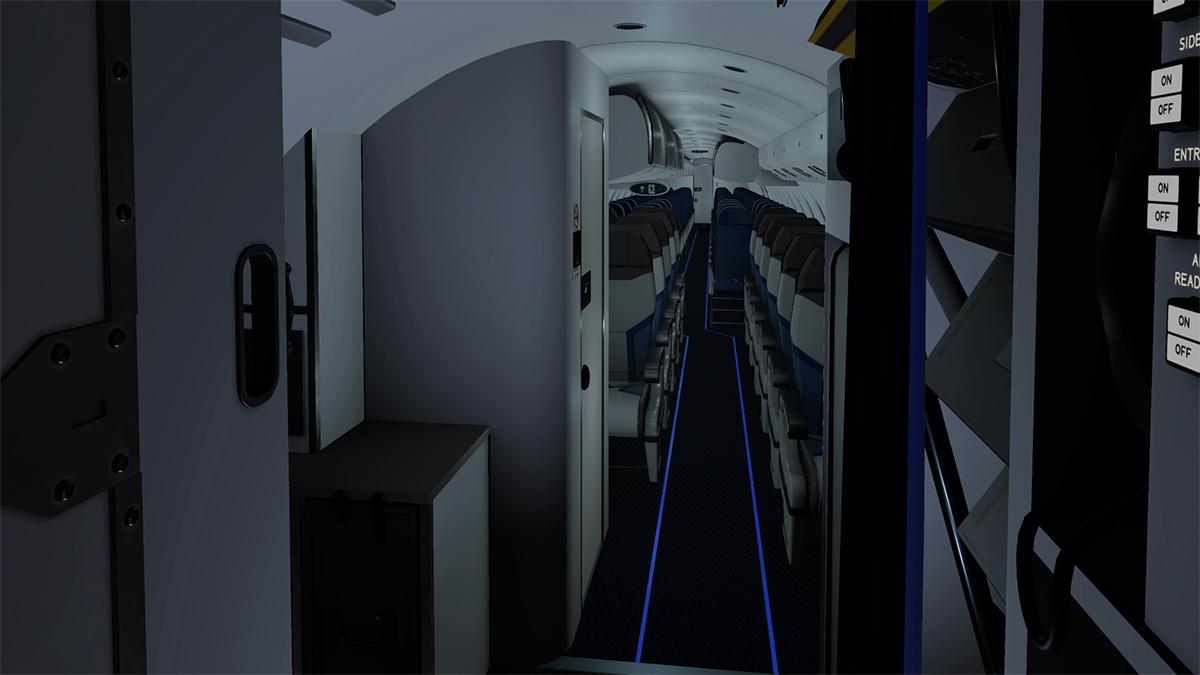
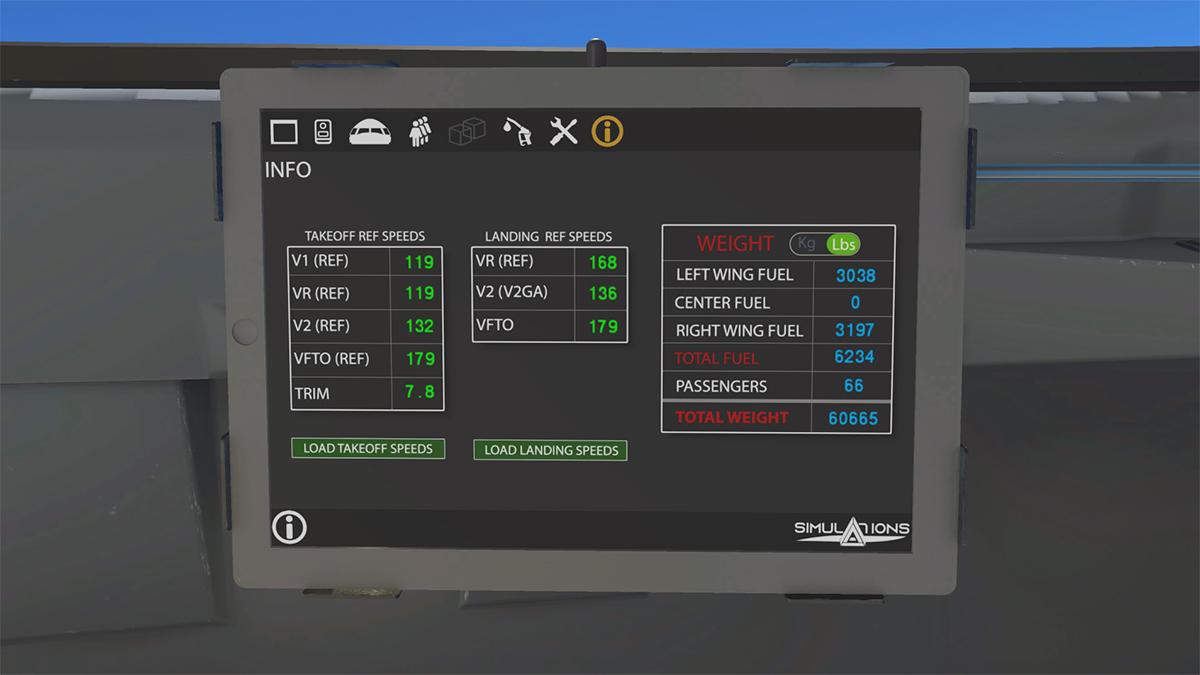
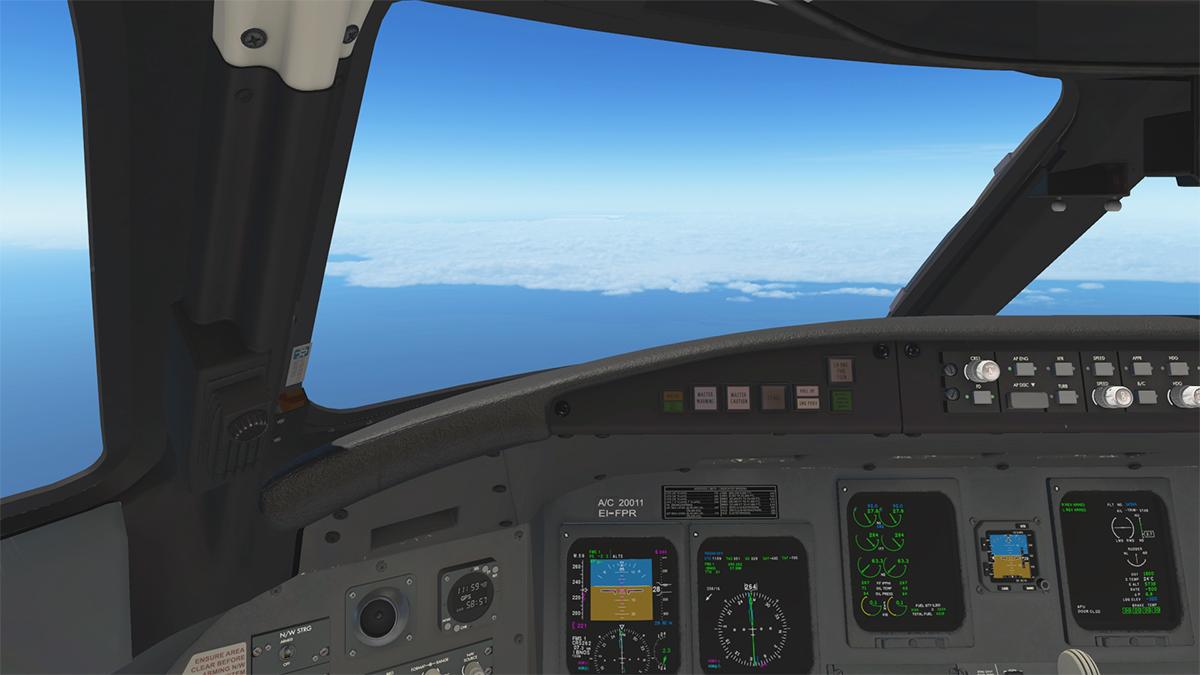
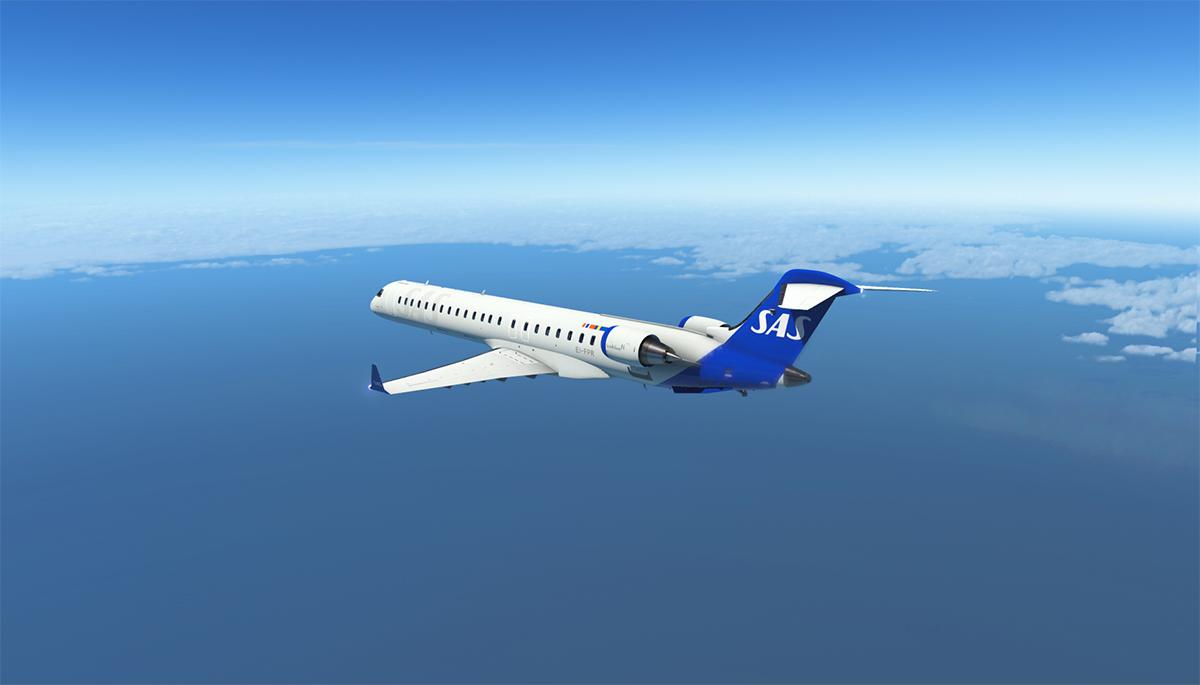
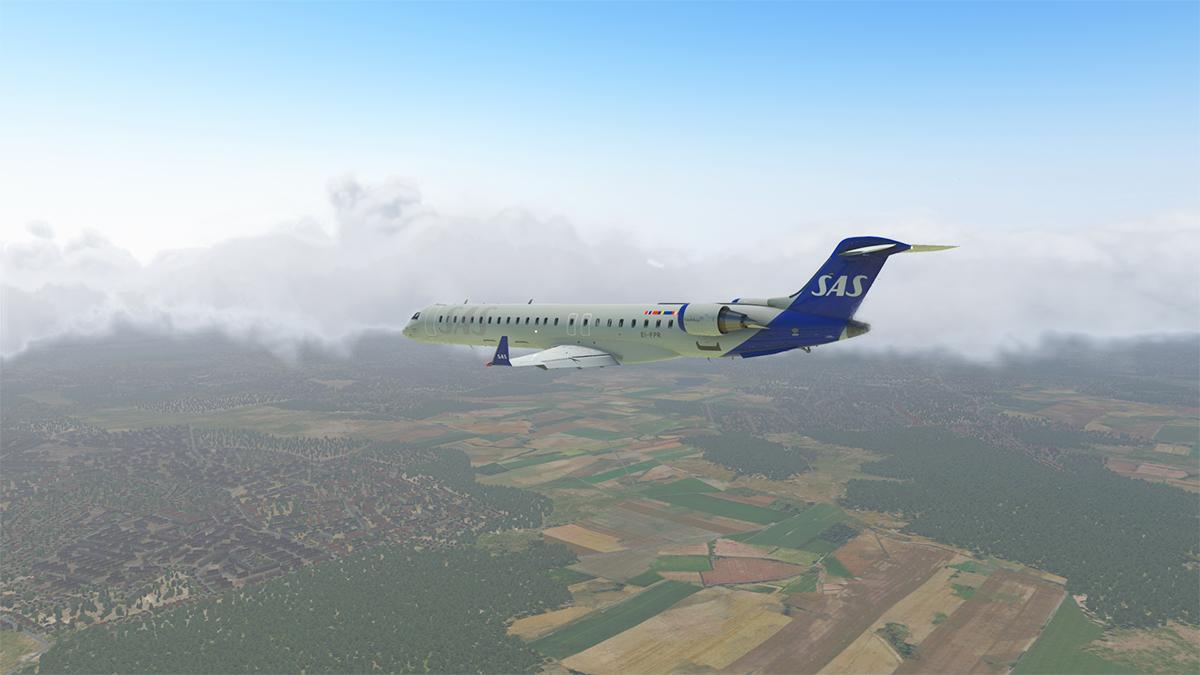

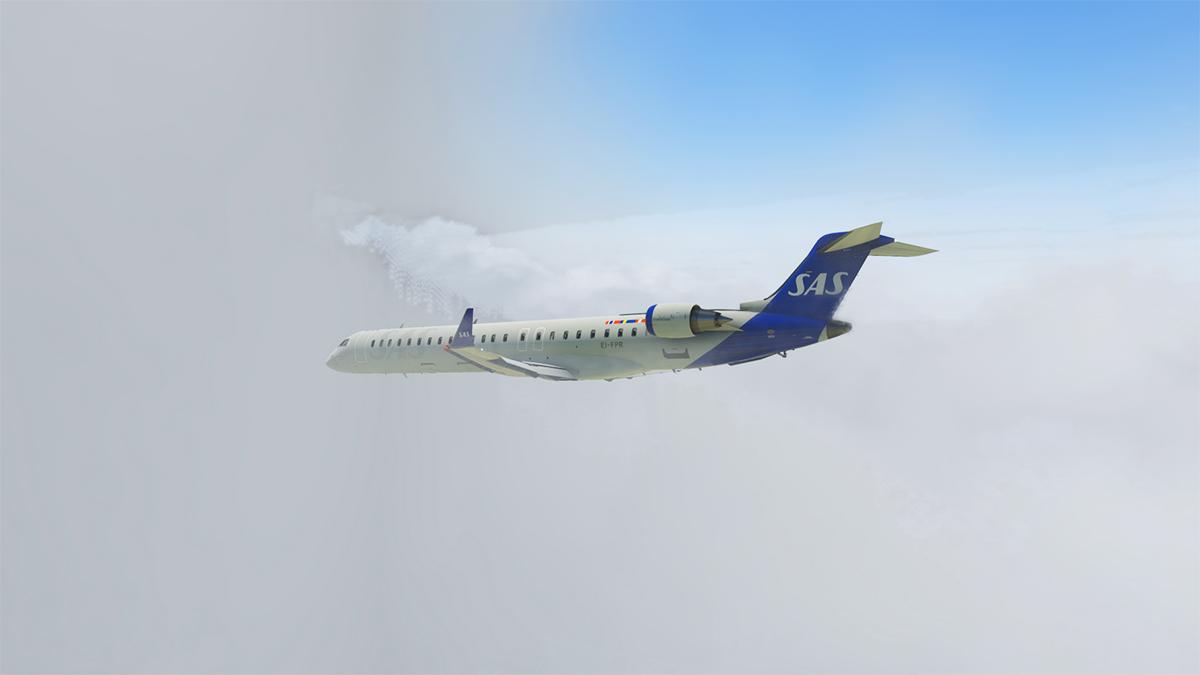
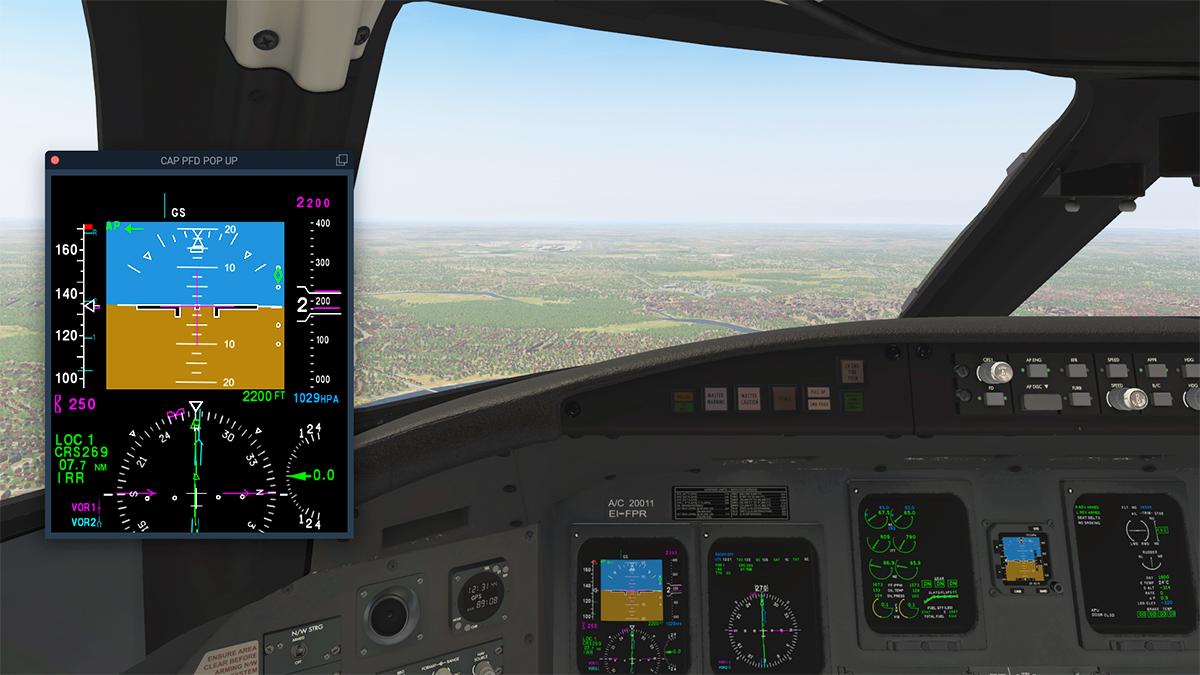
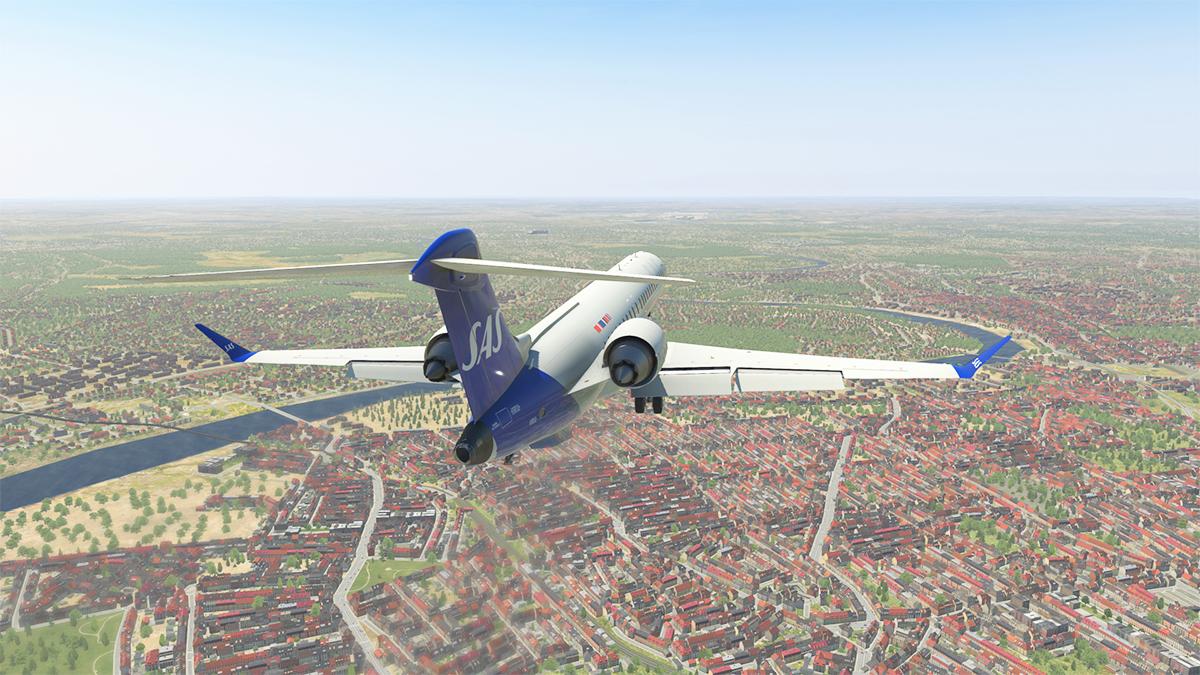
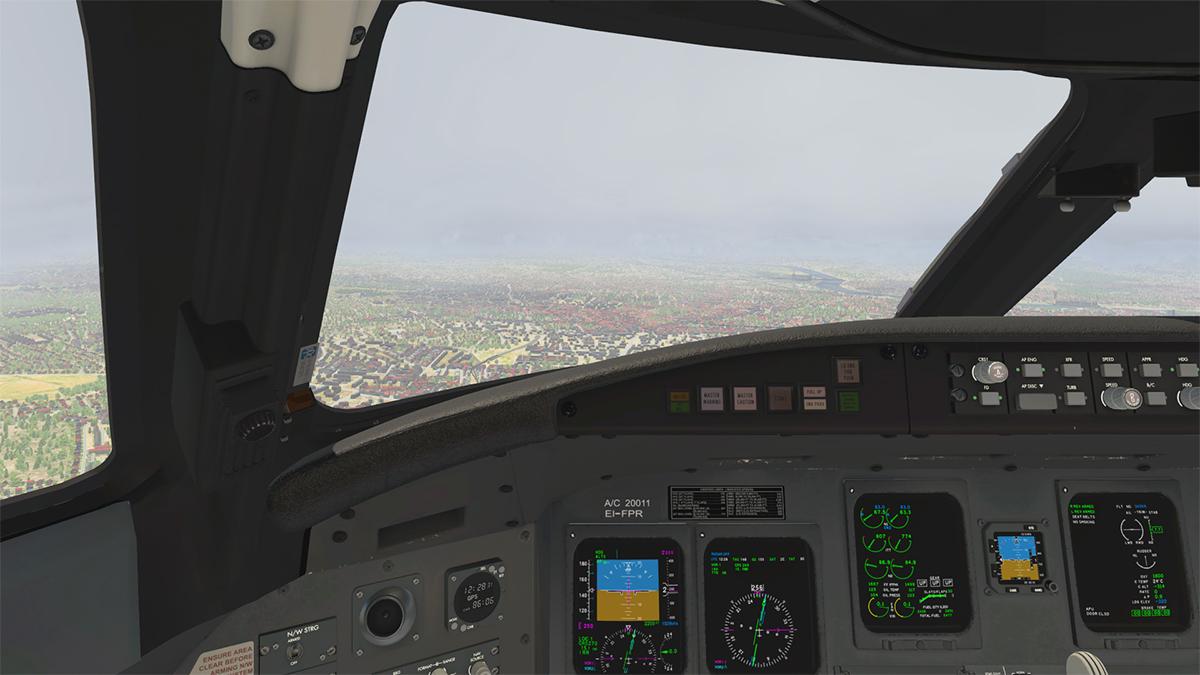
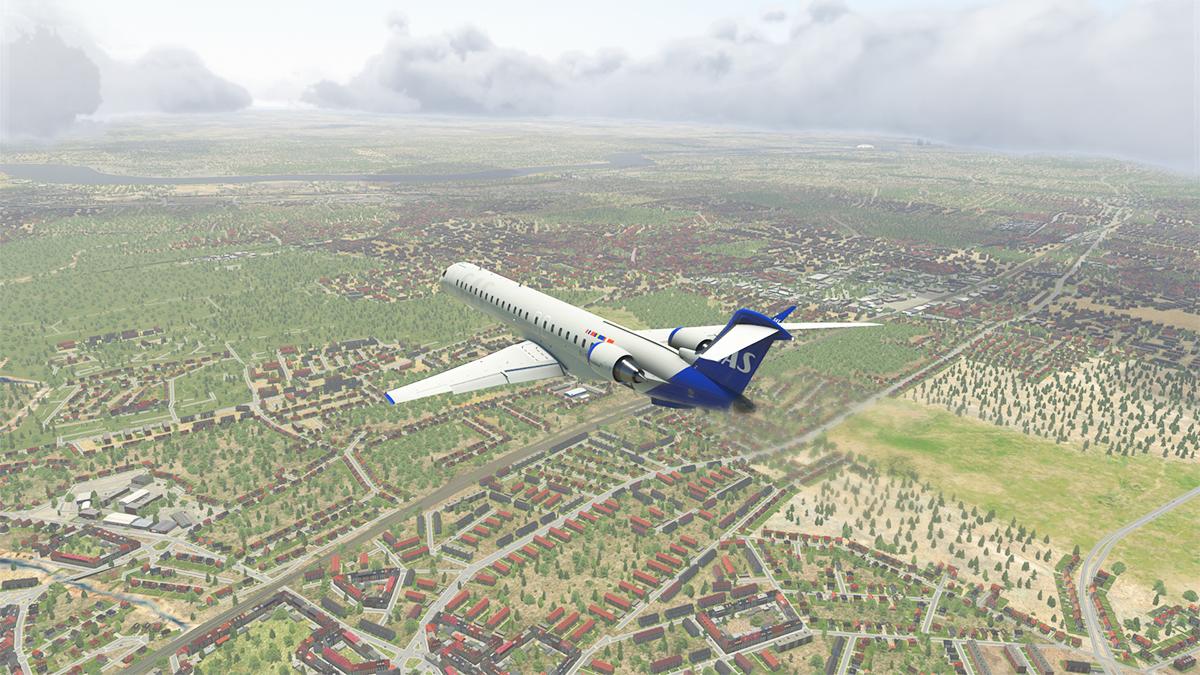
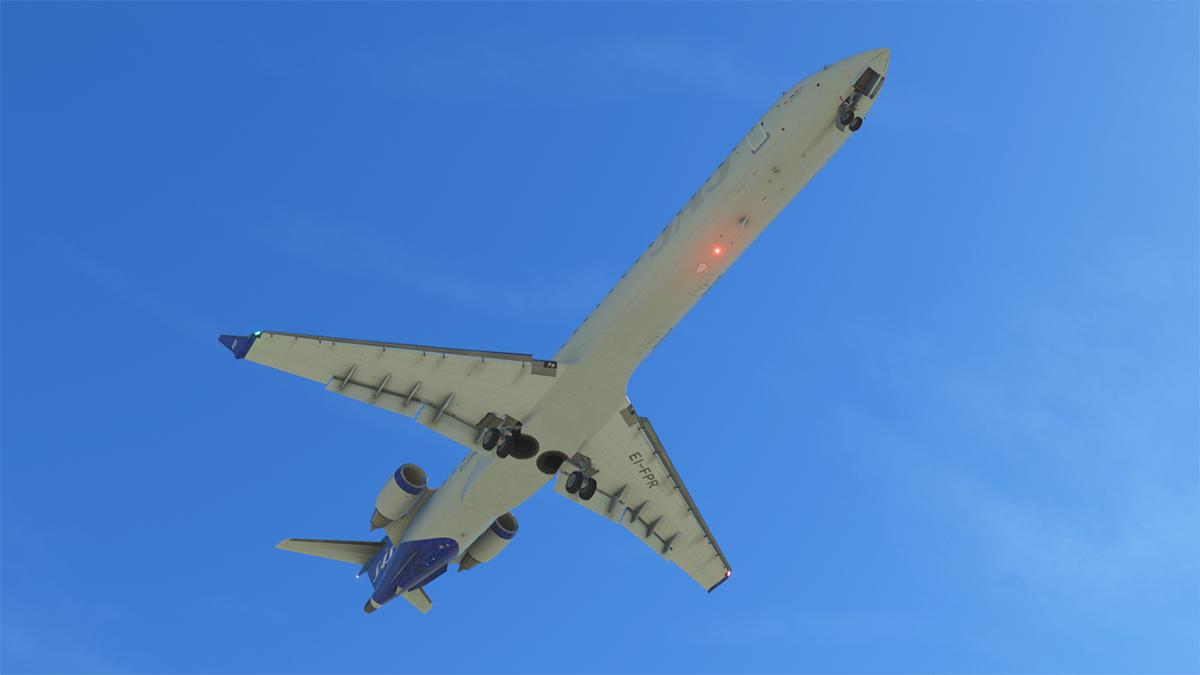
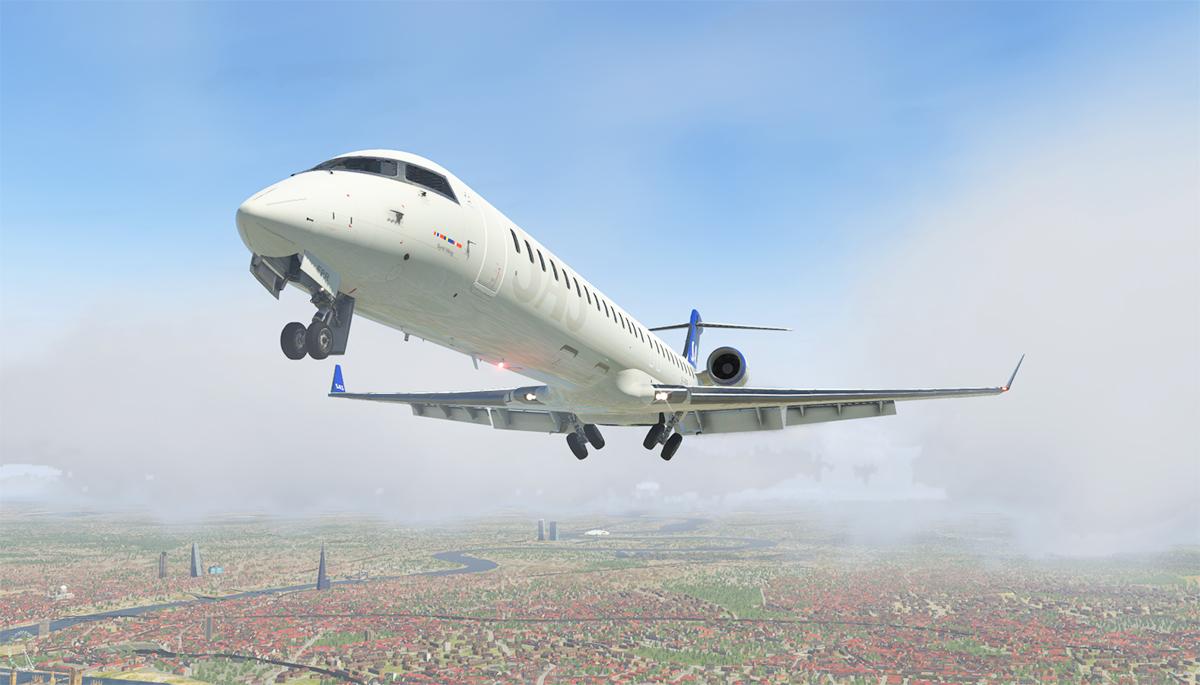

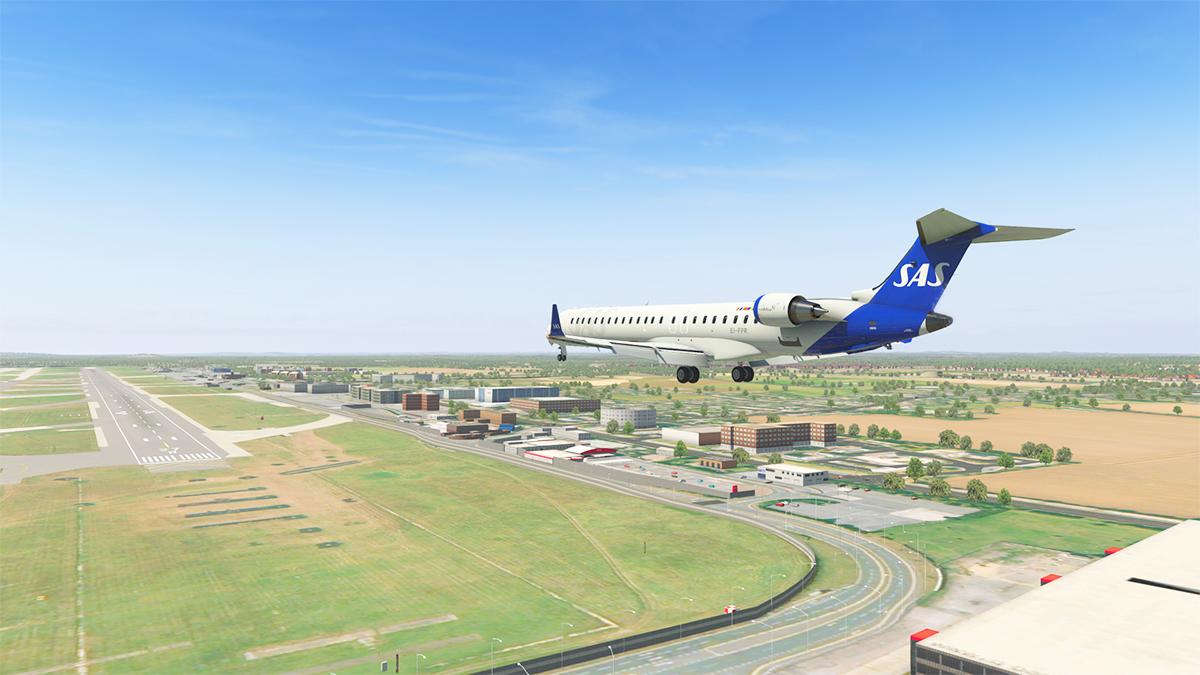
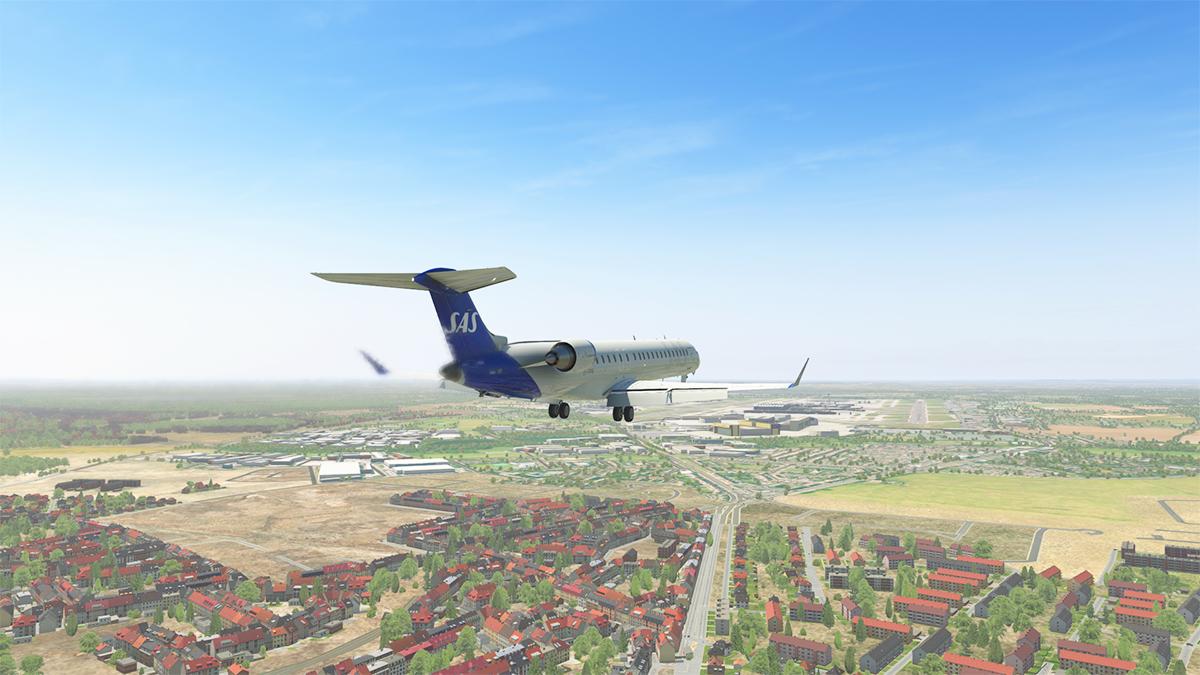

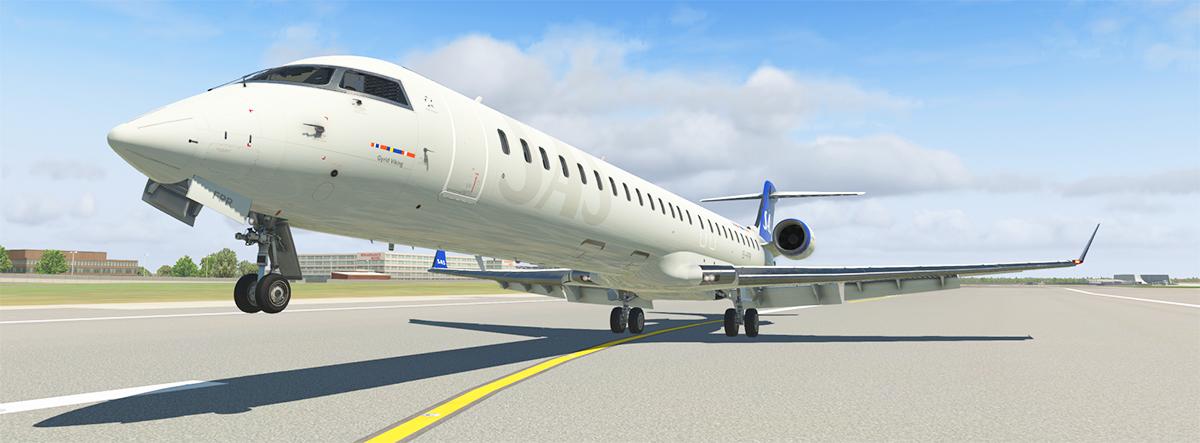
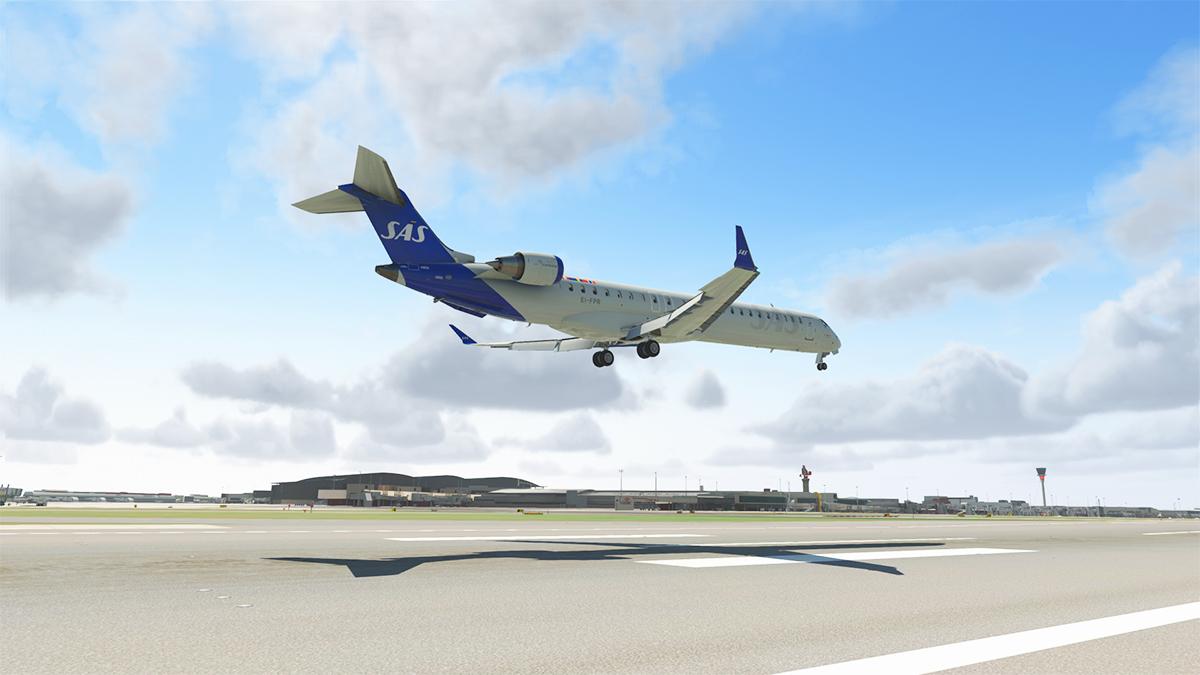
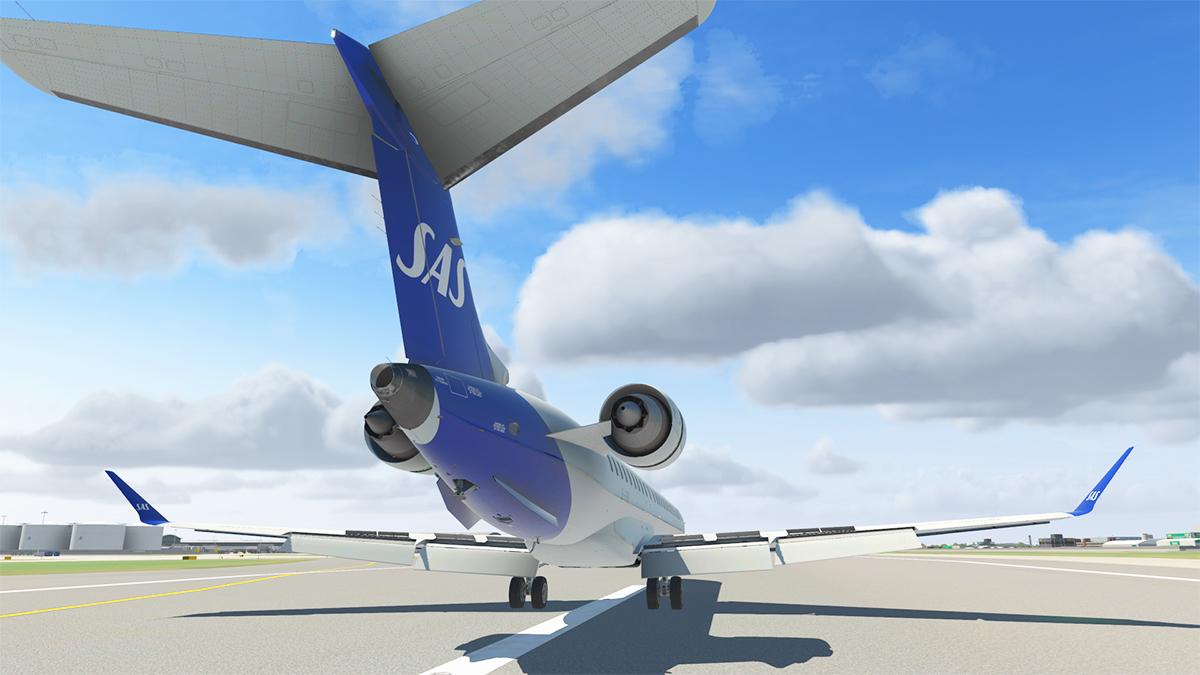

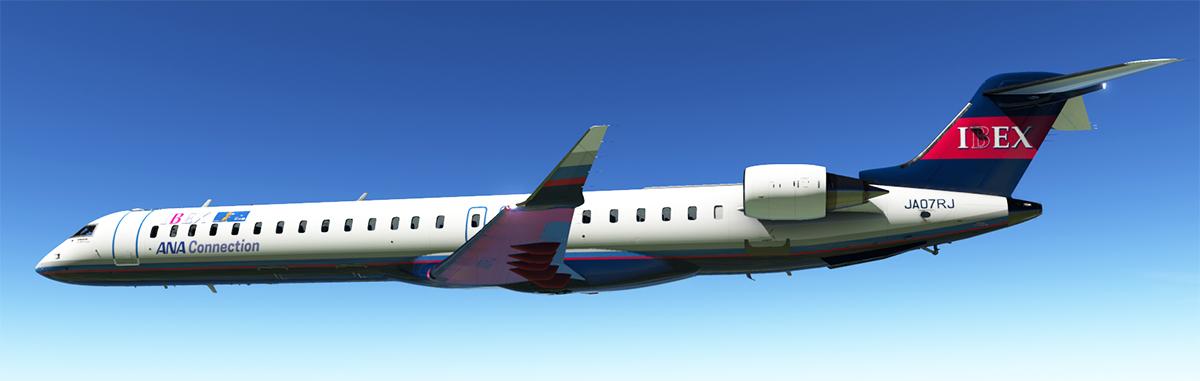
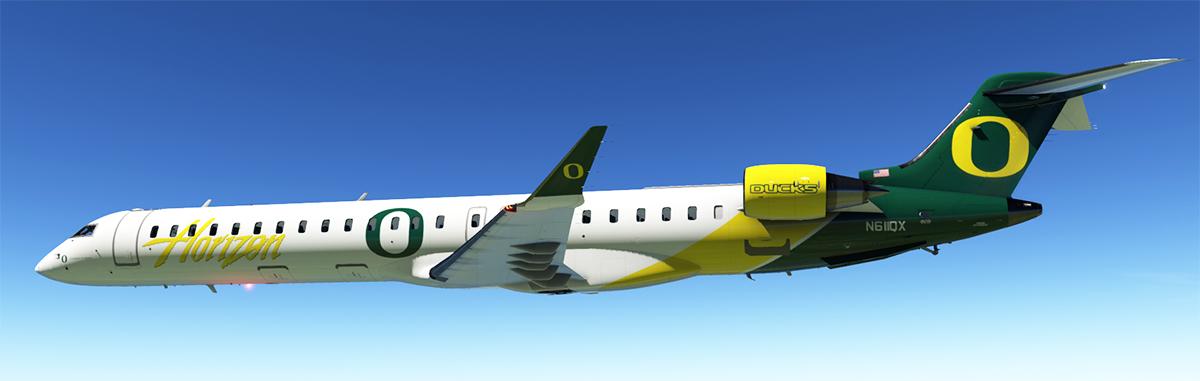
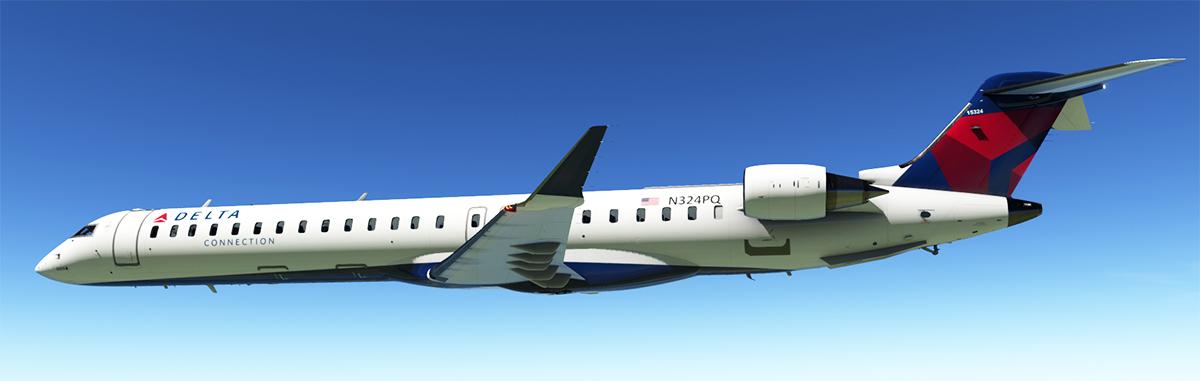
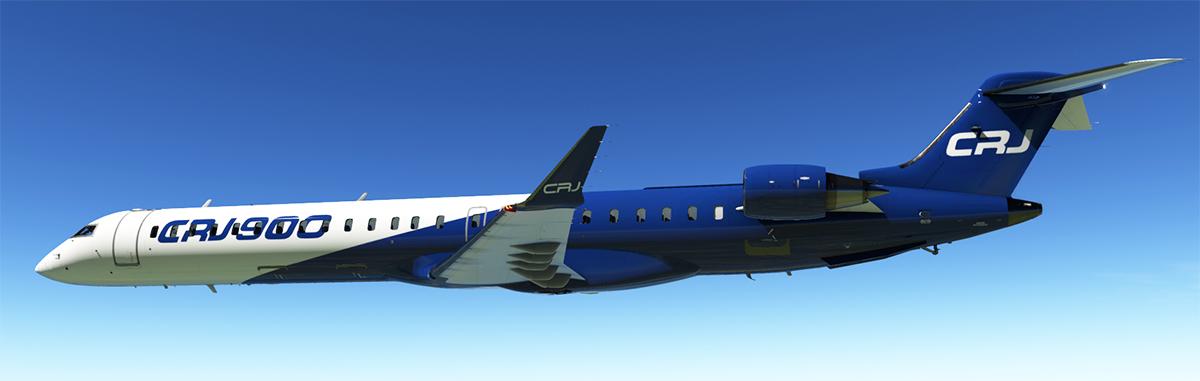
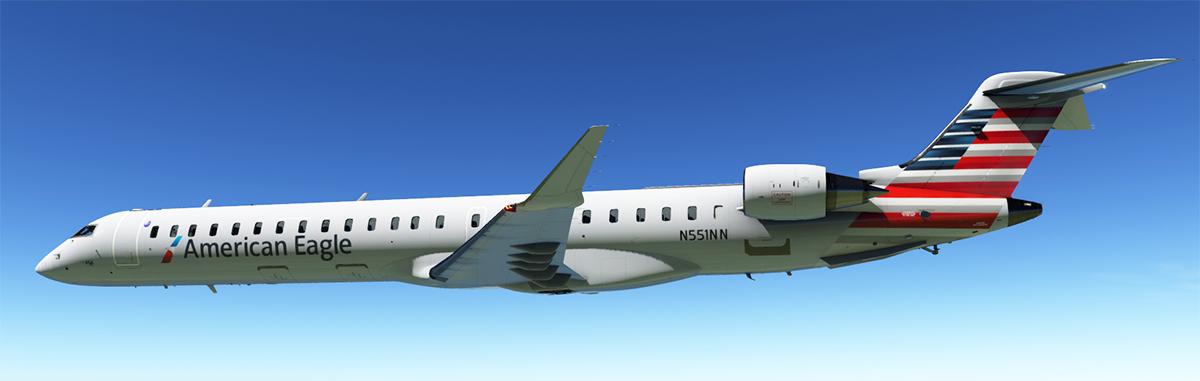
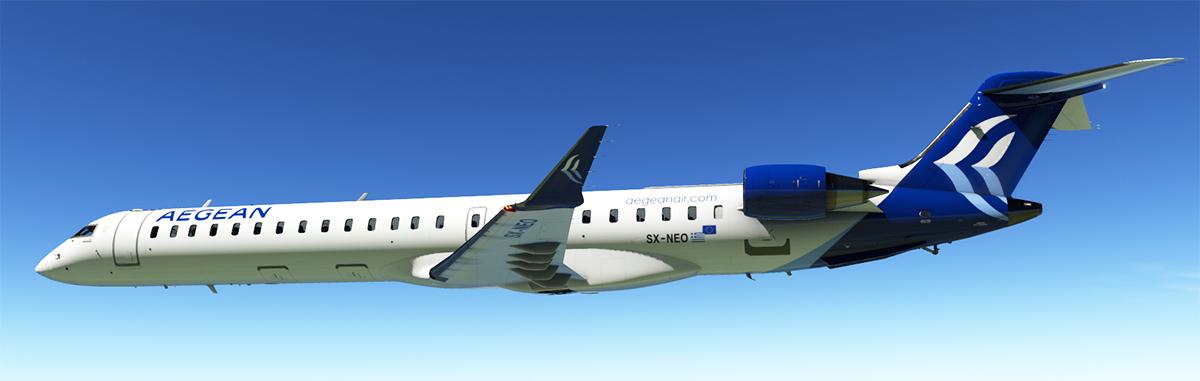
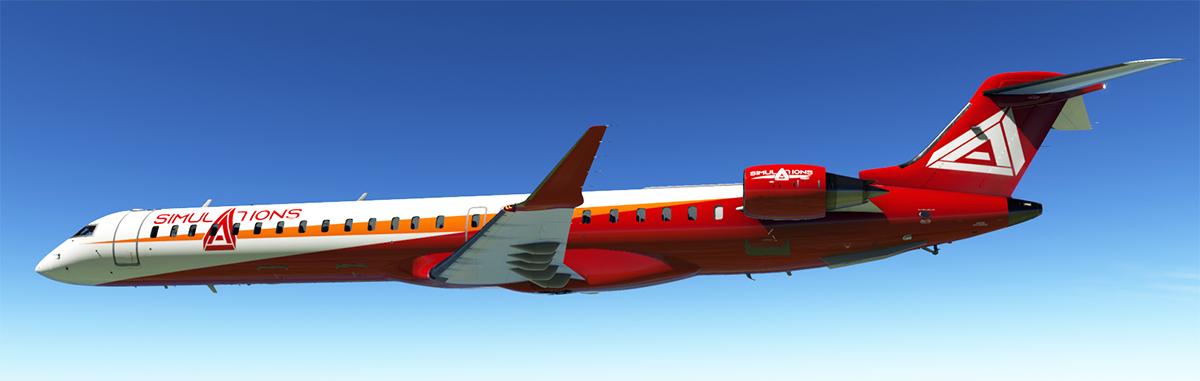
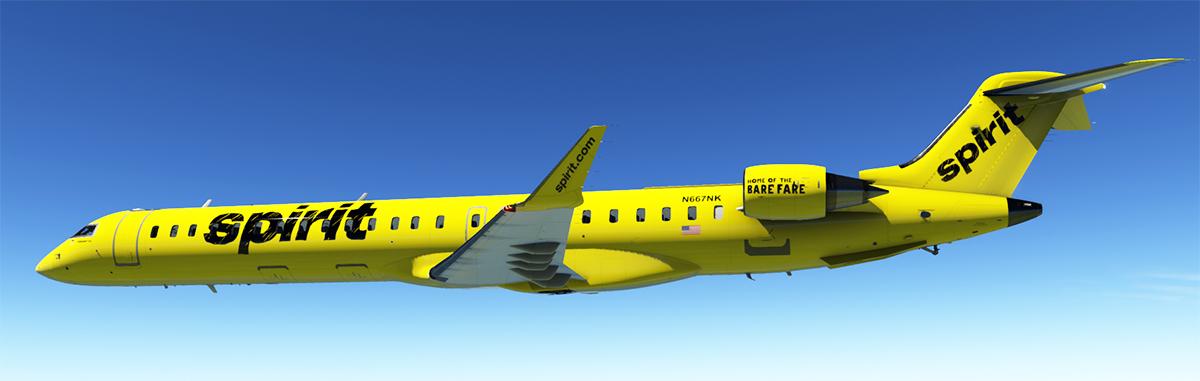
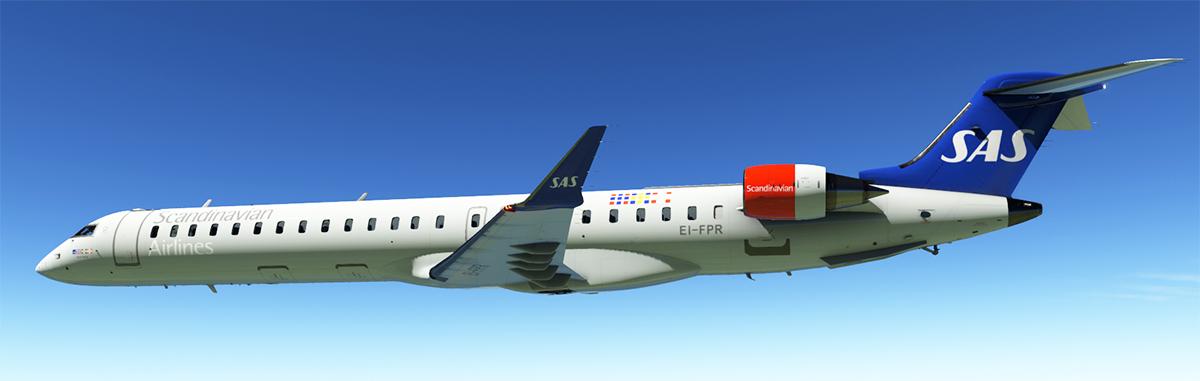
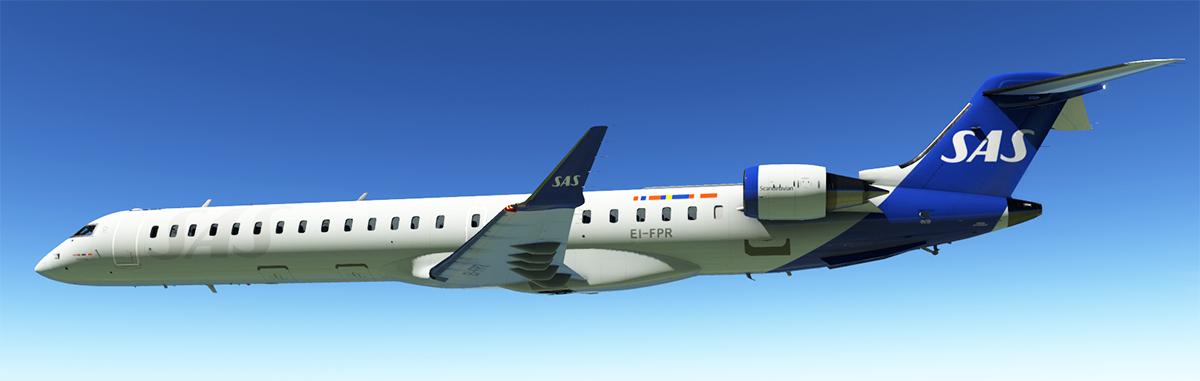
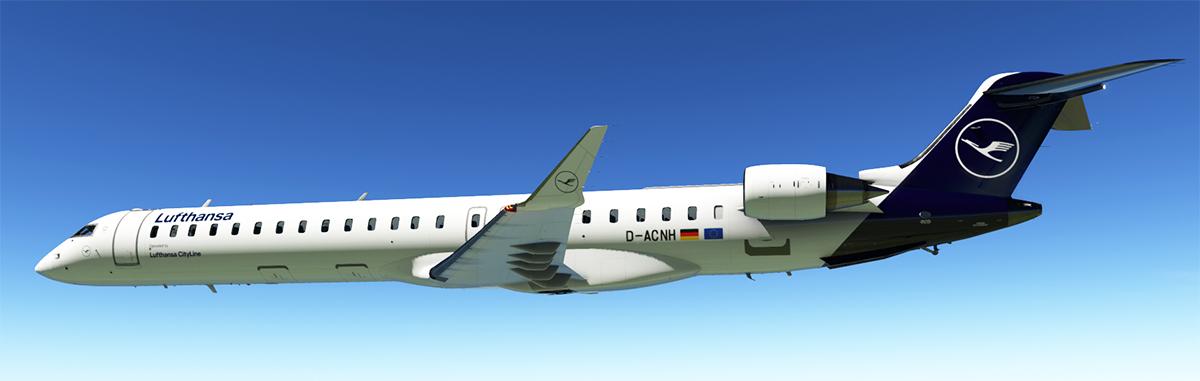
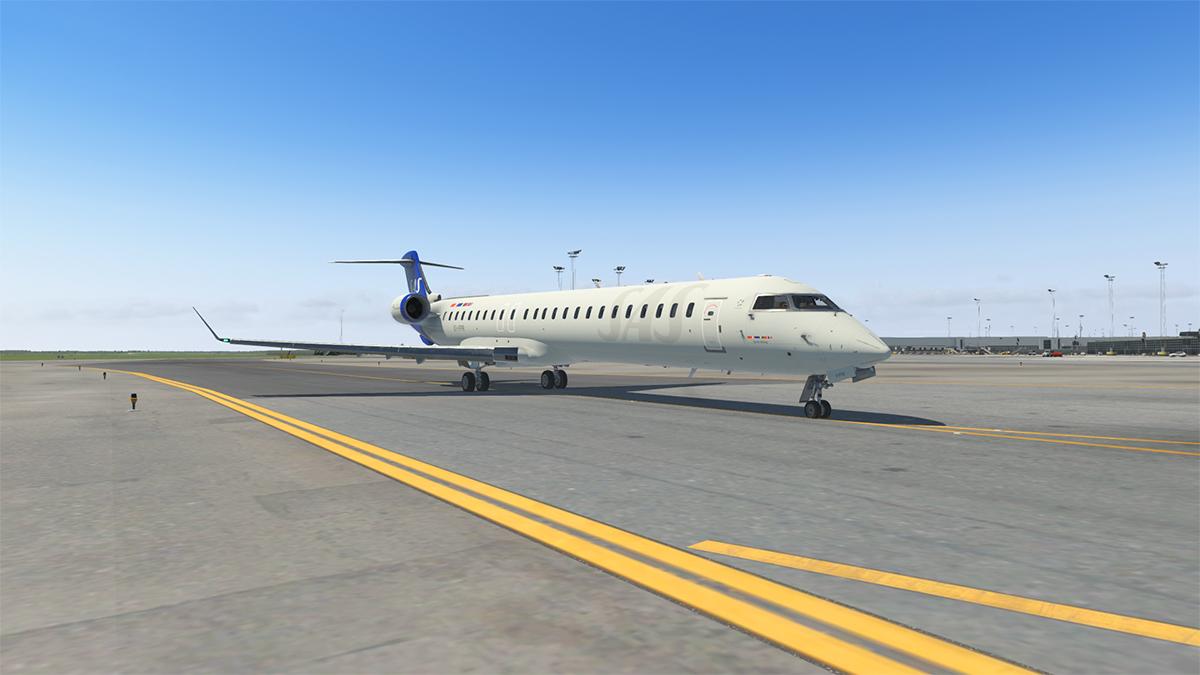
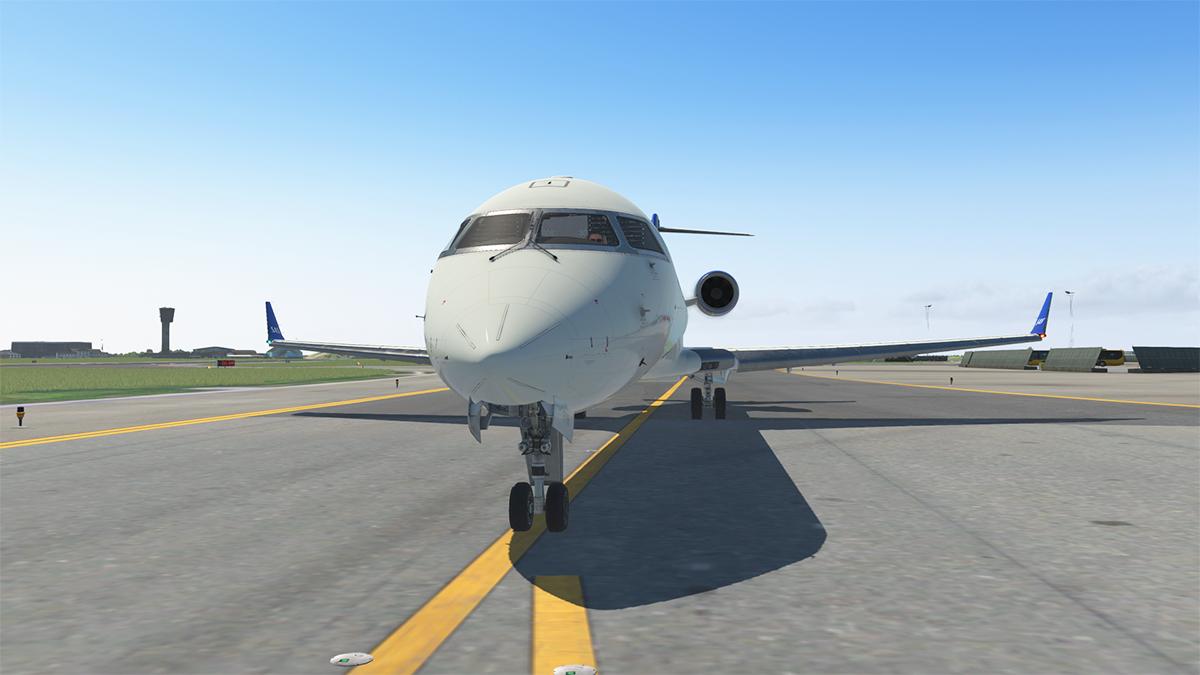

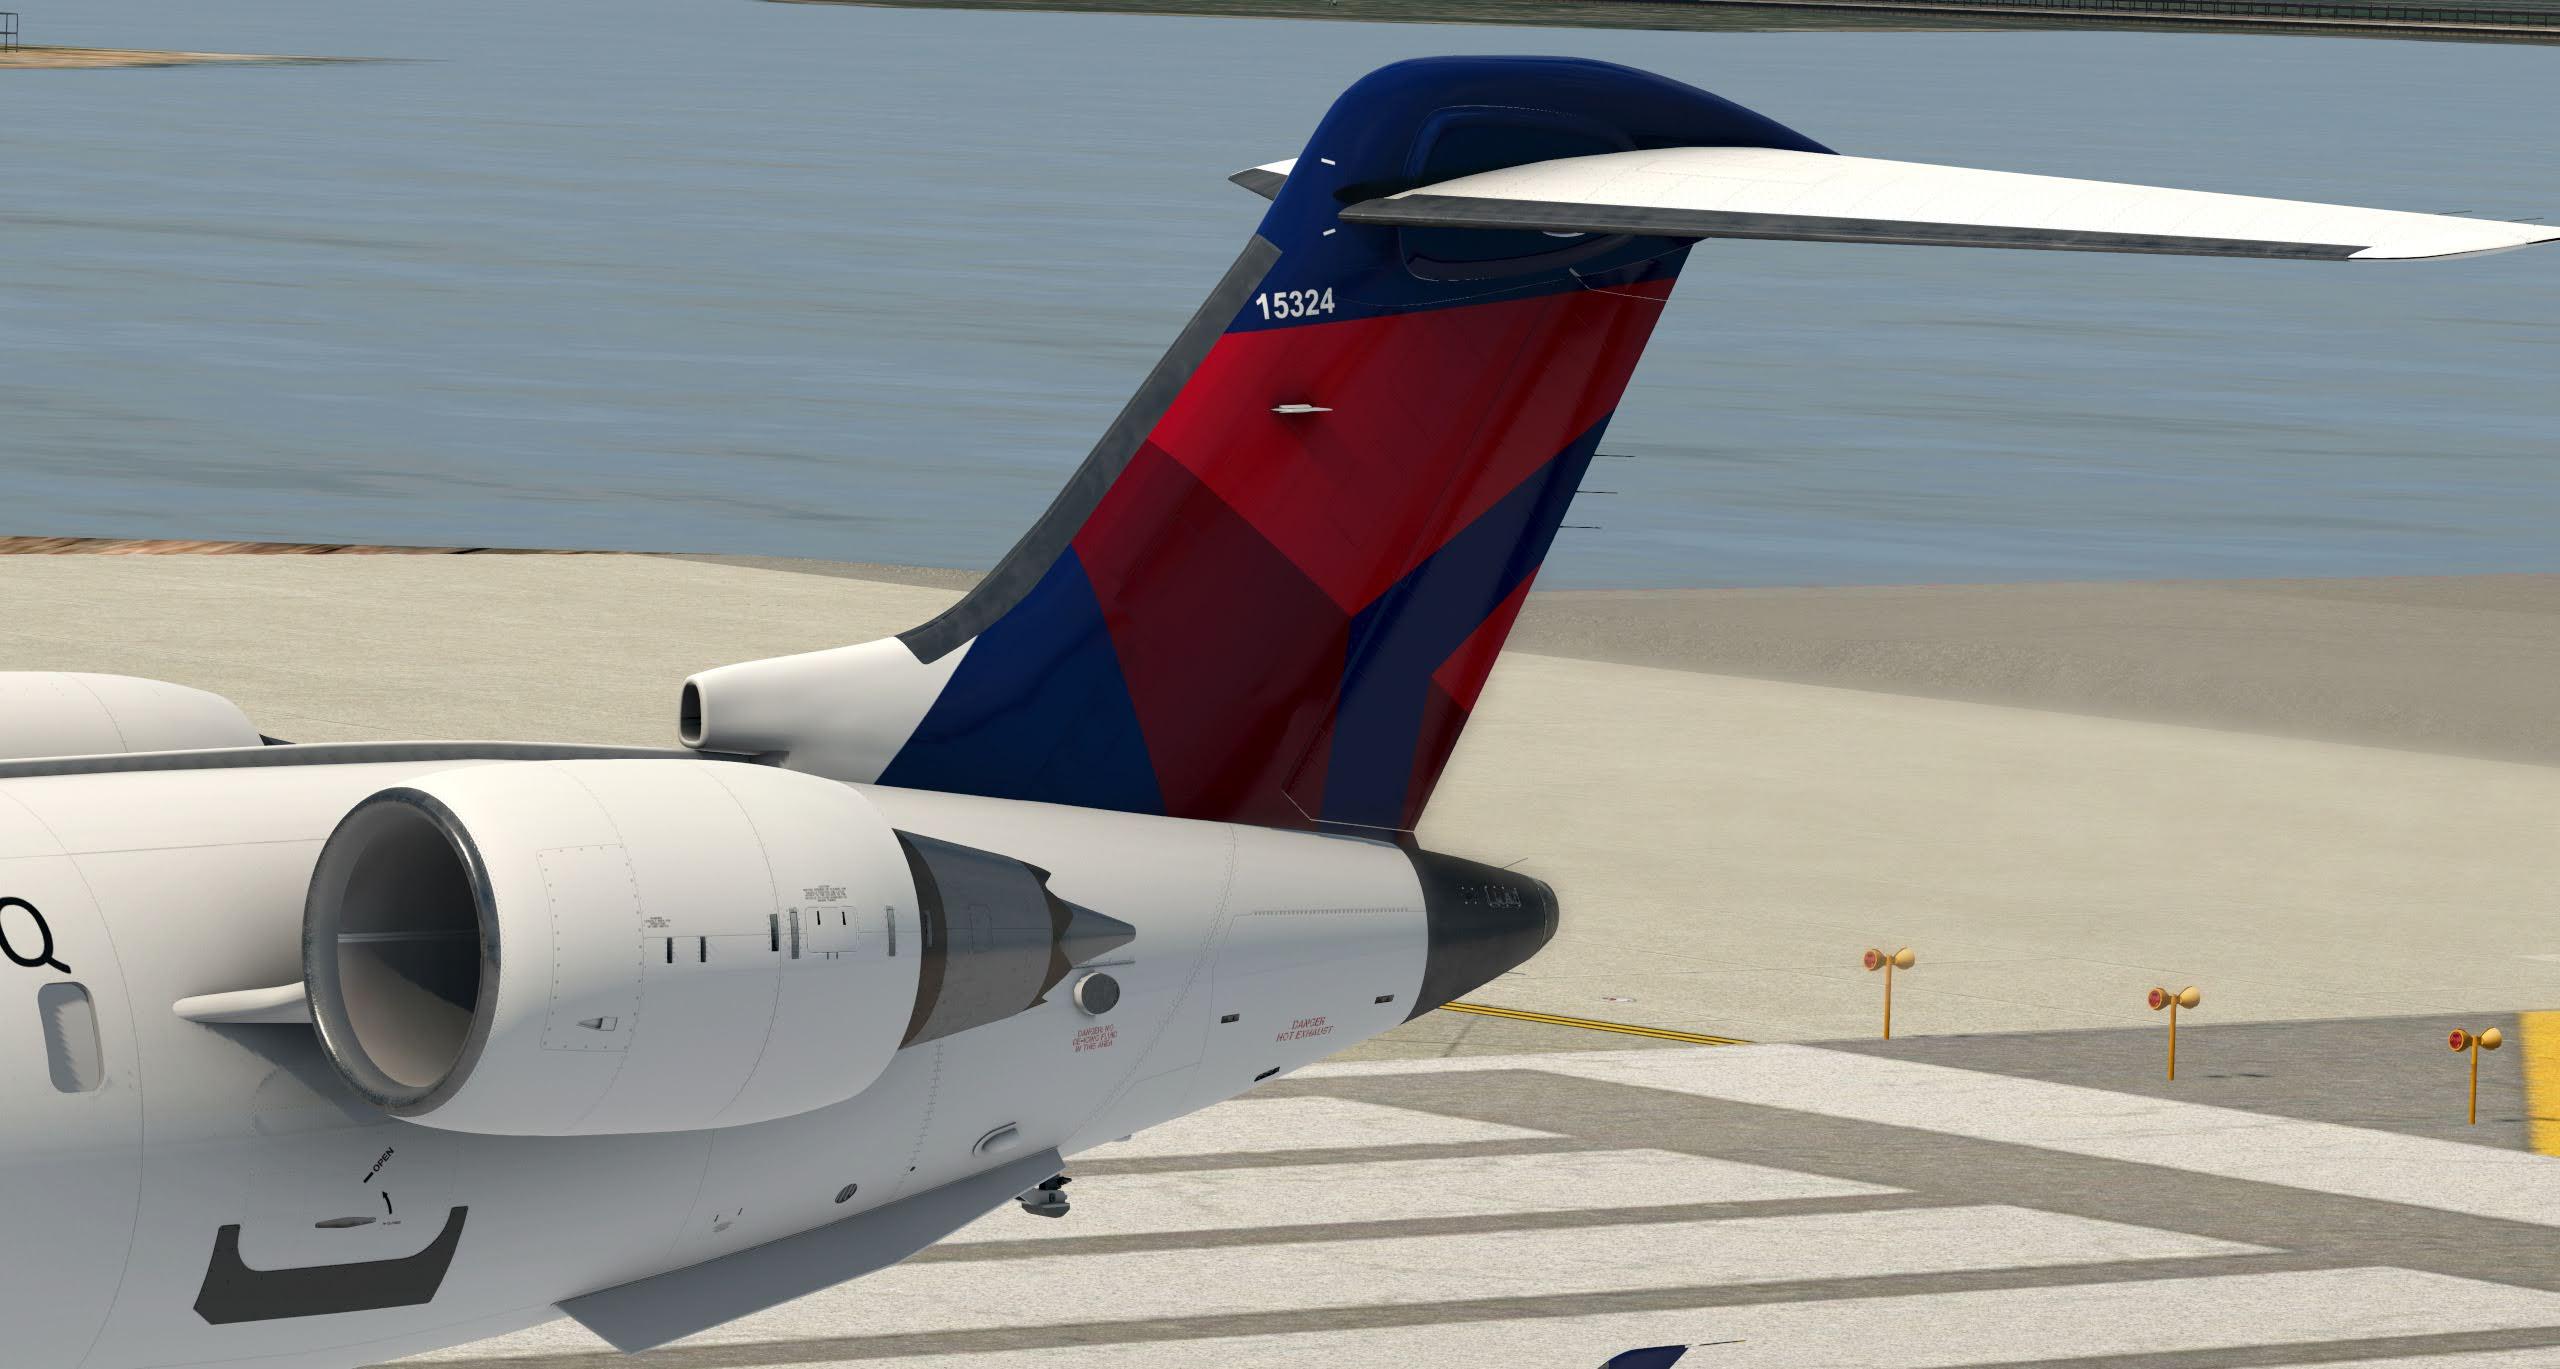
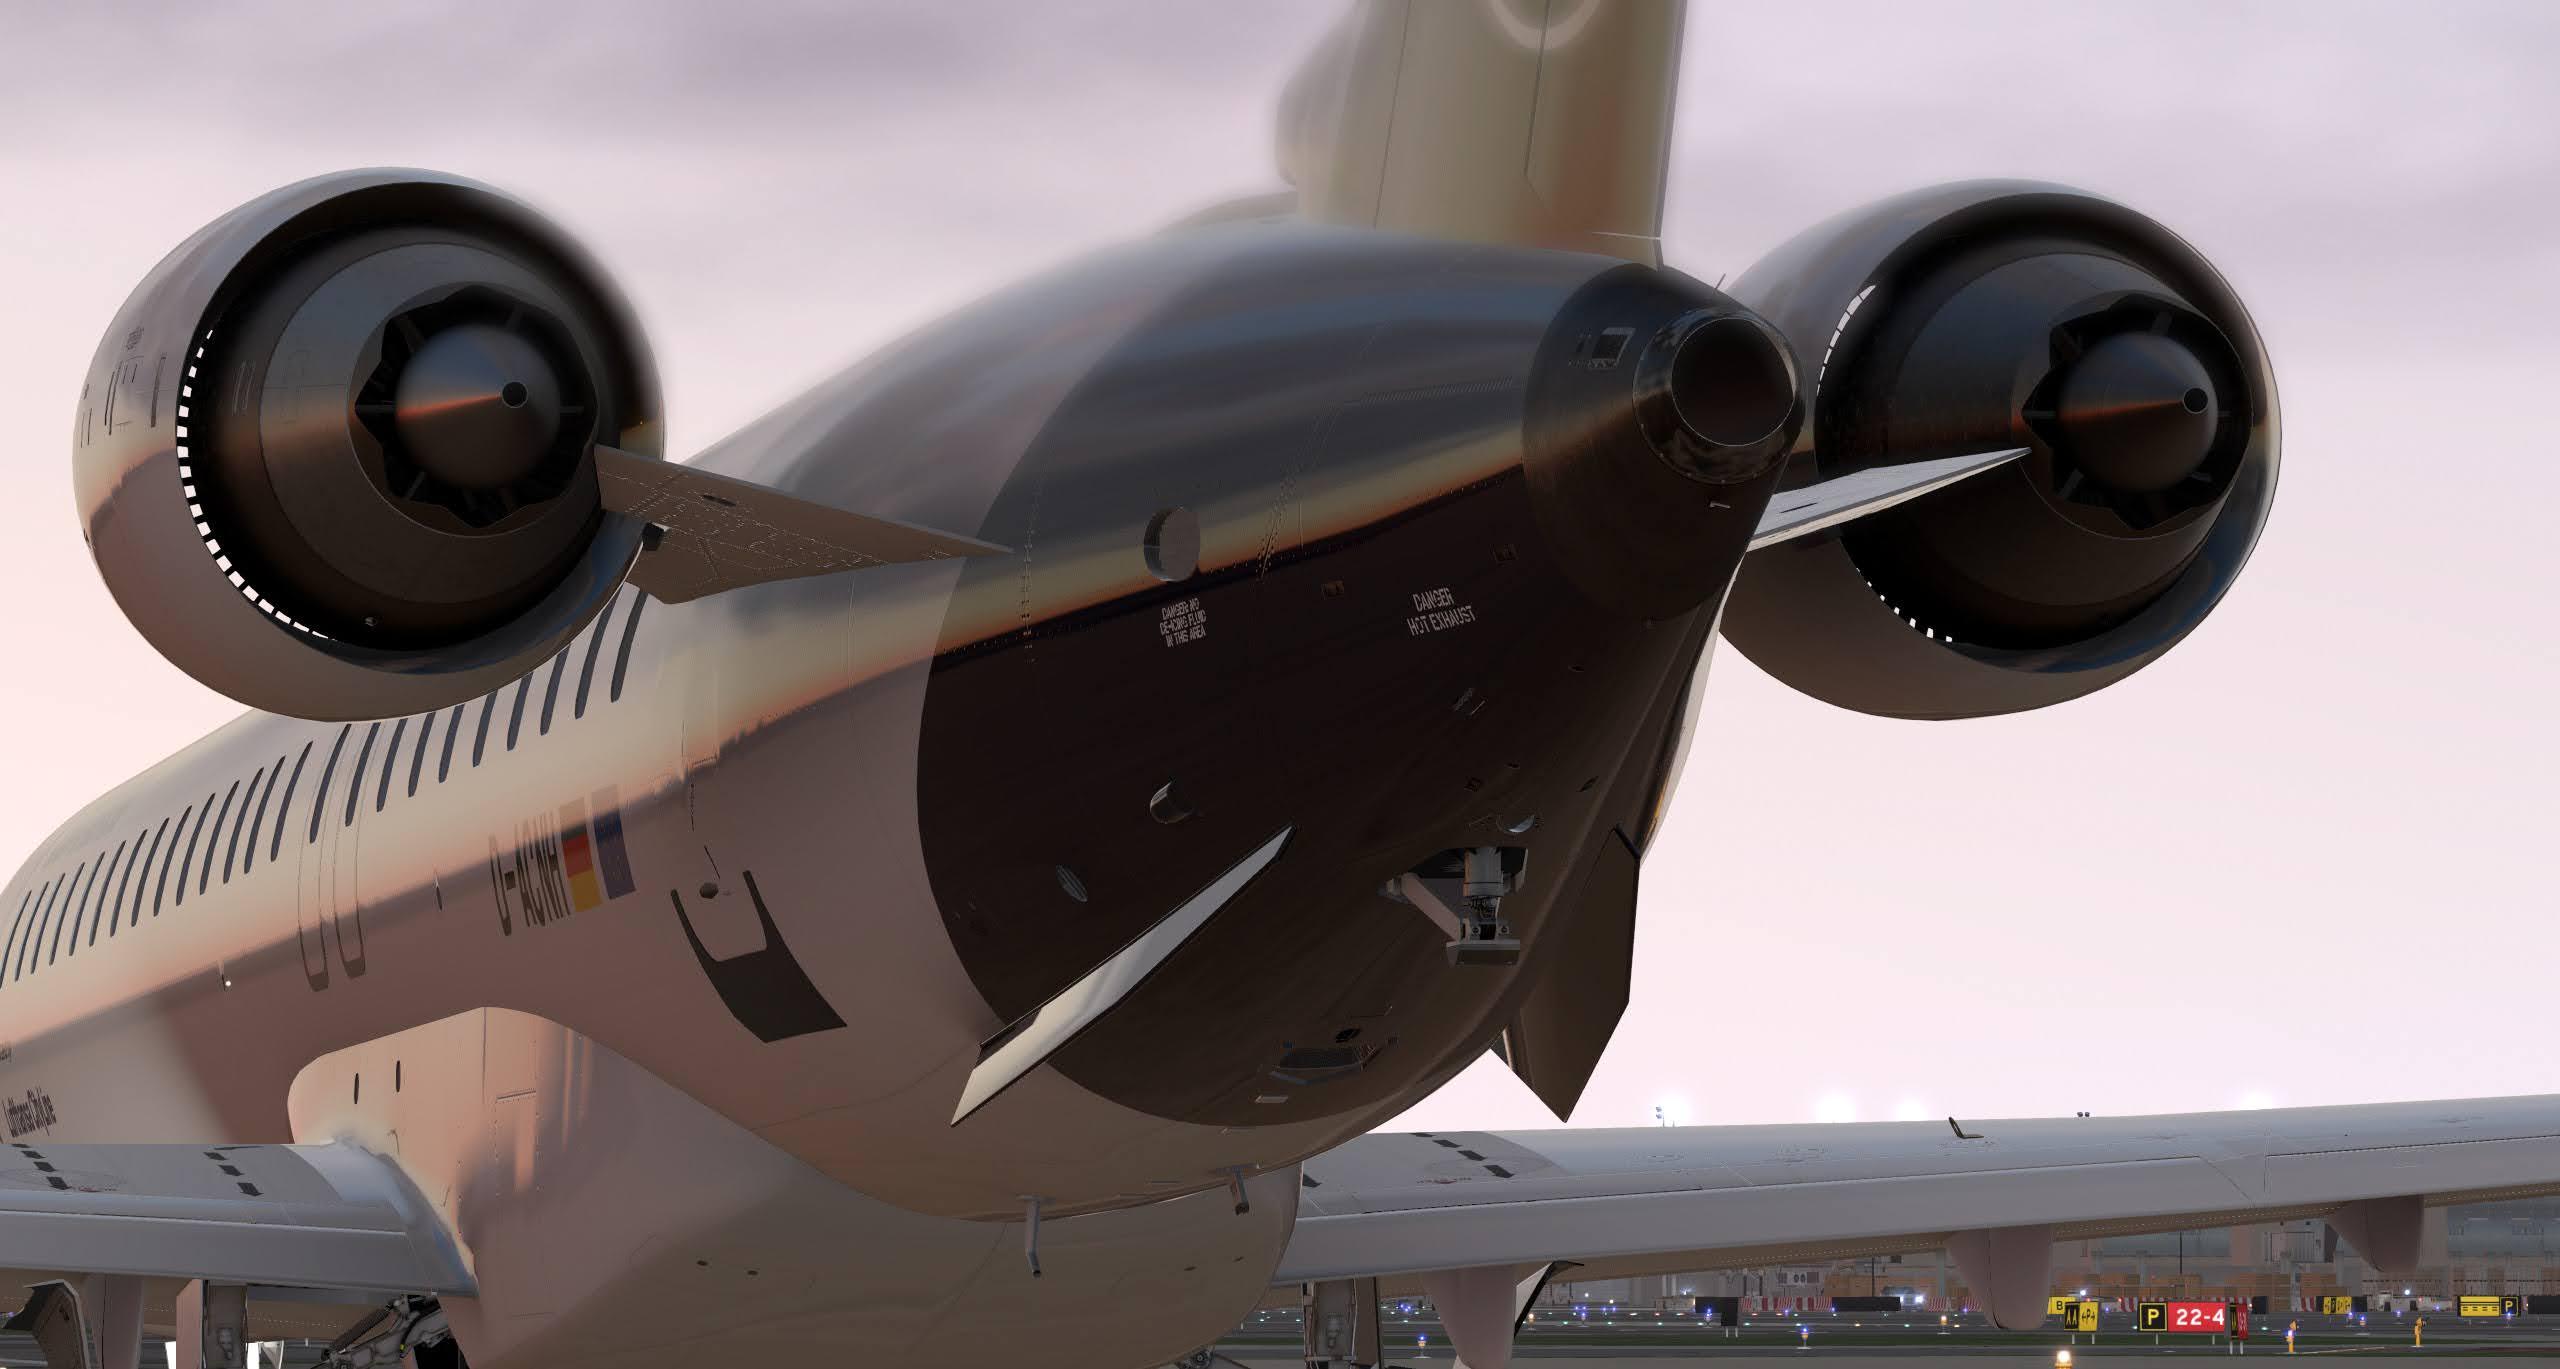
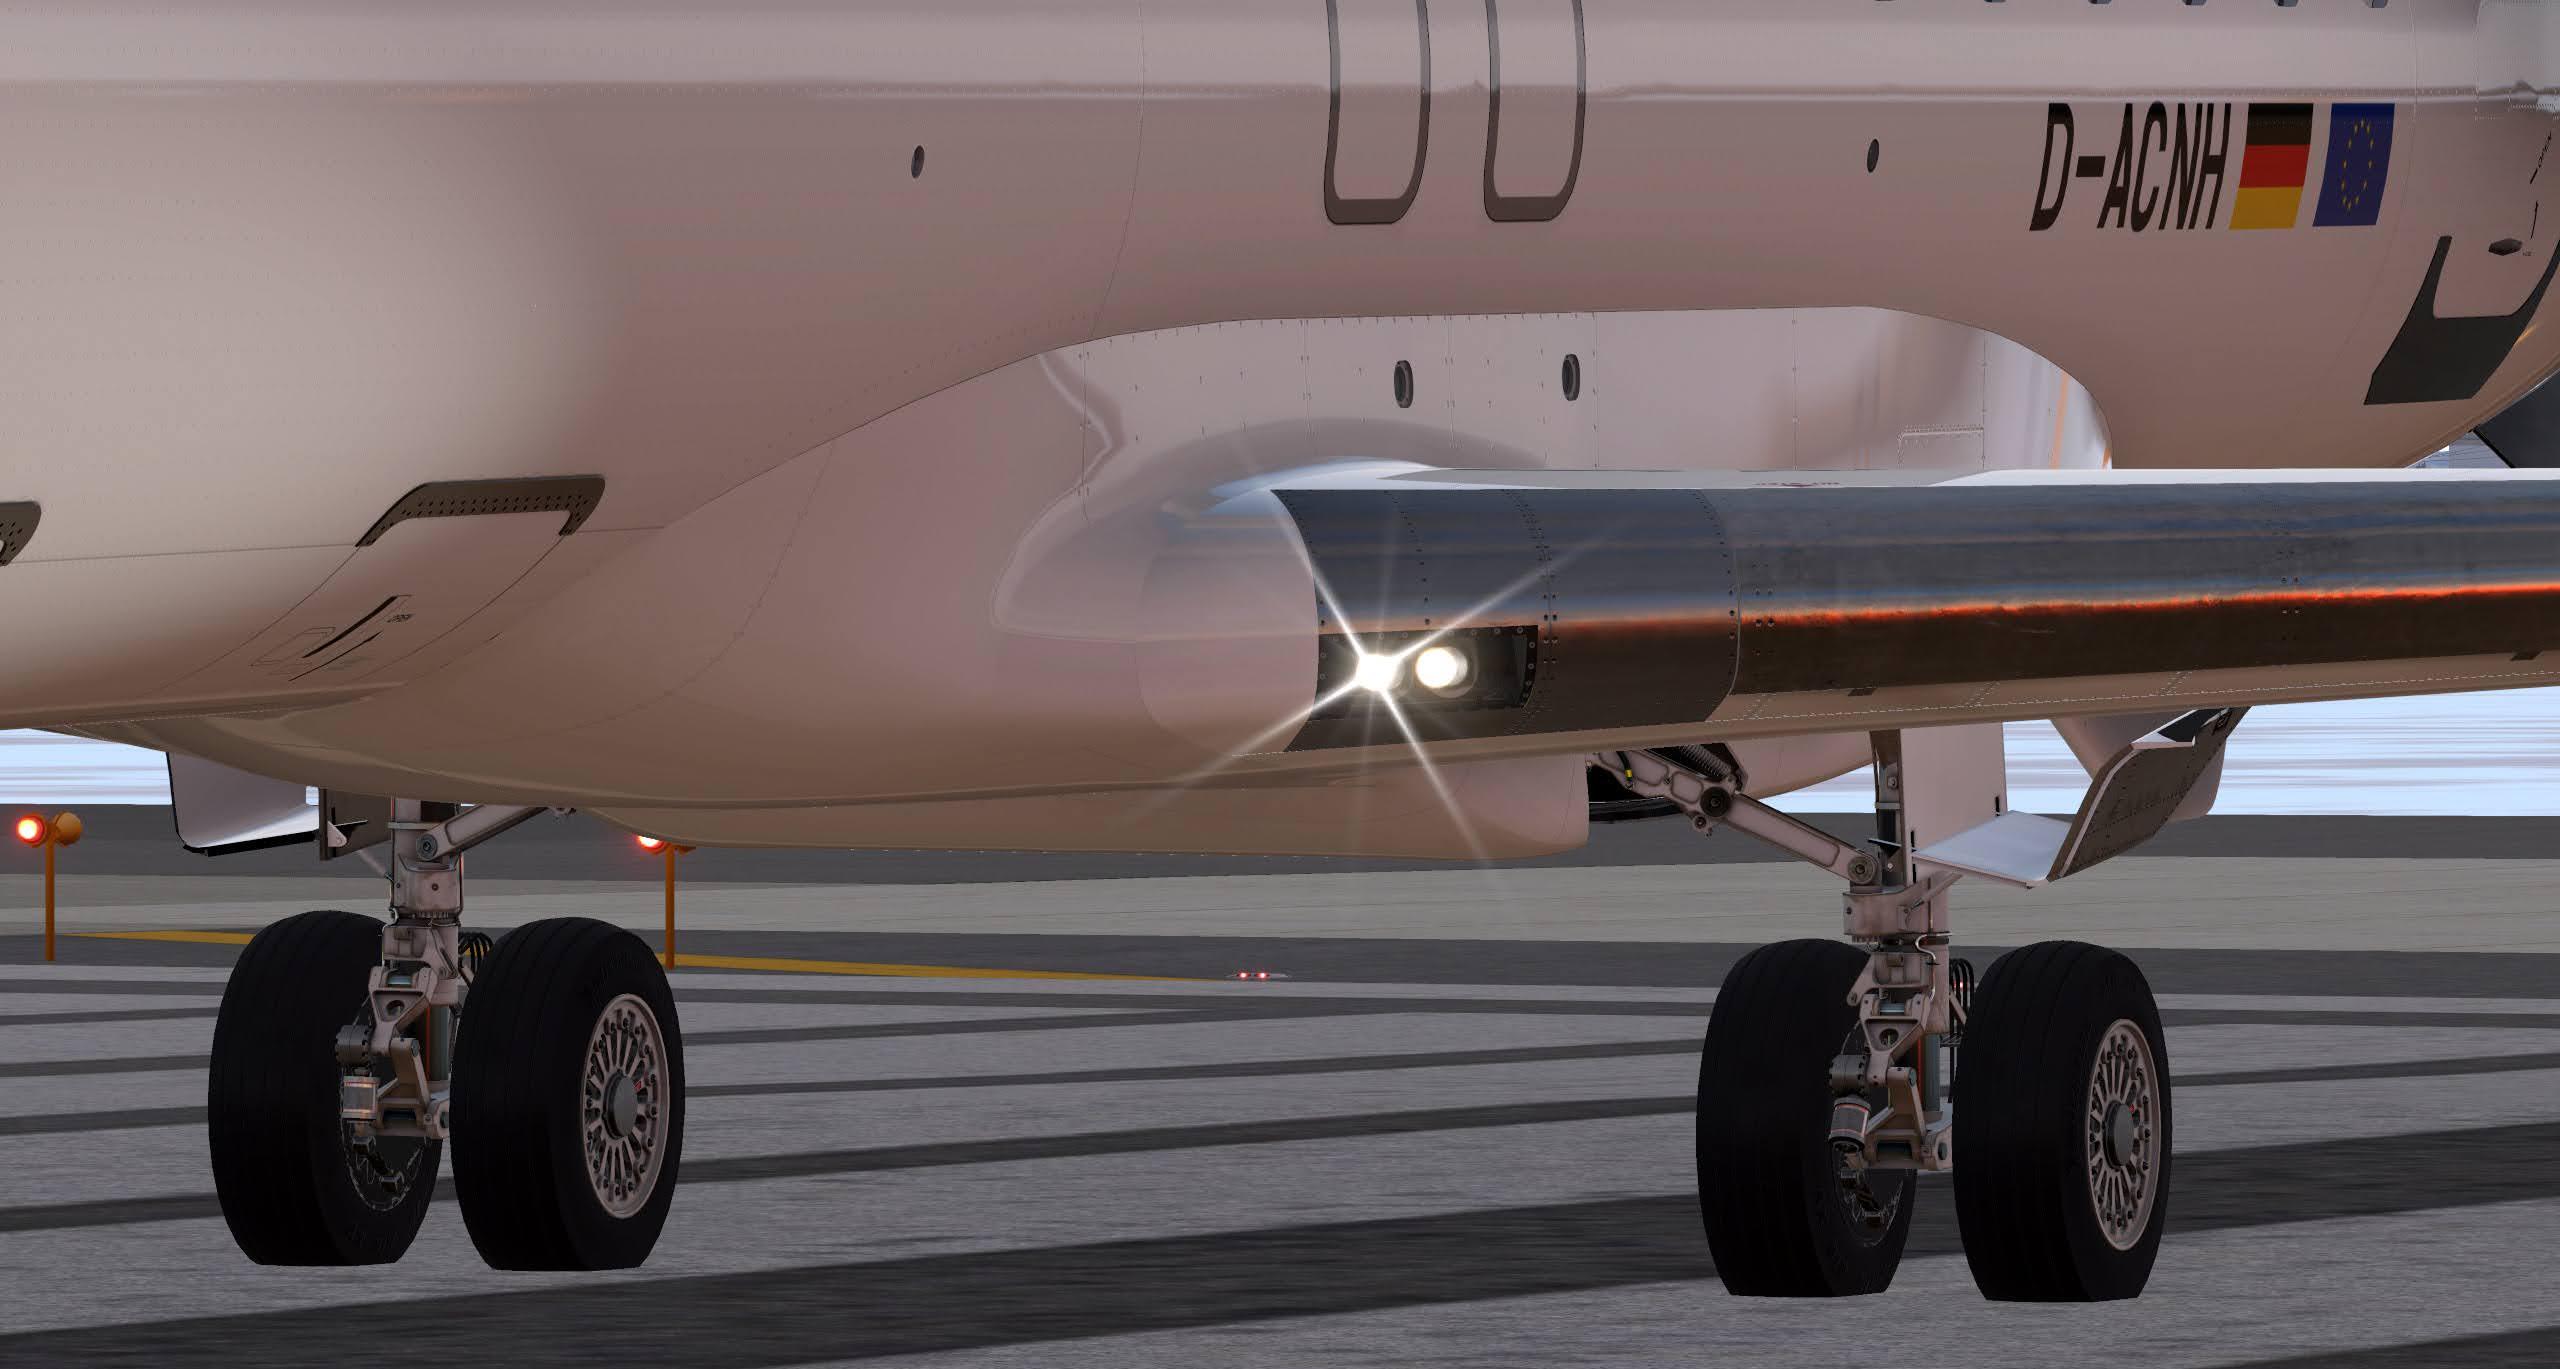
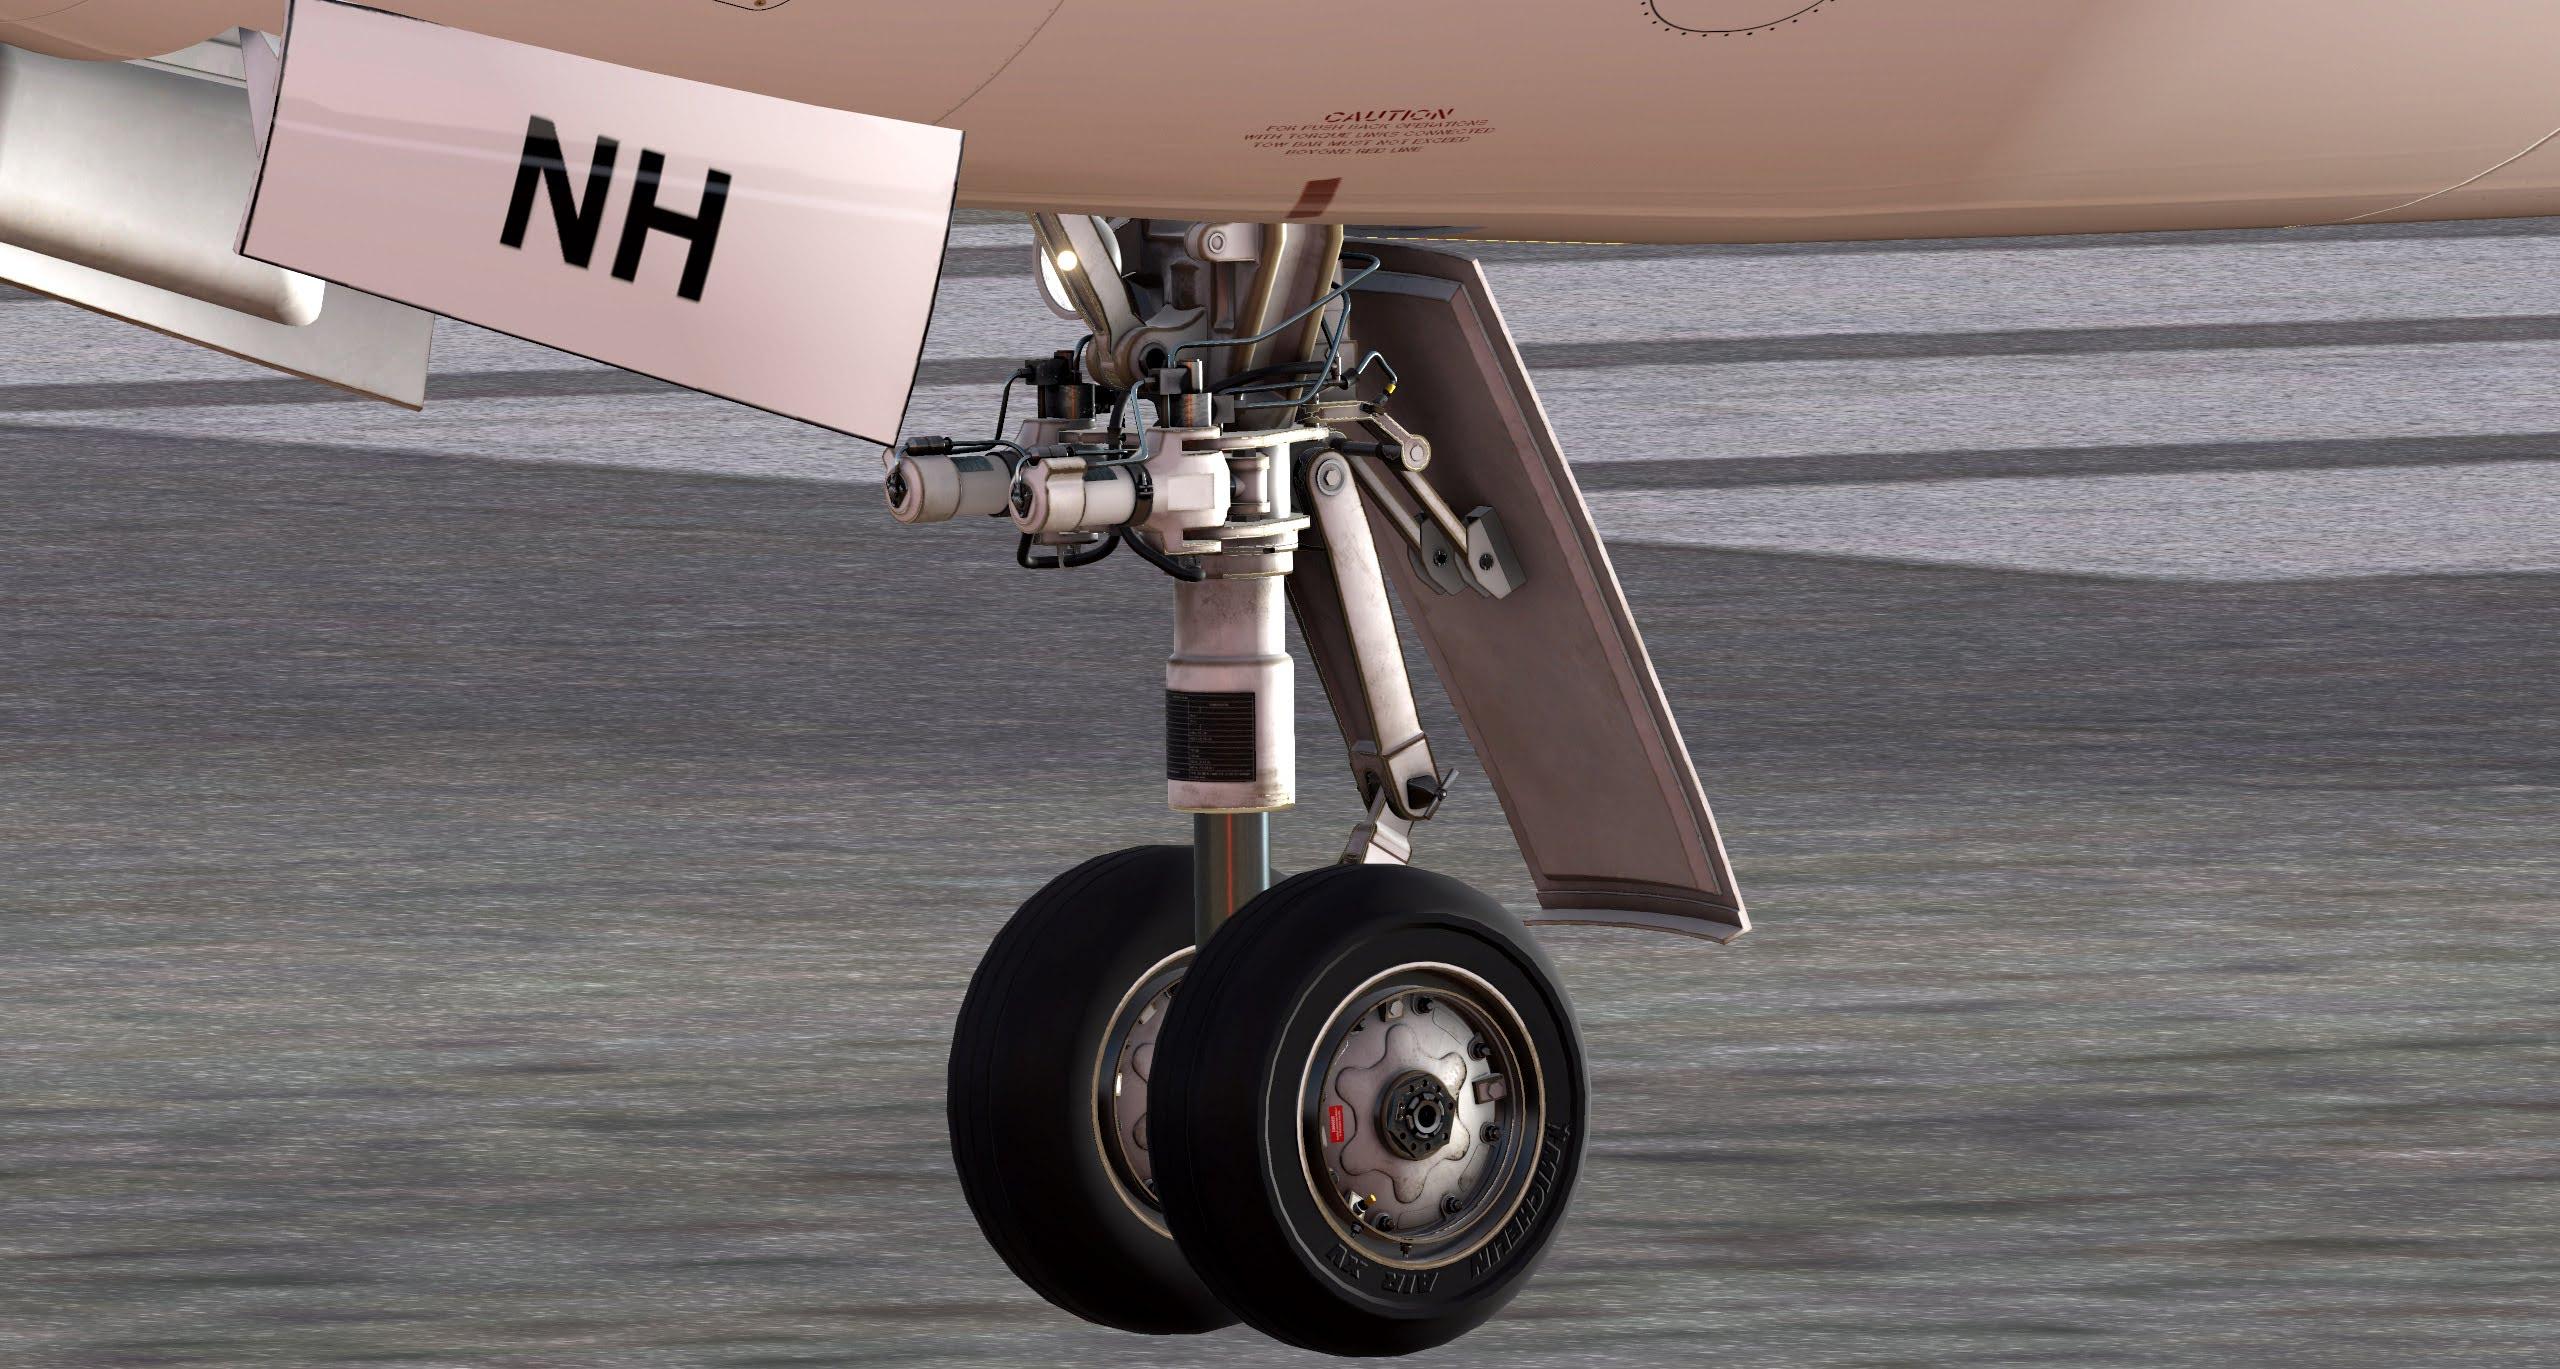
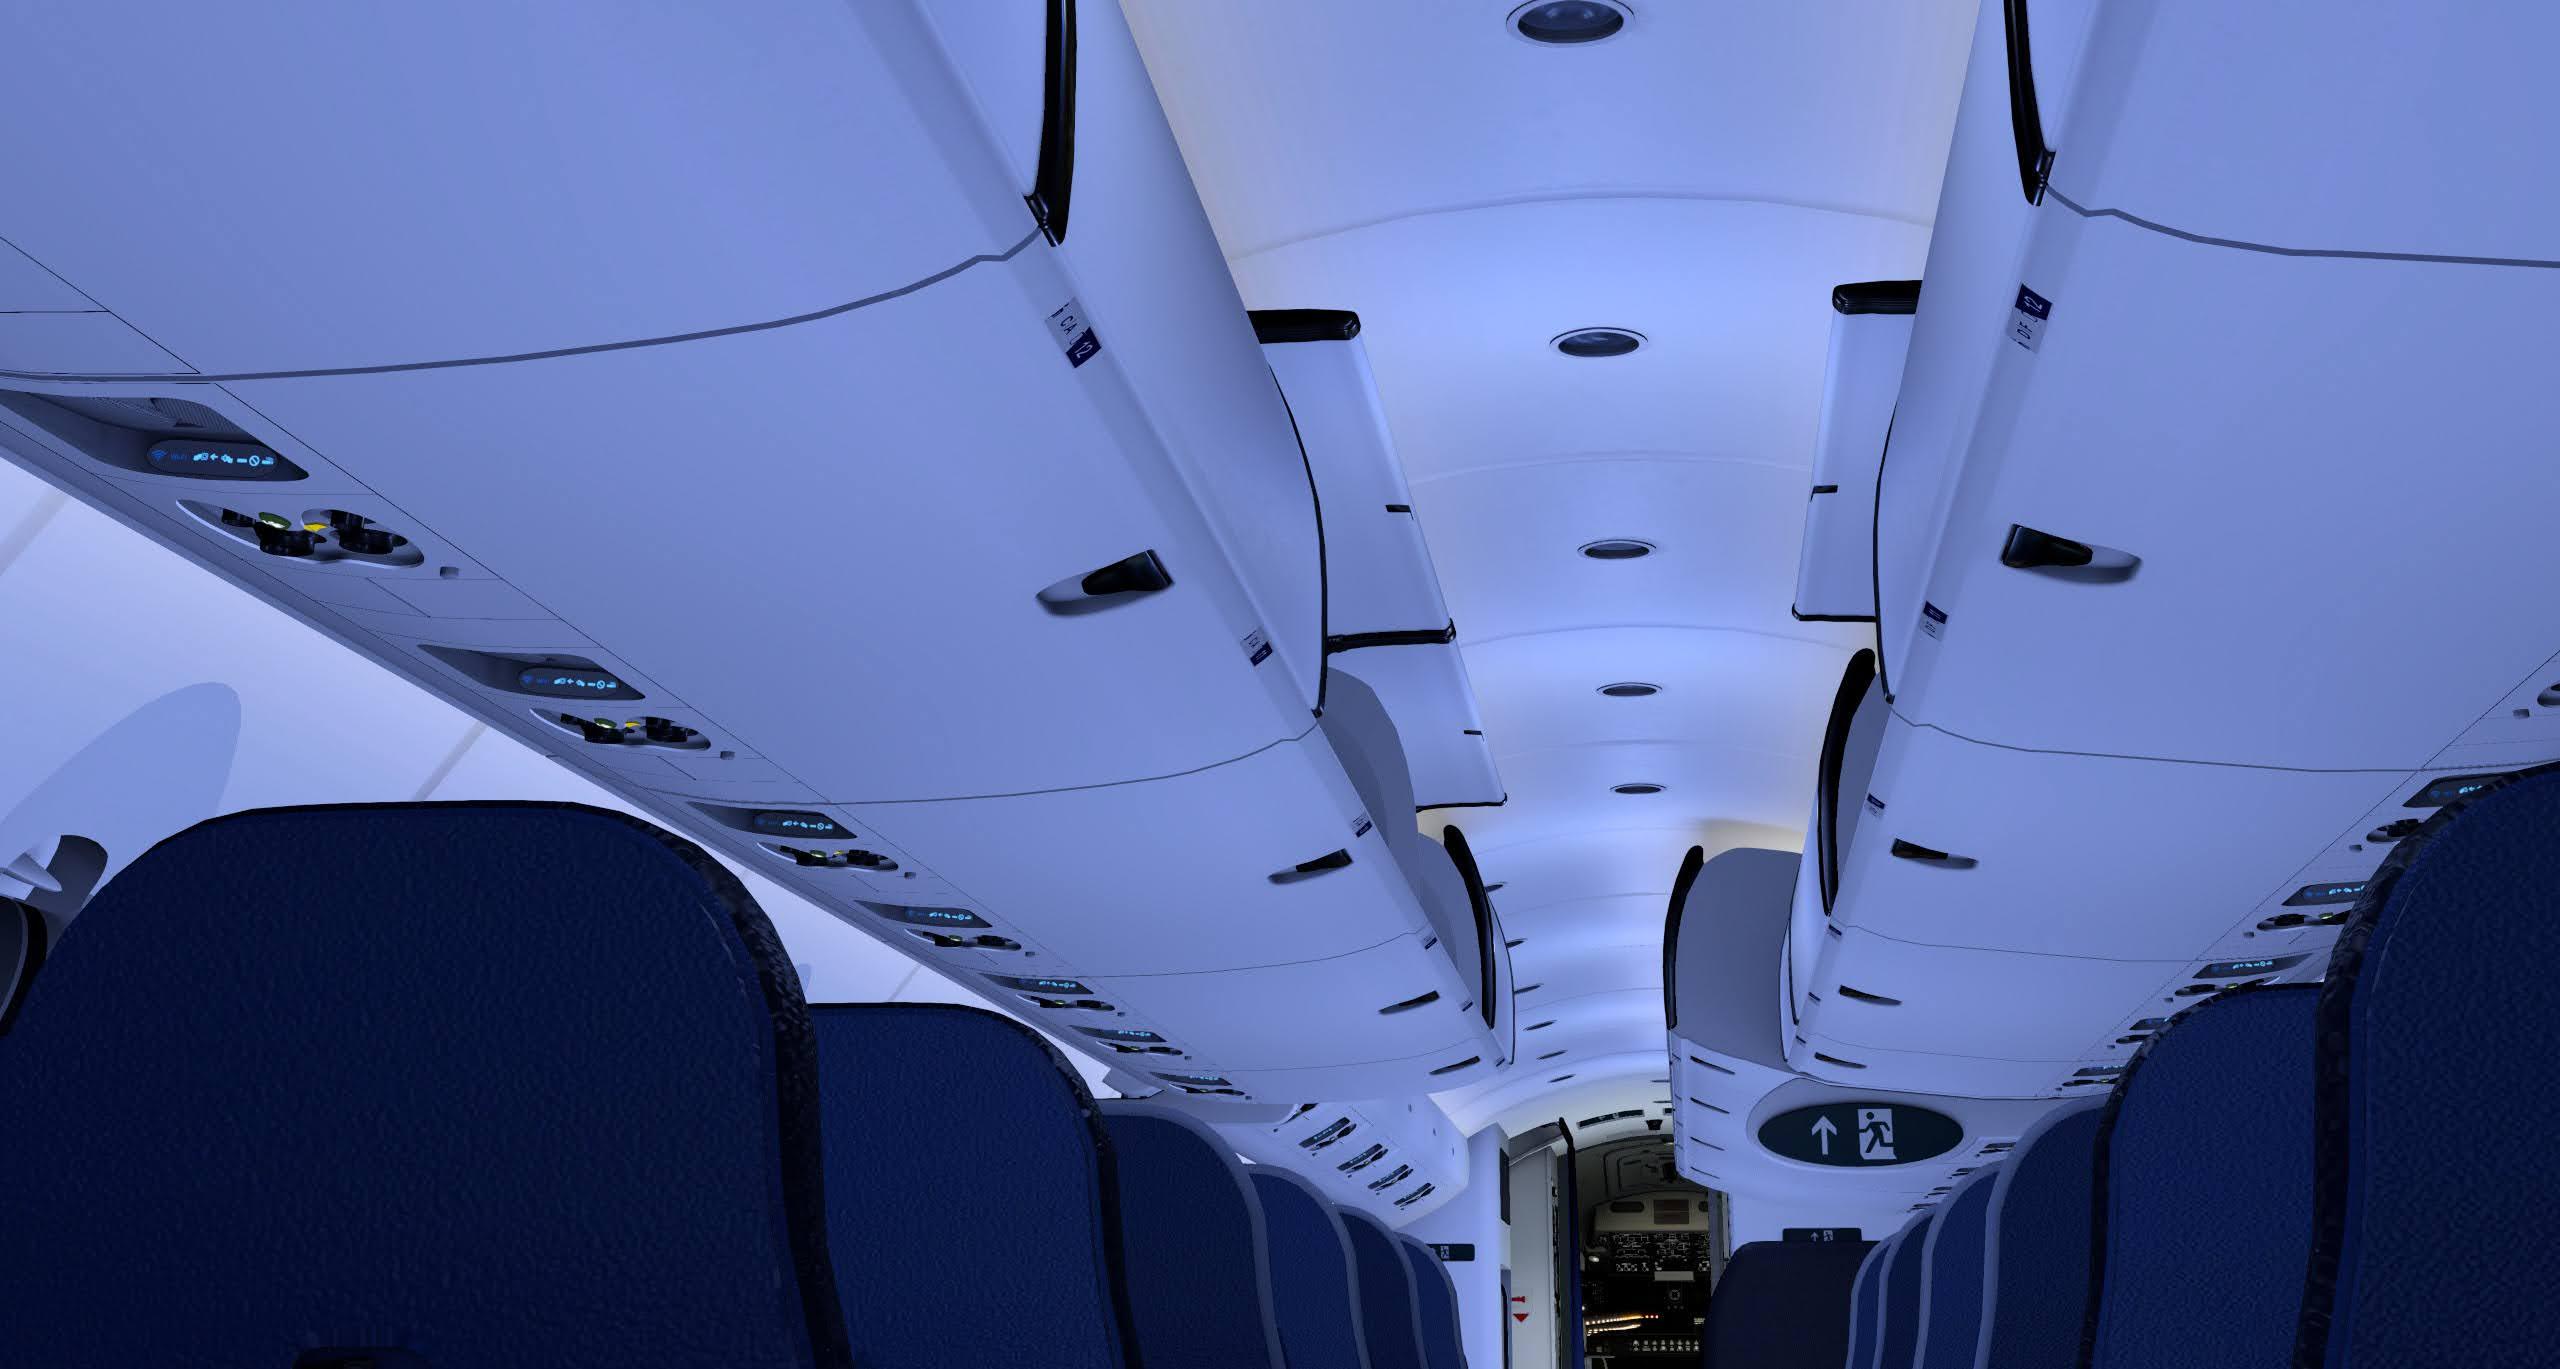

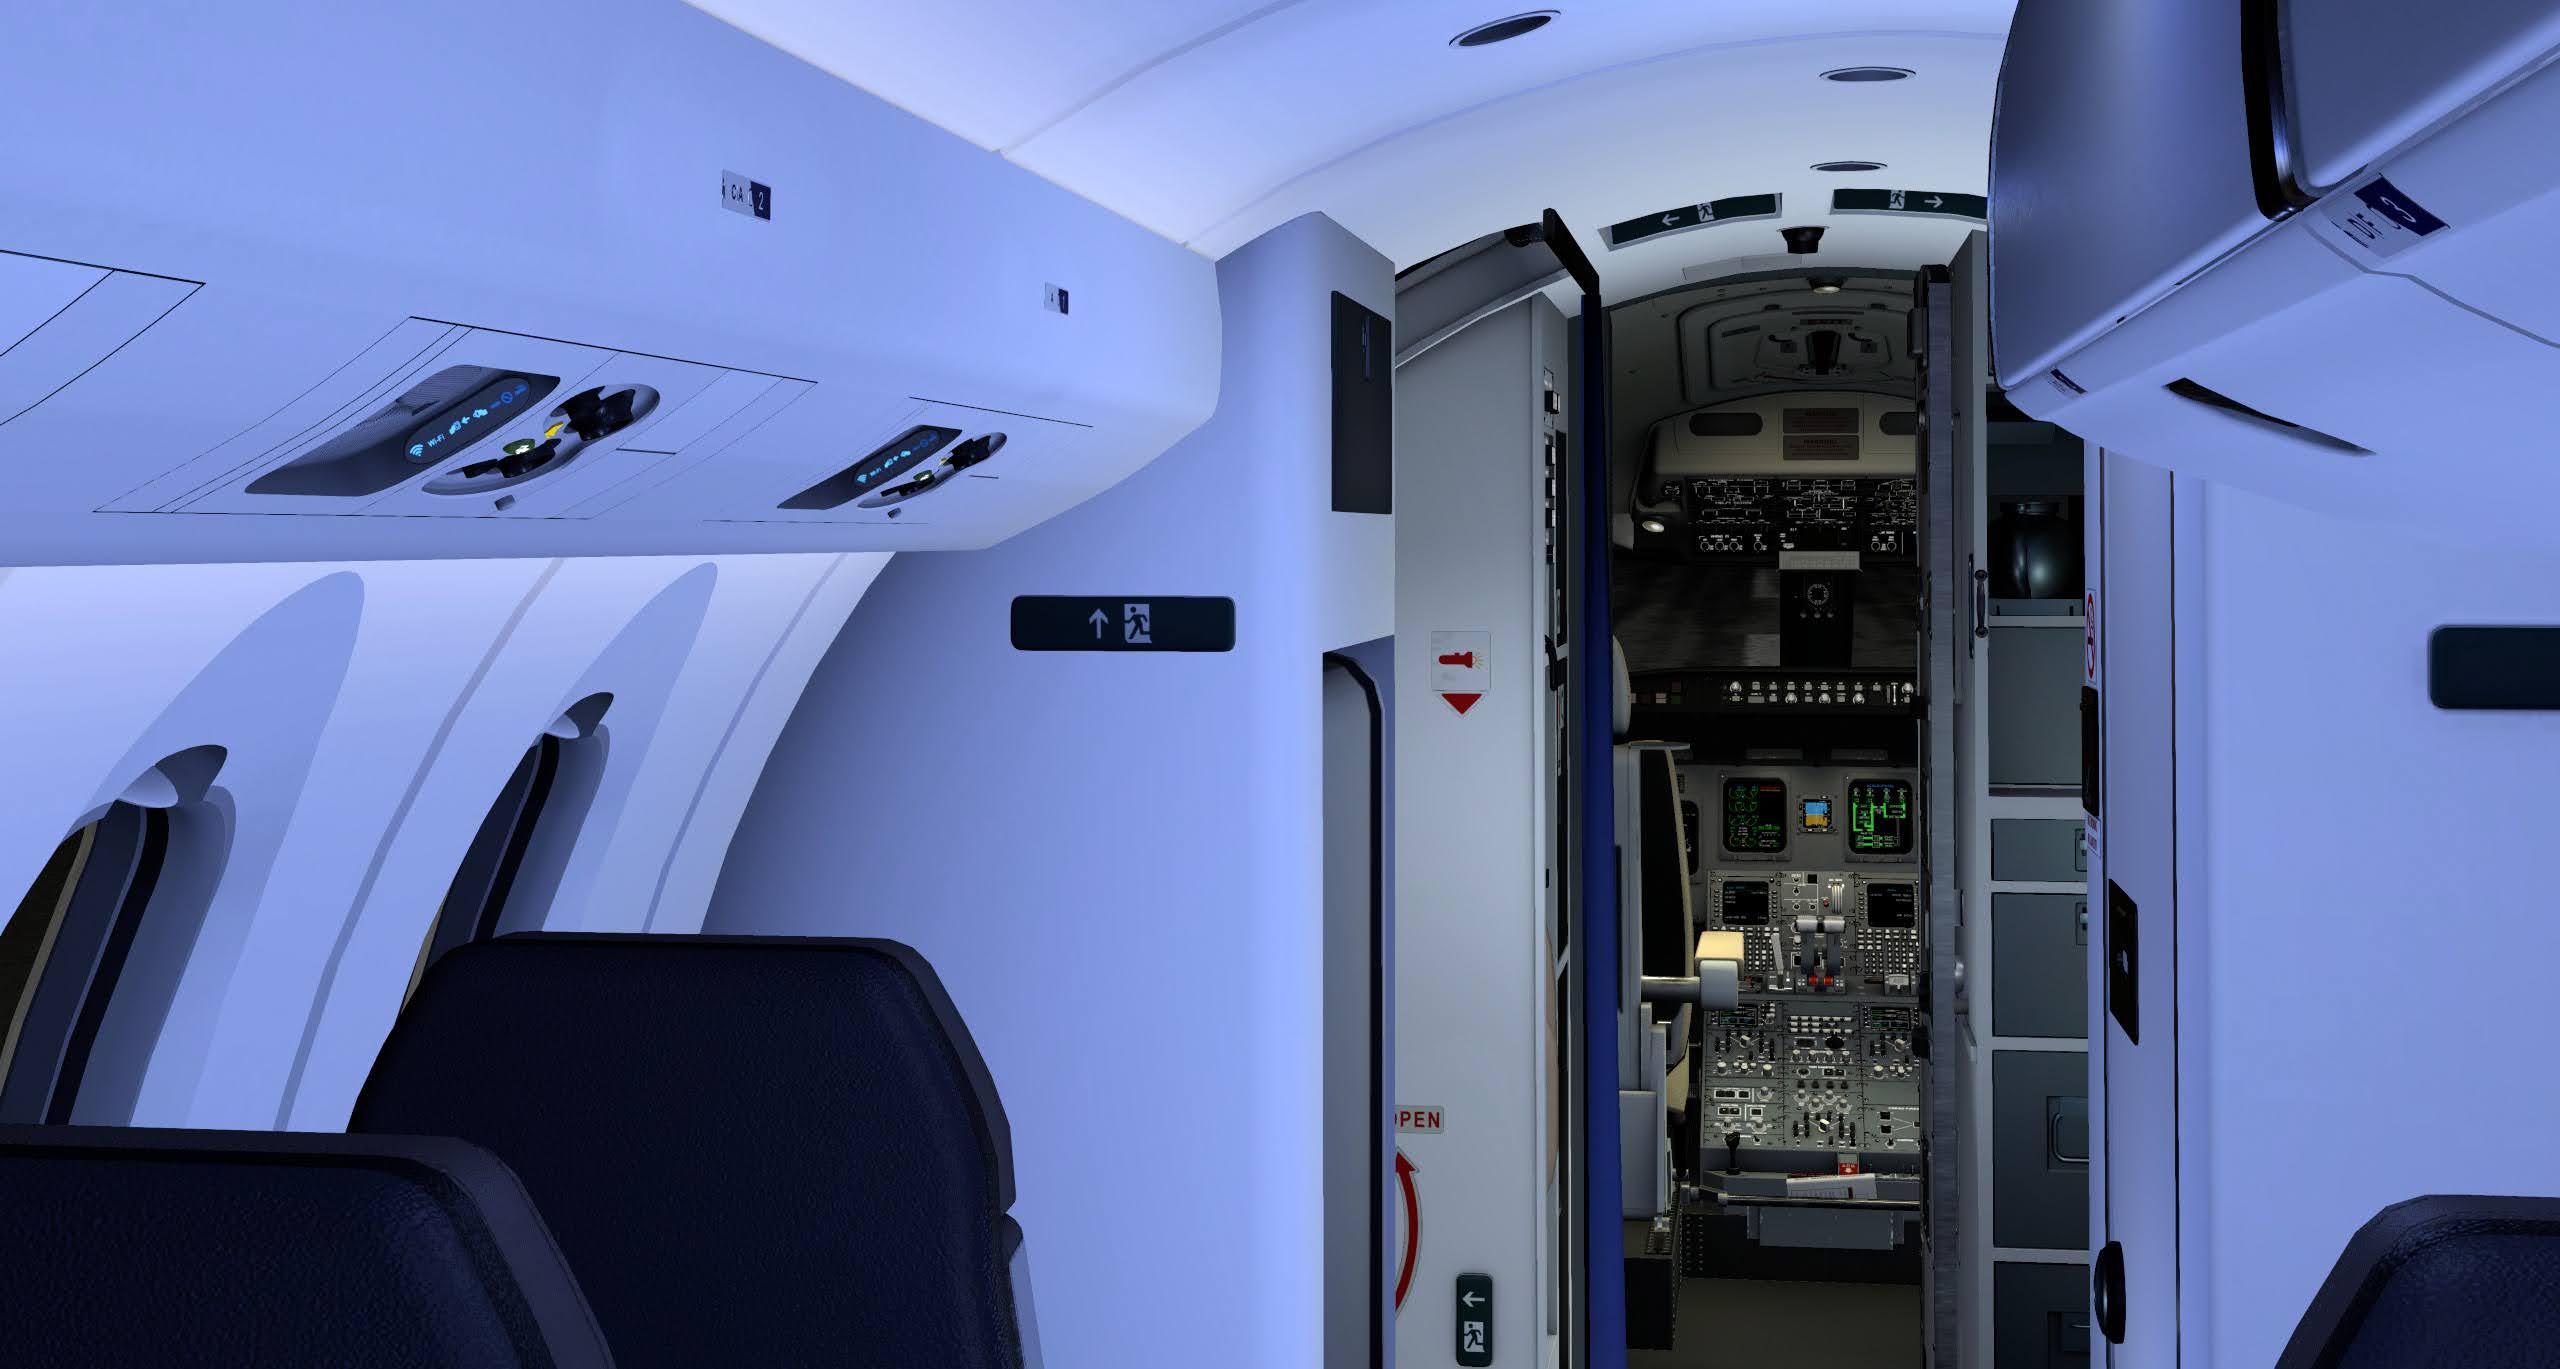
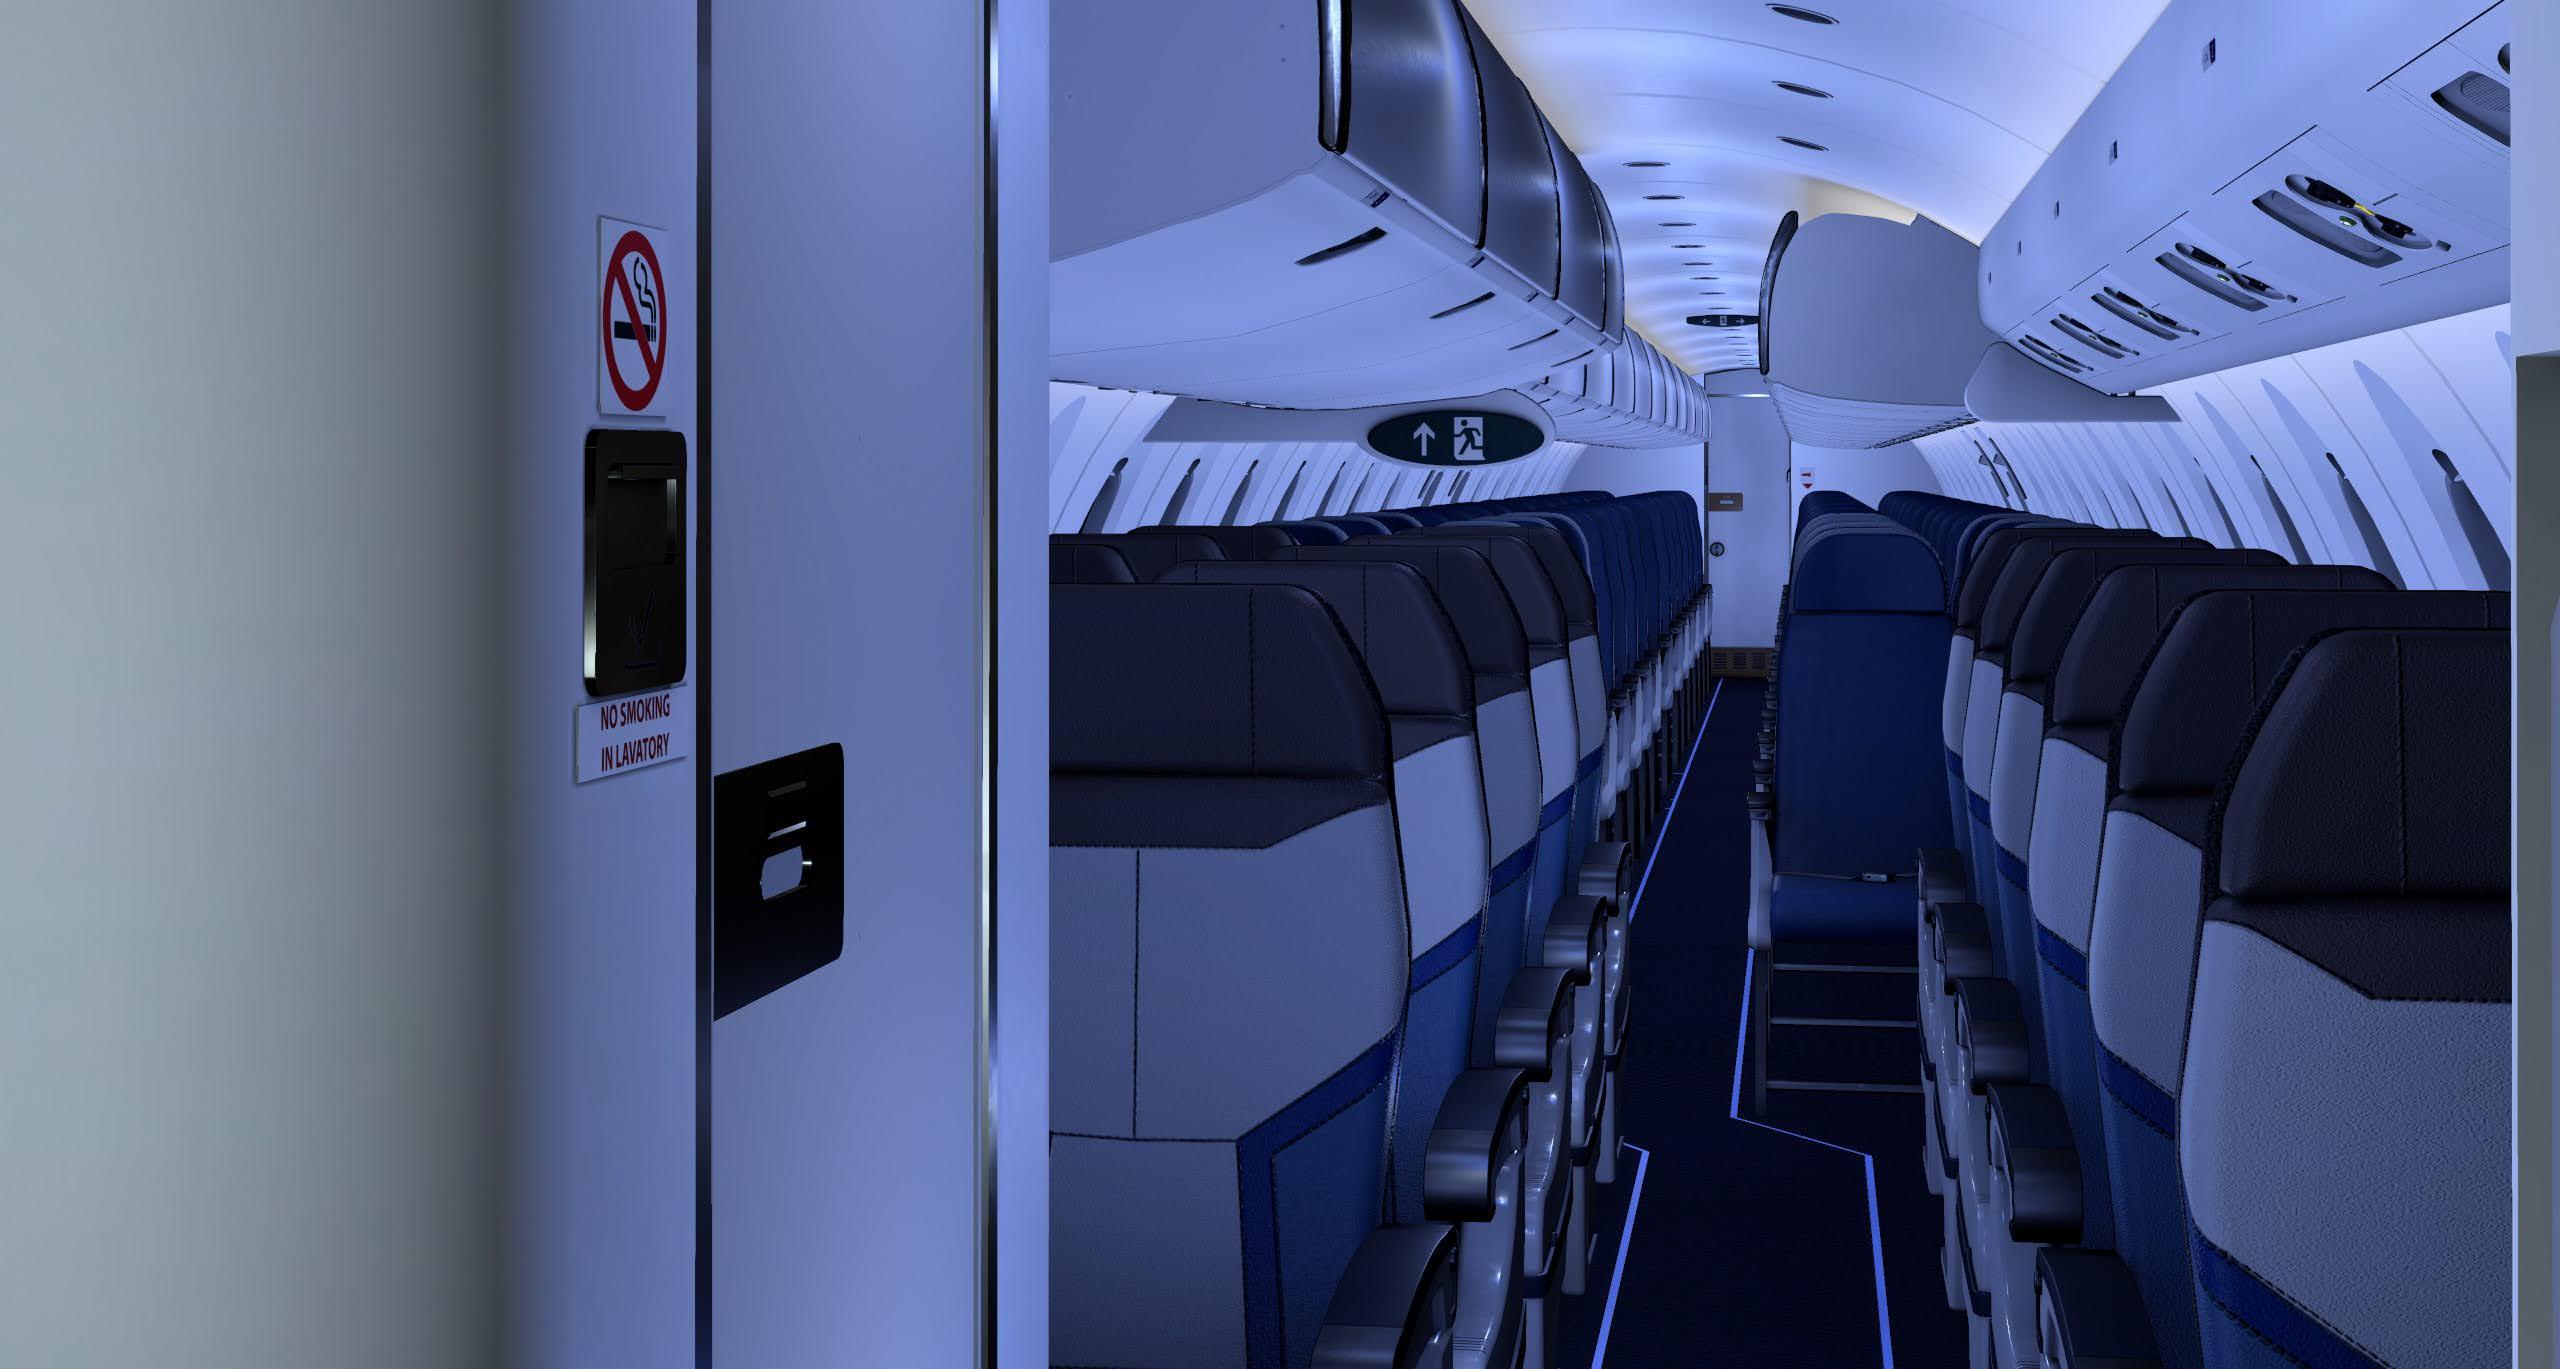
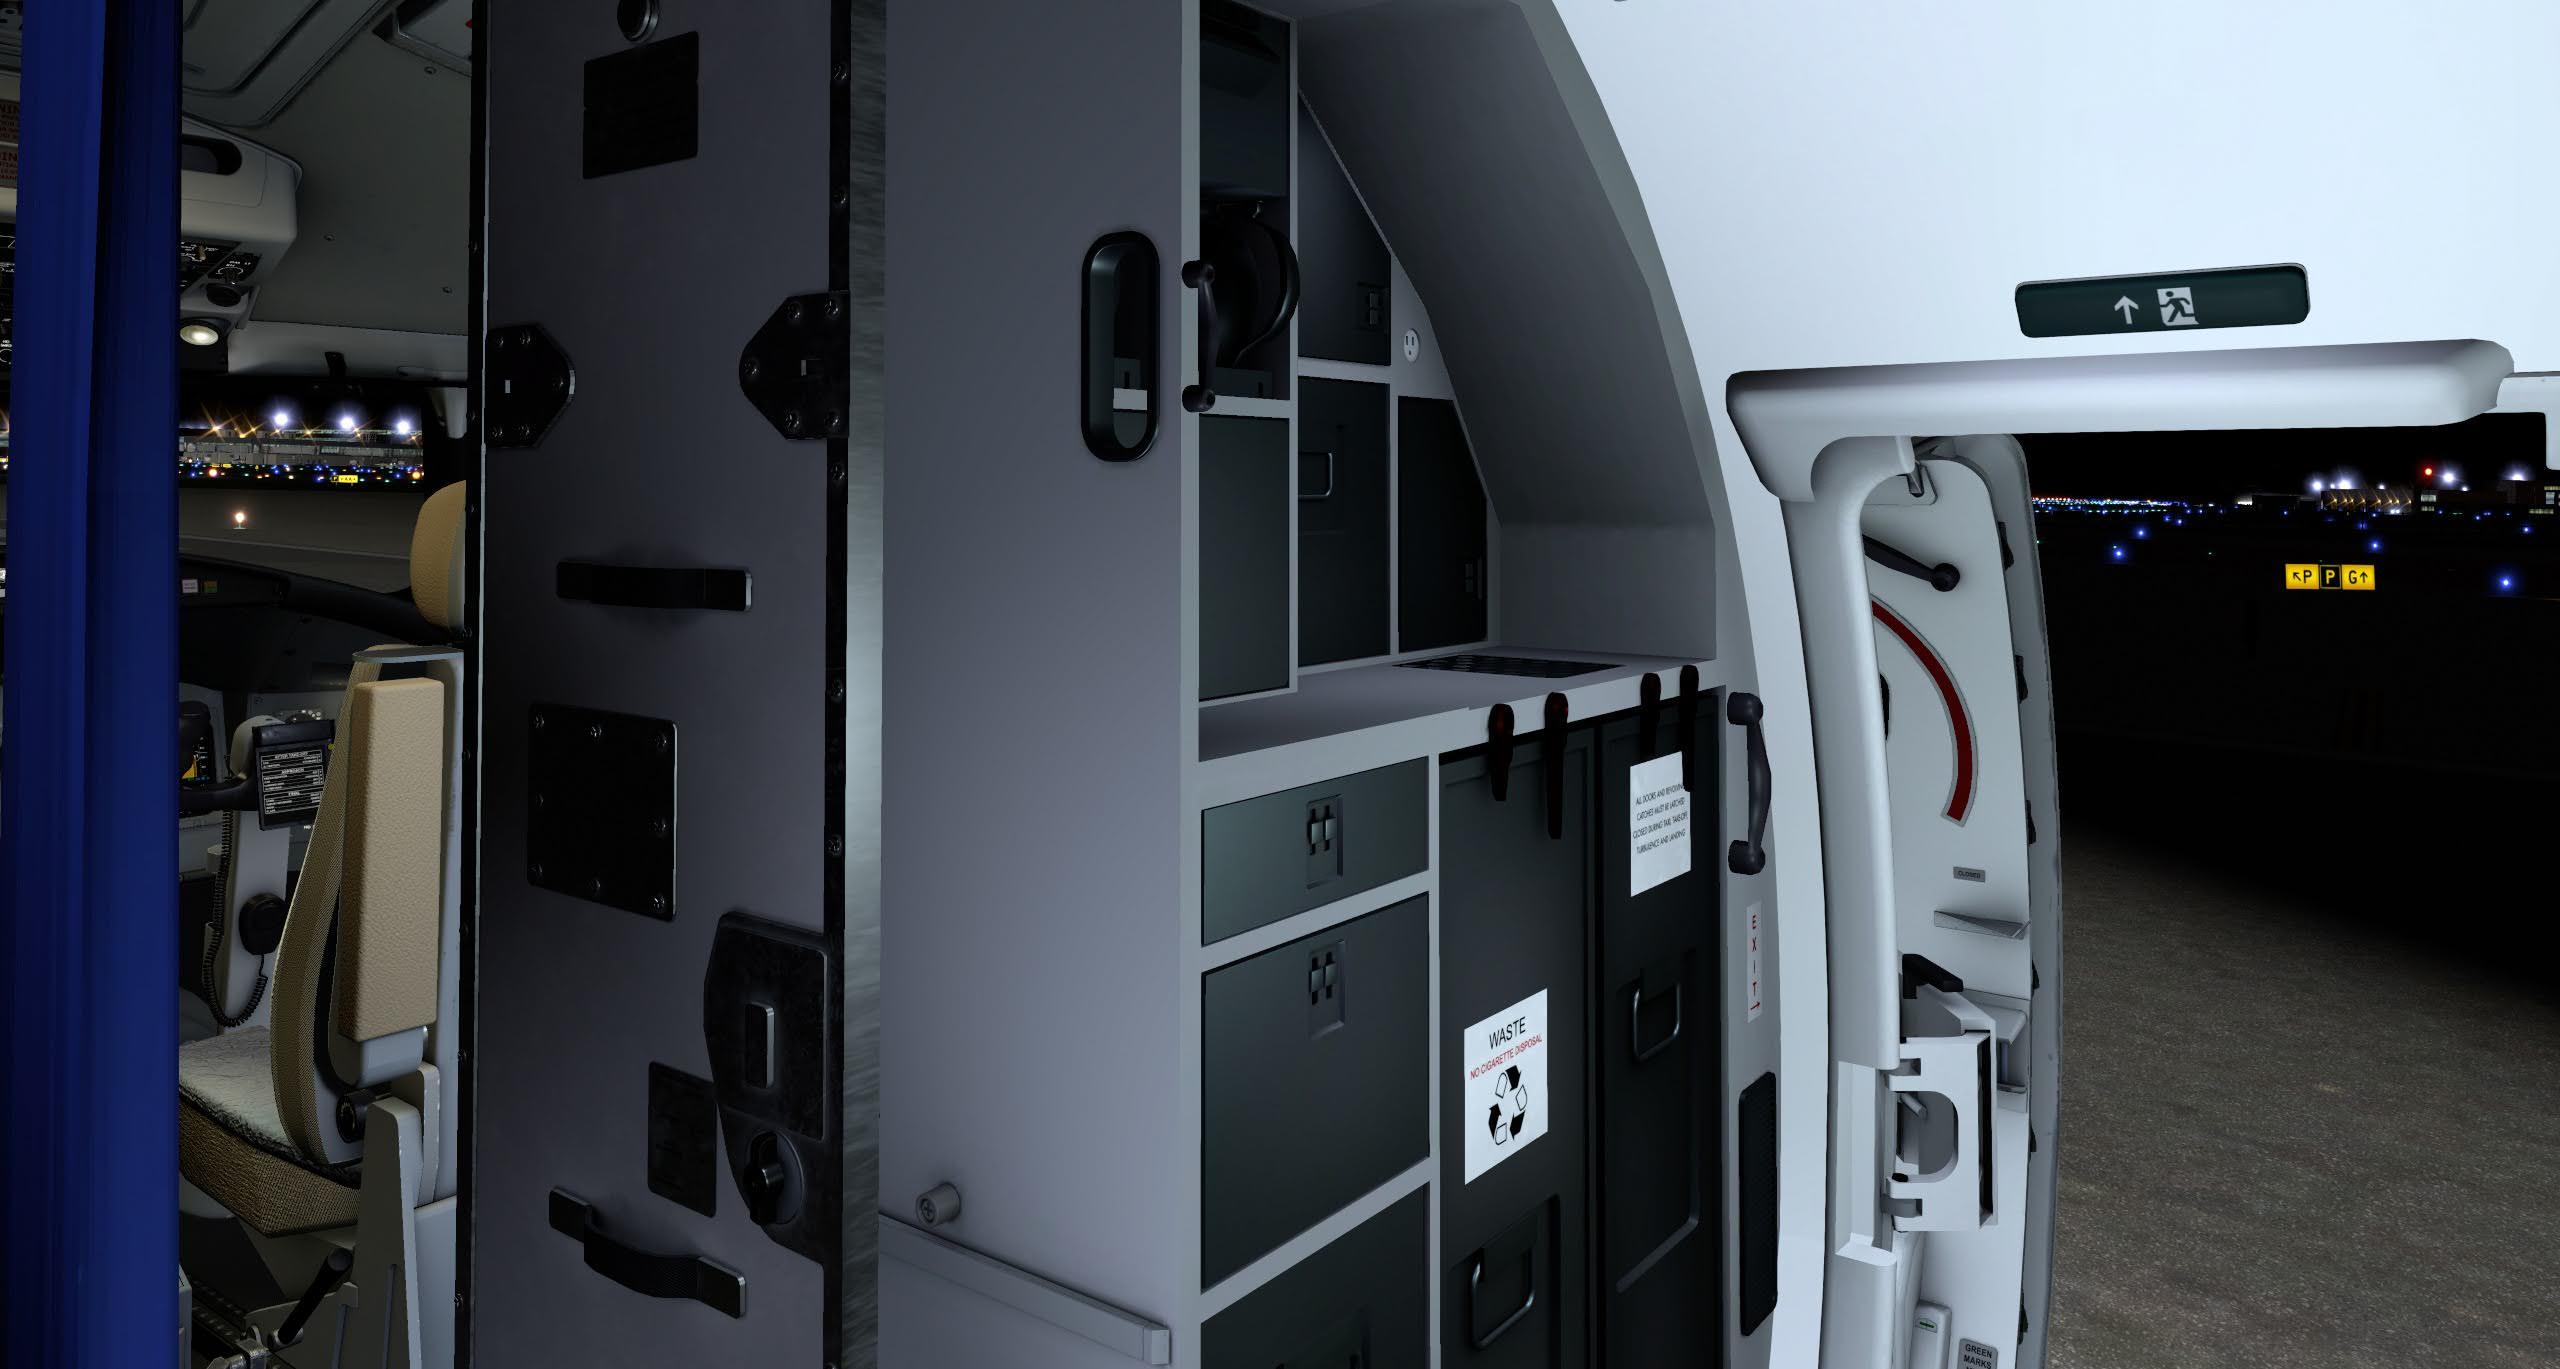

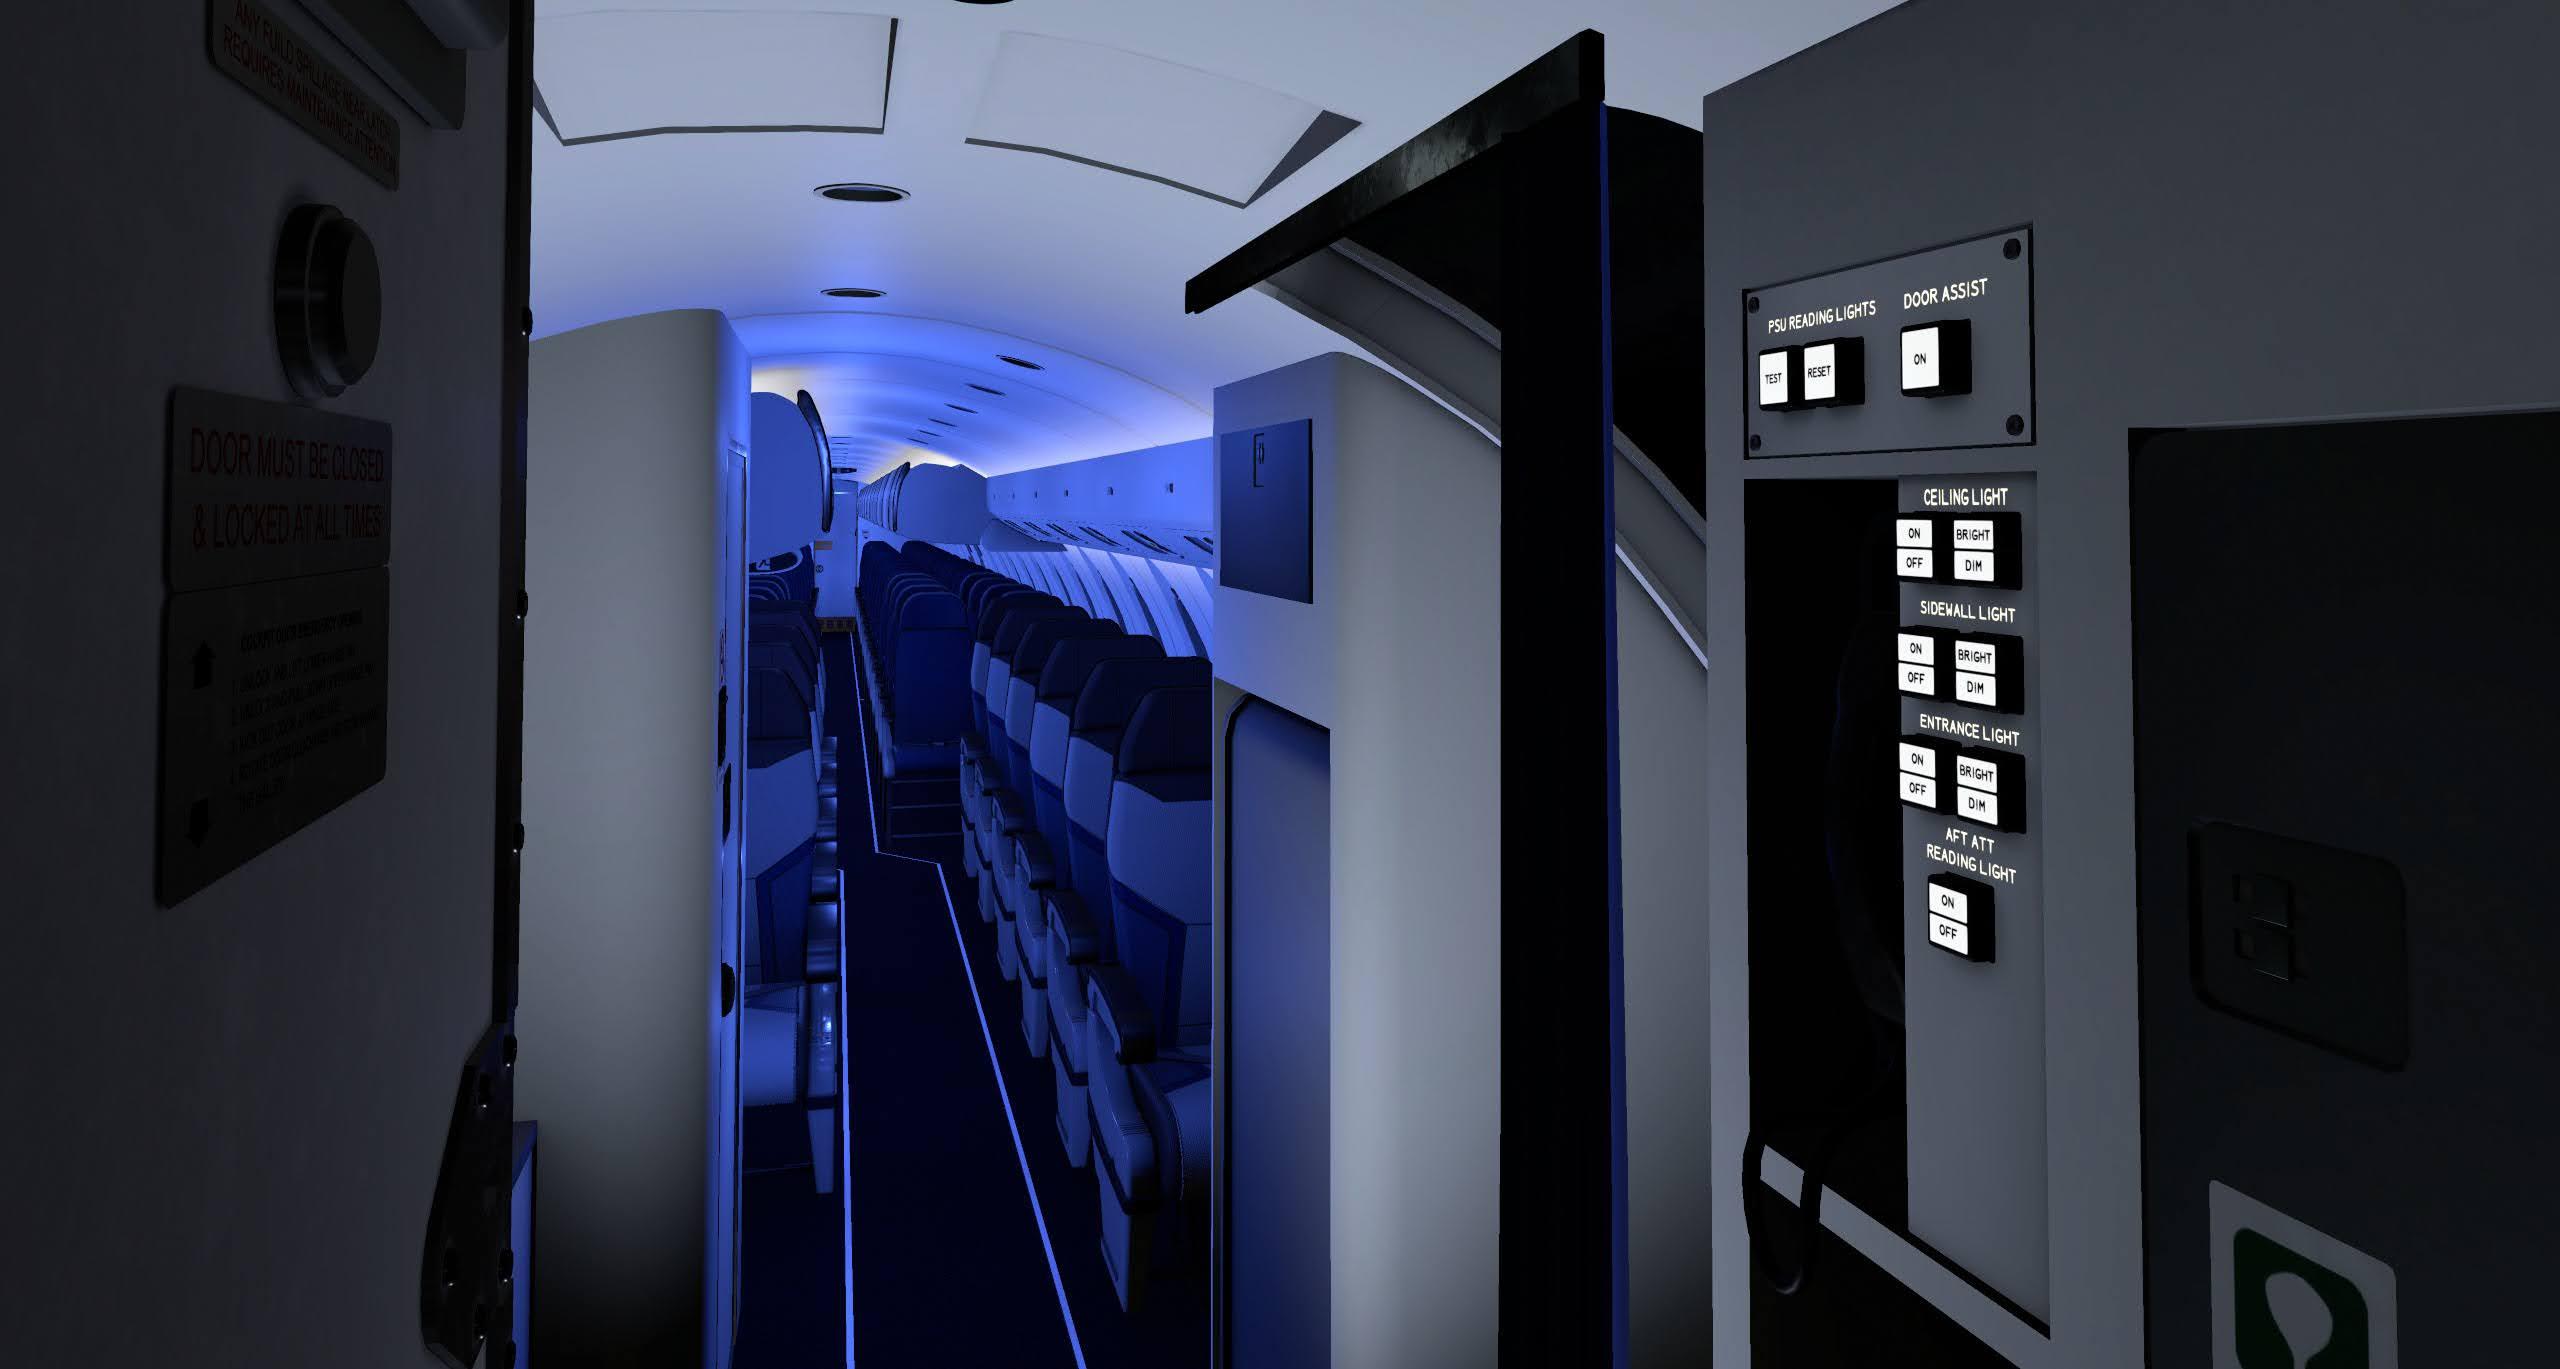
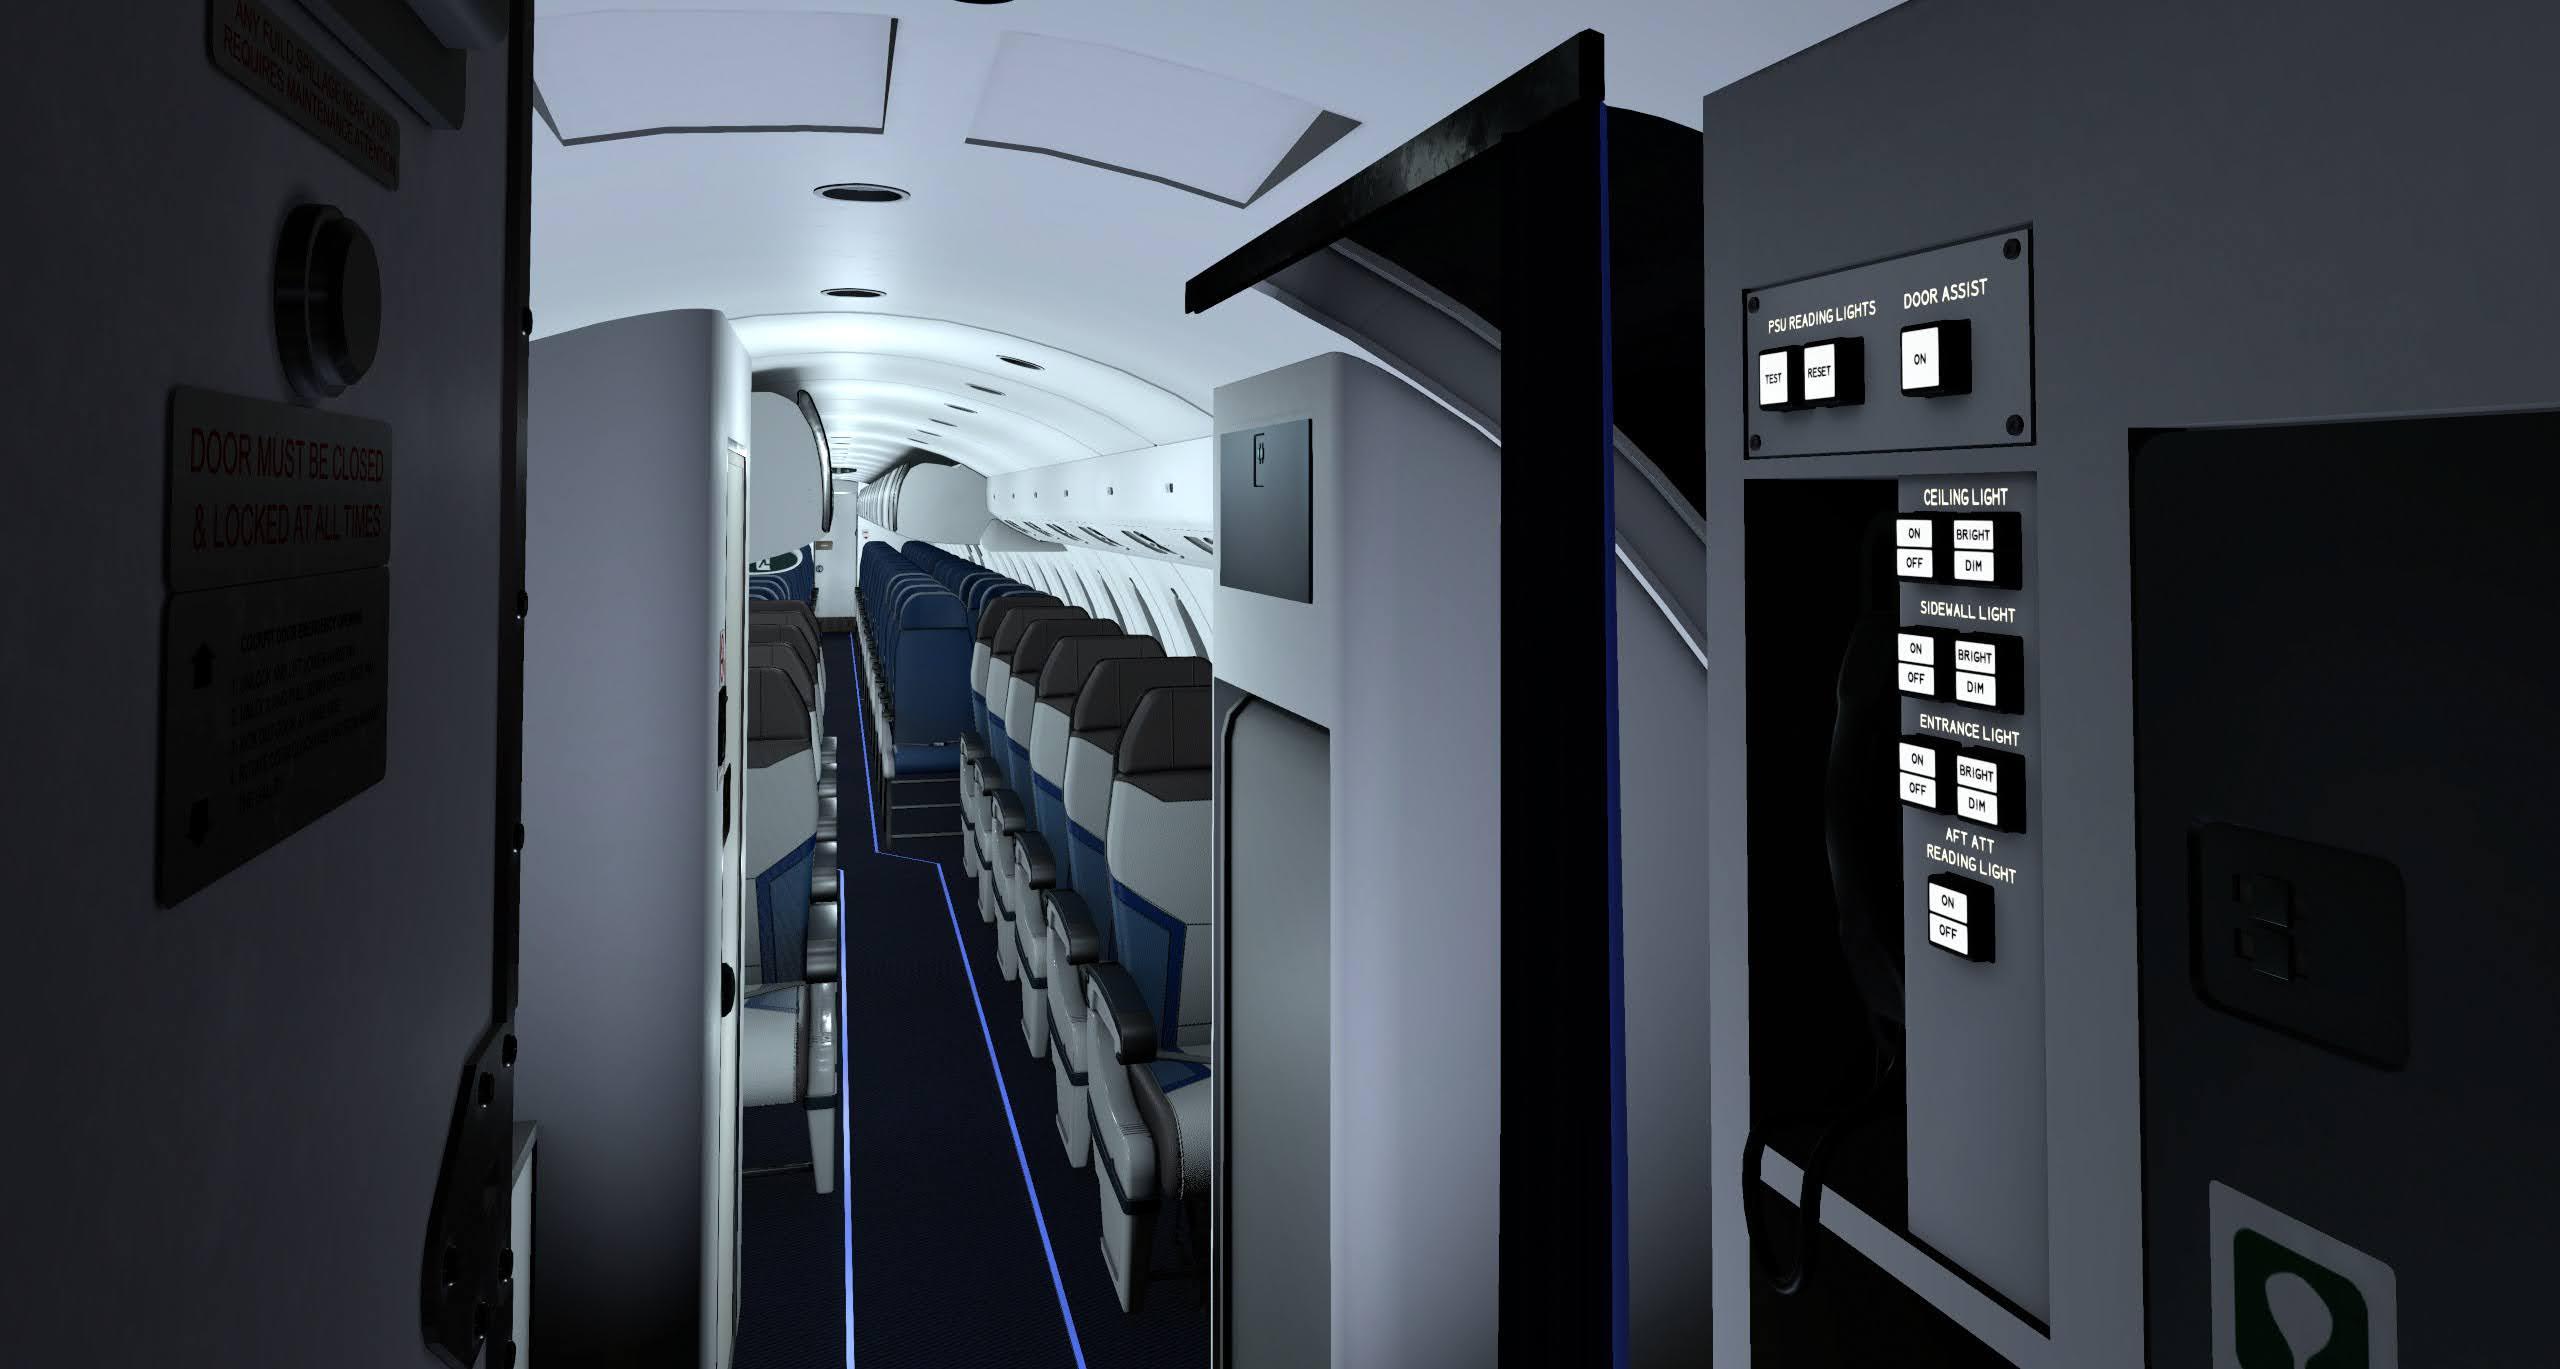
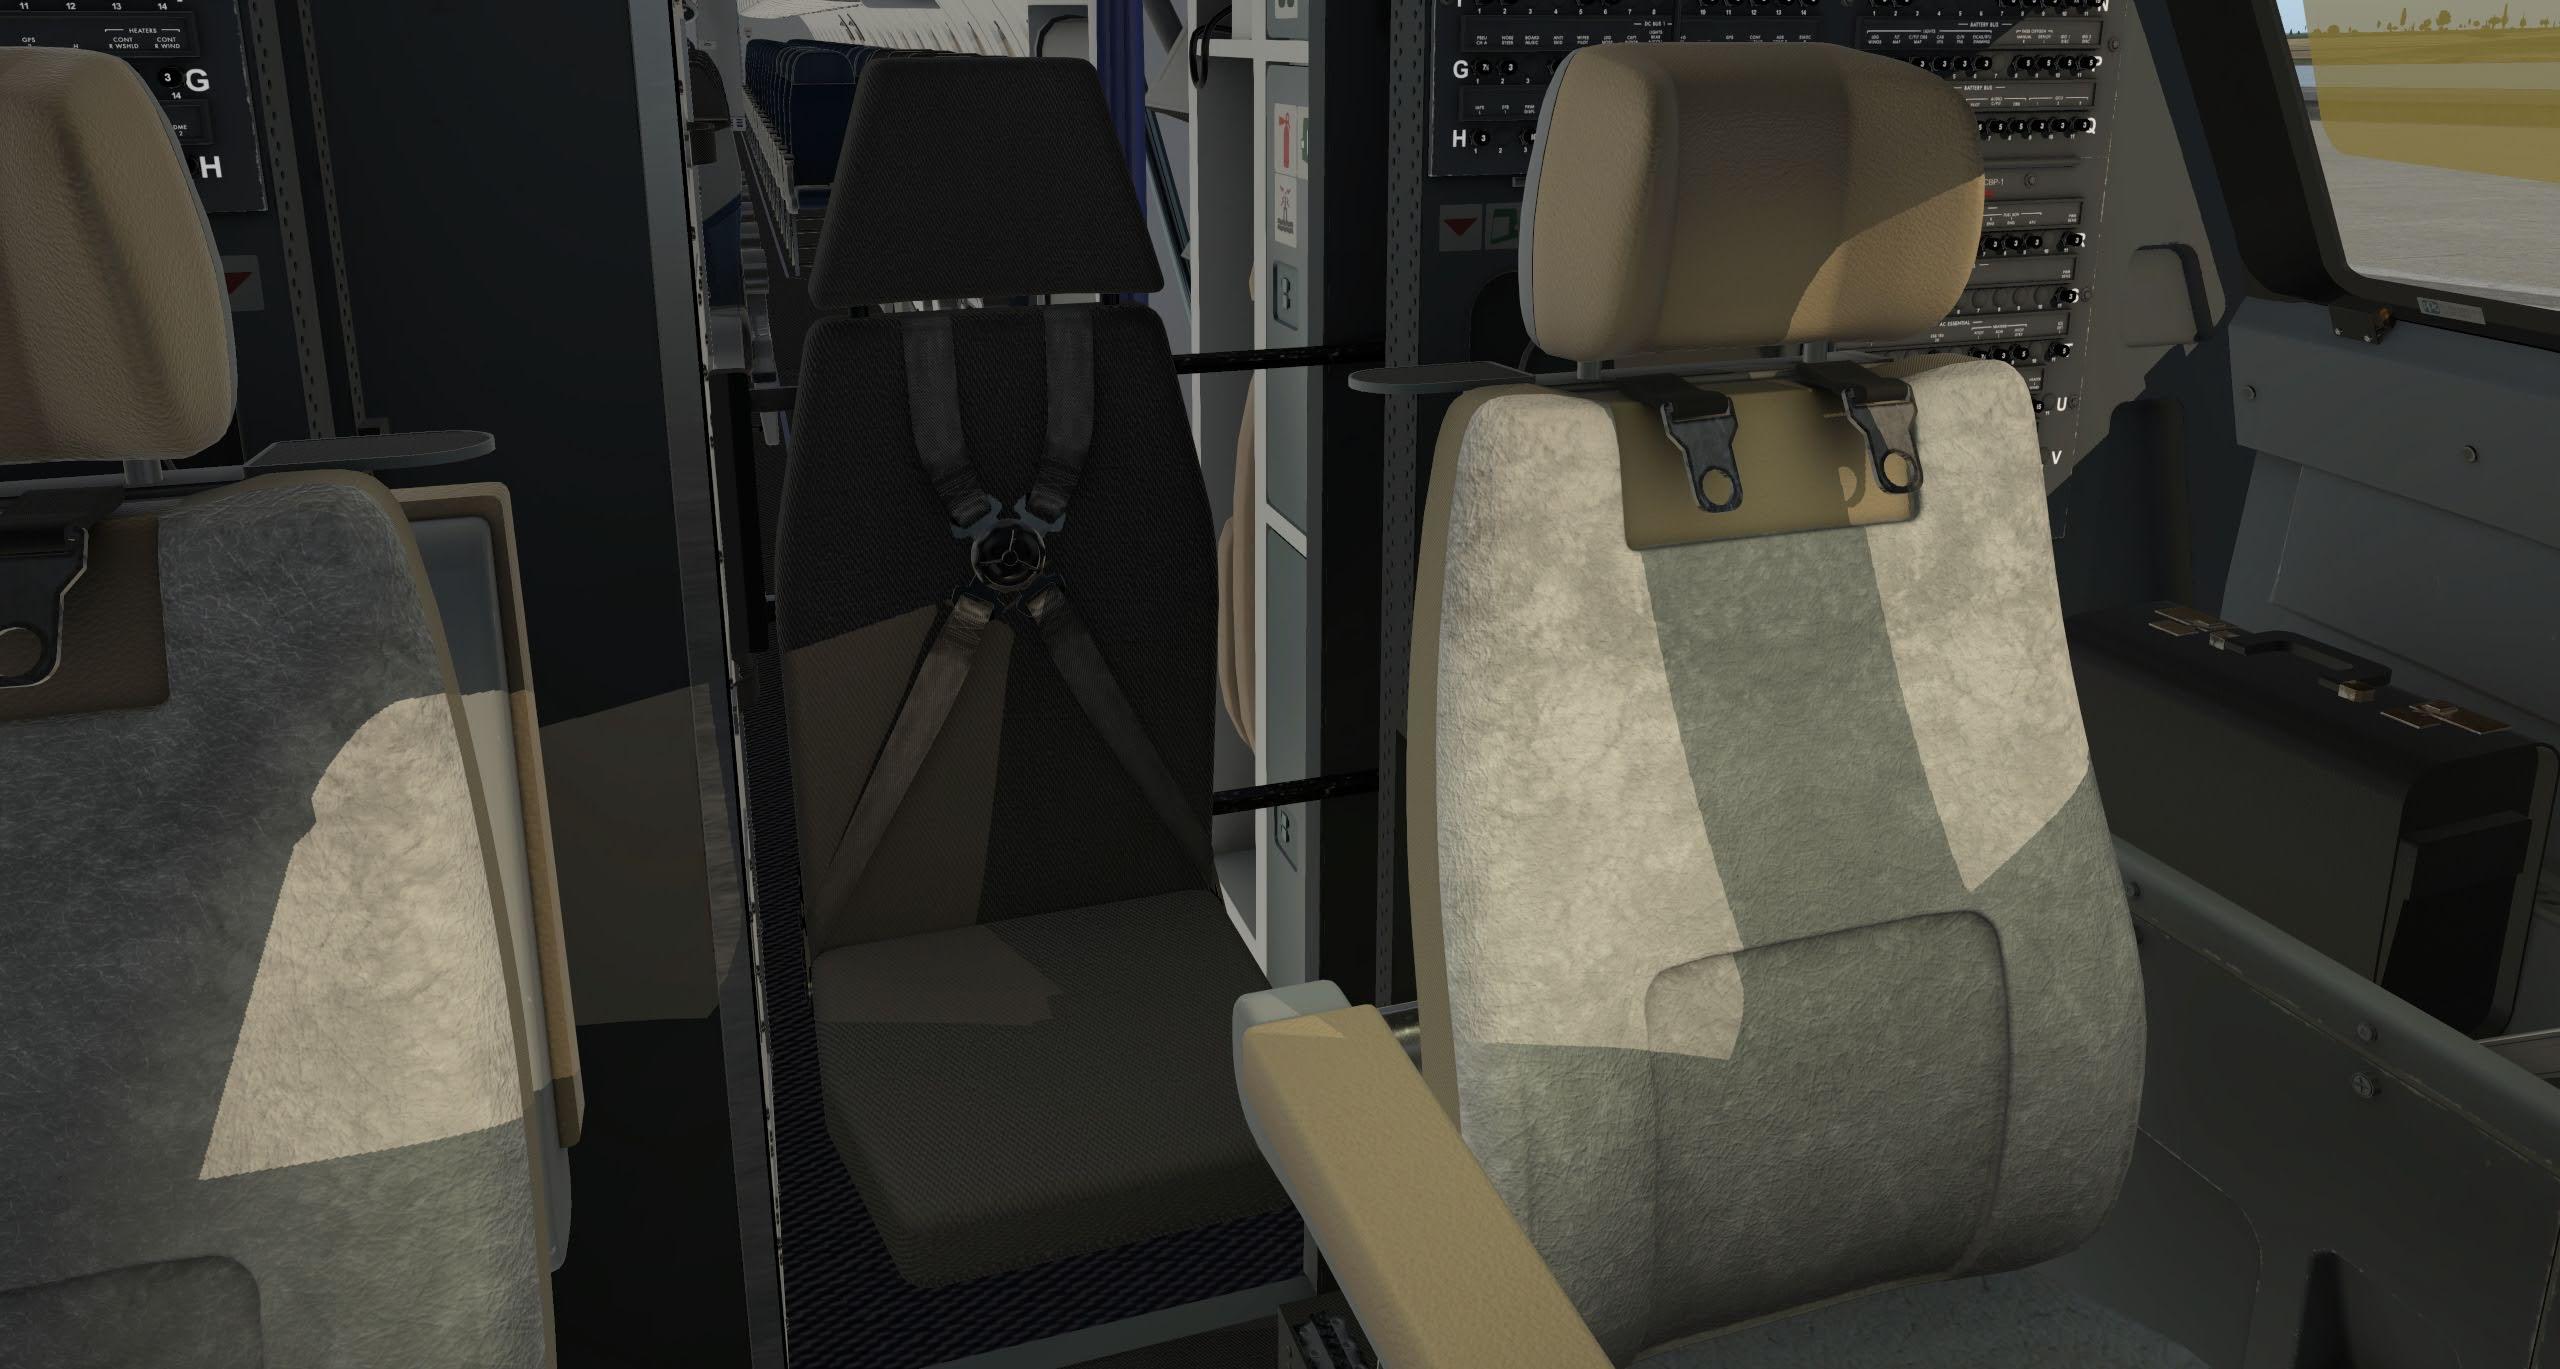
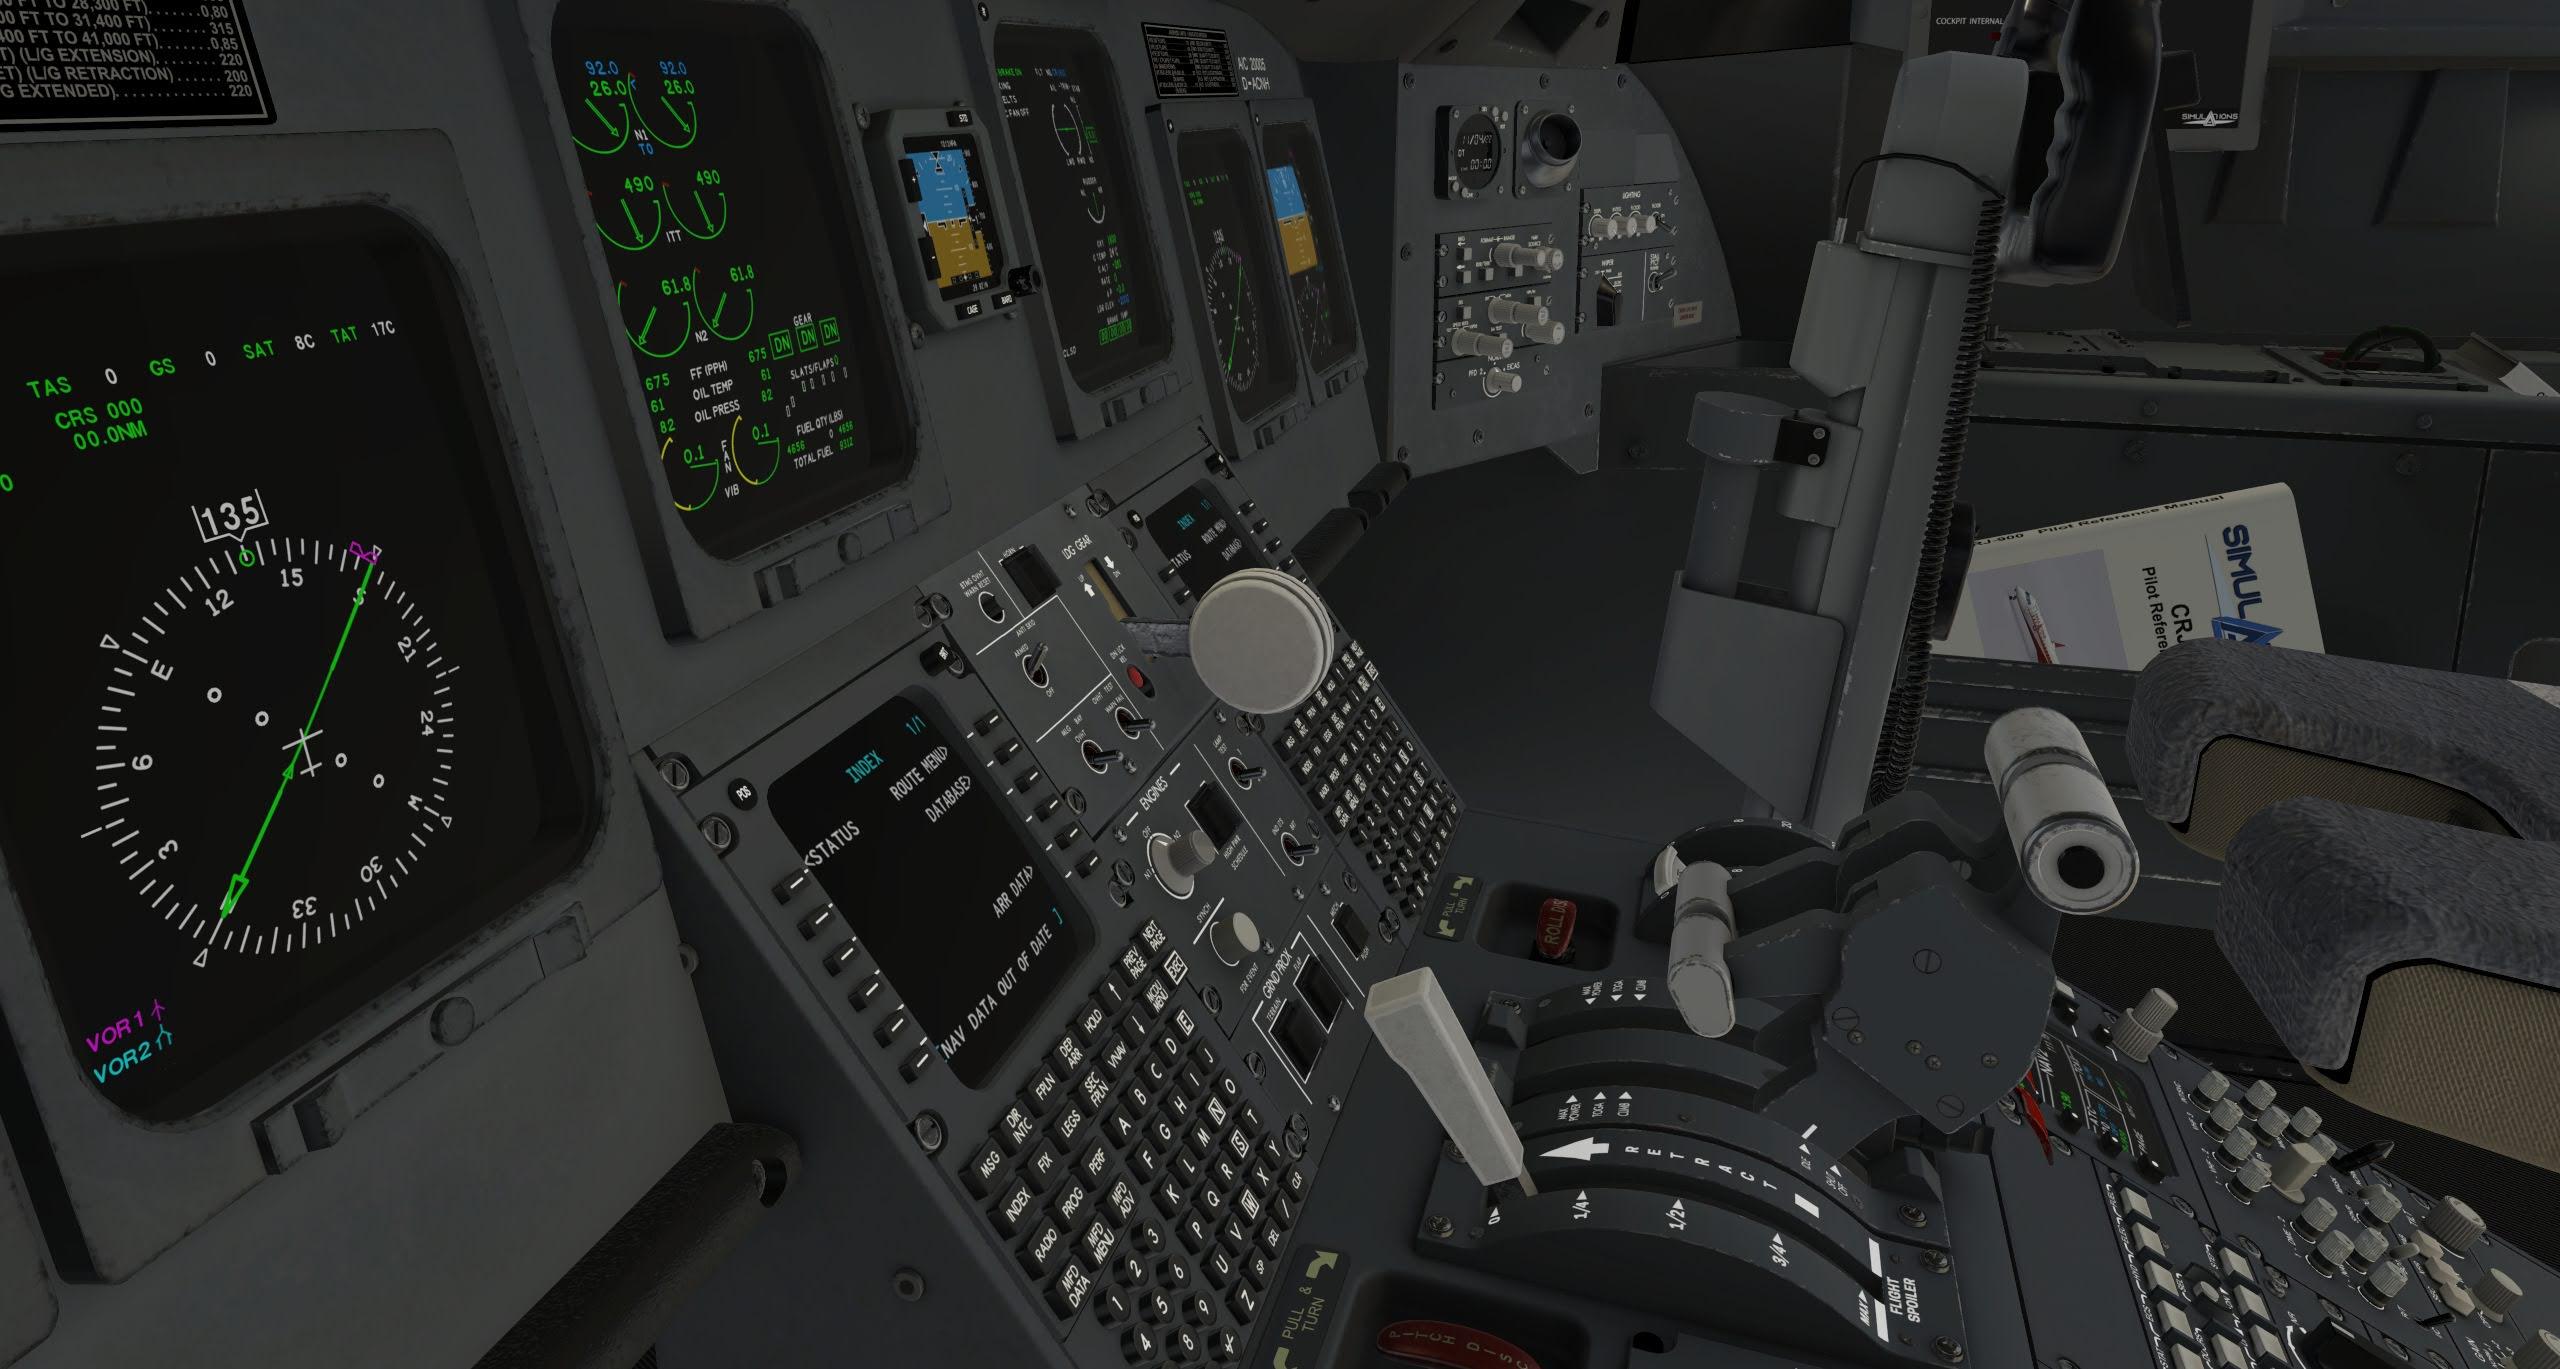
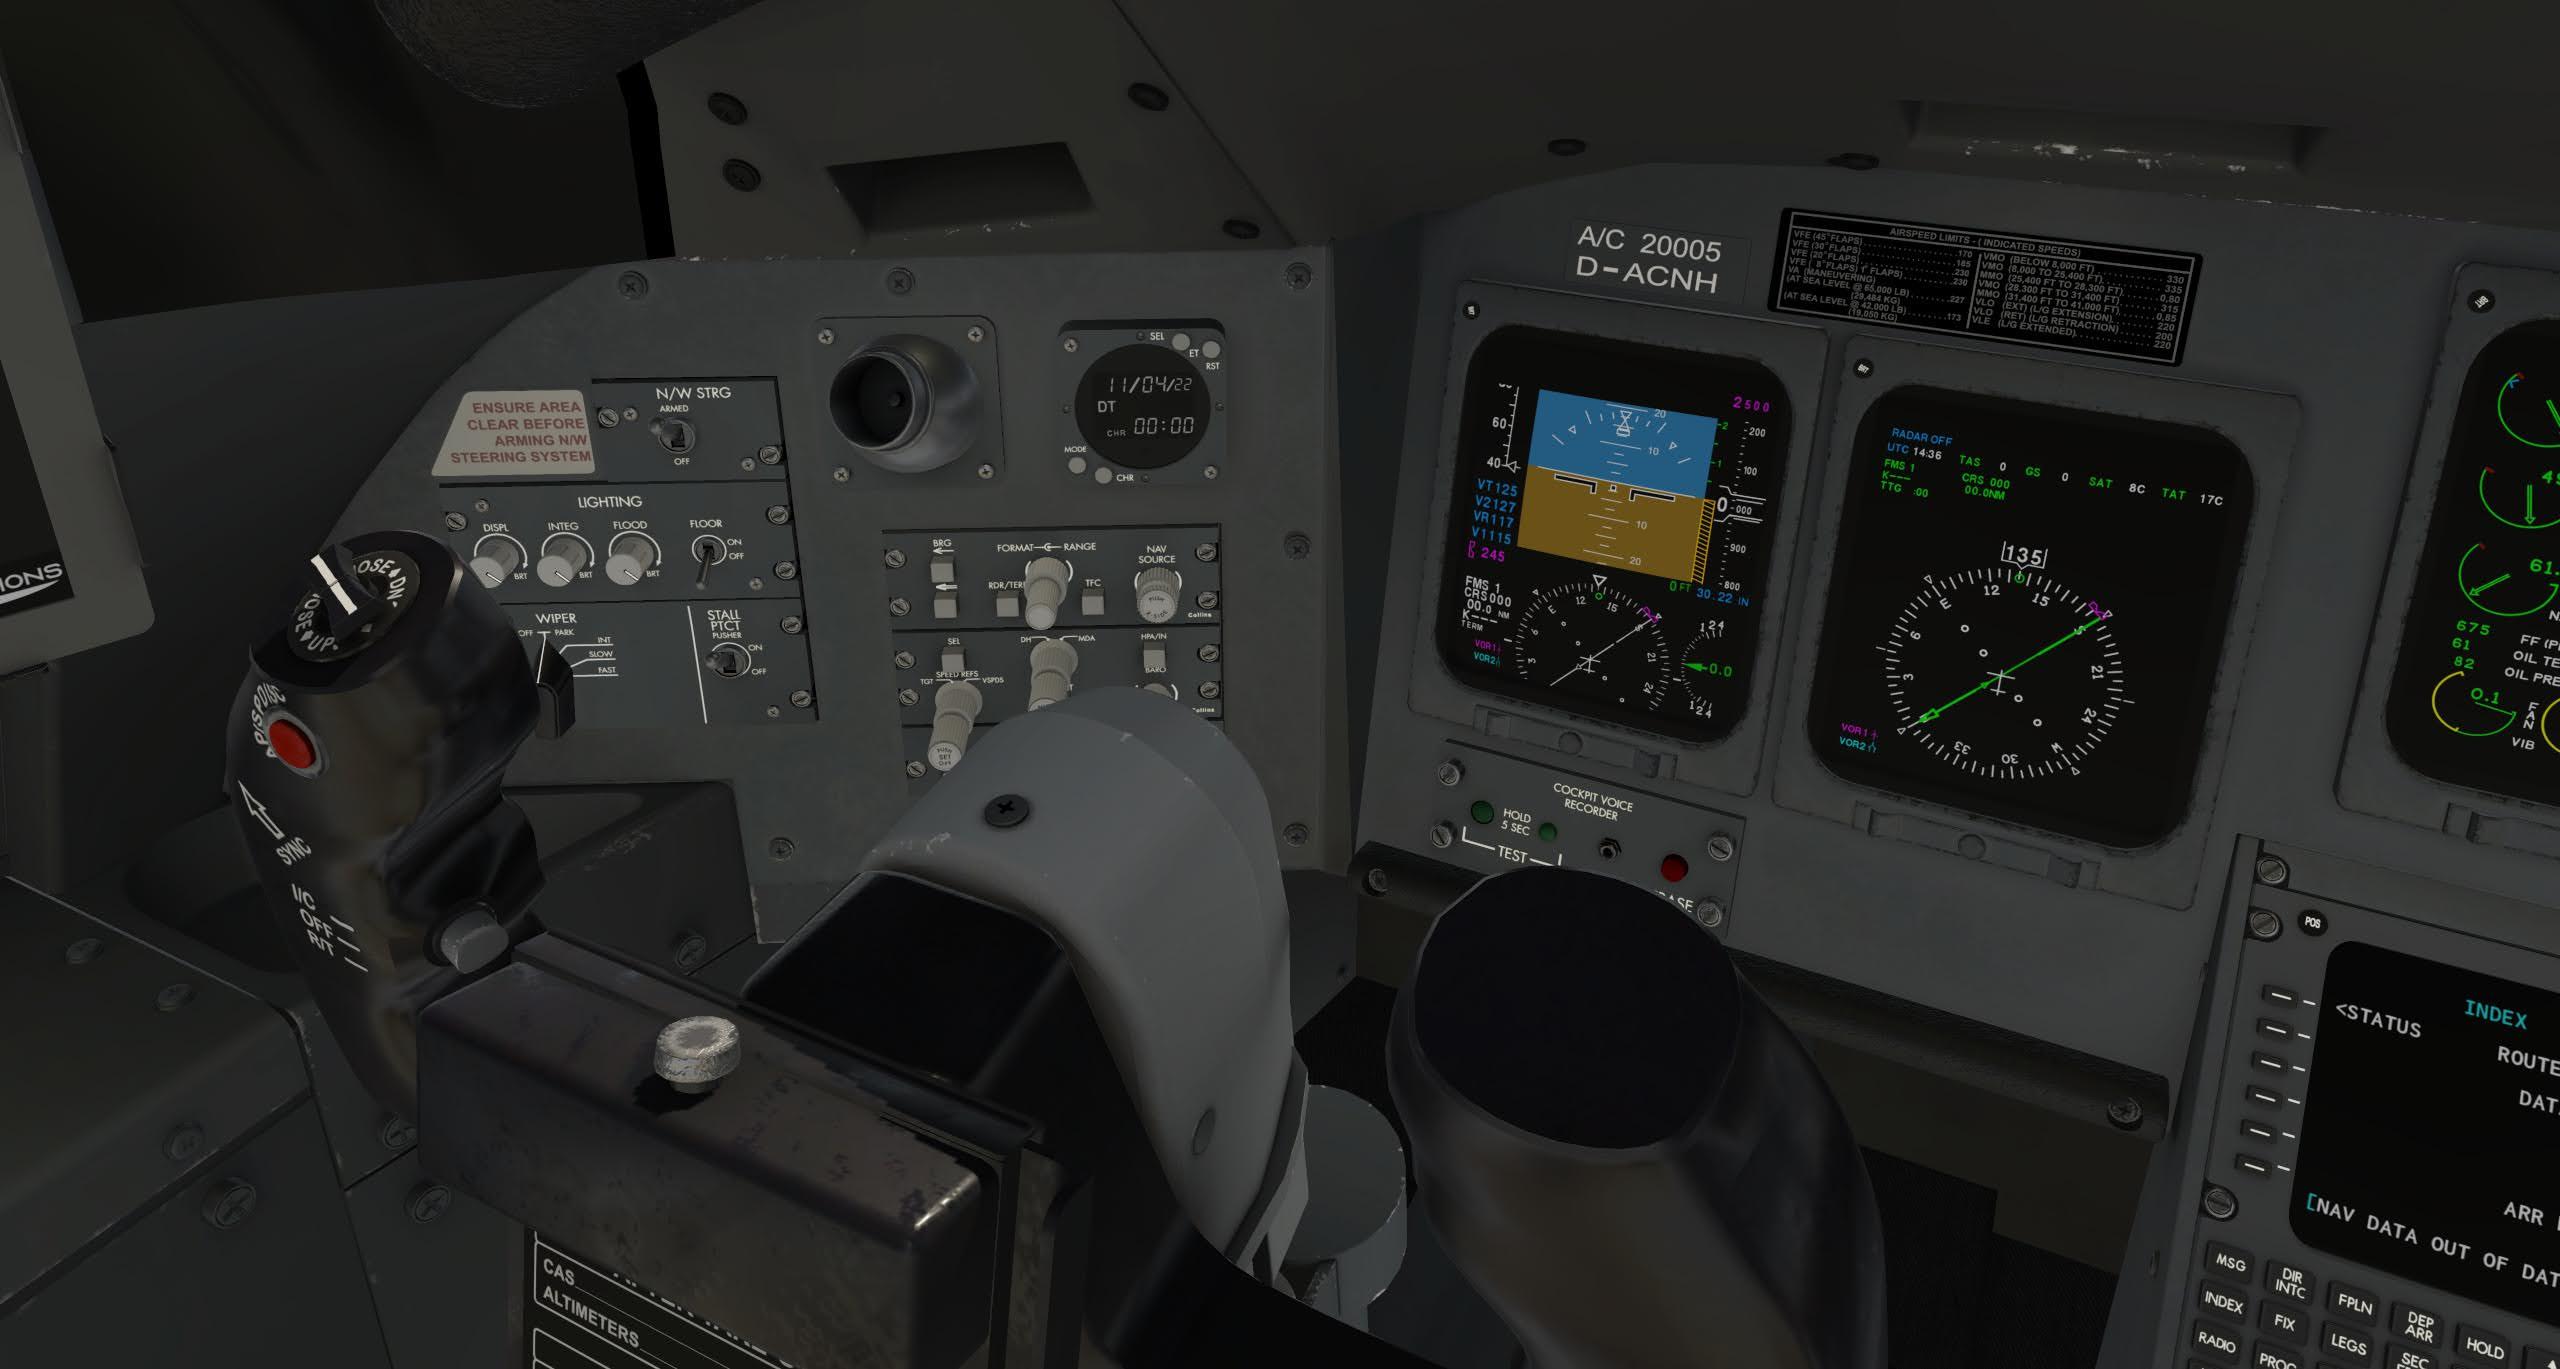
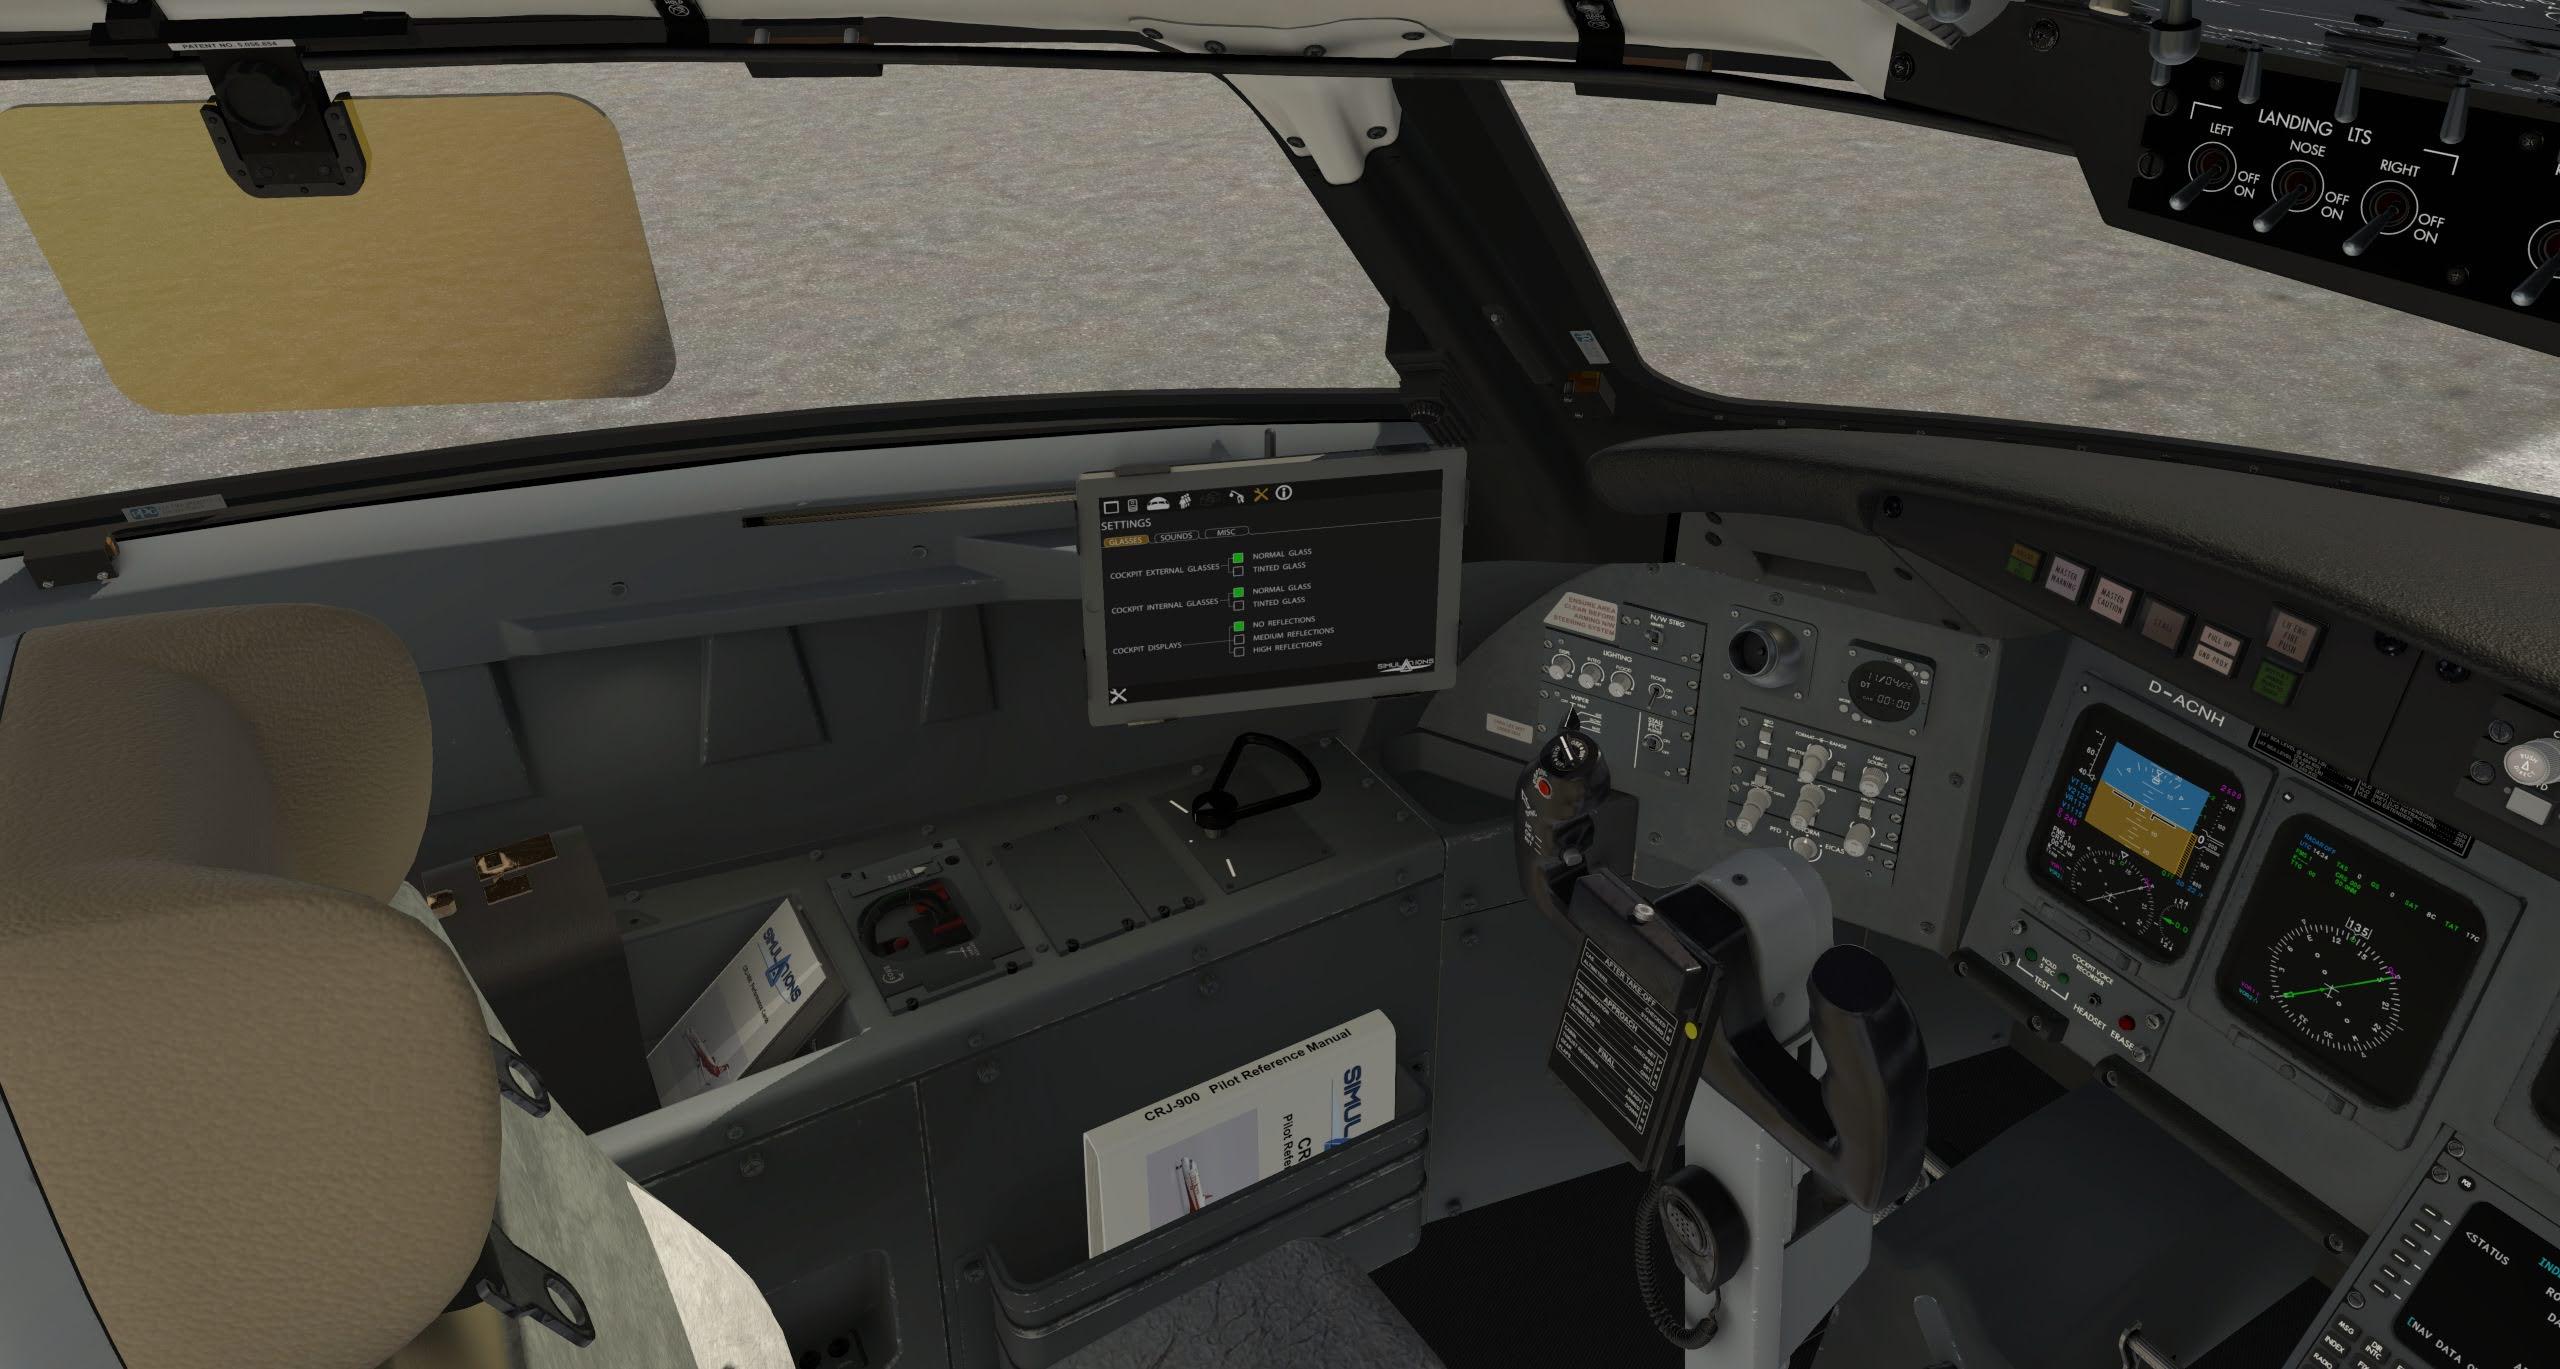
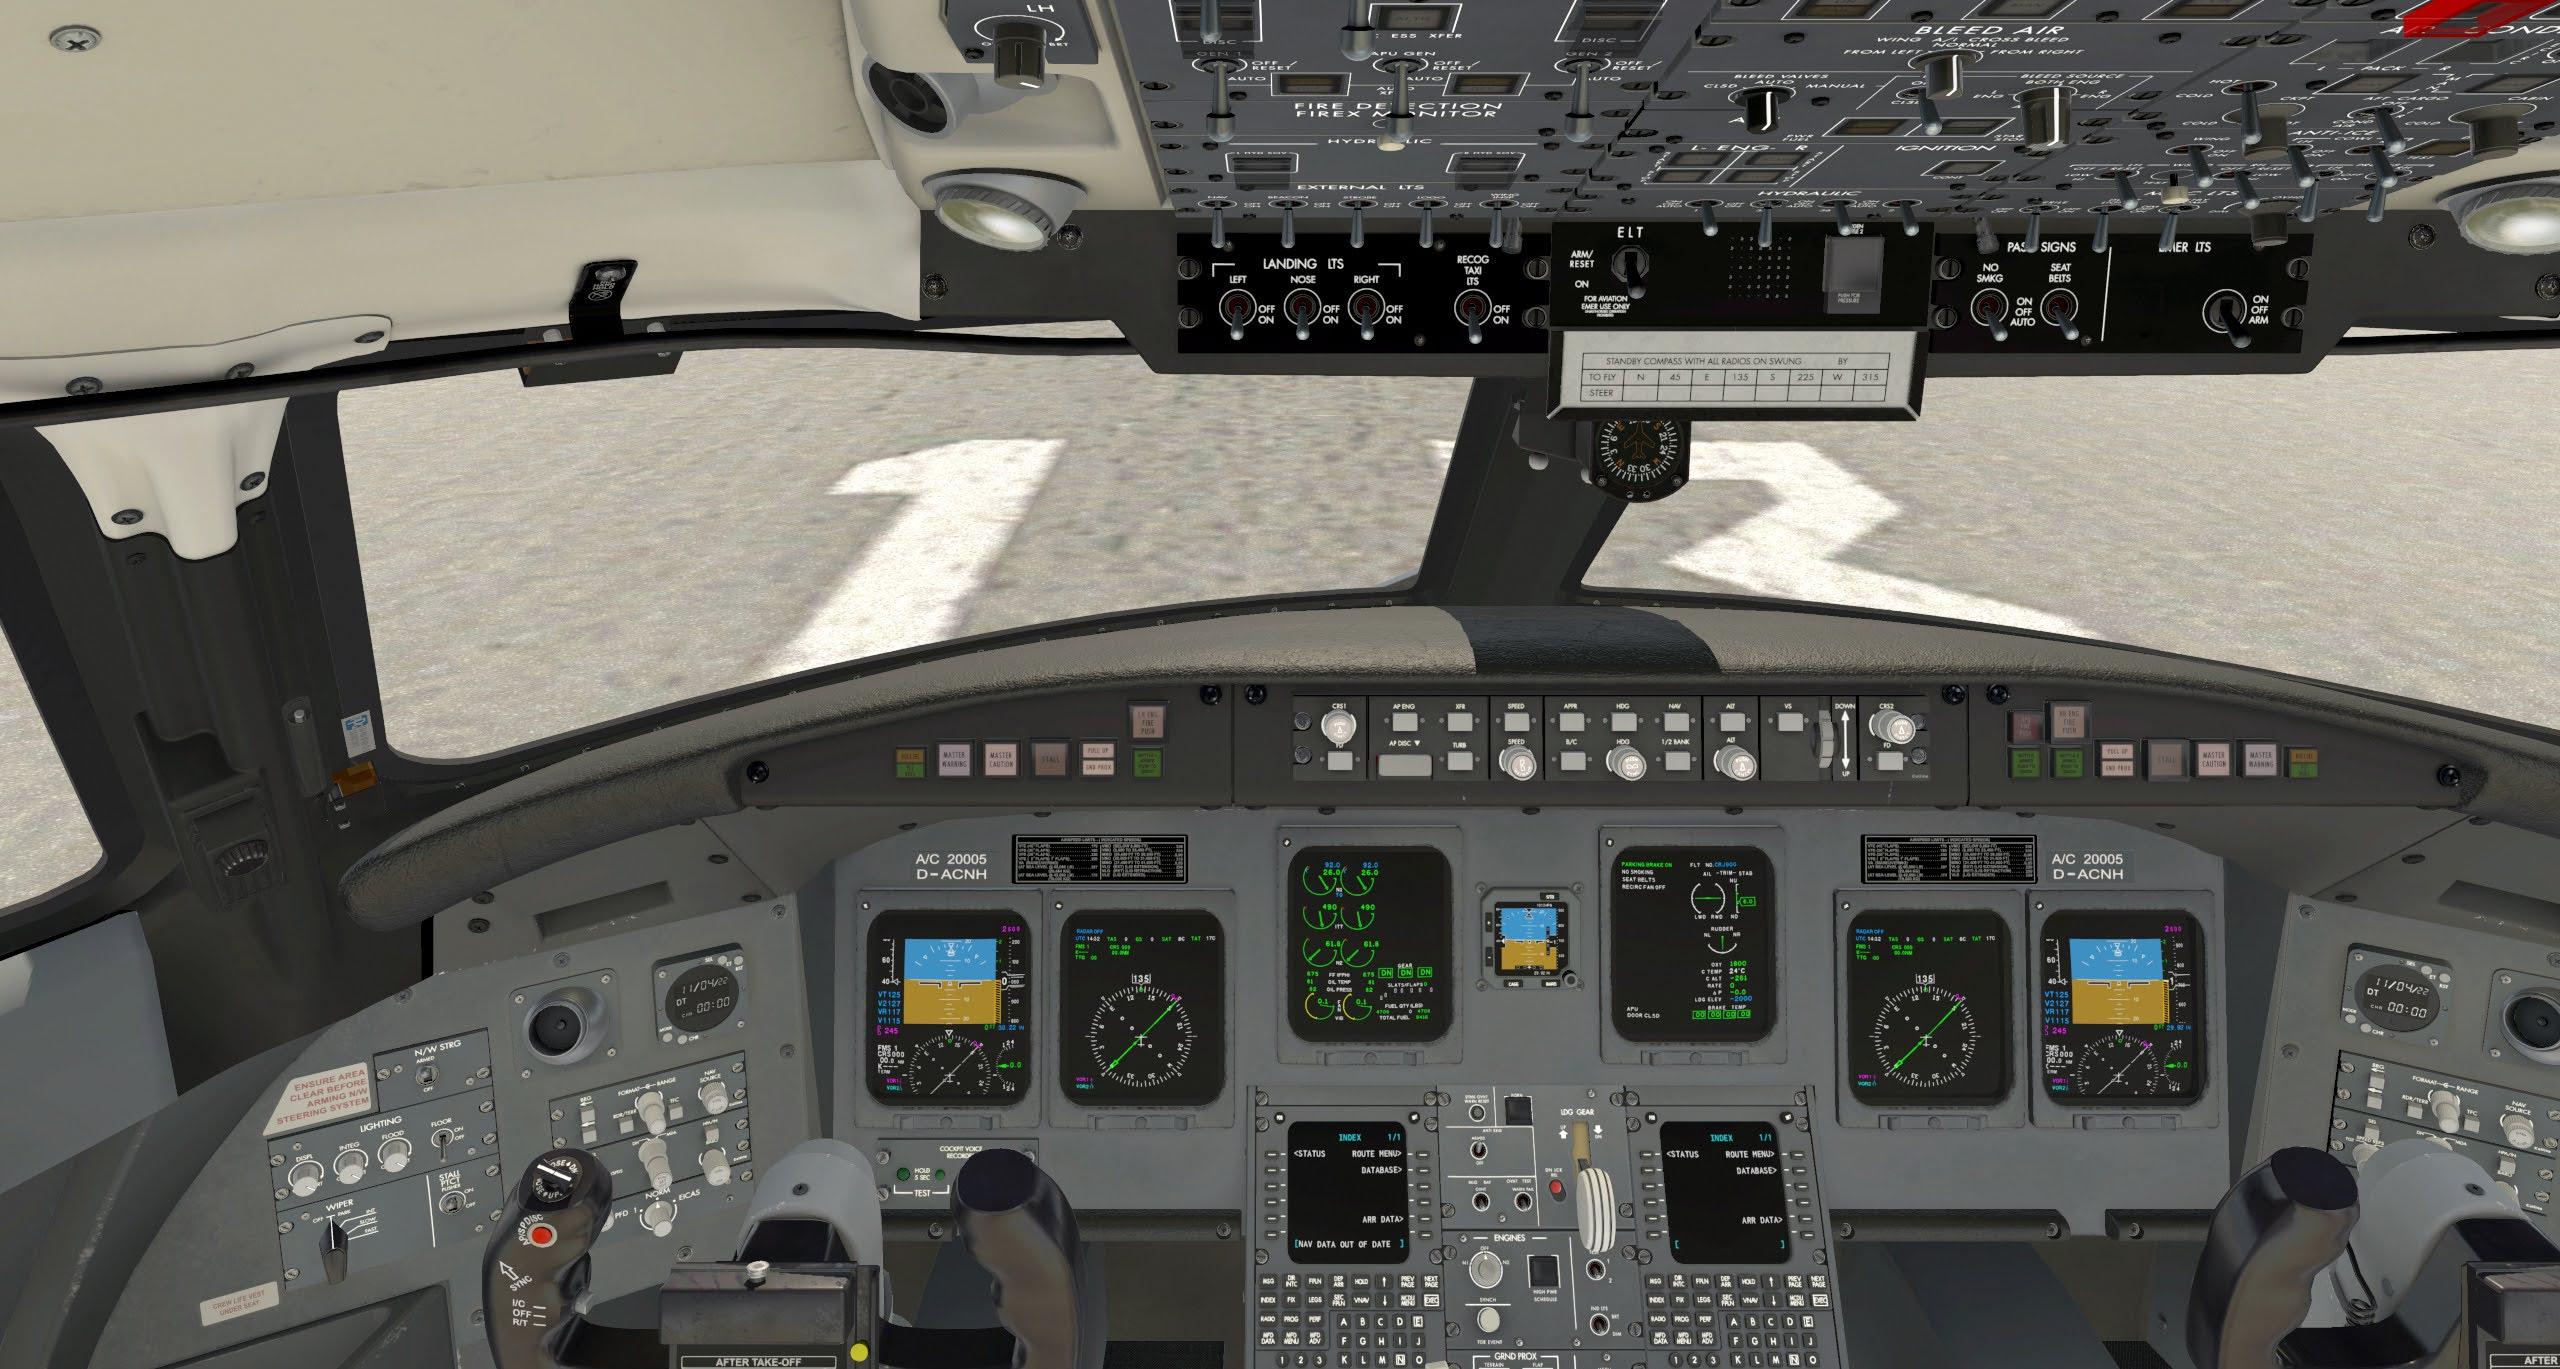
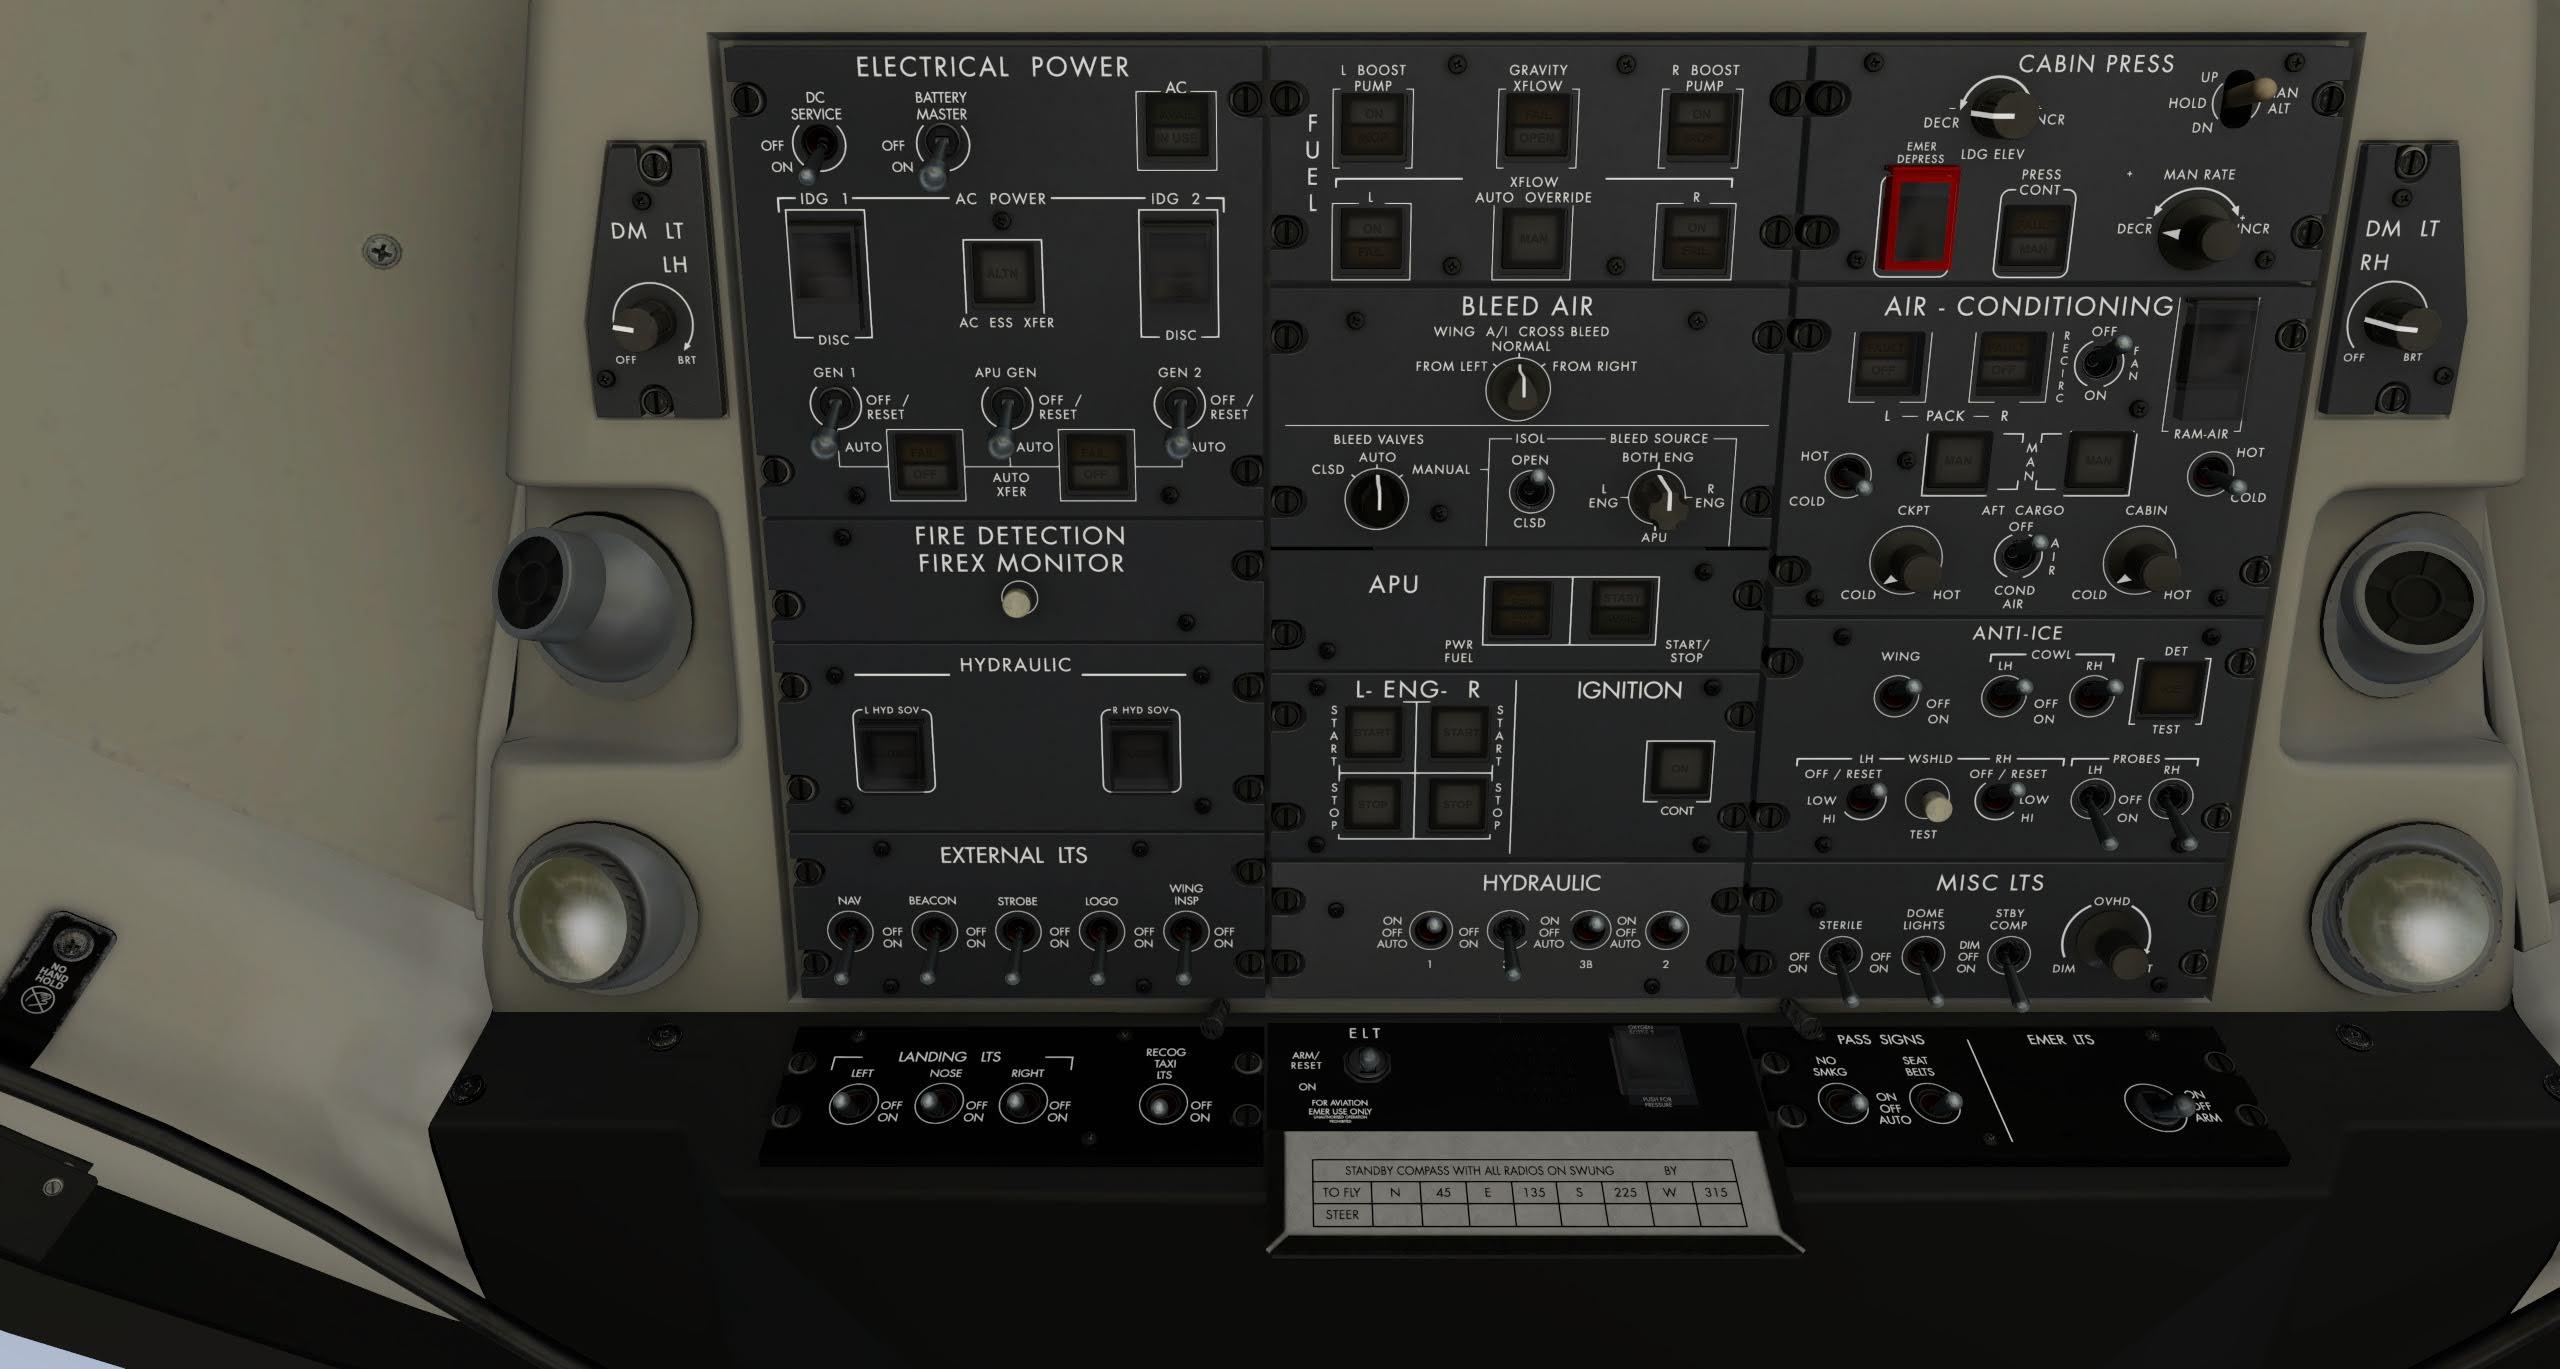
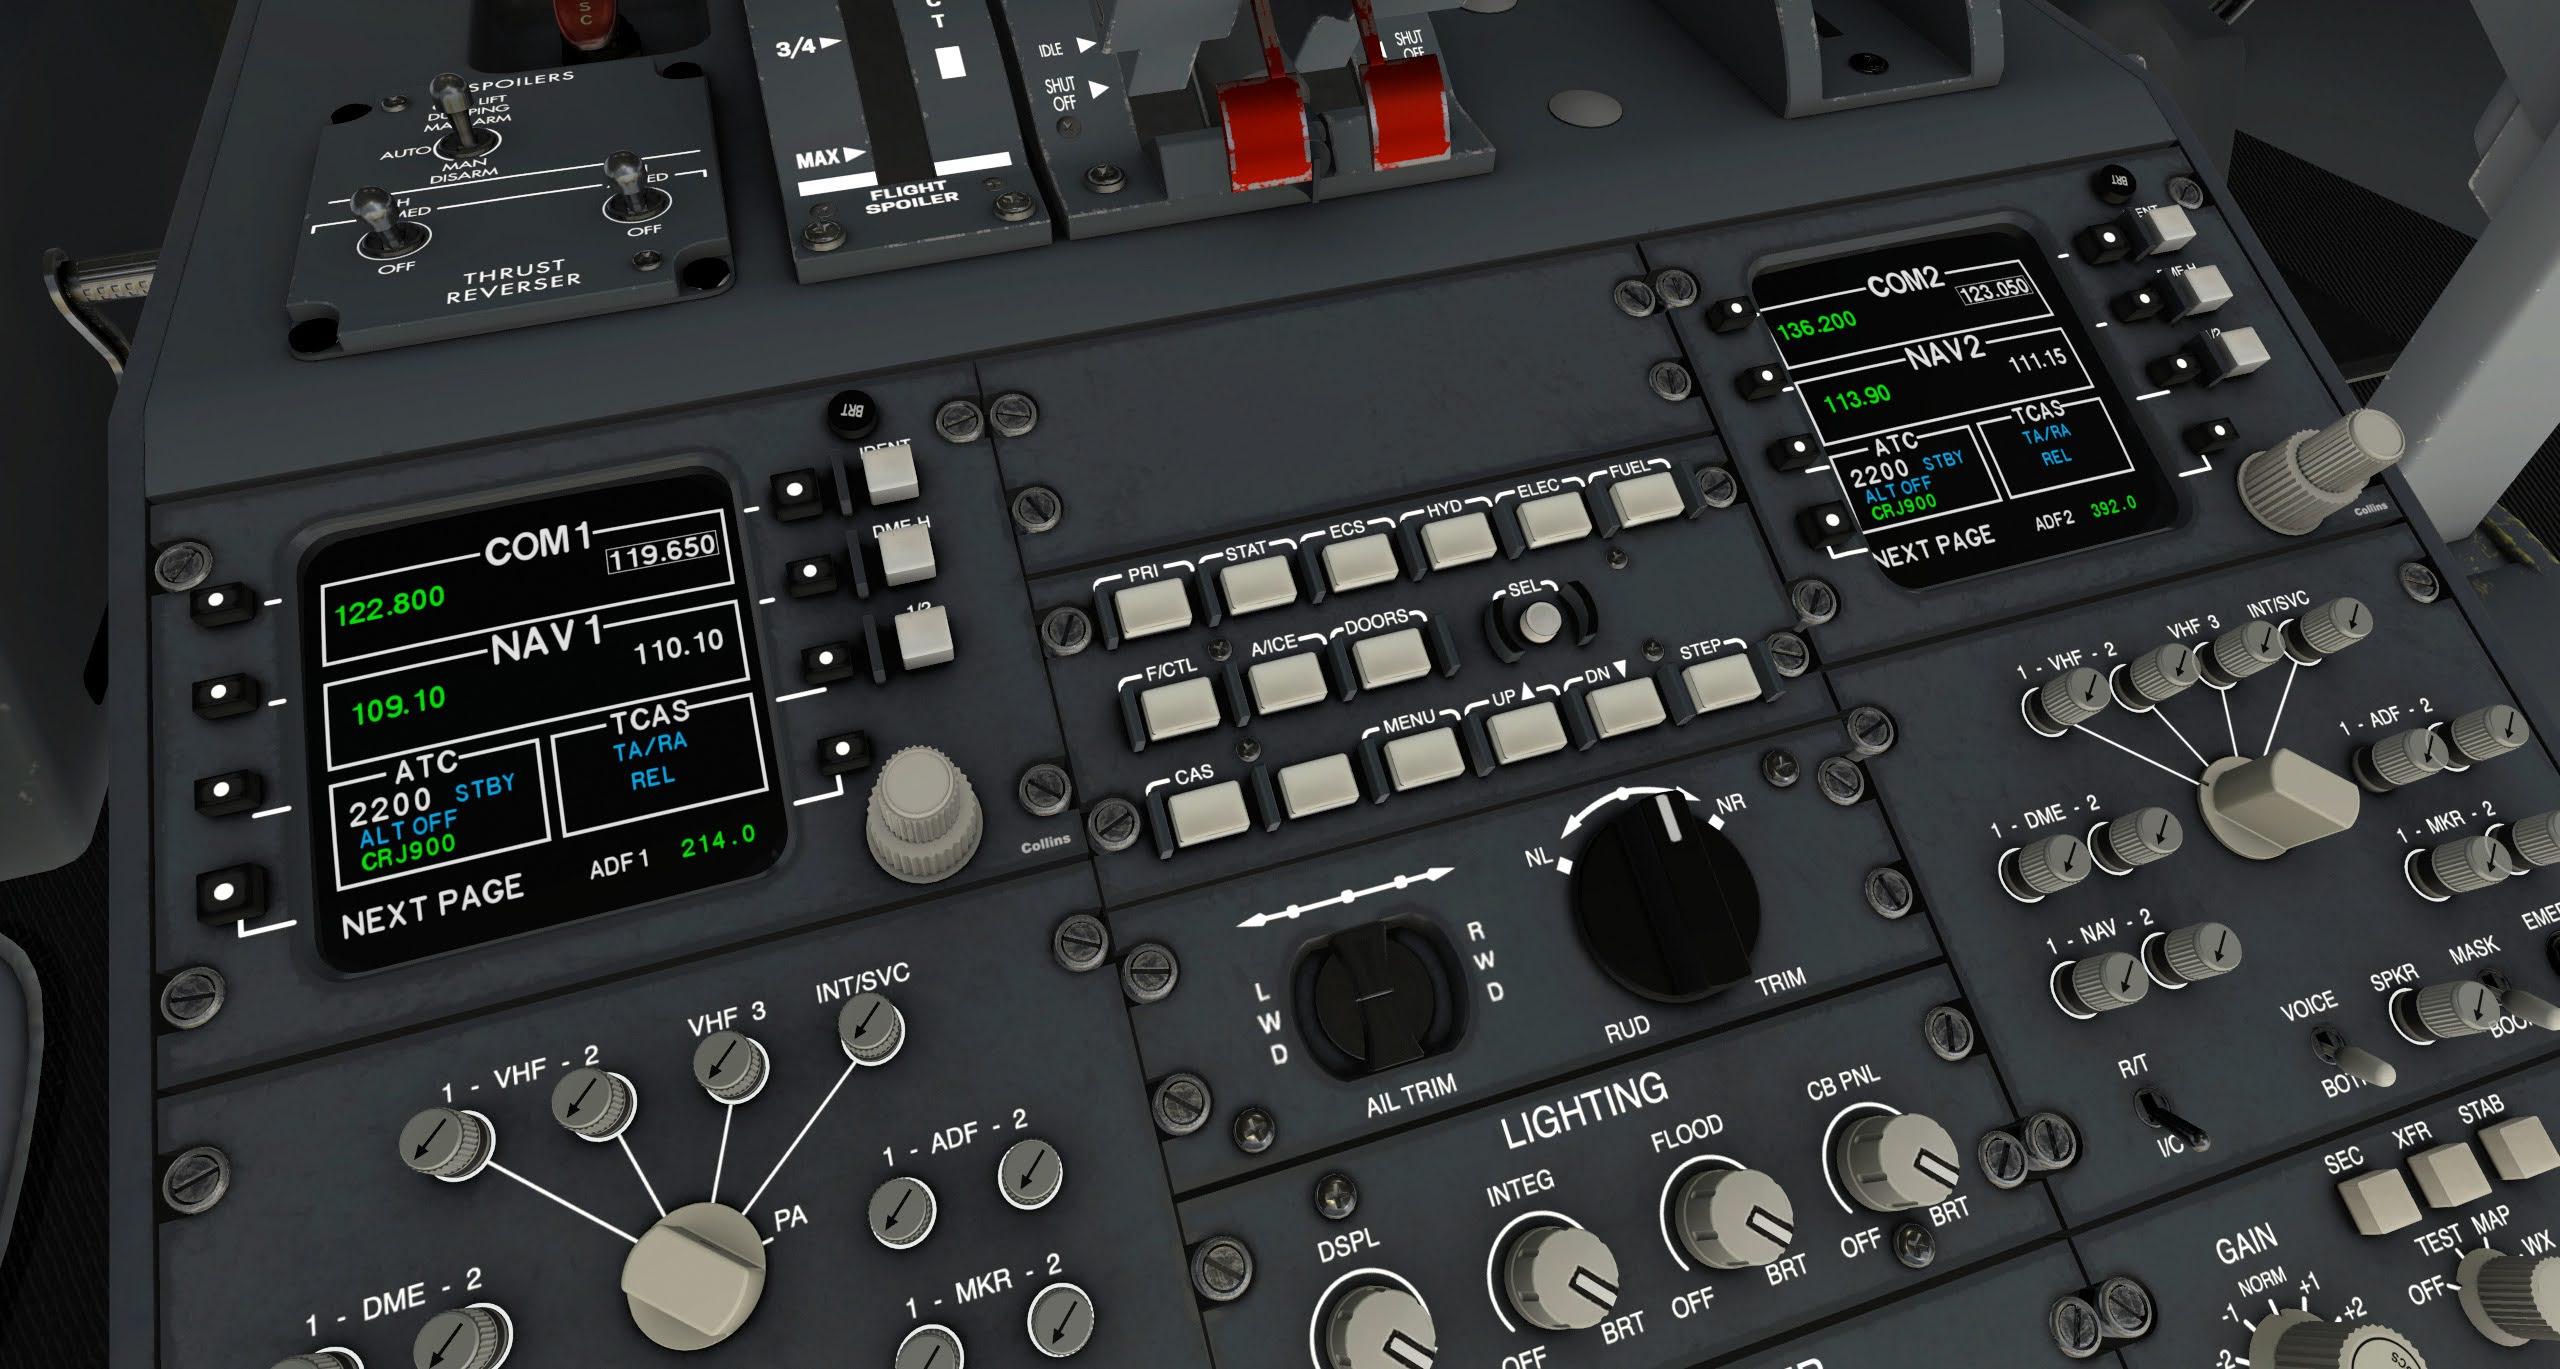
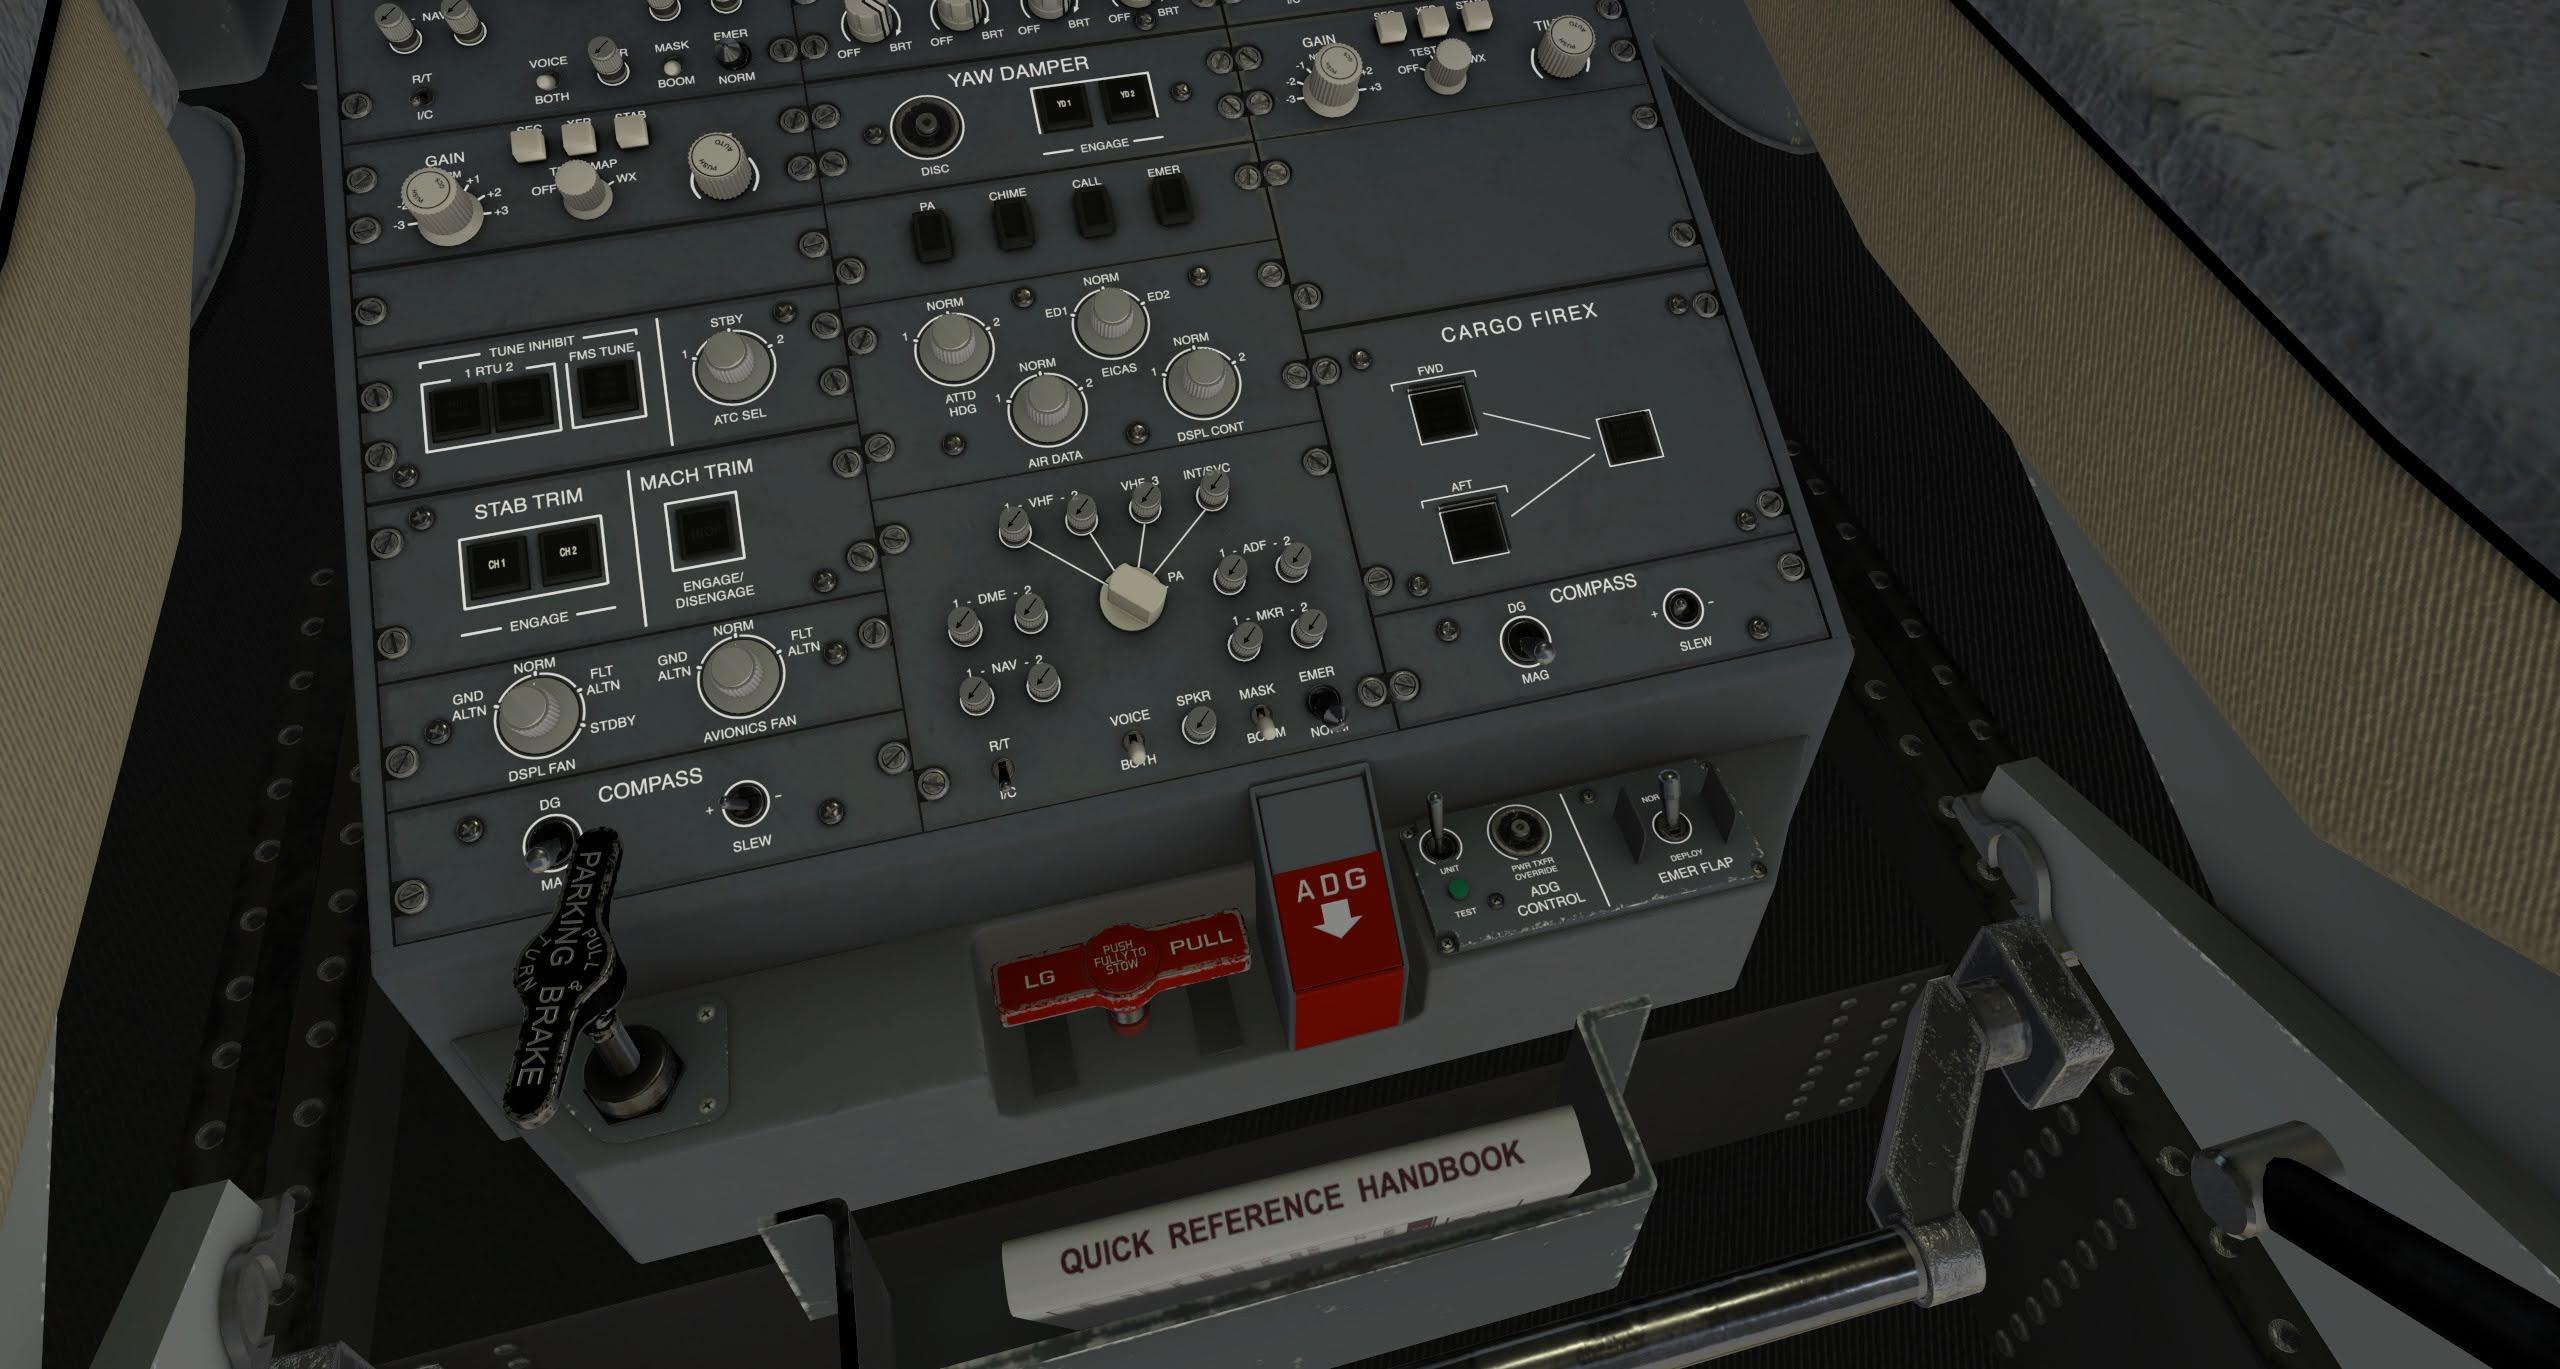

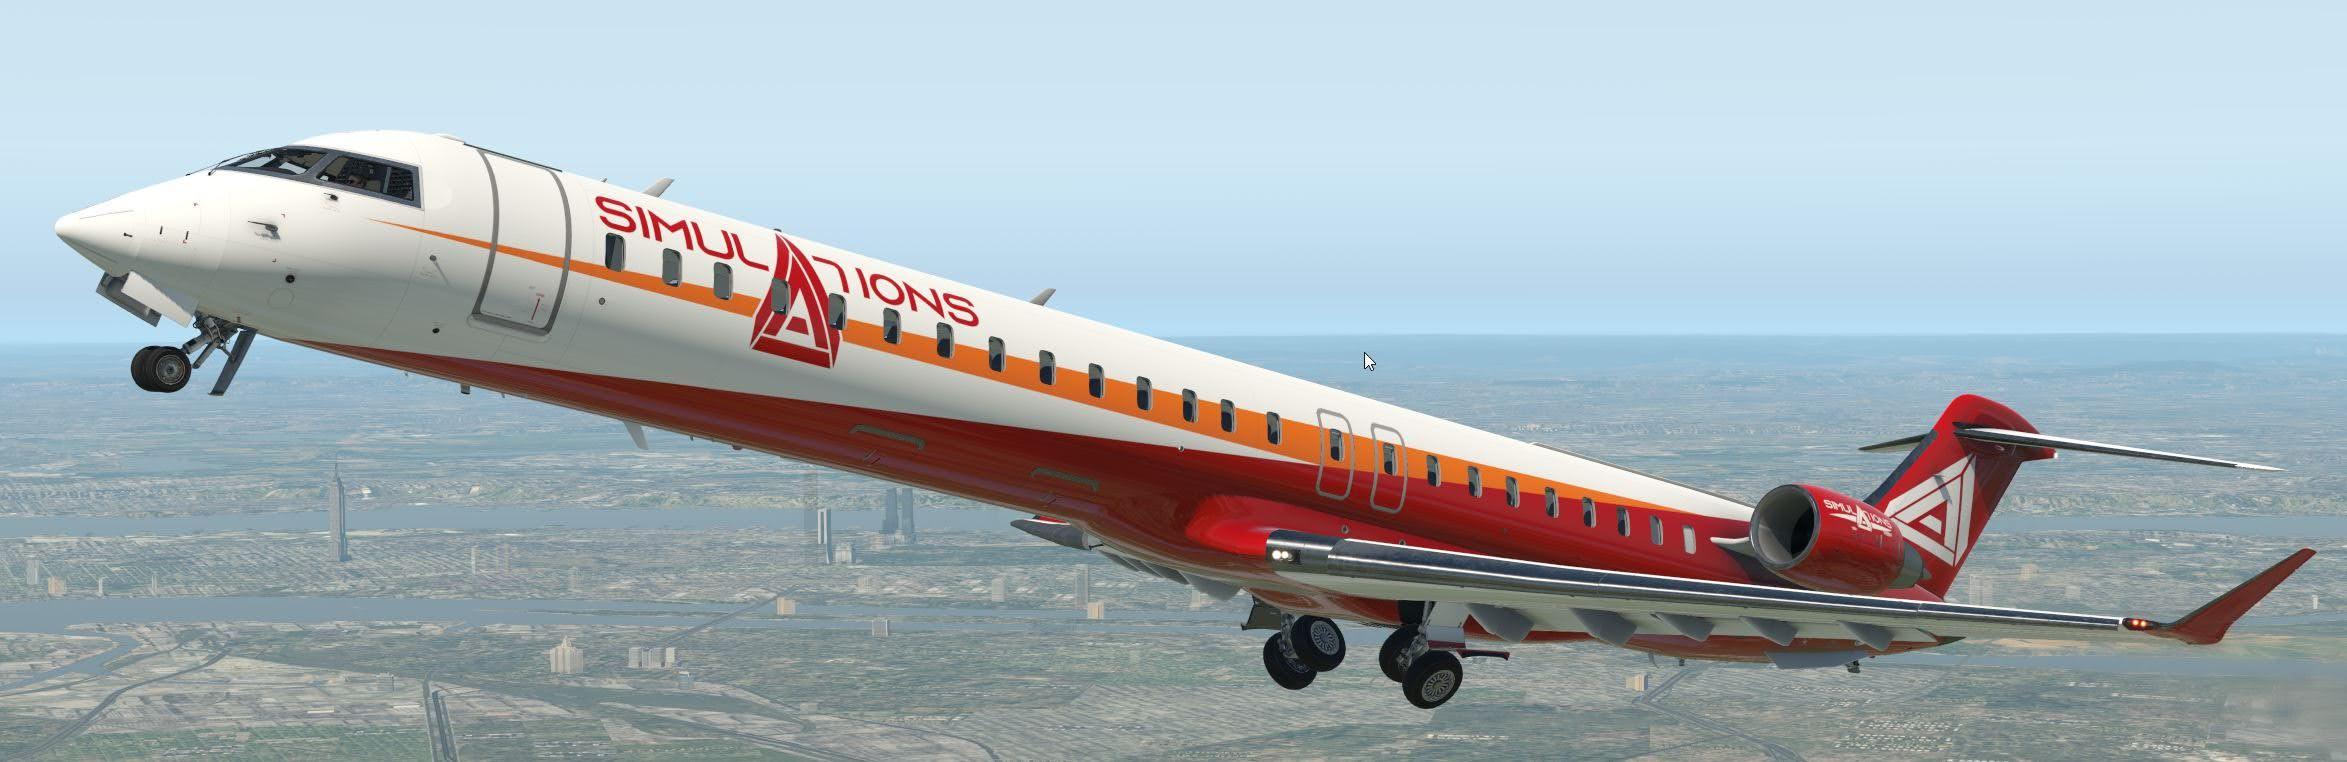

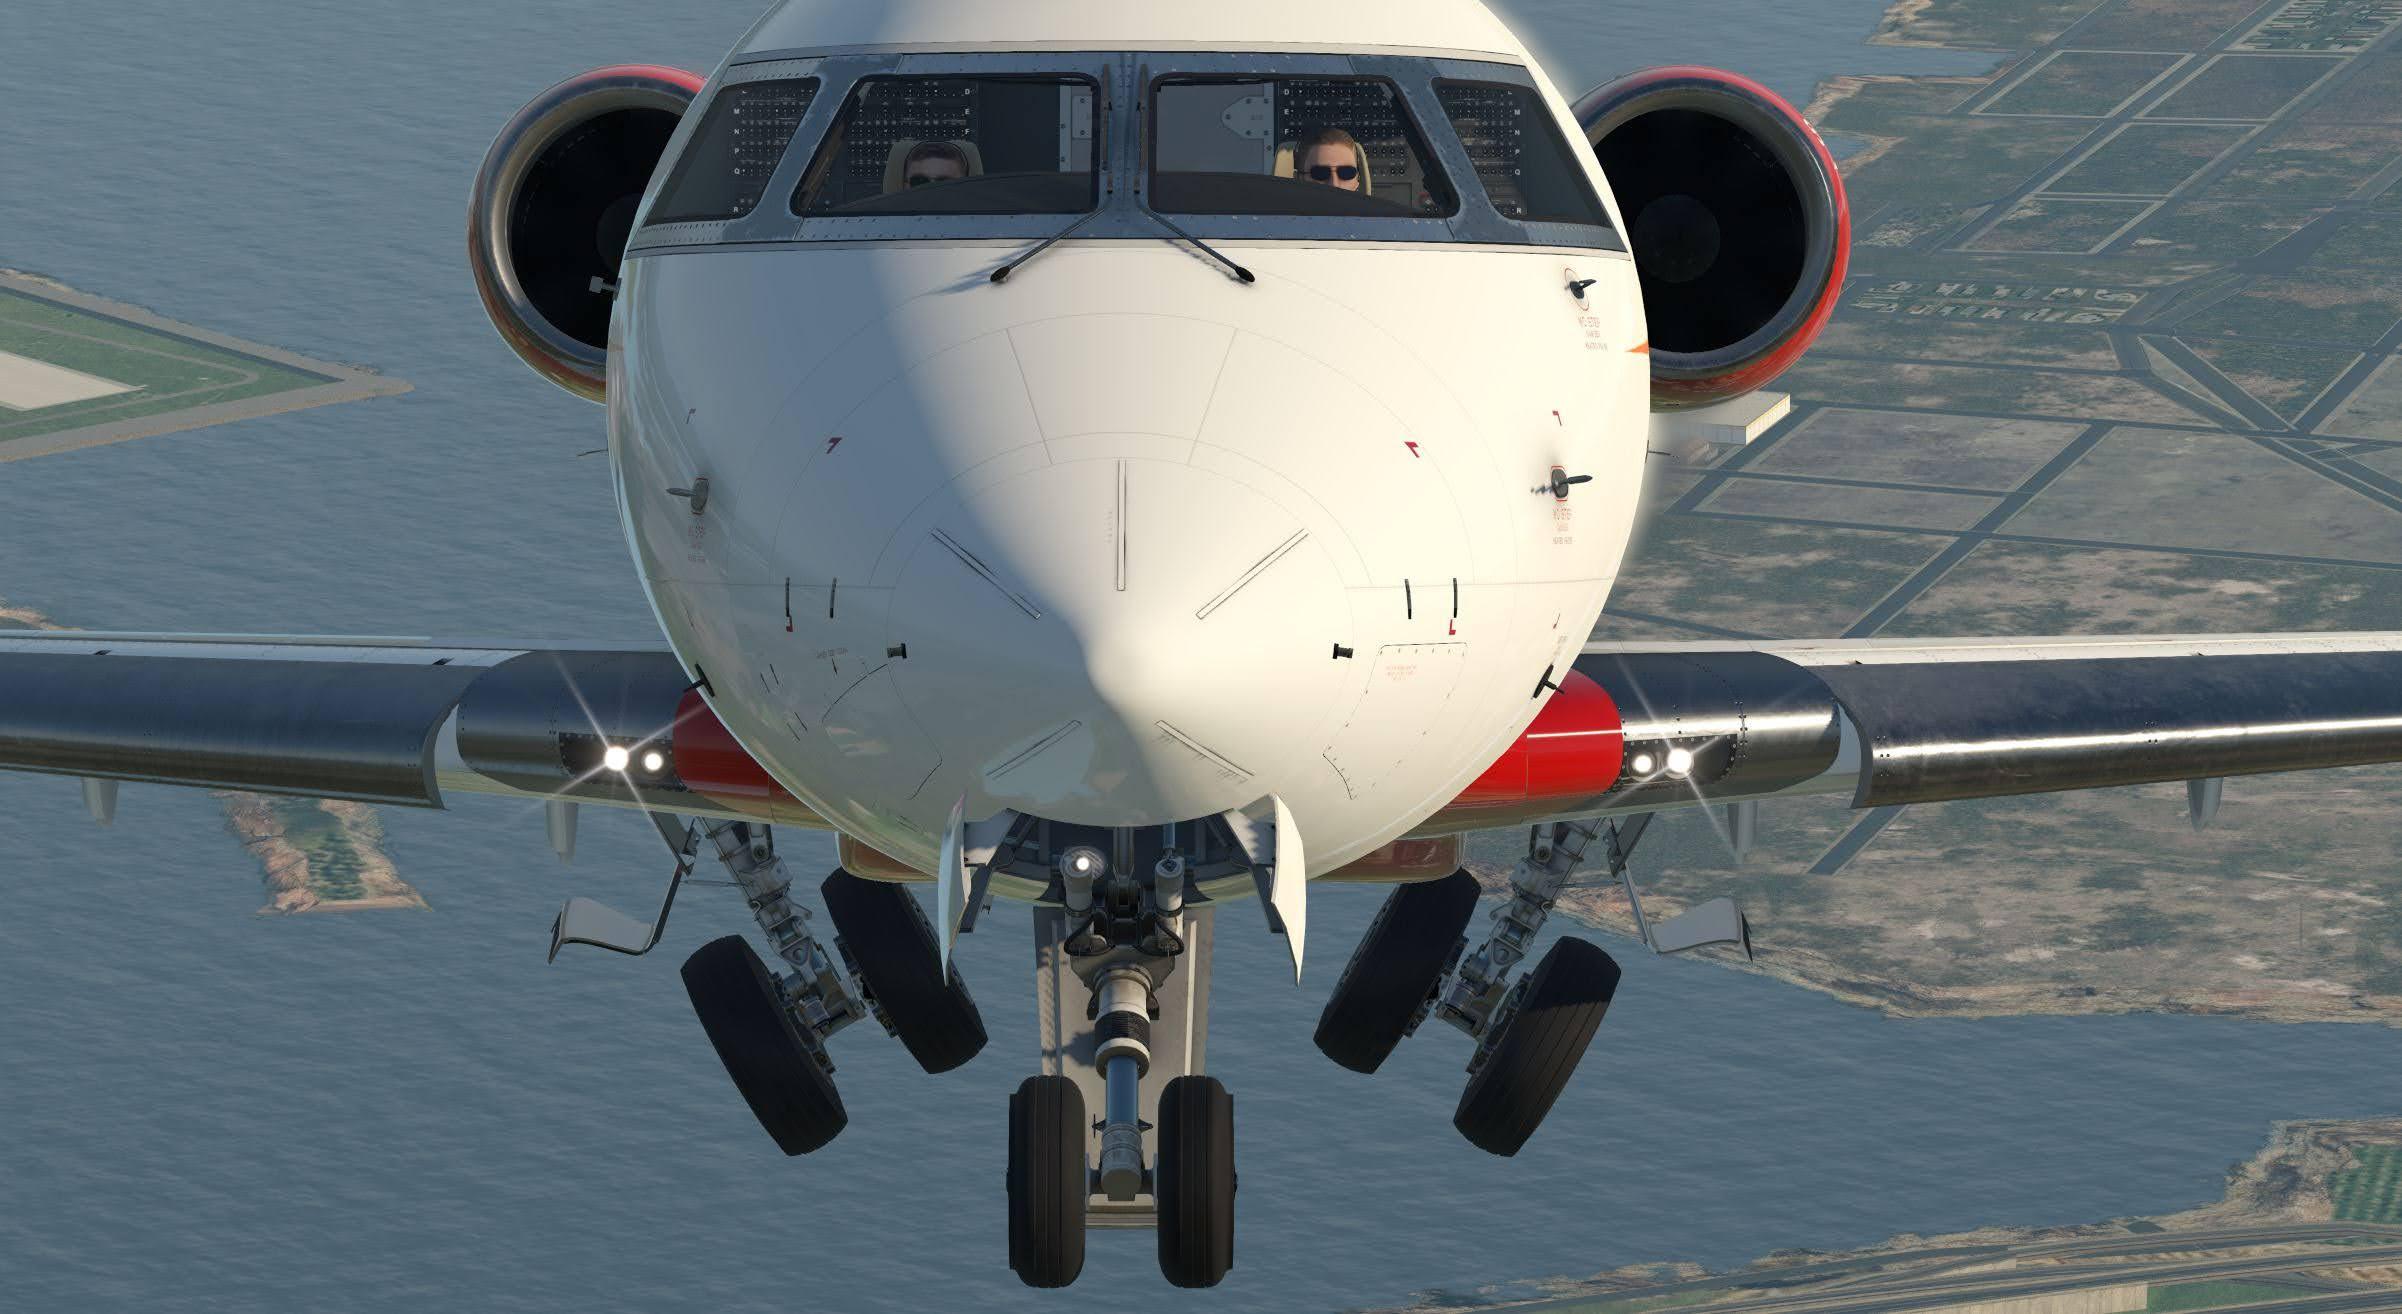
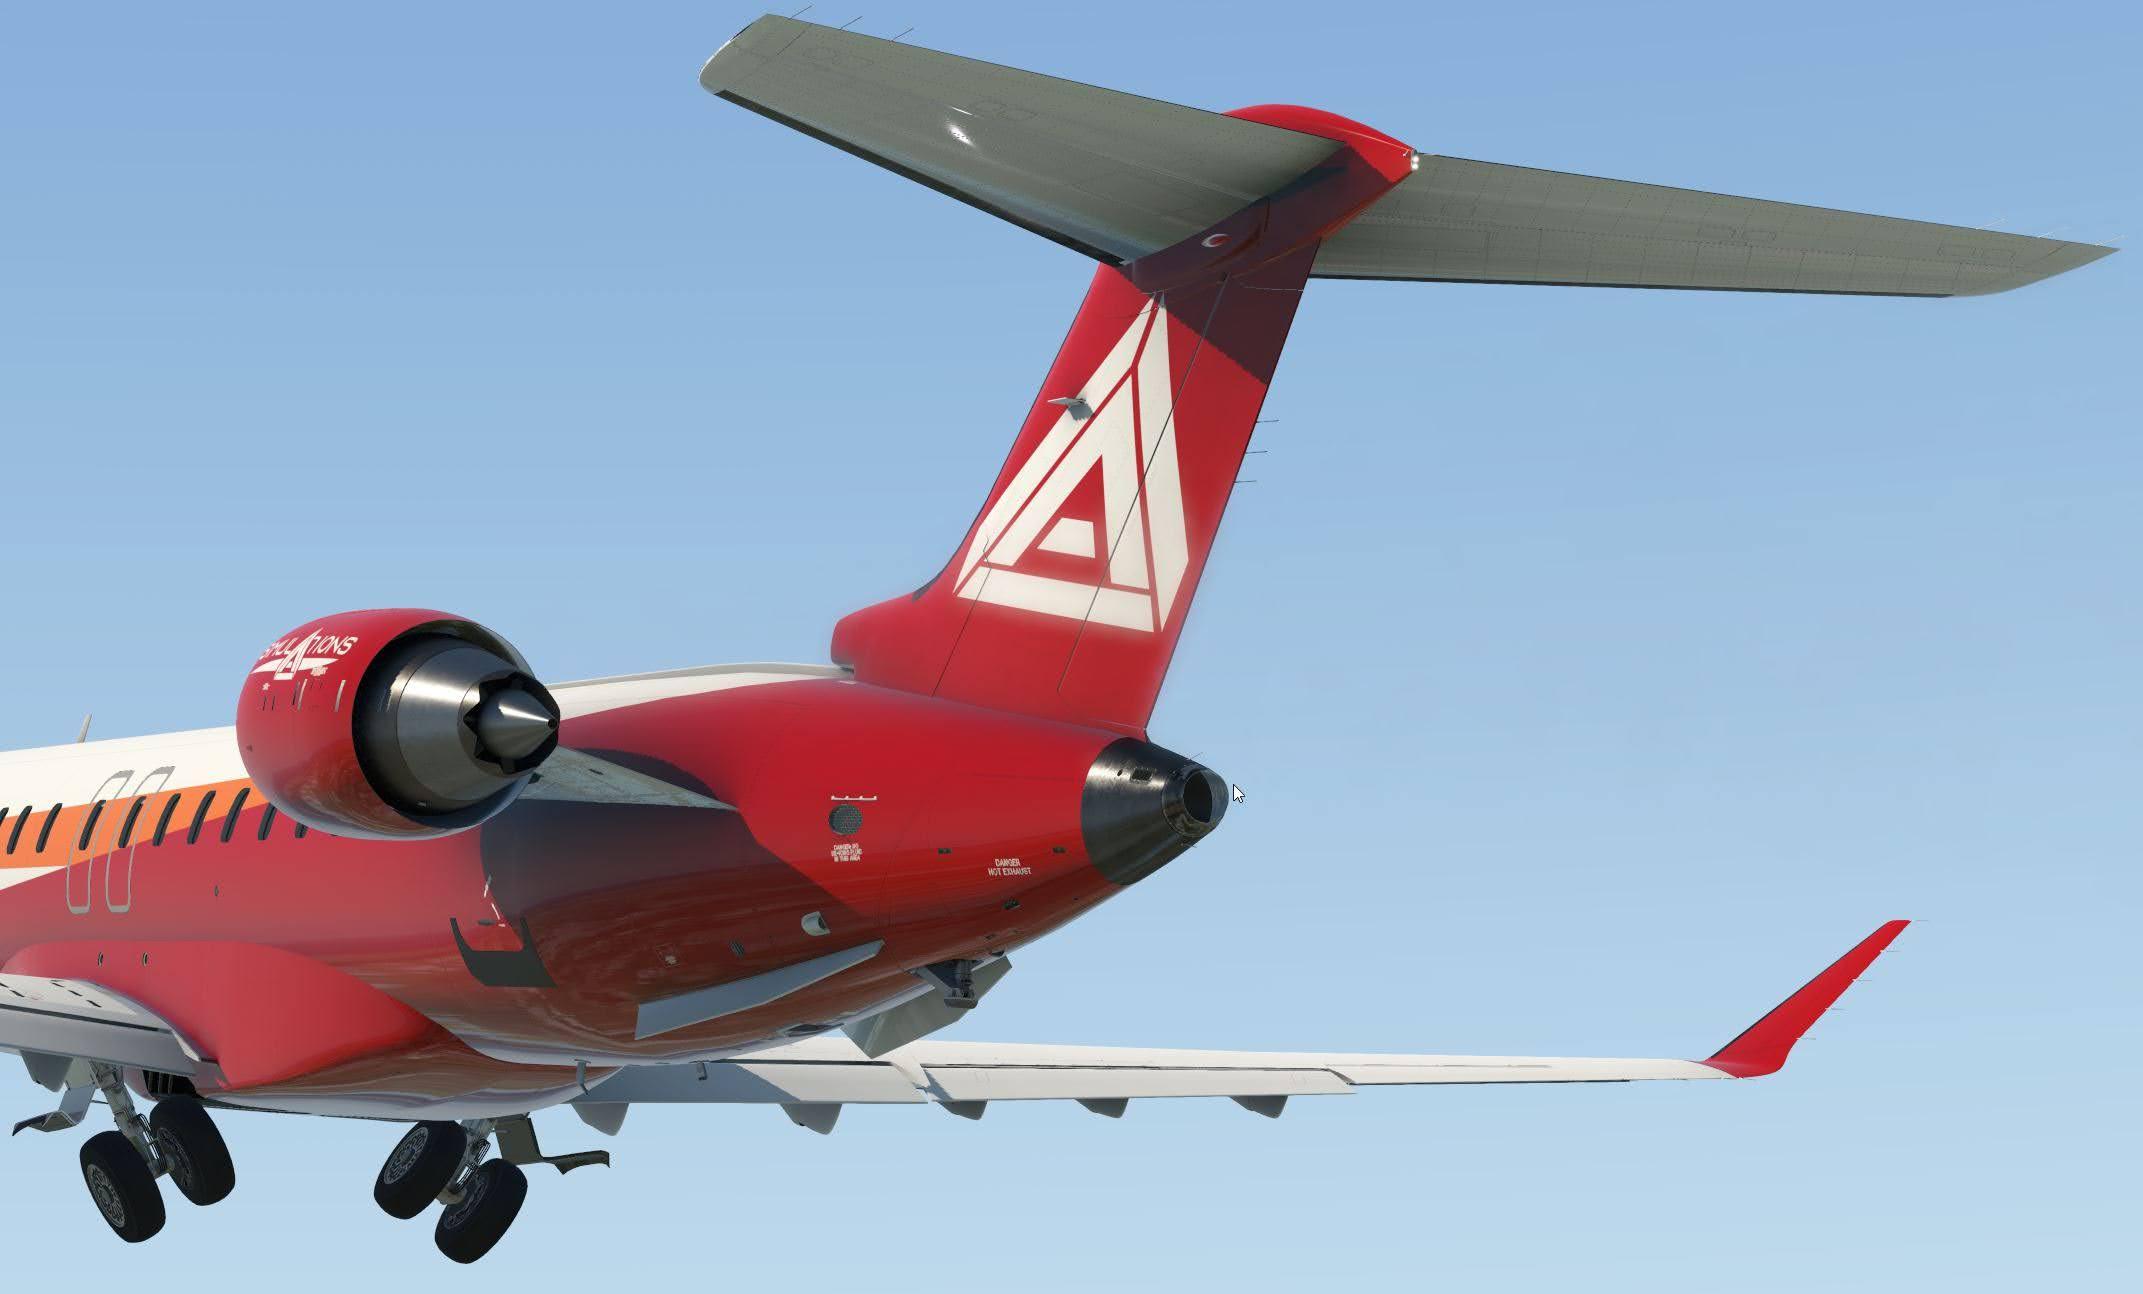
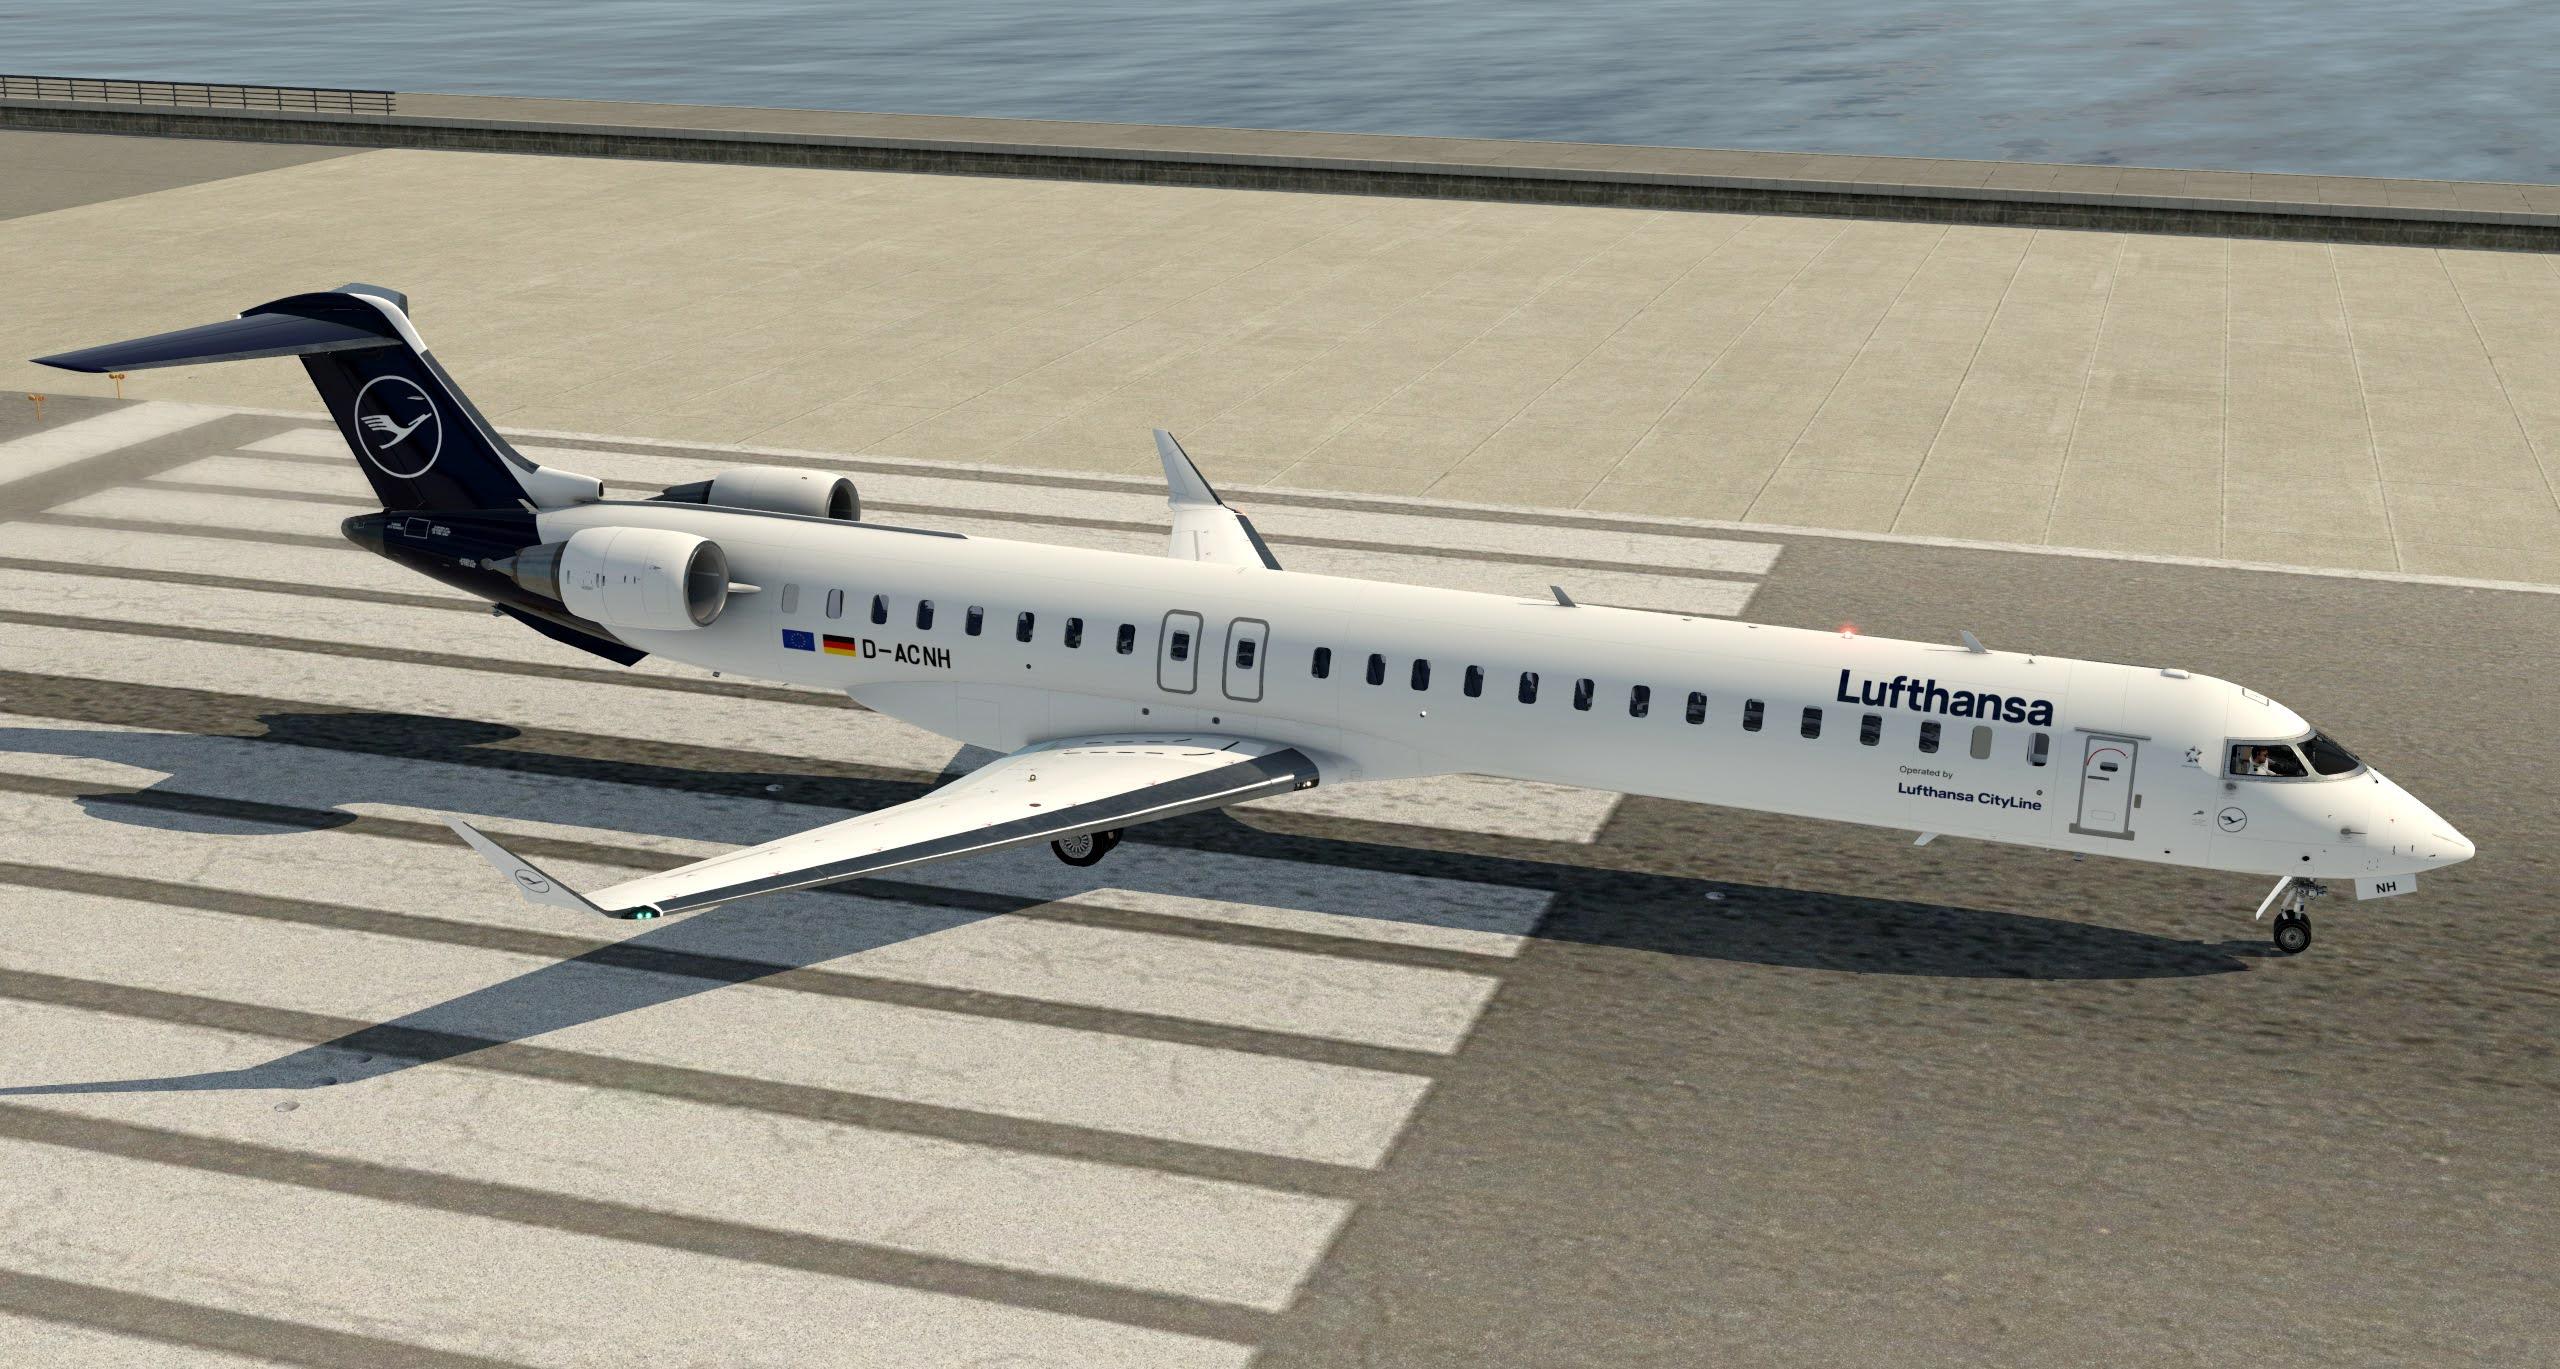
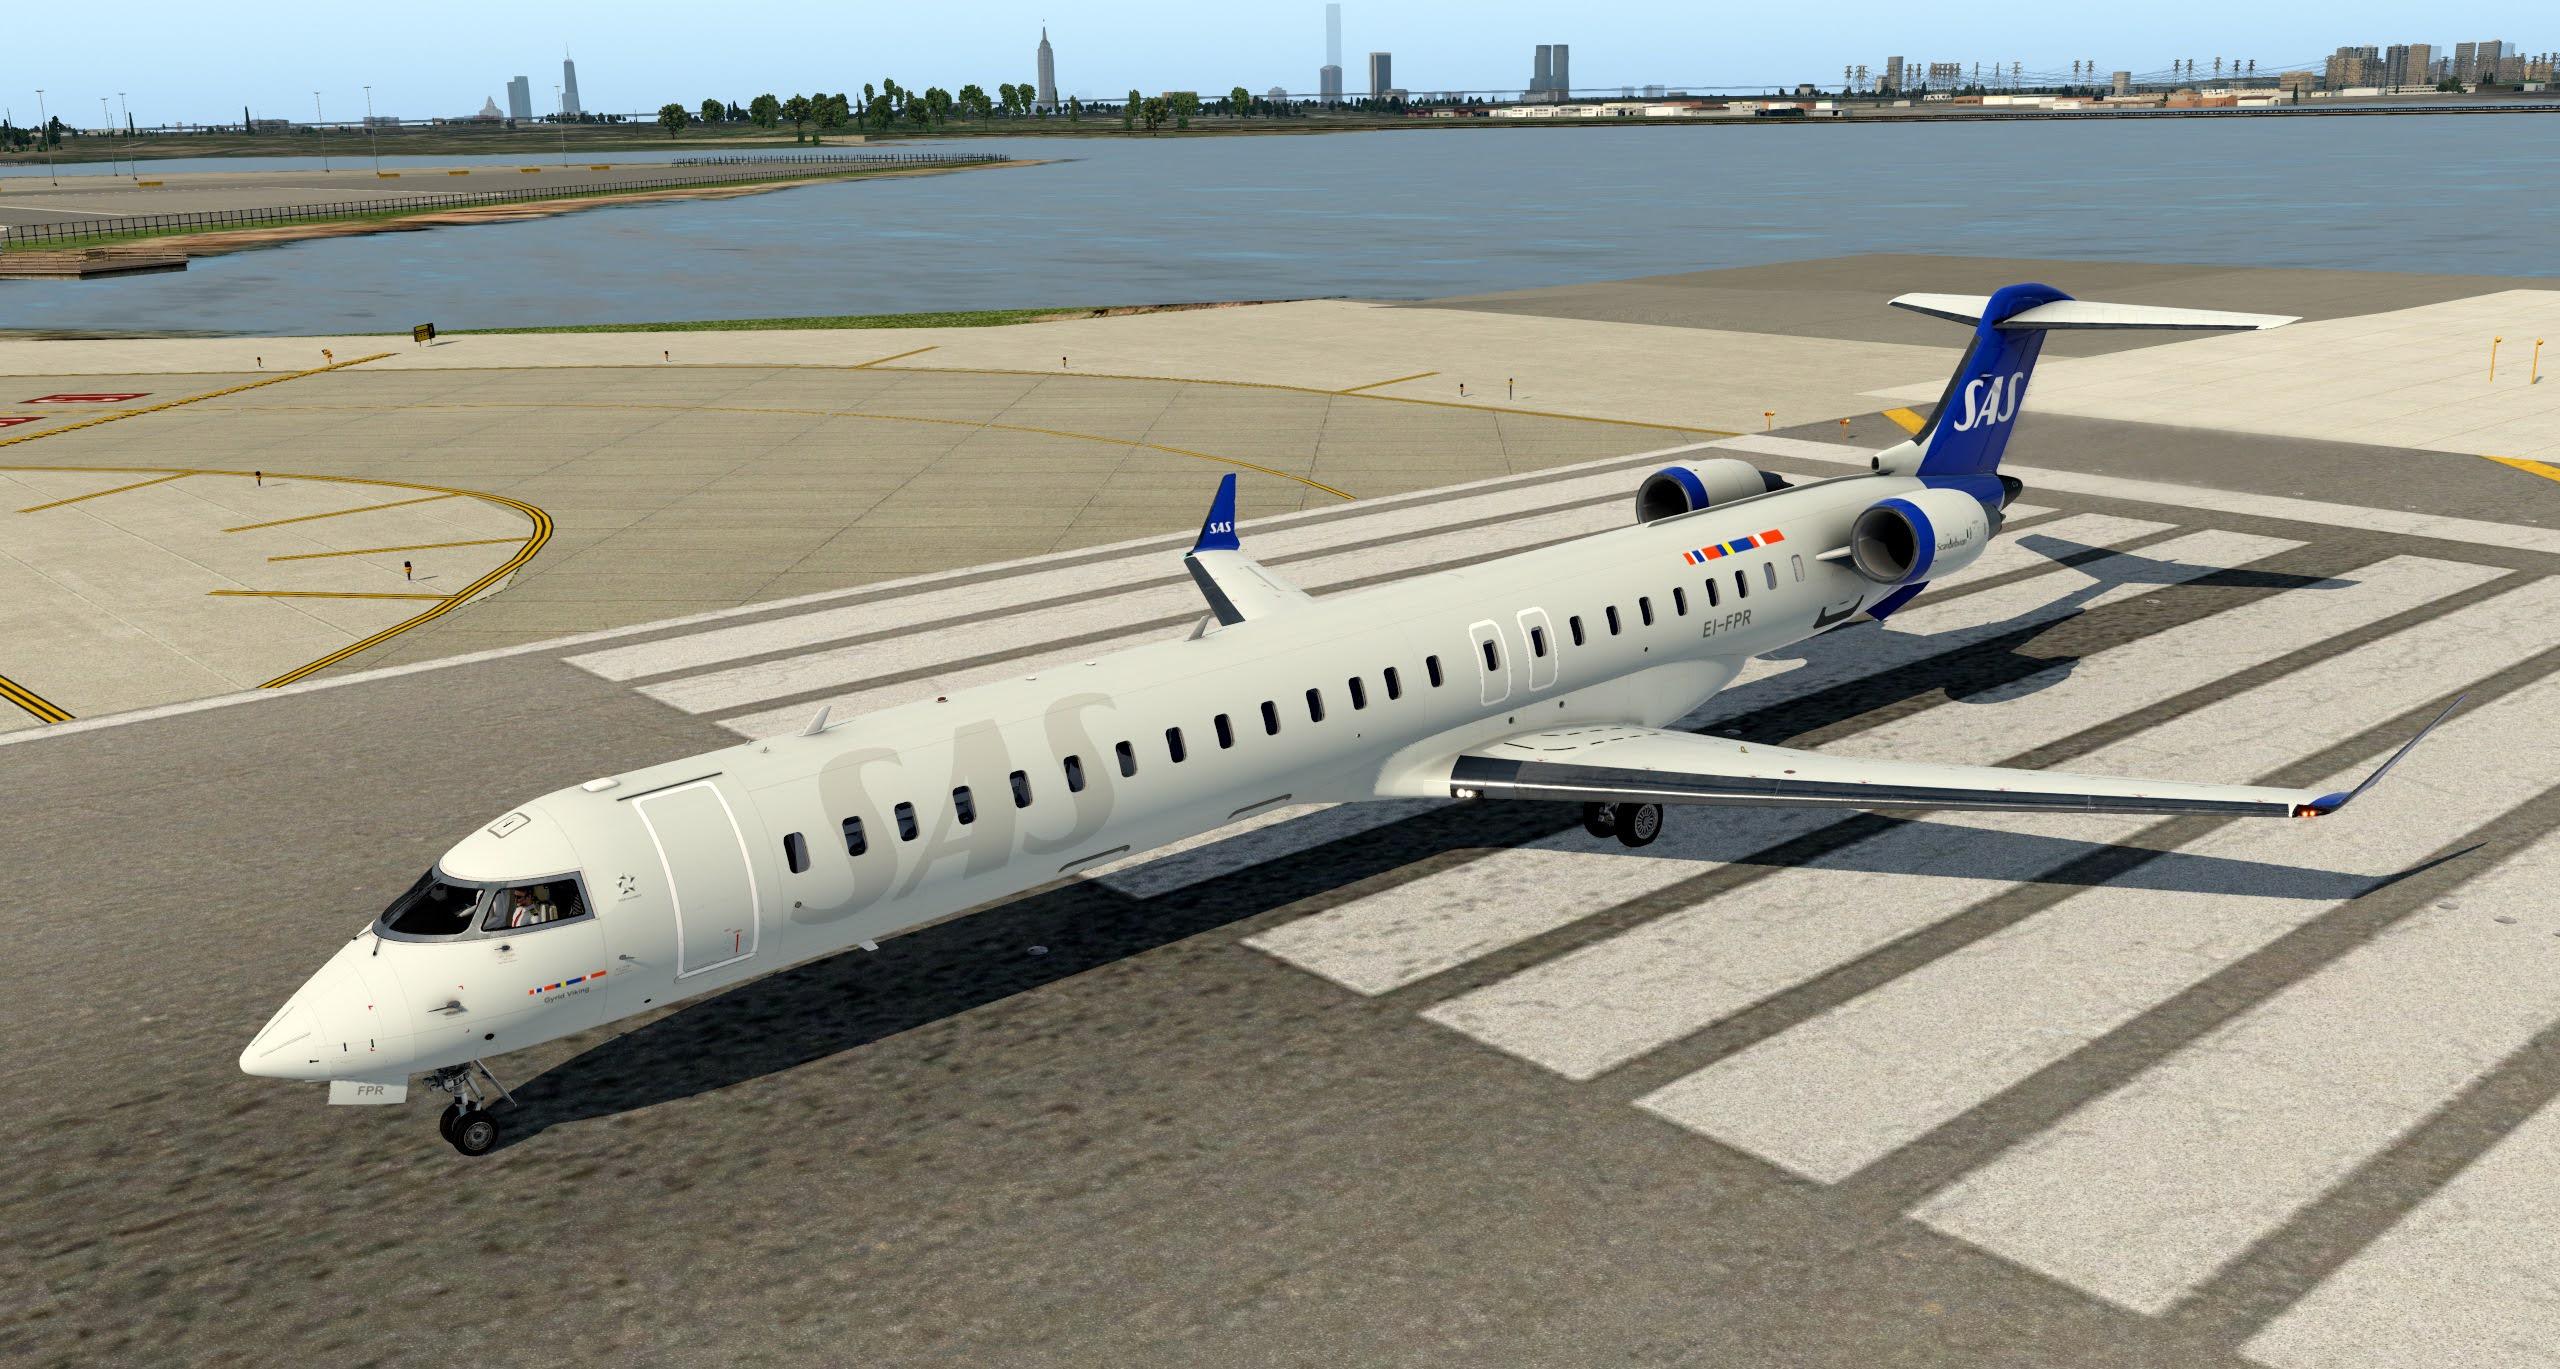
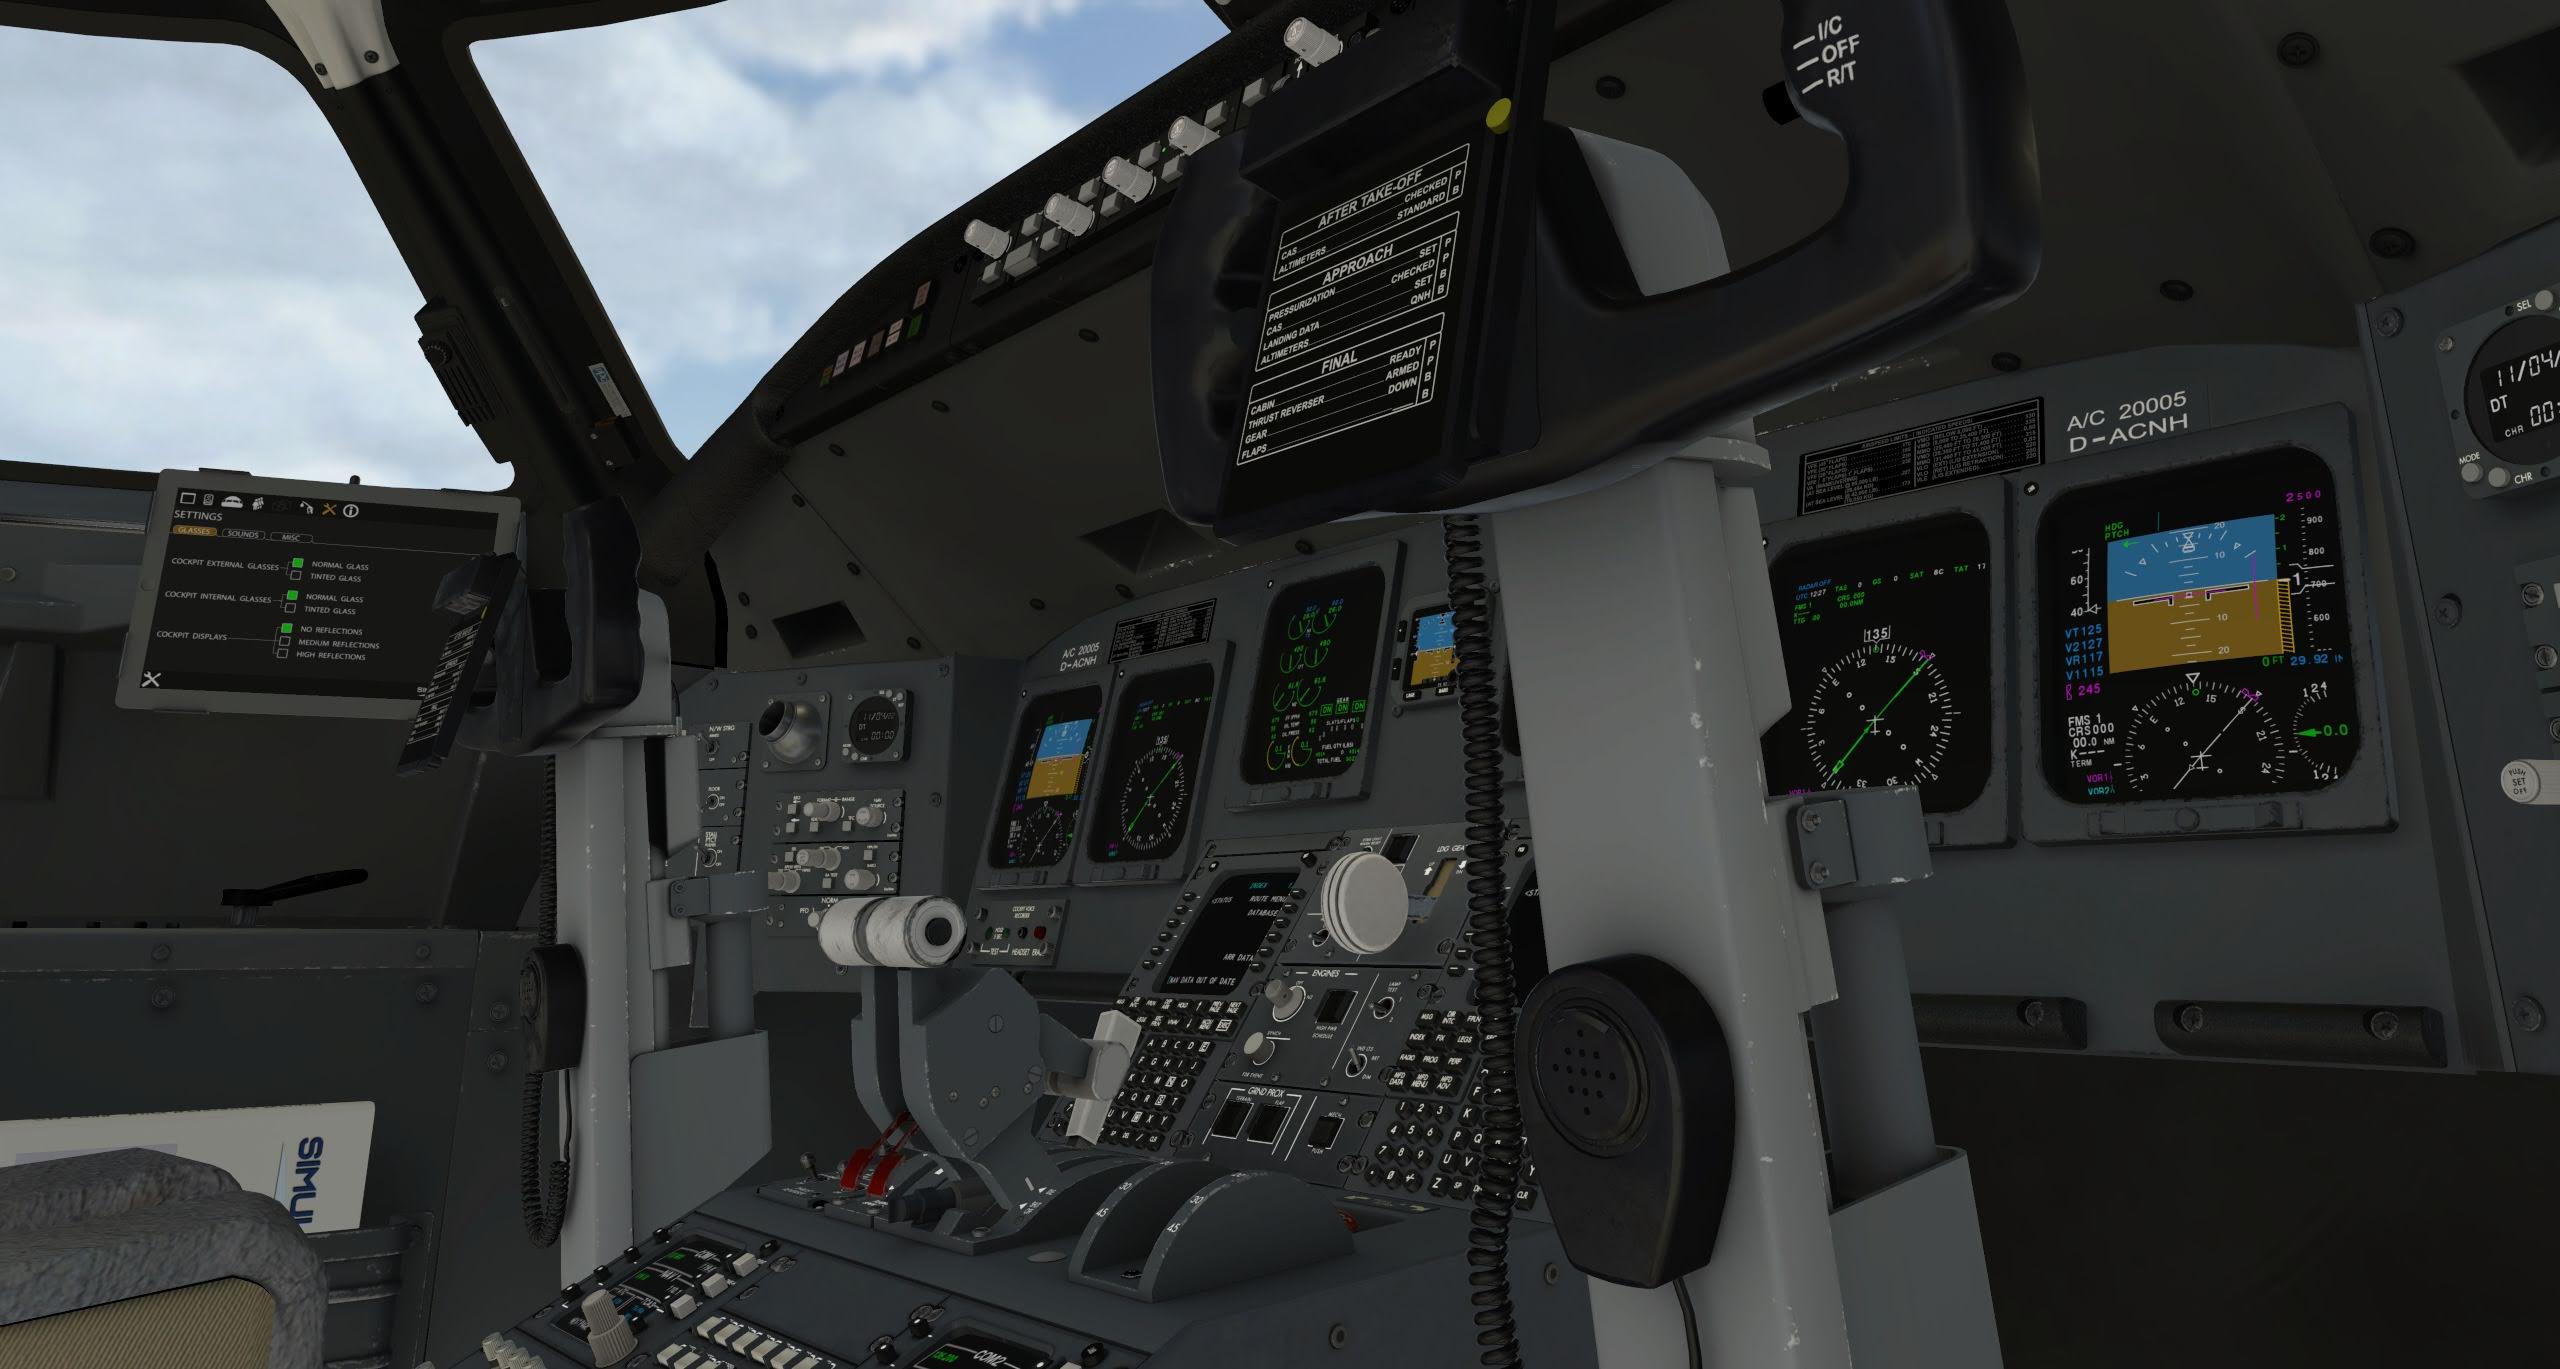
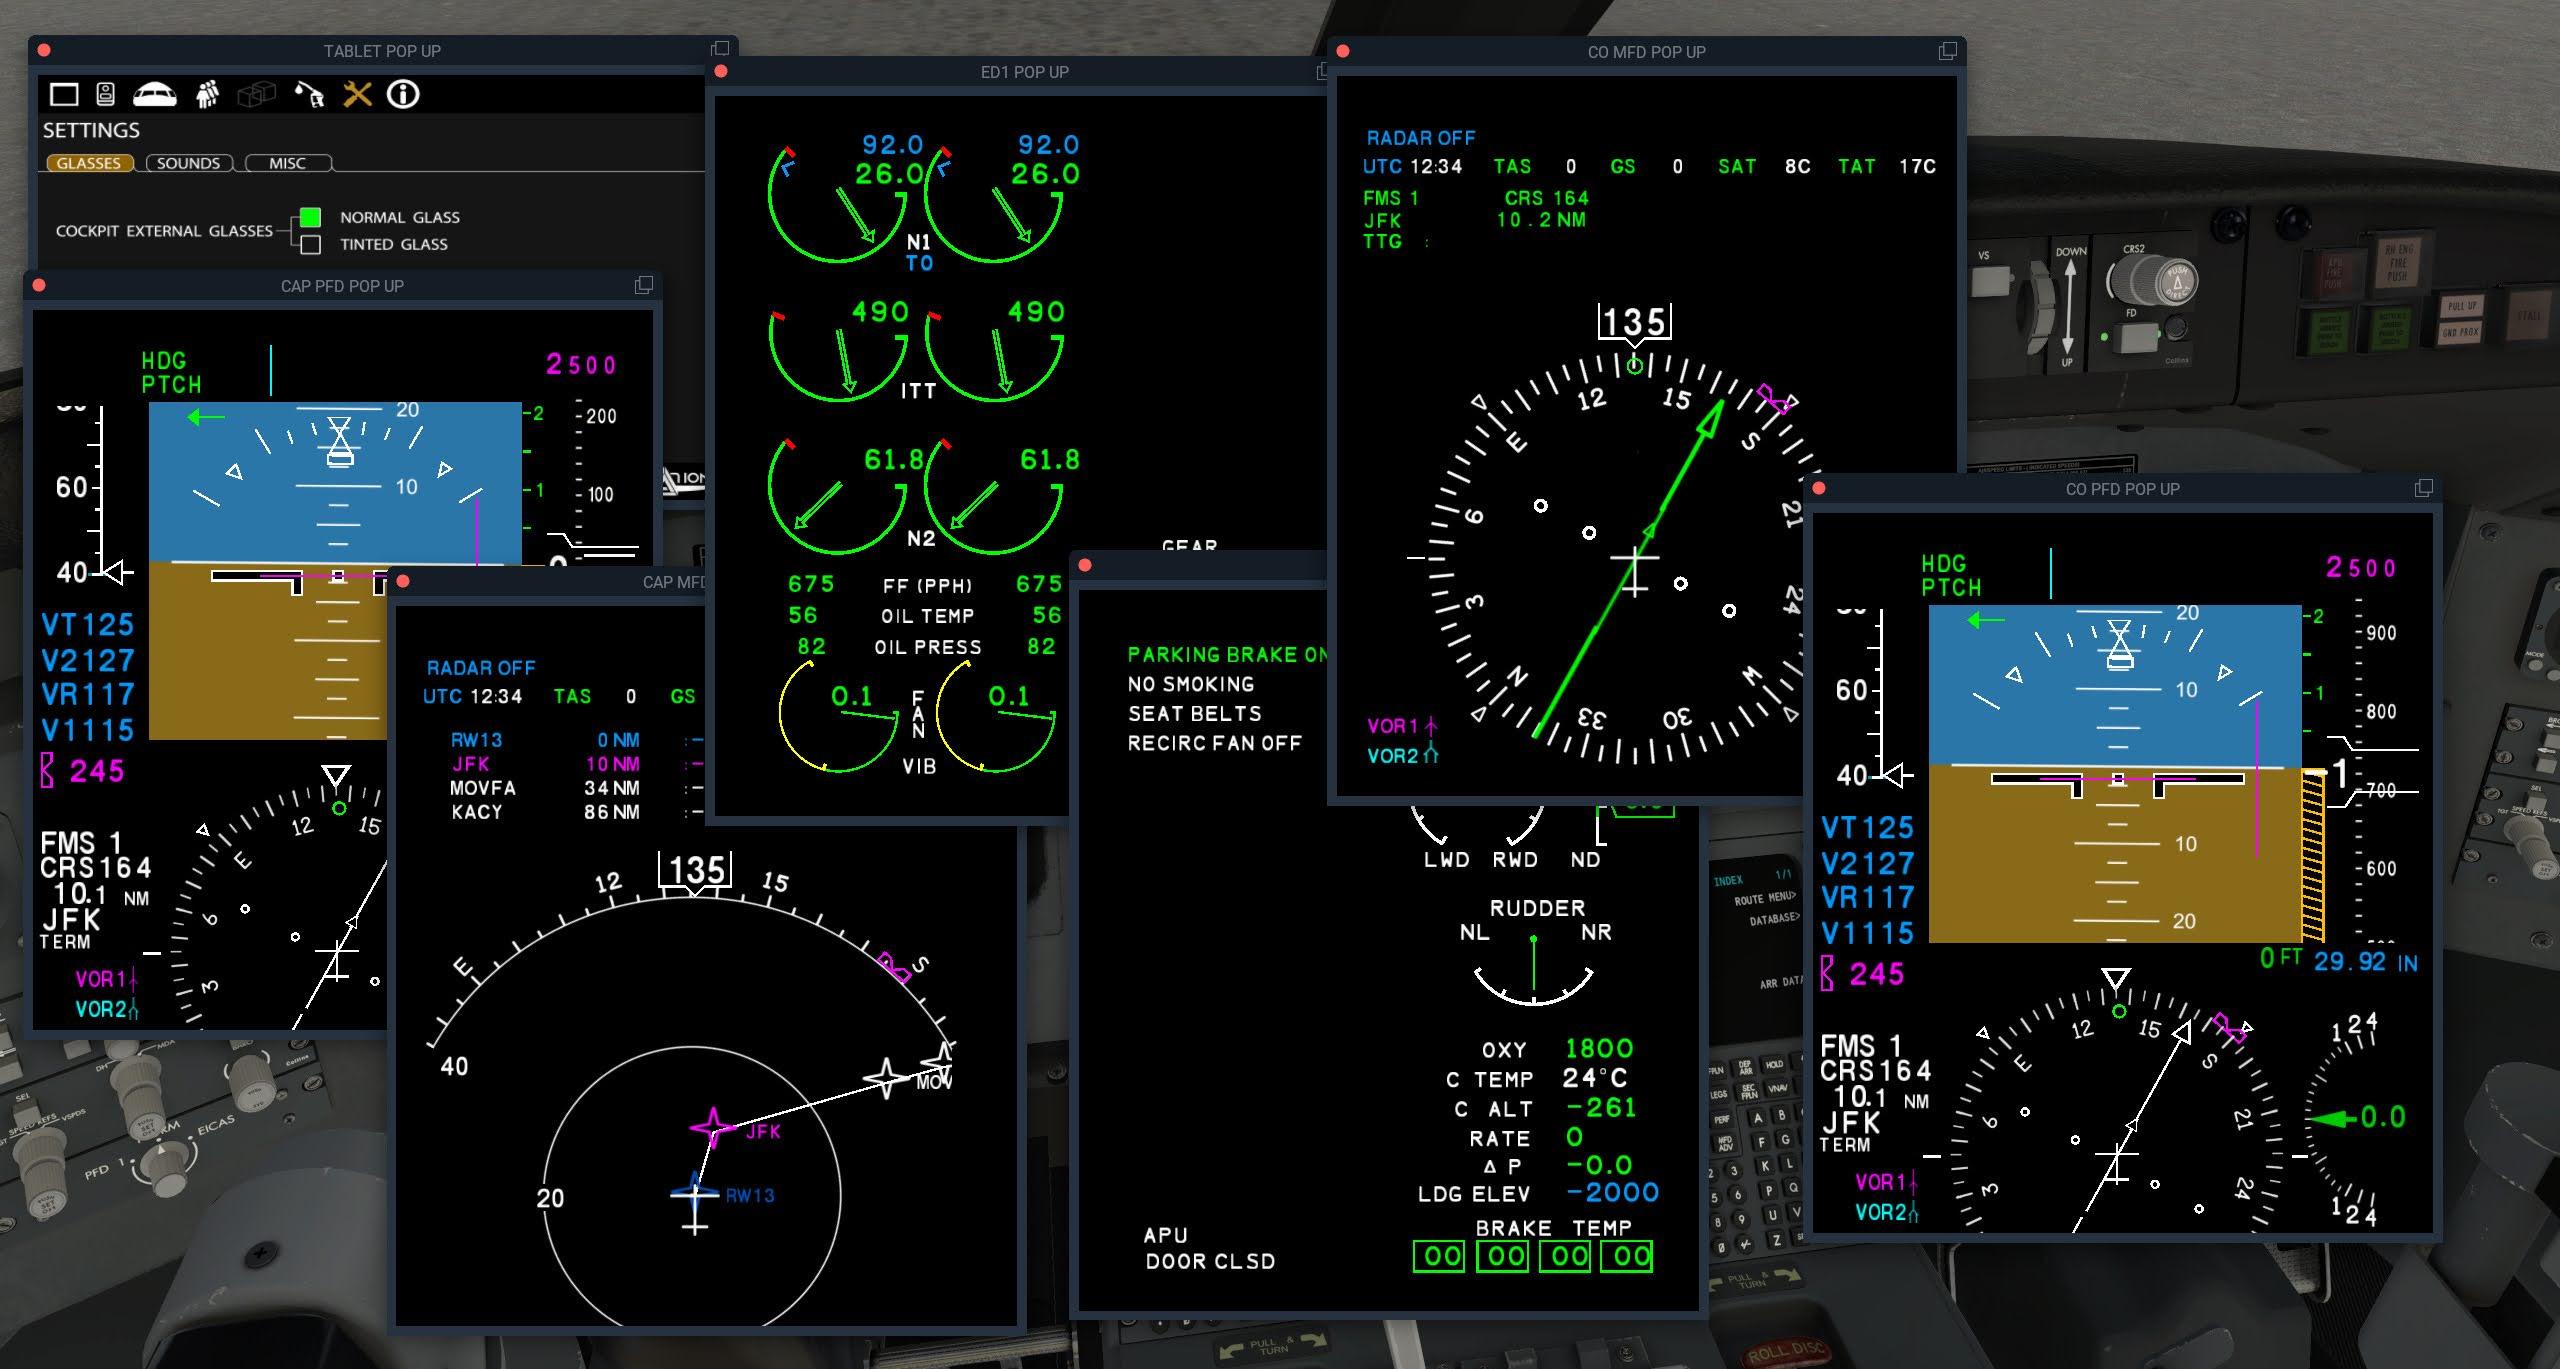
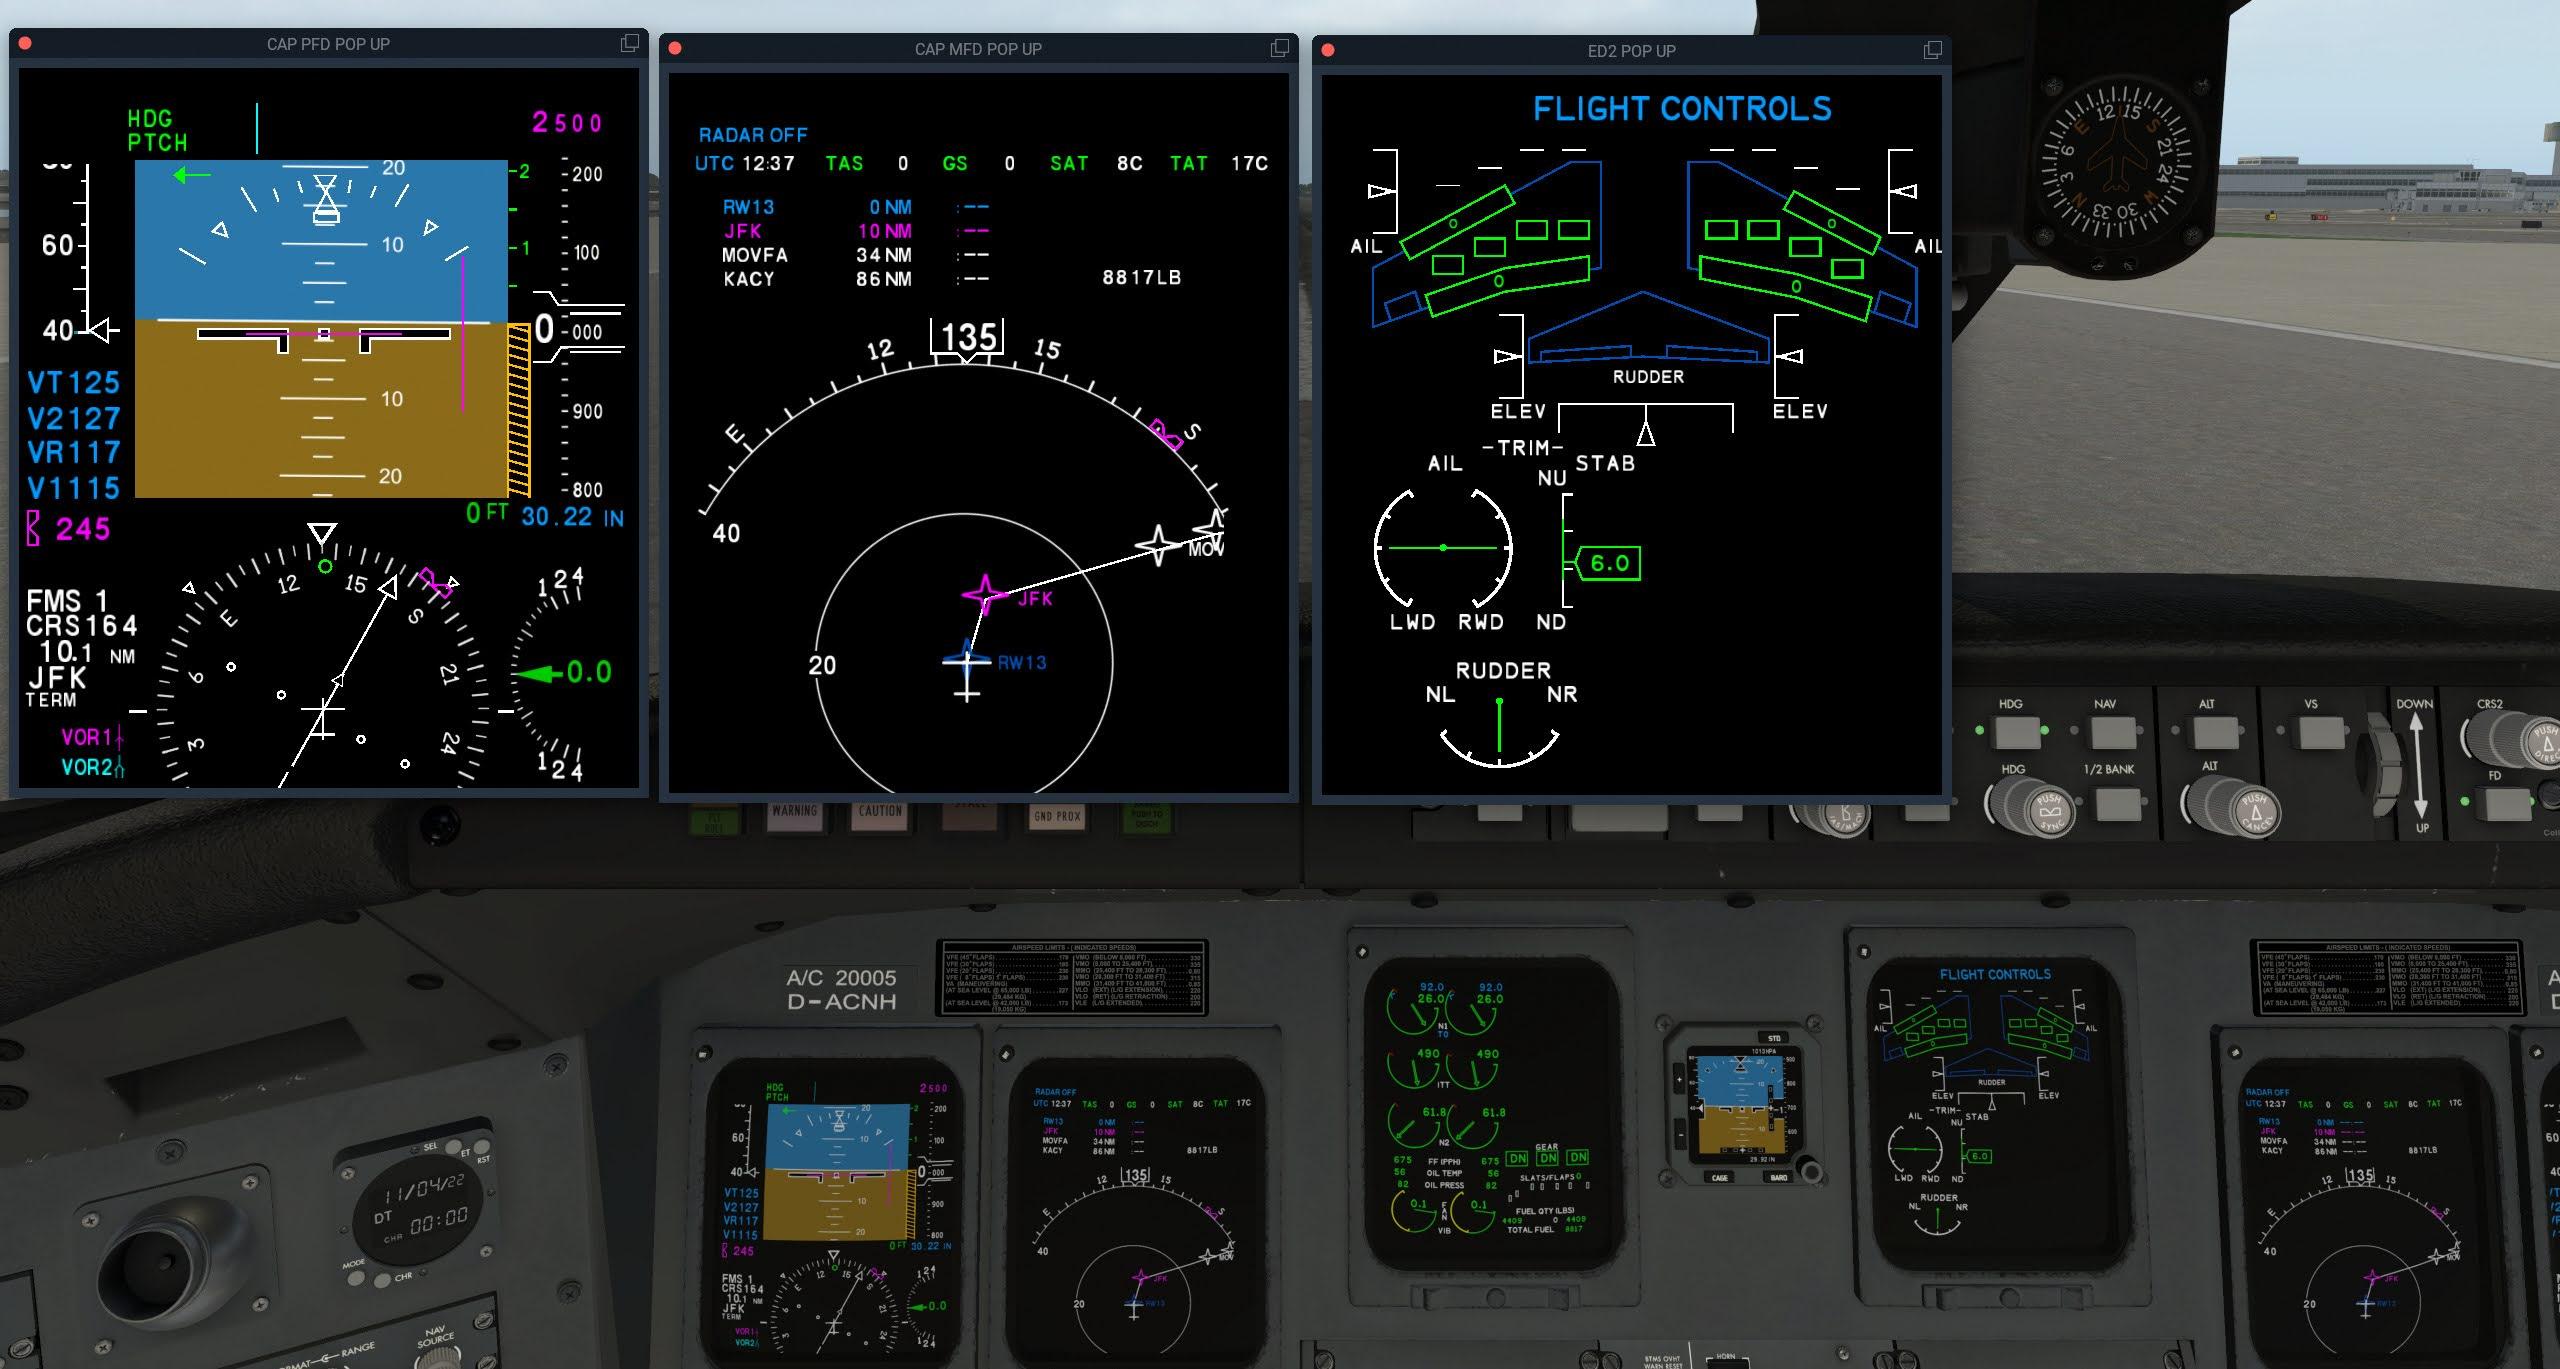
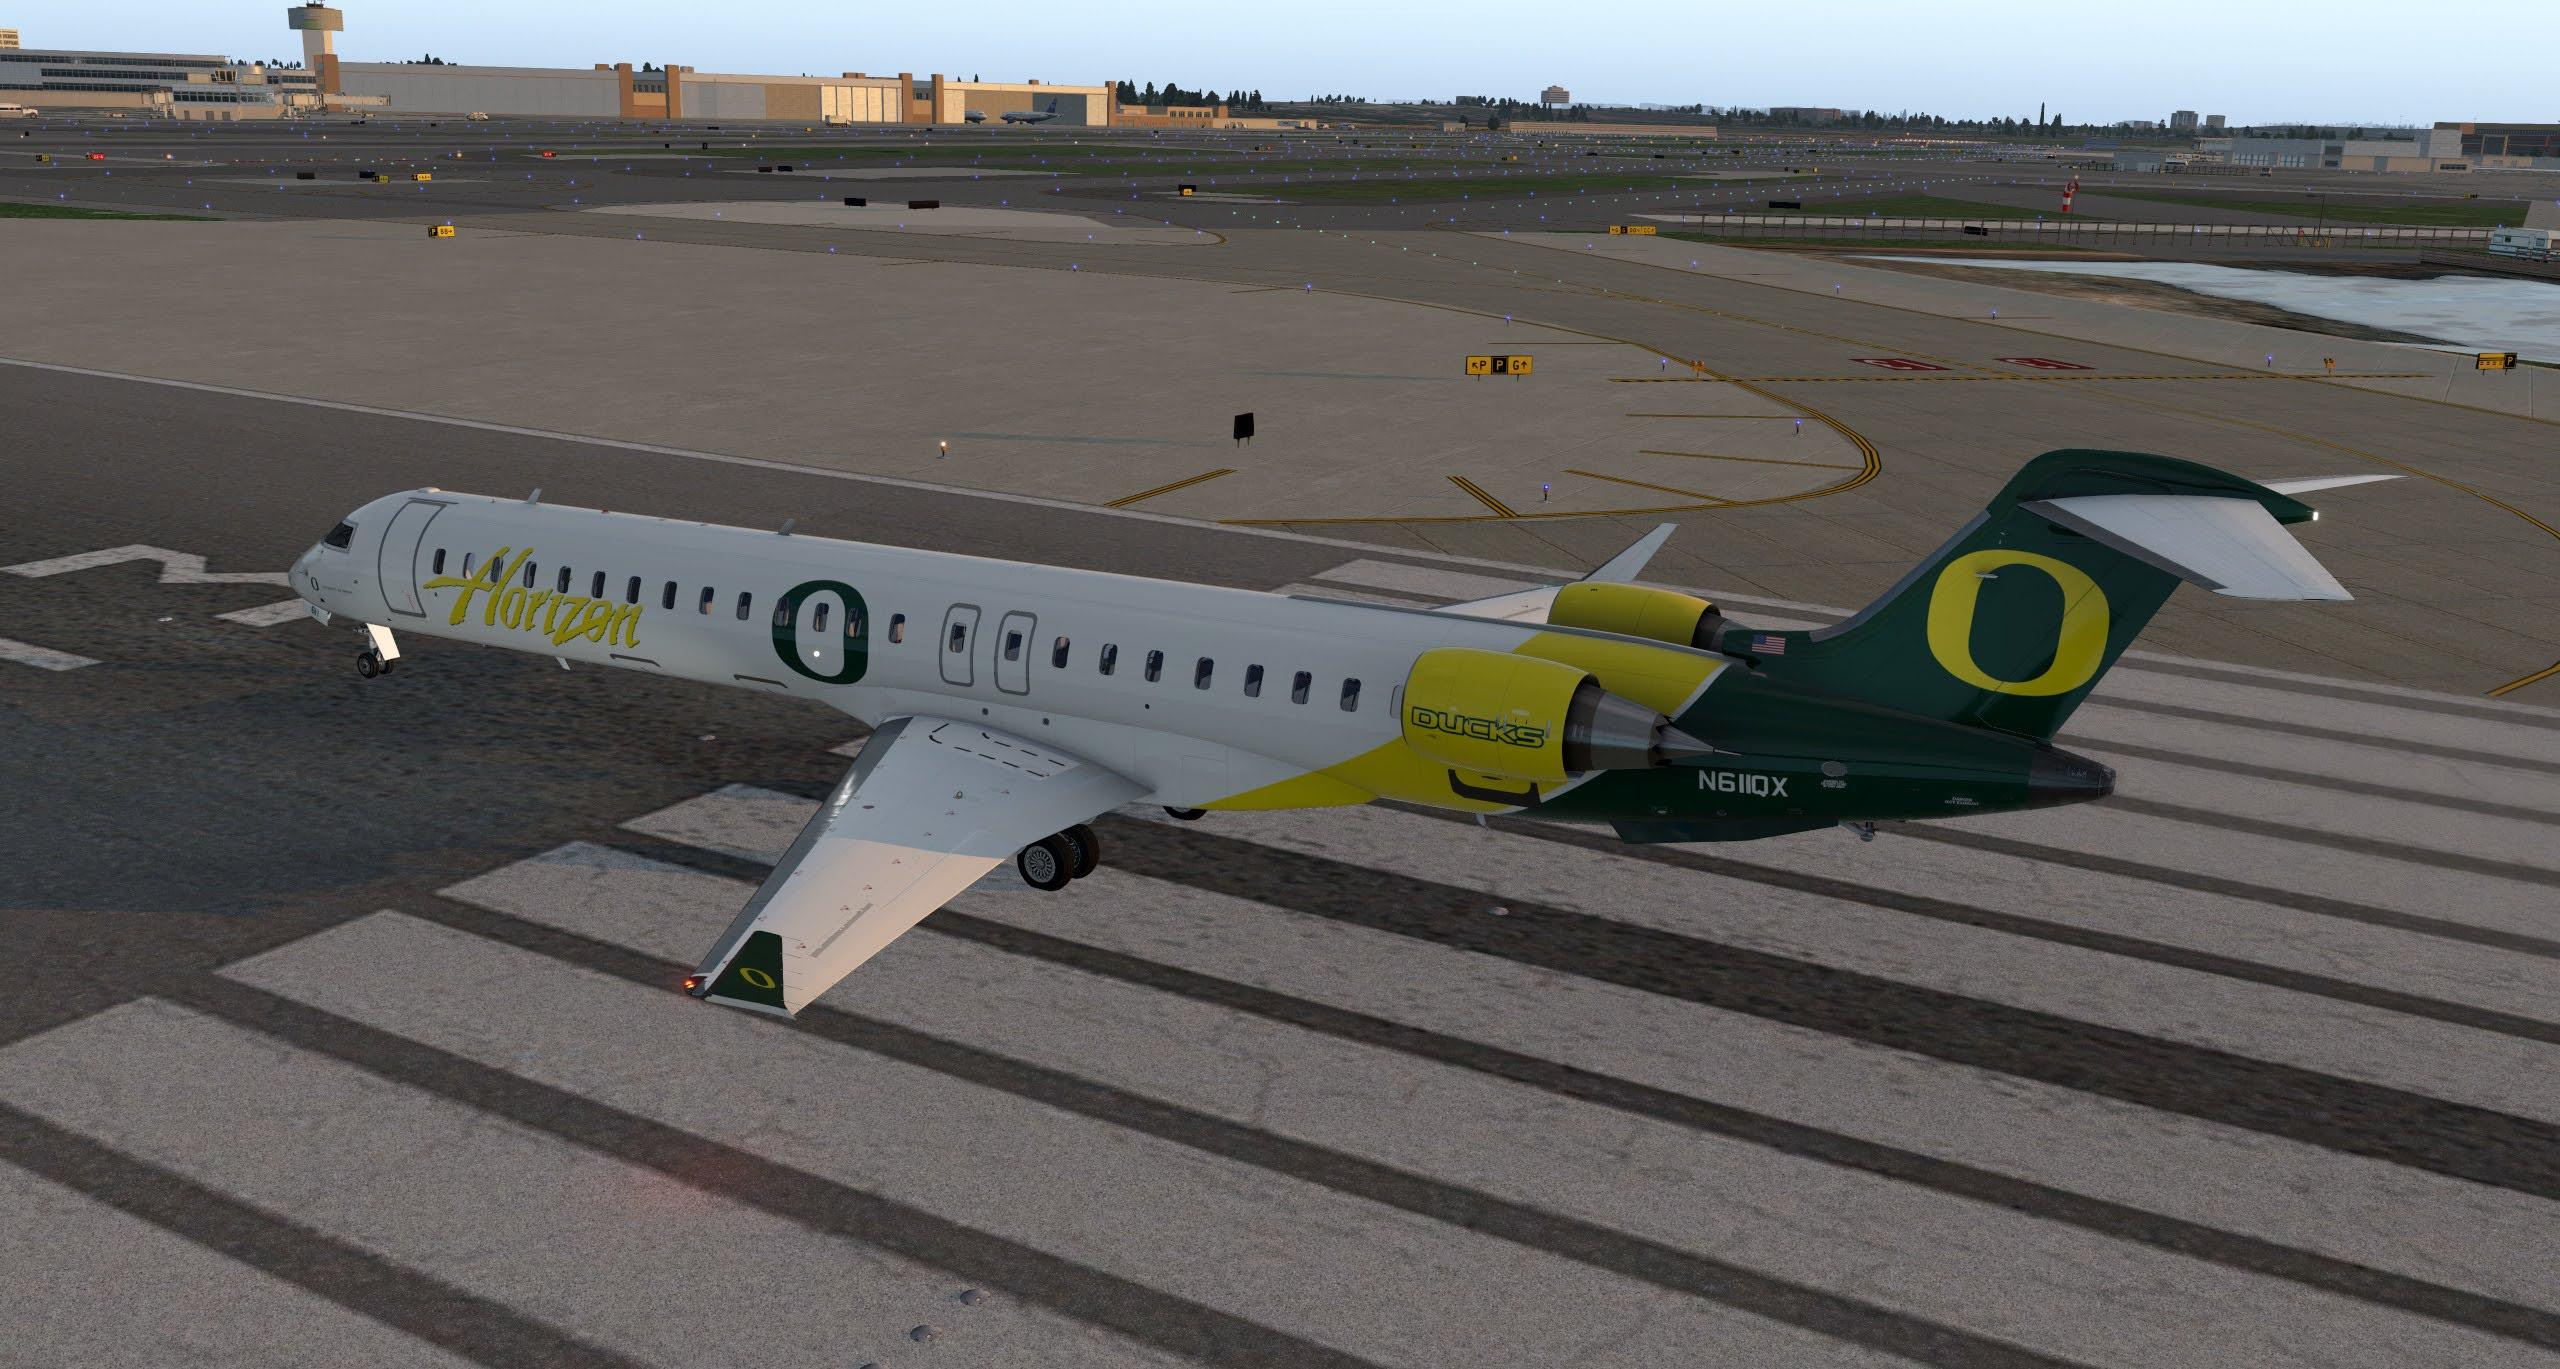
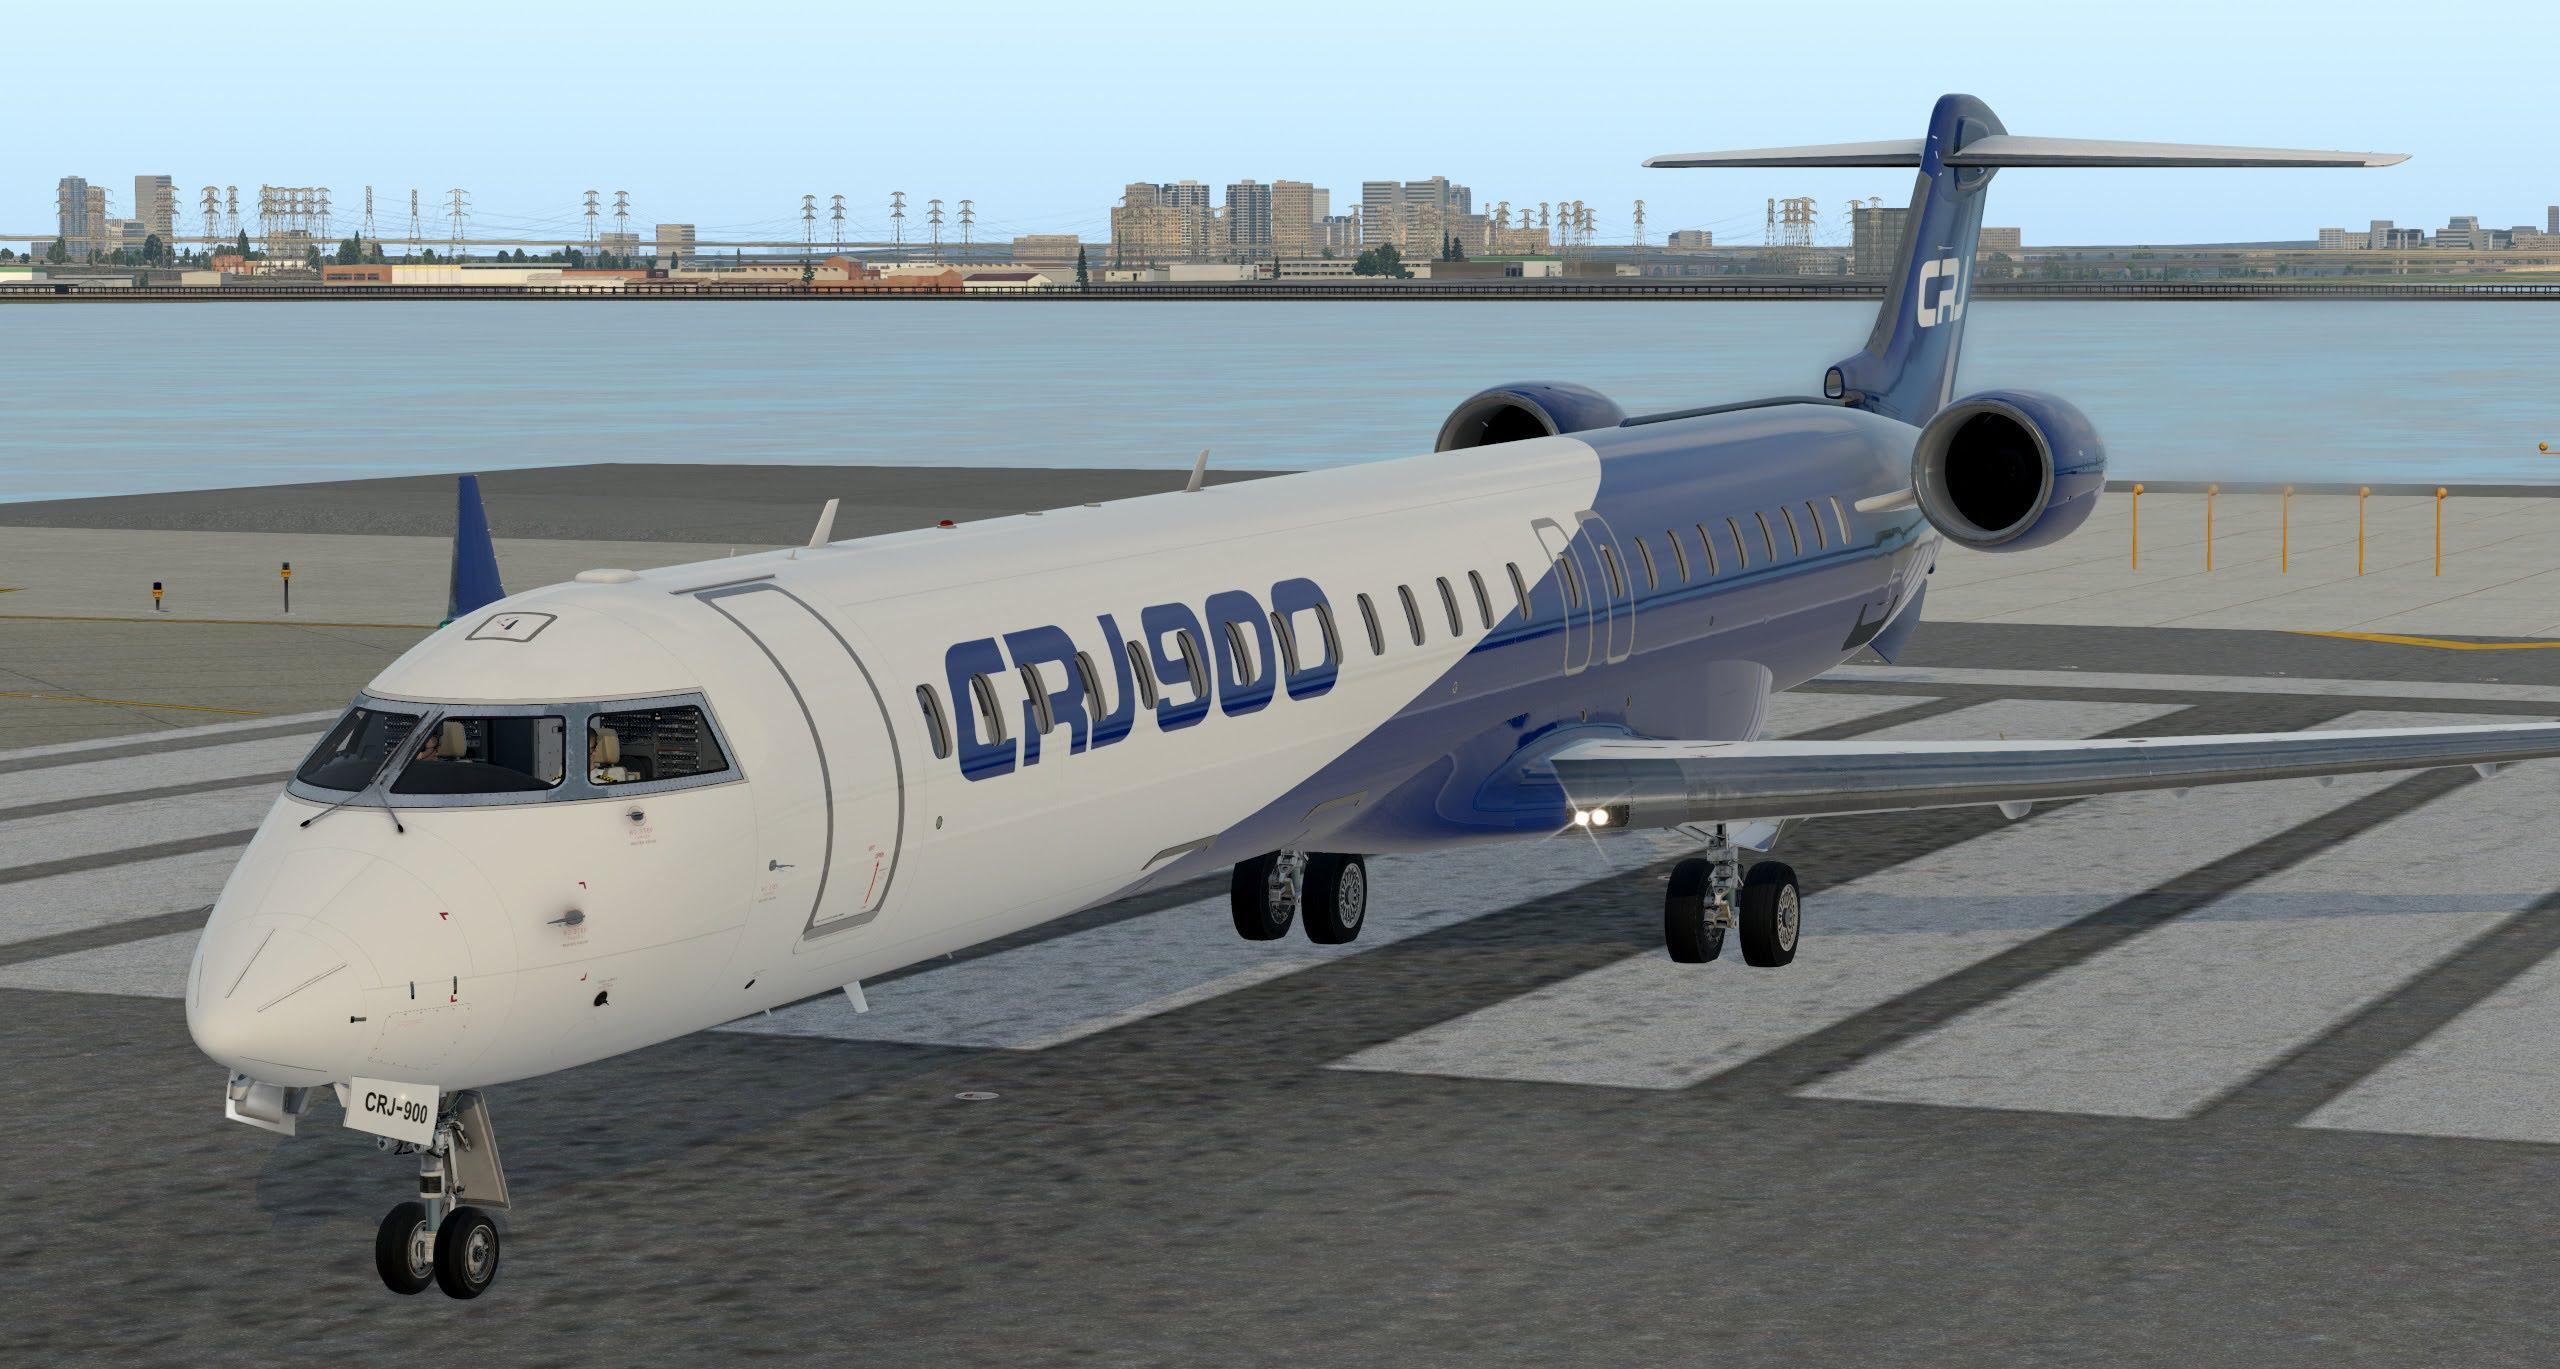
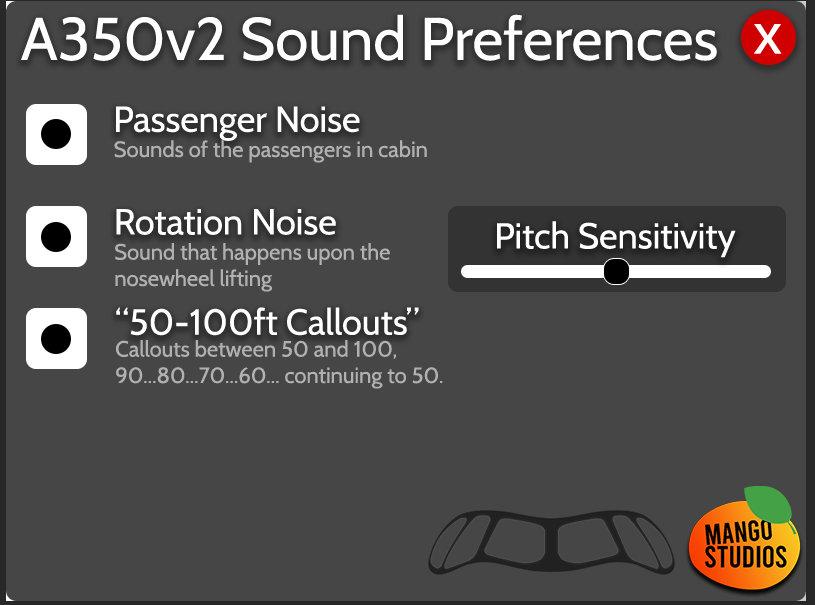


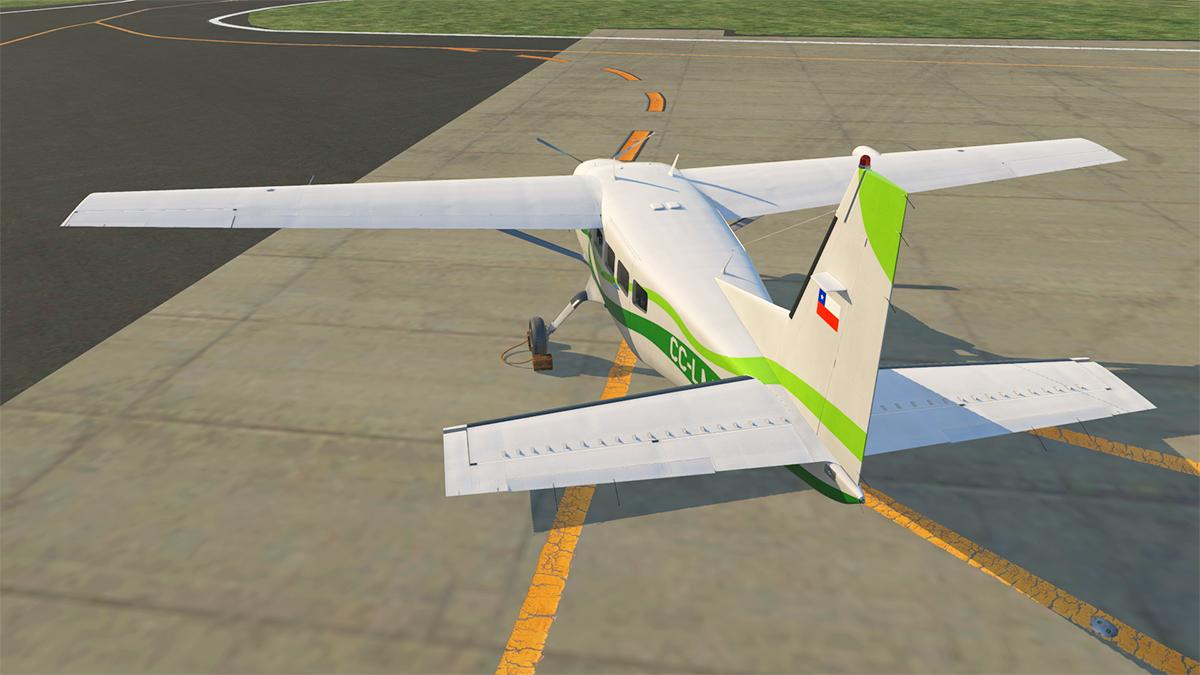
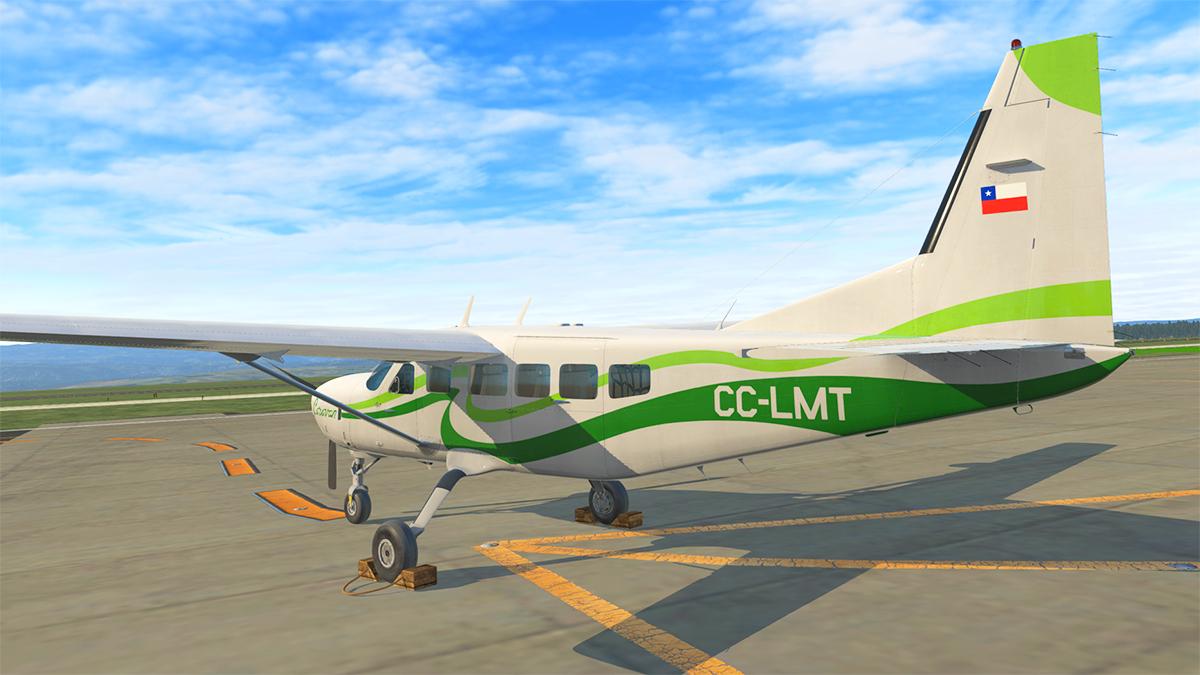
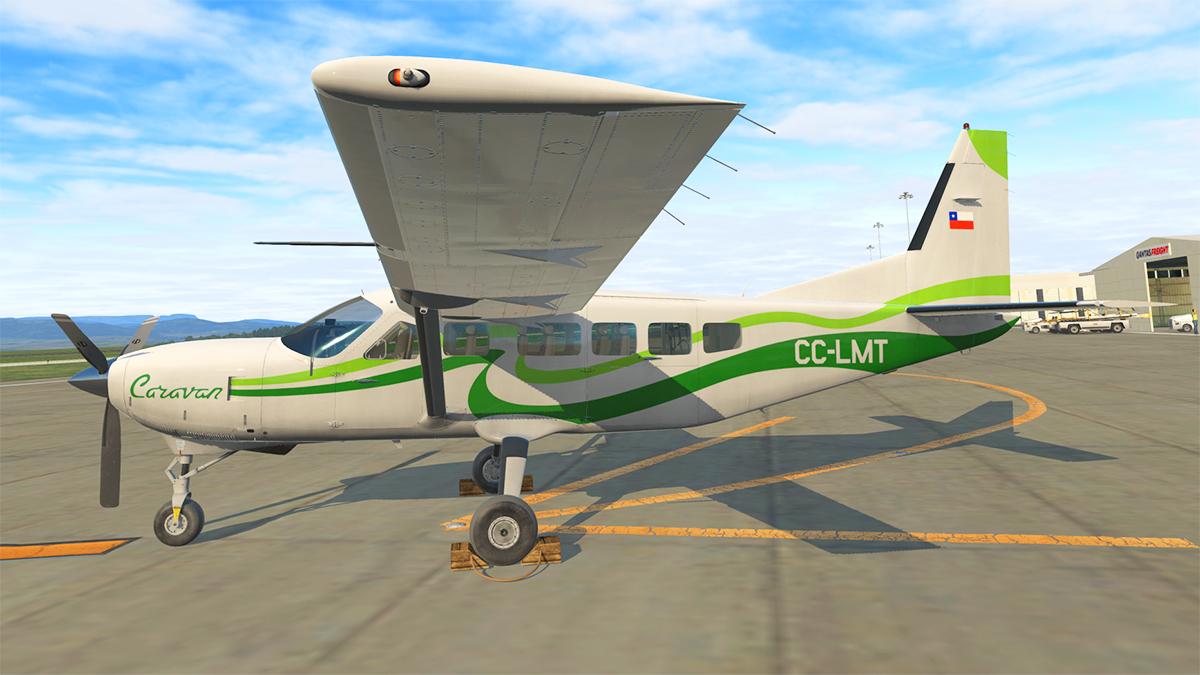
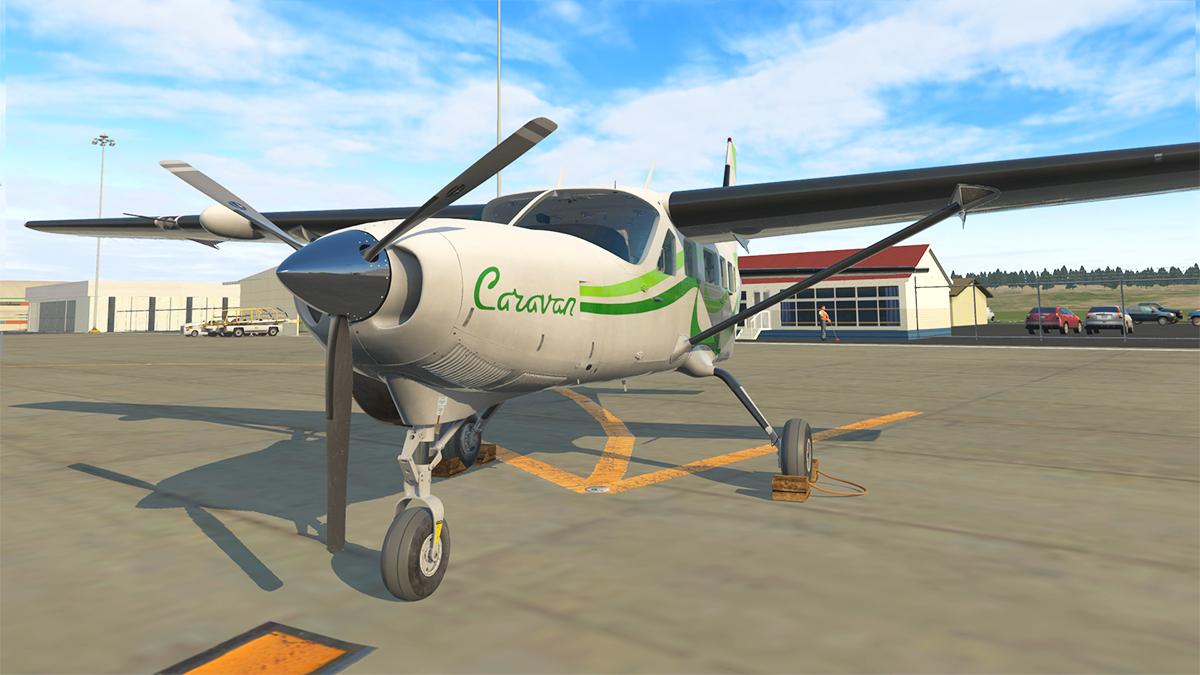

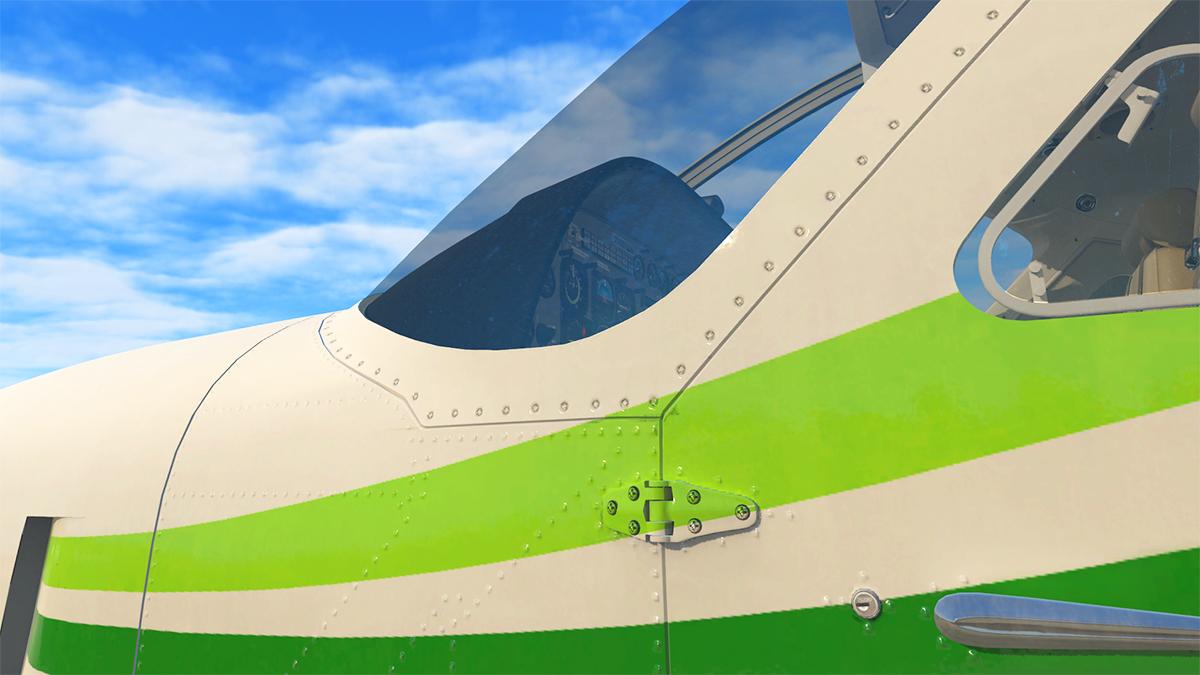
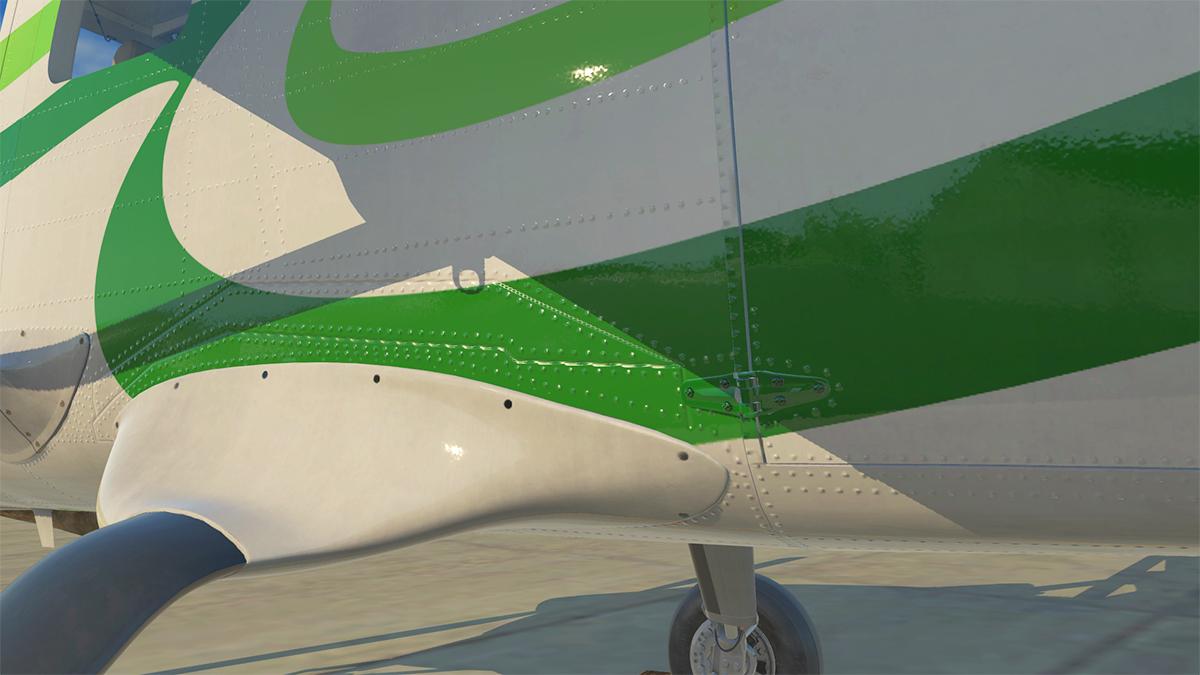

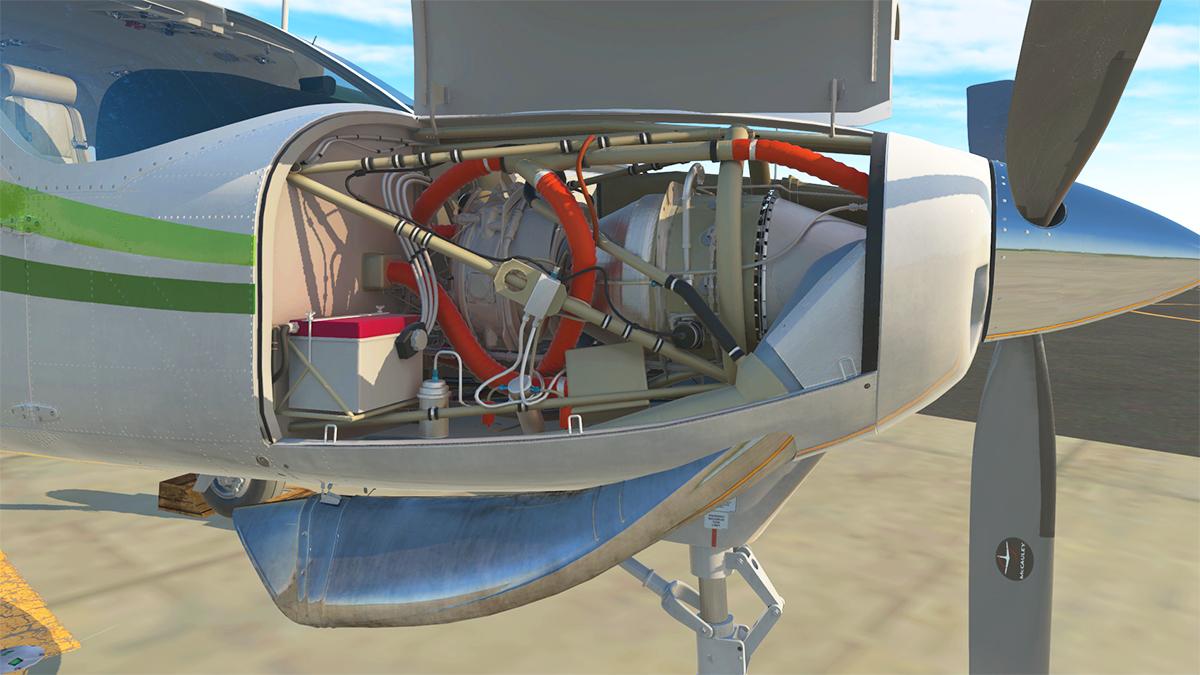
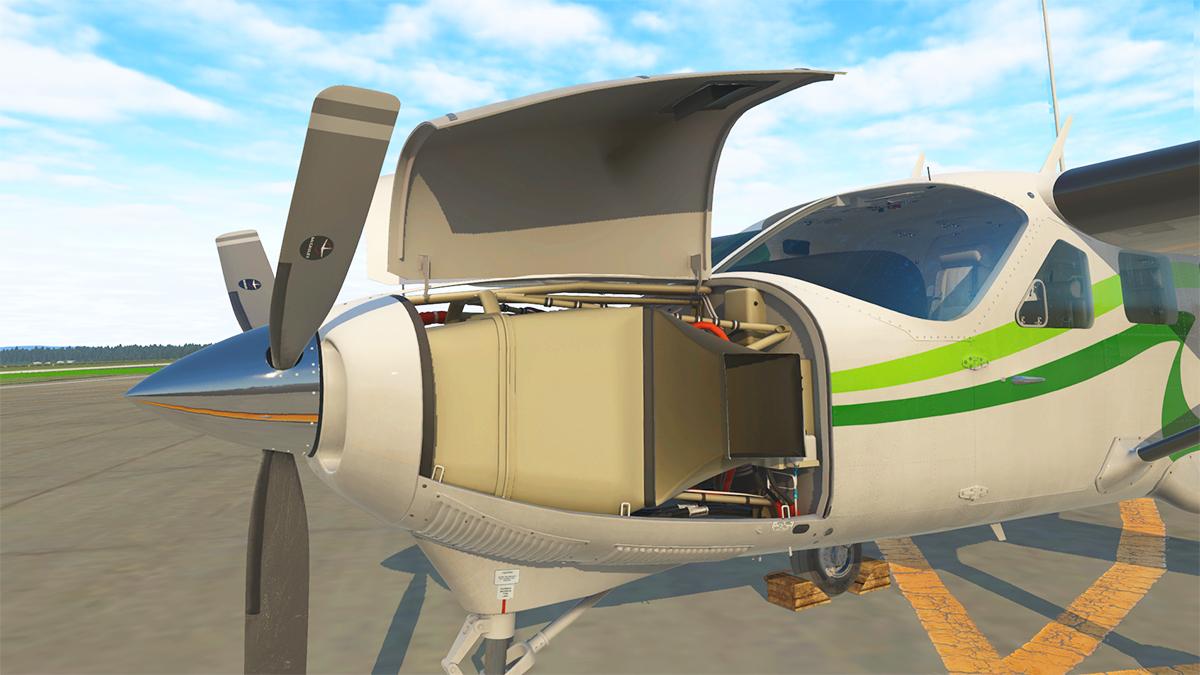
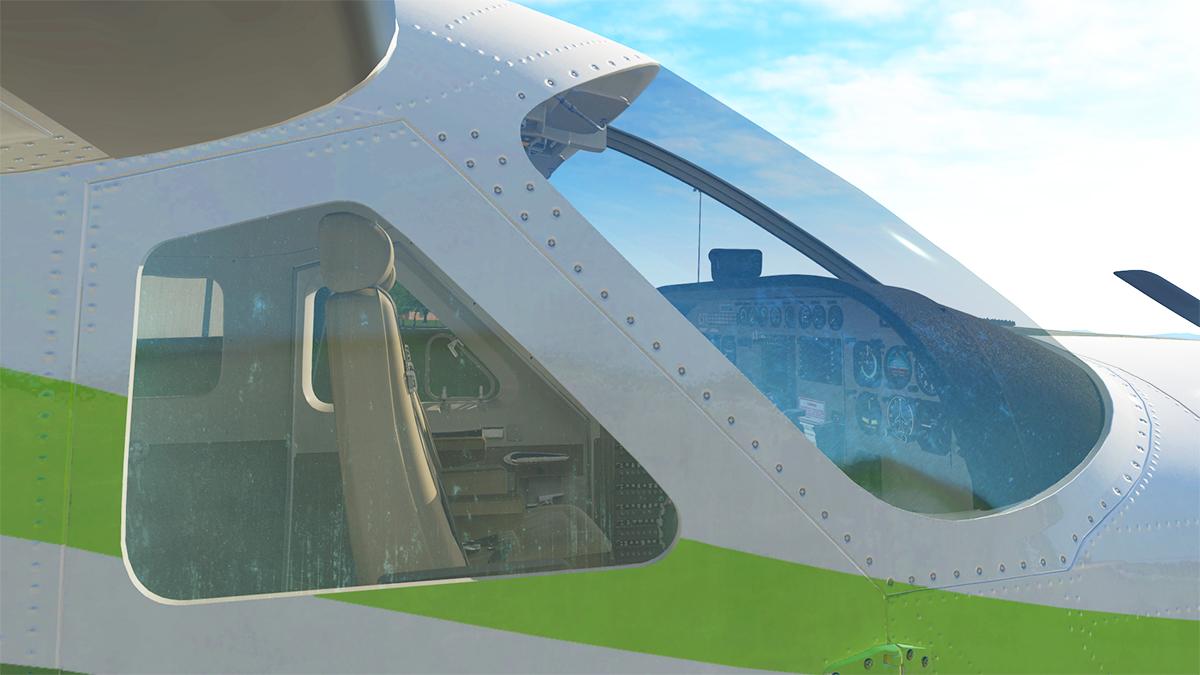
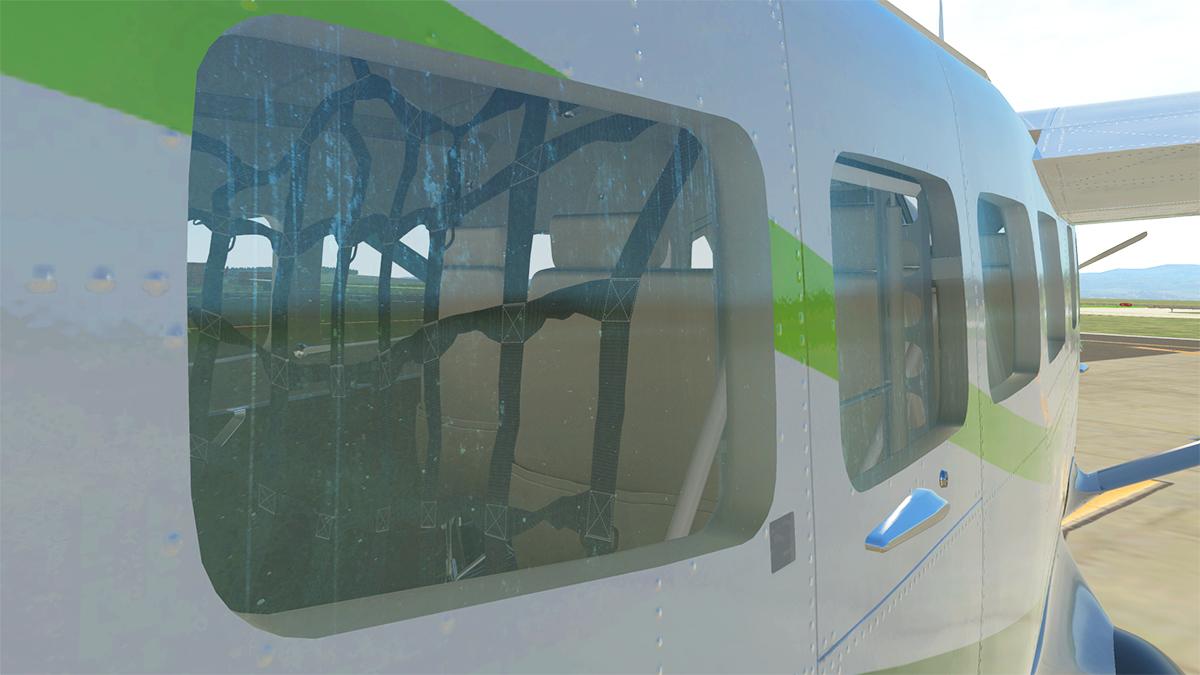


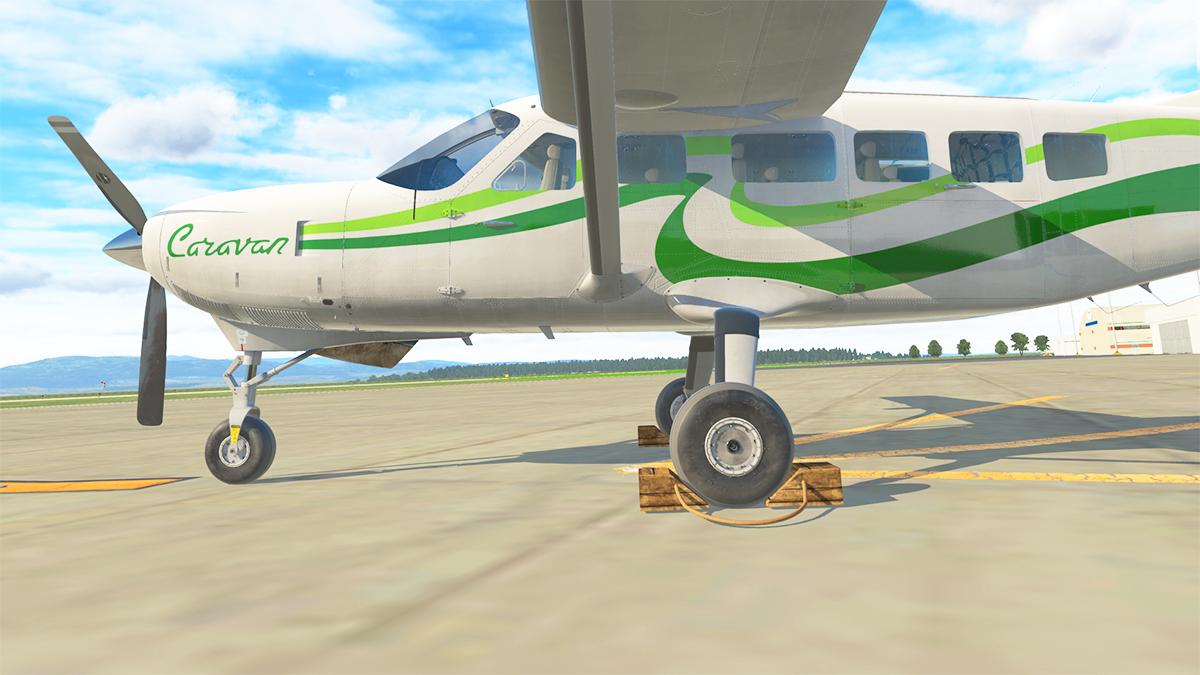
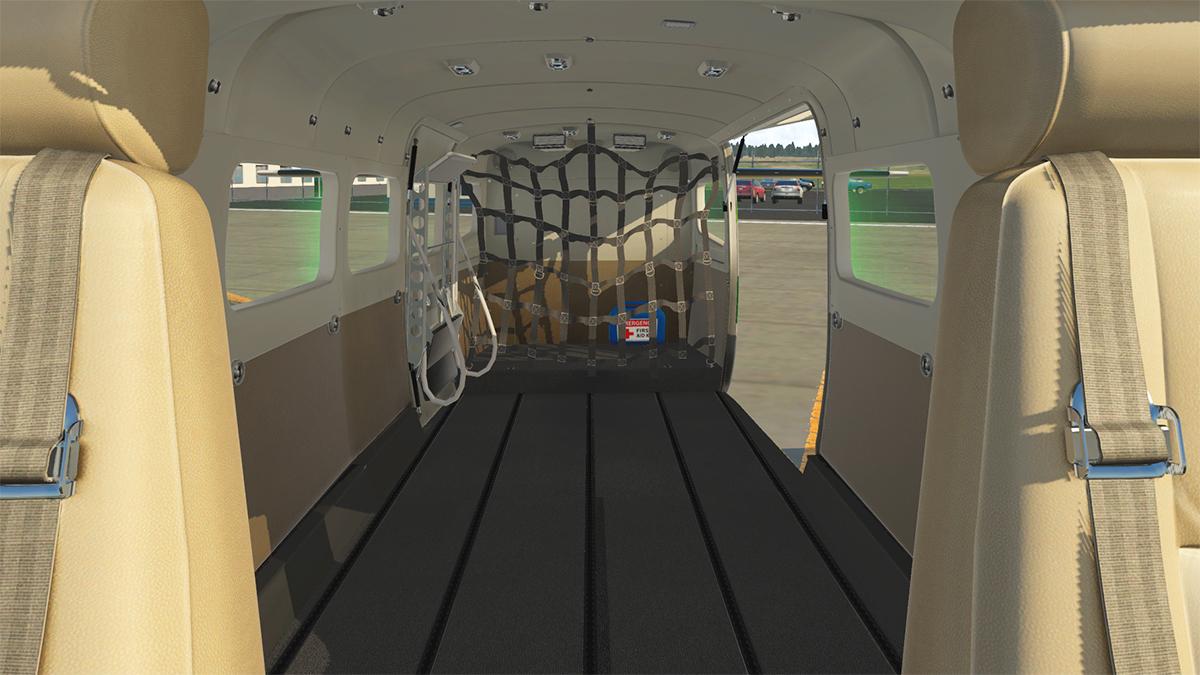
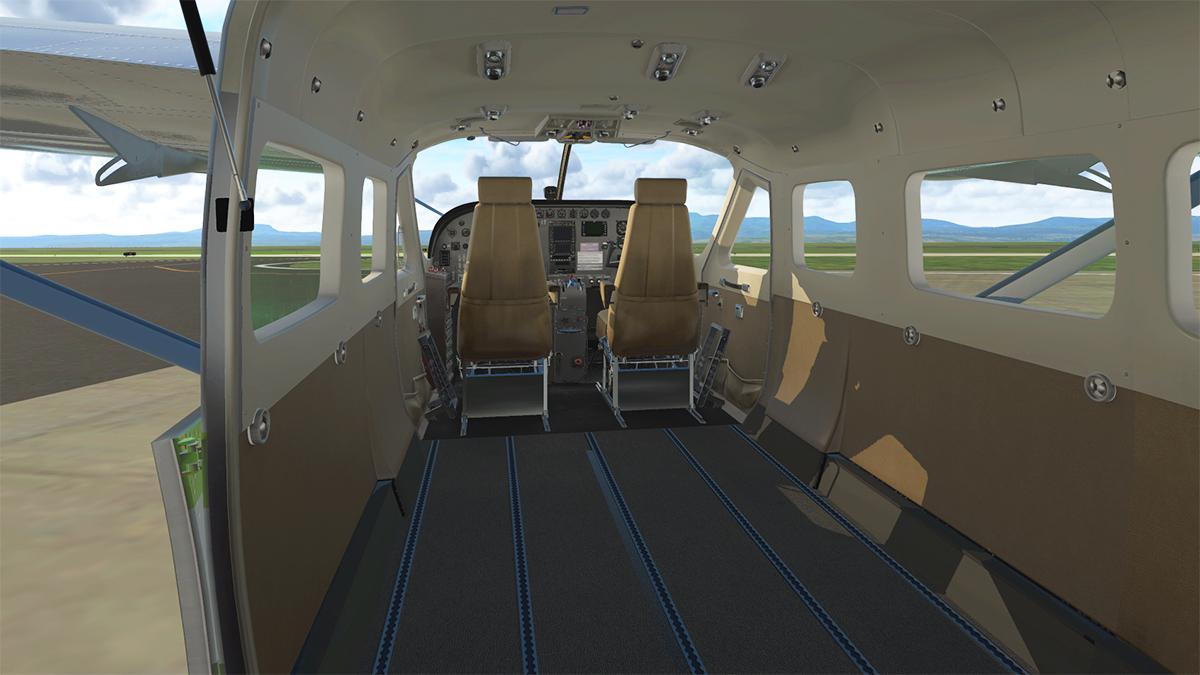
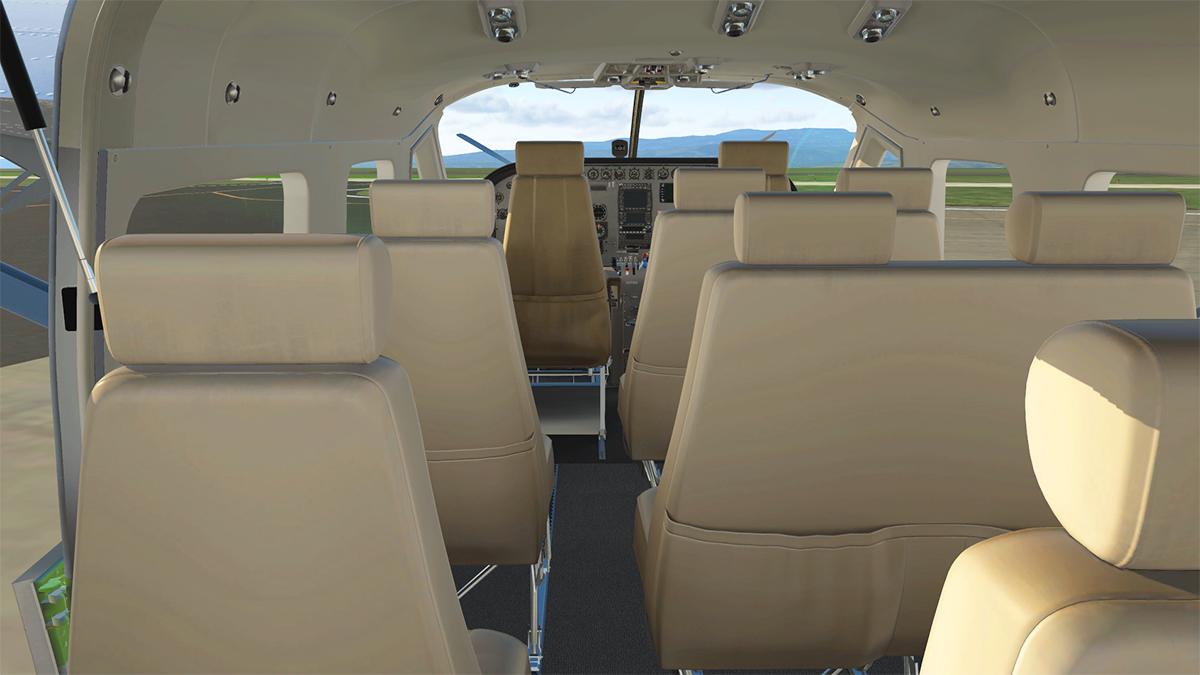
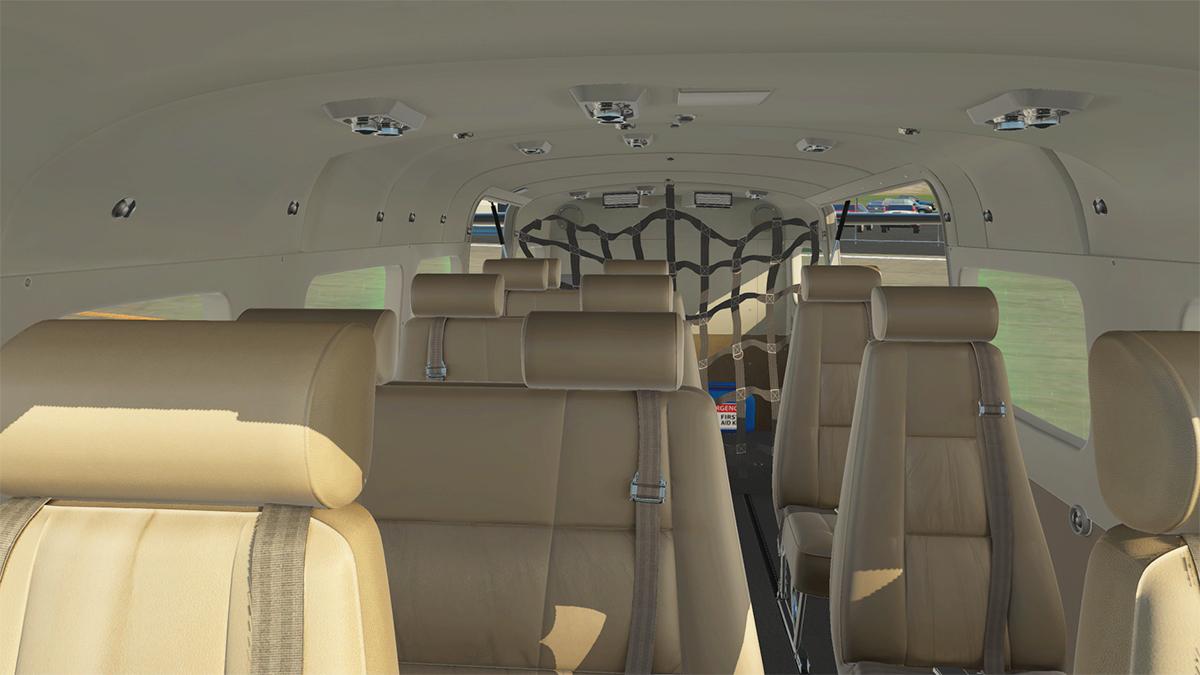
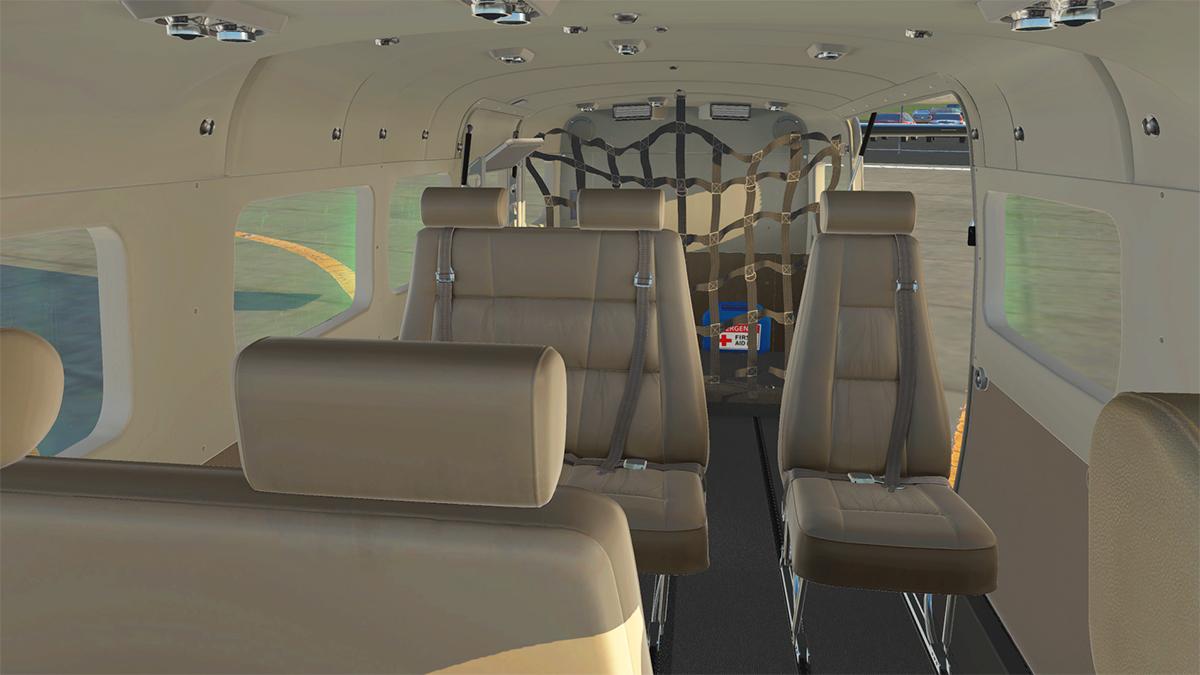
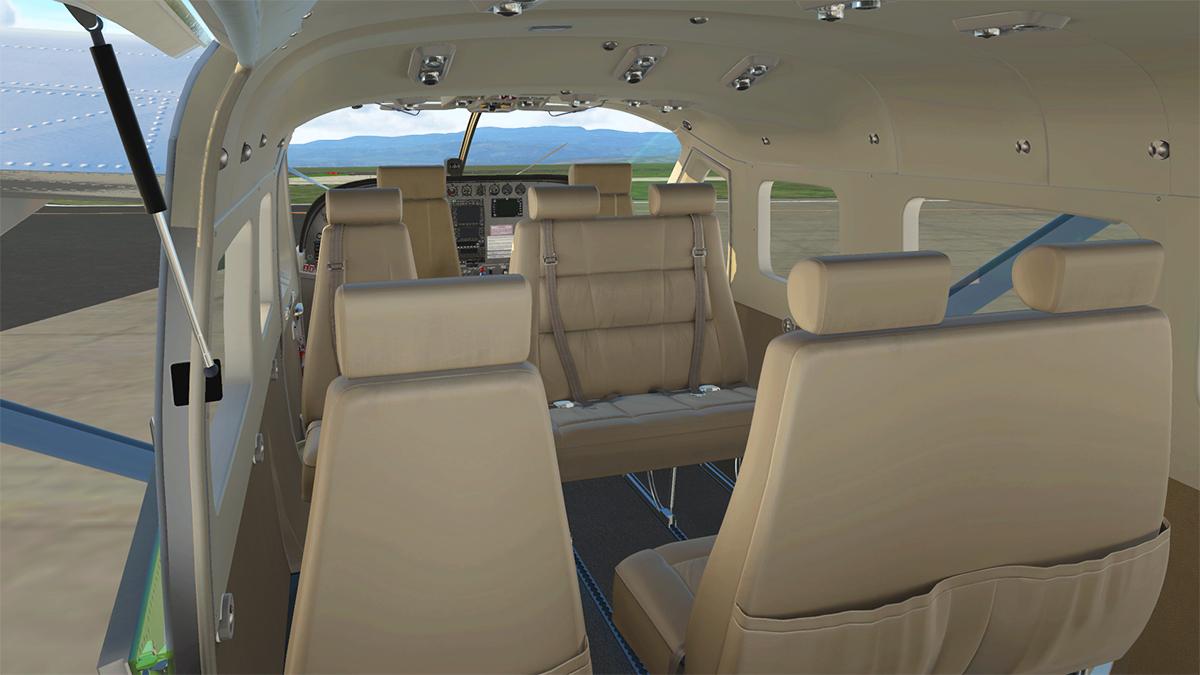

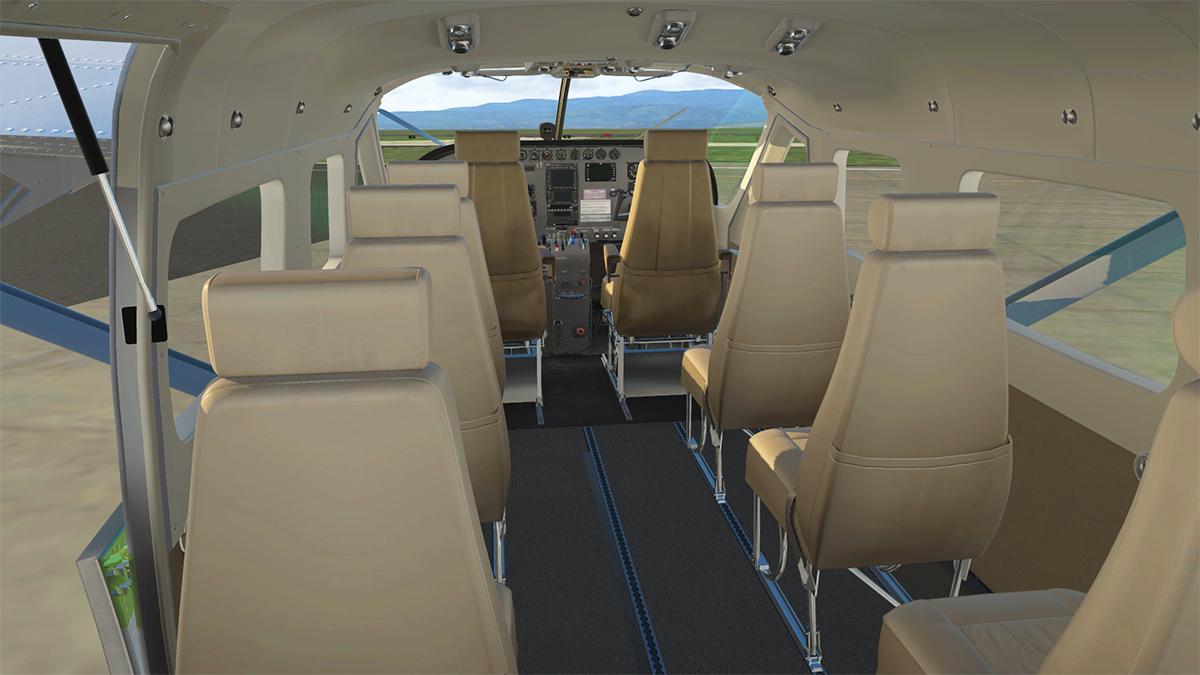
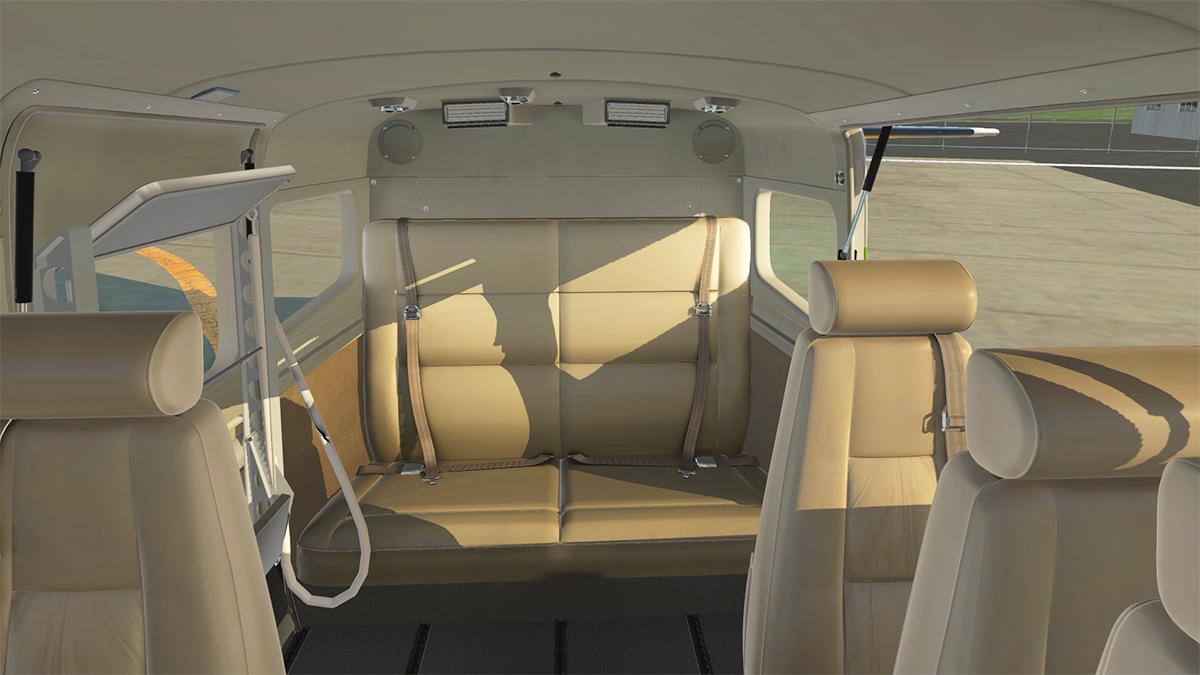
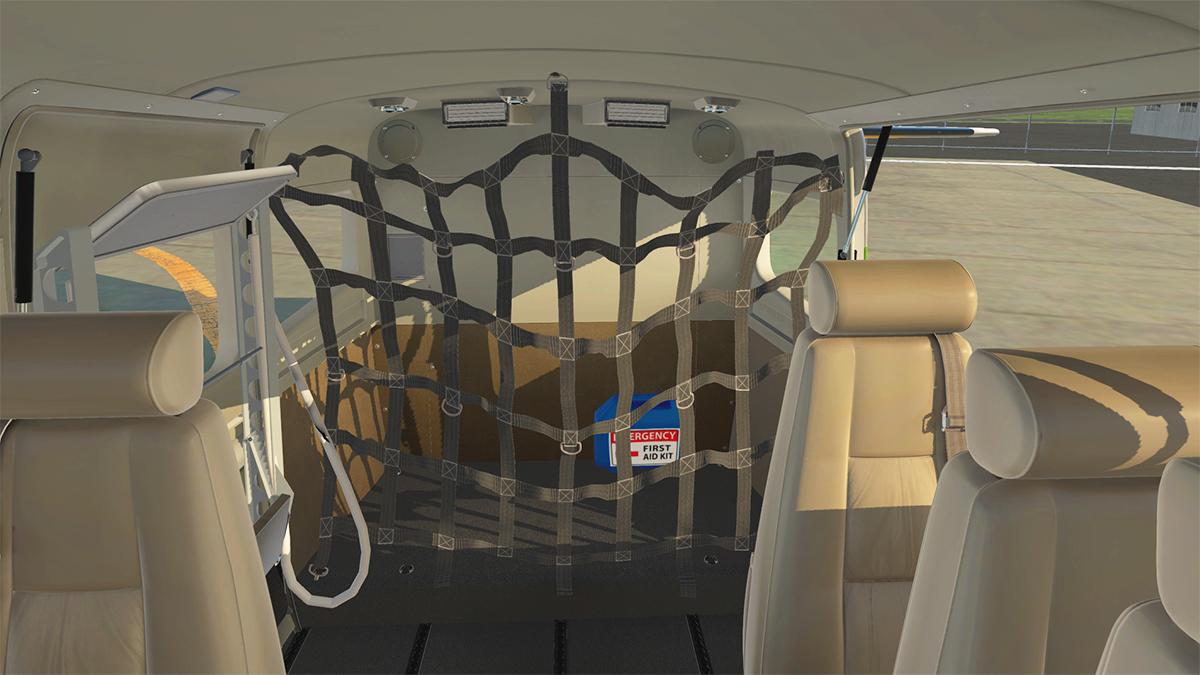
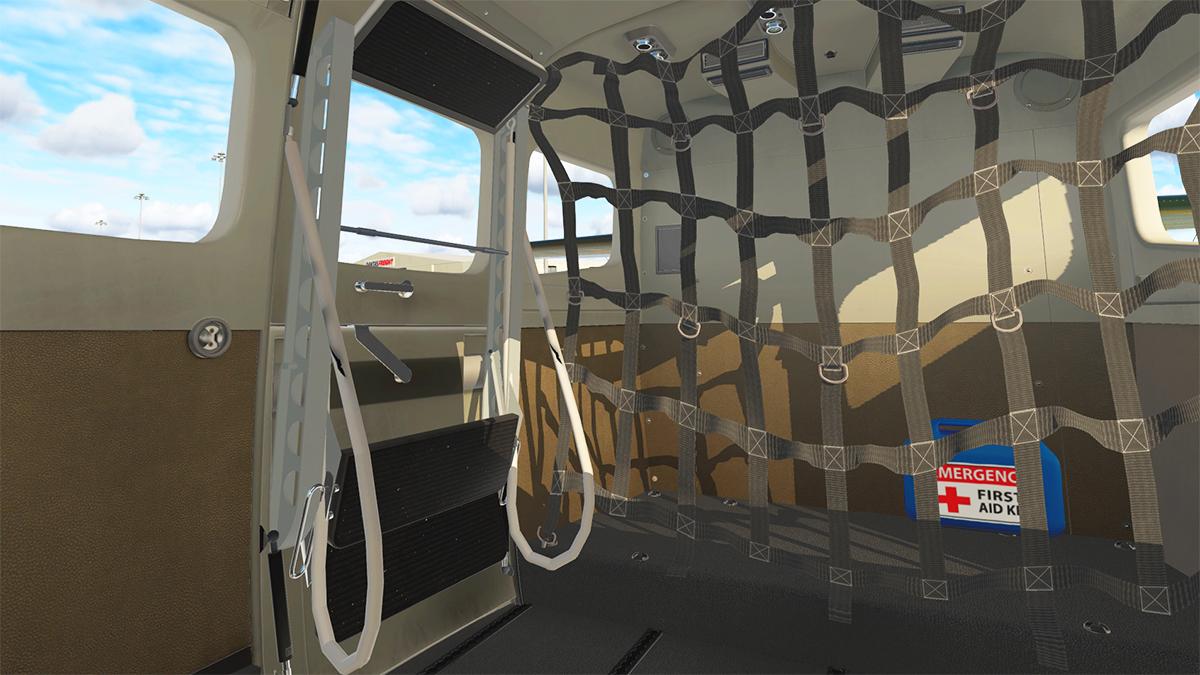
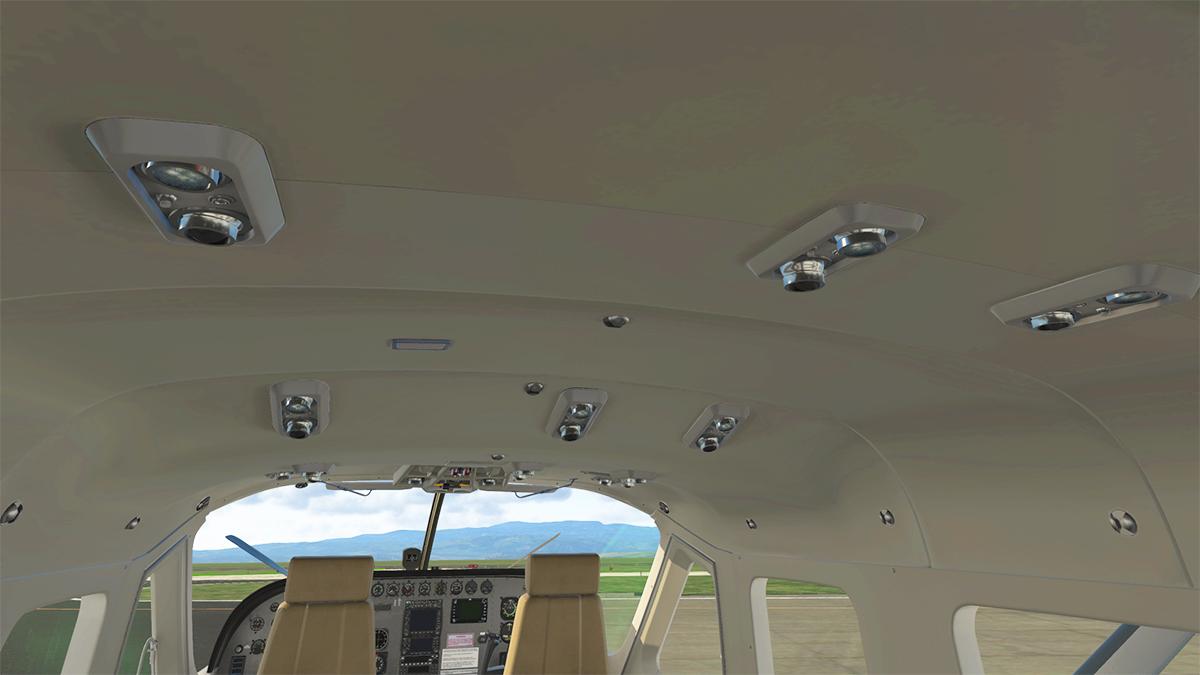
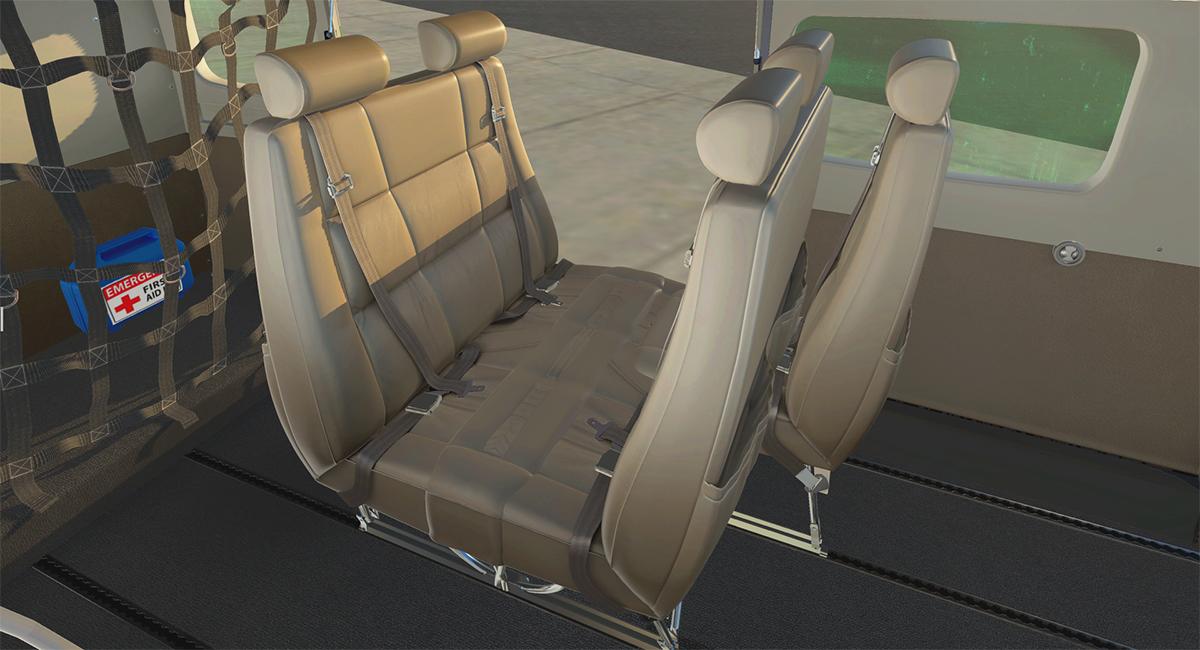
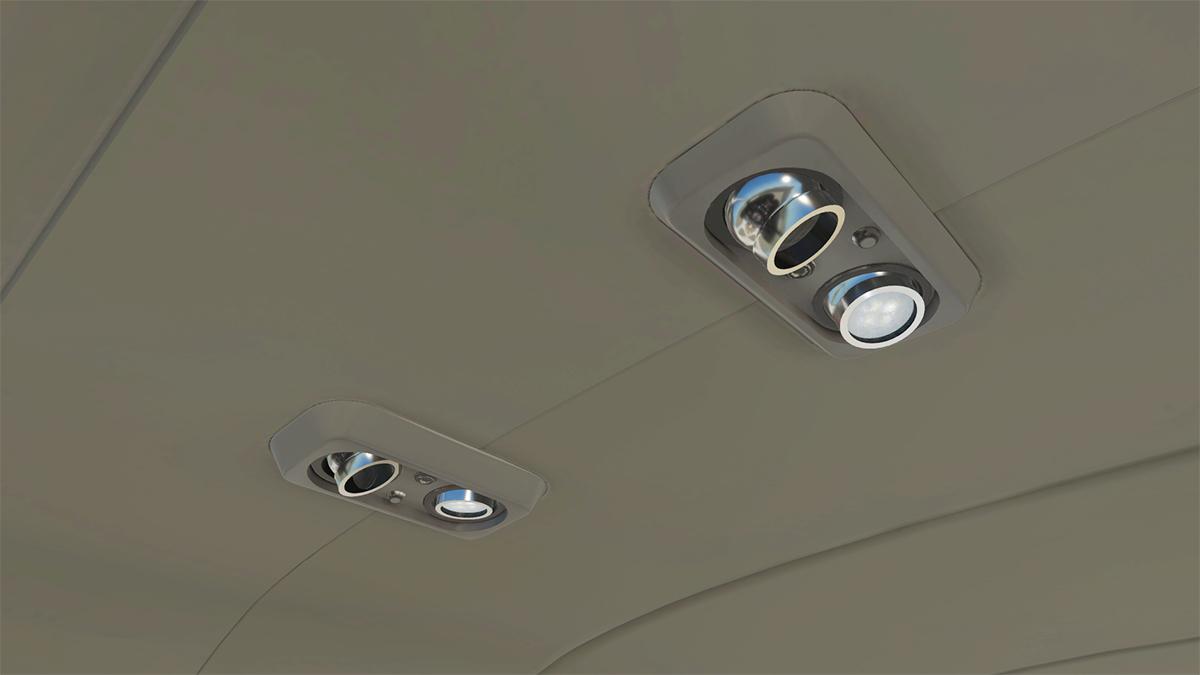

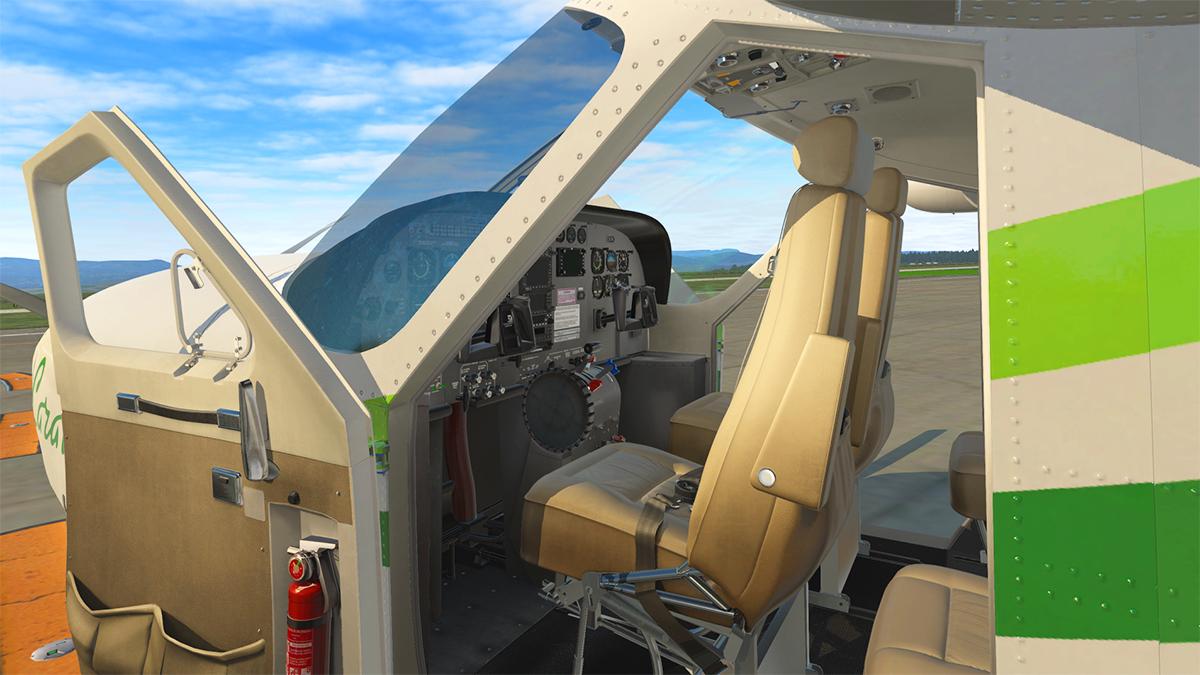
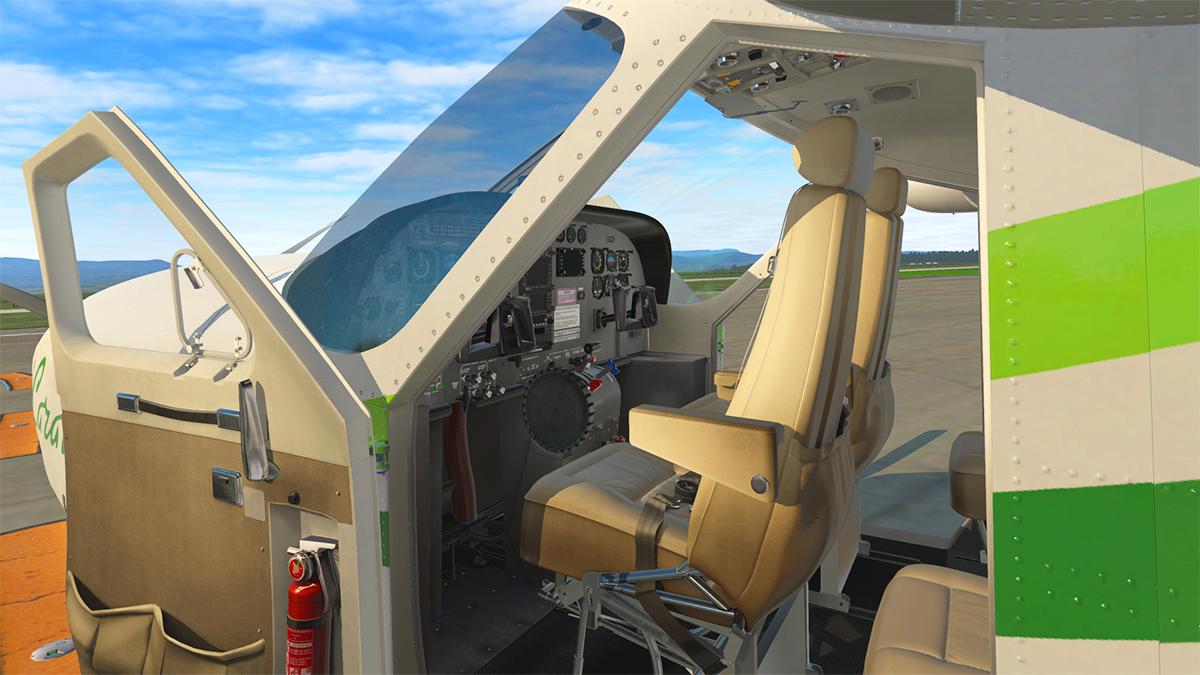
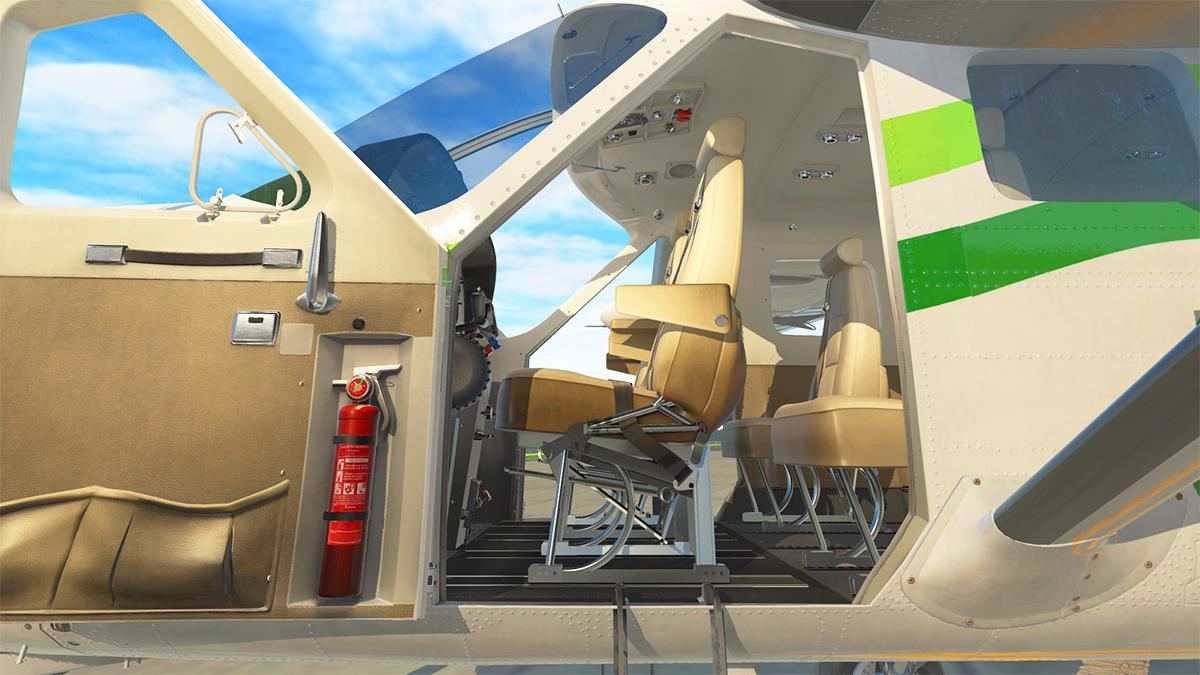
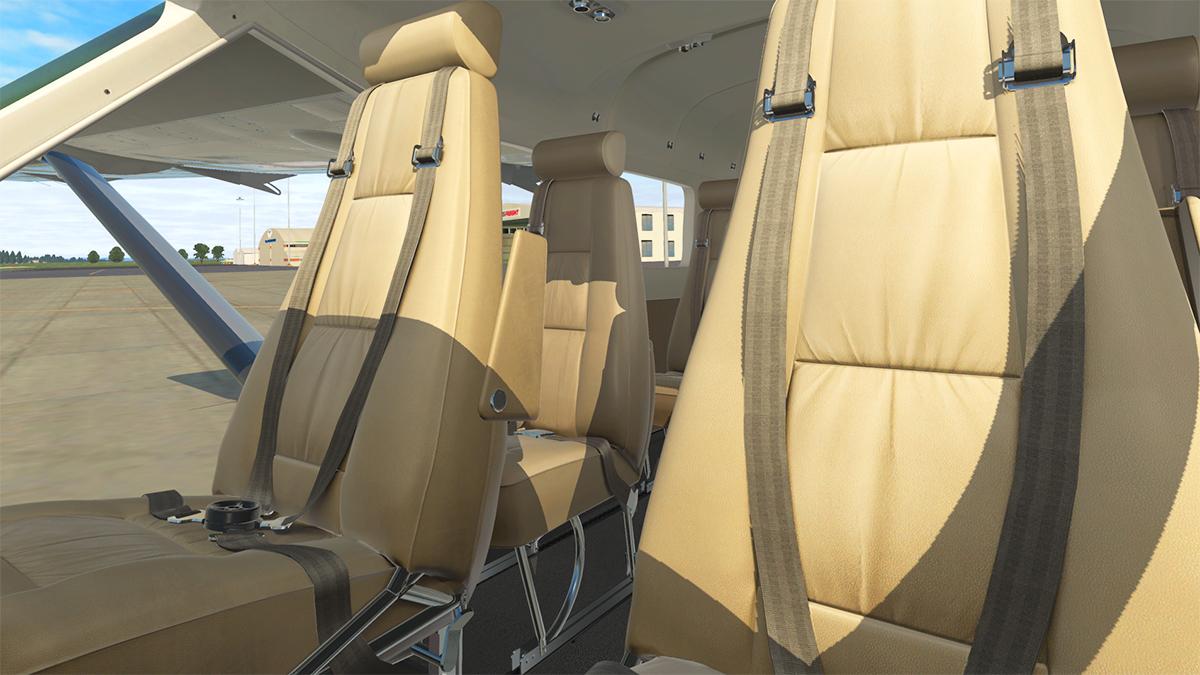
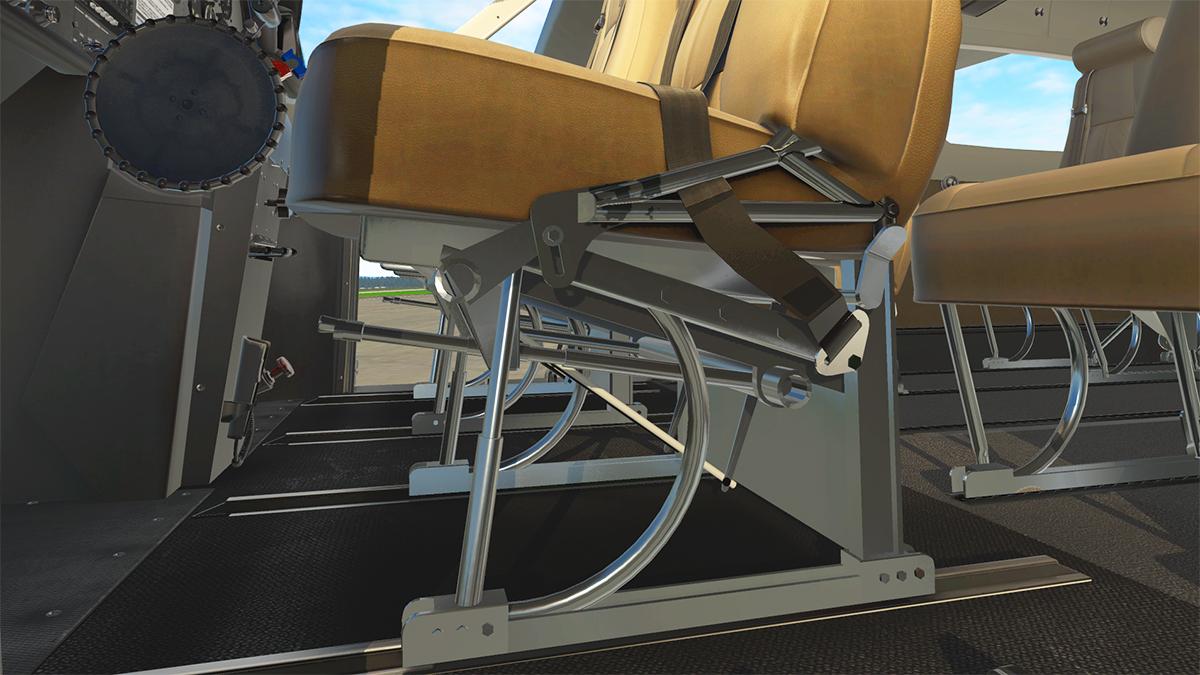


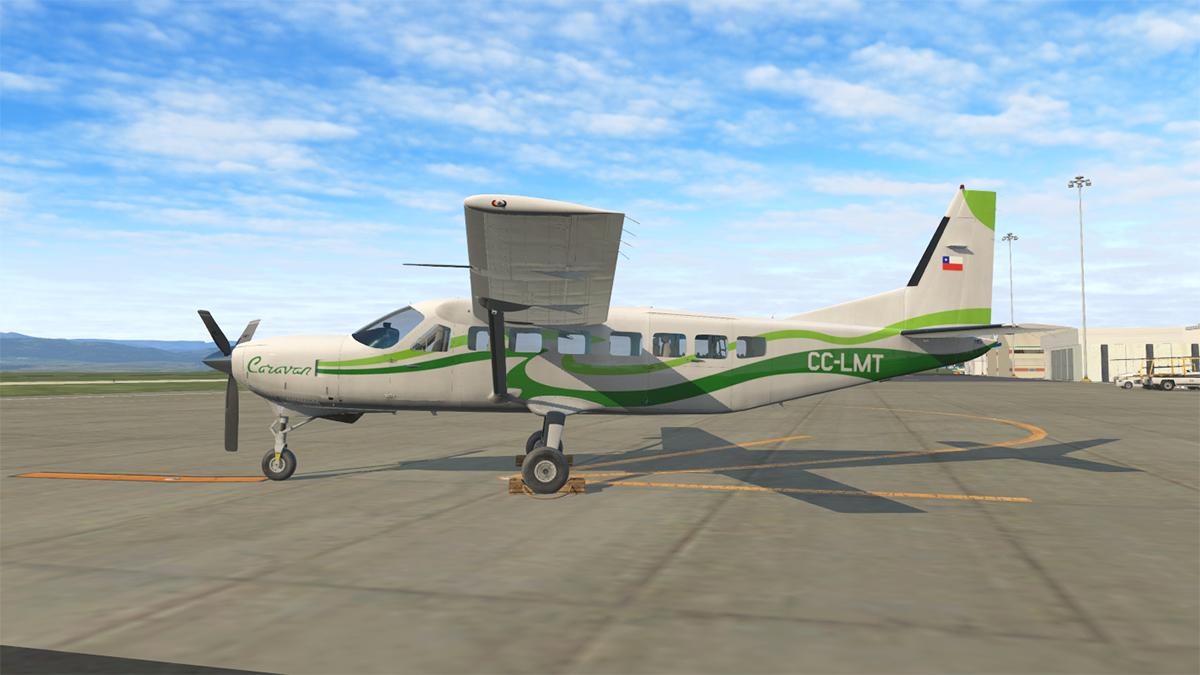
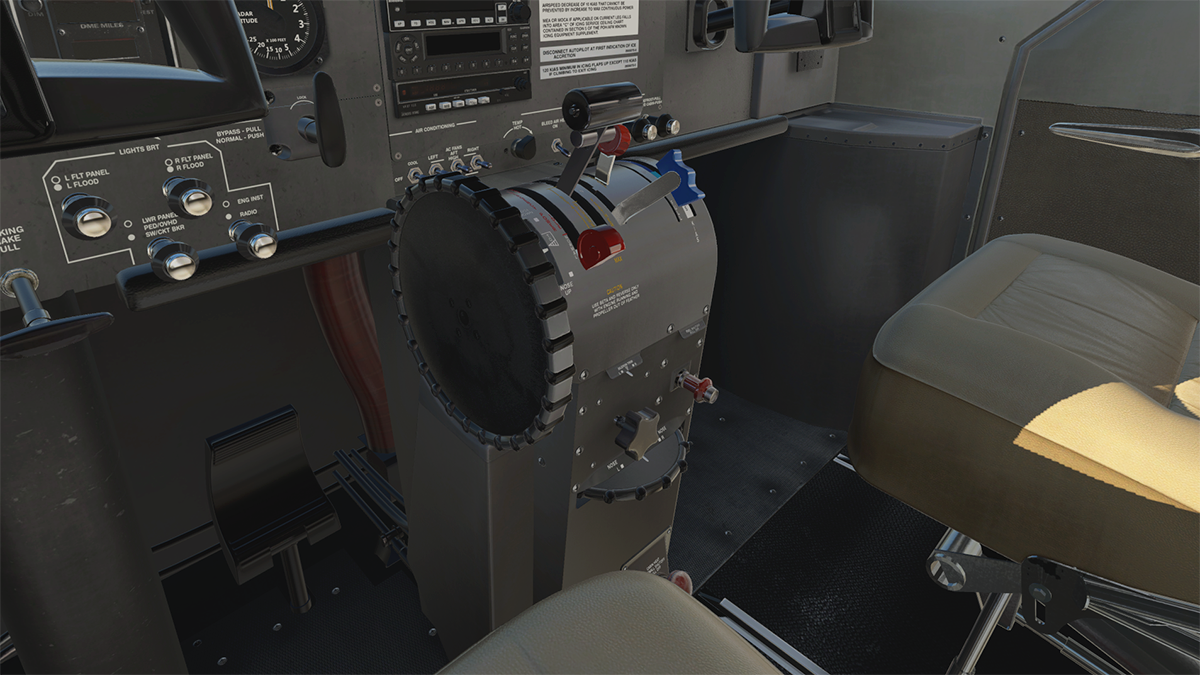
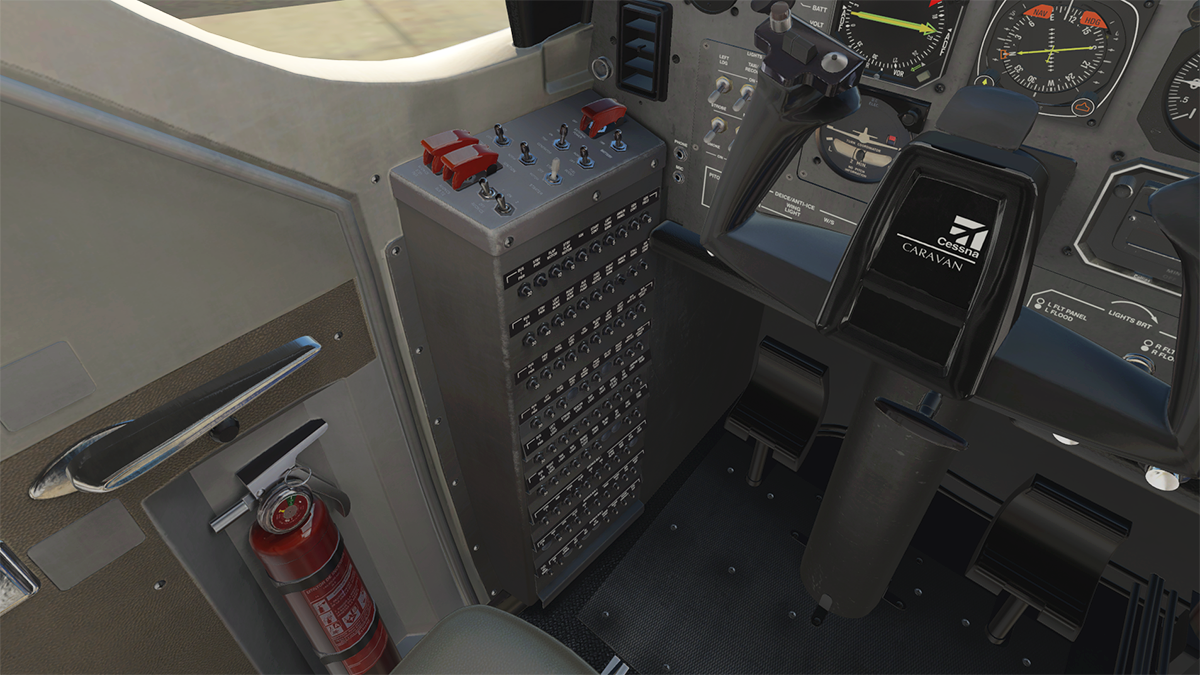
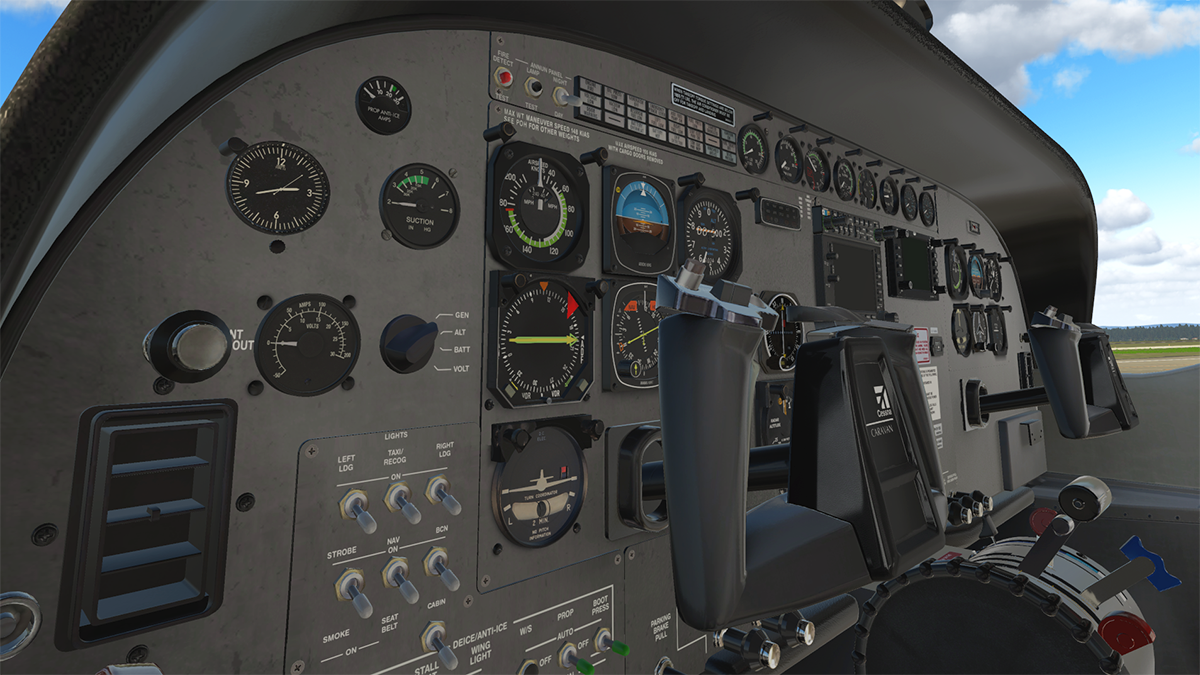
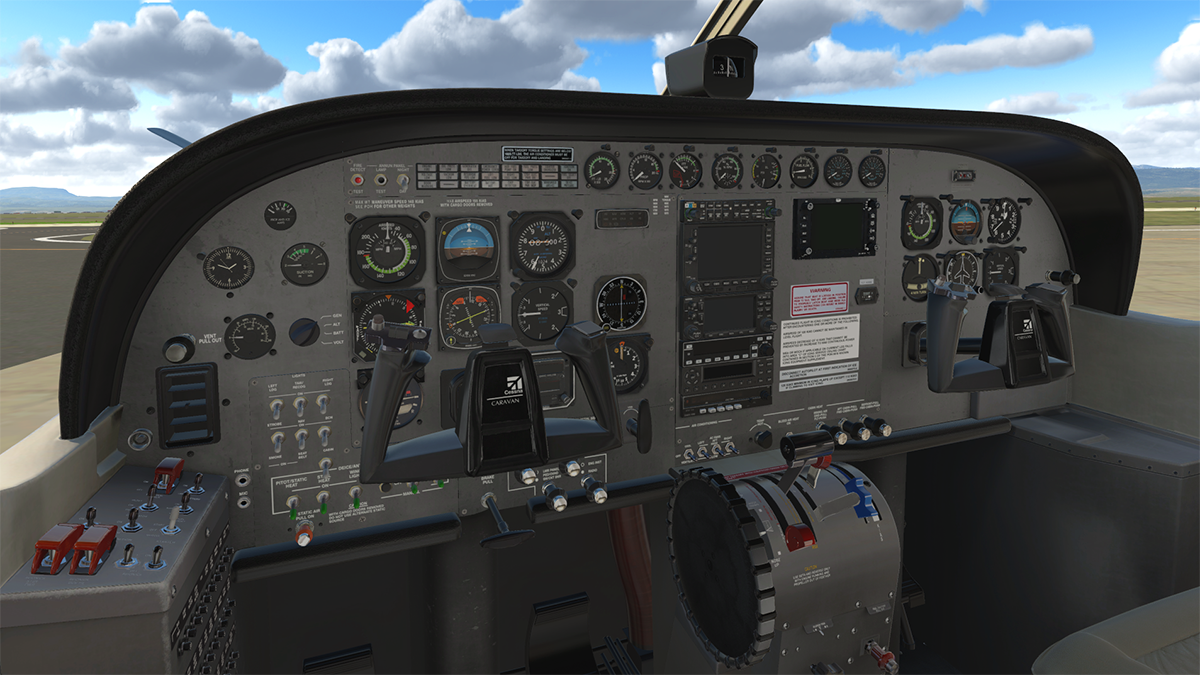
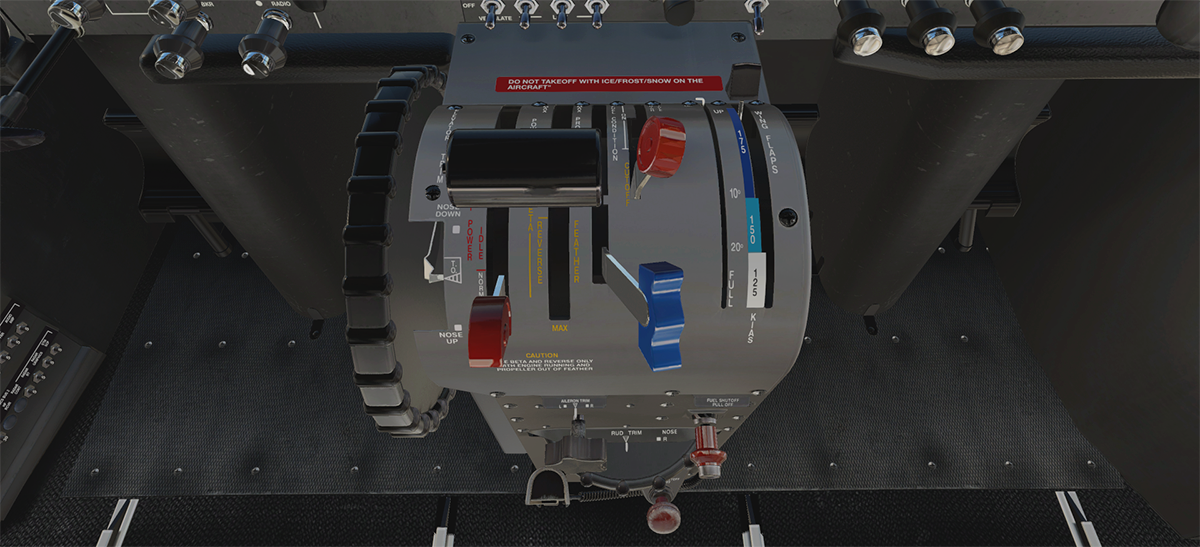
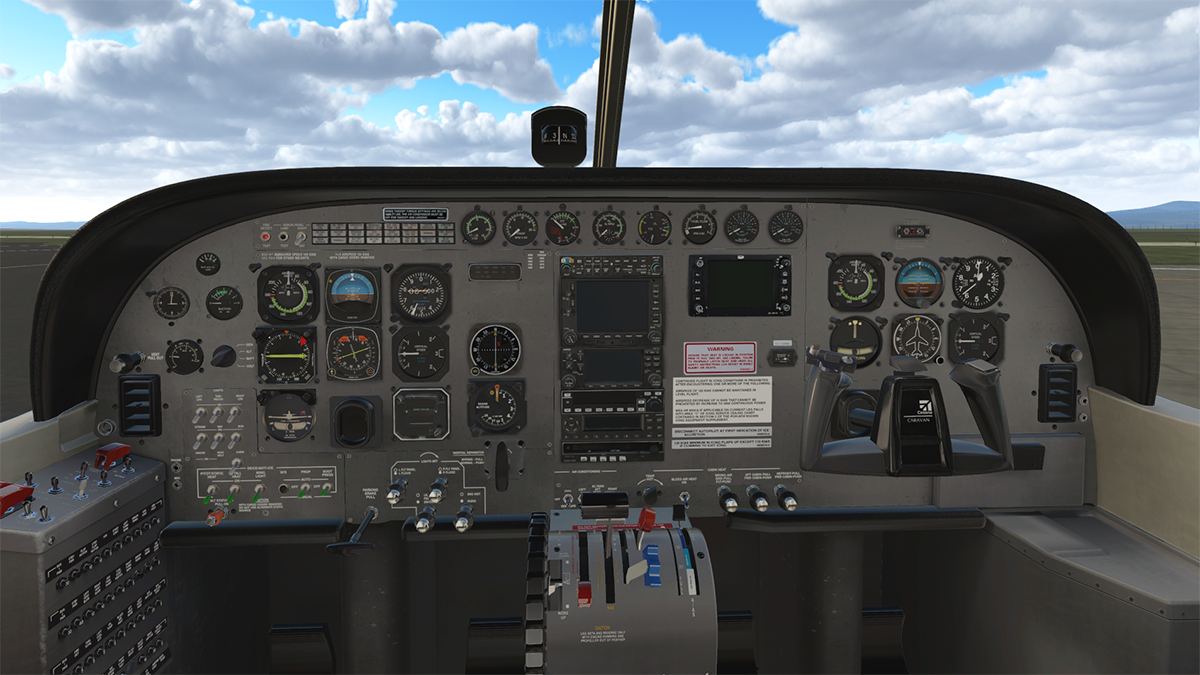
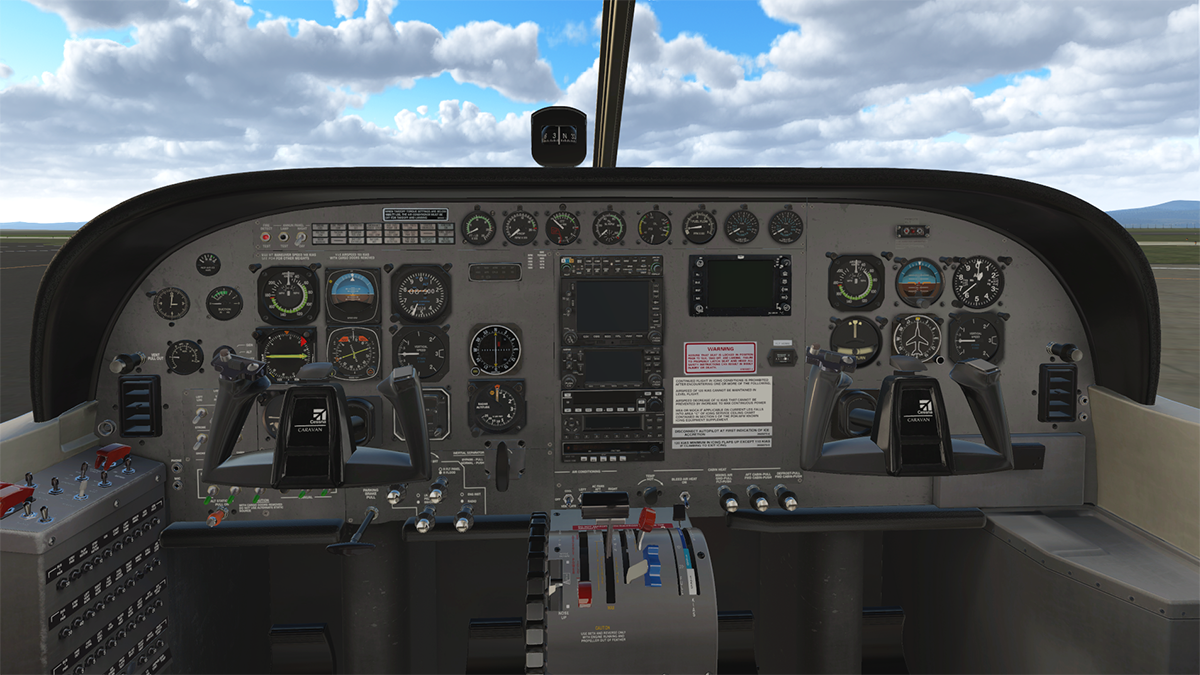
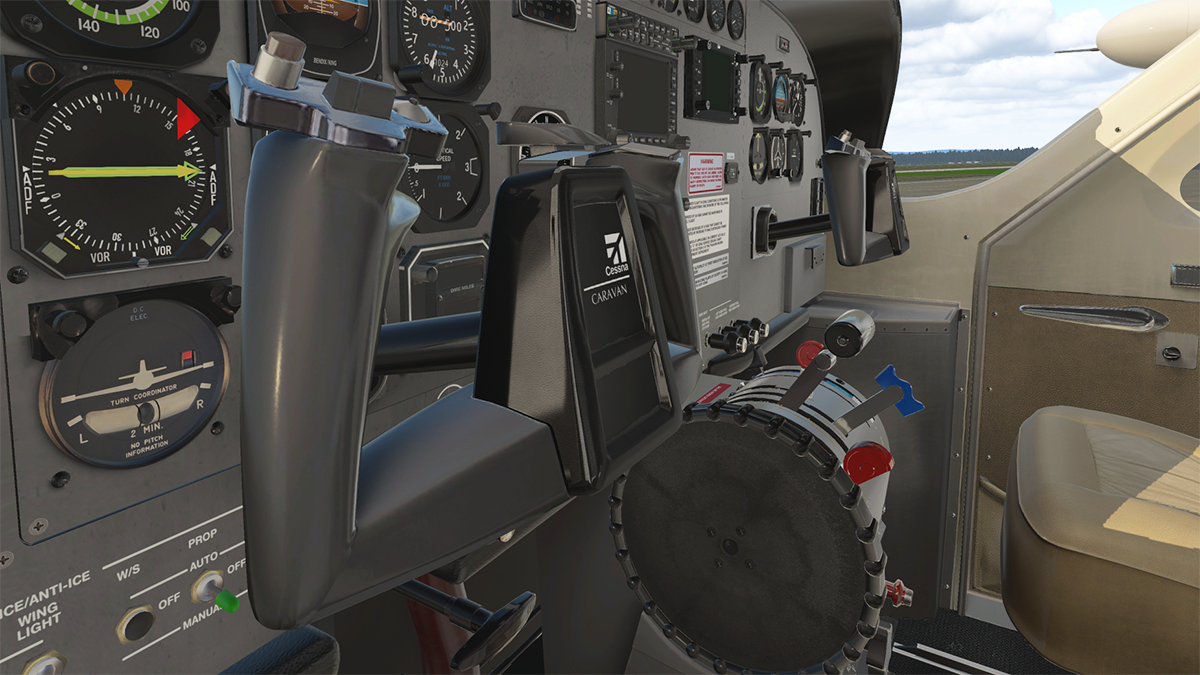

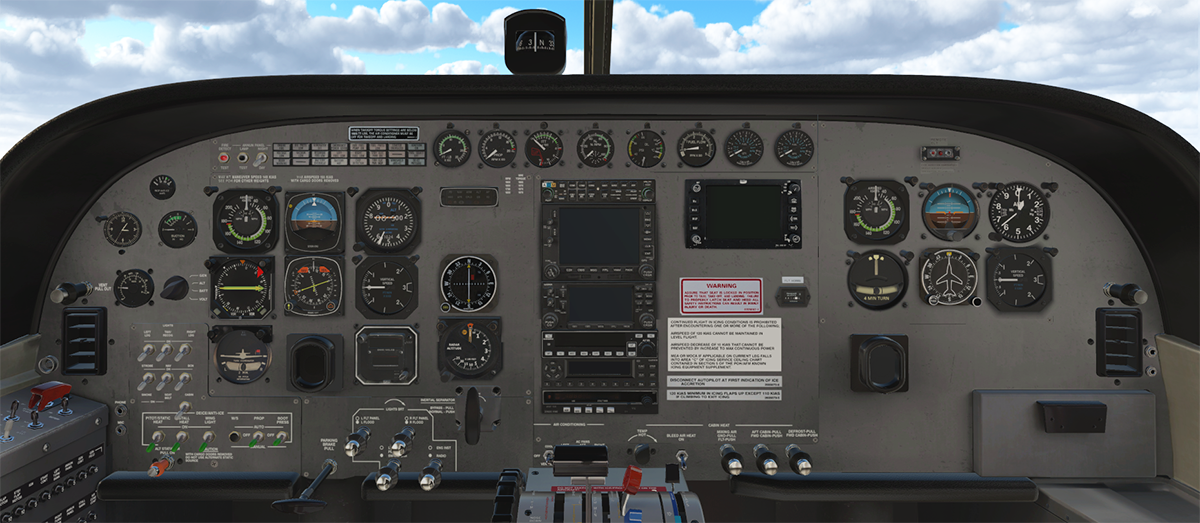


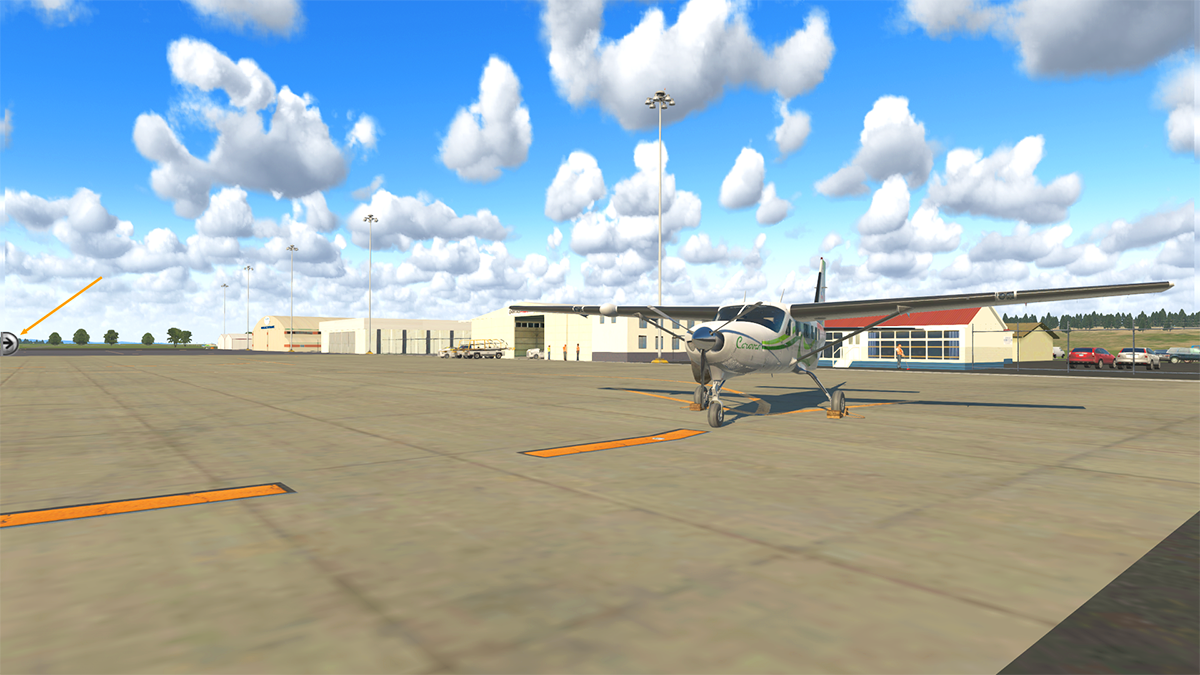
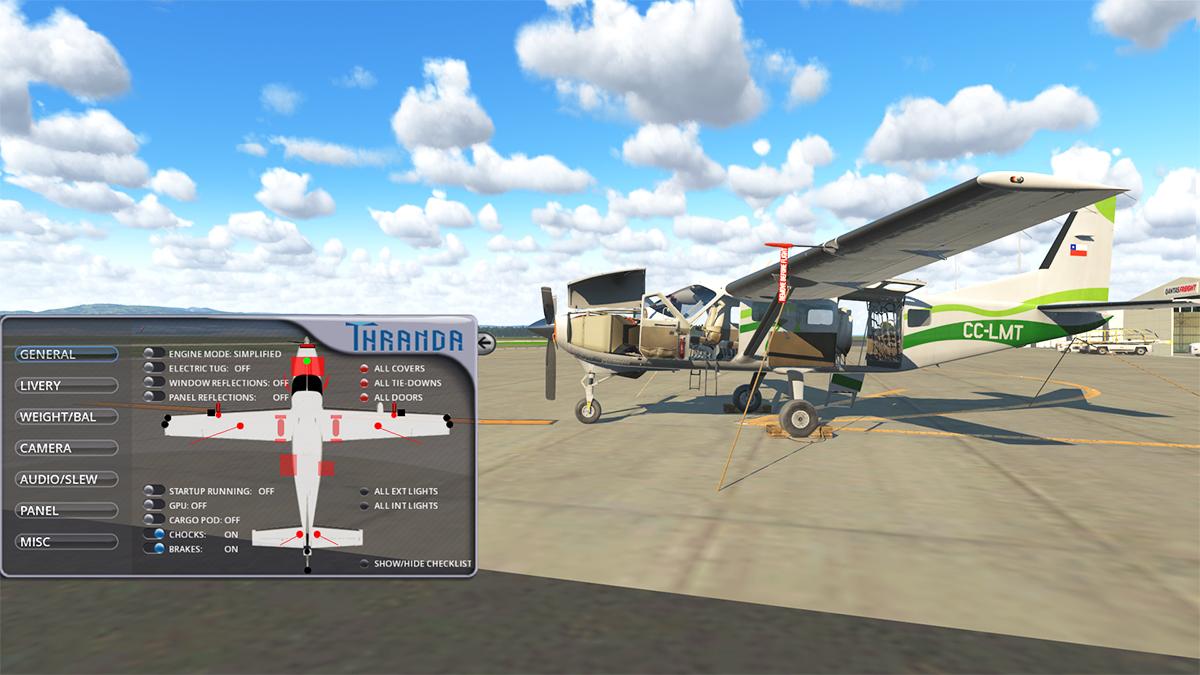

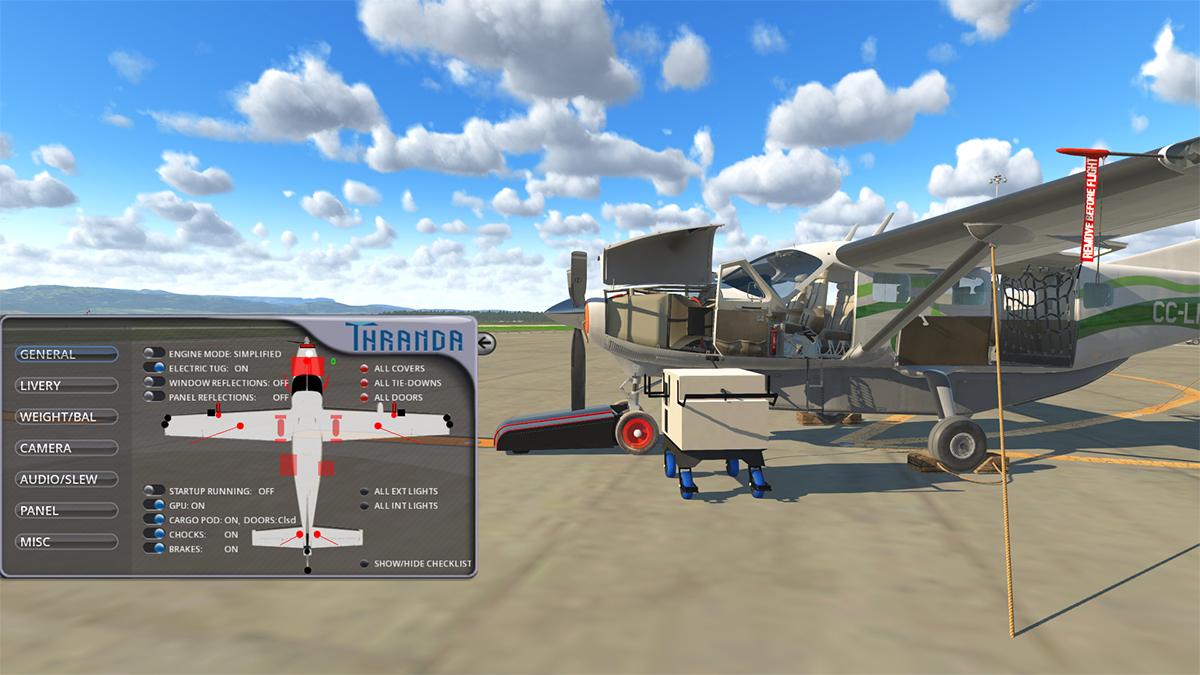

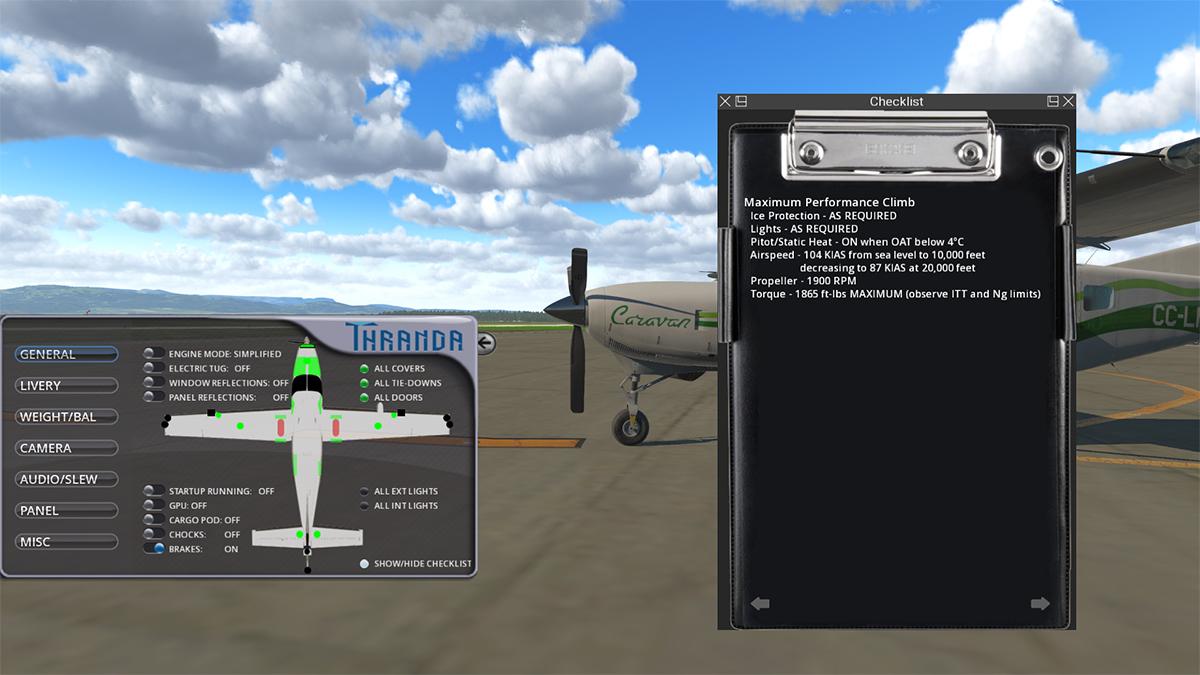
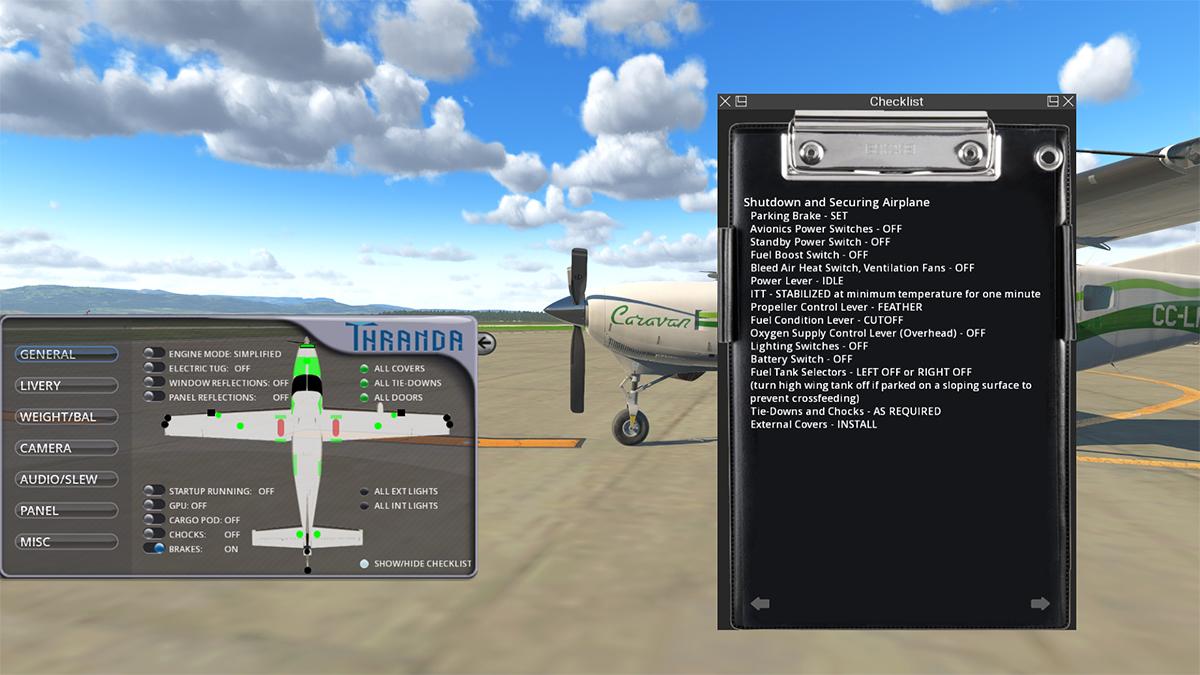
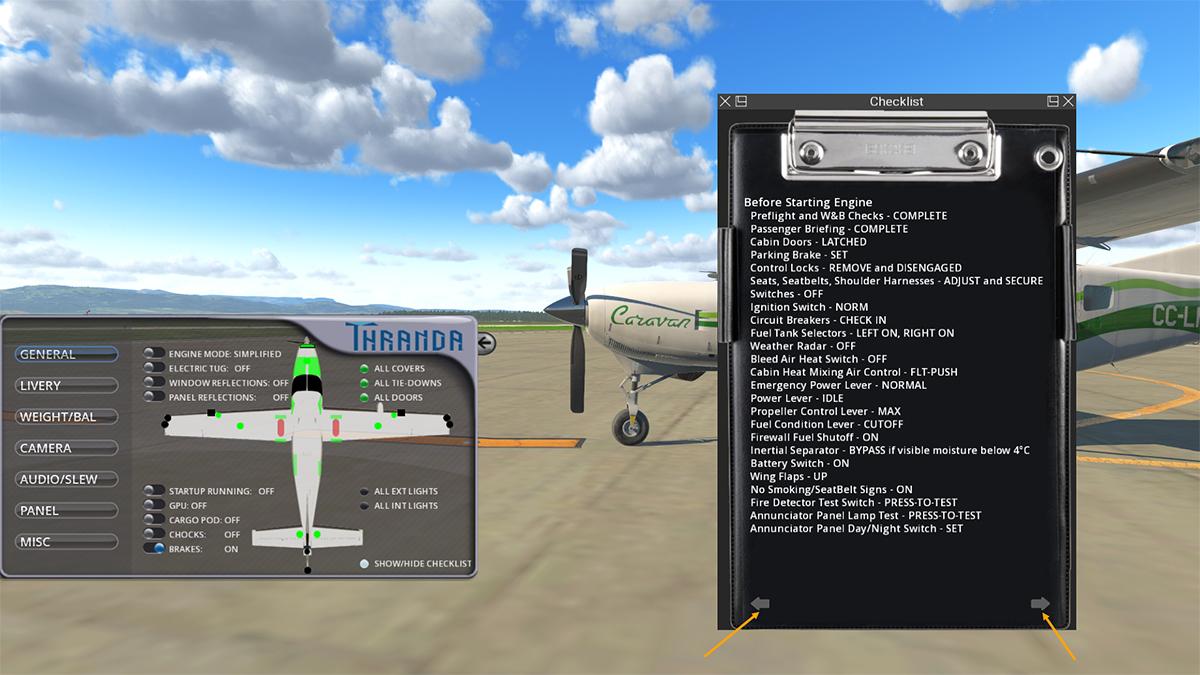
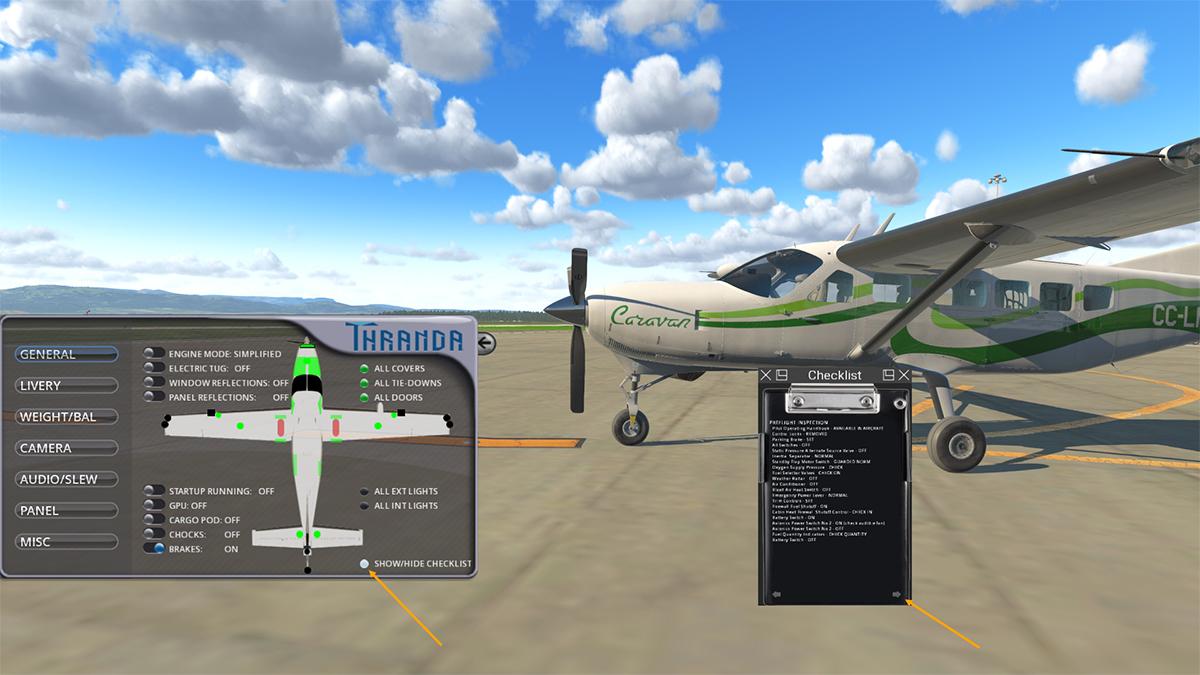

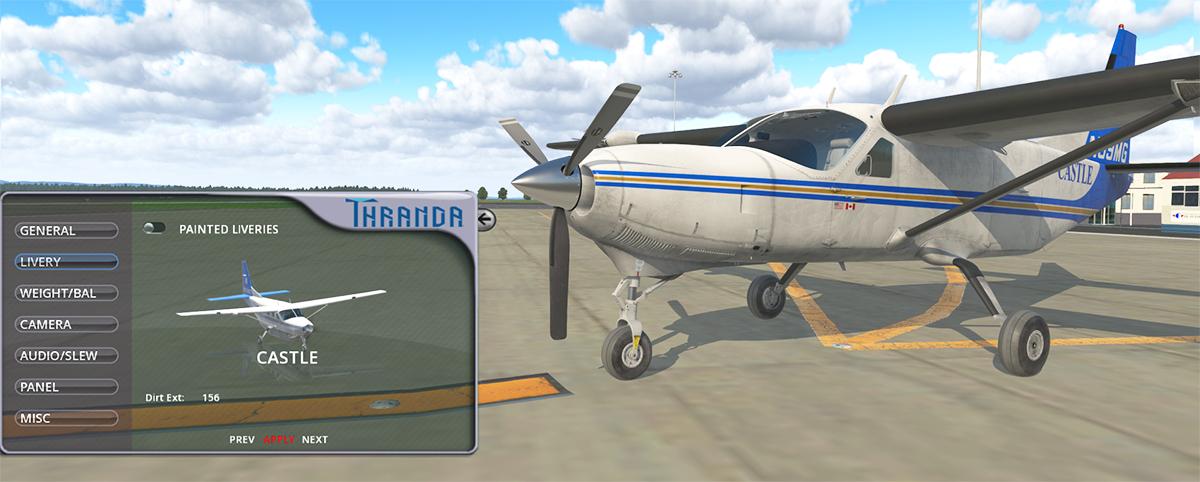
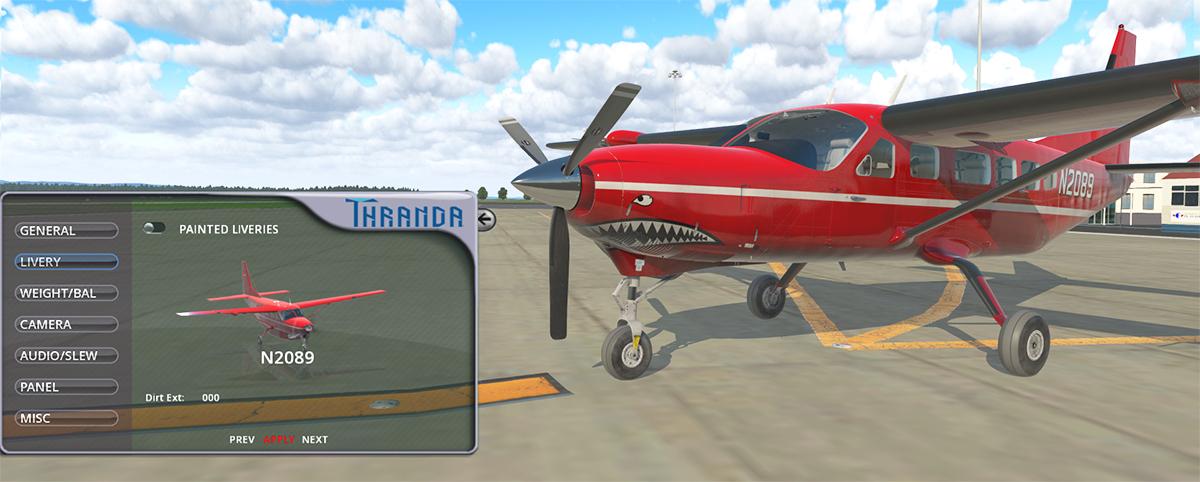

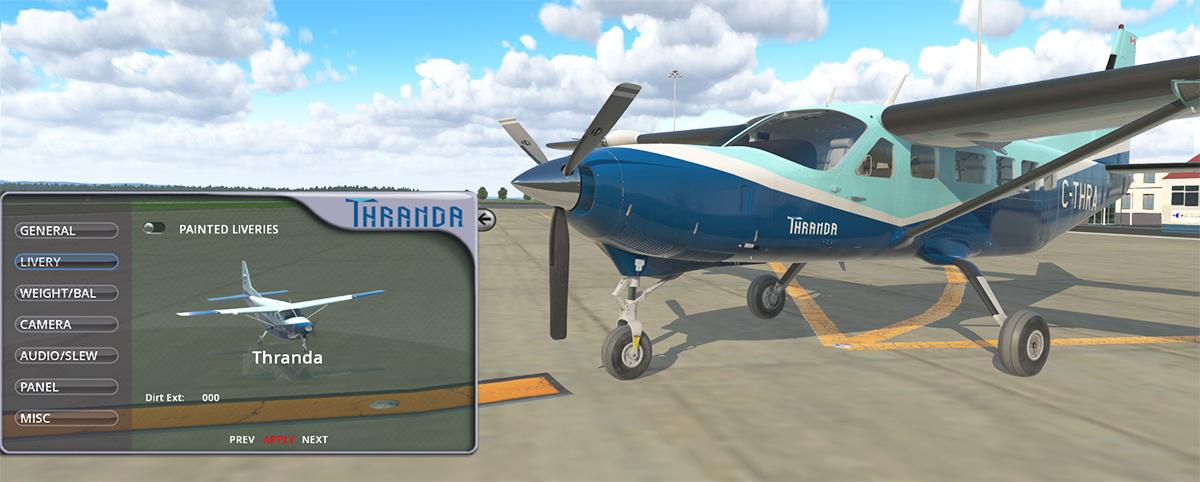
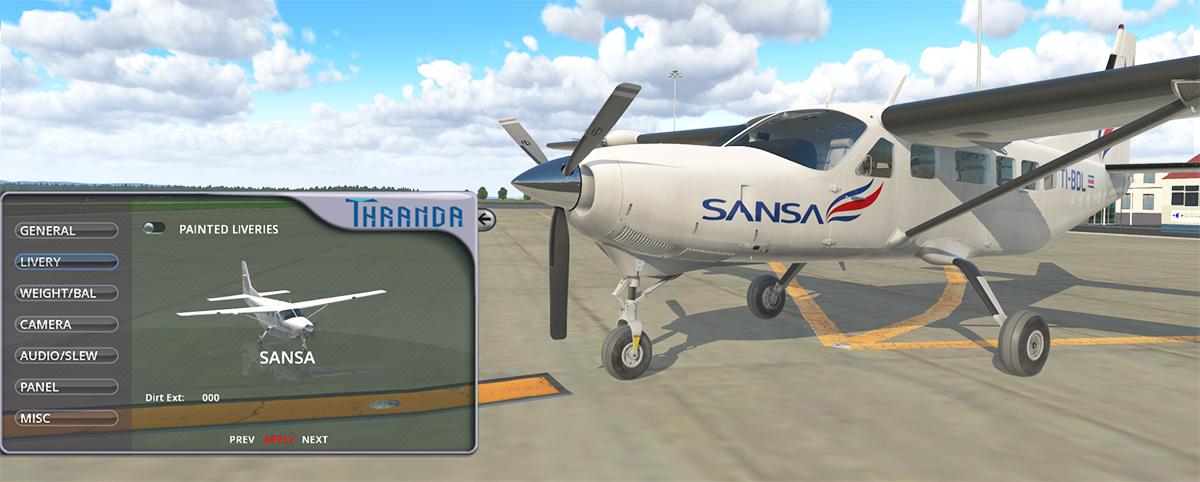
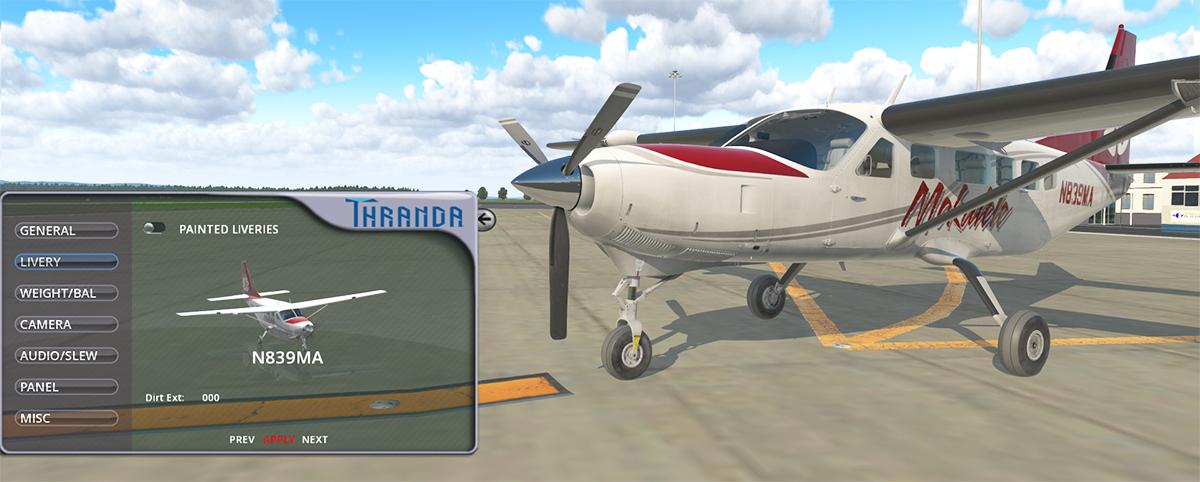

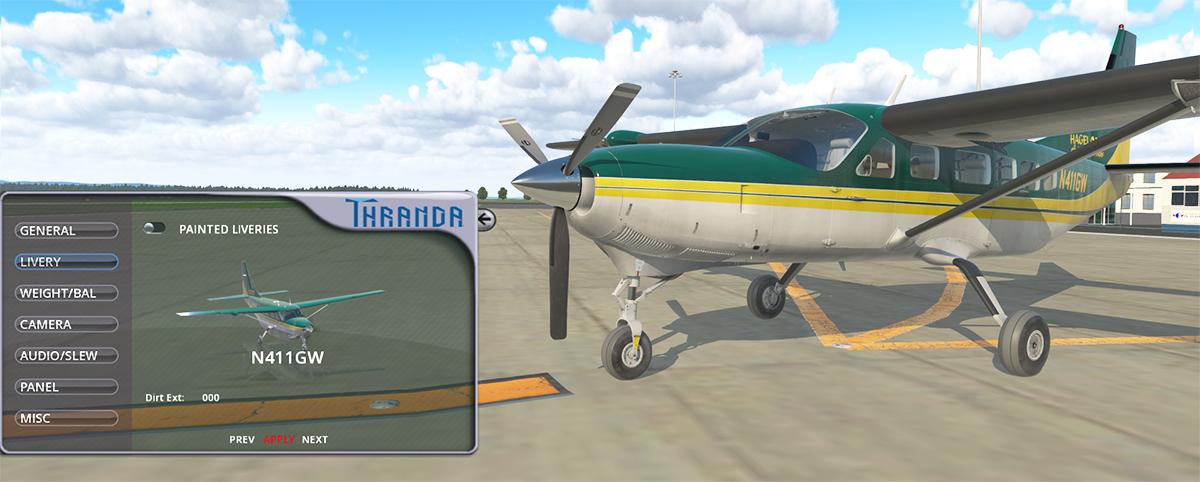

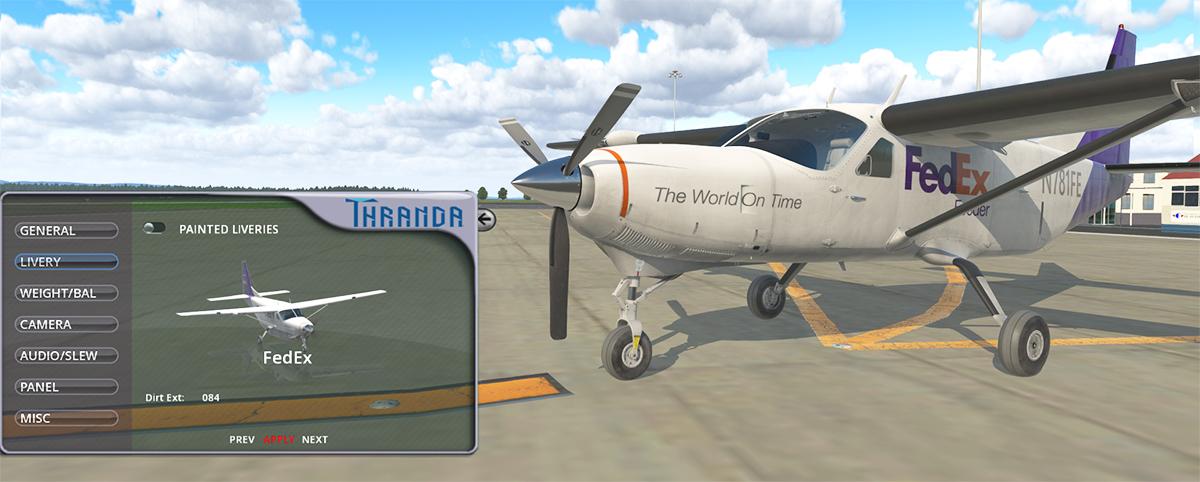

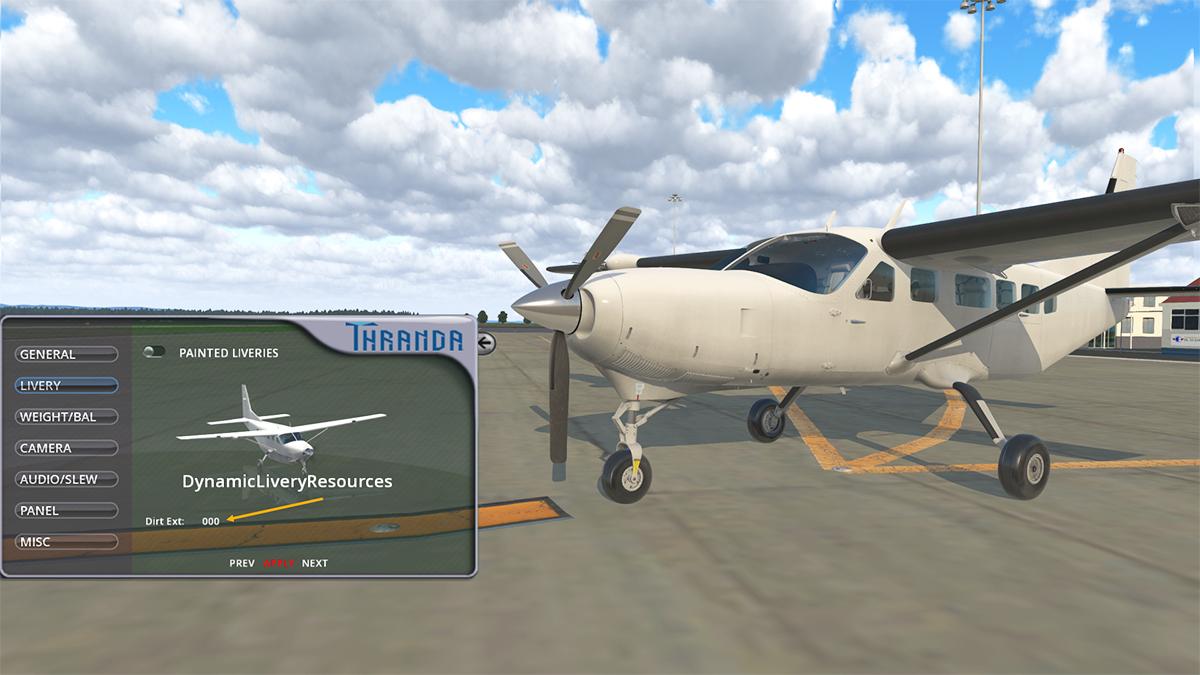
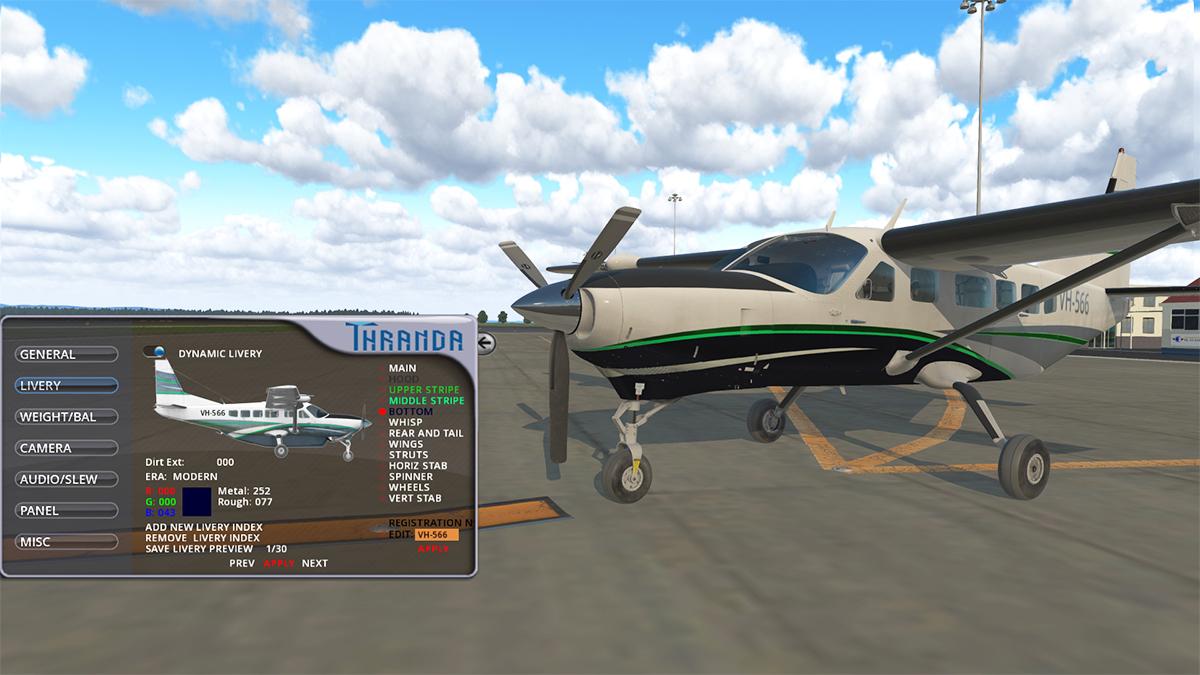
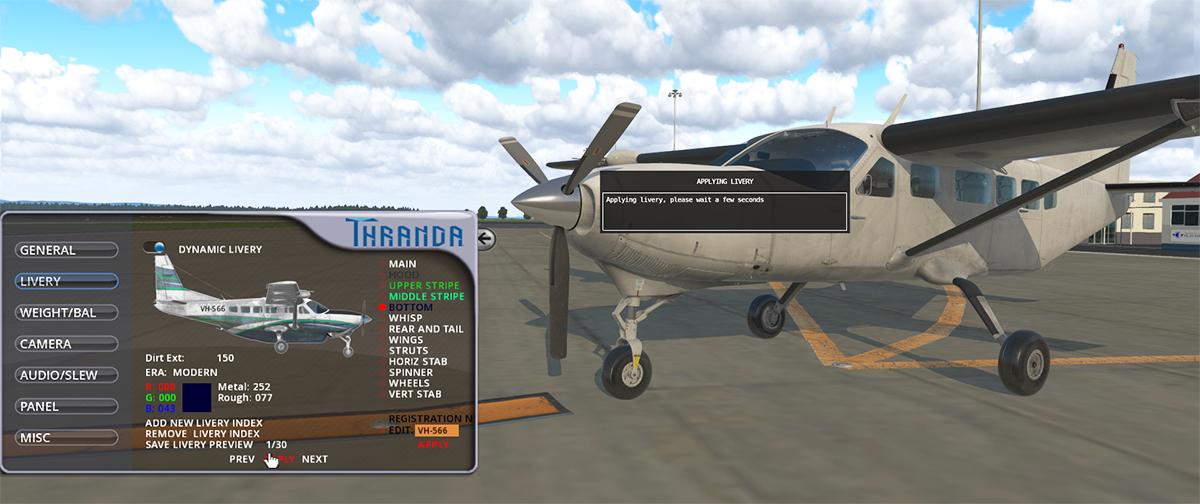
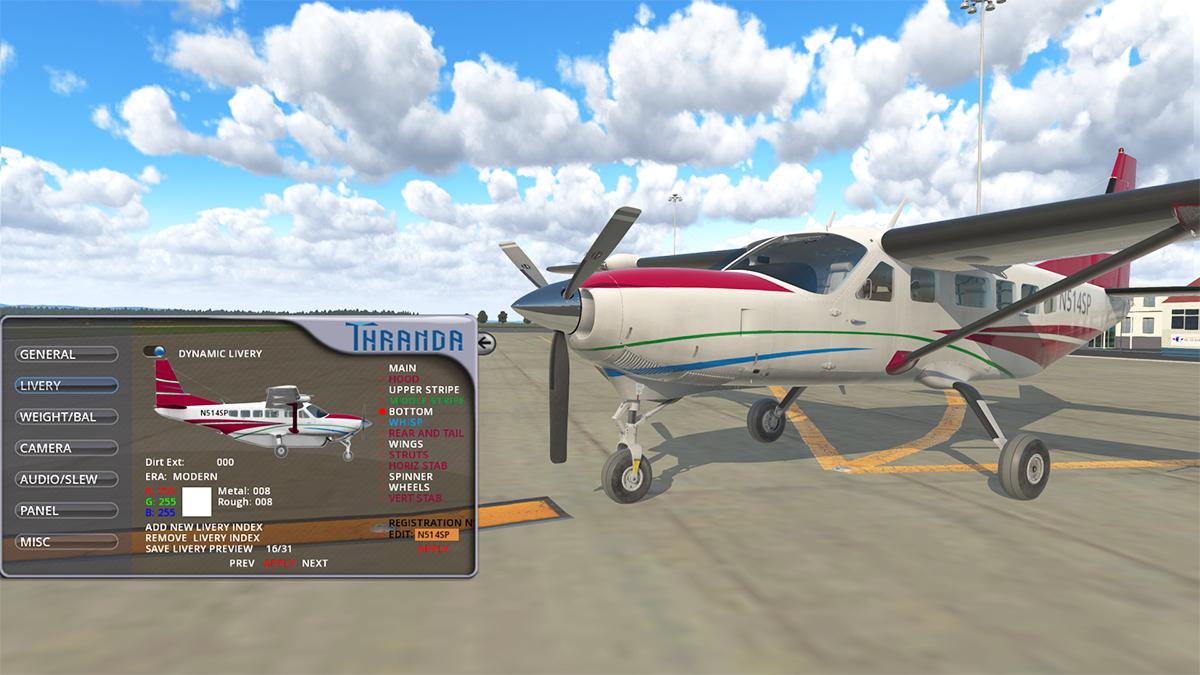

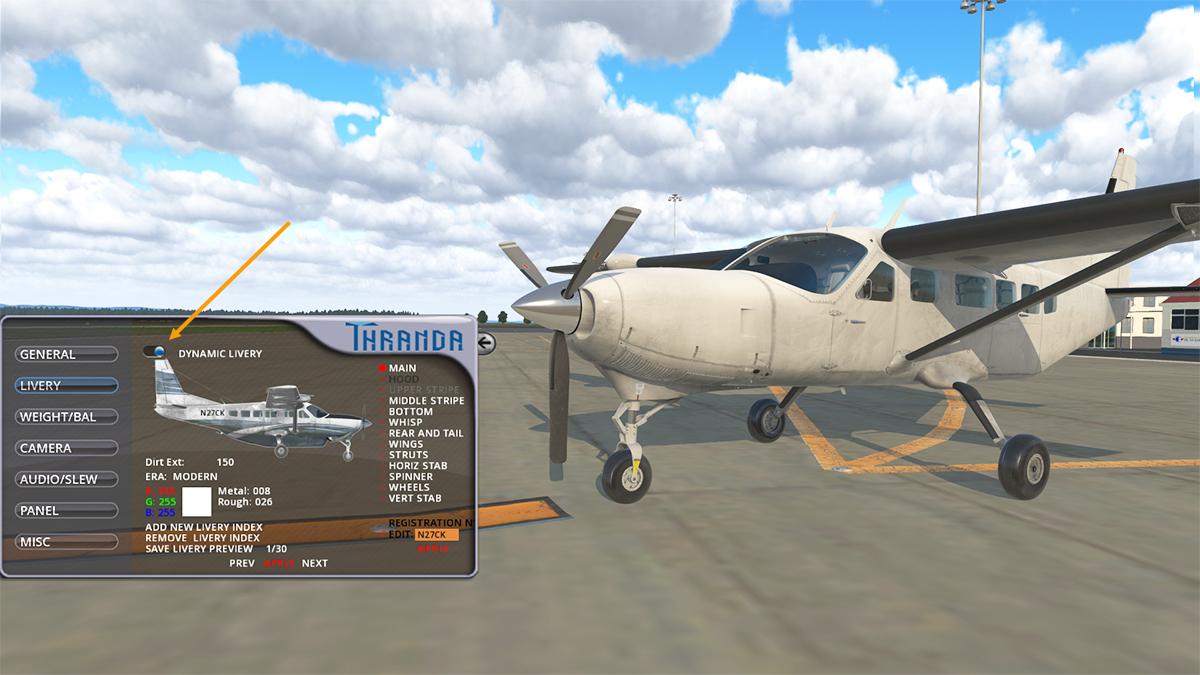
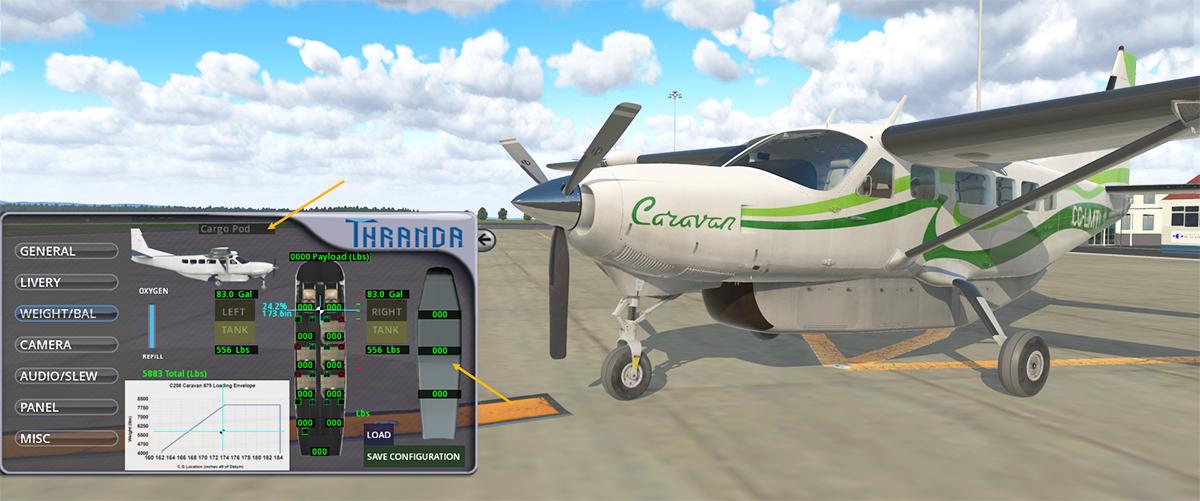
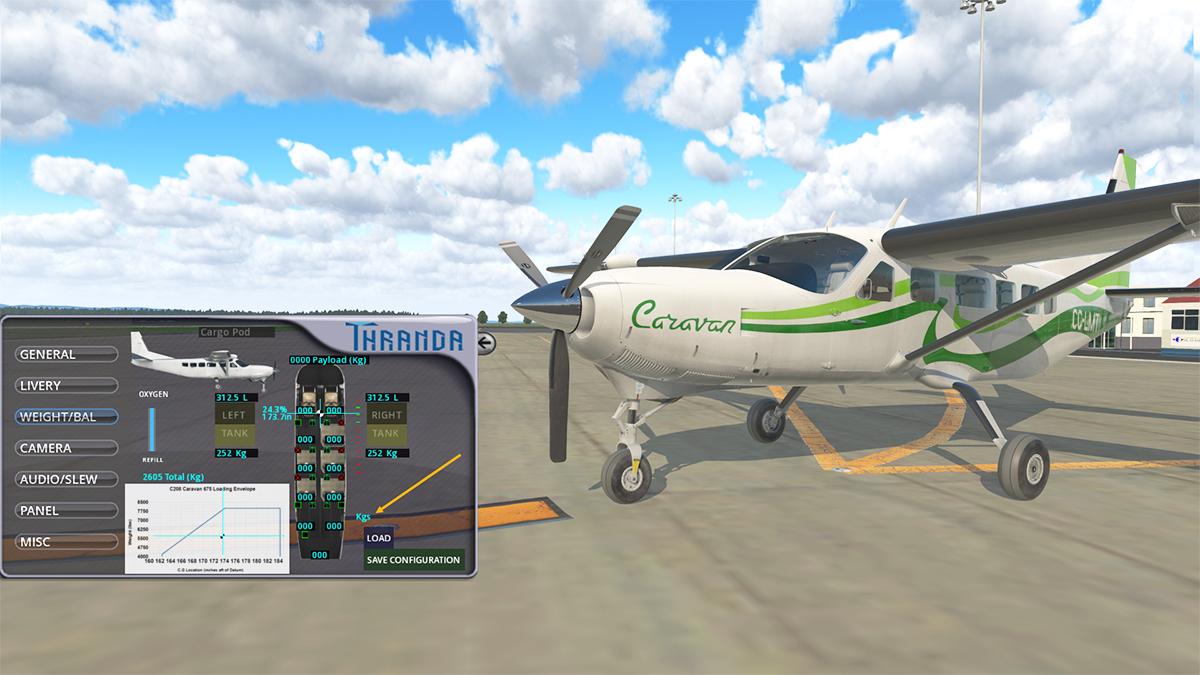
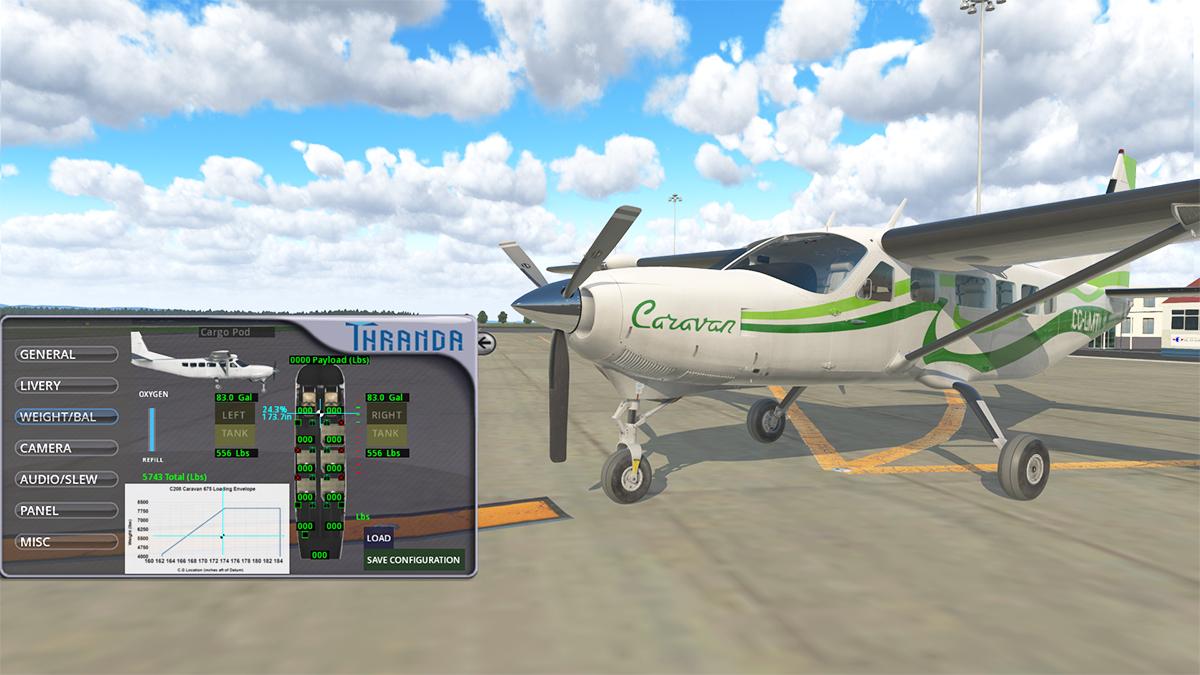
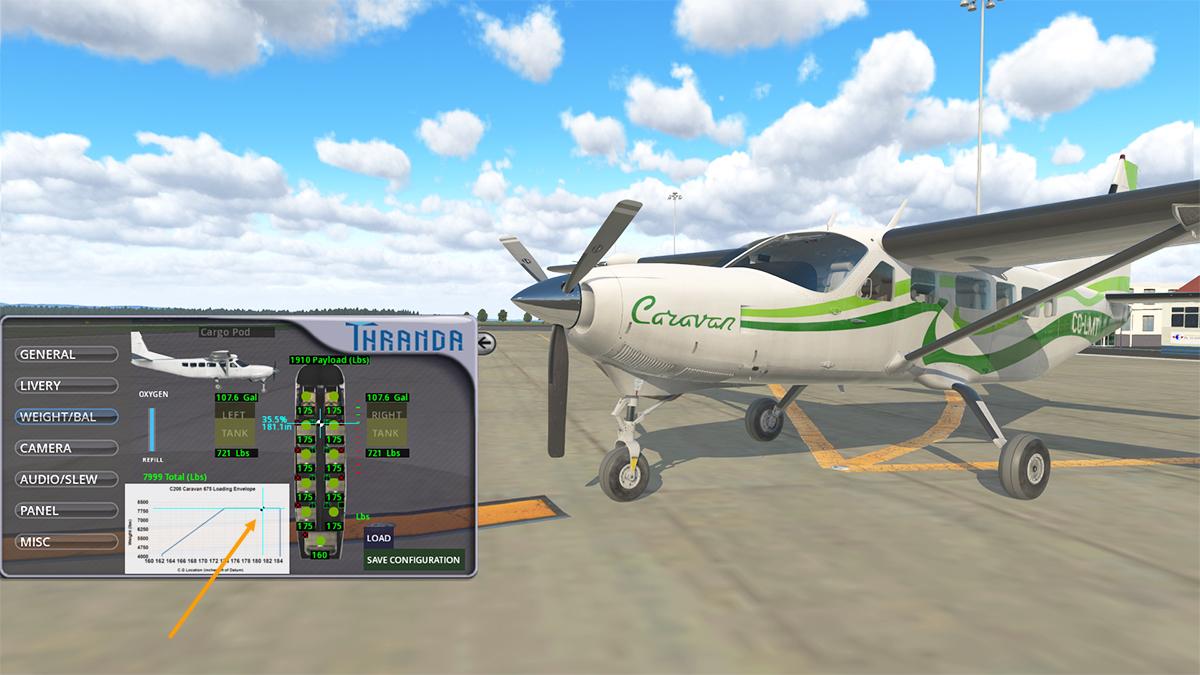
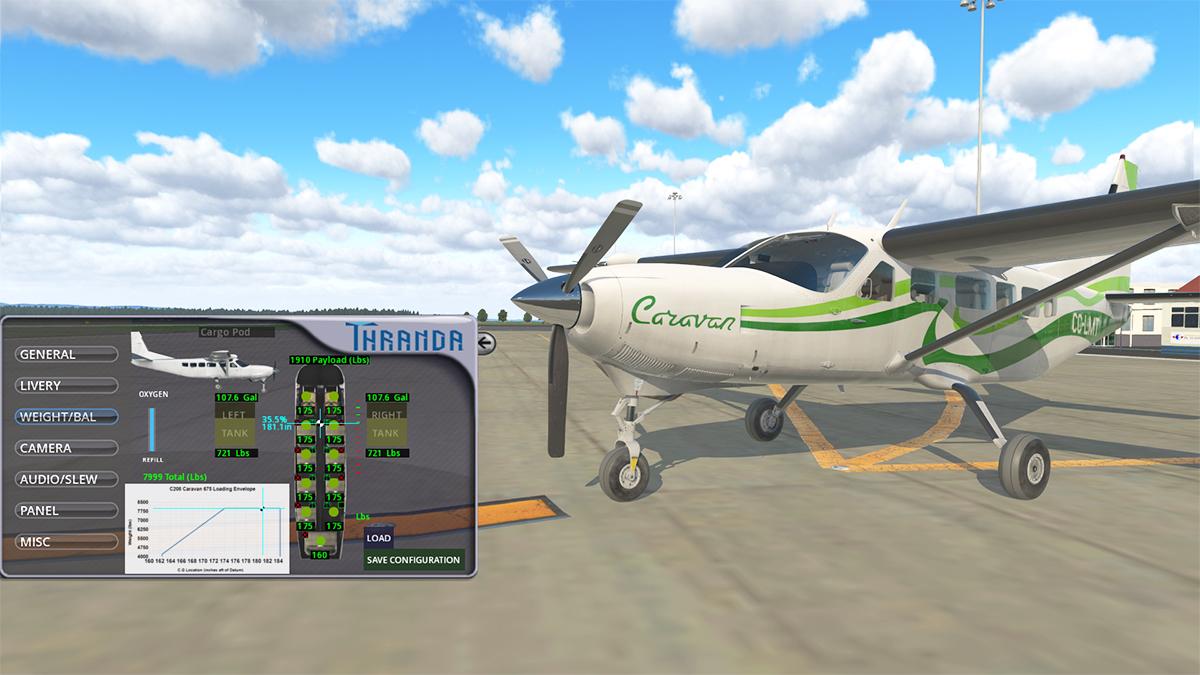


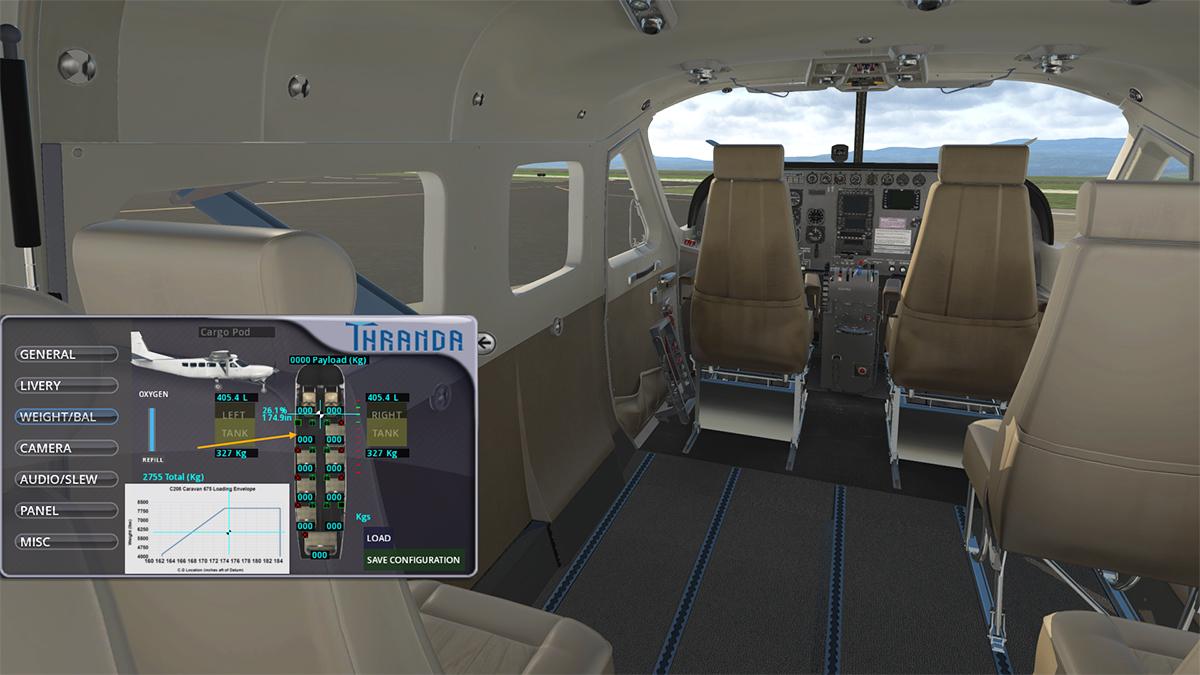
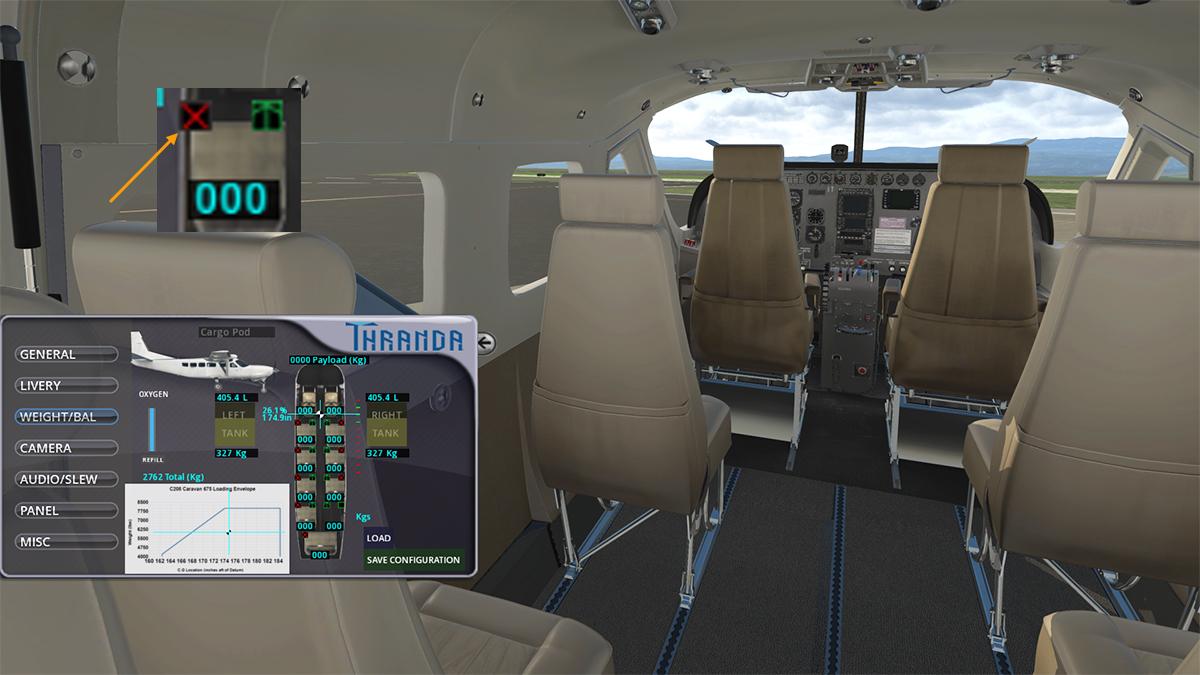
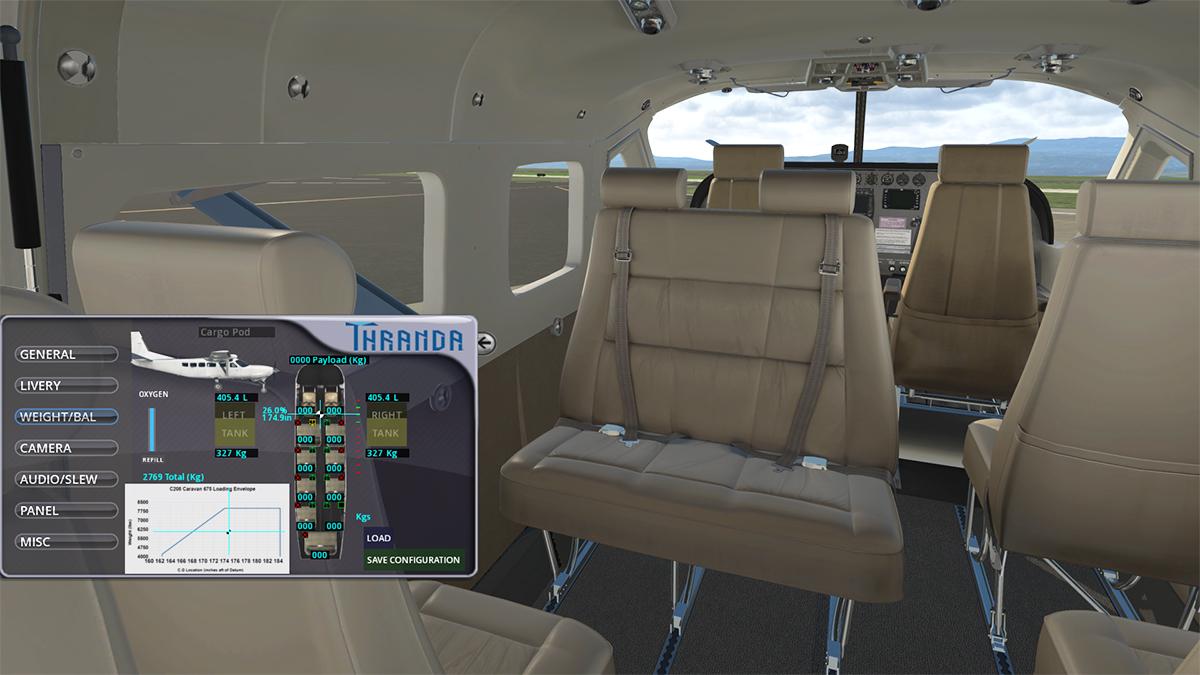


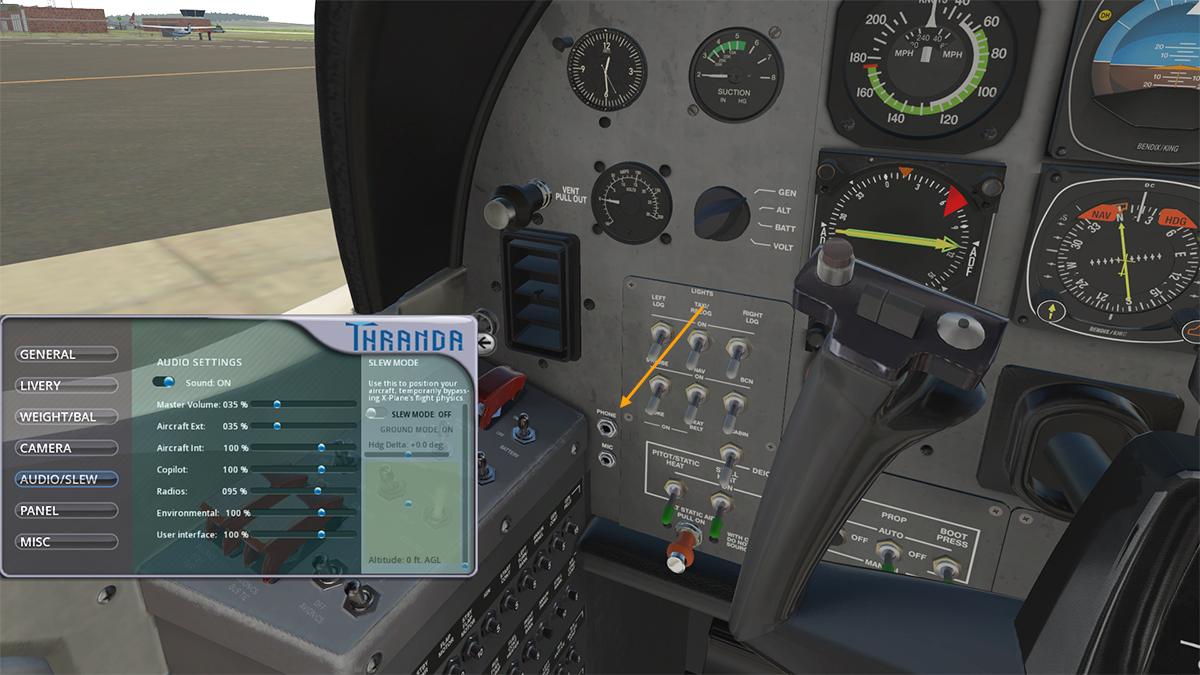

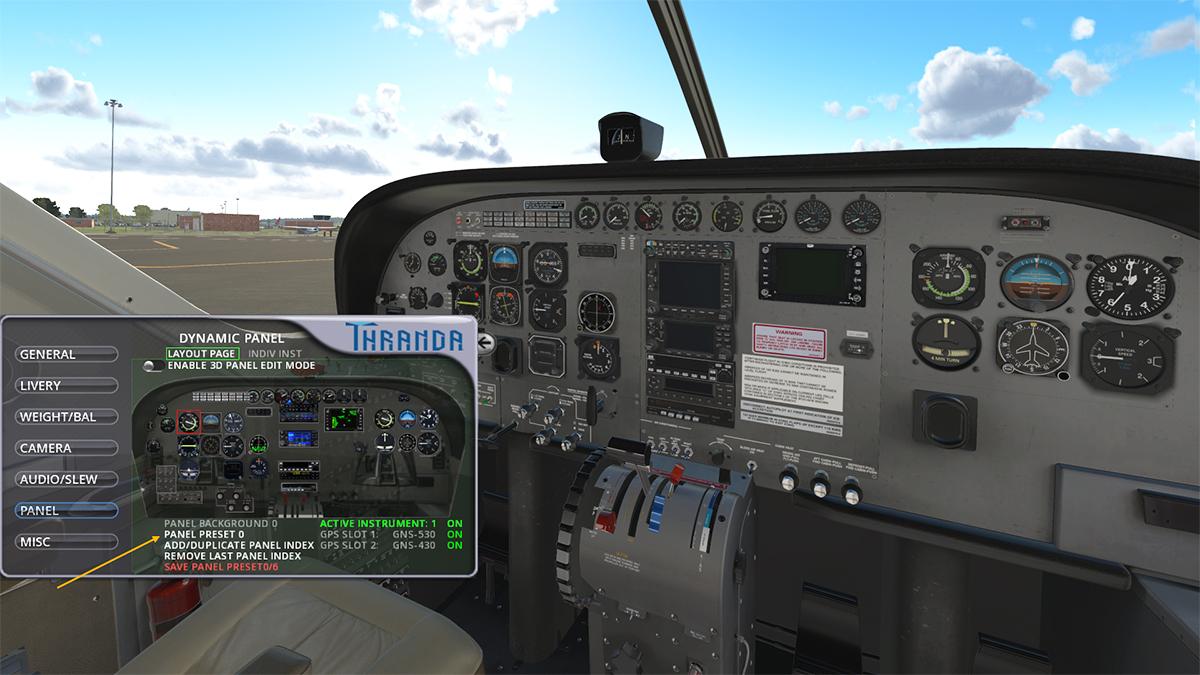
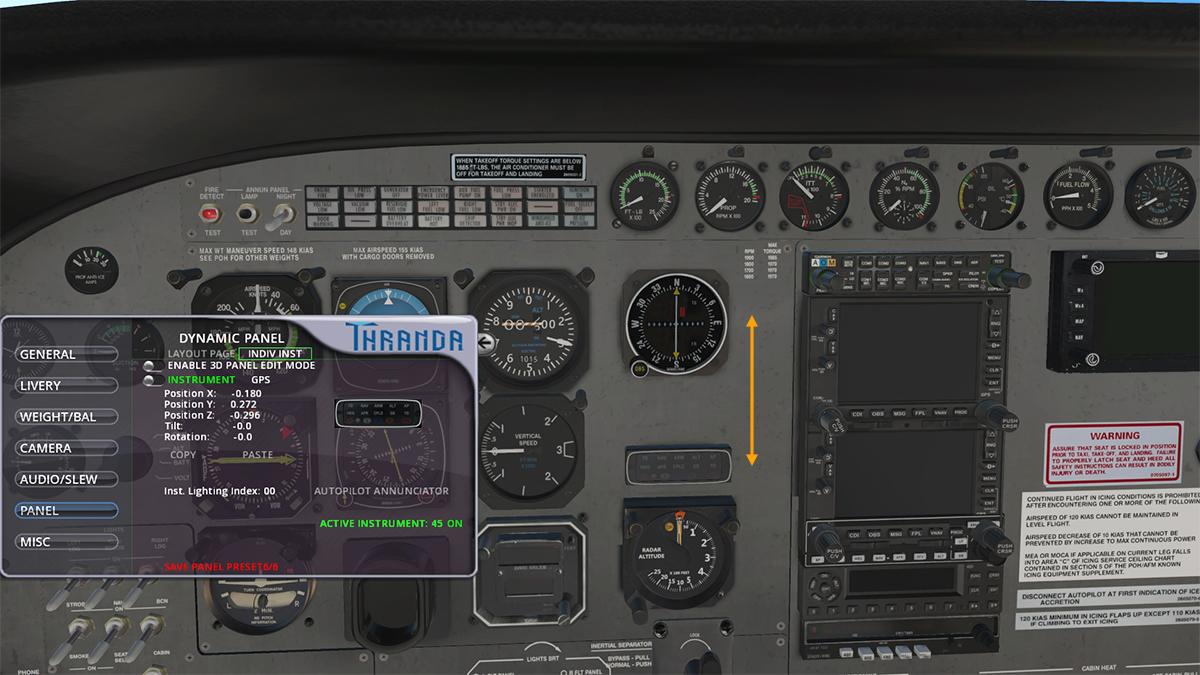

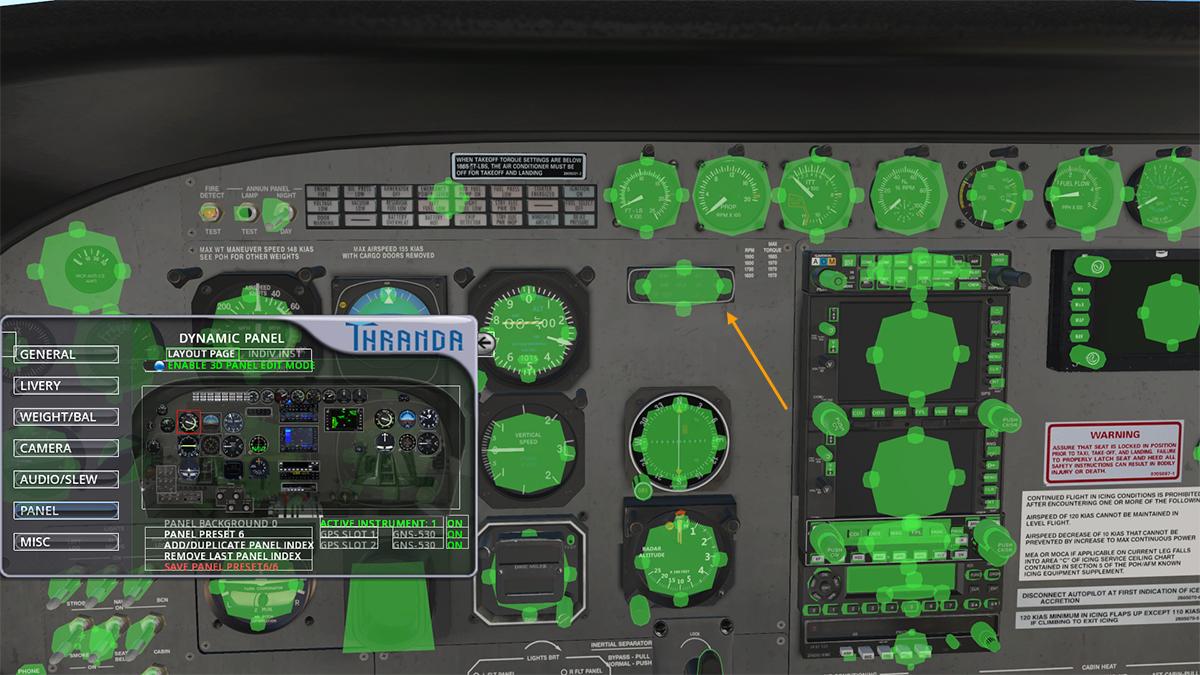
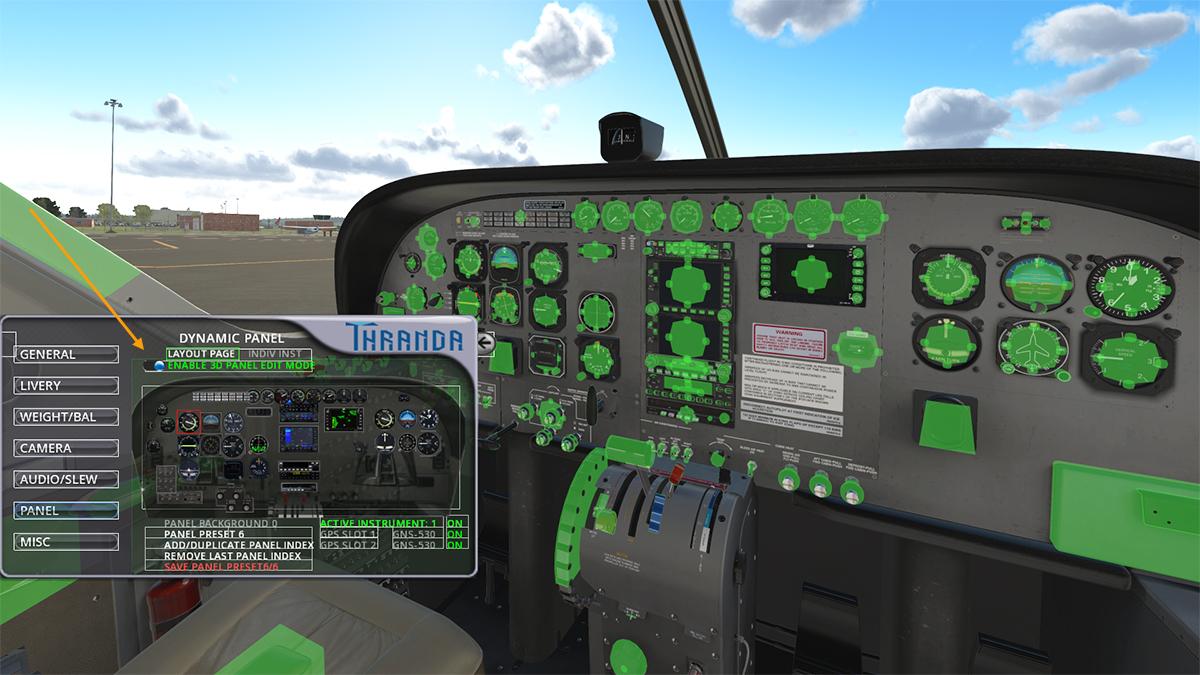

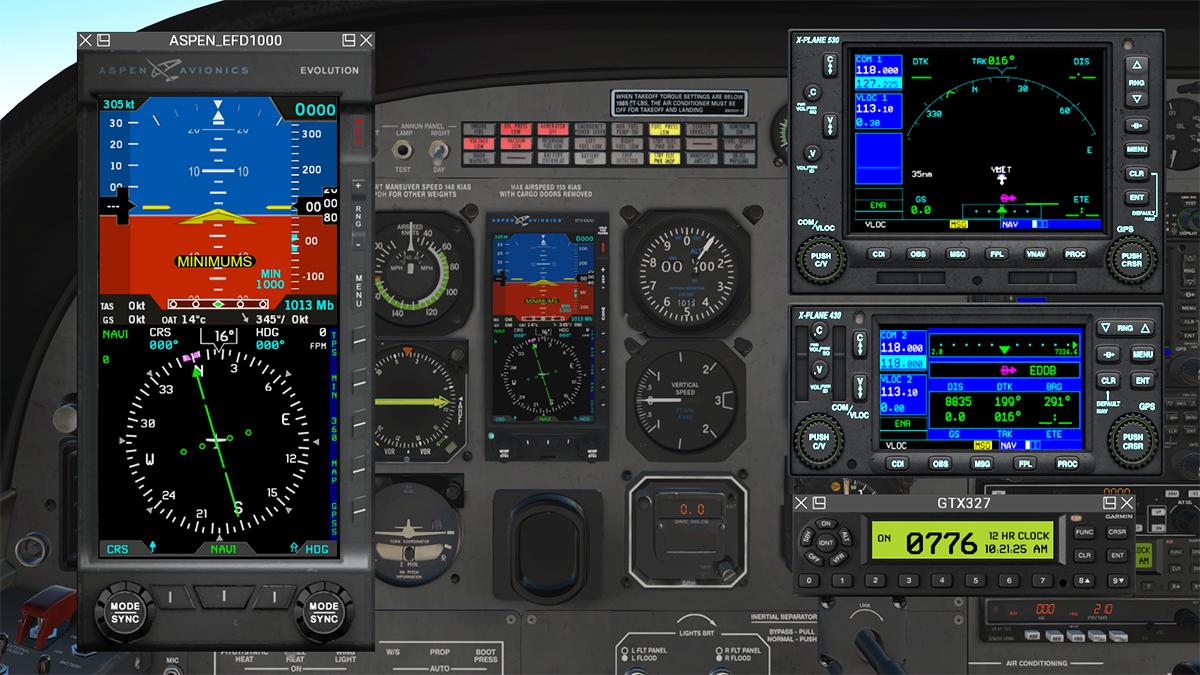
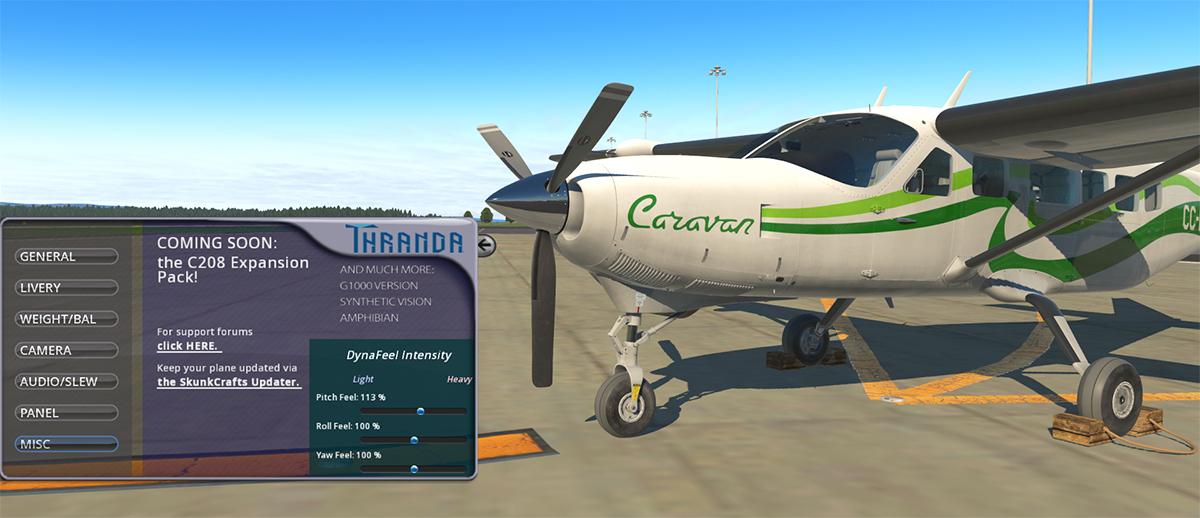
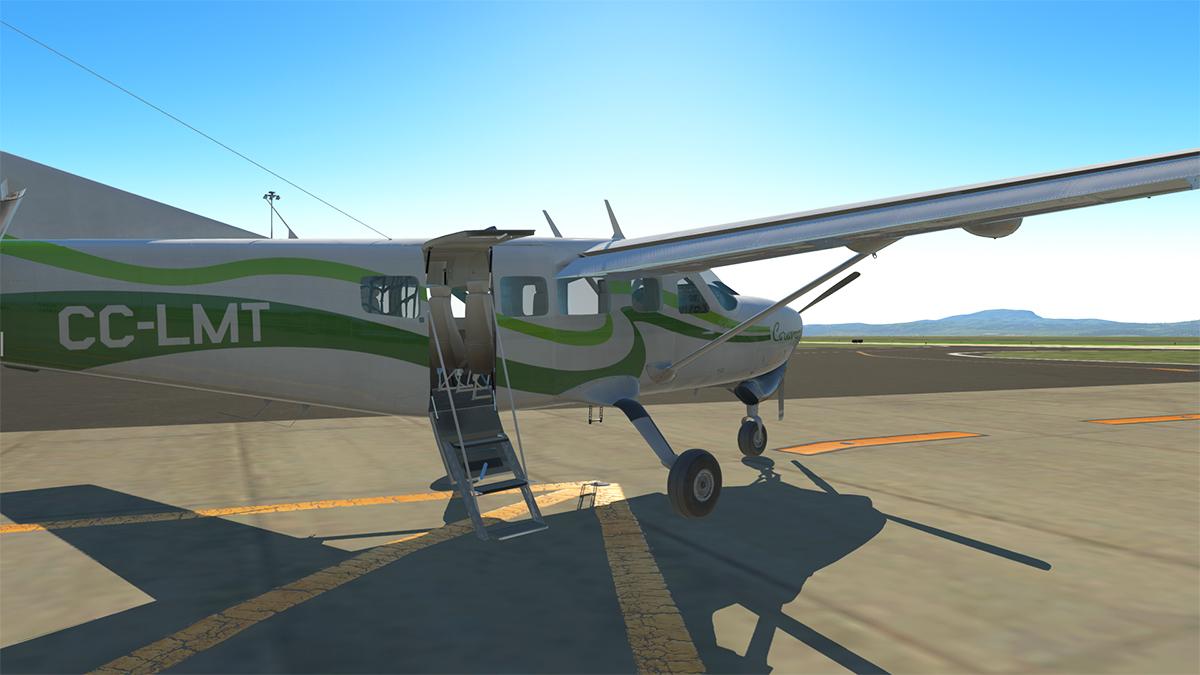
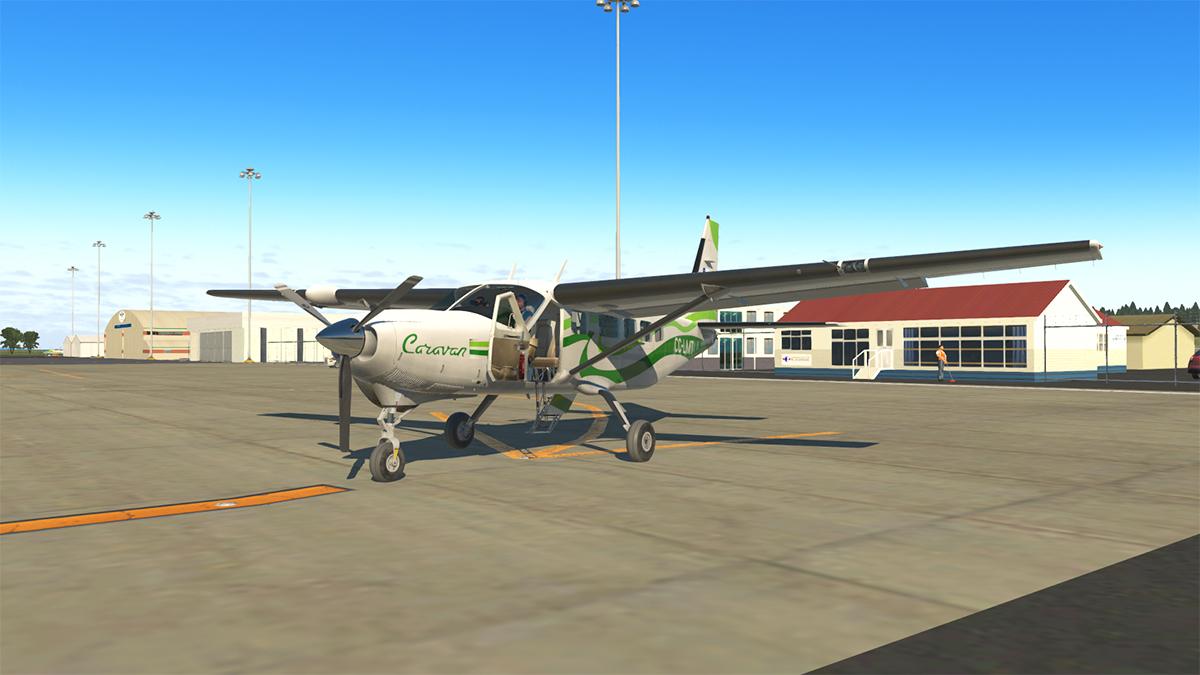
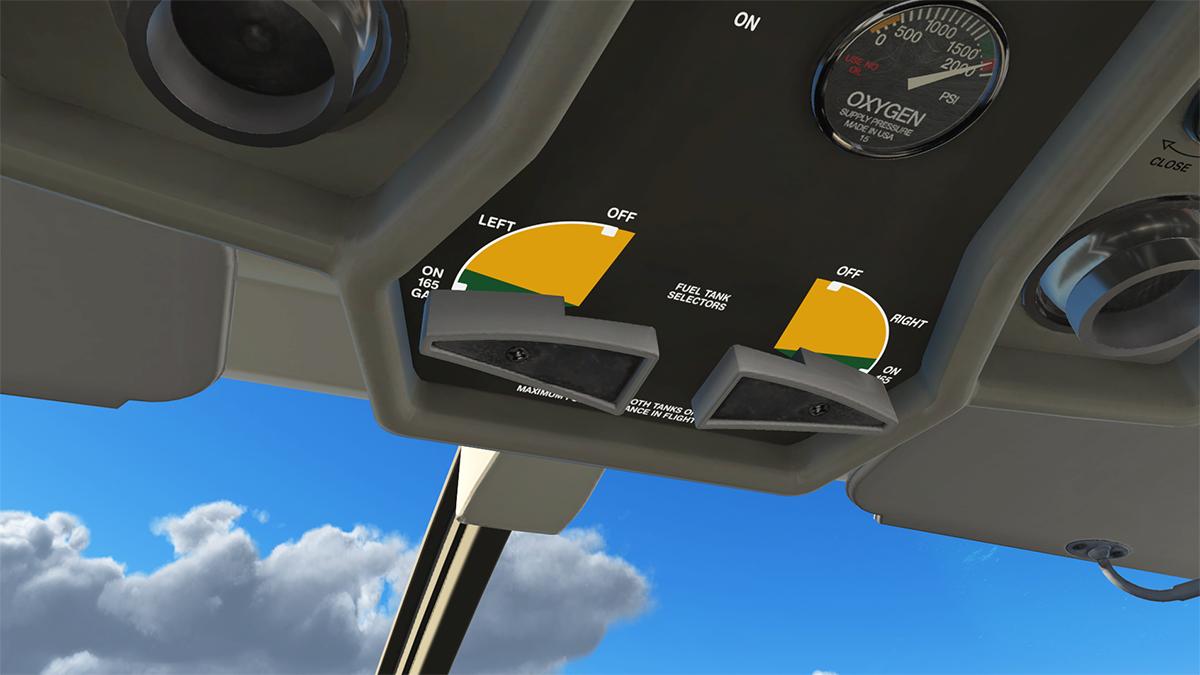
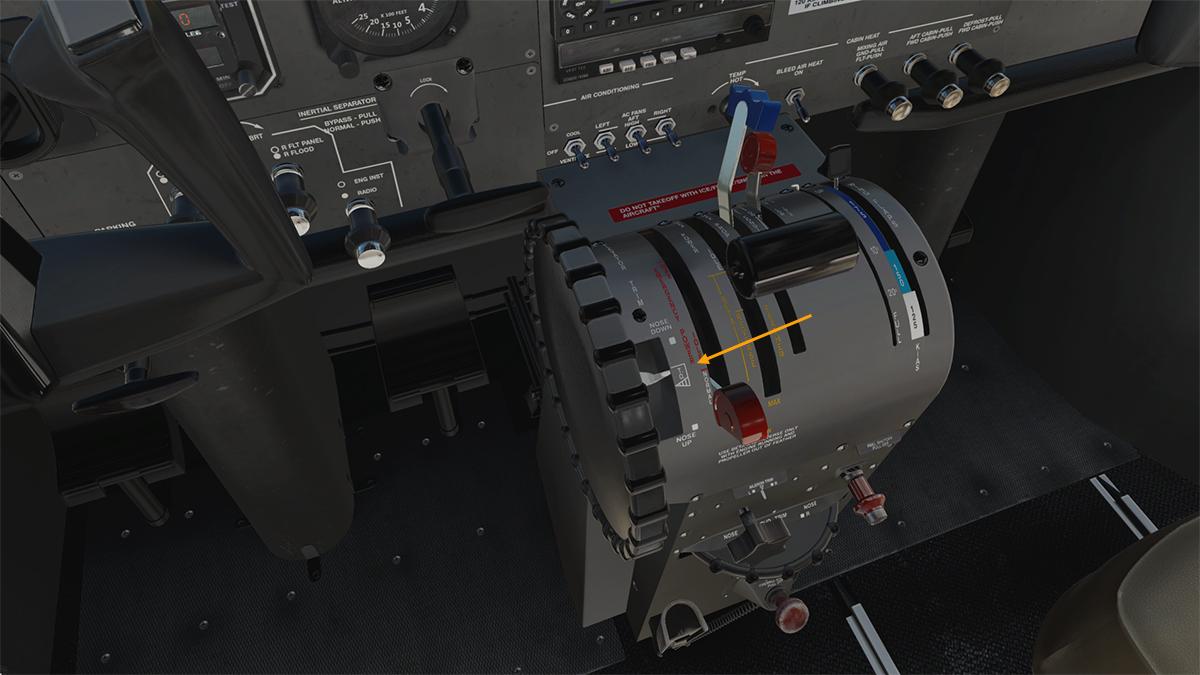
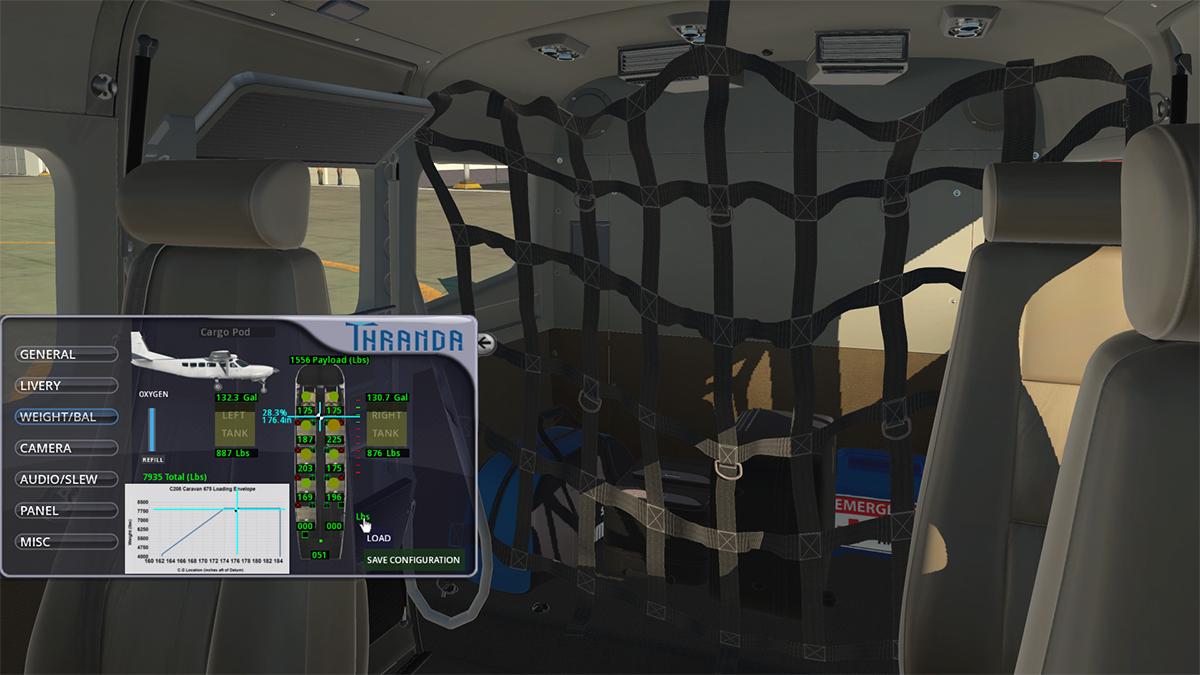
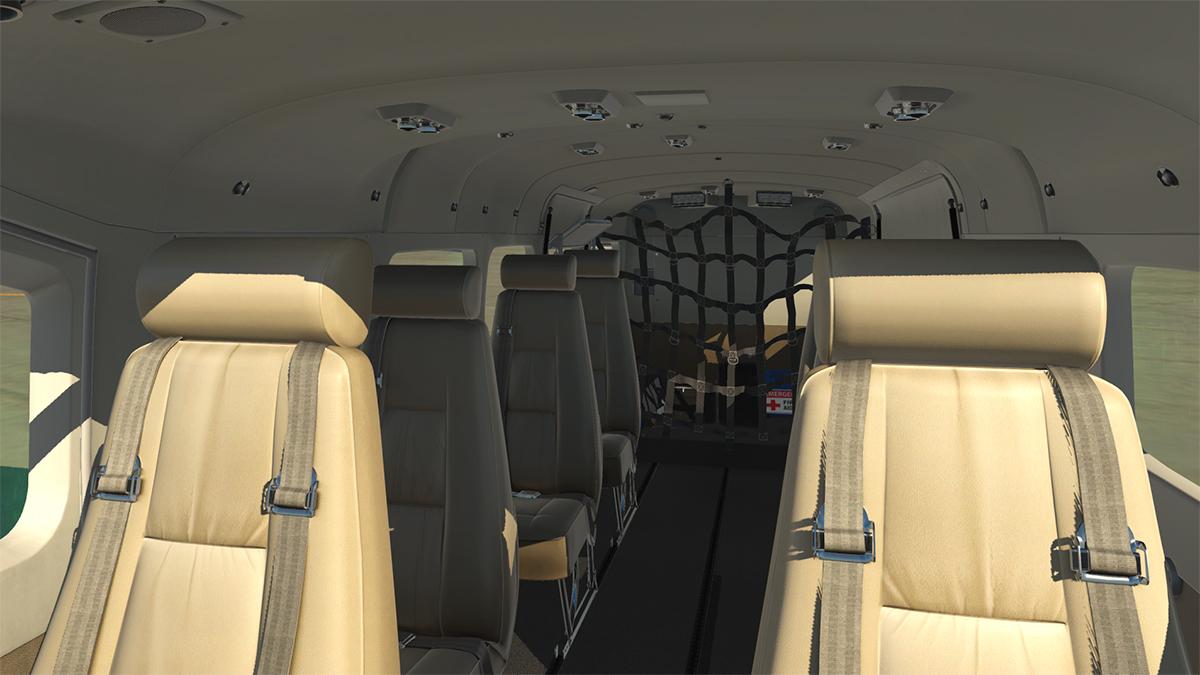
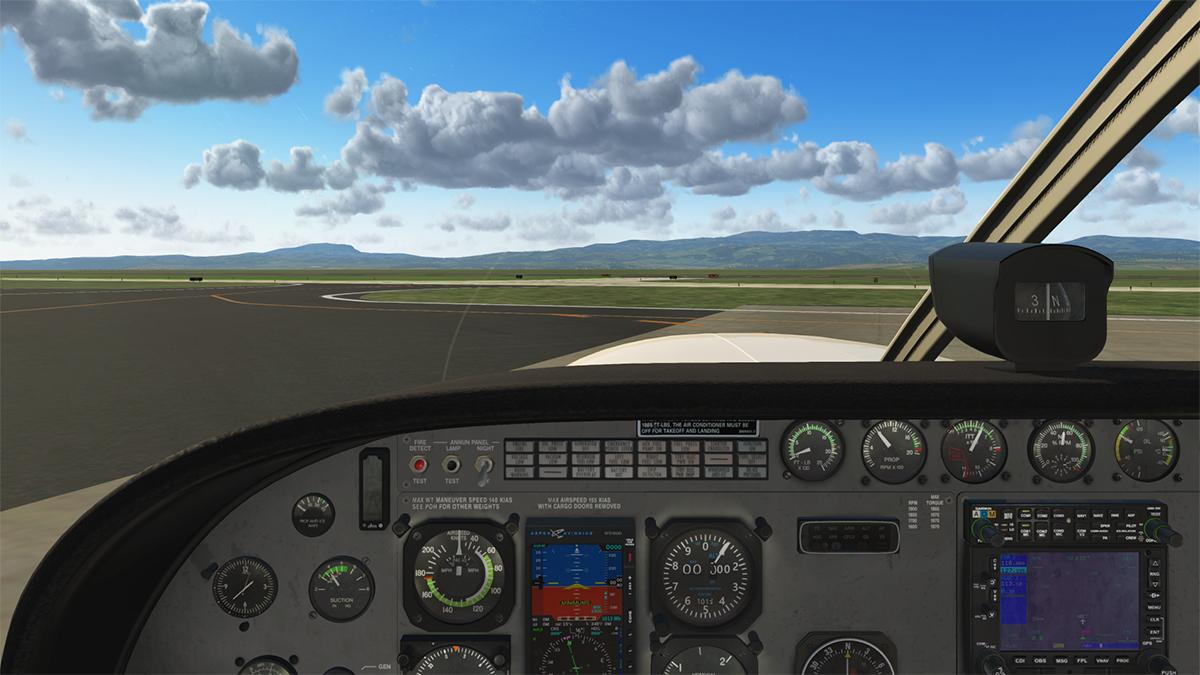
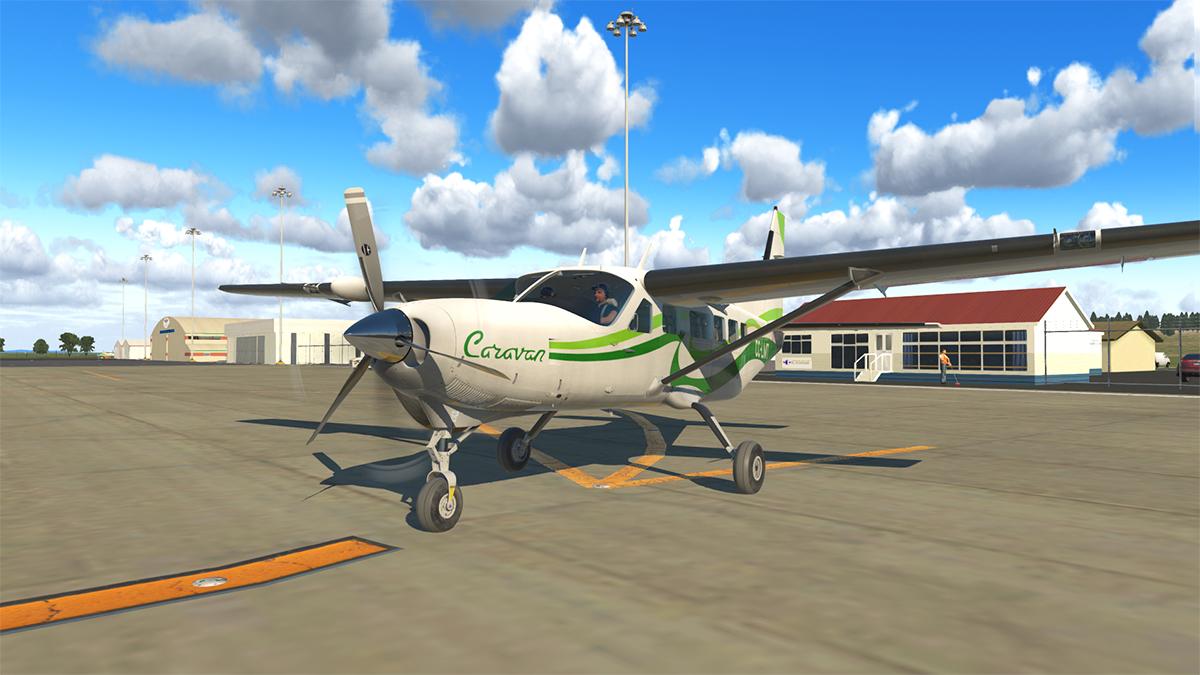
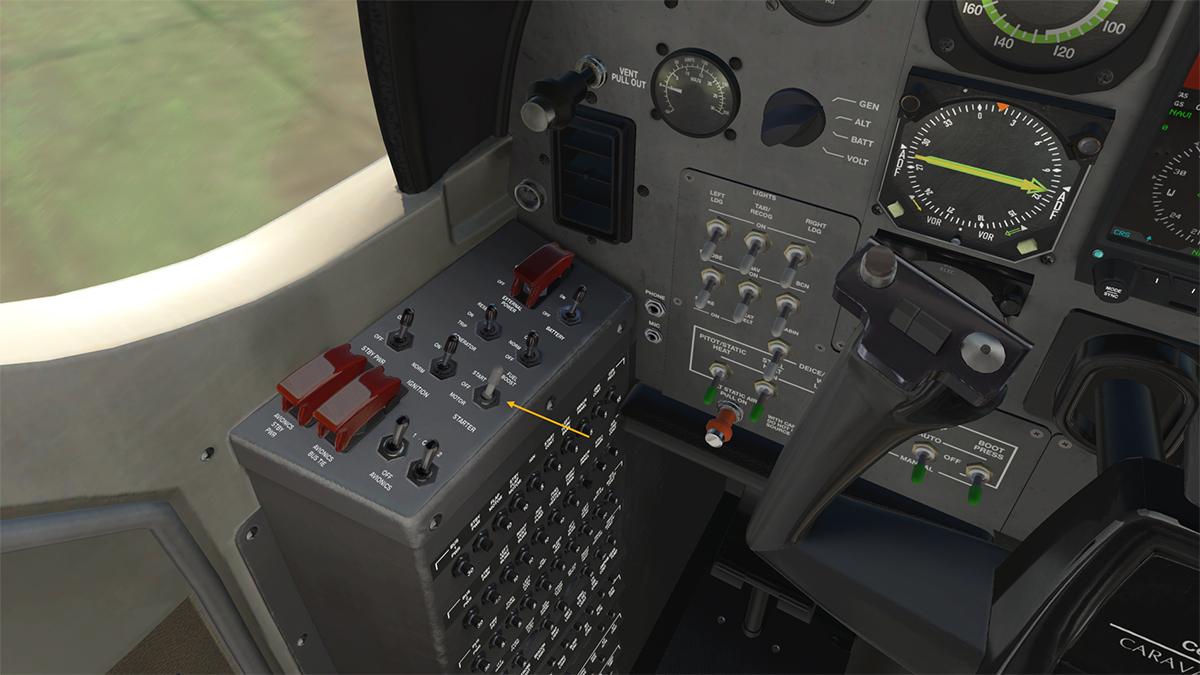
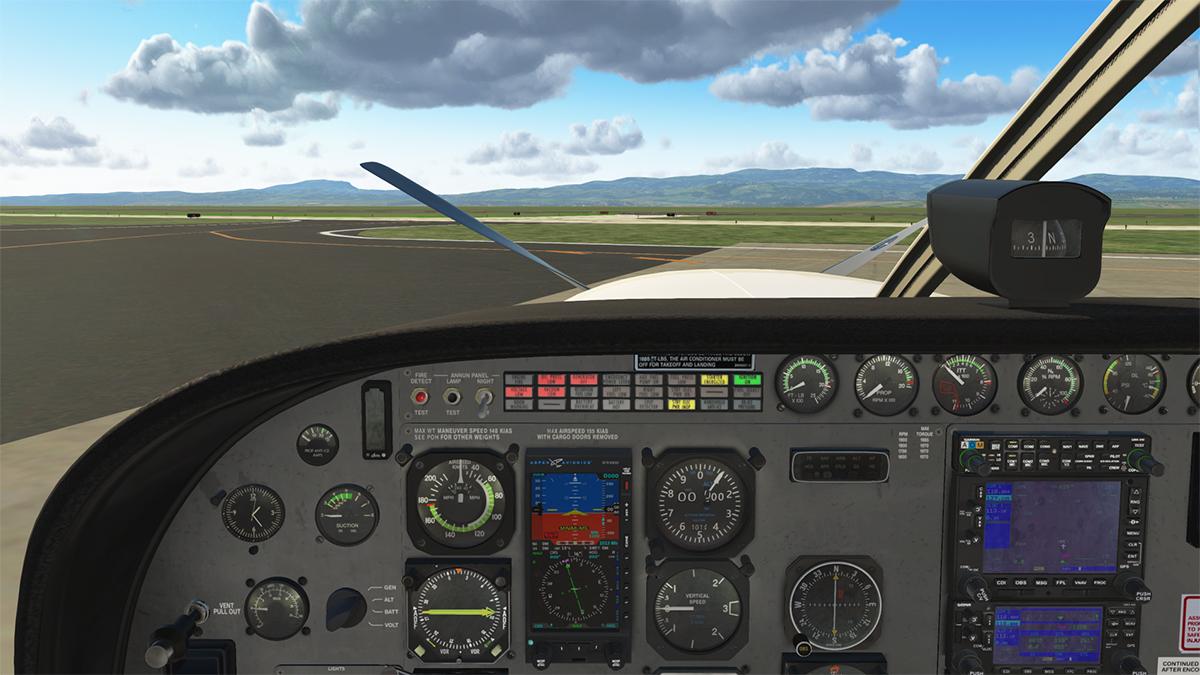
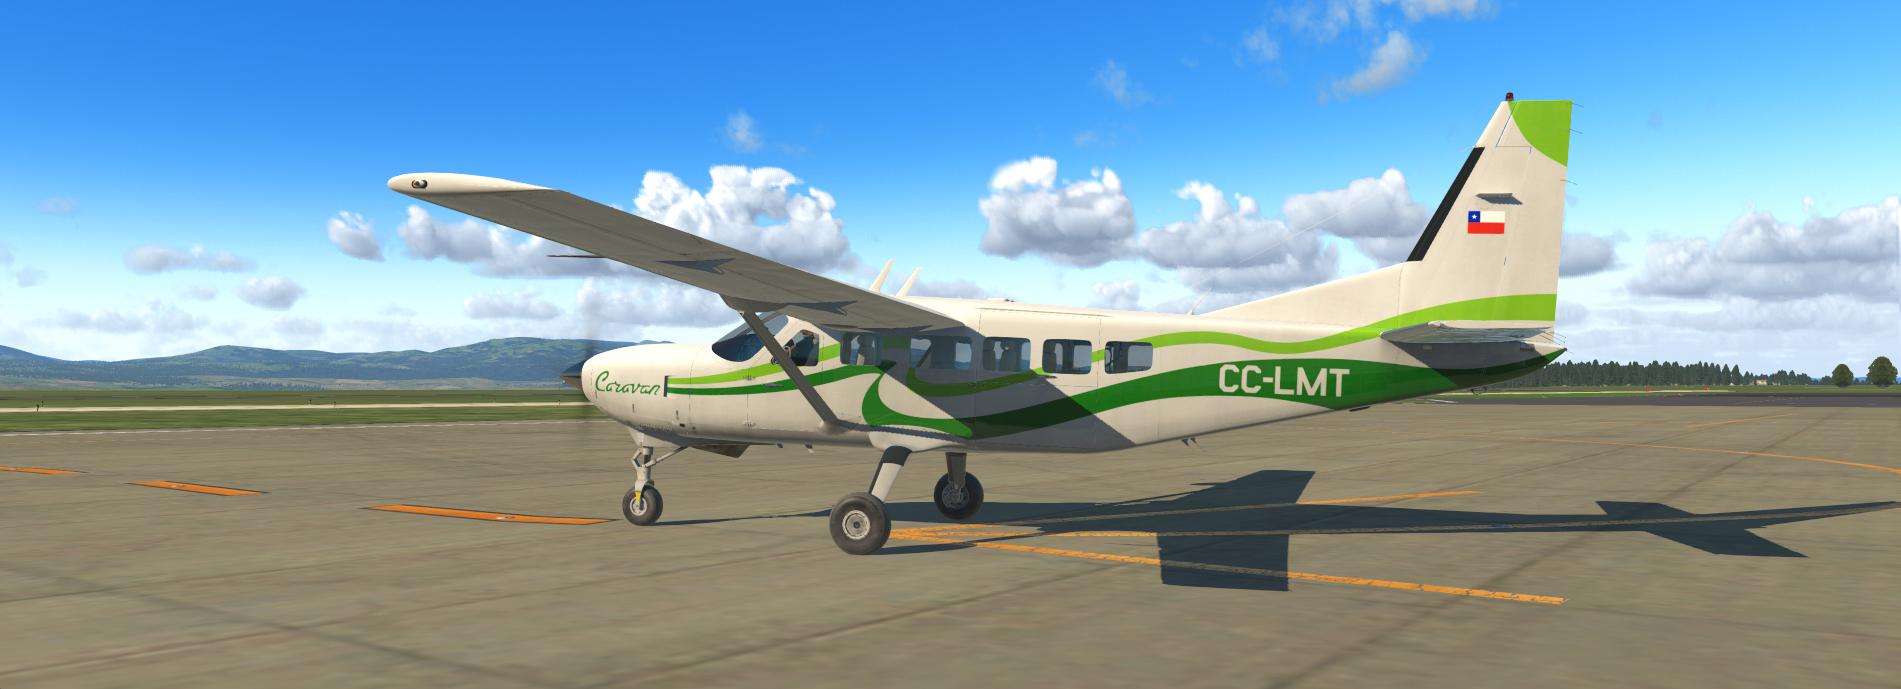
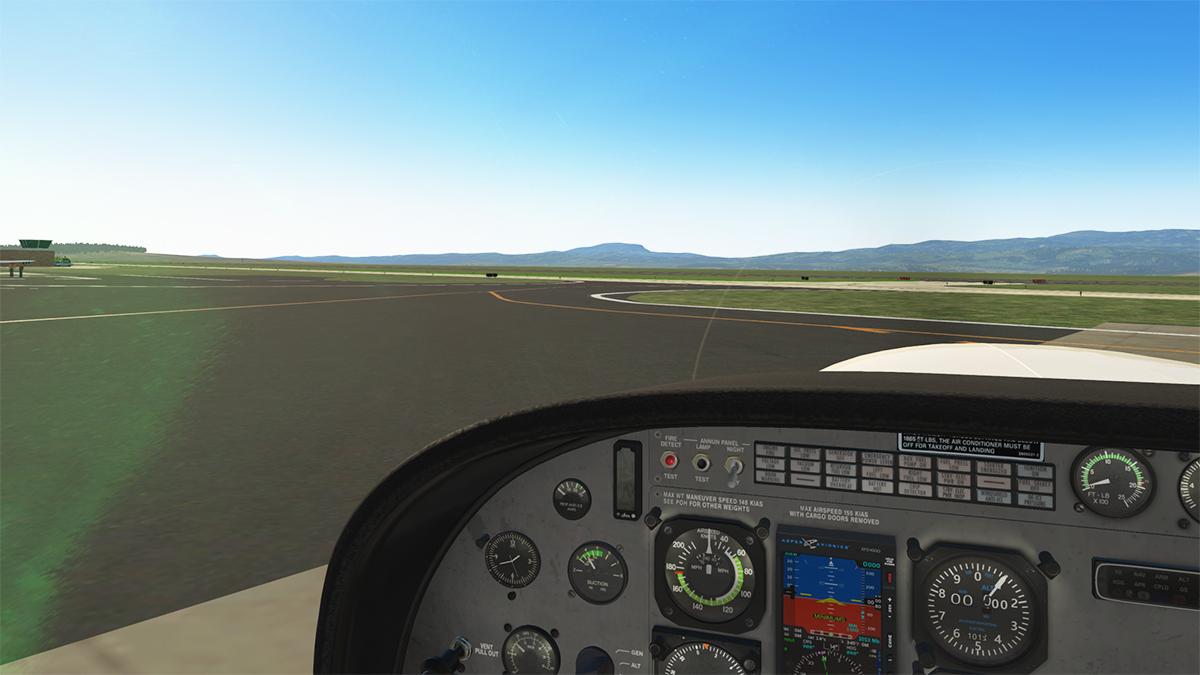
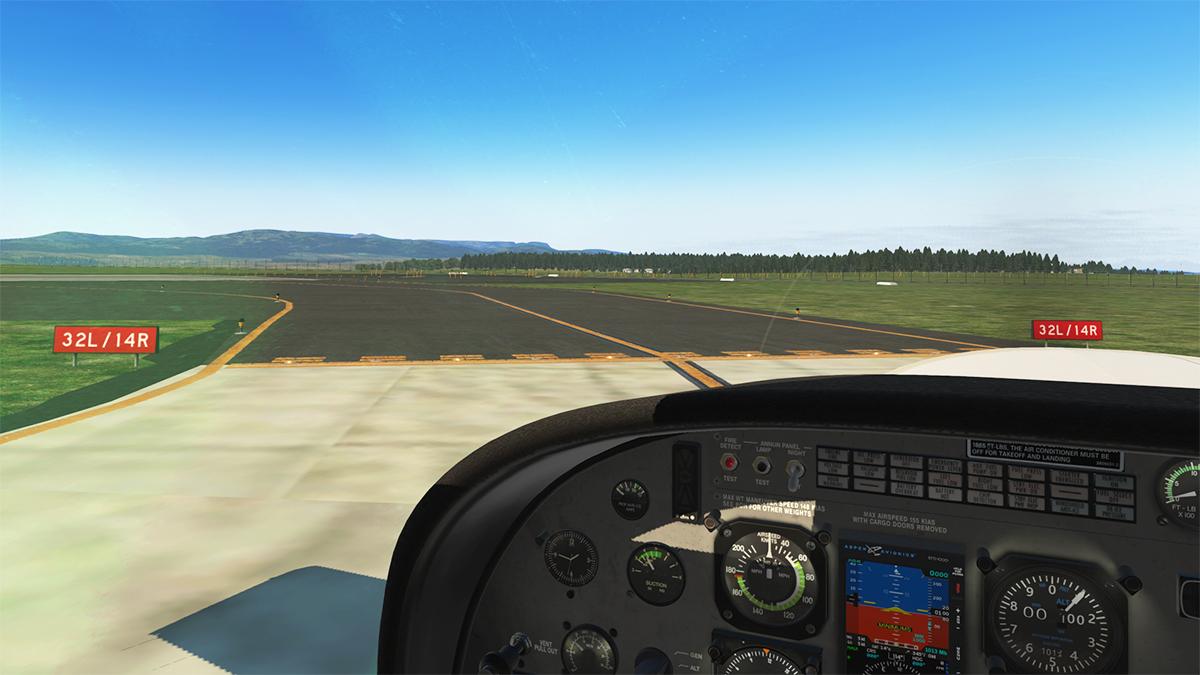
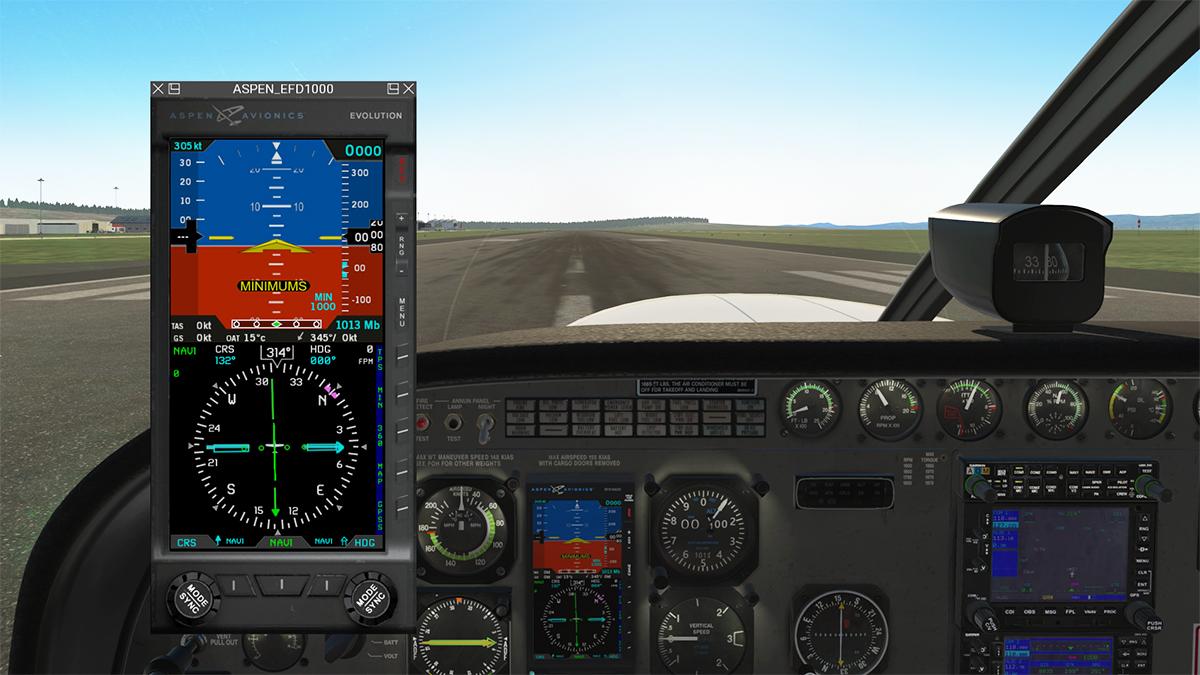
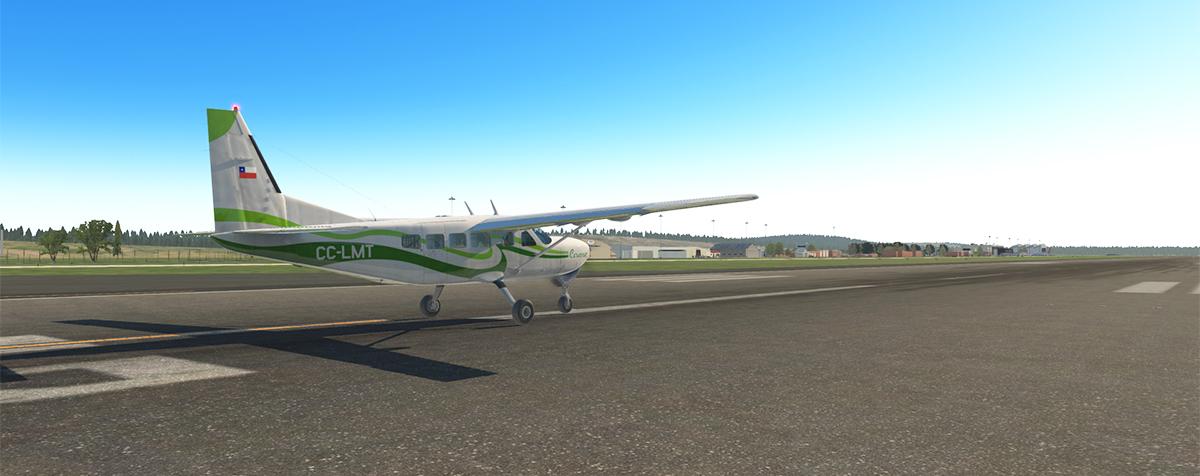


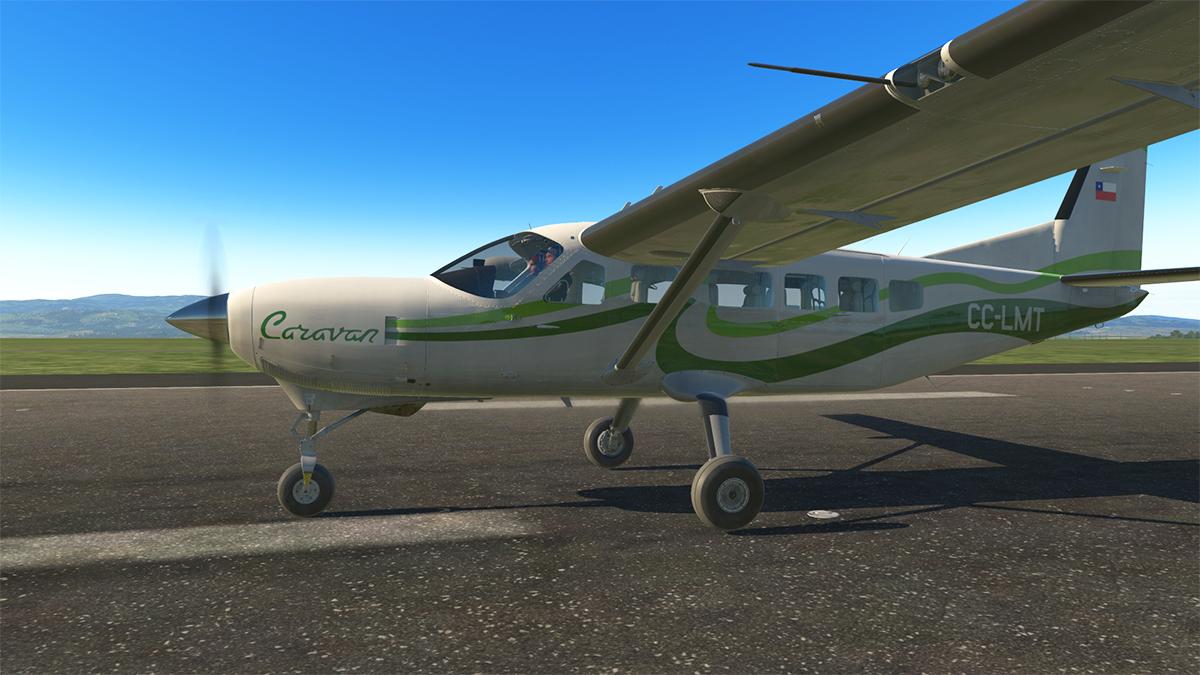

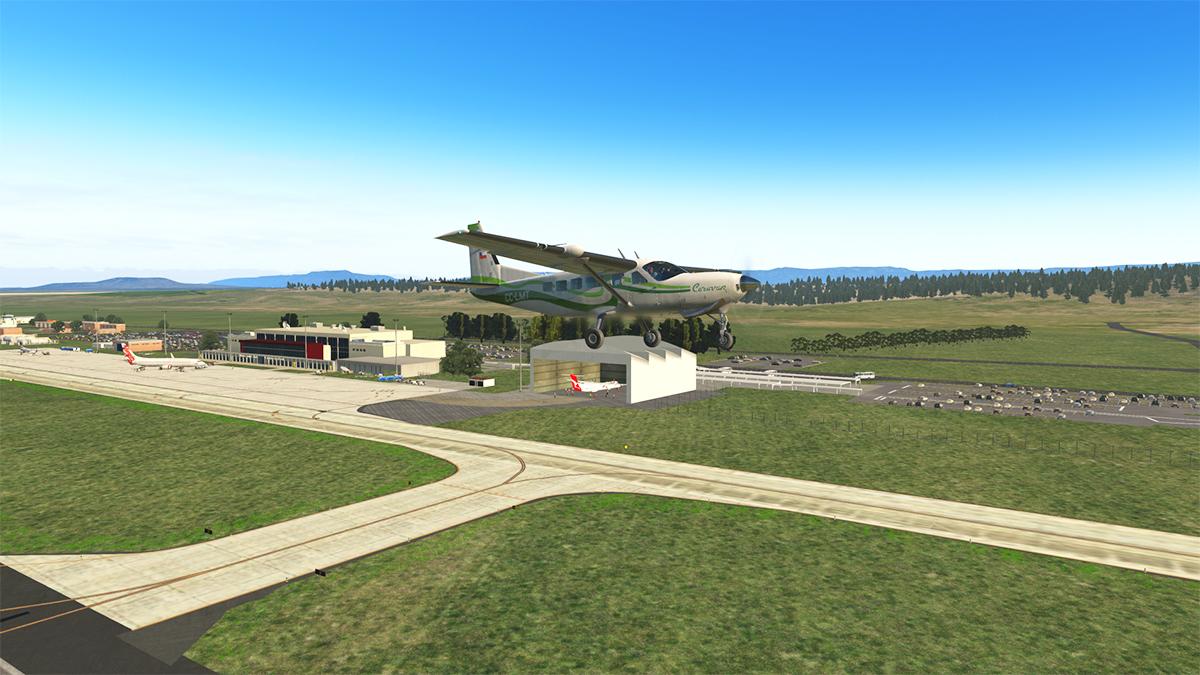
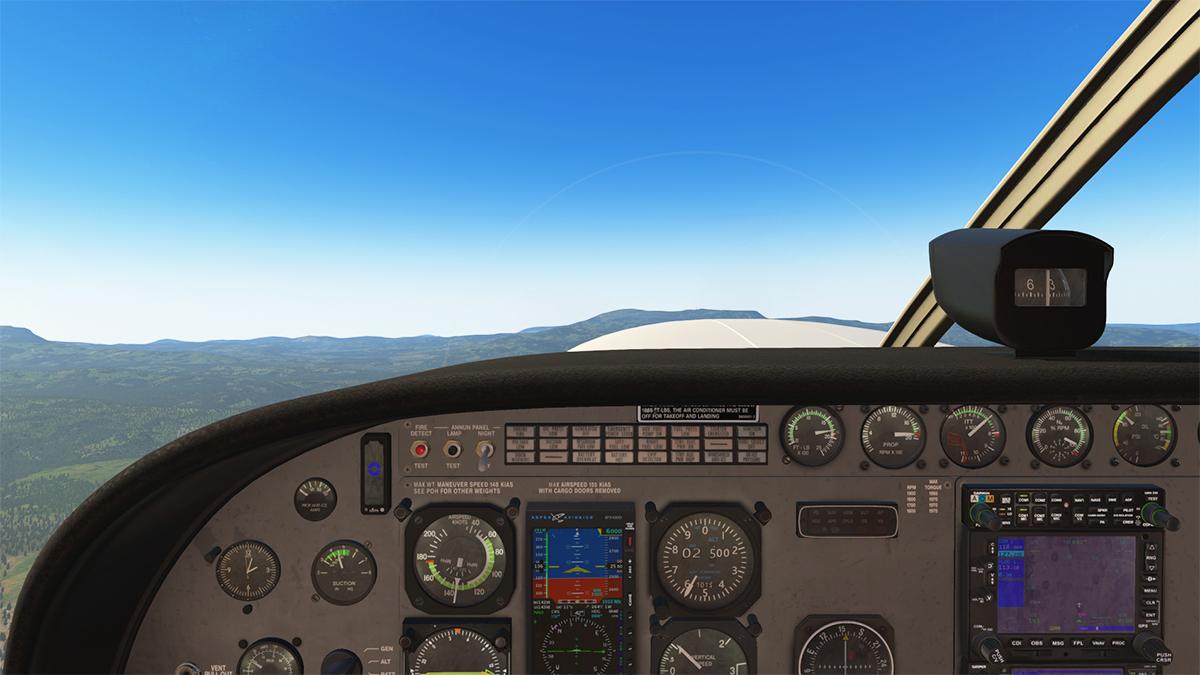
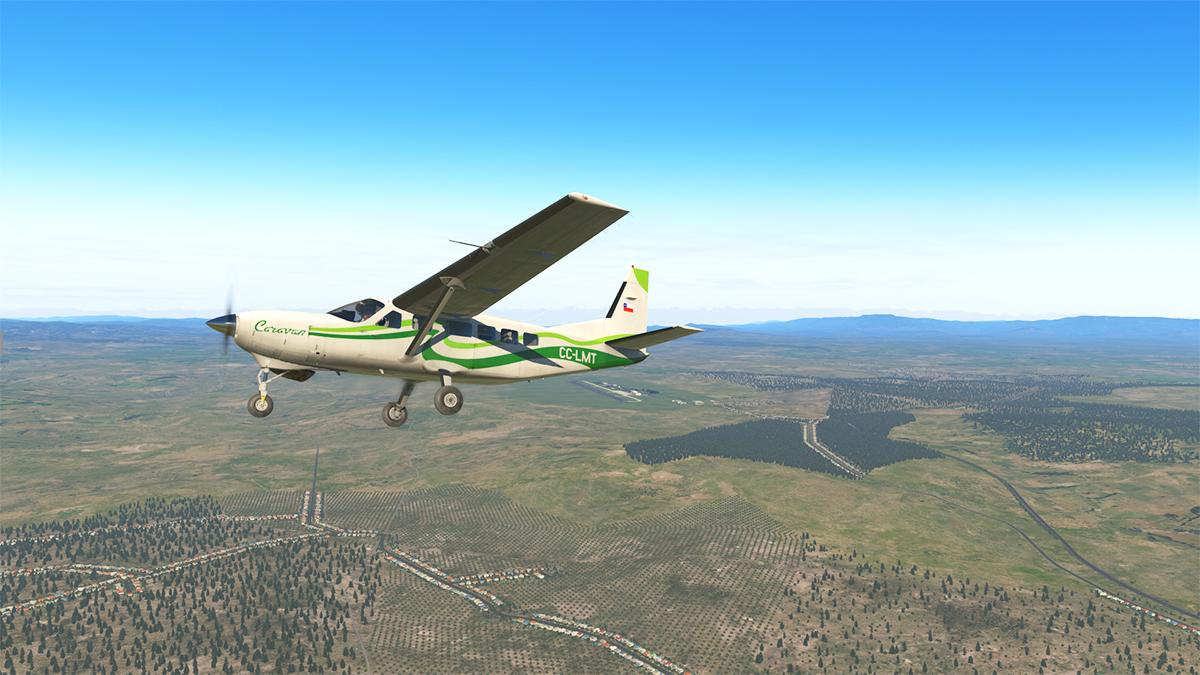

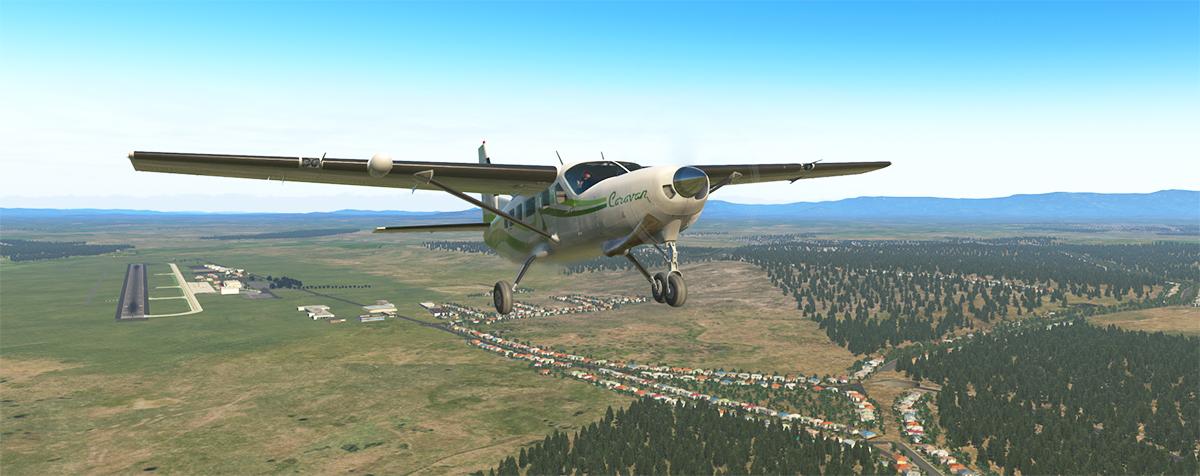
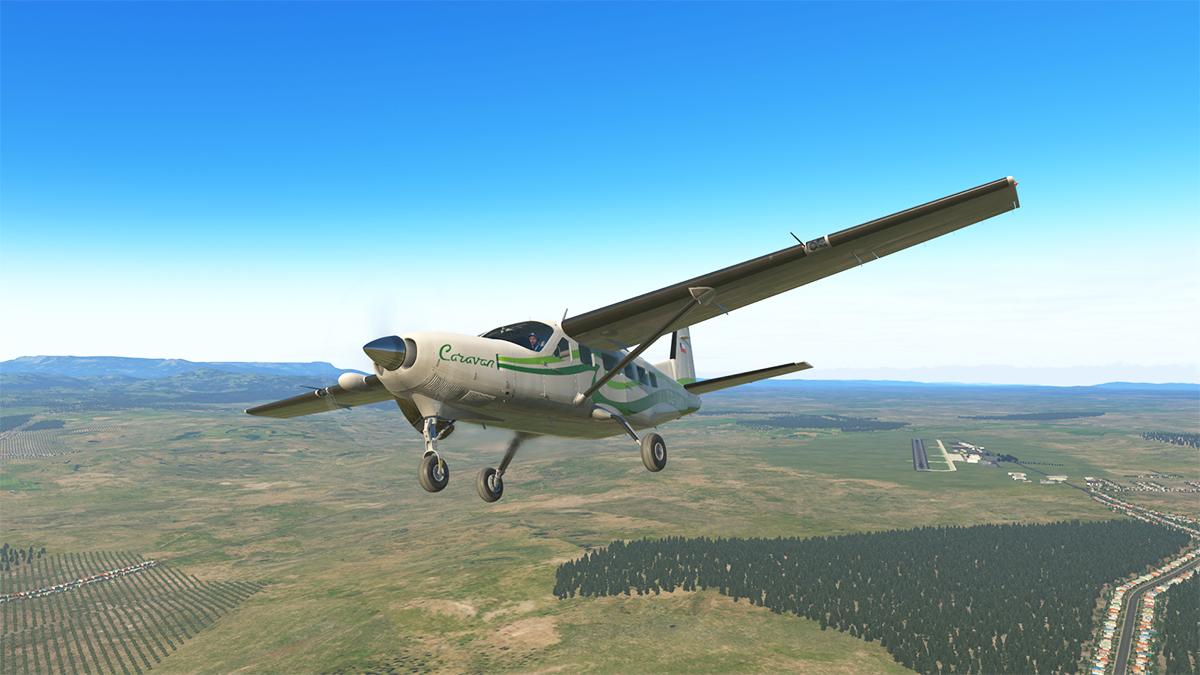

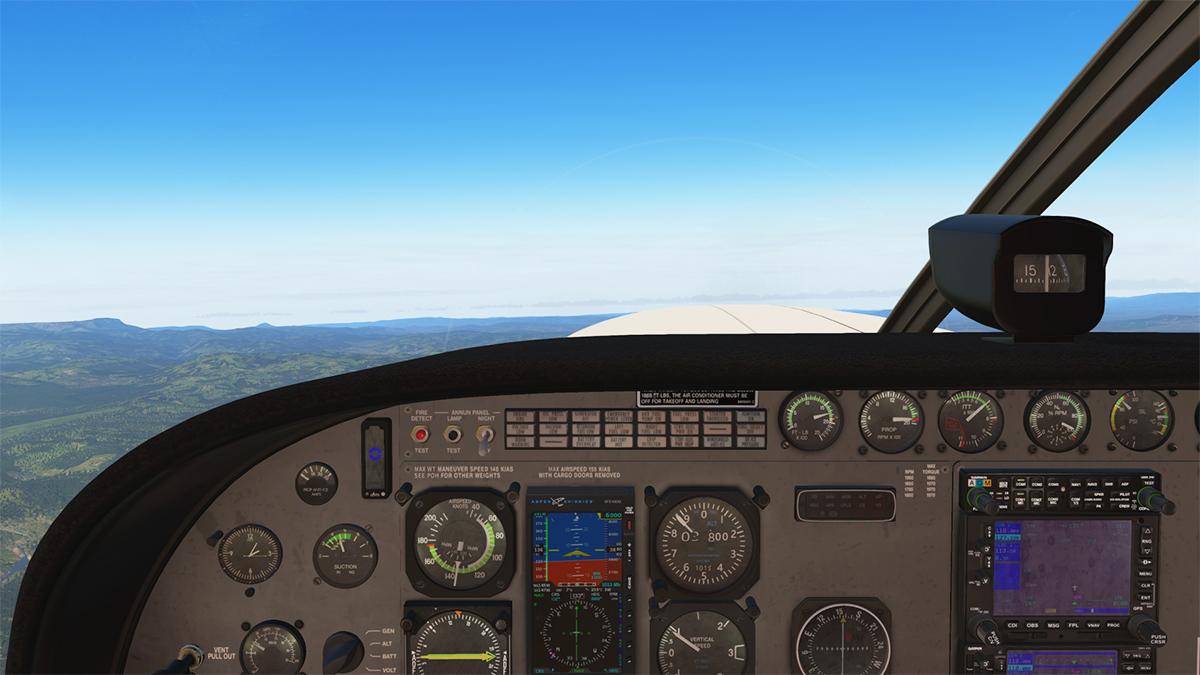
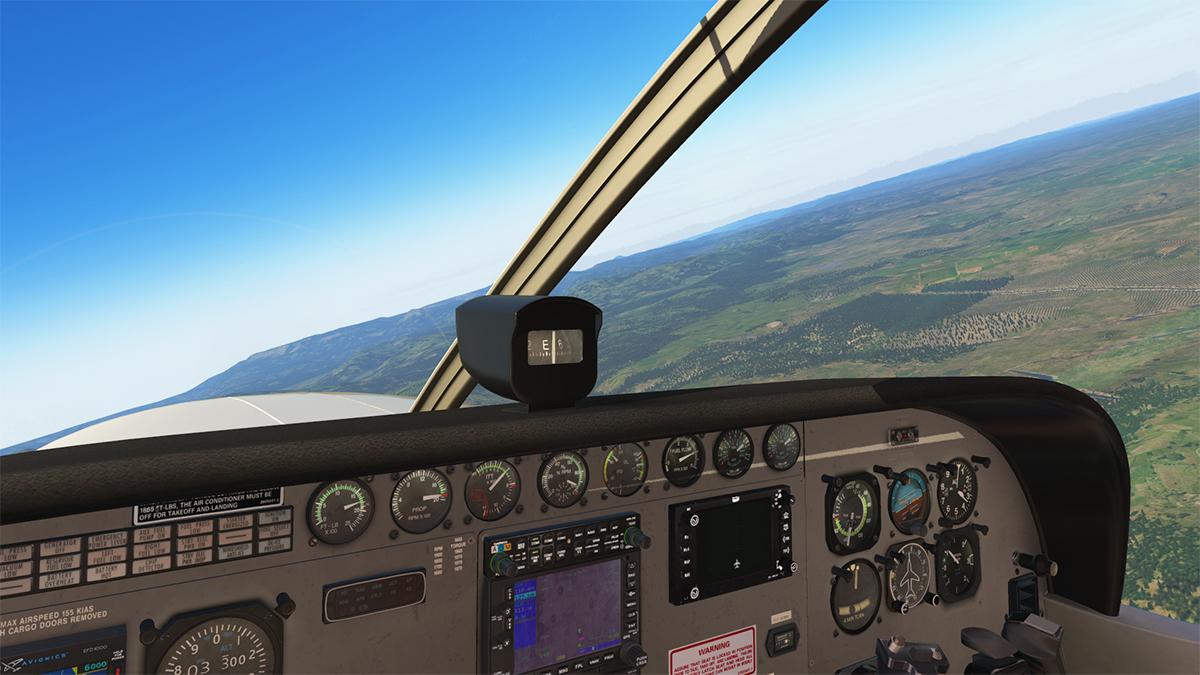

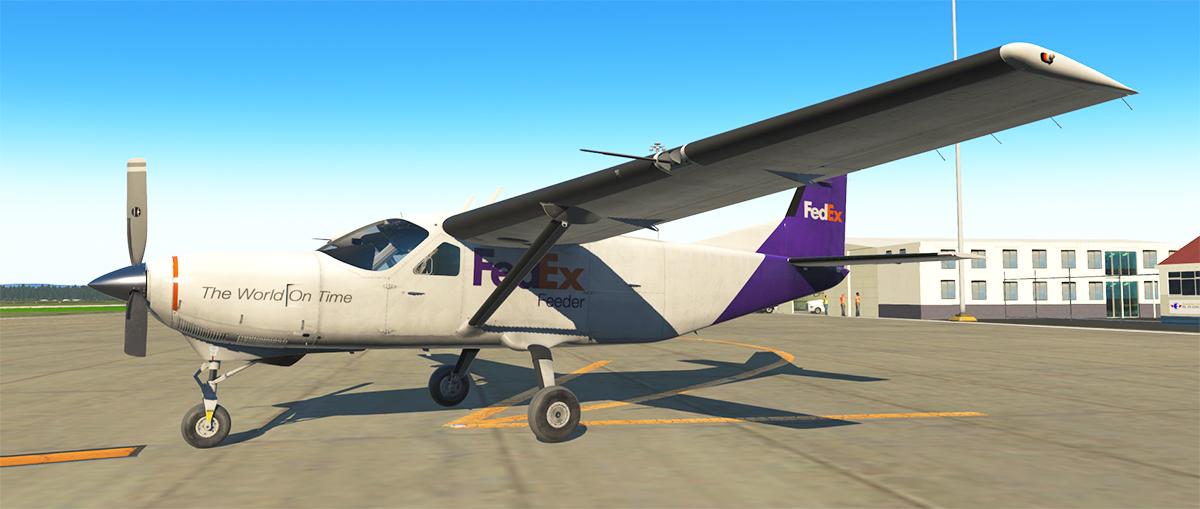

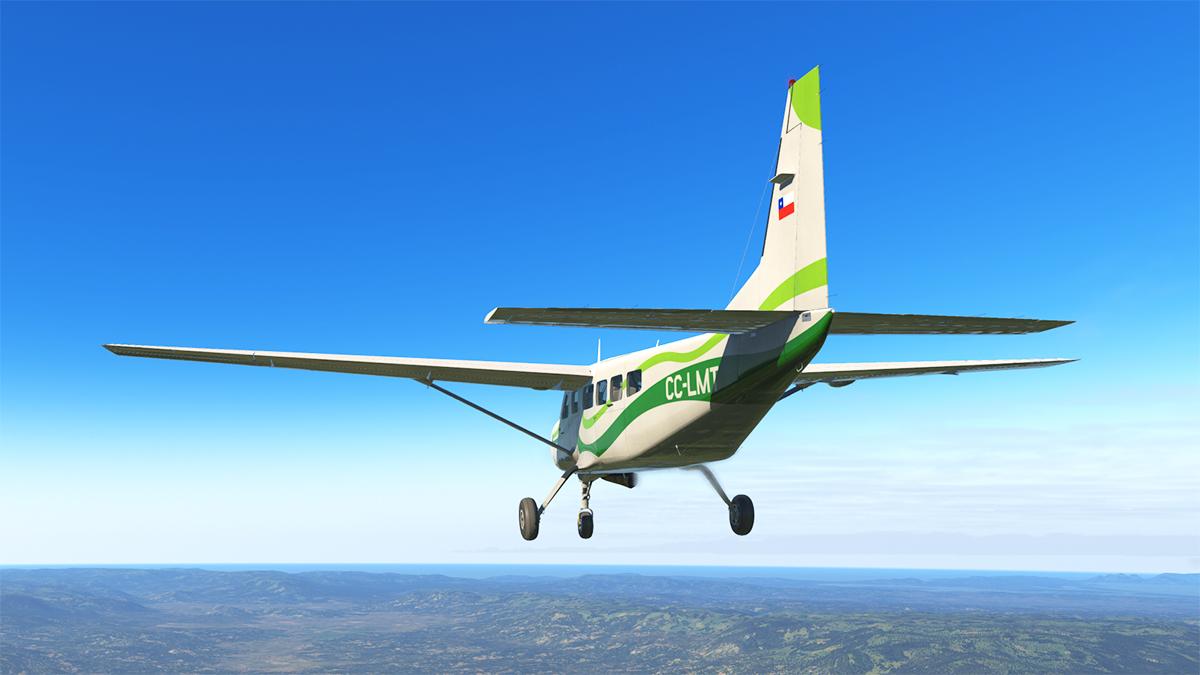
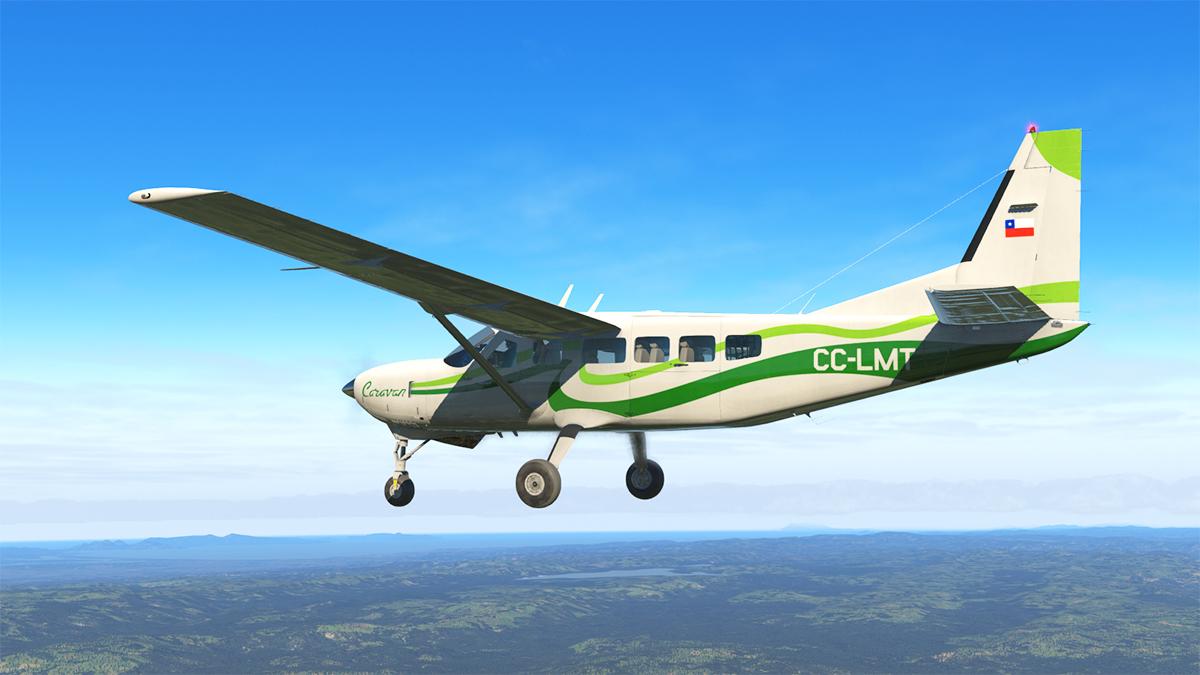
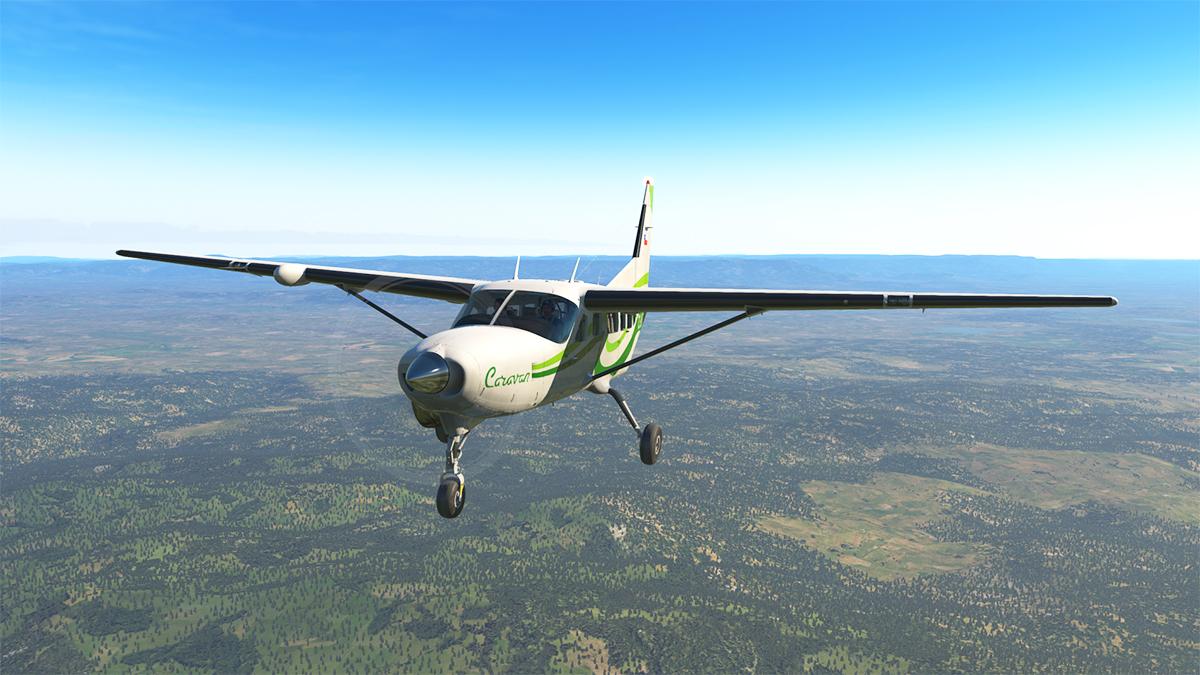


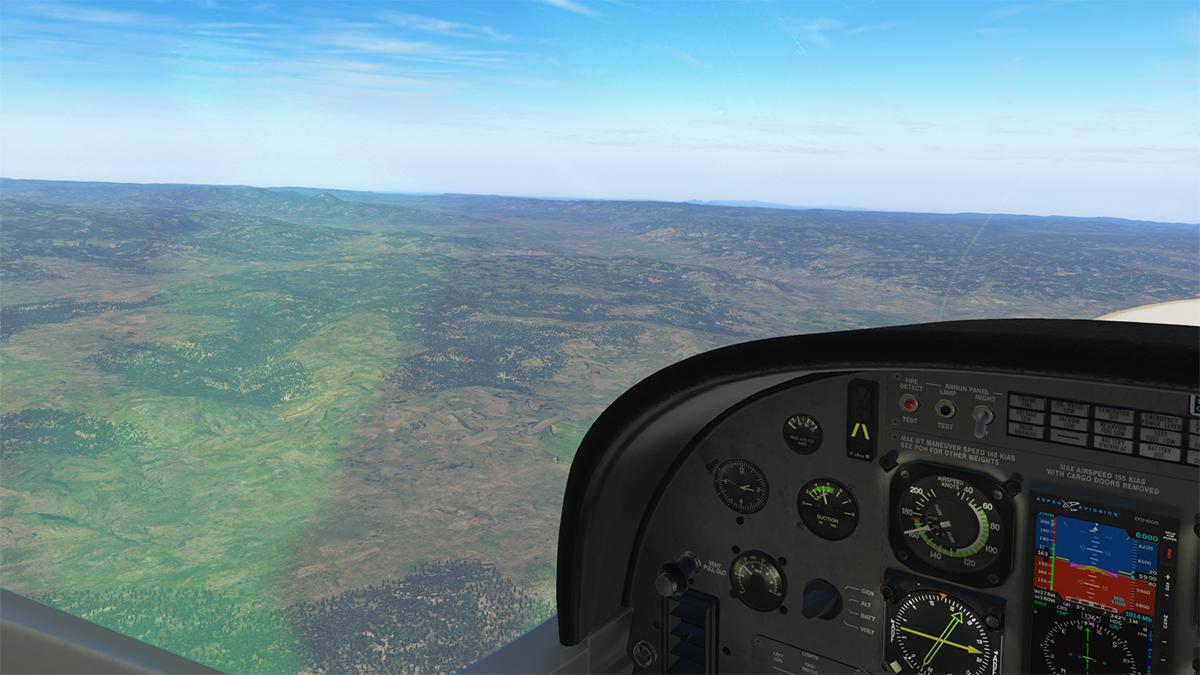
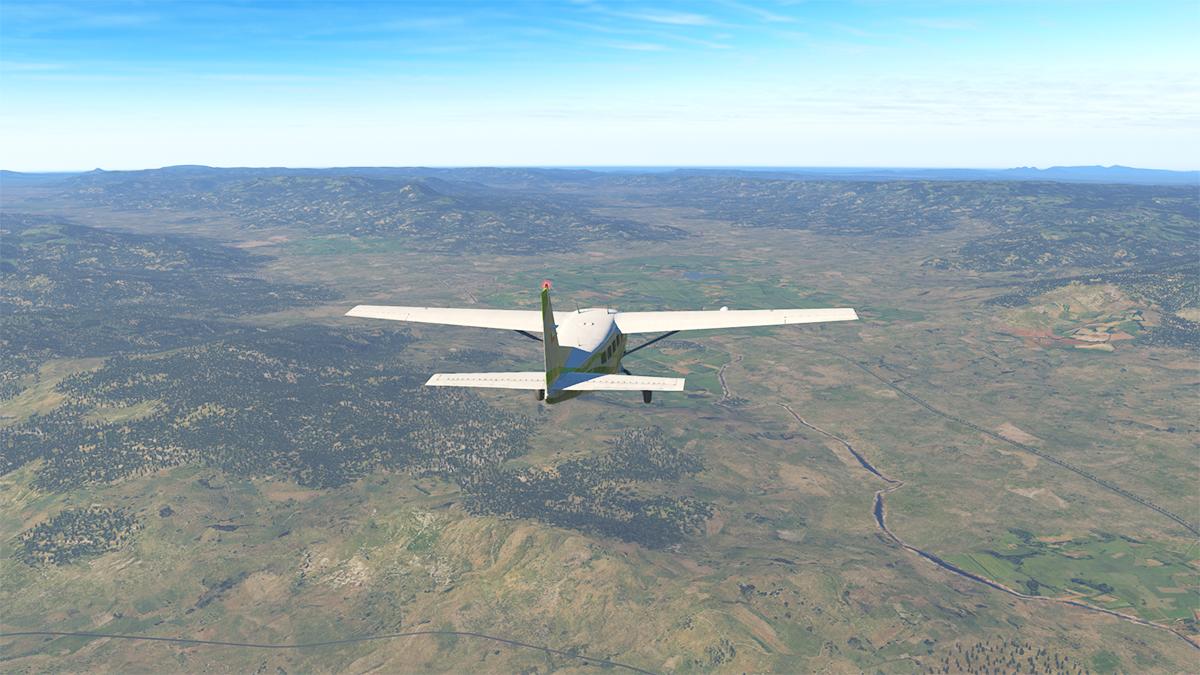
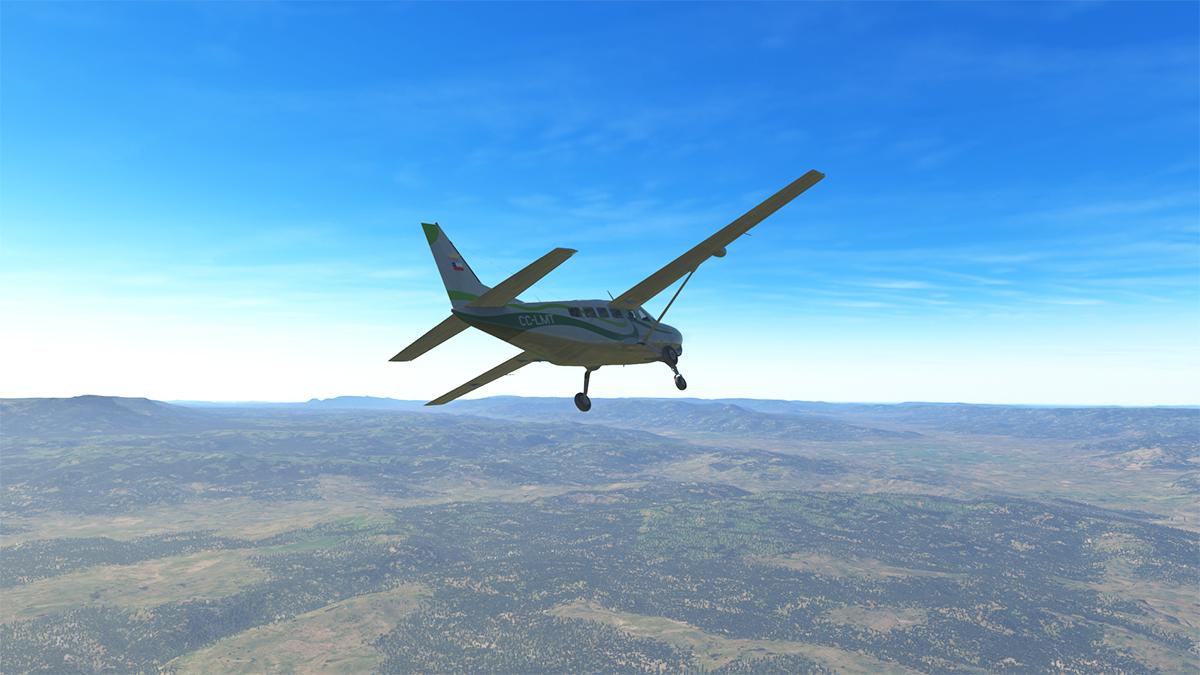
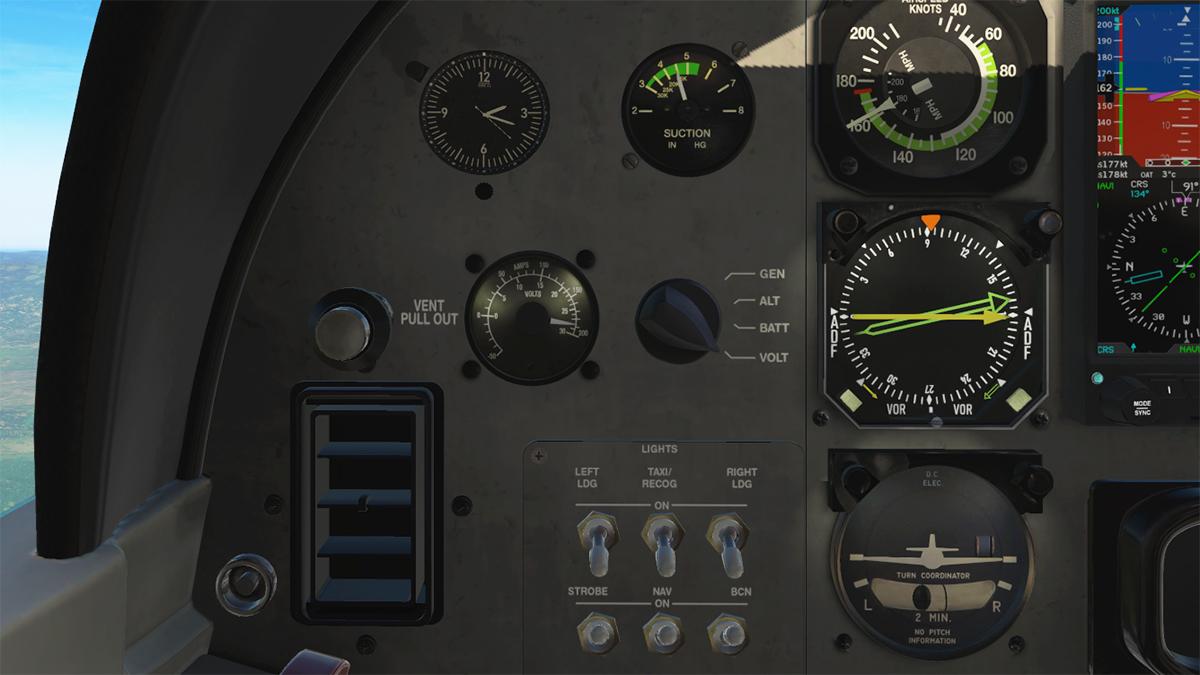


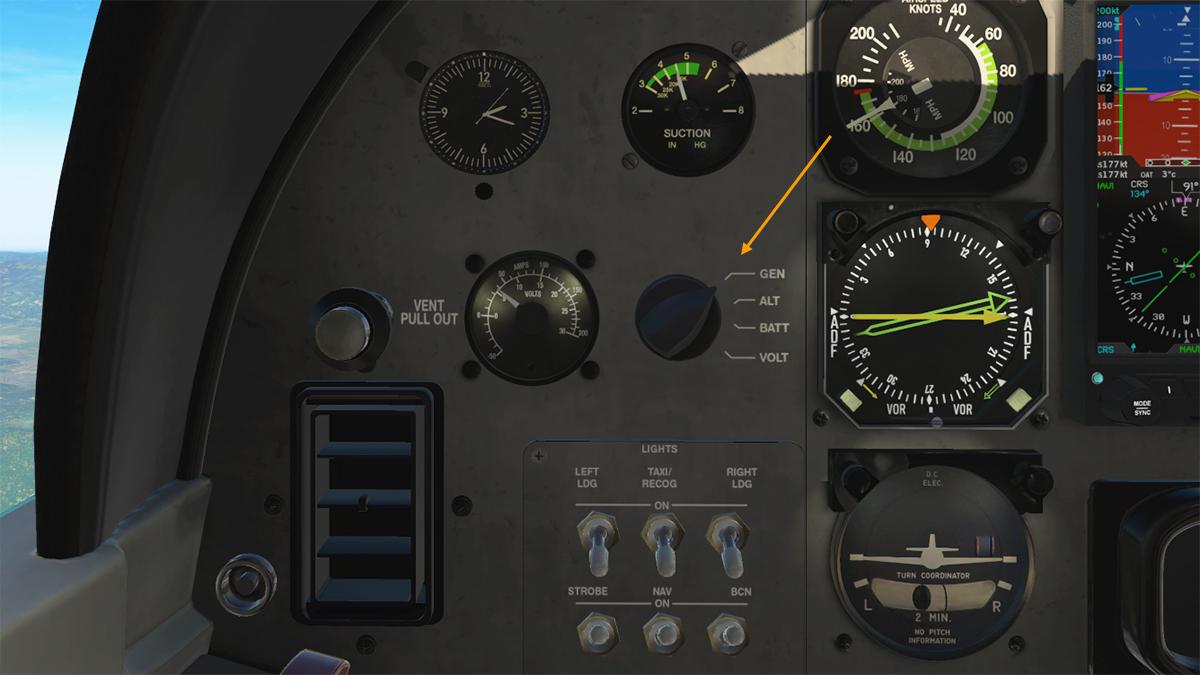
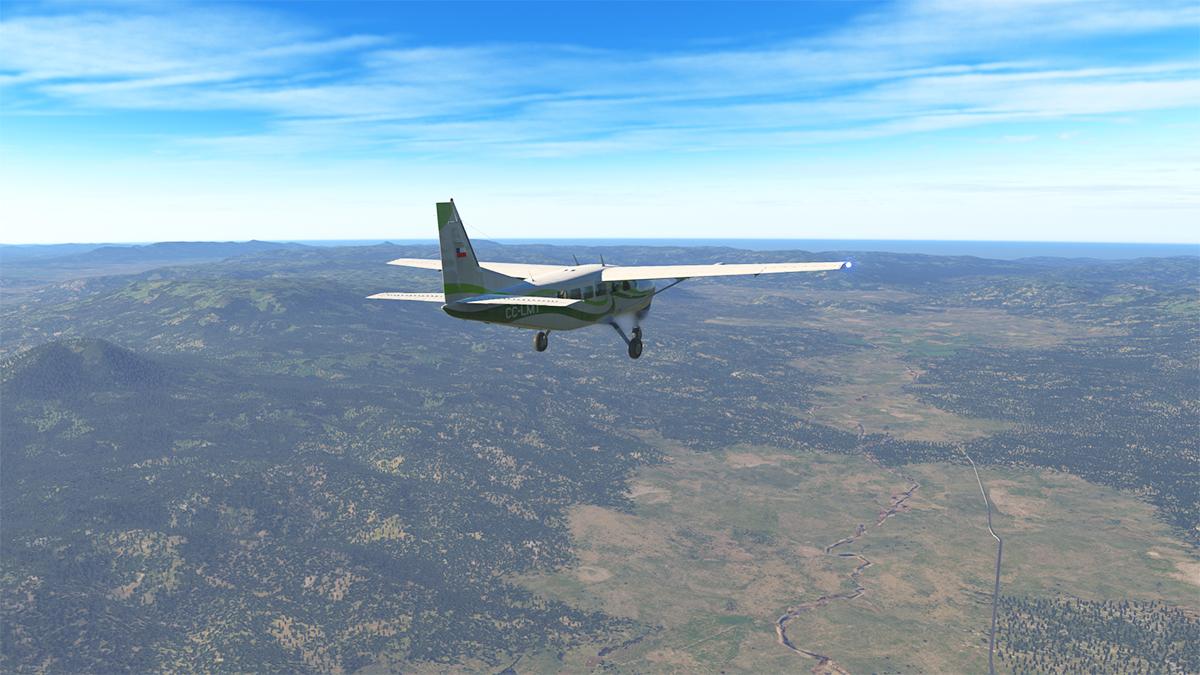

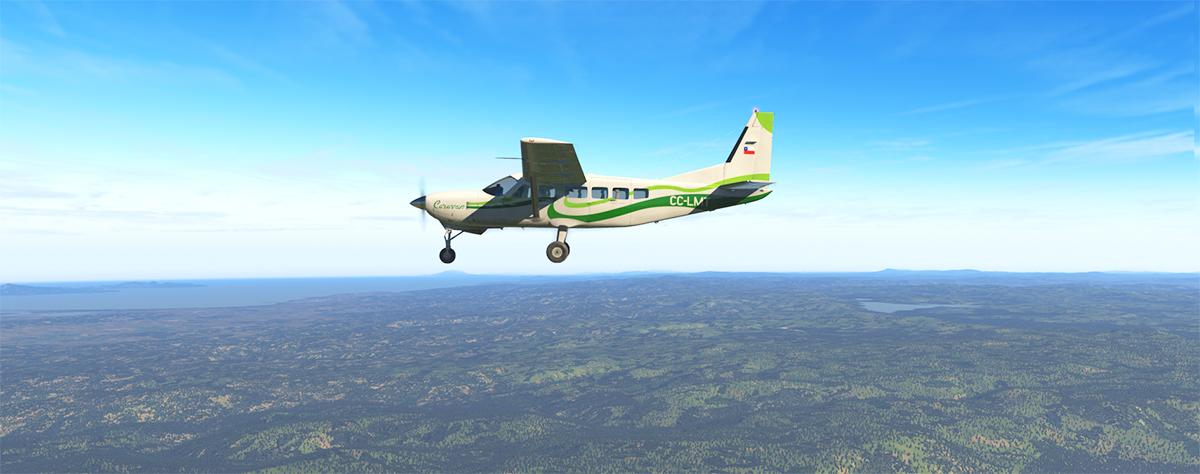
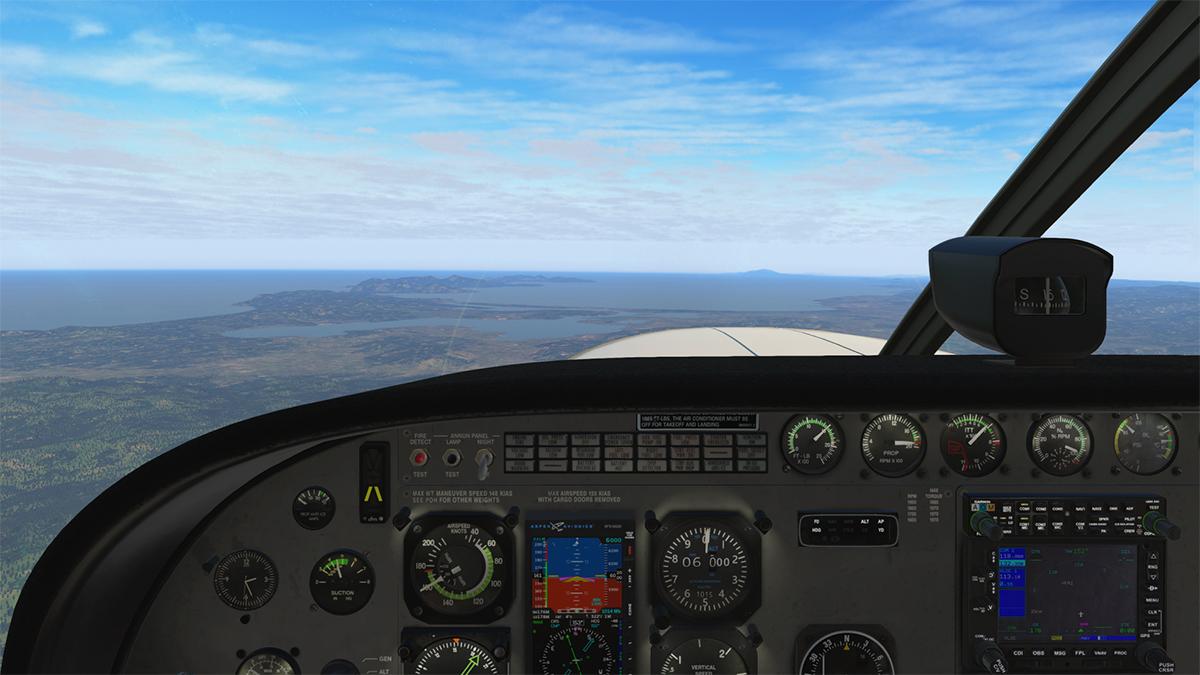


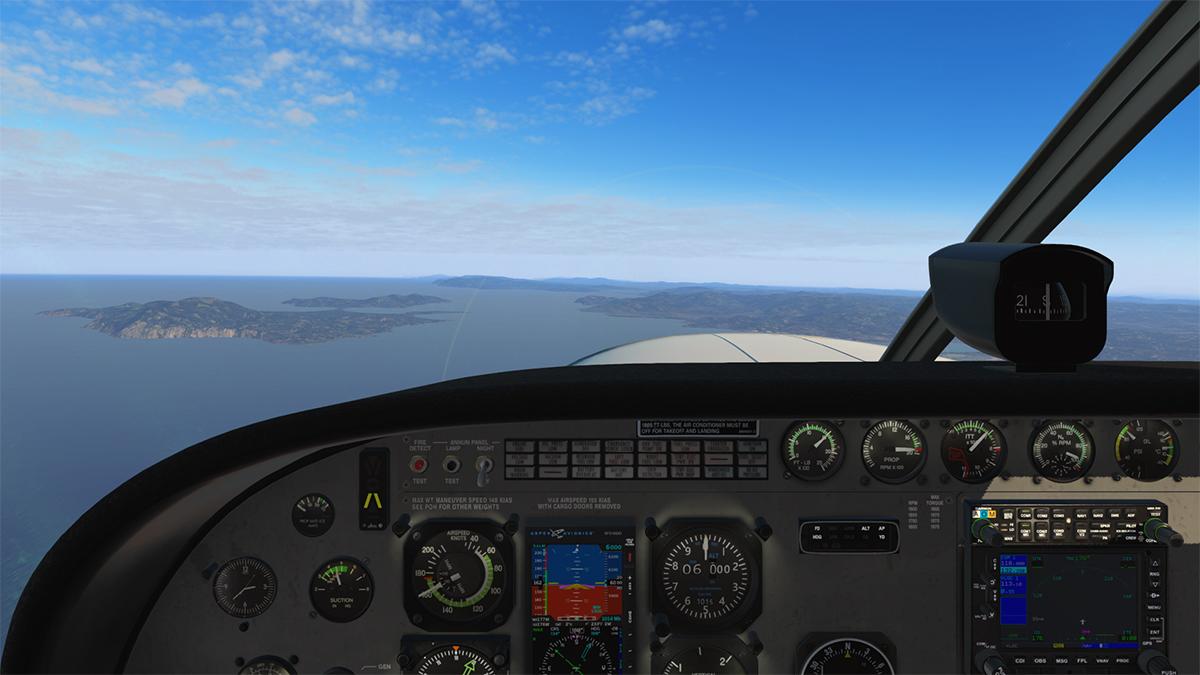
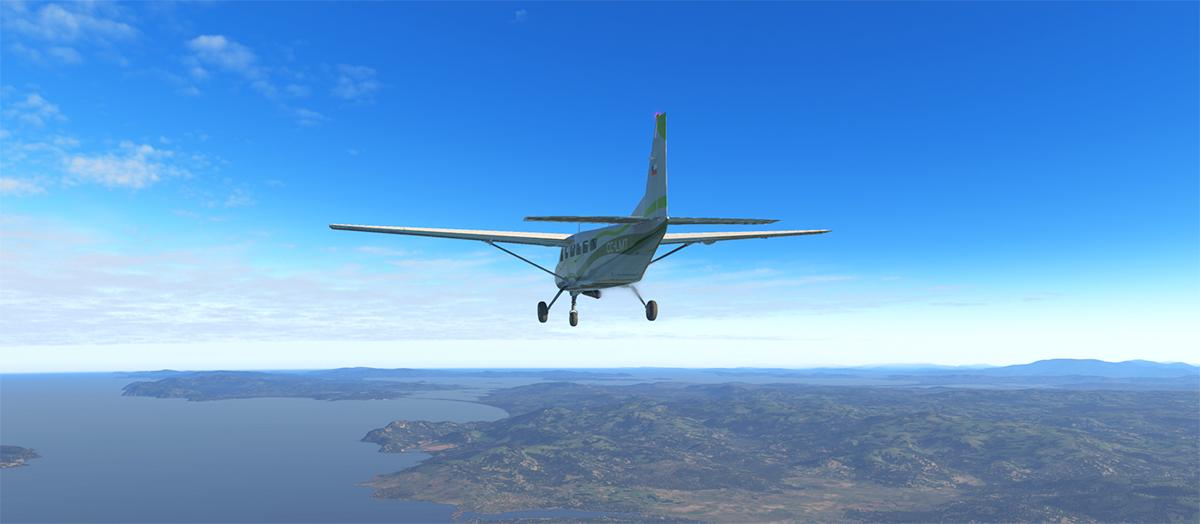

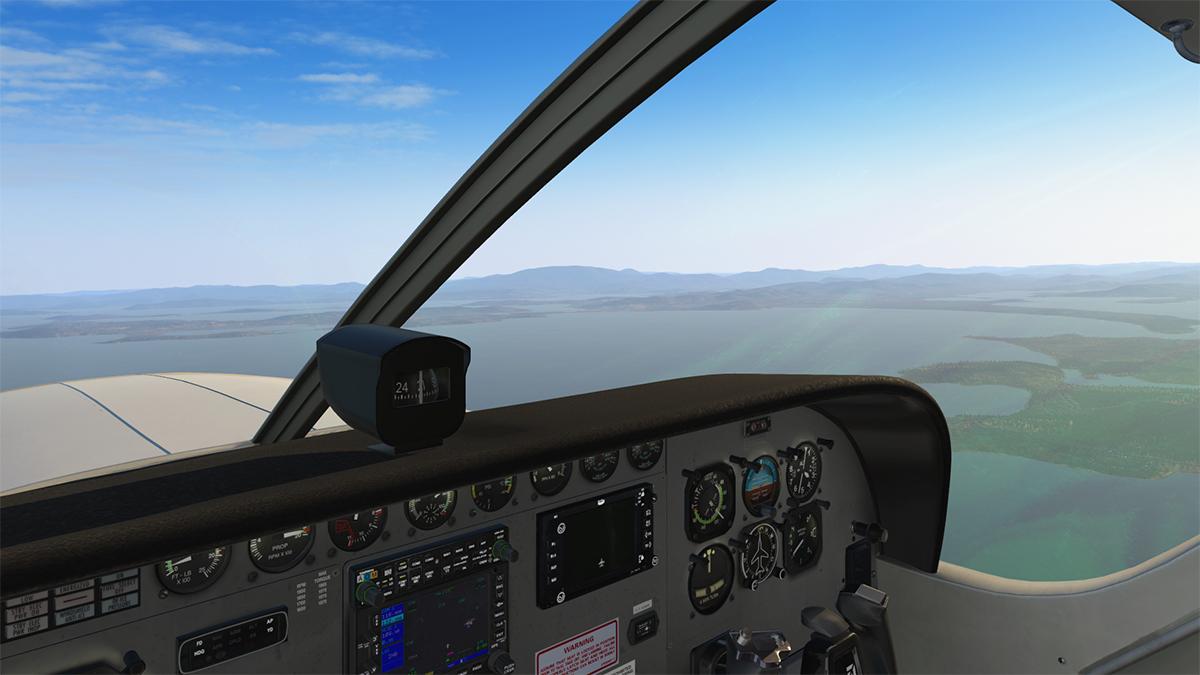
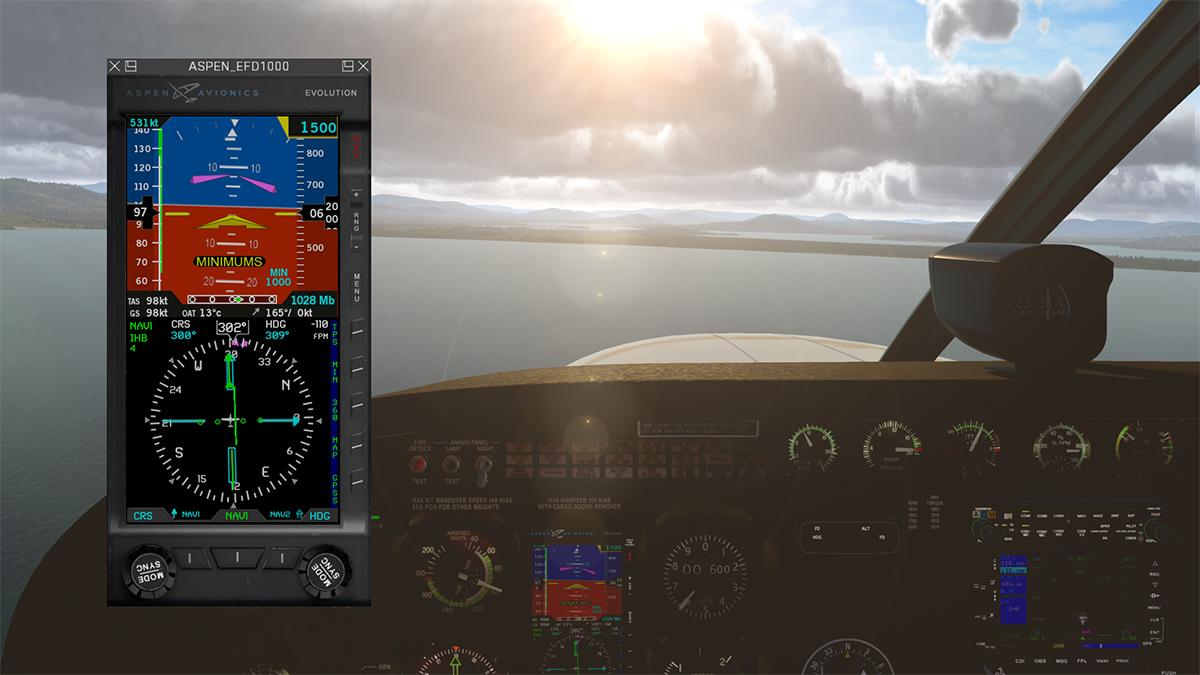
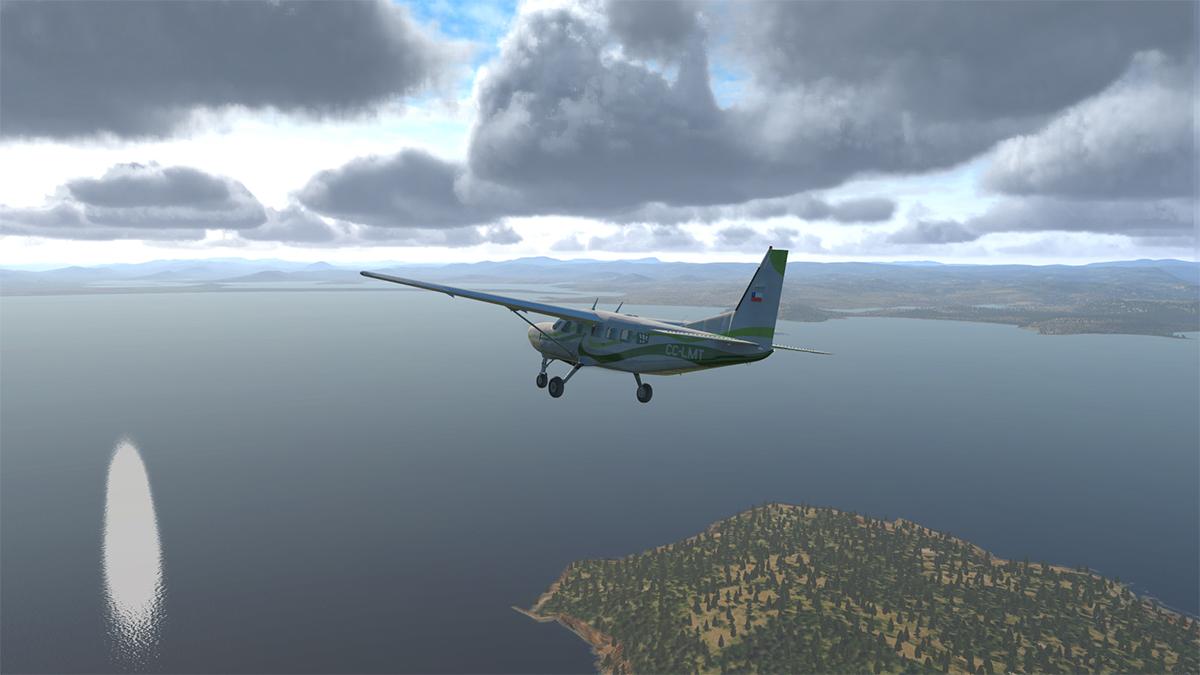
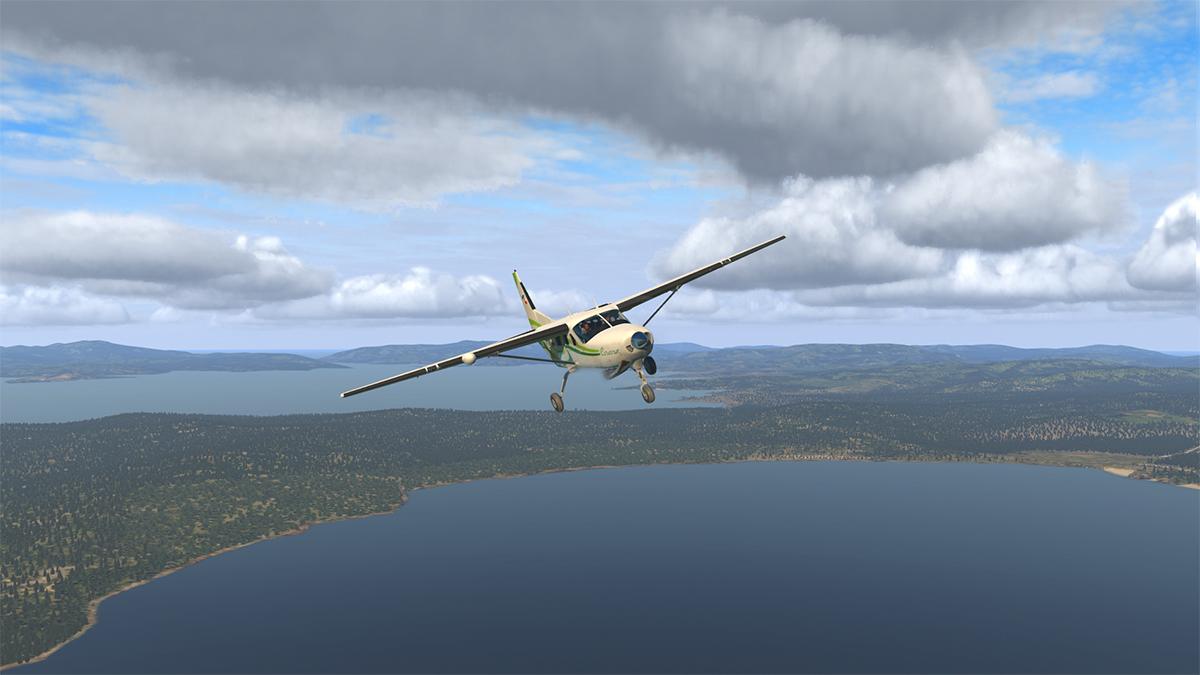
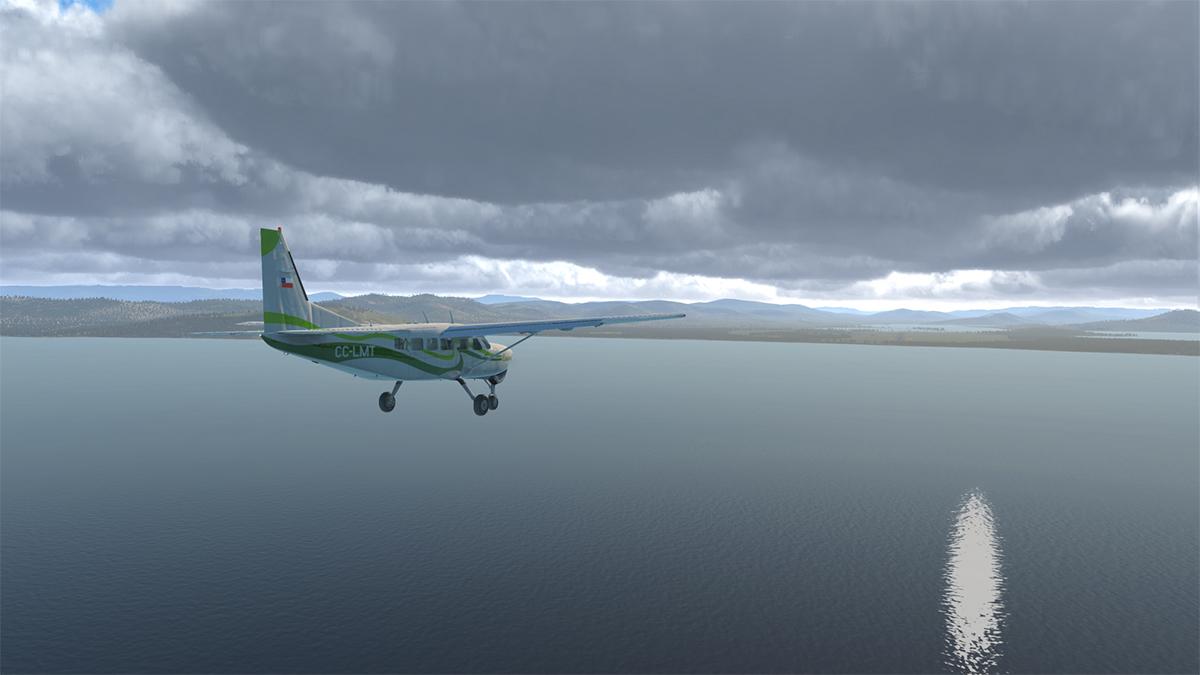
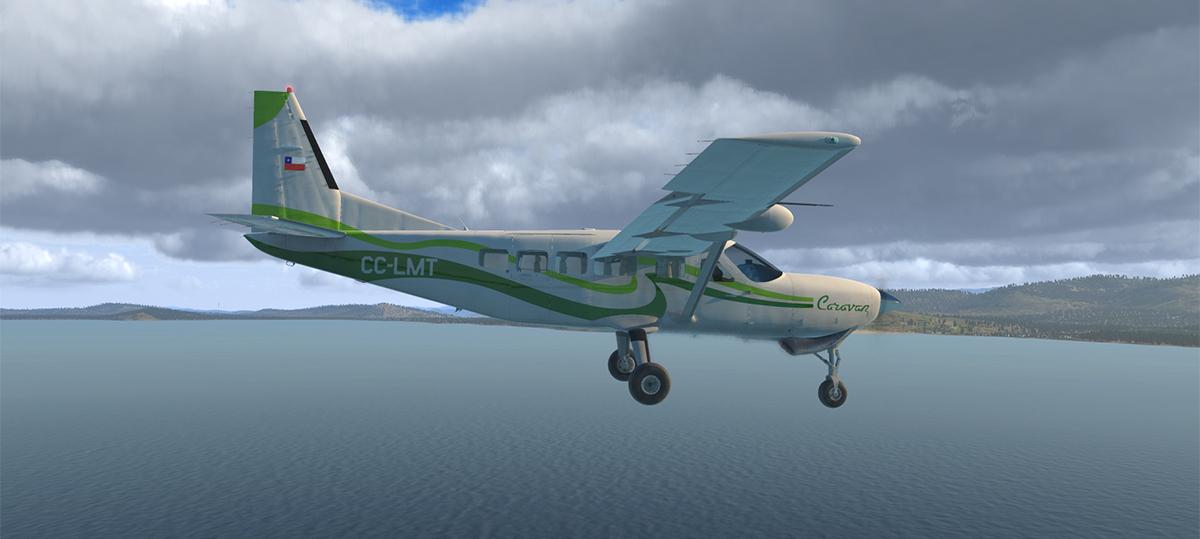

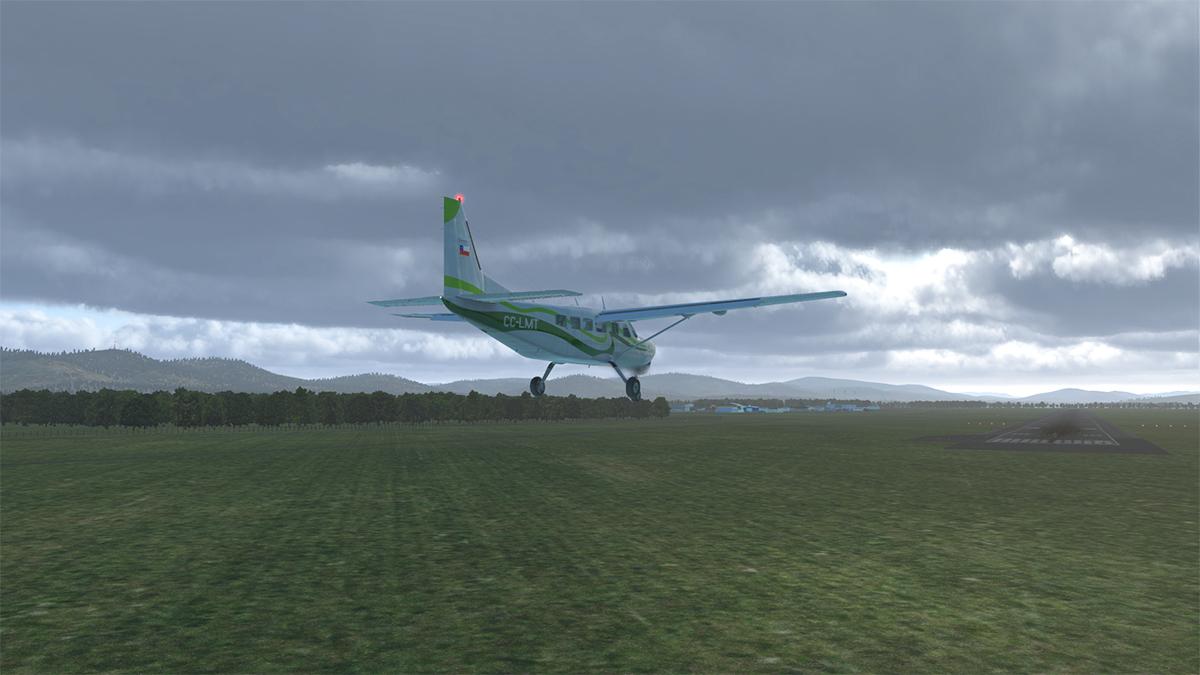


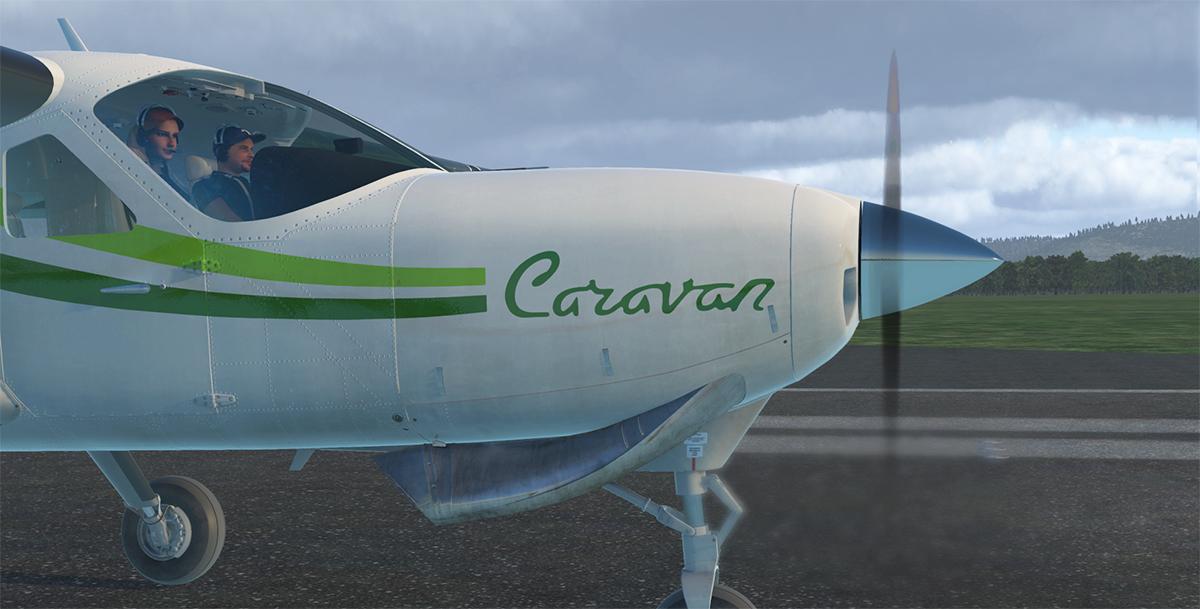
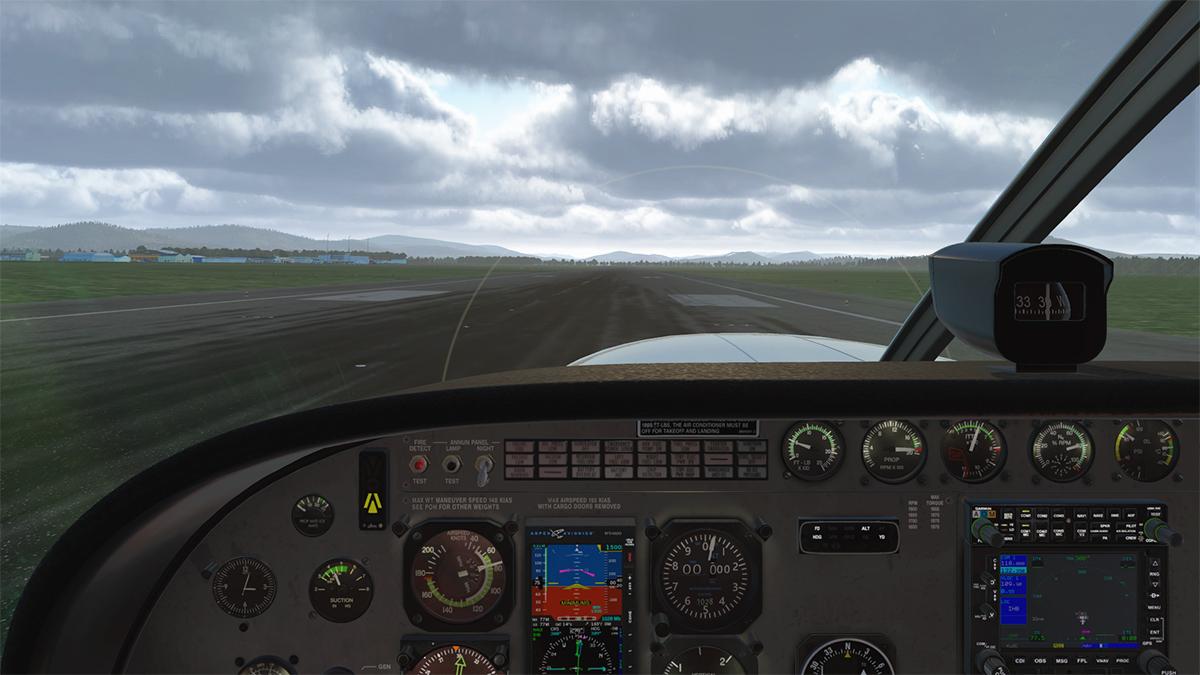
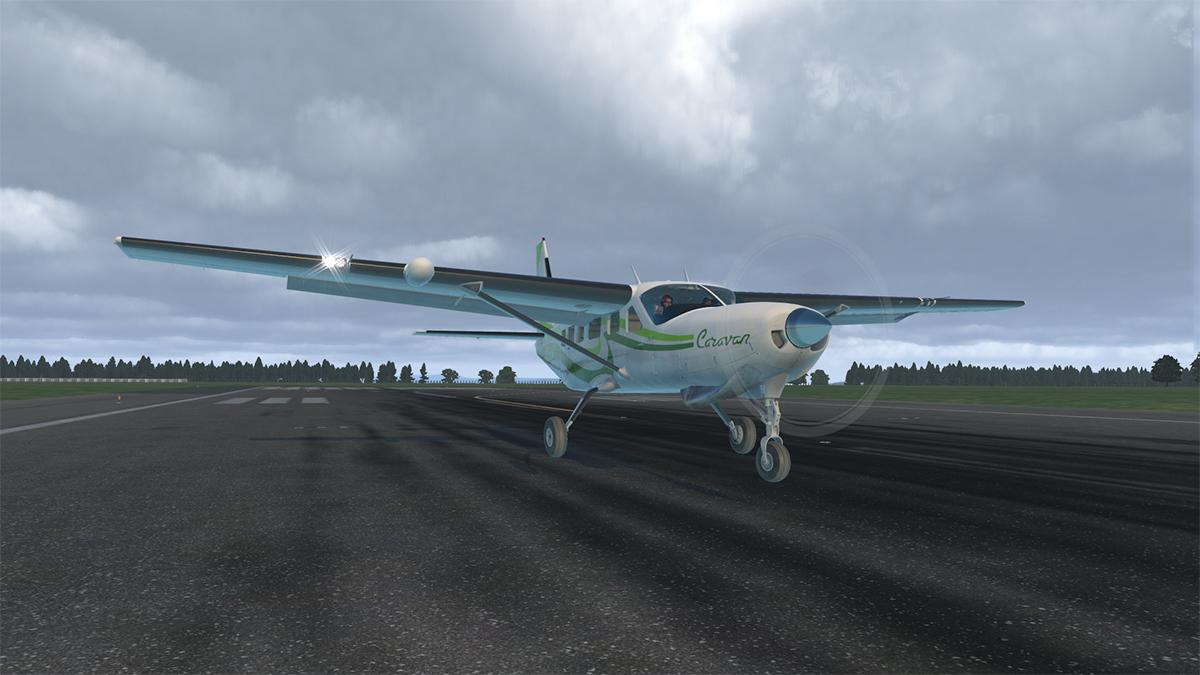
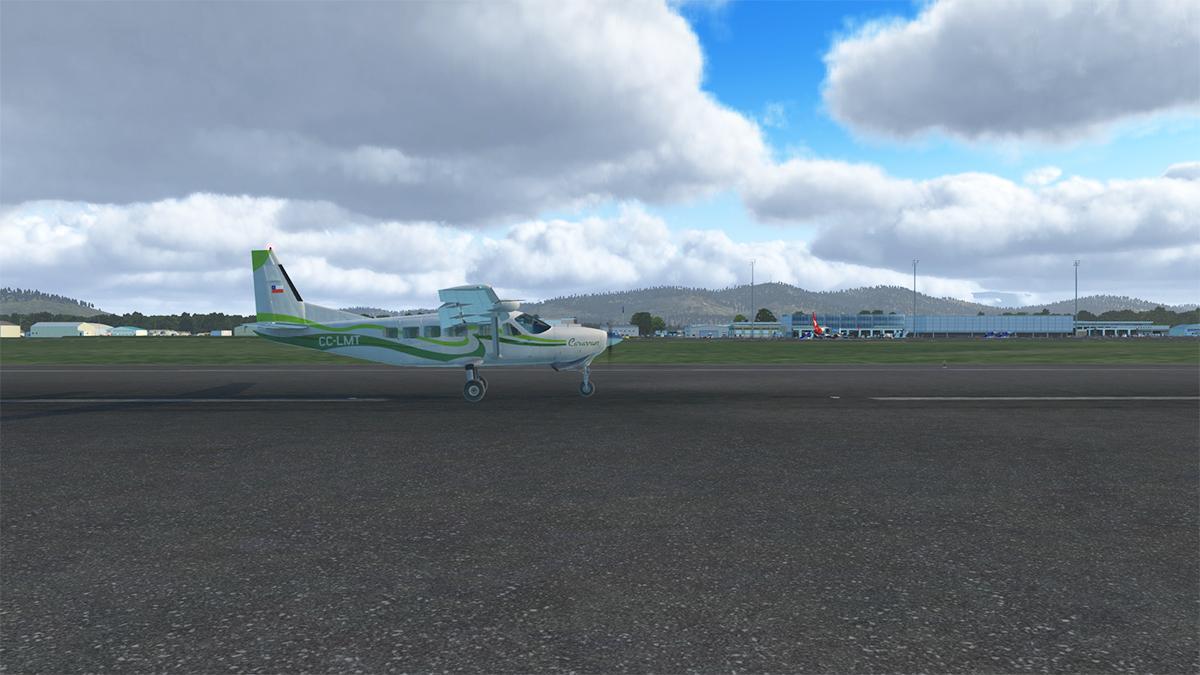
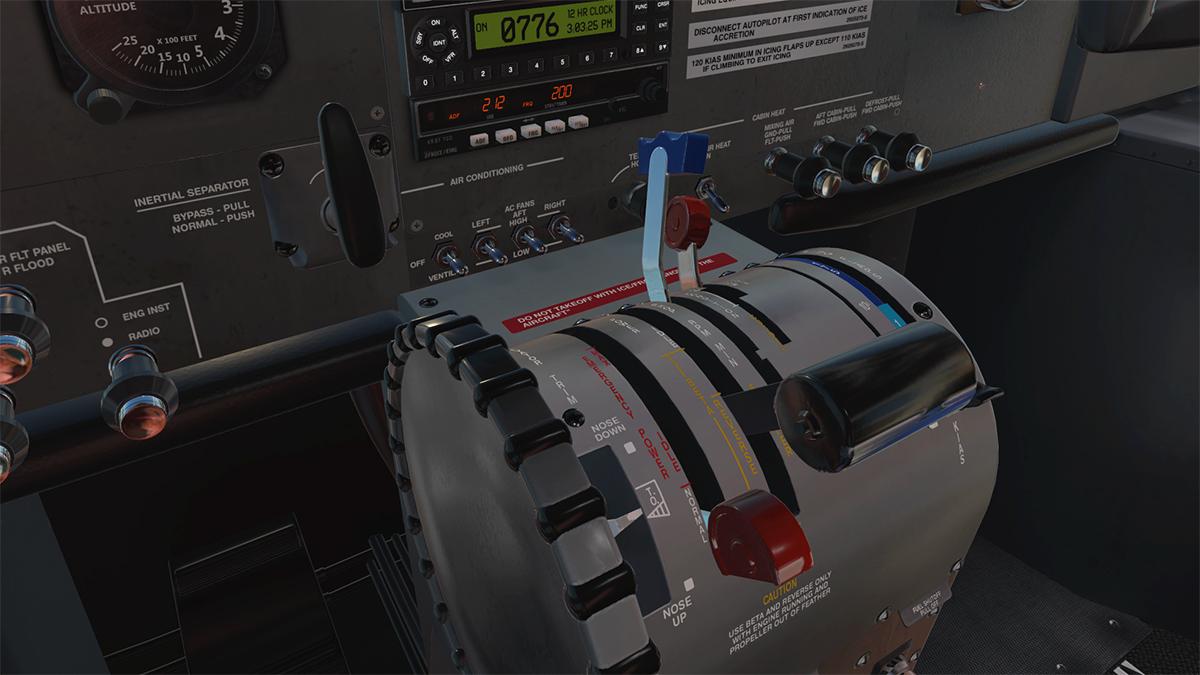
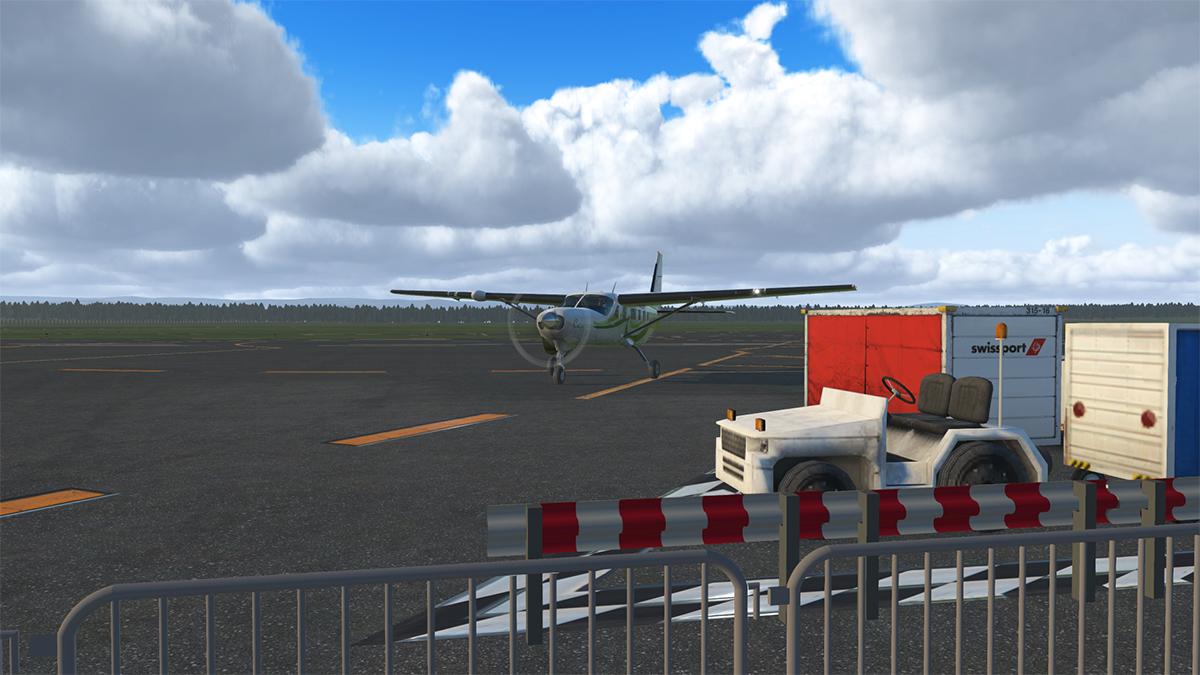
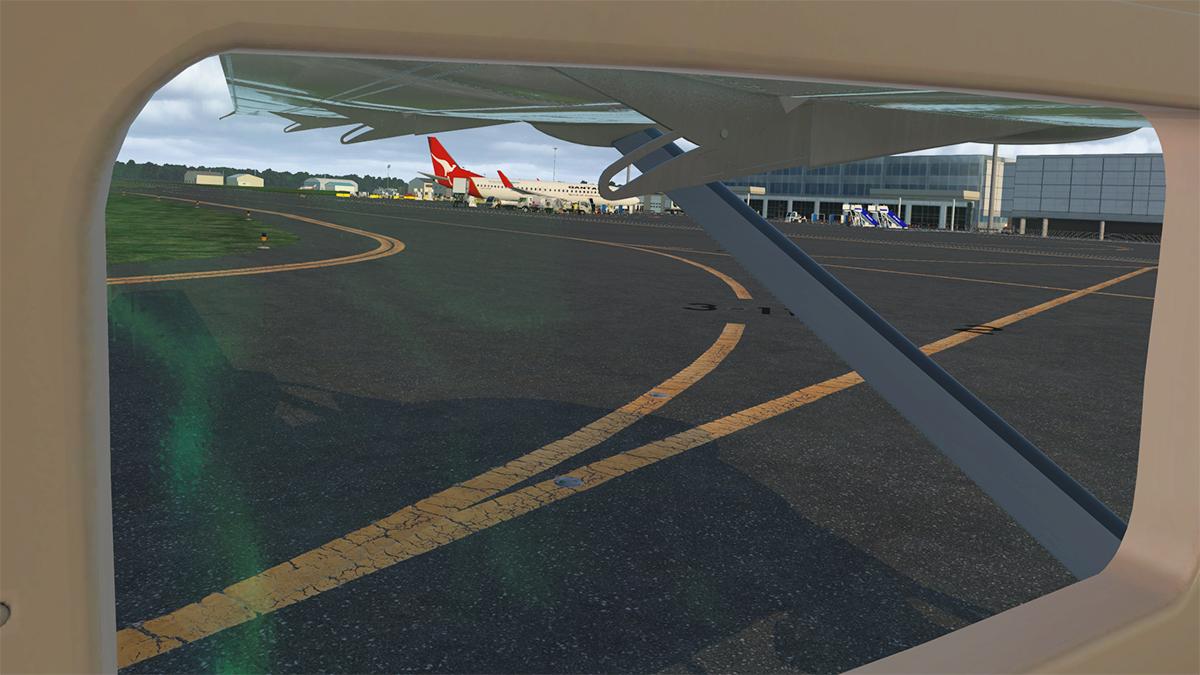
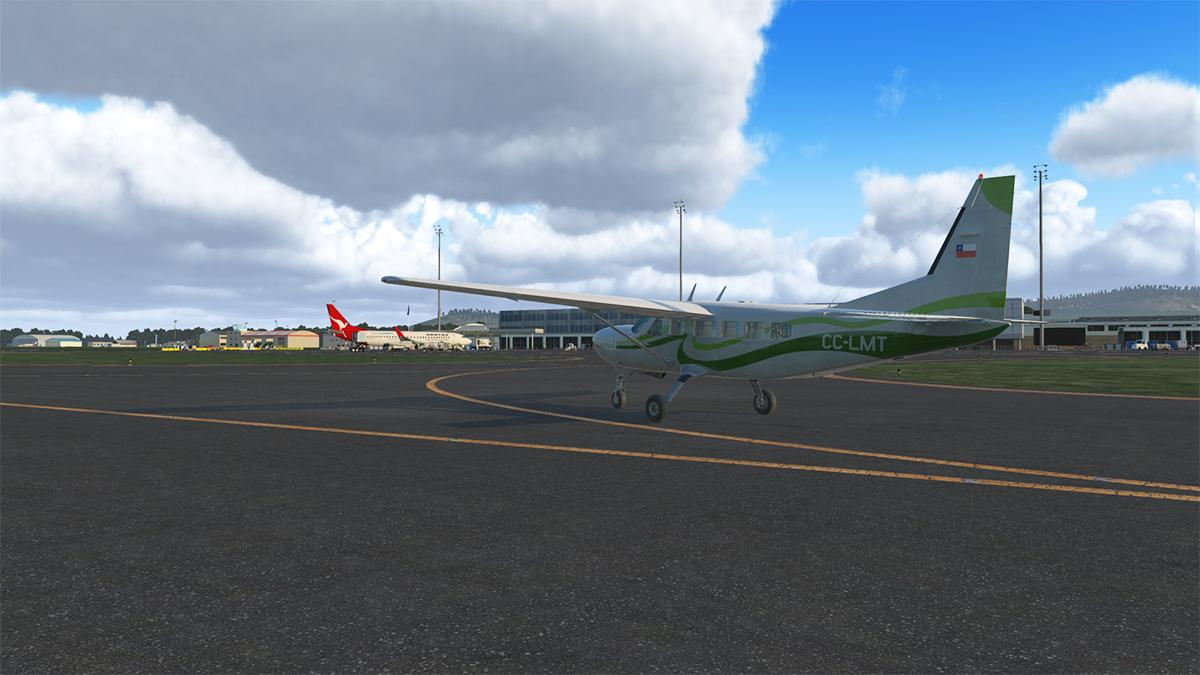
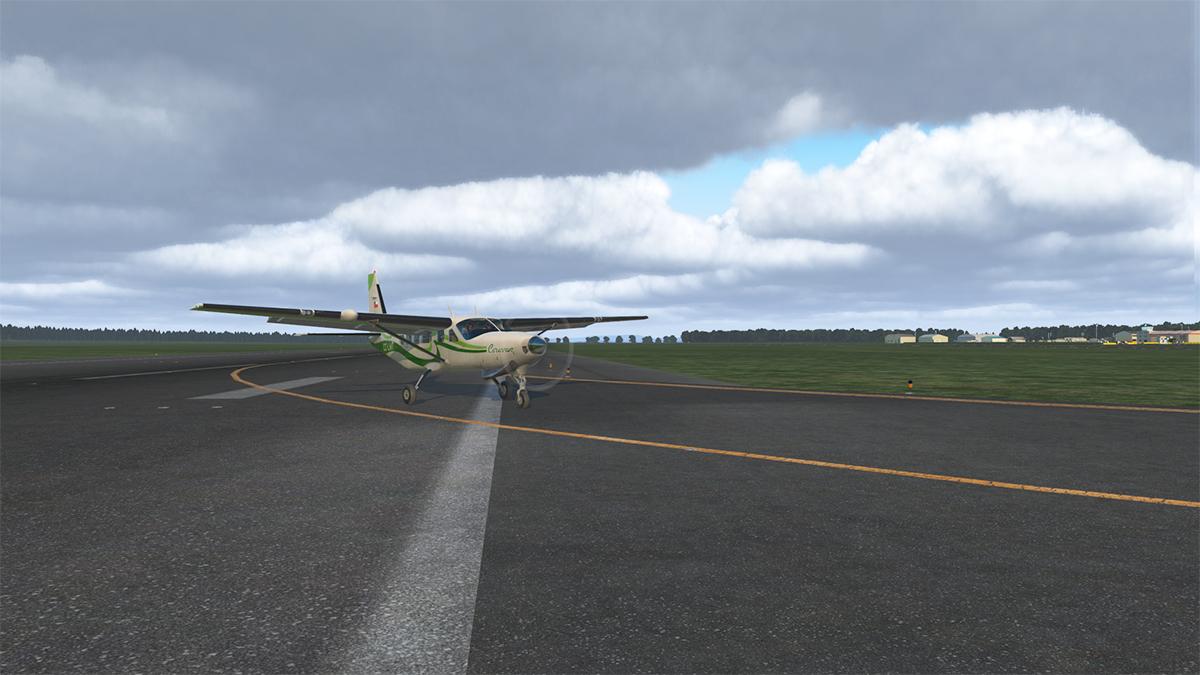
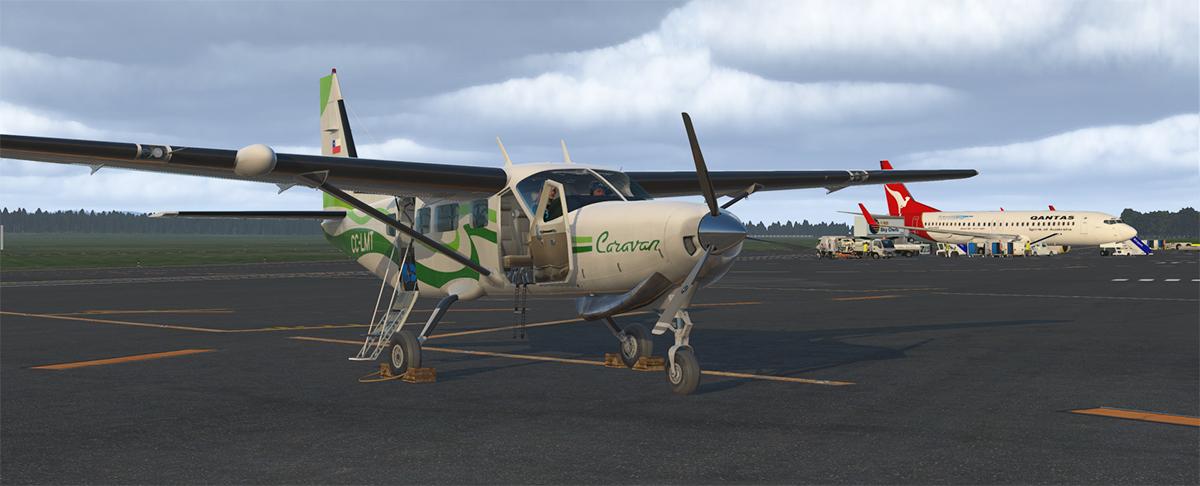
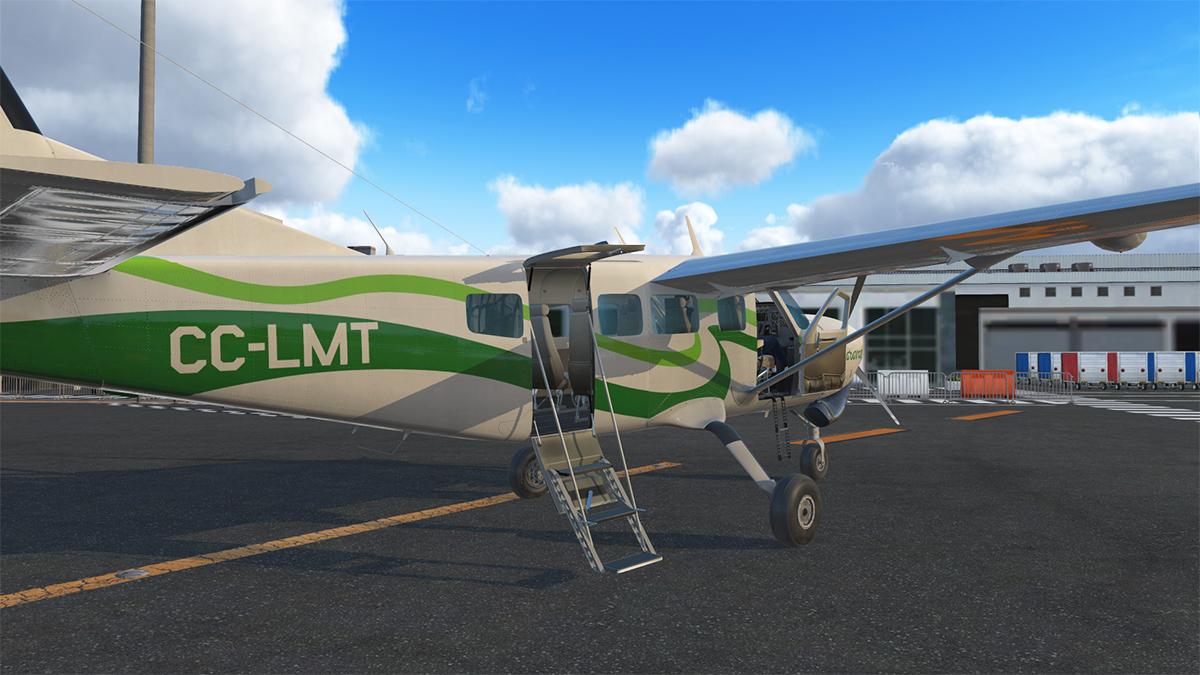


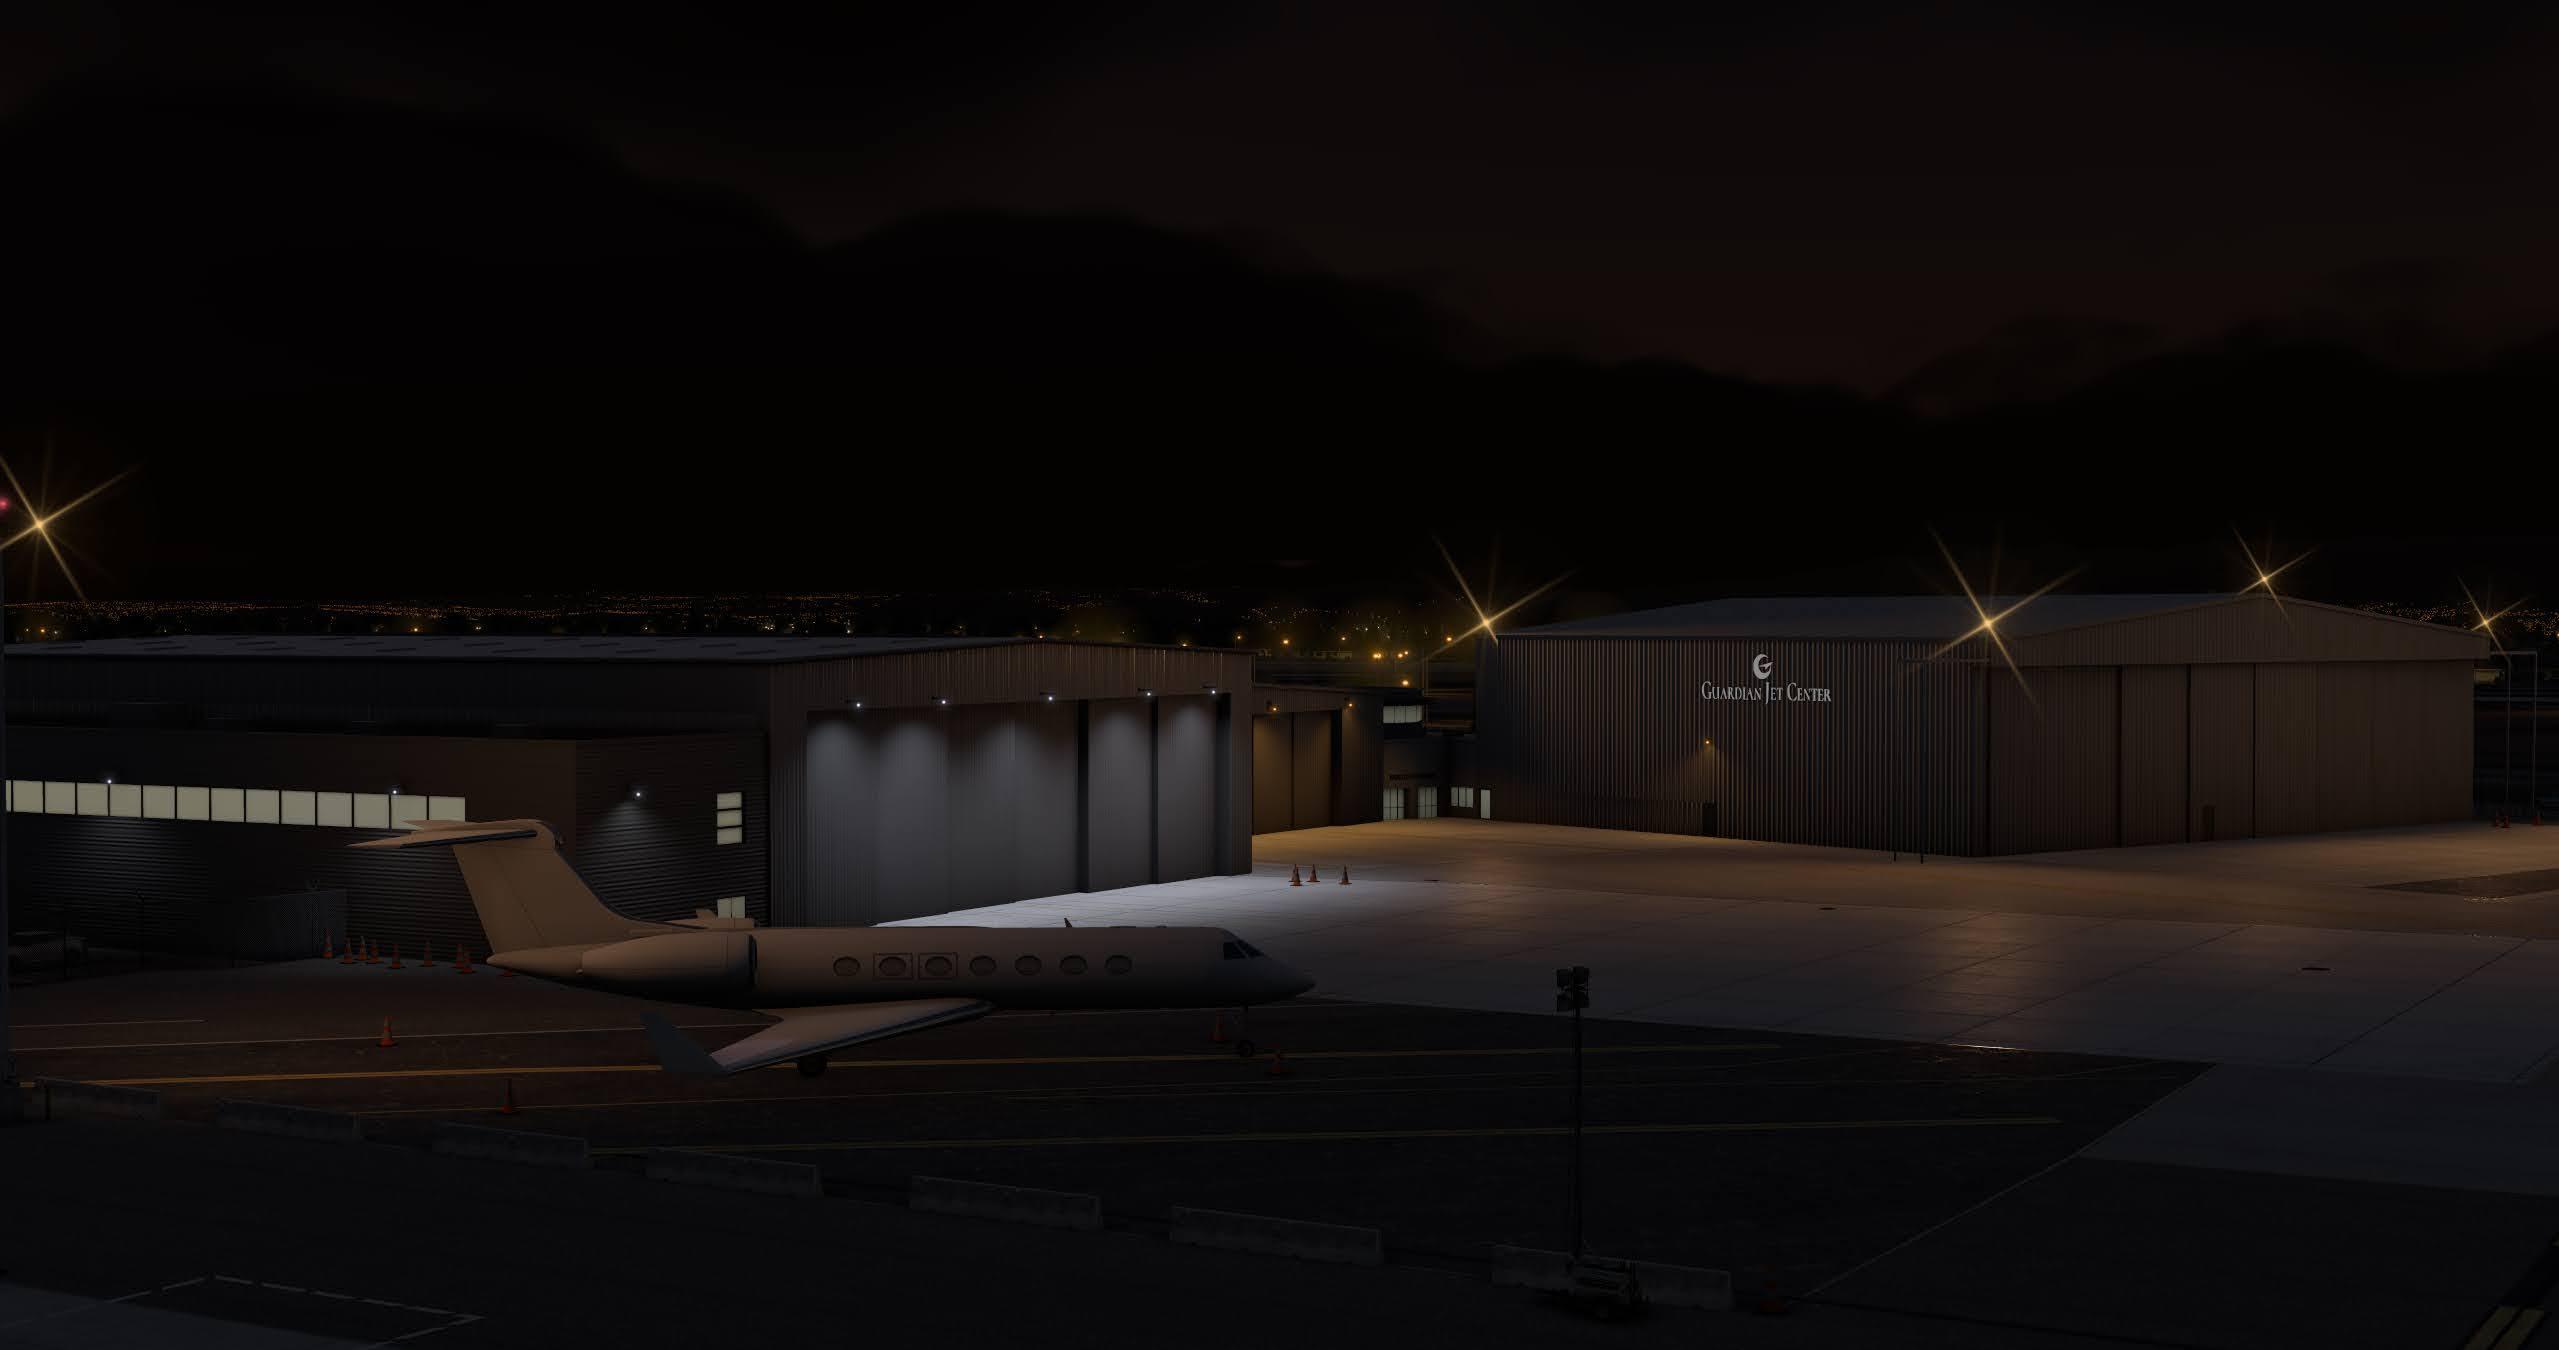
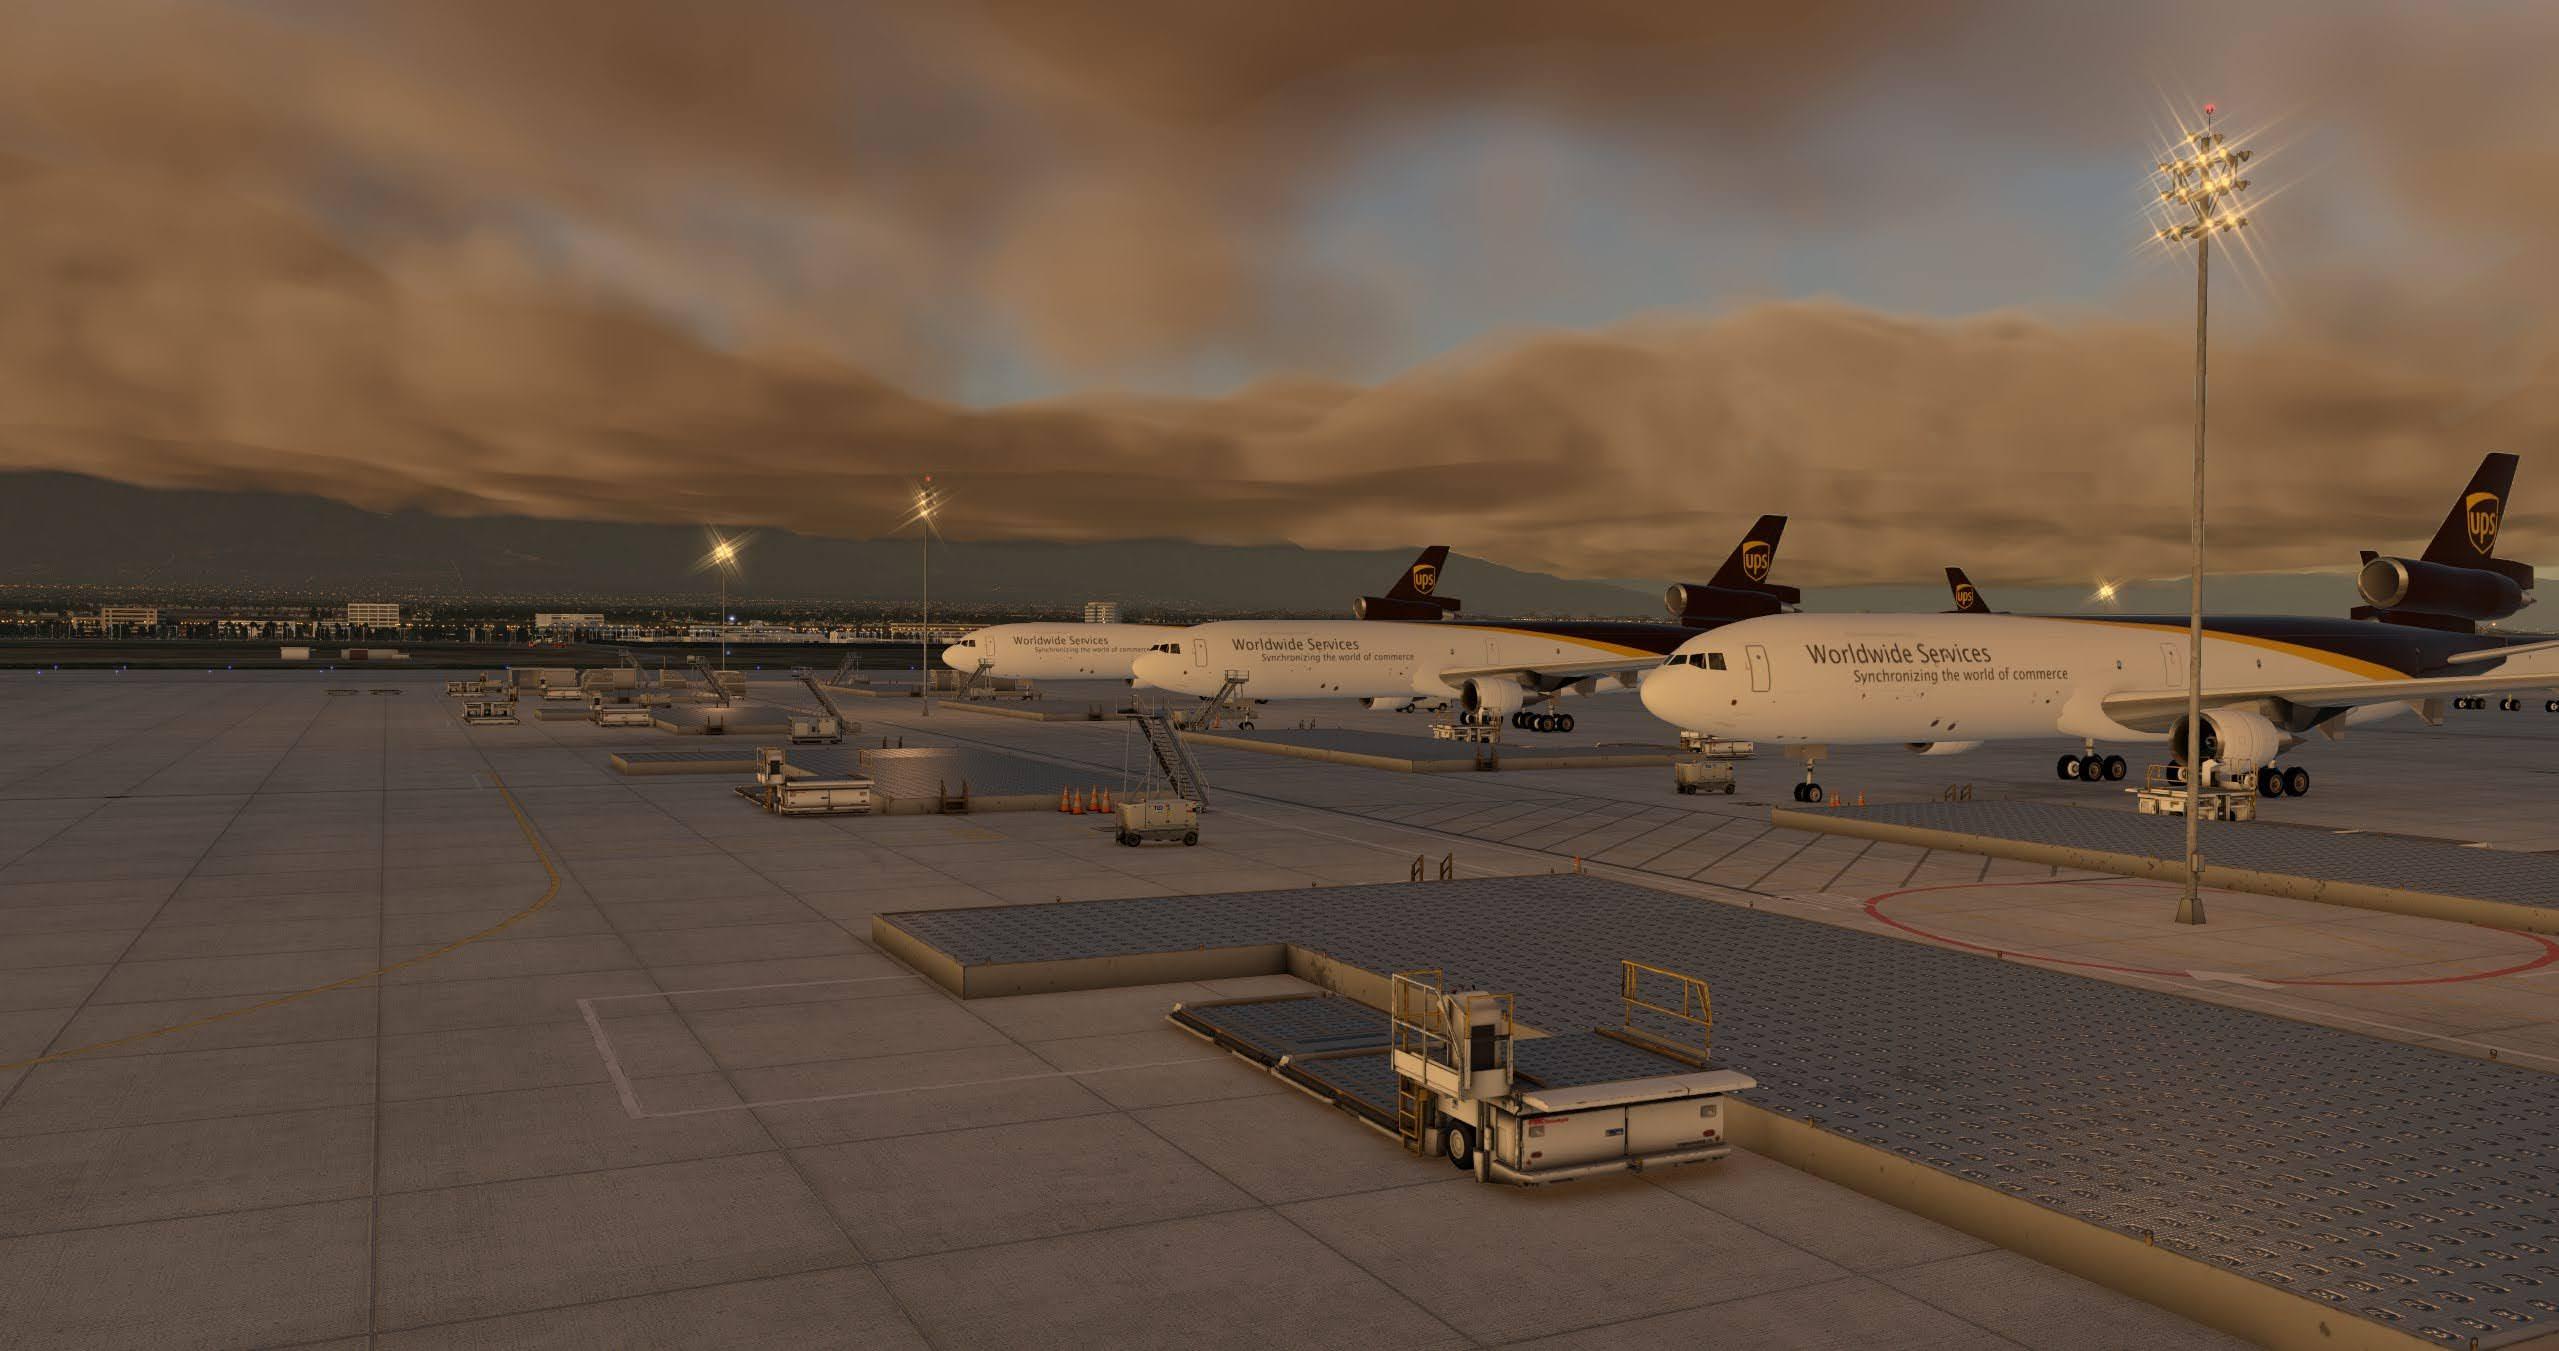
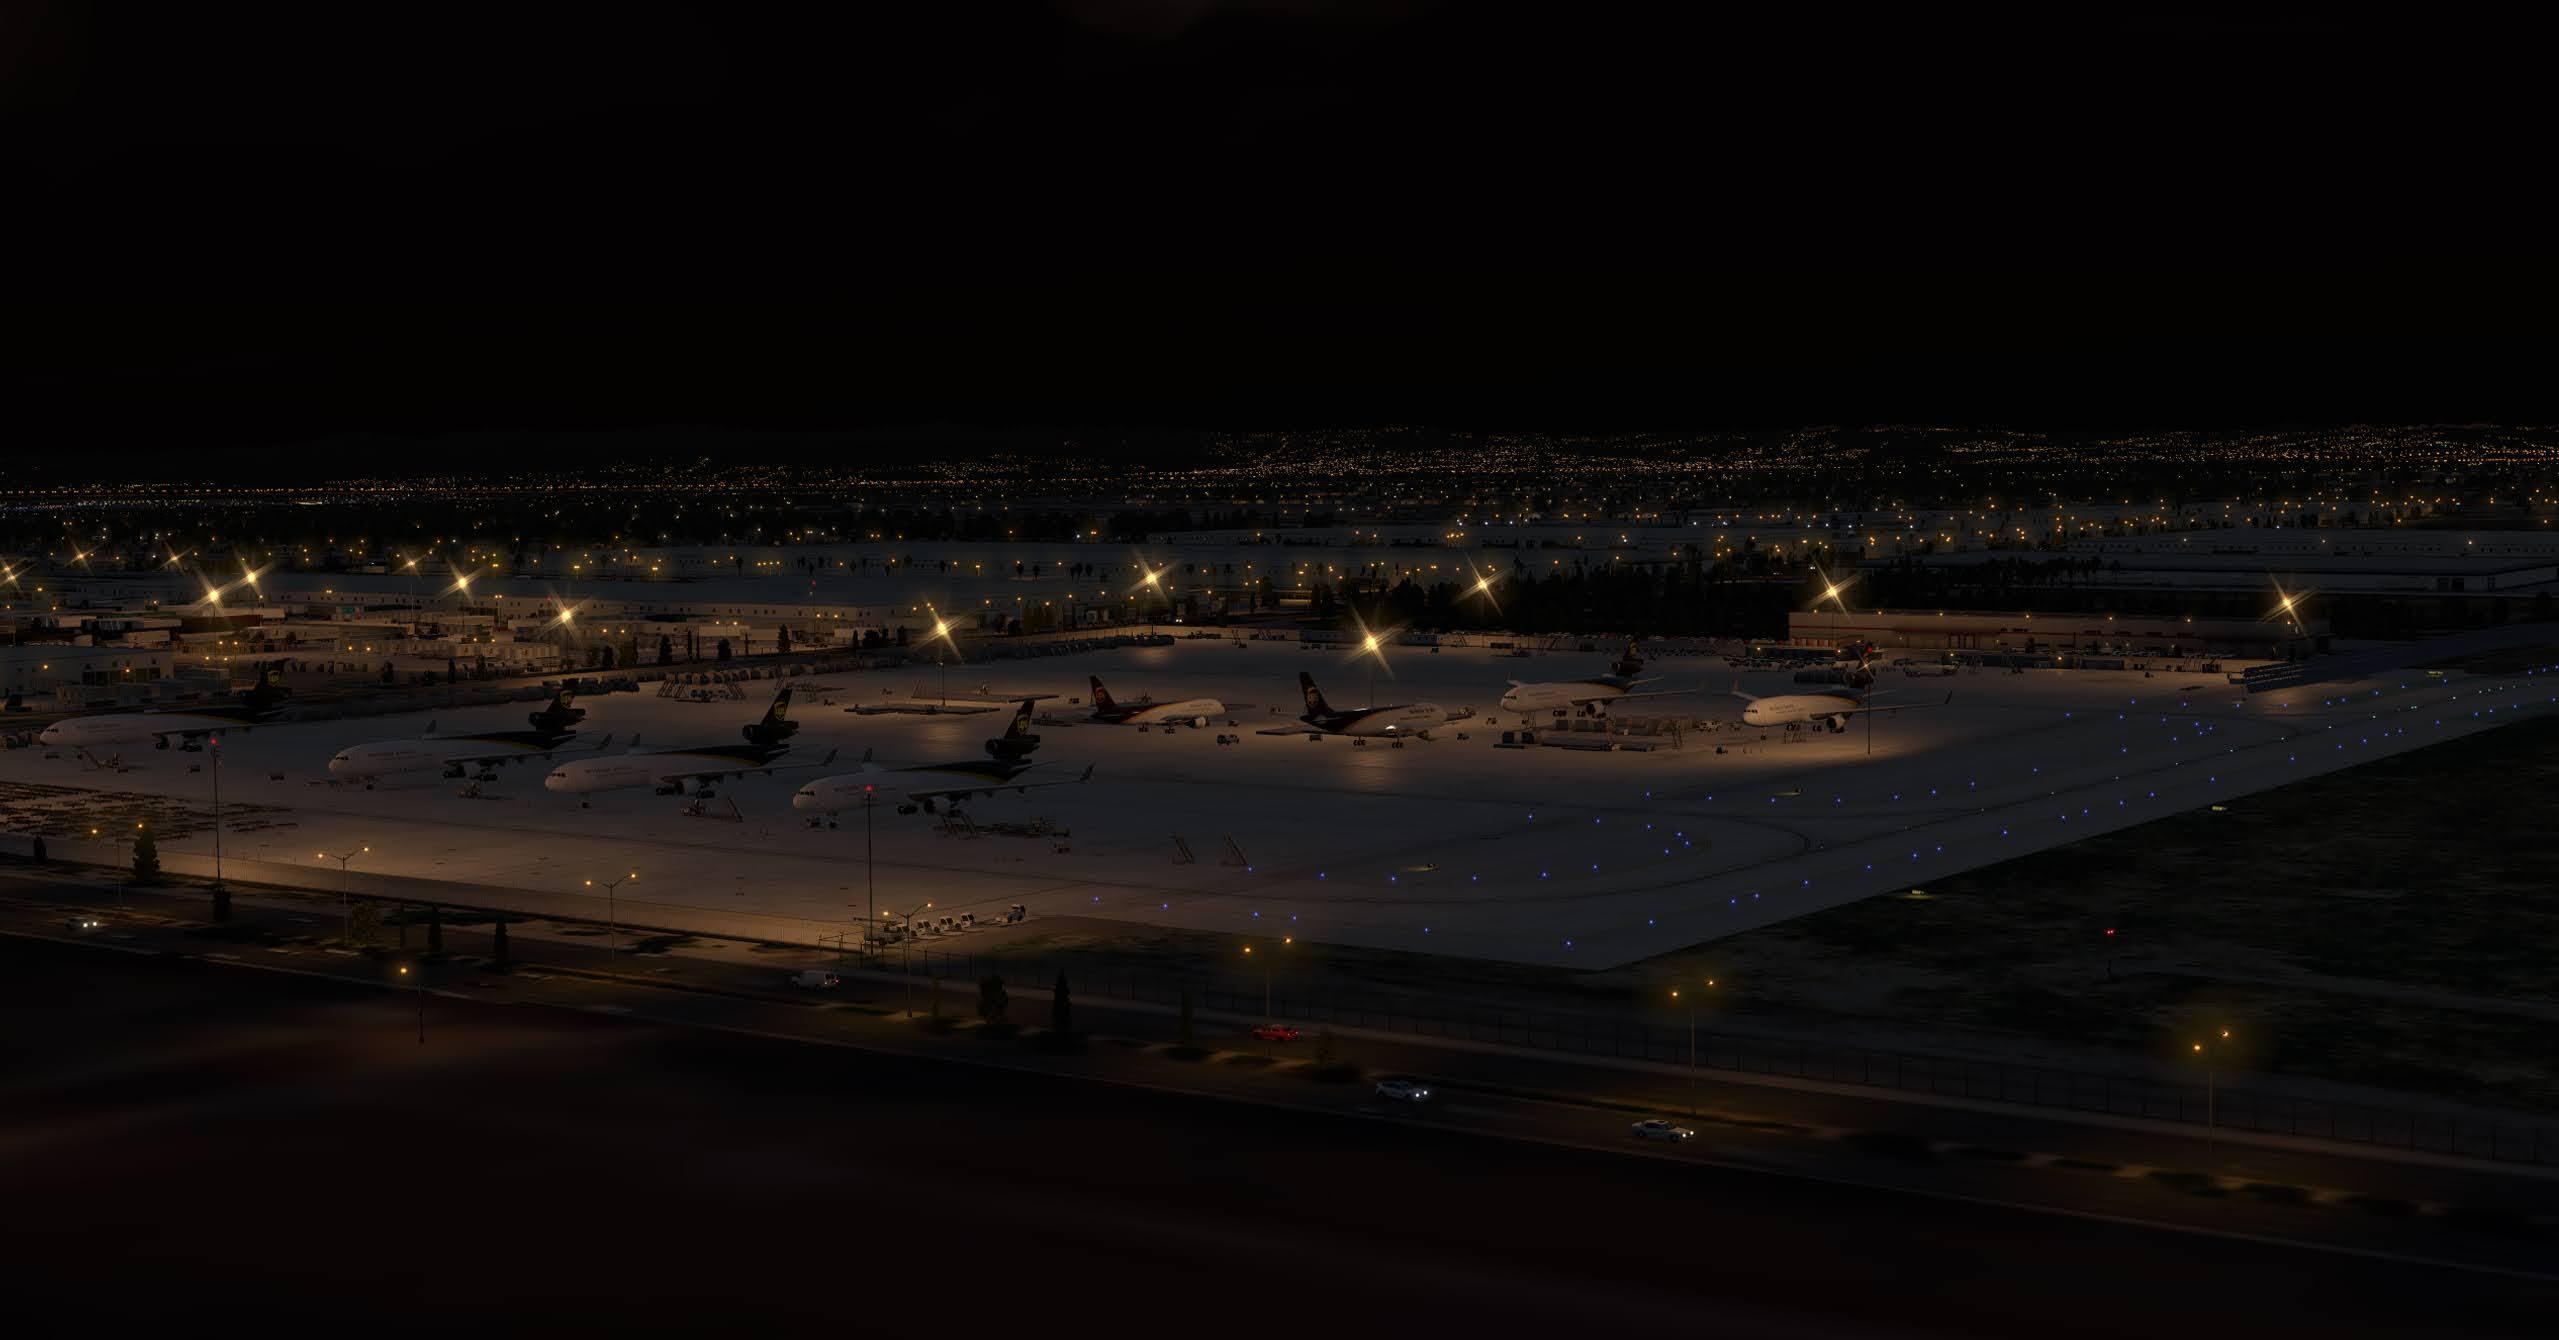
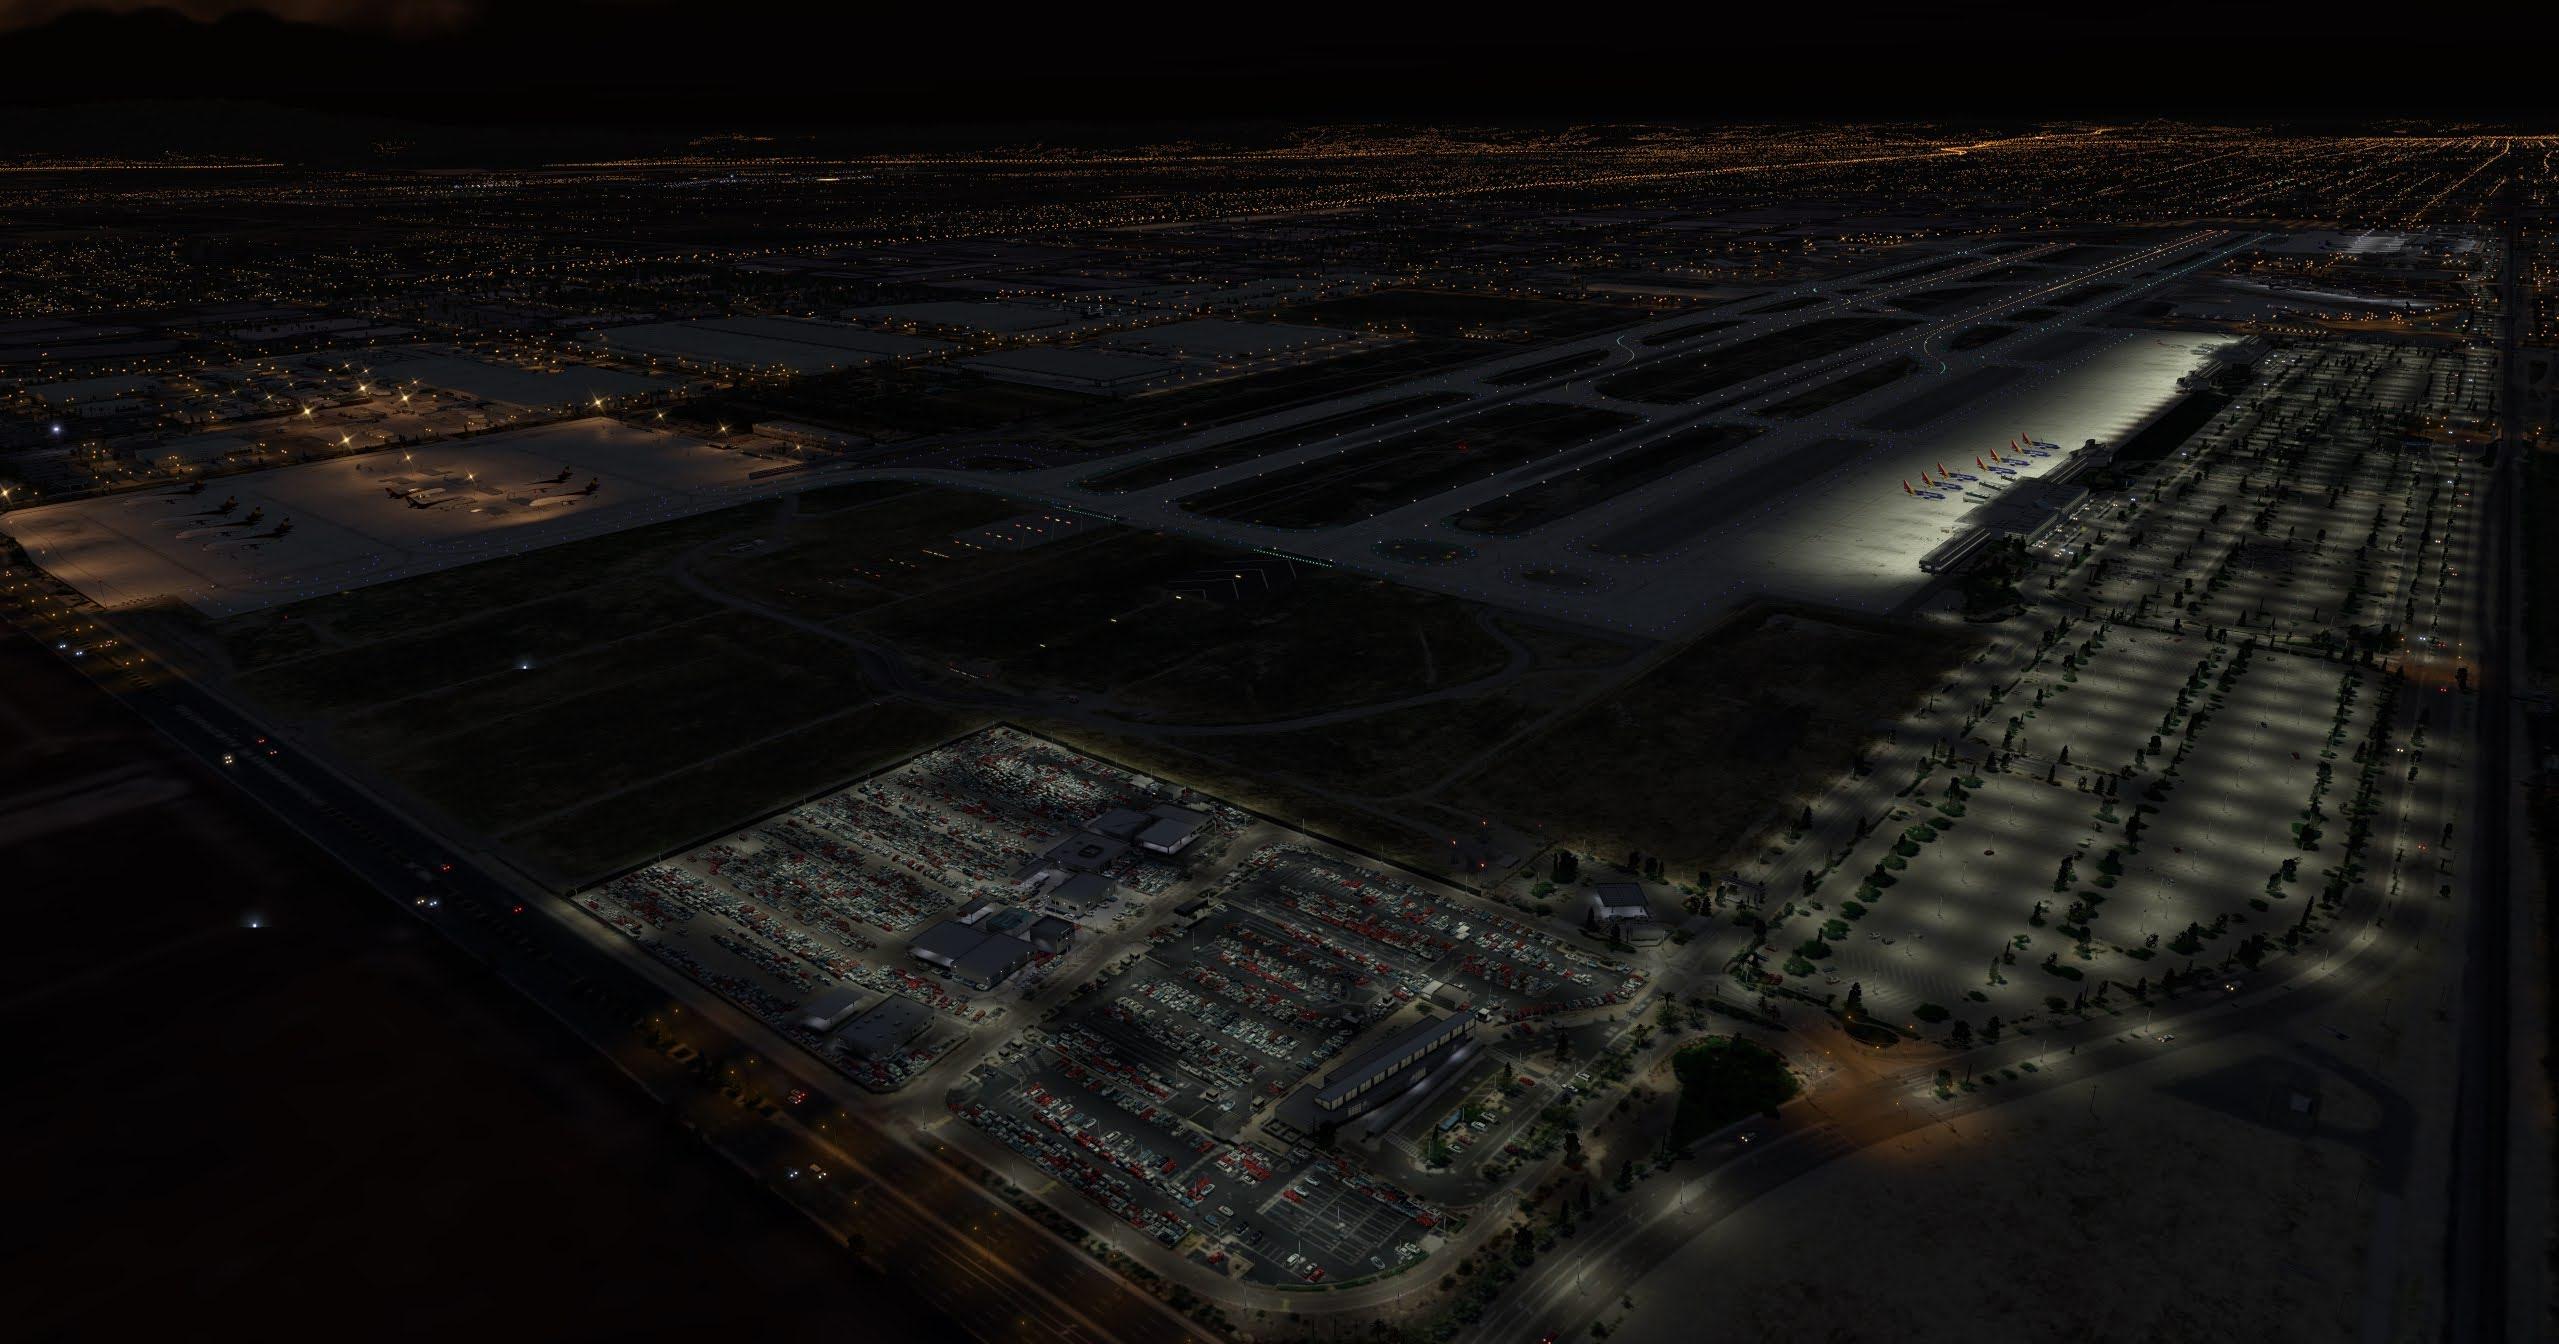
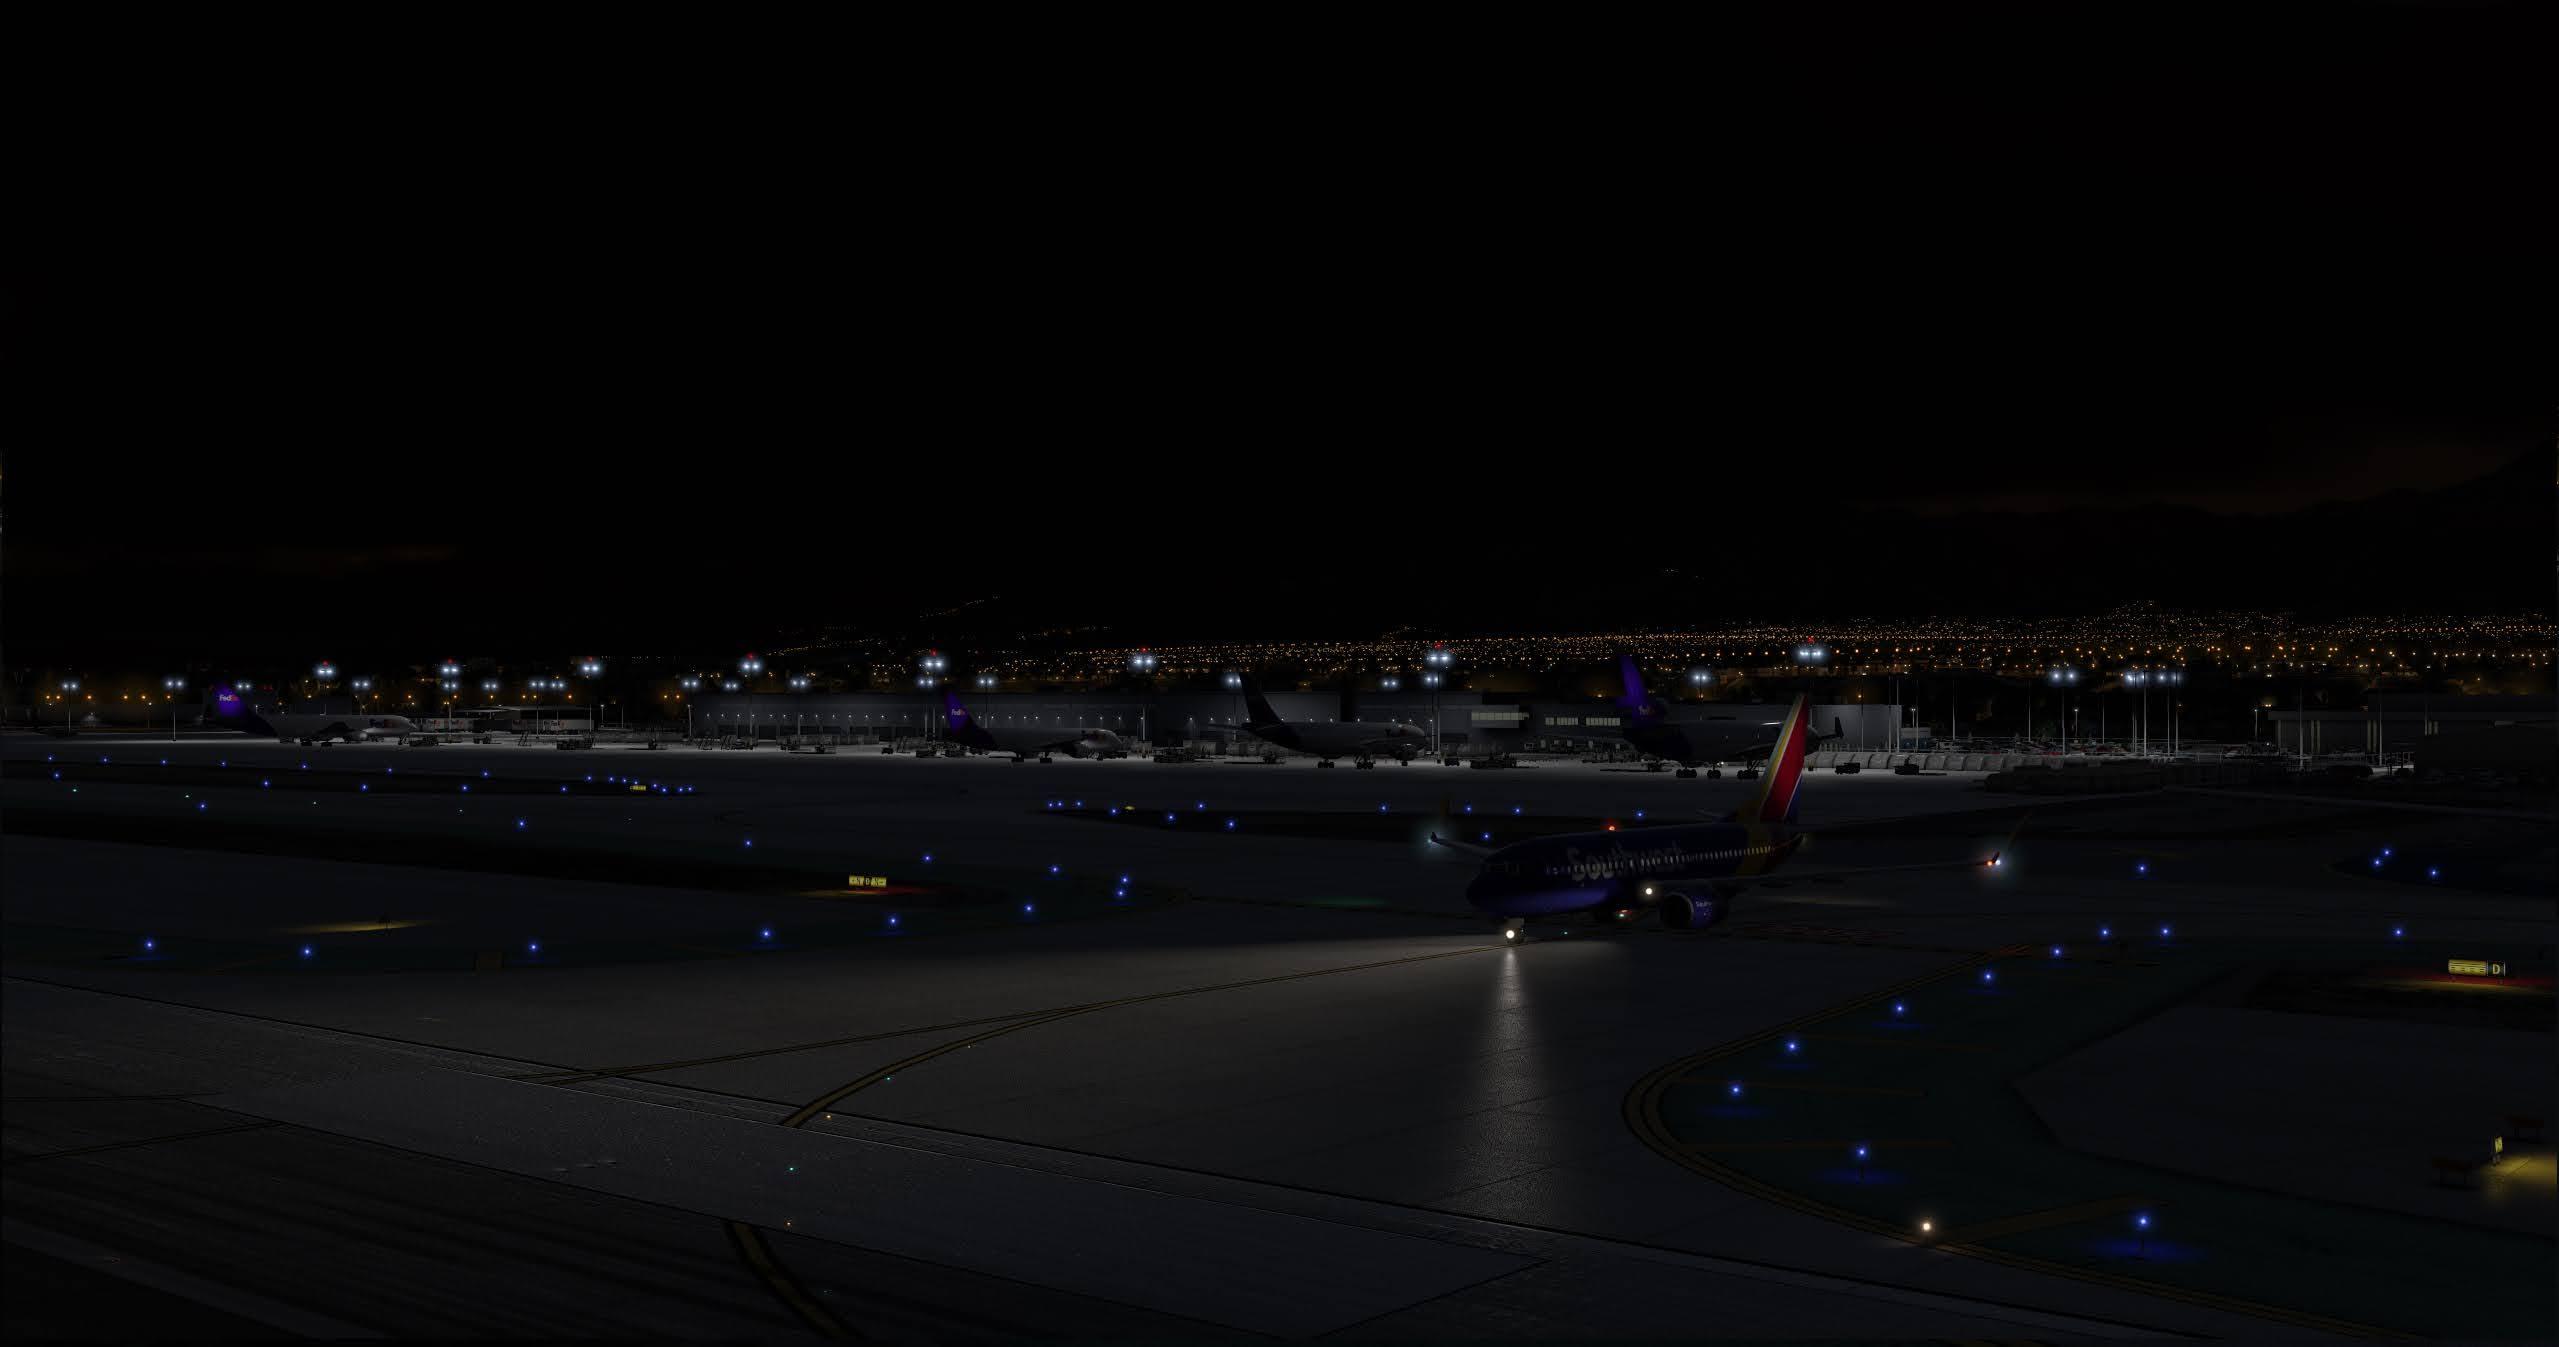
.jpg.0bc13835cb2372bfe5dae6f3fbfd9ddc.jpg)
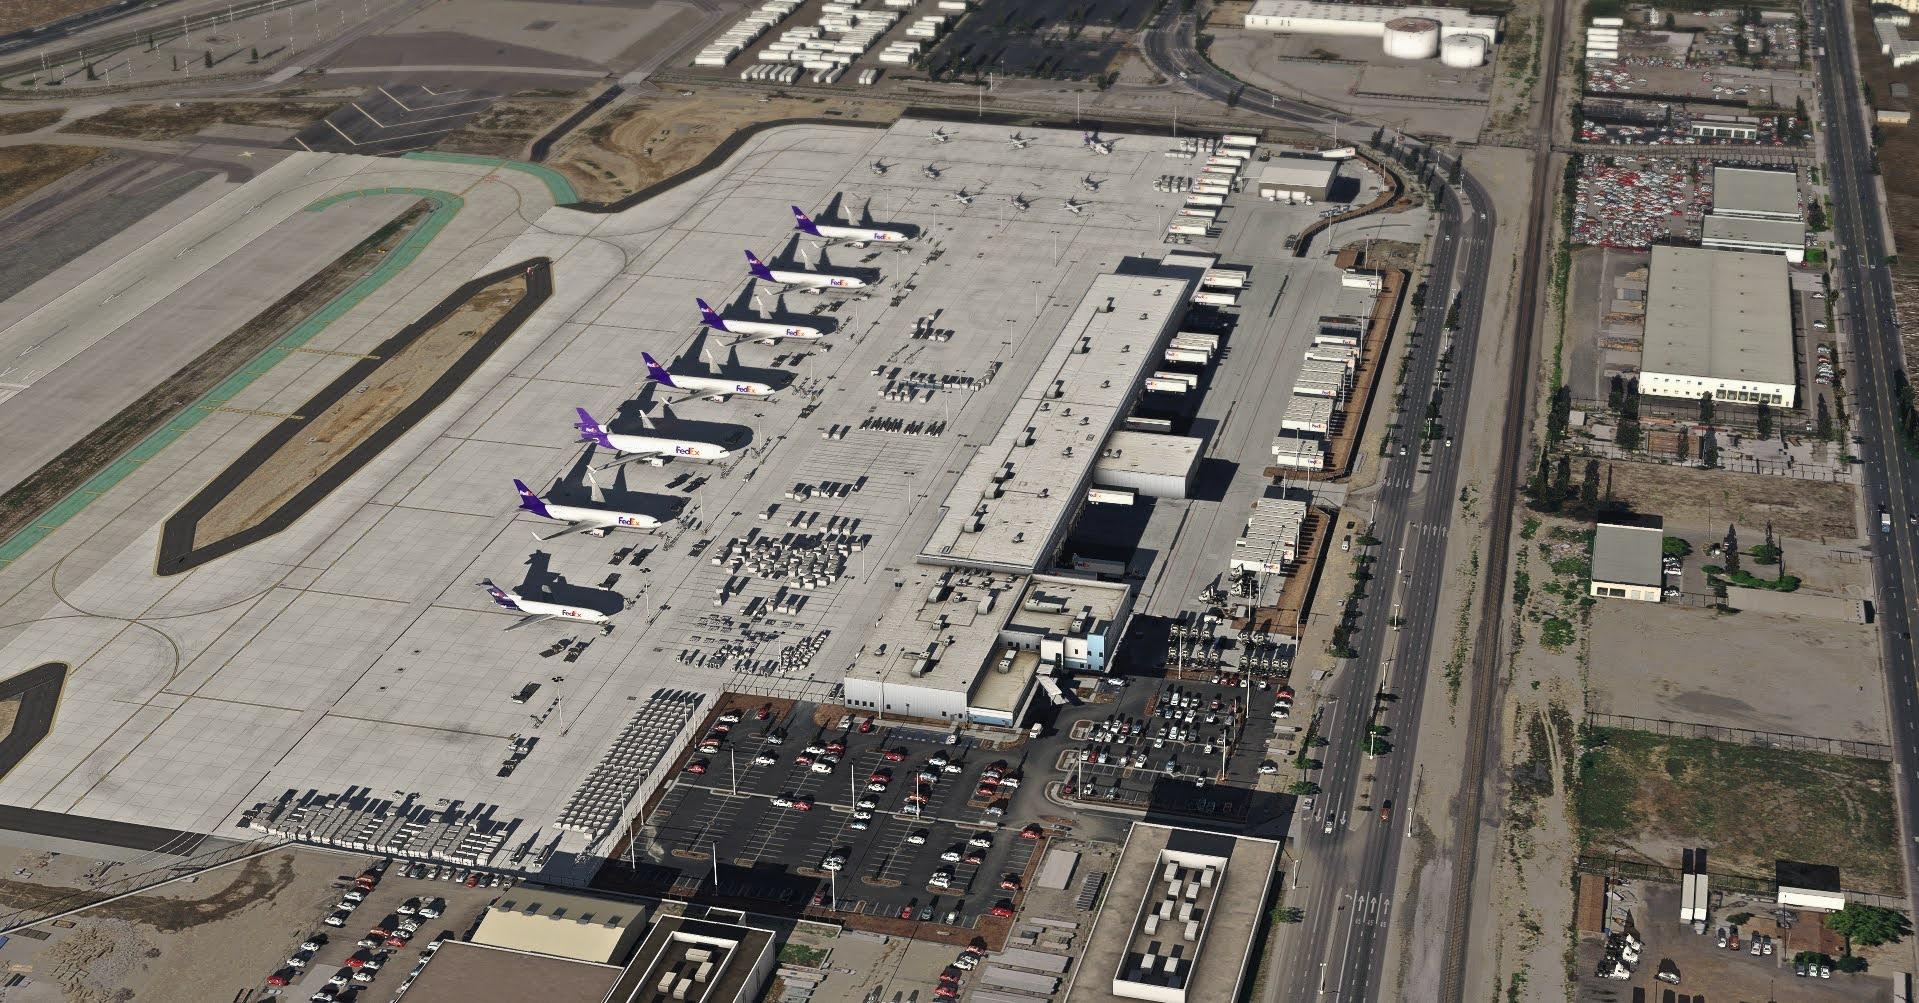
.jpg.9bfd1e8a159589ca8cde82858c86361b.jpg)
.jpg.907a96e96a3cc6f8526e476debc9dfae.jpg)
.jpg.7f0946ff202474a8b57308b800320d44.jpg)
.jpg.d7ba460ac33c8e79b1ec195ed161007d.jpg)
.jpg.b9acc421183df5f71ce6328b3512ac8b.jpg)
.jpg.c18ff503fbb2e428fbd38085d70384d2.jpg)

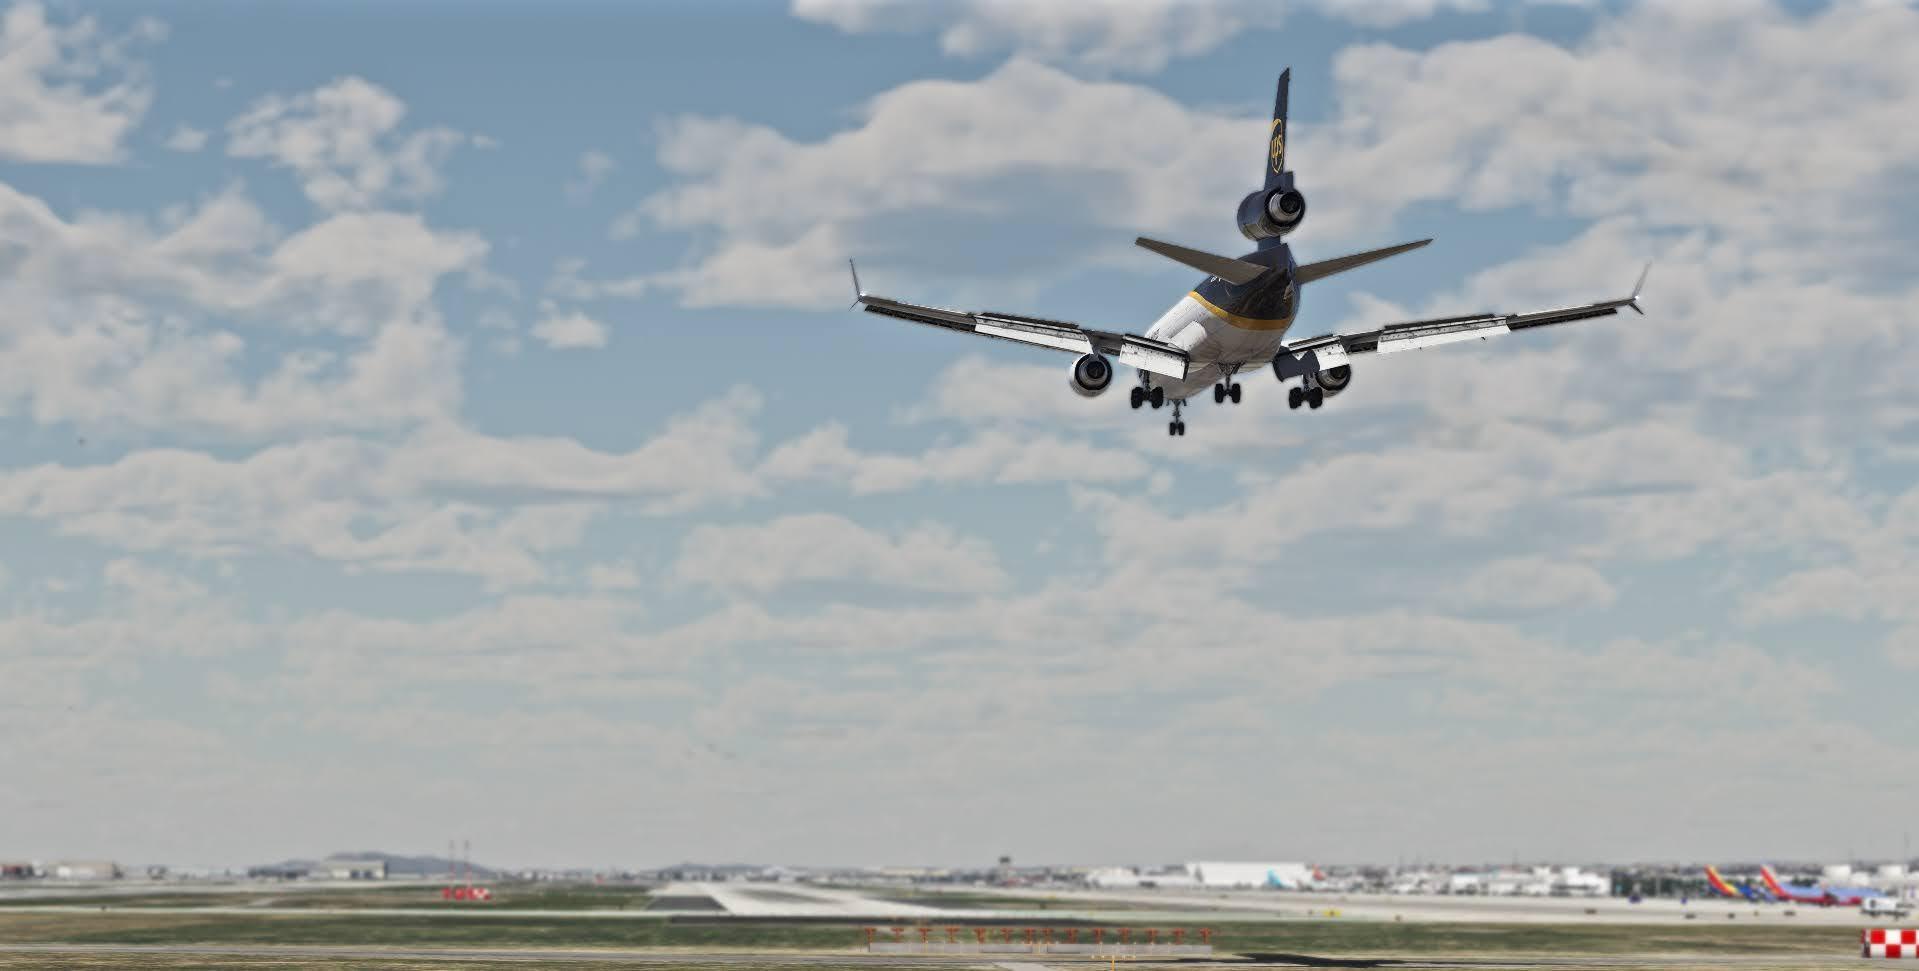

.jpg.839d2566c1e4d75987b11b81e22f7305.jpg)

.jpg.6dc1d341c0f3b12a2149b4de76705f80.jpg)
.jpg.41a56272fa5ef1edbc01564a538ffe64.jpg)
.jpg.0e64d12891fec31818c8c7156884e621.jpg)