Search the Community
Showing results for tags 'review'.
Found 8 results
-
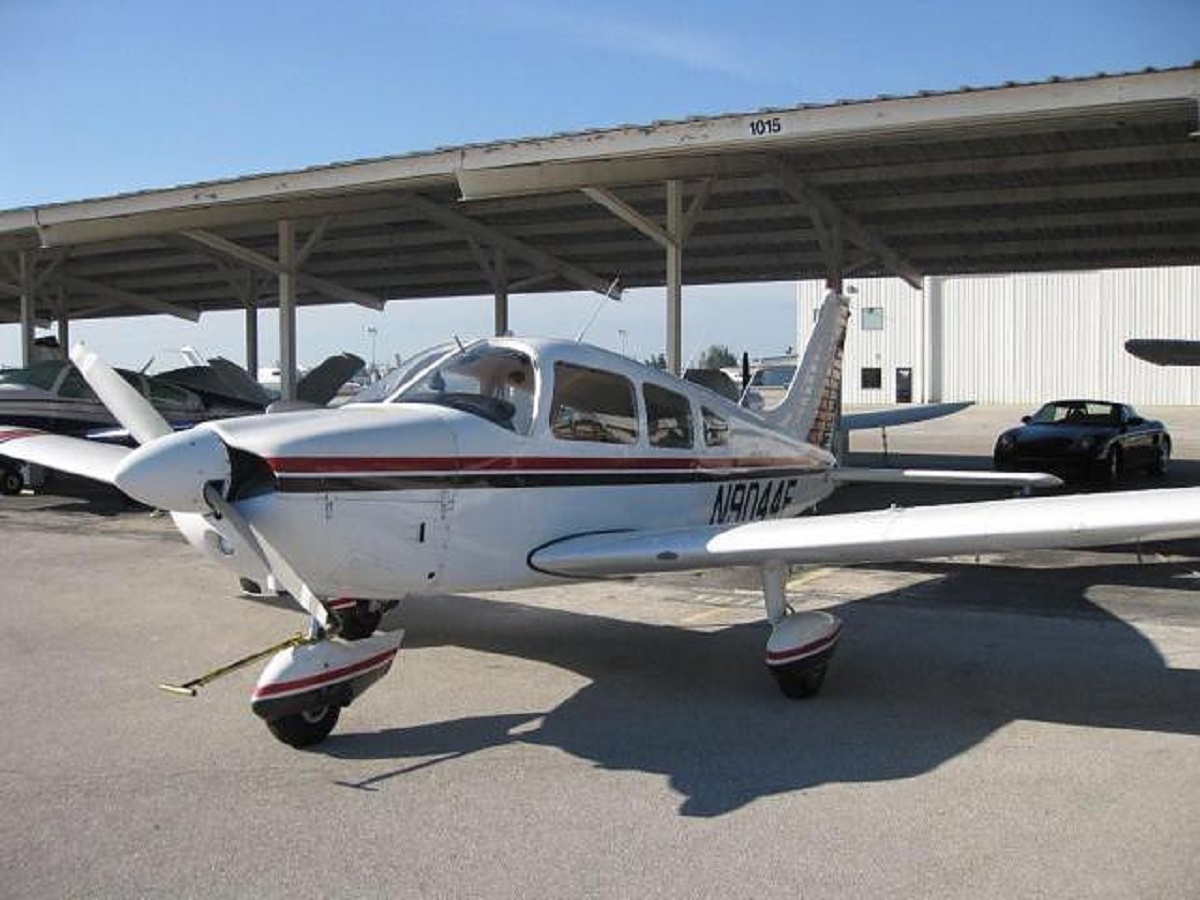
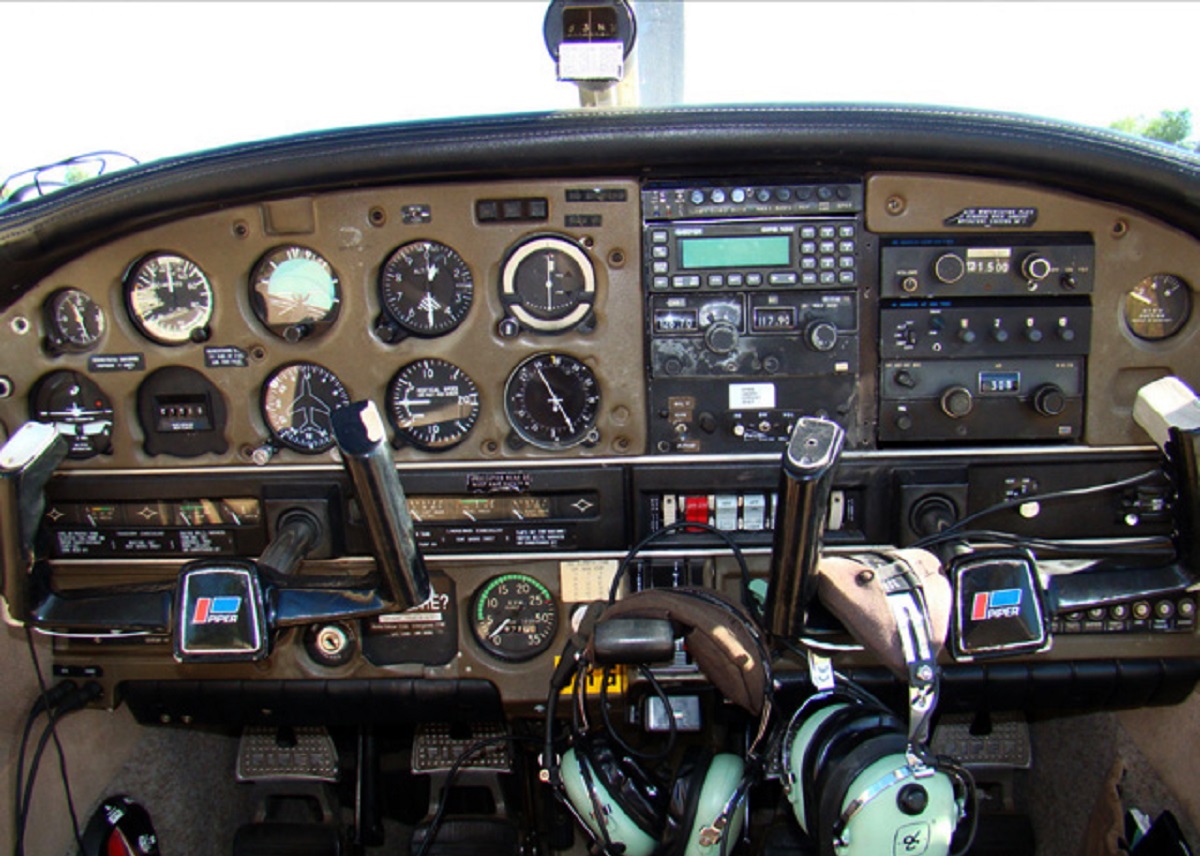
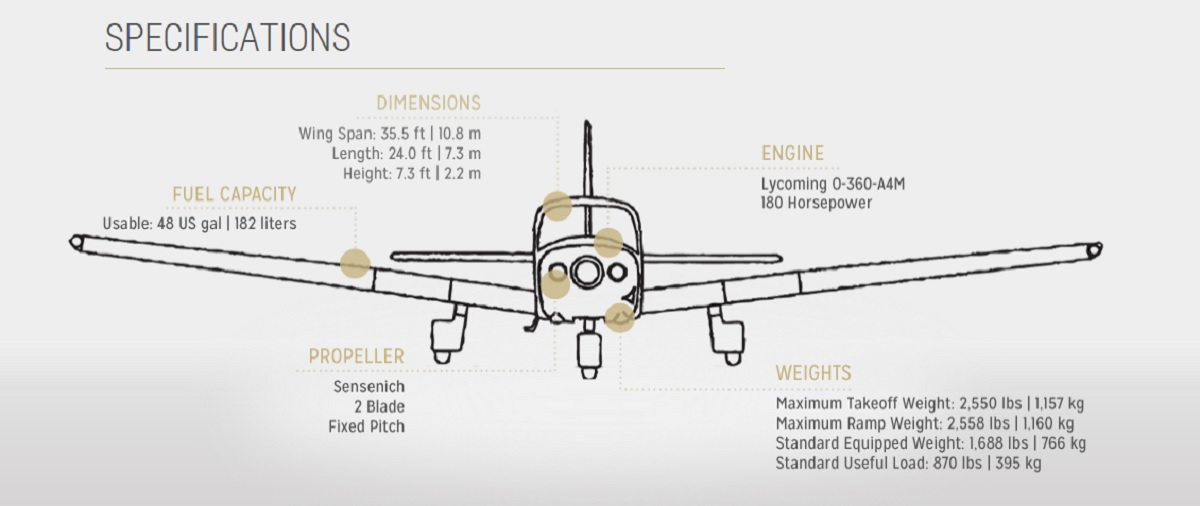
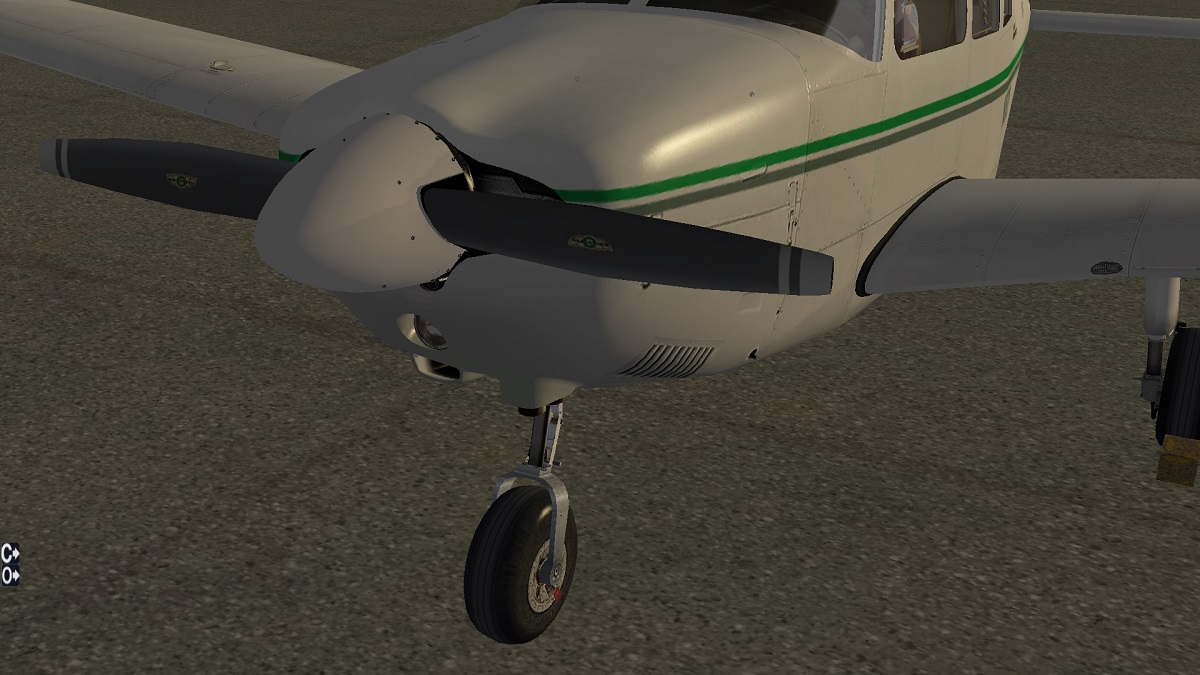
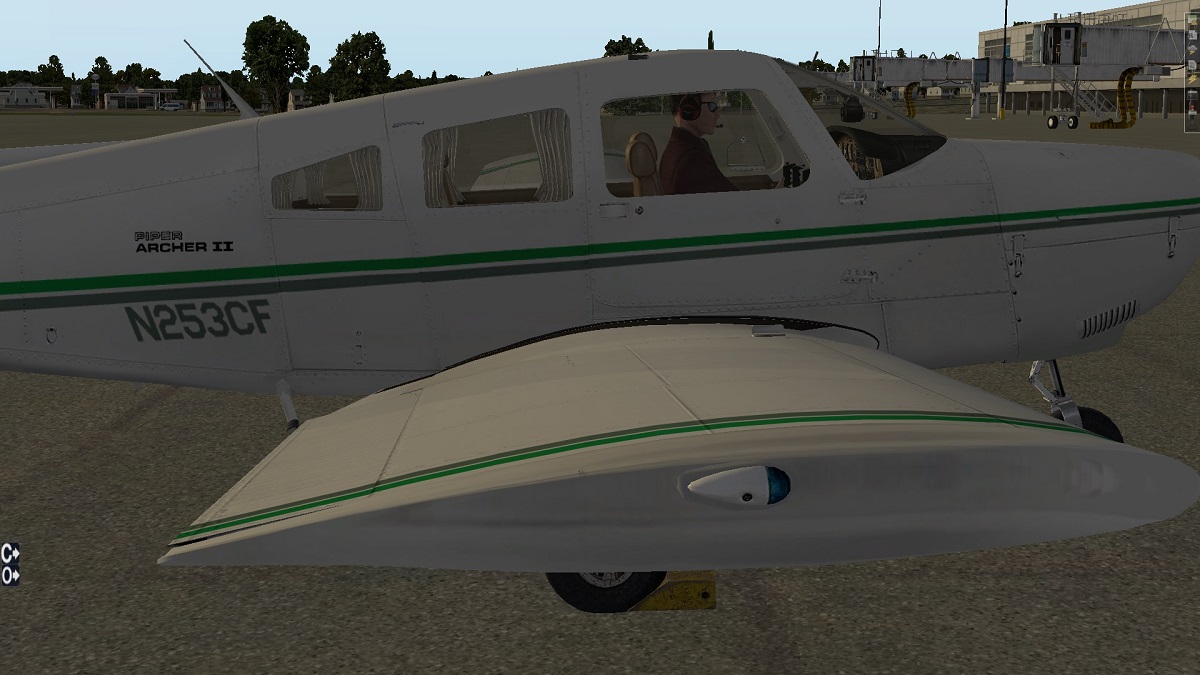
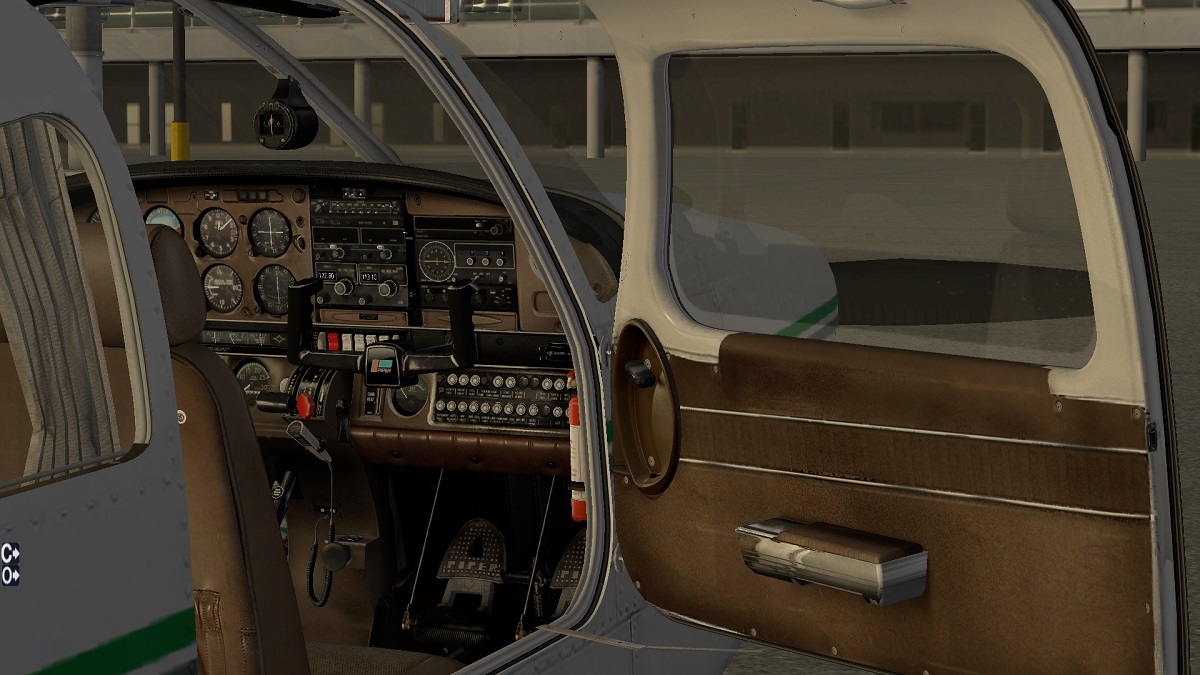
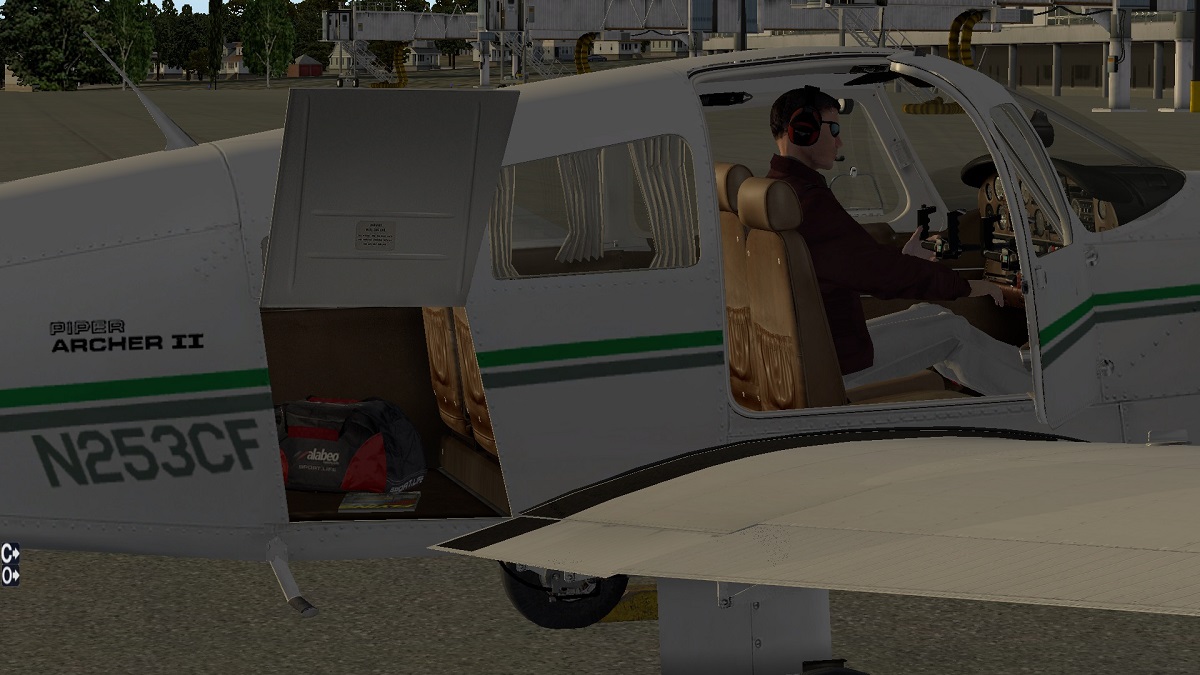
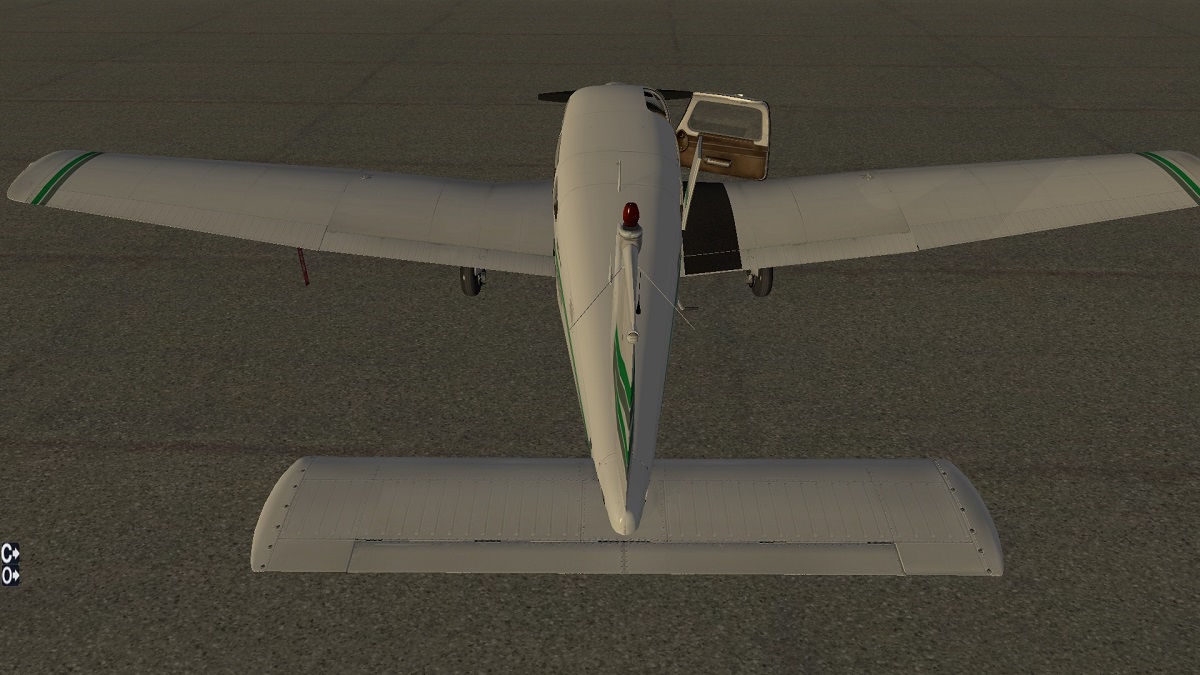
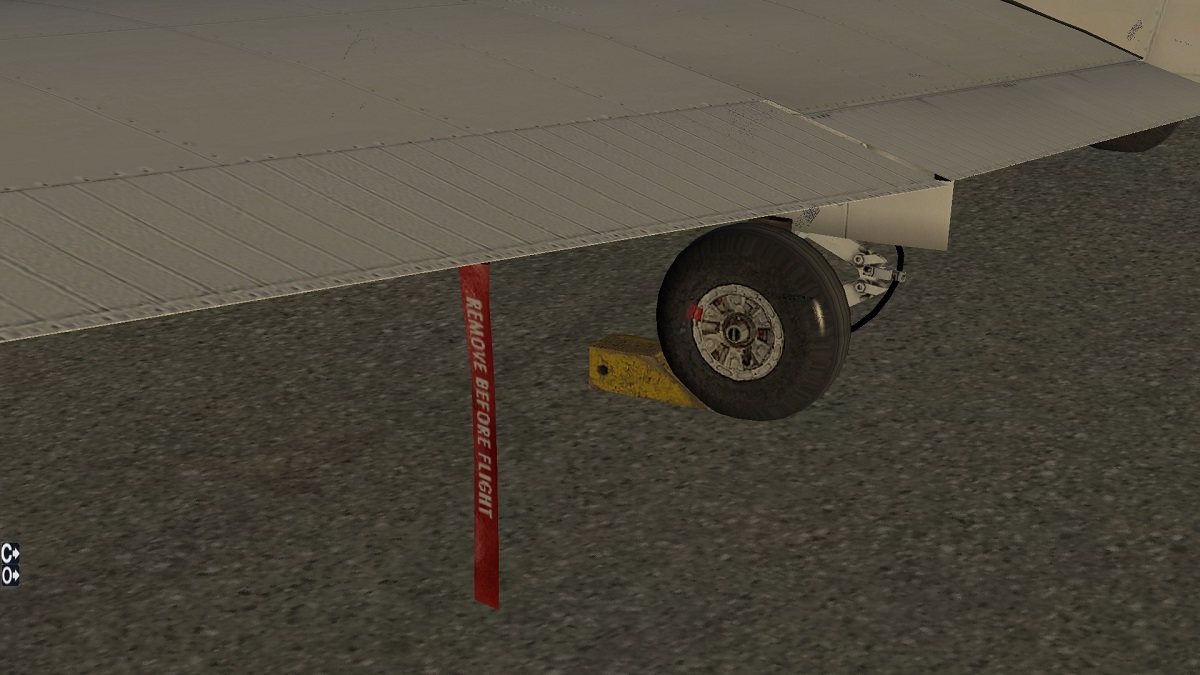
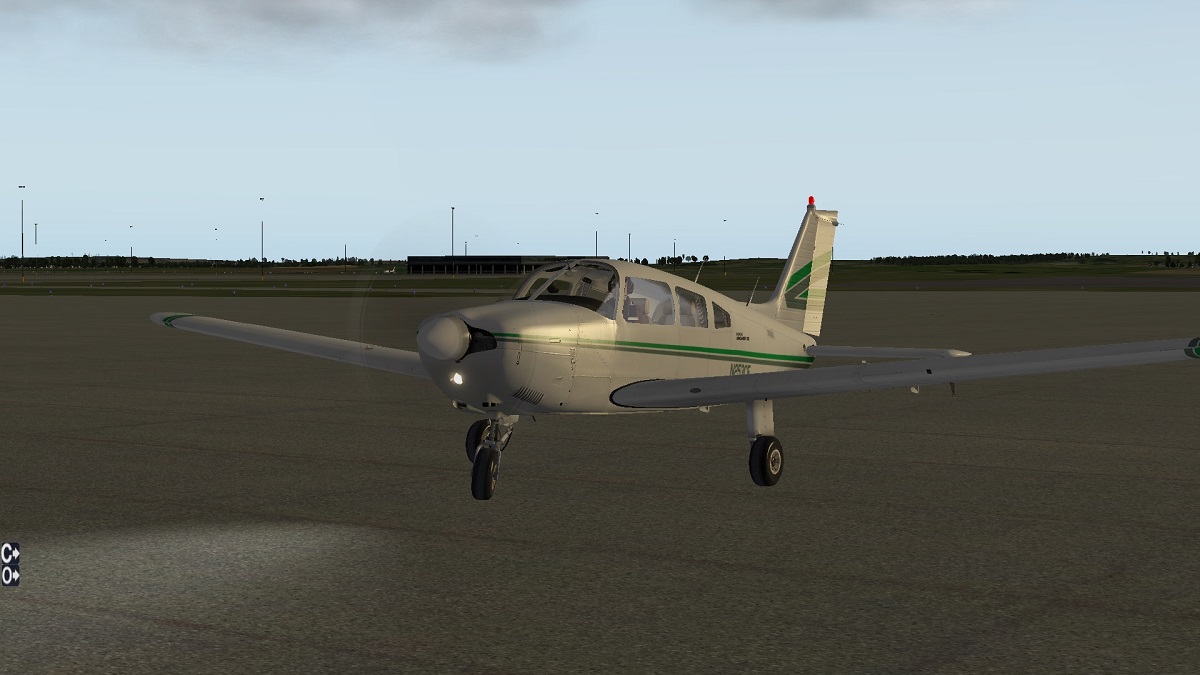
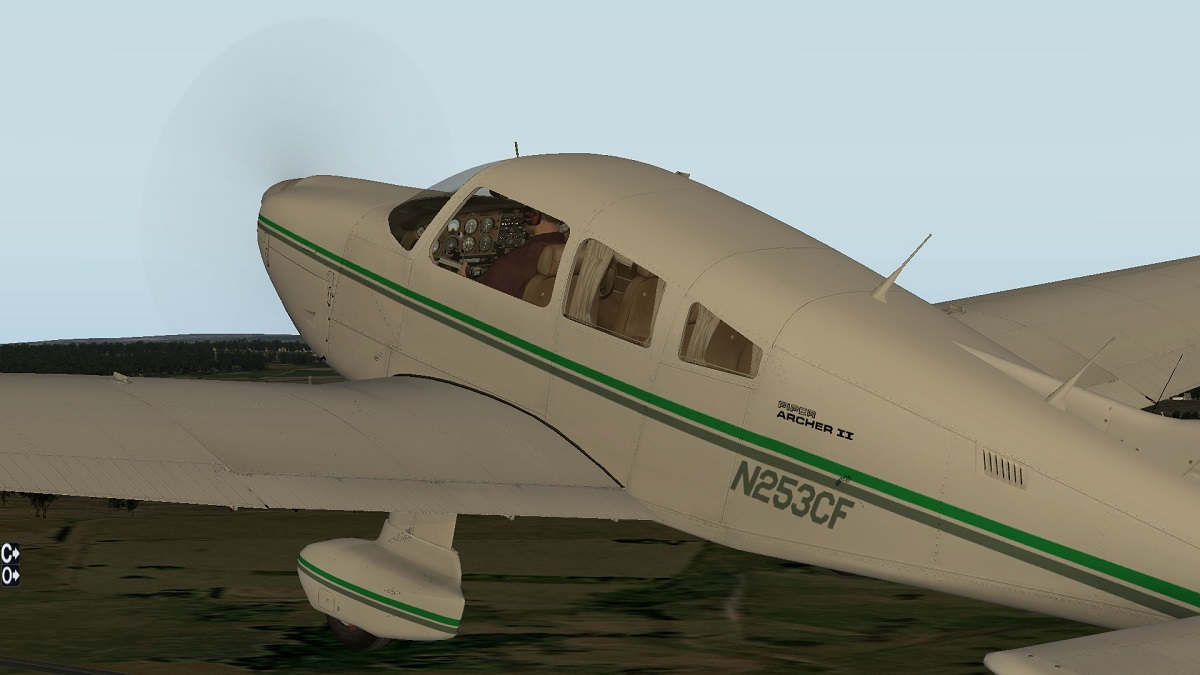
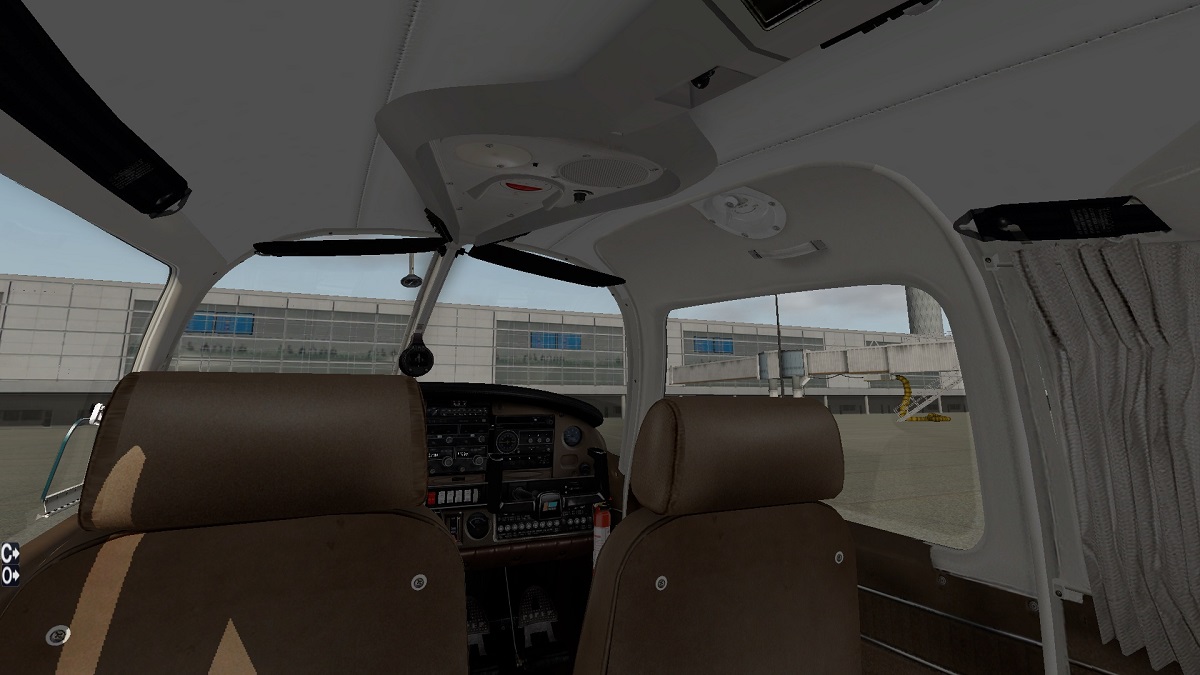
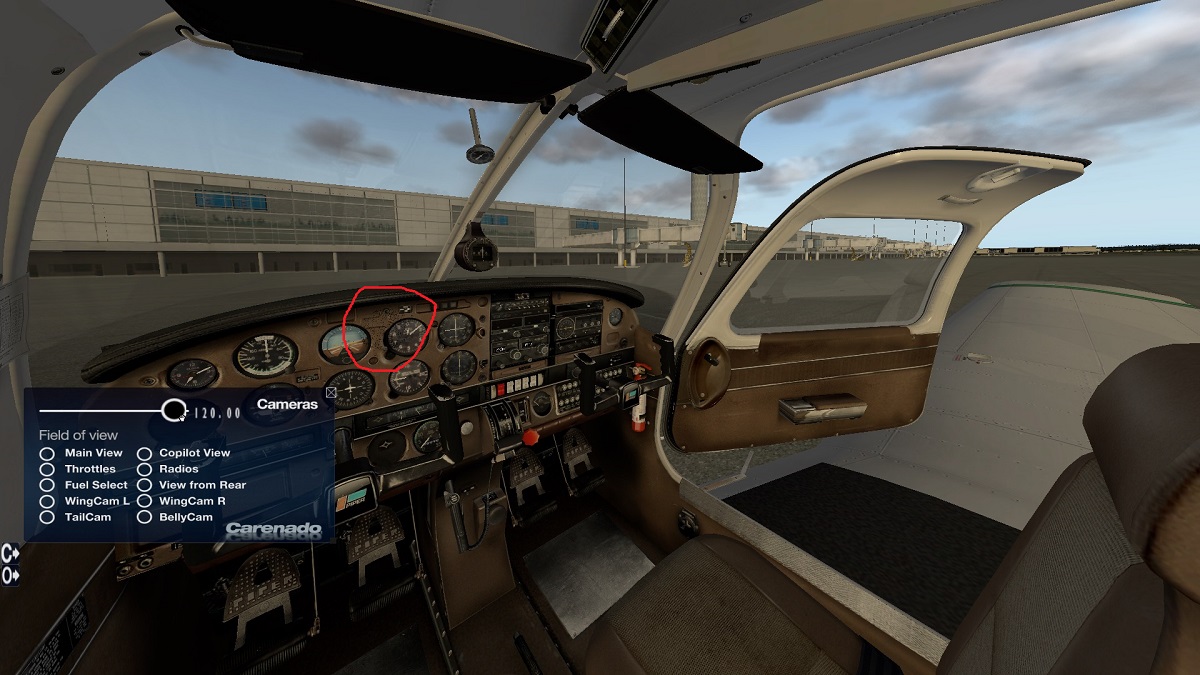
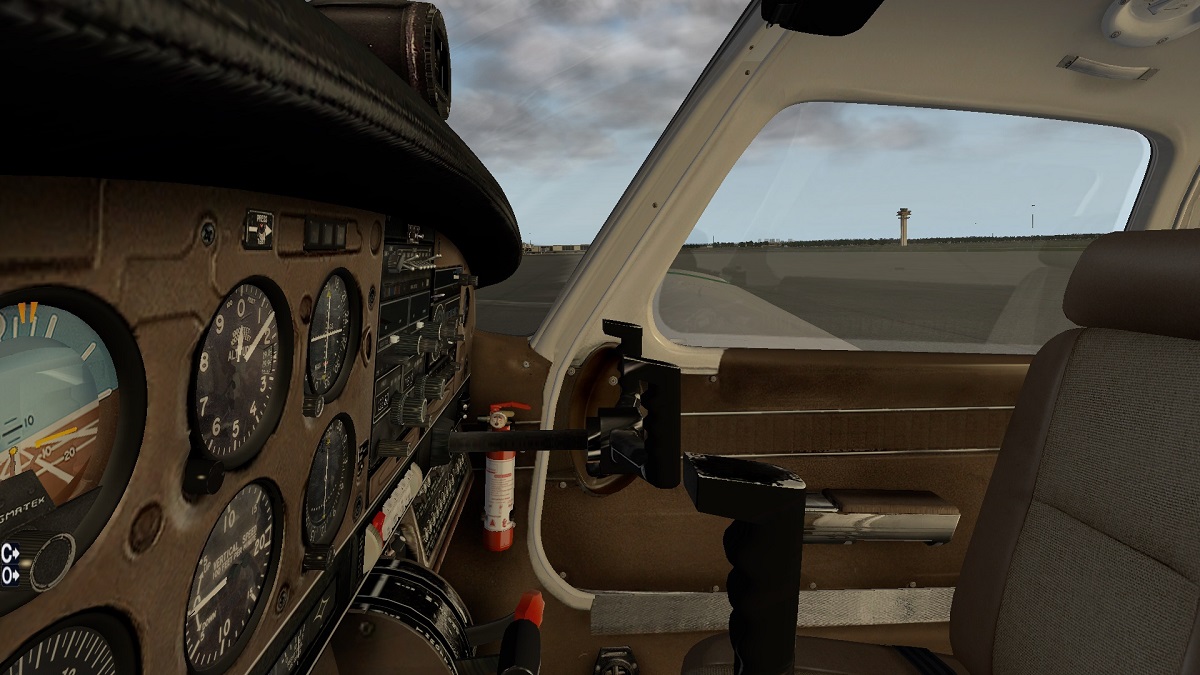
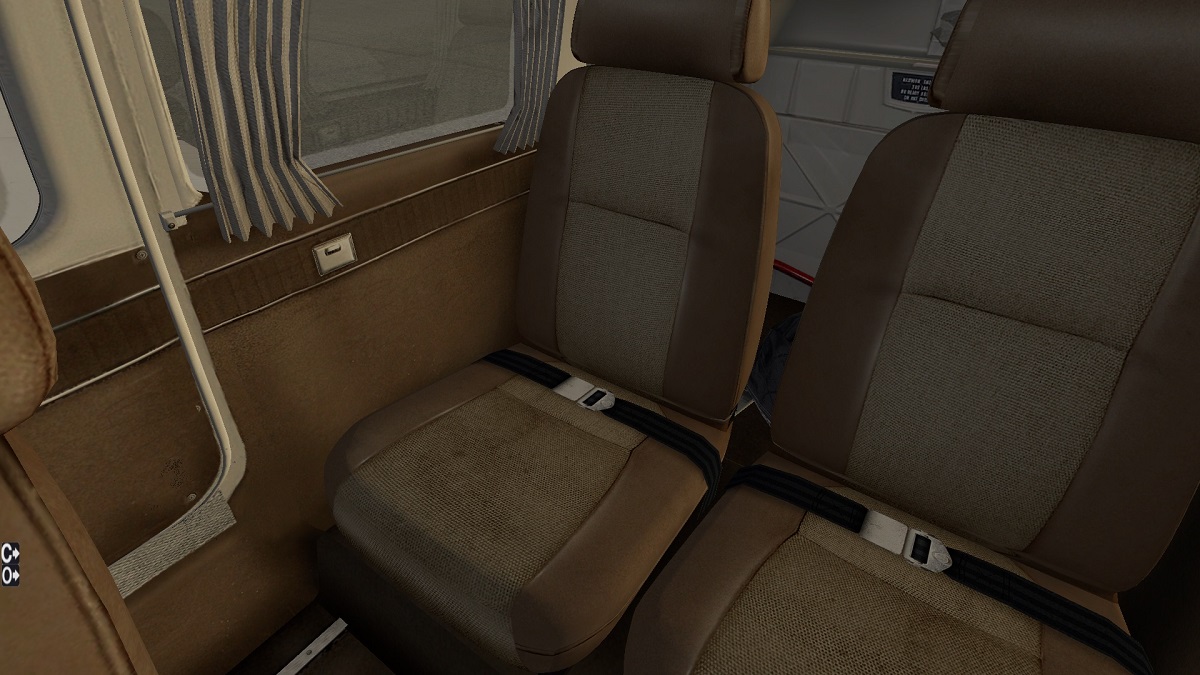
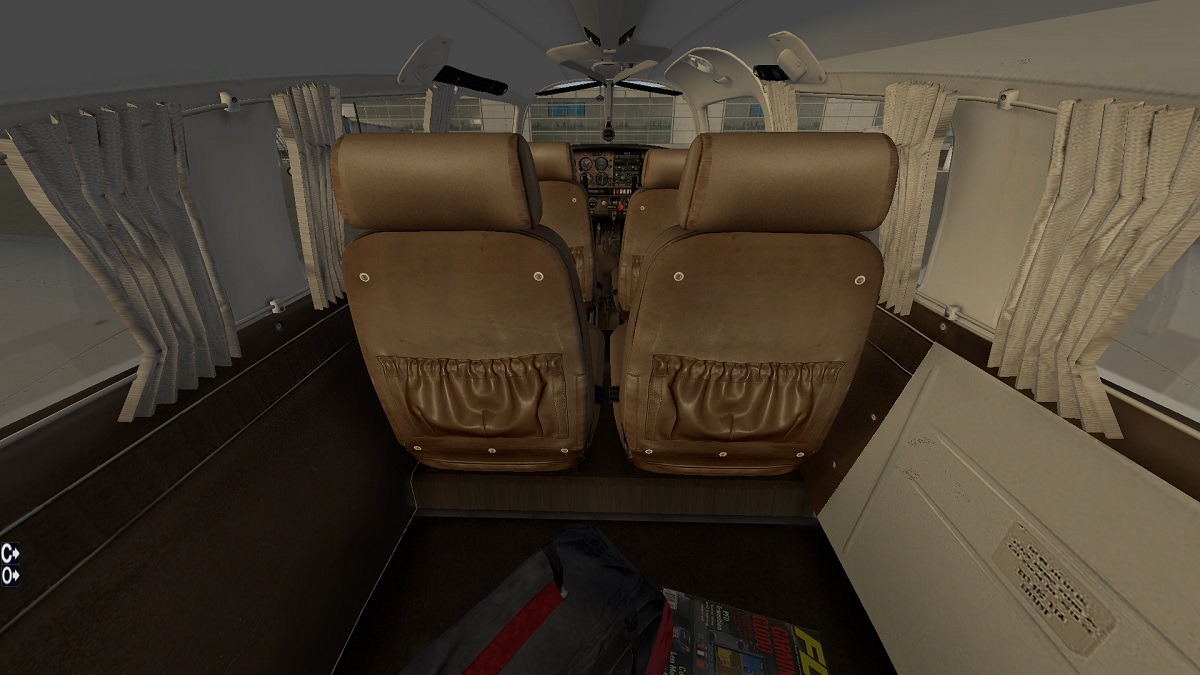
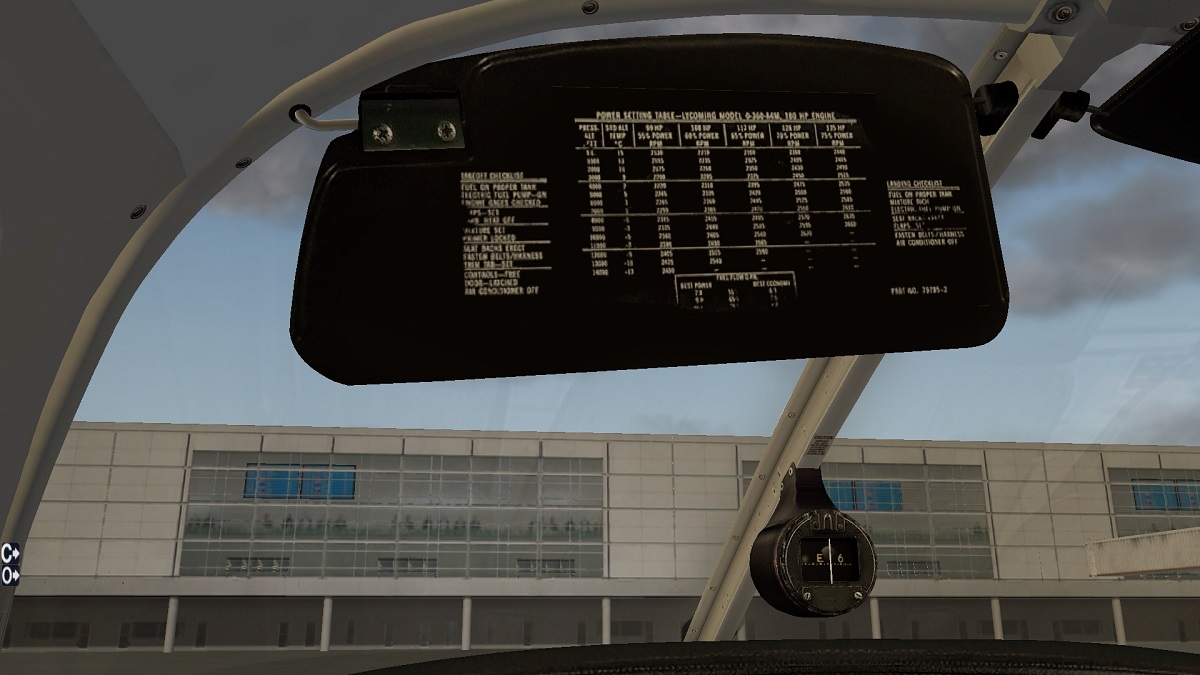
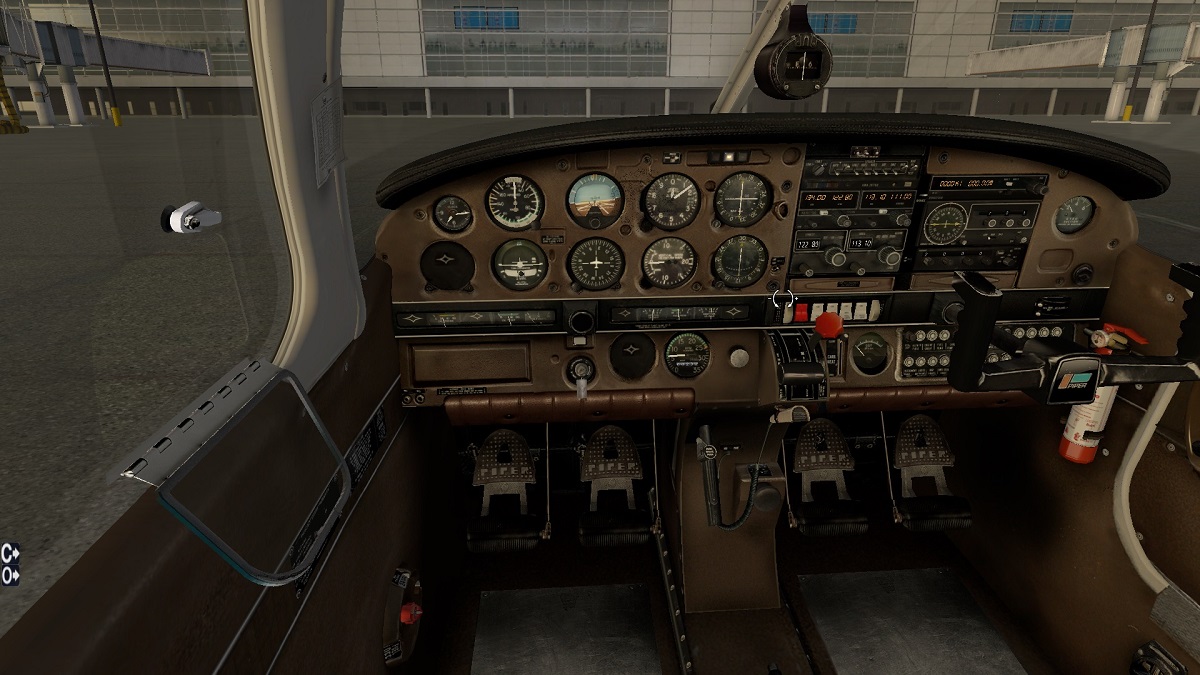
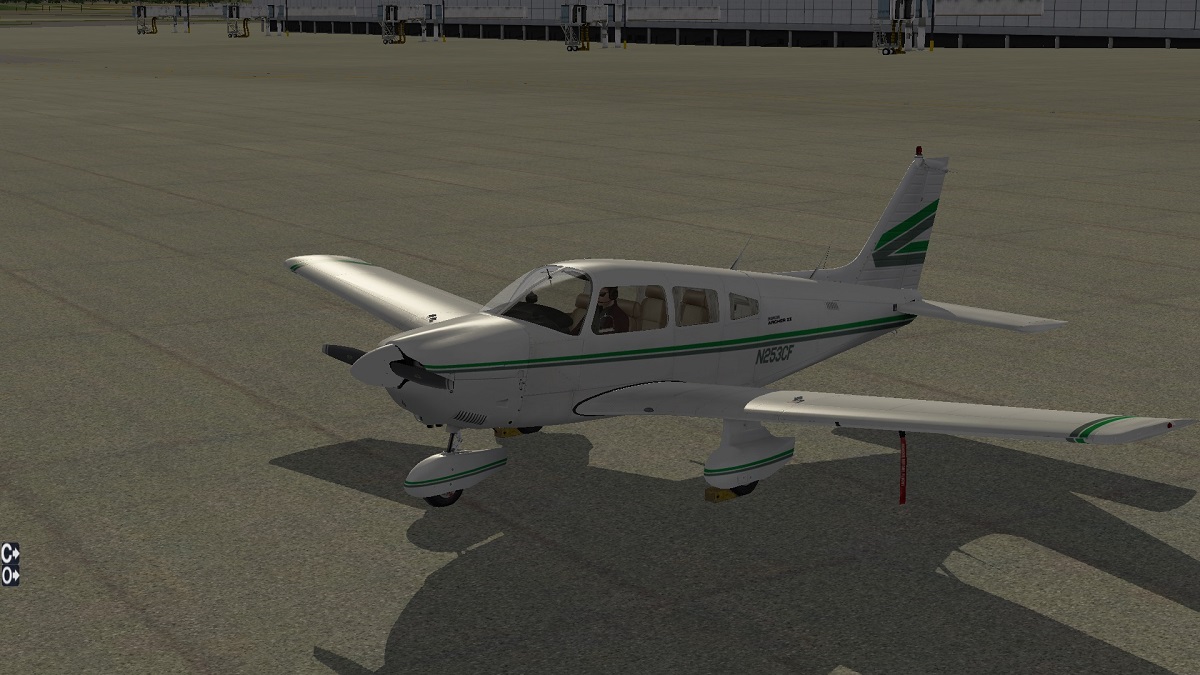
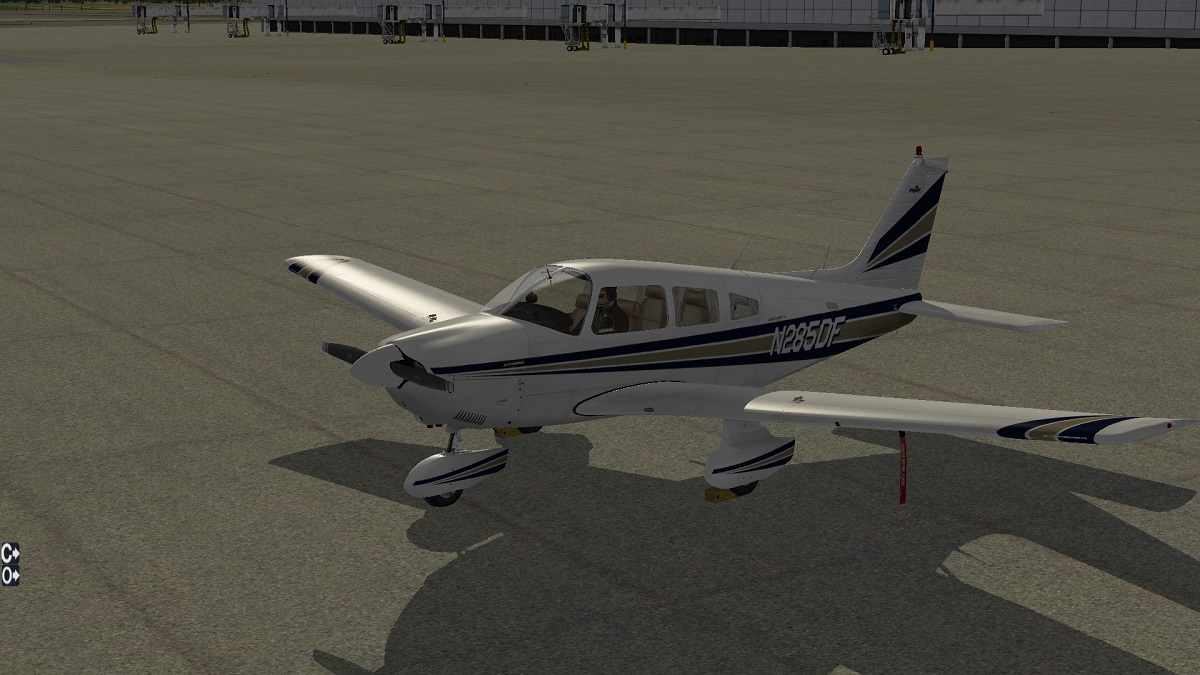
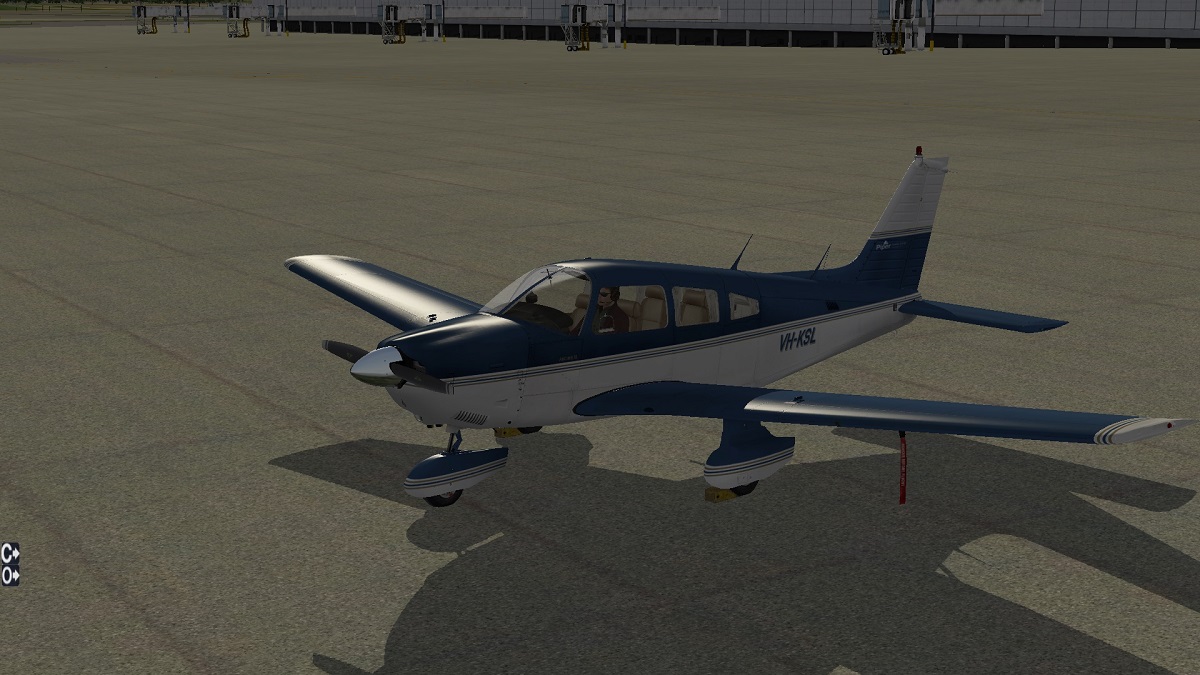
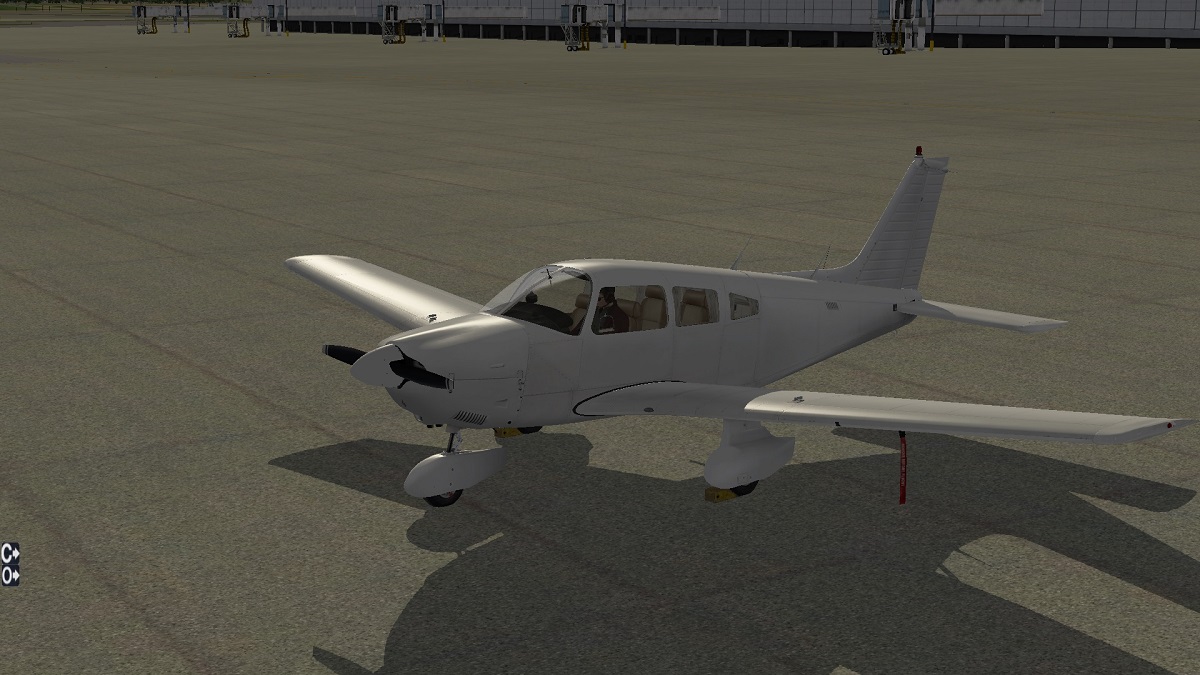
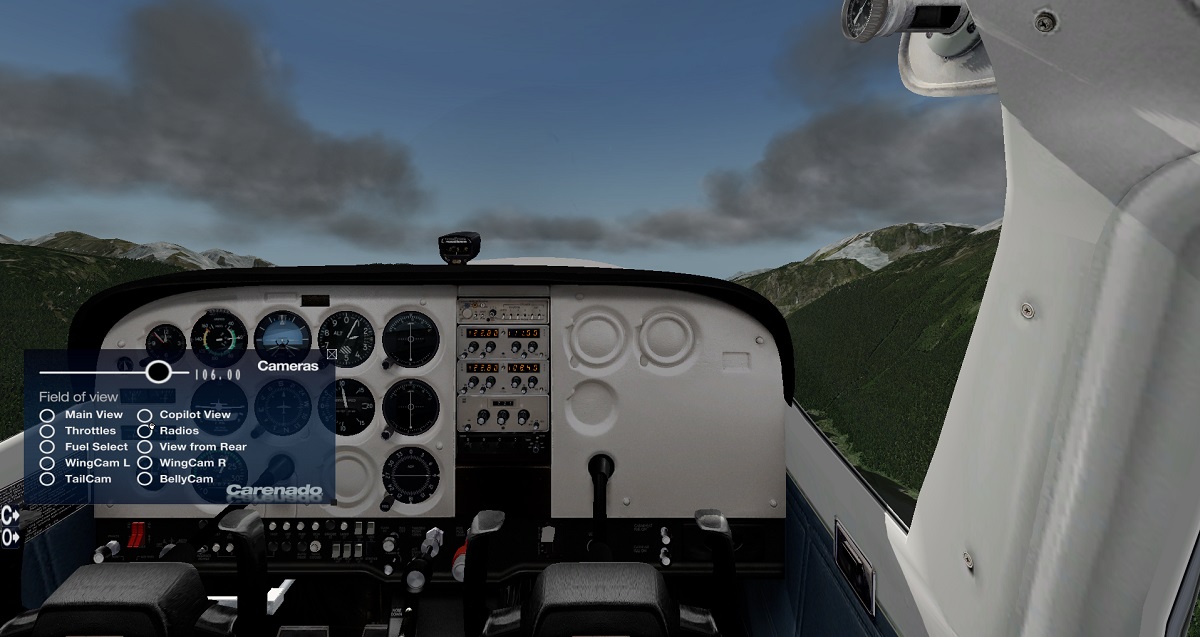
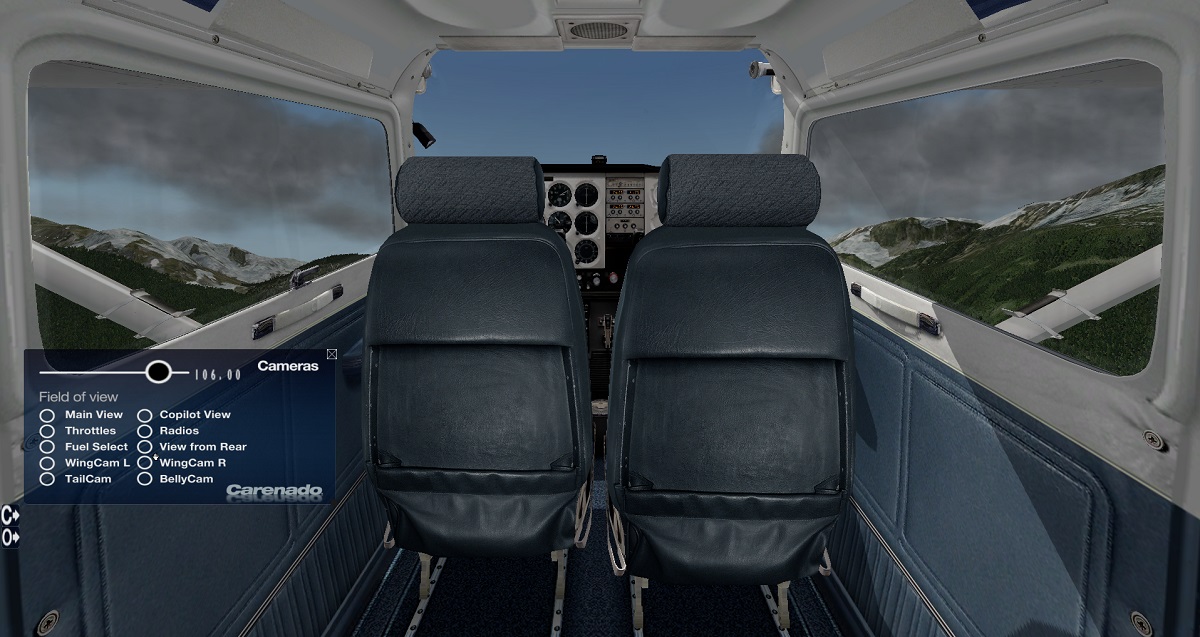
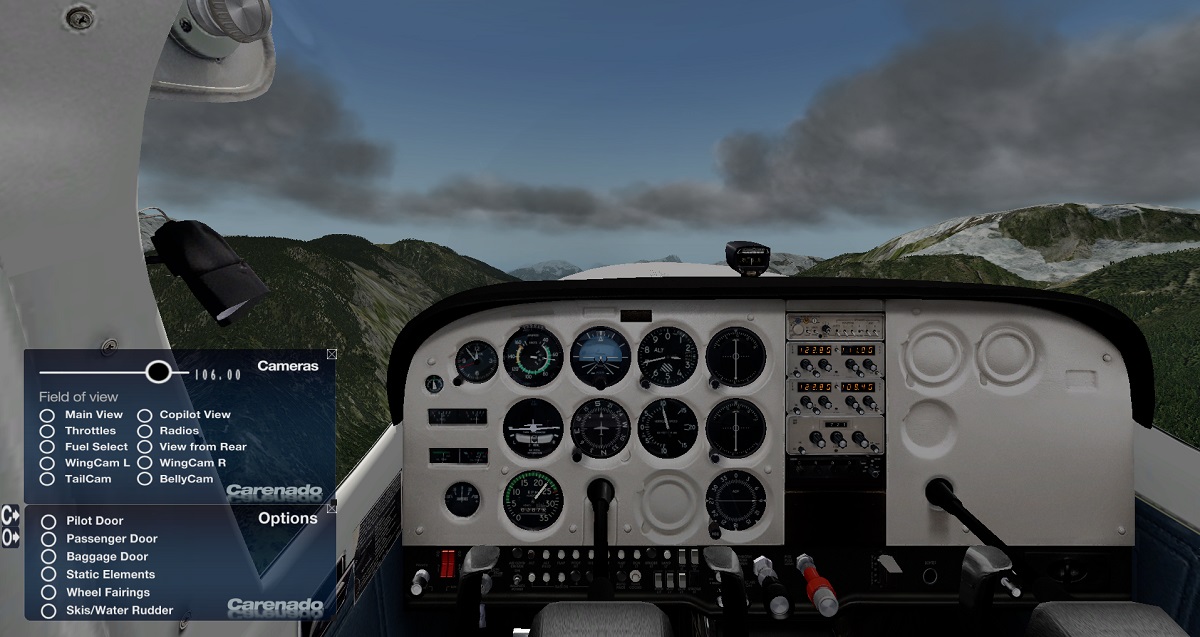
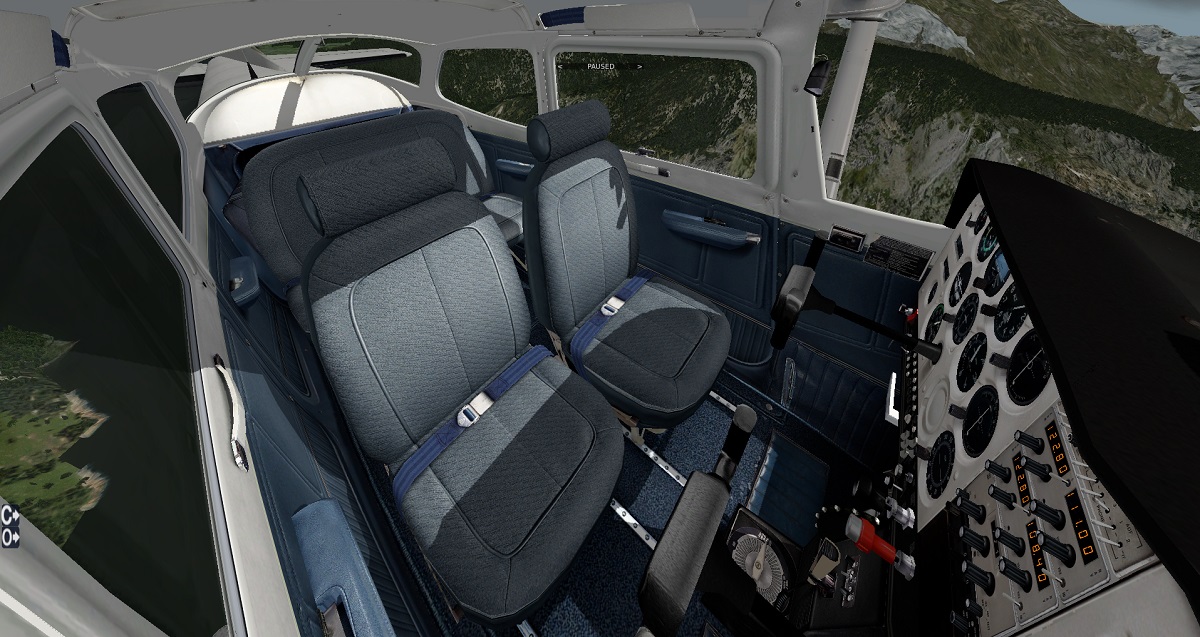
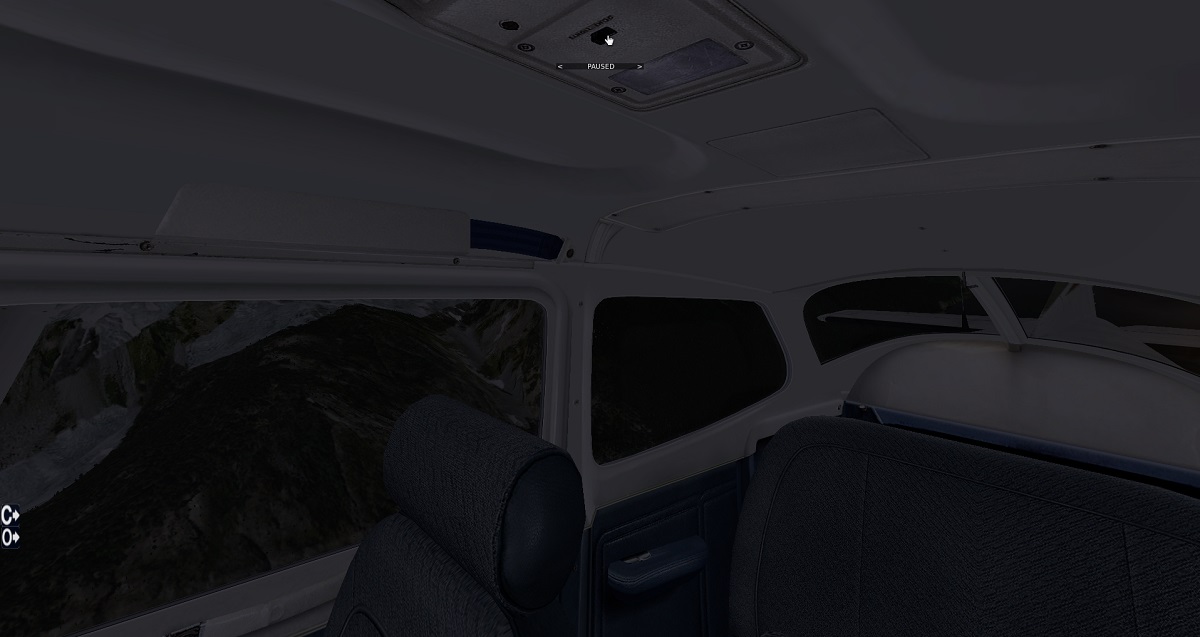
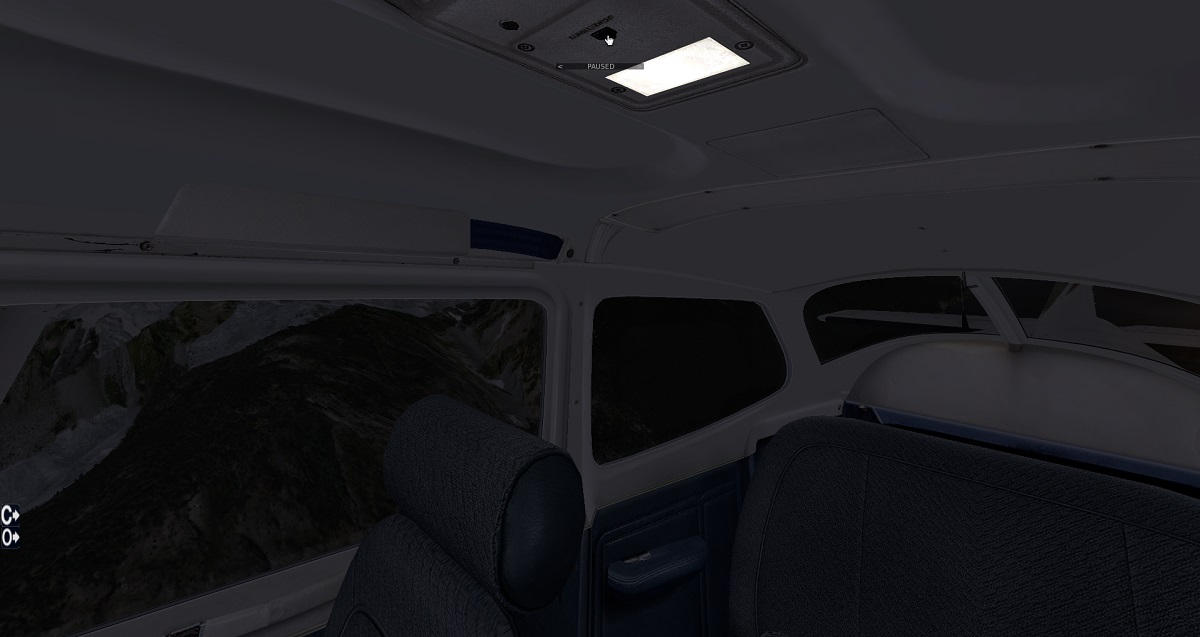
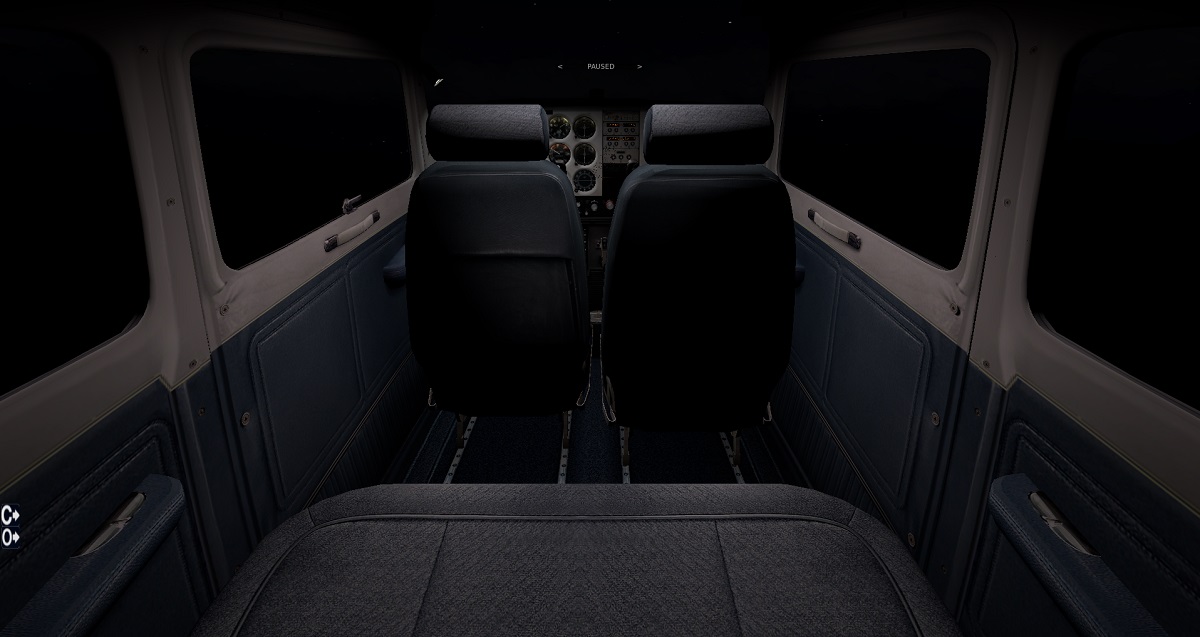
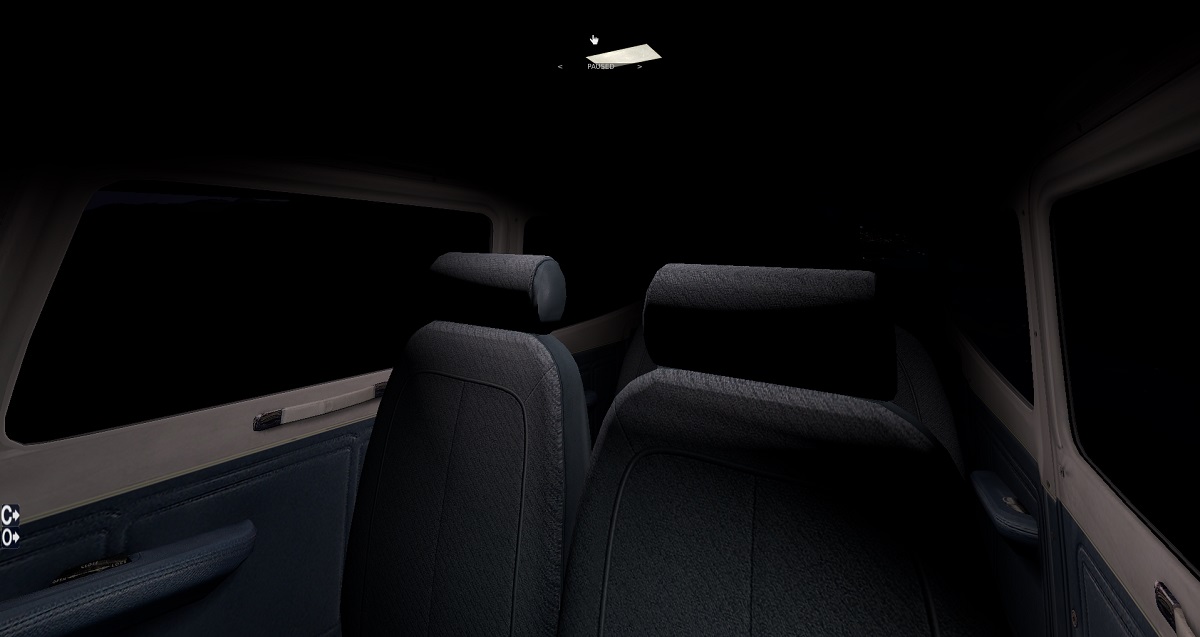
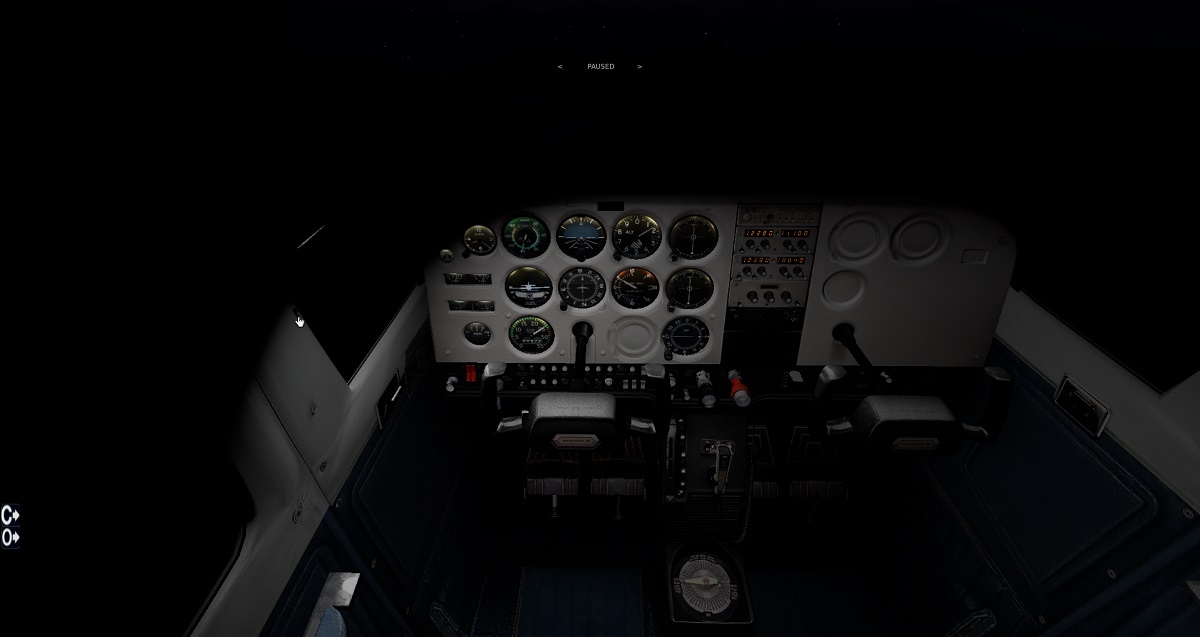
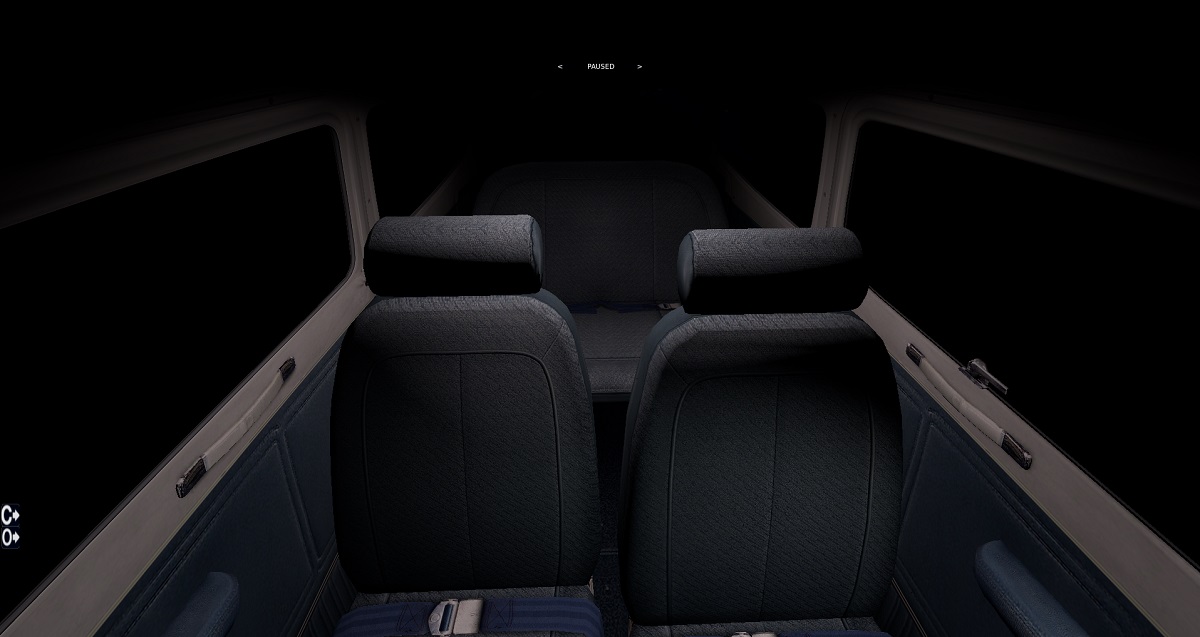
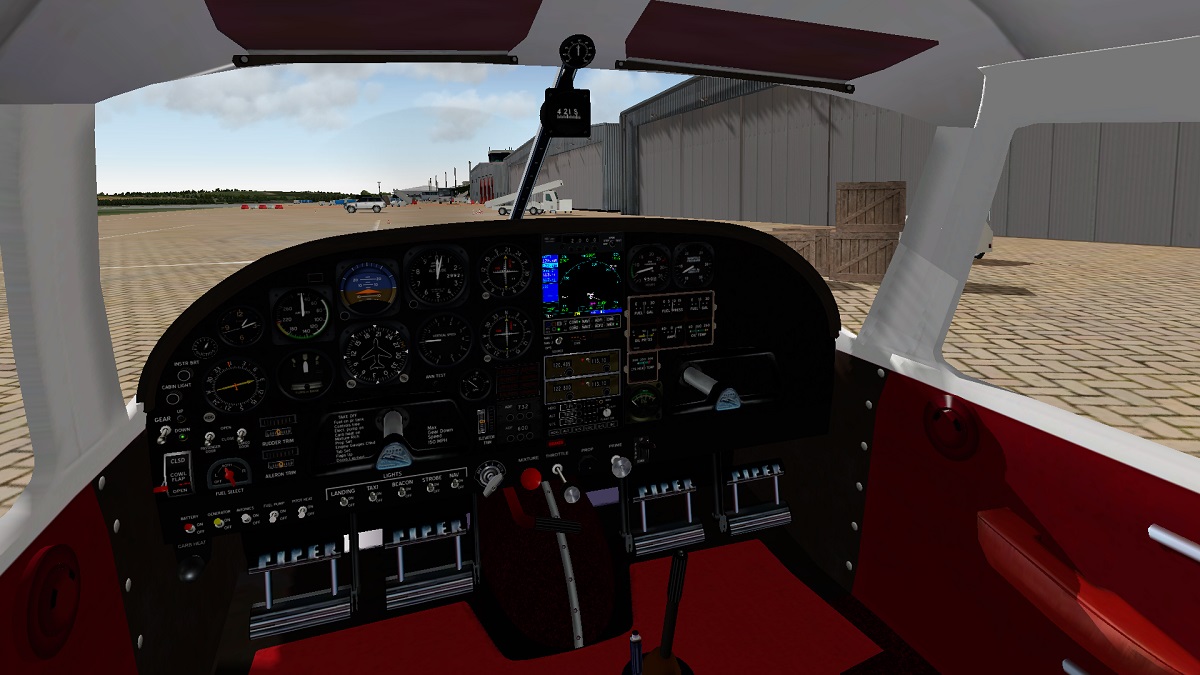
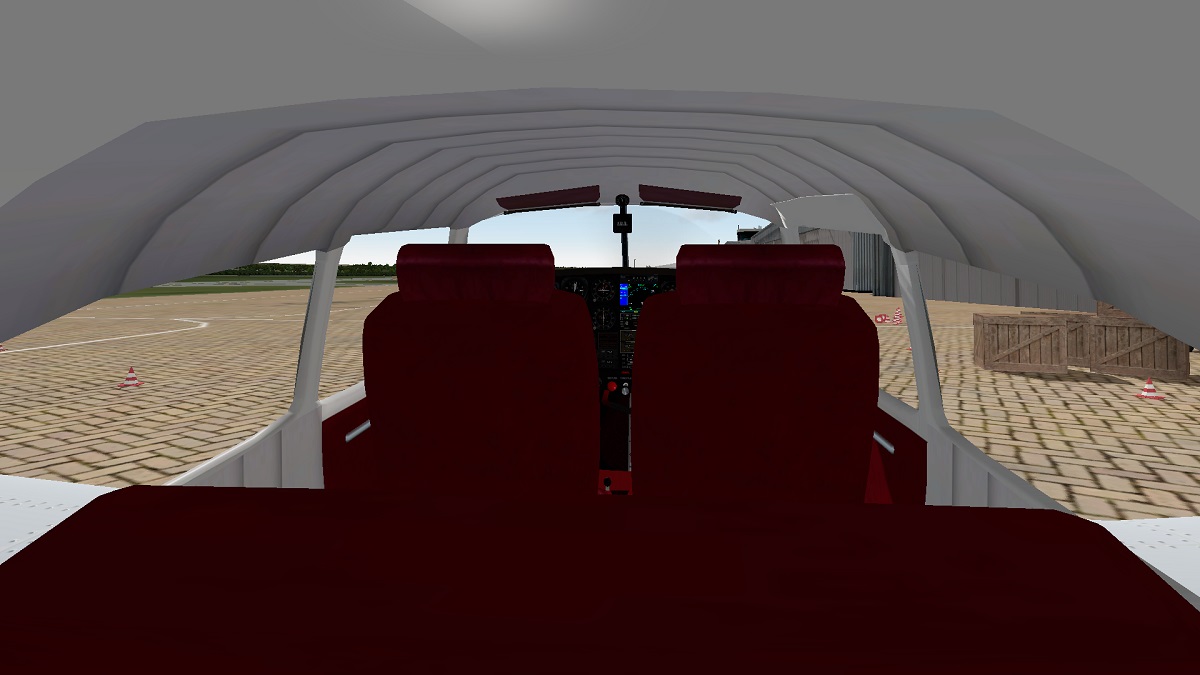
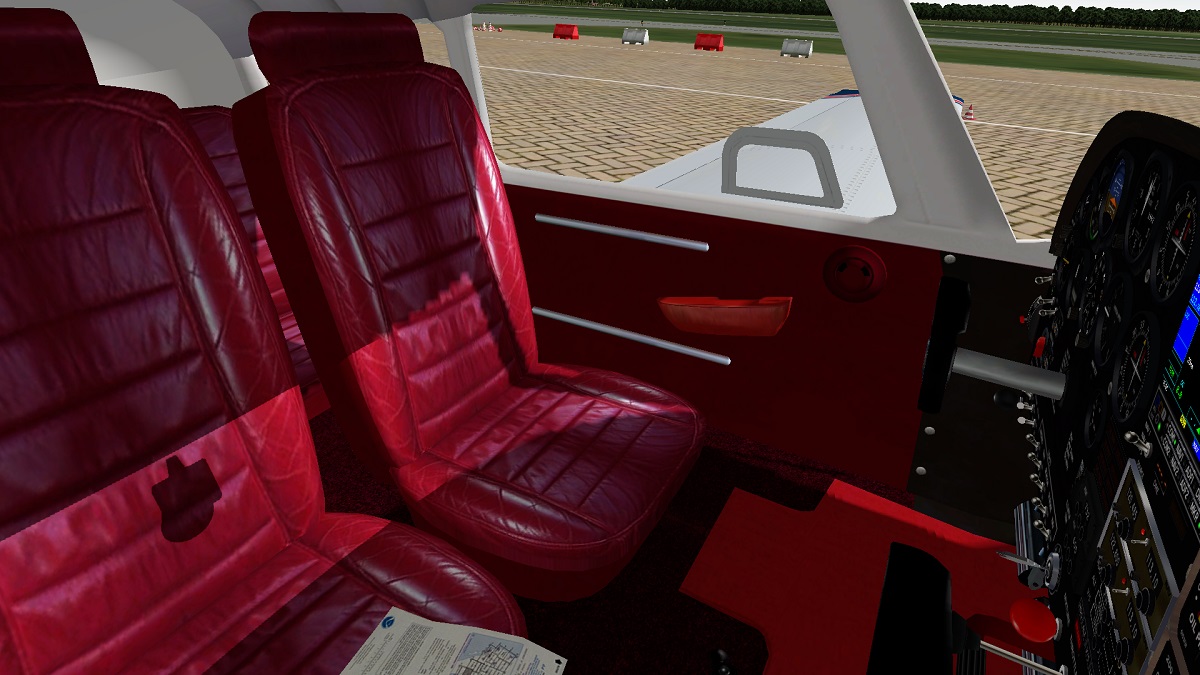
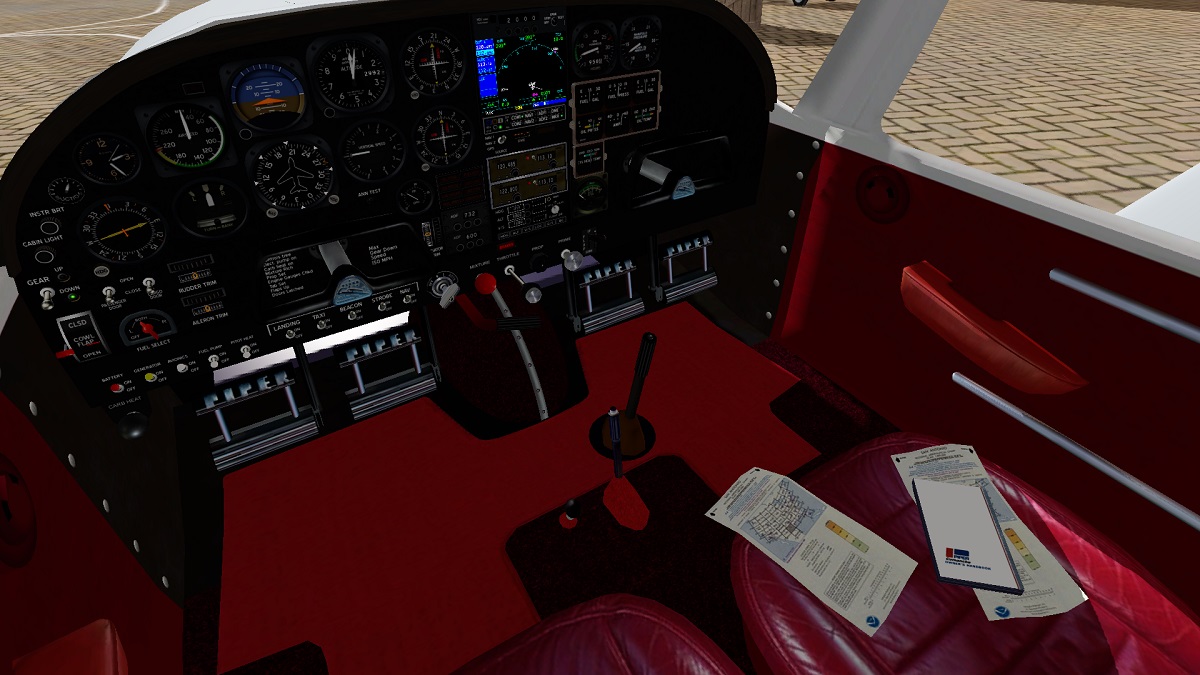
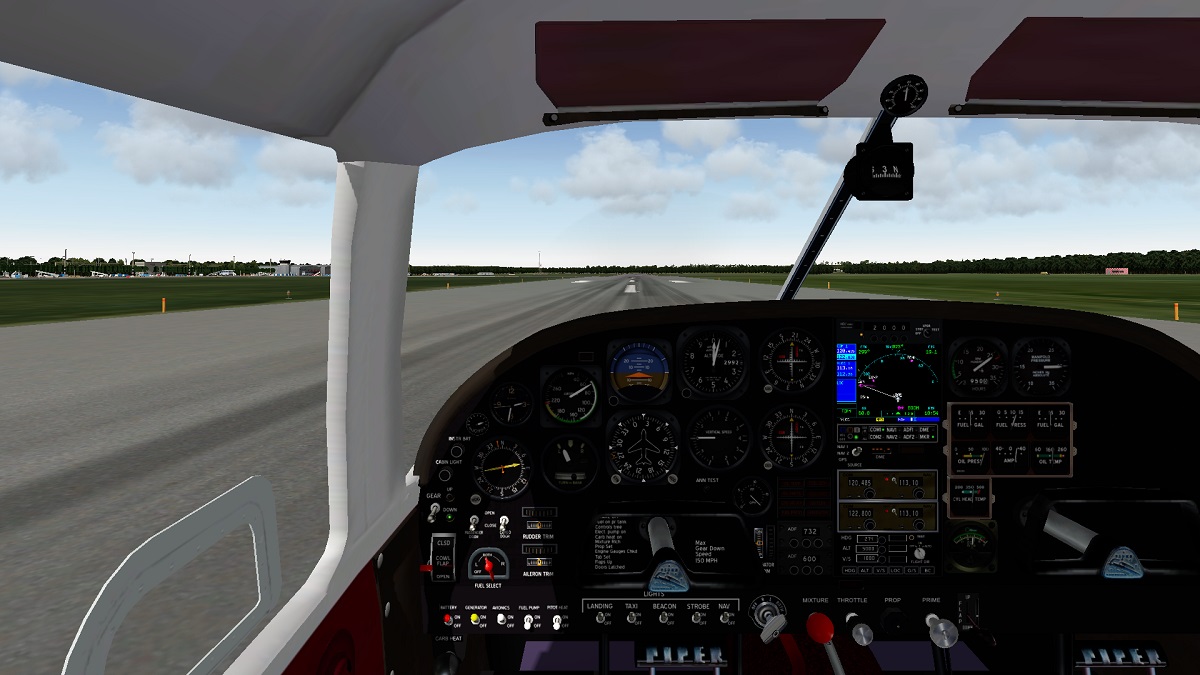
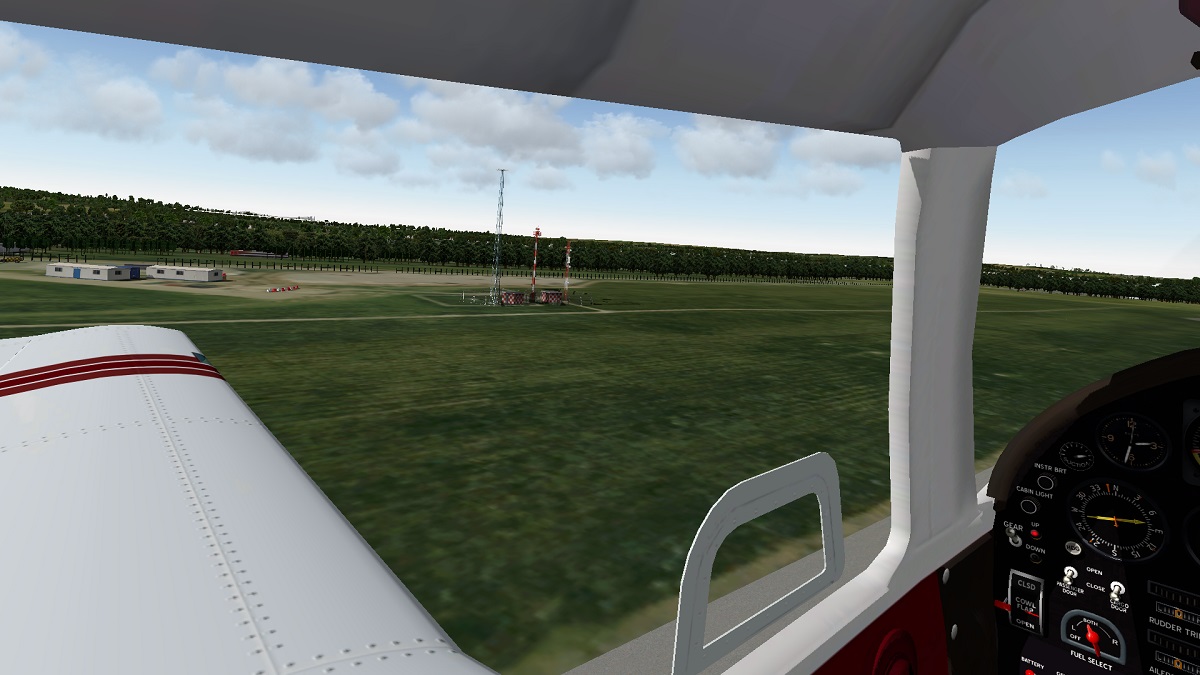
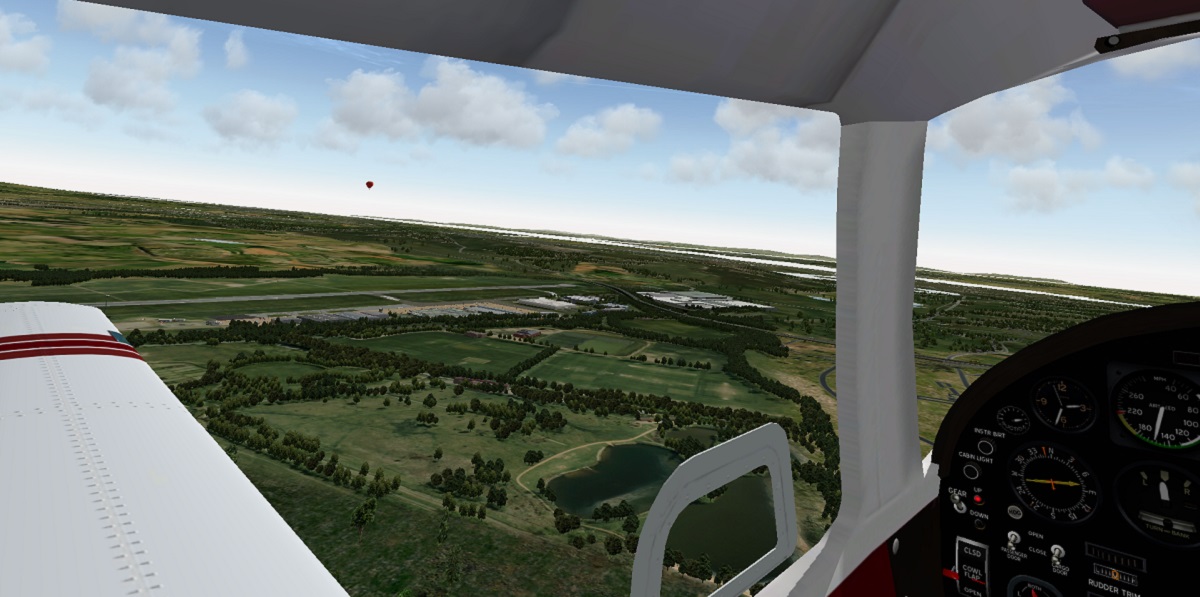
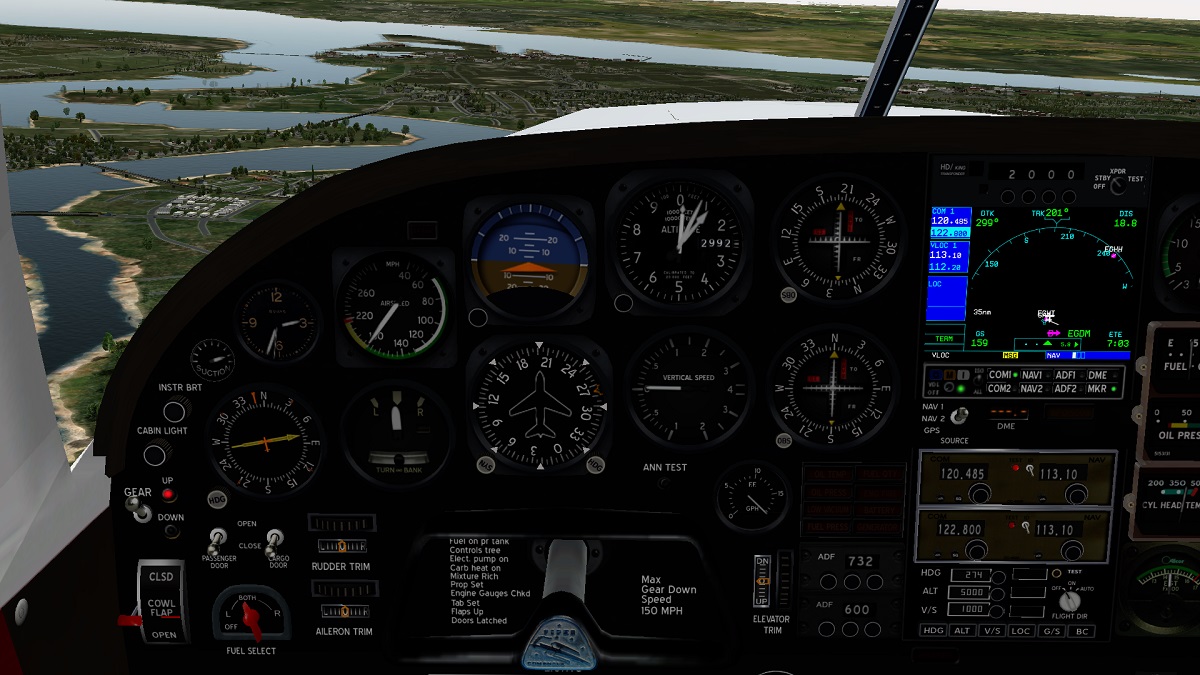
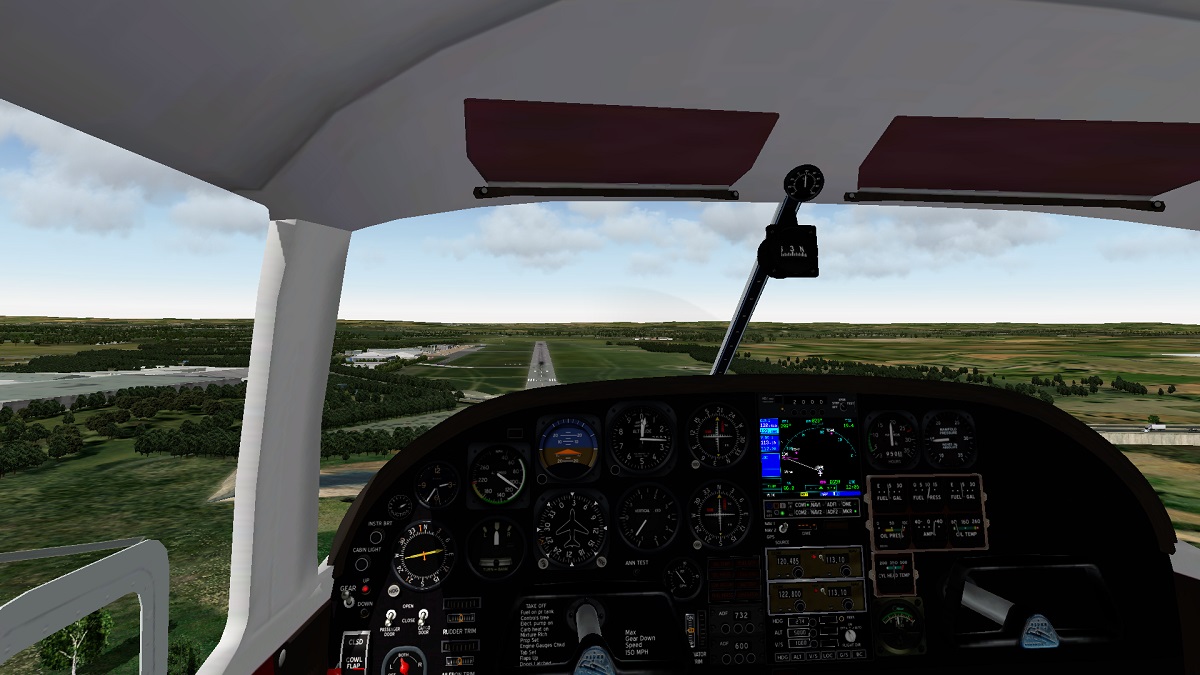
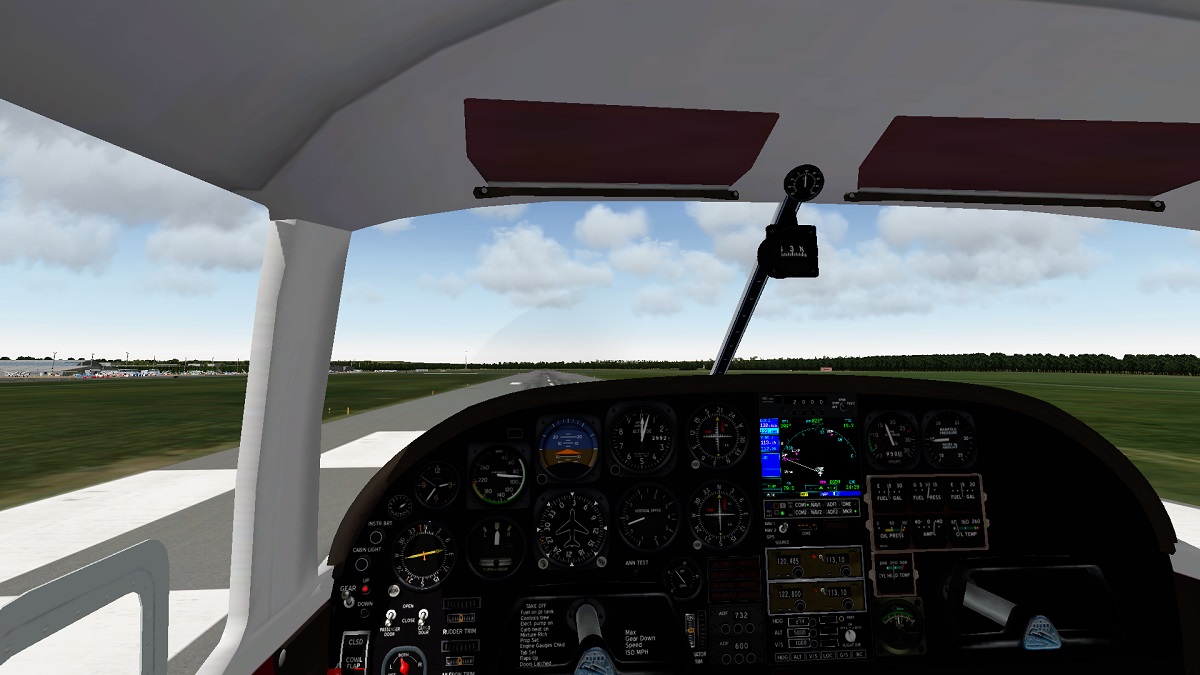
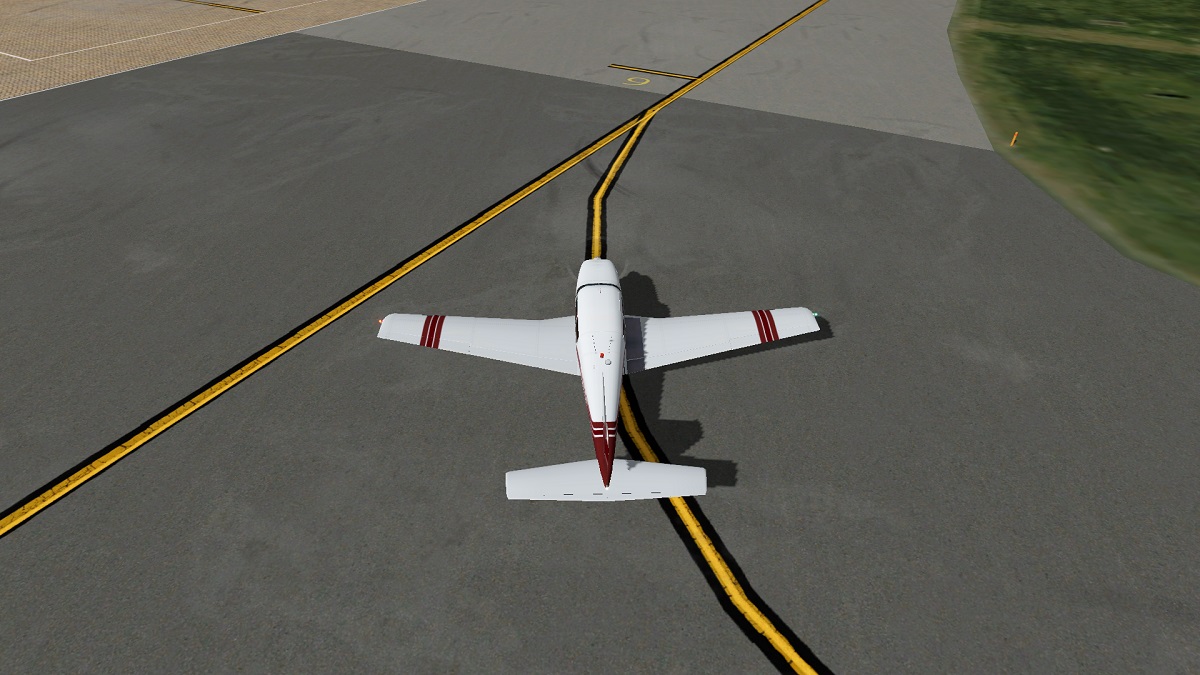
 http://newbluejournals.files.wordpress.com/2014/03/image.jpg Aircraft Review : Carenado Piper PA28 181 Archer II Route : VFR Circuits at EGKK - London Gatwick Carenado make the best general aviation aircraft payware, but does this Piper Archer live up to Carenado's high standards? Well I will get to the main message of that in the conclusion but first its time to analyse everything. Despite the size of this small GA plane (general aviation) it is very complex. Carenado have really showed their talents in this plane, it is absolutely fantastic! Over the next few paragraphs I will describe everything about the plane and give an overall summary. Below is a list of features for this aircraft. According to Carenado: - SASL plug in added functionality - 32-bit and 64-bit Mac, Windows, and Linux support. - Stereo 3D sound, with new dynamic effects - Custom prop, which adds realism to the spinning prop etc. - 2D pop-up windows to control camera presets, FOV etc. - Interior lighting optimized for X-Plane v9 and v10. - Overhauled lighting system. - Strobe lights blink in a custom pattern and order. - Landing light features tightly-focused “glare” effect. - Navigation lights have been improved. - Improved ground handling. We start we some real life pictures of the Piper PA28 181 Archer II which can compare to the model made by Carenado, these pictures show the cockpit and the exterior. From the real life pictures you can tell this small GA is great fun to fly, and from past experience I can tell you it most definitely is! With a 180 HP Lycoming engine and an advanced Garmin G1000 Avionics Suite, the Archer is a modern and reliable aircraft for both teaching and cross-country flying. All Specs can be found by clicking the above picture. Having flown this aircraft prior to this review I can say this plane handles lightly, with a rotation speed of roughly 65kts and a cruising speed of 128 ktas, its the feather of the skies. Now onto the Carenado Archer! Exterior The first things I am going to evaluate are the textures of the aircraft. We begin outside which I can easily say looks stunning! From every nut and bolt to door seems can be seen at a good resolution which is always nice when flying in VFR (visual flight rules). However the outside visuals cannot be described as crisp. As well as high resolution on the side of the aircraft we can also find this on the wheels, the tires are crisp pixel sharp and even reflect the sunlight! When in “chase” mode a 3D pilot appears in the cockpit, this is a nice effect when viewing the externals although there should be an option to get rid of him! But he is not just sat static, his head turns according to the input of your flight controls as well as his arms to the yoke and throttle and his legs to the rudder. The prop has been modeled with great care however as the textures are at an acceptable standard we can still find that two logos are blurry (see picture above) but, the prop is only static when the aircraft is stationary so this can go un-noticed. All outside lights have been modelled well especially the navigation lights on the edge of the wing. All the control surfaces have the delay of input movement just like on the real Archer, and the control surfaces are also modelled well. The main feature that stands out though is the reflections on the tires, this is a stunning feature as the sun wraps its rays around the tire. This is also important though as the hear is not retractable, so when your in 'chase' view taking in the scenery, you can constantly see it. 3D Cockpit Moving through the door and into the 3D cockpit the textures are at an amazing resolution, this can be expected as all carenado models are! I believe that the images below speak for themselves, as you can tell the textures in the 3D cockpit and surroundings are photo-realistic which adds to the immersion. The seats and yoke have a weathered effect which adds more realism when flying, it is not an old and battered model nor a brand new plane, but just right for a good weathered look and feel. Moving down toward the floor we find an aluminium plate as a floor scratch/foot pad which has a photo-realistic finish along with the pedals which perfectly match the real ones! Looking back up to the ceiling of the aircraft we find two lights which are interactive. One is a general lamp whilst the other is a night vision light for night VFR flying. There are also animated sun-visors with information on them however the information is blurry. But all information needed looks fantastic if you print out the documentation.The 3D gauges in the aircraft are spectacular the textures on these are great too. Despite living in the 3D cockpit when flying I never had a loss of frame rates which was good, my average FPS was 31. The radio stack and all other knobs are easy to use, this helps a lot if you are flying on vatsim. Above is a mounted compass with a photo-realistic casing, the compass is well positioned meaning it does not interrupt your visual display. Near to this is a window which is nicely animated, sound is also affected when opening or closing the window which adds to the realism when in the 3D cockpit. Even the compartments on the armrests are animated! Also I have a comment which may be debated in the comments, space awareness. To help you understand I will explain. Everything has been positioned well in the cockpit despite whatever filed of view angle you have set in the pop-up option menu everything remains to a realistic degree. This plane will be my first of choice to try with the upcoming release of the Oculus Rift VR headset! As its so close to the real thing! The option menu’s are a great feature of this aircraft, you have two options to choose from, “camera” or “options. The camera menu offers a wide range of camera shots whilst flying, see the picture below. However despite this great camera option there is a slight snag, by the way this is NOT a bug of any kind. For instance I have a 3D cockpit button and a chase button assigned to my hardware flight controls, if you are in the 3D cockpit and switch a camera view via the menu when you go to chase view everything is normal. However when going back to the 3D cockpit using my assigned button I go back to the previous view set by the menu. This gets slightly annoying at times but does not affect anything to do with the plane or my view of the plane. There are two menu’s that are 2D pop-ups which can be accessed on the side of the screen or on the panel in the clicking zones. The camera menu was described in the last paragraph so I will now explain the nice features and animations of the options menu. The first option is used to open the passenger door, the second opens the baggage door, the third triggers static elements, and finally the last option is for wheel fairings. All of these options work perfectly and with ease, changing the options during flight does not effect the frame rates. Night lighting is a big issue with many planes, but not this one. Outside you have the navigation lights and the landing lights, all lights effect the surface glare of the plane. Moving back inside there is a option of three lighting affects. In the cockpit there are two lights on the ceiling, one is for night lighting on the panel which is controlled by a knob and the other is for passenger lighting controlled by a switch. The only thing I don't really like about the ceiling lights is the lack of 3D. It would be nice to see a rounded dome shape on these lights, but mainly your looking out the front windshield so this doesn't bother me too much. The third effect is for integral lighting on the gauges, this scan be controlled by a scroll positioned next to the outside lighting switches. Placed together all lights create a pleasurable night flight experience. Liveries Now to the liveries, excluding the default white paint there are an additional four liveries with this aircraft (pictured above) which are pretty nice. All liveries have been based on real life replicas which is a neat feature of this plane, as a result of this if you have your PPL I am sure you will recognise these like I do! All liveries have reflections etc.. And make the aircraft a beauty to fly. All liveries have the option for wheel fairing's on/off. You can get some extra liveries on x-plane.org under the downloads section but not many which is a shame. When I was flying for real in the Archer the plane had the Gold_Blue skin, its not identical but its similar and I am sure there are many American variants! Flight Dynamics Having flown the real Piper Archer myself I can comment on the flight dynamics of this aircraft compared to Carenado's version. So first I will start with the in-air model. The model of this aircraft behaves quite realistic however it cannot be compared exactly to the real thing. The real Archer behaves with a delay, as you would expect, however Carenado's model does not simulate this to a detailed extent. This model from Carenado is extremely responsive, and if the controls are held in a certain place the aircraft will dive and spin around, this simply wouold not happen in the real Archer. The next test was the stall test. Throttles back, pitch up, and enter stall. Carenado's version responds very quickly, in fact too quickly. When the throttles are applied again and the nose is pitched down the aircraft recovers fast, this is unlike the real Archer as when I conducted a Stall in the real thing it took a lot longer to recover. With throttles and flaps full for take off at a speed of 70 KTAS the Archer "sticks to the ground" this feels very realistic. When pulling back at take off speed the Archer wants to resist as though its very heavy, this feels real and the same as when I took this plane for a spin in the UK. Also when taxiing this plane it took 1/5" throttle to get it moving, in x-plane its a lot less. Overall the flight dynamics are "Ok" at an acceptable level. To lower the response time it may be worth changing the joystick settings. However its not necessary to have an enjoyable flight! Sound Now we move onto sound. The sound for this aircraft is phenomenal, when the throttle is 1/4 open the prop sounds normal, then when the throttle is positioned 2/4 open and you reach 2000 RPM the sound changes and you are then listening to many different .wav files playing. The sound is so close to real, but it does not pan around you like in the new Carenado Mirage. Its a shame but this is an older plane of Carenado's, although in the version 2 update many new features were added with the help of 64 bit processing. To hear this for yourself I recommend visiting you tube to take a listen. As highlighted earlier the door and window changes the sound heard in the cockpit, just like in real life! Conclusion Overall I would highly recommend purchasing this aircraft, whether you are a beginner or post PPL this aircraft will become one of your favourites by far. The systems and animations all simulate the functions just like a real life archer. It is a Carenado plane, Carenado has quality written in its name, this Archer wont disappoint. Another thing is Frame rate. My x-plane settings are all relatively high, despite this fps on this aircraft is an average of 31. This is great as my computer can handle detailed scenery, cloud puffs and extensive framerate killing options. I suffer absolutely no lag when flying this beauty. The only bad thing about this aircraft would be the unclear textures in some areas such as the cockpit interioir roof and prop. Apart from that this is a great plane to add to your virtual hangar! Is it worth buying this aircraft? Yes! Well, its available on the x-plane.org store for the price of $24.95 : Carenado PA28 181 Archer II Carenado Aircraft support: Click here Reviewed by : Joe ©copyright 2014 : X-Plane Reviews Technical Requirements: Windows Vista or Windows 7 (32 or 64 bits) or MAC OS 10.6 (or higher) or Linux XPlane 9.6/9.7 or XPlane 10.11 (or higher - 64 bit compatible) Pentium 2 GHz - 4GB RAM/1GB VRAM 250MB available hard disk space Version 2.1 (last updated June 2013) Review System Specifications: Computer System: - Intel Core i5 3330 @ 3.00GHz - 4.00gb of RAM - Geforce GTX 650 Software: - Windows 7 64 bit - X-Plane 10 Global version 10.25 - Saitek Pro Flight Yoke System - Carenado PA28 181 Archer II
-
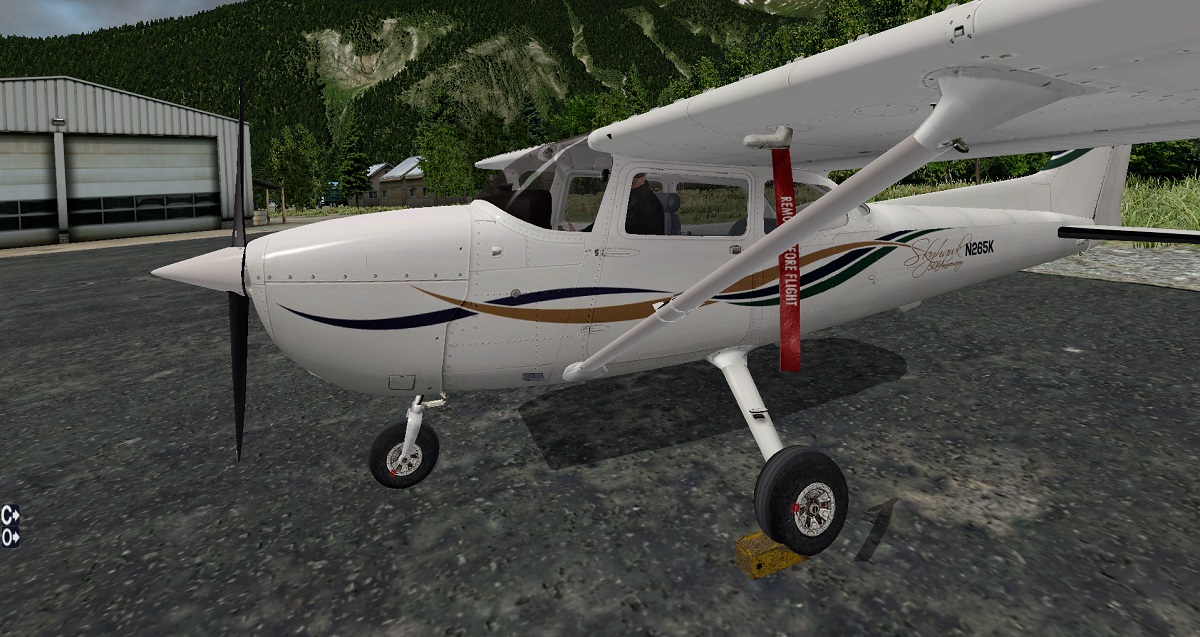
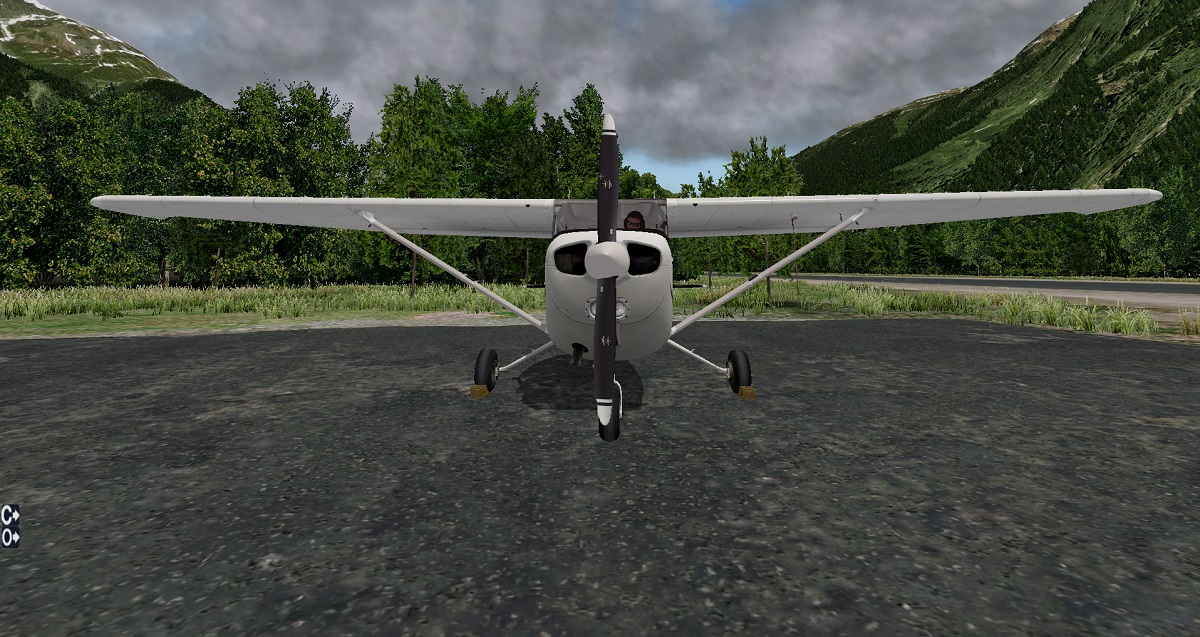
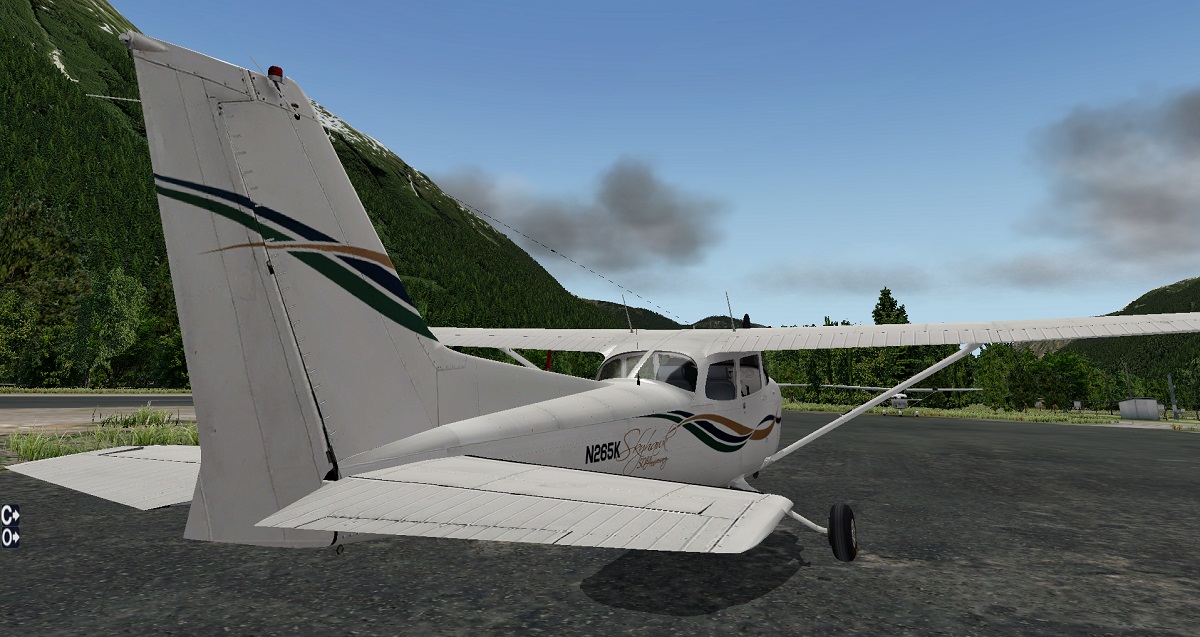
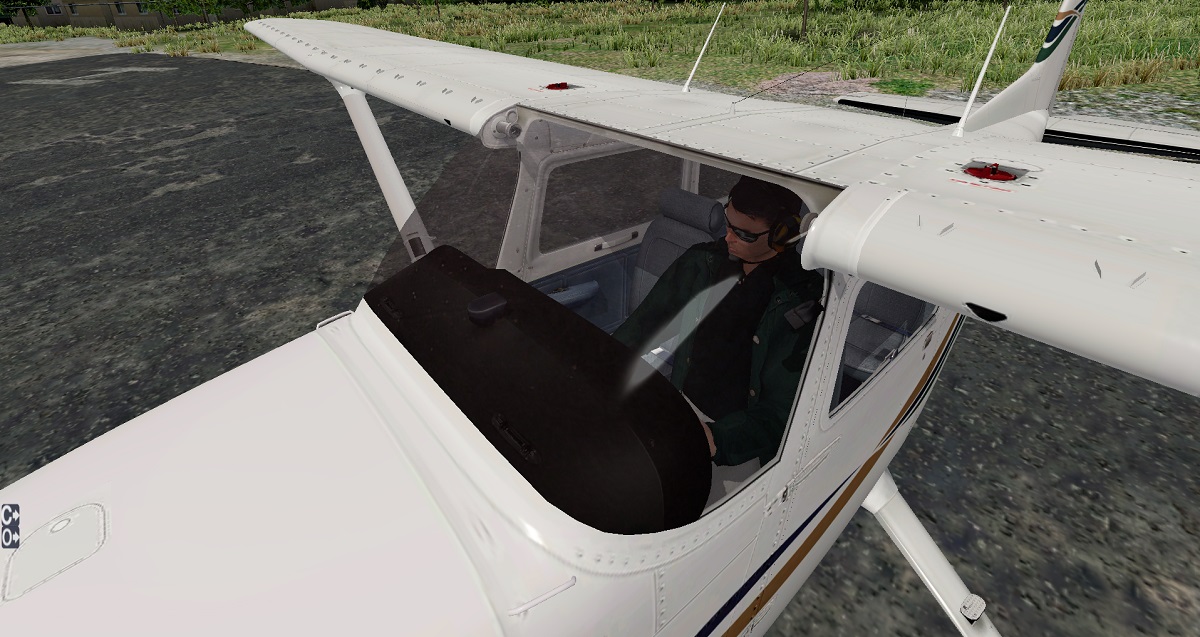
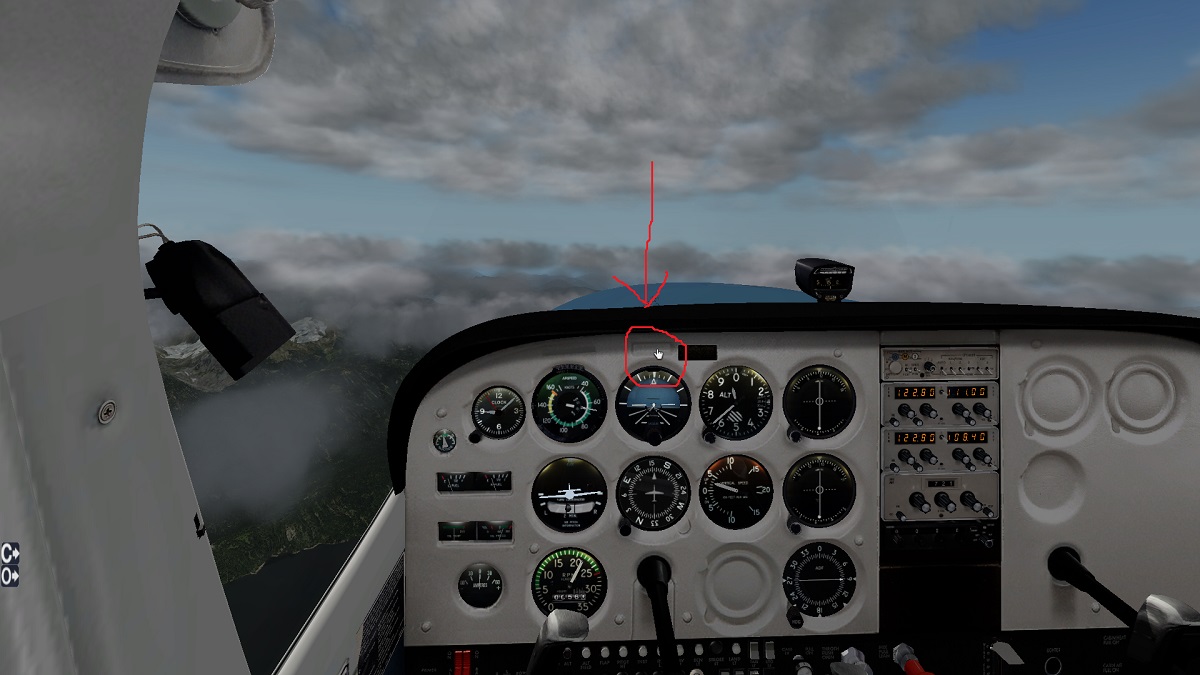
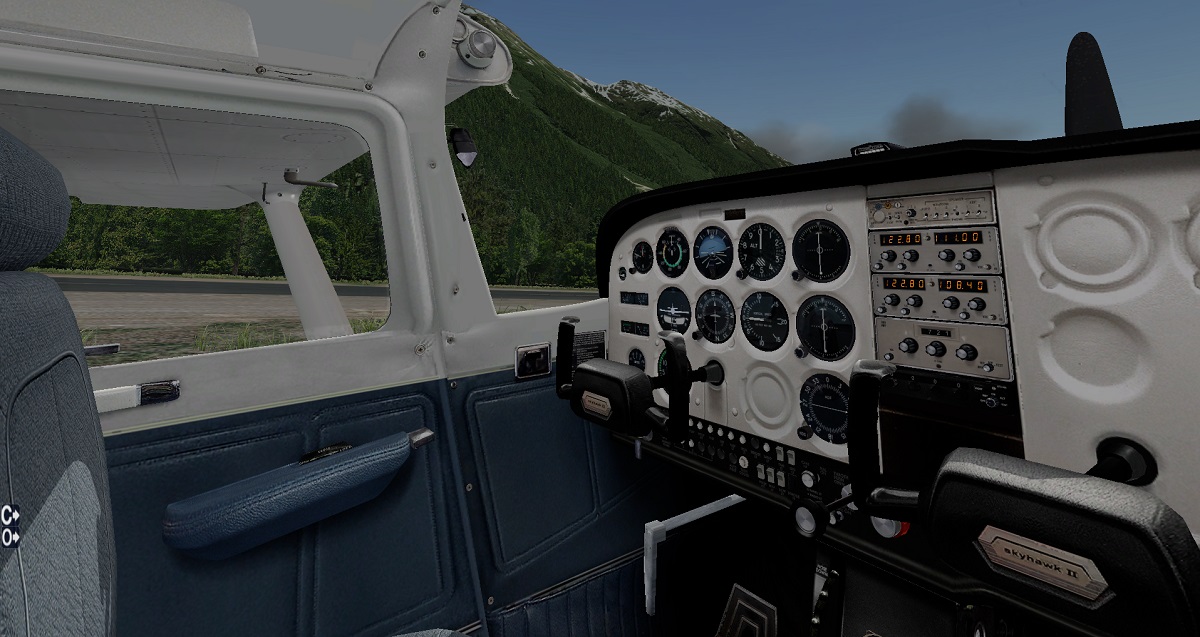
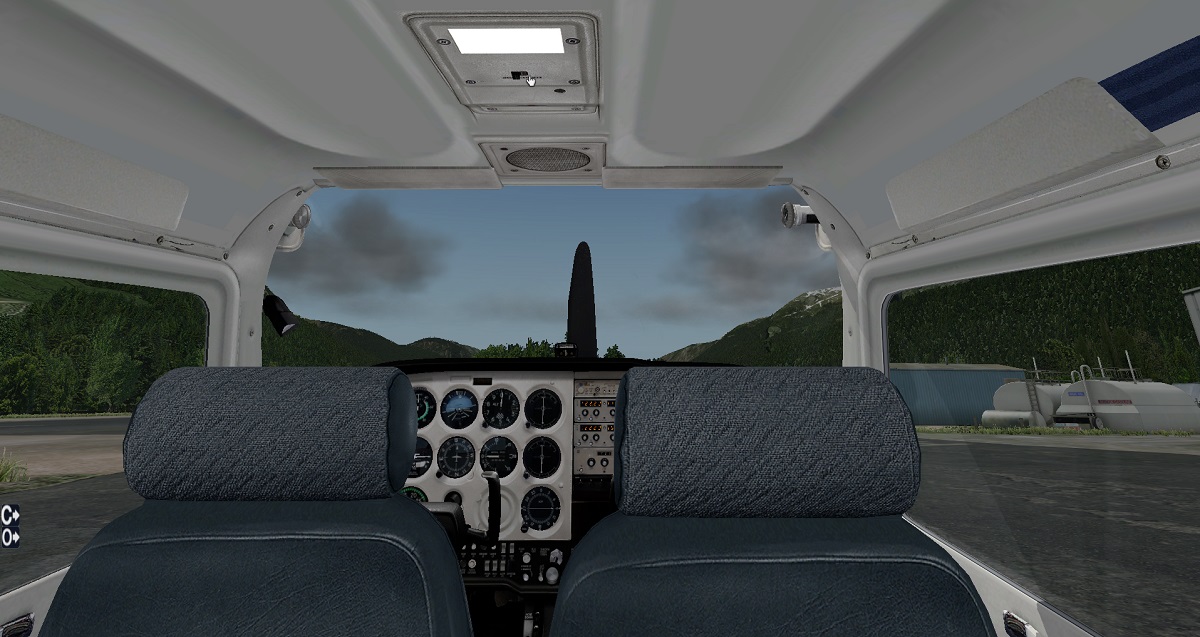
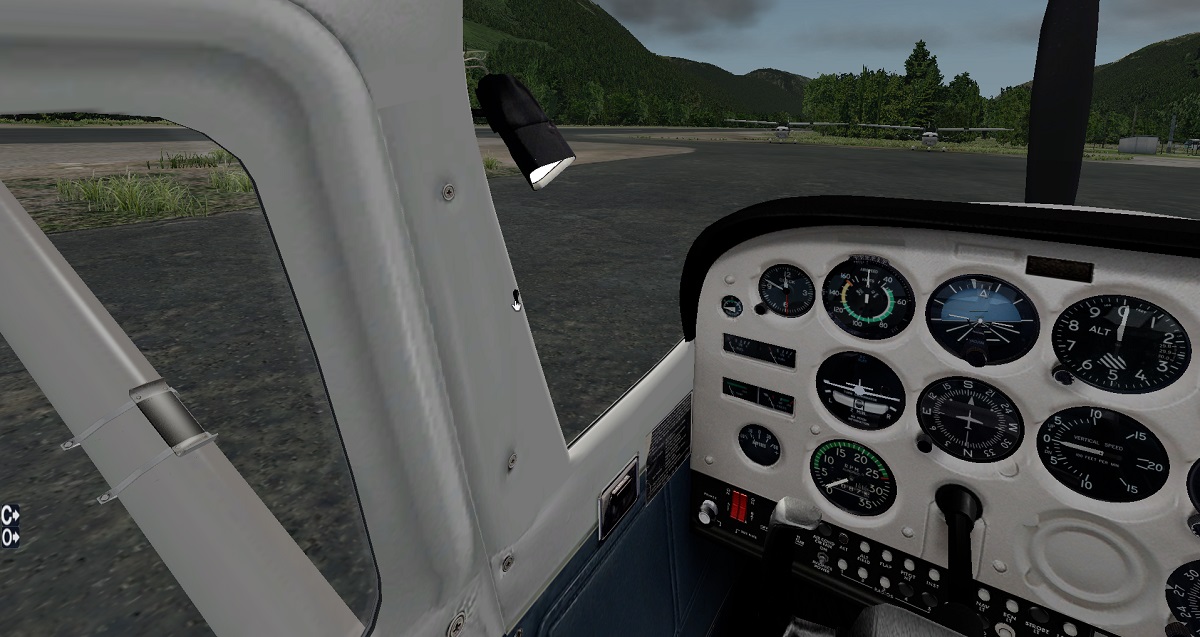
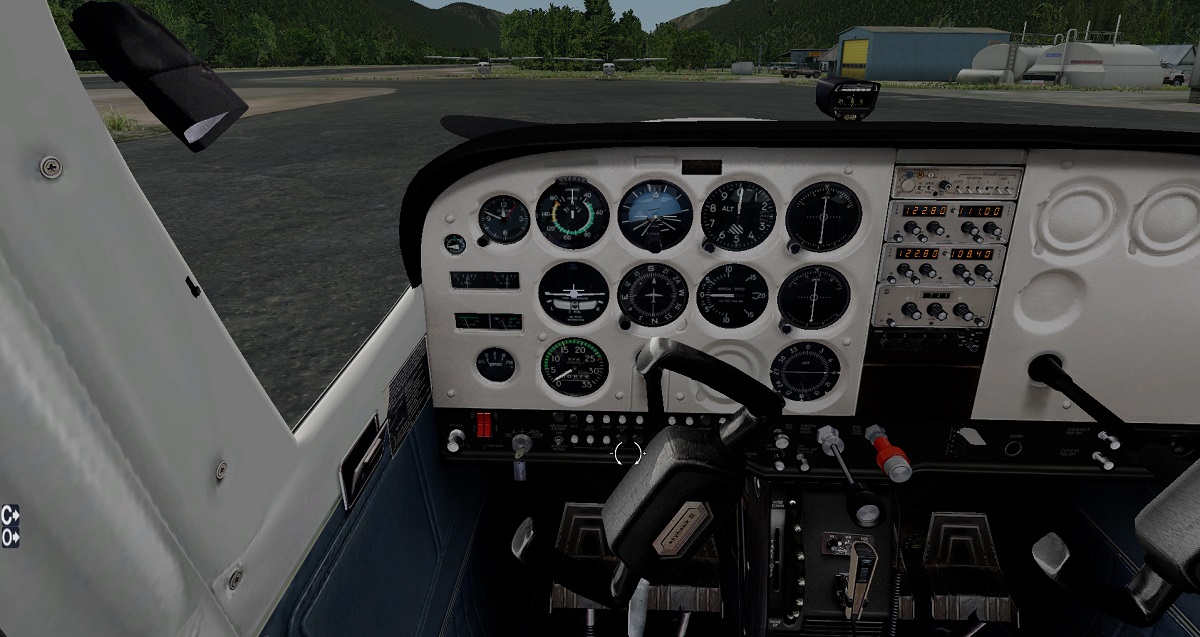
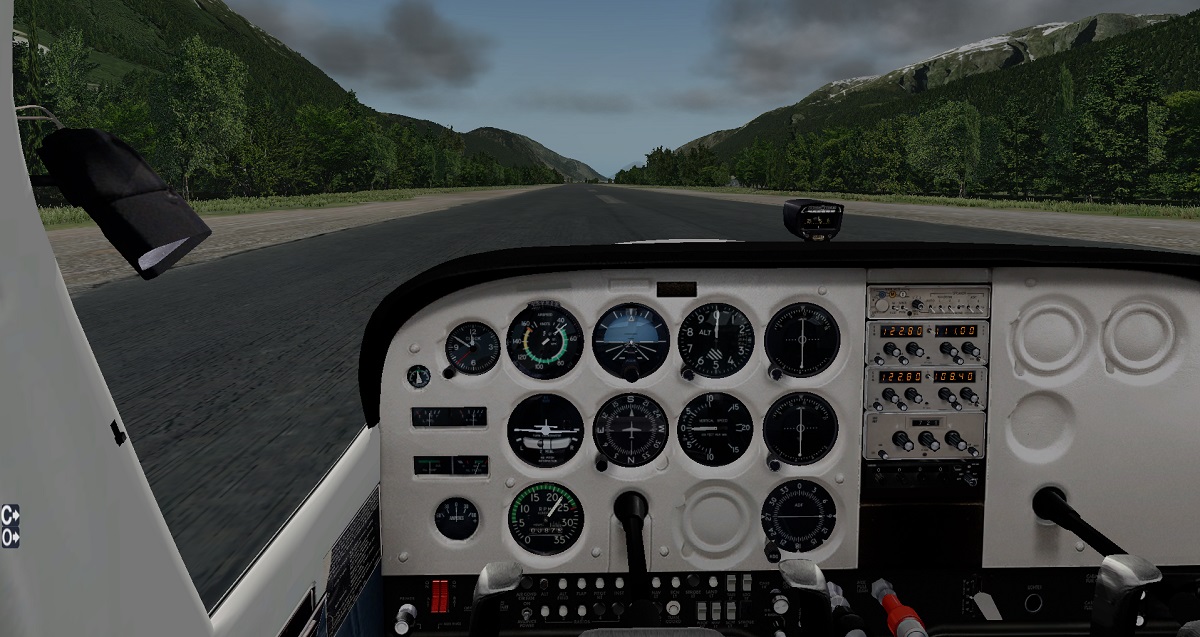
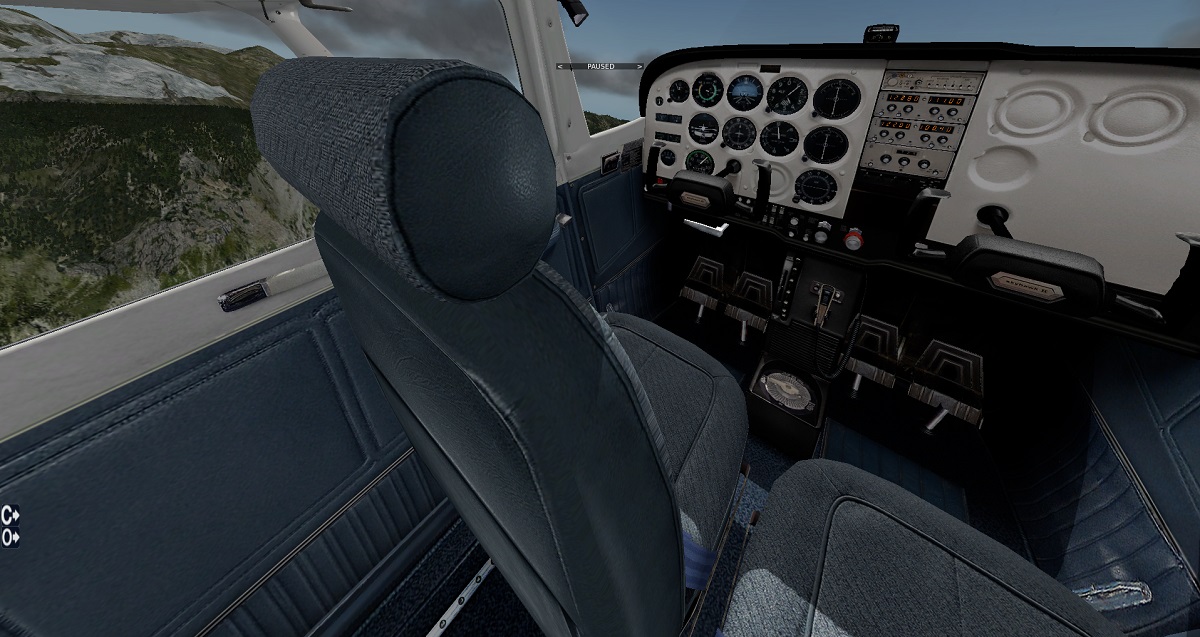
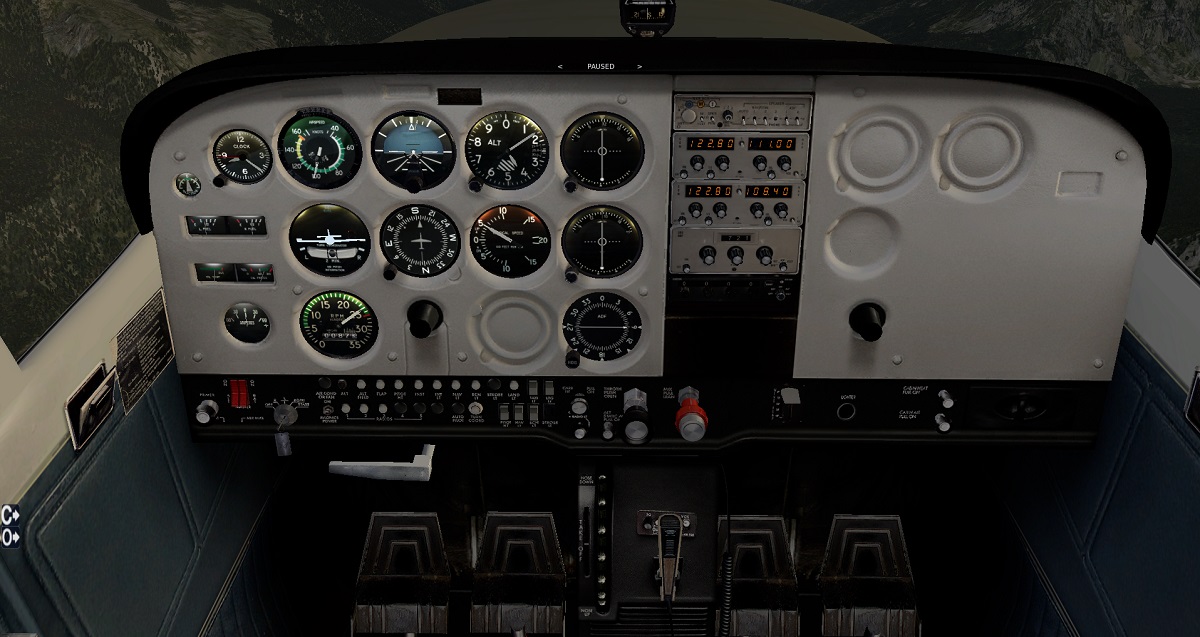
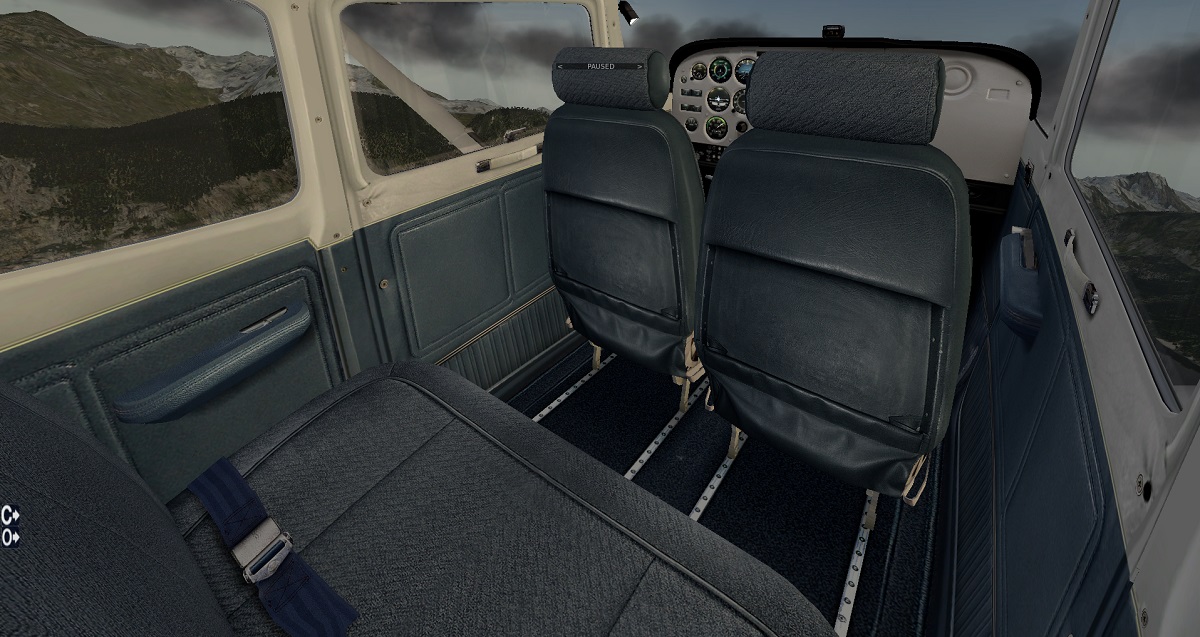
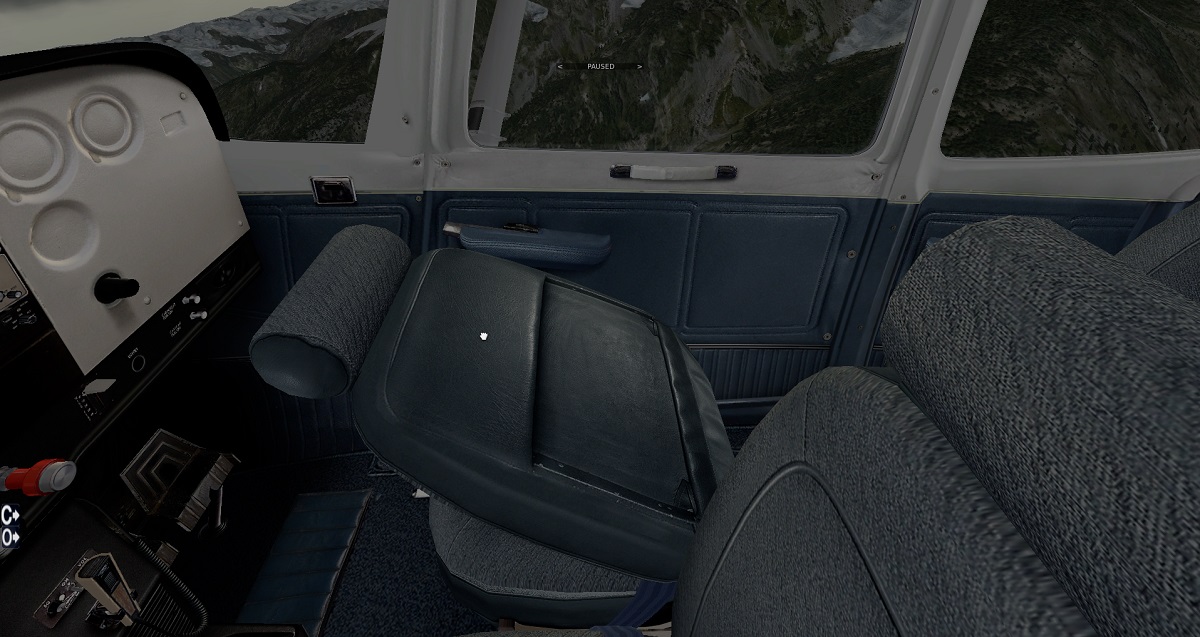
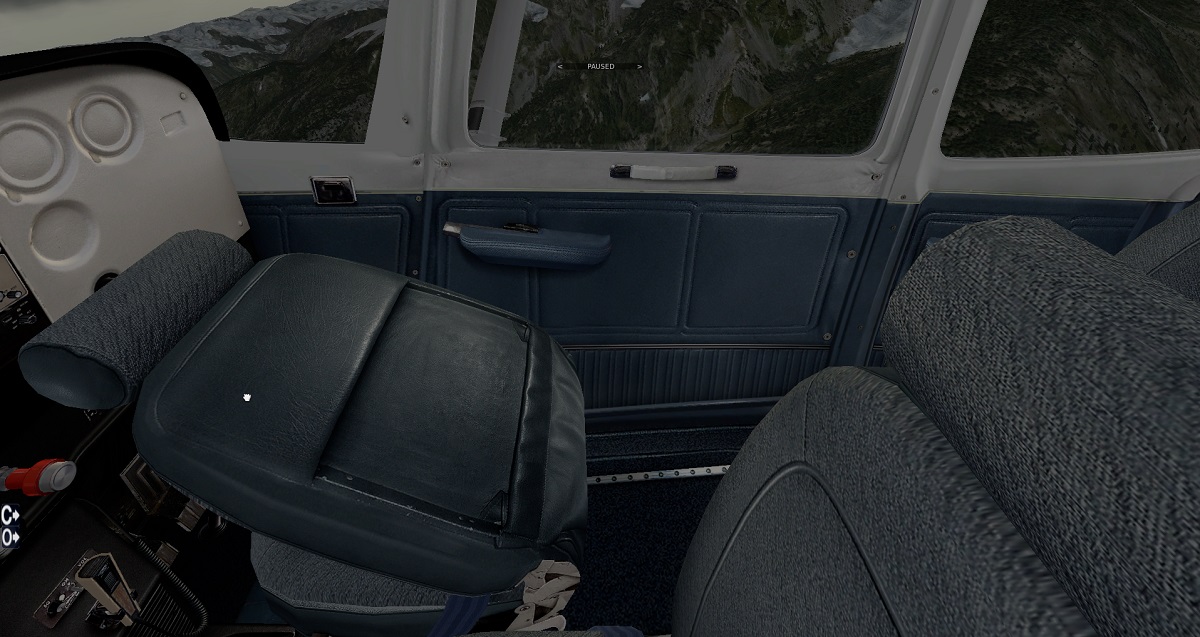
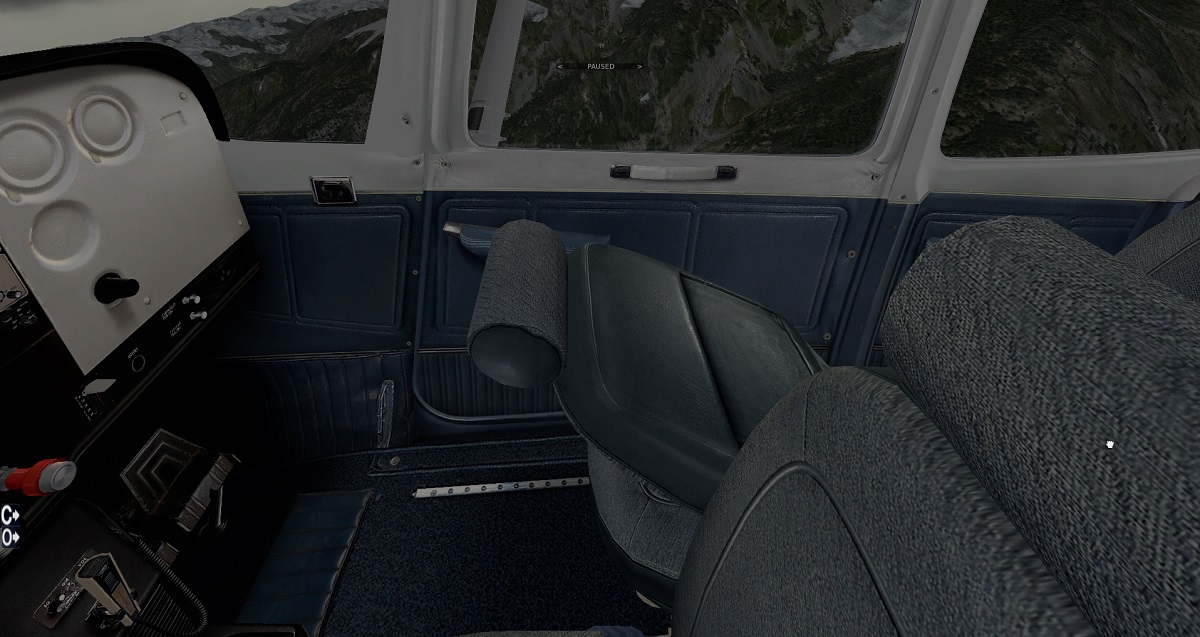
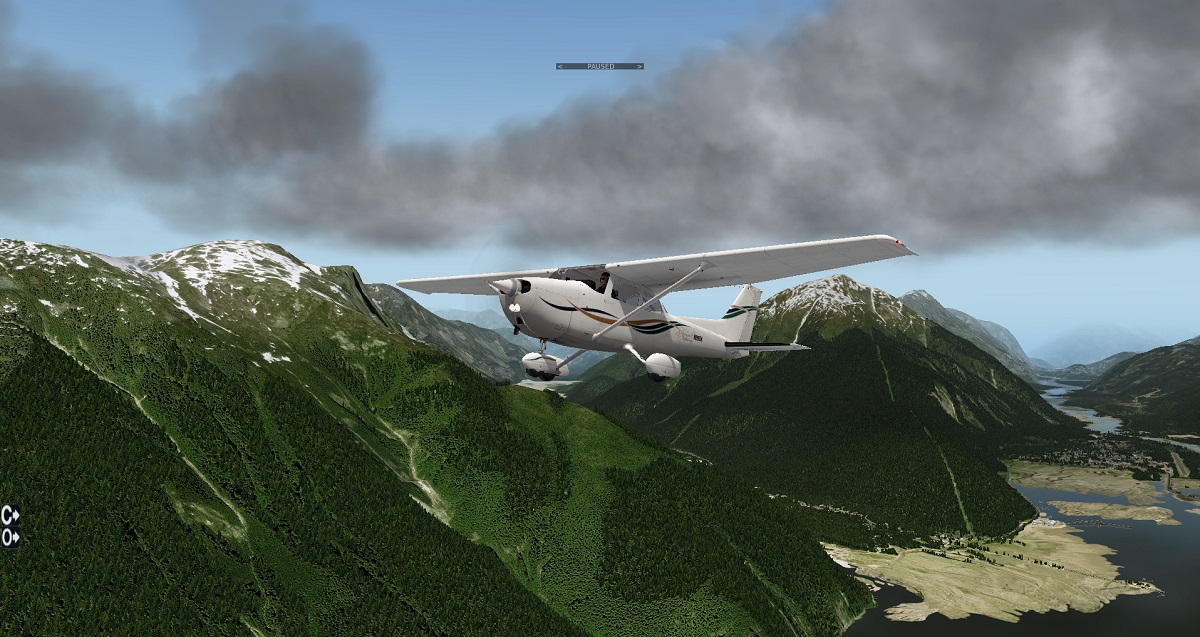
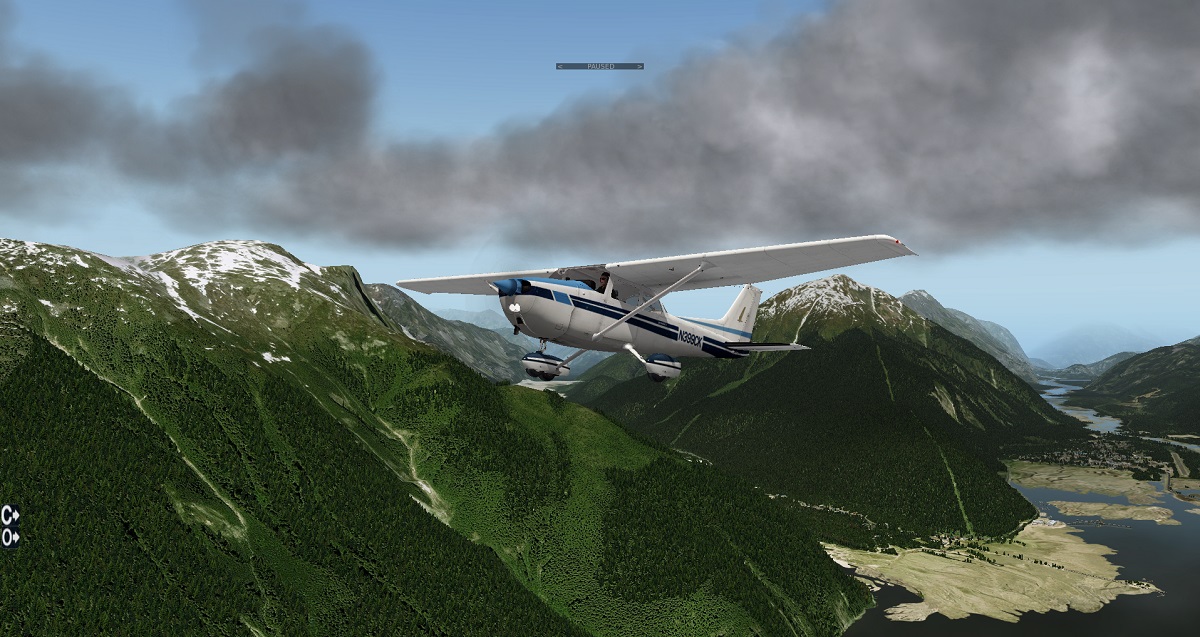
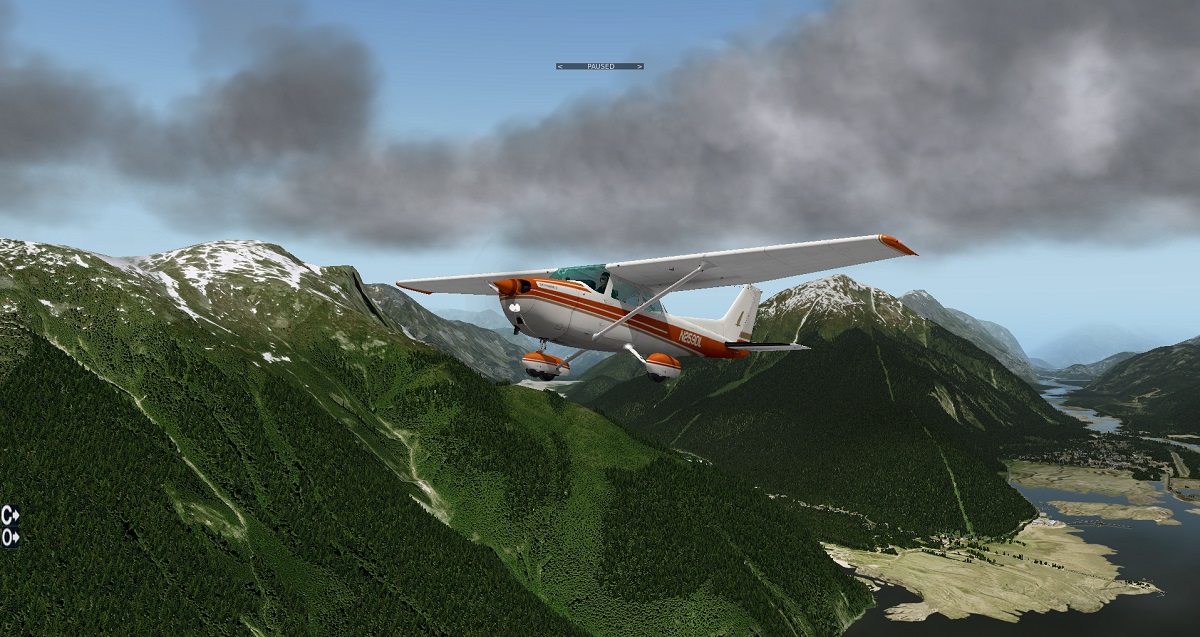
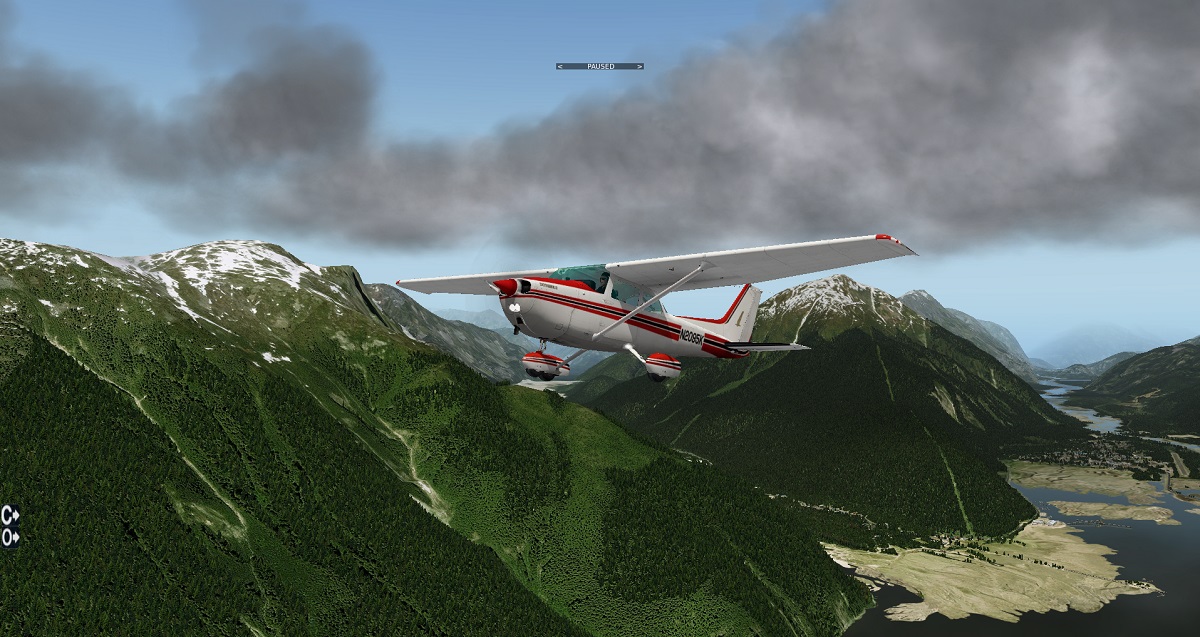
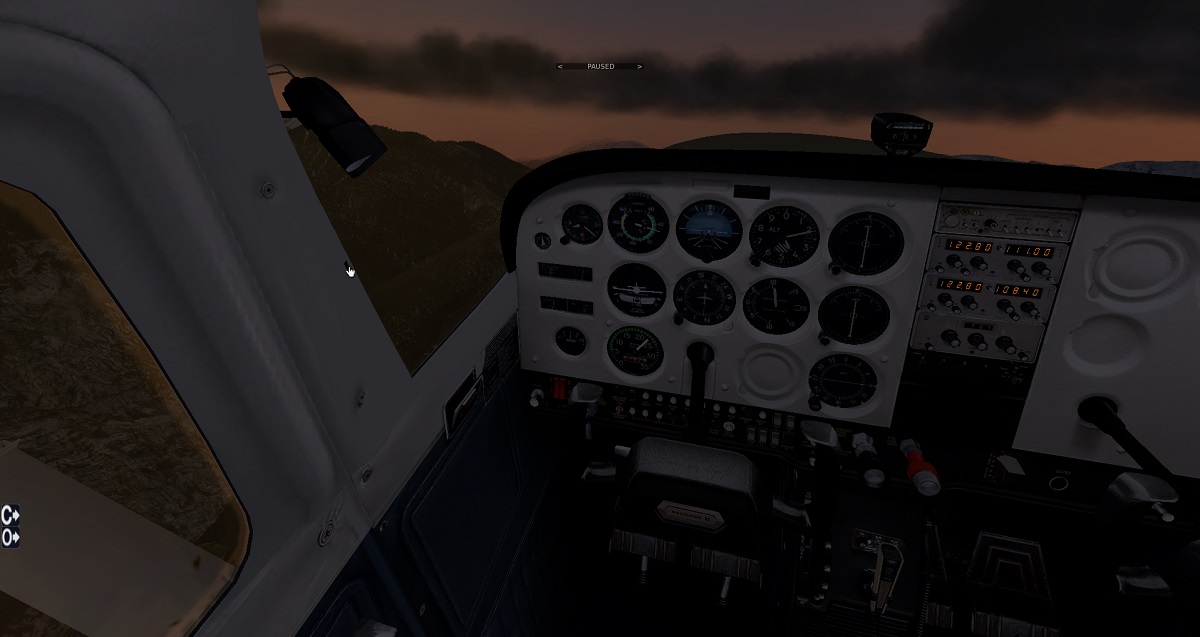
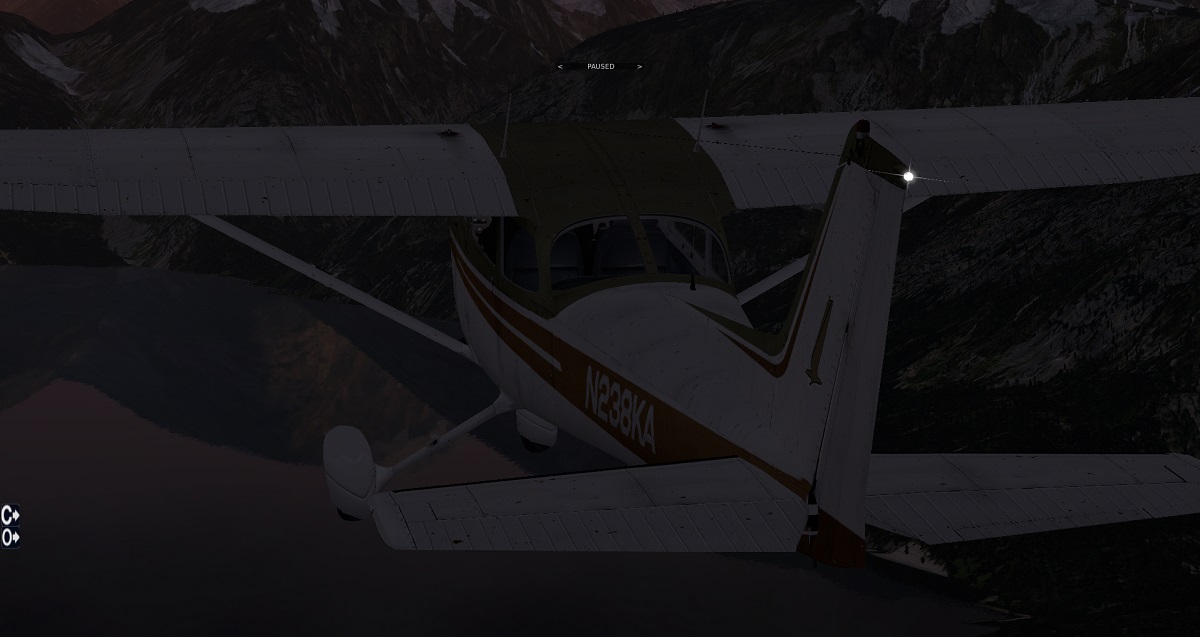
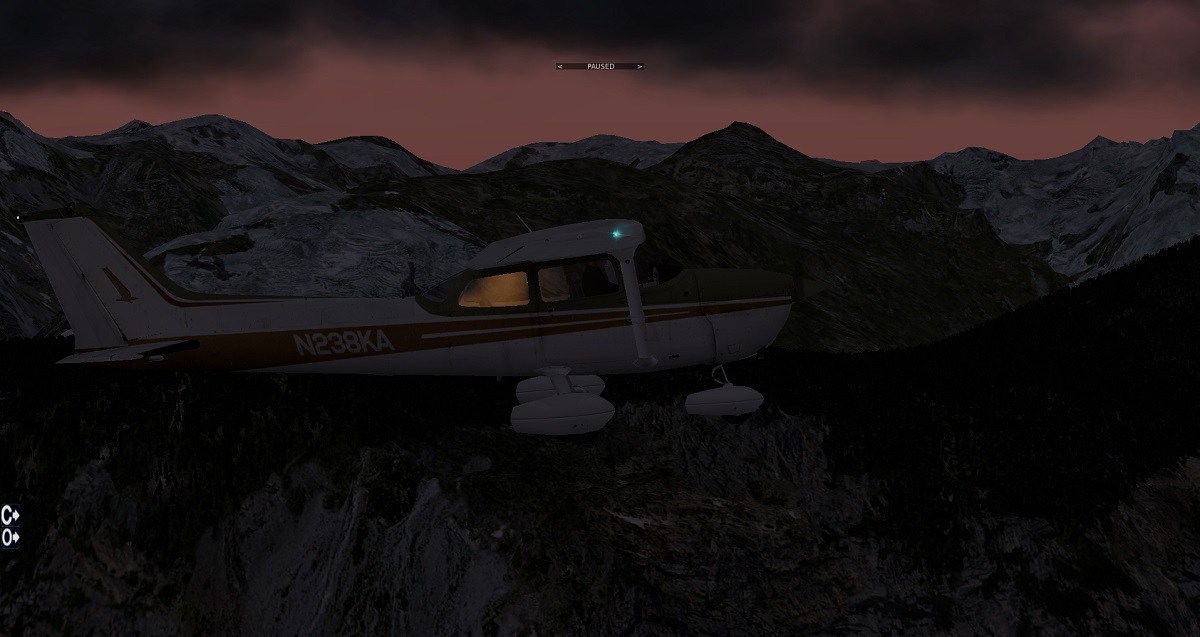
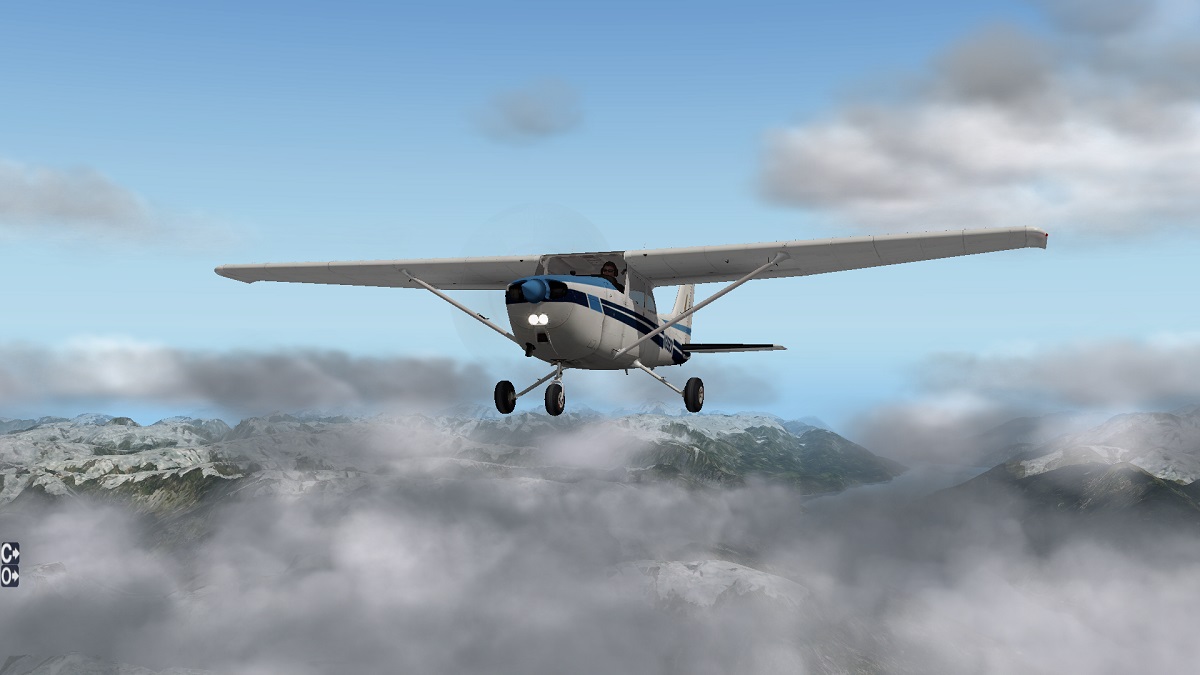
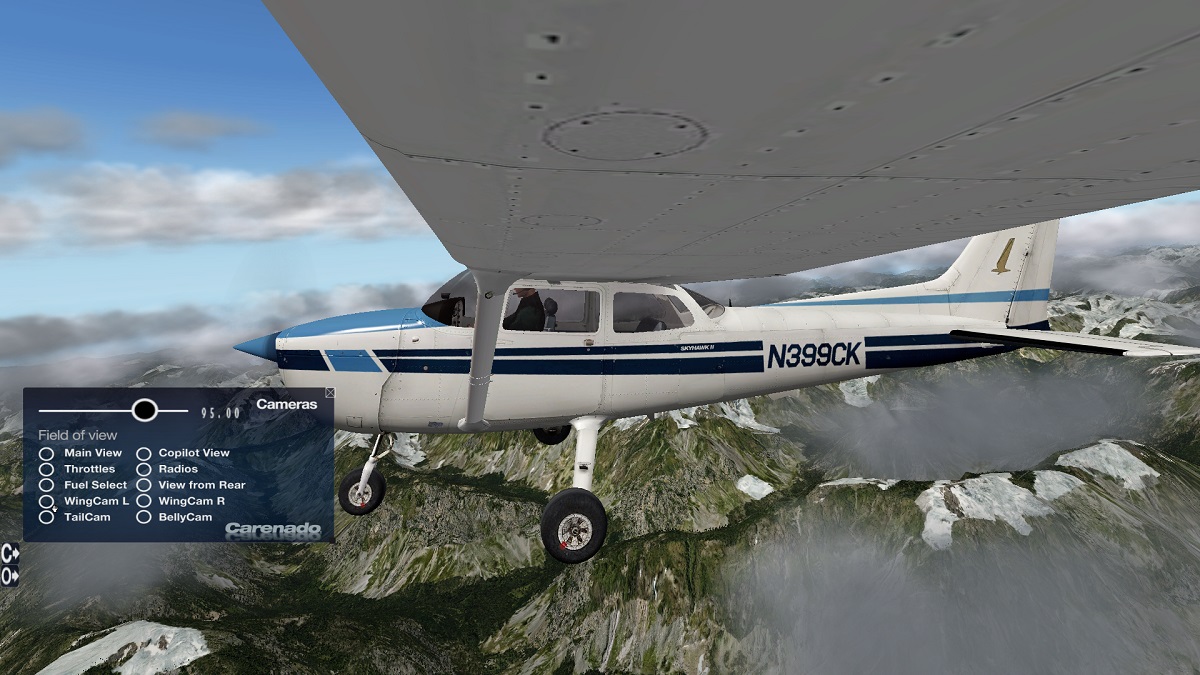
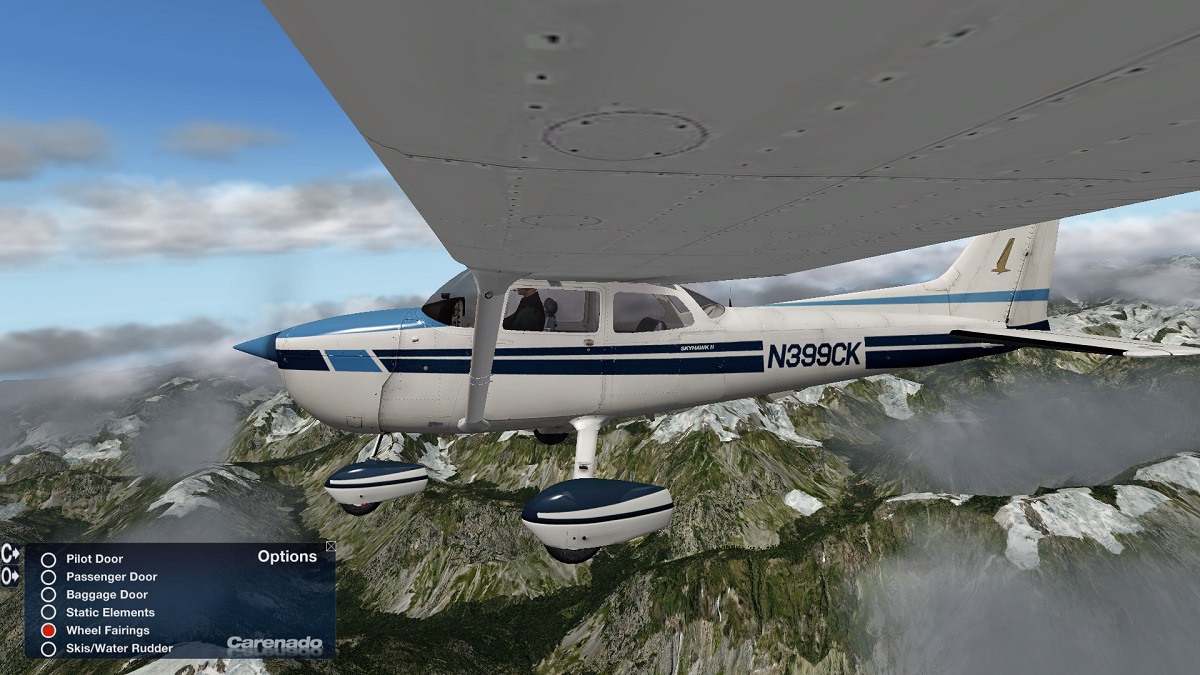
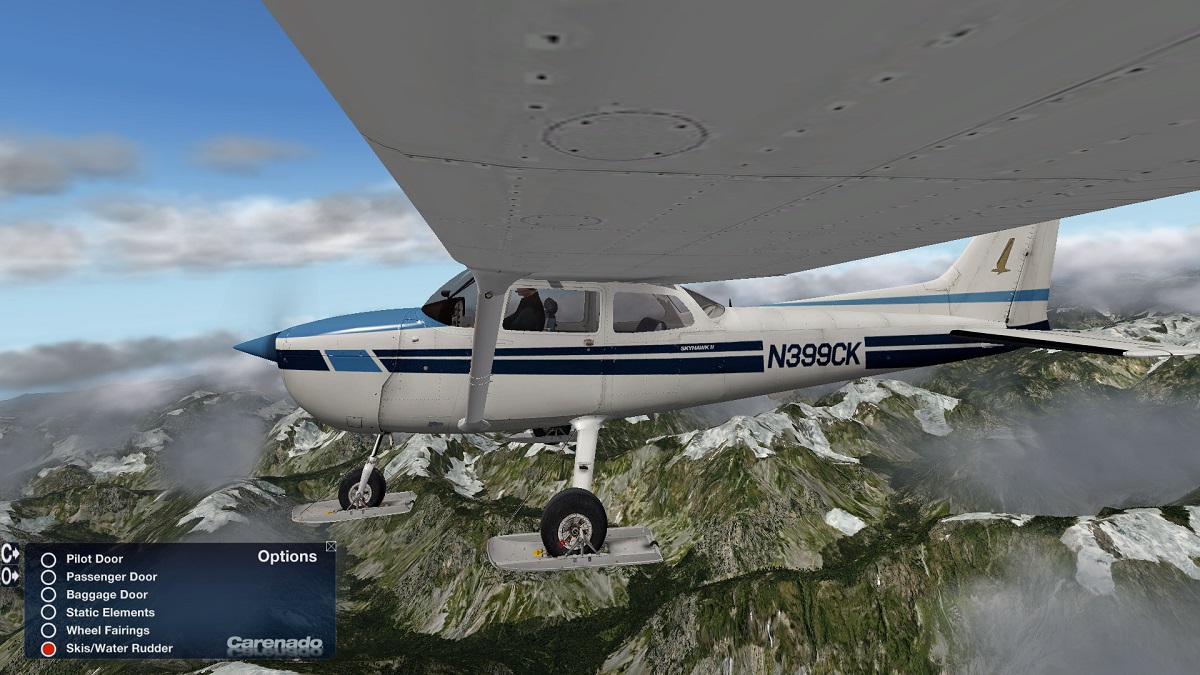
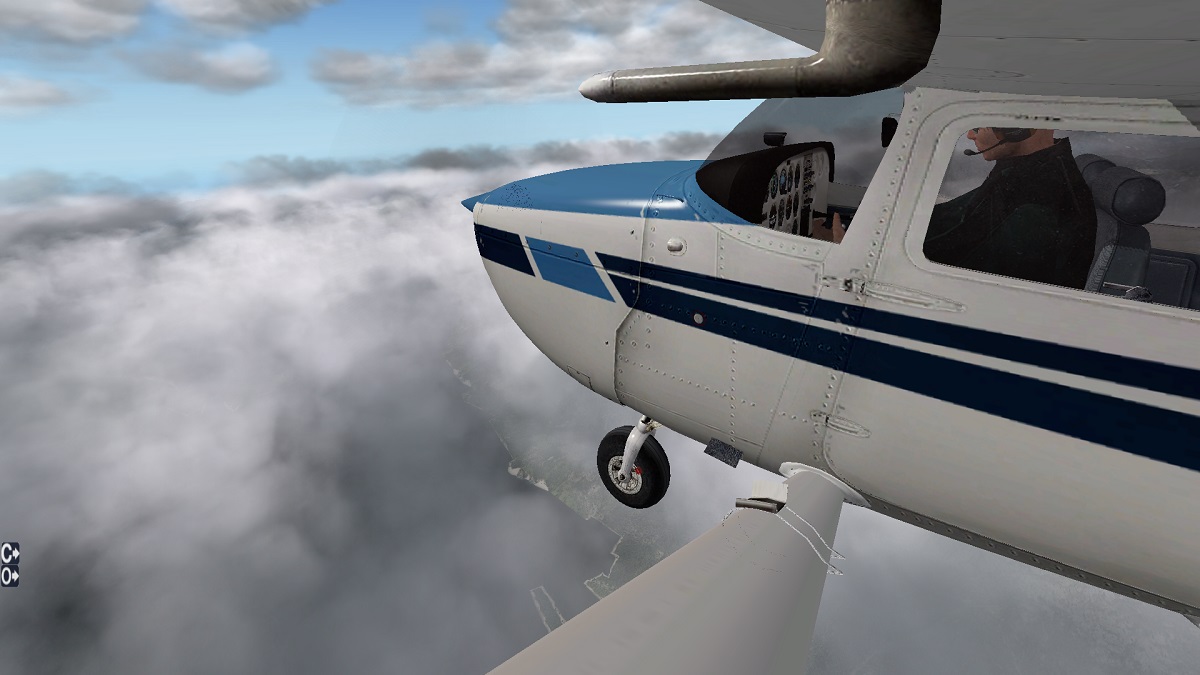
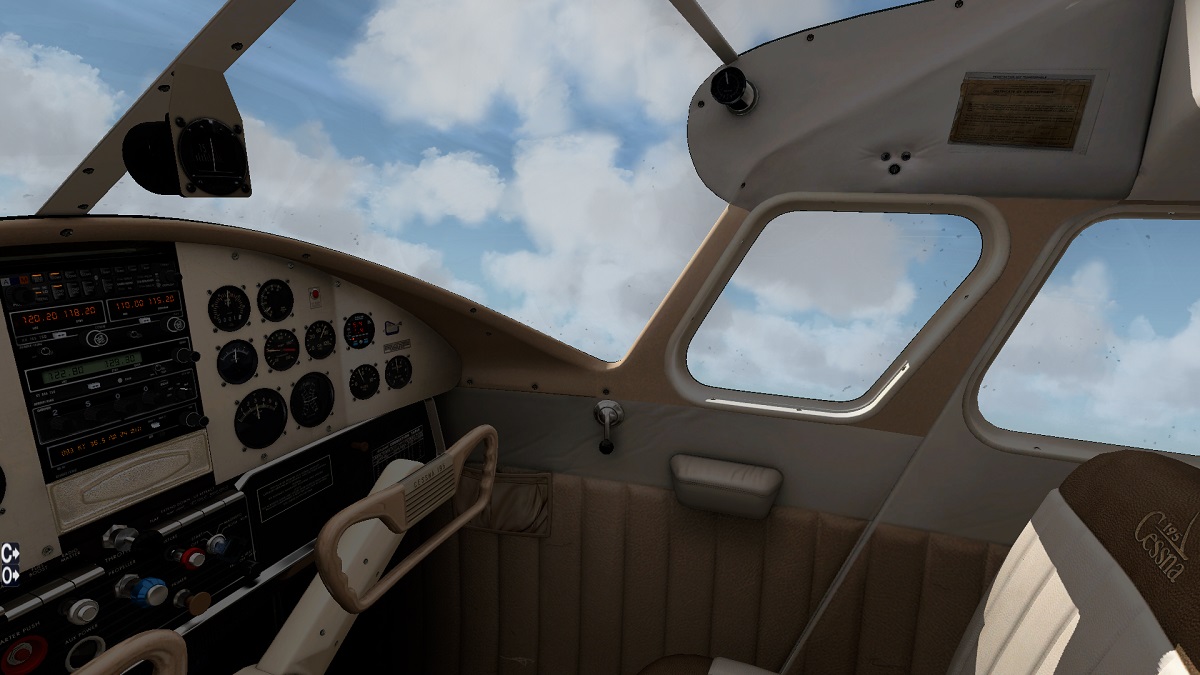
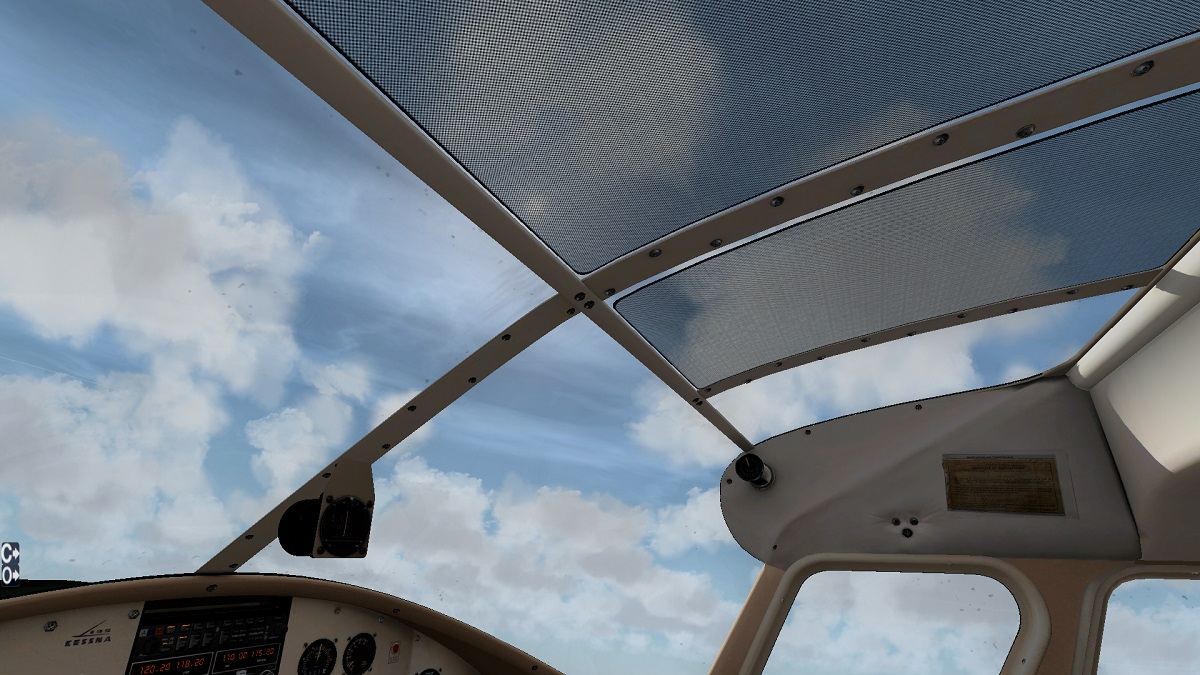
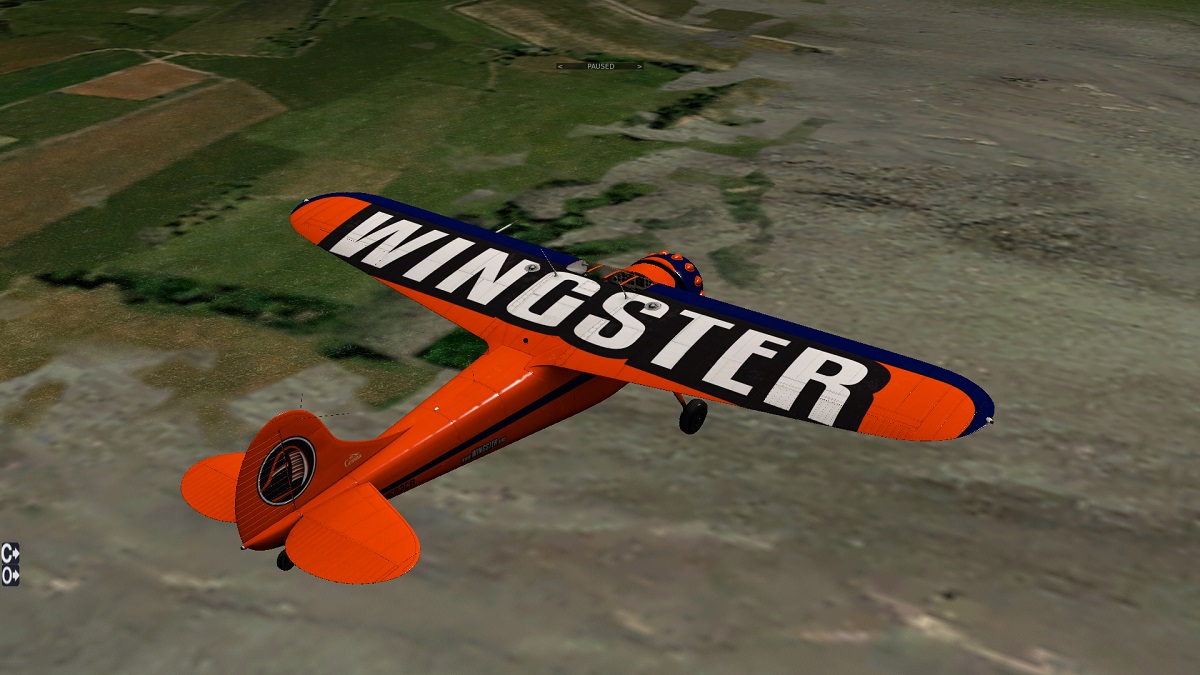
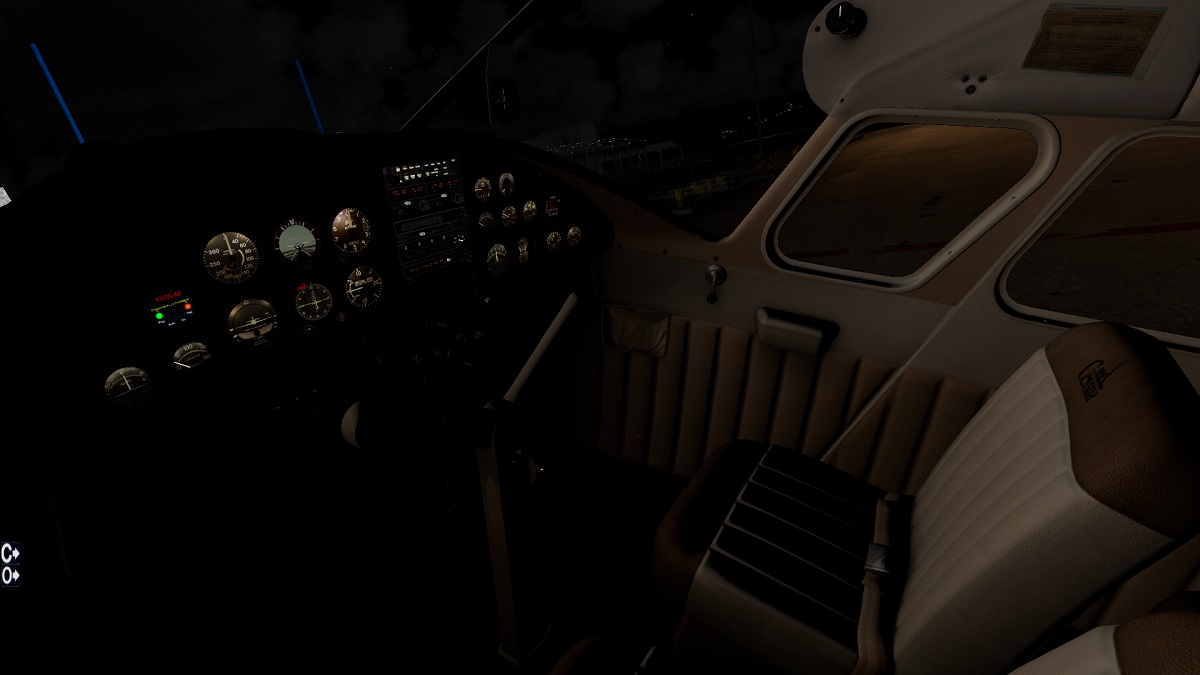
Aircraft Review : Carenado C172N Skyhawk II (version 2.1) Route : CZST-Stewart - to - PANT-Annette Island Depart runway CZST 18 - Arrival Runway PANT 12 When you think about Carenado you certainly think about the high quality and extremely detailed aircraft they produce, as well as the new experience their planes bring to X-Plane, well the C172N Skyhawk II is no exception. Over the next page I will analyse all of the features and qualities of this incredible aircraft. The C172N Skyhawk is a lightweight fixed gear aircraft powered by a 180 hp Textron Lycoming Piston engine. Its propeller, manufactured by McCauley, is a two blade metal, fixed pitch propeller. Its capabilities take it to a range of 640nm. The aircraft can seat up to four and is single pilot certified (obviously), it also has a maximum cruising speed of 124 ktas at a weight of 415.94 kilograms. During this review I will be using a Saitek Pro Flight Yoke and X-Mapper Pro on an IPad. If your unsure, X-Mapper Pro is a live map for x-plane which tracks your movements across the globe! From the app you can also control your aircraft and vital things like radios and Autopilot. I think it's a great add-on to enhance your sim, all for £1.99! So, what's the Carenado version like of the C172? Well, I decided to take a trip to the beautiful British Columbian Fjords, taking off at Stewart , to find out! I will now describe my encounter... I found myself at CZST - Stewart, parked on the ramp at around 11:00am , the weather report wished a pleasurable day for a flight to PANT, 17 cavok visibility and clouds with a base of 4000ft, and the temperature, about 9 degrees Celsius. First I start with a walk around inspection of the C172 (without floats). Features: X-Plane 9.6/9.7 and X-Plane 10.21 or higher X-Plane 64 bits compatible Polygon optimized model Interactive virtual cockpit Full moving parts: Ailerons, Elevators, Rudders, Flaps, Rolling wheels Animated sections such as : doors, pilot's window, co-pilot seat, sun visor and fresh air control Realistic lighting: Navigation lights, beacons, landing lights, cockpit lights 3D modelled pilot and cockpit area Many details, such as : pitot pressure chamber, antennas, chocks, pitot tube cover. Custom panel and gauges Realistic textures and original paint designs Realistic light effects on gauges Accurately reproduced flight characteristics Real weight and balance System Requirements: (at the minimum) Pentium 2 GHz - 1GB RAM 210MB available hard disk space X-Plane 9.6 (or higher) - X-Plane 10.21 ( or higher) Windows XP - Vista (32 or 64 bits) or Mac OS 10.6 (or higher) or Linux Walk Around: The exterior of this aircraft is phenomenal, every nut and bolt can be seen from a considerable distance away. The glass reflects the light as well as the liveries, which is a nice touch and adds to the overall immersion. The 3D modelling of this plane is great, the fuselage matches identically to the real one! The control surfaces have been recreated with extreme care, I especially like the weathered look around these parts which can be found on all liveries. The weathered look of the aircraft gives it a worn characteristic, this is one of many factors which contribute to create the 'new experience' in x-plane flying! On top of the cabin and in various other places small antennas have been placed which look fairly thin and small to me but I'm sure carenado would have modelled them on accurate dimensions. Another feature which Carenado planes normally have is reflective tires, its a shame that I couldn't see that on this aircraft. Now we move onto the menus: Provided with this aircraft are two on-screen menu's, if you are familiar with Carenado aircraft this will look normal. The first menu is called 'C', you can use this menu to navigate through a series of camera positions, we will talk more about that when we are up in the air! The second menu is the 'O' menu, most of its features apply when you are stationary on the ground with the engines off. The first option is to open or close the pilot door, the animation for this is smooth with no guttering and the sound effects are in synchronisation with the animation. The sound effects them selves are clear and dominant, you could say they sound slightly weird when your stationary on the ground and its silent in game! Anyhow the effects are still immersive. This also applies to the 'passenger door' and 'baggage door'. The next option is static elements, this involves the option to have the chocks and pitot covers on/off. The chocks are at a high resolution and so are the pitot covers. However I did notice one thing, the pitot covers don't actually have a sock that covers the actual tube. The next option on the list is for the wheel fairings. The wheel fairings look great when using any livery, they are also modeled quite nicely. The last but not least option is for 'skis/water rudder' on/off, this is a neat feature if you wish to land on an icy strip or water if you are using the other model. We will discuss this later on in this review when analysing the 'float' model (different acf.). Now we move onto the 3D cockpit. 3D Cockpit: Well, I am sure from the pictures above you can see the high quality that this aircraft was made to by the interior. All gauges have 3D knobs that can be used easily, although some can be a bit tricky to turn, it's just a matter of getting used to the way the knobs work. Another thing to mention is the shadows that are casted into the cockpit. The shadows are reflected in the gauge glass as well as the yoke which is a nice touch. When flying this route I was using the Saitek Pro Flight Yoke system which is great, as I moved my Saitek Yoke it was in synch with the one on-screen, this meant that when I turned my Saitek Yoke it's movements were reflected on the glass of the gauges! In the 3D cockpit there is also a clickable region which brings up the 'O' (options) and 'C' camera menus, this is illustrated in the first picture. Now, time to talk about the 'C' camera menu. This menu has many different features which you could call 'unique' to Carenado. The first feature is FOV (field of view) this is adjustable using the slider, this is a nice feature to get your head in the exact position you want it in. This helps when you want to see the lovely scenery as you fly by as well as your important instruments. Underneath this are many different pre-set camera positions, all work fine and smoothly, although this can also be pretty annoying! The reason it can get annoying is because it adjusts your 3D with command look option, on my Saitek yoke I have two buttons programmed for view. One is 'Chase' and the other is '3D with command look', if I am say pre-set to 'belly cam' (using the menu) when using my yoke to return into the cockpit it does nothing! However despite this feature being annoying in my set up you have a massive range of pre-set camera positions to choose from! The 3D cockpit and cabin also give the feeling of space awareness, you actually feel as though you are crammed in a small C172 cockpit for real! This is a good time to plugin Track IR, but I do not own that, I believe the Oculus Rift will take care of that in the future! The colours of the textures are nice inside the cabin, the high res seats talk for themselves, although the ceiling of the aircraft from inside looks a bit 'washed' with white. Anyhow this is compensated by the high res leather and fabric on the walls and seats. The 3D cockpit also has 'clickable yokes' this gives you the ability to 'hide' the yoke which gives you more panel visibility and the ability to get to hard to reach places. As always you have the 6 instruments you need for a VFR flight; speed, Artificial horizon, Altimeter, Vertical Speed Indicator, Heading Indicator, Turn co-ordinator. All instruments work exactly as they are supposed to according to the position and where about of your aircraft etc.. now onto levers and buttons. The lever furthest to the right is for flaps, this lever extends four times. Next to that is the mixture control, followed by the throttle. Sat beside this toward the left of the plane you find every switch and lever you would find in a real C172. This includes lights, circuit breakers, park brake, ignition key input, master and avionics switches and engine prime etc.. Liveries: As you can see from above, you get a wide range of liveries to choose from. All liveries are at a fine textured quality and based on real life designs. With all liveries you get the choice of wheel fairings on/off or Skis/water rudder on/off. You also have the same liveries when you load up the 'float' variant. All liveries have a weathered look, this is especially emphasised on the green rustic livery where you can find dried oil marks on the under carriage. As well as all of these liveries you also get a 'blank white' livery, this is mainly used in paint scheme developments. As well as the liveries listed above there are many more available on the download section of x-plane.org. Documentation: Included with this aircraft you receive an extended amount of documentation, this includes every thing from recommended settings to start up checklists. Today I will focus on the checklists. With this aircraft you receive three PDF documents each one focuses on a certain model variant. This includes ' float ' 'normal' and 'ski'. Each checklist is very detailed with information for emergencies and normal procedures. I think the checklists are great, I have them in my drop box using the IPad app, this gives me off screen checklists. However trying to use X-Mapper pro at the same time can be tricky! So the last option is to print out the document. I didn't actually do this for the C172 however I have done this for the Carenado C208 caravan, it adds an extra sense of realism holding the checklist! From the picture above you can see the level of detail that was put into the documentation. The documents also look aesthetically good. Night Lighting: There is not much night lighting on this plane, but this aircraft is mainly used for VFR flights I suppose. But anyway as dusk began it was time to turn on all of the lights. As you can see all lights work and cast spill onto objects beneath them, also switches for the lights are easy to use. This is demonstrated on picture 2 + 3, and 3 and 4. There is also a twisty switch which operates internal lighting of the gauges, this is a great effect as they cast an orange dark faded look. Outside the navigation lights, beacon lights and landing lights are dim. From picture 14 above you can see the effect of the sun reflecting on the windows, this looks great when blended in with the aircrafts exterior lights. The night lighting is not very adjustable however, despite the twisty switches for the internal gauges, it would be great if the spot light on the pilots side could be adjusted to spin around and point to different areas of the cockpit. Sound: This plane comes with many custom sounds. First we shall start with the engines, unfortunately I can't supply sound files for you to listen but don't worry youtube has some videos of the incredible sounds that this plane produces. The sound quality is great and it feels as though it pans around me when I slowly increase the rpm. As well as engine sounds many other small custom sounds are played when you do certain actions in the cockpit. For example when you open the pilots window you hear to opening sound and closing sounds which are both different, the same is applied to the doors and baggage door. Its a shame that there are no sounds when moving the co-pilot seat but this hardly got moved on my flight. I believe that there are also sounds for the light switches however due to the complexity of the engine sounds I may have heard wrong. Conclusion: So, you could call it a big decision to make the choice to buy this mighty plane. This is because there is the default C172. But don't be fooled by think you already own a C172 in your sim hangar because the Carenado C172 can not even compare to the default C172, Carenado's version is better in every single way! Also both models handle different as the default SP model has a higher RPM. The only limitation will be computer specs, but you will be fine if your computer will run X-Plane! The C172 is great fun to fly especially around CZST - Stewart. Its light weight and strong capabilities make it durable and a great addition to your Sim hangar. Carenado make the most finest payware for the X-Plane sim in terms of GA (general aviation) planes. If you purchase this plane you wont be disappointed. Since the update to v2 and now being 64 bits compatible this aircraft has many features that aren't even necessary, such as side pockets that can be operated and sounds that are extremely realistic. The aircraft doesn't have many instruments but if you are learning fly, real world or just on-screen, this will most certainly benefit you. If you are post PPL this is a chance to re-live the memories of the C172! Along with add-on scenery such as CZST by Beti-x, parking your C172 on the ramp like I did will give you a great experience. Realism at its best! Is this aircraft worth buying? Yes! Well its available to buy on the x-plane.org store for the cheap price of $24.95 Carenado C172N Skyhawk II Carenado Aircraft Support : Click here Reviewed by : Joe ©copyright 2014 : X-Plane Reviews Payware scenery used : CZST - Stewart by Beti-x Technical Requirements: Windows Vista or Windows 7 (32 or 64 bits) or MAC OS 10.6 (or higher) or Linux XPlane 9.6/9.7 or XPlane 10.11 (or higher - 64 bit compatible) Pentium 2 GHz - 4GB RAM/1GB VRAM 250MB available hard disk space Version 2.1 (last updated Dec 10th 2013) Review System Specifications: Computer System: - Intel Core i5 3330 @ 3.00GHz - 4.00gb of RAM - Geforce GTX 650 Software: - Windows 7 64 bit - X-Plane 10 Global version 10.25 - Saitek Pro Flight Yoke System - CZST - Stewart by Beti-x - Carenado C172N Skyhawk II
-
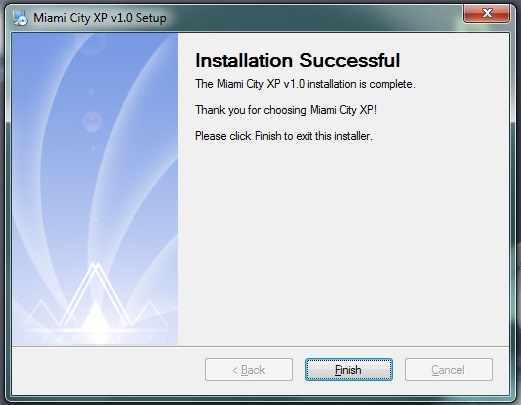
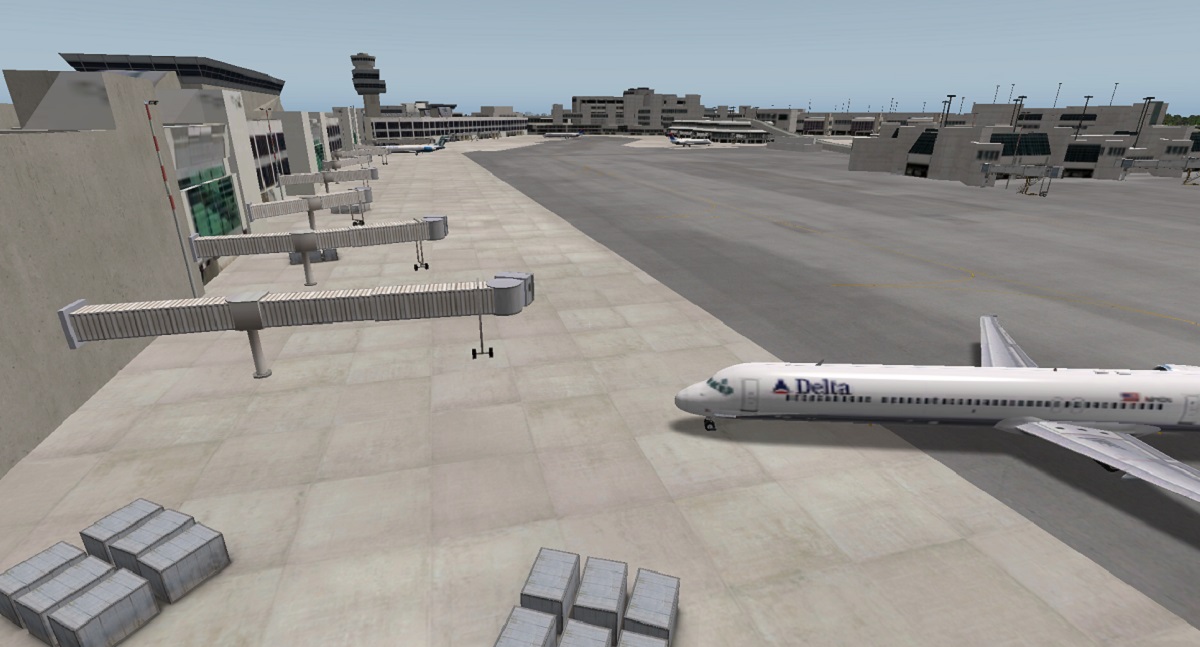
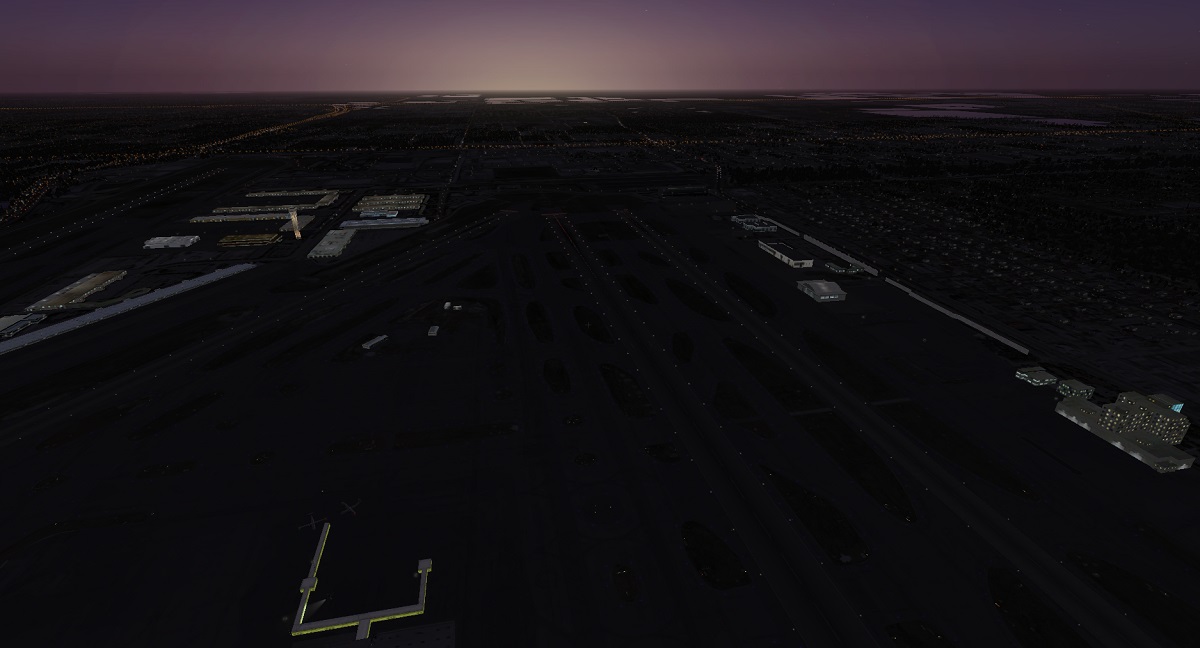
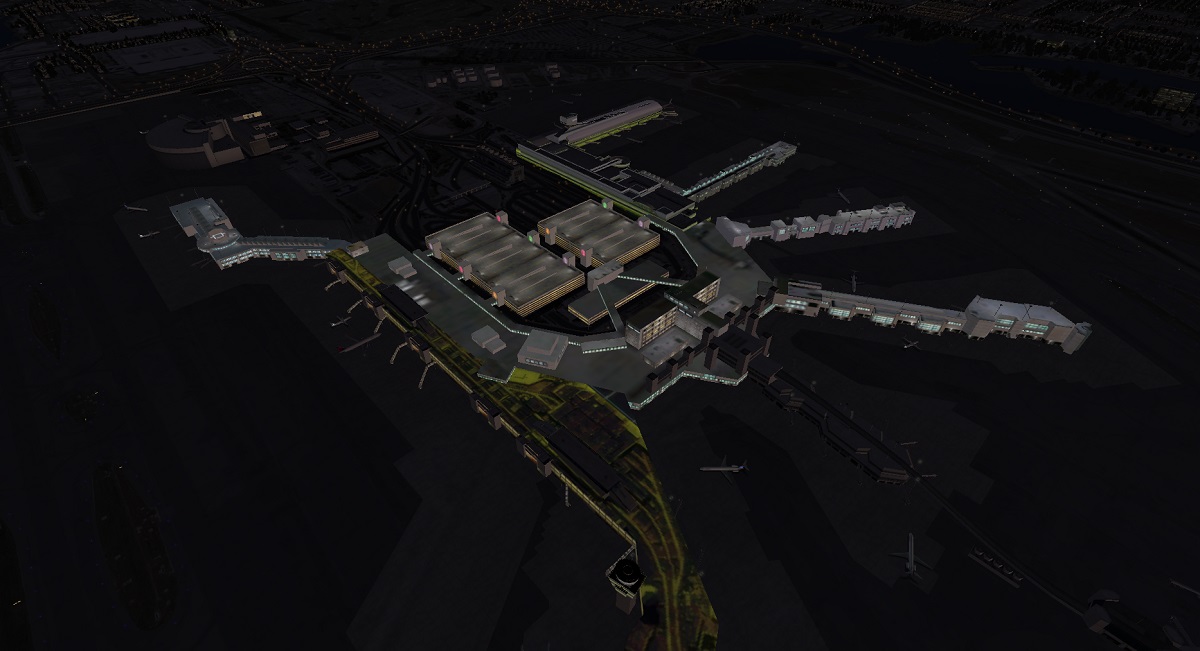
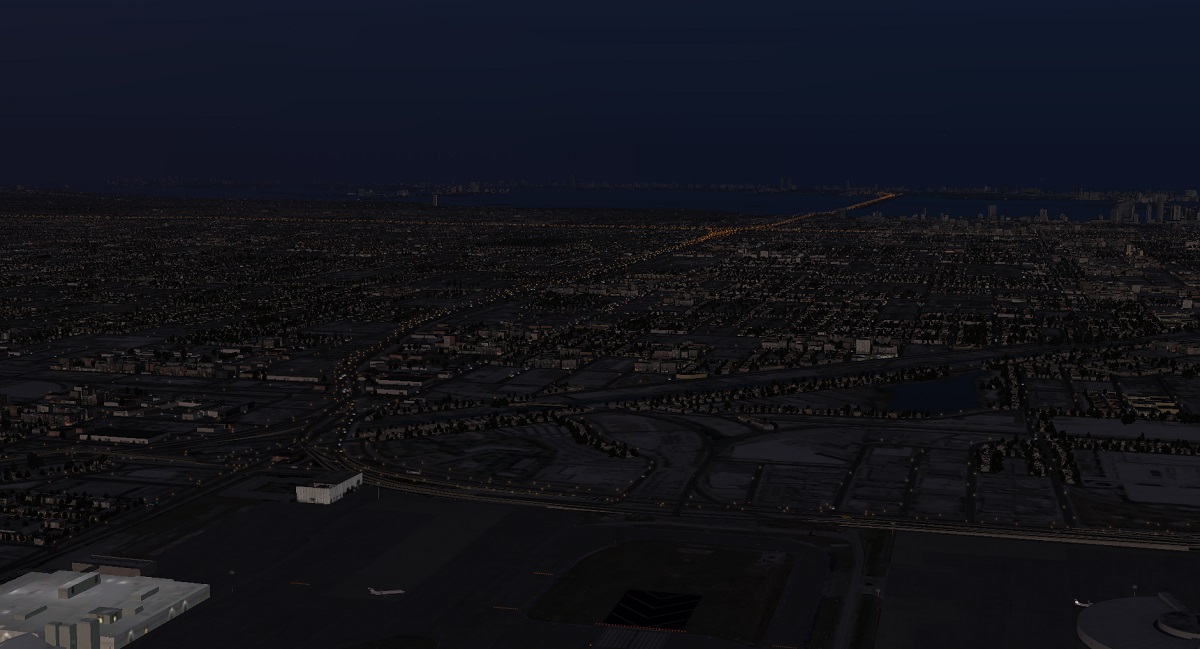
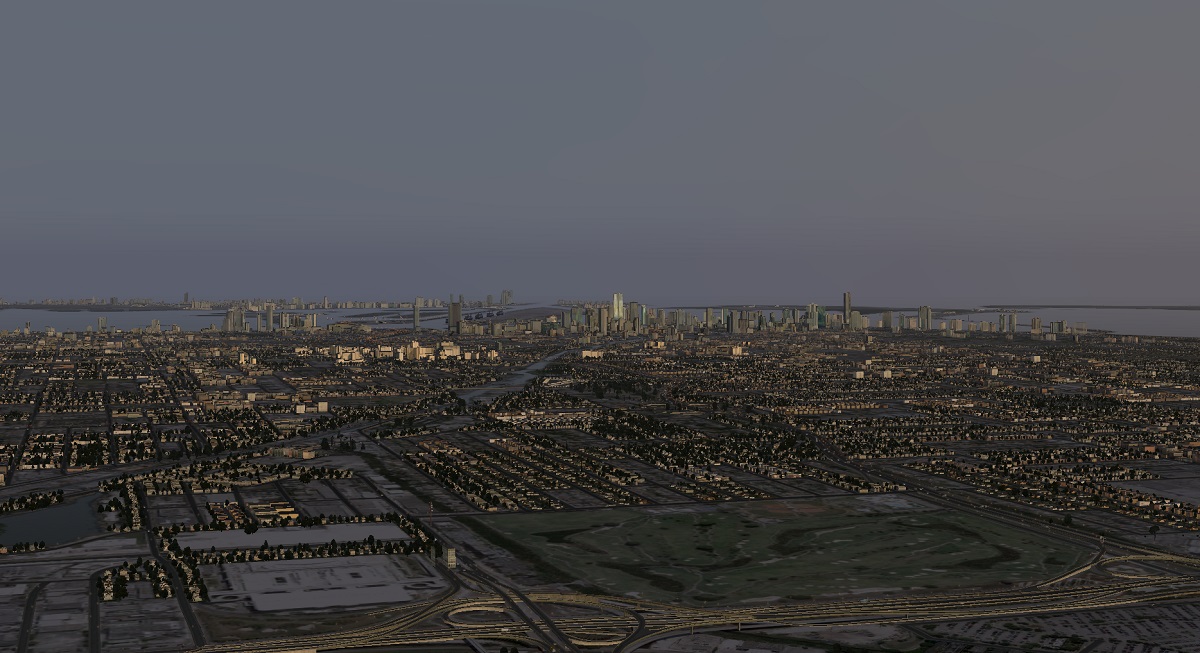
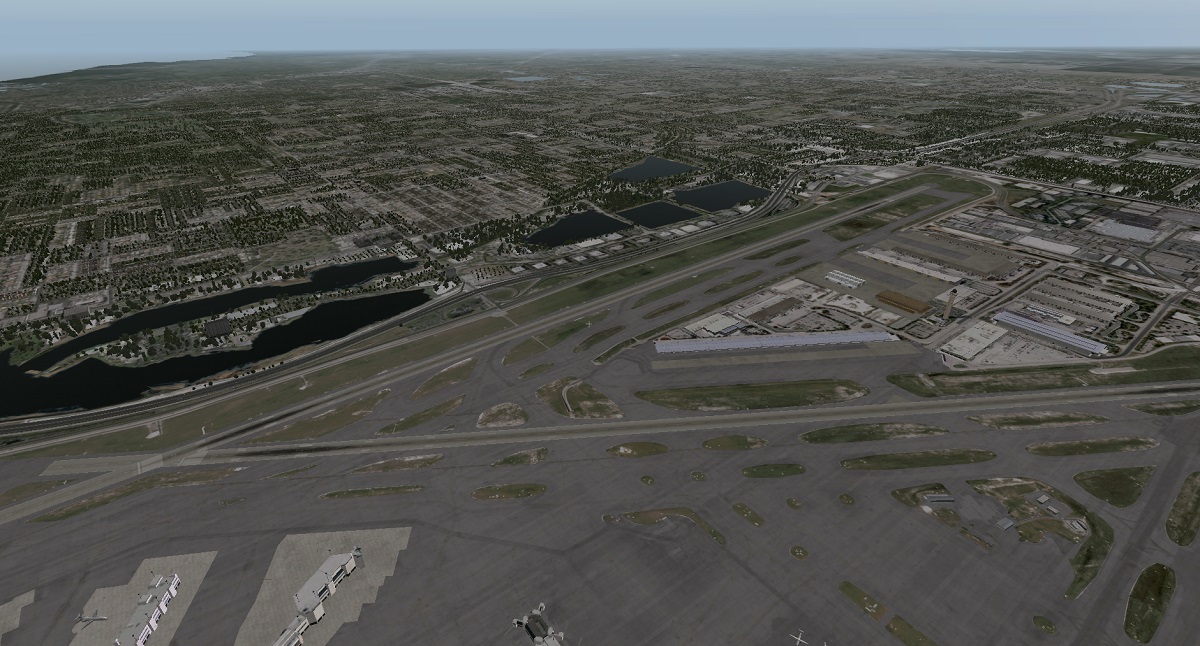
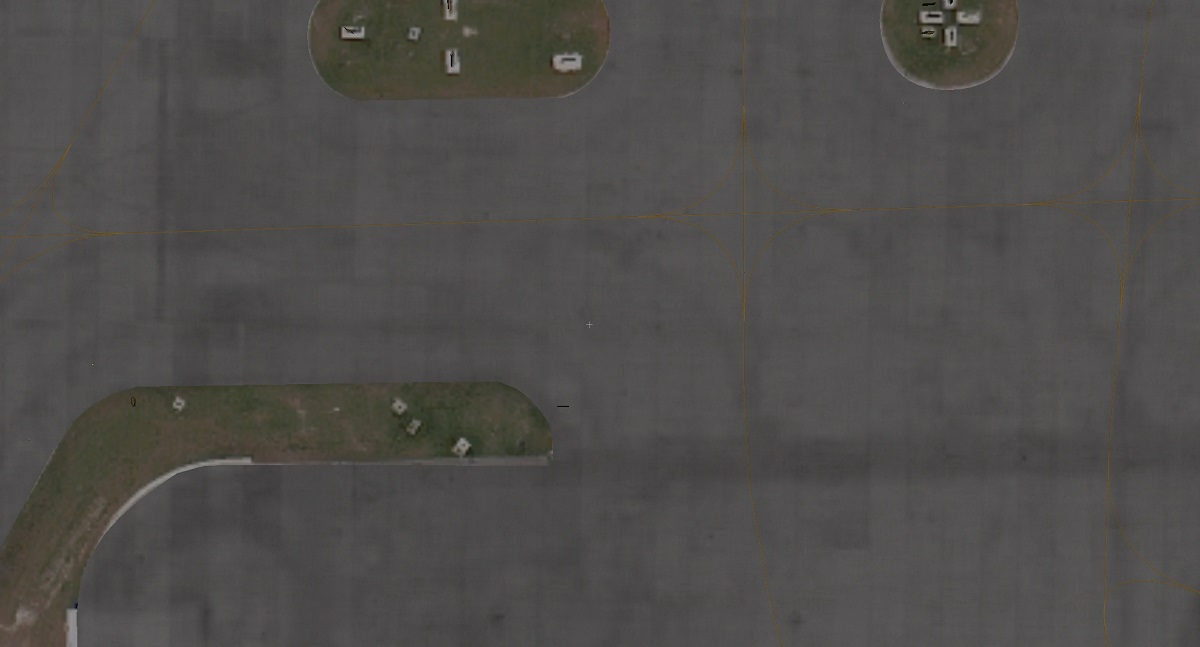
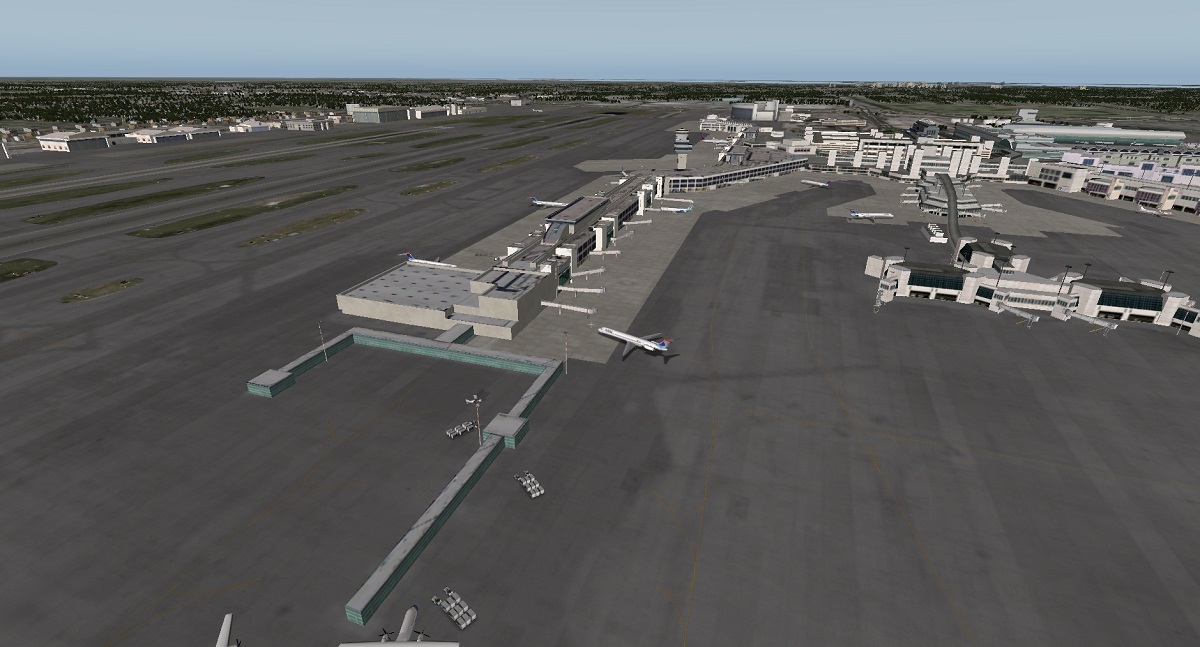
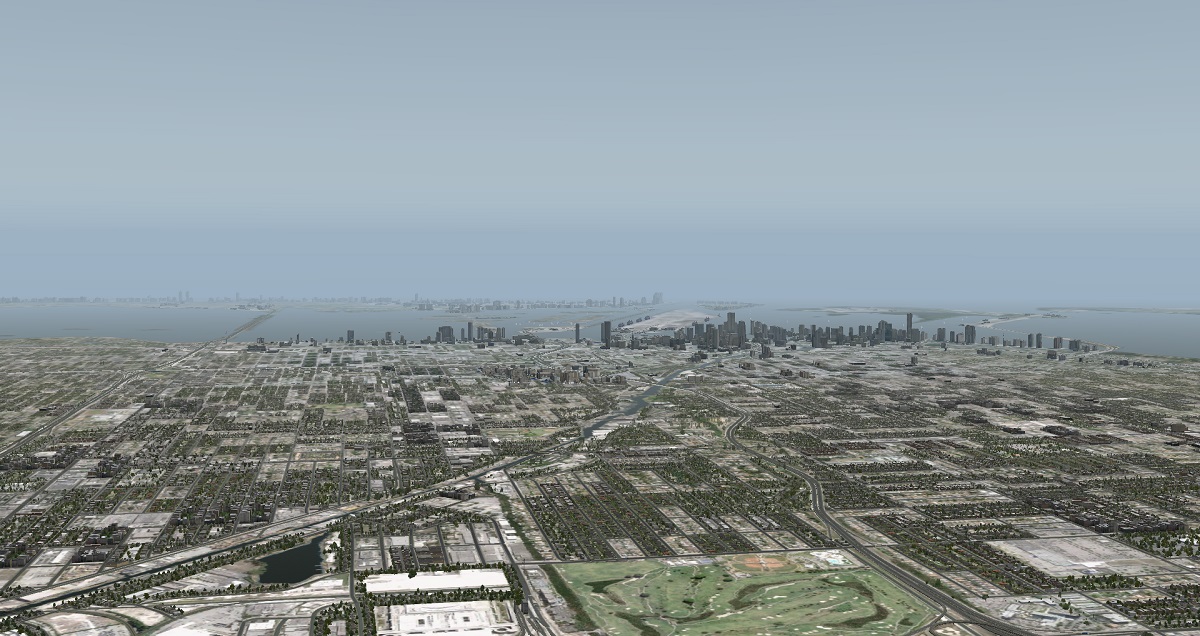
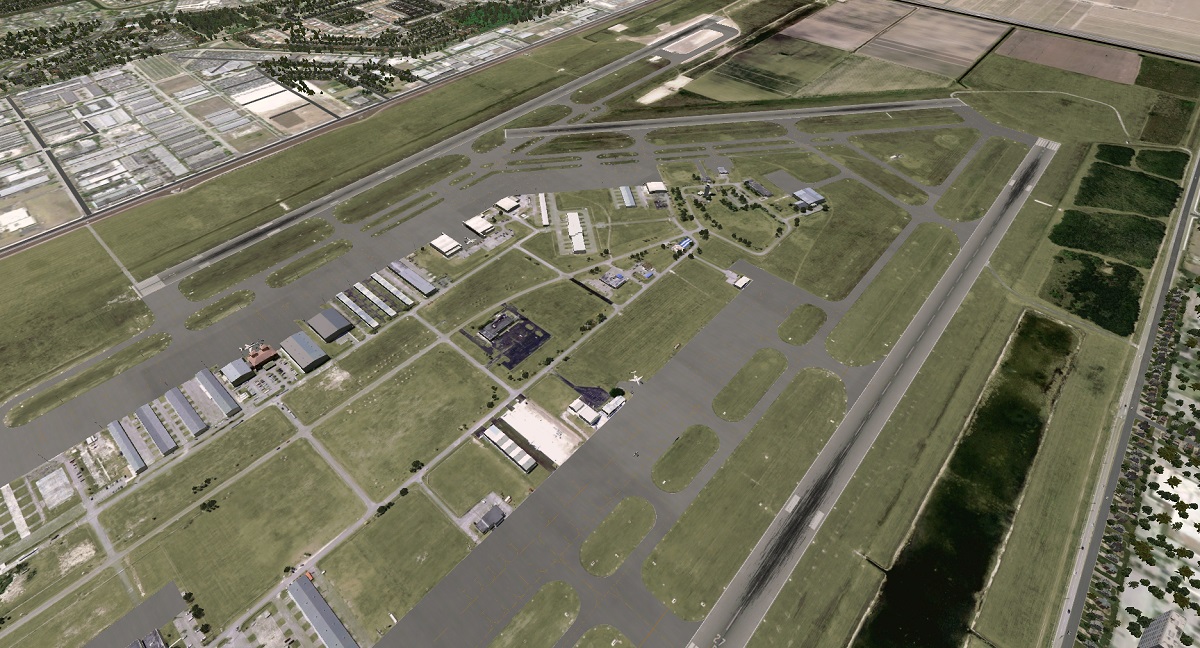
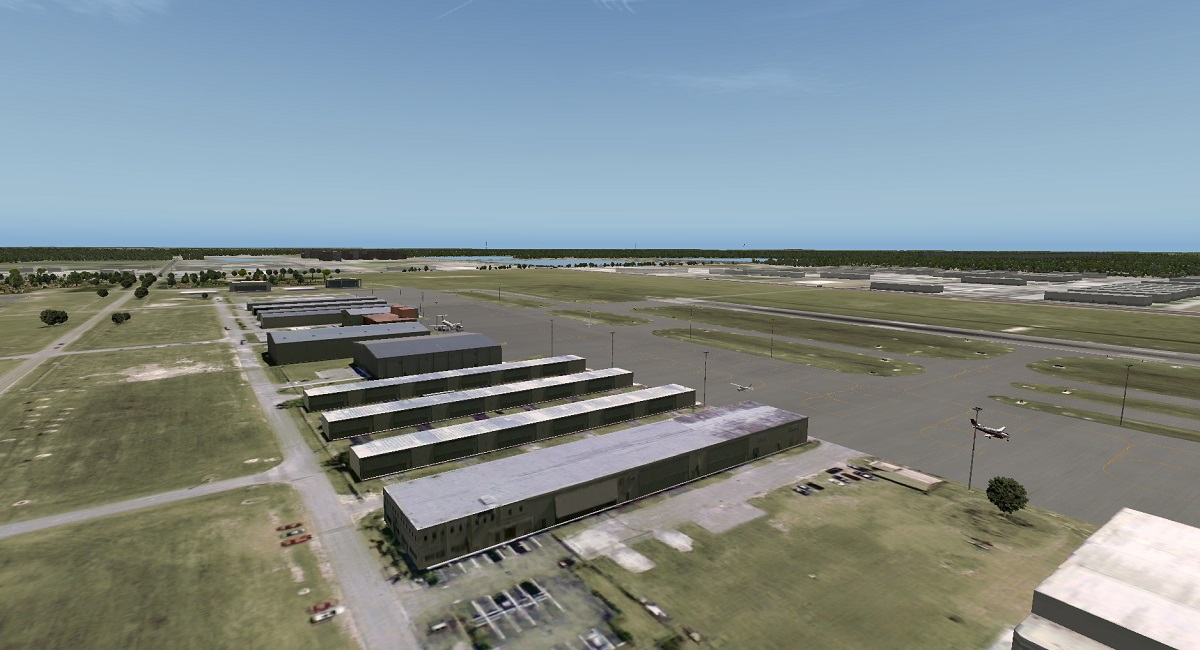
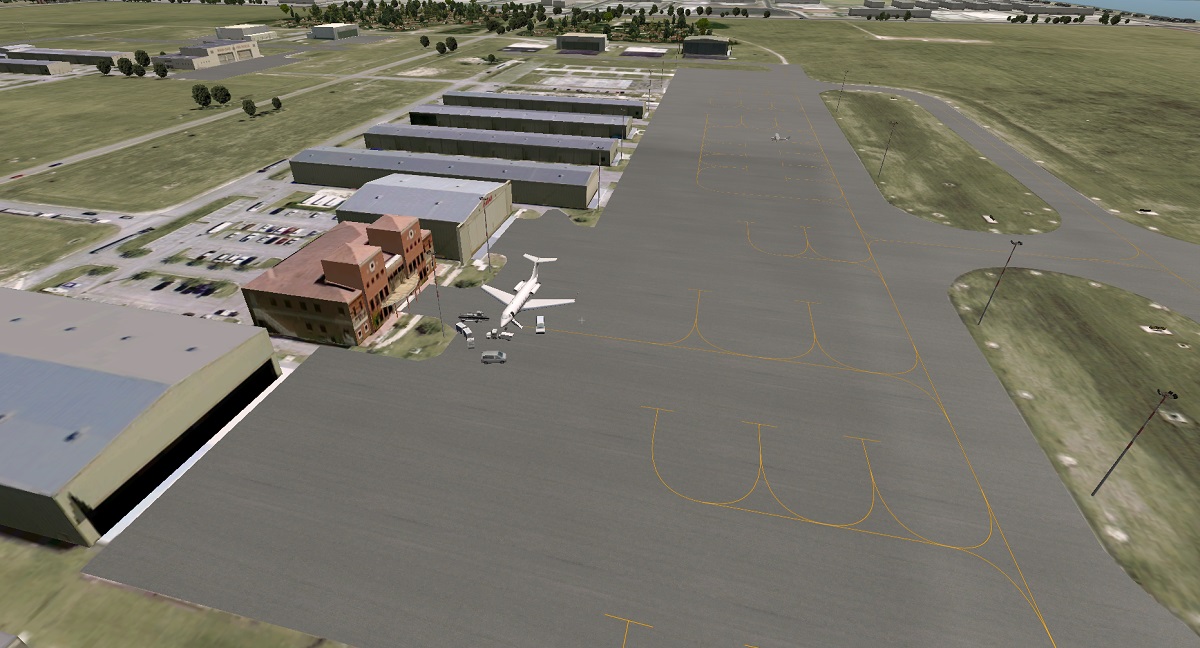
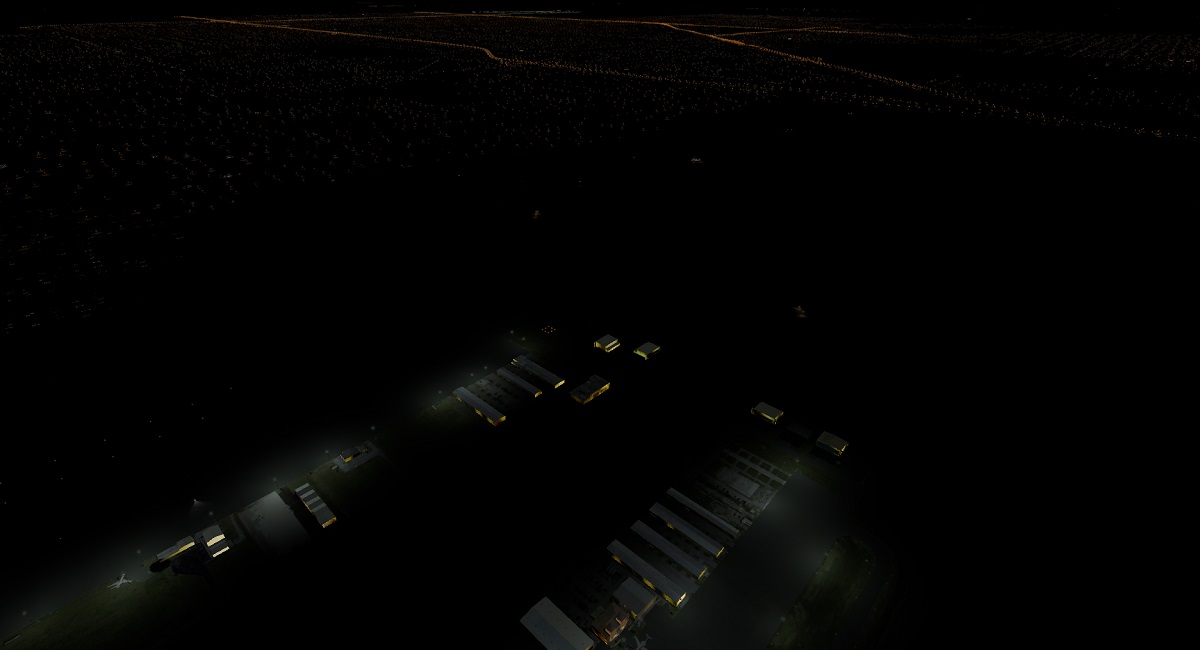
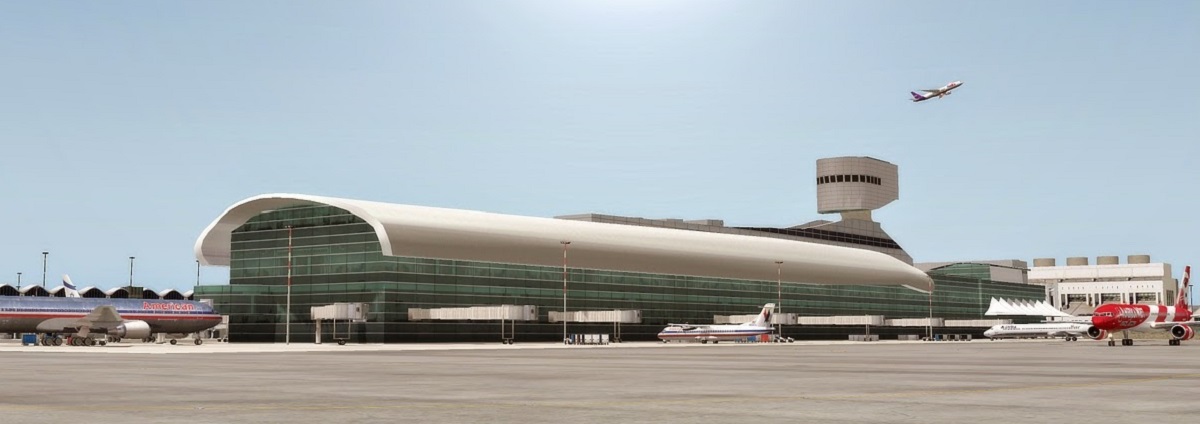
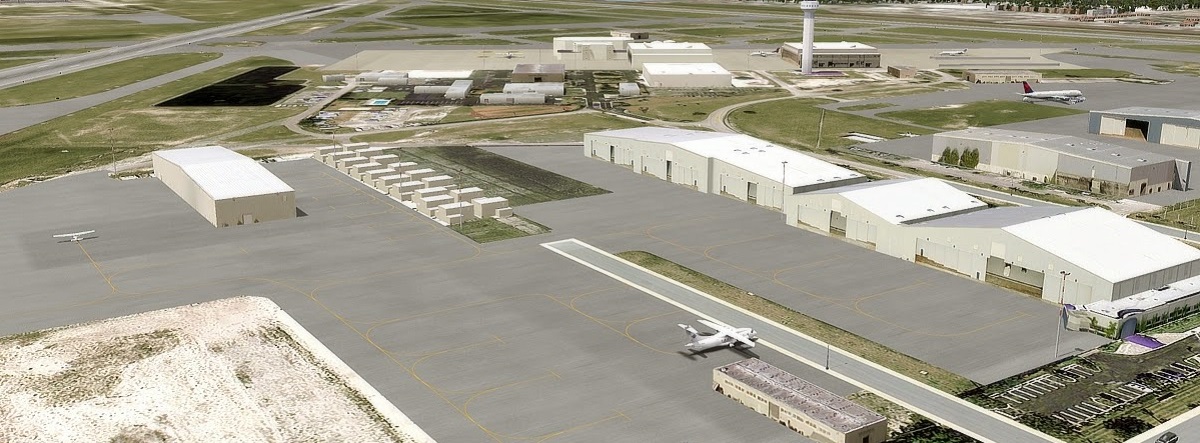
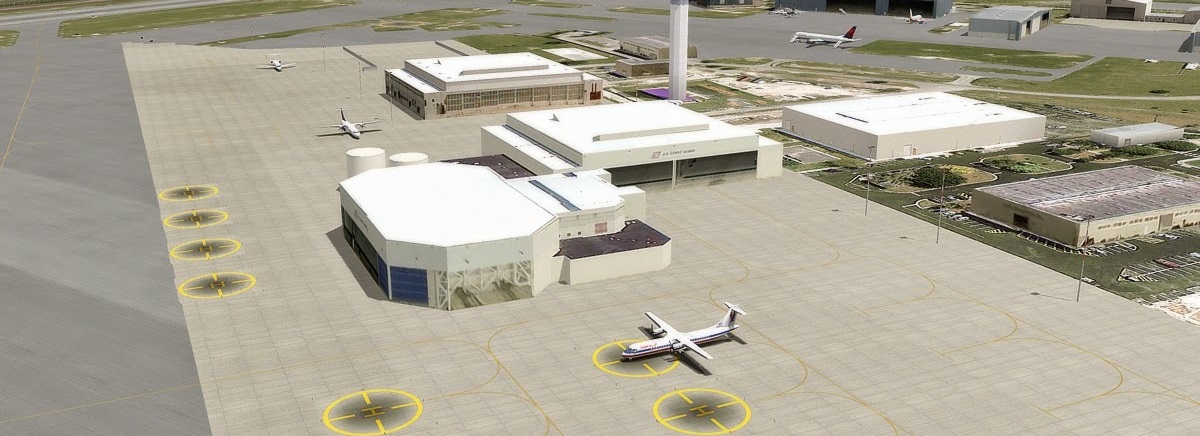
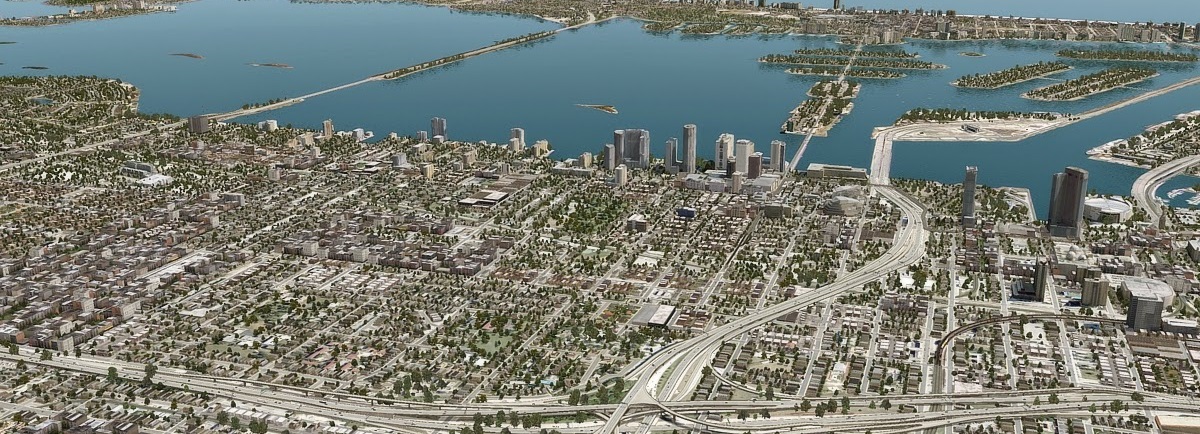
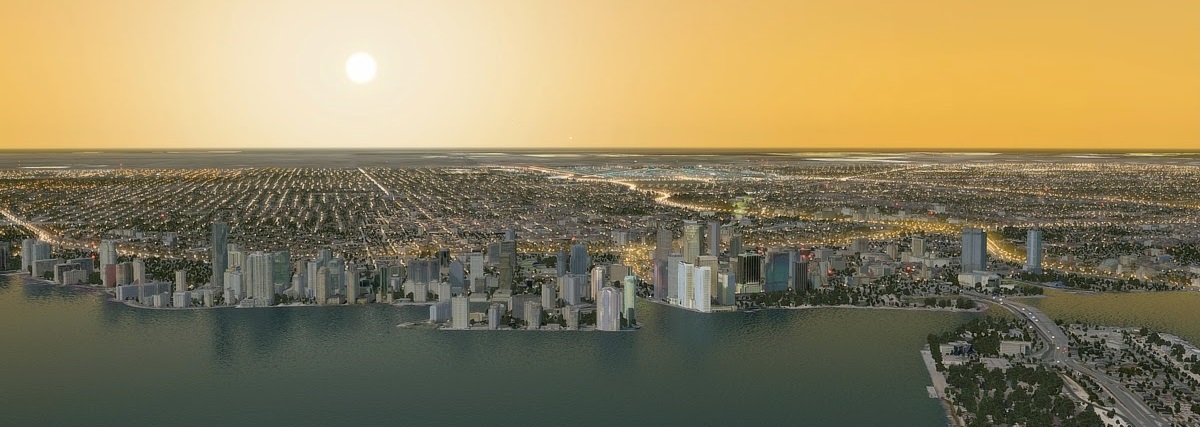
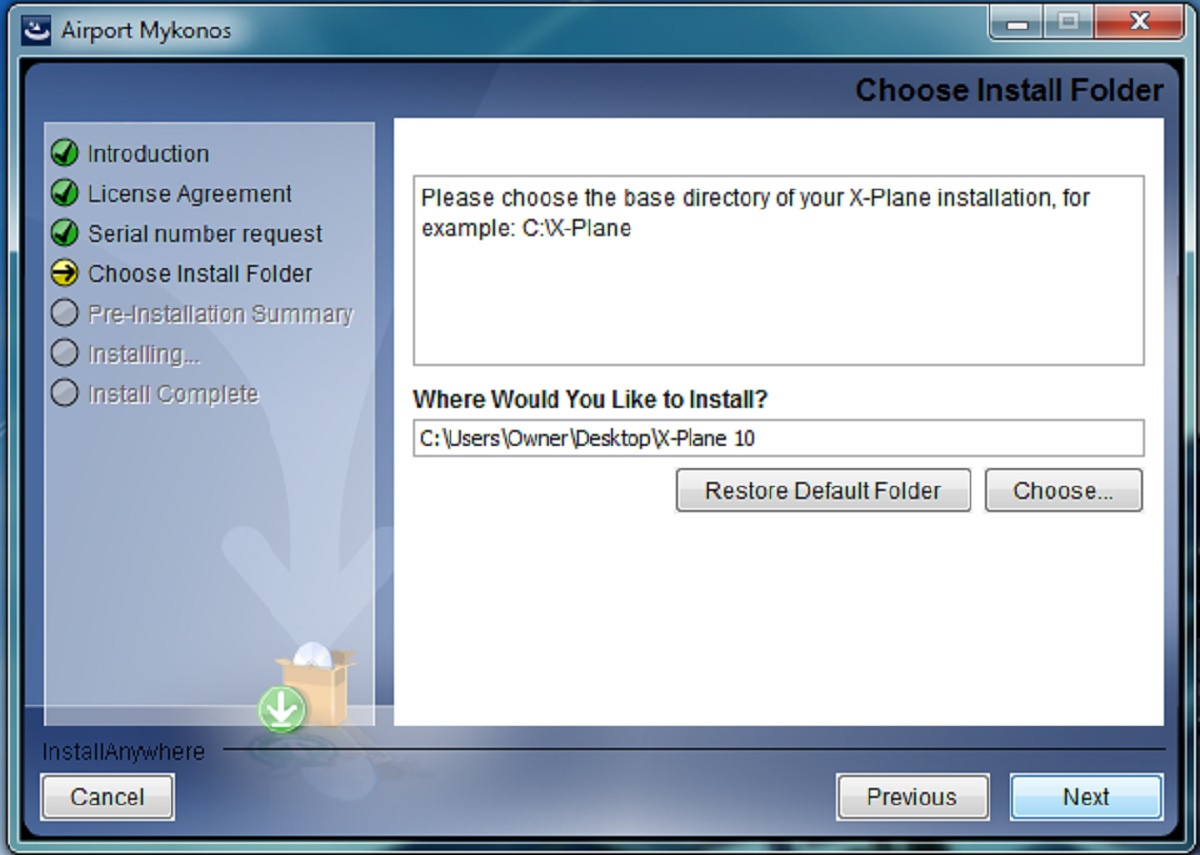
Scenery Review: Miami City XP Drzewiecki Design (DD) are well known for scenery and airport development, not just for X-Plane but for FSX and Prepar 3D as well. With 7 scenery packages on the x-plane.org store covering 20 airports DD offer a wide range of airports all over the world, primarily covering the U.S and Poland. The latest release from DD goes by the name of Miami City XP. The scenery covers three airports with 'lite' detail including KMIA Miami Intl, KTMB Kendall-Tamiami Executive Airport and KOPF Opa-Locka Executive Airport. Drzewiecki Design provide a very vast scenery with Miami City XP, as you would expect from the title this scenery covers the majority of Miami City. Developing scenery for a whole city is a big challenge, but it seems that DD managed to pull it off. They managed to do this by first underlaying the majority of Miami City with an orthophoto (aerial image), then the 3D buildings are a mix of custom and autogen. The autogen looks great, you really get the 'American' feel of a big city leading off to small suburbs, whats great is the orthophoto fits well with the roads and houses placed on top. The custom buildings come into action within the airports and along the coastlines, the coastline office blocks and tall infrastructures blend seamlessly into the environment. Scenery Features Fully compatible with X-Plane 10 3 FPS-friendly, lite sceneries of KMIA, KOPF and KTMB Complete area of Miami including Miami Beach, North Miami, Coral Gables, Key Biscayne etc. Whole area photo coverage with autogen, roads, railroads and other X-Plane native features Hundreds of custom-made city buildings with photoreal textures Up-to-date airport layouts Each airport includes HDR lighting Installation Installing Miami is very simple (for windows) as there is an installer. After following the steps Miami will install for you. If you are a Mac user I believe you have to install it manually, but don't panic if you don't know how to do that as documentation is included. KMIA Miami Airport First we start with Miami International Airport, (from the author) this airport also known as MIA and historically Wilcox Field, serves as the primary international airport of the Greater Miami Area. One of the busiest international airports in the world, Miami International Airport caters to over 35 million passengers a year. Identifiable locally, as well as several worldwide authorities, as MIA or KMIA, the airport is a major hub and the single largest international gateway for American Airlines, the world's second-largest passenger air carrier. Miami International is the busiest airport in Florida, and is the United States' second-largest international port of entry for foreign air passengers after New York's John F. Kennedy International Airport, and is the seventh-largest such gateway in the world. The airport's extensive international route network includes non-stop flights to over seventy international cities in North and South America, Europe, Asia, and the Middle East. The 3D models can be classed as basic but still represent the real life variant accurately. For example you will recognise the infrastructure but attention to detail such as 3D set back door inlets are missing, however this airport is very large so therefore as of the size of the airport sacrifices have to be made. The 3D modelling of the jetways is very good, this is significant as this is where you will start most of your flights. 3D modelling of ground vehicles is second to none although I believe that the ground vehicles and models are from the default X-Plane library? Therefore credit can't quite be given there. The apron lights have been modelled with precision, by looking closely you can really see the attention to detail, again this is significant as these are objects that you will see up close. Textures on the sides of buildings at KMIA is very good, all textures are at a good resolution to emulate the real MIA and real life. Despite those textures being good the roof textures don't carry the same standard. The roof textures have been mapped with weird looking polygons in places and overall have a lower resolution from the textures on the side of the buildings. From about 1000ft up the roof textures look good as it makes the buildings blend in with the rest of the scenery however the closer you get the worse it looks, although you will most likely only see those roof textures flying above the airport anyway. The lighting at MIA gives off a 'white' illumination, this looks great when mixed with the orange spill lights scattered around on the city. It also helps you find the airport amongst the bright city! The night textures on the jetways also looks good, you get the sense of lights along the top of the jetway giving a realistic feel, although those lights are not HDR 3D lights, the jetway lights are baked into the night texture. The textures at night on the roof are very bright, maybe they could be darkened to make it a little more realistic. The aprons feel a bit 'bare', however for the price you pay and the vast area you receive and three airports, attention to detail has to be a sacrifice. The 3D models described above can be found scattered around, but as for dense realistic vehicles everywhere making it emulate the real thing, this isn't that. That is what is meant by a 'lite' scenery. It is a shame that the airport lacks in dense objects making it very detailed and realistic however the area and number of airports you get just makes up for that. Unfortunately there is no ground traffic which takes away from the realism slightly, although this is something that could be added within an update as it is simple to add. KTMB Kendall-Tamiami Executive Airport Secondly we have KTMB (from the author) KTMB is a public airport located in unincorporated Miami-Dade County, Florida, United States, 13 miles (21 km) southwest of Downtown Miami. The Kendall-Tamiami airport is owned and operated by the Miami-Dade Aviation Department. There are 450 aircraft based at this airport: 69% single-engine, 20% multi-engine, 8% helicopter and 3% jet. This 'lite' KTMB airport features the extended runway 9R/27L. The runway has been extended 550 feet to the east and 1,798 feet to the west. All airport buildings are included. KTMB is a great airport to start a flight if you want to fly VFR around Miami city and take in the scenery in a cessna. The reason for this is its size and environment. KTMB can't be classed as small, as compared to a UK airport it isn't. However KTMB lacks in mass buildings and complex terminals making it the perfect environment well suited to a small aircraft. If you are flying over Miami City I would certainly recommend this location to start your journey, its close (only a few nautical miles from the big city), although trying to actually do this whilst maintaining good frame rates can be an issue. First impressions of KTMB? Mixed opinions really, all buildings are custom modelled, textured and included. So you won't find any buildings that are not included by which the roof is on the floor, this is a nice touch of realism especially when flying over the airfield. I also like how this airfield is mainly grass, it gives a break from larges areas of concrete and massive cities. The 3D models at KTMB are basic, but again it is a 'lite' scenery so I guess you can't expect too much, but wouldn't you expect more? All buildings are at the correct height perspective and blend well with the orthophoto. 3D models of ground vehicles are equipment lacks again at this scenery, it's a shame as its nice to have objects around you whilst parked on the ramp. Despite a lack of aviation ground equipment there are 3D static aircraft included within the package, along with a few 3D cars / vans to accompany them. This is a nice touch and means that the something is on the ramp, despite that it is a bit bare. The textures on the buildings at KTMB are slightly blurry, not a massive downfall but still an element that takes away from the realism. Again, as with MIA, the roof textures are blurry and really bright at night. Although there are ramp lights illuminating a vast area, the majority of the night lighting is baked into the night textures. With HDR off this means that frame rates increase yet you still get the night lighting effect, a nice touch, especially as frame rates are a slight issue I had with this scenery which is discussed in the conclusion. The baked night lighting has been done very well, the sense of night can really be felt at and around KTMB. Some areas are a little dark as well, this gives it that 'remote' airfield feel which is nice since its very close to a big city. KOPF Opa-Locka Executive Airport Last but not least we examine KOPF, Opa-Locka. (from the author) is a general aviation airport and joint civil-military airfield 10 miles (16 km) north of Downtown Miami, primarily in metropolitan Miami, Florida, United States, with a portion within the city proper of Opa-locka. The airport's control tower is manned from 7:00 AM to 9:00 PM. In 1926 Glenn Curtiss founded the City of Opa-locka. In late 1925 he moved the Florida Aviation Camp from Hialeah to a parcel west of the city. This small airfield was surrounded by the Opa-locka Golf Course. In 1929 he transferred this land to the City of Miami, and the city erected on it a World War I surplus hangar from Key West. This field became known as the Municipal Blimp Hangar. The following year, the Goodyear Blimp started operations out of this hangar. In 1928 Curtiss made a separate donation of land south of Opa-locka for Miami's first Municipal Airport. The Curtiss Aviation School later moved from Biscayne Bay to this airport. In 1937 Amelia Earhart started her attempt to circumnavigate the world from this airport. OPF is a very large airport with three runways this makes it great for flying small GA or larger aircraft. As with other airports in Miami City XP, included are 3D custom buildings however I noticed in this scenery not all institutions at the airport are included. Obviously all major buildings are included within the airport just not smaller, more minor buildings. The 3D buildings are fairly basic again within this 'lite' scenery, attention to detail is basic, however all buildings easily emulate their real life variants. Textures at OPF are blurry when up close however have details included, by this I mean that the resolution is low however details such as doors and air vents can still be identified. 3D ground vehicles and equipment are more persistent at OPF, there are more static aircraft and vehicles that can be found. The texture detail and resolution of the statics are good and really stand out at the airport. Yet again, more equipment placed on the ground would be a nice touch to add realism to this airport. The autogen doesn't quite flow into the airport as well as it does in other areas, you can see that some autogen roads would look much better as orthophoto roads instead. These are just really picky points though. Night lighting is good at this airport, there are areas of brightness and darkness which give a great sense of environment. The roof textures at this airport seem to be slightly darker as well which is good to emulate more realism, at MIA the textures on the roof are too bright at night giving an unrealistic experience. Although to notice this you have to fly above the rooftops at night and this airport is primarily GA aviation. Summary This scenery package is a big one, three airports and Miami City with an orthophoto covering the whole thing! Overall it makes a great addition to your scenery library, whether flying international flights or GA VFR these airports and the vast scenery coverage is great! In many places the airports lack close attention to details and many aprons seem very bare and empty, but for the price you pay and the area you get balances my opinion. Below are four screenshots of the skyline city view which really makes x-plane look great! The images below speak for themselves, DD have done an amazing job recreating Miami city to give it a very realistic flare. One thing that needs to be pointed out though is frame rates (FPS). The feature list claims 'FPS- Friendly airports' however frame rates were very tricky to hold high on my computer, even having HDR rendering off and running a default aircraft FPS was on average 18-21. This meant that a pleasurable VFR cessna 172 flight taking in the Miami City scenery was hard to enjoy with a lagging x-plane 10. Having a choice of airport to depart from or arrive to in and around Miami is great, MIA takes care of international flights or busy VFR departures and TMB takes care of GA aircraft and flying. The addition of beaches and tall buildings along the coast really gives that sense of a busy city and its great to fly over and see car traffic etc... So I have covered everything great about this scenery package, although are there any drawbacks about this scenery package? Area coverage is phenomenal, it's just the level of detail in some areas is restricted but all three sceneries are 'lite' and therefore sacrifice the small details. You would also think these 'lite' airports would be good for frames although on my machine I seemed to suffer dramatically with a lagging x-plane. That said, if you can get x-plane up and running Miami City with good frames rates, flying VFR around the highrise city is fantastic it looks and feels realistic which is the main aim of the scenery. You could argue that the airports lack in extreme detail however Miami City XP is three airports for the price of one! I highly recommend it to be in your custom scenery folder! Where can you grab this scenery from? Miami City XP v1.1 by Drzewiecki Design is now available from the New X-Plane.Org Store here : Miami City XP and is priced at only US$25.00 If you have any questions please feel free to comment below. Reviewed by : Joe ©copyright 2015 : X-Plane Reviews Technical Requirements: Windows Vista or Windows 7 (32 or 64 bits) or MAC OS 10.6 (or higher) or LinuxXPlane 9.6/9.7 or XPlane 10.11 (or higher - 64 bit compatible) Pentium 2 GHz - 4GB RAM/1GB VRAM150MB available hard disk space Version 1.1 (fixed pink coastlines) Review System Specifications: Computer System: -Intel Core i5 3330 @ 3.00GHz -4.00gb of RAM -Geforce GTX 650 Software: -Windows 7 64 bit -X-Plane 10 Global version 10.31 - Miami City XP by DD Hardware: - Saitek Pro Flight Yoke System - Saitek Rudder Pedals.
-
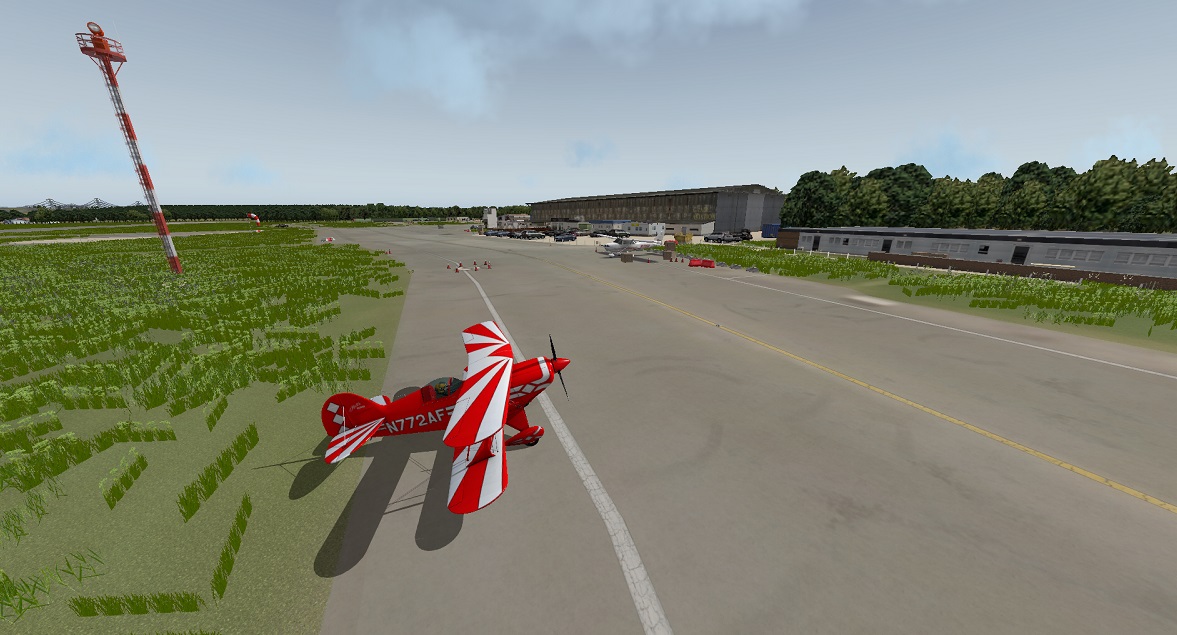
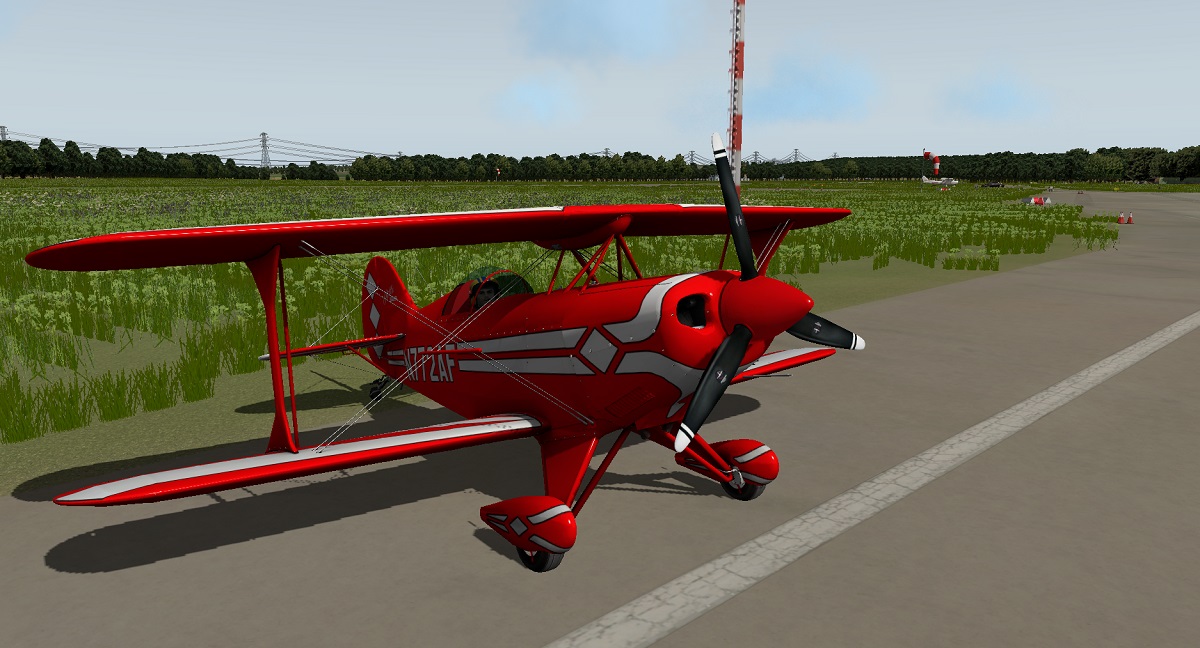
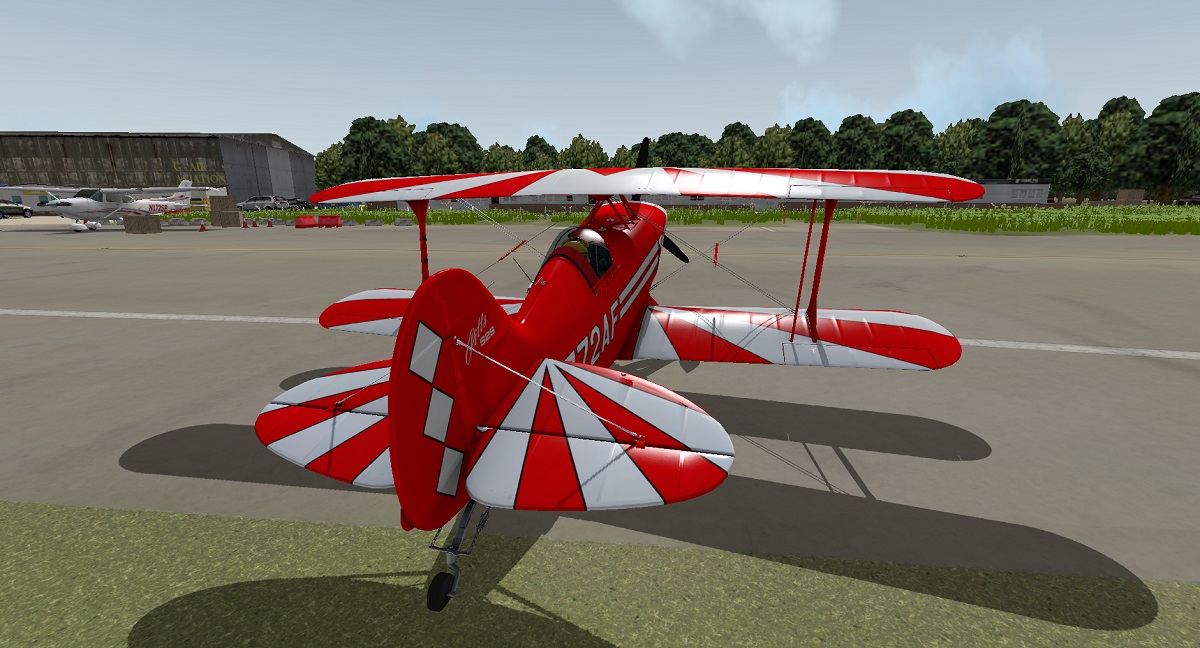
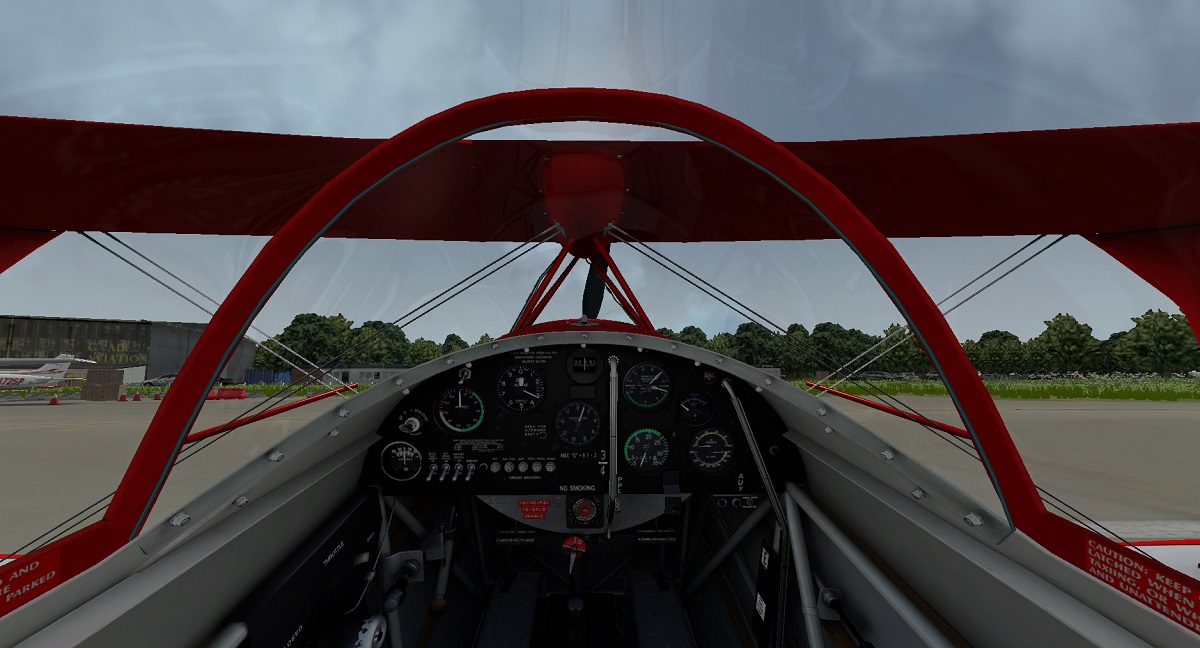
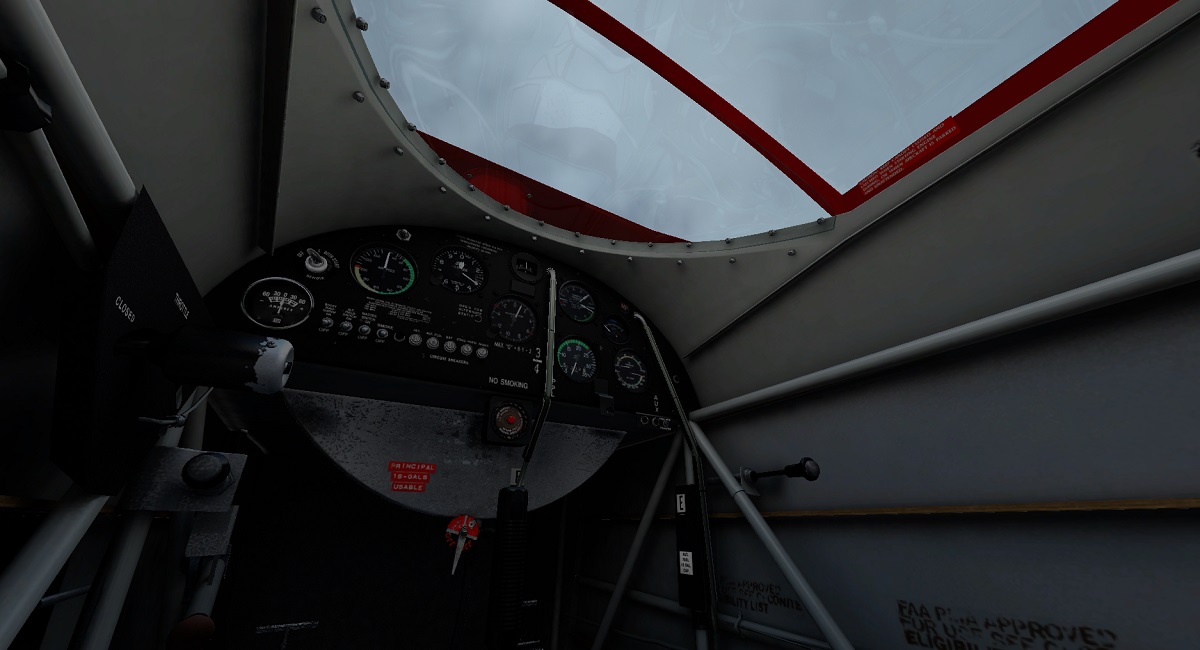
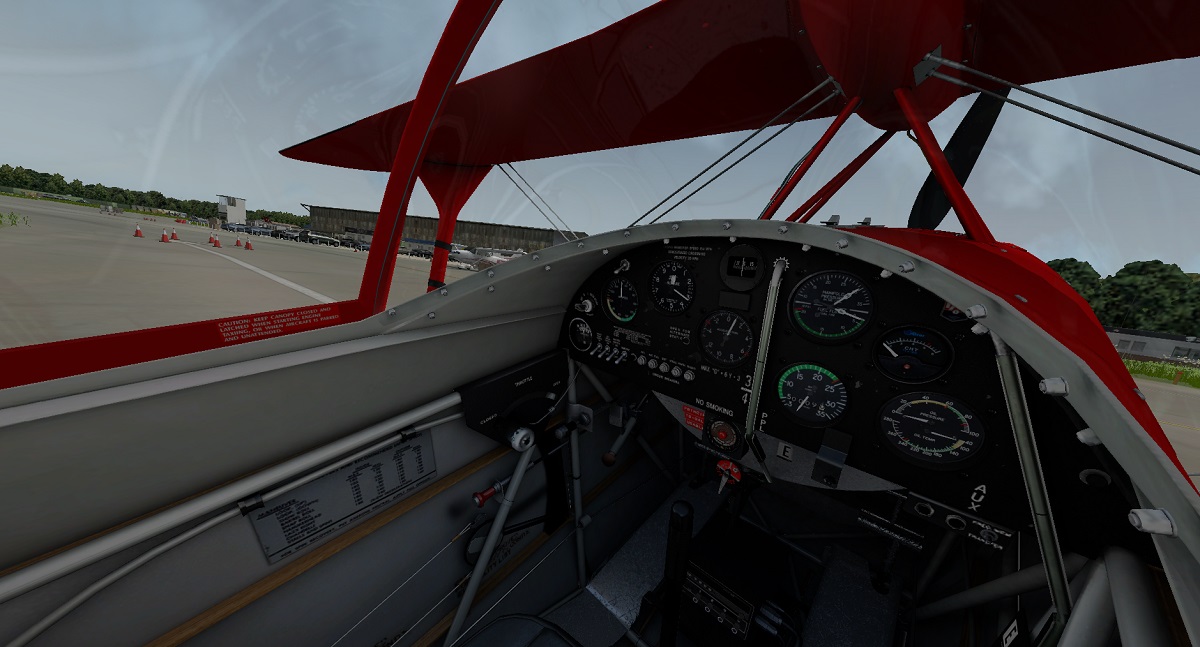
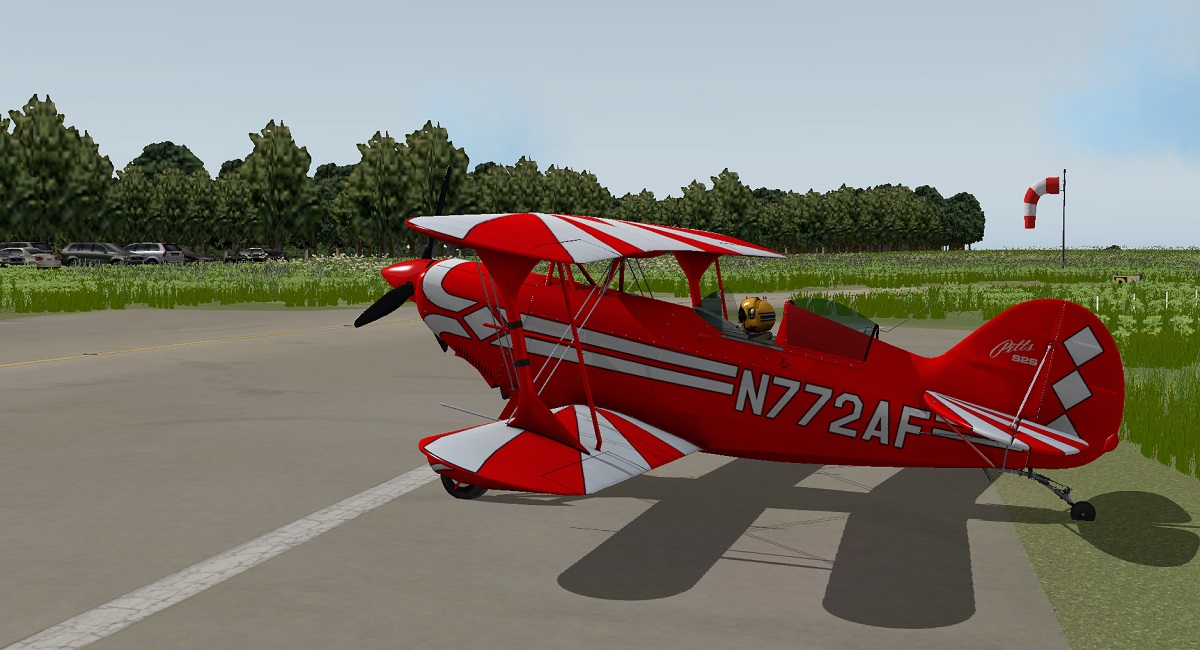
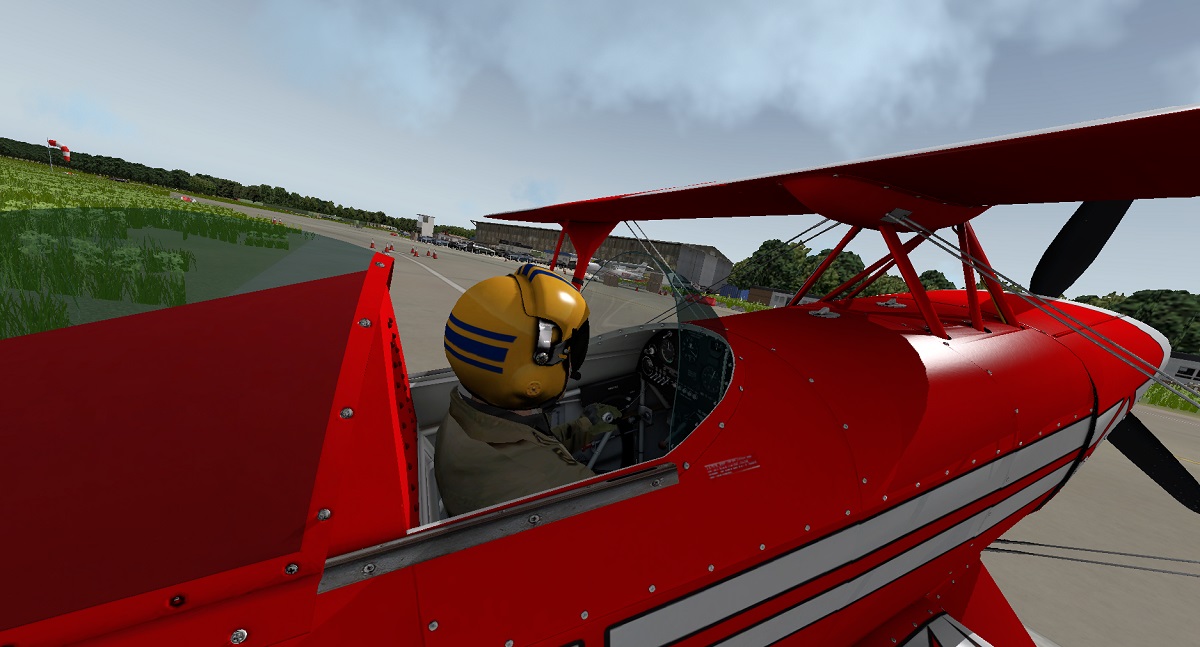
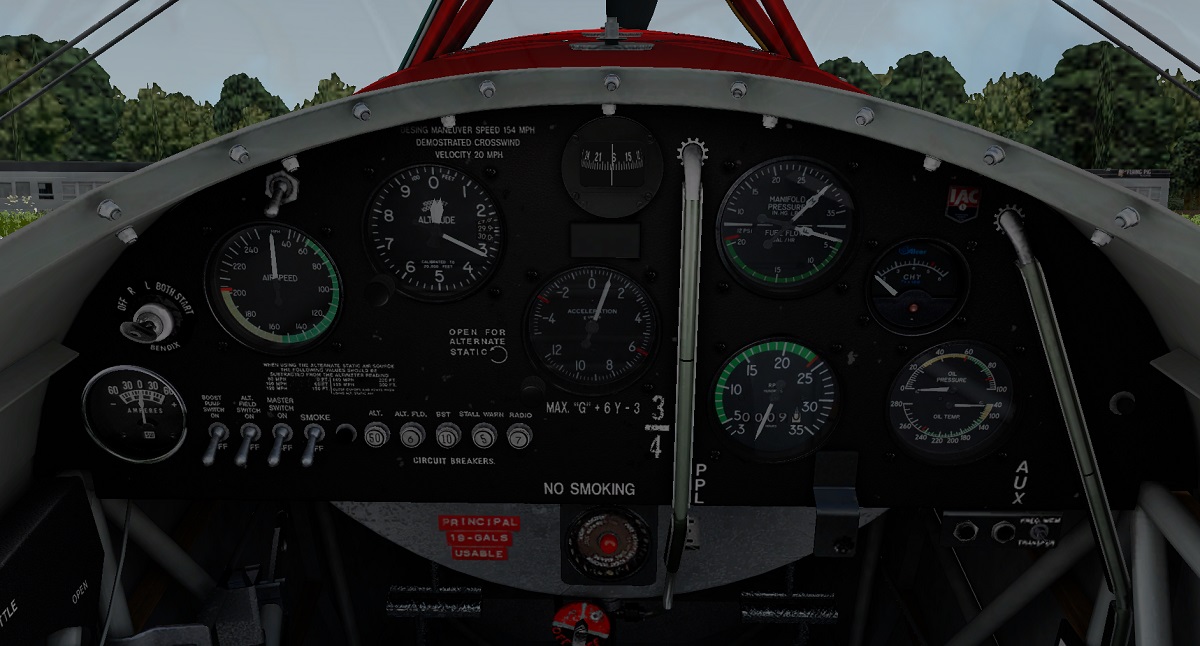
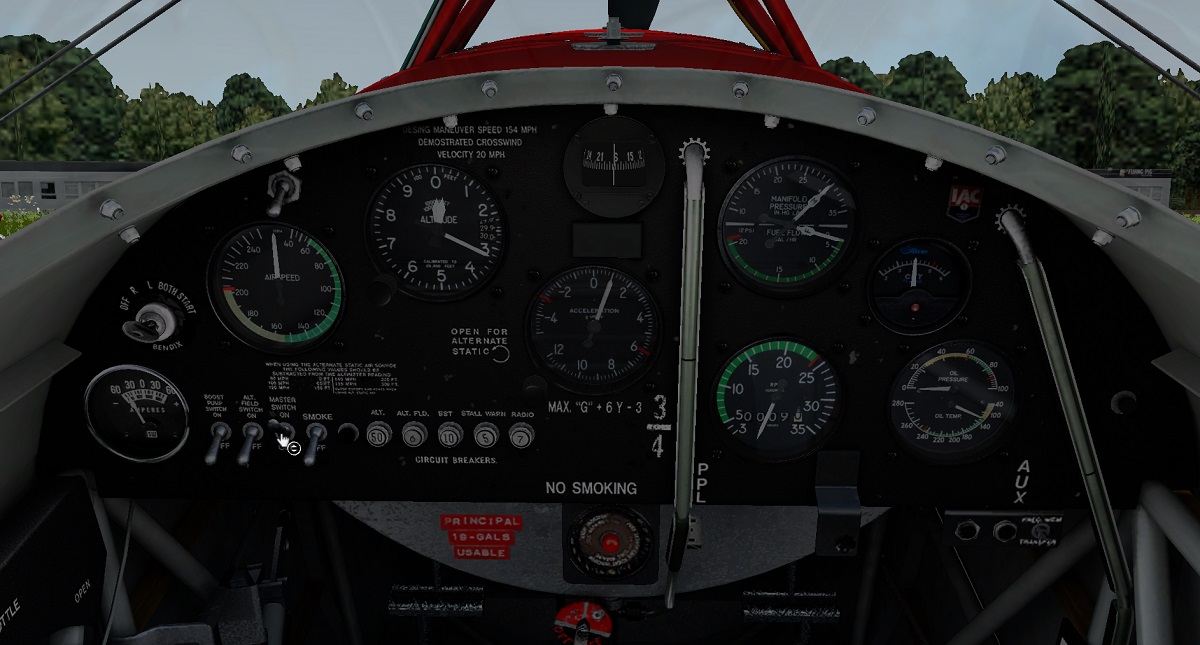
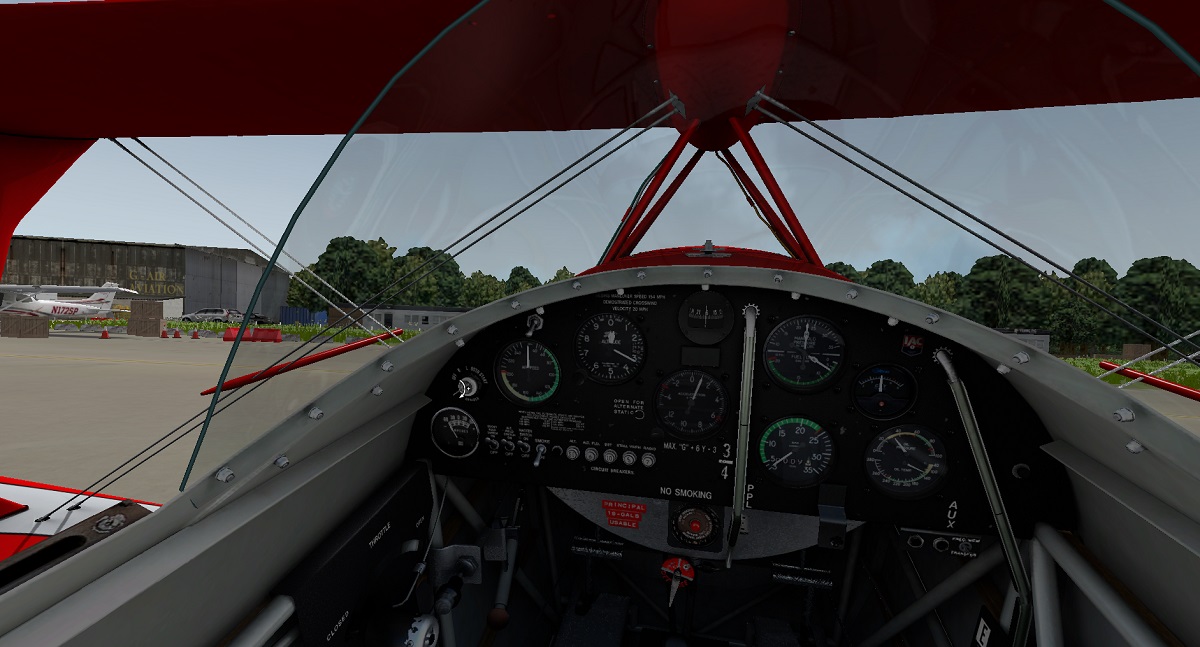
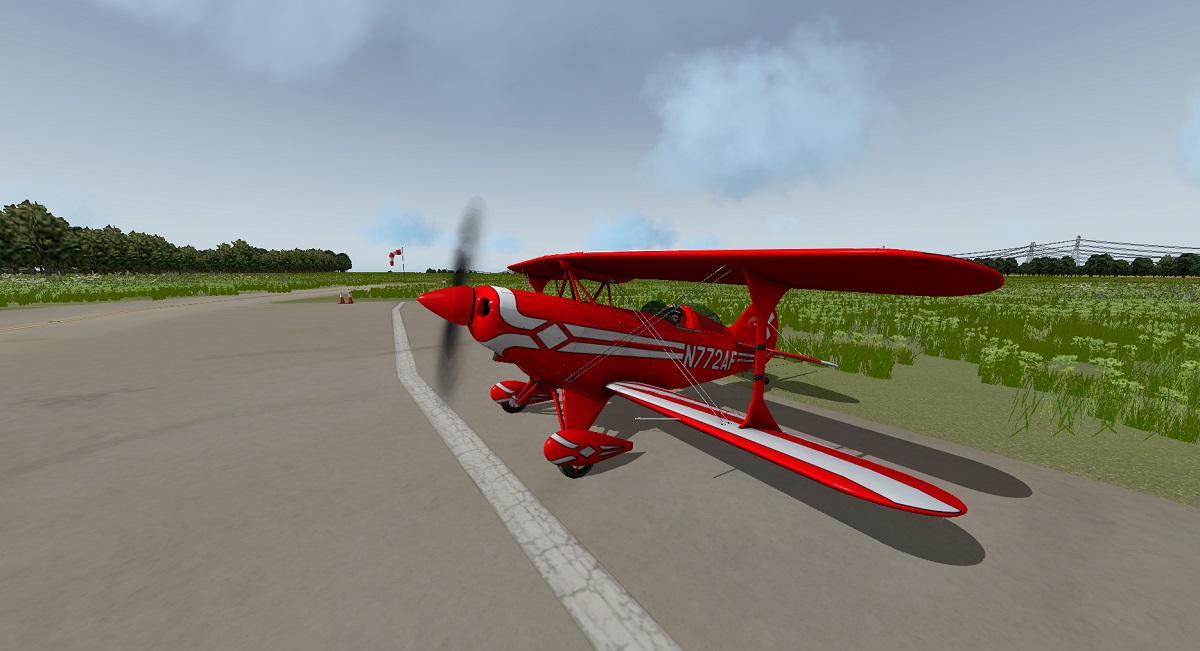
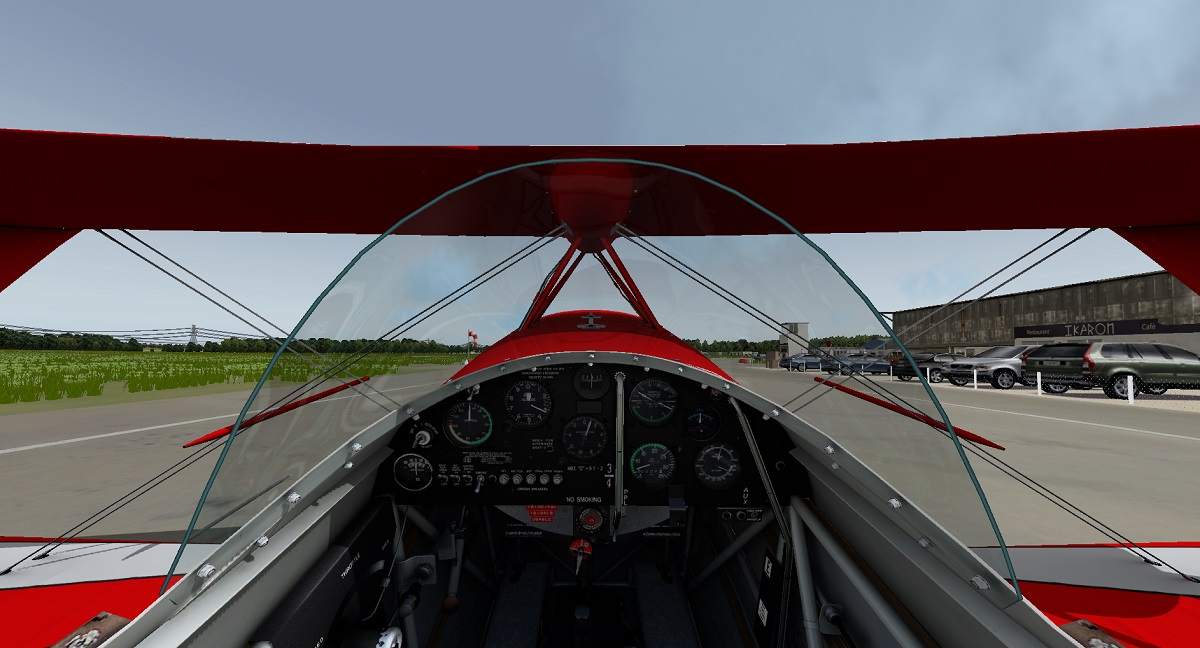
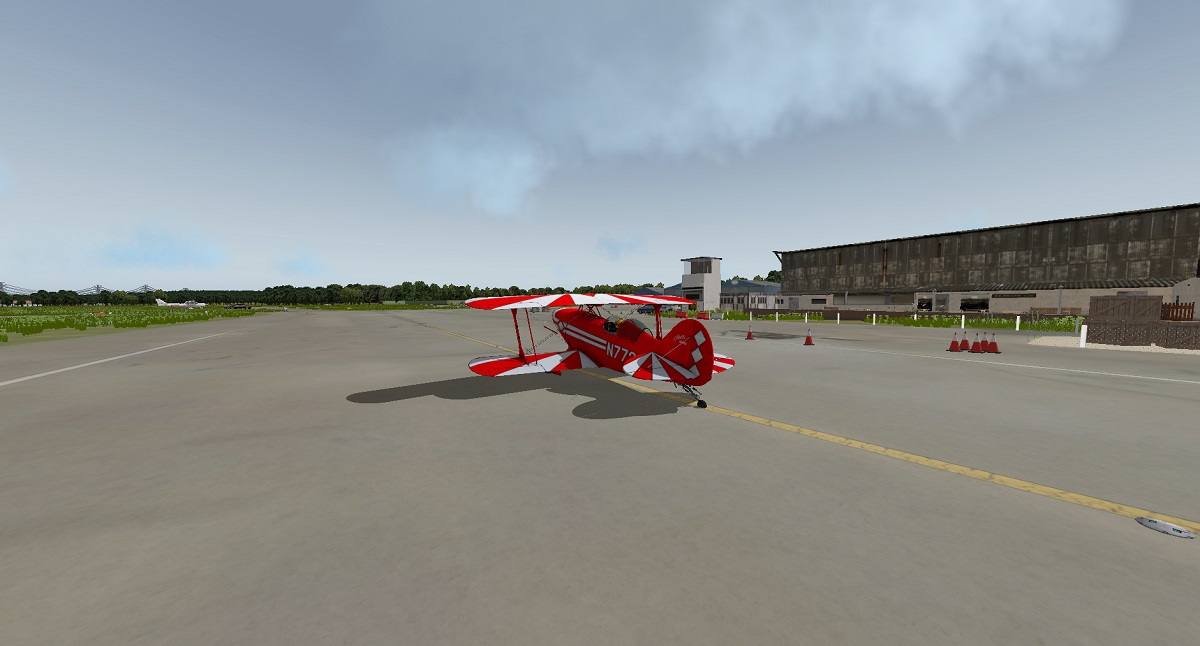
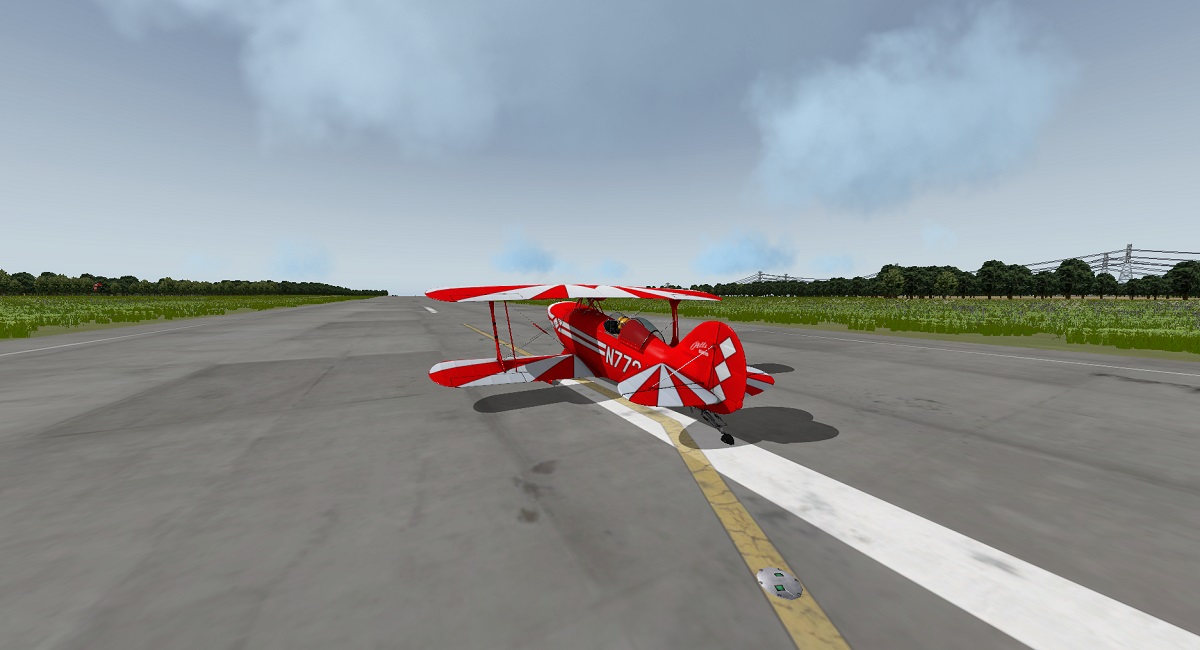
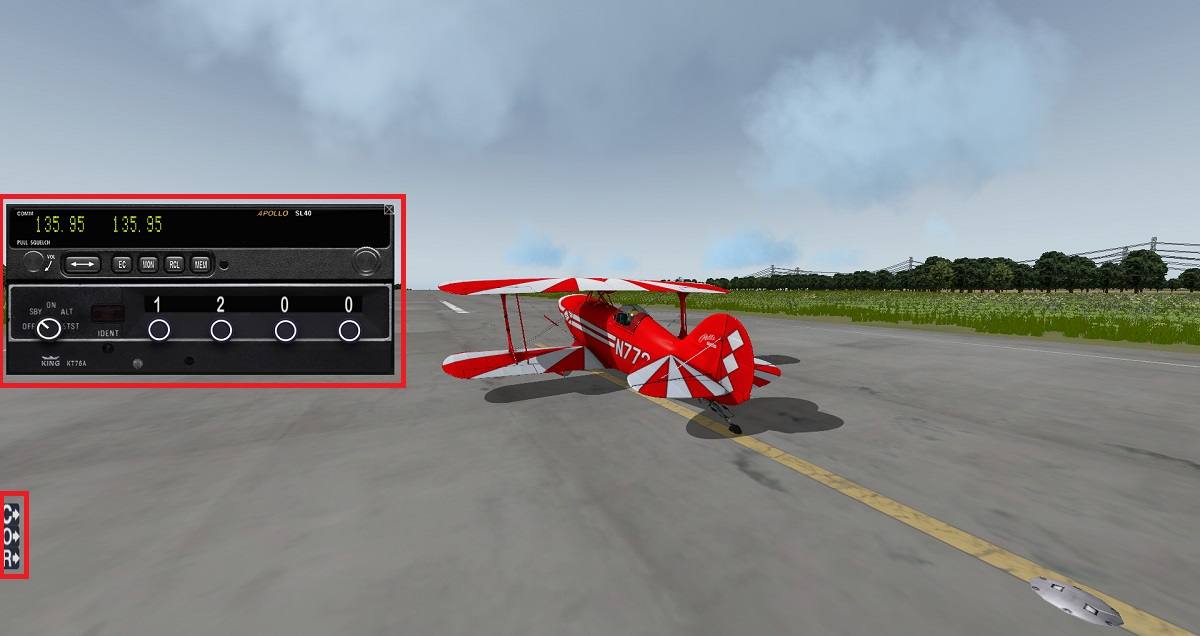
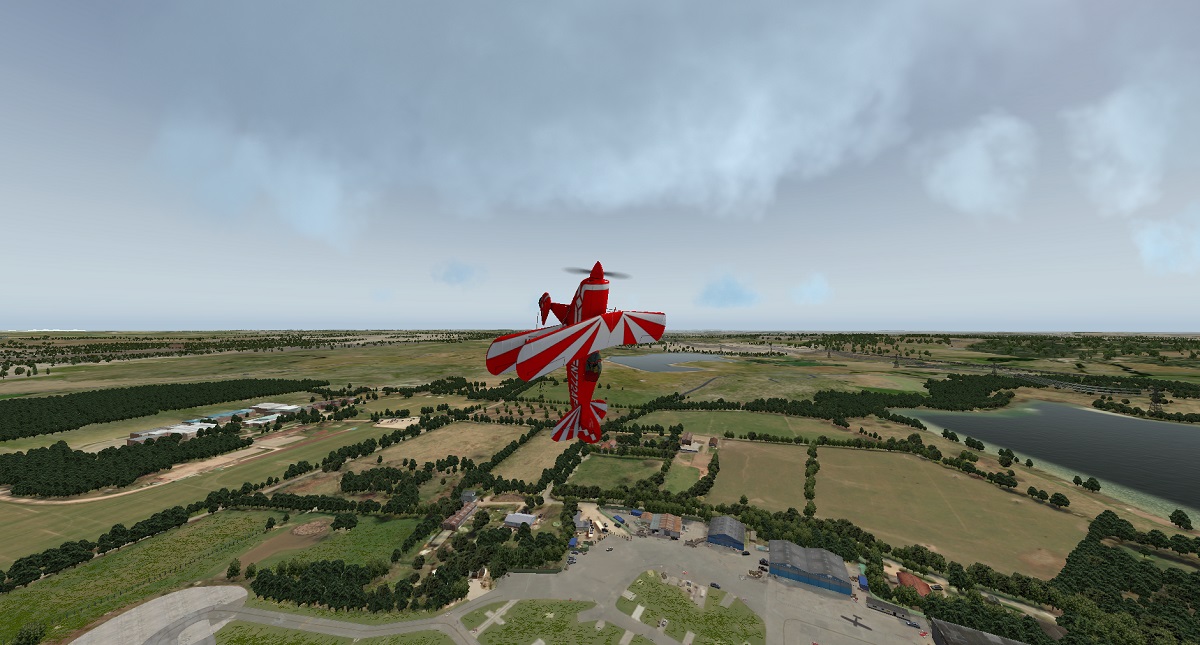
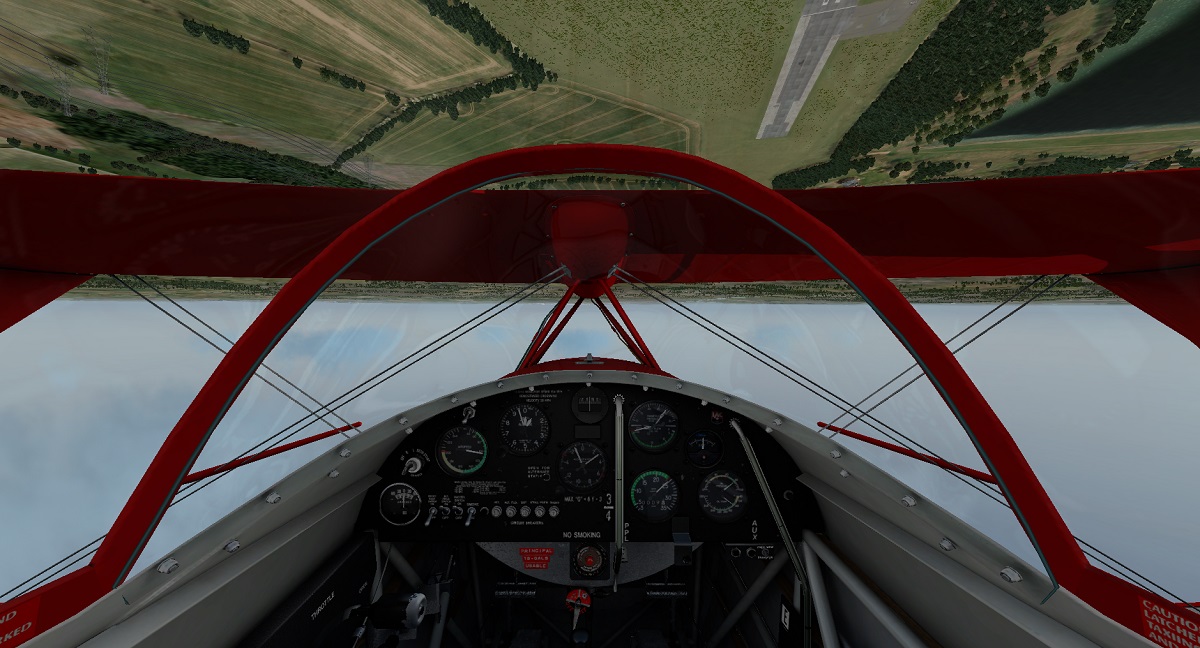
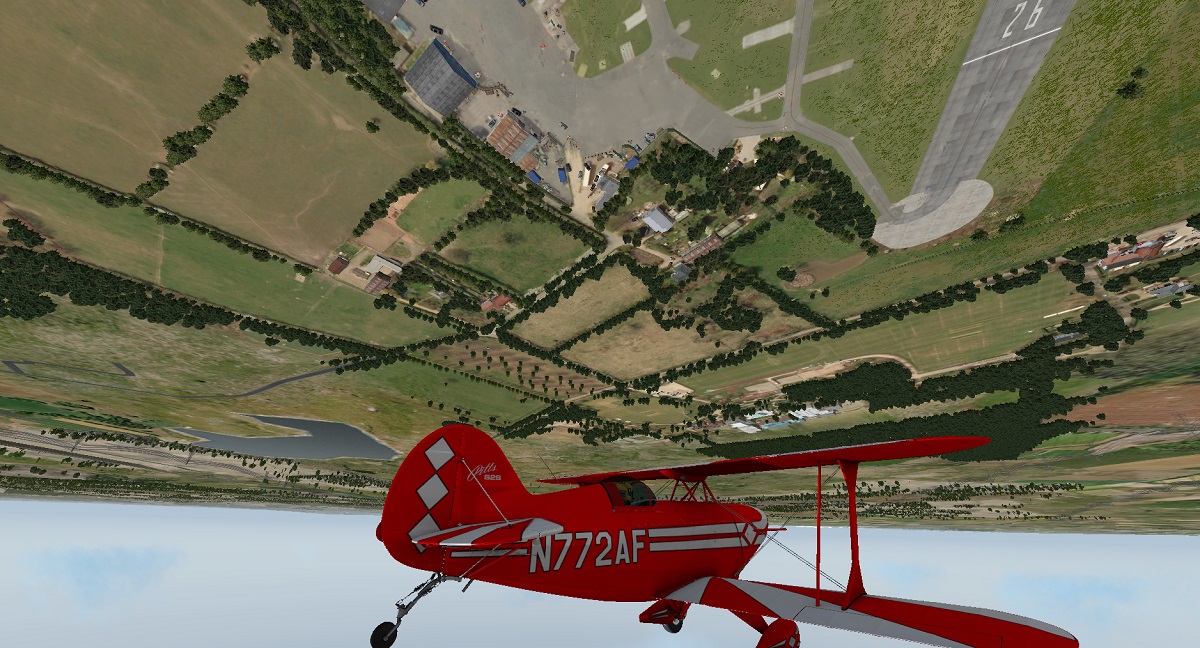
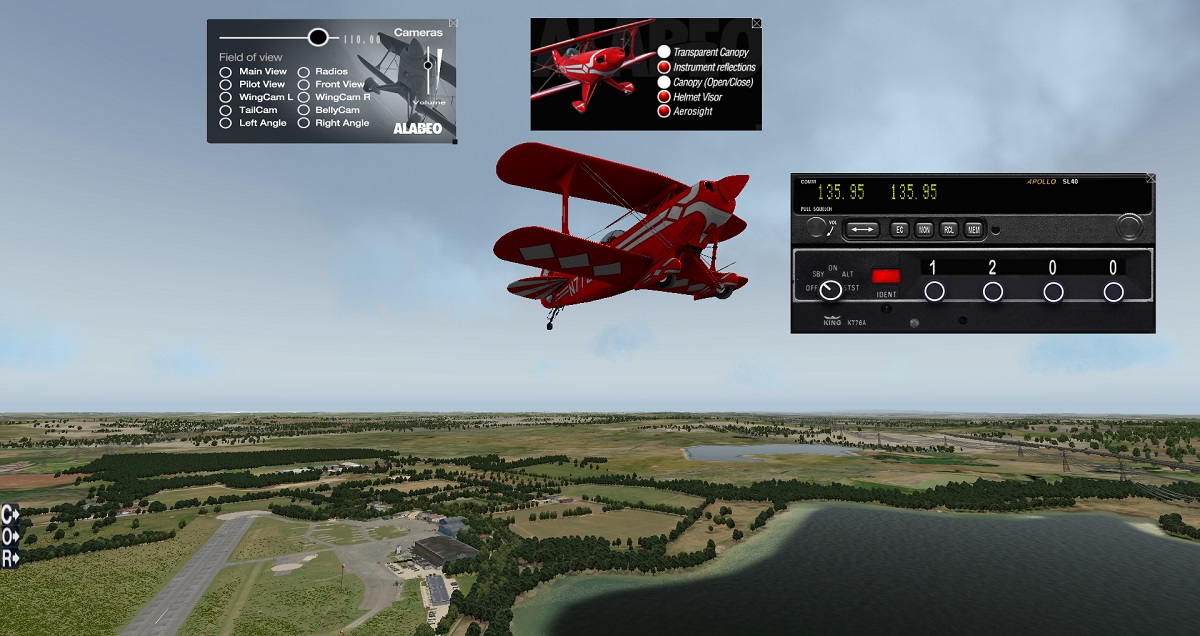
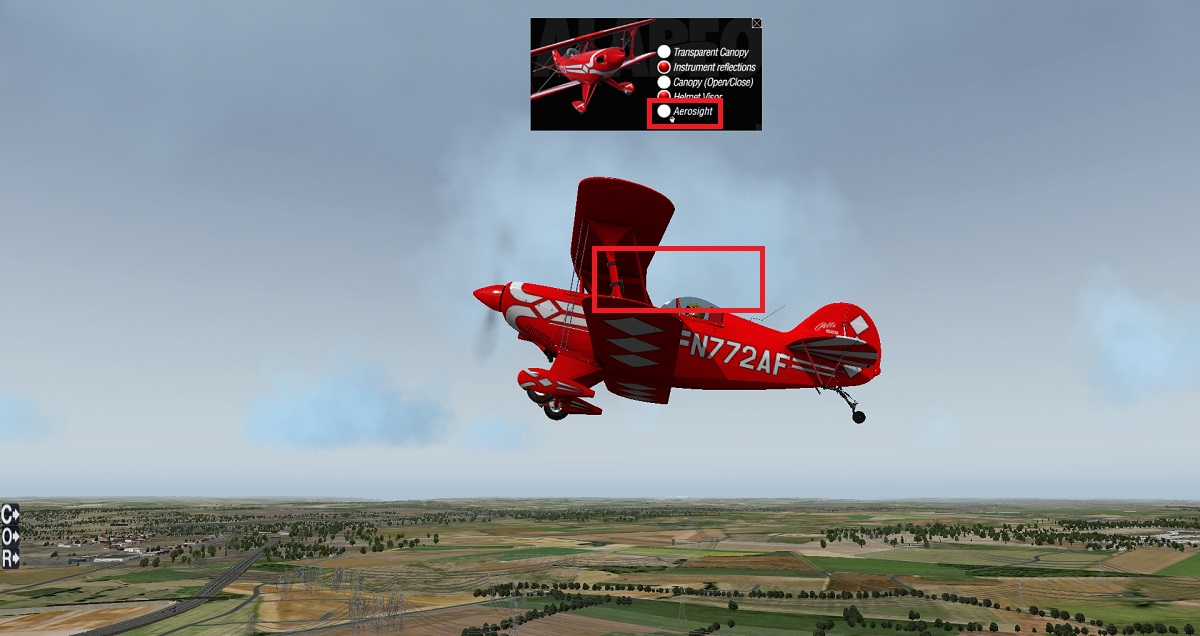
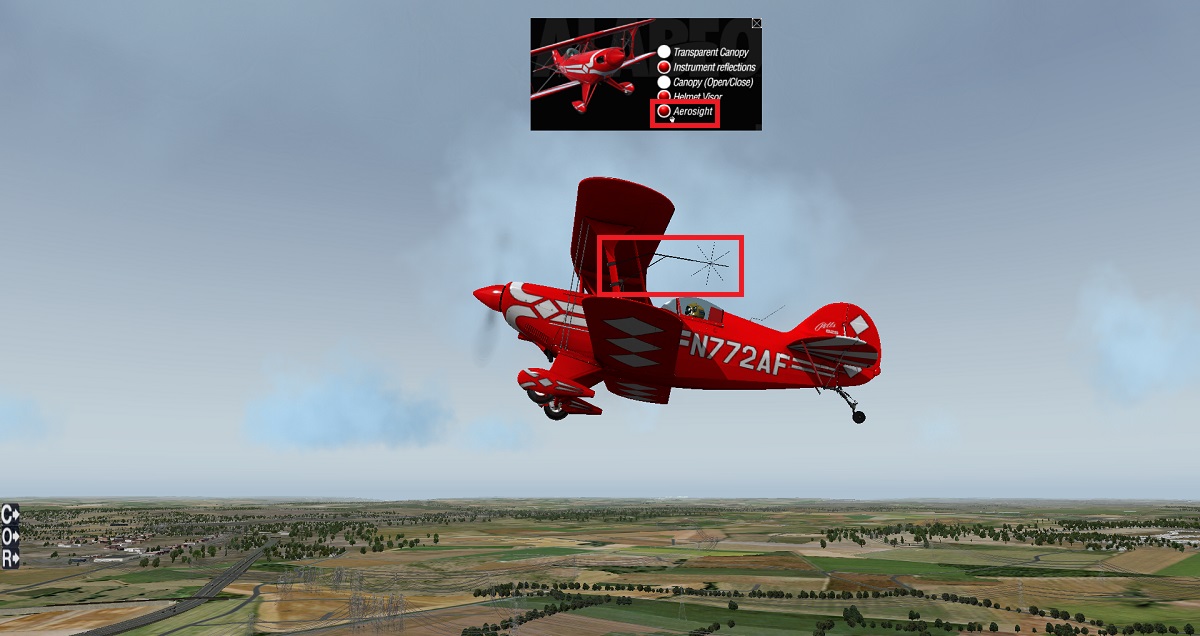
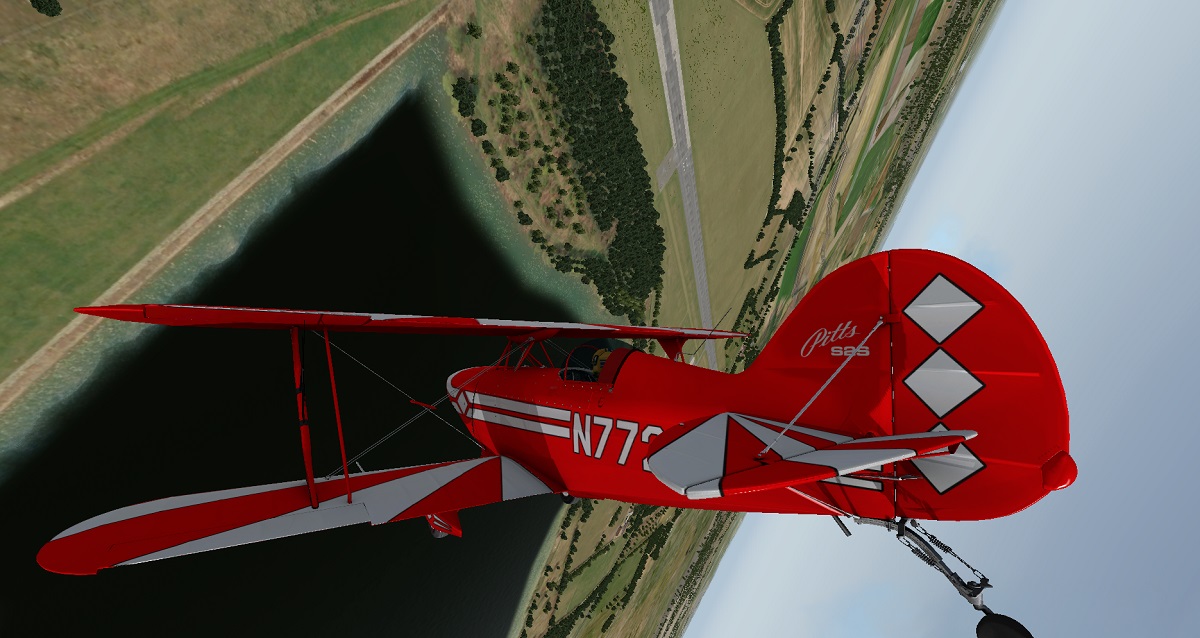
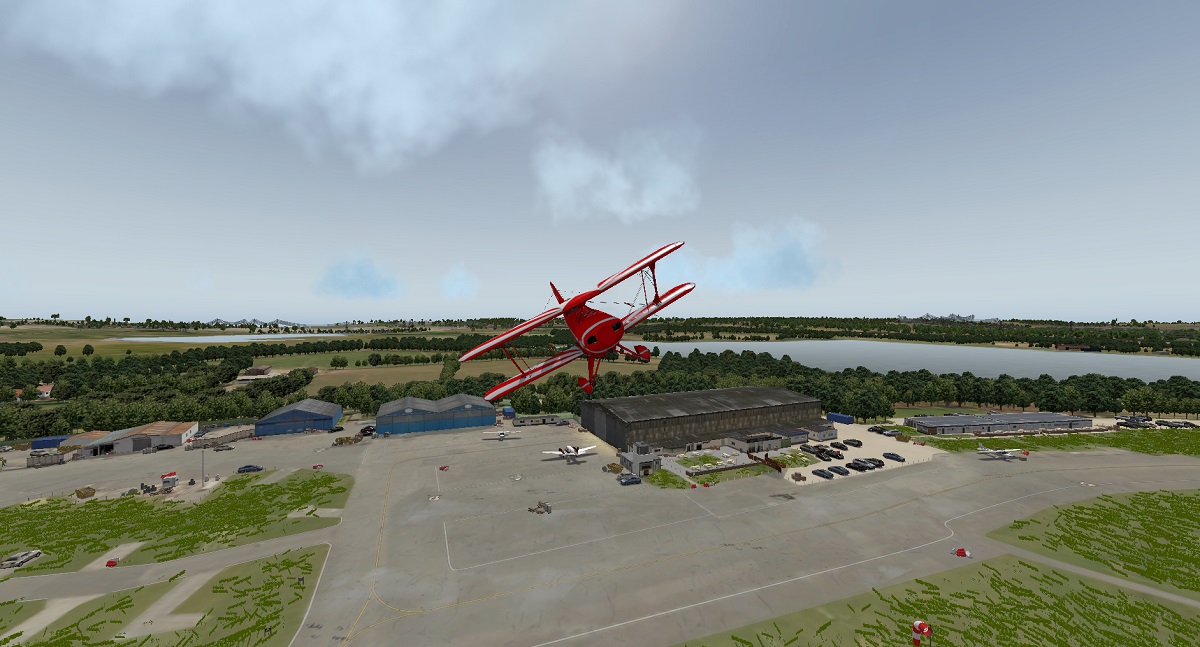
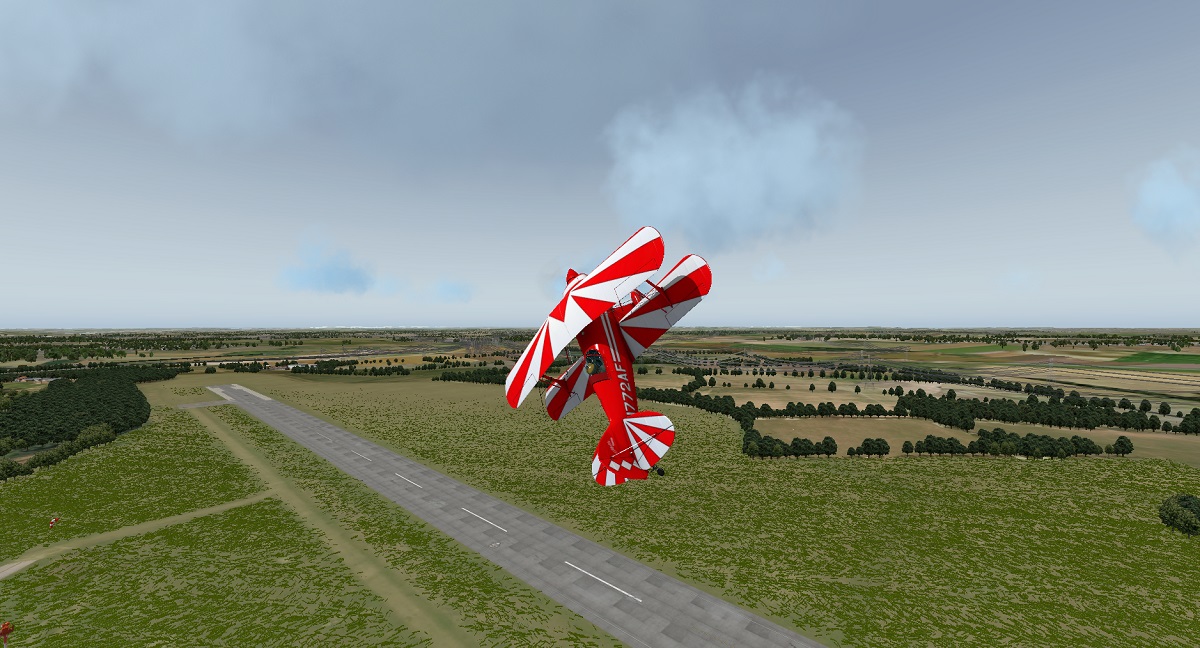
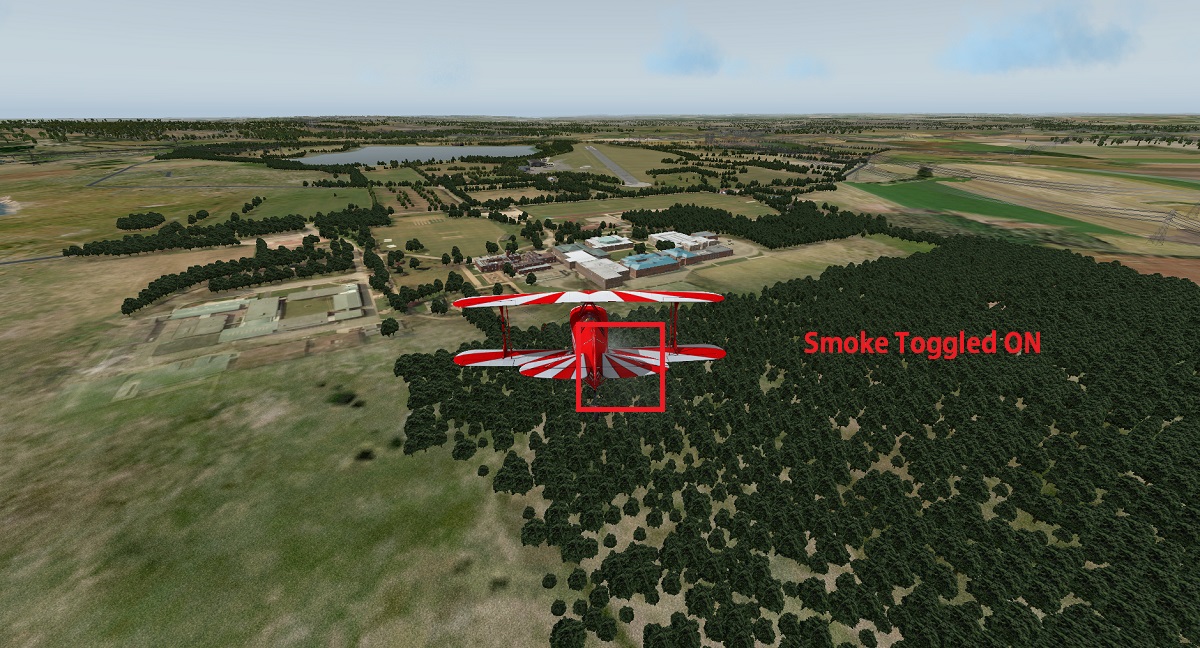
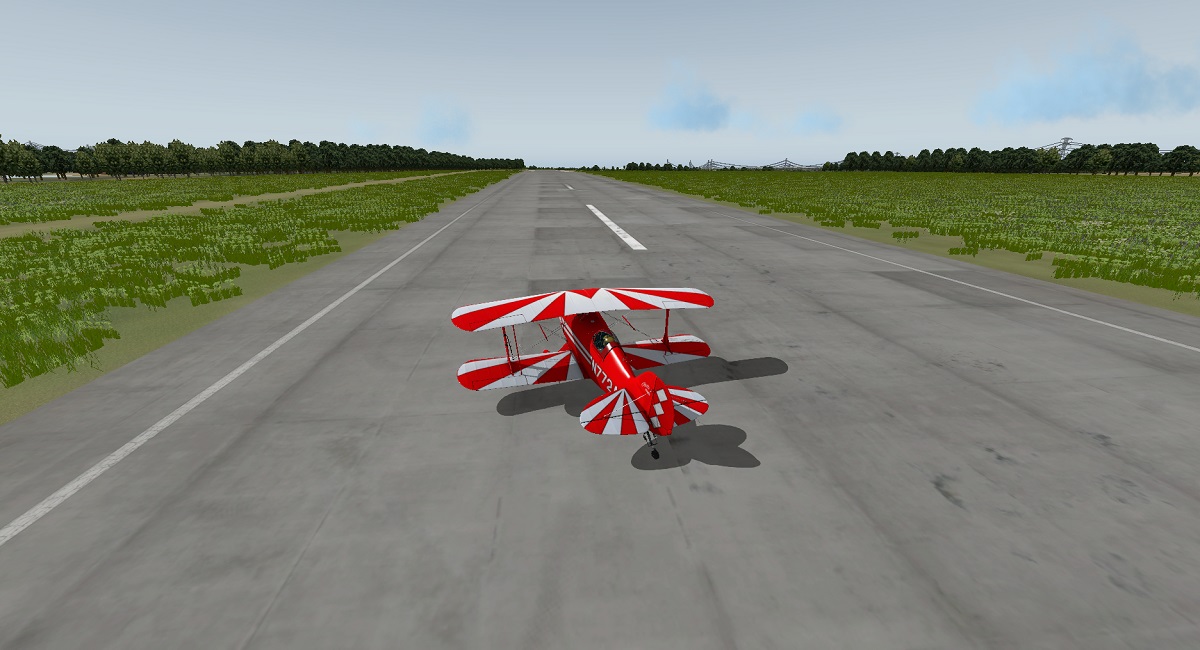
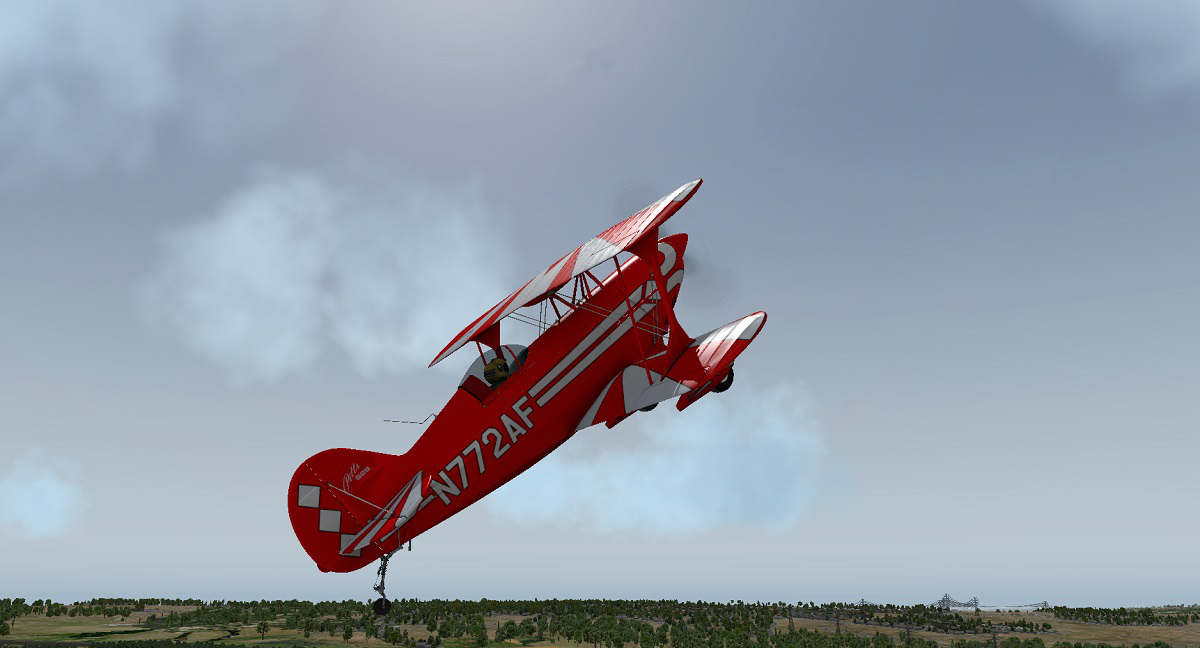
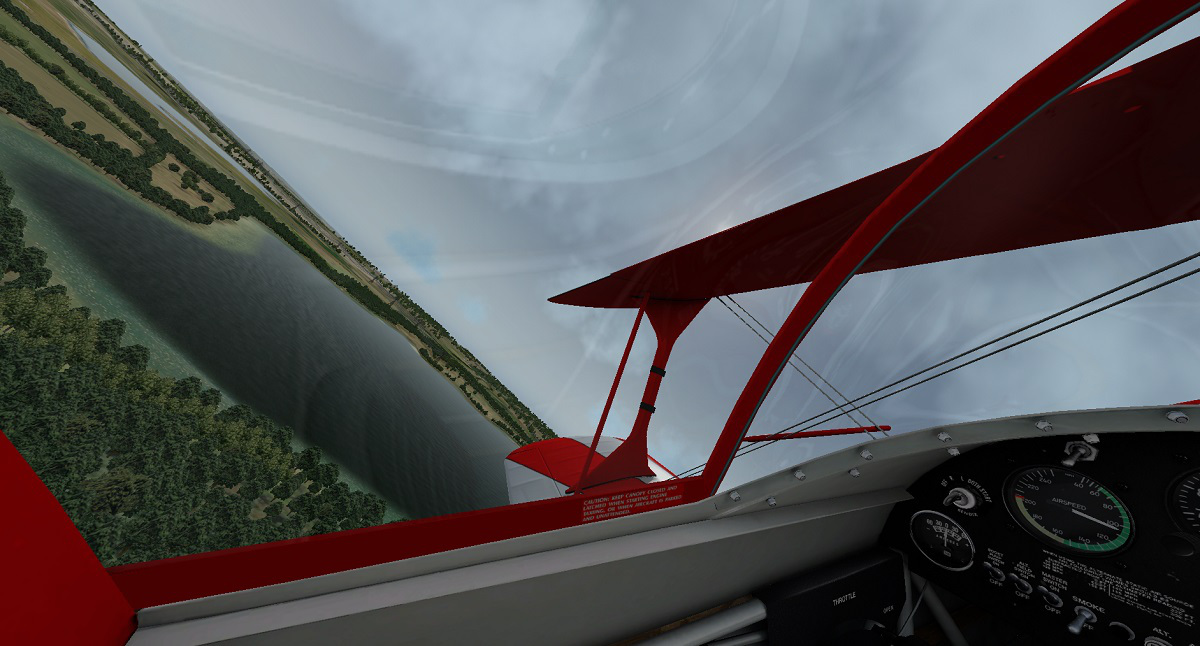
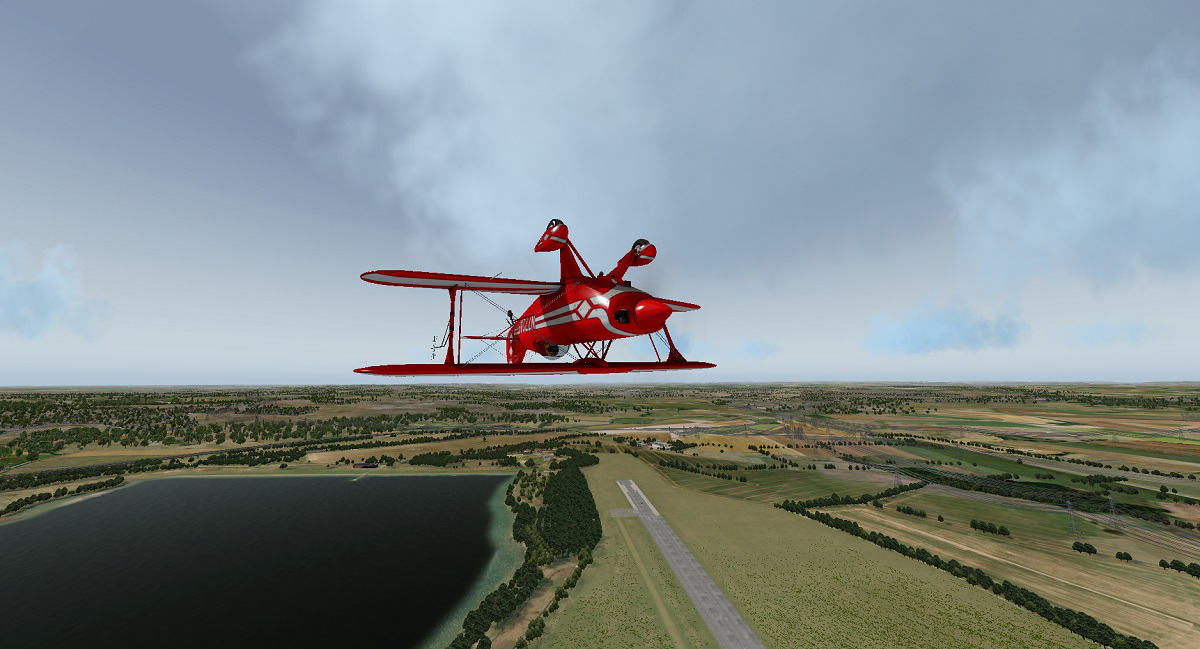
Pitts S-2S Review The Pitts S-2S (special) is an iconic aircraft for aerobatics all around the world, if you see a small biplane tumbling around and spinning out of control above you, it's most likely going to be the Pitts! It's strong airframe and remarkable design makes it readily available for sharp turns and stunt upon the pilots command! The powerful Lycoming AEIO-540-D4A5 (260hp) is a heavier engine from the previous models of the Pitts Special but it's increased power makes it more agile in flight. The S-2S model has one single cockpit seating one pilot, other models such as the S-2C can seat two people, so you can make the passenger feel nausea and ready to vomit! The S-2S has a twin talk fuel system and a 20ft wingspan. The real Pitts Special is a phenomenal aircraft, so does the Alabeo virtual version bring credit this aircraft deserves? I decided to do an aerobatics flight over EGTR - London Elstree to find out! First Impressions? Flying aerobatics is great fun! Performing organized stunts in a remembered progression, confined to a small cubic area, is very challenging but also very rewarding! So I decided to take the challenge with the Alabeo Pitts S-2S, performing a progression of stunts in an organized manor of Elstree, London. So I started with the Pitts positioned on the ramp, engines off, cold and dark. Seeing the aircraft and walking around it made me very impressed by the 3D modelling and attention to detail, from seeing a real Pitts S-2S in real life I can really relate to the real experience I had walking around the real Pitts! The 3D modelling, like always from Alabeo, has been done very well and accurately. Textures on the outside are great, every nut and bolt is clearly visible. My favorite textured area outside is the tail wheel strut, the dirty metal looks great and shows the 'real' age of the aircraft. It does look a little clean, but every well loved aircraft does! It makes me think if I could take off the cowling the engine would be in pristine condition, unfortunately that's not possible though! The actual tail wheel texture looks a bit odd though, I would expect a wheel to look a bit different to that! More like the main gear at the front of the aircraft where those wheels have been textured well. Another thing to notice is the 3D pilot, he is not optional though. When you are looking around outside he is sat in there whatever you do! A nice touch would be to make him optional. You can however move his visor up/ down, this can all be done in the pop out menu's. Opening the canopy, moving into the cockpit. 3D modelling in the cockpit is superb, every gauge, strut, button and lever has been modeled and there are no proportion issues or anything that looks 'out of place'. I really like the fact that you can 'feel' the depth of where you're sat when you look down, this type of view is what will make a device like the oculus rift shine, depth representation is very important for a Virtual Reality headset. On the subject of VR, wouldn't it be great to do some aerobatics inside the Pitts and X-Plane and actually feel as though you are doing it! Looking down and feeling the depth of where you're sat will make the experience of VR much better. Texturing in the cockpit is very good, it's not clean yet it shows wear and tear. For example, I like the addition of worn throttle lever, very realistic. The glass canopy also has pre-rendered reflections which looks great from inside, there is also an option to turn the glass completely opaque which essentially removes any reflections and glass texturing. Preparing for flight The first thing you notice when you enter the cockpit is the availability of instruments. The two main instruments you have are 'Speedometer' and 'Altimeter' the other common instruments such as 'Artificial Horizon', 'Turn Coordinator' , 'Vertical Speed' and 'Heading' are missing. It's common on a Pitts and other aerobatics aircraft to miss that although some previous models to the special had a turn coordinator. All of this just adds to the challenge! The idea of flying the Pitts is to do most things visually, using the visible horizon as a guide. This does help when doing aerobatics though as keeping a focus on the horizon level through the window helps to avoid any major crashing! After receiving clearance from the tower to start the engine and taxi to the holding point I then started the engine. Starting the engine is very simple, mixture rich, master switch on and fuel boost. Turn the the key to both and the engine will start if the throttle is left open a little. This is not a study level simulated aircraft so the procedures to operate it are very basic, that said flying loops and barrel rolls puts a smile on your face! I noticed one thing, after turning on the master switch my oil temperature instantly was set, the needle did not rise but was just instantly placed. It would be nice for the Pitts to simulate a slow rise after the master is switched on, this is only a very small detail though. In Flight The Pitts is very responsive to all changes, I felt that my joystick inputs where picked up a little too sensitive so I decided to reconfigure a few of my X-Plane settings, after though the aircraft felt a little heavier to move which I believe is more realistic. The Pitts was very hard to control on the ground, I have never controlled the aircraft for real on the ground but I don't believe that the tail wheel sliding around like its on ice is the most accurate of representations! So onto the fun stuff... Aerobatics! The first move I tried was a barrel roll, just a simple aileron roll to the left or right, no rudder needed. This is a great aerobatic move, it's fun quick and easy, it can also be made more challenging by doing it closer to the ground. The second move was the loop, full throttle into steep climb pulling back. At the top, reduce throttle and gently let the plane fall back on itself to complete the loop! It looks great from the ground and it feel great in the Pitts too. On all moves I performed the Pitts flew flawlessly, Alabeo have found the balance between agility and power which makes it fun to fly. The engine is not so powerful that you look like a space rocket but just powerful enough to perform great stunts and be able to recover safely. The iconic feature of this aircraft and all that perform aerobatics is smoke that leaves a fantastic trail behind the plane. When I saw the smoke button in the cockpit that is what I expected to happen, instead the default smoke came out which as you may know is not very white and fluffy! So an improvement there would be for Alabeo to make such system or plugin for the white fluffy smoke that leaves a long trail. Configuration Options As with all Alabeo aircraft you get a side menu that never goes away. It would be nice to be able to hide that menu from the screen. From the menu you change your camera view which is a great feature, especially when performing stunts! There are many camera options to pick from and the camera moved instantly but I did suffer a slight bit of lag. The second menu is the option for certain changes you can make specific for this aircraft. For example you can add or remove the aerosight, put the visor up/ down on your pilot, instrument reflections on/ off and transparent canopy on/ off. These options are fun to play around with. The third menu gives you quick access to your radio and squawk box, this is most certainly needed as flying without it in x-plane would be very tricky. Inside the cockpit the radio is virtually impossible to see from pilot head POV, therefore this feature is great and shows Alabeo have thought about user experience. Summary Overall I believe that this aircraft is certainly the best aerobatics capable for X-plane, it looks great, its fantastically fun to fly, sounds realistic and functions as you would expect. It is a little touchy on the flight controls but once it's adjusted in X-plane settings the plane feels heavier and more realistic. There are a few issues I found such as the instant rising needle upon start up but apart from that Alabeo have made a great product. The canopy is not operable from inside the cockpit, or it might be but I couldn't find the switch. The only way to move the canopy is by the menu, it can be annoying if you open it and close it a lot. Not a big issue though. 3D modeling and texturing is great, only two liveries by default though, more would be nice. You can however download some from Alabeo's site at no extra cost, and as always you can design your own! (blank livery included). The feature of smoke trails would be great, or if Alabeo don't do it maybe someone else will. It would be great to leave a trail in the X-Plane skies! Multiplayer would be very fun with that addition as well! Documentation is good, you get the standard from Alabeo however you also get an aerobatics manual. This manual tells you how to perform a variety of maneuvers with pictures to assist the explaining, very nice touch! This aircraft is great fun to fly and has been modeled and textured with great detail, I certainly recommend it! Where can you get the Pitts S-2S? Get The Pitts S-2S $19.95 Reviewed by : Joe ©X-Plane Reviews 2015. Technical Requirements: X-Plane 10 - Windows Operating System . Mac or Linux not supported Reviewer Computer Spec: - Intel Core i5 3330 @ 3.00GHz - 4.00gb of RAM - Geforce GTX 650
-
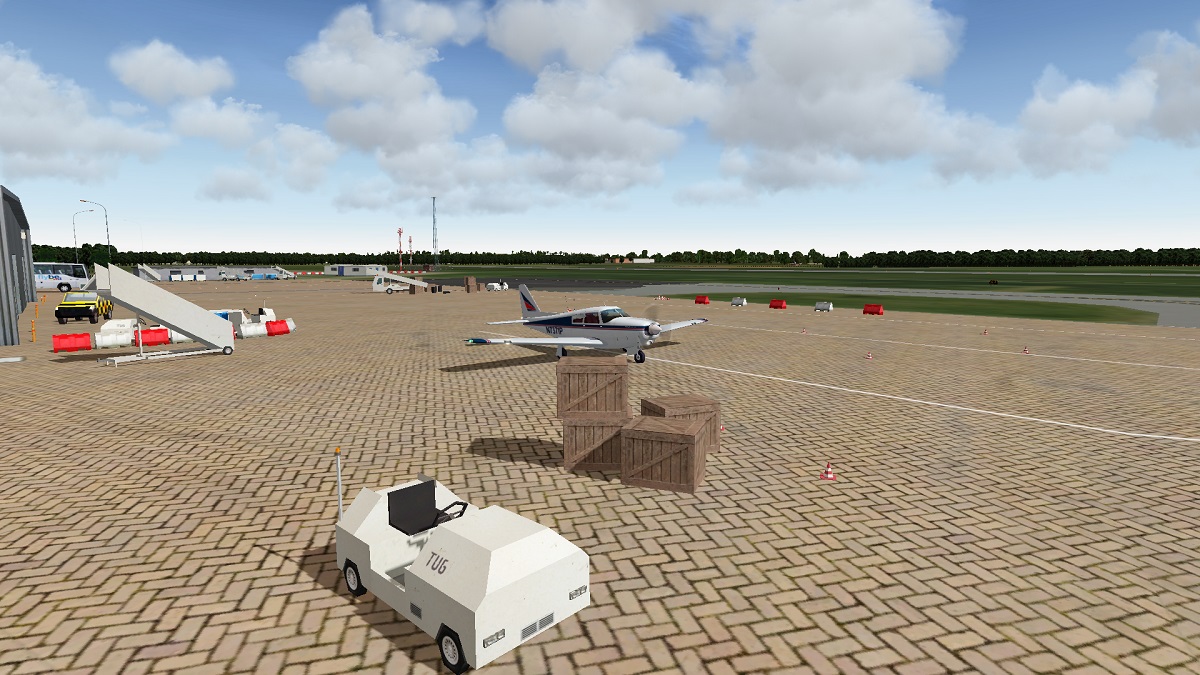
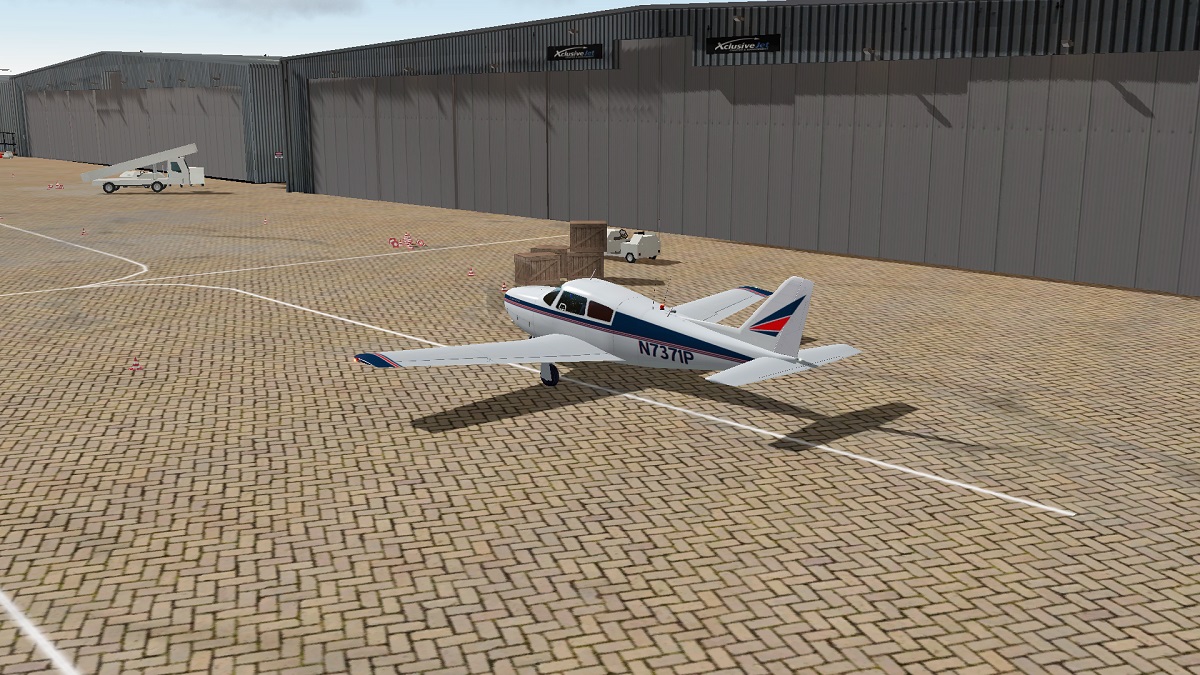
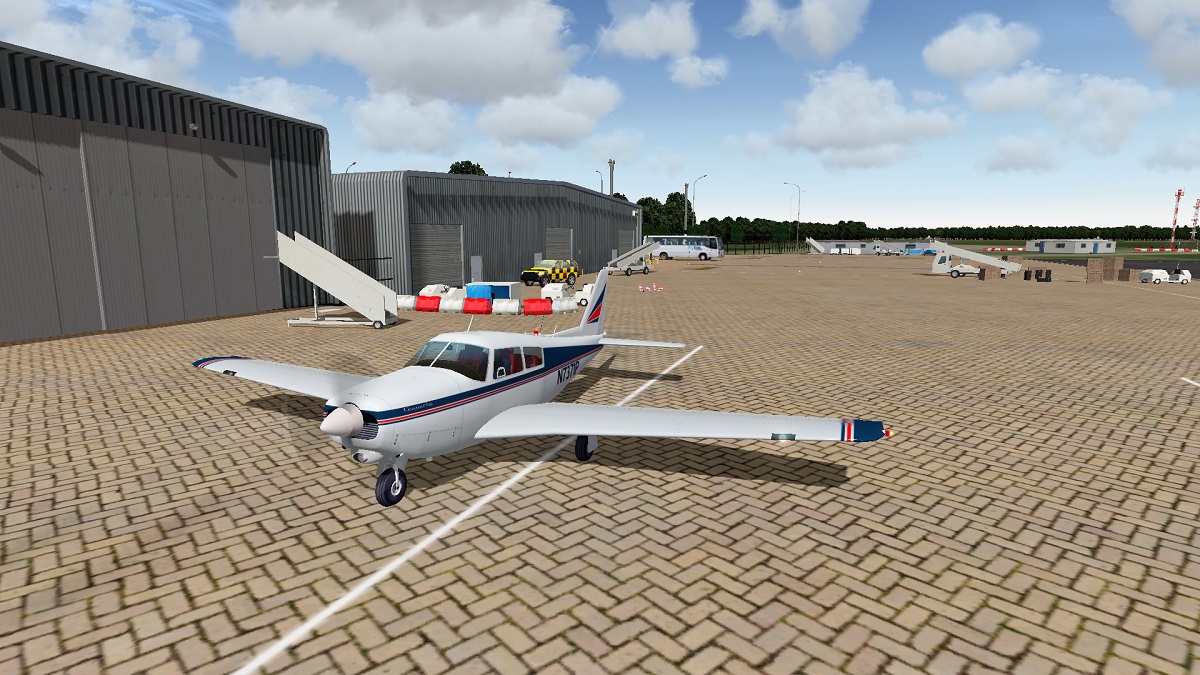
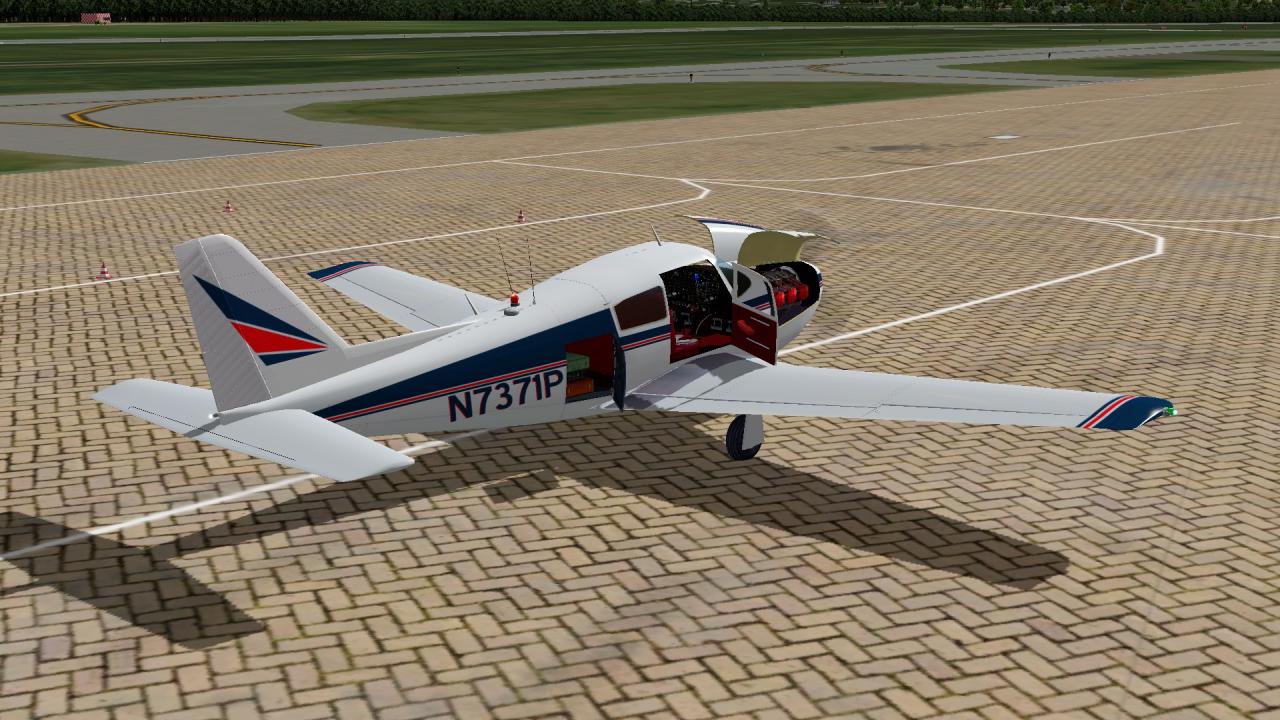
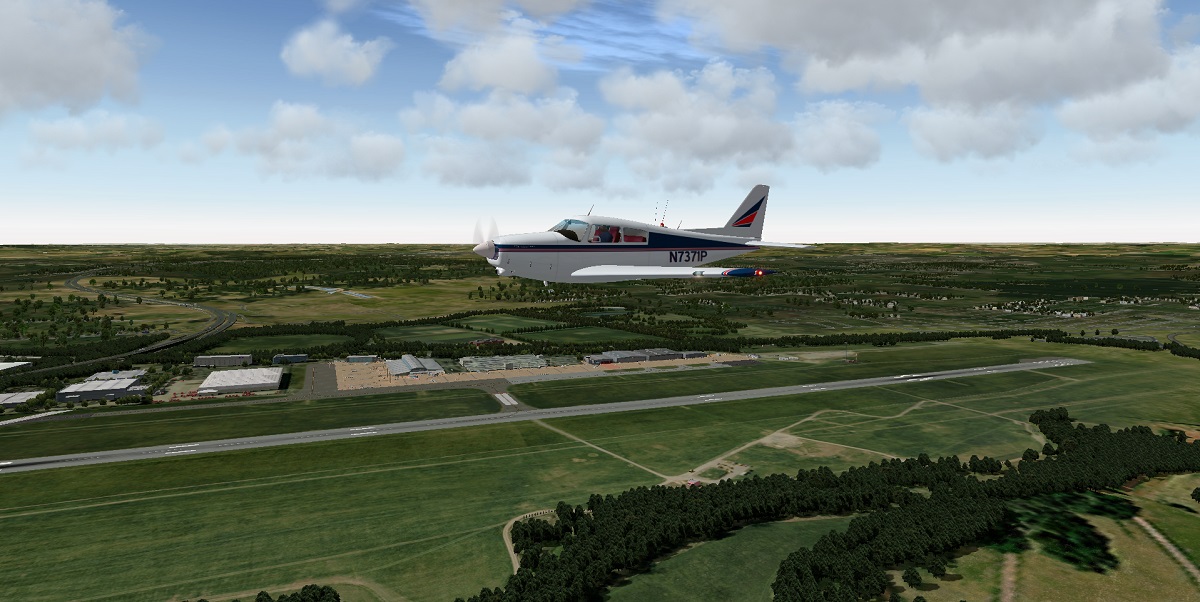
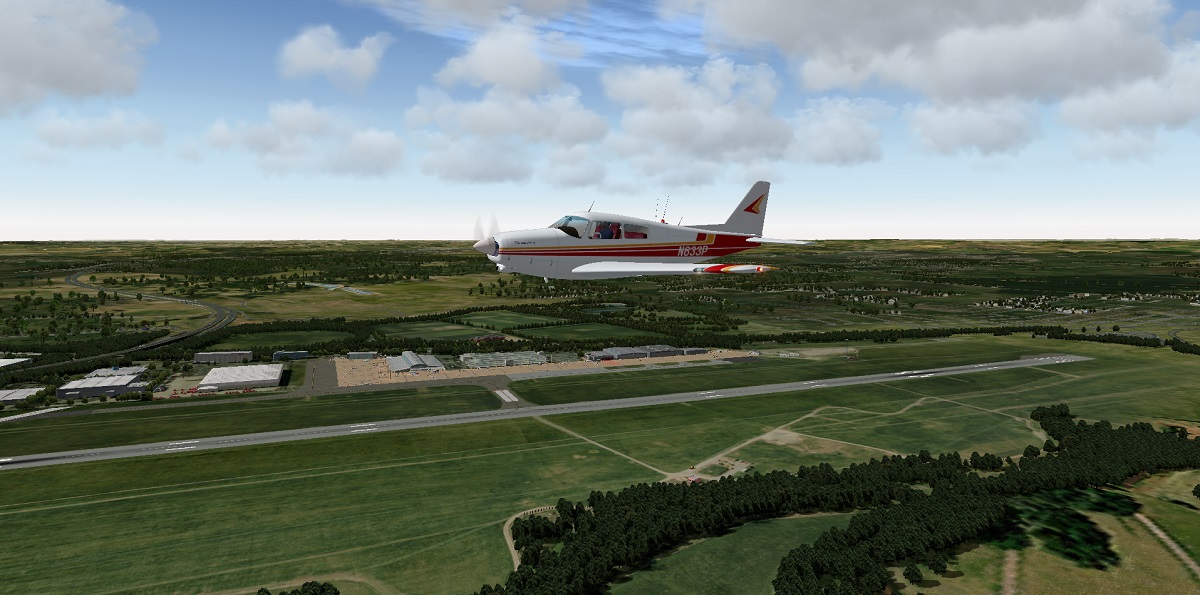
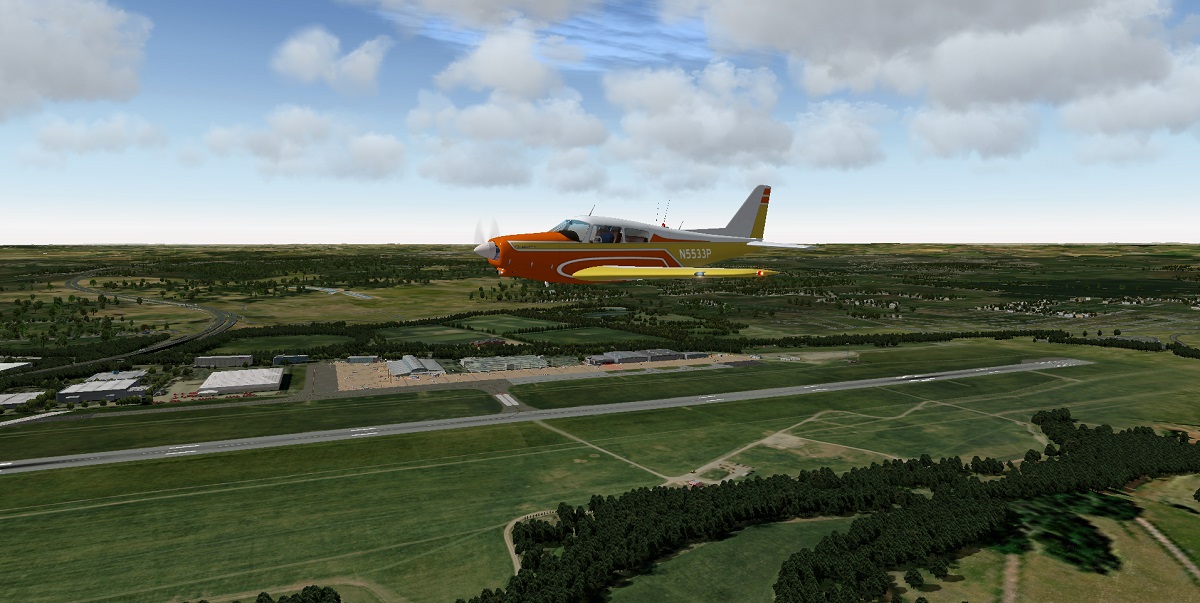
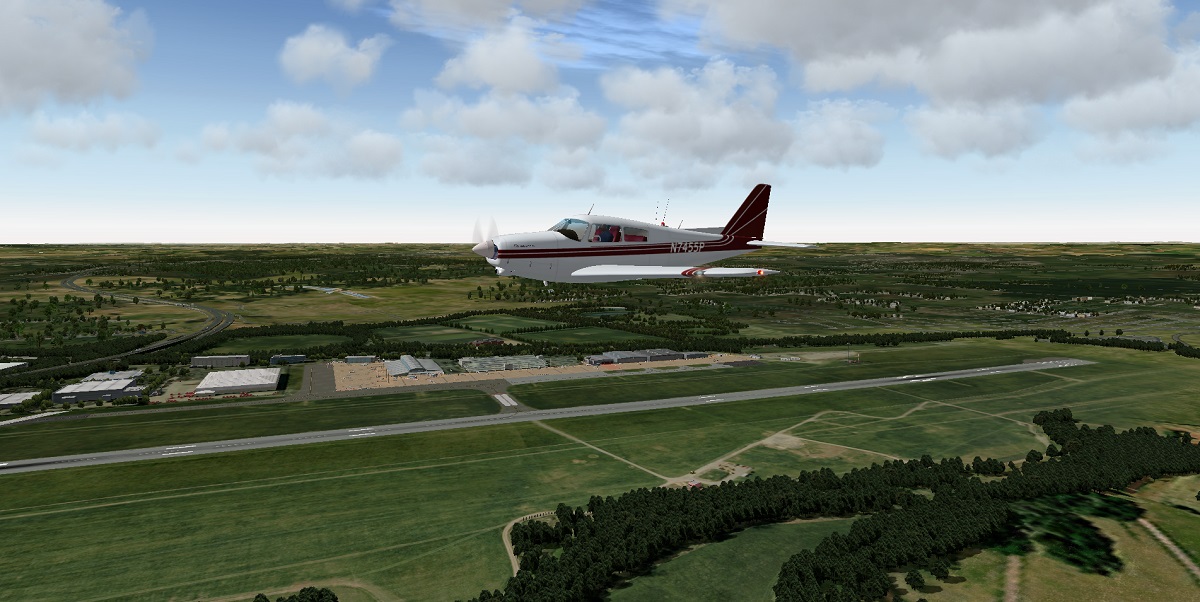
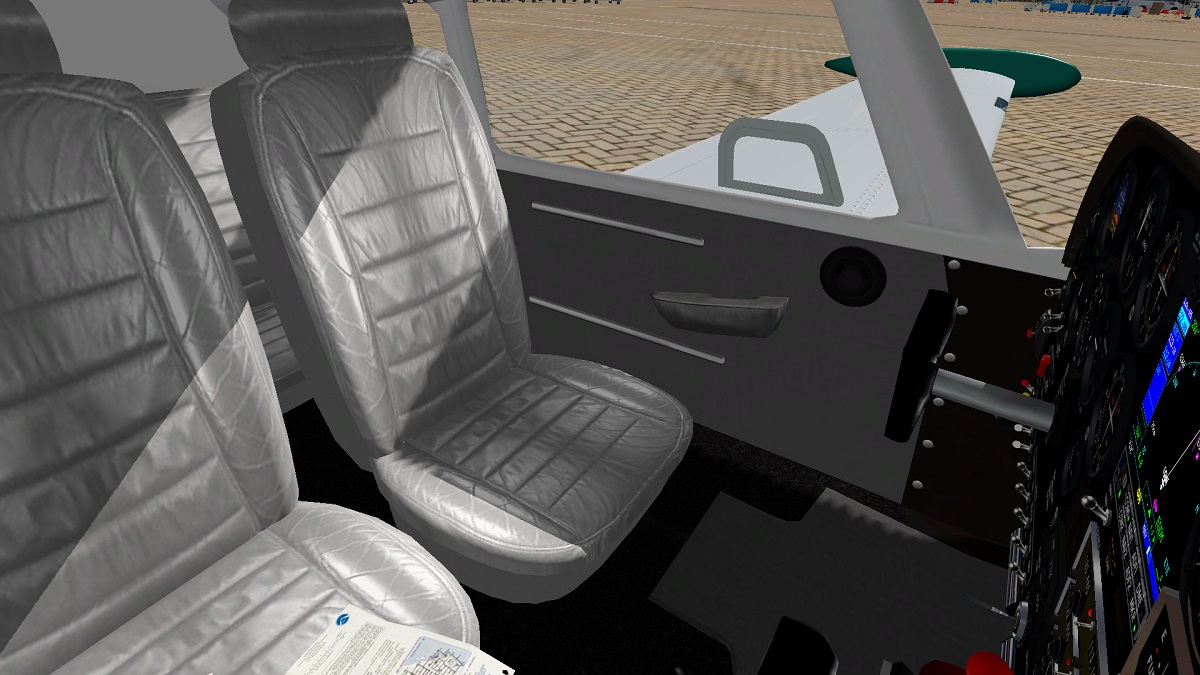
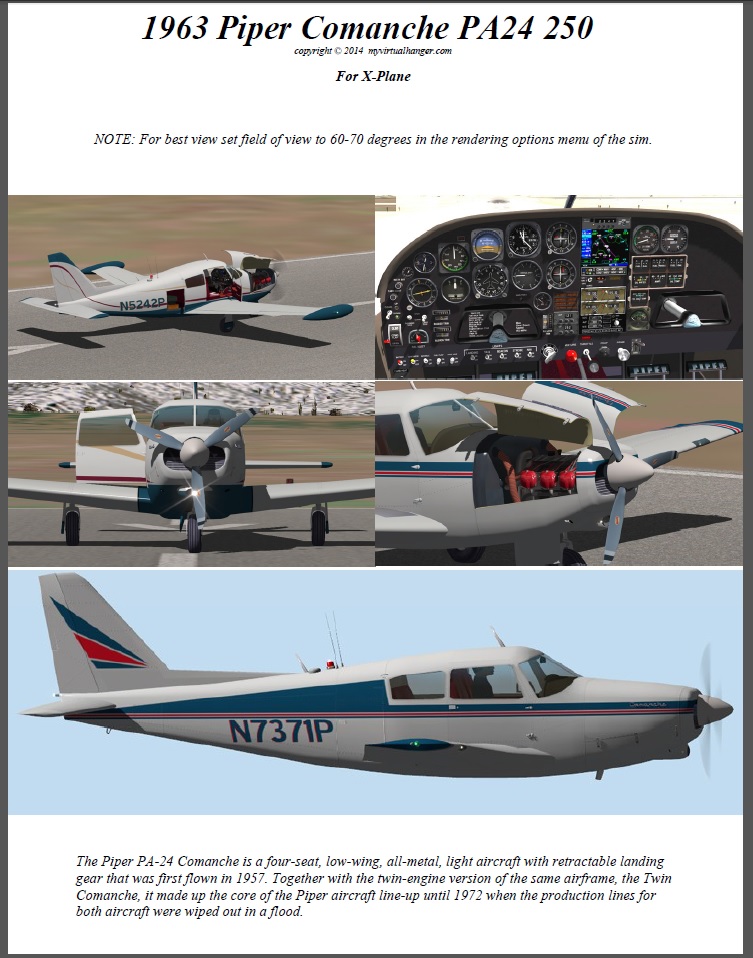
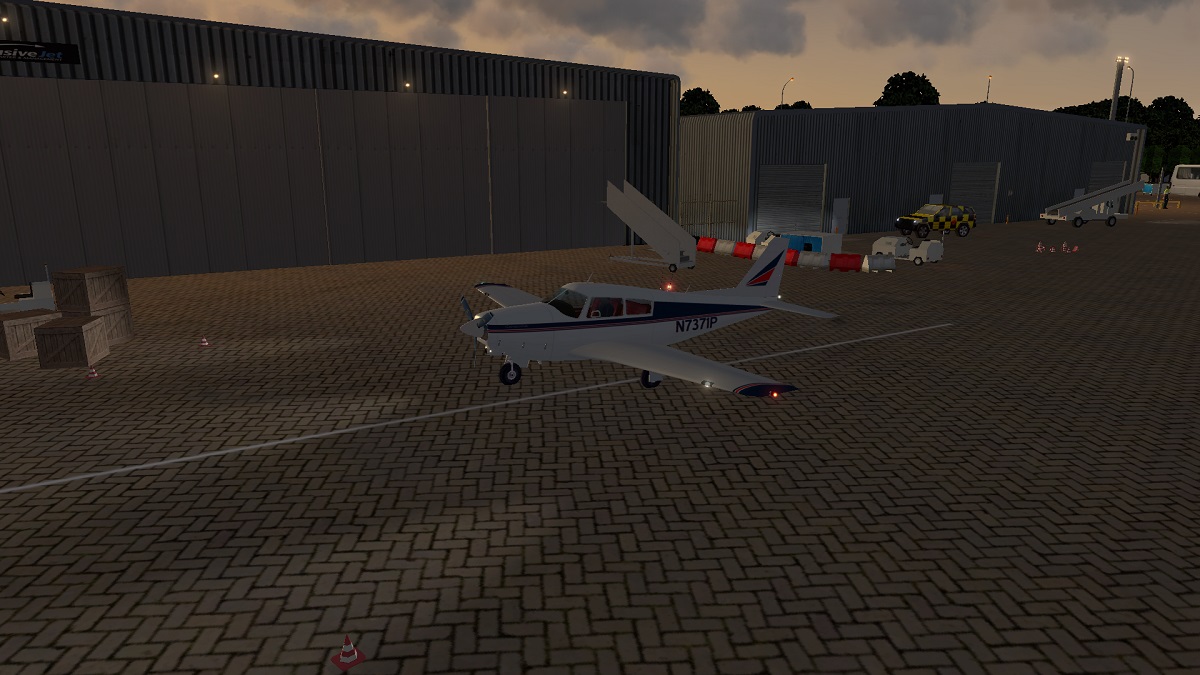
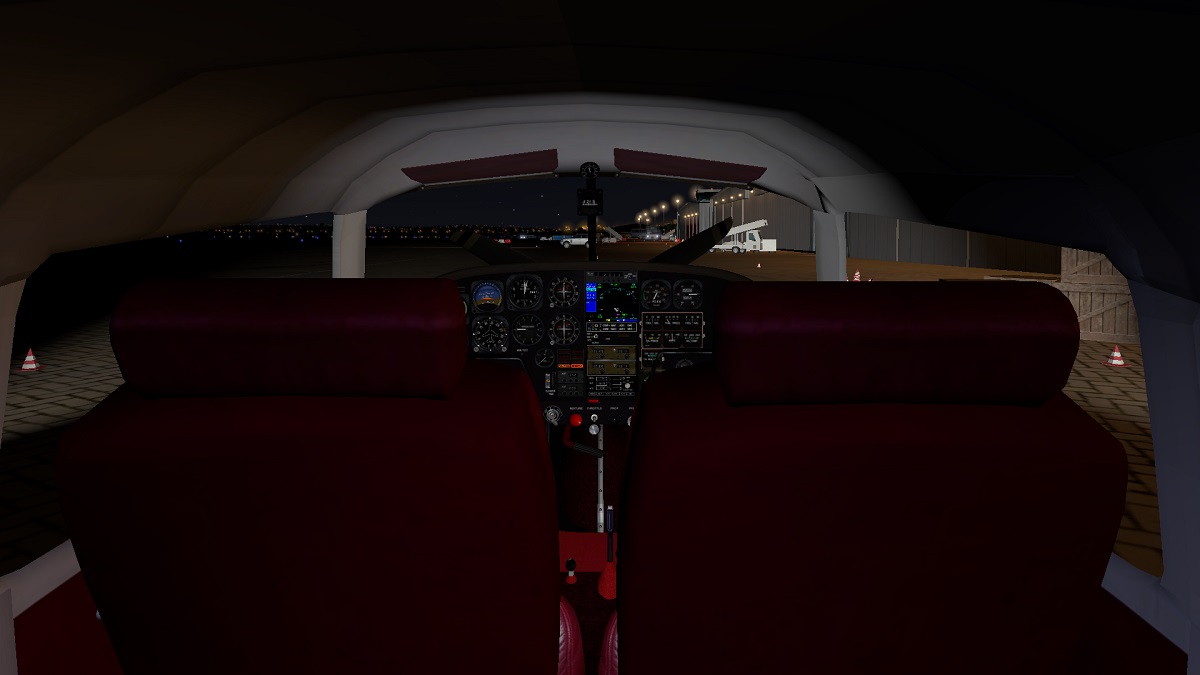
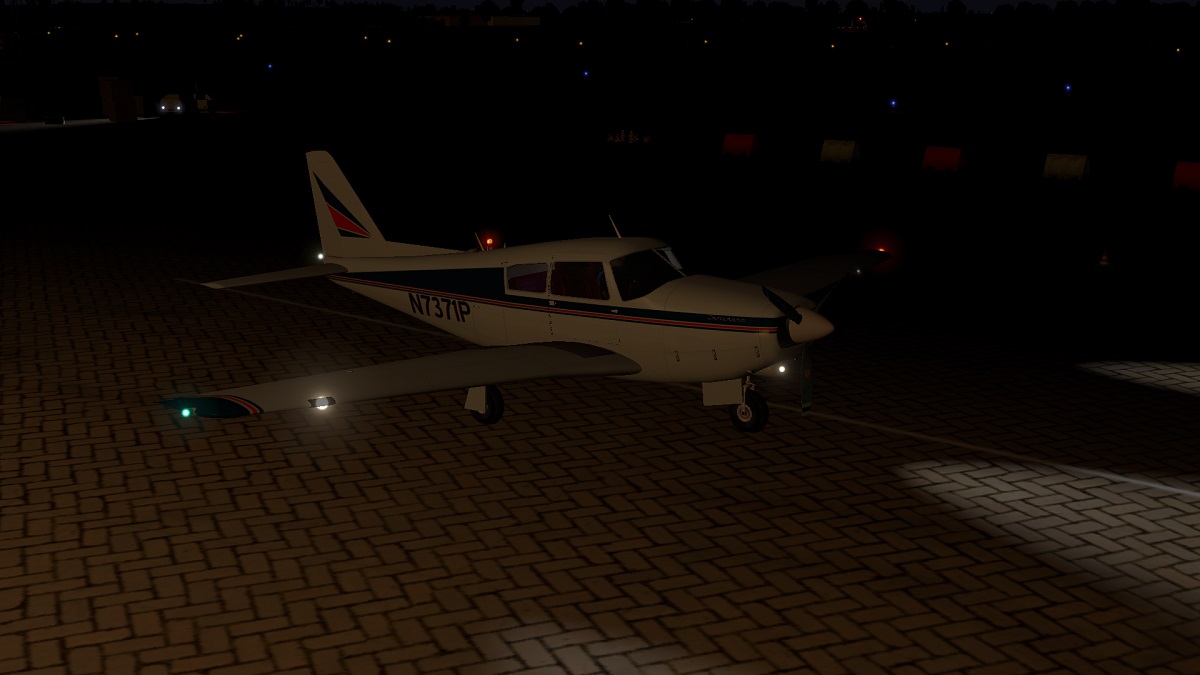
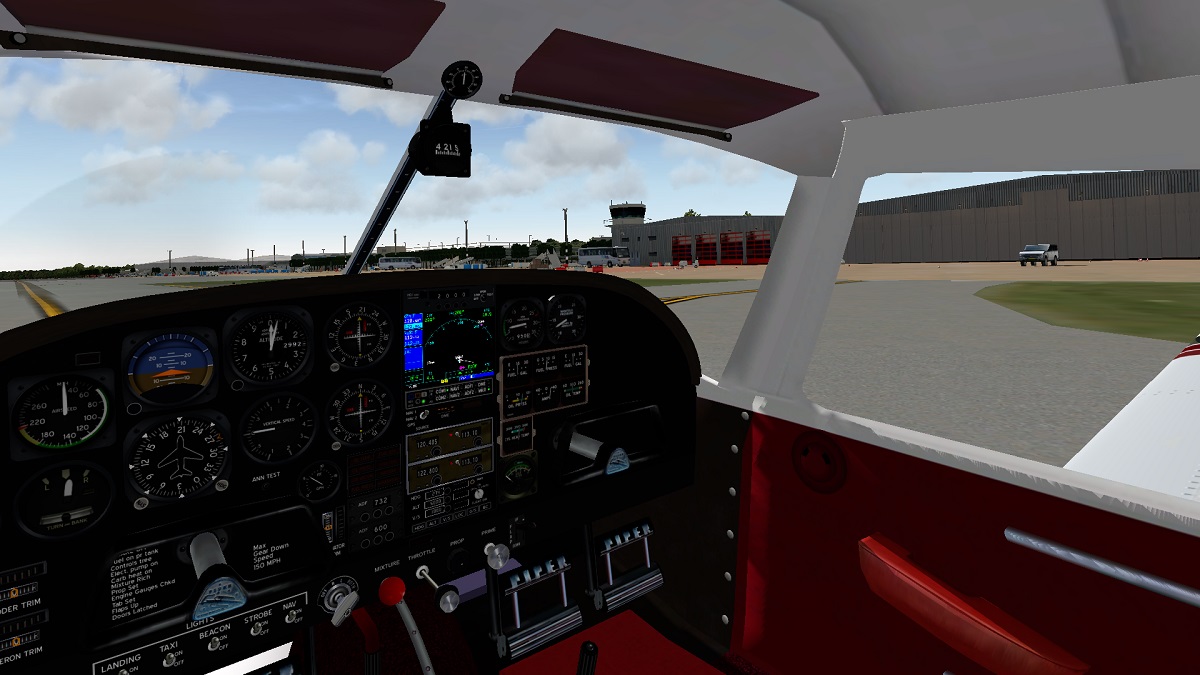
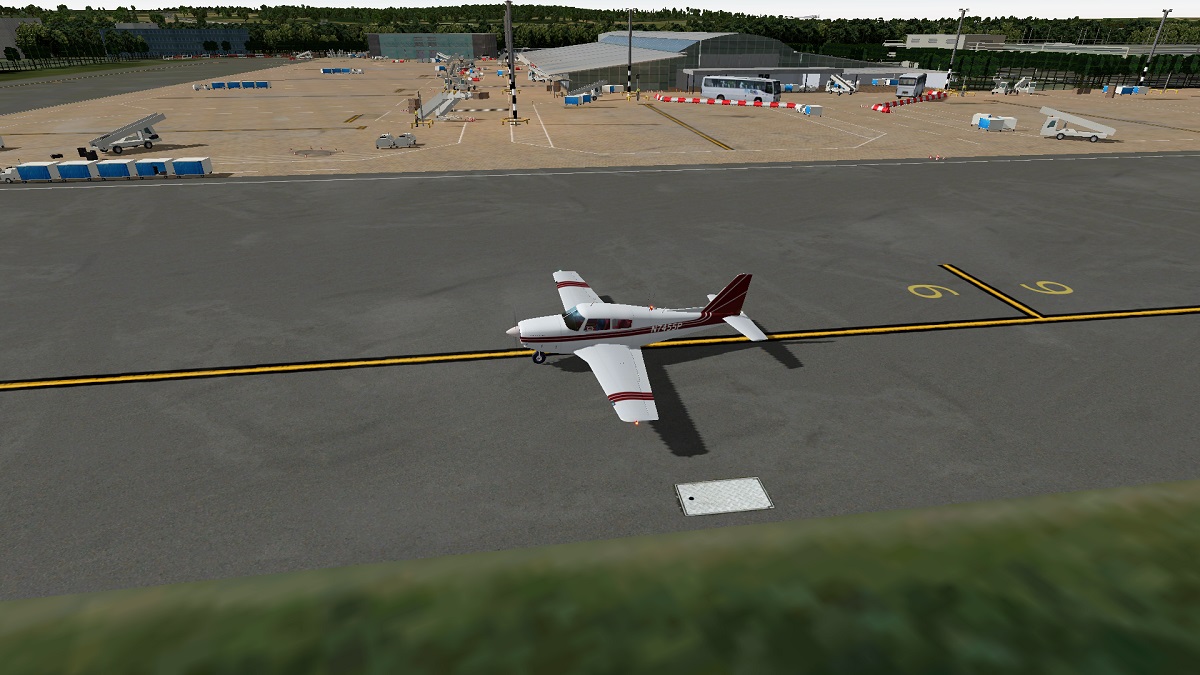
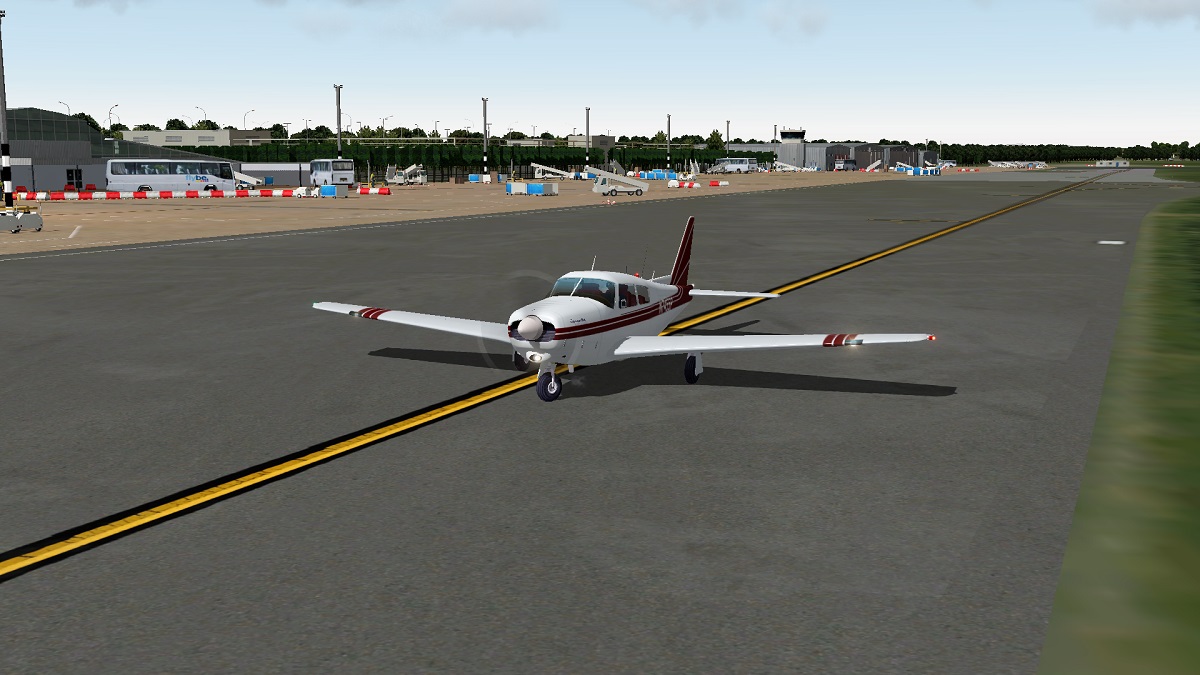
Aircraft Review: 1963 Piper Comanche 250 Route : VFR Circuits at EGHI Southampton International When you think of Heinz Dziurowitz you will most likely think of many GA (general aviation) aircraft that are on the .org store with most being at a good standard quality and low price. Heinz's latest release, the Piper Comanche 250, is no exception to this. With fun and good modelling of the exterior this GA aircraft can be brilliant to fly for quick flights! From analyzing images you can see that the aircraft Heinz produces are not quite on the same quality as for example Carenado aircraft however all of Heinz's aircraft are much cheaper. But quality level I am referring to extremely detailed modelling, texturing and flight characteristics. The Piper PA-24 Comanche is a four-seat, low-wing, all-metal, light aircraft with tricycle retractable landing gear. More about the 250 variant (from wiki): In 1958 Piper introduced a 250-horsepower (186 kW) version using a Lycoming 0-504 engine, giving the PA-24-250 Comanche a top cruise speed of 160 kts (185 mph; 298 km/h). Most 250s had carbureted Lycoming O-540-AIA5 engines, but a small number were fitted out with fuel-injected versions of the same engine. Early Comanche 250s had manually operated flaps and carried 60 US gallons (230 L) of fuel. Auxiliary fuel tanks (90 US gallons (340 L) total) became available in 1961. Electrically actuated flaps were made standard with the 1962 model year. The aircraft's gross weight was increased from 2,800 pounds to 2,900 pounds in 1961, making the useful load 1,270 pounds. During this review I have used the Saitek Pro Flght Yoke and Rudder Predals, I have kept the same settings for the yoke setup so I can carefully examine flight dynamics. So, what's the Heinz version like of the Comanche? Well, I decided to take a VFR Circuit around Southampton Airport (UK) , to find out! I will now describe my encounter... I found myself at EGHI - Southampton, parked on the ramp at around 11:00am , the weather report wished a pleasurable day for a circuit. First I start with a walk around inspection of the PA-24 Comanche. Features: Integrated Garmin GNS 530 Highly detailed 3D cockpit Detailed exterior Night Textures Additional paint schemes Includes 2 versions Regular version Tip tank for longer trips System Requirements: Windows, Mac or Linux.X-Pane 10.30 or higher - 32 and 64 bit compatible 4Gb RAM/ 512Mb VRAM Walk Around: The exterior model of the Comanche has been modelled very well with even the smallest of details added, such as the vibrating engine I noticed. The attention to exterior detail is very good. The fuselage and wings have been modelled with precision along with small features such as peto tubes. The landing gear has also been modelled very well, the wheels are shaped proportionally and everything is how you would expect it to be. The propeller has also been modelled with detail when static you can clearly see the iconic shape of it. However textures look a little bright and out of contrast, I think that the Comanche would really benefit from weathered textures. Textures where there are shades around the bolts and streaks of oil leaking out of the fuel cap running along the wing, things like that could really help the amazing modelling stand out. Although the texture on the propeller is OK, that looks very detailed and at a high resolution. I am not saying that all of the exterior textures are low quality as they are not, they could just benefit from a weathered look and feel. All of that sad for the rest of the exterior instead of the wheels, the tire texture is absolutely spot on in terms of realism. 3D Cockpit: The 3D cockpit is OK although there are more detailed cockpits on the market if you are one for eye candy, but you must remember the very low price of this model. The modelling of the 3D cockpit is pretty basic to be honest, the panel looks flat and 2D from the captains eye point and the rest of the interior has been modeled very basically. Also textures seem to be a bit basic as well inside, the seat texture is OK however the panel and side/ roof textures really are plain. As you would expect most instruments are animated and some other nice features such as the passenger door and cargo door. The cargo door switch also opens the cowlings over the engine which is a nice feature although you do not have an option for that specifically, the cowling doors open and close with the baggage doors. On the co-pilots seat there are maps and charts which are a nice edition. The windows don't seem to be custom made, by this I mean that there are no dirt marks around the window ledges etc.. However inside still looks good without that feature. In the cockpit as always you get the pilots standard six and a the new default Garmin 530 on the panel. The 3D cockpit textures are very bright and maybe a little out of contrast, the red is quite blinding when looking around the cockpit, I think if this texture was a little darker then this issue would be solved. The sun blinds are not animated but to be honest I don't really use them anyway when flying. This may be different with the integration of the oculus rift which I may need to be able to use the sun blinds then! The piper rudder pedals are a nice edition to the aircraft,a bit blurry but a nice edition to have, the rudder pedals are also animated. Going lower down into the cockpit the seats seem very low to the floor, this may be correct for how it is in the real aircraft but it seems a little too low! Apart from that the rest of the 3D cockpit has been modeled to precision of where things are placed and there sizes. Also another strange thing, the landing gear toggle is a normal switch like what you would have for your beacon lights, this may be correct according to the real aircraft however I am very used to a lever of some sort somewhere in the cockpit! Liveries: Four liveries are included with the Comanche, all liveries are of the same quality and none have a weathered look. Each livery has been made with precision and to me each livery resembles that 1960 Piper look and feel. As you can see you get a wide range of liveries to choose from, all apart from a blank livery to design your own but maybe this will get added in the future. As well as the liveries above you may also be lucky for some people to post some on x-plane.org for you to freely download. Model Variation: When you purchase the Comanche you get two variant models. The first is the main focus of the review above, the second is the same but with tip tanks which extends the aircraft's range. The interior model is very much the same apart from the grey texture scheme which I prefer over the bright red. Externally is where the majority of the changes are, the tip tanks have been modeled carefully and are identical on either wing, that is obviously something you expect however sometimes models can vary. The flight dynamics of the tip tank Comanche is very much identical to the normal Comanche, there was not a considerable difference that could be spotted. Documentation: You get all of the documentation you will need in order to successfully operate and install the Comanche. You get one PDF (Portable Documented Format) which explains everything you will need to know. You then also get three more text files which open in notepad (windows) or such programme on Mac. The three text files are Copyright, Contact Info and operations. Operations is a key file to successful flight, it contains all procedures you will need to operate the Comanche, my opinion is that the Operations content would be much better as a section in the manual therefore it can be easily printed. Night Lighting: The exterior night lighting of the Comanche is OK, its everything that you would expect really, a rotating beacon and casting landing lights. You can also see the lights of the hangars at Southampton Airport casting over the right wing. However the interior night lighting is somewhat different to what I am used to. The interior lighting does not include any 3D per pixel lights, as you turn up the cockpit lights the texture of the cockpit brightens which for me is lower quality than normal. Normally you get a light bulb which very cleverly looks as though it is casting light into the cockpit. In the Comanche in the dark I couldn't find out where the light was coming from! it virtually just is the cockpit textures lighting up. It's perfectly fine if are not an eye candy simmer however on payware aircraft I do like to see per pixel lighting. But you must remember the low price of this machine. Normally payware aircraft are much more expensive than the price of the Comanche. Sound: The sounds of the aircraft are as you expect them to be, nothing stands out and makes it extremely immersive however the sounds are quite good. On start up you can hear the engine choke and then the running sounds. like I said, no sounds stand out to make me feel as though I have just started a real Comanche however each sound has been placed well. Something I didn't notice though, 3D sound. When circulating around the outside of the aircraft I did not hear a more clean sound when close to the engine and a more lower pitched roar moving toward the rear of the aircraft, things like that are very good. An example aircraft that has the is the Carenado Piper Malibu Mirage however again this aircraft is cheaper so really you pay for what you get. Conclusion: In conclusion is the Comanche worth a few dollars? Yes! The aircraft is great all around, yes there a few things highlighted in the review that could be changed, edited or added however it is still a great base model to have parked in your hangar. Some textures are great such as the tire textures and the textures for the seats and manuals on the co-pilots seat, as I mentioned a weathered texture would solve a lot of issues of the aircraft looking too clean. Apart from that is is great. The static pilot sits and enjoys the ride with you! He has been modeled and textured brilliantly. It's difficult to fault many things, mostly everything is animated, the vibrating engine is very good. All doors open but not the captains window, however it is there. The landing gear has been carefully crafted and animated. The interior and exterior modeling has been done to a very good standard, the main thing letting it down a little is the interior textures, the red is too bright for me. But little things like this can be sorted out in updates, it's not like the aircraft is not airworthy! Static elements could also be added, that would be a nice feature. Also another improvement could be to have an on screen menu for the doors instead of panel switches, or click-able doors and windows. In a future update that all may be added to this great little machine. The best part about it is the price! It is a good model for the price you are paying, not only that you also get two variants with and without tip tanks. So as well as great fun to fly its also customizable! Where can you find this aircraft? On the X-Plane.org Store of course for $14.95 Get the : Heinz - Piper Comanche 250 1963 - Here. What scenery is that? EGHI Southampton Intl Airport by Pilot Plus. Heinz Aircraft Support : Click here Reviewed by : Joe ©copyright 2014 : X-Plane Reviews Scenery used (payware) : EGHI - Southampton Airport by Pilot Plus. Technical Requirements: Windows, Mac or Linux.X-Pane 10.30 or higher - 32 and 64 bit compatible 4Gb RAM/ 512Mb VRAM Review System Specifications: Computer System: - Intel Core i5 3330 @ 3.00GHz - 4.00gb of RAM - Geforce GTX 650 Software: - Windows 7 64 bit - X-Plane 10 Global version 10.31 - EGHI Southampton - Alabeo C195 business liner Hardware: - Saitek Pro Flight Yoke System - Saitek Rudder Pedals.
-
Scenery Review : LGMK - Airport Mykonos by Aerosoft This is my review of LGMK Mykonos, having been there myself I hope this review gives you a detailed insight to how Aerosofts rendition of Mykonos compares to the real thing! Publisher and Developer: Mykonos LGMK is Aerosoft's latest scenery release! Developed by Icarus, this scenery is definitely one not to ignore. Aerosoft have released many sceneries in the past, but none live up to the standard of Mykonos! LGMK is Aerosofts first scenery using new developed features such as, animated ground traffic and Ultra HD textures. This is also Aerosofts first scenery covering a whole island in lots of detail! This release is the first time I heard the name Icarus, after some research I found out that the team are also developing a DC-9 which is very exciting! So LGMK Airport Mykonos can be found on a small island of Mykonos off the coast from Athens in Greece. In Greek mythology, Mykonos island named from Mykons, son of Greek God Apollo. The place of a big battle between Zeus and Titans, where Hercules killed the powerful Giants. Even now it is rumored that the large rocks over the island are corpses of the Giants. Mykonos is the most famous island in the heart of Cyclades and Aegean Sea, which attracts thousands of tourists every year. Installation and Documentation: Mykonos could not be easier to install, just simply run the installer that you download and select your x-plane folder. After entering your activation code it will start installing. In the past I have had trouble using the installer provided by Aerosoft, others seem to have had the same issue, but installing Mykonos worked perfectly. If you are new to x-plane in general then you may install the scenery and load up the sim and see your new airport, however you can find the manual within the three folders that are installed. First locate your x-plane 10 folder and click into 'custom scenery' in here you will find three folders each with Mykonos in the title. The folder you need to open is called 'Mykonos Airport' in here you will find the very detailed 16 page manual. The manual tells you everything that you need to know, and includes extensive explanations of certain things including a FAQ (frequently asked questions). Unfortunately no charts are provided with the scenery, this could be something forgotten or the charts were intended not to be included. Anyhow it doesn't matter too much as many charts can be found online. Features: From Aerosoft: "This scenery package has been designed to take advantage of the most modern X-Plane technologies, like HDR lighting, texture detailing, object instancing, and many more. In order to experience the feeling of the actual airport during the night, the HDR option, in the rendering options, should be checked on. The night lighting was carefully designed to represent the real life lighting with the minimum affect on frame rates. The Airport is represented as close as possible to the real counterpart, with the combined use of Ultra High Definition (UHD) textures and High Definition (HD) textures. The ground is represented with custom textures with resolution 3-5cm/pixel. The whole island is covered with 50cm/pixel satellite imagery (orthophotos) with added shaders for increased resolution, with hundreds of the well known white/blue “Aegean Sea” type houses and local vegetation (trees), giving an accurate representation of the island. For the towns of Mykonos (Chora), houses are almost 1-to-1 ratio to the real world, giving you the feeling of the dense town. Moreover, every light is a “real” light, emitting and lighting the surroundings. There are plenty animations providing a “living” environment, like the windmills. Also there is maritime traffic around the island." Highly detailed rendition of Mykonos International Airport (LGMK) Complete coverage of over 140km with high resolution satellite imagery (0.5m/px) High resolution day and night scenery complex terrain mesh animated car traffic around the airport complete reconstruction of airport's lighting equipment realistic 3D grass and vegetation complex reconstruction of the town over 2,000 hand placed objects animated windmills Highly detailed manual compatible with x-plane 10 HD Mesh Scenery v2 x-plane 10 HDR lighting custom ground textures with about 5cm/px (only airport area) First Impressions: The first thing that stood out to me was the scale and complexity of the scenery, every house on the island has been placed on top of an orthophoto at high resolution! This airport is great for VFR circuits over the main town, so that is the first thing I did. I started up the Carenado Malibu Mirage and taxied to runway 34. After take off I turned left and flew over the small town. Flying over the town was great fun, from 1,200ft you can see the windmills turning and boats slowly sailing around the island! If you look closely you can also see small smoke puffs coming from the cruise ships parked in the docks! The town looks very clustered with houses from 1500ft, however close down the houses can appear to be spaced out. I have pointed this out as when I visited Mykonos the public foot paths were only about 3 meters wide! You can even tell from google earth how crammed the houses are in the town. After flying over the town I turned left and set my heading back to runway 34. The approach was actually quite challenging! As the runway is slopped at 400ft above sea level it is a difficult approach. Nether the less it was pretty fun, trying not to touch the roofs on the big hotels! Also the other thing that stood out first was how detailed the ground textures are at the airport, the 5cm/px looks excellent especially when taxiing off of the runway onto the apron. Location: Having been here myself I personally love the location of Mykonos, surrounded by islands in the Aegean Sea! But currently this gives us all one issue, where can we go to do a short flight from Mykonos? You are probably thinking of the small islands around Mykonos however there is no amazing scenery to fly to. I have done a few long flights to Mykonos however sometimes I like to jump in a small cessna and island hop! It would be great to island hop to Tinos (the island next to Mykonos) or all the way to Athens! Having been to Athens as well, it would be great to see some fantastic sceneries for around there! So the x-plane.org downloads would be a good place to search however we are in need for another good quality payware airport near Myknonos that we can fly to! Apart from that Mykonos is a nice destination for flying around europe. Textures and Frame Rates: The textures on the airport buildings are all standard white with a slight layer of dirt which looks good as the airport looks a little worn and not brand new. Cracks can also be noticed on the walls and pillars. The roof textures have to be the best, all colours match the same as real life and the roof window hatches have cloud reflections! By the way I should point out that the reflection is a picture within the texture, there are no 'actual' reflections. The ground textures on the beaches and slightly out to sea look phenomenal! The sea looks great and I feel as though I want top go swimming in it! The orthophoto sea also fades out nicely into the default sea. Overall the textures and 3D modeling within the airport from Aerosoft, summed with the high resolution orthophotos and great visuals, puts this scenery in the top list of airports ever made for X-Plane 10! Despite this the control tower windows look very dark and they do not have reflections. I believe that the texture needs to be brightened up and reflections should be added, this will then make the control tower look identical to the real one! Also the A320 parked on the apron has low resolution textures compared to the rest of the scenery. It would look great if the textures where sharpened up on the A320, in turn it would add more realism. With the addition to better textures brings us onto frame rates. All textures within this scenery are .dds, this adds performance which is good. On average I get around 28 fps. Sometimes this does drop, for example the 3D lighting has a negative effect on fps. As each light in the scenery, including the island, casts a spill on the XP environment. Overall the frame rates aren't too bad, but I would advise you to check your system first before purchasing as you want to make sure that you can run it and get good performance. You can read the manual and follow steps to increase performance however be warned you cannot change the number of objects. Changing the number of objects in the settings menu will not alter the amount of objects you see, your computer has to render each object wether it likes it or not! To improve your frame rates the most drastic thing you can do is turn HDR off,I do not like doing this as the quality of the sim gets reduced when this happens. Light is not reflected etc.. and when flying around Mykonos with HDR off you can considerably notice the difference day and night. 3D Modeling: The 3D modeling is great and very creative. Mykonos can look a bit square but thats how it looks in real life! The 3D modeling in this scenery is not ground breaking or overwhelming, but simple and life like. The architecture of the airport at Mykonos is very simple anyway so the icarus team have a faithful replica. Other Aerosoft airports can be known for their bland and emptiness, Mykonos is totally different. The best 3D model has to be the turning windmill don't you agree? The windmills turn not to fast and not to slow, a very good rendition! When I visited Mykonos the windmills were barely turning, this is because there was not enough wind that day, just blazing hot sun! Obviously the windmills in x-plane are not wind dependent but still operate great! 3D modeling just outside the airport is also very good, the benches, bins, people, signs, railings all are very detailed. The vegetation has many different varieties, shapes and sizes, lot's of work has gone into that end of 3D modeling as well. Every model is custom made with precision and high resolution textures, some models are basic but this reflects the style of the real Mykonos. Night lighting: The night lighting in the town looks okay, you definitely know you are entering Myknonos, the white walls are even further emphasized by the lights! The airports runway is extremely dark and hard to visually find 15nm from the island but this is nobodies fault, just the airports fault for not installing more lights! The main Apron lighting is sum what special. The bright cast of pale white light shines on the side of your aircraft as you move about the apron, the light even lights up inside the cockpit! However the light is very pale and not appealing to the eye. Also another thing that could be added to the light casting are rays of light coming from the bulb, I have seen this in many of Aerosofts airports for FSX, there is a picture below. There is not much else to comment about the lighting apart from it being very dark over the otherside of the island where no houses have been modeled and therefore there is no night lighting. What to find on the Apron: During my initial wander around the airport the apron looked very basic. However that's simply because there are not many object where you taxi your plane, most airport objects such as portable fire extinguishers, buses, GA Aircraft, stairs, the Aegean Airbus, cones, GPU's, belt loaders and cars etc.. As you can see the list is long and therefore creates a realistic environment. The apron is also home to the "ultra HD Ground Textures", written on paper can still impress but walking around the apron whilst oil spills reflect the sun is just great! As well as the oil spills and concrete cracks the grey grained ground looks good in HD as well. Before seeing the ground textures I did not know what to expect, I thought that the ground textures would look like the default repetitive design however I was totally wrong. The main missing item on the apron is taxi lines and markings, but this is accurate to real life as pilots have to rely on ground crews to guide them in! This is very realistic as you feel as though you have to wait for the ground crew to turn up when you're in your aircraft ready to park up! In all, this creates a very realistic experience. The biggest objects on the apron are the apron lights. These lights stretch high into the sky and have been modeled with precision, just like everything else on the apron. Summary: So is this scenery on the Beti-x Stewart level? Unfortunately no, not quite, but close! It is very nice to have a whole island with an airport, especially with orthophoto under everything. This airport brings something special to x-plane, a realistic experience wether your in a GA Aircraft or a heavy 737. It is difficult to make a replica of an international airport, also very time consuming. Despite that Mykonos is very close to the real thing, every building and visual. I would most certainly recommend Mykonos to any FS enthusiast, even though the airport is small and basic the icarus/aerosoft team have re-created the airport and island with precision. When flying long haul to Mykonos you are waiting desperately to land just to see the airport in it's beauty. It's as though you can feel the heat when you open the door and put on your sun glasses, looking around at the airport as you walk toward the enclosed passenger terminal. When flying around Mykonos I also sense a colour scheme, it's as though I have a product like Maxx-fx running (which I don't). Everything seams light blue and bright, just how I experienced the real Mykonos on my real life trip. "Overall the textures and 3D modeling within the airport from Aerosoft, summed with the high resolution orthophotos and great visuals, puts this scenery in the top list of airports ever made for X-Plane 10!" For the price of this scenery at $21.48 it is worth the purchase. Don't think of this airport as small and basic, there is so much to explore! There are always ways in which things can be improved, more objects around the dock and town area could be a start. But then people with low end machines will not be able to run the scenery, icarus can either find a balance or have an option to show certain types of objects etc.. Also it would look great to see moving objects around the airport such as belt loaders and even 3D people, such as the ones Orbx have! One last thing was the difference of colours between two of the orthophoto's just past Ornos, this left a line between the two. Just a simple fix though of changing the brightness/contrast (pictured below). But don't let this put you off, so much is already included much of which is explained above. This scenery is a great rendition of Mykonos for x-plane. Orhtophoto issue: So why not wait, you can buy LGMK - Mykonos Airport for $21.48 on the X-Plane.OrgStore. Please comment if you have any further questions. Aircraft Featured: - Robinson R66 by Alabeo - A230neo by JARdesign - C208B Grand Caravan by Carenado - PA46 Malibu Mirage by Carenado - C172RG Cutlass by Alabeo - B200 King Air by Carenado - 732 TwinJet by FlyJSim Review System Specifications: Computer System: - Intel Core i5 3330 @ 3.00GHz - 4.00gb of RAM - Geforce GTX 650 1 Software: - Windows 7 64 bit - X-Plane 10 Global version 10.25 - Saitek Pro Flight Yoke System - LGMK - Mykonos Airport by Aerosoft - Skymaxx Pro Review by Joe Sharman 29th June 2014 Copyright©2014 : X-Plane Reviews
-
Aircraft Review : C195 Business Liner by Alabeo Alabeo has contributed greatly to the X-Plane 10 payware market releasing 9 aircraft to date, all aircraft made by Alabeo are at a very high quality and I can't recommend them enough! One of their most recent releases, the Cessna 195 Business Liner, is one of the most greatly modeled aircraft for X-Plane 10 with phenomenal 3D aspects in and outside. The C195 Business Liner is a very light weight, radical engine powered, general aviation aircraft with conventional landing gear. The C195 has a fixed pitched two blade propeller, can seat four and is single pilot certified. The aircraft is very traditional so therefore an International club has been set up just for it! The International C195 Club. So how does Alabeo's Model compare? Very well is the short answer! The Alabeo team have made a magnificent aircraft matching the real aircraft extremely closely, also with additional animations. With any detailed x-plane add-on you need to make sure that your computer is up to the job of running it! Here are the system specifications for the Alabeo C195. Technical Requirements: Windows XP, Vista or 7 (32 or 64 bit) Mac OS 10.6 (or higher) or Linux X-Plane 10.21 (or higher) 2 GHz, 4GB RAM 104 MB Hard Drive space It is difficult to sum up my thoughts and opinions into a small paragraph so I have taken a small flight taking off at Portoroz LJPZ to really analyze what I think of the Business Liner. I start parked on the apron at LJPZ, with the 195 sat cold and dark. Installation Installing the C195 is very simple, just unzip the folder to your C:/..../..../X-Plane 10.. Aircraft.. General Aviation. Directory. When unzipped into that directory you will be able to select the C195 to fly during start up. No installer is included for the C195 by Alabeo however installation is still very simple if you follow either the manual or my comment above. Textures & Option Menu's The 195's textures truly make this aircraft 'traditional' in a way, although the textures are not worn showing wear and tear the textures definitely match the colour scheme of the 195. All textures are in a super high resolution format which looks fantastic, for example the seating leather texture is very detailed and crisp. Within the 195 every nut and bolt can be seen as well as creases in the leather which look great! The crippled leather and fabric in the cockpit makes this aircraft feel ultra realistic, another texture which is very good is the dirt marks on the bottom of the glass. It would be great to see more dirt marks placed in level eye vision for extra immersion however the cleanliness is mostly down to the owner, this Alabeo 195 is certainly a collectors one! The metal foot pads on the floor of the 195 are at a high resolution however the actual carpet texture could be a little more high resolution. The sun screens above the pilots head in the cockpit are very detailed and crisp looking, you also have the option to have them or not in the pop up menu, however, from the outside when you disable the sunscreens they do not disappear? The texturing on the yoke has been finished to perfection, the pictures simply explain themselves. As always it is possible to hide the yoke from view by clicking on the yoke hotspot, when hid an Alabeo texture is displayed. The rudder pedals have been textured to the same colour scheme matching the rest of the 195 interior however could be more crisp looking although who stares at the rudder pedals whilst flying! The exterior texturing is amazing as always with any Alabeo model, its a shame that the textures don't reflect their surroundings however that is a limitation from the simulator itself and not Alabeo's fault. The tires have been textured OK however the tire tread cold be more crisp. As you can see from the images above you get the normal two option menu's with the 195, C for 'cameras' and O for 'options'. The two menus allow for change such as static elements, door animations, sun screen options and many more. The cameras menu is very useful when flying high in the sky! This easy accessible menu lets you change the 'FOV' field of view and camera position, clicking on the selected camera position will transfer the camera to the designated place. Pilot View takes you to a predefined 3D cockpit position with mouse look. Liveries 5 HD Liveries are provided within the 195 package, all of them look great and can be used for different flying purposes. The liveries are named ' livery 1, livery 2, livery 3 etc...' this can be slightly annoying when your trying to find a livery that you really liked! Apart from that the liveries are all great with or without fairings. You may be thinking I said 5 liveries were included by four are shown, this is because the 5th livery is a blank white livery for custom designs possible with photoshop. It is very difficult picking a favourite livery, if you have one please comment below. Eventually after a tough decision I chose livery number 4 ' Wingster', the main reason is because it looks like a redbull livery for stunt flying which somewhat fits well with this traditional 195. All liveries are high definition quality and as you can see from the images above they all look great! 3D Modeling The 3D Modeling Alabeo has pulled off for this aircraft is fantastic! You can really feel a sense of immersion whilst in the cockpit and looking around. The interior modeling has been done very well, especially the yokes! Attention to detail is superb, the seat belts resting on the two front seats have been 3D modeled with great textures applied to them. The side arm rests have even been modeled and look very realistic with the crumpled leather texture. As you would expect the panel is fully 3D with 3D knobs and switches along with 3D gauges. The only issue some people may find with the 3D cockpit modeled the way it is, is the fact that if you are a 2D panel flyer it is going to be very difficult to see the whole panel clearly. However if you are a constant 3D cockpit flyer, like I am, this won't be an issue for you. Despite the difficulty it there is still a work around, you can adjust your FOV 'field of view' using the slider circled in the images in the first paragraph. The windscreen glass really gives the aircraft a sense of immersion inside, stretching from the bottom of the glare shield over to above your head. It could look much better with more dirt applied, or maybe an option to toggle window dirt on/off. Looking up and seeing the clouds above your head is great on a monitor, imagine that in the Oculus rift, especially with the depth of field immersion. Opening the door, using the options menu, and stepping outside we can really see the beauty of this aircraft. The enormous engine and cowling mounted onto the aircraft chassis is really emphasised whilst walking around, the fuselage is long and every nut and bolt holding the aircraft together can be seen. The engine intake looks fantastic, every metal strut an exhaust tube has been modeled accurately showcasing the traditional look of this iconic aircraft. The peto tubes have been greatly modeled as well as very accurate modeling and dimensions for the leading edge of the wings. With static elements enabled using the side bar options menu, you guessed it, static elements are enabled and displayed around the aircraft. Static elements include chocks, obstruction cones etc... all of which have been modeled and textured well. I don't recall however Peto covers, 'remove before flight', being animated within the static elements option? Or the other fabricated covers placed in the engine intake after shut down if the weather is bad? A possibility for Alabeo to add that. Flight Dynamics & Animations After engine start it was time to take off and fly out from LJPZ. After about 7 seconds of rolling on the runway I had taken off and at 15 seconds into the flight I was already at 500ft, that just proves how sensitive, light weight and power full the C195 really is. From one of the pictures below you can see how I slowly started to drift right not maintaining the runway heading , this was not a nature factor of the wind but the general yoke sensitivity and control you have. After correcting the drift it was already time to take my 160 degree turn to my new heading. With hardly any delay in response it can be difficult not to bank the aircraft too steep, however with the correct level of rudder input a steady bank can be made. Once level I leaned the mixture and throttle to maintain flight without wasting fuel. Not having flown a C195 myself it is difficult to comment on the flight dynamics compared to the real C195. I can only report on how sensitive the 195 is, obviously with the under wing flaps down causing drag the 195 is less responsive to change however the more you force the controls you will find yourself in a steep bank. Animations are great, ailerons and elevators have been modeled and animated in detail with a slight delay on the animations in the exterior view. Doors are animated and move at a moderate speed, doors can be opened and closed using the 'O' options menu. The animations look great and even the door handles move correspondingly. During touchdown the landing gear struts flex for suspension taking the force out of the landing, this animation is great! Sound When moving around the 195 in the exterior mode it is impossible to miss the 3D positioned sounds coming from the engines, maybe a little too loud. However if you do not like a loud roaring old engine there is a volume control within the side menus. As always with any Alabeo product you get great sounds of flaps, aircraft doors and switches etc... Here is a video I found on YouTube which demonstrates the C195, you can clearly hear the different prop sounds switching between interior and exterior. Night lighting Night lighting is OK in the C195, nothing much spectacular, however. As normal you get the landing lights casting on the ground in front of the aircraft and the landing light animation (drop down) fits well with the textures and the actual light itself. When using the C195 at night its best to use HDR rendering, then you get the full effect! The interior lighting is not great, the gauges light up by a switch however there are no night cockpit lights, this is probably as it is day VFR (visual flight rules) aircraft however it would be a nice feature to have especially when landing during sunset. Above on the third picture along from the right the cockpit lighting seen is not how it would look parked in a dark field. The seats in the image have spill of the LJPZ apron lights, that is what's lighting up the cockpit. Documentation As normal with any Alabeo product documentation is in great detail and there is a lot of it! Your documentation can be found here: 'X-Plane 10/../Aircraft/../General Aviation/.../ Documentation or wherever you have your C195 directory, although I doubt it will be in heavy metal! In the documentation folder you get 6 PDF's (portable documented format) and 1 JPEG image showing you the recommended joystick settings to have the most realism when flying the C195. If you have any issues with the plane you can contact Alabeo or just refer back to the manual as your question is probably noted in there. Summary Overall the C195 is another great release from Alabeo, if the C195 is to your taste or not it's an aircraft you will still enjoy flying. There are many animations dotted around which look great for example the sunscreen pictured below, meaning there are many ways to configure you C195 to suit you are re-enact a flight you have completed in real life. The textures are high resolution as always and really make this aircraft look special and dated for its era. Wether you are a redbull stunt man or a casual sunday flyer the selection of liveries will suit you and your needs. Everything on this aircraft has been optimized to replica the real C195, if you fall in love with classic aircraft then this 195 is certainly for you. This aircraft is worthy of the investment and fairly cheap for the great quality you are receiving. You may be thinking you already have a few GA aircraft in your hangar however the C195 offers something different, an experience of a vintage classic aircraft that feels fragile to fly. When you fly the C195 you are hesitant to take very steep banks just because of the fact it is an old fragile aircraft. With all effects and animations the 195 still manages to perform well on my system setup, with on average 23 FPS not dependent on interior or exterior views. Wherever you fly in the world, put the C195 to the test. I believe Lukla VNLK will put the C195 to the test, if you have the C195 or plan getting it comment below you experience with Lukla vs C195! The aircraft is not a heavy study sim but something to enjoy in your favourite locations in X-Plane. The sounds are of great quality, the animations from the prop to the landing lights all work as they should and how you would expect them to. The flight model is accurate and precise to the C195, agile, fragile and fun! With a bunch of liveries and detailed options for configurations, the C195 is a great -plane addition. Where can you find this aircraft? On the X-Plane.org Store of course for $22.95 Get the : Alabeo C195 Business Liner - Here. Alabeo Aircraft Support : Click here Reviewed by : Joe ©copyright 2014 : X-Plane Reviews Scenery used (freeware) : LJPZ - Aerobridge Technical Requirements: Windows Vista or Windows 7 (32 or 64 bits) or MAC OS 10.6 (or higher) or Linux XPlane 9.6/9.7 or XPlane 10.11 (or higher - 64 bit compatible) Pentium 2 GHz - 4GB RAM/1GB VRAM 150MB available hard disk space Version 1.0 (last updated July 25th 2014) updated store# Review System Specifications: Computer System: - Intel Core i5 3330 @ 3.00GHz - 4.00gb of RAM - Geforce GTX 650 Software: - Windows 7 64 bit - X-Plane 10 Global version 10.31 - LJPZ - Alabeo C195 business liner Hardware: - Saitek Pro Flight Yoke System - Saitek Rudder Pedals.
-
App Review: Copilot X App Store: Google Play Store Developer: Appropel Price: £2.42 Phone: Sony Xperia Z Version: 2.0 Introduction: Copilot X can be found on the Google Play Store and is one of few x-plane apps available. This app uses your phone as a microphone to give commands to the sim. You simply touch and hold the screen and speak, the app will then turn this into a command telling x-plane what to do. For example if I said 'flaps down' the sim will then lower the flaps in the aircraft I am using. It's basically a virtual copilot! So I downloaded the app and gave it a try! User Interface (UI): I first started up the app to see literally a blank screen, but I was expecting that as had seen pictures previously. The whole screen becomes a button which is held when you speak into the phone, this is a good feature as you do not need to look at your mobile device to check what button your checking. The colour scheme is very dull however I suppose your going to be focused on flying! There is also one other button at the top of the screen to the right. This is options/settings, so its pretty simple to navigate the app. The settings menu also uses the colours set by you, from the pictures you can see that the bars are blue, this is set in my phone settings. The menu screen is a scroll screen, so its easy to use. The in-app graphics was designed by a graphic designer and not the main developer himself. Well I can say that the graphic designer done a good job as the icons and animations look good and go well together. I especially like the robot face that lights up when voice recognition is activated, this robot head also matches the app icon. Function: Next I tested the app. The first thing that had to be configured was the IP Address, this is what it uses to communicate with the computer running X-Plane. This was simple, I just typed in my IP Address that was shown by Net Connections > IPhone Remote. So now the app and the computer are connected it was time to look at the rest of the settings. Other options include . Command Set - A group of commands that the app will read, the difference between a C172 and a 737 . Use ExtPlane Plugin - Enabling this gains you access to more features if you download the plugin . Push to talk Button number - An option to assign a joystick button for push to talk - only available with use of the plugin . Show Recognised Text - Will display a list of results of what the phone thinks you said, the correct command in green . Read Back Commands - The phone will read back commands that you give, a virtual co-pilot! So with my settings configured it was time to give a command. I started first with "Battery On" . It worked perfectly and the battery switch in my Cirrus jet turned on. The second command was "Beacon on" however at the time is was holding the phone and as it automatically went into landscape mode the button holding disabled. Any how I proceeded with more commands that all worked great and fast. So does it recognise your voice perfectly? The simple answer is no. You have to speak clear and loud for the app to detect your voice. This is because the app uses the built in speech recogniser, which works ok and good enough for what the app needs. It would be brilliant if you could plug in a microphone/headset into the phone and therefore use Vatsim at the same time, but that's nothing to do with what the developer can do. This app has some functions which are needed such as the ones listed in bold above but it feels a bit plain. It would be great to see this app grow so it matches something like FS2Crew. But comparing prices, this app only costs you £2.42! Also It would be great if the voice read back sounded like a real human therefore simulating a virtual co-pilot. But I am sure that this app will grow great over time. The push to talk button feature is great! I assigned it to my pro flight yoke, and I then didn't have to even touch my phone! This feature also works pretty well, it certainly adds ease of use because touch/holding the screen can distract me from flying. Now we move onto analysing different features that are highlighted in bold above. Command Set : This function works well, it will accept certain commands for certain aircraft. First I tried this option set to "Generic" this will accept most general commands. Here is a list of the commands that are accepted by the Generic setting: ADF A-D-F one frequency number (e.g. 316) A-D-F two frequency number A-D-F one heading number (e.g. 140) A-D-F two heading number or direction finder one frequency number direction finder two frequency number direction finder one heading number direction finder two heading number ALTIMETER altimeter number (e.g. 3011) APU A-P-U off/on/start ARRESTING HOOK arresting hook extend/retract AUTOBRAKE autobrake rejected takeoff/off/1/2/3/max AUTOFEATHER auto feather off/on/test AUTOPILOT Note that as of v1.20 the word “engage” is no longer used to activate most autopilot functions. Speaking the name of the button acts as a toggle (the only exception to this is the back course button). autopilot altitude number (e.g. 6000) autopilot altitude flight level number (e.g. 360) autopilot altitude autopilot speed number (e.g. 140) autopilot autothrottle autopilot back course autopilot disengage back course autopilot flight level change autopilot glide slope autopilot heading number (e.g. 220) autopilot heading autopilot localizer autopilot vertical speed one thousand autopilot vertical speed minus five hundred autopilot vertical speed BATTERY battery (1-8) off/on BRAKES brakes on/off CARBURETOR HEAT carburetor heat on/off COWL FLAPS cowl flaps open/closed DME D-M-E frequency number (e.g. 111.2) D-M-E mode remote/frequency/groundspeed D-M-E select 1/2 ECAM ecam mode engine/fuel/flight controls/hydraulics/failures FADEC F-A-D-E-C (1-8) off/on FLAPS flaps extend/retract (ExtPlane required) flaps extend/retract full flaps up/down (ExtPlane required) flaps up/down full FLIGHT DIRECTOR flight director off/on/auto FUEL PUMP fuel pump (1-8) off/on FUEL SELECTOR fuel selector off/left/centre/right/both/all GENERATOR generator (1-8) off/on ICING ice off/on ice A-O-A off/on ice inlet off/on ice pitot 1 off/on ice pitot 2 off/on ice prop off/on ice window off/on ice wing off/on IGNITER igniter (1-8) off/on IGNITION ignition off/right/left/both ignition (1-8) off/run INTERIOR LIGHTS cockpit brightness percentage (e.g. 70) hud brightness percentage instrument brightness percentage LANDING GEAR landing gear extend/retract landing gear up/down MAP map range 2 (this is the index of the knob position 1-6, not the range in miles) PARACHUTE parachute deploy PRESSURIZATION cabin altitude number (e.g. 5000) RADIOS communication one frequency number (e.g. 124.3) communication two frequency number navigation one frequency number (e.g. 114.4) navigation two frequency number navigation one bearing (or O-B-S) number (e.g. 140) navigation two bearing (or O-B-S) number SPEEDBRAKES speedbrakes extend/retract SWITCHES alternator off/on avionics master off/on beacon off/on inverter off/on landing light off/on nav lights off/on prop sync off/on strobes off/on taxi light off/on yaw damper off/on TRANSPONDER transponder off/standby/on/altitude transponder number (e.g. 5152) squawk number As you can see that's a massive range of commands that are accepted, and that's only on the generic setting. When set to x737 (which is in the menu default) you get a ton more commands, for example precision control when using the flaps. You get a more wide range of commands rather than "flaps full" you get "Flaps 01/02/05/10/15/20/25/30/35/40". Obviously I didn't get a chance to try every single command but I had the opportunity to try most of them. When doing this I realised that lots of pressure is taken off from you as the captain, this is because your virtual co-pilot is doing all of the work! However I did notice that you cannot get away with speaking casually. For example if I said "turn on the generator" as if I was speaking to a close to life co-pilot it would not be recognised. You have to say the exact command, but I suppose its not a problem as nothing in the flight simulator world will do this. Even in FS2Crew for FSX you still have to say commands which match the criteria that's been programmed. Plugin: As you can see from above there is an option to activate an External Plugin which increases the amount functionality the app has. For example the extra plugin enables more commands such as "Flaps up a notch". The extra plugin is worth downloading, and it's simple. Just simply download it and drop it into your plugins folder! The plugin also gives you the ability to assign a joystick button for push to talk which was described briefly in the above paragraph. So overall the plugin is worth downloading as the push to talk feature and extra commands just adds more to the app. It would also be great if the assignment option for push to talk would automatically pick up the button when you press it, the same way when assigning button functionality in the x-plane menu's, but its still easy to assign a button the way it currently works. Apart from that the plugin doesn't actually do much else. The developer did comment though that he wishes to gain a community for Copilot X and therefore many people can gather together and make more plugins. I think that its a great idea and will only make the app even better! Show Recognised Text: This feature will display a result of five results of what it thought you said. The correct command that it recognises will display green. Its a good feature because it gives you reassurance that the command was picked up properly, although you could say it takes up screen space that is used to press and hold to speak. However this will not be a problem if you have a joystick button assigned. Pictures of this can be seen below. Read Back Commands: This feature speaks back commands that you give it. Its basically a virtual co-pilot. The "virtual co-pilot" is a computerised voice which for me is not life like. In the future it would be great to hear a more realistic voice such as a recorded humans voice, with the option for male or female. Also when the app reads back the commands the computer voice speaks through the phone which is a nice feature because it adds to the 3D sound immersion that you get in x-plane. Manual: The manual included is very detailed and explains everything that you need to know. Its well designed and is easy to read and use. I had to refer to the manual when I started it up for the first time, after reading the manual my problems were solved. The only issue I have with the manual is that it the command list can become unclear after scrolling through many pages, but its nothing to complain about as it has all of the information that you will need. Sound: The sounds are great with this app as they are easily recognisable. For example when you say a command into Copilot X if it gets recognised it will play a bright and happy "ding" noise. If the command is not recognised you will hear a dim and low in pitch screech noise to warn you. Personally I have no problem with these sounds as if you don't want to hear them you can just mute the phone/tablet. Other sounds include the sound pack for "read back commands", like I said above I don't really like the computerised voice, hopefully this can be changed in the future. For me the whole point of this app is a virtual co-pilot, this would be great if Copilot X could speak back commands in a real pre-recorded voice, and even the option to select male/female! However the app is only £2.42, so you have to be considerate of what you will get. So, that's all of the features analysed with my opinions. As well as the review I decided that it would be nice to have an interview with the developer: Is there a team developing the app, or was it done solo? I am the sole developer. I hire a graphic designer for icons, in-game graphics, promotional materials, etc.. I am a licensed pilot and I have previously worked on ATC research... Flight Simulation is a big area of interest for me. What inspired you to make the application, was it a link with real aviation? It was a case of putting two things together in my mind. When I was reading about Google's Voice Recognition service I realized that I could use it to translate commands into something that x-plane could understand. I figured it could ease the pain of putting numbers into the radio's. autopilot, etc.. and that has indeed proven to be one of its greatest strengths. What is unique about the app you built? I've seen few other solutions that offer voice recognition for x-plane. As far as I know this is the cheapest, easiest solution- just load it onto your phone/tablet and go! With the growing number of Apple IPhone users, why did you make the decision to build the app for Android? I am strictly an Android developer as I favour the open ecosystem over Apple's "walled garden". Voice recognition is now built into the Android Platform so it served my needs very well. How long did it take you to get the app where it is now? The initial version came out in June of 2012, so its been close to two years. I just released version 2.0 which is a major rewrite allowing the user to develop their own custom command sets. This enables users to change the commands to suit their preference, support custom aircraft, and even translate the command set into other languages. What are your future plans regarding the development of Copilot X? Now that version 2.0is released I plan to work on more command sets to support custom aircraft and other languages. I'm hoping that the Copilot X user community will chip in here. I just found out about the great new Garmin 430 that will included in x-plane 10.30, and I will be researching to see if I can connect with it. The number one feature I've wanted to do is to be able to programme the GPS and FMS using voice commands, which has been impossible to do because x-plane does not adequately support it. Can we expect future app builds? Are there any examples? I will continue developing Copilot X as long as people are interested in using it. Support for GPS/FMS and ATC are two areas for future development. I'm hoping that more people find out about this app and the community grows..... It's really like magic when you watch x-plane respond to you spoken commands! Can you explain about your other apps, such as X-plane to GPS? X-Plane to GPS was another idea that worked out great. I had just purchased Garmin Pilot and I was using it on my tablet for real flying, but I wished I could use it together with x-plane to practice. When I discovered that Android supports "mock locations" , or simulated GPS co-ordinates, the idea was born. I got the rough concept running in a few days and developed the app form there. Since then I've polished it with upgrades to keep it competitive in the marketplace. X-Plane to GPS costs £0.60 Conclusion: Overall I would give this app 4/5 stars. This is because it functions properly and the way it should, however it would get the full five stars when many more features are added. But that doesn't mean its not worth getting! I would really recommend it if you have trouble controlling knobs and switches in the cockpit, as the app will do it for you making flying more easier. Also it is pretty cool being able to speak into your phone or tablet and for it to translate your voice into x-plane commands! This app deserves much more recognition, more than what it currently gets! Another constraint that I didn't mention above is the lack of the app on Apple's IOS, but the developer clearly states in the interview that he is strictly an Android Developer. But is suppose that many people own an Android device now, despite Apple's IPad or IPhone being more popular its not too much of a problem that this app is for Android. So, Yes its worth buying! For a cheap price this app is very good, I am glad I found it on the Android store! it was a small review but being an App there is not a great deal to comment on, nether the less this app is worth having on either a phone or a tablet. You can buy Copilot x version 2.0 from the Android Store for the cheap price of £2.42 The v2.0 update is free to anyone who already owns the app. Developers website: Appropel Support Email: Appropel Support Review by Joe Copyright © 2014 : X-Plane Reviews Software: - Windows 7 64 bit - Sony Xperia Z ( Android version 4.3 ) - X-Plane 10 Global version 10.25 - Saitek Pro Flight Yoke System - Copilot X