Dominic Smith
-
Posts
143 -
Joined
-
Last visited
-
Days Won
52
Content Type
Profiles
Forums
Articles
Everything posted by Dominic Smith
-
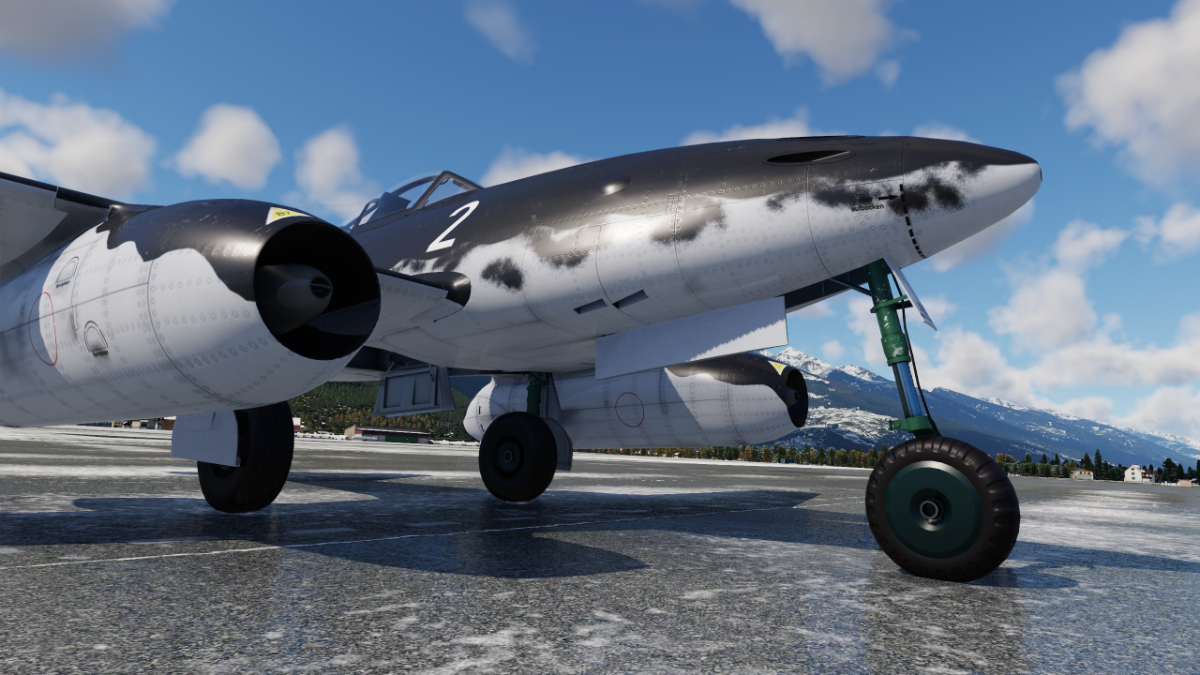
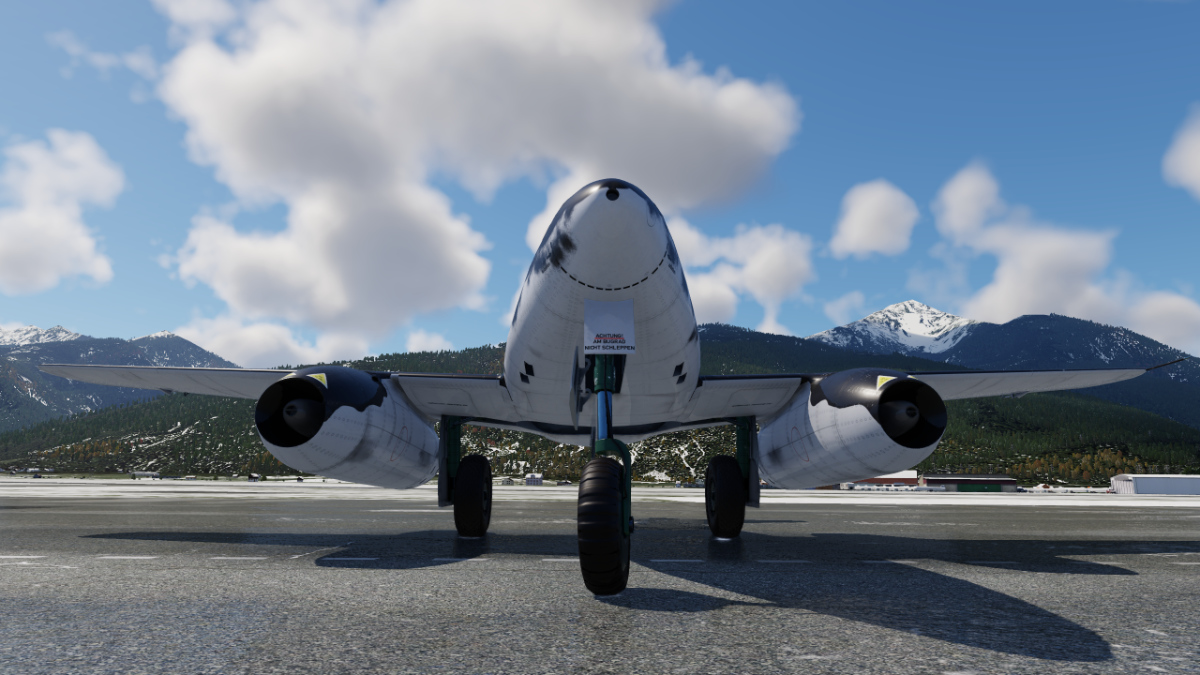
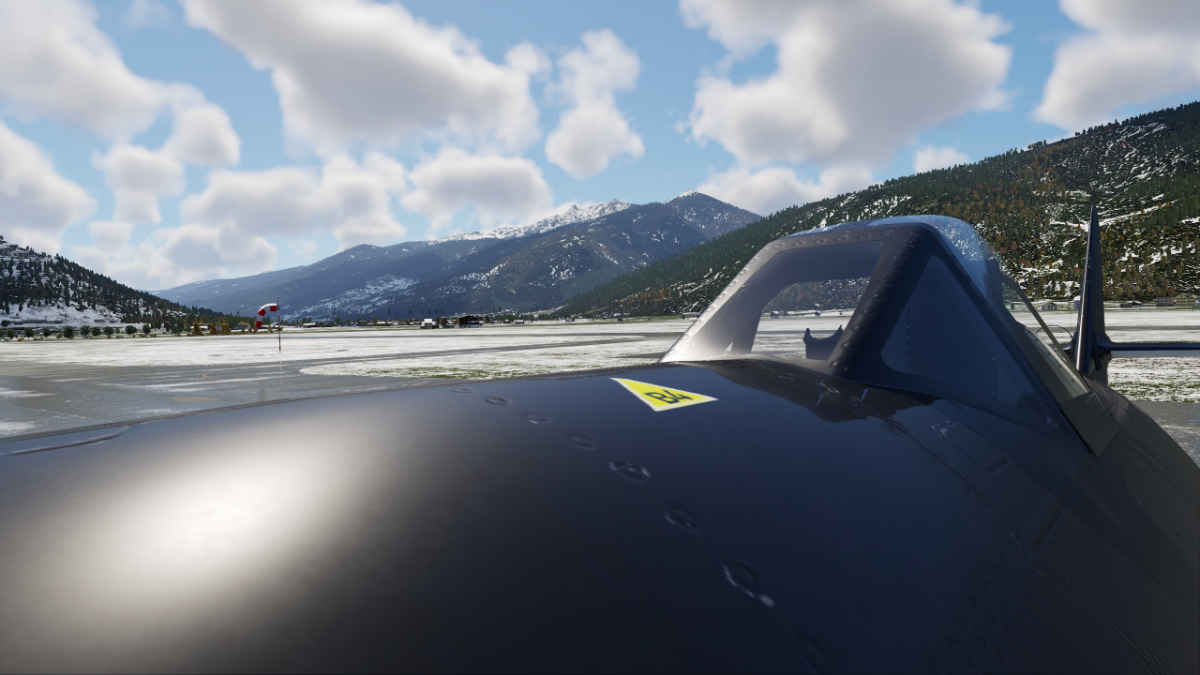
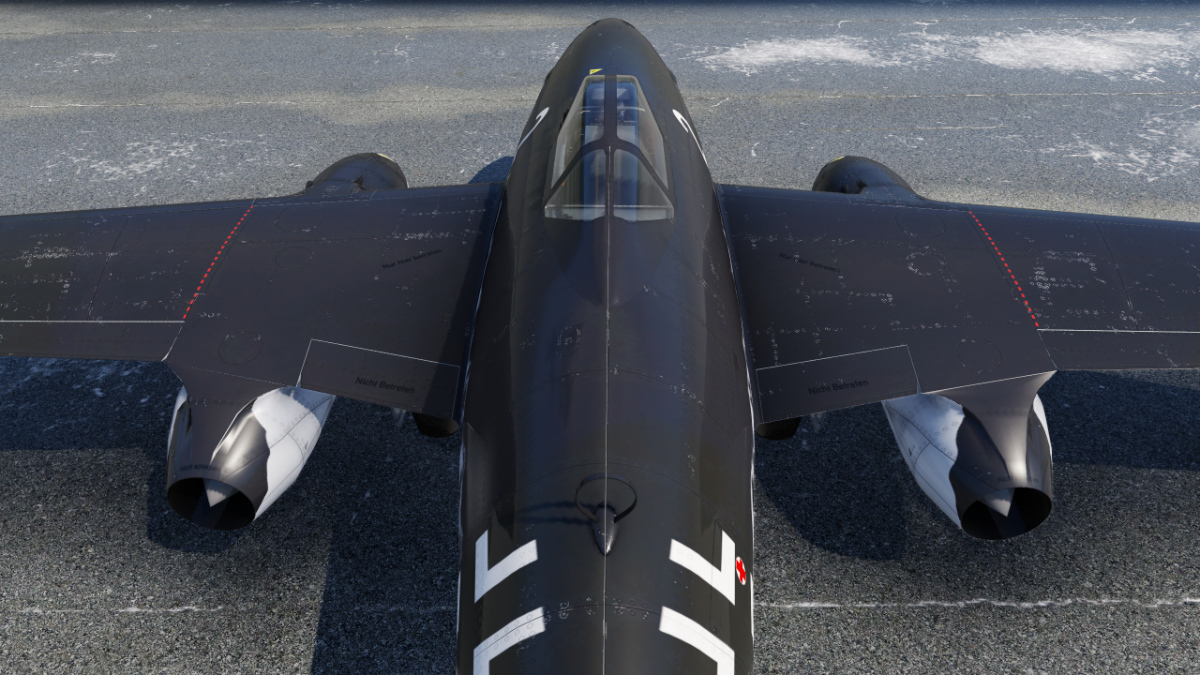
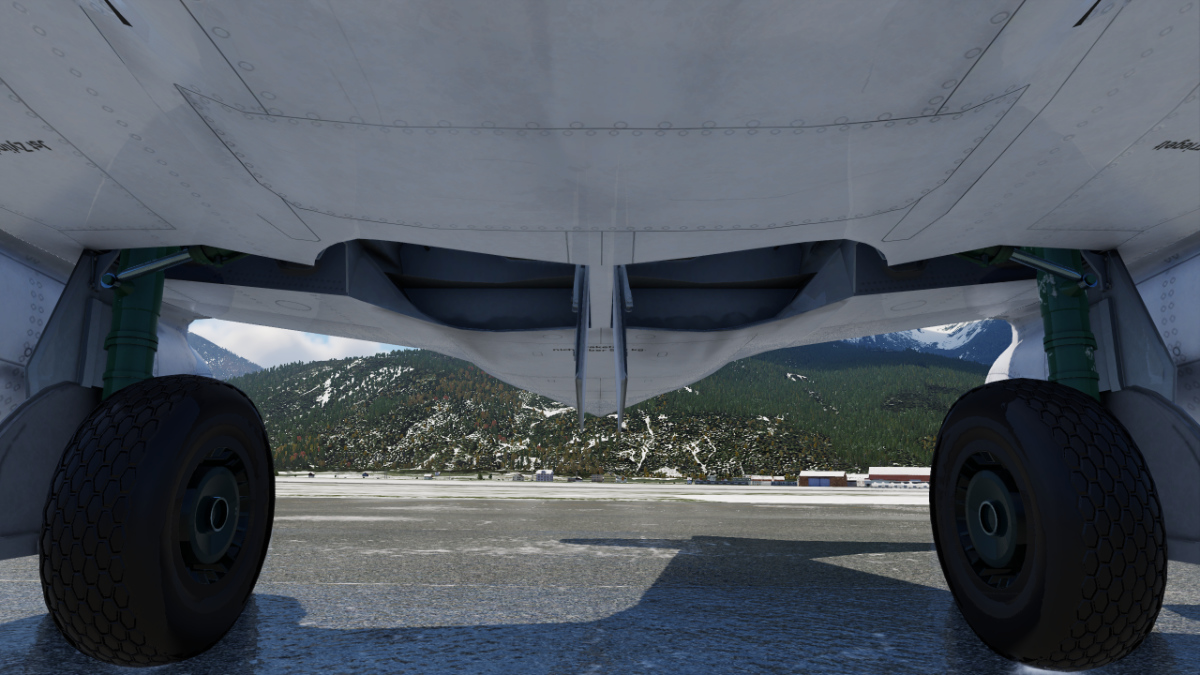
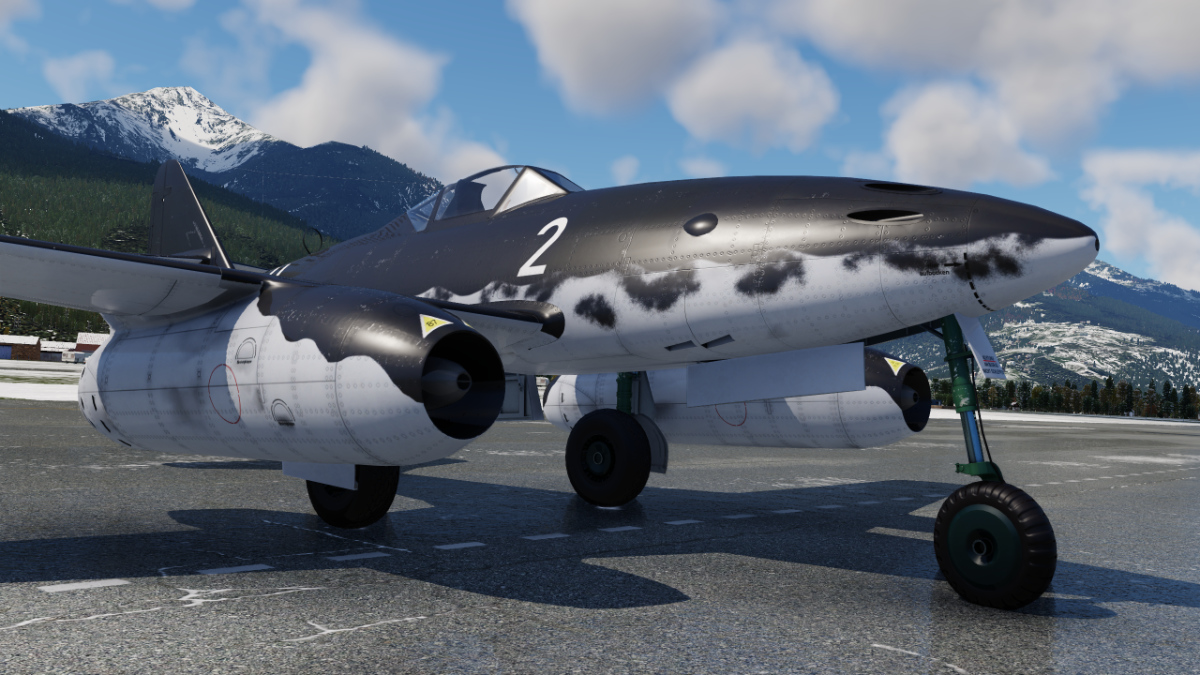
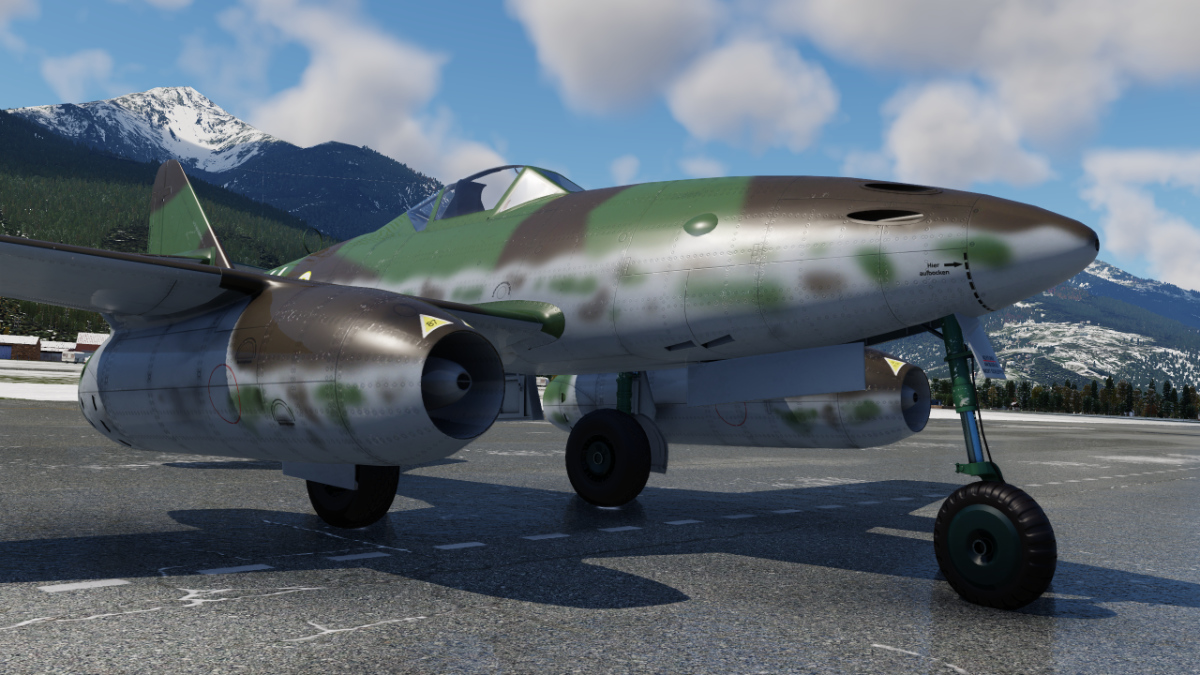
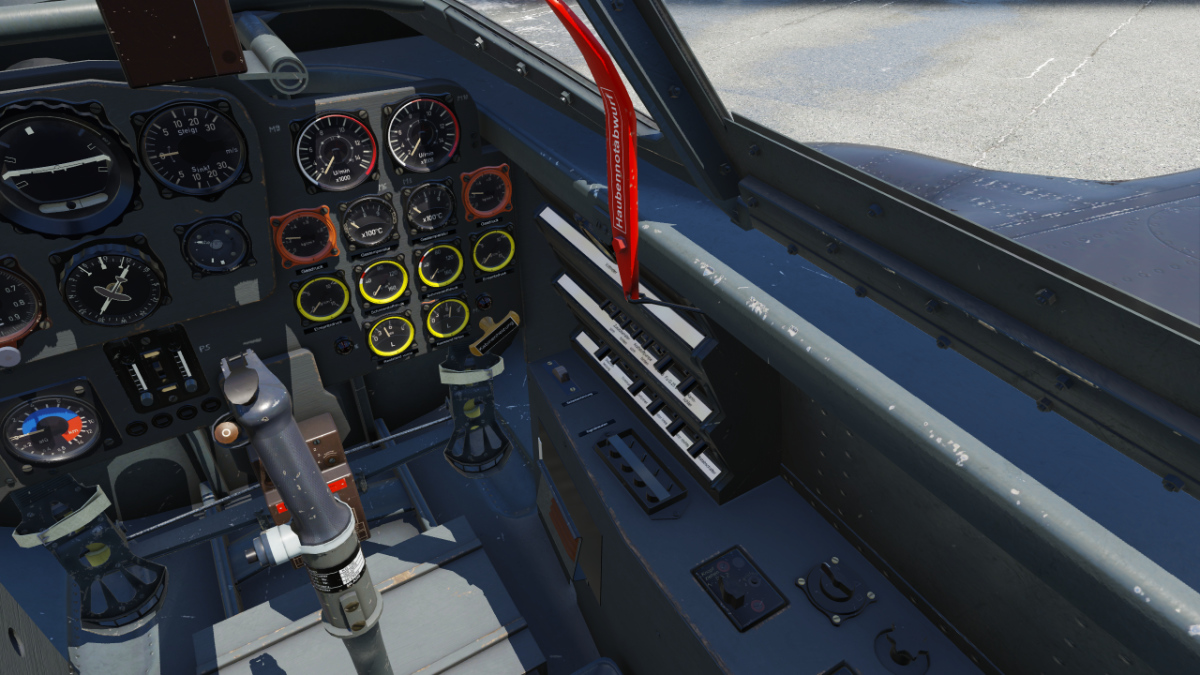
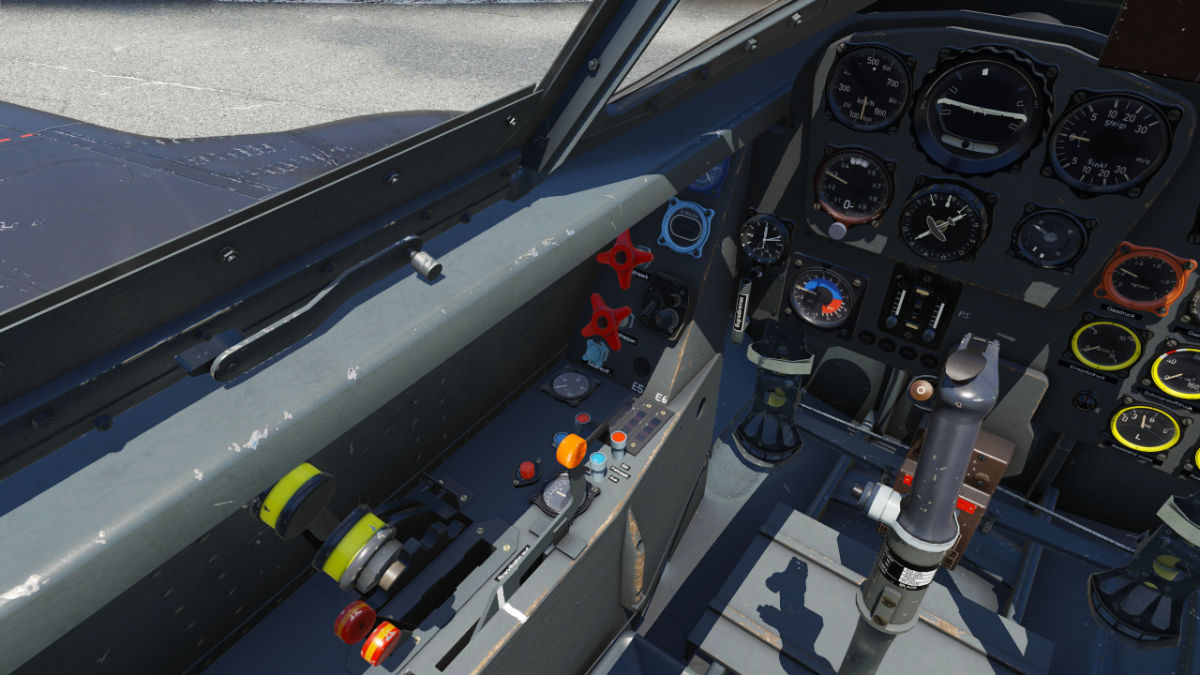
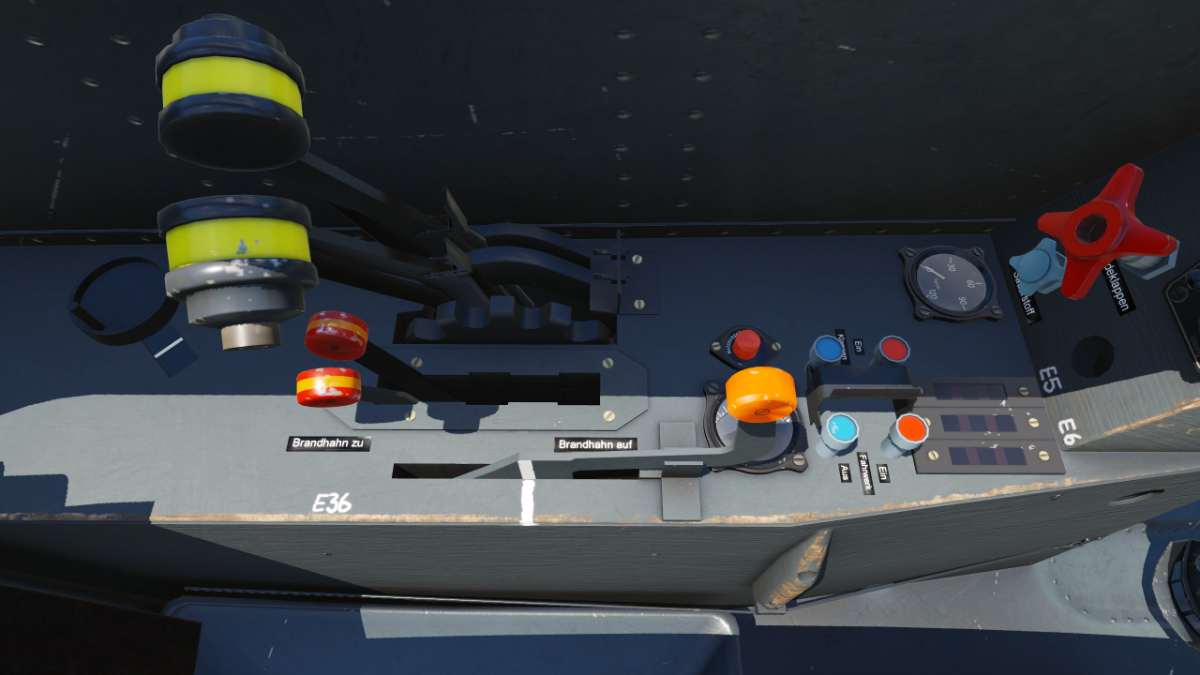
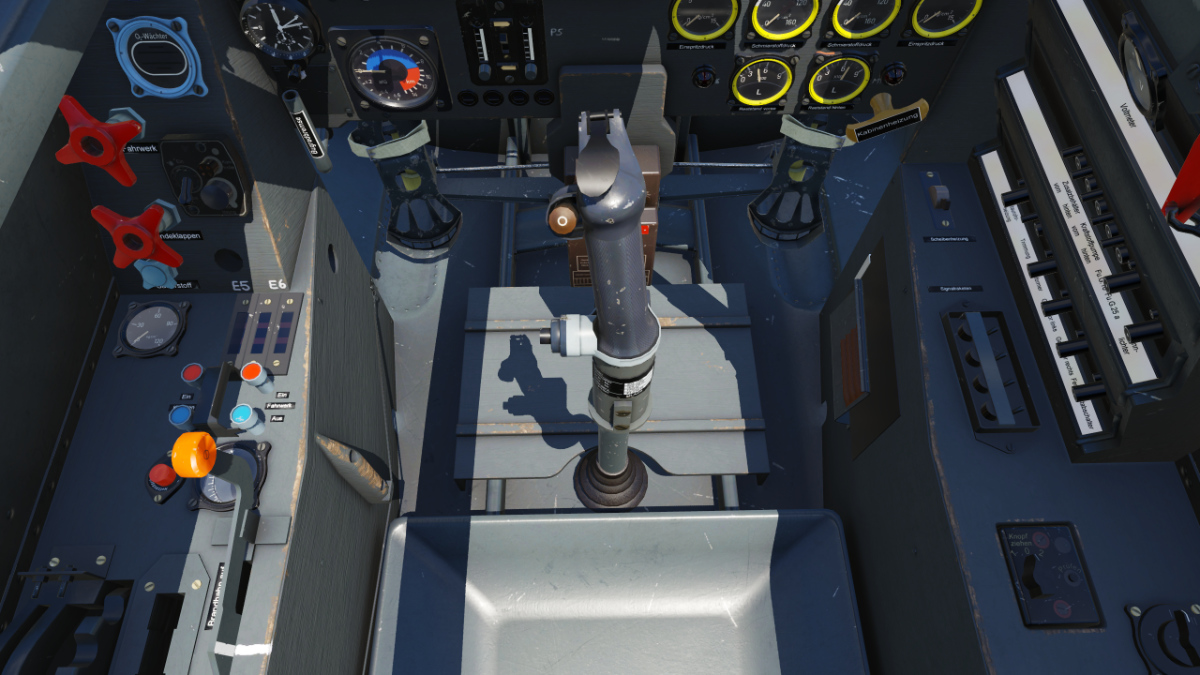
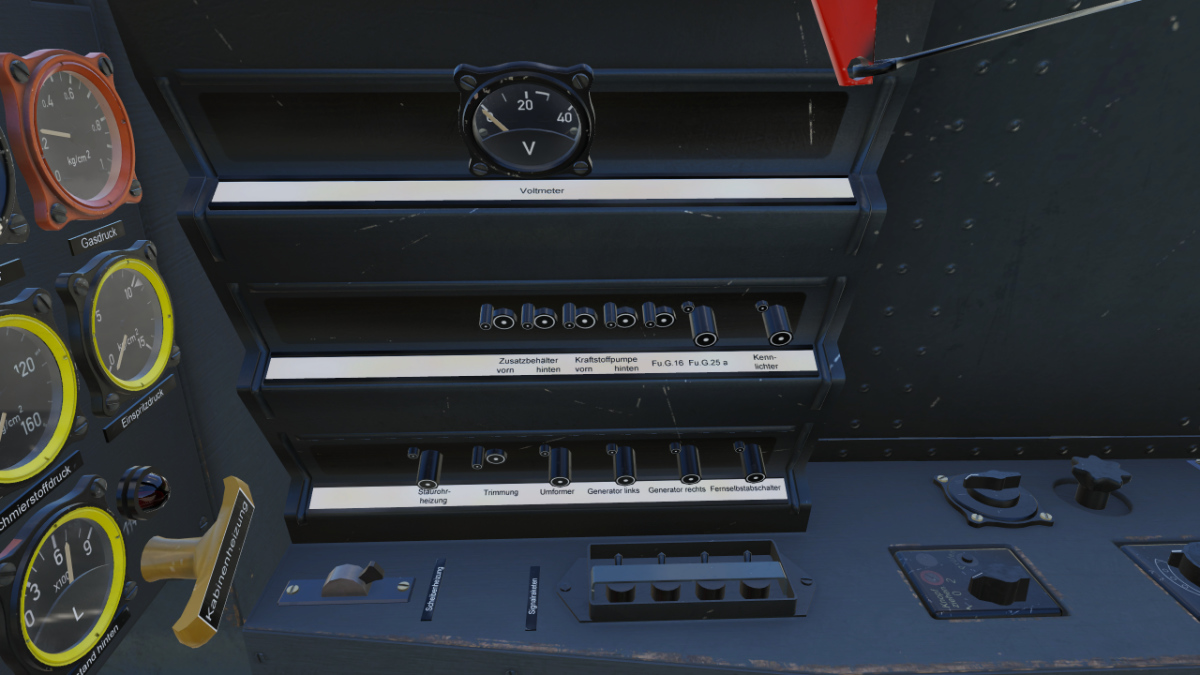
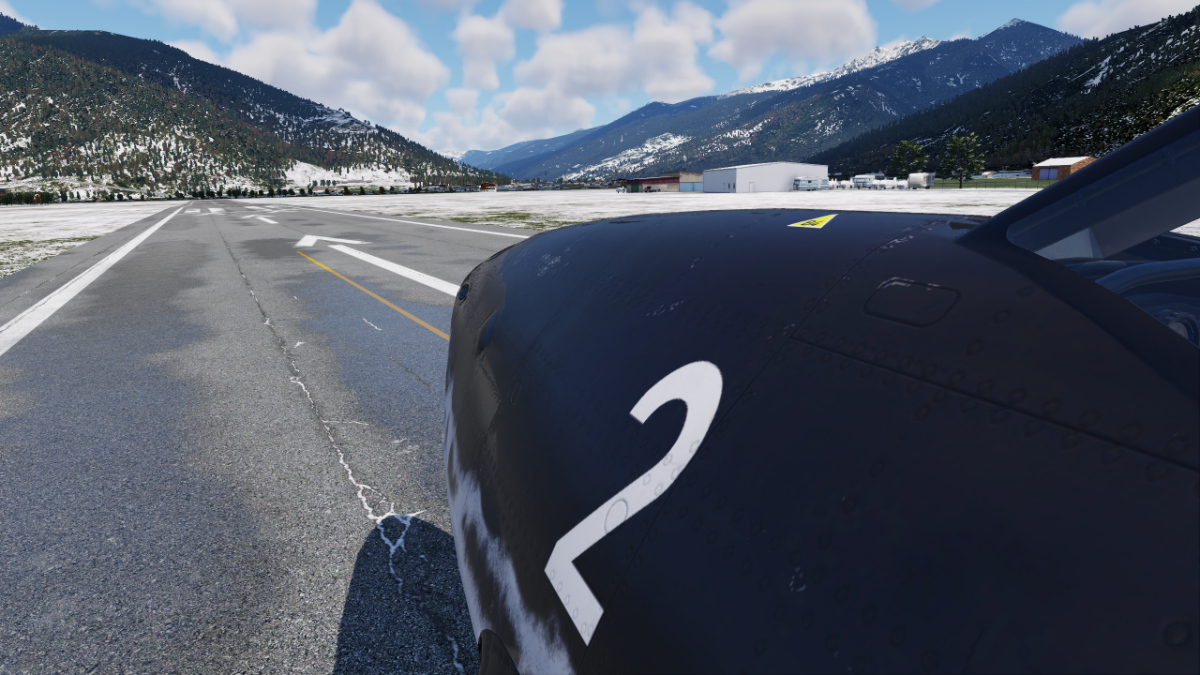
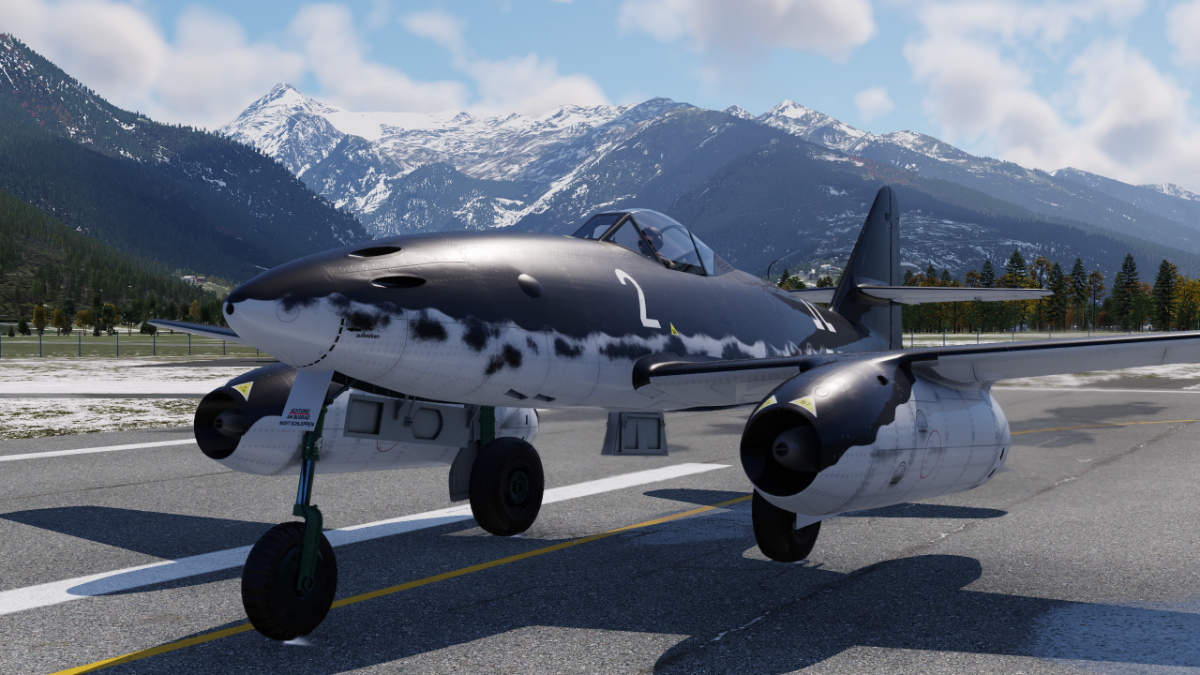
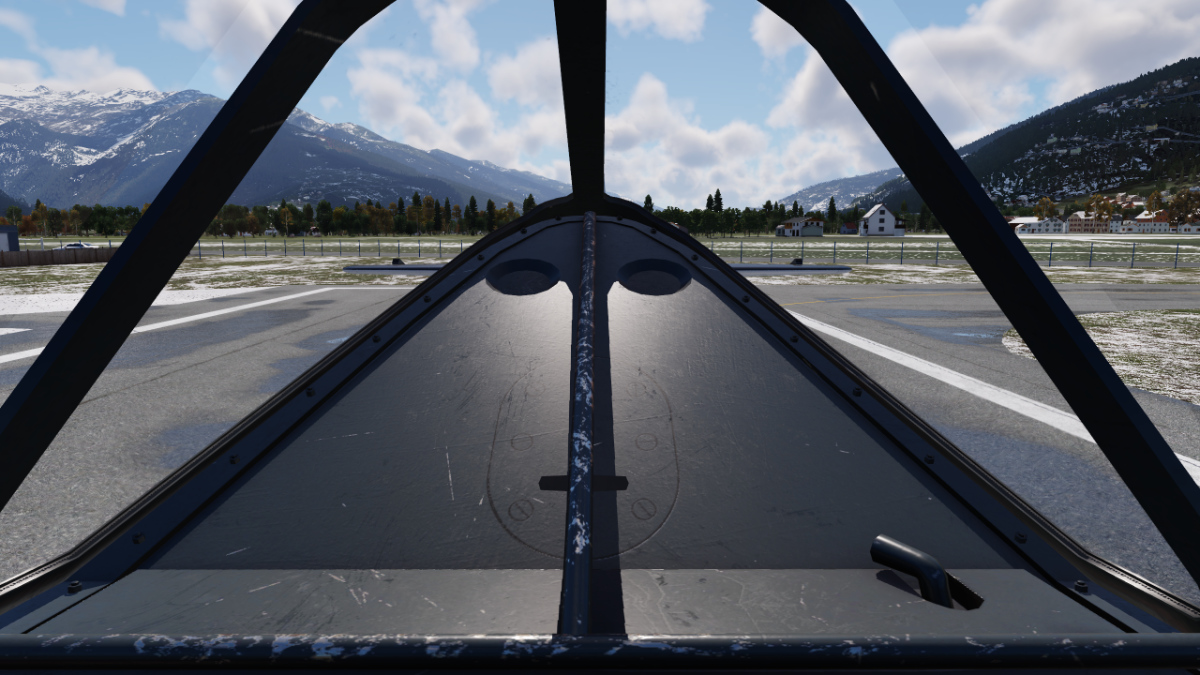
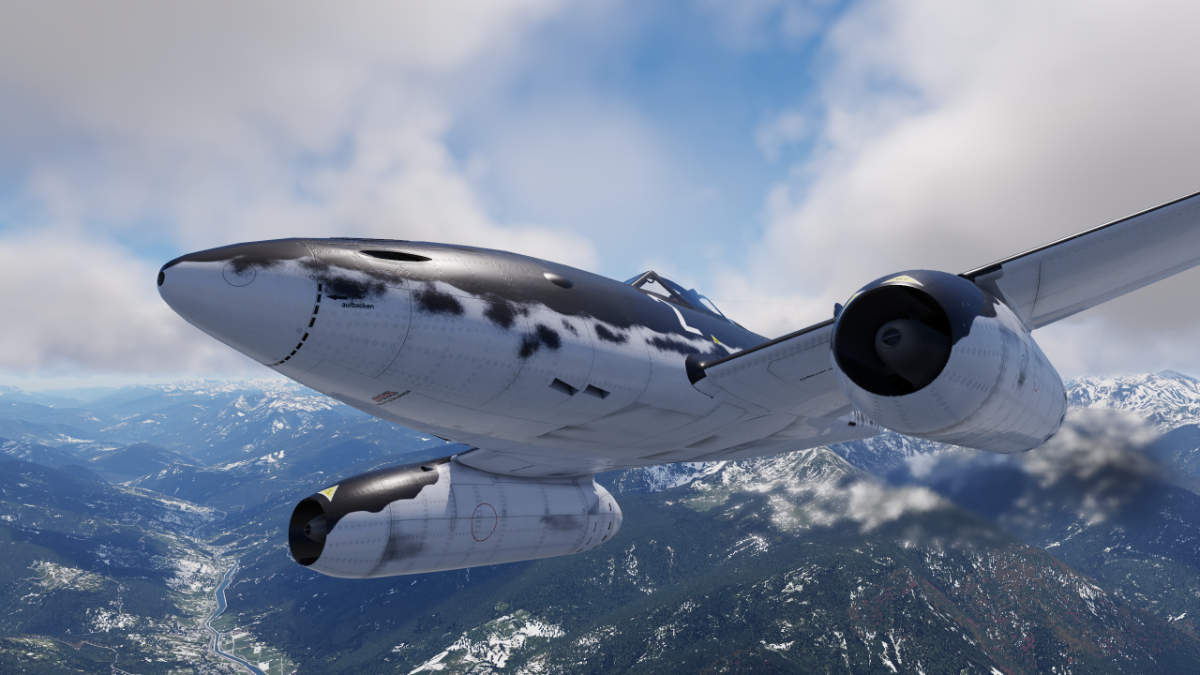
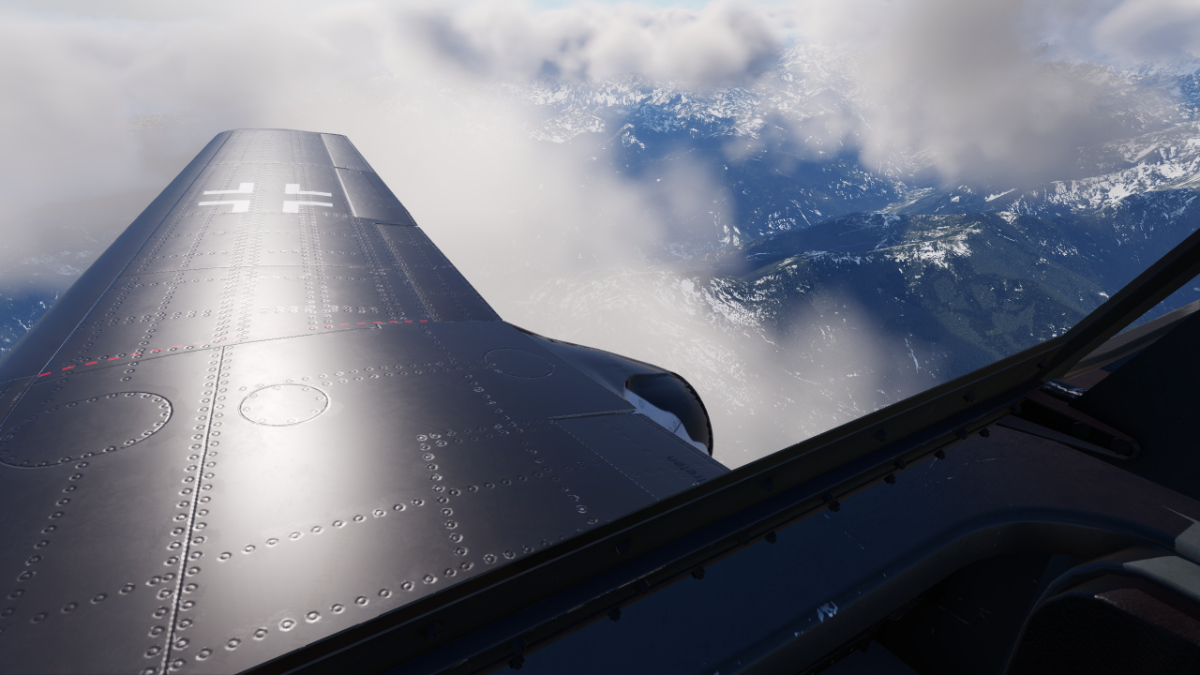
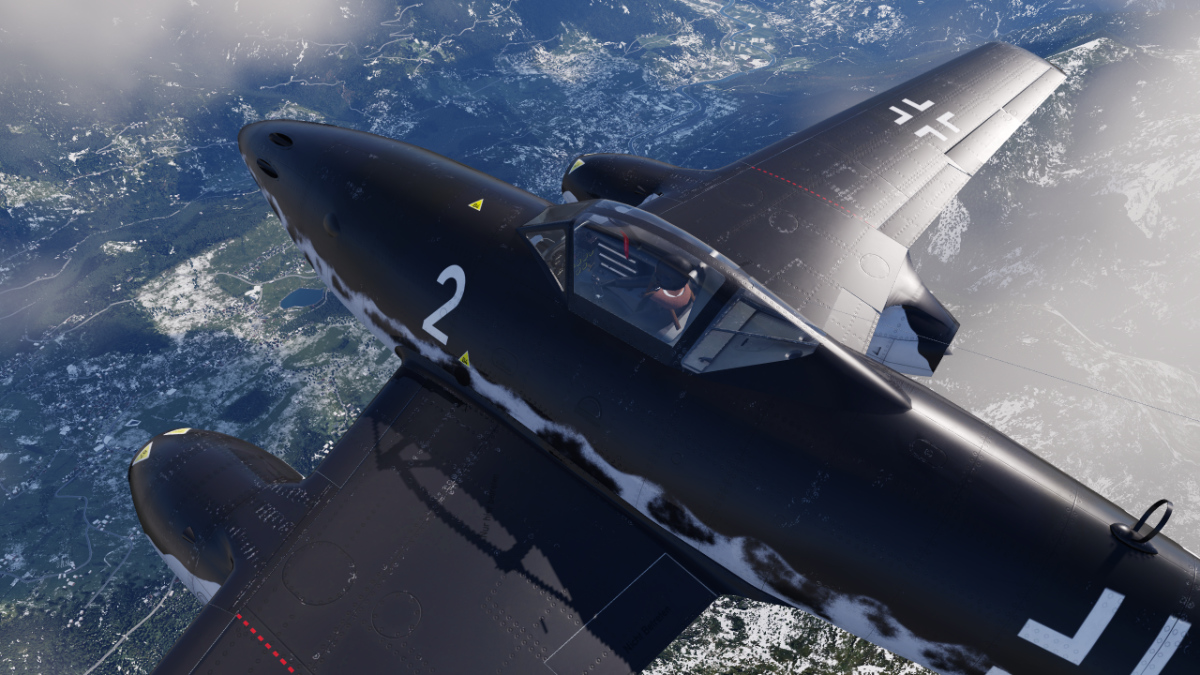
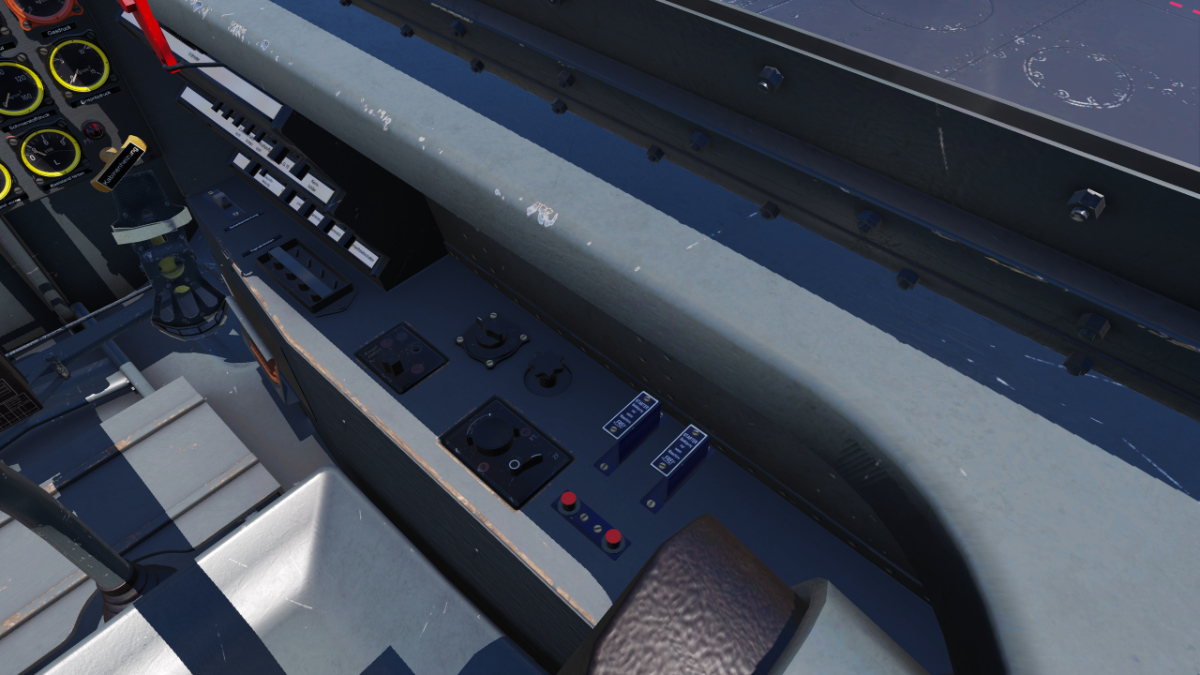
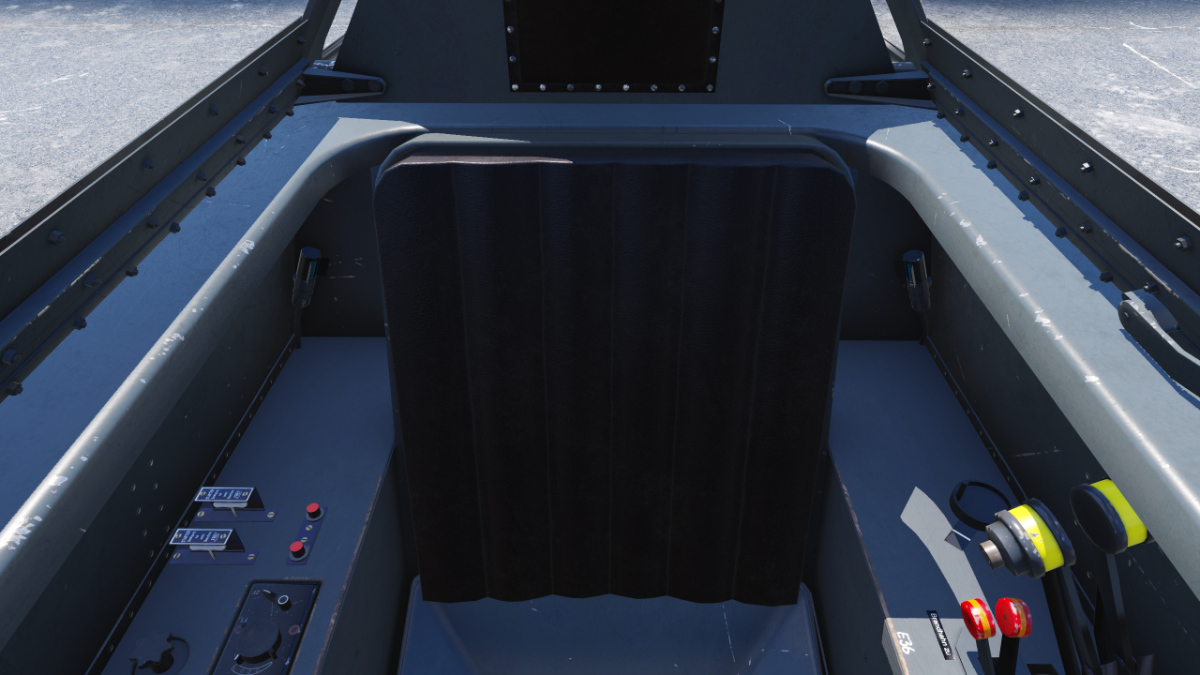
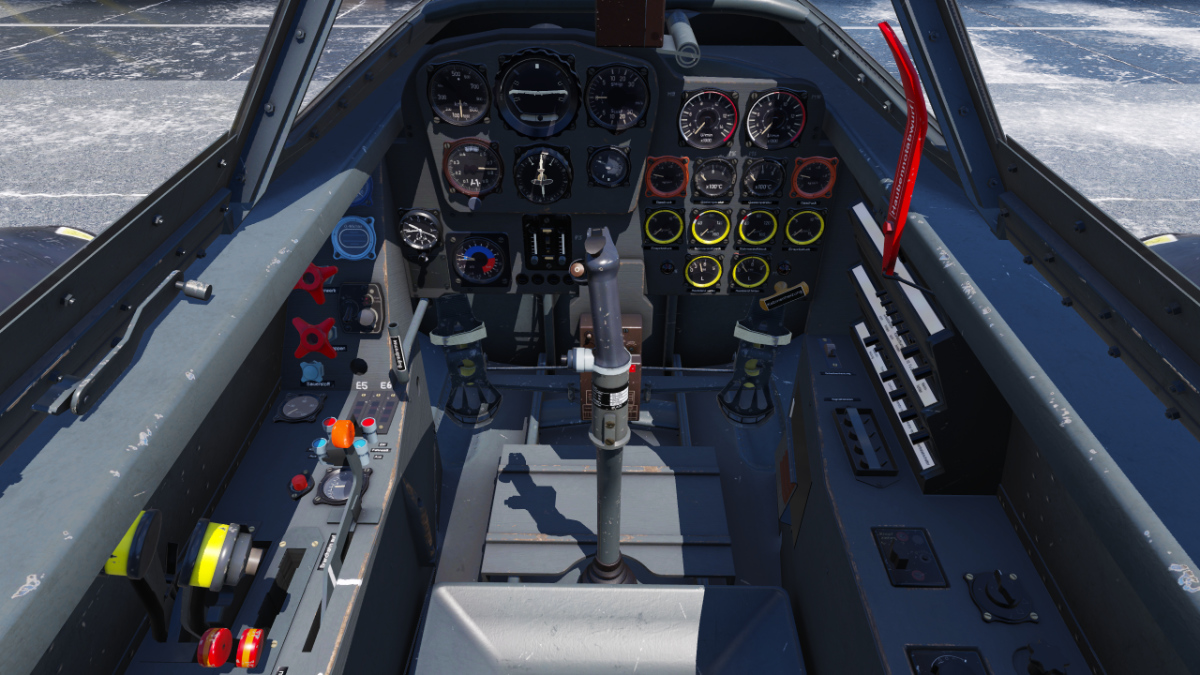
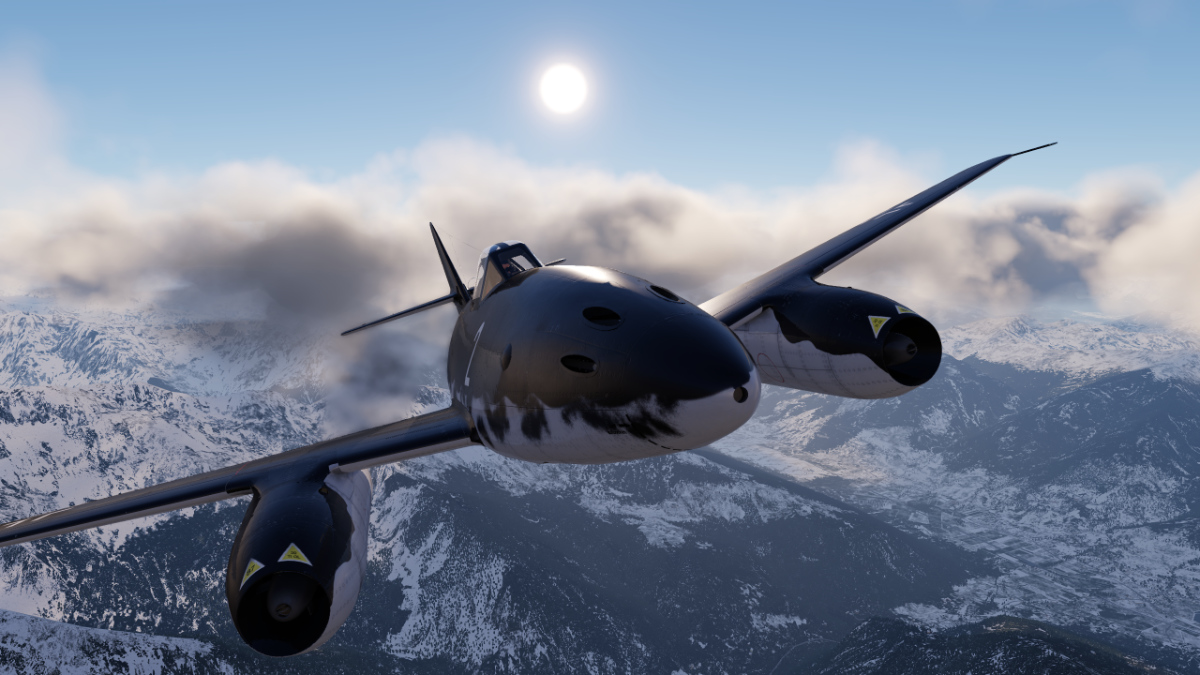
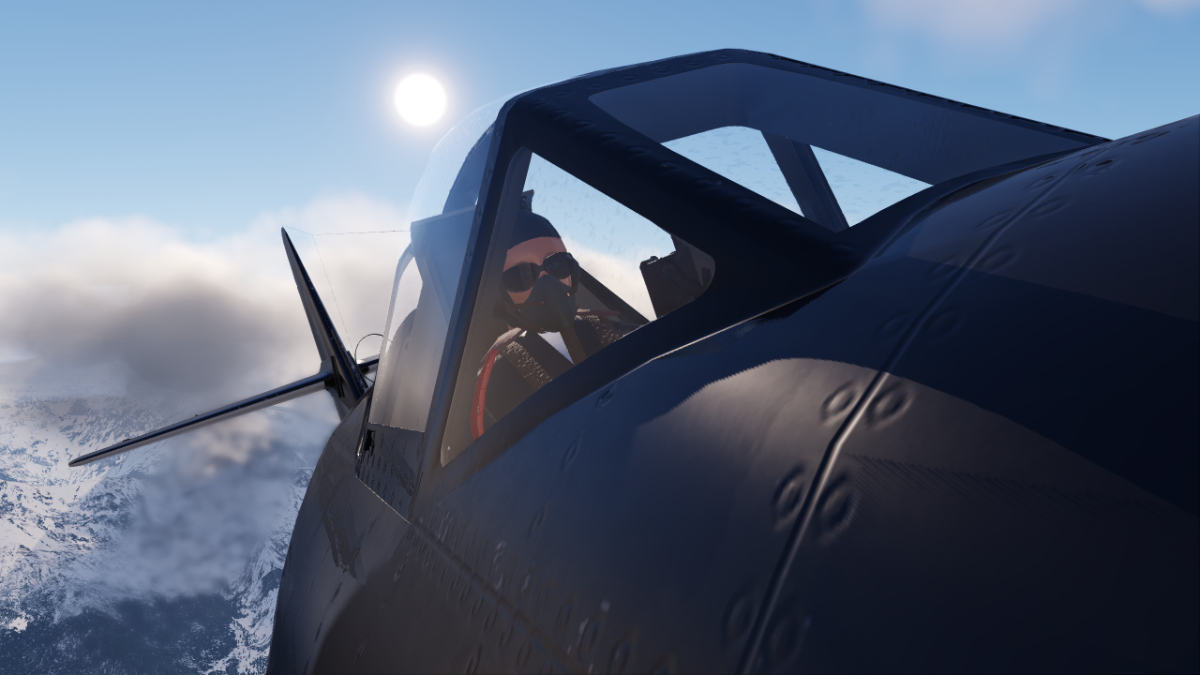
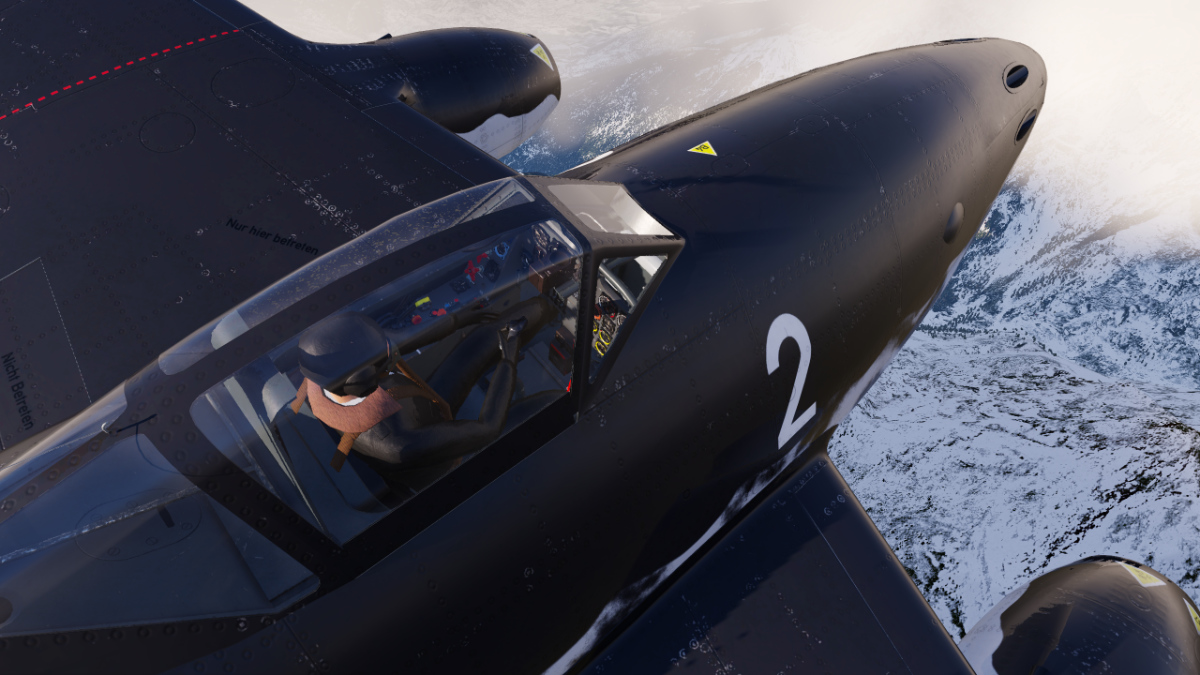
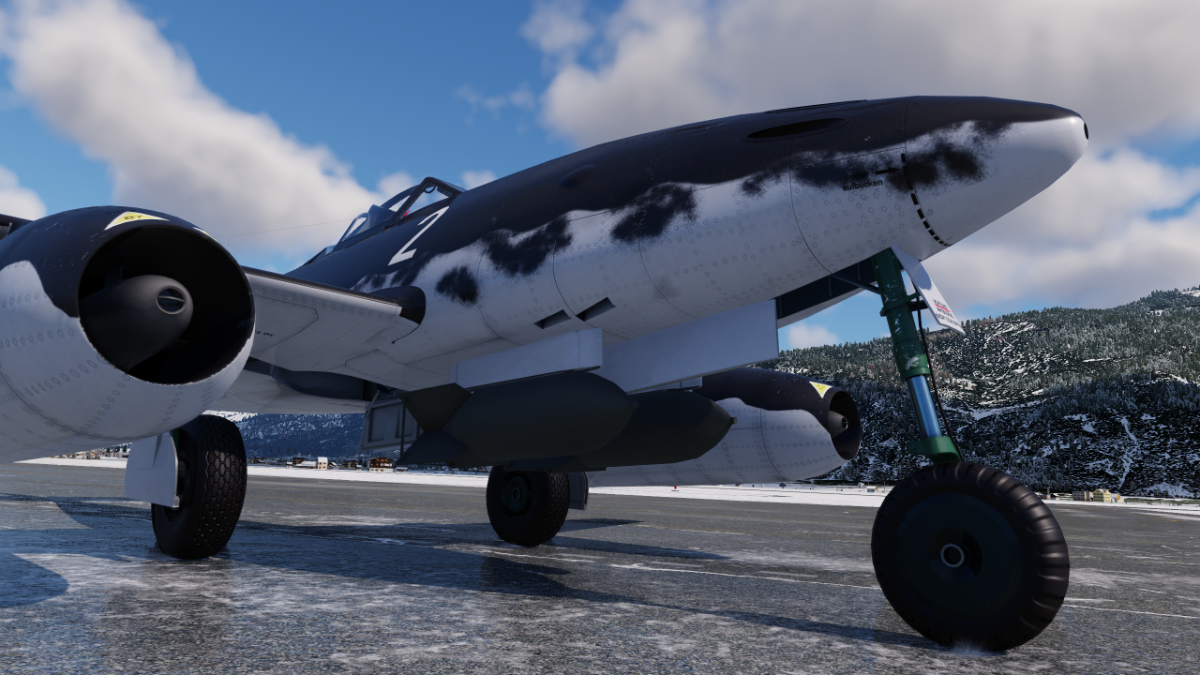
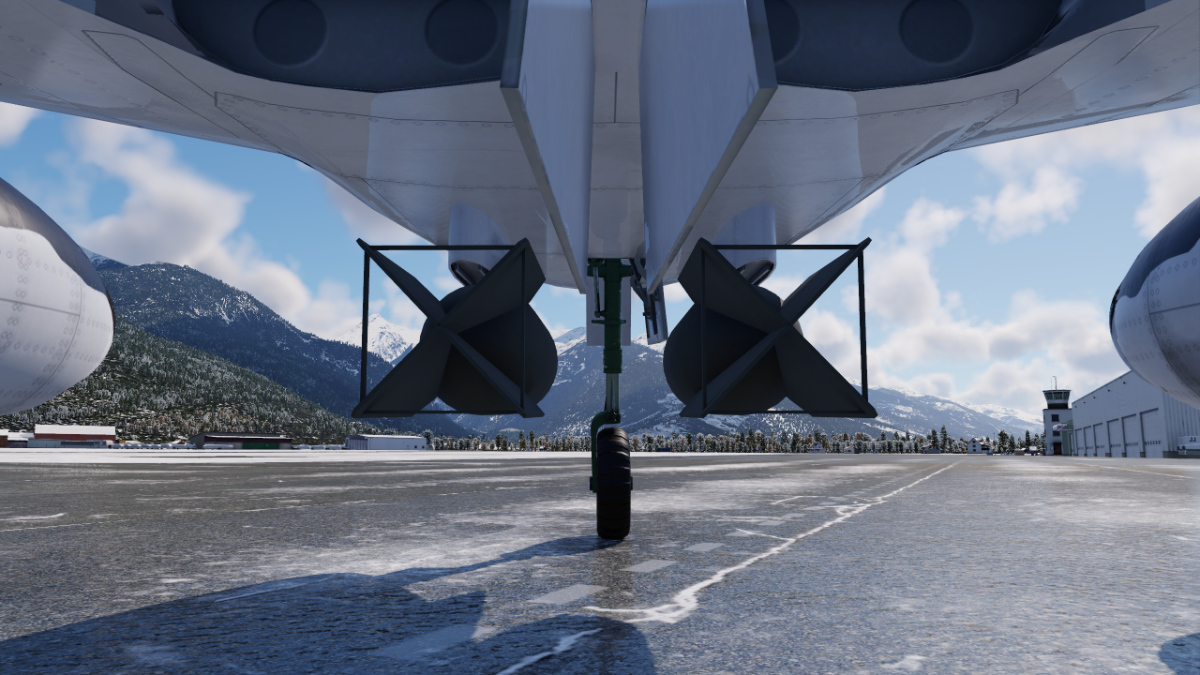
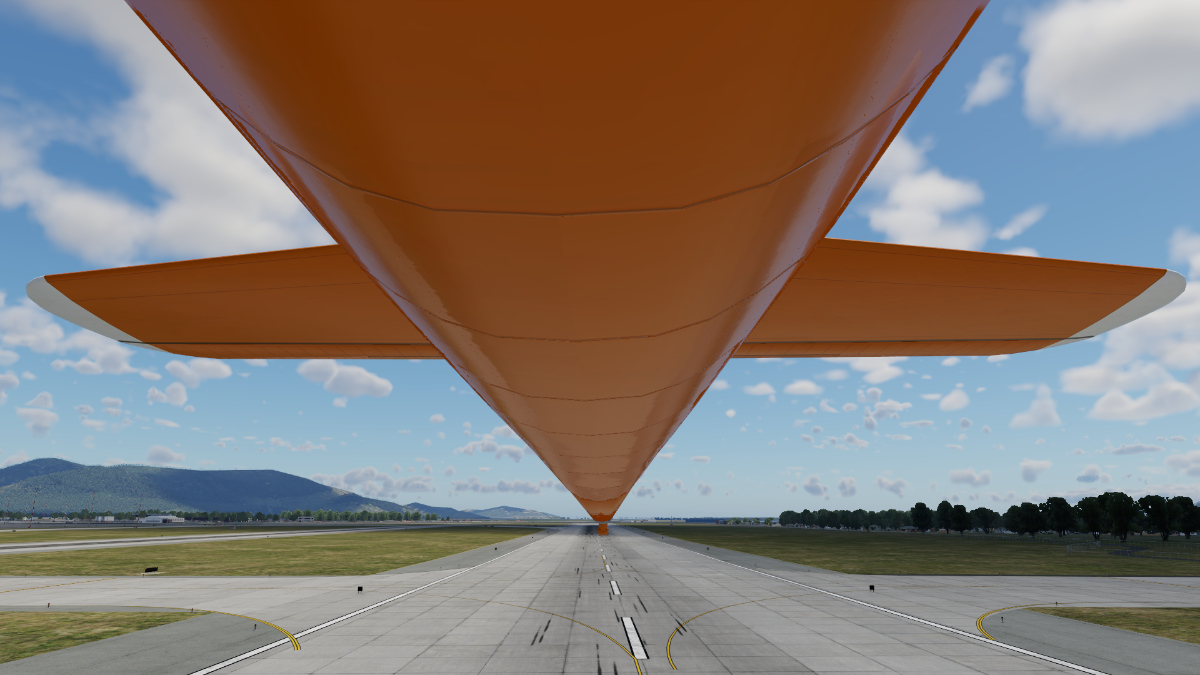
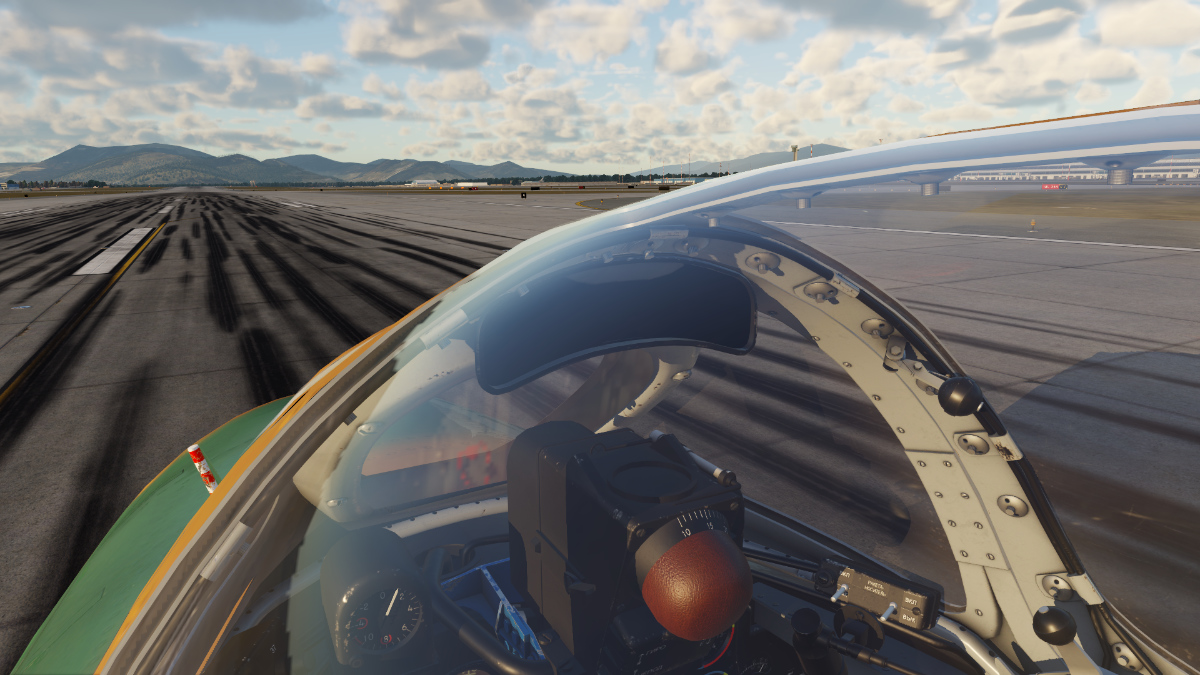
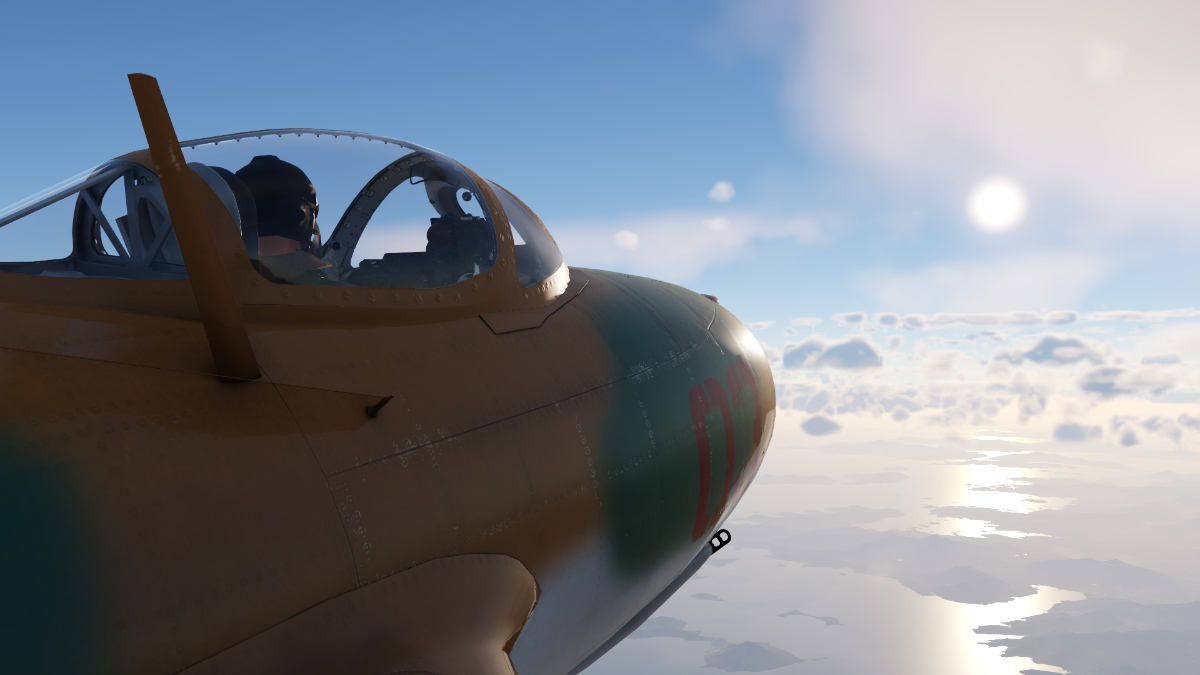
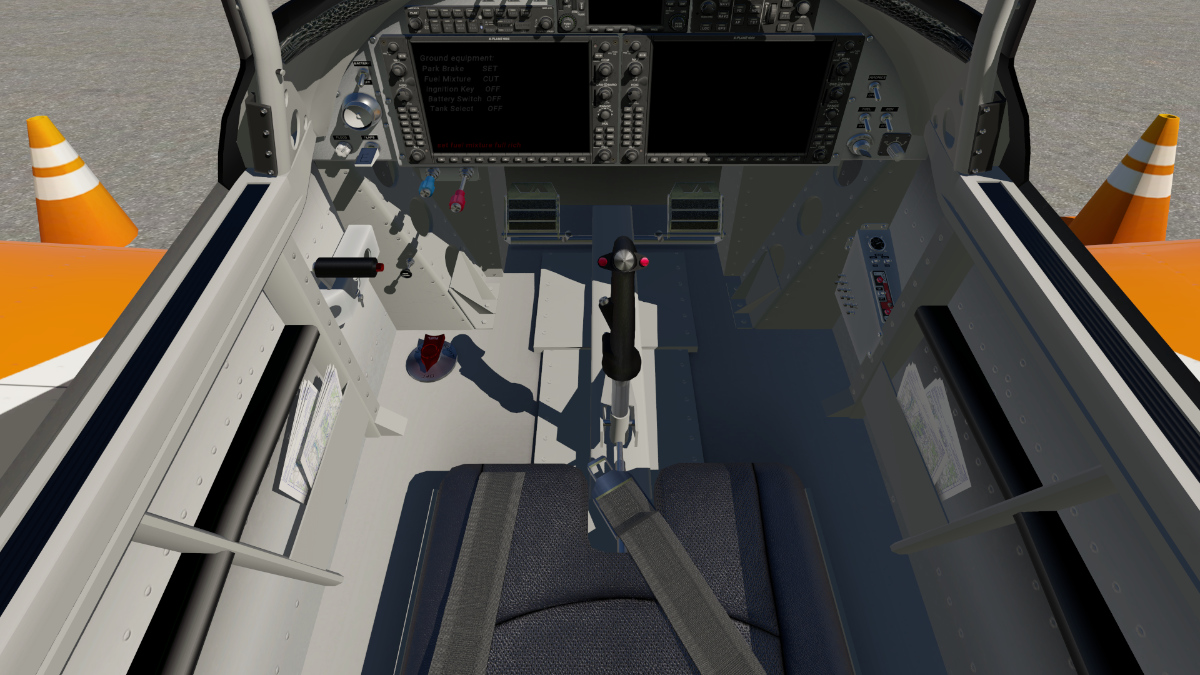
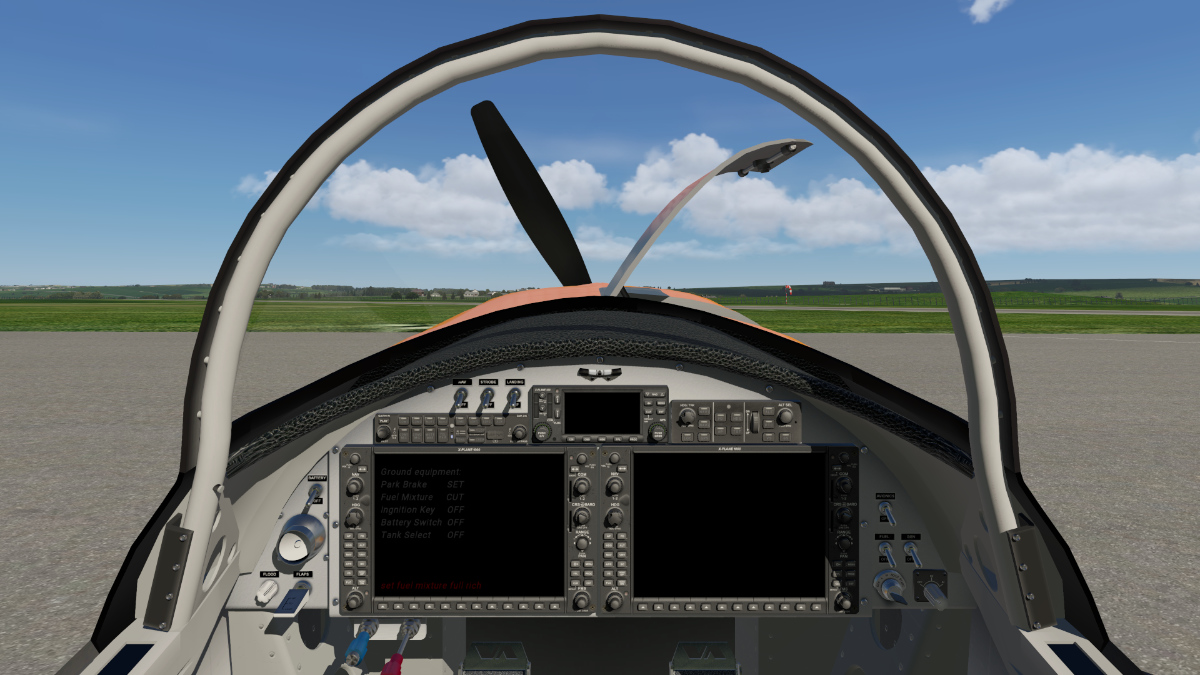
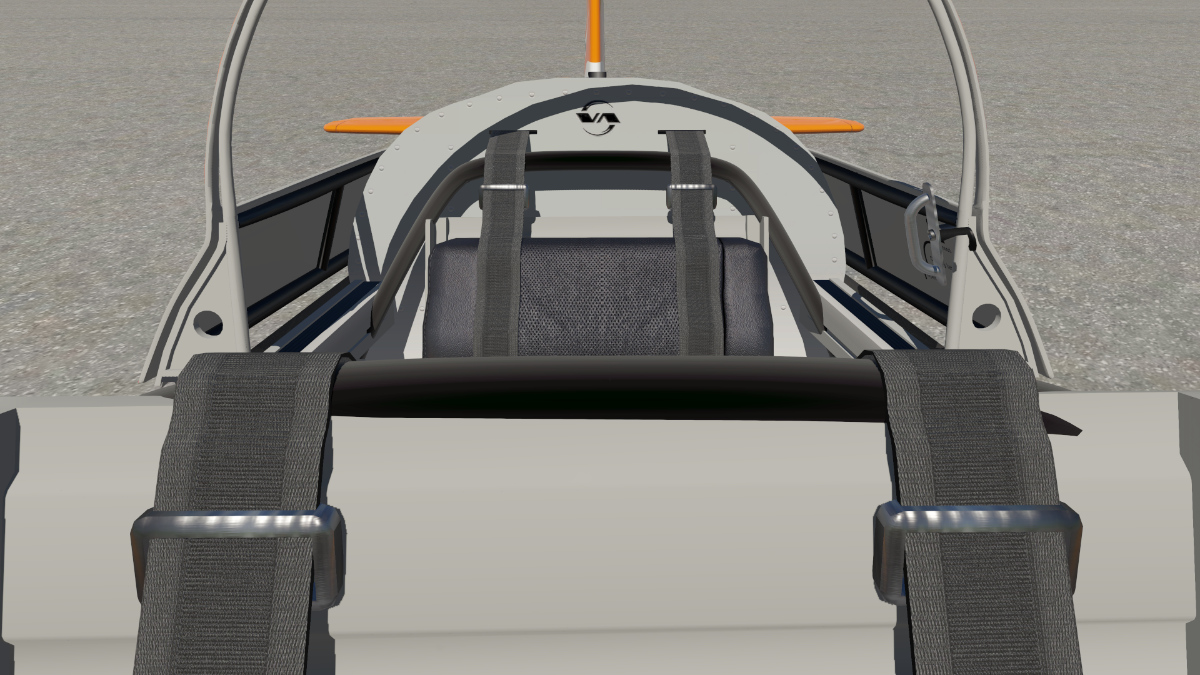
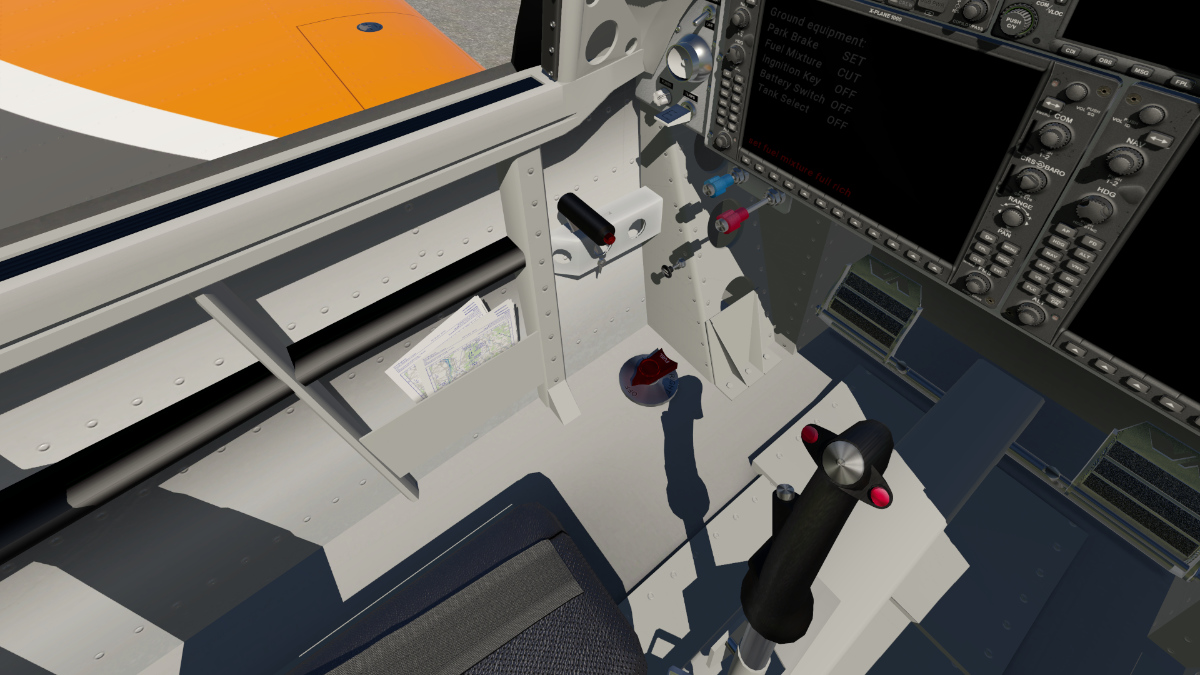
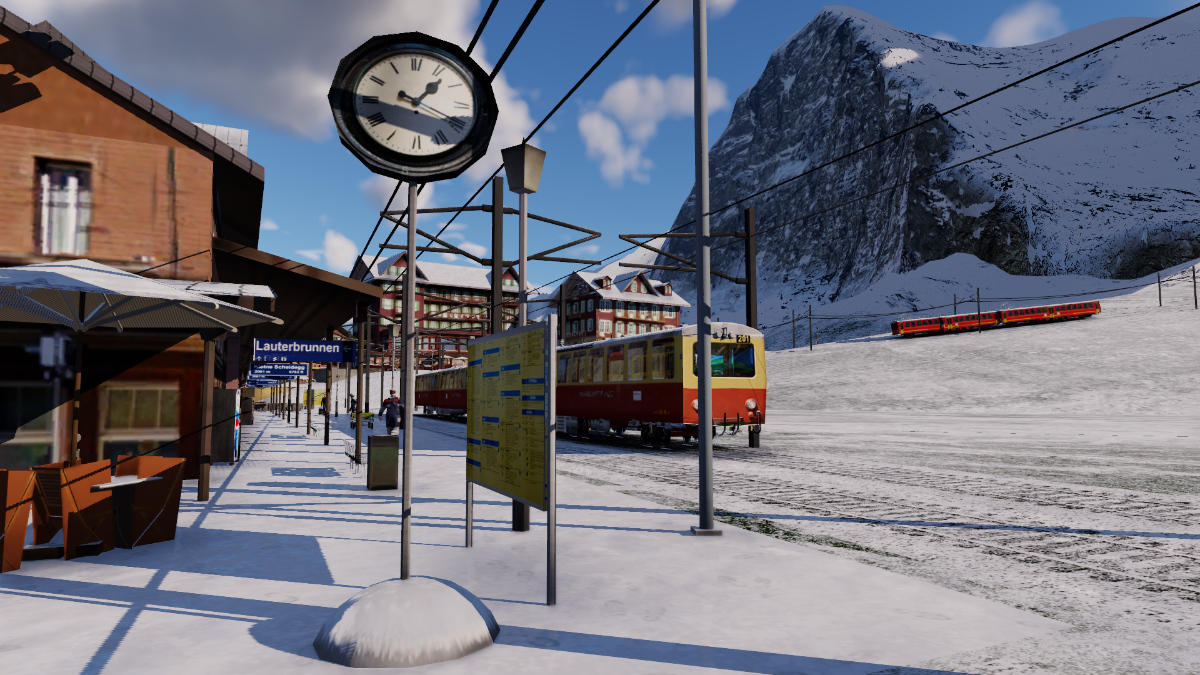
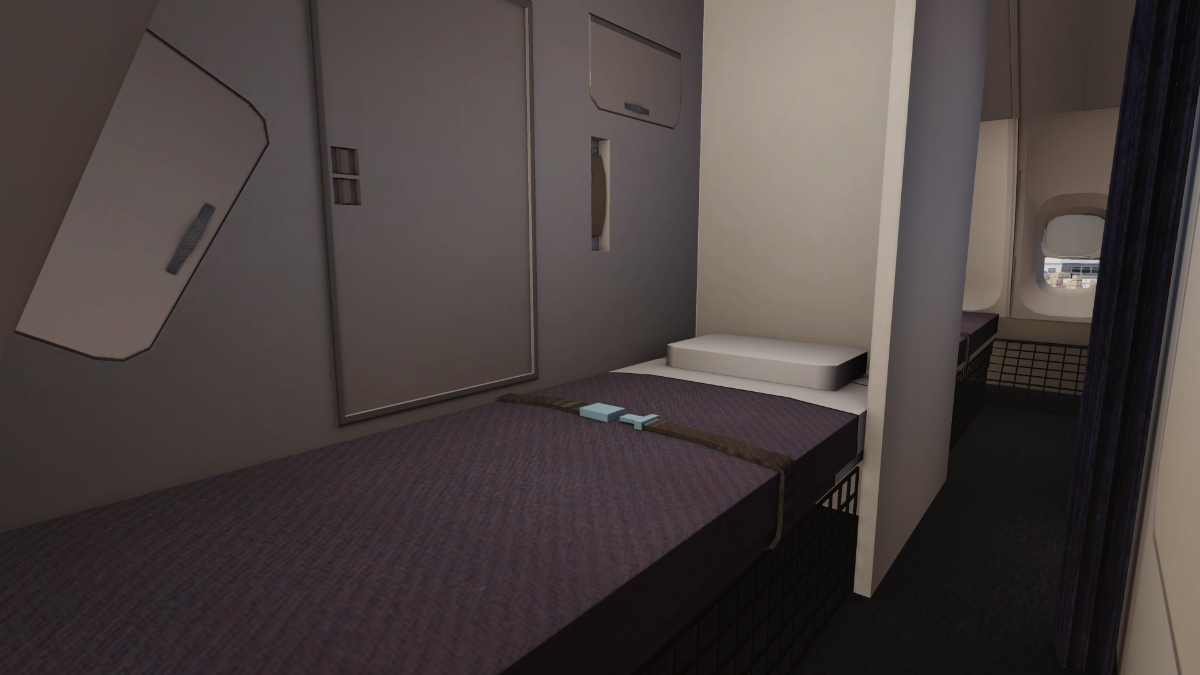
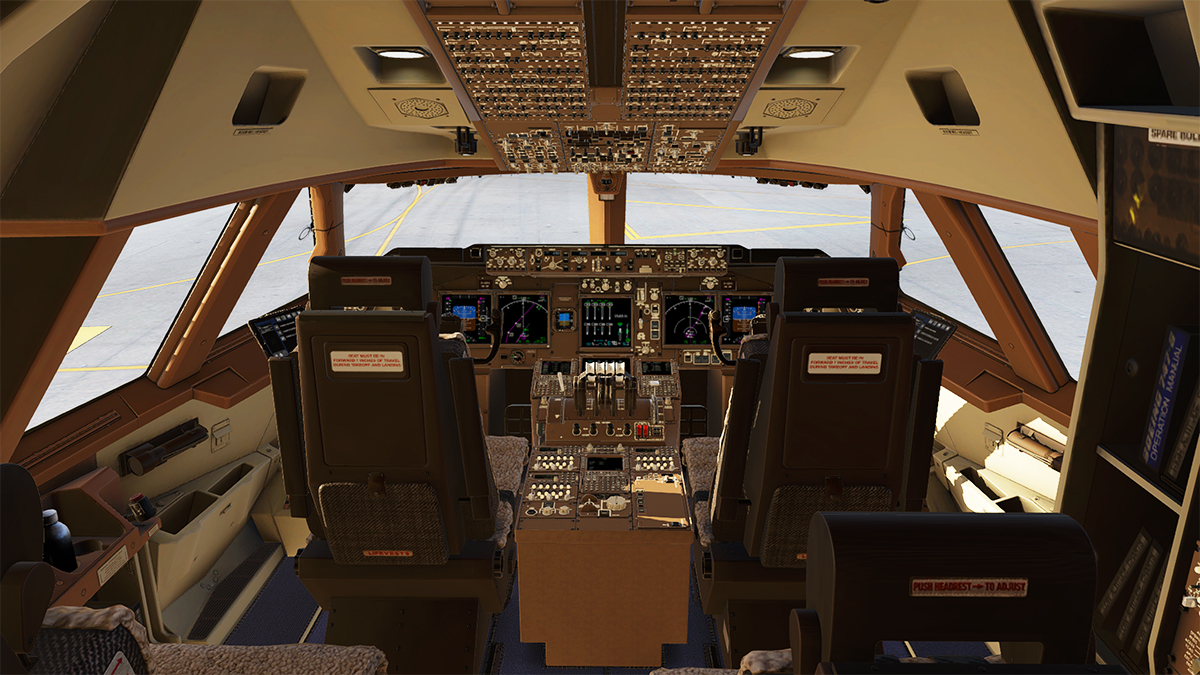
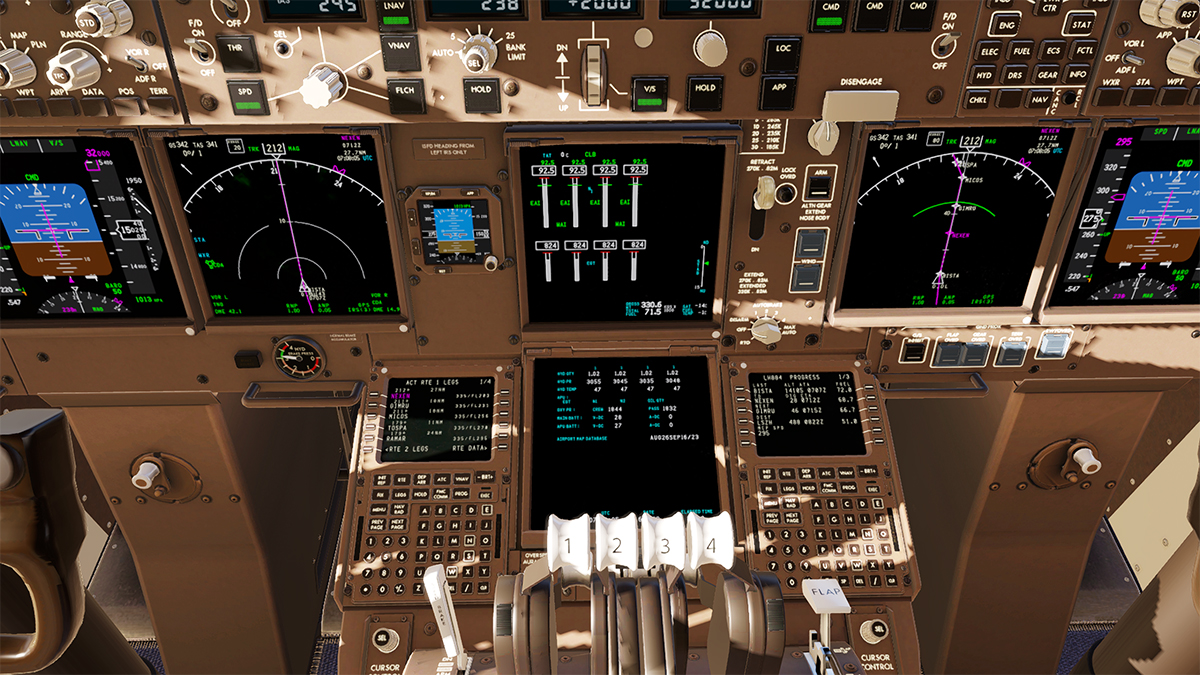
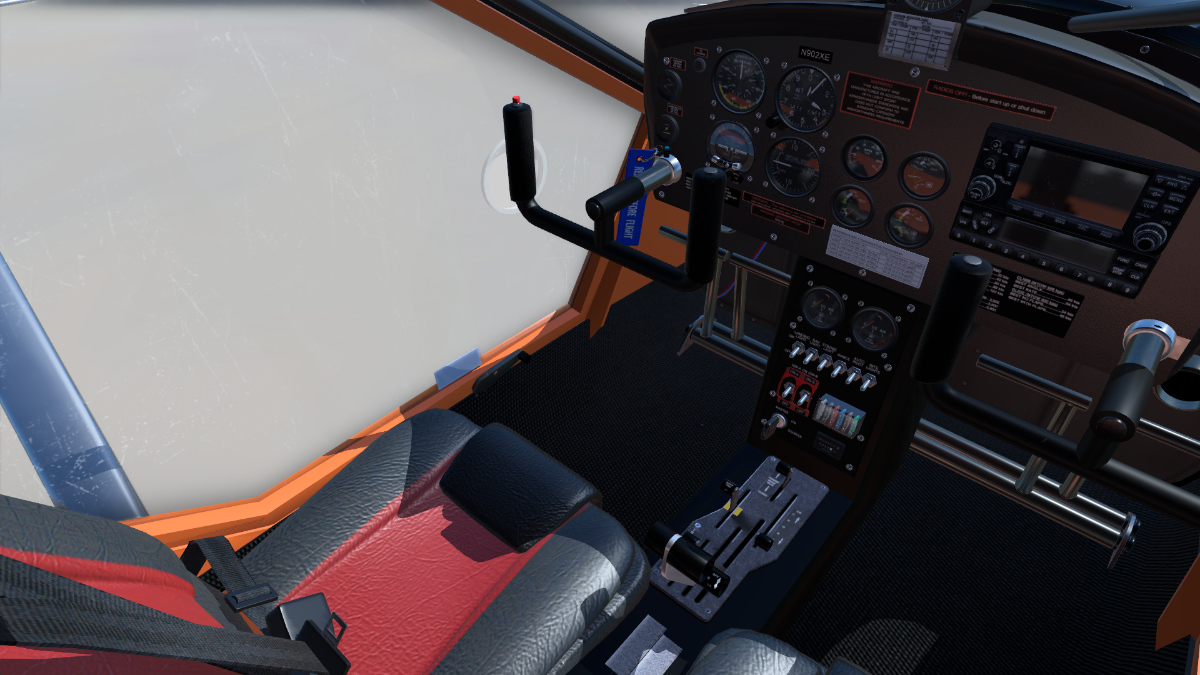
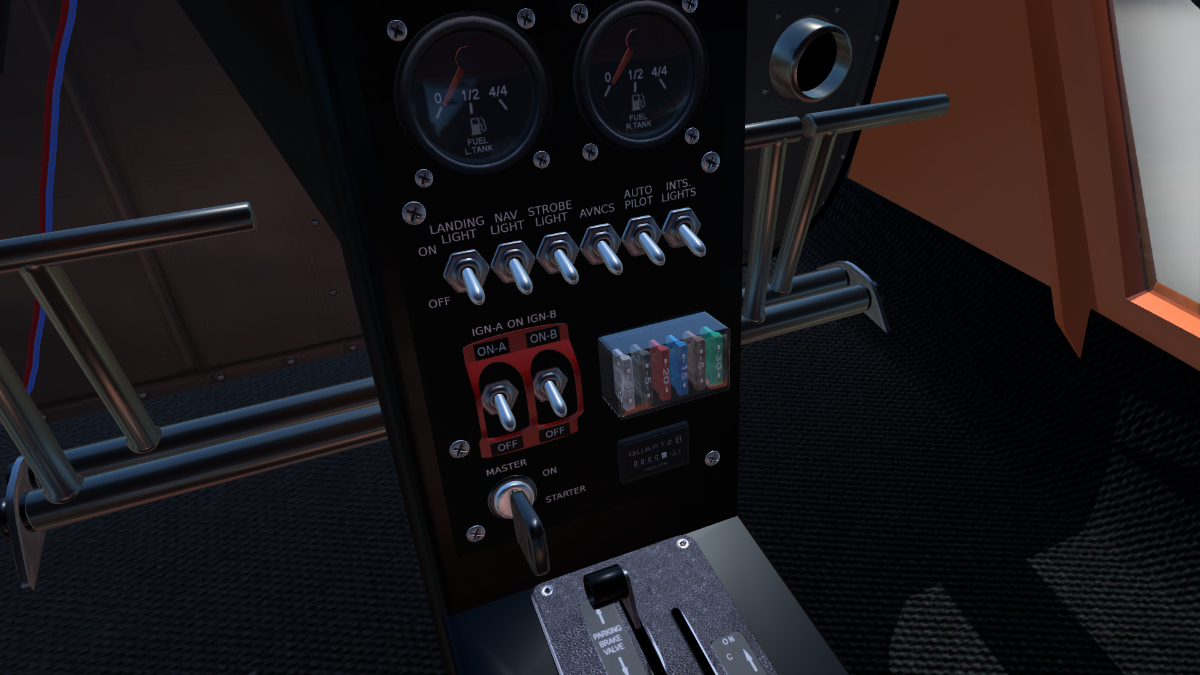
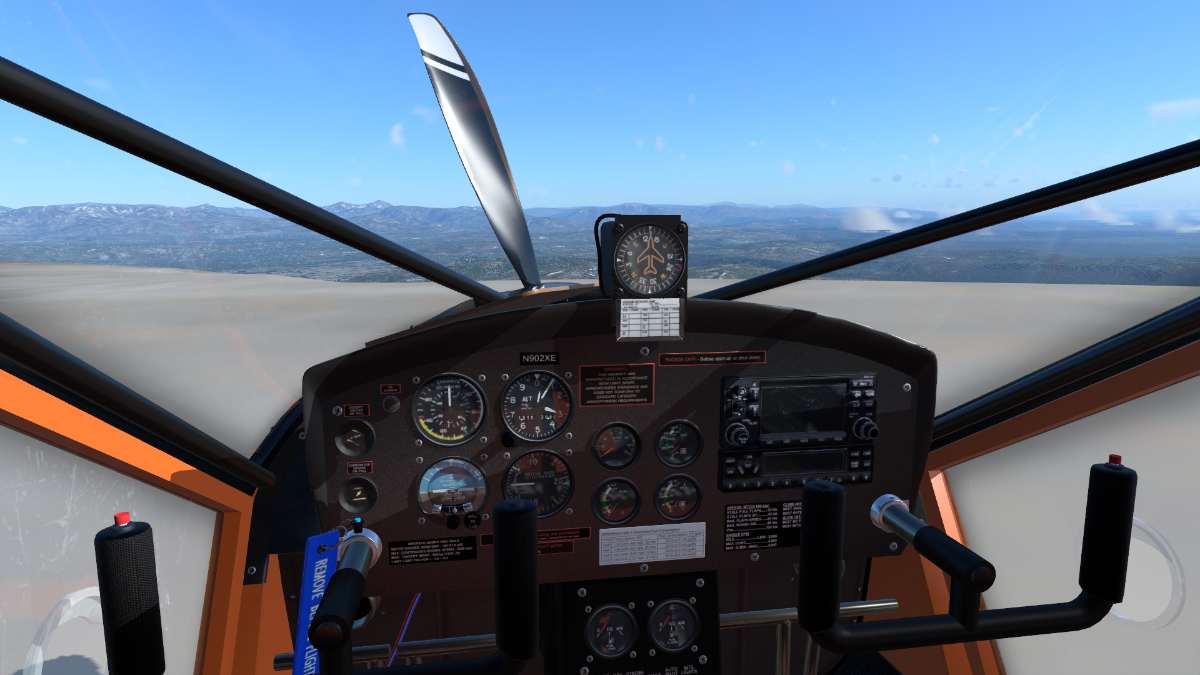
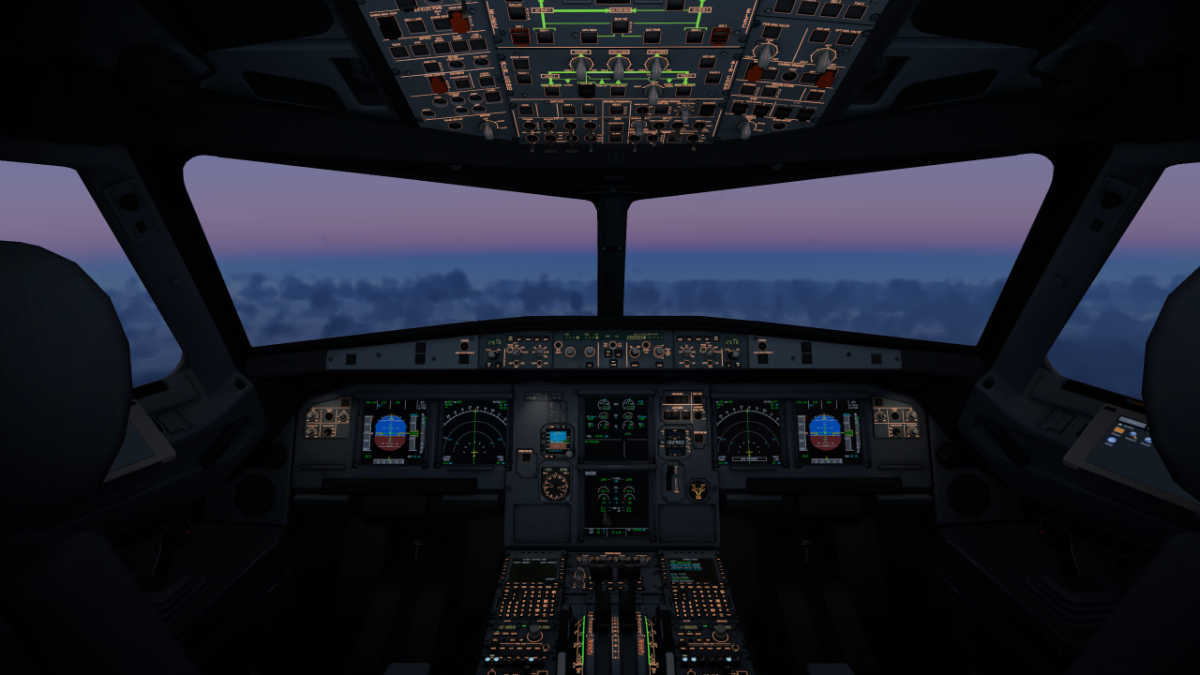
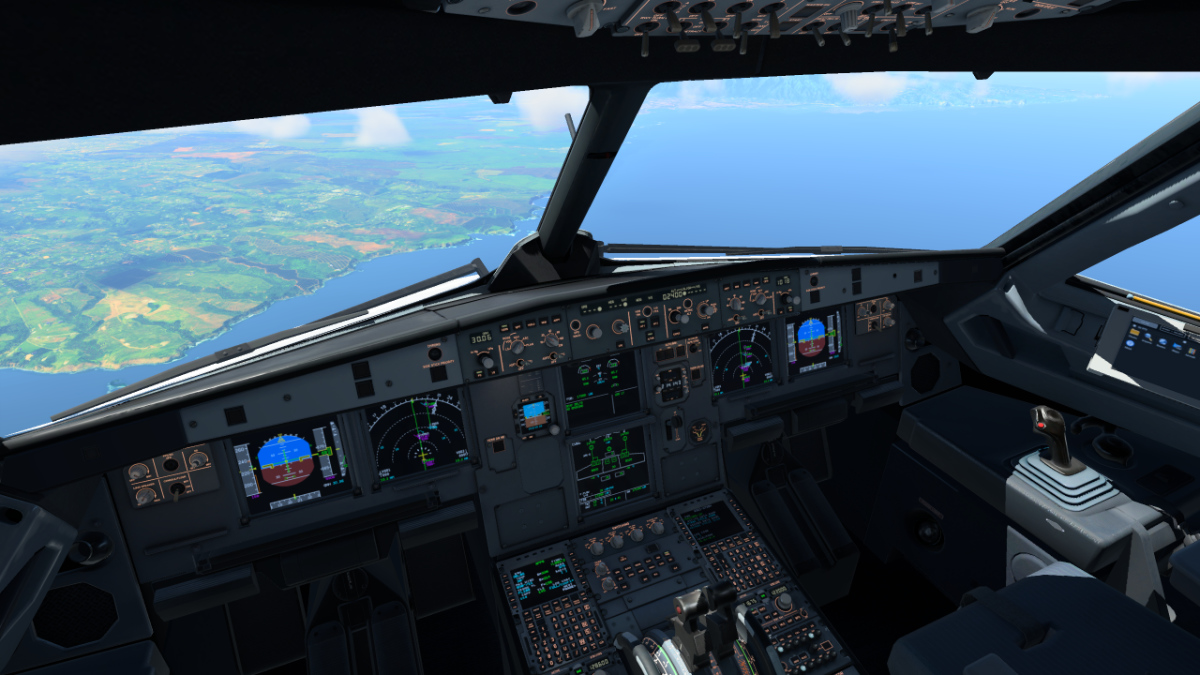
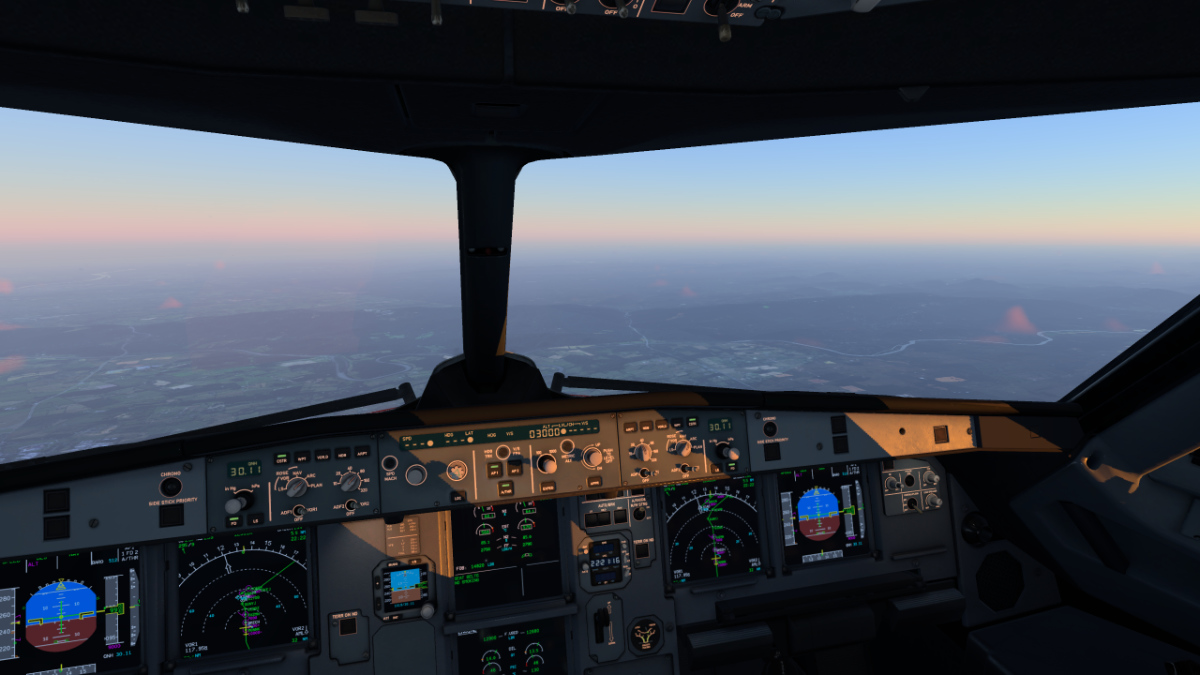
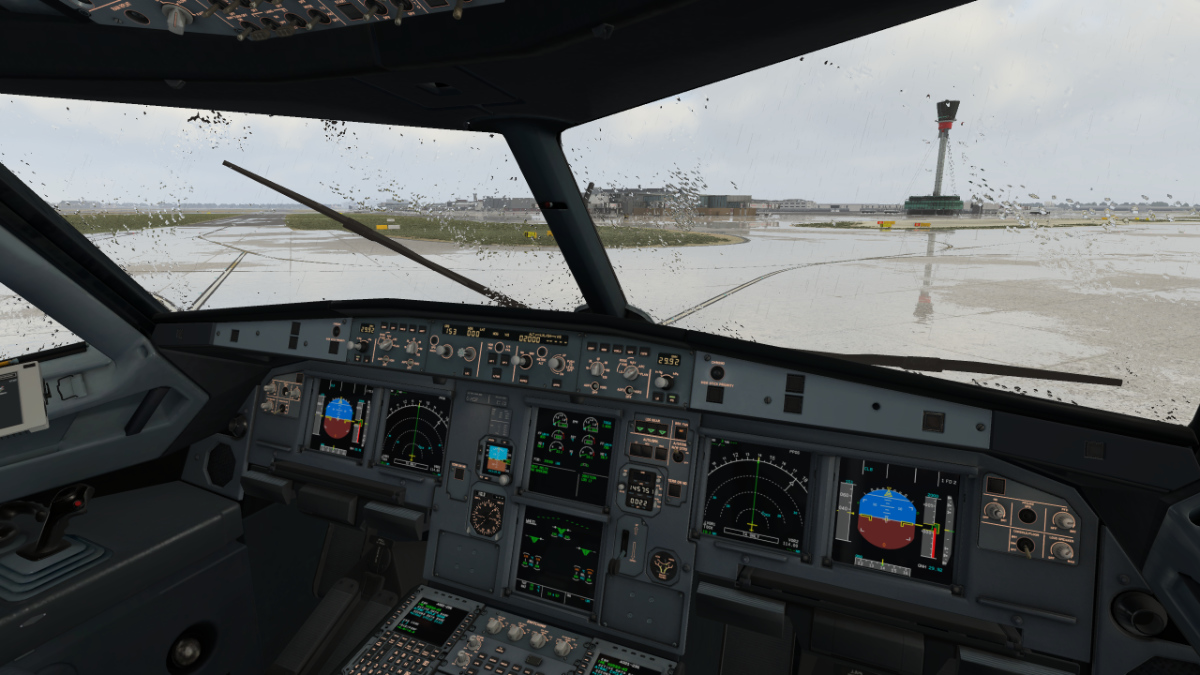
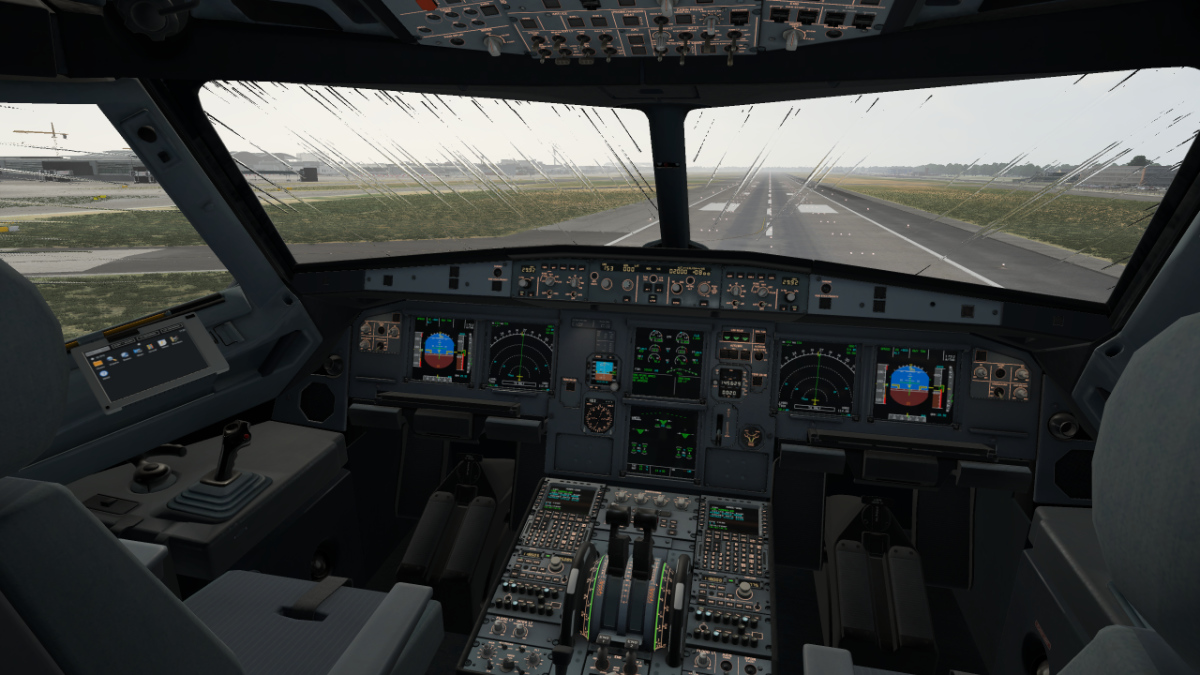
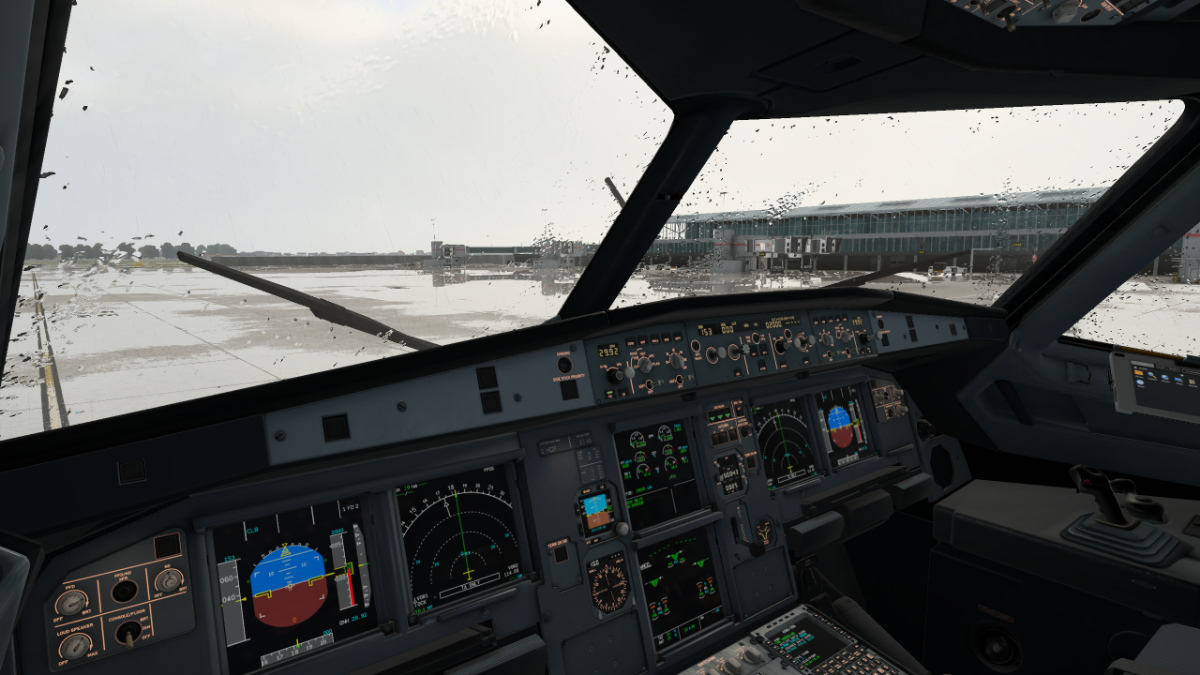
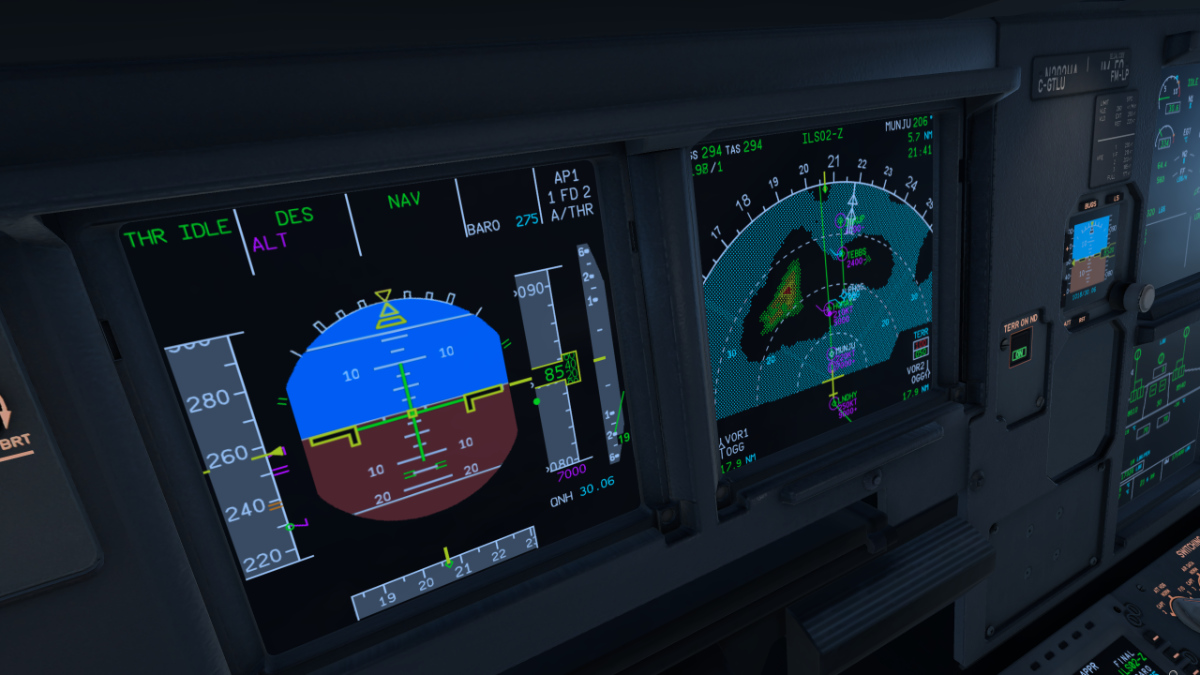
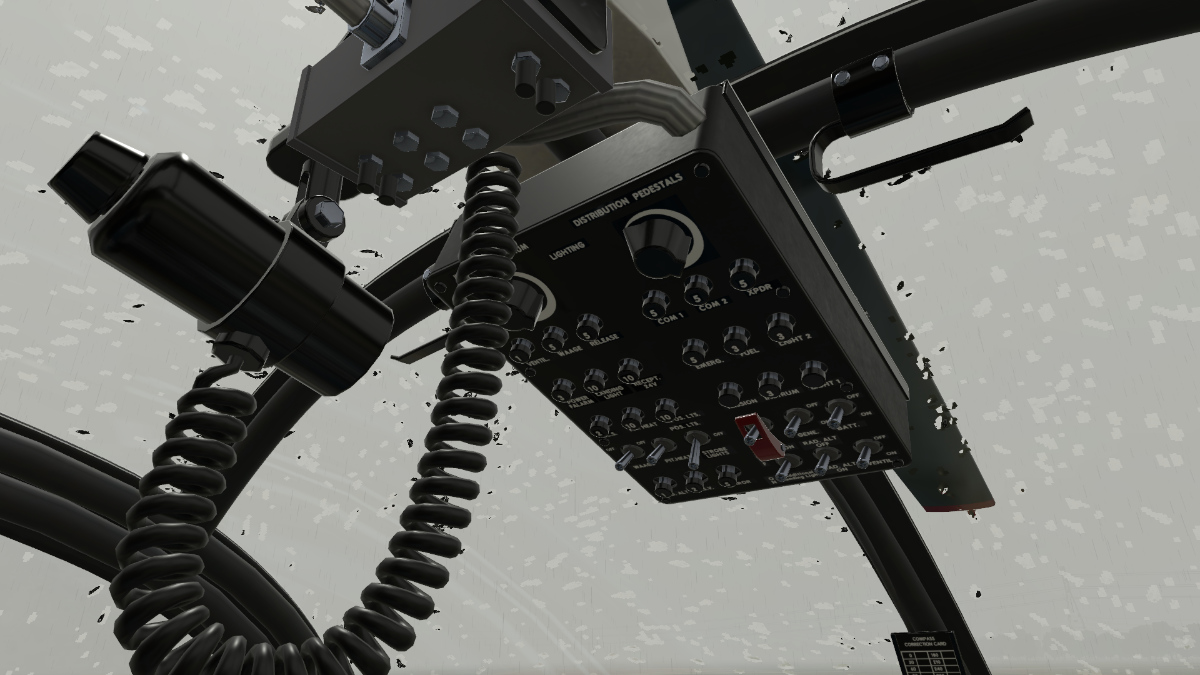
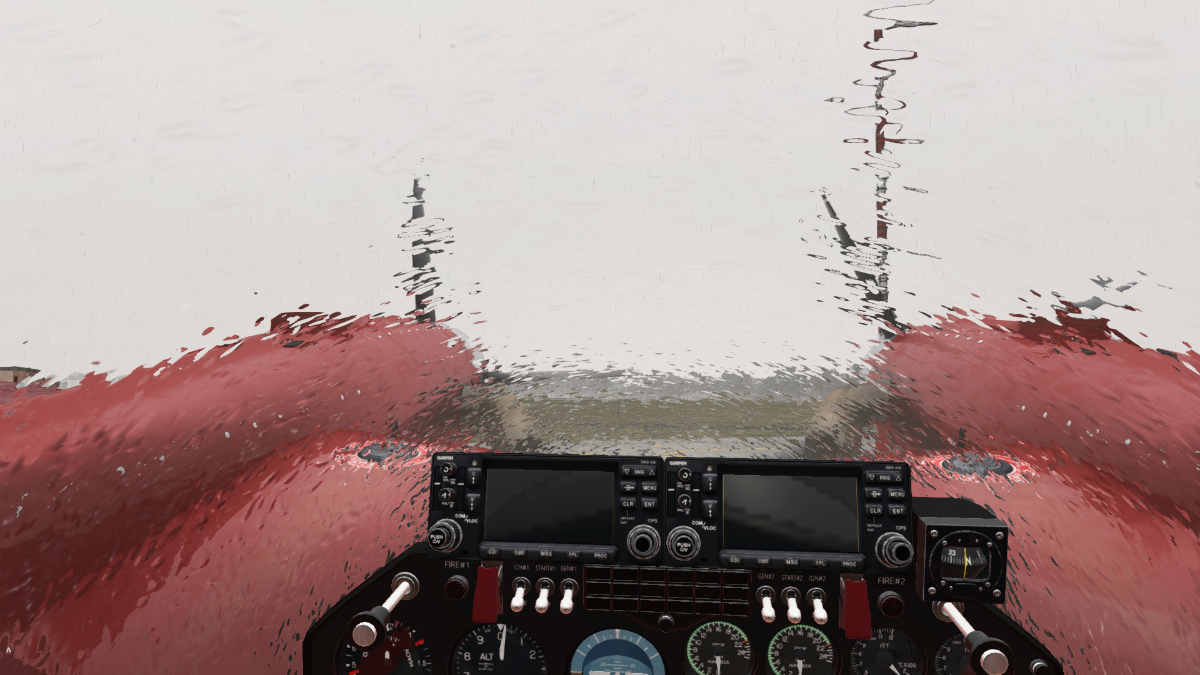
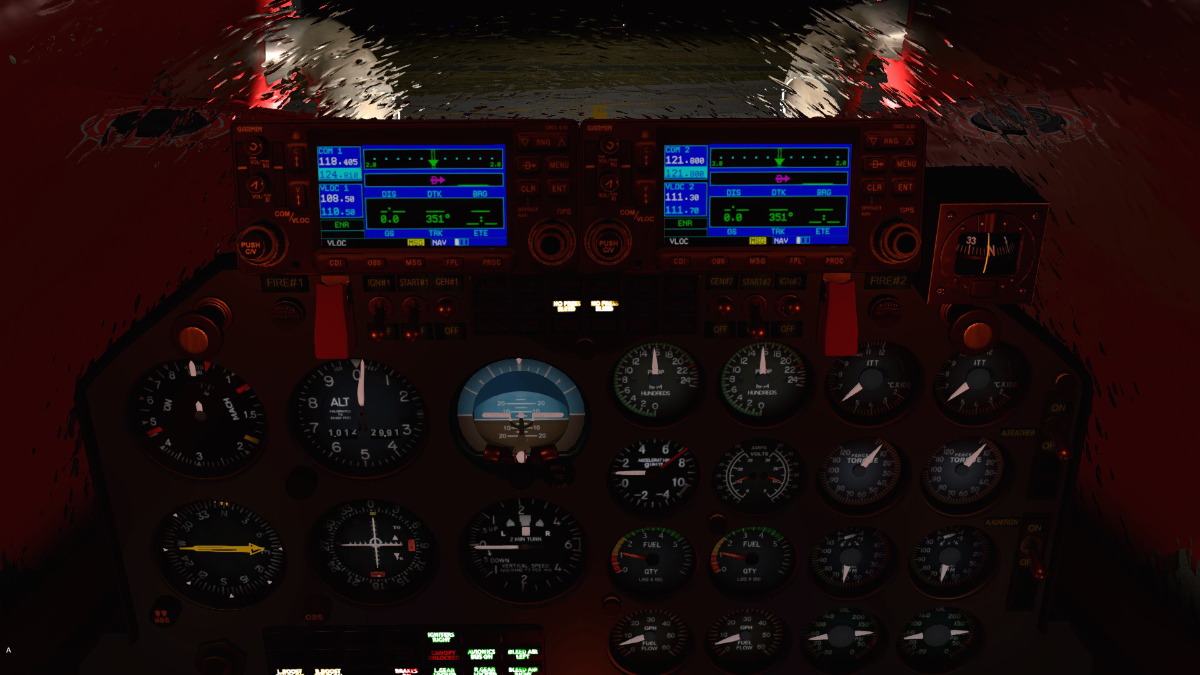
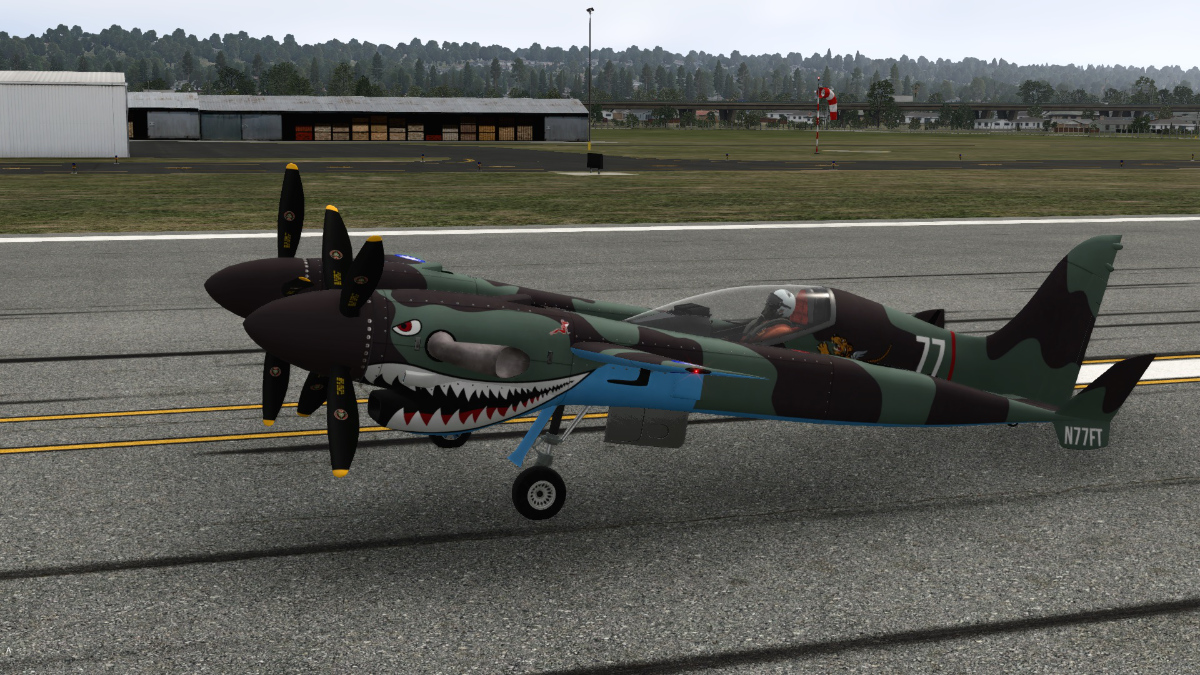
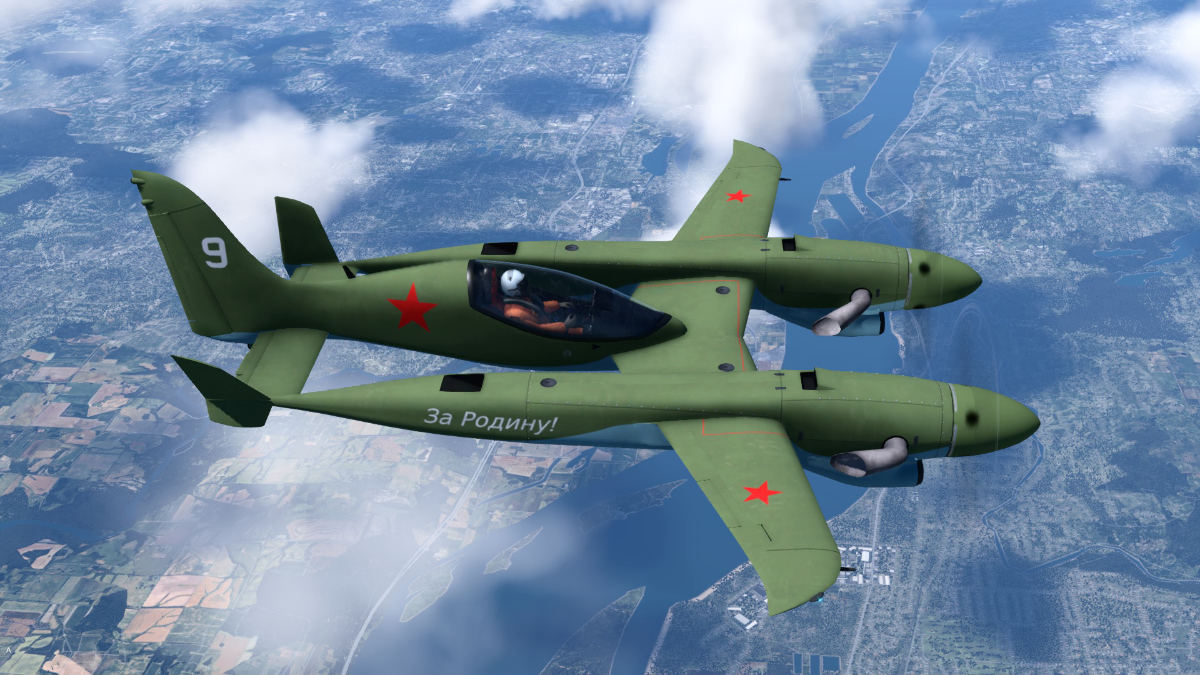
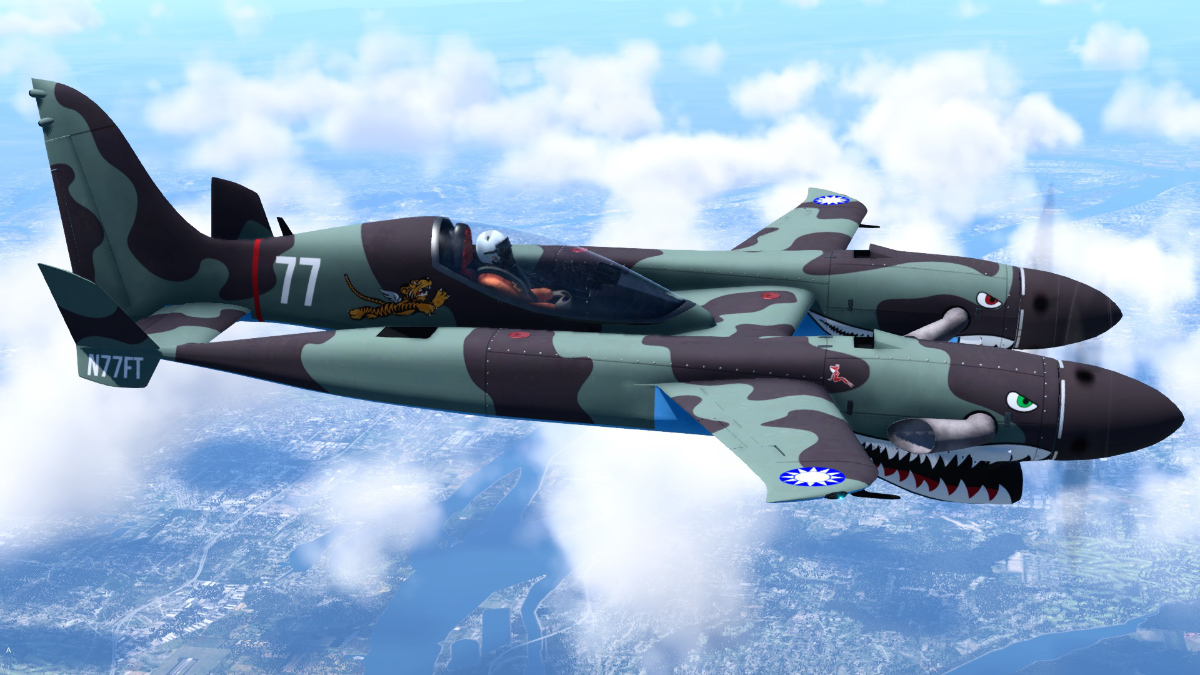
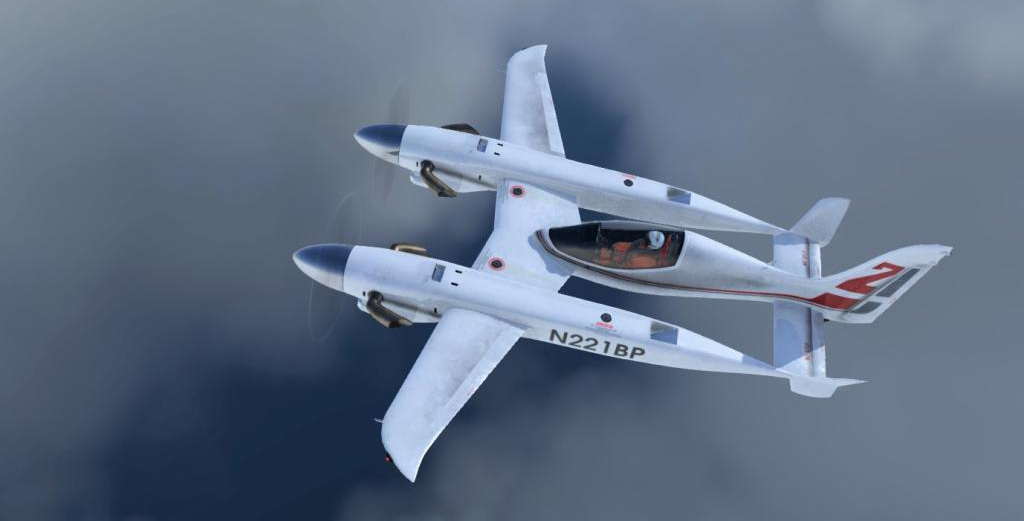
Aircraft Review: MLADG Me 262 By Nick Garlick Introduction Previously on “Garlick Reviews”, we looked at the wonderful Grumman Tigercat by Virtavia, and in today’s piece, my adventure with vintage aircraft designs continues, as I have been given the keys to both a “Swallow” and a “Storm Bird”. For those of us who are fluent in German, that’s a Schwalbe and Sturmvogel, however, to me and you, it’s the Messerschmitt Me 262 (fighter and fighter bomber) from MLADG. Developed during the Second World War, the Messerschmitt Me 262 served with the Luftwaffe, both as a fighter and a fighter bomber. It had a climb rate of almost 4,000 ft/min, a reported service ceiling of over 37,000 feet and a top speed in excess of 500mph, extremely impressive for an aircraft at that time. It was also fitted with four x 30mm Mk108 cannons, mounted in the nose, with underwing hardpoints for 24 x 2.2in R4M folding fin rockets, so quite a formidable aircraft to find yourself pitted against. As a fighter bomber, the Me 262 could also carry 2 x 550lb bombs mounted under the nose, with the later A2 variant being able to carry 2 x 1,100lb bombs, but at the expense of losing two of its 30mm cannons. Installation & Documentation Once purchased, you are provided with a zip file weighing in at 430MB. When unpacked, this contains the main aircraft file and documentation, along with two further zip files for the Me-163 Komet and a period glider (not the focus of this review). To install the models, it’s just a simple task of placing them into your X-Plane “Aircraft” folder. The package ships with a full-colour 18-page manual which includes technical data sheets, cockpit layout plans and pictorial diagrams with accompanying annotations. However, it seems the manual is the same one which came packaged with the original release, and as such does not mention the modifications made for X-Plane 12. It would have been nice to have seen these changes referenced, but as it stands, we are left with slightly out-of-date documentation. Exterior The developer has managed to capture the unique shape of the Me 262 with its pointed nose, flat underbelly, swept wings and tall triangular-shaped dorsal fin extremely well. Indeed, when observed from some quarters, it resembles the profile of a shark more than a swallow, but they do say beauty is in the eye of the beholder. The external model features exquisitely drawn panel lines, along with appropriate flush riveting, plus stressed skin panel effects, which can be seen in the right lighting conditions. The model features fully operable slats and flaps, plus an animated undercarriage, with reasonably detailed wheel bays. Liveries The model on offer features only three liveries, default Splinter Green, Green, and Gray, but each one is done incredibly well and in fitting with both the aircraft and period. The liveries are the same for both fighter and bomber variants, along with a paint kit which enables you to create your own liveries if desired. Though not included in the product, my favourite livery is an RAF paint created by the Org member “amerrir” Cockpit Interior Looking back at Stephen’s original Me 262 writeup from 2014, it’s quite clear to see that the cockpit environment was really quite dark. Also obvious was the absence of any form of cockpit wear and tear on the panels or instruments for that matter, which to be honest, left the cockpit feeling rather bland and dare I say it…a depressing place to find yourself in. However, fast forward to today, and you’ll be glad to know that the cockpit environment has received a significant makeover. It now features upgraded panels (now employs a much lighter grey/black colour palette for the cockpit tub), plus some nice subtle weathering effects. All these improvements lead to a far more satisfying and engaging cockpit environment, something the original model couldn’t quite achieve. Away from the textures, you’ll find that all the gauges, switches, and dials, are printed in authentic German, so you’ll have to familiarise yourself with the cockpit layout before attempting any sort of flight. Luckily, this is where the excellent manual comes in handy. If you take the time to read through it carefully, you’ll find that everything comes together, which in turn helps create a more enjoyable simming environment. Handling Having sat in the cockpit for a while familiarizing myself with the layout of the instruments, I thought it was about time I lit the pipes! With the parking brake on, battery master on, and fuel pump on, I pulled the Riedel switch, pressed the ignition and a short time later, I was trundling along the taxiway. At the edge of the runway, I set the elevator, rudder trim, and flaps to their desired settings (20 degrees in this case) and held the toe brakes. With this done, I slowly increased the throttle until the two Junkers Jumo 004 engines were running at 7000RPM, and then released the brakes. For a moment, nothing happened, but then, just like the real aircraft, I started to move forward, slowly at first, then gradually faster. Unlike the fast jets of today, the Me 262 was from a time when jet engine propulsion was in its infancy, so it takes a while for her to get going (a bit like myself). Once airborne, it was landing gear up, flaps up, and then reducing RPM as required. From here I set my trim and pitot heat, whilst constantly checking my instruments. At level flight, I found the Me 262 to be incredibly stable, one might even say docile. With enough direct input, she will manoeuvre on a whim, but be prepared for some engine lag…those two old Jumo engines really do take some time to get going. Landing is a relatively simple affair, but once again, you do have to consider that engine lag. Coming in slightly faster than necessary, rather than slower, is probably the safer option. However, even here a degree of caution is advised, as the Me 262 has quite a slippery profile, so it’s best to plan a few moves ahead. Once down, it was a case of retracting the flaps, and then proceeding to my designated parking area. Overall, the Me 262 is a true delight in the air, and as such, a real pleasure to fly. Sounds For me personally, there’s something special, maybe even oddly unique about the sounds emanating from an early jet engine. It’s difficult to explain, but they seem to sound sharper, more high-pitched, than the roaring rumbling monsters we have today. So, imagine my delight when first hearing the provided sounds for the engine. The included FMOD soundset is a delight and does a fantastic job of conveying those two vintage Jumo engines. From engine start to shut down, the entire range is there and it’s simply a pleasure to listen to. Various other sounds are also present, such as ones for levers and switches, plus the opening and closing of the canopy, as well as guns and bombs. Conclusion Over the years I have had the pleasure of owning several models from MLADG, and I’ve yet to be disappointed by any of them. In my opinion, they deliver products that are well-produced, and beautifully detailed, all at a very reasonable price point. That trend continues with the Me 262 being reviewed here. Yes, it’s based on an earlier model but the cockpit environment (which had numerous issues in the original) has received a much-needed makeover, and due to that, it no longer looks bland, dark or…uninviting! The result is an aircraft which is more enjoyable to sit in, and as such, is one you are far more likely to enjoy. The Me 262 is not a complex model (not if going by some of today’s high-end products), but it does have enough about it so that it appeals to a broad range of simmers. The only downside to the package I can really think of is the lack of liveries included with the product (one or two more would have been nice), plus the slightly dated manual. That said, I do like the developer's approach of including models for the previous version of X-Plane, as I believe that many users still prefer using X-Plane 11 at this time. Summing up; the Me 262 package from MLADG is a model I thoroughly enjoyed using. When you factor in the inclusion of two other models (the Me 163 Komet and the period glider), I think it’s safe to say that this is a package which has considerable long-term value. All you have to ask yourself now is, are you ready to strap yourself into one of the earliest jet aircraft in aviation history… _______________________________ MLADG Me 262 is available from the X-Plane.Org Store here: MLADG Me 262 Priced at US$19.95 Features Based on real documentation SASL-based features and failures Fully functional 3D cockpit Paint kit included for repaints Fully animated model Realistic instrumentation based on real counterparts In-flight refuel possible JATO can be used for short fields Metrical instrumentation VFR plane with limited radio navigation equipment Gunsight available Requirements X-Plane 12 or X-Plane 11 Windows, MAC or Linux Support: Support forum for the Me 262 Current version: 2301 (Feb 7th, 2023) Review by Nick Garlick 17th March 2023 Copyright©2022: X-Plane Reviews Review System Specifications: Windows 10, Intel 4790K liquid-cooled, overclock to 5GHz, 32GB DDR3 1600MHz RAM, Nvidia GTX 1070ti, Titanium HD Audio Card. (Disclaimer. All images and text in this review are the work and property of X-PlaneReviews, no sharing or copy of the content is allowed without consent from the author as per copyright conditions) All Rights Reserved

-
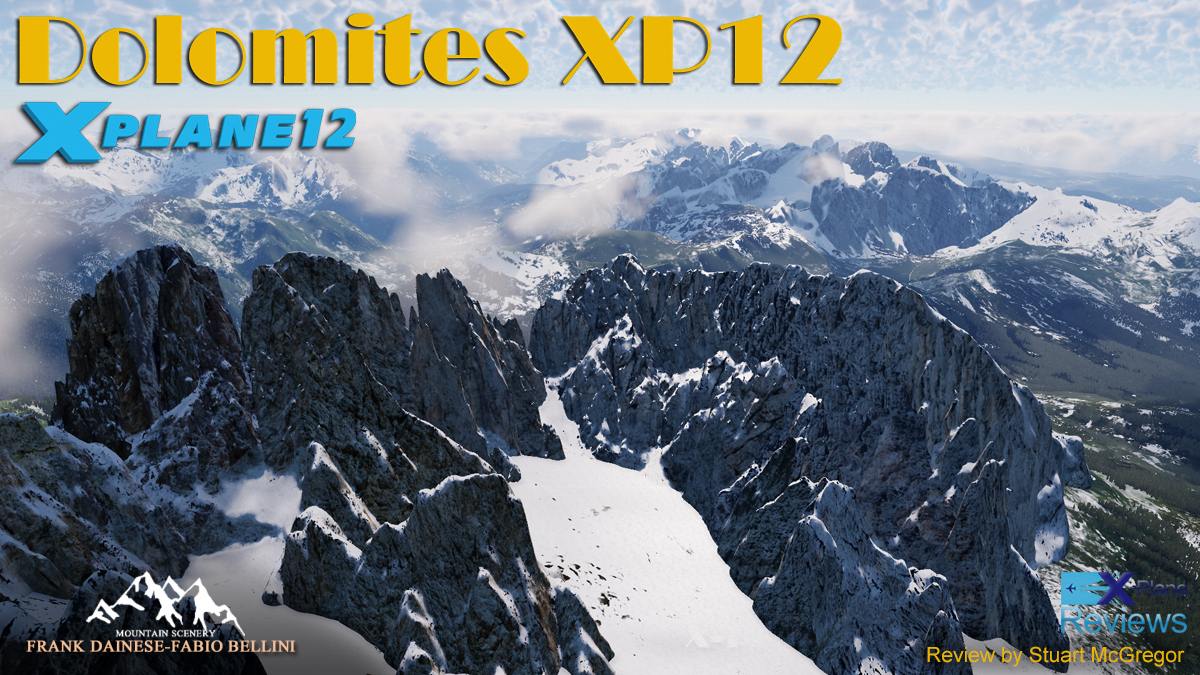
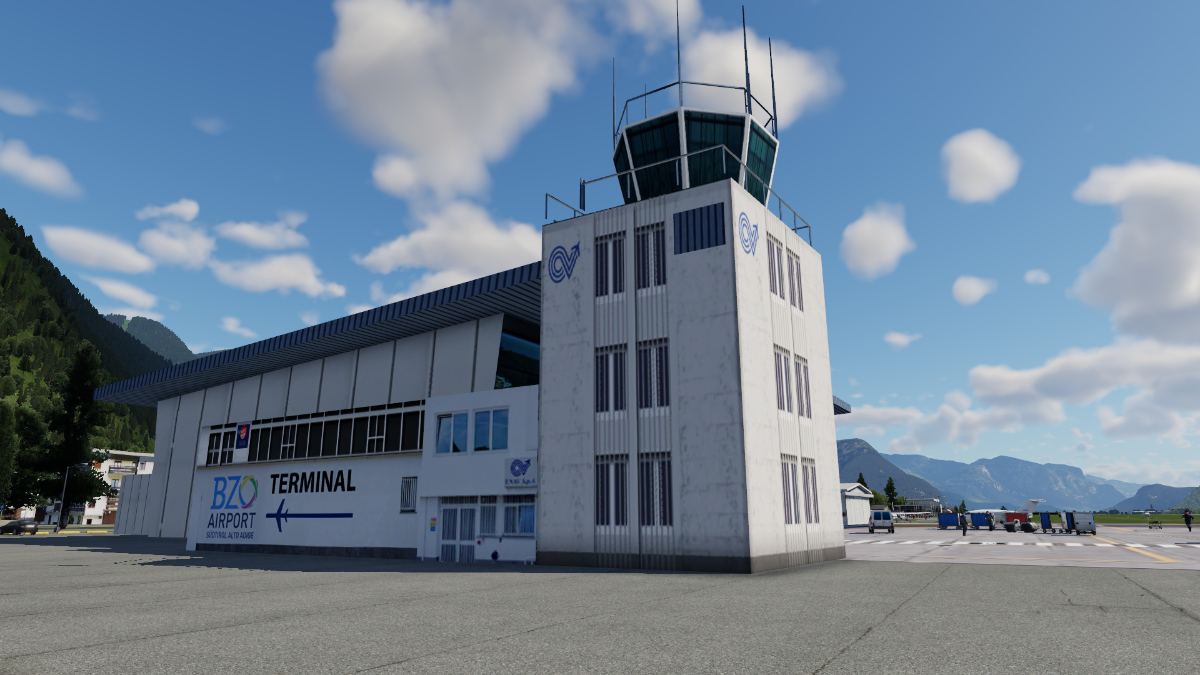
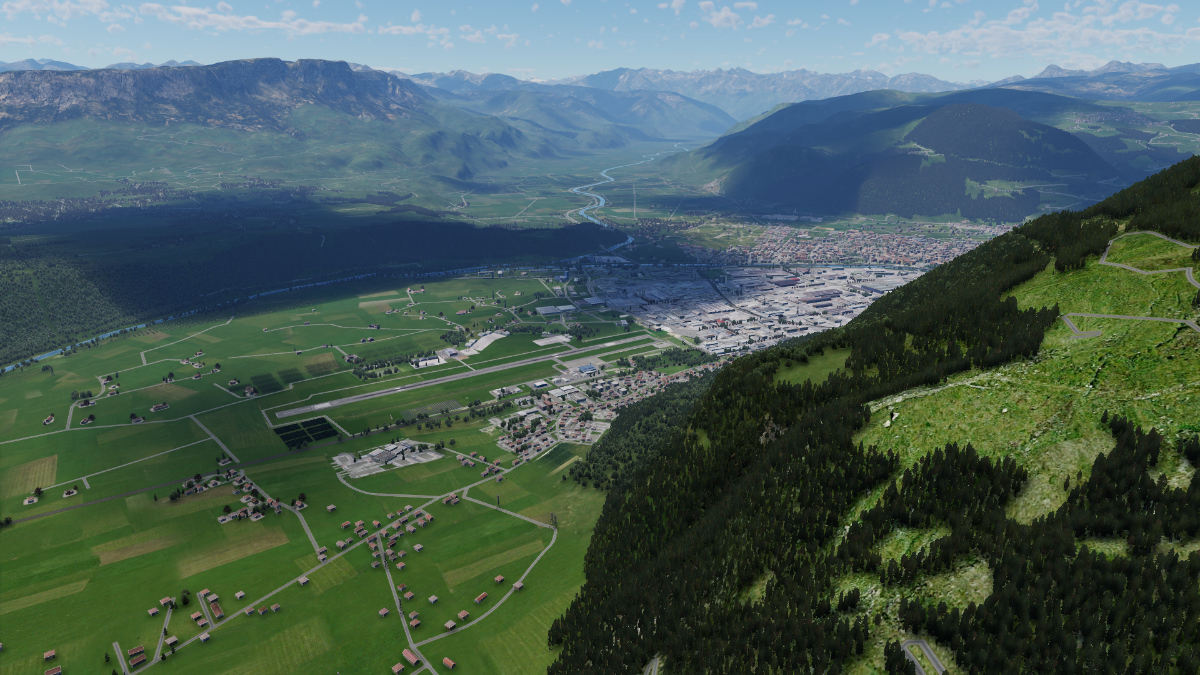
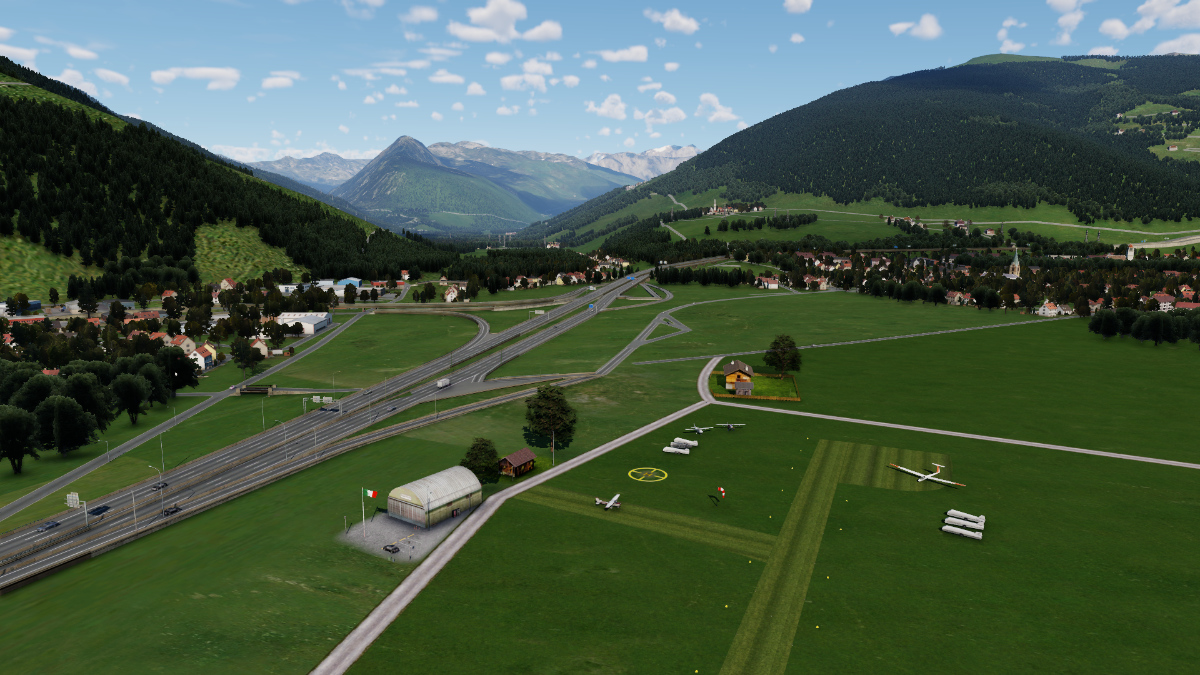
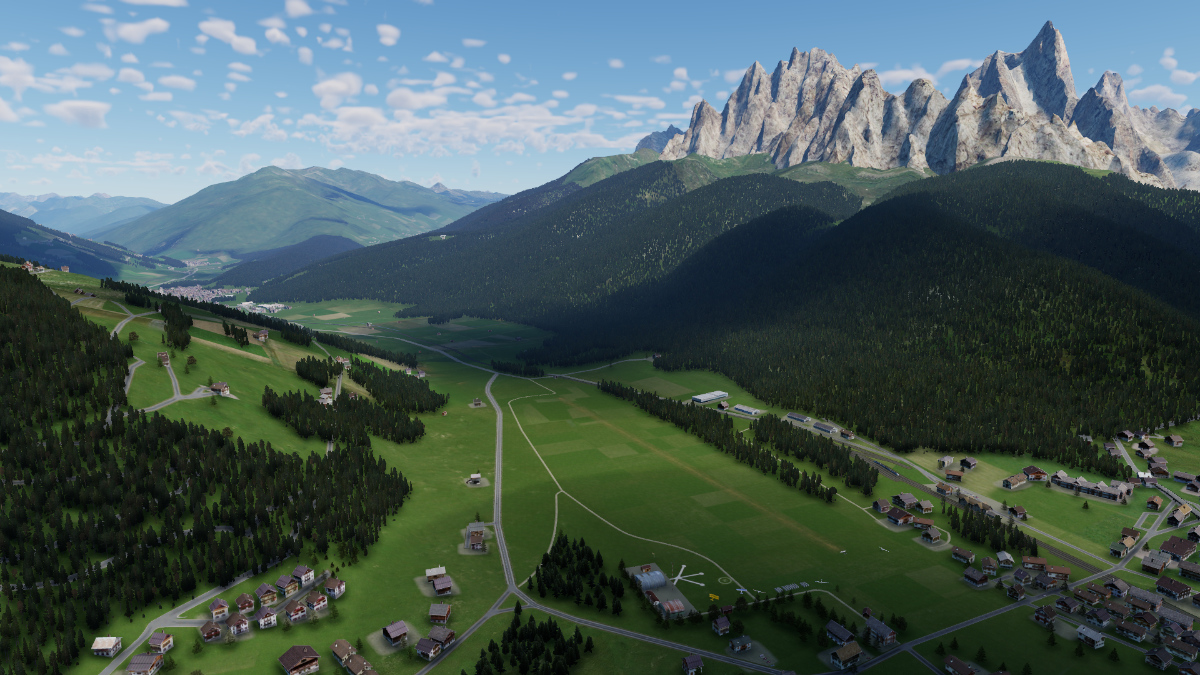
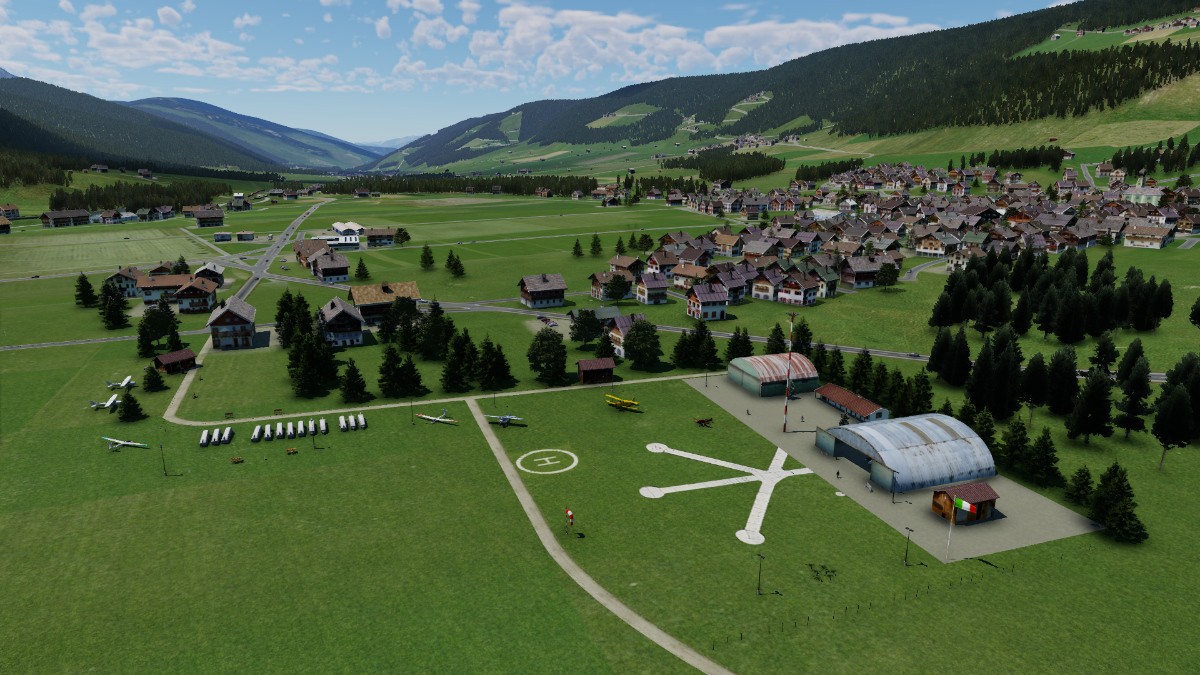
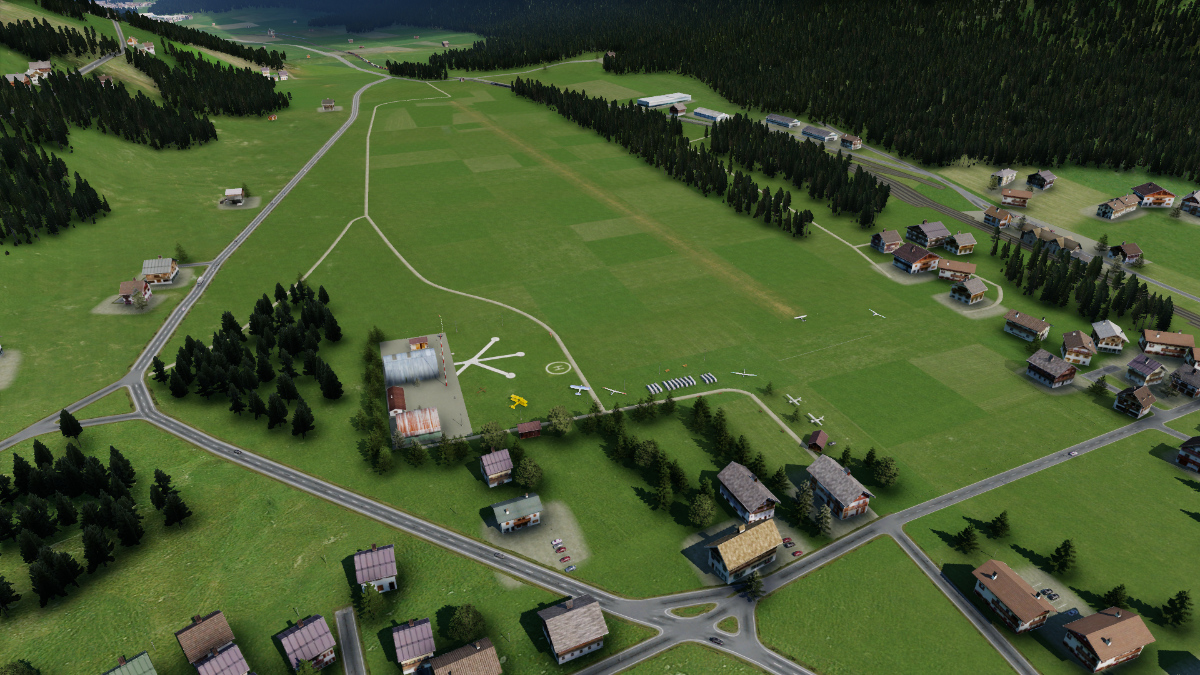
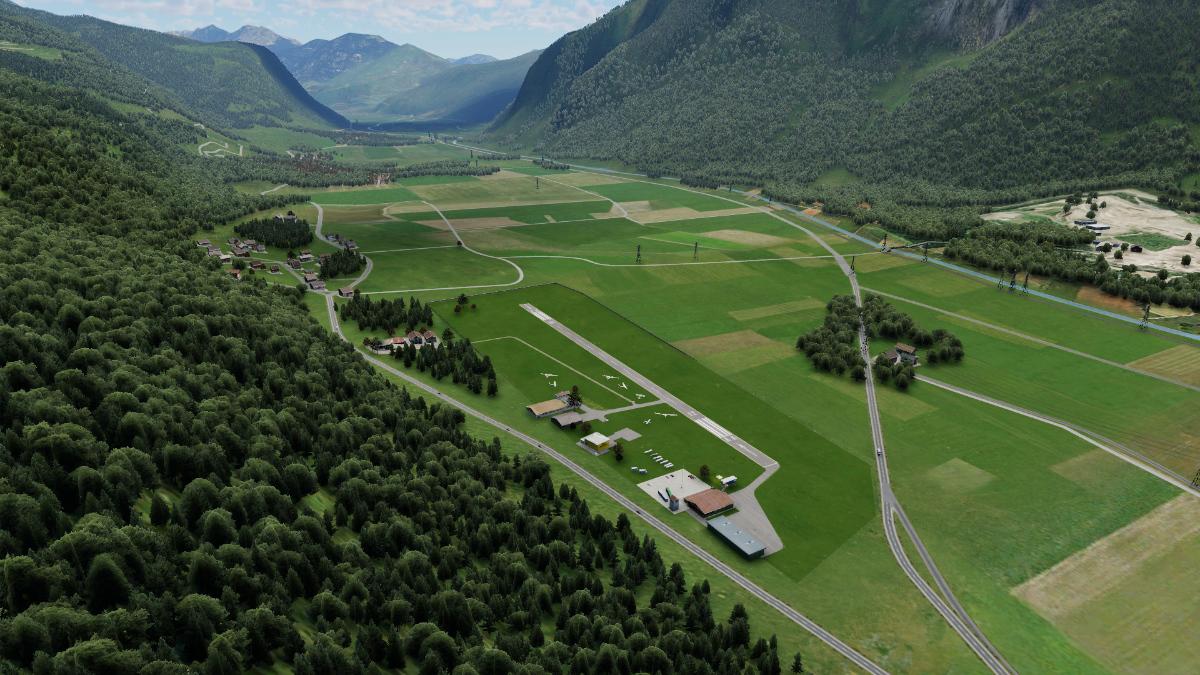
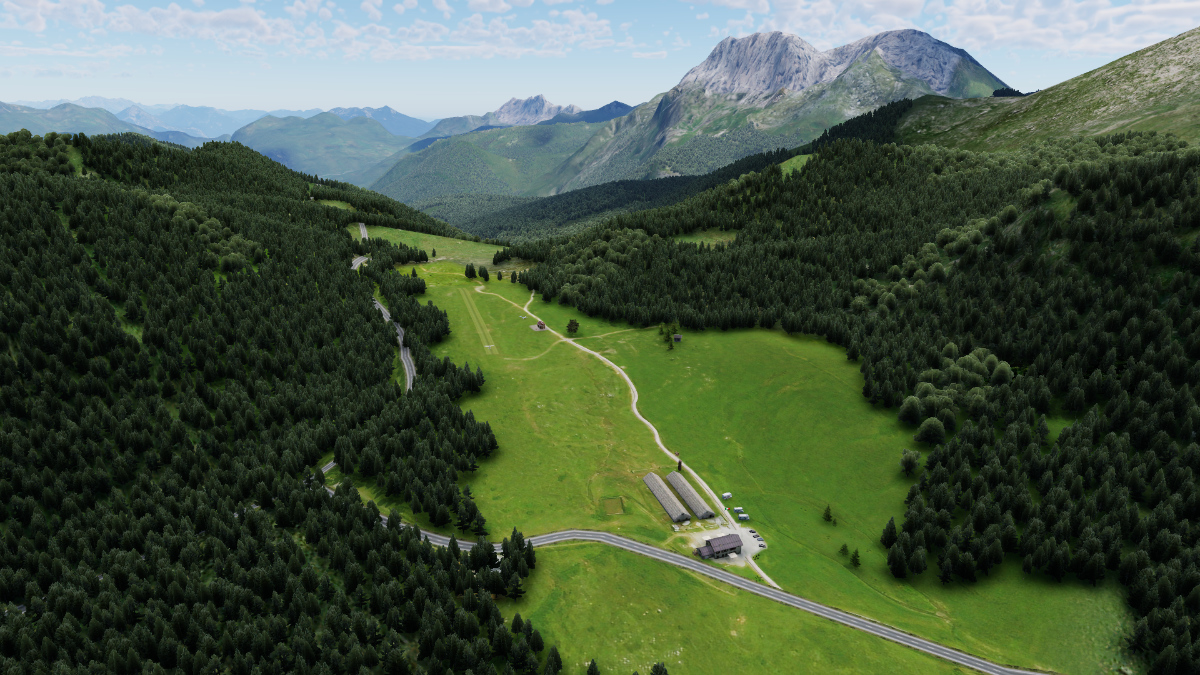
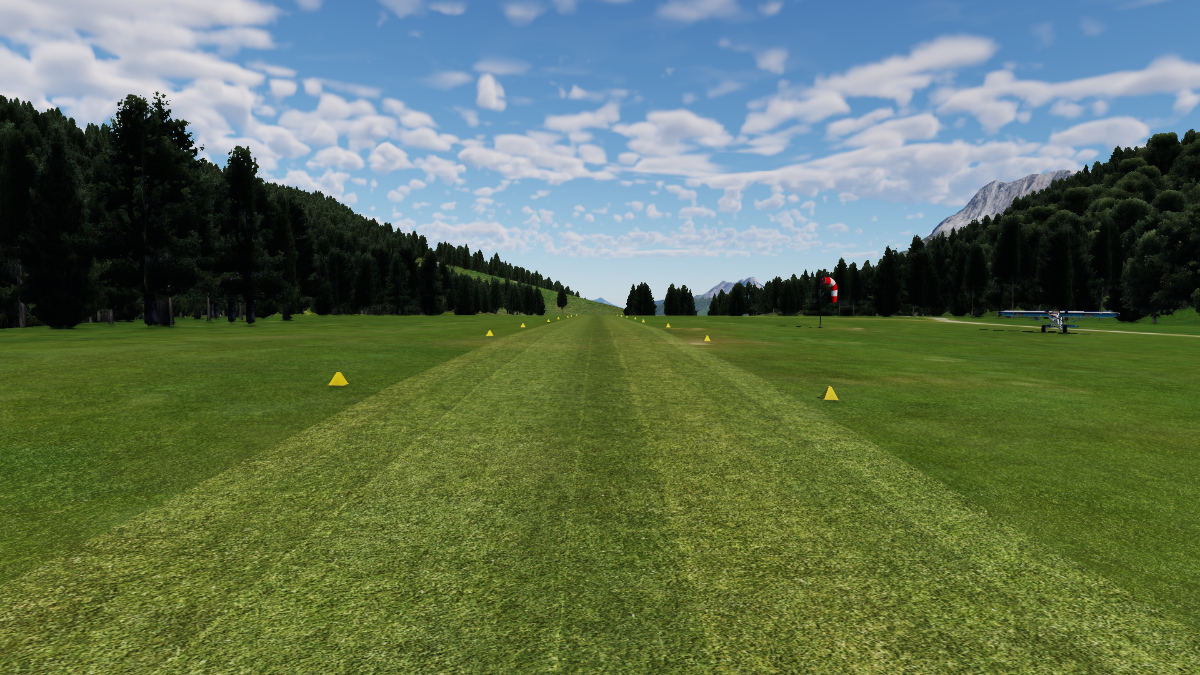
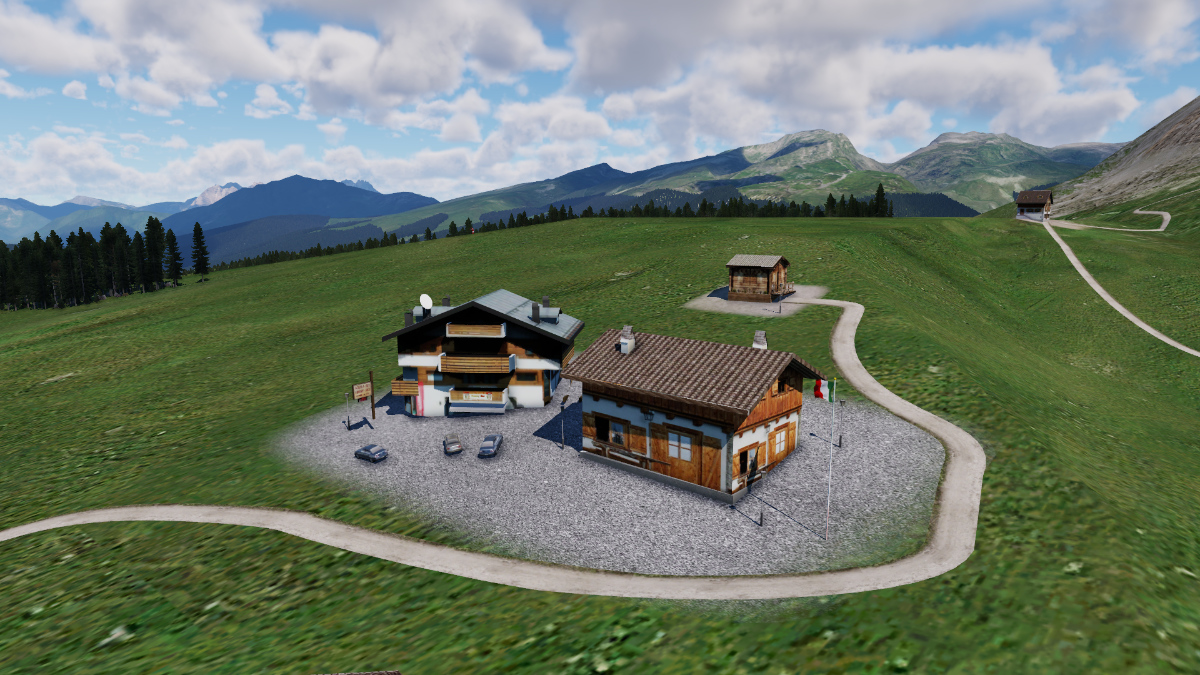
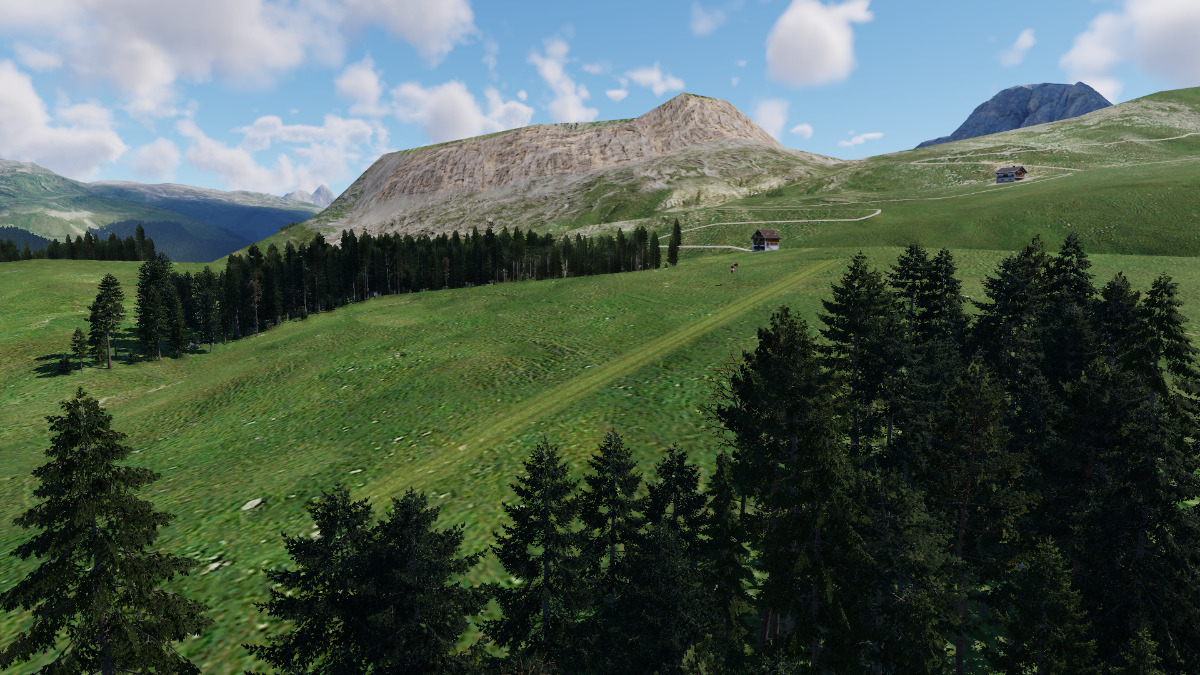
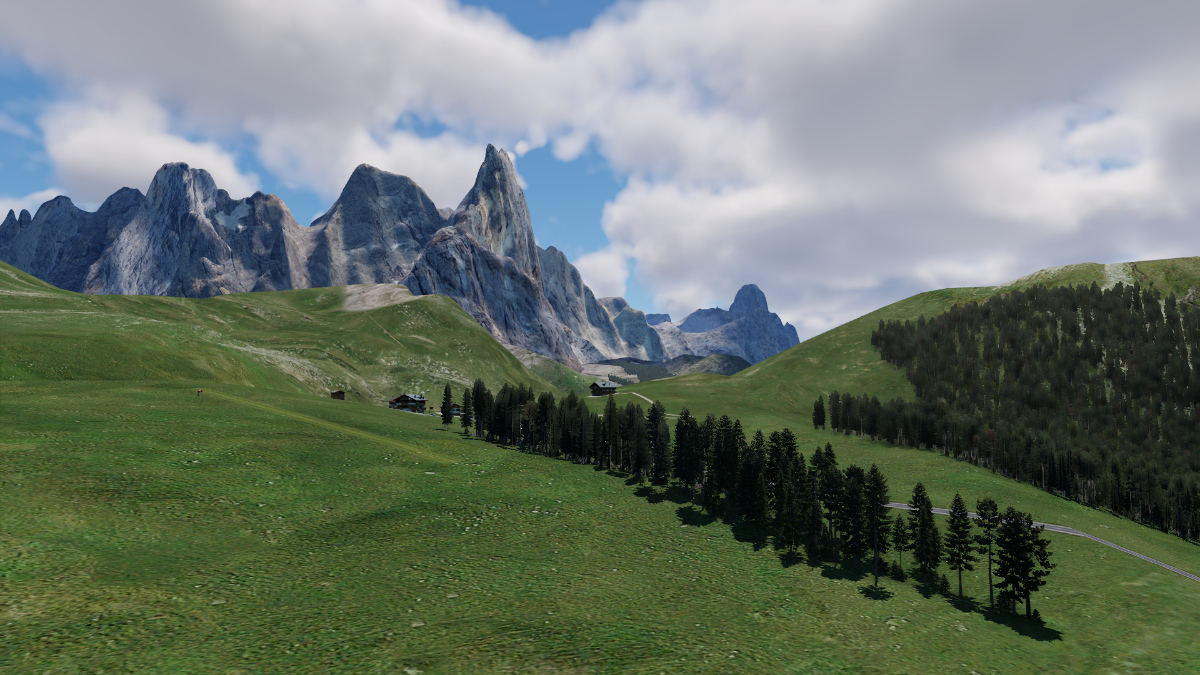
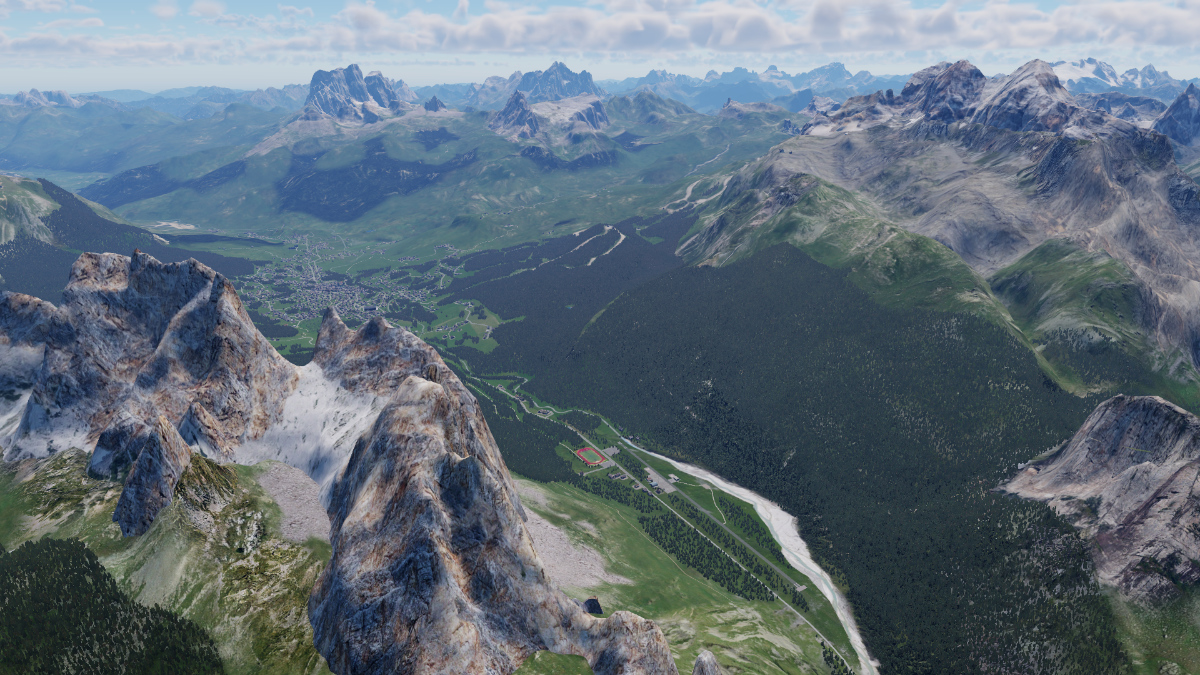
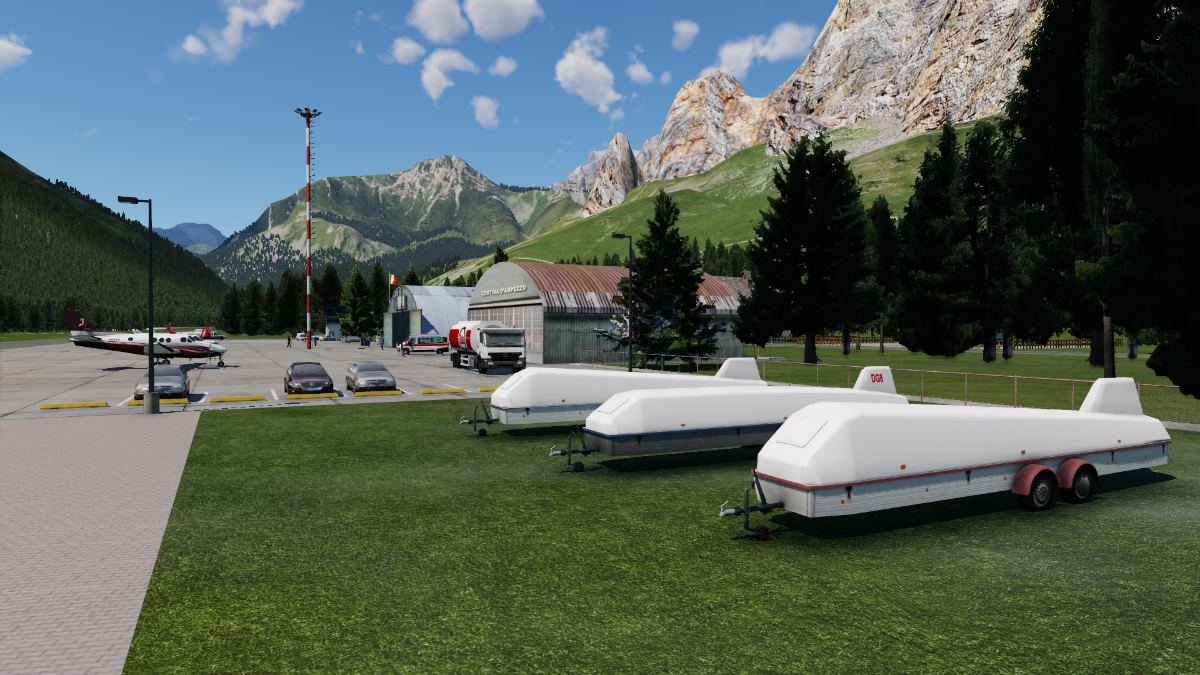
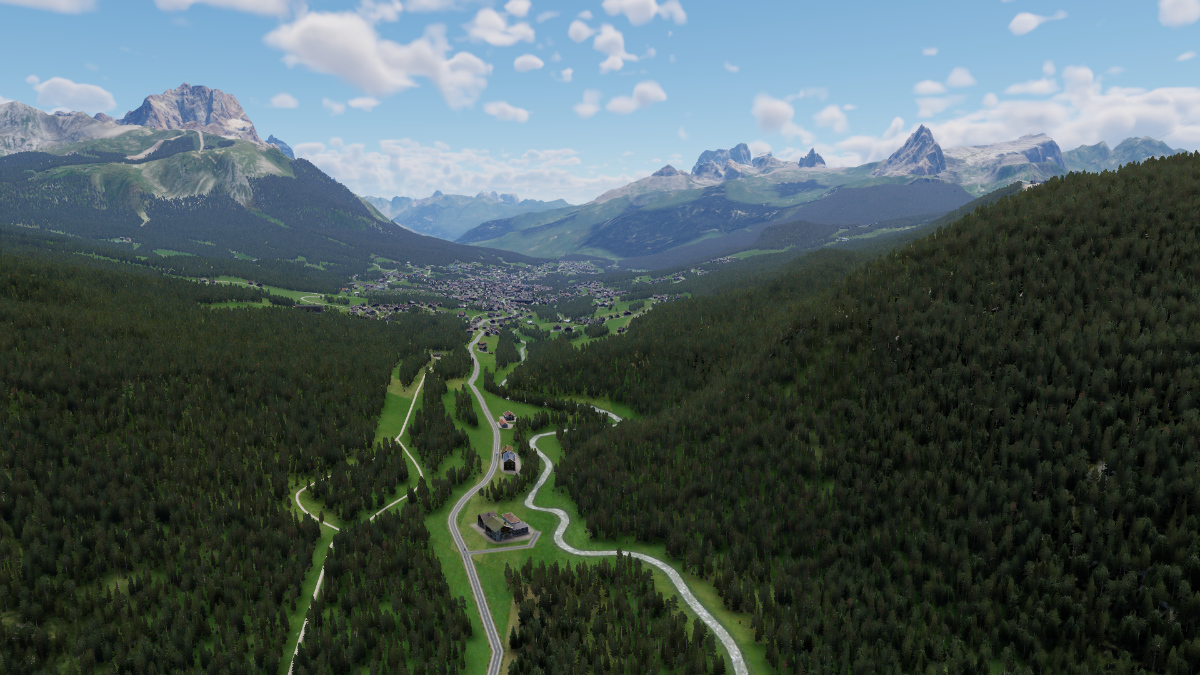
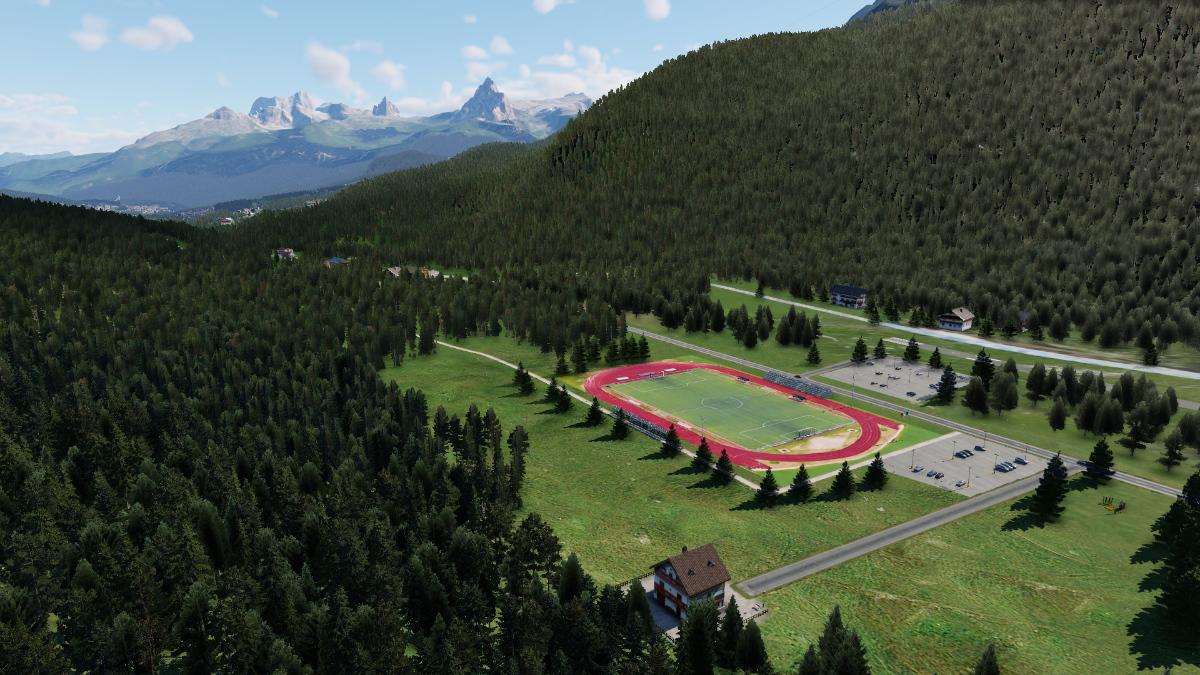
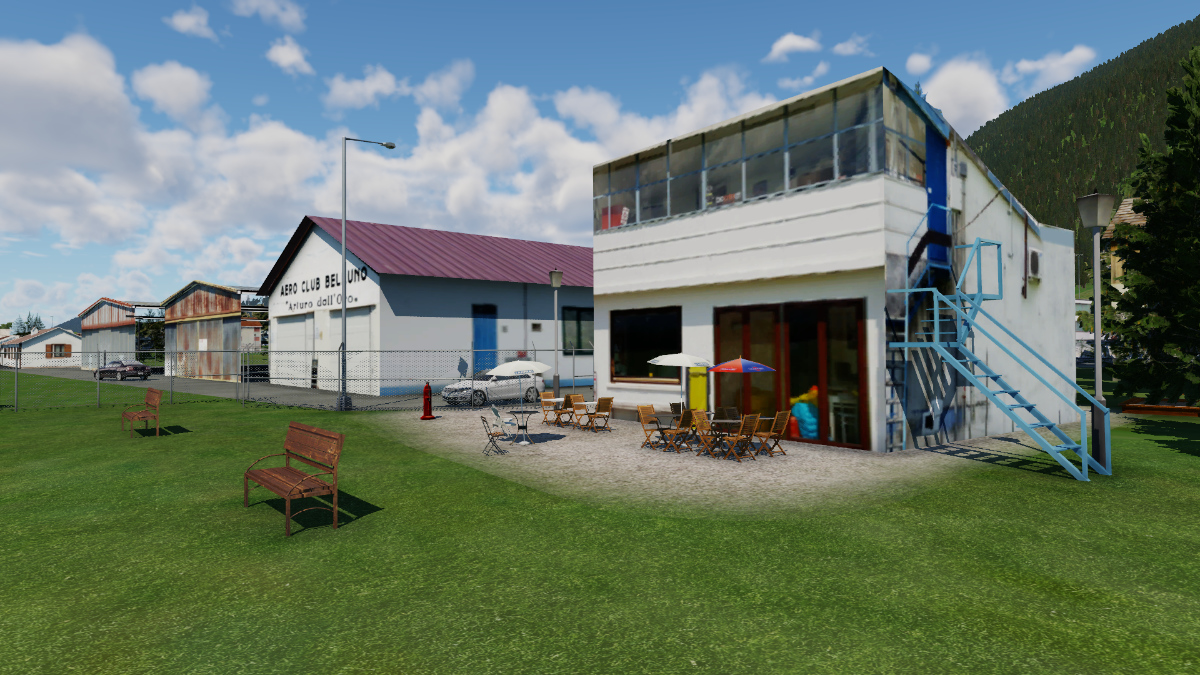
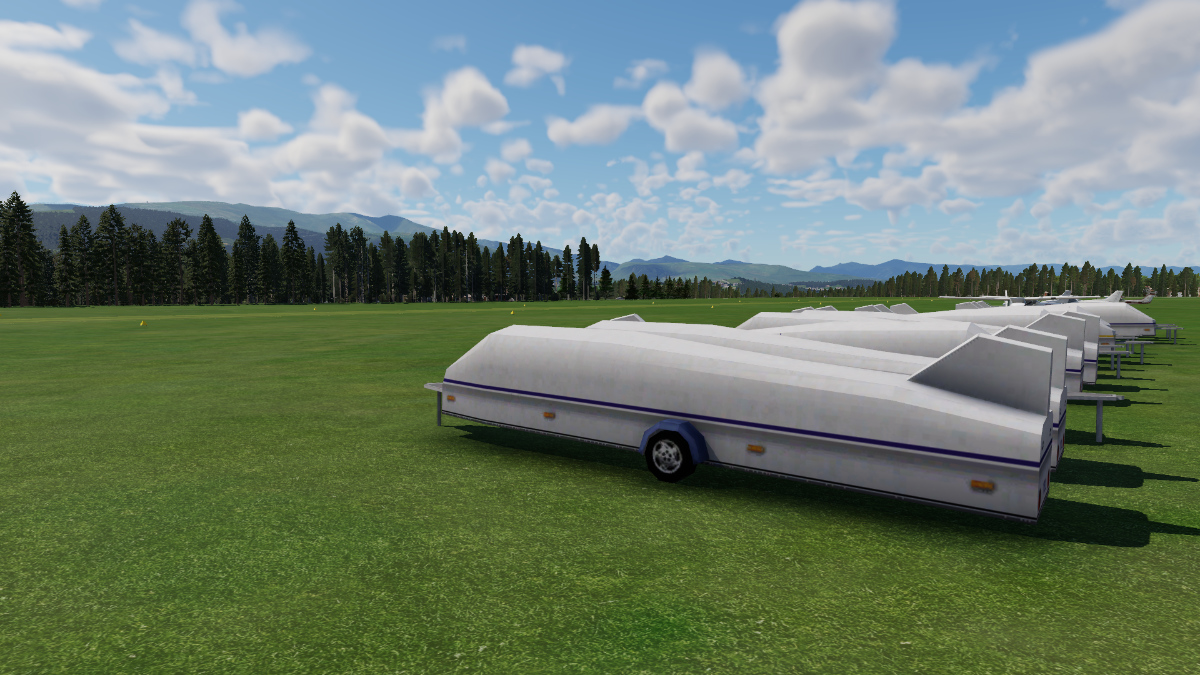
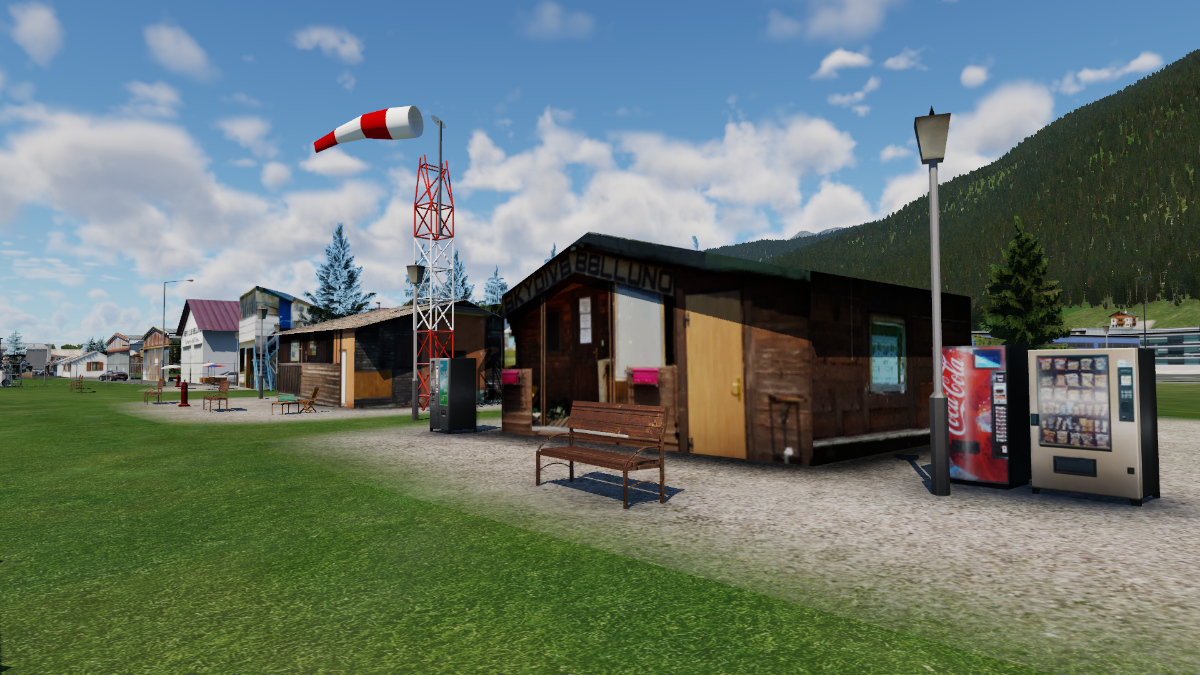
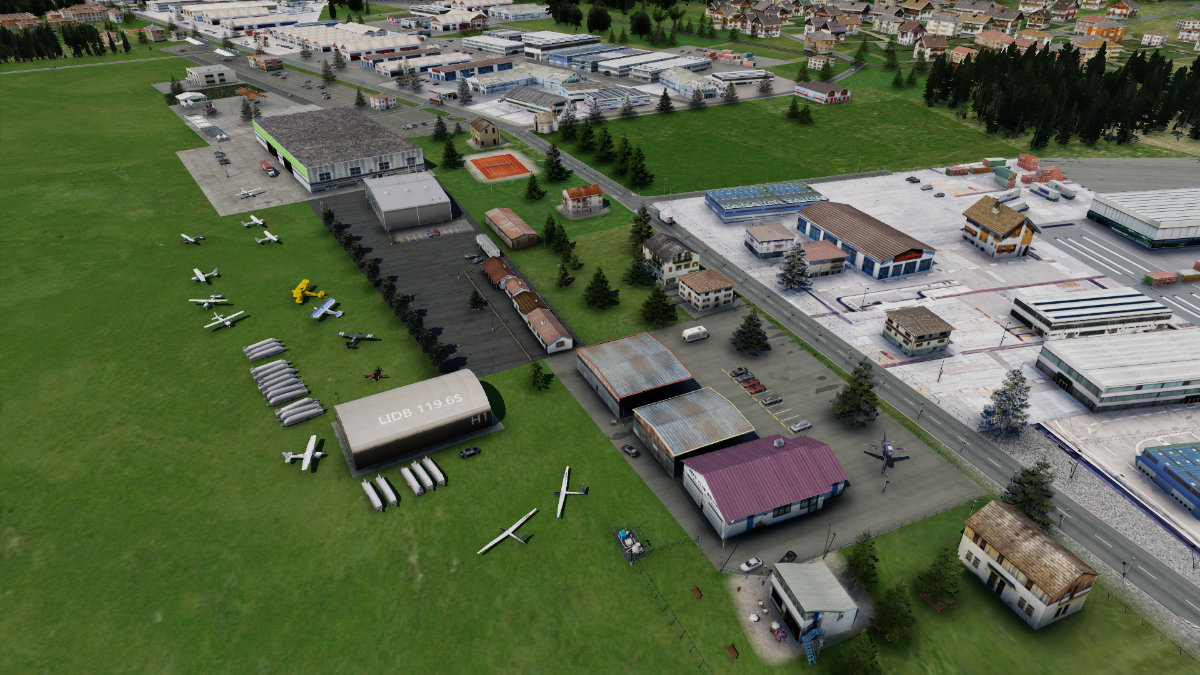
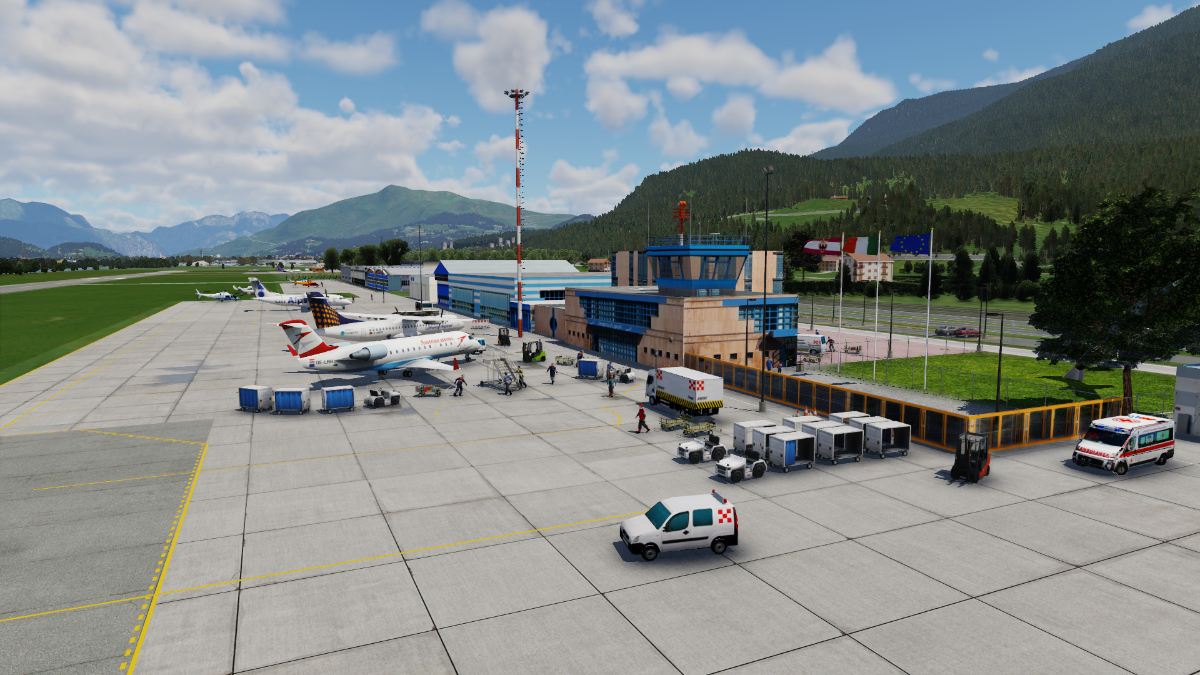
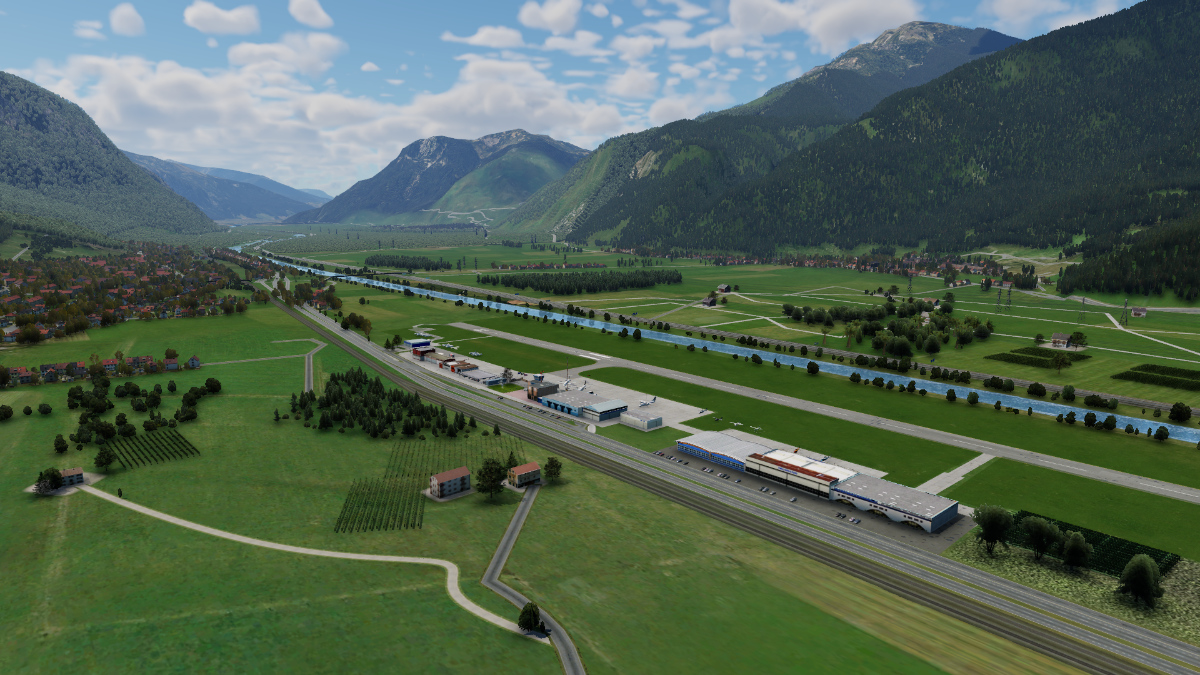
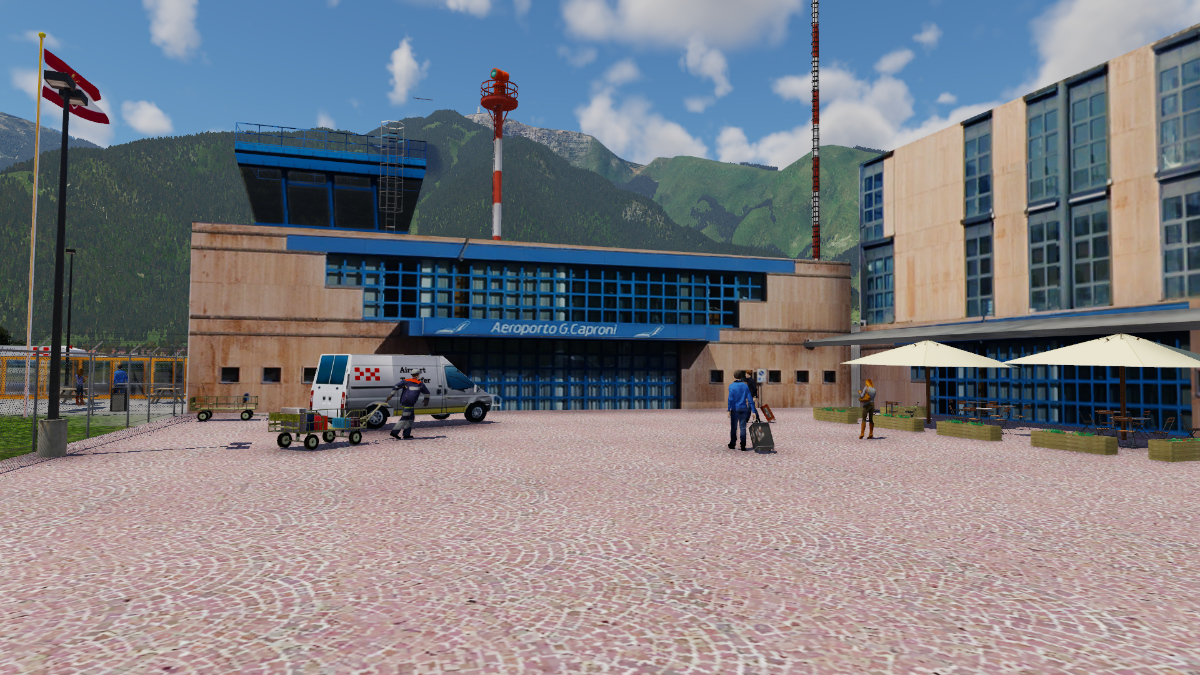
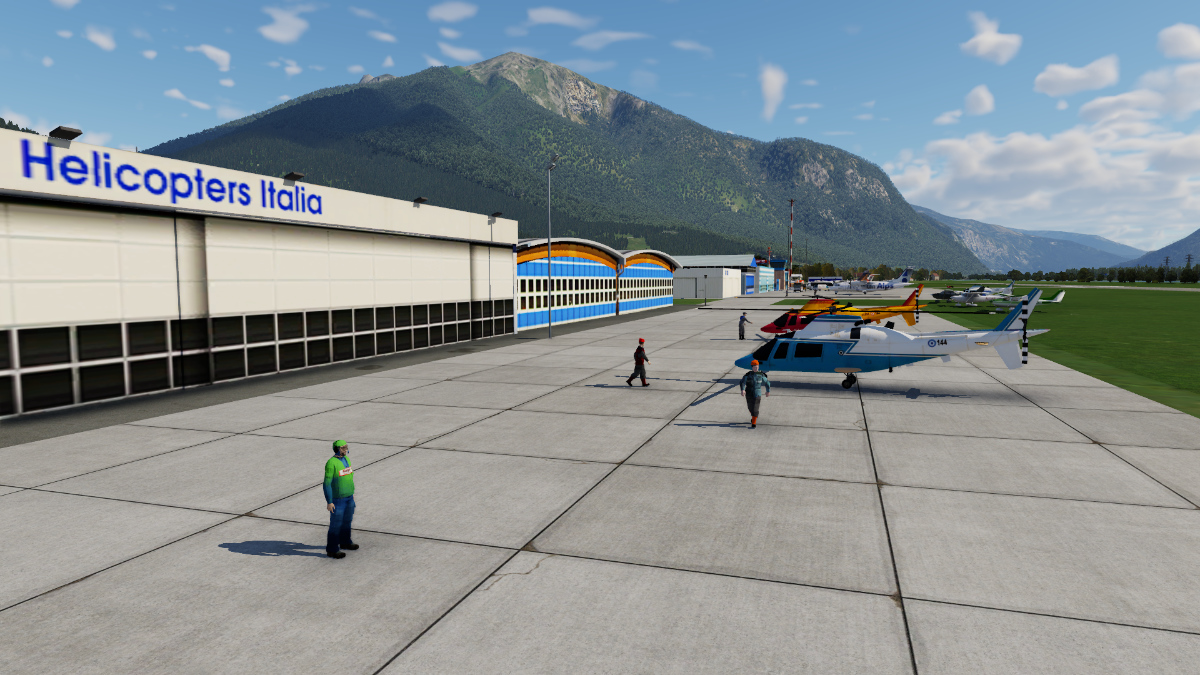
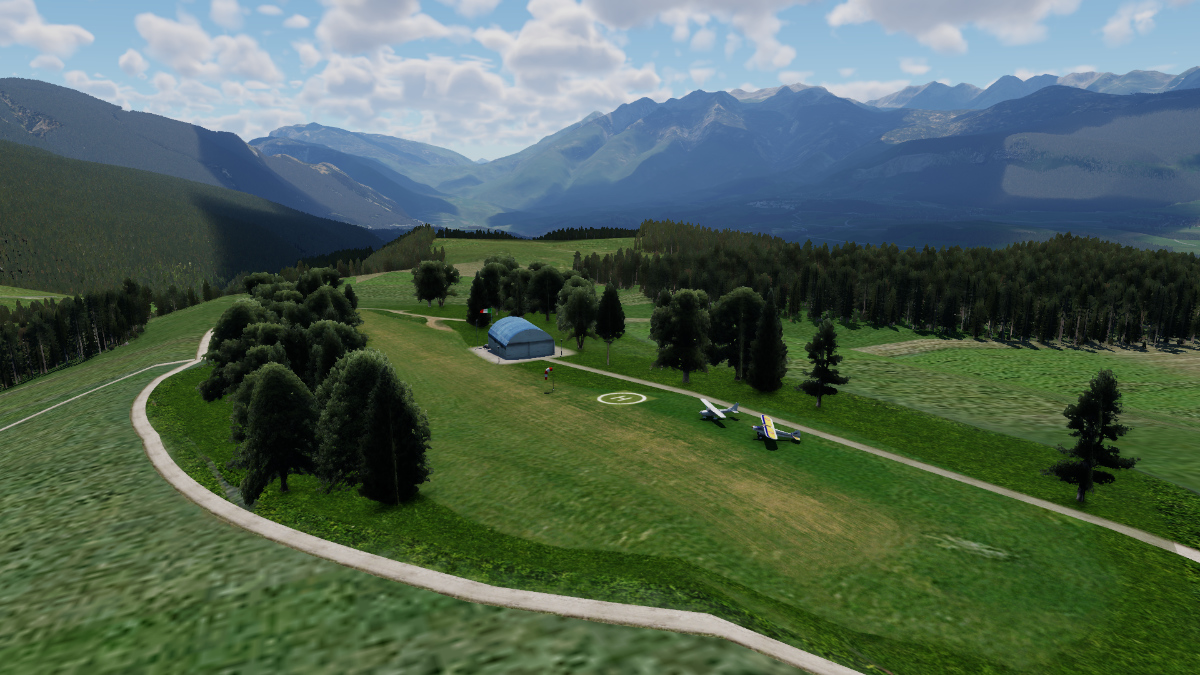
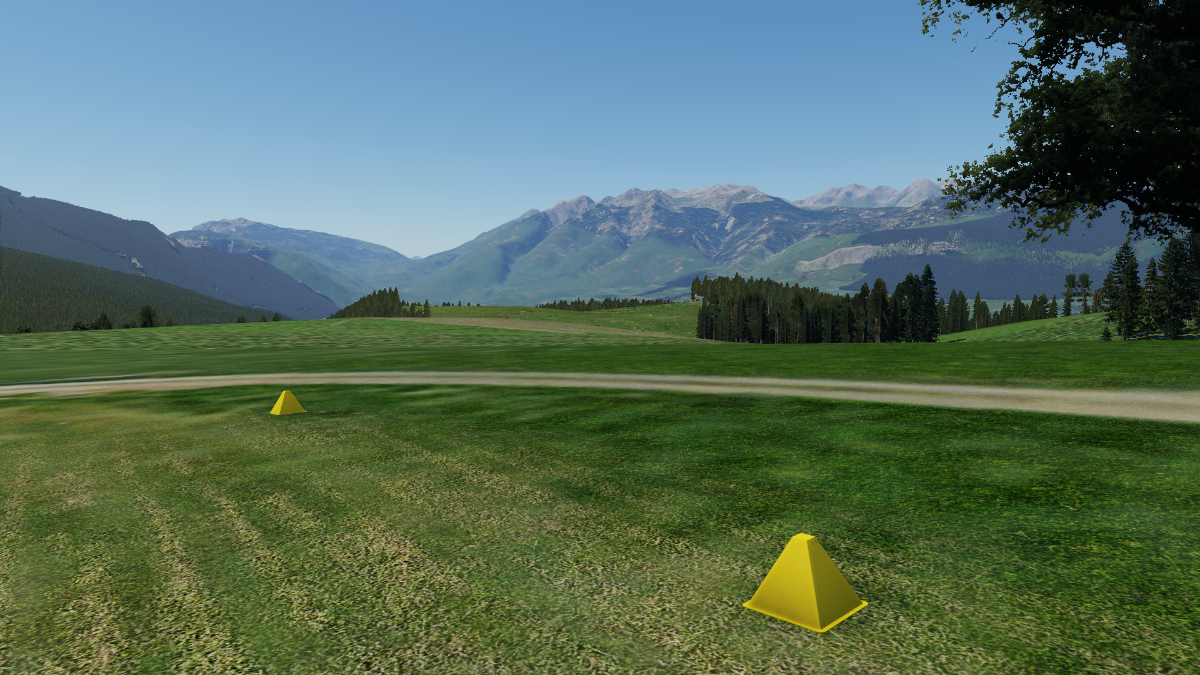
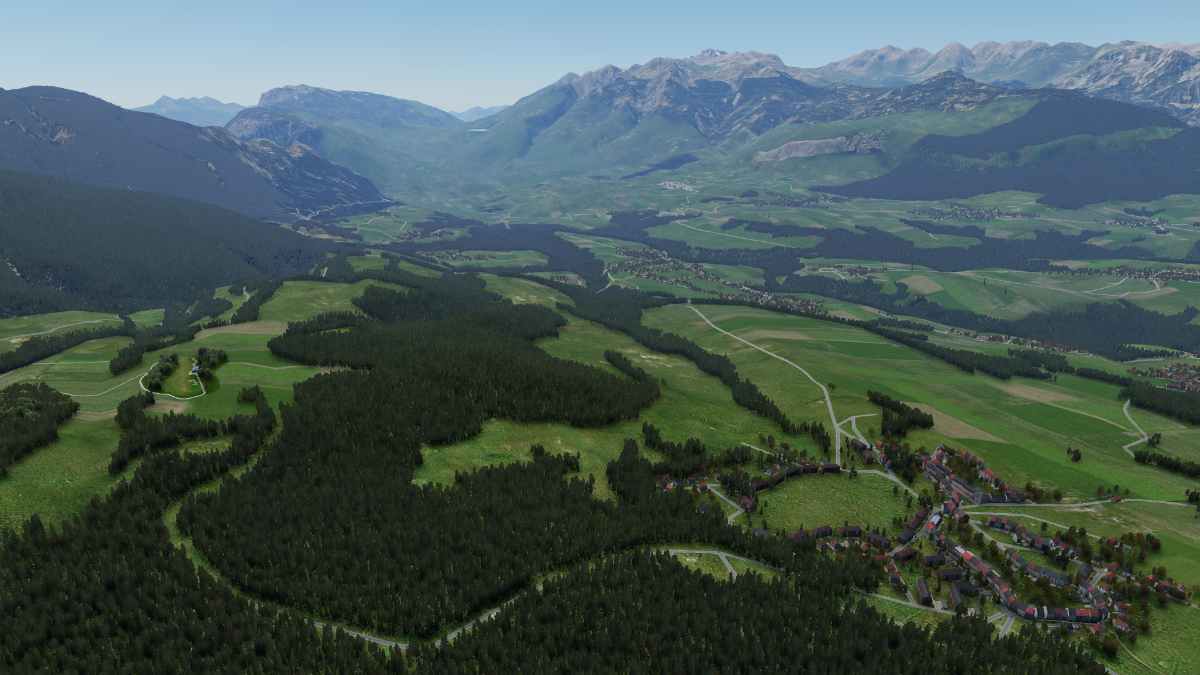
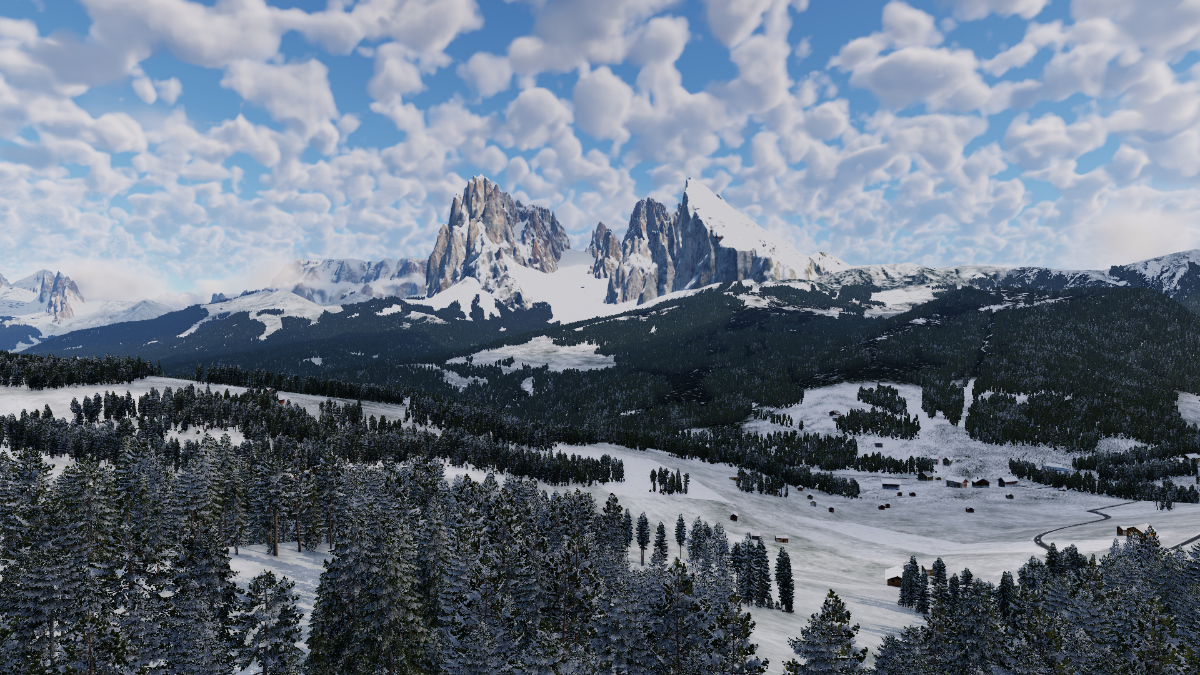
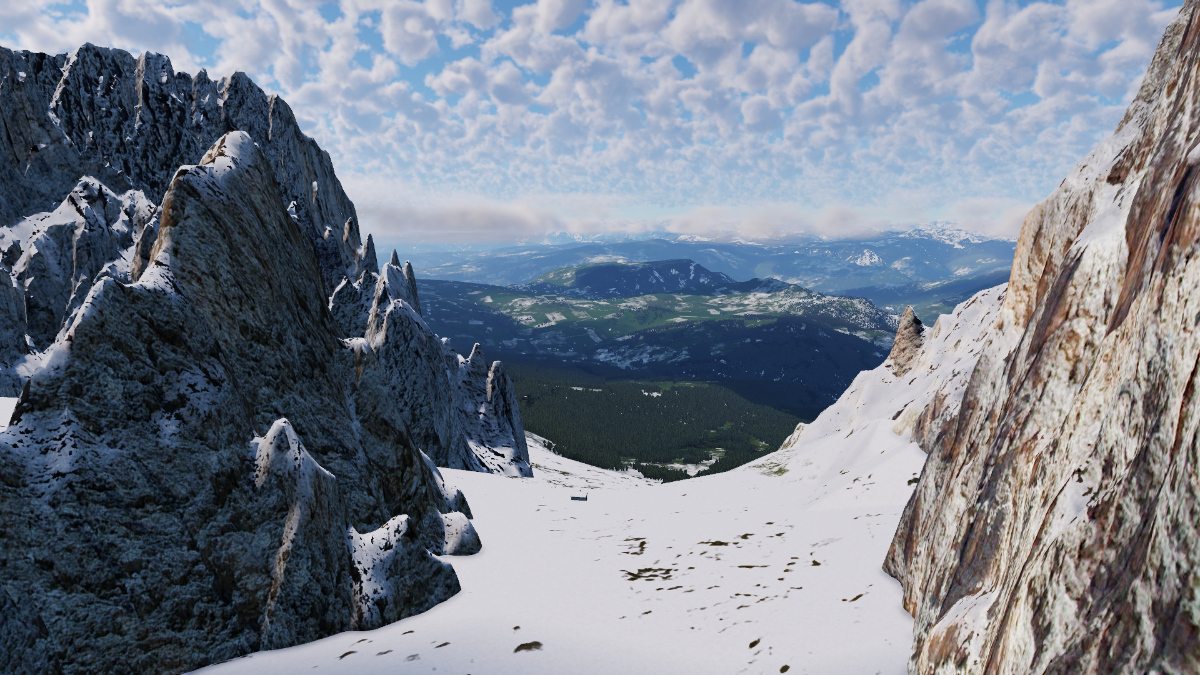
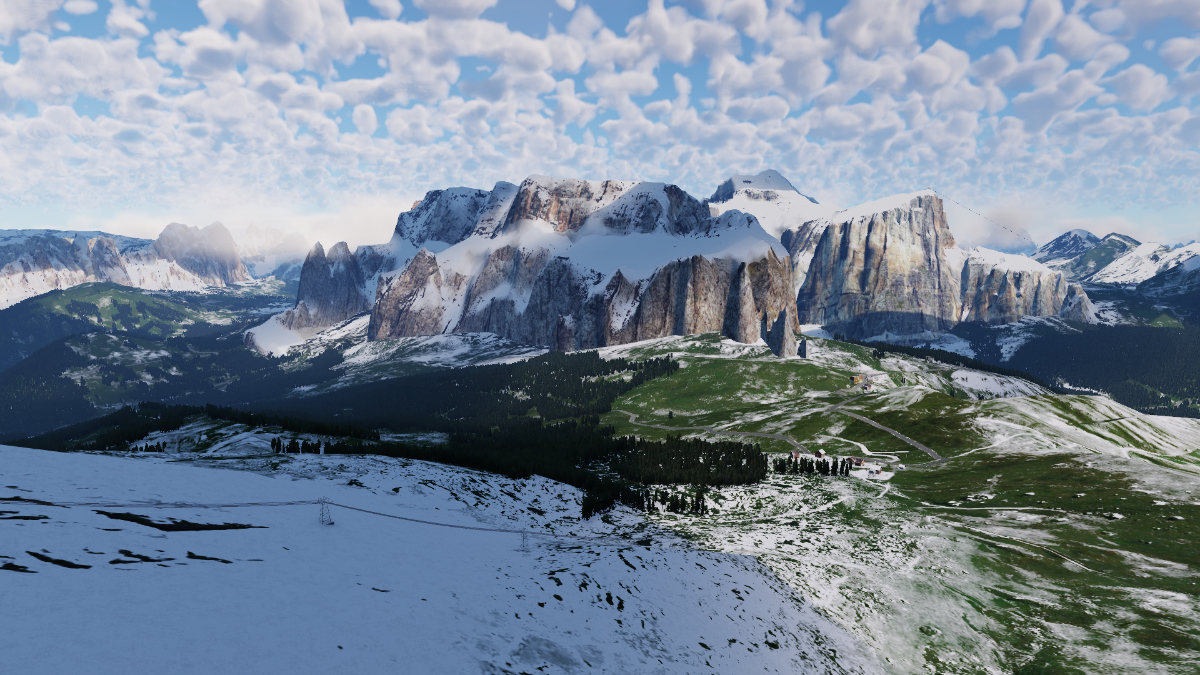
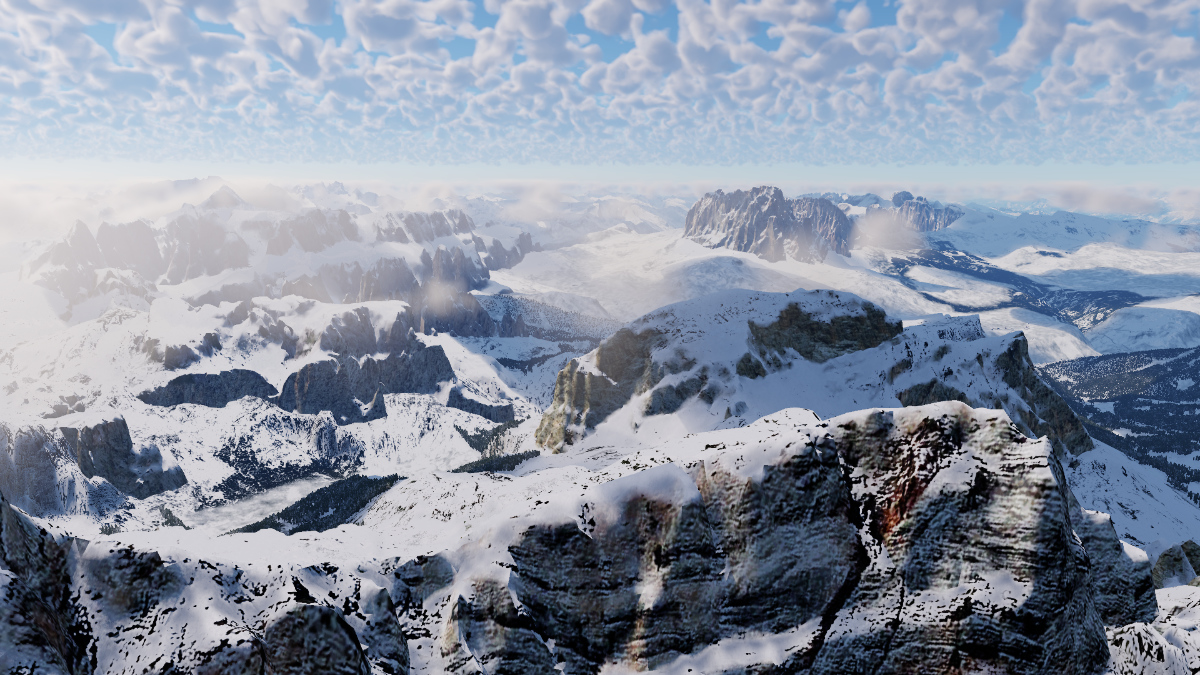
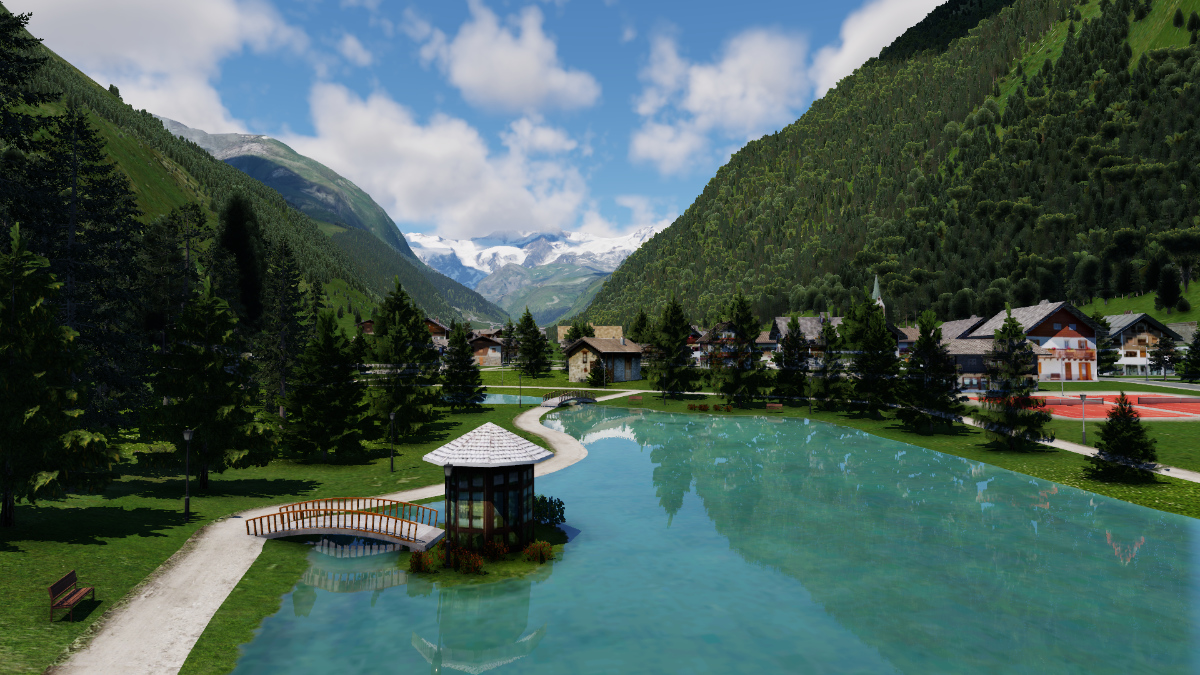
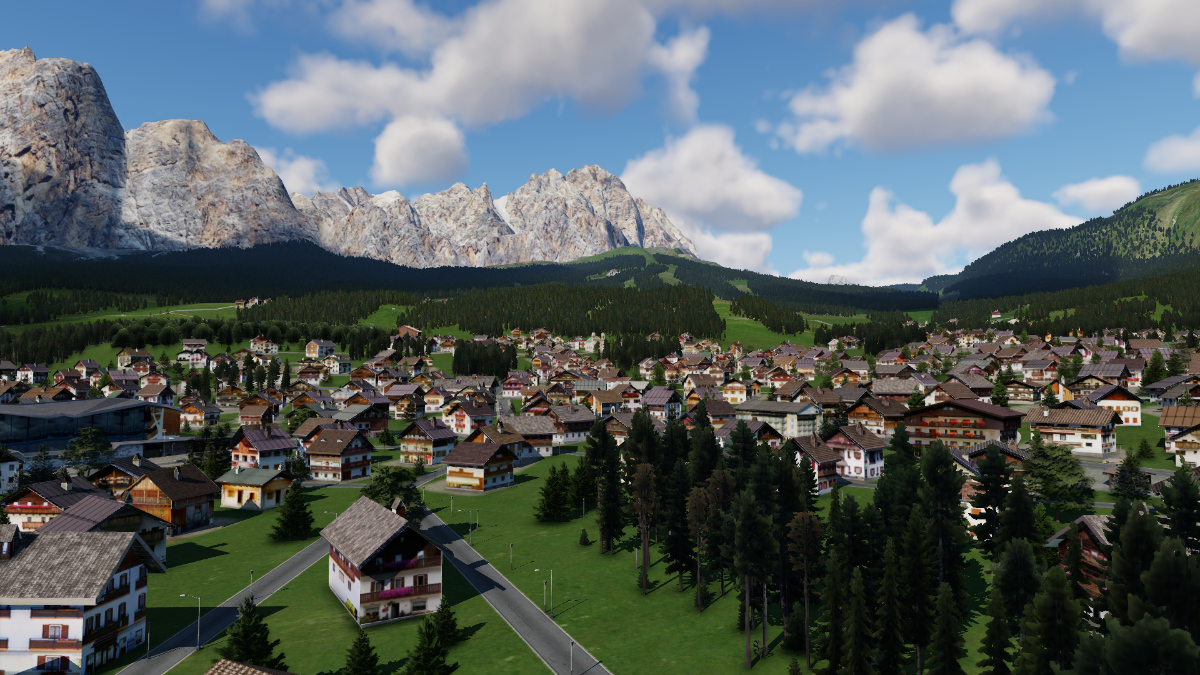
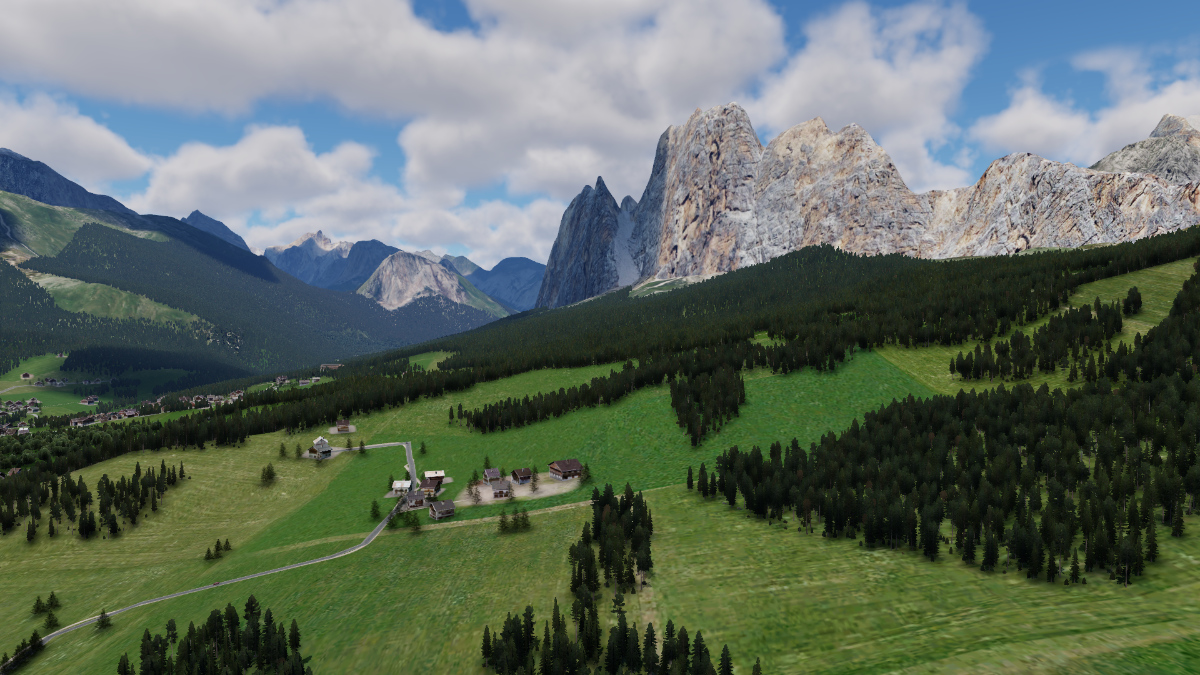
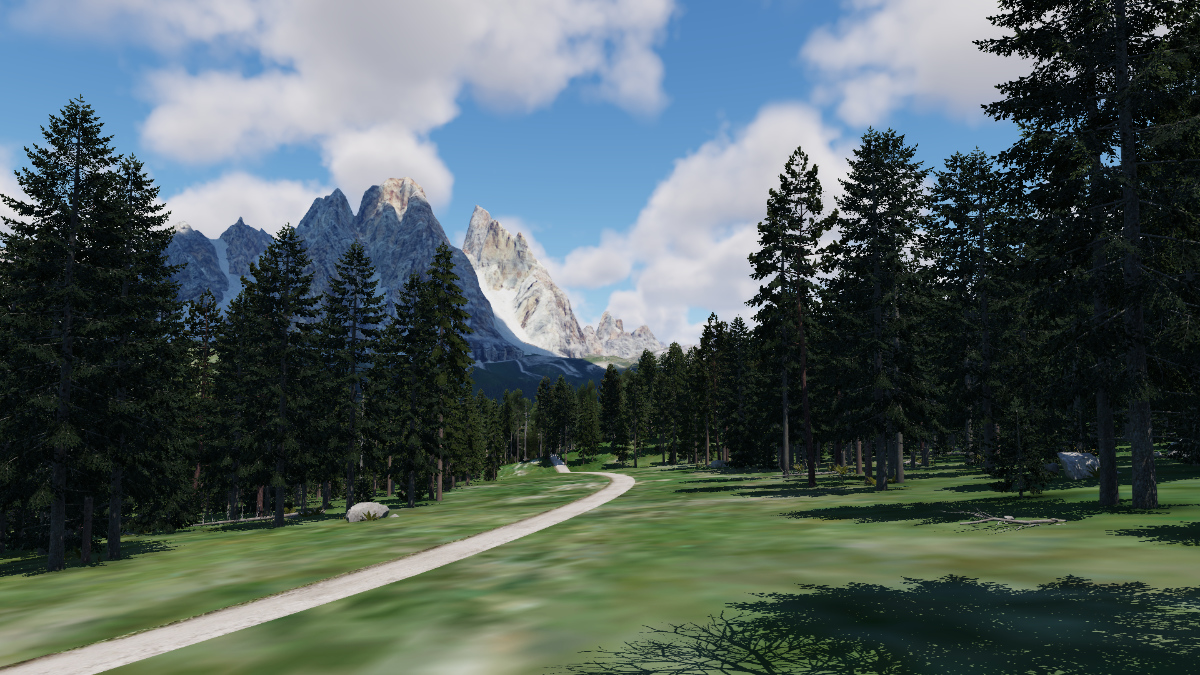
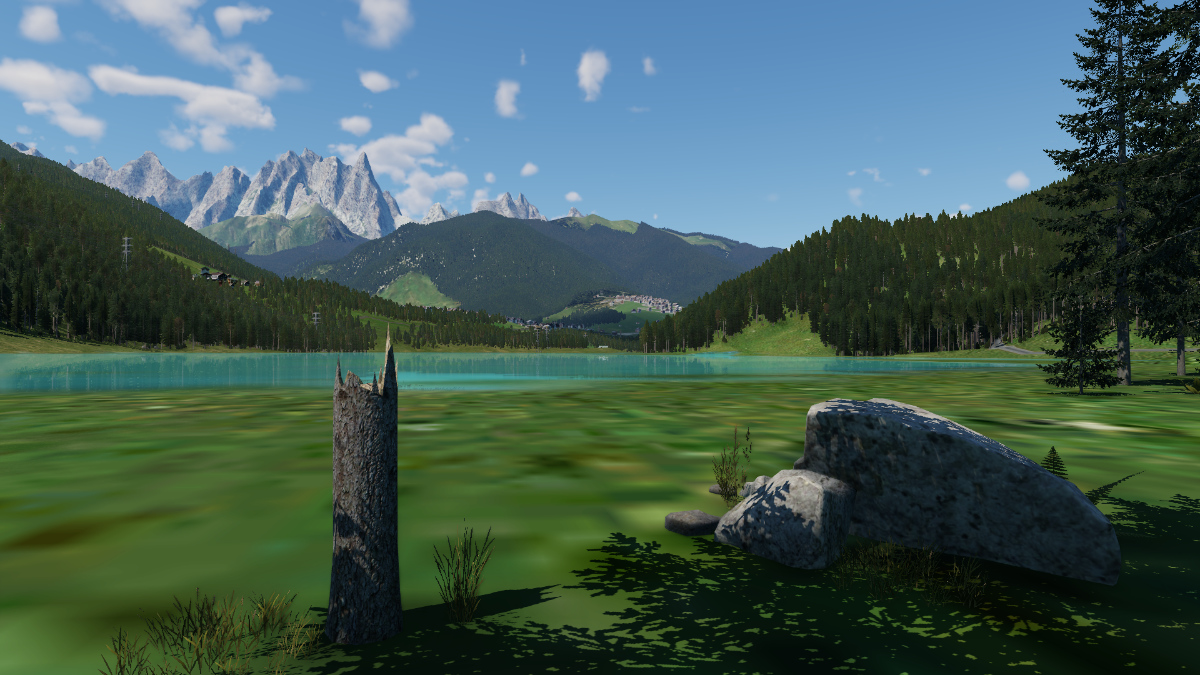
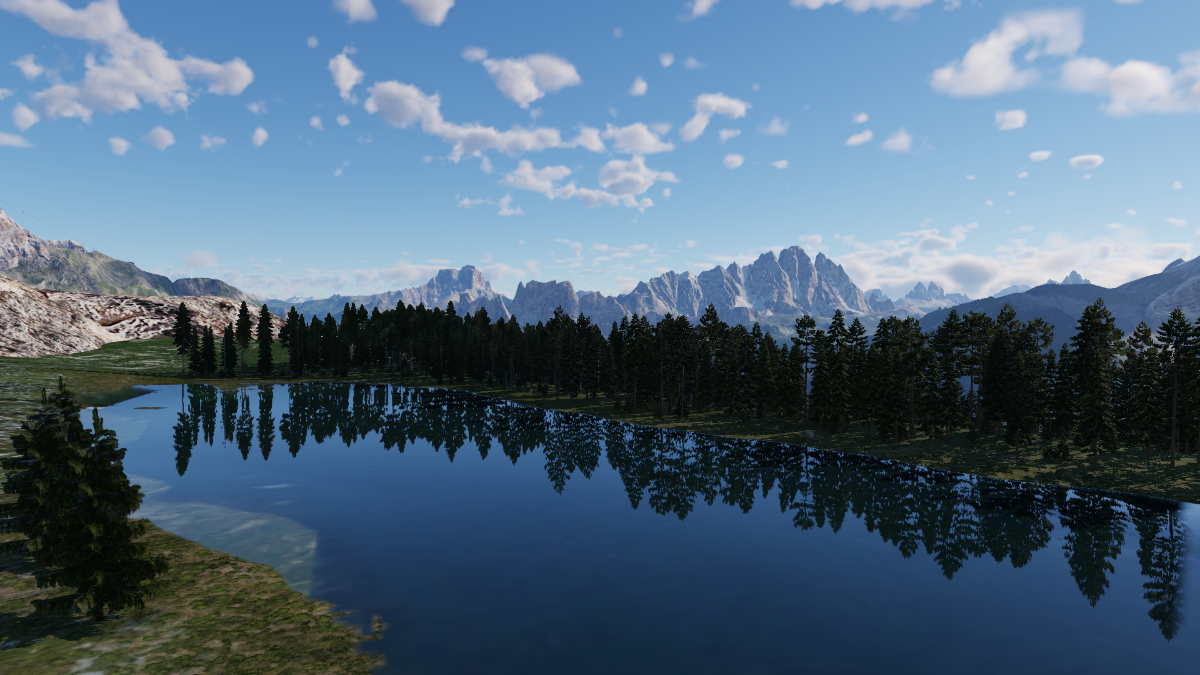
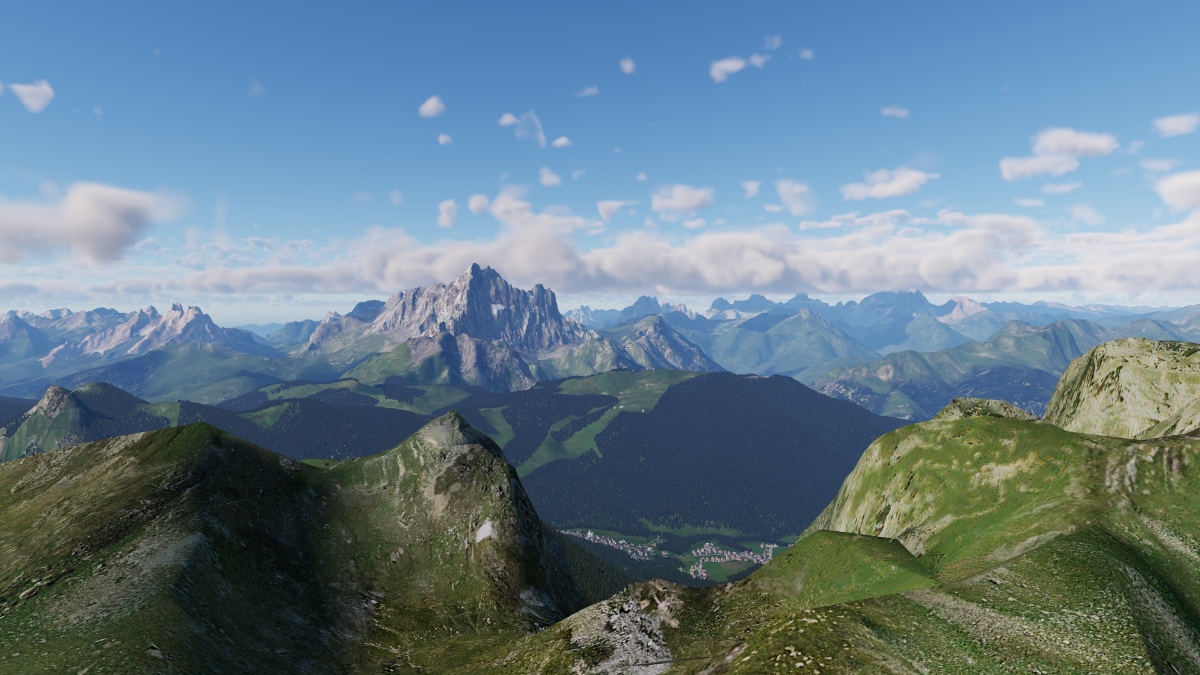
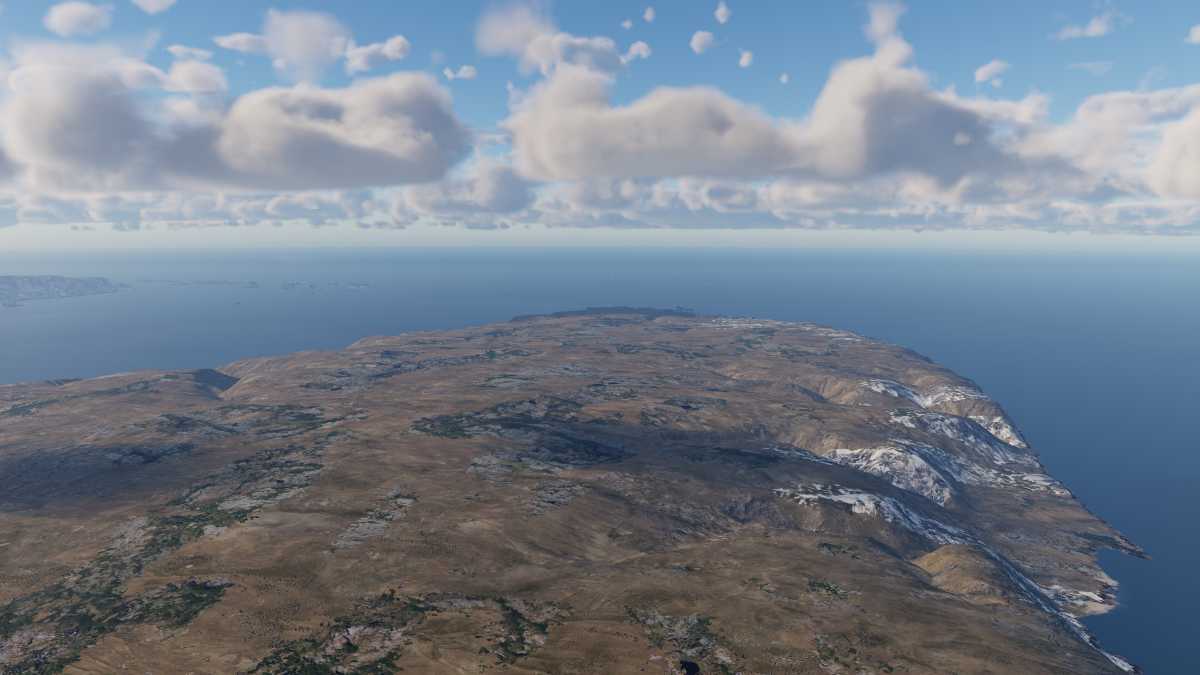
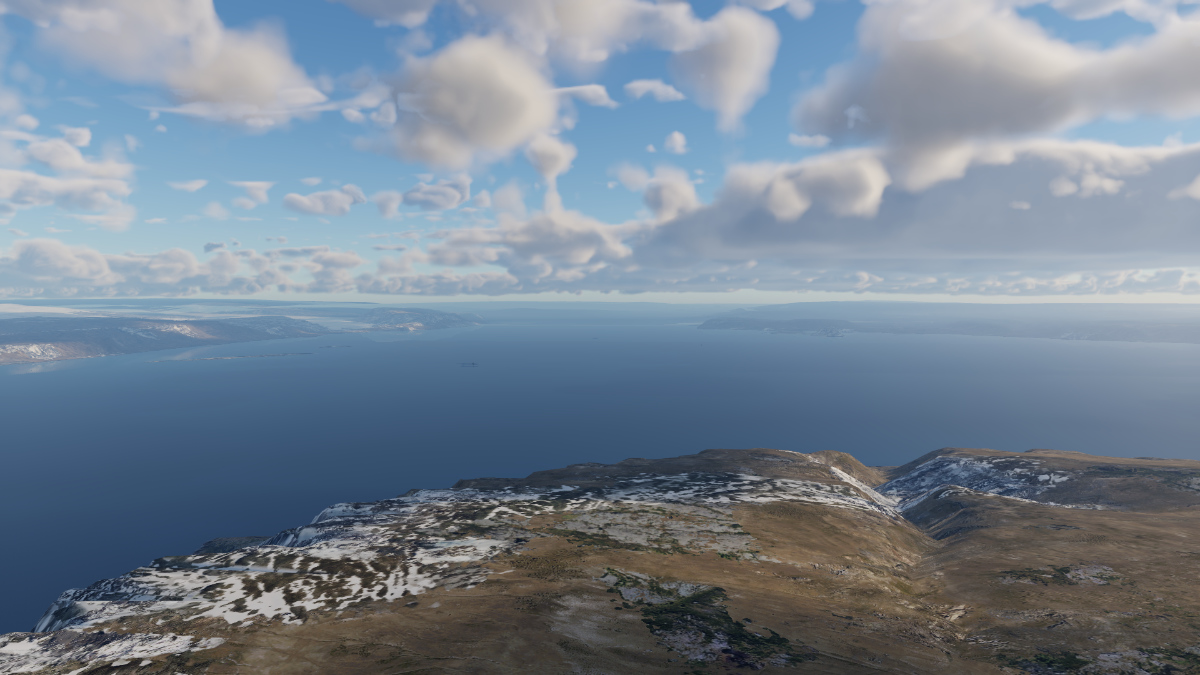
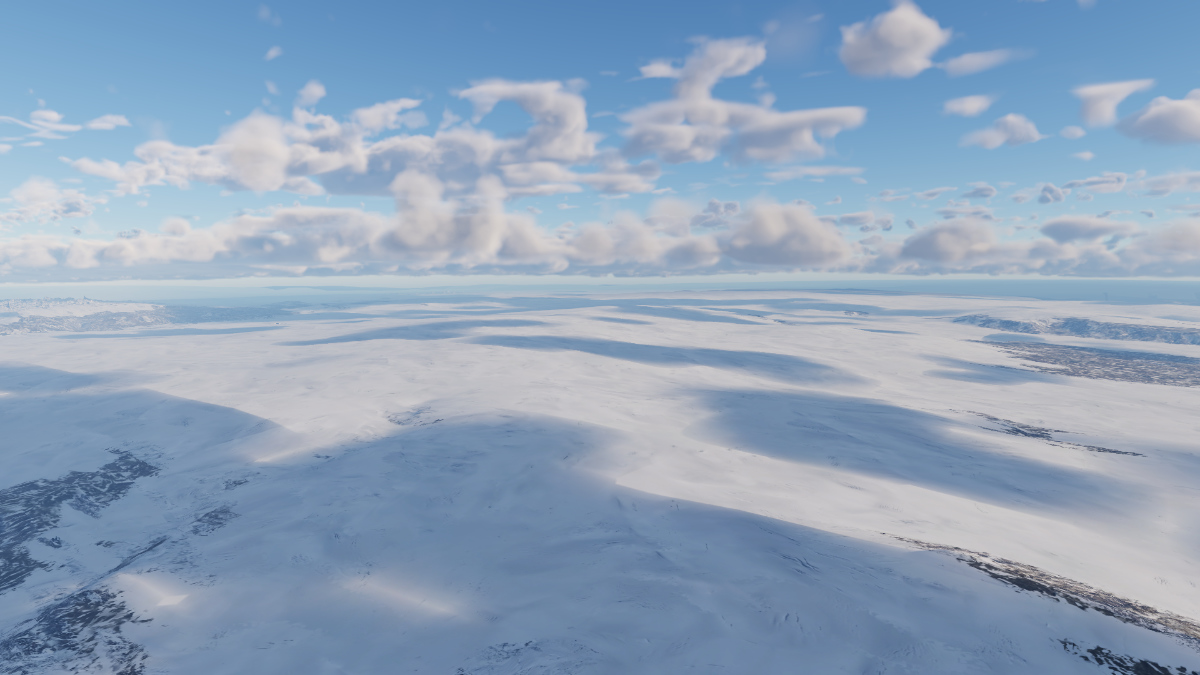
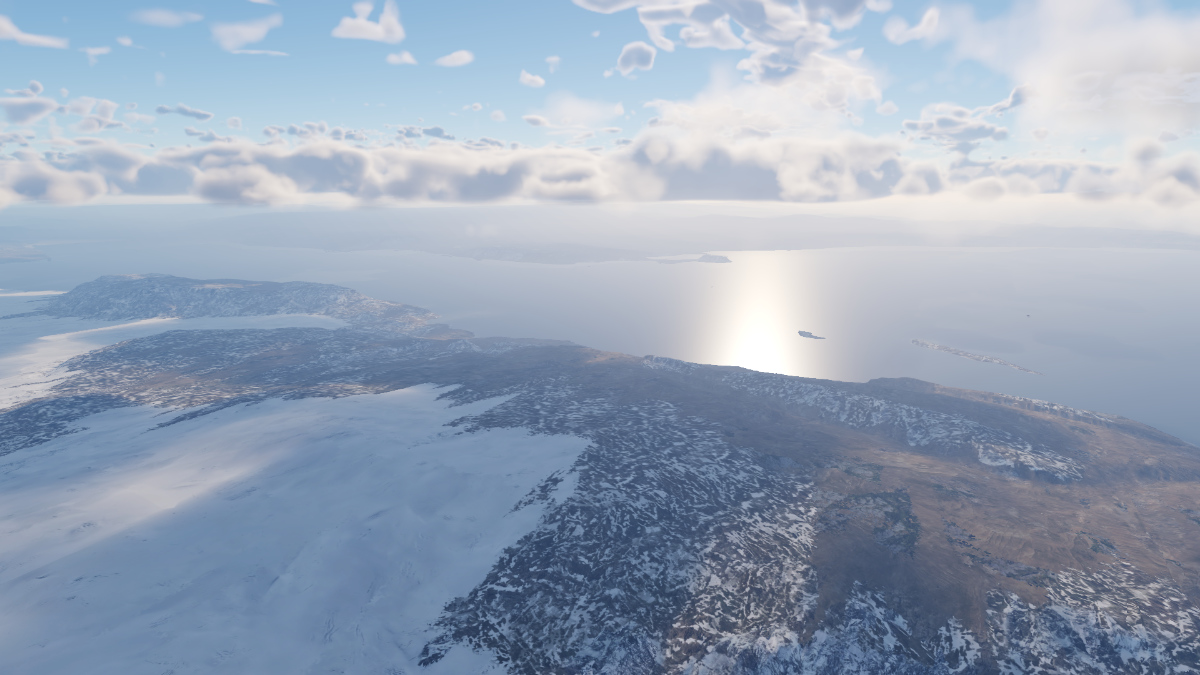
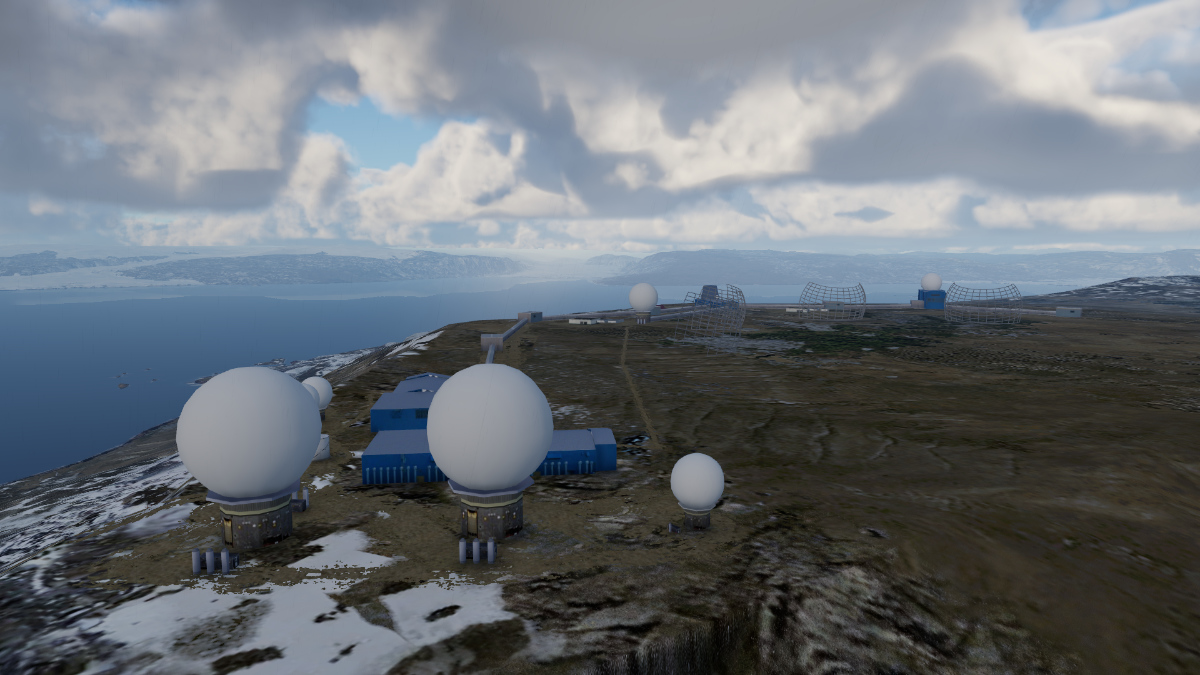
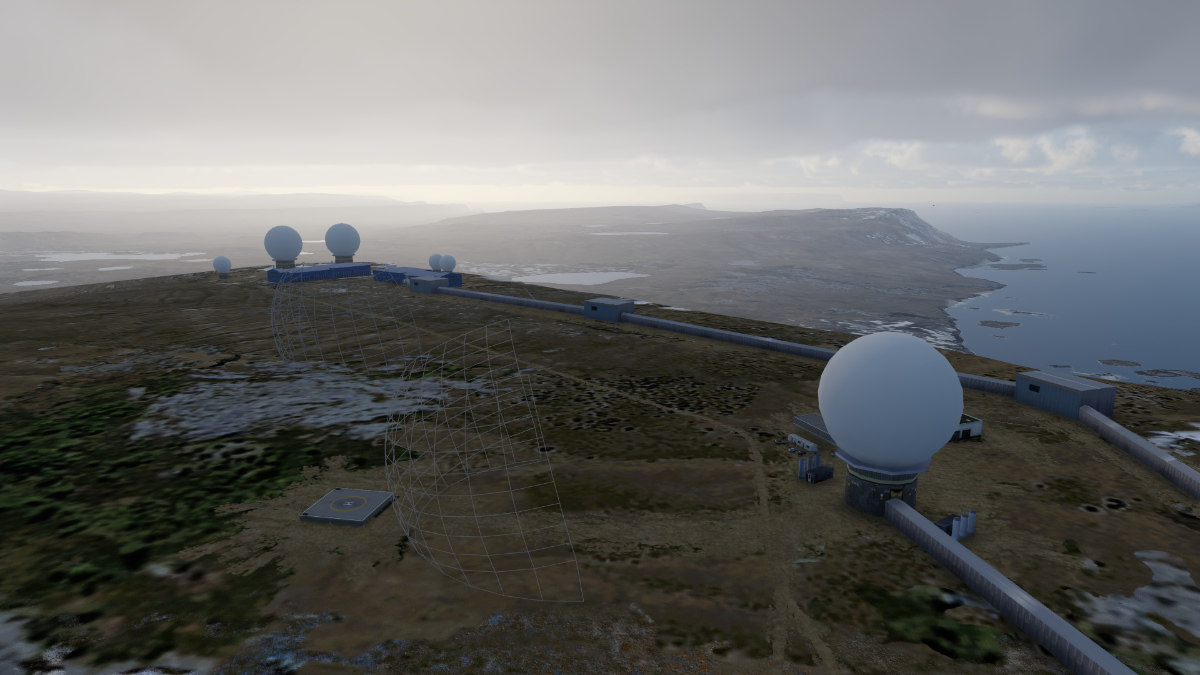
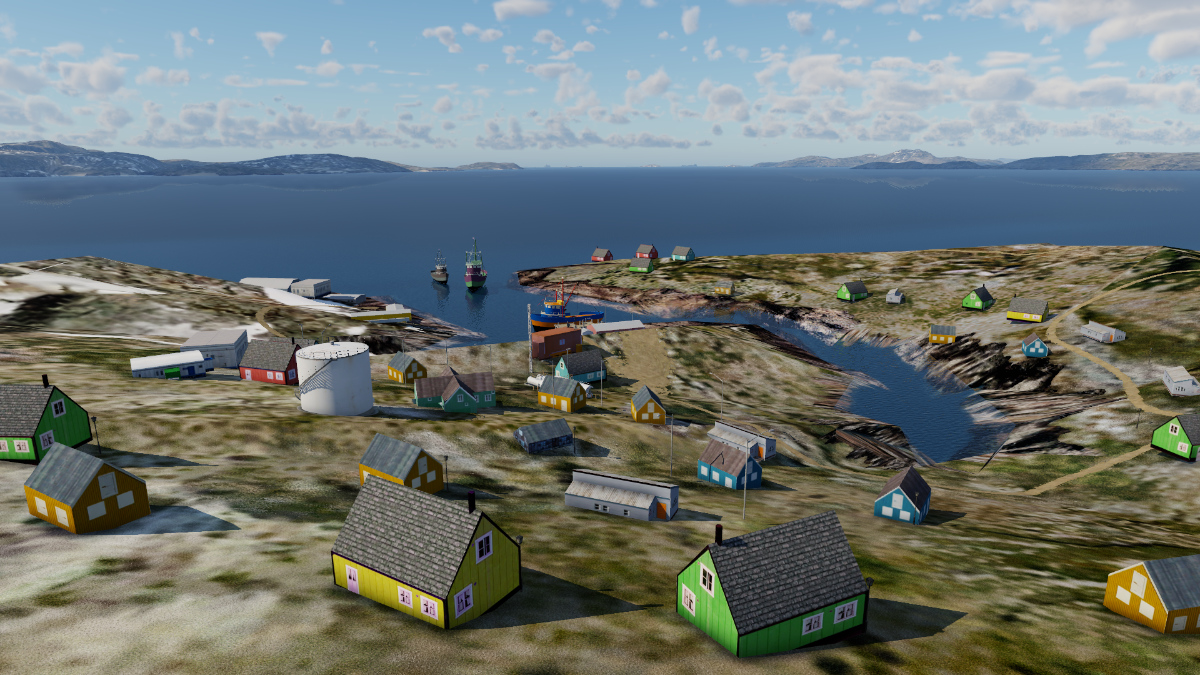
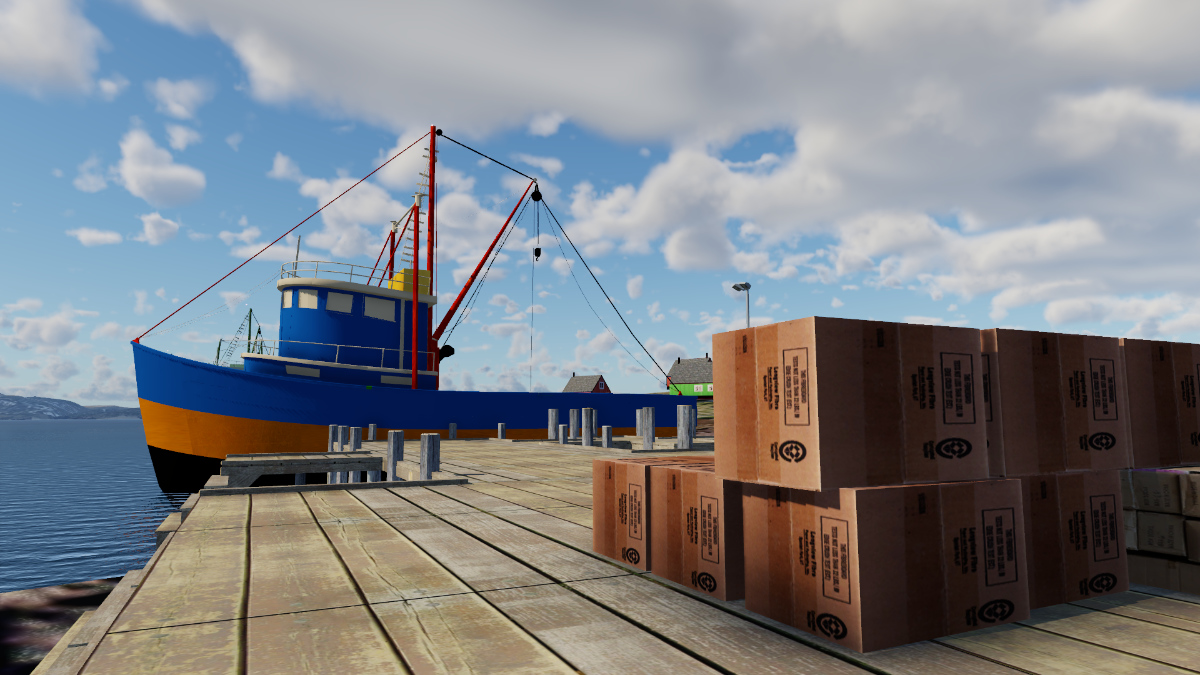
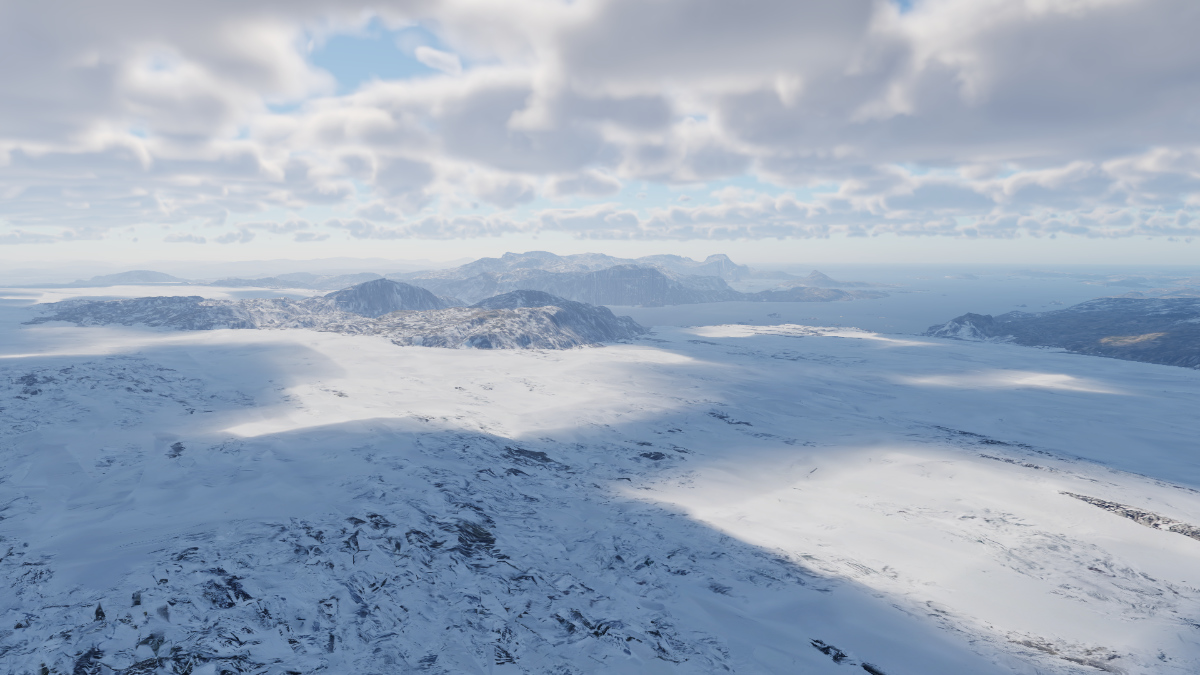
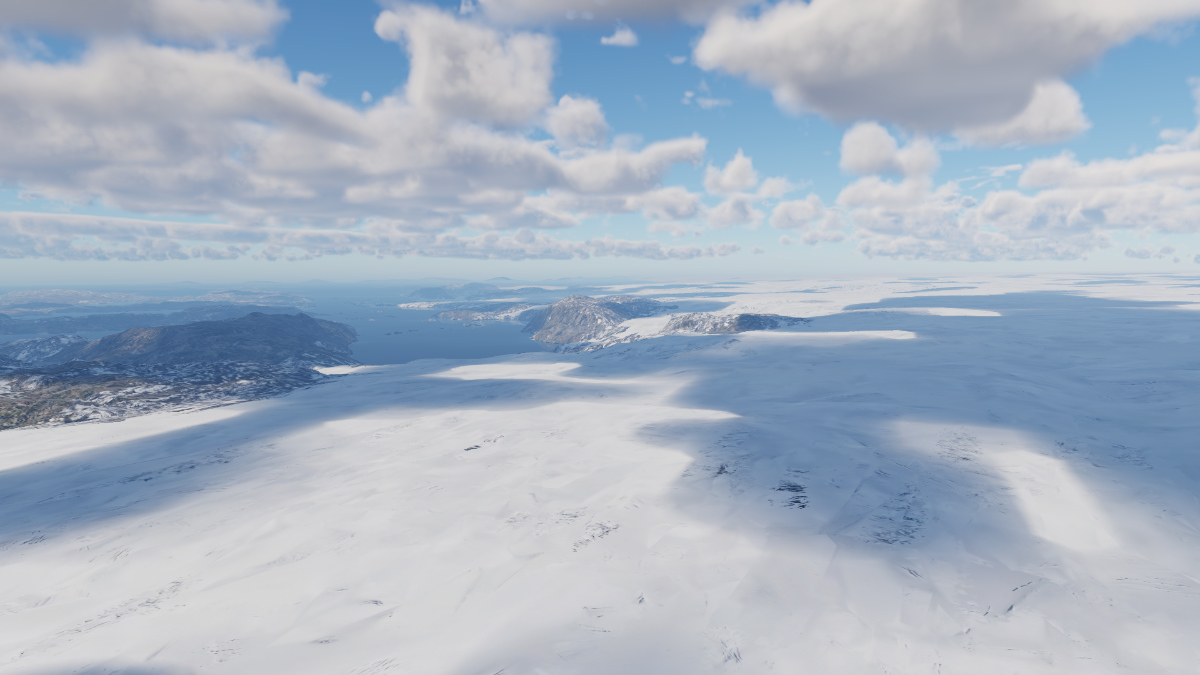
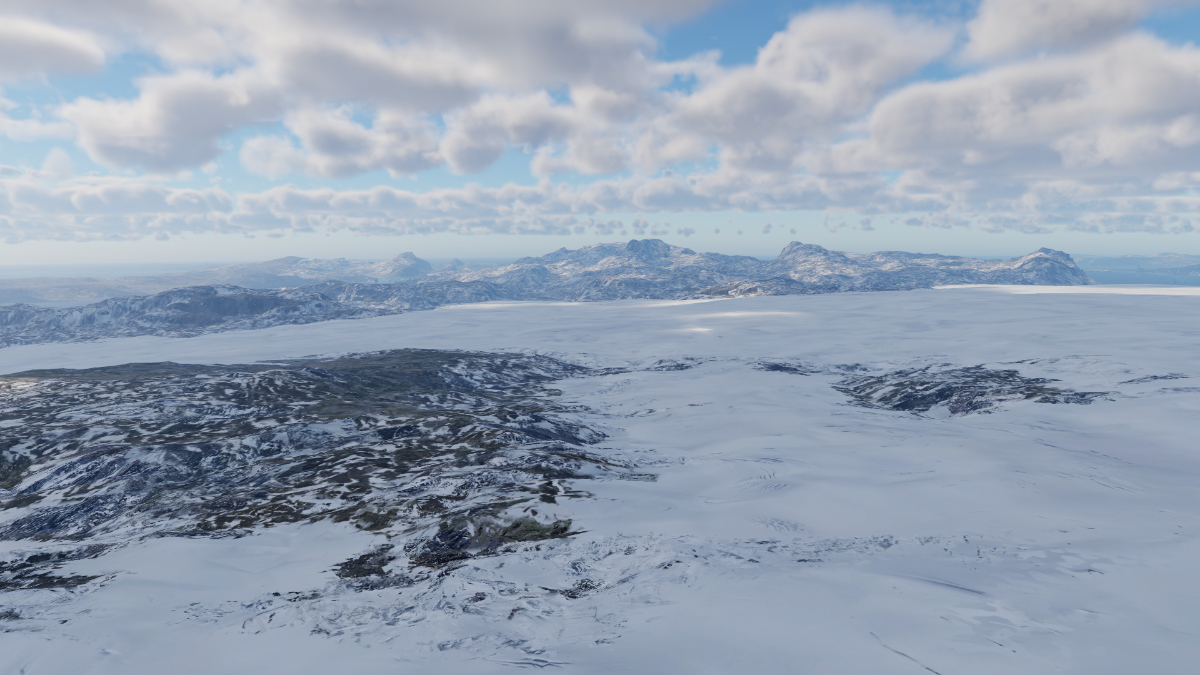
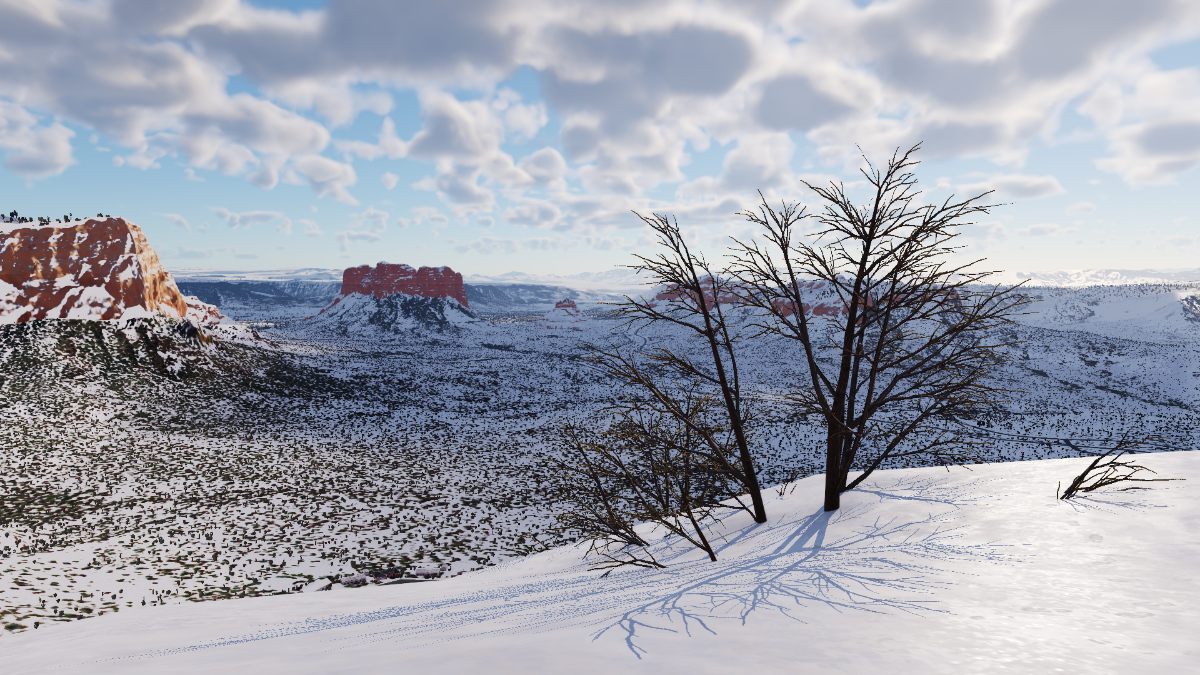
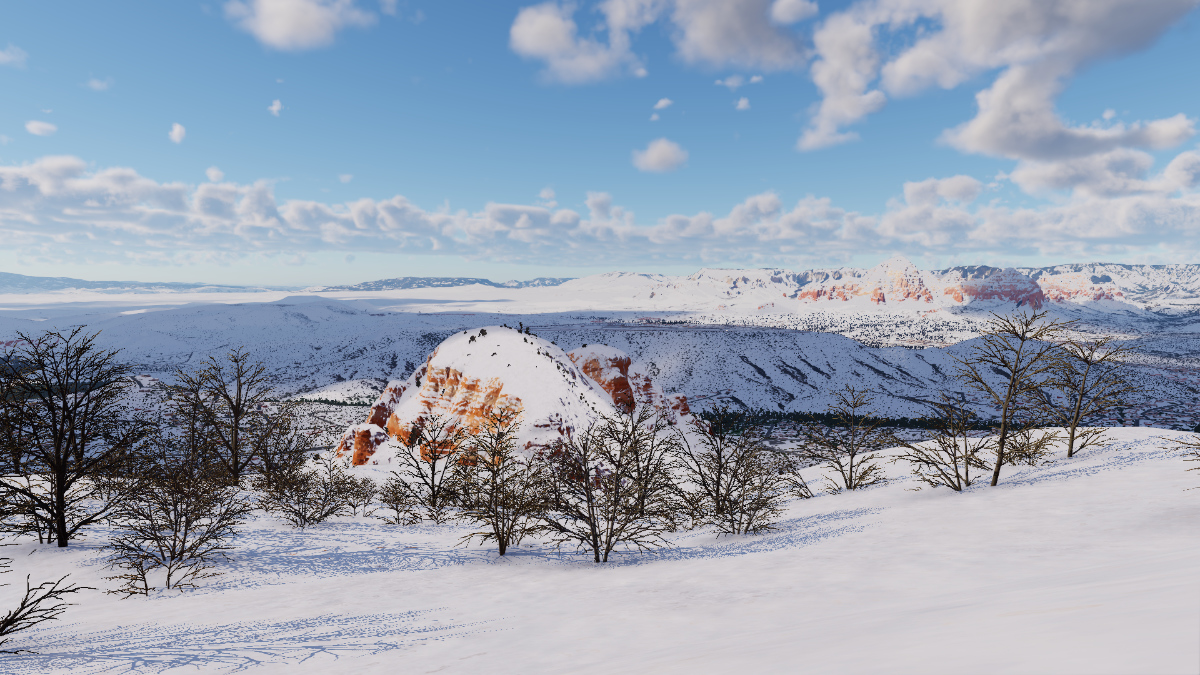
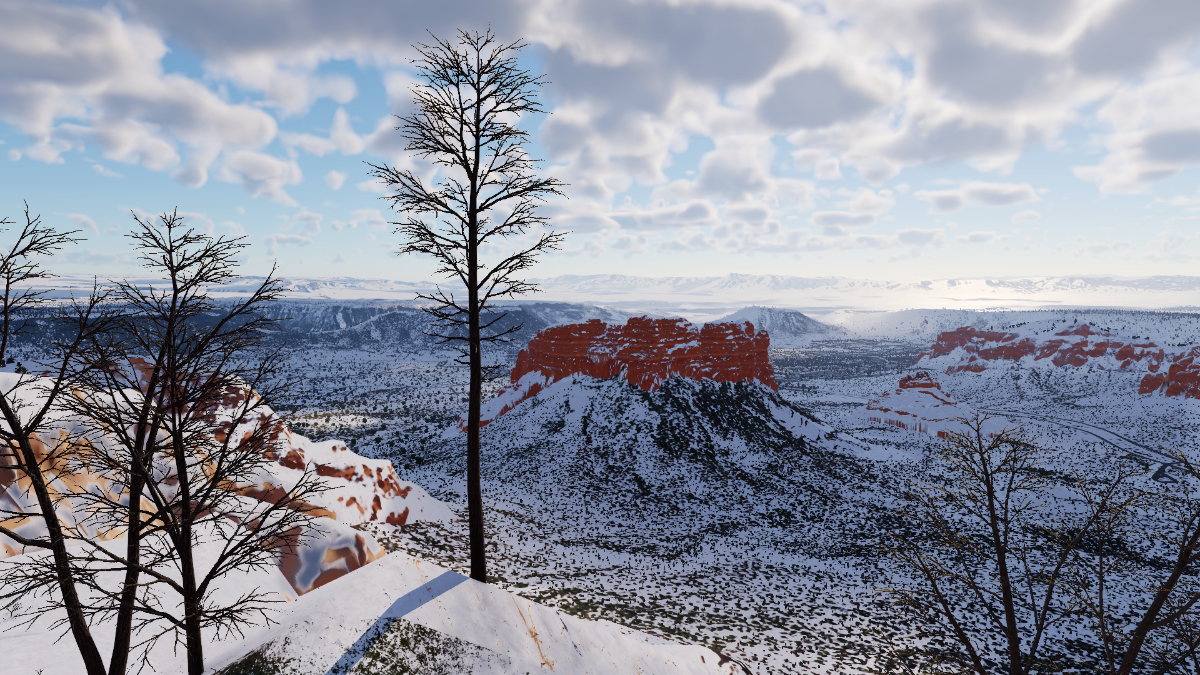
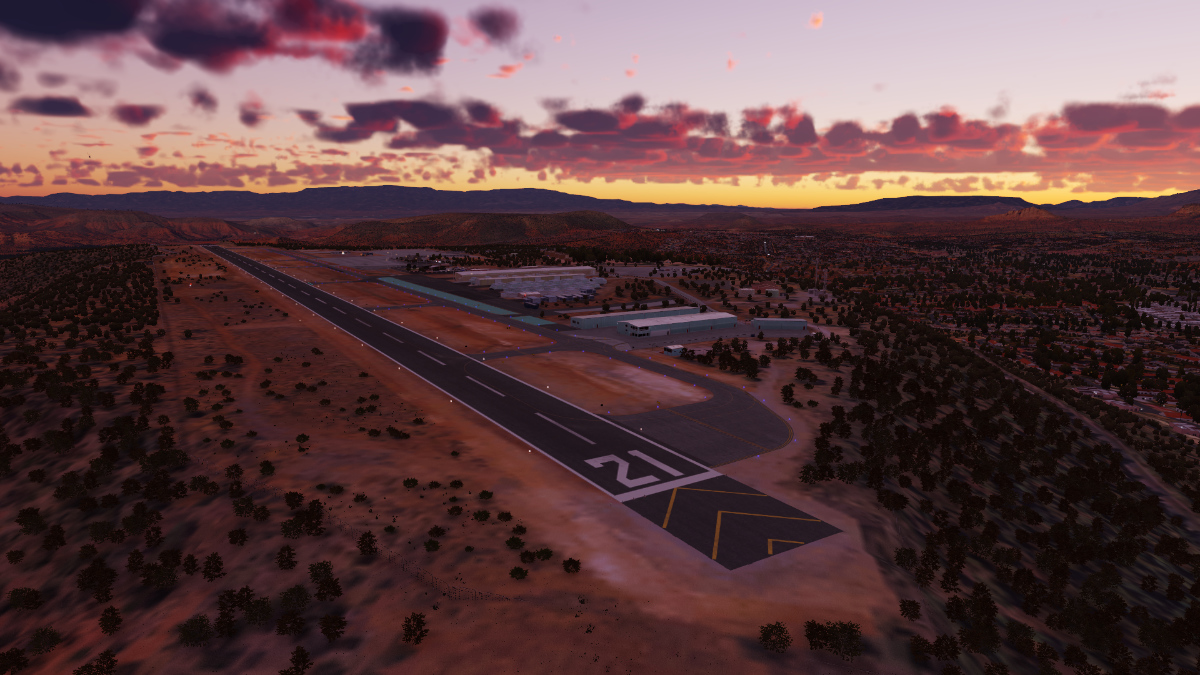
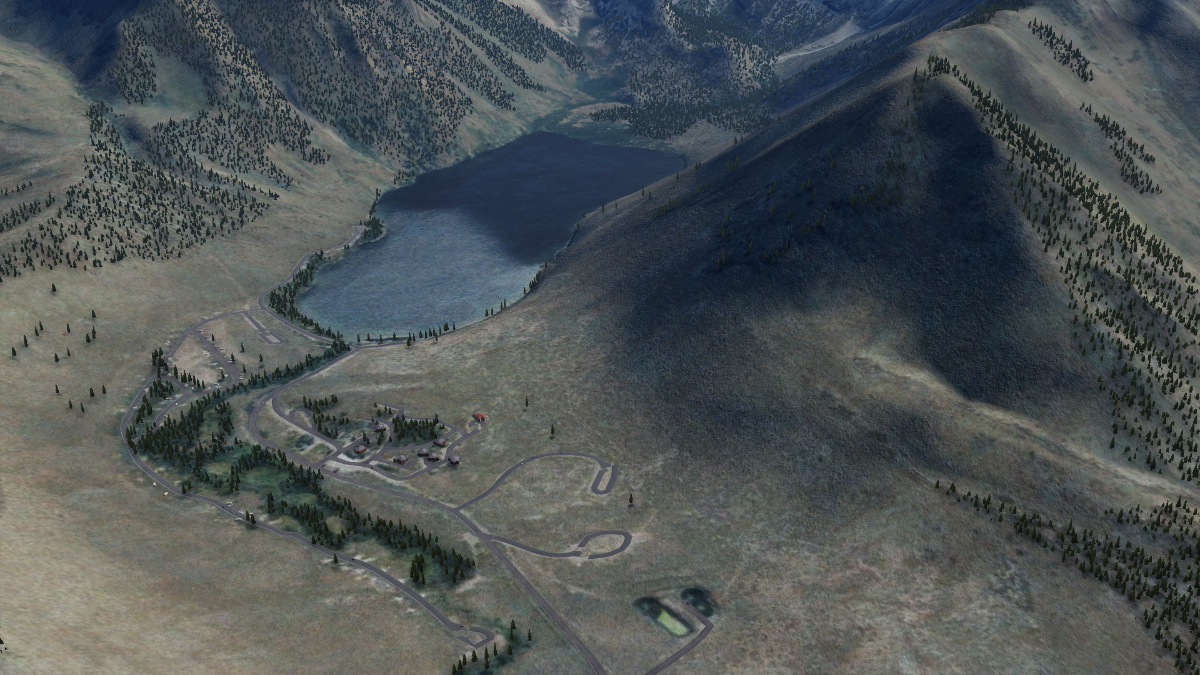
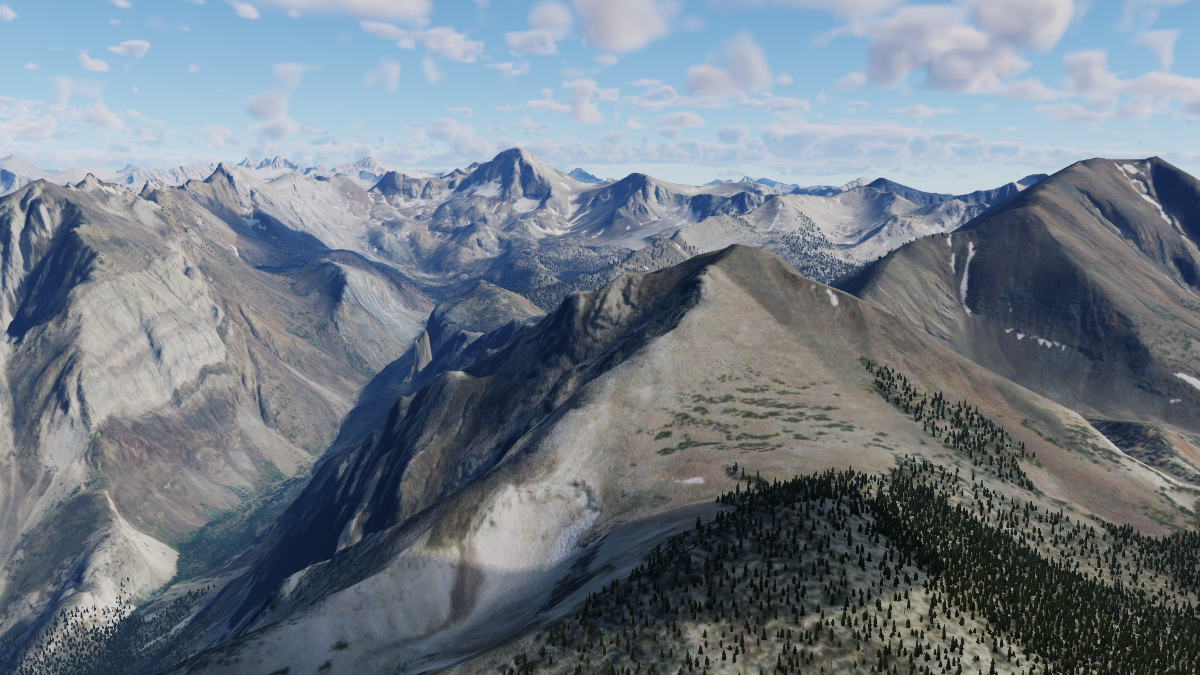
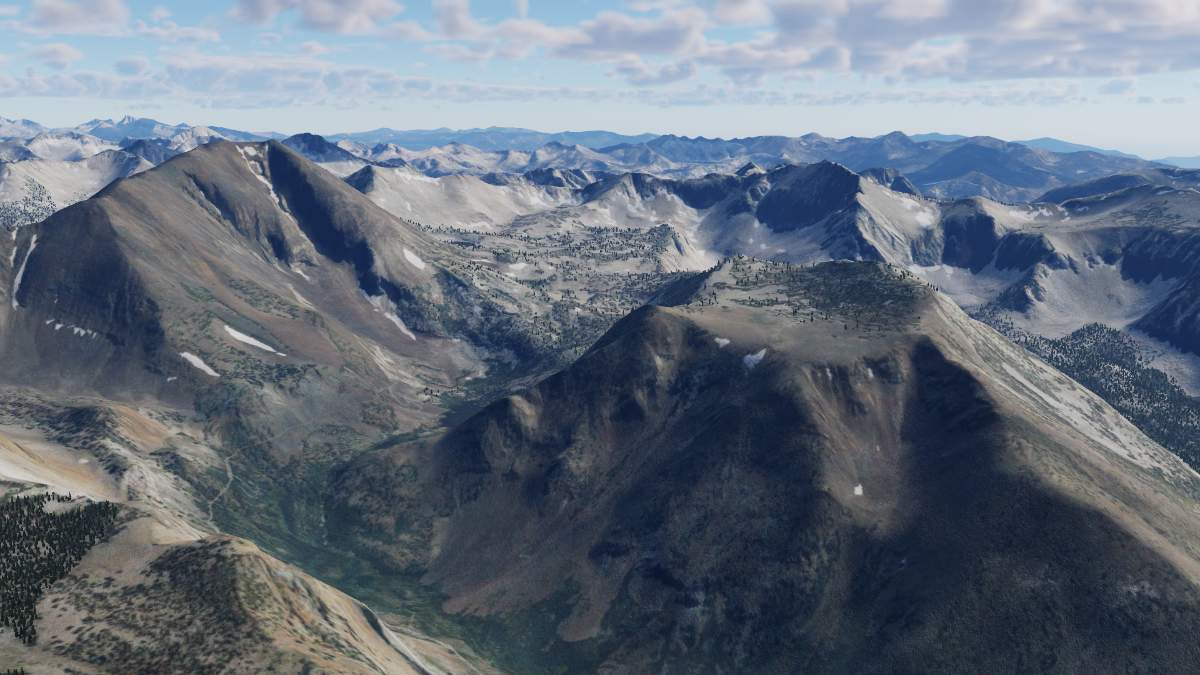
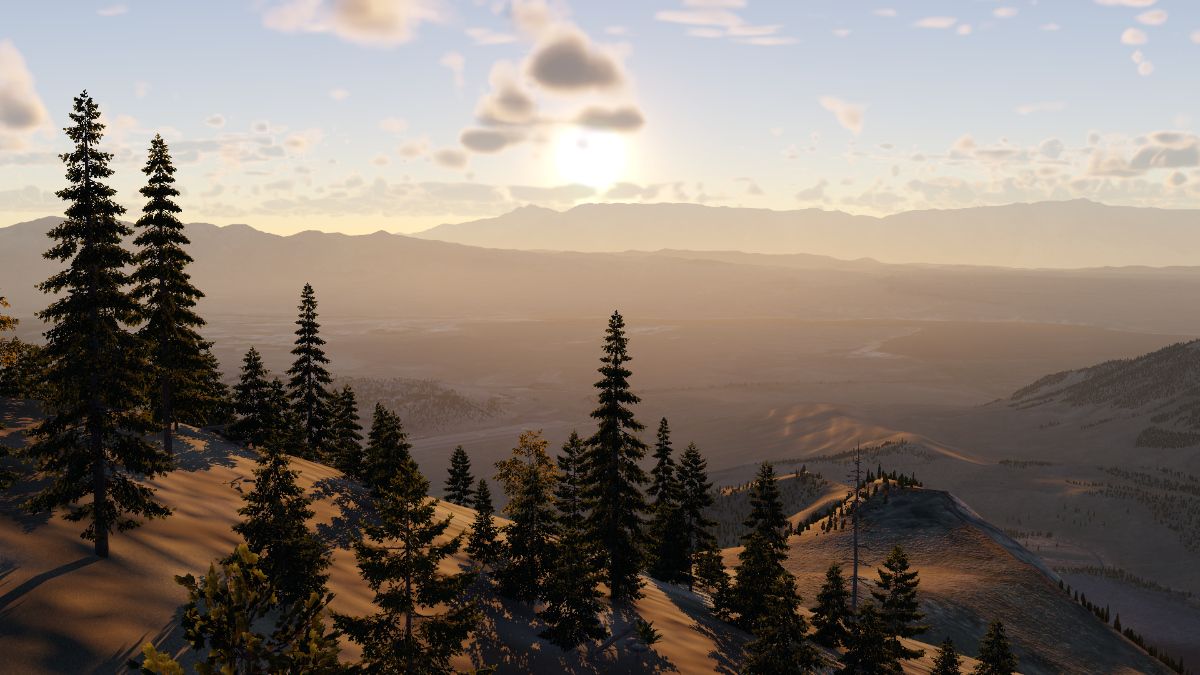
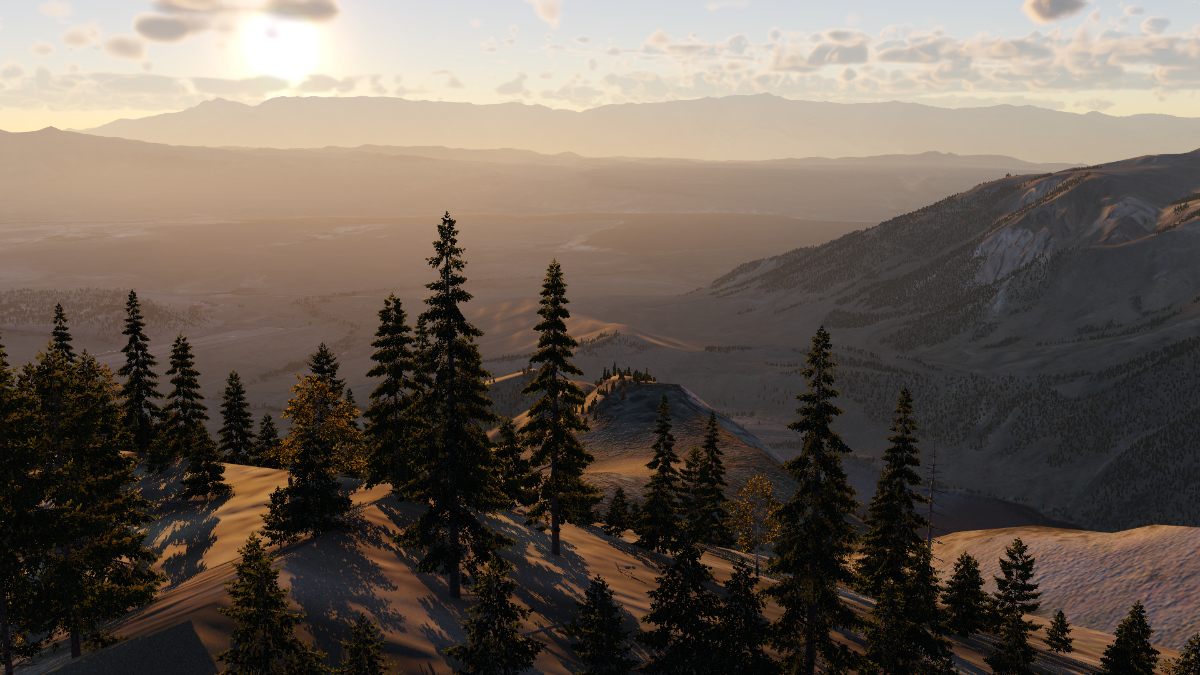
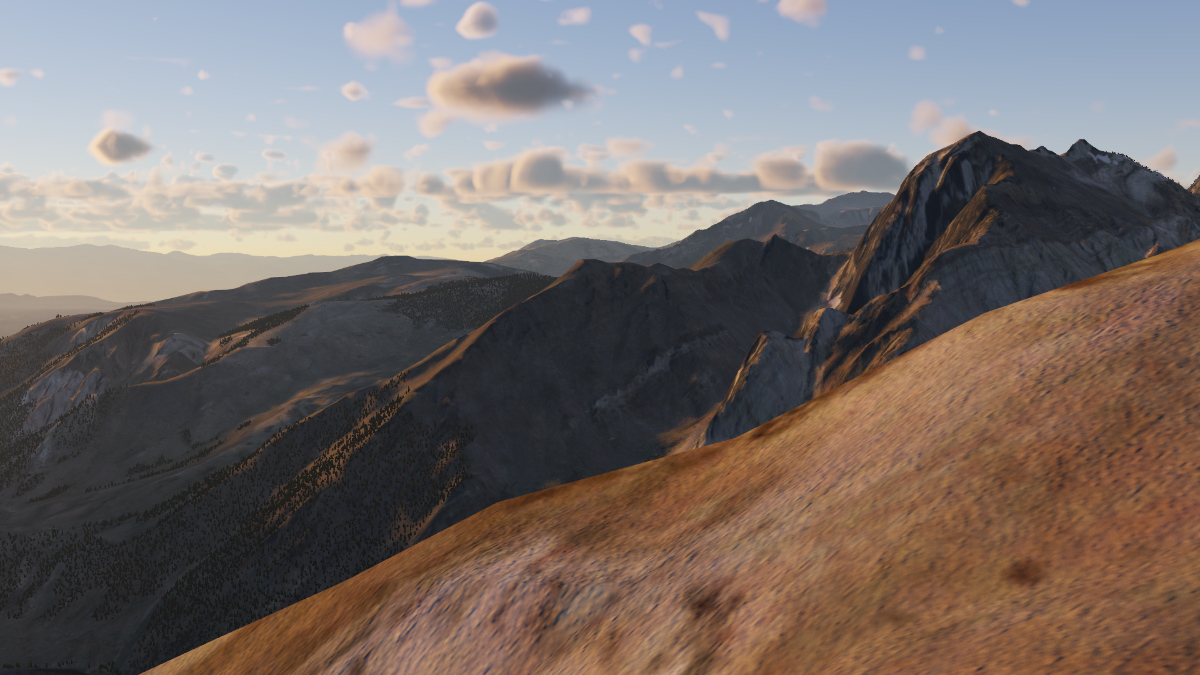
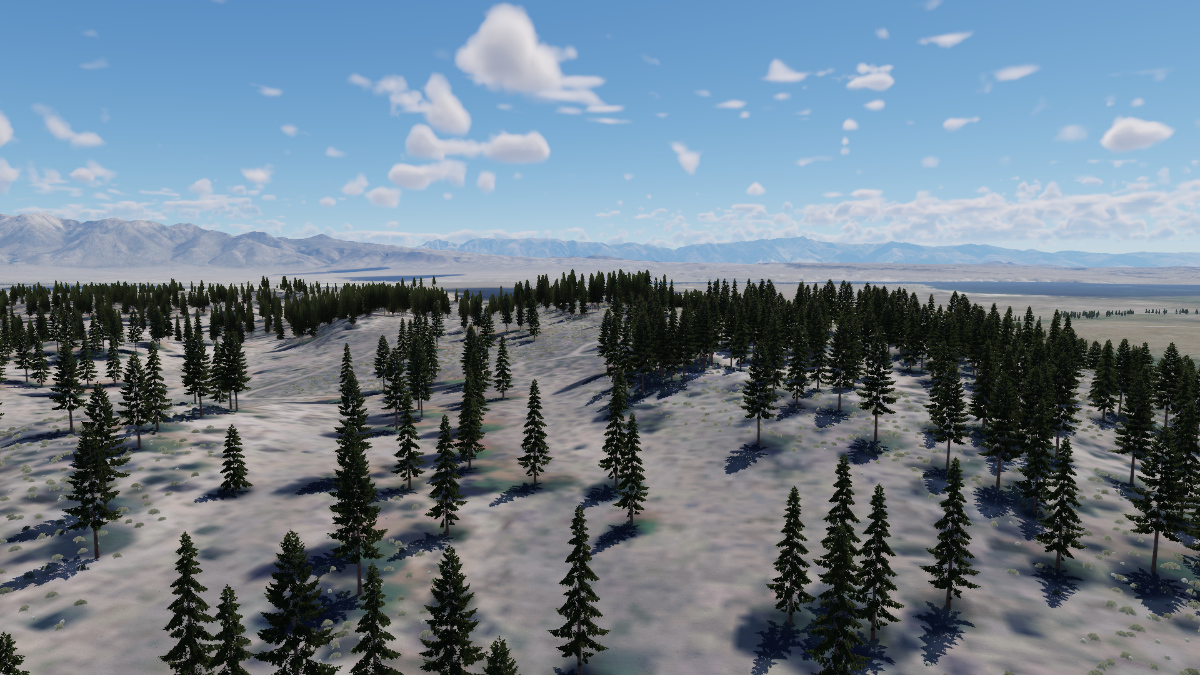
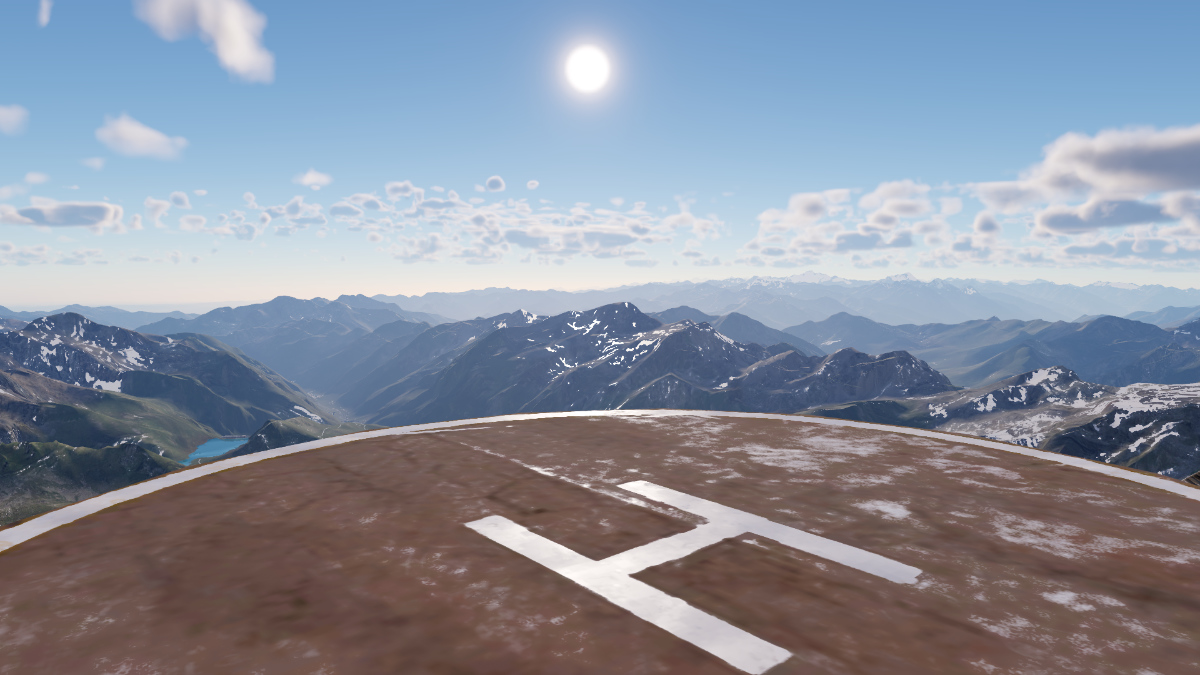
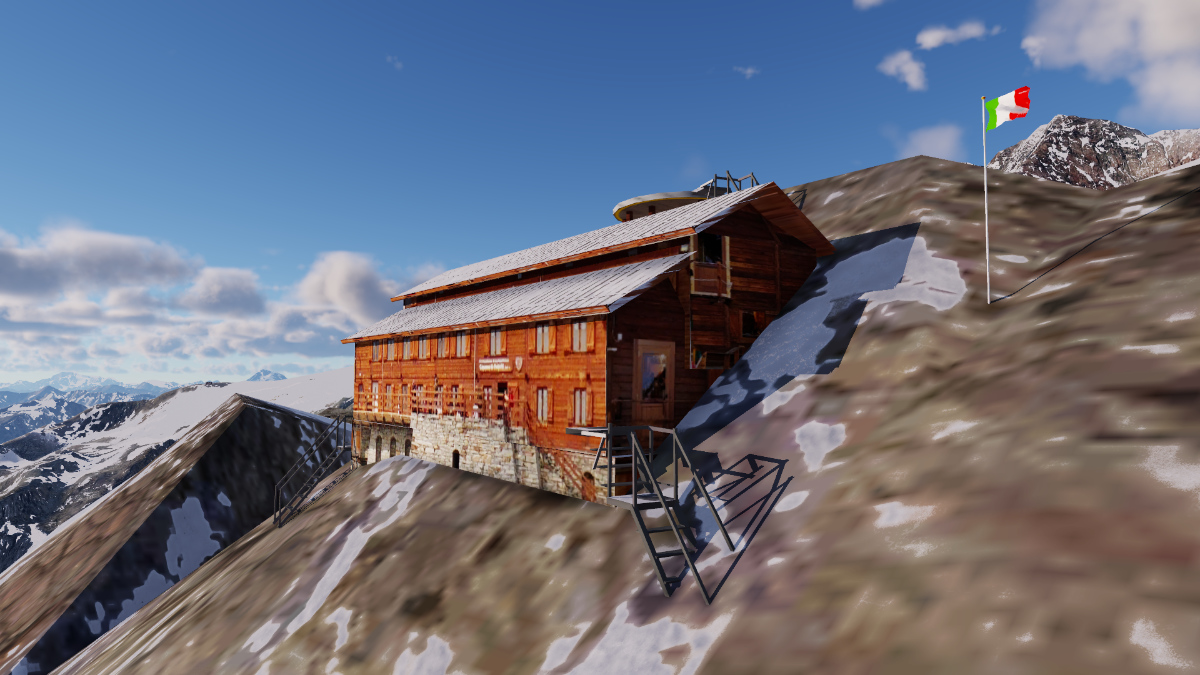
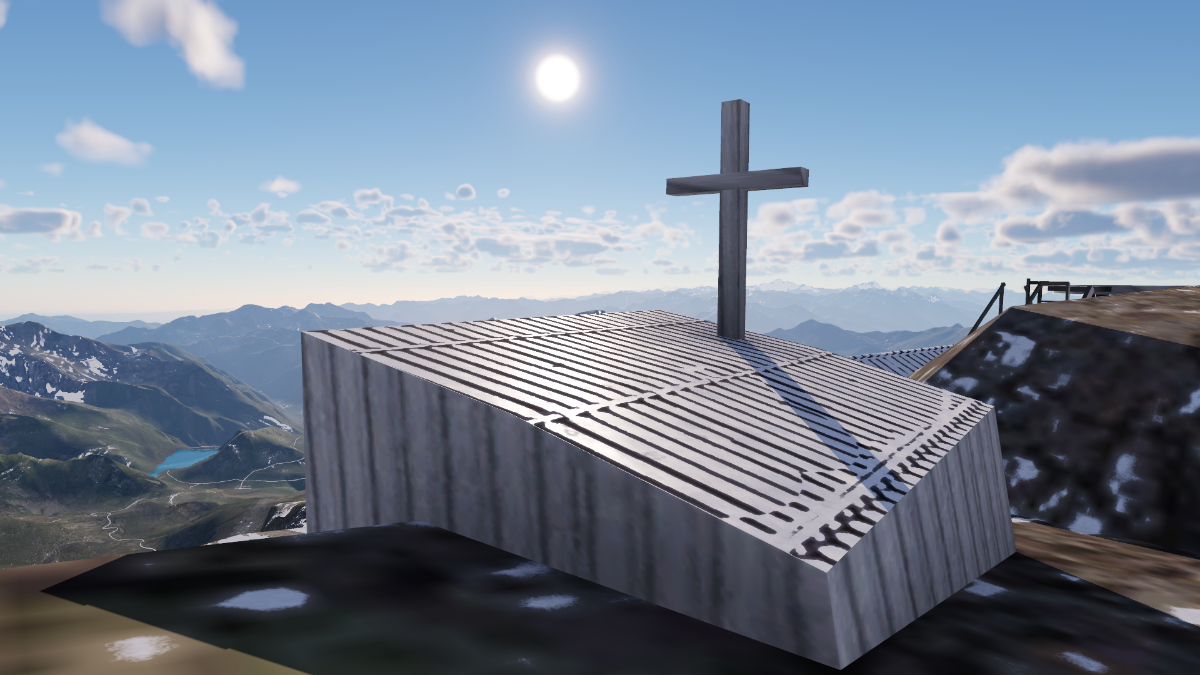
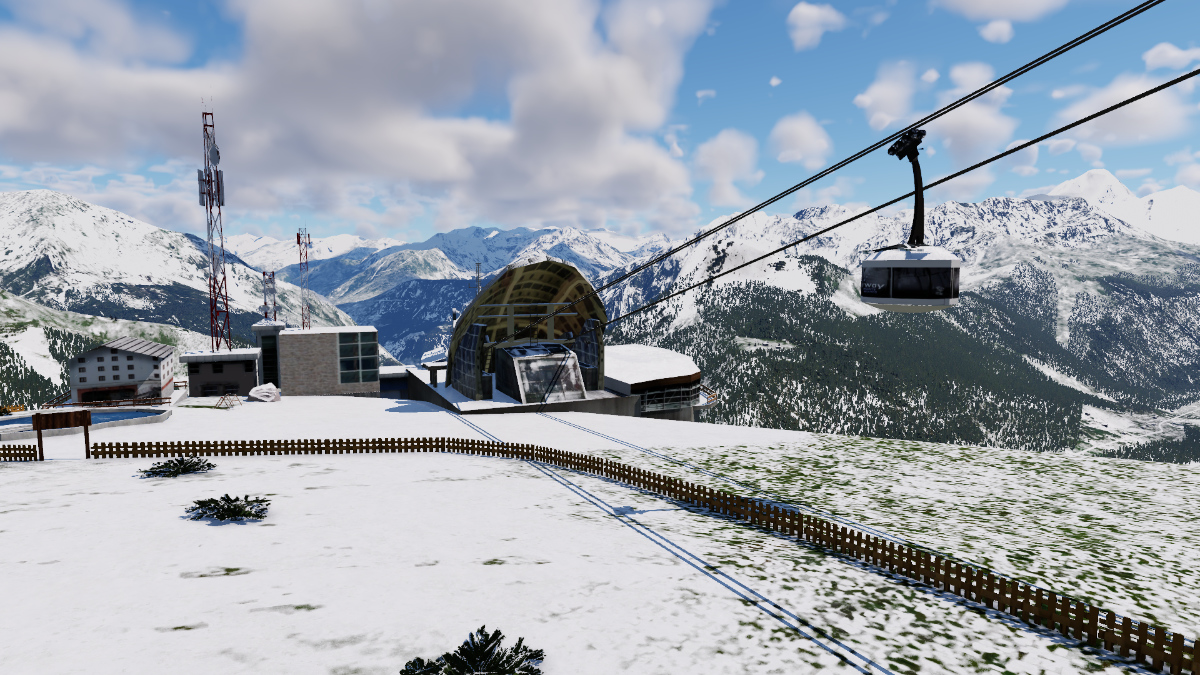
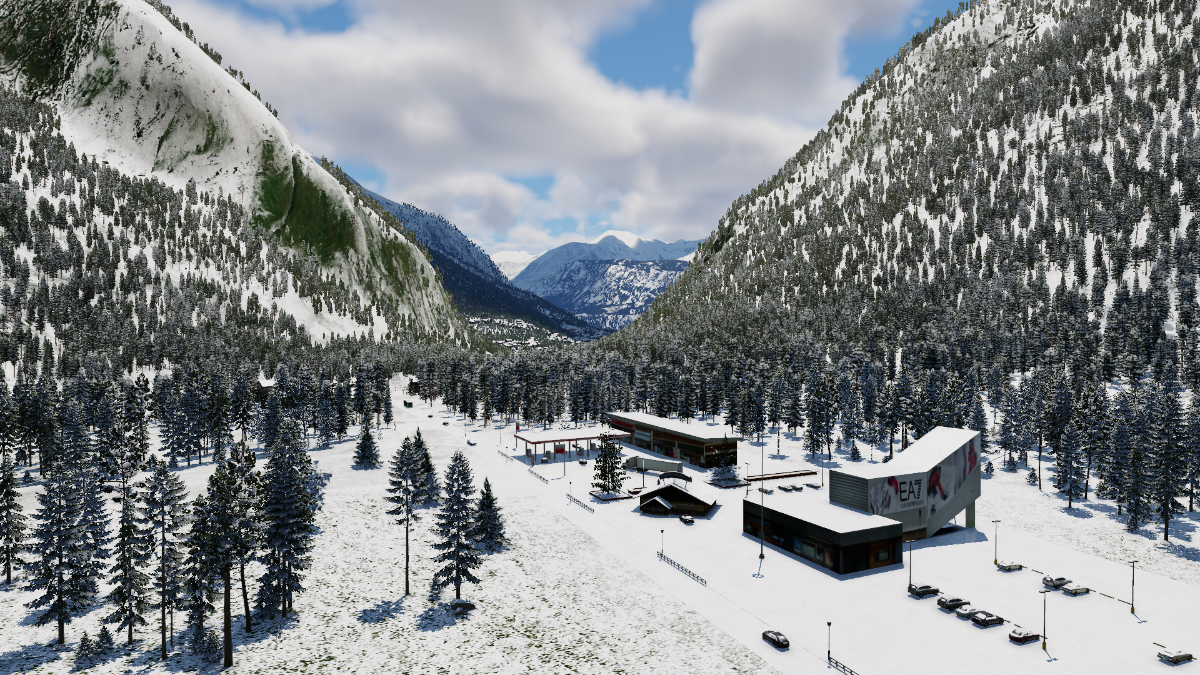
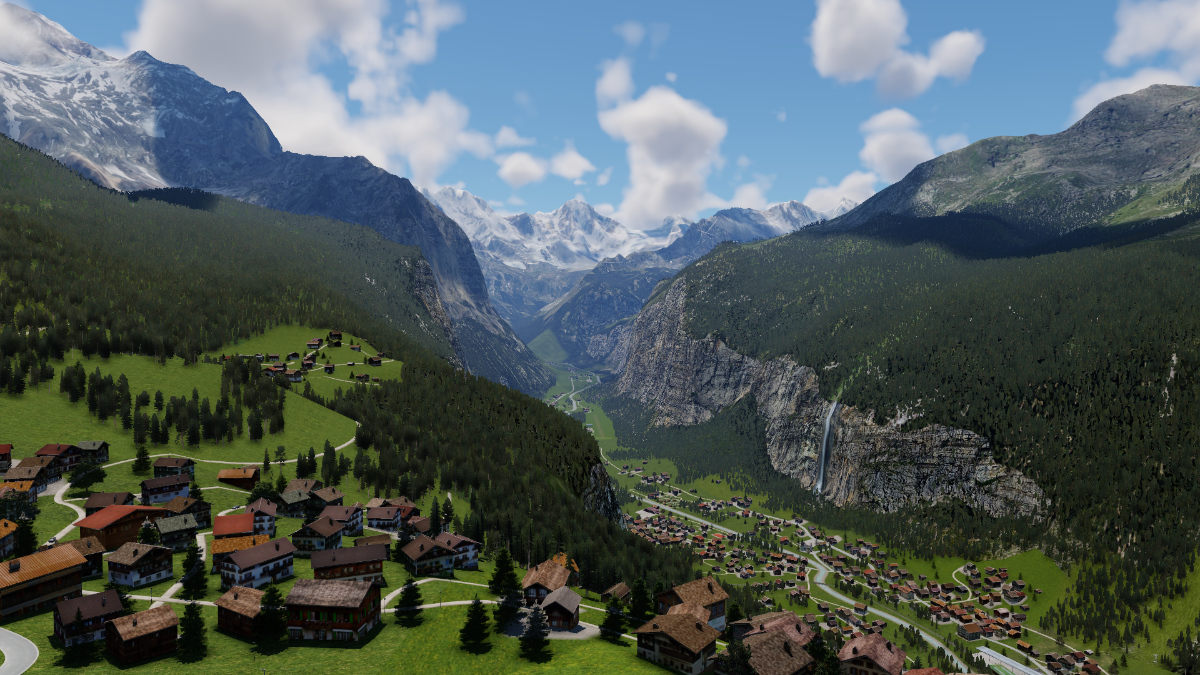
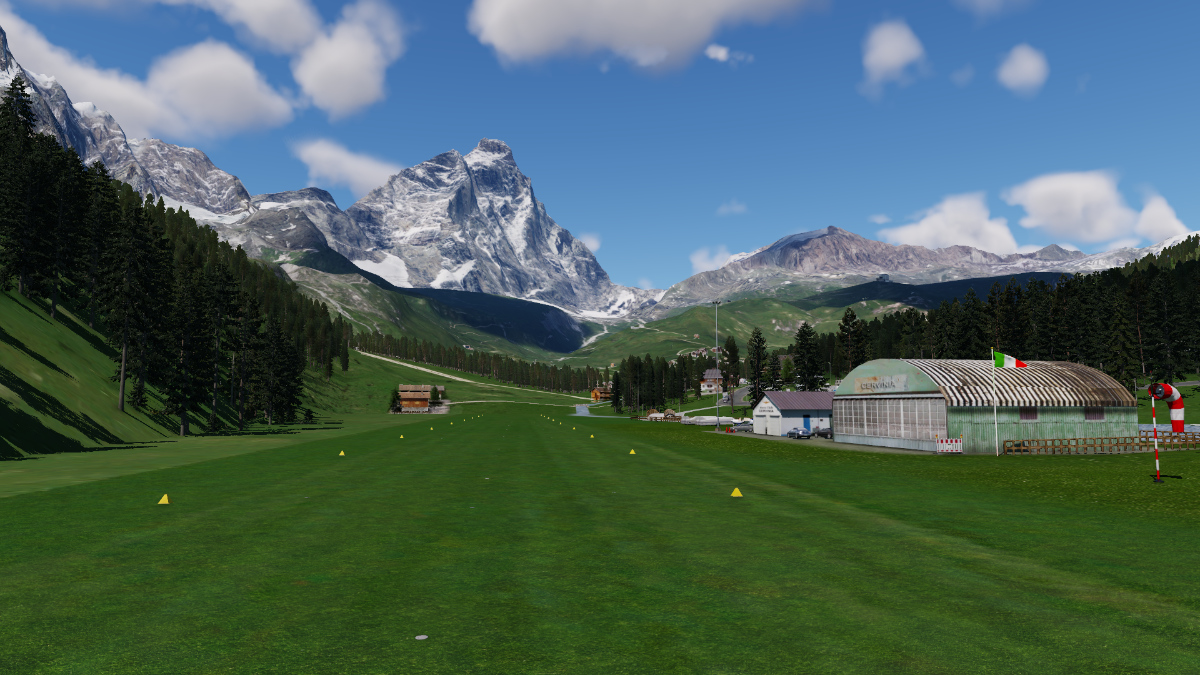
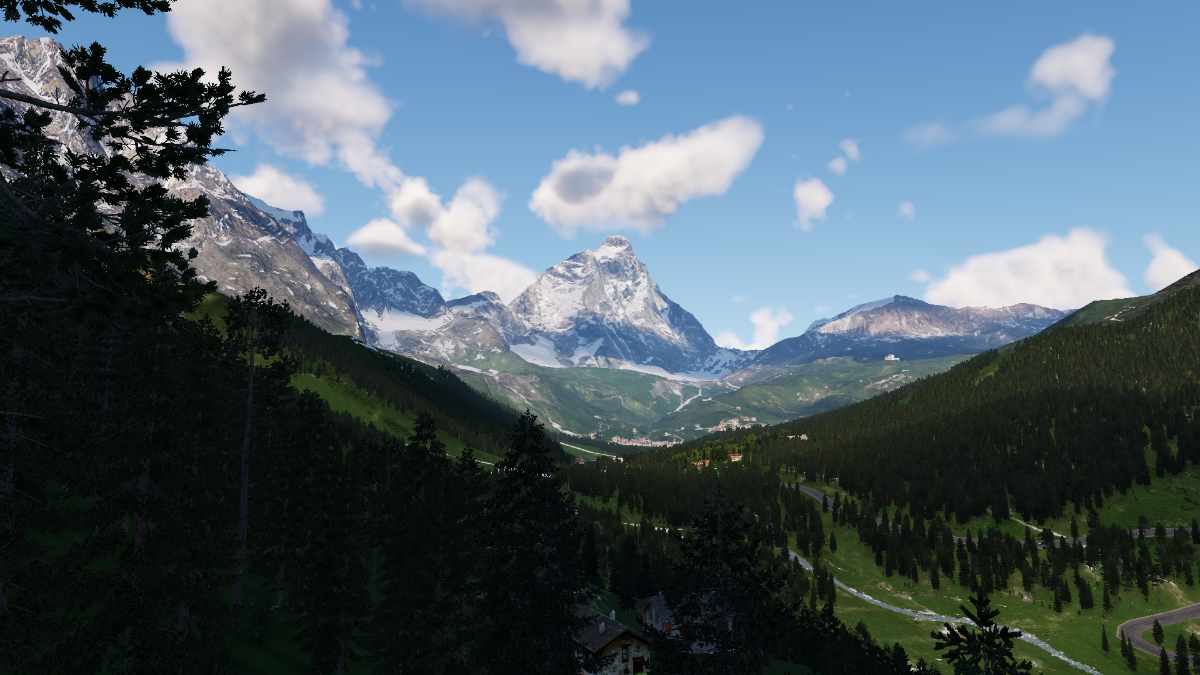
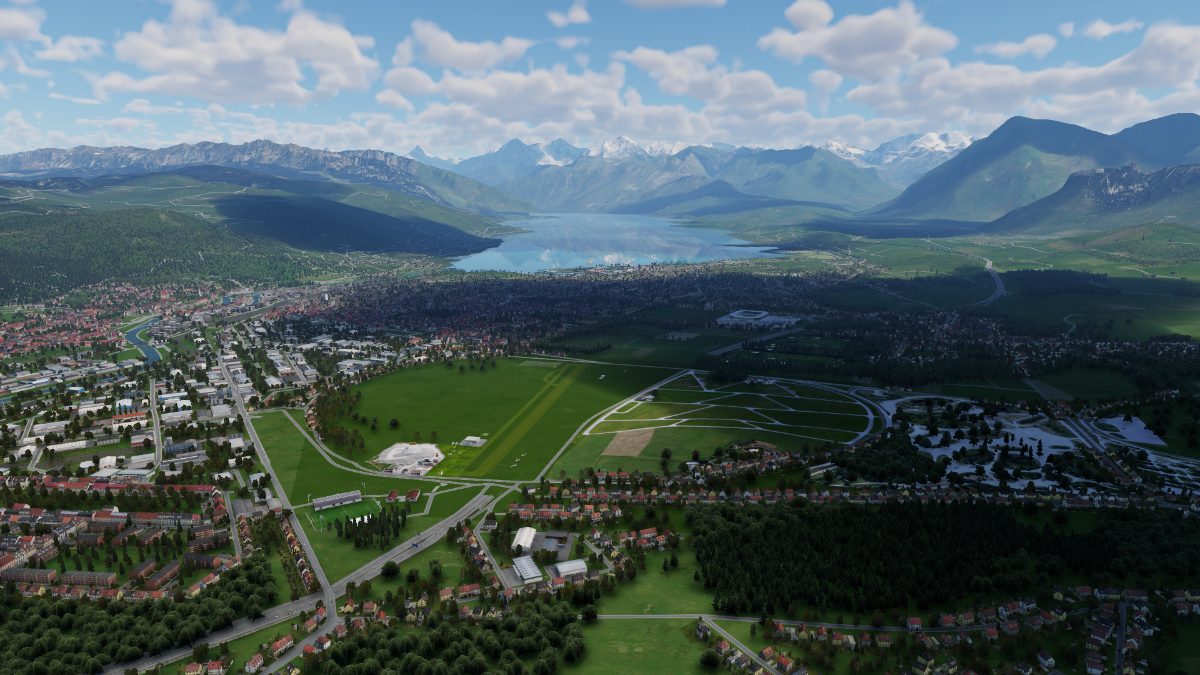
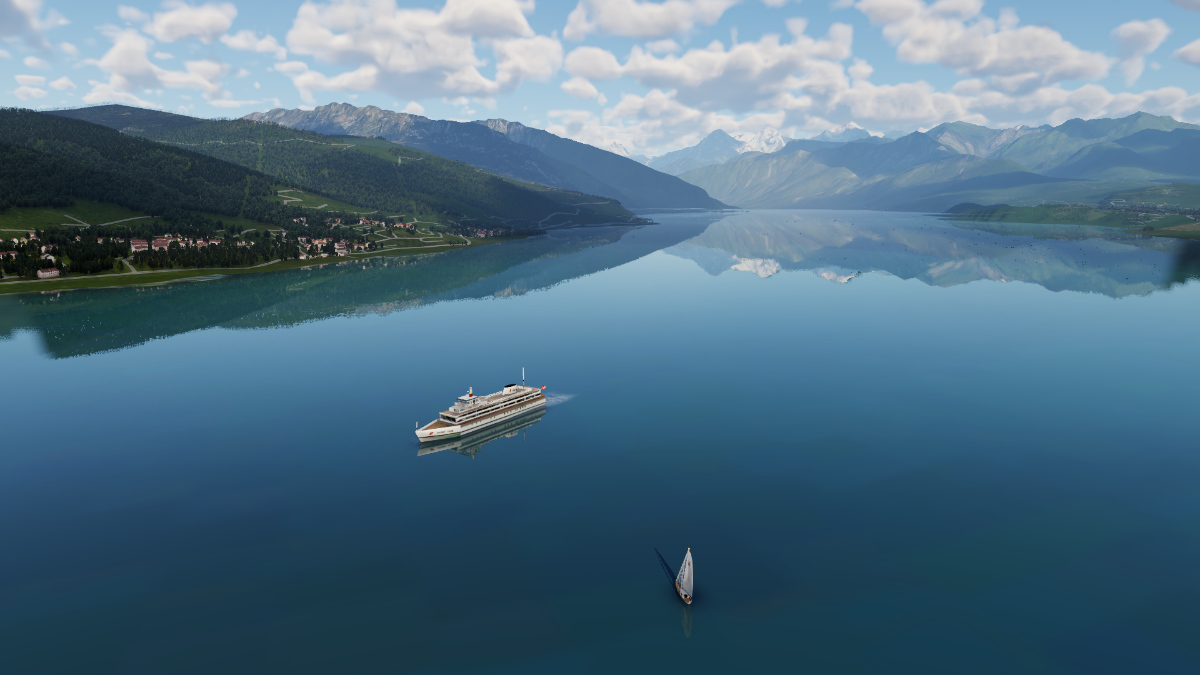
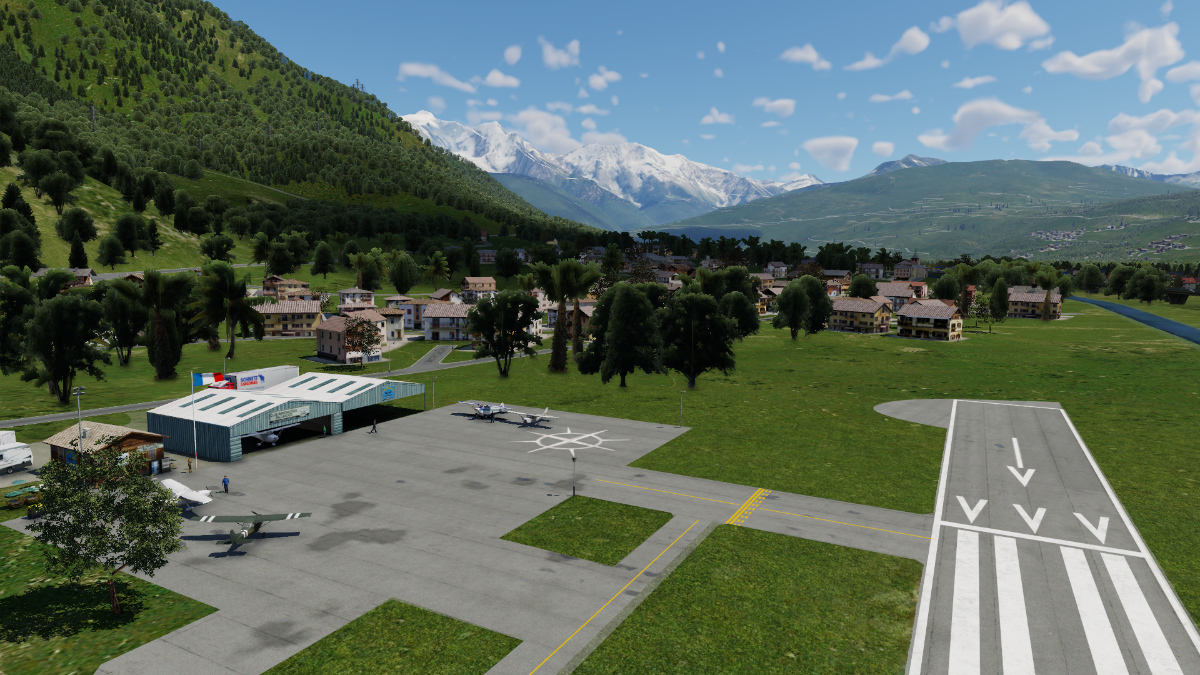
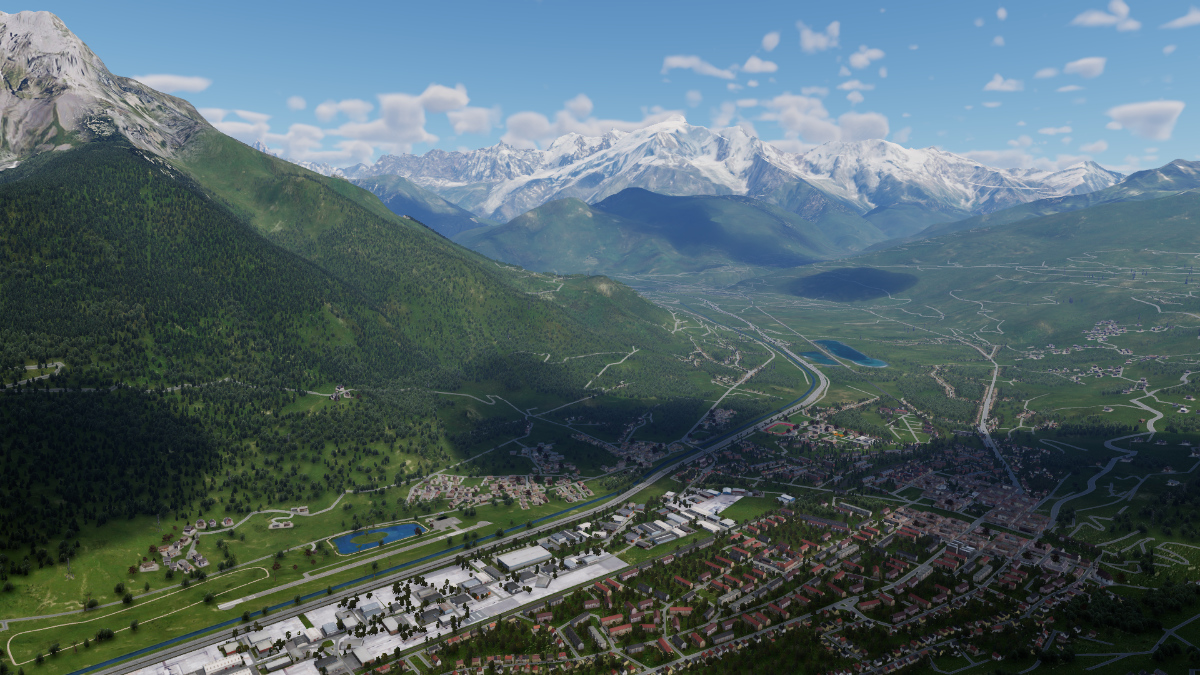
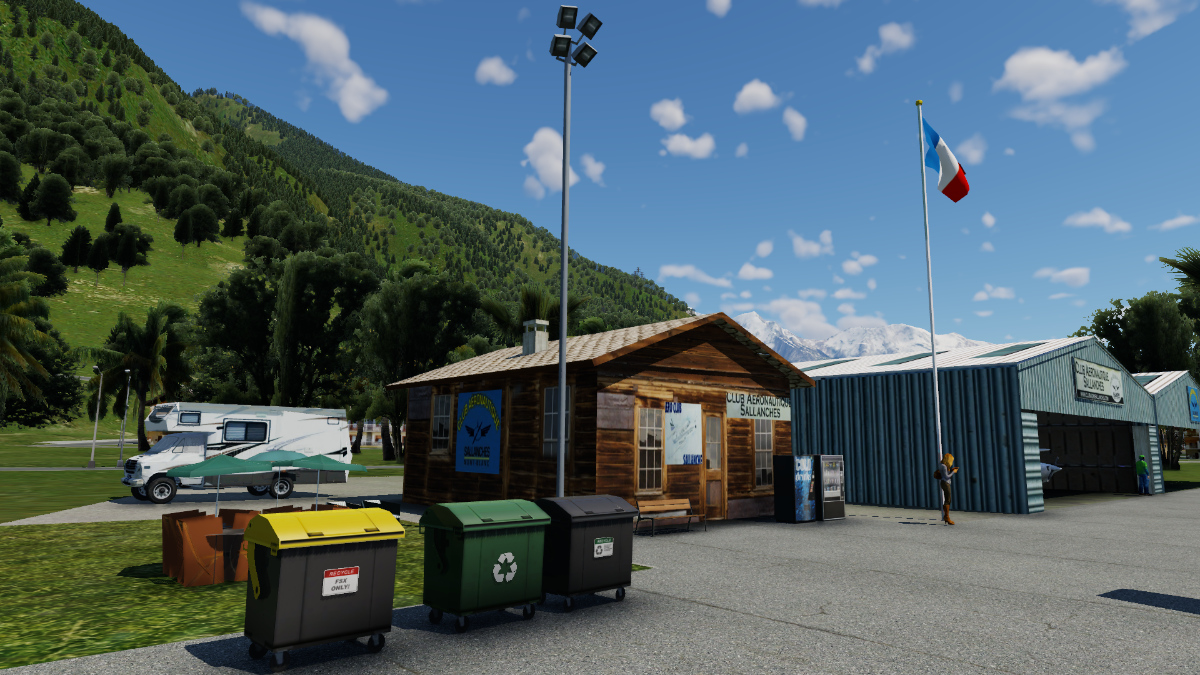
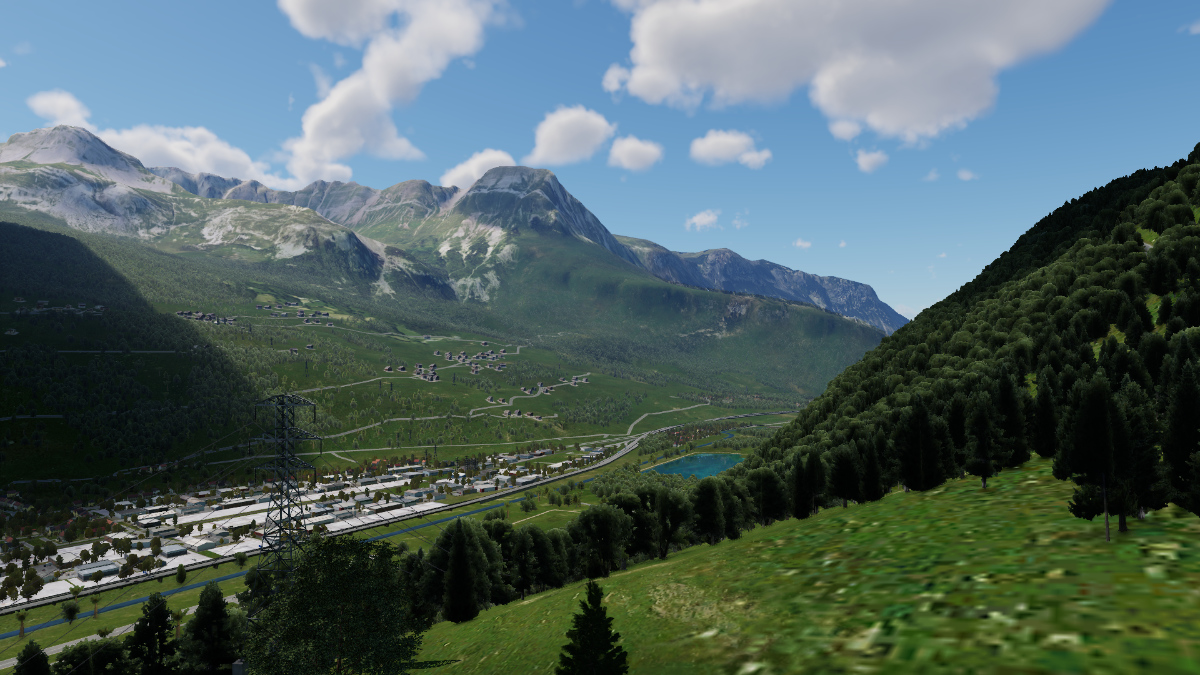
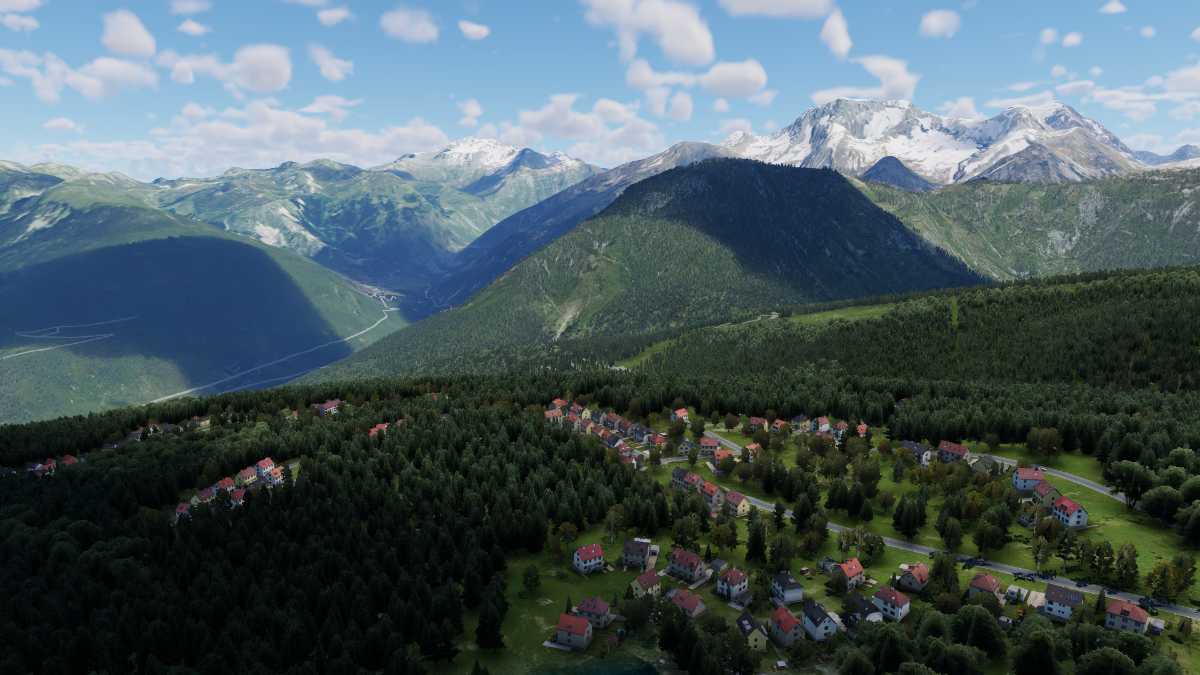
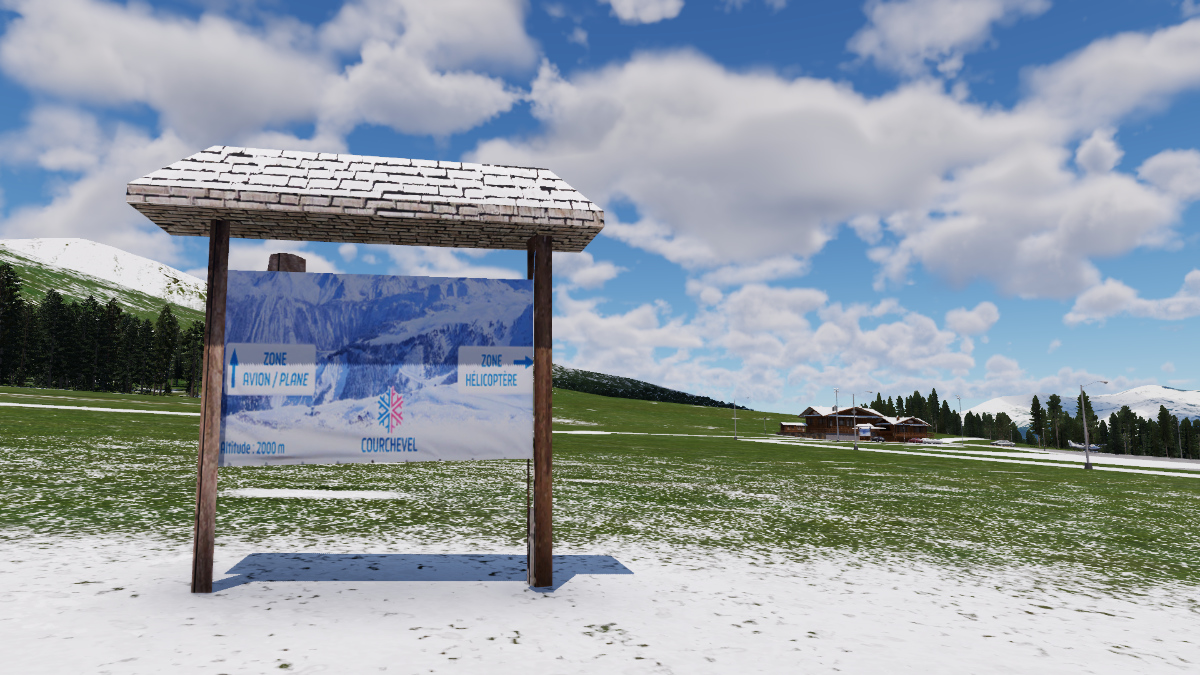
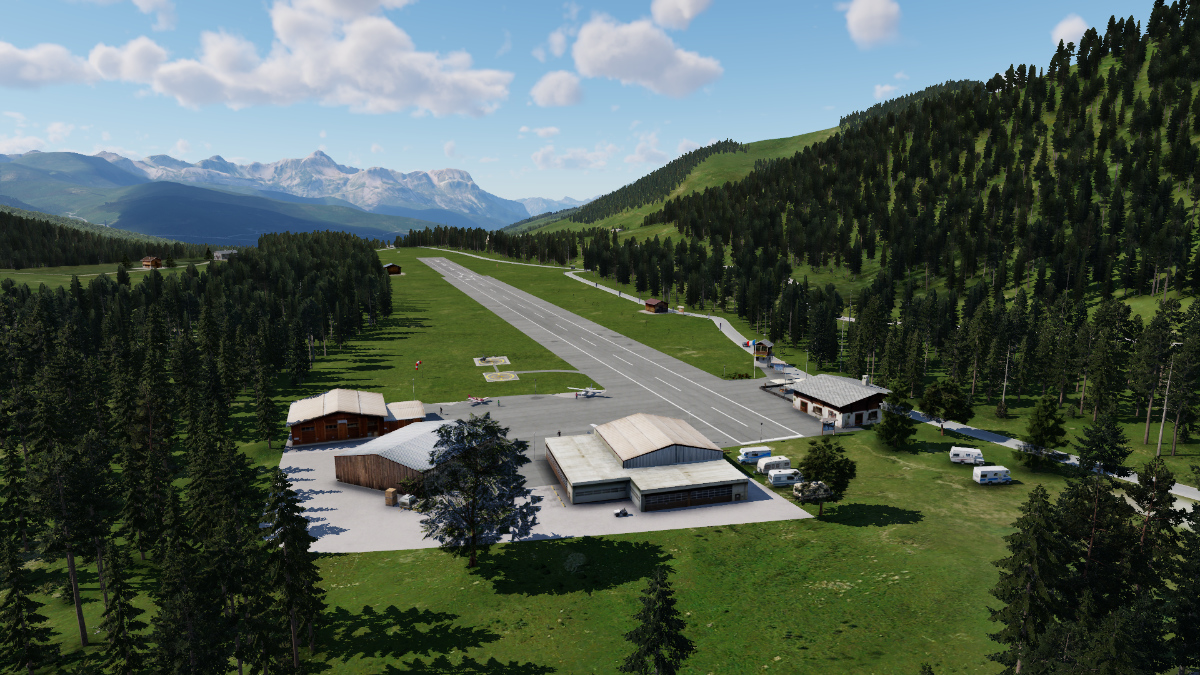
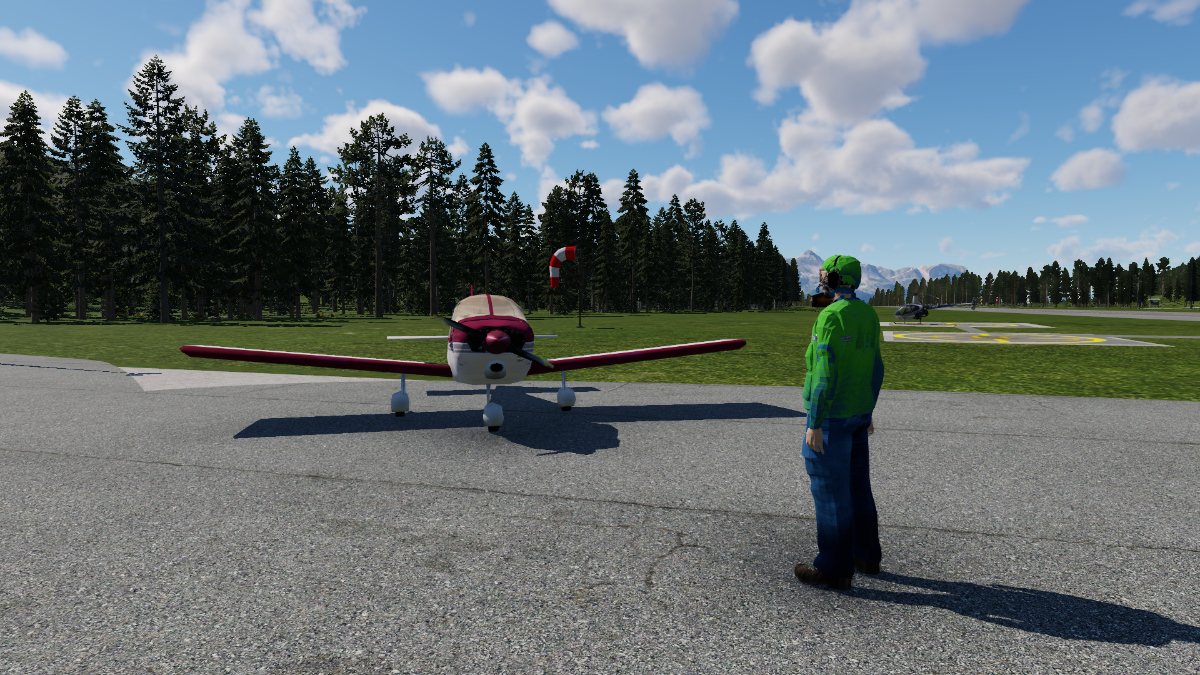
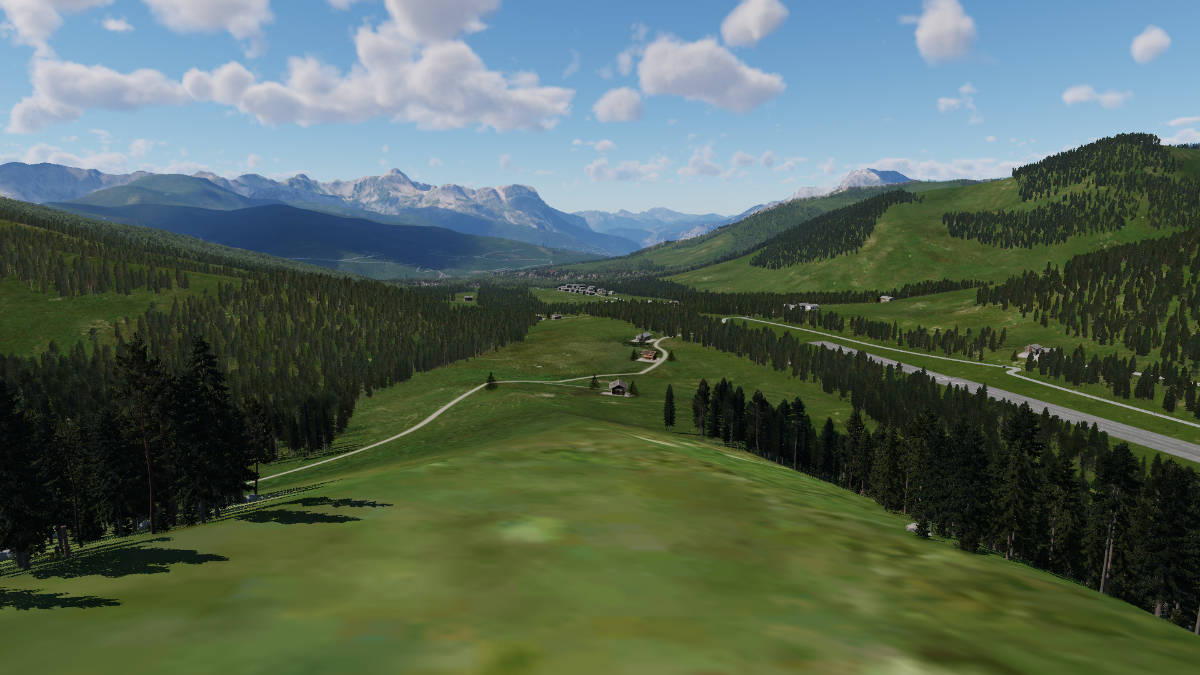
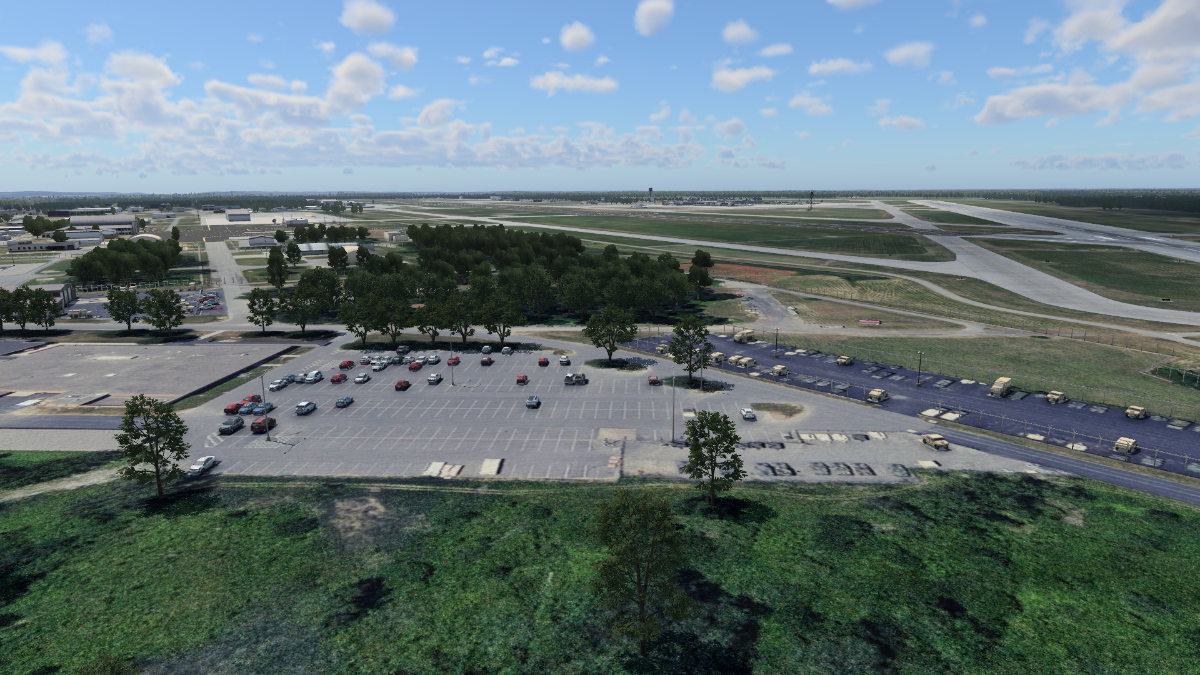
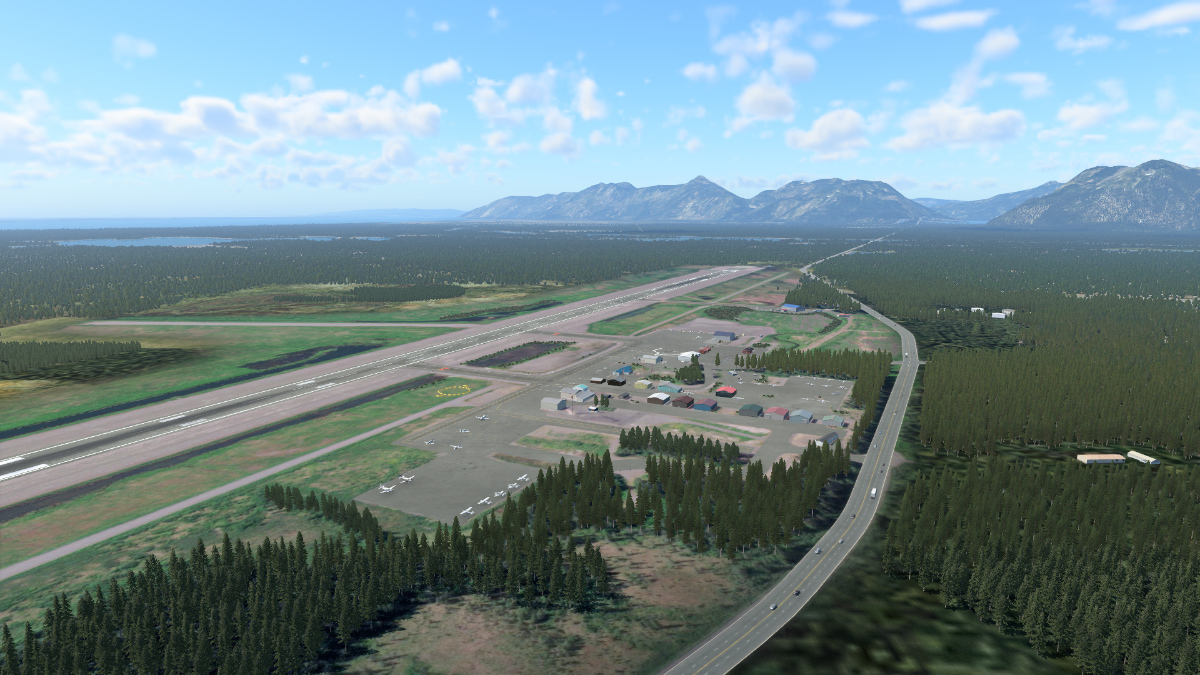
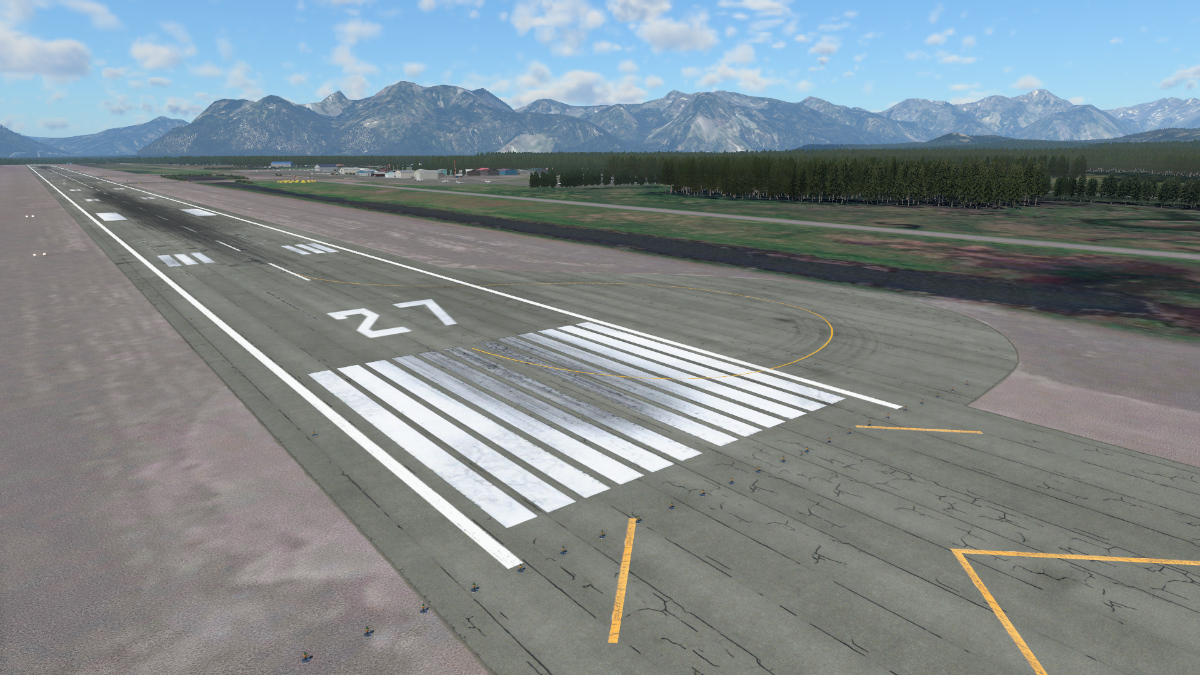
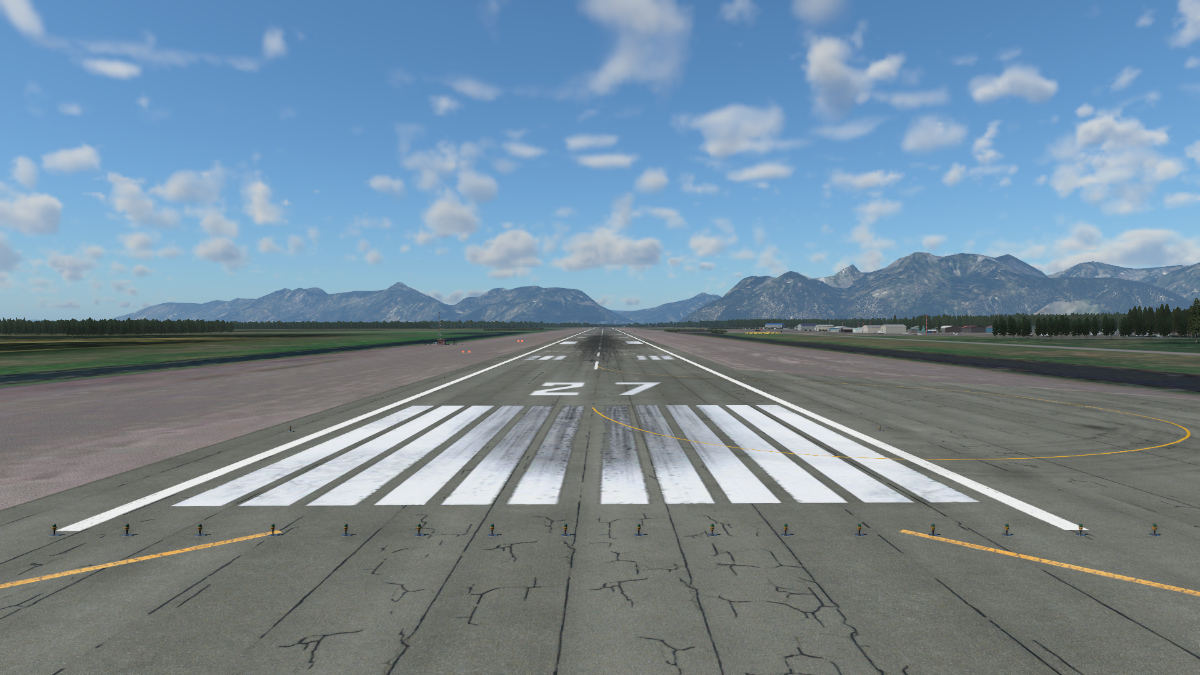
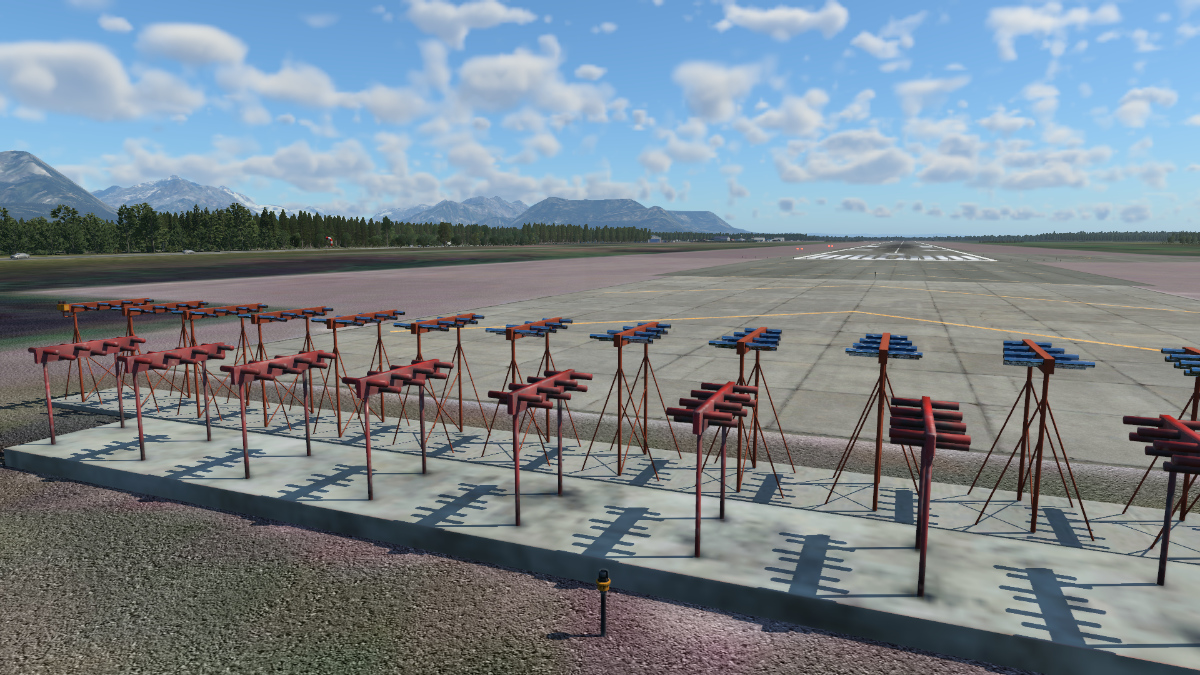
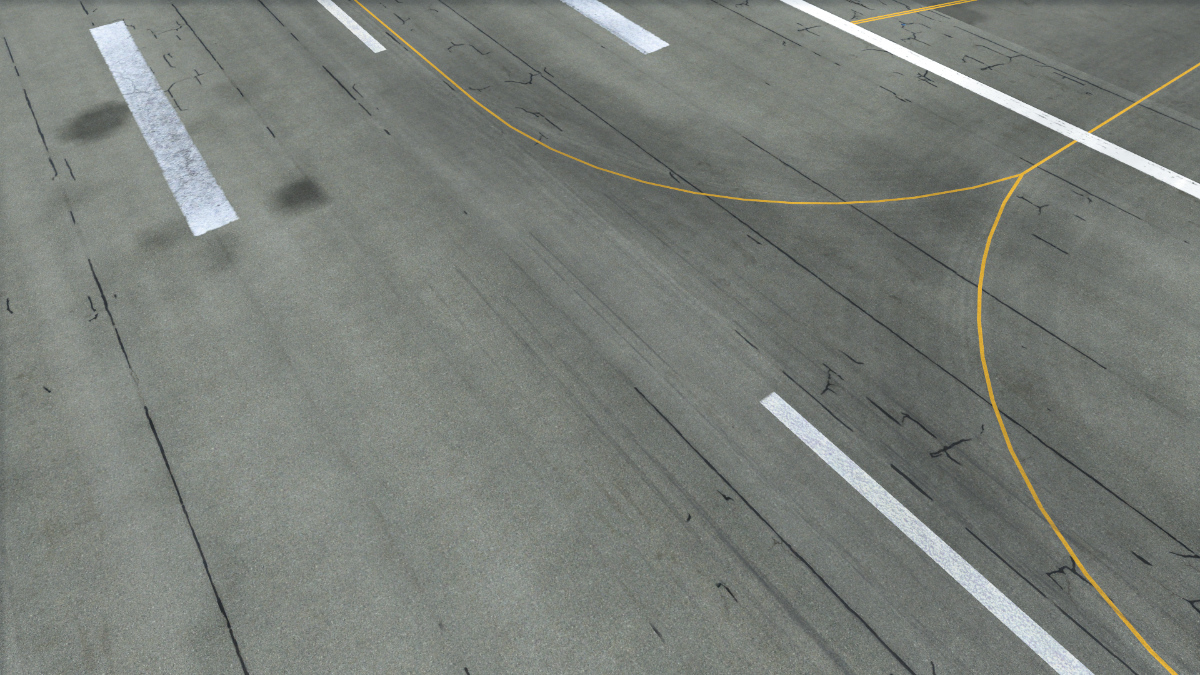
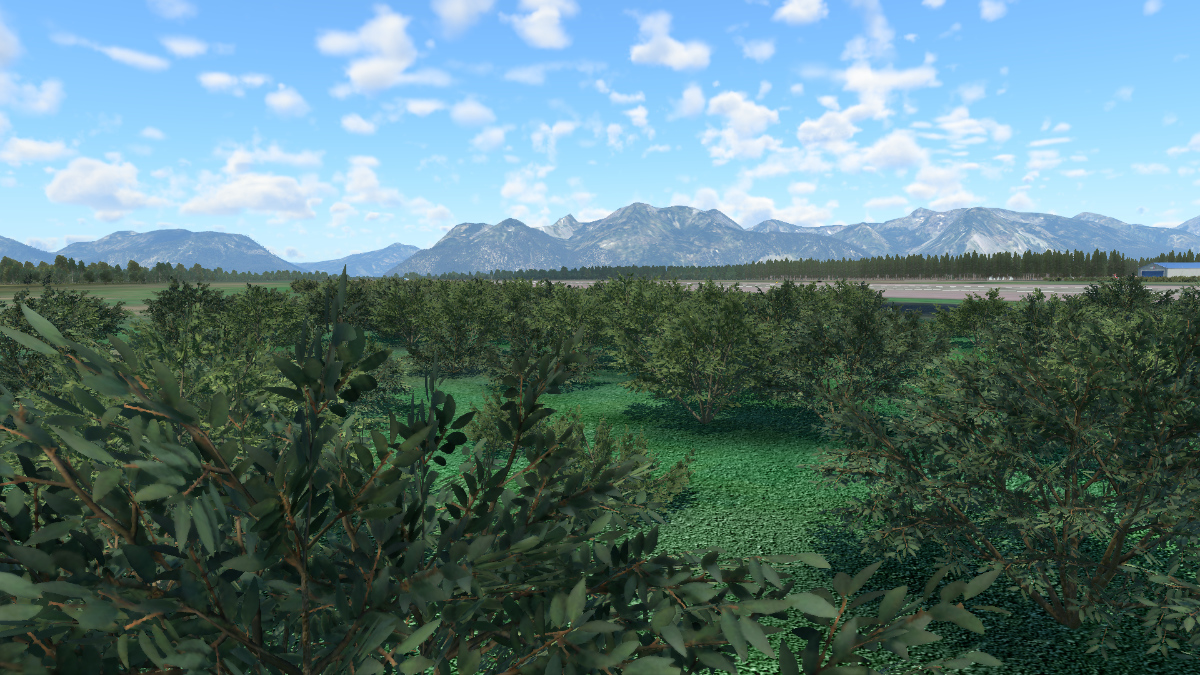
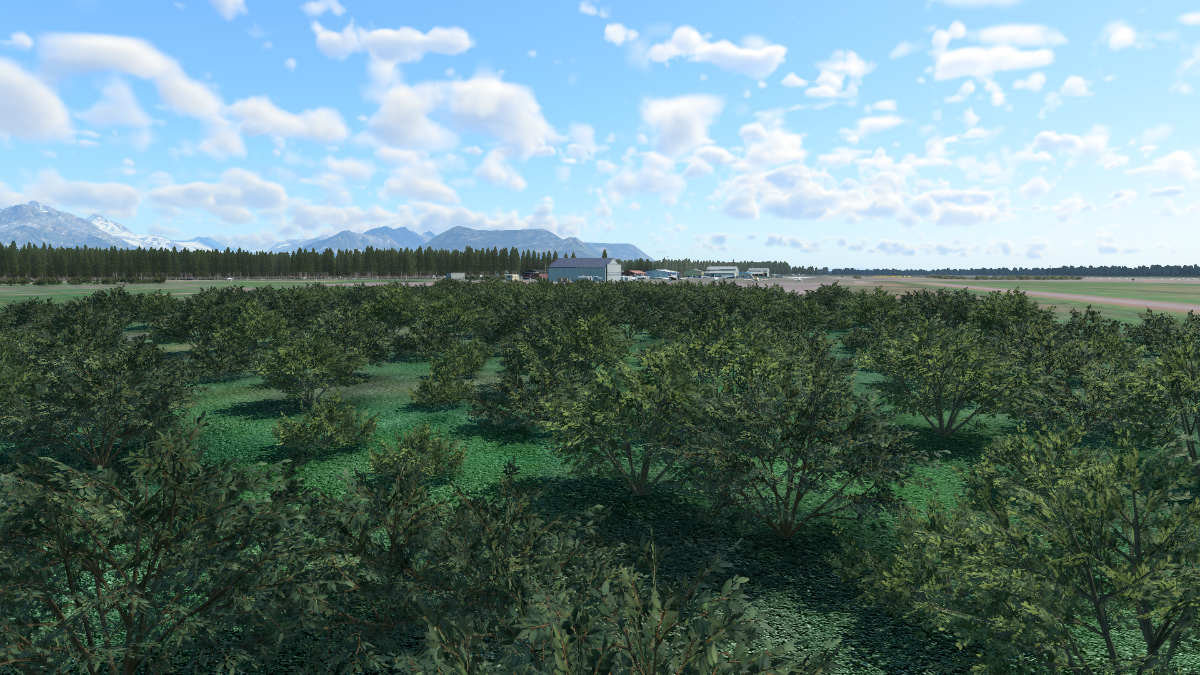
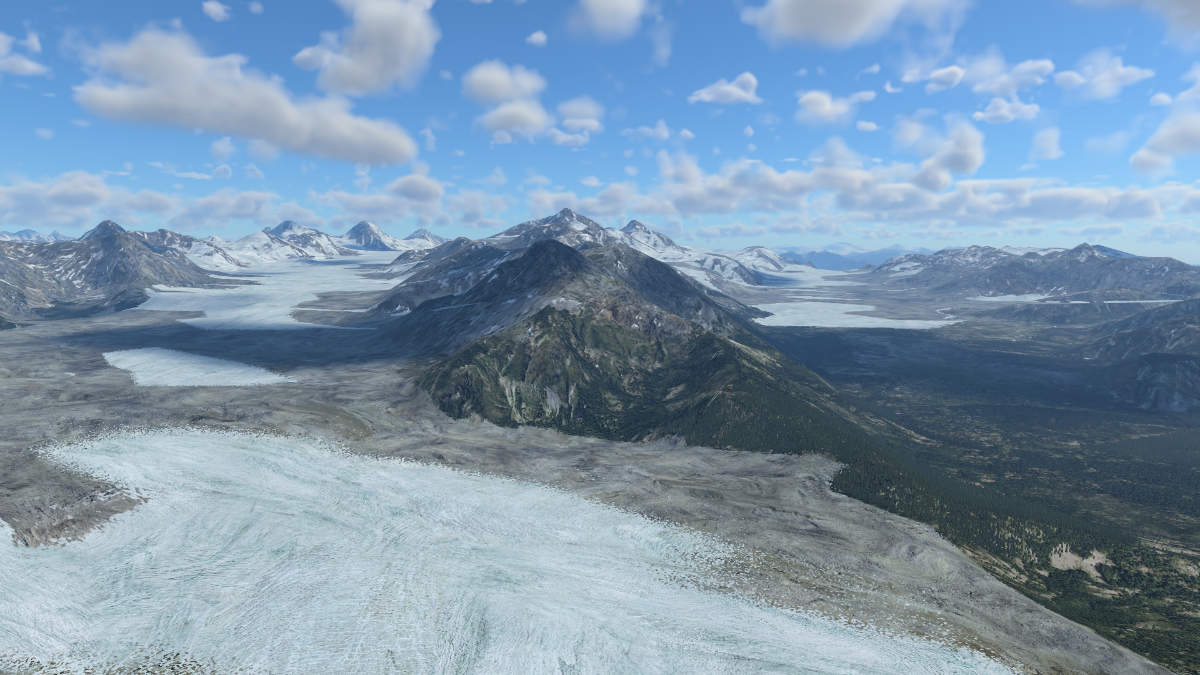
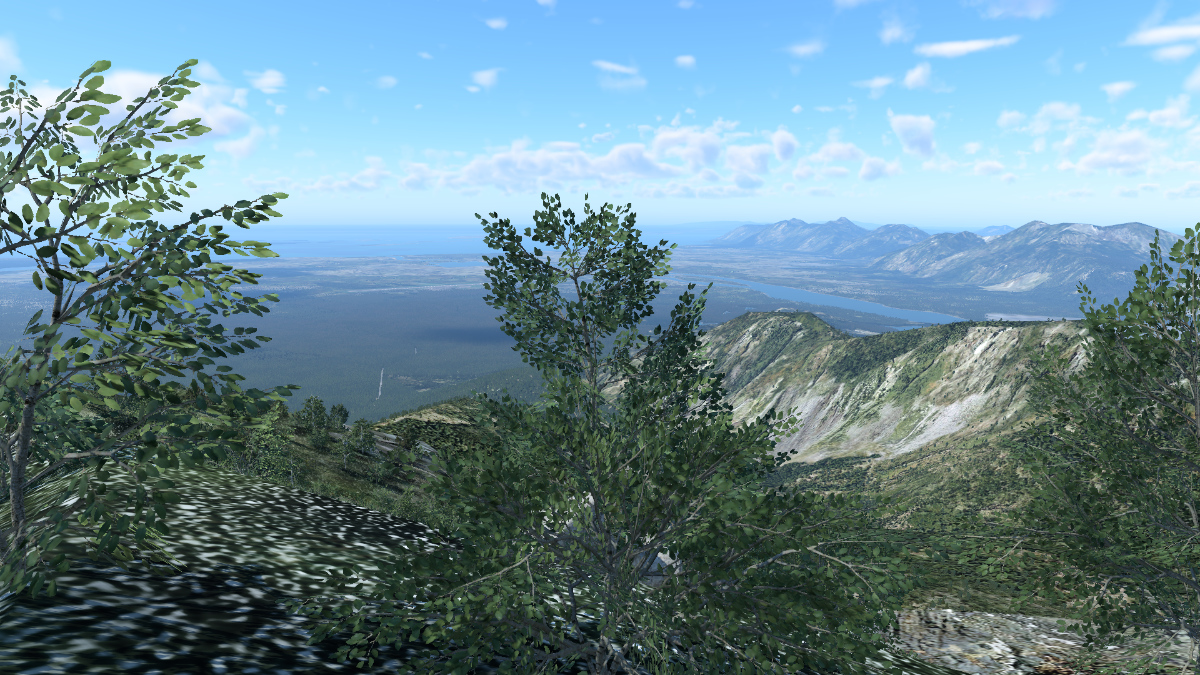
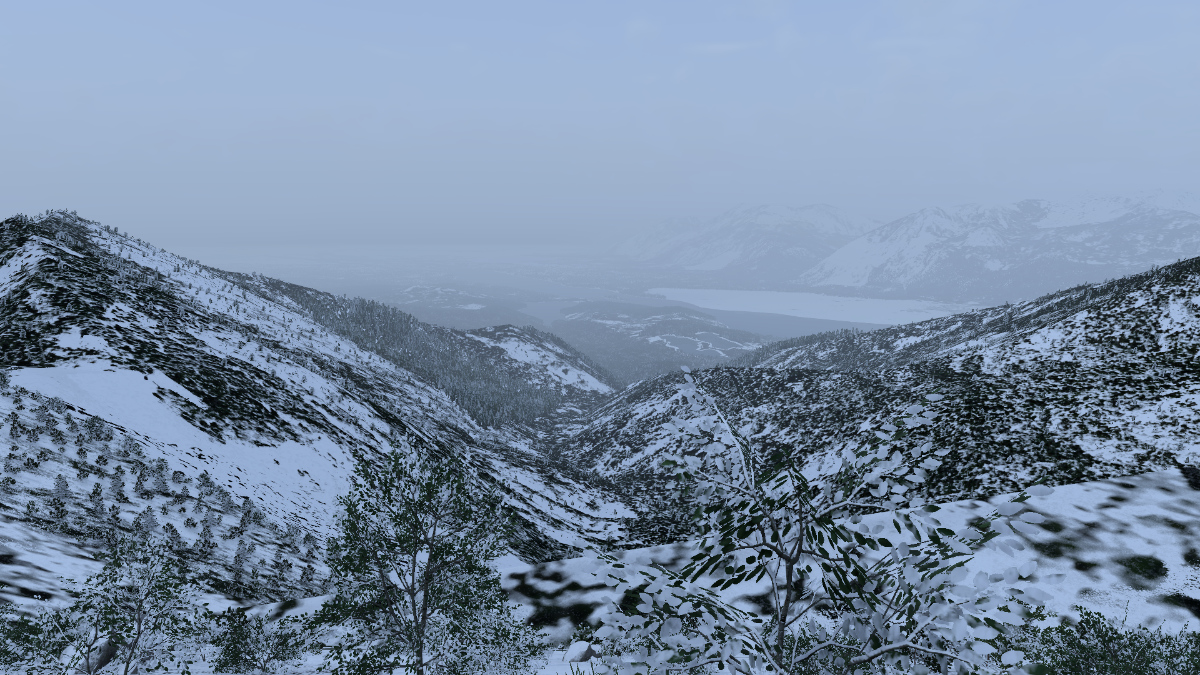
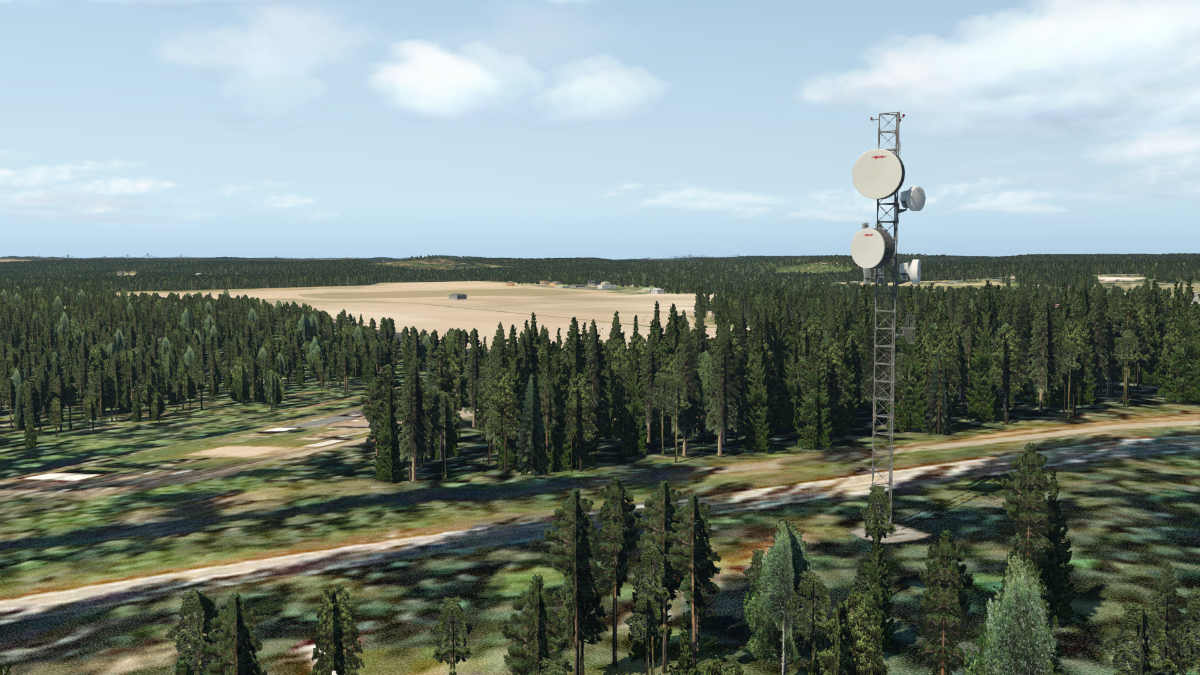
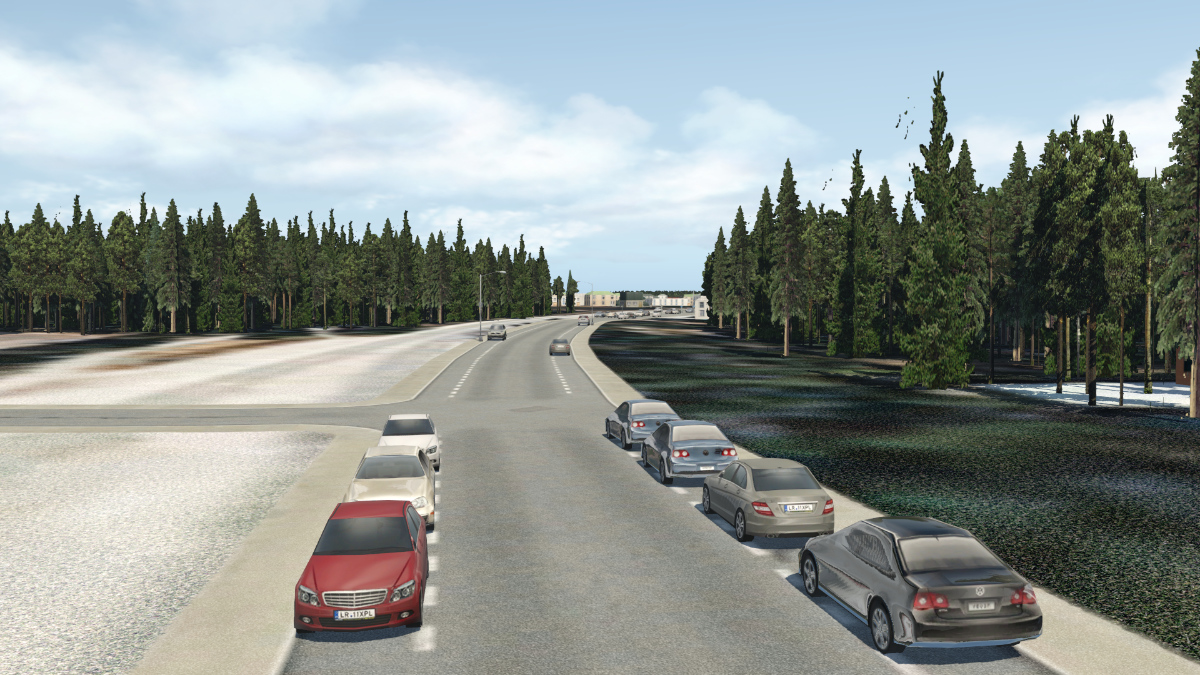
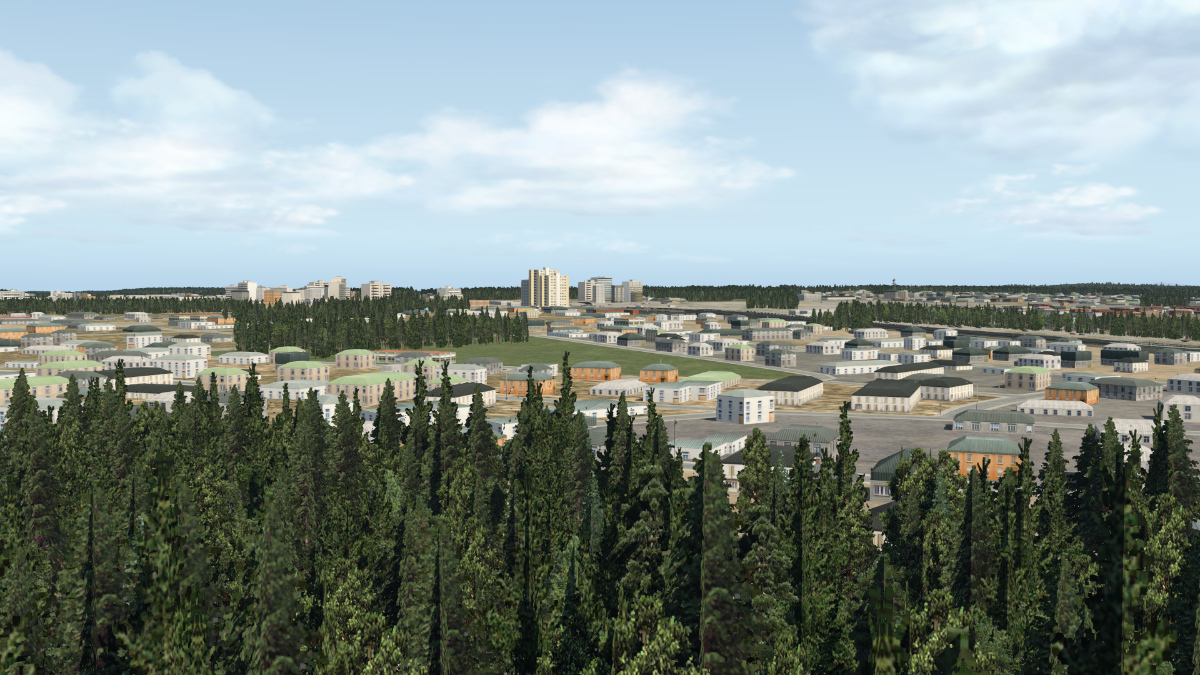
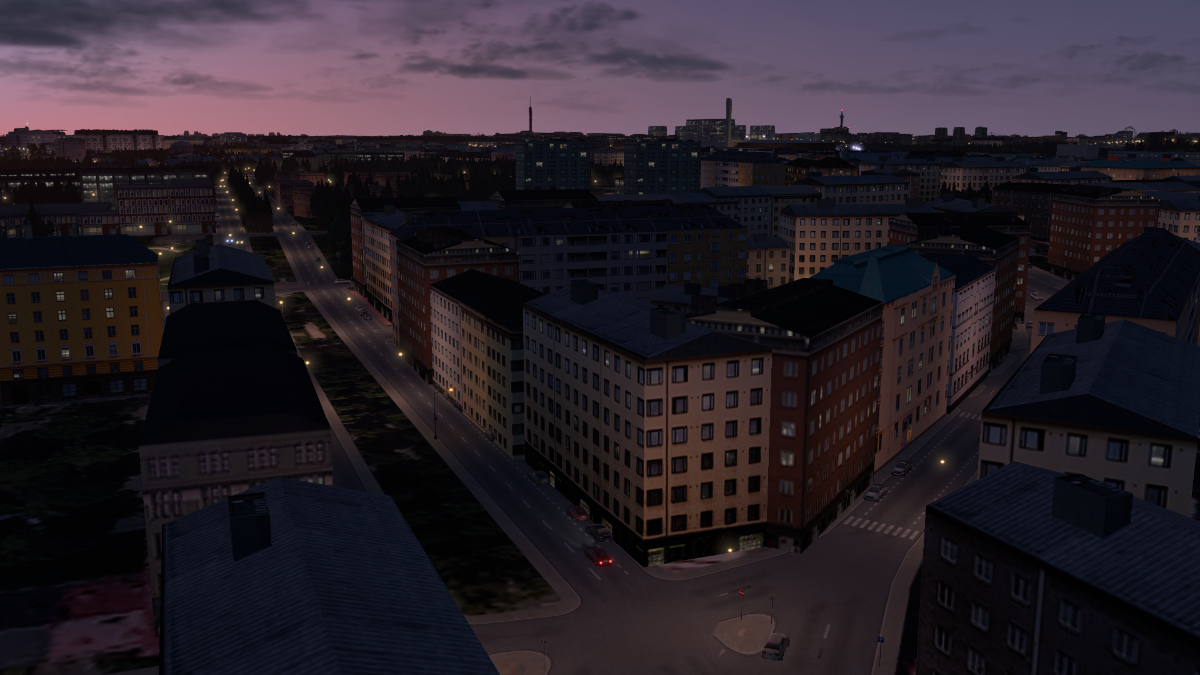
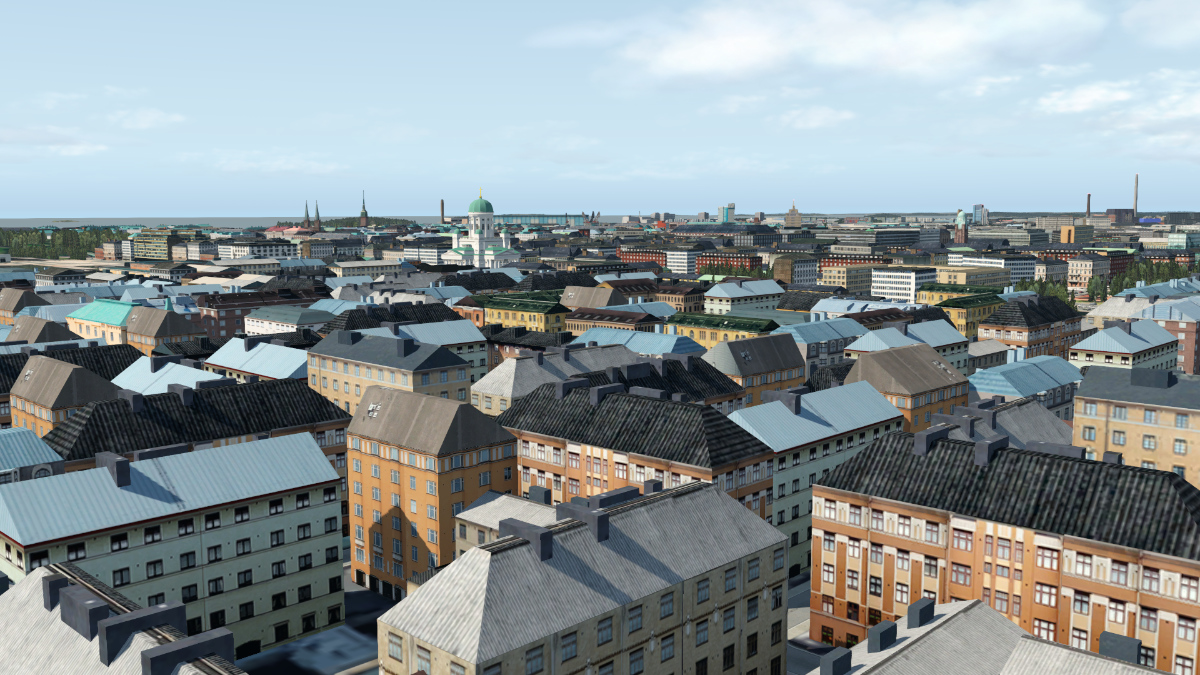
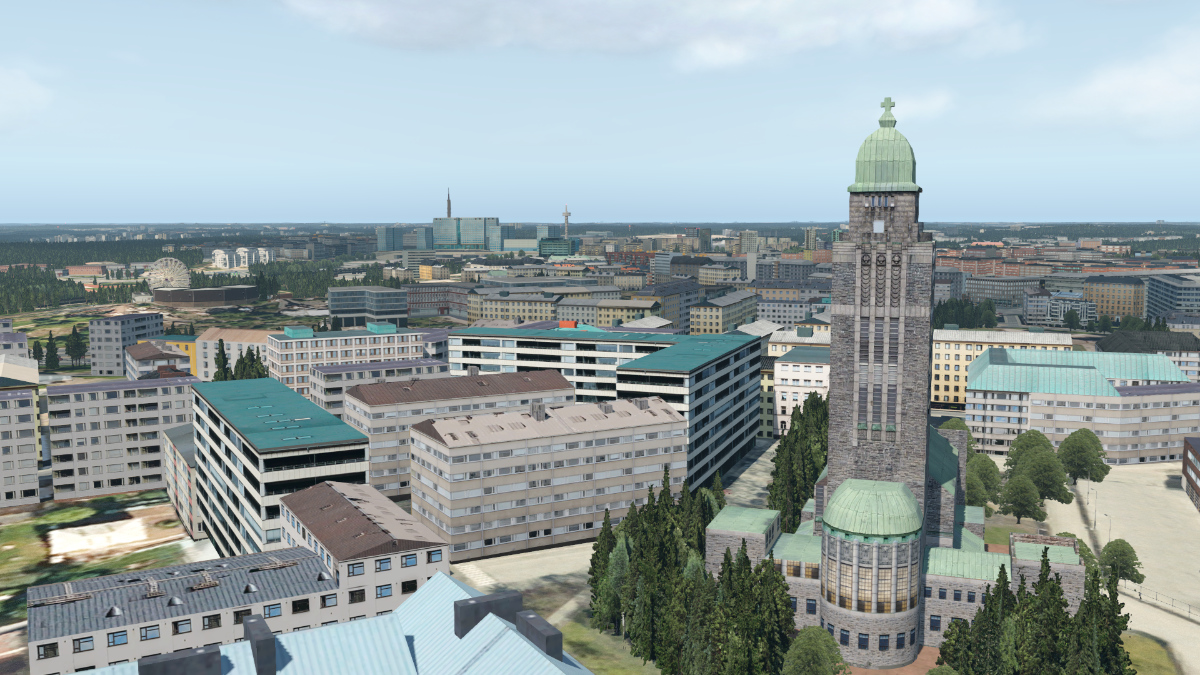
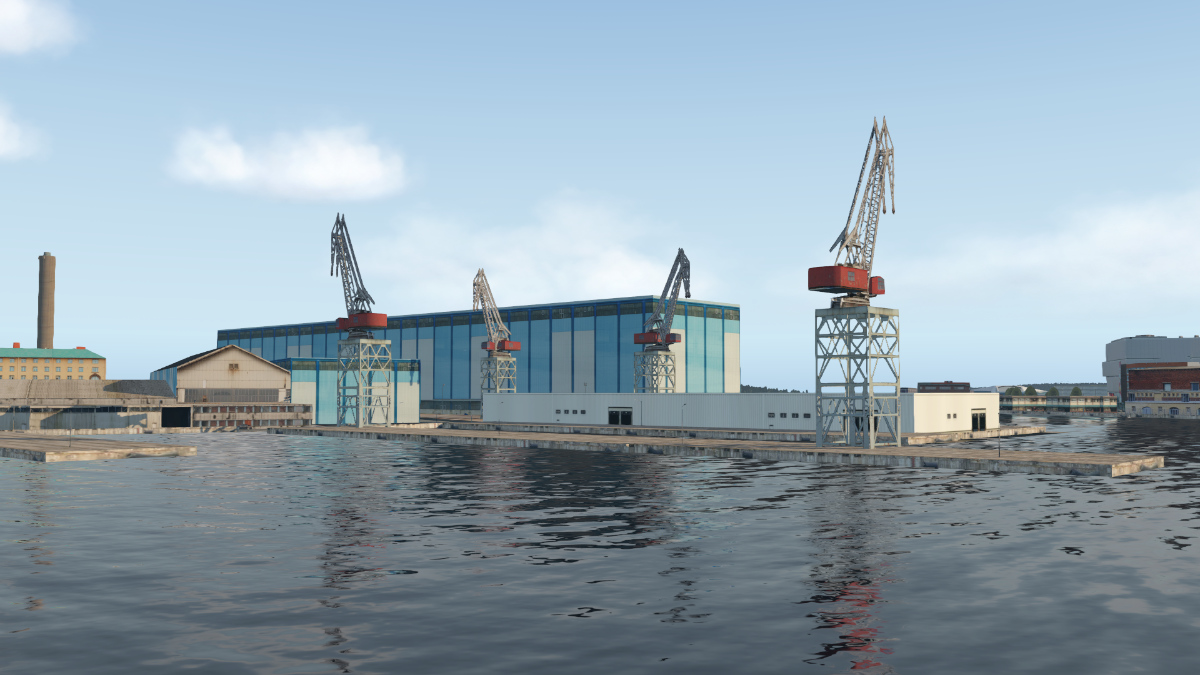
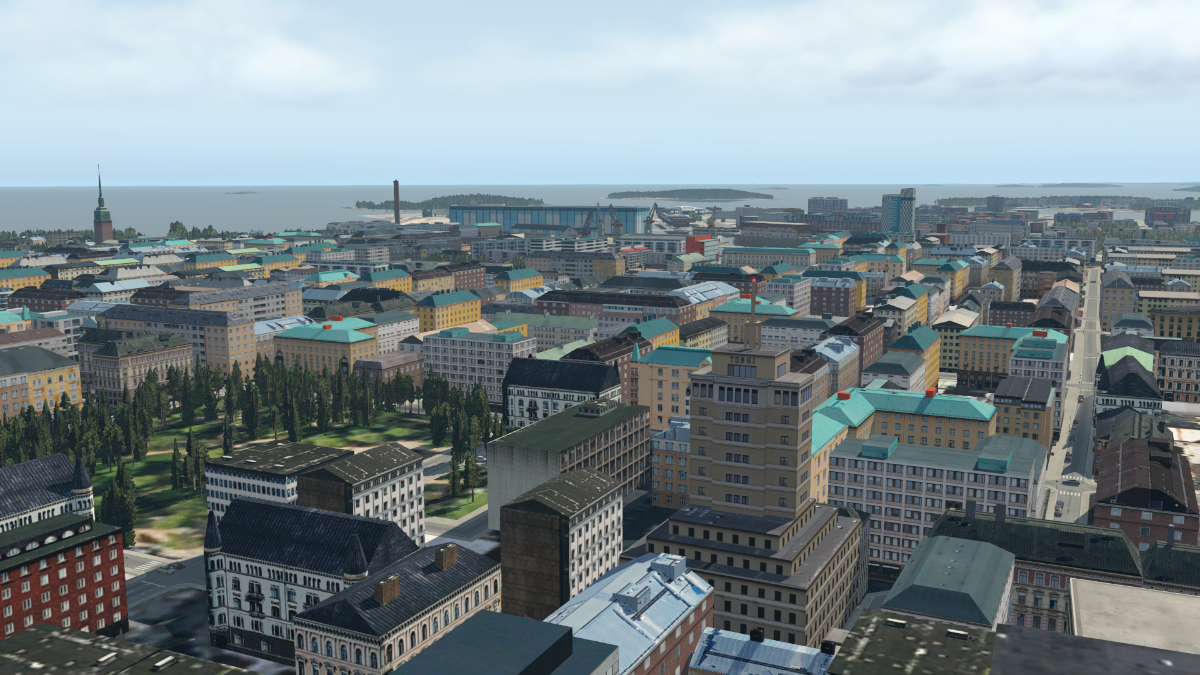
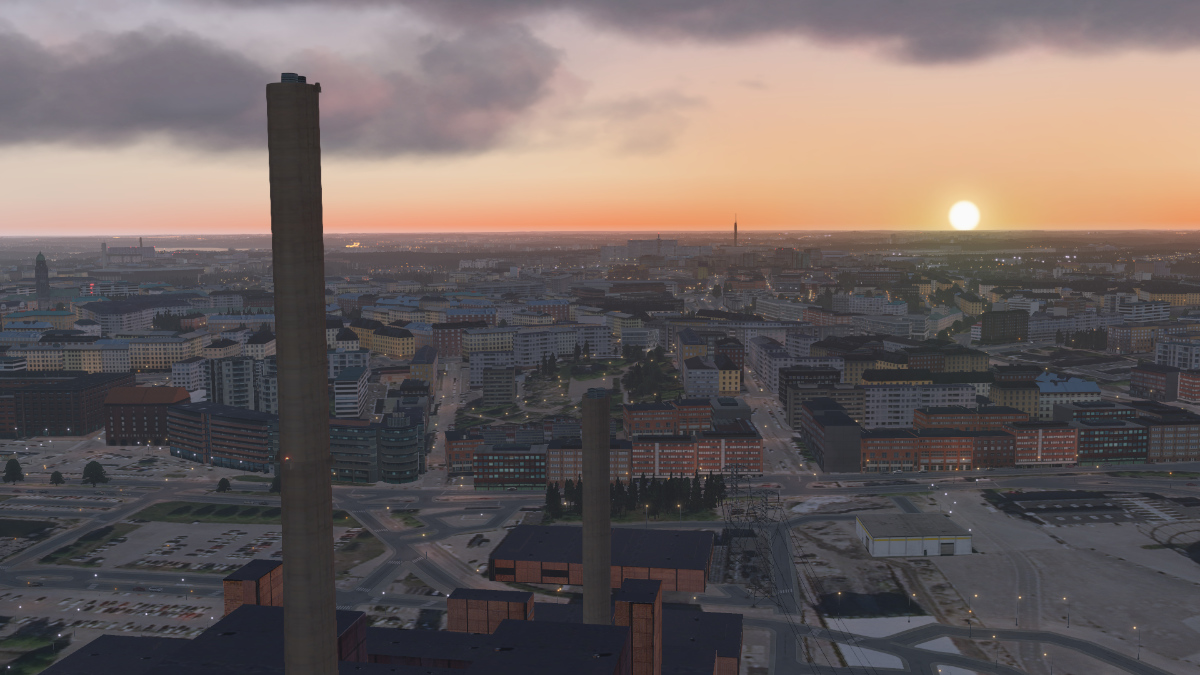
Scenery Review: Dolomites XP12 By Stuart McGregor Some say that too much of a good thing is bad for you, however, when you are talking about the work of Frank Dainese and Fabio Bellini, I am not sure that old saying is totally true as I have found myself back in the mountains again, this time in Italy and Austria with the recent release of their Dolomites scenery. This scenery pack covers an even larger area than the previous Alps scenery I reviewed a couple of months back, with somewhere around 11,000 square kilometres being quoted. These guys clearly like to go big! Talking about big, the Dolomites package itself weighs in at a whopping 9GB when unzipped (3.5 GB zipped), so a good internet connection is advised unless you are prepared for a long wait. Inside the package, you will find fifty-one (yes, I did say, fifty-one) separate scenery folders that you simply drop into your main Custom Scenery folder. I had no issues with the load order, however, just make sure everything sits above GLOBAL AIRPORTS in your scenery.ini file after you first run the scenery, just to be sure. If you already have other scenery from this area installed, a quick check is advised to ensure you have no conflicts. Although functional and simple to install, adding all those folders may not be to everyone’s taste, so I believe it is important to understand what you are purchasing from the outset if you are not familiar with the developers’ work. The Dolomites package currently retails for $59.95, which is the same price as other scenery packs the developers have recently released for X-Plane 12, and again, they are offering the same 40% discount if you have previously owned X-Plane 11 versions, such as Brenta Dolomites, Western Dolomites, Belluno Southern Dolomites, Cortina Cadore Dolomites, and Drei Zinnen Dolomites. Once again there is a lot on offer within the package, including seven airports, fifteen airfields and forty-seven heliports across large swathes of Northeast Italy and parts of Austria, but it is still quite a large investment in my opinion for a scenery package. As it states in the advertised information, the package covers Trentino Alto Adige, and as such includes the cities of Bolzano, Trento and their airports, plus heliports and airfields such as Loker, Sterzing, Termon, Vervò, and Corvara. The whole province and city of Belluno, along with its airport, are also covered, as well as heliports near mountain refuges and airfields, such as S.Giustina and S.Felice, Casera-Razzo (Friuli), Val Fiemme (Cavalese), and Agnedo (Val Sugana). The developers also mention that several of these airfields are particularly suitable for ultra-light aircraft. I will be honest and say that I’ll have to take their word for much of this, as I am not familiar with the area, although I did visit several locations along the way to get a true sense of what is on offer. One thing that really helped was the availability of a map located within the provided five-page manual. Strangely though, the manual doesn’t actually come with the download and was something I had to search for via the X-Plane forums. I did find this a little unusual, as an extra folder for documentation within one of the existing folders would have been handy, particularly as I am not sure that all users are frequent visitors to the forum and could therefore miss this. That being said, the manual was quite helpful, as in addition to the map and basic description of the scenery, there is information provided on the minimum advised computer specs as well as some of the known issues, e.g., scenery blur, no waves on lakes, and low fps in some cases with low-end computers etc. If you are considering purchasing this scenery, perhaps a more detailed read of the manual would be a worthwhile exercise (just so you are aware of some of the limitations). So, with scenery installed, settings set and map in hand, I began to explore this unique part of the world. Again, if you are perhaps not a regular mountain flyer like me, you simply can’t help but be impressed by the splendour and natural beauty of the landscape. From the majestic mountains to the beautiful and tranquil lush valleys laced with crystal clear waterways and lakes, the Dolomites really are a VFR pilot’s dream. As I am also a regular VR flyer, I again spent quite some time in VR through my various tests, and even though X-Plane 12 still has some way to go with respect to the overall VR experience, I really enjoyed it. Although not perfect, this didn’t detract too much from my experience, and again the fully immersive 3D feeling when in VR, really gave the mountains that additional level of realism. The extra added details and photographic textures are very nicely done at the various stopping points and across the general landscape. It is worth noting that there are some unique features in the Dolomites with respect to the chiselled shape of some of the mountains, and the needle-like appearance really does make the landscape stand out in my opinion. This is particularly true if you strap yourself into a helicopter or microlight, as this provides the best chance to really get up close and take in what is laid out in front of you. Another feature that also stands out (thanks to X-Plane 12) are the winter textures, and I believe there are no sceneries that benefit as much from this new dimension as the mountain sceneries by Frank and Fabio. Seeing the mountains in their full winter glory is just so special, it’s almost like having two completely different worlds; one is the tranquil lush green mountain pastures, and the other, is the harsh and menacing winter wonderland that snow and ice brings. X-Plane 12 has a bit to go before it is the finished article in my opinion, however, this really is a nice feature that makes me want to come back for more. I began my tour at LIPB Bolzano Airport, and travelled clockwise all the way around the map, stopping at several locations en route. These included XLIAS, XSTR, LIVD, LOKL, then down to XLICS, LIVR, LIDI, LIDB, LIDA, LIDT, TNVER, and then finally back to LIPB. Bolzano was a great spot to start from, as the airport is well-modelled with lots of details and nicely appointed photographic textures on the main terminal building. There is plenty of clutter about to make the airfield feel alive, and I loved the inclusion of people, that really made my day. Sure, they were all static, however, just having people represented is a great addition to the scenery, and it felt like I was off to a great start. My next stop was XLIAS, Alpe di Siusi to the northeast. This was the first of the small grass airstrips that I was to visit, and as such, there wasn’t a huge amount to see in terms of details, other than a few houses scattered about, a chairlift nearby which is a nice feature and a couple of light aircraft. Nevertheless, it is a beautiful spot as the backdrop of the mountains is simply breathtaking. From there I headed northwest to XSTR, Sterzing-Viiteno, another grass strip. This area is clearly a favourite with glider pilots based on the number of trailers located at the airstrip. Here the terrain is more rolling hills and peaks, rather than the hard sharp mountains I had seen previously. LIVD, Dobbiaco to the east, was next on the list and was another GA/glider grass airstrip. The scenery is very much set up for GA pilots, helicopter jockeys and glider pilots alike, as you can’t help but be taken aback by just how majestic and beautiful this part of the world is. The local buildings are nicely done and really add a special sense of attention to detail. There are an insane number of buildings scattered across the scenery, and having made a few of my own (much, much smaller) sceneries in the past, I can fully appreciate the work that has gone into this. The next stop on the tour was LOKL, Lienz-Nikolsdorf, close to the edge of the area covered, and going by the flags, we had now crossed the border into Austria. LOKL has an asphalt runway and a bit more detail than some of the areas we’ve visited so far and looks like another superb location for glider pilots. Sadly, I couldn’t find any people, which was a little eerie, but considering the additional detail, it wasn’t such an issue. Leaving LOKL behind, I headed onwards to another grass strip, this time XLICS, Casera-Razzo (great name and approach…) before heading across the mountains to the sloping grass trip at Passo Rolle, LIVR. Again, just looking around at the scenery is simply stunning, and this strip I believe would give most pilots a significant challenge due to its slope. I have a funny feeling that this strip must be used as a ski jump in the winter months… At this point, I decided to head north again up to LIDI, Lidi Cortina Ampezzo, before heading back south to LIDB. There are some nice details at LIDI, the people are back, and the nearby sports track is a nice addition. This airfield is one of the larger ones in the package and sits in a very narrow valley pinned in by massive peaks all around, so if you are looking to test your skills, this is one to try out. Just a few more stops now, and I found myself next at LIDB Belluno, another of the larger airfields, although it still has a single grass runway. Just next to the airfield, you will find the town, and this area is much less mountainous and more open. I liked the fact that not everything in the pack is set high up in the mountain peaks, and the variation of scenery makes a welcome change. I don’t believe mountain flying gets monotonous, however to a layman like myself, once you have been up a few mountains, they do all sort of merge into one, however, in this package, the variety of locations, details and scenery, makes you want to find that next interesting setting. The last few hops included LIDA, Asiago, LIDT, Trento-Mattarello (also known as Aeroporto G.Caproni) and TNVER. LIDT is a much larger airport than Asiago, with multiple buildings, asphalt runway, lots of clutter and people going about their business. This airport would be more suited to larger twin props and private jets, although the approaches are a challenge when you see how the mountains cut into the direct flight path. Trento-Mattarello was a great spot to set off from on my final destination, that being, TNVER, Campo di Volo Vervò Airport. This was another beautiful spot in which to take in the view, and again another very challenging runway to get in and out off. Good luck with this one…. So, as I headed back to LIPB Bolzano Airport, I had plenty of time to reflect on my journey, and I can safely say I thoroughly enjoyed my time back in the mountains. The whole package is simply stunning, and the developers have done an amazing job of creating so many details across this vast landscape. From the basic and simply defined grass strips to the more detailed airports, each one is unique and carefully crafted, and every one of them is different to its neighbour. Unless you are only flying heavies, there is something for everyone in this scenery pack, and my advice to you all, is to strap yourself into your favourite light aircraft or helicopter, or even a glider, find yourself some inspiring music to listen to, and off you go. Touring around in the summer you can almost feel the fresh mountain air, and if you want more of a challenge, set the date to the winter months and enjoy the ferocious winter winds and snow. As with all the mountain sceneries from Frank and Fabio, there are so many different elements to enjoy and numerous scenarios you can play out, and I believe that only the most cynical amongst us would be disappointed by their work. As far as system performance goes, I should just briefly mention I had no issues to report. My trusty 2080ti and 9th gen CPU coped well, and my fps were generally 30 to 50+, and even in VR with my Rift S, everything was always pretty much smooth. There was a little blurriness on a couple of occasions, however, this really didn’t detract from what is a very nice and well-constructed scenery pack. There is no doubt in my mind that the developers have again worked hard on this scenery release, bringing the best in mountain sceneries to our virtual world of X-Plane 12. If you have never tried this type of experience (and my previous Alps review wasn’t sufficient candy to tempt you) then this scenery is well worth considering, not least because of the sheer beauty and area offered. I personally believe that VFR GA, glider, microlight, or helicopter pilots will get the most out of this scenery pack, although I am sure those who like larger twin-engine regional aircraft or private jets, will also find something in it for them, particularly if they enjoy the challenge of navigating to the larger airfields. Maybe it is time to try something new… __________________________________ Dolomites XP12 by Frank Dainese and Fabio Bellini is now available from the X-Plane.Org Store here: Dolomites XP12 Price at time of writing US$59.95 Customers who own any of the previous Dolomites XP11 packages can get 40% off this new package. Please check your original Dolomites invoice for the coupon code. Features: Included in the degree + 46+ 010, +46+011, +46+012, area Italy, Austria Mountain scenery with 3D models sixty-four groups Dolomites Seven airports, fifteen airfields, and forty-seven heliports Reproduced towns and villages with typologies of buildings and customized houses Photographic polygons/ textures as covered of terrain typical zone of great mountains. Polygons/textures 4K - area covered more 11000 kmq. Complete scenery of about 9GB, fifty-one folders, more than forty valleys, and more than sixty thousand placed objects. Requirements: X-Plane 12 (not for x-plane 11) Windows, Mac, or Linux 4GB VRAM Minimum - 8GB+ VRAM Recommended Download Size: 3.5 GB Review System Specifications: Windows 10 64 Bit CPU Intel i9-9900k 64GB RAM Nvidia RTX 2080 Ti Oculus Rift S Scenery Review by Stuart McGregor 10th March 2023 Copyright©2023: X-Plane Reviews (Disclaimer. All images and text in this review are the work and property of X-PlaneReviews, no sharing or copying of the content is allowed without consent from the author as per copyright conditions)
-
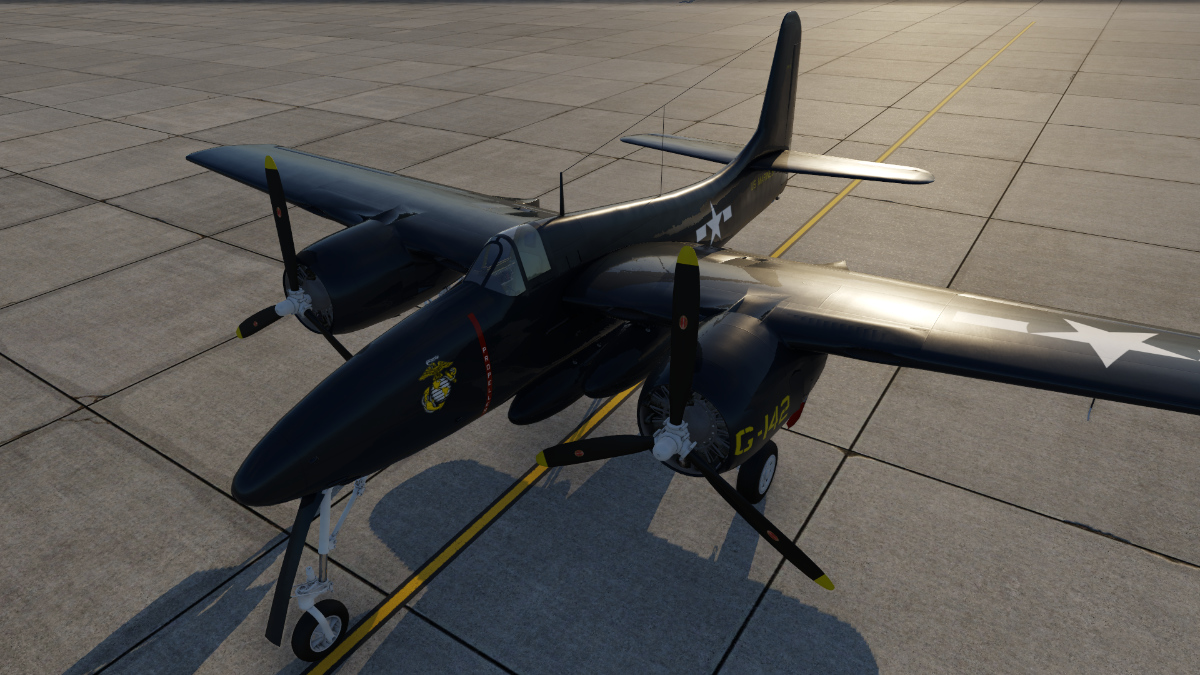
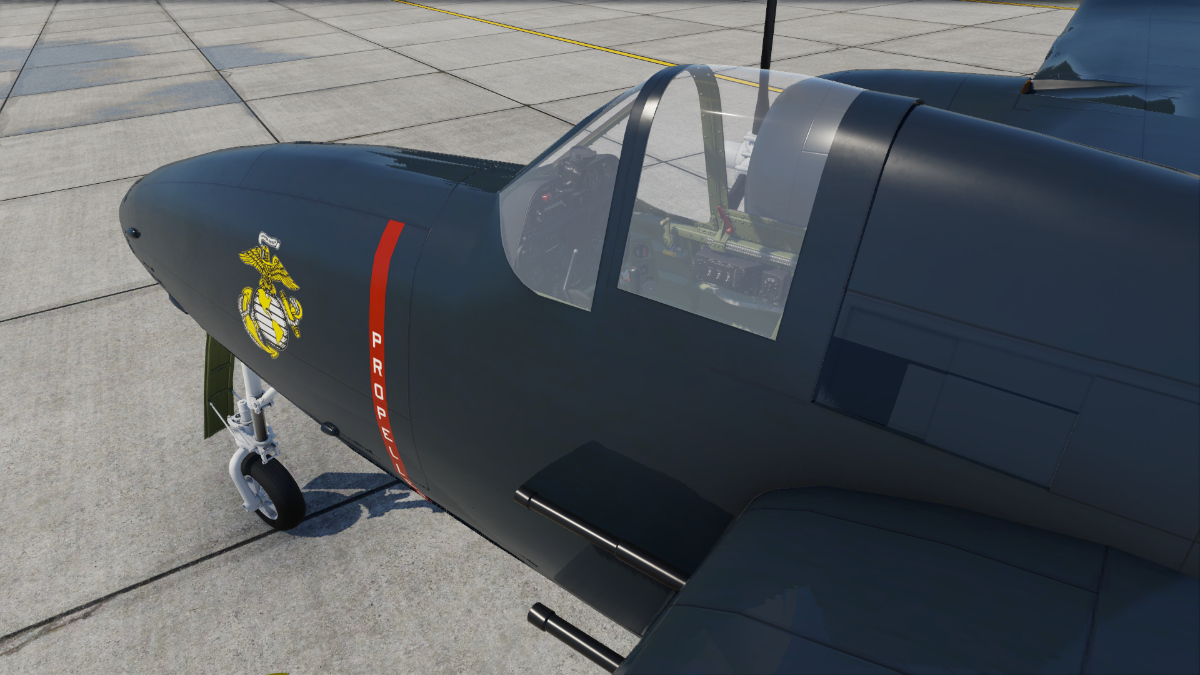
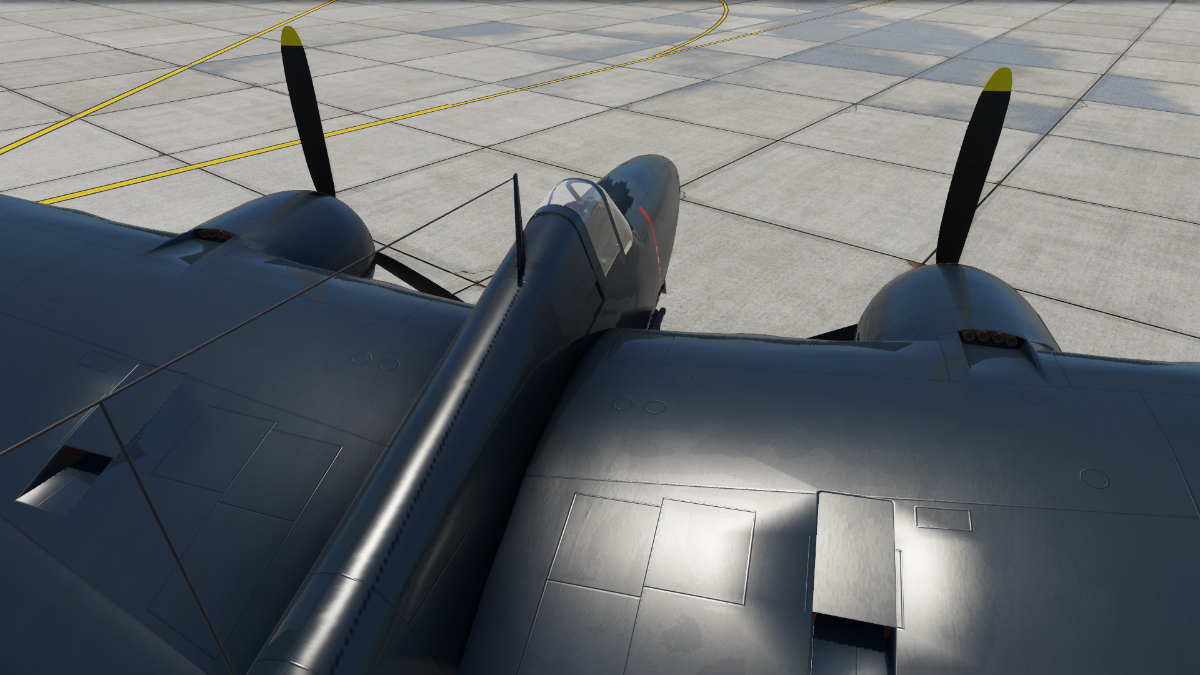
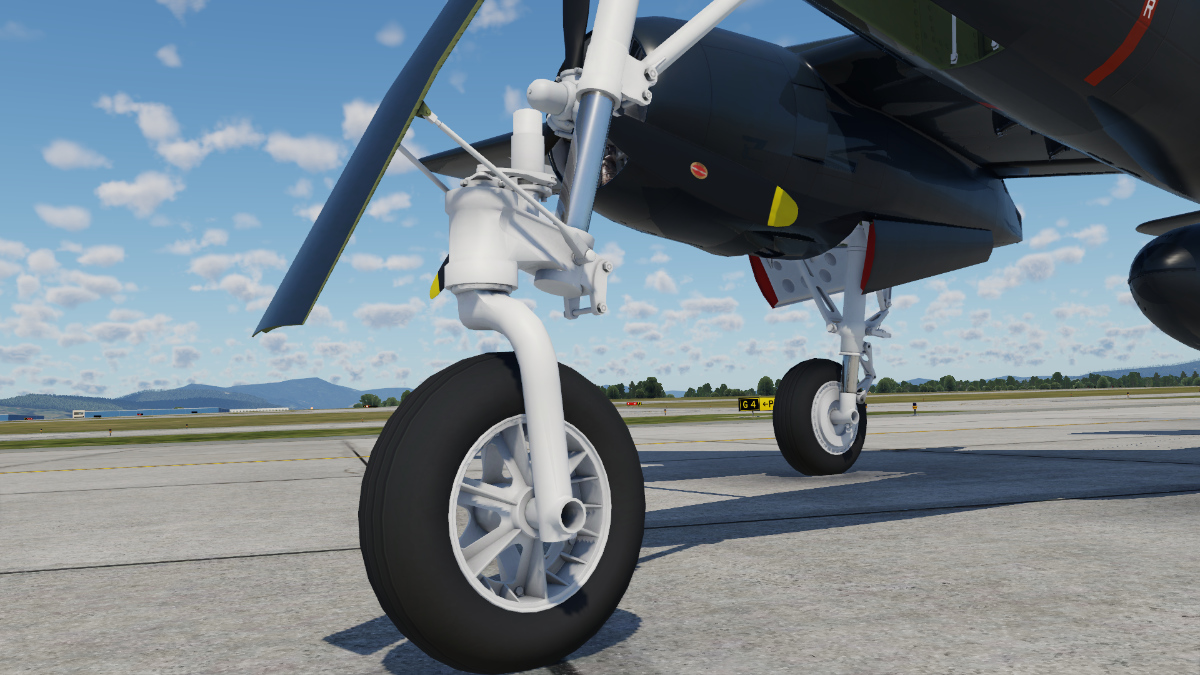
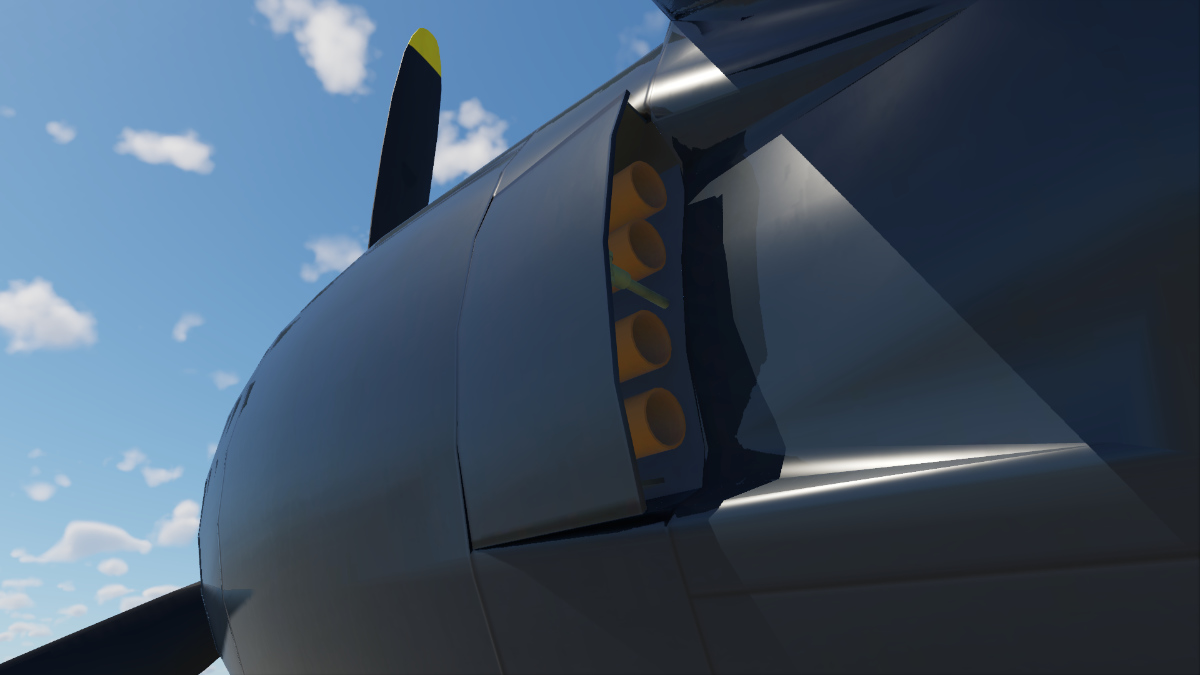
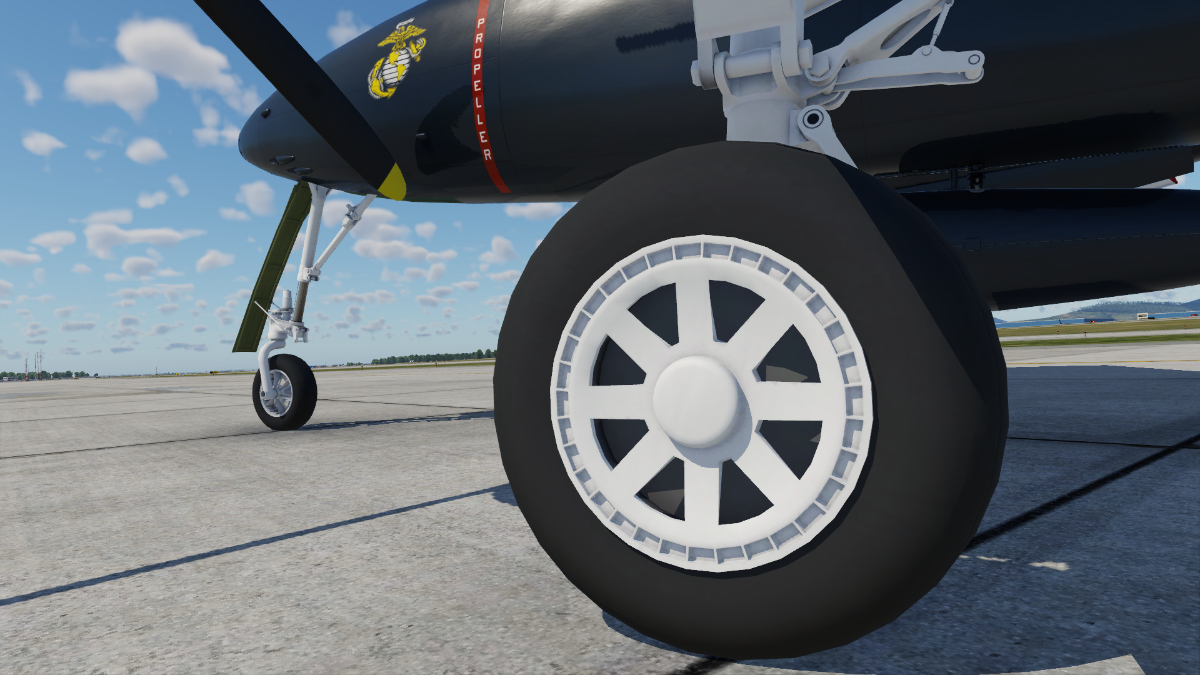
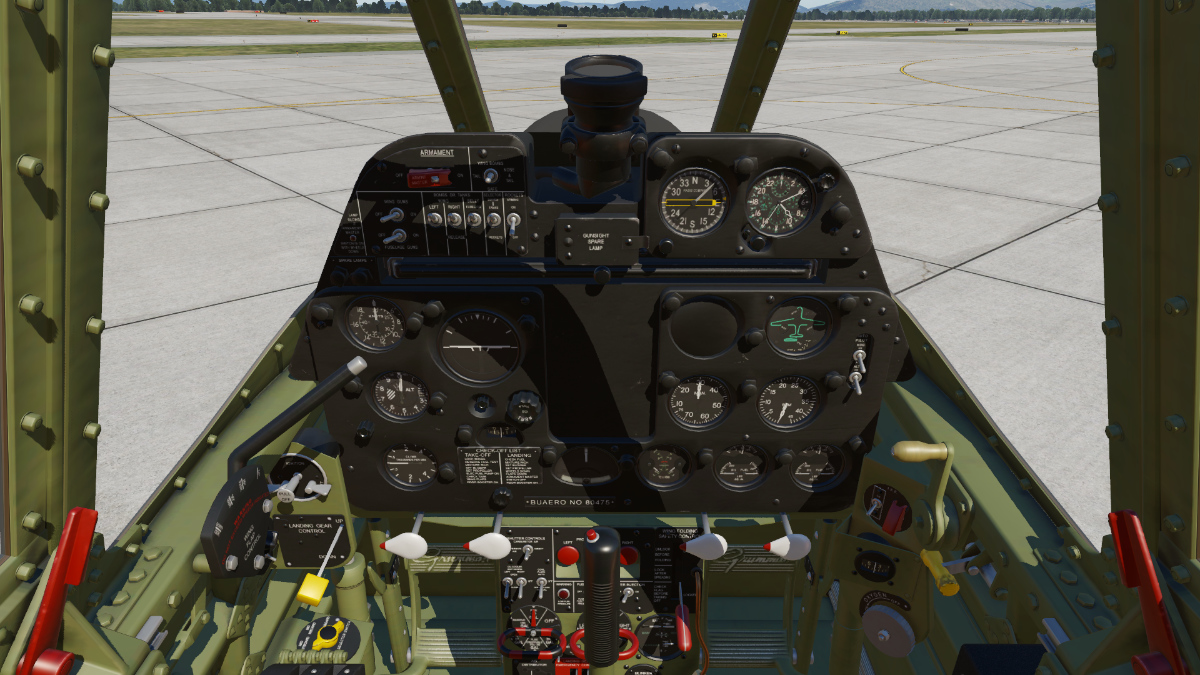
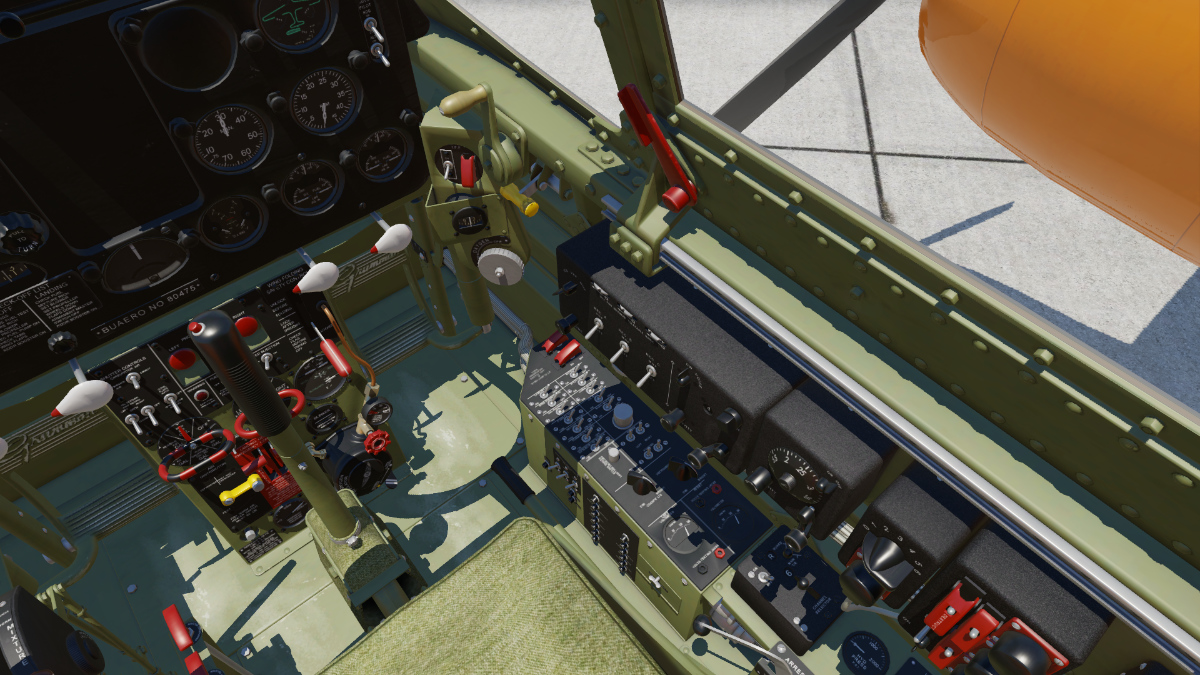
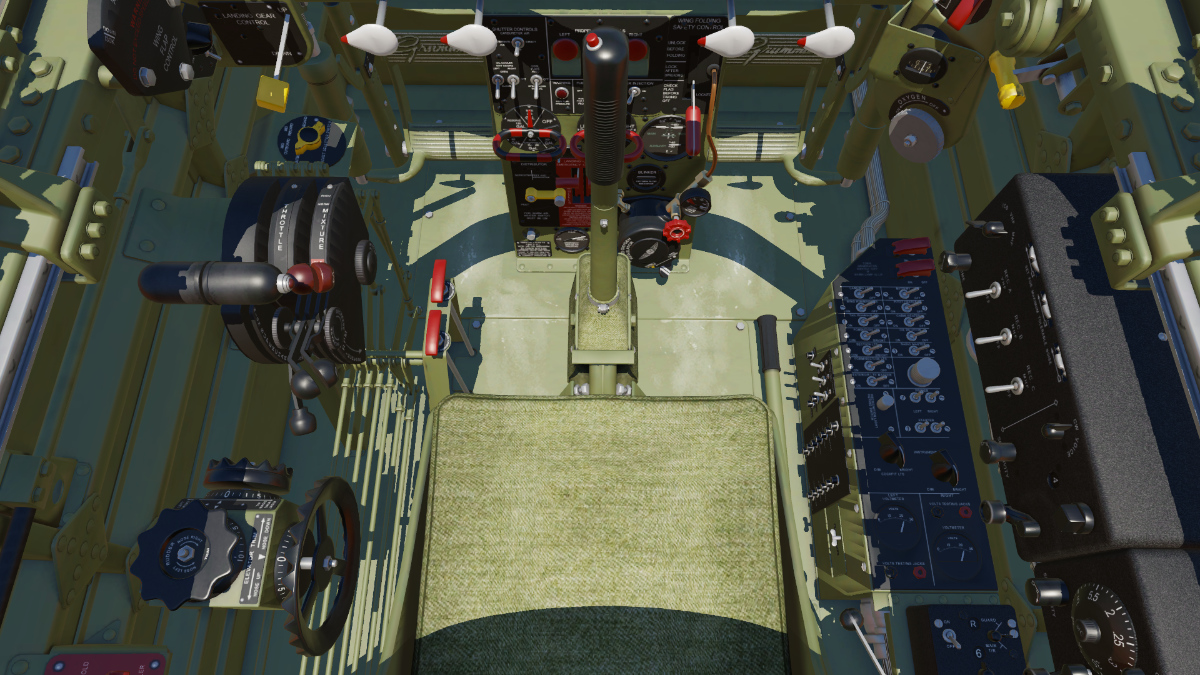
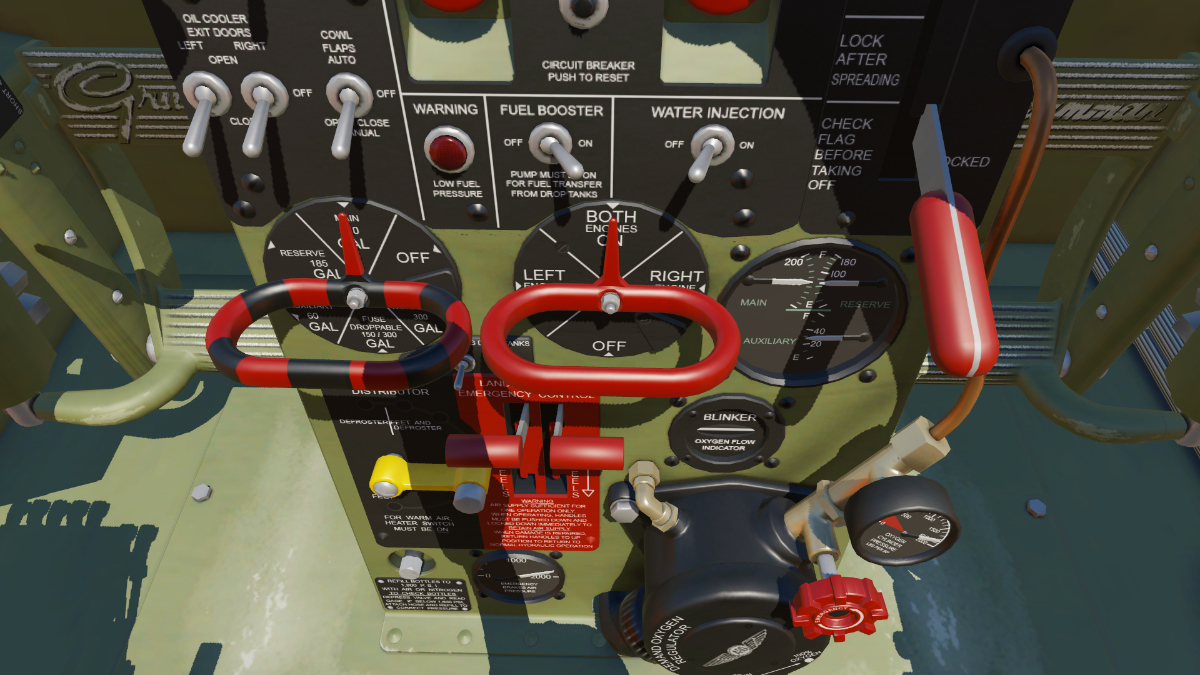
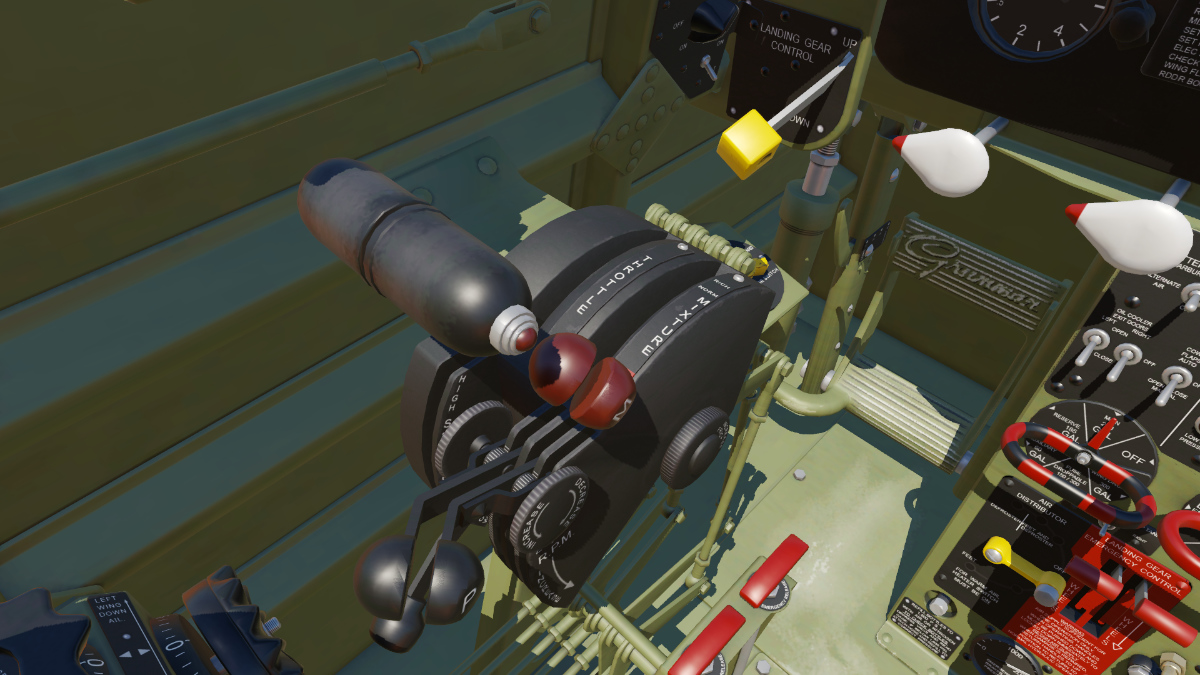
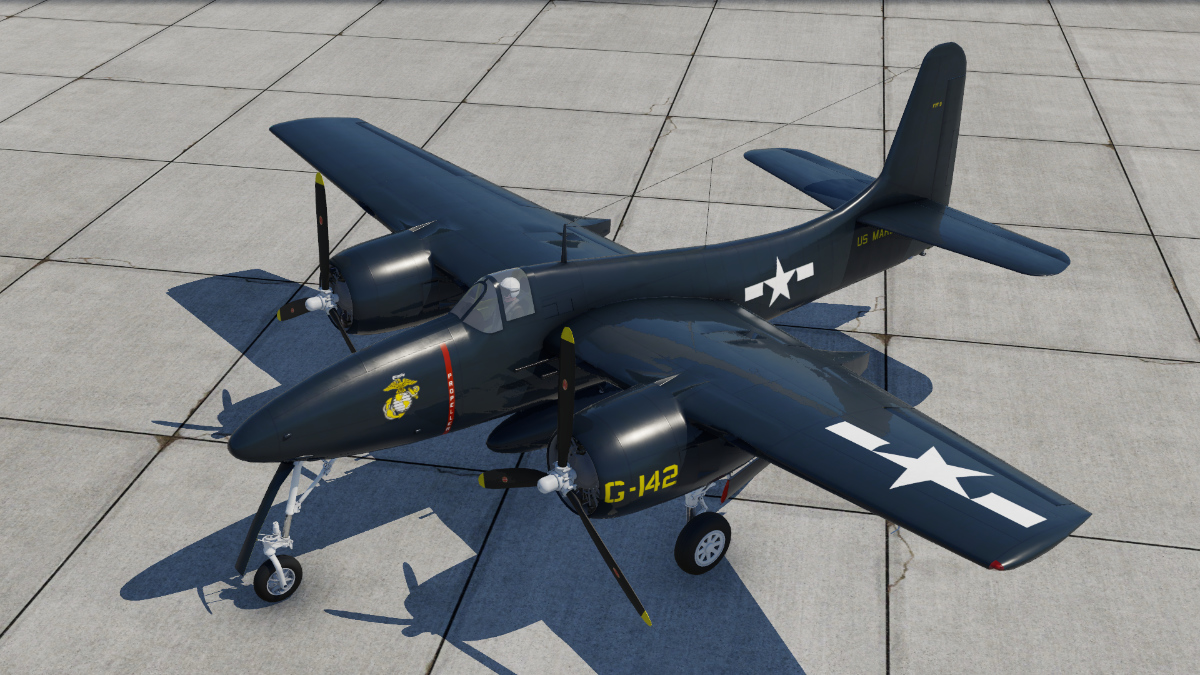
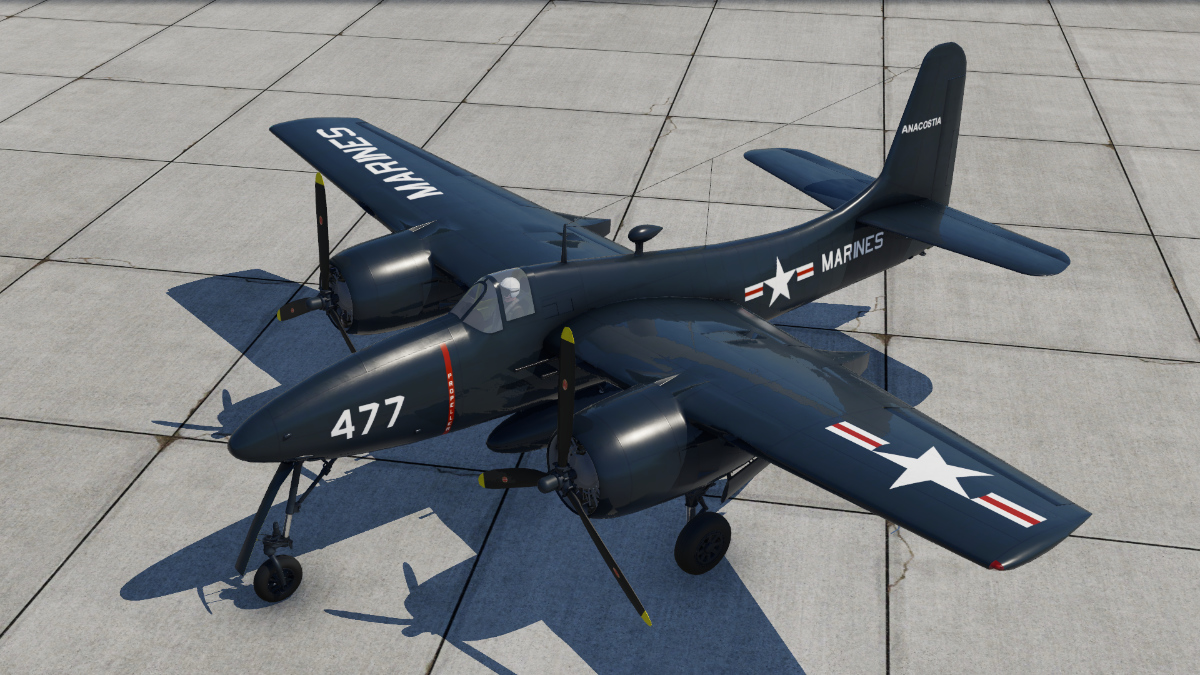
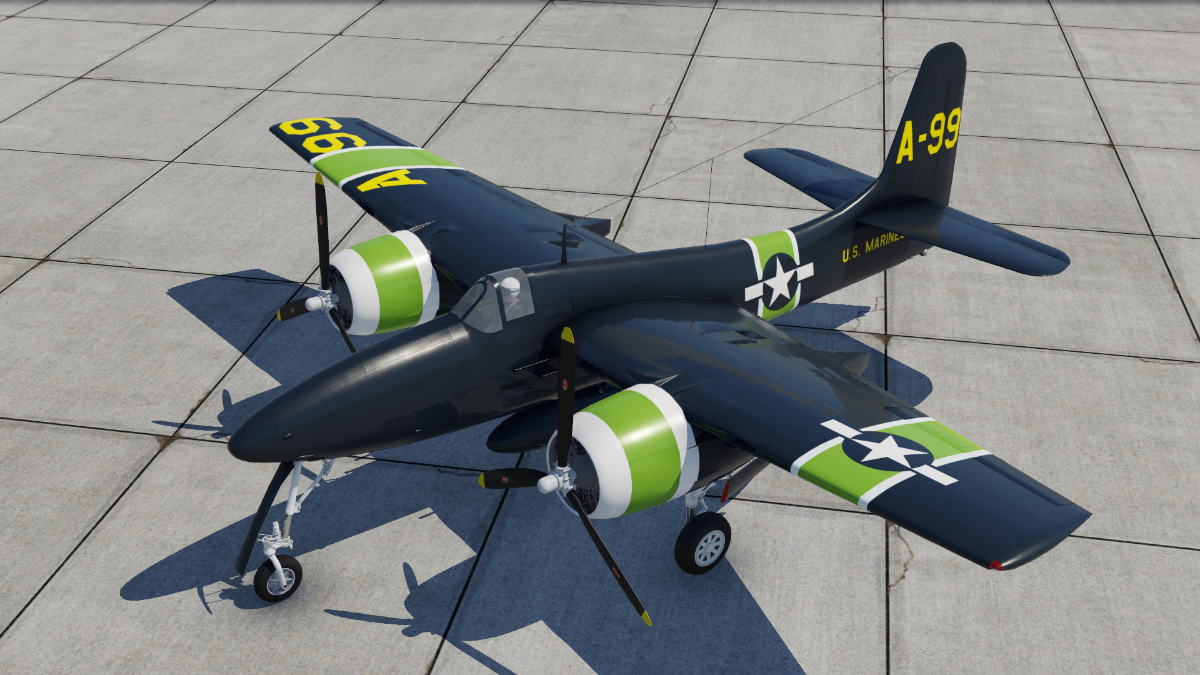
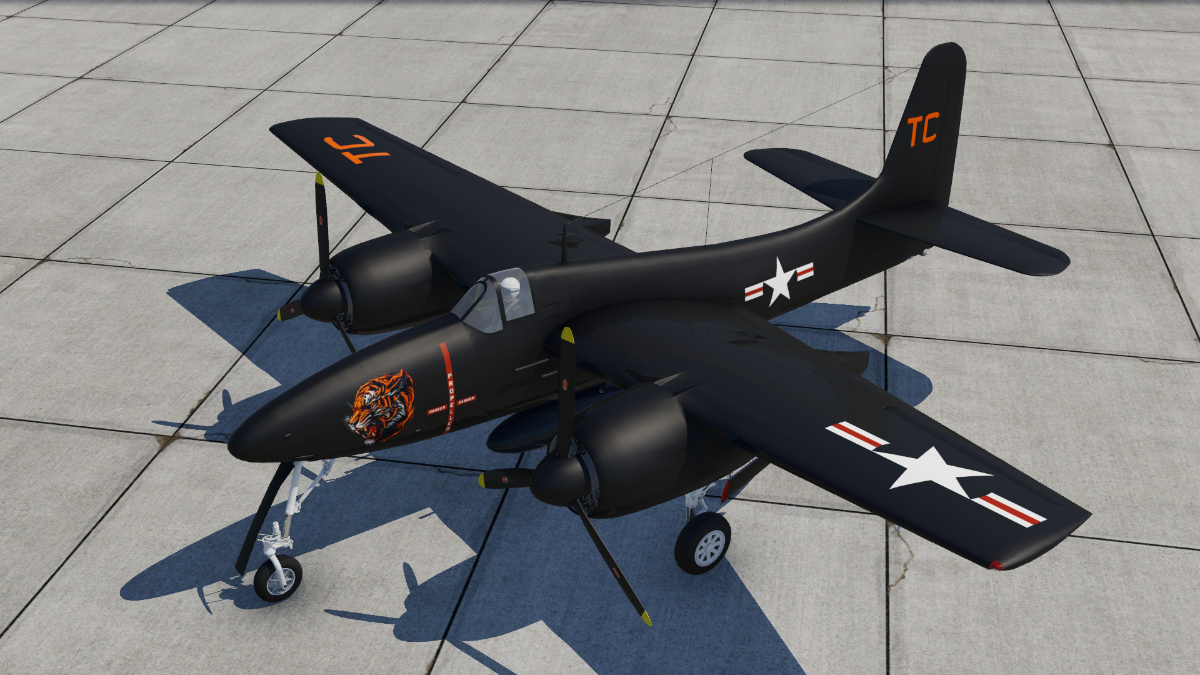
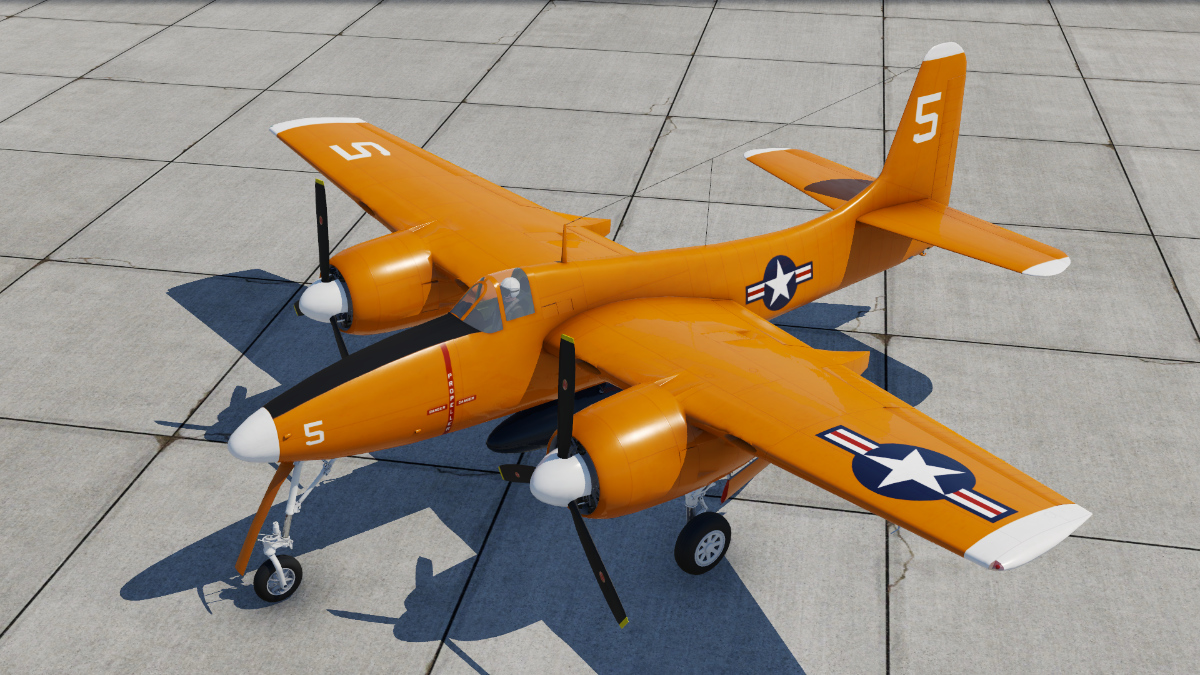
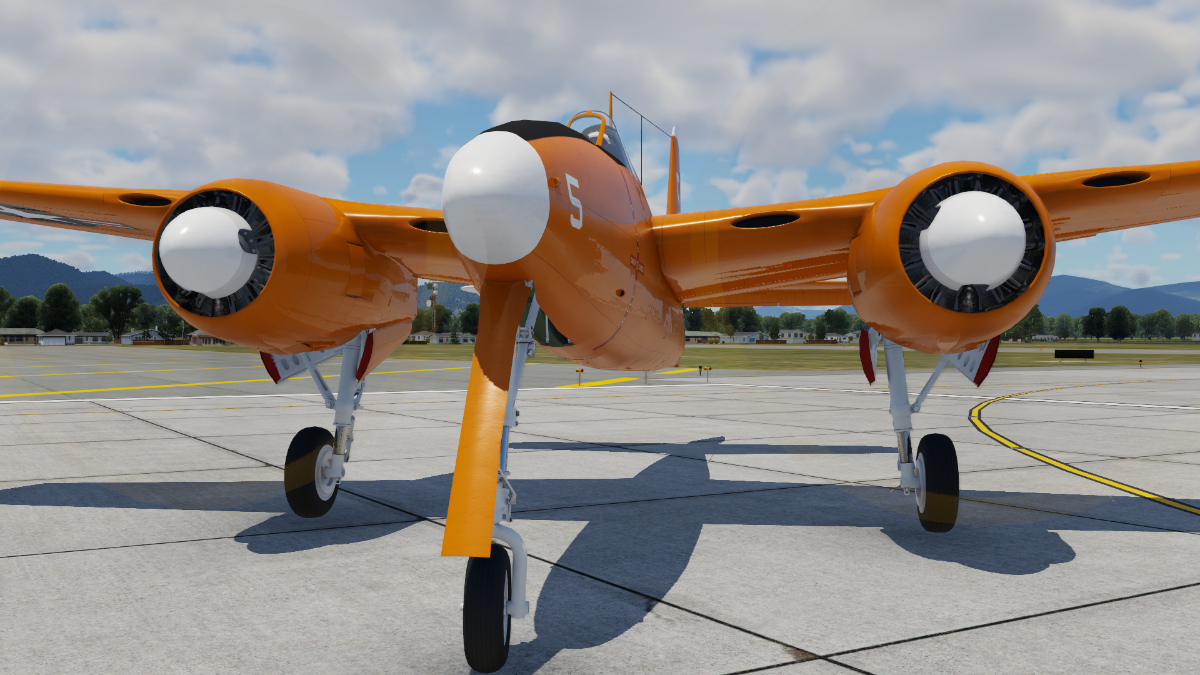
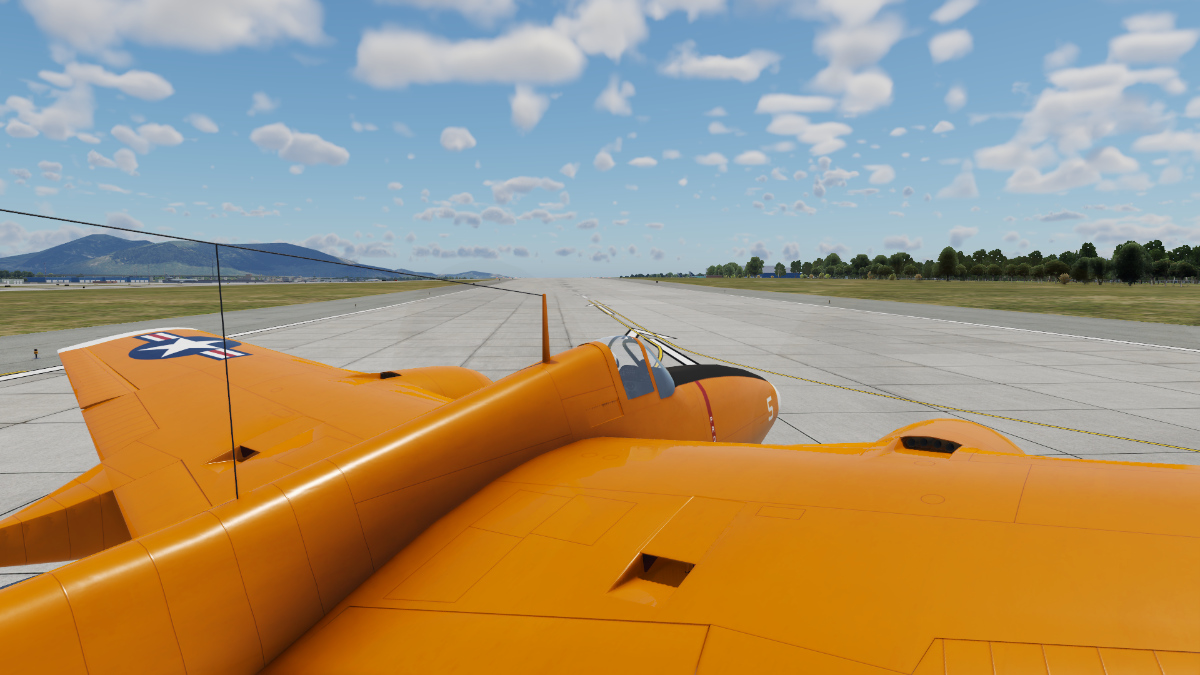
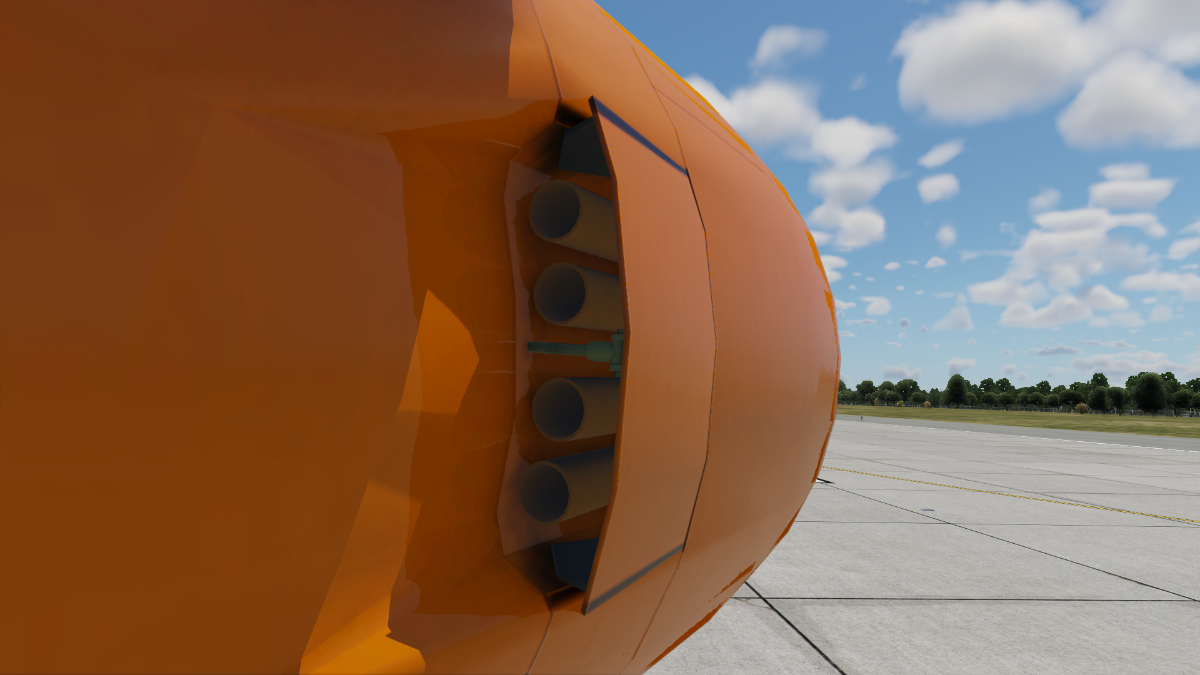
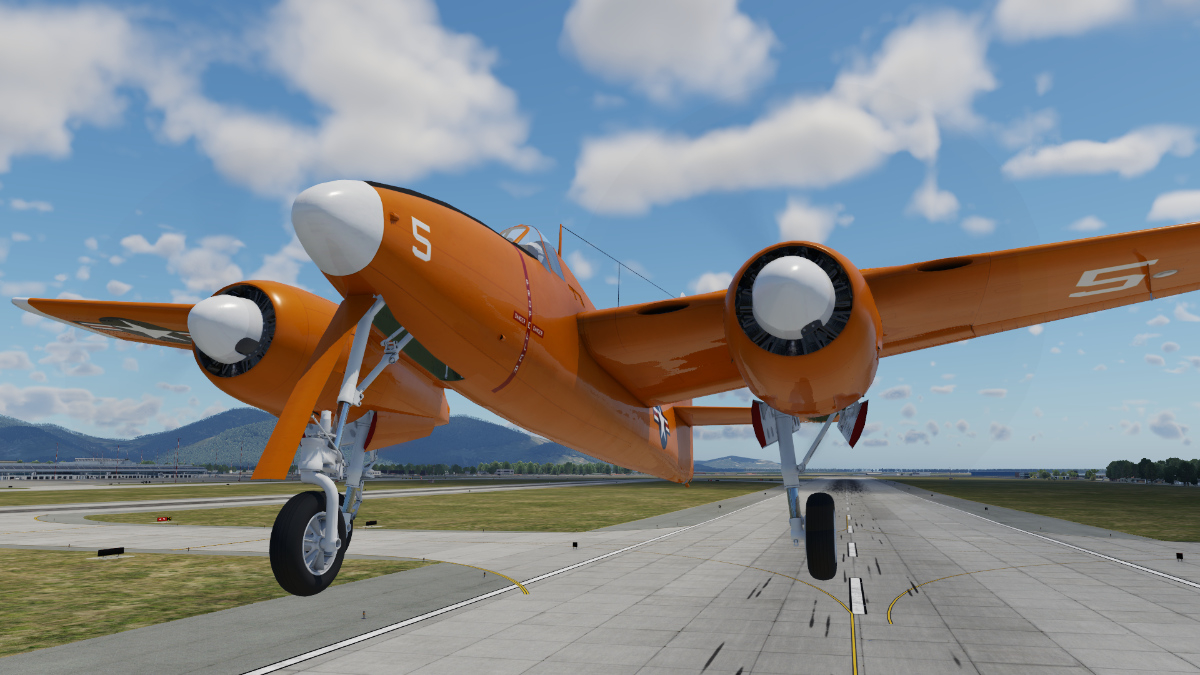
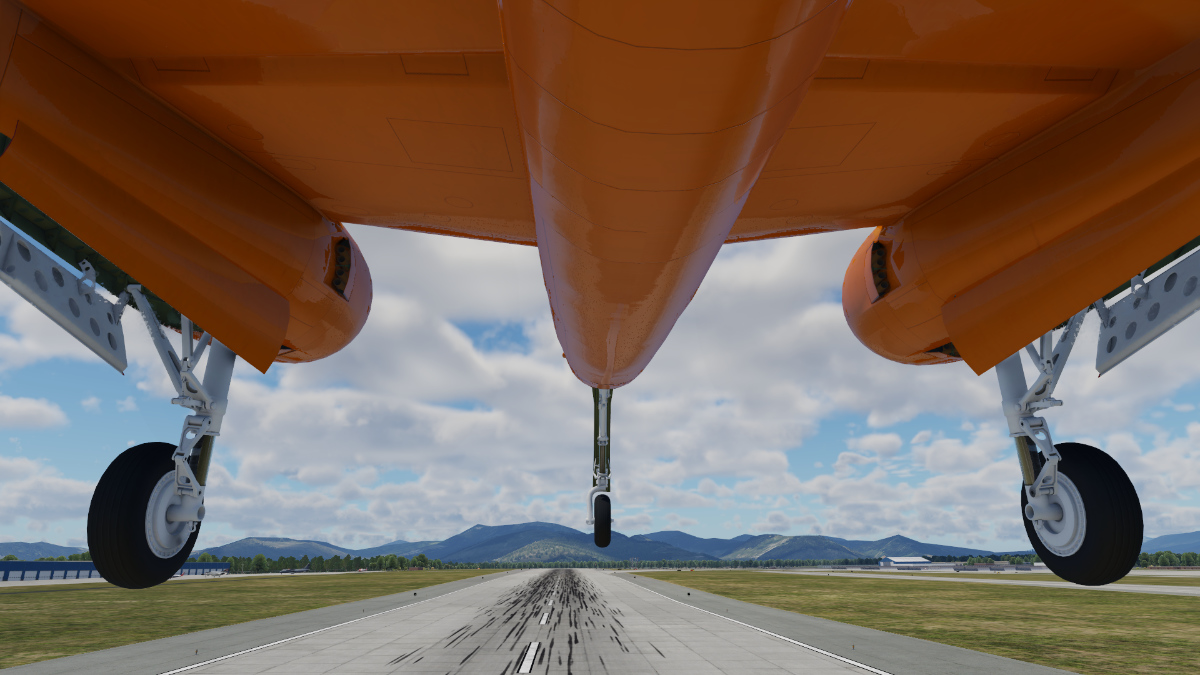
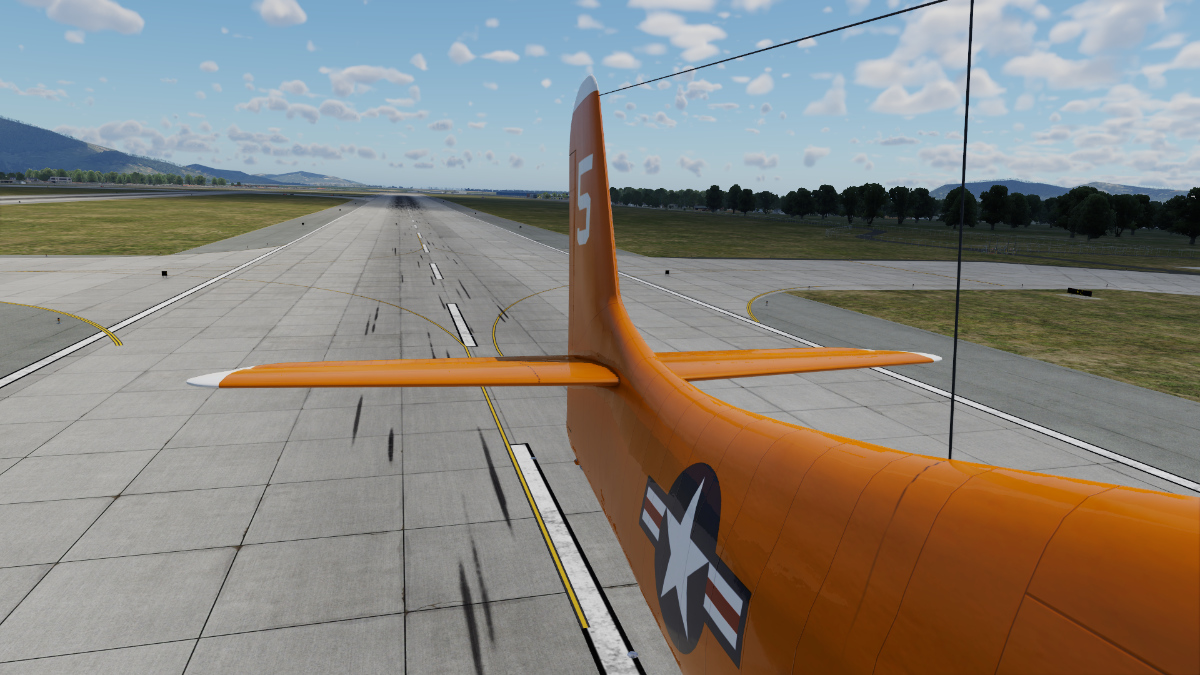
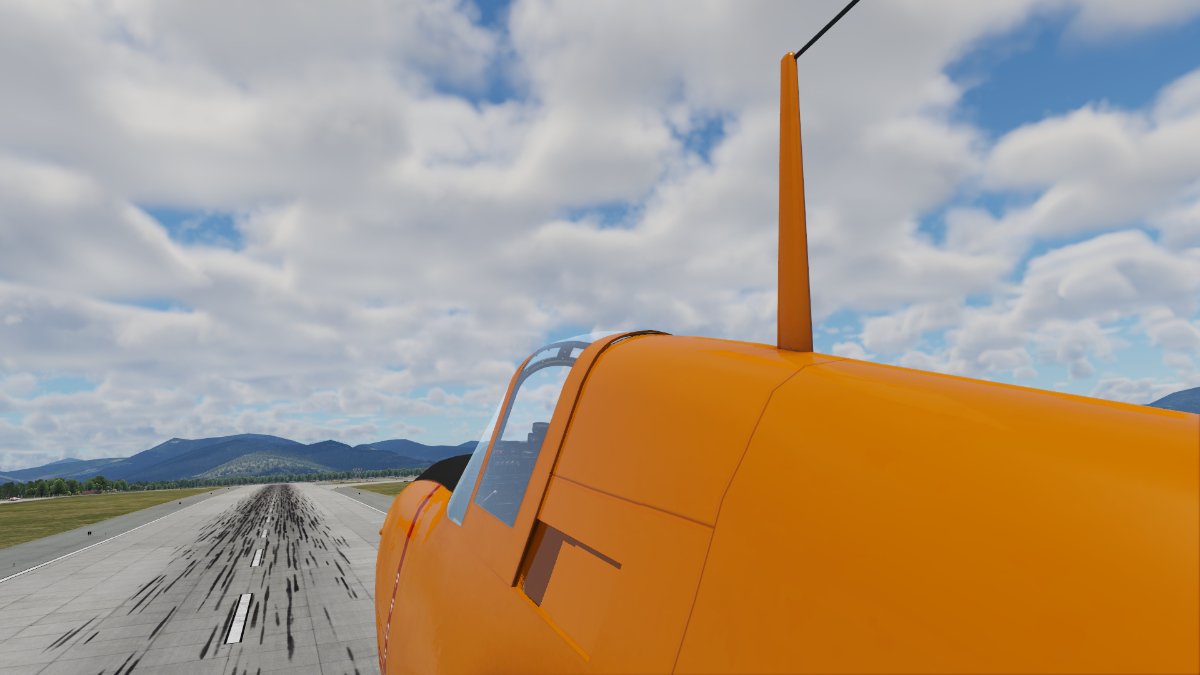
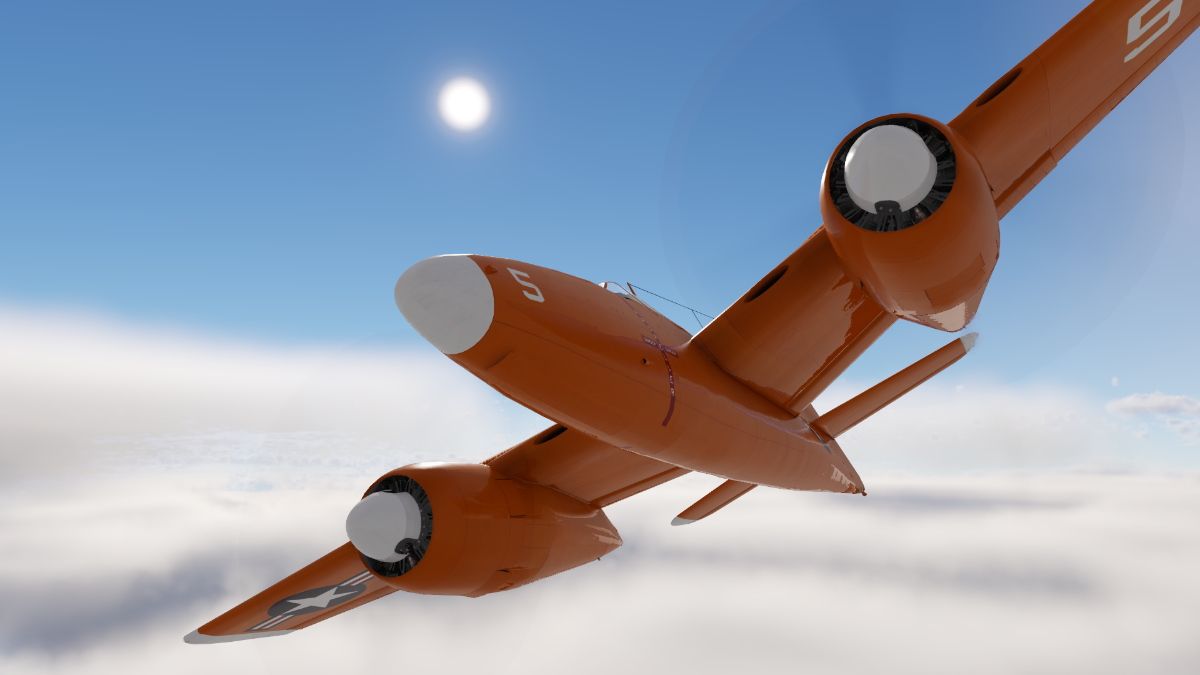
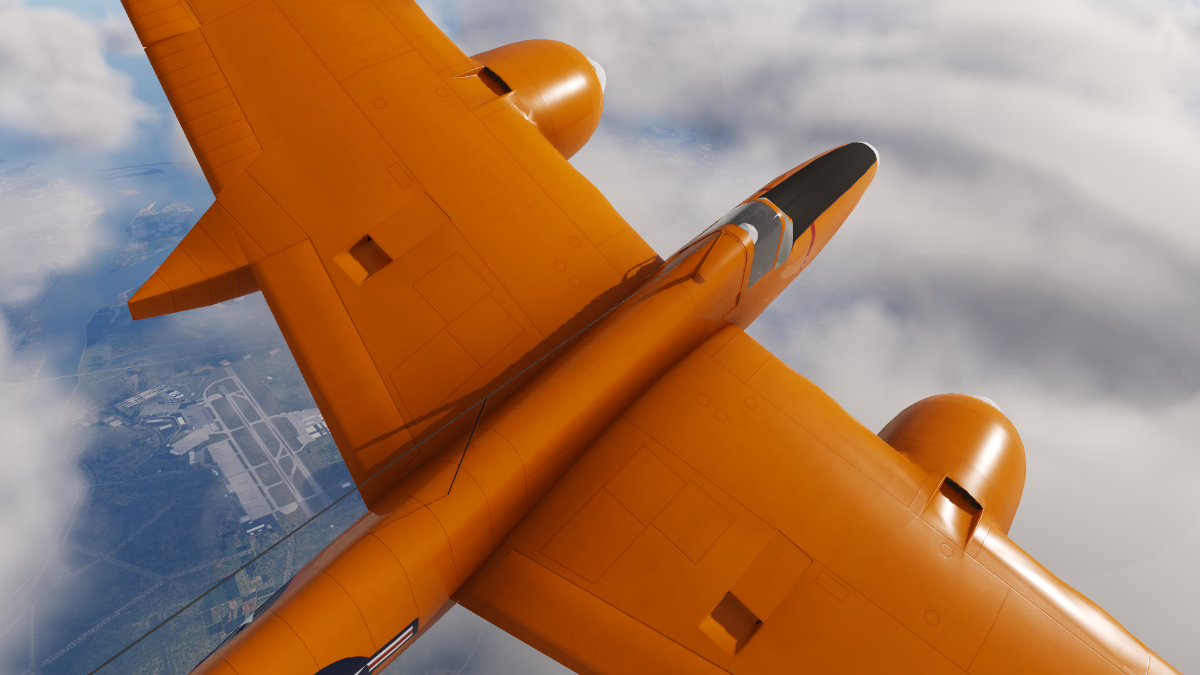
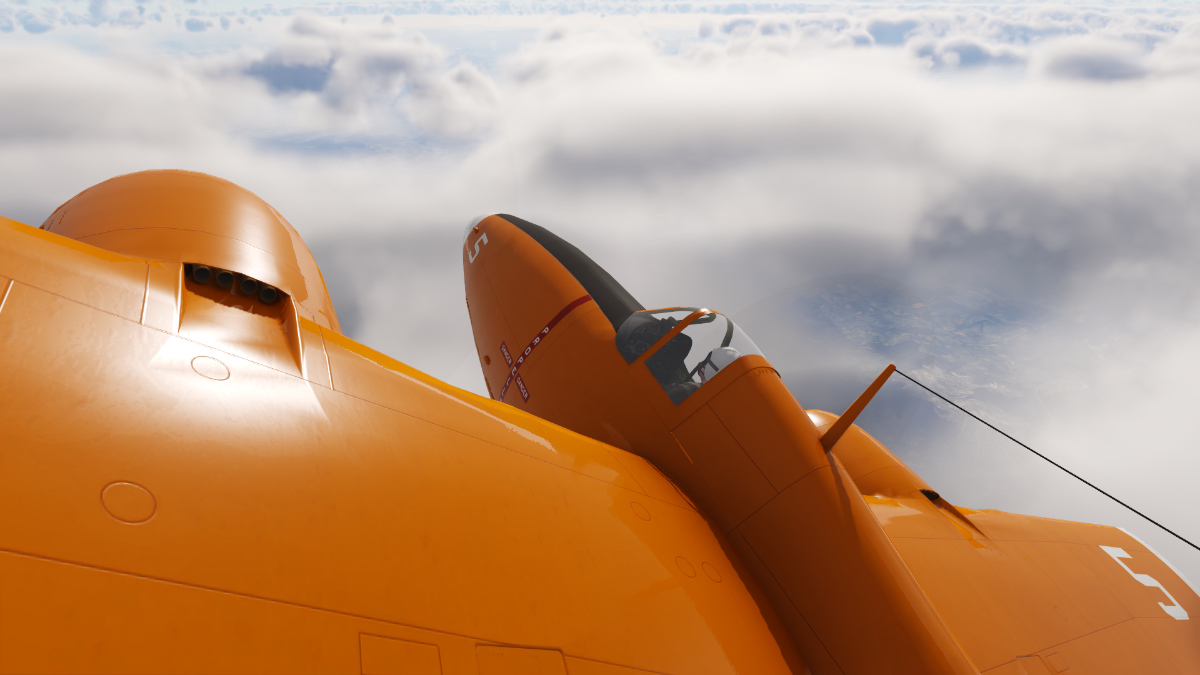
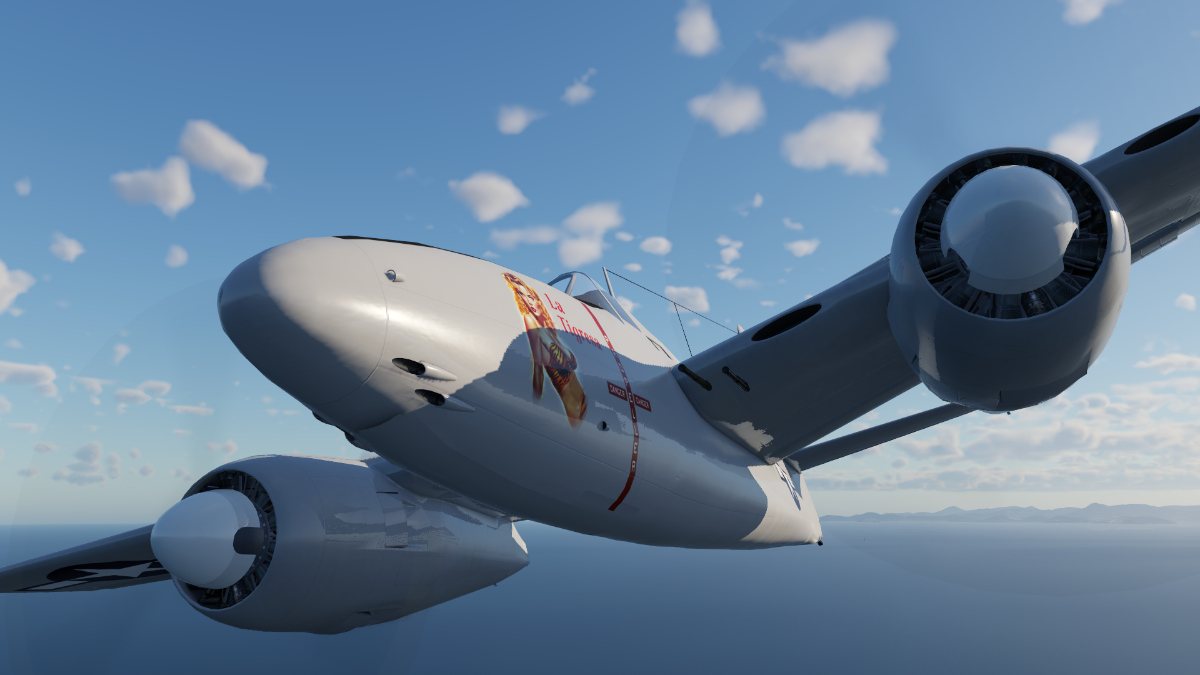
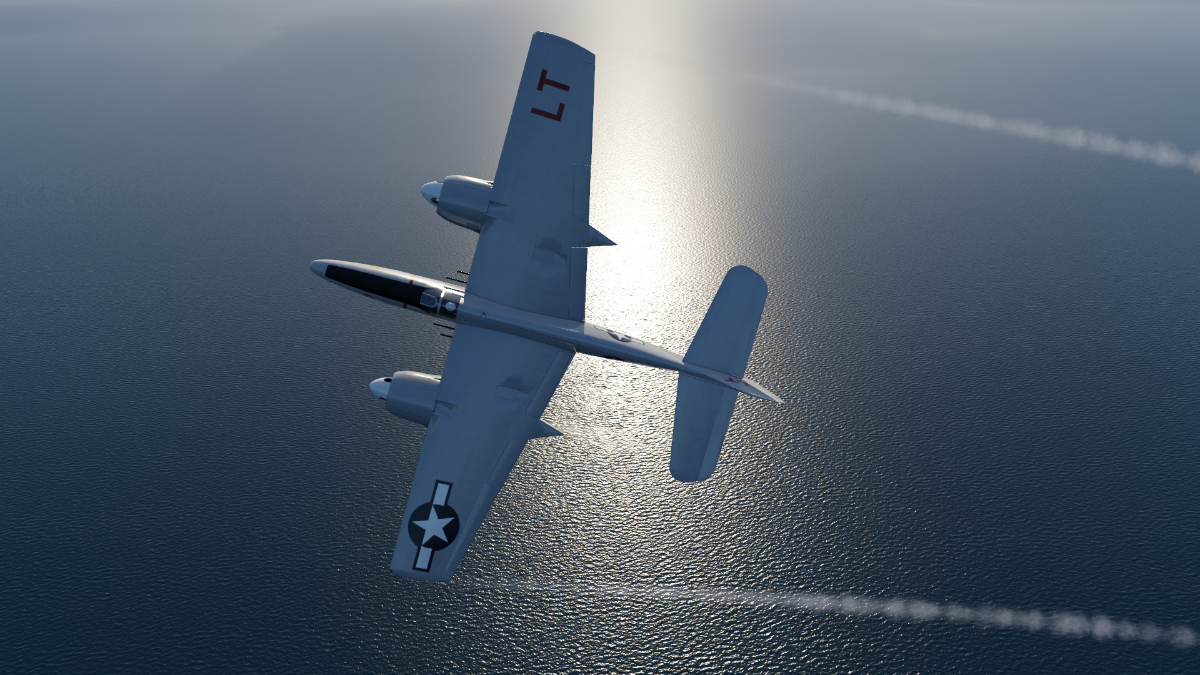
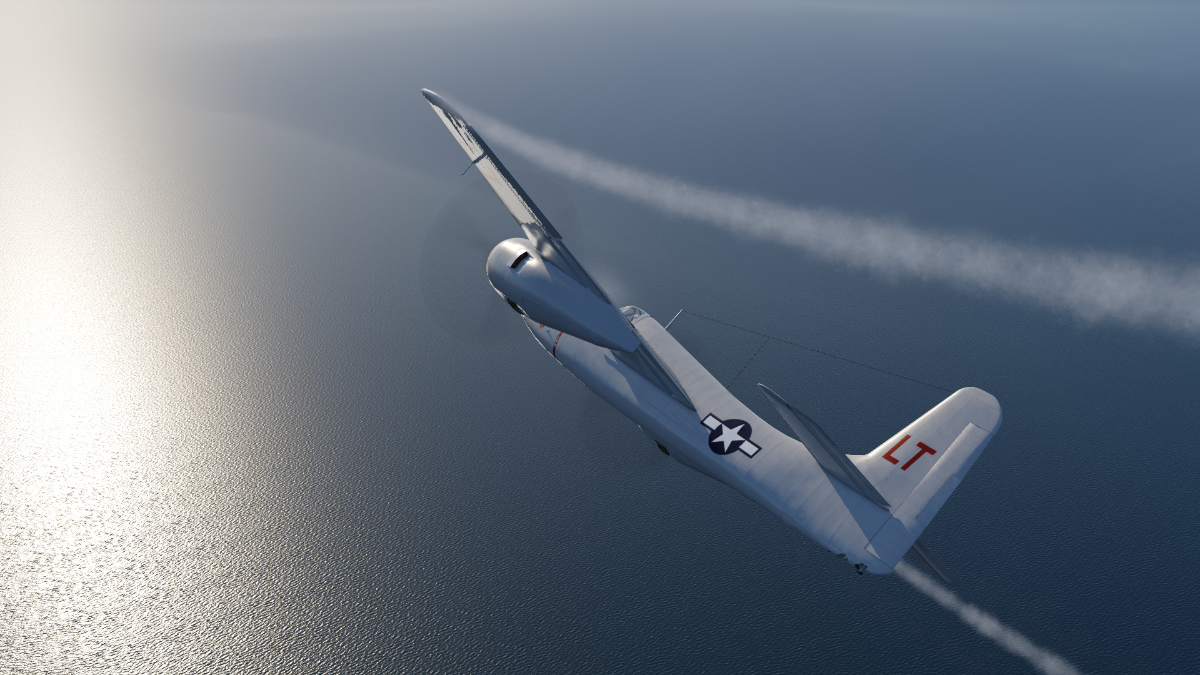
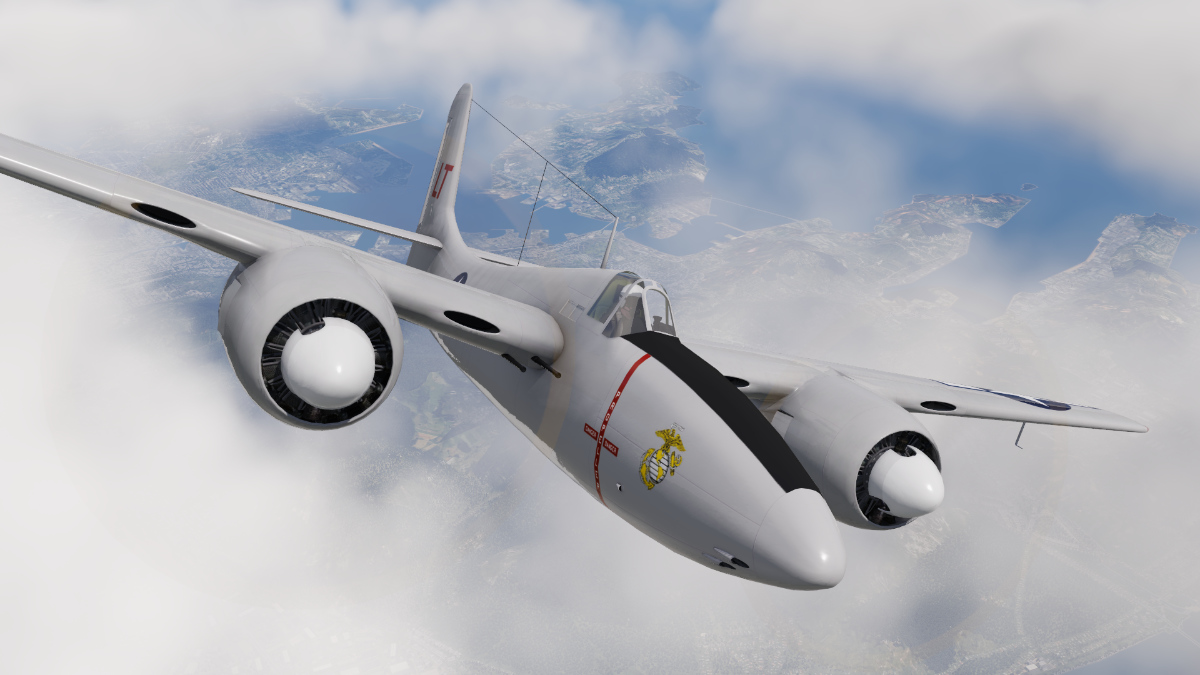
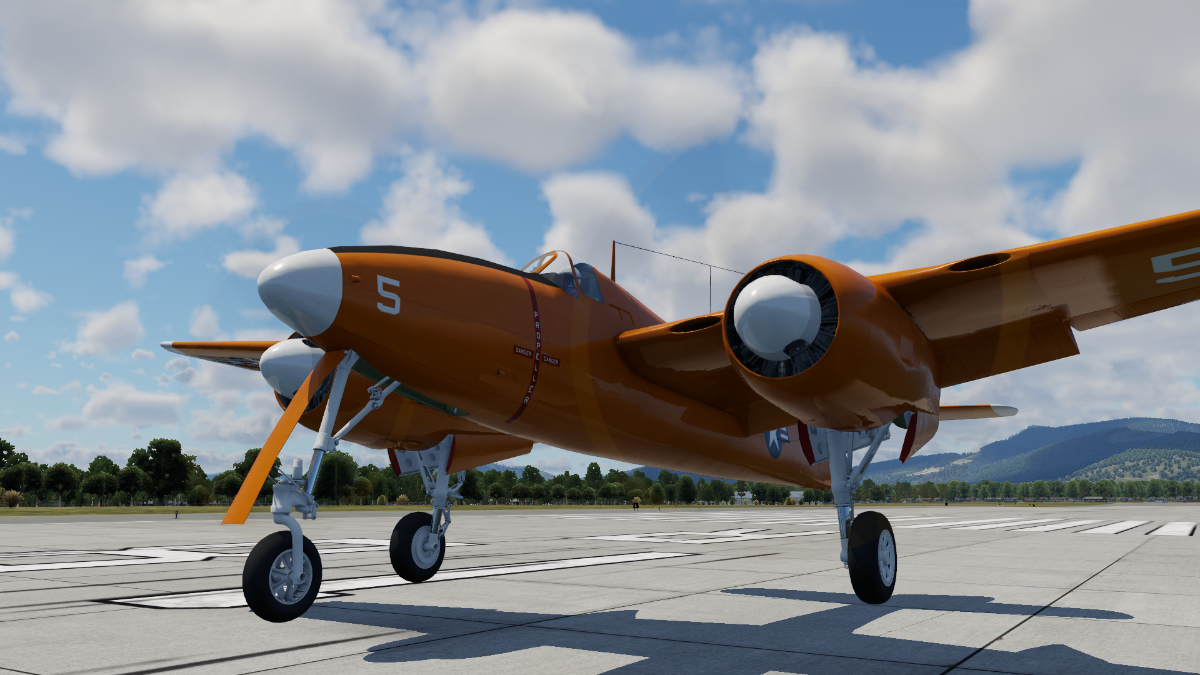
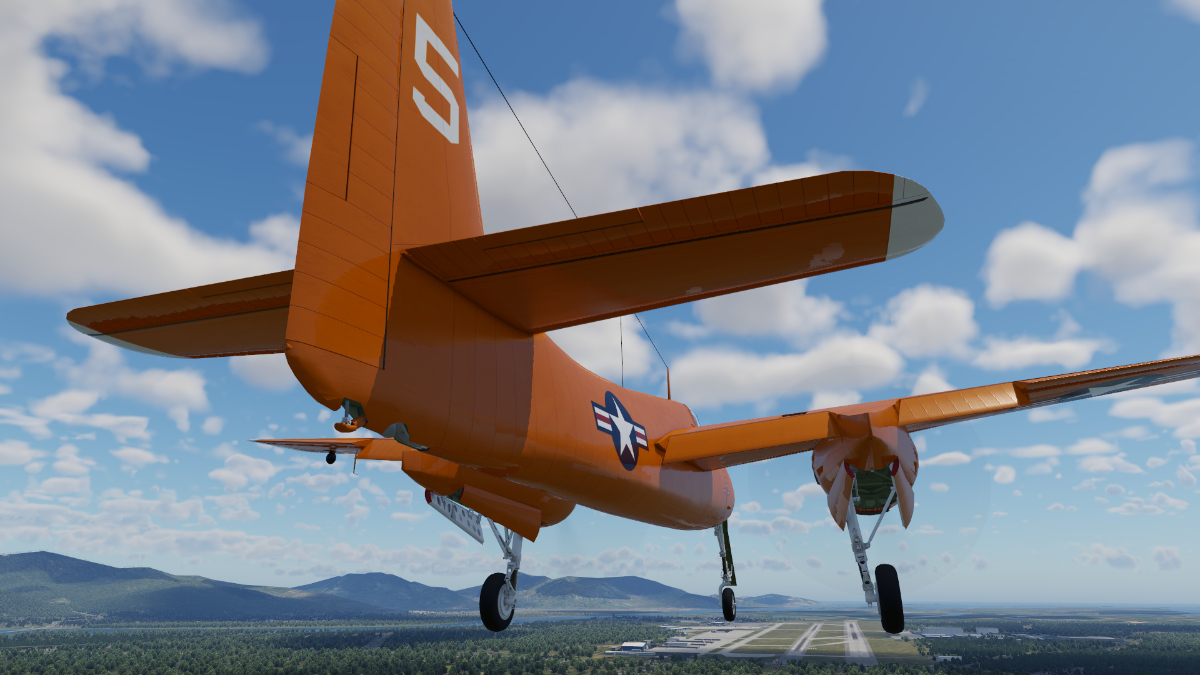
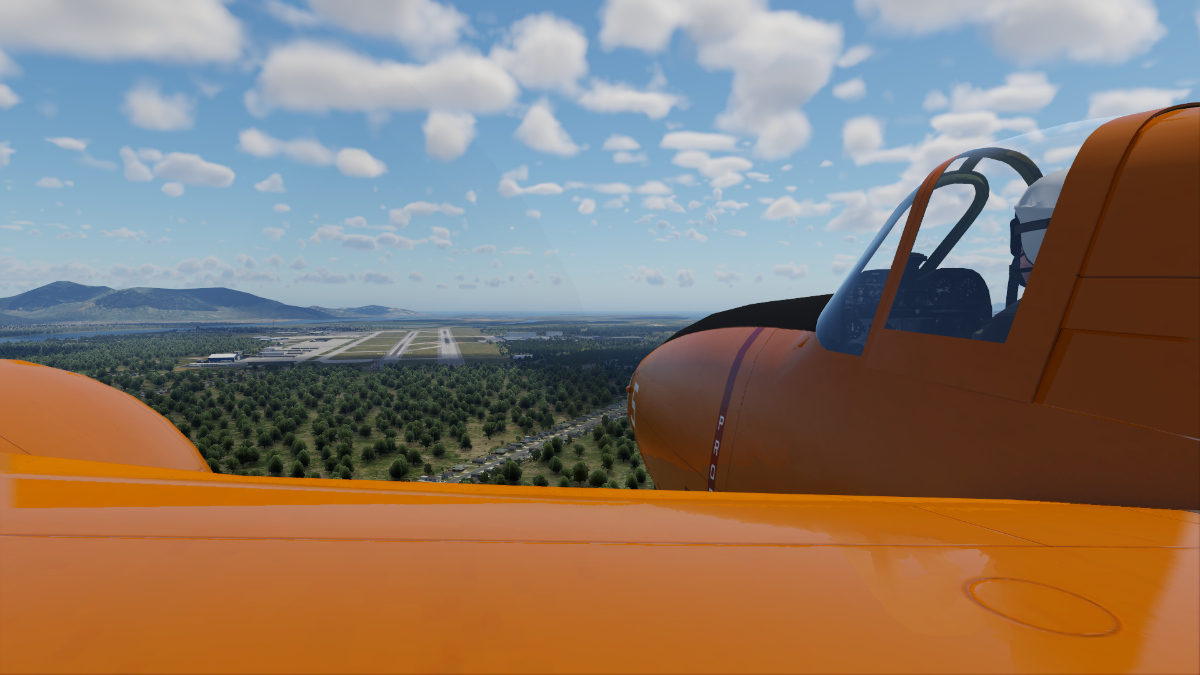
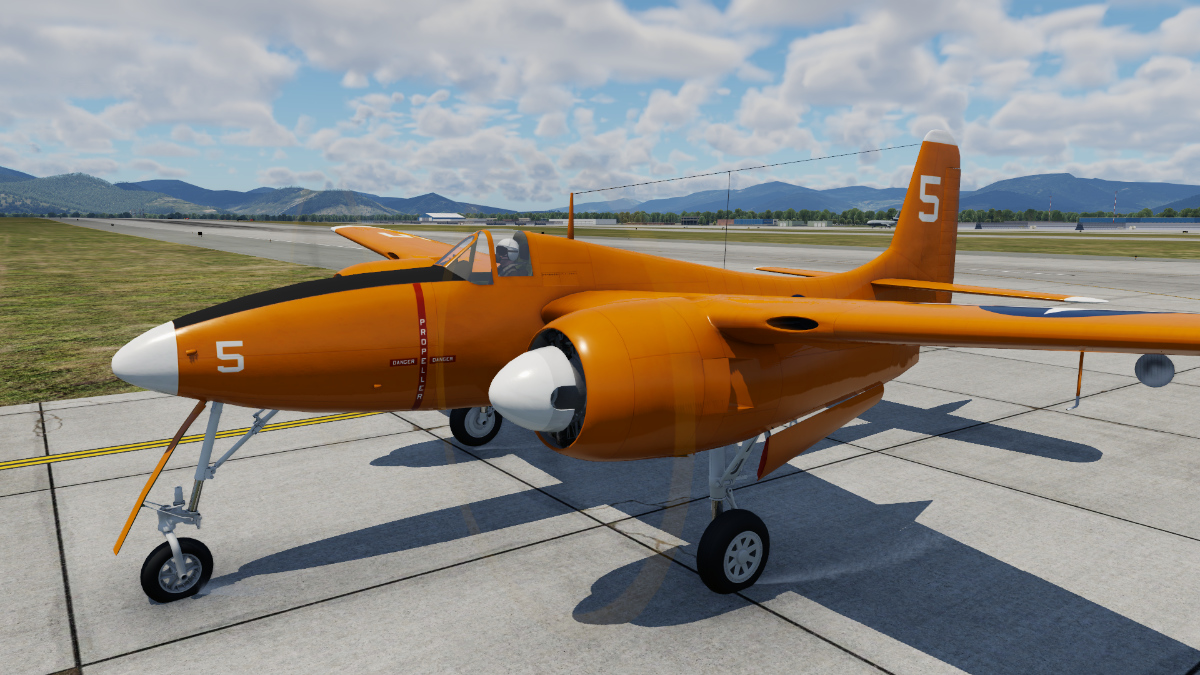
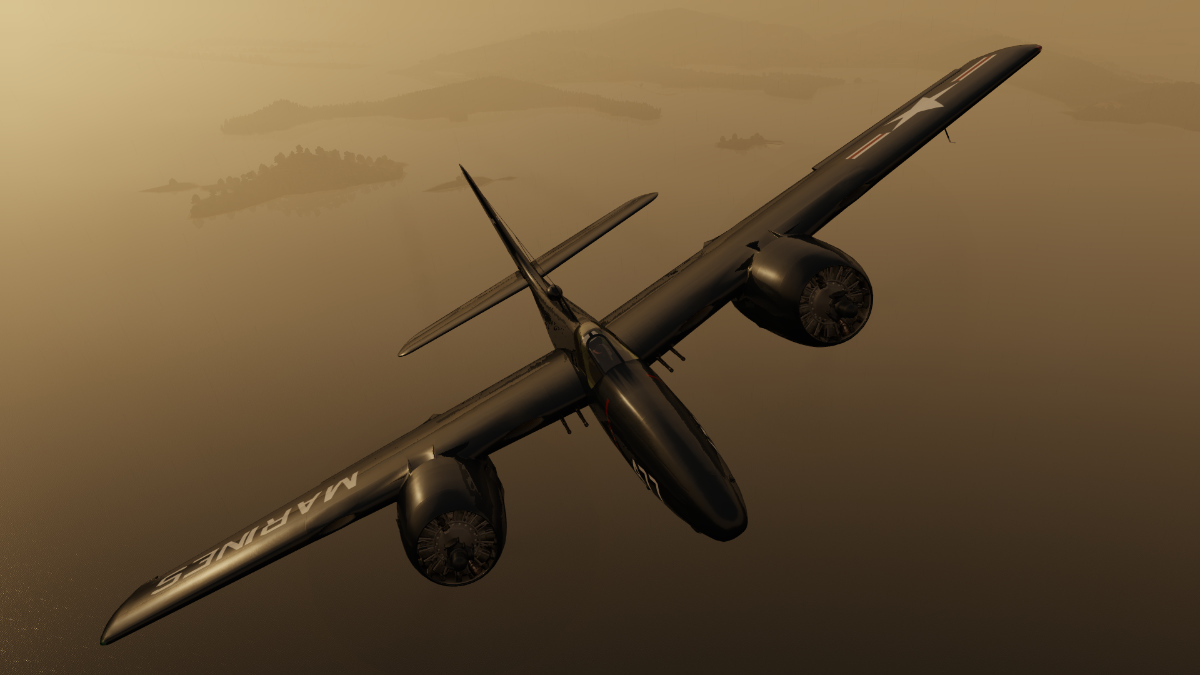
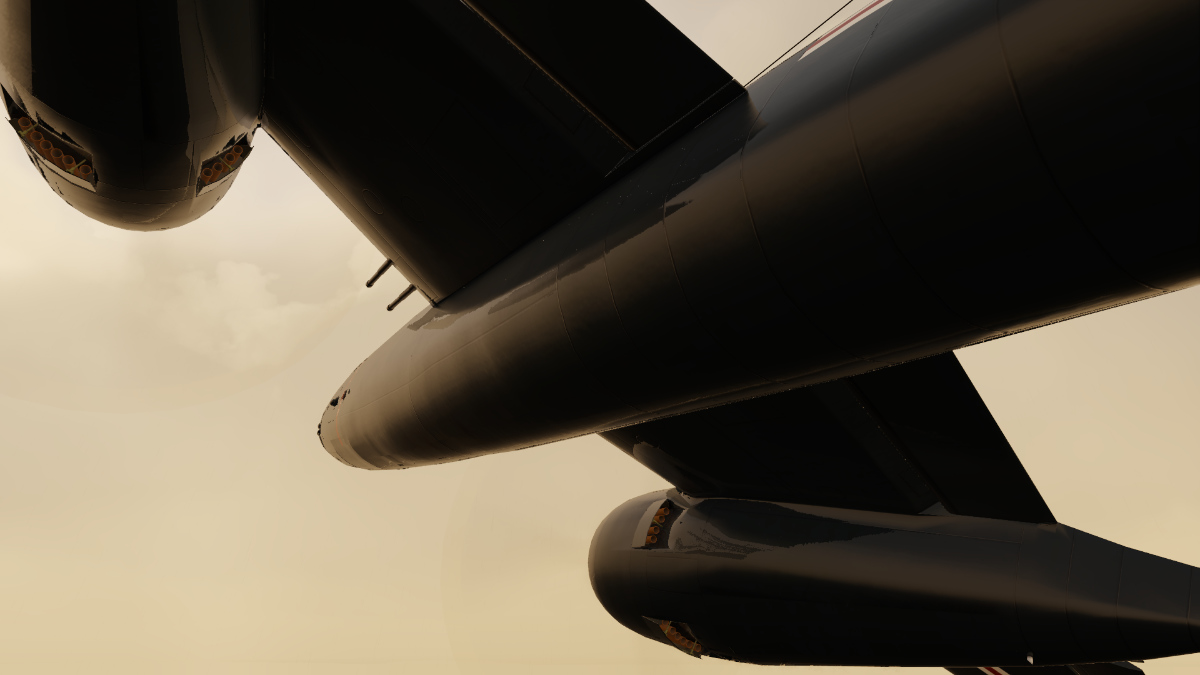
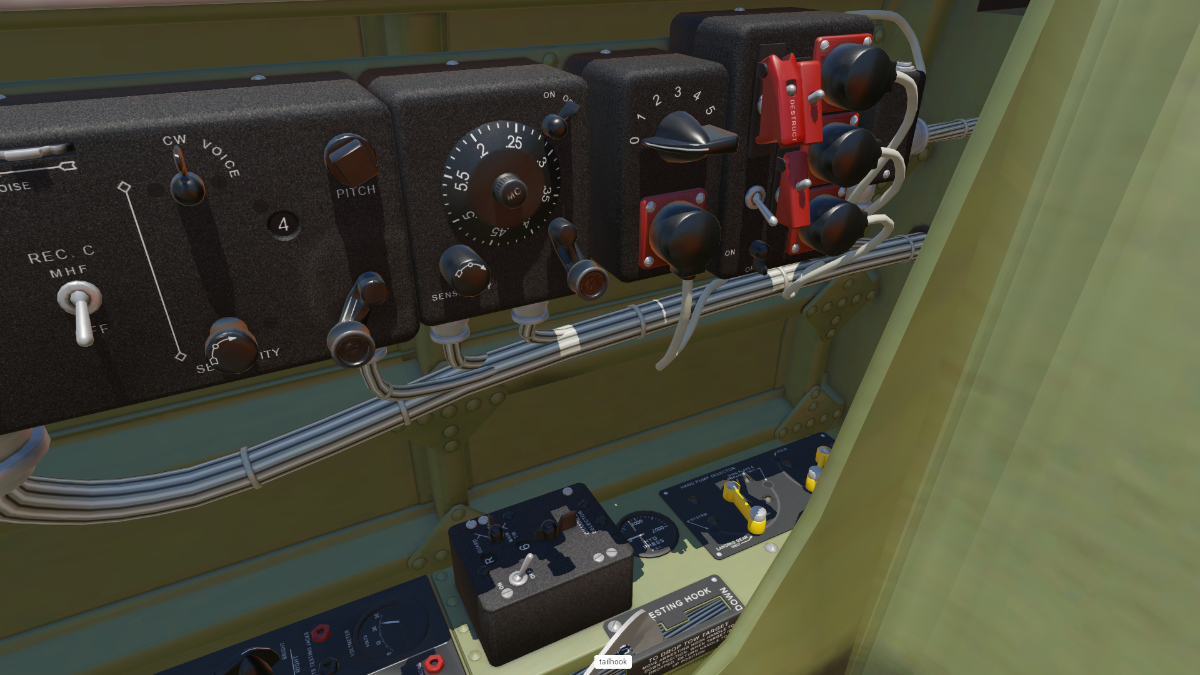
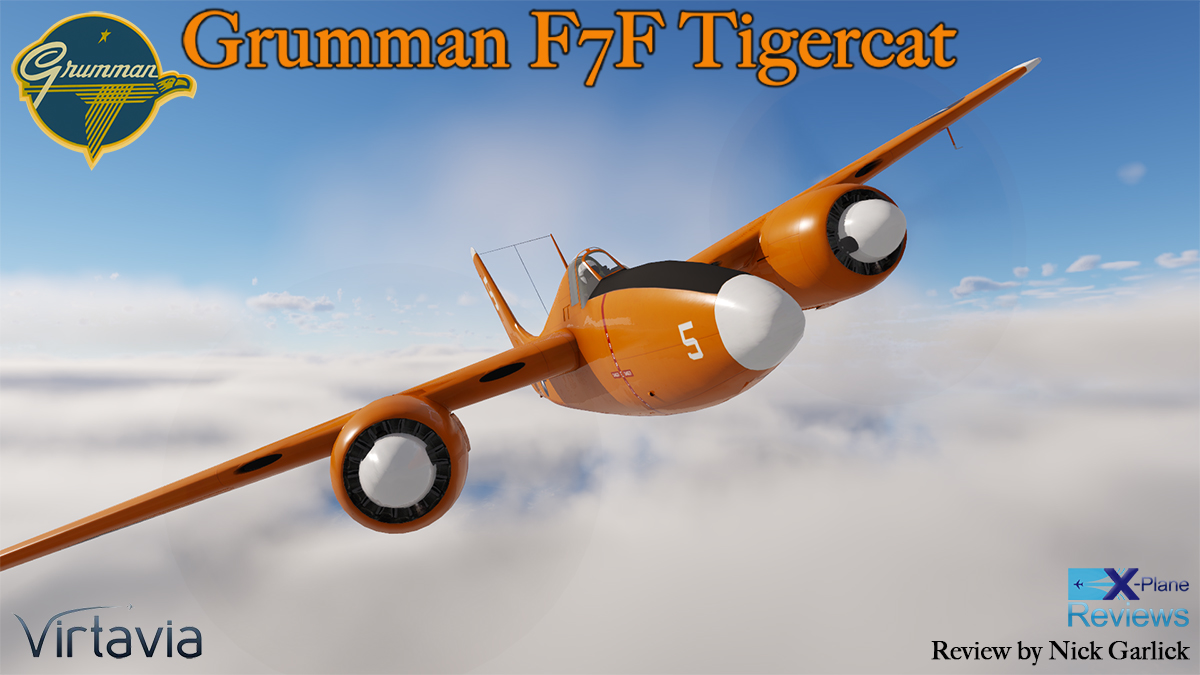
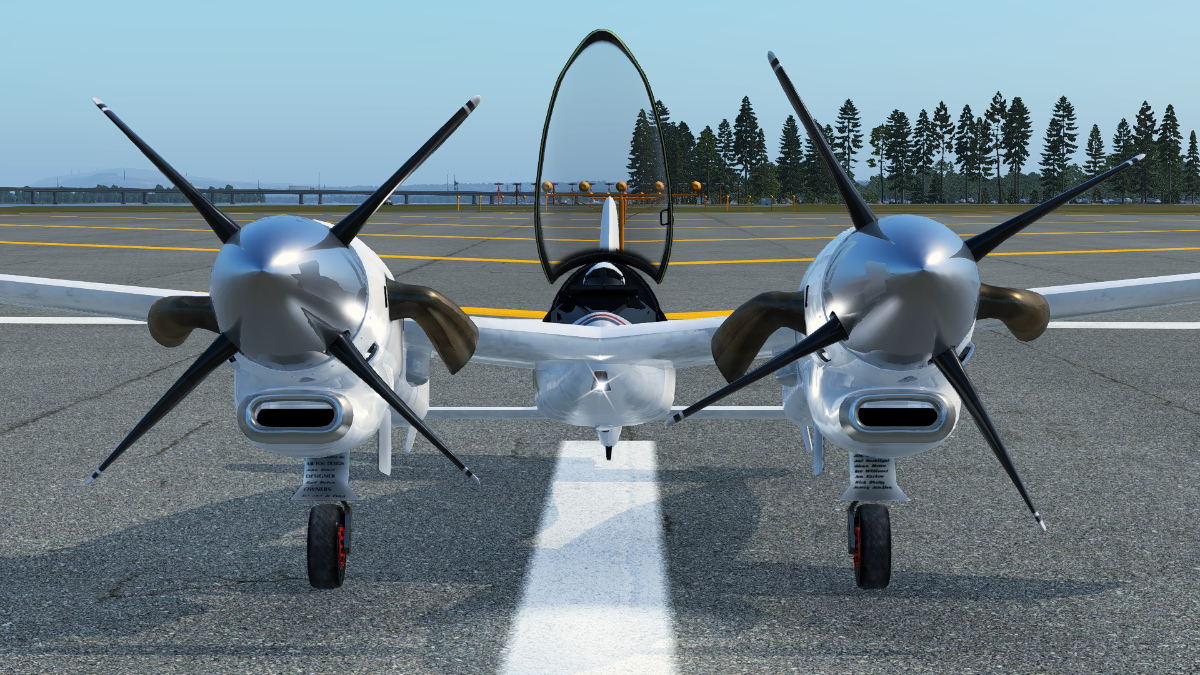
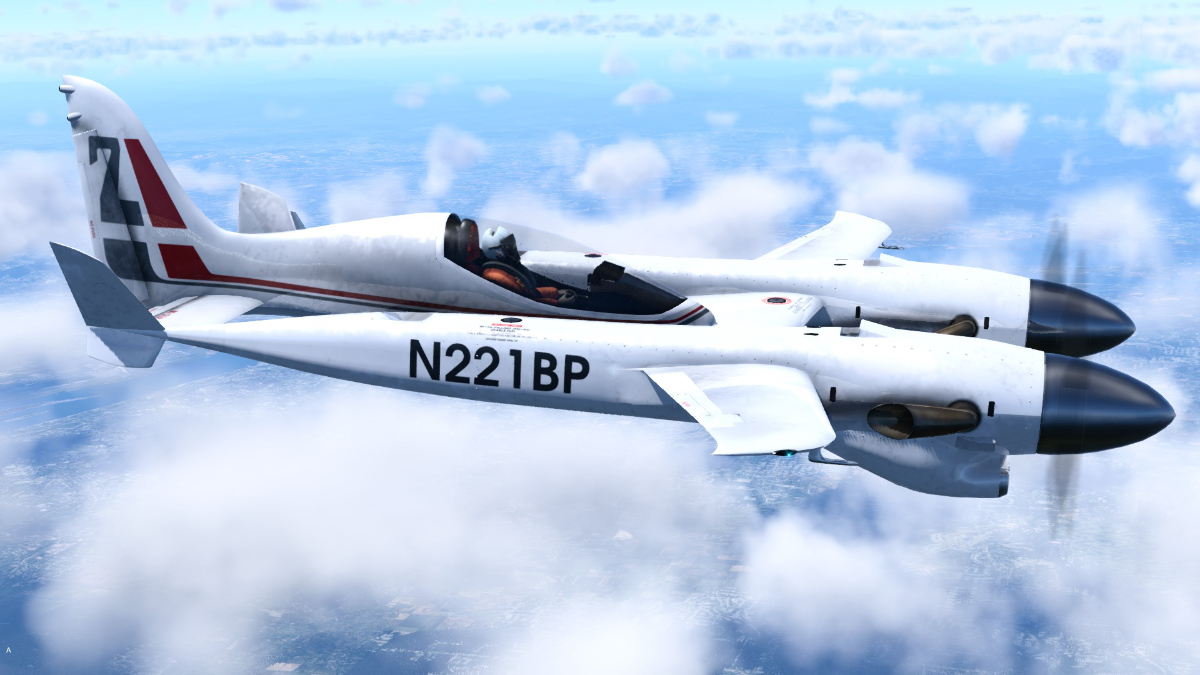
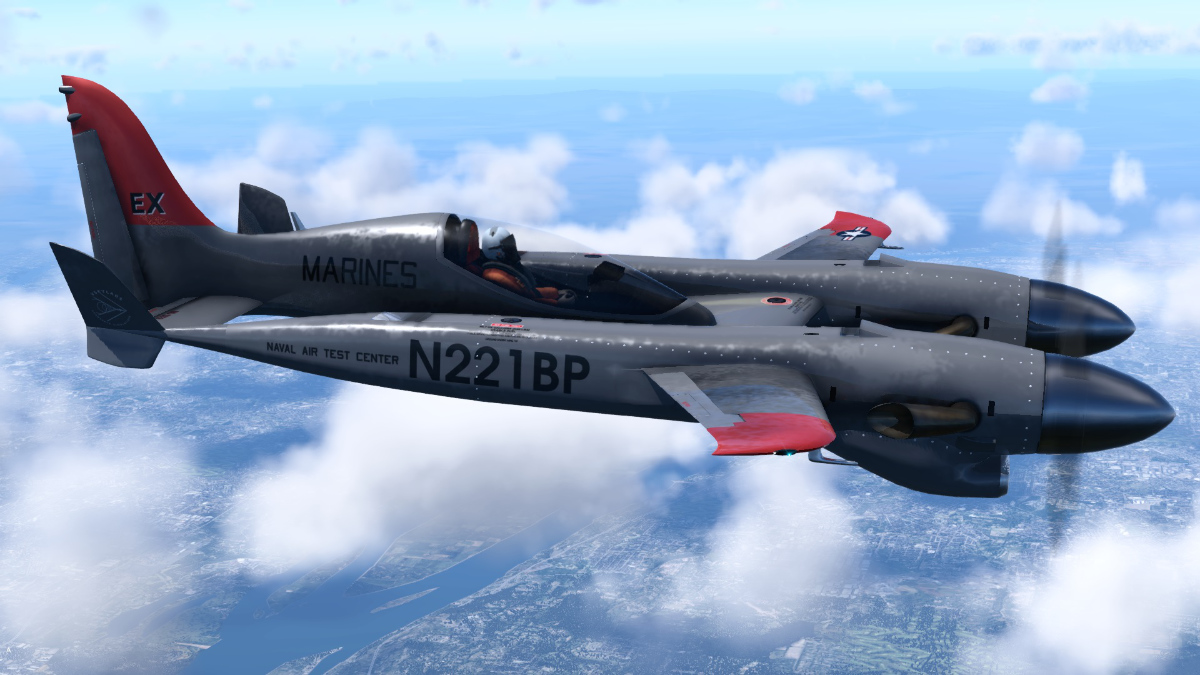
 Aircraft Review: Grumman F7F Tigercat by Virtavia By Nick Garlick Introduction Today I am pleased to share my thoughts on a classic warbird from the late 1940s, the Grumman F7 Tigercat from Virtavia, perhaps one of the least well-known of the "Grumman felines”. Designed and conceived in the latter stages of World War 2, the Grumman Aircraft Company delivered the F7F Tigercat in response to a request from the United States Navy for a fast well-armed convoy fighter. Grumman’s Tigercat would eventually go on to serve with both the United States Navy (USN) and the United States Marine Corps (USMC) until 1954. The Tigercat had a range of approximately 1200 miles, with a service ceiling of 40,400 feet. Fitted with two Pratt & Whitney R-2800-34W Double Wasp engines, they delivered a rate of climb of around 4,530 ft/min, with a top speed of approximately 460mph. This made the Tigercat one of the fastest piston-engine fighters of the day, flying faster than many of its siblings, including the F4 Wildcat and F6 Hellcat. The Tigercat was not only fast, but it was also heavily armed, as located in the wings were four x 20mm cannons, along with 4 x 50 calibre machine guns in the nose. The aircraft also featured numerous hard points for carrying ordnance, such as fuel tanks, rockets, and bombs. Altogether, that gave the Tigercat some real bite. Featuring a wingspan of just over 51 ft, a length of over 45ft, and a height of 16ft, these were (unquestionably) large for a fighter at the time. Unfortunately, this fact would lead the USN to determine that the Tigercat was unsuitable for use on carriers. After leaving active service, a few of the remaining Tigercats would go on to serve as "water bombers" to fight wildfires. Eventually, though, even these were finally deemed too old and were retired in the late 1980s. As of today, very few remaining airframes are to be seen and even fewer are left in flying condition. Happily, none of that matters in the X-Plane world, thanks to Virtavia. Installation & Documentation Virtavia’s package includes versions for both X-Plane 12 and X-Plane 11, which is a major plus point, as many X-Plane users still prefer the stability of the older platform. After purchasing the Virtavia Tigercat, simply extract and place the relevant files into your respective X-Plane Aircraft folder. Once installed, the size expands to 141 MB. The package includes a comprehensive 25-page full-colour PDF manual split into several sections. These include a comprehensive history of the aircraft, detailed instructions on how to operate the Tigercat, plus procedural lists. Tigercat Exterior The exterior model faithfully captures the lines synonymous with the Tigercat's profile; from the shark-like nose to the sweeping tapered rear fuselage, it’s all presented in wonderful detail. PBR textures are used throughout the model and when observed in conjunction with the new lighting effects in X-Plane 12, or even in X-Plane 11 for that matter, the whole model just shines. The oil cooling grills, cowl flaps, cockpit canopy, and access ladder, can all be opened and closed by clicking on the relevant controls in the cockpit, or by the necessary keyboard commands. Virtavia’s model features a faithful rendition of the real aircraft’s rather ungainly tricycle undercarriage layout, unique at the time for a fighter. This area is further enhanced with smooth and accurate animations of the gear, along with the closing and opening of the bay doors. Unlike some aircraft I have used on different platforms, the undercarriage and wheel bays are not excessively modelled, but there is enough detail included to satisfy most people. Variants & Liveries In terms of the included variants, they are: Clean - no external stores, Ferry - carries three drop tanks, Fighter - carries one belly drop tank, and Rocket - carries one belly drop tank and eight underwing unguided rockets. For each, you have the following liveries: Anacostia 477, 80405 VMF-312, La Tigresa, Black Cat, and lastly the fictional White 5. Tigercat Interior As with their earlier Hadley Page Hampden model, it’s clear to see that Virtavia have taken a lot of care when modelling the interior. When sitting inside the Tigercat’s cockpit, you will find yourself seated in a rich and diverse environment with both texturing and modelling being of the highest order. Although the cockpit is rather lacking in terms of weathering, I still found that it offered a highly authentic experience. The numerous gauges are clear and easy to read, and the abundant switches and levers which surround you, are easily accessed. All in all, I found Virtavia’s representation of the Tigercat’s cockpit, to be one of the best I had experienced in a simulator. Tigercat Handling Takeoff The Tigercat is wonderfully overpowered, but if you don’t respect that aspect of the aircraft, you can find yourself in trouble rather quickly. As per the Grumman Pilot’s Handbook, set all the trims to zero, select your desired flap setting and make sure you’ve turned on the rudder booster. If you forget the rudder booster, you’ll soon be reminded once airborne, as the Tigercat will have you dancing on the rudder pedals to counteract the Dutch roll effect. Line up for takeoff and advance the throttles to forty inches of manifold pressure, then let the power stabilize. You can stand on the brakes as you advance the throttles, or you can perform a rolling takeoff. If you’re at lighter gross weight, you can leave the throttles there, but for heavier weights, you should of course use more power if your runway length demands it. All things being equal, the Tigercat should become airborne at around ninety knots, and will accelerate fairly quickly. Raise the gear and close the canopy (limit speed is 140 knots), if you’ve performed the takeoff with the hood open as per the pilot’s manual. With this done, accelerate above 120 knots, as this is the minimum safe control speed for single-engine emergencies, and then…climb away! Cruise One of the nicest aspects of sim flying is that the fuel is always free, and you don’t have to worry about engine overhaul costs! If performance is your vice, then set your throttles at around forty-five inches of manifold pressure and bring the propeller levers back to 2400 rpm, and you’ll find that you’ll shoot along at a rather comfortable pace. If on the other hand you’d prefer to take in the sights; bring the prop levers back to 2200 rpm, the throttles to your desired setting, then sit back and enjoy the rumble of those two Pratt & Whitney R-2800s. Landing The Tigercat is an exceptionally clean airframe – have a look from head-on and you’ll see what I mean, not a lot of frontal area - and as such, will maintain its airspeed. Descent and approach planning is a bit on the “necessary” if you aren’t into performing an overhead-break manoeuvre in which to land. From altitude, throttle back as desired to maintain your speed; alternately keep the throttles up and come down like a bat out of hell! If you do that though, your airspeed will build up quickly and you’ll have to shallow your descent rate to prevent exceeding your Vne speed. Until you’ve applied a bit of flap and extended the landing gear, don’t count on slowing down while trying to enter the landing pattern. Get the flaps and gear extended first, then make your approach. I highly recommend maintaining an approach speed of 120 knots on final until you’re below 1000 feet above the airfield elevation, as this will protect yourself in the event of an engine failure (not a problem in the flight sim universe, unless of course, you enjoy the challenge of practising emergencies). Bleed the speed back to around one hundred knots, or lower if you’ve set full flaps, and then…touchdown! Sounds The FMOD sound samples included in the package are outstanding as they capture the dynamic sound of the two Wasp radial engines perfectly. From a cold and dark start, the engines come to life with a slow whistling wine before they suddenly spit, pop, and then rattle into life. When opening and closing the cockpit canopy (again nicely sampled), the sounds of the engine are subtly muffled, but still audible through the canopy. Other sounds include the numerous switches, plus various other squeaks, and groans of the aircraft. It’s truly amazing what you can do with FMOD soundsets, and Virtavia seem to have the technique down to a tee! Conclusion The Tigercat derives from a time when fighters were much simpler to operate and fly than their modern 5th and 6th generation counterparts. As such, this is not a particularly complex aircraft in which to fly, which suits casual flight simmers such as myself. That said, don't forget a tiger is a wild animal, and Virtavia’s Tigercat is not without its own vices, as you will find out if you happen to purchase it. As I said previously, you need to make sure you are always ahead of the aircraft, because if you’re not, then be prepared for a bite. Visually, the model faithfully captures the lines of the original aircraft, with some very nicely stressed skin effects. When these are observed from certain angles under the right lighting conditions, the model really does shine. However, finer details such as slightly raised panels and flush riveting, are for the moment, missing. With that said, the lack of such detailing (and I could be accused of being fussy), does not detract from an overall visually impressive exterior. As for what I would like to see improved on in future updates, I would have to say some cockpit weathering would be number one on my list, whilst externally, slightly more attention to the finer details on the external skin, again employing a degree of subtle weathering on the fuselage, which was a nice feature on the Hampden. In my opinion and without question, Virtavia have fundamentally nailed this product in terms of quality and its intended audience. The icing on the cake would have been a rendition of the two-seat and radar-equipped versions, but perhaps those variants are yet to come (hoping). They say a cat has nine lives, so here are nine reasons why I think you should consider adding Virtavia’s Tigercat’s to your hangar: The excellent price The inclusion of versions for both XP12 and XP11 in one single package VR compatible (according to the developer press release) The inclusion of a comprehensive PDF manual A rich and diverse cockpit environment, which is in a class of its own The inclusion of an impressive FMOD sound pack The different load-out options. Rain and ice effects on the canopy (XP12 only) The level of functionality Finally, whilst summing up, I came across a post by X-Plane org member "Eldo", who posted a couple of nice screenshots in the "What did you fly today" section on the Org portal. Whilst turning and burning over Duluth / Superior Harbour in the Virtavia Tigercat, “Eldo” wrote: “The “clean” F7F3- Variant with no bombs, rockets, or drop tanks, flies like the aircraft equivalent of a mid-60s muscle car. Just hold on for the ride!” _______________________________ Grumman F7F Tigercat by Virtavia is available from the X-Plane.Org Store here: Grumman F7F Tigercat Priced at US$29.95 Features Support for both X-Plane 12 and X-Plane 11 Folding wings Guns/cannons can be fired Rockets' variant has 8 shootable unguided rockets PBR materials/textures used throughout VR config file included, cockpit manipulators optimized for easy VR use FMOD sounds package with multi-stage engines, pilot's slide canopy muting, switch clicks and other unique cockpit sounds Very detailed cockpit with numerous animations and mousable controls Retractable crew steps Togglable pilot figure Canopy glass rain and ice effects (XP12) Animated cowl flaps Animated tail hook Animated oil cooler exit doors on wings Authentic flight model with checklist 4 unique flight models (.acf files) 25-page illustrated User Operating Manual Source texture files available for livery artists Requirements X-Plane 12 or X-Plane 11 Windows, Mac, or Linux 4 GB VRAM Minimum - 8 GB+ VRAM Recommended Review by Nick Garlick 28th Feb 2023 Copyright©2022: X-Plane Reviews Review System Specifications: Windows 10, Intel 4790K liquid-cooled, overclock to 5GHz, 32GB DDR3 1600MHz RAM, Nvidia GTX 1070ti, Titanium HD Audio Card. (Disclaimer. All images and text in this review are the work and property of X-PlaneReviews, no sharing or copy of the content is allowed without consent from the author as per copyright conditions) All Rights Reserved
-
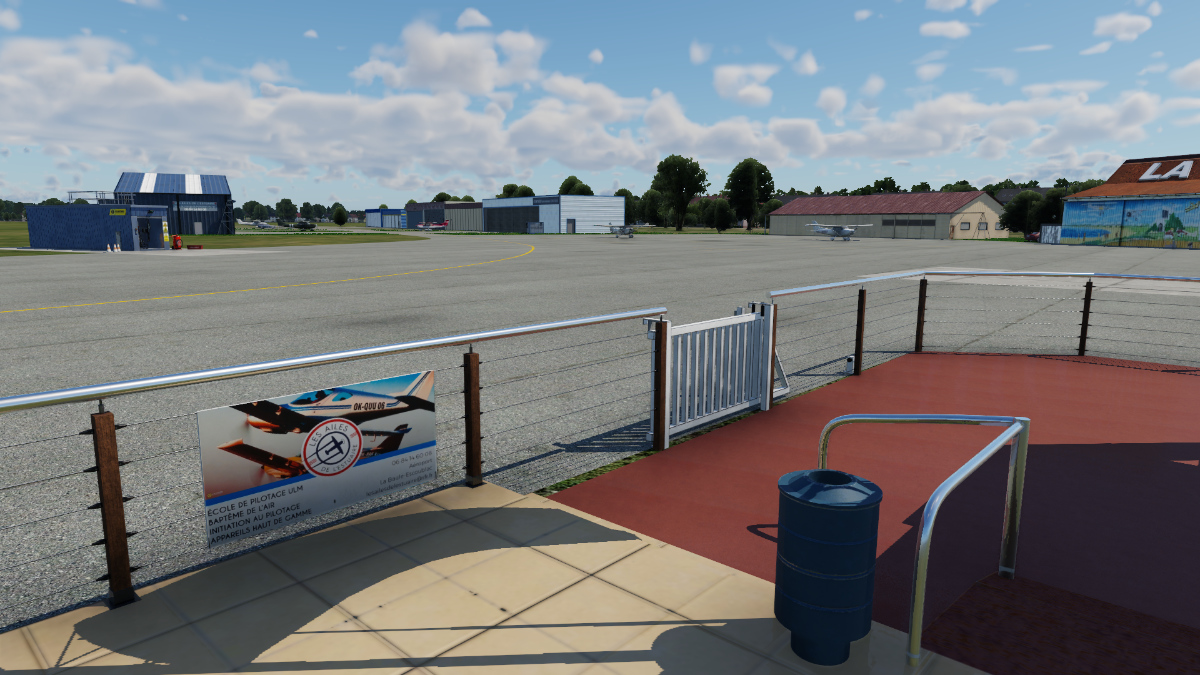
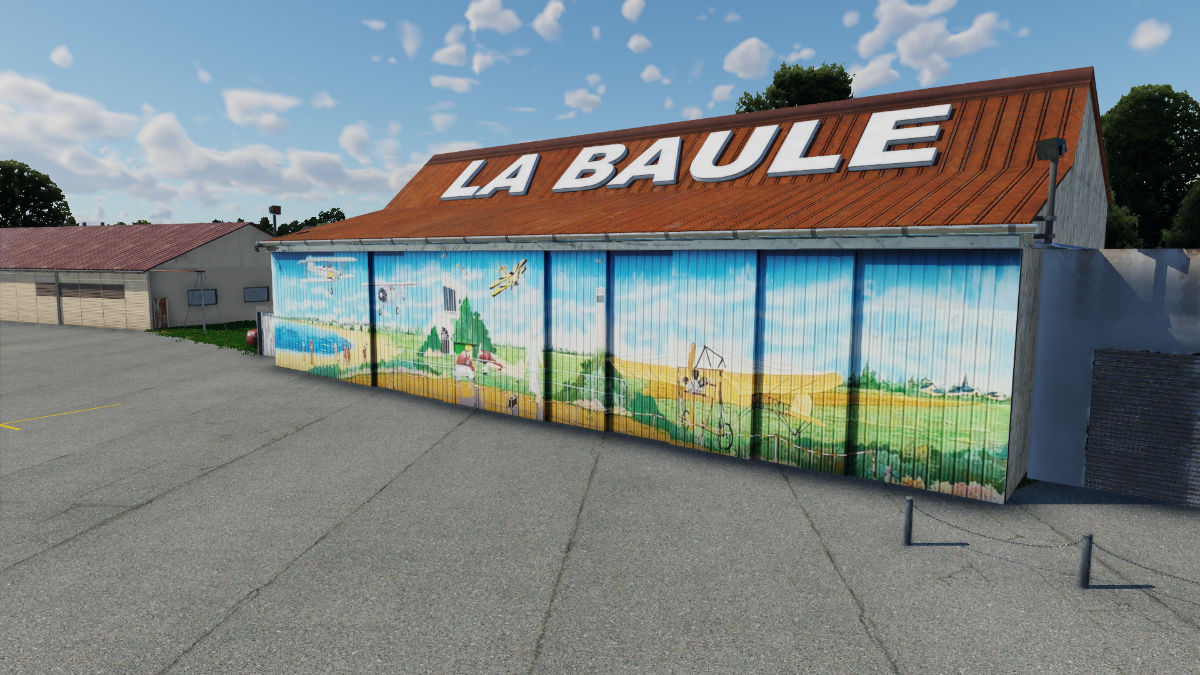
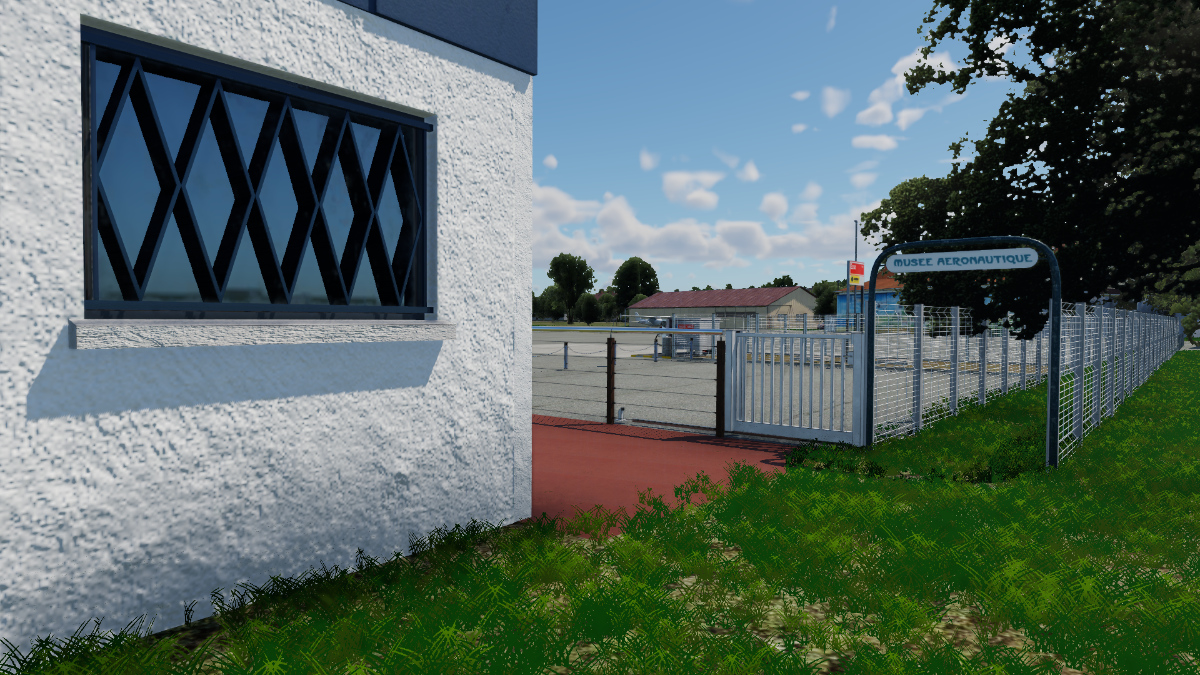
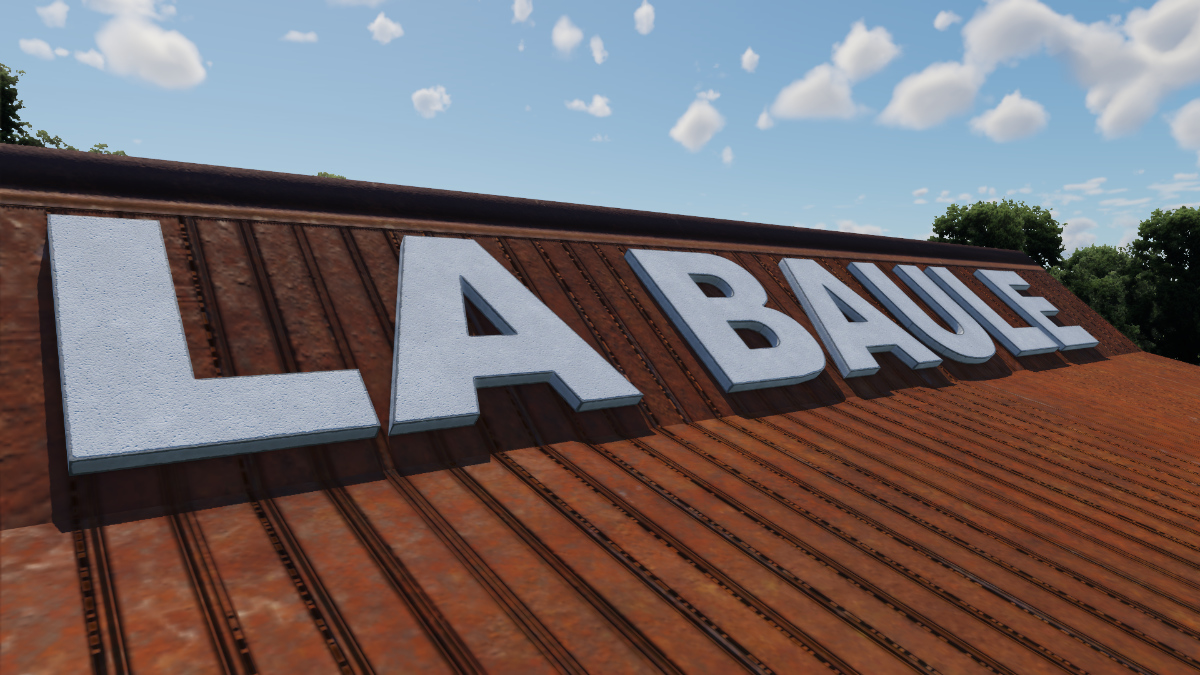
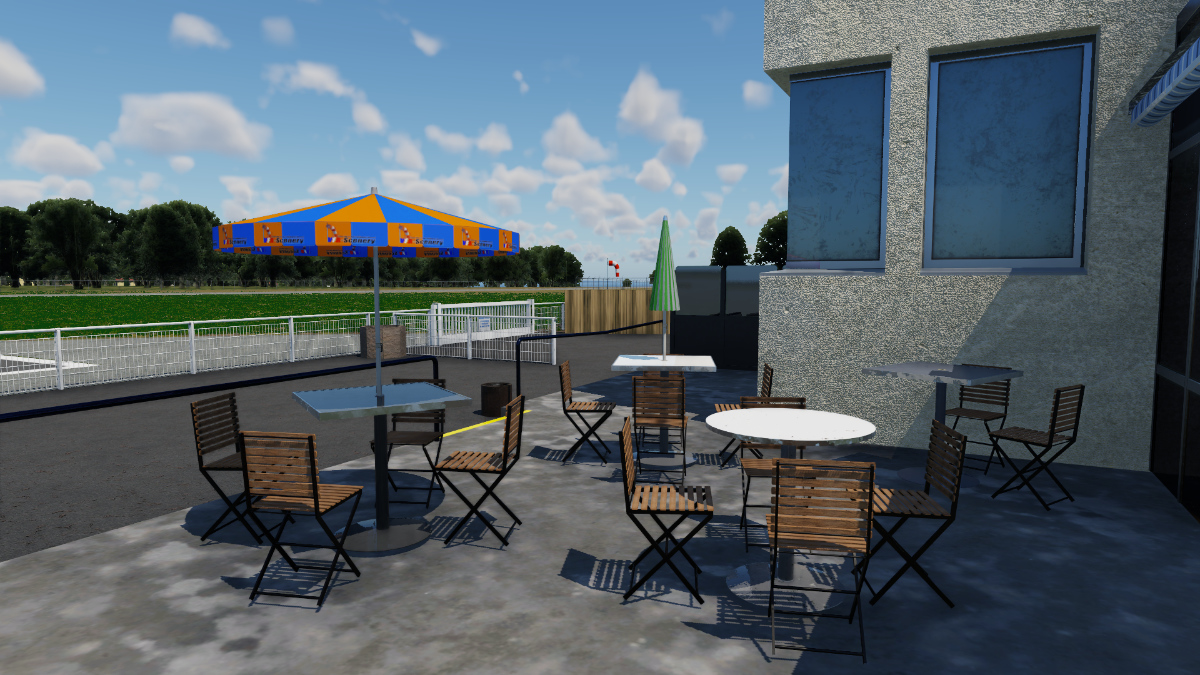
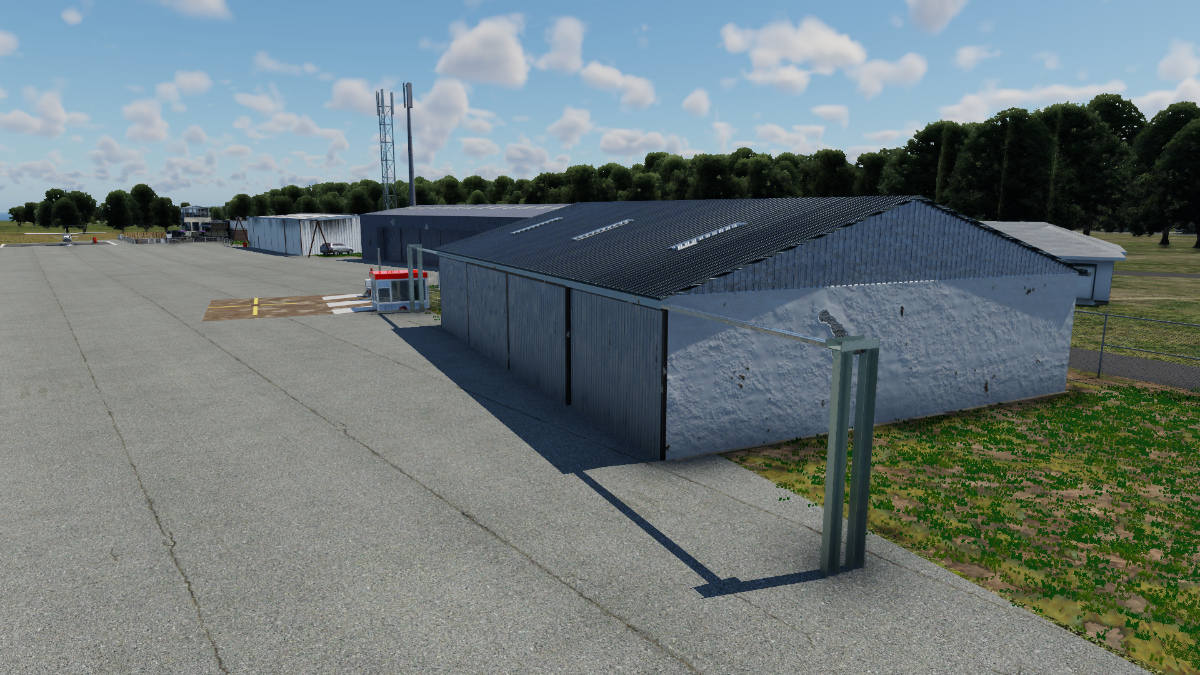
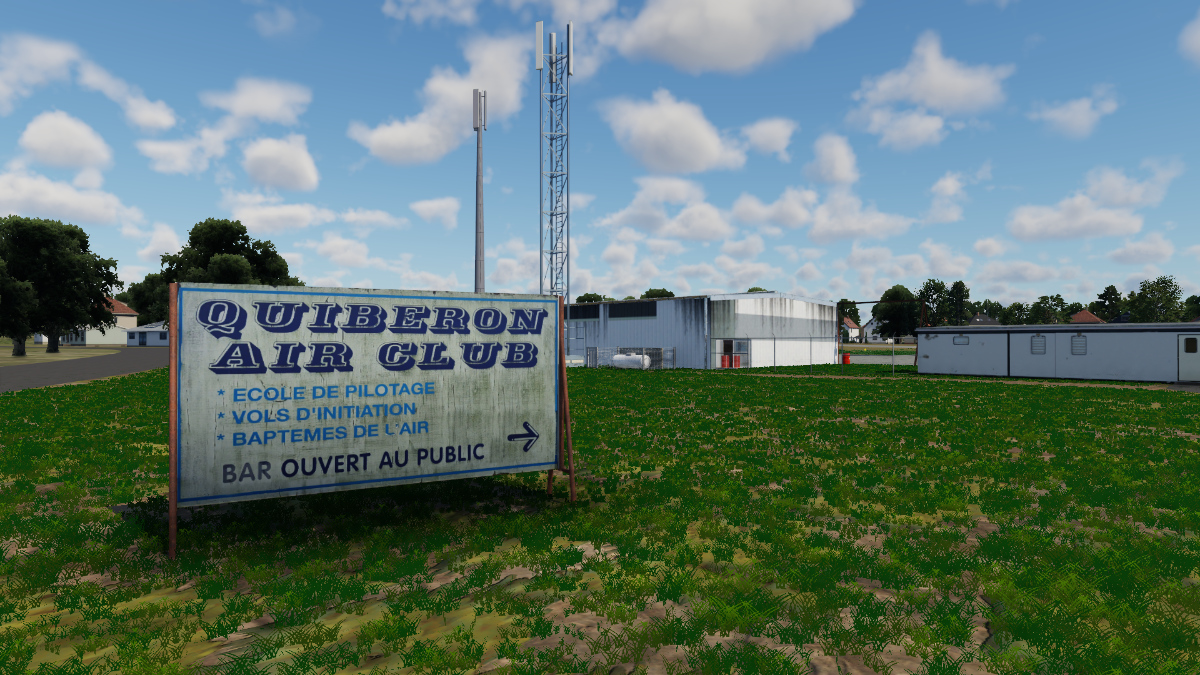
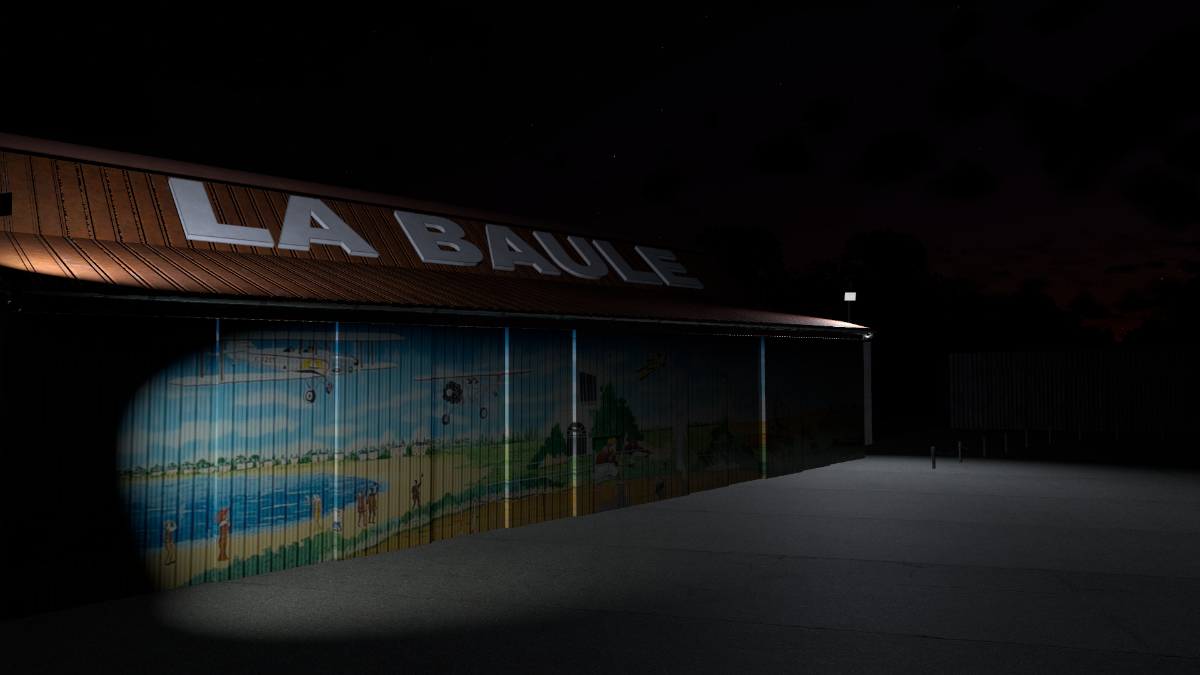
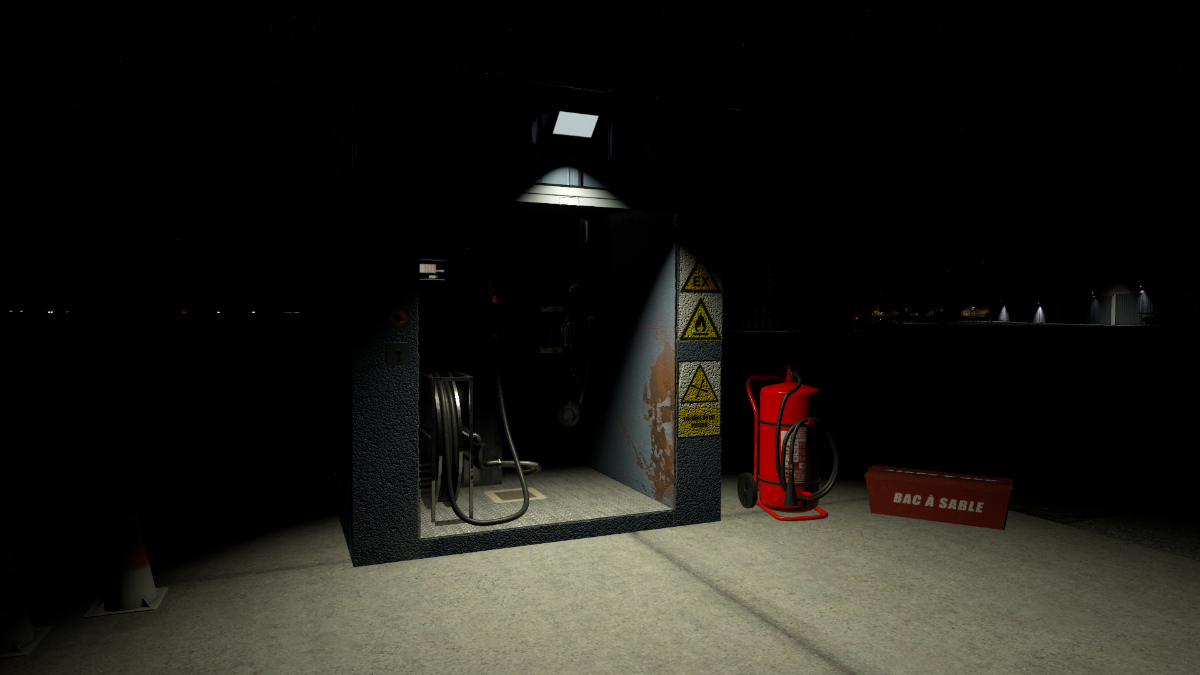
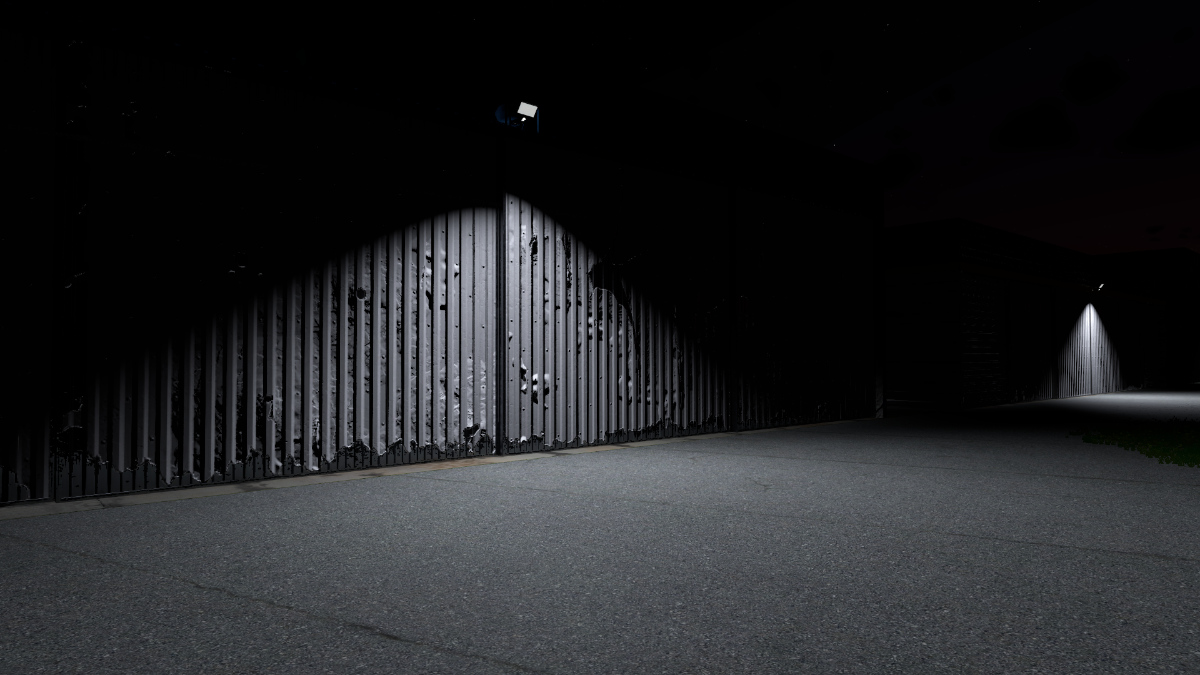
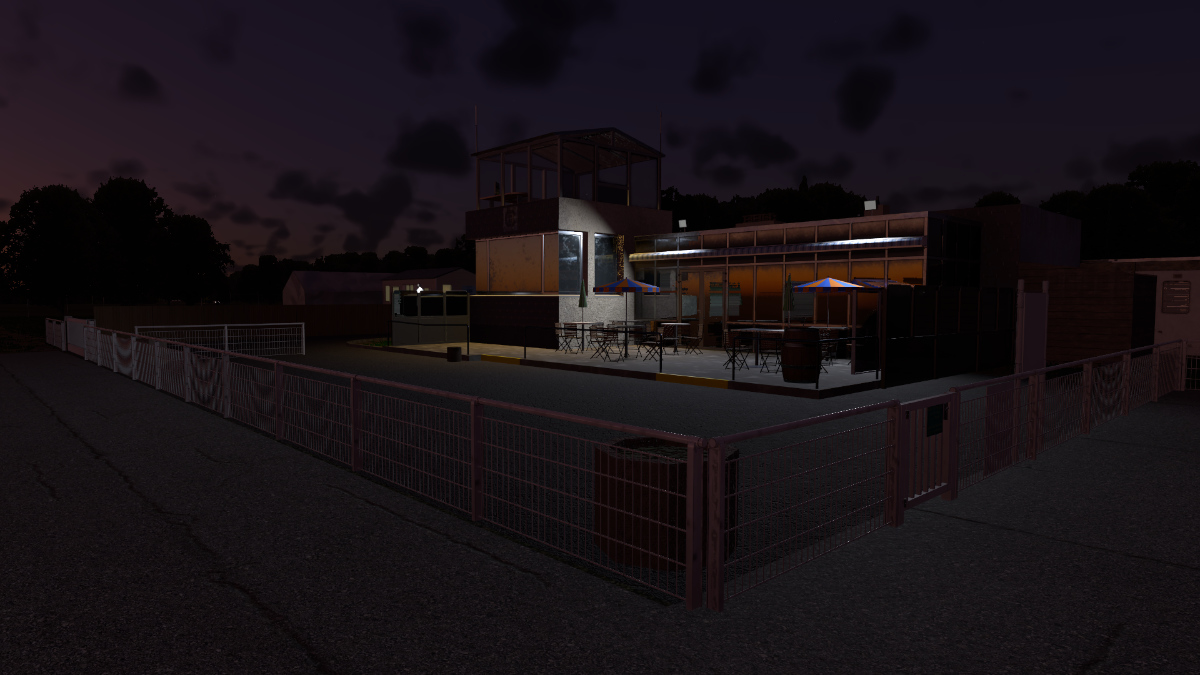
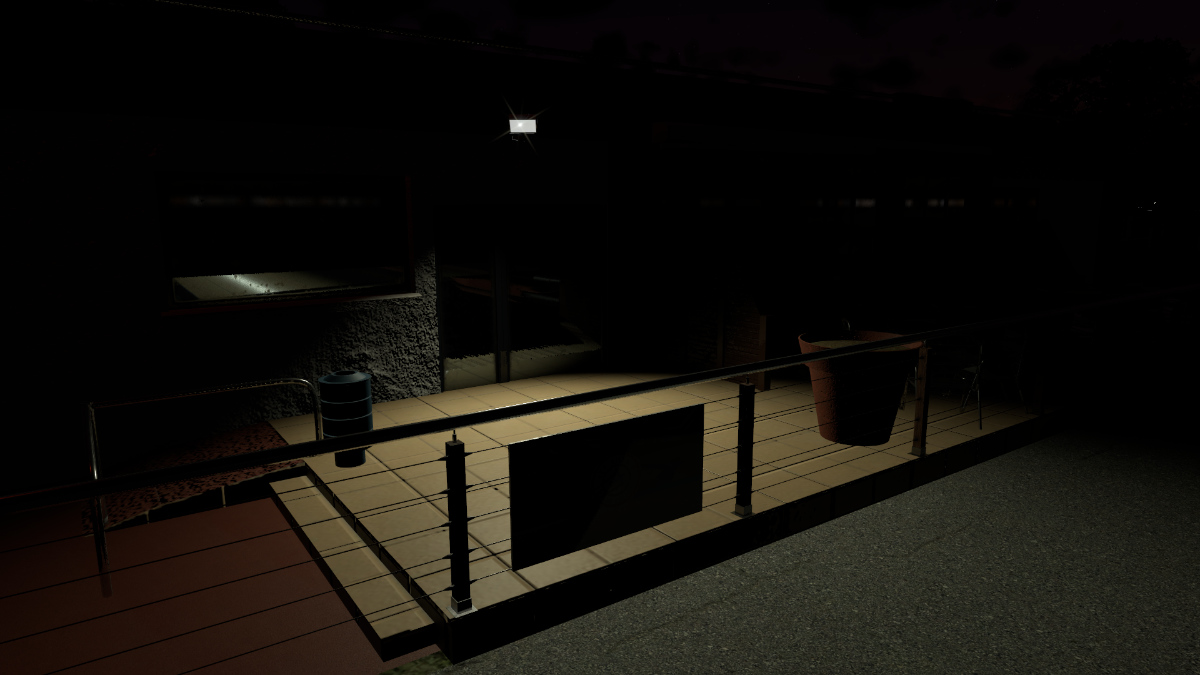
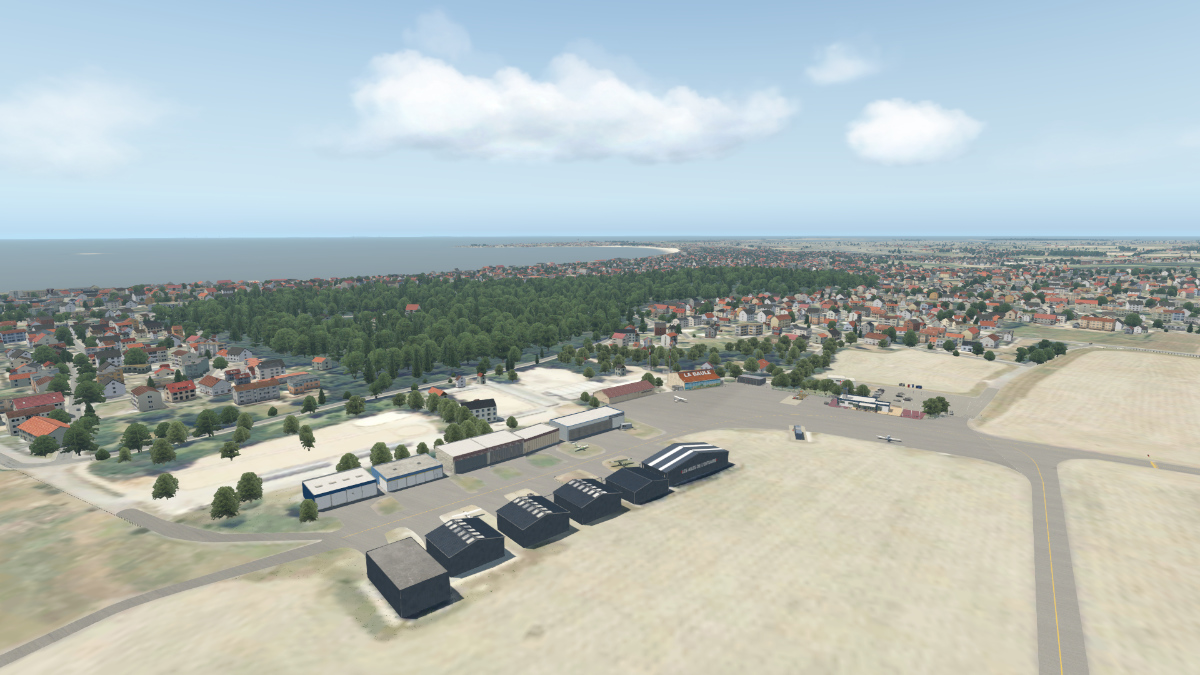
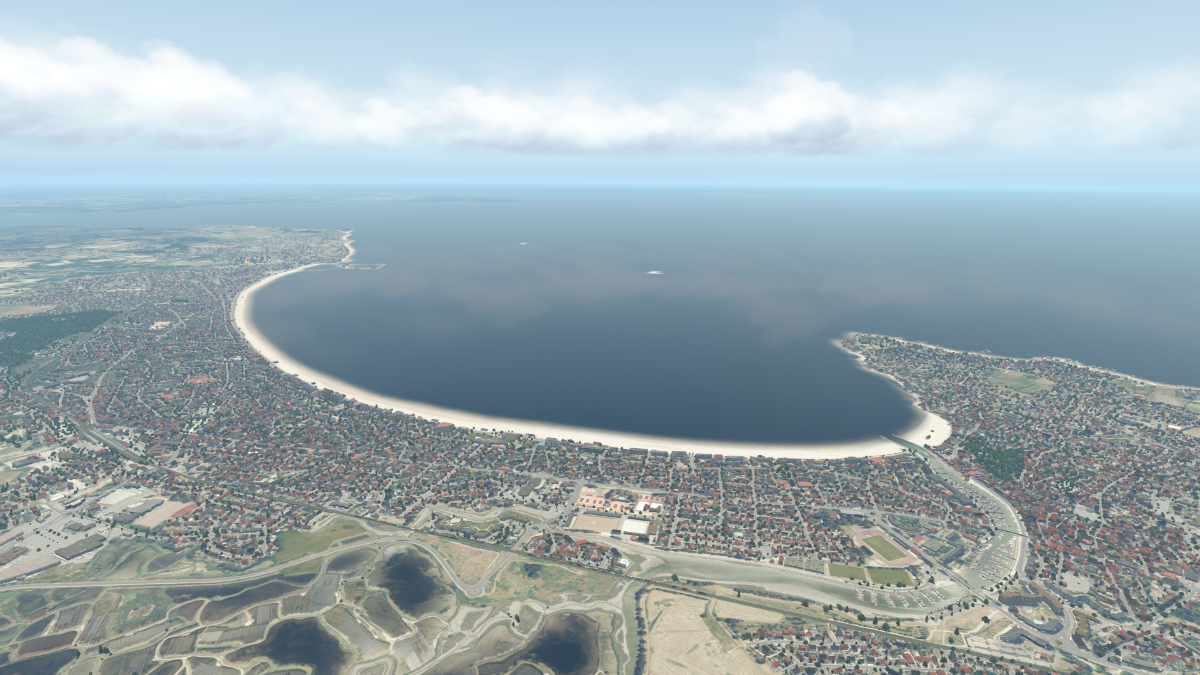
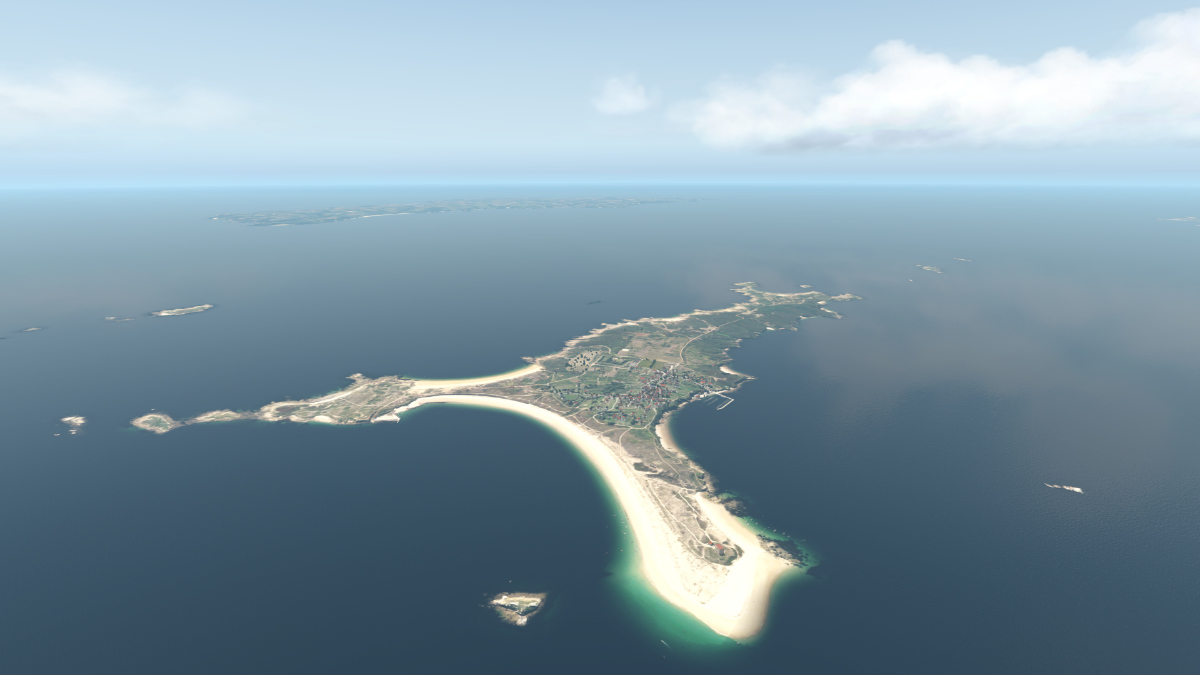
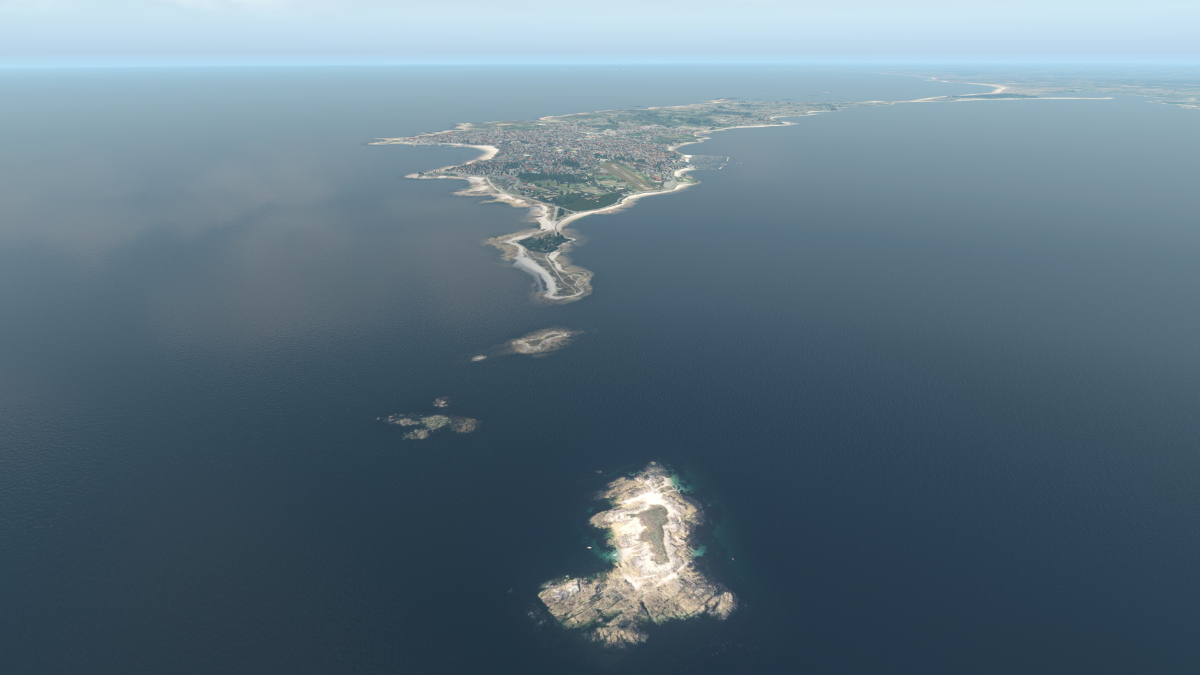
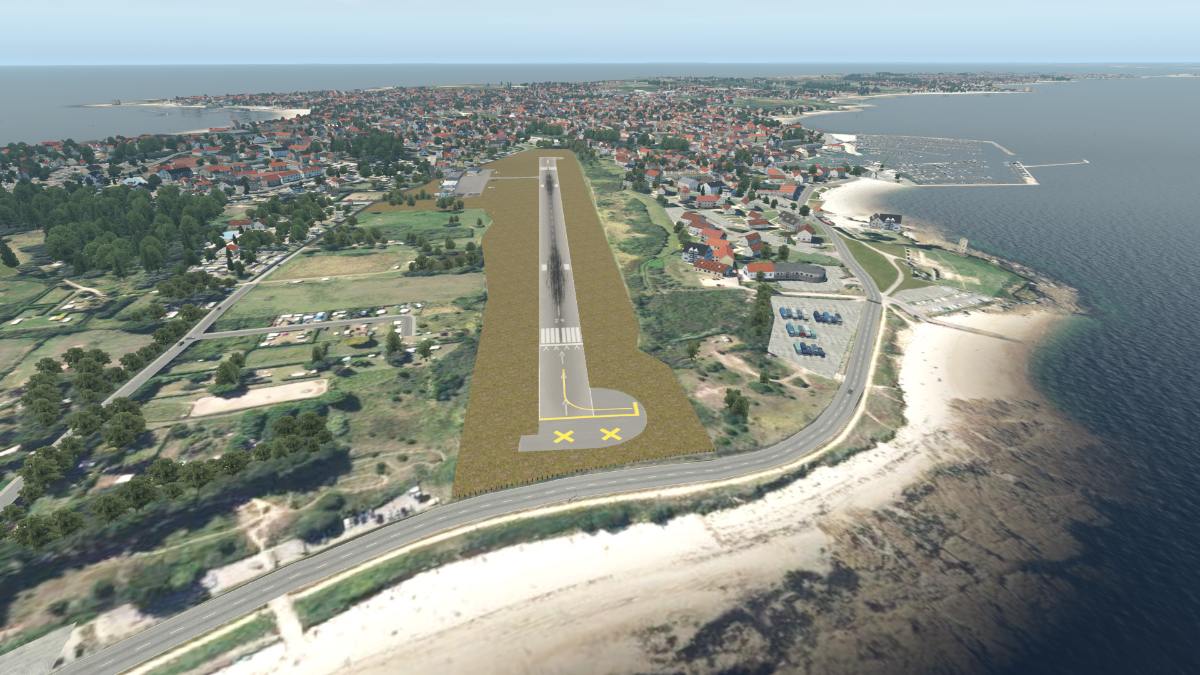
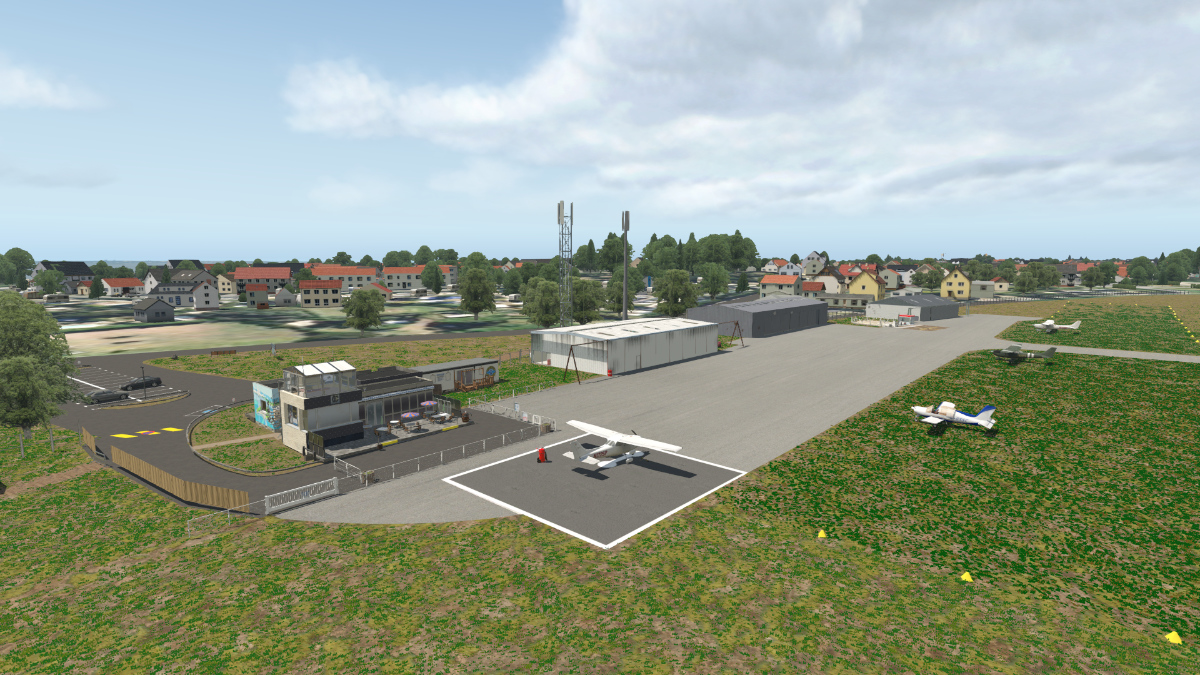
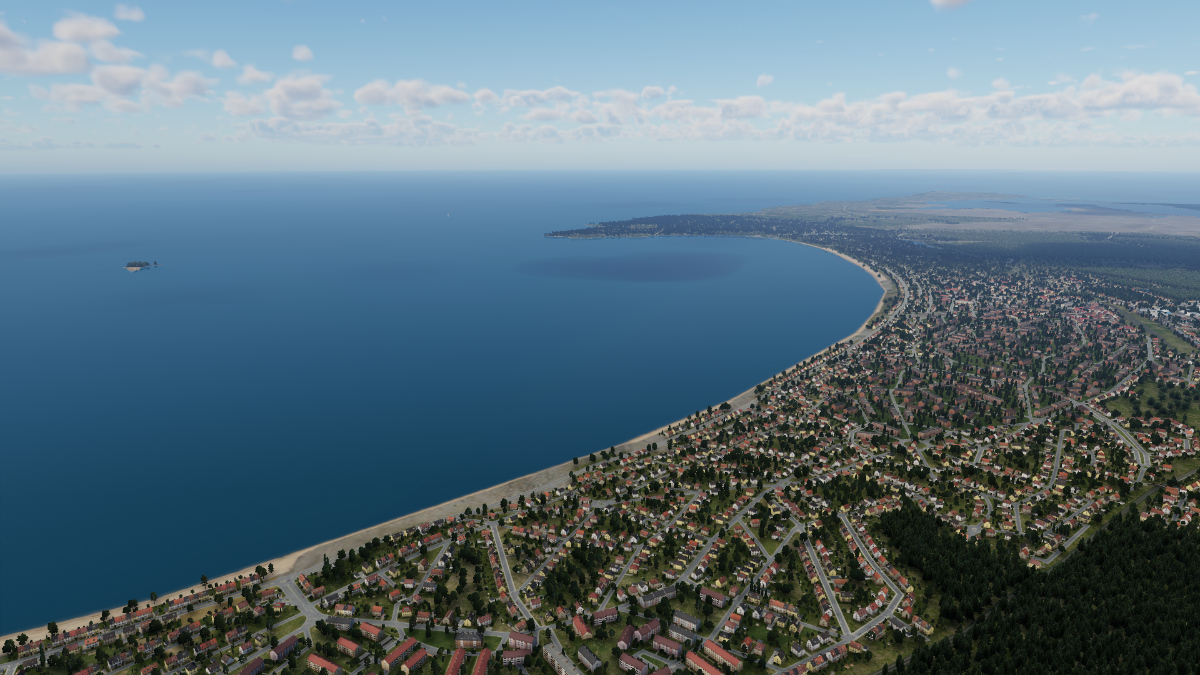
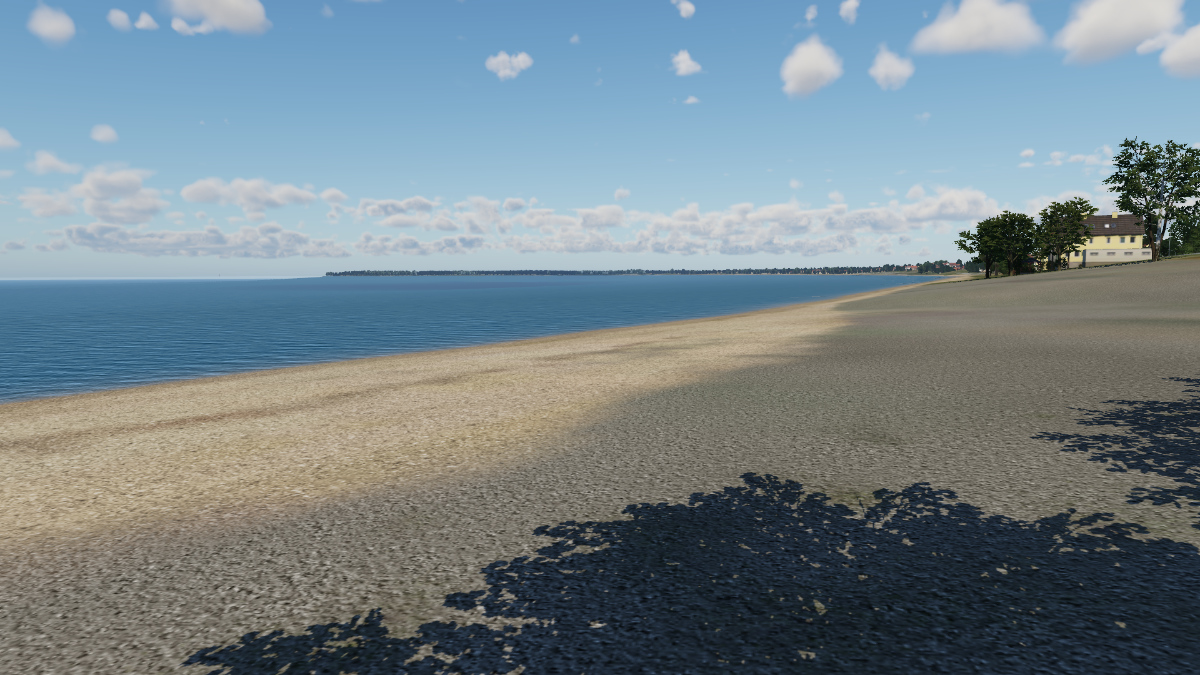
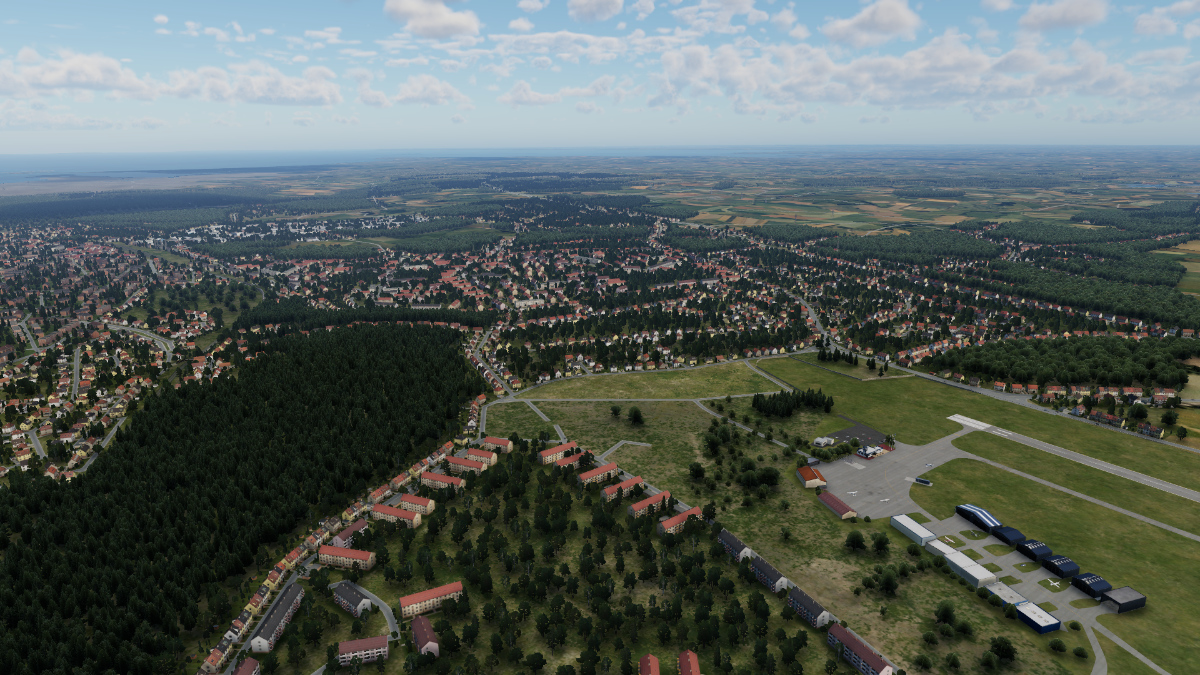
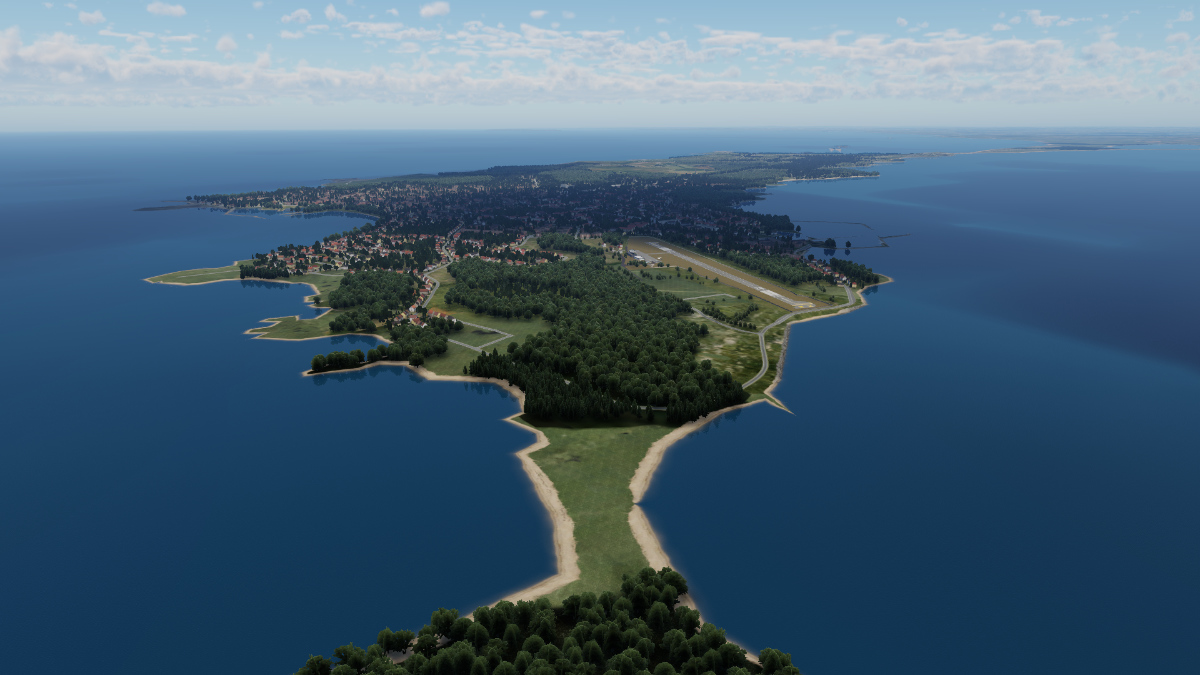
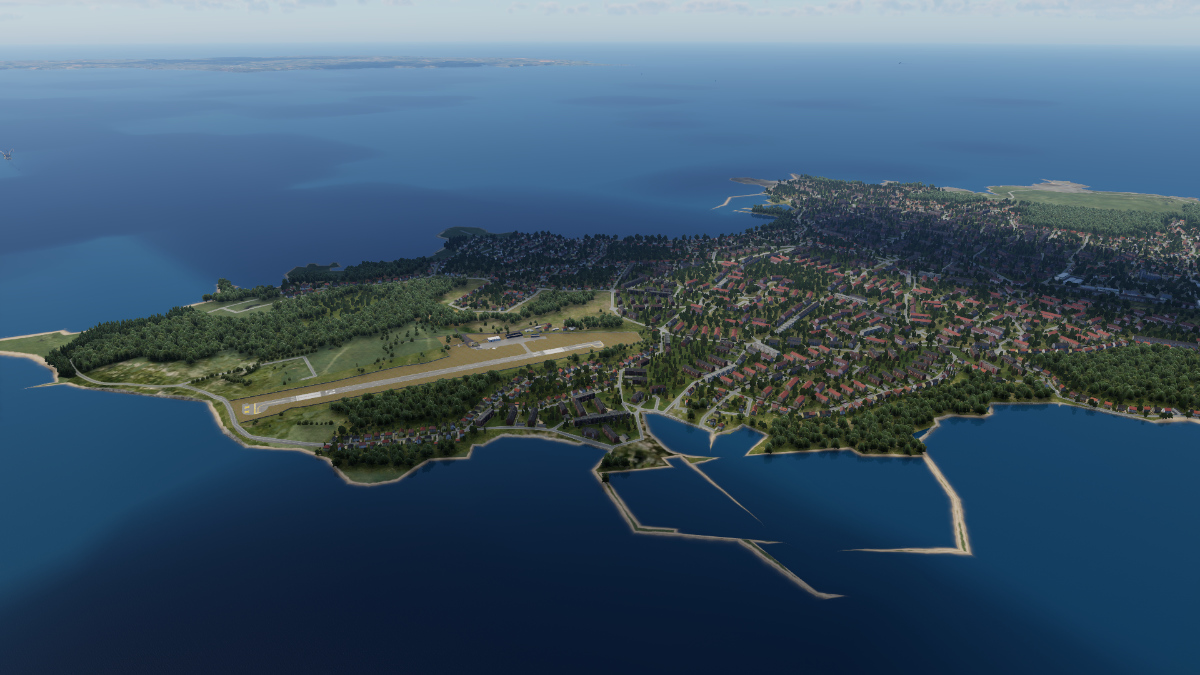
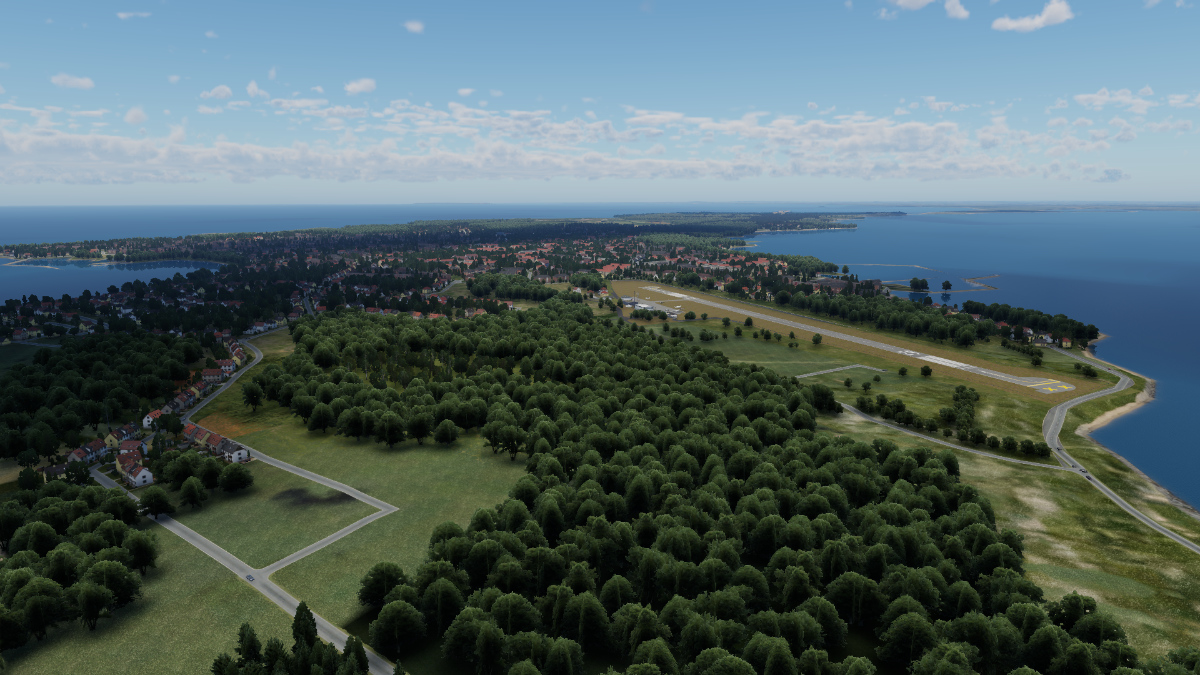
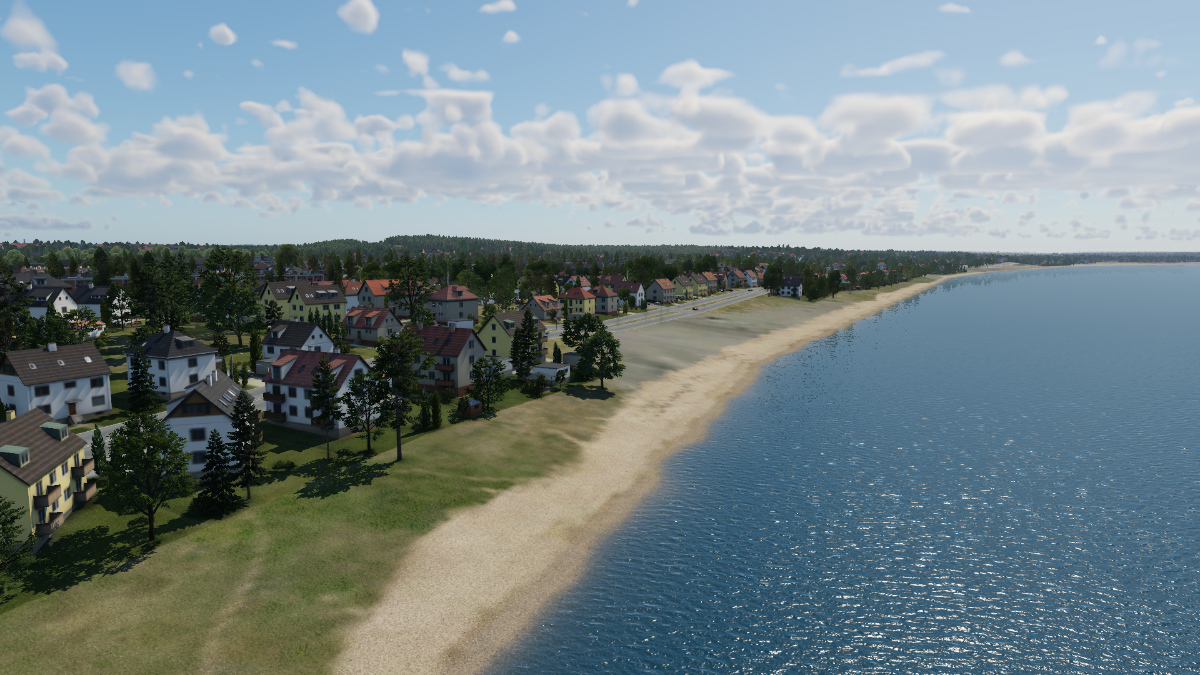
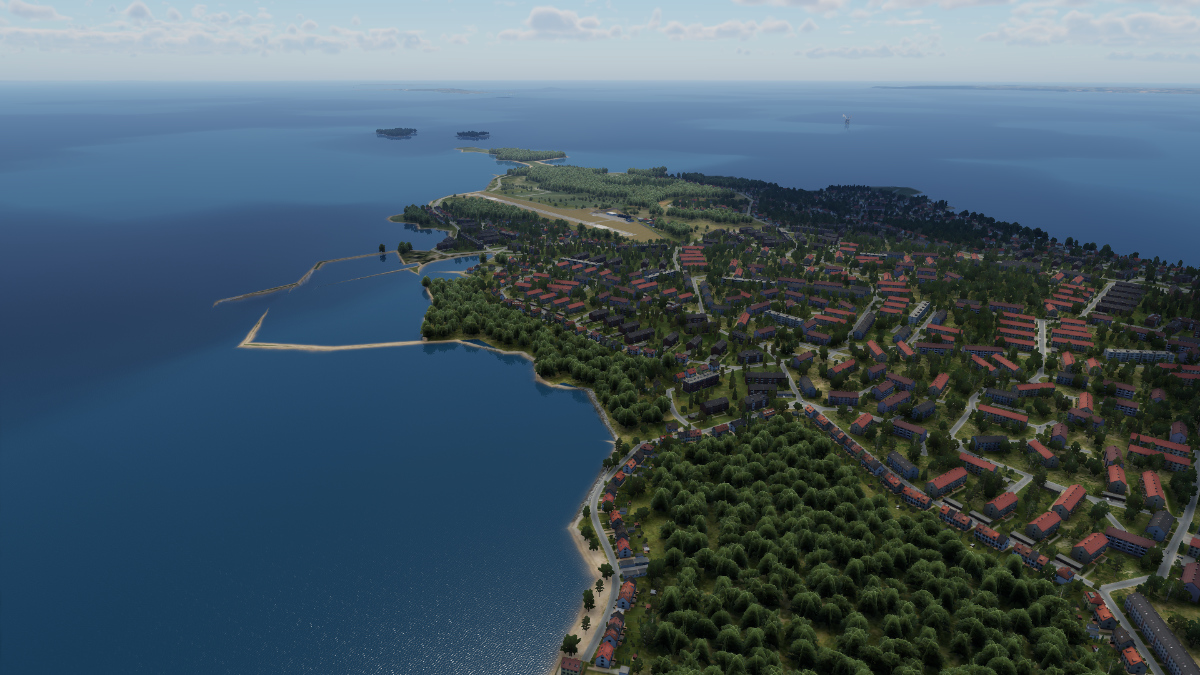
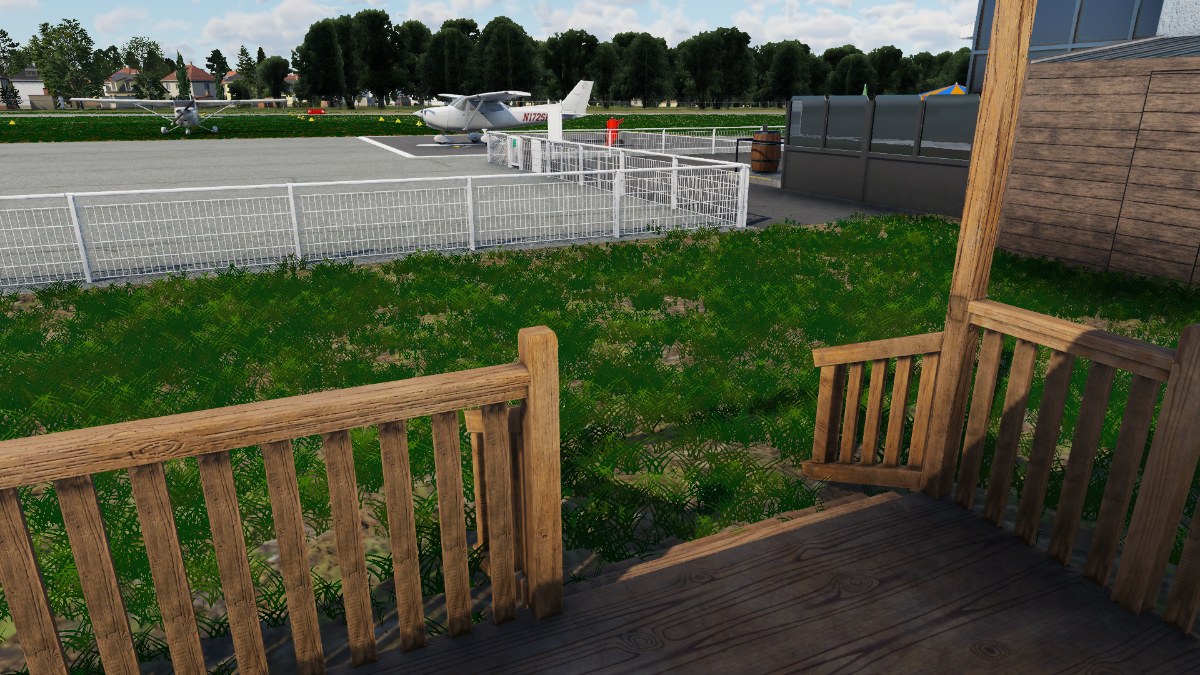
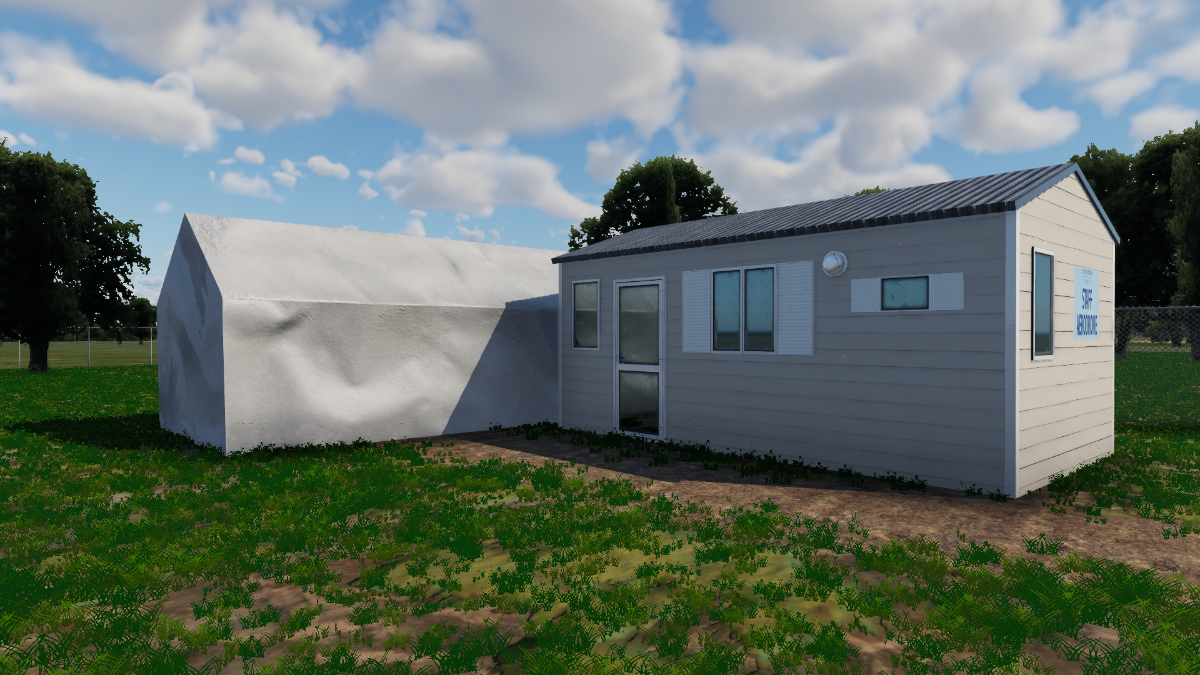
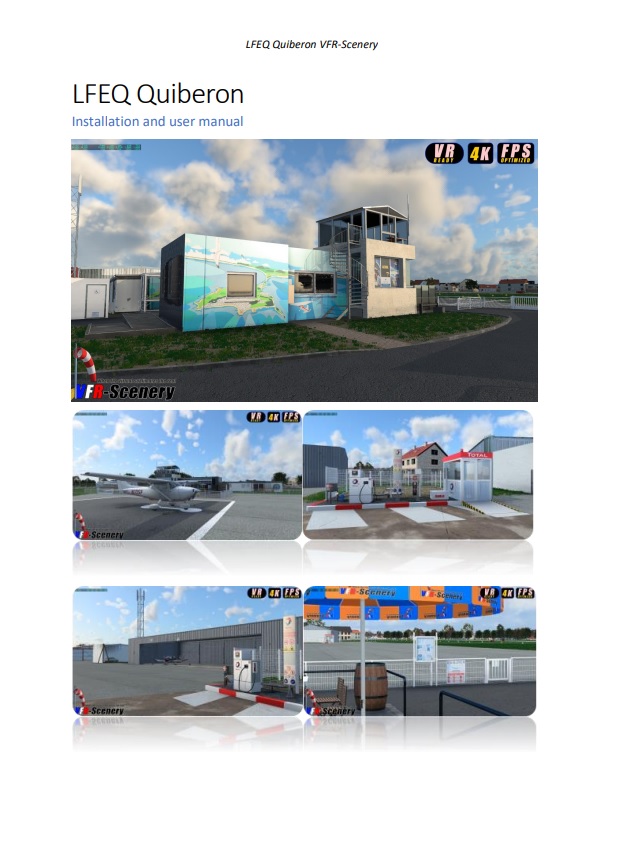
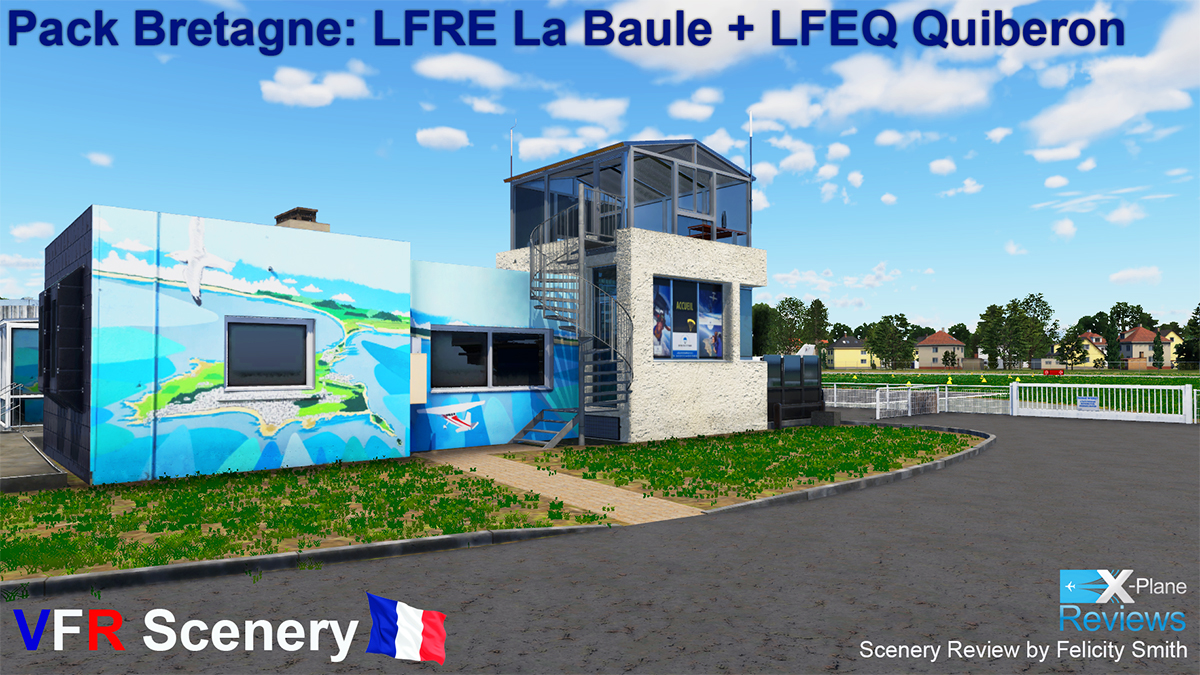
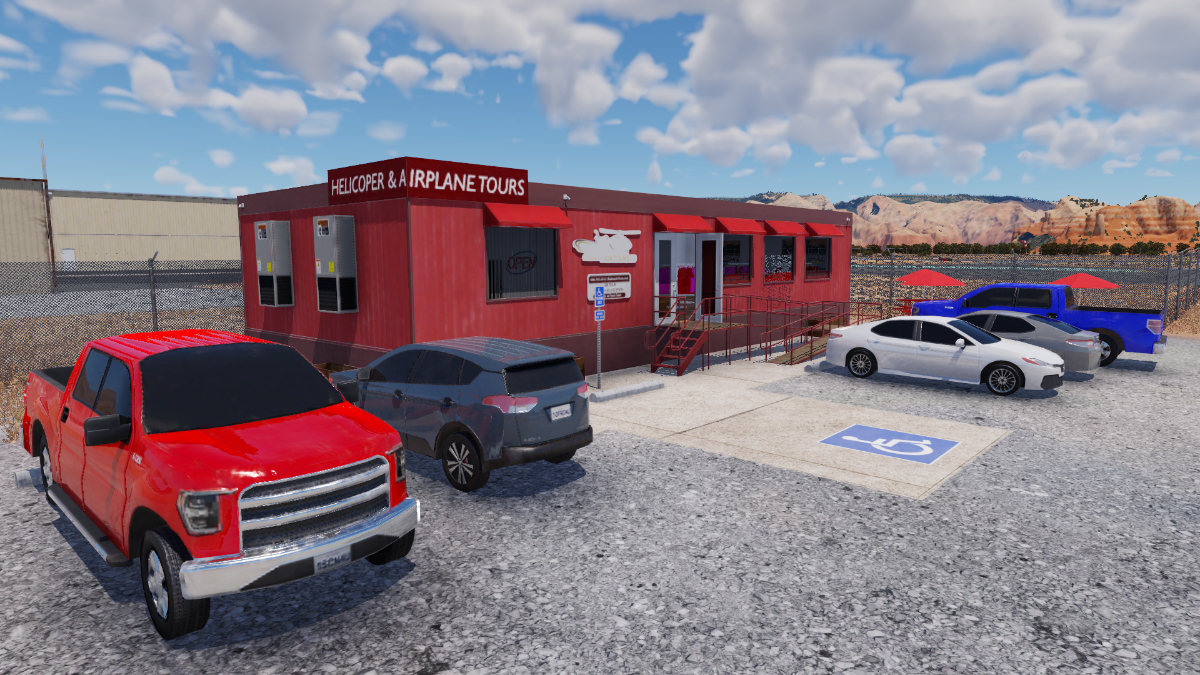
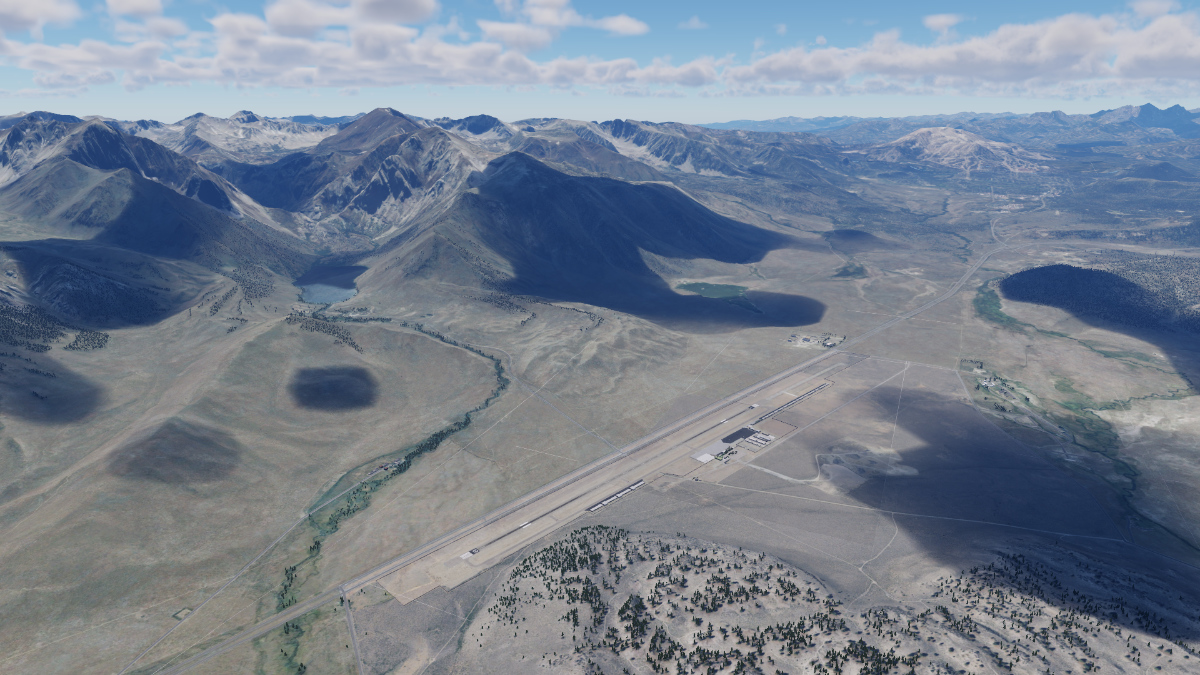
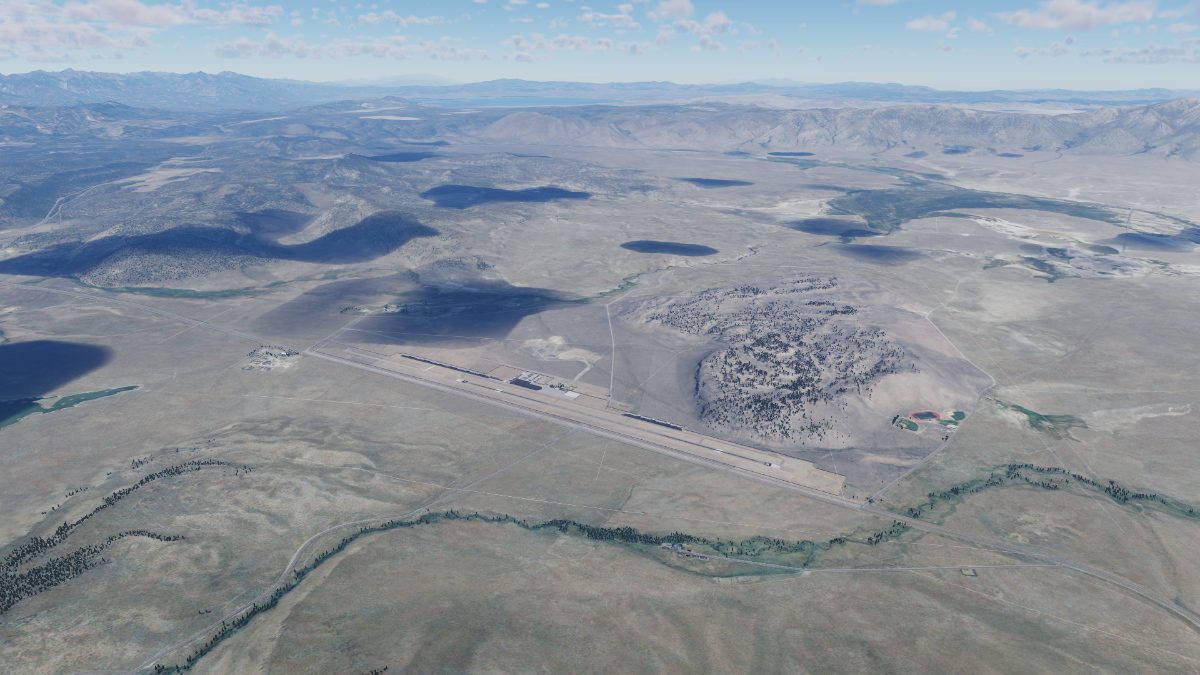
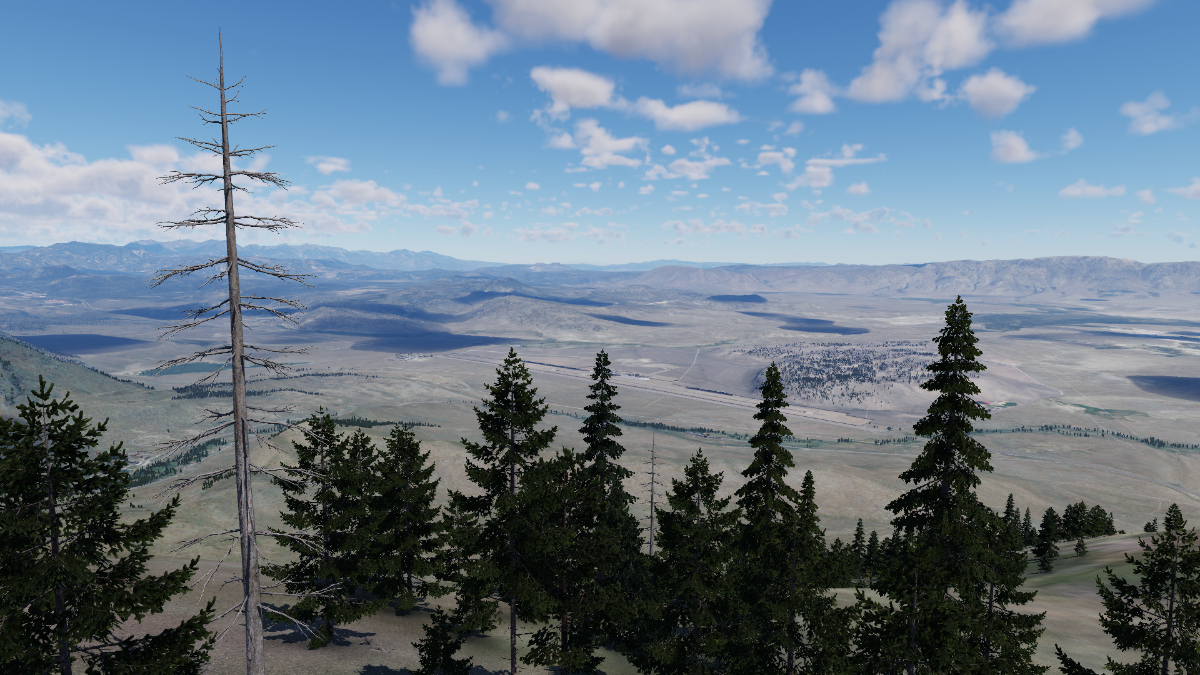
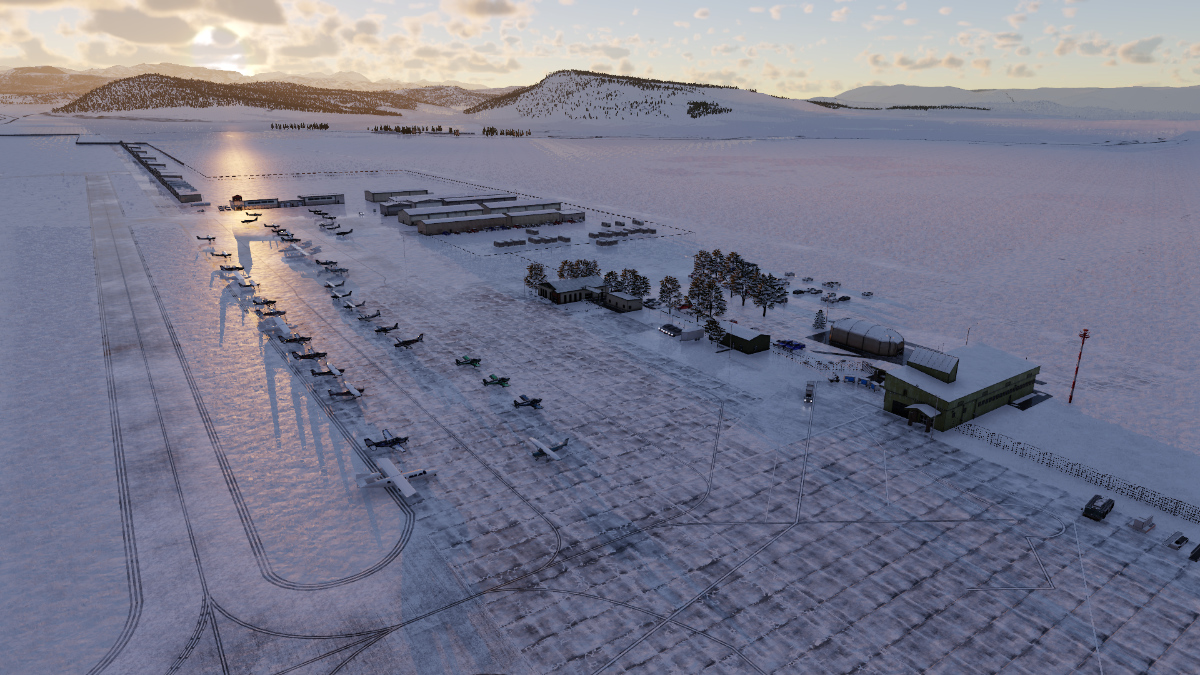
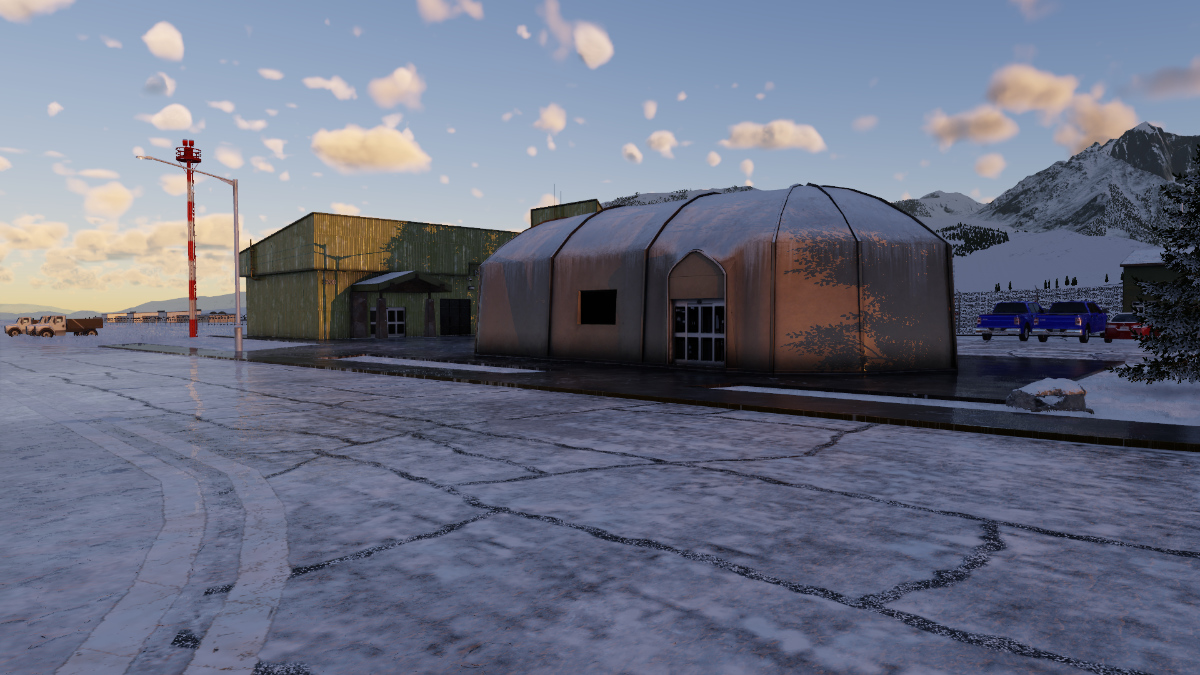
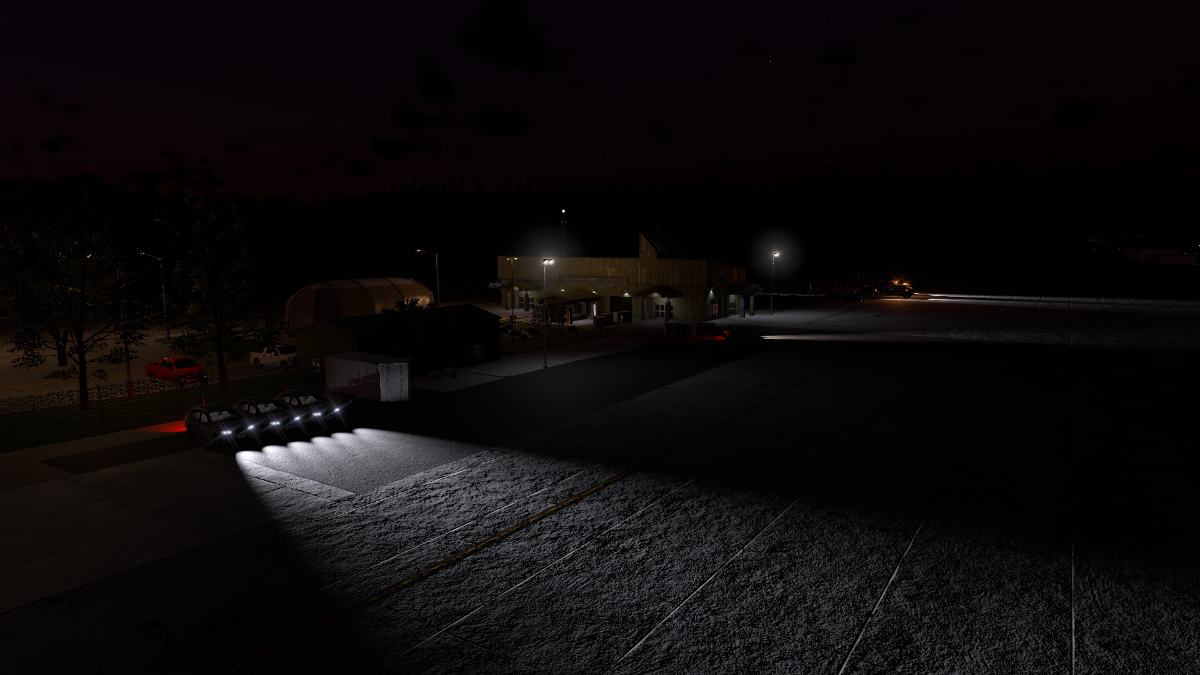
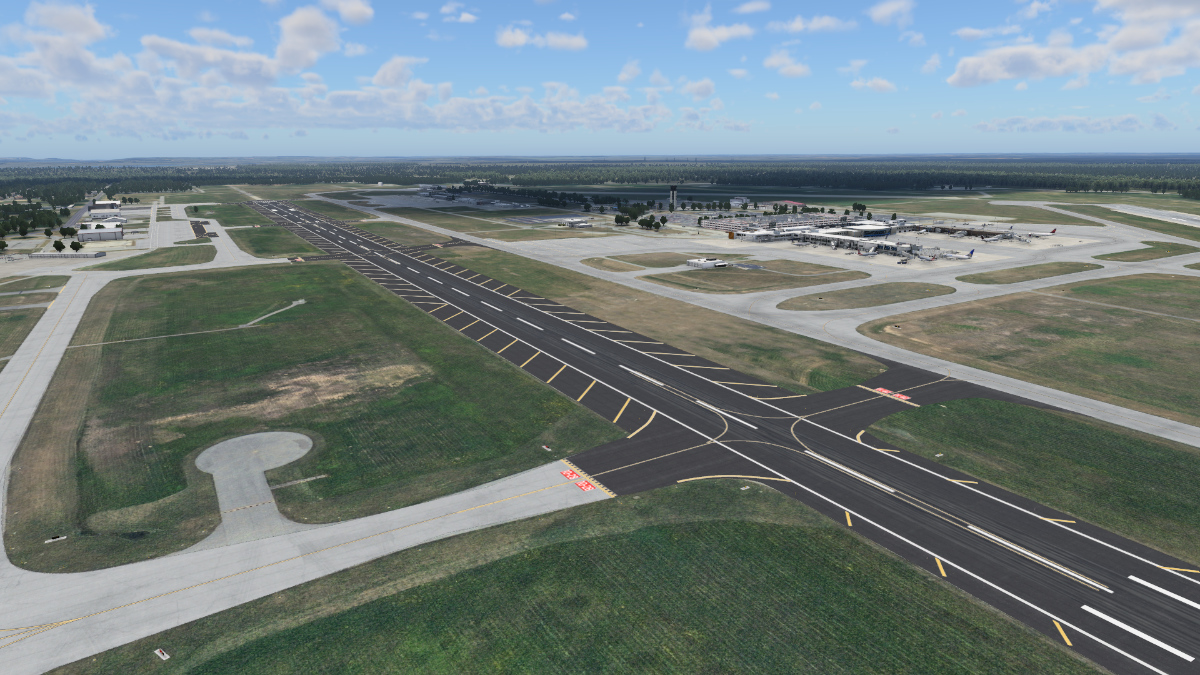
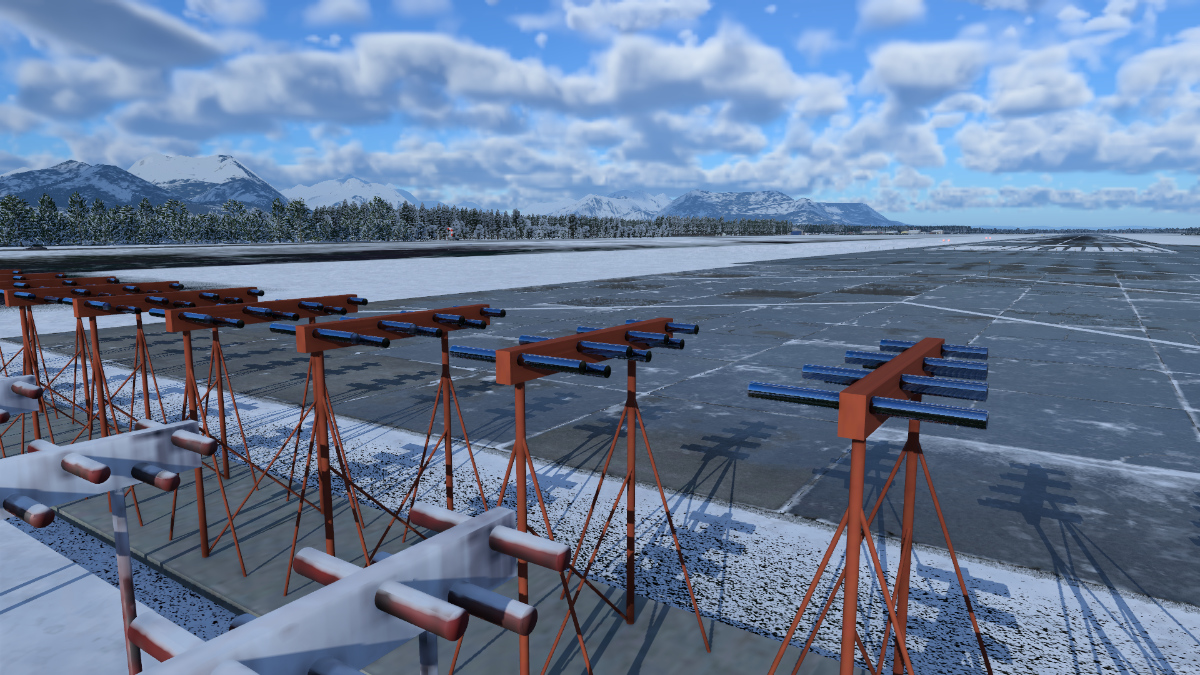
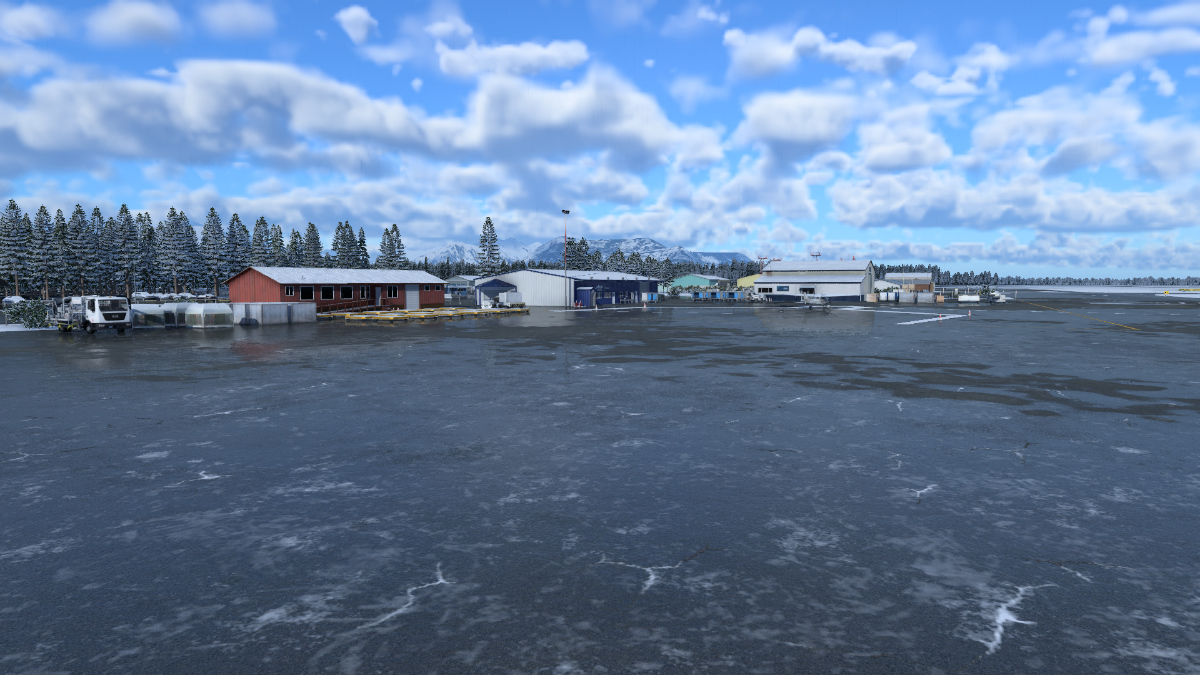
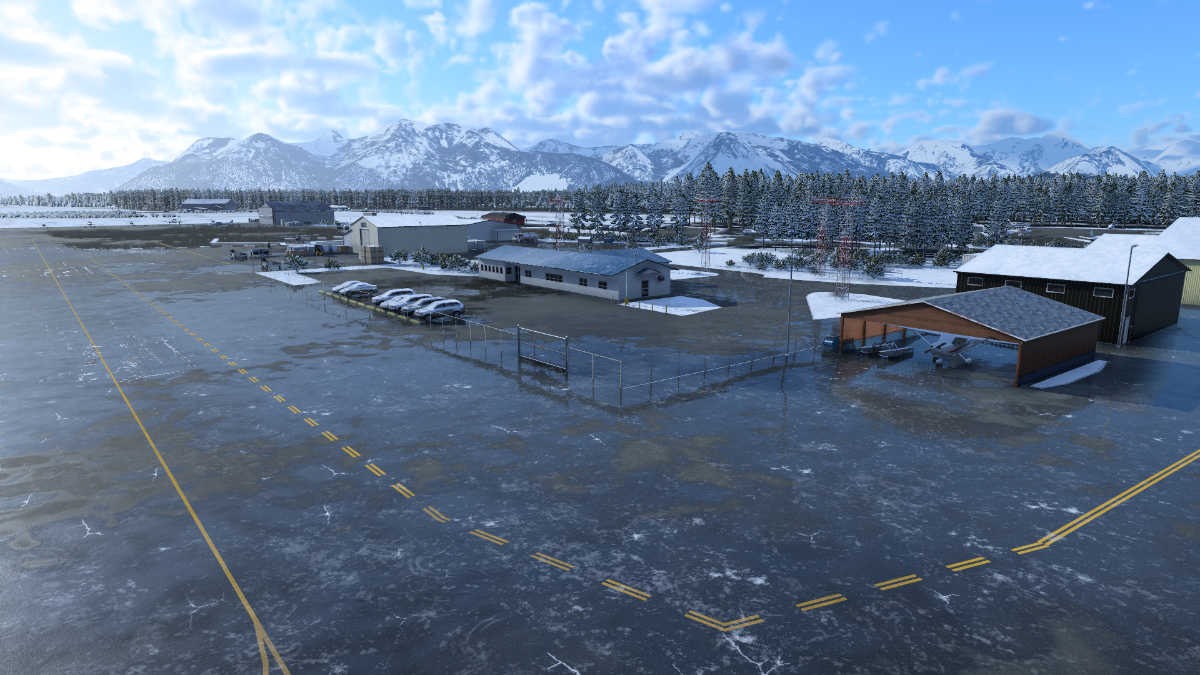
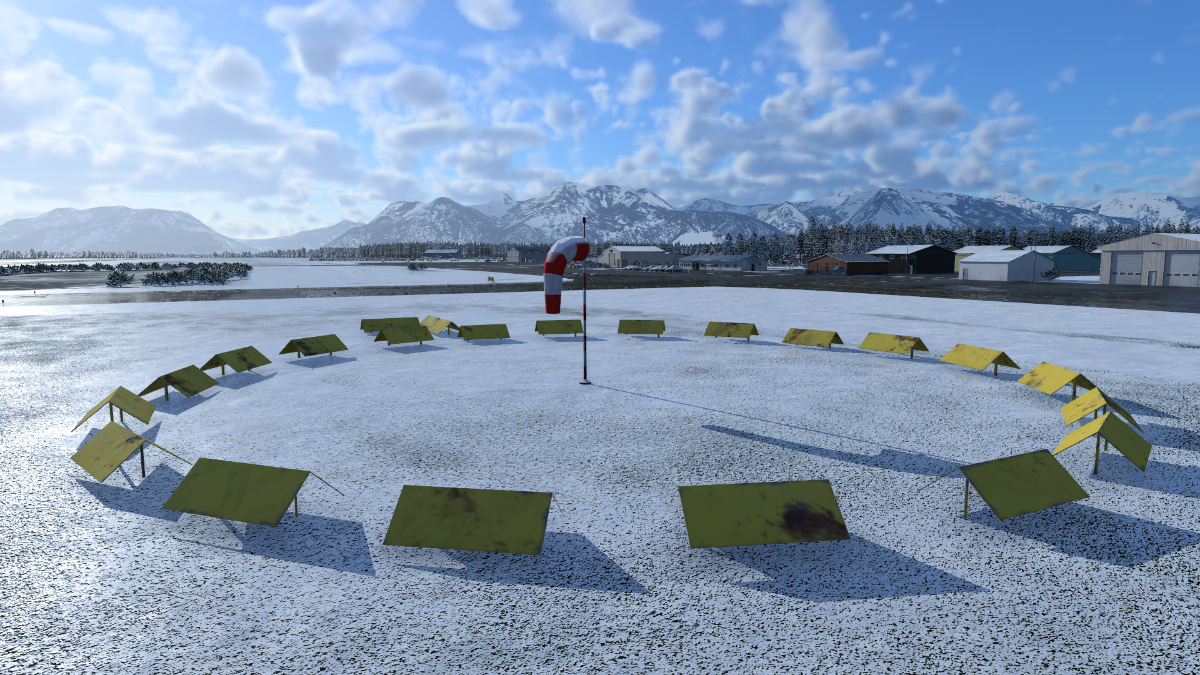
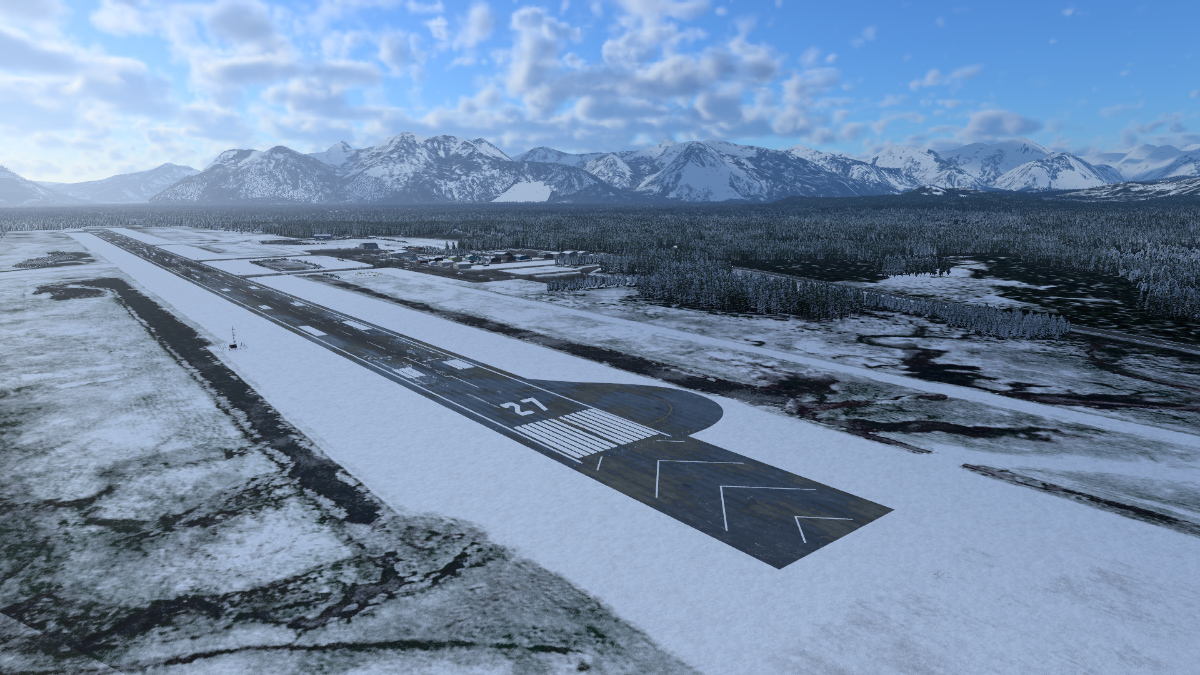
Scenery Review: Pack Bretagne: LFRE La Baule + LFEQ Quiberon By Felicity Smith Introduction Bonjour mon ami, c’est moi, Felicity! As you may have already guessed, this review has a positively European flavour to it, namely… French. For those of you who are already familiar with my previous reviews, you will know I have a soft spot for the smaller, more quaint airports of the world. The ones that are quite content just sitting quietly, minding their own business, while their larger, busier counterparts work around the clock getting an endless stream of people to the places they want to go. So, with that in mind, I will be looking at two small French airports situated in coastal Brittany – La Baule-Escoublac and Quiberon. Our first stop takes us to La Baule-Escoublac (LFRE). Unsurprisingly, being situated on the sunny coast of Brittany, it is a popular destination for holidaymakers and has been so for over a century. This is with plenty of reason, for not only do you have a wonderful bay (dubbed "the most beautiful in Europe", admittedly a biased description by the local tourist board!) but the town itself is steeped in history, from Nantes Castle to the Musee Aeronautique Presqu'ile Cote d'Amour – a historical collection of French aircraft all painstakingly restored to their former flying glory. Incidentally, should you wish to visit this museum, you would not have far to go as it is located at the airport. Having sampled the many delights of La Baule, our next stop is Quiberon (LFEQ). Another popular holiday destination, Quiberon also offers much to see and do, but it is also commonly known for its sardine production (sardines for breakfast anyone?) out of the tourist season. A starry snippet of trivia with which to wow the younger crowd; Quiberon is the home of a professional Quidditch team operating within the fictional Harry Potter universe. The Quiberon Quafflepunchers team players wear shocking-pink robes. Download & Installation Upon purchasing the package, I was kindly provided with download links for both X-Plane 11 and 12, the size of which was a rather hefty 3.6GB each. Once downloaded, it was a straightforward task of extracting the file and placing the newly created three folders into my X-Plane Custom Scenery directory (making sure the included object library was placed below the two airport entries). Documentation Contained within each airport folder are manuals, both in French and English, plus charts of the included areas. The manuals are carefully done and cover areas such as installation, recommended settings for the package, and how to use the “opening hangar door” plugin. Walkabout Note: for the purpose of this review, I have installed both sceneries into a fresh install of X-Plane 12, with no other sceneries, libraries, or photographic scenery added. LFRE- La Baule Escoublac As you come into land at LFRE, you will notice the absence of any kind of photographic overlay, a common addition to most payware airports. This, unfortunately (depending on what you are used to), means you are greeted by X-Plane’s default ground textures. This regrettably, has an impact on how you perceive the airport, especially in terms of immersion. I mention this because if like me you have photographic scenery installed for places you frequently fly into, then the vanilla textures offered by Laminar Research can be a hard pill to swallow at times. However, if on the other hand default textures are what you are used to, then LFRE looks perfectly acceptable on approach. I do recommend installing photographic scenery for the area though, as I feel it would boost the immersion factor considerably. Once on the ground, you are free to explore to your heart’s desire, not that this would take very long. Much like the real La Baule, this X-Plane rendition stays truthful in the fact that there isn’t a whole lot to see within the airport perimeter. In saying that, what you do see is done remarkably well, with obvious care and attention. One of those areas is the 3D modelling and texture work employed on the numerous airport buildings. The small FBO building deserves a special mention as I found it to be extremely well done, especially the weathered textures; suitably fitting for an airport situated by the sea. The hangars too were nicely modelled, not quite at the same level as the FBO building, but good enough to feel authentic. On a slightly negative note, it was a shame that I found the copious amounts of 3D grass to be such a performance hog. I’ll be the first to admit that my PC isn’t the latest or greatest, but I was rather frustrated by the performance hit, especially when I can explore airports with twice as many buildings and features without any kind of framerate hit. I was also disappointed to see (or not) that there were no people present at the airport, something which I feel is strongly needed with an airport of this size. With large international airports, you can lose yourself somewhat with the comings and goings of airport traffic, but with an airport of this size, you really do need to have a few people present, static or otherwise. LFEQ - Quiberon, France Our next stop is Quiberon located about thirty-seven miles to the northwest. As with La Boule, if you do not have photographic scenery installed for this area, you are again relying on X-Plane default textures, so my thoughts apply as before. However, once down, you are greeted by a rather pleasant environment. Much like La Baule, Quiberon is made up of a few hangars and maintenance facilities, plus the main FBO building. The detailing and modelling of these structures are of a high standard and really help create a sense that you are indeed at a small French airfield. I was most impressed with the FBO building, which even included its very own painted wall art, along with an exterior spiral staircase. Present here also was a rest area, complete with chairs and tables, but sadly no people (which would have finished the appearance). The Quiberon Air Club hut was another structure I was impressed with, most notably, the peeling paint, plus the sign and logo on the front of the hut, which I felt just completed its rather worn out (but loved) appearance. Ground textures overall are well done and suitable for their location, with the asphalt and tarmac textures around the buildings being of slightly better quality than those using the default X-Plane textures. Also present was the infamous 3D grass, but strangely, this didn’t seem to have so much of an impact this time around. Night Lighting The night lighting overall was very good, being suitably muted, with the effect striking just the right balance between having too much and too little. The runways at both airports are not lit, so it’s daylight operation only I’m afraid (safety first) Performance Being both small GA airports, I wasn’t expecting to have any issues in terms of performance, so (as mentioned above) I was quite surprised when I saw my framerate drop whilst exploring La Baule. This occurred mainly around areas where 3D grass was bountiful…namely the hangar areas, and behind the main airport building. Away from these locations, performance was what I expected, hence my assumption that it’s the large amounts of 3D grass at fault. Quiberon on the other hand performed well, with no noticeable slowdowns experienced during my walkabout. Photography Scenery As mentioned previously, this package was tested in X-Plane 12 using its default ground textures, as this is what most people have installed. However, intrigued to see how it would perform with a photo scenery added, I fired up X-Plane 11. You might be asking why I didn’t use X-Plane 12 and the answer is simple, I don’t have the VRAM it takes to run both the custom airports and the photographic element together at an acceptable level. With that said, hopefully, the screenshots included below will give you an idea of how the two sceneries work together. Our first set of images shows the airport, the town of La Baule and then onwards towards Quiberon: The final set of screenshots shows Pointe du Conguel and the airport and town of Quiberon: Conclusion I have to say that overall, I enjoyed my time at both La Baule and Quiberon, even if I do have certain misgivings about the package. Their proximity to each other allows for some highly enjoyable flights, which is greatly enhanced if you happen to have photographic scenery of the area installed. Speaking of which, I really do wish these little strips had orthos included as this would greatly enhance their appeal. As it is, you are left with default ground textures, which rather dampens the effect. There is also the fact that neither airport includes any people, plus the performance hit I experienced, so perhaps these are all areas the developer could look at. In terms of the numerous buildings found at the two airports, I found the 3D modelling and texturing to be of extremely high quality. The weathering applied to the building textures is excellent, and really helps add character. When it comes to pricing, I think it’s best to say, that this is a package you would have to think carefully about before purchasing. If you are concerned about the lack of orthos, the absence of people, or are already “performance limited” in X-Plane, then I would have to say that this is probably a package you should best avoid. However, if you have orthos of the scenery installed, enjoy flying around the beautiful coastline of Brittany, or have a connection with the area, then I would absolutely pick this package up, as I’m sure it will offer a high level of enjoyment for quite some time to come. Happy flying, safe living! _______________________________ Pack Bretagne: LFRE La Baule + LFEQ Quiberon by VFRScenery is available from the X-Plane.Org Store here: Pack Bretagne : LFRE La Baule + LFEQ Quiberon Priced at US$30.98 LFRE- La Baule Escoublac Priced at $19.99 LFEQ - Quiberon Priced at $19.99 Requirements X-Plane 12 or X-Plane 11 Windows, Mac, or Linux 4 GB VRAM Minimum - 8 GB+ VRAM Recommended Download Size: 3.7 GB Current Version: 1.0 (December 8th 2022) Review by Felicity Smith 26th February 2023 Copyright©2022: X-Plane Reviews Review System Specifications: Windows 10, AMD Ryzen 5 2600 (overclocked to 4.1GHz), 1650 4Gb, 32GB RAM, 256 M.2 SSD, 2TB HD (Disclaimer. All images and text in this review are the work and property of X-PlaneReviews, no sharing or copy of the content is allowed without consent from the author as per copyright conditions) All Rights Reserved
-
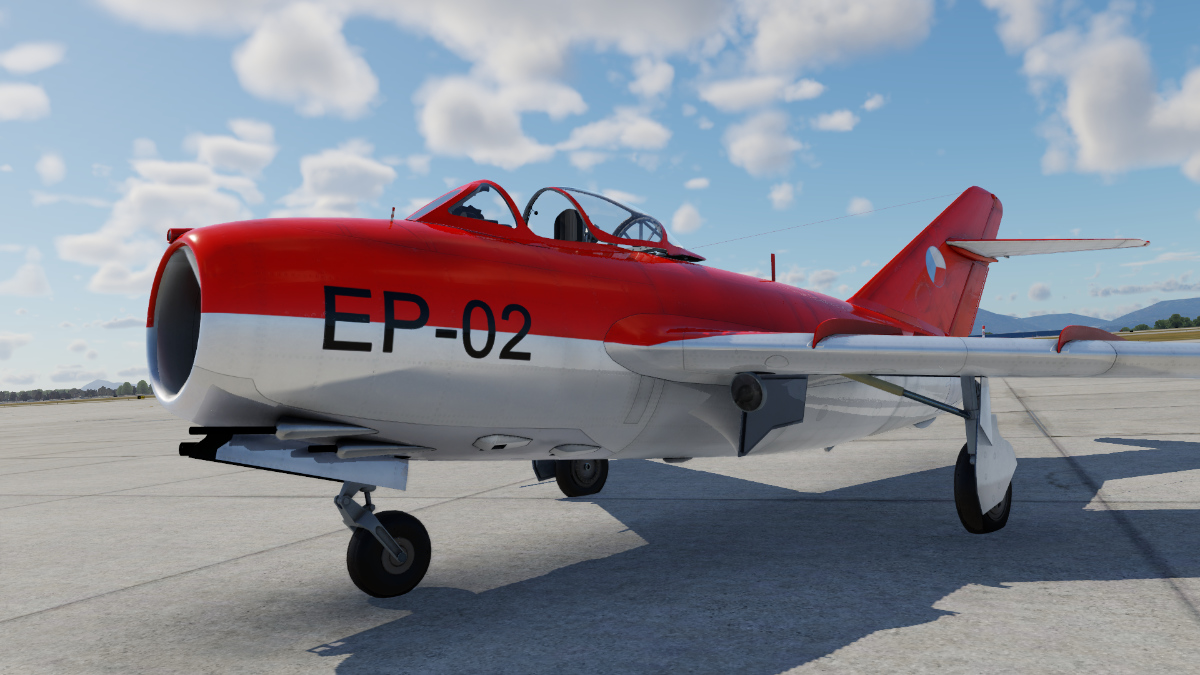
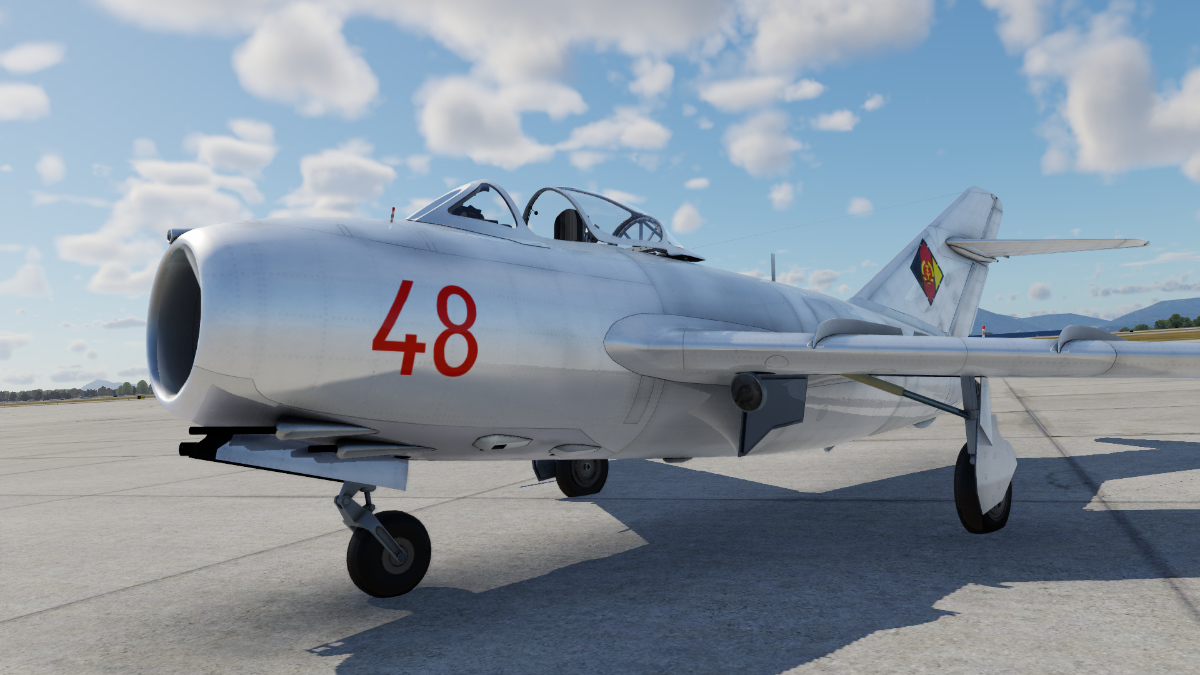
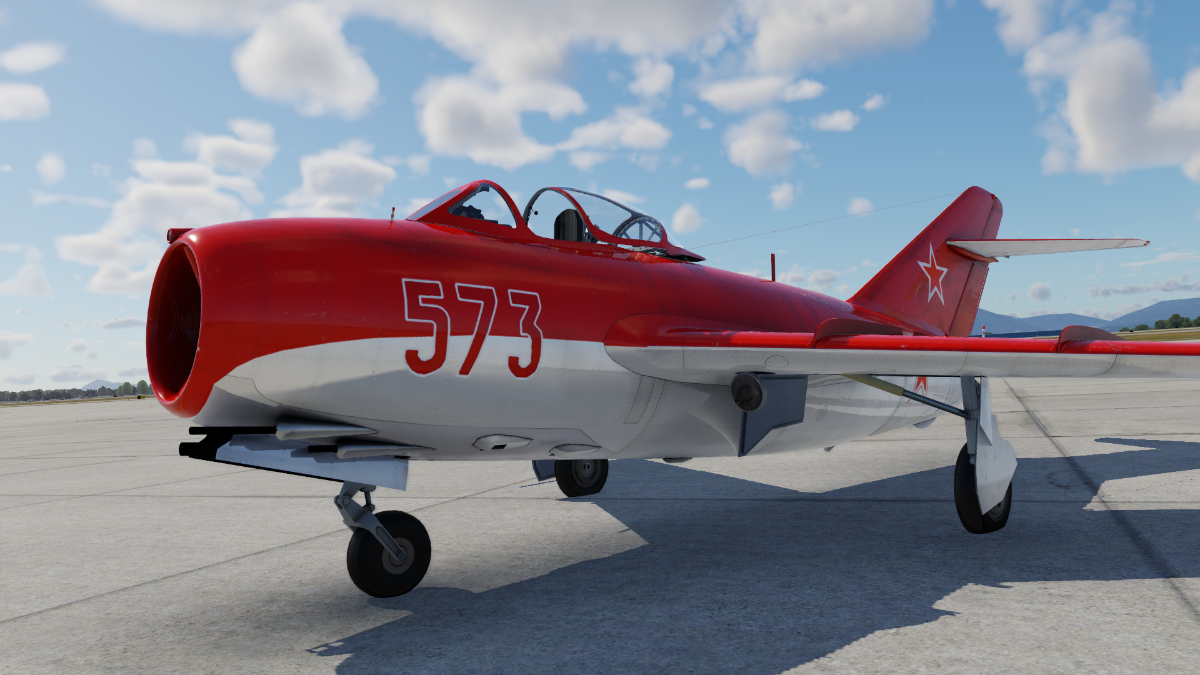
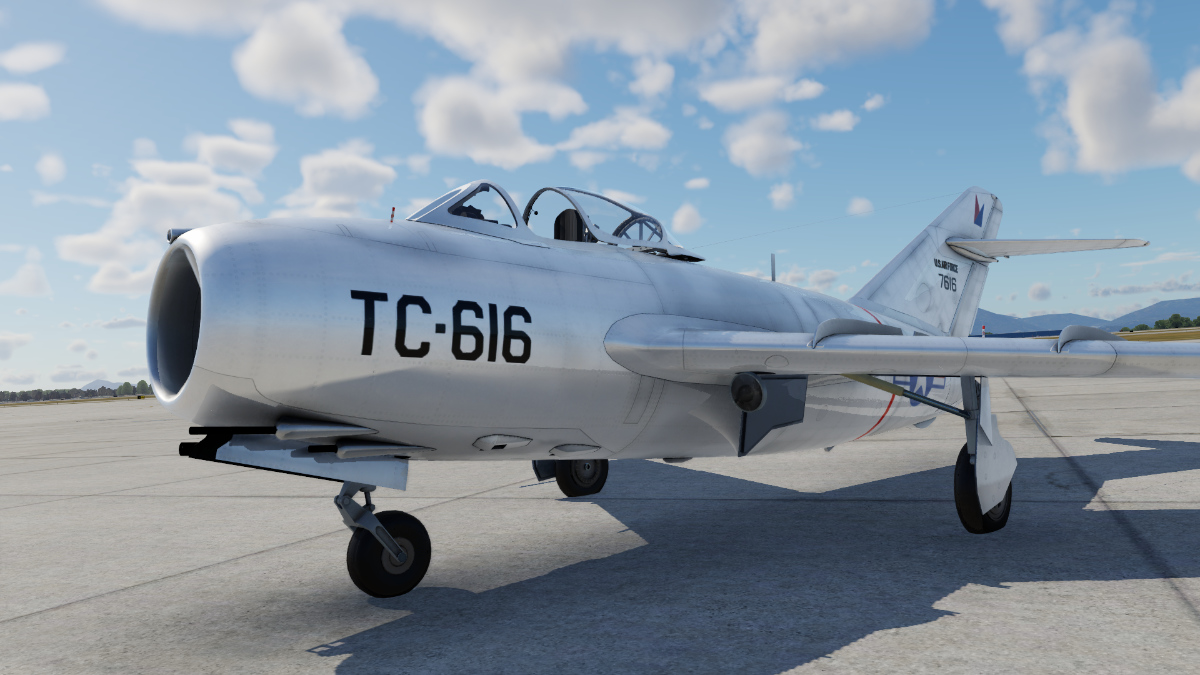
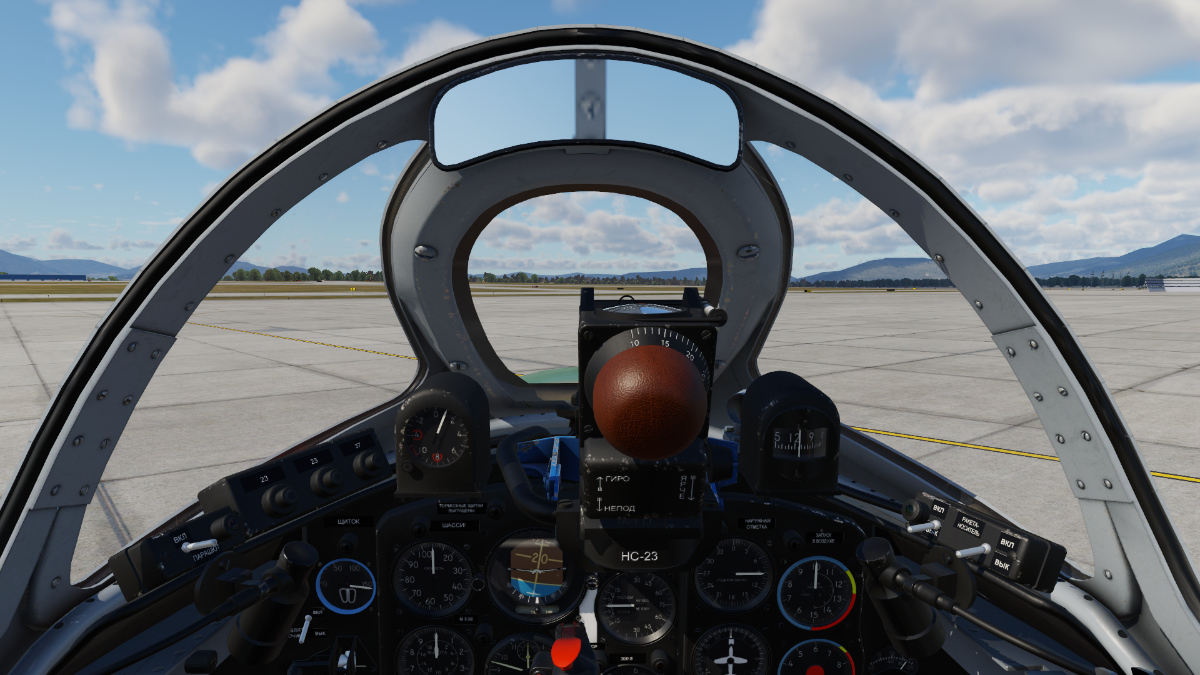
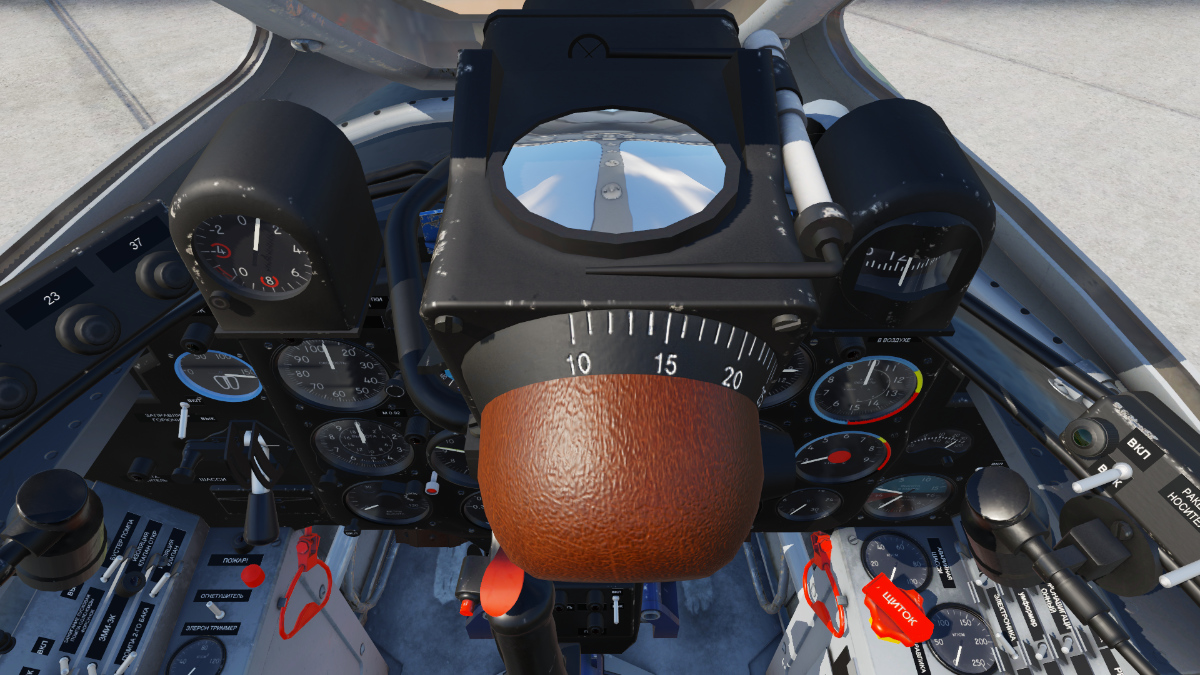
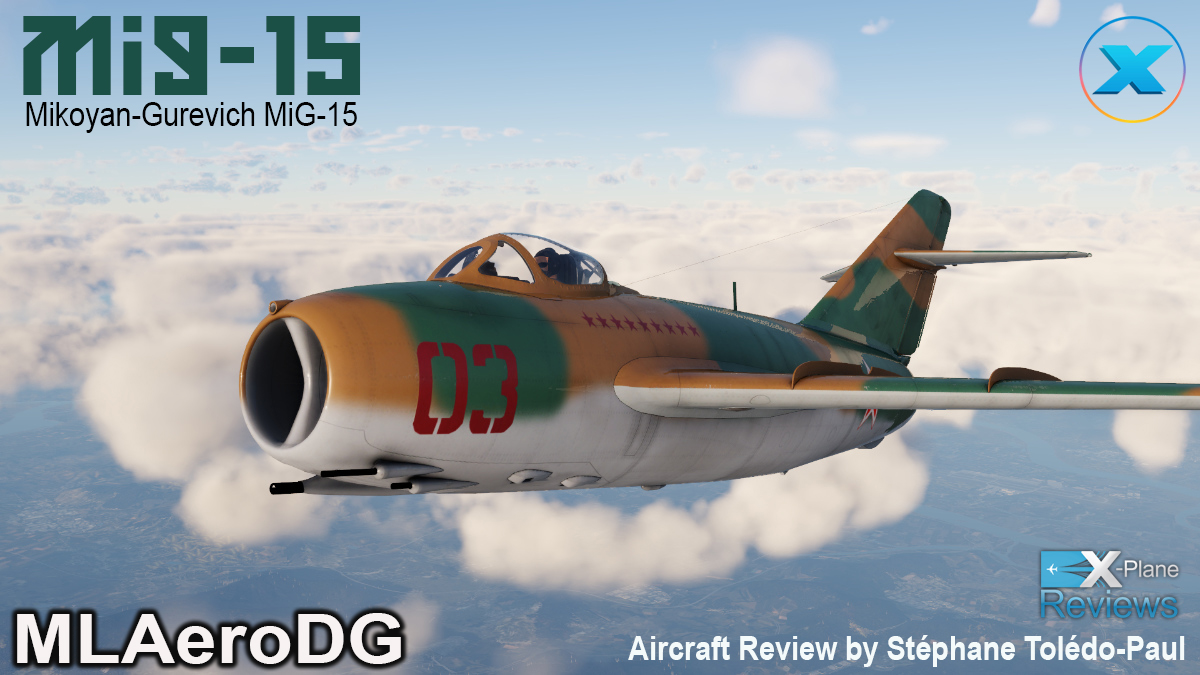
Aircraft Review: MiG-15 by MLADG
Dominic Smith replied to Dominic Smith's topic in Military Aircraft Reviews
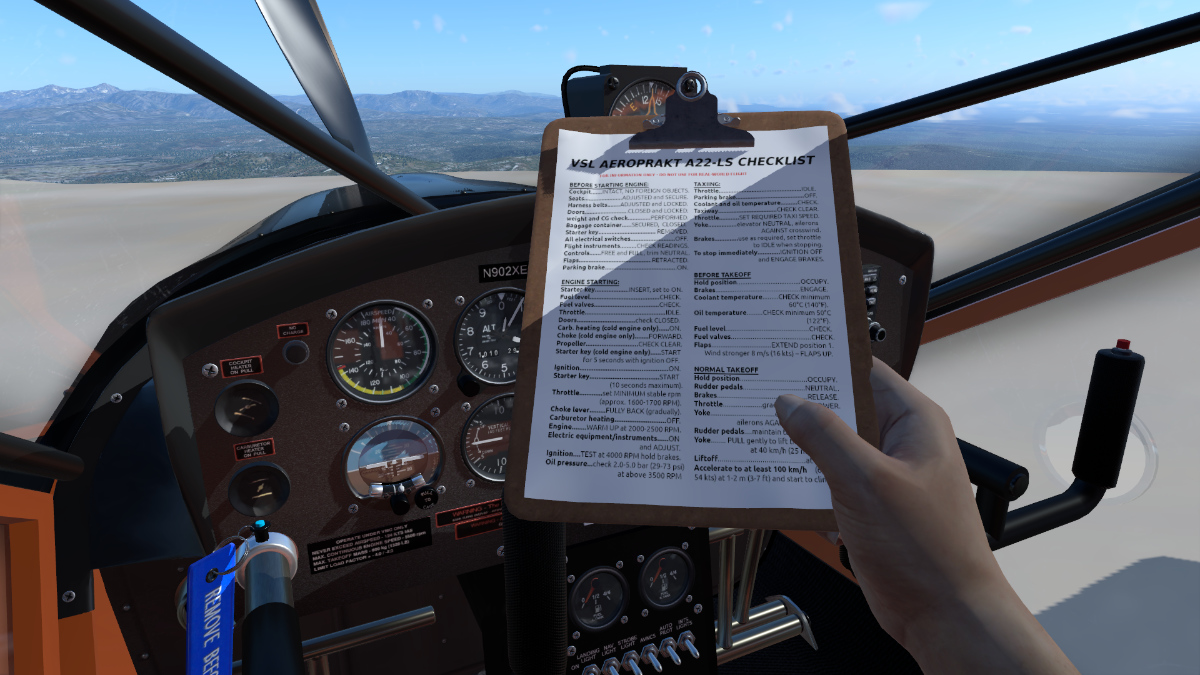
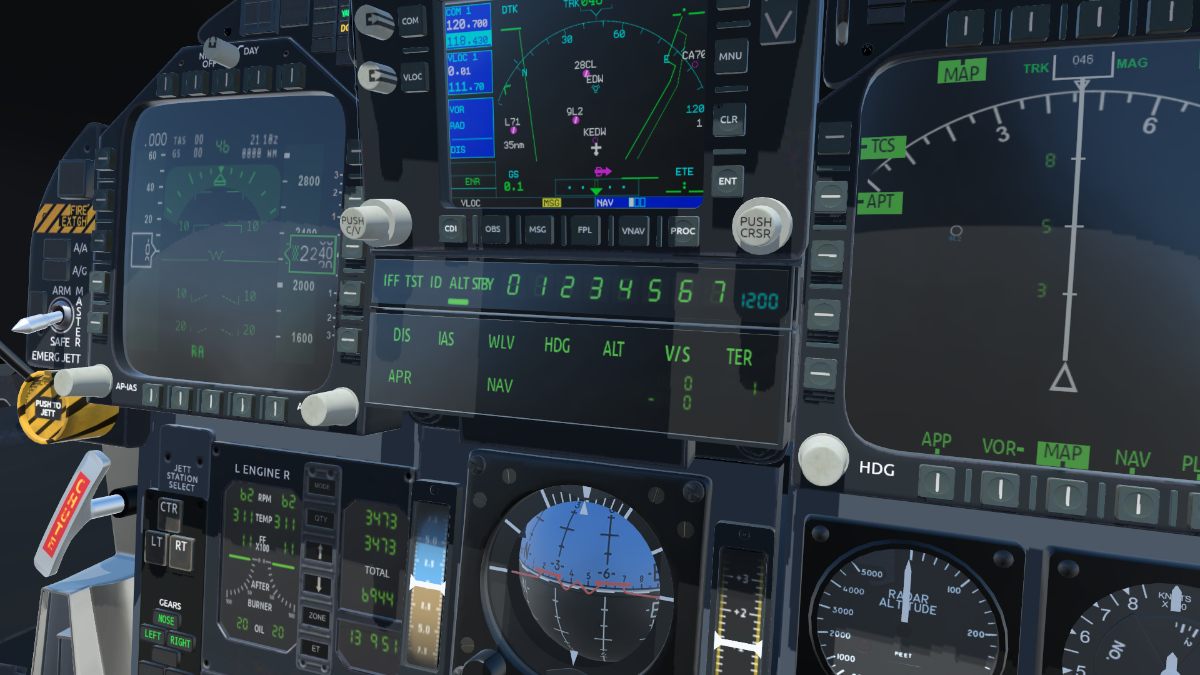
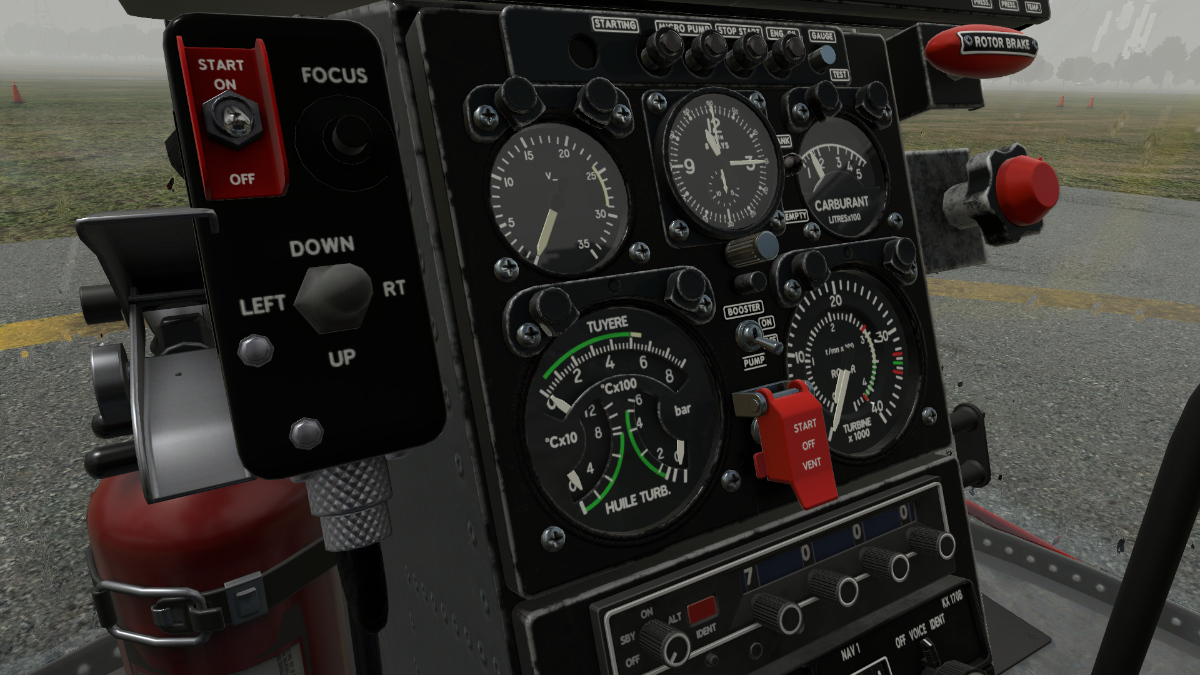
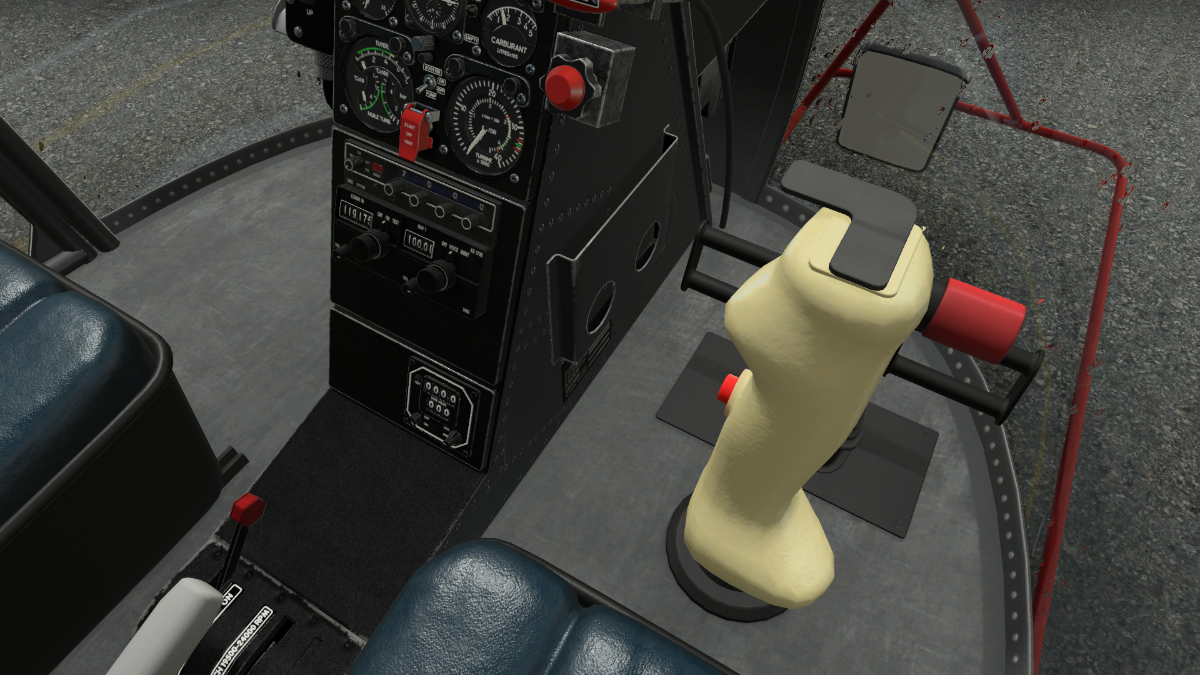
Hi J.M, Yes, the yoke is indeed highlighted. Kind regards Dominic -
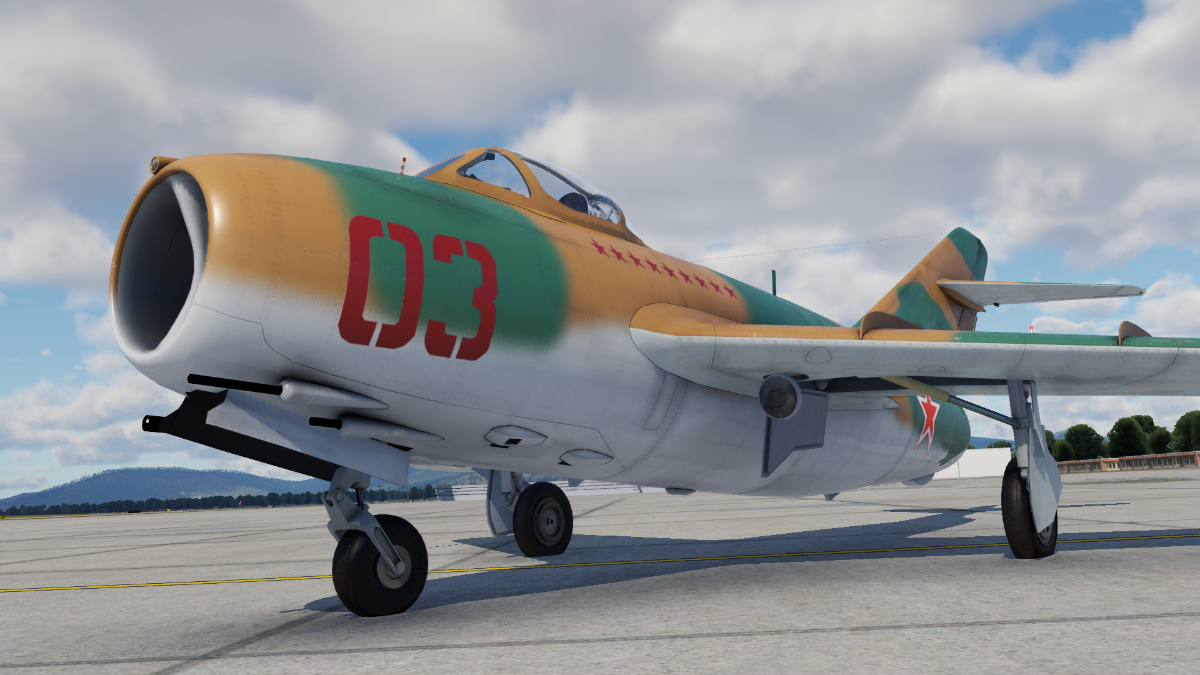
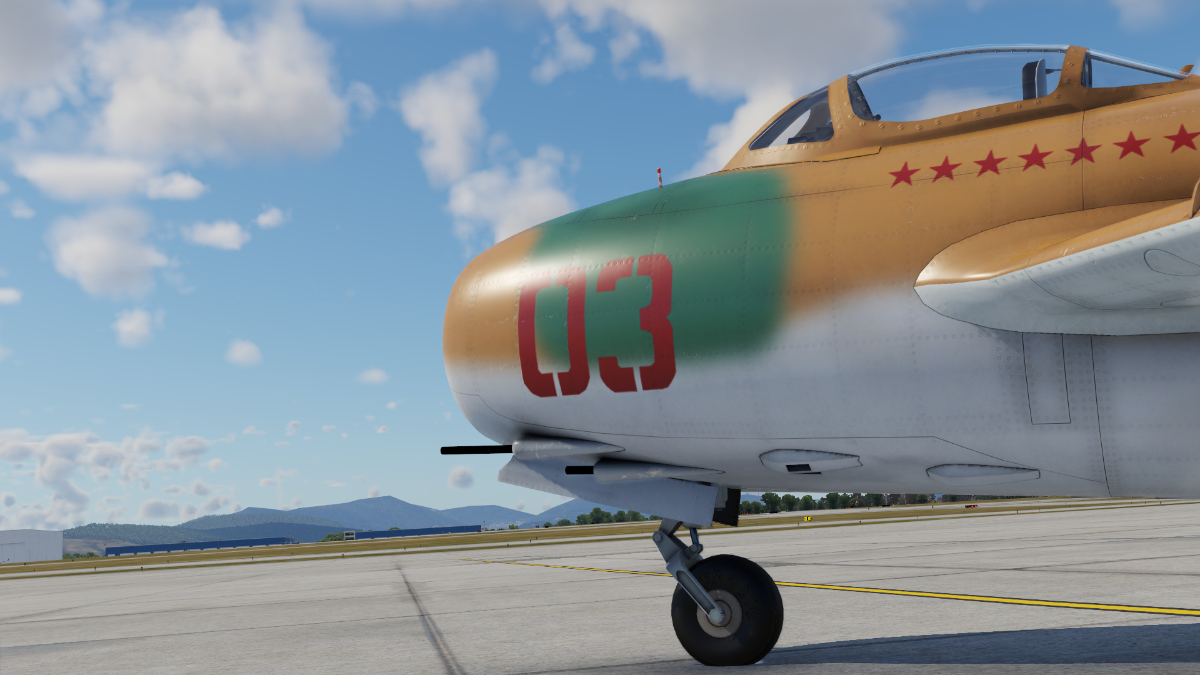
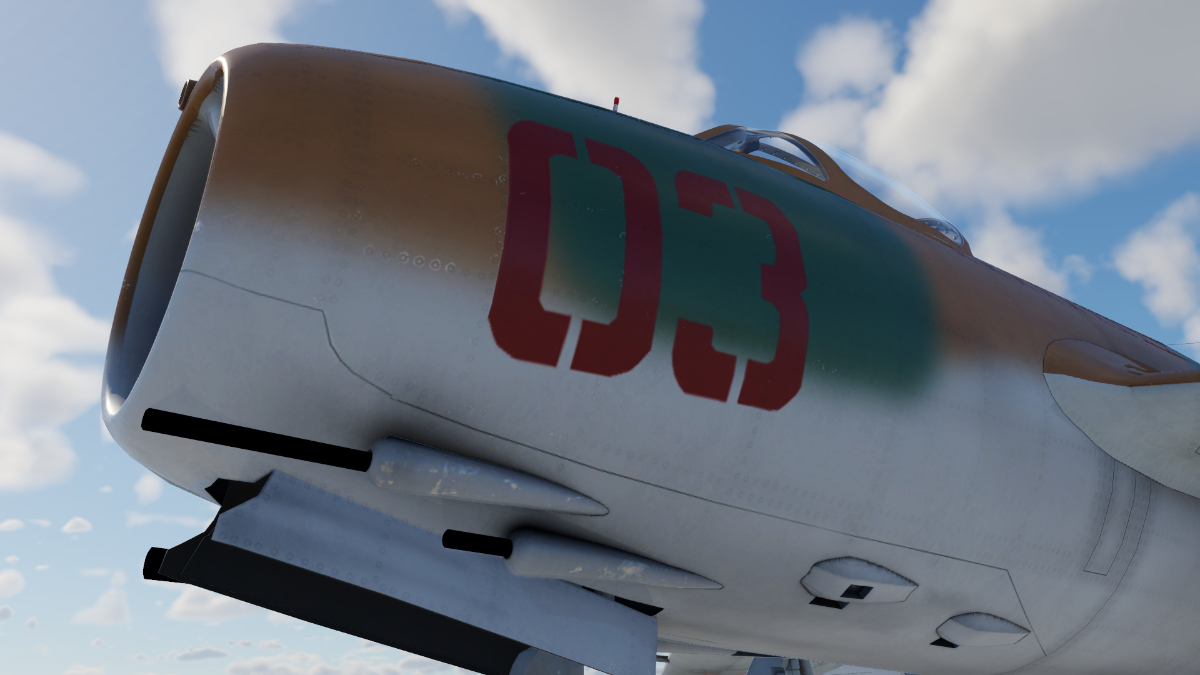
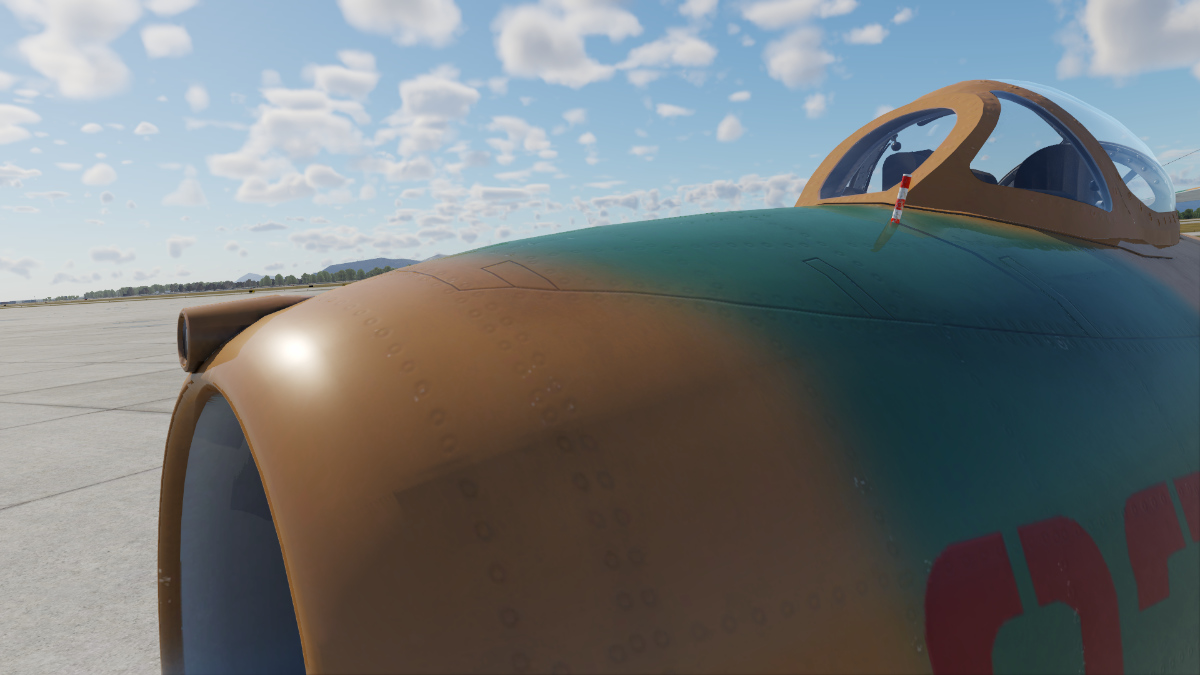
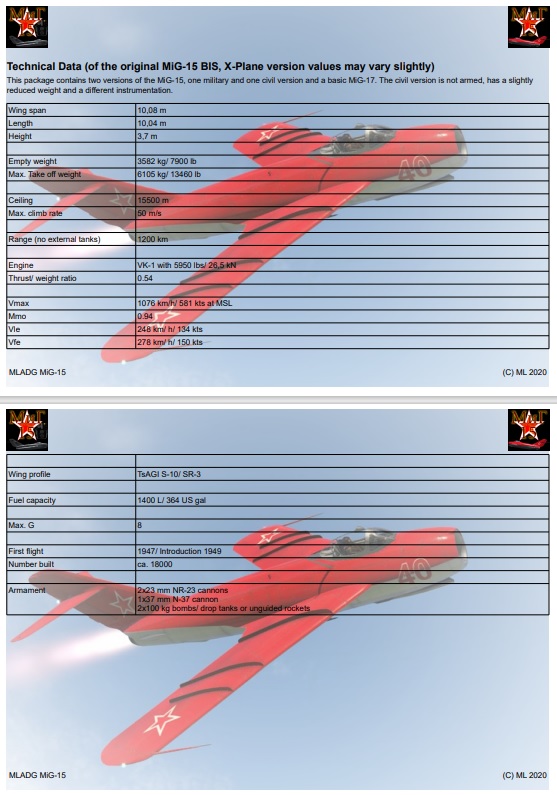
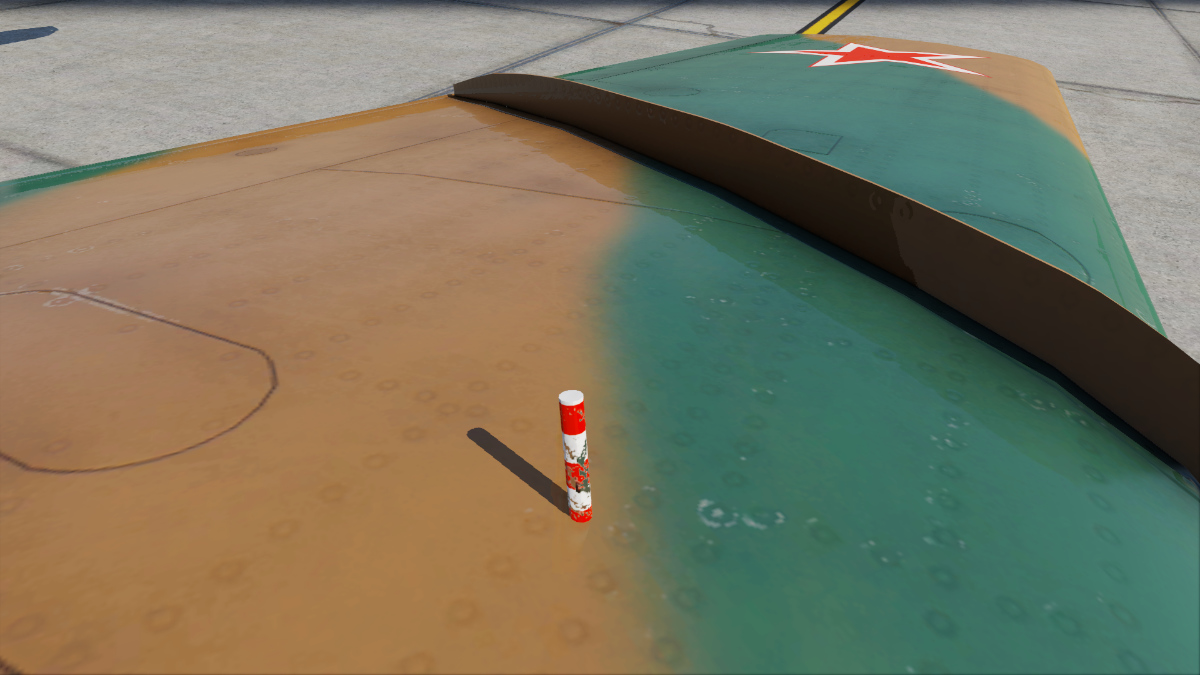
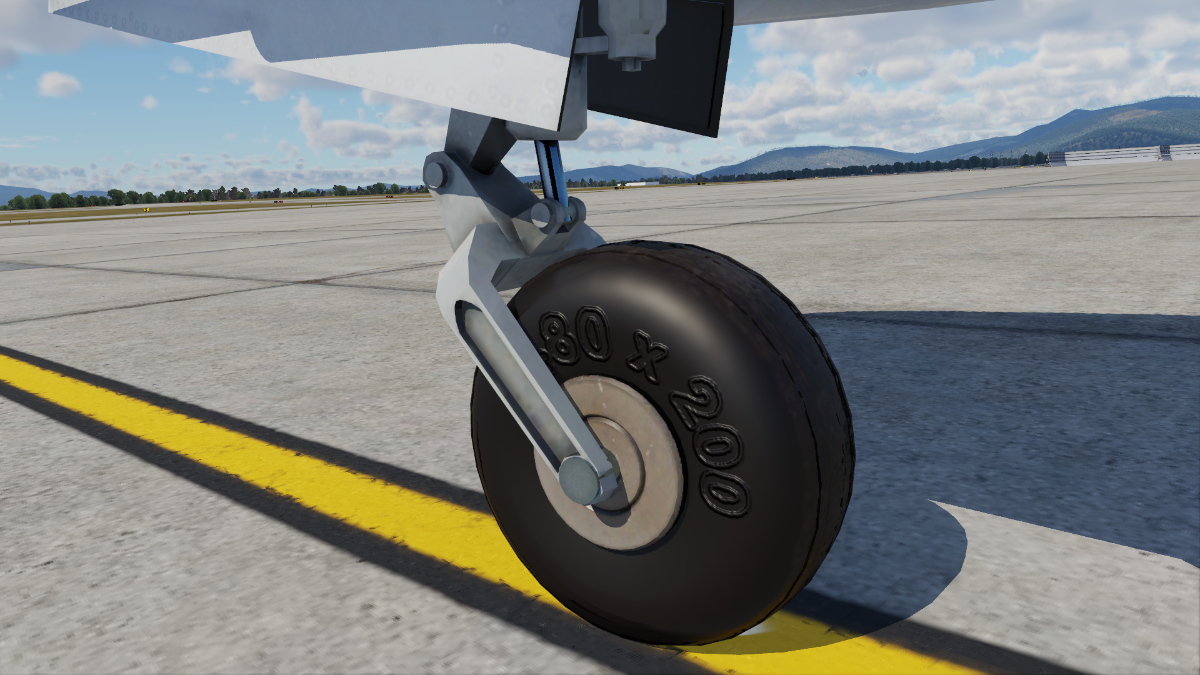
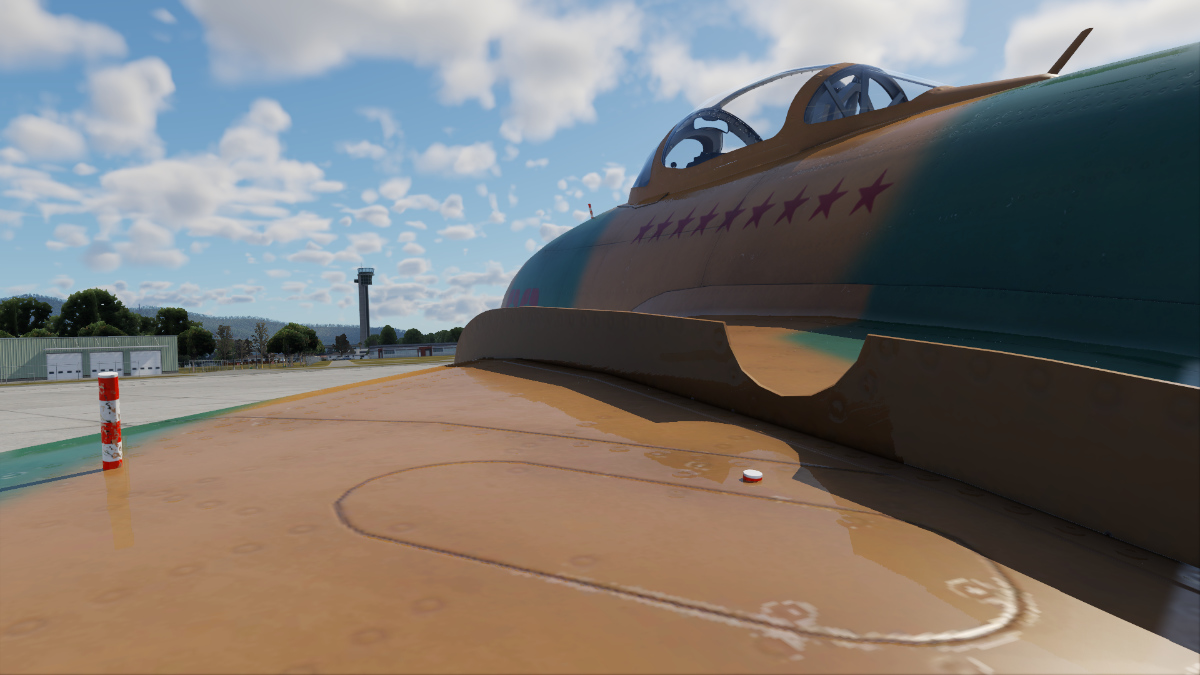
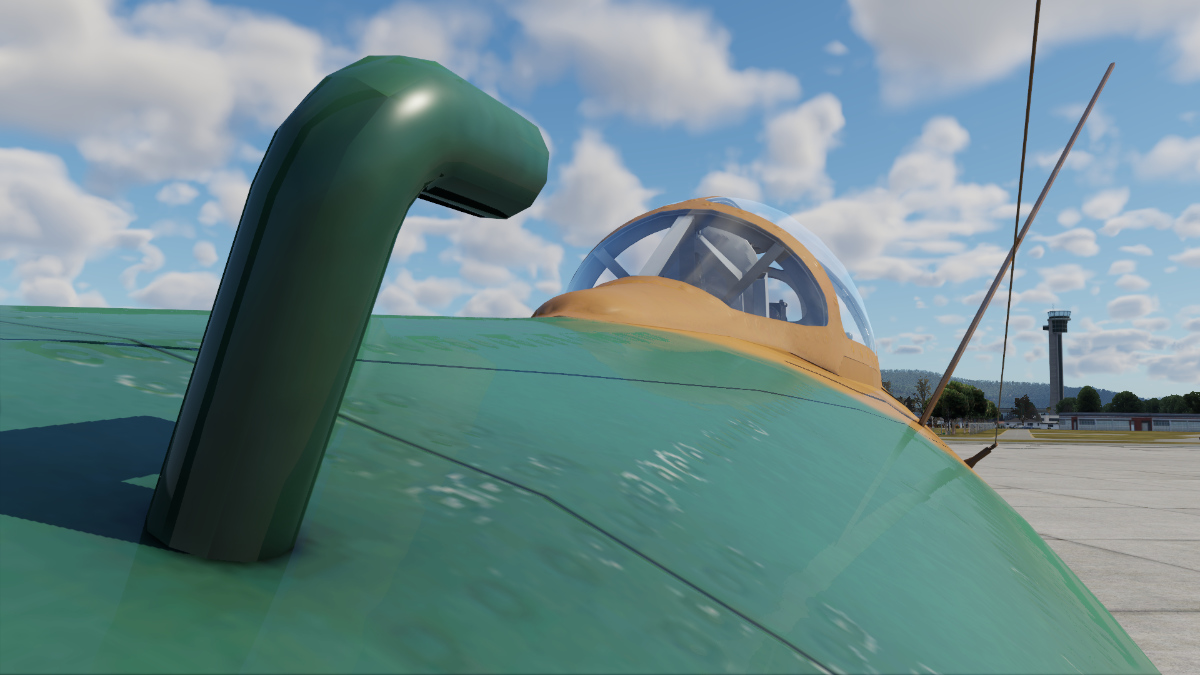
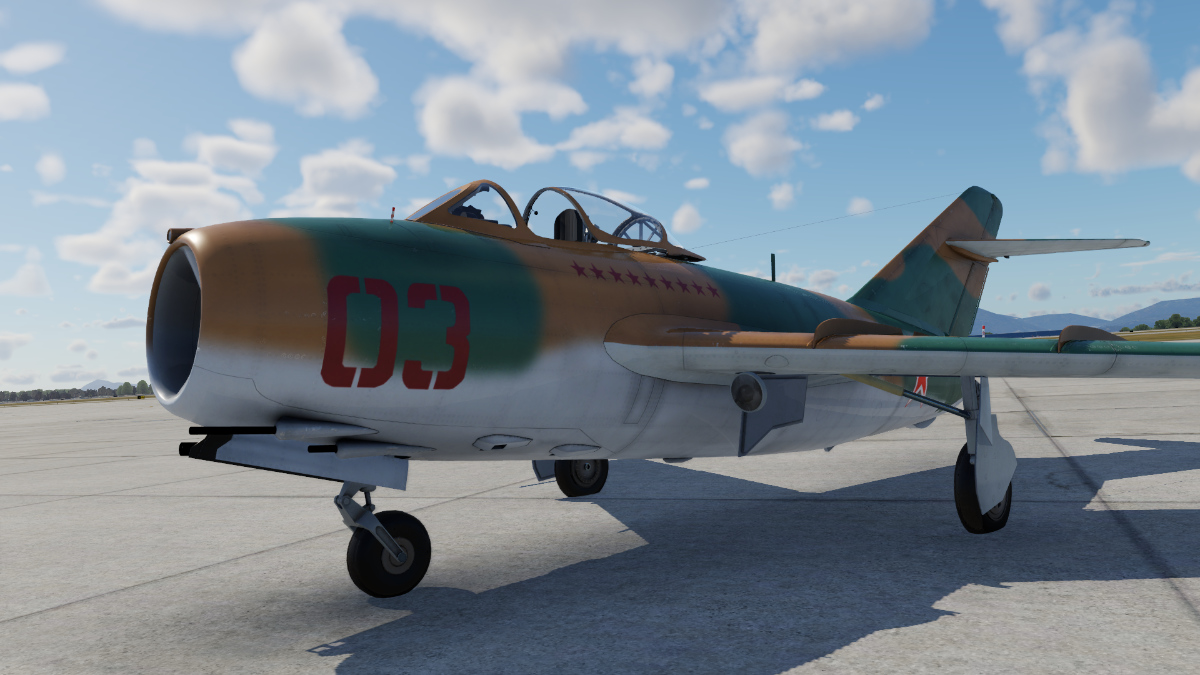
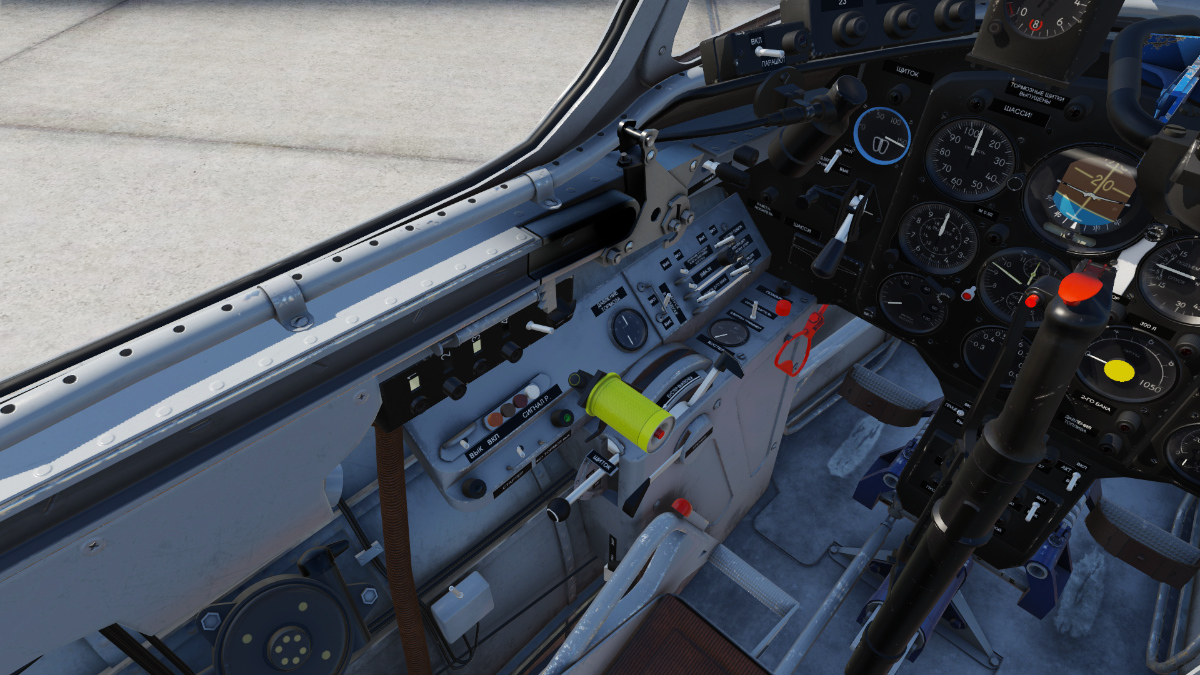
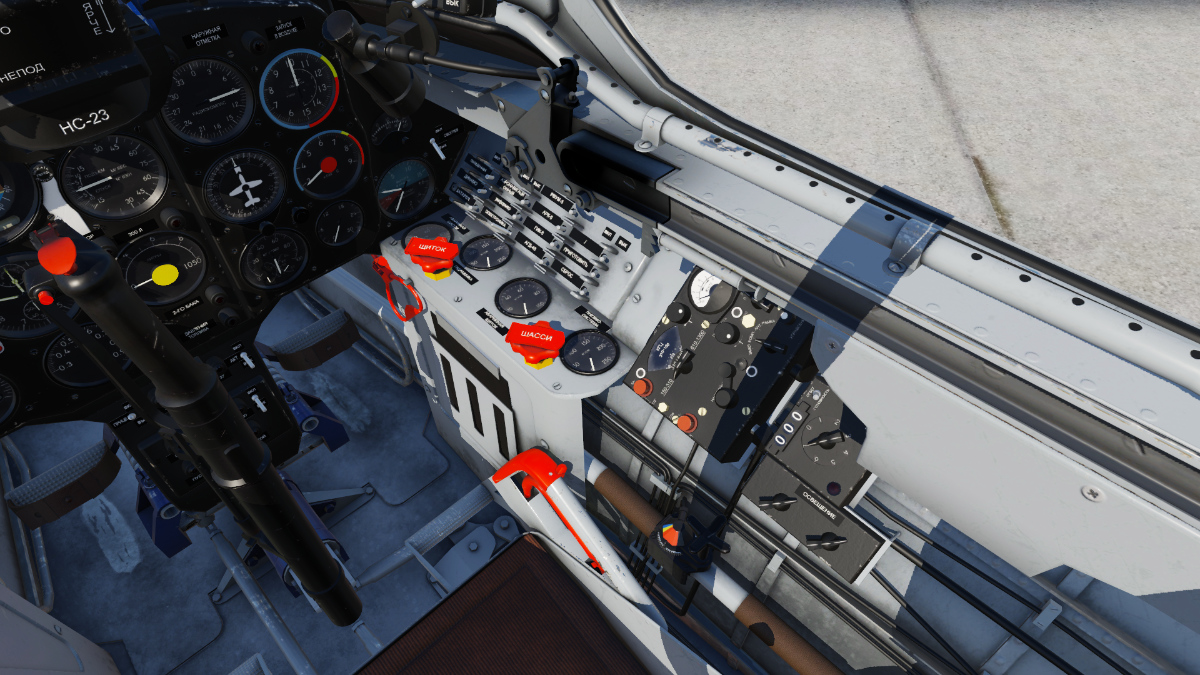
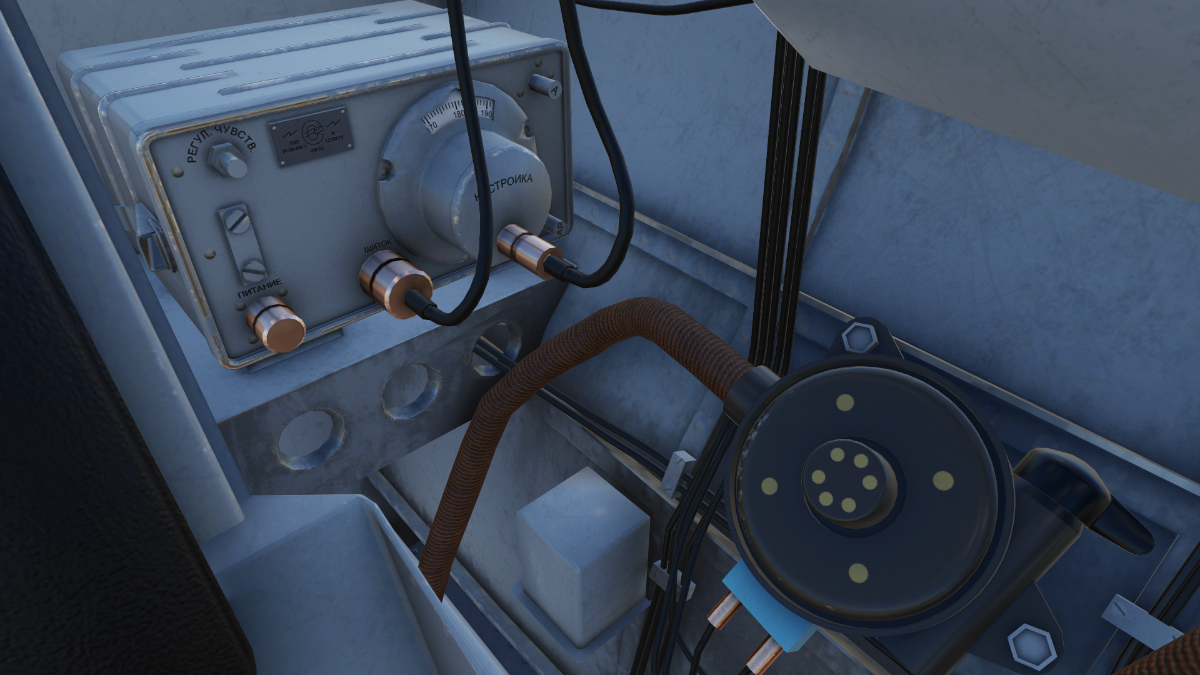
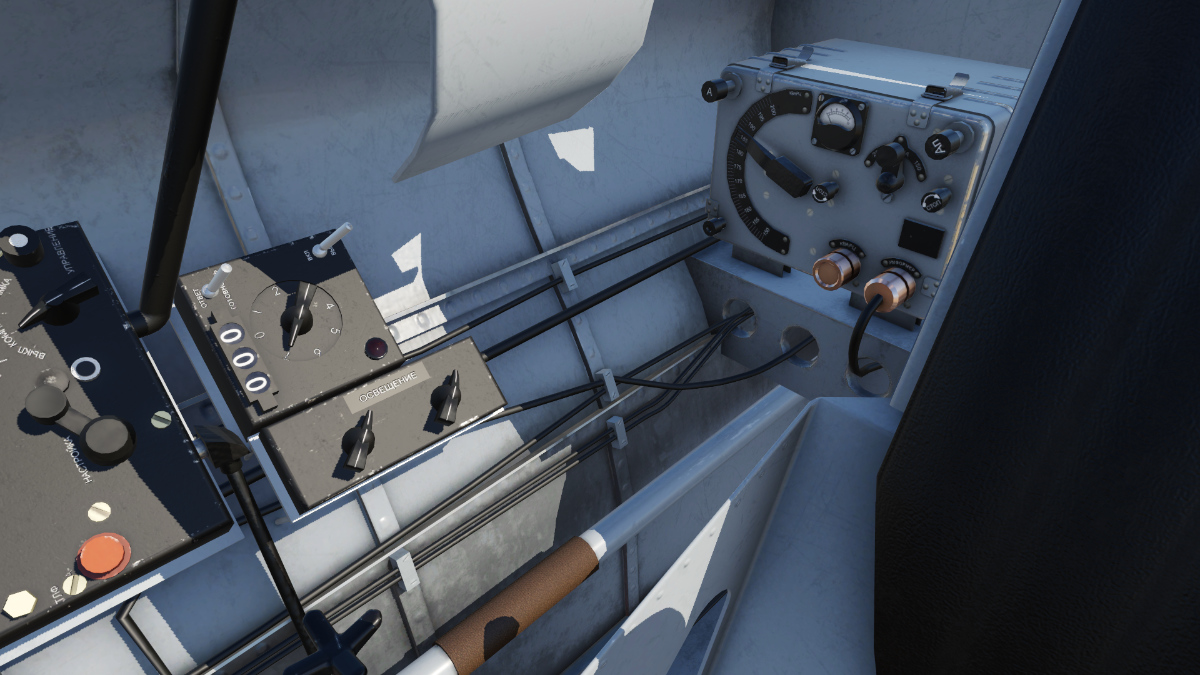
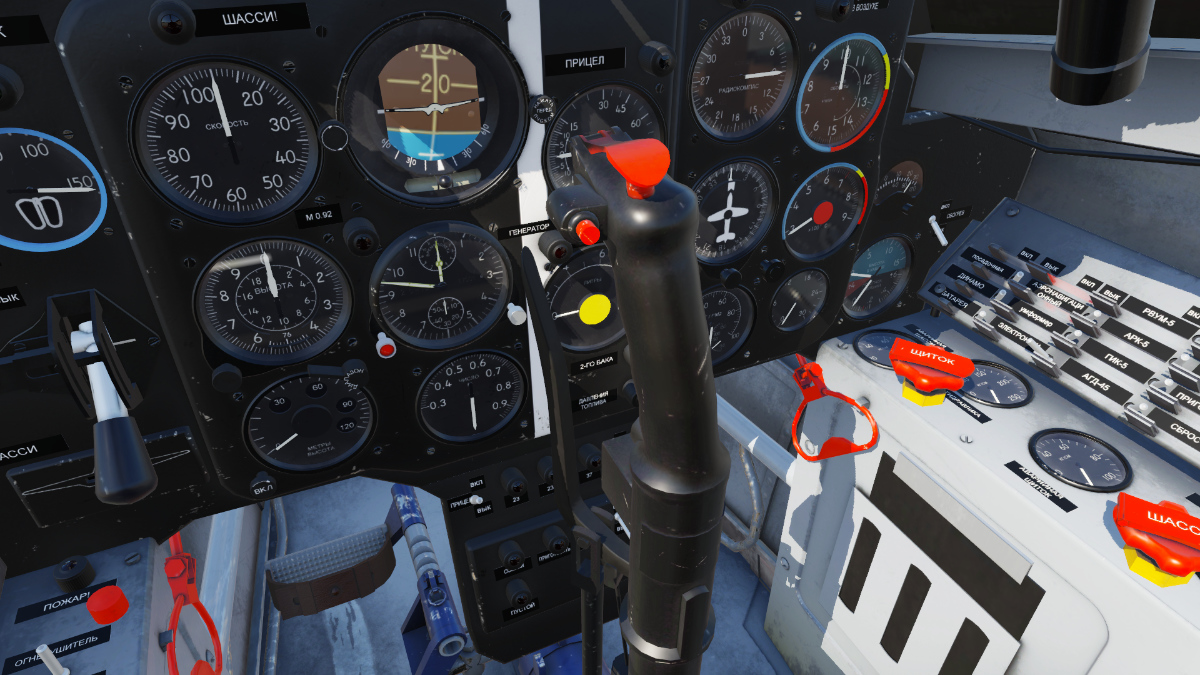
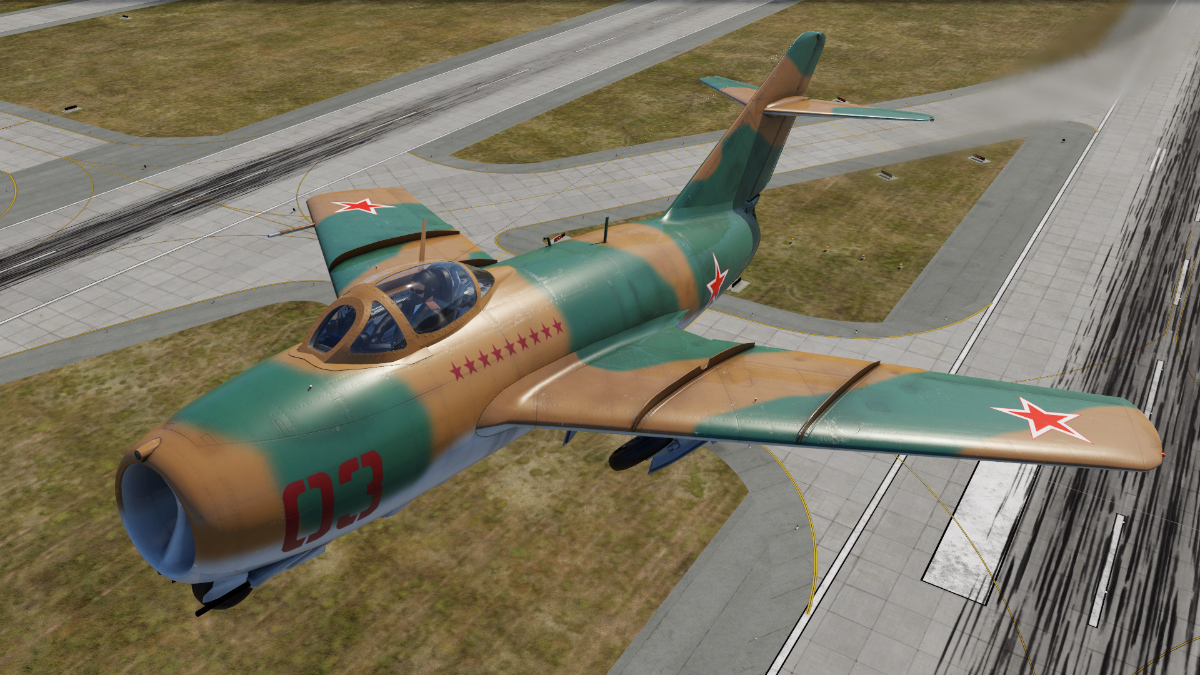
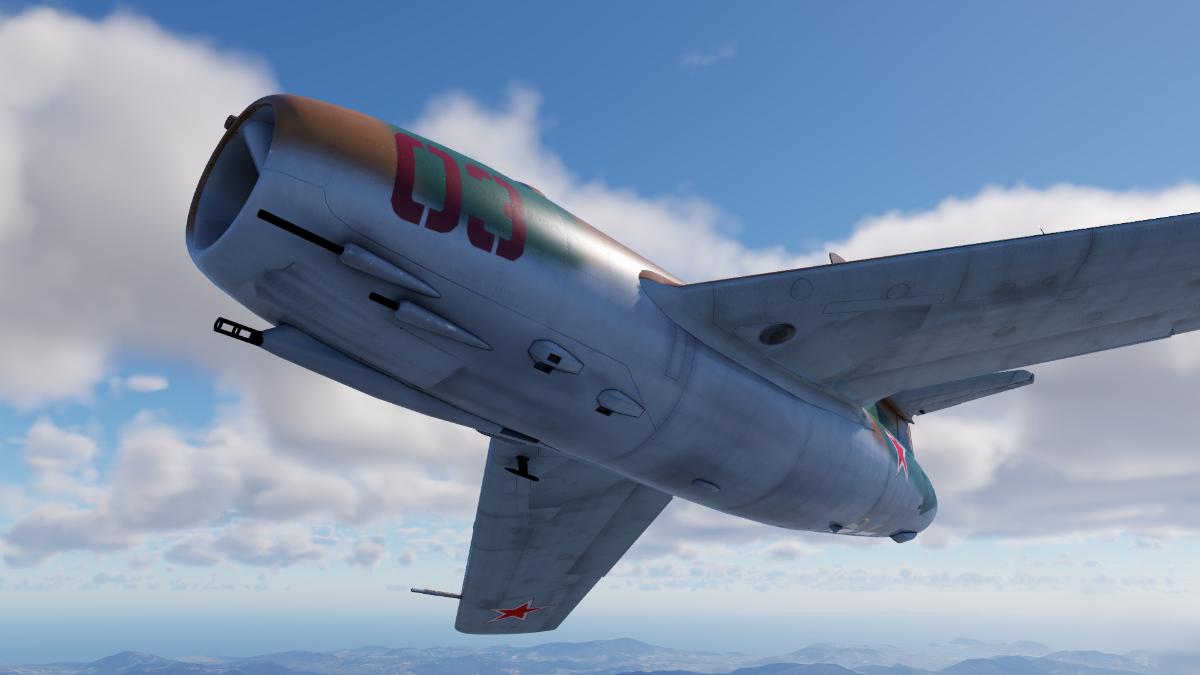
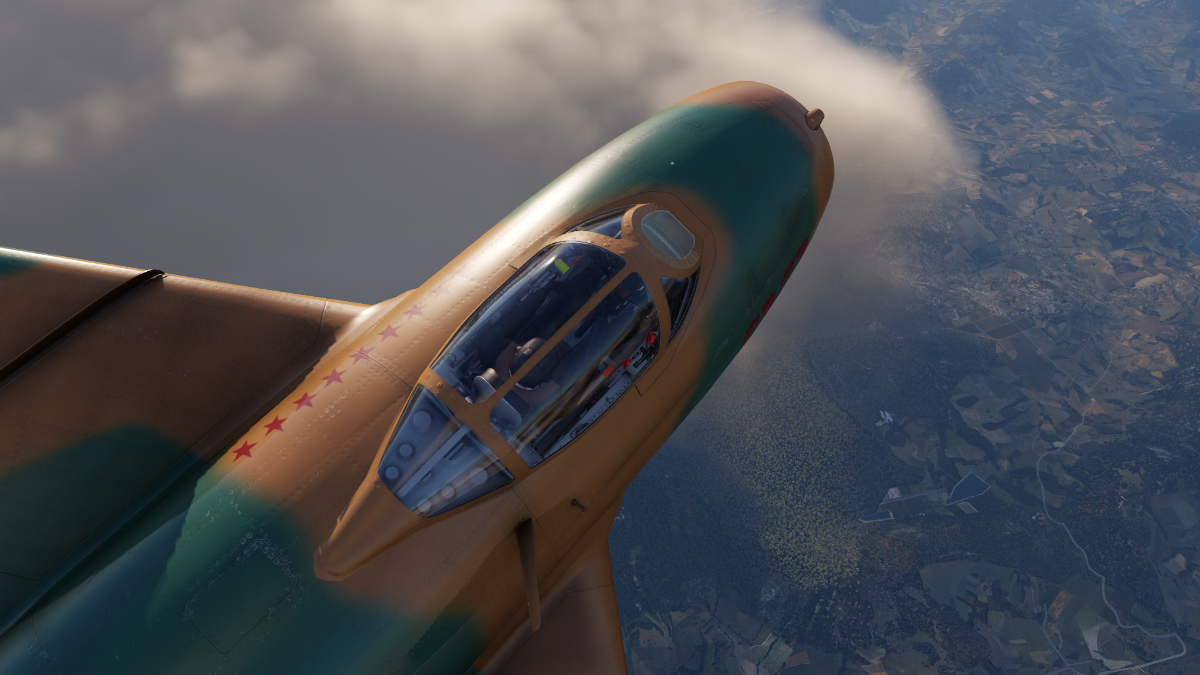
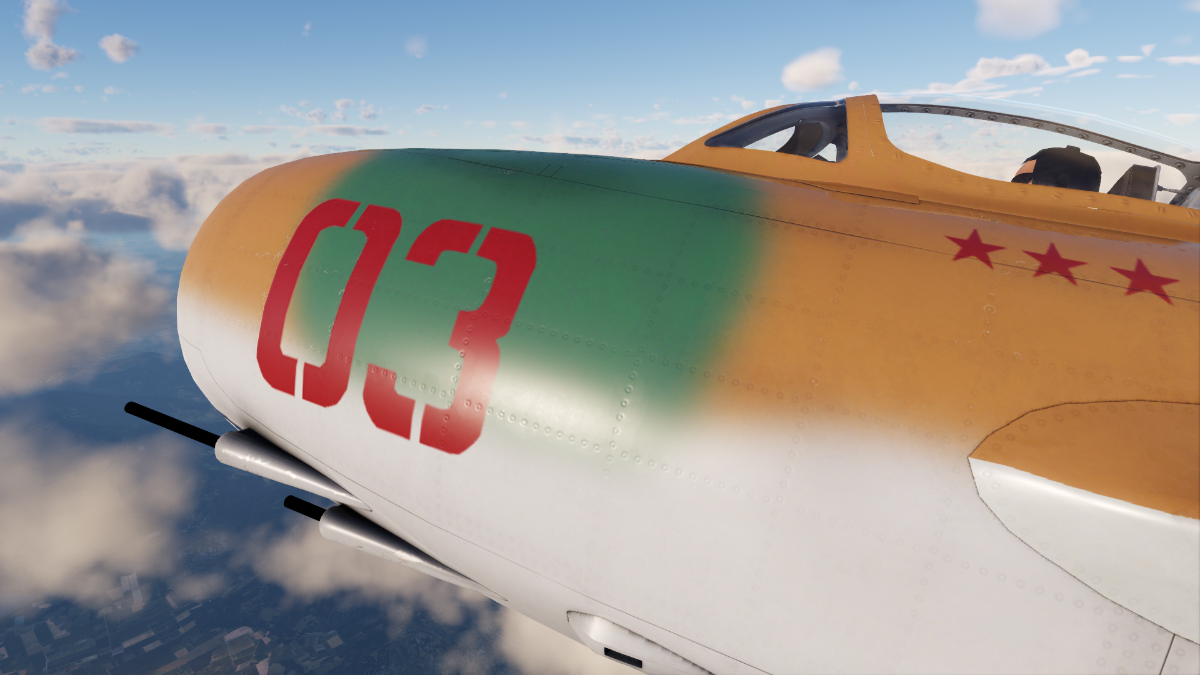
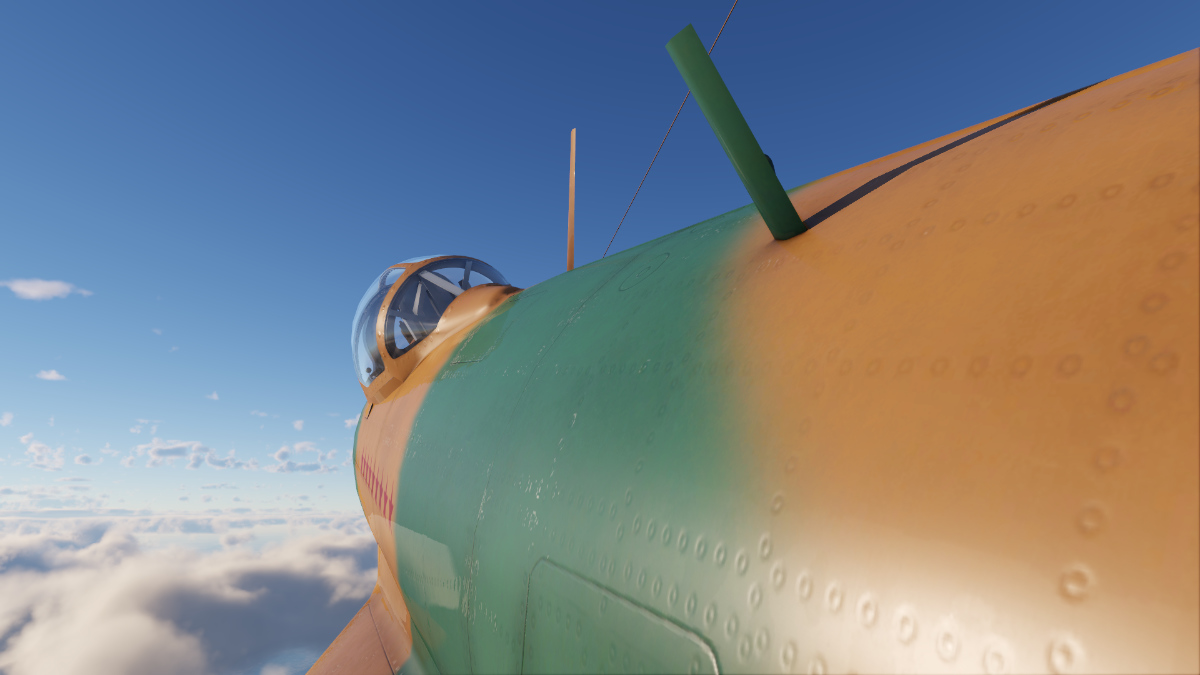
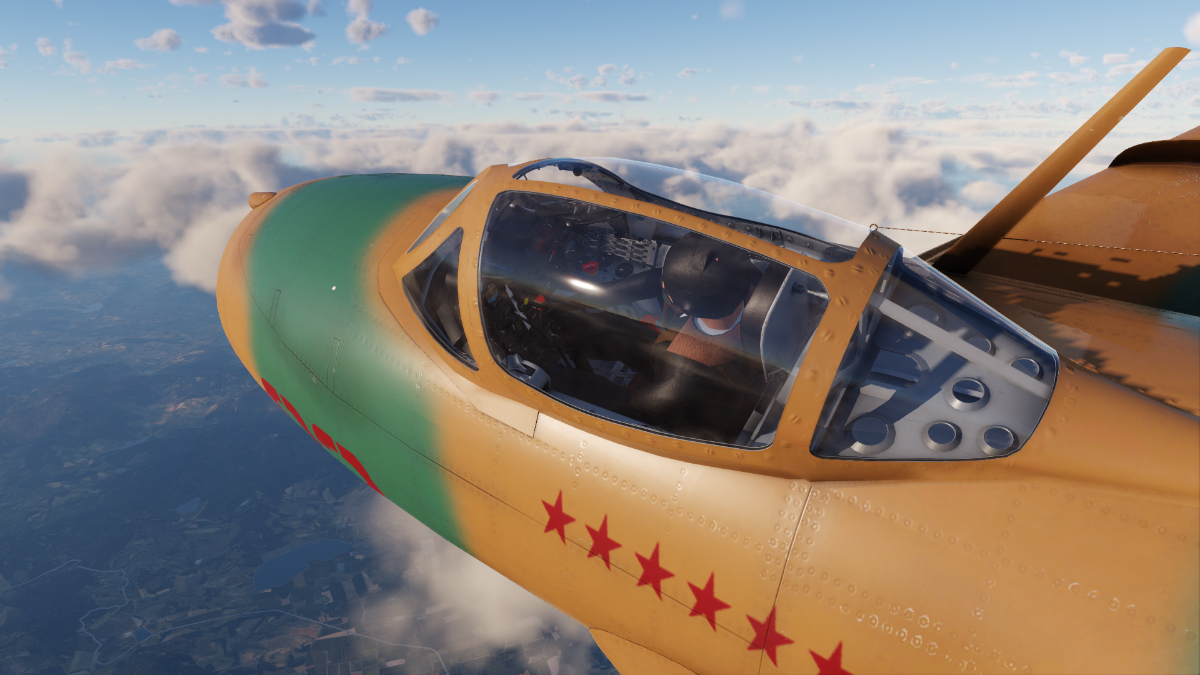
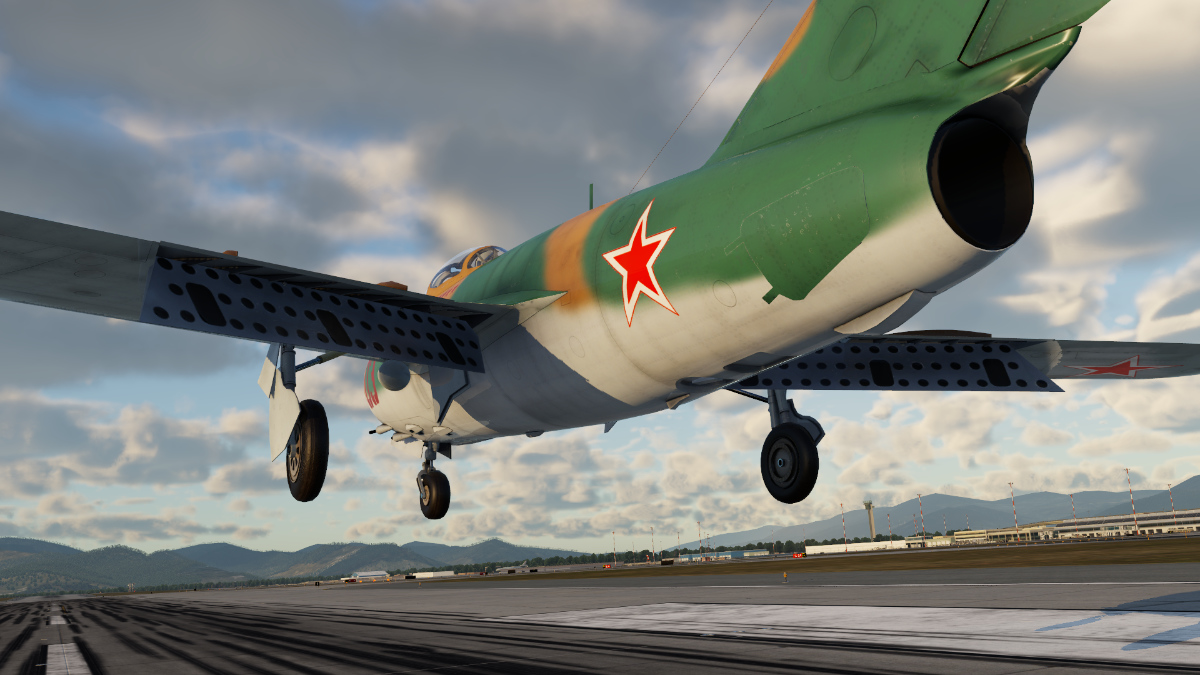
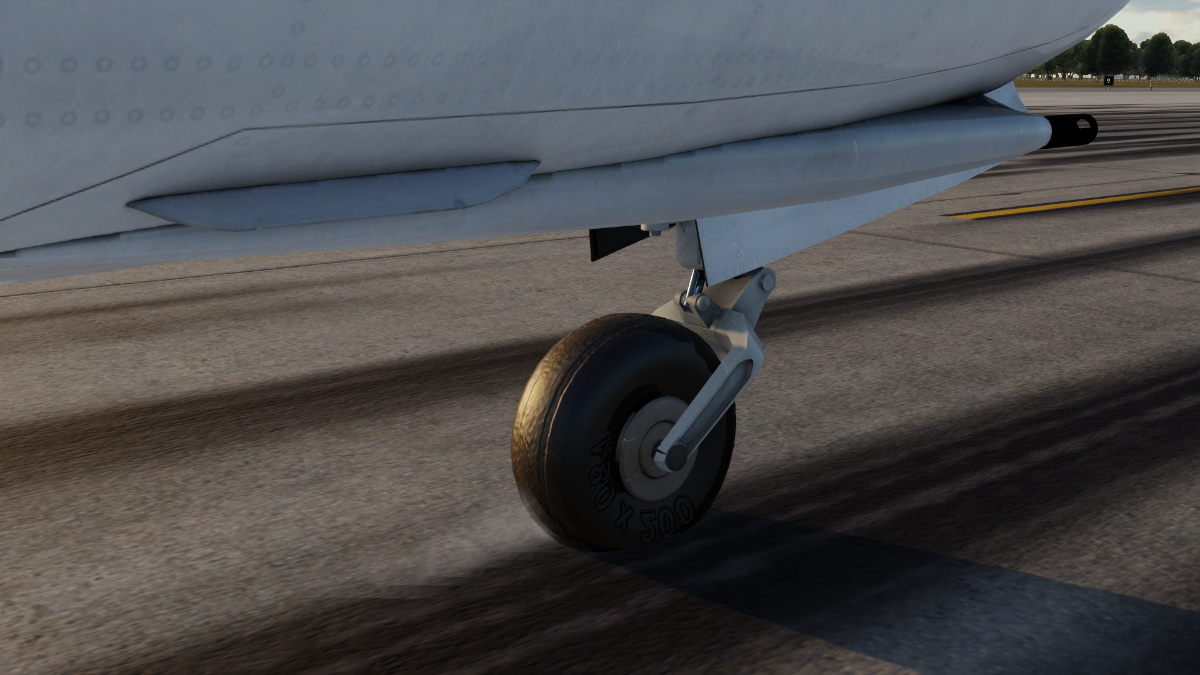
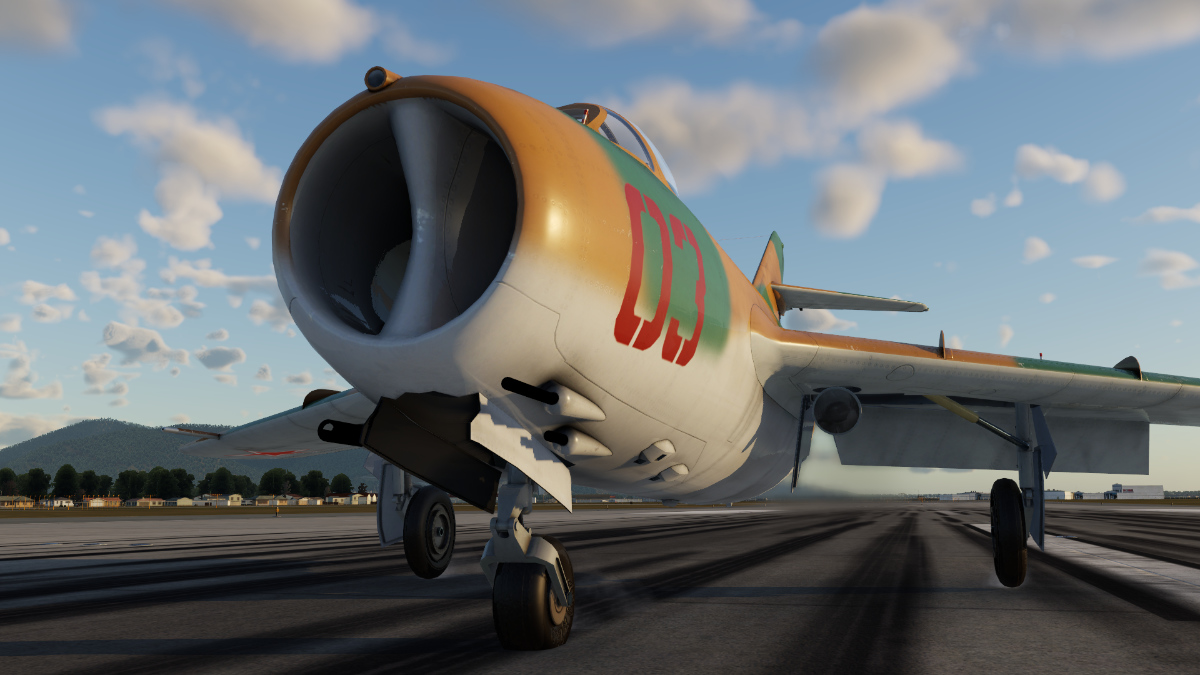
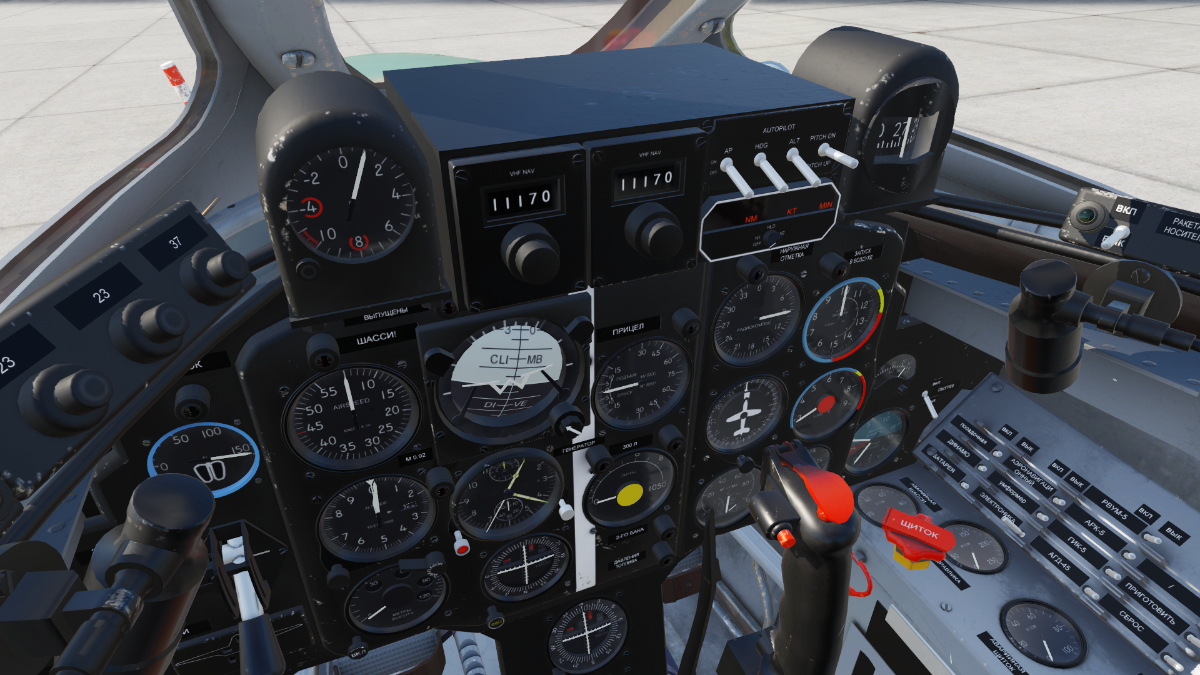
Aircraft Review: MiG-15 by MLADG By Stéphane Tolédo-Paul Mikoyan-Gurevitch, (MiG) founded in 1939, is renowned for its production of famous fighter aircraft, such as the MiG-1 and 3, MiG-21 "Lancer", MiG-23 "Flogger", MiG-29 "Fulcrum", and of course the MiG-15bis "Fagot" and MiG-17 "Fresco" which is the focus of this review. The MiG-15 was one of the first mass-produced swept-wing jets, making its maiden flight on 30th December 1947, and was introduced into the Soviet Air Force in 1949. More than 13,000 airframes were produced, with another 4,200 manufactured under license. More than forty countries have (at one time or another) operated this aircraft, mainly those from what was then known as the Warsaw Pact. The MiG-15 took part in the Korean War where its performance impressed the Americans, who, with their first generation of jet fighters, were unable to compete with the aircraft. It was not until the introduction of the North-American F-86 Sabre that aerial combat was finally balanced. Both the MiG-15 and 17 were equipped with a Klimov VK-1 engine of 5,950 lb of thrust, with an afterburner fitted in the MiG-17. Two Nudelman-Rikhter NR-23 23 mm cannons constituted its main armament with eighty shells each and a Nudelman N-37 37 mm cannon with forty shells. With an empty weight of 3681 kg, it carried a maximum fuel load of 1420 litres for a maximum takeoff weight of 5044 kg and had a top speed of Mach 0,9 at 3000 m, (9843 ft), with its cruising speed of Mach 0.69. Purchase & Installation MLADG’s MiG-15 package is priced at US$19.95, with the downloaded file weighing in at 479 MB. Once the product has been downloaded, it’s then a simple task of unzipping the file and transferring it to your X-Plane 12 "Aircraft" folder. The X-Plane models presented in the package include a MiG-15bis, in civilian and military versions, a MiG-17, also in a civilian and military guise, and as a bonus, a red Yakovlev Yak-3, which while nice to have, is not the focus of this review. All the models mentioned have variants for both X-Plane 12 and 11, which is a nice touch. Documentation consists of a PDF document covering each of the models included and contains information related to technical characteristics, production numbers, armament etc., as well as instructions on how to operate the aircraft. The latter is highly welcomed, as the instruments for the military versions (for realism), are not in English. Personally, I have no issue with this type of layout, but it may take some people a little time to get used to. Exterior Model The fuselages of both the MiG-15 and 17 are very well modelled, both proportionally and in terms of realism. For example, finer details which could easily have been “dumbed down” in terms of modelling, have been reproduced in intricate detail. An example of this is the landing light, the various antennas, pitot tubes, and the undercarriage. In terms of liveries, I found the variants contained in the package to be both varied and well-chosen, with even an American bare metal variant included (complete with a USAF insignia). The metallic shine of this particular livery is well done, and looks fantastic, especially with the right lighting. Personally, I like a bit more weathering on my liveries, particularly with an aircraft of this vintage. However, even with that taken into consideration, the result is still visually satisfying. With each livery, both the panels and rivets, albeit discreetly, are visible when viewed up close, which is something I really enjoyed seeing, as it added an additional touch of realism to the models. Also, and this can be subjective, when viewing the aircraft on the tarmac, both models exhibited a degree of heaviness or weight, in other words, they didn’t float a few centimetres in the air, but rather gravity pulled them down, which again, added to their authenticity. Cockpit & Functionality Upon entering the cockpit for the first time, I was struck by just how well-modelled it was. The detailing here was as good if not better than what I had observed when viewing the exterior of the aircraft and exhibited a high degree of weathering on the canopy and instruments. The numerous gauges surrounding me were easy to read, with their text remaining sharp even when viewed up close. I felt some of the backgrounds of the dials could have been done to a higher standard, but overall, I was extremely impressed with what was on offer. Many of the controls found in the cockpit are manipulable, with the military versions being equipped with a gunsight. In the civilian variants, this is replaced by a box that controls the autopilot. While this may not be truly accurate, it is nevertheless, simple, and highly effective. Also included was a kneepad, activated by clicking on the right side of the cockpit. When opened, it provided both an aircraft checklist for the various phases of flight, plus help with setting radio frequencies. Flight Characteristics The MiGs are very pleasant to taxi, easily controllable on the ground, and offer good forward visibility. This makes your short trip to the runway an enjoyable experience (weather permitting). Takeoff, when done correctly, is, for the most part, nonevent, with the only exception, of having to wait for the engine to spool up. If you’re used to flying modern jets, this can be quite a revelation. Once airborne, the MiGs are enjoyable to control, with power delivery being smooth during all phases of flight. Both the MiG-15 and 17 react extremely well to pilot input and will easily do rolls and loops without a hint of laziness, which shouldn’t come as any surprise when you consider their combat history. During the cruise phase, stability is excellent, with small trim adjustments being both smooth and easily managed. Landing is probably the hardest aspect of the flight, not because of the stability of the aircraft, but because of the delay in the power output (requires a degree of forward-thinking). As such, go-arounds are to be expected during your first few flights, but this becomes progressively easier once you learn the flight characteristics. Speed brakes are highly efficient at reducing your velocity, so with the right amount of flaps, you should reach the threshold of the runway without too much difficulty. Once down, it’s a simple case of applying the brakes and taxiing to your assigned parking area. Sounds The FMOD sound samples of the MiGs are very convincing, especially the immersion they create whilst in the cockpit. An example of this is the rolling sounds as the aircraft moves along the runway, as well as the retractions of the wheels or the deployment of the flaps. There is also the air flowing around the fuselage as well as the jet engine, which is always audible, but which is never intrusive. Opening and closing the canopy will change the volume of sounds which was a feature I really appreciated. The sounds of the numerous controls and switches in the cockpit were realistic enough, but I was slightly disappointed with the sound of the gun, as it felt slightly muffled in my opinion. Overall, the sound on offer was on par with the rest of the product. Performance The package worked very well on my hardware, which is hardly cutting-edge by today’s standards. I experienced no slowdowns or freezes during my testing, and everything simply worked as it should (well done to the developer). Conclusion To conclude, this is a remarkably interesting product, which for a relatively modest price will offer you a variety of extremely well-made and enjoyable models, all of which perform faithfully (within simulator limitations) to that of the original aircraft. Russian aviation is a bit of a rarity on the X-Plane platform, with the recent current events not particularly helping the situation. As such, MLADG’s MiG-15 package is highly welcomed, as this is an aircraft rich in history. Yes, it has a few flaws, but these never detract from the overall flying experience. When you factor in the low purchase price of the models (including the bonus of having the Yak-3), then this is a package which rightly deserves its place in any X-Plane hangar! _______________________________ MiG-15 by MLADG is available from the X-Plane.Org Store here: MiG-15 Priced at US$19.95 General features: Detailed 3D interactive cockpit - detailed outside model Instrumentation based on real counterparts In-flight refuel possible JATO can be used for short fields Civil version features: Western instrumentation (altitude in feet, speed in knots) Equipped with western avionics: VOR/DME Removed military equipment English labels available Military version features: Metrical instrumentation Gunsight available Can be loaded with drop tanks, bombs, guns Requirements X-Plane 12 or X-Plane 11 Windows, MAC or Linux Support: Support forum for the MiG-15 Current version: 2301 (February 7th, 2023) Review by Stéphane Tolédo-Paul 21st Feb 2023 Copyright©2022: X-Plane Reviews Review System Specifications: Windows 10, Intel i5 8400 2.8GHz, 16GB, Nvidia GTX 1060 (Disclaimer. All images and text in this review are the work and property of X-PlaneReviews, no sharing or copy of the content is allowed without consent from the author as per copyright conditions) All Rights Reserved
-
Scenery Review: Grand Arctic Scenery XP12 by HSimulators By Nick Garlick Introduction I am extremely pleased to be invited back once again so that I can share my views and opinions on yet another new add-on for the X-Plane 12 platform, this time Grand Arctic XP12 By HSimulators. The Arctic: a cold barren, polar region located at the northernmost part of Earth and an area more often than not, forgotten in the world of flight simulation. The Artic covers an area which includes the Arctic Ocean, neighbouring seas, and parts of Canada (Yukon, Northwest Territories, Nunavut), Danish Realm (Greenland), northern Finland (Lapland), Iceland, northern Norway (Finnmark and Svalbard), Russia (Murmansk, Siberia, Nenets Okrug, Novaya Zemlya), northernmost Sweden and the United States (Alaska), so as you can see, a considerable land area! In saying that however, as large as it is…it’s still not included with X-Plane. Yes, I know we now have snow in X-Plane, but I must remind you this is only available if you fly below and above the parallel lines of latitude seventy-four north and latitude sixty south, where X-Plane’s default scenery is available. Fly above or below these lines of latitude in a default install of X Plane and you will encounter vast areas of open water, reminiscent of something from an apocalyptic climate crisis of rising tides, something we X-Planers are all too familiar with! To resolve this virtual climate crisis, enter Grand Arctic XP12, a product that builds on the original Grand Arctic for X Plane 11, a product I thoroughly enjoyed when released a few years ago. I will not bore you by flying over old ground, especially when the core of Grand Arctic XP12 covers essentially the same terrain, airports and helipads as found in the original product. However, as new readers may be interested in this product, we will see how this enhanced version improves on the already tried and tested formula by taking advantage of all that XP12 now has to offer. HSimulators started work on this updated version several months ago with the initial release being in December 2022. Grand Arctic XP12 is for use in X-Plane 12 only and runs on either Windows, Mac, or Linux. It requires a graphics card with a minimum of 4GB VRAM, but from experience, I would recommend 8GB or higher for the best results. Even though XP12 has seen improvements in many areas over XP11, there remain huge chunks of land and ice missing from Austin’s plausible world. As such, Grand Arctic XP12 aims to fill part of the area above the 73/74th north lines of latitude to fill some of that void. Being such a large area, the package covers areas of North Greenland and the northernmost reaches of Canada. The approximate area covered by the scenery package can be seen in my illustrations below with a global representation of the before and after installation of the package. Download & Install When you initiate the download, the compressed zip file weighs in at just under 6GB. Having downloaded the product without any issues, I then when about extracting and installing the scenery file. Installation is quite straightforward, unzip the contents by pointing to the drive where your X-Plane 12 is installed. Then, once you have extracted the scenery, you will need to check both your Custom Scenery and Global Scenery folders. If the installation has gone to plan, you should see the following in each of the respective folders. Once installed, Grand Arctic will occupy around 6.70GB of your hard drive space. First Impressions HSimulators Grand Arctic features an impressive call-down list. As mentioned earlier, the area of coverage is from the northern extremities of Western Canada to the east of Greenland, from just above the 73rd and 74th lines of latitude. It is stated the scenery encompasses almost one million square miles, and all of this sits on top of a terrain mesh sampled at between 15 and 20m in resolution, which appears to be an improvement over the original product. It’s also interesting to note that the scenery has been designed to work with the weather stations in X Plane 12, which can lead to some rather impressive weather environments. Now let’s look at the airports featured in the geographical area covered by the scenery. I observed no less than sixteen airports/airstrips and eight helipads and many of these were rendered with adequate detail featuring 3D Objects. The complete feature list can be seen on the map below. It is beyond the scope of this review to mention every specific location included in this package, so here is a selection of some of the areas which I feel are worth pointing out and which should give you an indication of the kind of quality you will experience when exploring the scenery. To begin with, we have Thule Air Base (BGTL). Situated on the northwest coast of Greenland, Thule Air Base is the northernmost air base of the United States Armed forces which is located 750 miles (1,210 km) north of the Arctic Circle and 947 miles (1,524km) from the North Pole. HSimulations have captured the footprint of the air base reasonably well, as well as the surrounding scenery which features various listening and satellite surveillance stations. Also included is the harbour, which I think adds an additional degree of interest and ambience. Next up is Qaanaaq BGQQ, an unpaved airstrip formerly known as Thule or New Thule. Qaanaaq is the main town in the northern part of the Avannaata district in north-western Greenland. The developers have again produced a nice rendition of the airport, along with its surroundings. I particularly like this location, as the approach “on most occasions” will see you pass over the town of Qaanaaq, with the open sea on one side, and the hills on the other, which when the weather is clear, can be very scenic! Leaving Qaanaaq behind, we next head for Danmarkshvan (Denmark's Harbour), which is a small remote weather station located in Dove Bay, which resides on the south shore of the Germania Land peninsula in the National Park of Northeast Greenland. Danmarkshvan is an unpaved airstrip located by the coast, and due to its location, will present quite a challenge when the weather becomes unfavourable. Our next stop is CFS Alert (CYLT) and Mould Bay (CYMD). Canadian Forces Stations Alert (CYLT) is a semi-paved airstrip, with the main function of the airbase being a signals intelligence intercept facility. In other words, they eavesdrop on the world’s communications. Often shortened to just CSF Alert, the base resides in the Qikqtaaluk region of Nunavut and is situated on the northeastern tip of Ellesmere Island. Mould Bay Airport is located on Prince Patrick Island in the Canadian Northwest Territories. It was originally built in 1948 as a joint effort between Canada and the United States in which to service the former Environment Canada weather station, which in turn was automated in 1997. This automation eliminated the need for a fully active airport; however, as of 2012, members of the Canadian Armed Forces still occasionally visited the island. The developers have captured the spirit of this remote location with just enough detail to ensure that every flight (both in and out), is an enjoyable one. As well as the landing areas mentioned above, the developers have also included many settlements. Whilst these are all relatively simple in terms of their modelling, they are more than adequate at conveying just how vast and remote this part of the world really is. The screenshots below are an example of this and show the settlement of Innaarsuit. Performance Given the geographical area covered by this scenery, the file contains little in the way of auto-gen (often the cause of framerate issues), and as such, any impact on framerates is negligible. In fact, the most taxing element is probably the new mesh data, but even here, and despite the added detail on offer, I was still able to achieve remarkably high framerates at X Plane’s highest graphic settings. Areas for Improvement Whilst there have been some significant improvements over the previous X-Plane 11 version of the scenery, such as the richer, slightly more detailed ground textures and the inclusion of a bespoke terrain mesh, I still feel there is room for improvement, mainly regarding some of the detailing found at the airports. Whilst many of them were more than adequate, I feel some of the airports could do with being lifted a level. However, that said, at the same time I accept as the developer states, this is a new product and Grand Arctic XP12 should be considered “a start”. At the time of writing, I believe that the development kit from Laminar Research (which is used to produce “new mesh”) has yet to be made available to third-party and public developers, though I stand to be corrected on this point. However, given the lack of an official development kit, the developer had to draw on their own development solutions to create a bespoke mesh. Hopefully, when this development kit becomes available, further improvements can be made. HSimulators have stated that as soon as the required development kit from Laminar has been made available, work will commence on developing better edge adjustments between the aquatic and land masses and improved renditions of peaks and troughs. These improvements will then be implemented into the scenery file which will be updated accordingly. Conclusion Overall, I am very pleased with this product, as Grand Arctic XP12 covers part of an extensive area that to this day, continues to be omitted from X Plane. Featuring enhanced ground textures, along with new mesh relief, HSimulators' Grand Arctic XP12 offers an increased level of immersion over its predecessor (a highly recommended product in its own right). At the time of writing, Grand Arctic XP12 can be purchased for $29.00, which I feel represents excellent value, especially when you factor in the exceptionally large area which is covered. With HSimulators ongoing commitment to the package, the potential scope of the scenery in general, and the ongoing improvements to X-Plane 12, I for one look forward to seeing what the future brings for Grand Arctic XP12. _______________________________ Grand Arctic Scenery XP12 is available from the X-Plane.Org Store here: Grand Arctic Scenery XP12 Priced at US$29.00 Main Features Scenery from west of Canada to the east of Greenland above 73 degrees Nearly one million square miles of mesh terrain between 15 and 20 m resolution Built to work with weather stations in X-Plane 12 17 airports in 3D (all airports in the geographic area) 7 helipads in 3D Places in 3D (small cities and villages) Mesh terrain from 10 to 15 resolution meters North Canada and Greenland Airports and heliports in 3D Thule Air Base Fort Conger Nuussuaq HLPN CFS Alert Innaarsuit HLPN Resolut Bay Station Nord Isachsen Siorapaluk HLPN Qaanaaq King Christian Sagvisivik HLPN Grise Fiord Kullorsuaq HLPN Tanquary Fiord Eureka Malloc Dome Tasiusaq HLPN Arctic Bay Moriusaq HLPN Mould Bay Danmarkshavn NEEM Camp Skiway Thule BMEWS HLPN Requirements X-Plane 12 Windows mac or Linux 4 GB VRAM Video Card. 8 GB+ VRAM Recommended Download Size: 6.2 GB Current version: XP12rev1 (December 30th, 2022) Review by Nick Garlick 17th Feb 2023 Copyright©2022: X-Plane Reviews Review System Specifications: Windows 10, Intel 4790K liquid-cooled, overclock to 5GHz, 32GB DDR3 1600MHz RAM, Nvidia GTX 1070ti, Titanium HD Audio Card. (Disclaimer. All images and text in this review are the work and property of X-PlaneReviews, no sharing or copy of the content is allowed without consent from the author as per copyright conditions) All Rights Reserved
-
Aircraft Review: Van's RV-8 /8A Duo by AOA Simulations By Peter Allnutt Founded in 1973 in the USA by Richard Van Grunsven, Van’s Aircraft has, for the last fifty years, produced a series of highly successful low-wing monoplane kit aircraft. One of those kits is the RV-8, a two-seat aerobatic model featuring a bubble canopy providing good all-around visibility. It first flew in 1995 and as of late 2022, over 1500 have been built. Like the RV-4, the RV-8 variant has two seats, one behind the other and is generally larger overall. The two-seat RVs are designed to use Lycoming-style engines developing between 118 and 200 horsepower, although a higher performance derivative was also produced, the Harmon Rocket. This had clipped wings and utilised a Lycoming IO-540 engine with 300 horsepower. There are two variants of the RV-8 kits available from the manufacturer, one with a traditional taildragger configuration and the RV-8A, which uses a tricycle undercarriage instead. Purchase & Installation Three different packages of the RV-8 are available to purchase via the X-Plane.org store: taildragger, tricycle or a package including both. The individual aircraft are priced at $24, with the Duo Pack (being reviewed here) costing $32. With your purchase completed, you are provided with a link in which to download the required 150MB ZIP file. When done, it’s just a simple case of extracting the file and then copying it over to your X-Plane “Aircraft” folder (no activation keys required). Included in the download, is a rather nice X-Plane user guide and a brochure from Van’s Aircraft, introducing you to their range of models. There is also a document for Apple users detailing the required security setting. The user guide is twenty pages in length and is well worth a read as it explains how to lean the engine and perform aerobatics, along with a suggested button guide for joysticks and other helpful tips. Note: At the time of writing the RV-8 package is for X-Plane 11 only, but the developer has stated that an X-Plane 12 version is in development (will be a free update to existing customers) and will be released when the new simulator is deemed ready. Exterior Model The RV-8 has a relatively simple shape, something I assume aids with its kit construction. It is well-modelled and judging by images I have seen of the real thing, is accurately proportioned. I didn’t spot any real visual differences in the engine cowlings, but the RV-8 is modelled with 180HP, whilst the RV8A gets the increased 200HP powerplant. As with most AOA models, there are some nice touches included, such as the “Remove Before Flight” ribbons if you start from cold and dark. AOA’s RV-8’s control surfaces are nicely animated, as is the cockpit canopy, which automatically closes when the aircraft reaches 10MPH and above (perfect for those who tend to forget such things). The wheel covers and rear suspension are also nicely modelled, as are the light clusters in the wingtips. There is also a little cubbyhole just in front of the cockpit which contains a first aid kit, a fire extinguisher, plus room for a few small personal items. There are a few liveries included with the model, as well as a paint kit should you wish to create your own. As well as those already supplied, AOA Simulations have also made available several livery packs for download, the link for which, can be found in the user guide. Additional liveries from the developer can also be found at the Org. Cockpit & Functionality Moving on to the interior of the RV-8 and I found that whilst good, the modelling wasn’t quite up to the same standard as the exterior, the footwell being one example, which looked slightly odd in my opinion. Also, the prop and mixture handles seemed a bit on the small side, but then again, perhaps I just have big hands! Texturing was, for the most part, very nicely done, although it did seem a bit too clean. Whilst I appreciate the fact that this is a kit aircraft, it would be nice to see a degree of weathering applied (not all aircraft will be new). Both variants in the package sport the same glass cockpit configuration, two G1000 displays, a Garmin 430 GPS, a Garmin 245A Audio Panel and a Garmin GFC500, so you’re not left wanting by any means. The engine start checklist is displayed on the Garmin 430’s display when the battery switch is set to on, and this updates as the steps are completed. When you’re ready to operate the starter, you get a nice audio call of “Clear Prop”, which I thought was a nice touch! AOA Simulations also provide a plug-in which enables you to toggle the “Extras” option on and off. When selected, you will find that it adds additional information to the two GF1000 displays. On either side of the pilot, there are two side pockets which can be activated. The one on the left brings up the default X-Plane map, whilst the one on the right brings up AviTab (if installed). AOA’s RV8/RV8-A also comes equipped with a rather neat smoke system (red and blue available) which is activated by switches on the right-side panel, along with oxygen controls. Handling In terms of handling, I think it’s important to point out, that I am not a real-world pilot and as such, I can’t really comment on the authenticity of the flight model. However, in saying that, I was extremely impressed by how the model performed in the air, and I can only put that down to AOA’s exceptional modelling talents and the fact that this X-Plane model was developed with the help of the Van’s Aircraft Company. This is an aircraft that can be calm and docile one minute, and then totally exhilarating the next…wonderful! Taxiing in the tail dragger variant of the RV-8 is slightly more challenging than the tricycle version (RV-8A) due to the slightly upward view and the tailwheel. When throttling forward during takeoff, it’s immediately noticeable that there is plenty of power at hand, and when airborne, the little RV-8 will climb at 2000fpm, which is quite impressive for such a small aircraft. During the cruise phase (around 170 KTS), both variants were easy to trim out, but if you’re feeling lazy, then there is the autopilot to help you out should you wish. As mentioned earlier, the RV-8 is reasonably aerobatic, and as such, I managed to perform quite a few aerobatic manoeuvres during my testing, all without too much difficulty. Okay, they weren’t particularly textbook, and I wouldn’t have won any awards, but it goes to show you what the aircraft is capable of. The controls are quite sensitive, so it’s fairly easy early on to overdo some of the inputs, but you know what they say… practice makes perfect! Landing either of the models was straightforward, with touchdown being at around 60-70 KTS. The RV-8 only has two stages of flaps, one for takeoff, and the other for landing. This means that during the approach phase, you’ll notice additional drag caused by the flaps, so you’ll have to adjust power and trim as required. AOA Simulations have also included an excellent “Brake With Stick” (BWS) feature via their plug-in. This is particularly useful for those simmers who don’t have rudder pedals with toe brakes (and there are many), as it means that upon touchdown, all that is required to activate the brakes is to push the stick forward…very imaginative and extremely useful. Sounds The RV-8’s included sounds are well-sampled and of good quality, with the engine sounding particularly nice. There was no audible looping present, and at no time did the soundset become monotonous or intrusive. The numerous “click” points in the cockpit were present, but I was disappointed I couldn’t hear the difference between a switch-on and a switch-off action and the canopy closing didn’t give a reassuring clunk when fully shut. However, I did notice that the engine was nicely muffled when the canopy was closed, so that was another nice touch. Performance During my testing of AOA’s RV-8, I experienced no performance issues whatsoever. Framerates remained high and there were no noticeable lags or spikes. For reference, my X-Plane setup is as follows: Intel i9 10900K – 32GB RAM - NVIDIA MSI RTX 3090 Suprim X – Windows 10 Home 64 Bit, so as you can see, quite a capable system. Conclusion Summing up, I have to say that AOA’s RV-8 is a wonderfully enjoyable and fun little plane to fly. Not only is it a capable tourer thanks to its good cruise performance, but it’s equally happy when performing the odd aerobatic manoeuvre. The modelling, both inside and out, is done well, and apart from a few issues with the sounds, I can’t really think of any reason why you shouldn’t add this little flyer to your hangar. Overall, the AOA RV-8, is a terrific addition to the GA family of aircraft available for X-Plane, and I hope the updated version for X-Plane 12 won’t be too long in the making. ________________________ The Van's RV-8 /8A Duo by AOA Simulations is now available from the X-Plane.Org Store here: Van's RV-8 /8A Duo Priced at US$32.00 Features Accurate flight model Detailed cockpit and exterior with animations, manipulators and PBR textures VR-Ready Custom particles emitters Customized Garmin G1000 PFD and MFD FMOD Sounds Ground equipment Animated pilot Dynamic pilot POV camera options (non VR mode) Automatic AI plane tracking pilot POV camera capability (non VR mode) Garmin GFC 500 Included in the package 5 HD liveries + more than 30 liveries available at www.x-plane.org Comprehensive User Guide Photoshop Paintkit Requirements X-Plane 11 - X-Plane 12 when available (in progress) Windows, Mac, or Linux 4GB VRAM Minimum - 8GB+ VRAM Recommended Current version: 1.5 (October 6th, 2022) Review System Specifications Intel i9 10900K – 32GB RAM - NVidia MSI RTX 3090 Suprim X – Windows 10 Home 64 Bit __________________________________ Aircraft Review by Peter Allnutt 31st January 2023 Copyright©2023: X-Plane Reviews (Disclaimer. All images and text in this review are the work and property of X-PlaneReviews, no sharing or copy of the content is allowed without consent from the author as per copyright conditions.
-
Scenery Review: KSEZ - Sedona Airport by X-Codr By Joshua Moore Introduction Sedona Airport is located two miles southwest of Sedona, Arizona, on top of a mesa that overlooks the city. Dubbed the tabletop runway for its appearance, it offers some unique challenges for pilots making a trip to the airport. Sedona Airport began life in 1955 as a 3,700-foot dirt runway and was paved in 1957. Today, Sedona is considered the United States’ most scenic airport and features a nearly 5,200-foot long/100-foot-wide runway. X-Codr’s rendition of Sedona for X-Plane 12 is an update to their existing scenery for X-Plane 11, so it will be interesting to see how it looks and performs in Laminar’s latest offering. First Impressions The installation process of the scenery is mostly standard, consisting of three zip files, with the unzipped contents totaling 8.7 GB across four folders. The manual is six pages long and includes basic installation instructions for installing the scenery, as well as a few notable highlights of the package. Upon loading into the airport, I was greeted with a copious amount of red rock and a rather nice-looking airport environment. The overall scope of the product is well-sized, with a good portion of the area surrounding the airport having been modeled with custom orthos, autogen, landmarks, and the famous red rocks. From my initial observations, I was very pleased with what I saw, as the attention to detail, especially the airport, was very well done. Exploring the Airport Again, and this is something I like to do with all my reviews, I began by viewing the airport from above in which to get an idea of its layout. The overall scenery looks fantastic, with most details being visible, even those in the distance. The city of Sedona looks great from above, and the surroundings feel wonderfully natural and come across as well-textured, with the added bonus of merging perfectly with the supplied ortho. Mesh also feels enhanced and helps bring the airport alive, though there are a couple of areas which I felt could be improved on, such as the road leading up to the airport, which could do with some smoothing out. The airport environment is quite frankly one of the best I have seen in X-Plane 12 as it feels so alive, especially with the animations, vehicles, and people; the whole atmosphere is simply fantastic. The custom 3D vegetation sways with the wind, and as such, really helps add another level of immersion to the overall ambience. The exteriors of the main terminal and the Mesa Grill diner are well-modelled, with some nicely done texturing to go along with them, they even feature seating areas outside. Two other airport buildings which featured interiors were the Helicopter Tours hut and the Helicopter Airplane Tours shop. Whilst not as detailed as the other two buildings mentioned, they were a nice addition to the package. Both the terminal and diner include highly detailed interiors, and these are done well for the most part. However, I did find them to be a little too shiny for my taste, with both the chairs and floors feeling overly polished and unnatural. Another area which I felt could be improved upon, was the ramp area which had a slightly dead appearance, as there were simply no aircraft anywhere to be found, and while I’m not a huge fan of static aircraft, having the option to add some here and there, would have been nice in this case. Both the taxiways and runway felt realistic in their appearance, and the grass, albeit a bit scraggly and pixelated, really helped sell the idea that I was looking at an authentic, small, GA airport. During my testing of Sedona, I would see animated vehicles drive up to the airport gate, and then for the gate to open, which I thought was another nice touch! There were also animated people playing games in the garden, and having drinks, plus wind chimes spinning in the breeze. It’s these wonderfully thought-out details such as these, which help bring the airport to life and is something I really appreciate. The surrounding red rock formations found in the scenery deserve their own special paragraph, as they have been created entirely in 3D. The texturing of these formations is excellent, and the models themselves look detailed even from a distance. However, if you get too close, the illusion, unfortunately, starts to fall apart, but from an aircraft window, at a reasonable distance, they look incredible and are far superior to using base-only orthos. Textures When it comes to Sedona’s textures, I think it’s safe to say that this particular scenery is one of the better X-Plane sceneries that X-Codr has created. Most of the textures, when viewed from a relatively short distance, looked sharp and only started to lose clarity when viewed up close. The taxiway signage was a bit low-res for my tastes, but that was also the case for Mammoth Yosemite, which I reviewed only recently. The interiors of the various airport buildings were slightly blurrier than other more visible parts of the scenery but were just fine if your intended purpose was to simply stroll around the airport, just remember to not get too close. Winter Sedona, due to its climate, doesn't receive much in the way of snow, and when it does, it usually melts quickly. However, as I had seen some photographs of Sedona during winter, I was keen to see what it looked like with the new weather engine in X-Plane 12. I was glad I did because the results, as you can see, are simply stunning. The underlying ortho used for the surrounding scenery looks great as well, save for the various “off” colors you’ll see if you look too closely. If you use any ortho scenery for this part of the world (something I highly recommend you do), then you’ll find that the package, due to the quality of the supplied ortho, works very well, especially with something like VStates. Performance When it came to performance, I was again pleased with the results, as I experienced hardly any framerate issues. In fact, the only thing I noticed about running the scenery was my increased VRAM usage, which wasn’t surprising really, especially when you consider the sheer number of textures being used by Sedona. With X-Plane 12 not yet fully optimized and suffering from blurry textures, I would advise caution, and to check your GPU’s VRAM specs plus the package’s minimum memory requirements before purchasing the scenery. Night Lighting Sedona’s night lighting consists, for the most part, of X-Plane standard lighting effects. That’s not to say it looks bad, it’s just that nothing really stands out. There are a few areas where the lighting doesn’t quite work, such as parts of the terminal and restaurant, which look a bit odd at night, as if they don’t share the same lighting engine, but everywhere else exhibits the usual X-Plane lighting. Conclusion As with Mammoth which I tested at the same time, Sedona is another high-quality GA airport that I really enjoyed exploring. For VFR flyers, it’s a dream come true with its stunning red rock formations, but it’s equally appealing for those who enjoy flying something larger, like business jets. With challenging approaches, a wonderfully modelled airport environment, plus again, that incredible landscape, Sedona is one of those airports that I can wholeheartedly recommend. ________________________ KSEZ - Sedona by X-Codr is now available from the X-Plane.Org Store here: KSEZ - Sedona by X-Codr Priced at US$19.95 Features Ultra-detailed rendition of KSEZ - Sedona Buildings are detailed down to door handles and gutters Most "feature buildings" have full 3d interiors, including food on the restaurant table High quality normal maps utilize X-Plane 12's gorgeous photometric PBR rendering engine High quality realistic ground textures Hand crafted detail textures and detail normals add unparalleled detail with virtually indistinguishable tiling Hand painted, subtle grunge overlays for the whole airport make the airport feel life like and natural. Up to date layout as of 2021 including significant changes to the center-north ramp Living Airport Cars will randomly wander the airport roads, and occasionally drive up to the gate, open it, and drive to a spot on the apron. 3D animated people 3D animated trees using X-Plane 12's new forest system 3D animated grass and shrubs Custom surroundings Generic, regionally appropriate autogen for the surrounding valley Stunning hand crafted rock formations for most of the Sedona Valley Low poly landmarks (schools, old stadium, etc) Custom Ortho4XP Mesh Custom UHD Mesh V4 overlays (courtesy AlpilotX, used with his permission) Optimizer for excellent performance. VR ready, constant 60 fps with near max settings on high end systems. Requirements X-Plane 12 or X-Plane 11 Windows, Mac or Linux 4Gb VRAM Minimum. 8Gb+ VRAM Recommended Download size: 5 Gb X-Codr Designs Library 1.6+ (available on the download page, redownload if you downloaded before 10/26/2022) Living Scenery Technology 1.05+ (available free on x-plane.org, https://forums.x-plane.org/index.php?/files/file/82876-living-scenery-technology/) Current version: 2.0 (October 26th 2022) Review System Specifications Windows 11 Ryzen 5800x RTX3070ti, 32GB RAM __________________________________ Scenery Review by Joshua Moore 29th January 2023 Copyright©2023: X-Plane Reviews (Disclaimer. All images and text in this review are the work and property of X-PlaneReviews, no sharing or copy of the content is allowed without consent from the author as per copyright conditions.
-
Scenery Review: KMMH - Mammoth Yosemite Airport by X-Codr By Joshua Moore Introduction Mammoth Yosemite Airport is located approximately seven miles from the town of Mammoth Lakes California and is one of the premier GA airports serving the local area. Built as an auxiliary landing strip by the US Army Air Corps in WWII, it has seen multiple expansions and runway improvement projects over the years in which to increase its commercial viability. As of today, the runway is seven thousand feet long by one hundred feet wide with one parallel taxiway spanning the length of the runway. X-Codr’s rendition of Mammoth Yosemite is an update to an existing product available for X-Plane 11 and features native support for all the enhancements and features the latest version of X-Plane offers, including surface water, snow, icing, new texture support, lighting, and much more. The surrounding scenery includes 120 square miles of custom ortho imagery and an enhanced rendition of Mammoth and the ski resort. NOTE: The airport does feature custom 3D grass and vegetation, however, due to an update to X-Plane 12, the rendering of such vegetation has turned all the grass invisible. My many bug reports and emails over the last month to Laminar regarding this issue have (so far) unfortunately fallen on deaf ears, which is disappointing. I’m unsure whether this issue is unique to my setup as I have yet to find any mention of it anywhere else or even being acknowledged by Laminar themselves. This issue affects not only KMMH being reviewed here but almost every other scenery that includes 3D vegetation. As such, please keep this in mind when viewing the screenshots, and if you can, shoot the team at Laminar an email regarding this issue so it can be properly dealt with. Enjoy! First Impressions The installation process for this package is a little bit more involved than some users might be used to. I mention this because once purchased, you are greeted by a download page containing three zip files. All three are required for the installation and include the airport, the mesh file, and the library X-Codr uses for all their sceneries. Once installed, you’ll find a total of four folders added to your X-Plane Custom Scenery folder totalling 5.36GB. The included PDF manual is four pages in length and whilst relatively short, includes all the basic installation instructions for installing the scenery. Exploring the Airport Starting from a large overhead view and it was clear to see that the textures included were rather good, with the ortho not appearing too out of place and the airport blending in well with its surroundings. Moving slightly closer, the overall layout of the general ramp area and buildings are done quite well, and I have no complaints in that department. Many of the hangars and maintenance buildings leading up to the terminal are not only accurately placed (as far as I could tell from Google Maps) but are well-modelled and exhibit many finer details which could have easily been overlooked by less savvy developers. In terms of 3D modelling, the main terminal is, without a doubt, the highlight of the scenery and as such, is well done, especially the exterior details. Texturing is also of a high standard (more on that later) and when combined with the modelling, really helps add a degree of authenticity and realism. My only gripe with the terminal and this goes for the FBO as well, is the lack of interior modelling. Due to Yosemite being a relatively small airport, I think X-Plane 12 could easily handle an interior due to its low VRAM requirements and would help to make the airport feel more…alive! When winter weather sets in, the airport looks extremely atmospheric, especially with its snow-covered buildings. However, I did notice that with severe winter weather, both the runway and taxiways were particularly difficult to navigate, which I thought was strange, especially as the numerous YouTube videos I had watched previously, show these areas clear of any snow. I don’t know if this is a bug with X-Plane or with the scenery, but the end result is that the airport is pretty much off-limits when a snowstorm rolls through. Mammoth Ski Resort A nice bonus to the scenery was the inclusion of the nearby Mammoth Ski Resort. Whilst simple in terms of modelling compared to the main airport, it was nevertheless highly welcomed. The ski lifts unfortunately weren't animated, but even though they are described as generic by the developer, I still enjoyed seeing them. Textures When it comes to the textures used in the package, they are certainly up to today’s modern standards, although I did notice some of the smaller items were a bit lacking, mainly the taxiway signs. As mentioned previously, the terminal looks great and the use of PBR texturing on the corrugated metal surface looks outstanding. The ground textures are done extremely well, with the pavement having noticeable defects, such as bumps, wear and tear and other things you’d expect an airport surface to have. The smaller vehicles and details situated around the scenery also seemed up to the job and didn’t seem to lose too much quality in the texture department. The one area which I did think wasn’t quite up to the same standard was the large photographic ortho for the scenery. The reason being, it had been sampled at ZL16, which if you’re flying at 36,000ft in an airliner, would be totally acceptable. However, this is a scenery designed for VFR exploration, and as such, a higher Zoom Level (for example ZL18) would have been very much preferred. Night Lighting Much like the real airport, night lighting isn’t the scenery’s biggest selling point, so although it doesn’t look particularly impressive, it’s pretty much how the airport is in real life. The main terminal is adequately lit and the other small maintenance buildings surrounding it, all exhibit the usual “X-Plane” glow. So, whilst nothing really made me go “wow!” regarding the lighting, I wasn’t particularly disappointed with what I saw either. Performance During my testing, I noticed no slowdowns or spikes whilst exploring the scenery, everything was as smooth as butter. This could have been due to the relatively low VRAM requirements set by the scenery or the fact that the 3D grass was on holiday. Either way, I was happy with the way the package performed as there’s nothing worse than having a scenery which is a stutter fest! Conclusion I really enjoyed my time at Yosemite, especially whilst flying in and out in the Phenom 300; the RNAV 27 approach is a wonderful way to arrive at the airport. For someone who enjoys VFR flying, both real and simulated, I found the scenery to be an excellent starting point in which to explore the greater wider area. This is probably one of the scenery’s biggest selling points, as there are so many places within easy reach of the airport, such as Yosemite National Park, the Sierra National Forest, and if you’re brave, Death Valley National Park! So, if you’re looking for a small airport in which to explore some of America’s incredible and diverse scenery, Yosemite Mammoth Airport is certainly well worth considering. ________________________ KMMH - Mammoth Yosemite Airport by X-Codr is now available from the X-Plane.Org Store here: KMMH - Mammoth Yosemite Airport by X-Codr Priced at US$19.95 Features Detailed rendition of KMMH All buildings feature ultra-high resolution textures (most 4 pixels per inch). All buildings feature advanced PBR normal maps for realistic reflections and bump mapping. All buildings are highly detailed, down to even door handles. All buildings feature "lite" interiors to give windows more depth. Detailed ground textures with large scale realistic wear. All ground textures feature realistic normal maps. Realistic X-Plane 12 3d vegetation for the entire airport. Living scenery Integration with X-Plane 12’s weather effects system Ground equipment automatically serves your aircraft upon request. Other Features All models optimized for maximum performance. Generic custom rendition of Mammoth. Generic custom rendition of Mammoth Ski Resort. Realistic surroundings including custom forests. Custom 10-meter mesh with color-corrected ZL16 ortho. (Thanks to Oscar Pilote for creating the amazing tool Ortho4xp) Custom overlay scenery based on Alpilotx’s HD Mesh V4 scenery (used with his permission) Requirements X-Plane 12 or X-Plane 11 Windows, Mac, or Linux 4 GB VRAM Minimum - 8 GB VRAM Recommended Download Size: 3.6Gb Current version: XP12 - September 6th, 2022 XP11 - 1.01 (December 13th, 2020) Review System Specifications Windows 11 Ryzen 5800x RTX3070ti, 32GB RAM __________________________________ Scenery Review by Joshua Moore 27th January 2023 Copyright©2023: X-Plane Reviews (Disclaimer. All images and text in this review are the work and property of X-PlaneReviews, no sharing or copy of the content is allowed without consent from the author as per copyright conditions.
-
Scenery Review: KAST - Astoria Regional Airport, Oregon Introduction Welcome to beautiful Astoria, Oregon USA, recreated for your X-Plane adventures by developers, Skyline Simulations. Founded in 1811, Astoria is the oldest city in the state of Oregon and was the first American settlement west of the Rocky Mountains. Astoria is located on the south shore of the Columbia River, where it flows into the Pacific Ocean. The city is named for John Jacob Astor, an investor and entrepreneur from New York City, whose American Fur Company founded Fort Astoria at the site and established a monopoly in the fur trade in the early nineteenth century. Astoria Regional Airport, much like the city, is again located on the south shore of the Columbia River. This General Aviation airport sits directly at the border of two US states - to the north is Washington and south lies Oregon - divided by the mouth of the Columbia River. It’s not a particularly busy airport for commercial traffic - it’s not presently served by a scheduled commercial airline - but it’s certainly dynamic and active. KAST is home to a US Coast Guard service station - Coast Guard Air Station Astoria - that serves the Oregon and Washington coasts. Also of note, portions of the popular classic adventure movie The Goonies was filmed in the town of Astoria. Download & Installation I purchased and downloaded my copy of Astoria through the X-Plane.Org Store (other outlets available). The 3.3GB file size (unzipped) is what I consider to be substantial, but others may see it as the norm these days. Upon expansion, you will have one folder that contains two subfolders and the PDF manual, with the total file size rising to 5.03GB. Installation instructions are nothing out of the ordinary; move(cut-paste) the folders into your Custom Scenery folder. Launch X-Plane and go to the Graphics settings tab, adjust the Number of World Objects to Maximum. Since the art assets of the scenery package are high-definition and utilize PBR materials, it’s also important to make sure you have Visual Effects slider set to at least High (HDR). The Airport The largest structures at the airport are the two large hangars which date back to World War II. Both the 3D modelling and texture work is of a high standard, and when viewed up close, you really get a sense of their size. Situated nearby are numerous smaller buildings, such as the FBO terminal and T-hangars. Runway 26, the longest of the runways measured at 5773 x 100 feet, is served by an ILS (modelled by default in X-Plane) and RNAV(GPS) approach for when the wet West coast weather closes in. The other runways lack precision approaches but are served by PAPI & VASI visual approach aids as well as non-precision RNAV(GPS) and VOR approaches. The Skyline team has used a large number of decals and textured polygons to give tons of detail to the airport environment, such as cracks in the asphalt and concrete surfaces, stains from oil and dirt, tire skids, water puddles, and grass in the infield and surrounding areas. Everything is very high fidelity, crisp and clearly textured. The downside to all this detail is that users with low to middle-end systems might possibly experience slowdowns at certain parts of the scenery. Even though the scenery demands higher spec’d computer hardware, the details of specific elements of the airport area impressed me, such as the gateway and hangar of the Coast Guard station, the general aviation hangars with high-resolution signage, plus other nicely detailed exterior features such as wooden staircases. There appears to be a driving school that uses one of the decommissioned runways as a training area, and there is liberal usage of 3D grass objects that help to add a lot of character to this airport scenery. Surrounding Area Away from the airport, you can find landmarks specifically modelled by Skyline, such as the Astoria Column and the Astoria-Megler bridge which are nicely detailed. There is mention of a lighthouse, but I haven’t found it yet, which gives me one more reason to keep on exploring this scenery! PBR & Night Lighting During the evening and late-night hours, the scenery really comes alive with the vehicle traffic lights moving through the airport's various areas. Around the hangars, I noticed a few parked vehicles with their lights on which was a nice touch and helped create a sense of realism. The airport environment is well lit with some especially nice areas, but I found the interior lighting from the general aviation hangars unfortunately shines through their roofs and creates a floodlight effect that doesn’t strike me as particularly realistic. However, the custom-made landmarks, such as the Astoria-Megler bridge, shine beautifully across the river, and when the Astoria Column is lit, the lights are really well done, as they are omnidirectional and not simply focused spotlights on the column. Performance During my testing, I have to say that I have spent more time than I wished working on finding an optimal balance with my existing scenery collection and Skyline’s KAST package. If you haven’t already done it by now, you can safely use the HD/UHD scenery meshes created by Alpilotx. Also, if you have the HDD space, I recommend installing the orthophoto overlays created by Forkboy or generating your own using Ortho4XP. There are many small GA airstrips nearby to KAST that can be enhanced by other available free third-party scenery packages. If you haven’t yet discovered simHeaven, they create freely available add-ons that can enhance the surrounding area nicely, but I’ve found there are some object conflicts and anomalies when combined with this scenery package. When compared with their other offerings, I’ve found Skyline’s KAST scenery detail isn’t quite as deep, i.e., the omission of building interiors and human figures, but then again, the size of this package is considerably smaller than the others. A couple of words of caution for prospective customers; the installation requirements stated in the enclosed support documents mention you need to set the X-Plane object density to Maximum. I was able to do this, but due to my system being on the low end, really strained by computer systems. However, I found that I could use medium density, but it did detract from the overall look of the geographical area, i.e., fewer trees in the forests and a smaller amount of building objects in the populated areas. If you have the Orbx Washington SD/HD orthophoto scenery package installed, you will see object conflicts and anomalies. If you want to fly around this specific area with orthophoto overlays, I recommend those created by Forkboy. Conclusion One of the reasons why Astoria Regional Airport has such a pull, is due to its beautiful location in the Pacific Northwest. There are just so many amazing places to explore, such as the Gifford Pinchot National Forest to the east and the Olympic National Park to the north. And if you’re a Goonies fan, then there’s a bit of nostalgia thrown in for good measure! Even with the issues I encountered with my system, I have to say the developers have done an excellent job at recreating this airport for the enjoyment of X-Plane pilots. It really did bring a smile to my face as I explored the airport grounds and surrounding areas. Keeping in mind my concerns about this scenery offering (do your homework), I really do think you'll enjoy exploring KAST Astoria Regional Airport by Skyline Simulations. _______________________________ Astoria Regional Airport by Skyline Simulations is available from the X-Plane.Org Store here: Astoria Regional Airport Priced at US$20.00 Features Designed with the latest airport updates UHD Realistic Custom Textures Detailed HD Ground with PBR and decals Landmarks. Bridge, Column, Super Detailed 3D modeling PBR Materials on every building Thousands of 3D custom static objects Amazing and detailed night textures FSEco-subsystem Accurate City using original OSM data Ground Traffic Requirements X-Plane 11 - X-Plane 12 (when available) Windows , Mac or Linux 4 GB VRAM Minimum. 8GB+ VRAM Recommended Download size: 3.3 GB Current version: 1.0 (May 16th 2022) Review by Sean McLeod 8th Sept 2022 Copyright©2022: X-Plane Reviews Review System Specifications Windows 10, i7-2600K @ 3.9Ghz, 32GB DDR3 RAM, Gigabyte GTX1070 G1 8GB RAM, SATA HDD. (Disclaimer. All images and text in this review are the work and property of X-PlaneReviews, no sharing or copy of the content is allowed without consent from the author as per copyright conditions) All Rights Reserved
-
Scenery Review: KAST - Astoria Regional Airport, Oregon Introduction Welcome to beautiful Astoria, Oregon USA, recreated for your X-Plane adventures by developers, Skyline Simulations. Founded in 1811, Astoria is the oldest city in the state of Oregon and was the first American settlement west of the Rocky Mountains. Astoria is located on the south shore of the Columbia River, where it flows into the Pacific Ocean. The city is named for John Jacob Astor, an investor and entrepreneur from New York City, whose American Fur Company founded Fort Astoria at the site and established a monopoly in the fur trade in the early nineteenth century. Astoria Regional Airport, much like the city, is again located on the south shore of the Columbia River. This General Aviation airport sits directly at the border of two US states - to the north is Washington and south lies Oregon - divided by the mouth of the Columbia River. It’s not a particularly busy airport for commercial traffic - it’s not presently served by a scheduled commercial airline - but it’s certainly dynamic and active. KAST is home to a US Coast Guard service station - Coast Guard Air Station Astoria - that serves the Oregon and Washington coasts. Also of note, portions of the popular classic adventure movie The Goonies was filmed in the town of Astoria. Download & Installation I purchased and downloaded my copy of Astoria through the X-Plane.Org Store (other outlets available). The 3.3GB file size (unzipped) is what I consider to be substantial, but others may see it as the norm these days. Upon expansion, you will have one folder that contains two subfolders and the PDF manual, with the total file size rising to 5.03GB. Installation instructions are nothing out of the ordinary; move(cut-paste) the folders into your Custom Scenery folder. Launch X-Plane and go to the Graphics settings tab, adjust the Number of World Objects to Maximum. Since the art assets of the scenery package are high-definition and utilize PBR materials, it’s also important to make sure you have Visual Effects slider set to at least High (HDR). The Airport The largest structures at the airport are the two large hangars which date back to World War II. Both the 3D modelling and texture work is of a high standard, and when viewed up close, you really get a sense of their size. Situated nearby are numerous smaller buildings, such as the FBO terminal and T-hangars. Runway 26, the longest of the runways measured at 5773 x 100 feet, is served by an ILS (modelled by default in X-Plane) and RNAV(GPS) approach for when the wet West coast weather closes in. The other runways lack precision approaches but are served by PAPI & VASI visual approach aids as well as non-precision RNAV(GPS) and VOR approaches. The Skyline team has used a large number of decals and textured polygons to give tons of detail to the airport environment, such as cracks in the asphalt and concrete surfaces, stains from oil and dirt, tire skids, water puddles, and grass in the infield and surrounding areas. Everything is very high fidelity, crisp and clearly textured. The downside to all this detail is that users with low to middle-end systems might possibly experience slowdowns at certain parts of the scenery. Even though the scenery demands higher spec’d computer hardware, the details of specific elements of the airport area impressed me, such as the gateway and hangar of the Coast Guard station, the general aviation hangars with high-resolution signage, plus other nicely detailed exterior features such as wooden staircases. There appears to be a driving school that uses one of the decommissioned runways as a training area, and there is liberal usage of 3D grass objects that help to add a lot of character to this airport scenery. Surrounding Area Away from the airport, you can find landmarks specifically modelled by Skyline, such as the Astoria Column and the Astoria-Megler bridge which are nicely detailed. There is mention of a lighthouse, but I haven’t found it yet, which gives me one more reason to keep on exploring this scenery! PBR & Night Lighting During the evening and late-night hours, the scenery really comes alive with the vehicle traffic lights moving through the airport's various areas. Around the hangars, I noticed a few parked vehicles with their lights on which was a nice touch and helped create a sense of realism. The airport environment is well lit with some especially nice areas, but I found the interior lighting from the general aviation hangars unfortunately shines through their roofs and creates a floodlight effect that doesn’t strike me as particularly realistic. However, the custom-made landmarks, such as the Astoria-Megler bridge, shine beautifully across the river, and when the Astoria Column is lit, the lights are really well done, as they are omnidirectional and not simply focused spotlights on the column. Performance During my testing, I have to say that I have spent more time than I wished working on finding an optimal balance with my existing scenery collection and Skyline’s KAST package. If you haven’t already done it by now, you can safely use the HD/UHD scenery meshes created by Alpilotx. Also, if you have the HDD space, I recommend installing the orthophoto overlays created by Forkboy or generating your own using Ortho4XP. There are many small GA airstrips nearby to KAST that can be enhanced by other available free third-party scenery packages. If you haven’t yet discovered simHeaven, they create freely available add-ons that can enhance the surrounding area nicely, but I’ve found there are some object conflicts and anomalies when combined with this scenery package. When compared with their other offerings, I’ve found Skyline’s KAST scenery detail isn’t quite as deep, i.e., the omission of building interiors and human figures, but then again, the size of this package is considerably smaller than the others. A couple of words of caution for prospective customers; the installation requirements stated in the enclosed support documents mention you need to set the X-Plane object density to Maximum. I was able to do this, but due to my system being on the low end, really strained by computer systems. However, I found that I could use medium density, but it did detract from the overall look of the geographical area, i.e., fewer trees in the forests and a smaller amount of building objects in the populated areas. If you have the Orbx Washington SD/HD orthophoto scenery package installed, you will see object conflicts and anomalies. If you want to fly around this specific area with orthophoto overlays, I recommend those created by Forkboy. Conclusion One of the reasons why Astoria Regional Airport has such a pull, is due to its beautiful location in the Pacific Northwest. There are just so many amazing places to explore, such as the Gifford Pinchot National Forest to the east and the Olympic National Park to the north. And if you’re a Goonies fan, then there’s a bit of nostalgia thrown in for good measure! Even with the issues I encountered with my system, I have to say the developers have done an excellent job at recreating this airport for the enjoyment of X-Plane pilots. It really did bring a smile to my face as I explored the airport grounds and surrounding areas. Keeping in mind my concerns about this scenery offering (do your homework), I really do think you'll enjoy exploring KAST Astoria Regional Airport by Skyline Simulations. _______________________________ Astoria Regional Airport by Skyline Simulations is available from the X-Plane.Org Store here: Astoria Regional Airport Priced at US$20.00 Features Designed with the latest airport updates UHD Realistic Custom Textures Detailed HD Ground with PBR and decals Landmarks. Bridge, Column, Super Detailed 3D modeling PBR Materials on every building Thousands of 3D custom static objects Amazing and detailed night textures FSEco-subsystem Accurate City using original OSM data Ground Traffic Requirements X-Plane 11 - X-Plane 12 (when available) Windows , Mac or Linux 4 GB VRAM Minimum. 8GB+ VRAM Recommended Download size: 3.3 GB Current version: 1.0 (May 16th 2022) Review by Sean McLeod 8th Sept 2022 Copyright©2022: X-Plane Reviews Review System Specifications Windows 10, i7-2600K @ 3.9Ghz, 32GB DDR3 RAM, Gigabyte GTX1070 G1 8GB RAM, SATA HDD. (Disclaimer. All images and text in this review are the work and property of X-PlaneReviews, no sharing or copy of the content is allowed without consent from the author as per copyright conditions) All Rights Reserved View full article
- 1 reply
-
- 1
-

-
Thanks Anthony, I'm glad you liked the review. Michael certainly had fun with the 747 🙂 Cheers Dominic
-
Scenery Review: Alps UHD XP12
Dominic Smith replied to Dominic Smith's topic in Payware Airports and Scenery Reviews
Hi Dave, I believe Stuart got them here (same as myself). Hope this helps 🙂 Dominic -
Scenery Review: Alps UHD XP12 By Stuart McGregor If you love mountains and valleys, and specifically those in Europe, I am sure you are going to love this scenery! Frank Dainese and Fabio Bellini have brought their creative talents to X-Plane 12, with the recent release of their Alps UHD scenery. Covering a staggering 8,000 square kilometres, this scenery is massive in every sense. It currently retails for just under $US 60, which to be honest at first glance seems a little bit expensive for a scenery package in my experience, however, when you consider you are getting five airports, fifteen airfields and forty-six heliports across three countries, France, Italy and Switzerland, and if mountain flying is your thing, then this is well worth considering and perhaps not a bad deal after all. Megève Airport in the Alps If you are a fan of this type of scenery, you will no doubt be familiar with the work of Frank and Fabio as they have already created several similar 3D Mountain Park sceneries for X-Plane 11, and this release for X-Plane 12, is a further extension of their prolific work in this area. However, if you’re an X-Plane 11 user and have yet to experience Frank and Fabio’s mountain scenery packs, then I highly recommend you check out Stephen’s excellent reviews of their previous versions: Scenery Review: Matterhorn Park 3D by Frank Dainese & Fabio Bellini Scenery Review: Eiger Park 3D by Frank Dainese & Fabio Bellini Scenery Review: Mont Blanc Group by Frank Dainese and Fabio Bellini If you are already a customer and have purchased individual X-Plane 11 sceneries previously (specifically Aosta & Matterhorn, Mont Blanc & Eiger) they are currently offering a whopping 40% discount at the time of writing, which is a nice way to acknowledge the patronage and loyalty of existing customers. The human disposition typically wants more for less, and something for nothing, however, for me at least, I believe it is not unreasonable for this to be a paid ‘upgrade’, considering the developer’s statement that this is not a simple like for like overhaul of existing sceneries. What the actual price is and what is a fair price, I am sure we all have our own views based on what we are typically willing to pay, but either way, the offered discount is a nice touch. Courmayeur Alpine Resort in Northwest Italy, at the Foot of Mont Blanc In their latest release, there are four main packages provided, and these cover the Eiger Park, Matterhorn Park, Aosta & Mont Blanc, and the main peaks of the Alps, and within these, there are quite literally thousands of hand-placed objects and dozens of fascinating places to visit. This is no mean feat, believe me! Wengen in the Bernese Oberland Region of Central Switzerland From the outset, you can’t help being impressed by the splendour and natural beauty of this part of the world, from the majestic and rugged snow-capped mountains stretching to the sky, to the beautiful and tranquil lush valleys peppered with crystal clear waterways and lakes. If you close your eyes for a moment, you can almost taste and smell the clean, cold and crisp fresh air. As I have a VR headset, I was also able to experience this scenery in the truly different manner that VR brings, and if you have never tried it, you really should. Being able to stand at the base of one of the famous peaks and crane your neck upwards or perch yourself on the very edge of a cliffside and look down on the valley below, is an experience I will never forget. This was largely because of the scale of what is laid out in front of you, but also because of the improvements to the way many of the structures and mesh have been remodelled to reflect the real thing. Now some naysayers will undoubtedly shout, but this is a flight simulator, who cares about the ground experience, and for some, that may very well be true, however, my own view is that X-Plane is more than just the flying experience and offers an authentic (all be it virtual) opportunity to see parts of the world I may never get the chance to visit in real life. Breuil-Cervinia Located in the Alps Based on images and descriptions I have read on the internet, the stock X-Plane 12 scenery makes a reasonable job of representing this part of the world, however, the Alps UHD scenery enhances the vanilla state and takes this to an altogether different level. Many of the improvements are quite subtle, for example, tree placement and shape of lakes etc, and even the improved definition and appearance of the key peaks are quite subtle if you just glance quickly. However, it is this level of detail that really makes this scenery pack stand out. If you’re just a casual flyer or typically spend life at 35,000ft in a 747 and are not really bothered by this level of detail, then perhaps a scenery like this is not going to do much for you, however, if your passion is to get as close to the real thing as possible in a VFR sense, then in my opinion, this scenery is a big step in the right direction. For VFR pilots specifically, and those that like to fly helicopters, microlites and GA aircraft generally, you really can spend hours and hours exploring the breathtaking scenery whilst trying to take it all in. There are so many peaks and valleys to explore, not to mention the towns, villages and features that are strewn across the landscape. The Town of Thun and Lake Thun in Switzerland As I am sure most of us know, X-Plane 12 is still very much in its infancy, however, there are clearly new features that blend effortlessly well and complement sceneries of this type. For example, the winter textures that are now included in X-Plane 12, turn what is a beautiful green lush garden in the spring and summer months, into the harsh but beautiful reality of what winter weather brings, freezing temperatures, snow and ice! During my testing, I was quite amazed at just how real all of this felt (particularly in VR) when I set the temperature to sub-zero with deteriorating weather. Watching the new X-Plane 12 volumetric clouds come rolling in across one of the valleys and the snow and ice start to form on the ground was just stunning. Yes, there are clearly some issues and bugs still to be worked out in X-Plane 12 for sure, however, the initial signs are very promising when it comes to creating an immersive experience in sceneries of this type. The Gnifetti Hut in the Aosta Valley, Italy The scenery is large at just a little over 3GB, and when you download the scenery, you will find inside the main folder a whole raft of sub-folders. Although installation is just a case of drag and drop, there are more than thirty new folders that will appear in your Custom Scenery folder. Unfortunately, from what I understand, not all of this will be compatible with other third-party mesh upgrades, however, I am not able to speak for this as I don’t have any for this part of the world, but something worth considering if you already have these installed and can’t live without them. By comparison, what is spelt out very clearly by the developers, is that the package is only meant for X-Plane 12, and therefore is not compatible with earlier versions of the X-Plane sim. The Kleine Scheidegg Mountain Pass Once you have installed it and have checked your scenery.ini folder for any conflicts, (I always do this with new scenery just to be sure the load order is right), off you go… but hold your horses!! Where do you start? Fortunately, the scenery comes with a nice manual, plus a guide and map to show where everything is in relation to each other. As well as the included documentation, there is also an excellent support forum over at the Org, with the developers being highly supportive when answering questions: (Frank Dainese Mountain Scenery - X-Plane.Org Forum). Detailed Map of the Scenery So, where do you start? With more than sixty-five possible starting points, there is a massive choice of locations, and I must admit, I didn’t investigate all of them, however, I did make my way around all the main airports and a considerable number of the airfields and heliports. So, what awaits you? Well, assuming you visit outside the winter months, one of the first things you will notice is the massive difference in appearance that the photo-realistic textures bring to the ground. In X-Plane 12, the default ground textures, compared to some of its peers, is still an area where the sim lags behind, however, the addition of sceneries of this type, really makes a massive difference. The other thing that is very noticeable is the inclusion of additional and bespoke objects to those solely present in the default scenery, with many of these being based on photo textures and therefore in keeping with the feel and look of the region. Sallanches, Located Near the Mont Blanc Massif in France Now, whilst it’s true that some of the textures are perhaps not as sharp as they could be, compared to the default objects, I was able to look past that, and just marvel at the sheer number of objects, time and effort that must have been put into creating this scenery package and everything in it. Traffic Global was adding traffic to at least a couple of the airports, as I did see several GA aircraft going about their business while I was exploring the scenery, but you can’t help but be drawn to those majestic mountains above and marvel at how fabulous they really look. Moving away from the larger airfields and up into the mountains is even more pronounced. Meribel Airport in the French Alps As you progress higher, there are numerous alpine-styled houses and buildings dotted all over the sloping hillsides, and many of these were very nicely done. There is also a great deal of other smaller objects situated around the scenery and some of these include, signs, tables and chairs, flags, fences, traffic and marker cones, assorted vehicles, radio masts, lights, etc, and one of my favourite features, the chair lifts, which enable you to have a direct route to and from the various peaks. When you include the default animated trees from X-Plane 12, it all fits together nicely, and again, I can’t even imagine how many hours of work went into creating all of this. Sadly, I didn’t see any animation of the chairlifts which would be the ultimate cherry on a very fine cake, but nevertheless, just having these inserted into the scenery is very nice indeed. I should mention that although there are numerous objects, I wouldn’t say the airfields and heliports are crammed full, however, they are probably more than sufficient for most tastes. I guess the question to ask is, when is enough, enough? And in a scenery pack of this magnitude, what is presented is honestly quite impressive. Oh, I also forgot to mention that there are a few people dotted about the place, which is a feature I always look for when trying out new scenery. Without them, sceneries just don’t feel real to me, so seeing a few hardy souls present made me smile. Several of the remote helipads found in the scenery are literally on the edge of a mountain, a real ‘Eagles Nest’, and when you visit these, the photographic textures, the improved mesh, and the animated trees, all help to create a feeling of being in the wilderness. As I also mentioned earlier, having the VR experience in this scenery was also special, as when you add in the winter textures from X-Plane 12, the sounds of the wind and rain, you really do get an enhanced sense of being in the mountains. Plateau-Rosa Situated Near the Matterhorn Looking up from, or even down onto the majestic Skyway cable car at the Courmayeur helipad (LICYH) is a fitting example of one of the keynote features that are provided in this scenery pack. When combined with the new features X-Plane 12 has to offer, this scenery is a truly wonderful experience, and in my opinion, exploring it via helicopter is the best way to get the most out of every nook and cranny. Being able to drop in on one of the cliff edge helipads or follow one of the many ski lifts from top to bottom, really allows you to explore this massive scenery. You just won’t get that at 35,000 ft as you watch the latest movie and enjoy your chicken and rice (vegetarian, vegan and gluten-free options are available on request…)!! The Skyway Panoramic Cable Car in Action As far as performance goes, with my trusty 1080TI and 9th gen CPU, I didn’t have too many issues, and my FPS were generally OK (30 to 50+), even in VR with my Rift S. However, this is in all fairness, not a particularly good test right now, as there are still several areas which I believe X-Plane 12 will improve on, particularly around VR performance and general texture appearance. Courchevel Airport in the French Alps Based on my observations whilst reviewing this scenery, there is no doubt in my mind that the developers have worked tirelessly on making this scenery pack as realistic as possible, and in my opinion, they have succeeded in recreating the experience in X-Plane. Yes, there is perhaps some opportunity for improvement; for example, I noticed that some of the windsocks and flags are a little out of sync, and if one wanted to be picky, some of the texturing could be improved on a few of the buildings and objects. Additional features like a rescue scenario here and there would be a nice extra touch too, however, that doesn’t take away from the fact that if you are interested in mountain-styled scenery, this pack should offer you a very enjoyable experience as it stands. If you liked what the developers brought to X-Plane 11, I am sure you will love what is offered here! __________________________________ Alps UHD XP12 by Frank Dainese and Fabio Bellini is now available from the X-Plane.Org Store here: Alps UHD XP12 Price at time of writing US$59.95 Customers who own of of this previous mountain package can get this new Scenery for 40% off. Please find your coupon code in the original invoice. Eligible packages: AOSTA+Matterhorn, Mont Blanc and Eiger for XP11 Features: Includes the degrees +45 +007, +46+007, +45+006, areas of Italy, France, and Switzerland Mountain scenery including 3D models of the Mont Blanc massif, Matterhorn and Eiger Five main airports, fifteen airfields, and forty-six Heliports Faithfully reproduced towns and villages with appropriate types of buildings using customized textures and modelling. Photographic polygons/textures covering the mountain ranges and surrounding areas Polygons/textures 4K - covering an area of 8000 km Requirements: X-Plane 12 (not compatible with X-Plane 11) Windows, Mac or Linux 4 GB VRAM - 8 GB+ VRAM Highly Recommended Download Size: 3.3 GB Review System Specifications: Windows 10 64 Bit CPU Intel i9-9900k 64GB RAM Nvidia RTX 2080 Ti Oculus Rift S Scenery Review by Stuart McGregor 19th January 2023 Copyright©2022: X-Plane Reviews (Disclaimer. All images and text in this review are the work and property of X-PlaneReviews, no sharing or copy of the content is allowed without consent from the author as per copyright conditions)
-
Aircraft Update: B 747-8 Series Anniversary Edition X-Plane 12 Since its first flight on February 9, 1969, the Boeing 747 family of aircraft has become an icon of the skies. Dubbed "The Queen of the Skies", it has served for well over 50 years since its first iteration of -100 in 1969 with four generations following subsequently. A legend in aviation, it adores the hearts and minds of passengers and crew that have flown it. The -8 is the latest and final variant of the Boeing 747 which at the time of writing this review, has only one more delivery to be fulfilled in early 2023, meaning sadly we find ourselves right at the very end of its production lifespan, but certainly, with a few decades more to go for it to fly under commercial and freight operation. I was fortunate enough to have flown on the -8 myself back in September, traveling with Lufthansa from Frankfurt to New York. I always said that my first visit to America would be on a Boeing 747, so as soon as they took their aircraft out of storage and back on the pecking order, I just knew I had to take it on the first opportunity I got! Supercritical Simulations Group (SSG) are a well-respected developer within X-Plane and has recently updated their aircraft to include all the features and extras available to them for X-Plane 12. In this review, we take an in-depth look at the Boeing 747-8 and see how it stands as a fully-fledged simulation of one of the most iconic aircraft to ever grace the skies. Aircraft Specification ● Crew: 2 ● Length: 250ft 2in (76.25m) ● Wingspan: 224ft 7in (68.5m) ● Height: 63ft 6in (19.4m) ● Empty Weight: 485,300lb (220,128kg) ● Maximum Takeoff Weight: 975,000lbs (442,253kg) ● Powerplant: 4xGEnx-2B67 Aircraft Performance ● Range: 7,730nmi (14,320km) ● Service Ceiling: 43,100ft (13,137m) ● Max Cruising Speed: Mach 0.86 (504kn, 933km/h) Download & Install After purchase of the SSG B748, you are given a download page with two versions of the aircraft, one for X-Plane 11 and another for X-Plane 12. Select your chosen version (in this case we opted for XP12), download the file and extract it into your X-Plane “Aircraft” folder. On the first launch of the aircraft, you are asked to input your Serial Number. This can be copied and pasted from the download page to the pop-up. Then, after an aircraft reload, you are good to go. The SSG B748 comes with two PDF files and several text documents. These include a 238-page in-depth analysis and operations manual for the aircraft, a 45-page step-by-step quick start guide for the aircraft illustrated with pictures and screenshots as well as several change logs and license agreements. The Operations Manual I found rather special as while it marks each page as not for use in real-world flying, you can see that SSG took the time to analyse the real-world operators' handbook for the Boeing 747-8 and translate this into simulator terms, bridging the gap between their product and reality. The two guides are certainly worth a read as these go into great detail about the operation of this aircraft as well as tips and tricks on how to get the best performance out of it. When it came to start-up and procedures, I found these guides more than helpful in pushing for the best out of the 747. Exterior Model SSG have included both the -8i passenger and -8F freighter variants of the Boeing 747-8 family. The biggest difference between the two is the upper deck which has been stretched for the passenger variant to include seats, while the freighter sticks to the original length (this also slightly lowers the weight of the aircraft as there are no seating requirements). The -8F also features a nose opening for cargo, but apart from that, everything else from the wings back is nearly identical. From the get-go, I have to say the models look fantastic, as within the X-Plane 12 environment, you really do get a sense of the scale of this incredible aircraft. The Boeing 747 is the second largest commercial aircraft in the world, and as such, when you stand up close to it, you certainly get a feeling of its immense size, something I can attest to, having stood next to the real thing only a few months ago! Detailing on the SSG 747 includes 4K resolution textures across the body, allowing for warning labels and text to be both clear and visible. There is also bump mapping across the fuselage where panel gaps and bolts will sit in place, as well as several animations across the aircraft - this also includes the freighter variant of the 747-8. As per real-world operation, cargo is loaded through the front nose of the aircraft. To allow for this, Boeing made the entire front portion of the aircraft in front of the cockpit raise up, thus providing ground crews unparalleled access to the cargo bay of the aircraft. This is quite some spectacle to see in real life and is well recreated within X-Plane 12. Looking up close at the engines, the GEnx units used by the Boeing 747, share the same diameter as the entire body of the 737! These are extremely well-detailed, with the ability to see inside the engine through the fan blades and vents that appear when the reverse thrust is active. When combined with the wing and flex when in the air (remember, the Boeing 747 uses tungsten bricks in the wings to counteract flutter when airborne!) you can appreciate the size and weight of the aircraft as it flies. Cockpit and Interior The Boeing 747-8 gets its designation from the 787, with many displays and systems crossing over from Boeing’s newest jet to their longest in production. This means several digital displays as well as several backup EICAS units. Having once required three pilots to operate, there is now a lot of space behind the pilots where the flight engineer once was, giving you a lot of room to move around. The 747 is also the only Boeing aircraft of this generation to use the brown cockpit colours, as opposed to the grey they now use within their jetliners. Boeing used brown as it was light and pleasing to the eye of the pilots and SSG has certainly replicated this within their own rendition of the aircraft. Textures are done at 4k resolution, with text, panels, and gauges all clear and easy to read. The overhead panel can appear cramped at first, especially with all the systems in which to manage and maintain the four engines, but I found myself having no issues whatsoever when it came to reading and manipulating the various systems of the aircraft. The 747-8 is also surprisingly well-optimised for what it is too. A lot is going on both inside and out, so it was pleasing to see that everything performed smoothly when it came to framerates. You also have a different interior for both the passenger and cargo variants of the aircraft, and as such, the 747-8i includes a full passenger cabin interior for you to explore. This is both the upper and lower deck modelled in a tri-class configuration, textured and detailed to the same level as you would find inside the cockpit. I decided to position one of X-Plane’s custom camera points on the seat I had occupied when flying on this type myself. When up at cruise altitude, I was taken aback by how the cabin looked and felt - it was almost as if I was back onboard the 747 I had used just a few months previously! The detailing on offer, combined with the sound (something we will cover later in this article), really helps bring this aircraft to life and is something I have really appreciated. The 747-8F features the entire lower deck with cargo box mountains and trails for the movement of containers. This once again looks superb within the simulator environment and fits with the scale of the aircraft. The space is indeed massive, with a number of containers modeled into the aircraft, sitting two-by-two towards the centre of the cabin where the centre of gravity would be. You can decide on the number of containers and load factor and adjust this in the EFB tablet. The upper deck has also been modeled into a small crew rest area, making use of the small hump behind the cockpit. This includes a toilet, beds, galley, and seats for the crew – somewhere to enjoy a bit of shut-eye when flying ultra-long haul. Buttons, Gauges & Functionality For an aircraft of this size and complexity, I think it’s fair to say that a lot is going on within the SSG Boeing 747-8. Your core panel features your main Primary Flight Display, Navigation Display and EICAS screens as you would expect, but with several buttons and switches surrounding it that control your lights, displays and other features within the cockpit. The glare shield is also massively used with all of your autopilot systems sitting ready to take over once your aircraft is airborne and en route. This will be familiar to you if you fly Boeing (and even Airbus) jets often, but it’s the overhead panel that really takes time to learn. The overhead is littered with switches and buttons that maintain each aspect of your flight. Here you will find your lights, anti-icing and engine systems to keep all four power plants alive and burning. With the development of the previous 747-400 which removed the need for a flight engineer, the overhead panel became a lot busier with extra engine management systems included. This was carried over to the -8 and SSG has utilised this well. Everything is laid out in order of use, with most checklists on the aircraft starting in the top-left and slowly working their way down section by section. The Flight Management Computer is also custom-made and developed for the 747-8. This includes all of the route inputs and calculations that the pilot would make on the real aircraft as well as system management and planning that helps you in guiding the aircraft through each stage of flight. This has been well-developed and shows in operation when planning your different phases, allowing for each detail of your flight plan to be tweaked and perfected before you depart. Getting to grips with the 747-8 took a few moments to get going but having spent a lot of time in virtual Boeing jetliners, as well as having flown the -8 that comes packaged with Microsoft Flight Simulator, I didn’t find myself too out of depth. Familiarity with the aircraft is key, especially when planning to take it long-haul, which can take up most of your day. I would certainly advise spending time just looking around the cockpit and gaining an understanding of where different systems are located so that when it comes to flying, you know exactly where to look and know what you are expecting to see and do. As with any aircraft, the more practice you put into it, the better and easier you will eventually find the operation to be. SSG has also included an EFB tablet within the cockpit which serves as the loadmaster of the aircraft, allowing you to input your fuel and payload as well as interact with ground services and calculate your departure speeds. It also allows you to control the doors and exits on the aircraft which in the case of the freighter, includes the nose rising to allow for cargo to enter via the front. As more developers include these within their add-ons, I find them incredibly useful to procure my Flight Management Computer with the numbers it needs to programme a perfect departure and landing. Sound To put it simply, the SSG 747-8 sounds fantastic! There’s no other way of putting it, you can sense that a lot of time was spent recording audio samples from both within and outside of the aircraft, with fine-tuning in which to replicate the actual environment of the real aircraft. The spool-up of the engines sounds great when making that take-off run or listening to the rumble behind you as you start to pull back on the yoke and take the aircraft to the sky. The whir of the engines during start-up is also really well-defined, especially when you focus on all four engines being activated during the pushback procedure of the aircraft. One thing I have always enjoyed and appreciated about X-Plane is its fly-by-camera view. Not only is it visually appealing, but it also enables you to hear the sound variations from around the aircraft as well as the Doppler effect that is applied. Listening to the engines purr as the aircraft glides past your camera is great and a real testament to the time that SSG has put into getting that effect right for their aircraft. The immersion doesn’t just end within the cockpit. Moving my camera over to the passenger cabin and sitting myself down on one of the seats, I found the audio to be rather immersive; I was back in the seat of that Lufthansa 747 flying to New York! Flight Dynamics The SSG 747-8, as expected, feels very heavy when in the air. I find myself putting a lot of input on the yoke to bank and make turns. I haven’t had the pleasure of flying the real-life aircraft myself, but you can certainly (as a passenger) get a feeling for how the aircraft behaves, especially since using far more nimble jets and props in X-Plane in the past. As the 747 grew with each generation, and despite advancements in fly-by-wire technology to make control easier, I can still imagine it takes a lot of input from the pilot to tame the aircraft. The aircraft has a strong rate of climb too, more than you would perhaps expect for its sheer scale and mass. The GEnx-2B67 is a powerful engine and having four of these, helps propel the 747 into the sky. Descent too is quite something as the 747 can drop like a brick, especially with flaps and spoilers to help slow you down. When trying it out on a hop from Frankfurt to New York following the same flight plan as my trip in real life, I had one or two late descents which I could easily manage by dumping the spoilers and watching the altitude go without much movement from the pitch. During cruise, the aircraft is a joy to fly. With the autopilot on and FMS navigation in control, it will glide through the sky getting you to your destination with ease. This especially comes into play when performing a landing with crosswinds involved. You need to make a lot of small corrections to keep the aircraft on course, but the moment those rear wheels touch down and you find yourself gliding down the runway to come to a halt, you can certainly feel the sense of accomplishment of having performed an expert landing. Taxiing the 747-8 is also worth commenting on. It’s the longest commercial aircraft in the world (beating the Airbus A380 by 3 meters) and you’re looking out from the upper deck. This means you have very little coverage of the ground below you, with little sense as to where your nose gear is. Airbus achieved the ground control of the A380 by placing the cockpit on the lower deck, but with Boeing, and using 1960s technology, combined with the need for the cargo variant to load through the nose, this was never going to be the case for the “Queen of the Skies”. The more you practise ground movement the better you will get at positioning the aircraft, as well as learning to fine-tune and steer the aircraft with the throttles, adding power towards the direction you want to go. It’s certainly a beast in that regard! Liveries SSG has also included several liveries for the Boeing 747-8, both freighter and passenger variants, while there are also several more available on the org ready to download. The sets included are as follows: Intercontinental • Air China • BBJ • Boeing Family • Boeing Sunrise • Korean Air • Lufthansa Freighter • Atlas Air • Boeing Family • Boeing Light • Cargolux • Cathay Pacific • Silkway Cargo They are a nice selection of liveries, but all are new. Again there has been a change to the file structure, and so the sets of older liveries don't work anymore, they have to be v2.5+ or higher to work with the X-Plane 12. There are six Internationals liveries and six cargo liveries included. Opinion & Closing Remarks Overall, I have had an absolute blast flying the SSG 747-8 within X-Plane 12. The aircraft is a joy to fly and while it does take some practice getting used to, especially when performing banking turns once airborne, I have enjoyed virtually every minute since adding it to my virtual hangar. With an extremely well-defined model, cockpit, cabin, and audio, what SSG have is a complete package for one of the world’s most popular aircraft, with their passion for this project showing in every detail they have included. A great deal of time and effort has been put into getting the best they possibly could out of the X-Plane platform, and it certainly shows. The Boeing 747 has been around for well over 50 years now, and whilst not necessarily a ‘rare’ aircraft type to fly on (especially between popular destinations), I just knew I had to fly on it. Being able to recreate my two real-world flights within X-Plane 12 has been a wonderful experience and I am very impressed by the end product that SSG have managed to create. The aircraft is also very much in active development, meaning we will likely see updates and improvements for it for some time to come. SSG’s 747-8 is a product that I would be more than happy to recommend to anyone looking to fly the Boeing 747 within X-Plane 12. ______________________________________ Yes! the Boeing 747-8 Inter Anniversary Edition X-Plane 12 By Supercritical Simulations Group is available from the X-Plane.Org Store here B 747-8 Series Anniversary Edition Price is US$69.00 (currently on SALE for US$54.90) Features: Officially licensed by the Boeing Corporation. The entire external 3D model for v2 has been redone, including the following: All new fuselage closely modeled on the real one with added details Each door can be opened individually and is more detailed dded animations and details (almost all parts that can open/move on the aircraft are modeled). New external details such as a satellite antenna and tail camera New cut passenger windows instead of textures New vertical and horizontal stabilizers with added details New nacelles and engines with more details and new animations Reworked and more detailed landing gear/gear doors with additional animation Improved and more detailed leading and trailing edge flaps and added flap mechanisms Upper deck interior with seats/galleys and stairs to lower deck New wing flex and nacelle animations The textures for the entire aircraft have been redone to match the new model, along with decals for certain detailed areas, right down to most of the external placards, working closely with our technical advisors to ensure all the main details are present and that we have gotten them right. COCKPIT The entire cockpit 3D model has been largely redone and completely retextured. New overhead panel and buttons/switches New forward panel and buttons/switches New pedestal and buttons/switches/handles New miscellaneous panel and buttons/switches Side panels and window frames completely redone New cockpit seats Various added details SYSTEMS/FMC Almost all switches function properly and independently IRS alignment process implemented More realistic fuel system with different pumps and tanks along with FUEL TANK / ENG logic Realistic AUTOSTART and RUNNING indicators on secondary engine displays Improved and more realistic air conditioning system and logic Better track representation on ND Clock and chronometer on ND working like on the real aircraft More realistic baro pressure logic (STD, preselected, transition altitude) Captain and First Officer FMCs are now independent FMC FIX page added FMC Route 2 function added FMC Diversion function added Librain rain effects (currently not working on Macs) Skuncraft Updater Now with Skunkcraft updater. No need to download anything for updates, the plane will automatically be updated Requirements: X-Plane 11 or X-Plane 12 Windows , Mac and Linux 4 GB MB VRAM Minimum - 8 GB+ VRAM Recommended Current version : XP12: 2.6b4 (December 21st 2022) XP11: 2.5.1 (June 7th 2022) NOTE: Framerate requires a decent graphic card, minimum of 8gb is RECOMMENDED, so I would also recommend a power machine as standard. Installation : Download is 1.17gb which is unzipped and is inserted in your Heavy Aircraft folder as: 1.80gb Key authorisation is required. Documentation : includes SG 747-8 V2 FCOM.pdf SSG 747-8 V2 Quick Start Guide.pdf SSG License Agreement.txt SSGCUSTOMLIST.TXT ______________________________________________________________________ Aircraft Review by Michael Hayward 13th January 2023 Copyright©2023: X-Plane Reviews (Disclaimer. All images and text in this review are the work and property of X-PlaneReviews, no sharing or copy of the content is allowed without consent from the author as per copyright conditions) The Technical Bit Review PC Spec • Windows 10 Professional • AMD Ryzen 5 3600 Processor • 32GB RAM • Palit GeForce RTX™ 3080 GamingPro
-
Scenery Review: VerticalSim KSYR - Syracuse Hancock International By Joshua Moore Introduction Syracuse International Airport is situated in upstate New York, USA. The site on which it was built was first developed into an airport by Charles Hanna, the Mayor, and former WWI pilot. Upon the United States entrance of WWII, the US Army Air Corps built 3 runways and renamed the airfield Mattydale Bomber Base. It was used as a training and staging base for B-17 and B-24 bombers. In 1946 the airport was leased back to the city, with it being reopened as a commercial airport in 1948. It gained international airport status in 1970 and today serves twenty-eight destinations over eight airlines. Syracuse has two asphalt runways: 10/28 is 9,003 by 150 feet (2,744 × 46 m) and 15/33 is 7,500 by 150 feet (2,286 × 46 m). Prior to developing this X-Plane 12 version, VerticalSim had previously released Syracuse International Airport for X-Plane 11 and MSFS. Having enjoyed both, I was intrigued to see what Syracuse would look like in Laminar Research’s latest sim. So, without further ado, let's see how this rendition stacks up... Download & Install The installation process follows the tried and tested method many X-Plane users are familiar with. Once the 1.6GB file has been downloaded and unzipped (extracted size is 3.1GB), it’s a simple case of dragging and dropping the airport into your X-Plane’s Custom Scenery folder. Located in the airport’s scenery folder is a single eight-page PDF document which covers the installation process, features, and contact details for the developer. It’s simple and to the point, but it would have been nice to have seen some charts of the airport included. First Impressions Like many scenery developers, Verticalsim has used a photographic overlay as the main airport ground texture, and it certainly looks the part, especially with the ground objects all being correctly placed. When viewed from above, it makes X-Plane’s default ground textures stand out, but if you use photographic tiles of the surrounding area, it fits together seamlessly. However, one thing I did notice that was missing from the previous X-Plane 11 version, was the copious amounts of 3D grass. When I contacted the developer about this, I was told it had been temporarily removed, with the reason being, and I quote: “I removed it because they changed the way .for (forest files) are working, and I was getting weird shading issues with it. So, I just removed it for now till I had time to figure it out “ Other than the 3D grass, the rest looked quite familiar, which was a positive sign. Exploring the Airport Starting off with the main terminal building and I have to say that Verticalsim has done an excellent job at modelling the exterior, with all the major details being covered. It looks good, especially the smaller details that could have easily been left out. Unfortunately, some of the texturing didn’t quite meet the high standards set by the modelling, as I thought the entrance of the terminal looked a bit bland by comparison, especially with its repetitive textures. In saying that, this was when viewed close up and not something you would normally see from an aeroplane, so in this respect, the texturing is sufficient. The same is also true for the textures used for the roads, which I found to be slightly blurry but again adequate. As well as the main terminal, there is also the Million Air building located close by and again, this has been modelled to a high standard. The texturing was also good and upon checking with numerous sources on the web, found it to be a remarkable likeness of the real building. Further afield and you'll find the FedEx building plus other smaller maintenance facilities and hangars, along with the airport's own fire station. Airside and there’s plenty of detail to be observed. Multiple baggage carts, containers, pushback trucks, and other typical details can all be seen, with each being modelled to an acceptable level. Many of these are animated too, which really helps bring the airport to life. The cargo ramp contains plenty of ground clutter, and if you enjoy cargo operations as I do, this airport sees daily flights from UPS and FedEx, so there are plenty of chances to visit the apron from your choice of aircraft, be it an A300, 757, 767, etc. The Air National Guard side looks quite typical for a guard base, as it includes a lot of brick and steel buildings, all built to typical DOD standards. The one thing missing is the guard shack at the entrance of the airport, as in the scenery it’s represented by a single US flag. One area of the scenery which I hope will see an update in the near future is the addition of a 3D interior to the main terminal building. While I am certainly no fan of memory-hogging lavish interiors, such as those seen in certain sceneries in MSFS, I do think this add-on would benefit from one, even if it were basic. Being able to see chairs, counters, or even people inside the terminal, would add some additional life to the airport. As it is, it just seems to feel slightly empty. The developers at Verticalsim have always managed to get their apron ground textures to look authentic and Syracuse is no exception, as there is plenty of weathering on offer, such as scuffs, rubber marks, oil stains, etc. If only every airport employed this kind of detail…unlike the clinical feeling you get from some I have experienced in the past. The included jetways, and I observed three types, on the whole look good, with some variants looking more realistic than others, mainly due to the texturing. Both taxiway and runway texturing have been used to good effect and unlike some airport sceneries I have used, they do not look repetitive or blurry. Both the numbering and lettering for the majority of the scenery is very good, but I did notice that one of the runways was labelled sixteen instead of fifteen as it should be. Apart from that one error, the results were quite pleasing. Lighting Night lighting overall was good, especially the volumetric effects used around the ramps, terminal, and other buildings, but there were a few areas which I felt were lacking, the lit windows on the terminal being the main culprit. Here the textures consisted of a baked, flat 2D lit texture and didn’t do the building any favours whatsoever. This was a shame because the terminal itself (as mentioned previously) looks good and is another reason why a 3D interior would be beneficial. When it came to navigating around the airport, I found the lighting to be more than adequate, with both taxiways, runways and signage being well lit. Performance While testing Syracuse, I observed no noticeable slowdowns or stutters. Framerates always remained high which wasn’t a total surprise, as the airport isn’t overly detailed, plus it was missing the 3D grass, which can, on some systems, occasionally play havoc with framerates. Conclusion I have always been a huge fan of Verticalsim’s work as many of their sceneries exhibit higher than average framerates, decent quality texturing and modelling, plus interesting locations to fly in and out of, and Syracuse doesn’t break with that tradition. Yes, it does currently have a few issues, namely the lack of any 3D grass and a 3D interior of the main terminal. However, even with those faults, I still found this to be a scenery I enjoyed flying in and out of. So, is it worth the asking price? Well, if you enjoy flying airliners and visiting large hubs as I do, then this is a scenery I think you would really enjoy. When you also factor in the developer’s track record for updating and improving their sceneries, then I think this add-on becomes even more compelling. ________________________ Syracuse Hancock International Airport by VerticalSim is now available from the X-Plane.Org Store here: Syracuse Hancock International Airport by VerticalSim Priced at US$19.99 Features X-Plane 12 version now available 4K PBR texturing Circa 2022 airport layout SAM jetway support Animated vehicle traffic HDR night lighting Taxi routes for use with AI traffic addons Requirements X-Plane 12 or X-Plane 11 Windows, Mac or Linux 4 GB VRAM Minimum - 8 GB+ VRAM Recommended Download Size: 1.7 GB Version XP12 - September 21st 2022 Review System Specifications Windows 11 Ryzen 5800x RTX3070ti, 32GB RAM __________________________________ Scenery Review by Joshua Moore 8th December 2022 Copyright©2022: X-Plane Reviews (Disclaimer. All images and text in this review are the work and property of X-PlaneReviews, no sharing or copy of the content is allowed without consent from the author as per copyright conditions.
-
Aircraft Update: Aeroprakt A22-LS Project XP12 by VSKYLABS By LPNils Introduction VSKYLABS has modelled the A22-LS version, tailored for the American market as a Light Sport aircraft, which means a max gross take-off weight of 1320lbs (600kg) for land planes and 1430lbs (650kg) for seaplanes. It also means the aircraft cannot stall at speeds higher than 45 knots. Other limitations are a fixed pitch or ground adjustable prop, two seats maximum, one engine, fixed gear, unpressurized and a maximum speed in level flight that does not exceed 120 knots. Fear not though, as this plane certainly won’t get near those numbers! Purchase and installation The VSKYLABS A22, like the developer’s other work, is available at the X-Plane.org store, for a very reasonable price ($27.50 at the time of writing). The pack has download links for both an XP11 and 12 version of the aircraft, but for the purpose of this review, I tested the XP12 model (even though 12 is still in Beta!). Reassuringly, the developer Huss has committed to keeping the pack up to date with changes still happening to the X-Plane Beta. He always tends to stay on top of updating models, so no worries in that regard. The download size for the A22 is just under 200MB. Installation is very straightforward, just drag the A22 aircraft folder into your X-Plane Aircraft directory as instructed by the manual found in the download. Documentation Inside the aircraft folder, you will find an installation manual, which is very clear and to the point. The most important piece of documentation is the Instructions Manual / POH. Huss compiled the manual as some sort of Pilot Operating Handbook Supplement. In it, he is very clear about what this Aeroprakt add-on does and doesn’t do, how it compares to the real-life aircraft and the limitations of X-Plane and how he worked with or around those. In all, it’s extremely clear and transparent, which is superb! If you would like to configure your hardware to the A22, Huss has written a detailed list of what control assignments are required for specific interactions with the aircraft. In this list, he again mentions some of the X-Plane limitations and how you should work with those. VR users will be able to find all interaction zones described in the manual, with visual representations. Huss also goes on to explain the Experimental or LSA Autopilot included in the X-Plane model. The “POH Supplement” ends by referring to the real-life Pilot Operating Handbook and you can download this POH for real-life operating instructions and performance. Exterior The VSKYLABS A22 is well-modelled and really does mirror its real-life counterpart. There’s plenty of detail on the external model, but not so much that it’s overly excessive. I love the triangular windows on the aft sides of the cabin. An Aeroprakt A32 regularly visits the airfield I work at, and it does have a cool look to it (also it’s entirely black) …except for the extended range fuel tank covers, which do slightly odd. It’s a lot less odd looking in this A22 model though and flying this VSKYLABS rendition sort of made me get used to them. The real A22 has these bigger fuel tanks as an option (57L each instead of the standard 45L) and I am glad Huss went for the larger tanks. Another feature that stood out to me was the design of the wings (TsAGI wing profile, Soviet equivalent of NACA). These are slightly swept forward which after talking to a local aviation buff (CFI, examiner, airport manager) was told is sometimes done to add more flexibility to weight and balance. The empennage of the A22 is equipped with some sort of ventral fin with a small wheel to protect the stabilizer. I doubt it can take excessive forces of incompetency, but it is incredibly nice to have, especially since it has an elevator with plenty of authority, although, in backcountry operations, or rougher strips, I wouldn’t advise getting the tail feathers down that low (protect them from debris). Speaking of the backcountry… it also comes with decent size wheels and mudflaps, which are great options to have on STOL planes. The mudflaps probably won’t stop all the muck from slinging onto the aircraft (wings in particular), but anything’s better than nothing, plus it looks cool. The flight control surfaces of the A22 are huge, and this is well represented in the metallic & orange livery. It also doesn’t come with separate ailerons and flaps, it comes with flaperons. A wing has only a limited span to add ailerons and flaps, so why not combine both so you get a decent lift increase from the flaps and good roll authority at low speeds? It’s also simpler to implement than let’s say drooping ailerons and flaps, and again, it looks cool! It’s interesting to see what the flap settings do to roll deflections and in particular to deflection limits. The A22 comes with five liveries in total, with the standard livery being fully yellow. In addition, there’s a blue version with yellow door/window frames, a metallic grey body variant with orange frames, flight controls and cowl (black on top to block reflections), a red and black body version with white frames and number 22 (air rally look?), and lastly, a blue frame with yellow wings and stabilizers (reminds me of old USAAF basic trainers). Personally, I really like the metallic and orange livery. Interior & Functionality The first feature of the Aeroprakt A22-LS that catches the eye is the optional yoke! The standard control is a Y-shaped stick mounted in the centre console. This can appear an odd configuration at first, but on an earlier flight in a Zenith STOL, I learned that it feels nice, and on longer flights, you can lean your forearm on the Y and chill out a bit. I like it, as it suits my Honeycomb Alpha yoke very well. Upon a cold-and-dark start, the gust lock pin will be installed, which can be removed by clicking on the tag. Also, the yokes can be hidden by clicking where the rod enters the panel. Another huge plus of this model is the Garmin GNS430. It’s getting old for a Garmin GPS/NAV/COM, but for its size, it’s a very suitable instrument for this cockpit. I imagine in this modern age; one may be looking for a newer setup if you have funds to spare and that’s where the tablet comes in. I do not have the AviTab plugin, so I cannot elaborate too much on it, but I think it’s a welcome feature to this pack. Tablets are what most modern pilots use to fly with nowadays, using apps like Foreflight or SkyDemon. One oddity is the location of the (battery) master switch! It’s under the left-hand seat and is a plastic key that with a quarter turn switches on power to the battery (12V DC). Then there’s another master switch on the panel, with a regular key, which also acts as a starter switch. The ignition switches are two separate toggles on the panel, rather than included in the master/starter switch. You may see them mentioned as mag switches (magnetos), but the Rotax 912 uses two electrical ignition boxes (of Ducati make) instead of antique magnetos. This brings me to another thing that is a little off or confusing depending on how old the aircraft/engine is. If you click on the checklist at the top of the panel, it will come up for you to read. When looking, you’ll see that it mentions Coolant Temperature but if you look at your engine instrumentation you will only find a Tecnam brand CHT gauge (Cylinder Head Temperature). However, the Rotax 912 has air-cooled cylinder bases and liquid-cooled heads. Older Rotax 912s had the temperature probe on the bottom of the #2 or #3 cylinder and picked up Cylinder Head Temperature, whereas more modern cylinders have the probe on top of the cylinders, dipping into the coolant. So Rotax, in 2015, published Mandatory Service Bulletins (SB-912-066 & SB-912-068). This requires owners or operators to change the temperature limit numbers in the documentation and get rid of the potentially confusing usage of both terms “CHT and CT”. With a newer engine (or cylinders) you just go with Coolant Temperature. Along with that, a CT gauge gets installed instead of the CHT gauge (in consultation with the aircraft manufacturer). I also notice that the engine instruments stay live even with the master is off, so this is a slight bug at the time of writing. Another cool feature of this VSKYLABS model is the clickable airspeed indicator as this can change units between a joint MPH/Kts (BK-3) or KPH (BK-240) backplate. Rotax-powered aircraft can have different RPM gauges and since the Rotax 912 is a geared engine, the engine RPM and Prop RPM differ (this rendition in X-Plane has the engine RPM indication). The gearing is included in the engine to maintain enough torque on the prop while the engine itself has rather tiny pistons (compared to a Lycoming O-320 for example). As mentioned in Huss’ aircraft manual, the choke doesn’t work quite the way the real one works. You see, Rotax engines don’t have a mixture control. In a legacy engine, you would use a full-rich mixture to start the engine, after which you can lean pretty aggressively. Rotax requires you to add more fuel to the mix upon starting and has Bing carburettors with membranes to maintain a proper mixture after that. So, it’s not even a real choke (which chokes the air to enrich the mixture), it just injects a little more fuel. To start a cold Rotax, you use full choke and close the throttle. After it fires up, remove the choke and increase the throttle to a minimum smooth RPM (1900-2100ish). A recurring mistake is that pilots want to add a little throttle while using the choke. Of course, it won’t start that way, you’re just draining the battery. I noticed some other small details where it differs from the real deal: if you leave the choke on, RPM will not drop below 2400 engine RPM. For reference, I have had plenty of students and renters come back complaining that the engine idles too high, and this nearly always means that they have forgotten to take the choke out after starting. If you try and add choke quickly while it’s already running, the engine starts to shake and tells you it is not happy with what you’ve just done. Also, adding carb heat should induce a very slight RPM drop, not as much as a legacy carbureted O-320, but just slightly. But hey, for a sim this will do just fine. The flap(eron)s are actuated manually and the handle is located on the ceiling. It comes with three positions: up, 10 degrees and 20 degrees. Manual flaps are great for this type of STOL aircraft as you can use them to push it off the runway by using ground effect for minimum take-off roll. If you search YouTube, you’ll see this used in STOL competitions. Being a modern light aircraft, it comes with a BRS (ballistic rescue system) recovery chute, and you’ll be pleased to know, it works in XP! Make sure you pull the locking pin before you fly (as per the checklist). The sound of the BRS activating in the sim is slightly underwhelming as I’ve experienced a real deployment up close, and boy does it grab your attention with that rocket being fired! But then again, I’m amazed this model even comes with a working chute. Apart from the autopilot, which is displayed by clicking the compass, the VSKYLABS A22 doesn’t come with many other features. It’s a very basic aircraft, but what I can say is that what’s included is done to a very high standard. Another attribute of the A22 is that its visibility is very good, being a high-wing aircraft. I very much appreciate being able to look down and forward, so I can still sort of see where I’m going while on final approach. Handling Now on to the real fun! Before I begin though, I have to say that I have noticed the model tends to fall on its tail when parked slightly nose-high, which can be an issue in the backcountry. However, I have a feeling this may be the same for its real-life counterpart, as some are very light on the nose. When treating the brake system like the real thing, I felt it sometimes lacked some nose wheel steering authority (I added some toe-brakes to help it turn). Nose wheel steering is effective enough to make relatively tight turns with no help from brakes needed, though for sim use I don’t feel this is a large issue. During takeoff, it’s highly apparent that the elevator has plenty of authority. I say this because it’s easy to over-pitch, leading you to potential tail dragging, which risks damaging the stabilizers and adding drag on your roll. Be very gentle when applying back pressure and once you have a feeling for it, it’s easy to do a soft field departure with the nose wheel just slightly off the ground. The A22 will fly off rather quickly after a very short run as it’s very light, and with a ~100 horse Rotax 912ULS, you have plenty of power for a decent climb. At low speeds, the aircraft feels mushy, and it really does depend on those huge control surfaces to make its way around turns, but they do work, which is incredible, especially when you realize just how slow the air is moving over them. During the cruise phase, the controls are very light and direct, with plenty of airflow over them. Stalls are relatively docile. You can make the plane descend in a stall by keeping the yoke pulled and then power right out of it. Letting the nose drop also ends the situation. It can however snap on you, dropping a wing if you wrestle it just too much. On landing, it depends on the weather, location and other variables as to what technique you want to use. You can drag it in with some power to do spot landings without obstacles, or you can drop it in from high and use all the drag you can get from the flaperons and maybe even some forward slip. Again, the roll control feels sort of mushy, so you need large deflections sometimes, but this means it’s easier to make small corrections. During my testing, I can’t say I’ve got the landings nailed quite yet but it sure is fun getting to know the character of this low-and-slow fun machine. Sounds The sound pack is OK as it sounds like a Rotax 912. The starter sound is there, and you can hear the gearbox slapping on shutdown, which always hurts my “mechanic feelings” a bit. In real life, I close the throttle and while spooling down, I cut the ignition. Tough to nail, but oh it’s so nice not to hear the gears rattle, so yeah, it does sound and feel like it should! The sound does change when you open or close the doors, which makes for a nice and loud experience when flying with the doors open. There are sounds for the buttons and switches, but it appears to be rather generic. Overall, the sound is fine for what it is and does a good job of mimicking the Rotax engine experience. I suspect the price of the pack would go up if a high-detail FMOD soundset was included (I’ve seen the process of how SimAcoustics records those, quite professional and has lots of expensive-looking microphones). Those are nice but aren’t a must-have. Conclusion Well after my testing, I must conclude that this is a highly enjoyable model from VSKYLABS, especially for the price and what Huss is trying to do with his VSKYLABS range. I say this because Huss uses the default X-Plane flight modelling instead of resorting to all sorts of plugins and ‘dirty’ tricks often employed by others. This means there are some compromises made when it comes to specific systems and handling. In saying that though, the A22 is right there in the ballpark, where it should be. The documentation is very clear and transparent about it, which is a trademark of VSKYLABS. To sum up, the A22 looks great, includes some good quality liveries, sounds realistic enough and is interesting and enjoyable to fly. Sure, if you want to go somewhere in a rush, it might disappoint, but if like me you enjoy the magical world of low-and-slow flight, then the Aeroprakt A22-LS makes for the perfect companion. _______________________________ The VSKYLABS- Aeroprakt A22-LS Project for X-Plane 12 is available from the X-Plane.Org Store here: VSKYLABS- Aeroprakt A22-LS Project Priced at US$27.50 Project's Main Features: VSKYLABS 'Test-Pilot' Project: designed for use with X-Plane's cutting edge Experimental flight model environment, featuring superb flight dynamics with authentic performance and flight handling characteristics. Built for VR: development was tailored specifically for VR, and optimized for 2D usage. Engineered and designed as a default X-Plane aircraft (Like all VSKYLABS projects). The VSKYLABS projects are practically show-casing X-Plane, as they are stretching X-Plane default features, systems and flight model to its limits without any dependencies on complementary plugins or software...delivering a very robust simulation model, having maximum compatibility with the ever evolving X-Plane flight simulator. Perfect fit for beginner and expert pilots: The VSL A22-LS is featuring the standard, basic analog cockpit suitable for VFR + night flying. The simple and clear analog gauges layout is perfect for beginner pilots. It is also featuring an optional experimental LSA-grade autopilot. Built-in Avitab Plugin Compatibility (AviTab plugin is not included). STMA Auto Updater plugin is included - all updates are being pushed smoothly without the need to re-download the entire base package (base package will be updated every once in a while to minimize the gap). Highly responsive and professional support: VSKYLABS is offering continuous professional support from aircraft related aspects (operating and flying) to X-Plane technical support. The project is under constant maintenance and development. Requirements X-Plane 12 or X-Plane 11 Windows, Mac or Linux 4 GB VRAM Minimum - 8 GB+ VRAM Recommended Current version: XP12 - September 5th 2022 1.0 (April 29th 2021, XP11) Review by LPNils 17th Nov 2022 Copyright©2022: X-Plane Reviews Review System Specifications: Ryzen 7 3800X - 32GB RAM - Gigabyte RTX 2070 2X 8G - Windows 10 64Bit (Disclaimer. All images and text in this review are the work and property of X-PlaneReviews, no sharing or copy of the content is allowed without consent from the author as per copyright conditions) All Rights Reserved
-
Aircraft Review: VSKYLABS F-19 Stealth Fighter for X-Plane 12 By Alan Ashforth This is a review of the new VSKYLABS F-19, which along with X-Plane 12, is rapidly receiving updates. As such, this article will offer a snapshot of the F-19 in its current state (version 1.5 at the time of writing), and X-Plane 12 Beta 9, as of 29th October 2022. Introduction The actual F-19 story can be traced back to the 1980s when numerous news articles began circulating about a supposedly secret stealth aircraft called the “F-19”. At the time, the USAF had taken delivery of the F-117 Stealth Fighter, and when one of these highly secretive aircraft crashed in California in 1986, it only helped stir the media interest. To this date, the F-19 has never been officially acknowledged, but this fact has done nothing to deter the public’s interest. In fact, quite the opposite has happened, as the F-19 has been referenced numerous times over the years, most notably in the highly popular computer game, “F-19 Stealth Fighter” by Microprose, released in 1989. The F-19 model represented here by VSKYLABS, continues this trend of “what might be”, as much of what this model is based on is pure speculation. However, that is where a lot of the excitement comes into play…so let’s have a look at some of the F-19’s statistics. Performance figures provided by VSKYLABS are of an aircraft that can reach a maximum speed of Mach 1.2, an altitude of 53,000ft and a range of 1,400 miles. Not too shabby in the slightest! The aircraft carries internal missiles which include two AIM-9X air-to-air (AA), and AGM-158A air-to-ground cruise missiles. Download & Installation Once purchased and downloaded from the store, the VSKYLABS F-19 (unzipped) weighs in at 341MB. Contained within the folder, you will find a concise 14-page manual, which according to the developer, will be updated into a comprehensive manual. There is also an install guide complete with a warning that the model just purchased is an “Early Access Aircraft”, due in part to X-Plane 12’s rapid beta progression. Exterior There’s no denying it, VSKYLAB’s F-19 is a remarkable-looking fighter aircraft, with obvious stealth attributes on offer. From its pointed nose, angled front cockpit, concealed engines (from frontal radar returns) four-engine cooling ducts on the fuselage top (to reduce heat signature), rounded wings and inward tilted twin ruder/ vertical stabilizers (complete with built-in speed brakes), this is a design modelled entirely to go unnoticed by enemy radar. Other notable features of the aircraft include the in-flight refuelling (IFR) cover on the top centre of the fuselage (not yet implemented in X-Plane 12), tailhook, brake chute and the fully internal missile weapons bay. Interior VSKYLABS has modelled the interior of the F-19 to be quite snug, but in a way that fully embraces a design from the 1980s. It is equipped with mostly steam gauges, plus a few additions from the nineties, those being a Garmin G530 and a few EFIS units. Looking around, it is clear to see that the developer has put a lot of time and effort into making the interior as authentic as possible. Everything is modelled to an extremely high standard, including a nicely detailed seat and canopy surround, a nice feature of which, are the numerous marks and scratches on the glass. A feature I especially enjoyed (which is due in part to how X-Plane 12 works), was the wonderful rain effects on the cockpit glass, incredibly atmospheric and great fun to boot! Due to the layout of the F-19’s cockpit, learning where everything is located, is relatively simple. Yes, it takes a bit of time, but that’s half the charm of flying an aircraft such as this type. However, once done, everything falls into place and the experience is highly enjoyable. Flying & Operation When starting the F-19 from cold and dark, the battery is only used to test the fire warning and annunciators. Set your L/R engine shutoffs to the SET (UP position) and then turn on the APU switch; a green light will appear within 30 seconds. Hold down the right engine starter until 30% is achieved and the engine should then self-idle up to 65% RPM. To start the left engine, you simply follow the same procedure. If you happen to have AviTab installed, you can read the Normal Procedures list for engine startup. With our GPS, radios and other equipment checked, we can now progress to the takeoff phase. The advice given by VSKYLABS in the manual, recommends rotating at 130kts, with takeoff being achieved at between 150-170kts, depending on aircraft weight. At full throttle, afterburners (AB) will be activated, so if flying below 250kts, these can be switched off. For CAT launches, the procedure is almost the same, but with slightly more emphasis on having your afterburners ready, and don’t forget the launch bar switch on the lower front left panel. One of the first things you’ll notice about the F-19 when in the air, is just how stable an aircraft it is. This is particularly evident in the FCS Dogfight mode, as you’ll be able to undertake some rather impressive manoeuvres without even a hint of complaint. Of course, if you want to add some additional challenge to your flying, you can always turn off the artificial stabilizers, which has the effect of making the aircraft a lot more sensitive. It’s fun, just be prepared for the odd…shock! The F-19, whilst not as fast as the likes of the non-stealthy F-15/16/18, climbs very well and achieves its desired altitude in almost no time at all. All the weapons carried by the F-19 are stored internally in which to maintain the aircraft’s stealth properties. These include the two sidewinders stowed in the left and right fuselage bays and the larger air-to-ground missiles (AGM), located in the central fuselage compartment. Whilst X-Plane isn’t labelled as a combat flight simulator as such, it’s still possible to have a great deal of fun in it, especially with an aircraft like the VSKYLABS F-19. To operate the weapons, you first turn on the Master arm switch and then choose either AA or AG (your chosen selection will then be lit up). In this mode, all relevant weapon bays will be opened, and the radar will show any “enemy” aircraft in range. For this example, I set up an AI MiG 27 as the enemy aircraft, and by using the keyboard command “Next Target”, I was able to select the MiG on the radar (turns red). As well as displaying the target, the radar also provides information regarding the speed and altitude of the enemy, in relation to your position. With the MiG locked and within around ten miles, I released a single sidewinder at the target. It looks like someone is going to have a long walk home! Unfortunately, when it comes to using the air-to-ground missiles in X-Plane 12, there is no means currently of being able to lock them onto either a ship or ground target. This doesn’t mean you can’t use them; you just can’t watch them hit anything. You can however observe a test flight of the AGM-158A during its launch phase, which to be honest, looks great, especially when the wings unfold, and the rocket motor kicks in! As well as selecting the desired ordinance, there is also a button for both chaff and flare countermeasures, but sadly during my testing, I couldn’t get the chaffs to work (this will no doubt be fixed in later updates). When navigating, cruising, or using the autopilot in the VSKYLABS F-19, it is recommended to use the Tactical mode of the FCS. This provides a smoother ride with less angle of attack (AOA), thus making the aircraft safer to fly when at low altitudes. However, one thing to remember, is that the autopilot will switch off if your speed drops below 170kts, so be aware of this, especially during landings. When flying at night, the F-19 looks fantastic, as not only are you presented with an easy-to-read cockpit panel, but you are also provided with some exceptionally bright landing lights. When combined with the new NAV and APR autopilot settings, night flights and carrier landings are a lot more enjoyable and safer. Due to the F-19’s poor forward visibility, both takeoffs and landings can be quite challenging at times, so you’ll have to move around the cockpit to get an idea of where you’re situated in relation to the airport or carrier. If you’re still having difficulty, then I recommend controlling the aircraft from (dare I say it), the external view. Whilst this isn’t as realistic, it does help with the frustration. Navigating in the F-19 works well during all phases of flight, as you can use either the sat-nav/autopilot or VOR/heading modes to complete objectives. When you factor in the new ILS making runway landings easier, plus the option of having either air-to-air combat or missile tests, the whole experience is just incredibly fun. Sounds No aircraft add-on is complete without a decent soundset, so you’ll be glad to know that the F-19 is well-catered for in this department. Not only are you provided with some truly incredible engine effects (FMOD), but this must be the first aircraft where I could hear myself breathing through the oxygen mask. There are also sounds for the closing and opening of the canopy, plus many other audio alerts, which when added all together, make for an audiophile’s dream. Conclusion As many of you will know, I have a fondness for military aircraft and as such, the VSKYLABS F-19 ticks many boxes in this regard. It’s an aircraft which is exceptionally well-modelled both inside and out (even in this early access stage). When you consider that fact, I think it’s safe to say that the model reviewed here will only get better, which is high praise indeed. The flight characteristics are both forgiving and challenging at the same time, plus the sound is to die for (wait till you listen to those flypasts). VSKYLABS are renowned for their modelling skills and the F-19 is no exception to the rule. One must also mention the model’s cost, which for an aircraft of this type, I think is more than acceptable. So, if like me you enjoy fast military jets, modelled to an exceedingly high standard, then VSKYLABS F-19 should definitely be on your radar! _______________________________ The VSKYLABS F-19 Stealth Fighter for X-Plane 12 is available from the X-Plane.Org Store here: VSKYLABS F-19 Stealth Fighter Priced at US$34.95 Project's Main Features: Project Highlights (Early Access Version): Early access version! A new aircraft for X-Plane v12.00 beta. Advanced concept aircraft simulation, including detailed, fully functional 3-d cockpit environment with realistic, working systems. Extensive, professional real-world experience and knowledge of jet-fighters design, systems, performance, handling and operation were involved in the making of the VSKYLABS F-19. Designed for X-Plane 12 cutting-edge flight model environment and presents superb flight dynamics with presumably authentic performance and flight handling characteristics for the hypothetical F-19 aircraft. Developed for VR: Development was tailored specifically for VR and optimized for 2D usage. Engineered and designed as a genuine, default X-Plane 12 aircraft. The VSKYLABS projects are practically show-casing X-Plane, as they are stretching X-Plane default features, systems and flight model to its limits without any dependencies on complementary plugins or software...delivering a very robust simulation model, having maximum compatibility with the ever-evolving X-Plane flight simulator. Comprehensive FMOD sounds for 'As Real As It Gets' experience! Perfect challenge for beginner and expert pilots: Provides a very wide flight envelope with comfortable control from ~140 knots to Mach 1.1. Autoupdater based on the SkunkCrafts autoupdater - all updates are being pushed smoothly without the need to re-download the entire base package (base package will be updated every once in a while, to minimize the gap). Highly responsive VSKYLABS support forums: VSKYLABS offers continuous professional support, from all aircraft related aspects (operating and flying) to X-Plane technical support. The project is under constant maintenance and development. Requirements X-Plane 12 - Not compatible with X-Plane 11 Windows, Mac, or Linux 4 GB VRAM Minimum - 8 GB+ VRAM Recommended Current version: 1.0 (October 21st, 2022) Review by Alan Ashforth 3rd Oct 2022 Copyright©2022: X-Plane Reviews Review System Specifications: Windows 11, Intel i7 10,700 Processor, 32GB RAM, 2TB SSD, GeForce RTX™ 2070 (Disclaimer. All images and text in this review are the work and property of X-PlaneReviews, no sharing or copy of the content is allowed without consent from the author as per copyright conditions) All Rights Reserved
-
Scenery Review: PACV - Merle K Smith - Cordova, Alaska XP12 By Paul Mort Introduction Hello, and welcome to my third review here at X-PlaneReviews. This time around, we’re heading off to Alaska, or more to the point, Merle K. (Mudhole) Smith Airport. If you enjoy remote airports, with a slight chilly factor thrown in (we’re talking about the weather, not the food) then you’re going to enjoy this X-Plane 12 scenery. With vast mountain ranges and glaciers to the north, and islands and the Gulf of Alaska to the east and south, there is plenty to see for the budding pilot. However, the weather can change in an instant, so if you do go exploring…make sure you plan ahead. The airport itself is named after Merle K. Smith, also known as "Mudhole" who was a bush pilot and who later became president of Cordova Airlines, which used the airport as a hub between 1934 and 1968. Situated relatively close to the Gulf of Alaska and eleven miles from the city of Cordova, Merle K. Smith Airport has an elevation of fifty-four feet or sixteen meters. There are two runways on offer: 9/27 is 7,500 by 150 feet (2,286 x 46 m) with an asphalt surface and 16/34, which is 1,899 by 30 feet (579 x 9 m) and has a gravel surface. Alaskan Airlines is the only carrier at the airport, and due to the lack of road access, the airport represents the only means of connecting Cordova with the outside world (apart from the ferry). Installation The downloaded file from the X-Plane.org store weighed in at just under 270MB, which is relatively small for an airport scenery but once extracted, increased to a more respectable 633MB. There was no online registration or EXE file to run (something I always find tedious), it was just a case of copying the folder to my Custom Scenery directory in X-Plane 12. Being an airport scenery with no additional folders to add, there was no need to edit my scenery_packs.ini file. There was no documentation of any kind to be found in the package, which was something I was slightly disappointed by, even at this price point. Default Scenery Prior to installing this scenery add-on, I was intrigued to see what the default airport looked like in X-Plane 12, and whilst it was passable in terms of general layout (taxiways, runways etc), it was missing many important buildings, not to mention, clutter and people. Walkabout With the add-on package installed from DC Scenery, things were improved greatly. When viewed from above, instead of the generic default textures we have become accustomed to, we are greeted with an ortho tile which covers the whole airport area. Compared to the default textures, the detail is night and day, which makes the supplied ortho stand out somewhat. It would have been great if the ortho covered a larger area and then was slowly blended into the default textures, but sadly this wasn’t the case. However, if you’re using your own ortho scenery of Alaska, then the ortho supplied with the package, should (in effect), blend in seamlessly with the one supplied. Moving to ground level, and the scenery maintains both its quality and clarity, with the runway textures employing some useful weathering effects, such as cracks and rubber marks. Quite often, runway textures can become repetitive if done badly, but this wasn’t the case here. Whilst there wasn’t a lot of variation in terms of textures used, what there was, worked well. Progressing onwards, and there was an abundance of flora on offer, namely 3D bushes. I did notice a slight framerate drop here and there but considering my X-Plane system is on the low end, it’s to be expected. For those users with more capable systems, I don’t see this part of the scenery to be an issue. Just over 46% of Merle K. Smith Airport’s traffic is GA, and this is well represented by the large general aviation parking area as we head towards the main airport. The aircraft on display are generic static models, and whilst they do the job, it would have been nice to have seen aircraft which actually frequent the airport. The main airport area is made up of numerous small buildings and hangars, including what can only be described as the main airport terminal. These are all well-modelled with some genuinely nice texturing included and really help set the scene. The Alaskan Airlines and the Cordova Auto Rentals hut both deserve special mention, as they both look just like their real-life counterparts (weathering included). There is an abundance of airport clutter, such as pallets, cones, barrels etc, and something I was especially pleased to see…people! I can’t tell you how much of a difference this makes. Over the years I have reviewed numerous sceneries which have been excellent apart from one mitigating factor…the absence of people. Well, I'm glad to say that DC Scenery hasn’t fallen into that trap, so hats off to them for including these models. Just outside of the airport there is what seems to be an industrial area, complete with silos and a few trucks. It’s not particularly well-modelled, and after viewing the same area in Google Maps, it seems to be more of a quarry/pit. Night Lighting X-Plane has always ruled supreme when it comes to night lighting, and Merle K. Smith Airport is no exception. The developers have carefully and thoughtfully added lighting effects to different areas of the airport, and it works exceptionally well…the runway lights reflecting off the runway are a prime example. Winter World With X-Plane 12, we now get (by default), the ability to experience winter textures, and oh boy, do they make a difference, especially for an Alaskan airport such as the one being reviewed here. Due to its location, the airport is quite often covered in snow, and whereas before we would have been stuck with summer textures (unless using a third-party mod), we are now able to set the scene in a far more realistic manner. The whole area is transformed, and to be honest, the scenery looks completely different, but not in a negative way. Now the airport really does feel remote and cut off from the real world…this is the difference winter textures can make. Performance As mentioned earlier on in the review, the only part of the scenery which caused a noticeable slowdown on my computer system was the copious amounts of 3D grass lining the parameter of the runway. Away from there, performance was more than adequate, and that’s saying something considering the age of my PC. Conclusion Having spent a good deal of time exploring both Merle K. Smith Airport and the surrounding area, I must admit the experience was (on both counts), highly enjoyable. Yes, there were a few areas where I felt the airport scenery could have been improved, like the blending in of the ortho and adding some form of documentation, but overall, I think the developers have done an excellent job at recreating the scenery. With the introduction of X-Plane 12, sceneries such as Merle K. Smith Airport can now make use of the superb weather effects on offer, and this is where the flying experience truly shines. Thanks to the excellent design work by DC Scenery and the creative minds at Laminar Research, we get to experience what an Alaskan winter is like, and how an airport as remote as Merle K. Smith really feels, especially when the weather closes in. __________________________________ Merle K Smith Airport by DC Scenery is now available from the X-Plane.Org Store here: Merle K Smith Airport Priced at US$12.00 Scenery features: X-Plane 12 ground effects X-Plane 12 3D vegetation Features a highly accurate recreation of Merle K. (Mudhole) Smith Airport Highly detailed models and textures of airport terminal, hangars, buildings and other objects High Detailed ground textures PBR on all objects Custom lights Accurate taxiway, runway and apron High level of airport detail Compatible with Orthophotos Requirements: X-Plane 12 (not compatible with XP11) Windows, Mac or Linux 4 GB VRAM Minimum - 8 GB+ VRAM Recommended Download Size: 282 MB Current version: 1.0 September 24th 2022) Review System Specifications: Windows 10 64 Bit Intel Core i5-3350p CPU @ 3.10 GHz 16GB RAM NVIDIA GTX 1050Ti Scenery Review by Paul Mort 27th October 2022 Copyright©2022: X-Plane Reviews (Disclaimer. All images and text in this review are the work and property of X-PlaneReviews, no sharing or copy of the content is allowed without consent from the author as per copyright conditions)
-
Aircraft Update: Airbus A321-231 XP12 by ToLiss By Joshua Moore Introduction & History The A321 from ToLiss is well known to be a high-fidelity, highly detailed, and well-loved model within X-Plane. I’ve flown it many times in X-Plane 11 and was quite excited to see it migrate over to X-Plane 12, where the newly enhanced environment allows it to take full advantage of the new lighting and reflection models provided by the new simulator. To complement the base model, I purchased the A321 Neo Add-on in which to increase the aircraft's range - perfect for extended flights. Note: In December of last year, Stephen published a detailed and extensive review of the ToLiss A321 (V1.31) in X-Plane 11, so I highly recommend checking out his review first before reading this X-Plane 12 update. The Airbus A321 program was launched in 1988 with the first flight being completed in 1993 with an IAE V2500 equipped airframe, and the second flight with the CFM equipped airframe following shortly after. The A321 entered service with Lufthansa in 1993 and has become a highly successful competitor to the 737-900 and 757. Today, the A321 Neo continues on the successful lineup of the A320 family, with the A321 XLR conducting flight testing to try and compete with the arguably more suited but aging 757 fleets. Documentation & First Impressions Documentation of the A321 from ToLiss includes a 57-page manual on the systems, a tutorial flight, and some product info. A full FCOM or in-depth systems description is not provided by ToLiss but can be found quite easily online in PDF format. Having flown the A321 in X-Plane 11, I know it to be a solid airplane, both in looks and systems. I have quite high expectations for it in X-Plane 12, and I am quite happy to see that it has had no issues maintaining my expectations on the new platform, with it easily accomplishing 6hr flights with no FPS degradation, no autopilot issues, and most importantly, none of those pesky CTDs. The texturing is slowly showing its age, but the systems are top-notch, and the cockpit looks far more accurate in terms of color compared to some of its counterparts. Electronic Flight Bag The ToLiss A321 has one weakness for me, and this has to be the EFB. Its main feature is the inclusion of AviTab, but other than that one feature and the ability to control certain loading functions through the tablet, it is more of a visual addition to the cockpit compared to a functional device I use on my flights. There are takeoff and landing performance tabs, however, they are not yet functional and serve no purpose other than being a “provisions for” screen. For those that use AviTab for major functions, it works as advertised in my limited testing with it, though I tend to stick to my iPad which has all my real-world applications installed and is a bit easier to pull from than an on-screen tablet. I would love to see ToLiss revamp the tablets in all three of their airliners, as the enhanced experience would greatly improve the overall quality feel expected of the price we pay for these add-ons. Exterior Model &Texturing The Exterior model of the A321 is one of the highlights of this addon. Gone are the flat textures with a static “PBR” reflection that adorned not only the A321 but every airplane in X-Plane 11. This has been replaced with the new X-Plane 12 model, and ToLiss has done an incredible job implementing the new reflection model onto the A321, as it looks incredible. The shine and reflections give the model a more lively appearance. The landing gear is modeled to a highly accurate extent, with grease, dirt, and grime sticking to the struts and various components. The engine models provided by ToLiss in the A321 are one of the model’s weak points. The IAE model is the worst offender, with the engine having incorrect shaping. The CFM isn’t as bad, but there are still issues. The Neo’s engines look a little better, however, on closer inspection they too suffer issues, namely the fan blades and aft cowling. For this review, I added the Carda engine mod for both the IAE and CFM engines. With these being freeware, I highly recommend these engine mods as being a must-have upgrade to improve the overall look of the engines of the ToLiss A321. These engine mods remedy the issues with the modeling and are quite easy to install. I would love to see ToLiss rebuild their CFM/IAE engines on their A321 or try to work with Carda to make his mods the default standard for their aircraft, they improve the overall look that much. I also tested the Carda Leap and PW mod for the Neo, however, they are currently incompatible due to some texture issues with the fan blades that affect the Ceo as well, so the Neo engines are the default for this review, however, I would say the same for the Neo engine mods. ToLiss could try to work with Carda to implement his engines into their models. The textures provided with the A321 are well done, albeit a bit on the lower resolution side. They have an acceptable amount of wear and tear that isn’t over the top but does not give the airplane a perfectly clean and unused appearance, which I really like. I would love to see the textures improved in terms of their resolution to allow for a bit more detail on the fuselage, but if you back away a couple of feet, the pixelation disappears and the textures look nice and sharp. The aircraft options that ToLiss provides for the exterior are quite extensive, allowing you to choose between wing fences and sharklets, Satcom versus no Satcom, door configuration, and engine type. I appreciate having the ability to edit all the options straight from inside the simulator which saves time and effort from manually editing files outside the sim to change these options. This is and has been the standard for years, and it’s nice to have it on the ToLiss A321. Interior Model & Texturing The cockpit appears to have changed little from X-Plane 11, though the new lighting model of X-Plane 12 appears to give it more depth and texture. The texture quality is amazing, the text is clear and easy to read, and the overall color of the cockpit compares extremely well to photos my friend sent me from the real aircraft at different times of the day. Rain effects have been included with the ToLiss 321 and look acceptable, though a little on the light side. I am unsure if it’s a Laminar or a ToLiss issue, but the photos below of the rain were with max precipitation set, and I could see out the windows just fine without wipers on approach. All the videos I’ve seen of airliners flying into heavy rain present a very different picture, with the wipers fighting to keep up with the amount of rain slamming into the windscreen. I can’t confirm that myself as I don’t dare fly the Bonanza into a heavy rainstorm, but it seems like there should be more rain on the windshield with extreme precipitation set in the X-Plane weather tab. We must keep in mind it is a beta, so maybe this will be tweaked and changed. Avionics Options & Systems ToLiss is well known for properly simulating the systems of the Airbus series, and it has proven itself in X-Plane 11, so with the port to X-Plane 12, it stands safe to say I didn’t find a single glaring issue in any of the tests or flights I did. FO Shatek and I did the same thorough walk-through we did with the Flight Factor A320 and only found minor issues, one of which turned out to be a company-specific option with the lighting. Starting with the MCDU, we walked through a full preflight and setup of the box and Shatek had no issues with the system. The “ACARS” pulled the Flightplan from SimBrief allowing for easy implementation of the flightplan, weights, and TO performance. The MCDU menu presented other menus including AOC for free text and weather requests, however nothing there has been implemented yet. I would like to see that implemented into the airplane as it would be a helpful addition to the flight deck. The only large issue which I would love to see resolved is the lack of weather radar. Supposedly this will be added in X-Plane 12 thanks to the new weather system, so I am hopeful to see it come to the A321 at some point. Flight Characteristics I cannot say specifically if the flight dynamics of the A321 are accurate, as I’ve not flown the A320 series in real life. What I can say however is whether or not it feels right, and in this case, it feels quite similar to the flight model in X-Plane 11, perhaps with a bit more fluidity. The flare seems to have changed, with the airplane floating a lot easier compared to X-plane 11, and that caught me off guard on my first flight in the A321 in X-Plane 12, which ended up in two go-arounds due to excessive floating even with the aircraft set right on the Vref. The ToLiss does model Normal, Alternate, and Direct law, which includes control overrides and additional protections being modeled. If you would like to read more into this, check out my review on the Flight Factor A320, where I explain it in more depth. The last area of the A321 I would like to mention is ground handling. It is quite slippery during taxiing and likes to overshoot turns if you are not careful. This could use a little tweaking, as I never remember the X-Plane 11 version sliding so much in a turn, even at 5-10kts. Sound The sounds that ship with the ToLiss A321, both Neo and Ceo, are in my opinion, quite acceptable. They are detailed and cover all the main points of the airplane, but I didn’t find them to have much of a wow factor, save for the PW4000. Commanding thrust from the PW engines provides you with an amazing spool-up sound, something that you almost need to experience for yourself to understand. For the rest of the engine variants, it’s quite a mixed bag. It is an 80-dollar airplane after all, so I would have loved to see the sounds get a bit more love. Are there better sound packs out there? For sure. Will I spend money on them? Well, that will depend on how much I fly the airplane. If you are a frequent visitor of the long bus then I believe a sound upgrade is worth the cost, though with four engine variants it may get a touch pricey. Conclusion Overall, I really enjoy flying the ToLiss A321. It’s a great bird for long hauls when you have other work to do, but don’t want to fly a heavy. With the Neo expansion, it will easily cross the pond and connect your favorite eastern seaboard destinations with Europe, but it can easily turn around and fly short haul quick turns on high-density routes. It’s a fantastic addition to my X-Plane 12 hangar and I look forward to many enjoyable years flying it as I did with the X-Plane 11 model. ________________________ The Airbus A321 XP12 by Toliss is now available from the X-Plane.Org Store here: Airbus A321 XP12 by Toliss Priced at US$89.99 Officially licensed Airbus product Major new features: XP12 adaptations Custom engine model for more realistic thrust and fuel flow values and new engine failure modes Circuit breakers with accurate system response (Current over 100 circuit breaker available) ACARS functionality for direct download of Simbrief plans into the active or the secondary flight plan ACARS functionality to retrieve TO data for various runways of the departure airport ACARS functionality to retrieve wind data from SimBrief flight plan and enter them in the flight plan. New ACP interactive screen to request ground services, change fuel or passengers without the ISCS. EFB on captain on copilot side. (Currently featuring AviTab and weight and balance computer) FMGS plan editing overhaul, enabling temporary flight plans also for the alternate plan Database holds are now available (besides Pilot and computed holds previously available) Offset function now available Addition of new failure modes for a total of 210+ different failure modes, these include now recoverable computer failures More than 70 new ECAM messages Animated push buttons in the cockpit Moving pilot seats and armrests Minor new features: VLS increases with speed brake deflection Added (ETP) circle on ND to display the Equitime point Option to control internal and external volume levels via x-plane sliders or custom ISCS sliders Added Filtering and rate limiting for FMGS position for more realistic ND behaviour on ADIRU init completion Open pax doors now have an effect on the temperature in the adjacent zone Added option to always have the display brightness rotaries starting at the 80% position, even for cold and dark start Functional on-ground deicing via the new ACP interactive screen to avoid nasty surprises during take-offs in icing conditions Improved pushback truck Added fuel truck animations for slow refuelling via IACP. Added Radio Navigation and transponder failures, including associated ECAM caution messages and PFD/ND flags Reworked EMER ELEC ECAM, ELEC ESS BUSSES ON BAT, ALL ENGINE FAIL procedure Requirements X-Plane 12 or X-Plane 11 Windows, Mac or Linux 4 GB VRAM Minimum - 8 GB+ VRAM Recommended Download Size: 680 MB Version 1.4.1 (September 23rd 2022) Review System Specifications Windows 11 Ryzen 5800x RTX3070ti, 32GB RAM __________________________________ Update Aircraft Review by Joshua Moore 26th October 2022 Copyright©2022: X-Plane Reviews (Disclaimer. All images and text in this review are the work and property of X-PlaneReviews, no sharing or copy of the content is allowed without consent from the author as per copyright conditions.
-
Aircraft Update: SA 315B Lama by Philip Ubben and Khamsin Studio By Stuart McGregor I recently had the opportunity to try out the SA315B Lama by Philip Ubben and Khasim Studio during the beta run of X-Plane 12, and I am delighted to share my thoughts and experiences in this review. In all honesty, I find the Lama to be an unusual-looking aircraft by today’s standards, with its bulging bubble canopy and open tubular fuselage exposing all its workings, and in a strange way, it reminds me of an insect that has had its wings pulled off. However, don’t be fooled by its rustic appearance, as it has some amazing characteristics and charm. Designed by the French Sud Aviation organisation to be able to cope with extreme conditions in terms of high altitudes and temperatures, the single turbine engine Lama was developed to perform in the mountainous regions of the Himalayas and has held several high-altitude records along the way. It is not the largest of aircraft by any means, only carrying up to 4 passengers or just over a tonne as a slung load, however, the fact it can operate comfortably in extreme altitudes does make it quite unique in many respects. Its main customer base has traditionally been military organisations operating in mountainous regions of the world, such as the Nepalese Army and Indian Air force, and its order book has stretched far and wide from Afghanistan to Peru. When you then consider the Lama’s roots are firmly planted in the late 1960s and early 1970s and it is still very much in use today, this is a real testament to the ingenuity and engineering expertise of the original Sud Aviation designers, and I am really delighted the developers have brought this amazing aircraft to life in both X-Plane 11 and now also X-Plane 12. This review has included a couple of firsts for me, namely, it’s my first real venture into the X-Plane 12 environment since its general release to the public, and secondly, most of the testing I carried out was in VR with my Oculus Rif S. Traditionally my reviews have been carried out in the 2D world, however, this time I thought I would just try something a little different and give VR a try. It is worth noting that this review was using the beta 7 version of X-Plane 12 and there are clearly lots of bugs still to fix, (flickering clouds for example), however, I believe that this didn’t detract too much from the overall experience. In all honesty, even with the bugs, I have very much been enjoying the new features available in X-Plane 12, and I believe this all bodes well for the future of the sim. So back to the Lama. The Lama was originally released for X-Plane 11 in the second half of 2021, and if you opt to purchase the X-Plane 12 model, you also get the previous version as part of the package. For a comprehensive and in-depth review of the Lama, including its many systems, please follow the following link to Stephen Dutton's excellent X-Plane 11 article. I did take a quick look at the version 11 variant just to see what has changed, and although I didn’t spend a lot of time in the older version, there are significant upgrades in the new X-Plane 12 model. One of the most noticeable changes are the upgrades to the pop-out 3D tablet and the addition of the ‘Nightsun’ searchlight, and I will come back to that later. The Lama is currently retailing at x-plane.org for $32.95, and it was released in early September this year with the launch of X-Plane 12. Installation is extremely easy, just a case of downloading and drop into your Aircraft folder, that’s it. Once you have it installed, if you look in the “Documents” folder under “Comprehensive Manuals”, you will find all sorts of helpful documents provided in a mixture of English, German, and French. You will find an Introduction to the Lama that explains a little about the helicopter itself as well as the start-up and shut-down procedures, operational start-up and shut-down checklists explaining what to do and in which order, a visual overview of the main instrument panels and functions, instructions on how to use the ‘Nightsun’ searchlight, an overview of the functionality provided via the 3D-tablet, and a list of FAQs that may answer some of the questions that you initially have. A separate document also describes the Pitch Indicator provided in the Lama and explains what it does and how to use it. In all honesty, I was a little confused by the explanation offered, however, I am sure with some practice it all makes sense. The developers also mentioned that in real life, as the unit is quite hard to read and would be a distraction during flight, most pilots consider any pitch limits throughout their flights prior to taking off. Nevertheless, it is a nice feature to have if you are looking for the best immersion possible and the dials are operational. There is one final document that is worth mentioning and that is the Quick Start Guide. This will give a few other general tips on how to get the best out of the Lama, and all these documents are worth reading to familiarize yourself with the numerous features the Lama has to offer. Now that you have installed the Lama and have read through the various documents, it is time to jump into the cockpit. There are two seats up front and three in the rear, and one of the first things you will notice is just how much of a view you have because of the bubble canopy. In VR especially, this is fabulous. For those who don’t have VR capability, this really is something that adds a totally new dimension to flying, and although it does take a little time to get used to, particularly when flying helicopters, the benefits far outweigh the negatives. The sense of depth that you get can’t be matched on any 2D screen, so when looking around the Lama’s cabin, you just want to reach out and grab everything. The instruments in the Lama are quite basic in terms of tech when compared to modern helicopters, however, I really prefer this as there are just fewer things to have to learn and ultimately worry about. Don’t get me wrong, tech is great and will often add in new safety features which is never a bad thing, however, sometimes it is just nice to be faced with some more basic instruments and controls. There is a small overhead panel above your head with lighting dimmer controls, switches to operate various electrical systems and a range of fuses, although the fuses are not functional. I found the central pedestal dials fairly easy to read, although VR in the Rift S does have its limits when looking at small numbers and lettering, however, the textures overall are very nicely done and realistic. If you can crane your head around and look above and behind, you will see the rotor head and rotors, and the attention to detail is excellent, even down to unique part numbers on the rotor blades. When cold and dark it is worth just taking a few moments to try out the cyclic controls and watch the rotorhead assembly parts all moving in perfect unison. Pretty impressive!! To get the Lama started, you can go the fully manual route and follow the provided checklists, however, one of the features I really like was the automated start-up (and shut-down) that can be accessed via the 3D-tablet. The tablet can be opened by clicking on the text label to the right of the central console on the airframe, and this is one of the areas where the XP11 and XP12 variants differ. In the XP12 version, several new features have been added and there is now a complete second page that can be accessed. This allows you to toggle on or off various features such as the doors, snow skids, external mirror, searchlight, and rescue winch; you can also adjust the type of baskets and type of airspeed indicator and altimeter, and from the first page you can also adjust the weight distribution, centre of gravity and the fuel load (see the Quick Start Guide for guidance when rotors are running). In addition, you can also set the auto pitch limit and pitch fail mode and turn the rotors to the front prior to starting. In real life, this is important as it avoids rotor damage caused by the turbine exhaust and is a nice little feature that adds to the immersion. I liked the sound of these changes being made when you click the screen, it really makes you ‘feel’ the changes are taking place rather than just appearing. On page 2 of the tablet, you have options to adjust visual effects such as glass reflections, downwash, vibrations and how lights and strobes show up. On this page, you will also find the automatic checklists for start-up and shutdown, and these have audible speech samples that take you through the process which I really liked. You can also have the view change automatically to show you the relevant section, which is OK in 2D but made me feel a bit sick in 3D, so I just disabled it. The final feature I would like to mention, and to me, an important one is the Augmented Stability controls. This allows you to set the intensity on the Heading, Pitch and Roll stability, and I had this set to 15% for all three. I found that controlling the Lama with these all set to zero was pretty tuff, and this is something you can play around with to find your own sweet spot. As I mentioned, 15% did the trick for me. Before we get the engine fired up and attempt a flight, I just wanted to take some time to mention the exterior features and detailing of the Lama. In X-Plane 12, the Lama is a thing of unusual beauty, it really is, and the developers should be extremely proud of what they have achieved. Sitting on a wet apron with puddles of water, and then walking around the Lama, was a surreal experience. Again, the VR element just gives you a whole new perspective and dimension to explore, and being able to do a walk around and dive into all the nooks and crannies around the fuselage was a magical experience. Details like ropes and rucksacks in the baskets are well done and I have never seen this type of detail before. The quality of the textures are exquisite and really should be enjoyed by getting up close. I even noticed that the engine has a readable nameplate tag which really shows just how much care and attention the developers have taken when creating their Lama. One final feature which I believe is worth a mention is the gentle flex and swaying movement of the rotors in the wind. This really is exceptional, and I even found myself just mesmerized watching this for a few minutes. It still amazes me just how far flight simulation has come in the 10 years I have been a fan, and aircraft like the Lama in combination with modern sims like X-Plane 12, is a testament to the various developer’s skills and imagination. The continuous improvement is remarkable, and the fact we can all enjoy this from the comfort of our living rooms is quite mind-blowing when you think about it. OK, so let’s start up the Lama. As mentioned, I just used the auto-start feature for simplicity, although I am sure it wouldn’t take much to do this manually if you wish. One of the first things you notice when the engine starts to spin up are the sounds of the turbine, this is particularly enhanced if you remove the doors or have them open. Although I have never stood next to a real Lama (animal or helicopter), the turbine sounds very authentic, and the richness of the sounds complements the visual features extremely well. You really get a sense of the power of the turbine as it goes through its various phases, and the tone changes further as the rotors spin up to their full speed. Be careful though with any throttle controls, as I did have a couple of engine fires along the way as I hadn’t closed my throttle. Incidentally, the smoke and flame effects are realistic although I would prefer not to have wrecked the engine as often as I did. Once you start the engine you will also see the pilot from the outside and he is very well-modelled and animated with head movements. Once everything had stabilised, I was able to hover taxi to my take-off point quite smoothly and with only a little effort on my controls. Perhaps it is worth mentioning that I am currently using a VKB Gladiator joystick and pedals and an old MaxFlight Stick collective, and the combination works well. The 3D tablet can be stowed via a click spot on the bottom left of the panel, although the tablet also doubles as the AviTab system, so if you would like to keep the map or other features up you can. In VR, I am using the OVR tool (it seems to still work in X-Plane 12), and I have the Super Sampling set to 1.5 and Asynchronous Spacewarp set to force 30 FPS, ASW enabled. This works well for me and is the best compromise over quality and performance. Out of VR, I was getting around 50+ FPS, and in VR, well it reduces the FPS to 27 in the Rift S. Having such an unobstructed view from the cockpit makes the Lama a joy to be in, so flying low and slow around the countryside and across towns was a fabulous experience. I was able to control the Lama quite easily and I found it very responsive to my inputs during both takeoff and landing. On the latter you do have to be careful you don’t get caught up in your own downwash, as then the ground does come up to meet you a lot faster than you would like. There is no autopilot in the Lama which means manual flying all the way as far as I could tell, but I like this. Helicopters by their very nature are unstable, so having the challenge of being able to keep all the various parts moving safely in the direction you want them to, gives you a real sense of satisfaction when you master it. When in flight after dark, I had a play around with the ‘Nightsun’ searchlight and this is great fun, particularly when you assign the controls to a hat switch. That way you can control the beam of light effortlessly and easily direct it to where you want it. According to the developer, the light start-up procedure is also modelled as in the real thing, so it does take a moment or two to switch on, again another nice piece of realism. At night, the cockpit instrument lighting is also very nicely done, and you can toggle between green and red, whichever takes your fancy. The only thing that I felt was a little disappointing was the rescue winch, and I had to do a little research on the forums to understand if I was missing something. Other than switching on and off a red and white box object attached to the bottom of a thin white line, this was all I could see, and based on the quality of the rest of the helicopter, I thought I must have missed something… but nope… that is it. You can change the object to one of your own, or change the weight of the object to suit, however, this is all done via the X-Plane Weights & Balance menu under the Flight option in the ribbon menu. Here you adjust the details of the slung load, however, I think a few lines in the manual would be helpful, as, without it, I scratched my head for ages trying to work this out. This apart, the SA315B Lama by Philip Ubben and Khasim Studio is a fabulous example of what can be achieved within the X-Plane world, and I can safely say this is one of the best helicopters out there. I have tried most of what is available these days, and the Lama is up there with the best of them in terms of overall quality of build, features, and cost. I normally shy away from advising whether to buy something or not, as it does always come down to personal choice and depends on what you are looking for, however, if you are a helicopter fan, I think in this case I would make an exception. So, whether you are a serious helicopter flyer or someone just starting out, this Lama is well worth considering in my opinion. __________________________________ The SA 315B Lama by Philip Ubben and Khamsin Studio is now available from the X-Plane.Org Store here: SA 315B Lama XP12 Price at time of writing US$32.95 SA 315B comprehensive features list Support for the entire X-Plane 12 cycle including patches and possible updates Both versions XP12 and XP11 included for the XP11 features please look at the Lama XP11 shop page Quick-start-document in English Comprehensive flight manual documents in EN, FR and DE Completely redesigned flight model to reflect all XP12 changes X-Plane 12 weather effects compatible "Safe-state" system which stores all tablet customizations when changing aircraft or exiting the simulator. Restores them when the Lama is reloaded Lama's own "Artifical Stabilisation" system, which is of course integrated into the "Safe-State" system. Once thoroughly made, stability settings for the three control axes are stored and restored each time the Lama is reloaded Automatic checklist including switchable acoustic speech and also switchable camera guidance to the operated switches for the complete sequence from "Cold and Dark" to "Ready to fly" and back again. Thus, the complete start-up and shut-down process can be marveled at and followed like in a movie theater Full simulation of the SX-16 "Nightsun" searchlight including sound, gimbal assembly, focus adjustment, focus dependent light intensity and realistic on/off behavior Rescue winch that automatically switches the attachment point for the bottom load rope from the load hook to the winch Second selection option for the baskets on the outside of the helicopter Possibility to mount a bubble door on the pilot's side Ability to unhook both doors independently and fly without doors FMOD 2 which, besides minor optimizations, now locally accounts for the opened doors Instrument lighting switchable between red and green color Vibration animations in the cockpit High detail 3D-model and textures by khamsin studio PBR textures Completely animated rotor head and blade flex Including Geforce plugin by Dreamfoil Helicopters (not native APPLE-arm M1/M2 compatible) Very accurate flight model (including Autorotation) up to MTOW of 1950 kg individual user setup friendly: Uses only default joystick axes (throttle, collective, pitch, roll and yaw) All custom commands access able via default X-Plane menu Complete recreation of real power management including: Real startup and shutdown procedures Real centrifugal clutch management Real turbine RPM-limiter Real safety microswitches Real usability of Collins-Pitch-Indicator Hide able 3D-tablet including: Custom weight-and-balance menu Attach or detach external parts Toggle able glass reflections Toggle able custom downwash effect Toggle able cockpit vibrations Ability to choose out of four strobe light variants for addon liveries Avitab integration Toggle able power management helper bug Let the groundcrew turn one blade up front for you Four different strobe light effects for different liveries Livery depending IAS gauge in km/h or KTS Working slungload scale VR compatible Very FPS friendly Requirements: X-Plane 12 - or X-Plane 11(both versions included) Windows, Mac* or Linux 4 GB VRAM Minimum - 8 GB+ VRAM Recommended Download Size: 840 MB Current version: 2.1b4 (September 26th 2022) Review System Specifications: Windows 10 64 Bit CPU Intel i9-9900k 64GB RAM Nvidia RTX 2080 Ti Oculus Rift S Helicopter Review by Stuart McGregor 20th October 2022 Copyright©2022: X-Plane Reviews (Disclaimer. All images and text in this review are the work and property of X-PlaneReviews, no sharing or copy of the content is allowed without consent from the author as per copyright conditions)
-
Aircraft Review/Tutorial: VSKYLABS- Rutan Model-158 Project By Alan Ashforth Introduction The VSKYLABS- Rutan Model-158 being reviewed here in X-Plane 12 is closely based on the Pond Racer, designed by Burt Rutan for Bob Pond, and flown at the Reno Air Races back in the early 90s. Only one was ever built and was sadly lost in an accident in 1993, killing the pilot Rick Brickert. What we have here in X-Plane, is a clever, plausible variant, that extends the racing aircraft, into an all-weather, cross-country sports plane, which allows it to be far more adaptable and useful in X-Plane. Its racing heritage is clear to see (there is no mistaking those sleek lines), which makes it very fast but also incredibly challenging to fly properly and safely, especially when landing. The model presented here features twin turboprop engines, with each one delivering about 600shp, which enables the Rutan Model-158 to achieve a top speed (TAS) of about 450mph/380kts, and a cruising range of 500 miles/ or 1.5 flight hours, coupled with a service ceiling of over 30,000ft. Installation The VSKYLABS Rutan Model-158 is available for both X-Plane 11 and 12, with Stephen from X-PlaneReviews offering a highly comprehensive review of the X-Plane 11 model back in March 2021. This review, whilst not as in-depth as Stephen’s, will hopefully give you an idea of how the model performs in X-Plane 12, albeit, in beta form (at the time of writing beta 5). With my purchase completed and downloaded from the X-Plane.Org store (extracted size was 407MB), it was just a straightforward task of placing the model into my X-Plane Aircraft folder. Included with the download is a 50-page, comprehensive, illustrated Pilot Operations Manual, including checklists. Exterior The Rutan Model-158 is quite a distinctive-looking aircraft, especially with its twin booms housing the two PT6A-28 propulsion free-turbine turboprop engines. Being a relatively small aircraft, these design characteristics portray an aircraft that is both highly dramatic and powerful in appearance. Although a taildragger, its stance is shallower than say a WW2 fighter, which has the added benefit of offering a forward view, even if it is somewhat limited. The engine covers of the two PT6A-28 engines can be removed to show the nicely modelled details within. The main gear is also modelled to a high level and even includes the names of all the people who made the original Pond Racer on the covers, a very nice touch, and one which could have easily been left out! The original aircraft was designed in 1991, and as such incorporates a variety of useful features, such as satellite navigation, full safety lights, and interior lighting, which makes night flying entirely possible, not to mention great fun! One feature of the VSKYLABS model which I was highly impressed with, and which is new to the X-Plane 12 model, was the excellent rain effect on the canopy. In terms of liveries, there are three included: No. 2 in white, Marines in grey and finally Storm Chaser in red, all of which have been created to a high standard and really make the Rutan Model-158 stand out. There’s also an included paintkit for those artists among you. Interior The interior of the Rutan, much like the exterior, is finished to the same high standard, with some great texturing on offer, including some excellent weathering effects (scuffs, marks etc), which gives the appearance of the cockpit being suitably authentic. This also has the benefit of making the cockpit a highly enjoyable place to be, particularly when navigating and manoeuvring the aircraft during flight. Both the seat and rudder pedals have excellent detailing, as do all the dials and switches, in fact, everything on offer is a class act. Of course, for an aircraft of this type, complete engine information is included for the pilot in the form of numerous gauges and dials, along with oxygen levels, cockpit pressure, etc. There are also the usual trim levers and autopilot/transponder settings, along with a rather handy cancel button on the stick. However, it’s perhaps the two Garmin 430 satnav units located in the centre panel housing which probably stand out the most, with the option of having the AviTab unit displayed for occasional use (a freeware download that you must acquire separately). Cold & Dark Start Before starting the engines, we need to set the desired fuel and oxygen levels required for the flight (in weights and balances). With that done, set the battery to on (right panel), then engine one igniter, and engine one starter, which will, in turn, slowly start the left engine spinning. Soon after this, you will hear an audible beep, which is the signal to push in the engine one fuel tap. When the engine is idling, turn off the igniter and switch on the generator. Lastly, switch on the engine one inverter, located on the right panel, and turn on the avionics. You then partially repeat the procedure for engine two. We are now ready to close the canopy and enter our flight plan into the first Garmin. This unit has a VOR and CDI to help you navigate and land, unlike the second Garmin which is not configured with a VOR or CDI. However, it is still extremely useful as it can be used to show the distance and range page, whilst the first unit displays the map. When it comes to landing, you can use the autopilot’s APR mode to get lined up properly, but that’s about it, there is no glideslope ability. From here on in, it’s all manual flying, and as the Rutan Model-158 is quite a hot ship, you’re going to have to keep your wits about you. With no flaps or speed brakes fitted in which to manage airspeed, you must rely on adjusting and setting the props correctly, which is an important skill to master. Flying Experience When taxiing from cold and dark, it’s crucial to remember that the props will be in beta (reverse) which can be fun to use if you’re starting on a stand! With that knowledge firmly cemented in your mind, gently slide the levers forward to about halfway, release the brakes, and then control your speed with both brakes and throttle. The minimum prop speed in alpha (forward thrust) is 1,200, while the maximum is 2,200. VSKYLABS recommends full forward props and 80% throttle for takeoff unless you’re at or above max takeoff weight, in which case it’s full throttle, which provides exceptionally swift acceleration. Once you have left terra firma, reduce acceleration (prop and throttle) so as to allow the gear time to retract. This is done below 180kts, as any higher, and the likelihood of damaging your undercarriage increases significantly. With this done, you are now ready to accelerate and continue with the climb out. As you proceed, you’ll notice that the Rutan is highly stable in the roll; not as fast to roll as a single-engine fighter, but at low speeds (below about 250kts) the elevators are highly effective until they tighten up with speed. For this reason (at low speed), I’d make sure you adjust your trim accordingly. The climb performance of the Rutan is exceptional, and as such, reaching our target altitude of 25,000ft is achieved in almost no time at all. According to the documentation, this cruising altitude achieves the best economy (500 miles), which for a cross-country sports aircraft of this type, is not too bad at all. One thing to note when climbing, is that if you’re going past 12,000ft, you’ll have to seal the canopy and adjust pressurisation accordingly, as failing to do this will cause you to blackout. Also, if you only have pressurisation on, and not oxygen (there is a separate oxygen control for your mask), then you will begin to blackout above 25,000 to 28,000ft, so if you’re going above that altitude (maximum ceiling is 33,500ft), you will need to adjust pressure and use oxygen. If there happens to be a fault with the pressure, you’ll need to use oxygen above 12,000ft. The procedure for accomplishing all the above is mentioned in the AviTab tablet, so it’s well worth setting up prior to takeoff. Achieving the desired course/route in the Rutan Model-158 is a relatively simple task, as the supplied Gamin 430 units should be a familiar site to quite a few X-Plane users. However, if they’re not, and you’re new to X-Plane, then I highly recommend downloading and then reading the Garmin 430 PDF manual kindly provided by X-Plane.com As you head towards your target airport, reduce your speed by first pushing props fully forwards (2200rpm) and then throttling back, which provides a steady and controlled reduction of airspeed. If you’re feeling adventurous, you can simply whack the props into full reverse (beta) position and lose altitude at an even greater rate. However, don’t forget to put the props back to alpha to land though! When your airspeed has been reduced to below 180kts, it’s safe to lower the main landing gear, and with your trim adjusted, you can reduce your speed to 150/130kts for landing. Gentle braking is advised, as from my experience, the Rutan has a tendency to flip if applied above 90kts. Landing is perhaps the most challenging aspect of piloting the Rutan, and will no doubt take a few goes to get right, but that’s what makes flying this unique aircraft so special…it’s the replay feature, and the desire to get it right the next time around. Conclusion During my testing, I found the VSKYLABS Rutan Model-158 to be both challenging and fun to fly. It’s well-modelled, especially the cockpit, includes some wonderful engine sounds, and is topped off by having a highly rewarding flight model. Considering X-Plane 12 is still in beta form, I was also impressed with how stable the model was in the sim. Quite often during the initial stages of an X-Plane beta, it’s not unusual for third-party add-ons to either freeze or crash the sim, so that was an additional bonus. For someone like myself who enjoys experiencing the thrills of flying powerful and challenging aircraft, I found the experience to be nothing short of exceptional, and as such would have no hesitation in recommending it to other like-minded X-Plane 12 users. Note: if you’re looking to add a few additional liveries to the Rutan, then there are some excellent and fun repaints available over at the Org by SimSmith and Criminy. _______________________________ The VSKYLABS- Rutan Model-158 Project for X-Plane 12 is available from the X-Plane.Org Store here: VSKYLABS- Rutan Model-158 Project Priced at US$28.50 Project's Main Features: VSKYLABS 'Test-Pilot' project. Highly defined flight dynamics model of the Model-158. Highly defined PT6 turboprop engine simulation (PT6A-28) including its associated peripheral systems. Built around the powerful, native X-Plane's 'Experimental Flight Model' environment. In-depth systems simulation: Fully equipped aircraft with deep systems simulation (electrical, lighting and warning systems, comprehensive fuel system, fire protection, bleed air and pneumatic systems, ice protection systems, pressurization system, landing gears system, flight control, oxygen system, canopy system, auto-feathering and auto-ignition systems and more). VR (Virtual Reality) Ready. Multi-Layer FMOD sound pack. 50-pages, comprehensive, illustrated Pilot Operations Manual, including checklists. STMA Autoupdater is included: Project updates are fast and efficient! Included Paint-Kit. Highly responsive VSKYLABS support forums. Requirements X-Plane 12 or X-Plane 11 Windows, Mac or Linux 4 GB VRAM Minimum - 8 GB+ VRAM Recommended Current version: XP12 - September 5th 2022, 1.0 (March 14th 2021, XP11) Review by Alan Ashforth 13th Oct 2022 Copyright©2022: X-Plane Reviews Review System Specifications: Windows 11, Intel i7 10,700 Processor, 32GB RAM, 2TB SSD, GeForce RTX™ 2070 (Disclaimer. All images and text in this review are the work and property of X-PlaneReviews, no sharing or copy of the content is allowed without consent from the author as per copyright conditions) All Rights Reserved
-
Scenery Review: Helsinki Metropolitan Area v3 by FA Simulations FA Simulations are well-known for their VFR cityscape scenery packs for X-Plane. They recently updated their Helsinki Metropolitan Area to version 3 which includes newly updated orthos from 2020 as well as improved buildings and vegetation. Having visited the city several times over the last few years, I thought I would take a closer look at what FA Simulations have put together and see if it stands up to the real thing. The City of Helsinki Helsinki sits as the capital city of Finland. It hosts the world's most northern metro network and has a population of around 632,000 people. Sitting on the northern coast of the Baltic Sea, Helsinki has a mix of urban, rural and forestland, especially as you head out further into Tikkurila and the Greater Uusimaa region. This add-on aims to cover the entire part of this with Ortho, with special hand-made buildings in the city centre. Installation Installation of Helsinki Metropolitan Area V3 is very easy. After purchasing the product on the X-plane.org store, you download a zip folder which includes all the files you need. Available on the FA Simulations website are some free download expansions for this scenery which include higher resolution orthos for Helsinki as well as parts of neighbouring Espoo. These are well worth a download if you find yourself running with some GPU memory to spare! Up Close and Personal with the Capital Overall, this add-on gives you a pretty good feel for the city of Helsinki. I have had the pleasure of visiting three times so far and have walked the streets on several occasions. Custom buildings are featured throughout the scenery, such as the railway station, Olympic park, harbor and famous cathedral as featured in the Darude - Sandstorm music video. Everything is modeled with a relatively low polygon count so as to save your graphics card from overloading with memory usage, meaning buildings do eventually start to lose their shine when you get too close, but when flying past at a couple of hundred metres, things still look good with high-resolution textures donning each structure. As you leave the city centre and head to the more rural places, the hand-made buildings do eventually stop, but instead, we now see a custom-building database which has been generated and placed over the ortho area, presumably using data from Open Street Map. This is a very good way of doing things, as it allows for accurate looking buildings to populate the real-world locations of shops, apartments, houses and more. This also means you enjoy the feel of a hand-made world while allowing the developers to greatly expand the coverage of the scenery they've created. Ortho imagery for the region has also been carefully worked on. Within the city centre, the satellite imagery is of high resolution and colour corrected to ensure that nothing looks out of place. This has been shaped around the coastline too, with the harbour and canals all visible and matching closely to their real-world locations. As you head north and out into Uusimaa, the resolution does drop slightly to allow for memory optimisations due to the larger area, but the colour correction and coastline adjustments are still very well worked on. The resolution and buildings pick up again as you get closer to Helsinki-Vantaa Airport, meaning from the ground when preparing for your flight, you can certainly enjoy the benefits of this add-on. I have noticed a very minor colour and resolution degradation on the border between the super-detailed city centre and the more rural parts of Helsinki, but when flying at a decent altitude, it's not something you're going to notice unless you're specifically looking for it. Overall, I am impressed with both the quality of the city as well as the scale of the add-on, as it reaches out to the Uusimaa region and Espoo. Satellite Imagery & Ortho Overall, the Ortho for Helsinki looks good, having been updated in 2020, and as such, you can enjoy a more up-to-date city when compared to their previous releases which came with the older satellite imagery from 2016. There are additional Ortho and scenery files you can also download from the FA Simulations website. These are made to the same high-resolution texture standard as the payware product and require the libraries and scenery files from Helsinki Metropolitan Area v3 to work. This means you're guaranteed to get the usual FA Simulations quality, without spending any more money! As this scenery was developed for X-Plane 11, there is not much in the way of seasonal effects, but I would certainly love to see an upgrade to this when X-Plane 12 moved into the frame. Nice Additions As well as the main metropolitan area of Helsinki, FA Simulations have included two small airfields. These are simply offerings, but their inclusion is highly welcomed as it means that VFR flyers looking to explore the area at low altitudes are well-catered for. More detailed is the Meilahti hospital helipad, which is very nicely done and allows for additional challanges. Nightlife in the Nordics After sunset and during the winter months when barely any light graces the city, FA Simulations have put a lot of focus on how the cityscape looks at night. Roads look fantastic from the skies, especially the motorways as they snake their way across the region. With the occasional smaller towns and lanes cutting through them, you really get a feel for the peaceful life down below, with vast amounts of dark woodland separating homes and population centres. As you head closer to the capital, suddenly things get a whole lot busier, brighter, and far more congested. Custom buildings within the city centre all have appropriate night lighting to fit with their real-world counterparts. The station, cathedral and Kauppakeskus shopping centre certainly stand out and help add authenticity to the world below. Cars also populate the streets of Helsinki and make good use of X-Plane's default roads and vehicle system. This makes flying over the city at night a joy, especially during the winter months when the southern part of Finland only sees limited light during the day. Opinion & Closing Remarks Overall, I am impressed with what FA Simulations have put together. As a Helsinki regular, it's nice to see somewhere I visit often, modeled well with high-quality Ortho and autogen overlays. Road layouts and buildings are all in their correct locations, and as mentioned the satellite imagery is high-resolution and colour matched. I especially like how well the more rural areas look, and whilst they employ fewer hand-made buildings, they make good use of the custom-building library in which to populate their real-world locations. Performance across the Helsinki Metropolitan Area v3 add-on is also smooth, with minimal loss across the region and capital. I didn’t experience any noticeable drop in framerates, nor have I come across any stutters when flying overhead. Potentially there is a little loss in FPS when flying into Helsinki from a distance, but this is usually very quick and sometimes unnoticeable. Helsinki-Vantaa Airport is known in Europe as the gateway to Asia, and if you find yourself passing through here regularly, then it's well worth picking up! _______________________________ Helsinki Metropolitan Area v3 by FA Simulations is available from the X-Plane.Org Store here: Helsinki Metropolitan Area v3 by FA Simulations Priced at US$25.00 Features Over 4000 square kilometres (1544 square miles) of detailed scenery 50cm/pixel resolution in the ortho scenery (approx. zoom level 16-17) Includes summer textures (winter textures will come later) Decals added to the whole scenery (will give you detailed terrain all the way to the ground). Hundreds of custom-built objects placed accurately on the orthophoto Extremely detailed forests, over 10 forest files used to accurately represent the forests of the scenery. The forests cover the whole scenery and match closely the underlying orthophoto. Custom-built HDR-night lighting for the whole area. Night/dusk/dawn flying has never been so realistic Two custom-built airfields in the scenery (EFNU and EFMN). Extremely detailed Meilahti hospital helipad (EFHY) Detailed helipad on passenger ship Silja Serenade Detailed helipad on top of Helsinki central fire station You can land a helicopter on all high buildings Custom built OSM-facades for the whole area. Southern Finland has very good OSM-coverage, so the scenery is filled with buildings. Hand-edited shorelines for very realistic coastlines Works with Truscenery airports, also with all other payware airports in the area. Airports must be above all HMS files in your scenery_packs.ini file Extra areas, HEMS missions and high-resolution terrain ortho can be downloaded from our website https://www.fasimulations.com/ Remember to delete all HMS files from the previous versions (1&2) Requirements X-Plane 11 – X-Plane 12 (when available) Windows, Mac or Linux 4 GB VRAM Video Card Minimum- 8 GB+ VRAM Video Card Recommended Download size: 7.4 GB Current Version: 3.0 (July 28th 2021) Review by Michael Hayward 26th August 2022 Copyright©2022: X-Plane Reviews Review System Specifications: Windows 10 Professional, AMD Ryzen 5 3600 Processor, 32GB RAM, Palit GeForce RTX™ 3080 GamingPro (Disclaimer. All images and text in this review are the work and property of X-PlaneReviews, no sharing or copy of the content is allowed without consent from the author as per copyright conditions) All Rights Reserved
-
Aircraft Review: A320 Ultimate XP12 Extended Beta by Flight Factor Special thanks to A320 First Officer Jaydon Shatek for his help and input on systems overviews. Note: All photos showing IAE engines or Sharklets have been modified from the Matavia mod and are not part of the actual aircraft purchased. They can be added on by the user but are not officially supported by Flight Factor. Introduction & History Known to be one of the most complex A320 aircraft simulations ever produced for any simulator, the Flight Factor A320 has held its own for quite a few years in the X-Plane market, and I myself have had many memorable flights with it in X-Plane 11. With X-Plane 12 now out, the Flight Factor A320 is their only product which requires an additional purchase to fly in the new sim, unlike their Extraordinary 757 and 767, my two favorite aircraft for X-Plane and my go-to choice for a casual flight. Well for any previous buyer, the upgrade price is set at $20.00 USD, and for any newcomer to the wonderful world of X-Plane, it is $89.99 USD to get yourself an A320 into your sim. So, with that in mind, before we dive into the addon, I would like to share a few facts about the A320 and its history. The Airbus A320 program was launched in 1984, with the first flight being completed in 1987, and fittingly the first revenue flight was flown by Air France in the spring of 1988. To date, over 4,763 A320 CEOs and 3,900 NEOs have been ordered, with 6,299 airframes having already been delivered. The entire A320 Family, (A318, 319, 320, 321 etc.) have a combined order total of 16,622 with over 10,474 total fleet-wide deliveries. The A320-100, the original variant, had no winglets, with the iconic “wingtip fence” being added to the A320-200 in the late 1980s. Today, the A320 has state-of-the-art Sharklets, and the A320 NEO improves on the A320 lineup and is today one of the most popular options for narrow-body aircraft. With so many options of engine variants, wingtip options, and more, Flight Factor has a lot it can bring to the table to provide a great experience within X-Plane. Documentation & First Impressions Documentation of the A320 included by Flight Factor consists of a 27-page PowerPoint on how to get up and running with the installation of the A320, however, there is no included tutorial flight, so it is up to the end user to find a good set of tutorials or manuals to learn the complex systems of the A320. There is an included link in the PowerPoint to the forums with links to various websites where you can find all the required info to fly the airplane, including a full FCOM if you’re into reading bedtime material, though having a good flip through it is almost a requirement with no previous experience. Once we get the airplane installed and running into the simulator it is a very familiar sight to the version from X-Plane 11, albeit a bit shinier thanks to the spectacular new lighting engine Laminar provides in v12. Getting up and running was quite simple, only requiring you to activate the airplane through the MCDU in a separate menu which pops up automatically upon first loading the airplane. Just remember to connect the GPU in the EFB menu or the MCDU will not power on. First Impressions were quite positive with a few issues that I noticed upon the first flight but will mention later on in the review. Electronic Flight Bag Starting off with what is becoming a must-have feature in any modern Airliner addon is an electronic flight bag from which all the aircraft doors, loading, maintenance, and performance calculations can be handled, with chart support and extra features being a plus. Where does Flight Factor rank in their EFB for the A320? Well, let’s find out. Included in the EFB are 11 different pages, helping you with various tasks on the A320. I’ll touch lightly on each one and add some input on possible improvements that would be a great help to the pilot. Page 1 is the Service page. This allows you quick and easy access to chocks, GPU, and ground air start units. It also includes 3 additional pages to handle fuel loading, passengers, and cargo. Page 2 is the PERF page. Essentially a Form-F, it gives the pilot easy access to CG data, weights, and trim position required to fill out the TO data page in the MCDU. Page 3 is the Checklist page. While quite self-explanatory, it would be nice to have an addition of click spots to keep your place when going through the checklist, as it can be quite easy to lose it. That is a QOL improvement, but overall, it is quite comprehensive and well done. Page 4 is the Browser, though I have yet to get a successful search with it, so it may still have a few bugs left in it that need to be ironed out. Page 5 allows the pilot control of possible failure scenarios which is good for training use if going through the A320 schoolhouse for an airline. Page 6 is the Settings tab, and there’s not a whole lot there in terms of options. I’ll go into a lot of improvements I’d like to see in this page later, mainly exterior and cockpit options. One basic QOL improvement I would love to see is an option to convert the weight units from Kilos to Pounds, as many Yanks like myself on the US side of the pond would love to use the imperial system to fly to all our favorite US destinations. Page 7 allows the pilot to auto-save panel states for the airplane for ease of use. Page 8 is the Map feature which uses a google API key to display your aircraft position in google maps on the EFB. Page 9 is the FAP page, which allows the pilot access to the flight attendant controlled parts of the airplane. Page 10 is the PA with options for auto or manual mode. I left it in manual mode for every flight I took and never heard a peep from it, so there may possibly be a bug there as well. Page 11 is the fun page, where all the magic happens, and where you can go to make things happen that you don’t want to have in a real flight, but it is a great way to practice emergency procedures and a must-have for any high-fidelity aircraft. Overall, is the EFB a little dated? Possibly. I would like to see AviTab implementation out of the box, though for some it’s not a huge deal. I myself use the tablet that I use for my real-world flying but that is not an option for everyone, so having access to charts inside the cockpit is a great feature that I would love to see in the A320. The settings menu is the second area I would like to see some work on. The A320 overall lacks many of the options that have become standard on all airliner addons, including the Flight Factor 757 and 767 fleets, which have plenty of options. These for me include options for cockpit features, window tint/reflections, and exterior visual features. These are small complaints, but the addition would give this airplane some bonus points in my book! Exterior Model & Texturing When I first showed the exterior model to Jaydon, he was quite happy to see many of the features the real A320 has, which should speak for how good the aircraft model has held up in its few years on the market. Starting off with general appearances, Flight Factor has gotten the A320 shaping down to a tee, and it speaks volumes about how the airplane looks. The nose of the A320 is quite distinct, and Jaydon was quite impressed with the details that were captured by the Flight Factor team. One area he really liked was the landing gear, which from his inspection are quite well-modelled replicas and deserving of praise. The main gear connection points, struts, hoses, wires, and shape are really quite spot on, and he did point out the addition of the brake fans included on the model, something which his airline’s A320s do not have. He had no major complaints whatsoever about the exterior model and was quite impressed overall with the quality put out by the flight factor team. However, there were a couple of discrepancies that were found. The CFM engines have a single metal tube in front of the main fans, and though for the life of me I cannot remember what it’s called, it is not in the model of the included CFM engine. The other little issue which we aren’t sure about is the parking brake light on the nose gear strut. When amber, the brake is set, and when green it’s released. Well, the light on the nose gear is always amber, so it may be a texture, or it may be a bug, but that is a tiny detail to even have to mention, so with just those two things, it’s safe to say Flight Factor did an outstanding job with the exterior model. Textures for the A320 are the same as they were in X-Plane 11, and there is a little bit of pixelation up close to the airframe, but a couple of feet back and they look perfectly sharp. A texture resolution boost would always be appreciated, but that is up to Flight Factor and then the repaint community to redo every single livery if that were to happen. All in all, I have no issues with the textures, and they look great overall! One last thing I will mention is the reflections of the fuselage onto the wing. Compared to all other aircraft that I’ve seen in X-Plane 12, the FF A320 has the least amount of reflection onto the wing, almost to the point of not seeing anything at all, so a boost in wing reflections would be an appreciated improvement, especially when looking out towards the wing fence from the passenger cabin. Now for the options. This is the one area where Flight Factor has always lacked with the A320, and sadly it is still the case. The A320 ships with one airplane, and no options to customize it. Flight Factor has not made IAE V2500 engines, Sharklets, or Satcom antenna. While the Matavia mod rectified this issue in X-Plane 11, it is not compatible with the v12 version. I managed to get the sharklets and Satcom working, but please keep in mind it is not officially supported by Flight Factor. As for the engines, I had good success with the Carda CFM-56A/B and IAE V2500 engine models which rectifies the visual aspect of the engines, but the internal avionics remain for the CFM. I would absolutely love it if Flight Factor would add these options to the airplane and allow us to choose the engine model, fences or sharklets, Satcom or no Satcom directly from the options menu in the EFB, much like the 757 or 767. This would add a lot of competitive value to the airplane and make it a more appealing option for potential buyers. Interior Model & Texturing The Interior cockpit of the A320 has been completely revamped for X-Plane 12, with more accurate dimensions and textures compared to the previous generation released for X-Plane 11. Upon first looking through the cockpit, I was satisfied with the model, with the cockpit dimensions feeling a lot more like its real-world counterpart in terms of size. Where I felt the interior was lacking however was the textures. The X-Plane 11 version had some of the best textures shipped with a payware A320, with extra freeware addons such as the Matavia mod making it even better. The new textures supplied by X-Plane 12 are sadly a bit flat, and the expected color variation is not quite there. The color variation normally seen on the autopilot panel is not seen in the updated version, with the same grey color being used uniformly across the entire cockpit. The overhead panel is also the same grey but is extremely dark to the point of being a gunmetal grey color. Flight Factor has acknowledged this issue, so hopefully, within the next few updates, we’ll see some improved cockpit textures. The textures for cockpit text were good, as I couldn’t find many at all, and the only one that I really noticed was on the weather radar, where the lines on the WX Tilt, WX Radar mode selector and WX Tilt were not lining up correctly with the selector. The other small glitch was in the magnetic compass, where some bleed-through of the texture was found causing some glitching. Another is the fact that the window heat vents on the glareshield have been omitted in this version, so hopefully, that can be rectified as well. These are just bugs however and are normal for a beta release. The second issue that Flight Factor has acknowledged is the lighting model not interacting properly with the cockpit, causing some extremely weird colors inside the airplane, almost like the sun is shining directly through the walls and lighting up the entire cockpit regardless of whether it’s coming through the windows or not. Also, when facing the sun, the cockpit becomes extremely dark. This has again been acknowledged by the team and I hope to see some improvements on that front. Both myself and FO Shatek both agreed that the X-Plane 11 version’s cockpit had a more correct color, and no other Flight Factor airliners have any cockpit lighting issue, so it appears to be X-Plane 12’s lighting model not playing nicely with the A320 for some reason. The windows of the A320 have also had a bit of an issue with X-Plane 12, as they seem to be a bit foggy, almost like there is a haze on them. Jaydon mentioned this when he was looking through the airplane, noting that the windows should be practically clear. I assume this is controlled by a texture file, though I was unable to find and edit the correct one to lessen the haze. Perhaps this can be fixed, or an option added to dynamically control this through the EFB, much like the 75/76 fleet. One other item I would like to note is the backlighting and flood light color. The real A320s have a warmer tone to their panel flood lighting, and this was correctly seen in X-Plane 11. In v12 it has taken on a more yellow tone, with the backlighting sharing the same fate. A small correction to this would vastly improve the cockpit as well. I am completely confident that the cockpit will see improvements, as their other aircraft like the 757 and 767 series look absolutely stunning in v12, with the rich brown color really making them stand out. Avionics Options & Systems The Avionics and systems depth is where the A320 really starts to shine. With more than 10,000 simulated sensors, units, buses, relays and more each with their own logic, it is truly a breathing airplane. Each of the systems, including Fuel, Pneumatic, Hydraulic, and Electric have been modeled in their entirety giving you a completely accurate simulation on all fronts. So, what does this all mean? Well, it meant that Jaydon spent a couple of hours on video calls running through every system trying to find anything incorrect or misrepresented with the airplane, and the list of errors that resulted is quite small, and I’ll run through them here. Starting off with the MCDU, we ran through every page and only found three things that were worth a mention. Firstly, the MCDU AIRAC is from February of 2017, so a navigraph subscription will be a requirement to get it up to date. I would love to see Flight Factor ship it with a new AIRAC for the new sim. Second, the TO PERF page gives the option for FLEX temp as it should, however, there is no included program in the airplane to calculate a FLEX temperature, so I would love to see a page in the EFB added for Takeoff and Landing performance to include a FLEX temp calculator. Thirdly, the last issue I saw with the MCDU was the scratchpad at the bottom had all the text being slightly cut off by the 3D model, so hopefully, that can be adjusted. Running through all the aircraft tests, full preflight and moving into a short flight, Jaydon only unearthed a couple of minor issues, quite possibly bugs that will be sorted out. The first one we noticed were the touch points being slightly off, though I’ve reported this, and the issue is being resolved. In terms of systems, the APU avail light would not illuminate for us even when in use, though on my next flight it worked fine, and the following flight it didn’t again, so there is some interference somewhere. Side stick priority has not been modeled so the “Priority Left or right” commands have not been implemented. The last thing we found was the Autobrake Decel light did not come on after touchdown, but for the rest of the flight, everything was exactly as it is in real life. Flight Characteristics The Flight Factor A320 flight dynamics have been perfected over the years, and the latest version for X-Plane 12 now includes Alternate Law logic which allows more in-depth failure scenarios in the case of degradation from Normal Law. While I won’t dive fully into the Normal and Alternate Law, I’ll give a brief run-through to explain what exactly Alternate Law brings to the Flight Factor A320. Normal Law includes three modes, these being Ground Mode, Flight Mode, and Flare Mode. Ground mode turns off autotrim and the Horizontal stab is set to 4 degrees up automatically, though this can be overridden by the CG setting. Ground Mode transitions to Flight Mode as soon as the wheels leave the ground. Flight Mode includes 5 types of protections, these being pitch attitude, load factor limits, high speed, high AOA, and bank angle. Low-speed protection is also available in certain phases of flight and when reaching a stall, Alpha floor engages which automatically engages TOGA to capture the descent and protect the airplane. Flight Factor modeled this correctly and it worked like a charm every time. Flight Mode stays engaged from takeoff till the airplane is 100ft above the ground. Flare Mode automatically engages when the RA detects 100ft above the ground and provides a direct sidestick to elevator relationship for landing. At 50ft the aircraft trims the nose slightly nose down requiring you to progressively pull on the sidestick rearward to add conventional input for landing. This also means that in the Flight Factor, if you let go of the sidestick or move too close to center again for too long, the nose will drop causing a less than smooth landing for your passengers. Alternate Law engages and indicates on the ECAM when degradation of normal law has been exceeded. This is correctly simulated by the Flight Factor A320. There are two slightly different categories of Alternate Law, with ALT1 combining Normal Law lateral mode with Alternate Law pitch modes, meaning the Alpha-floor slow speed auto stall recovery is no longer available requiring the pilot to manually recover the airplane. ALT2 is where Normal Law Lat Mode is replaced by Roll Direct Law and Yaw Alternate Law. Pitch mode also switches to Alternate Law. In ALT2, all protections lost in ALT1 are carried over, with additional protections being lost as well, including bank angle protection, and in some cases, high AOA and high-speed protections. ALT2 engages when both engines flame out, with faults in two inertial or air data reference units, with faults to all spoilers, certain aileron faults or with pedal transducers faults. Direct Law is all degradation as previously found in ALT2, however automatic pitch trim is lost, and all protections are lost. In this mode, the control surfaces directly correspond to sidestick movement. DIR is entered if all three IRUs or primary flight computers fail. The Flight Factor A320 has modeled all this, and from what tests I ran, it worked great, with proper degradation of control passing correctly through failures or issues, a great testament to the work put into the avionics and systems depth. In normal modes of flight, the Flight Factor feels quite solid and robust. Landings are a breeze and it’s a real joy to hand fly the airplane. It does have the slight lag found in the sidestick like its real-world counterpart, but all in all, it works exceptionally well, and it flies wonderfully. Sound The sounds that ship with the A320 are by no means bad, and in pretty much every regard, are perfectly acceptable. I found no issues with them, and they represent the A320 sound quite well. For customers of the BSS soundpacks, they work mostly fine without issues. There were a couple of error messages that popped up, but I flew a few flights with the soundpacks installed and everything worked as advertised. Conclusion I see the Flight Factor A320 as a work in progress, after all, it is a beta. In its current state, it has all the components needed to be a great X-Plane 12 model, and over the beta period, I'm sure it will only improve. Yes, it needs some IAE engines and sharklets included in the base product to remain competitive, but that will be on Flight Factor to do. For the $20.00 upgrade, I think it’s a good price, especially when you factor in all the new features you are getting, and for $89.99 for initial buyers, you get the already fantastic model that I enjoyed so much in X-Plane 11. The Flight Factor A320 is still the best A320 simulation on the market for X-Plane, though it needs a bit of updating on the visual side of things. I would definitely keep an eye on this airplane over the next few months, as I am sure it will only get better. _______________________________ The A320 Ultimate XP12 Extended beta is now available from the X-Plane.Org Store here: A320 Ultimate XP12 Extended beta Price at time of writing US$89.95 Requirements X-Plane 12 (or X-Plane 11) OS: Windows (64 bit) or Mac 10.14 (or higher) Processor (x86-64 Intel or AMD): 4-cores Intel Core I5-8400 or AMD Ryzen 5 2500X, Apple M1 not supported Video Card: GeForce GTX 970 or AMD Radeon RX 580 with 4 GB VRAM (8 GB recommended) RAM: 8 GB (16 GB highly recommended) Disk Space: 2 GB Last version: 1.5.0beta (6.09.2022) Review System Specifications Windows 11 Ryzen 5800x RTX3070ti, 32GB RAM __________________________________ Aircraft Review by Joshua Moore 29th September 2022 Copyright©2022: X-Plane Reviews (Disclaimer. All images and text in this review are the work and property of X-PlaneReviews, no sharing or copy of the content is allowed without consent from the author as per copyright conditions.