Jump to content
  • Search By Tags

    Type tags separated by commas.
  • Search By Author

Content Type

Forums

  • Airplane Reviews
    • Airliners Reviews
    • General Aviation Aircraft Reviews
    • Classic Aircraft Reviews
    • Freeware Aircraft Reviews and Developments
    • Military Aircraft Reviews
  • Helicopter Reviews
    • Helicopter Reviews
  • Scenery Reviews
    • Payware Airports and Scenery Reviews
    • Freeware Airport and Scenery Reviews
  • Designers News
    • News! The latest developments in X-Plane
    • Interviews
    • Aircraft and Scenery Releases and Developer Annoucements
  • Plugin and Simulator addons
    • X-Plane Plugins and Simulator Addons
  • Laminar Research
    • X-Plane Version and Beta Releases
    • X-Plane12
    • X-Plane11
  • Comments and Announcements
    • Comments and Announcements
    • Behind The Screen
  • Images
    • Images

Categories

There are no results to display.

Find results in

Find results that contain...

Date Created

  • Start

    End

Last Updated

  • Start

    End


Filter by number of...

Found 33 results

  1. Aircraft Review : British Aerospace 146 Professional XP12 by JustFlight/Thranda It was the accidental success story that even the aircraft manufacturers of British Aerospace were surprised by? It was certainly not expected to be a big seller, but it was, if just under 400 airframes produced was considered a major success story, but this was a very adaptable and flexible aircraft with great performance for the operastors. 70 or so are still operational and a great aircraft it is. The British Aerospace (BAe) 146 was created to fill in a marketing gap. Faster and bigger than a regional turboprop, but smaller than a standard airliner like the 100 seater segment Fokker 100 and even the smallest of the Boeing 737 family. Designed for the regional and short-haul markets, the 146 was manufactured from 1983 until 2002. The aircraft was offered in three variants, the 146-100, 146-200 and 146-300. The equivalent Avro variants were RJ70, RJ85 and RJ100, plus the QT "Quiet Trader" and QC "Quick Change" variants. The BAe 146 was marketed heavily as a low maintenance, low operating cost, feeder airliner. Design simplicity was the priority, as any components used were off the shelf products that could be easily sourced with a minimum of specialised tooling required. This went a long way to keeping the maintenance costs of the airliner down. Using the knowledge gained in the production of the Trident and Airbus A300, the wing was made also of as few components as possible. There are no leading edge slats and the top panel of the main wing is a single piece. The wide passenger cabin of the aircraft had a standard configuration of 5 abreast seating, although a high density 6 abreast configuration was also available... but the most significant aspect of the BAe 146 was it's 4 engine configuration. Just Flight in cooperation with Thranda Design released the BAe 146 Pro for X-Plane 11 in April 2021, by all accounts it wasn't a big seller, confounding the developers and in fact everyone else. This "Whisper Jet" was a great simulation by all accounts, but it just didn't catch on. Part of this review is to delve into the enigma of the aircraft, as there was a very intense debate for a very long time if to covert the BAe 146 Professional to X-Plane 12. For most of the time the answer was simply no, but a small hardy contingent kept up the argument (including yours truly), to give the 146 Pro a second chance of success, and here we are, the release of the BAE 146 for X-Plane 12. The Just Flight version of the BAe 146 is not the first one released for the X-Plane Simulator as that notion easily goes to the "Avroliner Project". I had been a huge supporter over the years of the AvroLiner Project by Andreas Much... The "Avroliner Project" was one of those projects that you signed up for, with consistent updates coming along mostly twice a year, but with smaller "Overnight" updates in-between. I loved the aircraft immensely and it was very good for it's time, but the project, sort went a bit sparse with more attention given over later to the actual website than the aircraft, but it is not to forget how much a leader the aircraft was for X-Plane in it's heyday development. So the change to the Just Flight version was expected to be a foregone conclusion, but even myself didn't fly it much in the intermediate years, so the introspection is also for myself as for the developers. British Aerospace (BAe) 146 XP12 by JustFlight It is not as simple as adjusting a few areas and re-releasing an aircraft in X-Plane 12. There are a lot of differences between the X-Plane versions XP11 to XP12. As textures, flight dynamics, lighting and loads of other areas are all required to be changed... but get it right and you get this X-Plane 12 glow. The Just Flight BAe 146 package is very extensive with eight variants, three main sizes are the 100, 200 and 300 Series. BAe 146 Series 100 Length: 26.19 meters (85 feet 11 inches) - 70–82 passengers (single class), 94 passengers (high-density layout) BAe 146 Series 200 Length: 28.55 meters (93 feet 9 inches) - 85–100 passengers (single-class layout), Up to 112 passengers (high-density layout) BAe 146 Series 300 Length: 31.01 meters (101 feet 9 inches) - 100–112 passengers (single class), 128 passengers (high-density layout) Out of these three Series sizes there are other variants of the BAe 146... The freighter versions come in two types on both the -200 and -300 series, top the QC "Quiet Change" pass/cargo and lower the QT "Quiet Trader" cargo. And all Freighter 146's come with a very large opening cargo door left rear. There is however one other QC Livery for the -200 in a RAF Military quise and detailed with military elements. CC.Mk2 - RAF Statesman (ZE701) – Queen’s Flight both Queens Flight aircraft are -100 Series aircraft (now retired), and note the infrared countermeasures on the side and rear of the Queens Flight Aircraft. CC.Mk2 - RAF Statesman (ZE701-Modern Livery) – Queen’s Flight There are also two Series -200 Formula 1 aircraft... "Bernie's Flight" if you wish. Altogether there are 44 different liveries for the six different variants. Modeling and detail It was four years ago in X-Plane 11 that we were "wowed" by the quality of the Just Flight BAe 146 Pro, as for the period it was very, very good. But we are now in the X-Plane 12 era, and that significantly moves everything up a few notches, as the lighting is now extraordinary good bring out the detail. Still the differences are stark, as XP11 looks now almost cartoony compared to the realism of XP12. Yes we have here exterior models that are stunningly detailed, featuring 4096x4096 textures for clarity and Physical Based Rendering (PBR) materials to produce these realistic metallic, plastic and glass surfaces. It's all here, looking brilliantly good in the Spanish sunshine. Get in close and you see those far more detailed textures, they would now barely register in XP11, but here you see the detail of everything, yes the BAe 146 Pro has that X-Plane 12 shine, a glow of knowing it is better era than ever before in the X-Plane Simulator.... You have to gotta love it! To a point we knew that the JS 146 would be very good in X-Plane 12 (thanks to Thranda's skills), but the fight was worth the results. The wing is high cantilever one piece with no leading edge spoilers but a metal casing, but it is highly efficient with the 146 being a STOL (Short Takeoff and Landing) aircraft, so the flaps also drop to an extreme to 33º for maximum lift, it comes with great animations on those flap extensions that are worth observing, and to note the excellent in tail detail with the airbrakes open. All fabrication by Just Flight here is very Rotate (MD11/MD80) in style and design. Runway turn lights are set in the wing root shoulders, and the Taxi/Landing lighting are in the middle of the leading edge wing. The Avco Lycoming ALF 502 H engines are beautifully modeled and perfectly shaped, they each deliver approximately 6,500 pounds of thrust, or 26,000 lbf combined. The Inlet and exhaust areas are perfect and nicely cast with a realistic metal cowling on the inlet and lovely shaped engine mounts. The internal fans are highly realistic, but there are no thrust-reverser systems on the BAe 146. The JF BAe 146 is exceptional in the gear detail and realism... The nose gear is stubby, with just the Nose Gear Torque Link Retention Plate/Guide Plate (often called a “pepper shaker”) showing. Eagle Claw trailing link main gear is exceptional in detailing. The work here is based on G-JEAO - Serial No. 1010 LN:10, which was retired from service with British European Airways in 2000 and is now preserved at the de Havilland Aircraft Museum. And the detail reproduced here is from that aircraft in all it's glory. Tyres are excellent as are the cast rims, and bolt detail and are connected to a trailing-arm suspension assembly. Glass is of course excellent, nicely shaped with great depth, tint and reflection... and delivers in realism. Notable are the aerodynamic strakes on the nose/fuselage that add in authenticity to the aircraft... side windows are also perfectly realised with a mottled tint on the glass Menu/Features The menu is surprisingly quite small with only eight selections to choose from and it is positioned via the usual JustFlight left screen side arrow, scrolling on the arrow will make it transparent. There is another menu built into the pop-up AviTab tablet. The side menu eight selections cover; ‘Toggle power’ icon (the lightning bolt) will toggle between ‘Cold & Dark’ and ‘Ready for Take-off’ states, Checklist panel, Flight computer, Animation panel (Doors and Ladder), Autopilot (Panels), Toggle the VSI between analogue and digital TCAS, "TMS" Thrust Management System and the Weather radar... and on the bottom of the tab are the arrows to change the livery. The Animation panel allows you to open all four main fuselage doors, with extendable stairs on the left front main entry door. .. and the two lower Cargo Doors and if you are using the Cargo variant then the menu changes to access the one large left rear cargo door. There is an GPU (Ground Power Unit) toggle and now you have a physical GPU unit and chocks (both missing on the XP11 version) Cabin All four access doors are highly detailed (as are the extended stairs), but on board there is a little bit of 3d modeling in the crew seating, but most of the forward galley is simply Lo-Res textures (images) and the quality depends on your Graphic/Texture setting... It is not bad at full resolution, but to be honest I expected more 3d detail in the galley areas. There has been a big effort to control the framerate and that is obvious here, so again it is very Rotate in using images more than objects and textures on the bulkheads and sidepanels. Cabin is the same... the X-Plane 12 higher quality textures work better for you here, certainly at max-resolution, so it is nice looking cabin, airy and bright with the six across seater layout and not the more spacious five across seating layout. Seats are again good, rather than excellent, again using the use of 3d modeling work to keep the numbers low. Depending on the variant, the seating materials and style can be different, here they come with dropdown trays or not. Overhead locker detail is images, not bad at full resolution, but quite lo-res ziggy at lower texture-res settings. Again both forward and aft galleys are the same treatment, again not bad at full-res, poor lo-res at lower graphic settings. For the cargo it is nicely modeled inside with an internal space to carry a maximum of nine standard LD3 containers, but only one LD3 is represented here. The QC "Quick Change" variant does not have the combo seating and cargo interior, but it is just the same Cargo layout as the below QT Quiet Trader variant Cockpit You can close or open the connection door between the cabin and the cockpit, by selecting the door knob... it is a tight squeeze to get into the office, but very realistic in tone. It's small in here, and they somehow even add in a rear centre jump-seat (folded, and actually-animated), note the extremely massive OverHead Panel (OHP), and the ceiling air-vents can be moved (animated). Both the Captain's and First Officer's chairs are superb, great seat molding and shape with a highly detailed frame lower, and covered by a lovely full blue/cream dot wool material. Armrests are also all fully animated, and fold up neatly to the side of the chairs. Note the third folded seat behind the First Officer's station, better still you can move both the Captain's and First Officers chairs forward via a slider, then slide out the jump seat via it's own slider and lower the seat cushion... now that is a great feature. Yokes are lovely, and fully active with A/P Disconnect, Electric Trim. You can hide both Yokes or each one individually by clicking on the Yoke base, which is a nice option. Note the slide out coffee cup holder and both pilot's can use their own tiller. It is noted in the Manual to use the SYNC button right Yoke, but that tool does not work on the X-Plane version (It does on the MSFS), we get V/S instead. The pedestal is very nice and boxy, but extremely well done... centre of the top of the pedestal is a (again X-Plane default) weather radar, with VHF COMMs set below (you have to turn them on). Airbrake (Speedbrake) and Flap lever strides the stubby four impressive throttles, they have a fuel safety switch on each lever, to disengage, but as noted there is no reverse thrust levers (you have to move the Airbrakes manually as well), and a large trim wheel left. There is a transponder that allows an ATC code and flight identification code to be entered, with XPNDR/TA and TA/RA selections. Bottom pedestal is an active BRAKE TEMPºC panel, ADF1 & ADF2 Radio and console lighting knobs (three). There was no EFB/Tablet on the XP11 version. There is now by selecting the black square on the sidewall on each side. It is still pretty basic, the earlier "Doors and Reflections" panel with added (cabin) announcements, Empty Weight, Zero Fuel Weight, Total Full Weight and Gross Weight. There is also a built in Avitab (plugin required) Instrument Panel I love the layout of this instrument panel, complex, clockwork and very well done for an aircraft of this era in the crossover period. This is the old era or dials, the RJ series was the (semi) glass era. Close up panel detail is simply first rate and very authentic, with nice highly realistic instrument reflections. The electrical power system on the BAe 146 has both AC and DC power services. AC power is supplied by two (outer) engine-driven generators, an APU-driven generator, a ground source and a hydraulically driven standby generator. The standby generator also supplies DC power. DC power is normally provided by transformer rectifiers (TRs) which convert the AC (provided by the engine and APU generators or the external source) to DC. The aircraft battery provides an emergency DC supply and also, via a standby static inverter, an emergency AC supply. The AC and DC supplies are distributed by a network of busbars classified as normal, essential and emergency. The normal busbars are duplicated to form the basis of a two-channel system: channels 1 and 2, both having AC and DC busbars. Even when I selected GPU and select the right power selection, aircraft still didn't receive any power? it was the bus-tie (two switches) and here are the points to make... as the 146 has a lot of the switchgear and in here it is mostly a three-way switch system, and finding the correct switch and the right switch position can need a little study... no it needs a LOT of attention. The central Artificial Horizon is very authentic in detail... known here as the Attitude Director Indicator (ADI), it provides a visual presentation of the pitch and roll attitude of the aircraft on a spherical display. The side scale shows glideslope, and localiser deviation is presented on the lower horizontal scale, and an inclinometer is mounted on the lower front face of the instrument. F-Fast and S-Slow indications, plus the ILS indicator... There is a secondary backup ADI right. Left of the ADI is the Airspeed Indicator with built in Mach markings, Right is the Altitude Indicator. Above is a very good and highly detailed Annunciator warning panel which you can test and adjust the brightness and follows the white, green, blue, amber or red legends warning system. There is a Instrument Comparator Monitor (ICM), compares the Captain’s and First Officer’s primary attitude and heading displays and if a difference shows warnings (ICM panel is upper left of the ADI) Lower centre Instrument panel is the Horizontal situation indicator (HSI), with built in Vertical Speed Indicator, with Heading indicator, MILES (to go) and GND Speed displays. The 146 has an identical twin gyro-magnetically stabilised compass systems installed. A flux valve is situated in each wing. With selections 1/2 that allows transfers to the other heading display. ... lower are the brake pressure dials. Note the Radio altimeter above the VSI. Two instruments left of the HSI is a Stopwatch/Clock and a Distance Bearing Indicator (DBI) for VOR1 (DME 1) and VOR2 (DME 2). Note the Radio altimeter above the Vertical Speed Indicator. As noted in the Menu, the standard Vertical Speed Indicator (VSI) can be switched to a combined VSI and TCAS display. In addition to indicating the vertical speed, it also displays any potential TCAS conflicts. Right of the VSI is a backup Altitude Indicator... On the First Officer's right side pane the layout is a little simpler, but has mostly the same Standard Six instrument layout... Centre are the same nice Attitude Director Indicator (ADI), Horizontal situation indicator (HSI), with left the Airspeed Indicator, Distance Bearing Indicator (DBI) and to the right the Altitude Indicator and Stopwatch/Clock with the Vertical Speed Indicator (VSI) set below. To the left centre of the First Officer's main instruments is the Thrust Modulation System (TMS) panel. The TMS system operates in a variety of modes and consists of a control display unit (CDU), through which the pilot can select a required mode of operation, which is interfaced with a microprocessor-based computer (TMC) driving an actuator on each engine fuel control unit to provide limited trim authority about thrust lever settings. System disconnect push-buttons are located on No.1 and 4 engine thrust levers. There are four modes the TMS system covers; Take-off (TO), TMS disconnect (GA), Maximum continuous thrust (MCT), Turbine gas temperature (TGT) and Flight descent (DESC). This TMS system is the heart of the 146, and the biggest point of flying the aircraft correctly, we will cover the TMS system at the takeoff point. Centre Instument panel is dominated by the four engine sets of readout dials... ... per engine row they cover with the top five dials; Oil Quanity, Oil Temp and Oil Pressure. N1 output, TGT (Turbine Gas Temperature) and N2 ouput. Fuel Flow (FF) with Fuel Used indicators... bottom row are the three Fuel Gauges. There are three main fuel tank compartments; The Main wing compartment, Feed(er) tanks and a Surge tank... Fuel consumption is per variant; 146-100 : 425 kn: 2,468 kg (5,441 lb)/h, 146-200 : 423 kn: 2,483 kg (5,474 lb)/h, 146-300 : 429 kn: 2,517 kg (5,549 lb)/h... with ranges of; 146-100 : 82 pax: 3,870 km (2,090 nmi), 146-200 : 100 pax: 3,650 km (1,970 nmi) and 146-300 : 100 pax: 3,340 km (1,800 nmi). The Master Warning System (MWS) provides the flight crew with indication of aircraft systems malfunction, status and the system is displayed on a very large warnings panel centre (Annunciators) and can be tested via button on the MWS Panel upper right (arrowed) and again it follows the white, green, blue, amber or red legends warning system. Very top right of the center panel is a Engine Vibration Indicator Monitor (EVIM) comprising of four separate meter mechanisms presenting vertical indication displays for engines 1, 2, 3 and 4 from the left which can be tested (arrowed lower, lower left). Below the EVIM is the flap position indicator 0º-18º-24º-30º and 33º degrees, Spoiler Indicator and Landing Gear Handle/Indicator. OverHead Panel There is a lot of switchgear and detail on the OverHead Panel (OHP). All the aircraft's various systems are grouped together in panels, that can be split into upper or lower Overhead Panel(s). Upper OHP. There is a lot on these upper sections and selections of the panel, that are usually sited in the lower sections. Top of the left are Yaw Dampers, and the "Main" switches for Autopilot and Avionics power. Anti-Skid and Lift and an Hydraulic panel fills out the left. The Hydraulic power is provided by two independent systems, Yellow and Green, each having an engine-driven pump (EDP) as its main source of power as well as a standby power facility and the switch arrangement means you can control both Yellow and Green channels. The Fire Protection system on the Just Flight 146 is quite comprehensive. Each engine is equipped with a fire detection system which consists of four detector loops in two parallel pairs. When the loops are subjected to heat, a signal is transmitted to a warning system as soon as a preset temperature is reached. The warning system comprises of red and amber flight deck presentations with associated audio warnings. Each engine is also equipped with a fire extinguishing system consisting of two extinguisher bottles for each engine. The bottles are in the nose cowling of each engine. The APU, Wings, pylons, fuselage spine, electrical equipment bay and the air-conditioning equipment bay are all active in warning systems. Right Panel top is the External and Notice lighting panel, with the Air-Conditioning Panel set below. Lower OHP. The full left side of the lower OHP covers the Fuel Panel, then the Electric Panel. Top centre of the lower OHP is the APU (Auxiliary Power Unit) panel, then below the Engine Power and Start panel. Set below is the Ice-Protection warnings and switches. Right top lower OHP, is a large Pressurization Panel that covers with the Air Supply Panel, more Ice-Protection warnings and switches bottom centre and lower bottom right is an annunciator lighting and OHP lighting adjustment panel. Very bottom centre is the lighting switchgear for FlightDeck Emergency, RWY Exit Lights, Landing Lights and the left and right windscreen wipers (Three-Way) and finally the Seat Beat light switch. As this JustFlight BAe 146 is a "Study" grade aircraft, then the systems and their operations are quite comprehensive. The manual does thankfully detail everything here, but the depth of the system knowledge required here is quite high. So "Study" means just that in going deep into these systems and understanding them to get the best out of the simulation. Autopilot The Smiths SEP 10 BAe 146 automatic flight guidance system has an integrated autopilot and flight director system which provides a three- axis stabilisation and two-axis manoeuvre computation in pitch and roll, in addition to flight director computation. Study is again required here as the layout of this AP panel is quite different, the ALT (Altitude) ARM is hard to see, but I love the winding ALT SEL knob (you will find that mouse wheel settings are more accurate), and the HDG (Heading) knob is centre lower panel (took me ages to find that?) Also centre are the Course selection knobs (both NAV1 or NAV2). VHF navigation has a panel to itself on the left, you will need to turn it on via the switch, and then press the centre knob to activate (there is a Automatic Direction Finder (ADF) panel lower pedestal). VHF NAV right is VOR 2 (NAV2) radio and besides there is a brilliant "ILS TEST" system for the instruments. Engagement of the autopilot is indicated by a green triangles on the AP button at the top of the panel. The bottom row selects lateral modes and the middle row selects vertical modes. There is a Turbulence mode (TURB) mode... This mode is one of a PITCH and ROLL attitude hold, with the initial datums being those at the time of engagement. On selecting TURB, any other pitch or roll mode (or armed state) will disengage. The autopilot is not your standard layout, and you use it differently as well. This is an interesting point to make. Most pilots new to this flight deck would simply want to jump in and fly the BAe 146... but that would be simply deadly. These 146's have a very unusual switchgear layout, plus the systems created here are very deep... this JustFlight BAe 146 is noted as "Professional" in that it is a "Study Grade" simulation and the extensive and deeply detailed manual bears that aspect out, the manual alone is 247 pages in size and a study of the systems and layouts are essential to getting the very best out of this aircraft. Even I had to stop, do the manual in a professional way and then go back to setting up the aircraft before doing any other aspect of understanding this complex simulation, yes I noted that statement again as it is an important point. FMS (Flight Management System) The FMS was the biggest barrier in to transferring the XP11 JS 146 to X-Plane 12, and the history is complex. The original XP11 release only had at the time the X-Plane default FMS, which was a very basic system, so it wasn't very well received. An extensive update for the XP11 v1.2.1 then updated the BAe146 to the better UFMC (Universal Flight Management Computer). It is not the same unit as in the P3D aircraft version as that uses the UNS-1Lw SBAS-Flight Management System or UNS-1, here it is still an Universal system with the long facia plate, that makes it look more of a default FMS than it actually really is. The UNS-1Lw has the shorter plate as on the FJS Q400. But this UFMC unit was then not available for XP12, as the developer was not available? Somehow the issue was resolved... and so you have in the JF 146 X-Plane 12 with four options with the FMC. A blank panel (no FMC), the X-Plane default FMC, thankfully the UFMC "Universal" and the bezels for the RXP GTN 750/650 Touch (3rd Party addon). Any FMC options can be selected via the Menu on the X-Plane Banner/Plugins Both the UFMC and Default XP have pop-out panels, but we will continue with the UFMC version as it both compliments the aircraft and is the most comprehensive to BAe 146. Lighting The BAe 146 lighting is extremely impressive, but also extremely complicated to use. There are five lighting panels to adjust, one each pilot side, OHP and rear console and the odd lighting knob set around the OHP. Most overhead (Storm, are on both side panels) and a rear Pedestal lighting panel. But one set of lighting totally threw me, it took 20 min of frustration (not in the manual) to find the culprit for the rear overhead cockpit lights, the switch for them was on sited high the entrance right wall.... aggggh! Left side Instruments and Centre dials are adjusted via the left lighting panel and the right side instruments are lit via the right hand panel, Glareshield lighting is via knob lower left OHP. and this is glorious stuff, it is the X-Plane 12 lighting dynamics and it shows. Main panel lighting lights (lovely flicker) activate the fluorescent tubes and filaments, which are really well done set under the glareshield. The best lighting feature is the centre adjustment knob on the lighting panel and two buttons for "SILL" and "LAP"... press SILL and you have a magnificent adjustable flexible stalks with a light on them... they can be positioned anywhere for the illumination of the instrument panel or side panels. There is LAP (animated overhead) and side panel lighting and lovely centre pedestal lighting via three knobs FWD, AFT and FLOOD. There is a third entrance/cockpit overhead light, the switch is noted as the "Flight Deck Emergency" lights... or really the STORM lights. OHP lighting is excellent, press the panel test switch to be amazed! You can dial everything down to a minimum for takeoff and landing phases. So in reality there are so many combinations you can find to get that perfect lighting scenario, for on the ground, in the air or for minimum approach instrument lighting... it is all quite perfect. There is far more lighting in the cabin. The main overhead lights can not be adjusted, but on the X-Plane 11 version as there was no cabin lighting at all when it went dark? but it is a now a very nice place to be in this cabin at night. Galleys have a separate lighting switches as does the EXIT lighting, which is excellent. The "No Smoking" or "Seatbelt" signs don't light up as their areas are only graphics. Externally the cabin looks excellent as well. As with the cockpit, the external lighting is extremely good as well again updated to X-Plane 12 specifications.... Navigation lights are three-way selectable; Off-Lo and Hi, however the ENTRY lighting switch can be mistaken for external use, but it is noted for the overhead cockpit use? Wing root shoulders has two sets of lights for the excellent runway turnoff lighting, and for wing (ice) lighting which is also excellent... both taxi and landing lighting is in the wing leading edge. Both taxi and landing lighting are in the wing leading edge. And you can only have one set or the other on a three way switch, which plays havoc if you use separate switches for the Taxi and Landing Lights. The Taxi lighting is wider and the Landing beams tighter, longer and more focused, but brilliant in both actions. Navigation, Beacon and Strobe are first rate with nice ground reflections... .... and the tail lighting is simply gorgeous. Flying the BAe 146 There are as noted a lot of depth in the systems in this JustFlight 146. So the awareness of all the systems and their layout positions is essential before tackling any flight. The built-in (Menu) Checklists are also invaluable to getting everything ready for flight, again I stress, that this 146 is not a hop in and fly aircraft, there is simply too much going on to do that quick fly aspect. A big help here is the excellent tickoff checklist from the side Menu, or put it on the Command toggle for quick access. As you go down the list you can check green the action, very comprehensive, and easier than a paper version. Starting up the APU, is quite easy... then switch on the aircraft batteries, select APU GEN and provide power to the busses. When you switch, either power, air-conditioning, hydraulics in that every action has an effect and all seen in the gauges... the depth of the systems here really are phenomenal... UFMC "Universal" Although added in later to the JS BAe 146 Pro, the "Universal" UFMC was a more authentic addition to the 146 over the original default system (which was simplistic and quite awful). But this addition is still many ways basic, however it is a far more an interactive tool with the aircraft and it comes with an extensive detailed manual to explain the details and actions. There an excellent "Performance PERF INIT" page and "Takeoff References", and a lot of weights and details are filled in automatically... but a few can't (CRZ.CG) and that knocks a few brownie points off the depth of the system, and two routes RTE 1 and RTE 2 can be filed and selected. All DEP (SID) and ARR (STAR) and route Waypoints are easily inserted, and VNAV calculations are well done (Yes the 146 has VNAV). Route editing is very good, but you don't have the PATH option here with STEP movements. There is no route to see either, so it is recommended to test the route on another (Aircraft) system and edit the route there to find anomalies and recording them to make sure the routing is correct before inserting the route in the UFMC. There is a HOLD function and PROG (Progress Pages) are also available, we will look at other PROG pages (2/3) in the air. Hidden under the VNAV button are the ECON (Economy) pages for CLB, CRZ and 286 (ECON 286 - best cruise speed). The FMC helps the flight crew with navigation, performance optimisation and automatic fuel monitoring. The flight functions manage the aircraft’s lateral flight path (LNAV) and vertical flight path (VNAV) via the autopilot. This FMC also tunes the navigation radios and sets the desired courses for various procedures such as approaches, SIDs and STARs, using the navigation database to supply the necessary data to fly all routes. So the UFMC is a great addition here. Starting the BAe 146... although the aircraft IS complex, the engine start is quite easy. Make sure all the fuel pumps are on, set the APU Air on (Bleed), START PWR (on), Ground Start (off position) CONT-IGN (x2) on and the START MASTER... .. select the engine you want to start, but always first an outer engine for a generator power supply via the main switch... Then press the START switch... The Avco Lycoming ALF 502 H engines will then spool up very, very quickly to the 20% n2 starting point, were at this point you up the throttle from the detent (release throttle lock) to the idle position to start the fuel flow, the engine then completes the start procedure to settle around the 52% n2 running in idle. Engine sequence start is basically in reverse order 4-3-2-1. If you want the full whine and intricate startup sounds then you will be disappointed here, because there is isn't any, well a little, but these tiny Avro engines are super quiet, even when all four are running it is hard to hear anything from the cockpit, except for a nice humm... the 146 isn't called the "Whisper Jet" for nothing. Now you clean up the OHP, switch off all the engine starter switches... except the two CONT-IGN, in case you need to relight the engine in flight. APU Bleed off, and APU shutdown, Electrics on, all ENG AIR on and set the cabin altitude dial, if the pressurisation is correct you should get the twin dials moving to anti-clockwise full. It is very important these actions are completed, if not you get loads of alert and warning noises in the air. Final checks of the GRND (Ground) test panel... the test of the "Stall Warning" alert will jump you out of your seat, but all the different sounds are very authentic, and a double check of the MWS Panel is also a good thing to do... There are significant differences between the different three variants, even by load capacity and weight as well, so this -300 at a gross full weight feels very heavy, even ponderous in the taxi, I don't mind that aspect as I love heavy aircraft to fly for the feel, but you have to be aware of the wide band of feel of flying the 146 in it's size (variants) and weights. In the taxi it is nice to tootle around the taxiways, but as noted you need a little thrust to move the set weight. Two notes... you can physically move the tiller to steer the aircraft as well as using the standard (joystick) yaw which is a brilliant option, it was usually one or the other. Another point is to check the "Config" button on the centre of the pedestal, which is similar to the Airbus "Config" test. It tells you if the aircraft is fully set up for takeoff, if not the red "Config" alert will show in the MWS... aircraft ‘doors not closed’ warning system is also part of the config system, if it doesn't scream at you, you can smile a grin of a professional in setting up the aircraft (correctly). Just Flight will give you your TO/Landing VRefs and current gross weight centre panel lower right, good to note. A note about the Honeycomb Bravo. As I now have the system I have the four engine (lever set up) which is excellent. There is no profile, so the AP is a unusual setup on the default profile, so yes HDG, ALT (even V/S) works, but IAS does not (explained in a moment), Flaps are a bit hit and miss as I have no physical notches but there are selections (notches) on the JS 146 Flap gradient. Overall it's excellent. Thrust Modulation System (TMS) The TMS system operates in a variety of modes and consists of a control display unit (CDU), through which the pilot can select a required mode of operation, which is interfaced with a microprocessor-based computer (TMC) driving an actuator on each engine fuel control unit to provide limited trim authority about thrust lever settings. I admit to making a mistake in the X-Plane 11 review on not focusing on the "Thrust Modulation System". To a point I think misunderstanding this TMS system was one of the biggest barriers to enjoying the aircraft, as it can have a profound effect on the way you fly the BAe 146. But I also found the TMS system in the X-Plane 12 is now far more refined with the better XP12 dynamics than with the XP11 version, putting even more emphasis on using the system correctly. When you fly most airliners, you usually push up the throttle to full power for Takeoff, or go into the GoAround mode even if the engines are using a FLEX thrust (derate). Do that in the BAe 146 and it will go seriously wrong quickly, in most cases you will plummet into the sea. Those lovely little Avco Lycoming ALF 502 H engines are pocket-rockets, but also very fragile if you abuse them, and they will blow out extremely quickly at full throttle power... do that a few times and your love affair with the 146 has suddenly become a broken relationship... this is where the TMS comes in. Today we have modern FADEC "Full Authority Digital Engine Control' to control engine parameters, but this 146 has one foot in the old analog world, so you could say the TMS is an early version of FADEC, or a manual interface instead of the mostly hidden fully automatic engine parameter system we currently use. You will use the TMS panel a lot. You can use the pop-up panel from the menu, but that is still a two step process to get it to appear. I would recommend to use a Command toggle for a one button view or hide selection, it needs to be quickly accessible, even for visual use. Press the PWR (Power) to start. every time you use the TMS you have to run the TEST (to align it). If you shut it down you can't just power it up again. On the test mode the system goes through every selection to verify the system, then you are ready to use it. First we will look at the "SYNC" mode... the idea of the Sync mode is to align the engines to one single parameter, in other words what one engine does, the others are then synchronised to do the same actions, so the settings for one are then the same as all four engines. In this case you can set the CTRL selection to either follow the N1 or N2 engine thrust output, and the MSTR selection is to Sync to either Engine 1 or Engine 2. "Modulation" is basically the operating parameters, or the thrust limits you can go to in the various phases of the flight. Pressing the TO (TakeOff) button will show you the highest limit N%/ºC you can go to with the takeoff thrust, here 93.7%. This is set by setting your current Airport temperature 15º in the T REF ºC You can adjust or "Derate" the TO percentage by adjusting the Airport temperature, here 35º to derate to 90.7%, you can do the opposite of more thrust output by setting the temperature lower than the Airport's local temperature. Once these settings are done you are basically ready to fly.... the route today is LEBL (Barcelona) to GMMN (Casablanca) 818 nm, about the normal flight for a regional airliner, the BAe 146-300 has a standard range of 1,700 nautical miles (3,150 km). You could note the TMS as being a Semi-Automatic system, it isn't as we noted a full AutoThrust system, it's job is to protect and keep the engines within their limits (and of why it is so easy to burn them out quickly). On throttles up all the Engines (top row 1-2-3-4) light up to signify the TMS system is now active.... first you will advance to around 25% thrust, and get the aircraft moving. Besides working your takeoff roll, your eyes also have to be glued to the TMS panel. When all four of the triangles disappear you stop moving the throttles, then the TMS system will take-over, driving an actuator on each engine fuel control unit to provide limited trim authority on the thrust output to the set N%, in other words it will takeover your throttle and advance only to the highest set parameter allowed for the engine reliability, noted here as 930% v2 - Rotate is around 124 knts, and you will go into a 10º climbout... "Positive Climb" The TO mode is limited to a 5 minutes maximum continuous use at full takeoff thrust, because you are set at the very upper limit of the Engines performance. So you will switch as soon as you can to MCT (Maximum Continuous Thrust), this mode changes the N% output to a lower thrust setting, and more within the Engines parameters, here 85.7% (Down from 93.0%) to protect the engines. Again if any triangles appear you have to adjust the throttle (slightly) until they all disappear again. It is noted that a lot of 146 pilots don't use the MCT option, but go directly to TGT (Turbine Gas Temperature) as we shall see. If you think the thrust management is tricky, the the AP - Autopilot just confounds the issues. As there are no V/S (Vertical Speed) or Speed controls visible on the panel. Mostly V/S is controlled by adjusting your pitch then reselecting the V/S to hold that pitch (trim can do the same job). I did find that I could use the V/S selection with my Honeycomb Bravo V/S controls, but that is sort of cheating. Mostly the TMS will control your climb speed (TO Mode/MCT Mode) by holding a speed, there is an IAS button, but in reality you adjust your thrust manually to change your speed, then the IAS will hold that thrust setting... the IAS can also be used to adjust your V/S. But there is one other mode you can use... TGT (Turbine Gas Temperature) to control the speed. Selecting TGT will give you control over the N1 output (or thrust). When in the TGT mode, you can adjust the N1 output on the TMS panel lower left (TGT ºC), this is synced to the N1 engine output (remember all four engines are synced together). So when you adjust the TGT output you increase your speed (or lower the speed), that is shown on your N1 engine outputs on all four engines, as noted 146 pilots go straight to this mode to get speed control. There is one more mode in DESC (Descend) which we will use later on approach. 146 Climb rates are around 2,000 to 3,000 fpm to 10,000ft, then 1,500 to 2,000 to 20,000ft, 1,000 fpm to 30,000 and finally 500 fpm to TOC (Top of Climb) in most cases you rarely fly higher than 31,000ft. The RJ series with the more powerful engines could do 35,000ft. You need to be very steadfast in controlling the TGT output. It's very tricky or it can trick you. You need a high output to climb. but then reduce N1 TGT at altitude (obviously)... but finding the sweet spot to TGT º to keep it on the set bug is tricky(er) that it looks? Suddenly you have an overspeed (alarm), so you reduce the TGT output%, then it starts falling too low, and up it goes, then it's too high again? so it take practise to find the right (narrow) window to keep the speed consistently at the point you want, for me it was 725º, but it took a long time getting there. The above shows why a lot of users found the BAe 146 Pro hard to fly, but learn and to get this TMS working for you and not against you, it is clever and very immersive to do, but you have to understand of what it does and be aware of the Engines limitations to get the best out of the system and the aircraft. The BAe 146 also has a complicated pressurization system. You have to set the Cabin Altitude (usually 6,000ft), but making sure the system is correctly set. (all) ENG AIR switches have to be on, PACK 1 and PACK 2 have be on (it looks the opposite way around) but the lights will go out if correctly set. If you don't set the environment system you will get consistent alerts/warnings (flashing), it will drive you up the wall. The UFMC has very good PROG or "PROGRESS" pages, and there are three pages. 1st page is the standard waypoint, dis, time and fuel use... 2nd page covers Wind, speeds and Fuel Quantity, and the 3rd page covers RTA (Required Time of Arrival). This page is used when a flight crew needs to arrive at a specific time, which is useful in delay situations. The Kgs to Lbs settings conversion it is set on the INIT REF INDEX page, so if you use Kgs (like me) it can show in Imperial (fuel) numbers as default and confuse you if not changed. I'm already over the Pillars of Hercules — one on the Rock of Gibraltar (Europe) and the other on Jebel Musa (Africa)... The Straits of Gibraltar is another name. There is a lot to do to get the aircraft ready for landing. ILS Freqencies 109.90 INR - RWY 35R, and 112.50 SLK the entrance VOR to INR. In the UFMC they are noted (under PARK) but these are just false numbers to look nice, they are not actually active, so all the frequencies are set manually, left and right on the glareshield. Top of Descent (TOD)... and you now press the last TMS mode in DESC. This will set the TGTº at 60, or idle, or the lowest thrust setting you can use, and the 146 will automatically lose height at around 1000 fpm, you can adjust more (or less) vertical speed via the V/S. You have to careful here not to lose too much speed, as you are tempted to re-engage the TGT mode to boost the speed up, it works to a point, but don't over do the idea. Part of the trick is to use (lower) the Flaps in the circuit to reduce the speed at the same output power, get it right and it can be a smooth transition for the final approach... I want everything right before I get to SIDI KHEDIM (SLK VOR) as it it is the entrance directly to the 35R ILS, so speed and Flaps at 30º are set early, and gear is already down, speed is around 140 knts in this configuration. The gear drag rubs off a little speed as well, so you have to compensate for it, as now your under manual throttle control and have now shut down the TMS. As at these lower speeds as there is now no need for engine protections. In the turn to final approach you flick off the HS/R NAV to NAV to use the ILS Frequency, and the beams come alive and you select V/L (VOR LOC) mode to arm the localiser hold mode and the GSL (glideslope) mode to arm glideslope hold mode. Flaps 33º (Full). Throttle control is very finicky in the ILS beams, get the speed wrong and the 146 will start to nose bounce, so you can't go too slow, or too fast, but you have a F-S gauge on the Artificial Horizon that helps in finding the correct speed, but your still adjusting the throttles all the way down to threshold to get the best performance out of the aircraft, on the slope the speed is 124 knts, most 146 pilots love this controlled phase of the flight, noted as with "good handling even in crosswinds; responsive but not twitchy". On the lower slope the speed is 120 knts, and your still consistently fine tuning the throttles to match the speed (Honeycomb Bravo). In the flare the 146 can get a bit pitchy, and so you can get a too nose high angle, so you need to be aware in controlling that aspect, touch was around 102 knts, which is close to the 95 knt stall speed. The wing airbrakes are automatic, but you have to manually open the rear clasp door speed brake, once under the 100 knts the wing brake drops back down, but the roll out speed is slow anyway and only a little braking is required, so no reversers? you don't need them at these low landing speeds. And we are back in the taxi phase... and Mohammed V International Airport stand E9 awaits. Thoughts on shutdown are that the Just Flight BAe 146 Pro is an excellent Simulation of an 70's era aircraft, but with that aspect so are the dynamics of flying an in this now 50 year old era, as the 146 reminds me a lot of the Dash Q400, but with jet engines. Phases of the flight requires certain skills to master, some pilots call it "Like a bus with four hairdryers", which is funny, but probably not far from the truth, another quote is “You had to fly it—not program it.” and again that is true as the challenge here is to master the dynamics and that the hydraulic and electrical systems were robust but somewhat overengineered for a regional jet, the 146 feels overengineered everywhere... but that is the satisfaction of this Simulation. ___________ Summary The British Aerospace (BAe) 146 is a short to medium range airliner. Faster and bigger than a regional turboprop, but smaller than a standard airliner, and the 146 was manufactured from 1983 until 2002 with just under 400 airframes. The aircraft was offered in three variants, the 146-100, 146-200 and 146-300. The equivalent Avro variants were RJ70, RJ85 and RJ100, plus the QT "Quiet Trader" and QC "Quick Change" and Royal Flight/Military variants. Powered by four small Avco Lycoming ALF 502 H engines that produced 6,500lbf of thrust each. There was a standard configuration of 5 abreast seating, although a high density 6 abreast configuration was also available and used in this aircraft. This is the highly anticipated JustFlight version of the BAe 146, but not the first RJ or 146 released for the X-Plane Simulator as that notion easily goes to the "Avroliner Project". The BAe 146 Pro was released by JustFlight originally for the P3D platform, the aircraft was then redesigned for X-Plane by the renowned X-Plane developers Thranda Design for X-Plane 11, a slow seller, the aircraft was ambivalent to be upgraded to X-Plane 12. However persistence prevailed, and so here is the XP12 version of the JF BAe 146 Pro. All major systems are covered from Fuel, Fire, Hydraulics, Air-Conditioning, Electrical, APU, Pressurisation, Iceing, Oxygen, Master MWS - Warning systems, Engine Air supply, Communication systems, Authentic Smiths SEP 10 Auto Flight systems the and extensive features of Thrust Modulation System (TMS) and AviTab menu and intergration, and you have four optional FMS systems including the "Universal" UFMC. All external and internal modeling is excellent and now upgraded to X-Plane 12 features and dynamics, it also comes with 44 high quality liveries and lots of perfect detail externally. Internally the cockpit is of perfect detail and immersion including for excellent VR (Virtual Reality). With moving armrests, chairs and even a pop-out third jumpseat the detail is ultra realistic with XP12 lighting effects. The cabin is although is a little lo-res and basic, but better here than in XP11. QT Cargo has huge detailed door, and two menus service all opening doors, AP pop-ups, Quick start, checklists, TMS pop-up, basic weights and fuel loading. Both Internal and external (complex) Lighting has been upgraded to X-Plane 12 with excellent results and the cabin is now fully lit in dark, fully developed 3D extensive sounds are also exceptional. This is a very highly detailed Simulation, but to be aware of the deep complex flying operations and clockwork instruments, this is no Boeing or Airbus in operation, more FJS Dash8 Q-400 (Q4XP) in detail and era designed operations with the authentic unique "TMS" Thrust Management System in the aircraft. The extensive manual is a deep 247 pages of systems and features, not just systems, but the 146 comes with reproductions of authentic systems that requires study and operation... so the package is a "Study" grade and a Professional aircraft to learn and operate. In X-Plane 11 the JF BAe 146 Pro was priced just under US$75.00, expensive, but still worthy on the amount of the 8 variants and the huge amount of features provided at the time. For X-Plane 12 that price has been moderated to US44.95, a bargain here on what you receive in quality and features, and for customers who own the BAe 146 XP11, they will get a 40% Discount on that release price (US$26.97), which has to be the bargain of the year. Certainly extensive in pretty well any area you would want to delve into, just pick one and be absolutely blown away by the depth of this BAe 146 Series from JustFlight. We expected it to be good in coming over to X-Plane 12, but it delivers extensively as a very deep but authentic simulation. But be aware, that depth of systems and operation, they do require time to learn and be put into practise, and there is a lot of areas to cover and a lot to learn to get the best out of these 146s. Certainly this clever regional airliner is no, drop in and fly (unless you want a lot of alarms in your ears, or plummets into the Sea), but again that is the aim of this very high level of study simulation aircraft, the skill level required is high here as well and you will need to commit to the aircraft to get the very best out of it... do that, and you will get an exceptional simulation in return.... Absolutely Highly Recommended, and the deal of the year!. ________________ Yes! the British Aerospace 146 Professional XP12 by JustFlight is NOW available from the X-Plane.Org Store here : BAe146 Professional XP12 - JustFlight Price is US$44.95 Requirements X-Plane 12 (not for XP11) Windows, Mac or Linux 8 GB VRAM Recommended Download Size: 3.8 GB Current Version: XP12 (May 22nd 2025) Customers who own the BAe 146 XP11, will get a 40% Discount. Discounted Automatically applied at checkout Designed by JustFlight and Thranda Support forum for the BAe 146 XP12 Download: for BAe 146 Pro is 3.8Gb. There is only one folder to install; JF12_BAe_146 Full Installation is 5.43Gb in your "Aircraft" Folder. (only X-Plane 12) Documentation There is excellent full coverage documentation and installation details, and separate FMC guide. 146 Professional X-Plane 12 manual.pdf (247 Pages) 146 Professional X-Plane 12 Variants and Liveries Guide.pdf EULAstandardcommercialandacademic2025.pdf Universal FMC 146 Professional X-Plane 12.pdf ________________ Review System Specifications:  Windows - 12th Gen IS1700 Core i7 12700K 12 Core 3.60 GHz CPU - 64bit -32 Gb single 1067 Mhz DDR4 2133 - PNY GeForce RTX 3080 10GB XLR8 - Samsung 970 EVO+ 2TB SSD Software: - Windows 11 Pro - X-Plane 12.2.0 (Beta) but checked in XP 12.1.4 Plugins: JustFlight-Traffic (X-Plane.OrgStore) US$52.99 : Global SFD plugin US$30.00 Scenery or Aircraft - LEBL - Barcelona XP by Aerosoft (X-Plane.OrgStore) - US$27.99 Aircraft Review by Stephen Dutton 22nd May 2025 Copyright©2025: X-Plane Reviews (Disclaimer. All images and text in this review are the work and property of X-PlaneReviews, no sharing or copy of the content is allowed without consent from the author as per copyright conditions) All Rights Reserved.
  2. Aircraft Review : Pilatus PC-12 DGS by Thranda Design The most successful General Aviation aircraft in the X-Plane Simulator has been the Cessna Caravan, in two forms, first by Carenado, then by Thranda Design. The second most successful aircraft, again by Carenado was the Pilatus PC-12, and there is a link between the two aircraft. Both aircraft use the Pratt & Whitney Canada PT6A engine, a small gas turbine engine for Turboprops, that drives the propeller through a reduction gearbox. So it is a very smooth engine with a high power output of 1,200 shp. A bit of trivia, the PT6A engine is actually installed in reverse, with the output connected to the reduction gearbox, then directly to the five-blade, constant-speed, full-feathering, reversible-pitch propeller. So basically you are facing the front of the Turboprop engine. The Pilatus PC-12 is a single-engine, turboprop aircraft known for its versatility, reliability, and performance. Manufactured by the Swiss company Pilatus Aircraft Ltd, the PC-12 is widely used for business aviation, medical evacuation, cargo transport, and special missions. It is one of the most popular turboprop aircraft in its class. Like the Cessna Caravan before it, here now is the Pilatus PC-12 from Thranda Design, an aircraft that is always at the top of any serious users Simulation wishlist. The Carenado offering was very good, but honestly I never bonded with it, it was a small thing in the instrument lighting, clunky to fly and it didn't look very realistic, and a couple of other peculiarities. Also X-Plane has come a long way since that Carenado release in April 2015, so here is the PC-12 reimagined by Thranda Design in it's DGS ((Dynamic Generation Series) form. The concept for the PC-12 was initiated in the 1980s, following the success of Pilatus’s PC-6 Porter and PC-7/PC-9 trainer aircraft. This was to be a slightly larger aircraft, and Pilatus aimed to create a pressurized, single-engine turboprop aircraft capable of combining passenger, cargo, and utility roles into a single platform. The Pratt & Whitney Canada PT6A engine was chosen for its reliability and efficiency, and the maiden flight was achieved on May 31, 1991. Its nickname, the “Swiss Army Knife of Aviation.” The prototype was technically closer in design to the PC-12/41, which was the initial production variant. In 1996, Pilatus upgraded the PC-12 to the PC-12/45 model, increasing the MTOW to 9,920 pounds (4,500 kilograms) without any major structural changes. This version became the standard production model and replaced the PC-12/41, and became known as the PC-12 Standard. This Thranda aircraft is based on the PC-12/47, another slight gain in takeoff weight of 10,450 pounds (4,740 kgs), the performance stays the same even with the higher MTOW. Thranda Design are already known for their quality and extensive list of features, so you are already expecting a very good looking Pilatus PC-12, but what was not expected... was how really good this PC-12 really is in the flesh. Maybe we just remember the older aged Careando PC-12, anyway this aircraft just leaps off the screen in quality and detail.... it is without doubt the best looking Thranda aircraft yet. Modeling is absolutely first rate, nothing even to nit-pick over here, as all the essential detailing is masterly covered. Every detail from vents, latches, aerials and beacons are all covered. Note the beautiful exhaust horns and lovely chrome spinner. The wings have a straight leading edge with a slightly tapered shape towards the wingtip, and the trailing edge is also tapered, giving the wing a sleek appearance and delivering improving aerodynamics. Then they also only have a moderate sweep angle, the wings are not highly swept back, but angled enough to help with high-speed stability and fuel efficiency. You could call it a modern clean wing. Notable is the right wing bulge, which contains a radar antenna, part of the onboard weather detection system. The system is used to detect precipitation, turbulence, and other weather-related hazards. The curved winglets are really nicely done, the earlier PC-12s had the more squared off wingtips. Flaps are four positions (0º - 15º - 20º - 40º)... 15º is used for takeoff, and the PC-12 is considered as a STOL (Short Takeoff and Landing) aircraft, as the 40º setting allows steeper approaches and shorter landings. Flap detail internally is excellent, as the flap tracks are all very aerodynamically pronounced. Nosewheel is a simple strut leg, fitted with durable, multi-ply tires. Rear gear is trailing-link, and the landing gear is specially designed to handle operations on unpaved, gravel, or grass strips, also reduce debris damage during takeoff and landing. The Landing gear and airframe components are also upgraded for durability under heavier loads in the heavier 12/47 we have here. Quality and detail of the wheel and strut assembly is expertly done, and all three wheels have built in taxi and landing lights. Glass is very good, tinted on the main cockpit windows, and all the glass comes with nice reflections (that can be turned off). External Static Elements The Thranda PC-12 has a nice selection of external Static Elements, including; Chocks (rear wheels), Engine inlet and exhaust covers, Tags, Pitot covers, Tiedowns and a support stand. GPU (Ground Power Unit), and both opening doors (forward and large rear left cargo door). Cabin Up into the aircraft.... .... the cabin layout is in an "Executive" style of only six seats, with the forward seats set in a "Club" style. In a commuter or charter cabin configuration, you can have installed in here 10 seats (single-pilot). Forward area has a very nice mahogany wood grain on the wardrobe and small buffet. The passenger seats are excellent, HUGE, cushy, with lovely ripples showing off the leather, the orange headrests are a nice touch as well (in Executive cabins Orange seems to be the current trend lately), the rear of the seat also can be laid back. There are two (animated) tables, one with the set of left club seats, and another on the single left rear seat. Fine (lovely) window shades are also all individually animated... ... Lighting and Air-Vent fixtures are exquisite, animated as well for movement, to turn on you press the centre of the lamp. Rear cargo hold is covered by a lovely blue netting with chrome rings, everything is done in here with a fine eye for detail. Cockpit Through the slight gap and your in the very tight cockpit, it looks small and it feels very intimate. Although not a full glass cockpit with big display panels, it still feels very modern by it's layout and instruments. Extremely well done here, it has a great look and comes with a realistic avionic feel by Thranda Design. The seats are set right up against the bulkhead highlighting the small space, they are very nice with their sheepskin covers, and the armrests can all be lifted and hidden away behind the seat. Control yokes are excellent and realistically worn, and come with Electric Trim, PTT (working Push-To-Talk) button, and also a disconnect AP (Autopilot) button, you can hide the yokes individually, via the hot-spot on the rear. Main electrical and lighting overhead panel (OHP) is still marginally obstructed by the pull down shades, so you have to move them to access certain parts of the switchgear, I found to move the shades right out of the way to the side, because they became quite annoying every time you wanted to access the lighting switch gear. The armrests hide the throttle which in turn hides the condition/feather lever (in one) of which you use a lot, thankfully the armrests can be moved up here to get access. There are more rocker lighting switches for panel, cockpit and cabin lighting on the rear of the pedestal with four extra adjustment knobs, The flap selection lever is of 0º - 15º - 30º and 40º of flap, and the flap indicator is positioned in the very top left of the pilots panel. Honestly you won't find this layout much different from the Carenado PC-12 version, you even have the same rudder pedal adjustment, via the nice winder. Power on... and voltages will change with any power selections! On the OHP many of the switches have a double function as in the first right switch turns the item on and you then select the choice by the second switch for two selections. It is very easy to use once you understand the functionality. Earlier generation PC-12s had either the Honeywell Primus Apex or Bendix/King Avionics. Here it is the Bendix/King KFC 325 Digital/Electronic Flight Control System panel (EFIS). The EFIS takes in two of the six standard flight instruments in the upper "EADI" ((Electronic Attitude Director Indicator) and the lower "EHSI" (Electronic Horizontal Situation Indicator). The others are the Airspeed, Altitude, Vertical Speed (V/S) and RMI (Radio Magnetic Indicator). There is a backup CDI (Course deviation indicator) but that is also built into the EFIS and two other backup instruments in another Artificial Horizon and Altitude dials and AFD direction finder. Co-Pilot's side is the same EFIS standard six layout without the backup dials. Center panel top under the extensive deep glareshield is the excellent Benedix/King KFC 325 Digital/Electronic Flight Control System (EFIS) and the autopilot panel pops out. Next to the autopilot is the GARMIN GMA 340 Radio Comms Panel. Your ADF unit is the standard KR 87T50 Bendex/King ADF receiver. Note the large Radar Altimeter far right lower. The KFC 325 is in four sections, EADI/EHSI, VVI (KAS297C), Autopilot Panel (KMC 321) and EFSI Select Panel. The centrally positioned EFIS Select Panel has a lot of features, with Course, DH (Decision Height) and ADF (1-2) / VOR (1-2) pointers built into the EFIS display. You can also switch from the HSI to ARC mode view as well. The focal point of any PC-12 is the central EIS (Engine Indication System) which complements the EHSI by offering an integrated view of flight data and engine performance on the MFD. It displays; Torque, ITT (Inter-Turbine Temperature), Ng (Gas Generator Speed), Np (Propeller RPM), OAT, Fuel - Quantity x 2, FL(ow) H(our), Used and ENDUR (Endurance). GEN 1/GEN 2 Voltage and Current (Amperage), Date and Time. Engine Oil Temperature and Pressure. The EIS can also be tested. It pops out here as a window, can be scaled and moved anywhere on the screen. In fact any instrument can be popped out, scaled and moved under the DGS system. 48 visible Annunciator lights cover Caution and Warning alerts, the panel pops out and you can test the system and the OHP annunciator lights via the button far left top on the OHP. This Instrument layout does not cover all of the DGS options, that aspect is covered in the menus. But this layout would be considered the PC-12 default setup. There are banks of Fuses/Circuit Beakers on each side wall panel, and every one is active and can be used. Menu/Tablet Since the last Thranda release of the PC-6 Turbo Porter, included was a new feature of built in EFB (Electronic Flight Bag) or Tablet and combined also with the menu. The iPad/Tablet can be used in the aircraft. There is a brown circular patch on the window, if you press the hot-spot, then the IPad/Tablet will appear, if you press the rear sucker cup, then it will also disappear... and the same tablet is also attached to the right hand side window. The iPad/Tablet can be tilt adjusted via the top edge, but not too far in movement as the window's glass gets in the way, but there is also far more movement in here than with the PC-6 installation. Menu layout is the same as the PC-6 with 13 icons to choose from; Aircraft Options, Weight & Balance, INSTR Options, Panel Editor, Static Liveries, DYNAFEEL, Log Book, Checklist, Ground Handling, Dynamic Liveries, Flight Computer, Equipment and AviTab... at the bottom is a "Brightness" slider 0% to 100%. The side Arrow window tab is still there, and so it still does have the same pop-up menu for external use. Aircraft Options This page menu is also changed from the earlier Thranda "General" selection, but the options and the layout stays the same, the layout is still as highly detailed and as very comprehensive as before in the General tab. Three selections cover group items, but any one item via "Click Spots" can be individually selected or hidden via the aircraft graphic. "ALL COVERS" will select engine inlet/outlet covers and pitot cover, "ALL TIE-DOWNS" for propeller and wing tie-downs and "ALL DOORS" for the main cabin door and the rear Cargo door, sadly there is no PT6A engine reveal like on the PC-6, however the engine can be set into two modes... SIMPLIFIED or REALISTIC In Simplified mode the engine will automatically limit the engine to remain below the maximum torque of 47.3 psi. In Realistic mode it will be up to the pilot to avoid exceeding the engine limitations. The propeller gearbox or propeller shaft can break if the torque limit is exceeded by a certain margin, resulting in engine failure and smoke in the cabin (the smoke can be cleared by pulling the firewall air shutoff control closed). Other Aircraft Options menu selections cover; Window and Instrument Panel Reflections on/off, Startup Running on/off, GPU (Ground Power Unit), Chocks and Brakes on/off. There is a Steering SIMPIFIED or REALISTIC, but the PC-12 is not a taildragger, (this option locks the tailwheel) so an odd addition? All EXT - External Lights can be switched on and off as can ALL INT - Internal lights. The individual lights can also be accessed on the aircraft graphic. The Electric Tug on the nosewheel, movement is controlled via your joystick and rudder pedals (yaw). Weight & Balance The PC-12 has the same intricate great "Weight and Balance" menu as earlier Thanda aircraft. Weights are in both Lbs and Kgs, which can be selected via the toggle... Pilot, passengers and cargo can all be set for their individual weights (scroll), and the CofG (Centre of Gravity) parameters are all shown on a graph and with a marker on the aircraft of it's physical CofG, when done you can SAVE the configuration and later reload it. INSTR Options Next menu item is your "Instrument Option" menu page. There are four options available; GPS #1 Popup (GNS 530), GPS #2 Popup (GNS 430), KFC 325 Autopilot Popup, all again are scalable. And there is also the option to change the Baro Units from mb to inhg. Panel Editor "Panel Editor"... is part of the Thranda featured "Dynamic Generation Series", More about the DGS Series The Thranda PC-12 can be highly customised in two areas to suit your taste. First in Dynamic Panel, as there is no default instrument setup, in the Pilatus as you can customise the panel to suit your own flying preferences. In the iPad/Tablet configuration the screen space is now far larger than the old "Panel" Menu. This is good, because as some of the small access zones in the menu before tended to overlap each over, so you always found yourself adjusting (scrolling) the wrong item. Top row of options are 2 different panel backgrounds, here in KFC 325 or G1000 with three display screens. (Note all options can be mouse scrolled). There are other panel options of which we can see later. The "Dynamic" in the panel is another featured DGS. Besides having different custom panel configurations, you can also customise the instrument panel by selecting "ENABLE 3D PANEL EDIT MODE". This will highlight the available instruments you can change in green. Selecting an instrument via the "INDIV INST" (Individual Instrument) and "ACTIVE INSTRUMENT", it will highlight the instrument you want to say, move to another place or to adjust items position on the Instrument Panel... There is however a slightly different adjustment system now in being used here, arrows in a cross. They will now allow you to adjust the depth (in/out), angle up/down or left/right, besides using the smaller white arrows to move the item around the panel in again up/down or left/right. You can also add in tools and instrument features of 52 different items, and these items also includes the Aspen EFD 1000 avionics. Alpine Avionics Evolution Part of the options available is the EFD 1000 which is a self-contained multifunction digital display that is divided into a Primary Flight Display (PFD) in the top half, and an Electric Horizontal Situation Indicator (EHSI) in the lower half. As EDF 1000 systems go it is not a highly featured system, with the GPSS, MAP, 360 and Menu functions all not simulated, but the display does pop-out... It works of course with the KFC 325 Autopilot. Basically you can also start with a completely blank panel and then create your own unique or personal instrument layout... and can have up to, or can save 14 different panel layouts (presets), and with the Reality GTN 750 as shown here. Static Liveries There are nine provided liveries, one extra is noted as "DYNAMICLIVERYRESOURCES", this is the space on the menu for the custom DGS livery for ease of selection. A dedicated NGX and Pilatus House is also included. "ZZTEMPLATELIVERY" liveries is now missing as the DGS system has been more refined, it is now more smoother and the long wait pause times have been reduced. You can adjust the "Dirt" 0% to 100% by scrolling the number... for a clean or dirty aircraft. DYNAFEEL "DynaFeel" is a system that dynamically adjusts the rate at which the controls deflect, in Pitch, Roll and Yaw. It is based on airspeed and how much the control's are deflected. This means the controls will feel light and responsive at low speeds and with some small deflections, but will get progressively heavier as the airspeed increases. Logbook This is one feature adopted from the JustFlight Menu. This Icon will just show the X-Plane Logbook window. Checklist A 35 page checklist is very comprehensive set in the iPad/Tablet. Navigation is via the lower left/right arrows, or you can scroll the pages via the centre box bottom. The Checklist will also pop-out into a scalable window, to make the list available anywhere in the cockpit.... You tick off the list one-by-one (green), but there is no default to clear the list in one click? Ground Handling This option just views the X-Plane default "Ground Handling" window. if you prefer that tool over the Thranda electric tug. Dynamic Liveries Earlier we saw the available "Static Liveries". Here you can actually design your own livery and save the livery. You have a menu to select on the right that can colour a certain part of the aircraft, like the Roof, Wing, Tail or Wing tips. Select which one you want and then adjust (scroll) the RGB colours for that area. Other options include changing the Registration of the aircraft and putting the "Pilatus" logo under the cockpit window. It looks hard but you can easily design a very nice livery in about twenty minutes... ... when done you can "Save" (Add) the livery and then "APPLY" it to the aircraft. When you apply the livery the screen will then freeze for a few minutes, and then go a bit weird? as the DGS processes the livery. The results are however excellent. A note... if the created livery does not appear correctly? Then go to the Static Liveries and select "Apply", then go back to the created Dynamic Livery and do it again, this time it should create the livery you wanted. A feature is the (Quick) selection of Dirt via percentage selections you can adjust the amount of Dirt, Scratches and Dirt Int on the aircraft (0%-255%) and apply it instantly. So you can have either a pristine or a very grubby aircraft with just a twirl of the numbers. Also changes can can be made to the Metal or Rough surfaces, this can be applied to any of the liveries. Note you can apply the same Dirt and Scratches onto any of the Static Liveries directly via that particular menu. There are 31 pre-installed Dynamic liveries to choose from, and you can save as many custom ideas as you want (within reason). Flight Computer Another new feature from the JustFlight menu. This shows you your current aircraft data including; OAT, GS (Ground Speed), Endurance, Range, NMPG/SMPG, Altitude, TAS (speed), Fuel Flow, Fuel Used, Headwind (knts) and Crosswind (Knts). Both units in Metric or Imperial are also available.... and you can reset the fuel burn. Equipment Under the "Equipment" Icon you have several items as external options, these items were originally under the MISC tab. There are two "Equipment" options, Recog (Recognition) Lights. This option makes the outer under wing lights "pulse" or not. You can select either a "Female" Pilot (Mrs Klaue) or a "Male" Pilot (Mr Klaue) AviTab AviTab is a PDF viewer, Airport info, METAR info and ILS frequencies information tool, it also has a moving map that supports online maps and offline maps, Navigraph integration in that you can link your Navigraph account and see the charts right in the cockpit. In the PC-12 the Avitab is available in both the 3D tablet and a scalable pop-out window. _____________ Internal Lighting I was not very taken with the PC-12 Carenado lighting, it looked over saturated and not very realistic, it was the X-Plane 10/11 era as well, and in not having any of the the X-Plane 12 dynamics. So I was expecting a big leap forward by Thranda, and I wasn't disappointed. It looks amazing... the X-Plane 12 dynamics really shine in here (pun intended). Everything is controlled via the lighting panel rear console. Four Rocker switches have double selections, two have three selections (DOME & Cabin FLOOD). Advisory has DIM and NORM. The four lighting knobs of which three are for the panel lighting work nicely as well. PHL (Panel) has three knob options to reduce the text lighting for either side pilot and the centre console. Fourth knob adjusts the lower flood lighting, including the nicely lit side panels and glareshield lighting. All can be turned off for takeoff and landing minimum glare lighting. Three way DOME (OFF-50%-100%) switch activates the twin overhead cockpit spots. Overall the internal cockpit lighting is a nice bit of kit and very flexible to your tastes. In the cabin, you again have the FLOOD (OFF-50%-100%) selection via the main two lighting strips, and 12 clickable individual READING spot lights that can be focused around. The Reading lights are tricky to switch on via their small central hotspots, but the ALL ON internal lights option is on the menu. External Lighting There are five forward lights in; Taxi and Landing lights on each wheel, and two RECOG (Recognition) lights that can be set to PULSE. WING/ICE light (left side), Strobe, Beacon, Tail Lights and Navigation lights make up an impressive external lighting. _____________ Flying the PC-12/47 This is a three airport flight, Wrangell PAWG to Petersburg PAPG then on to Sitka Rocky Gutierrez PASI, all three airport sceneries are by NorthernSky Studios Scenery, and they with others also cover this whole "Inside Passage" area of Alaska. I did the same flight way back when with the Carenado PC-12, so I wanted to revisit the flight in X-Plane 12. So after setting up the aircraft, power on, Baro done, Fuel pumps on, lights set, blinds moved out of the way... it was time to start the P&W PT6A powerplant... SimpleSimon, Just put the CONDITION lever to "Flight Idle" (once started you bring it back to "Ground Idle"), "Starter" on, then just press the IGNITION button... ... then the Engine Management System (EMS) does all the work, this aircraft also has the Electronic Propeller and Engine Control System (EPECS). EPECS is an advanced engine management system integrated into the PC-12/47’s Pratt & Whitney PT6A-67P engine very similar to FADAC, offering several benefits to simplify engine and propeller management while improving performance and reliability. It uses a single-lever power control that simplifies pilot workload by integrating propeller RPM and engine power into the one control lever. It takes a fair while for the engine to whine (that wonderful familiar PT6A start), and then the turbine speeds up to ignition, then the aircraft comes to life. It's a procedure I love every time I start the PC-12, the startup sounds are quite brilliant as well as Thranda are excellent in sound management. When all the engine parameters are settled, off goes the park brake... ... like the Carenado PC-12 it taxis fast, so you need a bit of footwork to keep to a slower taxi speed, bringing back the CONDITION lever to "Ground Idle" helps a little, but it's still a little too fast for me. Steers nice, but the high cowling makes the centreline of the runway hard to see, so you taxi a bit to the right to follow it. No flightplan here, it's only 31 nautical miles (NM) straight north from Wrangell Airport (PAWG) to Petersburg James A. Johnson Airport (PAPG), I have done it 50 times or more, so no guidance is required. This is my second time in the Thranda PC-12/47 from PAWG to PAPG. The first was a very messy flight test flight, the PC-12 was impossible to fly cleanly? Because there is a "Trick" to flying the PC-12... As the PT6A puts out 1,200 SHP through a single-prop, it produces horrible asymmetric thrust, a pain on takeoff, hell on landing. The trick is to set the rudder trim to the far right (green zone) to counteract the forces, you may need to set an X-Plane key COMMAND to adjust the rudder trim this far right or use the Autotrim. It looks odd this far an angle, but it works beautifully were it counts. Flap selection can be either 15º for a Normal Takeoff, or 30º for a Short/Soft Field Takeoff... I select 30º to test the STOL effect. Power up with the single throttle T-Bar lever, and the PC-12 pulls quickly away at a 3995 Kg TOW, 4740 Kg is MTOW... speed builds quickly, but Wrangell's RWY 28 is seriously bumpy, so the trailing link gear and your rudder control are both working overtime... At just under 100 kts I hit a massive bump mid-way down the runway, and the PC-12 literally bounces straight into the air without moving the stick? I'm now flying... It is the STOL effect at work, but I catch the moment, and pull the PC-12 into a climb of just over 1,200 fpm, Max Climb is 1,920 fpm, and the average is climb out is usually around 1,500 fpm, but I'm not going very high with the short distance to PAPG. Kadin Island is directly ahead of you, so you do a slight roll to the right as you climb out out of RWY 28 PAPG, this Thranda PC-12 is excellent for feel and feedback, you are instantly in touch with the machine, be as one from the start. I top out at 3,400 ft, to pass both Kadin Island (left) and then Dry Island (right), then reset my altitude to 3,000ft. The PC-12 looks sublime in the fading light of the day, this is only a short hop between PAWG and PAPG, but I'm enjoying it immensely, if you feel this good, it must be good. I am now seeing why this aircraft is so revered. PC-12 Service ceiling is around 9,150 m (30,000 ft), with a Power/mass of 3.7 kg/shp (8.2 lb/shp), you have big Range with 0 passengers (Ferry) it's 3,389 km (1,830 nm), full Range with 9 passengers is 2,804 km (1,753 mi) (1,513 nm). From now on it will be a long slow descent into Petersburg. You head directly towards the right hand coastline, before angling slowly around Frederick's Point and into PAPG, but this is not the official route into RWY 23, as both LDA (Landing Distance Available) and the RNV approaches demand you arrive only from the Northeast. It is also a tight twist in the final moments into RWY 23. I'm loving this long wide sweeping curve into Petersburg, losing 300 fpm in height, flaps already at 30º, with a speed of 80 kts, it is a slow and graceful approach. Gear down and the focus is totally on finding the hidden threshold of RWY 23. Gear sounds are excellent, a very slight "thump", "thump" and "thump"... ... from the 700 ft approach down to 500 ft, I'm ready for finals, grinning from ear to ear with a quick glace at the moving shiny water, loving this. I was as low a speed as 72 kts as I flared the nose, almost stall speed (67 knts), but I felt a lot of wing support, and only a small drift down, yes I am feeling totally in control, again be aware of the offset rudder trim, and it is again to be set in the green zone, if not you will pull badly to the left on landing, it's nasty believe me. Touch was right on stall... 70 kts. Yes the PT6A will do an extremely powerful reverse thrust (reversible-pitch propeller) here and has that amazing Cessna Caravan howl, but PAPG 05/23 has a long 6400 ft runway, so the RT was not needed here. Clean up the PC-12 and head to the terminal area, I'm getting more used to the taxi, but it still feels a little fast, most Thranda's are, fast in the taxi. Move into the parking place, and turn off the PT6A-67P by the CONDITION lever, and the wail, like the Cessna Caravan wail, while the engine winds down is so familiar... yes I love it all. Early the next morning it was a longer and higher flight out to Sitka. 10,000 ft is only nearly a third the altitude PC-12 can fly high to, at 30,000 ft with pressurization, but FL010 is a nice if perfect altitude to take in one of the greatest flying areas in the world, Alaska's "Inside Passage". The trick of the PC-12 is that it is a Turboprop that thinks it is a Light Jet, it flies smooth like a jet, has loads of power, and as noted can even fly higher than most small jets, this executive cabin arrangement adds in to the same role. The KFC 325 autopilot panel pops out and can be scaled, moved, which is very handy... ... but the EFSI Select Panel is awkward to use in the centre of the instrument panel, with the heading knob the furthest away from you, a pop-up panel for this Select panel would be really handy. The VVI (KAS297C) is tricky to use if your not familiar with it, the tuning button will switch between Altitude (setting) and V/S (Vertical Speed). So you set the altitude, then ARM it via the lower button, but where it is odd is that the indicator ARM light goes out and not on when you arm the altitude, which makes it confusing? The V/S is activated by the top button, when you have selected the vertical speed + or - The PC-12 is excellent in this cruise mode, just a smudge over 200 kts is fast enough. The ride in the back is not bad either. BIORKA ISLAND VORTAC (113.80 BKA) (SITKA) is the official way into PASI from the south, east or west, via a long circuit track. You pass waypoints KOYEG, then JETUT, a hard 90º turn to HEXAP situated on the start of the ILS 108.90 ISIT, which takes you into Sitka's SIT Rwy 11. I align the aircraft with the ILS beam to find the runway, hidden in the bright low morning light... the PC-12 is now configured for landing, flaps a full 40º, gear down, trim set (don't forget the rudder trim?), so my approach speed is again a very low 72 knts. You forget how good X-Plane 12 is now, brilliant water, bright cascading sunlight... love it. I am also now very familiar on the how to do approaches in the PC-12, as slow as you dare go, adjust the throttle to finely keep you airborne, just like landing in slow motion. You always need that high flare to rub off the final speed to almost a stall, then glide your way in... this time I used the powerful reverse thrust, the sounds go up! noisy, but brilliant, and the speed drops off very quickly. Note the CONDITION lever to "Ground Idle"), you have to look at the lever being set correctly from the side, looking straight down it is not aligned correctly. And I am now back in Sitka again, and it is so different to the old Carenado days, a far, far better PC-12, and a far better scenery around me.... X-Plane 12 delivers as well, so a great combo all round... ... it brings back big memories, but more so this flight has created new one, better ones, than those days that behind us that should now be forgotten, via X-Plane 12, and the excellent Pilatus PC-12. ________________________ Summary The Pilatus PC-12 is a single-engine, turboprop aircraft known for its versatility, reliability, and performance. Manufactured by the Swiss company Pilatus Aircraft Ltd, the PC-12 is widely used for business aviation, medical evacuation, cargo transport, and special missions. It is one of the most popular turboprop aircraft in its class. The Carenado Cessna Caravan was one of the biggest X-Plane GA sellers, the Carenado PC-12 was not far behind, mostly because of that unique and powerful PT6A turbine engine. Thranda's PC-12 now follows their earlier released Cessna Caravan for X-Plane 12,. Daniel Klaue needs no introduction if you have been in X-Plane for a period of time, he is certainly one of the most innovative, and one of the most talented developers out there that, a person that is very highly regarded within the X-Plane Simulator. This PC-12 is a Dan Klaue aircraft, and so you expect tons of ideas and clever features, and certainly the Thanda designs PC-12 does not disappoint in that department. Modeling and detail is absolutely first rate, this is an excellent Pilatus aircraft with a lovely design and high quality. This is a first release in X-Plane 12, and not a conversion from X-Plane 11, it's all new, new. X-Plane 12 textures in 8k (four times the higher resolution than before) it shows of course, but without the framerate hit. The EFB... Electronic Flight Bag, or the Thranda Tablet is still basically all new as introduced on the PC6, with now with 13 options, and all the pop-out windows are scalable. Flying Dynamics are also completely dynamic for XP12, as is the better LED lighting. Advanced FMOD (2)-based sound system is extensive for XP12, and all of course recorded from a real PC-12 and it's PT6 engine, The innovative menu system "Dynamic Generation Series", in you can create your own instrument panel layout or layouts as up to 14 different layouts of 44 instruments and avionics can be saved with 6 default layouts including a Aspen EFD 1000 with here the KFC 325 autopilot, and the panel is also RealityXP GNS 530W/430W or GTN 750/650 Touch with 3D bezels ready. A huge selection of 32 liveries is still complimented with a feature to create your own colour scheme and livery, then you can save them as well. This aircraft is X-Plane 12 only. Overall you get a huge feature list with a great value price for X-Plane 12, so this is absolutely the perfect PC-12 you always dreamed of. The PC-12 was very much requested, and here it is now available in this very high quality package... so what more can you ask for! _______________________________ Yes! the Pilatus PC-12 DGS Series XP12 by Thranda Design is NOW available from the X-Plane.Org Store here : Pilatus PC-12 DGS Series XP12 Price is US$44.95 Requirements Windows, Mac or Linux 8 GB VRAM Recommended Download Size: 4.1 GB - Download via the Skunkcraft Updater Current version 1.0 (December 19th 2024) Limited Time Offer: If you own the Carenado PC12 XP11, you can get $10 off this model. Discount will automatically be applied at checkout. Offer ends January 15th 2025 or sooner. We reserve the right to terminate this offer at any time _____________________ Installation and documents: Download is 4.05Gb and the aircraft is deposited in the "General Aviation" X-Plane folder. Installation key is required on start up and is supplied with the purchased download file. Full installation is 7.46Gb (heavy) SkunkCrafts Updater works with the Thranda PC-12, so instant updates are always available. Documents supplied are: Thranda Pilatus PC12 Manual XP12.pdf PILATUS PC12 PERFORMANCE.pdf X-Plane G430 Manual.pdf X-Plane G530 Manual.pdf A Blank Livery (PNG) of four files are provided for painting. Checklists, setting and loads of Performance graphs are provided in the various manuals _____________________ Review System Specifications:  Windows - 12th Gen IS1700 Core i7 12700K 12 Core 3.60 GHz CPU - 64bit -32 Gb single 1067 Mhz DDR4 2133 - PNY GeForce RTX 3080 10GB XLR8 - Samsung 970 EVO+ 2TB SSD - Bose Quiet Comfort QC35 Headphones Software: - Windows 11 Pro - X-Plane Version 12.0.1.3 Plugins: JustFlight-Traffic (X-Plane.OrgStore) US$52.99 : Global SFD plugin US$30.00 : RK Apps XPRealistic v2 - US$34.99 Scenery or Aircraft - PAWG - Wrangell Airport, Alaska by NorthernSkyStudio (X-Plane.OrgStore) - US$16.95 - PAPG - Petersburg James Johnson Airport, Alaska by NorthernSkyStudio (X-Plane.OrgStore) - US$12.00 - PASI - Sitka Rocky Gutierrez Airport, Alaska by NorthernSkyStudio (X-Plane.OrgStore) - US$15.00 _____________________  Aircraft Review by Stephen Dutton  21st December 2024 Copyright©2024 : X-Plane Reviews   (Disclaimer. All images and text in this preview are the work and property of X-PlaneReviews, no sharing or copy of the content is allowed without consent from the author as per copyright conditions)
  3. Aircraft Review : Beechcraft Duchess Model 76 by JustFlight and Thranda With most developers in that they usually keep to a particular category or theme in say all General Aviation, Airliners, Helicopters or the just plain weird. But JustFlight with Thranda tend to jump into any category that produces interesting aircraft, so can you as these developers go then pigeon hole them as what sort of developers they are. So from a review point of view you know that really anything could be next up on the release from JustFlight for a review. In the early releases they tended to follow the Carenado model (before Carenado went all regional and private jet) in other words the staple General Aviation market, of which was covered mostly with their various Archer/Arrows and the odd Cessna.... but all were solely single engined aircraft. So this is JustFlight/Thranda's first twin-engined aircraft and it is the Beechcraft Duchess 76, and the aircraft is developed out of the Beechcraft Musketeer family of single-engined aircraft family line, and at first glance you would be pushed to see any family resemblance, between the model 24 low-wing standard low elevator design to the Series 76 twin engined high T-Tail configuration and all round far larger aircraft in a 32 ft 9 in (9.98 m) to 38 ft 0 in (11.58 m) wingspan and longer fuselage 25 ft 8 in (7.82 m) to the 76's 29 ft 0 1⁄2 in (8.852 m) overall length. But get down into the parts catalogue and you would be amazed on on how many of the same spec are on both aircraft. Its main rival is the Cessna 310 of which there are several including Milviz's T310R and a new 310L that has just been added to the X-PlaneStore. Other references in this category include the PA-30 Twin Comanche and the PA-34 Seneca V. JustFlight are in that top category in another way in quality and price, they cover the upper echelons in all their GA aircraft are priced US$40+, as is this Duchess at US$41.99. So you are expecting a lot for your investment, and on JustFlight's past record and sales then the aircraft must meet such a high criteria and standard. I really liked their last machine PA-28-181 Archer III as it was a gem of a machine, so how would a twin feel, and could it be twice as good? I doubt that, but just as good would still be very nice. Nice detail includes NACA 632A415 airfoil shape, it is well done and shaped to perfection. Wings are bonded here for a cleaner airflow, but overall the detail of the design is first rate and very well recreated. The twin enclosures houses two Lycoming O-360-A1G6D air-cooled flat-four engines, 180 hp(130 kW) each, and through out the full production run 1978-1983 there was no updated or engine revisions, except for one in house turbo development aircraft. All minor detailing is also covered, note the lovely (working) trim and rudder assembly of that high T-Tail structure, and the really nice cabin vents rear fuselage and quality entrance grab handles, so there is not a lot to get picky about here as it is all really well done. All the undercarriage came directly from the Musketeer spare parts bins, so it is exactly the same trailing link layout and structure, all is expertly done in detail and animation, it is a complex gear system but fully realised here. There was a missing texture (and hole) in the left wheel-well, but that has been fixed in the update. Interior After the eccentric Bright Reds, Blues and Salmon colours of past JustFlight GA's this is a very different and sombre cabin of just different shades of greys, bland? well no as the detail in here is very good with the well done fabric creases and stitching, but you don't get the "Bam" in your face factor of the JF other aircraft. In cabin detail it is again all first rate I do however like the factor that the pilot's seat is more forward than the passenger's front seat, that works for me. Overhead the roof trim is a grey molded one piece, with just the speaker and cabin lighting forward... both shades hide two air vents which is nicely done, but the wires don't match to the window whiskey compass (noted again to be fixed). An emergency manual extension (gravity release) gear lever is set in a floor panel that is usable and active, nice touch is the lever in the door pocket. Pitch trim is situated between the seats and is well done, but requires help in key settings in a simulation environment (electric trim is available on the yokes), fuel levers are really nice as is the engine vents that can be opened, closed or set half way.... fuel crossfeed is active and the (working) Carb heat is here as well. Instrument Panel Again like with the other in your face JustFlight GA's the instrument panel doesn't have that 'wham bam, thank you mam" factor... even slightly flat, but look closely and the detail is very well done. Yokes are up close are quite authentic and gloriously faded from their 70's heyday, you can hide them and use the switch electric trim... ... dials are also rusted, dusty and worn out, with plasters even stuck to the panel from past use. Instrument gauges have faded graphics and the lighting studs are also well worn and even rusted from use. Instrument reflections are excellent in the pursuit of realism and overall it reflects a very earlier build of a Duchess than a last off the line aircraft. Panel layout is three layers of dials to create a deep feel of instruments... The Standard Six (SS) flying instruments are front and centre... Airspeed Indicator, Artificial Horizon and the Attitude Indicator are on the top row and the Turn Coordinator, Heading Dial/Course and Vertical Speed Indicators set out directly below. Left of the SS is a clock, backup Attitude Indicator and lower EGT (Exhaust gas temperature) needles. Right of the SS is a twin-needle Manifold pressure and below a twin needle RPM gauges, lower panel centre are two Bendix/King dials ADF (yellow) VOR2 (green) pointers driven by KR 87 ADF/VOR2 and the other is a VOR 2 / ILS indicator driven by KX 165 (NAV 2). Both heading and OBS rear dials/cards are adjustable. Lower panel is a Instrument air (vacuum) gauge and electrical starting and lighting switchgear with the neat gear knob. Top panel left is the label NAV 2 over the clock, very weird? Twin (engine sets) of six rows of gauges are centre panel, with from top: Fuel L&R quantity gauges, Fuel pressure gauges, Oil pressure gauges, Oil temperature gauges, Cylinder temperature gauges and Alternator load meters with Alternator-out under/over voltage warning lights inset (are beautifully done). Top of the gauges sits a DME indicator which displays range, ground speed and time to station for NAV 1 or NAV 2 frequencies. There are no instruments for the right seat pilot/passenger with the equipment stack dominating the area. Avionics stack is the usual Bendix/King KMA 28 TSO radio top which is above the GNS430 below (the Reality XP's GTN 750 unit can also be fitted and windows only, but this is an addon extra and costs you another $49.95) There is a really nice Bendix/King KT 76A transponder unit with a Bendix/King KX 155 COM/NAV 2 radio and Bendix/King KR87 ADF radio receiver bottom. Top far right is the Century IV autopilot which is (speaking to the passenger) "can you press the second button the top row, thanks very much" as far away from the pilot as reachable possible (there is thankfully a pop-up panel), and below is a WX-8 Stormscope. An outside air temperature (digital) matches the manual pressure left window type, and a Hobbs hour meter is far right. The circuit breaker panel is active and can be used and is noted in the twin-bus layout of BUS 1 and BUS 2, it is very good and highly authentic in use. Flap lever and display are below the avionics with 0º - 10º - 20º - DN settings, but the flaps are not section driven but are continuous in operation and so the degree markers are for display only. Twin Throttle levers, Propeller control levers (feathering on both 2-bladed Hartzell 7666A constant speed propellers does work) and Mixture levers are all excellent and well worn and feel nicely authentic to use. Menus The Duchess comes with the usual JustFlight pop-out side left menu, scroll above the arrow to make it less visible. Menus provided are pretty the same standard menu layout of all JustFlight menu options in three rows... There are eighteen menu tiles to use including: Top row : Open/Close pilot's door - Open/Close passenger door - Open/Close rear left baggage door - Toggle window reflections - Toggle Interior glass dynamic reflections - Toggle dome light if the engine is running, or flashlight when starting cold and dark. Middle Row : Toggle autopilot pop-up window - Toggle altimeter between inHg and mb - Toggle GNS 430 GPS pop-up window (or the GTN750 payware add-on by RealityXP) - Toggle fuel refill menu window - Open weight and balance window - Toggle sound volumes window  Bottom row : Select ‘ready for takeoff’ or ‘cold and dark’ state - Toggle checklist pop-up window - Toggle flight computer pop-up window - Toggle logbook pop-up window - Toggle ground handling pop-up window - Toggle chocks, aircraft puller and tie-downs. Static elements are "all for one and one for all", with not much custom choices or no engine covers, tags or pitot covers? Excellent animated pilot however does go home. 2d popup panels include: GNS 430, nice sound volume panel, Century IV autopilot panel... The flight computer panel provides a wealth of information that is very handy in flight with highlights including (time) endurance, range (available) and used fuel flow.... fuel burn can be reset. The Refill Menu allows you to view the fuel and oil status as well as the status of spark plug fouling, and you can recharge the battery if it goes flat, of which it does with regularity. The weight and balance window is very good, with adjustable weights for all four passengers, and baggage, fuel can be set here also as can the change from kg - lbs. A full list of weights, CG and a large graph of your settings are all very helpful into balancing the aircraft. Flying the Duchess 76 You have to prime the engines via a button in the middle of the starter switch before turning the starter switch, but it is a bit of a trick on how long to hold the primer button and not flood the engine, not a lot I believe... engine starts are excellent, but I found several times the No.2 right engine has a tendency to foul it's plugs more than the left one, if it does it is tricky to even hell to restart it again. The Hartzell constant speed propellers are counter-rotating, turning counter clockwise engine left and clockwise engine right, this is to balance the aircraft's thrust and it is very helpful on takeoff. Engine sounds are simply first rate, as they should be in this class... but more so in that they feel authentic and change through a huge range to even a deep gutter throb when close to idle but still under load, I like them very much. A fine bit of throttle while waiting with the engines running stops any stall, and the effects are shown on the EGT needles, you will note that will you use this gauge a lot in this aircraft. Both Attitude Indicators (main and backup) have to have their pressures manually set (yellow arrows above)... you can also set your Artificial Horizon marker to match the intended climb pitch (arrowed below)... Trim central to the takeoff T.O marker and you are ready to go... The Duchess will taxi at a nice speed, there is no fighting the thrust here in braking here and braking there.... so you enjoy the short ride to the runway. With no set flap degrees you can set the angle you want, here I go for 5º to create lift, but as little drag as possible.... the display (arrowed) can be hard to see at this distance, harder to set on landing. Power up and the counter-rotating blades keep you aligned on the runway, but I did find I had to still adjust each throttle (slightly) to absorb the different engine performance... but that felt highly realistic. Around 95 knts and your climbing out. Climb out is around 1000 fpm (Feet Per Minute) and that is a nice number here, officially the rate of climb limit is 1,248 ft/min (6.34 m/s), so you are using the climb to maximum effect, it doesn't feel like there is any strain on the engines or the aircraft. Using the set adjustable artificial horzion marker and your rate of turn instrument, you can get the perfect turn, while still getting the perfect climb... this is a very good tool for beginner learner flyers and to use their instruments to fly the aircraft well and with clean professionalism.... Once in KDAB (Daytona) left circuit departure pattern I leveled off at 2000ft and trimmed the aircraft. The Duchess will trim up very nicely thank you... I as noted still use the manual (keyboard) trim, but you can use the electric trim on the yoke, but to remember to switch on the electric trim version (required also for the autopilot) on the lower panel switch (lower arrow). Once trimmed the Model 76 will sit here all day with just minor adjustments, wind strength allowable. The Century lV autopilot (AP) won't work unless again you switch on the power in the same row of switches as the electric trim.... ALT will hold your current altitude, but to climb or descend you then press ATT and then set your pitch, you click and don't scroll the buttons to change the aircraft's pitch. The ATT setting can also be used just to hold your current pitch if you like that angle or rate of climb, so the AP is again very easy to use... you can really only use the pop-up 2d panel as the real layout is just too distracting a reach in it's too far right panel position. View out is excellent for a twin prop, yes the forward positioned engines do still obscure the view a little, but you seem to sit higher than in other twins so the aspect is still better than most. You go hunting for the EGT needles, the yellow needles represent the best lean to rich mixture for the best fuel flow and hence performance, you adjust both the throttles and the mixture levers to achieve your golden lean setting.... I found on the outbound flight it worked perfectly, but on the inbound flight (here) I couldn't get as close?.... unless I leaned the engines all the way to shutoff and too far. This setting is about right to the setting before, and I found the yellow needles moved back to their central positions the more the fuel burnt off. Cruise speed is 158 kn (182 mph; 293 km/h) at the best at 10,000 ft (3,000 m), Range is VOR busting 780 nmi (898 mi; 1,445 km) and the Service Ceiling is a generous 19,650 ft (5,990 m). Approach to KRSW (Southwest Florida) RWY 24 (rare as it is usually 06) means no airport circuit and a straight in approach from LBV (La Belle VOR). Height is reduced at 1300fpm to do the shorter distance landing. You can easily approach the airport at around 110 knts clean and not lose height or power, but on the final approach you drop it down to 95 knts with the first flap adjustment to 10º... you know instantly the flap drag kicks in with the low thrumming of the engines coming into play, I love the sounds they are brilliant in this phase of the flight, you adjust and the engine drag power sound adjusts to reflect the change.... brilliant. One thing has been renforced during this review of the Model 76 and that this is a nice easy aircraft for learners and it comes with a nice stable platform to practise on, yes the 76 is an easy aircraft to fly, but the pro's will get it as well... and love it as much as there is also a great built in depth in there. 20º flap (more thrumming!) 90 knts.... Full flap (dirty) and 80 knts is nice! Then gradually reduce the power to 75 knts to 73 knts then a slight pitch and you are touching down.... easy. The timing of the final pitch has to be perfect, to early and the 76 will slightly float, if right then a nice easy fall onto the runway and if the trim is right the aircraft is seemless in it's landing operational phase. Stall is 60 knts and a "no go there!" Run off the speed and then head for the parc ferme. Miss those "just chocks" and the non-choice all for one static elements, so I don't use any? Lighting Both internal and external lighting is quite basic... panel has only two adjustments in instruments (noted as "Post Lights") and Instrument flood. But you can find that nice night time flying sweetspot. However the worn graphics engine readouts look like early washed out X-Plane 2d panel, and have no depth, but otherwise the panel looks good. Overhead light (and red torch) selection does not work? (yes it will be fixed) but that also gives you a very unusable dark cabin? External lighting is basic, but very good.... navigation and strobe lights are well done, but there is no beacon. Taxilights and landing lights are situated at each wing outer leading edge, but the taxilights are a bit weak on the ground, in reality you need to use the stronger landing lights to find your way around the taxiways. Liveries Eleven Duchess liveries and a blank white are mostly focused on Europe with a few that are UK registered, The US of A gets one, so does Canada and one for Australia. All are 4K extreme top quality. ___________________________________ Summary The Duchess Model 76 is the first twin-engined General Aviation aircraft by JustFlight/Thranda for X-Plane after a procession of single-engined Arrows and Archers. The price range in the early forties is the same and so is mostly the features and details. First immersion with the aircraft found the Model 76 a bit bland, a grey interior and a flat plate panel tended to make the Duchess feel a little average. But the high quality detail is in there as is the nice wear and tear environment, the panel's authenticity also makes it in the realism stakes, after a while you just get used to it and in time don't find anything really wanting, even later very inviting. Features are the usual JustFlight panel of pop-ups and mixed X-Plane default panels: Autopilot, Door actions, Sounds, Quick Start, Flight Computer Panel, Refill Panel and that excellent Weights and Balance panel... Avionics list is good with Bendix/King KMA 28 TSO, KT 76A transponder, KX 155 COM/NAV 2 radio and Bendix/King KR87 ADF and an excellent Century IV autopilot. Static elements on an aircraft of this price however is a bit wanting? (compare to the AirfoilLab's B350!) and with not only no separate chocks, no engine inlet covers, tags and even something clever like window covers would be nice but really expected at this price range... more creativity is required here. A few missed items in the launch list will be corrected quickly in an update, but no working interior light on release is also a bit rich? But the core of the Duchess 76 is really, really good... on the surface it is a simple aircraft, simple to use and simply to fly, but that is also it's strength in that it is an excellent learner/trainee pilot aircraft, you can see why the flight schools fight to get these Duchess aircraft on to their flightlines to train up pilot's to their multi-engine rating. And this X-Plane version is that same environment in that any new pilot wanting to find their wings in a multi-engine rating environment, then I don't think there is a better aircraft out there to do that this well, and a note to those helpful nice counter-rotating props. The pros won't be disappointed either as the Duchess has all the tools and functionality is in here as well, so the Duchess comes out in the end as a really great all rounder.... Highly Recommended. _______________________________ The Beechcraft Duchess Model 76 by JustFlight and Thranda is NOW available! from the X-Plane.Org Store here : Duchess Model 76 Priced at US$41.99 Special Features MODEL Accurately modeled Duchess Model 76, built using real-world aircraft plans and comprehensive photography of the real aircraft Numerous animations including multi-animation passenger doors that, when open, respond to G-forces and air resistance, baggage door, cockpit window and sun visors Ground equipment including chocks and tie-downs HD textures are used to produce the highest possible texture clarity PBR (Physically Based Rendering) materials with real-time environment reflections for superb quality and realism Detailed normal mapping for down-to-the-rivet precision of aircraft features COCKPIT A truly 3D virtual cockpit right down to accurately modelled seat belts and screw heads - every instrument is constructed fully in 3D with smooth animations Cockpit textures feature wear and tear based on reference photos taken in the real aircraft to produce an authentic environment Interactive engine start checklist that responds to user inputs and sim variables Interactive checklists for every stage of flight Aircraft configuration system that will allow you to choose between 'cold & dark' or 'ready for take-off' (if aircraft is stationary on the ground) Fully functional and comprehensive IFR capable avionics fit including: KMA 28 audio selector Fully featured X-Plane-native GNS430 (supports procedures out of the box, and supports Navigraph and Aerosoft custom NAV databases) KX 155 COM/NAV 2 radio KR 87 ADF receiver KT 76A transponder unit WX-8 Stormscope Century IV autopilot HSI and ADF gauges Support for Reality GTN750 (sold separately, Windows only) Interactive logbook panel for logging your flight details (X-Plane native) Flight computer panel with useful information such as fuel burn, endurance, speed and wind speed/direction GoodWay compatible Ability to change barometric units from inHg to MB in altimeter adjustment Option to activate flashlight from within pop-up window, to aid in those pitch-black cold and dark starts at night Pop-up autopilot window Option to remove window and instrument reflection effects Animated toe brakes Radio knob animations routed through plugin logic, for optimum movement fidelity and sound synchronisation AIRCRAFT SYSTEMS Custom-coded fuel system with cross-feed Custom-coded electrical system with functional circuit breakers and avionics power circuit. Circuit breaker logic is linked to X-Plane's internal failure logic, so if the plane is set to fail a certain electrical component after a certain number of hours, the circuit breaker for that element will pop out. Realistic landing gear with emergency extension, slow/fast tire rotation animation (blurry when rotating fast), precise shock absorber animation and wheel chocks and tie-downs Functioning carburetor, cowl flap and primer controls Requirements X-Plane 11 Windows, Mac or Linux 4Gb VRAM Minimum - 8Gb+ VRAM Recommended Download size: 1.3Gb Current and Review version : 1.1 (April 4th 2019) Installation and documents: Download for the Beechcraft Duchess Model 76 is 1.3 Gb and the unzipped file deposited in the aircraft "General Aviation" X-Plane folder at 1.70 GB.  Documentation: There are two manuals provided. The ODM is full of performance graphs and data and the X-Plane Manual is a full detailed manual of the aircraft's systems and layouts, a good if basic tutorial is also included Duchess Model 76 X-Plane manual.pdf Duchess Model 76 ODM X-Plane manual.pdf ChangeLog.rtf A paintkit is also included Duchess Paint Kit ______________________________________________________________________  Aircraft review by Stephen Dutton 26th April 2019 Copyright©2019 : X-Plane Reviews (Disclaimer. All images and text in this preview are the work and property of X-PlaneReviews, no sharing or copy of the content is allowed without consent from the author as per copyright conditions)  Review System Specifications: Computer System: Windows - Intel Core i7 6700K CPU 4.00GHz / 64bit - 16 Gb single 1067 Mhz DDR4 2133 - ASUS GeForce GTX 1080 8Gb - Samsung Evo 512gb SSD Software: - Windows 10 - X-Plane 11.33 (v11.30 is required for this aircraft) Addons: Saitek x56 Rhino Pro system Joystick and Throttle : Sound - Bose Soundlink Mini Plugins: Environment Engine by xEnviro US$69.90 : WorldTraffic 3.0 Plugin - US$29.95 Scenery or Aircraft - KRSW - Southwest Florida International Airport by Aerosoft (X-Plane.OrgStore) - US$24.95 - KDAB - Daytona Beach by Aerosoft / Stairport Sceneries (X-Plane.OrgStore) - US$28.99 
  4. Aircraft Review : PA28R Piper Arrow III XP12 by Just Flight-Thranda JustFlight arrived with the original Piper PA28R Arrow lll for X-Plane 11 nearly seven years ago. back then the Piper added in another quality General Aviation developer into the mix, with vFlyteAir, Carenado and Airfoillabs. But you could never want for more in the GA category aircraft. Jump forward those six plus years and the X-Plane world has changed from those days of when General Aviation totally dominated X-Plane for aircraft sales and choice. With Carenado now gone, it is only vFlyeAir that is carrying the GA banner, Airfoillabs do of course still present their C172, but other wise it is down Aerosphere to fill in the gaps, but they are not set in that higher category of ultra quality and features. JustFlight in co-operation with Thranda Design however have delivered some very nice General Aviation aircraft for the X-Plane Simulator in those six years, but although there was some conversions to the release of X-Plane 12, they were not what you would call to the XP12 standards, just a revamp to align the aircraft with the new Simulator version. But here now is the release of the X-Plane 12 JustFlight Arrow lll conversion, this is the full comprehensive revision and complete realignment with X-Plane 12. The Arrow is a part of the PA28 Cherokee family, but in this latest more modern reincarnation as it is a four-seater that includes a five inch fuselage extension, span increase with a semi-tapered wing, a larger horizontal tail, gross weight increase and other minor changes over the earlier Cherokee. The Series III here also introduced the retractable landing gear arrangement. It also had enhanced performance and better handling characteristics compared to earlier Arrow models. Thranda use a system to enhance the PBR (Physically Based Rendering) materials with their real-time environment reflections for superb quality and realism, 8K textures are now also used, twice the density, but highlights the detail and quality to a far better compounding degree. It shows off easily the highlights of the superb quality of the surfaces and the exquisite detailing on the PA28. But the process also creates unwanted shadows, and dull areas, if you look at the model in certain lighting conditions. It is a Thranda phenomenon, it can also create darker areas were their isn't any, so in the X-Plane 12 lighting, it can be shaded in cases were there shouldn't be any effects. But the detailing is excellent, best in class. Glass is simply exceptional, perfect in thickness, tint and reflections. The three point landing gear has had a "Hard, Hard" life, with in being worn, oxidised and painted rusted springs... this is an aircraft that has had a lot of flights in hard conditions over decades of use. Gear detail is also really well conceived and done here by JustFlight, as the landing gear system comes with an intricate retraction animation, slow/fast tyre rotation animation (blurry when rotating fast), and the precise shock absorber animation with multiple linkages are animated accurately. The "R" in the name designation means "Retractable". The performance of the Arrow lll is not what you call spell binding, not average either... Maximum Speed is 148 knots (170 mph, 274 km/h), with a Cruise Speed of around 137 knots (158 mph, 254 km/h). The range is 880 nautical miles (1,630 km) with a service ceiling of 16,200 ft (4,938 m). Rate of Climb is 1,000 ft/min (5.08 m/s), but you would usually only do around 800 ft/min. The Arrow here is powered by a Lycoming IO-360-C1C6 engine of 200 hp (149 kW), all up gross weight is 2,750 lb (1,247 kg). The realism extends to the flight dynamics, which are based on real-world performance and handling data, and input from Arrow pilots. Lets us be frank, the PA28 Cherokee series is the saloon car of the aviation world. It is a steady handling, doing the chores sort of aircraft. It is not a sporty machine (unless you go for the Turbo), or dynamic in it's flight envelope. But it is very solid, reliable and even handed machine. It's not boring to fly, as you have those X-Plane 12 dynamics, which are now very well fine tuned. So if a word summed up this aircraft, it is "Classic". The Arrow trims quite nicely, but requires re-trimming with any power changes, which you can use also to climb or descend as well. Bank and you will need a bit of back pressure to keep the nose up, also flying straight and narrow requires a fair bit of right yoke to keep it in line, to counter the asymmetric thrust (there is a rudder trim, but hard to access)... so you work in here to keep the Piper on an even keel, you trim and then keep on trimming to get it perfect. That is not to say I don't like it, as the PA28 gives you a lot of feedback... the best sort of Simulation. In a landing configuration you get a lot of drag, not only from flaps at 10º, but set 25º the Intermediate setting (used during approach and landing), and the 40º which is the Full flap setting (used for landing). The gear creates havoc with your nice clean approach, so be aware of when you drop it down. Otherwise when fully configured for landing it is all about the throttle control, in adjusting your height, a bad cross wind (12 knts) didn't help either, but otherwise it was a nice clean if easy landing. Note, the PA34 is a bit shimmy on takeoff, so fine rudder control is needed so it doesn't become a problem, overall you need careful control and slow up throttle movement to get the best clean track. I love it when things are done properly... I love the door on the Arrow, yes I love a door, you may think that is just plain weird or whatever, but I do... It takes more actions to open or close it than what they use on the Apollo capsule. There are two catches to open, one set on the roof and a big catch set forward in the door, then you can use the outside latch to open it. Other doors (and windows) include a very large baggage hatch set right rear, and the opening paper window on the pilot's side. Note the nice metal window surrounding plates. Two other ground options include, Chocks on all three wheels, and wing tie-downs... but there are no flags or inlet covers. Notable also on the exterior is the opening oil hatch top, and the excellent detailed exhaust system. The Hartzell Scimitar 74 inch Three-Blade Propeller is a variable-pitch, but not demonstrated here. Cabin materials can be divisive here... they are first and foremost excellent, but bright red. You will either love this cabin or totally hate it, myself I adore it, even if it sorts of dates the interior. It feels like that brushed velvet, and red Faux Leather trim, there is even the chrome fittings as well... the beige curtains, or window shades are really well done. The rest of the cabin and roof is beige and cream, again very 70's. The roof has a massive air ducting module, that makes the cabin tight and even claustrophobic, but again quite authentic, if even fancy... The internal textures have had the same treatment as the exterior, better PBR effects and Ambient Occlusion, so it has that X-Plane 12 highlight sheen, that gives the aircraft a big "wow" factor. Yes it is the same cabin as the X-Plane 11 version, but it now feels so very different in it's better feel and look. Instrument Panel In the X-Plane 11 Arrow version you had two panel options, as I noted "loved and cared for" and "worn" or unloved and scruffy". Here JustFlight have reverted to just one design, the older 70's padded look. Panel design is absolutely first rate, beautiful detail and with all the sheer realism you can get in simulation today, a highlight is the lovely glareshield with it's realistic stitching... you can just feel and touch it, or is that a caress for the sheer ownership of it all. The aircraft's registration still also changes with the different liveries on the panel which is a nice touch. The yokes are still really outstanding, the left different to the right with the Piper logo. The left yoke is fitted with a digital chronometer. The mode button allows you to toggle between either the clock mode or the timer mode. On top of the yoke but very hard to see is a black electric trim button with down (forward) and up (rearwards) adjustments. You can have both yokes visible, or one each side, or hide both together... very flexible. The instrument panel layout is exactly the same as the earlier X-Plane 11 in features... Instrument panel is set out with the Standard Six instruments that are centred in line of sight of the flying pilot with the Airspeed Indicator, Artificial Horizon and the Attitude Indicator on the top row and the Turn Coordinator, Heading Dial and Vertical Speed Indicators set out directly below. Left of the six pack top is the Gyro Suction dial with the Bendix/King ADF indicator set below. On the right top is a Garmin OBS VOR indicator (VOR1) and the same OBS VOR indicator (VOR2) below. I prefer the pointer VOR needle than this version as it is better for circuits and runway lineup (that is if the VOR is placed close to the runway). All the main dials are older black/white in design and not with the coloured Artificial Horizon that you could also have in this aircraft. Mid-left panel gauges are standard Cherokee with Oil Press, Oil Temp and Alt Amp on the left side and Left Fuel tank, Cyl Head Temp and Right Fuel tank on the right of the yoke. Lower-left panel has a basic Piper "AutoControl IIIB" Autopilot, which we will cover in more in detail later, the start key and a Manifold Pressure (inHG) and Fuel Flow gauge (Gallons per hour). Another gauge here is a Tachometer/RPM dial with built in Hobb's meter. Avionics in the Arrow are very old, the only modern gadget is the centre stack mounted X-Plane default Garmin GNS530, and yes of course it pops out. There is also the provision to install Reality XP's GTN 750 unit, but this is an addon extra and it costs you another $49.95. Lower right panel is an Exhaust gas temperature (EGT) indicator and you can rotate the screw to control the position of the red (maximum value) needle and left of the EGT is a comprehensive set of active circuit breakers. There is a fan switch and heating controls as well. The only instrument on the right side is a standby Altimeter and spare hobbs meter. Custom-coded electrical system comes with functional circuit breakers. Circuit breaker logic is linked to X-Plane's internal failure logic, so if the plane is set to fail a certain electrical component after a certain number of hours, the circuit breaker for that element will pop out. The audio panel is a very early model Bendix/King KMA T20 TSO which is above the GNS530, below bottom is the Benedix/King 76A transponder. The right side stack has a Bendix/King KX 175B radio for VOR in COM2 and VOR2 (COM1 and VOR1 is set via the GNS530). Then below is a Bendix/King KN 62A DME (Distance Measuring Equipment) set, the Benedix/King KR 85 ADF radio is set out below the KN 62A. There are a set of rocker switches mid lower panel for (L to R) Power (Battery & Alternator), Fuel pump, Landing Light, Anti-Collision Lights in rotating and navigation and Pitot Heat. Either end of the switch panel are two scroll wheels for Avionic brightness and Instrument brightness. The centre mini-pedestal has the familiar Throttle, Propeller and Mixture levers, but also a mixture lever lock on the side that restricts the mixture lever from moving below a 40% setting. The levers are a bit odd in that you have to move your movement upwards to move the levers down and vise-versa and in busy traffic conditions it can be annoying in the actions being the wrong way around. Also you have to use your switch gear before moving the Propeller and Mixture levers to the full forward position as they cover the avionics lighting scroll wheel, main power switches and fuel pump switch. I love the chunky T throttle handle. Below the mini-pedestal is your aileron trim wheel and park brake lever. Between the front seats is your beautiful elevator trim and flap handle, there is an emergency gravity assist gear drop lever here as well that works. Left lower wall panel is the Fuel Selector, with a Fire Extinguisher set beneath your thighs. Gotta love those filthy, worn, dirt strewn red carpets, detailing 101... metal foot plates are gorgeous. Authentic "Piper" branded rudder pedals are worth your gaze as well. Lighting The Arrow III's lighting here is quite basic, but it is very good in what it does. The panel is really very sepia and black/white in its design, but it does make for a very readable panel in the dark or in low lighting conditions. The instruments are backlit, but show the aircraft's age. Cockpit lighting is done via an overhead red lamp, it is quite bright, but the rear cabin is dark. The external lighting is the same in just being the basic lighting, with a strobe on the tail and navigation lights (or noted here as "anti-collision") There is a very strong nose landing light and the bright flashes of strobe lighting that don't strobe together which is interesting, in that you get the left wing and then the right wing in multiple flashes on each side. All external lights are very different in colour and in the more modern LED halogen bright than X-Plane dull, you get the brilliant star feel (new X-Plane 12 halo) effect as well. Sounds At this level you expect really good sounds. And the JustFlight Arrow does really deliver here with custom sounds for; switches, doors, gear warnings and far more, it features accurate location placement of sounds in the stereo spectrum, 3D audio effects, atmospheric effects, adaptive Doppler, and the exterior sounds spill in when window or door(s) are opened, there are the different sound characteristics depending on your viewing angle and distance from the sound source. It is all FMOD 2 in quality as well. Menu The JustFlight Menu system is all changed for X-Plane 12 as noted in the Duchess Model 76, that was released early March. Gone is the generally average looking dated tab menu. Here it is replaced by an iPad style tablet, stuck to the left window, or bring the tablet up in the screen by clicking the arrow tab top left (you can also popup the main tablet menu by pressing the left side of the window tablet)... But you do have other options, as the tablet can also be placed on either yoke and right side windscreen by clicking the bottom of the tablet... The pop-up tablet can also be scaled, or moved anywhere on your screen. The tablet is also adjustable (movable) via the hot-spot, top frame. But because of it's size and shape, the view-point is not ever really square or set head on, the yoke position is usually better, but now also situated far lower in your eyesight. The earlier X-Plane 11 version had eighteen tiles for selection, here it has been reduced down to twelve... Top row : Aircraft Options, Weight & Balance, Instr Options, Engine Config, and Static Liveries Middle Row : Configuration, Log Book, Checklist, Ground Handling and Dynamic Liveries Bottom row : Flight Computer and Avitab (Plugin required) Aircraft Options: Covers the two doors; CoPilot, Baggage Door and Pilot Window (Open /Close), Window and Instrument Reflections, Cockpit Lights, Swap Pilots, Altimeter (IN.HG/MB) and Ground Equipment (Left/Right Tie Downs, Nose, Right and Left Chocks). We have seen the opening doors and pilot window, also the Tie Downs and chocks. Dan Klaue and his wife turn up as your pilots, and basically they are same two fully animated pilots as in Thranda Aircraft, by this menu option, you can swap the seating position of the pilots. Weight & Balance: The weight and balance window is very good, if basic to look at (it is the original W&B window). It comes with adjustable weights for all four passengers, and baggage, fuel can be set here also as can the change from kg - lbs. There is the option to load the Aircraft "Half" or "Full" tanks. A full list of weights, CG and a large graph of your settings are all very helpful into balancing the aircraft. Press "Save Configuration" to save your preferred load setup, and "Load Configuration" to set up the aircraft. Lowering the Co-Pilot weight usually will make Him/Her disappear, but not in this aircraft.... there are there no passengers either if the weight added in the rear, or any bags if added to the baggage area, such is shrinkflation today. You can open most pages into a "Window" via the arrow logo right top. Instr Options (Instrument Options) includes two pop-ups for the GNS 430 and the Century IV (autopilot). The "AutoControl IIIB" has only two functions in holding the heading and roll L&R. You can adjust the heading (thankfully) via the Heading instrument knob, or switch off the heading on the AP and roll the aircraft to your new heading. There is a hidden function to hold your altitude (not on the real system) by pressing the "Piper" text above the coupler knob on the left part of the panel, It is hard to find and almost half-hidden but you do get a manipulator hand or finger to say it is actually there and but not when activated? It does work very well but the aircraft has to be perfectly trimmed before pressing it on... it deactivates with a kick as well when or if you adjust the trim wheel, so be ready for that. Another point is that because if you don't use the altitude hold function, you can adjust the trim without disconnecting the AP, so it is quite easy to hold an altitude by setting the trim finely. The old "Refill Menu" has been changed here to the Engine Options; this allows you to view the fuel and oil status as well as the status of spark plug fouling and Vapour Lock, and you can also recharge the battery if it goes flat, of which it does with regularity. There is also an "Imbalance" indicator for the Fuel Weight, you can do a "Refill" here of the fuel here as well. Static Liveries; You can rotate through all the six liveries with the Arrow lll via the "Static Liveries" menu. An option here (new) is that you can adjust the Dirt (dirtiness) between 0-100%. Very Thranda. Configuration: Here you can change the aircraft configuration, and there are three options; Engines Running (power up to flying mode), DynaFeel and the tablet (screen) Brightness. DynaFeel" is a system that dynamically adjusts the rate at which the controls deflect. It is based on airspeed and how much the control is deflected. This means the controls will feel light and responsive at low speeds and with small deflections, but will get progressively heavier as the airspeed increases. If you fly Thranda Aircraft, then you will be familiar with the system. Logbook: This icon brings up the X-Plane standard Logbook. Checklist: There is a 31 page checklist that you can tick off... very good, but even though there is a "End of the Checklist" tickable box, it doesn't oddly reset all the boxes to a reset... that is a return through of 31 pages, and an average of twelve boxes per page to untick, so you do the maths... Ground Handling: All JustFlight menus have odd useless tools, here is one... the X-Plane "Ground Handling" tool, for "Pushback" and "Request Ground Service"? It's a GA, not a Boeing 737. Dynamic Liveries: Here is another Thranda feature now available on the JustFlight Series. Thranda introduced a clever feature of a way to design your own livery called DYNAMIC LIVERIES. You have a menu to select on the right that can colour a certain part of the aircraft, like the Roof, Wing, Tail or Wing tips. Select which one you want and then adjust the three RGB colours for that certain area, and the selected colour (here seagrass) is shown in the square. You can also separately change the aircraft's registration number, the Piper logo can be added as well. Another option is that changes can also be made to the Metal or Rough surfaces, this can be applied to any of the liveries. When done you can "SAVE" or ADD the livery to the index and then "APPLY" it to the aircraft. The conversion takes a few minutes with some weird screen changes, but the results are excellent and now the Piper Arrow is in your own nice livery design... the results are found under the "DynamicLiveryResources" in the liveries. Flight Computer: The flight computer panel provides a wealth of information that is very handy in flight, with highlights including OAT (Outside Air Temperature), GS (Ground Speed), Endurance (time), Range (available), NMPG (Nautical Miles Per Gallon)/ SMPG (Standard Miles Per Gallon), Altitude (Density and Pressure), TAS (True Airspeed) and FF and used fuel flow, Winds (Headwind and Crosswind).... fuel burn can be reset. Units can also be changed from Metric to Imperial.. AviTab: The AviTab tool can also be used, and with Navigraph charts if you have an account. There is no tablet rotation from landscape to portrait, and to get back to the main menu, you press the right centre section of the frame. I found that for using charts, it is best setting them up in the side window, before opening up the main Pop-up, otherwise it just goes to a window setting. _____________ Liveries There are six (Painted Liveries) liveries plus the two of the system liveries are noted as "DynamicLiveryResources" and "ZZTEMPLATELIVERY", these are the currently selected "DYNAMIC LIVERIES". Summary The Arrow is a part of the PA28 Cherokee family, but in this latest more modern reincarnation it is a four-seater that includes a five inch fuselage extension, span increase with a semi-tapered wing, a larger horizontal tail, gross weight increase and other minor changes over the earlier Cherokee. The Series III here also introduced the retractable landing gear arrangement. It also had enhanced performance and better handling characteristics compared to earlier Arrow models. Here the Arrow lll has been extensively upgraded to X-Plane 12 by JustFlight/Thranda, note this is an upgrade, and earlier purchasers of the Arrow lll XP11 can get 10% discount off the new Piper X-Plane 12 aircraft. The X-Plane 11 version was an excellent aircraft. But this rejuvenated version for X-Plane 12 is far, far better again, Highlights of the changes are the new 8K textures, and the far better PBR effects, and this creates a far more quality exterior and interior. First glances say, old and tired, but on a closer inspection, it will cry out with "Classic" authenticity and it all comes to a very high quality. The Arrow comes alive in X-Plane 12, highly realistic and it gives you a very high quality PA28 for X-Plane 12. There is also a new menu system, as replacing an old tab system, and it is a quality iPad/tablet, that can be positioned in four different places. Besides a few of the original tabs and pages, there are also three new added features directly from the Thranda Design stable, with now the "PAINTED LIVERIES" function, the build your own livery feature of "DYNAMIC LIVERIES" and the "Dynafeel" tool. Performance, physics and handling have also been highly improved to X-Plane 12 standards, based on real-world performance and handling data, Sounds are totally upgraded, with a full stereo spectrum, 3D audio effects, atmospheric effects and adaptive Doppler, and the feature list is very long. But the odd quirks oddly remain? The Static Objects in being separated here are better, but there are very few of them. Lighting is basic, and you still get the very odd tab and useless elements like the X-Plane Ground Handling? and Logbook?... fillers only. The checklist is another oddity, with 31 pages of checks, that you can't uncheck in one operation. Priced in that high price range of US$40+, you expect a lot for your money. Thankfully you get that aspect here, but now even more so in the X-Plane 12 environment. It is an aircraft to spend time with to understand it's depth, the more you use it, then the more you find what you really like about it... depth in design is the words here. JustFlight/Thranda create excellent, lovely aircraft, that even the most novice pilot can fly and enjoy... overwhelmingly the main thing about the Arrow lll is that it brings back that deepness required, that seems to be lost in the more modern environment. So it's like going back ten years but still having all the mod-cons, the effects and dynamics that X-Plane 12 provides as well are part of the deal, the JustFlight Duchess had this same feeling, as does the Arrow lll here, it is a brilliant combination of the very best of both worlds.... Highly Recommended. ___________________ Yes! the PA28R Piper Arrow III XP12 by JustFlight Thranda is now available from the X-Plane.Org Store here : PA28R Piper Arrow III XP12 On sale: US$42.99 Requirements: X-Plane 12 (not for xp11) Windows, Mac or Linux 8 GB+ VRAM Recommended Current version: 1.0 (July 1st 2024) * Customers who own the PA-28R ARROW III XP11 by JustFlight can get 10% off this new XP12 model. Coupon code can be found in the original PA-28R ARROW III XP11 Invoice Installed in your X-Plane Aircraft folder 2.47 Gb. Installation 2.65 GB, Authorization on startup is required. AviTab Plugin is required for this aircraft Documents ChangeLog.rtf EULAstandardcommercialandacademic2024.pdf GA Fleet X-Plane 12 EFB.pdf PA-28R Arrow III ODM X-Plane 12 manual.pdf PA-28R Arrow III X-Plane 12 manual.pdf Design by JustFlight/Thranda Design Support forum: JustFlight Arrow lll _____________________ Review System Specifications:  Windows - 12th Gen IS1700 Core i7 12700K 12 Core 3.60 GHz CPU - 64bit -32 Gb single 1067 Mhz DDR4 2133 - PNY GeForce RTX 3080 10GB XLR8 - Samsung 970 EVO+ 2TB SSD Software: - Windows 11 Pro - X-Plane 12.1.0rc2 (This is a Release Candidate review). Plugins: Traffic Global - JustFlight-Traffic (X-Plane.OrgStore) US$52.99 : Global SFD plugin US$30.00 Scenery or Aircraft - EGHI Southampton Airport by PilotPlus+ (X-Plane.OrgStore) - US$19.95 ___________________________ Review by Stephen Dutton 4th July 2024 Copyright©2024: X-Plane Reviews (Disclaimer. All images and text in this review are the work and property of X-PlaneReviews, no sharing or copy of the content is allowed without consent from the author as per copyright conditions) All Rights Reserved
  5. NEWS! - REP Package released : Reality Expansion Pack for Pilatus PC-6 Turbo Porter XP12 by Simcoders Add in more "Oomph" to your already highly developed PC-6 Porter from Thranda Design. We have just reviewed this excellent DGS Series aircraft as it is released in it's X-Plane 12 configuration; Aircraft Review - Pilatus PC-6 Turbo Porter - DGS Series XP12 by Thranda Design REP packages are for me, a way to bring default and sparsely developed aircraft a host of better performance and provide extra features, that brings the aircraft up to a higher and more immersive standard. But here we have (with Thranda's blessing) these excellent tools to amplify the PC-6 to a higher more logical standard. This PC-6 REP Package comes with an extremely long list of performance enhancements, and crash and damage effects. The notable feature list from Simcoders in this REP is quite impressive! Ultra Realistic Flight & Ground Dynamics Realistic stall speeds & behavior Correct climb speeds Realistic cruise speeds Realistic taxi behavior Complex Damages System Triggered by the pilot actions Based on real world data Target every system in the aircraft Meant to teach you how to correctly manage an airplane Economic System Can be enabled/disabled on the fly Earn virtual money when you fly Use virtual money to buy fuel and do maintenance/repairs Realistic fuel prices around the World Fully compatible with FSEconomy and X-CPL-Pilot More info at https://www.simcoders.com/reality-expansion-pack/economy Custom Towing System Driven by the joystick/steering wheel Realistic point of view (POV) Interacts with tie-down and brakes Interactive Walkaround Cockpit checks Lights checks Engine soft cover removal Aileron, rudder, elevator and flaps check Tire check and choks removal Tie-down removal Pitot tube check Engine cowl check Realistic PT-6 Engine Logic Uses an enhanced version of the new PT-6 model introduced with X-Plane Realistic lag Custom ITT evolution Custom throttle dynamics Custom propeller governor recreating all supported prop modes,electric, auto-feather included Custom hot-start behavior Correct fuel consumption Secondary fuel-flow Realistic startup procedure Automatic startup procedure available to help newbies Realistic engine temperatures The engine parts are damaged if not managed correctly Realistic Landing Gear The landing gear is damaged by hard landings The brakes and tires are damaged if not managed correctly The steering wheel acts like the real one. Spring loaded under 25° of turn, then free castoring. Electrical & Avionics System Native Virtual Reality Support Complete support of new X-Plane SDK 3.0 Menu visible in VR Windows visible in VR Learn with the in-flight tips A non invasive tip with a suggestion about the conduct of the flight is shown when you are not flying the airplane properly A non invasive tip with a suggestion on how to recover the problem is shown when you damage the airplane Custom simulation of Hypoxia Tunnel vision Hard breathing Popup Kneeboard Normal operations checklist Emergency operations checklist Reference tables (speed, fuel consumption etc.) May be shown/hidden with mouse gestures Simulation state saving Every single switch and lever position restores its position when you reload the aircraft The battery may discharge if you leave it on and then close X-Plane The engine restores its cylinders and oil temperature basing on the elapsed time between restarts Maintenance Hangar Engine maintenance tab Electrical systems maintenance tab Landing gear, brakes & tires tab HeadShake Integration REP drives HeadShake to simulate the correct vibrations of the Wasp Junior engine Developed with love Coded by real pilots Very easy on FPS Written in C++ with no compromise. Most of the changes and access to the unique features are done via the "Clipboard menu... This is an add-on to the Pilatus PC-6 Turbo Porter - DGS Series XP12. It will not work on the Thranda PC-6 XP11 version or any other aircraft. It is ONLY X-Plane 12 (not for XP11) Developed by Simcoders Support forums for the REP PC-6 Turbo Porter _________________________  The Reality Expansion Pack for the Pilatus PC-6 Turbo Porter XP12 by SimCoders is NOW available! from the X-Plane.Org Store here : REP Pilatus PC-6 Turbo Porter XP12 Priced at US$19.99 Requirements: This is an add-on to the PC-6 Turbo Porter XP12 by Thranda. It will not work on any other aircraft. X-Plane 12 (not for XP11) Current version: XP 12 - 4.8.5 (June 14th 2024) ________________ NEWS! by Stephen Dutton 15th June 2024 Copyright©2024: X-Plane Reviews Disclaimer. All images and text in this review are the work and property of X-PlaneReviews, no sharing or copy of the content is allowed without consent from the author as per copyright conditions) All Right Reserved.
  6. Aircraft Review - Pilatus PC-6 Turbo Porter - DGS Series XP12 by Thranda Design In June 2020. Thranda Design released the X-Plane 11 version of the utility Swiss aircraft, the Pilatus PC-6 Turbo Porter. The aircraft was a more modern replacement for the long-established DHC-2 Beaver in the highly competitive utility role. The first PC-6 version came with a 254 kW (340 shp) pistoned-engine, it first flew in 1959. But it was when an early turboprop powerplant version that became available for the PC-6 with the Garrett Air Research TPE 331, that the aircraft really came then into it's own class. But the TPE 331 installation didn't last long either, as in May 1996 with the Pratt & Whitney Canada PT6A engine performed its own maiden flight and the PT6A really then cemented the Porter's reputation and as a direct replacement for the DHC-2, the Beaver's production ended just two years later. A rugged utility design the PC-6 is... The aircraft and the excellent modeling was extremely good in X-Plane 11, even if the XP11 world was flat compared to the realism of XP12. The conversion to XP12 keeps the dynamics of the earlier aircraft, but now places it in the highly developed world of X-Plane 12 ULTRA hi-res PBR realism, it stands out, brilliantly in the world it richly deserved. Design wise there is not much difference, but the XP12 version comes with the newly created PBR textures, are all 8K now as well (four times the resolution), so the detail is far more highlighted, even extremely so. Admire the perfected riveting, the panel construction, ribs... all so very good. Rugged landing gear is intricately done, all the struts and built in dampers are beautifully realised, gotta love those tyres, also available are the bigger Tundra sizes as well. Daniel Klaue is one of the most prominent X-Plane developers so you are going to get nothing more that the very best, and certainly that is the case here. In the XP11 review I admired the wing profile, it's worth repeating again here... as it is an almost perfect sculpture. A lot of the glass areas are just flat, but the main windscreen is a complex, convexed shape and has a large helicopter feel... here again with all the glass it is highly realistic, and you can have the tint on or have clear glass. Cabin The cabin has a two-abreast layout in six seats, in the same check blue trim as XP11. Still very modern, and looks more towards the higher quality in XP12. Side doors can be left open in flight if required, but that would scare the bejesus out of anyone actually sitting in there, unless you were going for a parachute jump. Seat backs can be moved forward, and any, or all of the seats can be removed. The aluminium wall panels and riveting is still worth admiring, it looks and feels very realistic, note the parachute rail above. Cockpit The PC-6's cockpit is very basic in a utilitarian way, with just metal frames with all the controls or instruments added or bolted on... note the very rudimentary window air blower, it is basically a pipe with holes drilled in it? Still the quality of the instrument panel is absolutely first rate, it comes with lovely authentic instruments. The prominent forward metal frame bar also creates a shelf, and items like the quadrant and flap switch/rudder trim, clock (right) and Interrupt and the alternate trims are bolted directly on to the frame... note the loop wire park brake, it is really basic. ... three levers control "Prop", Throttle "Power" and Mixture "Idle" which has a safety gate. The lever to the panel push-pull rod is expertly crafted and has excellent realistic animation. T shaped throttle lever looks like a twin throttle handle but it isn't, but does carve out a working handle feel. Lower Flap selections are UP (0 degrees), TO (28 degrees) and LND (35 degrees). Rudder pedals are as basic as the ones you use with your simulator, it is just a simple moving bar and the extra pedals for brakes. The air and heat piping is visible and again something you would buy from your hardware store. Lovely simple control stick, with a PTT (Push to Talk) button front and has a trigger switch behind. Front seats are encased in a bucket style frame, and those hanging seat belts are still awfully well done. _________ Instrument Panel The instrument panel in this PC-6 is unique as it can be configured to your own personal preferences in the menu, a unique feature by Thranda, but first we will look at the default layout of the panel. The Porter is a strictly one pilot operation, rarely does it have two aviators flying, but the stick and rudder controls are provided in the second seat. So all the instrumentation is to the left and set around the pilot's eyes. Clear and concise, most instruments are quite large and really well done here. Standard Six covers Airspeed Indicator (knots), Artificial Horizon and the Attitude Indicator on the top row. Below is a ADF/VOR pointer, Heading Dial and Backup Attitude Indicator. Third row has a Vertical Speed Indicator, Turn Coordinator and Fuel Gauge (litres), far left lower is a Radar Altitude Dial. A note about the two Altitude Indicators in that the top row version only moves per hundred feet in a click, which I really like, unlike the backup standard clock dial version. Avionics package includes both the GNS 530 and the GNS 430 GPS units, a Garmin GTX327 transponder and bottom is a Garmin GNA 340 radio set. Centre panel left has four dials with two small top and two larger lower to cover the engine performance with (small) Prop RPM speed x 100 and gas generator RPM or Ng %, and below below (large) are the Torque psi and ITT or "Inter Turbine Temperature" gauge. Right side instrument panel has a few more engine readouts, these include the Indicators for the oil temperature, pressure, and fuel pressure which are combined into a single gauge... ... below is a ammeter and an voltmeter, the PC-6 utilises a 28V electrical system. A single 24V battery is installed to provide power for engine starting and as a secondary source for DC power. A 300-amp starter generator provides normal power at 28 volts. Far right is a suction gauge (Vacuum). Centre right panel is a Hobbs counter and a lovely Whisky Compass centre screen. There are two wing tanks of 170 US gallons each (643.5 liters, 1147.5 lbs, or 520.5 kg) of total of usable Jet-A fuel. These wing tanks gravity-feed into a small 2.9 gallon collector tank located behind the cabin rear bulkhead, which feeds the engine. The twin fuel tank gauges are lower right, in compliment with the total fuel gauge at the lower SS position. Dials are really well done and look really nice. All lower circuit breakers are active. The electrical switchgear are set out in two rows, top external lighting and lower Master (Power), Generator and various other generic electrical power switches. There is a panel each end of the instrument panel. To the right is a De-Ice system with ampere gauge. Left is the optional external fuel tank panel... ... each under-wing optional external tank holds an additional 49 gallons (185.5 liters, 330.7 lbs, or 150 kg) of usable fuel. The external tanks are really well done, but also makes the Pilatus look very military. Notable is the ADF panel sitting down between the two front seats, very hard to use in a simulator way, but again well done. At each of the end of the shelf, there are airvents which are fully animated for movement and flow. Menu - Tablet Biggest difference between the earlier PC-6 Porter in this updated XP12 version is a new menu... well sort of? The side Arrow window tab is still there, and it still does the same pop-up menu, but it is now in the shape of a iPad - Tablet. There is a reason for this change... the same iPad/Tablet can also be used as a Tablet in the aircraft. There is a brown circular patch on the window, if you press the hotspot, then the IPad/Tablet will appear, and the same tablet is also attached to the right hand side window. The iPad/Tablet can be adjusted, but not too far in movement as the window's glass gets in the way. The original seven menu selections have now been almost doubled to 13 selections, the side menu is also gone and they have all been replaced by square icons; Aircraft Options, Weight & Balance, INSTR Options, Panel Editor, Static Liveries, DYNAFEEL, Log Book, Checklist, Ground Handling, Dynamic Liveries, Flight Computer, Equipment and AviTab... at the bottom is a "Brightness" slider. Missing from the earlier menu is the "Camera" selection? Notable is that the screen tablet is set in a "Window" frame, and these window popups can be moved around the screen and also scaled in size... Aircraft Options This page menu is also changed from the earlier "General" selection, but the options and the layout stays the same, the layout is still as highly detailed and as very comprehensive as before in the General tab. Three selections cover group items, but any one item via "Click Spots" can be individually selected or hidden via the aircraft graphic. "ALL COVERS" will select engine inlet/outlet covers and pitot cover, "ALL TIE-DOWNS" for propeller and wing tie-downs and "ALL DOORS" for both cockpit doors, both cabin sliding doors and the twin engine cover doors, and open the forward panels and it exposes inside a lovely recreated PT6A-27 turboprop, flat-rated to 550 SHP (47.3 psi at 2000 RPM) as this is the Pilatus PC-6 B2/H4 version represented. The Engine can be set into two modes... SIMPLIFIED or REALISTIC In Simplified mode the engine will automatically limit the engine to remain below the maximum torque of 47.3 psi. In Realistic mode it will be up to the pilot to avoid exceeding the engine limitations. The propeller gearbox or propeller shaft can break if the torque limit is exceeded by a certain margin, resulting in engine failure and smoke in the cabin (the smoke can be cleared by pulling the firewall air shutoff control closed). There is also a very nice GPU (Ground Power Unit) and an Electric Tug on the rear tailwheel, that is controlled via your joystick. There is the selection of a SIMPLIFIED or REALISTIC tailwheel actions. in Simplified mode the tailwheel is standard X-Plane rudder connected yaw in a range of +- 30 degrees, In Realistic mode it functions as in the real aircraft. There is a section in the manual relating to steering in the freewheeling mode. Other Aircraft Options menu selections cover; Window and Instrument Panel Reflections on/off, Startup Running on/off, External Fuel Tanks show/hide, Chocks and brakes on/off. All EXT - External Lights can be switched on and off as can ALL INT - Internal lights. The lights can also be accessed on the aircraft graphic including the extending and retraction of the end of the wing landing/taxi lights, this action can be a bit fiddly and slow but clever. The lights on the PC-6 are now all LED. Weight & Balance The PC-6 has the same intricate great "Weight and Balance" menu as earlier. In both Lbs and Kgs, which can be selected via the toggle... ... Fuel can be added, and you can also use the twin-external tanks if they are then shown, and both are adjustable in the menu as well. Pilot, passengers and cargo can all be set for their individual weights (scroll), and the CofG (Centre of Gravity) parameters are all shown on a graph and with a marker on the aircraft of it's physical CofG, when done you can save the configuration and later reload it. As noted you can show/hide any of the rear seats, by pressing the X by the seat. Add in weights to the two front seats will also add in the Pilot (Dan) and his lovely female Co-Pilot. But adding in cargo (weight) will not put anything in there rear, unlike on some Thranda aircraft. INSTR Options A new menu item is your "Instrument Option" menu page. There are four options available; GPS #1 Popup (GNS 530), GPS #2 Popup (GNS 430), STEC 55 "Fifty Five X" Autopilot Popup, and there is also the option to change the Baro Units from mb to inhg. Panel Editor "Panel" is now "Panel Editor"... part of the Thranda "Dynamic Generation Series", also re-authored for XP12. More about the DGS Series The Thranda PC-6 Porter can be highly customised in two areas to suit your taste. First in Dynamic Panel, as there is no default instrument setup, as you can customise the panel to suit your own flying preferences. In the new iPad/Tablet configuration the screen space is now far larger than the old "Panel" Menu. This is good, because as some of the small access zones before tended to overlap each over, so you always found yourself adjusting (scrolling) the wrong item. Top row of options are 4 different panel backgrounds, Default Grey, White, Black and Blue. (Note all options can be mouse scrolled) There are also Five Panel "Presets". For most selections you have to save (overwrite) the preset you want, then reload the aircraft to get the panel configuration you want? Alpine Avionics Evolution Part of the options available is the EFD 1000 which is a self-contained multifunction digital display that is divided into a Primary Flight Display (PFD) in the top half, and an Electric Horizontal Situation Indicator (EHSI) in the lower half. As EDF 1000 systems go it is not highly featured system, with the GPSS, MAP, 360 and Menu functions all not simulated, but the display does pop-out... It works of course with the S-TEC Autopilot. Laminar Research G1000 Also part of the options is the duel screen Laminar Research G1000 GNS system, both the PFD and MFD/MAP pop-out for convenience. The RealityXP GNS 530W/430W or GTN 750/650 Touch 3D bezels are also available if you have these optional addons. The "Dynamic" in the panel is another featured DGS. Besides having different custom panel configurations, you can also customise the instrument panel by selecting "ENABLE 3D PANEL EDIT MODE". This will highlight the available instruments you can change in green. Selecting an instrument via the "INDIV INST" (Individual Instrument) and "ACTIVE INSTRUMENT" it will highlight the instrument you want to say, move to another place or adjust the position on the Instrument Panel... ... or hide the instrument completely to make space, say you don't want the Autopilot? then simply delete it. You can also add in tools and instrument features, like the "Switch Panel", or the Aspen EFD 1000, or the Reality XP bezels. You have access to all of the 44 individual instruments and avionic units... and basically you can also start with a completely blank panel and then create your own unique or personal instrument layout... and can have up to, or can save 14 different panel layouts (presets) ... so for absolute layout choice it is crazy! Static Liveries This was earlier called "Painted Liveries", now named just Static Liveries. There are only eight provided liveries, down from 16 earlier choices. But they are the best of the bunch. Thranda is the Default. The earlier twin white of the liveries that were noted as "DynamicLiveryResources" and "ZZTEMPLATELIVERY" liveries are now missing? as the DGS system has be refined, it is now more smoother and the long wait pause times have been reduced. There is a white "Blank_Livery" available (in the Documentation) as a template to add in more Static Liveries. DYNAFEEL "DynaFeel" is a system that dynamically adjusts the rate at which the controls deflect, in Pitch, Roll and Yaw. It is based on airspeed and how much the control's are deflected. This means the controls will feel light and responsive at low speeds and with some small deflections, but will get progressively heavier as the airspeed increases. Logbook This is one feature adopted from the JustFlight Menu. This Icon will just show the X-Plane Logbook window. Checklist New to the Thranda PC-6 is Checklist. A 36 page checklist is very comprehensive set in the iPad/Tablet. Navigation is via the lower left/right arrows, or you can scroll the pages via the centre box bottom. The Checklist will also pop-out into a scalable window, to make the list available anywhere in the cockpit.... You tick off the list one-by-one (green), but there is no default to clear the list in one click? Ground Handling This Ground Handling Icon is also new. This option just views the X-Plane default "Ground Handling" window. if you prefer that tool over the Thranda electric tug. Dynamic Liveries Earlier we saw the available "Static Liveries". Here you can actually design your own livery and save the livery. You have a menu to select on the right that can colour a certain part of the aircraft, like the Roof, Wing, Tail or Wing tips. Select which one you want and then adjust (scroll) the RGB colours for that area. Other options include changing the Registration of the aircraft and putting the "PC-6" logo on the tail. It looks hard but you can easily design a very nice livery in about twenty minutes... To help there is already 31 liveries already completed to choose from, or to adjust the finer details of any of the presets to your liking. ... when done you can "Save" (Add) the livery and then "APPLY" it to the aircraft. When you apply the livery the screen will then freeze for a few minutes, and go a bit weird? The results are however excellent. A note... if the created livery does not appear correctly? Then go to the Static Liveries and select "Apply", then go back to the created Dynamic Livery and do it again, this time it should create the livery you wanted. A feature is the (Quick) selection of Dirt via percentage selections you can adjust the amount of Dirt, Scratches and Dirt Int on the aircraft (0%-255%) and apply it instantly. So you can have either a pristine or a very grubby aircraft with just a twirl of the numbers. Also changes can can be made to the Metal or Rough surfaces, this can be applied to any of the liveries. Note you can apply the same Dirt and Scratches onto any of the Static Liveries directly via that menu. As noted before. the DGS system is far smoother in this new layout, it is also far easier to use as well with the larger scalable panel. Flight Computer Another new feature from the JustFlight menu. This shows you your current aircraft data including; OAT, GS (Ground Speed), Endurance, Range, NMPG/SMPG, Altitude, TAS (speed), Fuel Flow, Fuel Used, Headwind (knts) and Crosswind (Knts). Both units in Metric or Imperial are also available.... and you can reset the fuel burn. Equipment Under the "Equipment" Icon you have several items as external options, these items were originally under the MISC tab There are Five Equipment options. Top is the Regular or Tundra (large) Tyre option. A set of Skis. Mud Flaps can be used with either the Regular or Tundra tyred settings. Forward passenger window can be either sizes in Small or Large. And the optional twin wing tanks. AviTab AviTab is a PDF viewer, Airport info, METAR info and ILS frequencies information tool, it also has a moving map that supports online maps and offline maps, Navigraph integration in that you can link your Navigraph account and see the charts right in the cockpit. In the PC-6 the Avitab is available in both the 3D tablet and a scalable pop-out window. _____________ Lighting The lighting on the PC-6 is very utilitarian both externally and internally. Note the images here are from the X-Plane v12.1.0 beta, which is a huge improvement over the earlier X-Plane 12 lighting. There are two underwing Landing/Taxi lights, Red beacons top and lower fuselage (selectable) or you can have bright white Strobes, and the three standard Navigation lights. Instrument Panel is lit by a simple red light on the roof. And there are two sidewall mounted cabin lights for the rear. Amphibian Most Thranda X-Plane 12 releases now include both the wheeled version and also the Amphibian variant. There is no "Float" version here, only the Amphibian variant, but very good it is. The aircraft looks excellent in the air, but you have to be aware of the extra weight in takeoff and manoeuvring, the so called "pendulum" effect. Float design is the usual excellent Thranda thorough design and detailing, hull shape is excellent. Rudders are raised and lowered by a lever right forward side of the pilot's seat, or do as I do in using a keyboard command Excellent retractable gear is also very realistic, gear control is by the additional panel set on the beam in the centre panel. The performance on water is again absolutely first rate, water craft have come a long way in better realism since the introduction of X-Plane 12, here you are seeing the latest incarnation with the v12.1.0 water... it's now just perfectly brilliant. The "Equipment" Menu is also different in the Amphibian version. There is all new menu order, from top; Water Rudder (retracted/extended). Ladder Left, Ladder Right, Windows (Small/Big), Wing Tanks (Disabled/Enabled) and Docking Hold. We will look at "Docking Hold" first. This is the same tool as earlier noted as the "Slew" feature. Docking Hold mode allows you to manually move the aircraft around in a disconnected X-Plane space. It functions by temporarily overriding the various aerodynamic and physical forces on the X-Plane settings, it is to allow the user to reposition the plane as desired. This feature is however highly touchy and it is used mostly only really with the Amphibian/Floats option in docking the aircraft to say a pier or marina. But it works extremely well. The optional Left and Right ladders are connected to the wings. Both the Menu options of the same "Static LIveries, and "Dynamic Liveries" are also available for the Amphibian, with the floats being colour matched to the fuselage. Flying the XP12 PC-6 Porter First you have to understand the unique attraction to the PC-6 Porter. It is as they say a "Seat of the Pants" aircraft. True pilot's love the Porter because of the feel and reaction the aircraft has under their control. So if you need to get into an impossible remote landing strip then in most cases it will be with a Porter... short, rough even steep gradients are all challenges that the PC-6 can take on with it's incredible STOL - Short Takeoff and Landing capabilities. But also remember that in front of you is a massive PT6A-27 turboprop, flat- rated to 550 shp, turning a large Hartzell 4-bladed constant speed propeller. It is like having a powerful V8 engine attached to a Go-Kart, and in your case a monster of an engine attached to the light frame that you are sitting in... so the PC-6 is unique in the way you handle it, or fly it... overall you can see the immense attraction to pilots it has. So put on the power, and you get a serious "whoa!" in that PT6A-27 t will pull you left off the runway quick smart... even if you are ready for the pull, so slow power on to start, then build up the speed. Rudder action is however very good (considering the petit size), so you can easily straighten up the line, only 30 knts and the tail is off the ground... 70 knts and your flying. Use only one stage of the flaps (28º) and your flying even earlier, as the STOL effect is very good. The PC-6 has a rate of climb of 1,010 ft/min, or a 1,000fpm. But it can easily out-climb that rate at the limit, and still gain speed. Service ceiling is 8,197 m (26,893 ft). Thranda do note the engine limits for the PC-6, and to certainly the need not to exceed the parameters, as that would be easy with the power you have available, but now in the air and at your altitude it is time to trim the Porter. The electric trim is on the joystick and very easy to use (I have a keyboard trim setup), the trim display is left top on the instrument panel (arrowed). The PC-6 is super easy to trim via the vertical and a couple of flicks left of the rudder trim should have you easily flying hands off stick neutral, in fact you don't need an autopilot as the Porter will fly trimmed straight into the horizon very easily... one note though is there is no rudder trim, so the aircraft has a tendency to pull left under power, which you have to manually correct. I don't have any qualms at all in recommending the PC-6 as a "Pilot's" pilot aircraft, a bush plane that is easy to fly. For a novice flier, this is also a great starter aircraft, "Seat of the pants" sort of thing, you feel the Porter as much as fly it. Sounds have been re-authored in FMOD, capturing the subtleties of the PT6 engine and its very dynamic 4-bladed prop, with a lot more authentic wind noise and background sounds. Maximum speed is 232 km/h (144 mph, 125 kn) Vno, Vne: 151 knots or cruise at 213 km/h (132 mph, 115 kn). Range is 730 km (450 mi, 390 nmi) with maximum payload and Ferry range is around 1,612 km (1,002 mi, 870 nmi) with maximum internal and those twin-underwing fuel tanks. I checked out the banking again, and yes you still need that stick back-pressure to turn cleanly, but the stick feedback is very, very good, in fact the handling overall is quite superb. So the flight dynamics have also been extensively overhauled for both for the land and the amphibian version, and to closely match XP12's new dynamics. You can even adjust your altitude just by reducing the power, pull the throttle back and down you go, too steep then you can climb back just as quickly by pushing the throttle back up to counter the fall, and all without moving the stick... .. at the right height flare off the nose down attitude to rub off the speed... when the speed is around 80 knts and a good 15 knts into the white zone you can drop the flaps to 28º, this effect will then drag the speed down to the approach speed of 60 knts, lovely is fact there is no flap lift, or unbalance as the aircraft slows down, you feel the lift but not that secondary sinking feeling with less power... and it is all smooth as. I will note that with the no backlit instruments... in some lighting conditions the X-Plane 12 heavy shadows can make them hard to read, it is a very dark panel. Drop the flap to the full 36º and your speed will rub off to 55 knts, you are still flying well at this speed, but any less power and then you will lose height. Stall speed is only slightly below your approach speed at 96 km/h (60 mph, 52 knts), and you have a red light on the panel if you exceed this low speed. The trick is to go as low to the low speed warning without lighting the red light, it is the perfect landing speed as you will also wind down slowly to the runway. Only a slight flare is needed, it's a taildragger after all.... and your down! Yes flying the Porter was easy, but let us not get too cocky here as this aircraft is not for absolute total amateurs, skills were needed to do the right procedure, right speed at the right place to get that extremely exciting landing, but if you are good at flying like this, then the Porter will reward you back a thousand times over... as the PC-6 is brilliant to fly. _______________________________ Summary One of the most versatile and even a workhorse background utility aircraft, the Swiss built Pilatus PC-6 Porter is on of the most coveted pilot dream machines for its basic but powerful design, extremely flexible for its amazing STOL capabilities this is one of the most rugged and the best get in and then out of remote areas fixed-wing aircraft available. Daniel Klaue needs no introduction if you have been in X-Plane for a period of time, certainly one of the most innovative and one of the most talented developers out there that is highly regarded within the Simulator. This is a Dan Klaue aircraft and so you expect tons of ideas and clever features and certainly the PC-6 Porter does not disappoint in that department. Modeling and detail is absolutely first rate, this is an excellent Porter aircraft with a lovely design and high quality. For X-Plane 12 the PC-6 has had a very comprehensive overhaul, including all new authored textures in 8k (four times the higher resolution than before) it shows of course, but without the framerate hit. The EFB: Electronic Flight Bag, or the Thranda Tablet is all new, with now 13 options (up from seven before), and all the pop-out windows are scalable. Flying Dynamics are also completely revised for XP12, as is the better LED lighting. Advanced FMOD (2)-based sound system has also been extensively overhauled for XP12, and all of course recorded from a real PC-6 and it's PT6 engine, The innovative menu system "Dynamic Generation Series", in you can create your own instrument panel layout or layouts as up to 14 different layouts of 44 instruments and avionics can be saved with 6 default layouts including a Aspen EFD 1000 with S-Tec 55x autopilot, and the panel is also RealityXP GNS 530W/430W or GTN 750/650 Touch with 3D bezels ready. A huge selection of 32 liveries is still complimented with a feature to create your own colour scheme and livery, then you can save them as well. The feature list is huge, and the excellent Amphibian variant is now part of the package. This aircraft is X-Plane 12 only, but the X-Plane 11 version is still available. Simply a pilot's aircraft to fly and love, the Pilatus PC-6 Porter is extremely responsive to your inputs, but that is why you love this aircraft, skills are required to get the very best out of the machine as it is a powerful taildragger, but even the most early cadet pilots will still love it. That huge feature list and a great value price, all now in X-Plane 12, so this is the perfect PC-6 Porter you always dreamed of, and what more can you ask for! _______________________________ Yes! the Pilatus PC-6 Turbo Porter - DGS Series XP12 by Thranda Design is NOW available from the X-Plane.Org Store here : Pilatus PC-6 Turbo Porter - DGS Series XP12 Price is US$34.95 Retail Price:$44.95- you Save:$10.00(22%) Requirements X-Plane 12 (not for XP11) Windows, Mac or Linux 8 GB VRAM Recommended Download Size: 4.1 GB Current version 1.0 (May 4th 2024) _______________________________________________________________________ Installation and documents: Download is 4.05Gb and the aircraft is deposited in the "General Aviation" X-Plane folder. Installation key is required on start up and is supplied with the purchased download file. Full installation is 4.94Gb Documents supplied are: Blank_Livery_For_Painting ChangeLog.txt Thranda PC6 Documentation v1_2.pdf Thranda PC6 Expansion Pack Manual.pdf Thranda PC6 Manual XP12.pdf Thranda PC6 Performance Charts MASTER XP12.pdf Thranda Pilatus PC6 Graphics Settings XP11.pdf Thranda Pilatus PC6 Graphics Settings XP12.pdf Thranda Pilatus PC6 Joystick Settings.pdf X-Plane G430 Manual.pdf X-Plane G530 Manual.pdf A Blank Livery (PNG) of four files are provided for painting. Checklists, setting and loads of Performance graphs are provided in the various manuals _____________________ Review System Specifications:  Windows - 12th Gen IS1700 Core i7 12700K 12 Core 3.60 GHz CPU - 64bit -32 Gb single 1067 Mhz DDR4 2133 - PNY GeForce RTX 3080 10GB XLR8 - Samsung 970 EVO+ 2TB SSD Software: - Windows 11 Pro - X-Plane Version 12.05r1 (note, during the review X-Plane v12.1.0 was released, and features in the update are noted and shown in this review) Plugins: JustFlight-Traffic (X-Plane.OrgStore) US$52.99 : Global SFD plugin US$30.00 : RK Apps XPRealistic v2 - US$34.99 Scenery or Aircraft - PAWG - Wrangell Airport, Alaska by NorthernSkyStudio-PAWG (X-Plane.OrgStore) - US$29.95 _____________________  Aircraft Review by Stephen Dutton  16th May 2024 Copyright©2024 : X-Plane Reviews   (Disclaimer. All images and text in this preview are the work and property of X-PlaneReviews, no sharing or copy of the content is allowed without consent from the author as per copyright conditions)
  7. NEWS - Aircraft Released : Pilatus PC-6 Turbo Porter - DGS Series XP12 by Thranda Design Thranda Design have released their excellent Pilatus PC-6 Turbo Porter for X-Plane 12. The Pilatus PC-6 Porter is a single-engined STOL utility aircraft designed by Pilatus Aircraft of Switzerland. First flown in 1959, the PC-6 was produced at Pilatus Flugzeugwerke in Stans, Switzerland. It has been built in both piston engine- and turboprop-powered versions, and was produced under licence for a time by Fairchild Hiller in the United States. After 604 deliveries in 63 years, Pilatus ended production in 2022. Originally released in X-Plane 11. The "Porter" has had an extensive overhaul and upgrade for X-Plane 12, including... Re-authored textures in 8k (four times higher resolution than before. One 8k texture = FOUR 4k textures!) Completely re-done normal maps, and largely re-authored albedo textures. Fully re-authored sounds in FMOD, capturing the subtleties of the PT6 engine and its very dynamic 4-bladed prop with a lot more nuance and detail than before. Completely overhauled flight dynamics, both for the land and the amphibian version, to most closely match XP12's new dynamics Systems matched to new XP12 standards. Overhauled existing dynamic livery, added dirt and scratches effects (configurable in real-time). Now has "Modern" and "Classic" paint scheme layout. Re-authored lighting to take better advantage of XP12. EFB: Electronic Flight Bag, or the Thranda Tablet. All the extra functionality of this plane has moved from the fly-out menu (v11 PC6) to the EFB. Use it in 3D: you can move it from the pilot's side to the copilot's side, or disable it completely in 3D. Mounted on a swivel, for convenient viewing angle. Use it as a 2D pop-up window, or pop the window out onto a secondary screen. Use it in VR in either mode. Control the brightness of the EFB in 3D or 2D Intuitively set up like an iPad with different apps, all documented in the included manual. The PC-6 is part of Thranda's "Dynamic Generation Series", re-authored for XP12. More about the DGS Series Features Aircraft Options App: Option to run the engine in realistic mode or simplified mode. Control over chocks, tie-downs, and engine covers Control over the electric tug Window reflections on or off Instrument reflections on or off Startup running or cold and dark Control retractable landing lights via scroll wheel (independent left/right, Infinitely variable tilt, to use lights for both taxi and landing purposes.) Ground Power Unit (GPU) option External fuel tanks (under the wings) Steering options: realistic or simplified. Control over exterior and interior lights via a schematic of the plane. Control over doors and engine access Weight and Balance app Full control over aircraft's weight and balance. Control weights on a per-seat basis, or dial in the desired total, and the desired CoG directly. Hide seats, and replace weight with cargo. Control fuel quantities in the wing tanks by simply scrolling over the wing tank with the mouse. External fuel tanks can be enabled and disabled, and their weight independently controlled. Add weight to the copilot's seat, and the copilot shows up. Switch between Lbs and Kg. Preview weight and balance on a graph Load preset configurations, and save them to disc for later use. Instrument options app Call up pop-up windows for GNS430/530/Autopilot Switch between InHG and MB display in the Kollsmann window of the altimeter. Dynamic Panel app Move any instrument to any location on the panel, or even between pilot and copilot's seat. Supports 3rd party RealityXP GTN750 instruments, also fully configurable Save your own presets, and even share them with the community! 2 operating modes: Layout page and Individual Instrument page. Move instruments around a virtual panel layout or use numerical entry for precision placement. Also allows for control over instrument placement in 3D space, via special click spots that are made visible in edit mode. GNS430 and 530 can be swapped out, but a restart of the plane is required, as 430s and 530s are mutually exclusive in terms of compatibility. Supports G1000 configurations. Several preset panel configurations, showcasing different layouts and instrument equipment. Choose between different panel backgrounds. Static Livery app Preview available liveries and tailnumbers by scrolling over the plane. Apply dirt and scratches dynamically Also supports 8 traditionally painted liveries, in all their full 8k glory! Compatible with custom liveries. (Folder names should be named the same as the registration number, and the plugin picks that up as the livery's name.) DynaFeel app Dial in exactly how difficult you think the controls should be. This simulates different pilot's physique and strength. (Stronger pilots can put more pressure on controls, and hold full deflection at higher speeds). Log Book App Calls up Laminar's log book in a separate pop-up window. Log your flights and track your virtual adventures. Checklist App Very complete checklist, allowing for the ticking off of boxes of completed items. Navigate the many pages by using the scroll hotspot at the bottom of the checklist Pop up or pop out checklist app as a separate window Ground Handling App Call Laminar's default ground equipment, if you prefer that over the Thranda electric tug Opens up a separate pop-up window. Dynamic Livery app Create "virtual" liveries, based on one common design layout, and assign any color to any available paint segment. Now supports control over roughness and metalness Add dirt and scratches to your dynamic livery, and save these settings along with your livery preset. Quickly create preview of livery in real-time, using intuitive controls Apply selected livery in real-time (Granted, with these huge textures, it may be a bit of a wait... but no external graphics software required!) Option to include/hide manufacturer logo and "PC-6" sign Option to change the tail number in real-time, or disable it altogether Easily and quickly create dozens of paint schemes in-sim! Flight Computer App Easily visible data like OAT, Groundspeed, Endurance (HH, MM), Range, NMPG, altitude data, airspeed data, Fuel Flow, used fuel, headwind and crosswind component data. Pop up or pop out Flight Computer app as a separate window. Equipment App Tires: Choose between Tundra and regular-sized tires Skis: Enable or disable skis for snow ops Mud flaps: Enable or disable Windows: Choose between regular windows and massive windows in the sliding rear doors Wing tanks: control the loaded fuel weight in the "Weight and Balance" app. Option to enable/disable wing tanks, with realistically simulated weight, momentum, rotational inertia, and drag characteristics AviTab App (optional) If AviTab (freeware plugin) is installed, it can be viewed inside the tablet, or as a pop-up window. SkunkCrafts Updater Thranda recommends using the standalone SkunkCrafts Updater app, to stay up-to-date on the latest versions of the plane. Option to participate in Beta program, via check box in SkunkCrafts Updater Excellent ULTRA hi-res PBR realistic materials, featuring true-to-life plate deformation and to-the-rivet precision. Flight dynamics and systems: The PC6 has quite a few very unique flight characteristics, including the ability to enter Beta mode in flight, and these are faithfully reproduced. (This allows for very steep descents.) The real PC6 is considered to be a real STOL workhorse, whose flight characteristics and excellent STOL capabilities are calibrated to maximum precision in the sim Details, such as the condition lever latch mechanism and a functional throttle gate add to the realism Sliding passenger doors respond to G-forces, so when returning from a parachute drop, while on a steep descent, the doors will roll shut. Over-torquing the engine will cause shaft damage, when in "realistic" mode. This can result in prop loss, cabin smoke, terrifying turbine shaft friction sounds, etc Smoke in engine can be brought under control by killing the "Firewall Air" via cabin lever Tie-downs and chocks actually keep the plane from moving, even in high winds Advanced FMOD-based sound system: High fidelity, multi-track sounds with smooth transitions Individual volume control over different aspects of the sound experience Different sounds for front of plane than for back of plane Panning around the plane in exterior view yields awesome 3D audio effects, including "blade slapping" sound when view is perpendicular to prop Prop pitch produces characteristic aerodynamic aural effects, especially during Beta and Reverse mode. Individual buttons and switches in the cockpit each have their own unique sound. Realistic electrical sounds, based on bus load and other factors (Sounds actually give you clues as to what's happening under the hood) Combustion roar sound typical for turboprop engines -recorded from real PT6 engine Outside wind intensity is affected by slip and AoA. (The more the surface area of the fuselage is hit by oncoming wind, the louder the sounds) Support forum for the Pilatus PC-6 XP12 Images are courtesy of Thranda Design he Thranda Design DHC-2 Beaver is now available from the X-Plane.OrgStore for X-Plane 12 only. _________________ Yes! the Pilatus PC-6 Turbo Porter - DGS Series XP12 by Thranda Design is NOW! available from the X-Plane.Org Store here : Pilatus PC-6 Turbo Porter - DGS Series XP12 Price is US$44.95 Currently US$44.95 or $10.00(22%) Off Requirements X-Plane 12 (not for XP11) Windows, Mac or Linux 8 GB VRAM Recommended Download Size: 4.1 GB Current version 1.0 (May 4th 2024) ________________ News by Stephen Dutton 5th May 2024 Copyright©2024: X-Plane Reviews Disclaimer. All images and text in this review are the work and property of X-PlaneReviews, no sharing or copy of the content is allowed without consent from the author as per copyright conditions) All Right Reserved.
  8. Aircraft Review : BAe Systems Hawk T1/A Trainer by JustFlight - Thranda Design The Folland Gnat T.1 was the mainstay of RAF jet training onwards from 1959. The aircraft was a nimble and extremely good training aircraft for pilots moving into military jet aircraft and then moving on upwards to the heavier Hawker Hunters and English Electric Lightings. But in the early 70's the RAF realised that the next generation of jet fighters would require a more advanced trainer and a two-seater to accommodate the Sepecat Jaguar and the Panavia Tornado. The result was the Hawker Siddeley Hawk T1 (Trainer Mk1). In reality the relationship of the Hawk to it's predecessor the Gnat is actually very close and highly related. Hawker Siddeley had bought out Folland in 1959, as British Aerospace Systems (BAe) would also merge with Hawker Siddeley in 1977, however the Hawk was built and still assembled in Hamble at the old Folland factory where the Gnat had also been produced. The Hawk also followed the Gnat in being the mainstay of the RAF British Aerobatic Team, known as the "Red Arrows" and still holds that coveted position today. JustFlight - Thranda Design It is just under a year in that the partnership of JustFlight and Thranda Design released their first aircraft for X-Plane11, that was the PA28R Piper Arrow III and since then there has also been the PA28R Turbo Piper Arrow III/IV in February and the TB10 Tobago & TB20 Trinidad in May and finally the excellent Cessna 152 ll in June. All aircraft I thought brought far more to X-Plane in features and to the general aviation category, but more so in the highly realistic handing of the aircraft. They are not cheap aircraft and all sit on the top of the scale in price for general aviation aircraft, but they also do deliver in another level in quality as well. This is JustFlight's and Thranda's next release with the BAe Systems Hawk T1. First it is a radical change from the usual general aviation style of aircraft and it also took a long time to get released? The aircraft was initially first announced back in February earlier this year, then another promotion in the middle of the year sent our heart's a flutter again but then it all went very quiet, this time it is actually here... so was it worth the wait? That is what reviews are for, so let us see. BAe Systems Hawk T1/A Trainer We have come to now expect a very high quality aircraft from JustFlight/Thranda, as it should be in this price range as that is what you are paying for, in high very high quality and for loads of features. There is no doubt the Hawk stands out there in the quality stakes, the level here is extremely high, if the best fighter/trainer now in in X-Plane11. To be fair there is not a lot of competition to compare the Hawk with as very few modern fighters have yet made the transition from X-Plane10, coming and in the same category is X-Trident's Harrier AV8B, so that aircraft will be a better benchmark. Would this aircraft pass the Airshow walkaround test? you know the one where you walkaround the aircraft noting it's details and equipment points, take a few pictures to remind you of the aircraft... in this case yes. The quality of the detailing is phenomenal, and I am set at a lower resolution setting. Another level of detail again for X-Plane? If not then it is close... aircraft modelling is absolutely first rate, perfection, not a 3d bump out of place. In realism you have glass and reflections that really deliver (note the explosive cord for seat ejection on the canopy glass)... again are you looking into a real jet at an airshow? if not then you are pretty well close to it. It is the smaller details that create a believable realism, note the slightly worn landing light nose glass and wingtip lighting enclosures, the tail leading edge material and the correct accurate layout of rivets and paneling. As a note, the Hawk uses the Rolls-Royce/Turbomeca "Adour 151" non-afterburning turbofan with 2,360 kilograms (5,200 pounds) thrust. It is a more expensive engine, but also more economical to use; like the Specate Jaguar it also uses the "102" version of the Adour in a twin-engine installation. The engine drops down out of the Hawk's belly just behind the wings for service, and in principle can be replaced in one and a half hours. The Hawk is built with ease of serviceability in mind, and almost a third of the aircraft's surface is covered by access panels. There is a "Microturbo 047 Mark 2 Gas Turbine Starter/Auxiliary Power Unit (GTS/APU)" that is installed above the engine to permit self-starting, and to assist in relights after an in-flight flameout. If the aircraft loses power in flight, a ram-air turbine can also automatically pop up in front of the vertical tailplane to provide emergency electrical power and the RAM is featured here and works realistically on the aircraft. The Hawk has two main and one forward strut trailing link undercarriage assemblies... .... detailing is the very best as you would expect in this class, but even more so. Every joint, component, hydraulic line, hydraulic piston, nut and bolt is here, even the strut labels and markings are also correctly applied. Animations in ground movement and retraction/extraction are perfect, even more so as the trailing link assembly can give the taxiing of the aircraft a feel that is quite different from normal, but perfectly authentic. Back to the airshow... usually you stand in line, and usually for a long wait. But your turn does come and you have a fleeting few moments... ... you can look of course but can't touch! but what would you give to sit in there? "sit in the real jet"... The aim of the ultimate in simulation is break down that barrier, and to be able to not only sit in the aircraft but to actually flying this expensive complex machine as well, to live the dream. But for to that to work in simulation then the detail must above and beyond, you thought what was excellent even a few years ago, but here with this Hawk you see the level go higher again, and in a few years it will go even higher... but for now this is the best of the best current standard. First glance inside the Hawk cockpit is the usual overwhelming complexity. But usually as you decipher and break the detail up and work it all out it all comes to make sense... Panels are grouped as: Left console – throttle, engine starting, electrical and flying control systems Left main panel – weapon selection and radio Centre main panel – flight instruments and weapon sighting Right main panel – engine instruments Right console – avionics equipment You can't expect every switch or button and knob to work in the cockpit, but I would guess the number is still very high in here at around 90%. In the rear seat that percentage is around 70%, not bad, but you still miss a few things you would like to control. Cockpit detail is to the extreme. Many fighter cockpit have been exceptional in detail, but don't convey that realism factor, but that is not the case here, it is about as real as it gets, every seat belt, material stitching, pipe, metal panel, screw, nut and bolt is visible and all have highly realistic textures... ... the highlight is the instrument panel glareshields, they have that dusty, not touched since installed look about them, you just want to move your fingers in the dust to create a mark, perfection. Menu/Features The menu is fully featured and positioned via the usual JustFlight left screen side arrow, scrolling on the arrow will make it transparent. This menu layout is far better than the earlier menus, as they had just a red transparency when selected and they looked very dated. This version has coloured items for selection and looks the business. There are 21 selections and features to choose from, and not in any order we will start with the pilots. There are two animated realistic pilots that you can select via the menu, you can also select if you want their visors up or down... ... one note is that if you put the front seat pilot's visor down the screen image goes slightly darker, but the rear visor does not create the same effect? also the pilots selection is only external, so if you are seated in the front or rear seat, then the other seat internally is empty, which is a bit odd as you can select if you want this feature or not? (arrowed) Why not show the internal pilot if you so wish for realism? Overall the pilots are excellent in detail. Selections include static elements like: chocks (rear wheels), tags and pitot and engine inlet/outlet covers, and a very nice work maintenance step frame... ... another ingress option is the aircraft's built in steps, or pop out extensions that are well done (arrowed above). Options include the external diesel tank carried by display aircraft, or the M61A1-Vulcan 6,000 rounds per minute centre mounted cannon... Four armament racks allow a variety of weapons, that are selected via the X-Plane "Weapons" menu, here we have the AIM-9 Sidewinder and AIM120-AMRAAM, but bombs can be carried as well, but just watch their excessive weight are balanced! Nice detailing on the armament racks that will change to the correctly selected armament. Forward locker opens to reveal the avionic equipment racks. There are two Hawk versions to choose from in the T1 or the T1a. This is noted via the extension over the exhaust outlet... ... but in reality it is a bit useless? The difference between the T1 and T1a versions is that the T1 is the trainer, and the T1a is the armed or fighter version? so why not use the selection to denote the different types by having the armament off for the T1 and the aircraft armed for the T1a version? Menu options internally include the aiming gunsight, and two left and right flip up frequency display panels... ... they don't actually display any frequencies? but there is a fix by MatthewM that adds in the frequencies via an texture file. The same display fix is also in the Red Arrows display livery by Christophe, and here you also get with the livery the lovely Red (Arrows) flying suits as well! With the external diesel tank attached you get a double panel of a set of coloured lights on top of the glareshield (yellow arrows), but there are no notes on if they work, or why? There is a good kneeboard for checklists that pops up. It can be moved around the screen, but it is not scalable, which makes it a bit of a blocking visual distraction in the air (as you can't see anything forward!) as the menu itself is also locked to the left side of the screen and again not scalable.... joysicks front and rear can be hidden and note the "Rudder Lock" (arrowed) Final menu options include a "Cold and Dark" to ready (electrical on/off) and a full engine start up that starts the engines and configures hydraulic and electrical systems so that you are ready to taxi feature, you could call it a "Scramble mode!". There is a feature that configures the aircraft so that weapons are live (ready to fire) and you can select/change the livery from the menu. Instrument panels Power up and the Hawk comes to life. Panel lighting is excellent and adjustable for the left, right and main instrument panels. Annunciator warning panel (CWS - Central Warning System) can be tested. Main cluster of flying instruments covers clockwise... Turn-and-slip indicator, Main Artificial Horizon, Backup Artificial Horizon. Main Altimeter, Vertical speed indicator (VSI), Horizontal situation indicator (HSI) or heading indicator, Directional gyro indicator (DGI), Combined speed indicator (CSI)... top centre left is the Accelerometer. Right front panel is clockwise: Standby altimeter, Cabin Altimeter, Oxygen supply contents, Fuel gauge, TGT indicator (Turbine Gas Temperature), Engine LP shaft rotation indicator/RPM indicator. The Oxygen flow indicator will flip on and off if the oxygen is flowing correctly. lower right is the electrical switchgear and panel lighting adjustment knobs. Depending on if the Hawk is armed or not (T1a) then the firing panel is located upper left... The Lock/Live switch is upper right (magenta arrow). Pylon (rack) selection and armament selection is on the Weapon Control panel, but don't for "heaven's sake" fire it off on the ground like I did... ... as it is not pretty and I suppose that is what the "Safety" is for! The Hawk has a CCS or Communications Control System which provides overall control of the elements of the communications system. The CCS integrates the VHF transmit facilities and the audio signals from this equipment and from the ILS and TACAN receivers. It also integrates the audio tone of the tone generator in the Central Warning System. The radio below the weapons panel is the UHF radio set, but with X-Plane11 you can't access UHF, so the Hawk uses regular VHF frequencies. This radio will control the COM 1 frequencies. It is very nicely done anyway, and super easy to set and use. There are also 20 preset frequencies you can use and if you want a certain frequency, it can be set via the ‘manifest.json’ file with a text editor. Right Console Right panel has the other radio set and this unit is again a UHF unit, but set to the regular VHF (X-Plane) frequencies. This radio controls the COM 2 frequencies. Again the radio can be preset to frequencies and details on the correct insert order (‘manifest.json’) can be found in the manual. The radio panel layout and detail here really good and quite authentic (to a point with X-Plane restrictions). An ILS installation is comprised of a localiser and glideslope receiver and a marker receiver, there is no autopilot, so the ILS is a visual reference only. The Hawk is fitted with an IFF/SSR (Identification Friend or Foe/Secondary Surveillance Radar) system which provides identification facilities and IFF, and civil SSR including ‘Mode S’. The system provides facilities for an IFF or SSR ground radar station to interrogate the aircraft and for the aircraft to rapidly and automatically transmit an identifying reply. The system replies to Mode 1, 2, 3/A, 4, C and S interrogations, including civil and military emergency interrogations. The IFF/SSR control display unit (CDU) is used to control the operation of the IFF/SSR transponders. It works in this aircraft in the MODE 4 interrogations 4A and 4B and for civilian M3/A or auto selection. Note the oxygen valve (yellow arrow above right). Lower panel known as the "Leg" panel is on the upper panel is the AHRS (Attitude and Heading Reference System) control unit, and the lower is the ISIS control unit (Ferranti ISIS Century Series Gunsight). The AHRS is used to calibrate the artificial horizon or align, and if the balls (both main and standby) are lazy then you haven't done this before flying the aircraft. The Ferranti ISIS Century gunsight is adjusted via the left and right knobs (arrowed above right), but I can't see any brightness adjustment, so the sight is quite hard to see? Mode selections include: GA – for air-to-air firing, G – this mode is for air-to-ground gun attacks. With G selected, the aiming mark is then depressed to cater for the gravity drop of the shell, R – same as G, but drift control will adjust the horizontal position of the sight, B – when B is selected, the sight is initially depressed, but can still be moved with the depression control. S – same as B, but the sight is not initially depressed. M - air-to-air missile attack mode is not available. Left Console On the left the console covers the aircraft's throttle, engine starting, electrical and flying control systems. Note first the rearward and slightly hidden main fuel cock lever. Engine start and aircraft (electric) trim switches are rear panel. The lovely stubby throttle is excellent, but note the catch? (arrowed), to move the throttle and the catch needs to set in the up position, but be careful if you hit the catch in flight to click down, as then if you go back to idle the throttle will then lock, unless you release the catch again to up... not the best idea to do if you are on an approach? A set of five gauges cover: No. 1 and No. 2 hydraulic system pressure, Brakes supply pressure and Left and right brake pressures. Left lower main panel are buttons to raise and lower the undercarriage, "UP" is retraction, and "DOWN" is extraction, very different from the usual lever... a manual gear release for both the nosewheel and main gear is here as well. More unusual is a switch (arrowed above right) to lower the flaps between: Up - Mid - Down. and confusing is the flap setting of 0 -5 x10 (degrees). The battery "Volts" gauge is on this side panel as well. Rear position has a few items removed... ... with the ISIS Gunsight panel which is missing and AHRS is disconnected, and the left upper armament panel (T1a) shows the weapon activity, but there is no access to the switchgear.... side consoles lose the IFF/SSR panel right and the engine startup panel left. Overall I think the aircraft finds the right balance on providing a realistic immersion in the cockpit, without that overkill of the minute of details. Flying the BAe Hawk T1a Back to the airshow... you know when the air display is going to start, and everyone runs to the fence by the runway. Usually I go the other way and run to the parc fermé, as there is nothing, I mean nothing like a jet aircraft or helicopter starting up it's engine(s). (hint turn up your sound volume a little) Starting up the Hawk is actually quite easy. The T1 has a Microturbo 047 Mark 2 Gas Turbine Starter/Auxiliary Power Unit (GTS/APU) installed above the engine to permit ground self-starting and to assist in relights after an in-flight flameout. So there is no ground power cart (GPU). The system is comprised of a gas turbine air producer and a free turbine starter motor. The air producer (GTS) is at the top of the fuselage, forward of the ram air turbine. It supplies air via a solenoid-operated start valve, and when the dump valve is closed it supplies air to the starter motor which is fitted to the engine external gearbox and drives the HP shaft through the gearbox. It is really a bleed system, but a sort of that it builds up the pressure and then blows it into the starter motor, and that then turns the engine. The GTS also automatically supplies fuel to the nozzles in the combustion chamber containing two igniter plugs, then when you light the match.. oh, ignite the fuel it starts up the Adour jet engine. So fuel cock off, and switch on the fuel pump... Then you press the Start/Relight button forward on the throttle, which is a sort of primer button, but it is building up the air pressure ready to flow it into the turbine starter, and priming the fuel into the engine. When ready or primed you get a green light GTS lit up ready on the right panel... Then you just flick the start switch to "Start". The Adour's startup sounds and start sequence is amazing, highly realistic and the sort of a grin of ear to ear of excitement! Loud, keep it loud... bugger the neighbours sort of loud. Engine LP shaft rotation indicator and RPM indicator wizz around into action... then you get a "Rotation" light come on! At this point you need to nudge the throttle slightly forward, and you get the same sort of fire up that you get in an airliner when you turn on the fuel switches at around 18-20 N2, but then the Adour powers up to full power. The CWS will show HYD and AC (1-3) warnings so you have to reset them on the upper left panel by pressing the buttons (arrows upper right). And you are good to go... remember there is an easy start feature in the menu that does all this for you, but in reality it isn't that hard... If you get the start sequence wrong though it is 3 min wait to retry for another engine start. Remember to turn on the oxygen (switch right middle console), if working correctly the flow is seen via a flicking on/off flow meter upper right panel... however the rear seat oxygen switch and flow meter does not work? Ready to fly... The parkbrake lever is hard to access (or find) far right down by the seat. When moving then be aware of the front nosewheel. First it has a very long trailing link, but it can be very flickery as well (It flickers badly even when standing still?), and so it is very easy for it to go quickly at an odd angle... it works and works fine, but you have to get used to it when taxiing, it is a bit like the A320's remote tiller feel. Sounds when taxiing are excellent, with all that turbine power but whistle flow aural. Note the mirror reflections of the explosive cord. Usually I find these internal mirrors are quite poor, but in here they are the opposite and have very good and realistic reflections. Flaps are set to "Mid" for takeoff, and required if you are carrying a lot of fuel and full armaments. Your forward view is quite restricted at the normal FOV setting (73º), you could make it higher, but that is not realistic either, but it is hard to look forward and read the lower instruments at the same time at this FOV... ... throttle up and you give the aircraft about 80% RPM, not too much to make sure at first the front gear is tracking correctly... gradually to 90% then a third down the runway you give the Hawk the full 100% thrust. You want to feel that punch in the back, you certainly get the thrust but it is more slower building up speed than you would think it would be... ... I found 160 knts to rotate (officially JF note 190 knts?), and you quickly need to get the flaps to zero 0º (500 ft!) and the gear up, so I flick both switches at the same time, but remember to counter the flap lift loss! Ground and air gear animations are excellent, aural retraction (and extraction) gear sounds are also top notch, and the aircraft's excellent FMOD 360º sound externally and in the cockpit is as expected at this level are extremely good.... and yes the hairs on you neck will stand up and get quickly prickly. The Hawk's feel depends on the weight, you feel the extra weight of the T1a fully loaded compared to the far lighter T1 trainer, and although you felt it a bit sluggish on the ground the aircraft will accelerate very quickly to 300 knts in the air, and even while climbing set at 90% thrust. The T1 can climb at a whopping usual 9,300 fpm and one aircraft was known to climb at 11,800 feet per minute, light of course, but that is still phenomenal. Other statistics are still overwhelming with a maximum speed of 1,040 Kph 658 Mph/572 Knts and a service ceiling of 50,000ft and a range of (with only internal fuel) 2,400 kilometers 1,490 MI/1,295 NMI. That acceleration can deceive you, if you don't watch your artificial horizon, as with a quick glance at the Vertical speed indicator it will surprise you, for when you think you are flying nice and level as but the Hawk is still actually climbing easily upwards, so you will need to be aware of the aircraft's tendency to keep on lifting even when you want level flight and the required need adjust to that flight pitch angle and thrust requirement. There are no helpers in here to fly the aircraft for you, so this is all stick and rudder flying. To make it a bit more easy than relaxing then adjust the trim... ... the main tailplane trim is hidden under a safety cover rear left console (arrowed) and it is tricky to use as it is electric, but to be honest I have struggled with all JustFlight trims as the Arrow lll was a nightmare to trim easily. The far back position makes it hard to use as well visually (Any keyboard/joystick trim ideas are even worse), but if you do finally get the vertical trim set then the Hawk feel nicely balanced and requires only slight adjustments to it's flight path, but still watch those wide vertical speed swings with any adjustment of thrust (certainly more power). This is an aircraft to fly in the focus and fine movements as than the chucking it all around the sky, although it is a lovely almost aerobatic machine. If you want to fulfill your Airshow fantasies then this is the best aircraft into doing so... Approaching EGOV (RAF - Valley) RWY 14, you keep the Hawk at 170 knts and 200 ft off the deck, and don't forget to wave as you flypast, then just power up and climb away at 2000fpm, yes it is all as good as you thought it would be! Getting the speed down can be tricky though. You do have a two-stage airbrake far rear under the fuselage, but remember if the wheels are down, it doesn't activate? So any serious rub off of speed has to be done before you extend the gear. The aircraft systems included here are very comprehensive. Most of the major systems are covered including... Fuel system, Electrical systems, Central Warning systems (CWS), Hydraulic systems, Flight Control systems, Communications Control System (CCS), Air-Conditioning systems and Oxygen systems, Engine systems (Including the comprehensive start up system) and all systems have built in failures, and in most cases more than one system can fail at a single time. Full details of each system are well detailed in the manual. Lighting Internal cockpit lighting is excellent, as three knobs adjust the main panel and the two side consoles front and rear... ... there is "Emergy" panel dim switch, but in reality you adjust the panel lighting down anyway from the very bright full panel setting. Note the great night glass canopy reflections and to also note the reflections on the instruments and glass cannot be switched off, which may annoy a few fliers. External has both (the same) taxi and landing light in the nose, that X-Plane wise is highly visible, navigation lights and selectable Anti-Collision red or white strobes. The white flashing strobes at night are highly visible in the cockpit, but realistic. Landing Time to land... fighter jets can be tricky to land, as they are built for the extremes of speed and manoeuvrability and not the basic areas of flying. 150 knts is a nice approach speed clean, but once the flaps are down full and the gear is extended then your goal is 130 knts, but be aware of the fall in performance below the 130 knt zone as it is severe... .... I have found several times at this point in the approach the aircraft will start to behave oddly, of which I call the "Wobbles", power percentage is critical in staying out of the zone, because if the aircraft starts doing the "wobble" then in over correcting, you can lose it... more power or stopping the stall doesn't really fix it either, but helps, so the best way to get out of it is just to abandon the landing, go around and get it better and cleaner in the next approach and not in trying to fight it. It is groove thing in that when you get the aircraft into that fine groove of approach and then controlling the speed, then it can all come clean... power off to around 110knts and let the Hawk sink down, but be aware that the final stall speed is around 106 knts which is very close to the 110 knts required. Flare and touchdown has to be smooth as the gear is very supple, get it wrong or hit the tarmac to quickly or too hard and the T1 will bounce, so there is a fair bit of skill required to land the Hawk smoothly and professionally, but then again this aircraft is not for the average flier. Liveries There is a bonanza of liveries available. Twelve are provided with the aircraft package, and another twelve are available as a separate livery pack. Focus is totally on the RAF and RAF Valley, with a few international airforce users, but no Australian livery version, which is an odd one? Blank is default... The free Christophe Red Arrows "Flag" is noted here (below right) as it is a great livery. _________________________________________________ Livery pack has some excellent RAF celebration and production factory designs... Summary X-Plane has had some very good fighters or military aircraft of this category, the best is the AMX jet, FA-18F Super Hornet, X-Trident Panavia Tornado and MiG-29. But all fall short mostly now, as in most cases they are still all X-Plane10 (or with minor X-Plane11 modifications) aircraft and in reality all are very dated, only the GR4 Tornado is really what you would call modern... also they are all not in this price range or quality class, so that leaves this Hawk T.1 all in a category on it's own. The price in the mid-40's of US Dollars is to be considered in this summary. Again no fighter has cost this much, so you are expecting a high level of quality and a load of features. Yes you get both, as the quality here is exceptional and there is a realism with the cockpit from the external and internal views that is certainly a new level of real world reflection and hence the exceptional glass. So the aircraft in design is certainly top notch, and so does the custom sounds live up to their high expectations as well, the start up engine noises are simply the best yet for a small jet engine. Features are very good as well, with the expected static elements, quick engine starts, aircraft stands, opening canopy and equipment bay and yes the animated pilots are also highly lifelike and can be inserted or not, and you can also have their visors up or down, shame you can't have one in the other seat while you are flying in the front or the rear. Also the menus are good, and better than the earlier JustFlight/Thranda menus, but are not movable or scalable. The version change from T1 to the T1a is a bit of an odd one, where as the T1 is the trainer, the T1a is the armed version, the menu option just adds on a small tail extension? So there are a few quirks with the aircraft, but all are rather minor. Aircraft dynamics are excellent, but require skill and focus, but that is what you need when flying a fast small jet, and it is all physical manual flying as well... the aim here is to out fly yourself, and fly the aircraft to the best of your ability to do so, then the rewards will come. It would have been or even will become even more interesting when the aircraft acquires the X-Plane 11.30 new particle effects, as that was one feature that really kept on coming back to me as I reviewed the aircraft.. I hope we don't have to wait too soon for an 11.30 update for the Hawk as those dynamics would be excellent here. The development process for this Hawk was quite long, but the results have been well worth the wait, and the aircraft is certainly more highly refined for that wait, and overall JustFlight/Thranda are bringing a very much more highly refined and detailed aircraft to X-Plane, yes they cost more, but to have this level of quality and design, then that is also required in the new higher level of simulation that is now available to X-Plane, and it is a level we only dreamed of a few years ago, and more so. So to that person who stood looking at an aircraft and wonders what is it REALLY like to sit in that display aircraft at an airshow, and to actually fly it... well now and here with this excellent JustFlight/Thranda Hawk Trainer you now finally have that answer... Highly Recommended. _____________________________________________________________________________________ The BAe Systems Hawk T1/A Trainer by JustFlight - Thranda Design is a new release for X-Plane11 and NOW available here at the X-Plane.OrgStore BAe Systems Hawk T1/A Trainer Price is US$44.95 Hawk T1/A Advanced Trainer Livery Pack is also available... Price is US$14.99 This aircraft is a noted aircraft for X-Plane11 only.  The aircraft is directly available from JustFlight as well. Features Model Accurately modelled Hawk T1 and T1A, built using real-world aircraft plans Numerous animations including a storage hatch, ram air turbine (RAT), canopy and crew ladder Ground equipment including chocks, access steps and engine intake covers 4096 x 4096 textures are used to produce the highest possible texture clarity PBR (Physically Based Rendering) materials with real-time environment reflections for superb quality and realism Detailed normal mapping for down-to-the-rivet precision of aircraft features Cockpit A truly 3D virtual cockpit right down to accurately modelled ejector seats and screw heads - every instrument is constructed fully in 3D with smooth animations Cockpit textures feature wear and tear based on reference photos taken in the real aircraft to produce an authentic environment Interactive checklists for every stage of flight Aircraft configuration system that will allow you to choose between 'cold & dark' or 'ready for take-off' (if aircraft is stationary on the ground) Fully functional and comprehensive IFR-capable avionics fit, including AN/ARC 164 UHF radio, plus a retrofitted modern AN/ARC-232 UHF/VHF unit and TACAN/ILS radio units Authentic head-up display (HUD) Interactive logbook panel for logging your flight details (X-Plane native) GoodWay compatible Adjustable canopy mirrors with real-time reflections of the environment Animated toe brakes Radio knob animations routed through plug-in logic, for optimum movement fidelity and sound synchronisation Aircraft systems Custom-coded electrical system with AC and DC resets and loads Realistic landing gear with slow/fast tyre rotation animation (blurry when rotating fast), precise shock absorber animation and wheel chocks Custom-coded hydraulic systems, including functioning RAT Realistic lighting system with rheostat controls Custom external light logic with custom strobe light pattern and custom light halos for added realism Capable of loading and firing X-Plane's default weapons. The currently selected loadout is automatically saved for the next flight. Requirements: X-Plane 11 CPU: Intel Core i5 6600K at 3.5GHz or faster 8GB RAM or more DirectX 12-capable graphics card from nVidia, AMD or Intel with at least 4GB VRAM (GeForce GTX 1070 or better or similar from AMD) Windows 10 / 7 / Vista / XP, MAC OS 10.10 (or higher) or Linux 2GB hard drive space _____________________________________________________________________________________ Installation: Download for the BAe Systems Hawk T1/A Trainer is 629.40mb and the unzipped file is deposited in the "General Aviation" X-Plane folder at 1.12gb (including all 24 liveries) Key authorisation and a restart is required. Documents: Highly detailed manual covers installation and all instrument notes, systems details, panel and menu guides and a basic tutorial flight. Hawk X-Plane manual (93 pages) ____________________________________________________________________________________  Review by Stephen Dutton  29th September 2018 Copyright©2018: X-PlaneReviews (Disclaimer. All images and text in this review are the work and property of X-PlaneReviews, no sharing or copy of the content is allowed without consent from the author as per copyright conditions)  Review System Specifications: Computer System: Windows - Intel Core i7 6700K CPU 4.00GHz / 64bit - 16 Gb single 1067 Mhz DDR4 2133 - ASUS GeForce GTX 1080 8Gb - Samsung Evo 512gb SSD Software: - Windows 10 - X-Plane 11.25 Addons: Saitek x56 Rhino Pro system Joystick and Throttle : Sound - Bose Soundlink Mini Environment Engine by xEnviro v1.07 US$69.90 : XPRealistic Pro v1.0.9 effects US$19.95 Scenery or Aircraft- EGOV - RAF Valley for X-Plane 11 1.0.0 by RCMarple (X-Plane.Org) - Free! 
  9. Aircraft Upgraded to X-Plane 12 : Beechcraft Duchess Model 76 by JustFlight Thranda If you want to fill a void that has been left by Carenado, then the best place to look to is JustFlight, the British based developers. Who work in conjunction with Thranda Design, and ironically also Thranda that used to do the X-Plane development for Carenado. This was in recreating a market for nice and authentic single prop, and twin-engined General Aviation aircraft. Covered by JustFlight/Thranda has been the Archer TX/LX, Archer lll, Warrior ll and the Arrow lll/lV. A few in the Archer TX and Archer lll have already been converted to X-Plane 12, but a lot of the JustFlight stable are only still X-Plane 11. A Twin-Engined aircraft that was released for X-Plane 11 in April 2019, was the Beechcraft Duchess Model 76. It was a very nice twin, and now here it has been extensively upgraded to X-Plane 12, note this is an upgrade, and earlier purchasers of the Duchess XP11 can get 10% discount off the new Duchess X-Plane 12 aircraft. The aircraft is developed out of the Beechcraft Musketeer family of single-engined aircraft family line, and at first glance you would be pushed to see any family resemblance, between the model 24 low-wing standard low elevator design to the Series 76 twin-engined high T-Tail configuration, and an all round far larger aircraft in a 32 ft 9 in (9.98 m) to 38 ft 0 in (11.58 m) wingspan and longer fuselage 25 ft 8 in (7.82 m) to the 76's 29 ft 0 1⁄2 in (8.852 m) overall length. But get down into the parts catalogue and you would be amazed on how many of the same spec are on both aircraft. Its main rival is the Cessna 310 and other references in this category include the PA-30 Twin Comanche and the PA-34 Seneca V. The original Duchess looked really great in X-Plane 11, but the Model 76 now jumps out at you far more with the X-Plane 12 lighting effects, you never get used to it, it has that extremely visible realism factor in the better PBR lighting. Also notable here are that the textures both external and internal are now 8K, and used here to produce a far higher texture clarity, and you notice the difference immediately... vibrantly. Note the newer 8K textures actually use less framerate than the old double 4K textures, in the way they are produced and used here, a Thranda development speciality. Modeling and detail was also good, but again it is all the more highlighted here (that lighting thing!) the feel is actually Carenado, not Thranda... as with their other Cessnas and what not, that is not a bad thing, as that was Carenado's major attraction with the worn (if sometimes heavy) feel of their aircraft, or authenticity. Get in close and you won't at all be disappointed, it's perfection here with the aircraft skin and rivets, love that wing camber at a NACA 632A415 airfoil shape, so smooth and really well done... At this US40+ price your expecting a lot of high end quality, and yes it delivers here in buckets, as the detailing is very professionally and expertly done, as is the excellent glass, thickly tinted and lovely to look at, it all reflects with perfection (you can turn off the reflections, but why would you). The engine pods are also beautifully modeled, again those smooth curves scream out quality. They house two Lycoming O-360-A1G6D air-cooled flat-four engines, 180 hp(130 kW) each, and right through out the full production run 1978-1983 there was no updated or engine revisions, except for one in house turbo development aircraft. All the undercarriage came directly from the Musketeer spare parts bins, so it is exactly the same trailing link layout and structure, all the craftwork is expertly done in detail and animation, it is a complex gear system but fully realised here, with all the components highly visible. Two cabin doors open, and there is a rear baggage door, really nicely done with both external and internal door latches that work. Internally the layout is the same, but the materials are all very different. The X-Plane 11 Duchess had a very all grey (dull) interior design, here it is a dark blue cloth with slightly darker blue wall and door trimmings, roof is a weave texture mocha brown, with light grey walls... lovely in style and depth of an older period... the layout panels are actually very Carenado Bonanza, of which I love... classy! Instrument Panel The instrument panel doesn't have that 'wham bam, thank you mam" factor. that you are expecting... even if at first looking slightly flat, but get in and look at it all more closely, and the detail is extremely very well done. Dials are rusted, dusty and worn out, with plasters even stuck to the panel from past use. Instrument gauges all have faded graphics, and the lighting studs are also well worn and even rusted from use. As noted, if you are Carenado man (or woman), then this is heaven, a trip back into the glory days. Yokes up close are quite authentic and gloriously faded from their 70's heyday, you can hide them individually, and can also use the switch electric trim... Panel layout is in three layers of dials to create a deep feel of instruments... The Standard Six (SS) flying instruments are front and centre... Airspeed Indicator, Artificial Horizon and the Attitude Indicator are on the top row and the Turn Coordinator, Heading Dial/Course and Vertical Speed Indicators set out directly below. Left of the SS is a clock, backup Attitude Indicator and lower EGT (Exhaust gas temperature) needles. Right of the SS is a twin-needle Manifold pressure and below a twin needle RPM gauges, lower panel centre are two Bendix/King dials ADF (yellow) VOR2 (green) pointers driven by KR 87 ADF/VOR2 and the other is a VOR 2 / ILS indicator driven by KX 165 (NAV 2). Both heading and OBS rear dials/cards are adjustable. Lower panel is a Instrument air (vacuum) gauge and electrical starting and lighting switchgear with the neat gear knob. Top panel left is the label NAV 2 over the clock, very weird? Twin (engine sets) of six rows of gauges are centre panel, with from top: Fuel L&R quantity gauges, Fuel pressure gauges, Oil pressure gauges, Oil temperature gauges, Cylinder temperature gauges and Alternator load meters with Alternator-out under/over voltage warning lights inset (are beautifully done). Top of the gauges sits a DME indicator which displays range, ground speed and time to station for NAV 1 or NAV 2 frequencies. An outside air temperature (digital) matches the manual pressure left window type, and a Hobbs hour meter is far right. The circuit breaker panel is active and can be used and is noted in the twin-bus layout of BUS 1 and BUS 2, it is very good and highly authentic in use. Flap lever and display are below the avionics with 0º - 10º - 20º - DN settings, but the flaps are not section driven, but are continuous in operation and so the degree markers are for display only. There are no instruments for the right seat pilot/passenger with the equipment stack dominating the area. Avionics stack is the usual Bendix/King KMA 28 TSO radio top which is above the GNS430 below (the Reality XP's GTN 750 unit can also be fitted, but this is an addon extra and costs you another $49.95) There is a really nice Bendix/King KT 76A transponder unit with a Bendix/King KX 155 COM/NAV 2 radio and Bendix/King KR87 ADF radio receiver bottom. Top far right is the Century IV autopilot which is (speaking to the passenger) "can you press the second button the top row, thanks very much" as it is located pretty in being well as far away from the pilot as reachable possible (there is thankfully a pop-up panel), and below is a WX-8 Stormscope. Twin Throttle levers, Propeller control levers (feathering on both 2-bladed Hartzell 7666A constant speed propellers does work) and Mixture levers are all excellent and well worn and feel nicely authentic to use. Note... unless there is power on, the feathering won't work. Pitch trim is situated between the seats and is well done, but requires help in key settings in a simulation environment (electric trim is available on the yokes), fuel levers are really nice as are the engine vents that can be opened, closed or set half way.... fuel crossfeed is active and the (working) Carb heat is here as well. Note how the passenger seat is offset to the pilot's, a nice authentic touch. Internal Lighting Both internal and external lighting is still quite basic... panel has only two adjustments for instruments (noted as "Post Lights") and Instrument flood. But you can find that nice night time flying lighting sweetspot. However the worn graphics engine readouts look like early washed out X-Plane 2d panel, and they have no depth, but otherwise the panel looks good. Overhead light (and red torch) selection STILL does NOT work? so that gives you a very unusable dark cabin? External lighting Again very basic, even poor. The main wing and taxi lights are dull, and are missing their usual Thranda sparkle. Navigation lights (Red, Green and rear White) are fine, as are the wing strobes. Menu The Menu system is all changed for X-Plane 12. Gone are the side tab and the generally average looking tab menu. Here it is replaced by an iPad style tablet, stuck to the left window... But you do have options, as the tablet can also be placed on either yoke and windscreen right... You can pop-out the screen as a window as well... ... the tablet is also adjustable (movable) via the hot-spot, top frame. But because of it's size and shape, the view-point is not really square or head on, the yoke position is better, but now also situated lower in your eyesight. It's too far away as well for any detailed inspection and use. But the new layout and art does look far more modern, making it far nicer to use than the old version. The earlier version had eighteen tiles for selection, here it has been reduced down to twelve... Top row : Aircraft Options, Weight & Balance, Instr Options, Engine Config, and Static Liveries Middle Row : Configuration, Log Book, Checklist, Ground Handling and Dynamic Liveries Bottom row : Flight Computer and Avitab (Plugin required) Aircraft Options: Covers the three doors; Pilot, CoPilot and Baggage Door (Open /Close), Window and Instrument Reflections, Cockpit Lights, Ground Equipment, Swap Pilots and Altimeter (IN.HG/MB) Open (close) doors are as seen before... Cockpit lights, just turns full on the Instrument Lighting? but could have been more useful if used for the (missing) cabin light? Ground Equipment is as terrible as the earlier set up. A single option to add in a ground puller on the front wheel, chocks, tie-downs and to hide the pilot, it still does not work? The puller does not work (neither do the tie-downs) if you just want to park the aircraft after a flight. No tags or flags and engine inlet covers are here either, and even a windscreen cover would be nice? Dan Klaue and his wife turn up as your pilots, and basically they are same two animated pilots as in the Thranda Aircraft, by the menu option, you can swap the seat position of the pilots. Weight & Balance: The weight and balance window is very good, if basic to look at (it is the original W&B window). It comes with adjustable weights for all four passengers, and baggage, fuel can be set here also as can the change from kg - lbs. There is the option to load the Aircraft "Half" or "Full" tanks. A full list of weights, CG and a large graph of your settings are all very helpful into balancing the aircraft. Press "Save Configuration" to save your preferred load setup, and "Load Configuration" to set up the aircraft. Lowering the Co-Pilot weight will make Him/Her disappear, but there are no passengers if weight added in the rear, or any bags added to the baggage area, such is shrinkflation today. You can open most pages into a "Window" via the arrow logo right top. Instr Options (Instrument Options) include two pop-ups for the GNS 430 and the Century IV (autopilot). The old "Refill Menu" has been changed here to the Engine Options; this allows you to view the fuel and oil status as well as the status of spark plug fouling and Vapour Lock, and you can also recharge the battery if it goes flat, of which it does with regularity. Static Liveries; You can rotate through all the liveries with the Model 76 via the Static Liveries menu. An option here (new) is that you can adjust the Dirt (dirtiness) between 0-100%. Configuration: Here you can change the aircraft configuration, and there are three options; Engines Running (power up to flying mode), DynaFeel and the tablet (screen) Brightness. "DynaFeel" is a system that dynamically adjusts the rate at which the controls deflect. It is based on airspeed and how much the control is deflected. This means the controls will feel light and responsive at low speeds and with small deflections, but will get progressively heavier as the airspeed increases. If you fly Thranda Aircraft, then you will be familiar with the system. Logbook: This icon brings up the X-Plane standard Logbook. Checklist: There is a 27 page checklist that you can tick off... very good, but even though there is a "End of the Checklist" tickable box, it doesn't oddly reset all the boxes to a reset... that is a return of 27 pages and an average of twelve boxes per page to untick, so you do the maths... Ground Handling: All JustFlight menus have odd useless tools, here is one... the X-Plane "Ground Handling" tool, for "Pushback" and "Request Ground Service"? It's a GA, not a Boeing 737. Dynamic Liveries: Here is another Thranda feature now available on the JustFlight Series. Thranda introduced a clever feature of a way to design your own livery called DYNAMIC LIVERIES. You have a menu to select on the right that can colour a certain part of the aircraft, like the Roof, Wing, Tail or Wing tips. Select which one you want and then adjust the three RGB colours for that certain area, and the selected colour (here blue) is shown in the square. You can also separately change the aircraft registration number, the Beechcraft logo can be added as well. Another option is that changes can also be made to the Metal or Rough surfaces, this can be applied to any of the liveries. When done you can "SAVE" or ADD the livery and then "APPLY" it to the aircraft. The conversion takes a few minutes with some weird screen changes, but the results are excellent and now the Beechcraft is in your own nice livery design... Flight Computer: The flight computer panel provides a wealth of information that is very handy in flight, with highlights including OAT (Outside Air Temperature), GS (Ground Speed), range (available), endurance (time), and FF and used fuel flow, Winds.... fuel burn can be reset. Units can also be changed from Metric to Imperial.. AviTab: The AviTab tool can also be used, and with Navigraph charts, if you have an account. There is no tablet rotation from landscape to portrait, and to get back to the main menu, you press the right centre section of the frame. Missing from the earlier options are the Sound Panel and the Flashlight. ____________ Flying the X-Plane 12 Duchess Model 76 You have to prime the engines via a button in the middle of the starter switch before turning the starter switch, but it is a bit of a trick on how long to hold the primer button and not to flood the engine, not a lot I believe... engine starts are excellent. But I found several times the No.2 right engine has a tendency to foul it's plugs far more than the left one, if it does it is tricky to even hell to restart it again. The Model 76 taxi's like an older Carenado as well... You have to adjust both the Propeller and Mixture right low to get yourself a lower taxi speed, if not, even on idle the taxi rate is too fast. I'm used to this caper by now, but I don't remember the X-Plane 11 version having such a high throttle idle? The Hartzell constant speed propellers are counter-rotating, turning counter clockwise engine left and clockwise engine right, this is to balance the aircraft's thrust and it is very helpful on takeoff, keeping you clean on the centreline. With no set flap degrees you can set the angle that you want, here I go for 5º to create lift, but with as little drag as possible.... the flap display can be hard to see at this distance, harder to see and set on landing. You do adjust each throttle (slightly) to absorb the different engine performance... but that felt highly realistic. Around 95 knts and your climbing out. Climb out is around 1000 fpm (Feet Per Minute) and that is a nice number here, officially the rate of climb limit is 1,248 ft/min (6.34 m/s), so you are using the climb to maximum effect, it doesn't feel like there is any strain on the engines or the aircraft. The memories come flooding back... this is such a smooth Twin, super-smooth with tons of power. First climb is to 6,000ft, then Trim out... nice to trim and settle the aircraft. The electric Trim won't work unless you turn it on, on the panel behind the Yoke. Then you get the two up/down arrows on the Yoke trimmer button for trim adjustment. Same with the Autopilot, there is another panel switch for power, then another on switch on the Century IV panel... it's very hard to read (certainly with the bright daylight), so the AP pop-up is the recommended tool to use it most of the time... ALT will hold your current altitude, but to climb or descend you then press ATT and then set your pitch, you click and don't scroll the buttons to change the aircraft's pitch. The ATT setting can also be used just to hold your current pitch if you like that angle or rate of climb, so the AP is again very easy to use. Now we settle-in for the 2h 30m flight to Portland, if any aircraft is very capable, it is the Duchess. The Beechcraft looks extremely nice in the air, certainly in it's X-Plane 12 guise, realism 101... checkout ot the underside, fabulously done, remind you of anything? yes those dirty Carenados. Then then also remember to use the EGT needles, the yellow needles represent the best lean to rich mixture for the best fuel flow and hence performance, so you adjust both the throttles and the mixture levers to achieve your golden lean setting.... it works fabulously, and I learn't a lot back in the time on how to "Lean for Speed". Here the mixture levers are really well far back, almost at the engine cut-off point, but the speed is good, and you feel no loss of power. Cruise speed is 158 kn (182 mph; 293 km/h) at the best at 10,000 ft (3,000 m), Range is VOR busting 780 nmi (898 mi; 1,445 km) and the Service Ceiling is a generous 19,650 ft (5,990 m).... I need that height here as well? what is it if you fly North on the West Coast of California, as you always seem to be climbing, I'm finding I'm already up to 9,000ft, but those ridges are still close? It is a nice place to be in is the Duchess, the quality environment is absolutely first rate, a genuine feel. Now descending into Portland, I checkout the Flight Computer numbers, very handy and informative... good tools are always a help. One thing has been enforced during this newer review of the Model 76, and that this is a nice easy aircraft for learners and it comes with a nice stable platform to practise on, yes the 76 is an easy aircraft to fly, but the pro's will get it as well... and love it as much as there is also a great built in depth in there, certainly even better now in X-Plane 12. Sounds are excellent, they should be at this price, but overall and right through the engine ranges, startup and shut down, you will not be disappointed. The sounds cover the full stereo spectrum, 3D audio effects, atmospheric effects, adaptive Doppler, exterior sounds spill, and different sound characteristics depending on viewing angle... It's a very noisy aircraft as they are first rate and also upgraded to FMOD2. Set up and went into the approach of Portland Intl Rwy 10R. Tricky into getting right is the Flap setting... The JustFlight Duchess as noted uses a continuous movement flap selection... It's hard, because of the angle and distance of the flap dial, worse on this approach as the flat glass on the instrument was washed out, so the setting was a bit of a guess, or feel. Secondly it takes ages to get to the full 30º (DN) setting, extending and retracting, so you think you are there, then look and see it is only half-extended? They are seriously noisy as well, thrumming high noise in the aircraft. With the gear down you can see the excellent lower detail, it's impressive is this JustFlight. 90 knts full flap is a nice approach and losing height of around 200 fpm speed. You have to be careful not to get too nose down on the approach, so the right trim setting and throttle position is vital. Pitch adjustments via the throttle is excellent, but also sedate, so you have to anticipate where you want your speed and pitch angle before you get there... it's a bit of a trick, but it comes to you with the regular flying of the Model 76. Final approach is 80 knts, then you need to get that nose up to flare. The trick (there is always a trick), is to find that throttle sweet spot, so the Duchess has a slow speed landing, but not a lot of loss of lift, the margin is small, but findable, so doable. The timing of the final pitch still however has to be perfect in the flare, to early and the 76 will slightly float... Once all down, it should be at around 73 knts, then you just run out the speed down to the taxi speed, again the right propeller and mixture lever settings are important to get right before you land, to get the transition to taxiing correct. Stall is 60 knts and lethal, you will just fall out of the air because of that high T-Tail effect! Liveries There are seven liveries provided (PAINTED LIVERIES) (down from eleven), and two of the liveries are noted as "DynamicLiveryResources" and "ZZTEMPLATELIVERY", these are the currently selected "DYNAMIC LIVERIES". ___________________ Summary A Twin-Engined aircraft was released for X-Plane 11 in April 2019 by JustFlight and Thranda Design, this was the Beechcraft Duchess Model 76. It was a very nice twin, and now here it has been extensively upgraded to X-Plane 12, note this is an upgrade, and earlier purchasers of the Duchess XP11 can get 10% discount off the new Duchess X-Plane 12 aircraft. Covered also by JustFlight/Thranda has been the Archer TX/LX, Archer lll, Warrior ll and the Arrow lll/lV, but this Duchess 76, is the only big twin-engined aircraft of the series. The X-Plane 11 version was an excellent aircraft. But this rejuvenated version for X-Plane 12 is far, far better again, but a few quirks still however remain. Highlights of the changes are the new 8K textures, and the far better PBR effects, and this creates a far more quality exterior and interior. First glances say, old and tired, but on a closer inspection, it will cry out authenticity and a very high quality. The aircraft comes alive in X-Plane 12, highly realistic and gives you a very high quality twin for X-Plane 12. There is also a new menu system, as replacing an old tab system, and it is a quality iPad/tablet, that can be positioned in four different places. Besides a few of the original tabs and pages, there are also three new added features directly from the Thranda Design stable, with now the "PAINTED LIVERIES" function, the build your own livery feature of "DYNAMIC LIVERIES" and the "Dynafeel" tool. Performance, physics and handling have also been highly improved to X-Plane 12 standards, based on real-world performance and handling data (two real aircraft G-BZRT and G-GCCL were used as collation). But the odd quirks oddly remain? The poor Static Objects are still a one click nothing. No cabin lighting is still another odd omission, and the external taxi/landing lights are non-existent in brightness and feel, and you still get the very odd tab and useless elements like the X-Plane Ground Handling? and Logbook?... fillers only. The checklist is another oddity, with 27 pages of checks, you can't uncheck in one operation. When coming back to this JustFlight/Thranda Duchess 76, my thinking was "Why didn't I fly this excellent aircraft more, since the 2019 release as it was so good". In most cases you usually have an easy answer, but not with the Duchess, as it is a very fine aircraft in every area (except for separate chocks and covers). It is also in that high price range of US$40+, and that is fine as the aircraft does deliver exceptional quality, but now even more so in the X-Plane 12 environment. It is excellent, a lovely aircraft, that even the most novice pilot can fly and enjoy... overwhelmingly the main thing about the Duchess 76, is that it brings back into your hangar, something you felt you had lost, Carenado authenticity and feel. So it's like going back ten years but still having all the mod-cons that X-Plane 12 provides as well, a brilliant combination of the very best of both worlds.... Highly Recommended. ___________________ Yes! the Beechcraft Duchess Model 76 by JustFlight Thranda is now available from the X-Plane.Org Store here : Beechcraft Duchess Model 76 On sale: US$42.99 Requirements: X-Plane 12 (not for XP11) Windows, Mac or Linux 8 GB+ VRAM Recommended Download size: 2.2 MB Current version : 1.0 (January 31st 2024) Owners of the Duchess XP11 can get 10% the new Duchess XP12. Installed in your X-Plane Aircraft folder 2.44 Gb. Authorization on startup is required. AviTab Plugin is required for this aircraft Documents Duchess Model 76 ODM X-Plane manual.pdf Duchess Model 76 X-Plane manual.pdf EULAstandardcommercialandacademic2019.pdf Design by JustFlight/Thranda Design Support forum: JustFlight Duchess 76 _____________________ Review System Specifications:  Windows - 12th Gen IS1700 Core i7 12700K 12 Core 3.60 GHz CPU - 64bit -32 Gb single 1067 Mhz DDR4 2133 - PNY GeForce RTX 3080 10GB XLR8 - Samsung 970 EVO+ 2TB SSD Software: - Windows 11 Pro - X-Plane 12.09rc5 (This is a Release Candidate review). Plugins: Traffic Global - JustFlight-Traffic (X-Plane.OrgStore) US$52.99 : Global SFD plugin US$30.00 Scenery or Aircraft - KHAF - Half Moon Bay by Rising Dawn Studios (X-Plane.OrgStore) - US$19.00 - KPDX - Portland International Airport 1.5 by Mister X6 (X-Plane.Org) - Free Download ___________________________ Review by Stephen Dutton 4th February 2024 Copyright©2024: X-Plane Reviews (Disclaimer. All images and text in this review are the work and property of X-PlaneReviews, no sharing or copy of the content is allowed without consent from the author as per copyright conditions) All Rights Reserved
  10. Aircraft Release Review : DHC-2 Beaver DGS Series XP12 by Thranda Design In aviation folklore, there are machines that have created an impact by their design alone, but a few have gone even higher into a sort of immortal status, Say Spitfire or DC-3, Concorde and even the Boeing 707. One other aircraft can also join this upper echelons of achievement, and that is the de Havilland Canada Type 2... also known as the "Beaver". Often referred to as the “best bush plane ever built”, the DHC-2 has been instrumental in developing and servicing far-reaching frontiers since it was first introduced in 1947. The DHC-2 Beaver is a single-engined, high-wing, propeller-driven, STOL aircraft that was developed by de Havilland Canada in 1946, and is known as a bush plane, in fact one of the most highly regarded bush aircraft ever created. There was 1,657 Beavers built between 1947–1967 and half are actually still flying and working hard. In fact you can currently buy a zero-time frame and just rebuild your current aircraft and keep the machine flying as long as you can service the radial engine and afford the new airframes... History de Havilland Canada hired Punch Dickins, a famous bush pilot, as Director of Sales who began an extensive program of collecting requests from other pilots and to understand what they needed in a new type of aircraft. Almost without variation, the pilots asked for tremendous extra power and STOL performance, in a design that could be easily fitted with wheels, skis or floats. When de Havilland engineers noted that this would result in poor cruise performance, one pilot replied "You only have to be faster than a dog sled". Other suggestions that seemingly sound mundane but important in the bush plane world; full-sized doors were installed on both sides of the aircraft so it could be easily loaded no matter which side of a dock it tied up on. The large doors (known as Alaska doors) were also made wide enough to allow for a 45 Imperial gallon drum to be rolled directly up and into the aircraft. On September 17, 1946, de Havilland officially put together a design team consisting of Fred Buller, Dick Hiscocks, Jim Houston and W. Jakimiuk, led by Phil Garratt. The new aircraft was designed to be all-metal in using "steel from the engine to the firewall, heavy aluminum truss frames with panels and doors throughout the front seat area, lighter trusses toward the rear and all monocoque construction aft". At the time de Havilland Canada was still a British-owned company and there were plans to fit the evolving design with a British engine. This limited power, so the wing area was greatly increased in order to maintain STOL performance. When Pratt & Whitney Canada offered to supply war-surplus 450 hp (340 kW) Wasp Jr engines at a low price, the aircraft ended up with extra power as well as the original long wing. The result was unbeatable STOL performance for an aircraft of its size. it was decided that the new bush plane was much like the hard-working beaver and so as many aircraft at the time were named after animals, the aircraft was designated after this industrious animal. The first flight of the DHC-2 Beaver was in Downsview, Ontario by Second World War flying ace Russell Bannock on August 16, 1947. The first production aircraft was delivered to the Ontario Department of Lands and Forests, a design partner, in April 1948. The Beaver was designed for flight in rugged and remote areas of the world. Its short takeoff and landing capability made it ideal for areas normally only accessible only by canoe or foot. Because it often flies to remote locations, often in cold climates, its oil reservoir filler is located in the cockpit and the oil can be filled in flight. A series of upgrades to the basic design were incorporated. One major customer introduced the use of flat steps replacing the earlier tubes, a feature that is now almost universal. In 1987, the Canadian Engineering Centennial Board named the DHC-2 one of the top ten Canadian engineering achievements of the 20th century. The current ownership of the certificates and tooling gives Viking Air of Victoria, Canada the exclusive right to manufacture new Beavers. Viking now sells a remanufactured and rebuilt DHC-2T Turbo Beaver upgraded with a Pratt & Whitney Canada PT6A-34 680 hp (507 kW) turboprop engine. With a maximum gross takeoff weight increased to 6,000 lb (2,700 kg) it can carry 2,450 lb (1,110 kg) of freight. However, Viking Turbo Beavers are only rebuilt from existing air frames, and are not new-builds, unlike Viking's own DHC-6 Series 400 Twin Otter, which is manufactured from a completely new airframe. (wikipeida) Performance - Maximum speed: 158 mph (255 km/h) - Cruise speed: 143 mph (230 km/h) - Range: 455 miles (732 km) - Service ceiling: 18,000 ft (5,486 m) - Rate of climb: 1,020 ft/min (5.2 m/s) Thranda Design This is the second Beaver for X-Plane by Thranda Design, their first release was the X-Plane 11 version released in November 2020, and this is the totally revised aircraft for X-Plane 12. Current users of the earlier Thranda XP11 Beaver can also get 30% off this new XP12 version of the DHC-2 Beaver. The older XP11 version is still also currently available, if you want to fly the aircraft in X-Plane 11 This version is the Beaver that incorporates the "Holmes Extended Engine Mount", which moves the 917lbs engine forward by almost 10 inches. This modification then moves the center of gravity of the plane forward, and in then allowing additional loads to be carried in the back without exceeding the aft CG limit. First impressions are quite impressive. This is now also X-Plane 12, so you also get that huge photographic realism from the aircraft as well with the X-Plane 12 lighting and effects. In features and detail, there is is not that much difference outward between the two XP12 and XP11 versions, on the surface they are quite the same aircraft package. It is in the hidden areas, like textures (more soon), lighting, aircraft dynamics, aircraft performance, aircraft flight models is in were they differ. One significant difference is that the extra Floats and Amphibious floats variant is already included in this XP12 package, were as with the original version release they came a short few months awhile after, you also get a canoe as well! Thranda quality is extreme in detail and fittings. As noted the new XP12 Beaver comes with 8K textures, a huge pixel area 7680 x 4320. Just because it is 8K doesn't mean that you need a 8Gb Graphic Card to run them. 4 Gb VRAM is still recommended as Minimum. And 8 Gb+ VRAM is however recommended as normal. But like with the earlier Thranda releases, they had more than one 4K texture size, sometimes two 4K textures to fill in the same 8K area. So in reality you are only using the 8K to fill the same gap of the two 4K set of textures before. So Graphic Card size is not the issue, if you can run your current Thranda aircraft with your current graphic card size, then the DHC-2 will be exactly the same, in fact even a bit more efficient in that it only has to load in only the one texture sheet, rather than the load of old 2(K)or 4(K) texture sheets. As a classic Beaver, you won't get any better in modeling and design than this one, there was the original X-Plane Beaver from SoulMade Simulations DHC-2 version a few years back, that aircraft is a pure DHC-2, but without any updates, certainly no upgrade to X-Plane 12, the SMS DHC-2 is now quite dated and in the past. The detailing is exceptional, the mapping of the precision of the rivets are simply excellent, and I love the gap in the cowling, actually done twice with the Holmes extended engine mount if you look closely. The Pratt & Whitney R-985 Wasp Junior engine, is rated at 450 BHP at sea level. This is an air-cooled, carburetted, 9-Cylinder radial engine, incorporating dual magnetos and an engine-driven single-stage supercharger. And the engine detail really jumps out at you with the coloured inner components, that aspect should not work on such an old aircraft, but it simply looks brilliant here... Undercarriage is basic, but again very well done in total authentic detail, the DHC-2 is a taildragger, so there is only a small loose swivel wheel at the rear. Notable in the detail are the excellent double metal plate reinforce plates, they are all over the fuselage and they all make the aircraft very authentic. They are beautifully done, and shows the high craftmanship of the aircraft. Rear Rudder, Elevator control surfaces reinforce work is also top notch. Wing shape and camber is perfect, again you have a highly realistic wing, realistically modeled and designed with all the correct rivets. Oddly the aileron goes only about 3º up, but 8º down, note the full barn door flap deflection of 58º, mostly used for slow water landings. There is the debate if X-Plane 12 surfaces are too "shiny, shiny". The X-Plane 11 surfaces were certainly in the opposite of being very flat, but it also bought out the intimate detail, here, or for all current Thranda Aircraft, is that every surface is shiny, reflective.... I'm not sure if I am a total fan of this look. In one aspect aircraft certainly looks realistic in X-Plane 12, but in other ways they just don't, as the shininess can hide a lot of the wear detail that presented well on the older XP11 version of Thranda's Beaver. Glass is superb, thick where it counts (windscreen), with a mottled/scratch wear in the glass. All glass is a heavy green tint, and "Bubble" windows is an option on the passenger doors. Reflections can also be turned off. There are four forward doors, Two for the pilots, and two behind for the front row passengers (note the right side door has no external handle, and can only be opened outside via a hotspot). Rear are two separate large upward opening "Alaska" doors. Space inside was created to be wide enough to allow for a 44 Imperial gallon drum to be rolled up into the aircraft. There are four passenger seats, and one large rear bench seat in the rear, all seats are beautifully done in blue canvas, with metal legs and rear plate supports. All of the five Passenger seats backs can be folded forward. You can take one or all five seats out, to create a huge cargo space. This space can then be filled with cargo, including cases, crates and (small oil drums), cargo is also put in the small baggage area behind the restriction net (bench seat if installed). You can of course also mix the passengers with cargo... Cockpit You sit up there very high at the front of the machine... Both the pilot seats are amazing, with their metal clamshell bucket rear design, and hardwearing blue patterned levi Jean look cushions. Both pilots windows can be opened, or positioned in any place, up or down... you can play with the small window air-vent as well. The Thranda Beaver cockpit is not like the antique cream version like on the SoulMade Solutions DHC-2, that is very much beloved by me as to it's reference to an early Beaver. But this version is very much a more relative version to most of the working Beavers out there and it is extremely well done. The SMS version had a single left side Yoke, but here you get the TwinBar Y double version that disappears if you press the base. The logo we all admire... all in it's chrome and black plate glory "De Havilland" and in the right lighting conditions it just glows and shines like it has just been lovingly and newly polished. The cosmetic detail here is excellent, and you simply can't believe the intimate authentic detail all around you here. There are two choices of the famous throttle quadrant, the older original classic version with the Throttle Lever left, with in order Propeller lever and Mixture right... or the more modern squared off version with the Throttle now centre, Prop left and Mixture right. Centre top are the magnificently large DHC-2 iconic Manifold Pressure and RPM gauges, and the mid-screen mounted whiskey compass. The pilot gets all the flying instruments in the form of the six standard flight instruments in the Airspeed, Artificial Horizon, Altitude, Turn/Slip Indicator, Heading Indicator and the Vertical Speed, left is the main fuel tank selector It has positions of OFF, FRONT, CENTRE, REAR. Top panel is the (very) hard too find "Avionics" switch, and the metal plate flaps indicator is a work of art. There is a sensational JOS. POLLACK CORP Ignition switch, ELT and the logo plated MaxDim panel lighting knobs lower left panel, the metal plate storage box opens as well, to revel the three faces of the Thranda Design team. Right side panel has the avionics and electrical panel... There is an altitude selector top, then an S-Tec Fifty-Five x Autopilot, KX 155 NAV/COMM Radio (NAV 1/COM 1), Garmin GMA 340 Comm radio, and a Garmin GTX 325 Transponder lower... it is to be noted that these items are the default set of avionics, but as we shall see, you can use more different units if you want to. To the far right is an OBS Course Deviation Indicator (CDI) - VOR NAV 2. Lower right panel is a fully active (Fuse) Circuit Breaker panel, with the relevant electrical switches set below for power and lighting (Avionics power switch is as noted is high up on the left side panel facia). Next to the Fuses is the AMP's gauge, and Suction Gauge, and below is a lovely PS radio volume panel. Like with the XP11 Thranda Beaver there are still the two basic panel selections, the iconic version we know so well, but also a flat metal grey facia version, with the fancy LED lights under the glareshield. Centre panel is a default X-Plane GNS 530, but it can be replaced with a Reality XP GTN 750 if you own the extra feature. Mid-Panel are the engine gauges, with the Oil temperature shown on the top of the gauge, oil pressure on the left, and fuel pressure on the right. Next right is the sublime gauges to indicate the quantity of fuel remaining in the three primary internal fuel tanks. From left to right these gauges indicate the Front tank, Rear tank, and Middle tank, and below is a CYL. (Cylinder) Temperature gauge, with a Hobbs hour meter. Three lower levers cover (LtoR) the carburetor heat control lever, the famous Fuel Wobble Pump Lever and the Fuel and Oil Emergency Shutoff Lever. To the right is the internal Oil filler (yellow cap). Detail again comes to the fore with the Manufacture's and Aircraft registration plates. The authenticity is simply mind-blowing and it keeps on coming with the ratcheting carb heat lever, the manually pumped flap system (with direction valve), and the primer system that are all faithfully modeled for maximum immersion. The fuel system is complicated, with three internal tanks Front (35 GAL/132 Lts), Centre (35 GAL/132 lts) and Rear (25 GAL/95 lts), two wing tanks (21.6 GAL/85 Lts each) and an optional Belly Fuel Tank (43.1 GAL/163 Lts)... for a total of 181 GAL/685 Lts of fuel. The main internal tanks are controlled via the red switch upper left panel, the wing tip tanks via a red switch upper door left, and the belly tank via a handle under the instrument panel (Vacuum air pressure is required). On the roof are the manual Rudder and Elevator trim wheels and indicators. Lighting is two side spot lights and ceiling LED lights, note the roof mounted temperature gauge, both (green) blinds twist and turn into place. There are loads of pumps and levers on the Beaver, one is the pump handle for the flaps, down right of the pilot's seat and another is the engine primer pump on the left of the pilot's seat, the actions of both are really well done and authentic. You are probably now thinking "This Beaver is exactly the same as the X-Plane 11 version?". It is, nothing at all is different in here except for the Thranda team image in the storage box. But there is a difference though... in the look and feel. Oddly it feels different in here with the X-Plane 12 lighting, far more grey and dark metal. The centre quadrant(s) are now all black, not the steel metal grey of before, so the aircraft feels more modern now than aged, it has also lost something from the organic feel of a Traditional Beaver in the process. Cabin Lighting You still get the post style instrument lighting, but the brightness (even when adjusted to full), is nothing as bright as the X-Plane 11 panel lighting? And the Avionics are too bright for the main instruments, thankfully you can tone them down a little. The grey metal panel facia, has those lovely LED lights, but the instrument lighting can barely be seen? A switch on the lighting panel (arrowed) will turn on all four forward cabin overhead lights... ... oddly there is STILL no lighting in the cabin? But you can turn the roof LEDs right backwards to give some illumination, but a few rear lights in the cabin would be nice. Overall the lighting although the same, is actually worse? External lighting is also worse than in X-Plane 11. Basic lights and the landing lights have no flare or floor shine? Beacon on the roof and tail light. Navigation and a very bright strobe on the wings. Floats and Amphibious floats In the X-Plane 12 package, the earlier extra Floats and Amphibious floats version are now included. Both variants can be found in the X-Plane "Configuration Menu", The Seaplane version is shown twice, under "General Aviation" and "Seaplane". Both the land (Amphibious) and standard Float design is excellent, all the usual Thranda Design quality detail, both the forward wheels, and rear rudder system, the four float supports are well intergrated into the Beaver fuselage, detail is first rate as well. Both Amphibious and Standard Floats are really well shaped and perform nicely on the water, and with the right amount of drag in the air. The wheeled floats do create more drag than the cleaner "Float", and it is noticeable (slightly) from the cockpit. Menu Thranda's Menus are very feature rich and highly detailed. There is a popout TAB under the arrow, that can be (mouse) scrolled to hide it, that is if you don't like these sort of items crowding your screen (I don't). The Menu system includes the "Dynamic Generation Series" or DGS, a Thranda speciality feature that takes full advantage of X-Plane's flexibility for in-sim, real-time modifications. As noted the "Menu" Tab (arrow) is far left middle of your screen, this will activate the Pop-Out Menu... The Menu has seven menu tabs in; GENERAL, LIVERY, WEIGHT/BAL, CAMERA, AUDIO/SLEW, PANEL and MISC (Miscellaneous). Basically it is the standard Thranda default menu. Menu - General The menu "General" sections covers quite a lot of options, the layout is highly detailed and very comprehensive. General menu selections cover; Engine Mode (Simplified/Realistic), Electric Tug, Window and Instrument Panel Reflections on/off, Startup Running on/off (sets aircraft to full running mode), External Belly Tank, Chocks and Brakes on/off, Steering (Simplified/Realistic). Three selections placed right cover group items, but any one item can be also accessed via "Click Spots" and can be individually selected or hidden via the aircraft graphic. "ALL COVERS" will select engine inlet/outlet covers and pitot covers, "ALL TIE-DOWNS" for rear fuselage and wing tie-downs and "ALL DOORS" for both the cockpit doors and the right side luggage door. All EXT - External Lights can be switched on and off as can the ALL INT - Internal lights. And finally "Radial Engine Animation". Static Items include Wheel chocks, wing pitot cover and that rugged heavy duty engine cover over the nose. The Engine cover can only be seen/hidden via the forward selection on the General-Menu page (arrowed). Engine Mode - Toggles the engine realism between "Realistic" and "Simplified". When this is set to "Realistic", the engine will require the correct amount of priming for it to start, depending on the engine's temperature. When the Engine Mode is set to "Simplified", it makes starting easier. Electric Tug can be used to move the aircraft around on the ground via your Throttle (Forwards/Backwards) and Rudder Yaw (Left/Right), brakes can be used as well. Startup Running on/off this switch will re-load the plane either cold and dark or with the engine running. EXT Belly Tank is really well done (note the filler pipe), too much weight? then remove it, but I like the extra range it adds. Steering Toggles between "Realistic" and "Simplified". In Simplified mode the tail wheel steers directly with the rudder, through a range of +- 30 degrees. In Realistic mode it functions as in the real aircraft, becoming free-castoring past +- 25 degrees of deflection. There is an exciting separate animated pop-up window that shows details of the Beaver's engine in operation. At the top of this pop-up is a graph that indicates whether the engine is properly primed for starting. A small indicator line moves horizontally along the bottom of the graph to indicate the current conditions. This graph is only active if the Engine Mode is set to Realistic. There are no pop-up checklists for the Beaver, usually set on the General page, but there is a basic set of checklists in the provided POH Documents. Menu - Liveries Second Menu option is "Liveries", there are two options here with the first being "PAINTED LIVERIES". There are altogether 10 liveries and one blank (DynamicLiveryResource) overall Eleven designs, and all the liveries are of extremely high quality and have creative flare with the package. I will note that seven liveries only loaded after I ran the Skunkscrafts Updater to v1.0.1. The X-Plane 11 Beaver is supplied with fourteen liveries, but there is now only eleven on the XP12 aircraft? with the DynamicLiveryResources being the currently selected "Dynamic" livery. Dynamic Liveries Not happy with any of those designs, then why not create your own! With their earlier release of their Kodiak then Thranda also introduced a clever feature to design your own livery.This is done by switching from PAINTED LIVERIES to DYNAMIC LIVERIES top. I created this orange, black and grey for this review... You have a menu to select on the right that can colour a certain part of the aircraft, like the Roof, Wing, Tail or Wing tips. Select which one you want, and then adjust the RGB colours for that area, it looks hard but you can easily design a very nice livery in about twenty minutes... You can also change the aircraft's registration number, or have original de Havilland logo on the tail. There are also four effects you can apply. The said "Dirt" and "Scratches", and also "Metal" and "Rough(ness)" this gives the aircraft a dirty rough appearance. So applying these Dirt and scratches on the airplane will make the surfaces rougher, this is giving you the full PBR control in creating stunning metallic liveries, or matte, sand-blasted look, and these aspects will also slightly affect the Beaver's drag, and therefore it's cruise speeds. With full dirt and scratches you can expect a loss of 2 to 3 mph of cruise speed. Cleaning the plane by setting both values back to 0 will give you a smoother and slightly faster plane. ... when done you can then "APPLY" it to the aircraft. It was all quite easy to do. Then the aircraft goes through a sort of transmogrifying process that takes around a minute and a half.... ... you can "SAVE" the livery, in that then the custom livery becomes the "DynamicLiveryResources" livery in the "Painted Liveries" selection. Altogether there are 29 optional Dynamic Liveries to change or use. New to the Dynamic Livery application is ERA options in "Modern' or "Classic".... and of course personal taste is optional! In the Float/Amphibian menu, you can also colour in the float design to your own preferences, or to match the floats in with the same aircraft fuselage design, all the same livery options (29) are available here also. Menu - Weight/Bal The Beaver also has a great Weight and Balance menu. Lbs and Kgs which can be selected and changed via the toggle... Lbs In Green, and Kgs in Blue. There is the weight selection of all the seats. The X option on each seat will toggle the seat off/on, or go from a Passenger to Cargo layout. Fuel (including the EXT Tank) can be added in and the amounts are then shown and are adjustable as well in the menu (above)... pilot, passengers and cargo can all be set for individual weights and all are selected via a scrollwheel... and then all of the CofG (Centre of Gravity) parameters are all shown on two graphs, go too far or too heavy and the CofG goes red. When done you can Save the Configuration and then later re-load it, or press Load to add back in the set weights. Working out that right CofG balance here is critical, setting just inside the parameters is just not really good enough, as you need for the aircraft to be balanced in it's fuel and load weights, or you will have difficulty in flying the aircraft. So put too much (cargo) weight aft and you are tail heavy and unbalanced in the TakeOff, and in Flight. Menu - Camera There is a camera feature under the menu "Camera" selection. The left side of the panel is the "Walkaround" views, just pick the dot for the external viewpoint you want to see to rotate around the aircraft. To the right is the default views can be selected via a menu, or press the keypad to select the internal viewpoints. The FoV or "Field of View" is adjustable via a slider. Menu - Audio/Slew Sound can be adjusted via the Audio menu. There are seven slider selections with: Master, Aircraft External, Aircraft Internal, CoPilot, Radios, Environmental and User Interface. One other sound setting is on the Flap panel... As noted, on the right and left of the panel you get the audio simulation of an active noise canceling headset, which is seen as wearing a headset. Sound quality is beyond excellent as it is a built in audio mixer, so you can individually control the audio channels in real-time and you can adjust the volumes while hearing them play. Slew mode allows you to manually move the aircraft around in a disconnected X-Plane space. It functions by temporarily overriding the various aerodynamic and physical forces on the X-Plane settings, it is to allow the user to reposition the plane as desired. This feature is however highly touchy and it is used mostly only really with the Amphibian/Floats option in docking the aircraft to say a pier or marina. Menu - PANEL The sixth "PANEL" Tab option allows you to adjust or change the instruments and dials. Scroll the "PANEL BACKGROUND" number to see all the four background preset layouts. Scroll the "Panel Preset" number to see all the five preset layouts. The layouts can include both GNS 430/530 and the Aspen EFD. Even the The Reality XP GTN 750/650 Touch can also be installed if you have that external option, as the 3d bezels are provided. Aspen EFD is a self-contained multifunction digital display that is divided into a Primary Flight Display (PFD) in the top half, and an Electric Horizontal Situation Indicator (EHSI) in the lower half. As EDF 1000 systems go it is not as highly featured with the GPSS, MAP, 360 and Menu functions all not simulated... all the lower NAV1/NAV2/GPS selections are however available, as is the TPS (Tapes) see/hide option with the MIN (Minimums) selectable as well. and the PFD can be reversed with the EHSI. The EFD 1000 PFD pops-out for convenience. Customising the panel to your own personal layout is just as easy. Just select the "3D EDIT PANEL MODE" (arrowed) that gives you access to all of the 54 individual instruments and avionic units... There some great options including the Aspen EFD 1000, S-TEC 55x Autopilot, Angle of Attack gauge and so on... For those that find instruments are not to their liking, in say, "I wish I could move that altitude meter just a bit more to the left", then here you can simply adjust and move that particular instrument, or even swap the instruments around the panel to your liking. Here I have added in a Reality XP GTN 650 Touch instrument on the right lower panel... You can even adjust the brightness of the instrument. When you can "ADD" (or Duplicate) in a new "Preset", and then "SAVE" that new layout Preset (Preset /6). So basically you can start off with a completely blank instrument panel and then create your own unique or personal instrument layout if you have the time and patience... and you can have up to or save 14 different instrument layouts. It is however very important to restart X-Plane to lock in the new instrumentation layout before flying. Panel features include; S-Tec Fifty Five autopilot and the noted Aspen EFD 1000, KR 87 ADF Radio, Garmin GMA 340, Garmin GTX325 Mode C Transponder and the usual GNS 430/530 PS/Nav/Comm units. Both GNS units also require their own installation area. Note that the "Gear Advisory" Panel for the Amphibious/Float version can also be added to the custom panel. The DGS system is certainly very clever and versatile, but a small annoyance is that to get your custom livery or panel, you have to reset everything, every time you fly? Yes the custom SAVES are all there ready for you, but not when you start/load the aircraft. Menu - MISC The Misc (Miscellaneous) page has four panels that cover External; Skis, Wheels; Tires and Mud Flaps. Internal; Windows options and Throttle Quadrant options. Notably missing here is the usual "DynaFeel" Feature. High quality designed "Skis" are available for the Beaver... Tyres can be changed from "Regular" size, to the larger "Tundra" style. The larger tundra tyres however won't work with the skis... On the rear you can have "Mud Flaps", and here they work with either the regular or tundra tyre options. Rear Door windows can be "Flat" or "Bubble"... Throttle Quadrant options include; OLD (classic) or NEW... On most Thranda Design aircraft they have a "Pilot" option in that the pilots can be changed around from Male to Female. There is no Female pilot with the Beaver, but only the Male "Beaver Dan"... he is also fully animated in the arms, legs and head movements. The Float/Amphibian MISC Menu is different. You still have the earlier Throttle Quadrant (Old/New)/Window options (Flat/Bubble). Yes, you get a canoe! Amphibian or Float option... There is a Ventral Fin, that is an option under the tail... You can Retract or Extend the rudders from the MISC Panel There are another two options to raise and lower the rudders, One is a handle and cord in the cockpit, left floor... another (the most simple) is to use the Keyboard command "Toggle Water Rudder". ________________________ Flying the DHC-2 Beaver There are two options to starting the DHC-2, the (very) easy way via the Simplified "Engine Mode" option in the Menu/General panel... and the long winded "Realistic" way. With the full engine start up procedure as is explained in the manual. Did you always want to look actually inside your engine? Well now you can and the idea is to see how the engine is primed to start... here Dan Klaue's genius strikes again! There is the option via a menu selection "Radial Engine Animation" that brings up an animated Wasp Radial engine, you can also "PreHeat" and "Prime" your Wasp ready for start, but you have to be careful not to "OverPrime" the Cylinders. You can also prime the engine via the hand pump, deep left of the pilot's seat, switch the large ignition switch on (Fuel on as well of course)... setting the Mixture to almost full RICH lever and a slight 5th throttle... then flick the left switch under the red cover to start the Wasp.... get the procedure right and the Beaver's prop will rotate then fire into action... and also the Radial Engine Animation" will erupt into activity. On the Animation the pistons are exploding, and the animation is amazing beyond belief, adjust the throttle for a some serious movement, but the animation will also react to the adjustment of not only the throttle inputs, but with the fuel mixture from "Rich" to 'Lean" adjustments as well. Just move the mixture lever (not fully back) and see changes and the weakness in the sparks. These movements and the running of the DHC-2 also compliment the amazing sound range as well, there is a consistent adjustment of the excellent engine sounds to the condition of the running of the engine, that is the "Ugh, Ugh" of low lean to the high power "roar" of the full throttle. Also no two starts will sound alike, as there is coughing, sputtering, and the clanking of valves that all contribute the full aural experience, it's clever and highly realistic as well. The sounds actually also give you clues as to what's happening under the hood as is for the shear band of extensive sound patterns available here that show no gaps or the same patterns that just gets you all tinkly down your back... it is highly, highly aurally realistic... well like a full throated real 450 hp Wasp Jr engine sounds like. As noted you can have a freewheeling rear or locked to the rudder yaw, You really need a set of rudder pedals for the Thranda Beaver with built in toe brakes to use the freewheeling option, that aspect takes a little skill to get right. Taildraggers are a feel thing, and thankfully the Beaver is one of the better taildraggers. Of course experiment with the load and trim until you get that feeling the DHC-2 is rightly balanced. Thankfully the DHC-2 Beaver is one of the easiest taildraggers to taxi, keeping the right speed though is important, otherwise it's just easy to track straight. Thank God, because you can't see anything (sh**) with the nose high profile of the aircraft, so a slight hunch up out of the seat left is needed to follow the runway. I have also become quite adept at twisting the Beaver 180º to takeoff, right speed, then a touch more throttle, and then the full yaw tight turn, then quickly off the throttle again... You sit high, and the view out is quite good for a taildragger, but a slight glance to the left will align you up with the runway... flaps are set to "Takeoff" which feels extreme here, in a very high degree setting. But the Beaver has a very wide flight dynamic in that the flaps can be set to extreme positions, but still be well within the aircraft's STOL (Short TakeOff and Landing) performance envelope. Speed builds gradually then suddenly the tail unstick's, and you need a kick of full of right rudder to maintain the straight ahead line... ... another tool is to lightly touch the right toe-brake slightly to maintain the correct aligned course, between the two movements you can keep the Beaver straight. Takeoff is usually around 90 knts, but you don't need to pull back the stick as the Beaver just glides into the air on lift alone (the heavy set flaps), and to climb, it then only requires a little pitch to meet the 600 fpm climb-out you need. You can climb-out to the extreme of 1,000 fpm, but the 600 fpm angle is perfect, the one thing that should be highly noted is the aircraft's weight and feel, it is excellent. Now a slight adjustment to 800 fpm, which is perfect with still no loss of speed, also the Flaps are now at the "Climb" marker, as I need to climb up to 6,000 ft... high? not really as the Beaver can do a ceiling of 18,000 ft (5,486 m)... impressive. Unlike other aircraft you can consistently use the flaps and even in level flight, most aircraft need the flaps in and clean as soon as possible, but not the Beaver, as if you have a slightly uneven balance (front to rear) in the aircraft you can use the flaps to even out the balance without touching the trim, it is a tool every Beaver pilot's use. Stewart River is a 533-kilometre tributary of Yukon River. And heading up river towards Hecate Strait. But I am also not going all the way to the Strait either, just far enough to climb up high to turn west, but with the high mountains surrounding me, it means a climb of at least 6,000 ft, maybe more. Obviously you don't go very fast... 158 mph (255 km/h) or 140 knts is max and your cruise speed is only 143 mph (230 km/h) or 125 knts, but you don't really care about that factor, as this DHC aircraft is an absolute dream to fly. You can see why tourists love this lower Alaskan part of the world, the views are amazing, even X-Plane 12 amazing... I'm now at 6,000 ft, but it's still not enough, so another 2,000 ft to go up to 8,000 ft. Now higher I finally see a gap in the mountains and head west... Trimming the DHC-2 out is easy, the trims are set up up on the roof (But I use keyboard commands), and the Beaver trims out the pitch beautifully, now just small stick and rudder inputs keeps DHC straight, but better still yet is if you trim out the rudder as well, and now you can take both hands and feet off the controls and the Beaver will still fly like a dream straight and level.... this is one amazing simulation of a real aircraft. Fuel management is critical... Six tanks altogether, but basically you switch between three, Front - Middle - Rear, via the big knob, far left panel. The three tanks are shown on the lower console. The Wing tanks are selected via another large knob on the left side above the door. Select Left or Right Tanks or BOTH, and all selections feed to the Front main tank, usually you would leave it on BOTH, for an even balance... The EXT (external) Tank also feeds into another tank, the Middle one. There is a lever under the pilot's instrument panel to turn on the EXT tank flow, this then moves the ancillary fuel into the Middle tank, obviously it is good idea to select the middle tank to use all the extra fuel in there... The EXT tank lever is moved vertical (down) to access the fuel, when done then shut it off by moving the lever left. it will fill up the Middle tank quite quickly. I know why I love the Beaver, as you just purr along doing the job. The Beaver is like a light truck of the aircraft world, it shifts people and cargo with a ruggedness into a wilderness. Your sitting up there high, in charge, master of your own little universe, just shuttling along... heaven is a Beaver in flight, you can easily see why any pilot loves the DHC-2 so much. Ketchikan is rear to my left, Clarence Strait is to my immediate left... ... soon the Stikine Strait comes into view on my right, a glance down and I'm horrified on how much fuel, including the extra top up amount has been used from the middle tank, I switch again to the rear tank, supping more fuel from that one instead, the whole trip distance is only 177 nm, but I'm also using a lot of fuel with that powerful Wasp. Time to turn into the Strait... I have already lost 4,000 ft as I enter, but it was a slow descent. At first the Beaver dropped altitude, then crawled to a stop? the only way to continue the descent was to pull half back on the throttle, then you were moving downwards again. As we already know, the Beaver is known as a "flap-happy" aircraft and you can see and feel that aspect of why here... That is the "Landing" setting, but you can go even slower if you go deeper with more flap and into the red zone to the full 58º degrees... Usually you would never use 58º, that aspect just gives you too much drag, but it is useful for the water landings, as it gives you a far lower speed and more lift at those almost static water approaches. Wrangell pops up now on my right. I'm down to 800 ft, and ready for the approach into PAWG Rwy 10 (6000 ft). Approach speed is around 70 knts, here your altitude is controlled only via your throttle, more power to go up and less power to go down, but even the mixture adjustments can even have an effect, so be aware if you are leaning out the engine more while reducing power. One note I will say is that the touchdown speed is still around 70 knts, dropping to 60 knts on the runway, and that feels a tad fast at full flap? but the speed does still give you full aerodynamic control on the landing and you can finely follow the centreline as good as when you took off... The landing bit is quite easy, the tricky bit is lowering the tail and keeping tracking directly straight, master that and you master the DHC-2. Part of the trick is to use the toe-brakes, but lightly and the rudder (stabs) and find that straight line... I'm not saying it is easy because it isn't, but it comes to you with practise. But let us be thankful, this is an amazing experience of an aircraft, and now the Beaver is available to fly in X-Plane 12. Summary Often referred to as the “best bush plane ever built”, the DHC-2 has been instrumental in developing and servicing far-reaching frontiers since it was first introduced in 1947. The DHC-2 Beaver is a single-engined, high-wing, propeller-driven, STOL aircraft that was developed by de Havilland Canada. This version has the "Holmes Extended Engine Mount", which moves the 917lbs Wasp Jr engine forward by almost 10 inches for a better rear load balance (Centre of Gravity). Any aircraft coming from Thranda Design is usually full of amazing features and outstanding quality design, and certainly you are not disappointed here. In the design aspect the aircraft is extremely the best yet from Thranda, the quality is overwhelming to the point of ridiculous... the DHC has full hi-res PBR realistic effects, featuring true-to-life plate deformation and to-the-rivet precision, not to mention the high quality materials internally and externally. Detailing and the modeling is absolutely first rate, this is an outstanding Beaver. Not only is the instrument Panel one of the best yet in X-Plane, it is also fully customised via the "Dynamic Generation Series" in not only giving you your own control over the way the instruments are laid out, but to swap and change other instruments as well including; Aspen EFD 1000, S-Tec 55x autopilot, RealityXP GTN 750 (these are optional addons) and a Collins 614-12 ADF. Eleven liveries are provided, but also again you can create and design your own liveries with the DGS system. Options include, Skis, mud flaps, Old and New quadrants and bubble windows, and the Amphibious/Float version is now part of the X-Plane 12 package. Sounds are outstanding, with High fidelity, multi-track sounds with smooth transitions and amazing atmospheric effects, 3D audio effects, including "blade slapping" sound when view is perpendicular to propeller, start up and engine mixture variance is also highly realistic. Menus are also extensive, with sound adjustments, weight and balance manager with visual chart, lighting, doors, views, reflections and an amazing radial engine visualisation in a pop-up window, which showcases the inner workings of the engine. Yes a lot in this review is very much like the X-Plane 11 original version, as most in the design features and menus are the same, but a lot of the hidden areas, including the flight dynamics and performance related to X-Plane 12 have all been revised. Also the textures all now 8K, up from two 4K textures for better fidelity, the Skunkcrafts Updater is also now used for direct updates. All earlier purchasers of the Thranda X-Plane 11 DHC-2 can upgrade for 30% off with the new XP12 model. This aircraft is X-Plane 12 only, but the XP11 version is available. But a few things have been affected in the transition with the Beaver. Debatable is the "Shiny, shiny feel" of XP12, although overall the aircraft looks extremely better than XP11. Lighting has lost a lot of it's shine (pun intended) Instruments are hard to read and external lighting is virtually not visible, but to note a lot of X-Plane 12 aircraft are like this, we feel that lighting needs a lot more adjustment from Laminar Research. Thranda Aircraft also extremely dark, hard to see inside and use, but that also may improve over the X-Plane 12 changes. This is the iconic de Havilland Canada Beaver as in depth simulation, with as much quality and it comes with the sheer force of ideas available here, and in reality isn't that is what simulation is really all about, brilliant aircraft with exceptional quality and flying dynamics and a huge feature list. So really want the very best then here it is.... Highly, Hugely Recommended. _______________________________ Yes! the DHC-2 Beaver DGS Series XP12 by Thranda Design is NOW! available from the X-Plane.Org Store here : DHC-2 Beaver DGS Series XP12 Price is US$34.95 Requirements X-Plane 12 (not for XP11) Windows, Mac or Linux 8 GB VRAM Minimum. Download Size: 1.2 GB Current version 1.0.1 (October 16th 2023) The plane comes with the Skunkcraft auto-updater Owners of the Thranda DHC-2 XP11 can get this new XP12 model for 30% off. Please find the coupon code in your original DHC-2 XP11 Invoice. ________________ Installation and documents: Download is 1.66Gb and the aircraft is deposited in the "General Aviation" X-Plane folder. Installation key is required on start up and is supplied with the purchased download file. Full installation is 3.27GB Documents supplied are: Changelog.txt Thranda Beaver Documentation XP12 v1.0.pdf X-Plane G430 Manual.pdf X-Plane G530 Manual.pdf Checklists and loads of Performance graphs are provided in the extensive manual. Review System Specifications Windows - 12th Gen IS1700 Core i7 12700K 12 Core 3.60 GHz CPU - 64bit -32 Gb single 1067 Mhz DDR4 2133 - PNY GeForce RTX 3080 10GB XLR8 - Samsung 970 EVO+ 2TB SSD Software: - Windows 11 Pro - X-Plane 12.07r1 (This is a release candidate review). Plugins: Traffic Global - JustFlight-Traffic (X-Plane.OrgStore) US$52.99 : Global SFD plugin US$30.00 : Skunkcrafts Updater Scenery or Aircraft - CZST - Stewart - XPORG (formally Beti-x) (X-Plane.OrgStore) - US$25.00 - PAWG - Wrangell Airport, Alaska by NorthernSky Studios (X-Plane.OrgStore) - US$16.95 ___________________________ News by Stephen Dutton 20th October 2023 Copyright©2023: X-Plane Reviews (Disclaimer. All images and text in this review are the work and property of X-PlaneReviews, no sharing or copy of the content is allowed without consent from the author as per copyright conditions) All Rights Reserved
  11. Updated Aircraft Review : Cessna 172M Skyhawk DGS Series v1.1 by Thranda Design I'm three thousand feet above County Clare, Ireland. Dribbling along nicely at 130 knts. Life is easy, free... carefree. I'm in the "Skyhawk", the Cessna 172M, the most popular aircraft ever built with 44,000 units constructed, and is still going strong. The C172 is popular because it is just that right perfect fit for it's main role... pilot training. The C152 is good for training as well, but is also a little too small, the C172 came out of the C170, but that aircraft was a taildragger, were as the C172 has the Tri-cycle undercarriage, it also has a slightly more powerful engine 160 hp (120 kW) (C152 has a 110 hp (82 kW) engine, so it was the follow-on larger and faster aircraft... and it hit that perfect spot all round, a sort of Volkswagon Beetle for the air. The C172 was first flown in 1955. Part of the reason it is very good as a training aircraft, is the visual outlook from the aircraft. Being a high-fixed wing, the view internally to the external is very, very good. It wasn't always like this as the earlier 172's, as it had a had a "fastback" rear cabin with no rear window and also featured a "square" fin (tail) design. 1963 172D model introduced the lower rear fuselage with a wraparound "Omni-Vision" rear window and a one-piece windshield. On the 172K the rear windows were slightly enlarged again by 16 square inches (103 cm2). Although a Cessna 172, in later life it became known only as the "Skyhawk" and the 172 moniker was dropped from the name. -Update v1.1- Less than a month on from the original release of the Cessna 172M, here is a significant update to the aircraft in a Float and Amphibian variant. The changes to v1.1 are now all noted in this revised and updated review. This Cessna 172M is another Cessna from Thranda Design, after the Cessna Caravan and the later Cessna U206G Stationair, you could easily confuse this C172M with the U206G, but although they share the same bodyline they are completely different aircraft for different roles. Modeling is of course superlative. Thranda quality in extreme detail and fittings. As noted the Skyhawk comes with 8K textures, a huge pixel area 7680 x 4320. Just because it is 8K doesn't mean that you need a 8Gb Graphic Card to run them. 4 Gb VRAM is still recommended as Minimum. And 8 Gb+ VRAM is however recommended as normal. But like with the earlier Thranda releases, they had more than one 4K texture size, sometimes two 4K textures to fill in the same 8K area. So in reality you are only using the 8K to fill the same gap of the two 4K set of textures before. So Graphic Card size is not the issue, if you can run your current Thranda aircraft with your current graphic card size, then the C172M will be exactly the same, in fact even a bit more efficient in that it only has to load in the one texture sheet, rather than the load of old 2(K)or 4(K) texture sheets. It shows of course, but lately I have found Thranda aircraft to be incessantly dark. Externally and internally with the current development process, with an emphasis of the blackness shadow areas, however hi-res PBR realistic materials, featuring true-to-life plate deformation and to-the-rivet precision is very, very appreciable, you can spend hours going over the finer details of the aircraft. The dihedral of the wing is 1° 44′ and the total wing area is 174 square feet (16.17 square meters). The horizontal stabilizer span is 11 feet, 4 inches (3.429 meters). So it's a nice clean wing as seen here. The M model is important as it was the first drooped wing leading edge for improved low-speed handling. This was marketed as the "camber-lift" wing. The 172K model, introduced those sported fiberglass, downward-shaped, conical wing tips , as seen here. The 172L, sold during 1971 and 1972, Cessna replaced the main landing gear legs (which were originally flat spring steel) with tapered, tubular steel gear legs. The new gear had a width that was increased by 12 in (30 cm). The new tubular gear was lighter, but required aerodynamic fairings to maintain the same speed and climb performance as experienced with the flat steel design. These legs have been well reproduced here by Thranda. Rear legs are fixed, but the nose wheel comes with an oleo strut and scissor-or torque links, it has a 15º degree adjustable turn. Tyres are so detailed that you can read the name "Goodyear Flight Specials", and there is great wear and tear on the hubs and rims. Overall excellent. Glass is very good, as usual with Thranda... here it comes with a nice green tint, always lovely reflections and depth to the thickness, there are also the nice motley glass marks and scratches, some even distracting, like the lines lower left windscreen. Thranda comes up with some really interesting cabin interiors. In the Skyhawk it is the most unusual yet? The U206G had a nice cream and blue fitout, the Islander BN-2 had odd white seats. Here you get a light grey cabin with green highlights on the seats, lower instrument panel and side panels, seats are green with darker green inserts and even the adjustable blinds are green... it's all a bit Shrek? The side panels though are totally exquisite with the highlighted squares, and the cabin roof is dirty and worn with detail, beautifully done. Everywhere you look you see the aged wear, door posts, window surrounds, wing end plates.... all so well done. Instrument panel has a plastic cover plate (70's) design. But the DGS system is still an option here in a dynamic panel, the "Dynamic Generation Series" or DGS, is a Thranda speciality feature that takes full advantage of X-Plane's flexibility for in-sim, real-time modifications. Avionics with the fixed panel include Garmin 340 Radio, Bendix/King KX 165 radios, Garmin GTX Transponder, S-Tec FiftyFive X Autopilot and Bendix/King KR87 ADF unit. A EDM 800 Engine Data Management system is also installed, and most pop out, as do almost 50 instruments! You can hide one or both of the Yokes, they also come in two styles "Classic" and "Modern". But the trim (pickles) on the modern yoke (shown) don't work with the yoke options. Lower instrument panel is the trim wheel and fuel selector (19 GAL per wing tank). The 172 is a very basic aircraft, but you have everything you need here. All oddments like ashtrays, in-wing air-vents work, as do both the side windows open.... and the glovebox/cubby opens to revel the Thranda development team. Lighting Like a lot on the C172, the lighting is quite basic. You have the option of having "Light Posts" on the instrument panel, ON or OFF. And they make a big difference on. The one lighting knob has two adjustments, the panel lighting and the overhead red (dome) light. The red overhead light is quite powerful, and baths the cabin nicely, to the rear is a single large cabin light, its bright, but not very effective in the rear? Externally I really like the light spray around the twin Taxi/Landing lights, Navigation light/strobes and a single tail beacon is all just basic lighting. Flying the Skyhawk The Skyhawk is noted as "The Cessna 172 is arguably the most elegant compromise in the history of aviation.” A nice quote and not far from the truth, as the aircraft is perfect in the "right size, feels right" category. Once trimmed, the Skyhawk is a very neutral and balanced aircraft on the central axis, again to make it easy for pilot training, interesting is to do tight turns, very heavy degree turns and you will need very little back pressure on the yoke to keep the same altitude... .... the aircraft will literally "Turn on a dime", stand on it's wing, as you twirl the aircraft around the sky... certainly any aircraft will do this sort of semi-aerobatic manoeuvres, but it is the ease and cleanliness of the actions that make the aircraft so easy to control, and this is a General Aviation machine here, a heavy one by aerobatic standards. It's great fun, you can understand the love for the machine from not only newly born pilots, but from the professional aspect as well. Unlike the C152, the instruments and controls are not totally in the basic, basic category in here. You have your VOR Pointers (again great for point to point training) and for doing circuits with ILS central alignments. Performance of the C172M is good; Cruise speed is 122 kn (140 mph, 226 km/h), with a never exceed speed of 163 kn (188 mph, 302 km/h) (IAS) . The range is 696 nmi (801 mi, 1,289 km) with 45 minute reserve, 55% power, at 12,000 feet (3,700 m) and the service ceiling is 13,500 ft (4,100 m). Time to return to Kerry (EIKY). The Flaps indicator is quite buried (Fixed Panel) right lower, hard to see, settings here are 0º-10º-20º-30º-40º, a lot of adjustment, also they are continuous in operation, but really great for slow speed approaches with plenty of lift and support. But the flap support is great for novice trainee pilots, it gives them time to adjust the aircraft ready for the approach, minimises mistakes. I found this out by dropping the flaps to 40º at the start of the EIKY Rwy 26 ILS approach (108.70 (IKR), then slowly approaching at 70 knts until the point of descent... .... adjusting the speed down to 63 knts, and you will get a nice 300 fpm descent into the runway, smooooth and clean, if a little slow, but again great for practising your approach skills, as the C172M allows you to do this. (note; Rate of climb is 715 ft/min (3.63 m/s) or usually about a 500 fpm). I feel too complacent, as i'm now too high, so an adjustment to 500 fpm is required, but the descent speed stays low enough around 70 knts to pull off the manoeuvre... ... in reality you wouldn't get away with this steep approach, but I feel totally in control of the Skyhawk. 200 ft above terra firma, I pull back the yoke, up goes the nose and I smooth out the descent pitch, the C172M responds perfectly, speed runs off, descent rate slightly climbs, and I'm soon in the perfect touchdown flare. 60 knts on touch... stall is a low 47 kn (54 mph, 87 km/h) (power off, flaps down), and I'm rolling down the centre line, too easy! Again you can see why the Skyhawk is perfect for learner pilots, it's so sure (if a little too safe, that it can distract you into complacency), but the feedback from the controls and airframe are excellent, highly recommended for practising skills or circuits, of which is the aircraft's Modus operandi. It's nice to fly an aircraft so perfect. At taxi speed and idle throttle the familiar "knock, knock" from the Lycoming O-320-E2D is well heard from the cabin, all sounds are perfect here with high-fidelity, multi-track FMOD2 sounds, there is aural simulation of multiple layers of engine and prop sounds, depending on camera angle, distance, atmospheric conditions, doppler as well... well everything you need for a great aural experience, Thranda are good at details like this, and it's important to the overall joy of the aircraft. And it all works to the last splutter of the prop at shutdown (as also the excellent start sounds) are perfect... "perfect", that word comes a lot around the Skyhawk here! There is no doubt on how much I like this Skyhawk, but debatable on still which is the really very best one? I totally loved the Careando Skyhawk with a G1000 avionics suite, flew that 172 everywhere, there are glass instrument options here as well as we shall see, so time will tell if the Thranda Skyhawk can take the title away from the older version? Added in to v1.1. are the optional Float and Amphibian Float Versions. Float design and detail is exceptional, and anyone who has had an earlier Thranda Amphibian (C208B) will know about the high quality here. Float shape and modeling is about perfect, as are the the front strut and main wheel assemblies. Rear rudders are controlled by a push/pull lever left centre console to raise or lower the twin fins... the undercarriage is controlled by the "Gear Advisory" panel right Instrument panel... there is the secondary pump lever between the seats for a manual upping or lowering of the wheels. Option of a "Float" version is also available... the detail is again absolutely "top notch". v1.1... Two other changes to the v1.1 update are the fixed Alt Static Air knob's Dataref, and now also enabled is WAAS (Wide Area Augmentation System) in the GPS units. Menu Thranda's Menus are very feature rich and highly detailed. There is a popout TAB under the arrow, that can be (mouse) scrolled to hide it, that is if you don't like these sort of items crowding your screen (I don't). The Menu system includes the "Dynamic Generation Series" or DGS, a Thranda speciality feature that takes full advantage of X-Plane's flexibility for in-sim, real-time modifications. As noted the "Menu" Tab (arrow) is far left middle of your screen, this will activate the Pop-Out Menu... The Menu has seven menu tabs in; GENERAL, LIVERY, WEIGHT/BAL, CAMERA, AUDIO/SLEW, PANEL and MISC (Miscellaneous). Basically it is the standard Thranda default menu. Menu - General The menu "General" sections covers quite a lot of options, the layout is highly detailed and very comprehensive. General menu selections cover; Electric Tug, Window and Instrument Panel Reflections on/off, Startup Running on/off (sets aircraft to full running mode), Chocks and Brakes on/off. Three selections placed right cover group items, but any one item can be also accessed via "Click Spots" and can be individually selected or hidden via the aircraft graphic. "ALL COVERS" will select engine inlet/outlet covers and pitot covers, "ALL TIE-DOWNS" for rear fuselage and wing tie-downs and "ALL DOORS" for both the cockpit doors and the right side luggage door. All EXT - External Lights can be switched on and off as can the ALL INT - Internal lights. The "Electric Tug" that can be used to move the aircraft around on the ground via your joystick (left,right-forward,backwards). Static Items include Wheel chocks, Engine Inlet covers, wing pitot cover. One item not shown in the general menu panel is the front nose cowling removal. It's hard to do, but if you click the surround (arrowed) in the engine bay on the pop out menu, it will lift the nose cowling to reveal a fully modeled Lycoming O-320-E2D Engine, very nice it is as well. There is built in "Checklist" (lower right menu, arrowed), and very good it is. But also again changed back to a simple black on red graphic, with green cross-off lines. The Checklist can the moved and scaled anywhere on the screen, but the list can't be reset back again to just the red restart list? and so there are 14 separate pages of the list to uncheck? Menu - Liveries Second Menu option is "Liveries", there are two options here with the first being "PAINTED LIVERIES". There are altogether 8 liveries or two blank (DynamicLiveryResources/Thranda) and six designs, and all the liveries are of extremely high quality and creative flare with the package. Two of the liveries are noted as "DynamicLiveryResources" and "ZZTEMPLATELIVERY", these are the current selected "Dynamic Liveries". Dynamic Liveries Not happy with any of those designs, then why not create your own livery! With their earlier releases of their Kodiak and with the Islander, PC-6, PZL-104 and Caravan. Then Thranda introduced a clever feature of a way to design your own livery. This is done by switching from PAINTED LIVERIES to DYNAMIC LIVERIES top. You have a menu to select on the right that can colour a certain part of the aircraft, like the Roof, Wing, Tail or Wing tips. Select which one you want and then adjust the three RGB colours for that certain area, and the selected colour (here red) is shown in the square. You can also separately change the aircraft registration number, here I wanted an Irish Rego in EI-677. The Cessna logo can be added as well. When done you can "SAVE" or ADD the livery and then "APPLY" it to the aircraft. The conversion takes a few minutes with some weird screen changes, but the results are excellent and now the C172 is in your own livery design... If the custom livery does not load? then go to a PAINTED LIVERY, then load one close to the design you created, then go back and reload your custom dynamic livery... and it should now load correctly. A feature is the (Quick) selection of Dirt (Ext) Externally, Scratches and Dirt (Int) Internally. Via three percentage selections you can adjust the amount of Dirt, Scratches and Dirt Int on the aircraft (0%-255%) and apply it instantly.So you can have either a pristine or a very grubby aircraft with just a twirl of the numbers. Also changes can be made to Metal or Rough surfaces, this can be applied to any of the liveries. There are already 30 preselected selections in their various designs, all are very good, and like noted you can add in your own version to the list. New to the Dynamic Livery application is ERA options in "Modern' or "Classic".... of course personal taste is optional! v1.1... in the Float/Amphibian menu, you can also colour in the float design to your own preferences, or to match in with the aircraft fuselage design Menu - Weight/Bal The Skyhawk also has a great Weight and Balance menu. Lbs and Kgs which can be selected and changed via the toggle... Lbs In Green, and Kgs in Blue. There is the weight selection of all the seats. Missing is the usual Thranda seat removable X option, as here you can only select the seat weight. Fuel can be added and the amounts are then shown and are adjustable as well in the menu (above)... pilot, passengers and cargo can all be set for individual weights and all are selected via a scrollwheel... and then all of the CofG (Centre of Gravity) parameters are all shown on a graph, go too far or too heavy and the CofG goes red. When done you can Save the Configuration and then later re-load it, or press Load to add in the set weights. Oddly there are no bags or luggage shown in the rear (behind the rear seat) luggage area like with most Thranda's with the C172M? But the usual two animated Pilot and front seat passenger are still in there when you adjust the seat weights above 36 kgs/80 Lbs. They both will also disappear if the electrical power is switched off and the chocks added. But obviously there is a compromise? If you want a full passenger and baggage load, then you can't have full fuel tanks, as the excess weight takes you over the weight and the CofG limits as shown on the graph. For four passengers (with maybe a bag thrown in) then can you have your full tanks and the longer range and not go into the red. Menu - Camera There is a camera feature under the menu "Camera" selection. The left side of the panel is the "Walkaround" views, just pick the dot viewpoint you want to see to rotate around the aircraft. To the right is the default views can be selected via a menu, or press the keypad to select the view. The FoV or "Field of View" is adjustable via a slider. Menu - Audio/Slew Sound can be adjusted via the Audio menu. There are seven slider selections with: Master, Aircraft External, Aircraft Internal, CoPilot, Radios, Environmental and User Interface. One other sound setting is on the Flap panel... As noted, on the right and left of the panel you get the audio simulation of an active noise canceling headset, which is seen as wearing a headset. Sound quality is beyond excellent as it is a built in audio mixer, so you can individually control the audio channels in real-time and you can adjust the volumes while hearing them play. Slew mode allows you to manually move the aircraft around in a disconnected X-Plane space. It functions by temporarily overriding the various aerodynamic and physical forces on the X-Plane settings, it is to allow the user to reposition the plane as desired. This feature is however highly touchy and it is used mostly only really with the Amphibian/Floats option in docking the aircraft to say a pier or marina. Currently there are no plans for an Amphibian version of the C172M, but you never know. Menu - PANEL The sixth "PANEL" Tab option allows you to adjust or change the instruments and dials. First feature here is a new one to Thanda's Dynamic Panel... the selection of a "Molded Plastic Cover" panel, and to add in or takeaway the panels "Light Posts". (hint... nice on). The non-plastic cover look is a flat dark grey facia, actually very nice and the same as the U206G. Scroll the "Panel Preset" number to see all the three preset layouts. Preset 0 is the grey standard panel with the GNS 530, Preset 1 is the Molded Plastic Cover (top)... Preset 2 is the standard grey panel with the Bendix/King KX 165A radios... Preset 3 is the Aspen EFD 1000. Aspen EFD is a self-contained multifunction digital display that is divided into a Primary Flight Display (PFD) in the top half, and an Electric Horizontal Situation Indicator (EHSI) in the lower half. As EDF 1000 systems go it is not as highly featured with the GPSS, MAP, 360 and Menu functions all not simulated... all the lower NAV1/NAV2/GPS selections are however available, as is the TPS (Tapes) see/hide option with the MIN (Minimums) selectable as well. and the PFD can be reversed with the EHSI. The EFD 1000 PFD pops-out for convenience. Customising the panel to your own personal layout is just as easy. Just select the "3D EDIT PANEL MODE" (arrowed) that gives you access to all of the 53 individual instruments and avionic units... There some great options including the Aspen EFD 1000, S-TEC 55x Autopilot, Angle of Attack gauge and so on... For those that find instruments are not to their liking in say, "I wish I could move that altitude meter just a bit more to the left", then here you can simply adjust that instrument, or even swap the instruments around the panel to your liking. Here I have added in two instruments... A DME ranger and a PS Engineering Incorporated PM 1200 two place panel mount intercom. You can even adjust the brightness of the instrument. When you can "ADD" (or Duplicate) in a new "Preset", and then "SAVE" that new layout Preset (Preset /4). So basically you can start off with a completely blank instrument panel and then create your own unique or personal instrument layout if you have the time and patience... and you can have up to or save 14 different instrument layouts. It is however very important to restart X-Plane to lock in the new instrumentation layout before flying. Panel features include; S-Tec Fifty Five autopilot and the noted Aspen EFD 1000, KR 87 ADF Radio, Garmin GMA 340, Garmin GTX325 Mode C Transponder and the usual GNS 430/530 PS/Nav/Comm units. Both the GNS 430/530 GPS units can be selected. But you have to save them, then do a restart to lock them in. The Reality XP GTN 750/650 Touch can also be installed if you have that external option as the 3d bezel is provided. The DGS system is clever and very versatile, but a small annoyance is that to get your custom livery or panel, you have to reset everything, every time you fly? Yes the custom SAVES are there ready, but not when you start/load the aircraft? Menu - MISC The Misc (Miscellaneous) page has four panels that cover External; Skis and Fairings. Internal; Yokes, Windows and Pilot options. Wheels; Tires and Mud Flaps. lower right is the DynaFeel. High quality designed "Skis" are available, and so are neat wheel "fairings" Tyres can be changes from "Regular" size, to the larger "Tundra" style. The larger tundra tyres work with the skis, but not with the fairing option. On the rear you can have "Mud Flaps", again they work with either regular or tundra tyre options. Yoke options include; "Classic" or the more upright "Modern"... I prefer the later upright yoke to the flatter earlier version. Door windows can be "Flat" or "Bubble" You can also swap around the pilots, in Male/Female, or Female/Male in the drivers seat. A nice touch is the change of clothing style with the change of seat position. "DynaFeel" on the right lower is a system that dynamically adjusts the rate at which the controls deflect. It is based on airspeed and how much the control is deflected. This means the controls will feel light and responsive at low speeds and with small deflections, but will get progressively heavier as the airspeed increases. v1.1... The Float/Amphibian MISC Menu is different. You still have the earlier Window options (Flat/Bubble), Pilot options and the DynaFeel. New options include a Cockpit V brace, and a Ventral Fin under the tail... ... You can Retract or Extend the rudders from the menu, also select either the "Float" or "Amphibian" variant. The "Slew Mode" only works on water, but it is excellent to move around or or to align the aircraft with a jetty. Links to both the excellent Support forum for the C172M by Thranda, and to download with the newly updated Skunkcrafts v3.0 Updater are also provided. __________________ Summary The "Skyhawk" Cessna 172M is the most popular aircraft ever built with 44,000 units constructed, and the airframe is still going strong. The reason is that simply the Skyhawk is the best ever or the most perfectly positioned aircraft for training and instructional purposes, mainly also for it’s reliable flight characteristics. Thranda Design are one of the best developers in X-Plane, their history and quality is legendary. So that quality build and detailing is always going to be significant from the start, and so it here... exceptional. In every area and detail, modeling, fine details, glass and the interior materials. Feature list is very high (clever) with adaptable weight and balance graph cabin seating and baggage options; Skis, Tundra Tyres, Mud Flaps, Wheel Fairings, Checklists, two Yoke options and Flat or Bubble windows. Menus are also excellent with menu tabs in; GENERAL, LIVERY, WEIGHT/BAL, CAMERA, AUDIO/SLEW, PANEL and MISC (Miscellaneous), that covers all the options and including sound, weights and balances also including graphs, walk-around and camera options and general static elements including chocks, pitot covers, removable engine cover (with detailed Lycoming O-320-E2D Engine) and tie-downs. Thranda always comes with a high range of clever and unique features to give the user a lot of personal options. Known as "Dynamic Generation Series" or DGS, this is a Thranda speciality feature that takes full advantage of X-Plane's flexibility for in-sim, real-time modifications. Here you can change the actual livery to your own designs, but build the instrument panel to your own liking as well, including options of the Aspen EFD 1000 glass instrument and a special 3d bezel for the insert of a RealityXp GTN 750 unit if you own that add on. A new feature here is a standard "Molded Plastic Cover" panel, it sets the instruments in a solid form (so DGS can't be used), but it is more uniform in design... personally I like it a lot. X-Plane 12 dynamics are simply sensational here and a level above in feel and handling with those important C172 characteristics well founded, but also notable is the excellent sound package, in being very rattly lower and loopy in higher revolutions. Note that the Thranda C172 is X-Plane 12 only, there will be no X-Plane 11 version. Now updated to v1.1... the update includes both Float and Amphibian variants, fixed Alt Static Air knob's Dataref, and enabled WAAS in GPS units. Update is at no extra cost, and included in the package. Negatives? more slight inconveniences. Incessantly dark, inside and with the heavy shadows, makes the C172 hard work in the dark cockpit, not excessively bright in the simulator as well with heavy shadows. No saving of current liveries and custom options, means that every time you want to fly, it can take awhile to reset everything back to your previous (custom) choices. loading custom liveries can be tricky as well. Having the classic Cessna 172 in your virtual hanger is always a bonus, and a brilliant aircraft from Thranda Design is always a triple bonus. Hugely engineered to a high quality and all round exception detail, they are some of the best General Aviation aircraft in the X-Plane 12 Simulator... so basically here you have the best of all worlds. Deep down though is the exceptional performance and dynamics of the aircraft that are on display here, so take advantage of those skills and use the Cessna 172M to it's most profound devices.... Highly Recommended. _______________________________ Yes! the Cessna 172M Skyhawk DGS Series v1,1 by Thranda Design is NOW available from the X-Plane.Org Store here: Cessna 172M Skyhawk DGS Series Price is US$39.95 (Currently on a pre-sale of US$29.95)... you can save:$10.00(25%)) Requirements X-Plane 12 (not for XP11) Windows, Mac or Linux 8 GB+ VRAM Recommended Download Size: 3 GB Current version 1.1 (September 15th 2023) Special features: Extremely high res textures (1700 pixels per meter). 8K textures. Includes Land, Float and Amphibian Float Versions FULLY configurable 3D instrument panel. Fully VR Compatible Interchangeable yoke styles: old fashioned and modern Over 50 instruments to choose from! (Including Aspen EFD 1000, and support for RealityXP 650 and GTN750) Move any instrument to any location on the panel, or even between pilot and copilot's panel! Optional plastic molded cover for instruments Comes with 4 panel presets, but can easily be expanded by moving instruments around, using a simple and intuitive interface. Optional 3D light posts per instrument. Lighting is fully 3D, and dynamically move along with the instruments, as you configure the panel. Save your own presets, and even share them with the community! Almost every instrument can be popped up or popped out as a 2D floating window! They can be placed on other monitors as well. Instruments can be moved in 3D directly, on a 2D pop-up preview window, or by numerical entry for precise placement. GNS430 and 530 can be swapped out, but a restart of the plane is required, as 430s and 530s are mutually exclusive in terms of compatibility in X-Plane Dynamic livery editor (like in the Kodiak, the Beaver, the Wilga, the Caravan, the C206, the 337, the Islander, and the Pilatus PC-6) Full PBR control! Create stunning metallic liveries, or matte, sand-blasted look in mere seconds! Additional control over dirt/scratches, adjustable in real-time to dial in the exact desired amount of wear and tear. Create "virtual" liveries, based on two basic common design layouts (Modern and Classic), and assign any colour to any available paint segment. Quickly create preview of livery in real-time, using intuitive controls. Previews include visualization of metallic materials and dirt overlays. Apply selected livery in real-time, right in the sim, without the need to even touch a 3rd party image editor! Option to change the tail number in real-time, or disable it altogether. (Enter a "space" instead of a callsign number to create a blank tail number.) Easily and quickly create dozens of paint schemes in-sim! Also includes 9 traditionally painted liveries, all visible in a convenient pre-selection preview window. Ability to swap pilot/co-pilot figures Uses SkunkCrafts Updater (Now also available as a standalone app). Option to participate in Beta program, via checkbox in SkunkCrafts Updater. Excellent hi-res PBR realistic materials, featuring true-to-life plate deformation and to-the-rivet precision. Fully modelled Lycoming O-320-E2D engine. Windshield ice and rain effects Individual functional circuit breakers. Feature-rich elegant fly-out menu with the following features: Electric tug, with in-panel controls to move forward/backward at the desired speed, and steer proportionally Control over chocks, individual tie-downs, covers, internal lights, external lights, window reflections, instrument reflections, etc. Option to start up running (all systems ready), or cold-and-dark, for realistic startup procedures, directly from this fly-out menu. Control landing lights, strobes, beacon, and nav lights via fly-out menu Detailed weight and balance manager with visual chart, individual passenger seat weight control, Lbs/KG unit toggle, CG control, external tank control, and the option to save and load configuration. Multiple camera snap points, above and beyond what's available by default in X-Plane, so you can perform your walk around checks. Adjust your camera's Field of View without having to go to an X-plane menu, allowing for real-time adjustments. Audio mixer: individually control audio channels in real-time, so you can adjust volumes while hearing them play. Slew control: move your plane around the world, temporarily bypassing flight physics. Includes ground mode and air mode. Dynamic panel control page, with a separate view for the entire panel layout preview, or a per-instrument view, allowing for fine-tuning of instrument position, as well as copy-paste function to quickly replace instruments. Option to equip instruments with light posts Option to fit entire instrument panel with molded plastic cover with holes for the instruments Option to swap pilot and co-pilot Option to select different yoke styles DynaFeel panel: Dial in precisely how you wish for the controls to react as a function of speed. Flight dynamics and systems: Detailed and accurate flight dynamics and weight and balance with the help of multiple real-world active 172 pilots. This not only gives this aircraft the proper "feel", but also accurate takeoff, climb, cruise, and landing performance. Tie-downs and chocks actually keep the plane from moving, even in high winds. DynaFeel: controls that simulate how strongly the control surfaces are affected by oncoming air, and how much strength would be needed to overcome these forces. Advanced FMOD-based sound system: High fidelity, multi-track sounds with smooth, finely tuned transitions (actually having calculated the precise beat frequency for each section, to minimize "muddy" transition sounds), and amazing atmospheric effects. Individual volume control over different aspects of the sound experience, adjustable in real-time (while listening to the sounds) Different sounds for front of plane than for back of plane Panning around the plane in exterior view yields awesome 3D audio effects, including "blade slapping" sound when view is perpendicular to prop Far away sounds include aerodynamic interaction effects between front and rear prop. At a distance, you hear overtones caused by turbulent air feeding into the rear prop. Individual buttons and switches in the cockpit each have their own unique sound. Engine has typical cool-down ticking sound, based on engine temperature. Sounds actually give you clues as to what's happening under the hood. Outside wind intensity is affected by slip and AoA. (The more the surface area of the fuselage is hit by oncoming wind, the louder the sounds Doors and windows opening, let outside sounds in _____________________________ Installation and documents: download for the Thranda_C172M. is 3Gb and the aircraft is deposited in the "General Aviation" X-Plane folder. Download can also be by the Skunkcrafts Updater (file supplied) Full Installation is 5.74Gb Documents supplied are: C172M Performance Charts.pdf Thranda C172M Manual.pdf Thranda Graphics Settings XP11.pdf Thranda Joystick Settings.pdf X-Plane G430 Manual.pdf X-Plane G530 Manual.pdf There are a huge amount of Documentation provided here, not only for the Thranda C172M including performance charts, reference guides, but also X-Plane/hardware settings and custom and default avionics. All updates are via the new Skunkcrafts 3.0 Updater Support forum for the C172M by Thranda _____________________ Updated Aircraft Review by Stephen Dutton 19th September 2023 Copyright©2023: X-Plane Reviews Review System Specifications:  Windows - 12th Gen IS1700 Core i7 12700K 12 Core 3.60 GHz CPU - 64bit -32 Gb single 1067 Mhz DDR4 2133 - PNY GeForce RTX 3080 10GB XLR8 - Samsung 970 EVO+ 2TB SSD Software: - Windows 11 Pro - X-Plane 12.05r1 (This is a Release Candidate review). Plugins: Traffic Global - JustFlight-Traffic (X-Plane.OrgStore) US$52.99 : Global SFD plugin US$30.00 : RK Apps XPRealistic v2 - US$34.99 Scenery or Aircraft -EILY - Kerry Ireland by Boundless -EINN - Shannon Airport by Boundless (Disclaimer. All images and text in this review are the work and property of X-PlaneReviews, no sharing or copy of the content is allowed without consent from the author as per copyright conditions) All Rights Reserved
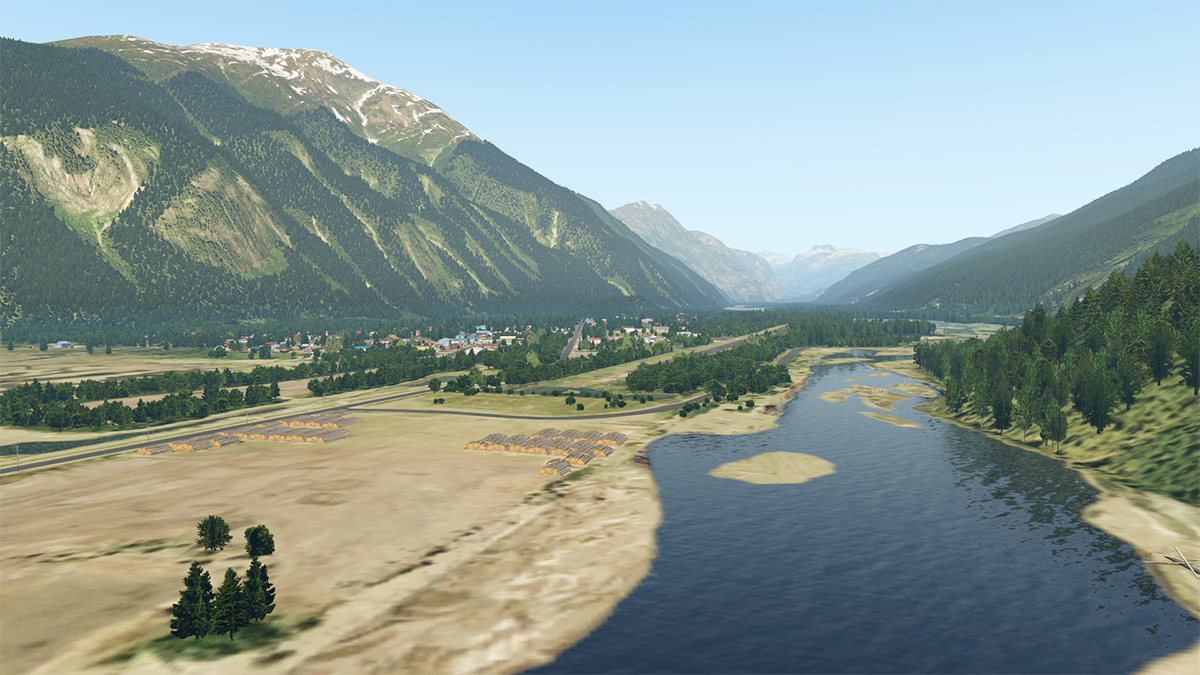
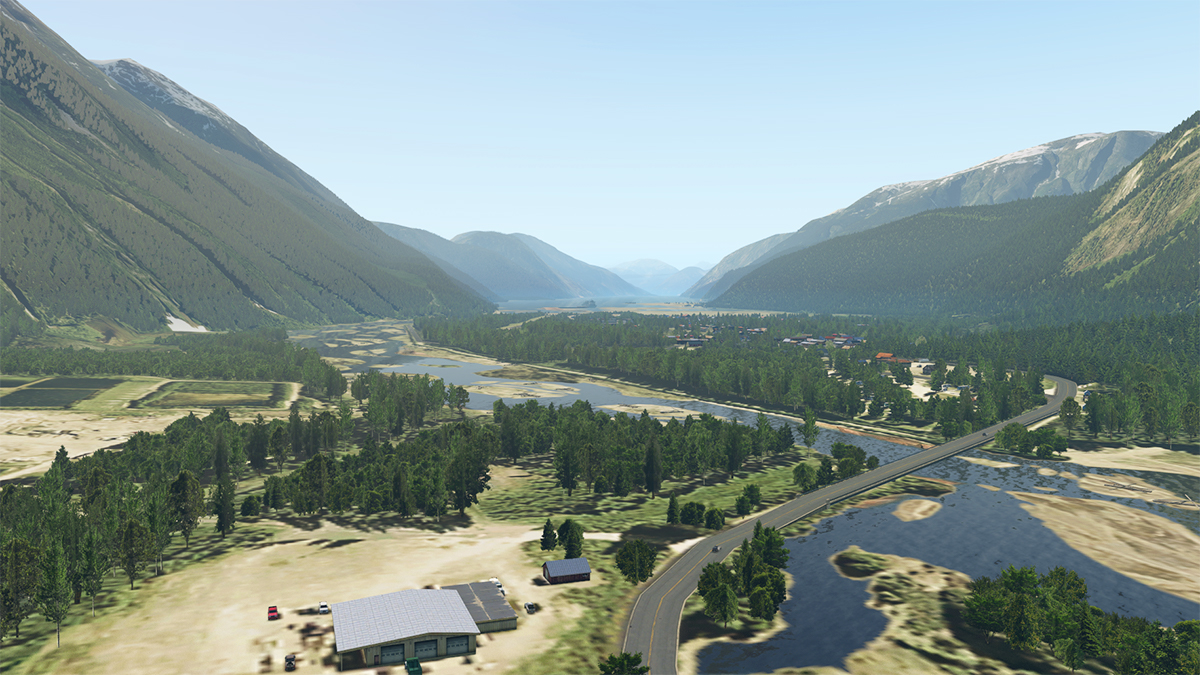
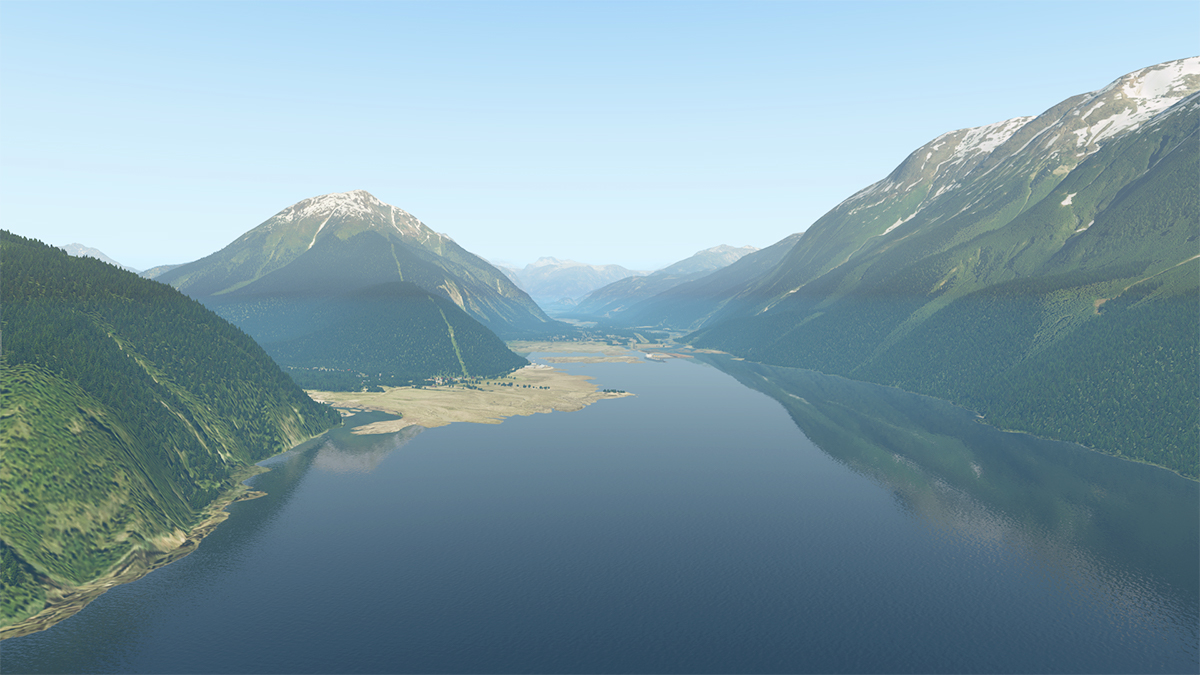
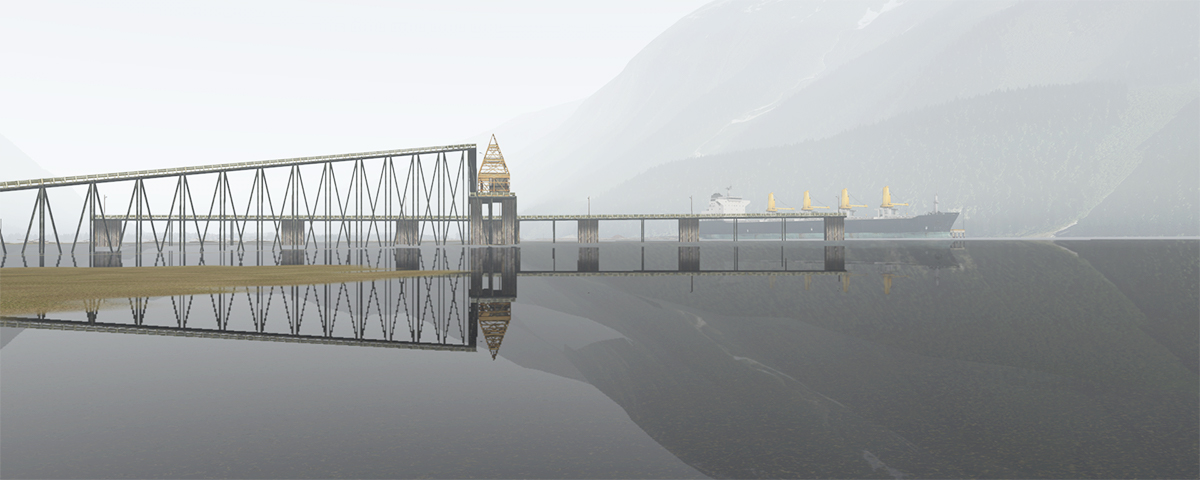
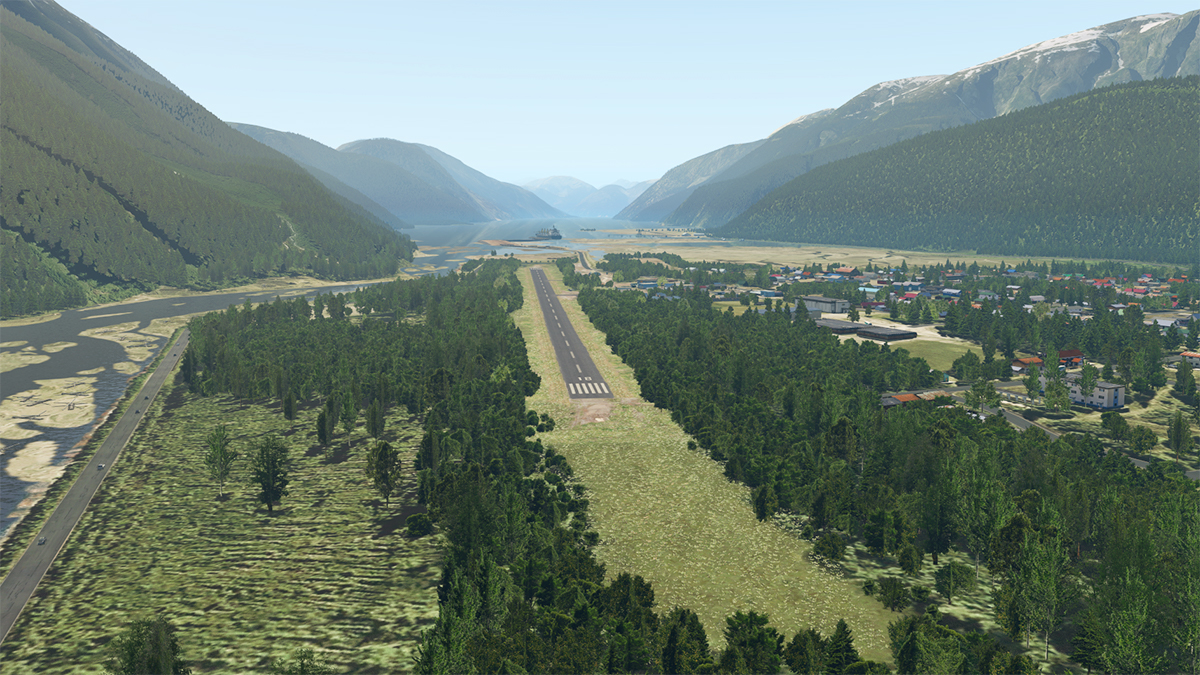
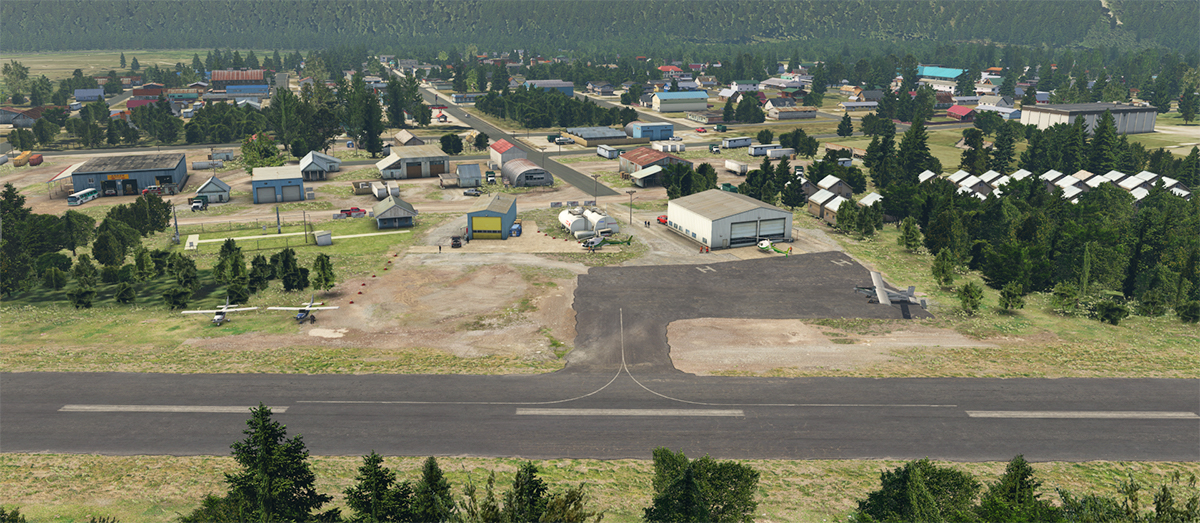
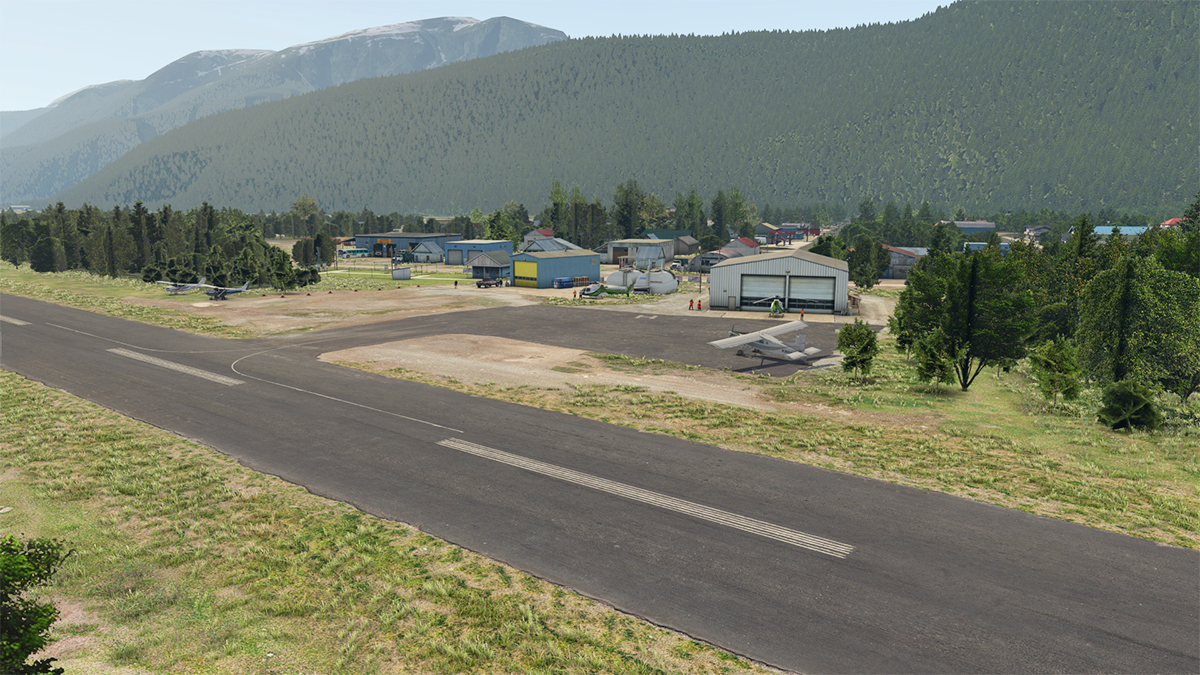
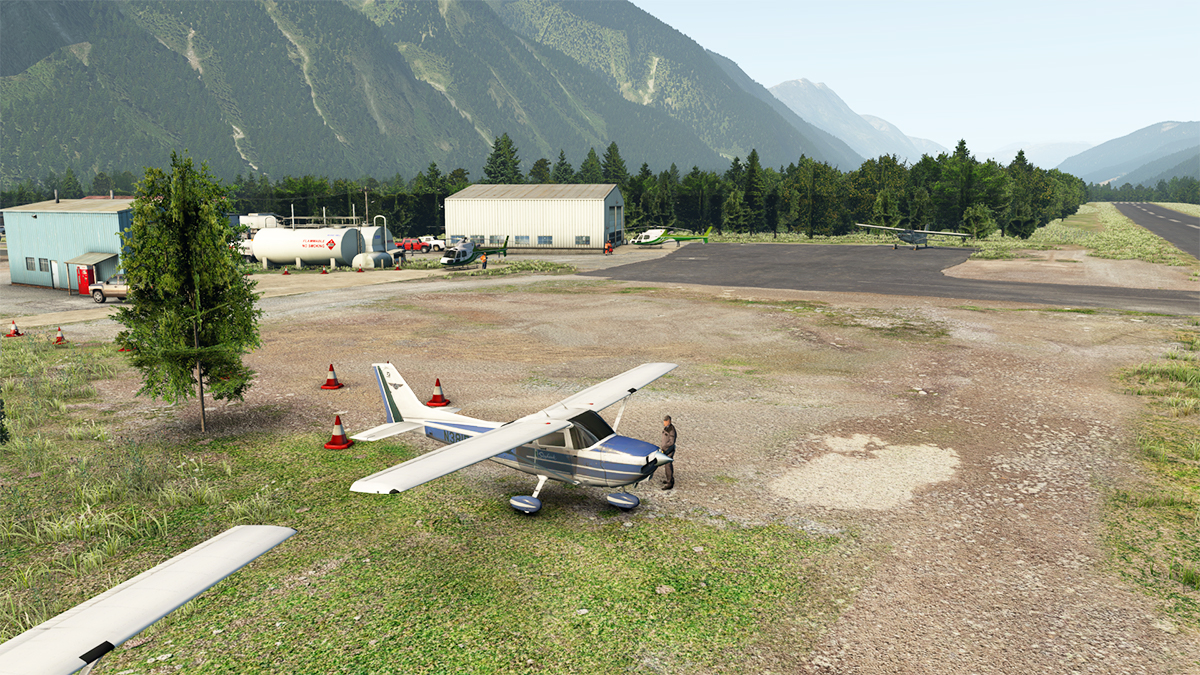
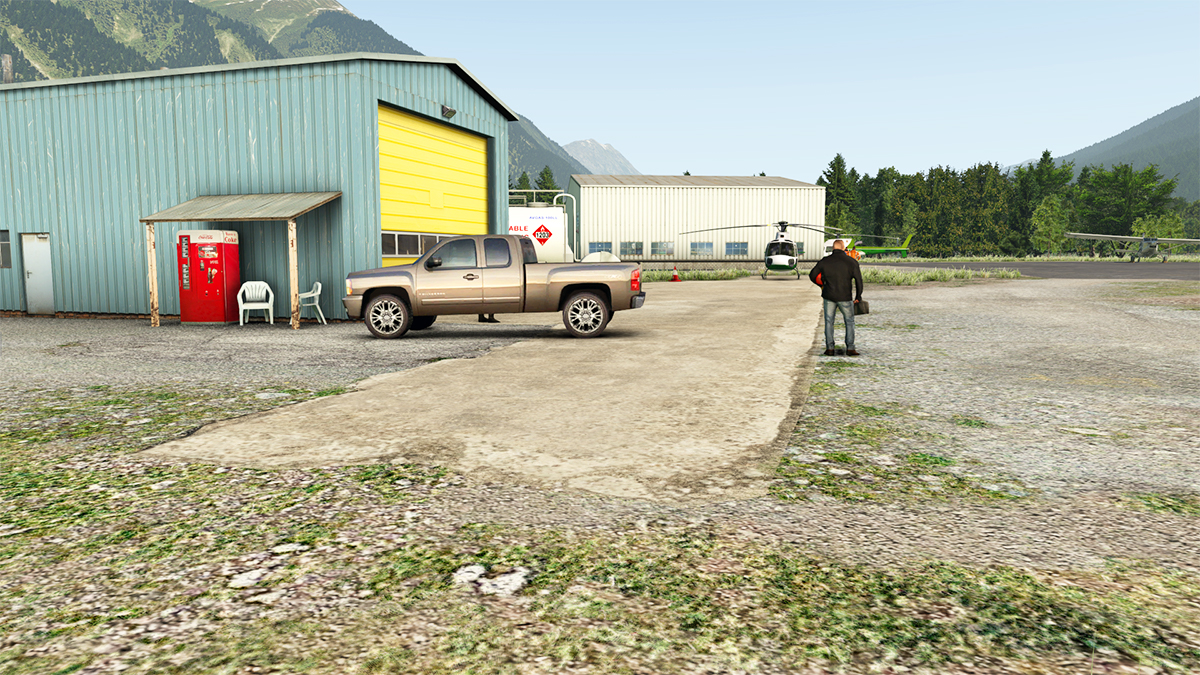
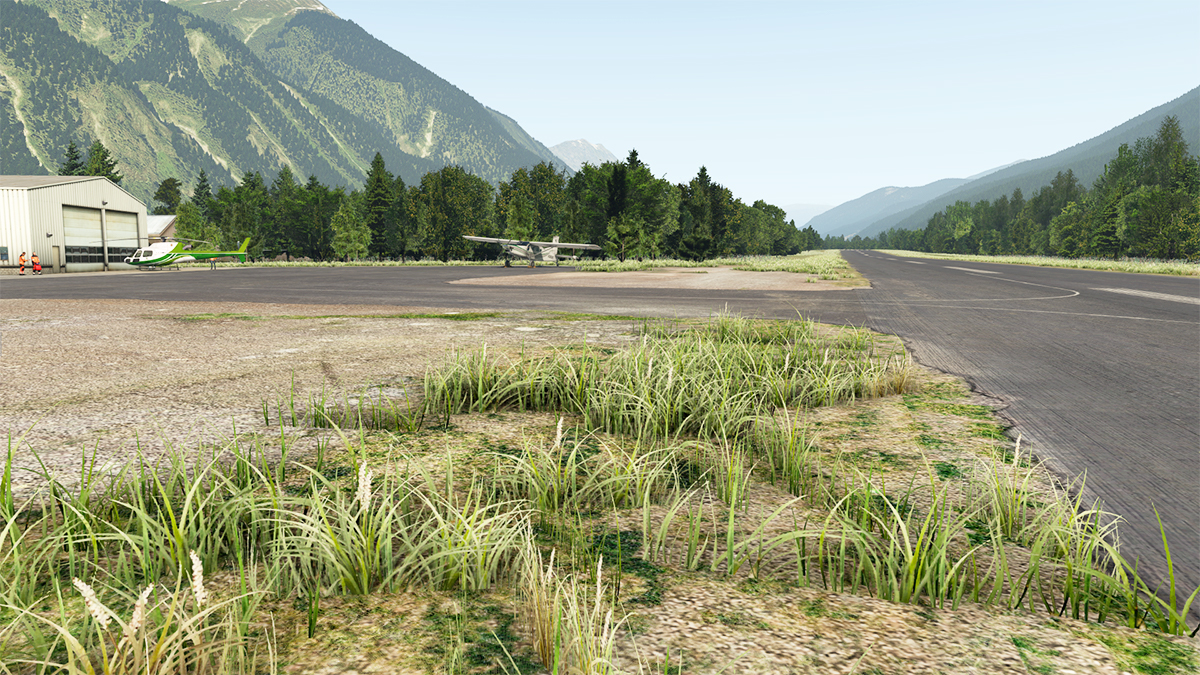
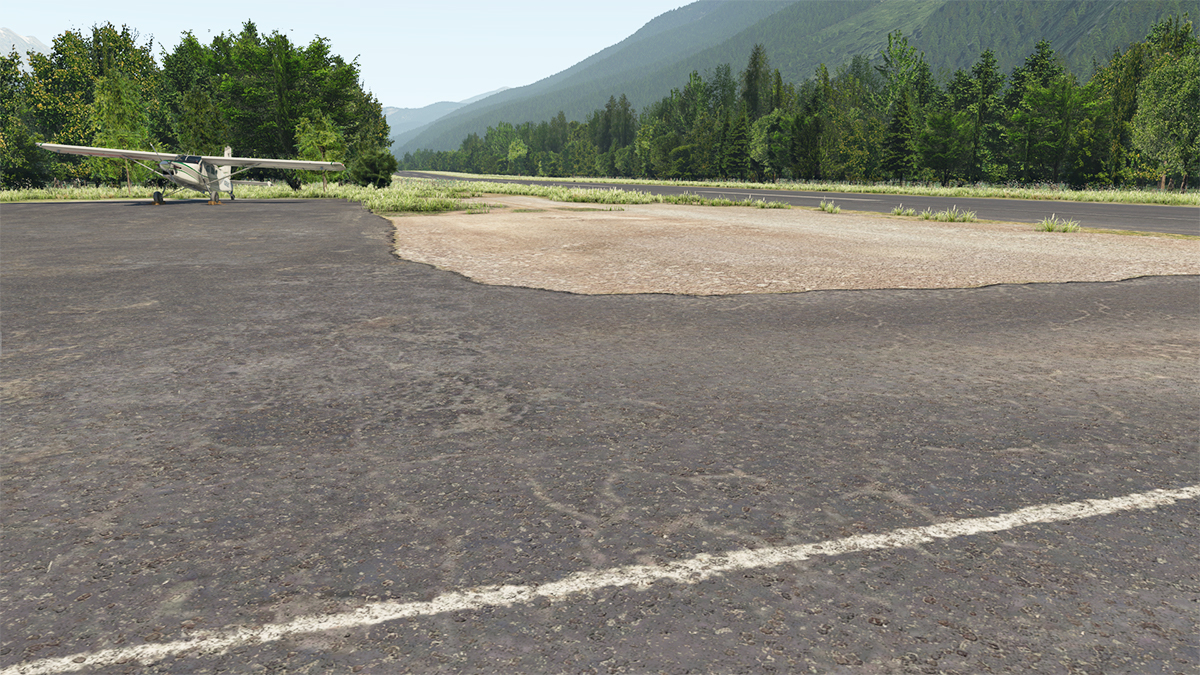
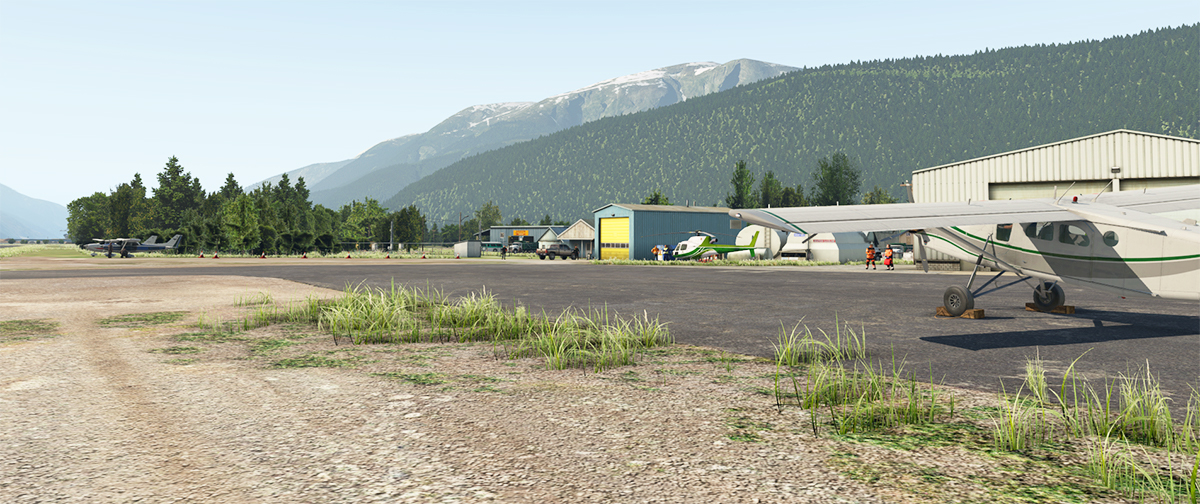
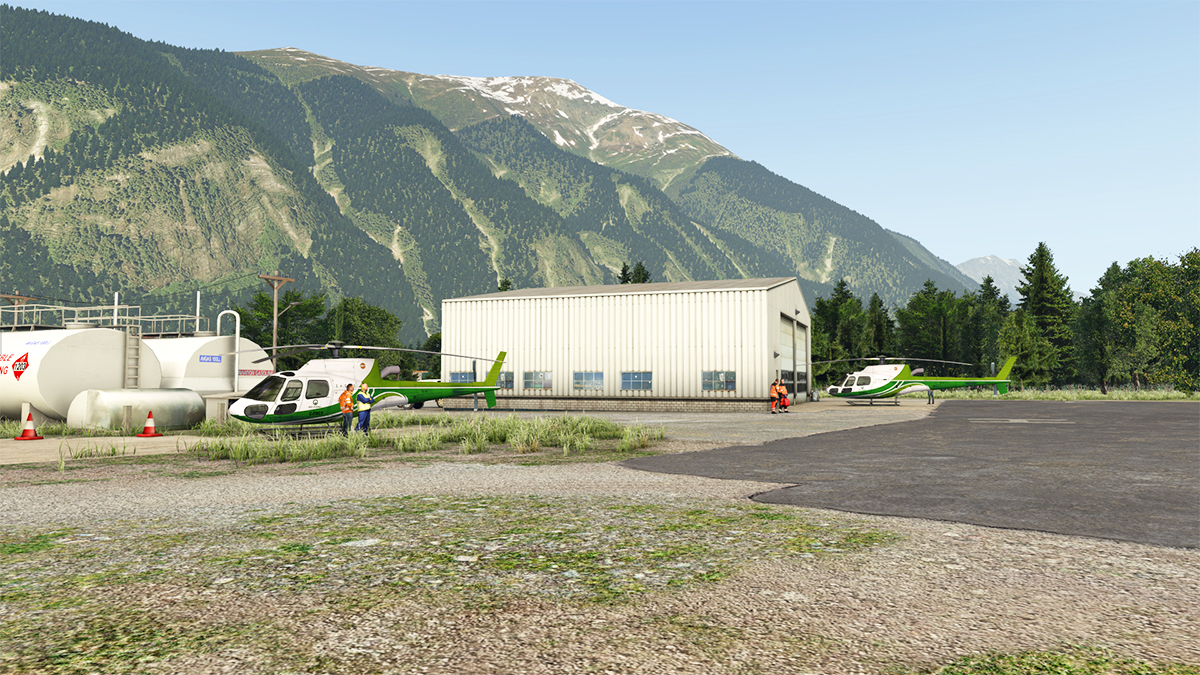
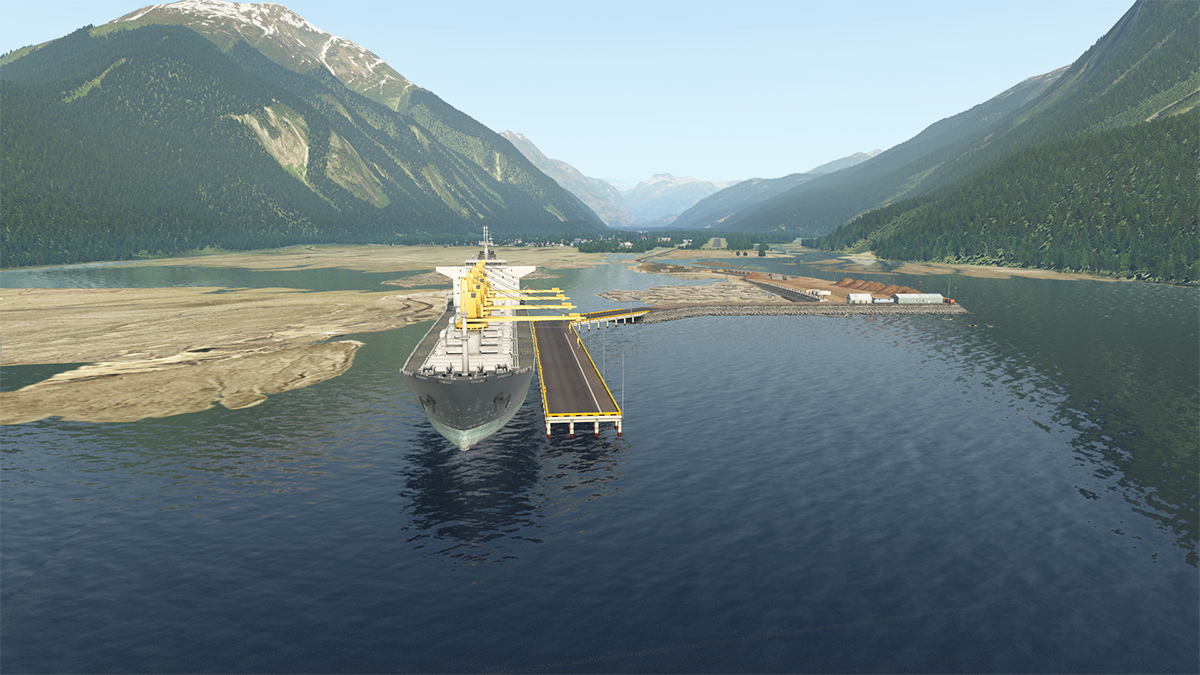
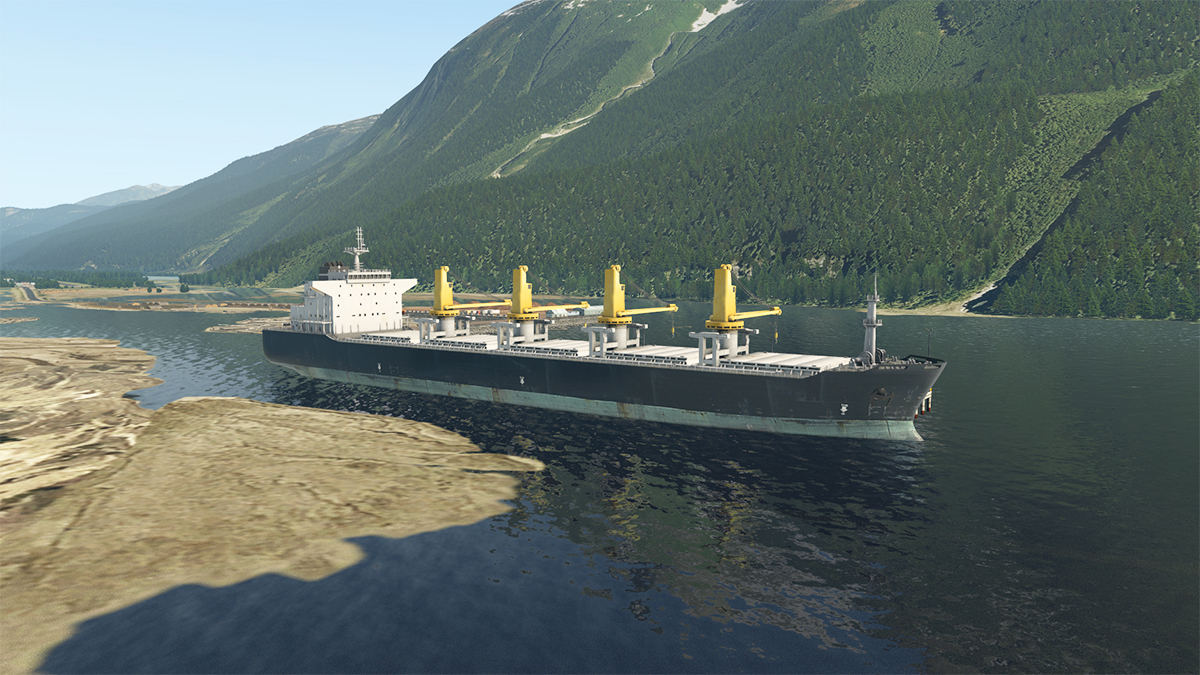
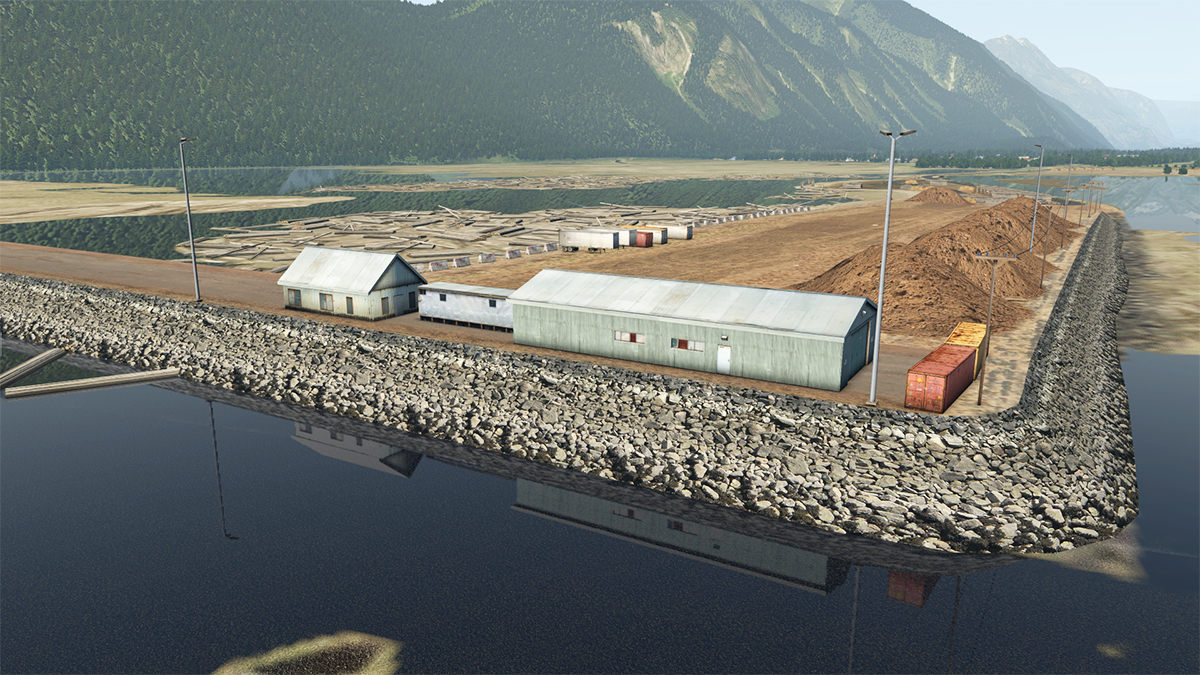
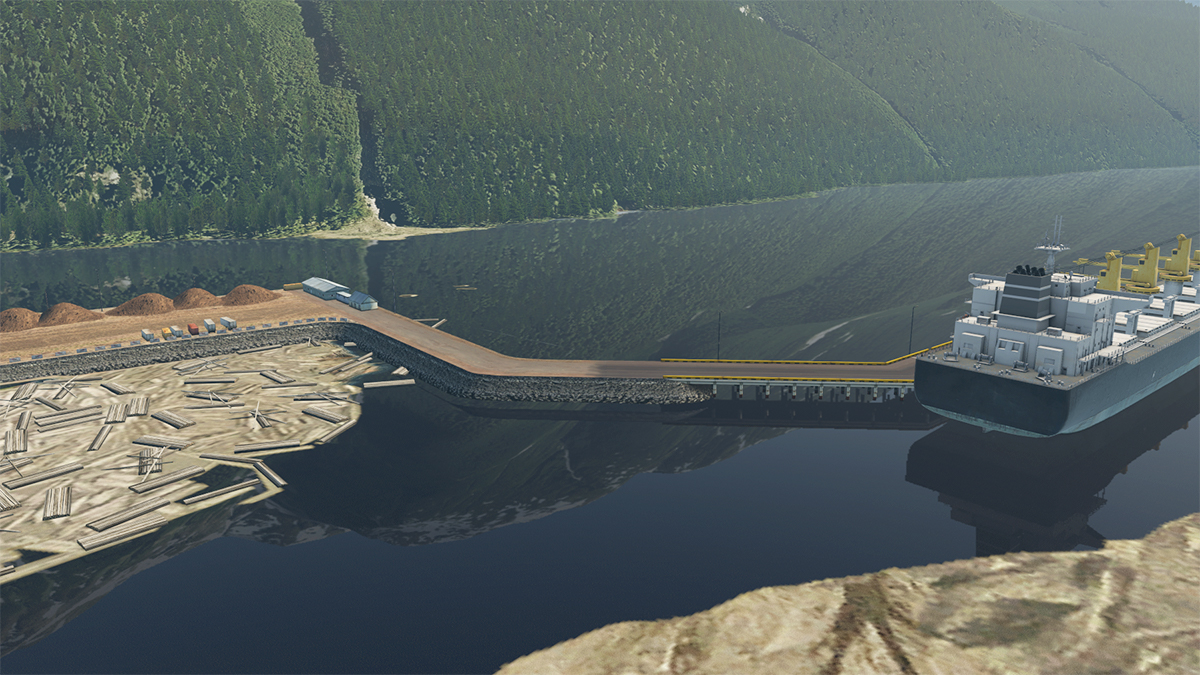
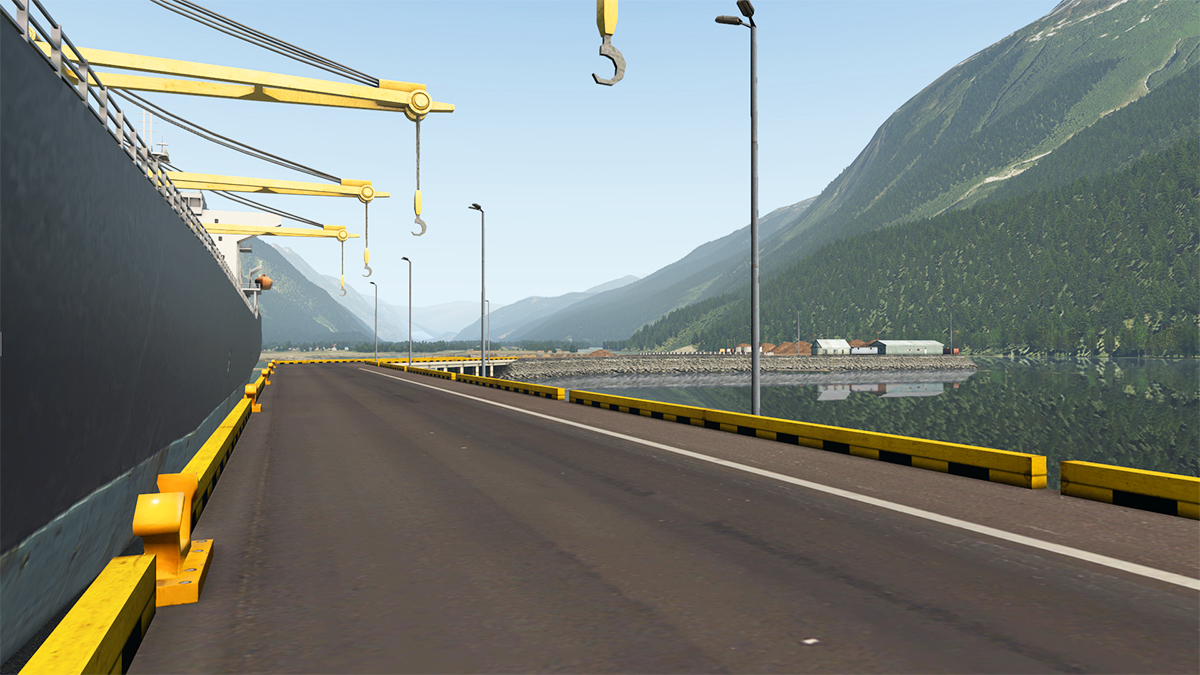
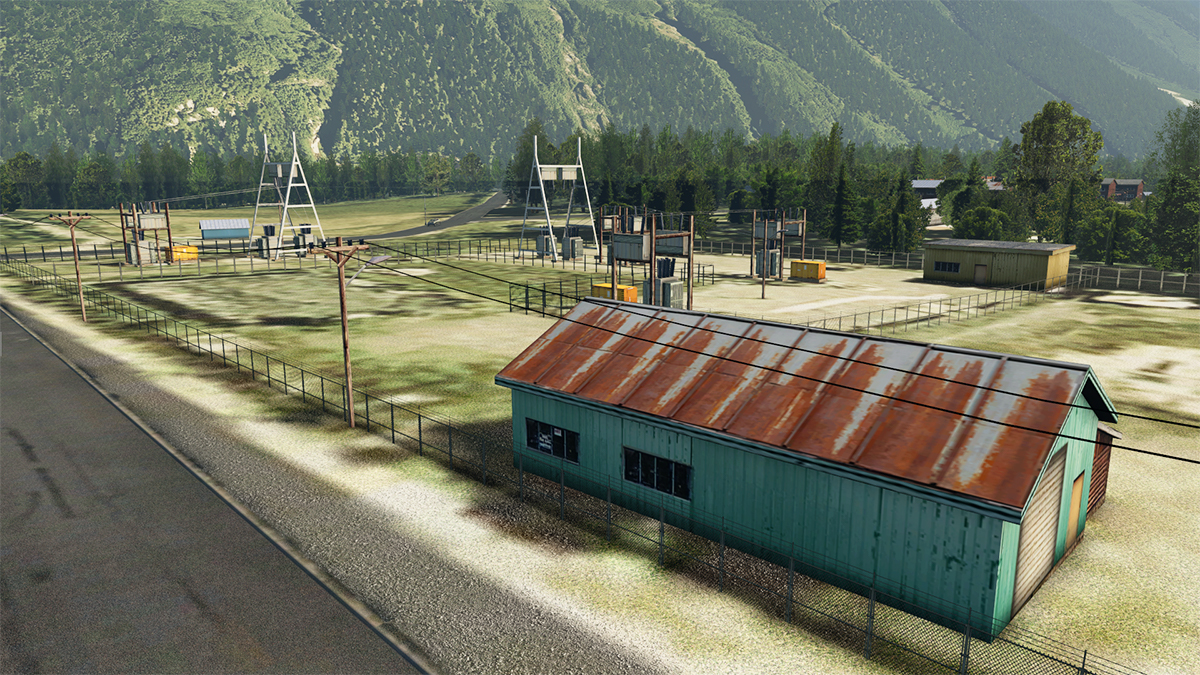
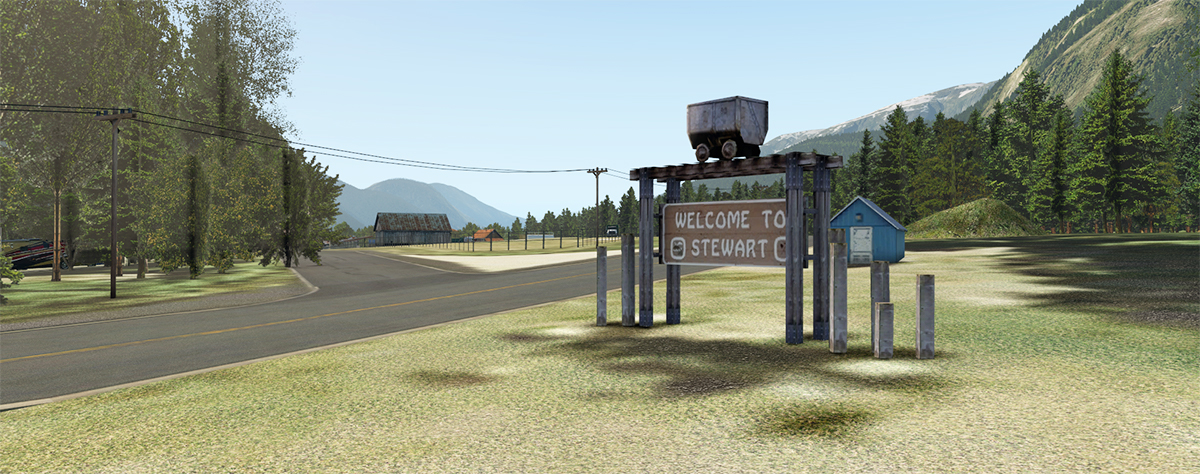
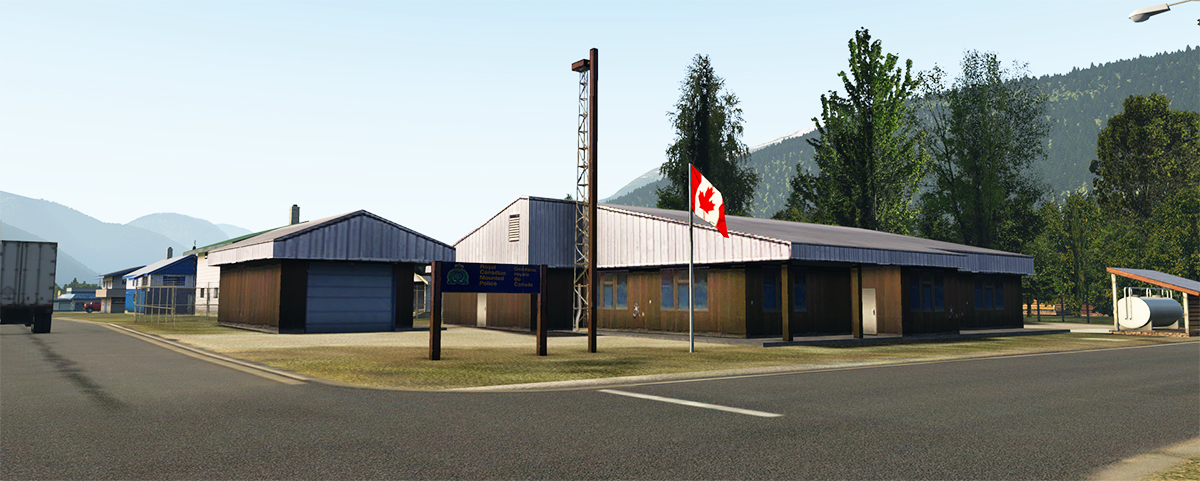
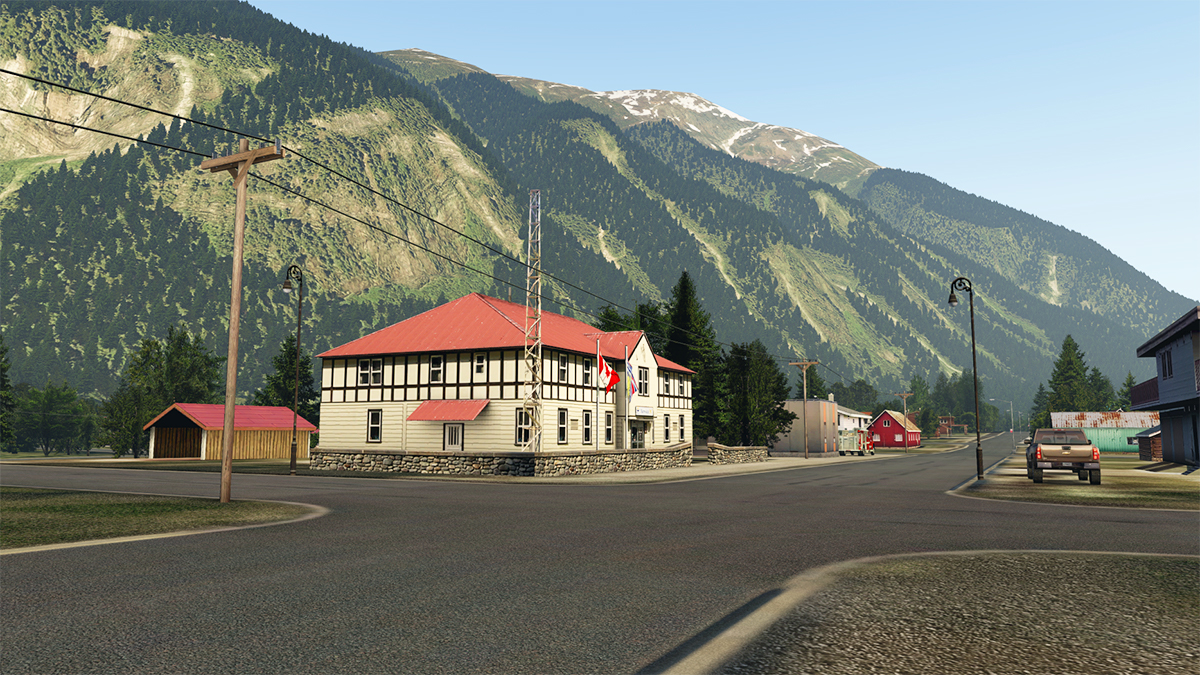
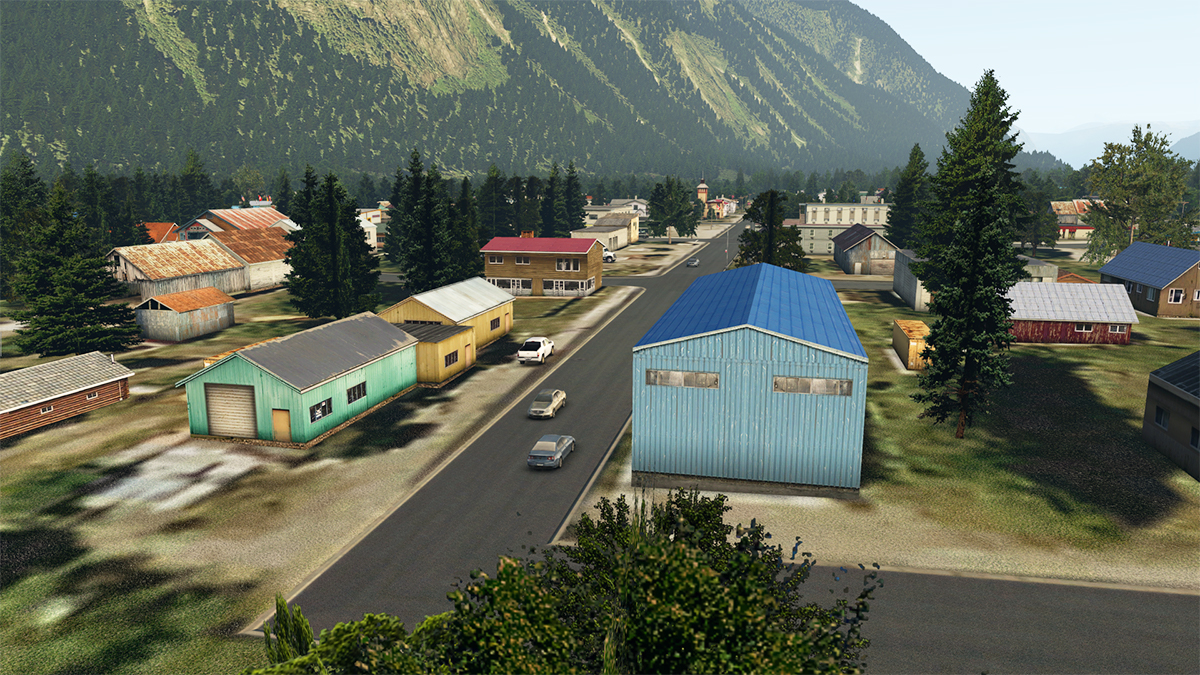
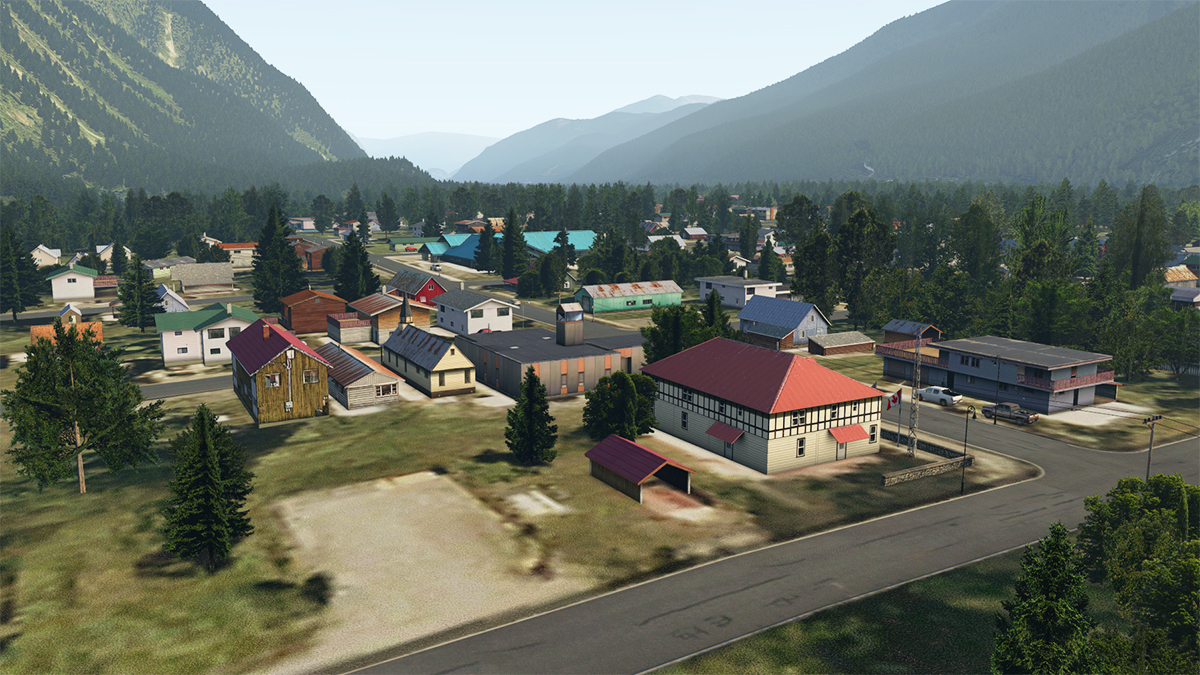
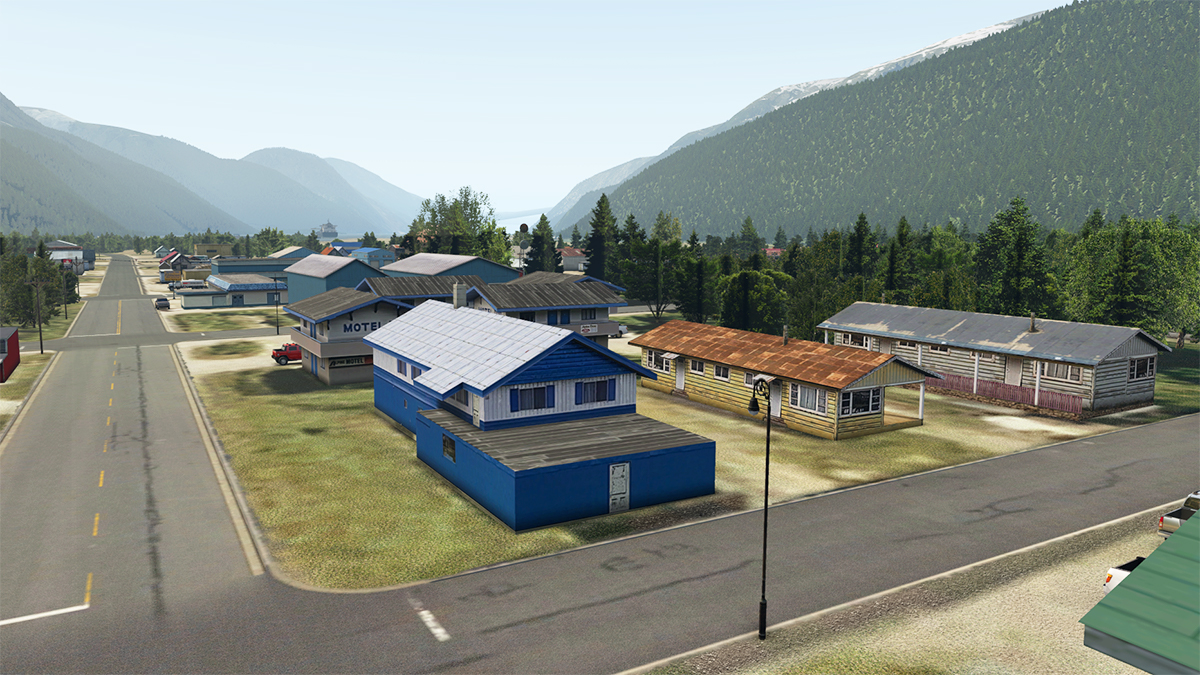
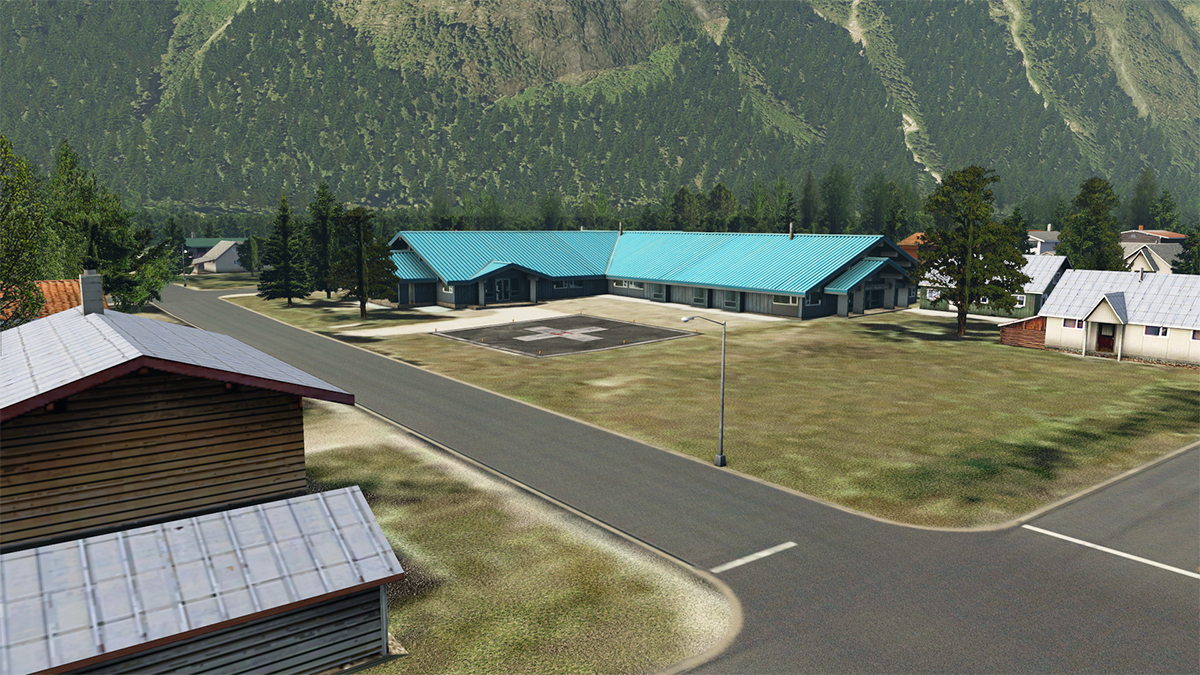
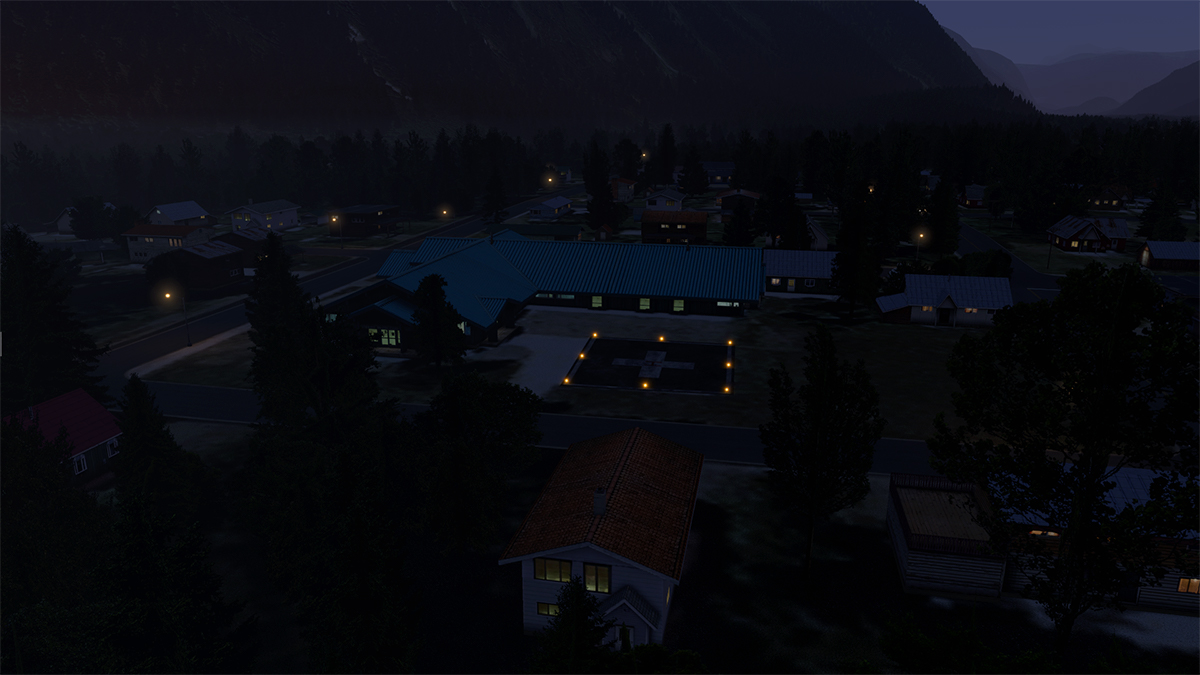
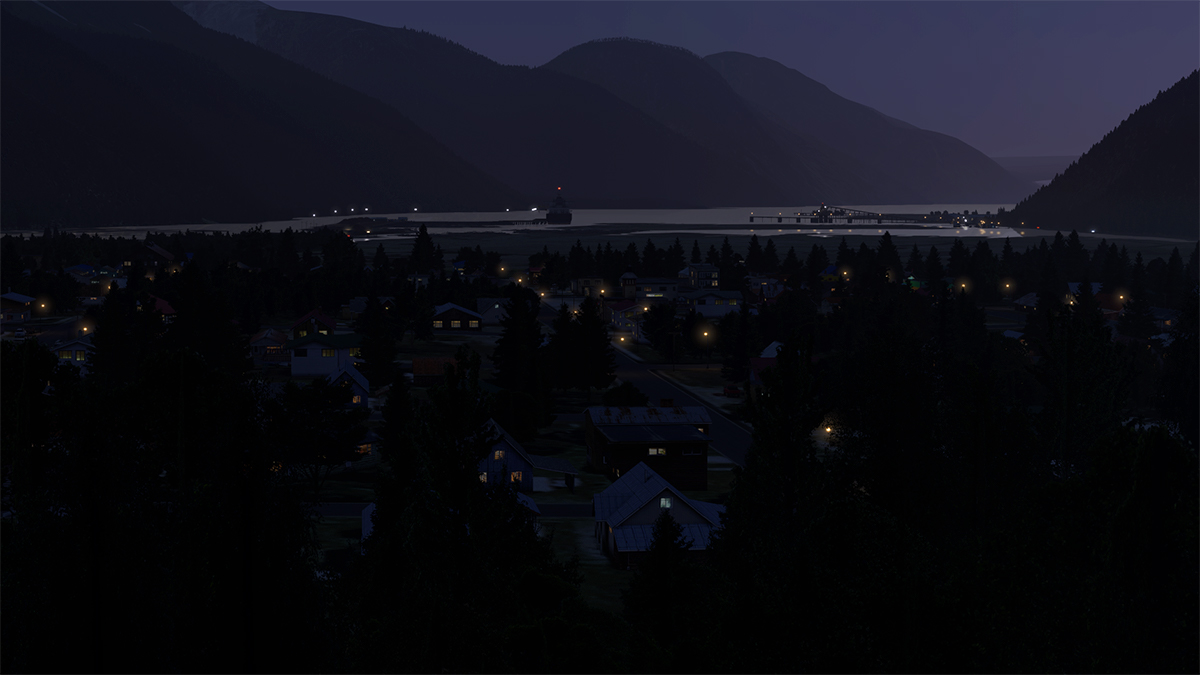
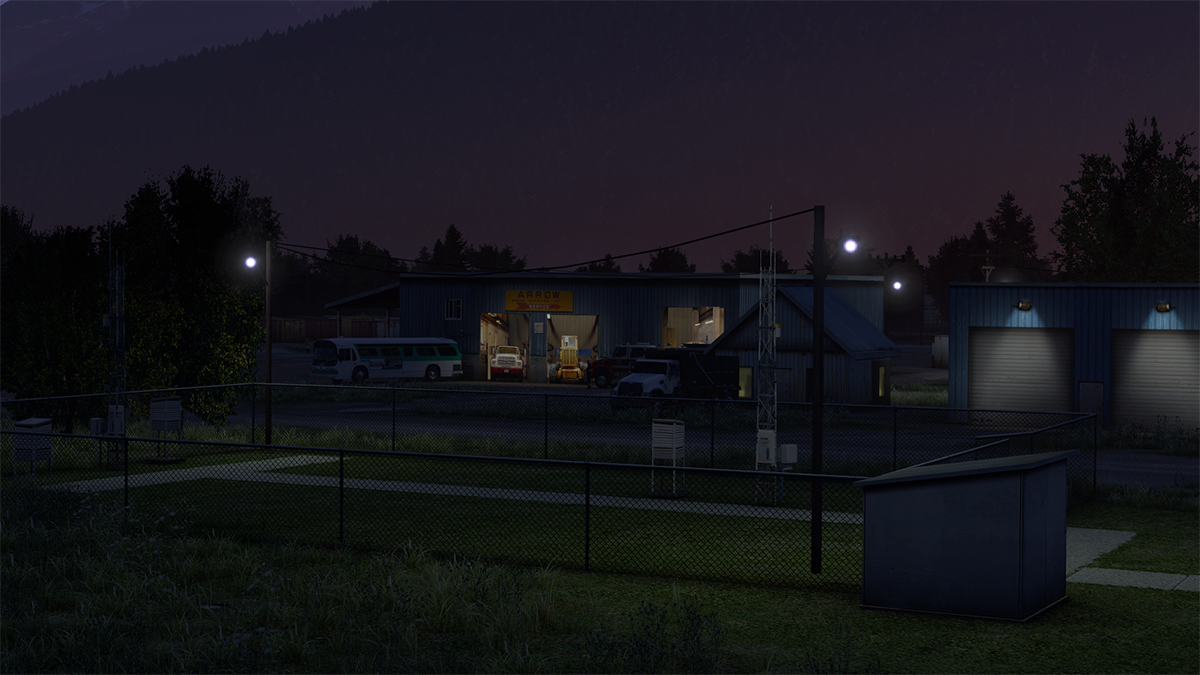
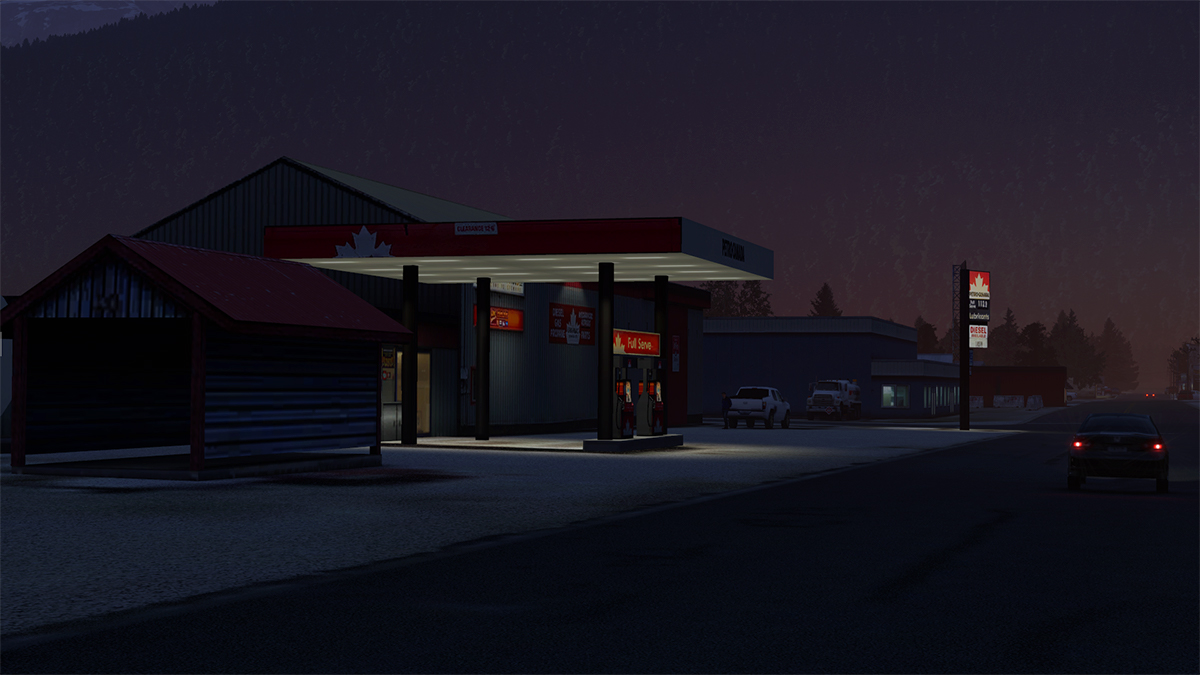
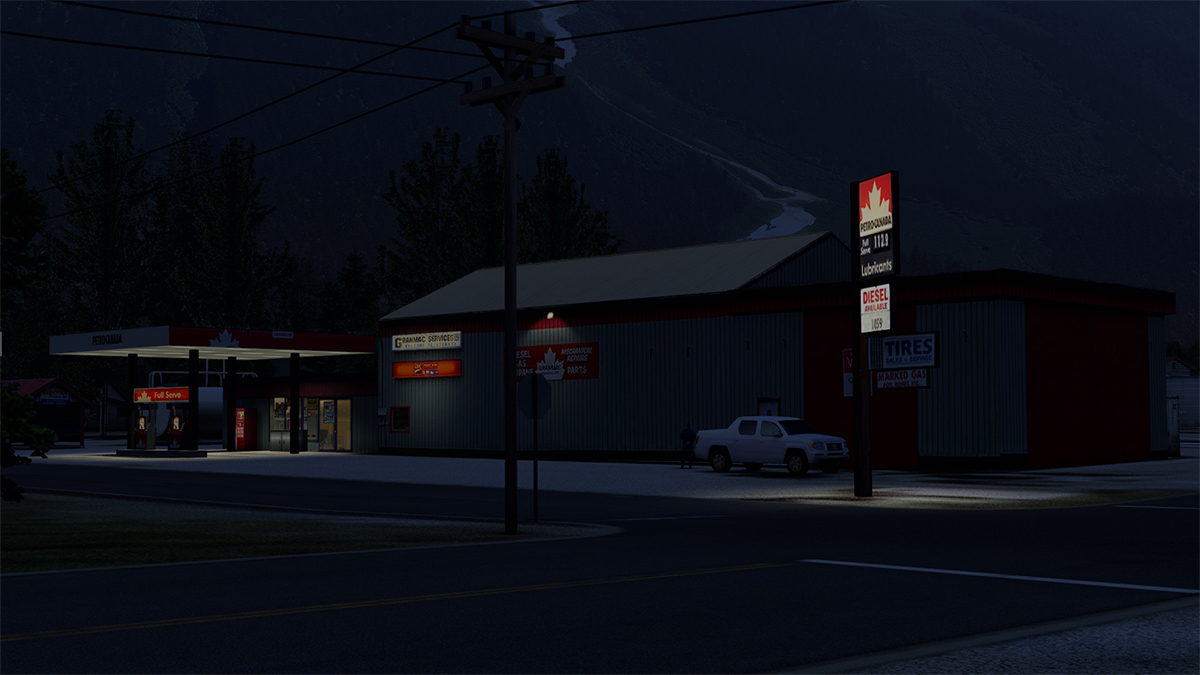
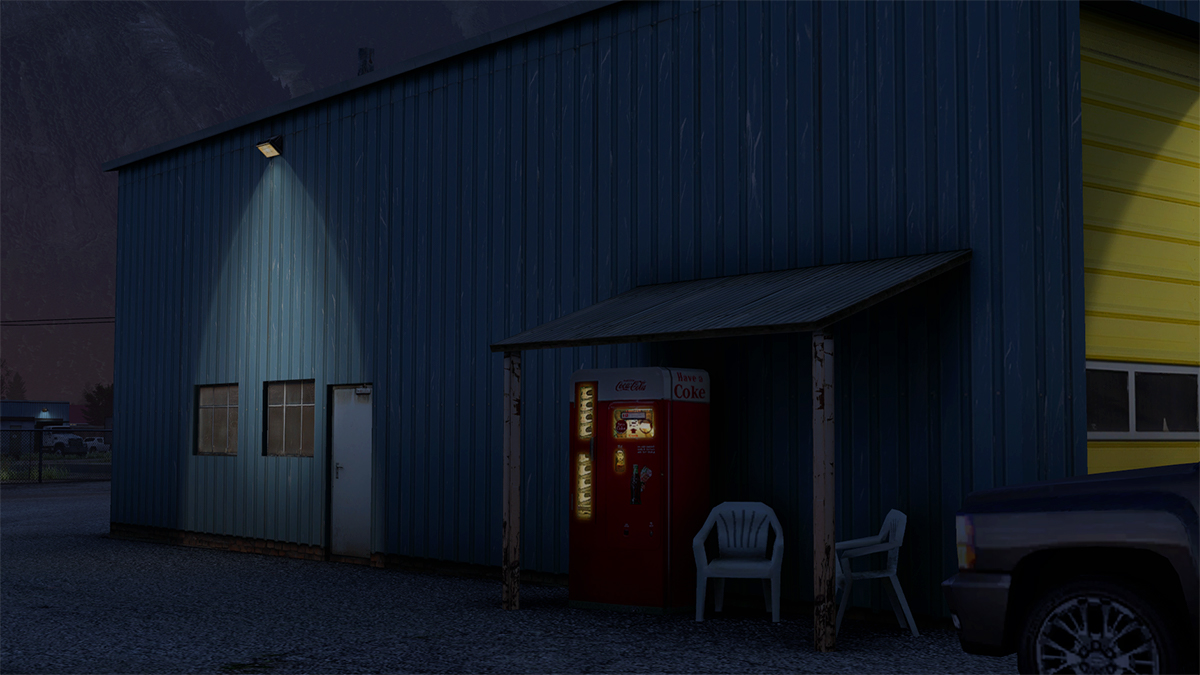
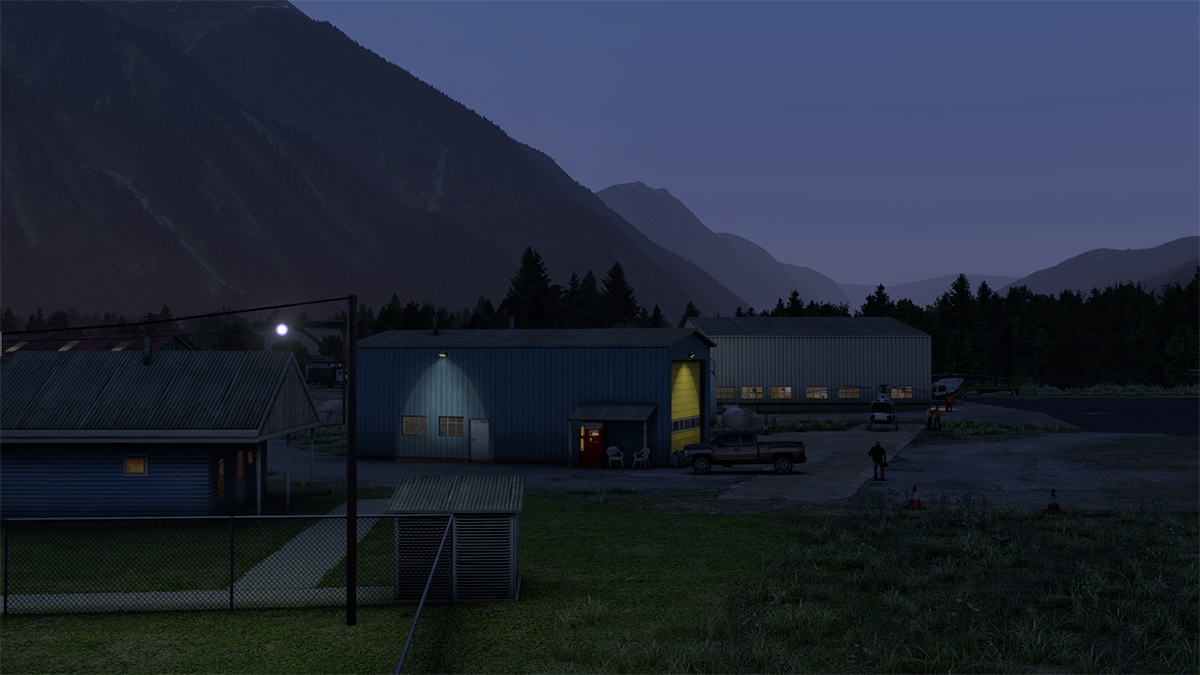
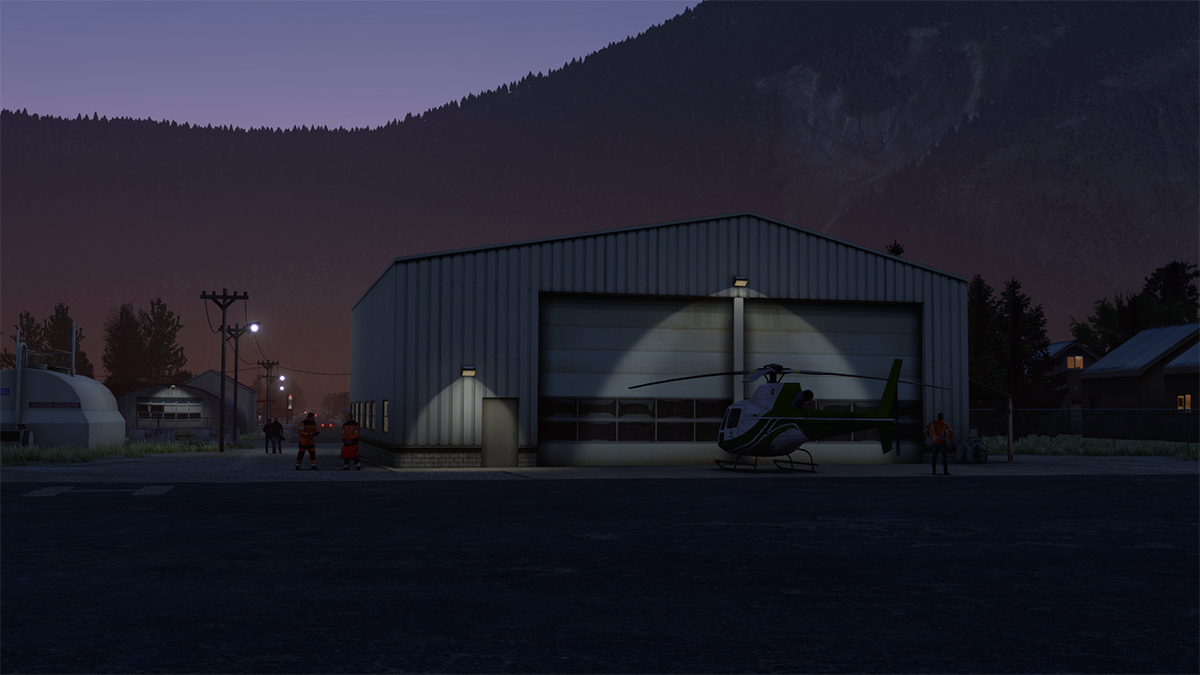
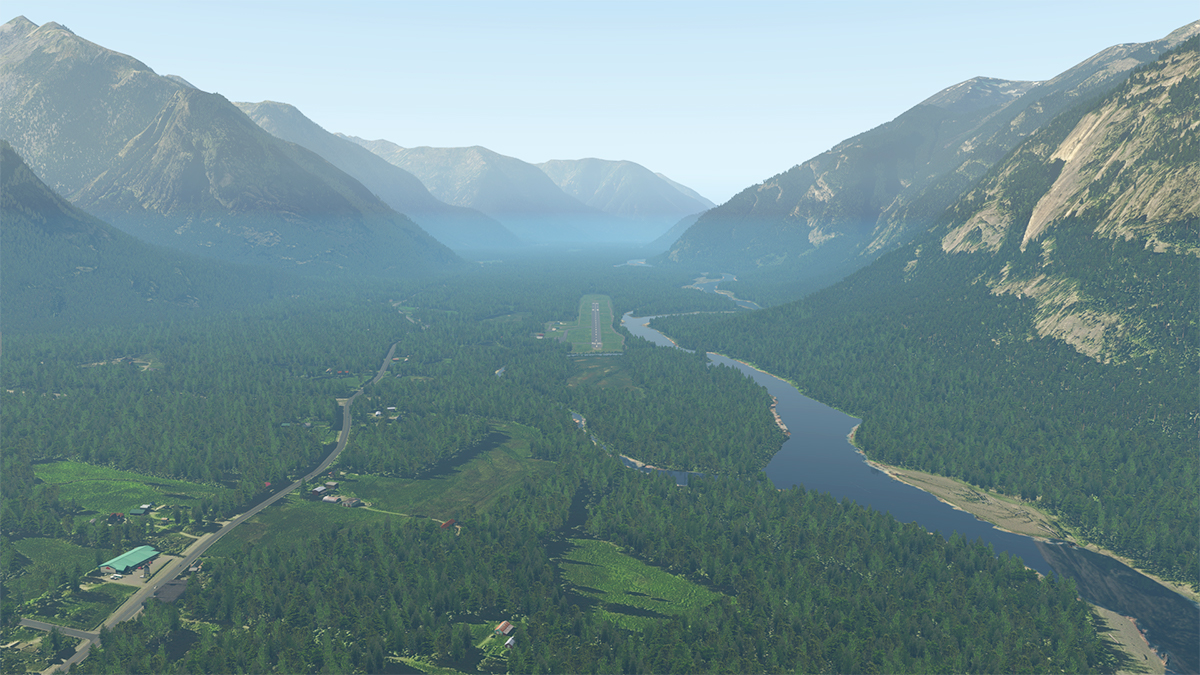
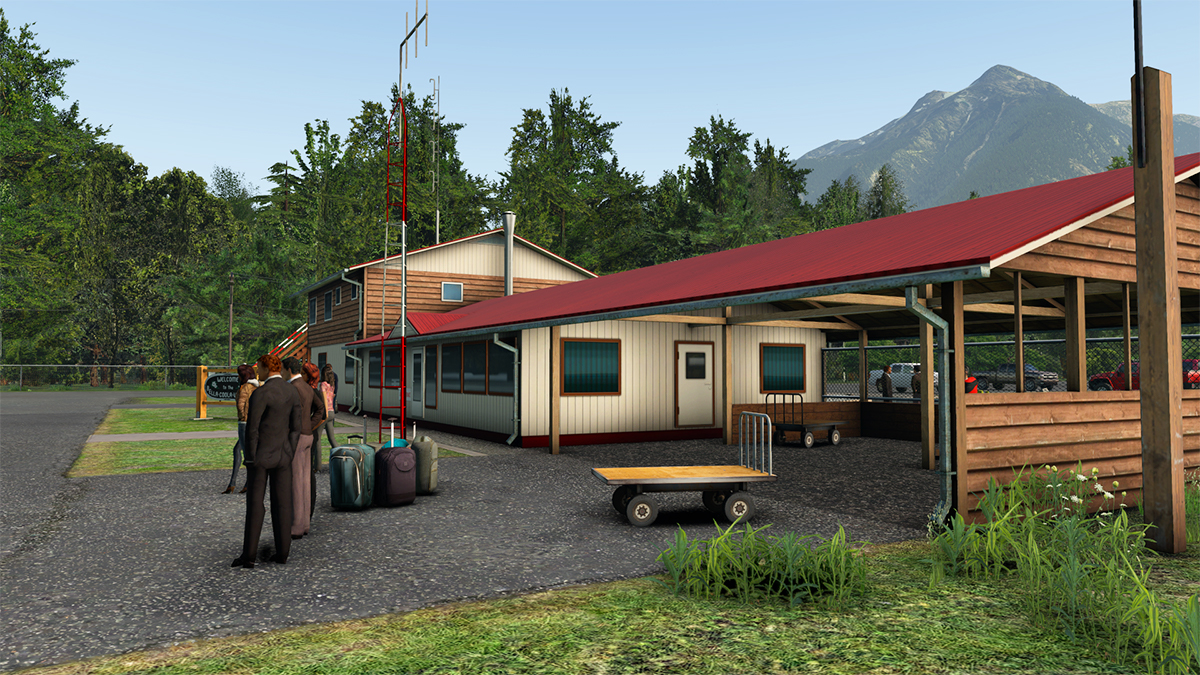
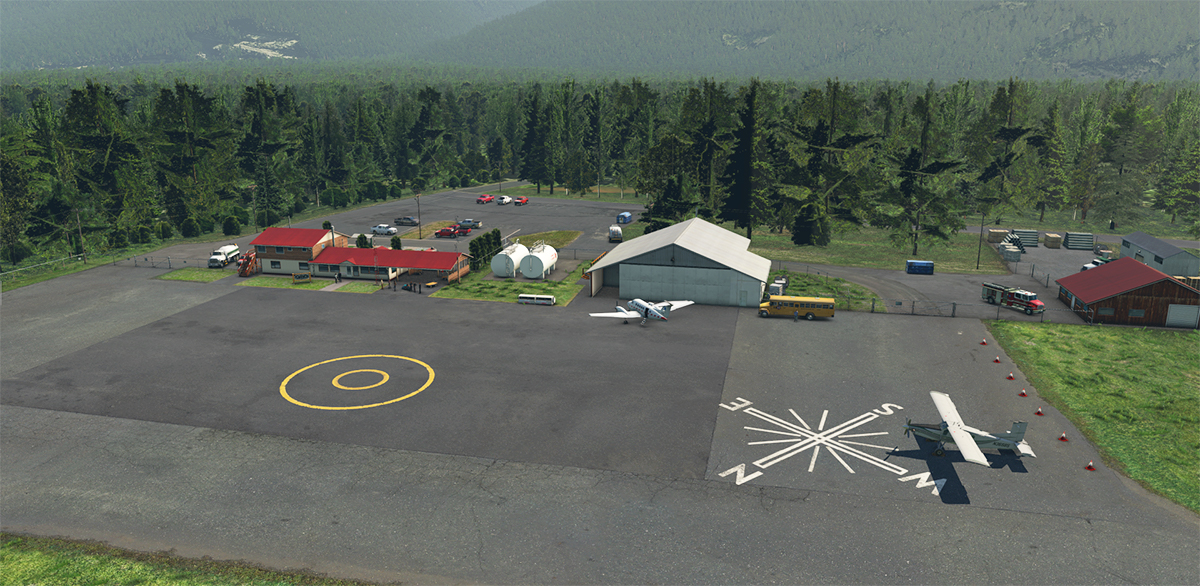
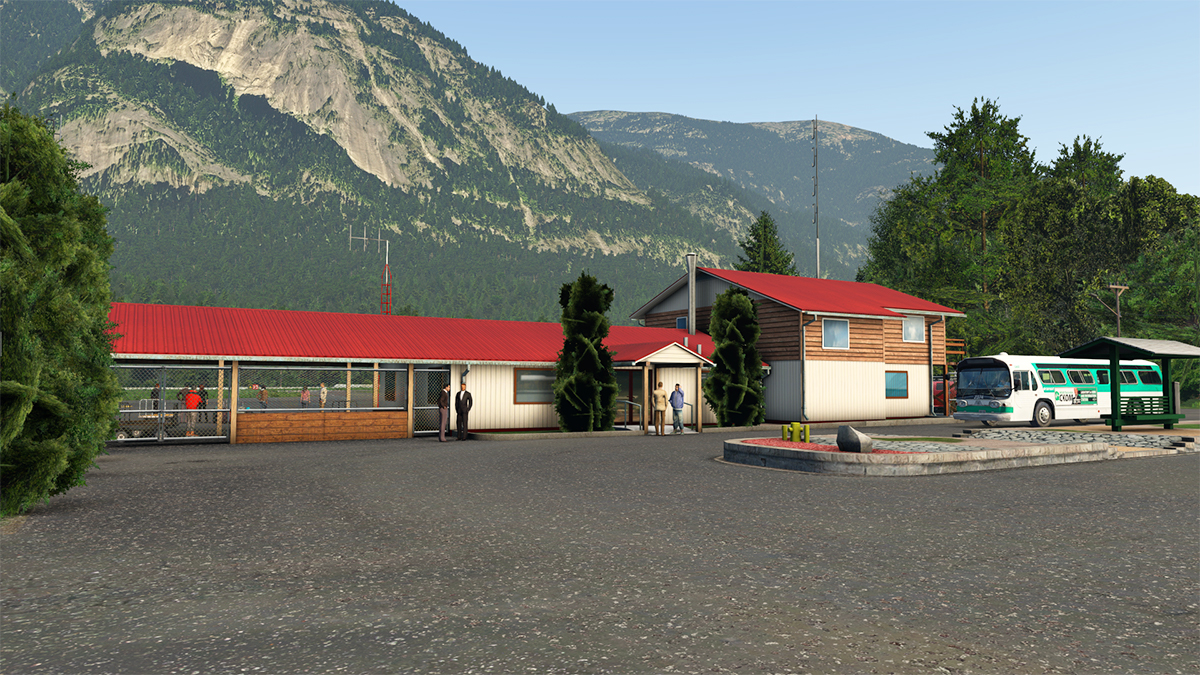
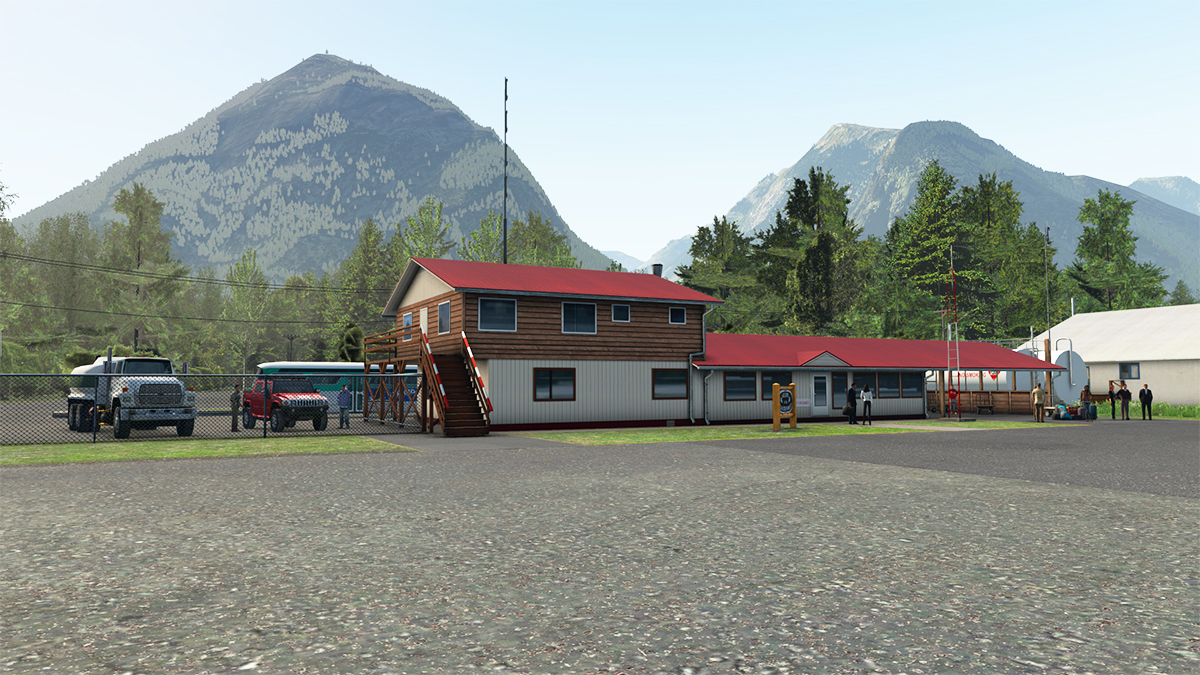
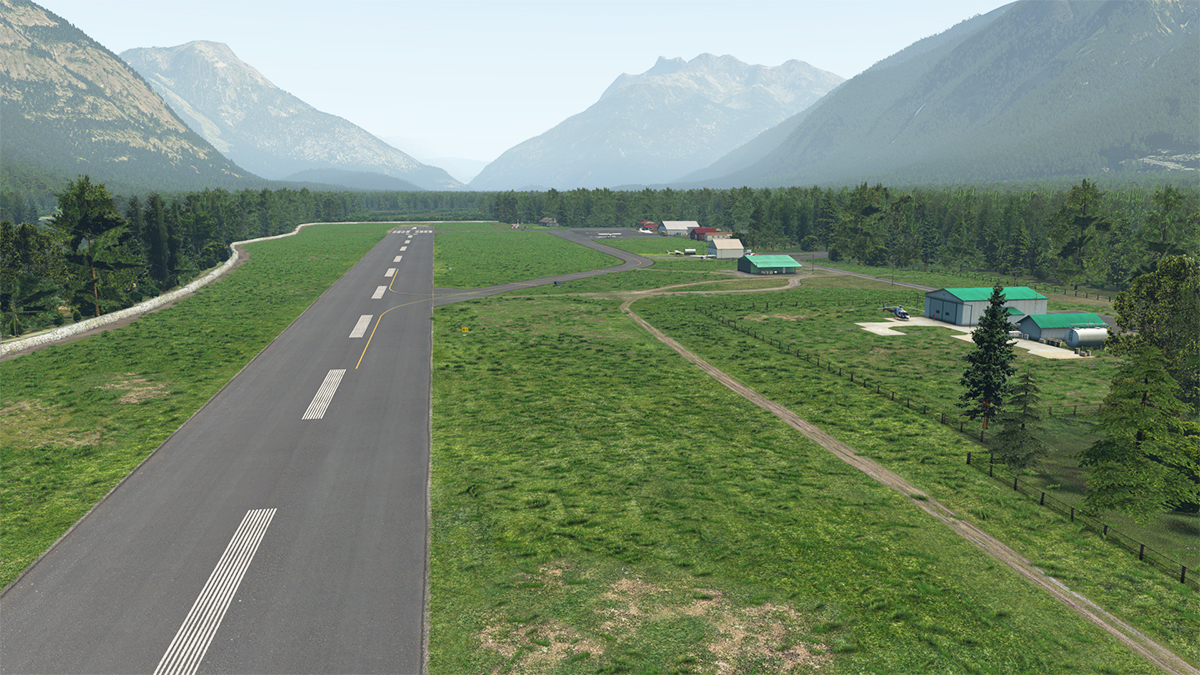
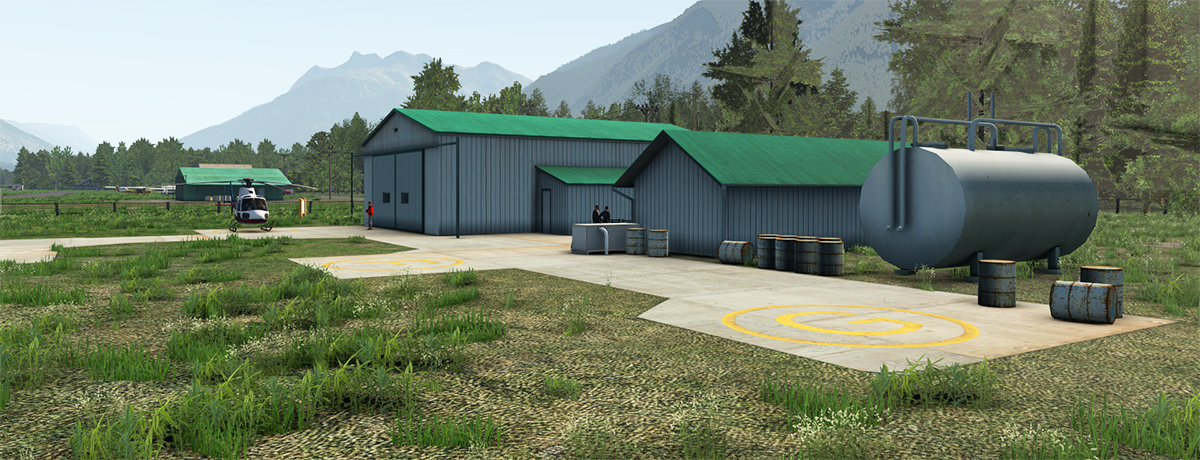
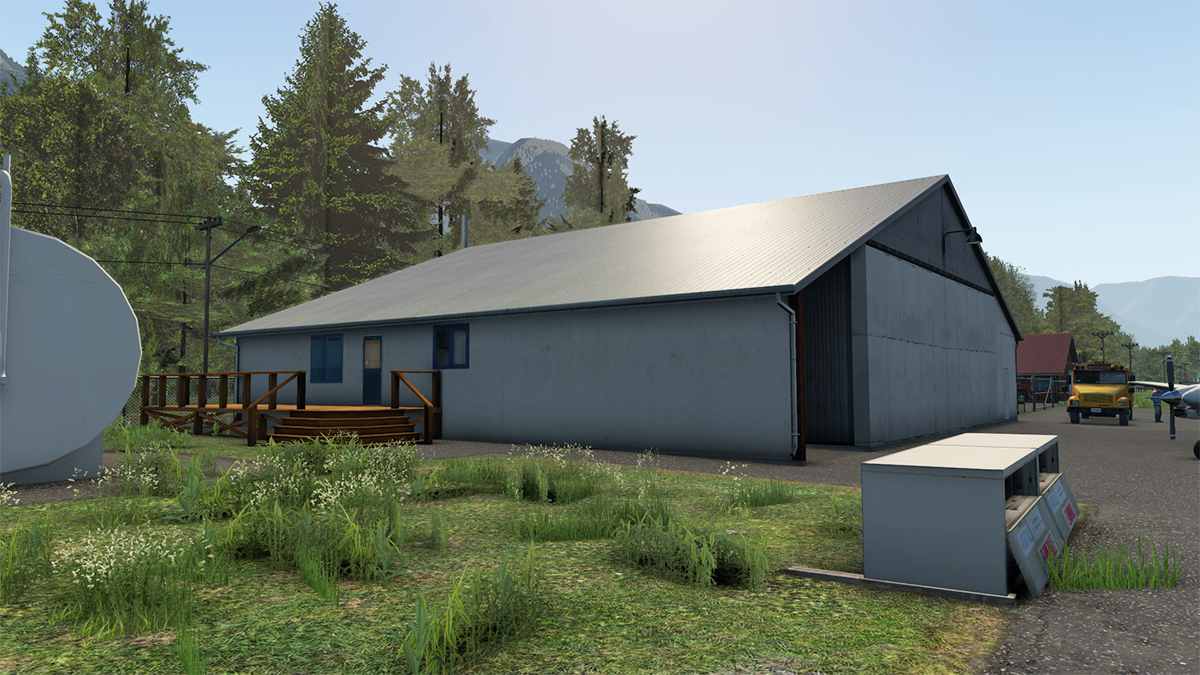
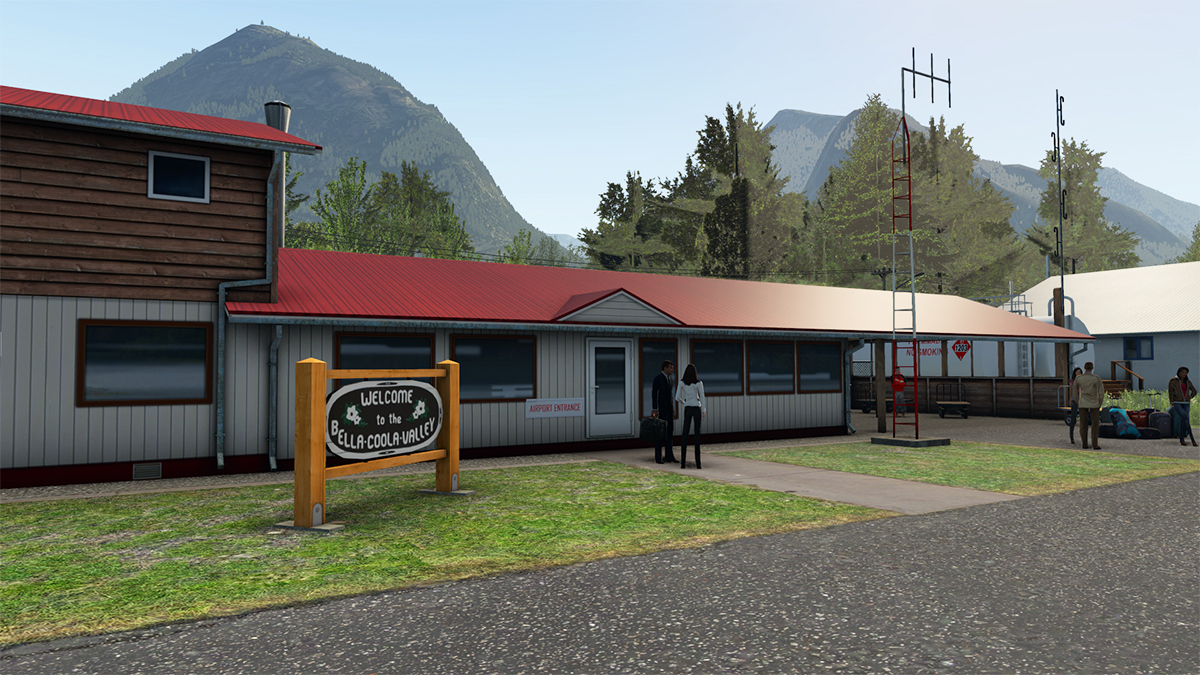
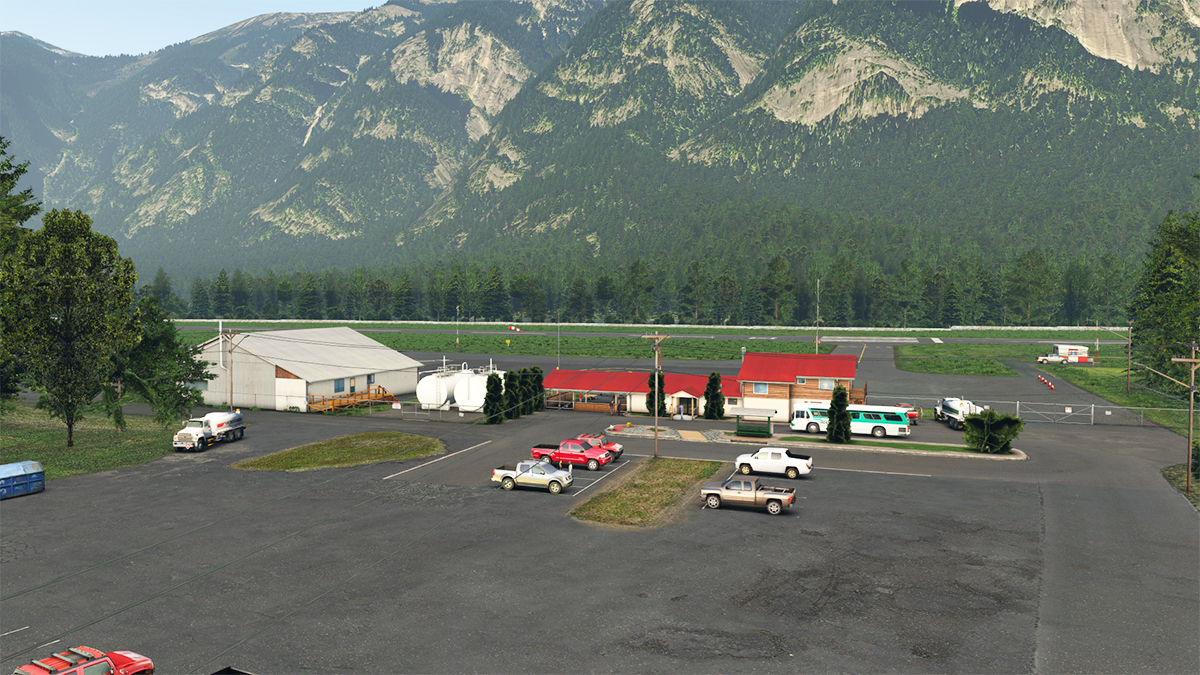
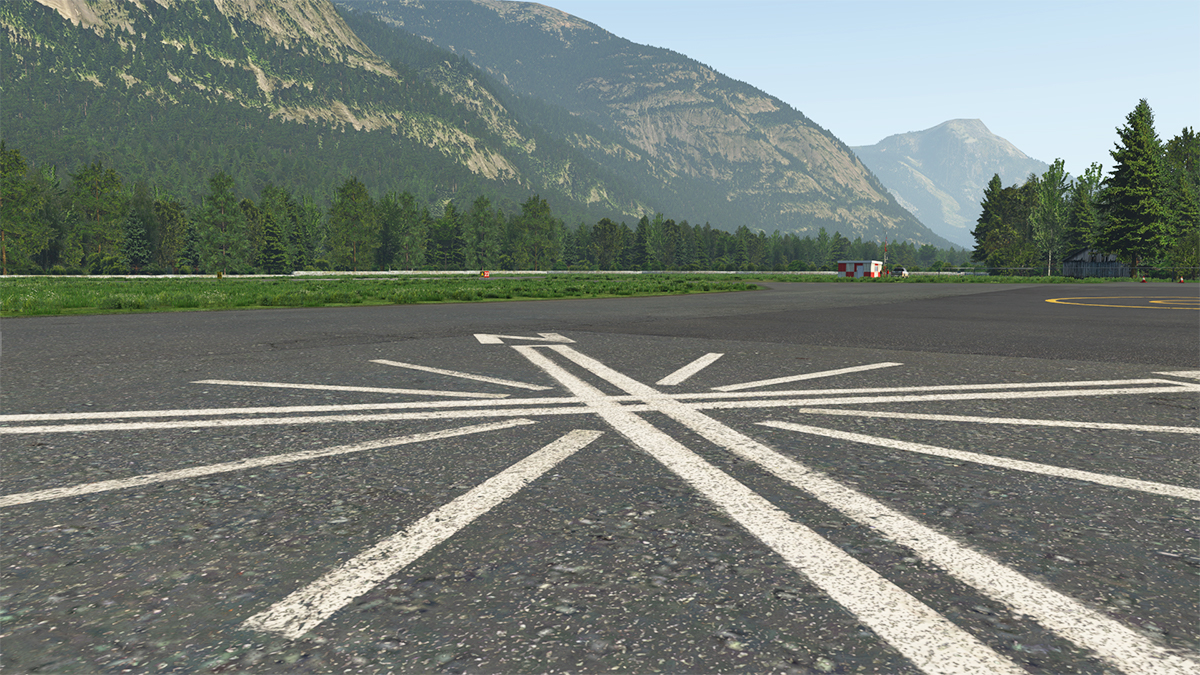
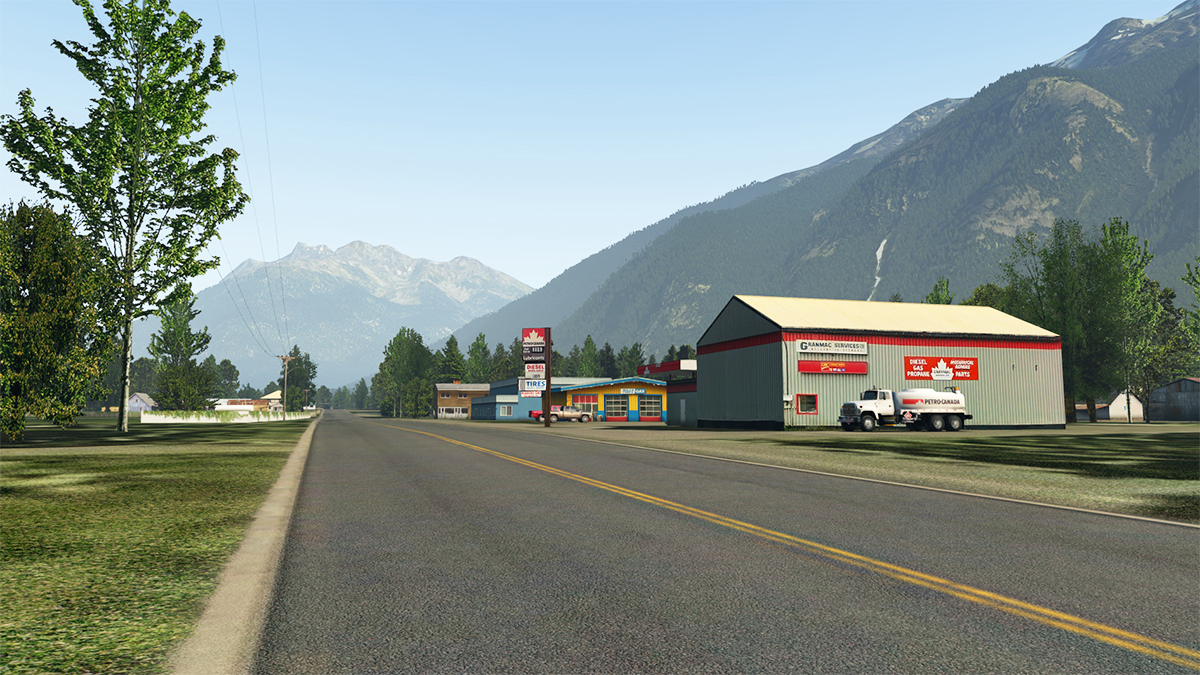
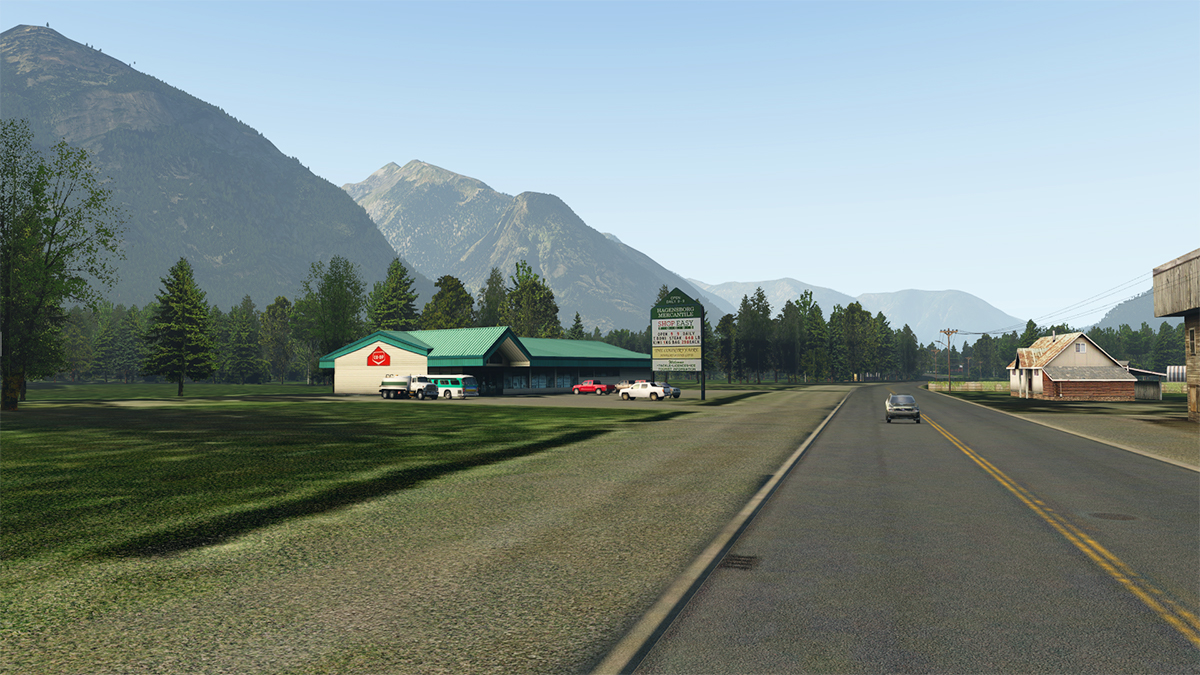
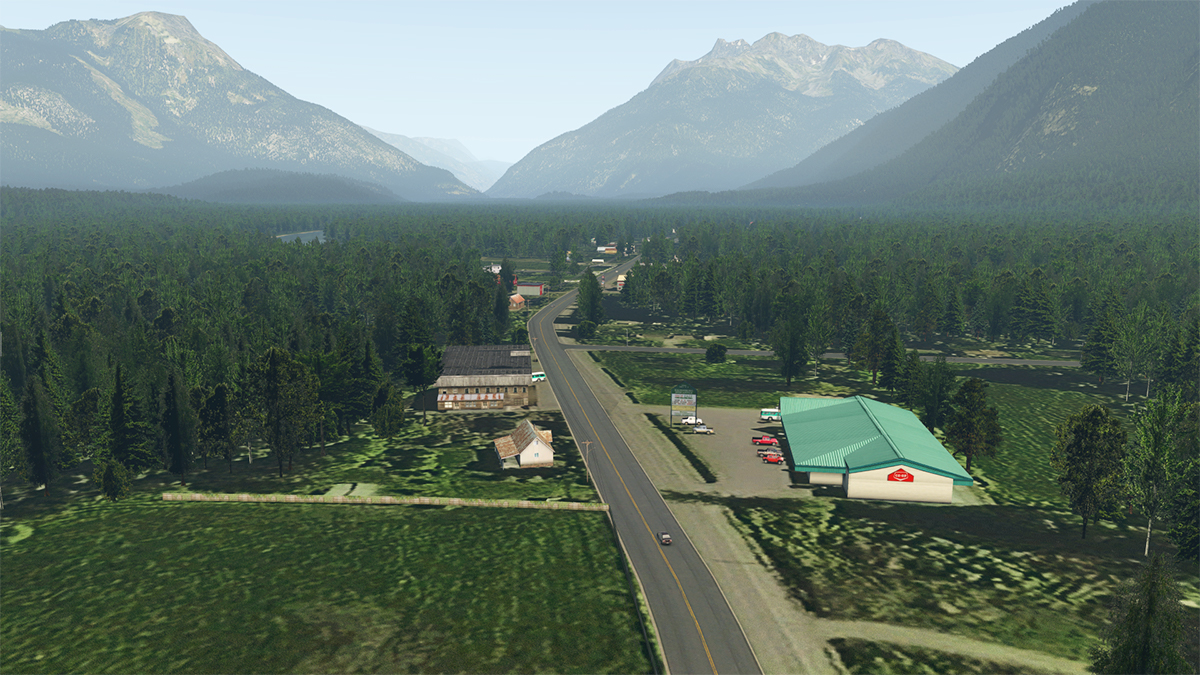
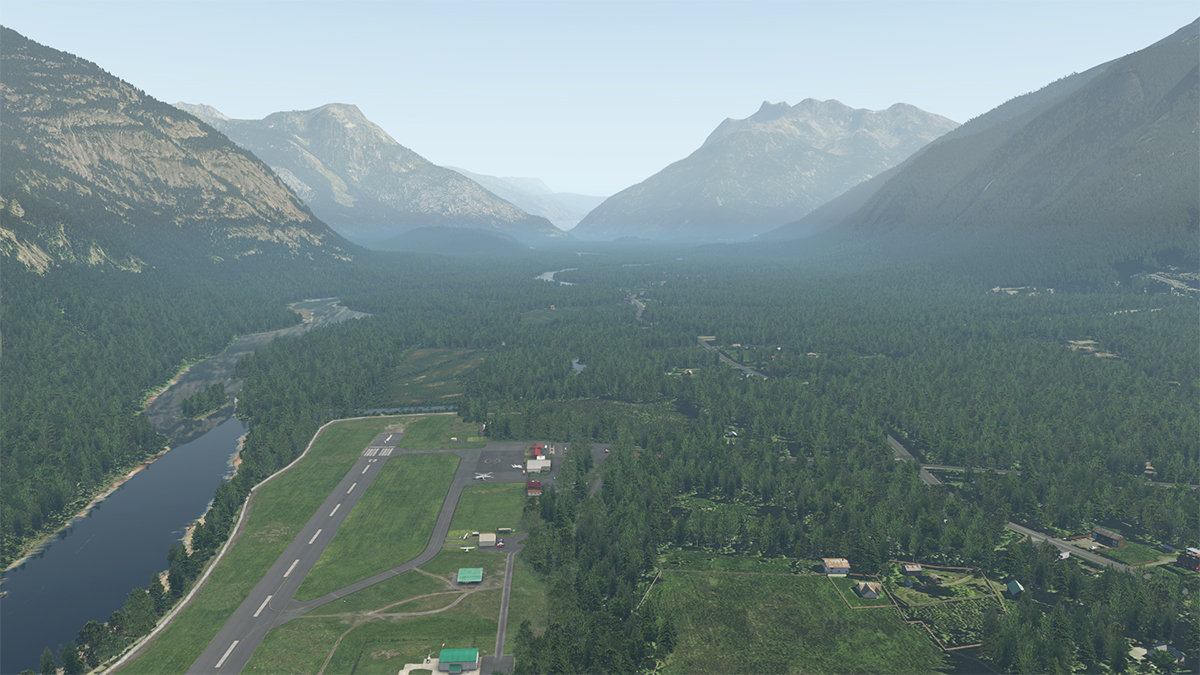
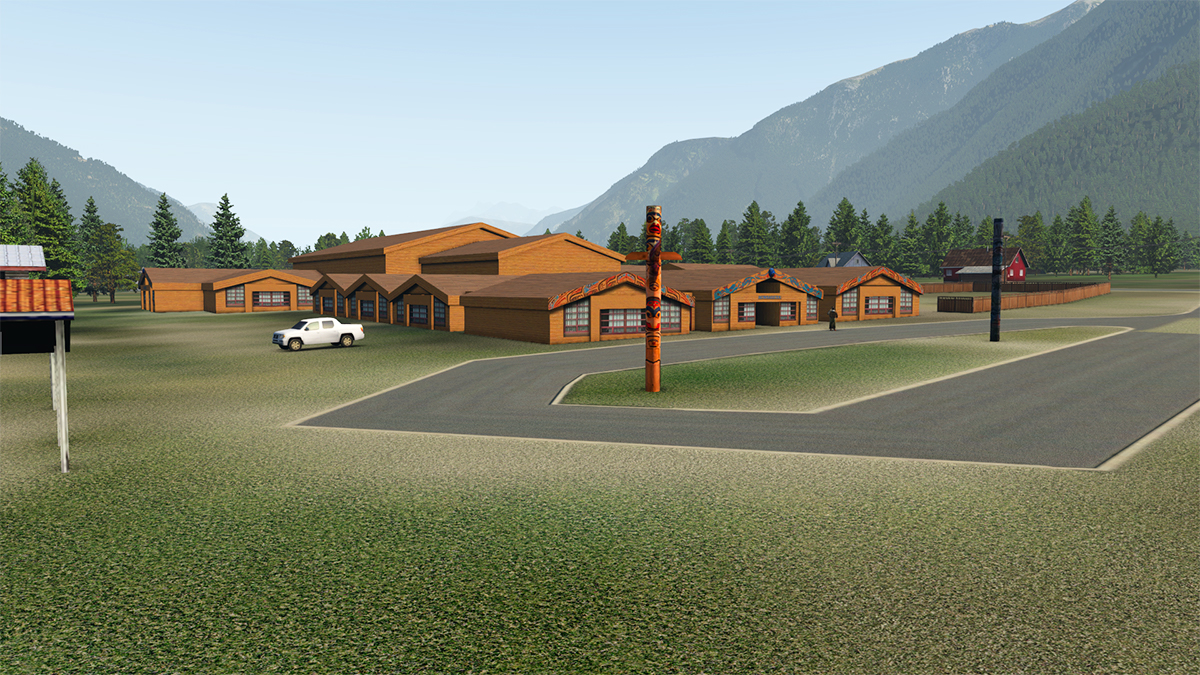
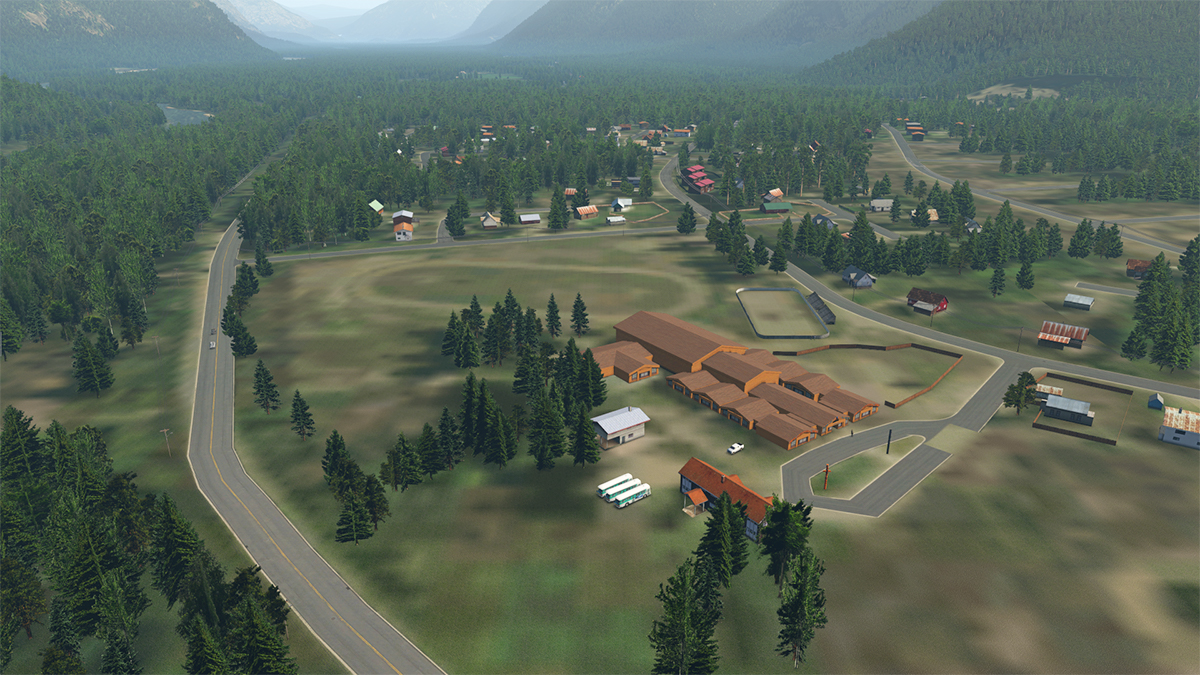
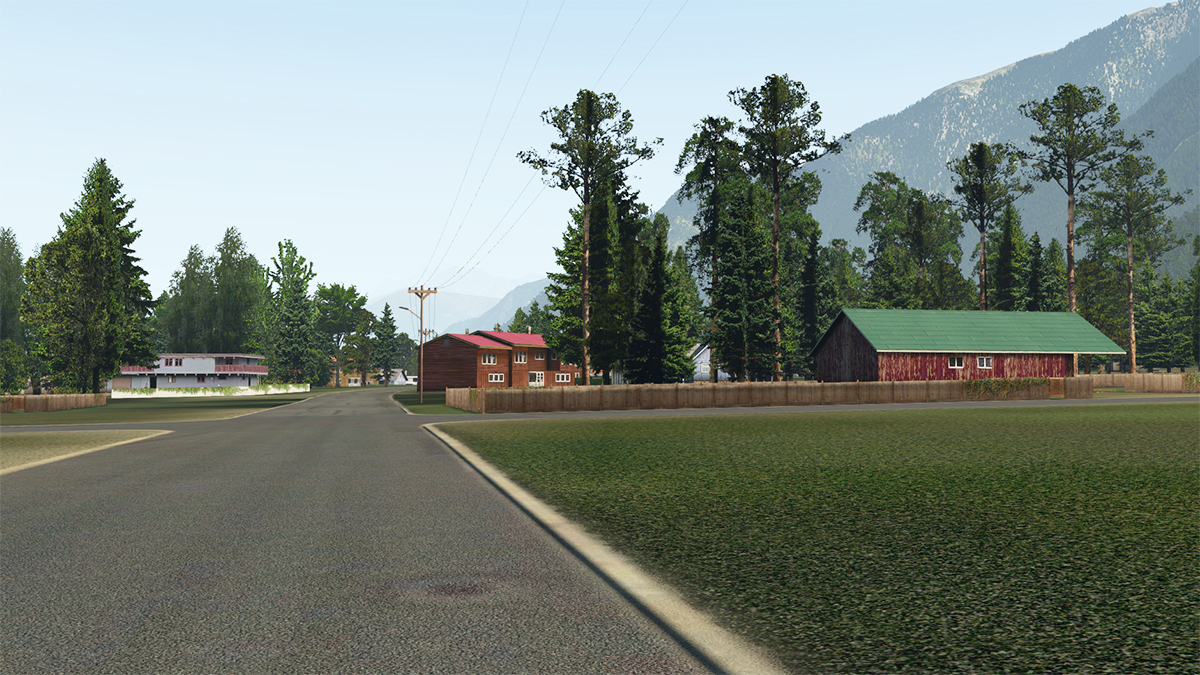
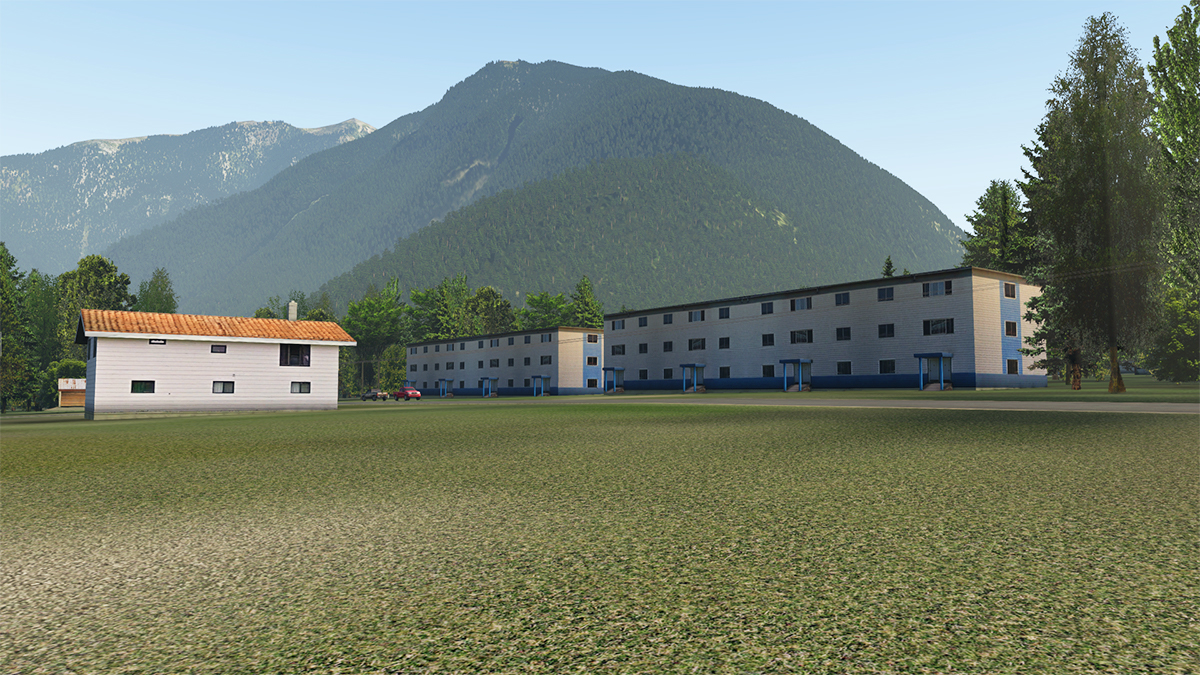
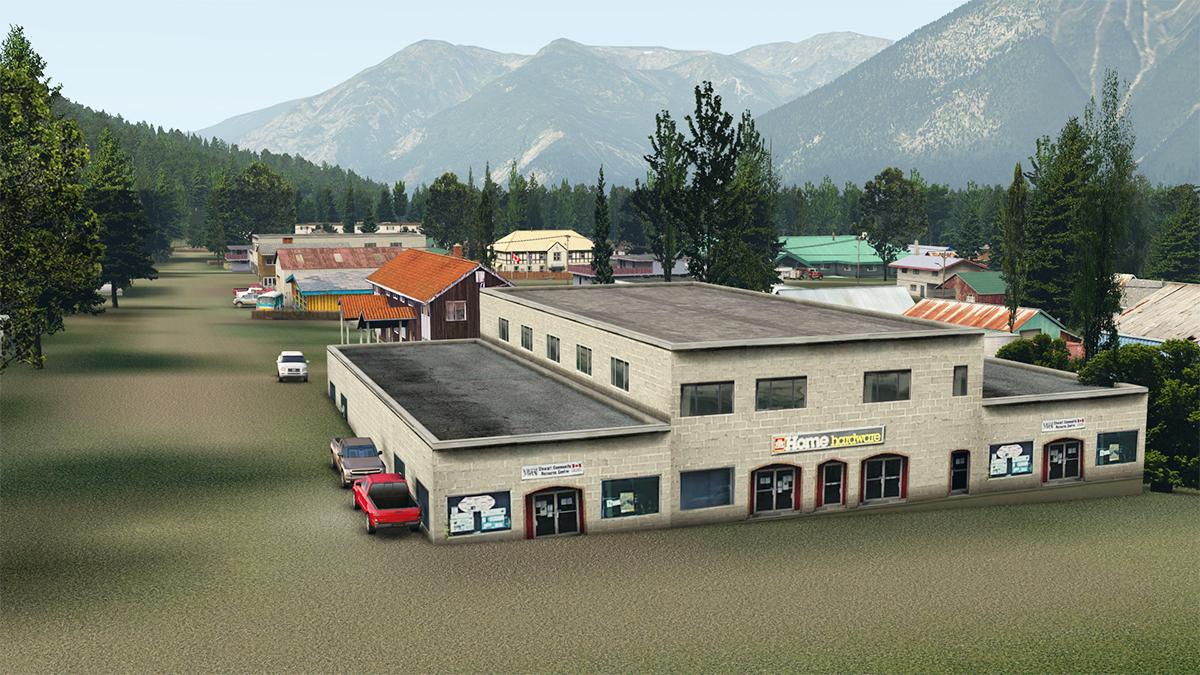
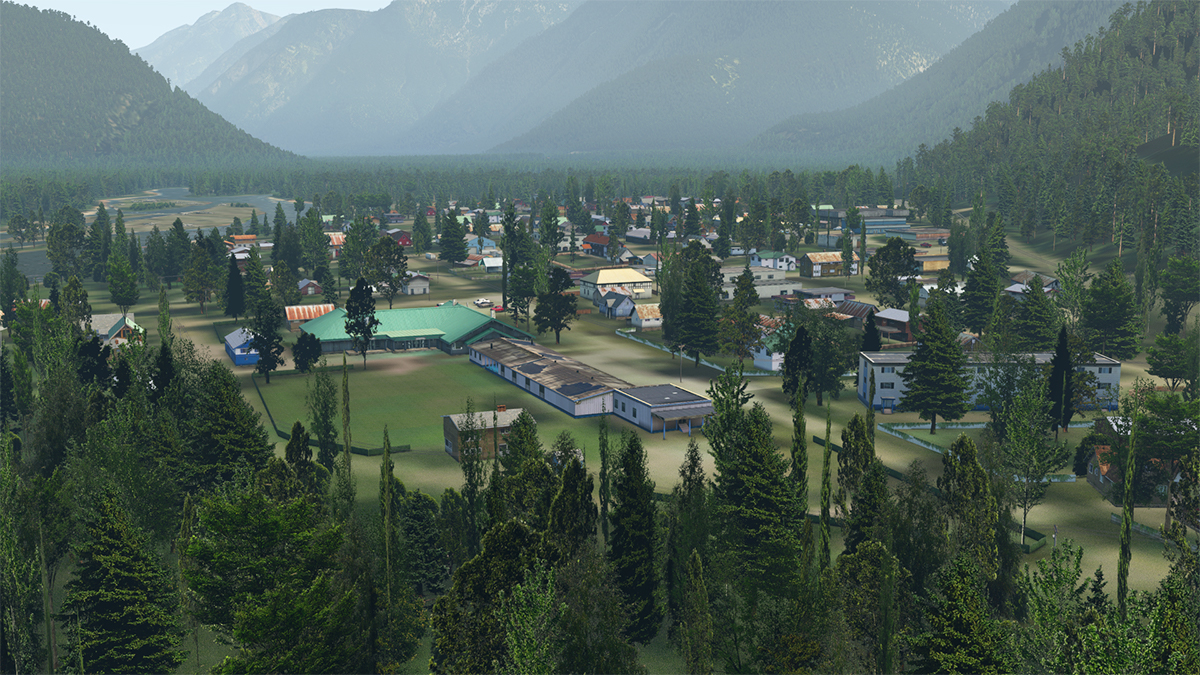
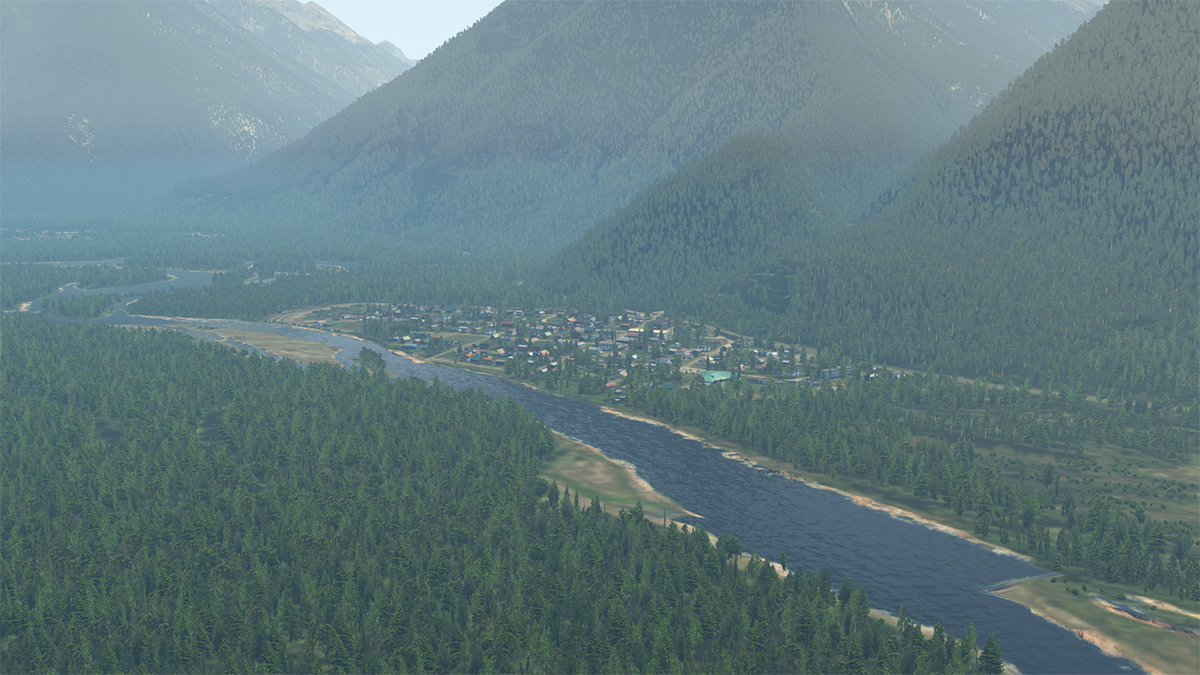
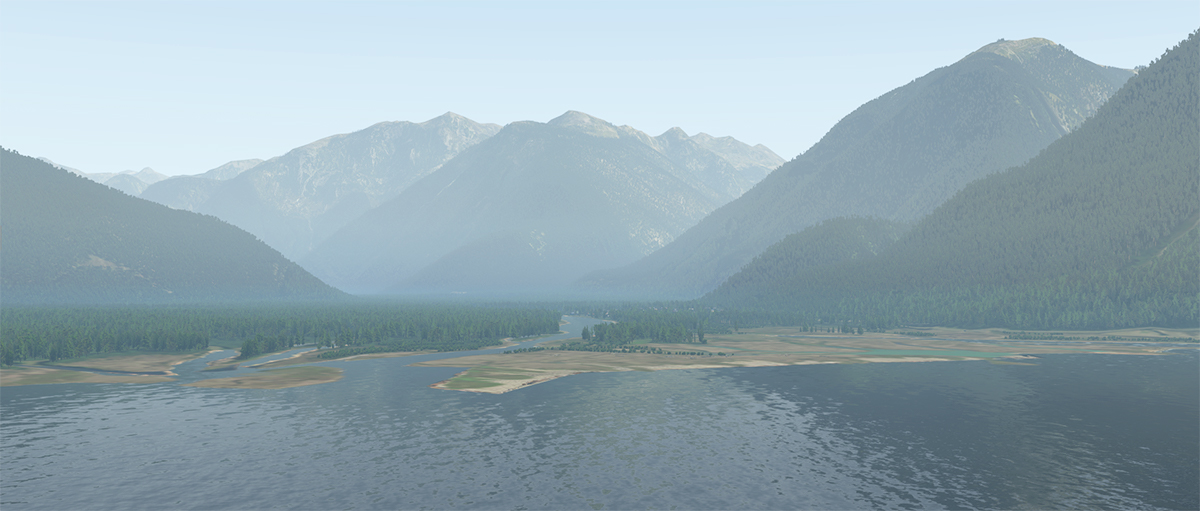
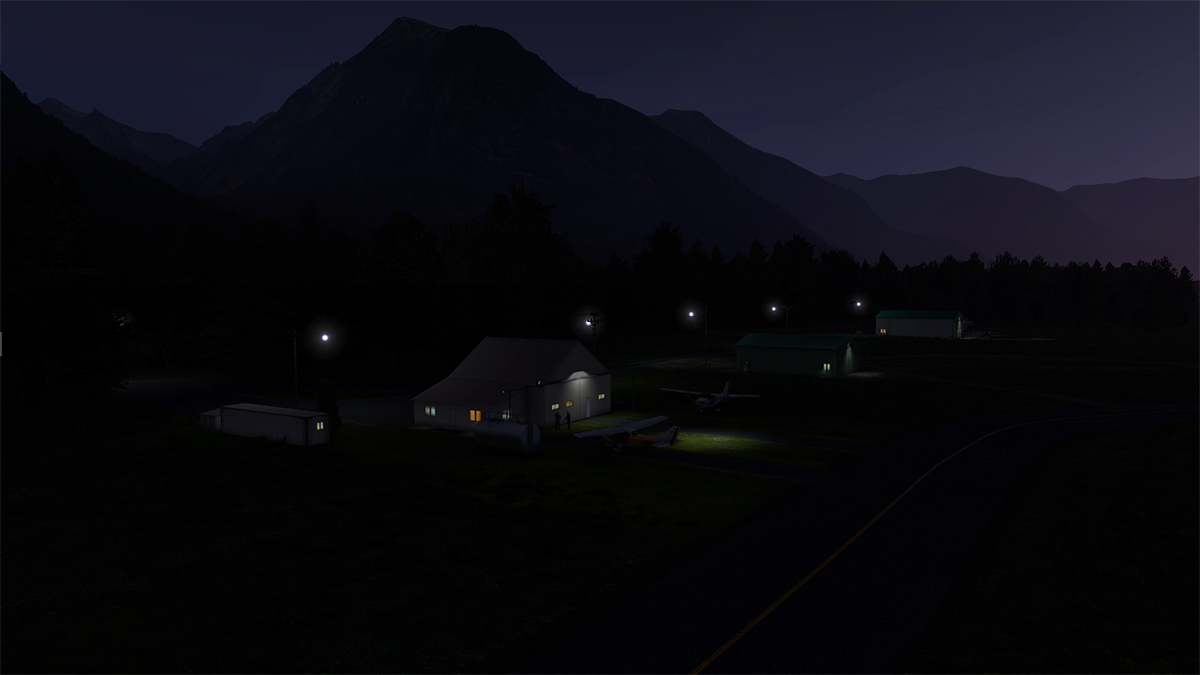
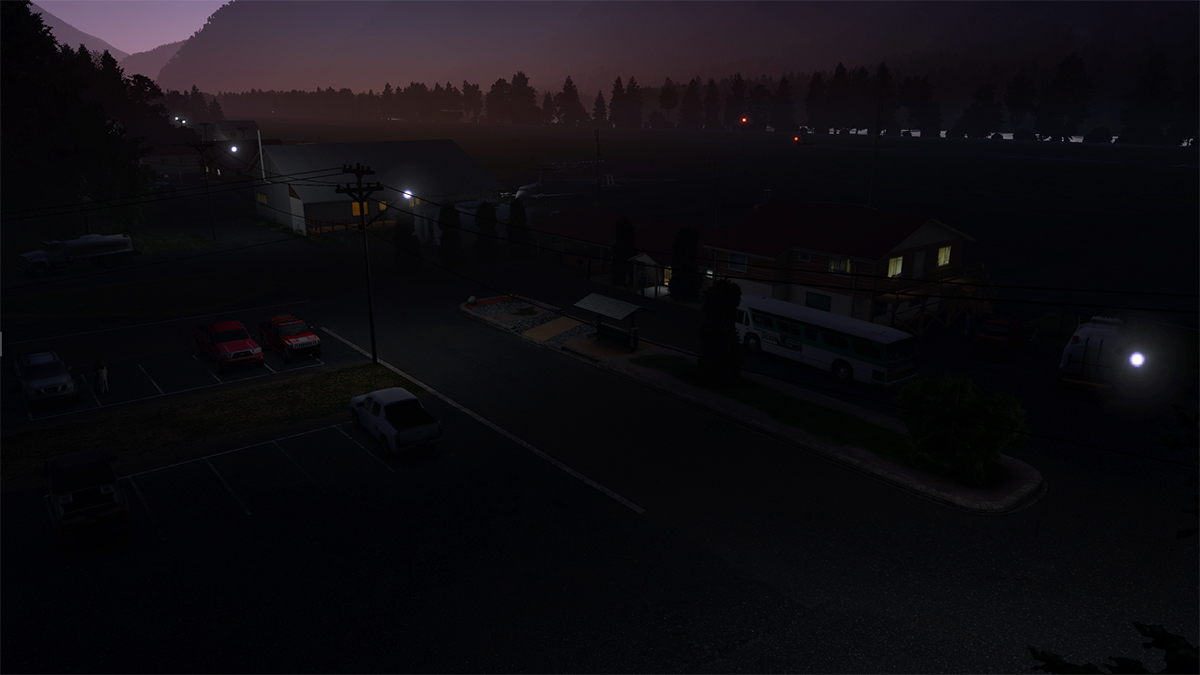
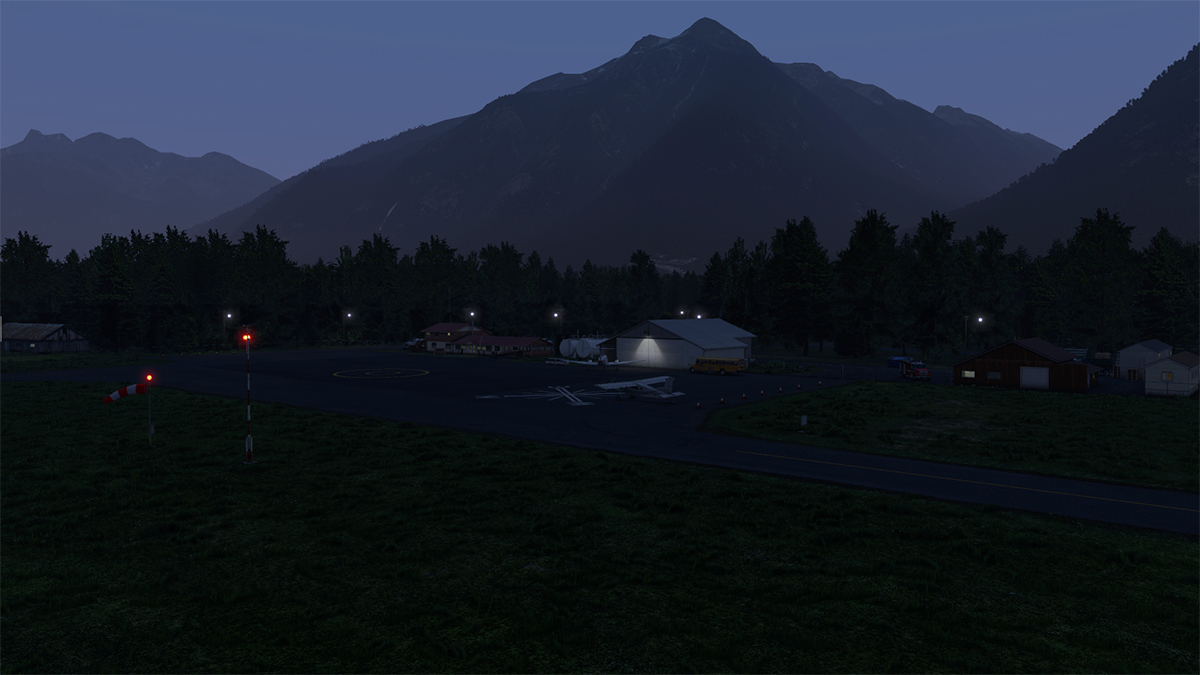
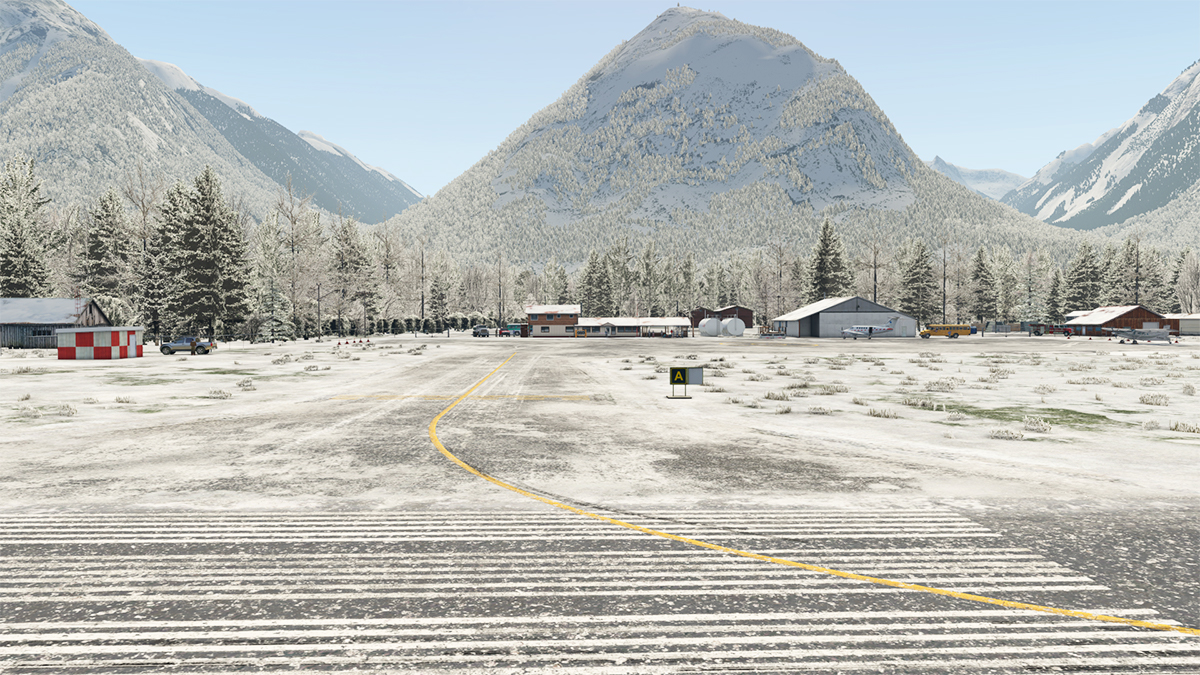
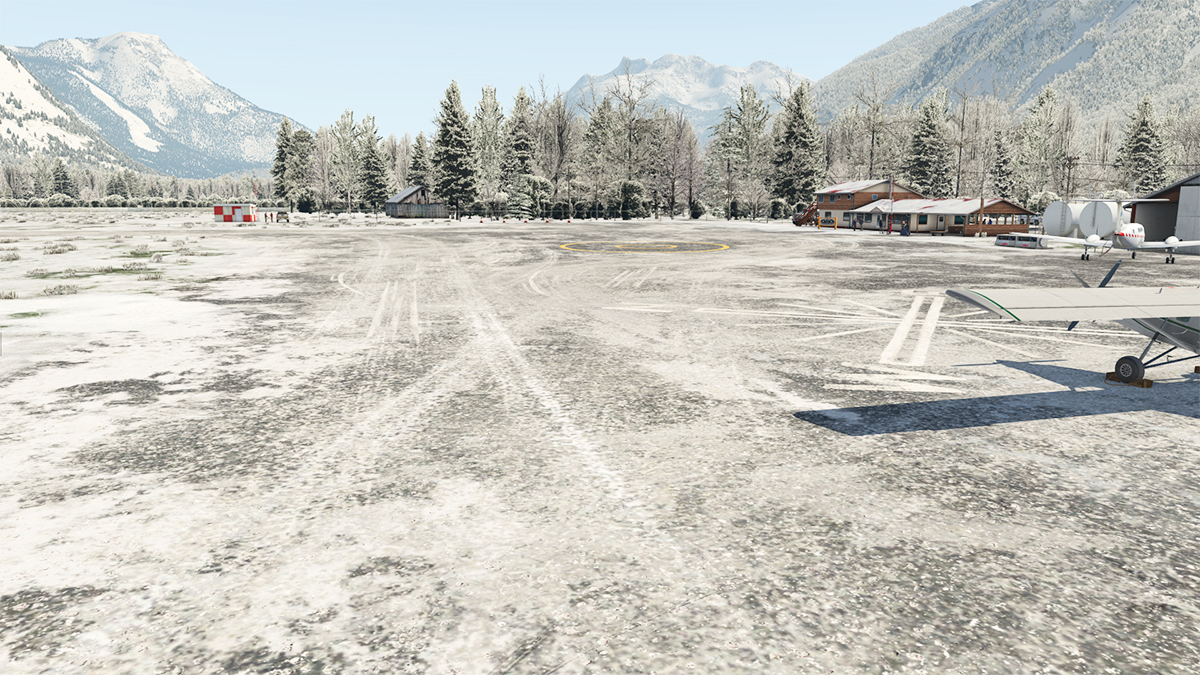
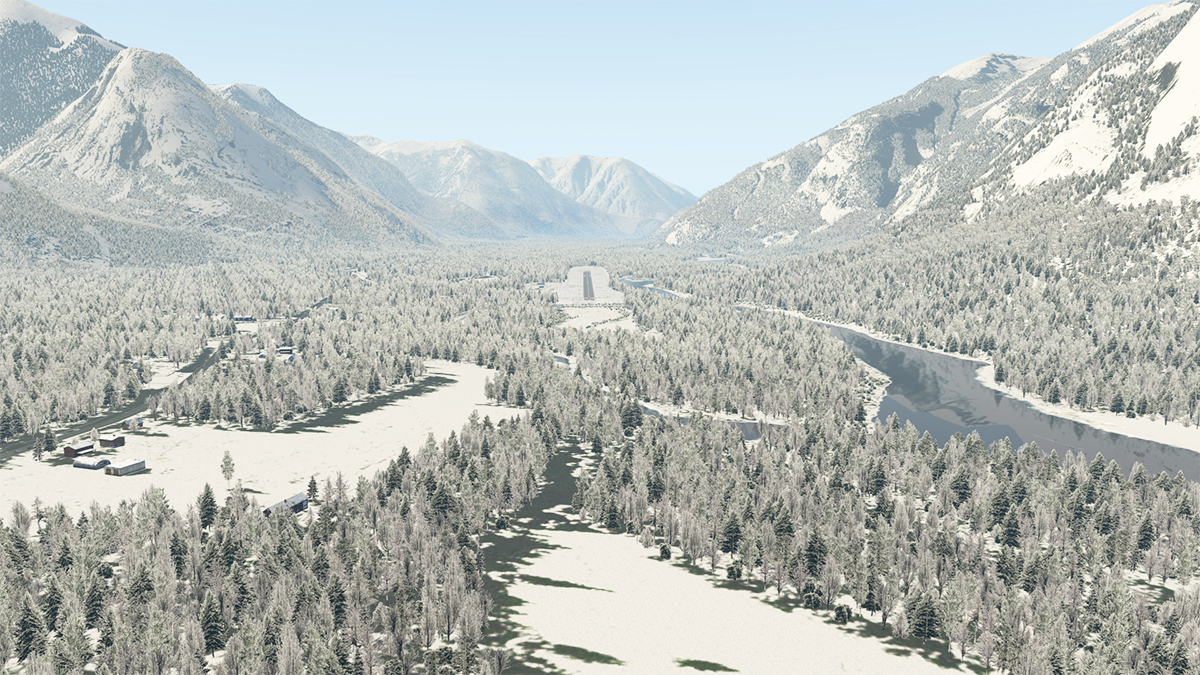
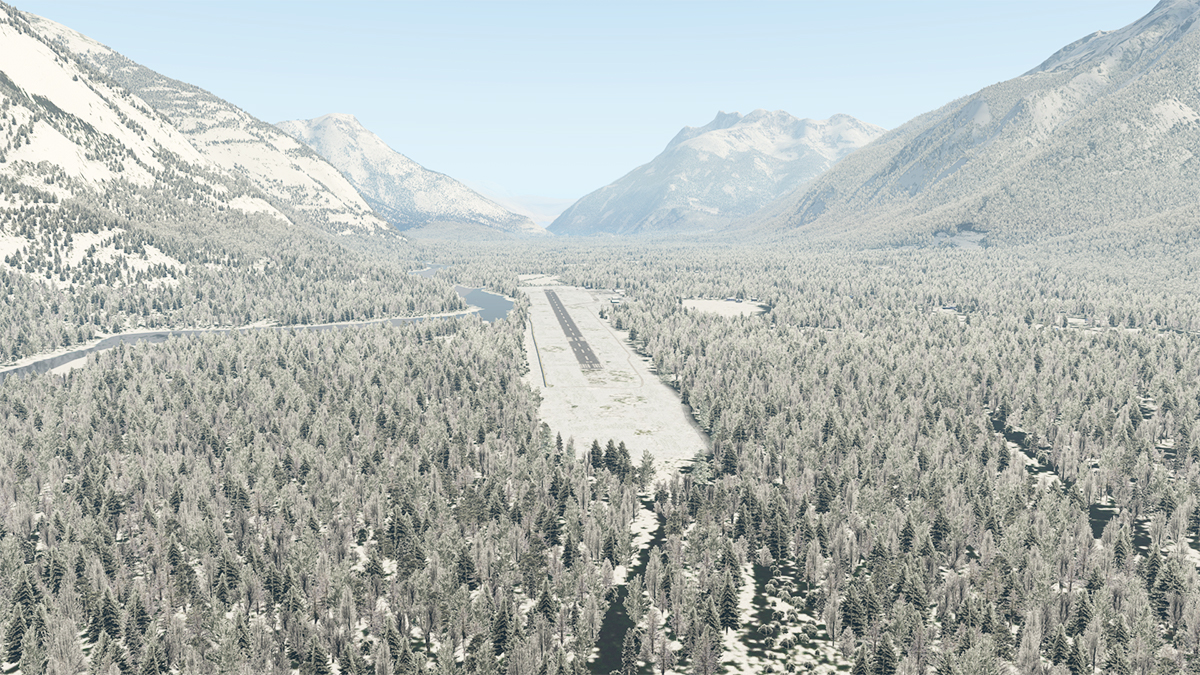
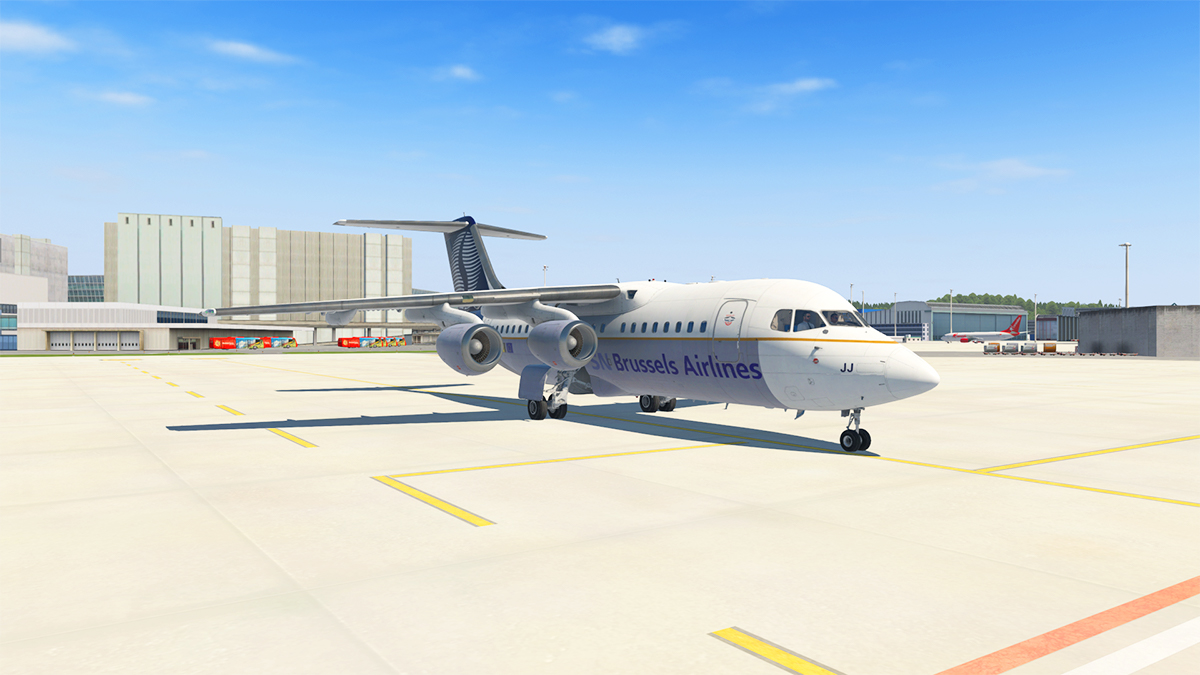
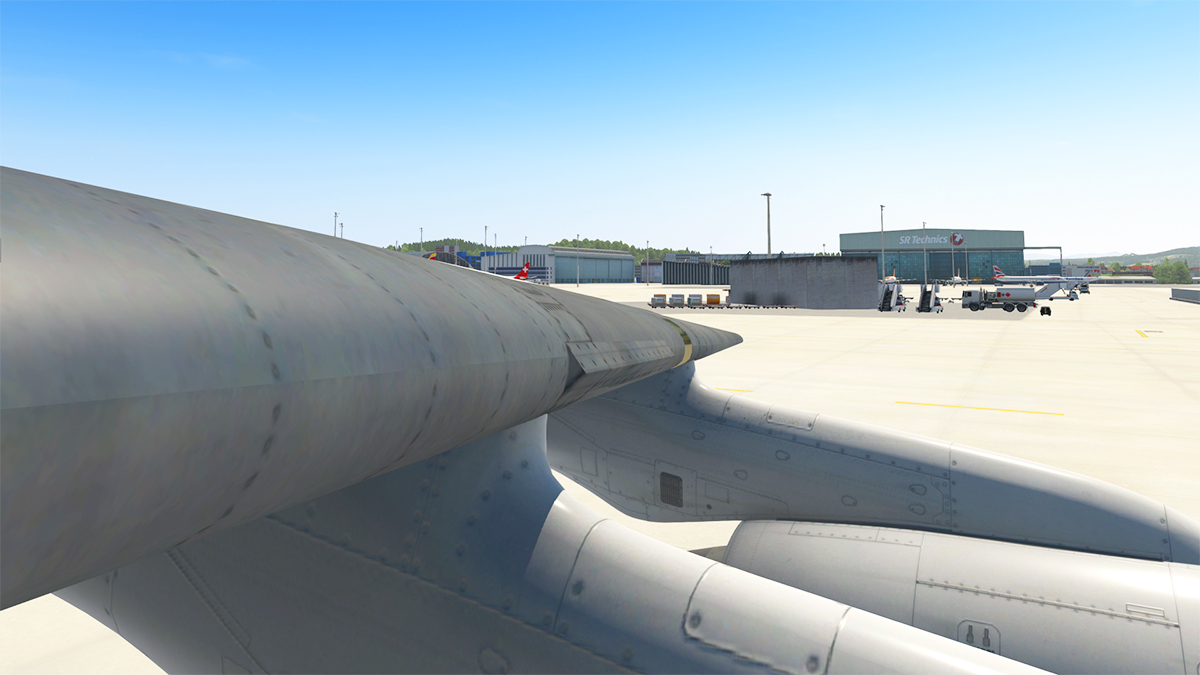
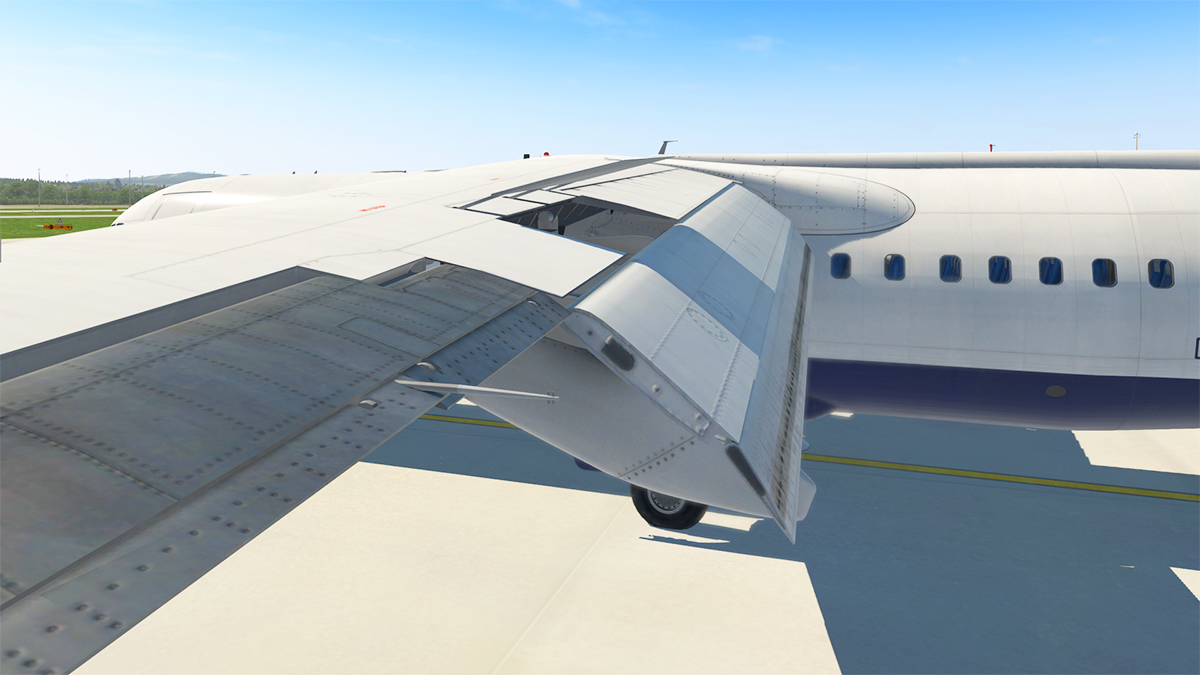
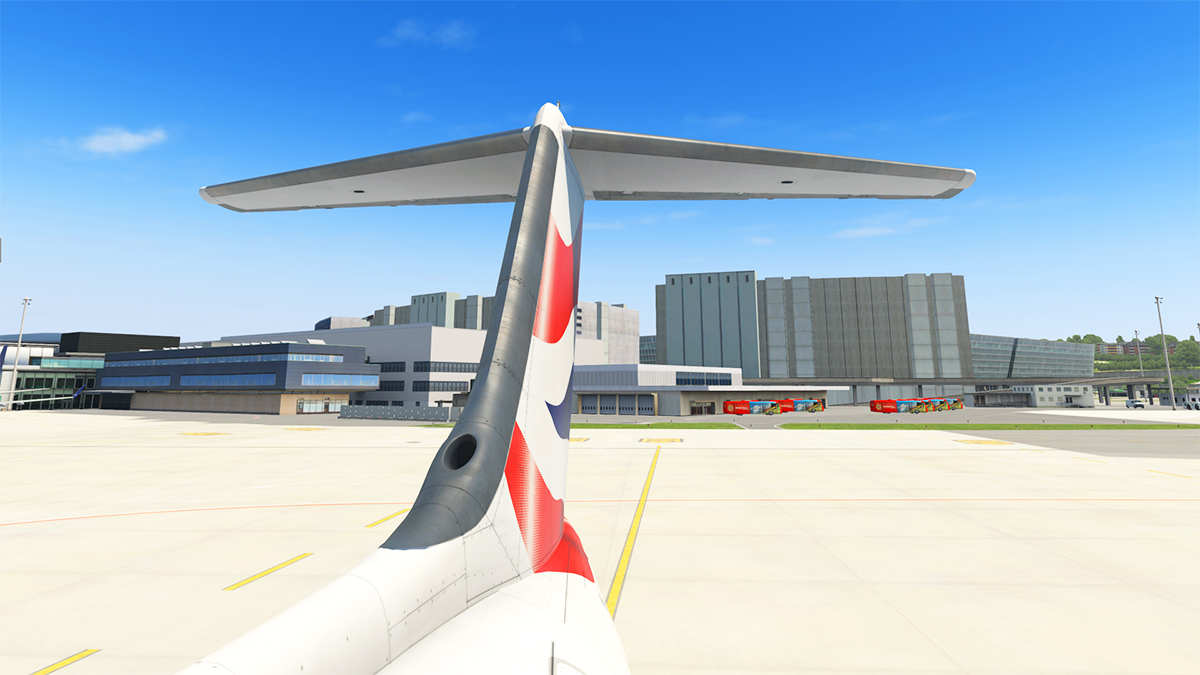
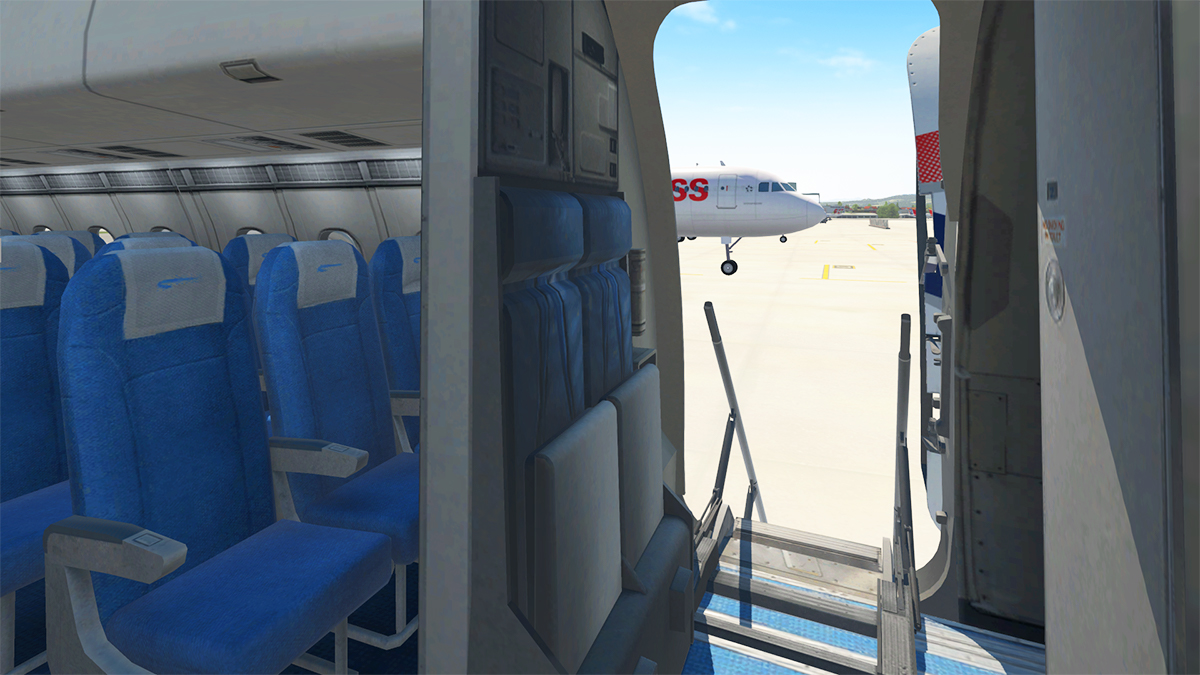
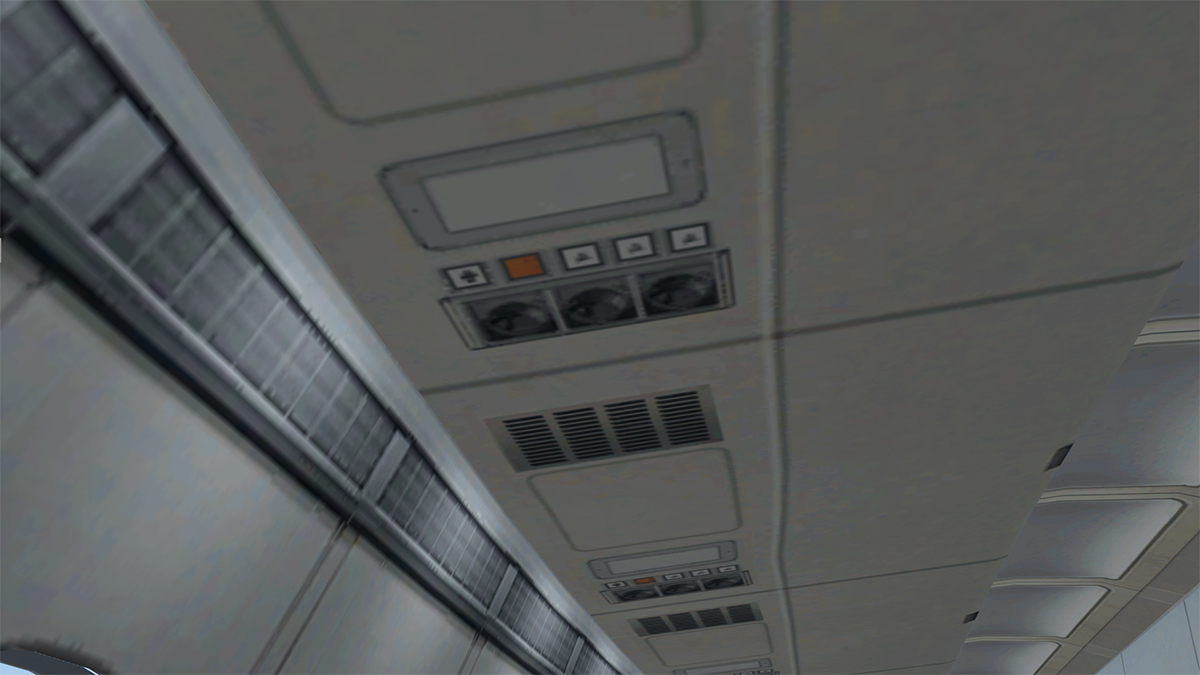
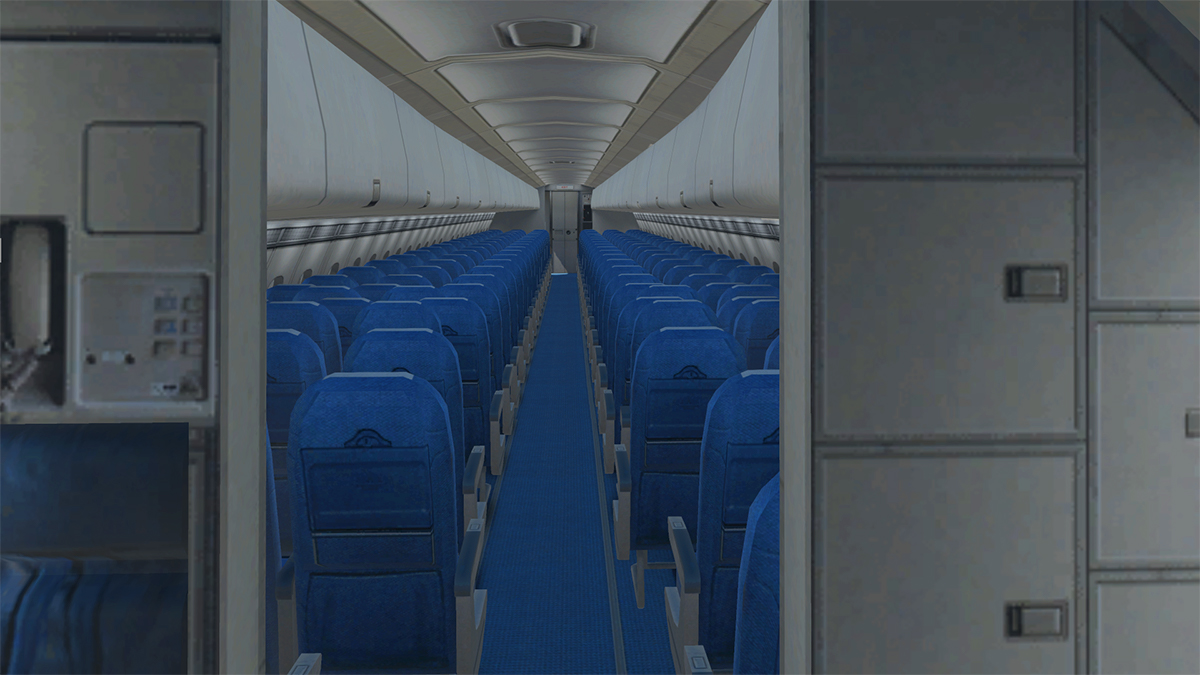
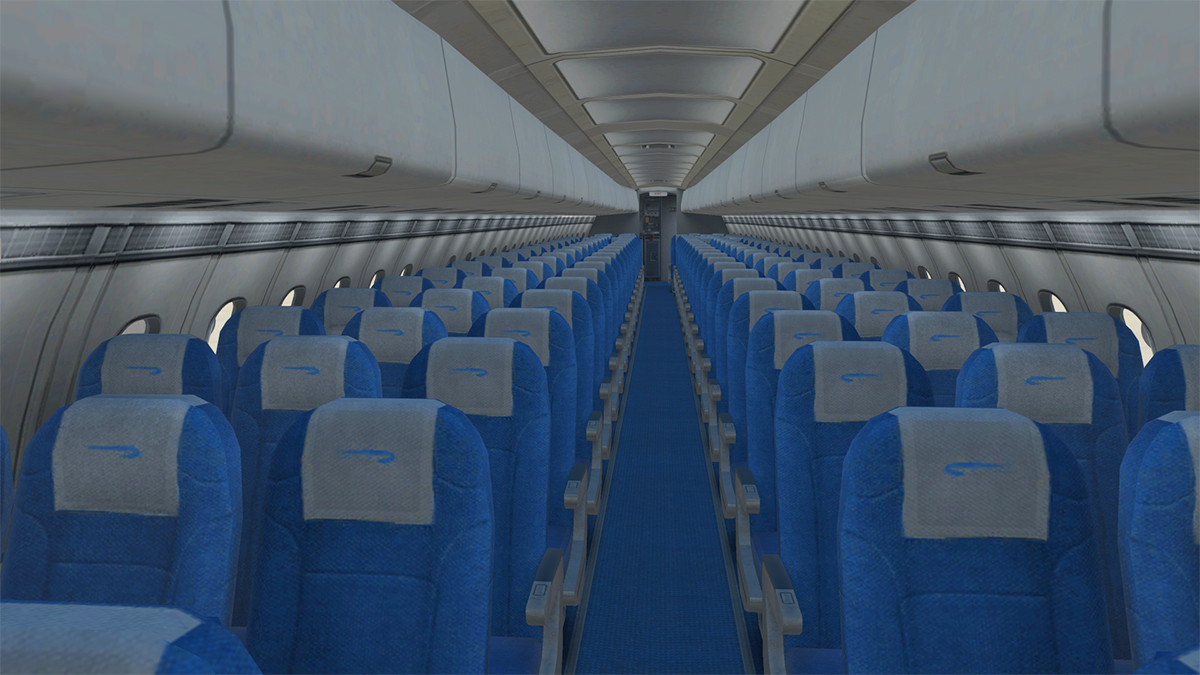
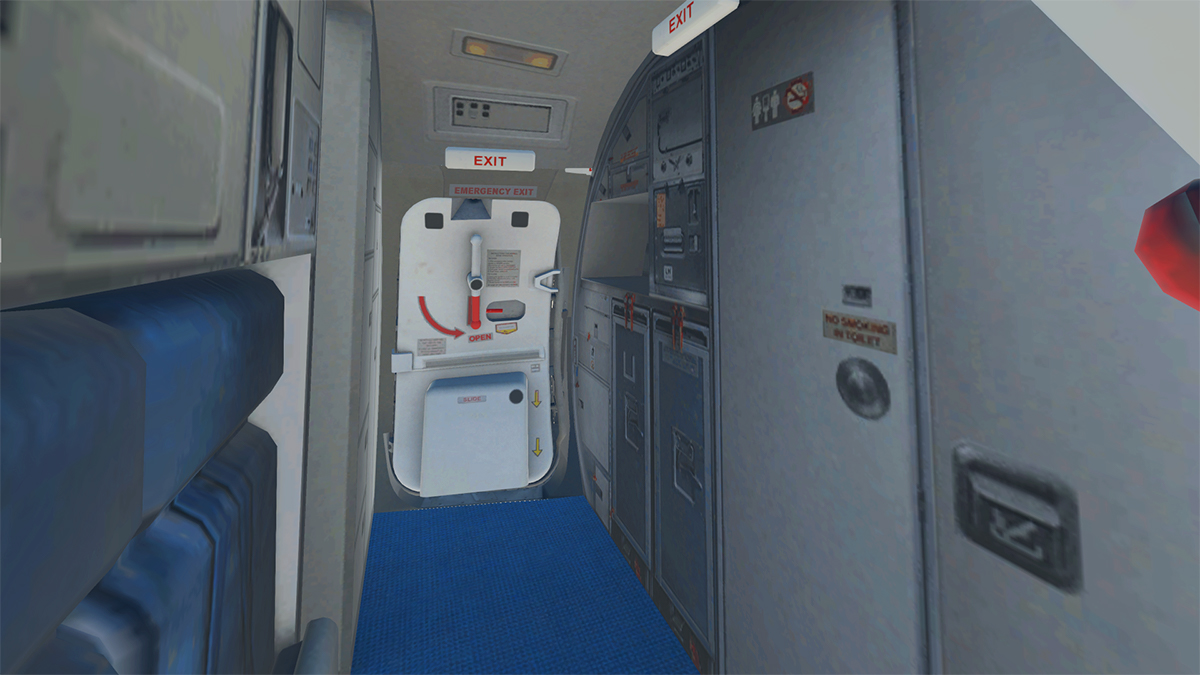
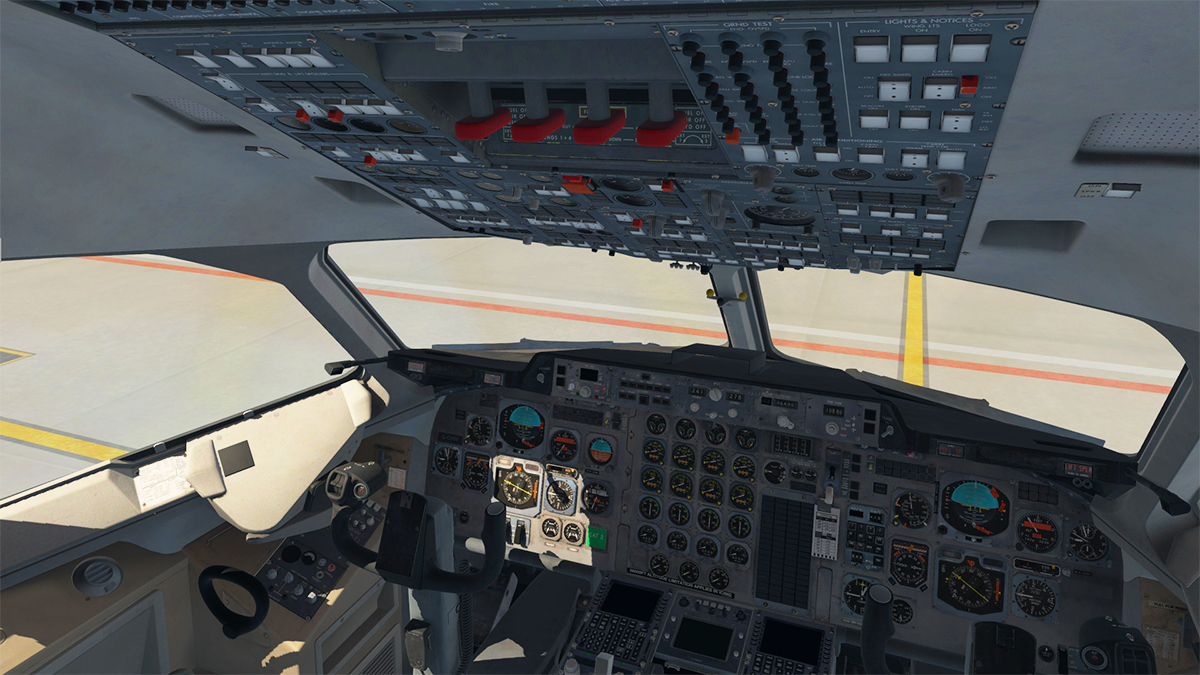
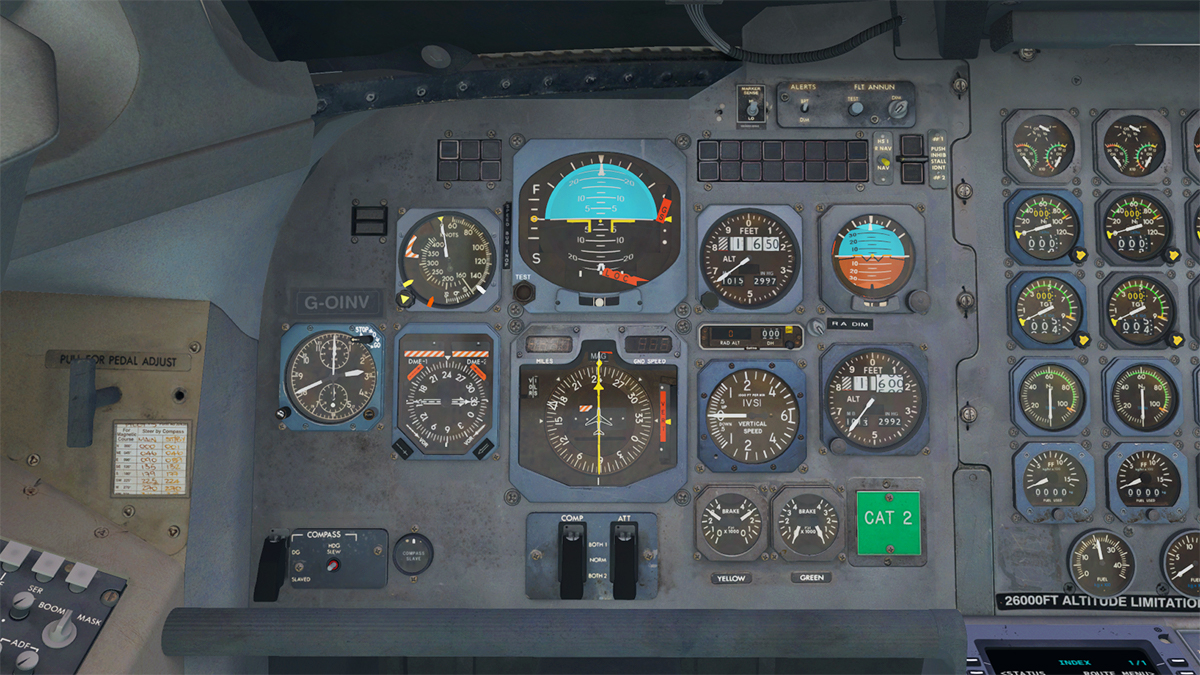
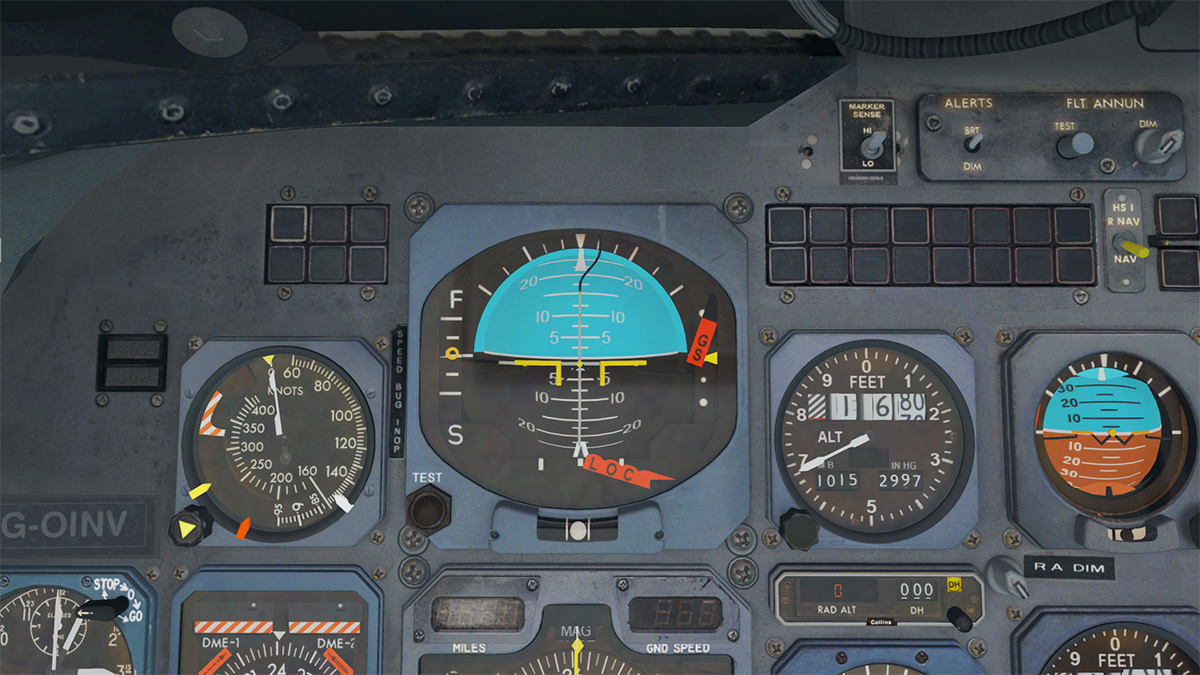
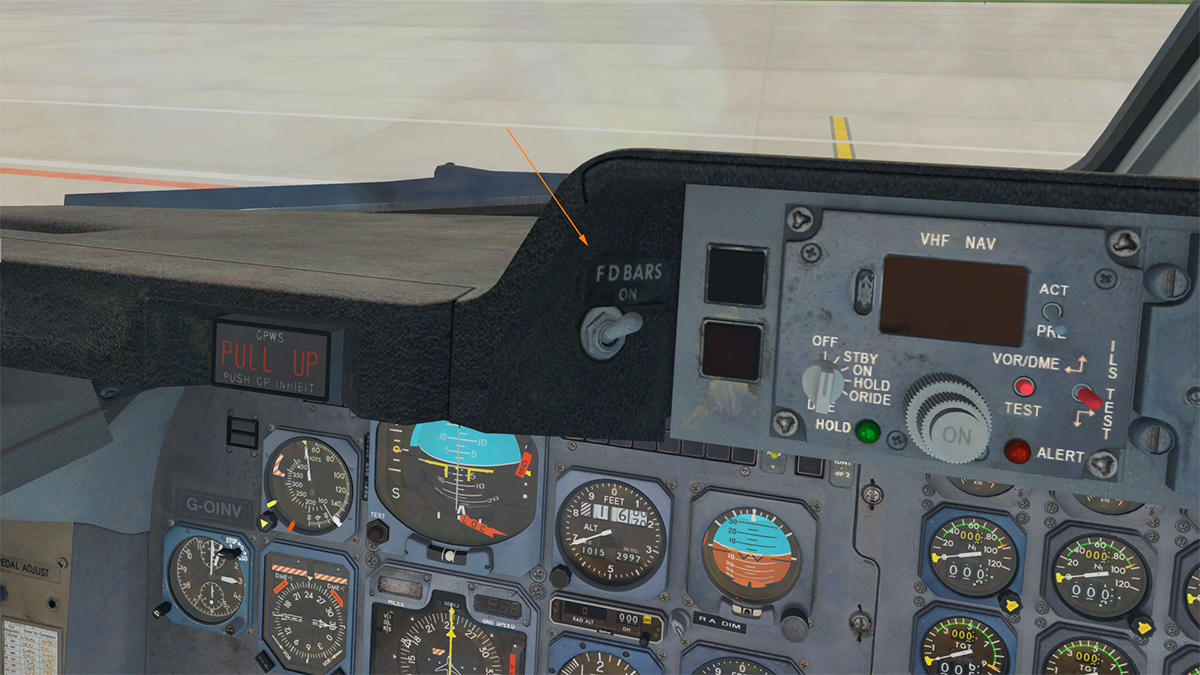
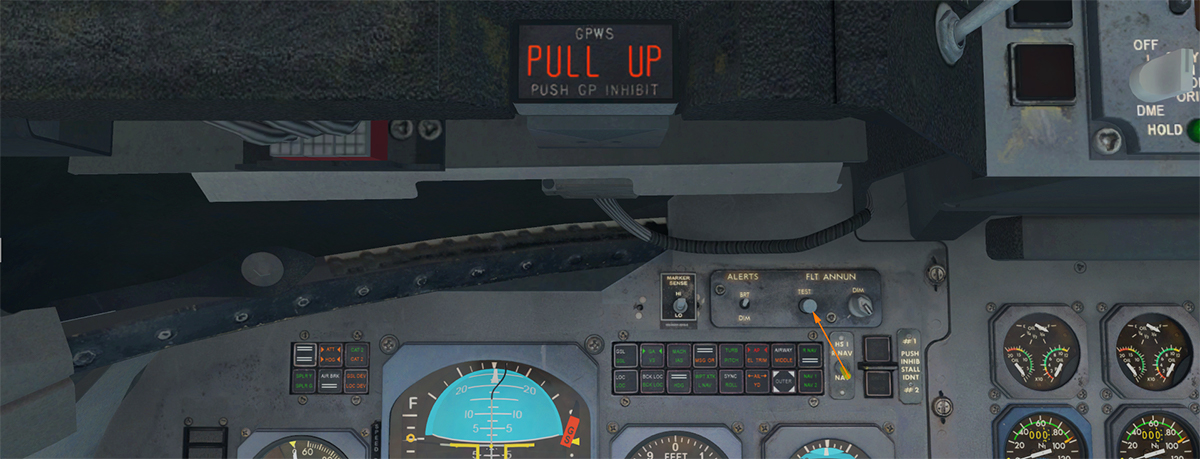
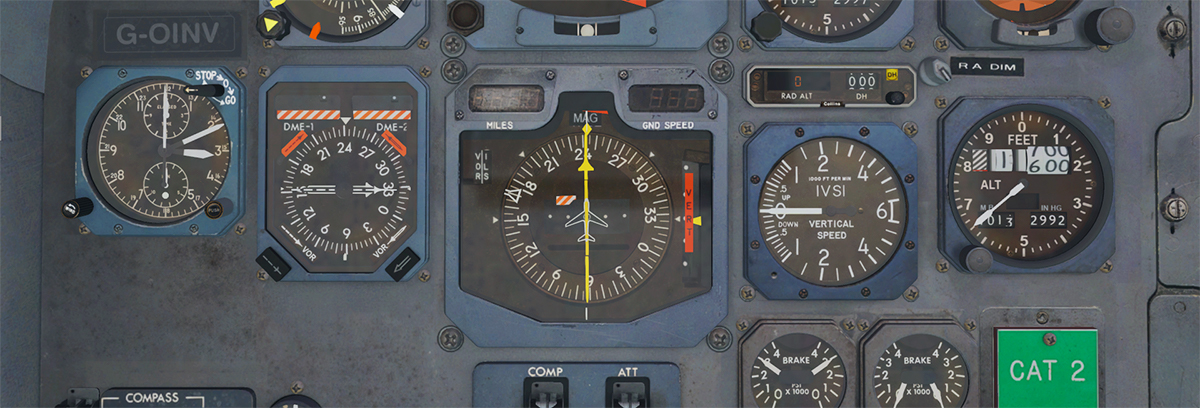
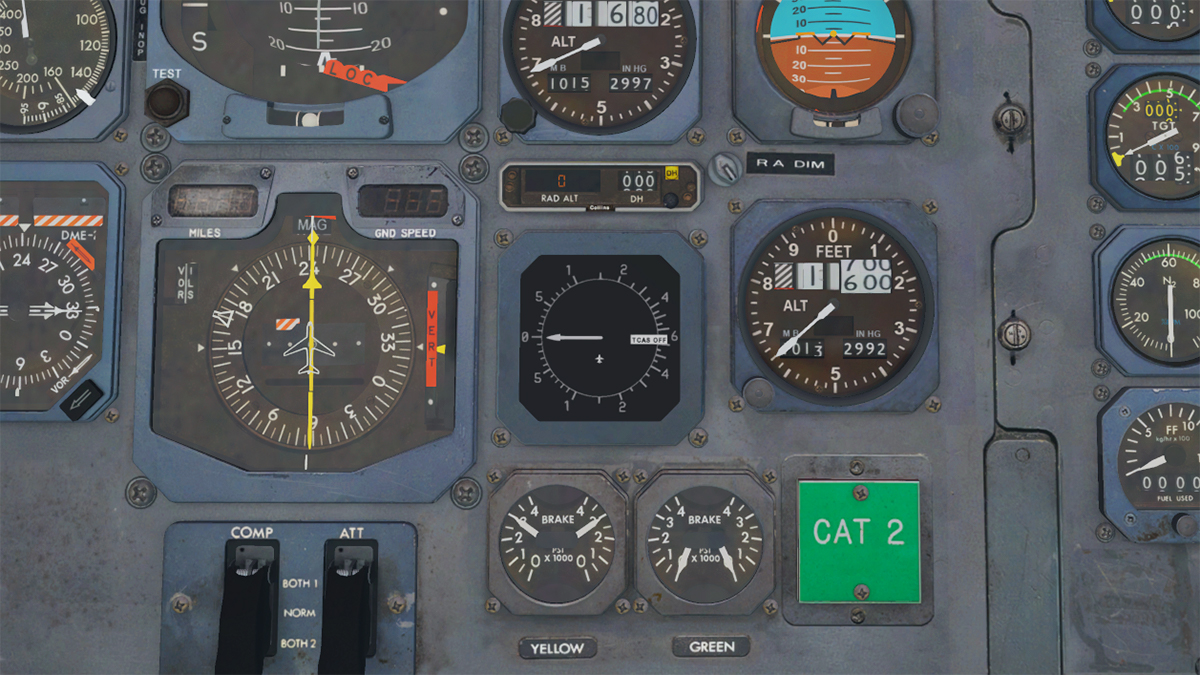
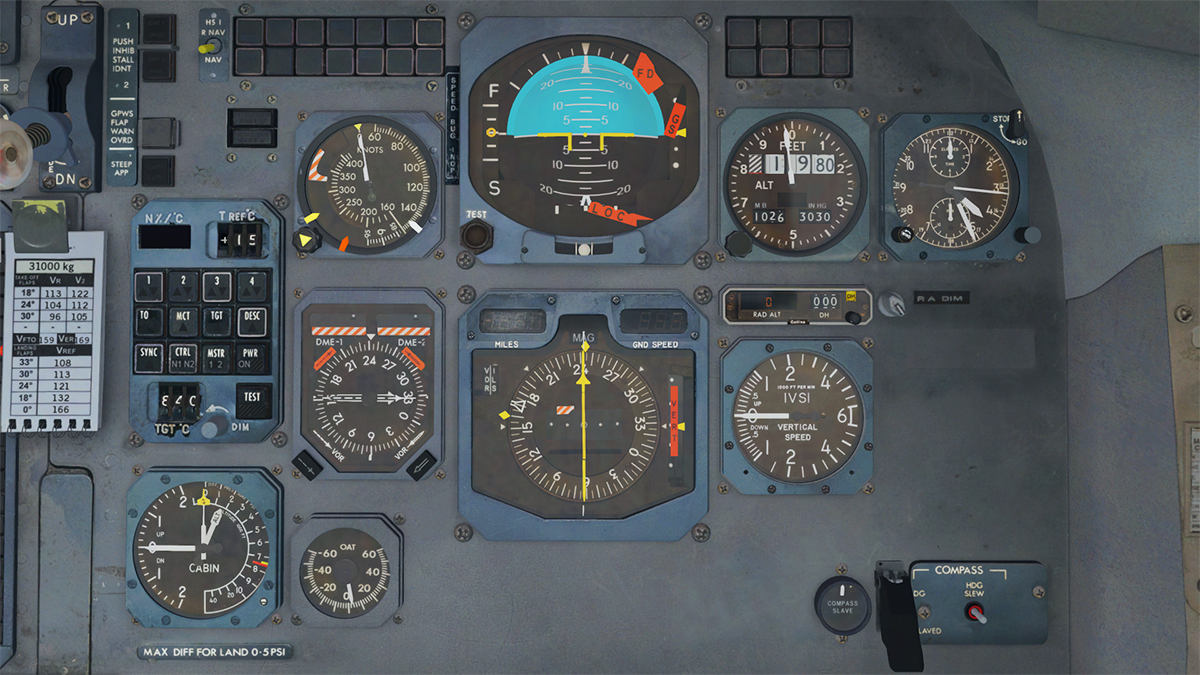
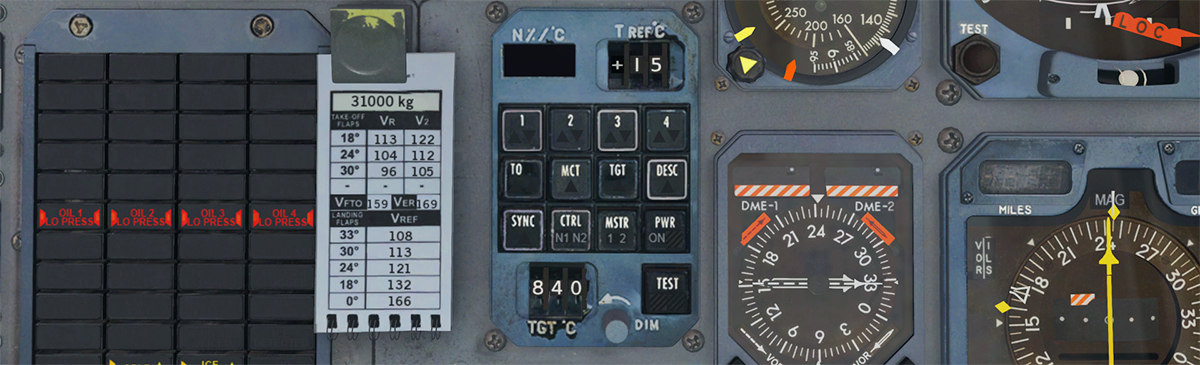
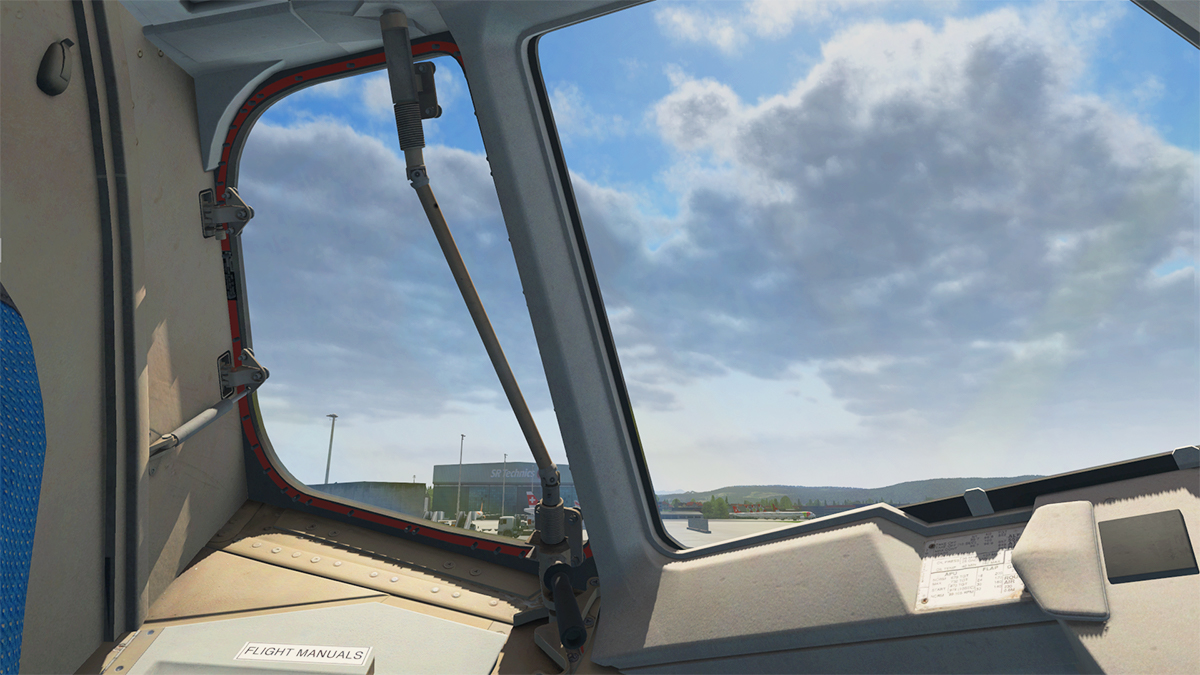
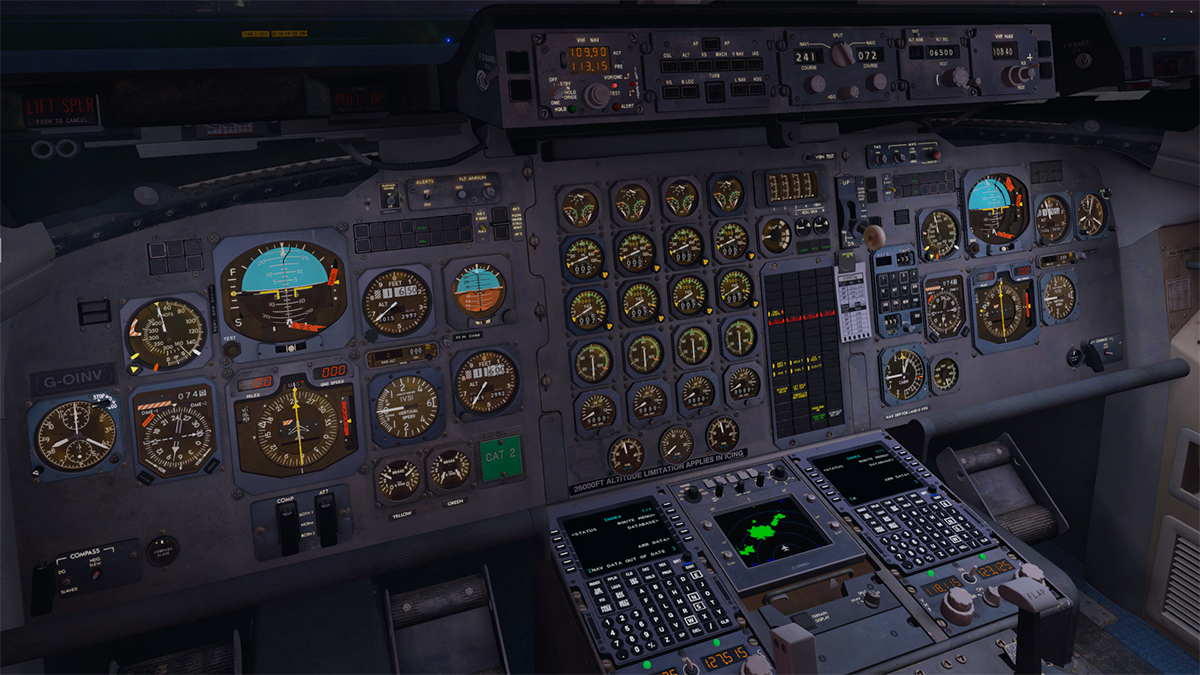
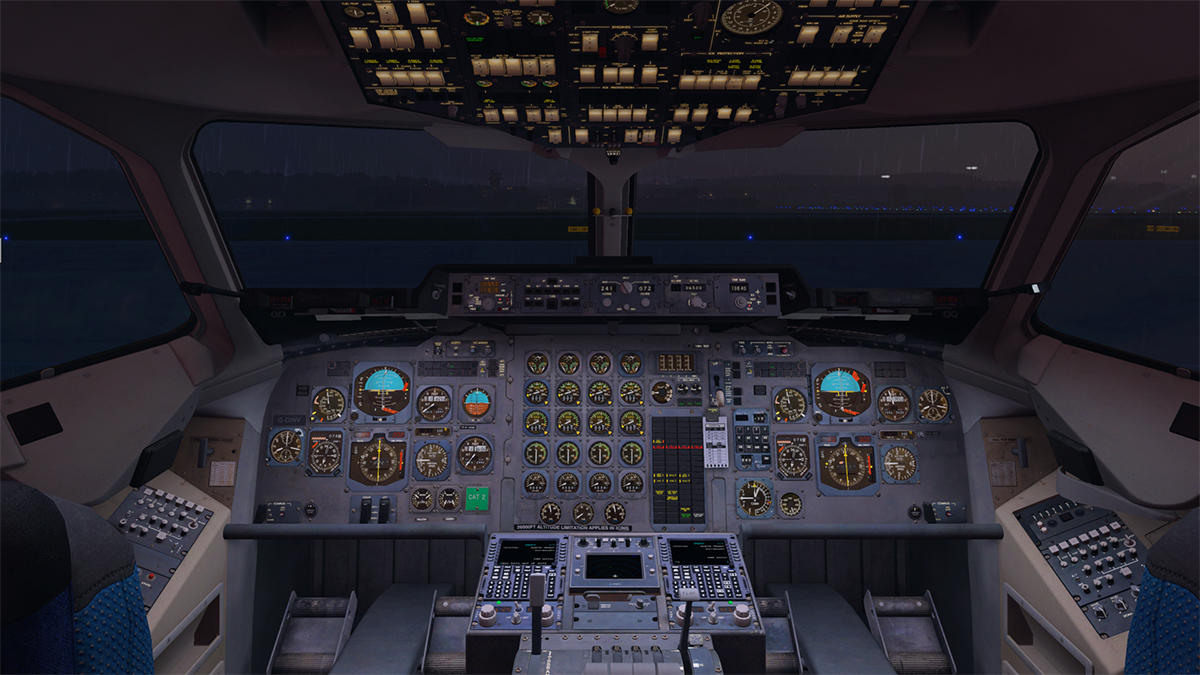
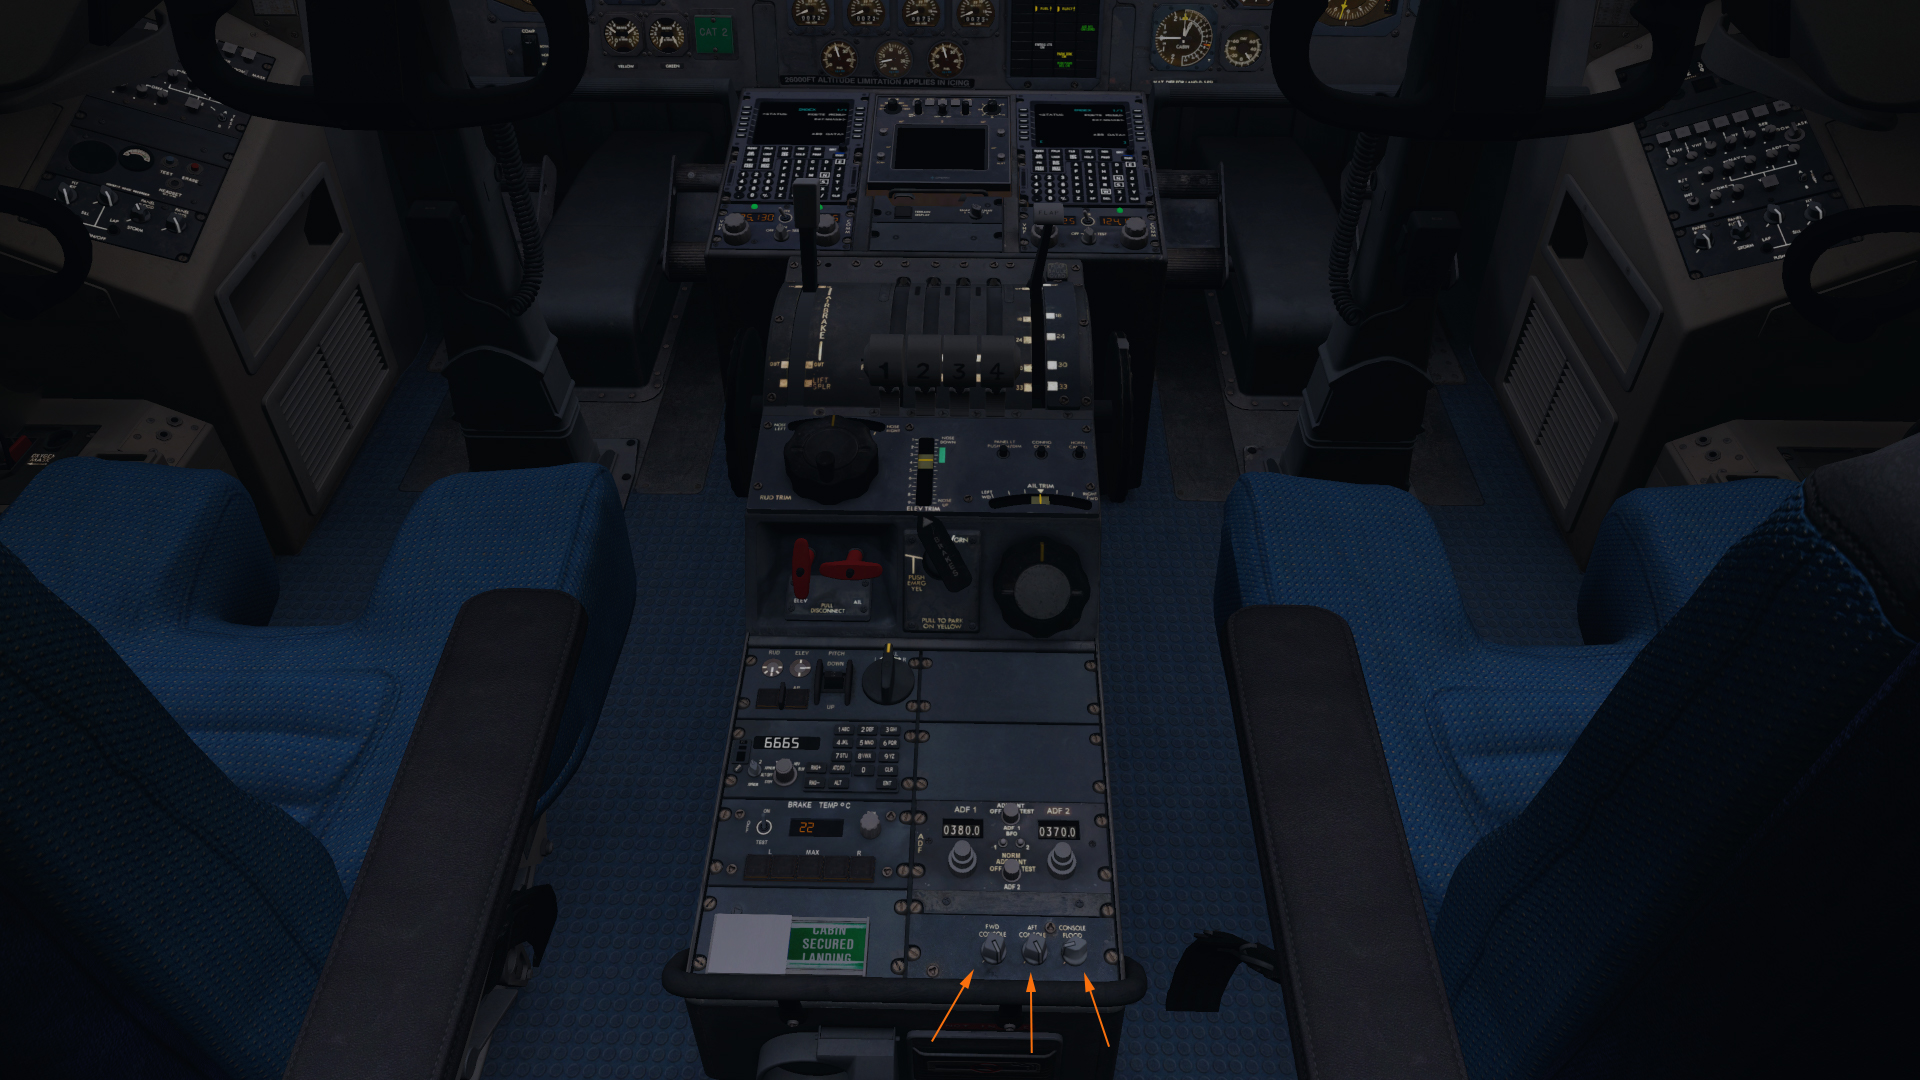
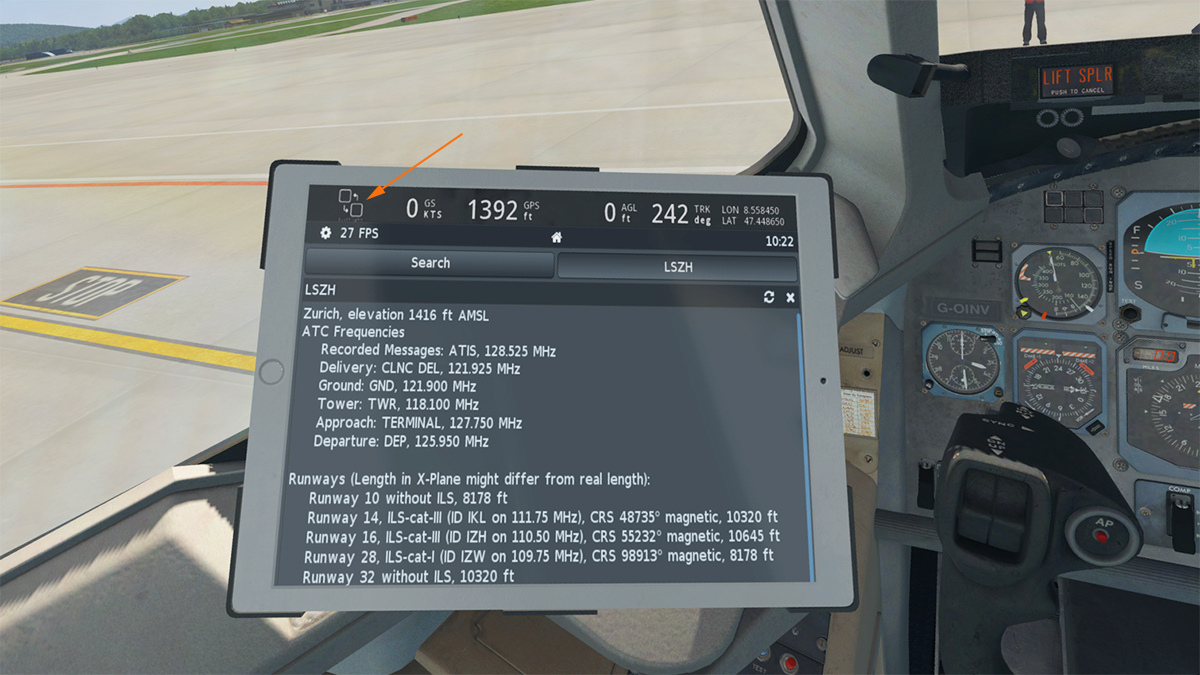
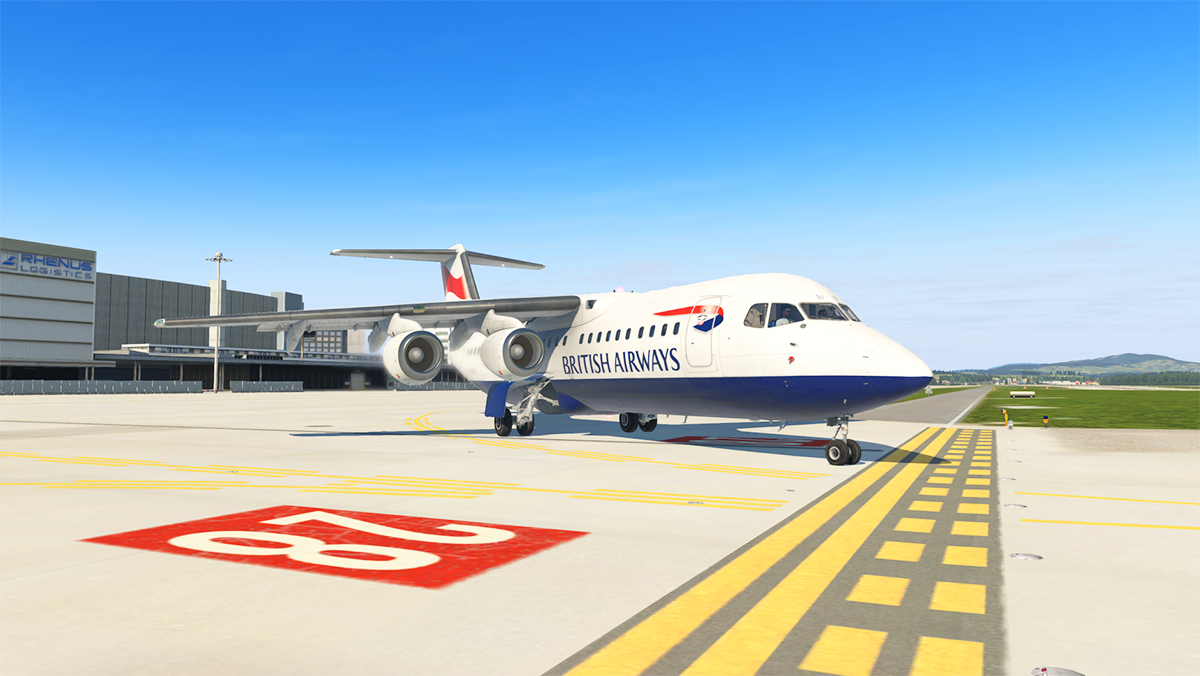
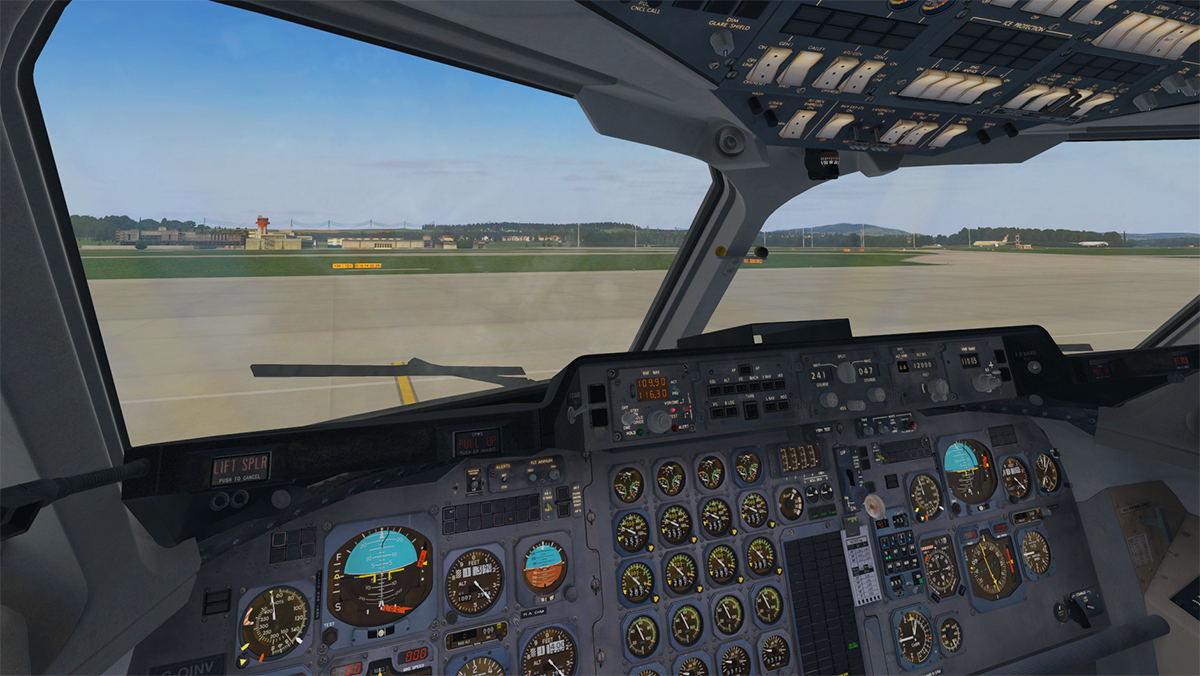
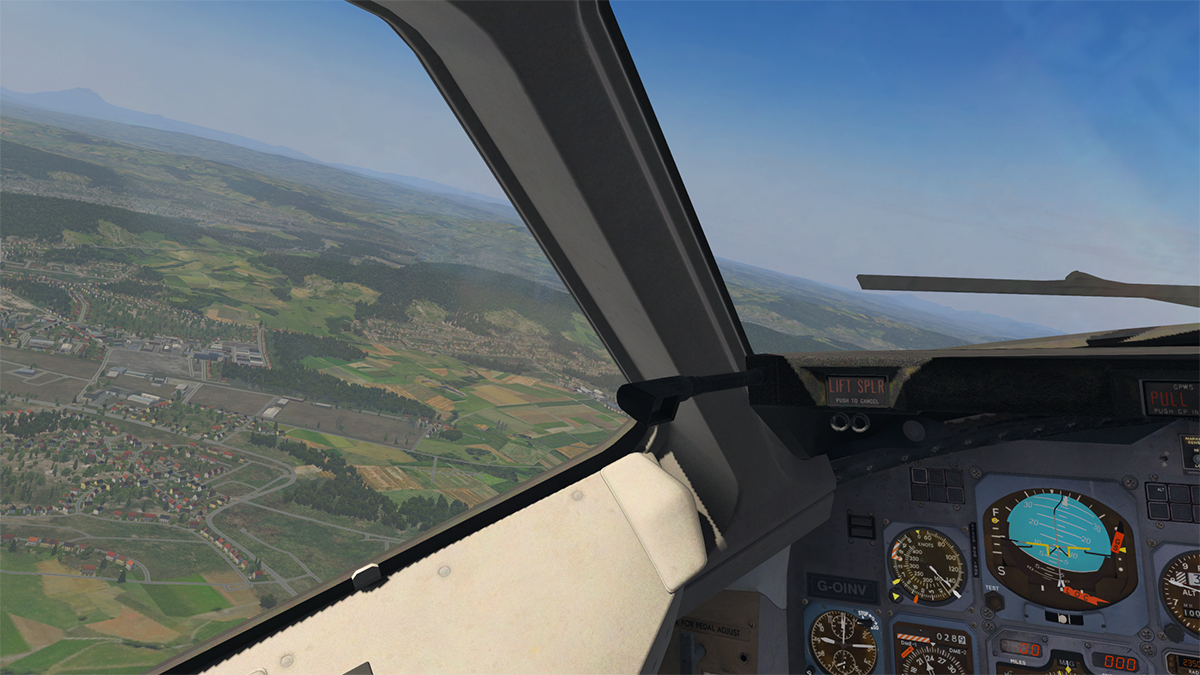
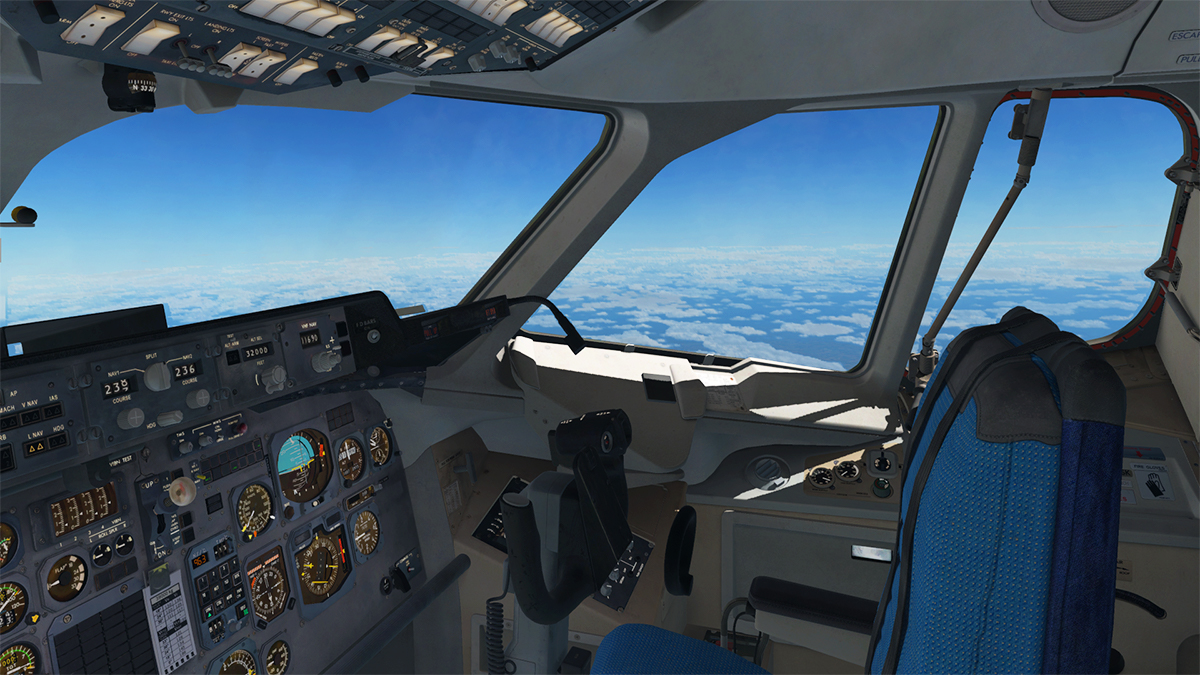
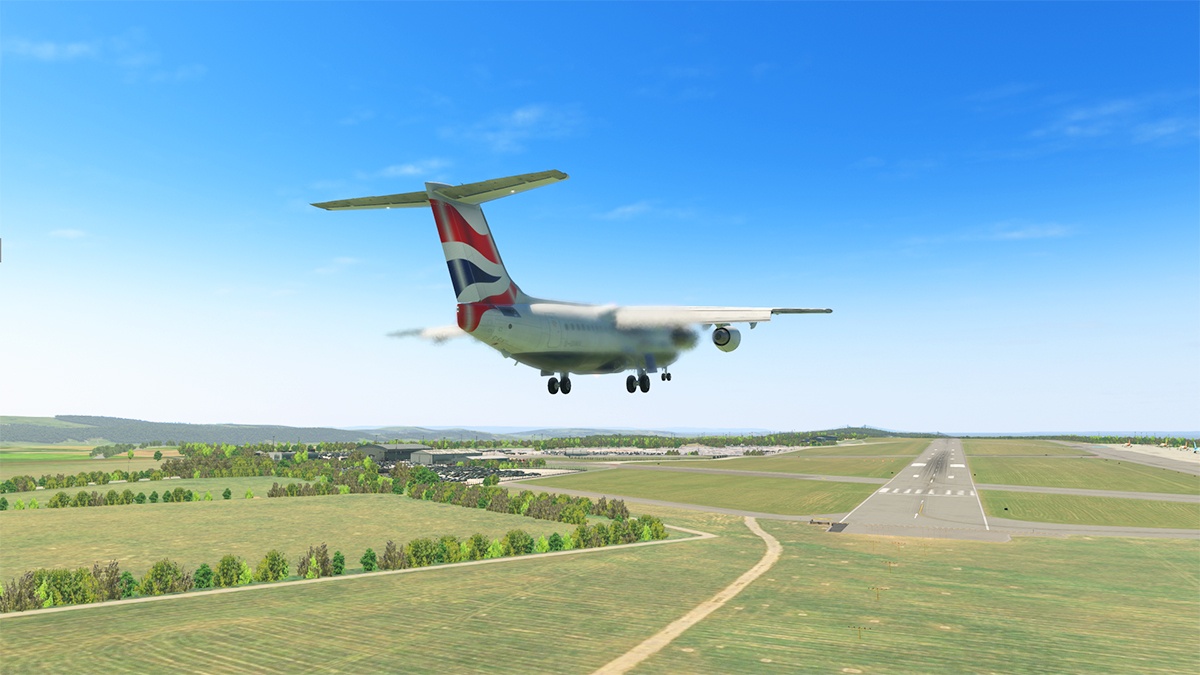
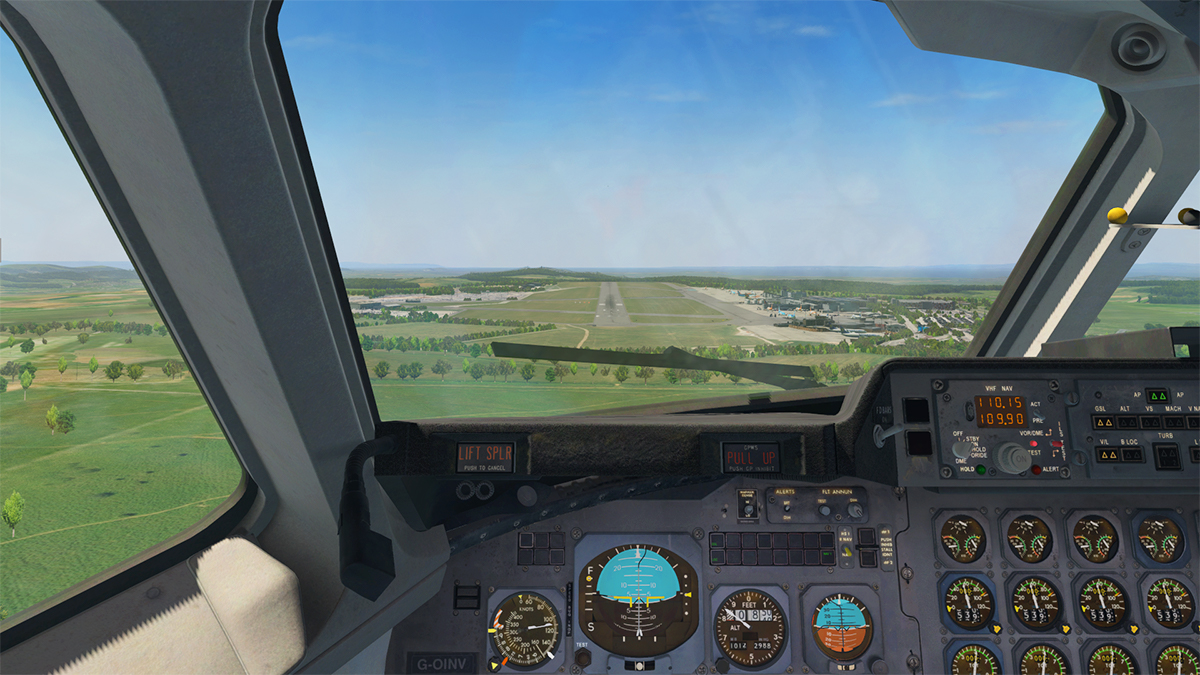
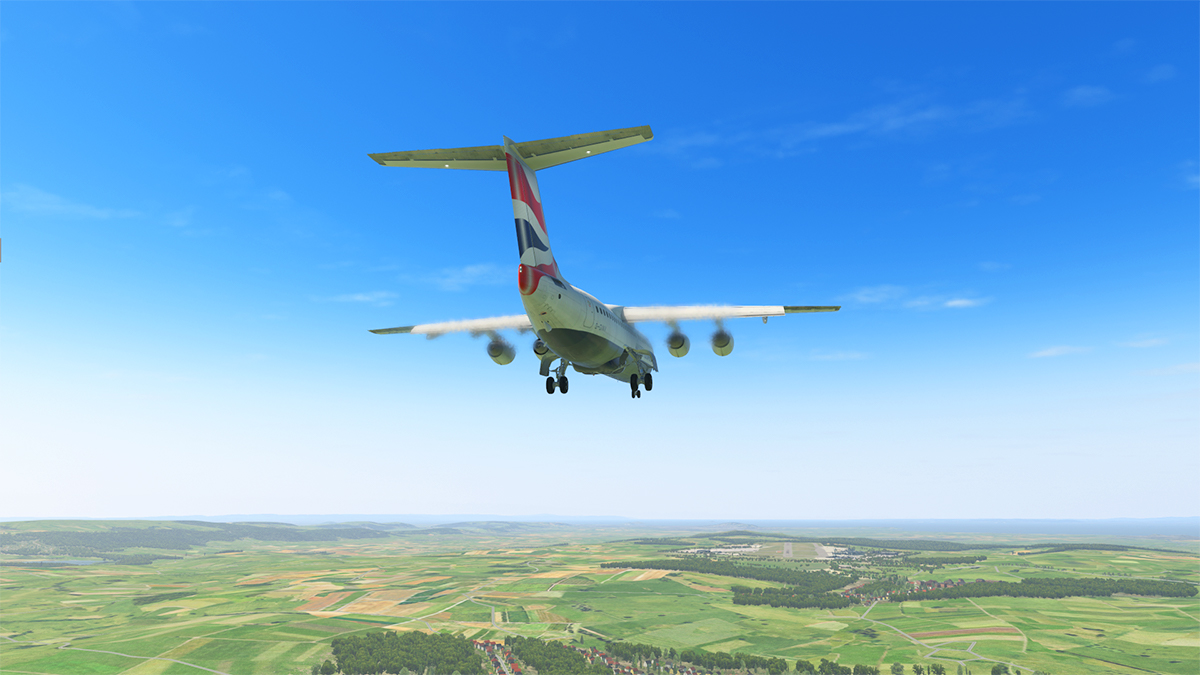
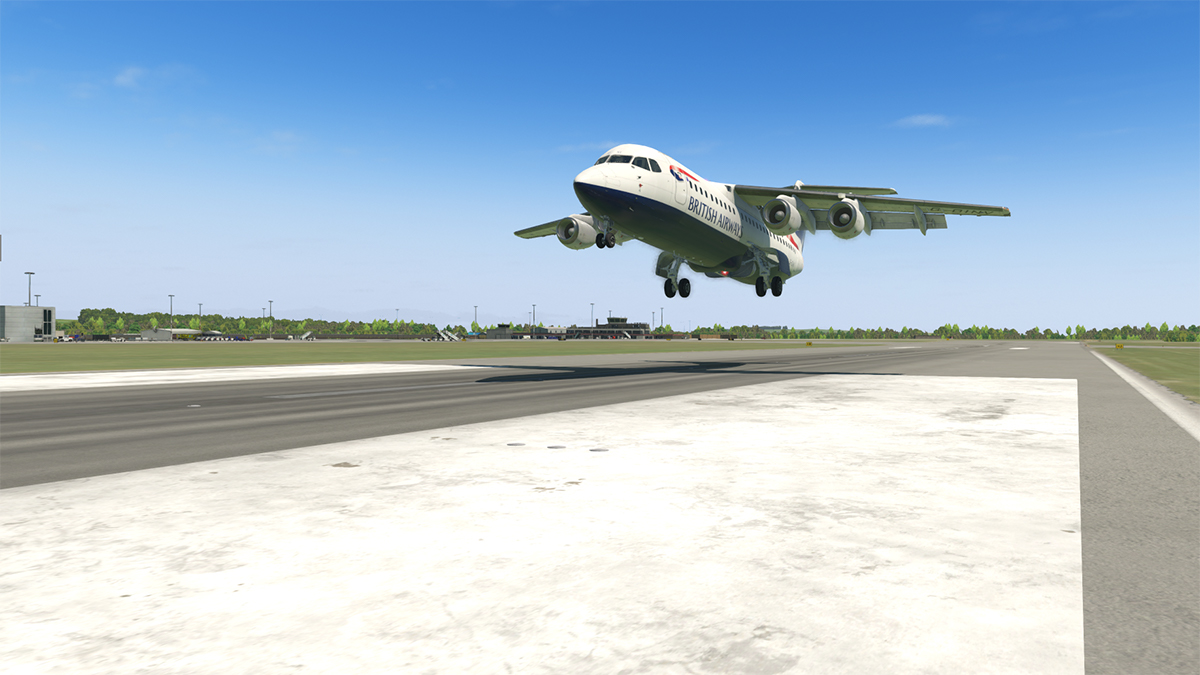
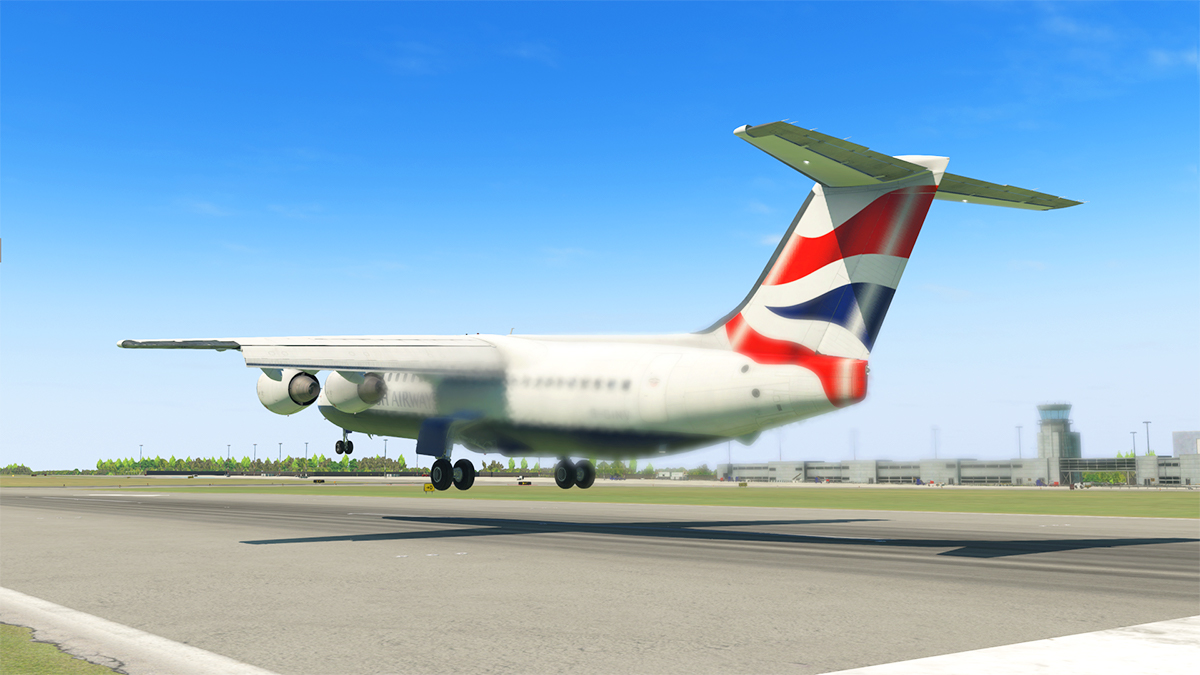
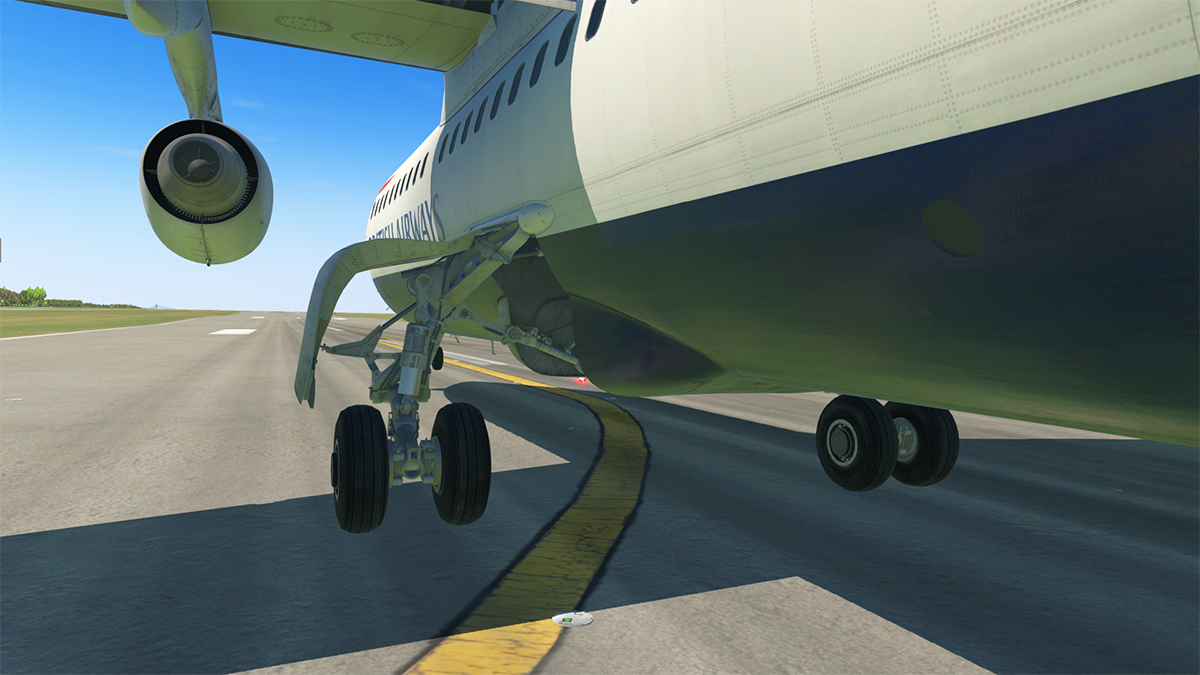
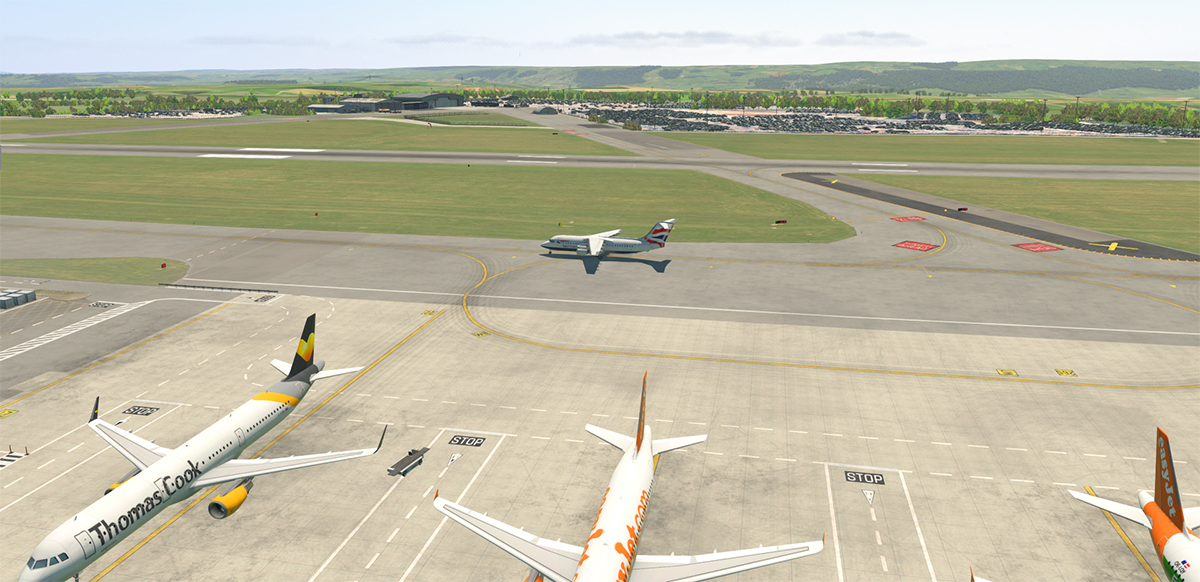
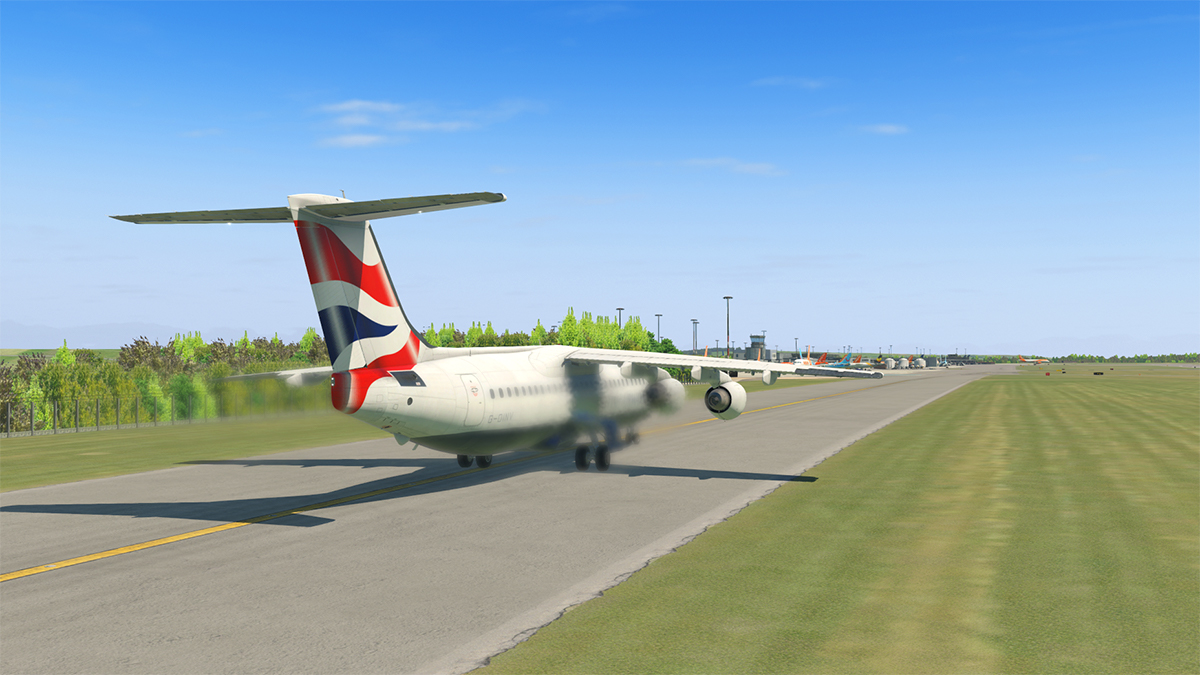
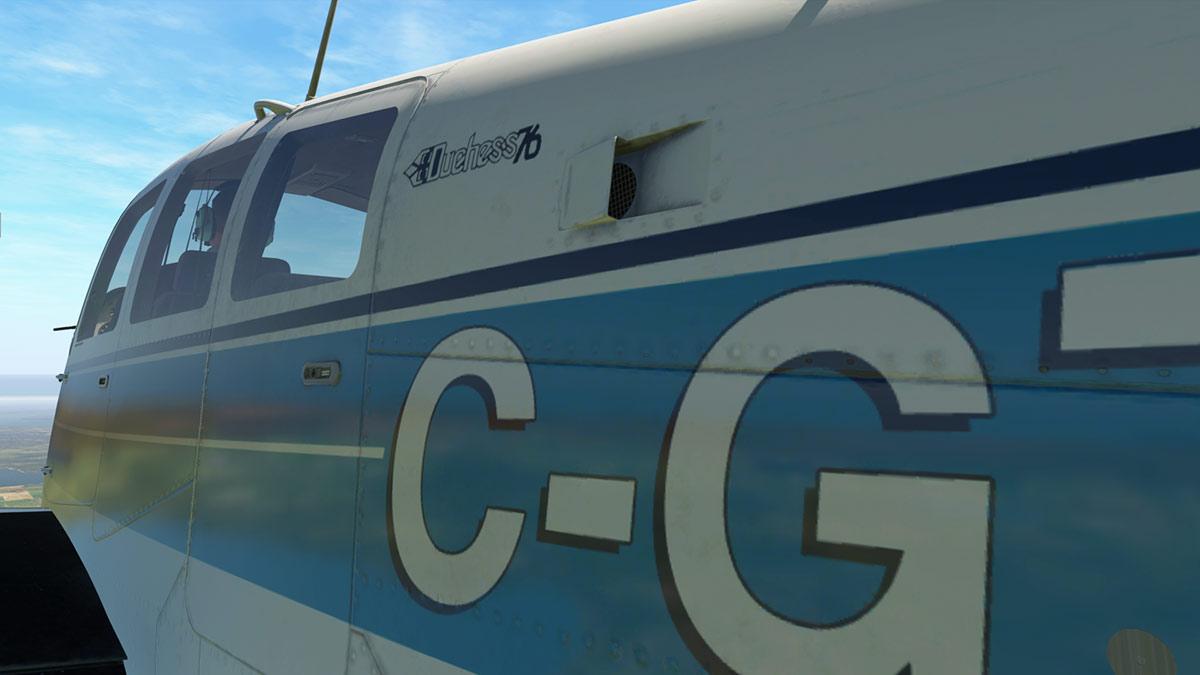
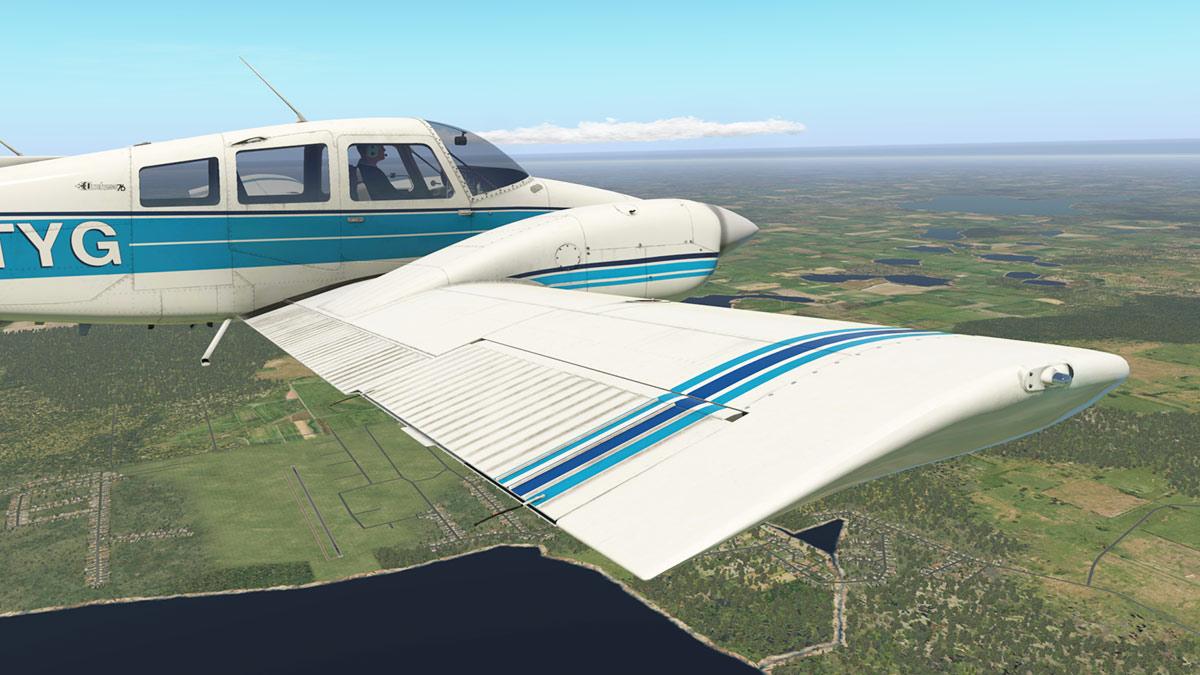
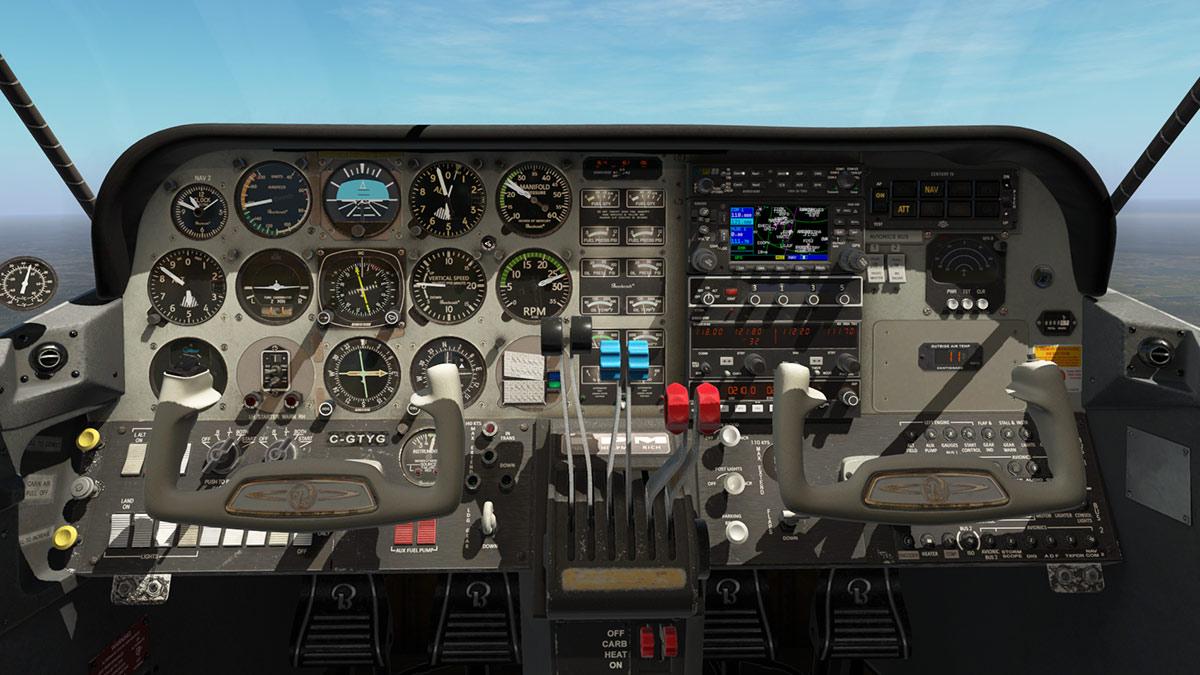
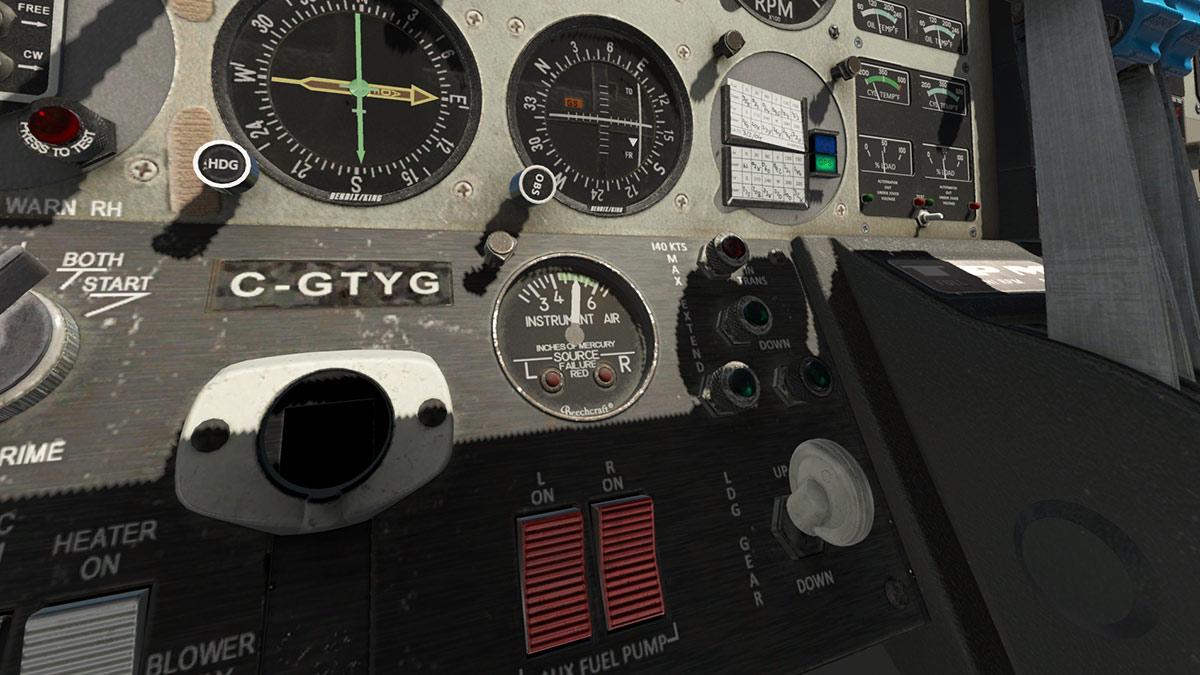
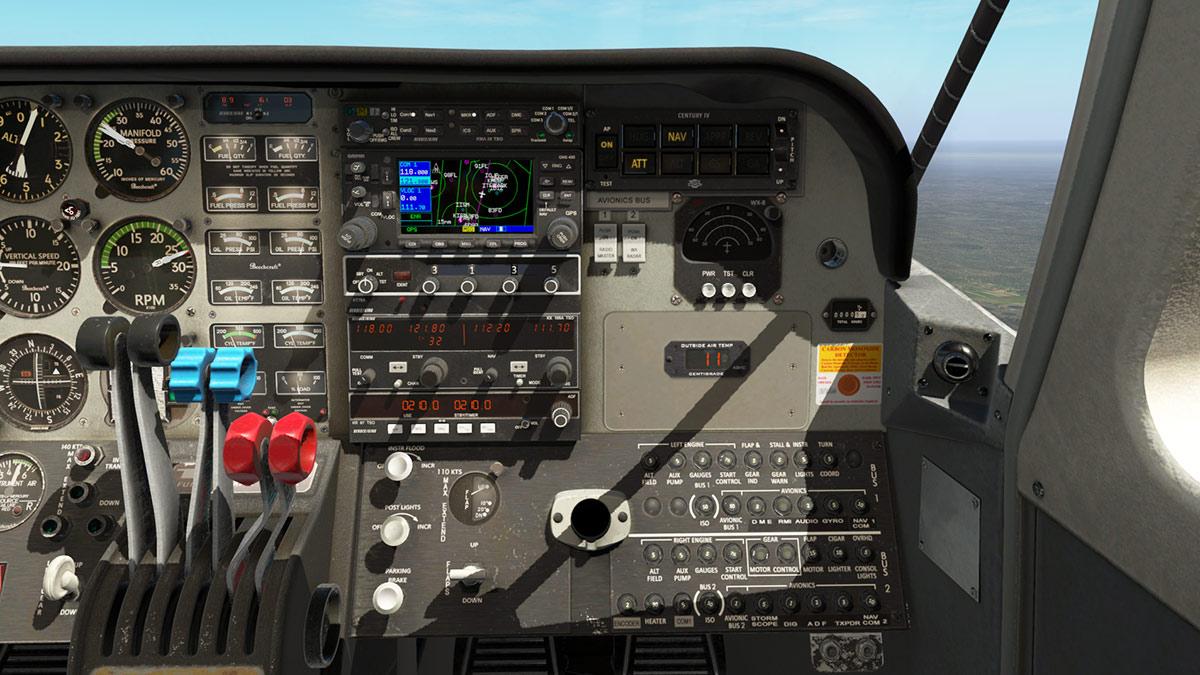
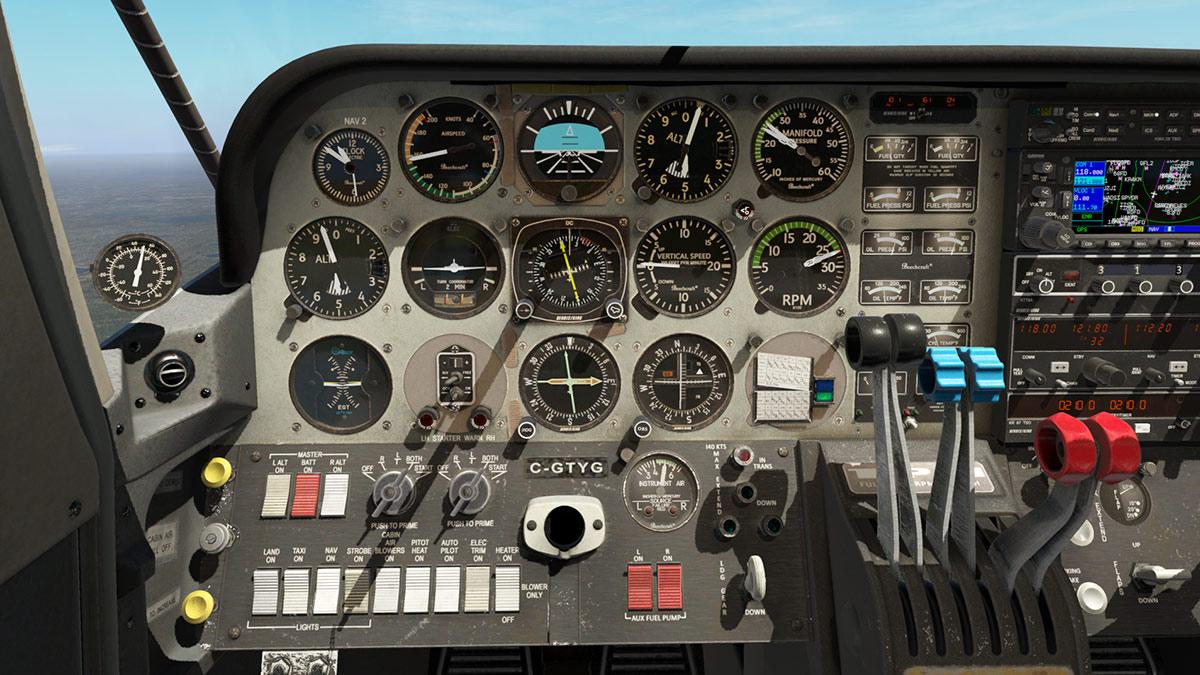
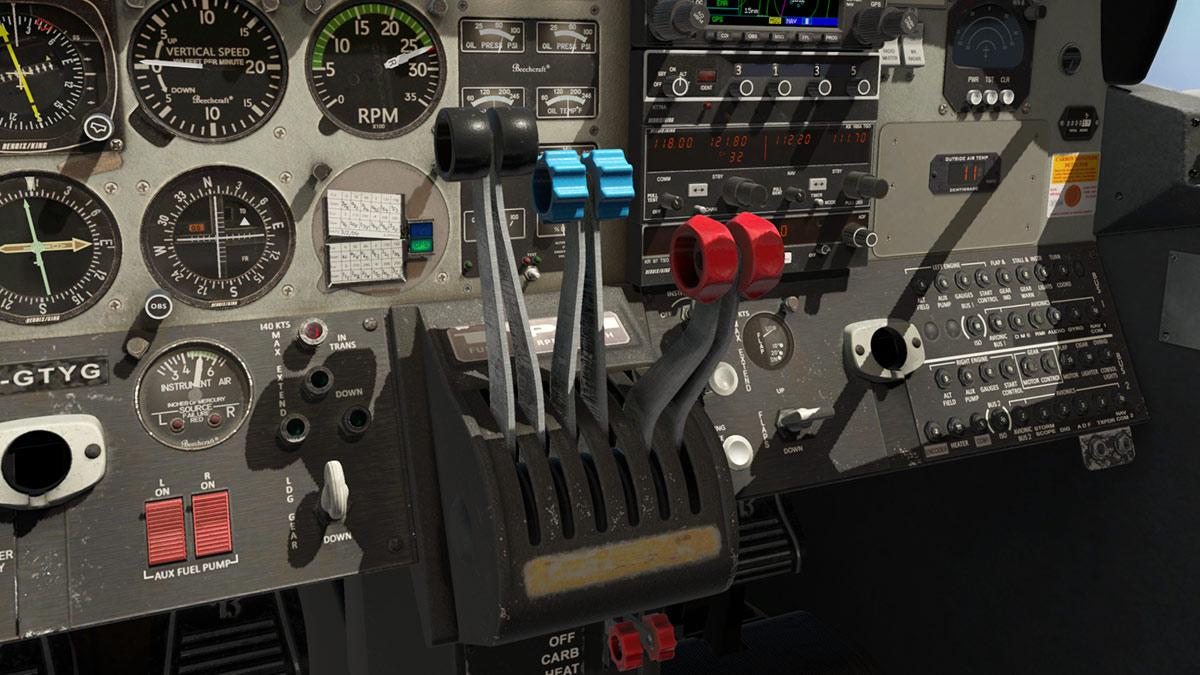
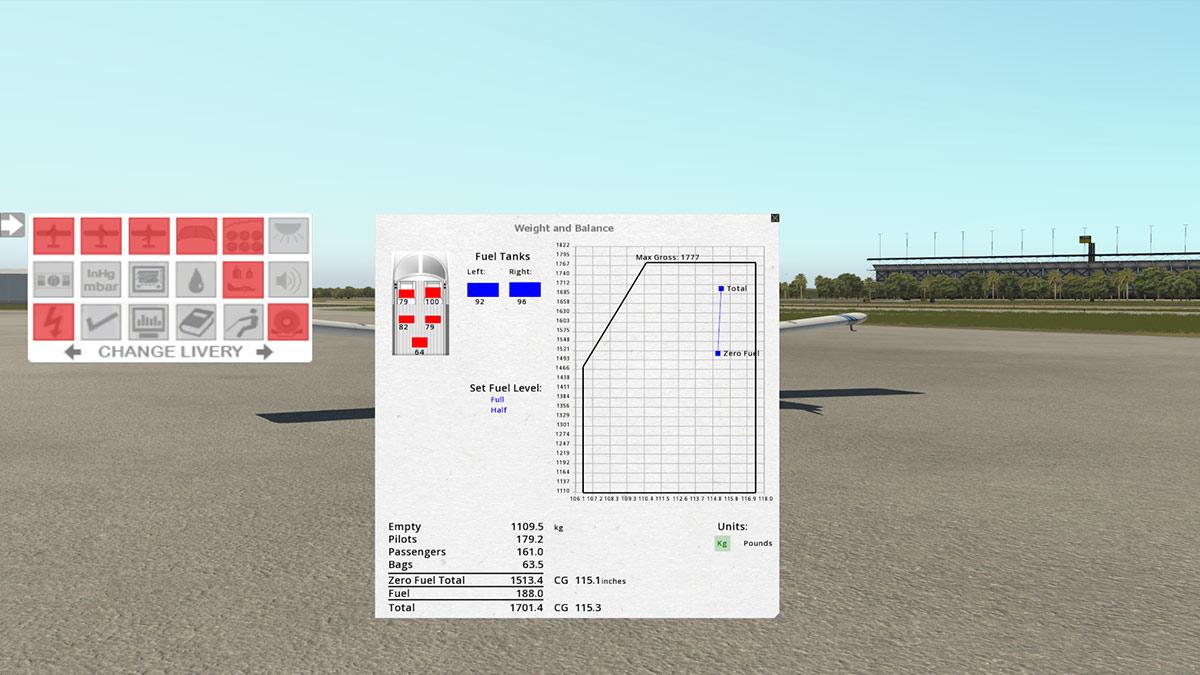
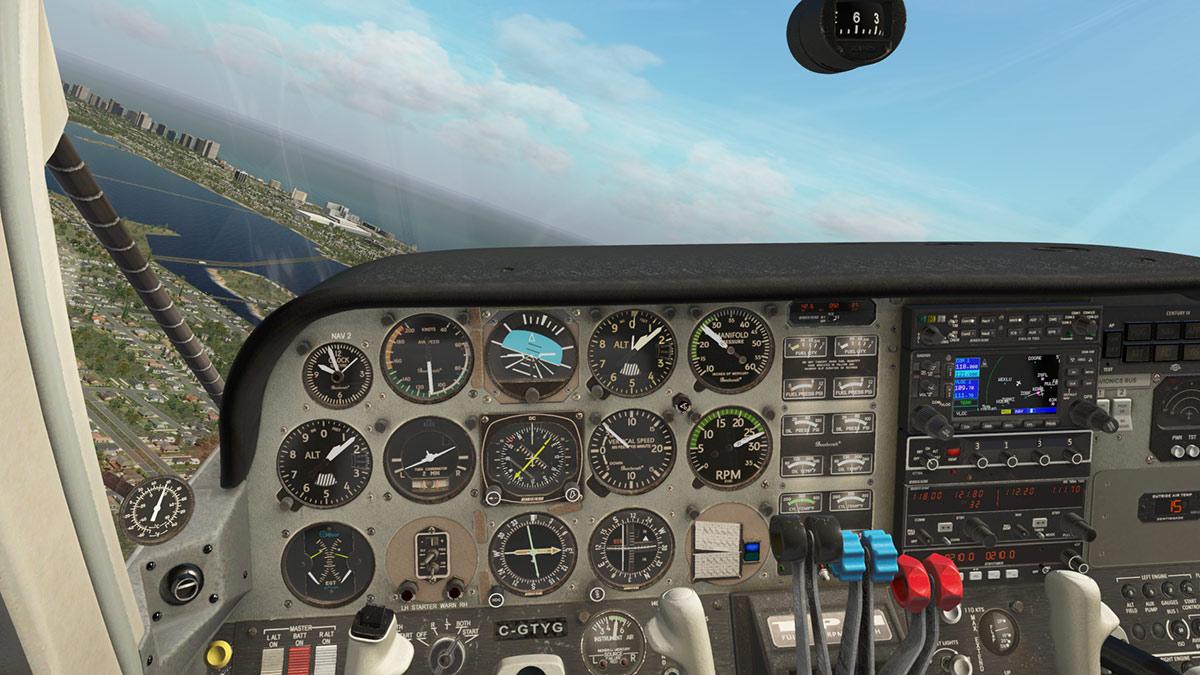
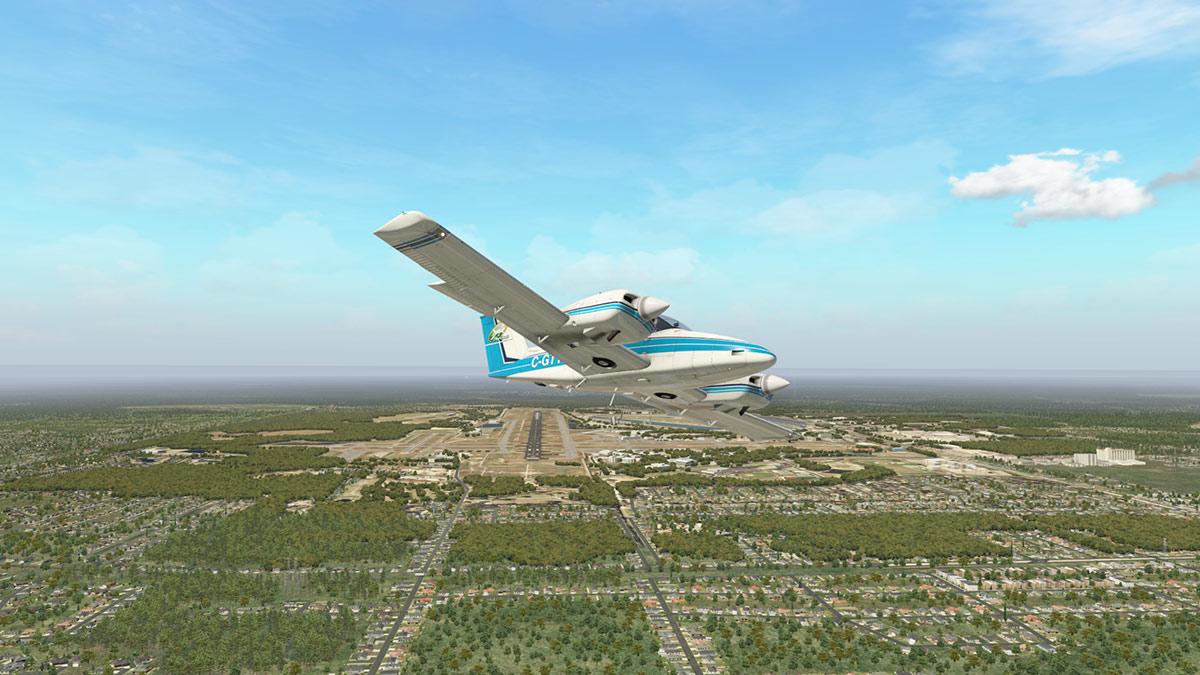
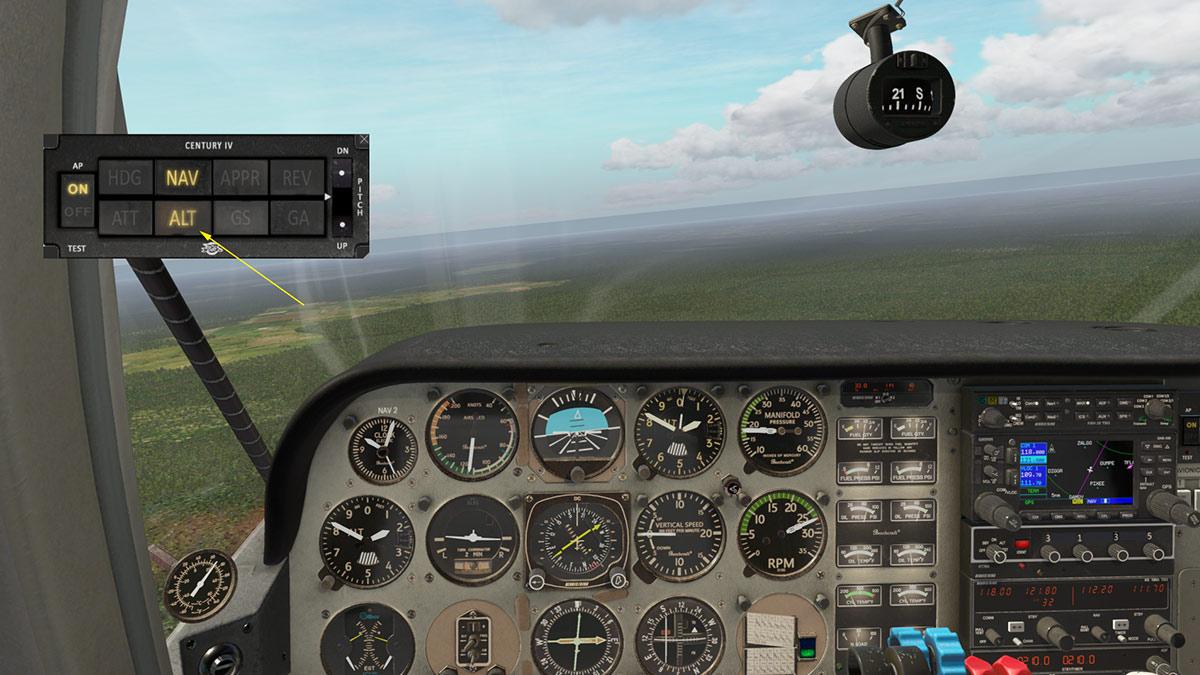
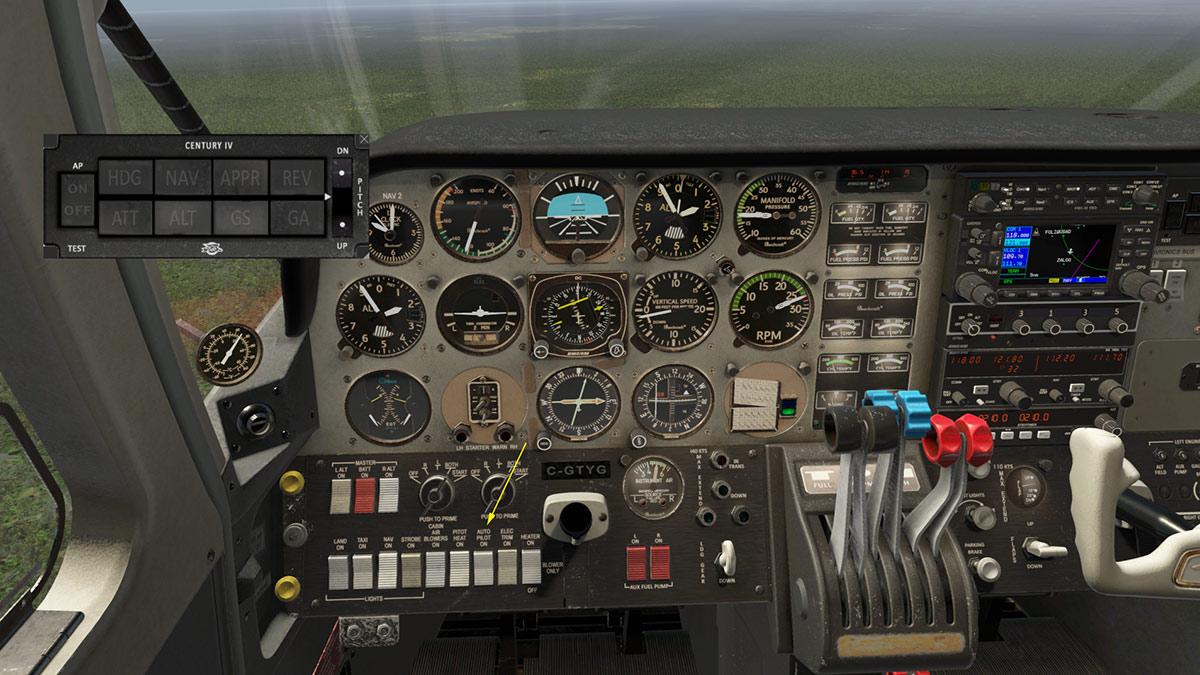
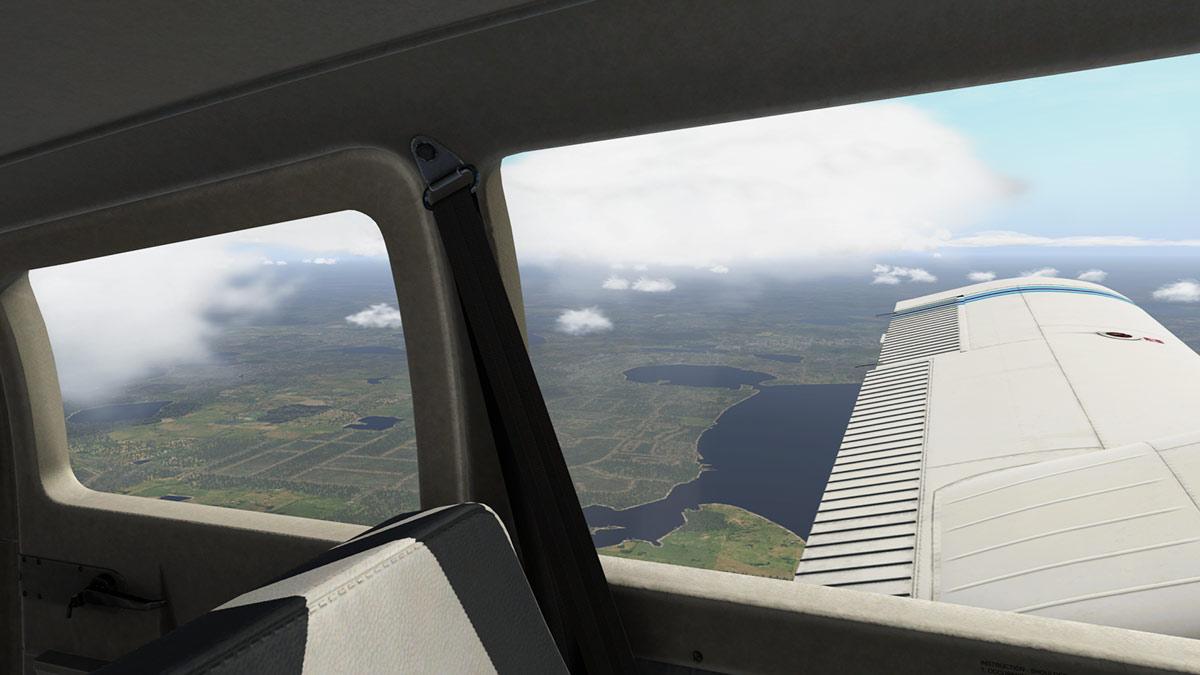
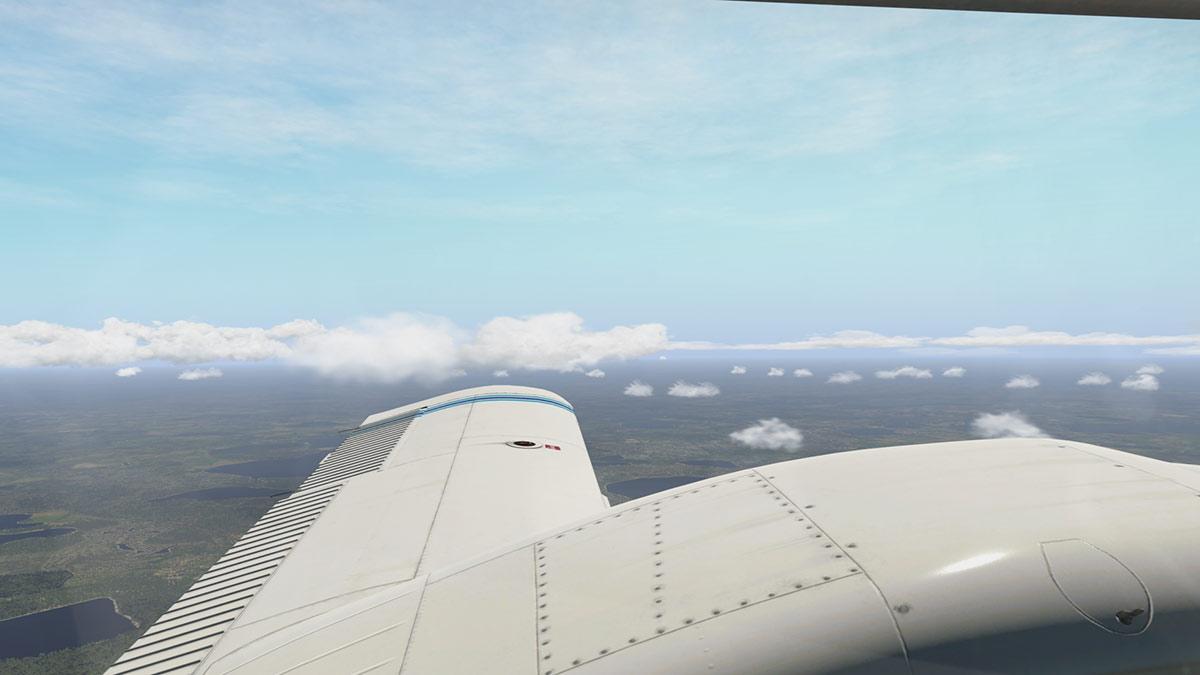
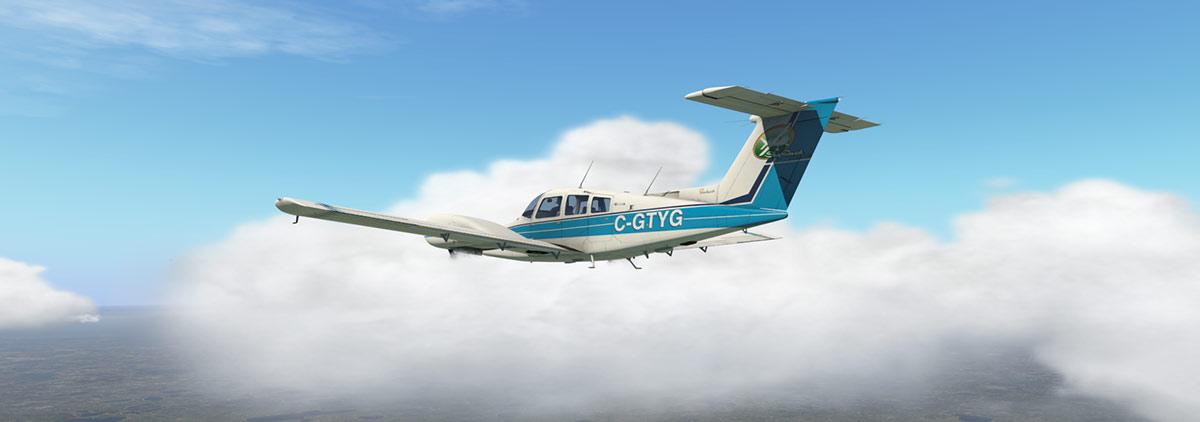
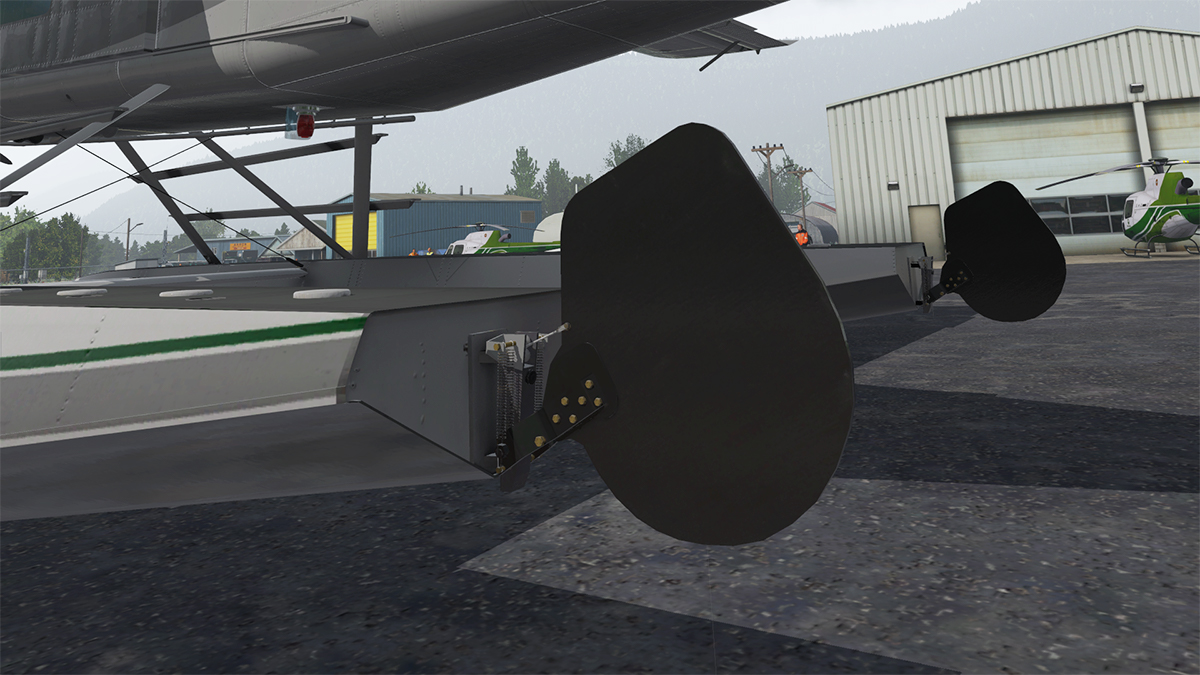
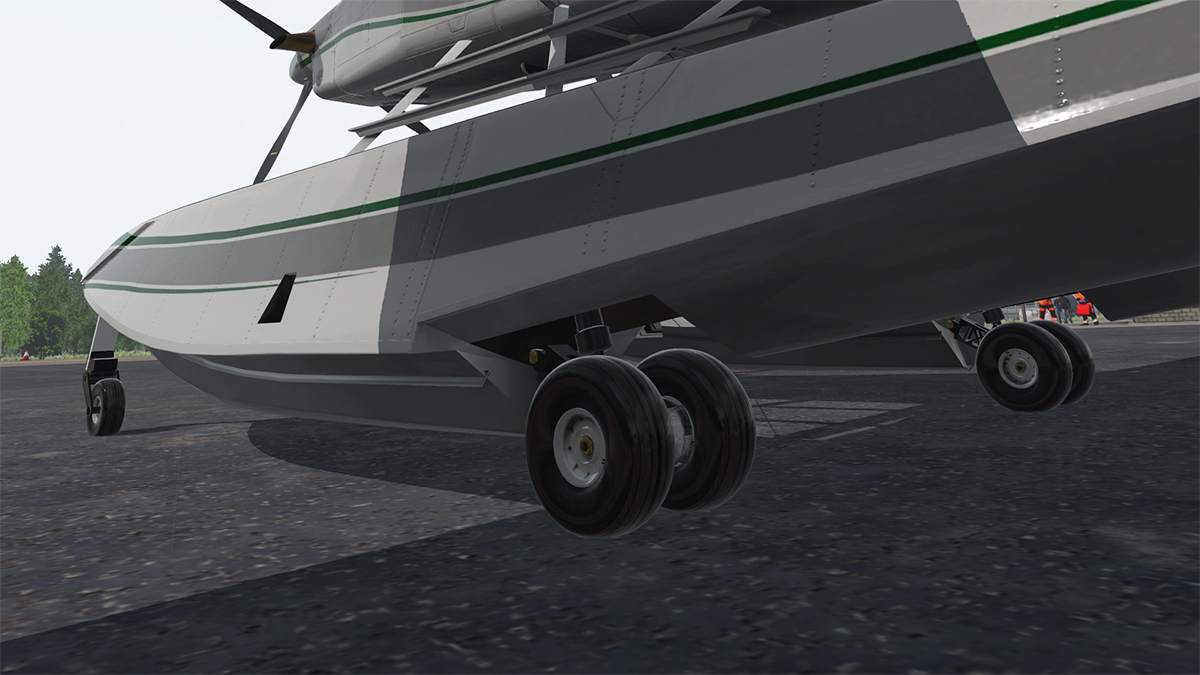
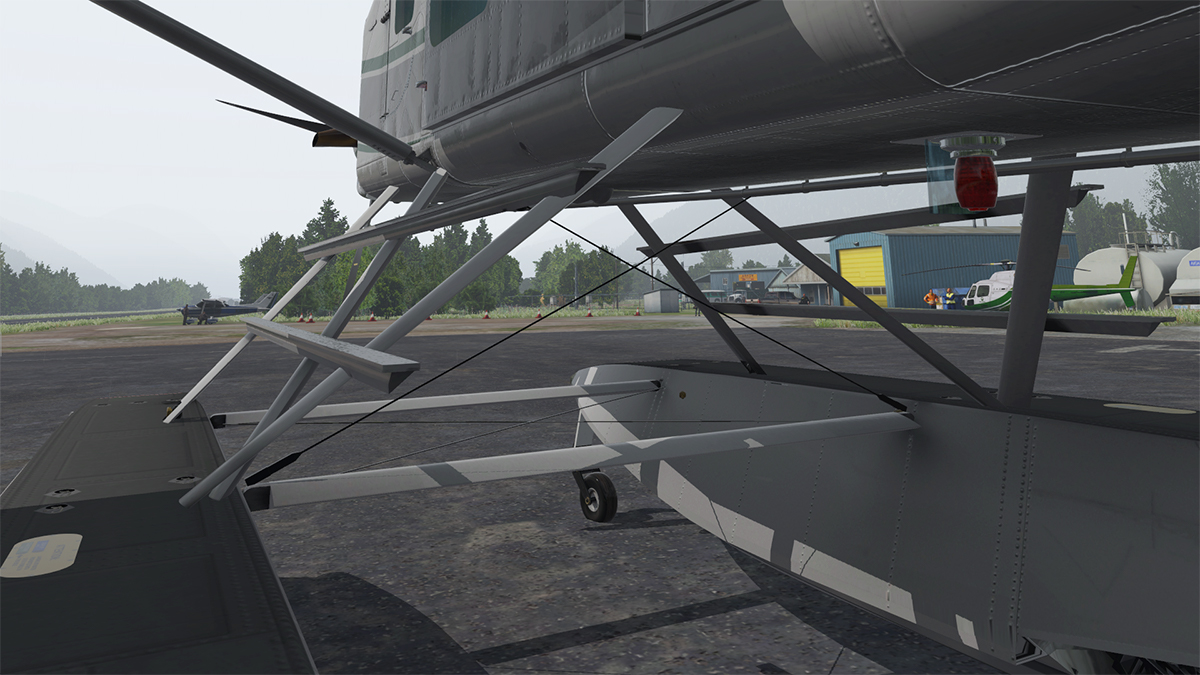
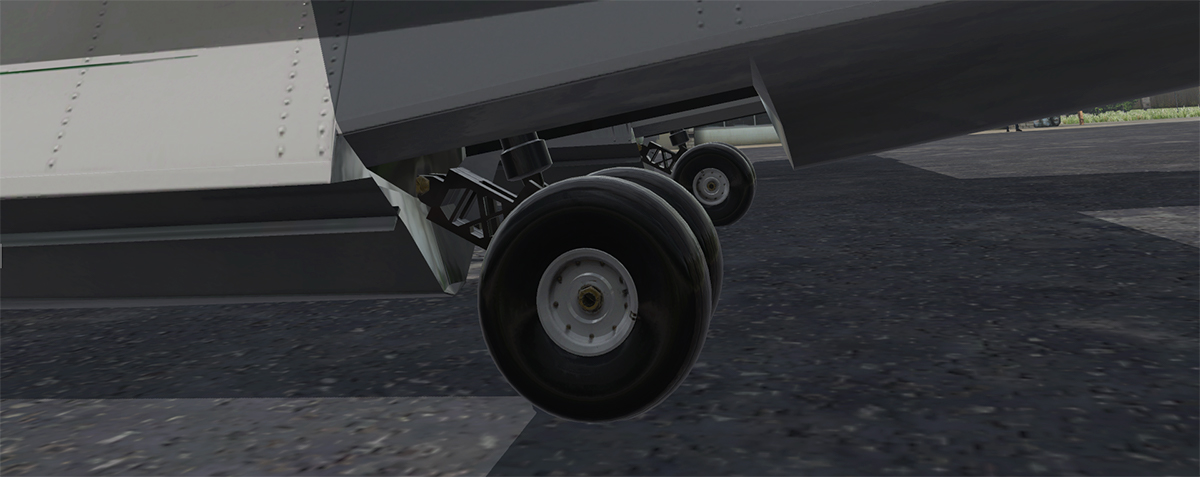
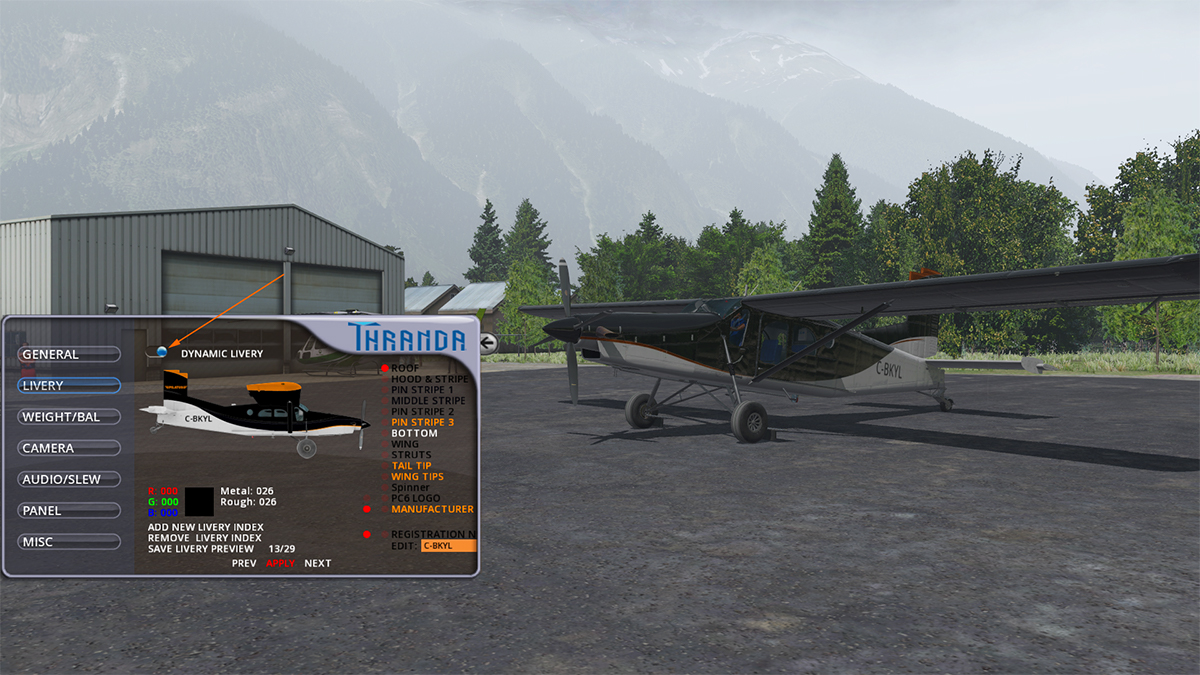
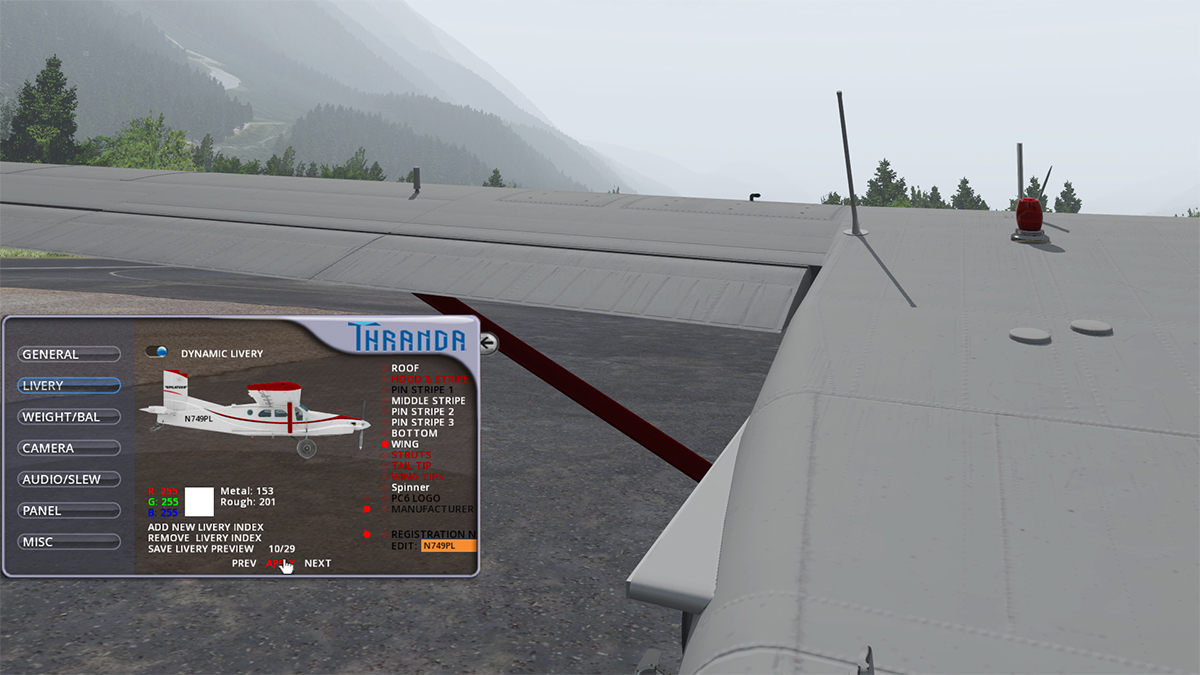
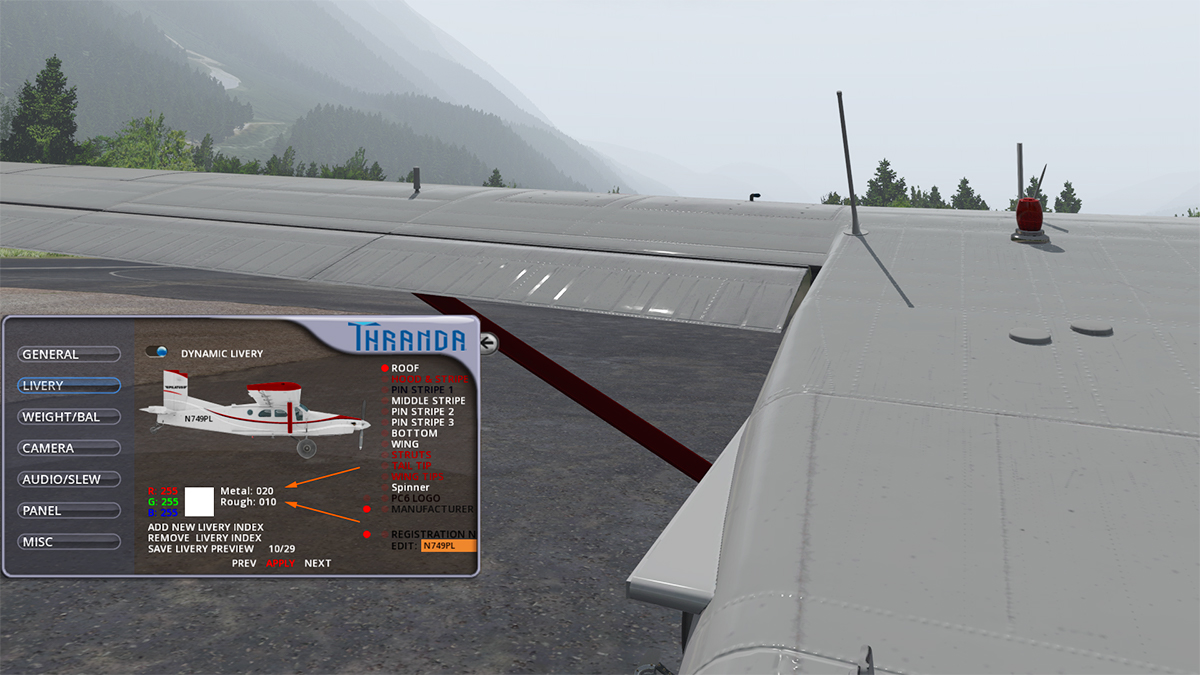
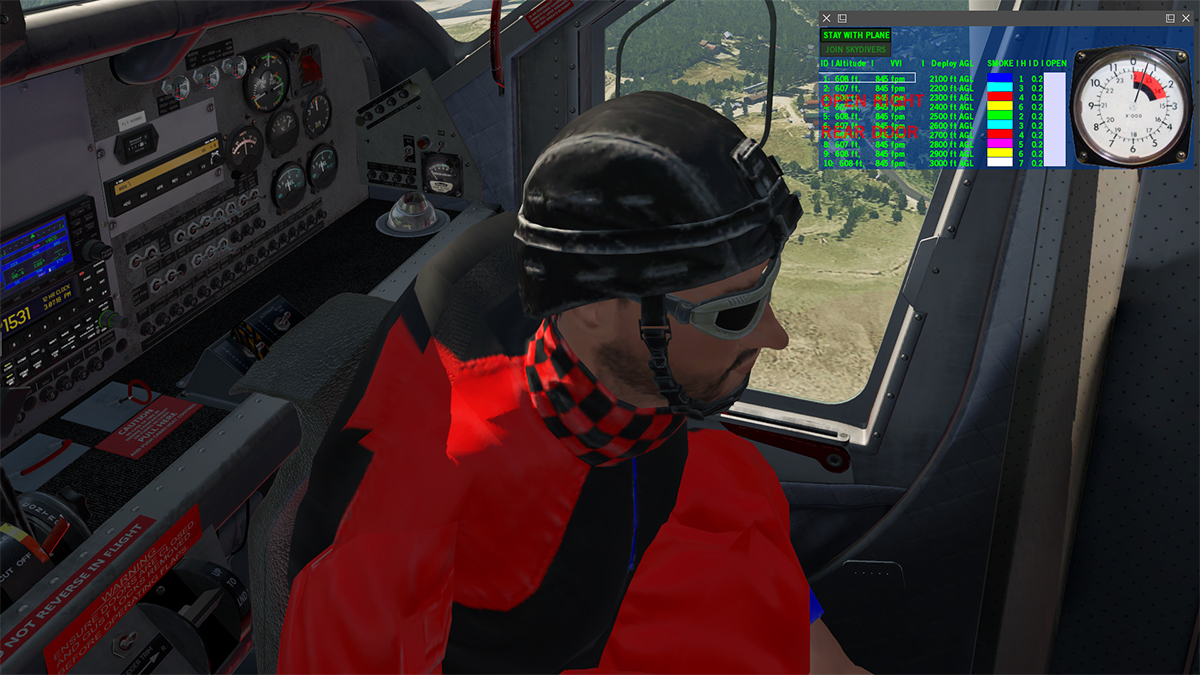
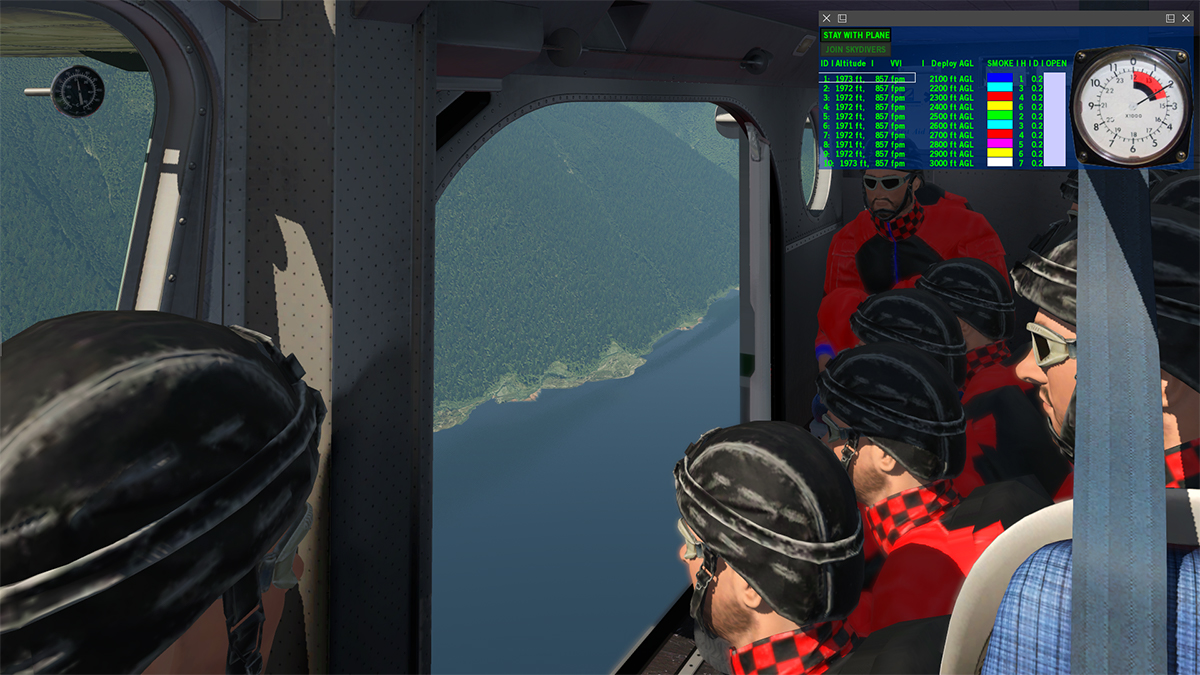
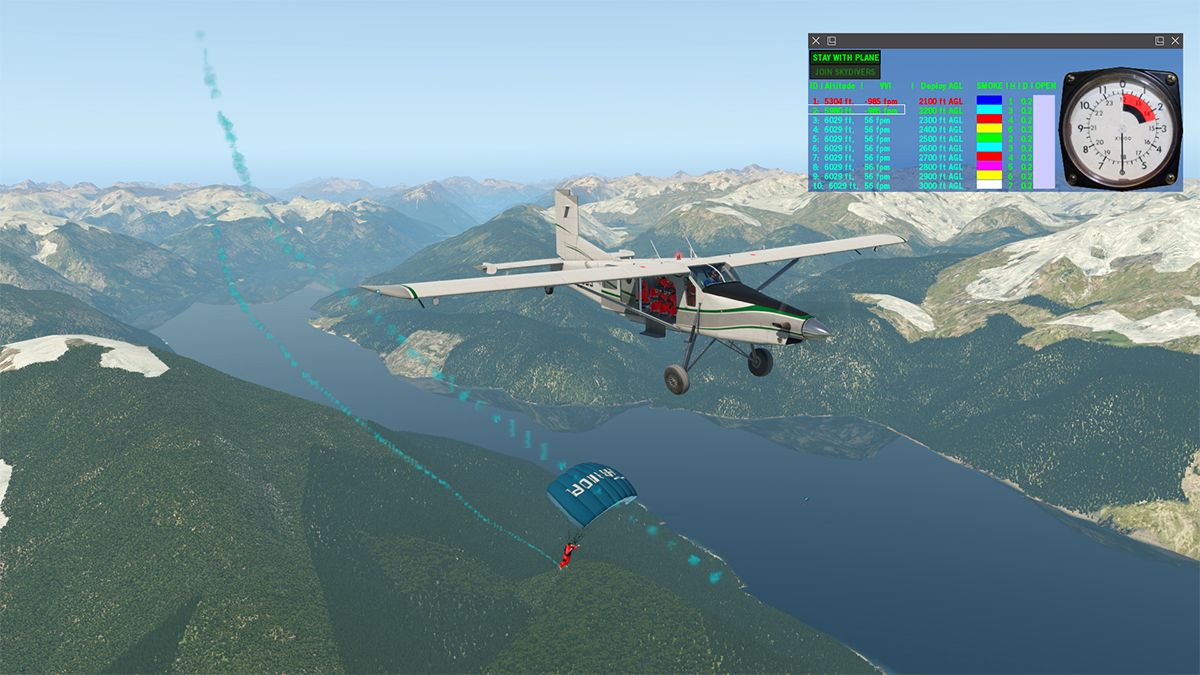
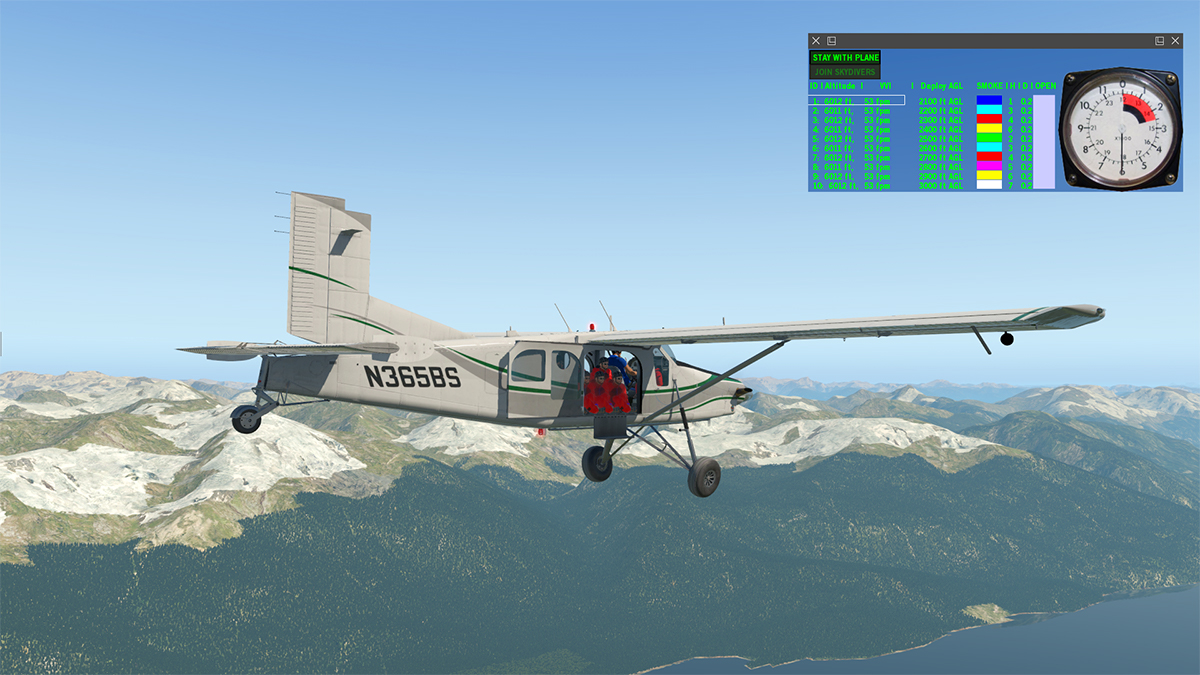
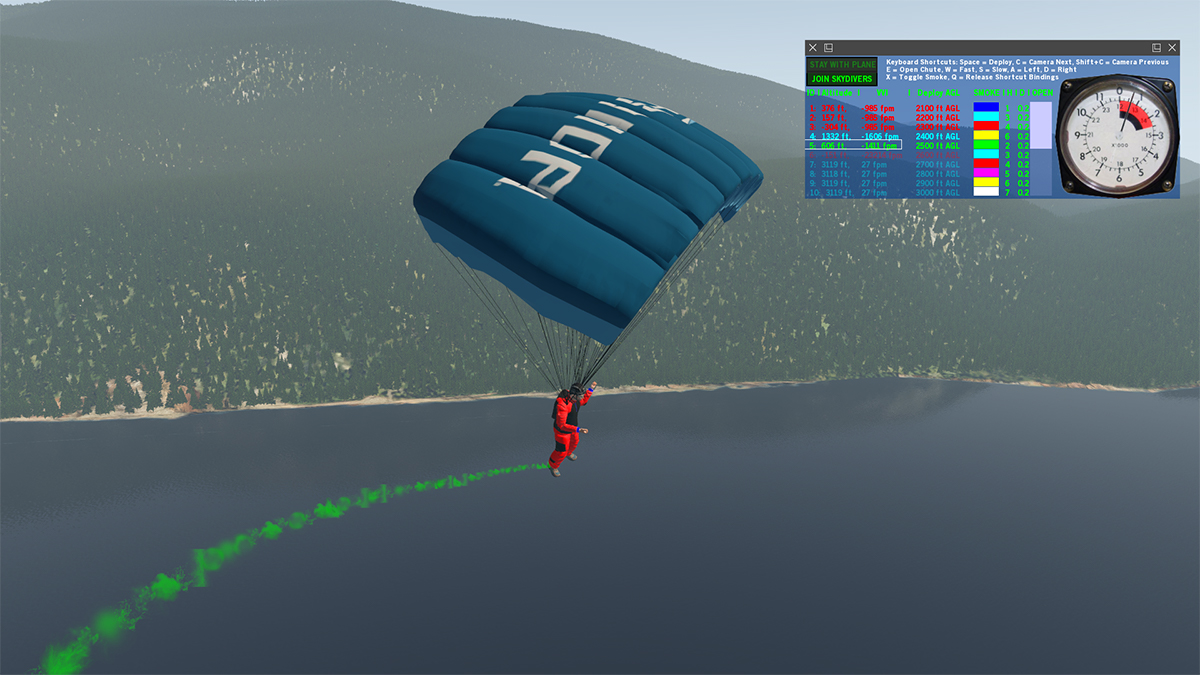
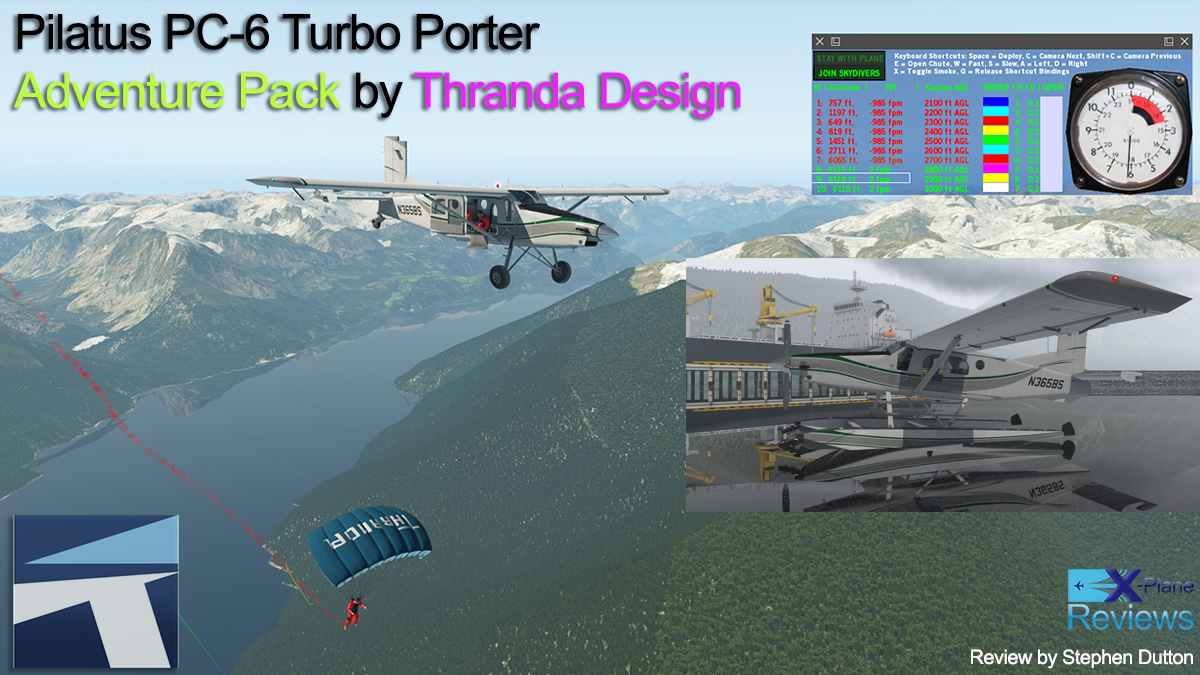
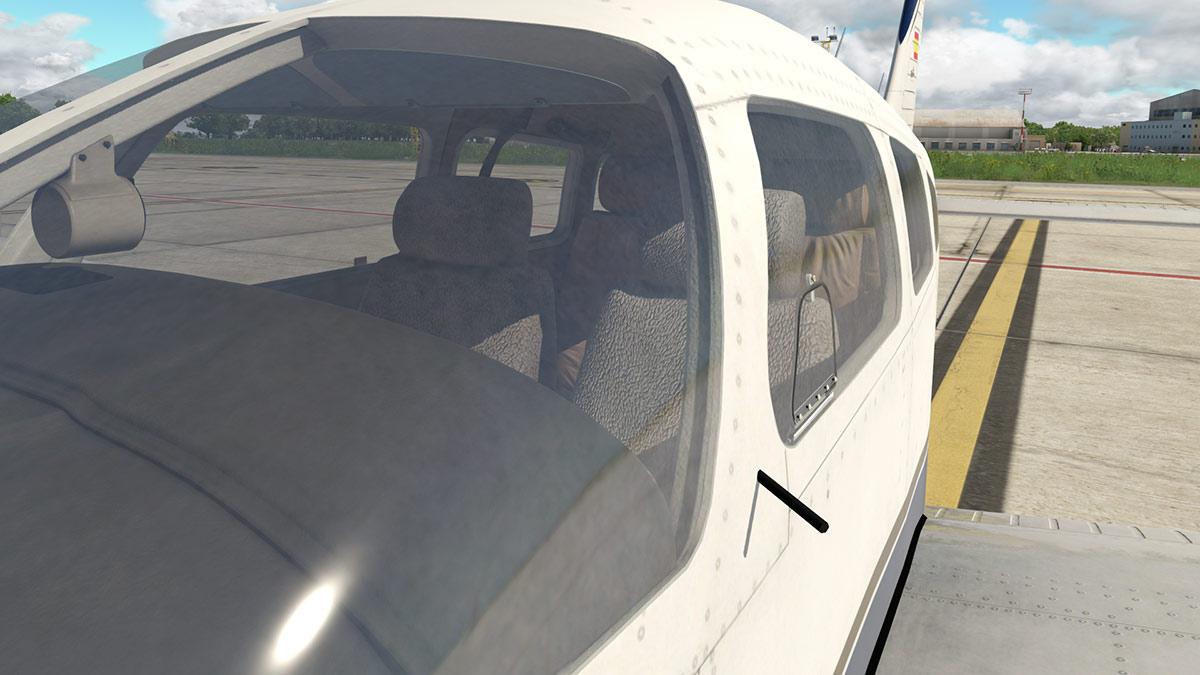
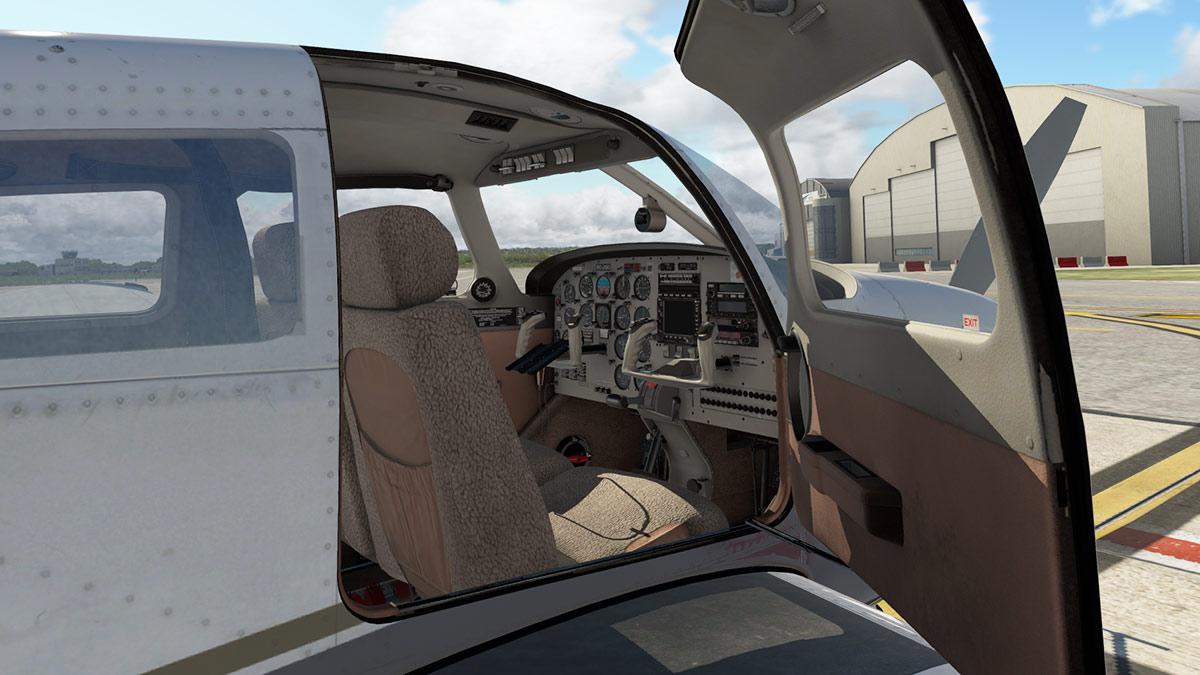
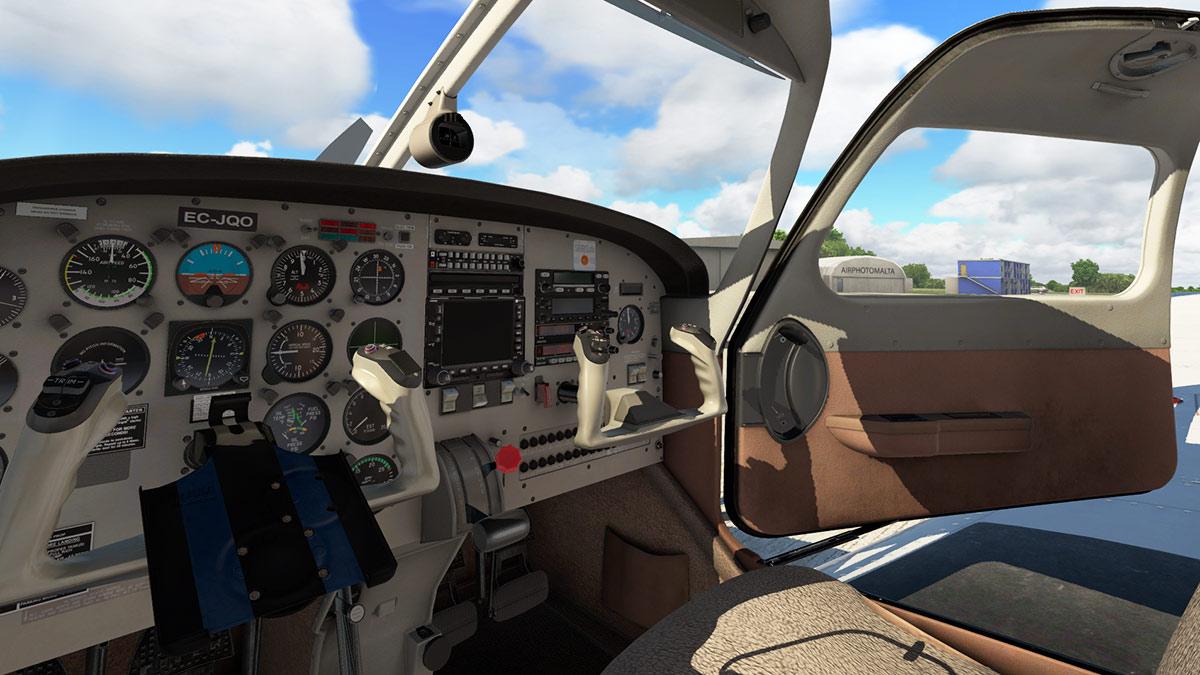
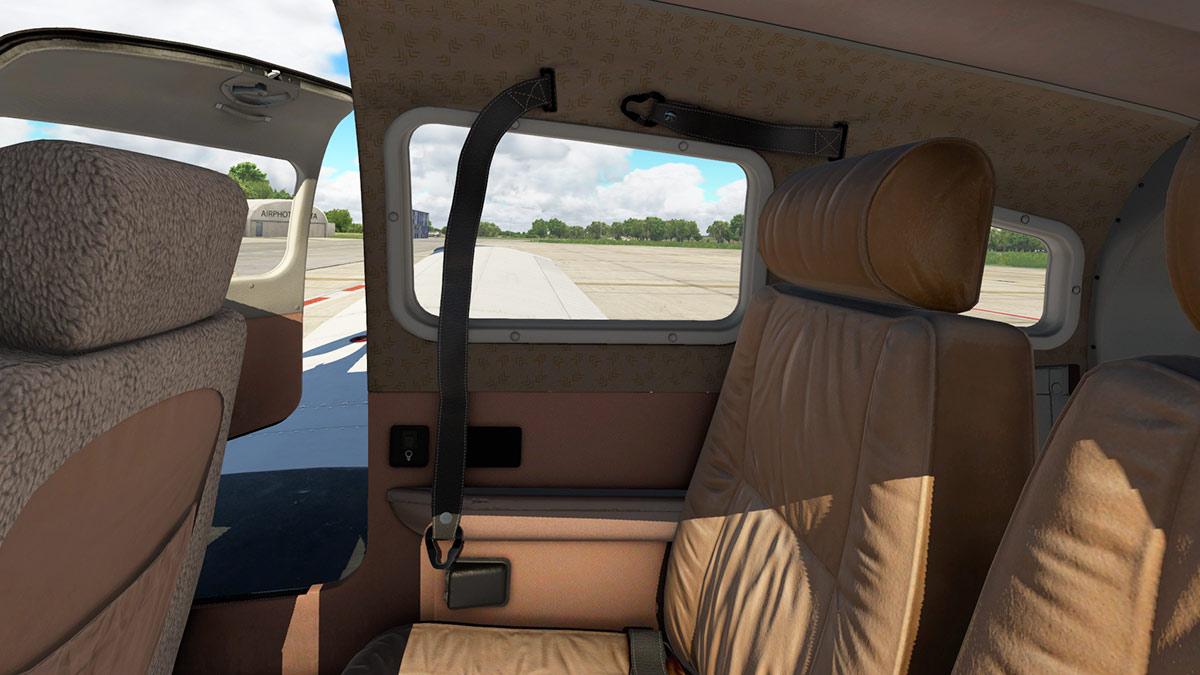
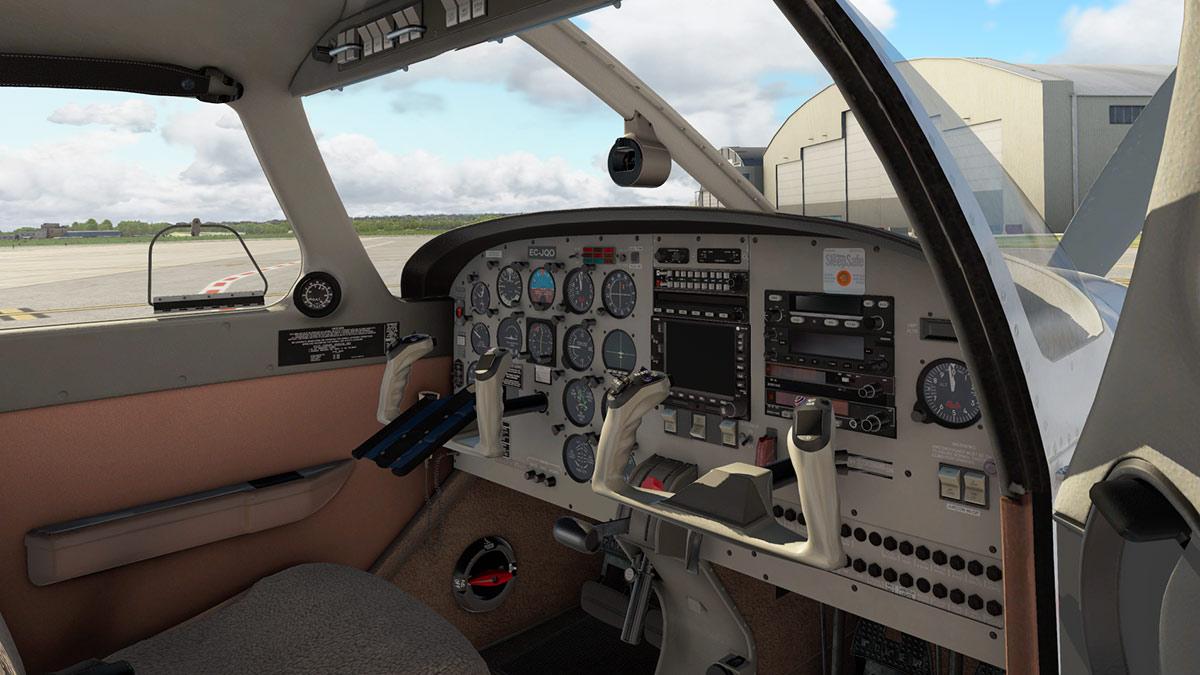
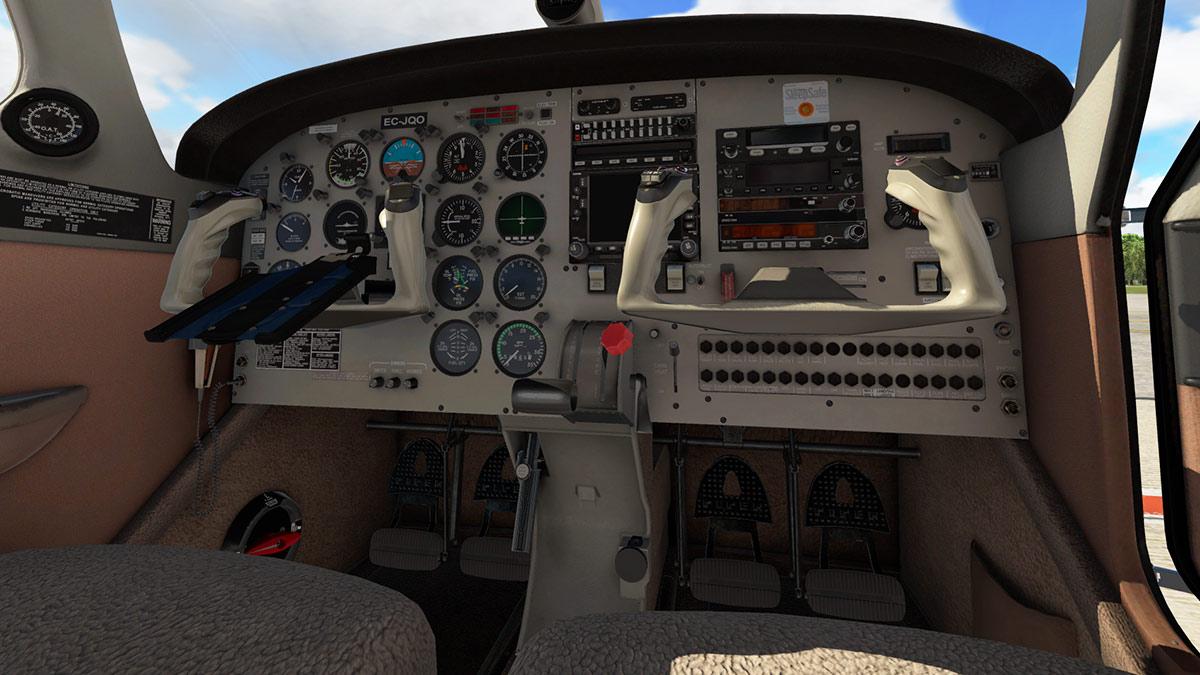
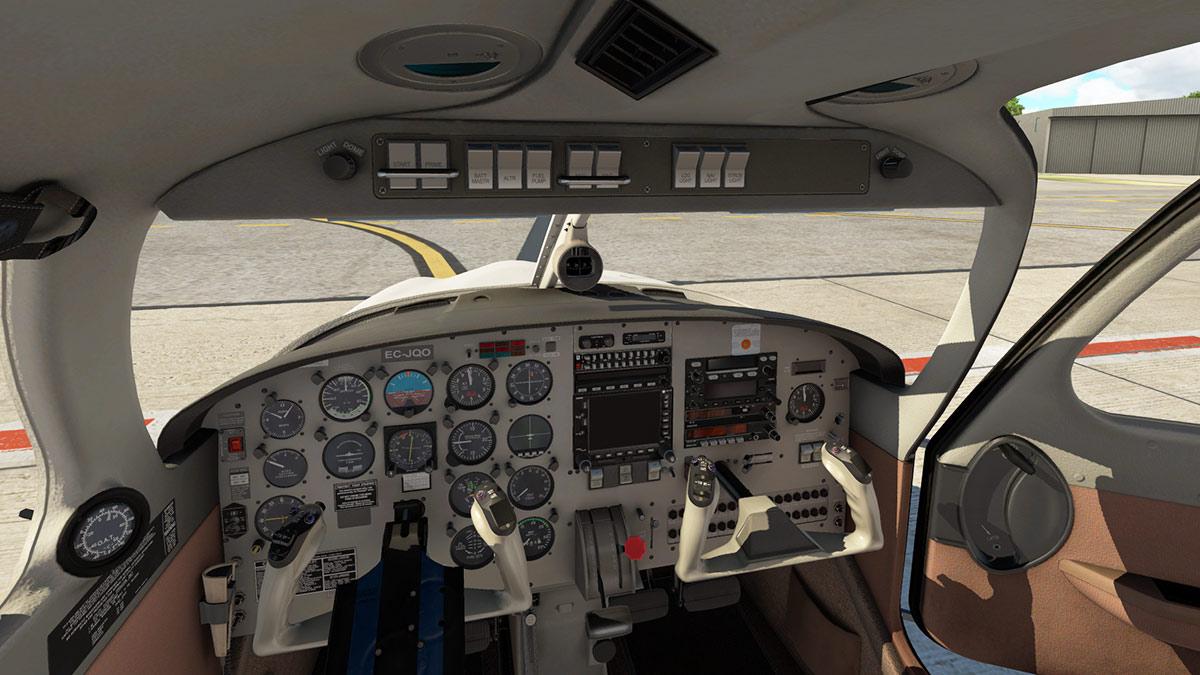
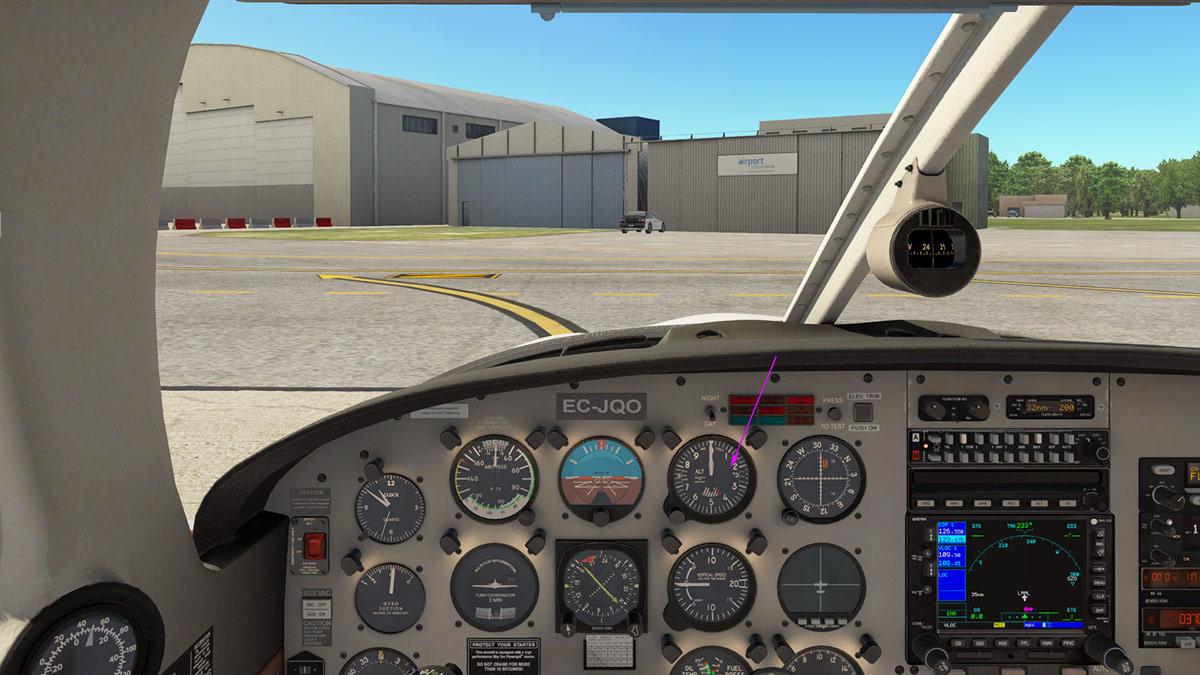
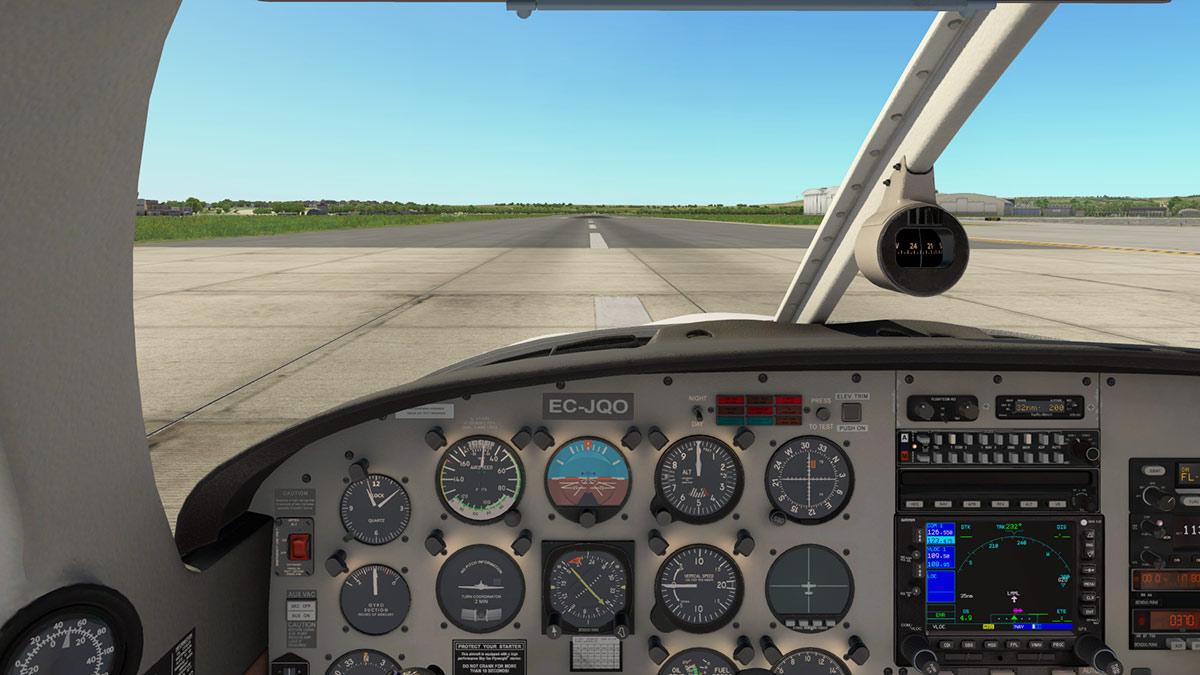
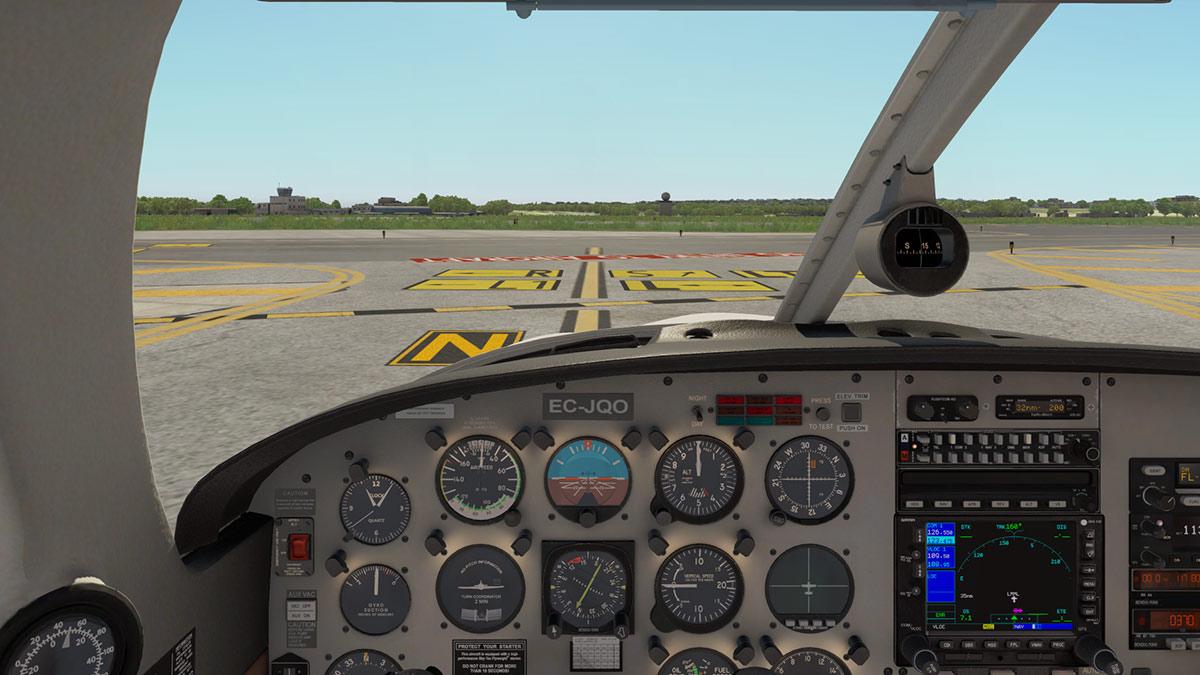
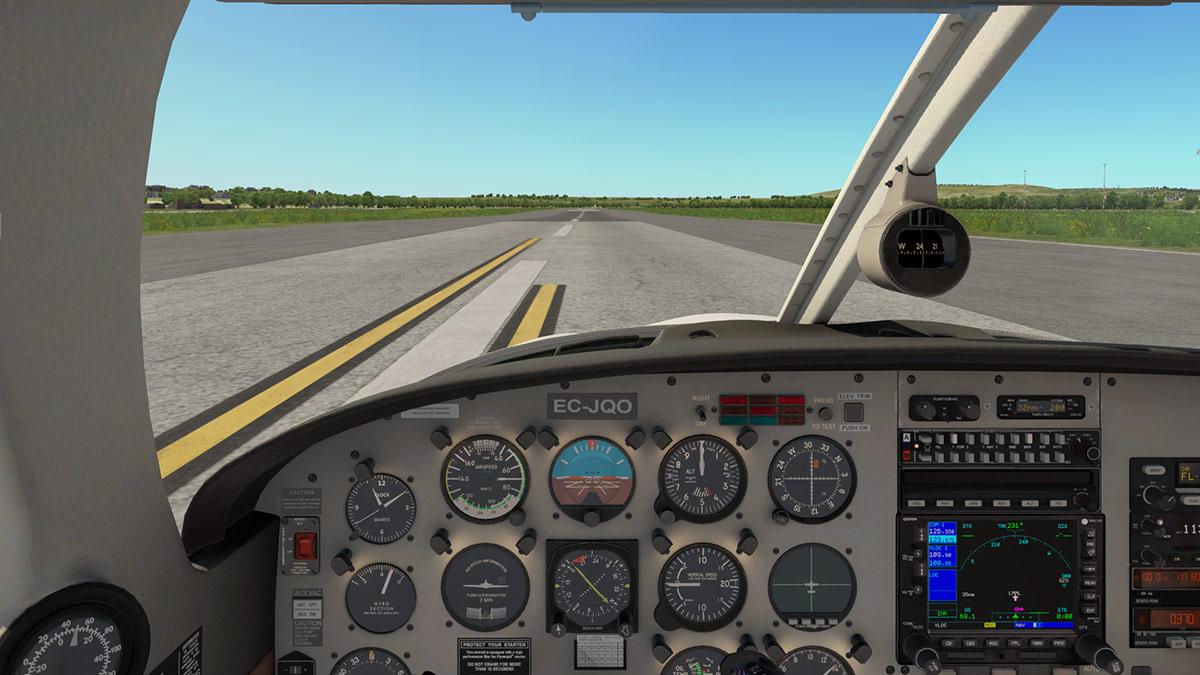
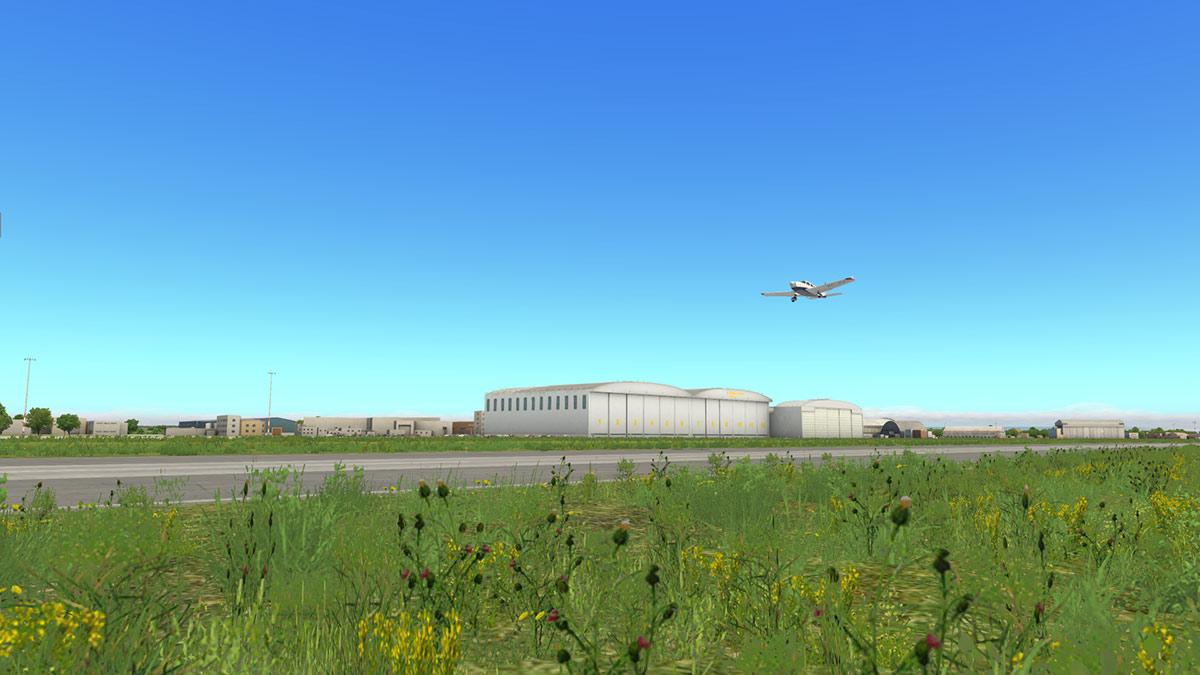
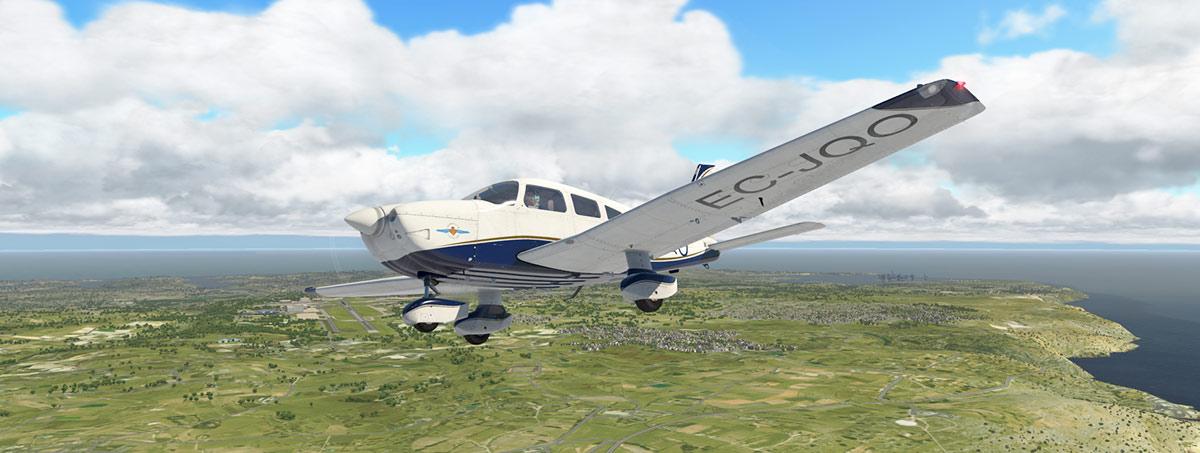
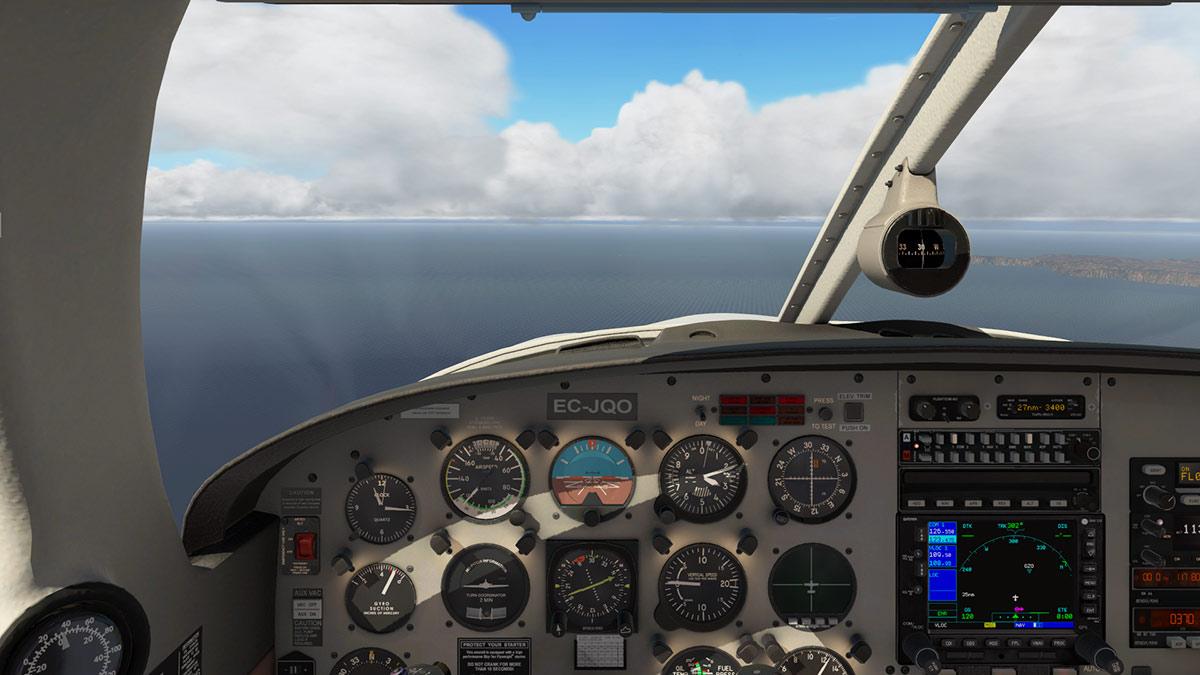
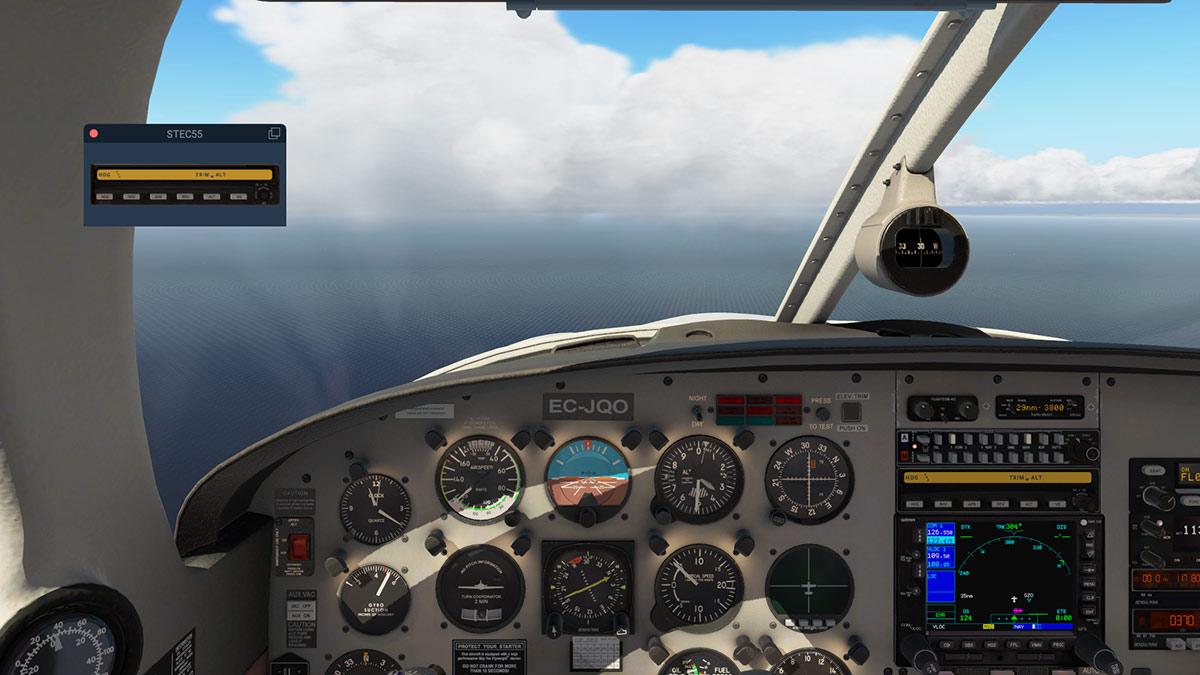
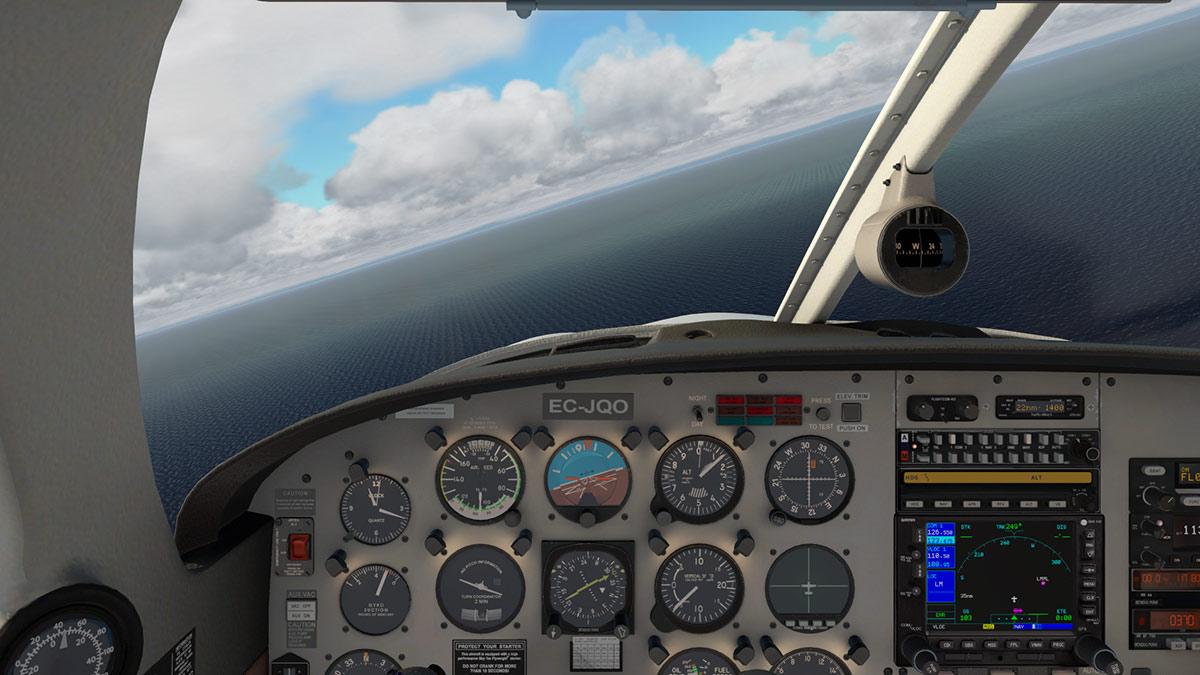
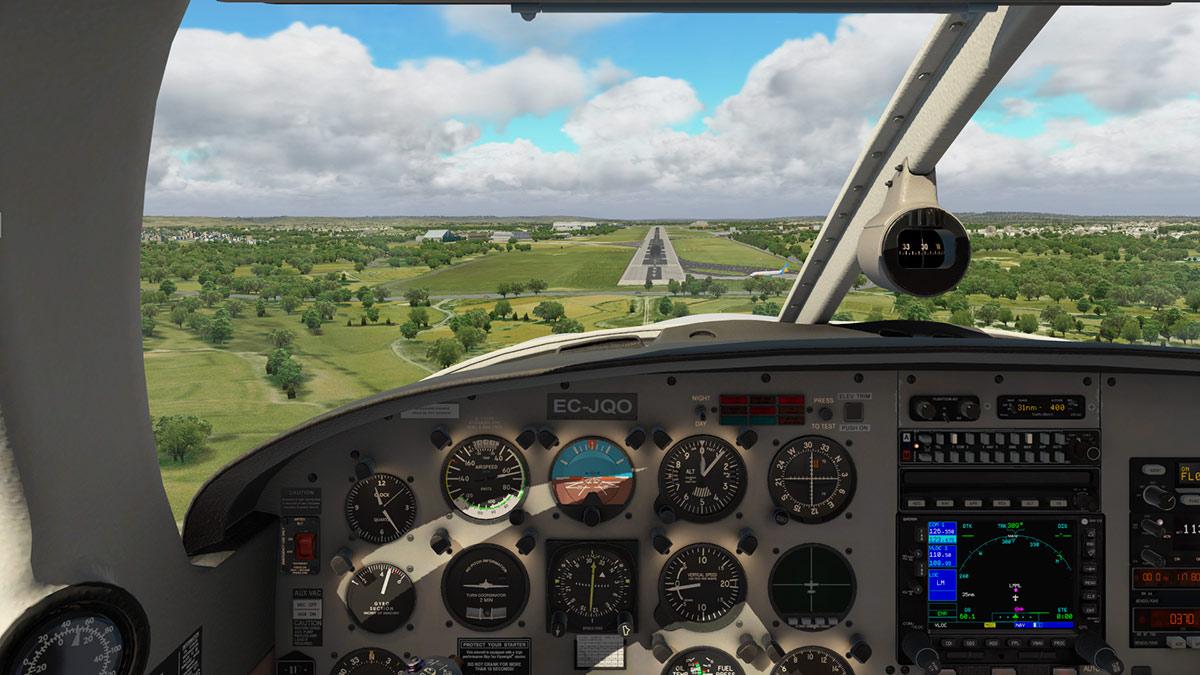
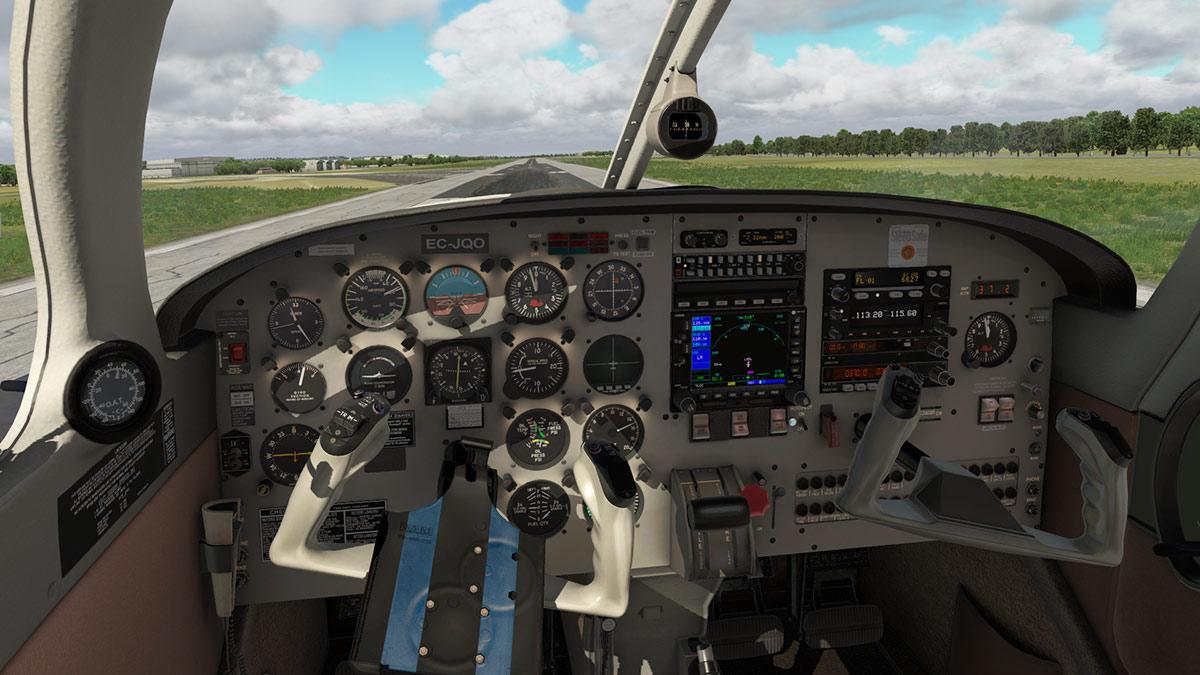
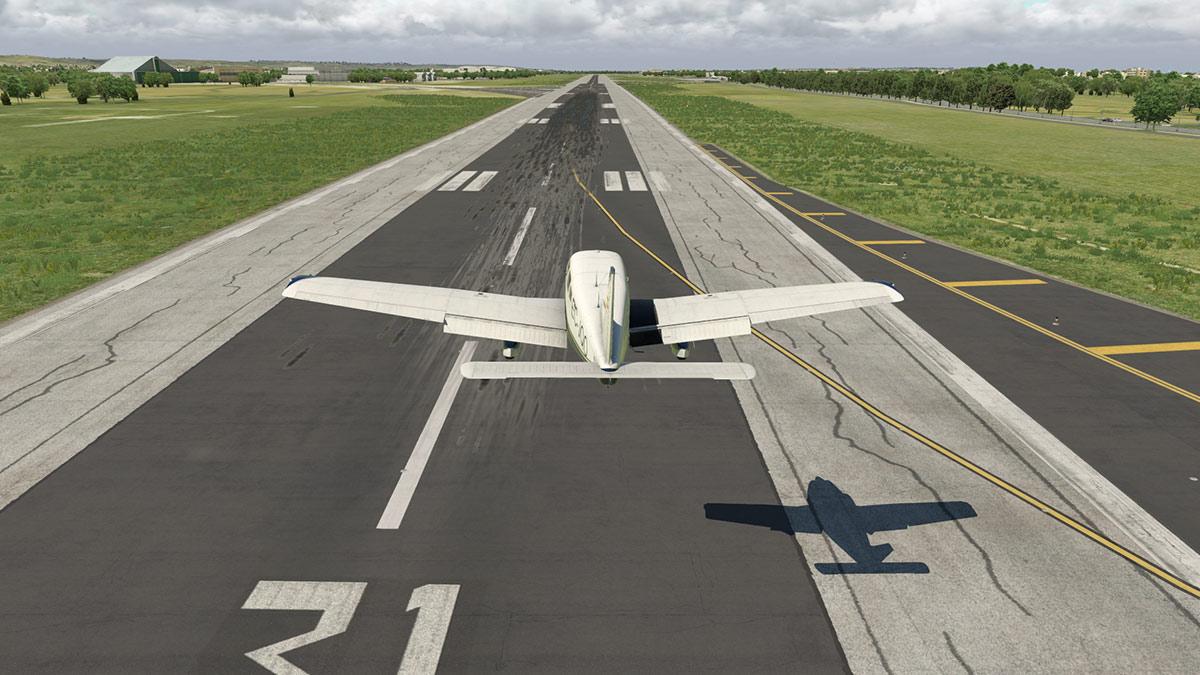
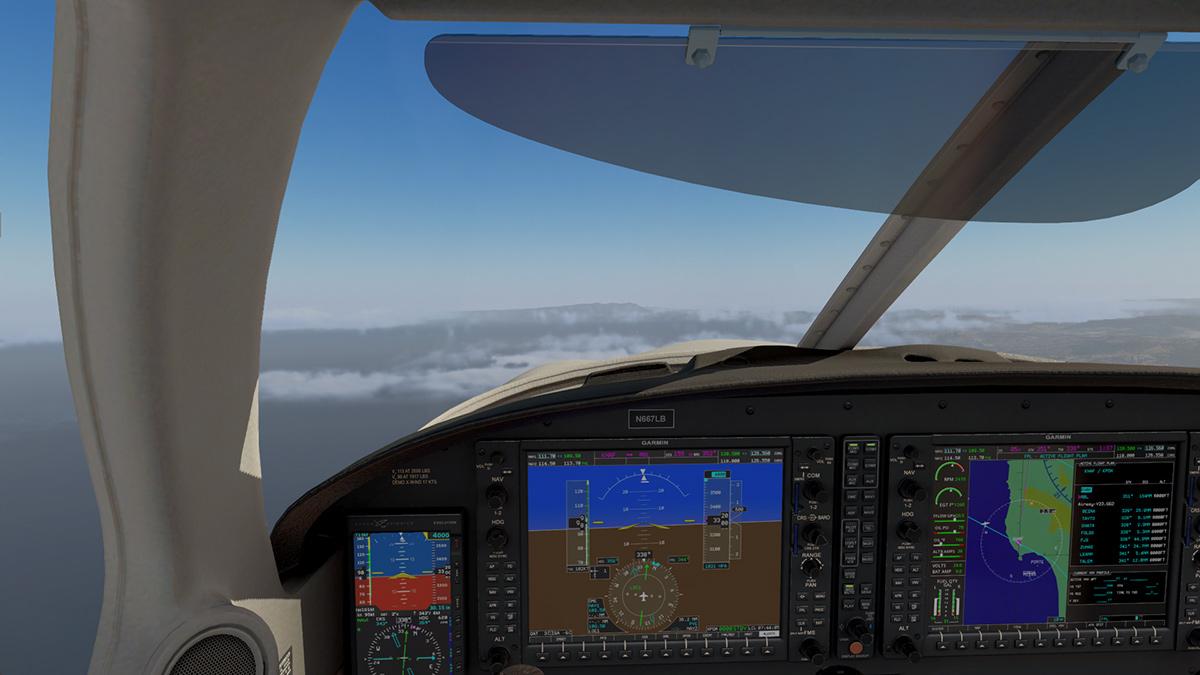
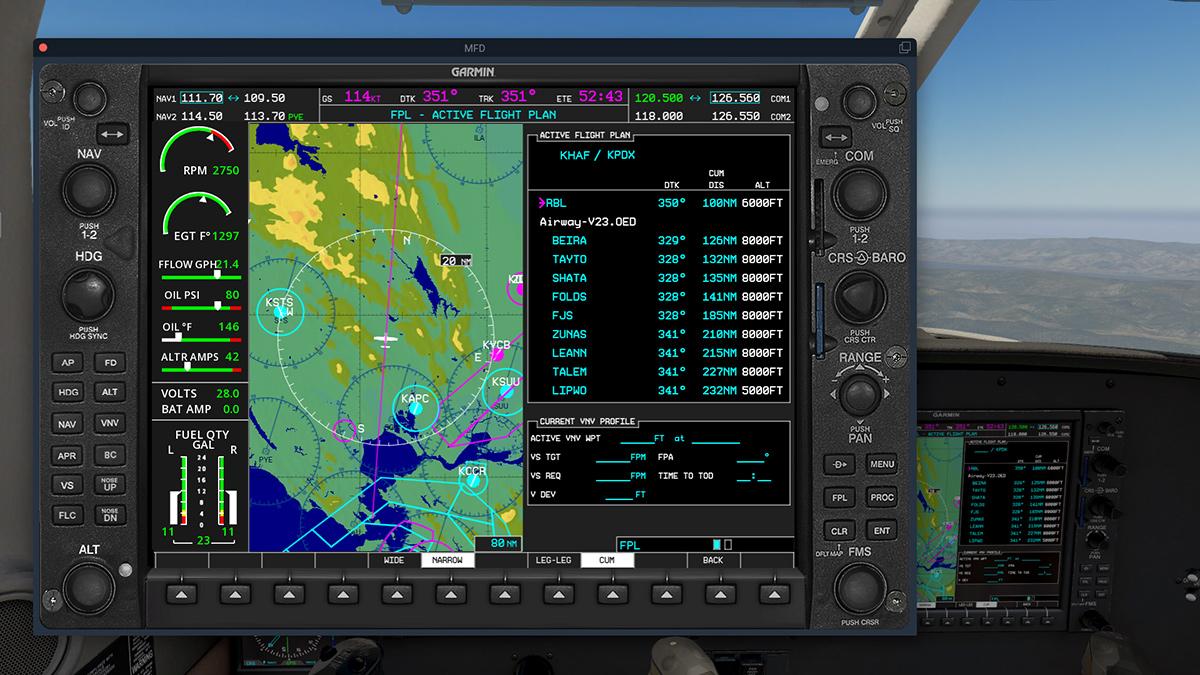
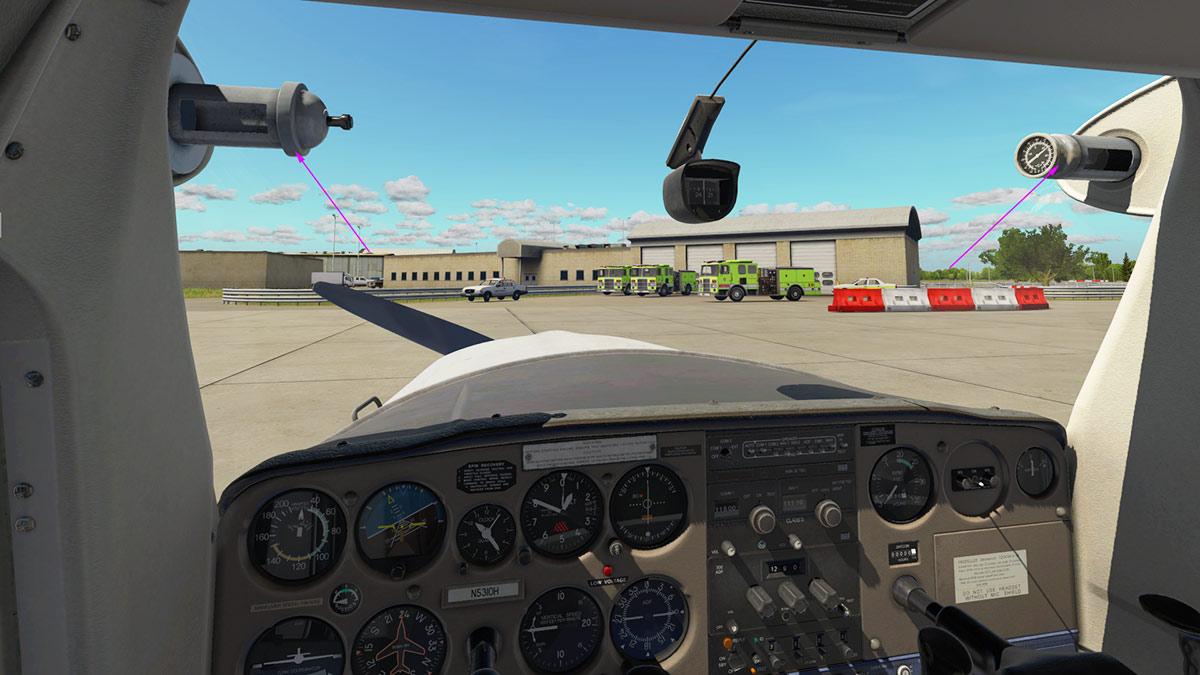
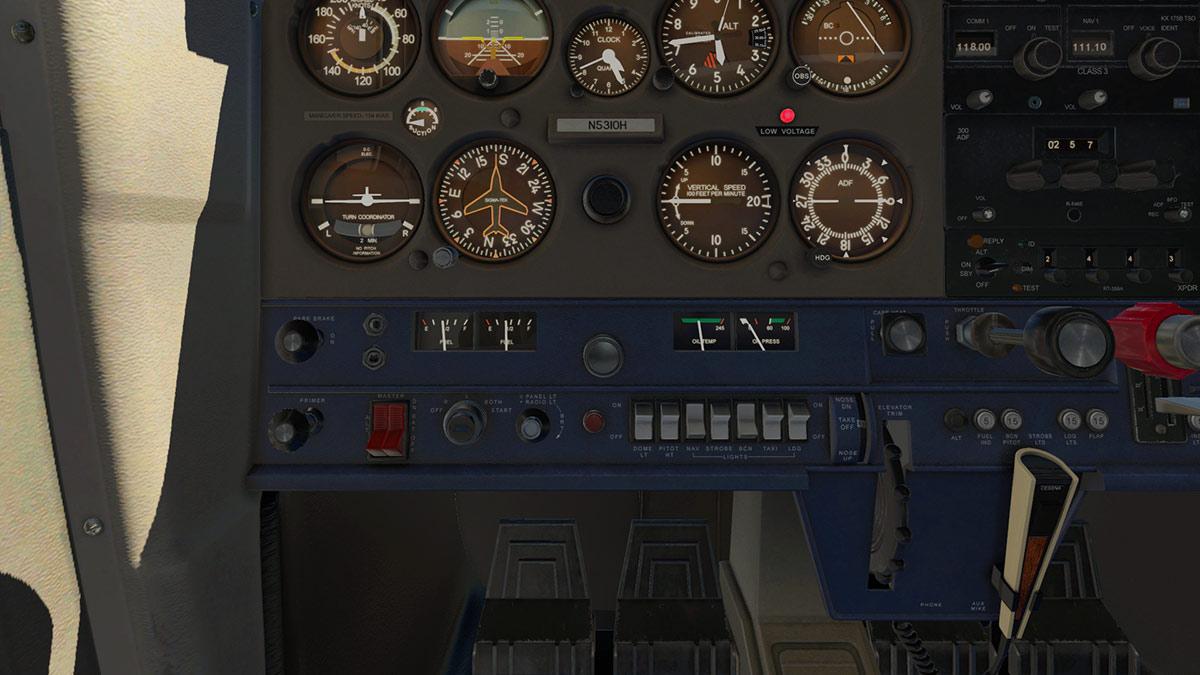
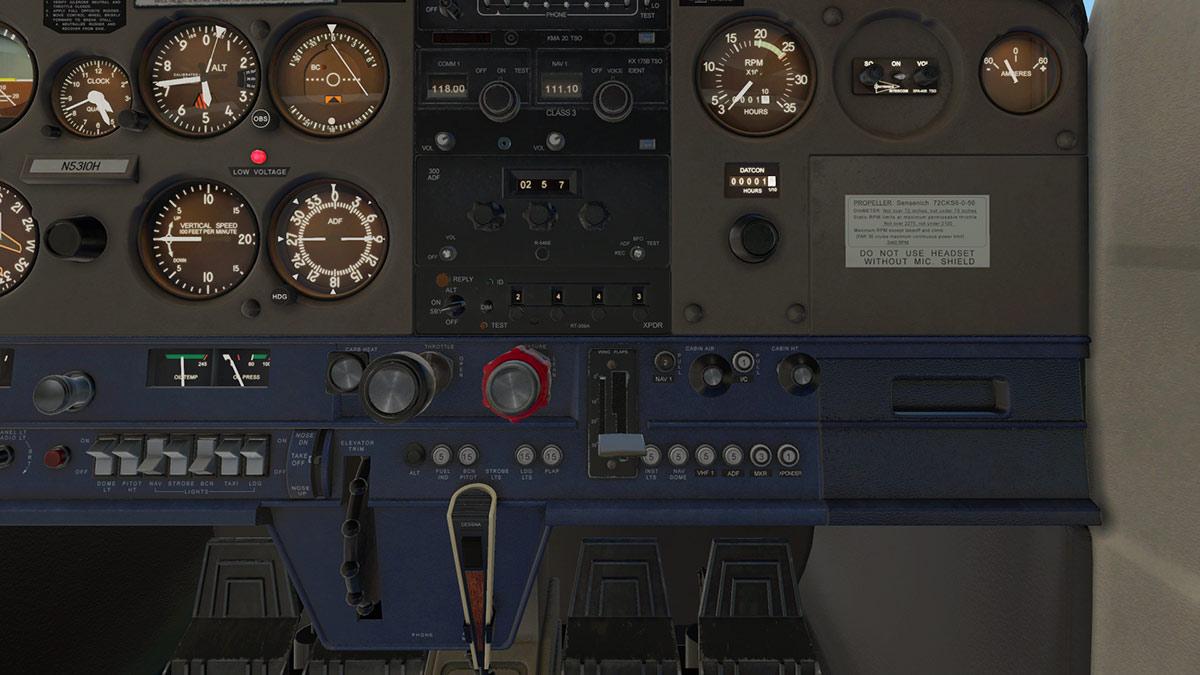
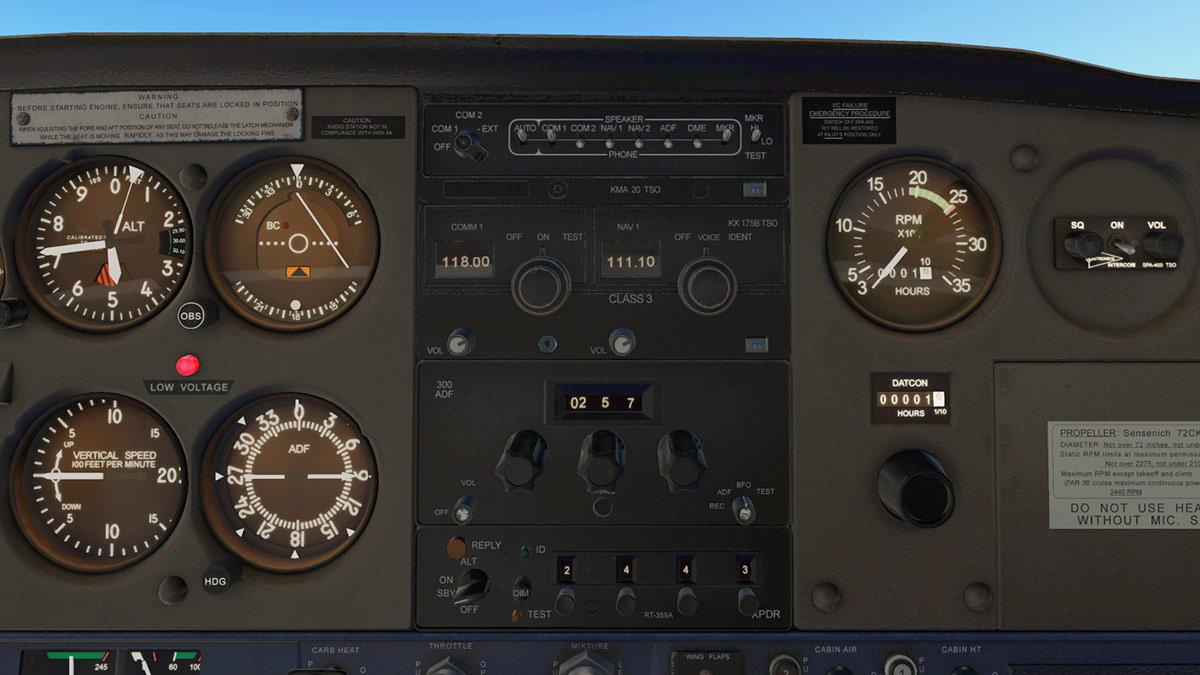
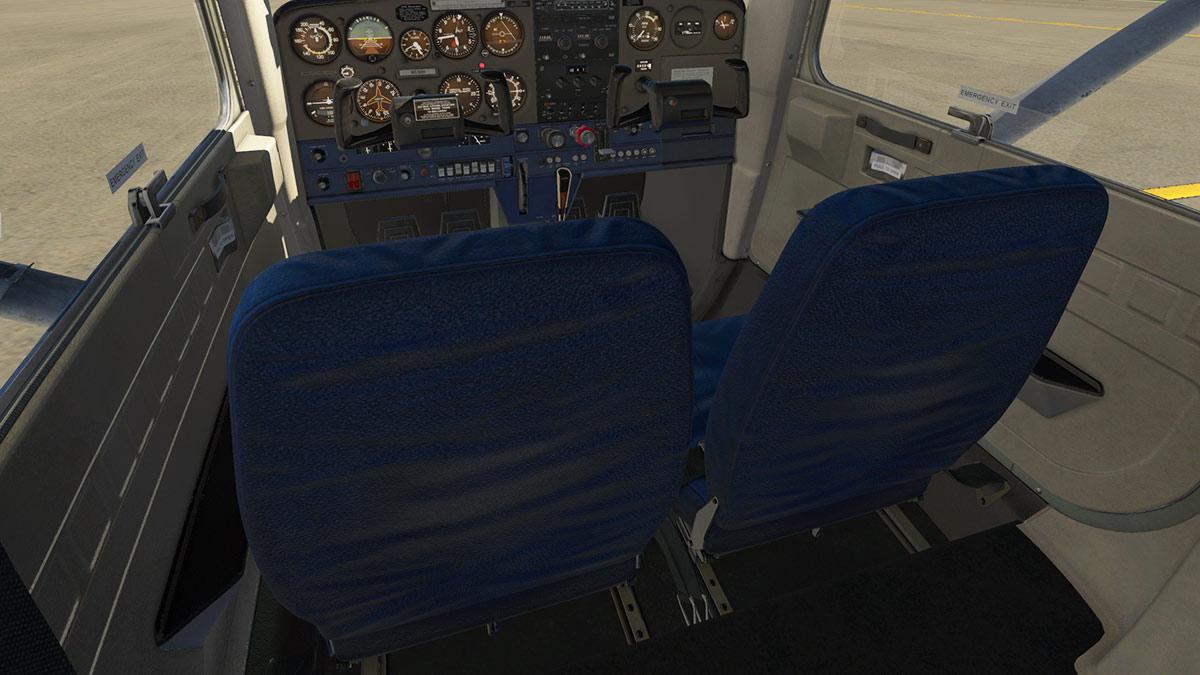
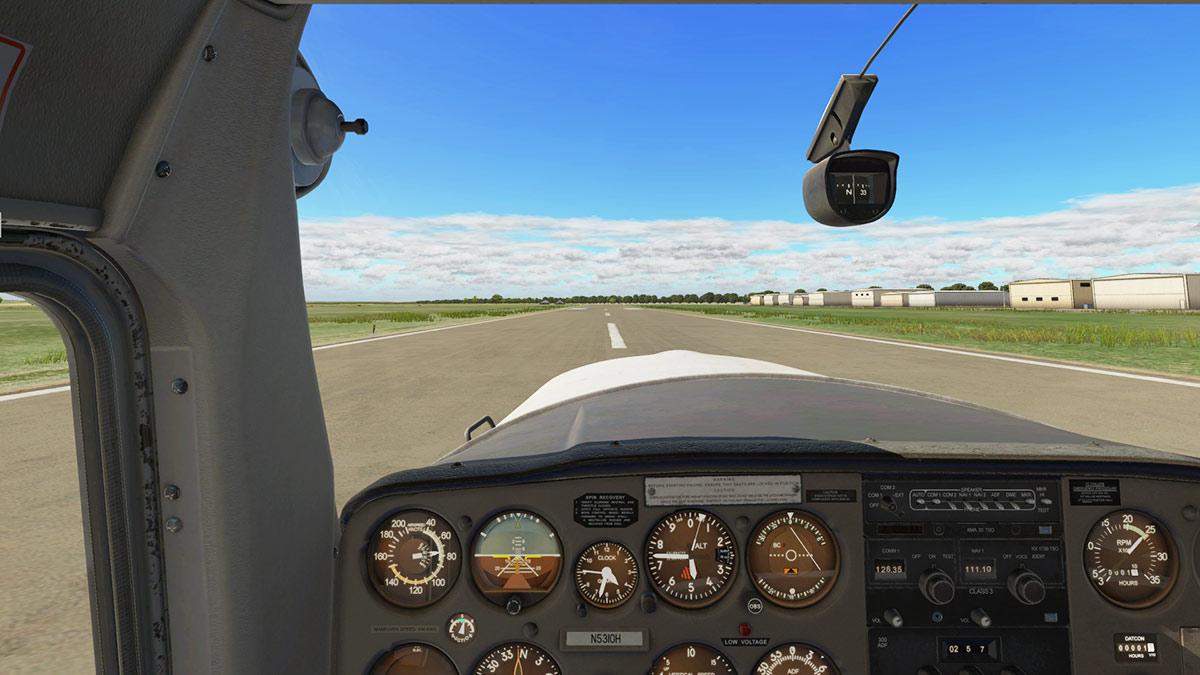
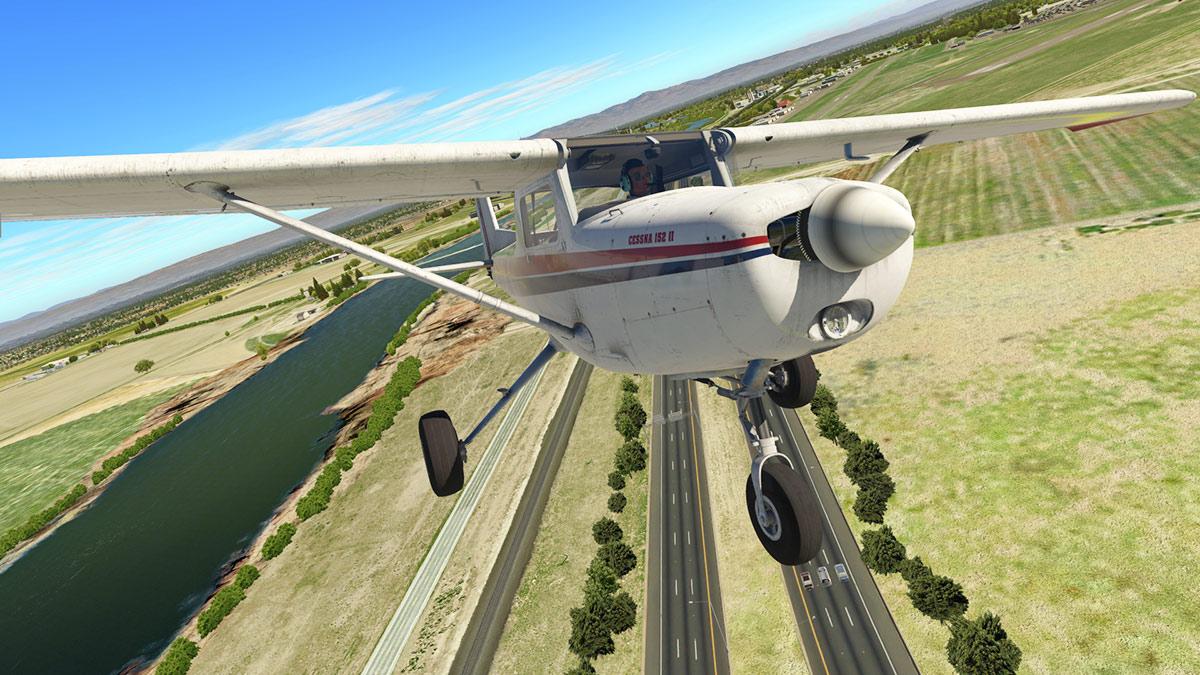
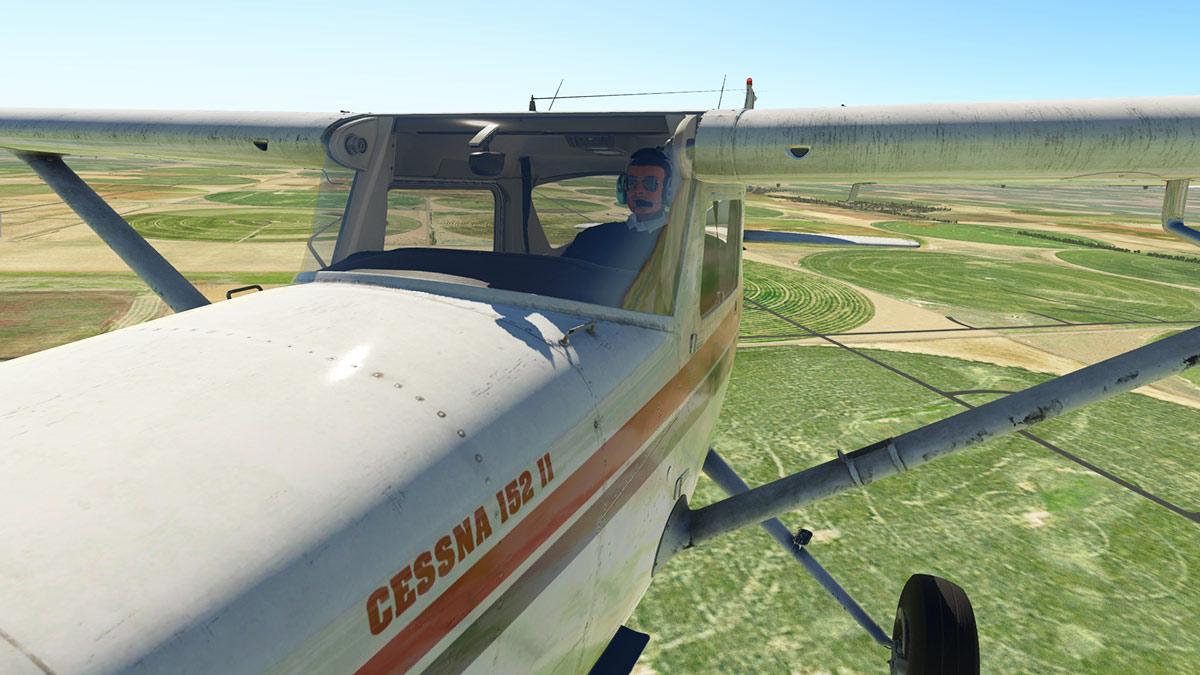
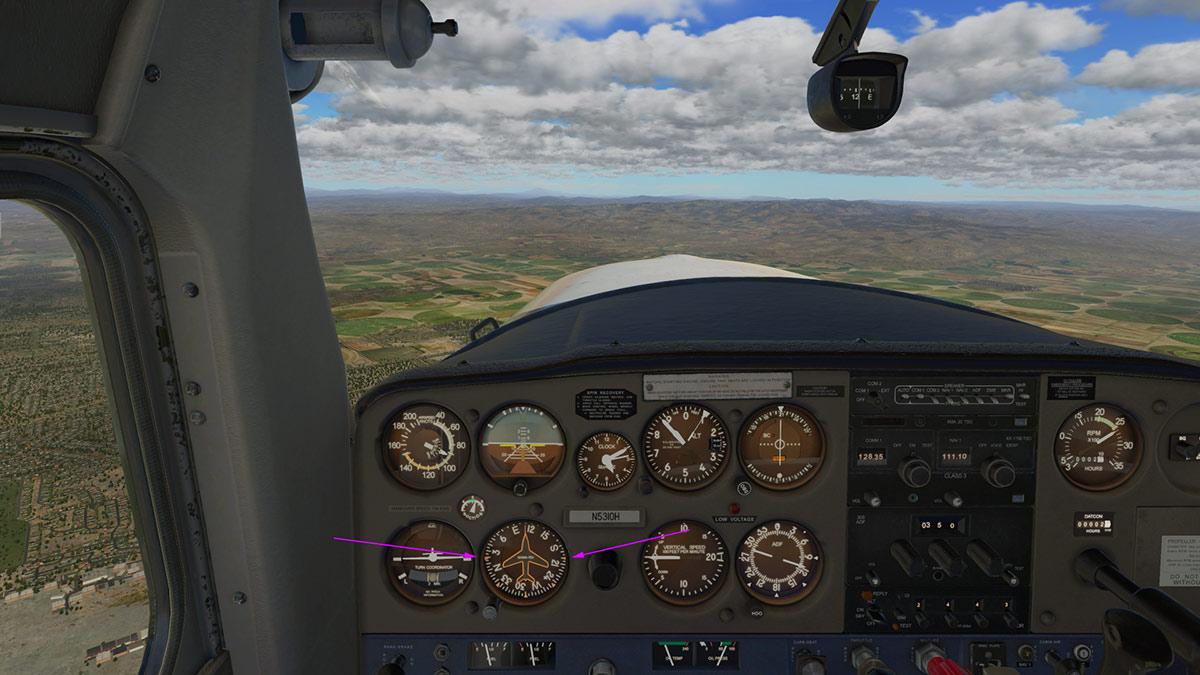
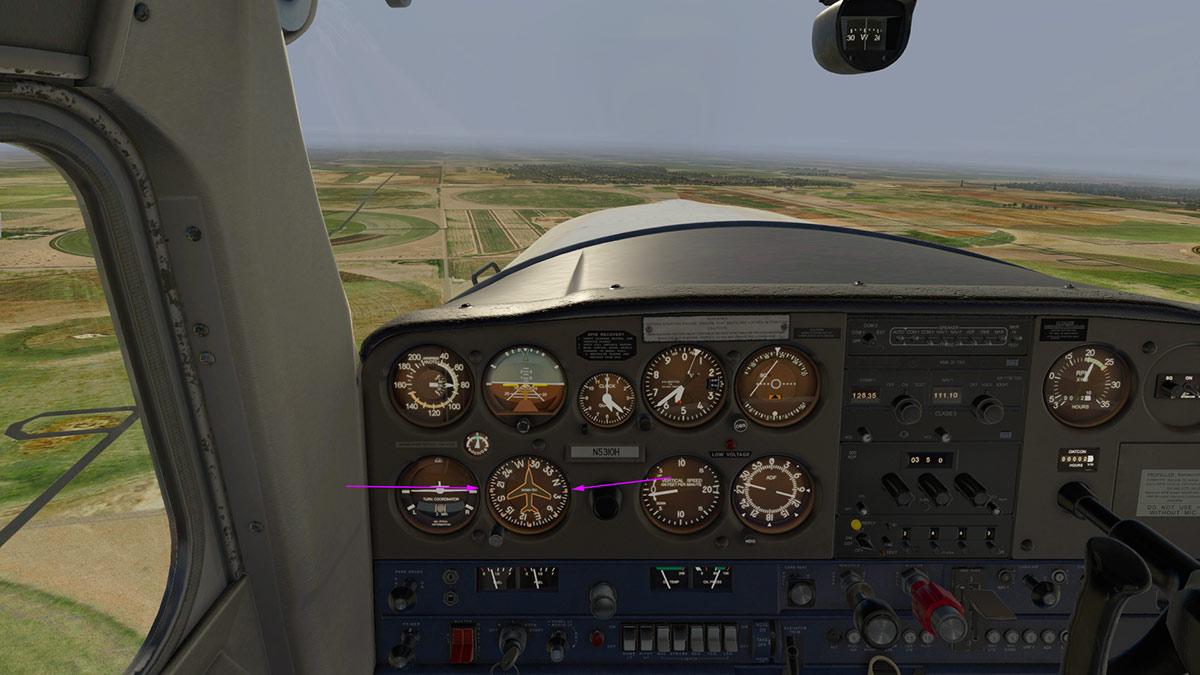
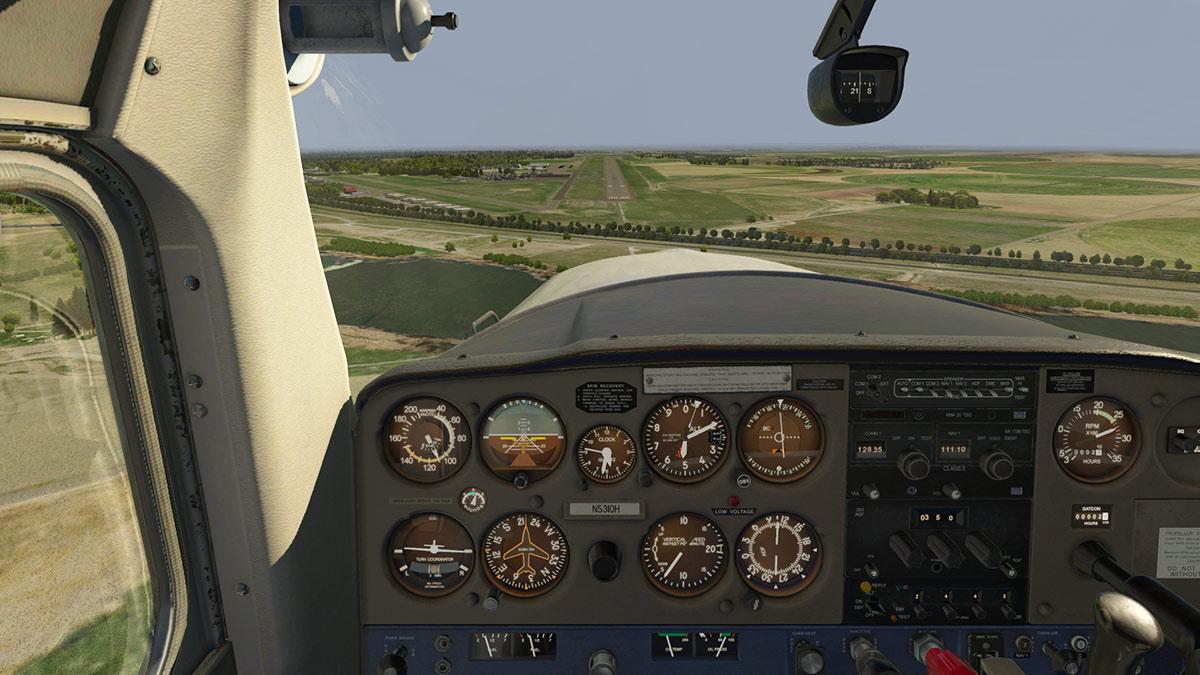
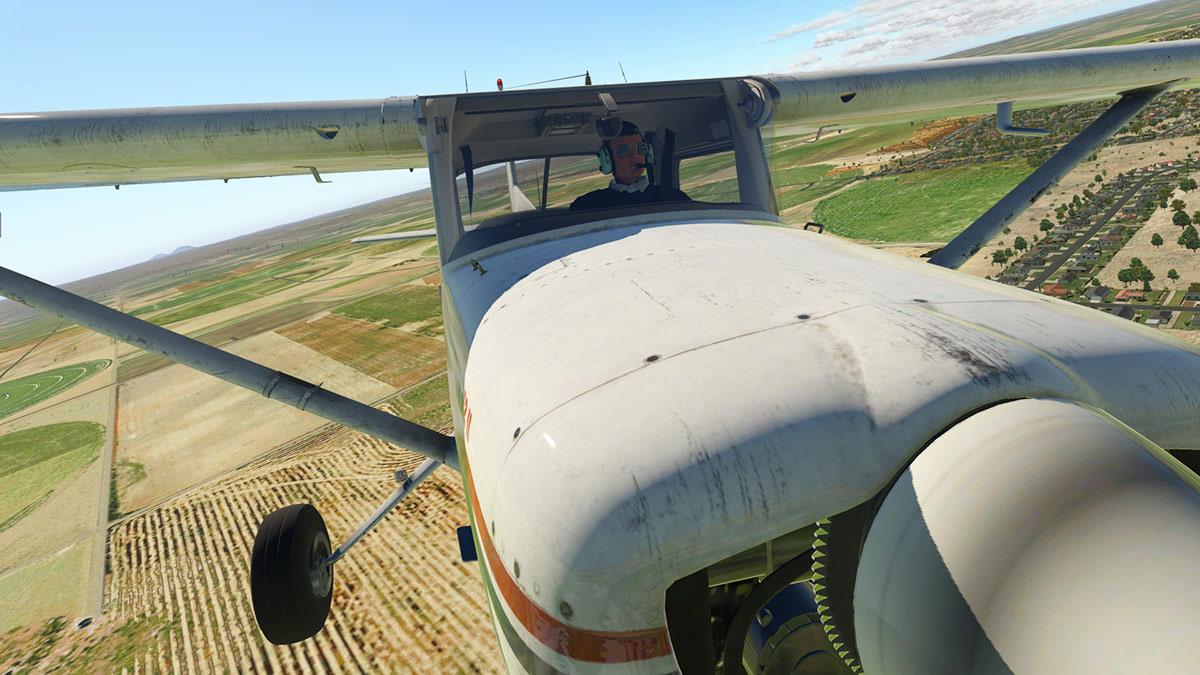
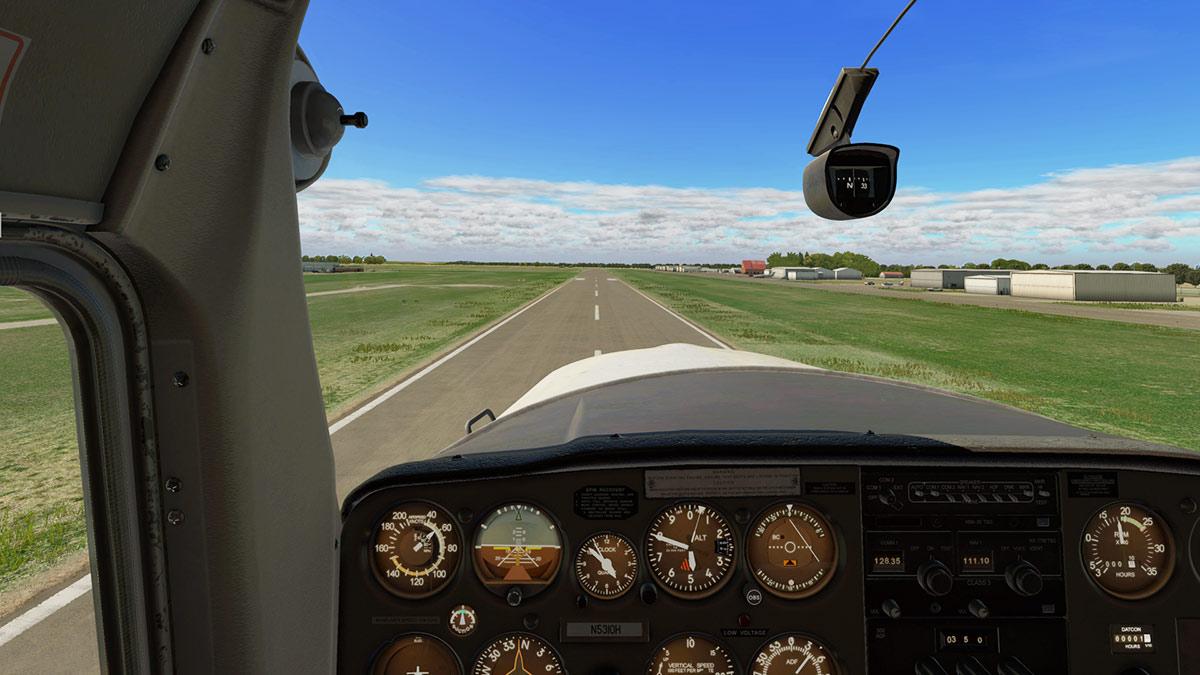
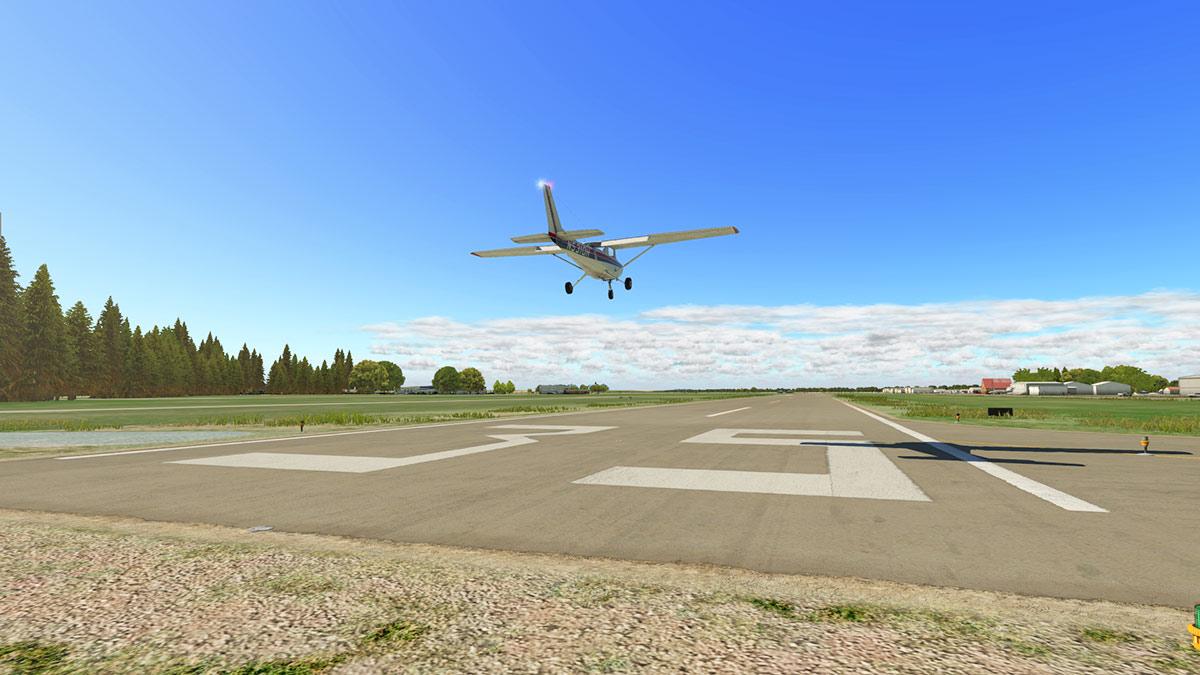
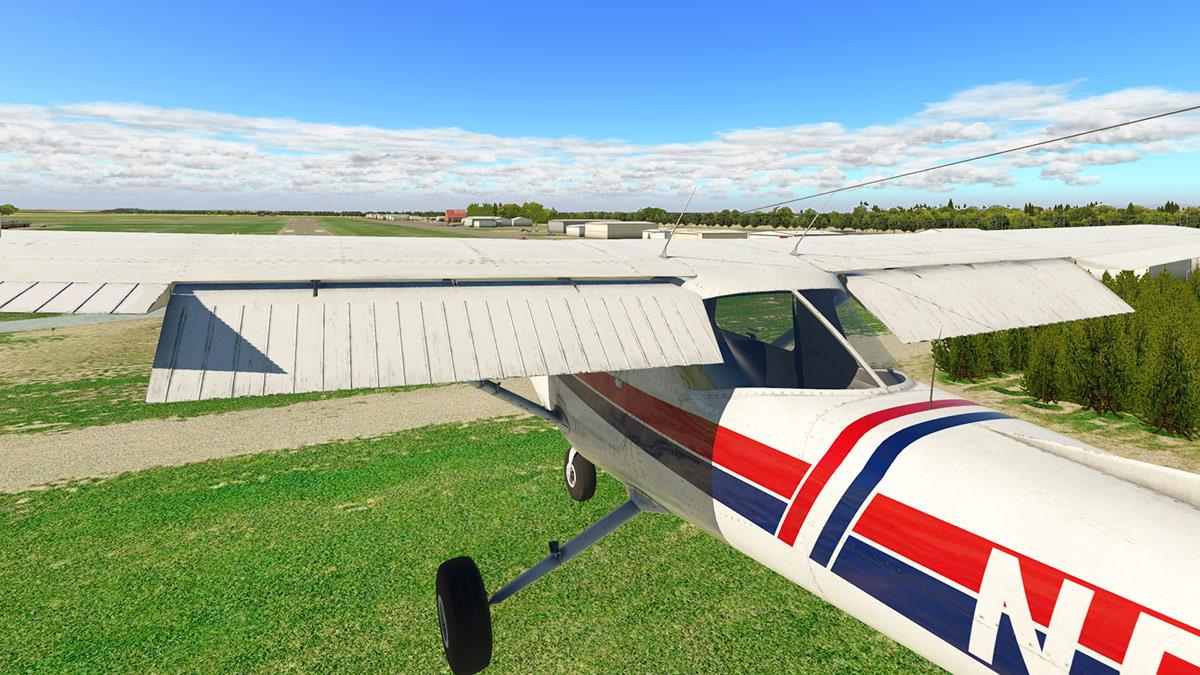
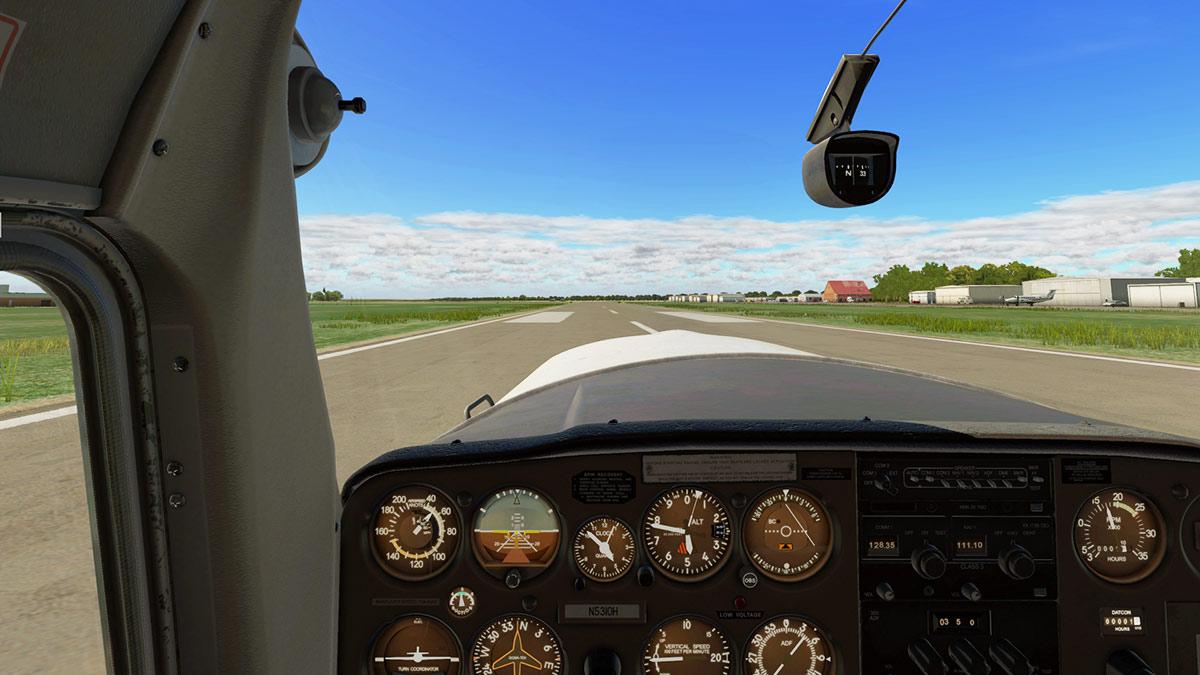
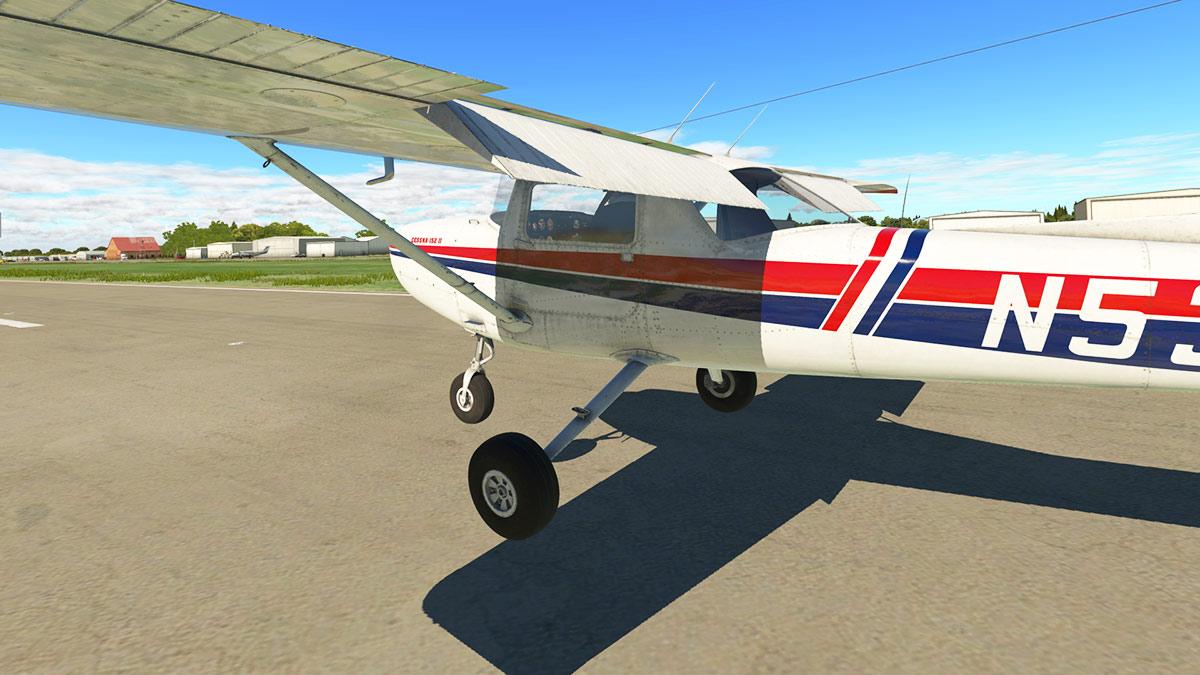
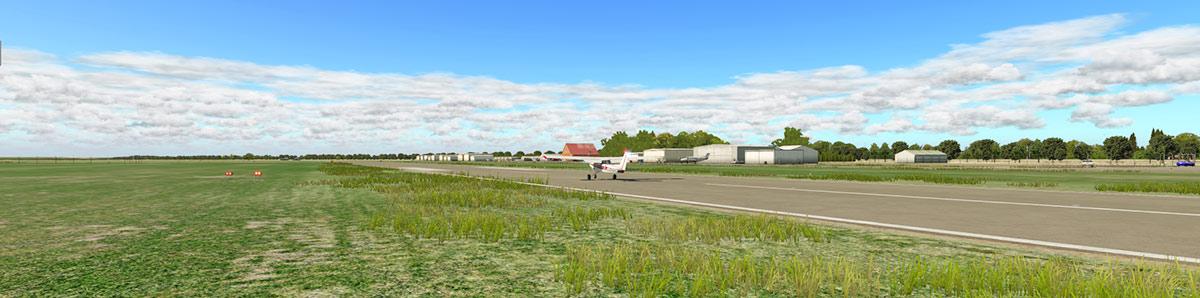
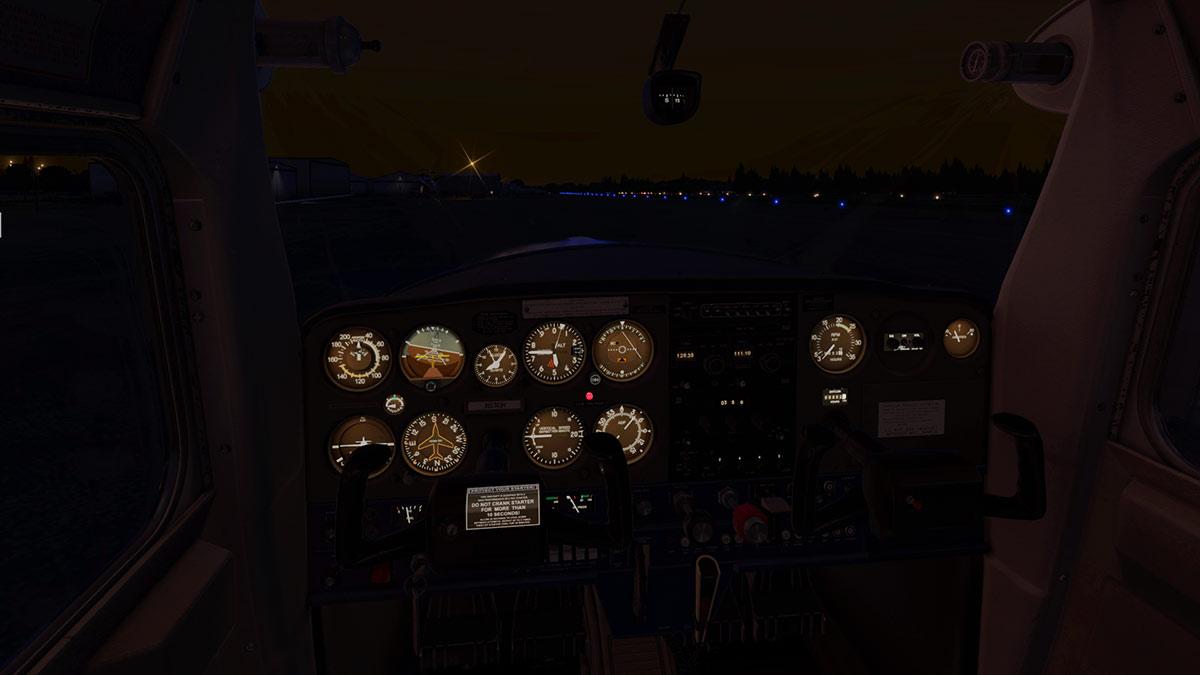
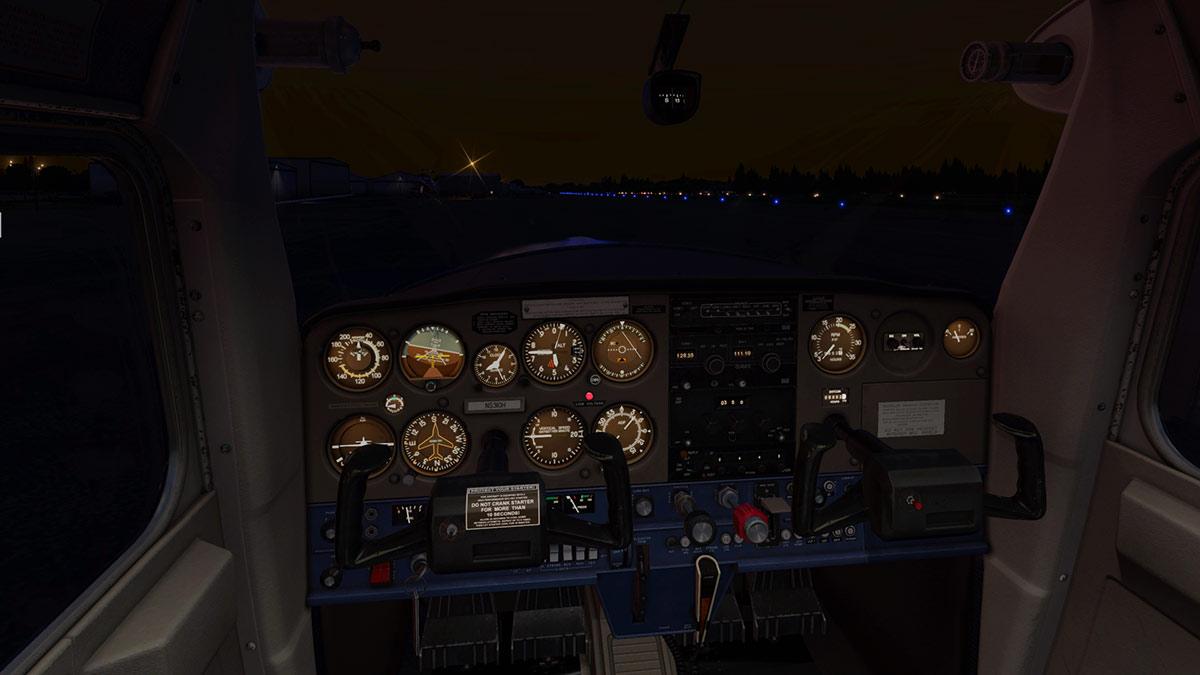
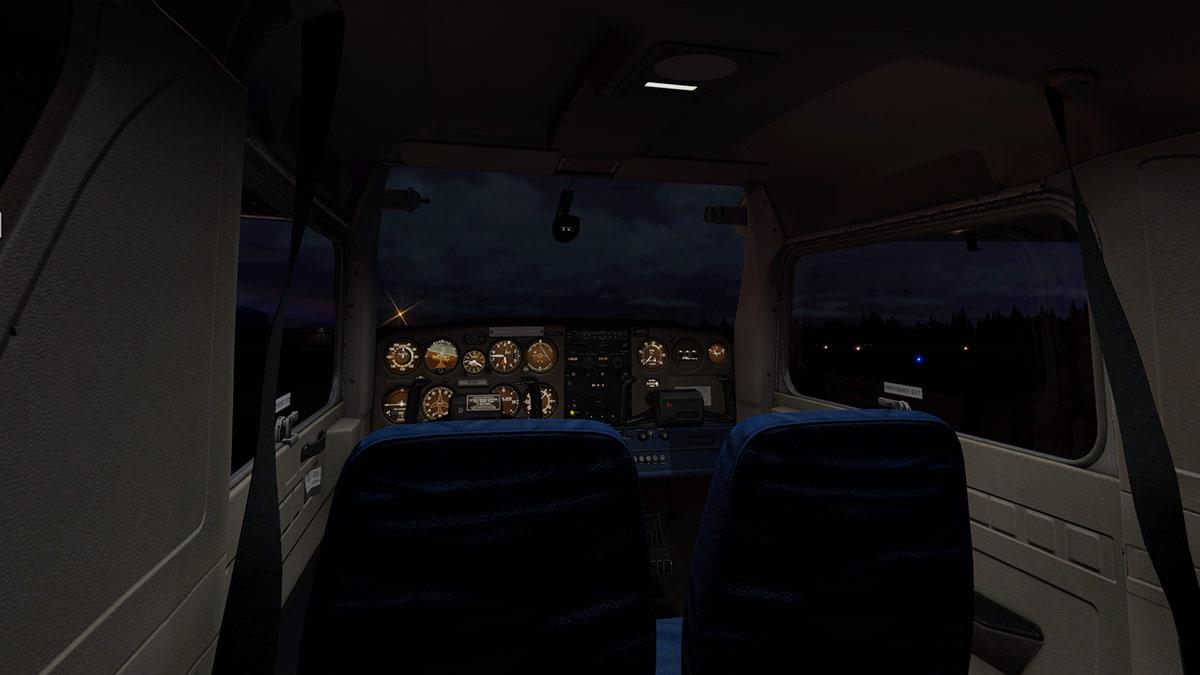
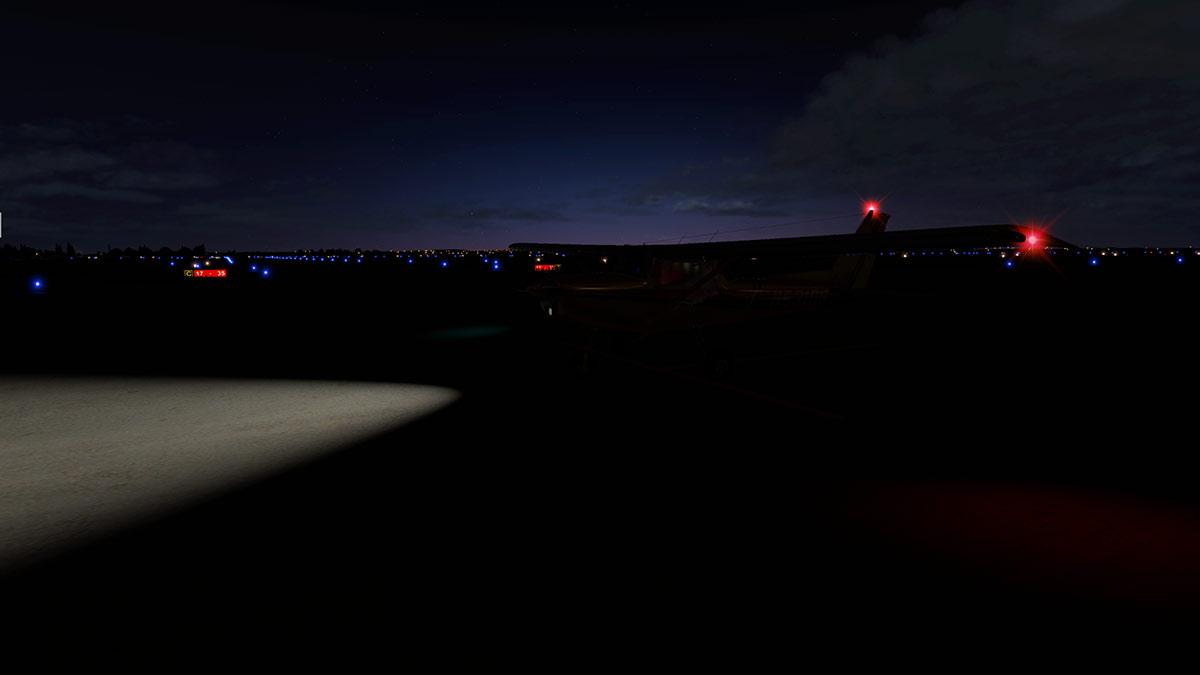
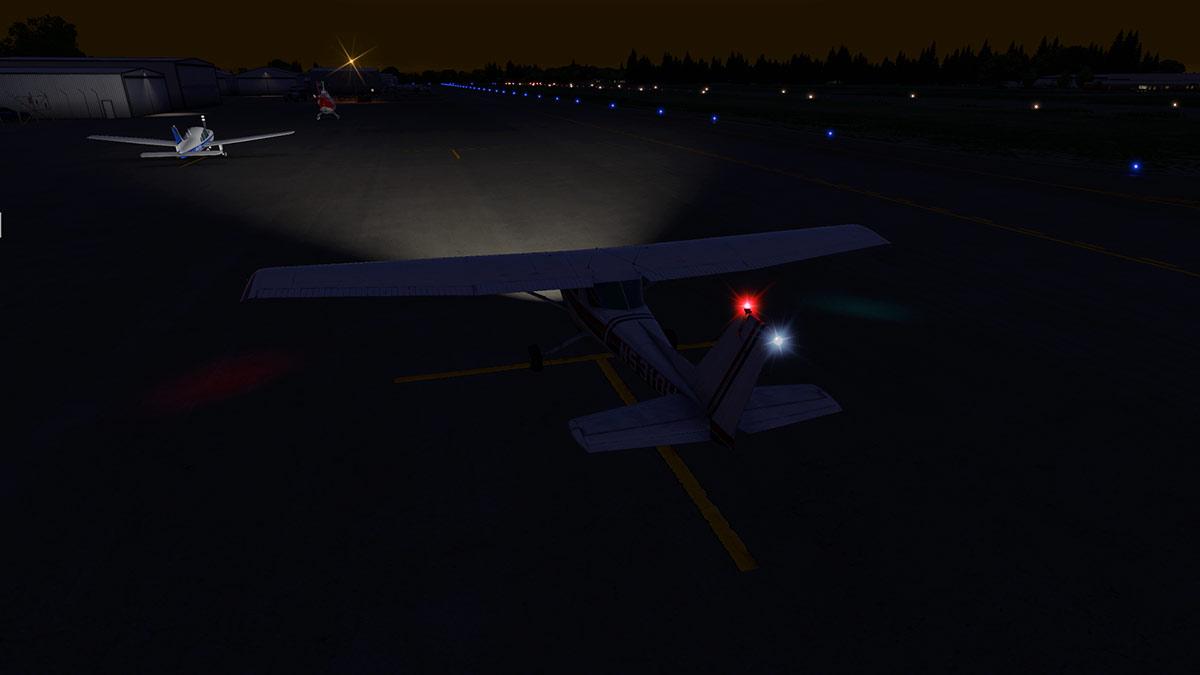
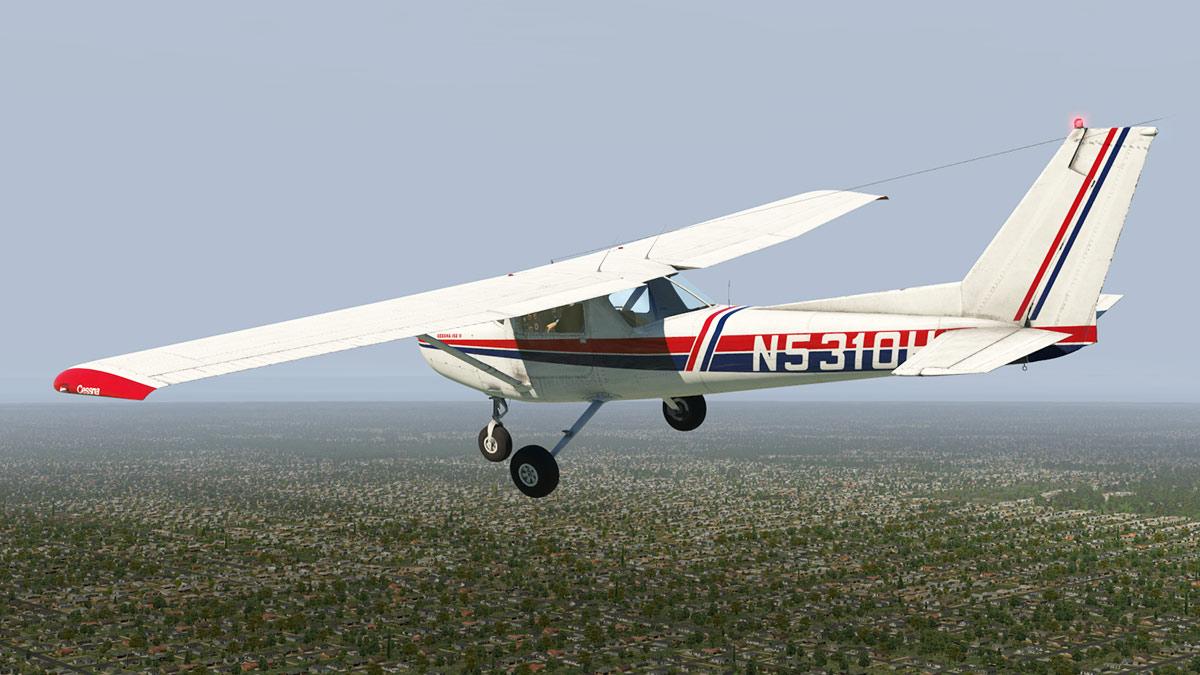
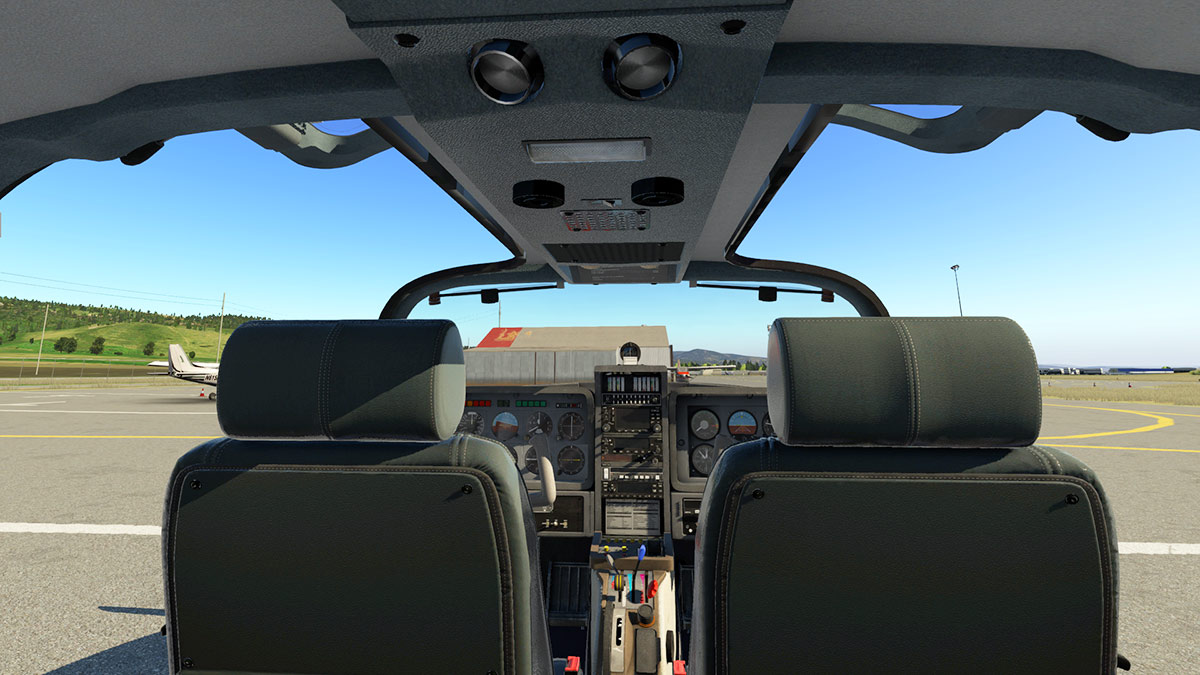
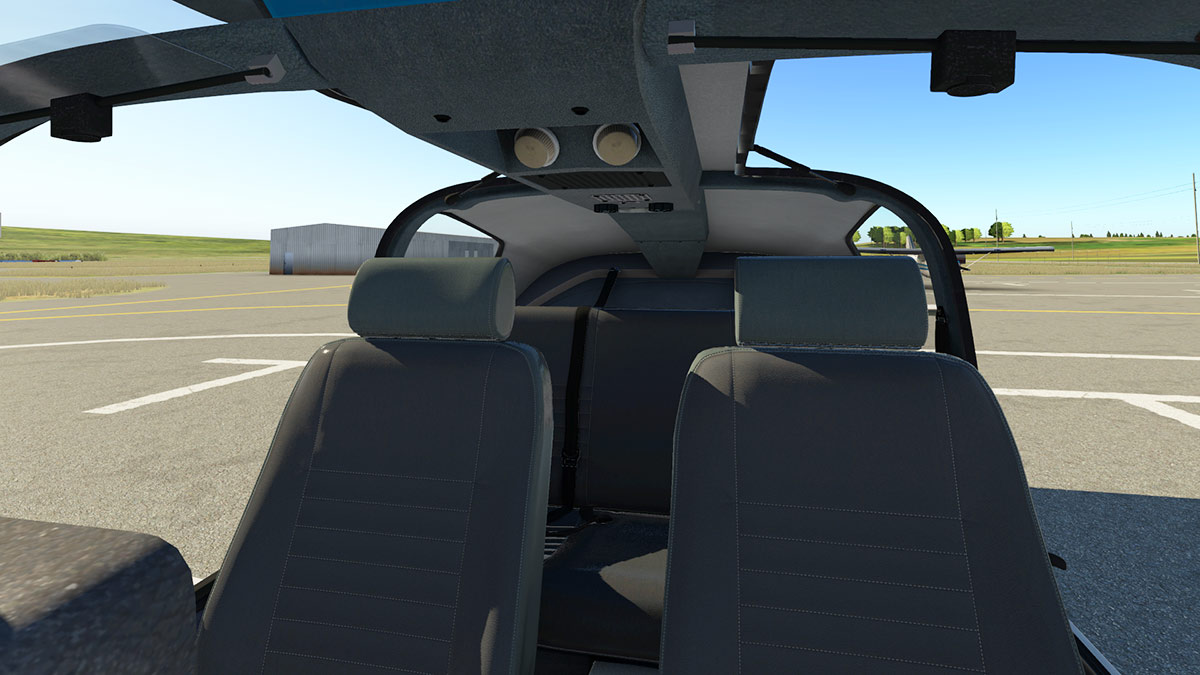
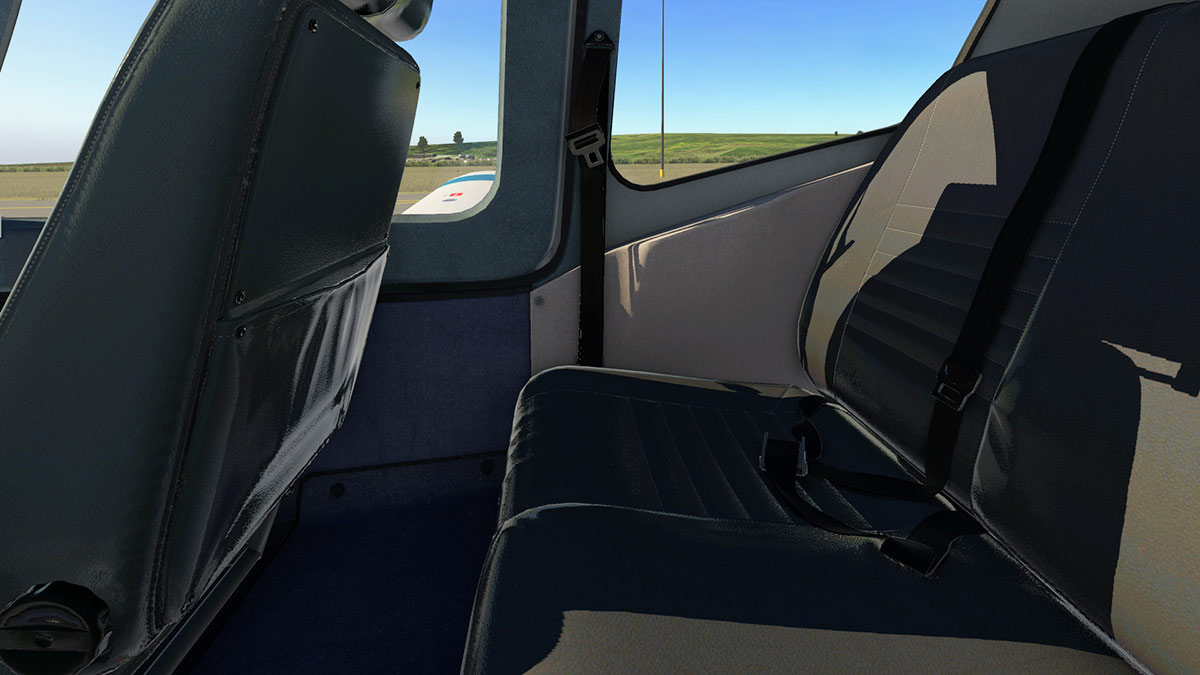
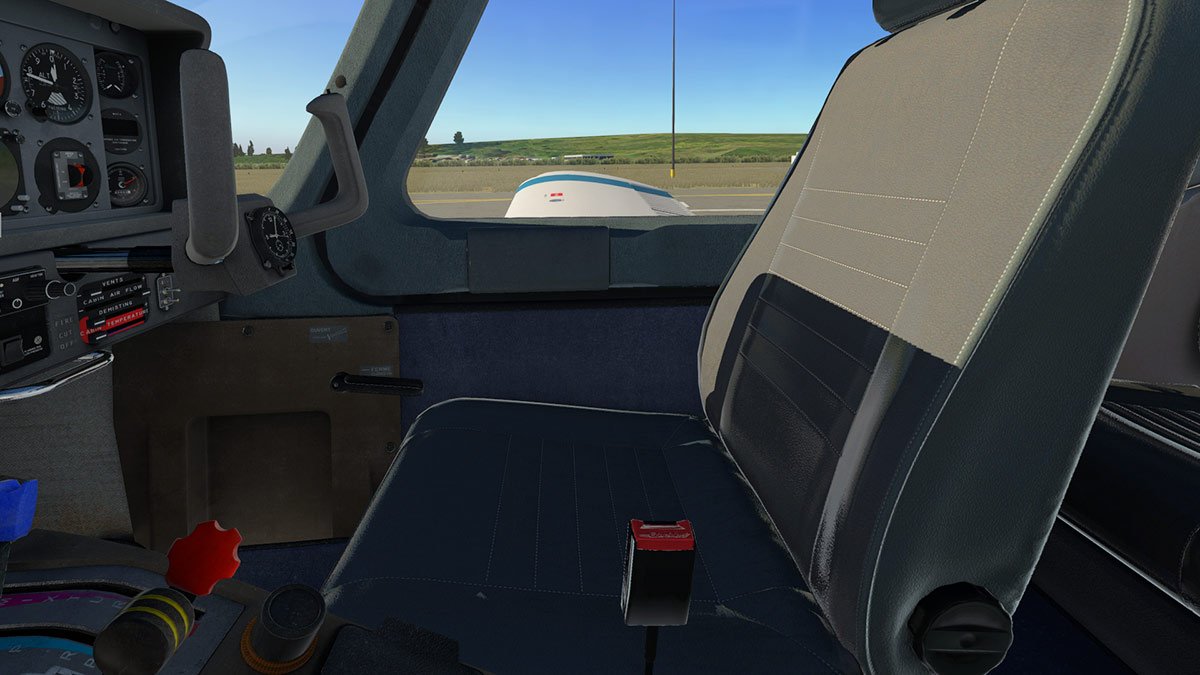
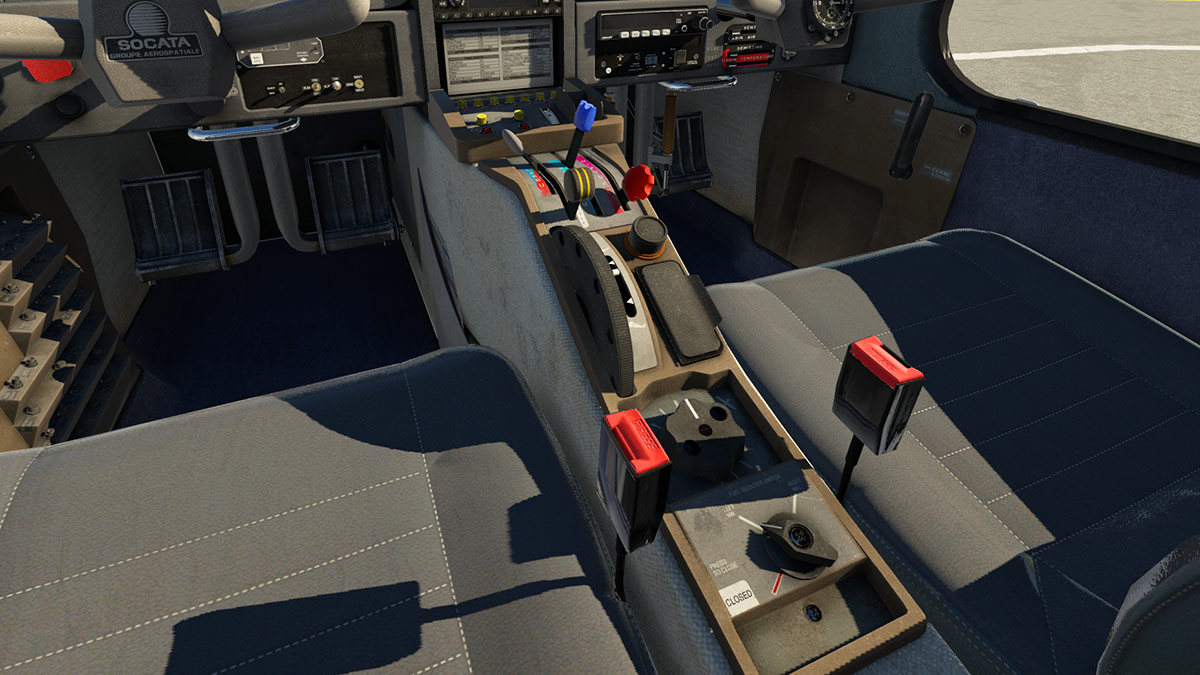
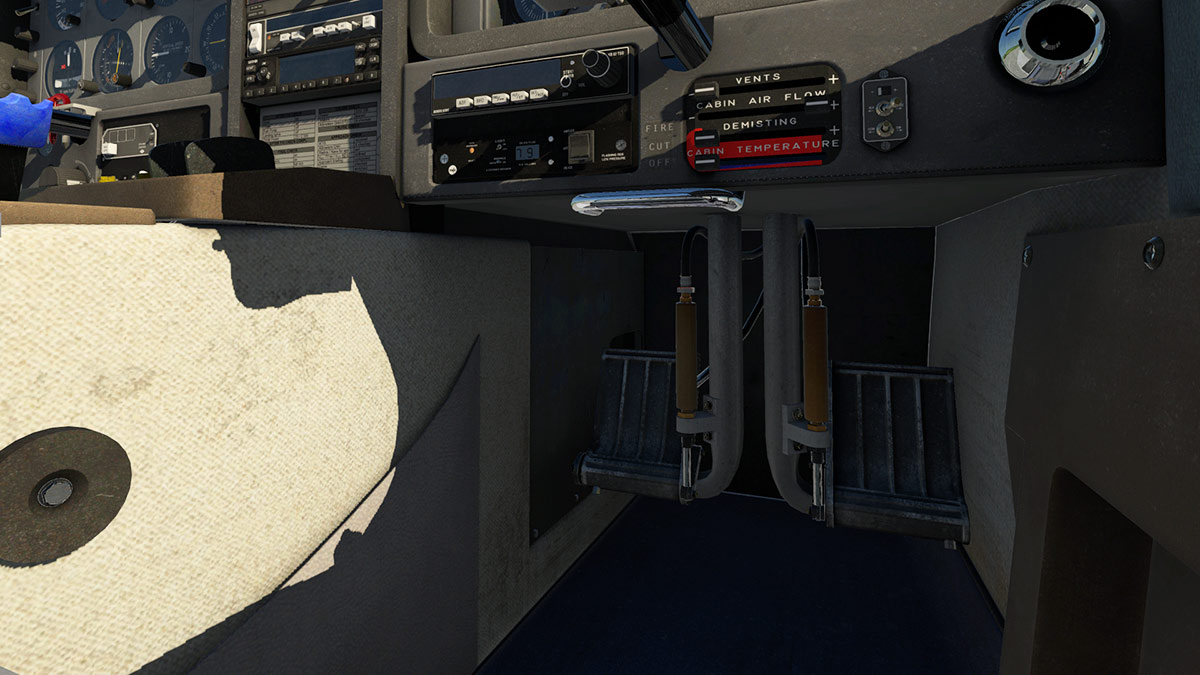
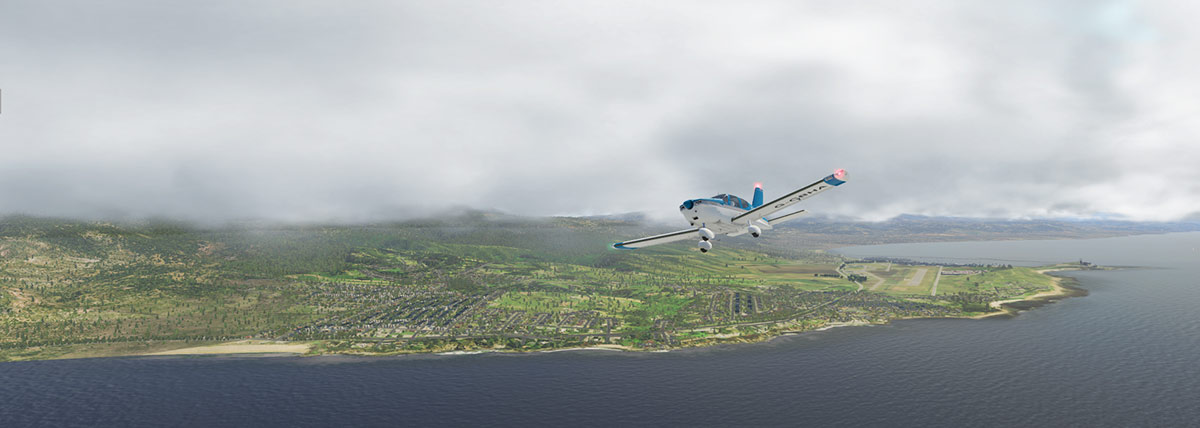
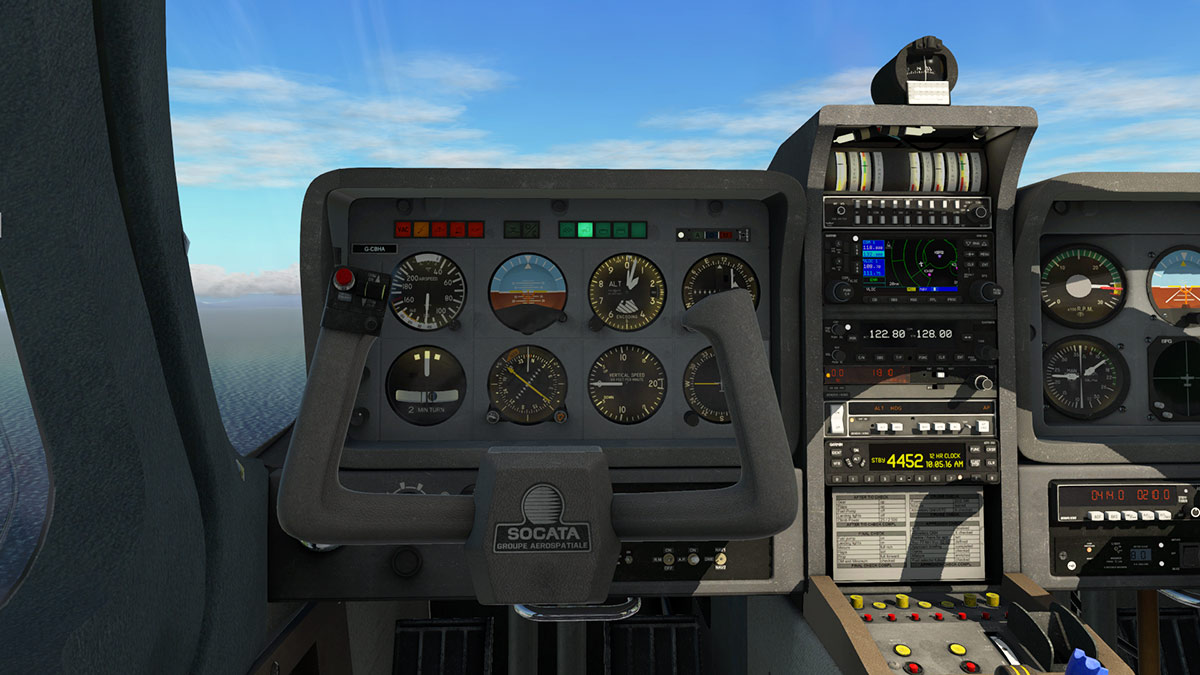
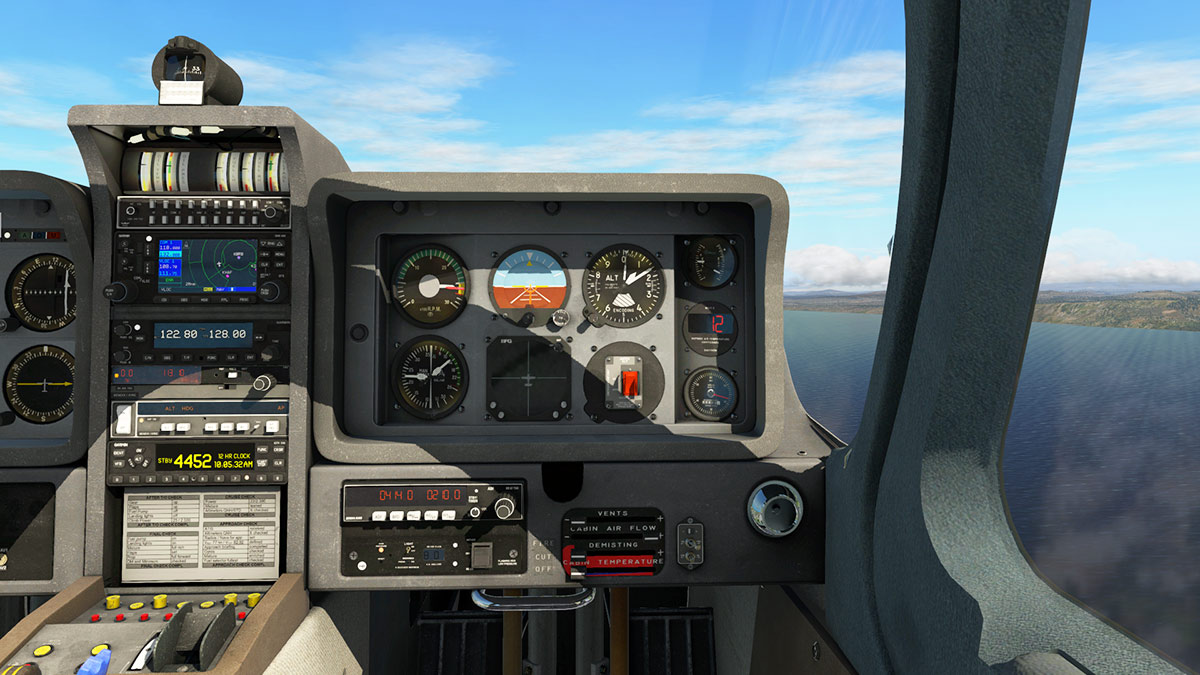
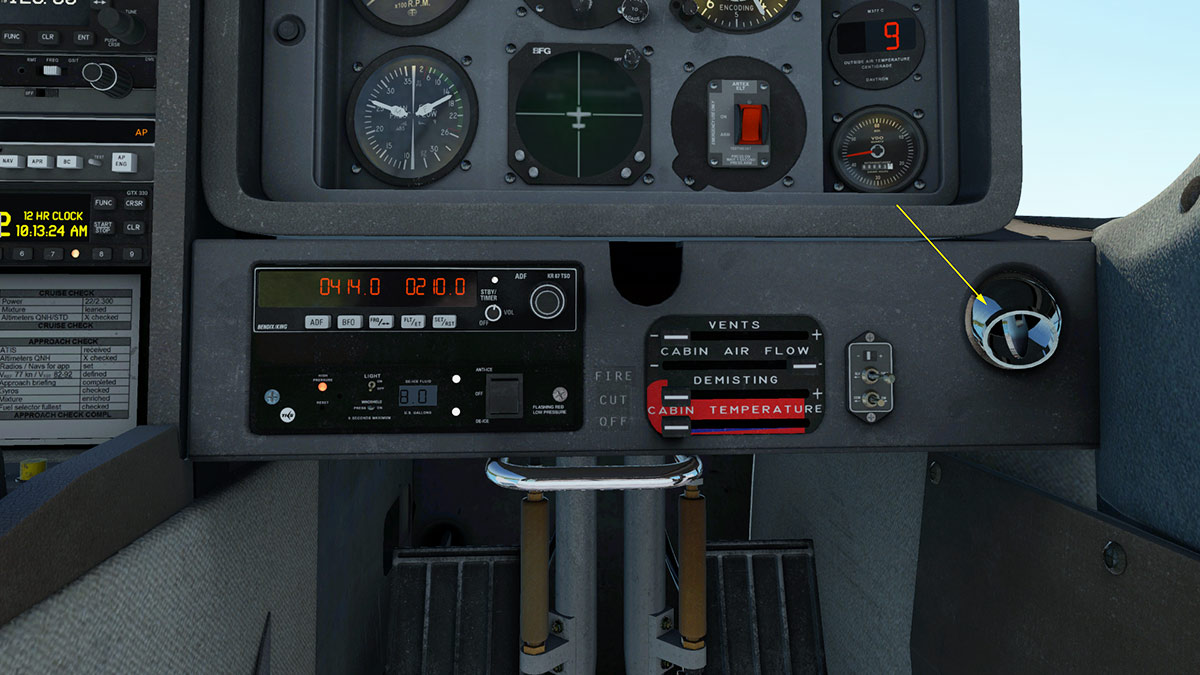
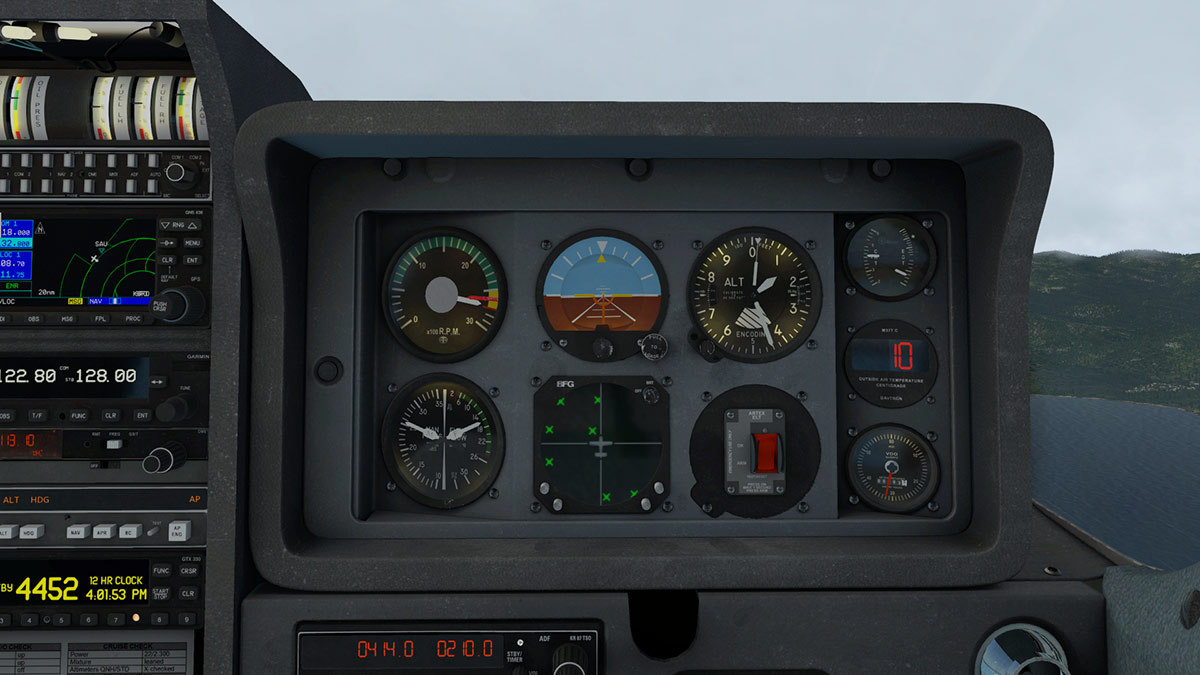
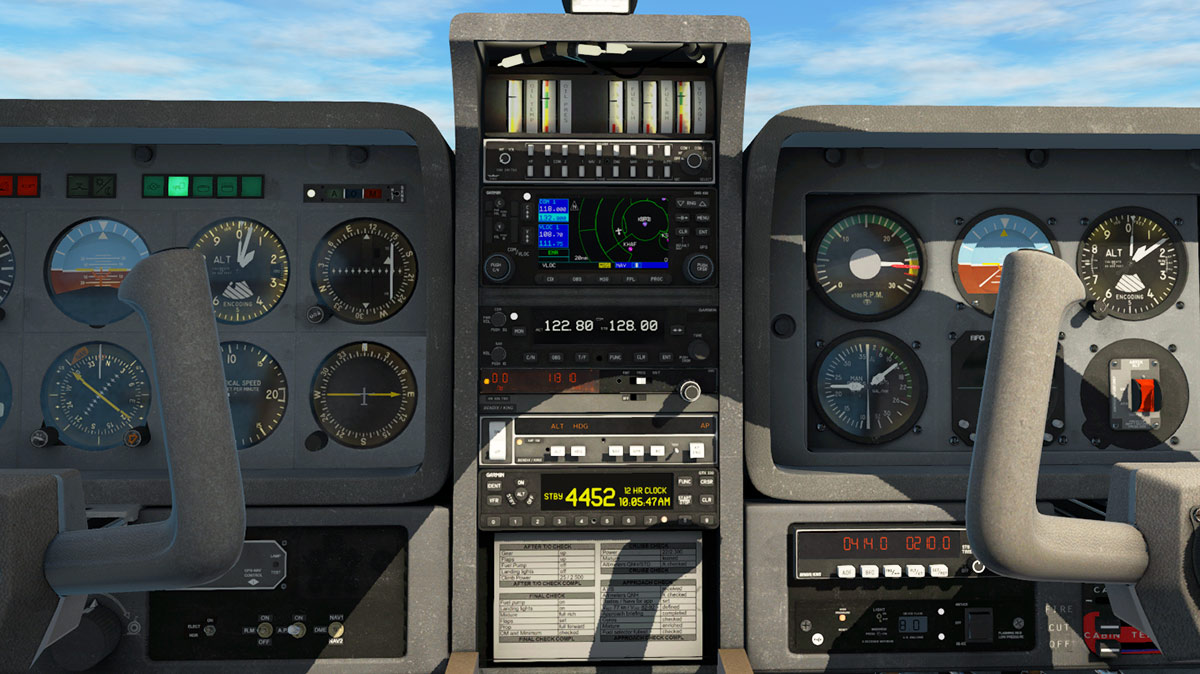
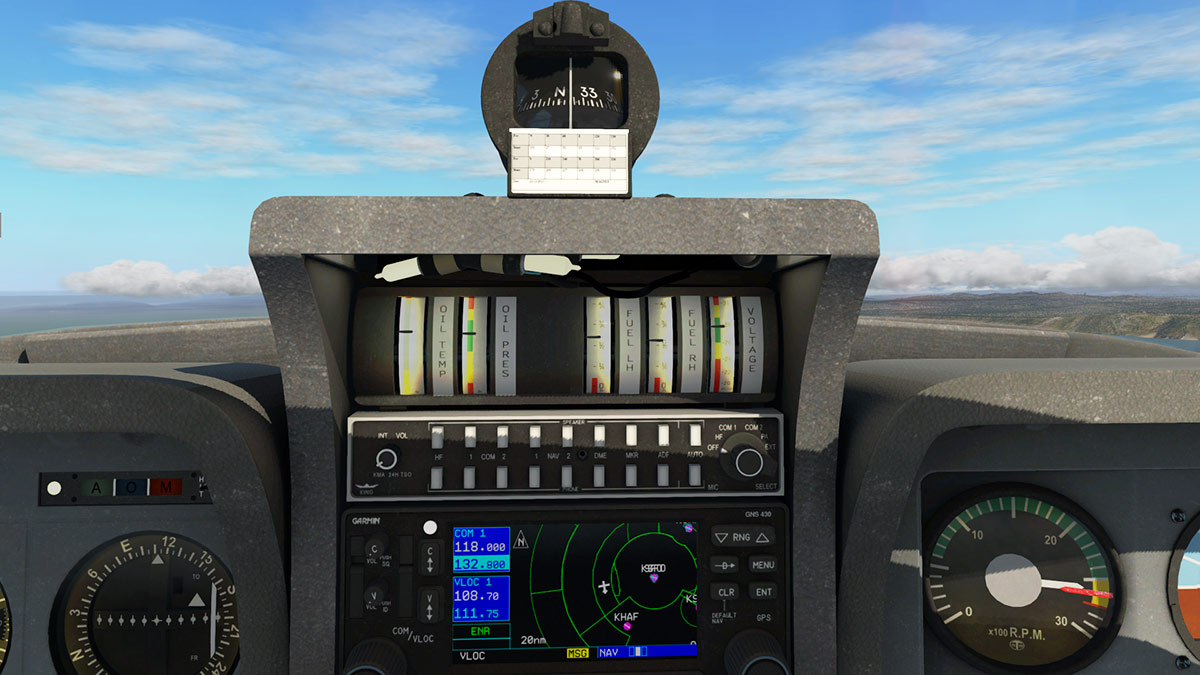
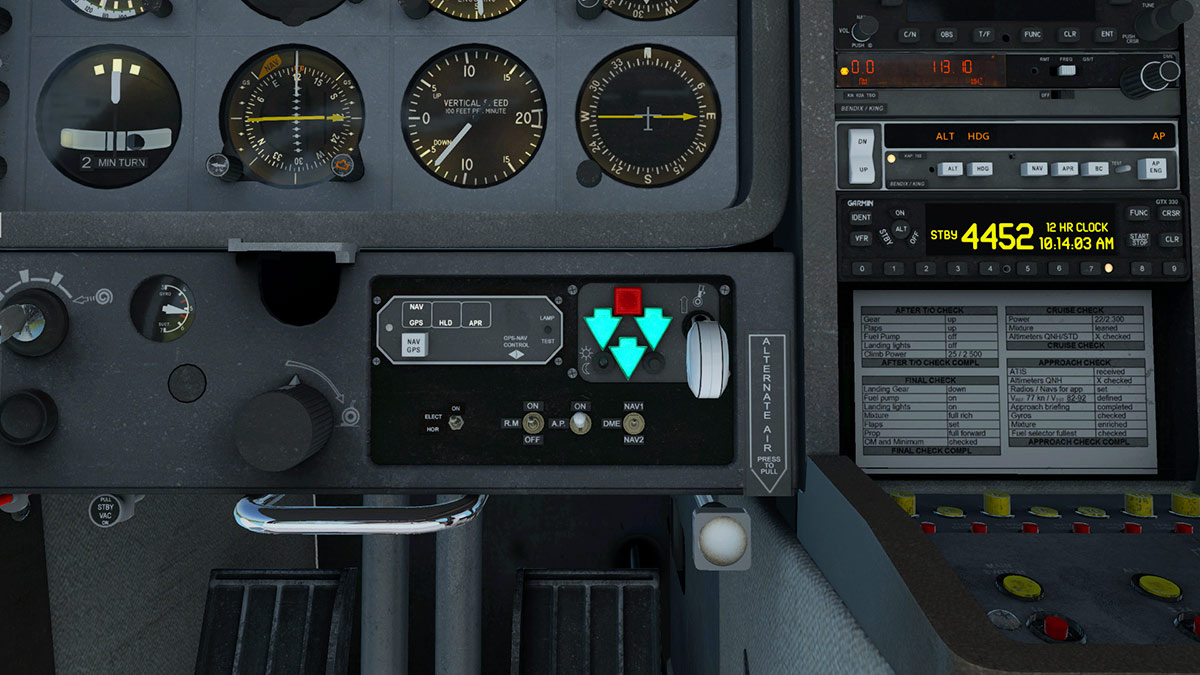
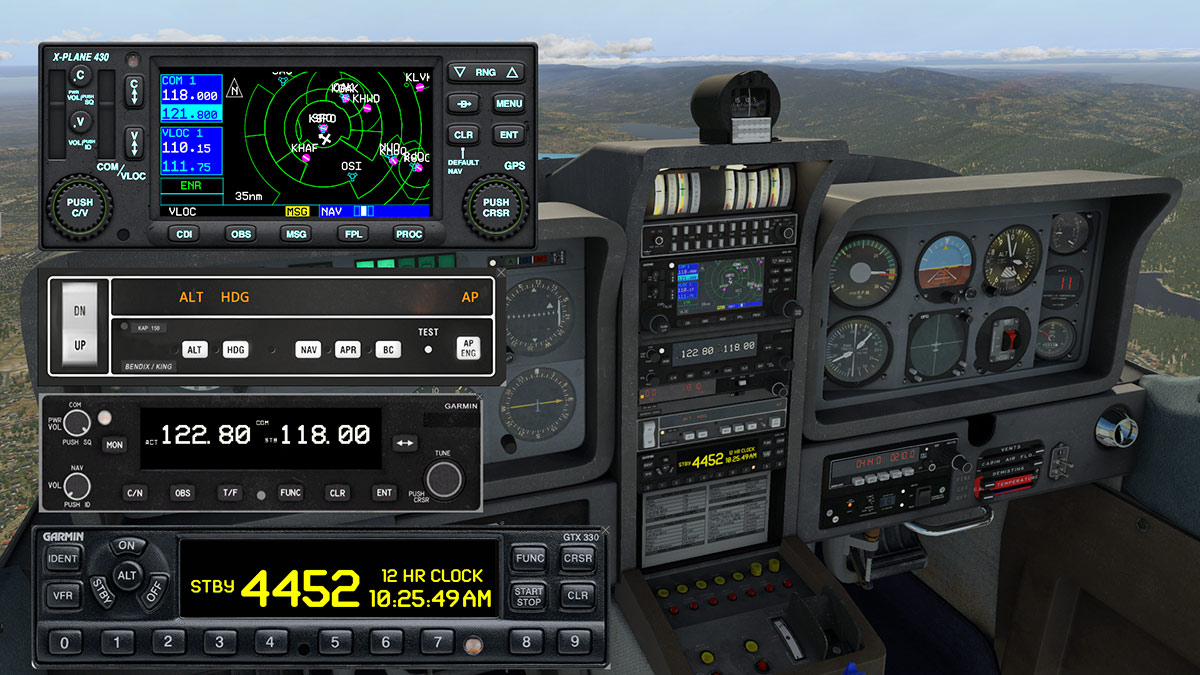
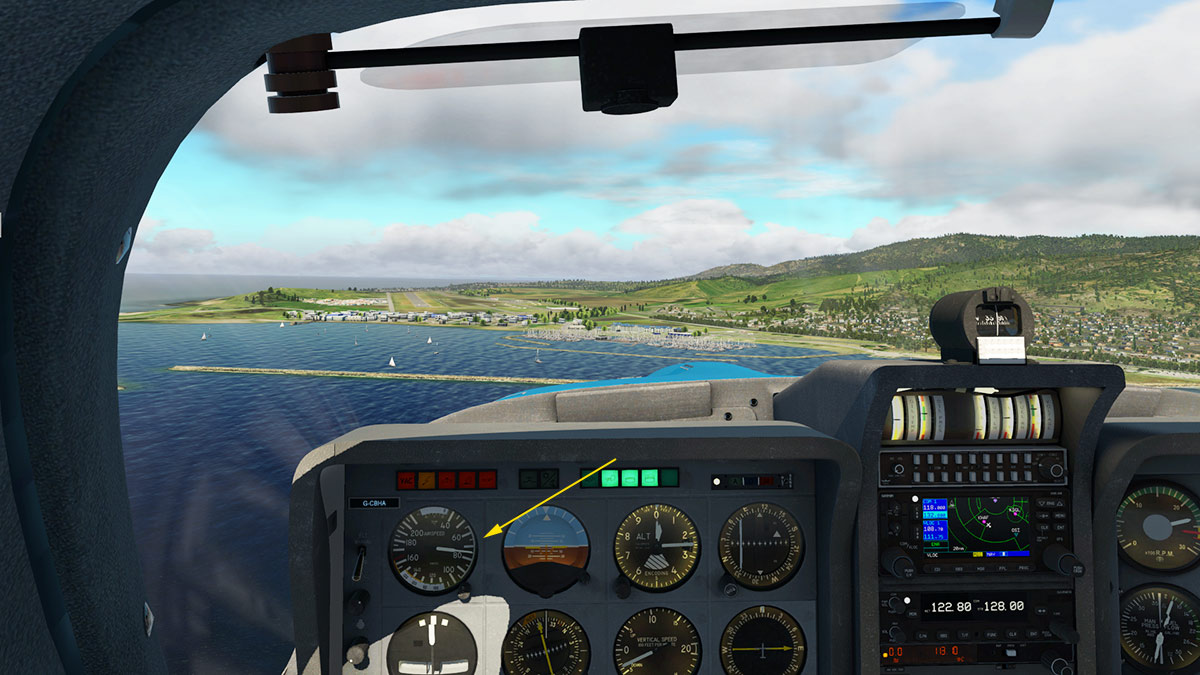
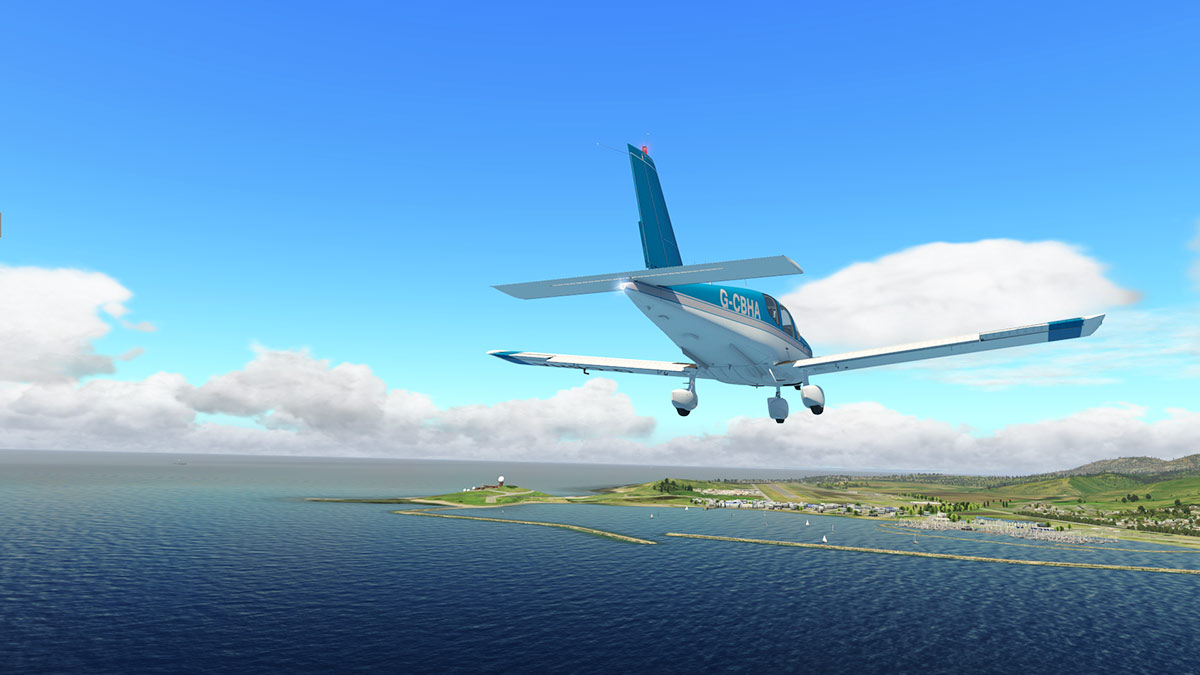
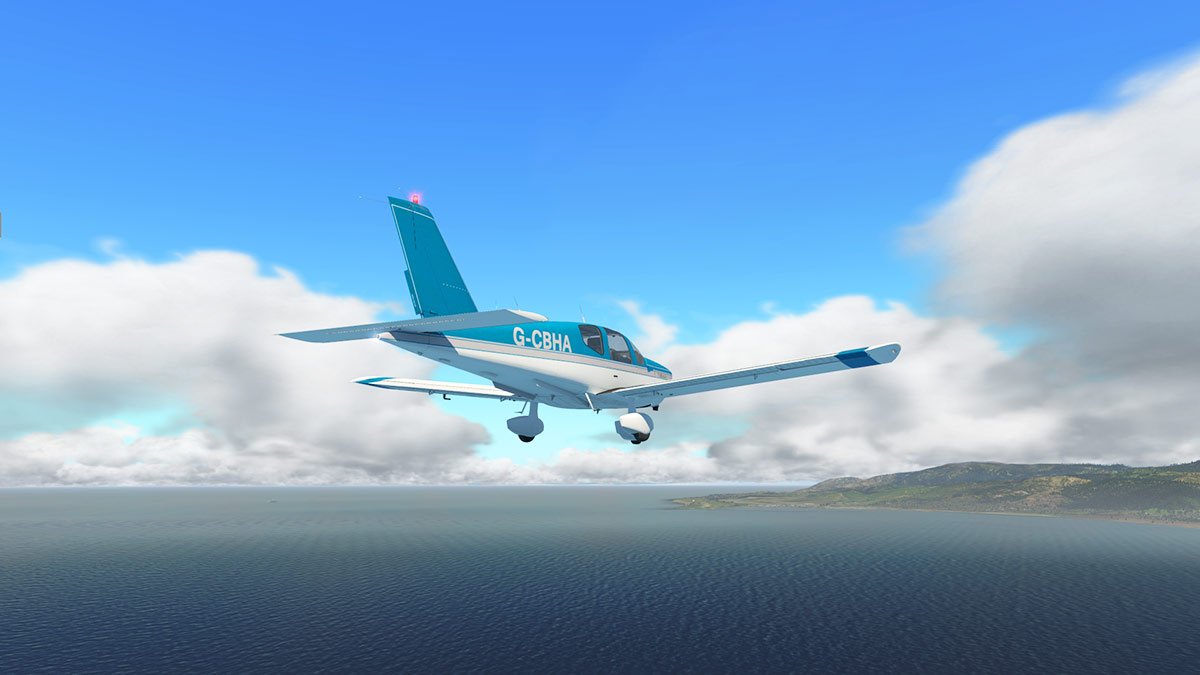
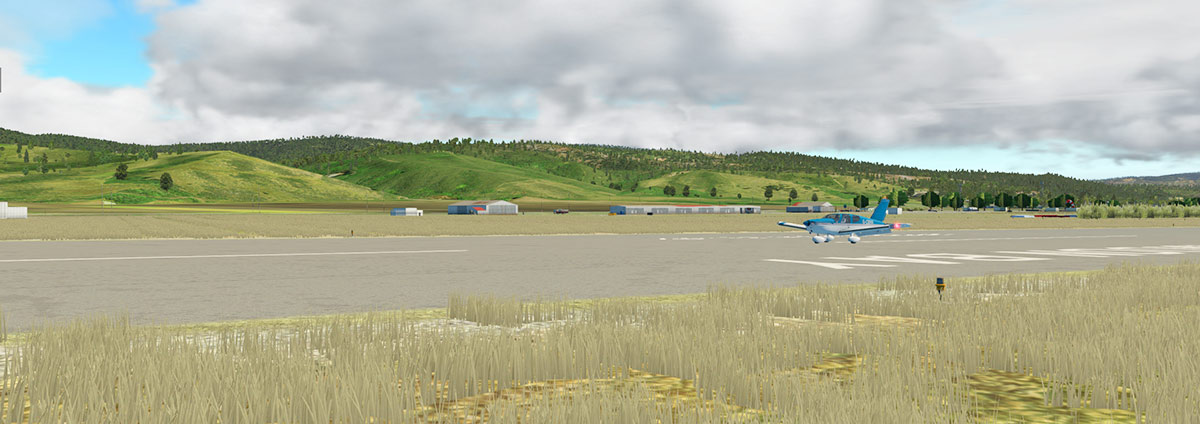
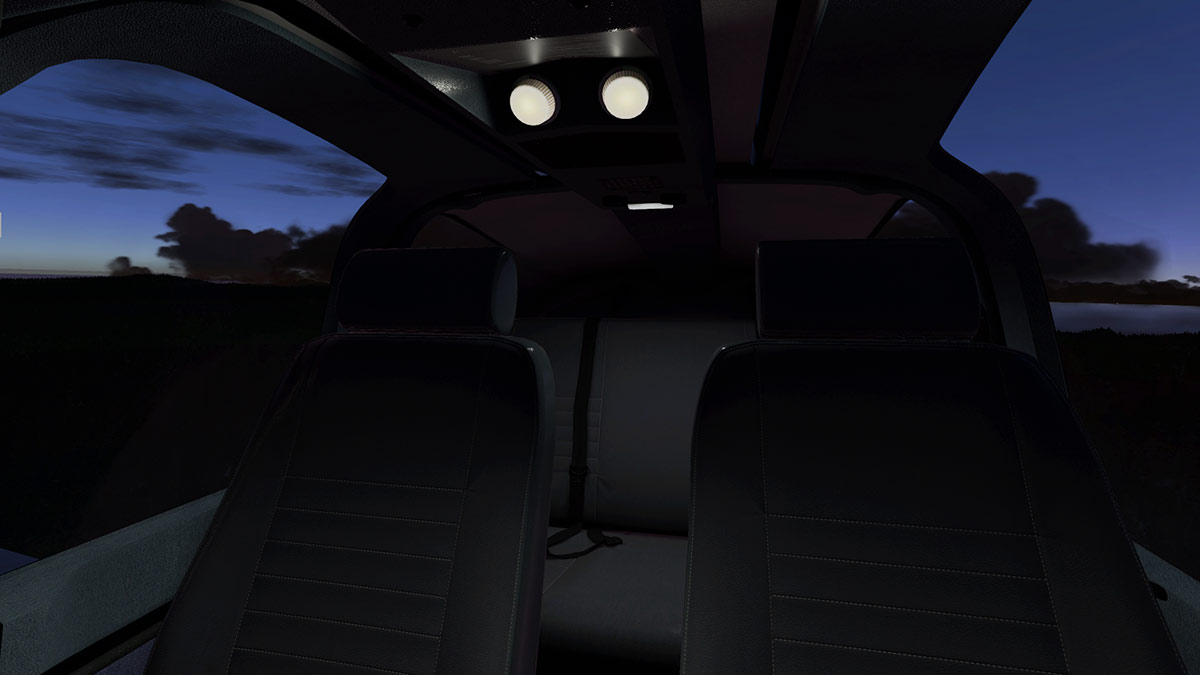
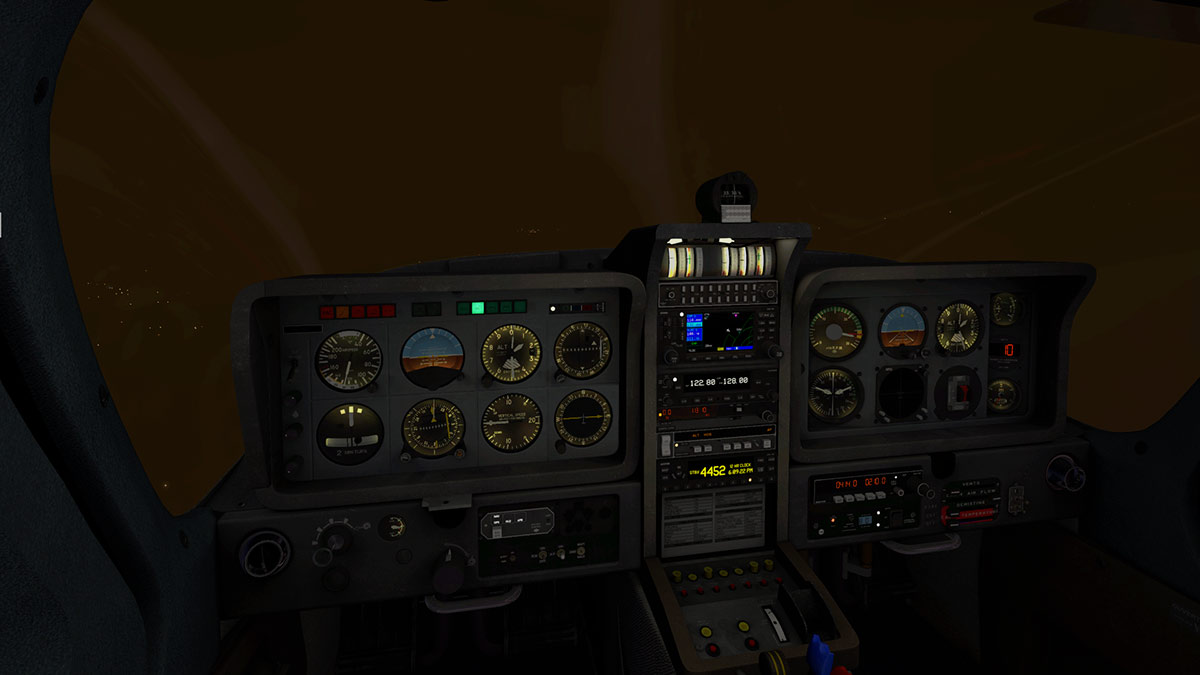
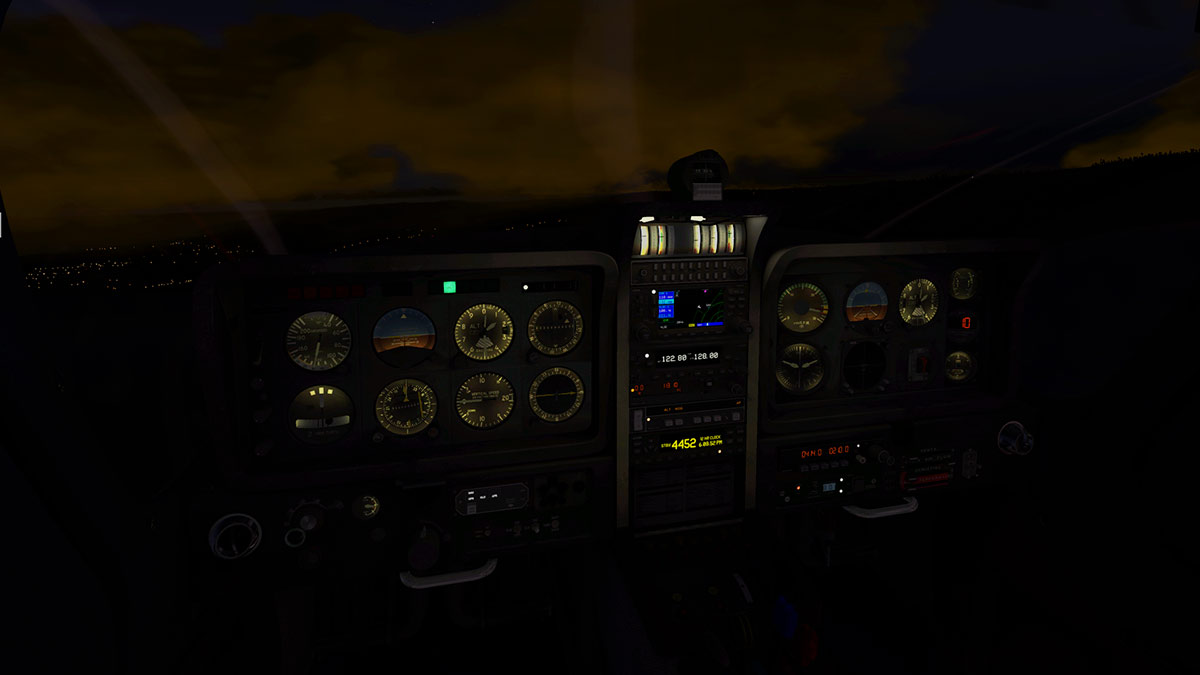
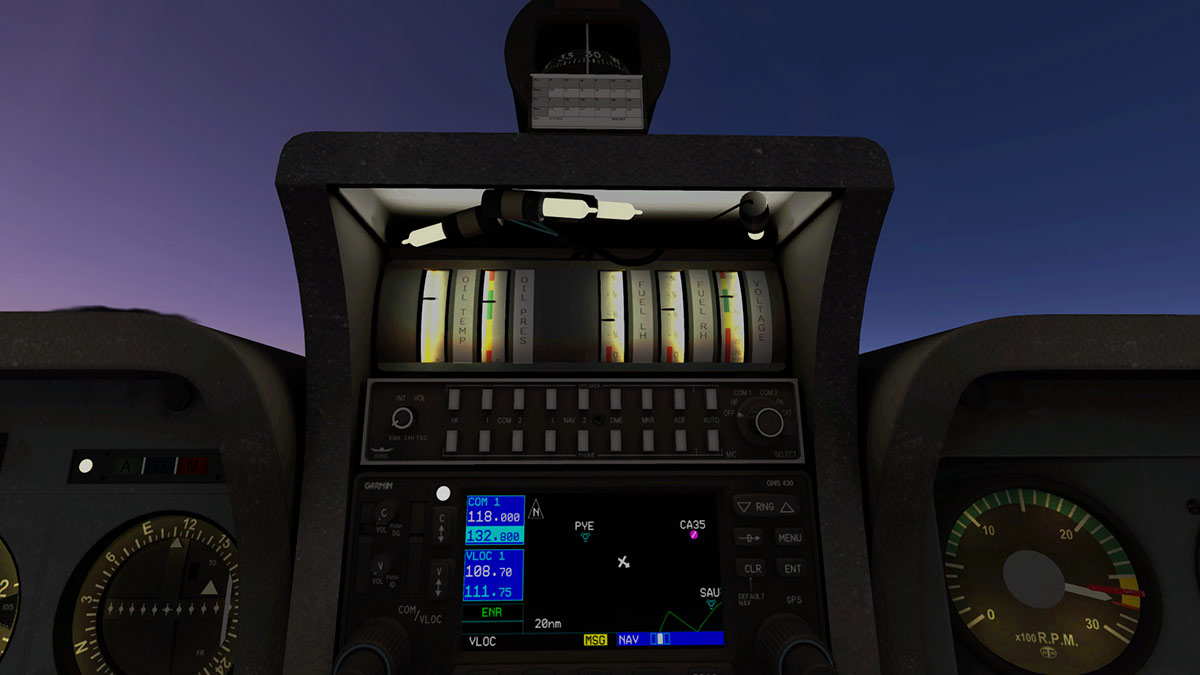
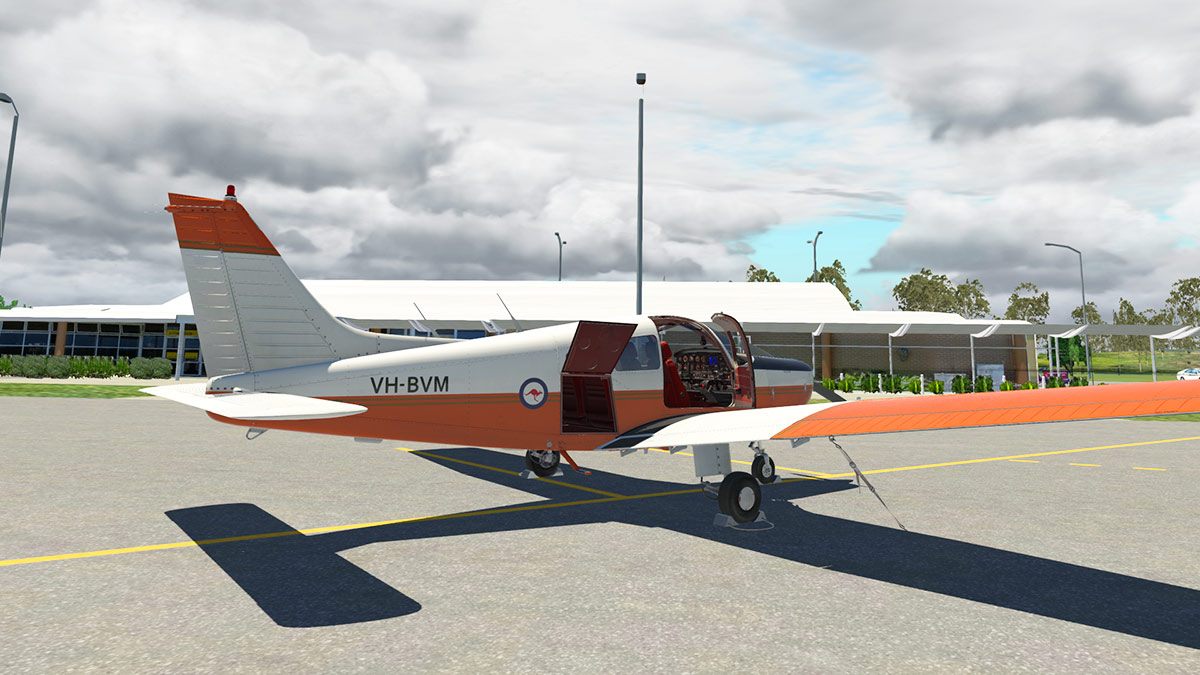
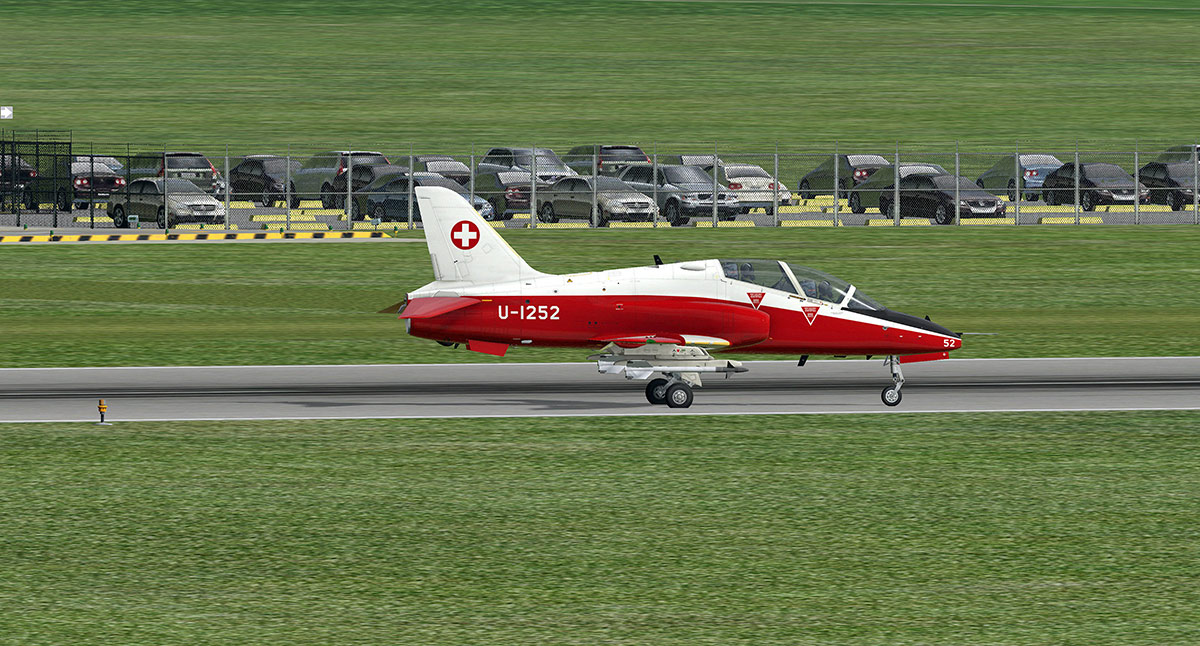
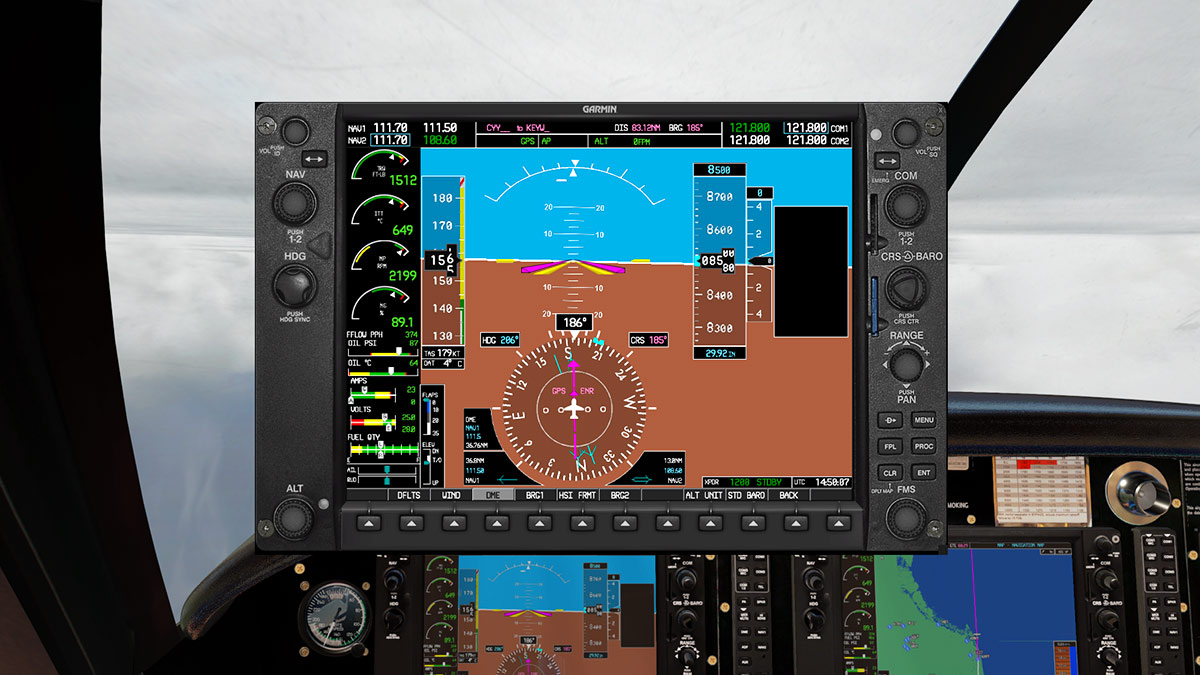
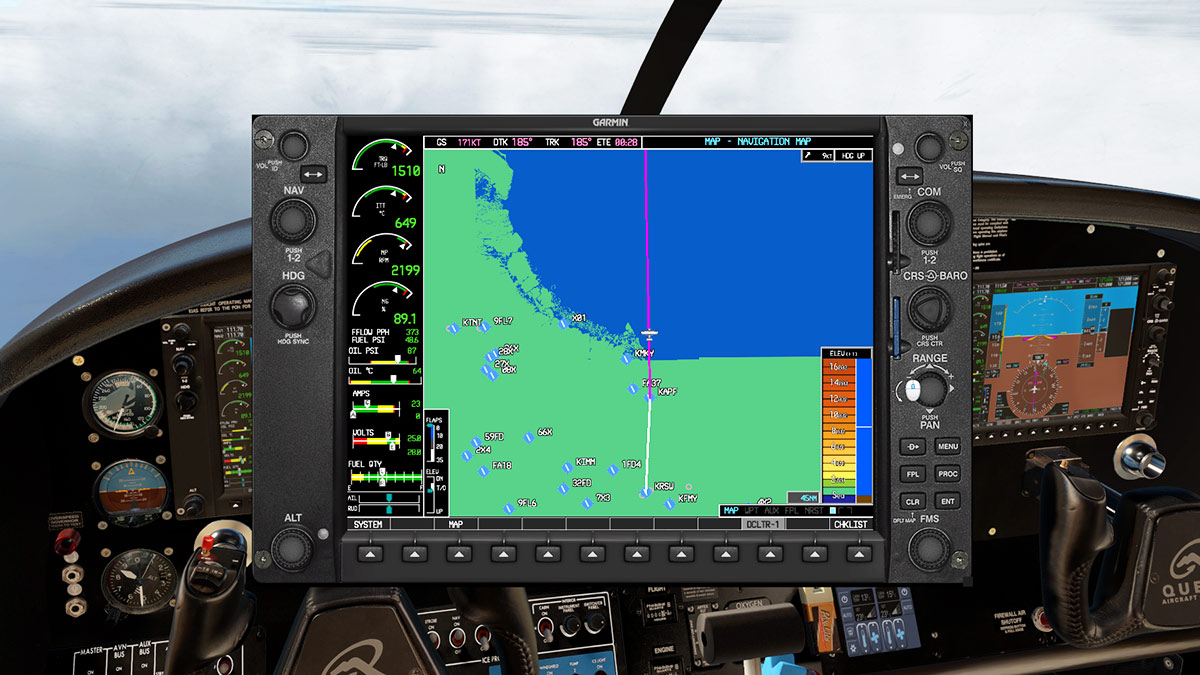
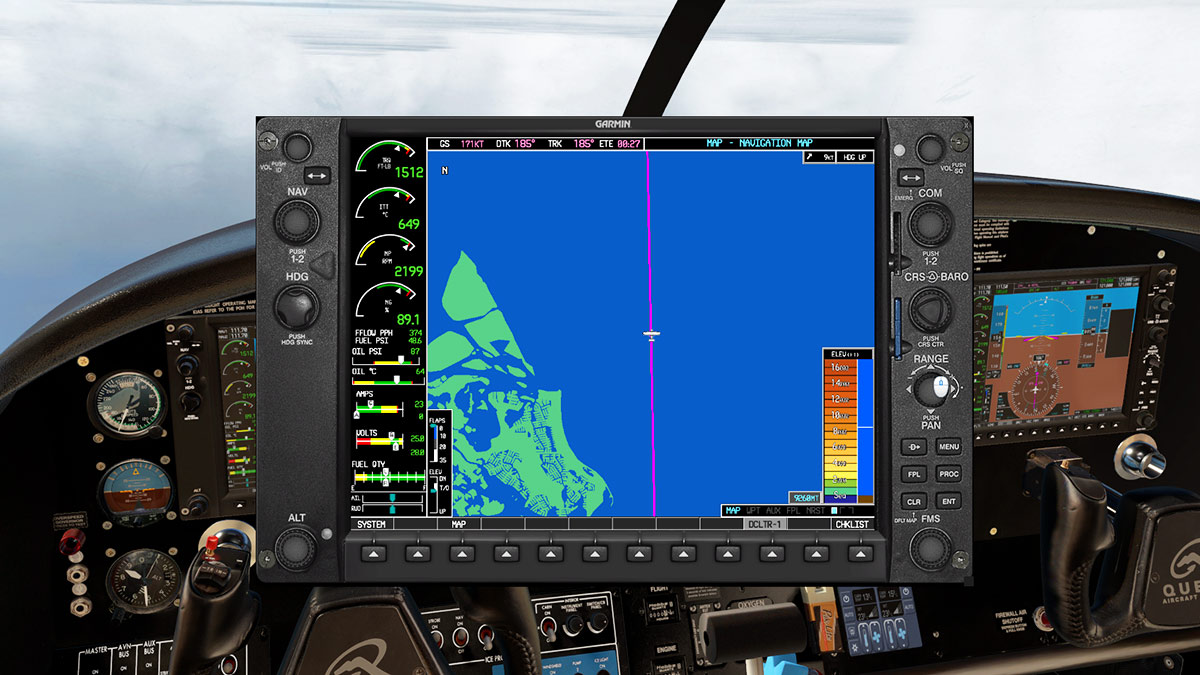
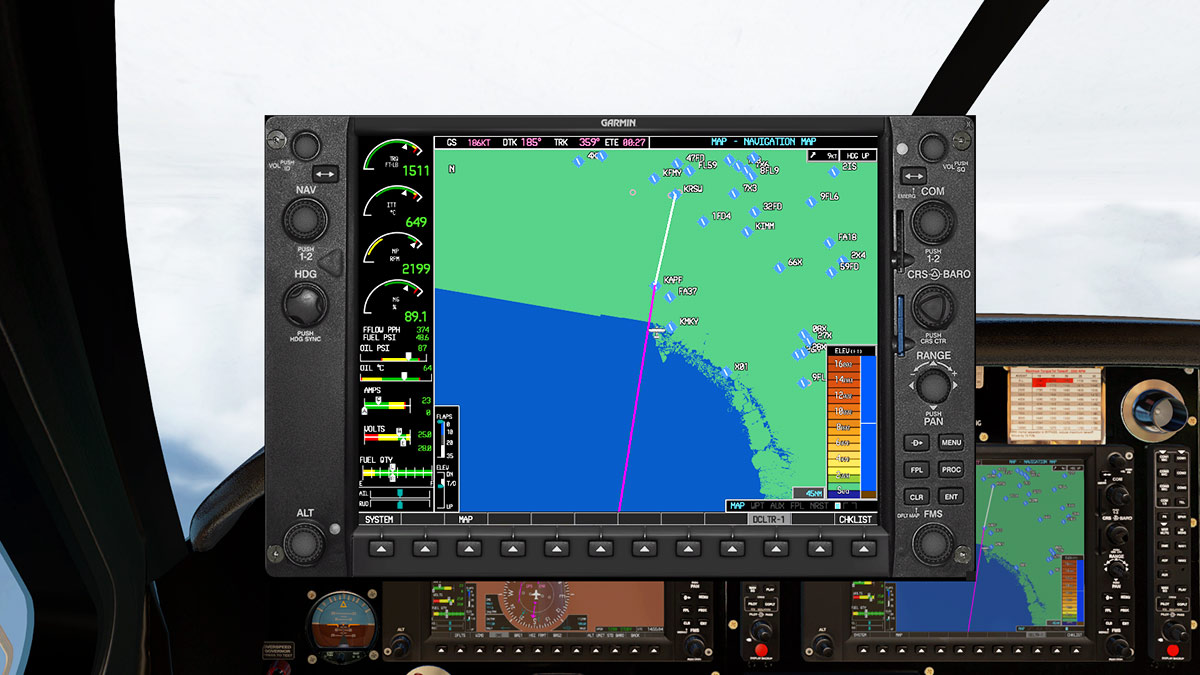
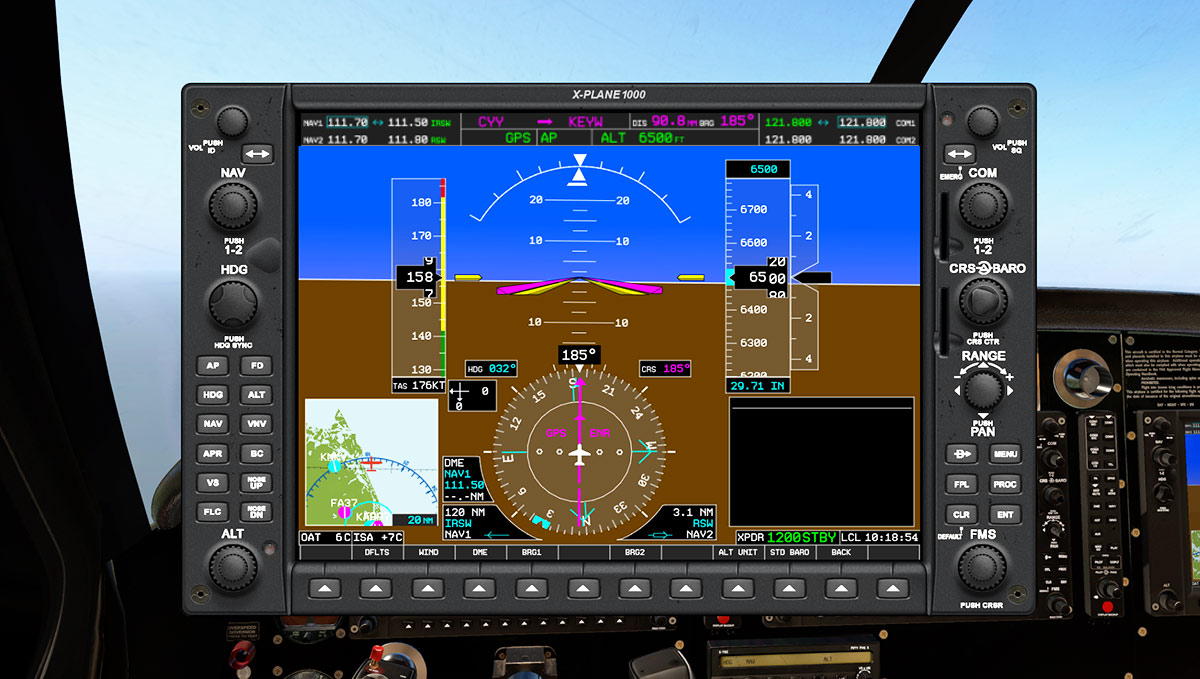
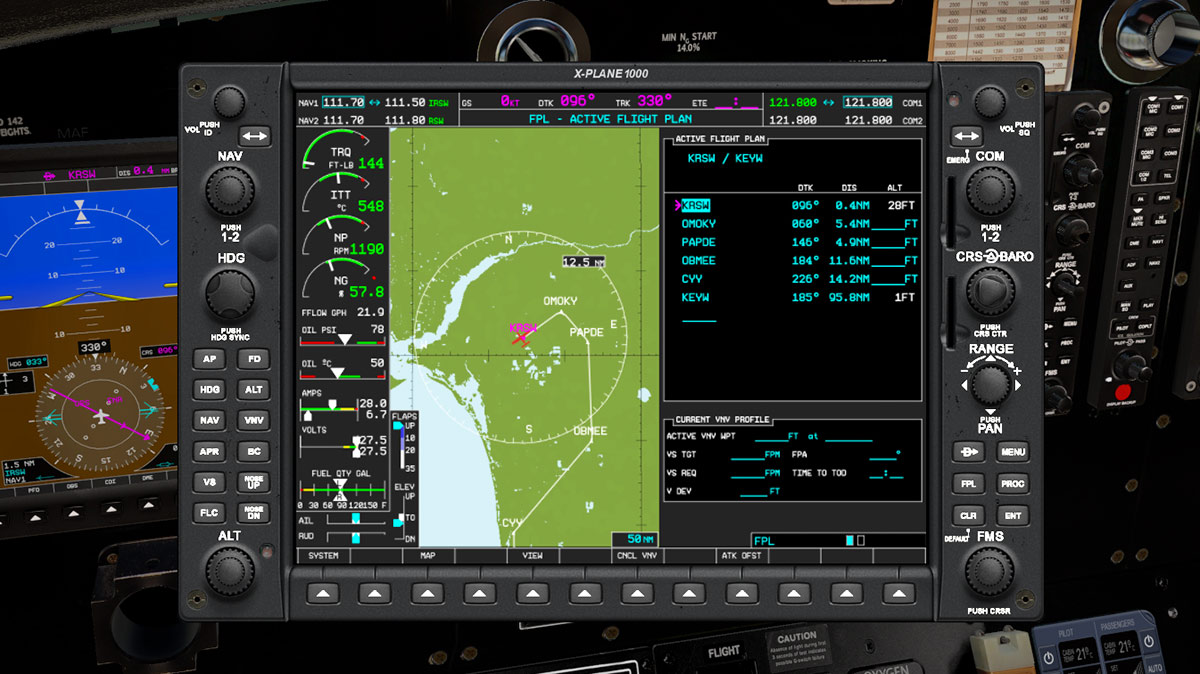
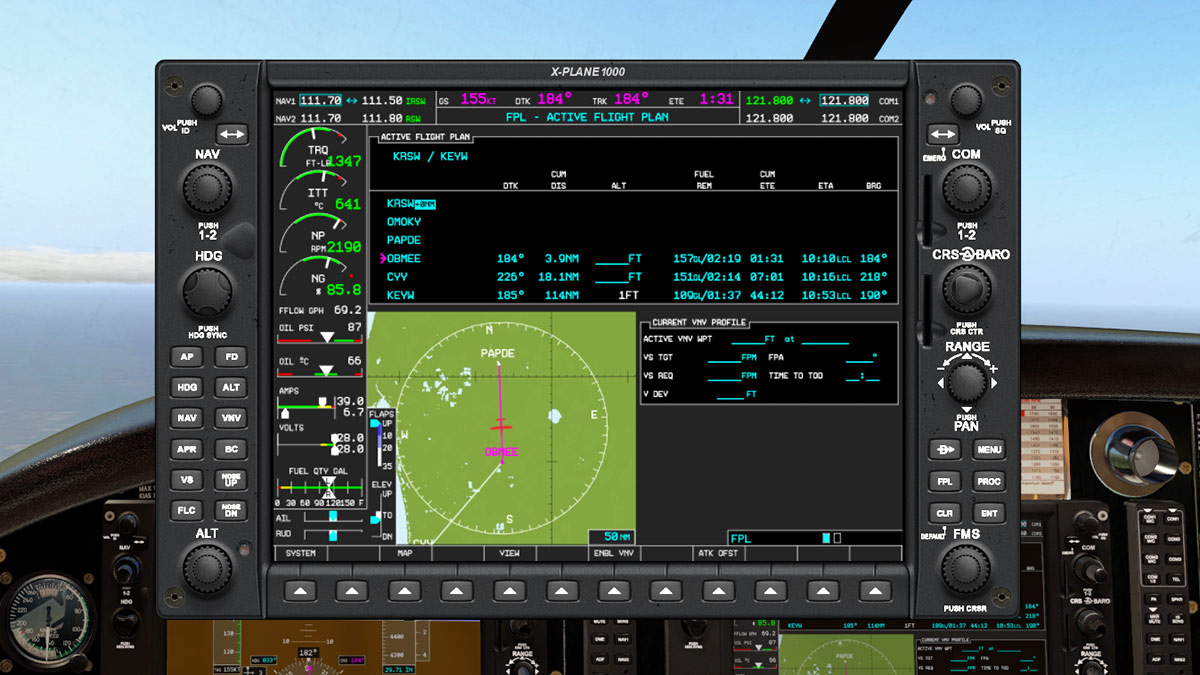
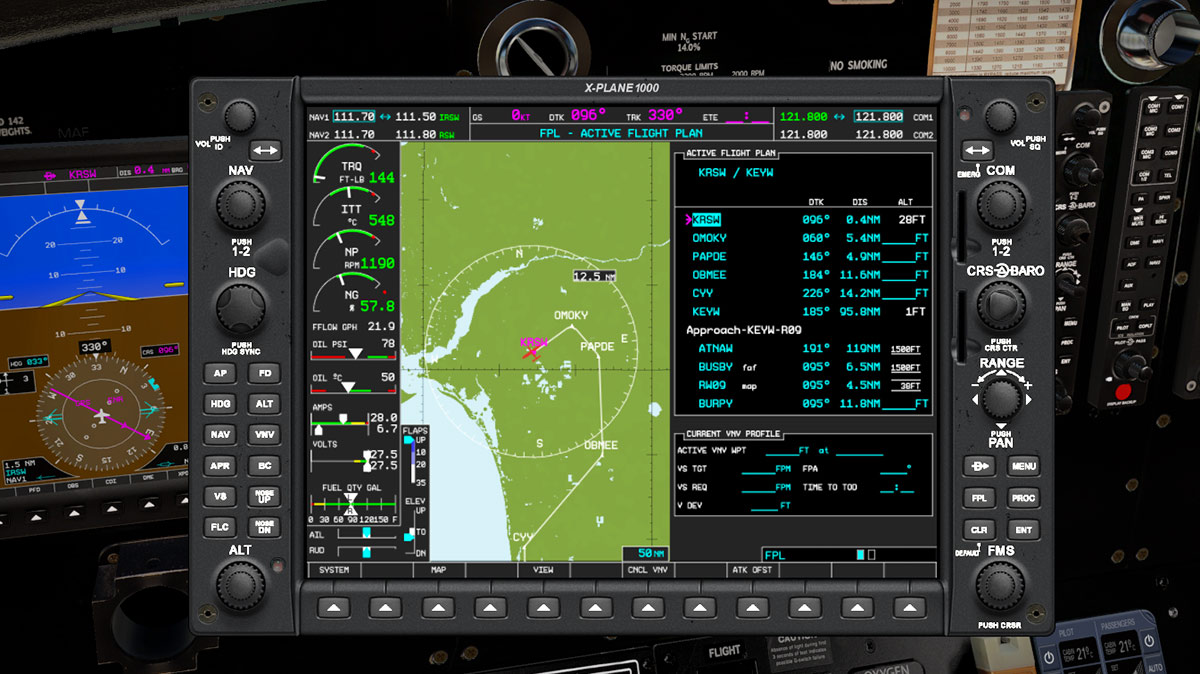
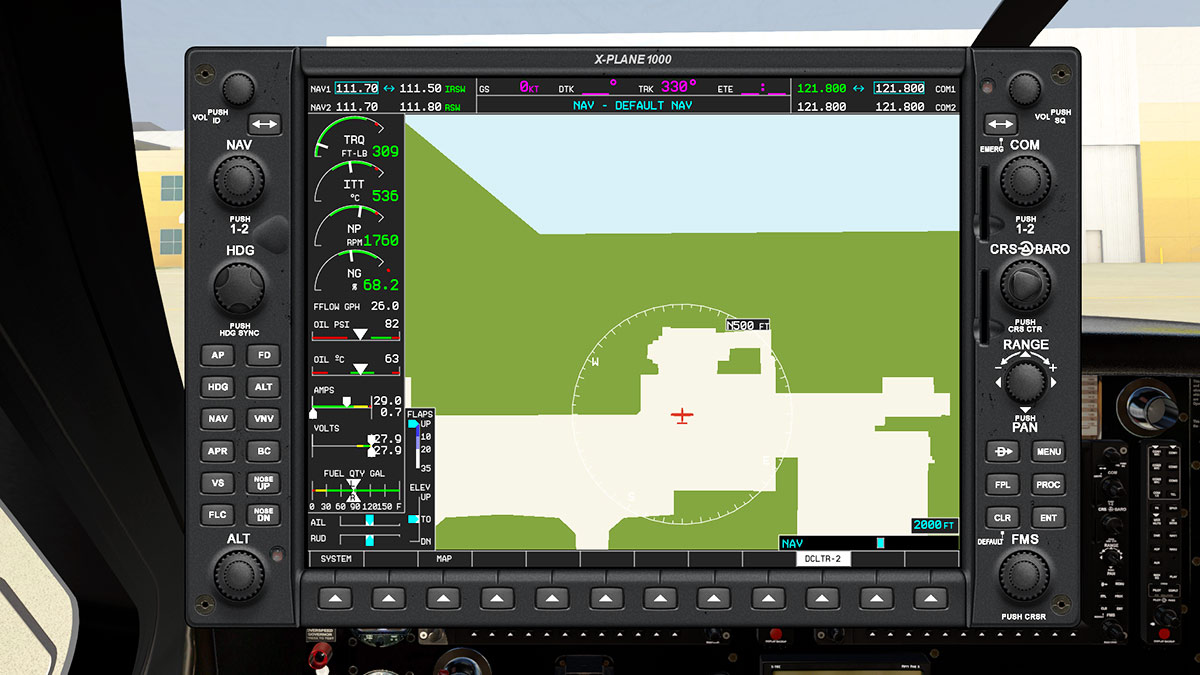
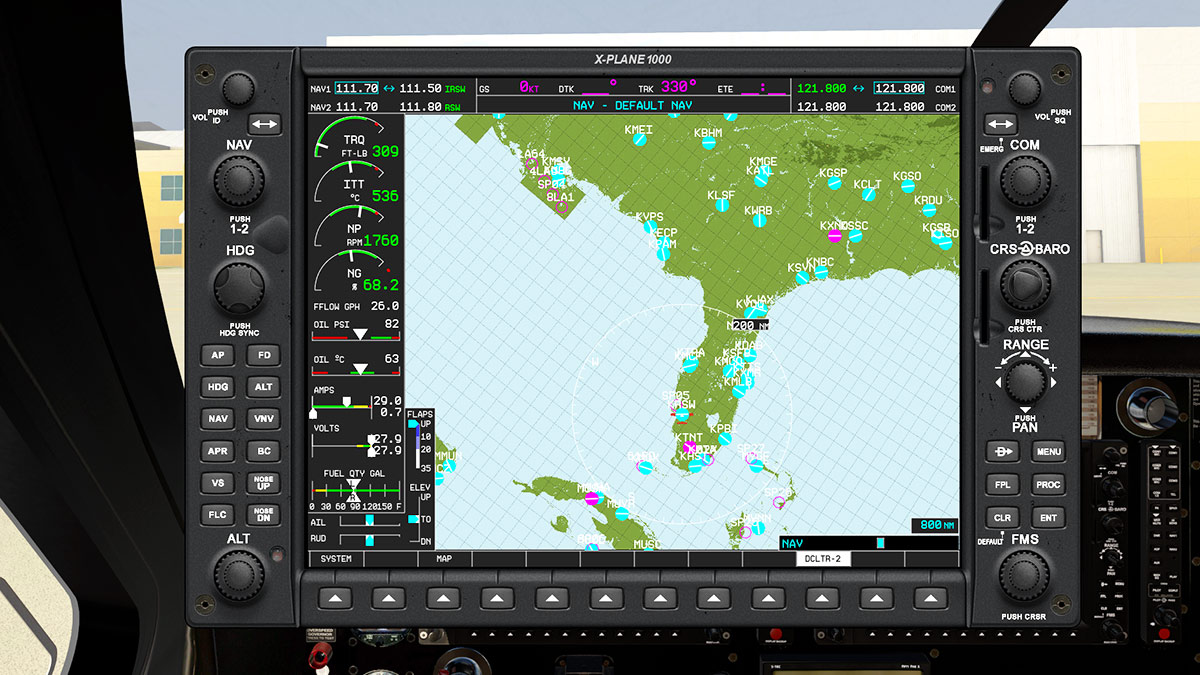
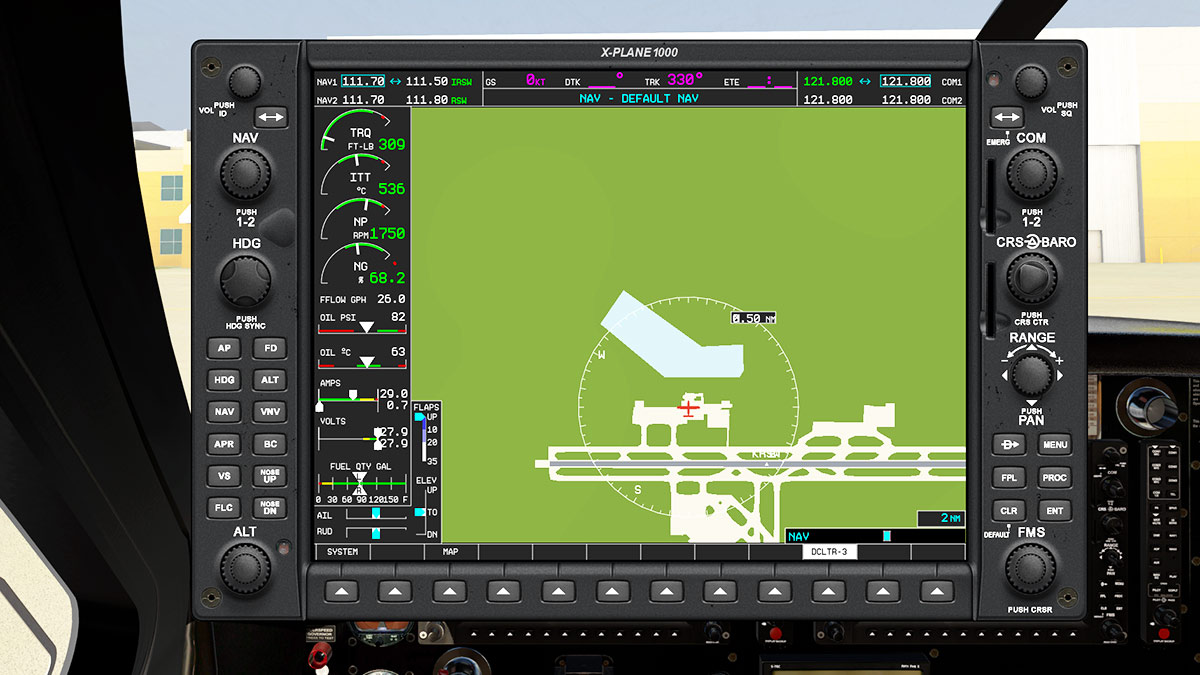
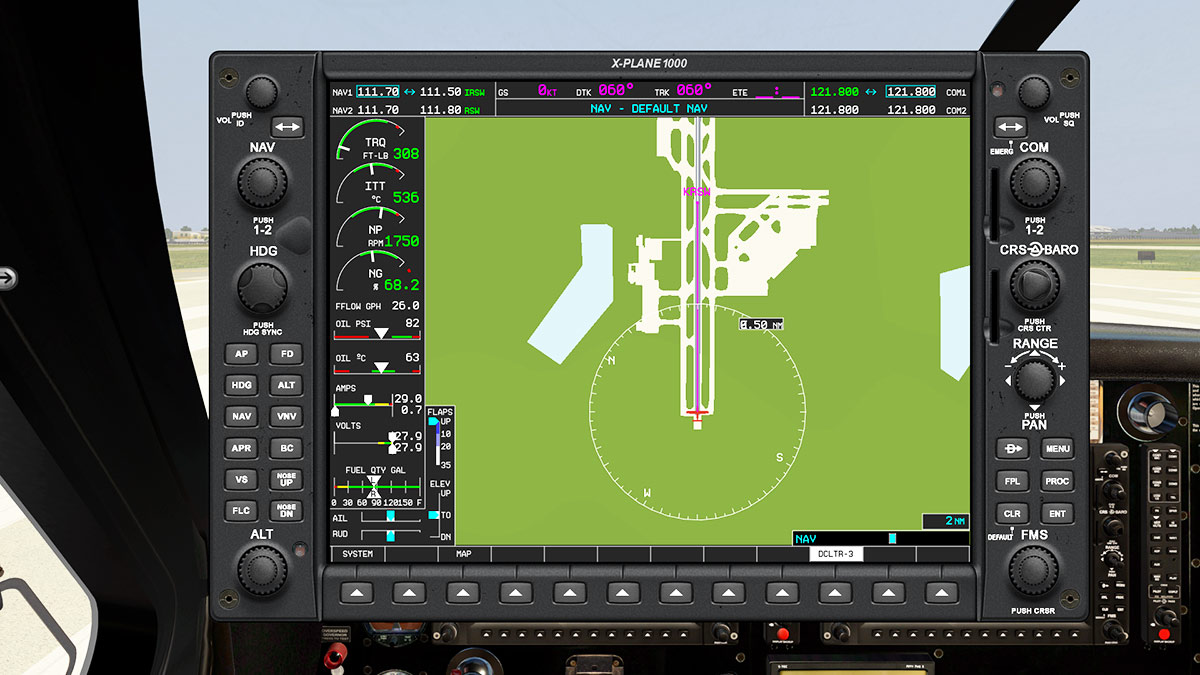
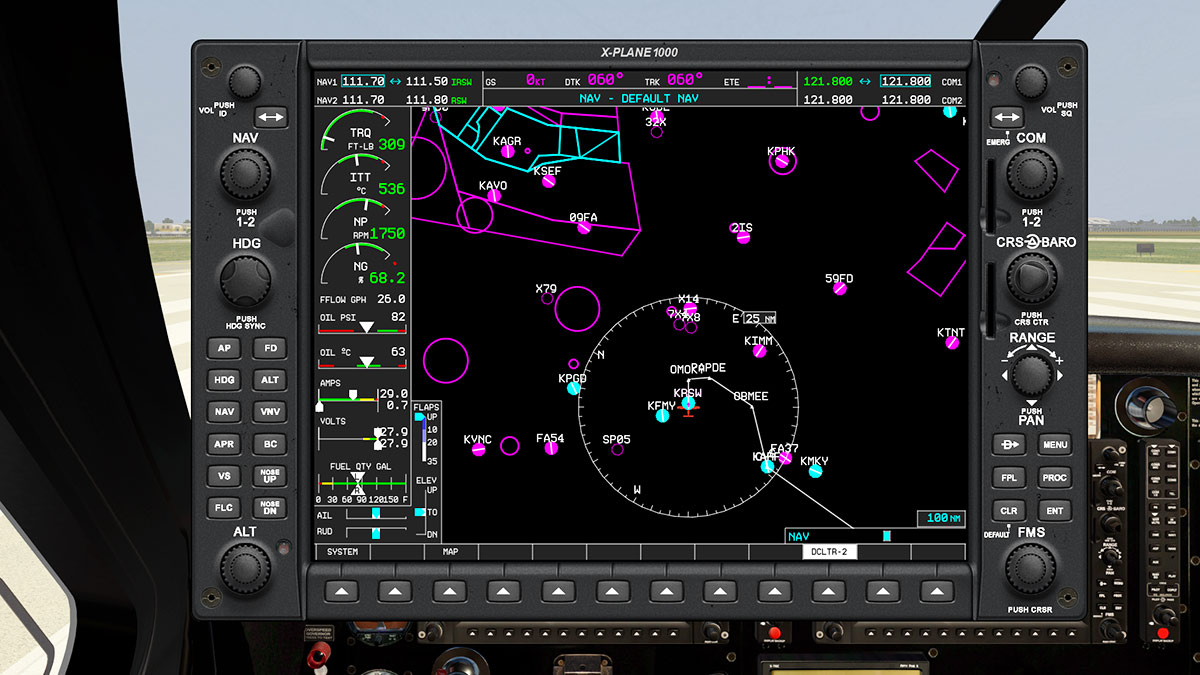
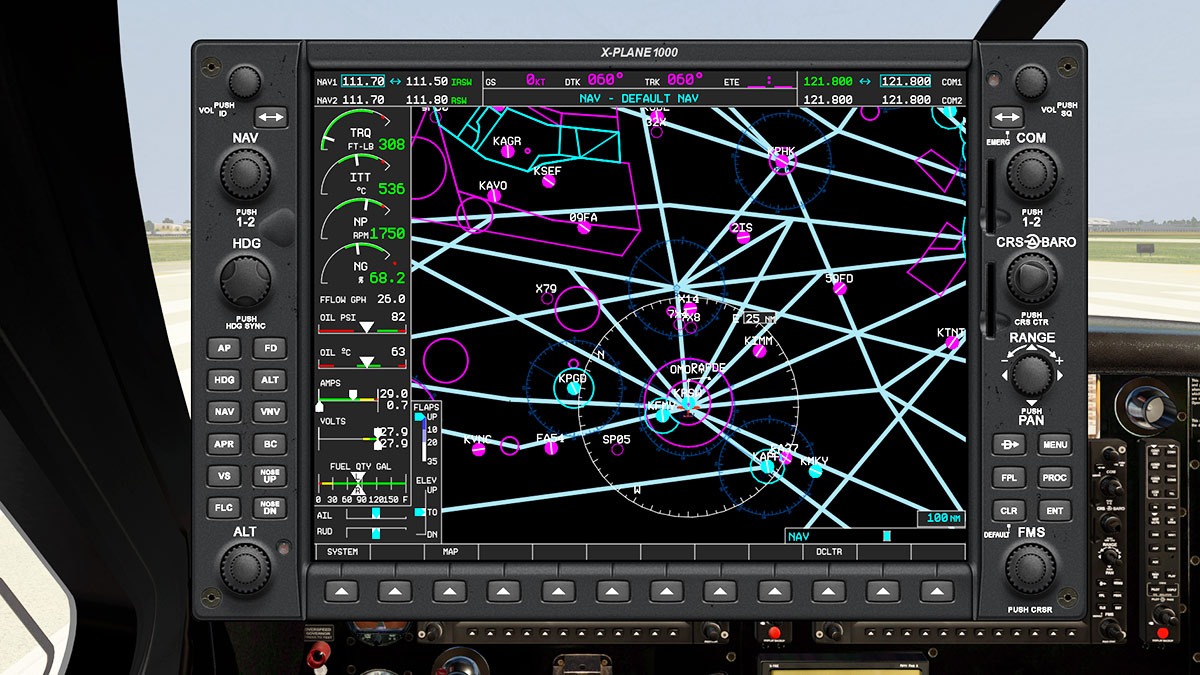
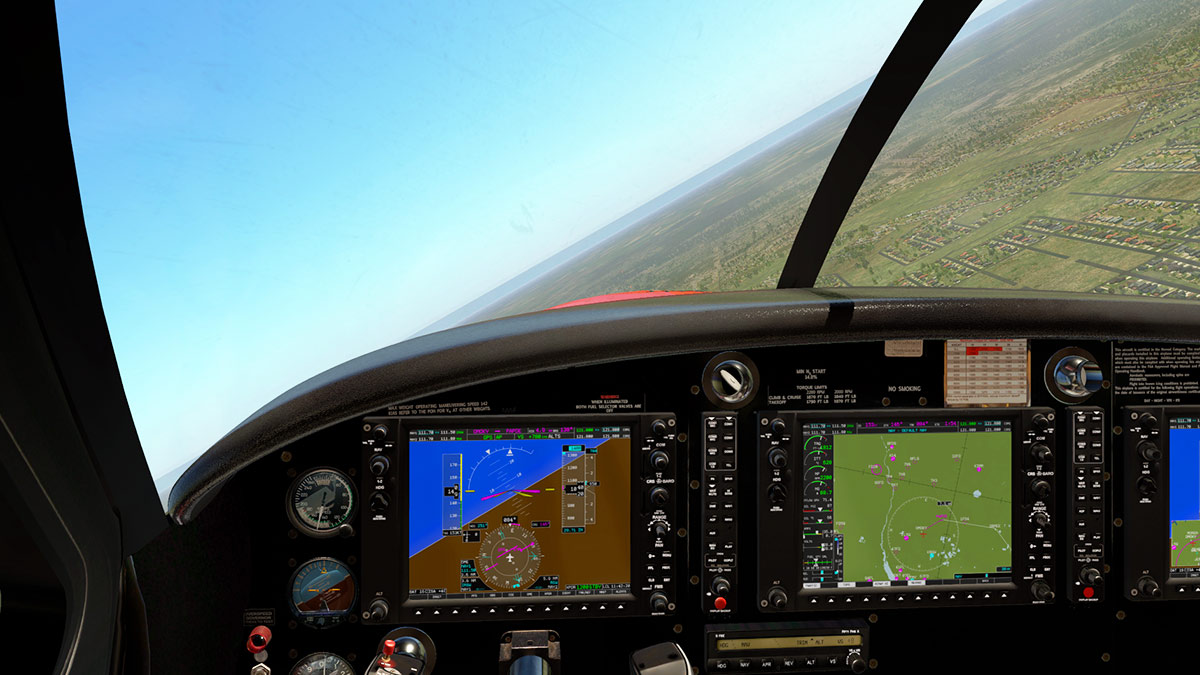
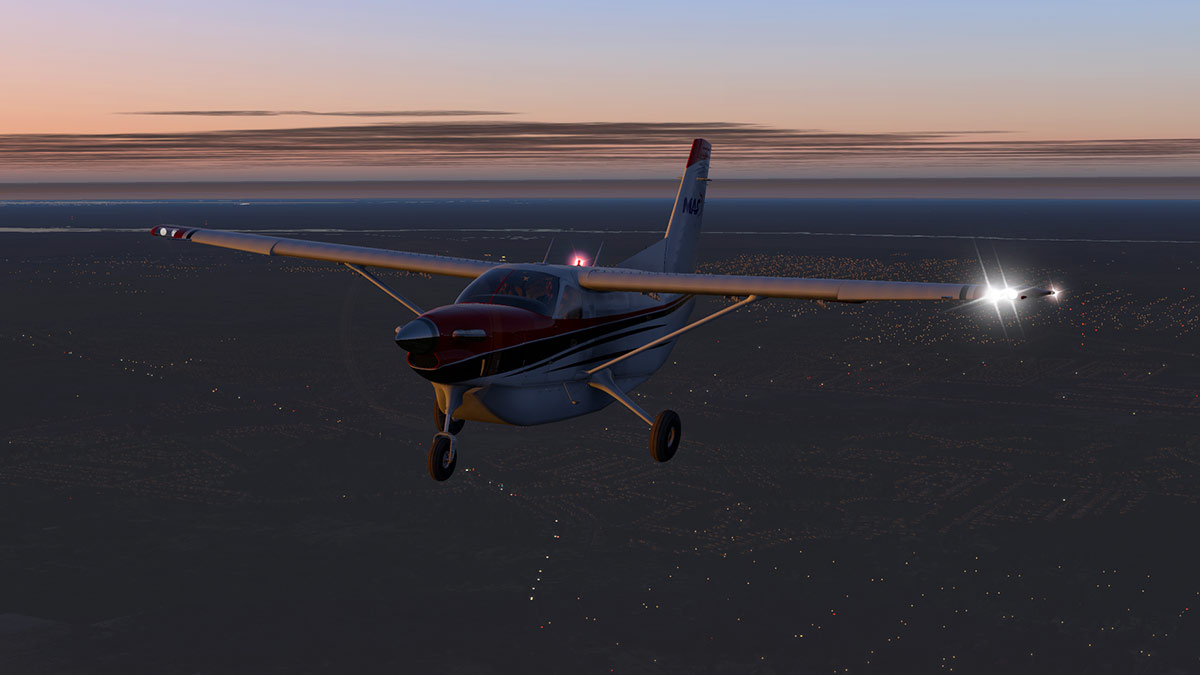
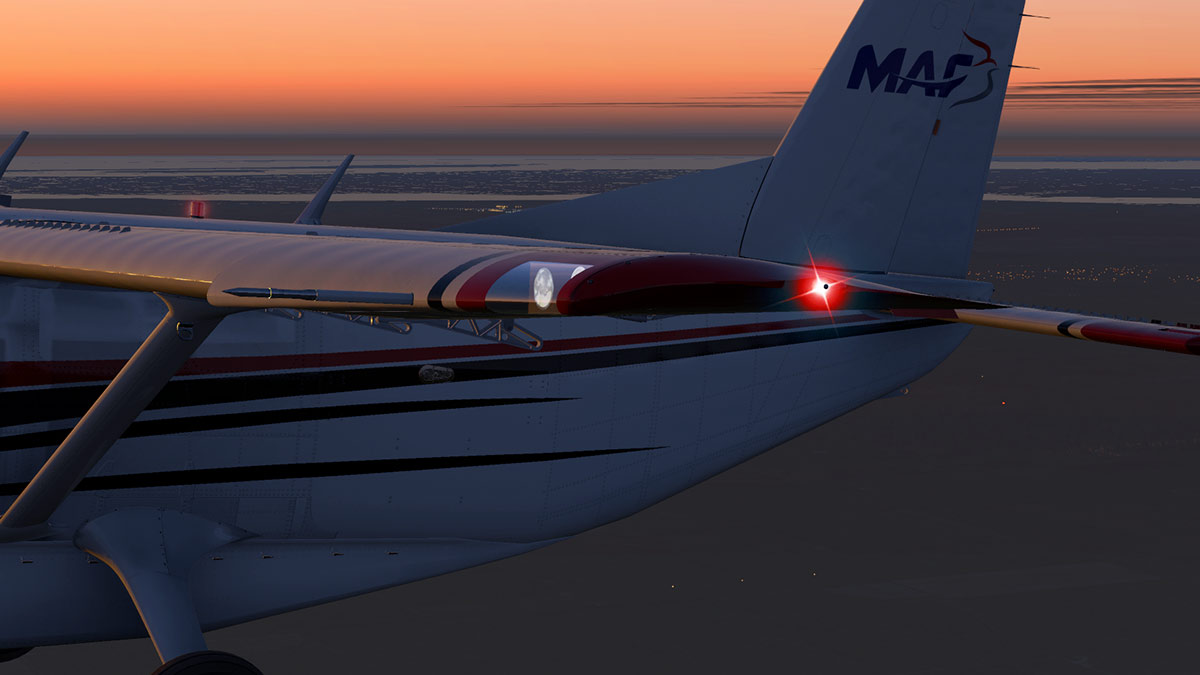
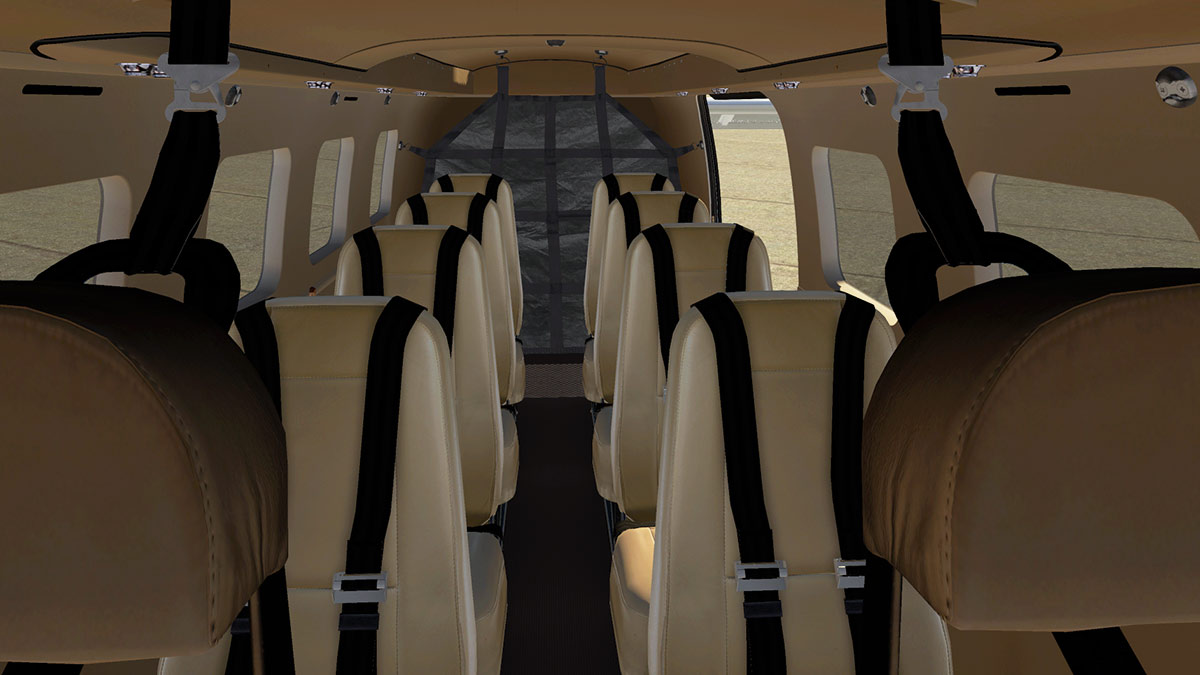
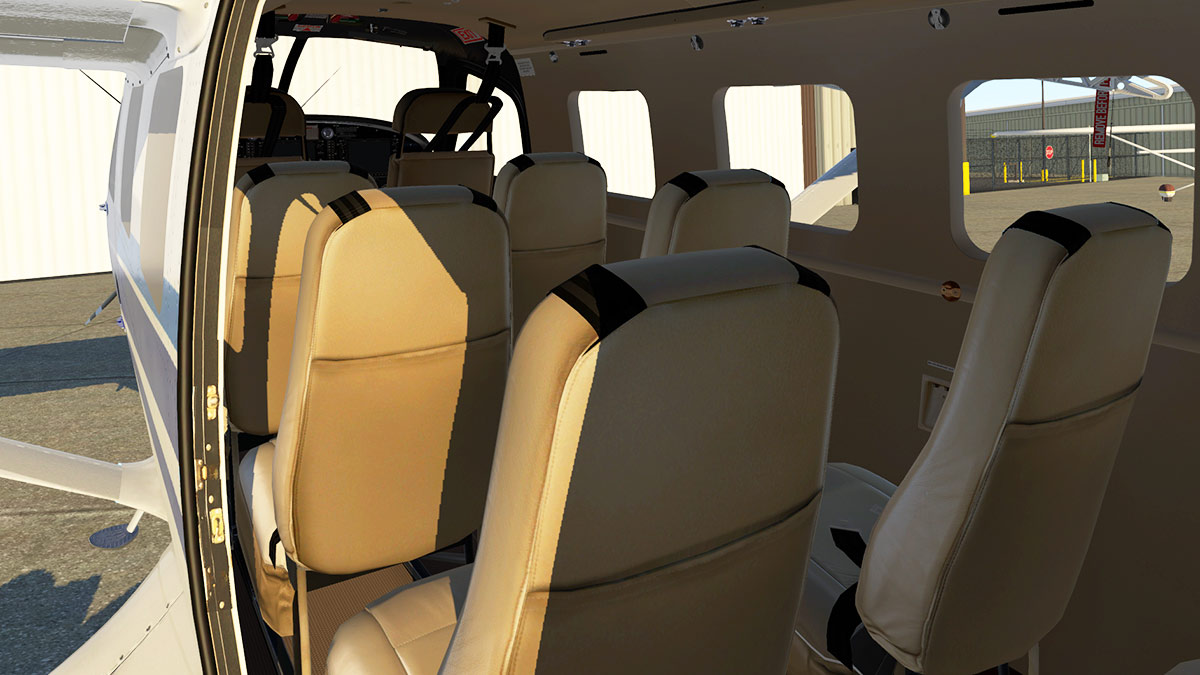
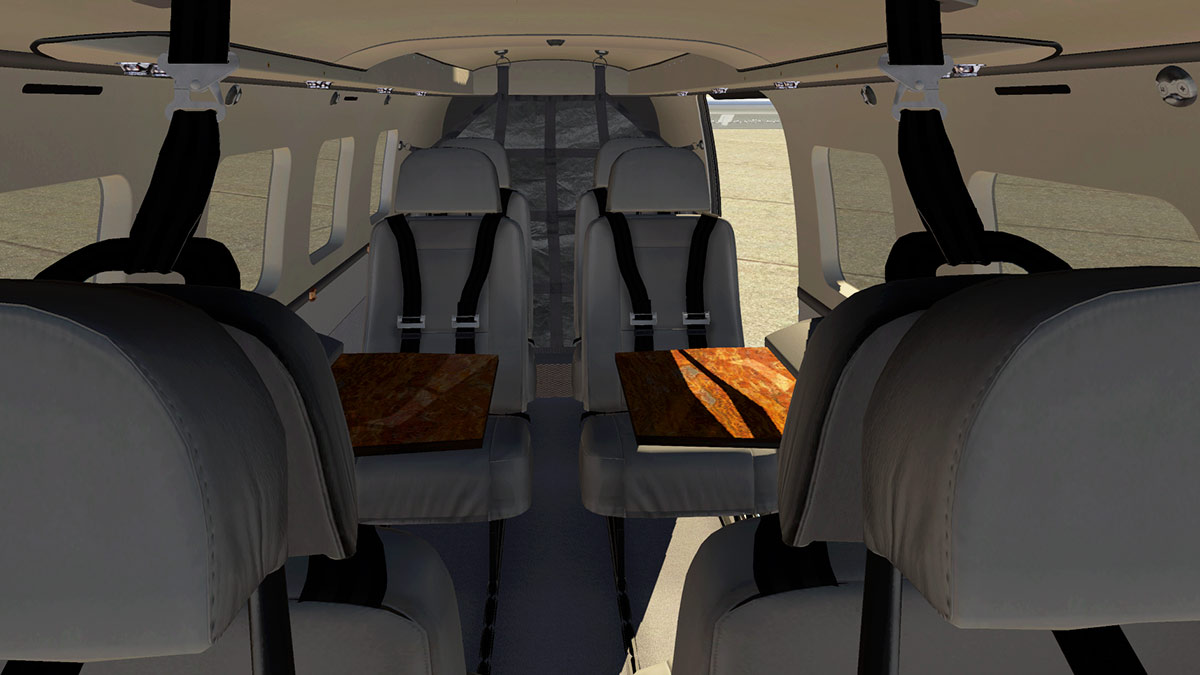
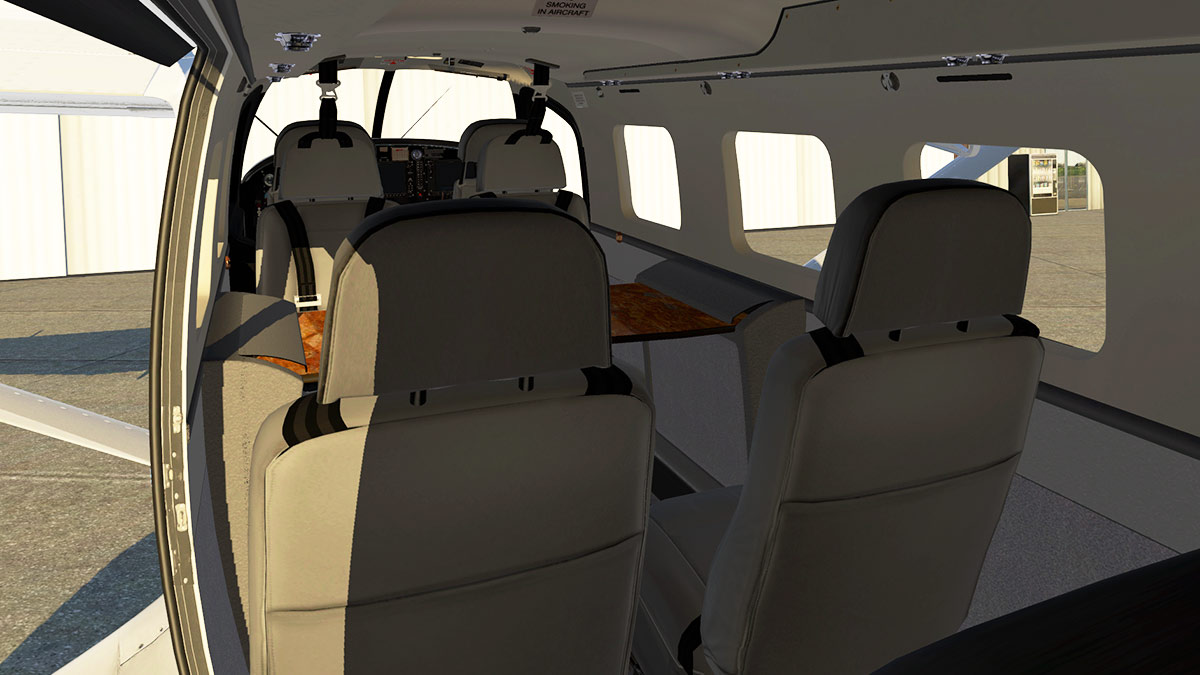
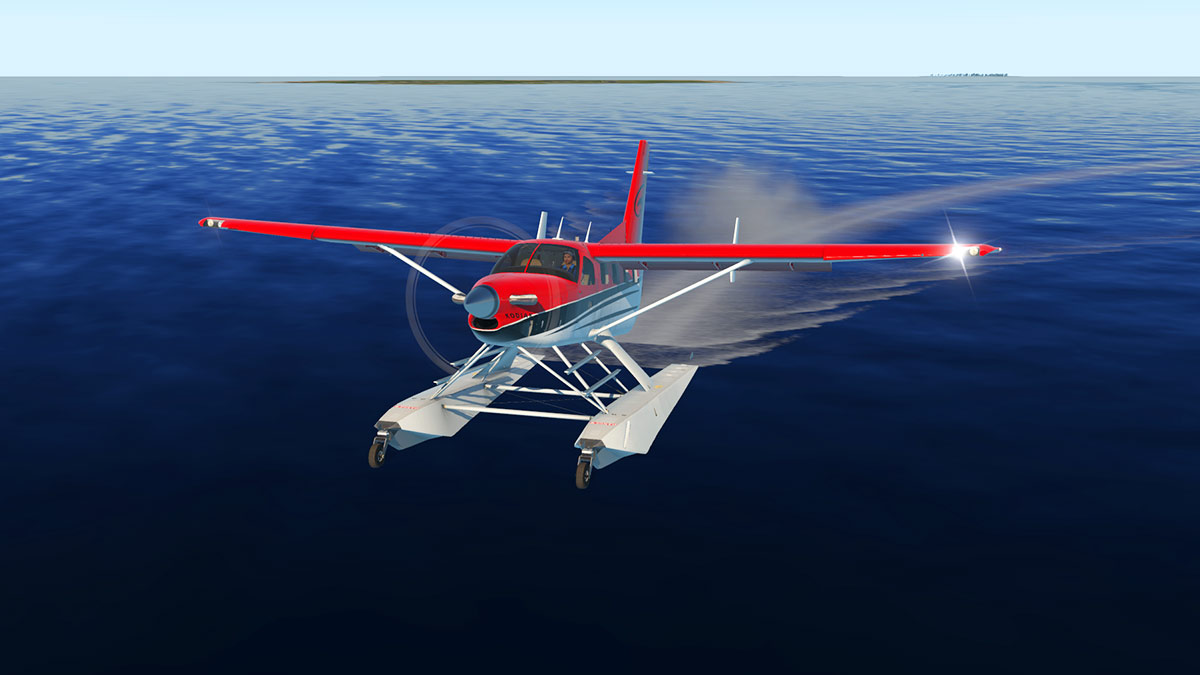
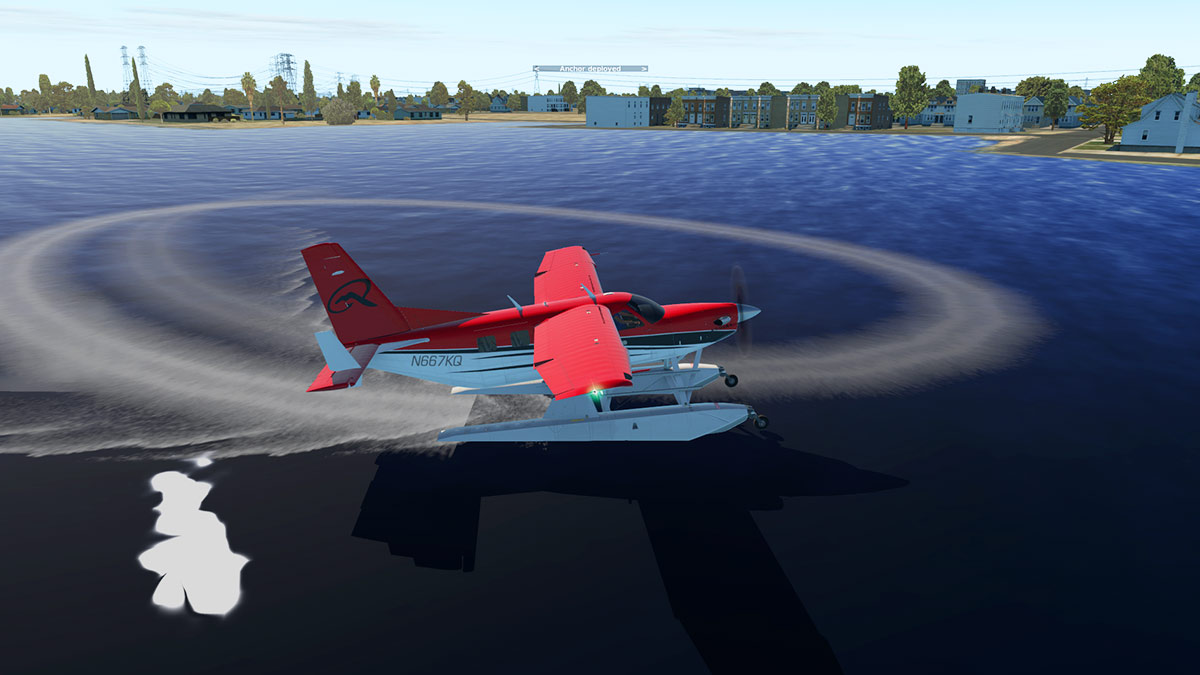
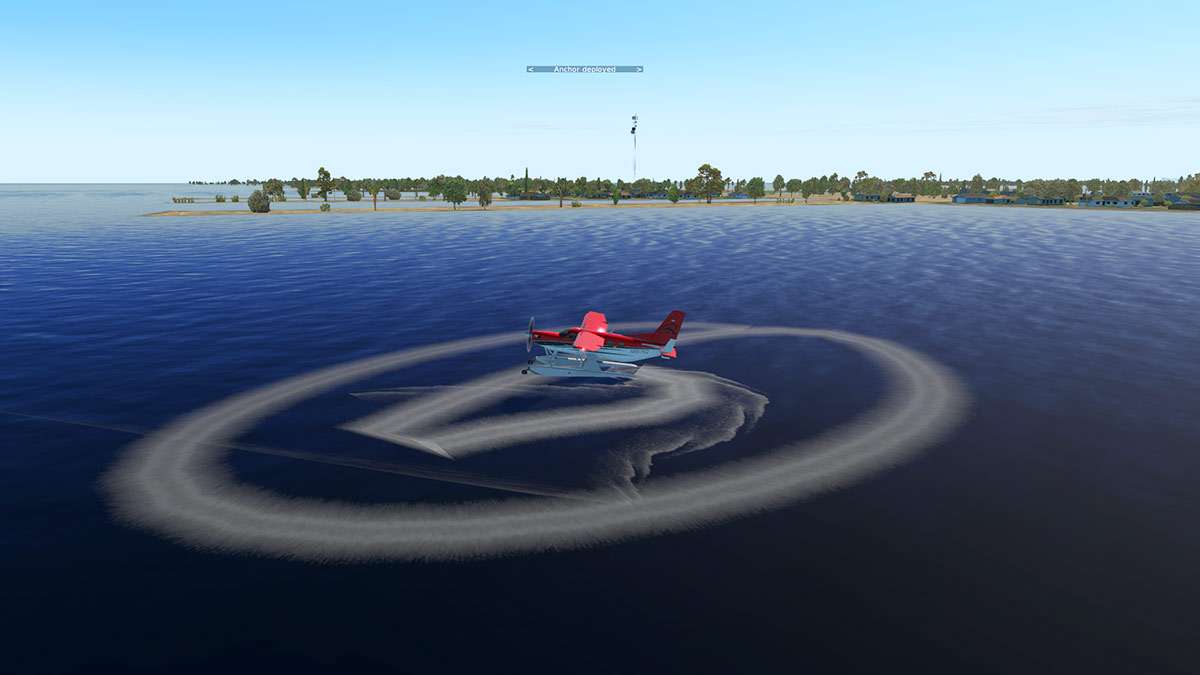
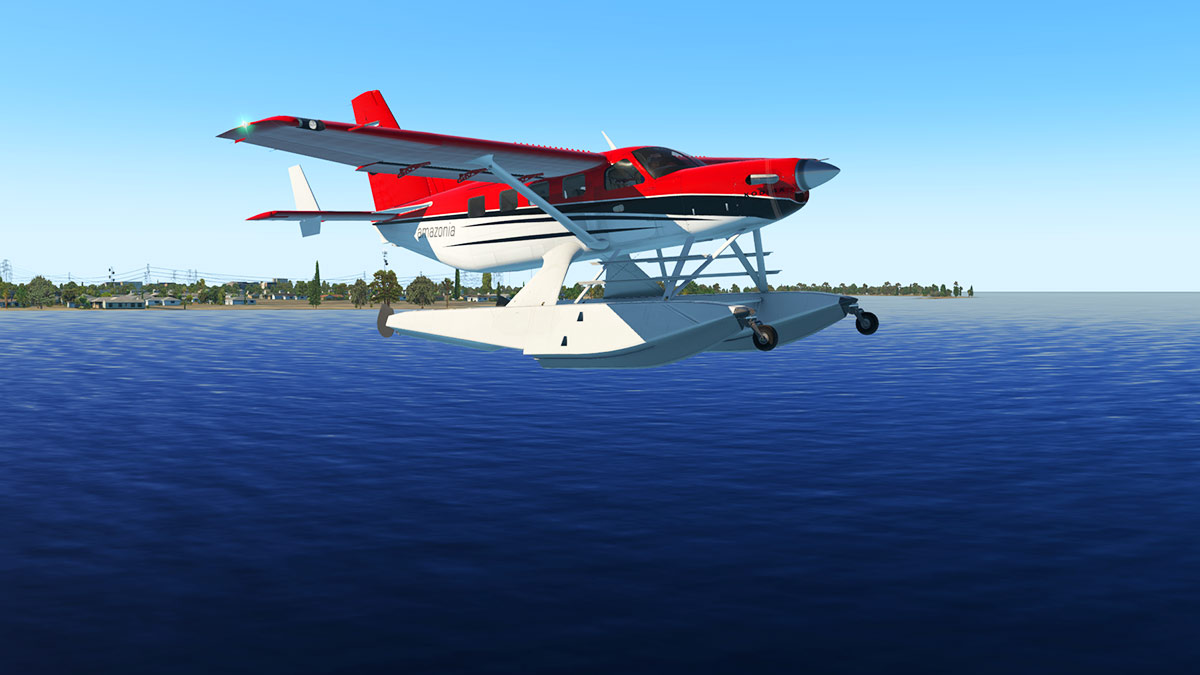
  12. Scenery Updates : CZST Stewart and CYBD Bella Coola v1.5 by X-Plane.Org Life throws up some weird coincidences... When I did the excellent Thranda Pilatus PC-6 Turbo Porter review back in June I went back to a very old scenery for two reasons, one was in how after all these years is if the scenery still held up to it's status of a winner of the scenery of the year award (2016), and two to try out the now running v11.50 (Vulkan) feature of reflections. I had even planned to use the second of this series sceneries in Bella Coola as a basis for Thranda's next project in the announced Beaver DH-2. Both of these sceneries have now been released under the XPOrg banner or X-Plane.Org. Both sceneries were originally created by Beti-x or Peter Kubek, but the developer has not been involved in simulator for now quite sometime, that aspect puts the scenery into a major conflict, in that in reality it can be seen as abandoned(ware). In most cases a lot of product would date and sometimes quite substantially from this period and gradually fade away. But CZST Stewart and CYBD Bella Coola are not your average sceneries, they are as mentioned award winning sceneries and also far more significant than that in that for their time, as both sceneries predicted the future of scenery development and in features as in detail. In this situation both of the sceneries rights have been bought out by the XP.Org and also revised to current standards, in this aspect the sceneries get a refresh, but more importantly they will survive and carry on well into the simulators future, in this case the XP.Org has to be applauded to save this outstanding work for generations to come from just being a lost cause to the past. I found that in using CZST Stewart in the PC-6 review was that the scenery had indeed faired extremely well. It was released six years ago at about the mid-development point of X-Plane10, and six years in X-Plane development time is an extremely long time for any product to survive without any updates and through the significant changes of texture quality, PBR (Physical Based Reflections), baked burnt-in ambient occlusion effects and metal/glass grading.... but survive well it did. The original CZST Stewart review is here: Scenery Review : CZST Stewart by beti-x CZST Stewart, British Columbia First differences between 2014 and 2020 is of the different atmospheric feel that you have, plus the water effect is now far, far better. Having the Vulkan reflection feature active is also a huge bonus in creating a very realistic panorama, it is a superb feature and not to be underestimated here in Stewart. The CZST airfield itself is located by the Portland Canal, tricky is a word in that both approaches require skill and nerve to get right, but they are also both in return highly rewarding for the pilot. Stewart has only one asphalt runway (more of a sealed gravel strip). 18/36 (3872ft)- Elev. 24ft. CZST is nothing more than a clearing with a big double shed on it, calling it a hangar would be generous... and a smaller garage. There have been changes here since the original release and that is reflected in this updated version... the area to the south of the apron has been cleared, and this aspect has been well represented in this new version. So the apron feels now very open, compared to the more closed in field feel from before... Textures were groundbreaking (no pun intended) for the time, and simply some of the best worn asphalt and stone work you could dream of and it all comes with 3d grass and turf.... .... textures have the resolution of 2cm per pixel, an unheard of quality for the period and here they are still as refined and as highly realistic, but still also have that gritty quality we love, what is the word... exceptional. Outwardly the buildings look exactly the same. But they are quite different in that the textures have been again reworked and refined to modern methods with burnt-in ambient occlusion effects and PBR reflections that gives the glass its reflective (lower doors and side windows) effects, the newer textures brings also out the lovely wear dirt lower brickwork to the more cleaner higher building paneling realism, doors are superbly rusted to perfection. Noted is that more static elements have been added to the scene... two MHS Aviation AS350 B2 helicopters now also grace the pad, and a lot of personnel in Hi-Viz jackets... this is a debatable element? Field strips like Stewart are remote, and not hubs of aviation activity. Yes the figures look very good, but in reality very few people hang around or are to be seen working around on aprons like this... debatable. That said it is very well done with hi-quality figures. Another huge change and addition is the amazing ship sitting at the new wharf... ... ships in X-Plane scenery are usually very basic, but this... is breathtaking in realism! with so much quality and detail, and you will fly over the ship every time to arrive on RWY 36 or depart RWY 18, shame there is no name on it? The wharf is all new and extremely well done, detailed and as are the older harbour areas, and the distinct woodmill wharf that is also still excellent. Another profound aspect of the original Stewart scenery was the township itself. Obviously recreating a small township like Stewart is not new to X-Plane, but Stewart was a very significant step forward in design in that the whole town was totally recreated, that is not just with generic buildings, but the WHOLE town with EVERY SINGLE building was recreated as a custom building, no two buildings are the same unless they actually are at Stewart, and if you think about that aspect of photographing and recreating everything there, it is a mindblowing experience... but that is what was done here as a complete photographic 3d reality of the area. All the main significant buildings are correct including all other main town buildings in Churches, Schools, Port & Fishing facilities, Fuel Stations, Fire Station, (Mounted) Police, Utilities in power stations and even the standing out blue roofed Stewart Health Centre and note the sited H-Pad in front of the building. The Stewart scenery represented for X-Plane the first real fully walk-around scenery, a place to explore as per the real life Stewart township, and I have done so mostly every time I come here... it is and still is an extraordinary achievement. Any negatives.. the trees are still only 2d and the original versions, okay but just passable for a very high quality scenery like this. Lighting is still also one of the best in X-Plane, and still a high standard to meet, not just with the big in drop down lighting and nice windows, but the minute small detail in say this Coke Cola machine... the service station was the highlight in the original and it still looks as great here... Shops, garages working at night, every house, every business is lit here as per perfection. __________________________ CYBD Bella Coola, British Columbia It was three years until Beti-x released their second scenery after CZST Stewart in another British Columbia scenery and in many aspects a very, very similar layout as the former release in CYBD Bella Coola. Original Review is here: Scenery Review : CYBD - Bella Coola BC by Beti-X Yes it was again set deep within a valley, yes it had a river flowing past the runway, yes every single building was a custom building, yes it had a tricky approach and departure... and again it was all as mindblowing. The only slight difference was that the township of (lower) Bella Coola was not situated behind the airport but the airport is placed a 14 km a distant west from the main townsite. And unlike Stewart then CYBD is more of what you would call an airport than a strip of runway, it even has a terminal building, well sort of in a house with an extension built on to it. Again a few more people have been added, but in reality there was a few placed already in the original scenery, here the new members are more by the remote buildings/hangars than the terminal ramp area, but the additions are far fewer here than at Stewart. The detail was again astounding... well it did take three years to do, so what did you expect. And here it still looks as good in X-Plane as it did back then... but like Stewart the buildings have also had their textures refined and processed for v1.5, so the glass and roofs are more reflective and shiny when need to be and any metal-ness or steel buildings, water or fuel tanks now look far more realistic in nature. Textures are again sublime, asphalt is in variations, cracked and worn edges, oil spills, rubber wear, and you still have to love the faded compass detail. CYBD has one tarmac runway that is 05/23 at 4,200ft (1,280m) - Elev. 117ft. From a reviewers point of view, in that once seen, you expect other developers to be as good or better, but that is putting the bar far too high, a lot of developers have done some brilliant ground texture work and yes even a few have reached these impressive heights, but they are still the best of the best you have ever seen in a simulator. Bella Coola Valley As noted the Bella Coola scenery is far more spread-out andthere are more villages than big townships out here, so in actual custom building count they are actually quite similar, but here most are laid out around the Hwy 20 (Chilcotin-Bella Coola Highway) that winds right down from the the east of the airport of the Hagensborg township, right down through to the dwellings of going westward to Lower Bella Coola, then to Bella Coola itself. Hagensborg above and Lower Bella Coola below. One significant difference between Stewart and Bella Coola sceneries is the 2cm per pixel definition is not used (it is around the airport) but here it is the standard 50 cm per pixel definition and it shows, certainly around Lower Bella Coola and Bella Coola, this was one area I thought would be updated in this version... But the quality of the custom buildings are excellent including the Mamayu (butterfly) building. Bella Coola itself is positioned on the North Bentinck Arm inlet right, and the Government Wharf is prominent here, and very well done. Lighting is very good, but there is not a lot of it, even the runway is unlit at night, so all the lighting is restricted to just windows and street lighting, the quality however is very good. One feature that Bella Coola has that Stewart does not have is that "Winter Textures" are provided. These textures are used here under the JSGME/Generic Mod Enabler system... I have no information if they work under the more recent SAM Suite Seasons system, but I would guess as yes... The results are quite still spectacular, and are well worth the switch over with the JSGME... ______________________________ Summary Both of these former Beti-x sceneries are award winning packages that set the extremely high standards of what could be achieved in X-Plane scenery development, the sceneries in CZST Stewart and CYBD Bella Coola are both situated in Canada's British Columbia territory are now owned by the X-Plane.Org by a purchasing agreement of a change of rights. But the change of owners has not meant just a transfer of the scenery, but an update to bring the scenery up to the current X-Plane11 standards and dynamics, and even added in a few additions to make them more involving. The most significant aspect of the sceneries is that they set standards of quality that are still not even being matched today, clever then, they are still outstanding today in the sheer concept and resulting outcome. Ground textures are simply the very best in X-Plane, custom modeling of every building as per real, and not just the airport, but of the whole township itself, and the detail is overwhelming and walk-around (another first) and both sceneries took over six years to complete, both these sceneries are VFR heaven in detail and complexity. The v1.5 update shows that the Stewart and Bella Coola sceneries have lost none of their original impact and quality, added has been updates to meet the current X-Plane dynamics in burnt-in ambient occlusion effects, PBR reflections and Glass/Metalness enhancements, not forgetting the natural X-Plane advances since the original releases of the sceneries that includes better water, better weather, shaders and even Vulkan/Metal power. Additions include more ground personnel and in the Stewart scenery a new wharf and high quality ship... All in all it adds up to quite a set of packages. (the "winter" option is also still available for Bella Coola). One of the most significant aspects of this v1.50 update is that both of these former Beti-x sceneries have not thankfully been consigned to history. And to have them not only revitalised, but also refined to still provide their outstanding features to future X-Plane generations is persevering a historical element of the simulators breakthough quality scenery periods of its past, not that they were now anything but relics but are still extremely more relevant than ever and still can deliver countless hours of enjoyment... outstanding then, both Stewart and Bella Coola sceneries are even more outstanding and relevant now... a must have investment for any private or bush pilot. ______________________________________________________________________ Yes! the CZST Stewart v1.5 scenery by XP.Org is now Available from the X-Plane.OrgStore : CZST Stewart Price is US$25.80 (Currently on sale:$17.50) Features: faithful replica of the real airport with HD buildings and pre-rendered ambient occlusion the airport surroundings with handcrafted ground imagery and a resolution of 2cm per pixel surrounding Photoscenery at a resolution of 50 cm per pixel covering an area of over 150 square kilometers volumetric grass hand placed 3D trees and other custom objects precisely visualized town of Stewart, with every building modeled in 3ds MAX, the architecture of the buildings fits in precisely with this location dozens of hand placed POIs, such as the museum, schools, fire station, port, fuel station, hospital and many others simulator many species of HD trees and landscape with dense forest hand edited Mesh of the whole area. Edited abnormalities in terrain elevation, perfected roads etc Requirements X-Plane 11 Windows, Mac and Linux 4 Gb+ VRAM Video Card Download Size: 586 MB Current and Review version: 1.5 (September 21st 2020) ____________ Yes! the CYBD - Bella Coola v1.5 scenery by XP.Org is Available from the X-Plane.Org Store here : CYBD - Bella Coola Price is US$24.00 (Currently on sale:$17.50) Features: Faithful replica of the real airport with HD buildings and pre-rendered ambient occlusion Airport surroundings with handcrafted ground imagery with a resolution of 2cm per pixel Surrounding Photoscenery at a resolution of 50 cm per pixel covering an area of over 275 square kilometers Volumetric grass Hand placed 3D animated trees and other custom objects The architecture of the buildings fits in precisely with this location Winter version included 1GB of pure High-detailed fun Requirements X-Plane 11 (or XP10) Windows, Mac or Linux 4 Gb VRAM Minimum. 8 GB+ VRAM Recommended Download Size: 1Gb Current and Review version: 1.5 (September 21st 2020) _____________________________________________________________________ Scenery Review by Stephen Dutton 29th September 2020 Copyright©2020 : X-Plane Reviews (Disclaimer. All images and text in this review are the work and property of X-PlaneReviews, no sharing or copy of the content is allowed without consent from the author as per copyright conditions) Review System Specifications: Computer System: Windows - Intel Core i7 6700K CPU 4.00GHz / 64bit - 32 Gb single 1067 Mhz DDR4 2133 - ASUS GeForce GTX 1080 8Gb - Samsung Evo 1Tb SSD Software: - Windows 10 - X-Plane v11.50 Addons: Saitek x52 Pro system Joystick and Throttle : Sound - Bose Soundlink Mini  Plugins: None Scenery or Aircraft - Pilatus PC-6 Turbo Porter - DGS Series by Thranda (X-Plane.OrgStore) US$34.95
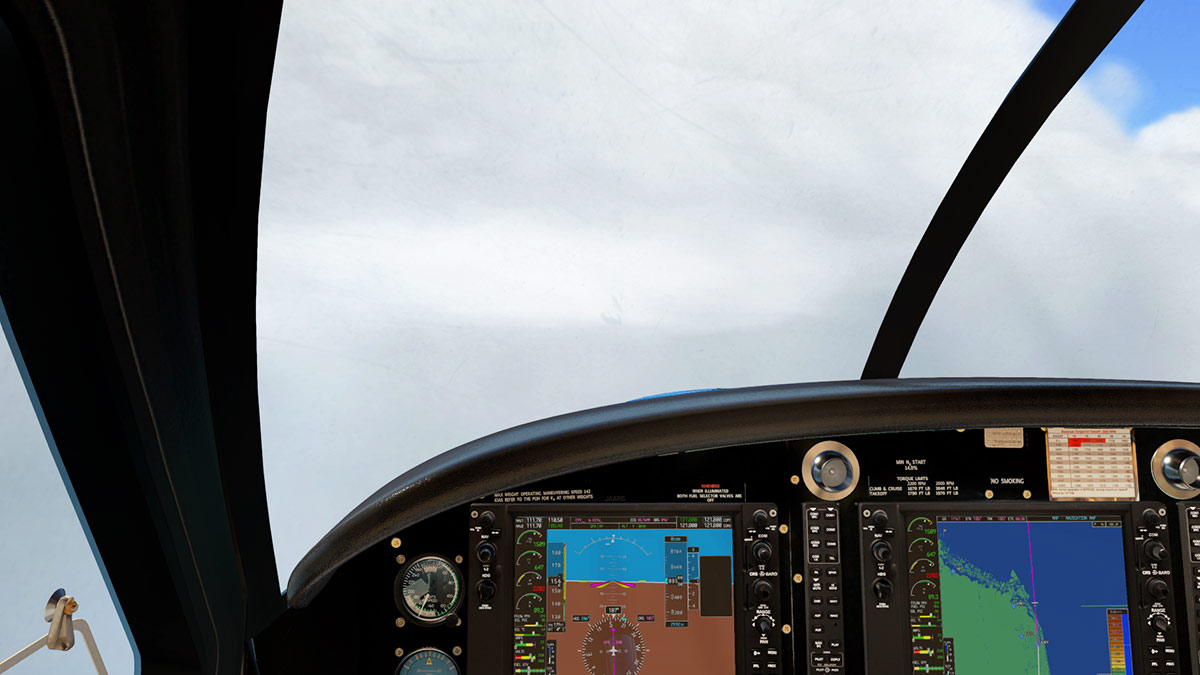
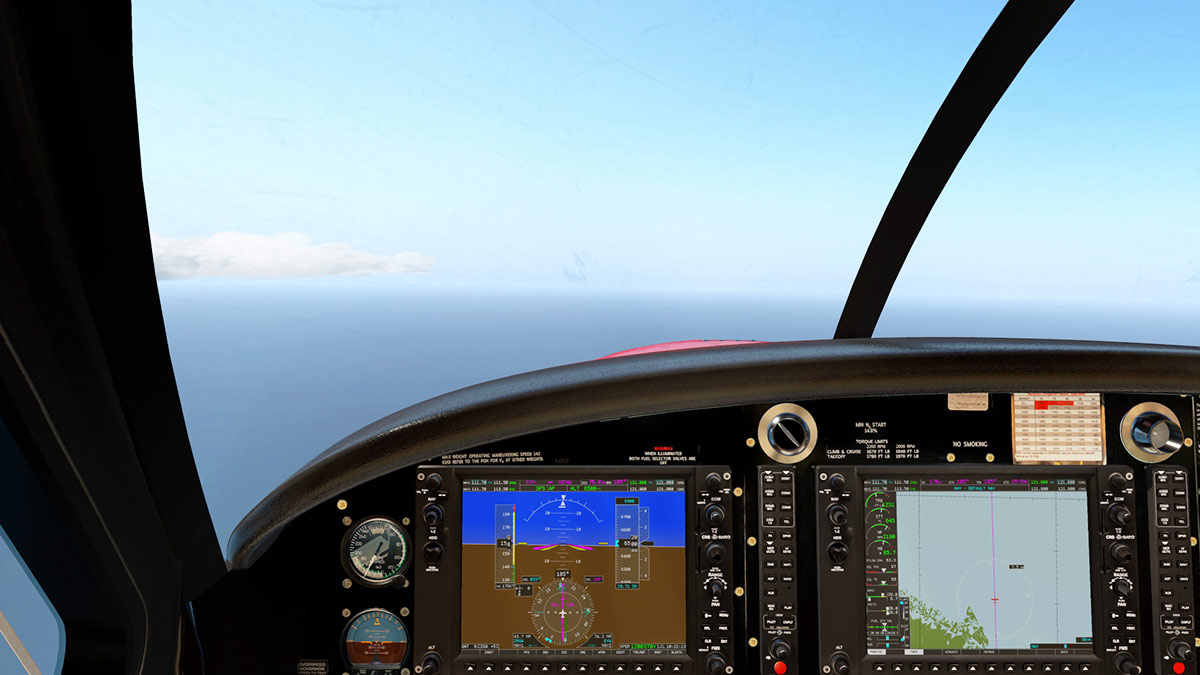
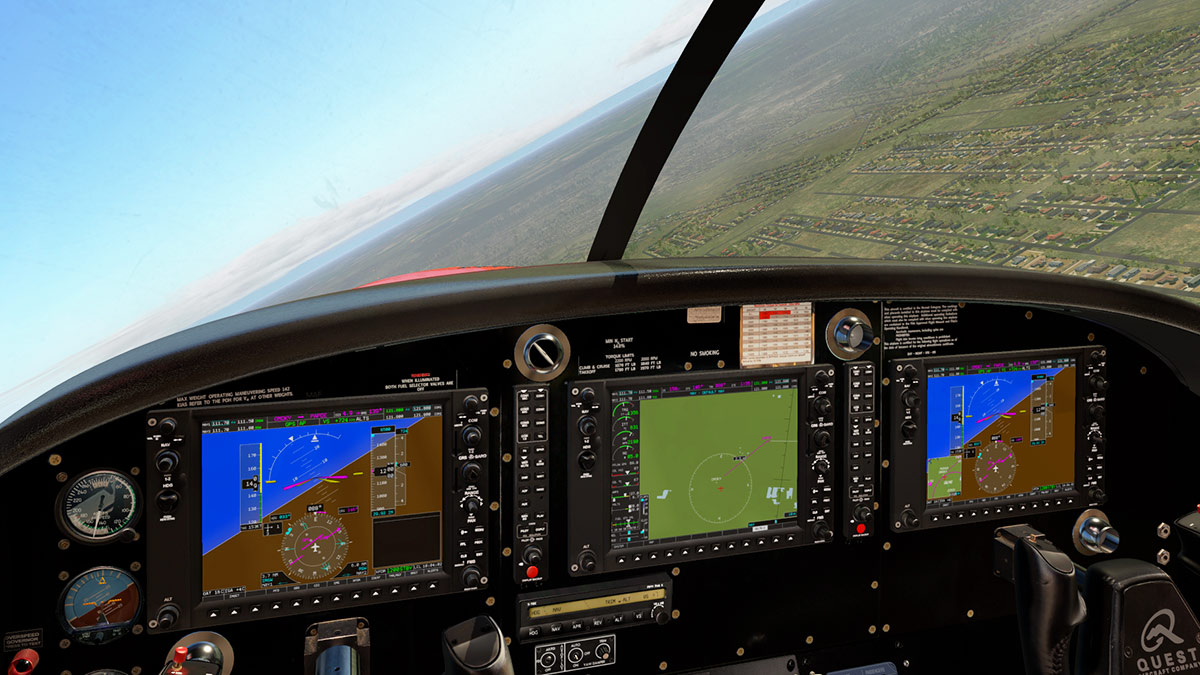
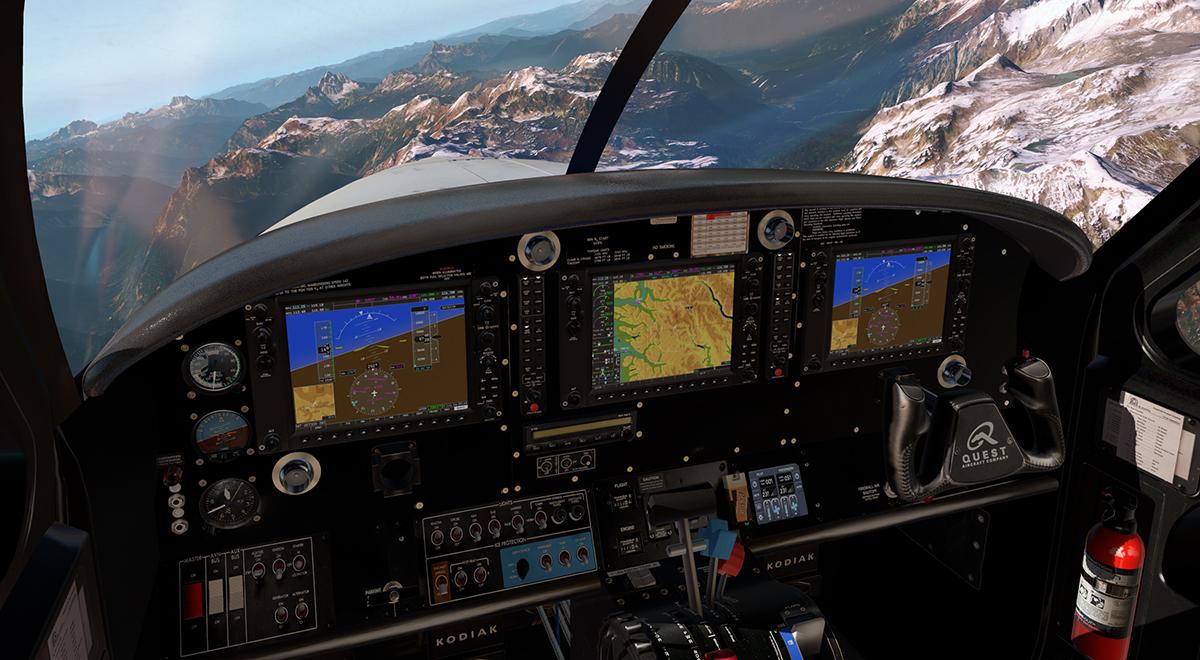
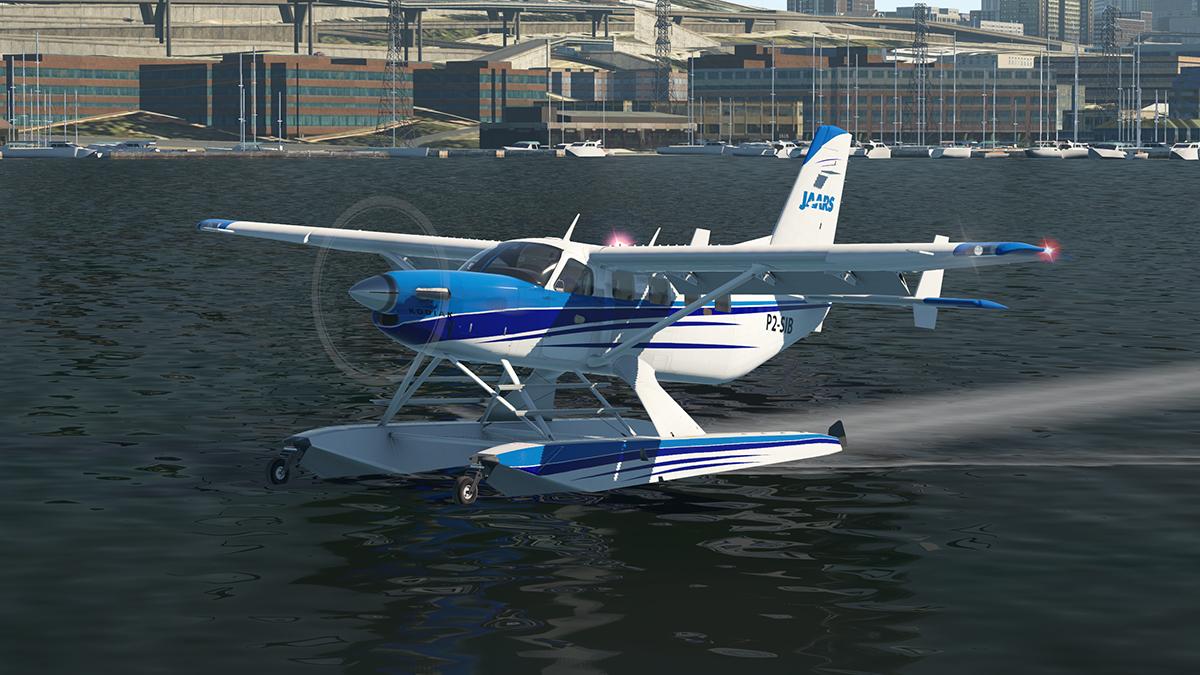
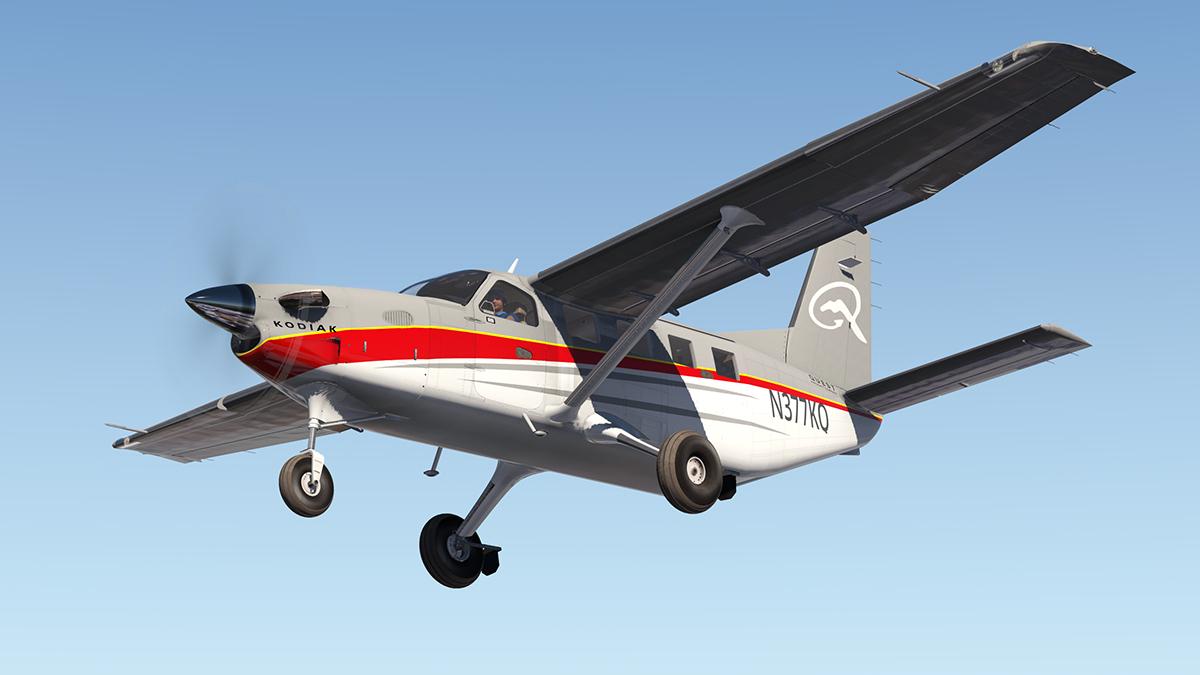
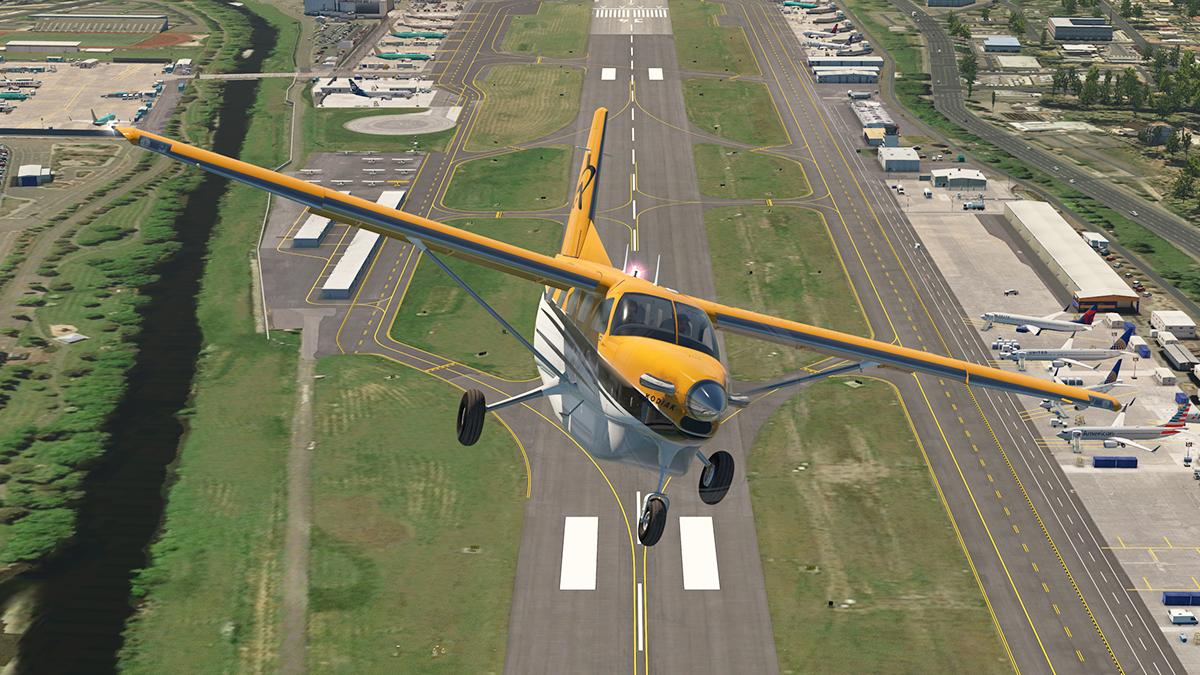
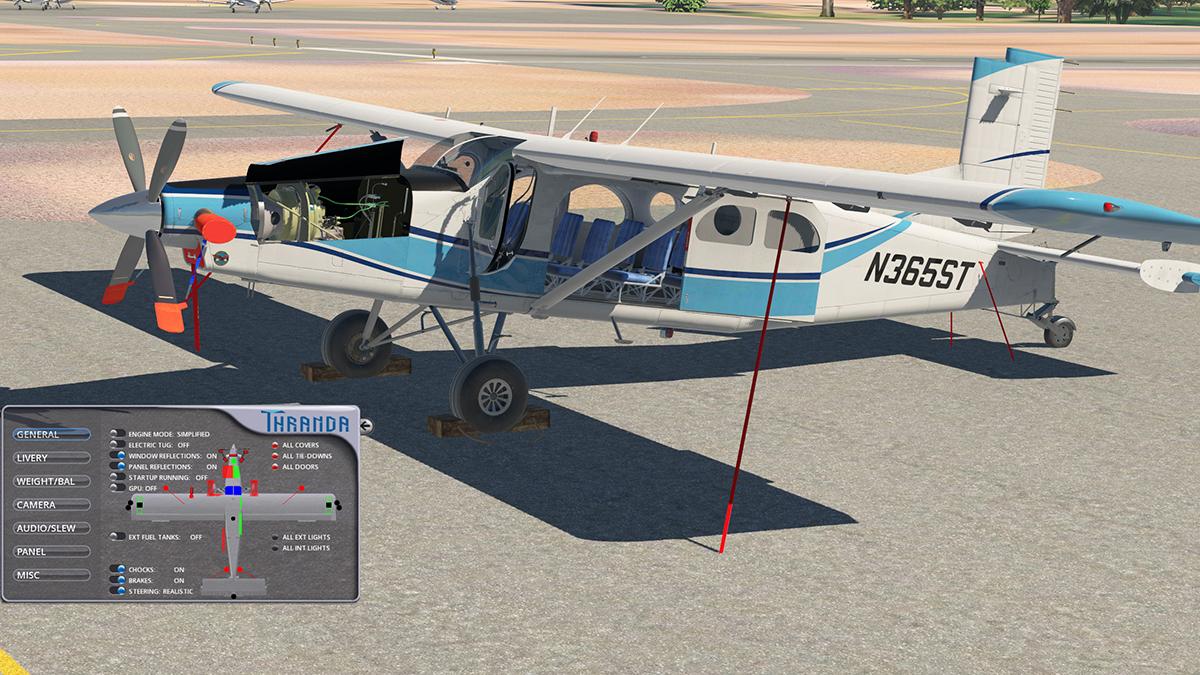
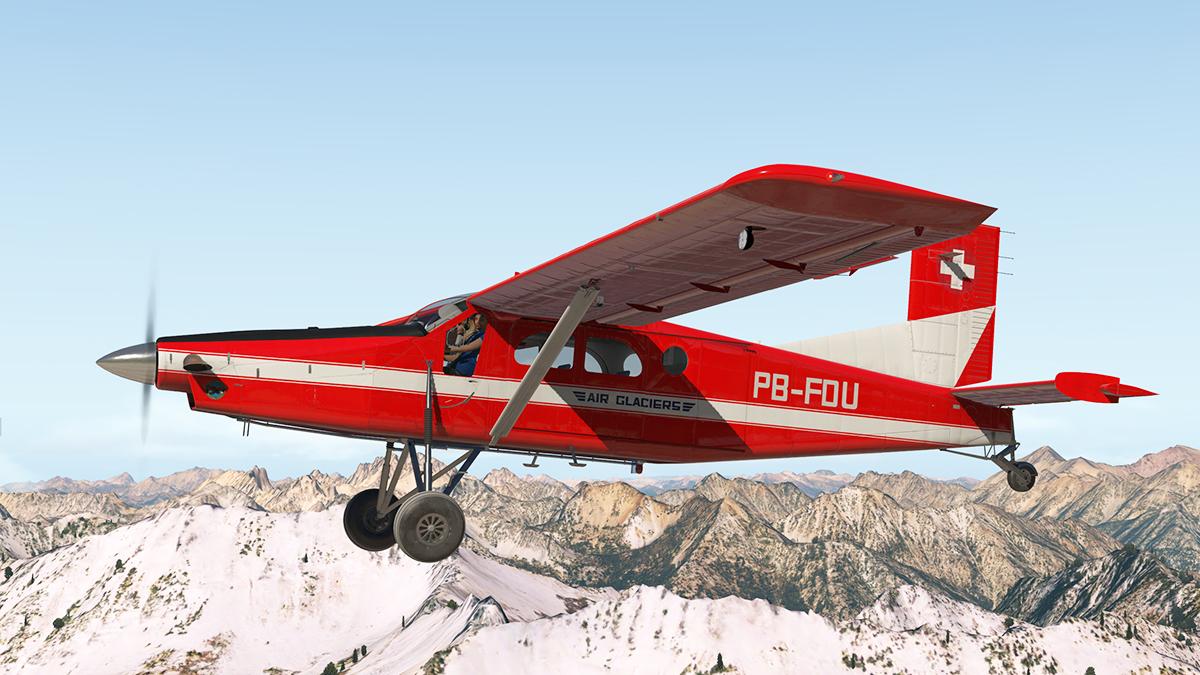
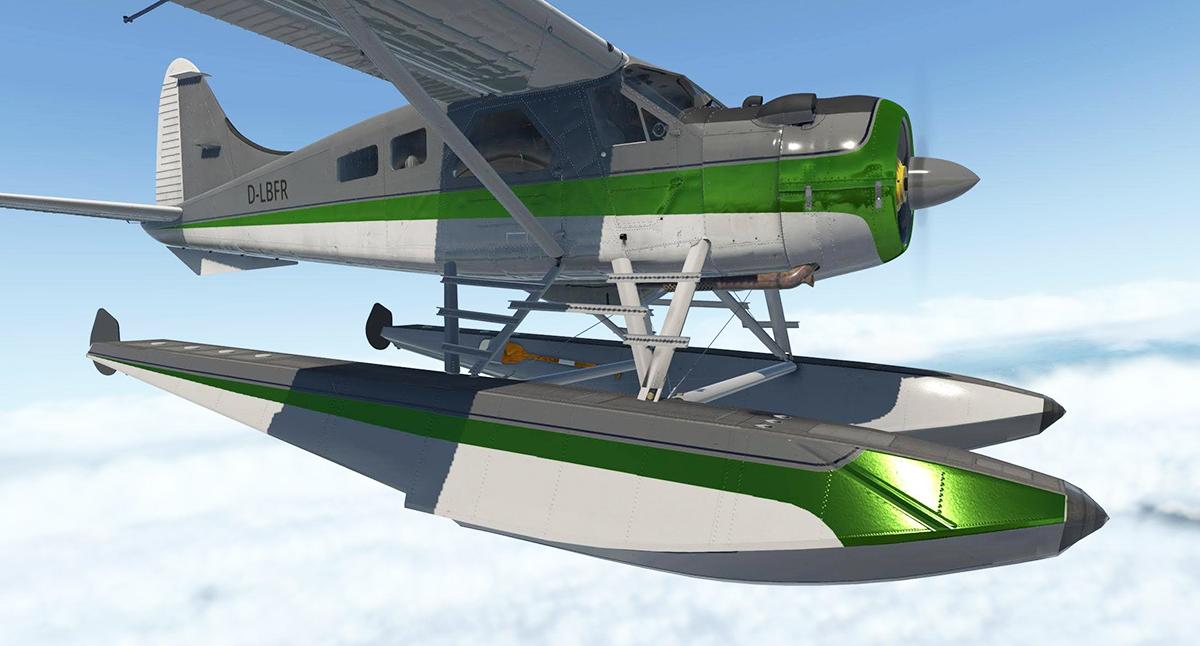
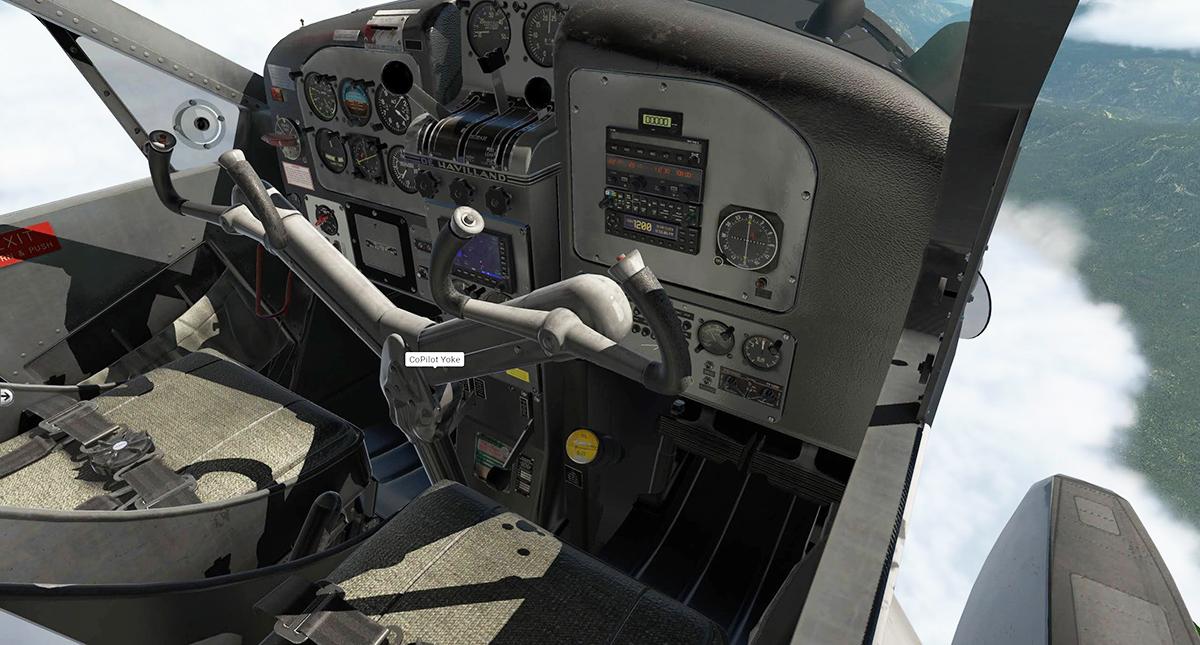
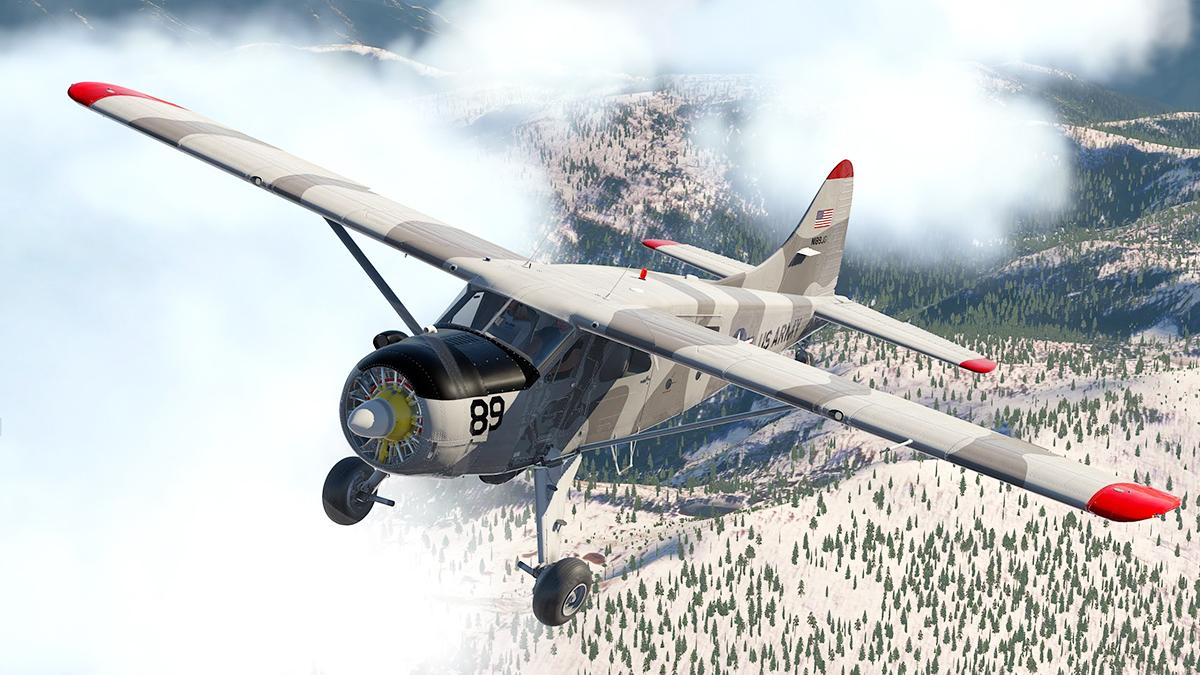
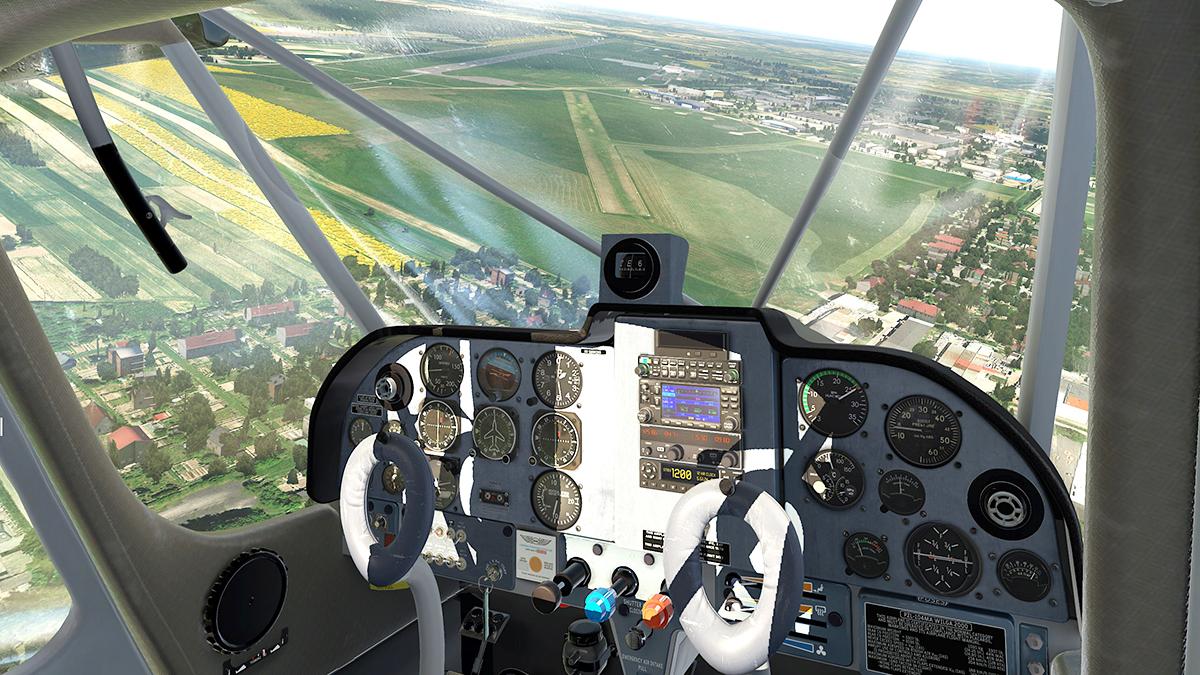
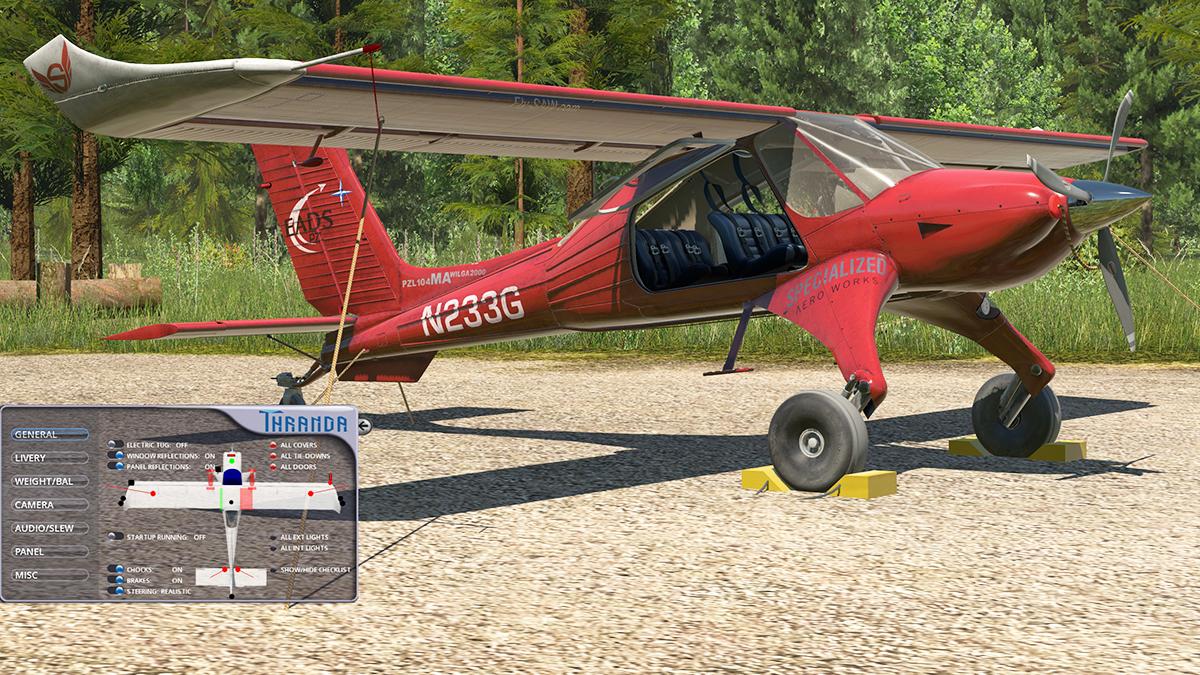
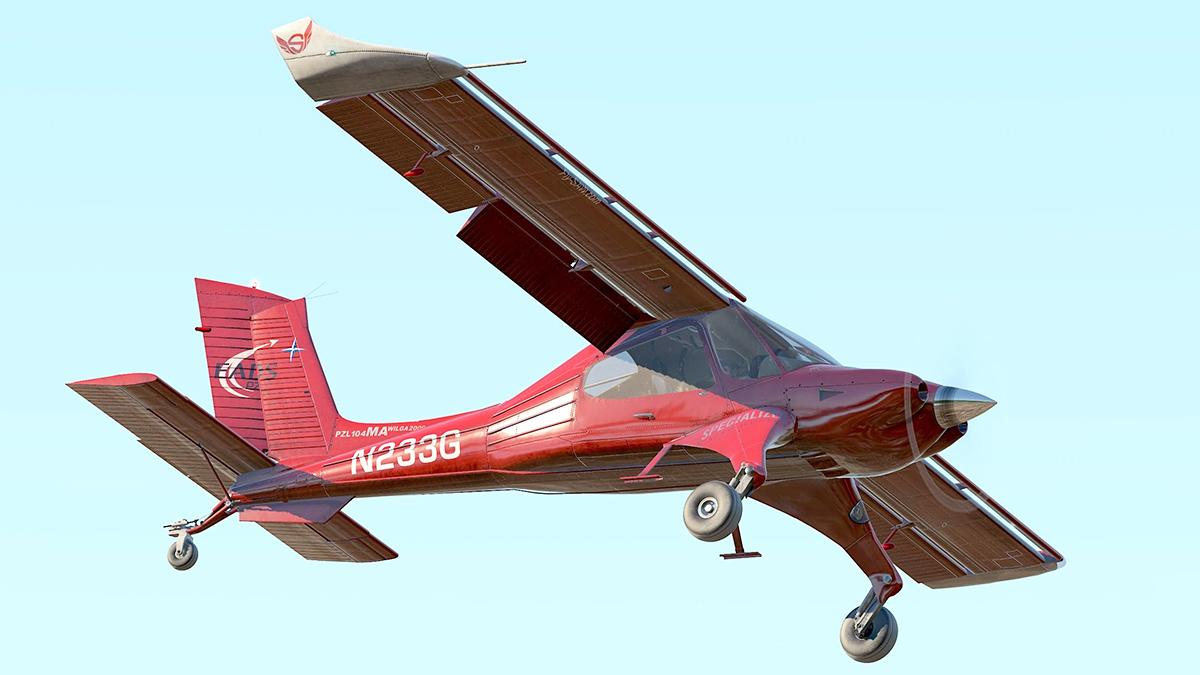
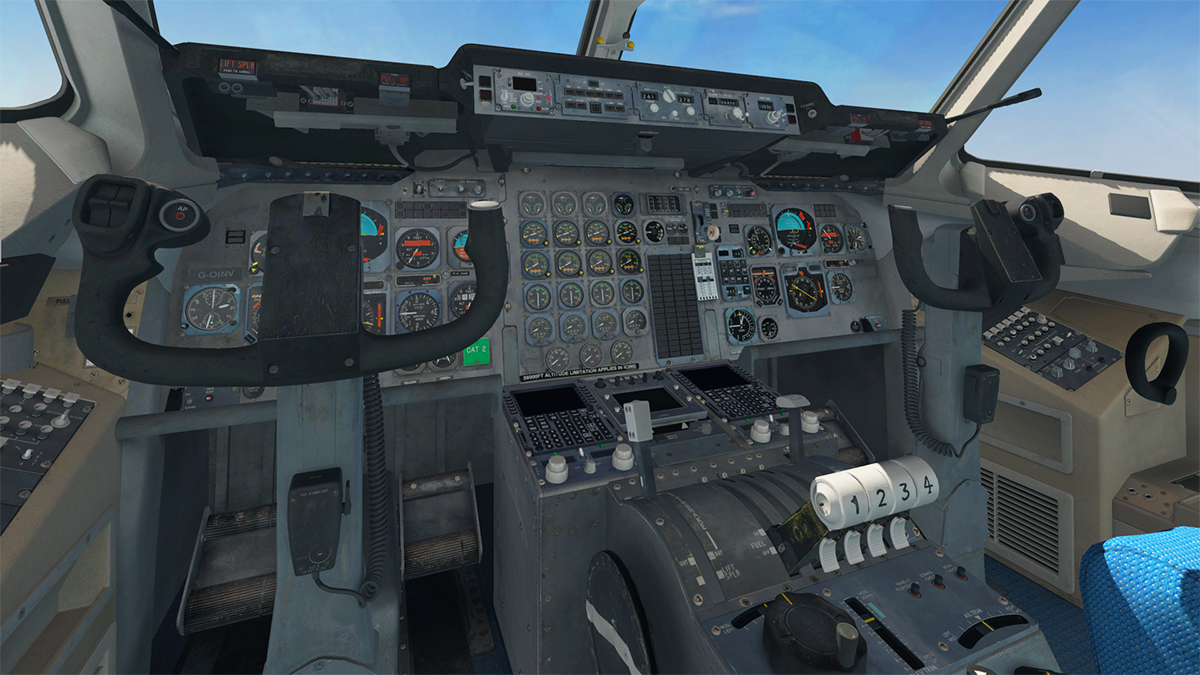
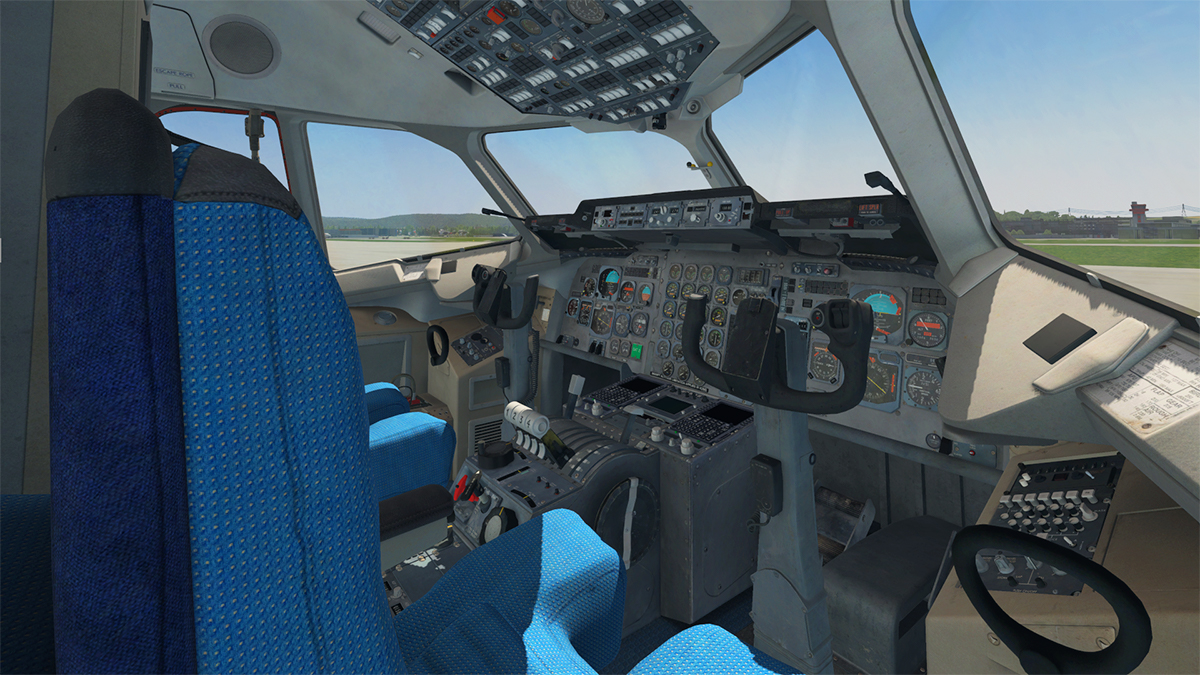
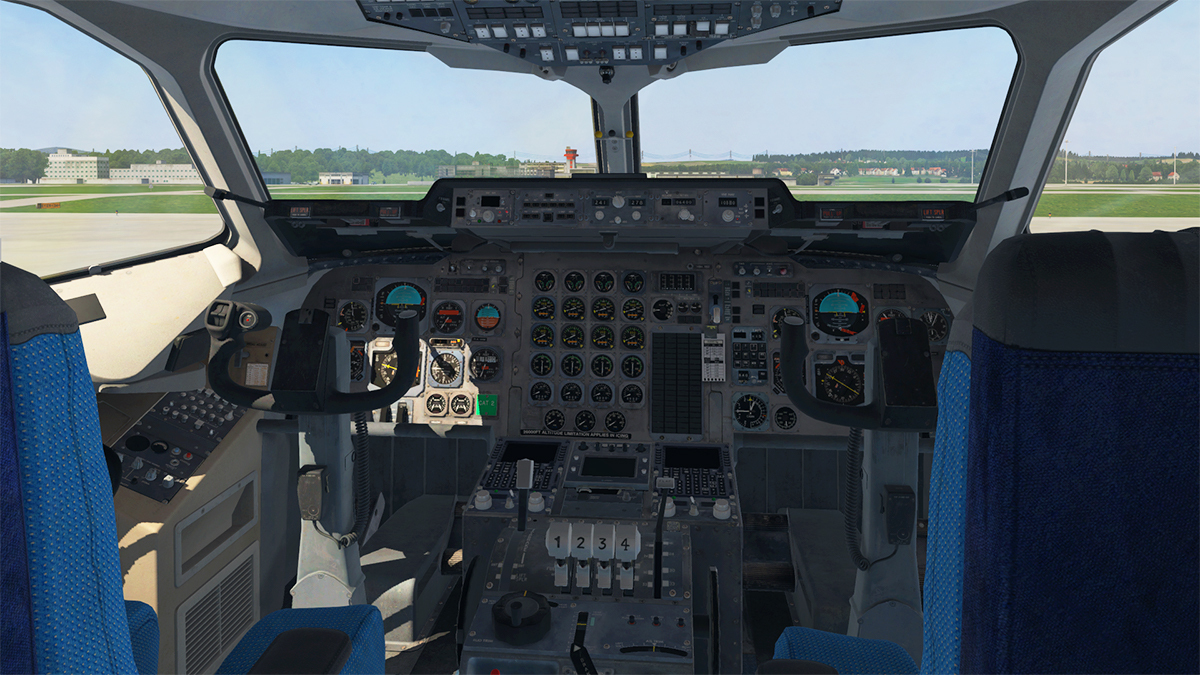
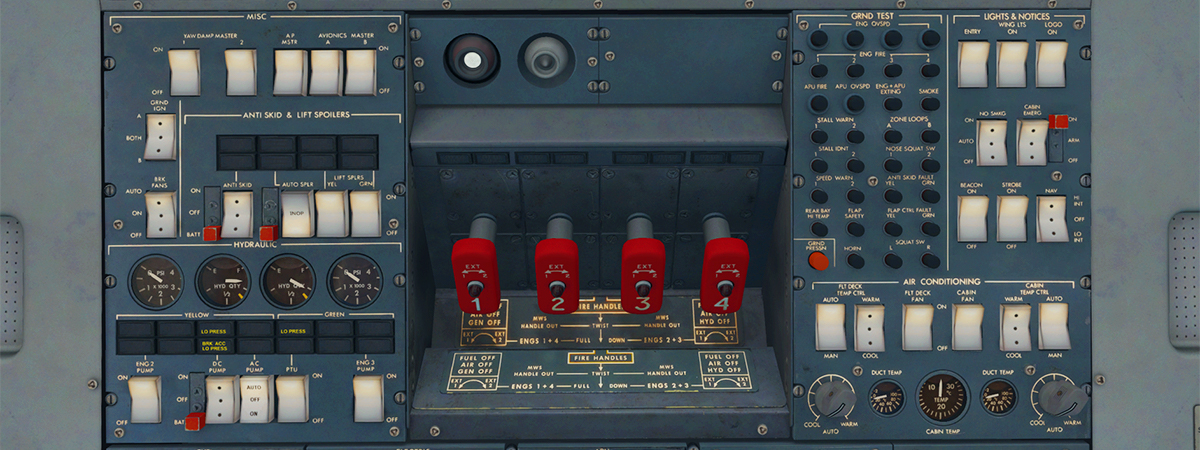
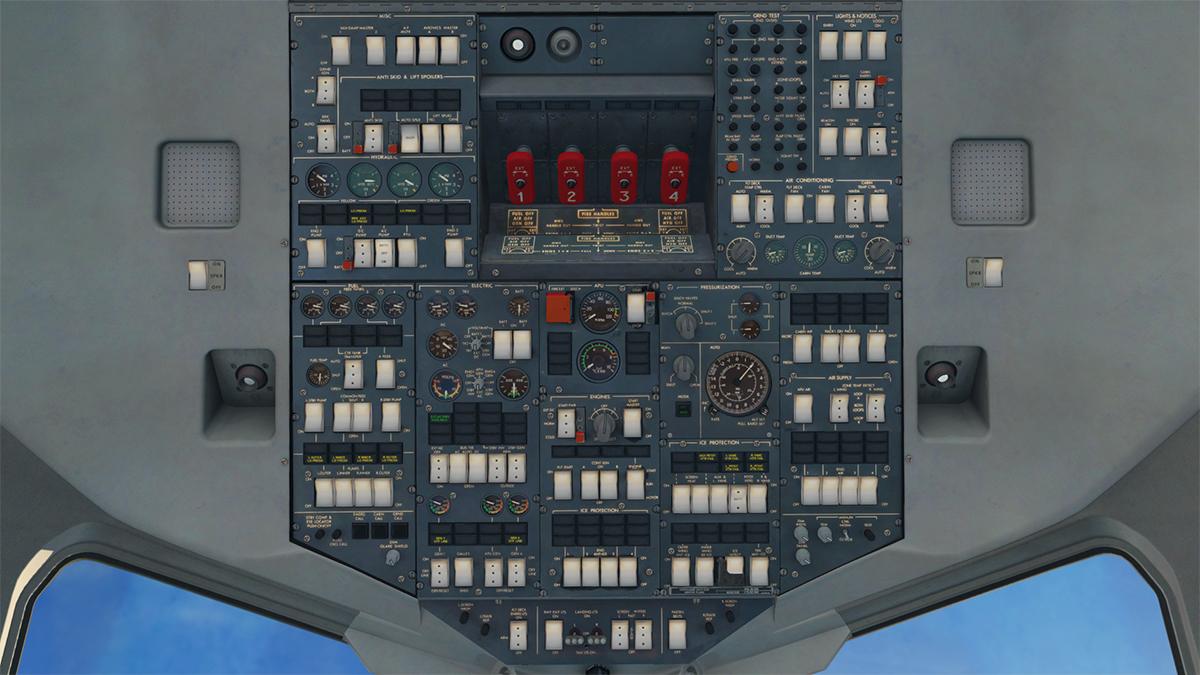
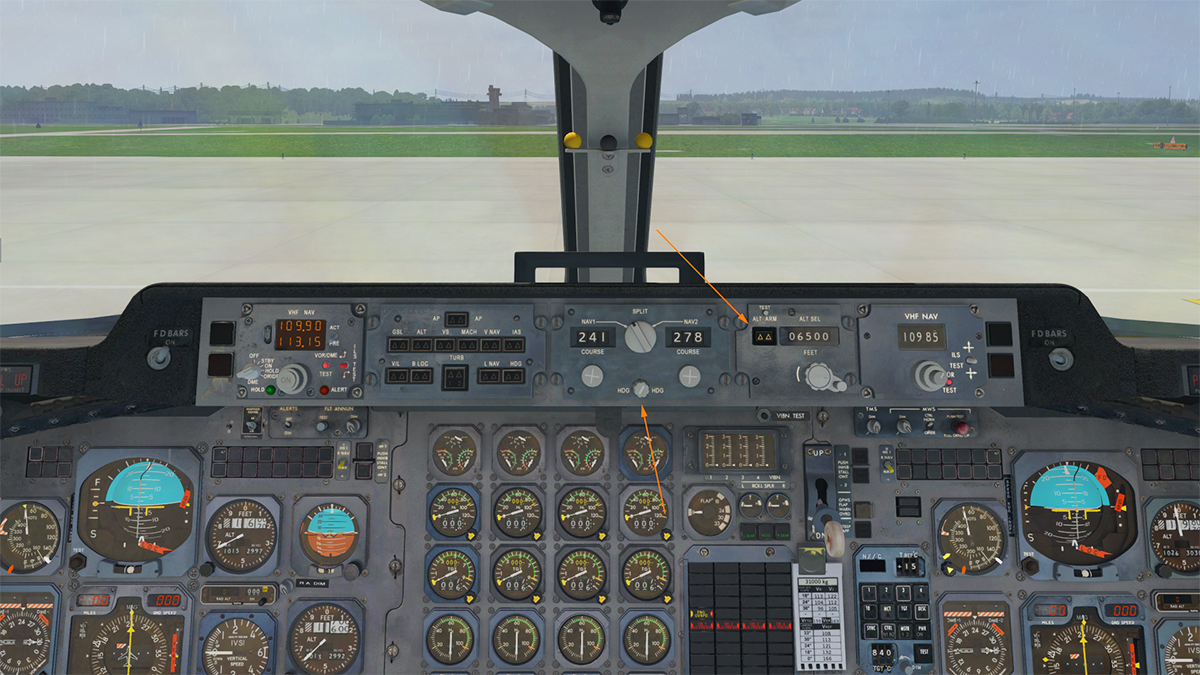
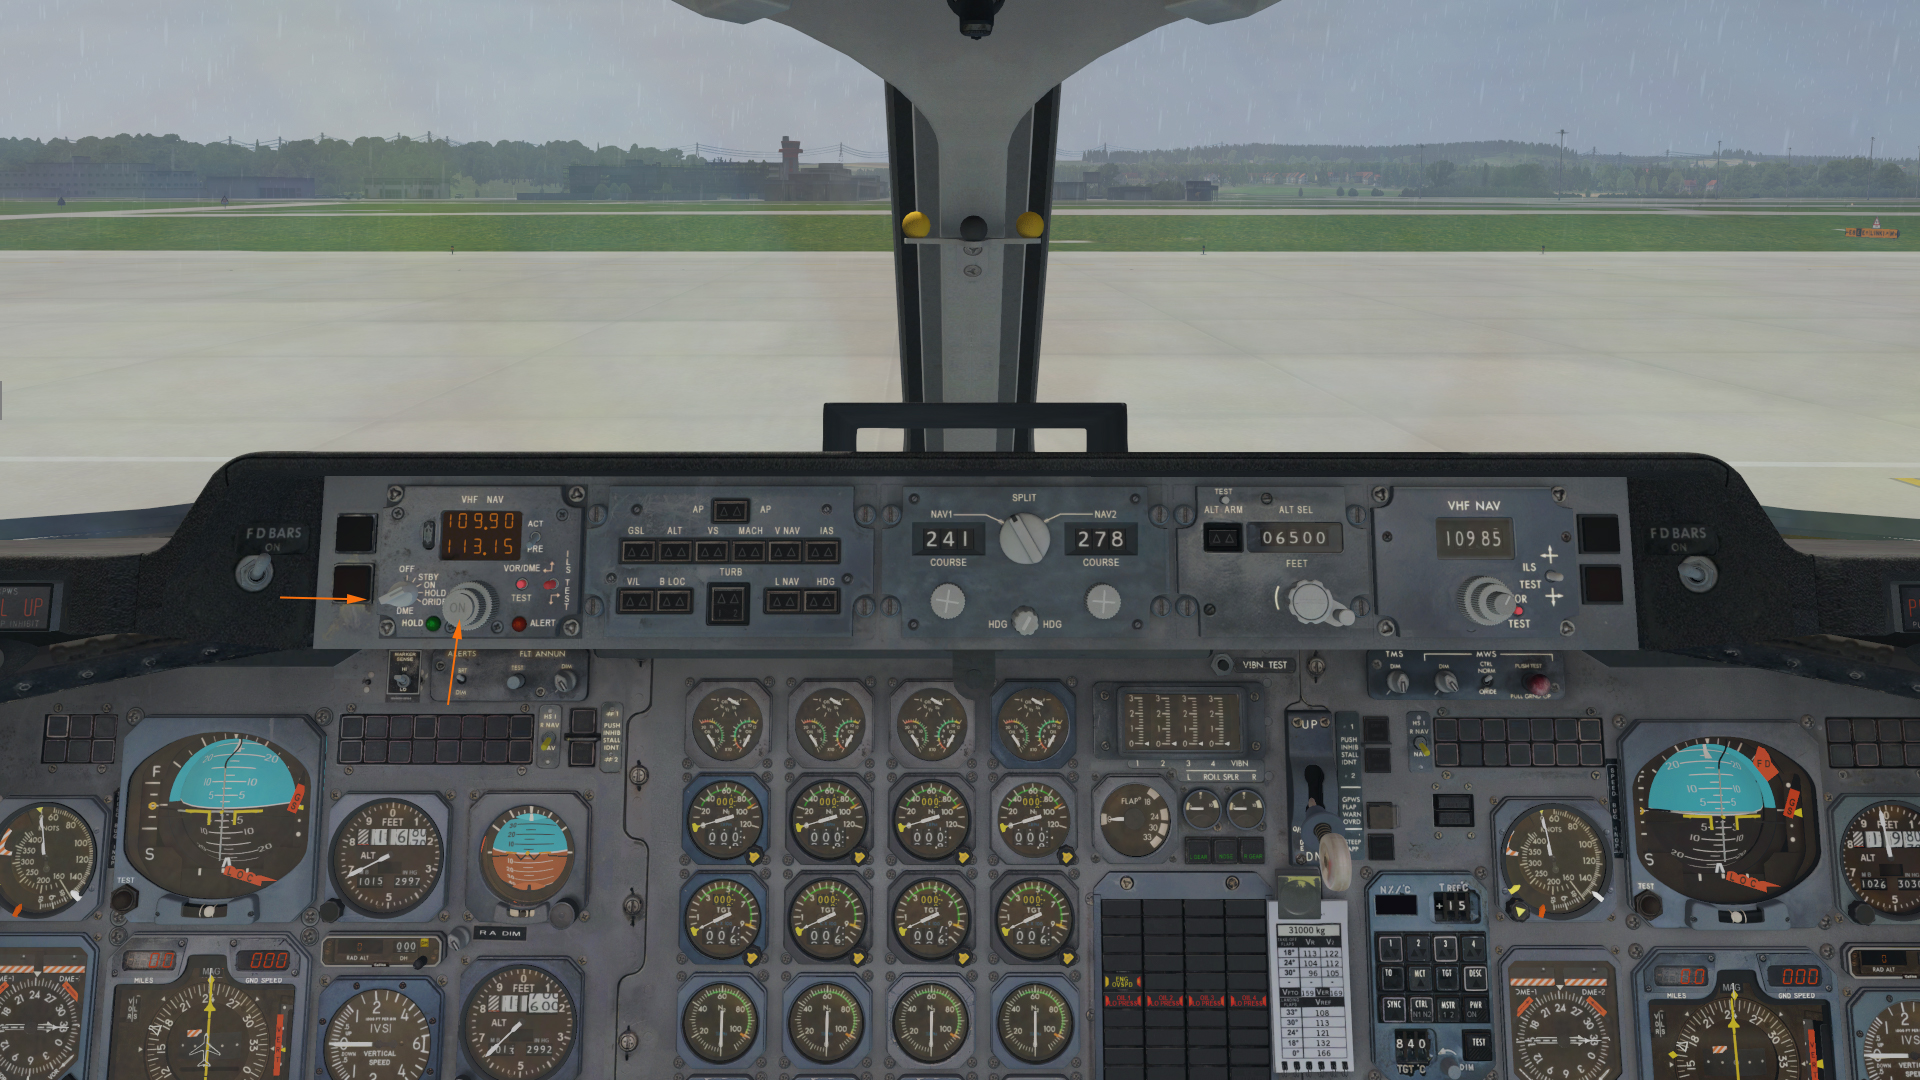
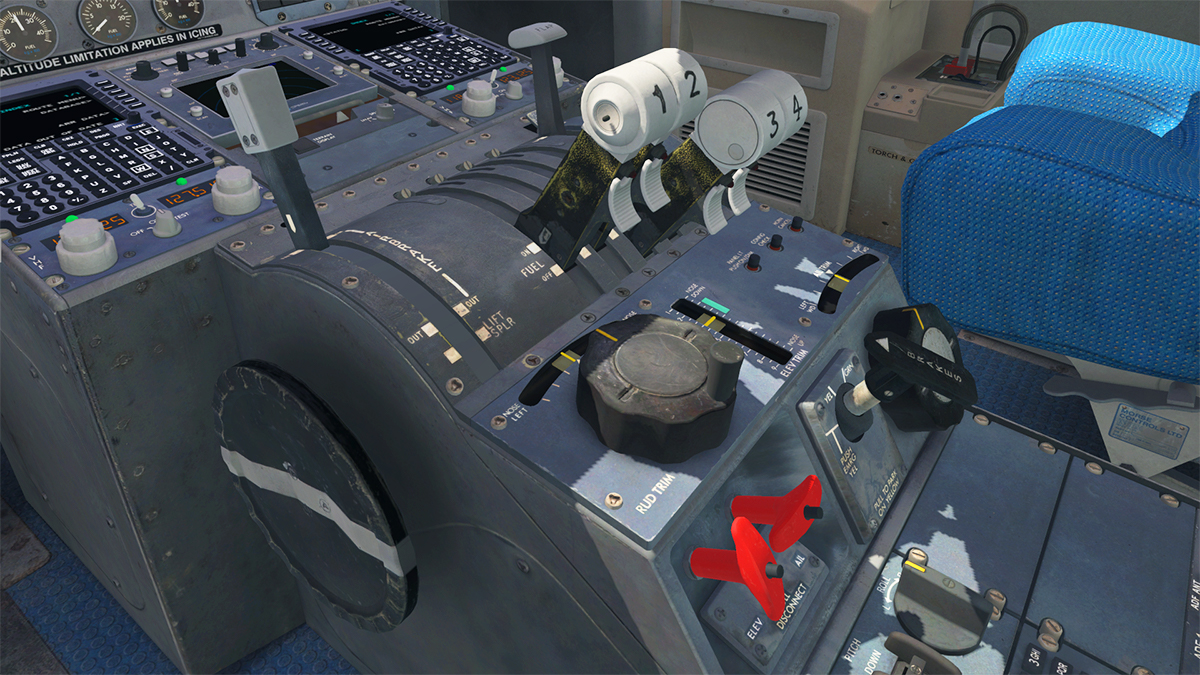
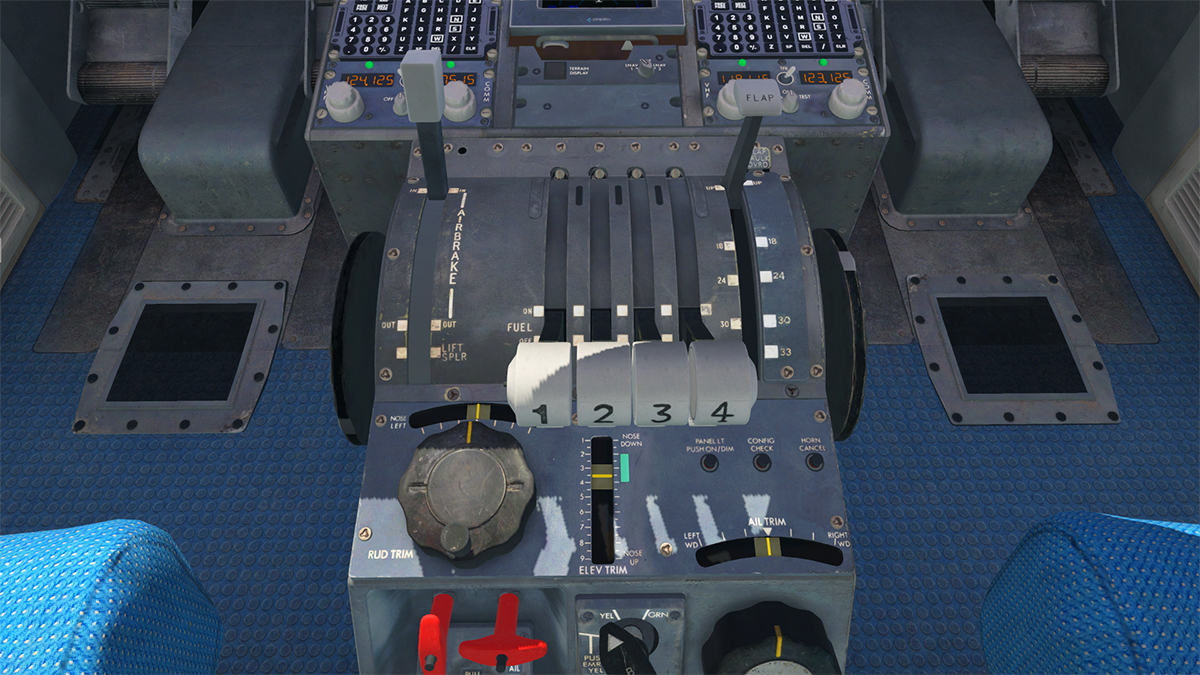
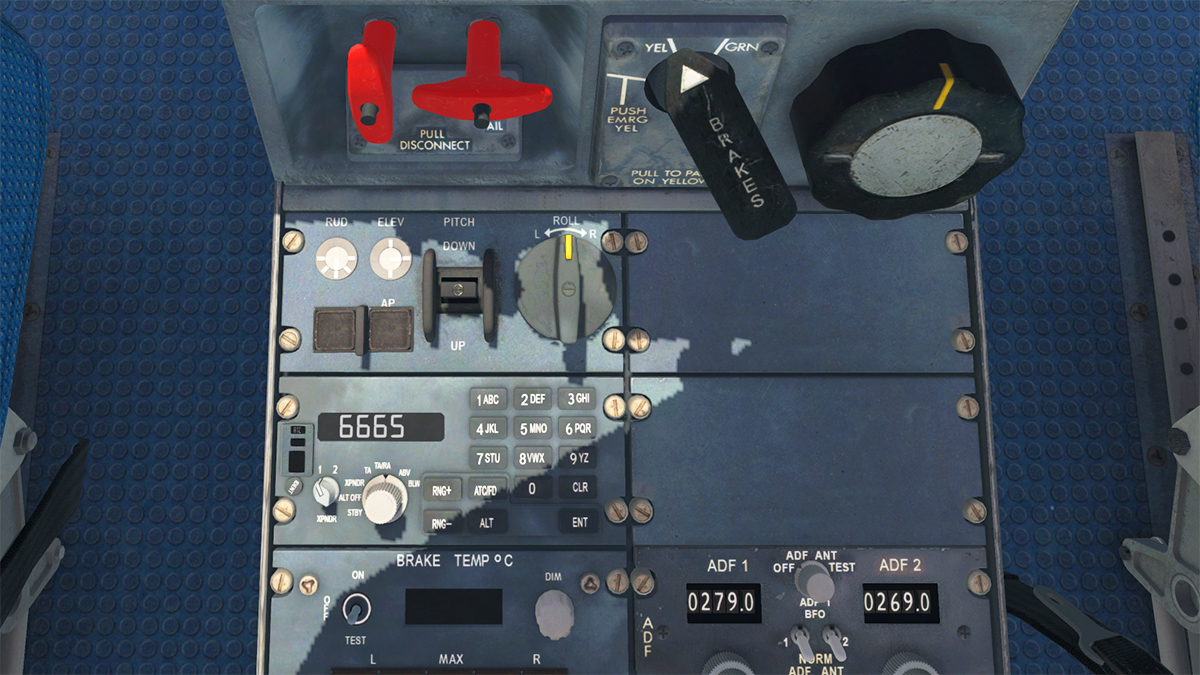
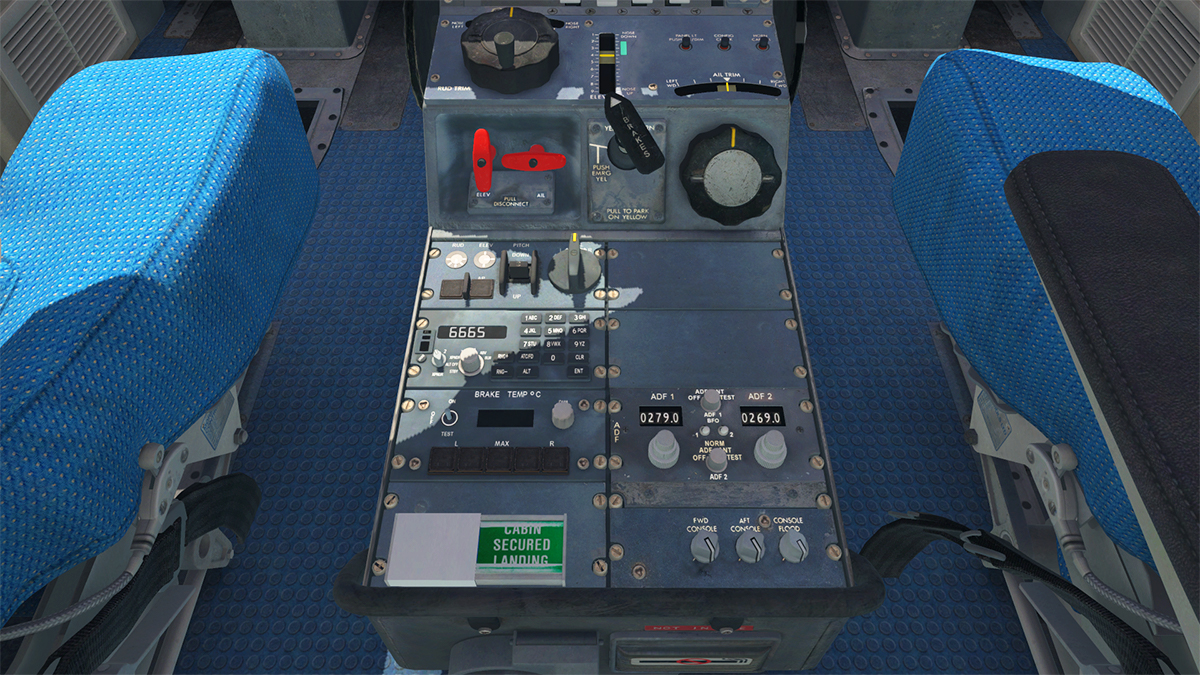
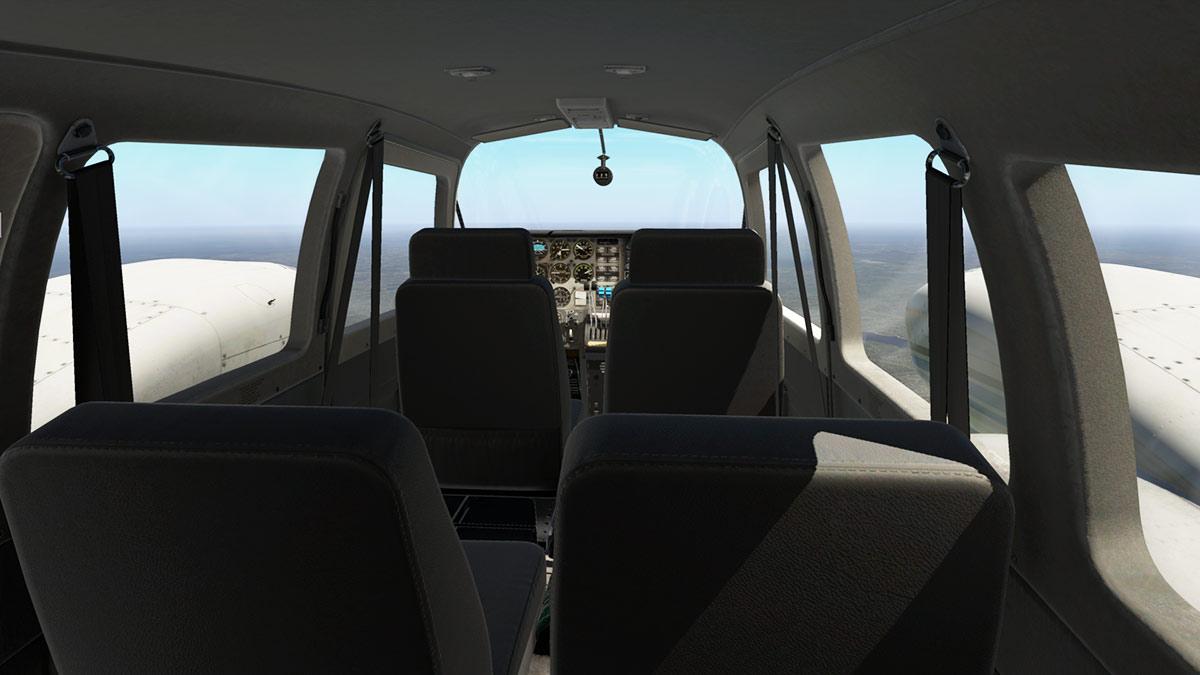
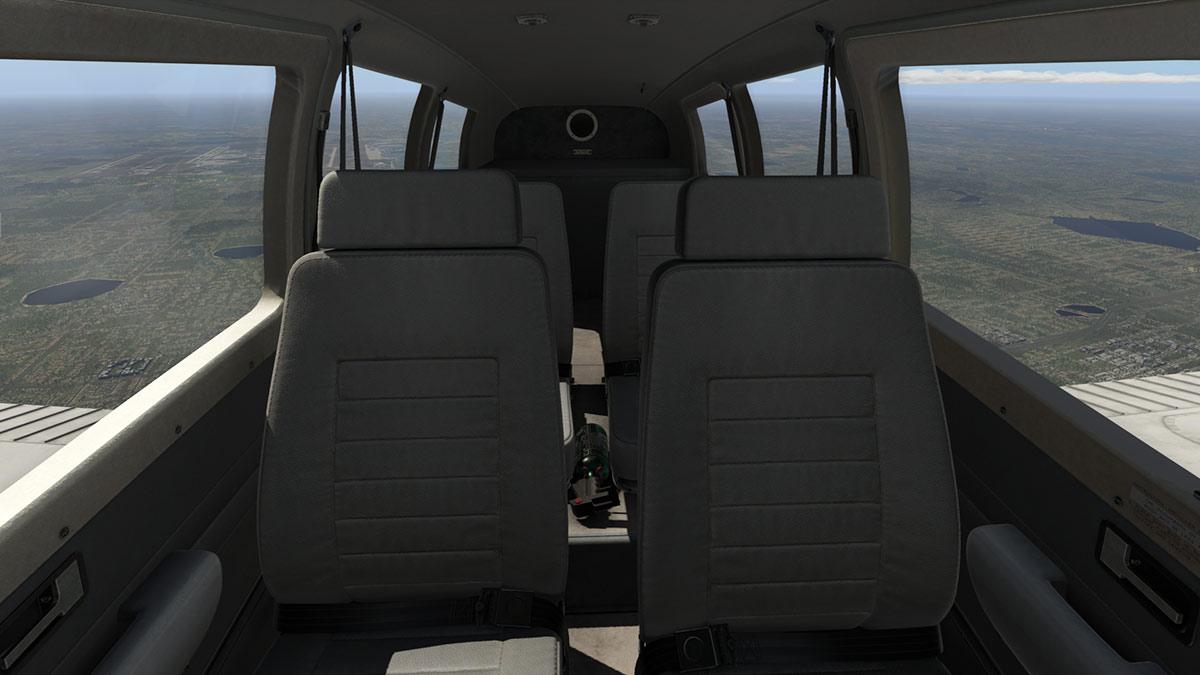
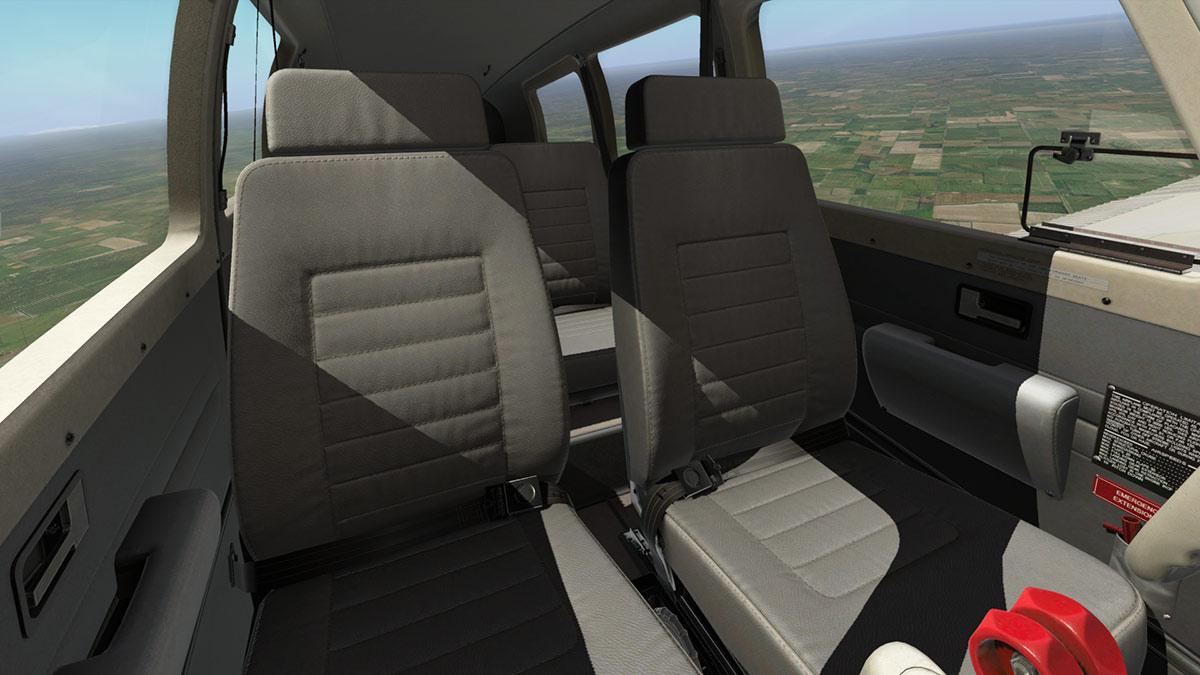
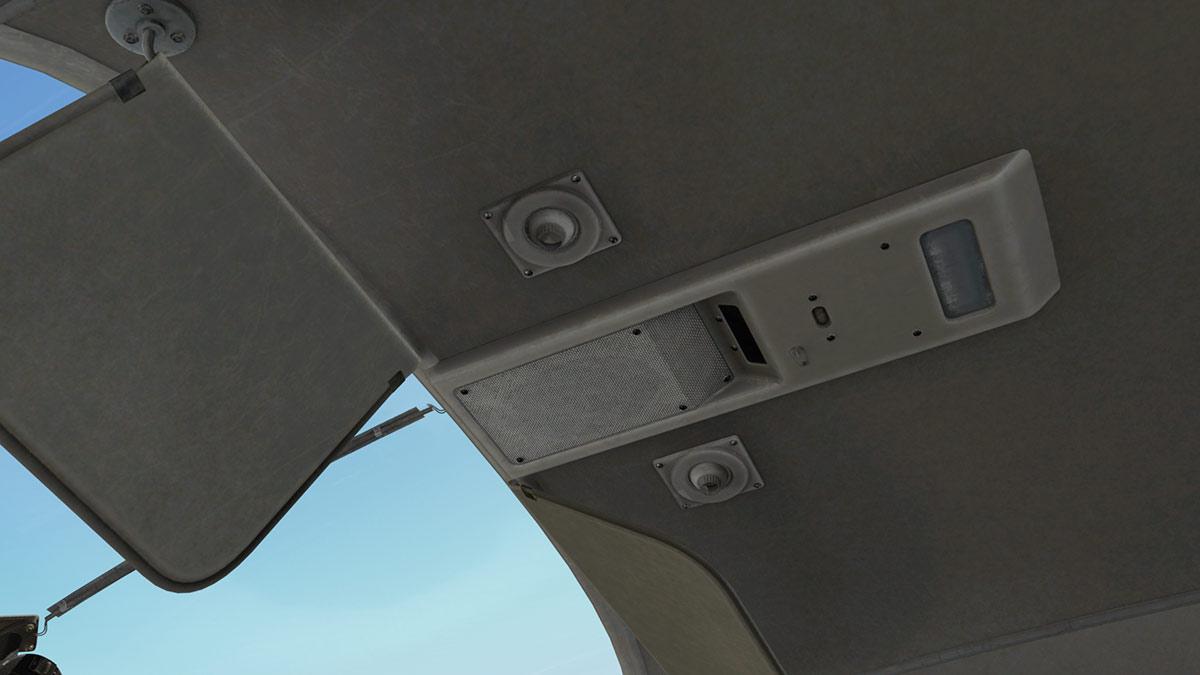
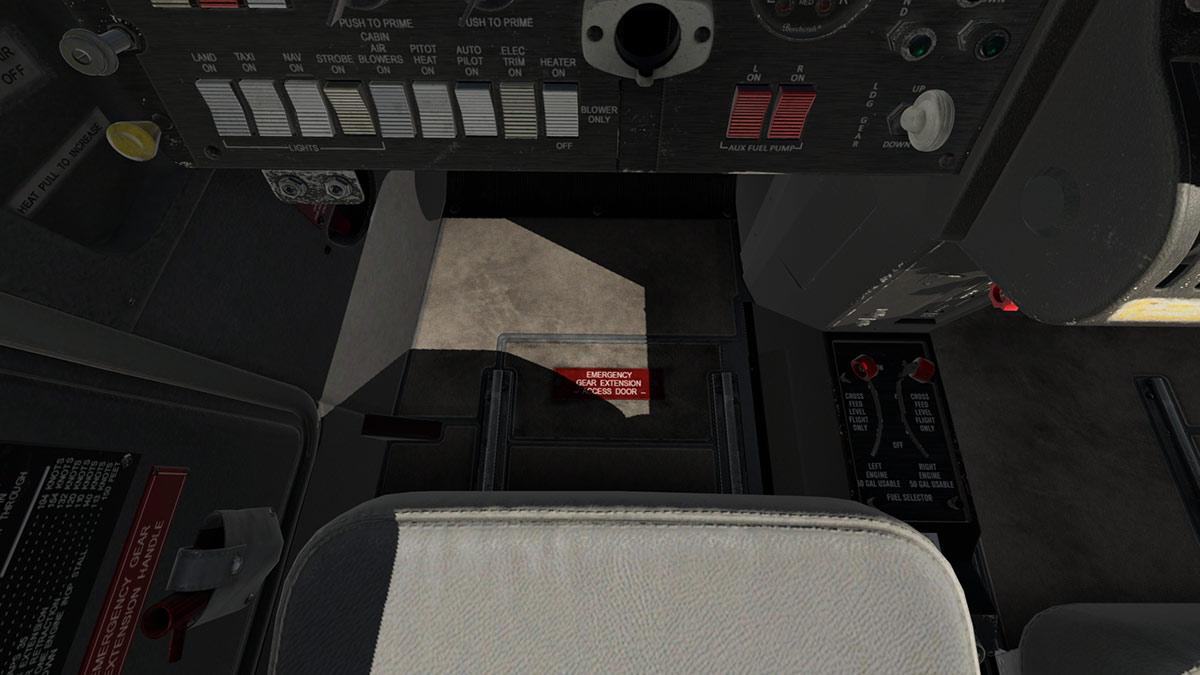
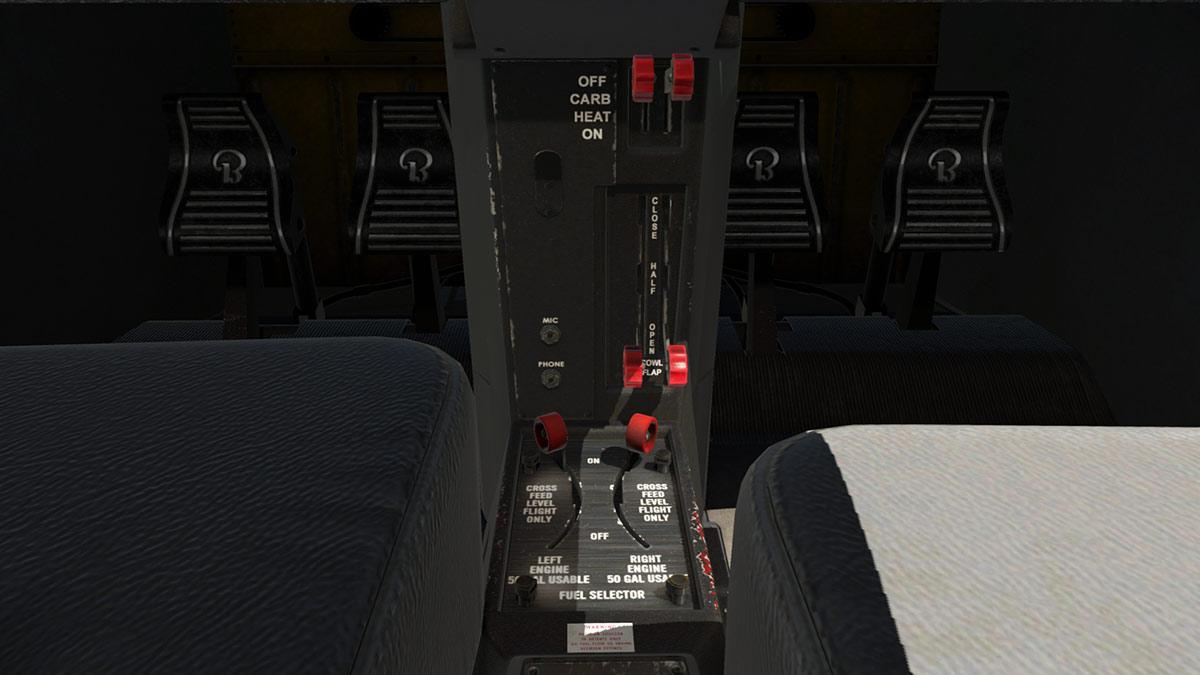
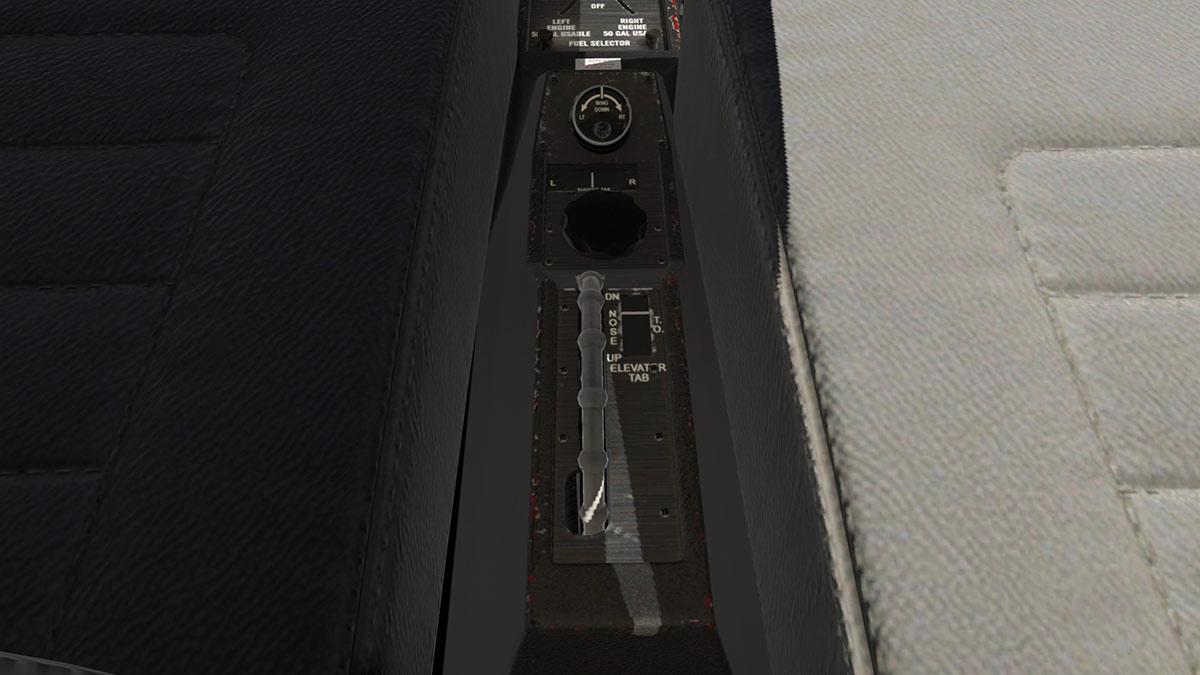
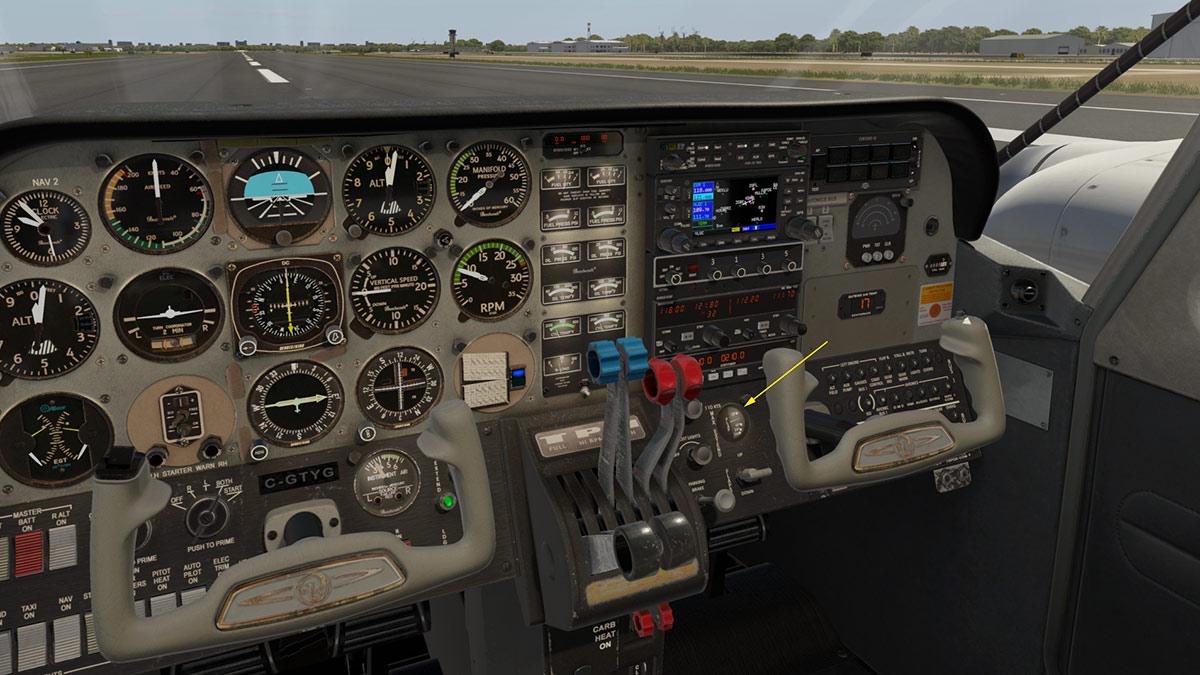
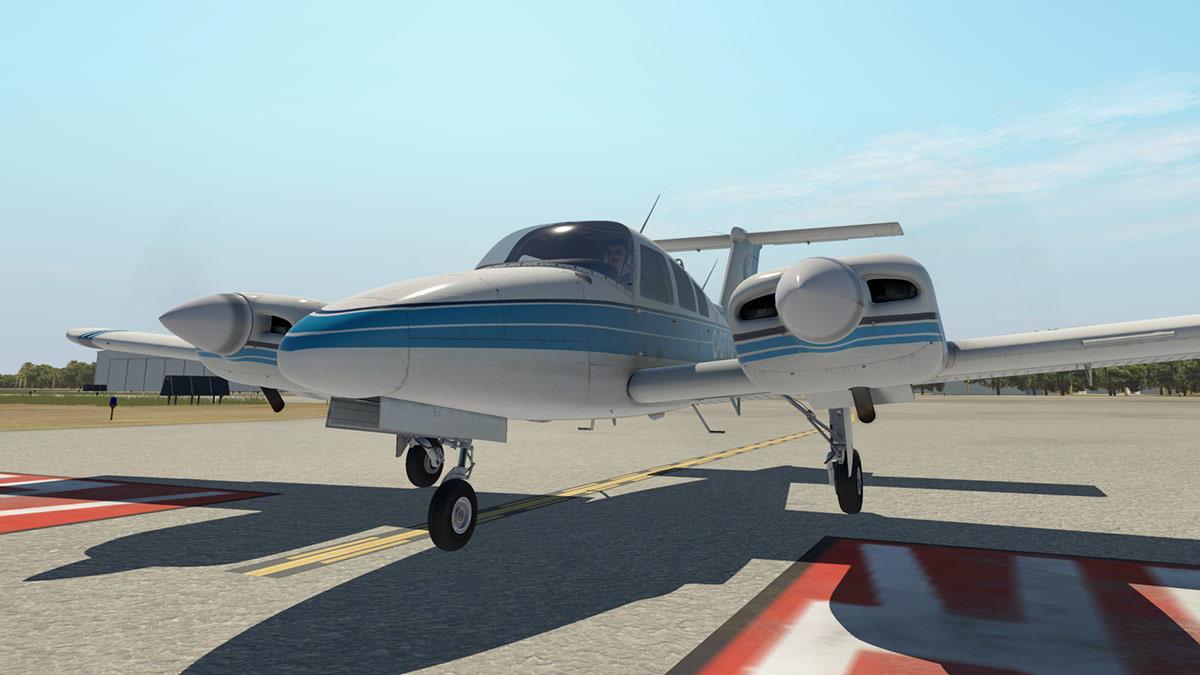
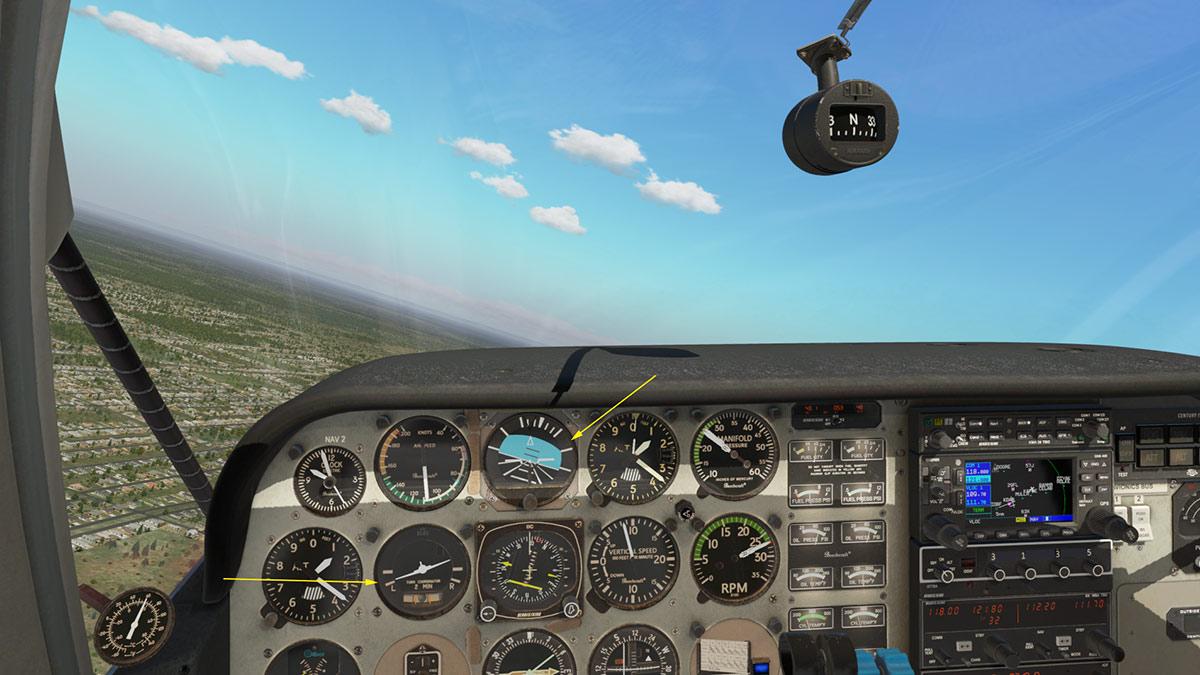
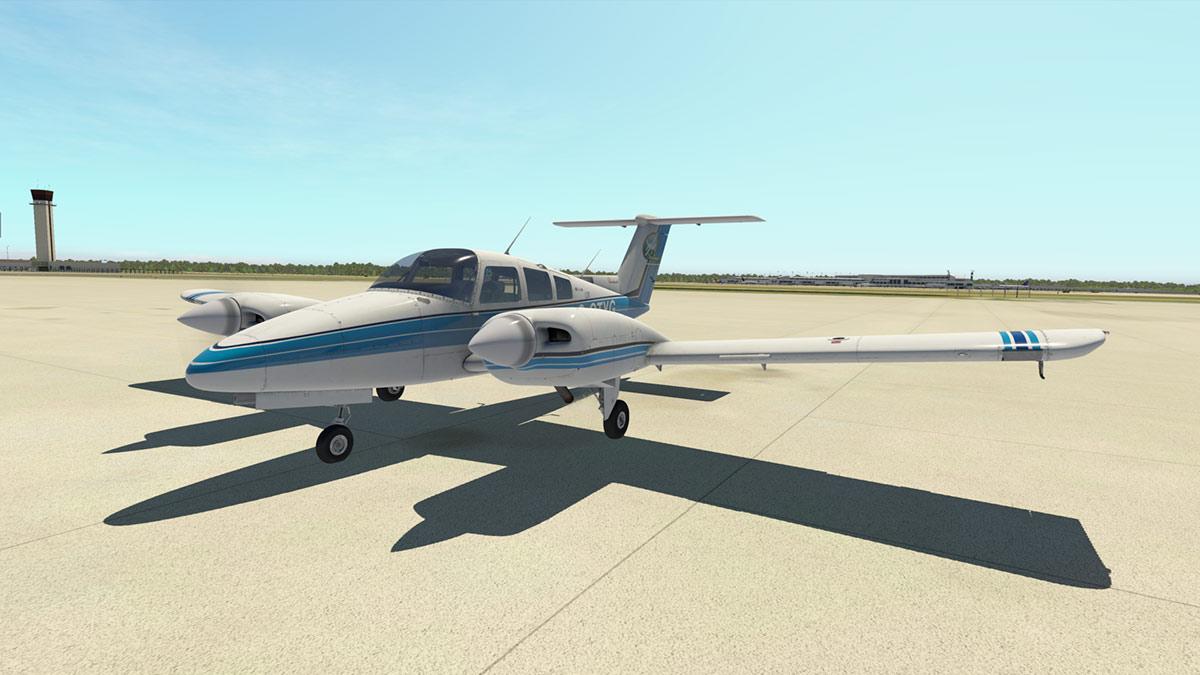
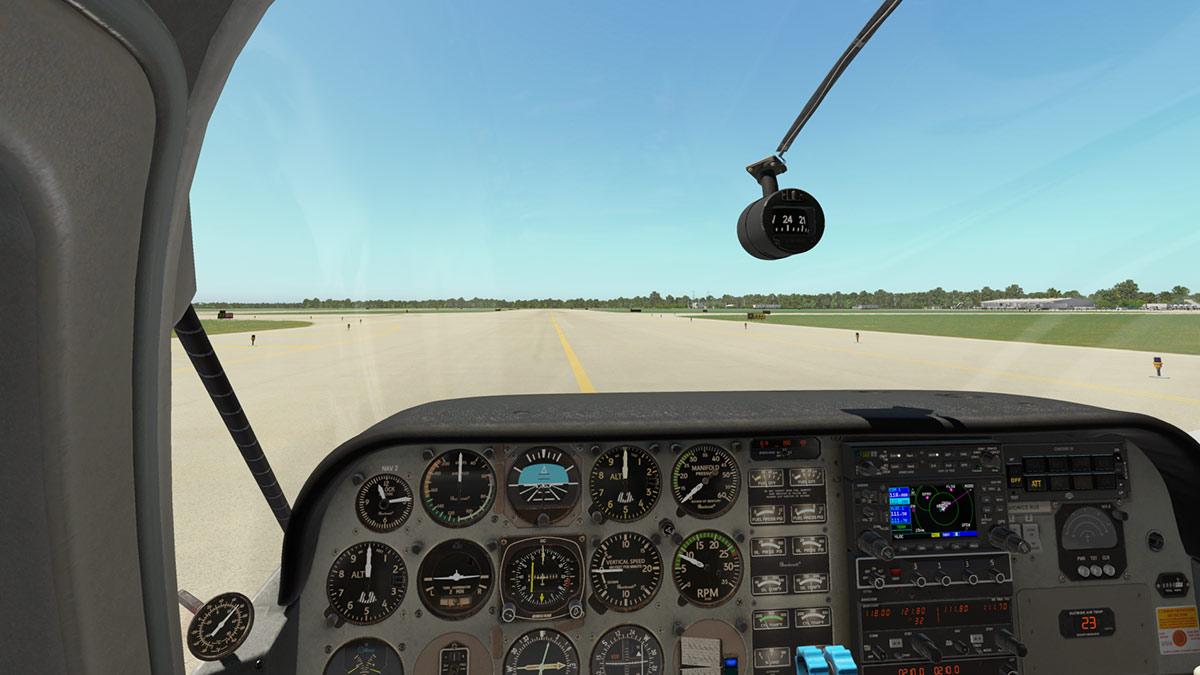
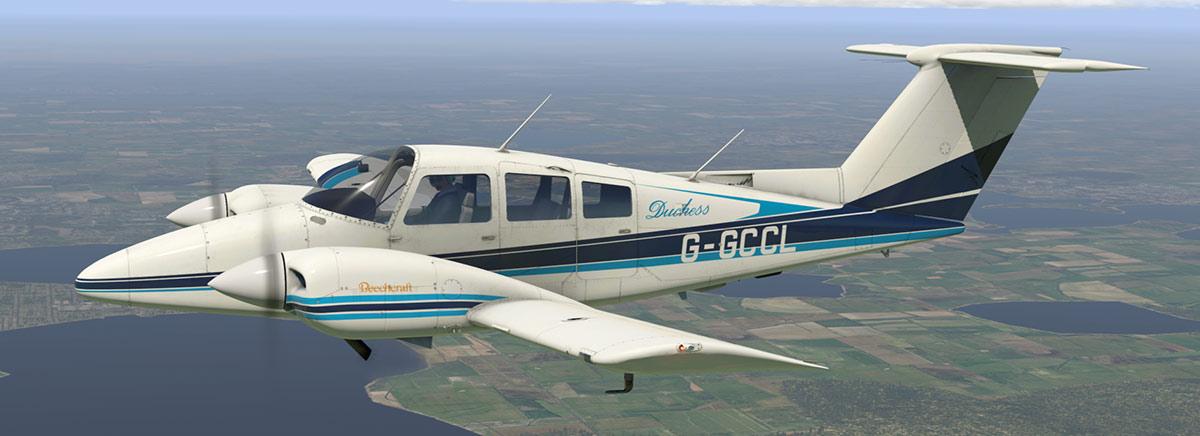
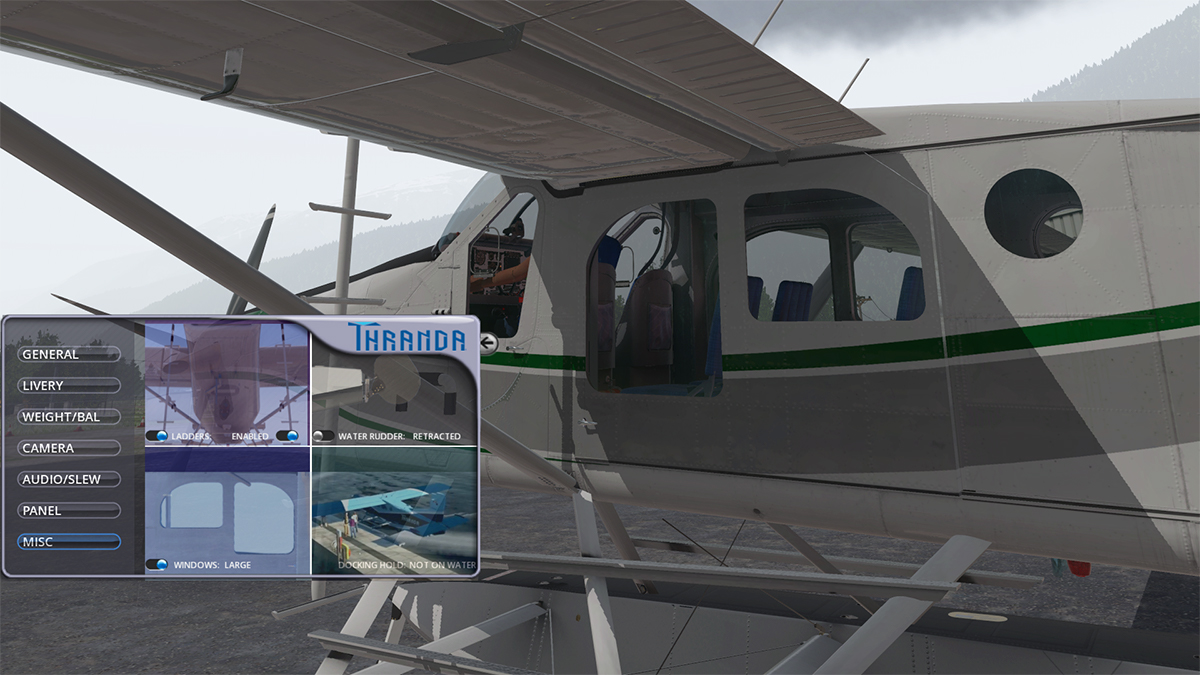
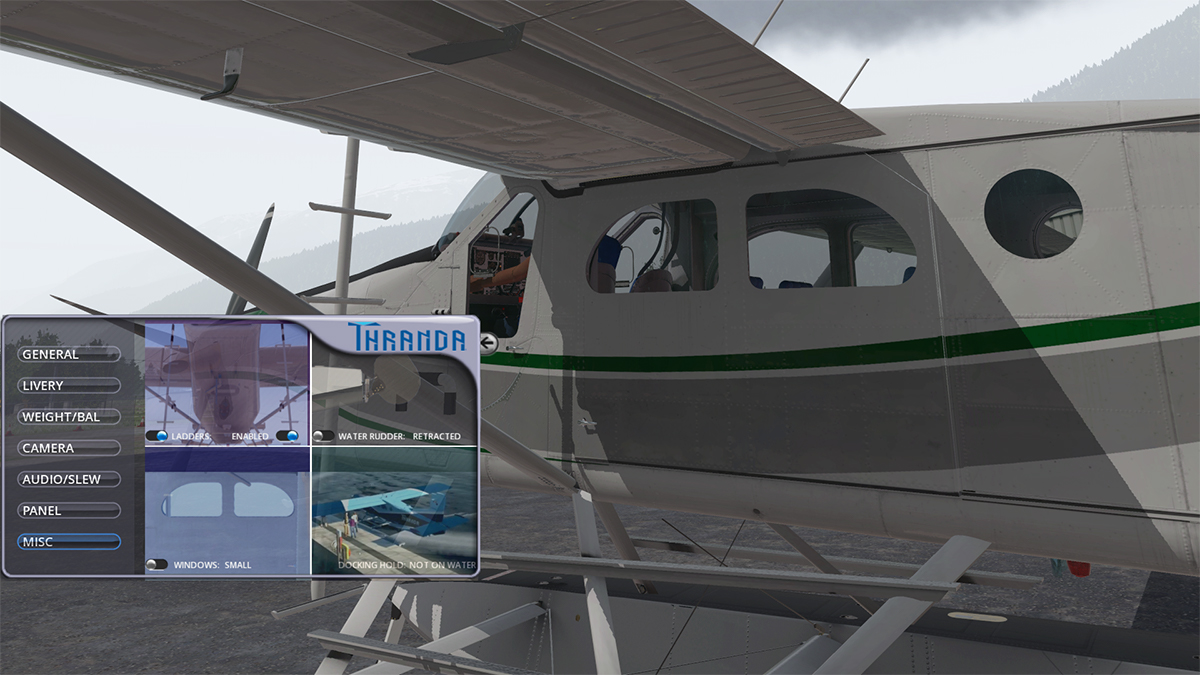
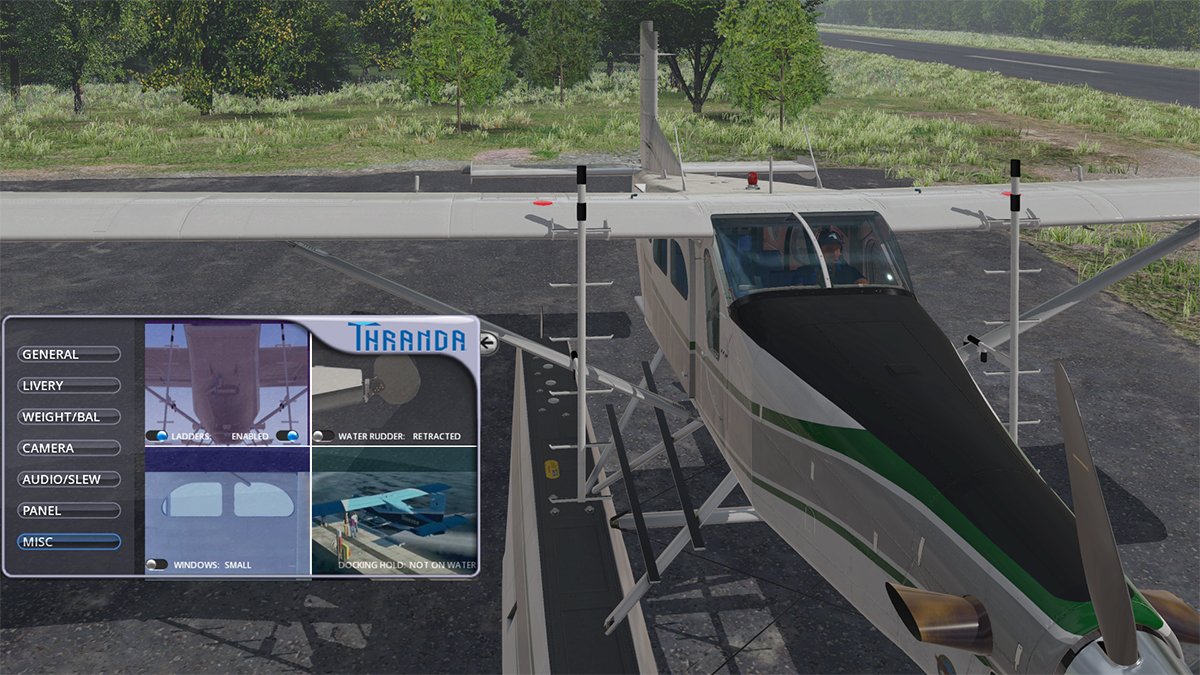
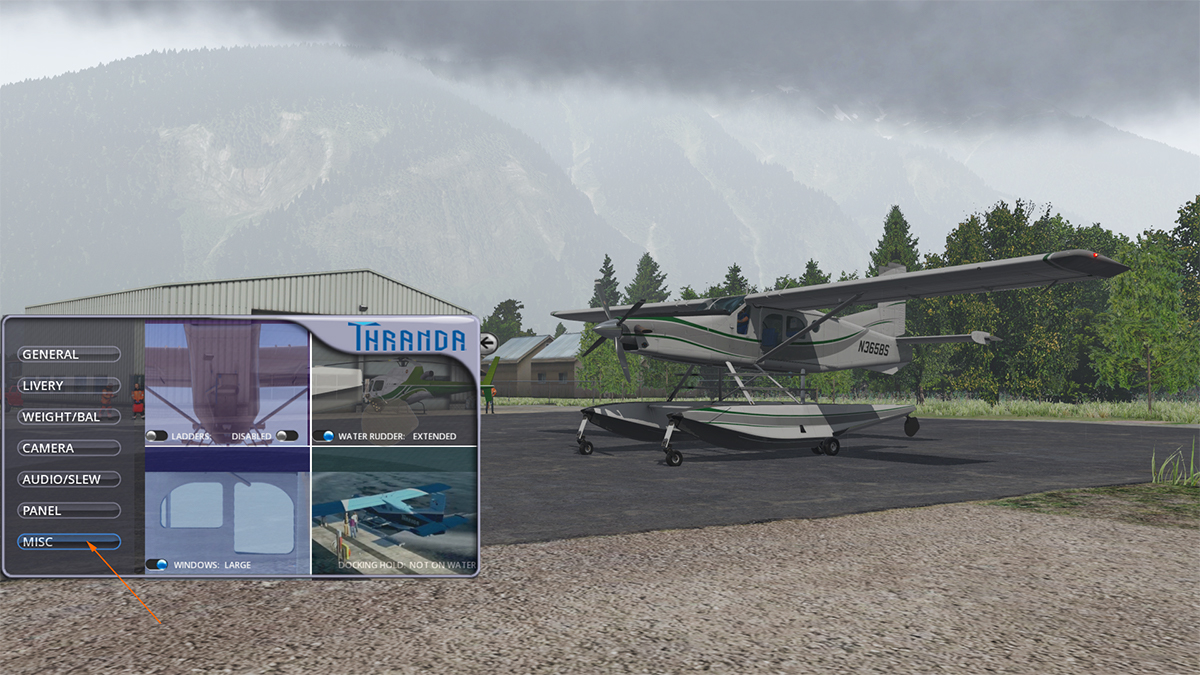
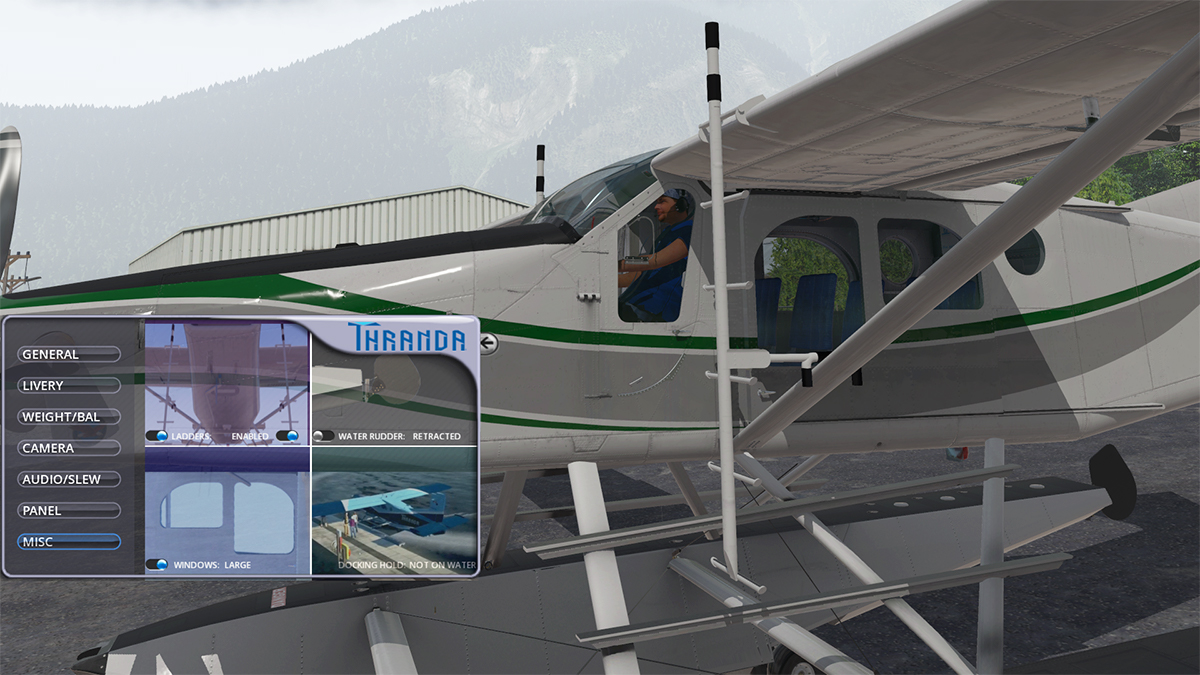
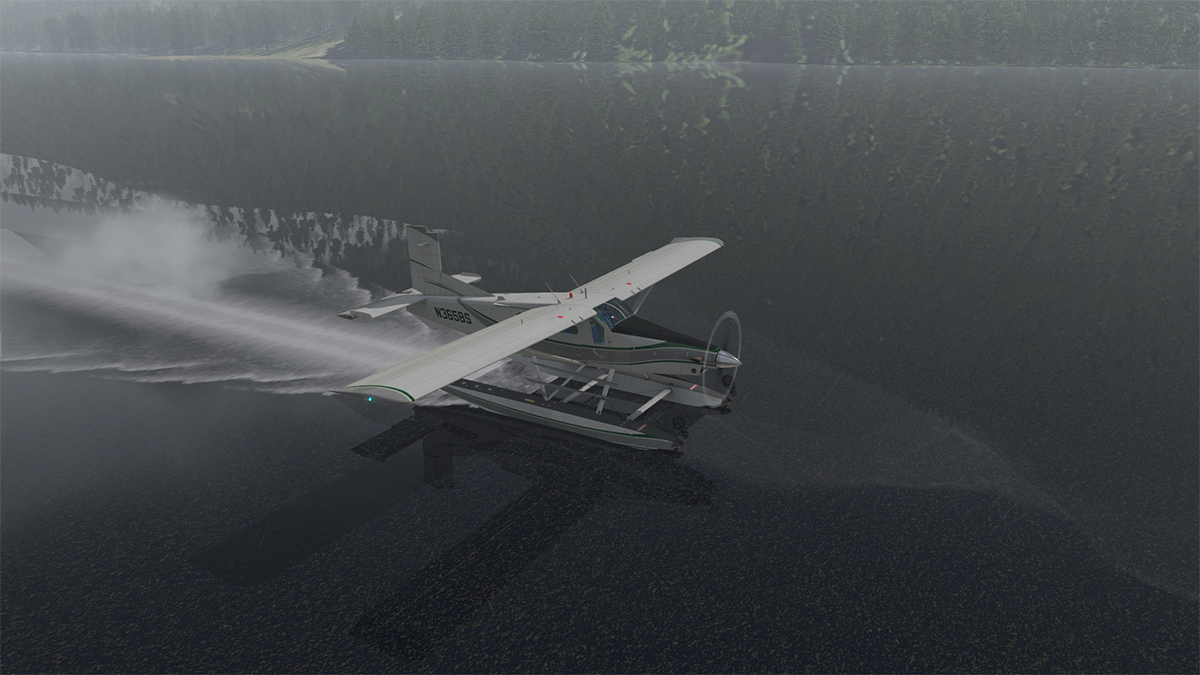
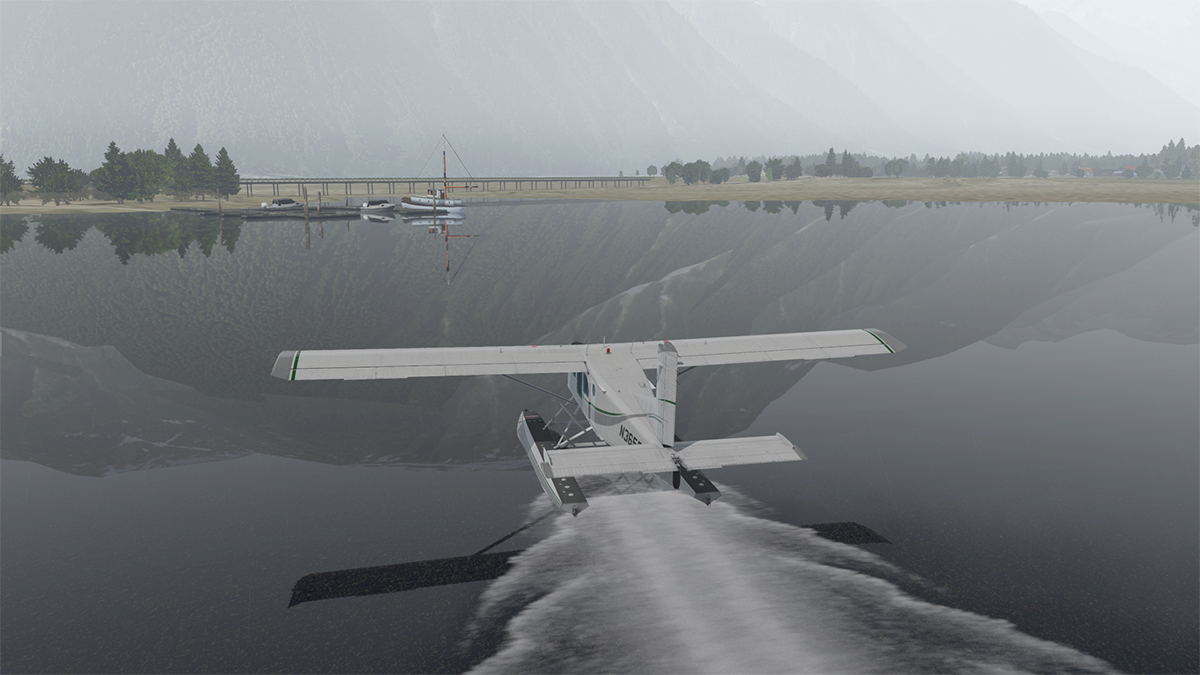
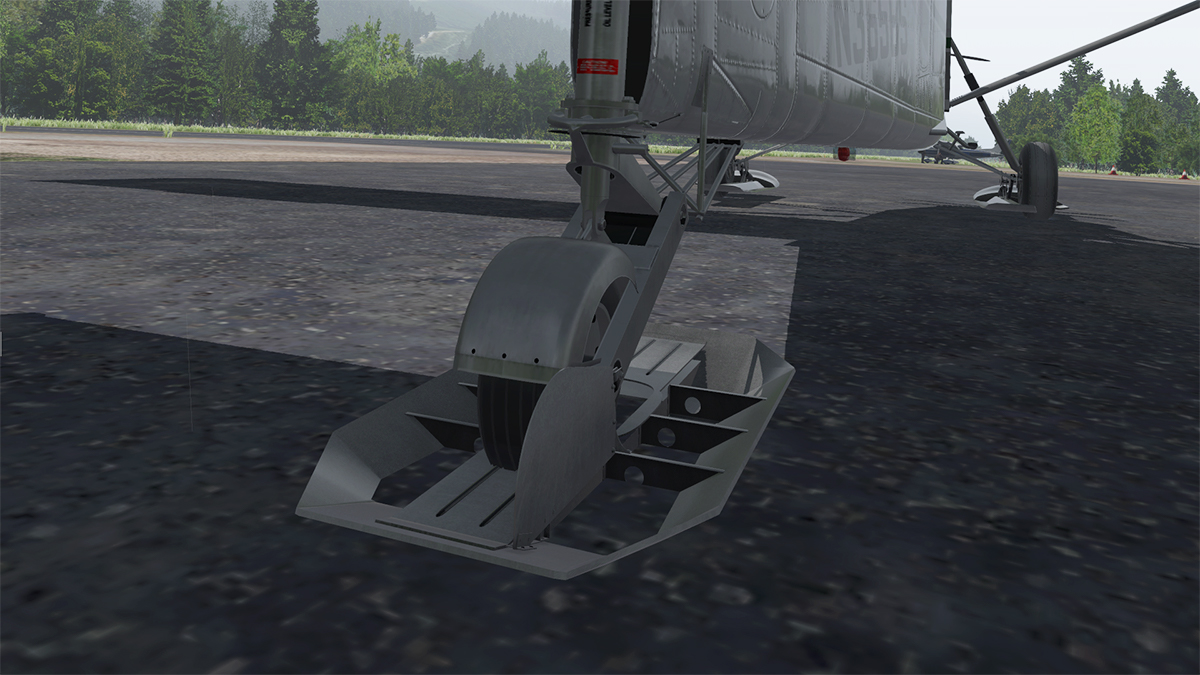
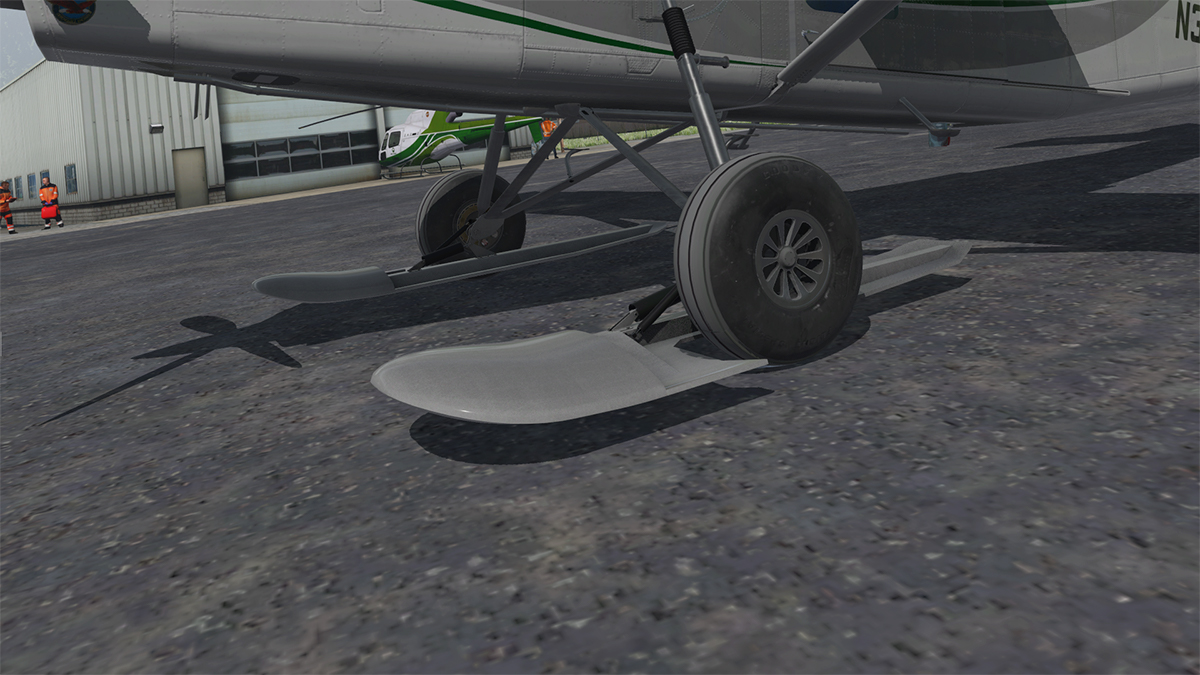
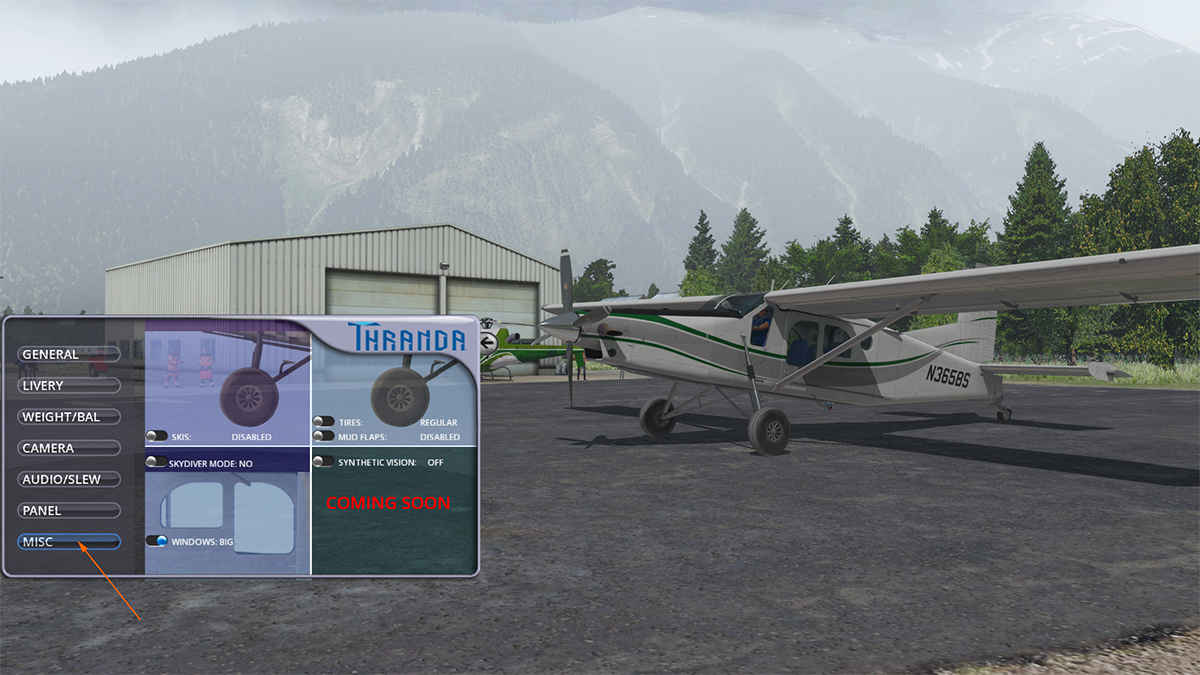
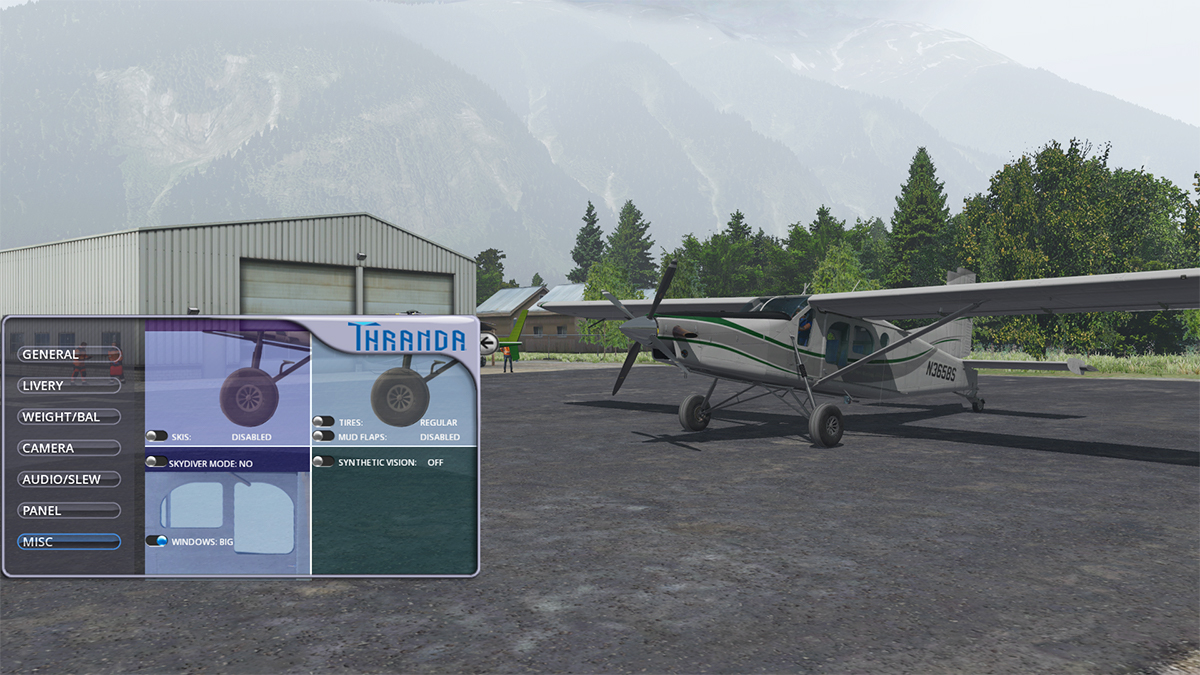
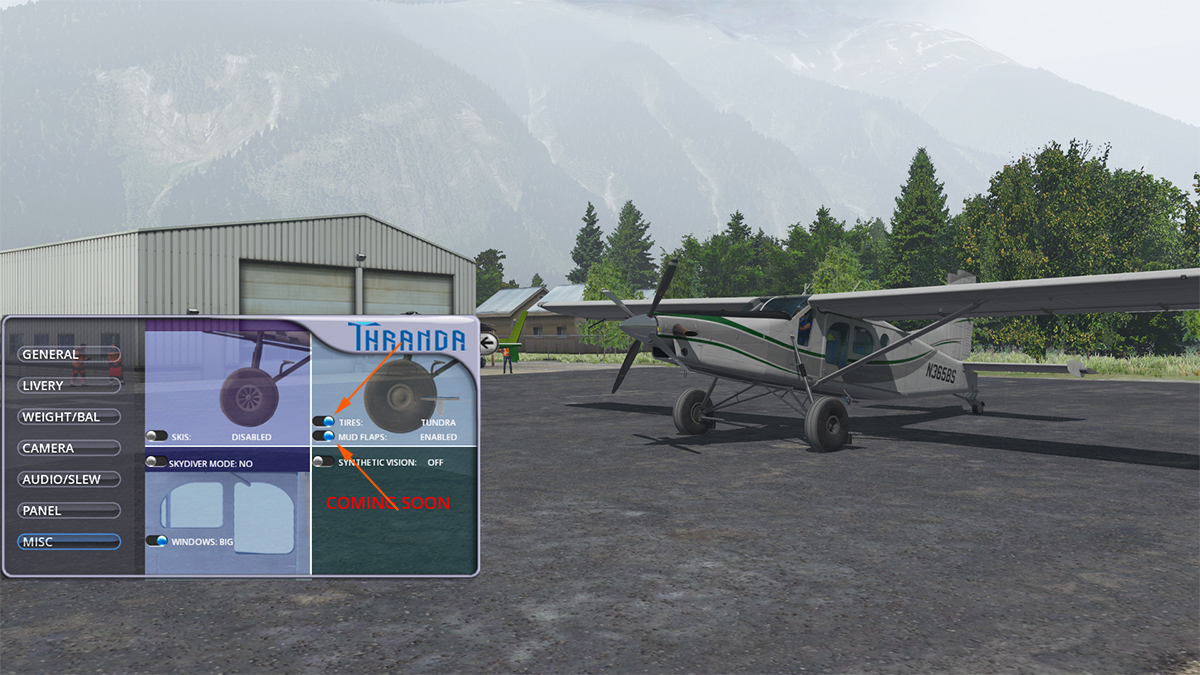
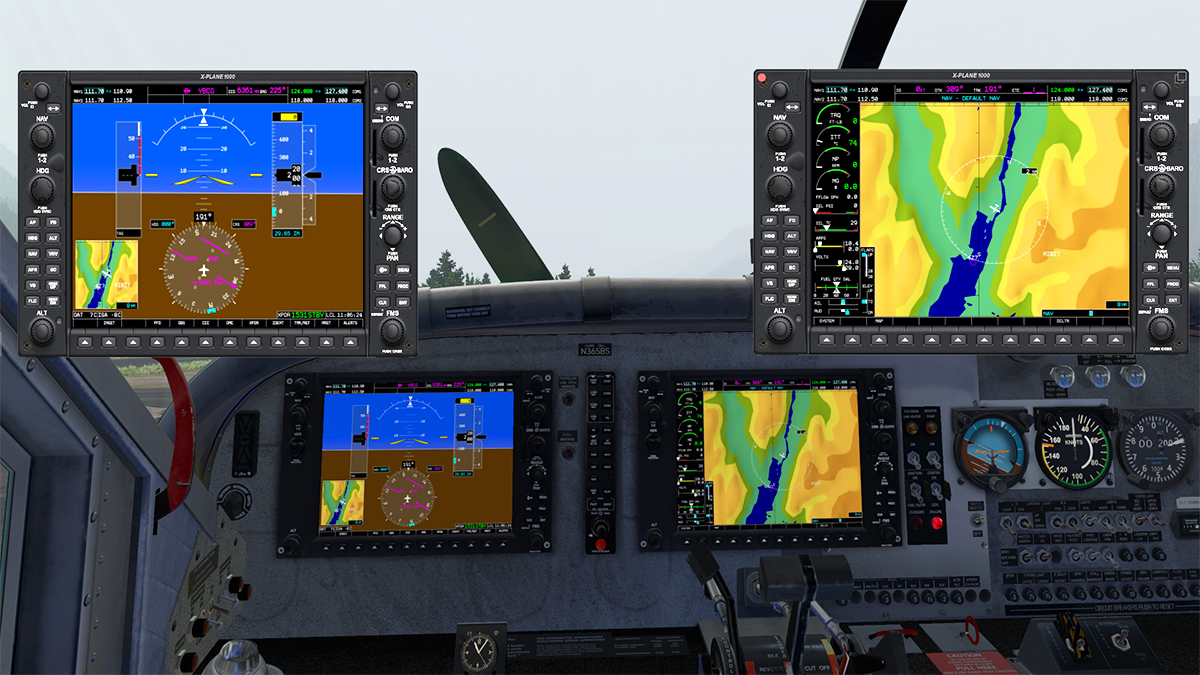
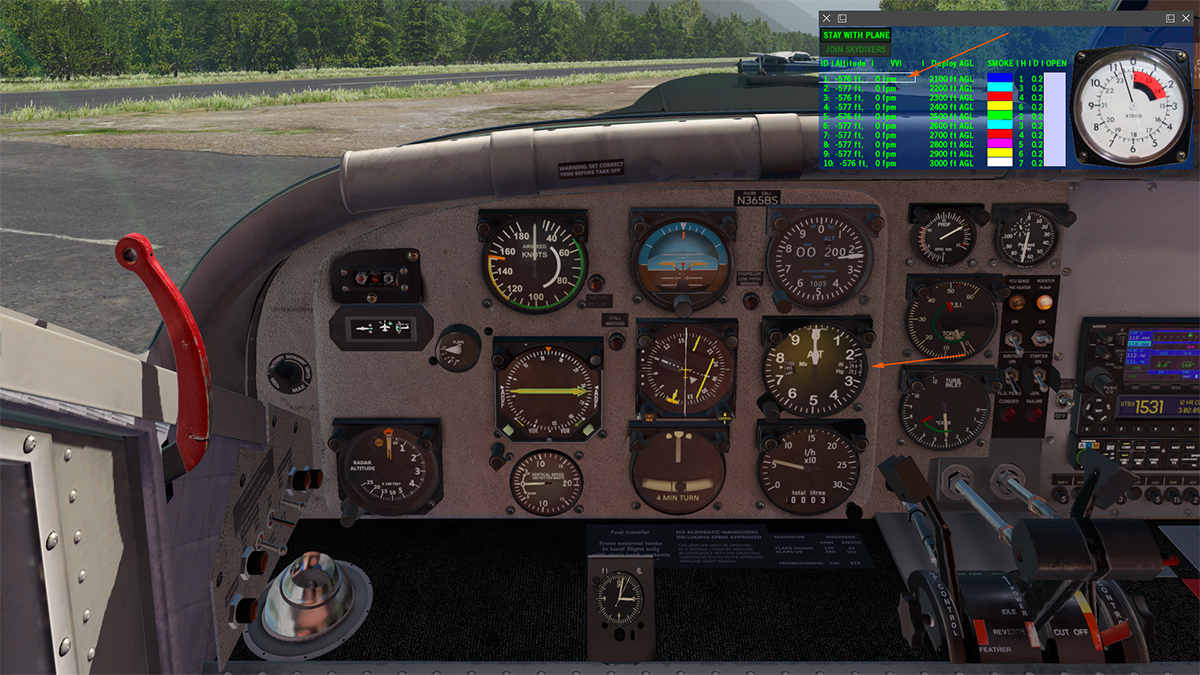
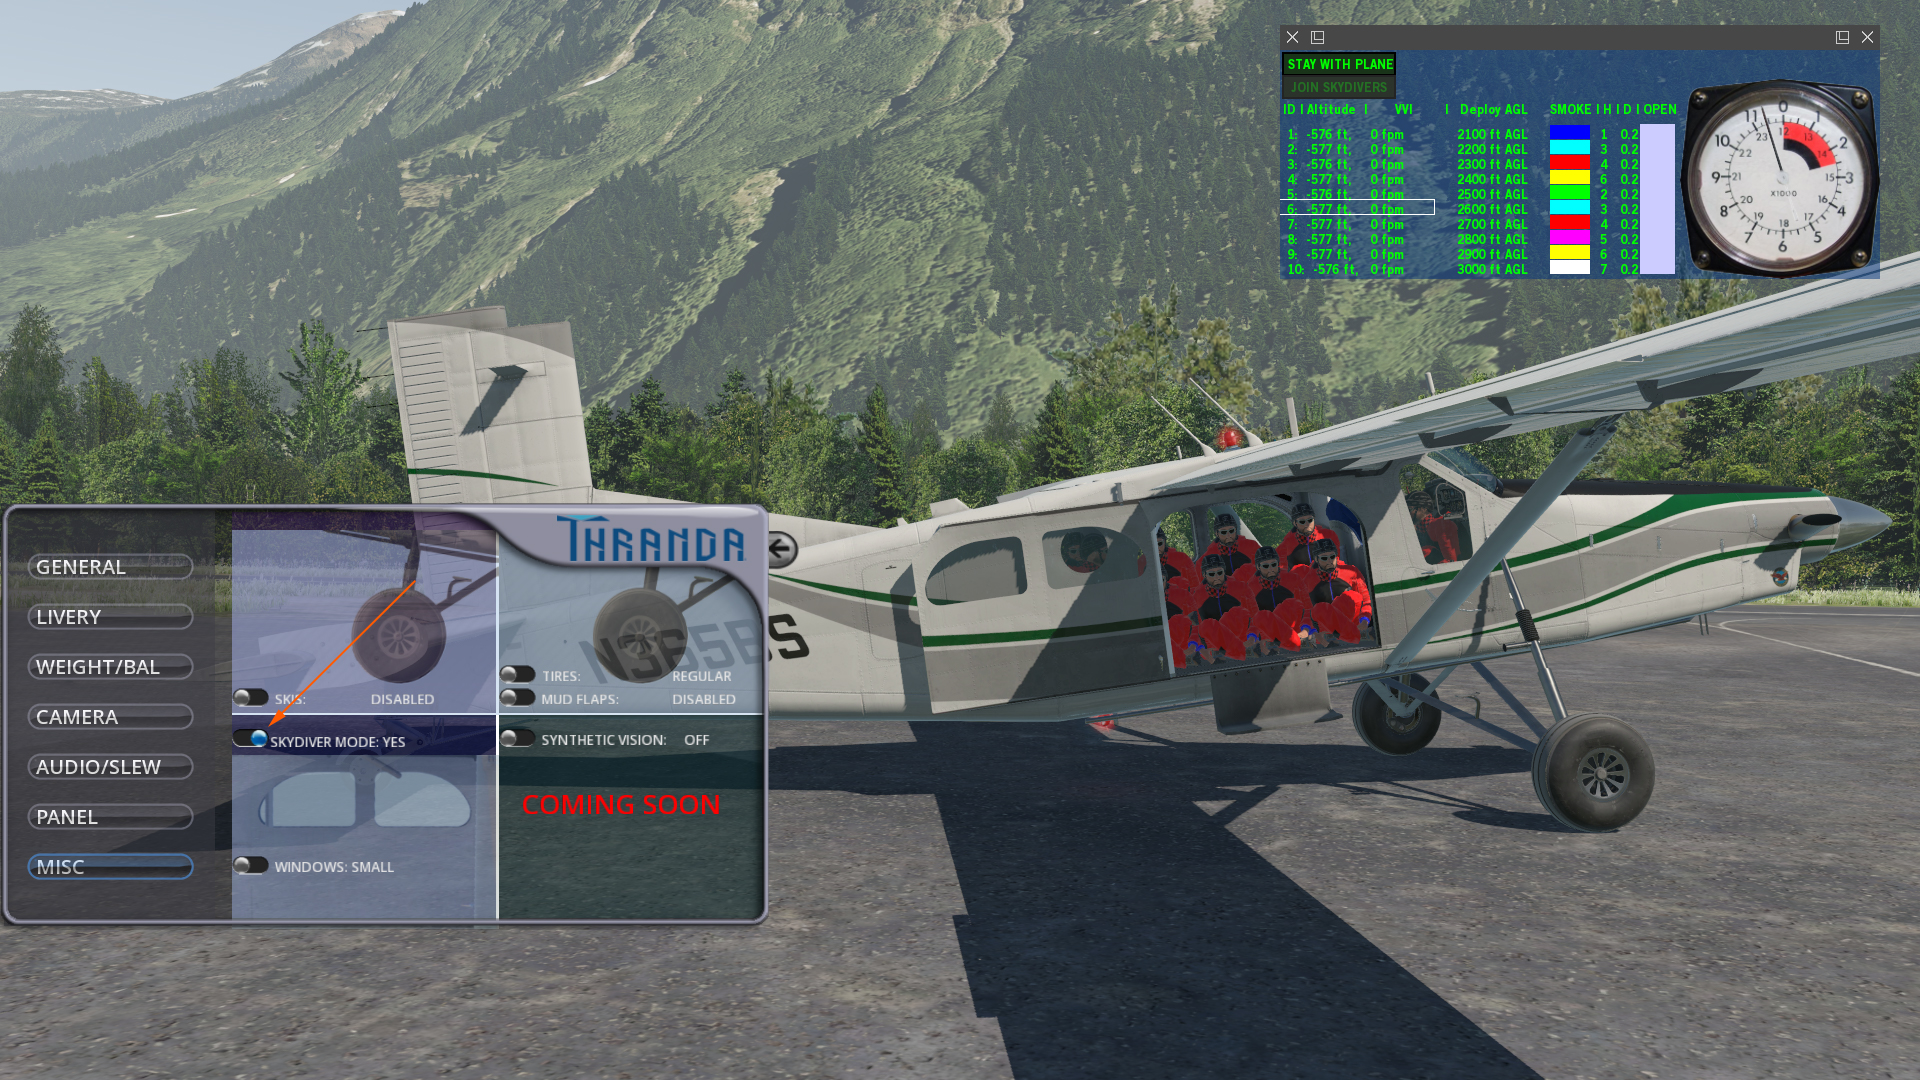
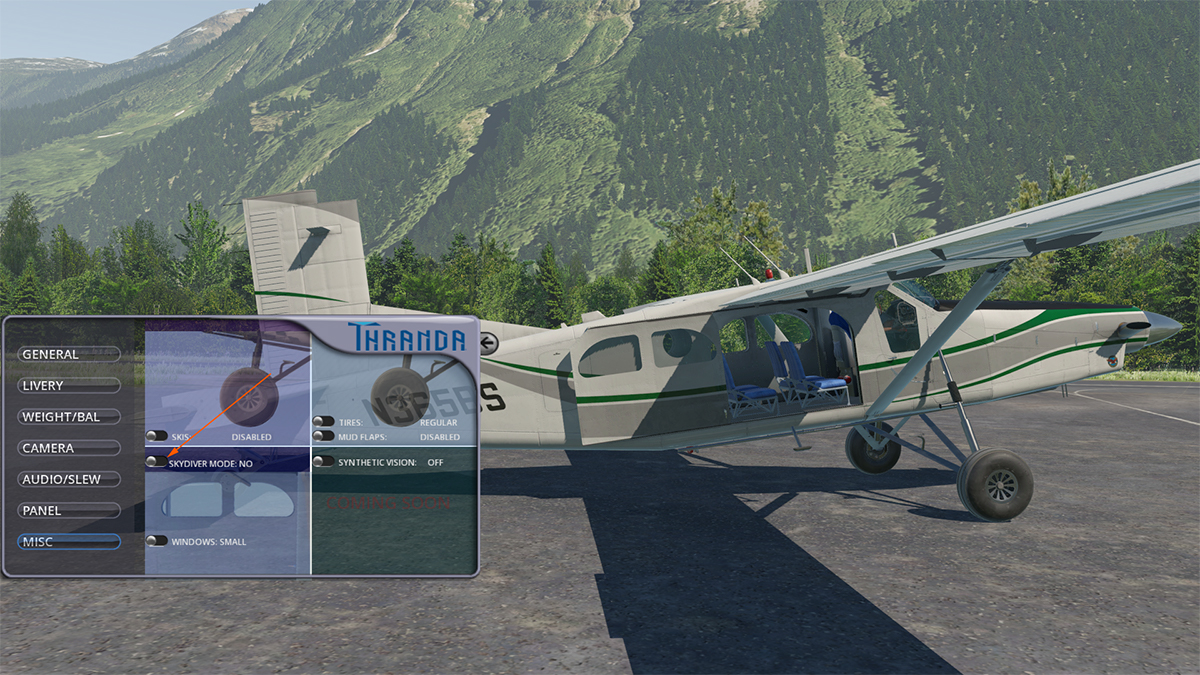
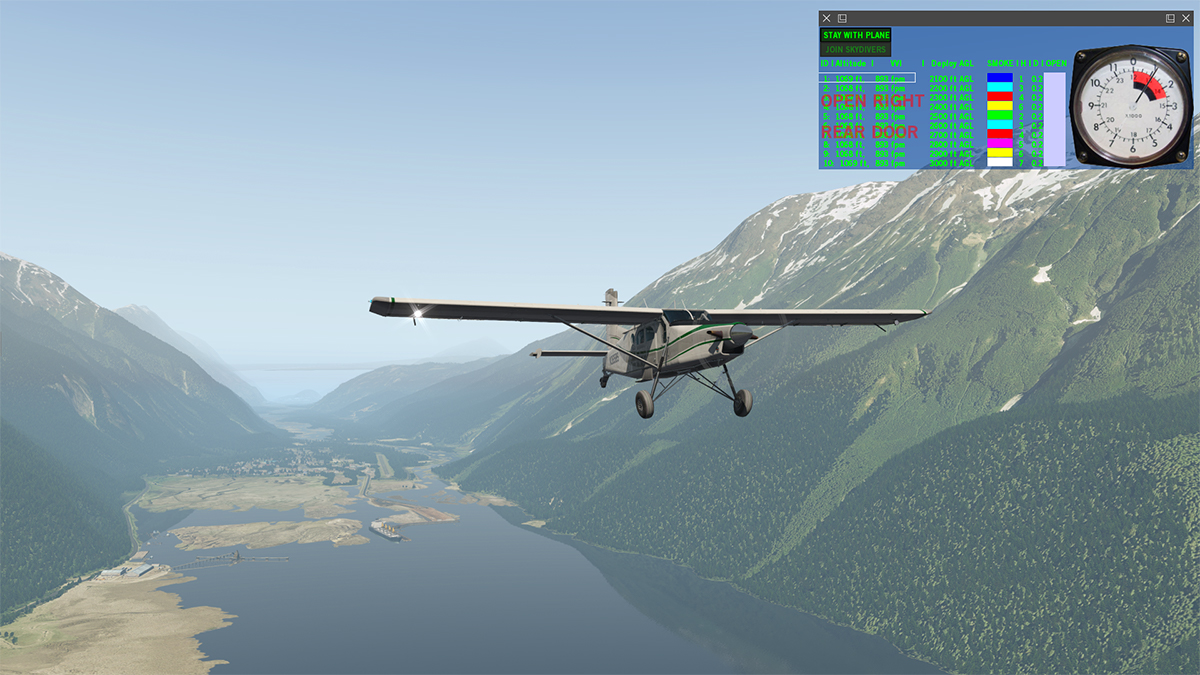
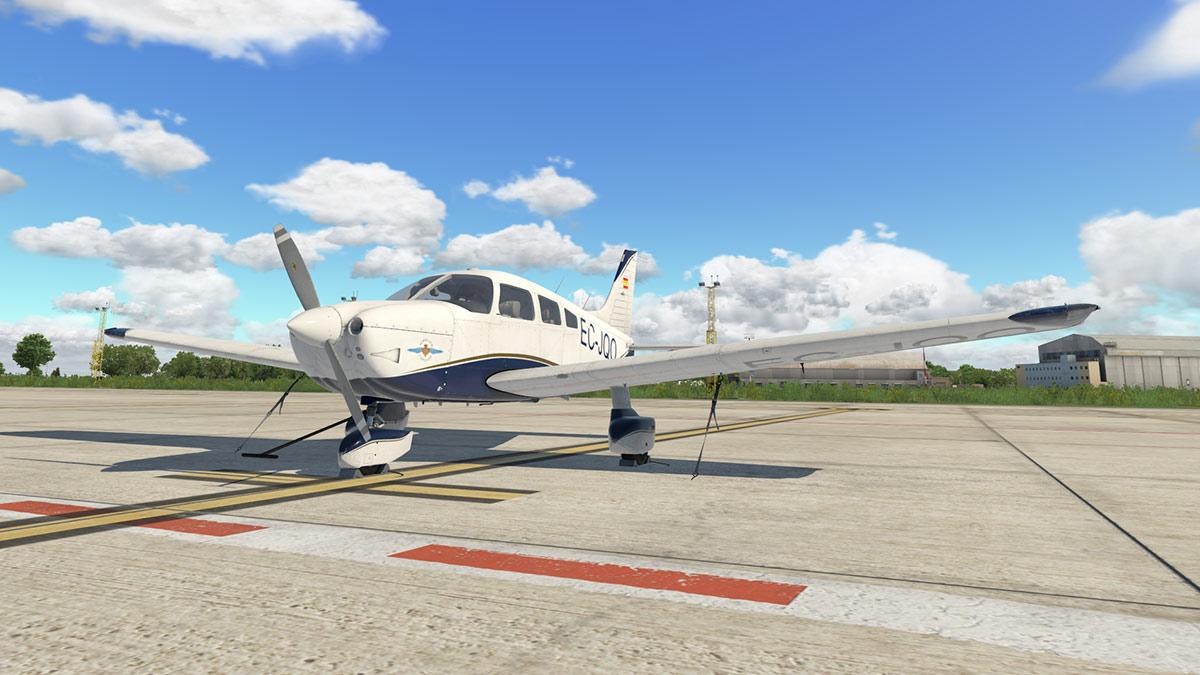
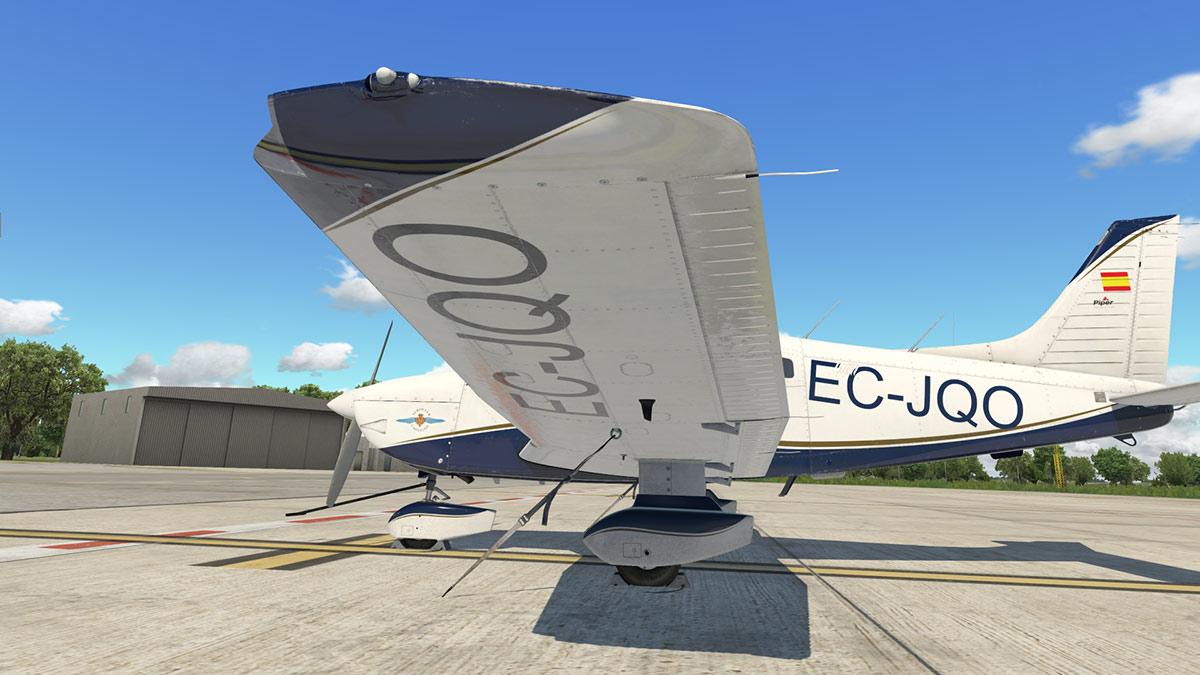
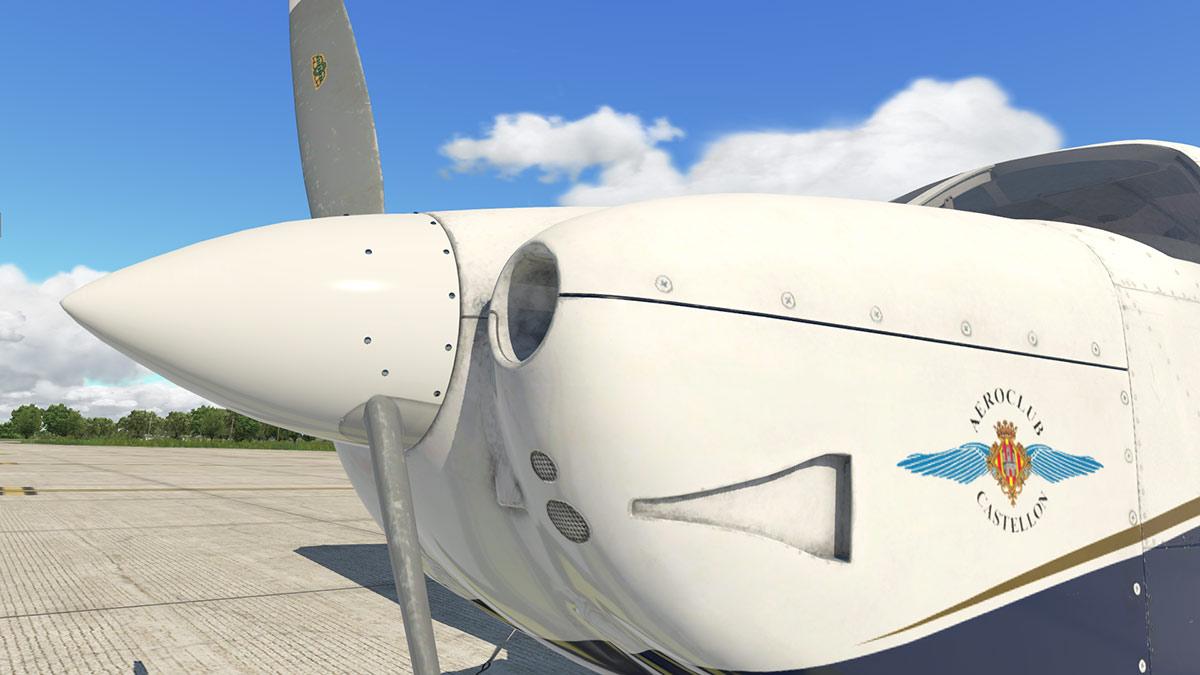
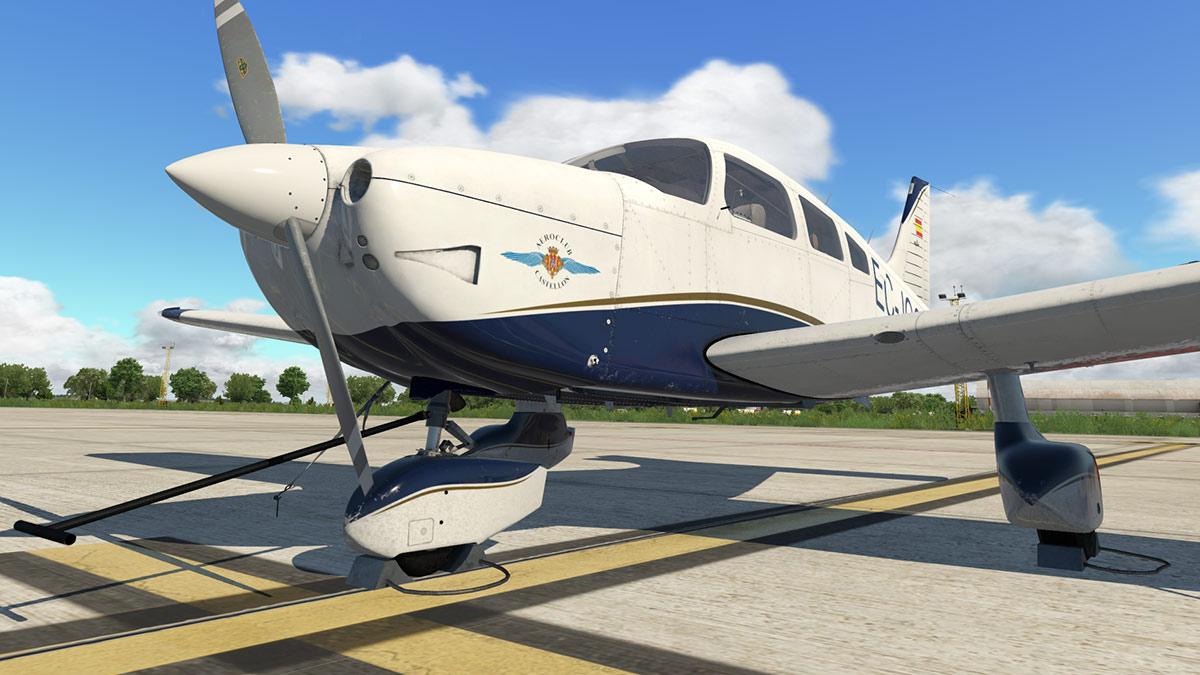
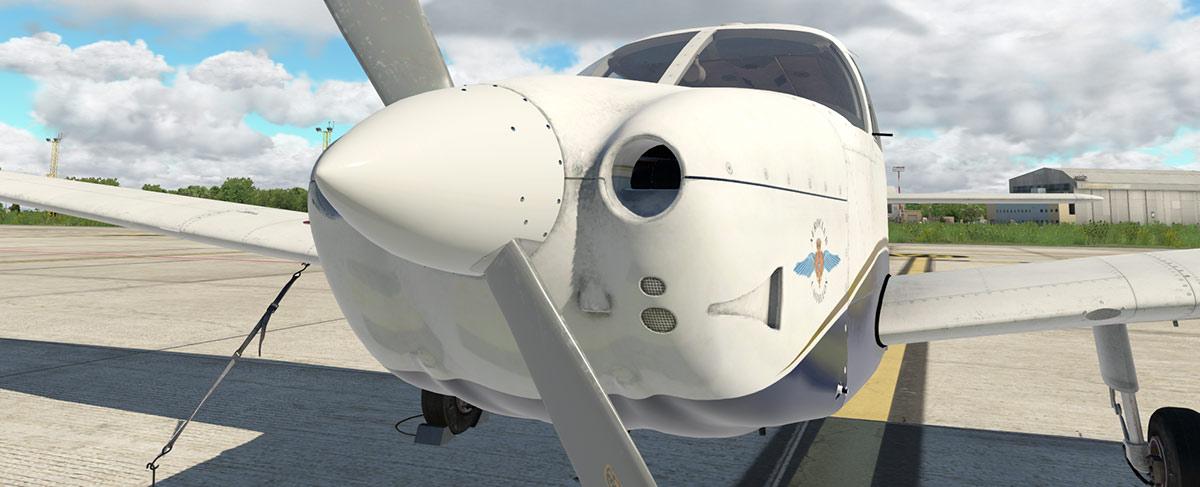
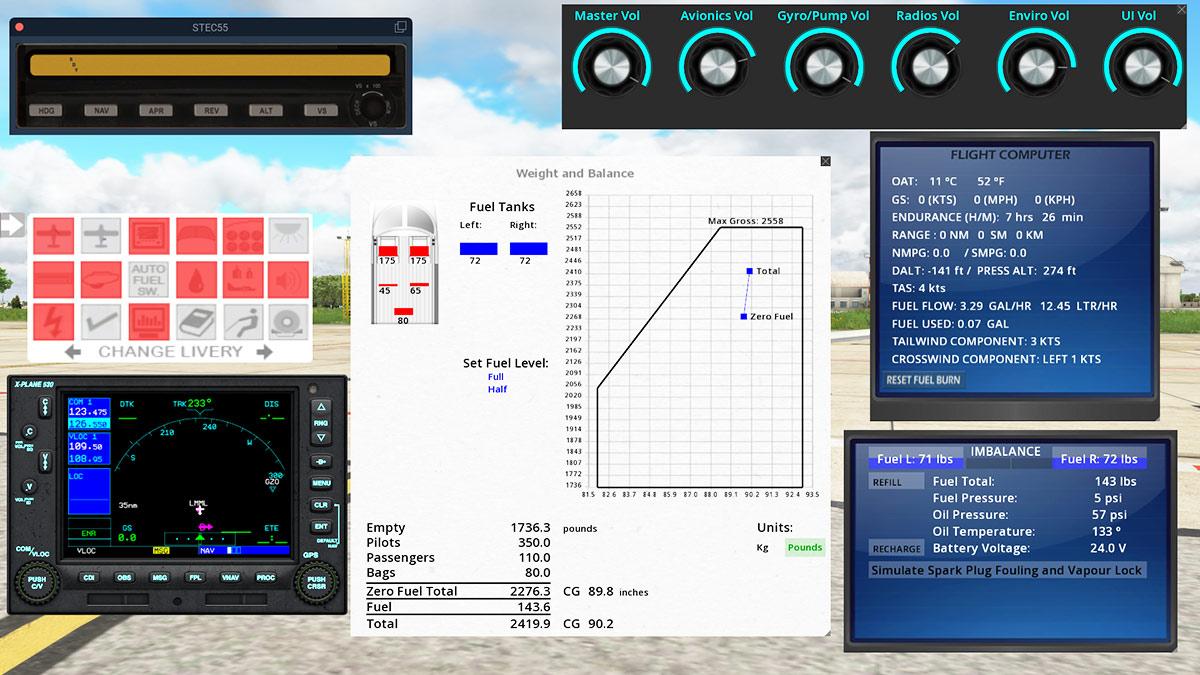
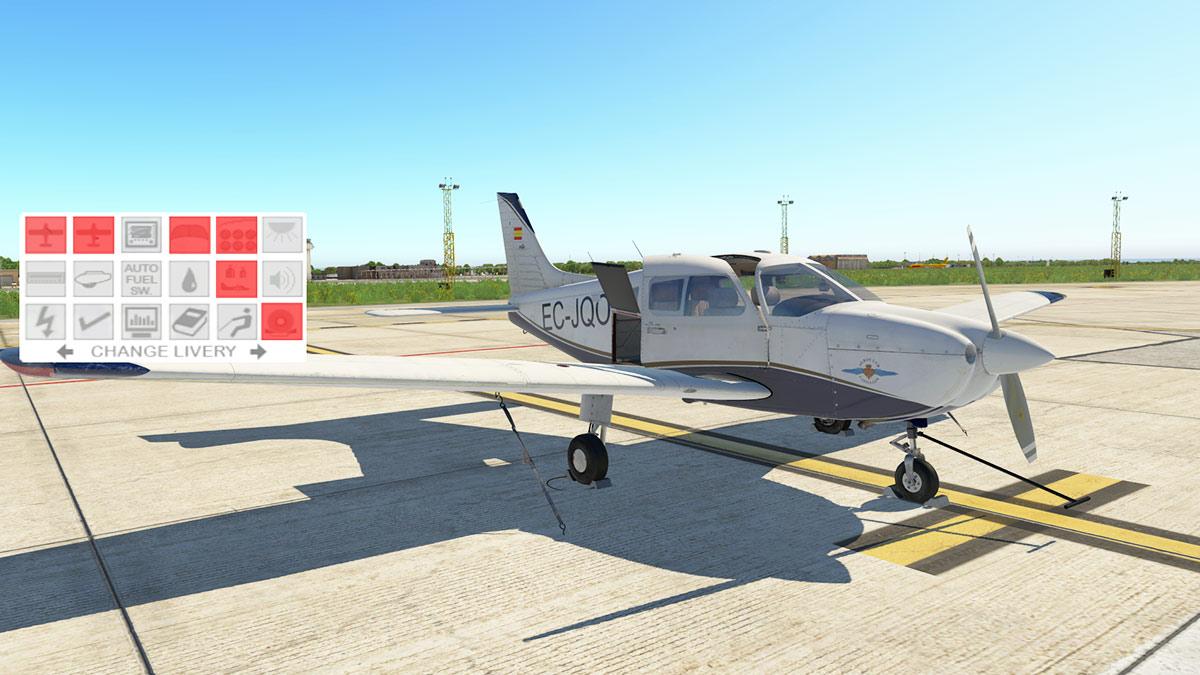
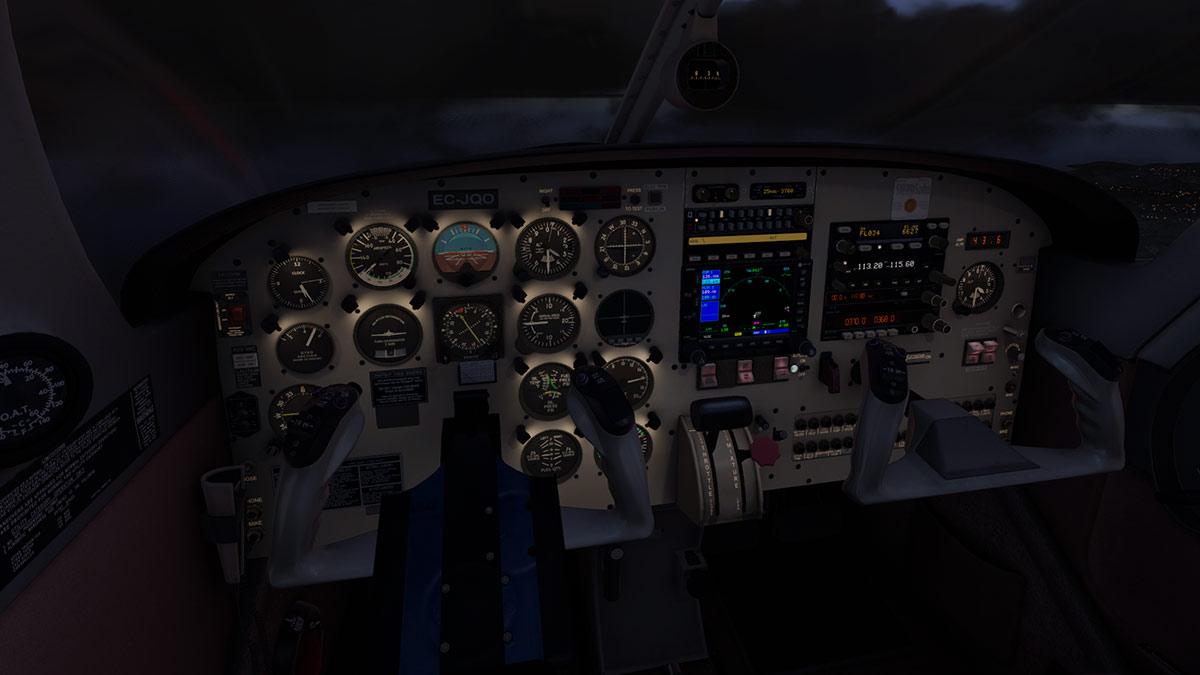
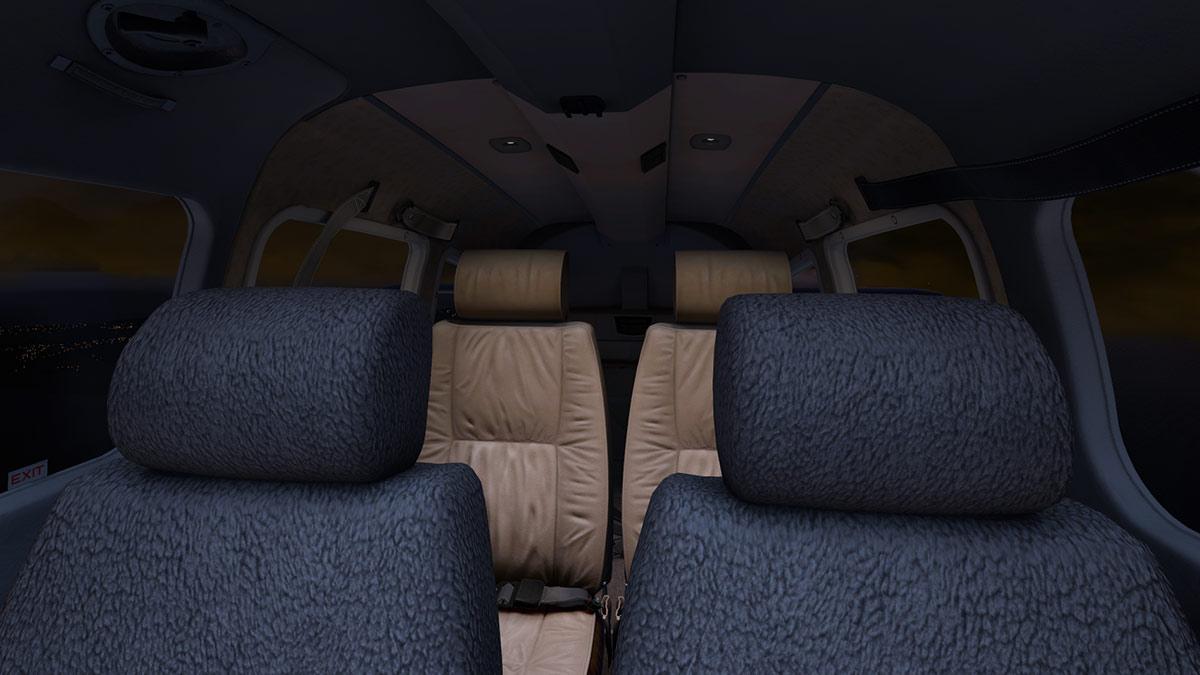
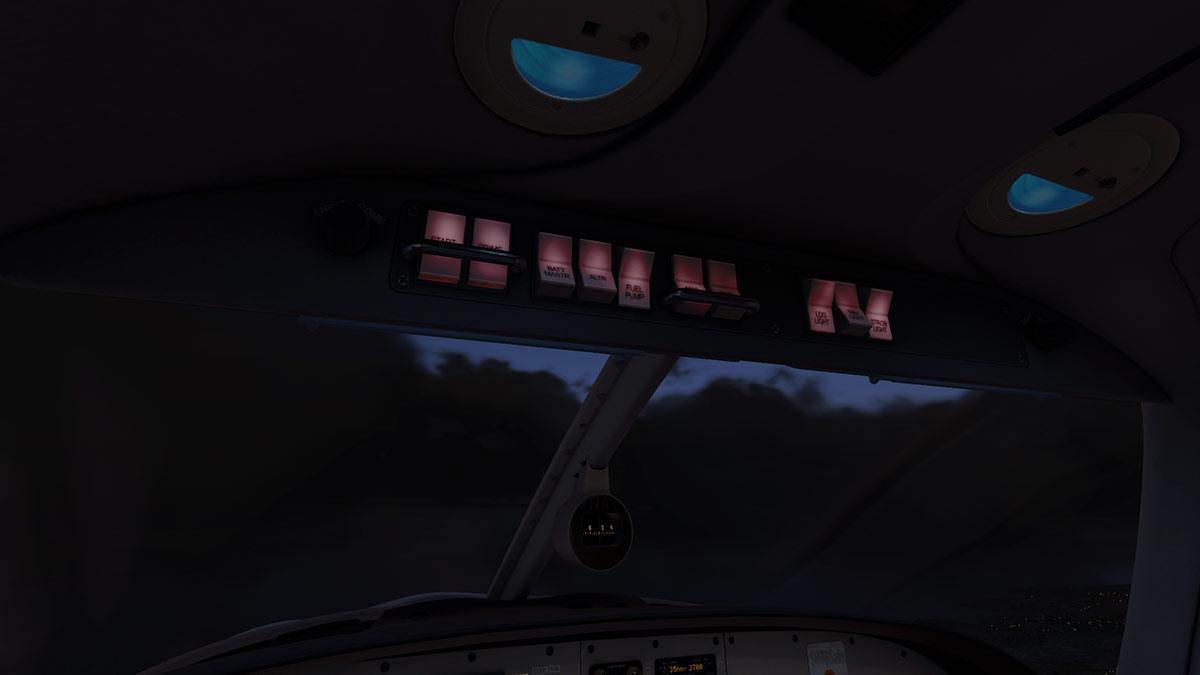
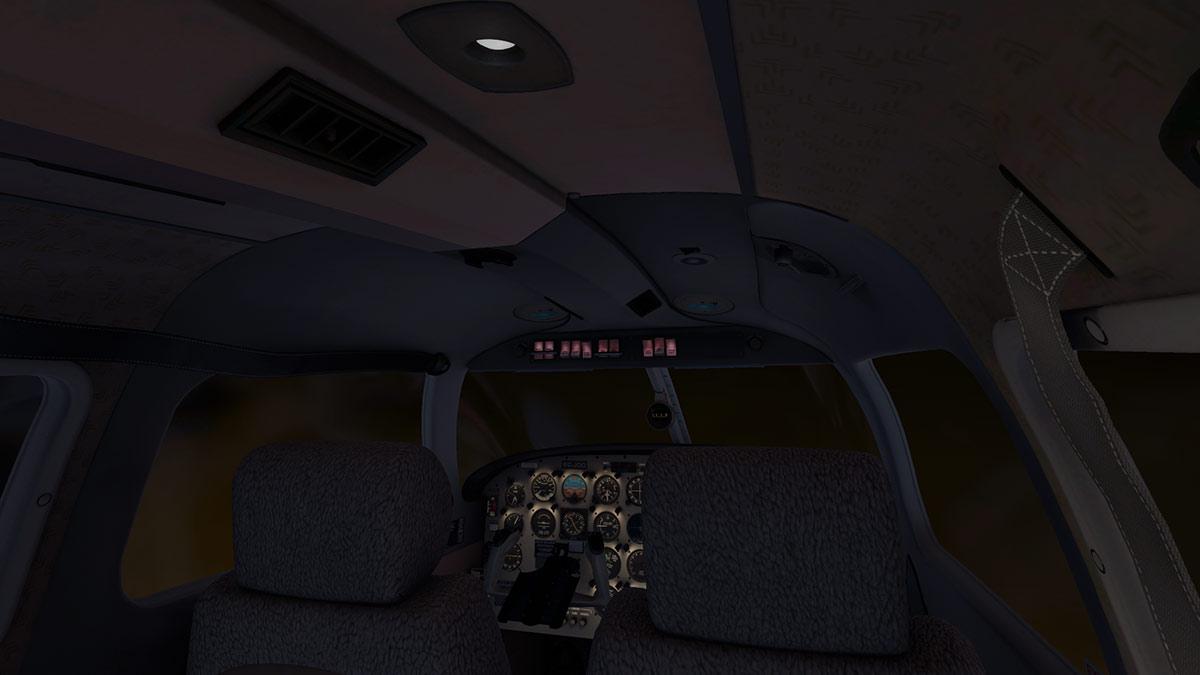
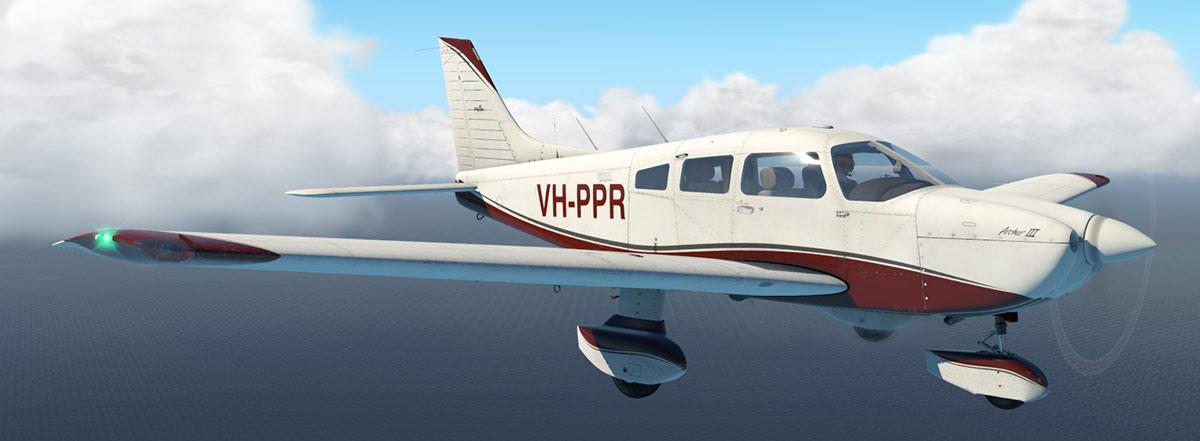
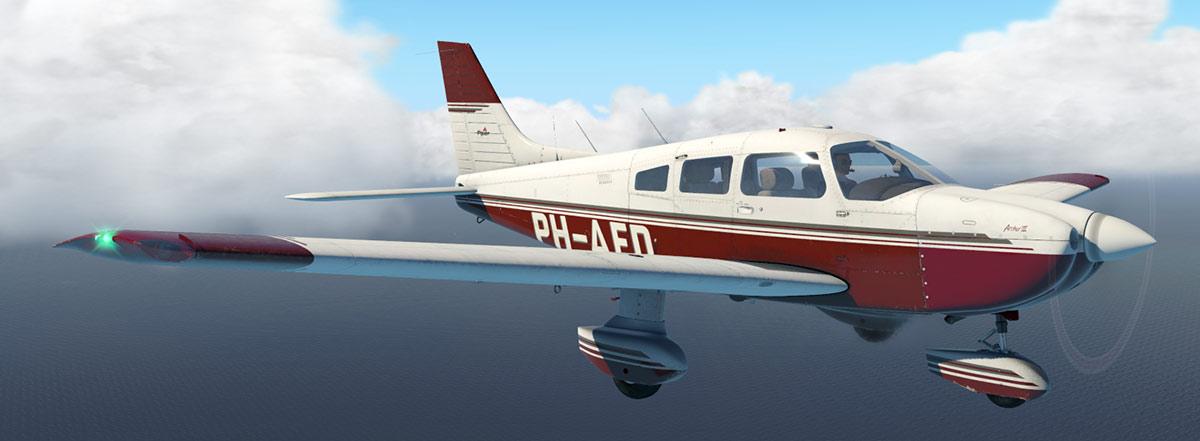
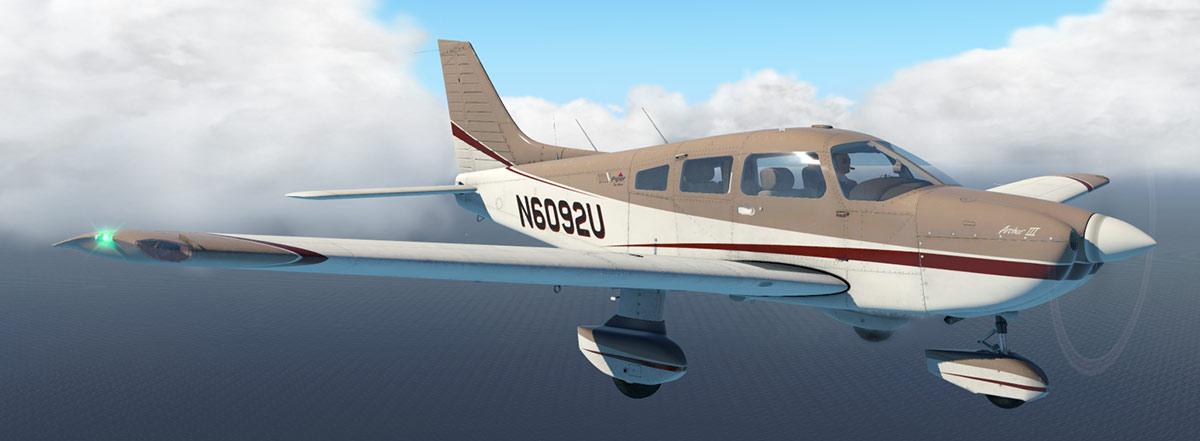
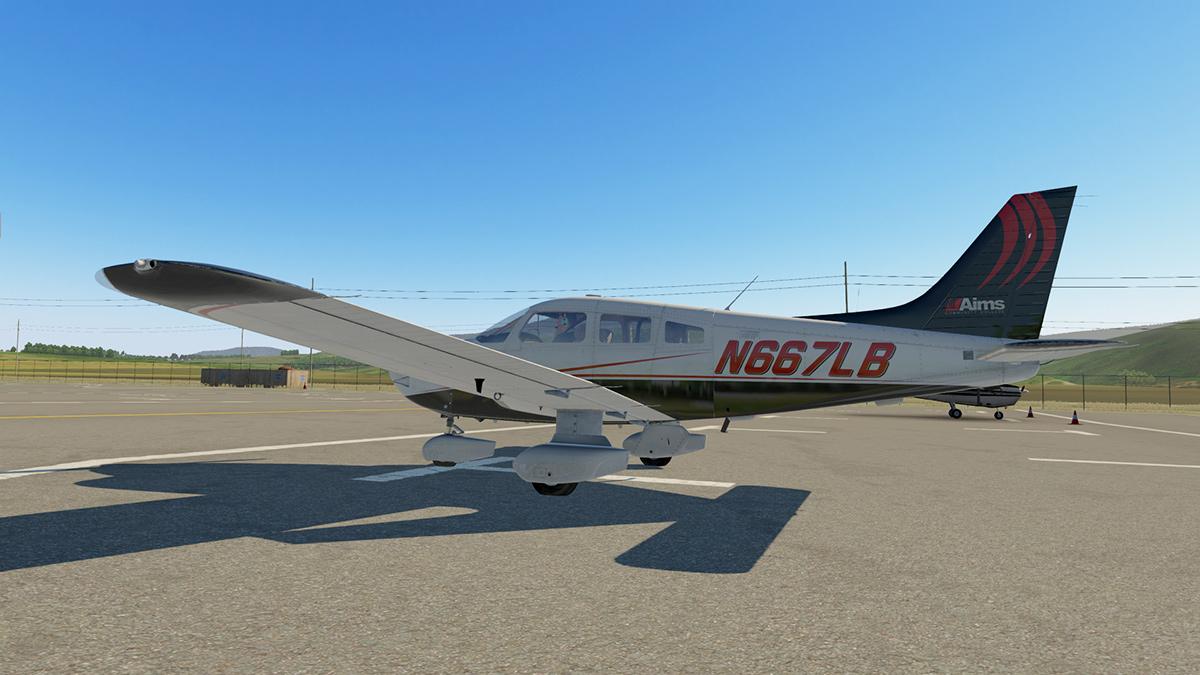
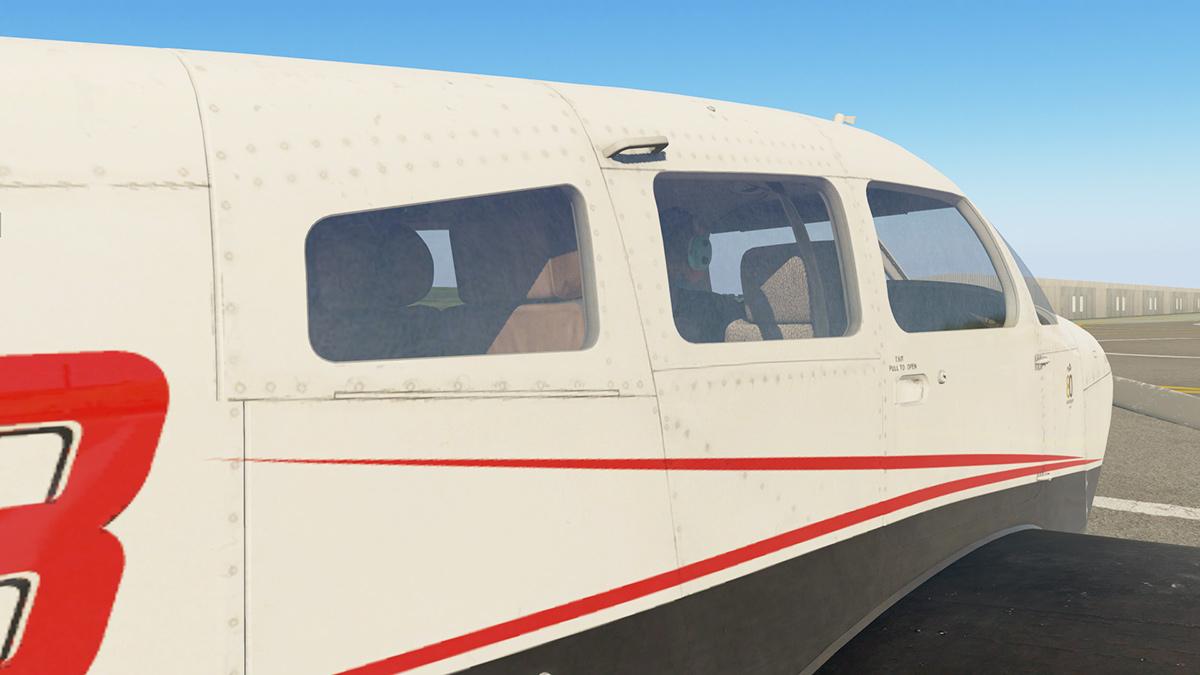
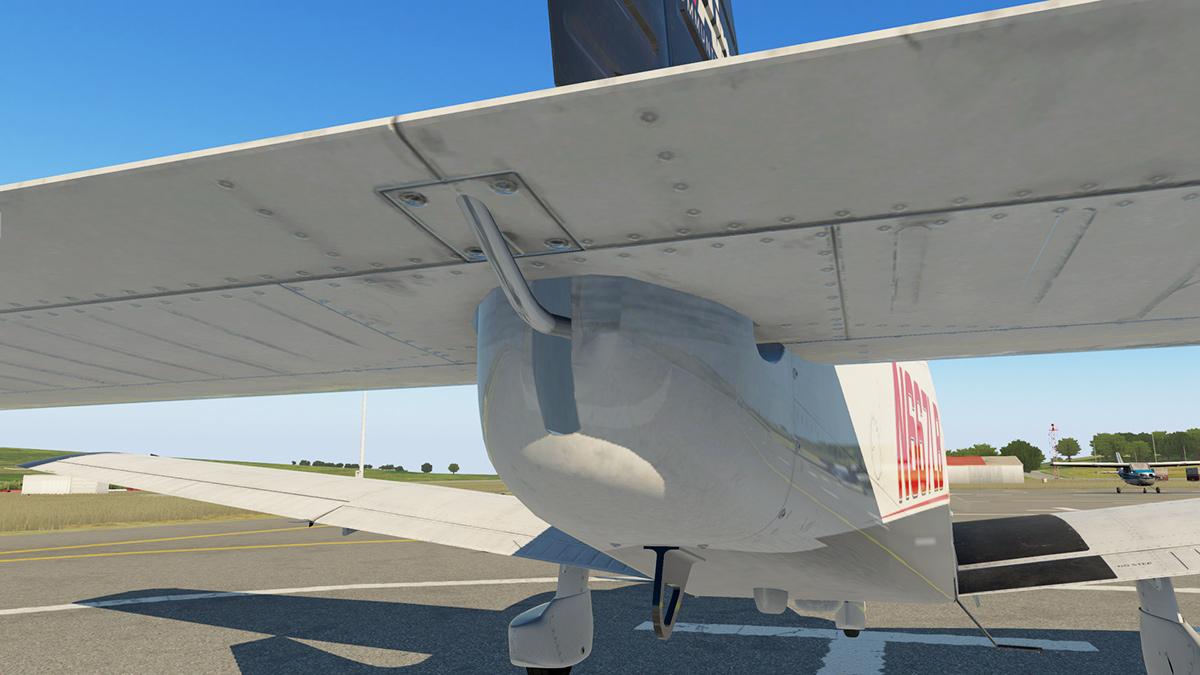
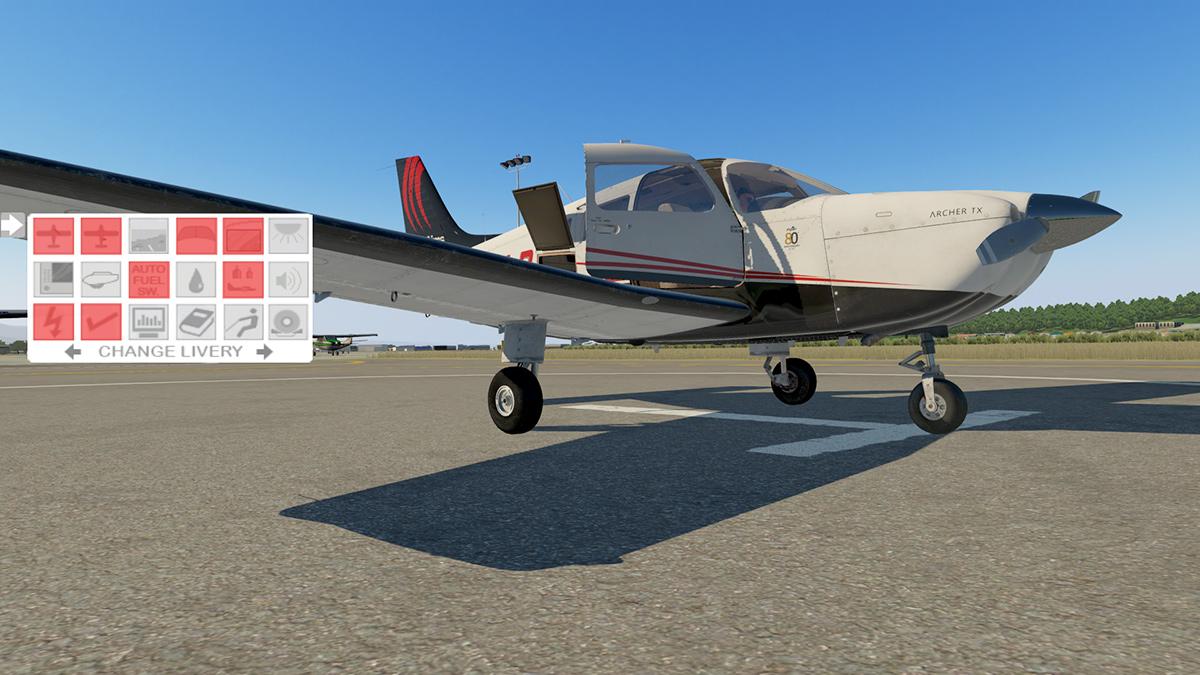
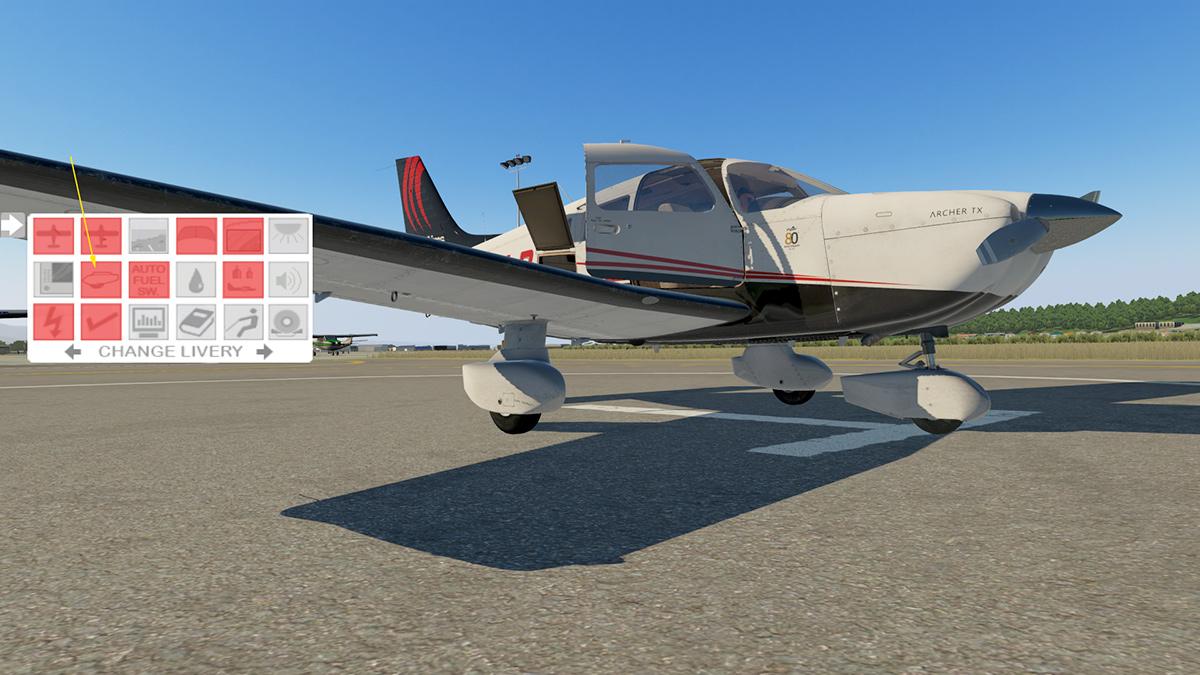
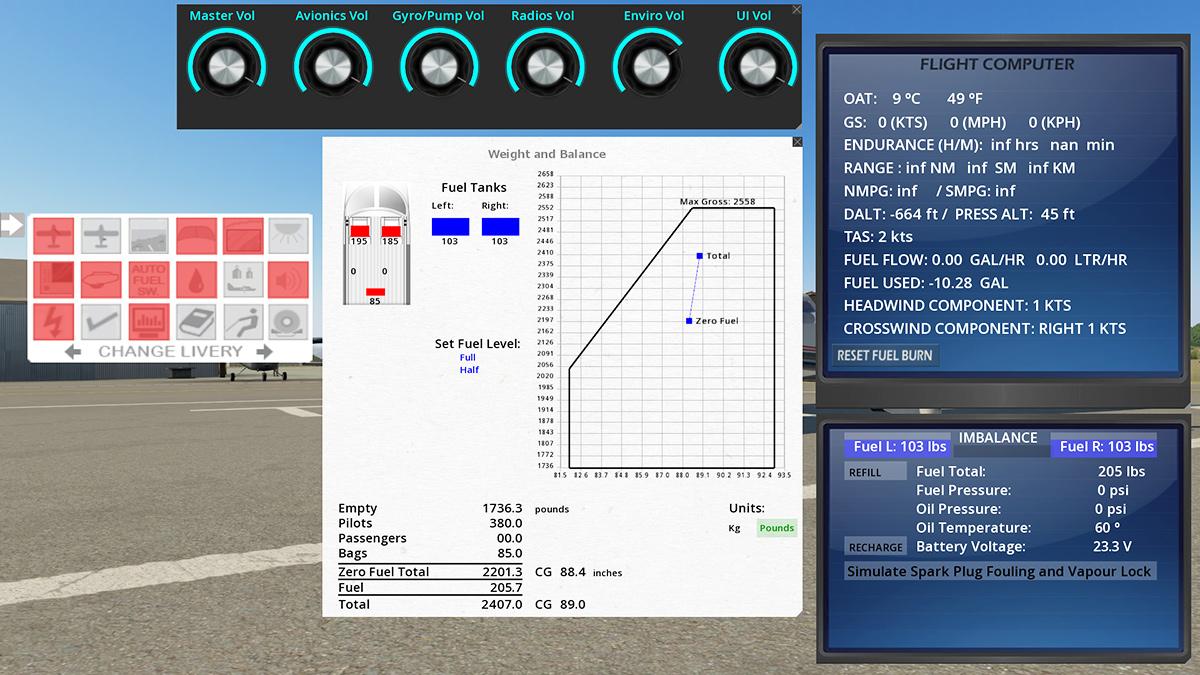
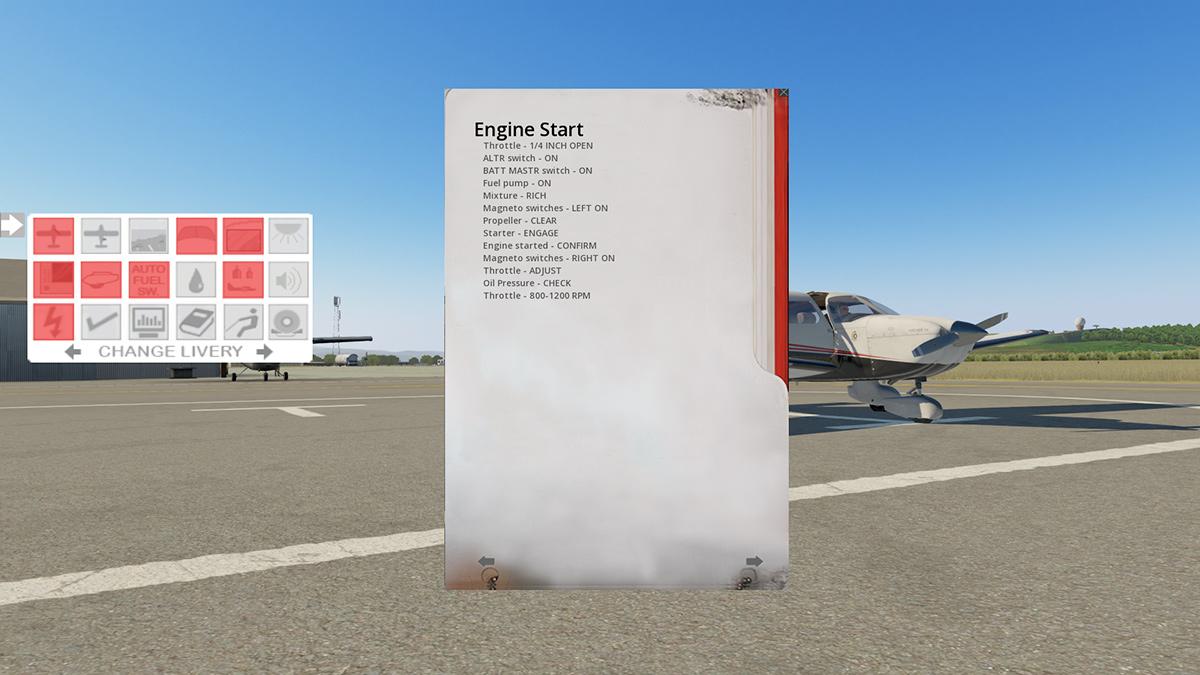
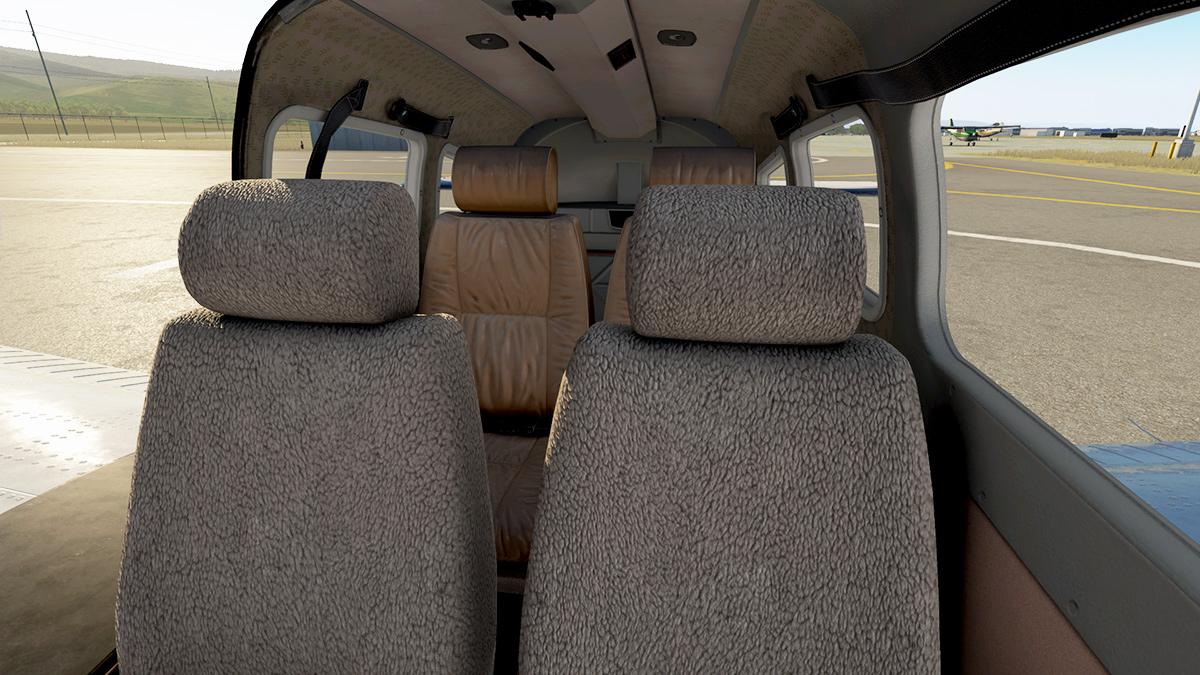
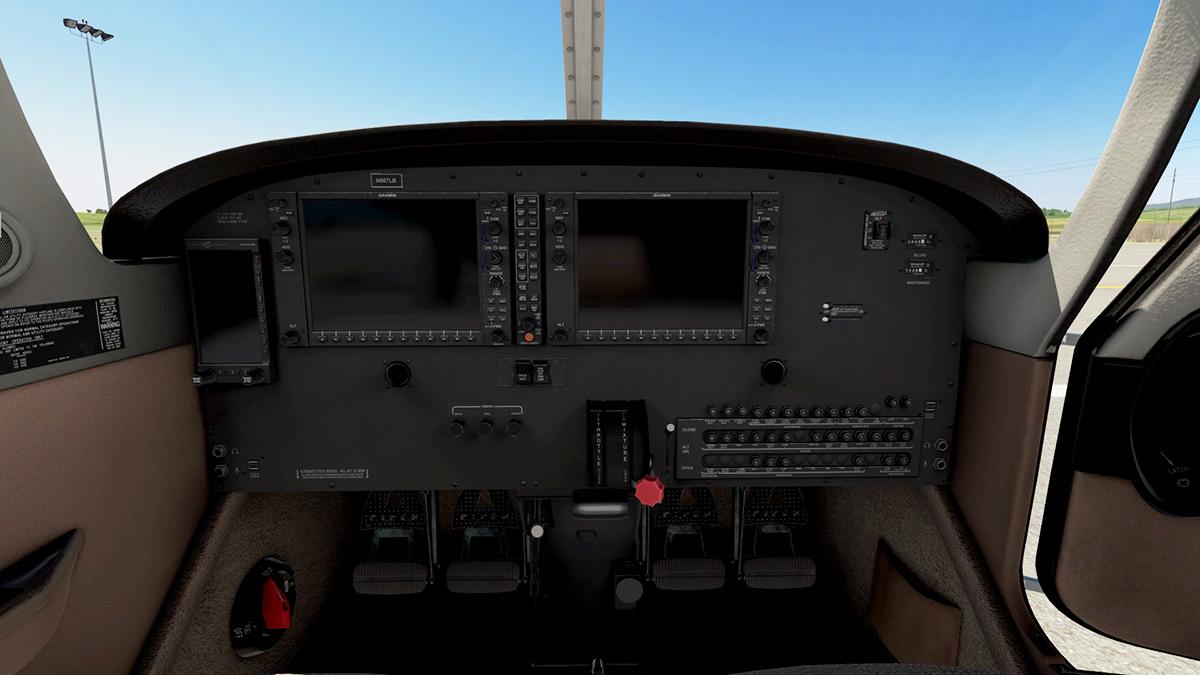
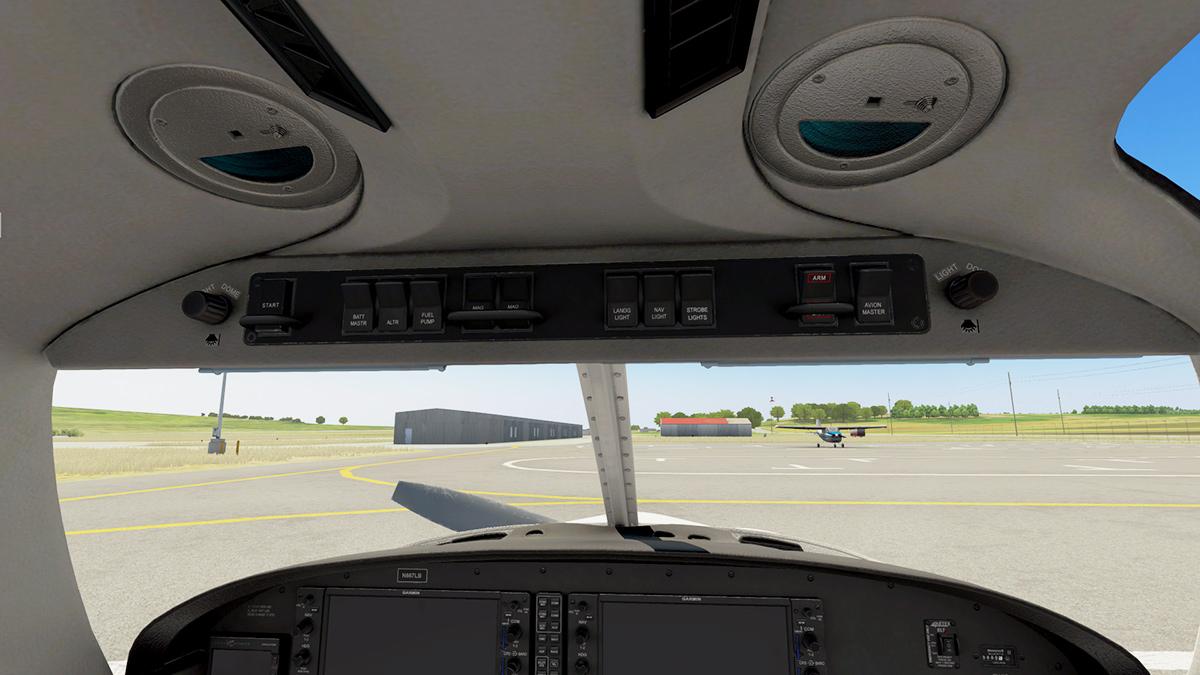
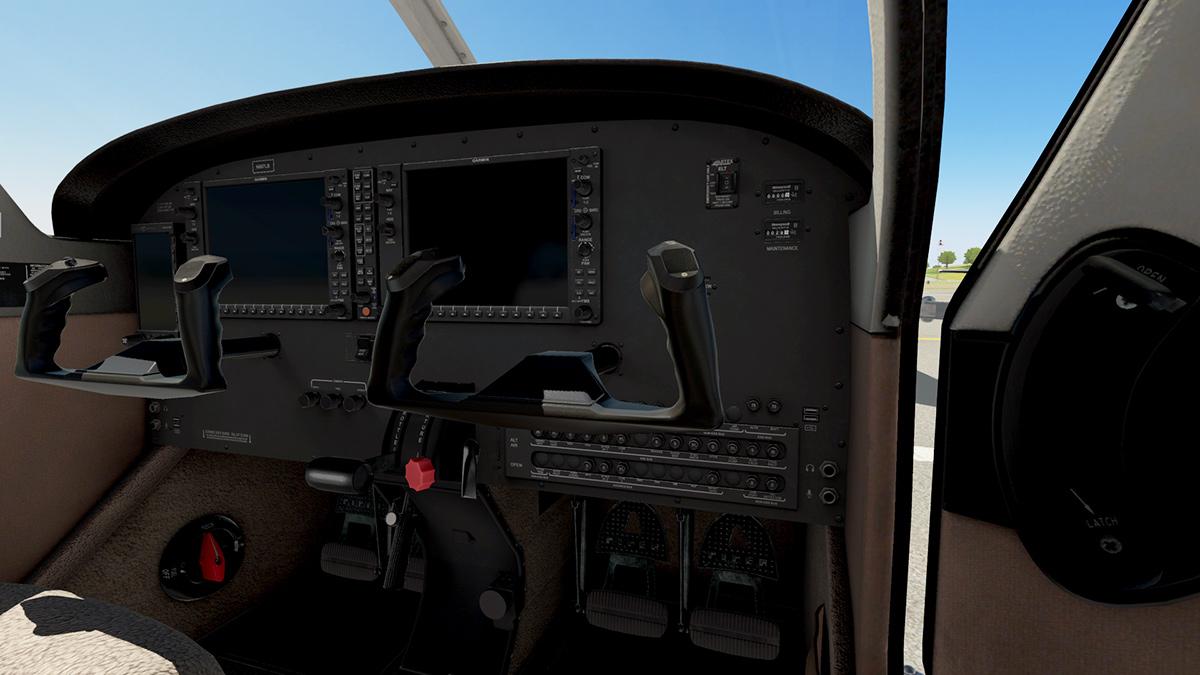
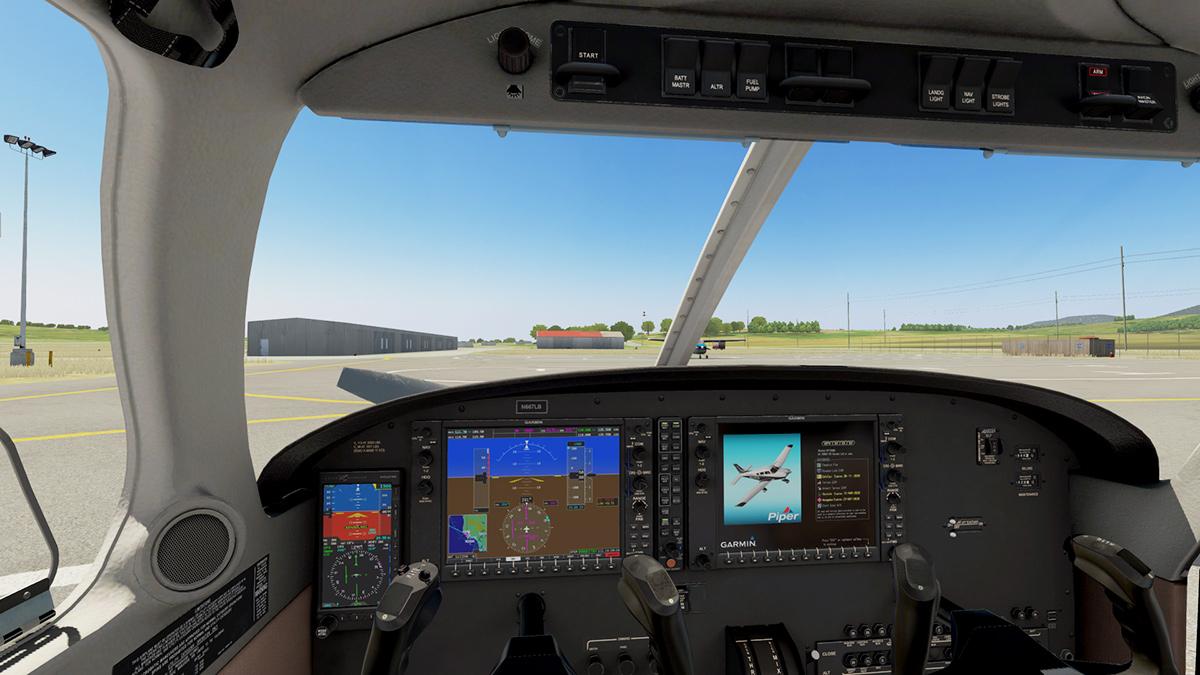
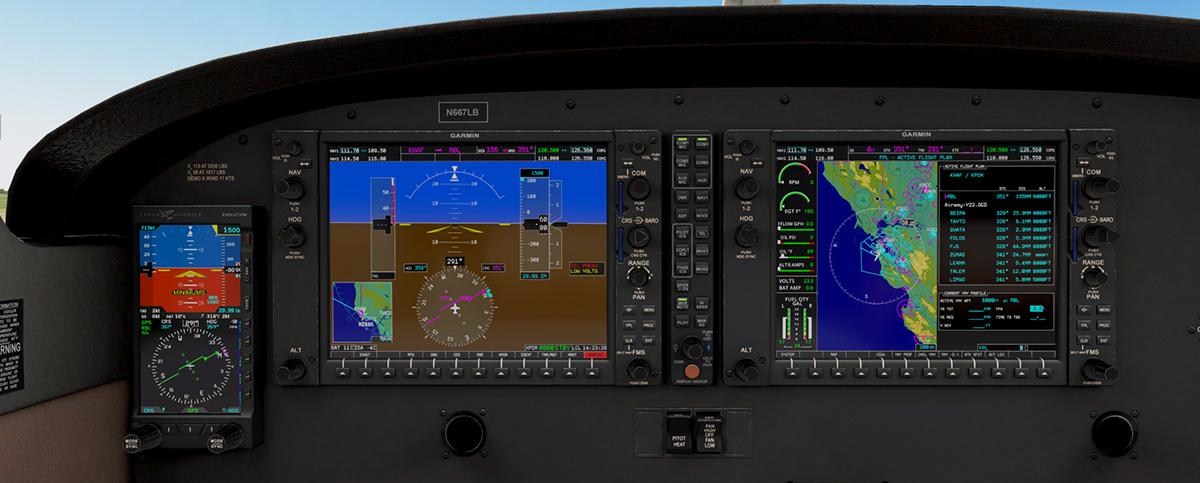
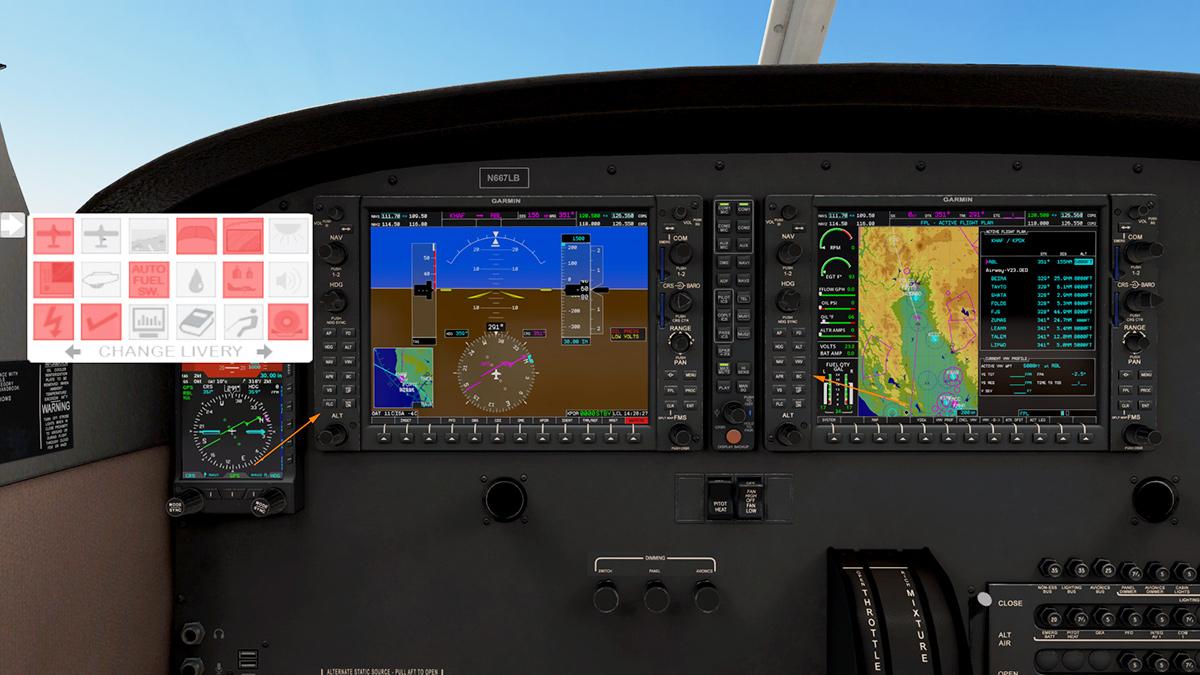
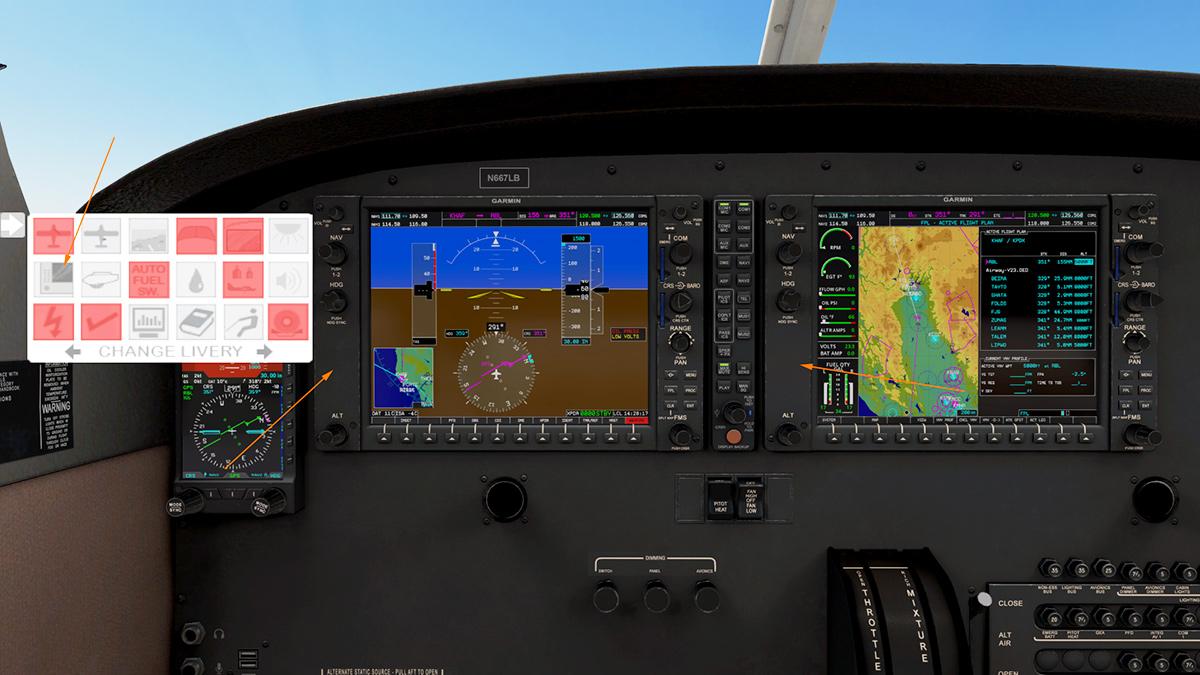
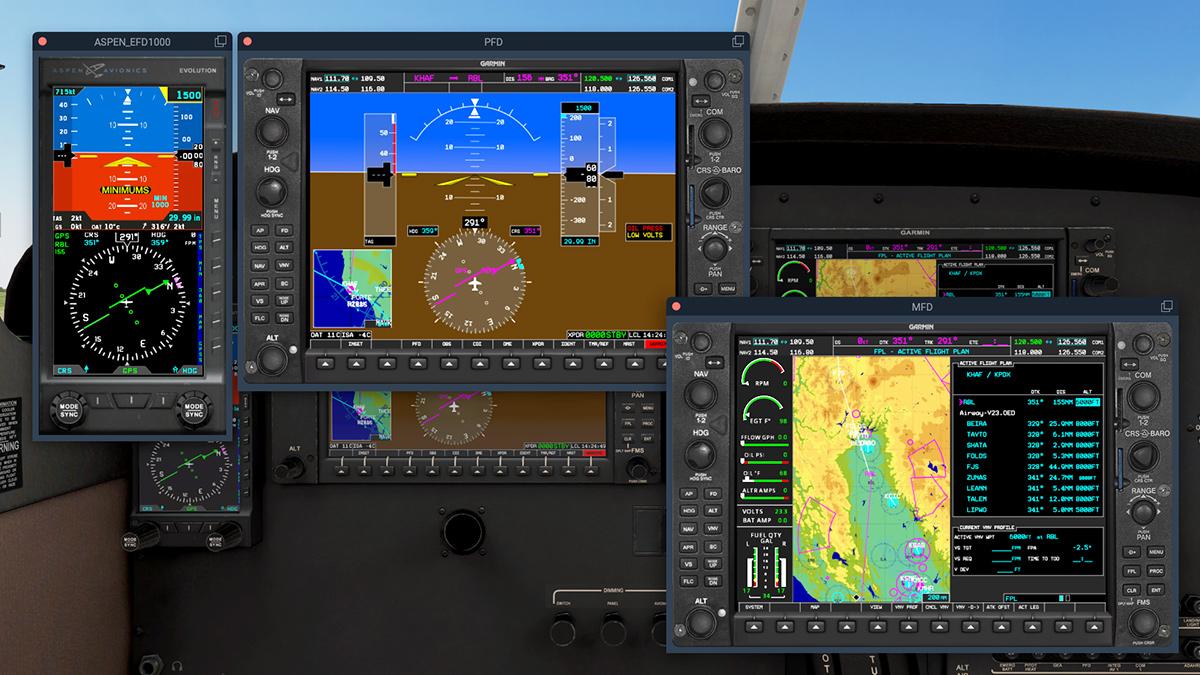
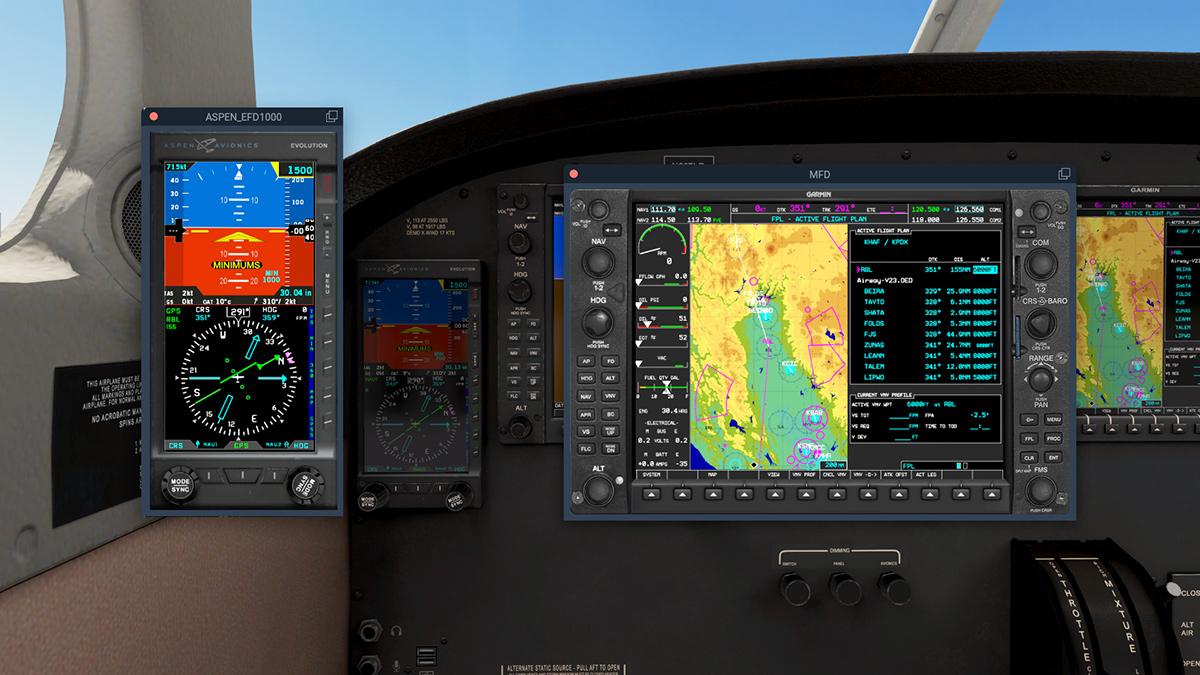
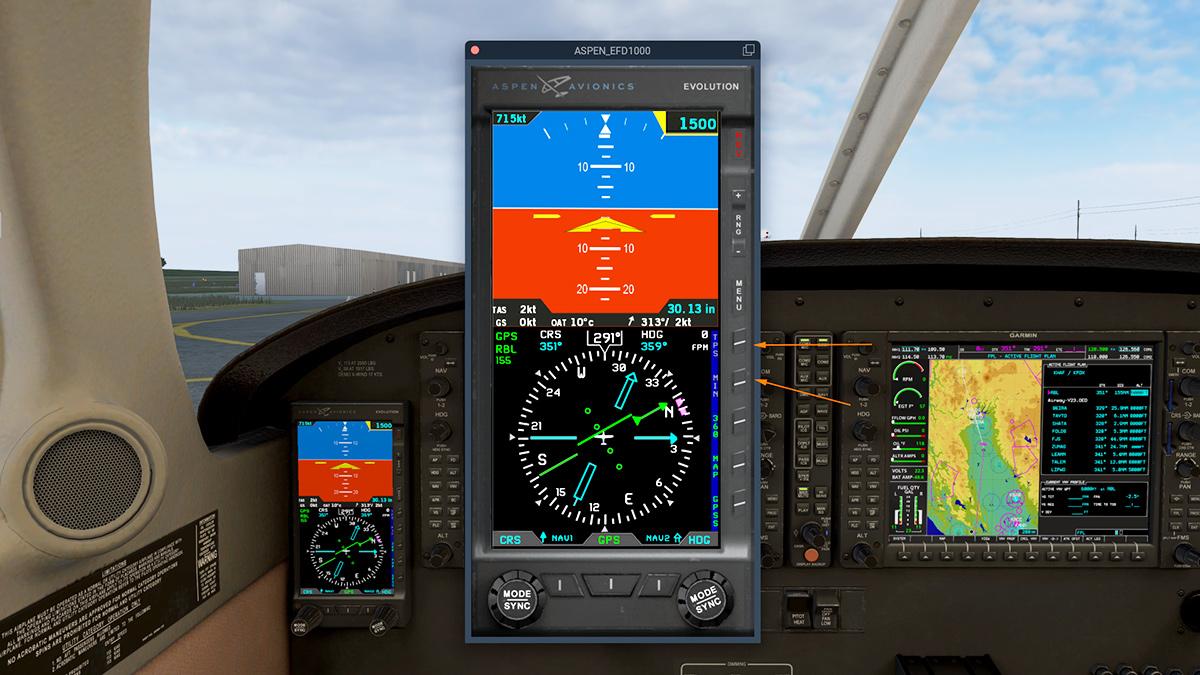
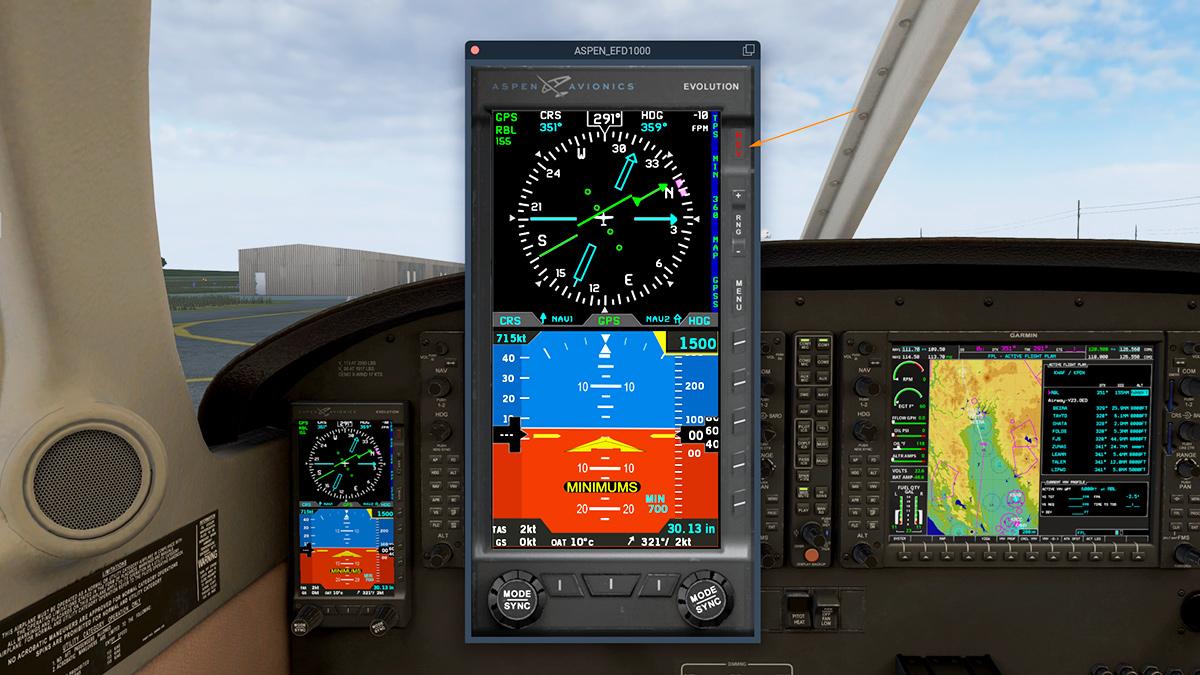
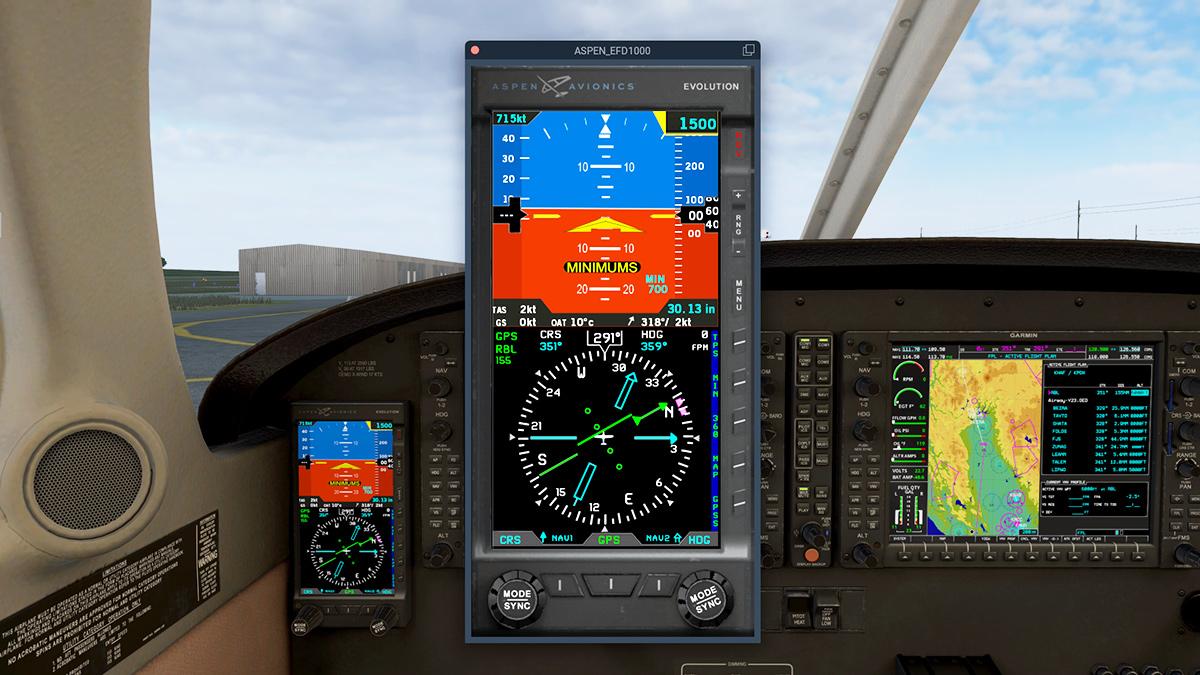
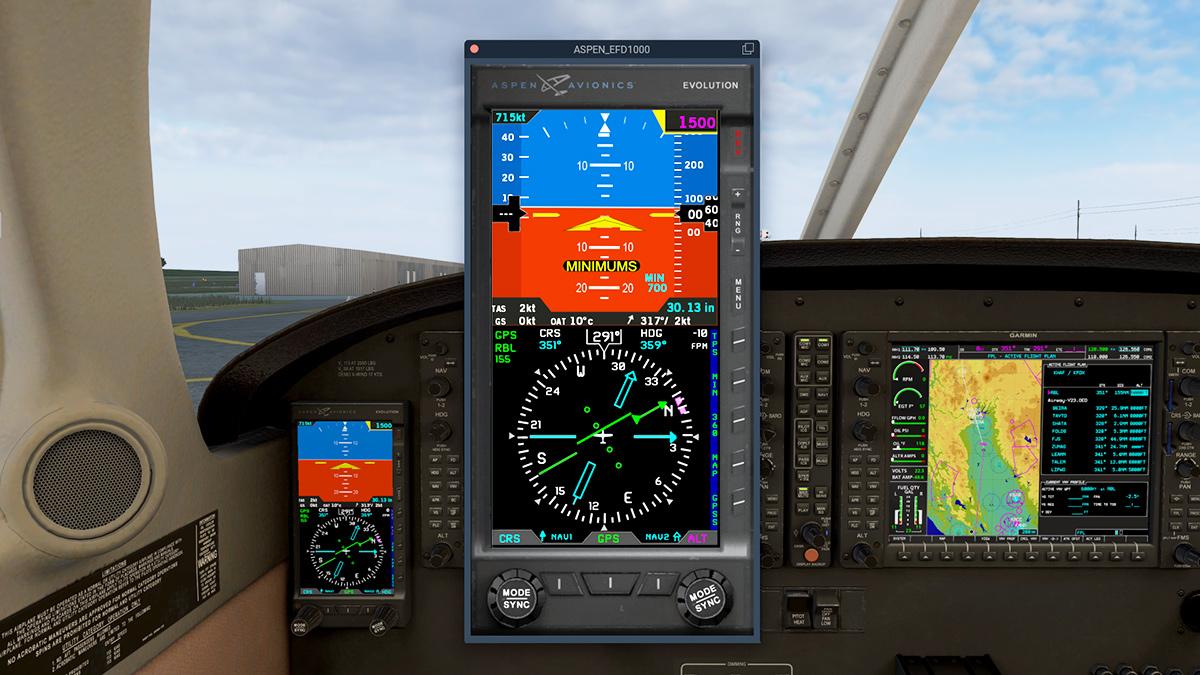
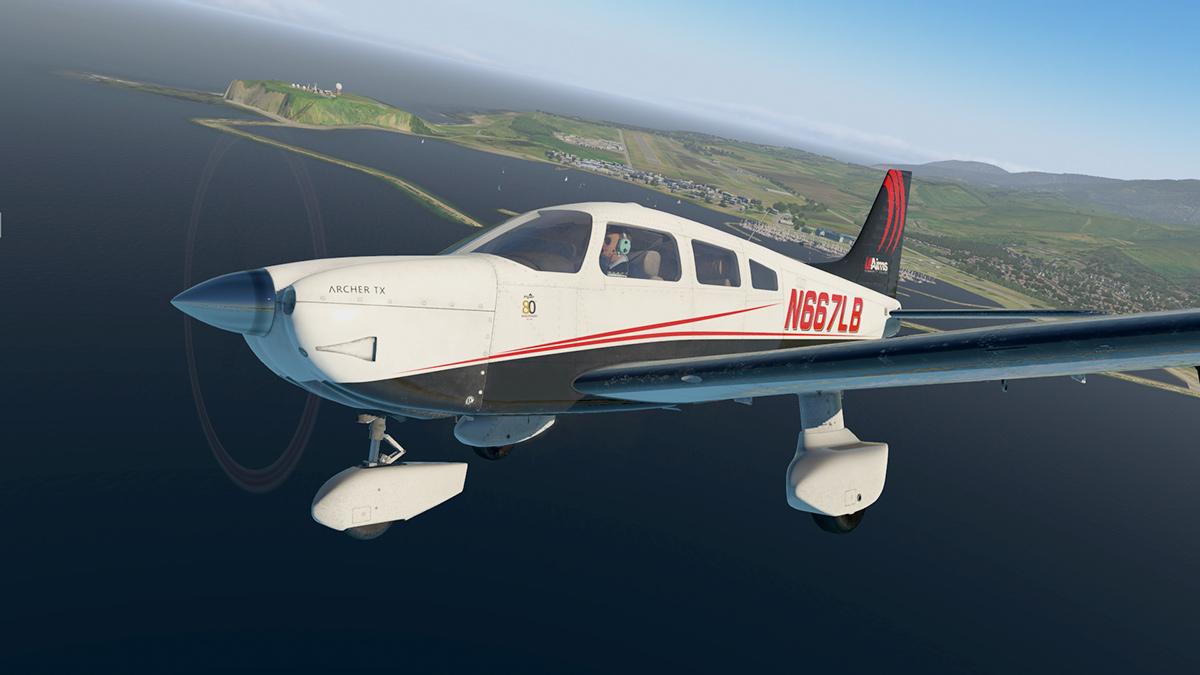
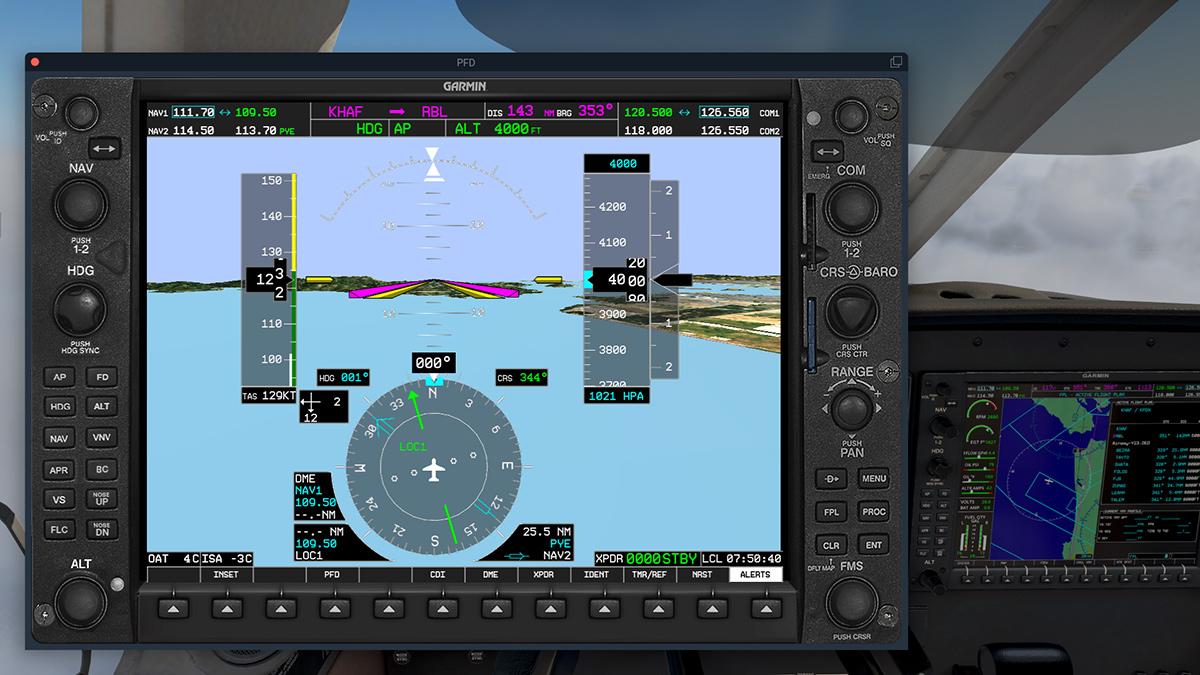
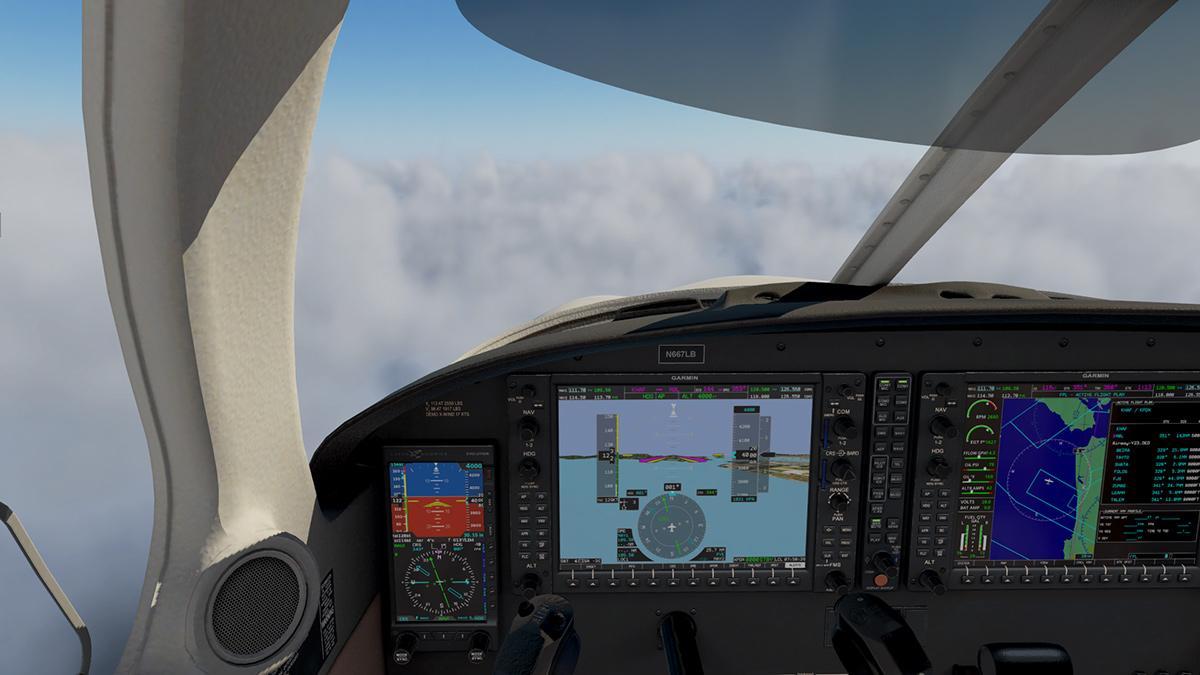
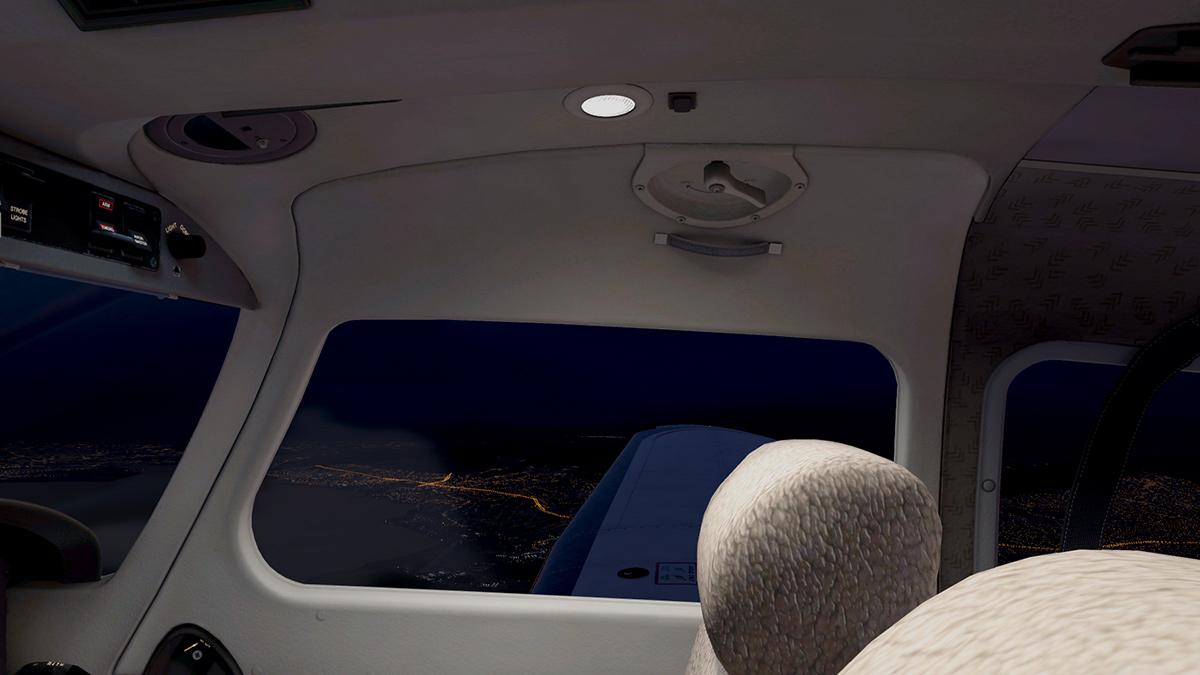
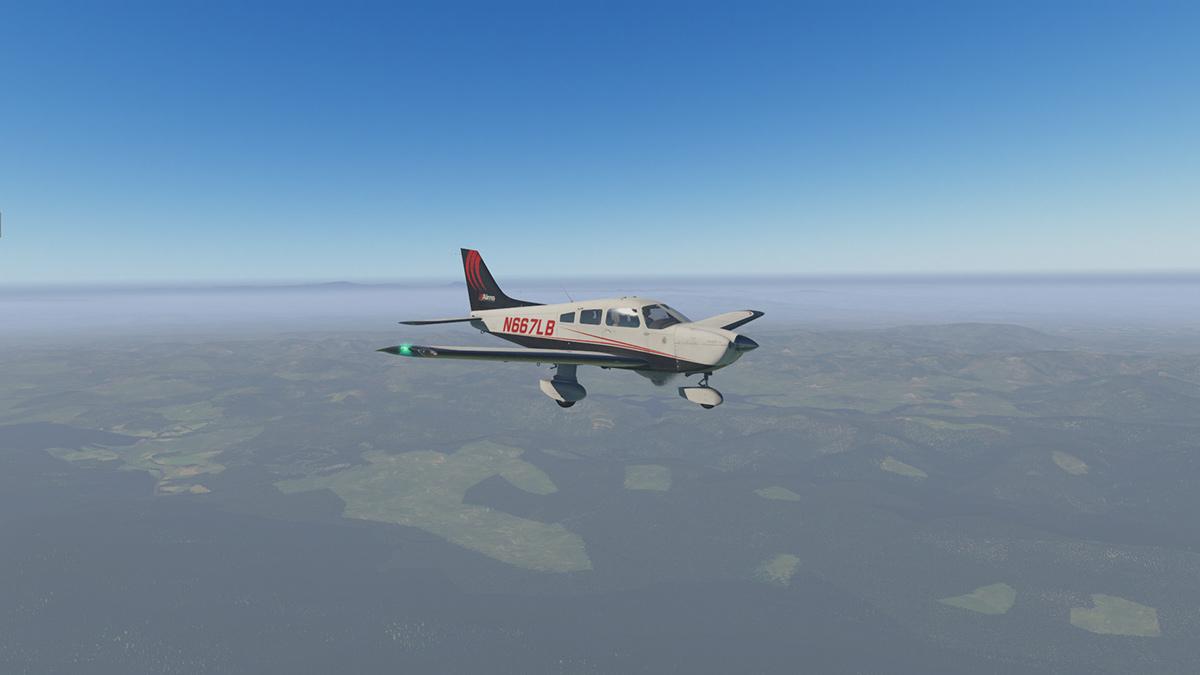
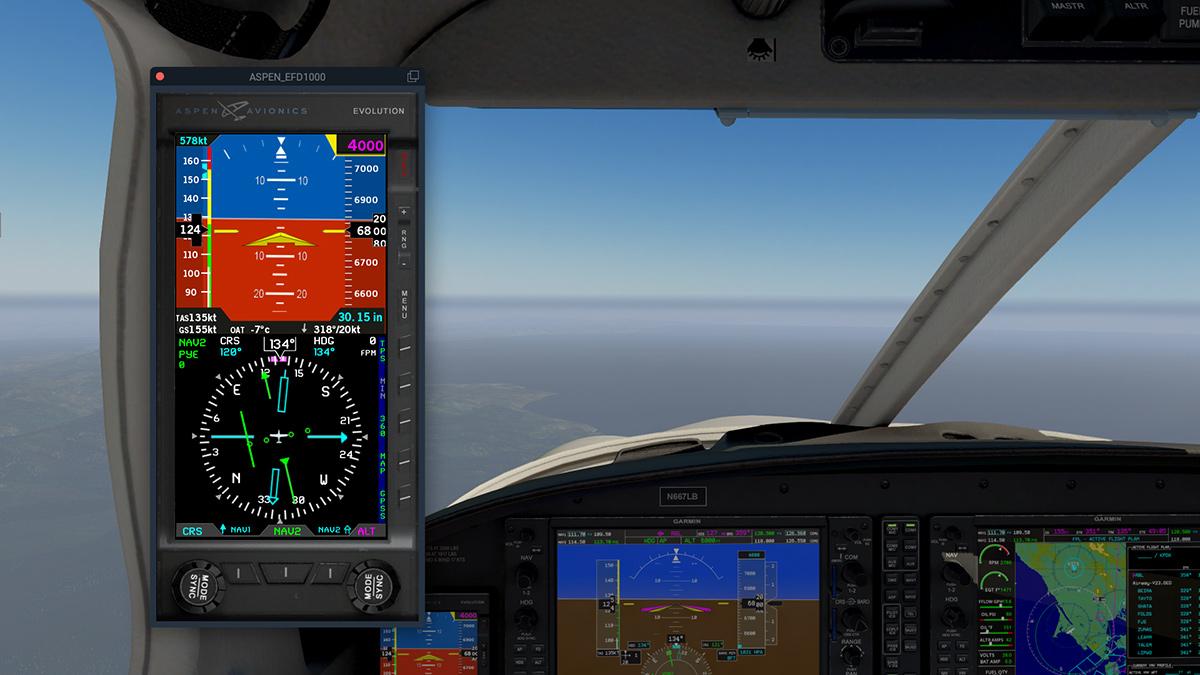
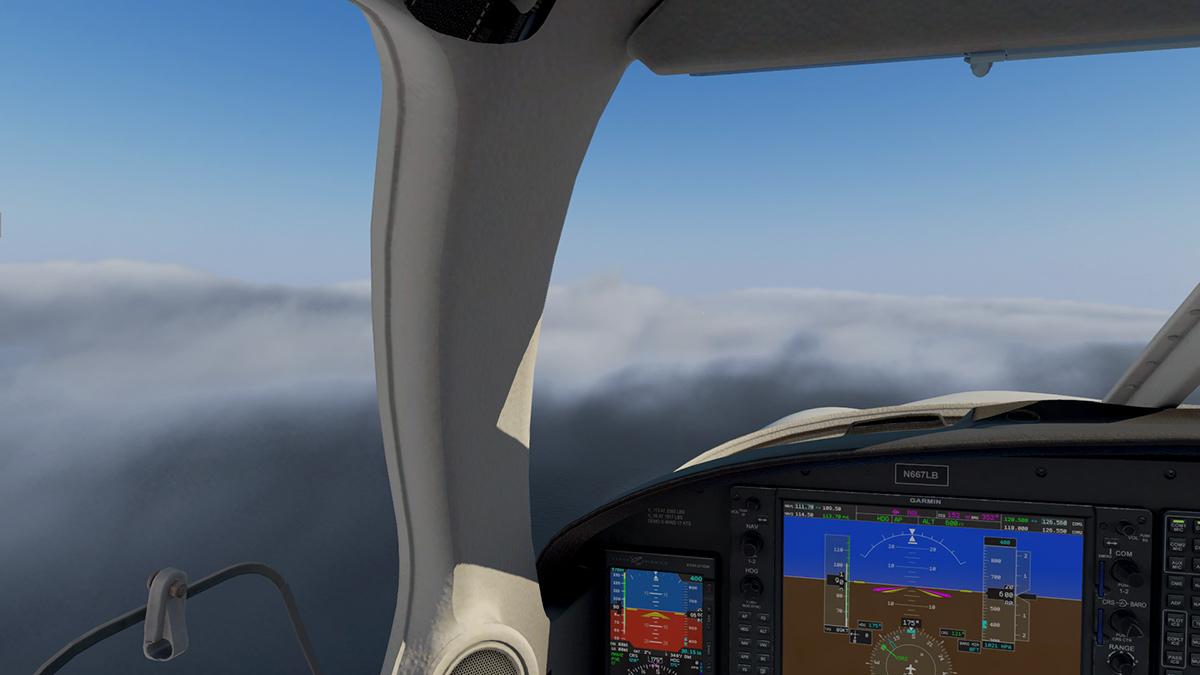
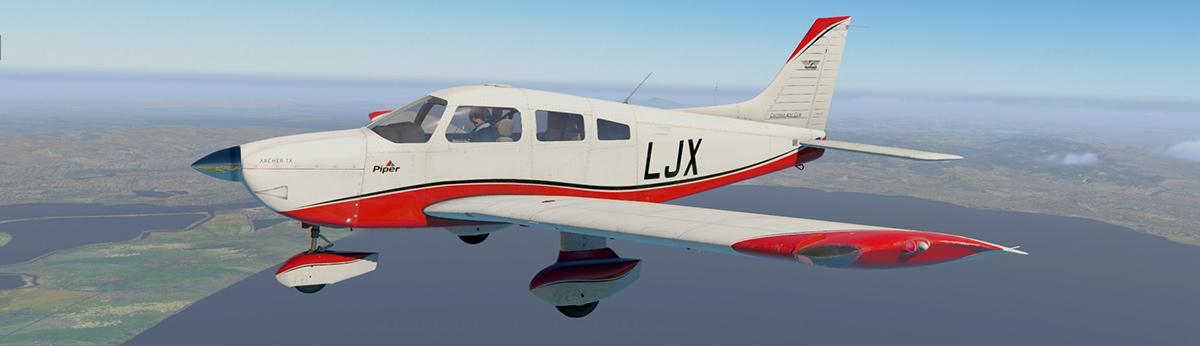
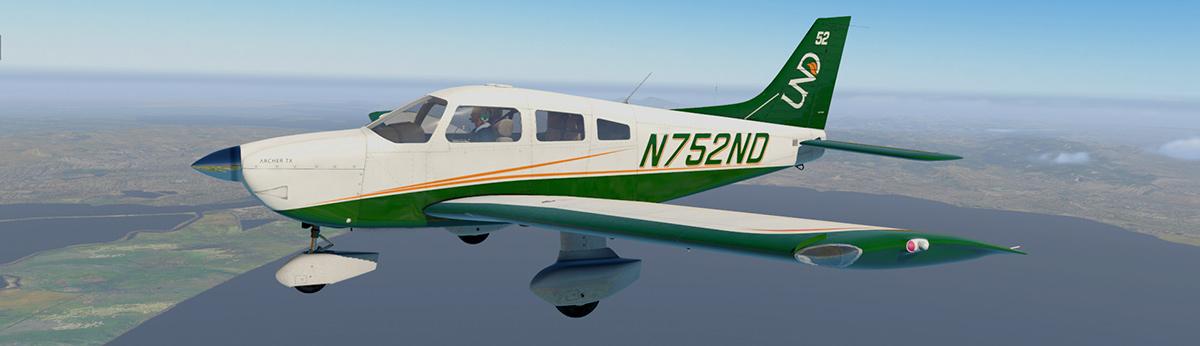
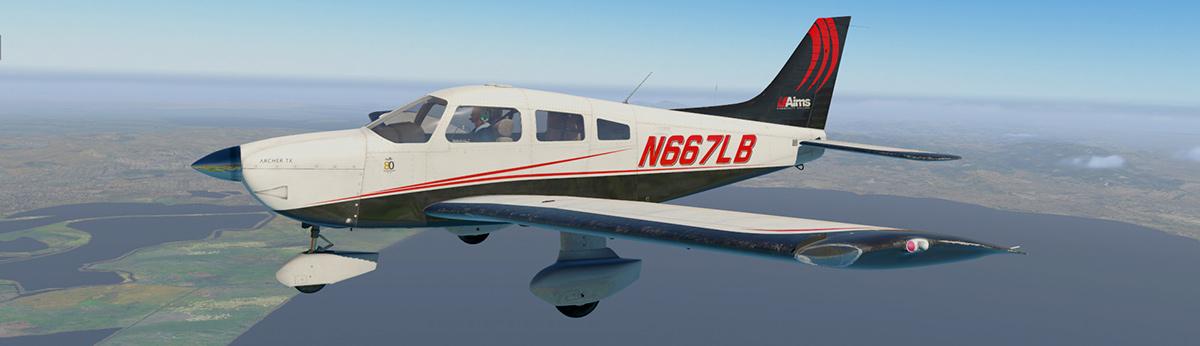
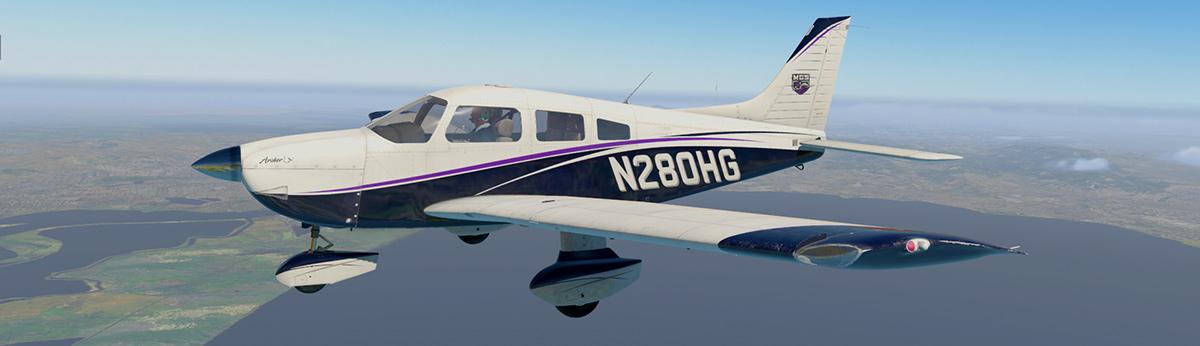
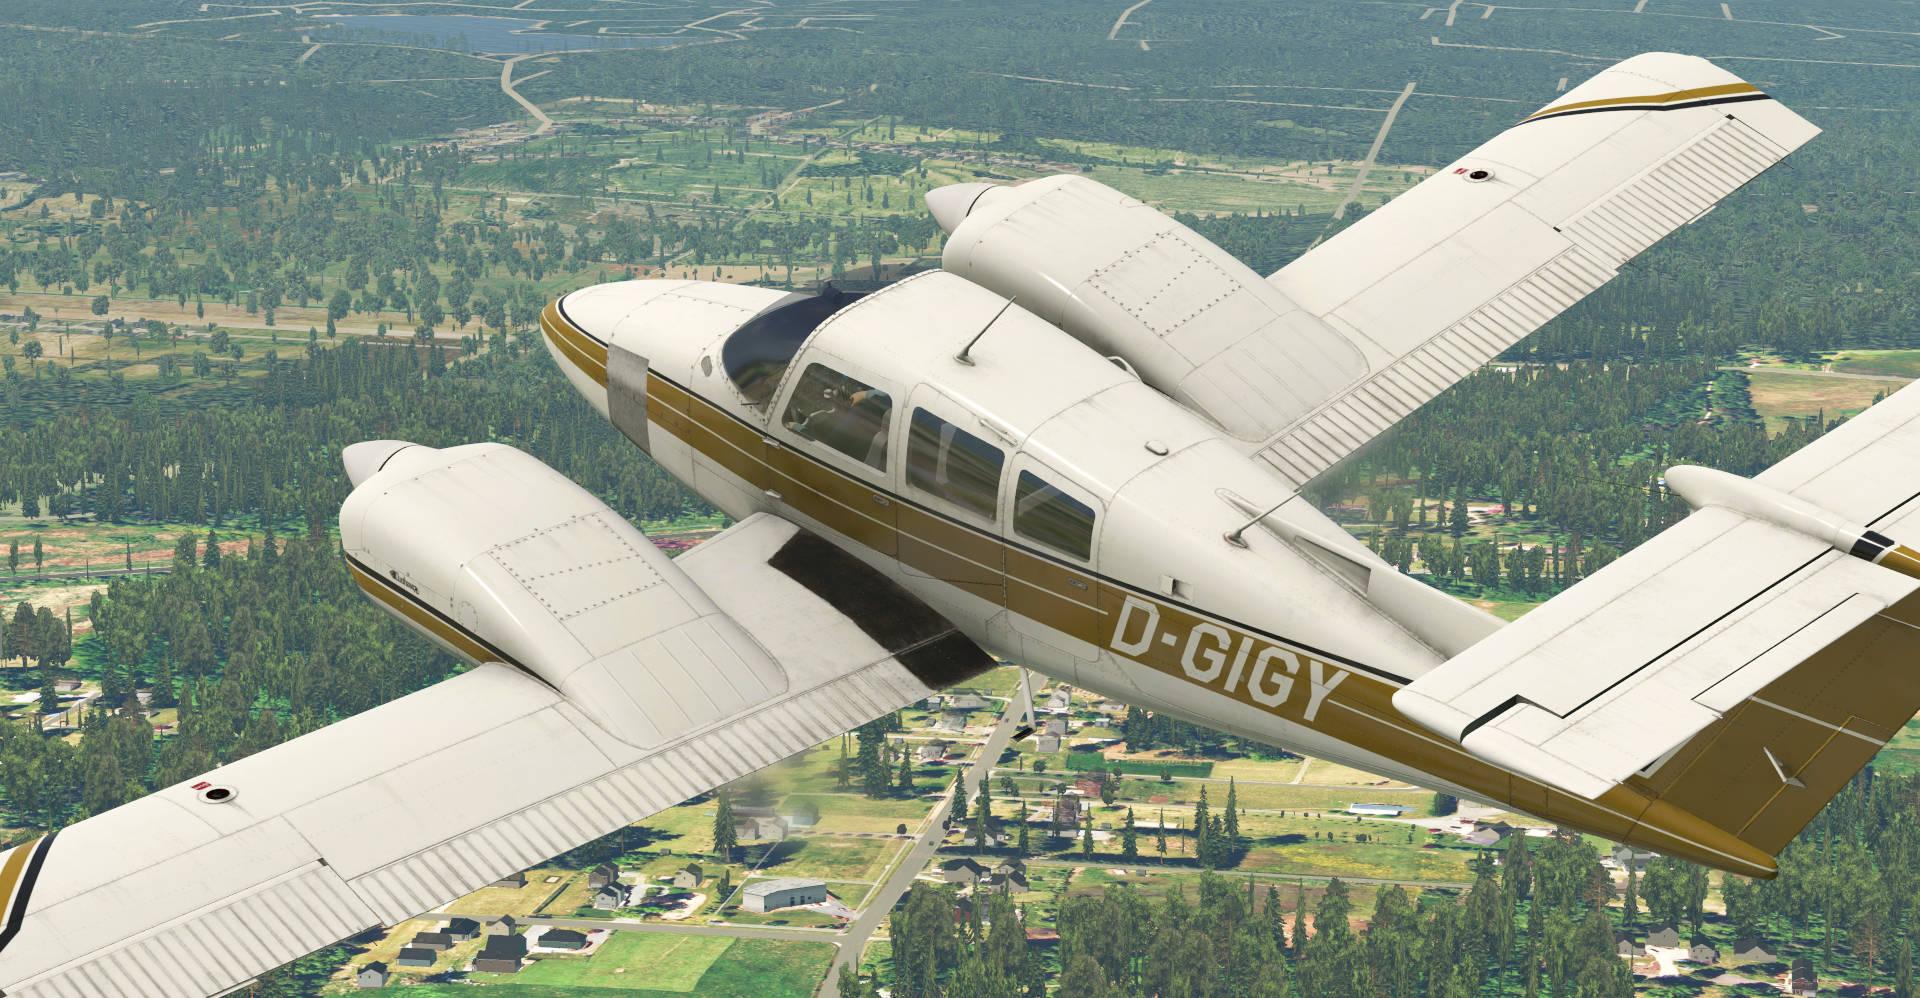
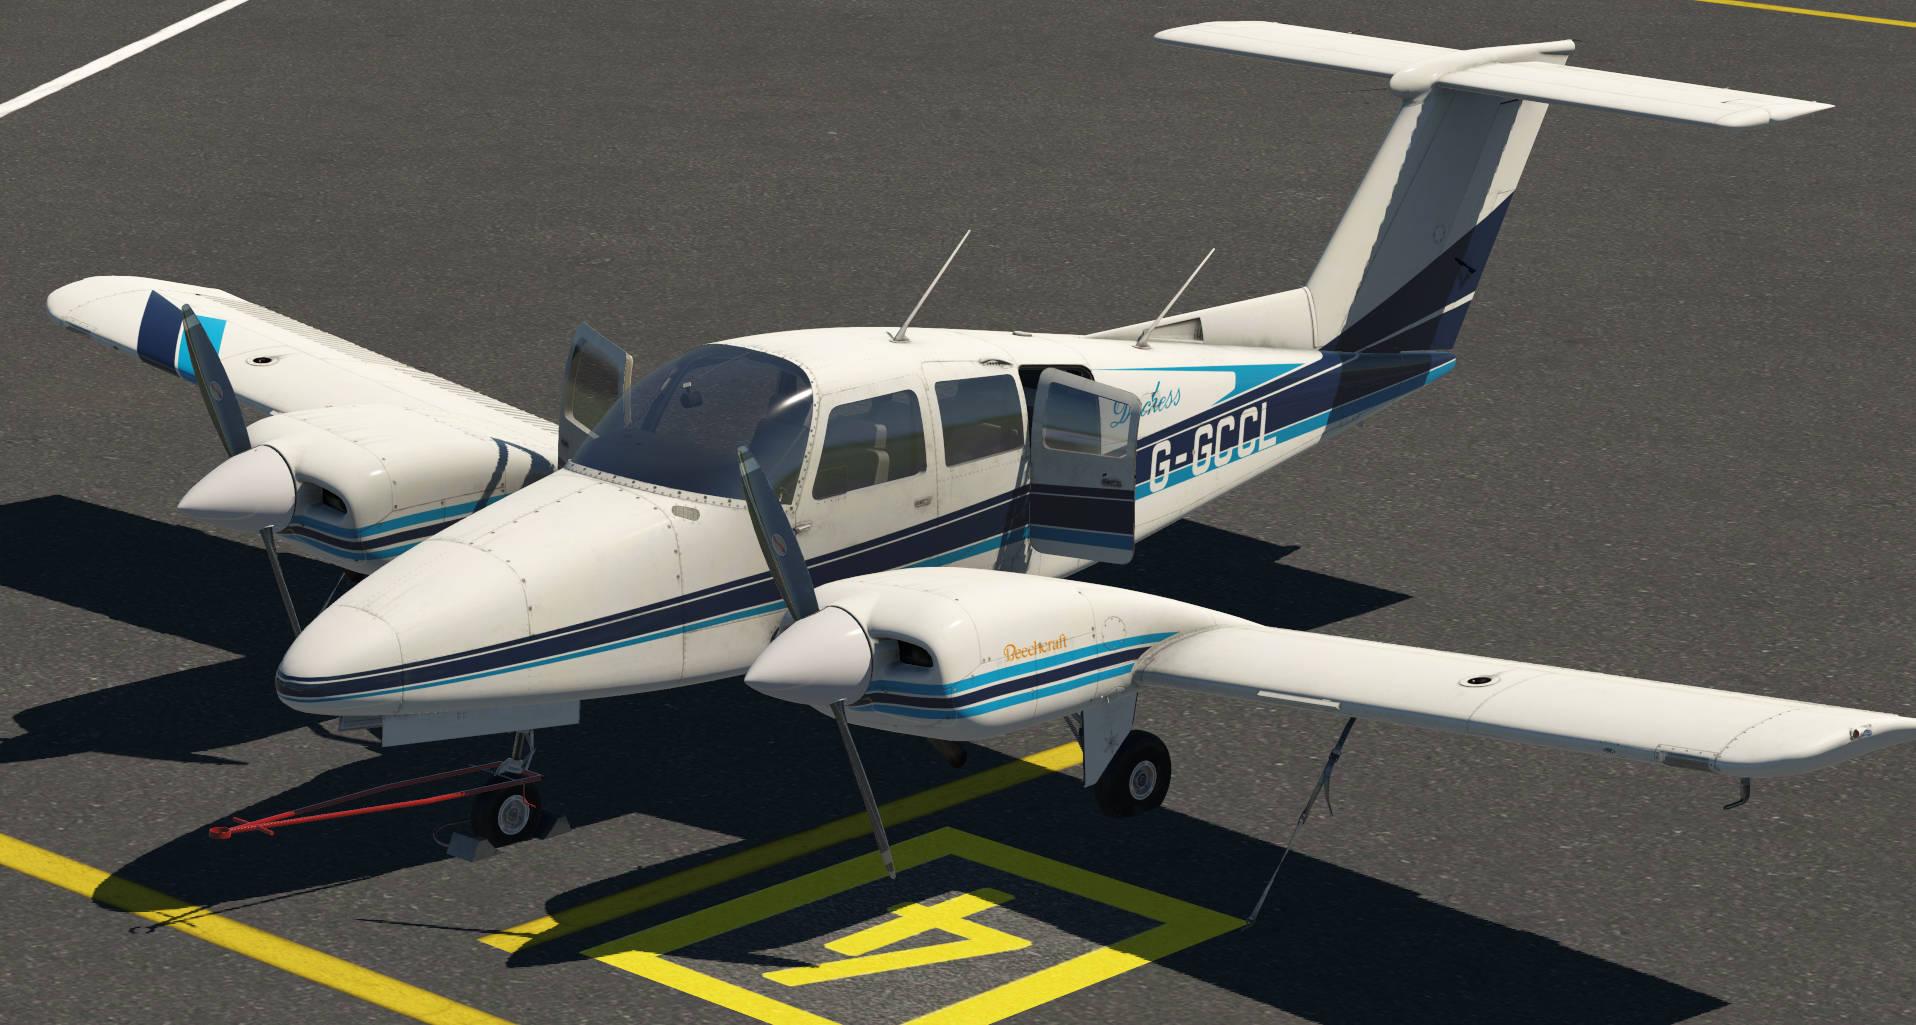
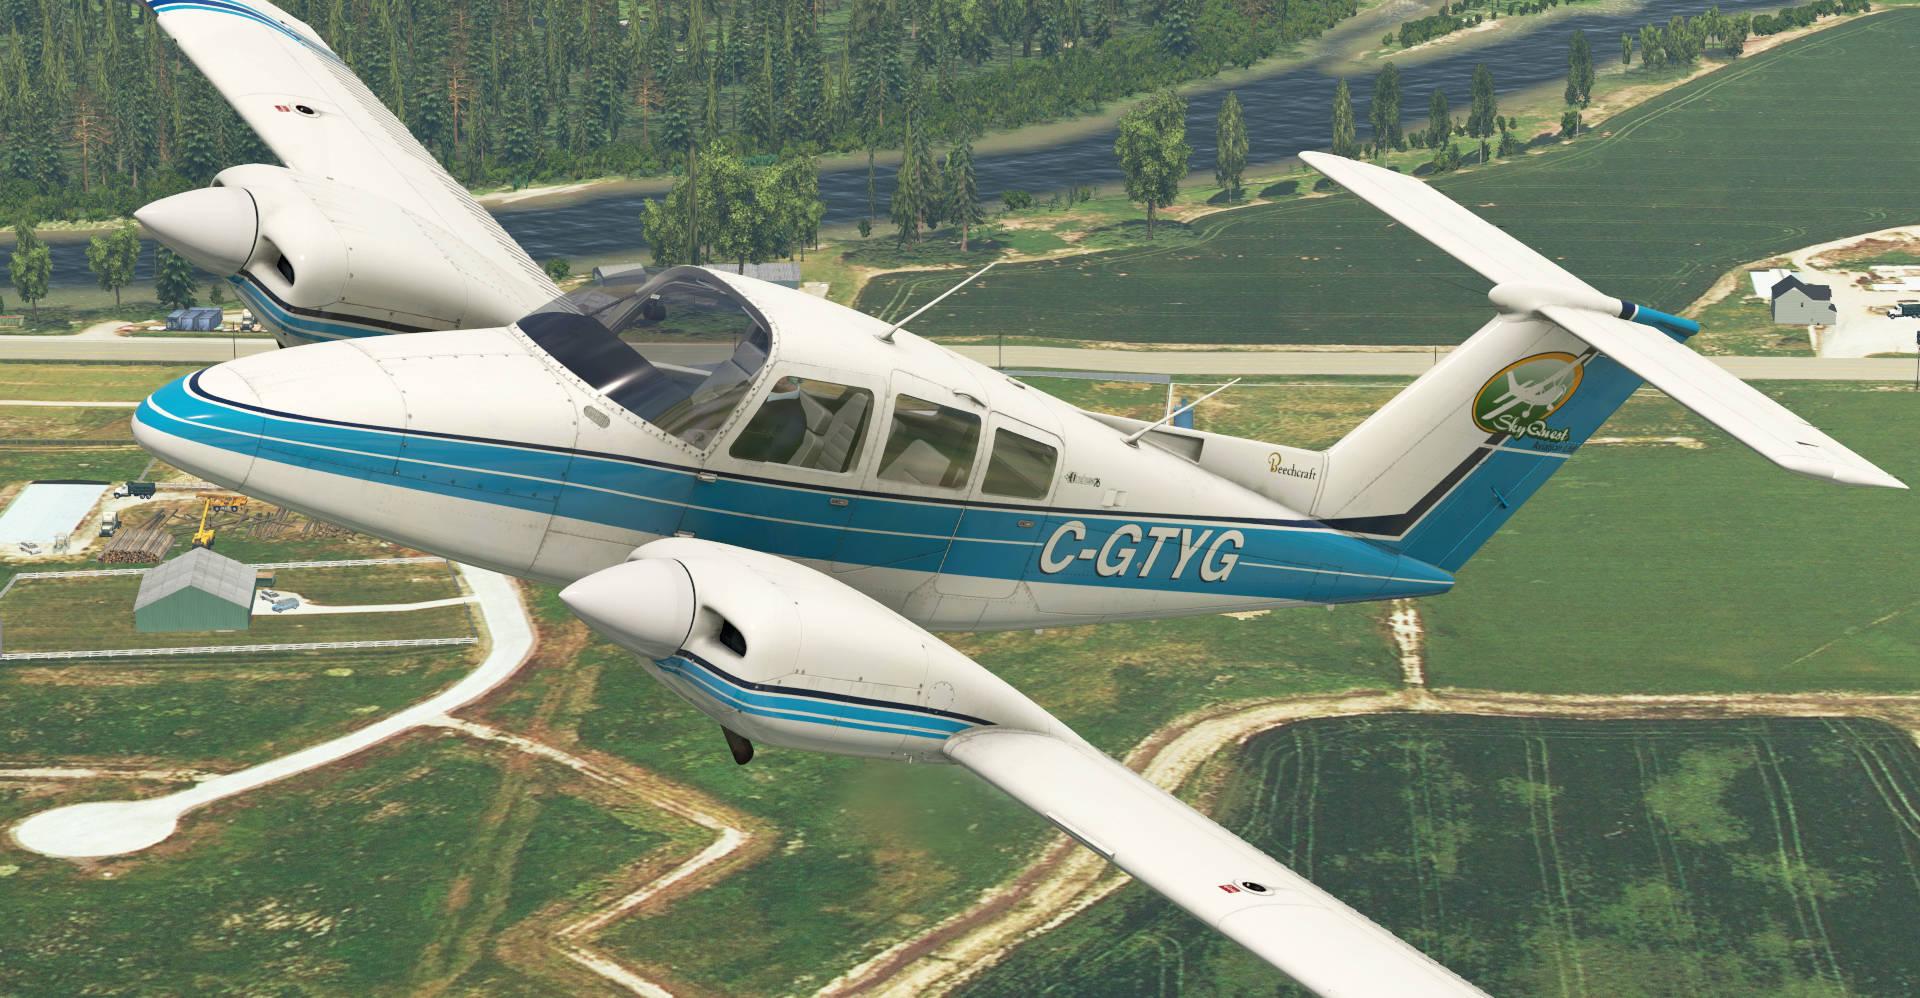
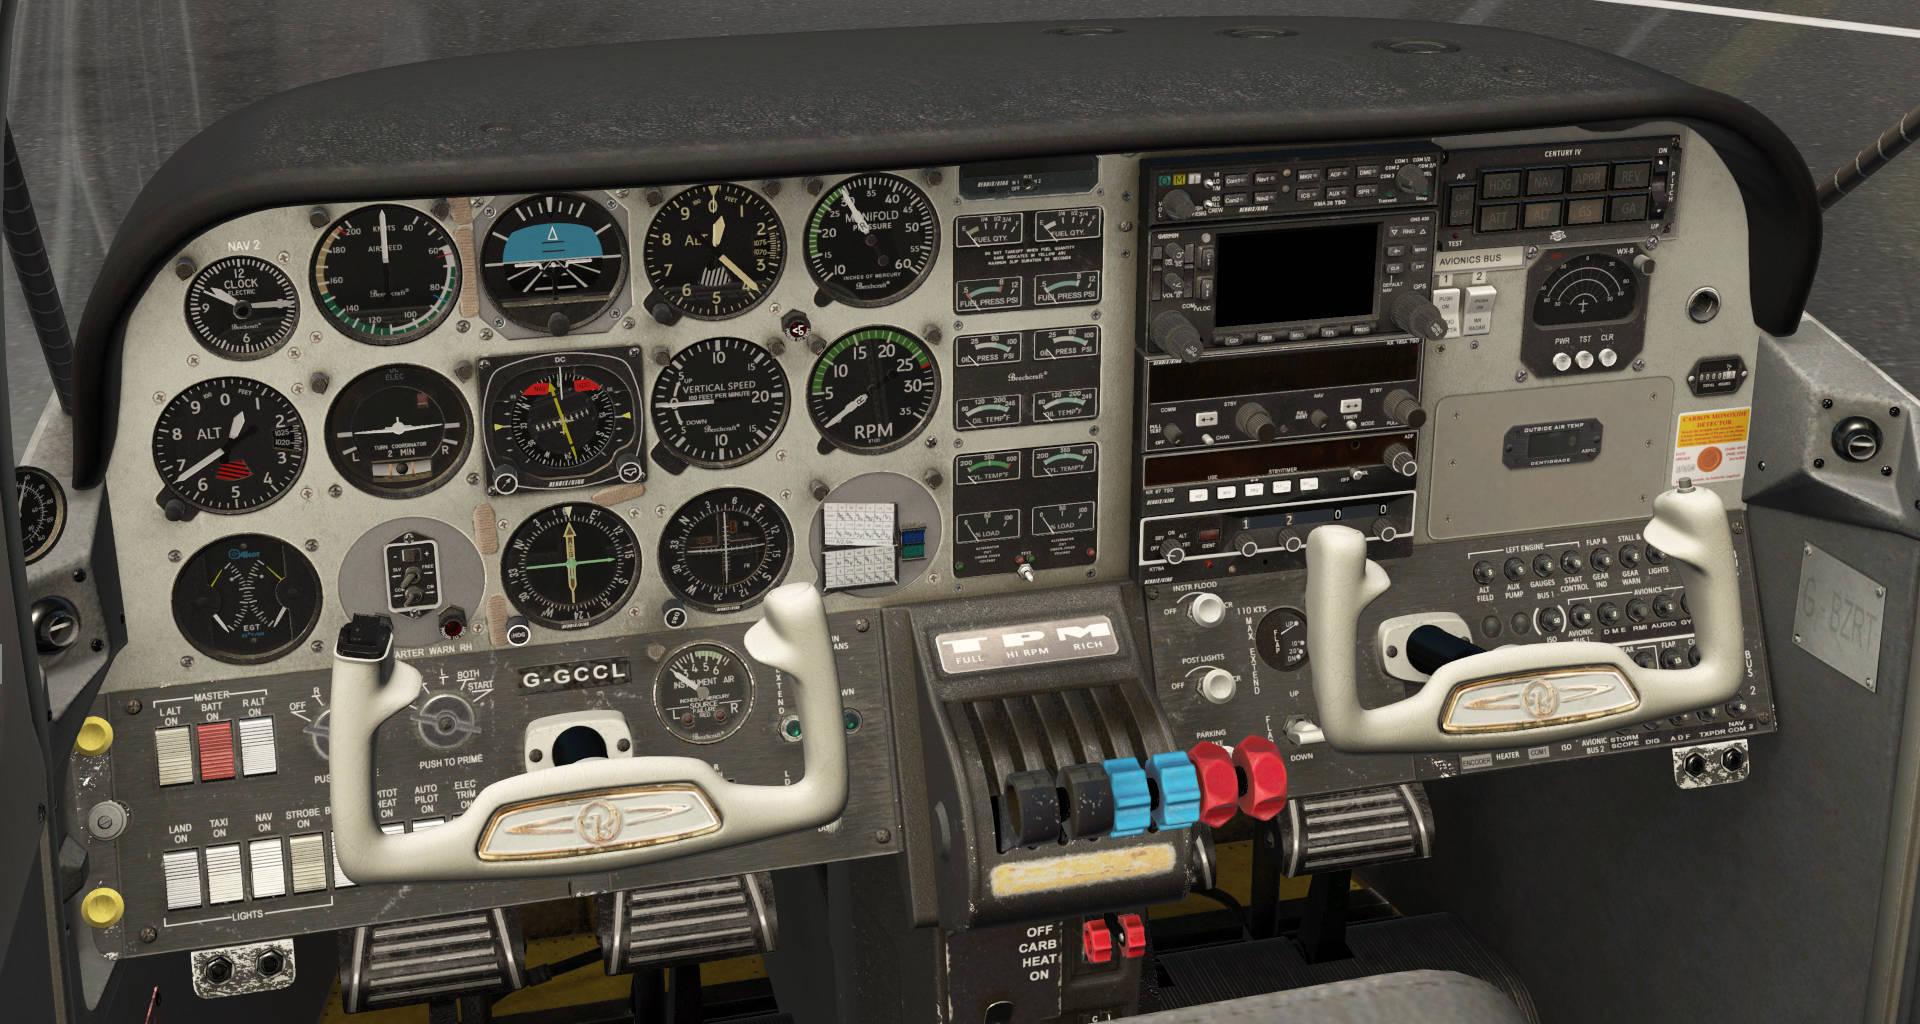
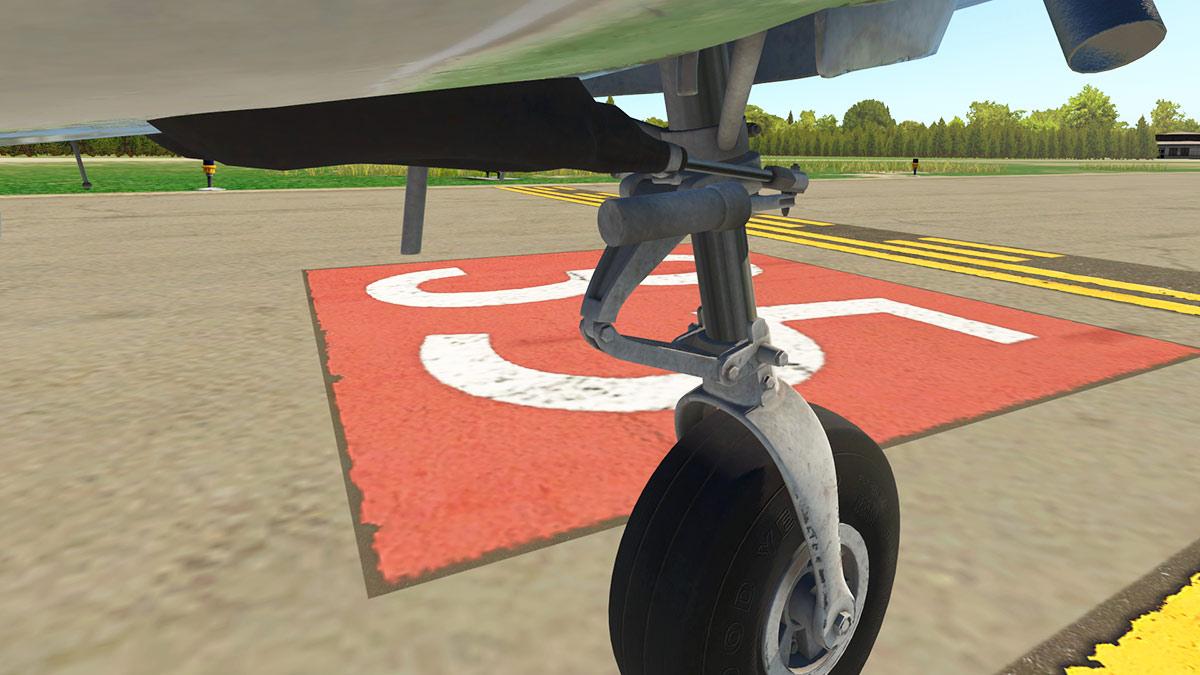
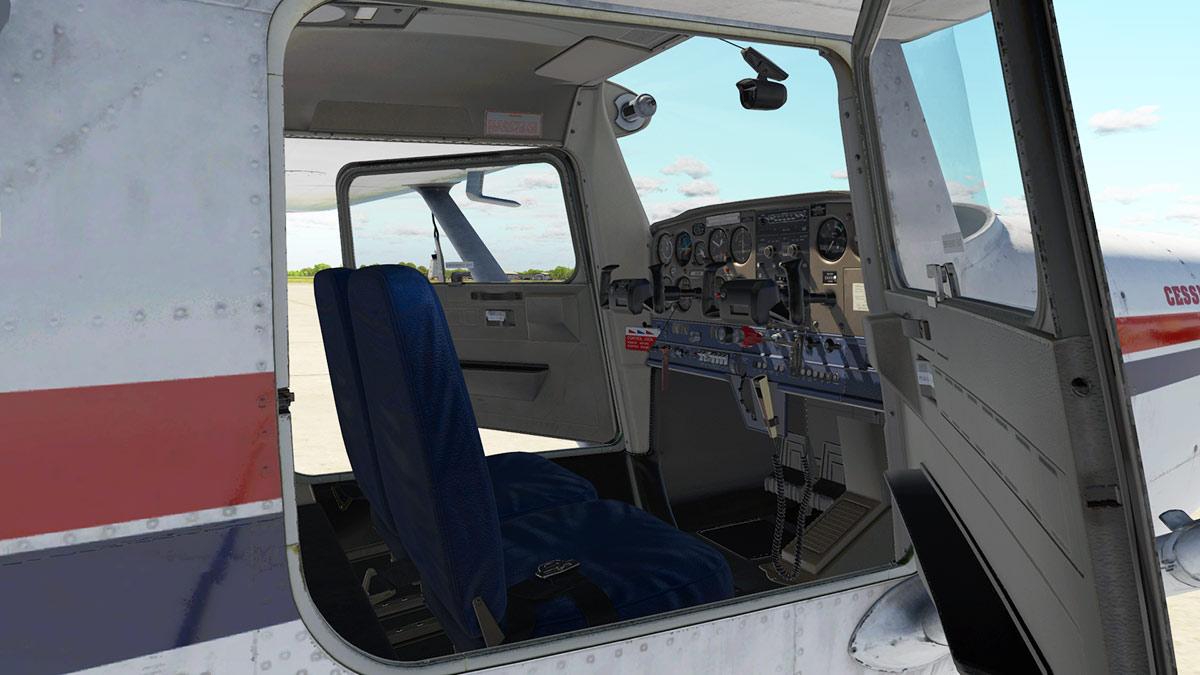
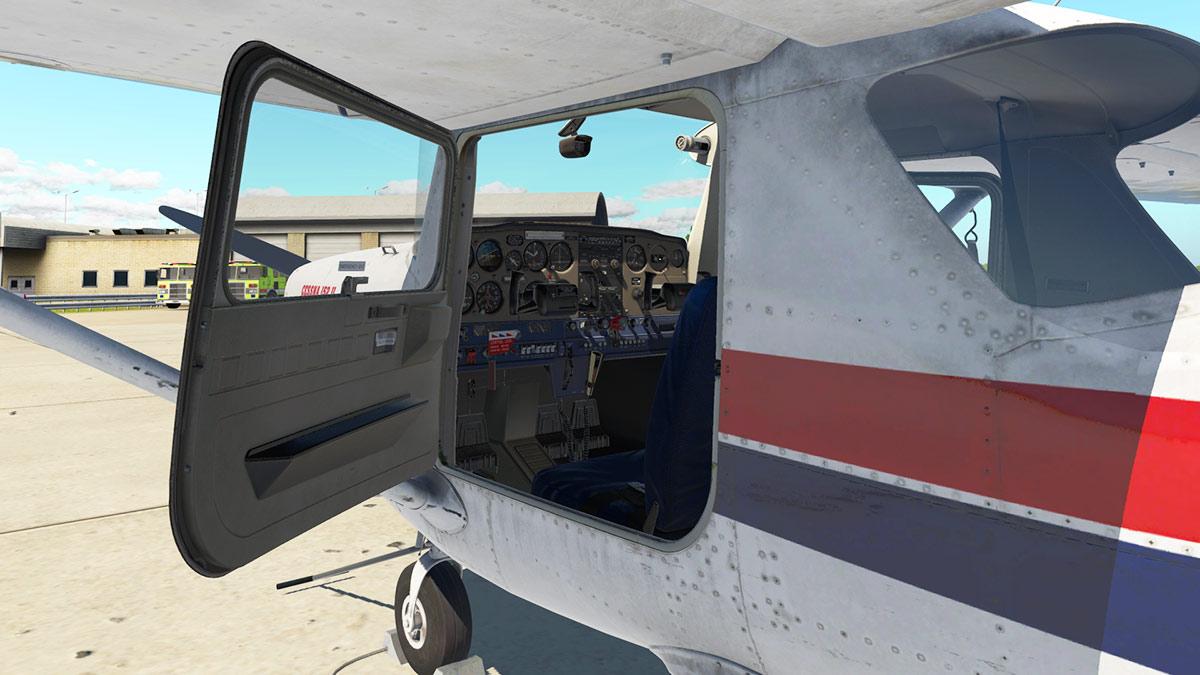
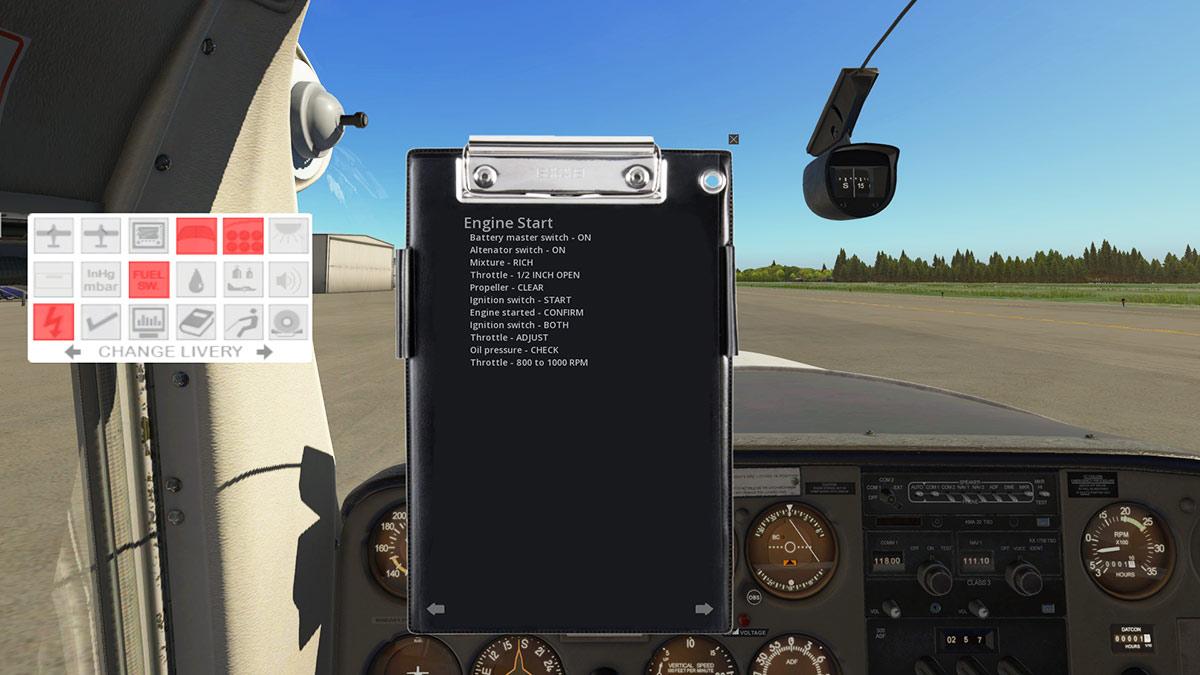
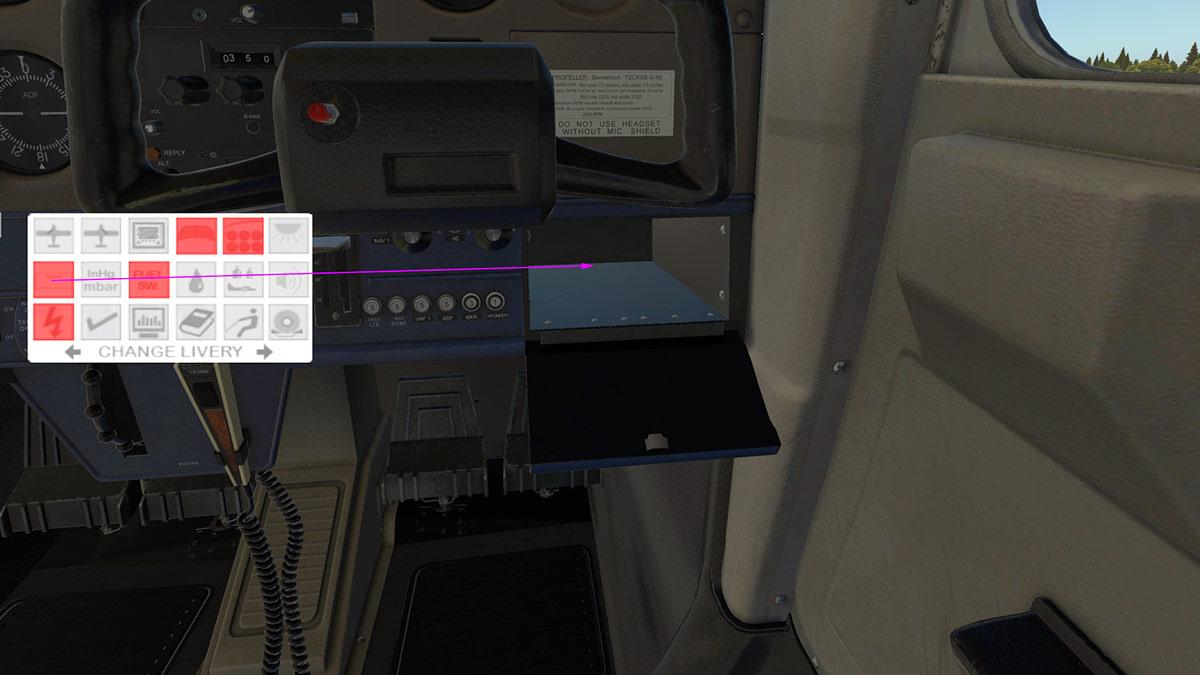
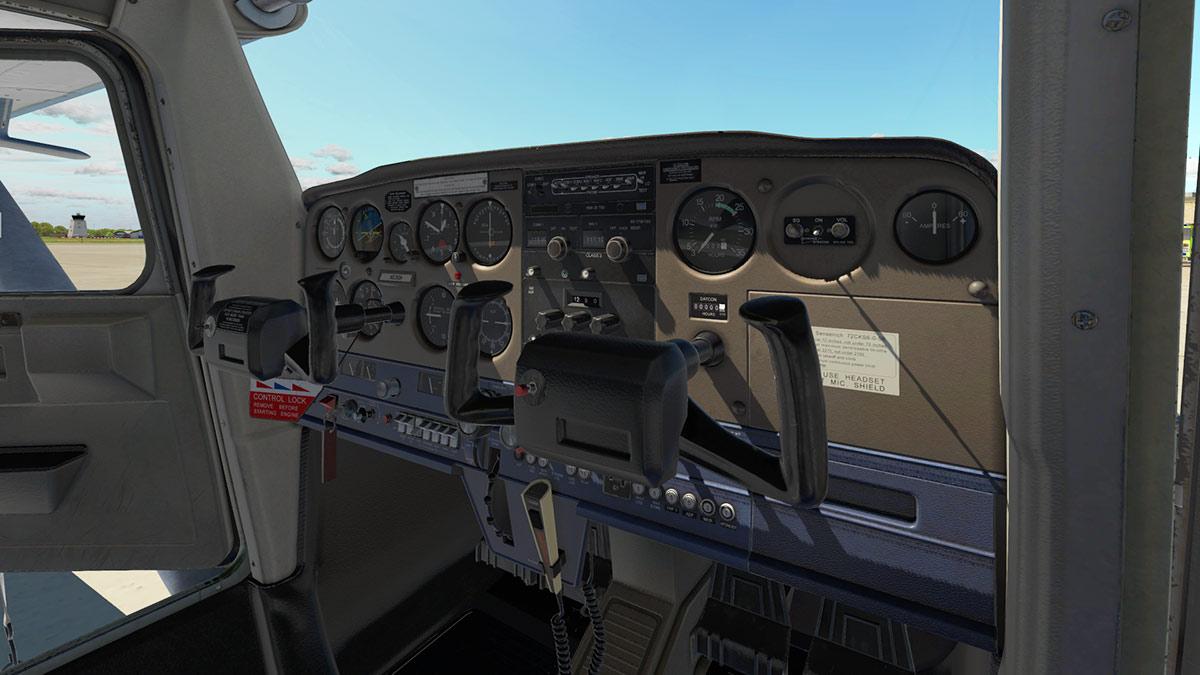
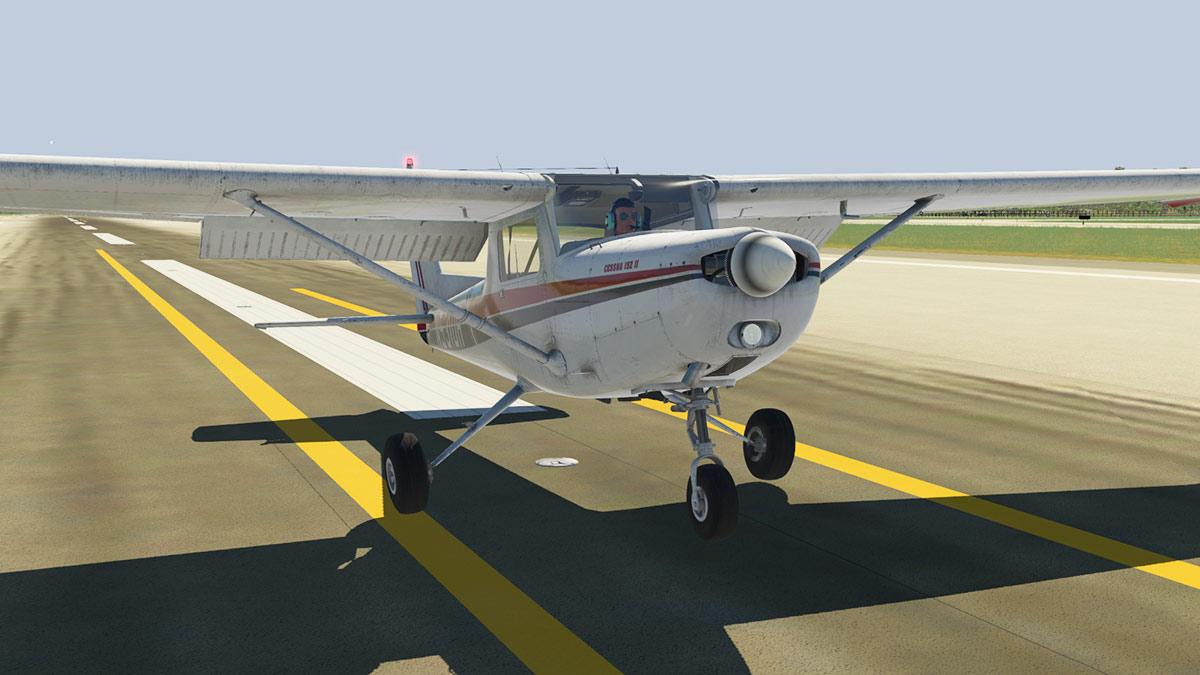
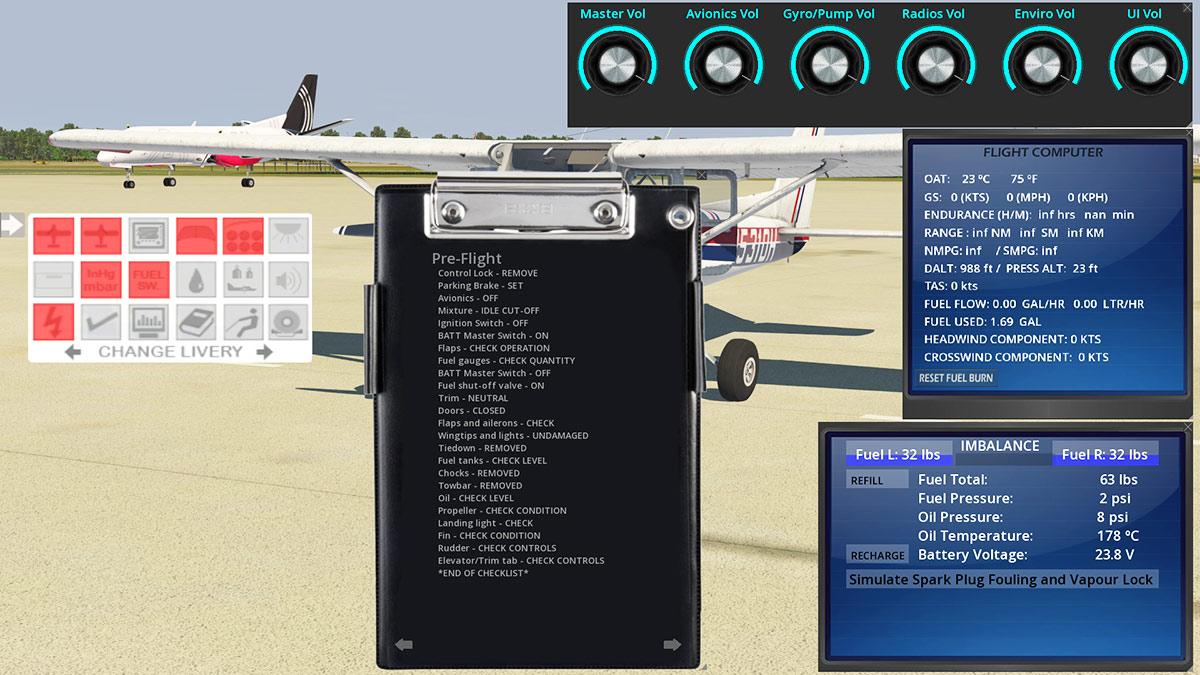
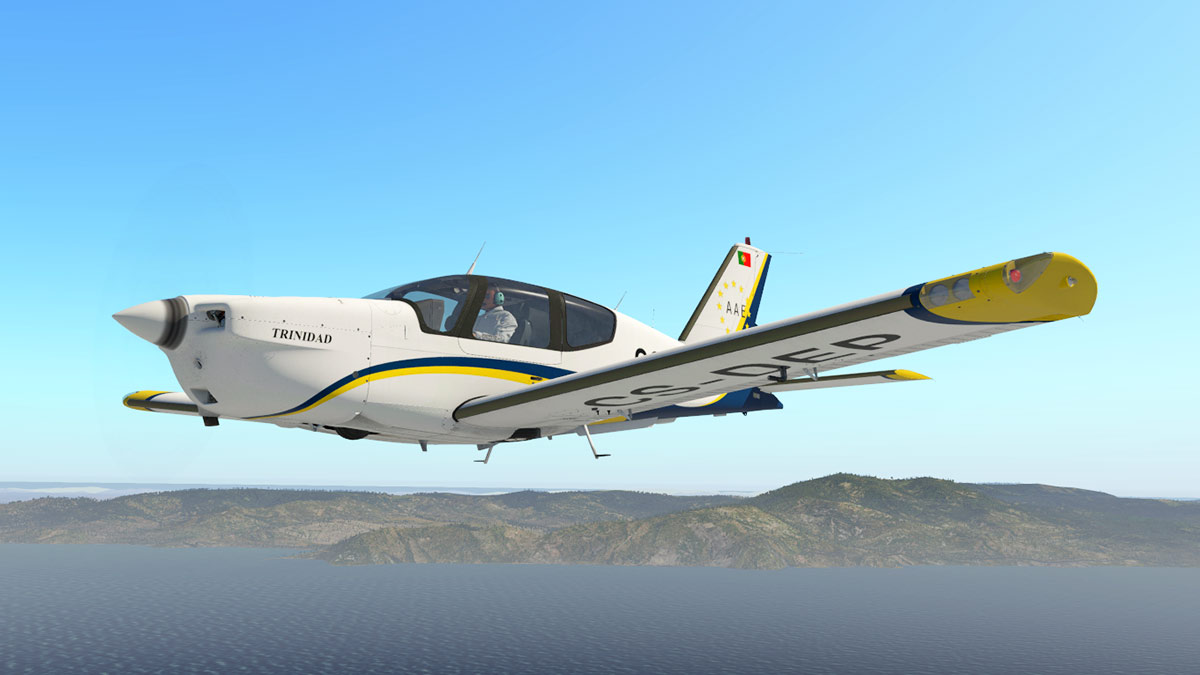
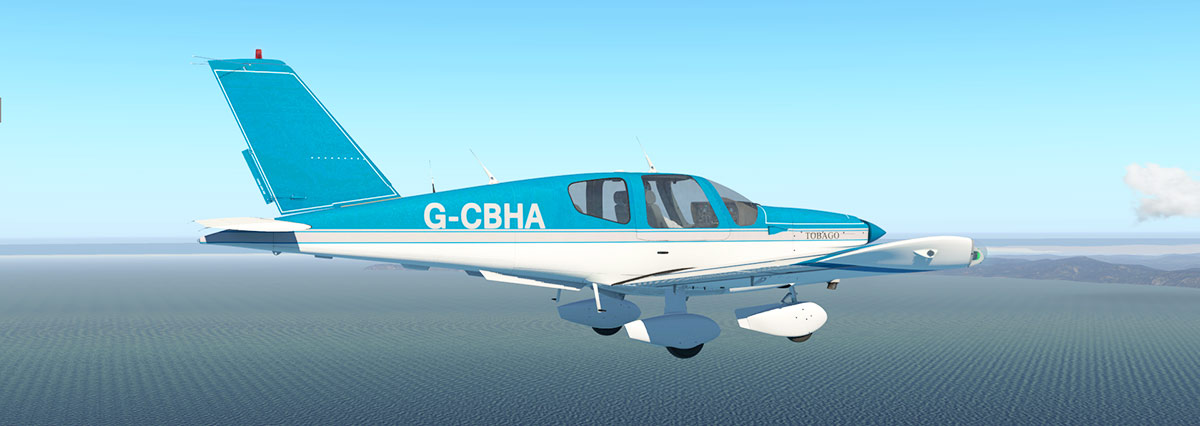
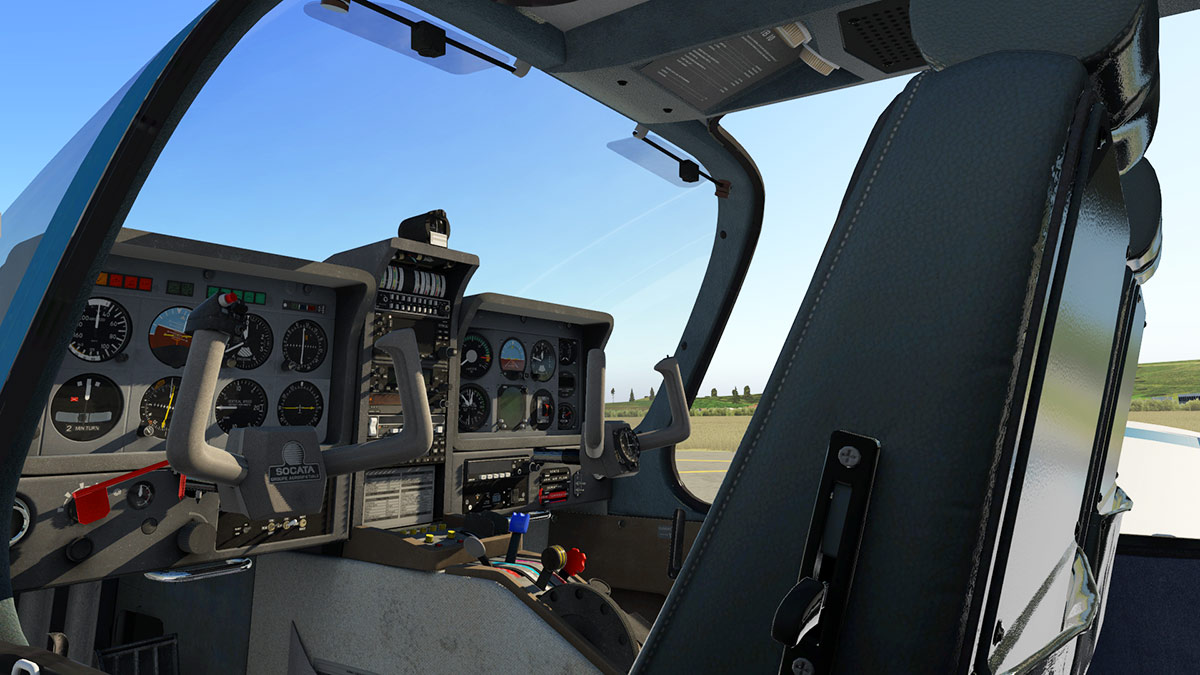
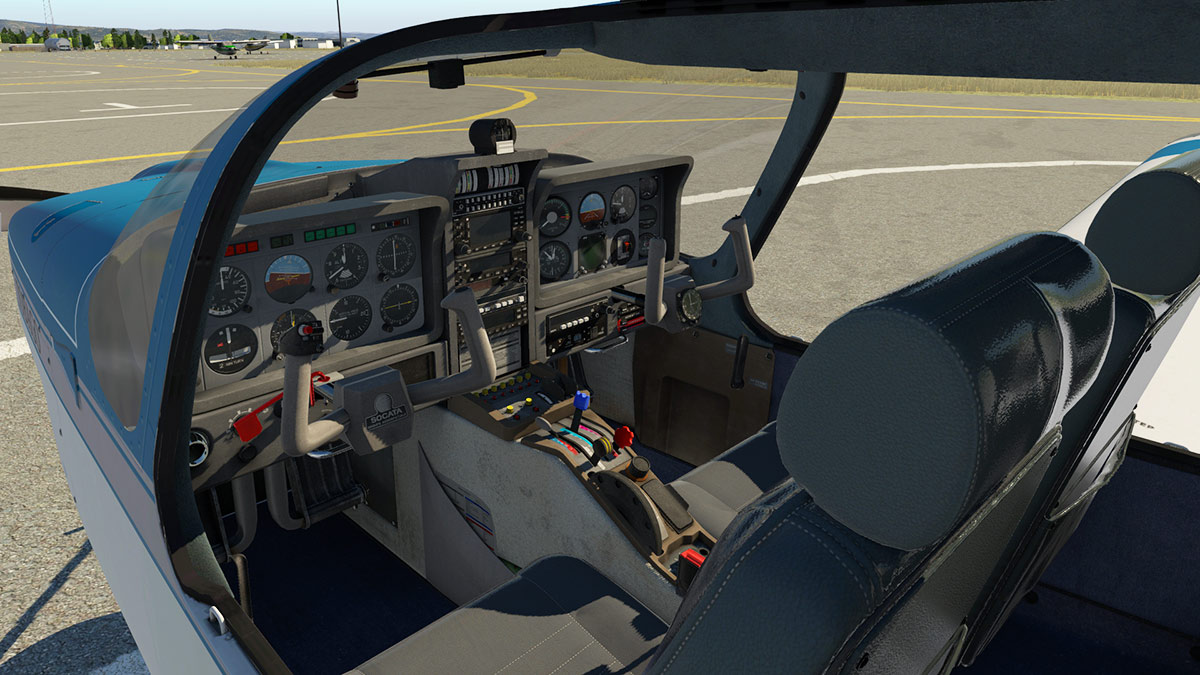
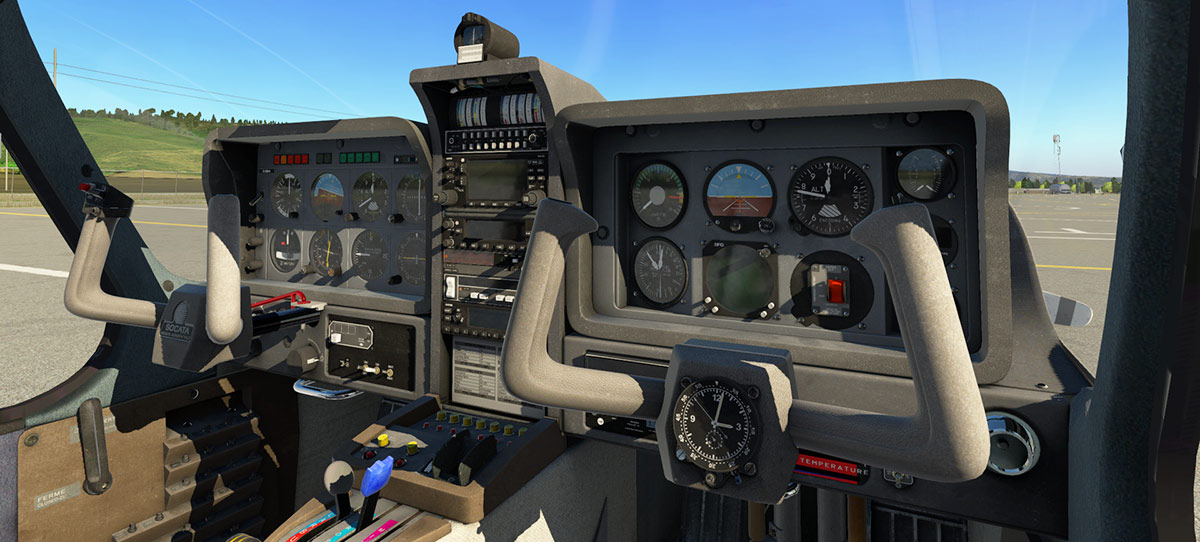
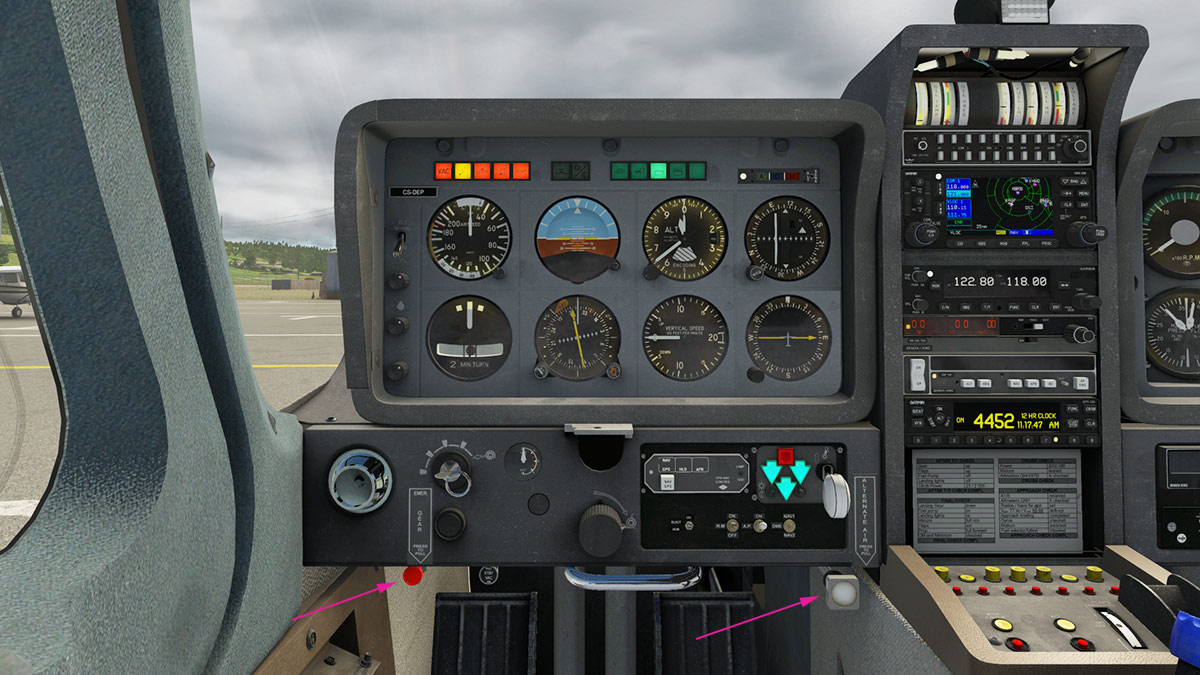
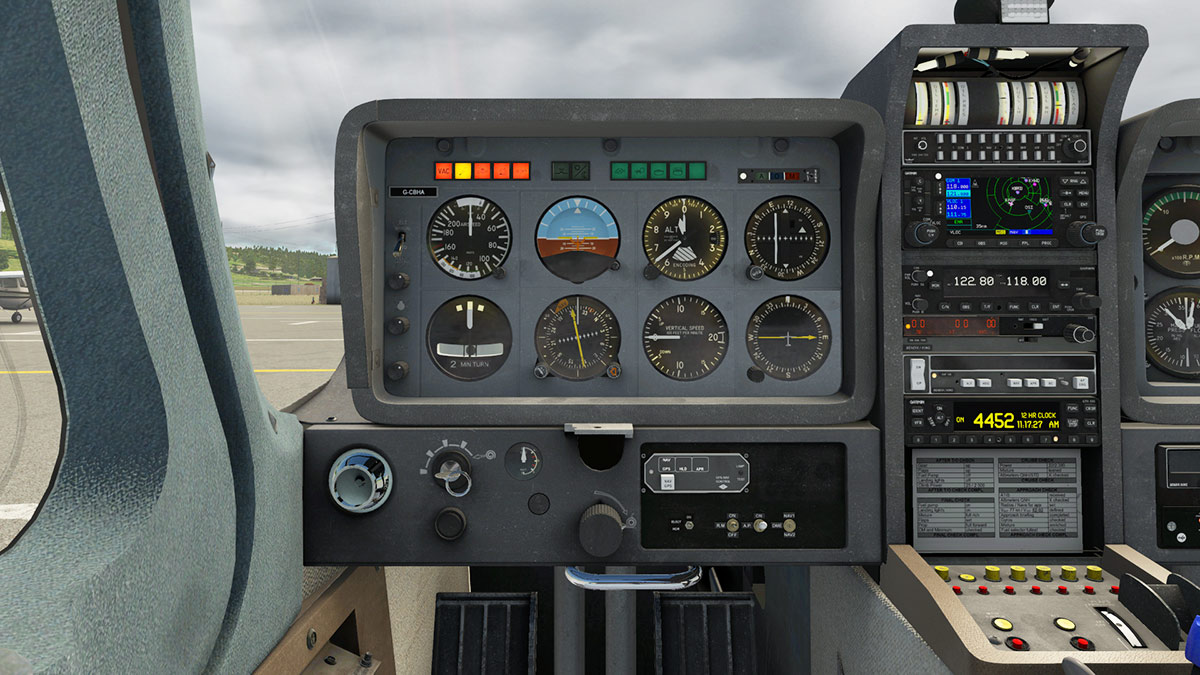
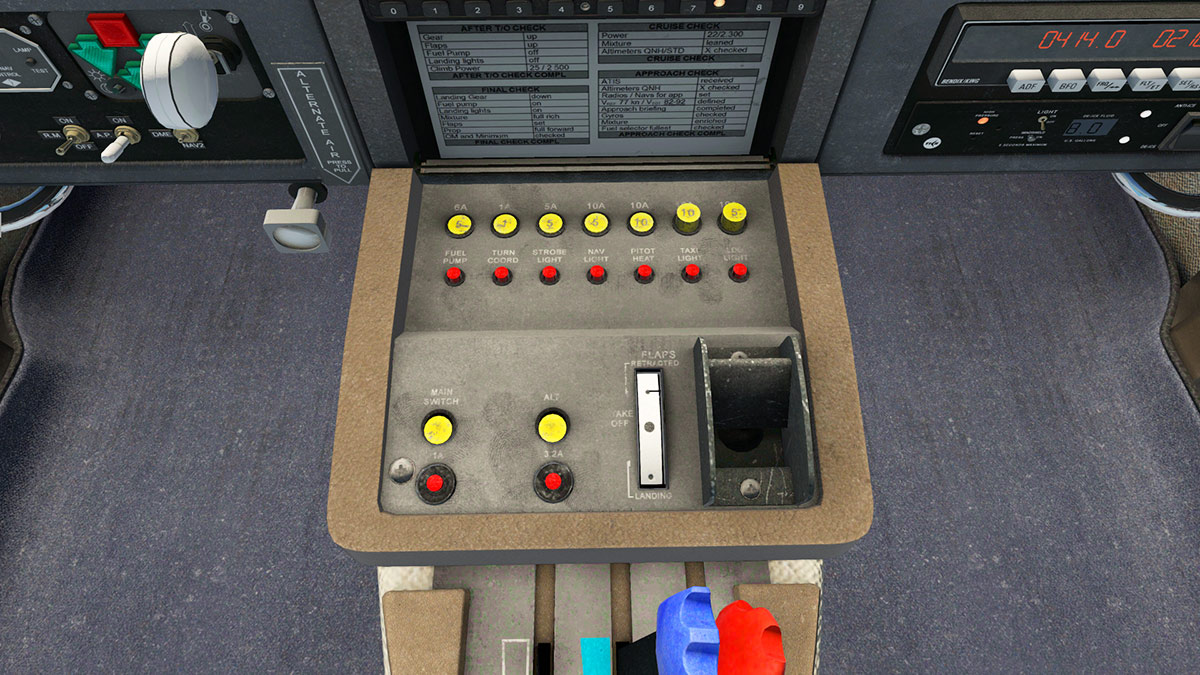
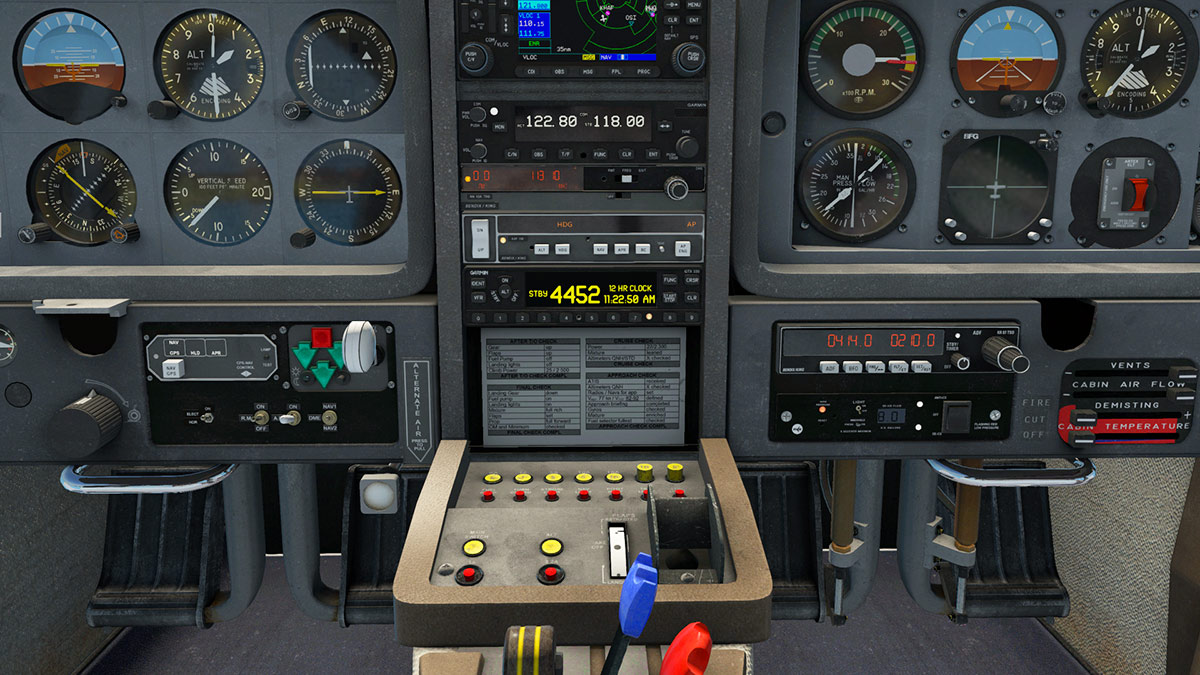
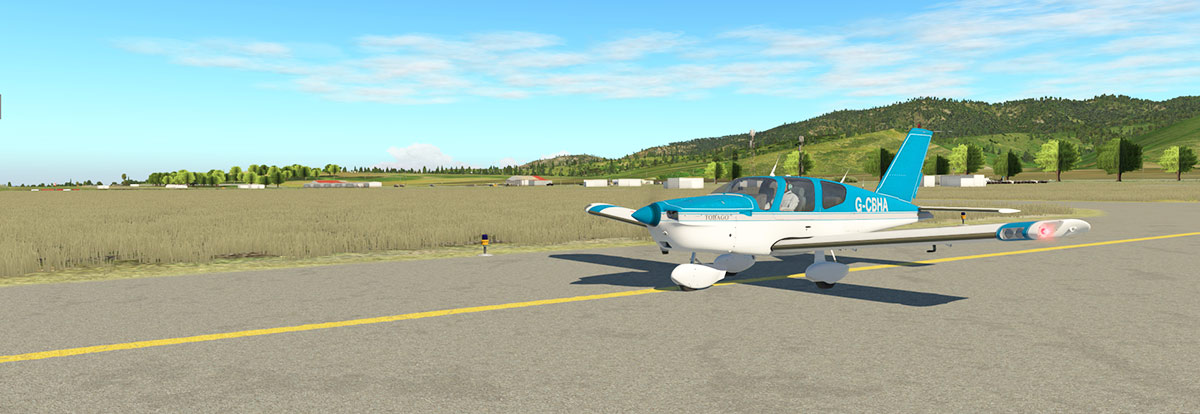
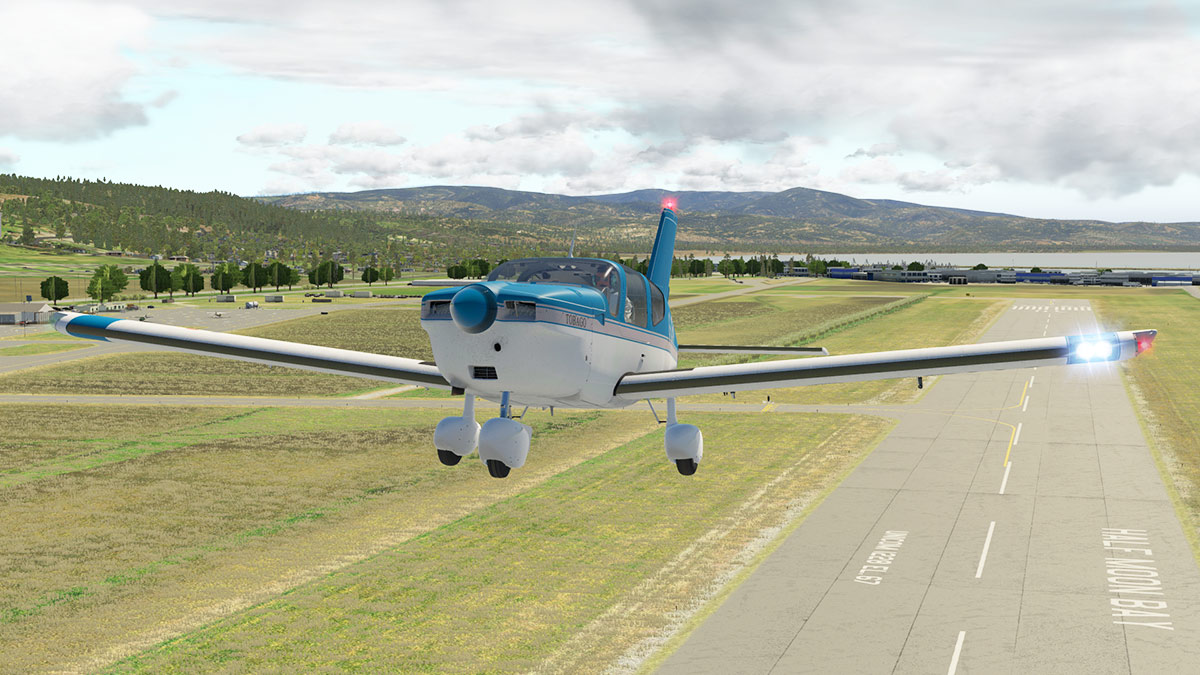
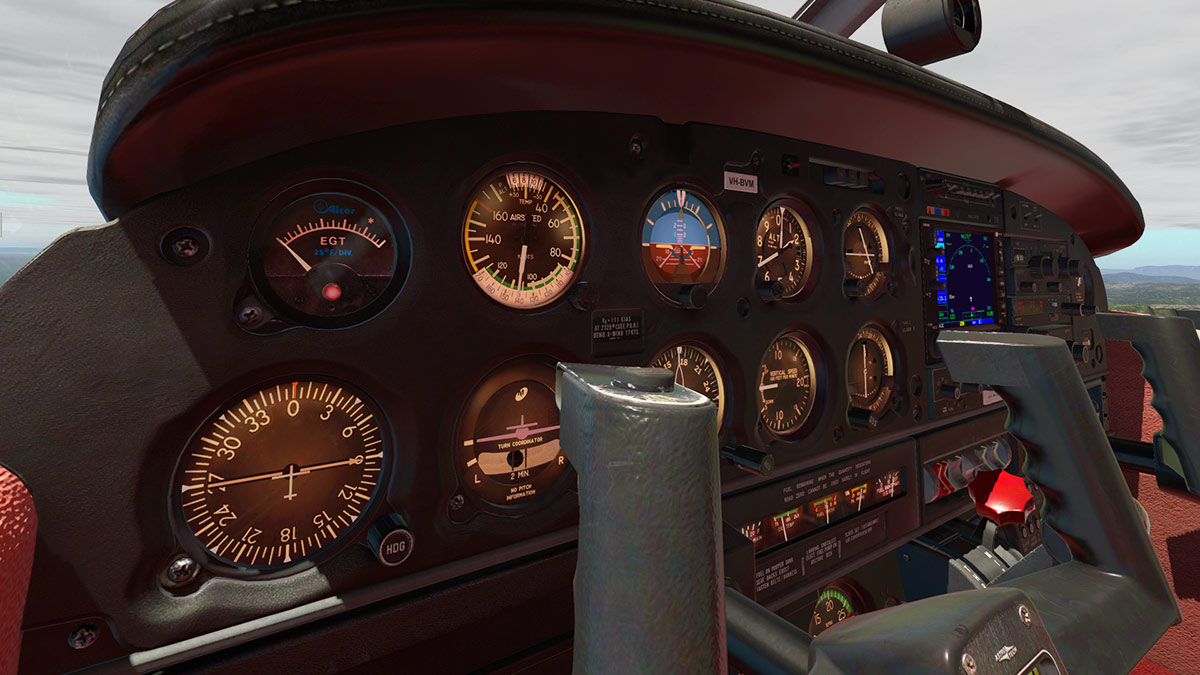
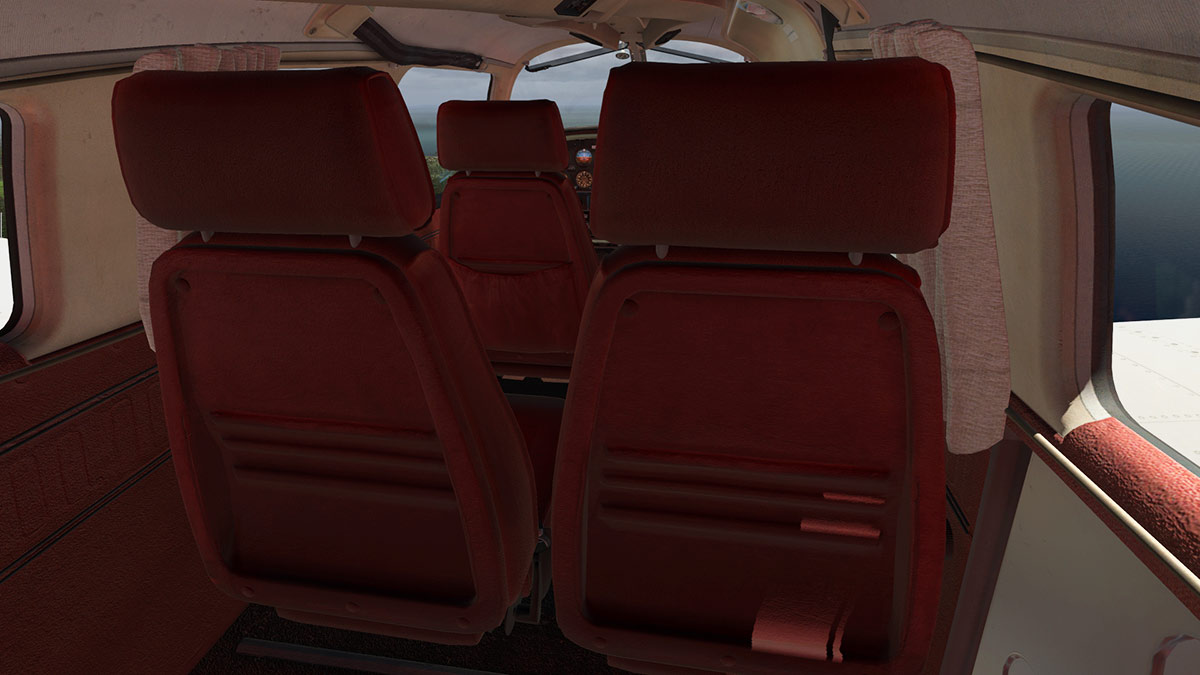
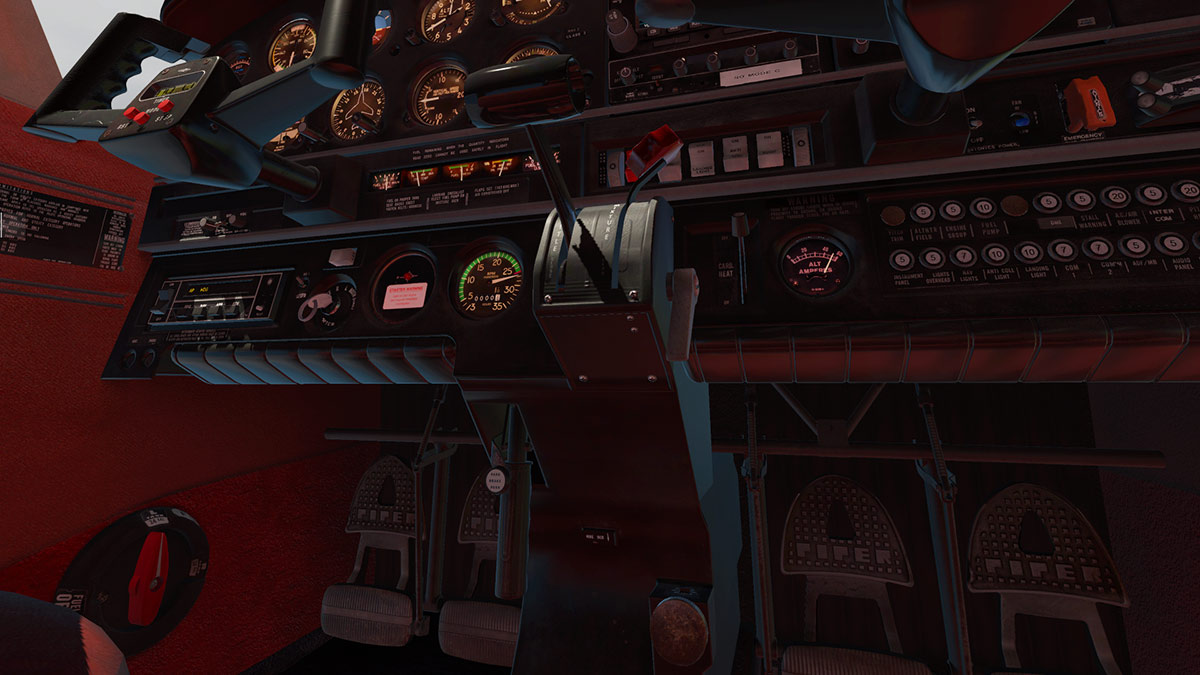
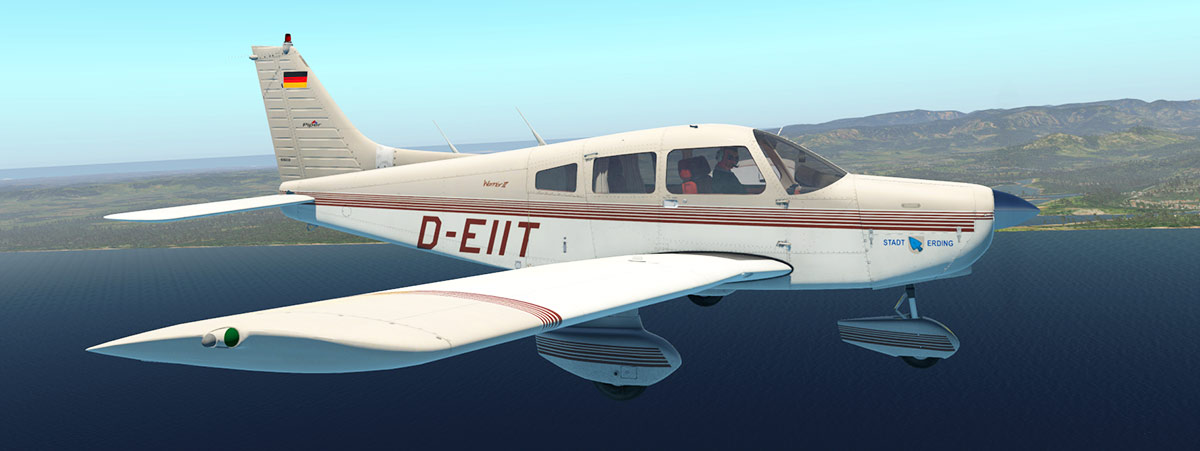
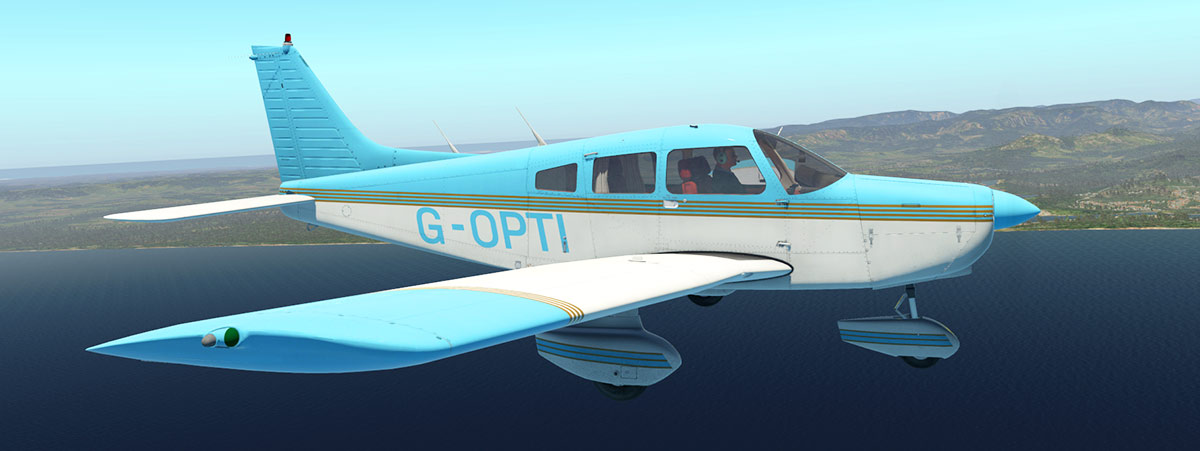
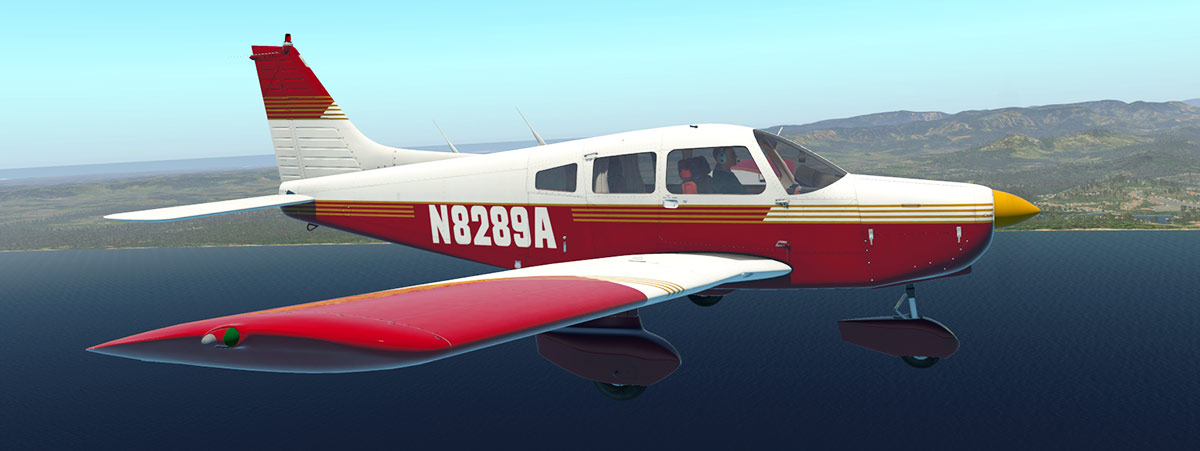
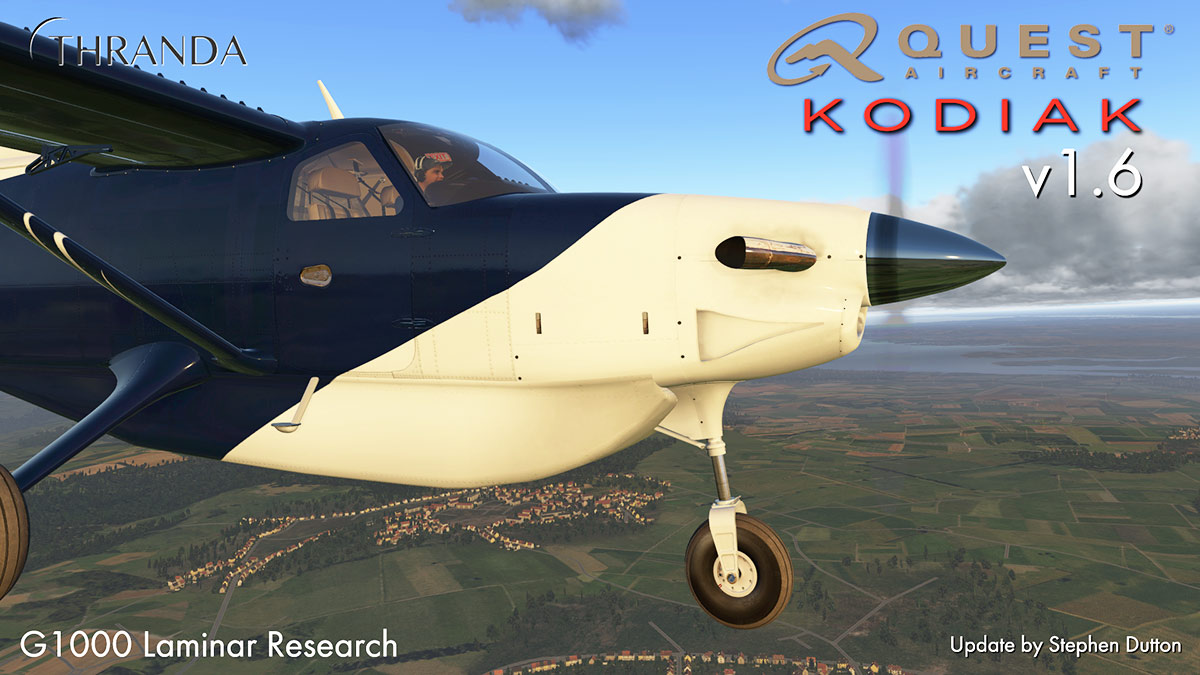
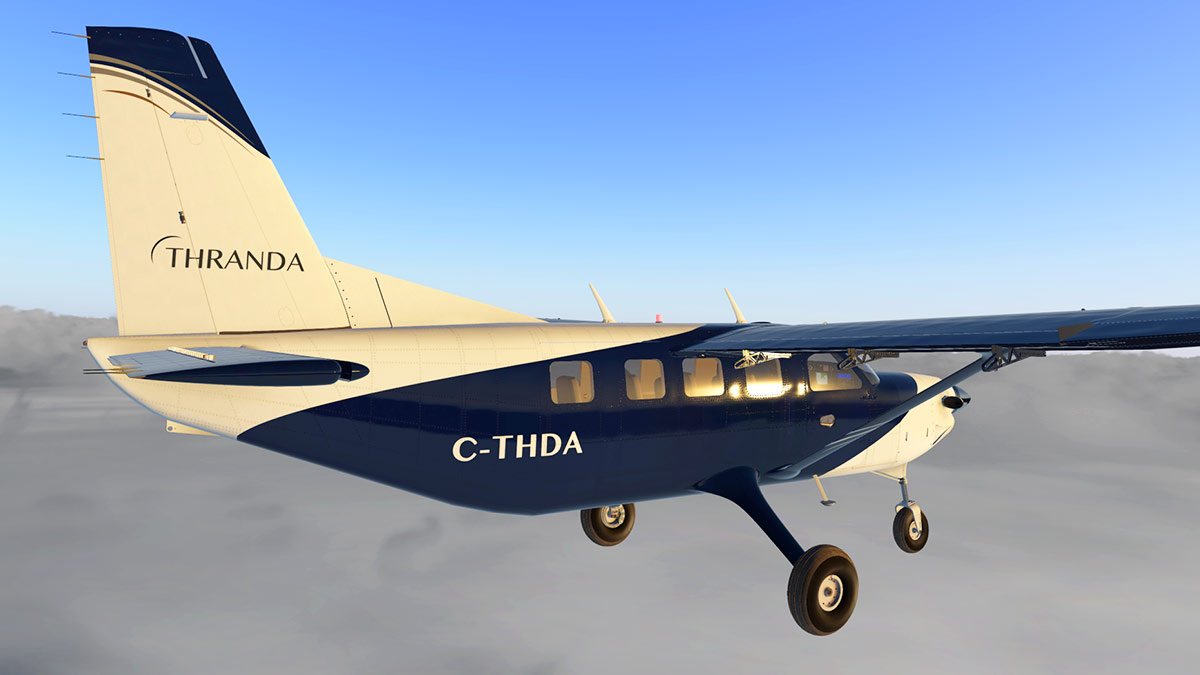
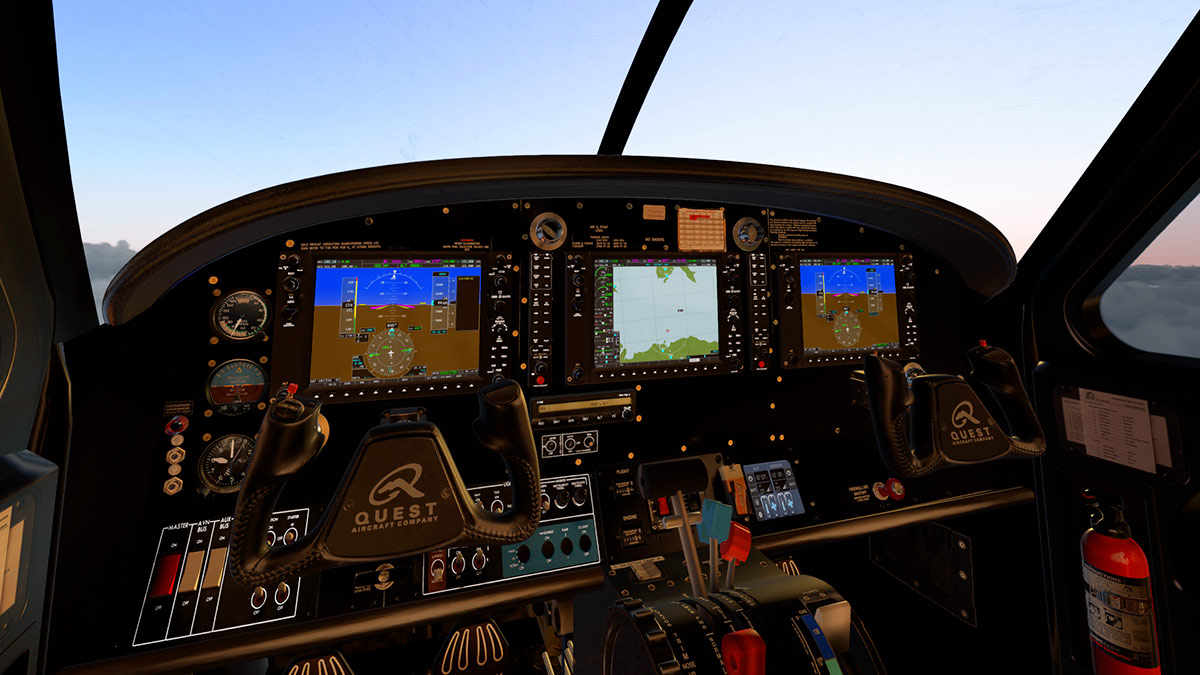
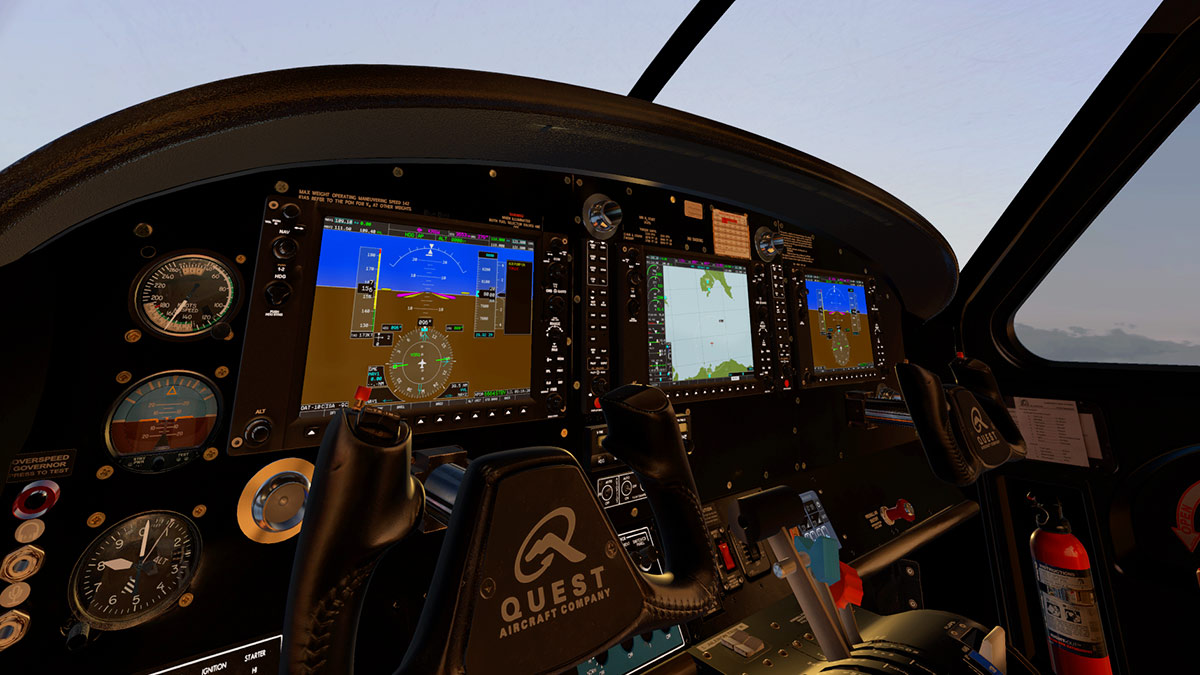
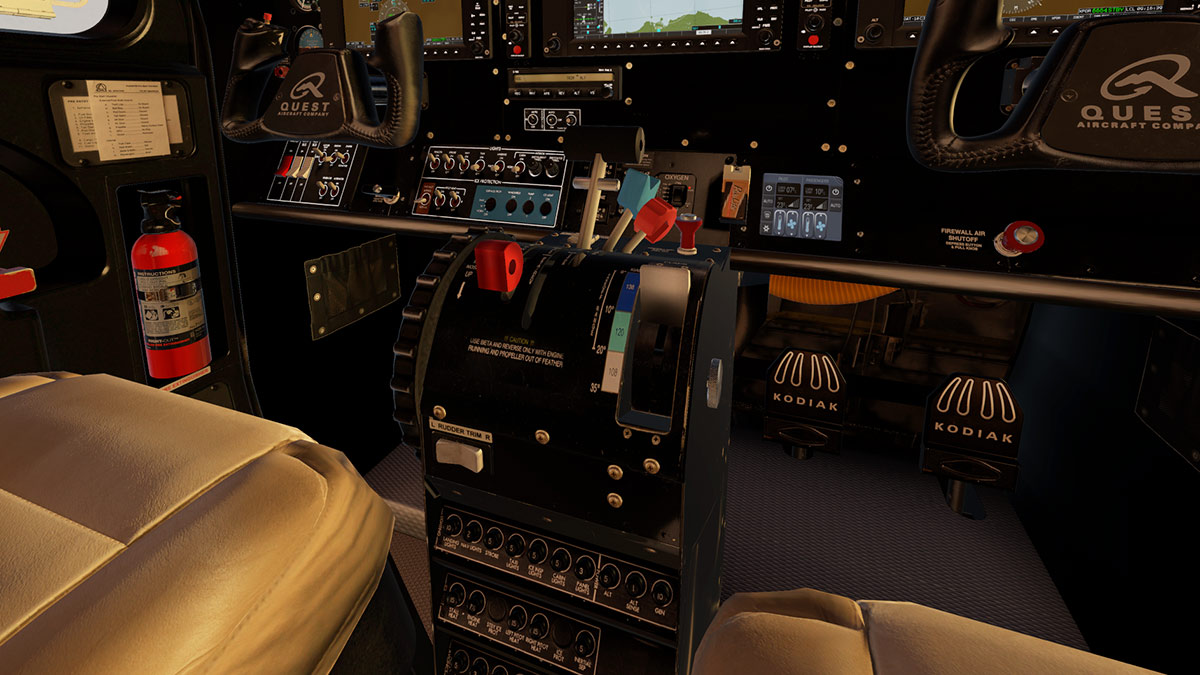
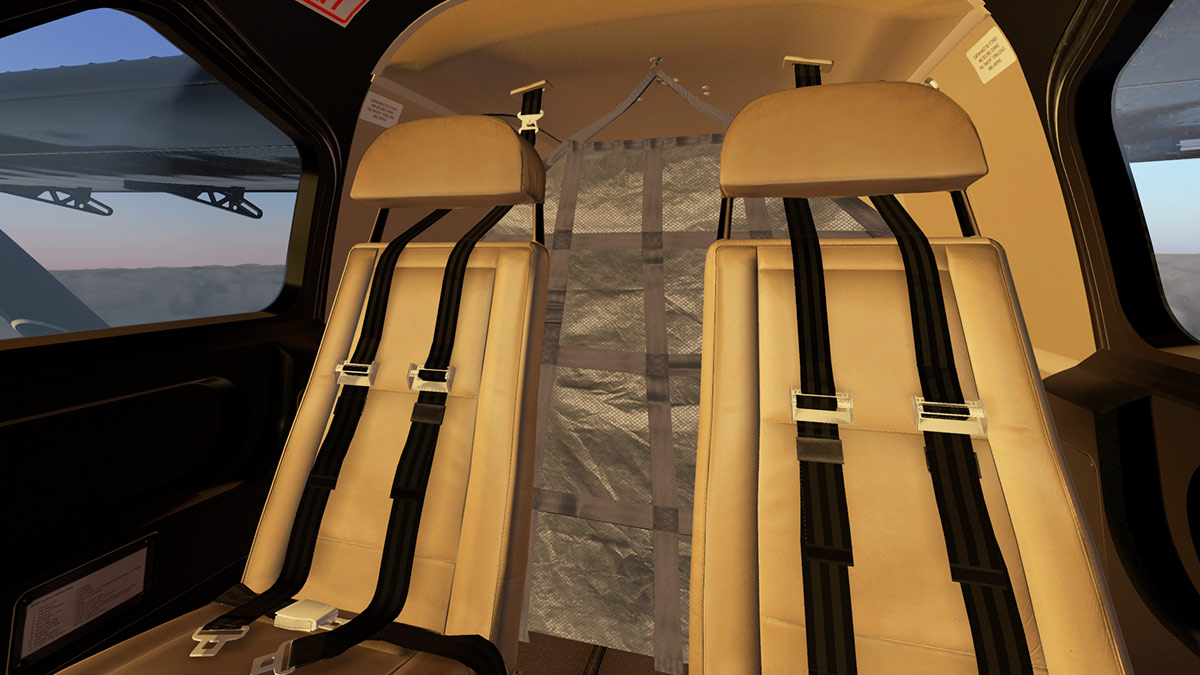
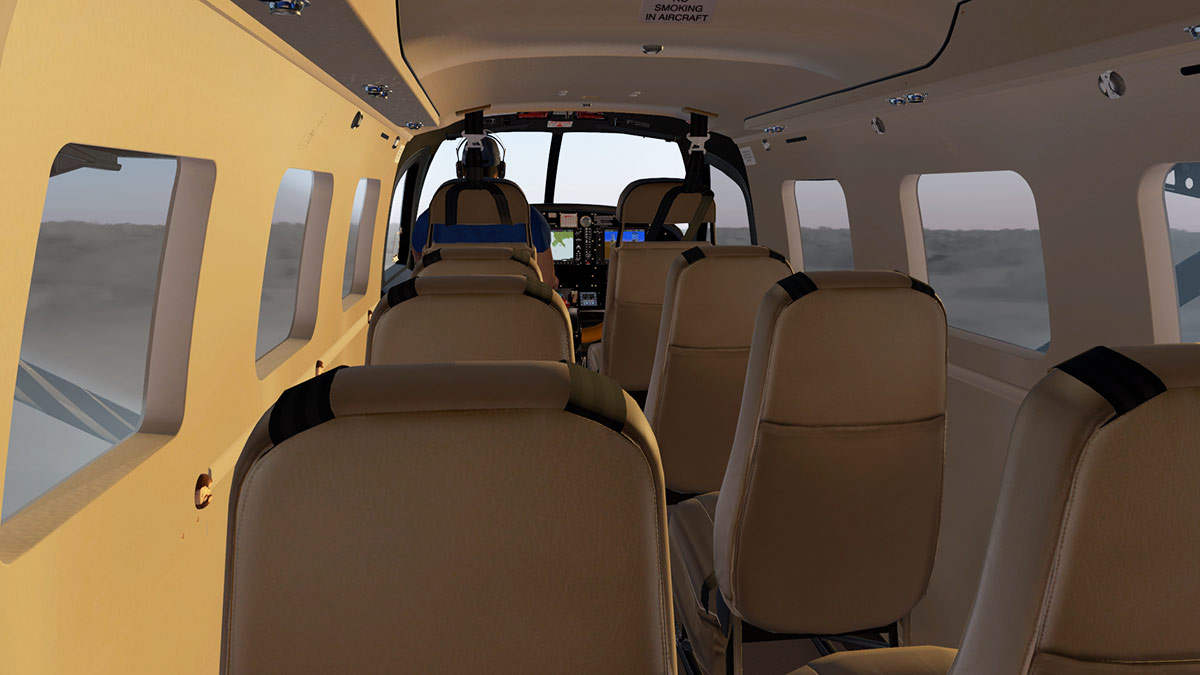
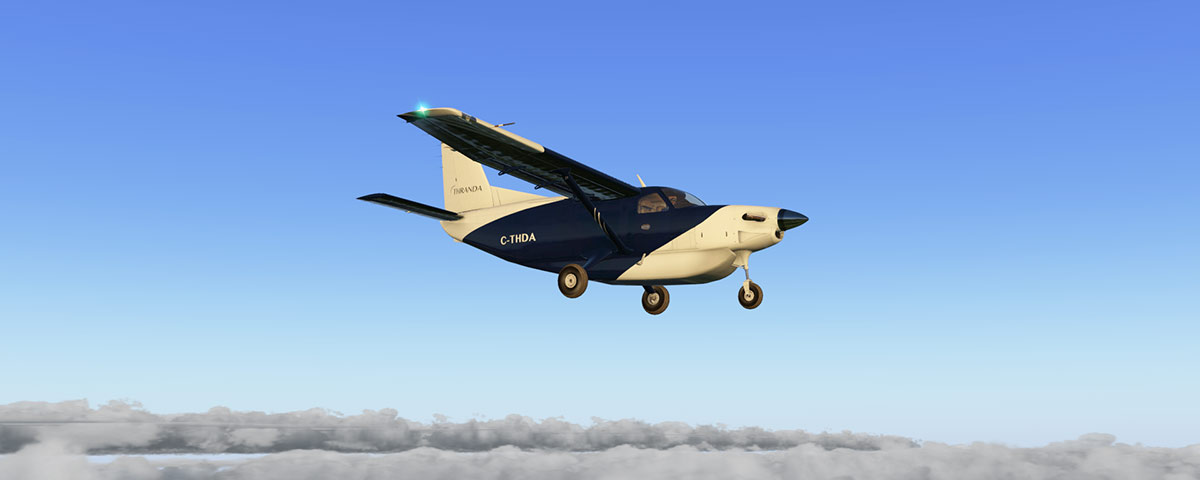
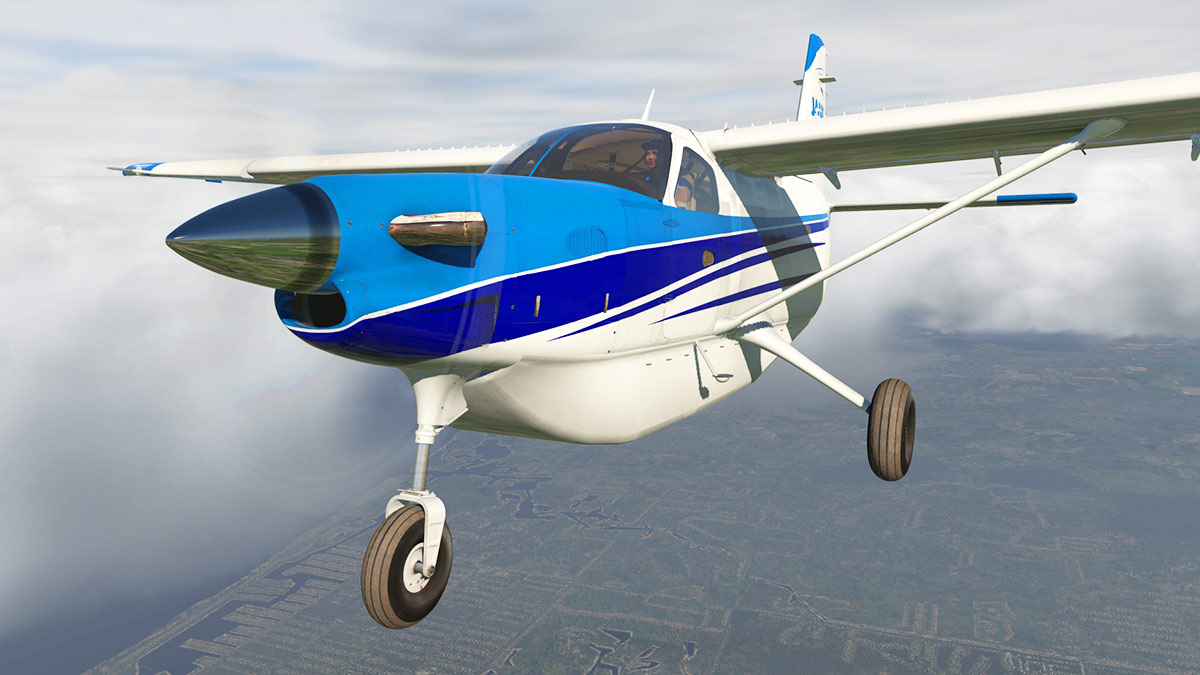
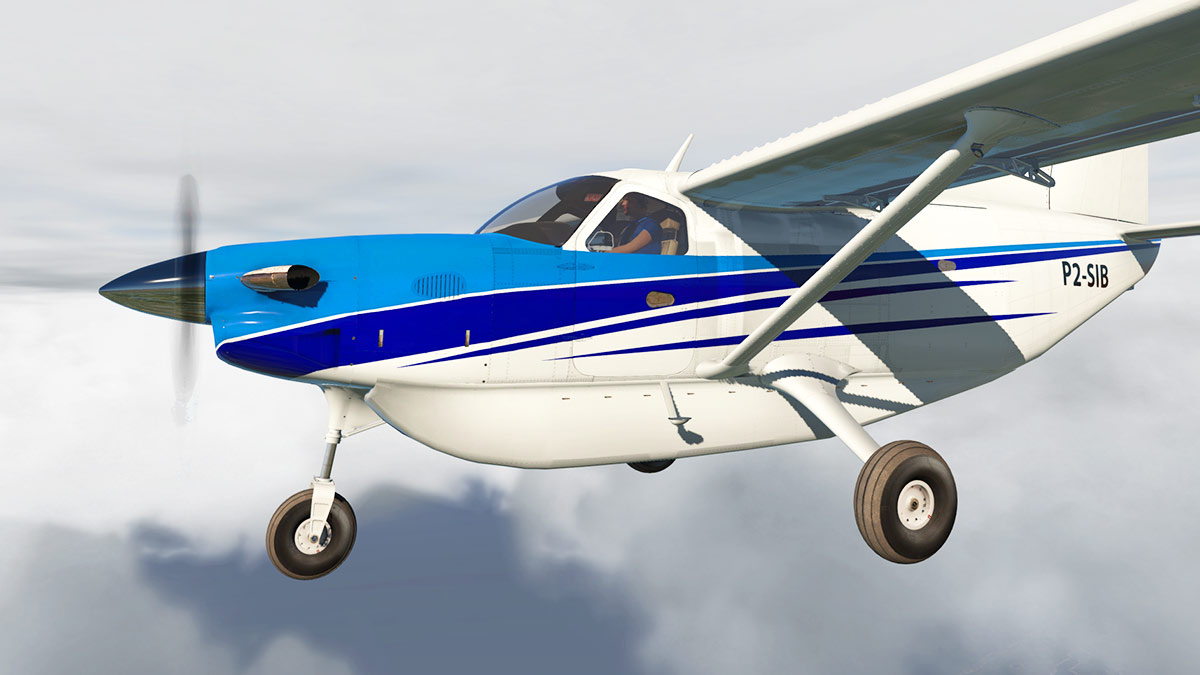
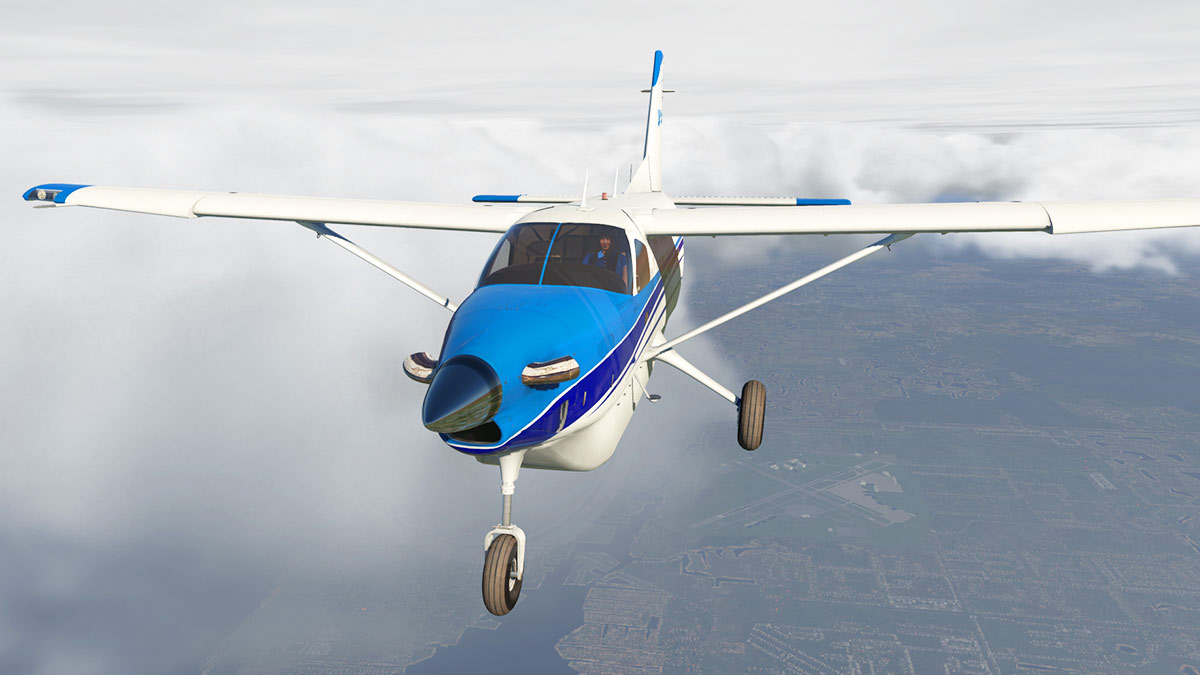
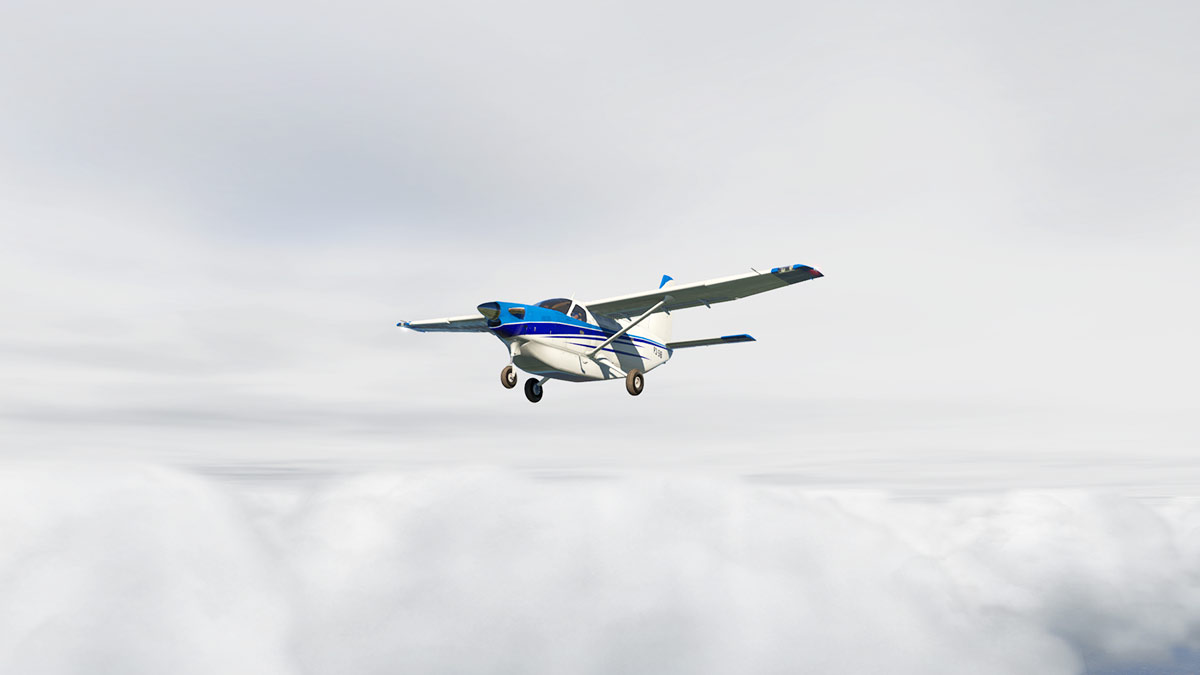
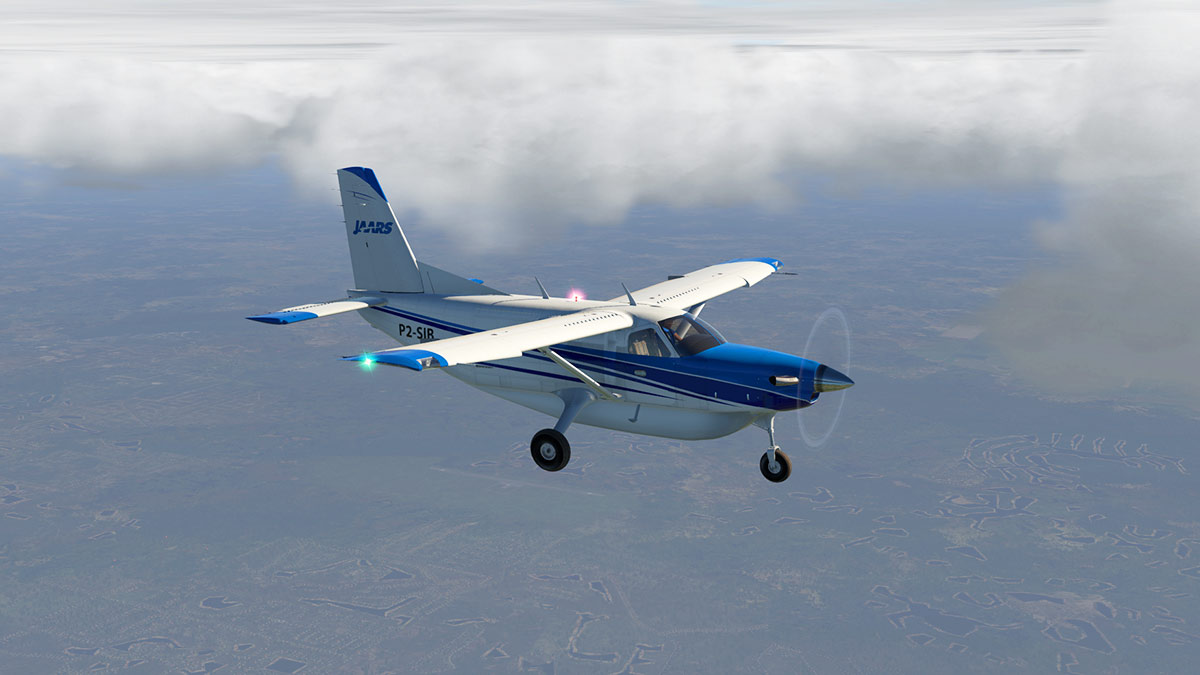
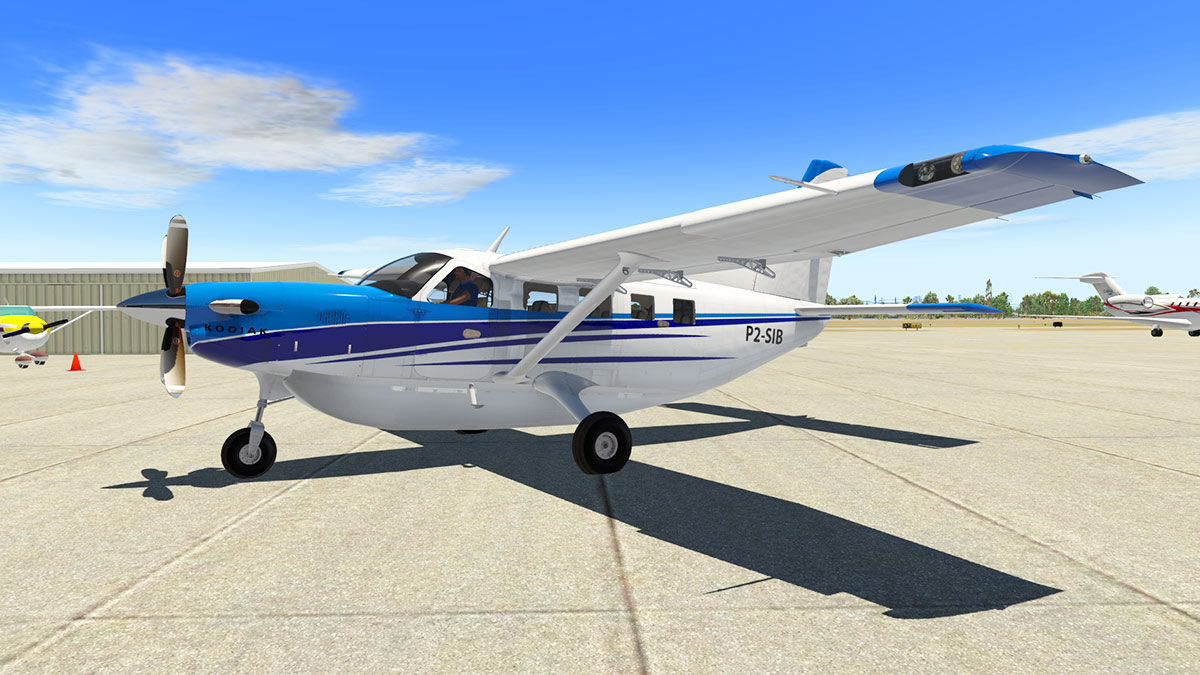
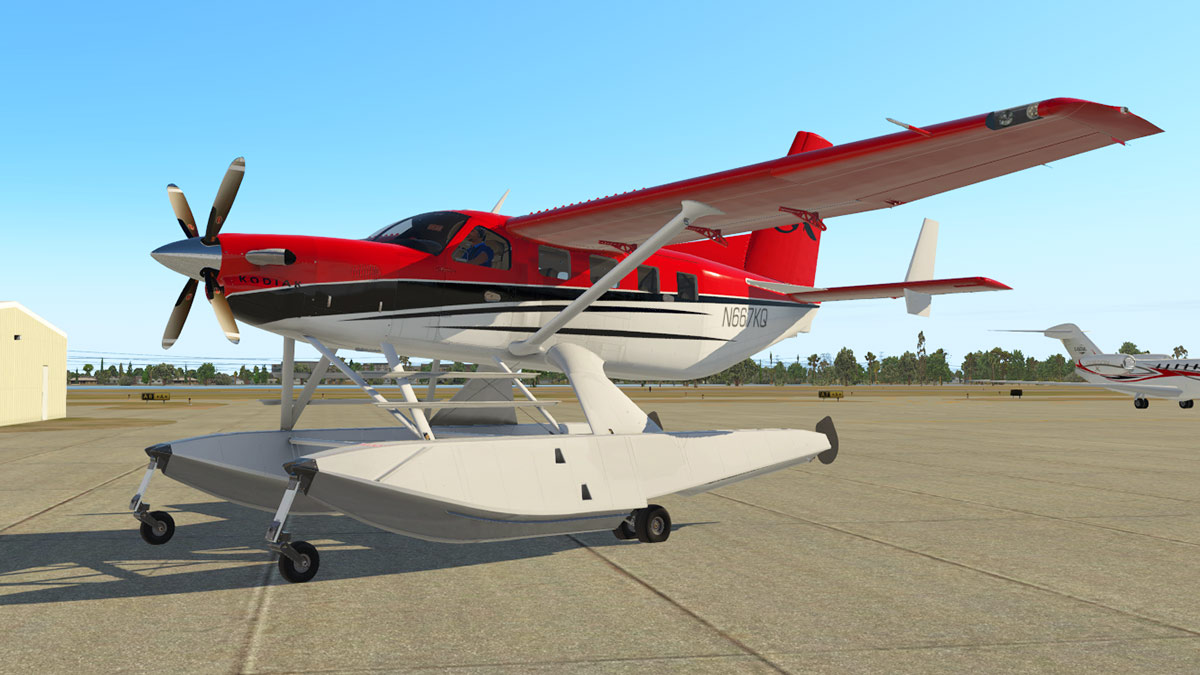
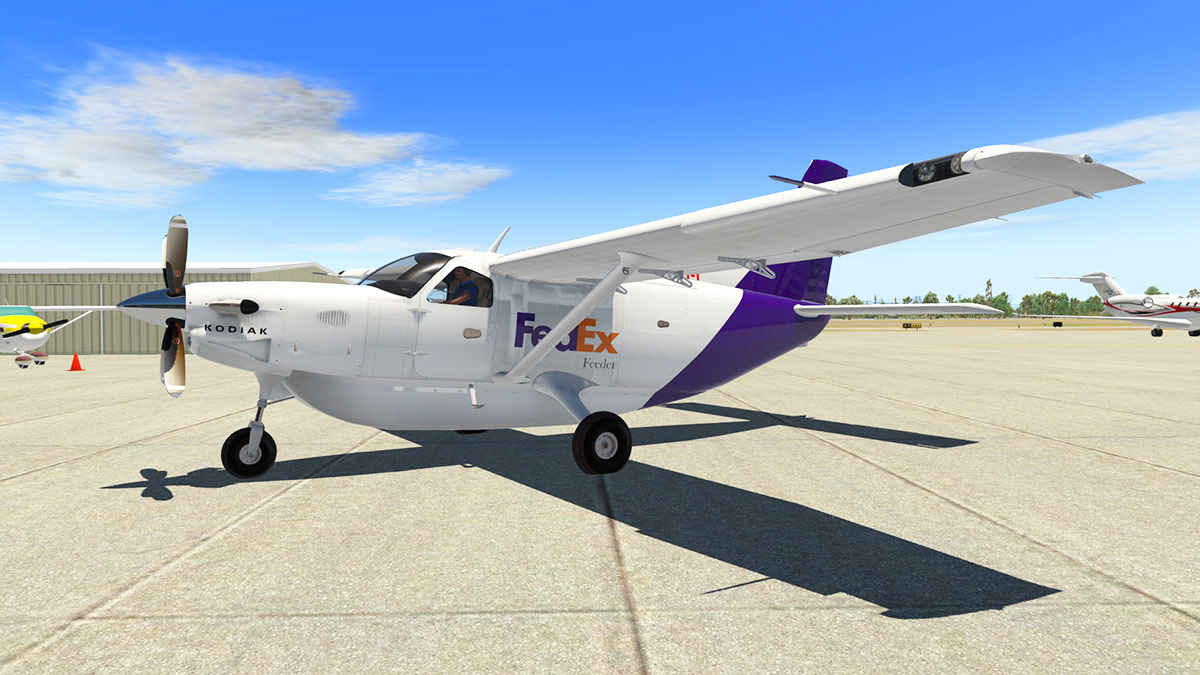
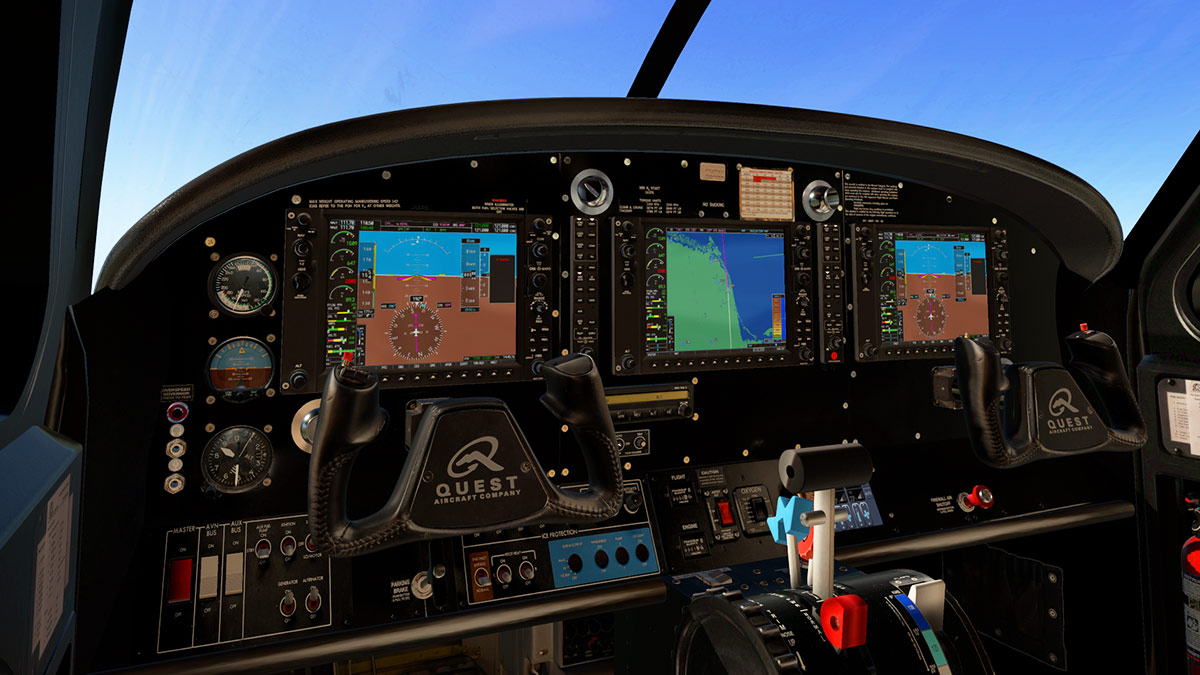
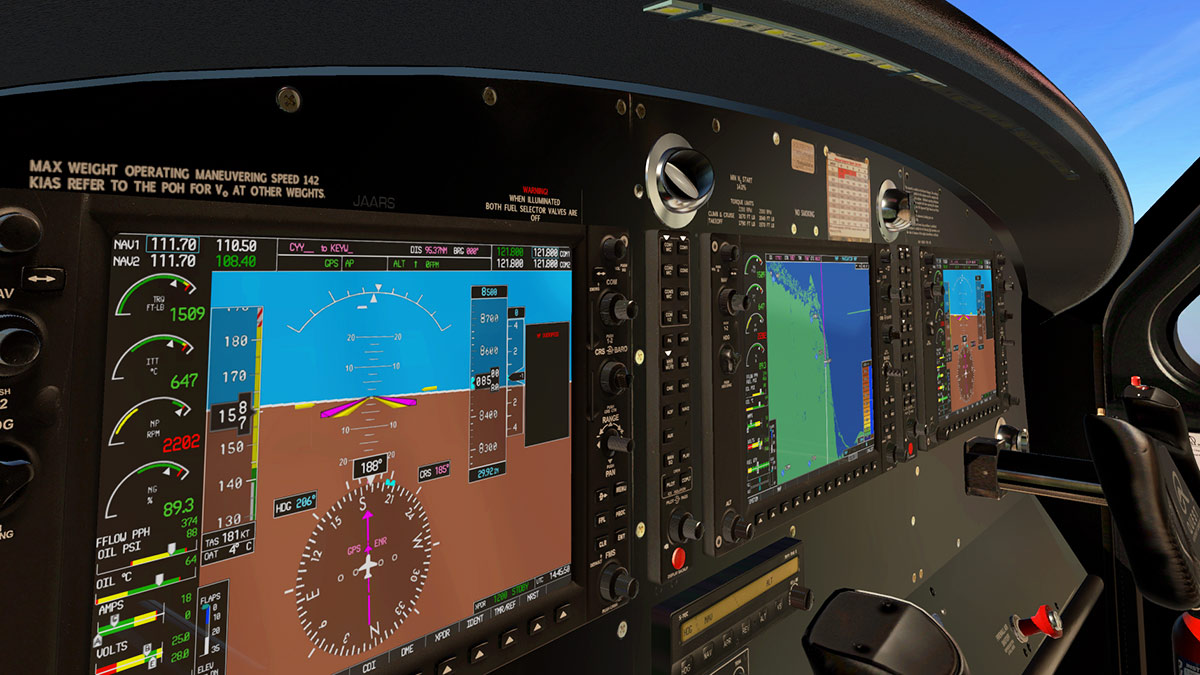
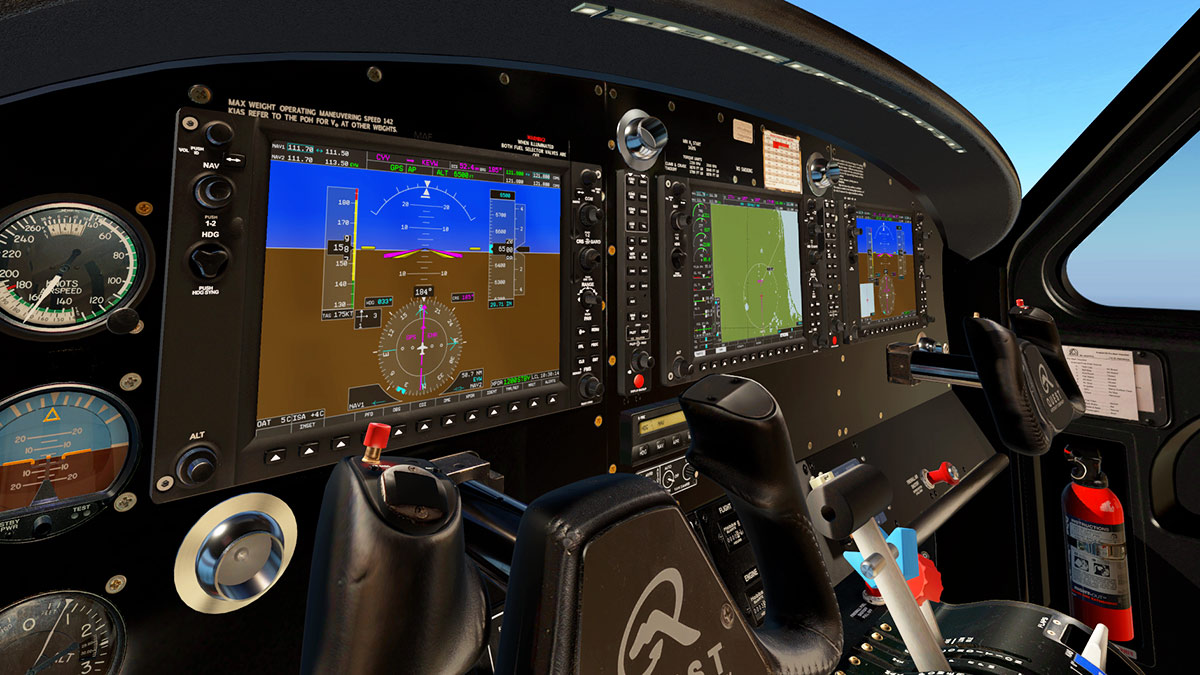
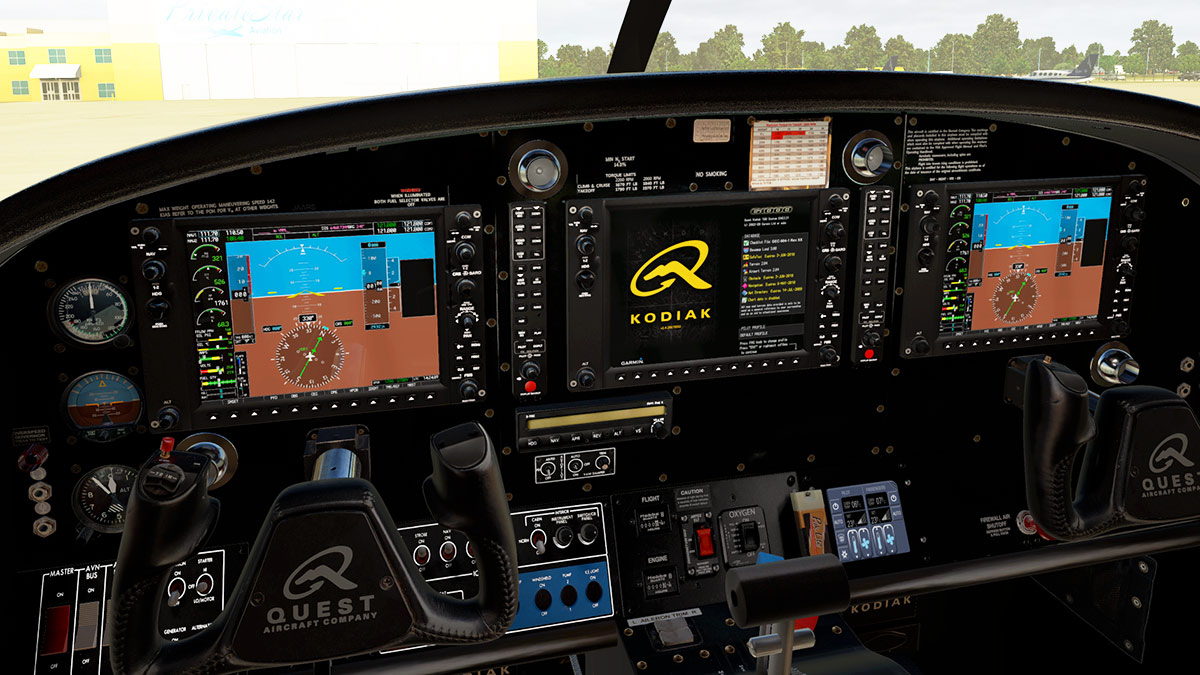
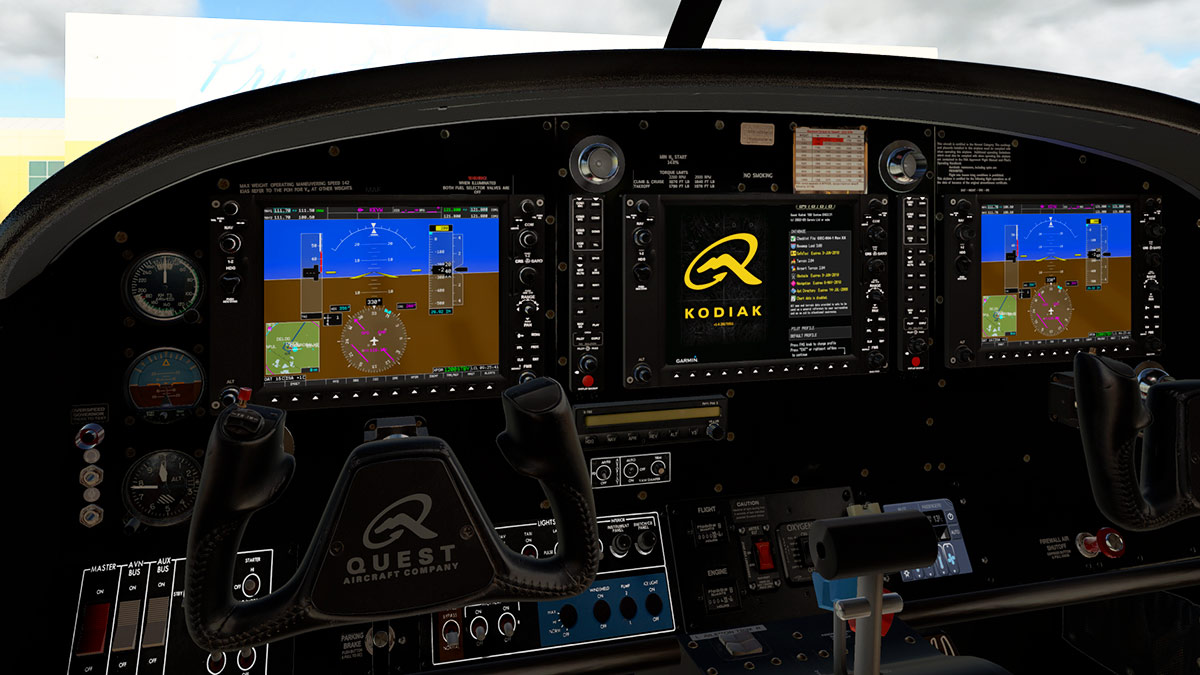
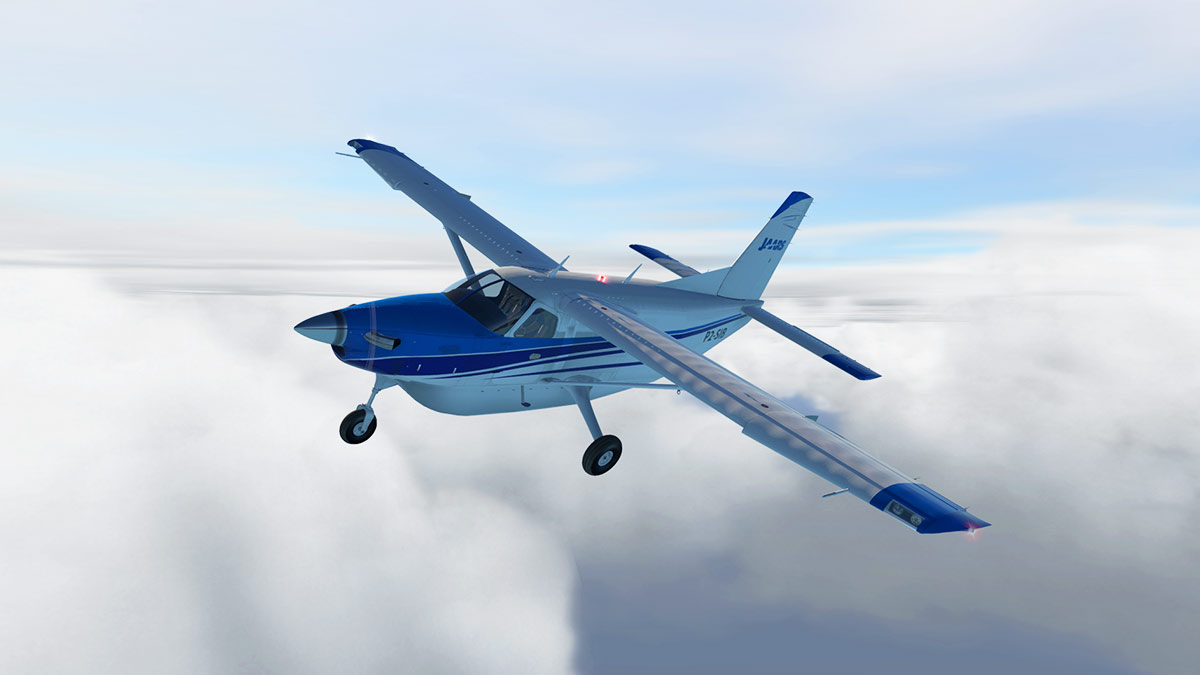
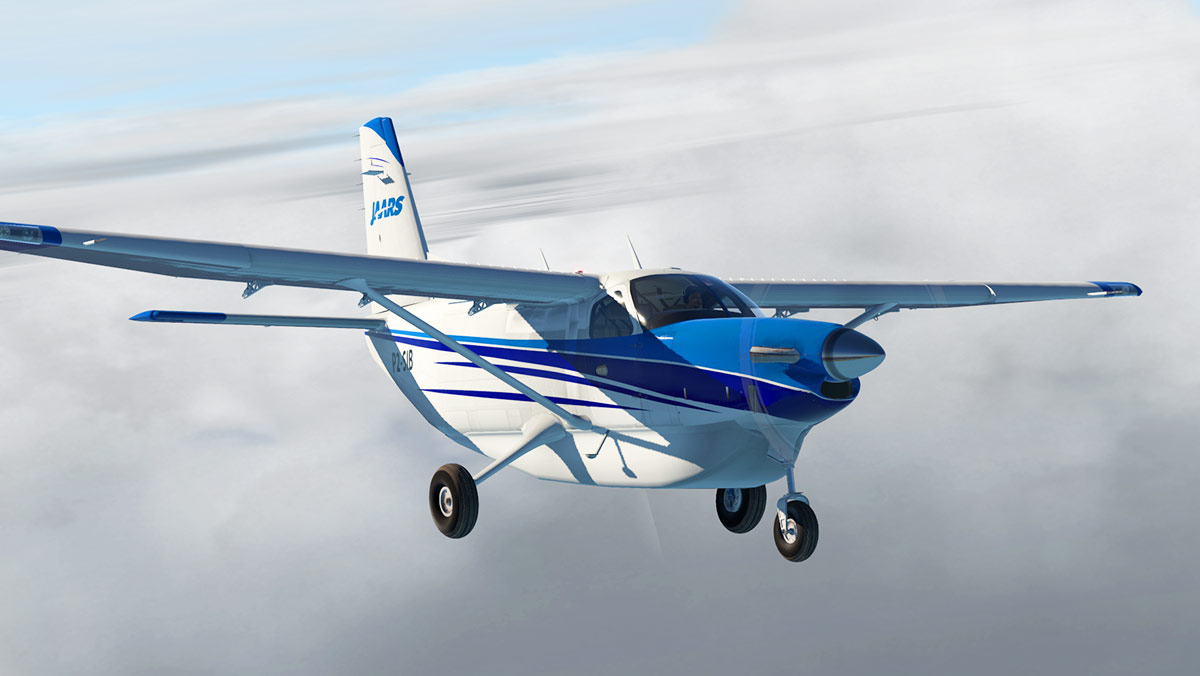
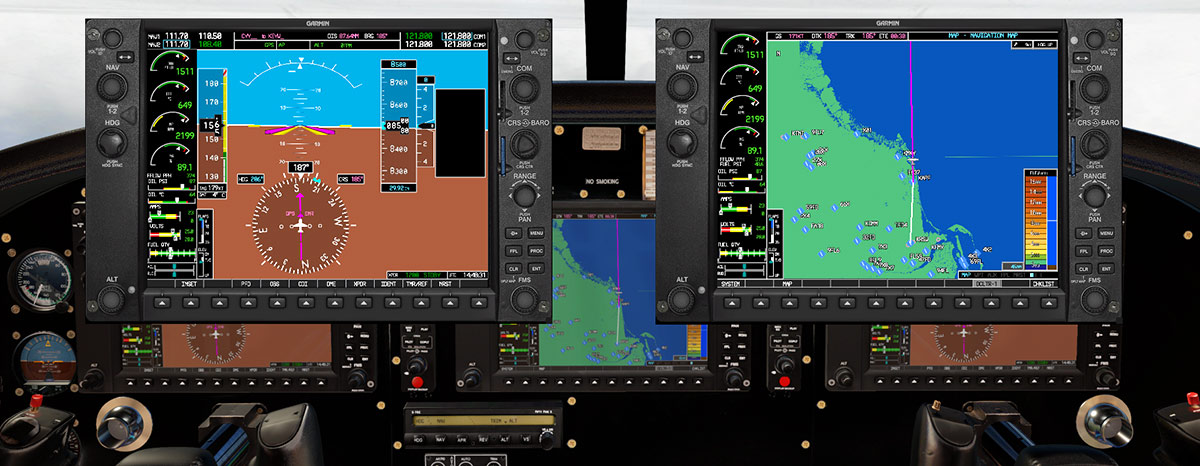
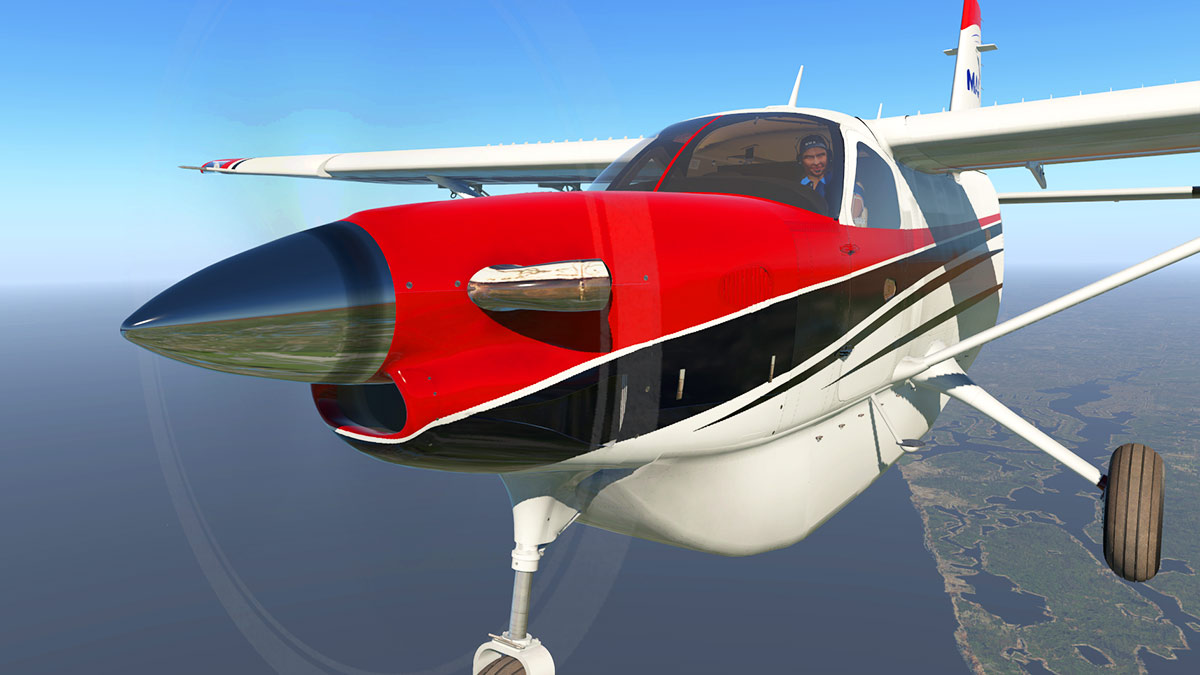
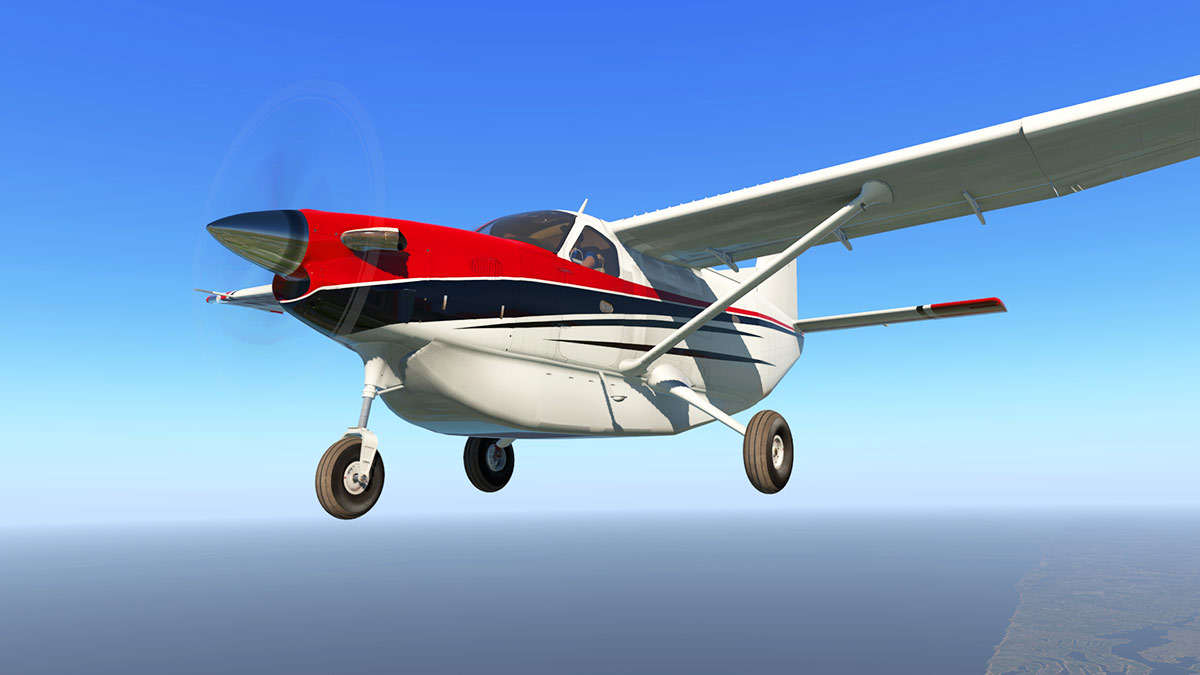
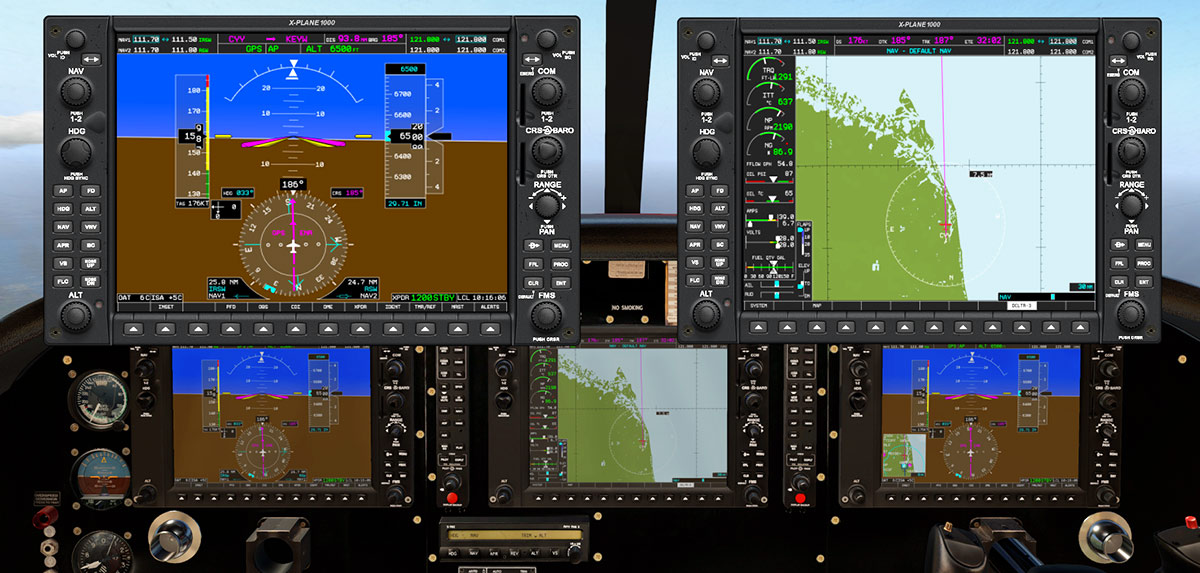
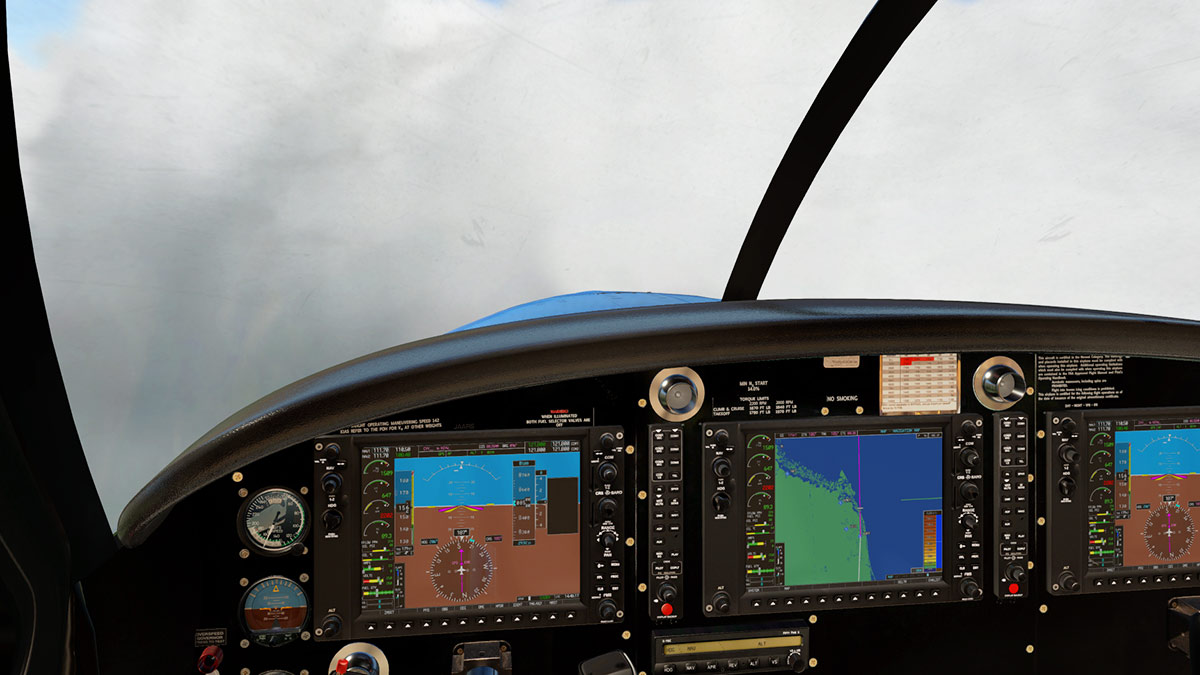
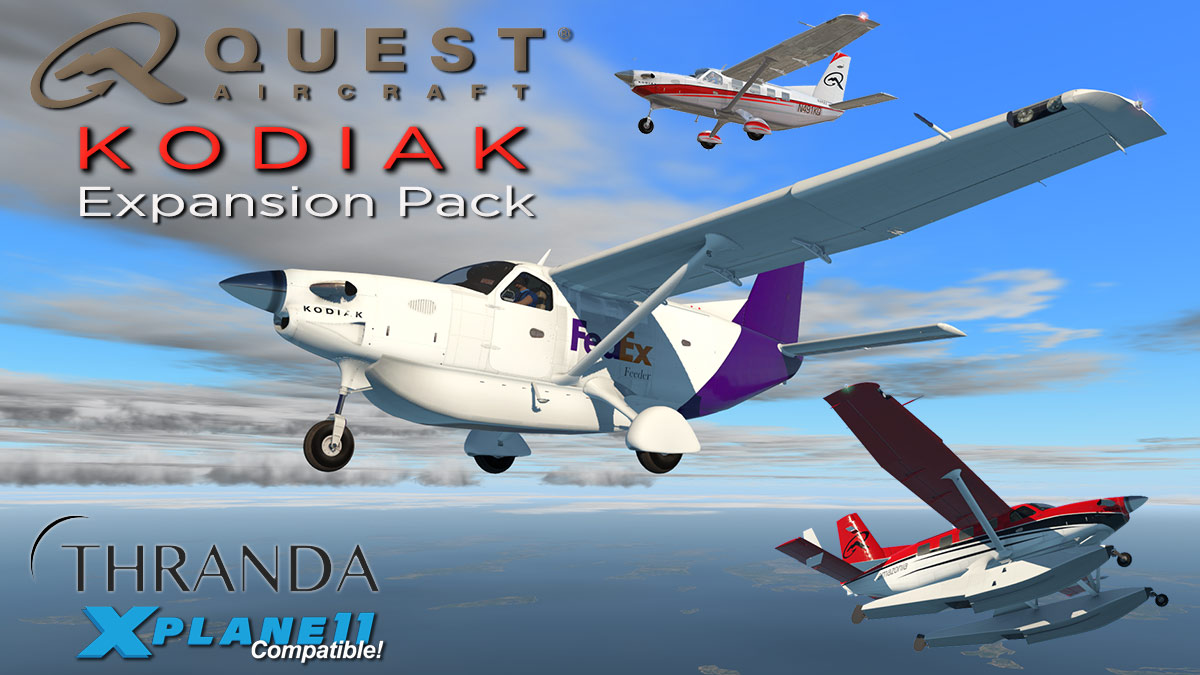
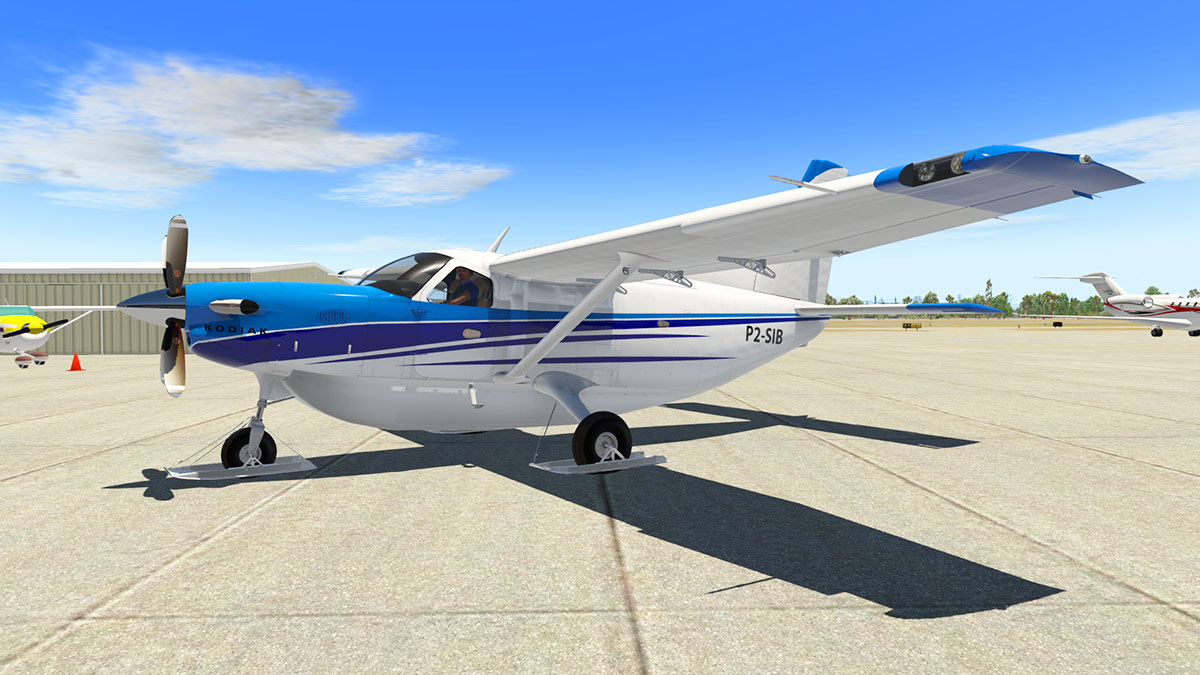
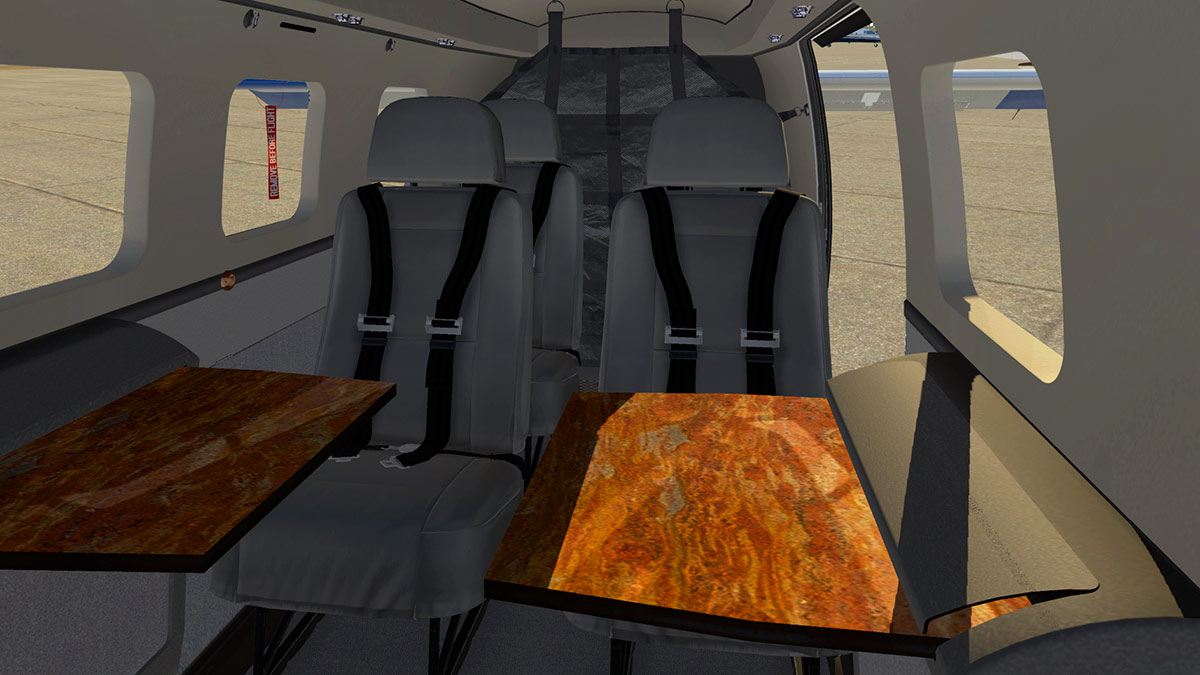
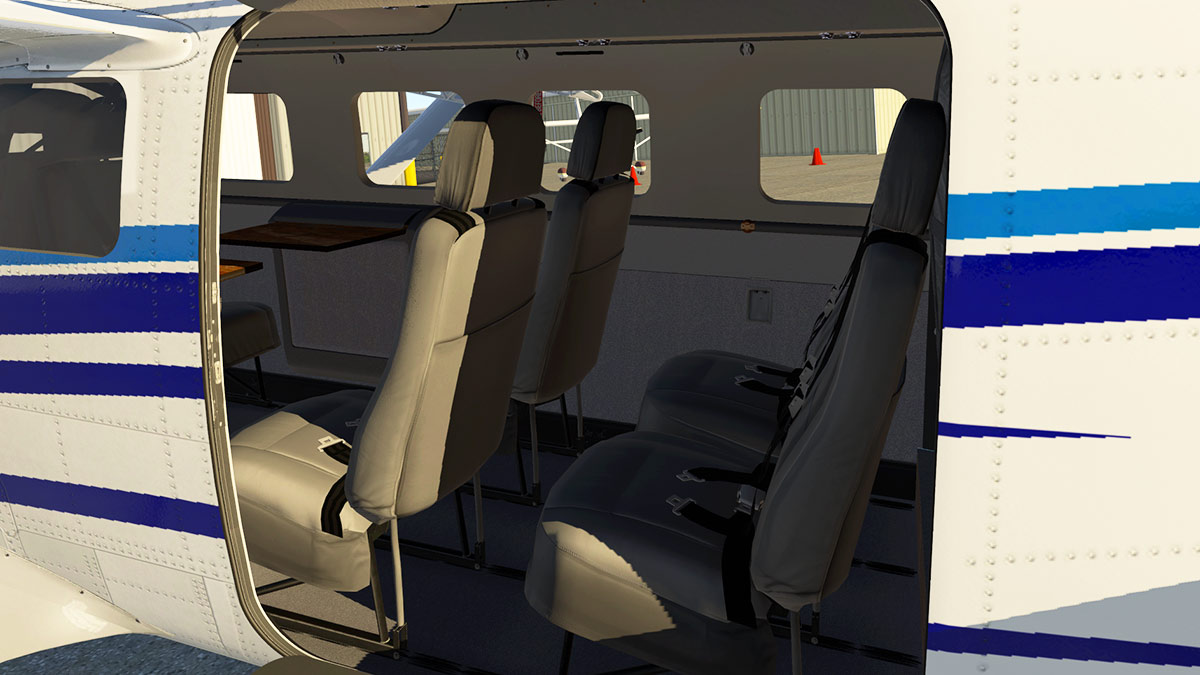
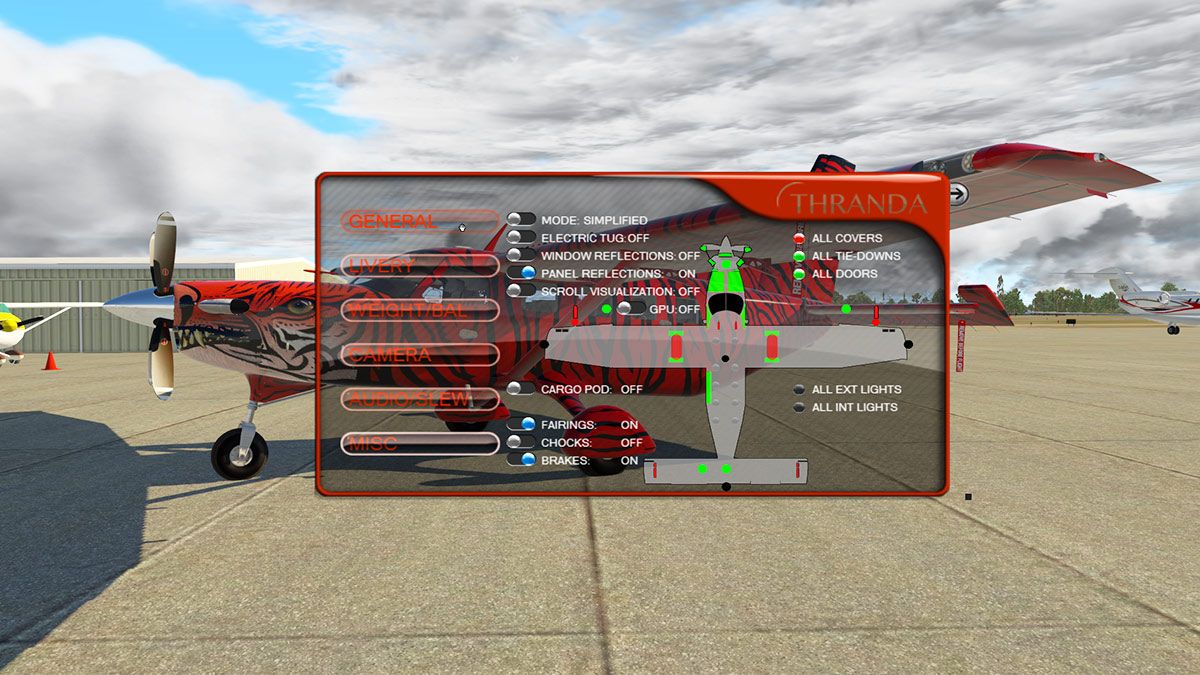
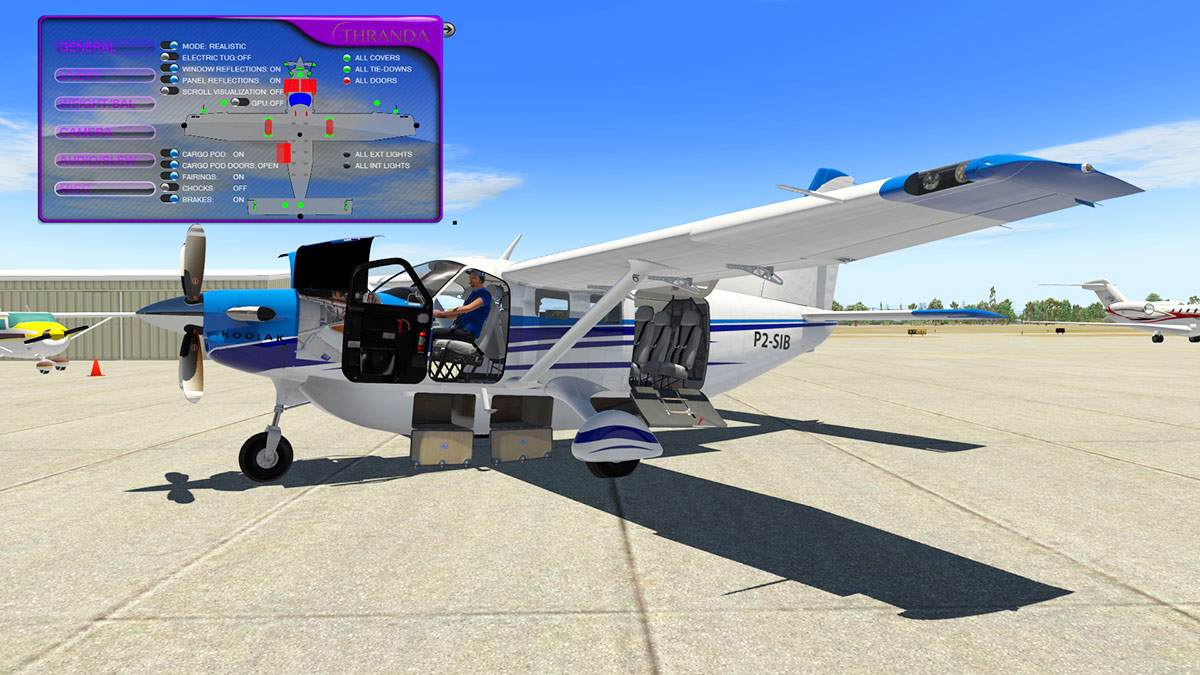
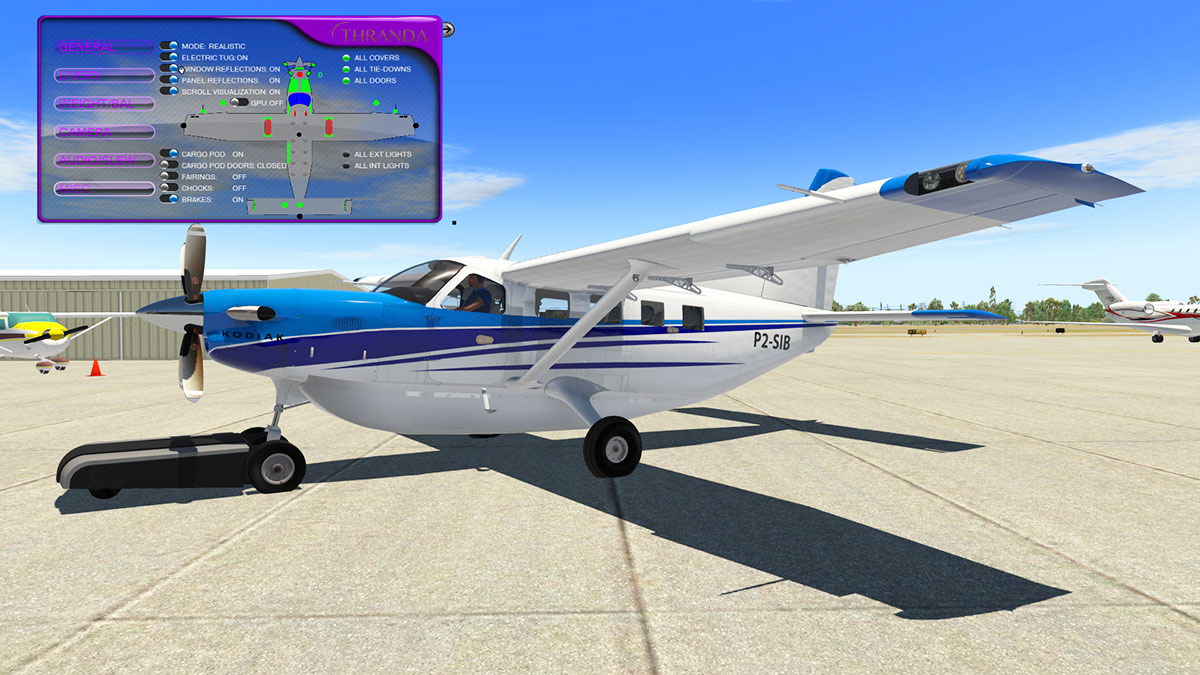
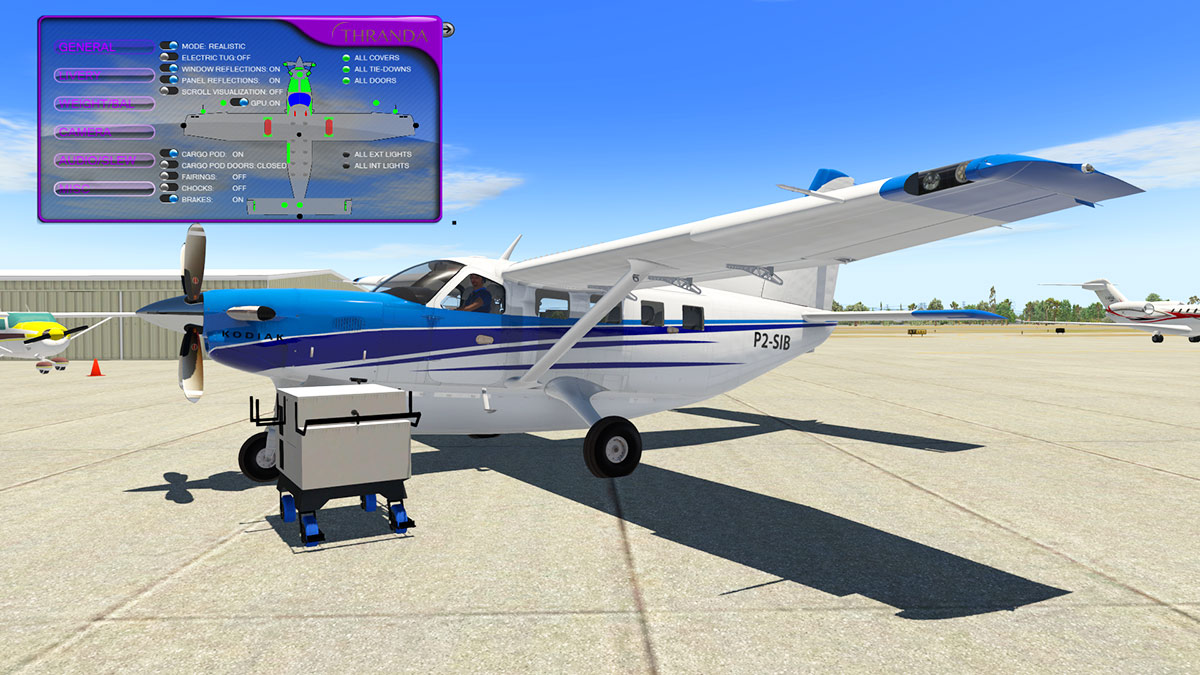
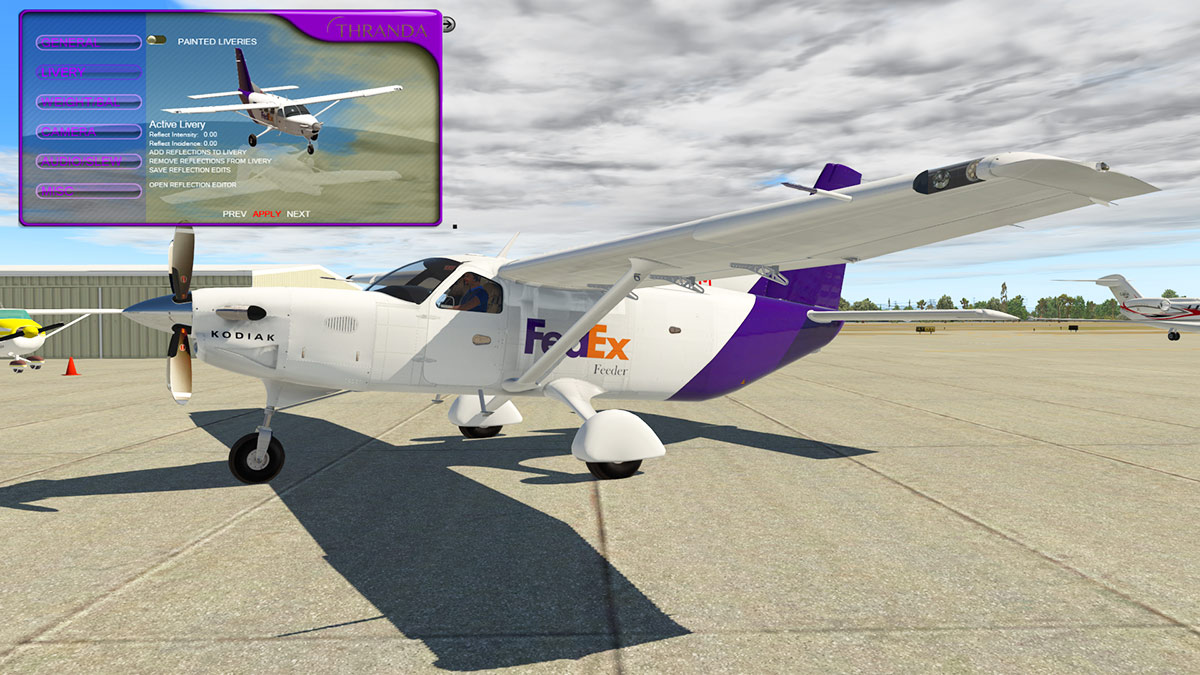
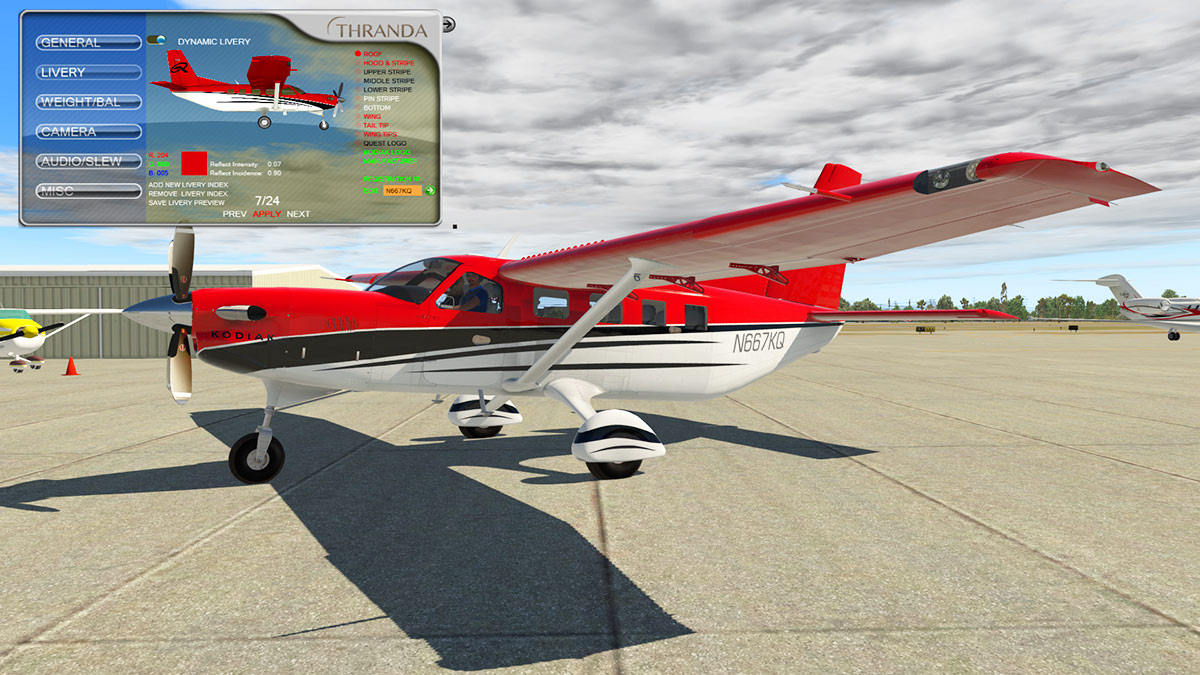
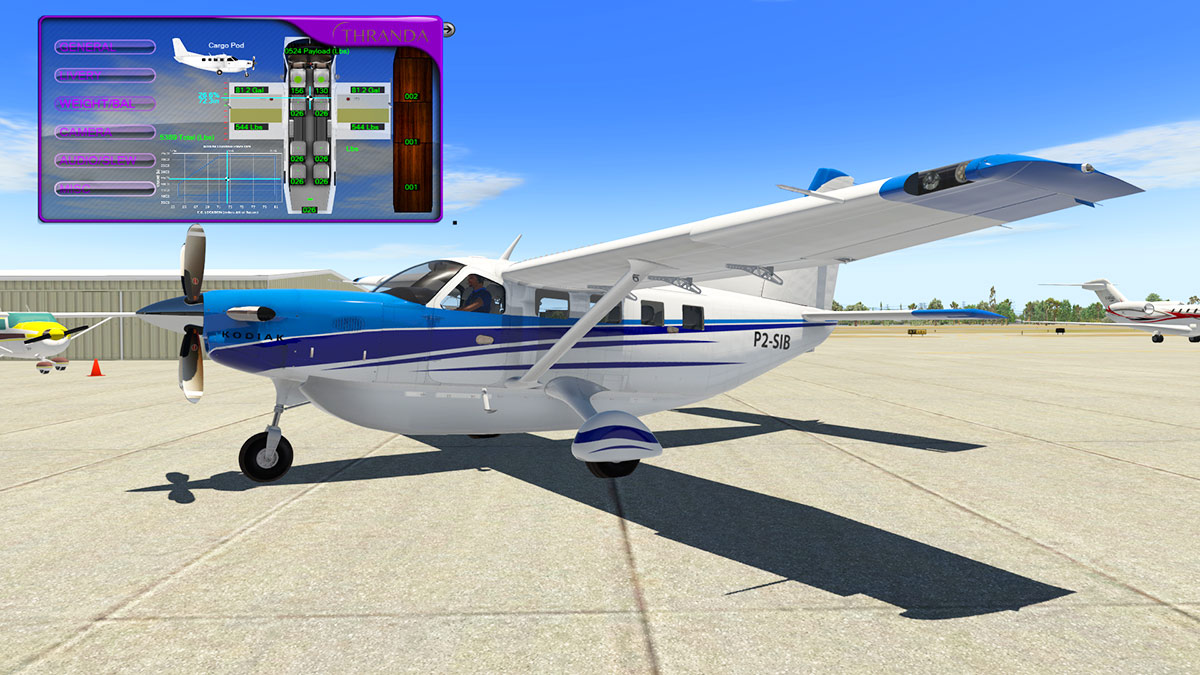
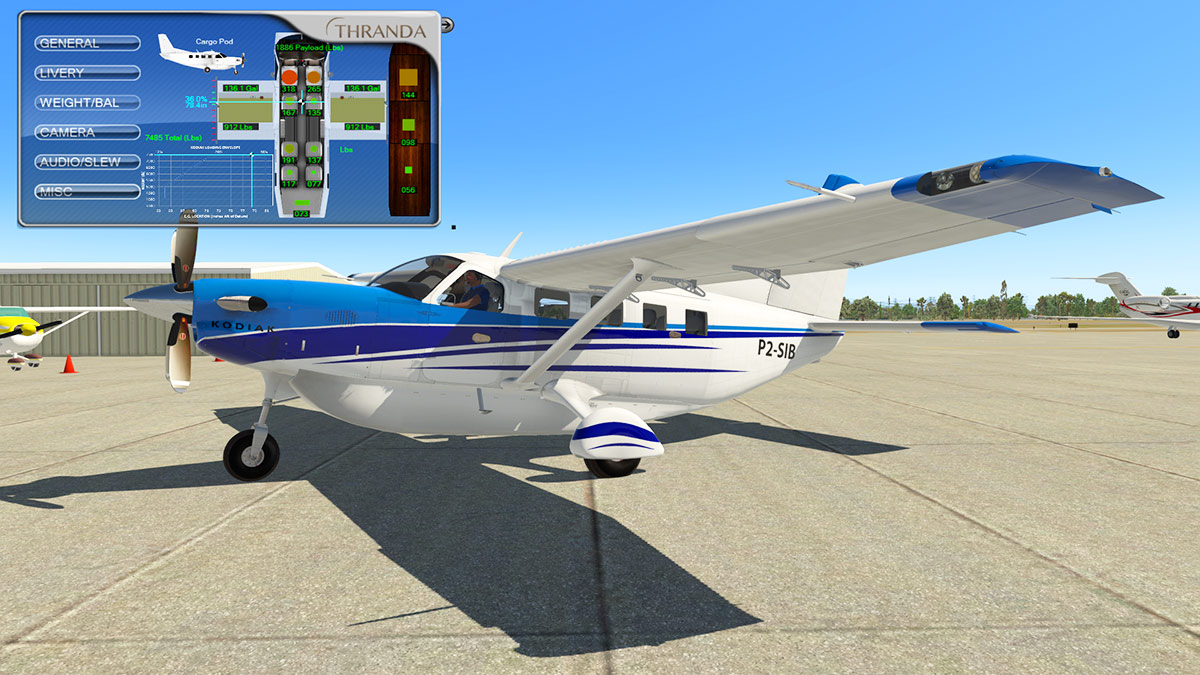
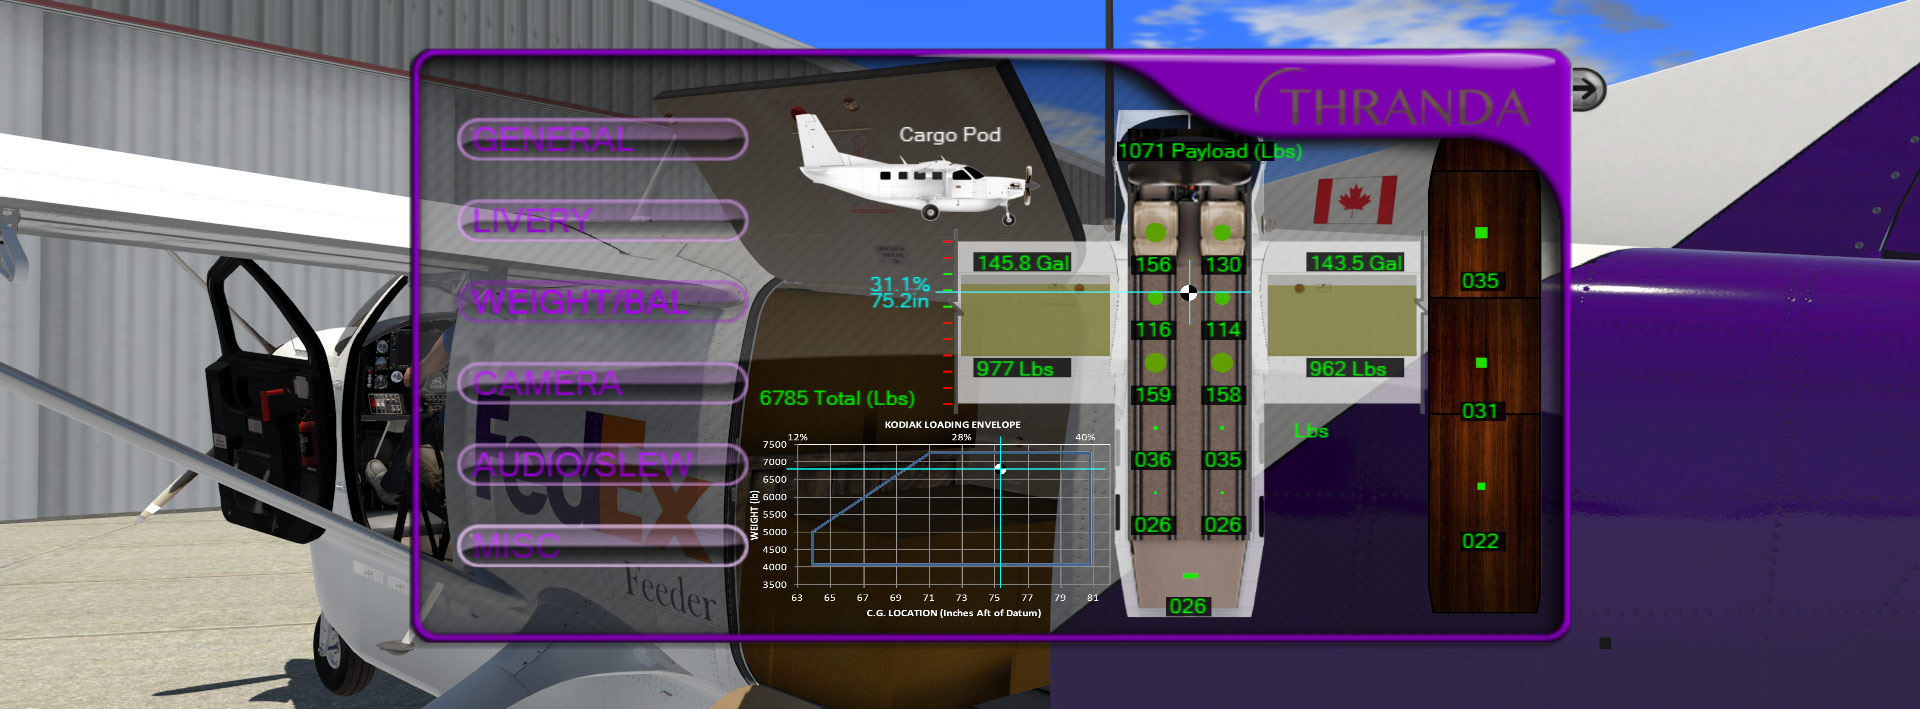
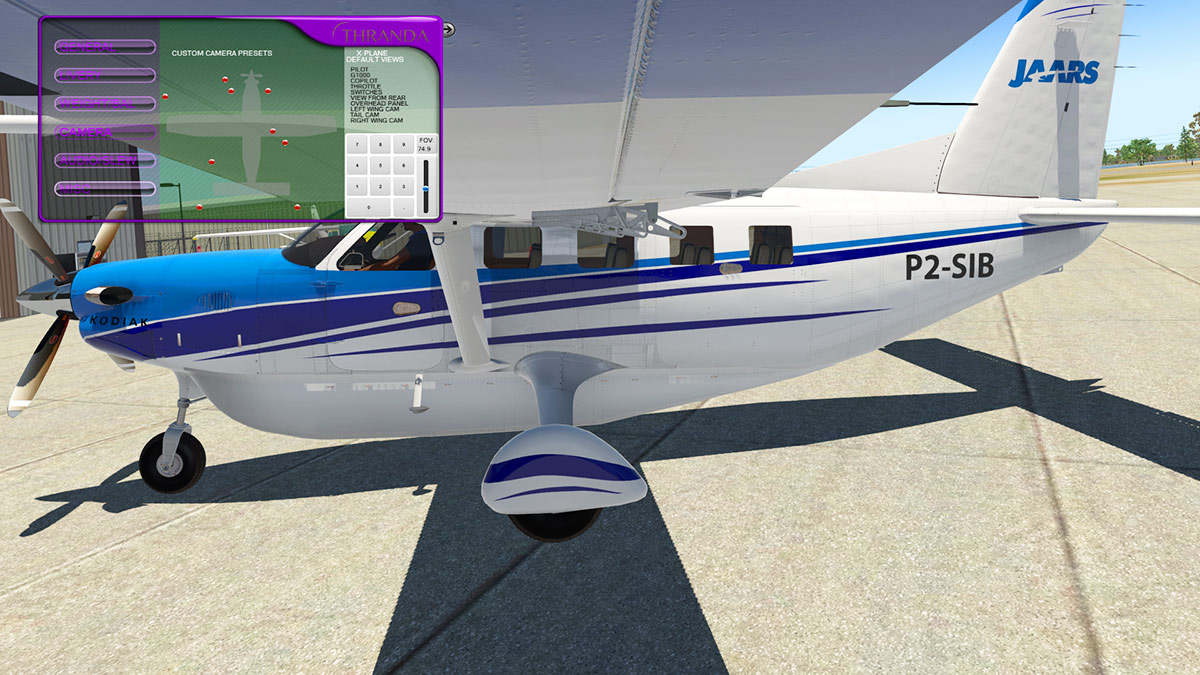
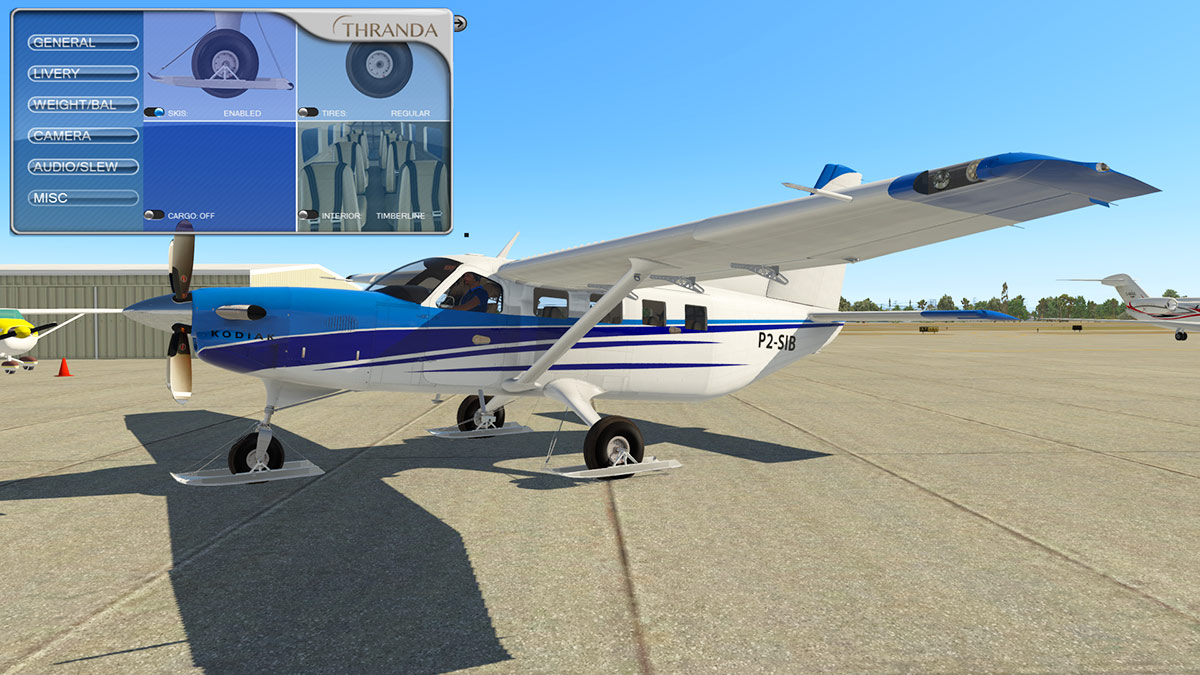
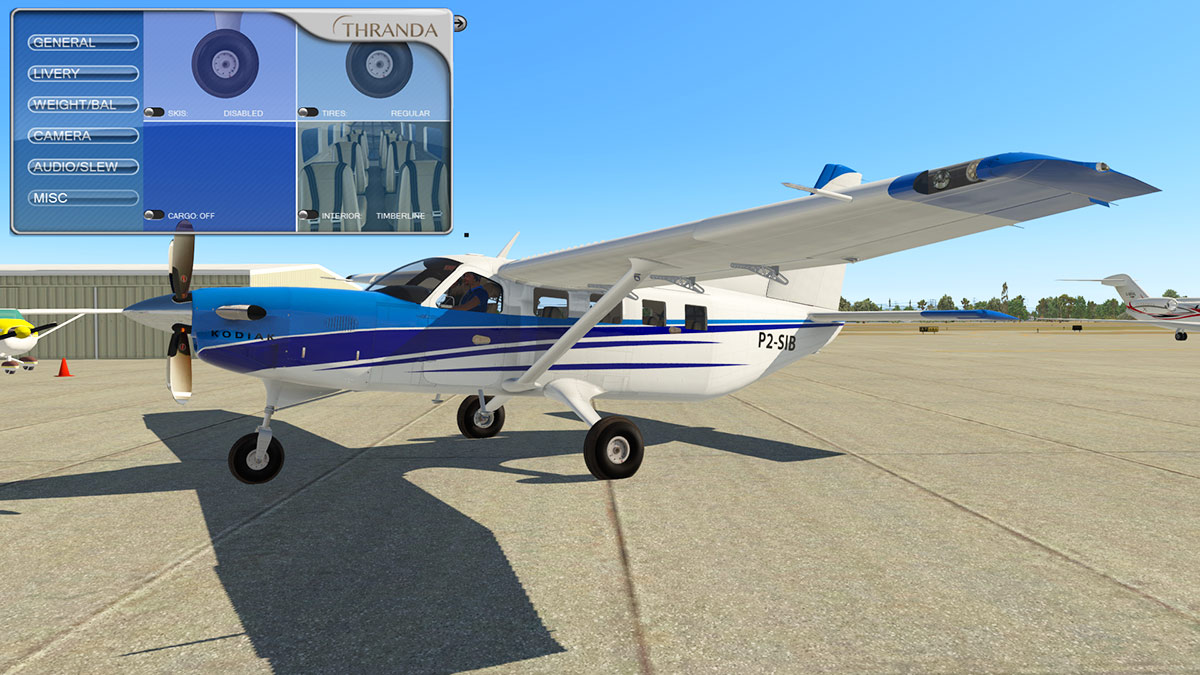
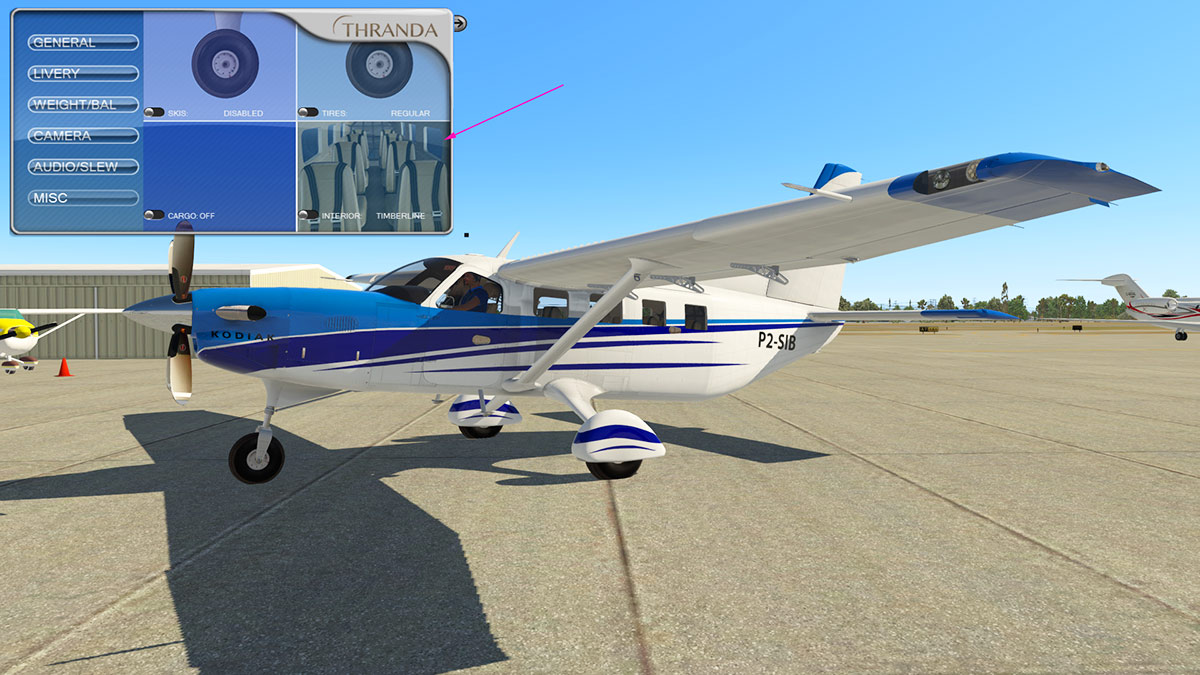
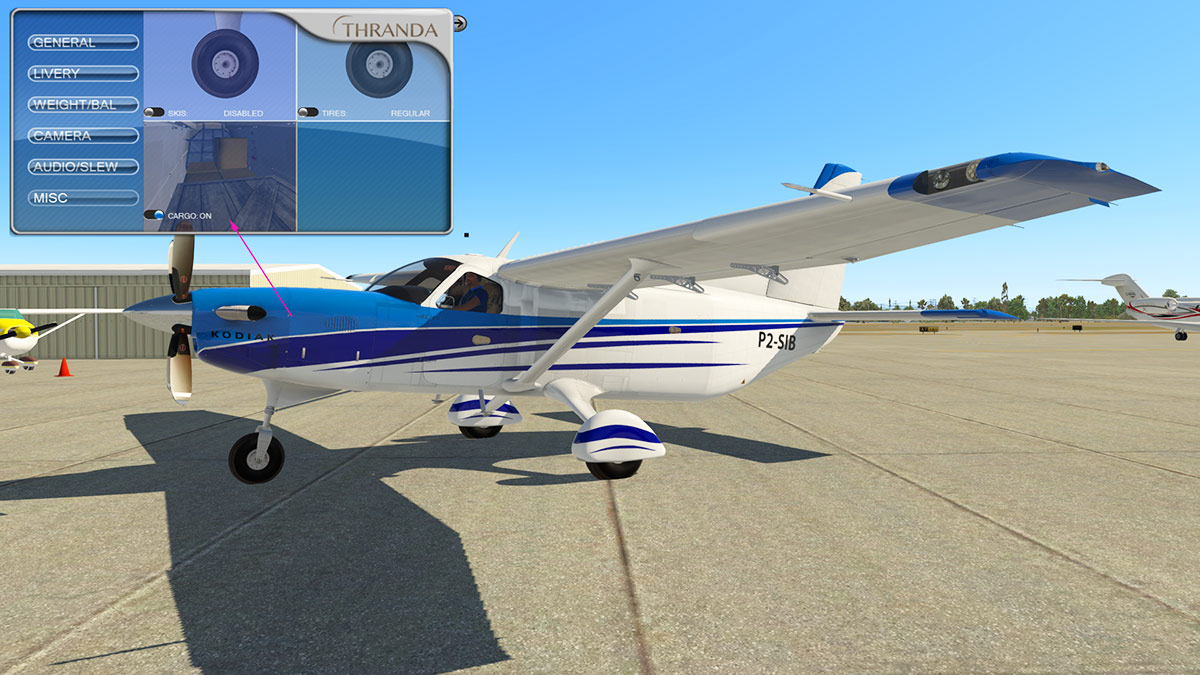
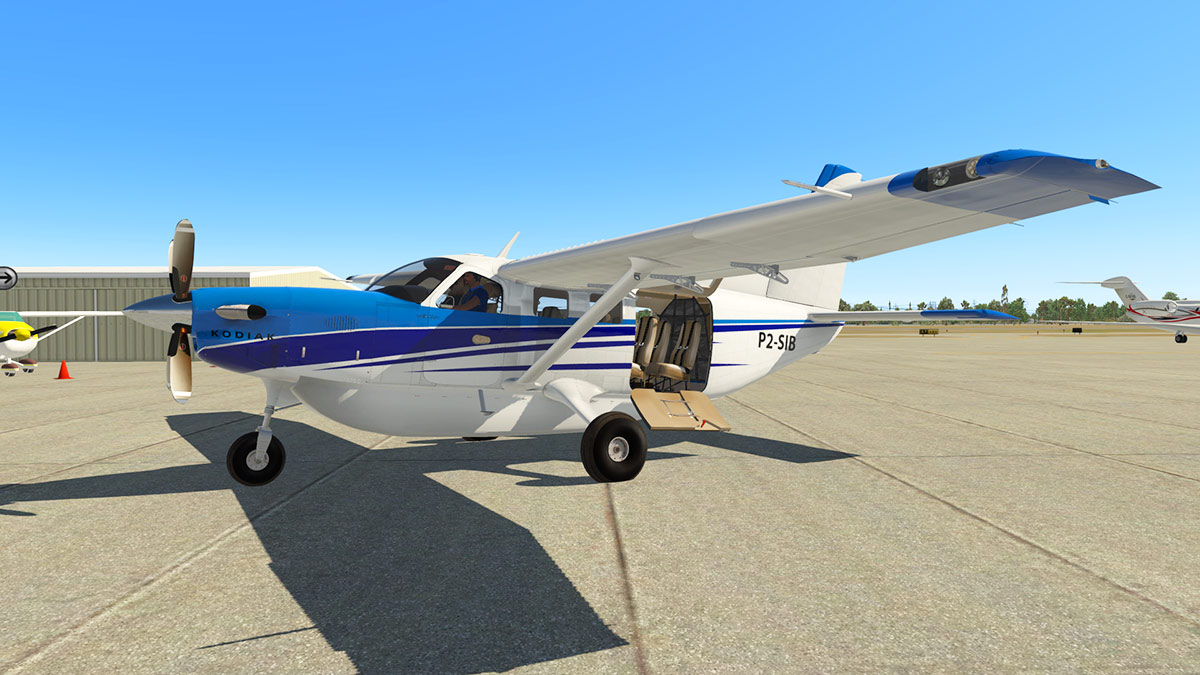
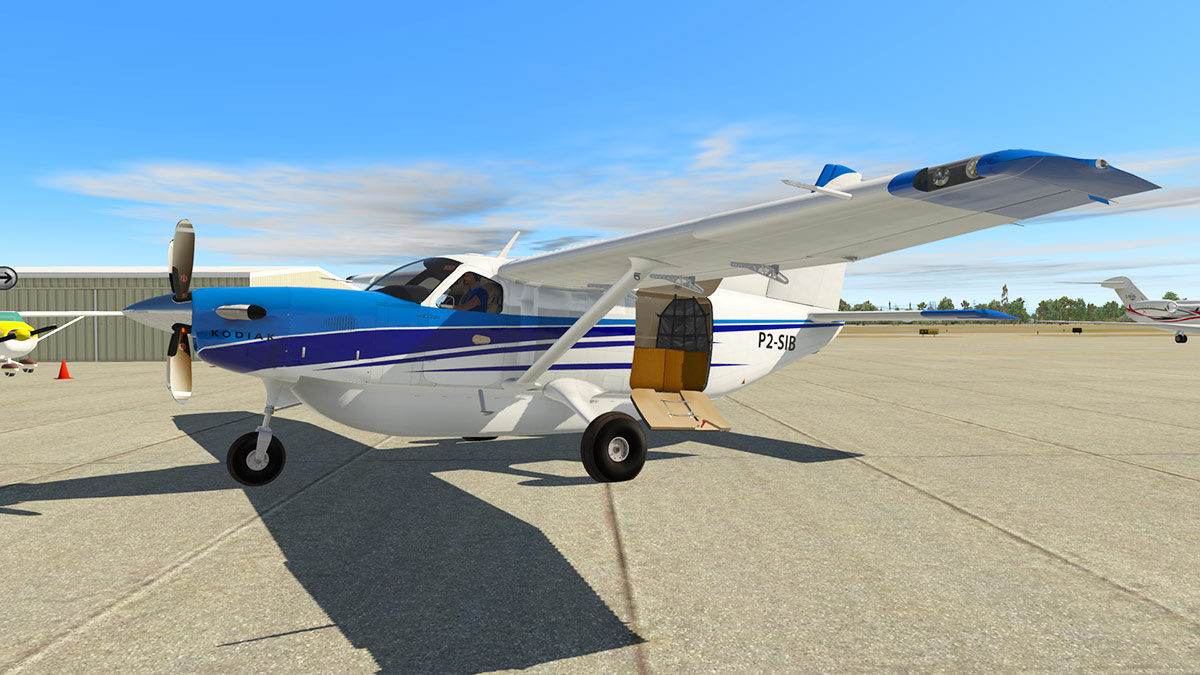
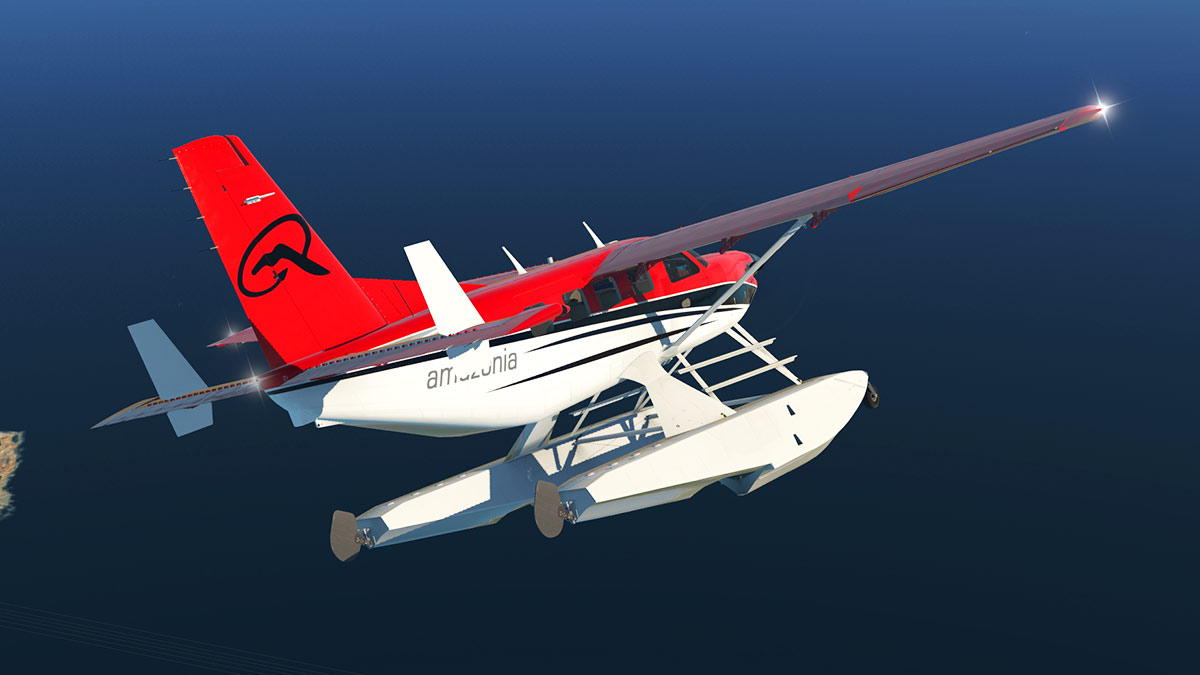
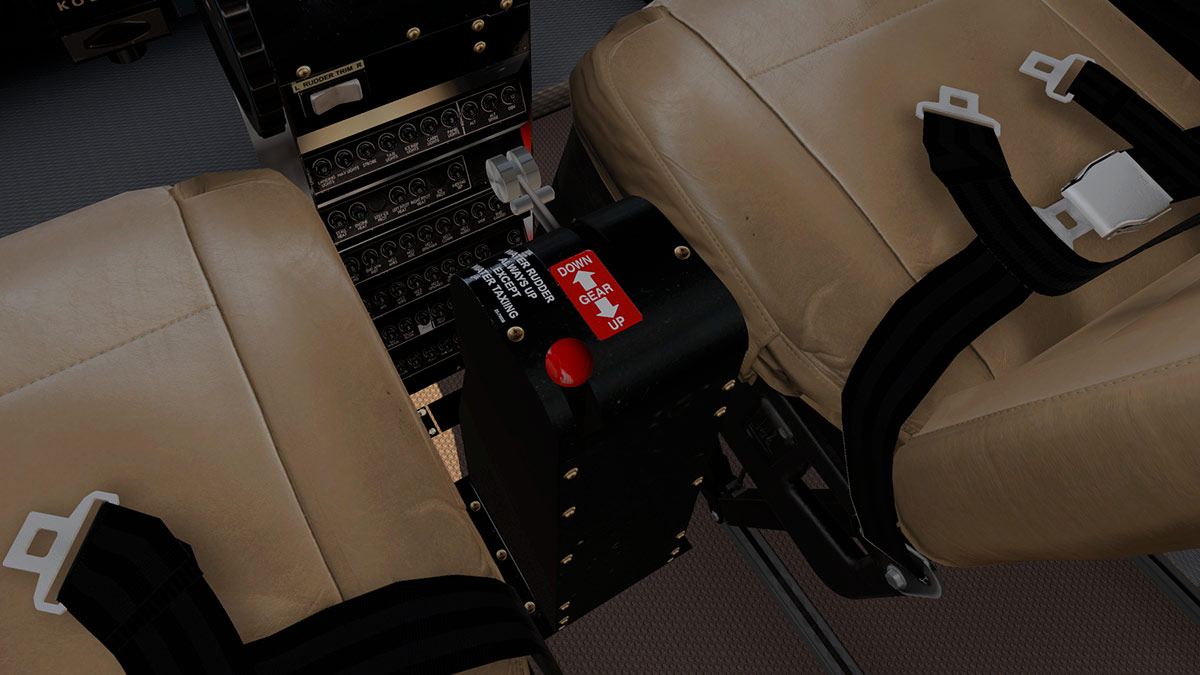
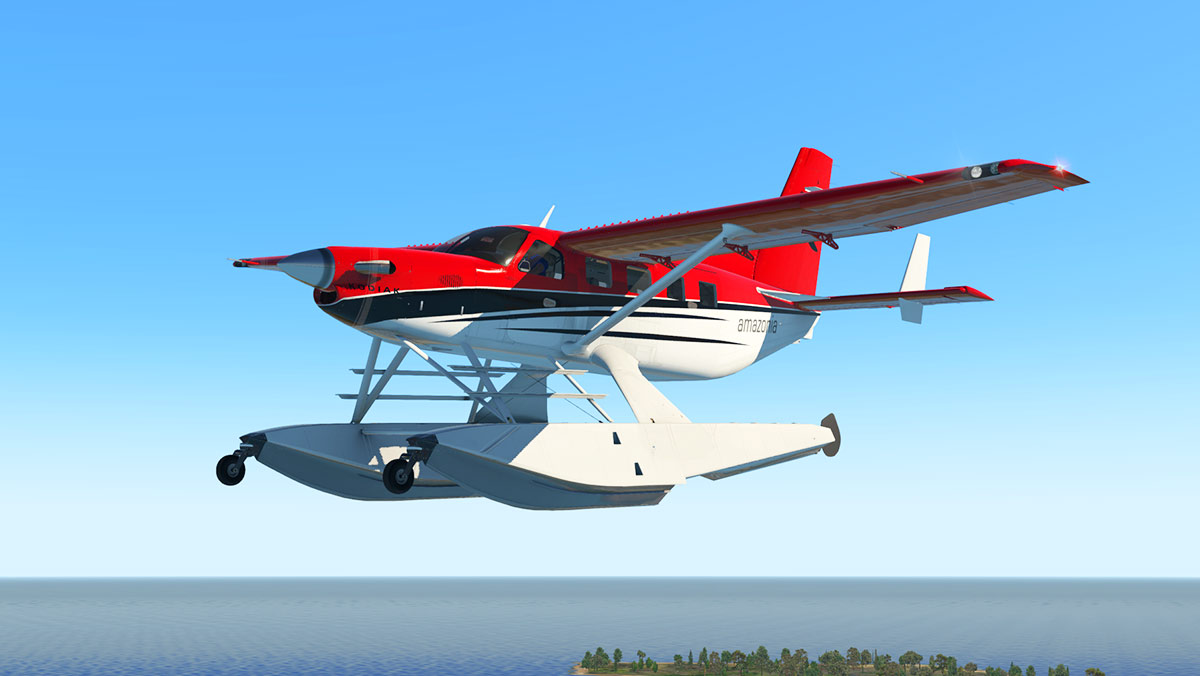
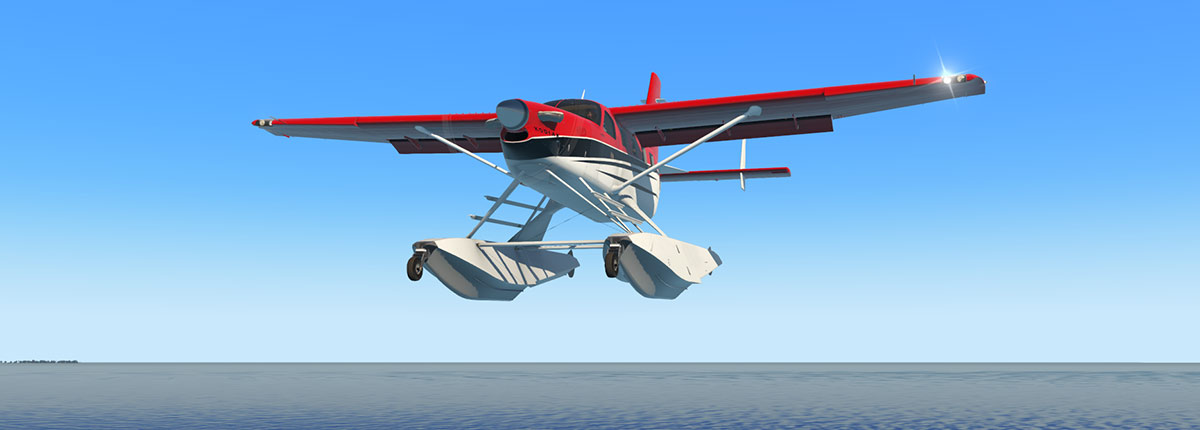
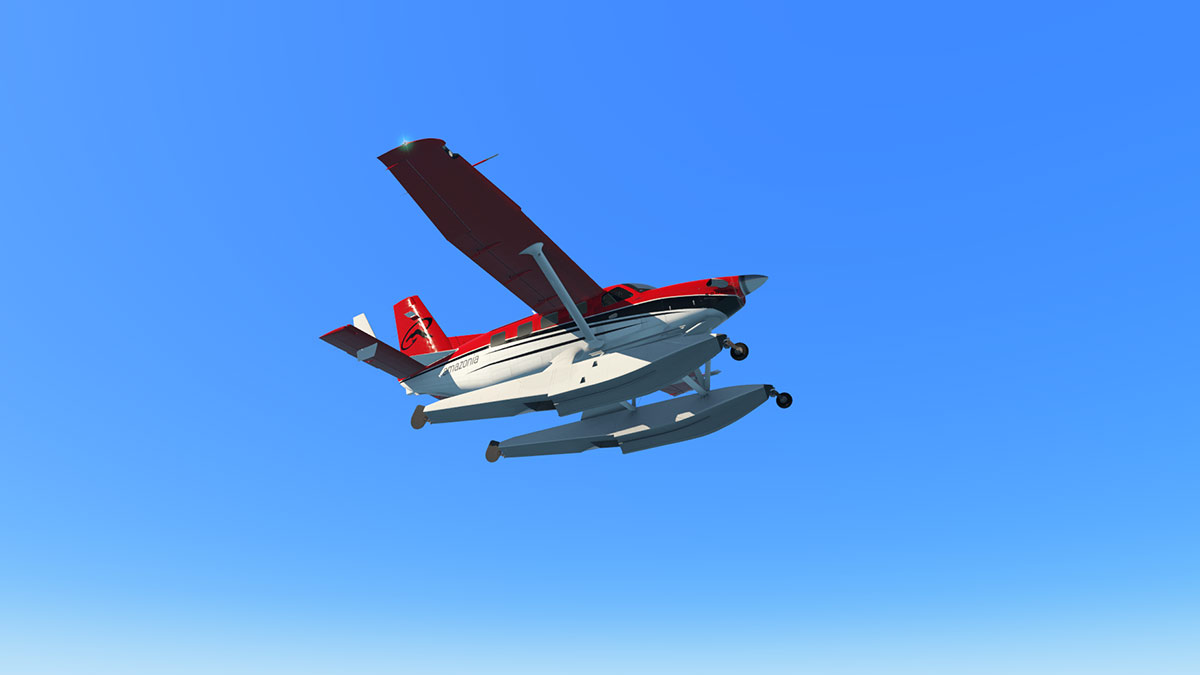
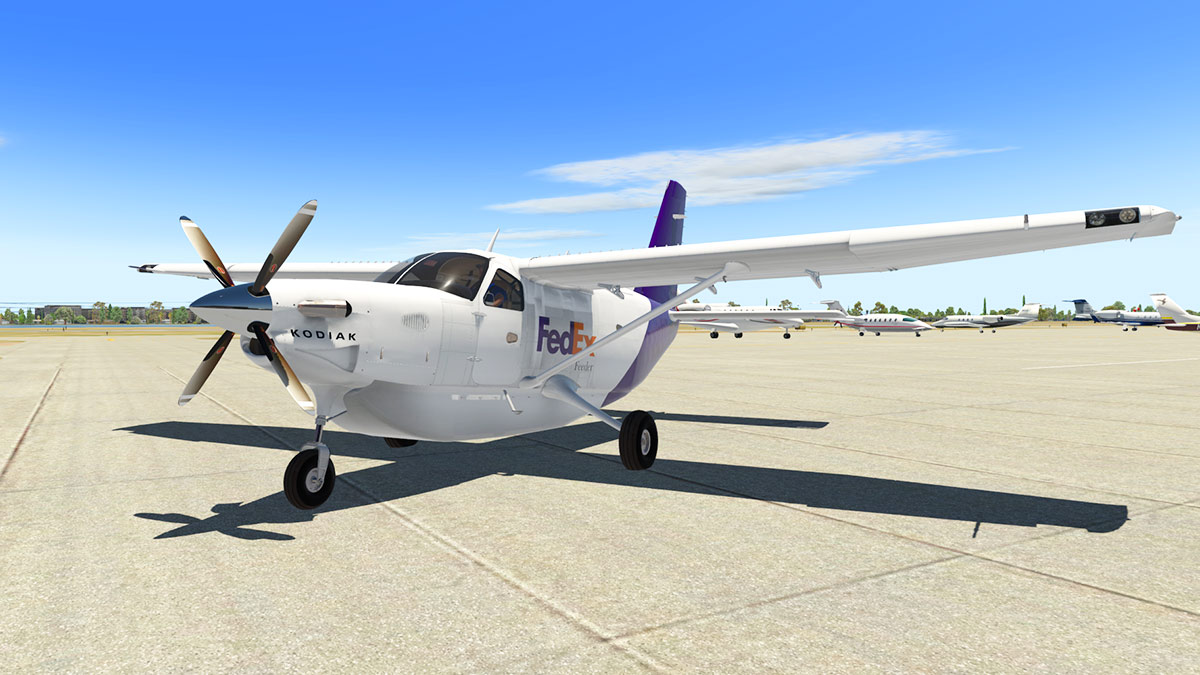
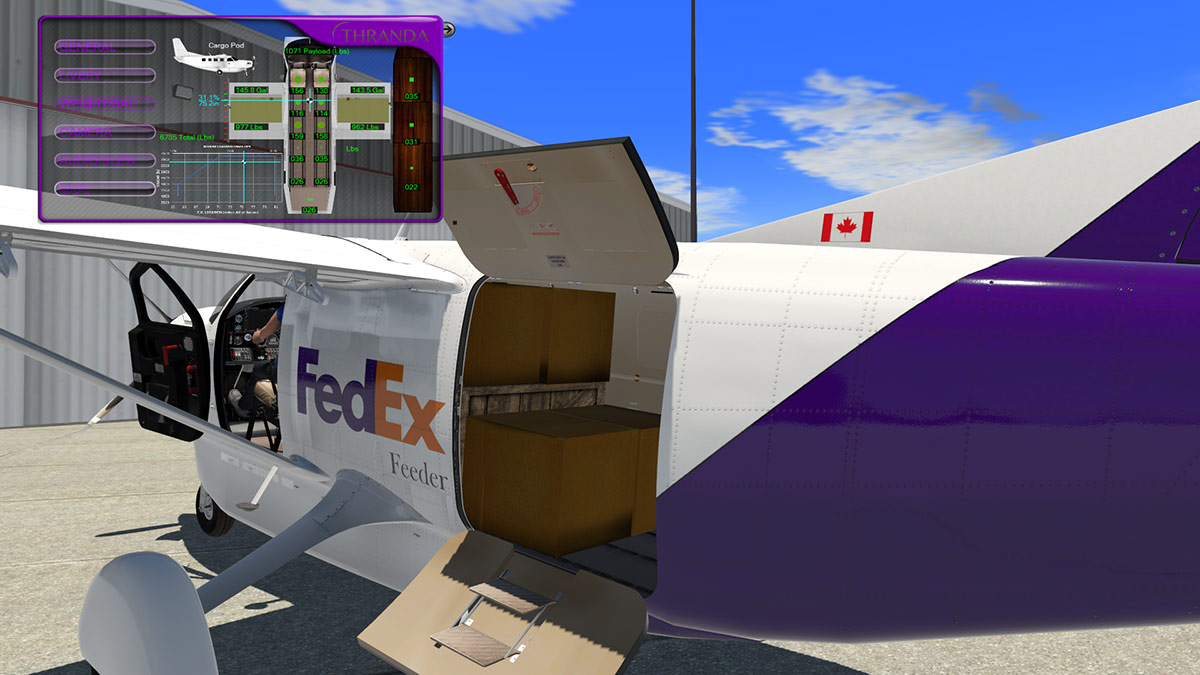
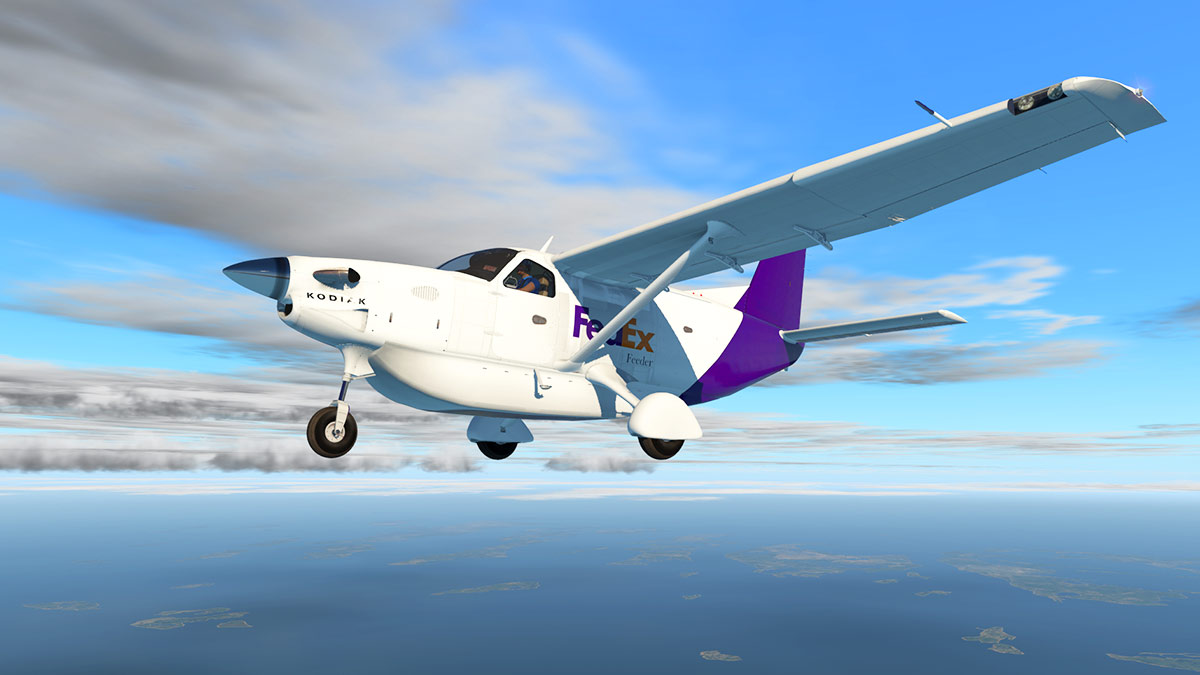
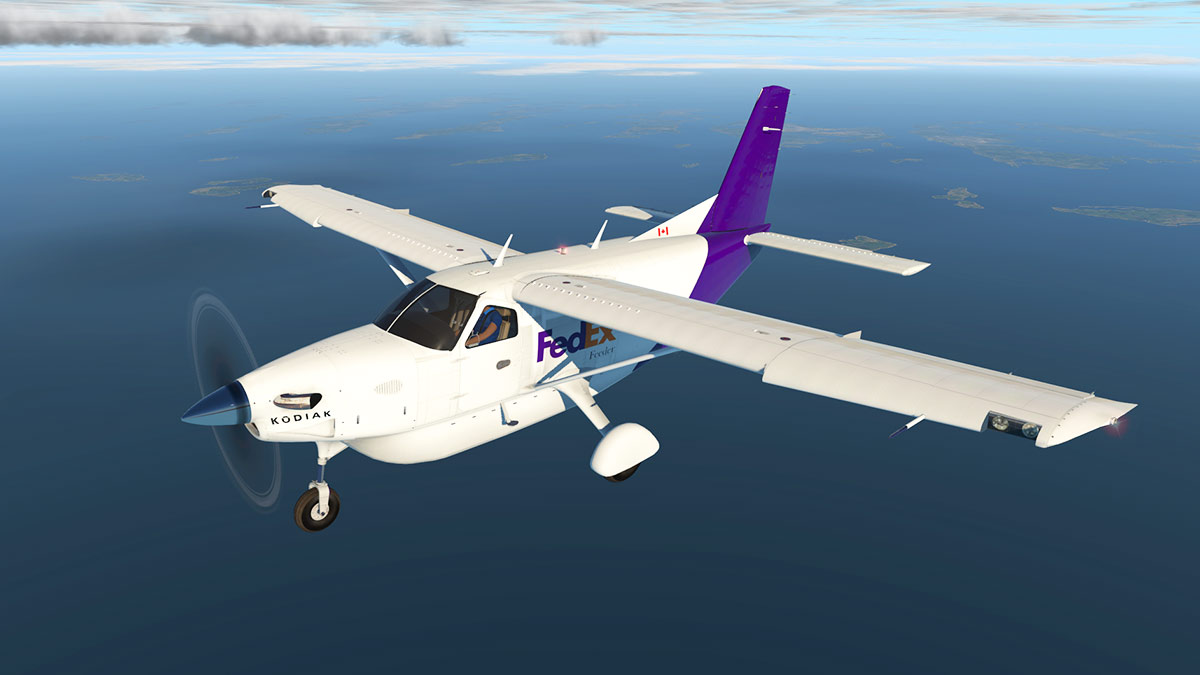
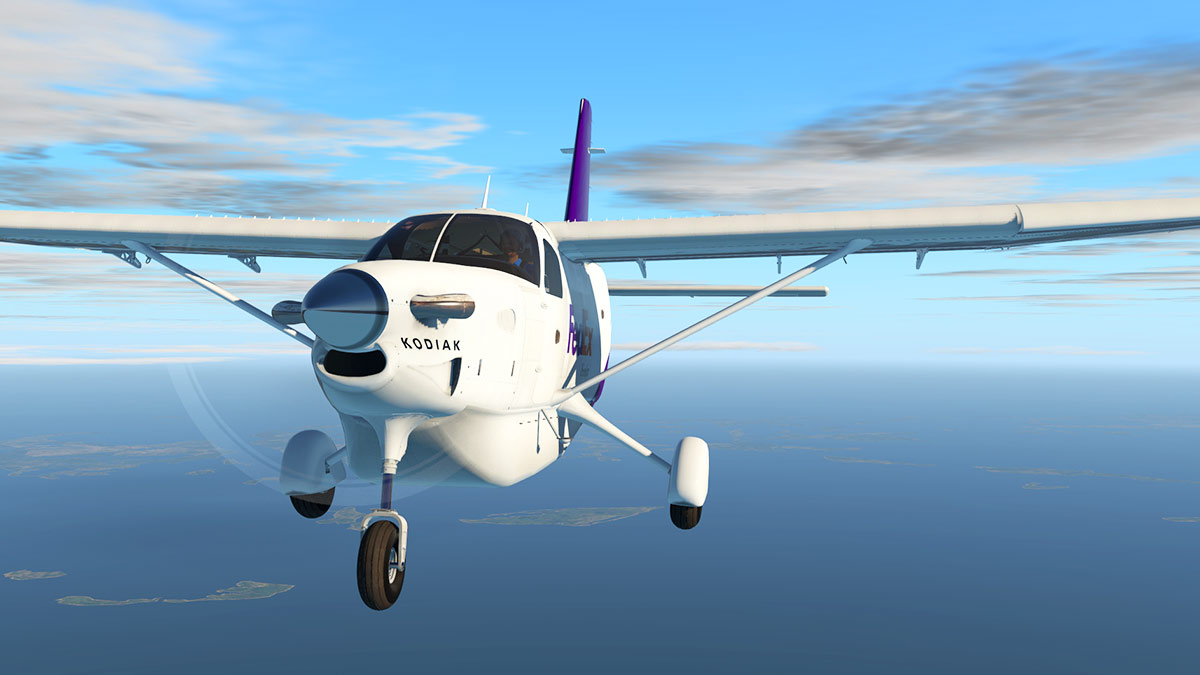
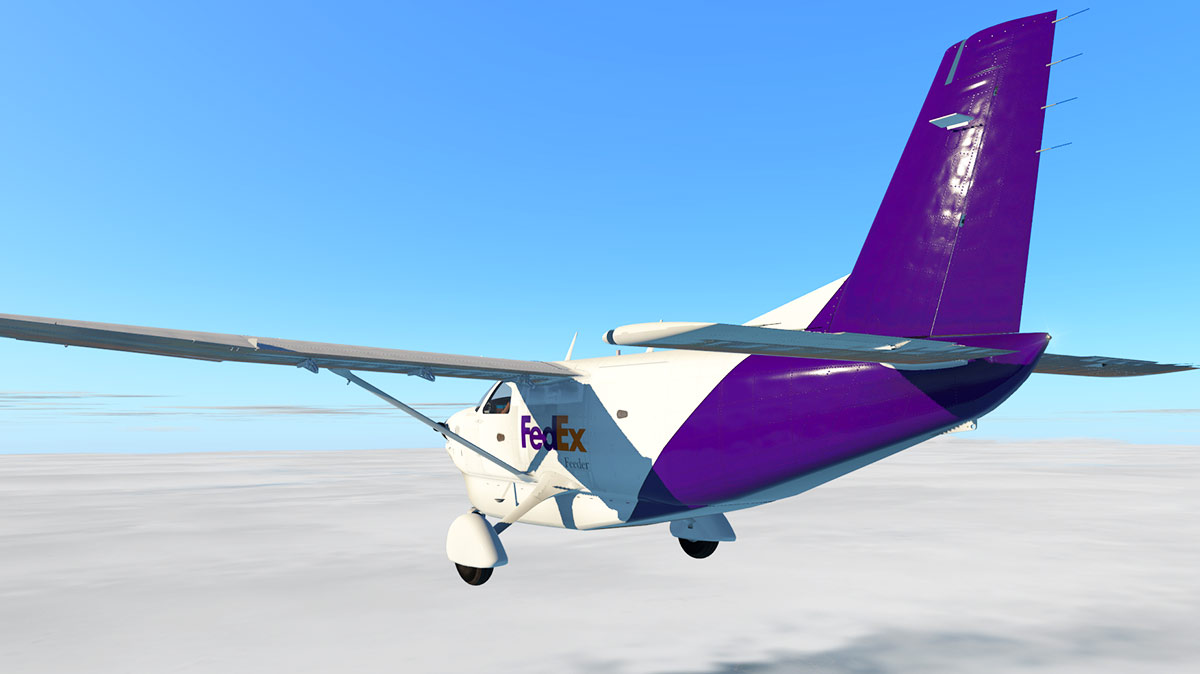
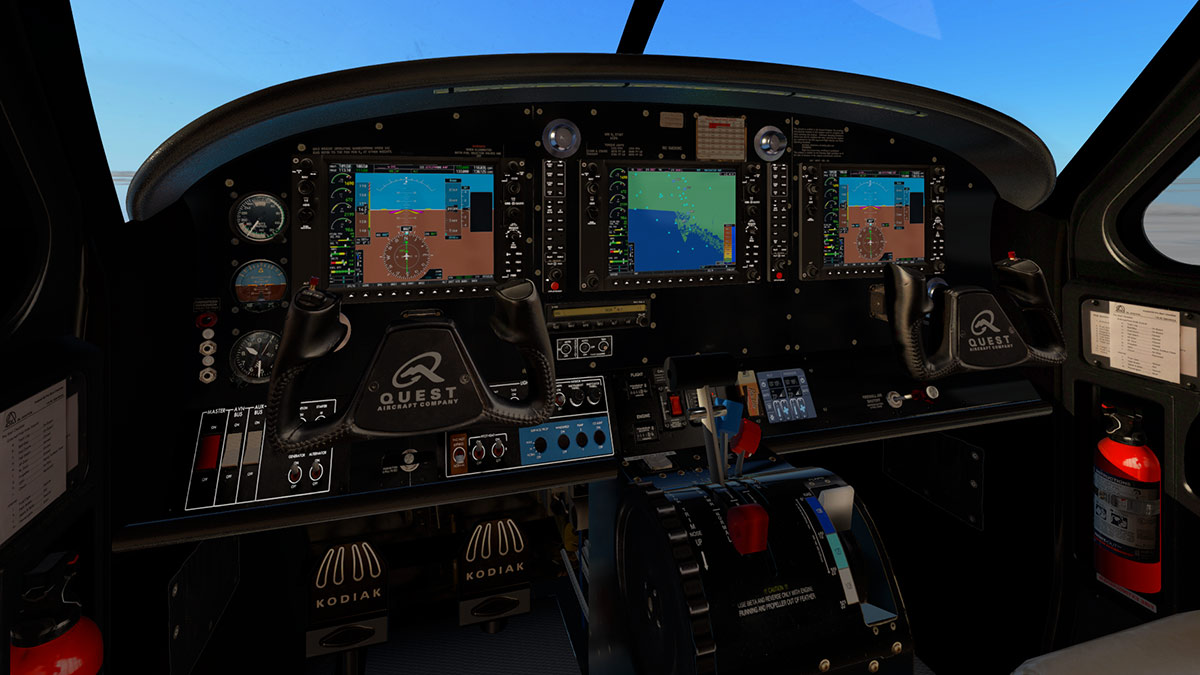
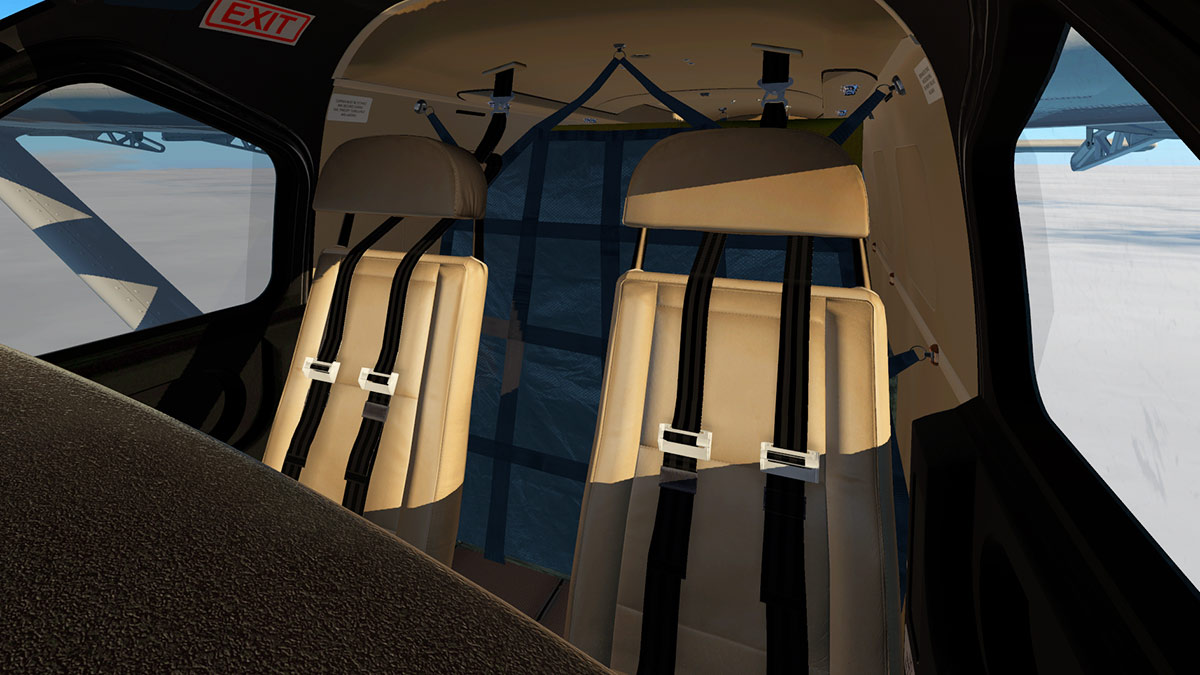
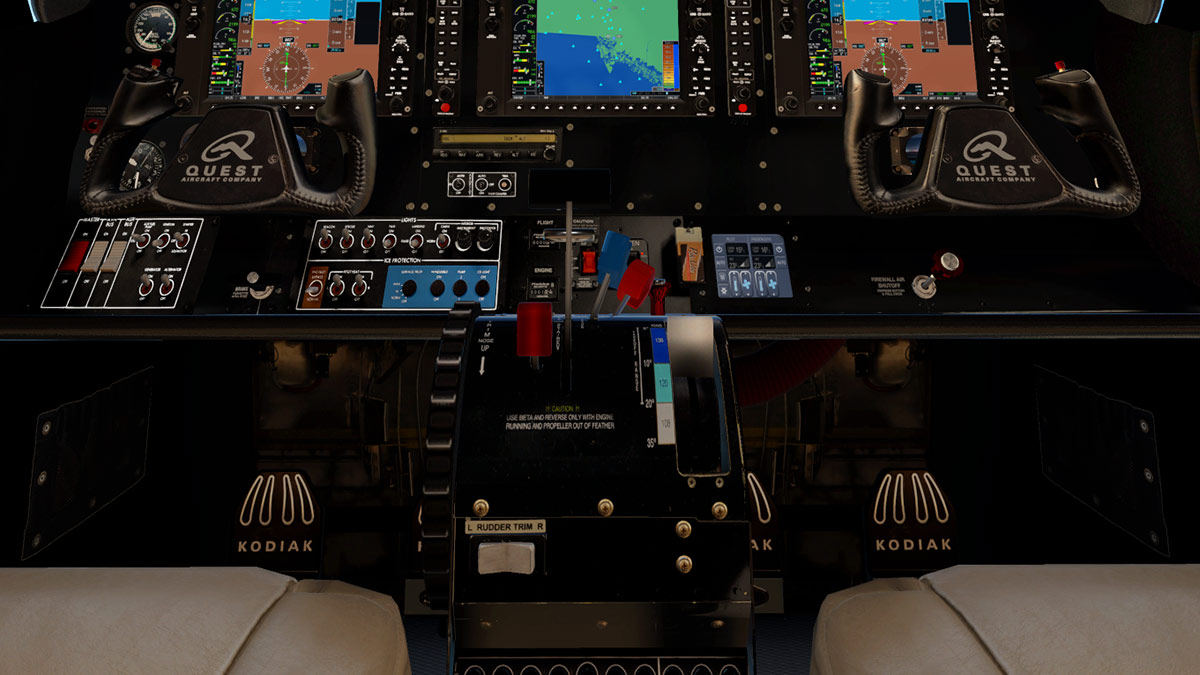
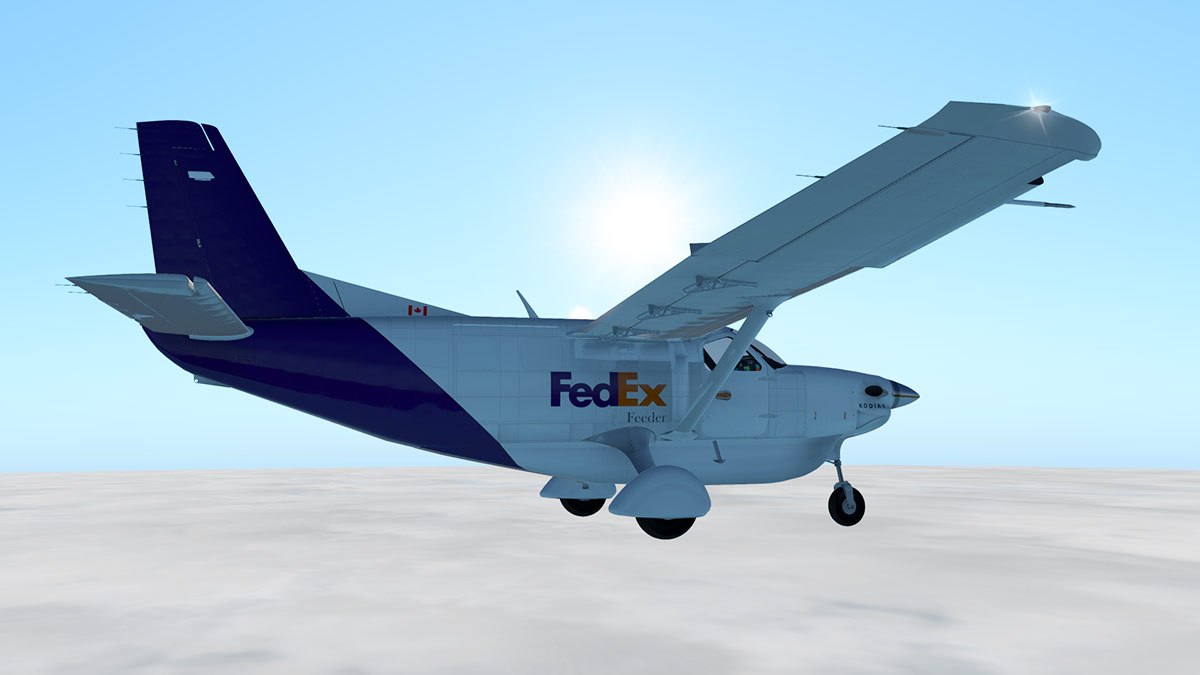
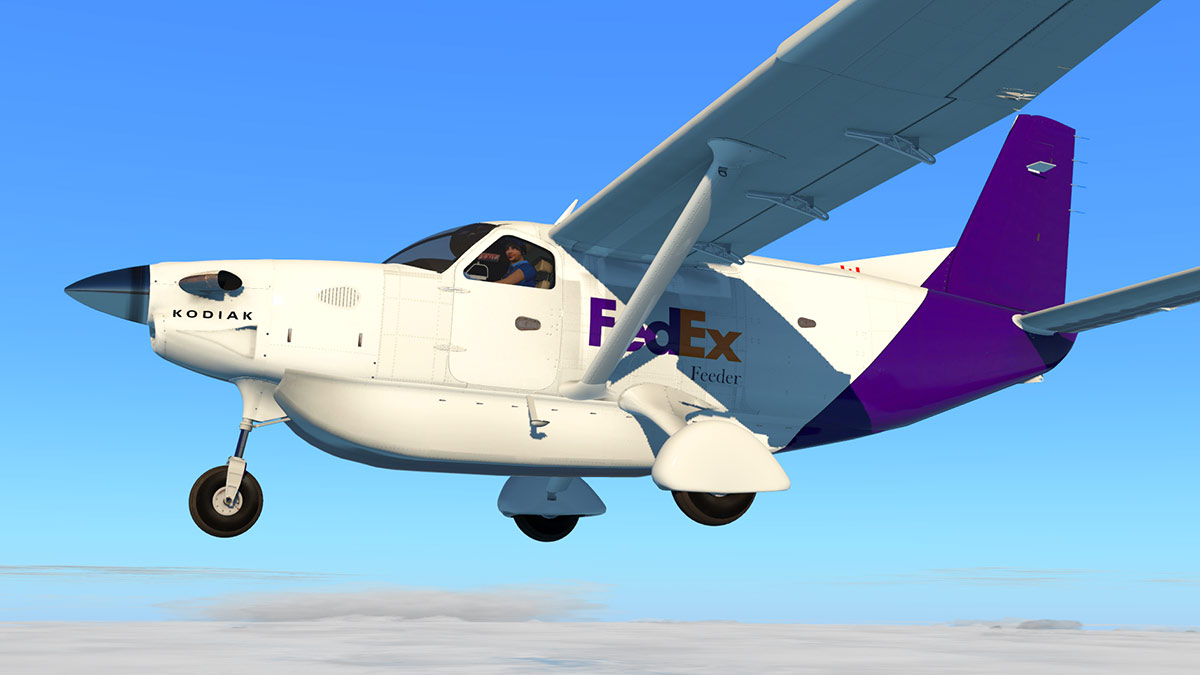
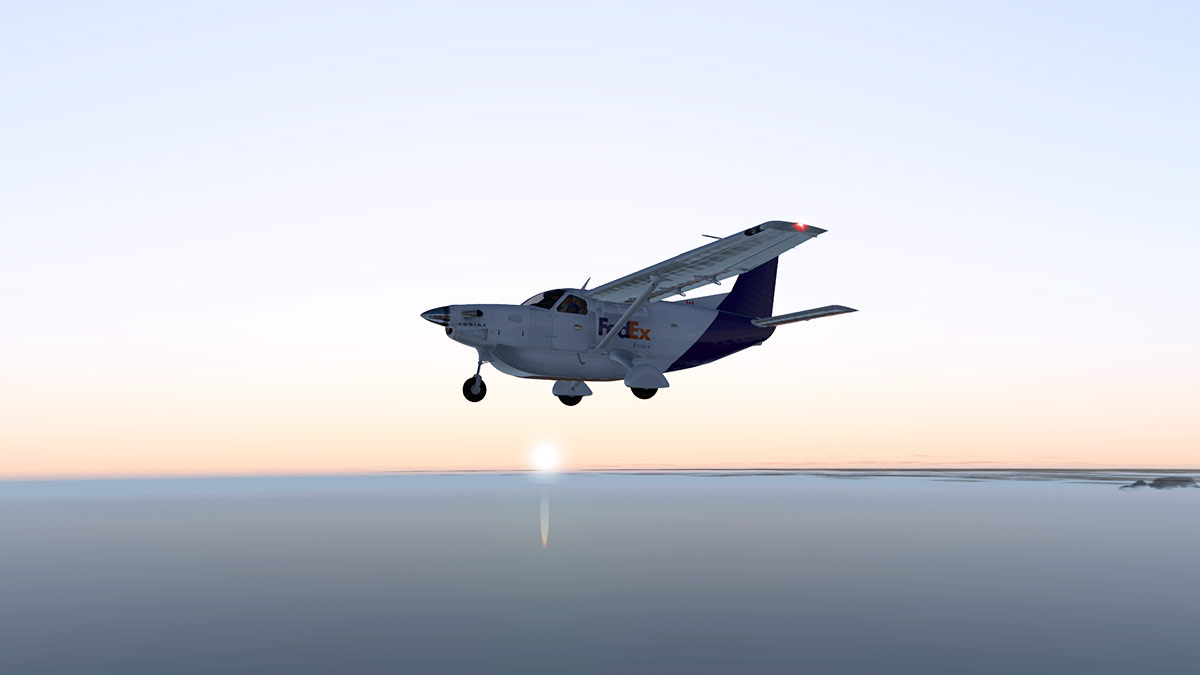
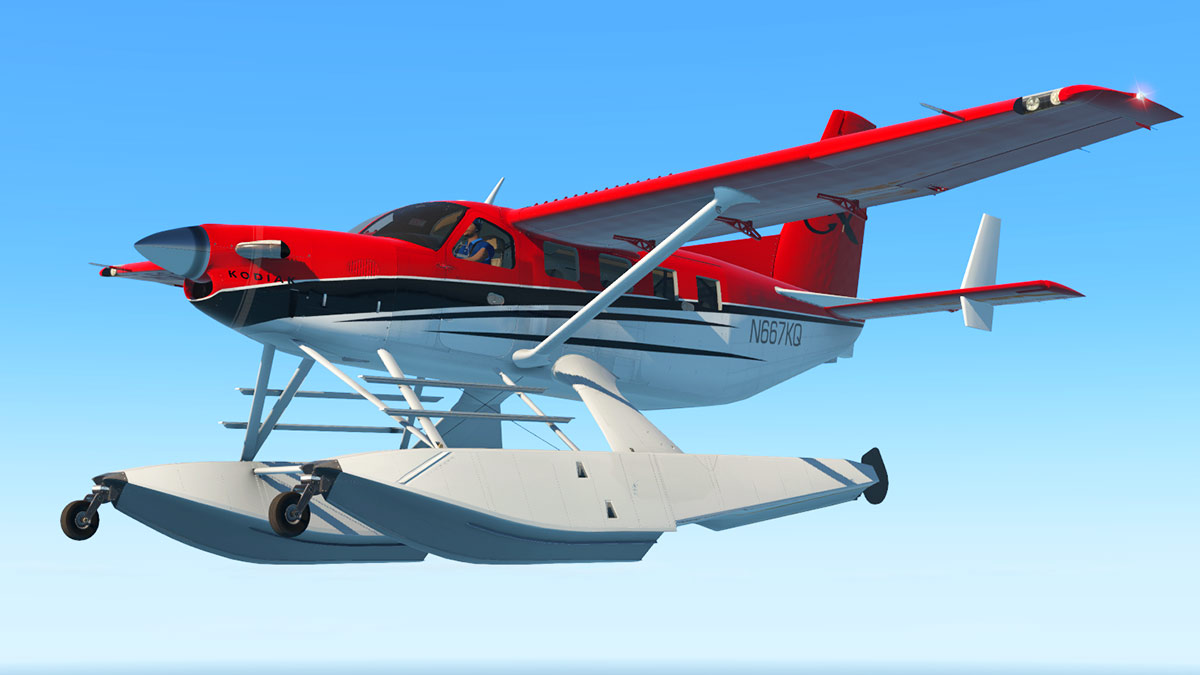
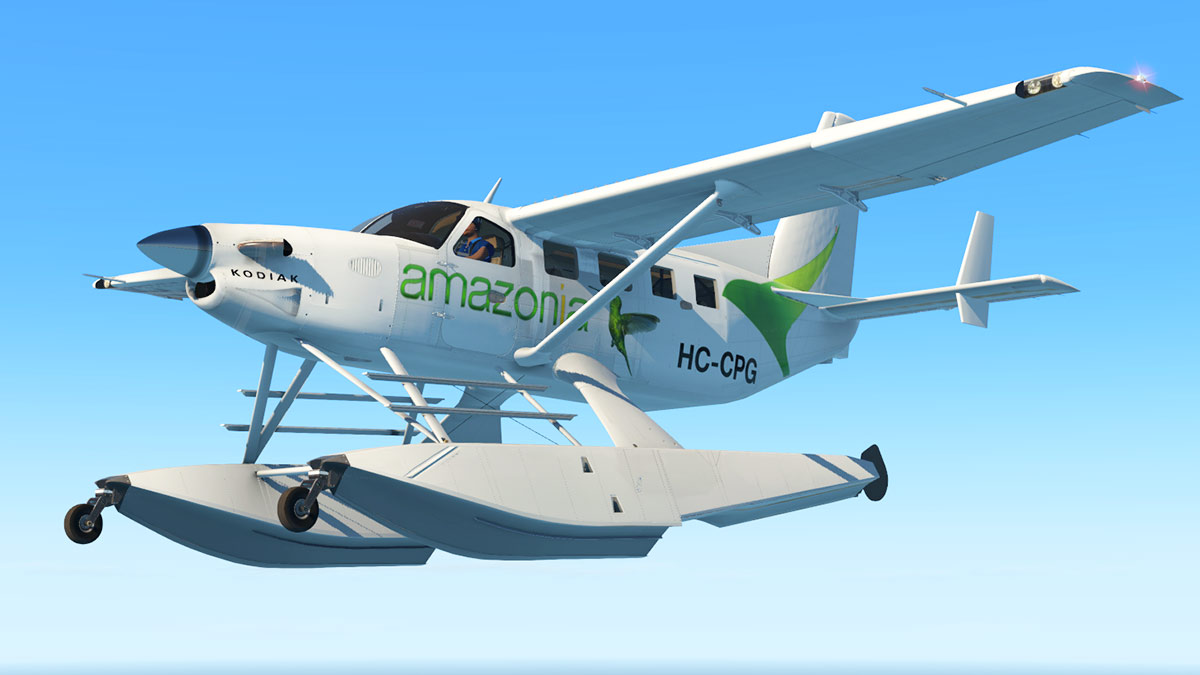
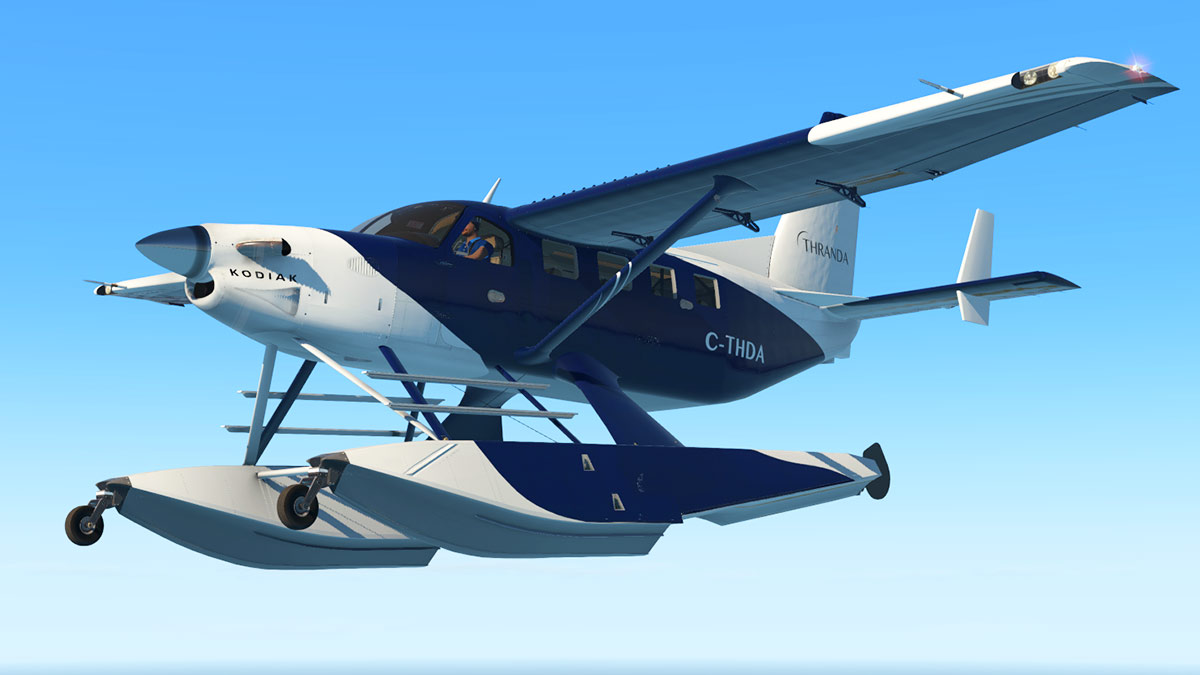
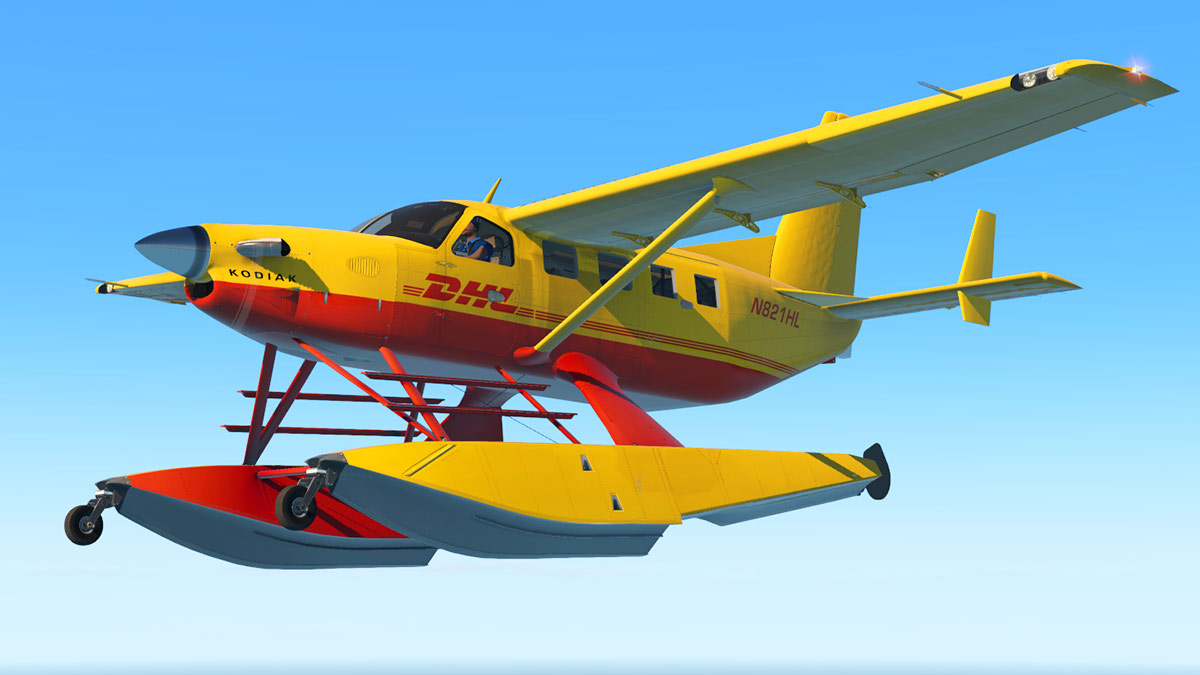
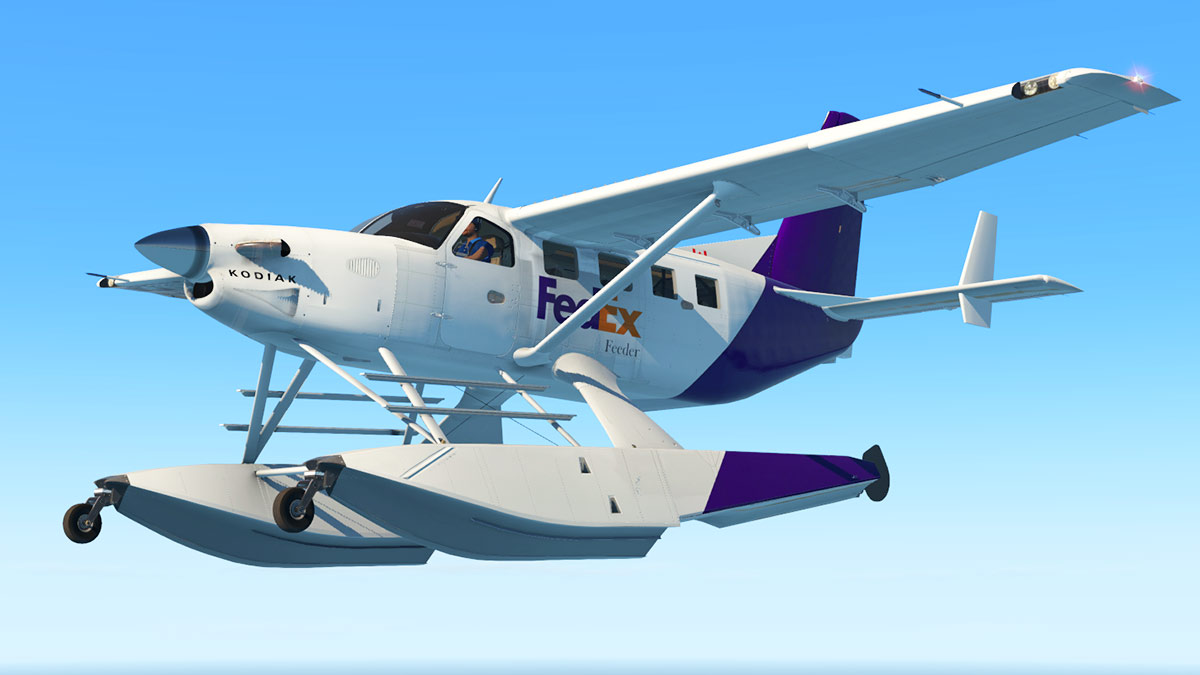
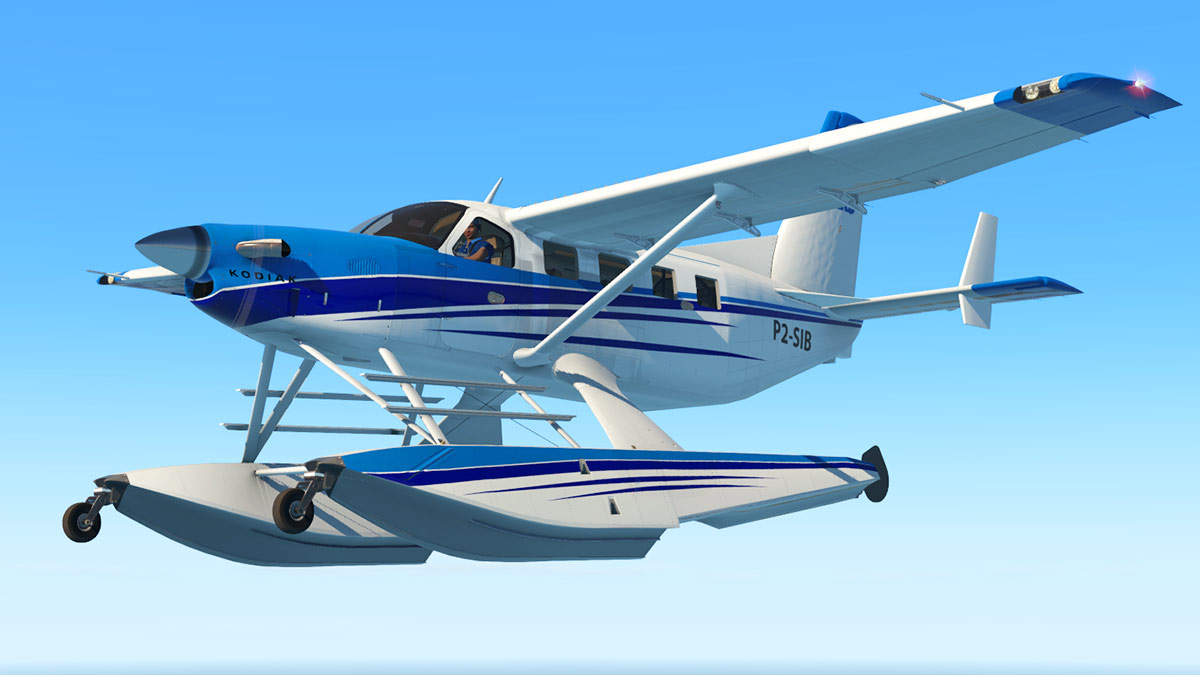
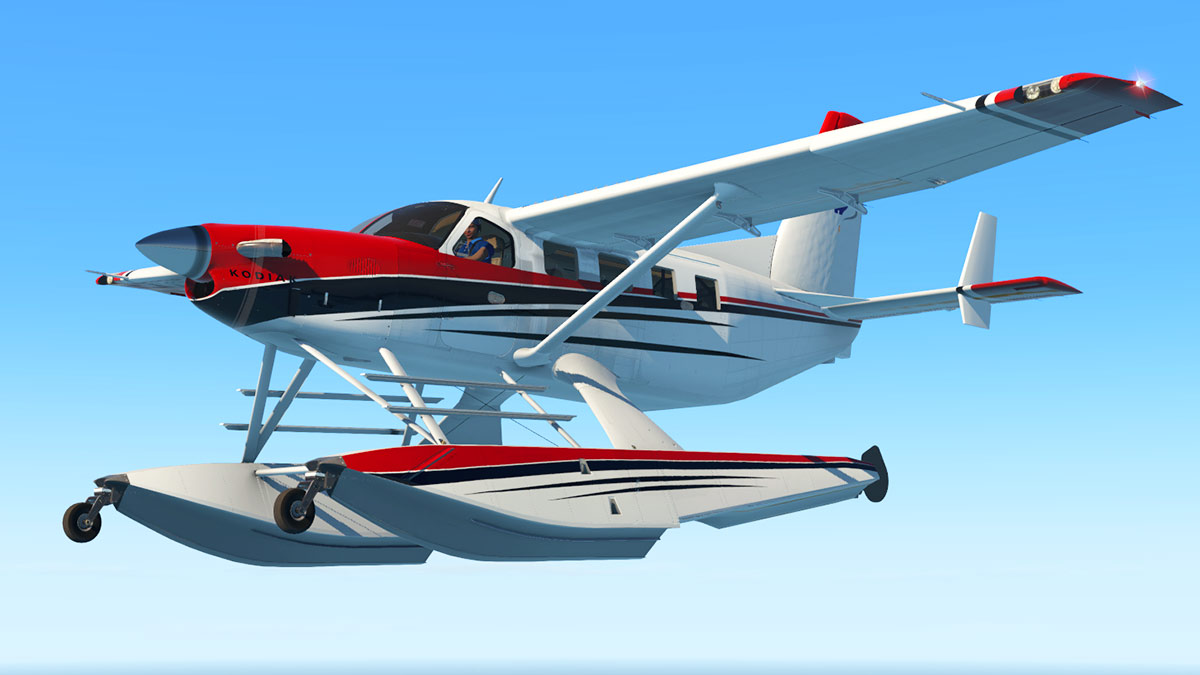
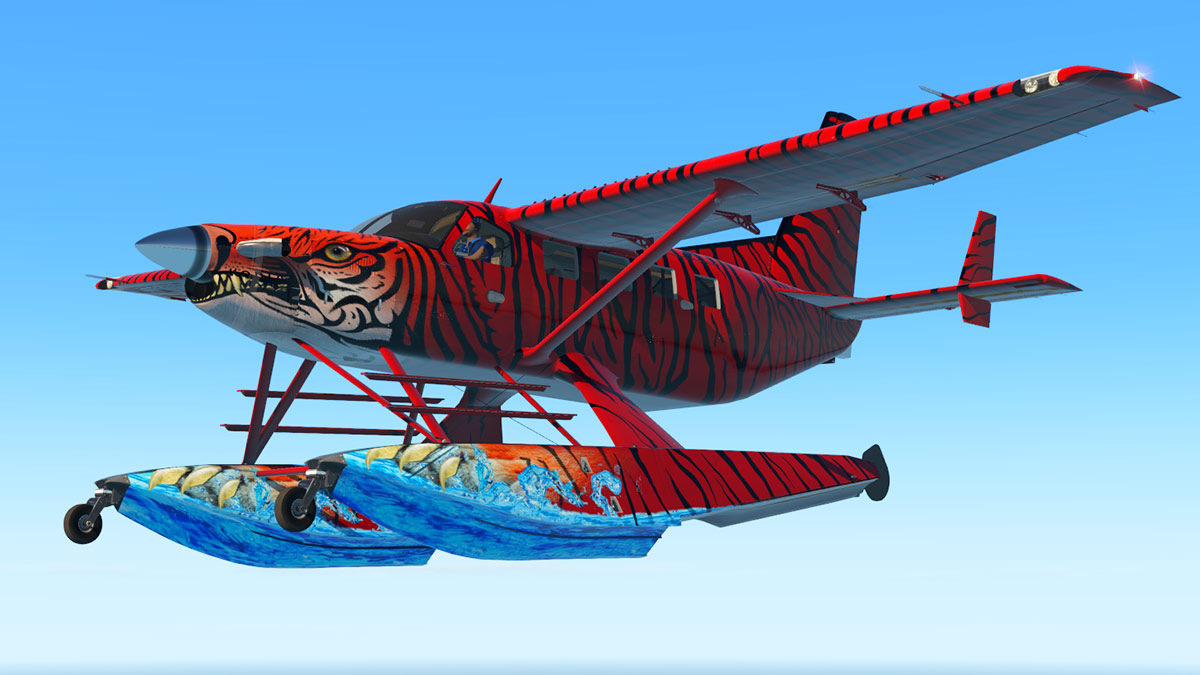
  13. Aircraft Review : Cessna 337F Skymaster by Thranda Design Thoughout the history of aviation there have been many different concepts... fuselage shapes, wing designs, power sources. But in the one area of multiple engines, there is the Twin Engine mounted wing configuration, or commonly known as "Twins". Several twins however use a very different concept, one was the wartime Do 335, another and another was far more famous aircraft the Cessna 337 Skymaster. The concept is called push-pull configuration in that has a combination of forward-mounted tractor (pull) propeller, and backward-mounted (pusher) propeller. In the Cessna 377's case it was two Continental IO-360-C air-cooled flat-six piston engines, 210 hp (160 kW) each, producing a combined 420hp, plus the unique "Twin-Boom" tail arrangement to accommodate the rear (pusher) engine/propeller. Basically the 337 was a standard Cessna forward fuselage, but with a totally different concept at the rear. The first Skymaster, Model 336 Skymaster, had fixed landing gear and initially flew on February 28, 1961. It went into production in May 1963 with 195 being produced through mid-1964. In February 1965, Cessna introduced the Model 337 Super Skymaster. The new model was larger, and had more powerful engines, retractable landing gear, and a dorsal air scoop for the rear engine. (The "Super" prefix was subsequently dropped from the name.) In 1966, the turbocharged T337 was introduced, and in 1973, the pressurised P337G entered production. Cessna built altogether 2993 Skymasters of all variants, including 513 military O-2 versions. Thranda Design are on a roll. Last year in 2022 they released two Cessna's, Cessna 208 Grand Caravan, then later a Cessna U206G Stationair. Now another Cessna joins the fleet in a Cessna 337F, the push/puller icon. This C337 is not the first 337 in X-Plane, that distinction goes to Carenado's Cessna C337H Skymaster v2 HD Series, back in 2013, an iconic and much loved aircraft (by me anyway)... I loved the thing, and you can see on how good it was even a decade ago in the review above. Thranda Design also had a lot of input into that aircraft, as they also managed back then the Carenado fleet for the X-Plane Simulator, so they already know the aircraft intimately. No matter how many aircraft you review, you are still amazed at the quality and detail you get today in simulation. Once you flew models (or modeled aircraft), but today they are realistically miniature aircraft in almost every perfect detail. Every panel, appendage, rivet, screw and the overall shaping is perfect, or perfection, inlets show a mock Continental IO-360-C, but the engine is not accessible (Unlike the U206G). Glass is perfect, a green tint (more visible internally) with wear speckles embedded, it looks and feels nicely authentic. The twin VHF roof mounted aerials are distinctive on the C337, as is the large cooling inlet for the buried rear engine. Note the top oil filler cap, nice detail. The support strut for the tail booms is interesting. It is plastic or early form of glass-fibre to save weight, behind the strut in the boom structure is a sump tank. Flaps are divided on to each side of the boom, so in essence there are four sections. Detail again is excellent, note the boom fairings around the flaps detail... there are three flap degrees. There is the beautiful cambered detailing of the wing tips, that defines the chord. And you have the choice between "Icing Boots", or a blank leading edge. The rear twin booms, with the large central horizontal stabiliser is huge, with built in elevator and trim tab. Each boom has each internal left and right rudder cables and the right hand boom carries the trim cable, the left boom the elevator cable... ... tailstrikes are common, rare that any C337 has no tail damage, both the upper and lower assemblies here are excellent detail. You can't just swap around a Continental IO-360-C engine either... the rear has a very different load bearing (push) to the front's (Pull) bearing (again made tougher to absorb the higher loads). Note the rear engine cooling flaps (open). The landing gear is basic in a complicated way.... the wheel assemblies quite basic, hub and arms, but complicated in that they have to fold up into the fuselage, the nose gear rotates sideways on retraction, the rear spindly legs also have to contort to fit in the rear bays. A lot of owners take the rear gear doors off, as maintenance wise they are a pain (an option here?). Early 337 models used a manual hydraulic floor pump to raise and lower the gear from 65 to 73, then it was converted to two ECSs in the model, each with a 5.5-volt BEC. The front BEC powers a receiver in the fuselage (behind the front engine ) that operates the retracts, doors, nose wheel steering, right aileron and right elevator. The second receiver is in the wing and is powered from the rear ESC. The wing receiver operates the left aileron, left elevator half, both rudders and both flaps. As noted the gear in detail is very well done by Thranda, all assemblies and tyres are first rate, even good enough to spend time and admire the work. Because of the type of undercarriage on this aircraft, there won't be any of the usual Thranda addon features like; Tundra Tyres, Ice-Skis and Float/Amphibian versions. There are a few 337 float conversions out there, but they are very rare. If you want to call it the "Arse End" or "Rear Belly" of the aircraft, the lower rear fuselage is really well detailed with great well designed vortex generators, to create a smoother rear (breakaway) airflow from the aircraft with the powered propeller above. From on-wards with the 337G Super Skymaster version, there was a split airstair entry door, like on the Carenado 337H, great for leaving the upper window open in flight. Here though on the "F" model with Thranda, it is the earlier single entry door, the only other opening door is the smaller cubby door for baggage rear lower right side. Interior Only a single door entry to a six-seater aircraft, so it is tight in there with this seating configuration. Usually you would only use the seats, and so where do you put the baggage? usually on your lap, so the six-seater configuration doesn't work. In a real 337 your on top of each other, so it's small, really small. Note the excellent seating, the lower base and legs are really well designed... nice to look at as well. Unlike most Cessna's, the rear of the cabin doesn't taper away, so it is really inside a tall box. The rear engine which is set just behind the rear bulkhead is close to the rearmost passengers, it is known to be noisy as well. Cabin is tailored in a mixture of creams and browns, again reflecting it's pre-70's age... the headlining has a zip to the rear, again nicely done, with the front high set Fuel tank opposite selectors, for the front and rear engines. Cockpit Forward and the instrument panel is dominated by the huge pedestal, with six levers (THROTTLE, PROP and MIXTURE) for the two engines... ... front side windows are huge and past the front line of the wing leading edge... and reason why most C377's are used for observation, e.g. the Cessna O-2 Skymaster (nicknamed "Oscar Deuce"), fire and maritime observation patrols. Front side window (sometimes known as the paperwork window) opens as does the ash tray (it was the 70's). The Pilot's window is fixed, but the door window can be opened. There are two choices of yokes, "Slim" or "Beefy", the beefy version is the same large centred yoke from the Thranda U206G, but it works in here. Looking at the instrument panel, there is one glaring omission between the Carenado 337H and this version... that lovely green buttoned Autopilot panel... disappointed, as it was a huge feature on the earlier aircraft. Otherwise they are very much alike. As this aircraft has the "Dynamic Panel" system from Thranda, there are no set instrument arrangements, as we shall see that aspect later. Two areas on the instrument panel are standard... the excellent twin engine gauges with Manifold Pressure and RPM. A Fuel Flow (FF) and EGT (Exhaust Gas Temperature). The highlight on this side is the engine dials that show (top row) fuel gauges (two tanks, 46 GAL each), OIL pressure. (lower row) CYL head temp, and OIL temperatures. Other dials cover SUCTION, Air Temperature and Volts (amperes). Left lower panel has the VOLTS/BATtery (alternators), IGNITION/STARTERS , Instrument lighting (Flood/Post), Cowl Flaps (Front/Rear) and main electrical switchgear; MASTER, AUX PUMPS, ANTI-ICE, AVIONICS, (External) Lighting. The (hydraulic) gear selector is by the excellent large and handy (pitch) trim wheel. Park brake is a simple push/pull knob lower. The six lever; THROTTLE, PROP and MIXTURE pedestal is large and excellent, with a yaw (Rudder) trim wheel set below. Lower is a ADF Receiver panel. Left side panel is a fully active "Circuit Breaker" (Fuses) panel. In the opening glove box are the happy faces of the "Thranda Team". Menu Thranda's Menus are very feature rich and highly detailed. There is a popout TAB under the arrow lower left, that can be (mouse) scrolled to hide it, that is if you don't like these sort of items crowding your screen (I don't). The Menu system includes the "Dynamic Generation Series" or DGS, a Thranda speciality feature that takes full advantage of X-Plane's flexibility for in-sim, real-time modifications. As noted the "Menu" Tab (arrow) is far left middle of your screen, this will activate the Pop-Out Menu... The Menu has seven menu tabs in; GENERAL, LIVERY, WEIGHT/BAL, CAMERA, AUDIO/SLEW, PANEL and MISC (Miscellaneous) Menu - General The menu "General" sections covers quite a lot of options, the layout is highly detailed and very comprehensive. General menu selections cover; Electric Tug, Window and Instrument Panel Reflections on/off, Startup Running on/off, GPU on/off, Cargo Pod on/off, Chocks and Brakes. Three selections placed right cover group items, but any one item can be also accessed via "Click Spots" and can be individually selected or hidden via the aircraft graphic. "ALL COVERS" will select engine inlet/outlet covers and pitot cover, "ALL TIE-DOWNS" for rear fuselage and wing tie-downs and "ALL DOORS" for both the cockpit door and rear cabin doors. All EXT - External Lights can be switched on and off as can the ALL INT - Internal lights. The "Electric Tug" that can be used to move the aircraft around on the ground via your joystick (left,right-forward,backwards). Static Items include Ground Power Unit, Engine Inlet covers, Pitot covers and Tie-Downs Cargo pod is nicely detailed and comes with a single opening door, you can also add in the amount of baggage according to weight. The excellent "Checklist", can also be found on this tab. Which is the same as the Thranda U206G system... in the red, or the checked green choices you used on the other Thranda aircraft, and not the single white text on the Caravan. On some pages it notes performance and flying tips. You can have checklist pop-up or in a window mode and thankfully you can move it, and scale it even from the very small to the very large size. The two lower arrows give navigation around the checklist pages. The action detail and hints in the lists are simply excellent and the checklist is fully detailed from Pre-Flight to Shutdown. And to reset, it is done at the end by switching all the green completed checklist back to red. Menu - Liveries Second Menu option is "Liveries", there are two options here with the first being "PAINTED LIVERIES". There are altogether 8 liveries or two blank (or DynamicLiveryResources/ZZTemplate) and six designs, and all are of extremely high quality and creative flare with the package. Thranda house is default. Dynamic Liveries Not happy with any of those designs, then why not create your own livery! With their earlier releases of their Caravan and U206G. Then Thranda introduced a clever feature of a way to design your own livery. This is done by switching from PAINTED LIVERIES to DYNAMIC LIVERIES (Arrowed). Two liveries are "Dynamic" in resources (White)... another New feature is the (Quick) selection of Dirt (Ext) Externally, Scratches and Dirt (Int) Internally. Via three percentage selections you can adjust the amount of Dirt, Scratches and Dirt Int on the aircraft (0%-255%) and apply it instantly.So you can have either a pristine or a very grubby aircraft with just a twirl of the numbers. This can be applied to any of the liveries. You have a menu to select on the right that can colour a certain part of the aircraft, like the Roof, Wing, Tail or Wing tips. Select which one you want and then adjust the RGB colours for that certain area, it looks hard but you can easily design a very nice livery in about twenty minutes... the selections of Dirt (Ext), Scratches and Dirt (Int). Metal(ness) and surface Rough(ness) can also be added or adjusted as seen earlier... When done you can "SAVE" or ADD the livery and then "APPLY" it to the aircraft. The conversion takes a few minutes, but the results are excellent and in your own design... There are already 30 preselected selections in their various designs, all which are very good, and like noted you can add in your own version to the list. New to the Dynamic Livery application is ERA options in "Modern' or "Classic". Of course taste is optional... Here I changed the aircraft registration to an Australian Rego (VH-337), because I didn't like the Australian default aircraft... cool. Menu - Weight/Bal The C337F also has a great Weight and Balance menu. Lbs and Kgs which can be selected and changed via the toggle Lbs/Kgs (arrowed). Fuel can be added, and the amounts are then shown and are also adjustable as well in the menu (above). Pilot, passengers and cargo can all be set for individual weights and all selected via a scrollwheel... and then all of the CofG (Centre of Gravity) parameters are shown on a graph. Go too far or too heavy and the CofG goes red (arrowed). When done you can Save the Configuration and then later re-load it, or press Load to add in the set weights. Overall it would be nice to have set of loading formats of different configurations, it is slow work setting them individually. Once you go over a certain weight, you will then get two pilot's in the front seats, but no rear passengers. Pilots (Female/Male) are switchable. Note if you turn the aircraft power off, the pilots will again disappear. More cabin options allows you to hide each of the four rear seats, via the small x tickboxes, if the weights for each seat is still set in place (or adjusted) then the area is replace by baggage. This makes for a very versatile cabin. The Cargo Pod can be added or removed on the MISC Tab. This then adds in the Cargo Pod weight options on the right. But obviously there is a compromise? If you want a full passenger and baggage load, then you can't have full fuel tanks, as the excess weight takes you over the weight and the CofG limits. For six (light) passengers (with maybe a bag thrown in) then can you have your full tanks and the range and not go into the red. You can also really pile a lot into the rear cabin two sections, and all the baggage is of very high quality. Menu - Camera There is a camera feature under the menu "Camera" selection. The left side of the panel is the "Walkaround" views, just pick the dot viewpoint you want to see to rotate around the aircraft. To the right is the default views can be selected via a menu, or press the keypad to select the view with most of these internal viewpoints. The FoV or Field of View is adjustable via a slider. Menu - Audio/Slew Sound can be adjusted via the sound menu. There are seven slider selections with: Master, Aircraft External, Aircraft Internal, CoPilot, Radios, Environmental and User Interface. One other sound setting is on the Flap panel... As noted, on the right and left of the panel you get the audio simulation of an active noise canceling headset, which is seen as wearing a headset. Sound quality is beyond excellent as it is a built in audio mixer, so you can individually control the audio channels in real-time and you can adjust the volumes while hearing them play. Slew mode allows you to manually move the aircraft around in a disconnected X-Plane space. It functions by temporarily overriding the various aerodynamic and physical forces on the X-Plane settings, it is to allow the user to reposition the plane as desired. This feature is however highly touchy and it is mostly used with the floats option (not really coming to the 337), but for use on the Caravan, Thranda Beaver and PC-6). Menu - PANEL The sixth "PANEL" Tab option allows you to adjust or change the instruments and dials. Scroll the "Panel Preset" number (arrowed) to see the extra six preset layouts (seven choices in all). Sometimes to restart you have to click to "Apply the Settings" for the GPS units. Panel features include; Bendix King KFC-225, and the noted Aspen EFD 1000, KR 87 ADF Radio, Garmin GMA 340, Garmin GTX325 Mode C Transponder, BendixKing IN-182A Weather Radar, S-Tec Fifty Five X Autopilot and the usual GNS 430/530 PS/Nav/Comm units. A EDM 780 Digital EGT (shown lower) is also available. And there is a special 3d bezels for the insertion of RealityXp GTN 750/430 units if you own those two addons (arrowed above). Here is featured the EDM 780 EGT display, a replacement for the twin EGT gauges, the instrument pops-out as well. The Aspen EFD 1000 is a self-contained multifunction digital display that is divided into a Primary Flight Display (PFD) in the top half, and an Electric Horizontal Situation Indicator (EHSI) in the lower half. As EDF 1000 systems go it is not as highly featured with the GPSS, MAP, 360 and Menu functions all not simulated... all the lower NAV1/NAV2/GPS selections are however available, as is the TPS (Tapes) see/hide option with the MIN (Minimums) selectable as well. and the PFD can be reversed with the EHSI. The EFD 1000 here can be used with the S-TEC Fifty Five X Autopilot. Customising the panel to your own personal layout is just as easy. Just select the "3D EDIT PANEL MODE" (arrowed) that gives you access to all of the 53 individual instruments and avionic units... There are some great options including Aspen EFD 1000, S-TEC 55x Autopilot, Angle of Attack gauge and so on... For those that find instruments are not to their liking in say, "I wish I could move that altitude meter just a bit more to the left", then here you can simply adjust that instrument, or even swap the instruments around the panel to your liking. You can even adjust the brightness of the instrument. Optional is to select the type of GPS unit you want GNS 530/430 via the "INSTRUMENT" selection. When done you can "ADD" (or Duplicate) a new "Preset", and then "SAVE" that new layout Preset (Preset /6). So basically you can start off with a completely blank instrument panel and then create your own unique or personal instrument layout if you have the time and patience... and you can have up to or save 14 different instrument layouts. It is however very important to restart X-Plane to lock in the new instrumentation layout before flying. Currently the optional "Panel Background" choice (colour) is not available on the 337F, like it was on some other Thranda DGS systems. Menu - MISC The Misc (Miscellaneous) page has four panels that cover Yoke Type (Chunky or Slim) ,De-Ice (wing) Boots, Cargo Pod (Normal or Cargo), Pilots (Option 1 Female, Option Two Male) and DynaFeel. "DynaFeel" on the right is a system that dynamically adjusts the rate at which the controls deflect. It is based on airspeed and how much the control is deflected. This means the controls will feel light and responsive at low speeds and with small deflections, but will get progressively heavier as the airspeed increases. _____________________ Flying the Cessna 337F Skymaster The 377F is an odd aircraft because of it's push/pull configuration. The front is standard, the rear installation is everything but. In the cockpit it is bit like wearing a very heavy backpack, you know it's there but you can't see it. And that heavily enclosed rear installation causes problems as well.... mostly the heating. So the aircraft is expensive to run, maintenance costs are notably high and so are the insurance premiums. This puts of a lot off buyers, which is a shame as the unique configuration is a very good flying machine. You have to start the front engine first, to push cooling air into the upper vent to keep the rear engine cool... ... even when you have started the rear IO-360-C air-cooled flat-six piston engine, you have to move forward quickly. More air is required by movement via the twin open cowls on the rear, the nose engine has the same cowls under the aircraft, but it also has the forward nose inlet. Sit there for a period of time and it could get very expensive... quickly. And yet you need the "Temps" to come up before moving, my trick is once the needles are showing rear temps, then go... the taxi to the runway will do the rest. And this highlights the biggest point in flying the C337, your eyes are never (ever) far from those Temp gauges, you can't see or feel that rear engine, so the gauges are your eyes and ears to what is happening back there. Sounds when running are obviously different. Although both IO-360-C engines are the same, however they sound very different because of their different locations and installations. So you get Individual sounds for the front and back engines, with different sonic characteristics. Combine that with 3D 360º audio effects, including "blade slapping" sound when view is perpendicular to prop, and you can even hear the turbulent air feeding into the rear prop. Also the "beats' are all there with the precise beat frequency for each section, to minimise "muddy" transition sounds, in other words the running "ticker, ticker", sounds at idle, the same as any Continental piston engine, but sonically coming at you from both ways... it's all very good. It is up to you if you want to taxi on one engine, or both... personally you don't need the rear engine to taxi, as the front IO-360-C has more than enough power... ... with no stress yet on the rear engine it helps in keeping it a bit cool(er). I use a Yaw setting on my Joystick to steer, but rudder inputs, in mostly the right rudder will fine tune the taxi line, even slight turns like this with the rudder input are easily available... on the ground the 337 is excellent, nice power inputs, that slack off when you reduce the power, so all it's lovely on the ground. Cockpit in detail in X-Plane 12 is realistic as it gets, Simulation 2023... the silhouette is the iconic C337. Because of the unique engine arrangement and rear fuselage configuration, the rear engine creates instant aerodynamic flow over the huge horizontal stabiliser and elevator, so the pitch feel is there from the word go... so you have to be aware in the way you use the pitch earlier than usual. On the real 337, the pitch trim is motorised automatically to compensate for the extra elevator pressure loadings, and will work (trim) from the moment you leave the runway. The rear propeller is highly exposed as well... thrown up rocks from the rear wheels can cause grief (in other words expensive repairs), and you have to leave the runway cleanly, or not a too pitched up, in not catching the ground sort of skill... obviously you can't see it at all. But the unique push/pull engine configuration also works for you in not creating any (depending on the power outputs) yaw, as the inline counter-rotating propellers give no directional thrust pull, so there is no asymmetrical thrust or yaw to the power output of the propeller, basically you go straight down the runway with no corrections or slight rudder corrections... and fast you do go! I usually bring the front (puller) up to 90% power, tracking right I then bring up the rear (pusher) to match it... ... remember the rear engine operates in the disturbed air from the forward engine, which may reduce its efficiency to 85% of the forward engine. Basically the 337 is a small aircraft with two engines on it, so it GOES... well "like shit!". At 100knts you break with the ground, slight pull back with the yoke, and once clear then a 10% pitch to climbout... you have ton's of power behind you, so the 337 will climb-out very easily... Rate of climb is 1,200 ft/min (6.1 m/s), but you can do a 1,000 fpm comfortably... now for the big theatrical production! First the gear doors open, then the nosewheel will twist sideways to fit into the front wheel-well... ... from the rear the fine limbed gear has to then contortion to fit in what is basically four rear bays. The animation work here is difficult and very complex, but Thranda have done an excellent job, in getting it perfectly correct. Then you have a nice clean aircraft. Note... the gear lever will go up, then return to the centre position once the hydraulics have finished the procedure. Once cleaned up, the one thing you realise very quickly, is that the 337F is one amazing aircraft to fly. Maybe it is huge wing arrangement, and twin boom tail, but it is steady as a rock and smooooth, easily trimmed, and can then bank to your will... ohhh it's "so good". You can bank to the extreme, say 80º/90º (See Redbull video), and the 337 will take it all in it's stride, but note the loss of height, if you are doing these sort of very angled manoeuvres. The numbers... Maximum speed: 199 mph (173 kn, 320 km/h) at sea level : Cruise speed: 144 mph (125 knots, 232 km/h) at 10,000 ft (3,050 m) (econ cruise) : Range: 965 mi (839 nmi, 1,553 km) : Service ceiling: 19,500 ft (5,945 m) A lot of operators use internal tanks on the 337 for on-station flying (fishing, fire, maritime patrols etc) so the range is expandable. Lighting Internal lighting is quite basic, but effective. There are only four adjustment knobs; POST (those little lights on the instruments), FLOOD, EL PANEL and ENG RADIO. Between them you get a full lit panel with red highlights... ... a Black&White panel, or a Red panel Last adjustment is for the lower left instrument panel. In the rear you have four spot lights that you can adjust the beams, the roof Fuel Switches are also lit up... but missing is a forward flood cockpit light, and you seriously notice the absence? Externally it is pretty basic as well, Landing/Taxi lights in the wings, navigation and strobe lights on the wingtips, a right tail beacon and white navigation lights on the twin tails. There is also a nice left side Ice-light on the wing. Notable is cooling as already noted. Once airborne you can close the cooling vents forward and rear, this nicely cleans up the aircraft. But there a need to keep all eyes on all the temperature gauges. It becomes a bit of a game on how long (or how far) you can go with the vents closed, once the needles are touching the red zones, you are out of there... switches are lower pilot panel right. Cruising you can easily see the 337F's main outstanding elements, as a stable observational platform. You can understand why the US Army grabbed a load of 337s for this purpose. I wouldn't use the aircraft so much in carrying fare paying passengers, it's too cramped and even too noisy to put into commercial service, but for two (Pilots) and a load of gear, it is perfect. A quick look at the Orbx Brisbane City pack... Brisbane is 70 kms north of here and my local state capital. It comes back to my original argument, create the inner city and the autogen will do the rest, it works fabulously well here, as does the complimenting Orbx YBBN Brisbane international... YBBN Runway 01L is all brand new, just completed only a year or so back... time to check it out. Two things are very apparent on the approach, first the 337F's lift is impressive, those wide wings and horizontal stabiliser (with added thrust on it, mind you) keeps you very steady, almost static in the air, which means manoeuvres can be easily controlled. So the old adage applies here, the Skymaster is a very "Sweet" aircraft to fly. Second is that once you reduce the speed on approach, even at 120 kts, off goes the gear alarm? it feels far to early, not even in the flap white zone, so you have to drop the gear early to just "shut it up". I think the alarm is there and early (still a bit too early though), because it takes the gear a very (very) long time to unfurl and lock down, it feels ages from when you drop the lever to when the green light comes on... notably I opened the cooling vents before landing, and instantly all the temp gauges drop. Flaps are 4 phase 3 degree movements; UP - 1/2 - 2/3 - FULL, get the speed right and there is simply no ballooning, just slight drop of speed, even down to the FULL setting, the Skymaster will stay calm and collected with no fighting of the aircraft... critical on approach. Over the threshold and your in the 70 knts range, perfectly stable... ... 60 knts in the flare. The flare has to be perfect, as you are very aware of that rear propeller hanging down. Slight 5º-6º degrees to keep the nosewheel slightly higher than the rears, then let it down. When the rears touch you bring down the nose carefully, the slow landing speed and excellent lift really helps here to get it right. Then back to taxiing with the rudder pedals. It's a long taxi from YBBN runway 01L/19R to the GA area, and i'm watching those temp gauges like a hawk... but I get there. BNE needs to create a shorter taxi route to 01L/19R from the GA Area, which the area is actually close to? I finally get there... notable with the engines now shutdown is the active variable-pitch on the propellers (PROP levers) in being feathered, it is all very well done here by Thranda, authentic, realism... take your pick but still great. Although a very different configuration from the usual, the 337F is actually a very nice aircraft for a pilot, you never oddly fight it, it is SO stable (that word again), a dream in all the aspects of manoeuvres in the air, trims nice, just "Bloody" feels nice as well. All round this a great aircraft, different in most aspects, but that is also it's attraction for a really special simulation. ___________________ Summary The Cessna 337 is a very unique aircraft in the history of aviation. It is only one of the few created and built in the Push/Pull configuration, or a forward PULL engine and a rear PUSH engine, to accommodate the rear push engine it has a two boom and twin tail arrangement, with a standard Cessna fuselage and forward engine layout. Yes it's totally unique, but it works. Last year in 2022, Thranda Designs released the Cessna 208 Grand Caravan and the U206G Stationair, those aircraft in the series are now joined by the Cessna 337F, after Thranda's earlier more rugged utility aircraft Series. This aircraft is powered by two Continental IO-360-C air-cooled flat-six piston engines, 210 hp (160 kW) each, producing a combined 420hp. Thranda Design are one of the best developers in X-Plane, their history and quality is legendary. So that quality build and detailing is always going to be significant from the start, and so it here... exceptional. In every area and detail, modeling, fine details, glass and the interior materials. Menus are also excellent with menu tabs in; GENERAL, LIVERY, WEIGHT/BAL, CAMERA, AUDIO/SLEW, PANEL and MISC (Miscellaneous), that covers all the options and including sound, weights and balances also including graphs, walk-around and camera options and general static elements including GPU, chocks, pitot covers, two pilots (Male/Female) and tie-downs. Sounds are excellent with High fidelity, multi-track sounds with smooth, finely tuned transitions, amazing atmospheric effects, different sonic characteristics (with the engine arrangement) and 3D audio effects, including the "blade slapping" sounds and the aerodynamic interaction effects between front and rear prop. Internal sounds are however a bit too low compared to the external. Thranda always comes with a high range of clever and unique features to give the user a lot of personal options. Known as the "Dynamic Generation Series" or DGS, this is a Thranda speciality feature that takes full advantage of X-Plane's flexibility for in-sim, real-time modifications. Here you can change the actual livery to your own designs, but build the instrument panel to your own liking as well, including options of the Aspen EFD 1000 glass instrument and a special 3d bezel for the insert of a RealityXp GTN 750 and GNS 430 units if you own those add ons. Comments include, Tricky to start, Tricky to keep cool, and the unusual undercarriage bans a lot extra features in Tundra Tyres, Ice-Skis and Float/Amphibian variants. Lighting is good, but there is no overhead cockpit flood light, four rear spots are also small, in making it a dull night cabin, instrument pane is however good, but you feel you need more adjustments. Missing also is that valued green buttoned Autopilot panel that was on the Carenado. Notable that the 337 is a unique aircraft to fly. The in-line engine arrangement gives you almost no asymmetrical thrust, but this also a powerful, but brilliantly handing aircraft that has not only a very stable platform feel in the air, but also on departure and approach procedures, you can see why the US Army bought loads of O-2 Skymasters for observation patrols. So it's a Thranda and that is a sale done right there. At a below US$40.00 price it is also exceptional value for what you get, including free updates for the run of the X-Plane 12 version and all that exceptional quality. A total winner in every department... and positively recommended. _______________________________ Yes! the Cessna 337F Skymaster DGS series by Thranda Design is NOW available from the X-Plane.Org Store here: Cessna 337F Skymaster DGS series Price is US$39.95 Requirements X-Plane 12 or X-Plane 11 Windows, Mac or Linux 4 GB VRAM Minimum. 8 GB+ VRAM Recommended Download Size: 1.4 GB Current version 1.0.3* (February 1st 2023) *Updates via the Skunkcrafts Updater Special features: FULLY configurable 3D instrument panel. Fully VR Compatible Interchangeable yoke styles Over 50 instruments to choose from! (Including Aspen EFD 1000, and support for RealityXP 650 and GTN750) Move any instrument to any location on the panel, or even between pilot and copilot's panel! Comes with 4 panel presets, but can easily be expanded by moving instruments around, using a simple and intuitive interface. Lighting is fully 3D, and dynamically move along with the instruments, as you configure the panel. Ability to assign a lighting index to individual instruments, to allow different lighting knobs to be assigned on a per-instrument basis. Save your own presets, and even share them with the community! Almost every instrument can be popped up or popped out as a 2D floating window! They can be placed on other monitors as well. Instruments can be moved in 3D directly, on a 2D pop-up preview window, or by numerical entry for precise placement. GNS430 and 530 can be swapped out, but a restart of the plane is required, as 430s and 530s are mutually exclusive in terms of compatibility in X-Plane Dynamic livery editor (like in the Kodiak, the Beaver, the Wilga, the Caravan, the C206, and the Pilatus PC-6) Full PBR control! Create stunning metallic liveries, or matte, sand-blasted look in mere seconds! Additional control over dirt/scratches, adjustable in real-time to dial in the exact desired amount of wear and tear. Create "virtual" liveries, based on two basic common design layouts (Modern and Classic), and assign any colour to any available paint segment. Quickly create preview of livery in real-time, using intuitive controls. Previews include visualization of metallic materials and dirt overlays. Apply selected livery in real-time, right in the sim, without the need to even touch a 3rd party image editor! Option to change the tail number in real-time, or disable it altogether. (Enter a "space" instead of a callsign number to create a blank tail number.) Easily and quickly create dozens of paint schemes in-sim! Also includes 9 traditionally painted liveries, all visible in a convenient pre-selection preview window. Ability to swap pilot/co-pilot figures Uses SkunkCrafts Updater. Option to participate in Beta program, via checkbox in SkunkCrafts Updater. Excellent hi-res PBR realistic materials, featuring true-to-life plate deformation and to-the-rivet precision. Fully modelled Continental IO-320-F front engine. Windshield ice and rain effects Individual functional circuit breakers. Feature-rich elegant fly-out menu with the following features: Electric tug, with in-panel controls to move forward/backward at the desired speed, and steer proportionally Control over chocks, individual tie-downs, covers, internal lights, external lights, etc. Option to enable/disable Cargo Pod, with realistically simulated weight, momentum, rotational inertia, and drag characteristics. Option to start up running (all systems ready), or cold-and-dark, for realistic startup procedures, directly from this fly-out menu. Control landing lights, strobes, beacon, and nav lights via fly-out menu Detailed weight and balance manager with visual chart, individual passenger seat weight control, Lbs/KG unit toggle, CG control, external tank control, and the option to save and load configuration. Show or hide individual seats, to create a hybrid passenger/cargo version. When seats are hidden, cargo fills the space when weight is added via the fly-out menu. Multiple camera snap points, above and beyond what's available by default in X-Plane, so you can perform your walk around checks. Adjust your camera's Field of View without having to go to an X-plane menu, allowing for real-time adjustments. Audio mixer: individually control audio channels in real-time, so you can adjust volumes while hearing them play. Slew control: move your plane around the world, temporarily bypassing flight physics. Includes ground mode and air mode. Dynamic panel control page, with a separate view for the entire panel layout preview, or a per-instrument view, allowing for fine-tuning of instrument position, as well as copy-paste function to quickly replace instruments. Option to swap pilot and co-pilot Option to select different yoke styles DynaFeel panel: Dial in precisely how you wish for the controls to react as a function of speed. Optional de-ice system Flight dynamics and systems: Detailed and accurate flight dynamics and weight and balance with the help of multiple real-world active Stationair pilots. This not only gives this aircraft the proper "feel", but also accurate takeoff, climb, cruise, and landing performance. The C337 is a well-behaved twin airplane, where the engines are in line, with props spinning in opposite directions, cancelling out torque on the airframe A single engine failure doesn't radically affect flight behaviour, as the engines are in line, and don't produce a net yaw force on the plane, as other twins do. Tie-downs and chocks actually keep the plane from moving, even in high winds. DynaFeel: controls that simulate how strongly the control surfaces are affected by oncoming air, and how much strength would be needed to overcome these forces. Advanced FMOD-based sound system: High fidelity, multi-track sounds with smooth, finely tuned transitions (actually having calculated the precise beat frequency for each section, to minimize "muddy" transition sounds), and amazing atmospheric effects. Individual volume control over different aspects of the sound experience, adjustable in real-time (while listening to the sounds) Individual sounds for front and back engine, with different sonic characteristics, as a result of their placement. Different sounds for front of plane than for back of plane Panning around the plane in exterior view yields awesome 3D audio effects, including "blade slapping" sound when view is perpendicular to prop Far away sounds include aerodynamic interaction effects between front and rear prop. At a distance, you hear overtones caused by turbulent air feeding into the rear prop. Individual buttons and switches in the cockpit each have their own unique sound. Engine has typical cool-down ticking sound, based on engine temperature. Sounds actually give you clues as to what's happening under the hood. Outside wind intensity is affected by slip and AoA. (The more the surface area of the fuselage is hit by oncoming wind, the louder the sounds Doors and windows opening, let outside sounds in Installation and documents: download for the Thranda_C337F. is 1.34Gb and the aircraft is deposited in the "General Aviation" X-Plane folder. Full Installation is 1.71Gb Documents supplied are: C337F Manual.pdf C337F Performance Charts Changelog Thranda Graphics Settings XP11 Thranda Joystick Settings X-Plane G430 Manual X-Plane G530 Manual There is a huge amount of Documentation provided here, not only for the Thranda C337F, but including performance charts, reference guides, but also X-Plane/hardware settings and custom and default avionics. All updates are via built-in Skunkcrafts Updater Support forum for the C337 Skymaster by Thranda _____________________ Review System Specifications Windows - 12th Gen IS1700 Core i7 12700K 12 Core 3.60 GHz CPU - 64bit -32 Gb single 1067 Mhz DDR4 2133 - PNY GeForce RTX 3080 10GB XLR8 - Samsung 970 EVO+ 2TB SSD Software: - Windows 11 Pro - X-Plane 12.01r3 (This is a beta review). Plugins: Traffic Global - JustFlight-Traffic (X-Plane.OrgStore) US$52.99 : Global SFD plugin US$30.00 : RK Apps XPRealistic v2 - US$34.99 __________________________________ Review by Stephen Dutton 2nd February 2023 Copyright©2023: X-Plane Reviews (Disclaimer. All images and text in this review are the work and property of X-PlaneReviews, no sharing or copy of the content is allowed without consent from the author as per copyright conditions.
  14. Aircraft Review : Daher Kodiak 100 DGS Series by Thranda Design The Daher Kodiak 100 is the same aircraft as the earlier Quest Aircraft Company, Kodiak. As for the French aircraft manufacturer Daher bought out the designs and also the production of the Kodiak in 2019 from the Japanese firm Setouchi Holdings. During October of that year, the acquisition of Quest Aircraft was finalised, in so expanding Daher's North American footprint and to merger its sales efforts with the former SOCATA's own TBM turbo aircraft series. If the Kodiak looks familiar, then go thinking about a Cessna Caravan 200B, then you certainly would have been on the right track. From a distance and even when you get quite close to the Kodiak it does look like a slightly taller chunkier 200B Caravan, and it is powered by the similar engine in the Pratt & Whitney Canada PT6A-34 750 hp were as the Caravan uses the PT6A-140 868 hp (647 kW). It's a utility aircraft, a bit noted as a bit more frumpy than the C208, but also well regarded as an all round capable aircraft. Design of the Kodiak began in 1999, it made its maiden flight on October 16, 2004, and was certified on 31 May 2007 before the first delivery in January 2008. By 2021, 300 Kodiaks have been delivered and production is still ongoing. The Kodiak is special to Thranda Design as well. It was their first aircraft released as a solo developer since moving on from Carenado in 2016. Created by Dan Klaue, the Canadian is very proficient in developing aircraft for X-Plane (Carenado had a fleet of 55 aircraft at the end) and was known mostly for his Embraer ERJ 140 Regional Jet now a decade ago. You don't have to acclaim the work of Daniel Klaue, as his talent is spread all over the X-Plane Simulator for ideas and forward looking features. Thranda Design pushes that aspect to the limit as with on the early Kodiak, it came first with the "Dynamic Generation Series" DGS, which takes full advantage of X-Plane's flexibility for in-sim, real-time modifications to a currently loaded plane. That DGS and other outstanding features will be seen below. This is an all new aircraft for X-Plane 12. Notable the Quest moniker will stay on the earlier X-Plane 11 aircraft, and this new aircraft will be branded the "Daher" Kodiak, and the Daher aircraft will only be available for X-Plane 12 as the with the latest features, 8K textures are also not transferable. As noted, The Kodiak comes with 8K textures, a huge pixel area 7680 x 4320. Just because it is 8K doesn't mean that you need a 8Gb Graphic Card to run them. 4 Gb VRAM is still recommended as Minimum. And 8 Gb+ VRAM is however recommended as normal. But like with the earlier Thranda releases, they had more than one 4K texture size, sometimes two 4K textures to fill in the same 8K area. So in reality you are only using the 8K to fill the same gap of the two 4K set of textures before. So Graphic Card size is not the issue, if you can run your current Thranda aircraft with your current graphic card size, then the Kodiak will be exactly the same, in fact even a bit more efficient in that it only has to load in the one texture sheet, rather than the old 2(K)or 4(K) texture sheets. As for all this release year's aircraft. X-Plane 12 creates a very different feel and look in the Simulator, a 3d look, or another level of realism. The Quest Kodiak was already very good in detail, but here it just jumps out at you in it's superb quality. Obviously more detailed and now better processed with those massive 8k textures, you feel just this aircraft, and it is very much alive on your screen. Don't call me "frumpy", it does look a bit that way with the cargo pod attached, more Caravan without it... just with a more fuller heavier tail section. There are also two other variants as part of the package.... a Cargo version, and an Amphibian seaplane (the Amphibian can also be set in both passenger and cargo configurations), but there is no "Float" variant, only the landwheels. Although it looks the same outwardly, the X-Plane 12 version is actually quite different in it's design, there is a new 3D mesh throughout, based on actual CAD model of the real plane for modeling perfection, with high quality textures with over over 1000 pix/m detail. And it shows... Not only do you get the panels and rivets, but the indentations of the rivets as well in the metal, even skin ripples in the aluminium, everything shows off the absolute realism presented here. Door (external) hinges, vents and fairings are all as on the real aircraft, and their are the vortex generators all over the aircraft, main wings and even on the horizontal stabiliser. Obviously it's all hard to fault anything as it is all so good, certainly a large step up from the X-Plane 11 modeling and quality. The original aircraft was quite glossy, but here we are X-Plane 12 glossy, glossy, as that has become the normal. As previously noted, there the discontinuous leading edge (also known as a leading edge cuff) on the outboard parts of the wing, it is there to improve the stall and spin characteristics of the aircraft. It is that at high angles of attack the cuff discontinuity generates a vortex that acts as a fence, preventing the separated flow from progressing outboard. The lift slope has a flatter top and the stall angle is delayed to a higher angle. To reach high angles of attack, the outboard airfoil has to be drooped, some experiments investigating "exaggerated" drooped leading edges. The physical reason for the cuff effect is not actually clearly explained. Here that effect is extremely well done... Wingtip light fittings (Landing) and navigation/strobe are perfectly done in detail. Flap tracks are well modeled with internal springs highly visible, Flaps are 0º-10º-20º-35º, notable that the Kodiak is a STOL (Short Takeoff and Landing) aircraft, for rough runways. Window reflections come with realistic scratches and imperfections, but it's not over done, or could be noted as "just a few, here and there", There is however a very nice green tint on all the windows (there is the option to hide, or lighten the window reflections), but the tinting gives the aircraft a nice quality look. Standout detail is the fully modeled Pratt & Whitney Canada PT6A-34, under the front engine bay cowlings, click to open and admire the overwhelming detail of the powerplant and it's ancillary components. Overall the detail and detailing is of course totally superb... It's a Thranda of course. Notable is what you pay for. If you pay more you get in that extra detail, the minute intricate detailing, but the Thranda Kodiak is priced only around sub-$35, so the payoff here is that you get all this extreme detailing and modeling, and at a value price. Internally you have a load of options. First there are two different cabin layouts with "Timberline" and "Executive" decors. Executive is a bright white/cream environment with grey chairs in a Club + 2 seating layout, in the club arena there are also two folding out (animated) work tables. Timberline is a darker more browny sort of interior fit-out. Here you have eight seats two per row. Seats are now a brown/tan matching a beige wall lining, both interiors feel very, very different in style and taste. But the seating detail is excellent and has great quality materials. Cargo is an empty rear space, unless to add up a cargo load by the weight, then it get quite full in here... Cargo uses the Timberline decor interior and is 49 inches (1.2 meters) in height and width. Instrument Panel At first it feels and looks like the same instrument panel as in the Quest XP11. But it's not, in the closer detail it is different, the layout is almost exactly the same however... as it is a Garmin G1000 Avionics suite in a three screen PFD-MFD-PFD display layout. Twin Yokes are sublime... they were nice and chunky on the Quest, but here you can almost small the leather and admire the stitching. Electric Trim and PTT are on the left pilot's yoke (PTT on the right yoke), and either or both Yokes can be hidden. "Kodiak" also replaces the earlier "Quest" logo on the front plate is a nice attention to detail. The panel itself has a very nice mottled effect, that gives it a realism in the metal, ditto the really lovely huge glareshield, also authentic and very feelable. Under the panel and it is highly detailed, not only with the "Kodiak" branded rudder pedals, but also the rear detail. Note the toe-brake effect. Central tall tower throttle quadrant, is also very Caravan in design and even look, only difference is the (working/active) Circuit breakers (fuses) in the front. Coloured Throttle, Propeller and (Fuel) Conditioner levers, are a tight formation, with left an "Emergency Power" lever to get more boost and out also of trouble. Far left is the nice Trim Wheel, far right is the Flap selector. Aileron Trim buttons are set above, and the rudder trim is top left console. The Kodiak unlike the other Thranda instrument panel layouts, only uses the three display G100 setup, ... so there is no build your own DGS panel option here, there is only this one, so the analog dials are out... Power off and it is still a black hole of and Instrument Panel, just like in the earlier Quest XP11, so switch on the power and only the both PFD (Primary Flight Displays) turn on, turn on the Avionics power and the central MFD (Multi-Functional Display )also then switches on. All three PFD/MFD pop-out on windows, panels are also moveable and scalable for home builders. Turning on the third power switch "AUX BUS",(arrowed) will turn on the AC (Airconditioning) Systems panel, that has a pop-up window. There are also two other selectable features on the G1000 system that are in the Menu. First is the switch between having the S-TEC Fifty Five X Autopilot on the facia, or to use the G1000 Bezel autopilot controls. The S-Tec also pops-out for ease of use. The second feature is the selectable standard blue/brown Artificial Horizon, or the "Synthetic Vision" mode. Honestly I'm not overly impressed by the current Synthetic vision screen, so will keep to the standard Horizon format, Lower panel left is the power (rocker) and starter switches, lighting switches and Ice protection. Two Hobbs meters covers flight and engine running times. Oxygen capacity indicator is clever and to the right panel there is a small AC display that covers Cabin Temp, and fan controls that all work and if you increase the fan speed you should be able to hear the fan noise in the background... Left vertical are the three analog backup instruments, Airspeed, Artificial Horizon and Altitude. The great original feature of moving eye air vents on the panel and on the roof, are still the same in here, as you can not only can you move the direction of the vent, but the internal airflow cover as well. There are four vents on the panel and the two vents overhead. Garmin G1000 Avionics is the standard Laminar Research G1000 PFD (Primary Flight Display), and MFD (Multi-Functional Display) with the radio controls set between the displays, nothing to learn here if you have used the default avionics before. The installation though is very nice and feels high quality. Original Quest Kodiak had a Carenado adaption G1000 back in 2016, but it's now all or only the updated Laminar version. PFD (Primary Flight Display) is very good with the large Artificial Horizon dominating the screen with the Speed and Altitude (with built in Vertical Speed) tapes either side, Rate of turn and FD (Flight Director) are all present. Lower is the Heading rose with built in Heading, Wind (3 options), CRS (Course) DME, NAV 1, NAV 2 and OBS. There is the option to put a small map on the PFD but I never do (it makes the display too crowded). All Radio, Autopilot (AP) settings and data are across the top banner of the panel. Note the inbuilt warnings panel centre right. The secondary display is MFD or MAP/Navigation panel which covers also all the (EIS) engine outputs which are in two versions with one visual and one in data. The colourful engine readouts covered are on page one; Top three segments cover both pages, with; TRQ (Torque), ITT, NP RPM, NG Readouts... Fuel Flow (Gallons Per Hour), RPM, Oil Pressure, Oil Temp, Amps, Volts, Fuel quantity for both tanks (320 gal). Lower are the Flaps and both Trims (positions). "System" switch (data) covers the same TRQ, ITT and NP, NG top, "Fuel" page (data) covers Fuel Calculations in FFLOW GPH (Gallons Per Hour), Fuel Pressure PSI, Fuel quantity (L/R)... Fuel Totalizer LB REM (Remain), LB USED... (Electrical) Volts and Amps, Gen A, Alt A, Bus 1v and Bus 2v. Lower screen (menu) are DEC Fuel, INC Fuel and RST Fuel options. Overhead on the roof are the two master Fuel valves, one for each wing tank, and an overhead lighting panel, and nice animated moveable shades. _________________ Lighting The lighting system on the Kodiak is really in two areas... one for the panel and two for the spot overhead lighting. The panel has two knobs with three adjustments. Outer right knob is the Switches panel (highlights) itself, but there is a mostly hidden inner knob that lights the LED lights under the glareshield and this is the one you use the most. The second left knob is the Instrument lights (inner) and glareshield LED lights (outer). The downcasting LED's feel far more dim than I remember, they were quite a lot brighter on the Quest XP11 version? There are two spots overhead and they are fully adjustable to put the spots right where you want them. There are eight spot lights in the rear for each seat that are again fully adjustable, and two overhead lights from a double way switch on the lighting panel... all interior lighting can be turned on or off via one switch in the General menu, you can switch off/on the external lighting the same way. Externally each outer wing has a taxi and landing light, a beacon strobe on the roof, navigation lights and strobes on the wingtips. However the beacon and the rear white navigation light also feels a bit weak. _________________ Menu Thranda's Menus are very feature rich and highly detailed. There is a popout TAB under the arrow, that can be (mouse) scrolled to hide it, that is if you don't like these sort of items crowding your screen (I don't). The Menu system includes the "Dynamic Generation Series" or DGS, a Thranda speciality feature that takes full advantage of X-Plane's flexibility for in-sim, real-time modifications. As noted the "Menu" Tab (arrow) is far left middle of your screen, this will activate the Pop-Out Menu... The Menu has seven menu tabs in; GENERAL, LIVERY, WEIGHT/BAL, CAMERA, AUDIO/SLEW and MISC (Miscellaneous). Basically it is the Thranda default menu, but here without the "Panel" Tab. Menu - General The menu "General" sections covers quite a lot of options, the layout is highly detailed and very comprehensive. General menu selections cover; MODE: Realistic or Simplified, Electric Tug, Window and Instrument Panel Reflections on/off, Startup Running on/off (sets aircraft to full running mode), GPU on/off, Chocks and Brakes on/off. Cargo Pod, when selected then shows the bin door option. Toggles between "Realistic" and "Simplified", and mainly pertains to the engine. In "Realistic" mode, you're much more likely to over-torque or otherwise damage the engine, if you're not flying the plane in such a way as to keep within limits outlined in the POH. If you DO over- torque the engine, the shaft will snap with a horrific sound, and the remaining turbine components will audibly grind against the housing. The engine will catch fire, and the various annunciator lights will go on, and the cabin will fill with smoke? Three selections placed right cover group items, but any one item can be also accessed via "Click Spots" and can be individually selected or hidden via the aircraft graphic. "ALL COVERS" will select engine inlet/outlet covers and pitot covers, "ALL TIE-DOWNS" for rear fuselage and wing tie-downs and "ALL DOORS" for both the cockpit door and rear cabin split doors. All EXT - External Lights can be switched on and off as can the ALL INT - Internal lights. The GPU cart (Ground Power Unit) is massive for an aircraft this size, but it is well done. The "Electric Tug" that can be used to move the aircraft around on the ground via your joystick (left,right-forward,backwards). Static Items include Engine Inlet covers, Pitot covers, Tail stand and various Tie-Downs. There is built in "Checklist" (lower right menu, arrowed), and very good it is. But also again changed back to a simple black on red graphic, with white cross-off line. The Checklist can the moved and scaled anywhere on the screen, but the list can't be reset back again to just the red restart list? and there are 18 separate pages of the list to uncheck? Menu - Liveries Second Menu option is "Liveries", there are two options here with the first being "PAINTED LIVERIES". There are altogether 10 liveries or two blank and eight designs, and all are of extremely high quality and creative flare with the package. Note... Only two liveries are delivered in the download package in DYNAMIC LIVERIES and the House Thranda. To access the rest you have to run the supplied "Skunkcrafts" updater, then all the liveries below are loaded into your aircraft liveries folder. Any livery can be used with both the passenger and cargo variants, but some suit more than others... Two of the liveries are noted as "DynamicLiveryResources" and "ZZTEMPLATELIVERY", these are the current selected "Dynamic Liveries". Dynamic Liveries Not happy with any of those designs, then why not create your own livery! With their earlier releases of their Kodiak and with the PC-6, PZL-104 and Caravan. Then Thranda introduced a clever feature of a way to design your own livery. This is done by switching from PAINTED LIVERIES to DYNAMIC LIVERIES top. Two liveries are "Dynamic" in resources (White)... another New feature is the (Quick) selection of Dirt (Ext) Externally, Scratches and Dirt (Int) Internally. Via three percentage selections you can adjust the amount of Dirt, Scratches and Dirt Int on the aircraft (0%-255%) and apply it instantly.So you can have either a pristine or a very grubby aircraft with just a twirl of the numbers. This can be applied to any of the liveries. You have a menu to select on the right that can colour a certain part of the aircraft, like the Roof, Wing, Tail or Wing tips. Select which one you want and then adjust the three RGB colours for that certain area, and the selected colour (here white) is shown in the square. When done you can "SAVE" or ADD the livery and then "APPLY" it to the aircraft. The conversion takes a few minutes with some weird screen changes, but the results are excellent and now in your own design... There are already 30 preselected selections in their various designs, all are very good, and like noted you can add in your own version to the list. New to the Dynamic Livery application is ERA options in "Modern' or "Classic".... of course personal taste is optional... Menu - Weight/Bal The Kodiak also has a great Weight and Balance menu. Lbs and Kgs which can be selected and changed via the toggle... Lbs In Green, and Kgs in Blue. There is the weight selection of all the seats,in both Timberline and Executive Selections. Missing is the usual Thranda seat removable X option, here you can only select the layout of the cabin and the seat weight. Fuel can be added and the amounts are then shown and are adjustable as well in the menu (above)... Pilot, passengers and cargo can all be set for individual weights and all are selected via a scrollwheel... and then all of the CofG (Centre of Gravity) parameters are all shown on a graph, go too far or too heavy and the CofG goes red. When done you can Save the Configuration and then later re-load it, or press Load to add in the set weights. Selecting the Cargo Pod option gives you an extra set of weight zones, add in the weight and you get bags in the pod, same with the rear cargo area, increase the weight and you get bags and boxes. But obviously there is a compromise? If you want a full passenger and baggage load, then you can't have full fuel tanks, as the excess weight takes you over the weight and the CofG limits as shown on the graph. For eight passengers (with maybe a bag thrown in) then can you have your full tanks and the longer range and not go into the red. You can really pile a lot into the rear cargo/baggage section and all the cargo is of very high quality. Set the weight in the front seats (pilot and co-pilot), then you get fully animated pilots in the aircraft, they will also disappear if the electrical power is switched off and chocks added. Menu - Camera There is a camera feature under the menu "Camera" selection. The left side of the panel is the "Walkaround" views, just pick the dot viewpoint you want to see to rotate around the aircraft. To the right is the default views can be selected via a menu, or press the keypad to select the view. The FoV or "Field of View" is adjustable via a slider. Menu - Audio/Slew Sound can be adjusted via the sound menu. There are seven slider selections with: Master, Aircraft External, Aircraft Internal, CoPilot, Radios, Environmental and User Interface. One other sound setting is on the Flap panel... As noted, on the right and left of the panel you get the audio simulation of an active noise canceling headset, which is seen as wearing a headset. Sound quality is beyond excellent as it is a built in audio mixer, so you can individually control the audio channels in real-time and you can adjust the volumes while hearing them play. Slew mode allows you to manually move the aircraft around in a disconnected X-Plane space. It functions by temporarily overriding the various aerodynamic and physical forces on the X-Plane settings, it is to allow the user to reposition the plane as desired. This feature is however highly touchy and it is used mostly only really with the Amphibian/Floats option in docking the aircraft to say a pier or marina. Menu - MISC The Misc (Miscellaneous) page has four panels that cover (Exterior) Fairings, Ski's,Tyres/Tundra, Mud Flaps and Cargo Pod, (Interior) Timberline or Executive layouts, Pilots (swap)... the noted Synthetic Vision and Autopilot S-Tec/G1000 Bezel and Anti-Ice Equipped. The usual DynaFeel feature usually on this tab has been removed. Shown here are; Fairings and Ski's... Mud Flaps centre, then lower Regular and Tundra tires. You can also swap around the pilots, in Male/Female, or Female/Male in the drivers seat. Last option here on the MISC tab is that you can make the Anti-Ice Panel active. The only menu option change on the Amphibian, is that you can choose the option of having the rear horizonal stabliser winglets visible or not via it's menu selection. _________________ Flying the Daher Kodiak 100 You sit up high and forward in the Kodiak, almost on a pedestal. The 208B feels almost sportscar like compared to this machine, but the Kodiak is what it is, in being a workhorse, getting people or cargo in and out of remote airstrips. It's a medium sized aircraft, not say big and truck like, or even a small GA or bush plane like, it's sort of in the middle of say a big Utility (say a RAM or Ford F160) purposeful, move stuff! Roof Fuel valves on... then set the Conditioner lever (far right blue one), to LOW IDLE. Flaps 10º. Trim is done via the large Trim wheel and the TO (take Off) setting is on the lower left of the MFD in the Trims. Ignition switch ON, then hit the STARTER Switch up... and then the familiar turbine Pratt & Whitney Canada PT6A-34 start whine comes from the front of the aircraft. Love this big and powerful monster of an engine... So open the small window for the full effects of the engine sounds which are simply excellent. And if you are of keen hearing then you should note also the friction sounds on the yoke and throttle lever as you move them, as well as independent sounds for brakes, oxygen hissing and electrical inverter buzzing sounds. The P&W soon settles down to a slight roar, and your ready to go... I found in the earlier Quest that I couldn't get a lower thrust for taxiing, a leftover issue from Carenado's as they always had a high thrust RPM on the ground that drove me nuts... here if you keep the COND LOW IDLE setting, in then that earlier over thrust issue goes away, yes being in low idle does mean far more throttle to move the Kodiak off the line, but more importantly you now have a much larger and lower thrust range to find the right taxi speed, so yes I really like it. I adjust the eye air vents to blow fresh air into my face, A small fan on top of the computer screen can give you the same effect! In X-Plane 12 I found that I have far more rudder pedal movement steering while taxiing, its very good here in keeping the Kodiak centred on the line, I only have to revert to the YAW/Tiller movements to the tight 90º turns. Ready enter KRSW Runway 06... My weight is set quite heavy at 3028Kgs... so the Kodiak is going to be a little ponderous not only in the takeoff, but the handling in the air. Entering 06, I put the COND to the HIGH setting, and then you get Upmph as the engine revs upwards... tons more power!. I go almost to the end of the (flap) white line or 105knts before pulling back on the Yoke and then set a positive climb of around 800 fpm, Rate of climb is around 1,371 ft/min (6.96 m/s), quite high, but everything always depends on your weight. Bank to the left and the Kodiak feels really, really good, and far better than I remembered earlier? Okay, time for a confession... I wasn't really dazzled by the earlier Quest Kodiak, maybe because I was so in love with the Caravan. It was nice aircraft but didn't really leave a flying impression on my personality, I flew it I remember only once or twice. But this X-Plane 12 version is a very different sort of aircraft than I remember... far more responsive, flows in the turn (banks) better, and even climbs smoother... "My God!" I'm really liking this aircraft a lot this time around. The better sounds really help... Now there are high-fidelity, multi-track FMOD2 sounds, simulating multiple layers of engine and prop sounds, depending on camera angle, distance, atmospheric conditions, but it is the superb "woo, wooo... roar" as the aircraft climbs hard under the weight. Upping the Flaps to zero, it does give you a little descent bump, but then the speed quickly rises as you power faster forward. You can still use the Emergency (EMER PWR) lever for more power if you need even more of it, but use it sparingly as it can blow your motor to kingdom come... .... as a precaution there is a "Overspeed" governor on the left of the panel to regulate the power. The Laminar G1000 Avionics feel far better than the original Carenado fitout. Back then it was the other way around with the very basic Laminar system. So that just shows how much change of the Avionics in X-Plane over the last four years, both screens are now excellent as LAL (116.00) comes on line, as I reach my 5,000 ft cruise height. I noted in the earlier (Quest) review "The Kodiak is quite sensitive to higher speeds. This is not an aircraft to set the Autopilot and the throttle and then just have a nap, because you will find if it goes a little too fast it will start to pitch and even if the autopilot trim is trying (hard) to compensate for this unseen barrier. So it is the awareness of this speed sensitive area in that it is you that has to find that sweet spot between the best cruise speed and the start of the boundary of the aircraft's aerodynamics." Humm... not finding that aspect here, I'm cruising nicely at 155 kts and she's all calm and collected, basically in X-Plane 12 it just keeps on smoothly cruising along... with the those very comforting, turn up the sound at the "woo, wooo... roar" in that it gets very memorizing as you sync in with the sound, but lets not get the wrong impression that these sounds are repetitive, because they are absolutely not. Kodiak's cruise speed is 211 mph (339 km/h, 183 kn) at a light weight of course, and a range of 1,303 mi (2,096 km, 1,132 nmi). The service ceiling is exactly the same as the Caravan at 25,000 ft (7,600 m). You notice the haze off the exhausts at full power, it sits lower left in the screen, but comforting in the effects mean the engine is running smoothly. Press the RED button between the PFD and the MFD and the G1000 system goes into safety mode, or "Get Home" mode as the two screens combine both flying instruments and engine performance. I'm covering 258 nm, almost the length of Florida, USA from KRSW (South West Florida) to Jacksonville JAX, at GATORS I turn 035º to head finally to KJAX, now only 55nm ahead. 28nm out from JAX and I start my descent to 1,500 ft, adjust the power back a little as I go down to keep the speed high, and use a decent of 800 fpm to adjust my flight level, once at a lower height, then up the power a little to compensate and keep the speed current. Now Jacksonville International is directly ahead, but I am going to circuit to the east, to land on Rwy 26. I now make my turn to the east and parallel fly to Runway 08/26 in the landing circuit. While cruising past JAX, my thoughts go to in what makes a very good simulation? Importantly first is the totally realistic handing of the aircraft, the way it flies, and the way it feels in your control movements, secondary is that the simulation is clean... meaning that from go (startup) to stop (shutdown) the simulation is perfectly non-distracting from the flying, no bugs and certainly no CTD (Crash to Desktop) freezes. Being a reviewer then the Replay is extremely important to me, the first two here are excellent from Thranda, but with the Kodiak I have had a few replay crashes, but thankfully any replays saved always worked, bugs a couple, but overall I found the Kodiak an extremely solid simulation. Jacksonville flows past below, then a 90º turn to DALTN in the beams of IPEK (110.3) ILS, I'm not using the ILS to land, but using the beams to line up my approach to RWY 26. Now in the approach phase and down to a 1,000 ft... ... Flap movements are very clunky, slight lift with every new degree of flap setting used, so you have to get the speed to flap change right, tricky is the aircraft weight pulls you down, creating the opposite in lift, it would be an interesting experiment at a lighter weight on the different effects of the aircraft in this critical approach and landing phase. You sort of settle down at 81-82 knts, full flap with about a 250 fpm descent rate, the Kodiak feels solid, really nice handling, but you feel the weight under the controls... 75 knts over the threshold Slight flare and the Kodiak floats? I'm trying to find the best descent window, and not hit the ground hard(ish), but I have found lately that X-Plane has closed this ground effect window to a very tight one, that is being felt in various aircraft, time for this X-Plane area to be refined? You can set the "Toggle thrust reverse" to give you a "Beta", detent setting that switches on the reverse prop, and the "howl" of the PT6A engine makes as it turns the air in the opposite direction, then in slowing down the aircraft... Back to the taxiing and into the LOW IDLE (COND) to control the thrust, really liking the change here in the better ground conditions... First time into FS Designs KJAX since my review... honestly it looks far better than I remember, loving it, like really liking this far more better Daher (ex Quest) Kodiak as well, its that everything is better here, but still really brilliant value at only $1 more in price than it's X-Plane 11 release four years ago, but you still get tons more in quality and detail, and even better flying dynamics. Remember also the price covers updates and services for the full X-Plane 12 run.... so what is not to like. ___________________________ Summary The Quest Kodiak was the first release from Thranda Design back in 2016. It was their first aircraft released as a solo developer since moving on from Carenado in 2016. Created by Dan Klaue, the Canadian is one of the most proficient developers of X-Plane aircraft, not only in design, but for their excellent features and unique ideas like their acclaimed "Dynamic Generation Series" DGS. Since the release of the original Kodiak, the Quest Aircraft Company was bought by the the French aircraft manufacturer Daher, including the designs and also the production in 2019 from the Japanese firm Setouchi Holdings. So this is an all new aircraft for X-Plane 12. Notable the Quest moniker will stay on the earlier X-Plane 11 aircraft, and this new aircraft will be branded the "Daher" Kodiak, and the Daher aircraft will only be available for X-Plane 12 as the latest features, 8K textures are not transferable. Three versions are included in the Kodiak package, Passenger, Cargo and separate Amphibian, with three interior designs of "Executive" and "Timberline" decors, plus the empty Cargo arrangement (all can be used on the Amphibian variant), animated pilots can also swap front seats. Thranda Design are one of the best developers in X-Plane, their history and quality is legendary. So that quality build and detailing is always going to be significant right from the start, and so it is here again in being... exceptional. In every area and detail, modeling, fine details, glass and the interior materials. Menus are also excellent with menu tabs in; GENERAL, LIVERY, WEIGHT/BAL, CAMERA, AUDIO/SLEW and MISC (Miscellaneous), that covers all the options and including sound, weights and balances also including graphs, walk-around and camera options and general static elements including chocks, tundra tyres, pitot covers, ski's, Mud flaps tie-downs and excellent detailed Pratt & Whitney Canada PT6A-34 engine. Settings include pilot/passenger weights, baggage weight and visually placed bags, cargo in the rear of the aircraft and in the large rear baggage area. A large Cargo Pod with bags by weight is also offered. Notable is that the usual Thranda "Panel" analog DGS option is not used here, but the full Laminar Research Garmin G1000 three display Avionics suite, it's very good and now highly detailed. Lighting is very good, but I would like a bit more under glaresheil brightness to match the earlier XP11 Quest lighting, otherwise excellent. Sounds are far, far better than the Quest version, really love those powerful PT6A sounds, when climbing and in cruise... Doppler High fidelity, multi-track FMOD2 sounds, simulating multiple layers of engine and prop sounds, depending on camera angle, distance, atmospheric conditions, yes a really big advancement from the earlier acoustics. Minuses are minimal... lighting externally (taxi/landing) is not good in the daylight (Laminar issue?), aircraft can be dark in overcast conditions, and selecting the replay can cause a nasty CTD (but not in a saved Replay) Note... 8K textures are now used, but have no effect on framerate. Obviously with a Thranda Aircraft I just can't list every feature, but they are some of of the very best utility aircraft in the X-Plane Simulator today. Being honest I didn't really gel with the earlier Quest XP11 Kodiak, it was very good, make no mistake, but there was something that I didn't quite tune into. But four years can make a difference, more so with the revision in X-Plane 12. In every area, flying dynamics, sound and always in the quality of the aircraft, it has been lifted far, far higher than I remember, so this is a brilliant change for the aircraft, you can say it has refined it up to the same high quality standard as the other X-Plane 12 releases from Thranda Design, that is a big ask from the original, but that overall upgraded feel is in there and well worthy of the upgrade price offered at only a $1 more than the original. Any Thranda Design aircraft is a worthy addition to your virtual hangar, and the Daher Kodiak 100, is certainly one of the best in value and features... So all you can finally say is that the aircraft comes... Highly Recommended! ___________________________ The Daher Kodiak 100 - DGS Series XP12 by Thranda Design is now available from the X-Plane.Org Store here: Daher Kodiak 100 - DGS Series XP12 Price at time of writing US$34.95 Requirements: X-Plane 12 (not for XP11) Windows, Mac or Linux 8 GB+ VRAM Recommended Current version 1.0 (July 20th 2023) This aircraft is a full upgrade to X-Plane 12 only, so there are no upgrade deals for the aircraft from the developer. Installation and documents: download for the Daher Kodiak is 1.57Gb (not including liveries) and the aircraft is deposited in the "General Aviation" X-Plane folder. Full Installation is 3.86Gb (including downloaded liveries) Documents supplied is: Changelog.txt Thranda Daher Kodiak for XP12 Manual.pdf Thranda Joystick Settings.pdf Thranda Kodiak Quick Reference Guide v2.pdf X-Plane G1000 Manual.pdf There is a huge amount of Documentation provided here, not only for the Thranda Kodiak 100, including performance charts, reference guides, but also X-Plane/hardware settings and custom and default avionics. All updates are via the built-in Skunkcrafts Updater Designed by Thranda Design Support forum for the Daher Kodiak 100 ___________________________ Review System Specifications Windows - 12th Gen IS1700 Core i7 12700K 12 Core 3.60 GHz CPU - 64bit -32 Gb single 1067 Mhz DDR4 2133 - PNY GeForce RTX 3080 10GB XLR8 - Samsung 970 EVO+ 2TB SSD Software: - Windows 11 Pro - X-Plane 12.05r1 (This is a Release Candidate review). Plugins: Traffic Global - JustFlight-Traffic (X-Plane.OrgStore) US$52.99 : Global SFD plugin US$30.00 : RK Apps XPRealistic v2 - US$34.99 Scenery or Aircraft - KRSW - Southwest Florida International Airport by Aerosoft (X-Plane.OrgStore) - US$24.99 - KJAX - Jacksonville International Airport by FSDesigns (X-Plane.OrgStore) - US$19.99 - Full X-PlaneReviews JAX review is here; Scenery Review - KJAX -Jacksonville International Airport by FS Designs ___________________________ Aircraft Review by Stephen Dutton 25th July 2023 Copyright©2023: X-Plane Reviews (Disclaimer. All images and text in this review are the work and property of X-PlaneReviews, no sharing or copy of the content is allowed without consent from the author as per copyright conditions) All Rights Reserved
  15. Aircraft Review : BN-2A Islander XP12 by Thranda Design Britten-Norman was formed in 1953 for the purpose of converting and operating agricultural aircraft on the Isle of Wright in the Southern United Kingdom. John Britten and Desmond Norman or the BN of the title, had observed the rapid growth of the commuter airline sector, and concluded that capacity was of a higher value to these operators than either range or cruising speed. On 13 June 1965, the first prototype BN-2 Islander conducted its maiden flight. It was powered by a pair of Rolls-Royce/Continental IO-360B piston engines; only four days later, the prototype aircraft appeared at the Paris Air Show. The IO-360B engines were later replaced by more powerful Lycoming O-540-E engines, which were located further outboard on the wings, for superior single-engine climb performance. The Britten-Norman BN-2 Islander is a high-wing cantilever monoplane with a rectangular fuselage and two wing-mounted engines; early aircraft were equipped with a pair of piston engines while later production models may be alternatively fitted with turboprop engines in their place. The rectangular cross section fuselage, which is furnished with a conventional tail unit and fixed tricycle landing gear, can accommodate a single pilot and up to nine passengers in a commuter configuration, or operate in a mixed cargo/passenger capacity. The X-Plane Simulator is no stranger to the talents of one of it's premier developers, Daniel Klaue. Klaue has been at the forefront of X-Plane aircraft development now for over a decade, first with his own designs, then as custodian involved with Carenado, that the partnership produced over 50 aircraft for X-Plane version 10/11. Then Daniel formed his own development house... Thranda Design, and has since produced some of the most significant aircraft in the X-Plane Simulator. First with Utility and bush aircraft then with three Cessnas in the 208 Grand Caravan, U206G Stationair, and finally the 337 Skymaster earlier this year. This is Thranda Design's latest release in the BN-2A Islander for X-Plane 12, and to note there will be no X-Plane 11 version of the aircraft. Being a Thranda design, features and quality abound including the Dynamic Generation Series or DGS, feature this is a Thranda speciality that takes full advantage of X-Plane's flexibility for in-sim, real-time modifications. BN-2A Islander XP12 First let us clear something up. The BN-2A comes for the first time with 8K textures, a huge pixel area 7680 x 4320. Just because it is 8K doesn't mean that you need a 8Gb Graphic Card to run them. 4 Gb VRAM is still recommended as Minimum. And 8 Gb+ VRAM is however recommended as normal. But like with the earlier Thranda releases, they had more than one 4K texture size, sometimes two 4K textures to fill in the same 8K area. So in reality you are only using the 8K to fill the same gap of the two 4K set of textures before. So Graphic Card size is not the issue, if you can run your current Thranda aircraft with your current graphic card size, then the BN-2A will be exactly the same, in fact even a bit more efficient in that it only has to load in the one texture sheet, rather than the old 2(K)or 4(K) texture sheets. The Islander is a utility aircraft. Its nothing flash, not fast but can carry ten (including the pilot). This makes it perfect for inter-island transfers, even close spoke and hub operations... it's primary job ferrying people to and thro, an AirTaxi. It's sixties design is very evident, even boxy, but I have a soft spot for Islanders, in their shape and design... I'm English after all. Detail and detailing is of course superb... It's a Thranda of course. Notable is what you pay for. If you pay more you get that extra detail, the minute intricate detailing, but the Thranda BN-2A is only priced around sub-$35, so the payoff here is that your extreme detailing at a value price. Modeling in shape, panel design and fit is faultless. You see every panel, rivets and area (fuselage) strengthening, and it is all there in absolute superb detail. Note most door/access doors are external hinges, and all have been well and individually created for authenticity. The detail around the inboard trailing edge is exceptional, notable also are all the rain gutters (rear left doors). Although the aircraft is quite simple in design, the detail is exceptional here, note again the horizontal stabilizer and rudder trims. Overall it is quite impressive. It's a lovely wing... again nothing flashy in design, but note the lovely sweet upturn at the rear of the tip. Yes it is all very professionally skillfully modeled. Underside is excellent with aileron balance weights, air pressure probes, flap tracks and fairings The BN-2A comes with two Lycoming O-540-E4C5 engines, pushing out 194 kW/260 HP per engine at 2,700 RPM. There is the 250-B17C turboprop engines configuration rated at 320 shp, and known as the BN-2T, but here we have the earlier more basic installation. And boy is the engine installation nice to look at, magnificent! Highlights are cowling shape, under extra cooling snout, chrome spinners and a fully detailed front view of the Lycoming O-540-E4C5... rear are the excellent twin exhausts and air-breathing pipe. I really like the chrome cowling catches, they are some really nice detailing and highly visible from the cabin. Propellers are 2-Blade Hartzell, but some 2A's can use a STC 4-Blade conversion... the feathering (animated) detail is excellent. The undercarriage is very, very basic and utilitarian. Single nose wheel and long fairings on the twin-wheeled main gear was used to save on weight, personally I love this configuration that give the aircraft a sort of "Bird of Prey" look from a lot of angles, certainly from the head on orientation. Wheel and tyre detail is simply excellent, worn, tired, rusted... these wheels has seen many a wet salty runway (or even a beach up here in Scotland). Thranda has got the look and feel of the wheels perfect. Glass is another area of perfection. Deep thickness, beautifully reflective and tinted a dark green. Yes you can turn off the reflections if required. Note the smaller opening (actually quite large) access window built into the main front door window. Externally you can't fault this Thranda Islander, it is a perfect reproduction of the real aircraft. Basically the Islander has an odd door configuation. There is a door for the pilot (left), a door for the co-pilot and second/third row passengers (right), and a third door left rear for the rear-back seating in the aircraft. There is a large baggage hold door (but no cargo door) far rear left. In the cabin there are six individual seats (chairs) and a wide rear bench seat. Oddly the seating colour is a bright white? with nice dark blue tartan cloth inserts... why odd? Because this is a hard working utility aircraft, clean white is not going to last very long in this wear and tear environment is it... it looks very nice, but also a little out of place. If you are not crazy about this all white seating, there is already a tan-brown seat/carpet option on the X-Plane.Org; Thranda Islander Tan Interior 1.0.0 and others in dark/red/wood instrument panel/seat options. But I really like them, I like the colour scheme a lot, it is distinctively different, but still nice. Cabin sides are grey with a dark blue piping separator. The roof lining is masterful, rippled and brown with lovely chrome screws, mid-way down is a passenger sign, works as well... there is a large rear baggage area but we will look at that in a few moments. Instrument panel It is a crowded instrument panel, but also like the aircraft utilitarian. The Standard Six instruments are mounted separately on their own panel, of which I really like. Panel facia colour is a dark blue. Glareshield (not much overhang though) has a mottled vinyl surface, with a nicely done inserted avionics heat vent Yokes are nicely worn with use, and only a single red PTT button. The authentic Brittan-Norman logo is set centre. You can hide either yoke independently, so hide one or both... nice. Deep down in the footwells are the lovely chrome rudder pedals. The Toe-Brakes work independently from the moving rudder movement, and note the hydraulic containers on each brake pedal. Power on and the panel looks excellent. Usually we have an instrument description, but this is a Thranda DGS Series aircraft and it comes with a "Dynamic Panel", so we will cover the instruments in the menus. Lower left is the PS-Engineering PM1200 audio panel, then the Heater/De-Icing (Services) and "Lighting" and "Electrics" switchgear with Panel lighting adjutment and BAT (Battery) switch. Lower right is a working (active) Circuit Breaker (fuse) panel. Centre is the throttle quadrant, usual (Twin) Throttle, Propeller and Mixture levers, with the pitch trim wheel oddly on the right hand side of the quadrant and away from the pilot. Over your head there is a lot of instruments/switches in the headliner... Far left headliner are the Cabin Temps/Air controls, directly overhead are the four (two per engine) Magneto switches, with the "Port" (PORT) and "Starboard" (STBO) engine starter switch set middle. Note the large inset "spotlight" on the switchgear. Right is the Flap (UP-TO.-DOWN) indicator, with the Fuel Pump switch. Right side headliner are the two "Tip" tank fuel gauges. Central headiner/roof is basically the Fuel system. Both main Fuel gauges are front and centre with 65 US Gallons per main tank (Tip tanks are 29.5 US Gallons per tank) for a total fuel capacity of 190 US Gallons (1,140lbs,517.1kg). The switches below select between the main and tip tank reserves. You can select (or cross wing) to select from the other main tanks via the large Red and Green knobs. Top roof is the rudder trim knob and indicator. There is also a hanging Whiskey Compass in the pilot's eye-line left window. Instrument/Cabin lighting There is only one (single) large knob to adjust the instrument lighting, but there is also the option of "Lighting Posts" that create an added illumination of the instruments, which is very nice. There is the mentioned headlining switch illumination spotlight (very nice), and all the upper instruments are nice lit for use... ... in the cabin headliner there are ten seating spotlights, all can be adjusted (rotated) to shine the light were you want, there are also two baggage area lights as well. Notable is there is the setting to turn all ON or all OFF with the internal lighting, which is a time saver. Menu Thranda's Menus are very feature rich and highly detailed. There is a popout TAB under the arrow, that can be (mouse) scrolled to hide it, that is if you don't like these sort of items crowding your screen (I don't). The Menu system includes the "Dynamic Generation Series" or DGS, a Thranda speciality feature that takes full advantage of X-Plane's flexibility for in-sim, real-time modifications. As noted the "Menu" Tab (arrow) is far left middle of your screen, this will activate the Pop-Out Menu... The Menu has seven menu tabs in; GENERAL, LIVERY, WEIGHT/BAL, CAMERA, AUDIO/SLEW, PANEL and MISC (Miscellaneous). Basically it is the Thranda default menu. Menu - General The menu "General" sections covers quite a lot of options, the layout is highly detailed and very comprehensive. General menu selections cover; Electric Tug, Window and Instrument Panel Reflections on/off, Startup Running on/off, GPU on/off, Chocks and Brakes on/off. Note there is no "Cargopod" option with the BN-2A, a usual default feature. Three selections placed right cover group items, but any one item can be also accessed via "Click Spots" and can be individually selected or hidden via the aircraft graphic. "ALL COVERS" will select engine inlet/outlet covers and pitot covers, "ALL TIE-DOWNS" for rear fuselage and wing tie-downs and "ALL DOORS" for both the cockpit door and rear cabin doors. All EXT - External Lights can be switched on and off as can the ALL INT - Internal lights. The "Electric Tug" that can be used to move the aircraft around on the ground via your joystick (left,right-forward,backwards). Static Items include Engine Inlet covers, Pitot covers and Tie-Downs. There is built in "Checklist" (lower right menu, arrowed), and very good it is. But also again changed back to a simple black on white graphic (no cross-off line colours). You can have checklist pop-up, or in a window mode, and thankfully move the checklist pad around, and scale it even from the very small to the very large. The two lower arrows give navigation around the checklist pages. The action detail and hints in the lists are simply excellent and the checklist is fully detailed from Pre-Flight to Shutdown. Menu - Liveries Second Menu option is "Liveries", there are two options here with the first being "PAINTED LIVERIES". There are altogether 10 liveries or two blank and eight designs, and all are of extremely high quality and creative flare with the package. Oddly there is no Thranda house as default on the BN-2A? Two of the liveries are noted as "DynamicLiveryResources" and "ZZTEMPLATELIVERY", these are the current selected "Dynamic Liveries". Dynamic Liveries Not happy with any of those designs, then why not create your own livery! With their earlier releases of their Kodiak and with the PC-6, PZL-104 and Caravan. Then Thranda introduced a clever feature of a way to design your own livery. This is done by switching from PAINTED LIVERIES to DYNAMIC LIVERIES top. Two liveries are "Dynamic" in resources (White)... another New feature is the (Quick) selection of Dirt (Ext) Externally, Scratches and Dirt (Int) Internally. Via three percentage selections you can adjust the amount of Dirt, Scratches and Dirt Int on the aircraft (0%-255%) and apply it instantly.So you can have either a pristine or a very grubby aircraft with just a twirl of the numbers. This can be applied to any of the liveries. You have a menu to select on the right that can colour a certain part of the aircraft, like the Roof, Wing, Tail or Wing tips. Select which one you want and then adjust the RGB colours for that certain area, and the selected colour (here green) is shown in the square. it looks hard but you can easily design a very nice livery in about twenty minutes... the selections of Dirt (Ext), Scratches and Dirt (Int). Metal(ness) and surface Rough(ness) can also be added or adjusted as seen earlier... When done you can "SAVE" or ADD the livery and then "APPLY" it to the aircraft. The conversion takes a few minutes (arrowed below), but the results are excellent and in your own design... There are already 30 preselected selections in their various designs, all are very good, and like noted you can add in your own version to the list. New to the Dynamic Livery application is ERA options in "Modern' or "Classic".... of course personal taste is optional... Menu - Weight/Bal The Islander also has a great Weight and Balance menu. Lbs and Kgs which can be selected and changed via the toggle... Lbs In Green, and Kgs in Blue. There is the choice selection of all seats, four seats (front) and the large bench in the rear. Selection is via an X on the box for that seat that you want to remove from the rear cabin. Fuel can be added and the amounts are then shown and are adjustable as well in the menu (above)... both Main and Tip Tanks are available. Pilot, passengers and cargo can all be set for individual weights all selected via a scrollwheel... and then all of the CofG (Centre of Gravity) parameters are all shown on a graph, go too far or too heavy and the CofG goes red. When done you can Save the Configuration and then later re-load it, or press Load to add in the set weights. But obviously there is a compromise? If you want a full passenger and baggage load, then you can't have full fuel tanks, as the excess weight takes you over the weight and the CofG limits. For six passengers (with maybe a bag thrown in) then can you have your full tanks and the longer range and not go into the red. You can really pile a lot into the rear cargo/baggage section and all the cargo is of very high quality. Another option is if you hide the cabin chairs, and if the weight is set, it is replaced in same weight as baggage or cargo (containers). Set the weight in the front seats (pilot and co-pilot), then you get animated pilots in the aircraft, they will also disappear if the electrical power is switched off and chocks added. Menu - Camera There is a camera feature under the menu "Camera" selection. The left side of the panel is the "Walkaround" views, just pick the dot viewpoint you want to see to rotate around the aircraft. To the right is the default views can be selected via a menu, or press the keypad to select the view. The FoV or "Field of View" is adjustable via a slider. Menu - Audio/Slew Sound can be adjusted via the sound menu. There are seven slider selections with: Master, Aircraft External, Aircraft Internal, CoPilot, Radios, Environmental and User Interface. One other sound setting is on the Flap panel... As noted, on the right and left of the panel you get the audio simulation of an active noise canceling headset, which is seen as wearing a headset. Sound quality is beyond excellent as it is a built in audio mixer, so you can individually control the audio channels in real-time and you can adjust the volumes while hearing them play. Slew mode allows you to manually move the aircraft around in a disconnected X-Plane space. It functions by temporarily overriding the various aerodynamic and physical forces on the X-Plane settings, it is to allow the user to reposition the plane as desired. This feature is however highly touchy and it is mostly used with the floats option as used on the Thranda Caravan, Thranda Beaver and PC-6. I doubt that a Float option would come to the BN-2A, so this option is of little use to the aircraft. Menu - PANEL The sixth "PANEL" Tab option allows you to adjust or change the instruments and dials. First feature here is the lighting option we saw before, as you can add or takeaway the panel "Lighting Posts". (hint nice on). Scroll the "Panel Preset" number (arrowed) to see the extra six preset layouts (seven choices in all). Sometimes to restart you have to click to "Apply the Settings" for the GPS units. There are four panel options One panel option give you the Aspen EFD 1000 which is a self-contained multifunction digital display that is divided into a Primary Flight Display (PFD) in the top half, and an Electric Horizontal Situation Indicator (EHSI) in the lower half. As EDF 1000 systems go it is not as highly featured with the GPSS, MAP, 360 and Menu functions all not simulated... all the lower NAV1/NAV2/GPS selections are however available, as is the TPS (Tapes) see/hide option with the MIN (Minimums) selectable as well. and the PFD can be reversed with the EHSI. The EFD 1000 here can be used with the KFC225 Autopilot. The EFD 1000 PFD pops-out for convenience. Another Dynamic Generation Series or DGS feature is that you can customize the panel to your own personal layout, and it is just as easy. Just select the "3D EDIT PANEL MODE" (arrowed) that gives you access to all of the 53 individual instruments and avionic units... There some great options including Aspen EFD 1000, S-TEC 55x Autopilot, Angle of Attack gauge and so on... For those that find instruments are not to their liking in say, "I wish I could move those "engine gauges" over past the avionics?", then here you can simply adjust that instrument, or even swap the instruments around the panel to your liking. Here I have moved the ENGINE INSTRUMENTS gauges right over to the right hand side... because I can. You can even adjust the brightness of the instrument. Optional is to select the type of GPS unit you want GNS 530/430. And there is a special 3d bezel for the insert of a RealityXp GTN 750 unit if you own that add on. Panel features include; S-Tec Forty Five X (autopilot) and the noted Aspen EFD 1000, KR 87 ADF Radio, Garmin GMA 340, Garmin GTX325 Mode C Transponder, BendixKing IN-182A Weather Radar and the usual GNS 430/530 PS/Nav/Comm units. When done you can "ADD" (or Duplicate) in a new "Preset", and then "SAVE" that new layout Preset (Preset /6). So basically you can start off with a completely blank instrument panel and then create your own unique or personal instrument layout if you have the time and patience... and you can have up to or save 14 different instrument layouts. It is however very important to restart X-Plane to lock in the new instrumentation layout before flying. Currently the optional "Panel Background" colour choice is not available on the Islander, like it was on other Thranda DGS systems Menu - MISC The Misc (Miscellaneous) page has four panels that cover Tyres/Tundra, Windows, Pilots, De-Ice Boots and DynaFeel. Available are both Normal and Tundra wheel sizes Side windows come in two options, Flat and Bubble. Pilots can be swapped from male to female, they switch over in duo mode as well. You have the choice of De-Ice boots on the leading edge of wings and the leading edge of the tail, notable is that they are active and work with the X-Plane 12 Ice feature. "DynaFeel" on the lower right is a system that dynamically adjusts the rate at which the controls deflect. It is based on airspeed and how much the control is deflected. This means the controls will feel light and responsive at low speeds and with small deflections, but will get progressively heavier as the airspeed increases. ________________ Flying the Britten-Norman Islander 2A Basically the Britten-Norman Islander is a Air-Taxi. ferrying people and their baggage to islands or areas of tourism. So the machine is pretty basic, easy to load, easy to configure, and easy to start... honestly you fill the BN-2A up and go, then go again with a new load. The route today is EGPE (Inverness, Scotland) to EGBP (Sumburgh, Shetland Is). Four passengers and their baggage, plus a little cargo in the rear, so I have removed the rear bench seat to add in the bags more to the centre than in the rear hold. All to go 140nm to the north. Mixture rich (okay just slightly lower than full rich), slight throttle, fuel pump on... then select the engine (PORT - STBD) to start above your head. After a few rotations the Lycoming O-540-E4C5 fires into life and settles down at a pulsing speed, until I pull it back to idle. Sounds are excellent. Panning around the plane in exterior view and you awesome 3D audio effects, including "blade slapping" sound when view is perpendicular to prop, so the Doppler effect is very convincing to your relative position of the aircraft, the engines can get very loud externally, so you have to dial it back a lot, open the paper window or any of the doors and the external sounds are far more heightened, again quite loud near the front, relative to near spinning props... but very good it all is. When reviewing the Nimbus BN-2B, there was a strange anomaly, when with the flaps set at UP they were still sitting 2º in the down position? Here in Thranda's case, the flaps sit flush (0º), and only when you set the T.O Flap position do you get the correct 2º down flap. It feels far more normal than the Nimbus version (obviously I checked out that 2º deviation, but couldn't come to a obvious conclusion), but honestly it didn't feel right and the aircraft in the air like it felt it was dragging... The taxi/landing light, one each wing tip, are not noticeable in the daylight? (I have found all internal and some external lighting is odd in X-Plane 12.05? so I don't think the lighting currently is a developers issue). But it shines fine in low light or the dark. External lighting is very basic, Navigation each wing and a white tail light, a beacon mid-roof, and alternating strobes which are well done. X-Plane is saying there are Icy conditions and needs carburetor heat, which is set lower pedestal, yes this is Scotland... but in June? Notable is the effect of using the Carb Heat, for the loss of power to the engines, so use it with consideration on takeoff, and other vital phases of the flight. You need a fair tuff of power to get the Islander moving, my takeoff weight is 5,287 Lbs, and you feel the weight perfectly as you move, the BN-2A is perfectly balanced as well for taxiing. A noticeable effect is that (all) Thranda aircraft react differently to the X-Plane 12 lighting? In clear bright skies they are fine, but have an overcast sky, then they go very dark, even in areas black or with heavy shadows, I will note no other X-Plane aircraft I have reviewed do this to this heavier extent. As only Thranda aircraft do of because within the way the textures are processed in the Simulator create this effect. I have always loved the stance of the Islander, that slightly low nose, with the high tail, and two claws for the gear! Power up, the the BN-2A tracks nicely, but you have to be aware of the engine power outputs, if one engine is not pushing out the same torque as the other engine, the Islander will pull quite considerably to the lesser power... most will say that aspect is given, well of course it is, but it is far more noticeable here in the BN-2A, so you have to make sure the power output is very balanced at full power... Nose pitch up, rotation is around 80 knts, when you leave the ground you really feel the weight and drag of the aircraft. Reach for the gear lever and there isn't one, and the hanging gear drag is highly noticeable on the climbout. The BN-2 is not a high performing sports aircraft and it shows that aspect straight away... 860 ft/min (4.37 m/s) at sea level is the maximum rate climb to a service ceiling of 11,300 ft (3,400 m) is not going to win any favours. 500 fpm is the expected climb out, you may get away with 600 fpm, but your weight would have to be light, even then it takes time to get to 3,000 ft. Get the climb rate wrong (too high?) and Islander will tell you with a frightening buffet and warning, so you have to keep the pitch within the right (tight) zone. Could you say the performance is ponderous, it's not slow if that is what I mean, as the BN-2A can get along quite nicely around 120 knts, but don't expect a fast aircraft, because that is not what this aircraft was designed for... I coaxed the BN-2A up to 6,000ft, mostly to avoid the cloud conditions,the Islander hates clouds... it saps performance and it gets rough! Scotland is falling away, but through the gaps in the clouds it looks marvelous. Cruise speed is around 139 kn (160 mph; 257 km/h) at 7,000 ft (2,134 m) (75% power), I am 6,000ft at 90% power and running at that 120 knts? Max speed is 148 kn (170 mph, 274 km/h)... Range is 755 nmi (869 mi, 1,398 km) at 130 kn (150 mph; 241 km/h) at 11,000 ft (3,352.8 m), but a ferry range is a doable 1,216 nmi (1,399 mi, 2,252 km) at 130 kn (150 mph; 241 km/h). To get out of the cloud mass, I climb even higher to 8,000ft via 300 fpm, I lose around 10-15 knts of speed for the climb, but it recovers the speed quickly at altitude. Of course the BN-2 is famous for flying the Islander services Loganair's Westray to Papa Westray flight, which is the shortest scheduled flight in the world at 1.7 mi (2.7 km); the scheduled flight time including taxiing is just only two minutes! The BN-2A is a workhorse, pure and simple, a basic aircraft to do mundane tasks easily... that is what you get here, an easy but very capable machine. The outside wind intensity is affected by slip and AoA. (The more the surface area of the fuselage is hit by oncoming wind, the louder the sounds). And it feels like that if the air (wind) is coming at you at an angle, or as noted you go into low cloud... it creates an aural immersion sort of feel, thank X-Plane 12 effects for that. As also noted, X-Plane 12 Icing and condensation effects work well here also. Inside the cabin it's all nice and cosy. Second row passengers get a window view, but the middle rows only get a blank cabin wall. I love flying around these parts on the top of Scotland, the area has loads of remote strips, and large islands including Shetland and Faroe to pick from. You can descend a lot faster than climbing, even as fast as 1,200 fpm. But you have to use the throttles to get the best balance between the best forward speed, and your descent rate. It is a very fine zone to get it right, and practise, or familiarity with the Islander will give you the right feel for the getting the descent phase perfect. Below the 3,000ft cloud cover then Shetland pops up on the horizon. Weather conditions can be really challenging up here in the north as well, its June and you still get low cloud and blustery conditions... ... I go parallel to runway to Sumburgh's 09/27 runway at 2,500 ft, and pass Sumburgh Head to my left. 90º then another 90º turn puts us directly on the beam into ILS ISG 108.5. I'm not using the beam (APR) to use it for landing, but only as a navigation aid to line up Rwy 27. The course deviation indicator (CDI) on the lower HSI can be a little deceptive? It shows the CDI position (alignment) fine, but the course needle maybe wrong, as you need to adjust the course position manually. So you are thinking the situation is wrong, but you are actually on the right line if you had adjusted the runway course angle correctly earlier. Flap adjustment is continuous... meaning you can set really any angle of flap you want, full flap and 70 knts is a great approach speed... reduce the throttles to 64 knts and you get a nice 200 fpm descent pitch nose down approach... The BN-2A is a great solid platform in these blustery approach conditions that you get you get up here in Shetland, yes you have to work the controls, but the Islander is very predictable to fly, even a lot of fun to test your skills. Drop under the 60 knts (58 knts) and your primed for landing. The BN-2A is very nose down in feel, so you tend to watch or set your correct flare pitch... EGPB Rwy 09/27 is a very short (4915ft/1498m) bumpy runway, so you have to get the approach perfectly right, or you will go into the sea on the other end. 55 knts and your sinking nicely, then nose (flare) up... I feel too high? But I keep my nerve and let the Islander sink naturally... ... it is a nice touchdown around 50 knts just beyond the keys, my fears of stopping (the water!) were unfounded. The BN-2A rubbed off the speed (drag) very, very quickly as the aircraft has very high STOL (Short Takeoff and Landing) capabilities. The Islander is a very natural aircraft to fly, you can throw it around with ease, and it will take the punishment... I flew the BN-2A straight back to Inverness, and was very comfortable with it on the return route... again Thranda have created a real gem of an aircraft. So the question is which is the best Islander? Thranda or Nimbus? Well both have their pros and cons, the Nimbus has great effects (wagging tail!) and is very well modeled, but I think performance wise it is not as good as the Thranda. The Thranda BN-2A also has a lot, lot more features (DGS) and far, far better sounds, and all round it is a more solid design. Want to try skilled flight in the BN-2A, then try this one from EDWS (Norddeich) to EDWJ (Juist) in X-Plane 12... great video, and the type of services the Islander does best. Britten-Norman BN2 - Island Hopping in Germany | day trip from Norddeich to Juist _____________ Summary The Britten-Norman BN-2 Islander is a British light utility aircraft and regional airliner designed and originally manufactured by Britten-Norman of the United Kingdom. Still in production, the Islander is one of the best-selling commercial aircraft types produced in Europe. Although designed in the 1960s, over 750 are still in service with commercial operators around the world. The aircraft is a light transport with over 30 military aviation operators around the world. Thranda Design are one of the best developers in X-Plane, their history and quality is legendary. So that quality build and detailing is always going to be significant from the start, and so it is again here... exceptional. In every area and detail, modeling, fine details, glass and the interior materials. Menus are also excellent with menu tabs in; GENERAL, LIVERY, WEIGHT/BAL, CAMERA, AUDIO/SLEW, PANEL and MISC (Miscellaneous), that covers all the options and including sound, weights and balances also including graphs, walk-around and camera options and general static elements including chocks, tundra tyres, pitot covers and tie-downs. Settings include pilot/passenger weights, baggage weight and visually placed bags, cargo in the rear of the aircraft and in the large baggage area. Thranda always comes with a high range of clever and unique features to give the user a lot of personal options. Known as "Dynamic Generation Series" or DGS, this is a Thranda speciality feature that takes full advantage of X-Plane's flexibility for in-sim, real-time modifications. Here you can change the actual livery to your own designs, but build the instrument panel to your own liking as well, including options of the Aspen EFD 1000 glass instrument and a special 3d bezel for the insert of a RealityXp GTN 750 unit if you own that add on. Sounds are excellent with High fidelity, multi-track sounds with smooth, finely tuned transitions, amazing atmospheric effects, different sonic characteristics (with the twin-engine arrangement) and 3D audio effects, including the "blade slapping" sounds and the outside wind intensity is affected by slip and AoA. External sounds are however very high compared to the internal and need to be dialed back. Minuses are minimal... lighting externally (taxi/landing) is not good in the daylight (Laminar issue?), aircraft is dark in overcast conditions, and the white seats are a bit odd. Note... 8K textures are used, but have no effect on framerate. Your first thoughts are that the BN-2A Islander doesn't quite fit into the Thranda fleet. But this is another clever utility aircraft, and it comes with loads of clever features, simply great to fly, so it is actually a perfect addition. A personal aircraft from my childhood, so the affection for the STOL, low nose - high tail classic aircraft was always going to be a winner for me. But putting emotions aside, this BN Islander is another excellent addition to X-Plane, note it is only an X-Plane 12 aircraft and no X-Plane 11 version will be available, that is okay, as the Islander is a fully complete X-Plane 12 machine inside and out. Highly Recommended! _______________________________ Yes! the BN-2A Islander XP12 DGS series by Thranda Design is NOW available from the X-Plane.Org Store here: BN-2A Islander XP12 Price is US$39.95 Requirements X-Plane 12 (not for X-Plane 11) Windows, Mac or Linux 4 GB VRAM Minimum. 8 GB+ VRAM Recommended Download Size: 2.8 GB Current version 1.0 (June 1st 2023) Special features: True X-Plane 12 Aircraft FULLY configurable 3D instrument panel. Fully VR Compatible Over 50 instruments to choose from! (Including Aspen EFD 1000, and support for RealityXP GTN650 and GTN750) Move any instrument to any location on the panel, or even between pilot and copilot's panel! Comes with 5 panel presets, but can easily be expanded by moving instruments around, using a simple and intuitive interface. Lighting is fully 3D, and dynamically moves along with the instruments, as you configure the panel. Ability to assign a lighting index to individual instruments, to allow different lighting knobs to be assigned on a per-instrument basis. Save your own presets, and even share them with the community! Almost every instrument can be popped up or popped out as a 2D floating window! They can be placed on other monitors as well. Instruments can be moved in 3D directly, on a 2D pop-up preview window, or by numerical entry for precise placement. GNS430 and 530 can be swapped out, but a restart of the plane is required, as 430s and 530s are mutually exclusive in terms of compatibility in X-Plane Dynamic livery editor (like in the Kodiak, the Beaver, the Wilga, the Caravan, the C206, the C337, and the Pilatus PC-6) Full PBR control! Create stunning metallic liveries, or matte, sand-blasted look in mere seconds! Additional control over dirt/scratches, adjustable in real-time to dial in the exact desired amount of wear and tear. Create "virtual" liveries, based on two basic common design layouts (Modern and Classic), and assign any colour to any available paint segment. Quickly create preview of livery in real-time, using intuitive controls. Previews include visualization of metallic materials and dirt overlays. Apply selected livery in real-time, right in the sim, without the need to even touch a 3rd party image editor! Option to change the tail number in real-time, or disable it altogether. (Enter a "space" instead of a callsign number to create a blank tail number.) Easily and quickly create dozens of paint schemes in-sim! Also includes 8 traditionally painted liveries, all visible in a convenient pre-selection preview window. Ability to swap pilot/co-pilot figures Uses SkunkCrafts Updater. Option to participate in Beta program, via checkbox in SkunkCrafts Updater. Excellent 8k hi-res textures with realistic PBR materials, featuring true-to-life plate deformation and to-the-rivet precision. Windshield ice and rain effects Individual functional circuit breakers. Feature-rich elegant fly-out menu with the following features: Electric tug, with in-panel controls to move forward/backward at the desired speed, and steer proportionally Control over chocks, individual tie-downs, covers, internal lights, external lights, etc. Option to enable/disable Cargo Pod, with realistically simulated weight, momentum, rotational inertia, and drag characteristics. Option to start up running (all systems ready), or cold-and-dark, for realistic startup procedures, directly from this fly-out menu. Control landing lights, strobes, beacon, and nav lights via fly-out menu Detailed weight and balance manager with visual chart, individual passenger seat weight control, Lbs/KG unit toggle, CG control, external tank control, and the option to save and load configuration. Show or hide individual seats, to create a hybrid passenger/cargo version. When seats are hidden, cargo fills the space when weight is added via the fly-out menu. Multiple camera snap points, above and beyond what's available by default in X-Plane, so you can perform your walk around checks. Adjust your camera's Field of View without having to go to an X-plane menu, allowing for real-time adjustments. Audio mixer: individually control audio channels in real-time, so you can adjust volumes while hearing them play. Slew control: move your plane around the world, temporarily bypassing flight physics. Includes ground mode and air mode. Dynamic panel control page, with a separate view for the entire panel layout preview, or a per-instrument view, allowing for fine-tuning of instrument position, as well as copy-paste function to quickly replace instruments. DynaFeel panel: Dial in precisely how you wish for the controls to react as a function of speed. Option to swap pilot and co-pilot Optional de-ice system Optional bubble windows Optional tundra tires Flight dynamics and systems: Detailed and accurate flight dynamics and weight and balance, with accurate takeoff, climb, cruise, and landing performance. Tie-downs and chocks actually keep the plane from moving, even in high winds. DynaFeel: controls that simulate how strongly the control surfaces are affected by oncoming air, and how much strength would be needed to overcome these forces. Advanced FMOD-based sound system: High fidelity, multi-track sounds with smooth, finely tuned transitions (actually having calculated the precise beat frequency for each section, to minimize "muddy" transition sounds), and amazing atmospheric effects. Individual volume control over different aspects of the sound experience, adjustable in real-time (while listening to the sounds) Panning around the plane in exterior view yields awesome 3D audio effects, including "blade slapping" sound when view is perpendicular to prop Far away sounds include aerodynamic interaction effects between engines. Individual buttons and switches in the cockpit each have their own unique sound. Engine has typical cool-down ticking sound, based on engine temperature. Sounds actually give you clues as to what's happening under the hood. Outside wind intensity is affected by slip and AoA. (The more the surface area of the fuselage is hit by oncoming wind, the louder the sounds) Doors and windows opening, let outside sounds in Installation and documents: download for the Thranda BN-2A Islander is 2.63Gb and the aircraft is deposited in the "General Aviation" X-Plane folder. Full Installation is 1.30Gb Documents supplied are: BN2A Manual.pdf BN2A Performance Charts.pdf Thranda Graphics Settings XP11.pdf Thranda Joystick Settings.pdf X-Plane G430 Manual.pdf X-Plane G530 Manual There is a huge amount of Documentation provided here, not only for the Thranda BN-2A, including performance charts, reference guides, but also X-Plane/hardware settings and custom and default avionics. All updates are via the built-in Skunkcrafts Updater Design by Thranda Support for the BN-2A Islander ___________ Review System Specifications Windows - 12th Gen IS1700 Core i7 12700K 12 Core 3.60 GHz CPU - 64bit -32 Gb single 1067 Mhz DDR4 2133 - PNY GeForce RTX 3080 10GB XLR8 - Samsung 970 EVO+ 2TB SSD Software: - Windows 11 Pro - X-Plane 12.05r1 (This is a Release Candidate review). Plugins: Traffic Global - JustFlight-Traffic (X-Plane.OrgStore) US$52.99 : Global SFD plugin US$30.00 : RK Apps XPRealistic v2 - US$34.99 ____________________ Review by Stephen Dutton 6th June 2023 Copyright©2023: X-Plane Reviews (Disclaimer. All images and text in this review are the work and property of X-PlaneReviews, no sharing or copy of the content is allowed without consent from the author as per copyright conditions.
  16. Aircraft Update : Cessna U206G Stationair DGS series v1.1 by Thranda Design A common theme from Thranda Design is to release an aircraft, then a few months later release another version with more features and mostly adding in the Amphibian/Floats variant. They did it with the Cessna 208 Caravan, all the other releases, and now the same here with the Cessna U206G Stationair. You can update to version v1.1 either by the Skunkcraft's updater, or do a full download from your account from the X-Plane.OrgStrore. Outwardly the U206G Stationair is the same aircraft as in the release, for a full run down of the features including the "Dynamic Generation Series" or DGS, then read X-PlaneReviews: Aircraft Review - Cessna U206G Stationair DGS series by Thranda Design In this v1.1 update you now have an extra aircraft (acf) to choose from, the "U206G" and now the "Amphibian" option. Amphibian The Amphibian uses the wheels to move the aircraft around on hard surfaces, the Float version does not have any, and both options are available here. Here is the Amphibian. We know that all Thranda Utility aircraft come with the Amphibian and Float options, so it is no surprise that the detail and quality of the floats are exceptional, as they are here. The retracting wheel system is also well done, and as is the high detail with all the spars, nuts & bolts, and wire tensioners which are perfect, you won't get better. Rear are the rudders, again the detail is excellent with working springs and attachments, obviously they lift and lower into the water. Float undercarriage (gear) is controlled via a panel on the lower instrument panel, and the rudder actions are controlled by a lever between the fronts seat, the pump detail shows no compromises in quality from Thranda. On the Amphibian variant, the MISC Menu options are different as well... There are four box selections. Top left allows you to install a brace in the windshield, and to switch the side windows from flat to bubble. Lower left box is the options; lower the rudders, to change the Amphibian version to Floats and to install a Ventral Fin on the underside of the tail. Top right Box on the right refers to Slew mode, which allows you to manually move the aircraft around in a disconnected X-Plane space. It functions by temporarily overriding the various aerodynamic and physical forces on the X-Plane settings, it is to allow the user to reposition the plane as desired and is especially a great feature to use while on the water for docking the aircraft to a jetty. Lower right box is "DynaFeel" which is a system that dynamically adjusts the rate at which the controls deflect. It is based on airspeed and how much the control is deflected. This means the controls will feel light and responsive at low speeds and with small deflections, but will get progressively heavier as the airspeed increases. A final option on the "Wheeled" variant of the U206G now has a skis option. Again the ski detail is excellent, with all the support wires and ski skid assembly required. I'll list the v1.1 updates changelist because it is quite comprehensive and detailed. Version 1.1 (November 11th 2022) Add amphibian seaplane version with plain and amphibious floats Update manual to add seaplane information Add skis option to landplane Remove trim "tick" sound, to hopefully help alleviate repetitive noise while autopilot is engaged Add Instrument #53: Tail number placard Update XP12 compatibility to handle multiple .acf (to handle the new amphibian) Improve XP12 compatibility system error handling Remove automatic reload in XP12 compatibility and Panel popup when using XP12, due to it causing XP12 to crash. It will now prompt the user to manually reload the plane. The automatic reload still works when using XP11. Improve clarity of instructions in ReadMe.txt for XP12 ACF Fix interior engine sound when panning the view around Fix cargo door flaps lockout not working. The flaps should now not move when the rear cargo doors are open XP12 ACF: Add WAAS approach capability. XP12 ACF: Slightly decrease fuel flows to better match the performance charts Fix Inst #11 (KPH/MPH airspeed indicator) 2D pop-up needle calibration, fix color arcs Fix floating screws and instruments in cabin Fix baggage area cargo netting intersecting with rear seats Fix beacon light for XP12 Fix tail section not showing metal effects in dynamic liveries Add gear panel to all default panel presets (only visible when using the amphibian floats) Add glass covers to Inst #14 and 15 (engine gauges) Hook up additional circuit breakers Remove duplicate circuit breakers Fix up some livery inconsistencies Corrections to Inst #25 (ELT) ELT now resets to off when starting a new flight Improve calibration of oil temperature 3D needle Improve calibration of turn coordinator Improved landing gear animation logic Fix potential crash when using docking mode in XP12 Fix "Dirt" overlay for dynamic livery preview popup One new feature is particularly interesting... "XP12 ACF: Add WAAS approach capability". The Wide Area Augmentation System (WAAS) is an air navigation aid developed by the Federal Aviation Administration to augment the Global Positioning System (GPS), with the goal of improving its accuracy, integrity, and availability. Essentially, WAAS is intended to enable aircraft to rely on GPS for all phases of flight, including precision approaches to any airport within its coverage area. It may be further enhanced with the Local Area Augmentation System (LAAS) also known by the preferred ICAO term Ground-Based Augmentation System (GBAS) in critical areas. A primary goal of the WAAS system was to allow aircraft to make a Category I approach without any equipment being installed at the airport. This would allow new GPS-based instrument landing approaches to be developed for any airport, even ones without any ground equipment. A Category I approach requires an accuracy of 16 metres (52 ft) laterally and 4.0 metres (13.1 ft) vertically. Obviously X-Plane 12 now has WAAS availability, an area to watch out for... but I know little of it at this moment. In The Air Takeoff is Tricky.... As you have a lot of weight suspended below you, almost another aircraft weight again. Also you need foot brakes to keep the Amphibian tracking straight, but it doesn't gain speed very fast either, flap 10º is highly recommended for lift. In the air you can see the size of the floats relative to the aircraft, speed with the extra weight is compromised here also. Now we can look at the Float option... The floats are slightly lighter and cleaner through the air, look great as well. Detail is of course excellent, highly realistic. The Floats are colour matched to the fuselage, and in the "Dynamic Liveries" you can colour them to to suit your own design. There are altogether 11 liveries or two blank and nine designs, same as the "Wheeled" version. Internally the cockpit is excellent, I'm flying the gauge layout this time (There is also the excellent Aspen EFD 1000 available), highly, highly realistic. Note the window brace, of which I really like. The Floats weight weighs you down, but also creates a supremely stable feel to the small C206G. Any manoeuvres are weighted, so no you can't throw the Cessna around in the sky, but I like this non-swinging feel as the aircraft is heavier (obviously), and the lower centre of gravity gives you a better placement, outright speed is also cancelled, but you are more inclined to enjoy the movements to your advantage, than the other way around. I'm heading to the Shannon Estuary, Ireland just off Shannon Airport EINN, to test out the amphibian variant. I'm a huge fan of the new X-Plane 12 water, you get a real realism from the air, better still with the custom mud flats in the transparency. Coming from the west, you get a nice throttle (power) action to control your descent. I try to get to Full 20º flap as soon as I can. Speed can be low in the approach of around or slightly below 50 knts, but your perfectly safe here. I love the moment you see the ripples on the water through the window, still flashing past. Your only 200ft up now and you give the aircraft a slight pitch. So stable... ... You feel like you are coming in as a big Swan with huge feet outstretched ready to land, the support is there ready and waiting. Slightly more up pitch, but you can't over do the angle... or it will cause you issues later. The idea is in trying not to dig in the front of the floats on landing, but to touch at the centre angled point, CLEAN, is the word in your head. Your touching now around a low 40 knts as you feel the water. Getting the landing right is not the actual landing itself? It is the bit after when you are riding the top of the water, so as the nose does not dig in and pull you over, controlling the drag and keeping the nose clean (high or straight), while slowing down takes a bit of skill, but delivers the exhilarating bit to get it all right. If you do get it all right then the aircraft will settle without any jerks or nose drops. Saying that... this Thranda U208G is a very nice, even easy aircraft to fly in the amphibian (float) variant, and certainly the X-Plane 12 effects help out here with their more wider and custom physics than X-Plane 11, you not only see it, but feel it as well. That water is exquisite! Rudder steering I found like with the wheels (braking) on takeoff, only works with my foot pedals? but I'm sure they can be fixed to the yaw movement. But they are very effective in the water. For takeoff... Flap to 10º, trim to zero, and here I upped the rudders a bit to early. I found the trick later was to start the takeoff run (half-power)... ... then when you feel the rudder control coming in, then quickly up the dragging rudders, its tricky to do but it gives you far more in straight-line control. Up the power and as the aerodynamics come in and the Cessna will surf and then also accelerate quite quickly, then around 85 knts your airborne. Once clear of the water with a nice small climb rate, then clean up the aircraft (flaps) and trim. So the waterborne additions are excellent with great flight and water capabilities, and oddly enough makes the U206G easier to fly. Summary This is the expected update from Thranda Design, as for all their releases, and usually within two months of the original aircraft release, they then release the Amphibian/Floats variant. Not only do you get the Amphibian/Floats feature, but the Ski option has been added as well to the "wheeled" land-plane version. Quality is of course the usual very highly detailed and quality fitout you expect from Thranda. They are renowned for it, but consistently deliver. Thranda Design are one of the best developers in X-Plane, their history and quality is legendary. So that quality build and detailing is always going to be significant from the start, and so it here... exceptional. In every area and detail, modeling, fine details, glass and the interior materials. The "Dynamic Generation Series" or DGS, a Thranda speciality feature that takes full advantage of X-Plane's flexibility for in-sim, real-time modifications is also part of this package. There is also a full changelog list of bugs and minor issues done in v1.1, including the added feature of Wide Area Augmentation System (WAAS) and it's approach capability. If you want a highly capable Cessna, then it would be seriously hard to go past this U206G Stationair, its also X-Plane 12 (X-Plane 11 is also available) capable as well, so it is a match made in heaven and it all comes with a value price for the incredible detail and features. It's the very best!... not much to add into that statement, and now available not only in the air, but on the water as well, obviously highly recommended. _______________________________ Yes! the Cessna U206G Stationair DGS series v1.1 by Thranda Design is NOW available from the X-Plane.Org Store here: Cessna U206G Stationair DGS series Price is US$39.95 Requirements X-Plane 12 (still beta at this stage) or X-Plane 11 Windows, Mac or Linux 4 GB VRAM Minimum. 8 GB+ VRAM Recommended Download Size: 2 GB Current version 1.1 (November 11th 2022) Special features: FULLY configurable 3D instrument panel. Over 50 instruments to choose from! (Including Aspen EFD 1000, and support for RealityXP 650 and GTN750) Move any instrument to any location on the panel, or even between pilot and copilot's panel! Comes with 6 panel presets, but can easily be expanded by moving instruments around, using a simple and intuitive interface. Enable or disable lighting posts per instrument. Lighting is fully 3D, and dynamically move along with the instruments, as you configure the panel. Ability to assign a lighting index to individual instruments, to allow different lighting knobs to be assigned on a per-instrument basis. Save your own presets, and even share them with the community! Almost every instrument can be popped up or popped out as a 2D floating window! They can be placed on other monitors as well. Instruments can be moved in 3D directly, on a 2D pop-up preview window, or by numerical entry for precise placement. GNS430 and 530 can be swapped out, but a restart of the plane is required, as 430s and 530s are mutually exclusive in terms of compatibility in X-Plane Dynamic livery editor (like in the Kodiak, the Beaver, the Wilga, the Caravan, and the Pilatus PC-6) Full PBR control! Create stunning metallic liveries, or matte, sand-blasted look in mere seconds! Additional control over dirt/scratches, adjustable in real-time to dial in the exact desired amount of wear and tear. Create "virtual" liveries, based on two basic common design layouts (Modern and Classic), and assign any colour to any available paint segment. Quickly create preview of livery in real-time, using intuitive controls. Previews include visualization of metallic materials and dirt overlays. Apply selected livery in real-time, right in the sim, without the need to even touch a 3rd party image editor! Option to change the tail number in real-time, or disable it altogether. (Enter a "space" instead of a callsign number to create a blank tail number.) Easily and quickly create dozens of paint schemes in-sim! Also includes 9 traditionally painted liveries, all visible in a convenient pre-selection preview window. Uses SkunkCrafts Updater. Option to participate in Beta program, via checkbox in SkunkCrafts Updater. Excellent hi-res PBR realistic materials, featuring true-to-life plate deformation and to-the-rivet precision. Fully modelled Continental IO-520-F engine. Feature-rich elegant fly-out menu with the following features: Electric tug, with in-panel controls to move forward/backward at the desired speed, and steer proportionally Control over chocks, individual tie-downs, covers, internal lights, external lights, etc. Option to enable/disable Cargo Pod, with realistically simulated weight, momentum, rotational inertia, and drag characteristics. Option to start up running (all systems ready), or cold-and-dark, for realistic startup procedures, directly from this fly-out menu. Control landing lights, strobes, beacon, and nav lights via fly-out menu Detailed weight and balance manager with visual chart, individual passenger seat weight control, Lbs/KG unit toggle, CG control, external tank control, and the option to save and load configuration. Control individual seat positions, or hide them altogether, to create a hybrid passenger/cargo version. When seats are hidden, cargo fills the space when weight is added via the fly-out menu. Multiple camera snap points, above and beyond what's available by default in X-Plane, so you can perform your walk around checks. Adjust your camera's Field of View without having to go to an X-plane menu, allowing for real-time adjustments. Audio mixer: individually control audio channels in real-time, so you can adjust volumes while hearing them play. Slew control: move your plane around the world, temporarily bypassing flight physics. Includes ground mode and air mode. Dynamic panel control page, with a separate view for the entire panel layout preview, or a per-instrument view, allowing for fine-tuning of instrument position, as well as copy-paste function to quickly replace instruments. Options for landing gear: Tundra tires, mud flaps, wheel pants (fairings) Option to enable bubble windows for pilot and copilot side windows. DynaFeel panel: Dial in precisely how you with for the controls to react as a function of speed. Flight dynamics and systems: Detailed and accurate flight dynamics and weight and balance with the help of multiple real-world active Stationair pilots. This not only gives this aircraft the proper "feel", but also accurate takeoff, climb, cruise, and landing performance. The U206 Stationair is a well-behaved airplane and a very stable IFR platform. Tie-downs and chocks actually keep the plane from moving, even in high winds. DynaFeel: controls that simulate how strongly the control surfaces are affected by oncoming air, and how much strength would be needed to overcome these forces. Advanced FMOD-based sound system: High fidelity, multi-track sounds with smooth, finely tuned transitions (actually having calculated the precise beat frequency for each section, to minimize "muddy" transition sounds), and amazing atmospheric effects. Individual volume control over different aspects of the sound experience, adjustable in real-time (while listening to the sounds) Different sounds for front of plane than for back of plane Panning around the plane in exterior view yields awesome 3D audio effects, including "blade slapping" sound when view is perpendicular to prop Individual buttons and switches in the cockpit each have their own unique sound. Engine has typical cool-down ticking sound, based on engine temperature. Sounds actually give you clues as to what's happening under the hood. Outside wind intensity is affected by slip and AoA. (The more the surface area of the fuselage is hit by oncoming wind, the louder the sounds ___________________________________ Installation and documents: download for the Thranda_C206. is 1.97Gb and the aircraft is deposited in the "General Aviation" X-Plane folder. Full Installation is 2.34Gb Documents supplied are: Changelog.txt Thranda Graphics Settings XP11.pdf Thranda Joystick Settings.pdf Thranda U206G Manual.pdf U206G Performance Charts.pdf X-Plane G430 Manual.pdf X-Plane G530 Manual.pdf There are a huge amount of Documentation provided here, not only for the Thranda U206G including performance charts, reference guides, but also X-Plane/hardware settings and custom and default avionics. All updates are via built-in Skunkcrafts Updater Support forum for the U206 Stationair by Thranda _____________________ Aircraft Review by Stephen Dutton 17th November 2022 Copyright©2022: X-Plane Reviews Review System Specifications:  Computer System: Windows - S1700 Core i7 12700K 12 Core 3.60 GHz CPU / 64bit -32 Gb single 1067 Mhz DDR4 2133 - ASUS GeForce GTX 1080 8Gb - Samsung Evo M2 2TB SSD - Sound : Yamaha Speakers YST-M200SP Software: - Windows 11 Pro - X-Plane 12.00B13 (This is a beta review). Plugins: raffic Global - JustFlight-Traffic (X-Plane.OrgStore) US$52.99 : Global SFD plugin US$30.00 : RK Apps XPRealistic v2 - US$34.99 Scenery or Aircraft -EKLY - Kerry, Ireland by Boundless -EINN - Shannon, Ireland by Boundless (Disclaimer. All images and text in this review are the work and property of X-PlaneReviews, no sharing or copy of the content is allowed without consent from the author as per copyright conditions) All Rights Reserved
  17. Aircraft Review : Cessna 208 Grand Caravan DGS series by Thranda Design The Cessna Caravan has been around since Mid-2012, as released back then by Carenado. So it is not an unfamiliar sight to the X-Plane Simulator and by far the most popular and successful aircraft that Carenado ever produced. The Cessna 208 Caravan is also and overwhelmingly the most popular utility aircraft ever produced by Cessna as well. The project was commenced on November 20, 1981, and the prototype first flew on December 9, 1982. The production model was certified by the FAA in October 1984 and its Cargomaster freighter variant was later developed specifically for FedEx. The 4 ft (1.2 m) longer 208B Super Cargomaster first flew in 1986 and was later developed into the passenger 208B Grand Caravan which is mostly known as the "Executive" version. First deliveries were in 1982 and the C208B aircraft is still in production with the current produced numbers of around 2,800 aircraft built. Although the original design of the Carenado Caravan was done in house, most if even all of the conversion to X-Plane and subsequent updates was done by Dan Klaue the renowned X-Plane developer, later formed into Thranda Design. So overall this brand new design of the Cessna Caravan has already had years of X-Plane development behind it both in the Carenado version and now with this fresh new design. The Cessna 208 is a high-wing braced cabin monoplane powered by a single Pratt & Whitney Canada PT6A turboprop in a tractor configuration. The cabin has room for nine passengers and two crew when used as a passenger aircraft with four doors: one for each crew member, and a airstair entrance door on the right side of the cabin and a large cargo door on the left. The basic 208 airframe has a fixed tricycle landing gear but can also be fitted with various types of landing gear and allowing the aircraft to operate in a wide variety of environments. Some common adaptations include floats with retractable landing gear on the Caravan Amphibian model, and skis. The roles for the caravan are huge and flexible; Sightseeing, Regional (hub &) Spoke, Skydiving, Executive VIP Transport, Medivac, Flight Training, Commuter Airlines, Air Cargo and Humanitarian Missions... and one C208 was even fitted with a Hellfire missiles, but sadly not an option on this aircraft. The 208B Grand Caravan is a 4 feet (1.2 m) stretch of the Caravan l, and both the shorter and longer variants are included in the package. Originally in 2012 the Carenado Caravan looked sensational (updated v2 Review), but over the last few years it became a little dated with not really having many changes over the years, extras or features (excluding the Super Cargomaster) were very low as well, so it had become a little tired. So the timing couldn't be more right, than right now, to get a more modern and bettered featured design of the Caravan aircraft. You were never going to be disappointed on quality and detail from Thranda, as they are already renowned for these aspects, in this light the 208B is simply excellent. Every rivet, panel, access panel, lighting detail and the excellent mesh air intakes are absolutely perfect... there is nothing to be picky about here at all, you just can't fault this sort of quality detailing. You can see how far we have come since 2012 by the reflections alone on the spinner and the lighting effects on the exterior panels. Glass is always a big deal to me, I want authentic thick glass with wear and tear, and I am not disappointed here either, it is all expertly done. A huge step forward is that unlike on the Carenado version, you also have opening forward panels to reveal a state of the art reproduction of the sensational Pratt & Whitney Canada PT6A, also still commanding is that huge horn style exhaust protruding from the lower right of the engine bay. Some how you always strangely missed this engine feature on the Carenado aircraft, but want no more. You always had a lot of fun with the Caravan on the ground, opening doors and loading in passengers and cargo, it was all part of the simulation. Here all the doors (can be opened inside or externally) are well done... the tight ladder entrance on the right and the swing door on the left, with the two pilot and co-pilot doors at the front with their drilled tall tight steps. Caravans come with an optional lower Cargo Pod, and so you have one here, with the same three opening bins on the left side, but you still can't open each of them individually, it is none or all three. Personally I don't fly the Caravan with the pod attached, I like the more pure look than the bulky heavy feel the pod gives to the aircraft... but then again it is a workhorse aircraft. CargoMaster There is a CargoMaster variant also included in the package, currently set with three liveries... FedEx, DHL and Castle... The same upper hatch and swing door is still on the left side, but the right side passenger door is removed. Internally the seating tracks on the floor are removed and replace with netting. If you want to convert a standard C208B to the Cargomaster, you just move the "Cargomaster.txt" file to the livery you want to change. Cabin Most 208B cabin configurations are twin seats right and a single chair left, or two rows of single seats with up to nine seats available. But you have far more options here, including removing of all the seats completely. Any seat can be made to disappear, and you are also able to move the seat forward and backwards on the floor tracks, and they are switchable from a single to a double seat... you can also have the seats facing forwards or rearwards to make up a club seating arrangement. The rear right single seat is hidden, so you have to make it appear later and place it by the closed door. At the rear you can have the choice of a cargo area and cover net, or a luxurious wide double seat. It is all very clever, but also a bit finicky to use, and so you can easily get the chairs all oddly blended together into each other, and you have to sort them out before each flight? There is a sort of reset as we shall see in the menu, but nothing like the Carenado's sets of seating layout plans, and you feel the need that this is still the overall quicker reset option. Cabin detail is not as heavy handed as the Carenado either which now looks quite bland and very dated, but that is a very good thing, as the detailing here interior wise is exceptional. The beautifully crafted chrome roof lighting and air vents are both fully animated, even down to the inner vent flow adjuster. All lights are LED. Cockpit You never seem to "Sit In" the Caravan, more like "Perch" yourself up on the high tall seats. Not a bad thing. The four armrests can be all folded back for ease of access, they are chunky and nice. Note the excellent wear (worn) dirt on the rear of the two chairs, all nice attention to detail. Both front pilot seats are really well done, but feel a little posh for a utility aircraft in leather. Under seat frame is all lovely steel and again very nicely replicated. That large heavily hooded instrument panel is also very familiar, but set here though in a dull grey, not the more modern Carenado white... ... the quality and detail is exceptionally high, it feels like a very professional panel to use. Left is the same Caravan tall electrical tower (box?)... .... centre is another tall familiar C208B item in the pedestal. With a large chunky trim wheel left, Emergency Power handle, Single T Throttle, Propeller, Fuel Conditioner and Flap selection levers all set on top. Front on is another large rudder trim wheel, Aileron Trim and the fuel cutoff. Note the nicely done metal plated floor, that gives the aircraft a workhorse feel. The short stubby yokes are excellent. They have authentic Caravan branding, active electric trim and working ATC call switch... ... you can hide one yoke or both individually, unlike the only both together on the Carenado, very nice. It is a Standard Caravan layout in the default mode, and all clock instruments. The usual but highly effective annunciator panel, also known in some aircraft as the Centralized Warning Panel (CWP) or the Caution Advisory Panel (CAP). The Caravan panel version is however one of the best (looking) and can be set to DAY or NIGHT brightness, and the engine readouts and gauges are all set out beside the CAP under the glareshield with the two Fuel Gauges (GALs) far right. (External) Lighting panel is below left, Anti-Ice Panel below and the Internal lighting panel lower left. Flying instruments are basically stock standard for each pilot, but in this aircraft they are not locked in as we shall see. Each vent positioned at the end of the instrument panel has two way animated vents, and the glovebox (far right lower) opens to reveal a nice photo of the Thranda Team. Menu Thranda's Menus are very feature rich and highly detailed. There is a popout TAB under the arrow, that can be (mouse) scrolled to hide it, that is if you don't like these sort of items crowding your screen (I don't). The Menu system includes the "Dynamic Generation Series" or DGS, a Thranda speciality feature that takes full advantage of X-Plane's flexibility for in-sim, real-time modifications. As noted the "Menu" Tab (arrow) is far left middle of your screen, this will activate the Pop-Out Menu... The Menu has seven menu tabs in; GENERAL, LIVERY, WEIGHT/BAL, CAMERA, AUDIO/SLEW, PANEL and MISC (Miscellaneous) Menu - General The menu "General" sections covers quite a lot of options, the layout is highly detailed and very comprehensive. General menu selections cover; Engine Mode Simplified, Electric Tug, Window and Instrument Panel Reflections on/off, Startup Running on/off, GPU on/off, Cargo Pod on/off, Chocks and Brakes on/off. Three selections placed right cover group items, but any one item can be also accessed via "Click Spots" and can be individually selected or hidden via the aircraft graphic. "ALL COVERS" will select engine inlet/outlet covers and pitot cover, "ALL TIE-DOWNS" for rear fuselage and wing tie-downs and "ALL DOORS" for both the cockpit doors and rear cabin doors. All EXT - External Lights can be switched on and off as can the ALL INT - Internal lights. The "Electric Tug" that can be used to move the aircraft around on the ground via your joystick (left,right-forward,backwards). Static Items include Engine Inlet covers, Pitot covers and Tie-Downs The "Engine Mode" feature toggles the engine realism between "Realistic" and "Simplified". In Simplified mode the engine will automatically limit the engine to remain below the maximum torque of 1,865 ft-lbs. In Realistic mode it will be up to the pilot to avoid exceeding the engine limitations. There is built in "Checklist" (lower right menu, arrowed). And very good it is, but here not in the the red, or checked green choices you used on the other Thranda aircraft, this checklist is just white text, but far better to read. You can have checklist pop-up or in a window mode and thankfully move it, and scale it even from the very small to the very large. The two lower arrows give navigation around the checklist pages. The action detail and hints in the lists are simply excellent, and the checklist is fully detailed from Pre-Flight to Shutdown. Menu - Liveries Second Menu option is "liveries", there are two options here with the first being "PAINTED LIVERIES". There are altogether 13 liveries or two blank and eleven designs (three are also cargo liveries), and all are of extremely high quality and creative flare. To note that a couple are very similar except for a different registration. Two liveries are "Dynamic" in resources (White)... another New feature is the (Quick) selection of Dirt (Ext) Externally, Scratches and Dirt (Int) Internally. Via three percentage selections you can adjust the amount of Dirt, Scratches and Dirt Int on the aircraft (0%-255%) and apply it instantly.So you can have either a pristine or a very grubby aircraft with just a twirl of the numbers. This can be applied to any of the liveries. Dynamic Liveries Not happy with any of those designs, then why not create your own livery! With their earlier releases of their Kodiak and with the PC-6 and PZL-104, then Thranda introduced a clever feature of a way to design your own livery. This is done by switching from PAINTED LIVERIES to DYNAMIC LIVERIES top. You have a menu to select on the right that can colour a certain part of the aircraft, like the Roof, Wing, Tail or Wing tips. Select which one you want and then adjust the RGB colours for that certain area, it looks hard but you can easily design a very nice livery in about twenty minutes... the selections of Dirt (Ext), Scratches and Dirt (Int). Metal(ness) and surface Rough(ness) can also be added or adjusted as seen earlier... When done you can "SAVE" or ADD the livery and then "APPLY" it to the aircraft. The conversion takes a few minutes, but the results are excellent, and in your own design... There are already 30 preselected selections in their various designs, all are very good, and like noted you can add your own version to the list. Menu - Weight/Bal The Caravan also has a great Weight and Balance menu. Lbs and Kgs which can be selected and changed via the toggle Lbs/Kgs (arrowed). The Cargo Pod can be added or removed via the toggle top centre. This then adds in the Cargo Pod weight options on the right. Fuel can be added and the amounts are then shown and are adjustable as well in the menu (above). Pilot, passengers and cargo can all be set for individual weights and all of the CofG (Centre of Gravity) parameters are all shown on a graph, go too far or too heavy and the CofG goes red. When done you can Save the Configuration and then later re-load it, or press Load to add in the set weights. Same for the Cargo Pod if attached, once the baggage weight goes above 19 Lbs (9kgs) the bags start to appear in the pod. But obviously there is a compromise? If you want a full passenger and baggage load, then you can't have full fuel tanks, as the excess weight takes you over the weight and the CofG limits. For six passengers (with maybe a bag thrown in) then can you have your full tanks and the range. Each seating area has another function box. This allows you to control the seating, not only in weight, but the seats themselves as we saw earlier. The left box selects the seat and the type of seat, in say a single or a double. The right box arrow shows the direction of the set, in front facing or rear facing, it is better to set up the aircraft configuration here than using the earlier HotSpots as it is more direct. If you don't put the seats in, but add in the weight to the area... then the seats are replaced by Cargo Crates, it is brilliantly done and the cabin can also be configured to carry both passengers and cargo together. In reality you can spend hours on trying out different configurations for your different flying roles. Adding in passenger weight gives you a pilot (Daniel Klaue) and in the co-pilot seat his wife, but there are no rear passengers, and both are nicely actively body and head animated to the controls. Note... if you turn off the aircraft's electrical power or add the chocks o the wheels, then they both disappear. Menu - Camera There is a camera feature under the menu "Camera" selection. The left side of the panel is the "Walkaround" views, just pick the dot viewpoint you want to see to rotate around the aircraft. To the right is the default views can be selected via a menu, or press the keypad to select the view. The FoV or Field of View is adjustable via a slider. Menu - Audio/Slew Sound can be adjusted via the sound menu. There are seven slider selections with: Master, Aircraft External, Aircraft Internal, CoPilot, Radios, Environmental and User Interface. One other sound setting is on the Flap panel... As noted, on the right and left of the panel you get the audio simulation of an active noise canceling headset, which is seen as wearing a headset. Sound quality is beyond excellent as it is a built in audio mixer, so you can individually control the audio channels in real-time, and you can adjust the volumes while hearing them play. Slew mode allows you to manually move the aircraft around in a disconnected X-Plane space. It functions by temporarily overriding the various aerodynamic and physical forces on the X-Plane settings, it is to allow the user to reposition the plane as desired. This feature is however highly touchy and it is mostly used with the floats option (not yet on the Caravan, but on the Thranda Beaver and PC-6). Menu - PANEL The sixth "PANEL" Tab option allows you to adjust or change the instruments and dials. Scroll the "Panel Preset" number (arrowed) to see the four preset layouts. Customising the panel to your own personal layout is just as easy. Just select the "3D EDIT PANEL MODE" (arrowed) that gives you access to all of the 53 individual instruments and avionic units... There some great options including Aspen EFD 1000, S-TEC 55x Autopilot, Angle of Attack gauge and so on... For those that find instruments are not to their liking in say, "I wish I could move that altitude meter just a bit more to the left", then here you can simply adjust that, or even swap the instruments around the panel to your liking, here I have swapped the NAV 2 pointer to the top, and the Autopilot Annunciator below the NAV 2 instrument.... because I can. You can even adjust the brightness of the instrument. When done I can "ADD" (or Duplicate) in a new "Preset", and then "SAVE" that new layout Preset (Preset 6/6). So basically you can start off with a completely blank instrument panel and then create your own unique or personal instrument layout if you have the time and patience... and you can have up to or save 14 different instrument layouts. It is however very important to restart X-Plane to lock in the new instrumentation layout before flying. Currently the optional "Panel Background" choice is only optional to the boring Steel Grey, but Thanda notes more panel colours and styles are coming in an update, I hope they put in the Carendo white panel, as I liked that facia design a lot and miss it's inclusion here. Panel features include; Bendix King KFC-225, and the noted Aspen EFD 1000, KR 87 ADF Radio, Garmin GMA 340, Garmin GTX325 Mode C Transponder, BendixKing IN-182A Weather Radar and the usual GNS 430/530 PS/Nav/Comm units. And there is a special 3d bezel for the insert of a RealityXp GTN 750 unit if you own that add on. The EFD 1000 which is a self-contained multifunction digital display that is divided into a Primary Flight Display (PFD) in the top half, and an Electric Horizontal Situation Indicator (EHSI) in the lower half. As EDF 1000 systems go it is not as highly featured with the GPSS, MAP, 360 and Menu functions all not simulated... all the lower NAV1/NAV2/GPS selections are however available, as is the TPS (Tapes) see/hide option with the MIN (Minimums) selectable as well. and the PFD can be reversed with the EHSI. The EFD 1000 here can be used with the KFC225 Autopilot. Highly notable and announced by Thranda is the coming soon option of a twin screen Garmin G1000 Avionics suite, which most modern Caravans now use. Menu - MISC The Misc (Miscellaneous) page is currently mostly under development... notes; COMING SOON - the C208 Expansion Pack, with Tundra Tyres and Mud Flaps, Executive Seats, Option for no De-Ice, Cargo Version, G1000 Version, Synthetic Vision and Amphibian (Floats) options. "DynaFeel" on the right is a system that dynamically adjusts the rate at which the controls deflect, based on airspeed and how much the control is deflected. This means the controls will feel light and responsive at low speeds and with small deflections, but will get progressively heavier as the airspeed increases. Links to both the Support Forums and to download the built-in Skunkcrafts Updater are also provided _____________________ Flying the Cessna Caravan One of my favorite flights in the (Carenado) C208B Caravan was from Launceston (YMLT) to Hobart (YMHB), but going the long way around via Nine Miles Beach and down the lower east coast of Tasmania, So I was itching to do it again. A sort of sightseeing plus passenger delivery flight in one. There are basically no waypoints on this route (there are very few anyway in Tasmania), so this was all headings and map work, but I know the route quite well anyway. I have a payload of 1,556 Lbs (706 Kgs), with six passengers and their bags, full all up weight was 7935 Lbs (3599 Kgs). Fuel was 261.4 Gal. I set the pitch trim a little nose down, I have a couple of heavey passengers and their bags swinging out in the rear. The Fuel switches are positioned overhead, and as there are only two (wing) tanks, overall there is 332 US gallons (1256.8 liters, 2224 lbs, or 1008.8 kg) for a total of usable Jet-A fuel available in the two tanks. On of the real highlights of the Carenado Caravan was starting that Pratt & Whitney Canada PT6A-114A, producing 675 SHP here. The startup sequence is full (FADEC) automatic, so all you do is throw the (start) switch... The turbine whine comes from deep inside the machine, then builds up consistently in whine and noise until the McCauley 3 bladed metal, constant speed, full feathering propellers starts to move. Sounds of this starting procedure is as good if not better than the Carenado version, so I'm very happy about that. And soon I have a clean annunciator panel, noting we are ready to go. Like a lot of Carendo aircraft their Caravan had a tendency to have too much power even set at throttle idle, unlatch the brakes you usually headed headlong straight into the scenery. Setting the mixture in the Idle setting here and with the letting go of the brakes, the Thranda Caravan will barely move (just a little), so taxiing is far more easier and wholly more realistic than the Carenado, it is a relief as well not to being always fighting the aircraft to make it slow down, or to continually fight the heavy forward thrust. So on the ground it is an easy aircraft with nice feel to manoeuvre around the airport layouts, I set the Flaps to 10º (0º-10º-20º-Full are all available flap selections). The NAV1/NAV2 pointers are not really usable out here, as there are no DME (Distance Measuring Equipment) or VOR waypoints until Hobart, so I'll use them later. I set the "Course" to 132º or the opposite direction directly from the YMLT departure Runway in 32L as a departure circuit guide. And we are ready to roll... Mixture to full rich, throttle up and off the brakes. The set weight under thrust feels perfect, so you quickly tune into the aircraft. Power builds very nicely until rotation around the 105 knts mark (flap 10º)... ... and climb-out is good around 120 knts and 8º pitch. Rate of Climb is 1,234 ft/min (6.27 m/s), but that depends on your weight, I feel even at the Rate of Climb limit you are pretty safe and will not lose any bleed of speed like here. Powering up out of Launceston, I am already loving the machine, sounds are deep down growling, with that faint turbo-whine on top... always loved the PT6A's sound and it is glorious here. Putting the flaps to retracted always brought a significant lowering of the nose, and so it does here, but it is easily corrected, once done the speed can now start to build faster to around 130 knts. You are always aware of the aircraft's handing on takeoff, but it is in that first turn that you get to grips with the machine, in how it reacts in the turn, how it turns, the feedback drumming into your brain and the back down to your physical commands reacting to the information. Pilots truly love the Caravan and I think I know why. It is not small in a General Aviation sense, so it does not feel too light or nervy, in the opposite the aircraft is not too big either to make it ponderous and heavyish, it has that sweet spot all to itself... the Caravan is just the perfectly sized aircraft. So the handing here is excellent in feedback and feel, and you are the master of the aircraft and not the other way around. Only blot on the landscape is that the nosewheel will always continue to rotate, even if you dab the brakes there is no action because the wheel is freewheeling with no brakes to slow the rotation. It looks good initially, but then you feel it should settle down from rotating later in the flight, it looks odd moving fast consistently even while flying slowly. Another 90º turn in the circuit puts you now going south with YMLT now to our right... still climbing. Up to our cruising altitude of 6,000 ft and I easily trimmed the aircraft out of the climb pitch, not onlt in pitch,, but in yaw as well... all the flying to this point has been in manual and I could have easily flown on the perfectly trimmed Caravan all the way to Hobart, but I wanted to check out the KFC 225 Autopilot. It is a nice bit of kit connected to the Aspen EFD 1000, and they work in nicely together... St Pauls Regional Reserve is to my right and surrounding it are two valleys, the northern one goes to St Mary's, and the southern route takes you to the coast over Royal George, and that is route I will take today. Sitting high and forward, means you view out is excellent, you can easily see the wings (for icing) as well... ... a slight turn to directly East and I head up the correct southern valley. Is it fair to comment when I am already a huge Caravan addict. But this is a far, far more better Caravan than the Carenado version beloved so much in the past. It feels and is far more modern, with better tools to use and everything in here works that you can touch. Take the Voltage selector left panel. Here you can select four different Voltages in; GEN (Generator), ALT (Alternating Current). BATT (Battery) and VOLT (Voltage). They all work as they should, and it is this sort of detail that gives you a more realistic and deeper simulation. As noted the Caravan is a brilliant commuter aircraft, really the best in it's class with really no competitors, so in this role you can't ask for anything better, and I am in my element here. The sounds are as noted to be already very good, but in the cruise there is a little repetitive droning, I got used to it, but think considering all the other perfect sonic areas it could be a little better. This engine feels like a real deep torquey tractor engine and you can run it hard at full throttle until the pressures start to show you that you should need back off a little, but that huge pull is there anytime you need it. Performance is very good depending on your configuration; Max speed is 186 knts (214 mph, 344 km/h) and Cruise Speed is around 159 knts (294 km/h) TAS, for a Range of 1,070 nmi (1,232 mi, 1,982 km), Because you have onboard oxygen the service ceiling is a high at 25,000 ft (7,600 m), but you would very rarely fly that high in this sort of aircraft. Lighting The Caravan's lighting is quite basic in theory. But well done to make it feel very authentic. Both the Taxi and Landing lights are both set into each wing, Navigation lights are simple red/green and a single white light in the tail, there is also a single beacon light on the tip of the tail, and the light touch LED strobes are perfect. The instrument panel lighting is again simplistic, but well adjusted via the four twin (x8) lighting knobs on the lower centre panel. The Caravan has indirect panel lighting and it looks gorgeous here. Left Front/Right Front instruments are separate, and you have Left Flood/Right Flood to cover the left Electrics panel (tower?) and the right hand side. Lower Panel (Pedestal), Overhead, Engine Instruments and Radios all have their own adjustable lighting knobs. Provided are two pilot/reading ceiling lights that are adjustable, and a separate centre placed switchable adjustable light, the roof Fuel switchers are also nicely back lit. As with most lighting today, you can adjust all the lighting down to just the instruments for takeoff or landings, again it looks great even in this basic lighting setting. In the Cabin, there is a "Cabin" switch, that switches on a light above the passenger door and a light left mid-cabin. The bonus is that there are eight (yes count them all) separate seating lights, and they are all fully adjustable. They take time to switch each on and adjust, then the same to turn them all off again with no global roof switch or set lighting preferences available, but it is all very well done. Externally the cabin lighting all looks extremely realistic as well... so the lighting overall is brilliant. Now we are getting well up and over Royal George and in the distance you can now see the Tasman Sea. To my right is my point of reference of the glorious Tasmanian Nine Miles Beach and the Freycinet Peninsula The non reference, non-photographic nature of the X-Plane textures does absolutely no justice at all to the area, in real life it is quite spectacular, but boring here. Now we are heading directly due south for Maria Island, which is again a spectacular National Park. You now have a choice? To get into Tiger Bay (the Derwent River estuary is further south), you can cut across the Marion Bay strip, or go around the full Tasman Peninsula (the famous Port Arthur Colony is on the southern part) and well worth the extra flight, if you have the time. I choose to cut over Marion Bay, reduce my speed and start to descend as I head into Tiger Bay, as YMHB airport can now be seen on my right. Both the VOR 1 and VOR 2 are now set on the EHSI, and so is the runway course 300º. There is no ILS into Hobart's Rwy 30, but there is one on the opposite Rwy 12 (109.90 IHB), so you can still use this Frequency as a guide on the approach into Rwy 30, which I did here. In this case it was a godsend, as the runway was hidden via the direct sunlight... Flaps at 20º, you do get a little flap balloon so you have to know your (or learn) speeds at each drop to smooth out each flap drop to get it perfect, in this way it does remind me very much of the Carenado approaches in the C208B in the same context. Speed is now under a 100 knts, and at 600 ft in the approach. "Full" Flap and your approach speed is now set at 80 knts, and it feels good. Throttle adjustment is nice to control the height, touch more and you hold the altitude, a touch less throttle and you slowly sink... personally I should have given myself slightly more runway as I know the Caravan's characteristics very well, 78 knts, should it be slightly slower?... well stall speed is 61 kn (70 mph, 113 km/h) calibrated air speed, so you do have a bit more movement there. ... I touch down a bit fast, but I have a great tool at my disposal, the C208B comes with significant reverse propeller thrust! Pull the throttle full rearwards and growl at that sound, it is glorious, and the speed quickly drops away. If you have the option, I would recommend using the foot pedal brakes to slow the aircraft, the regular braking action (set to my joystick pinky) is a bit weak, I get a lot more control and braking effort out of my foot pedals. During the last few years you had this horrible sinking feeling. The Carenado Caravan was now certainly feeling it's age, so what of flying it in the future, and in X-Plane12. Well that aspect has been well and truly fixed here and X-Plane12 will be supported when it is released. Even the winding down of the THAT Turbo-Prop engine feels so comforting... ... the Thranda Caravan delivers and easily eclipses the older aircraft, yes Dan Klaue has had his masterful hand over both of them, but here he is more free to add in a bit more (okay a lot more) of that outstanding Caravan magic. _________________ Summary We are no stranger to the Cessna Caravan in X-Plane. Carenado released a C208B way back in mid-2012, it later came with the longer Grand Caravan 4 feet (1.2 m) stretch Executive version and the CargoMaster variant. Over the decade it became the biggest seller and the most popular aircraft ever for Carenado in the X-Plane Simulator. But time marches on and in the last few years the Carenado version has felt very dated, and now out of tune with the current features of the simulator, the future of Carenado in X-Plane is very much in doubt as well. In that decade the Carenado fleet including the Caravan was managed by Dan Klaue, who later became Thranda Design. So here is Thranda's version of the C208B Caravan that has not only the original feel of the Carenado, but also comes with all the bells and whistles of a modern design, so this new version is certainly the best of both worlds, and will be supported in the coming new X-Plane version X-Plane12. Thanda has always lead the pack in design and features for the X-Plane Simulator, and all that energy is packed into any Thranda release, including this spectacular C208B Caravan. It comes with initially with all three variant's, the Standard Caravan, The Grand Caravan and the CargoMaster closed in version. There are both (clever) adaptable cabin seating and freight options, with the required lower Cargo Pod is also available. The Executive, Floats, Skis and Tundra Tyre versions with the G1000 Avionics will come later in an add on package. Thranda always comes with a high range of clever and unique features to give the user a lot of personal options. Known as "Dynamic Generation Series" or DGS, this is a Thranda speciality feature that takes full advantage of X-Plane's flexibility for in-sim, real-time modifications. Here you can change the actual livery to your own designs, but build the instrument panel to your own liking as well, including options of the Aspen EFD 1000 glass instrument and a special 3d bezel for the insert of a RealityXp GTN 750 unit if you own that add on. Detail and modeling quality is off the scale, certainly when compared to the older dated Carenado C208B, but it is the more intricate detailing (animated vents and lighting, and functional areas) that really makes this C208B really outstanding. Highlights are an exposed Pratt & Whitney Canada PT6A (under the cowling), great door arrangements, and lovely detailed interiors. Menu features including a very detailed weight&Balance menu with CofG graph, expansive static elements, checklists and a great sound menu. Negatives, your not going to find many as the aircraft is very well developed in the first place, so I will say niggles here. The complex rear seating/cargo feature sometimes has a mind of it's own, so it need a default setting to stop you laboriously having to reset everything back to normal on each flight. Sounds overall are dynamically excellent, but I can't tune into the cruise droning, it maybe authentic, but it feels to looped to me. The Cargo pod bins doors are all or nothing (like on the Carenado), and the extensive seat roof lighting is time consuming to switch all on then switch all off again with only a basic Global default switch setting, notable there is the All Internal lighting on/off, but a save to your lighting preferences would be nice. The missing white instrument panel from the Carenado version, I not particularly attracted to the dull slate grey, but there is a good chance it will be coming in "Executive" Pack. Also to be aware of the large 5Gb Download. The Cessna Caravan is a very unique aircraft, the perfect pilot's machine in not being too small, but also not too big and cumbersome either, it is the sweet spot of aircraft, hence it's huge popularity. Thranda Design have certainly done it justice here, with everything (and more) you would ever want of an almost perfect C208B Caravan. Priced well under the US$50 (US$44.95) it is brilliant value as well. For most it will be a brilliant replacement for an old beloved favorite, for the rest of us the new Thranda version of the C208B Caravan will be one of the best single-prop commuter aircraft in the X-Plane Simulator today, always a legend... this Thranda Caravan just elevates the C206B package to a whole new different higher, and a more modern level... Highly Recommended. _______________________________ Yes! the Cessna 208 Grand Caravan DGS series by Thranda Design is NOW available from the X-Plane.Org Store here: Cessna 208 Grand Caravan DGS series Price is US$44.95 Two Models in One - Both are included in this package C208 Caravan 675 C208 Grand Caravan Both planes come with passenger and cargo versions Special features: FULLY configurable 3D instrument panel. Over 50 instruments to choose from! (Including Aspen EFD 1000, and support for RealityXP GTN750) Move any instrument to any location on the panel, or even between pilot and copilot's panel! Comes with 4 panel presets, but can easily be expanded by moving instruments around, using a simple and intuitive interface. Save your own presets, and even share them with the community! Instruments can be moved in 3D directly, on a 2D pop-up preview window, or by numerical entry for precise placement. Realistic custom fuel system. GNS430 and 530 can be swapped out, but a restart of the plane is required, as 430s and 530s are mutually exclusive in terms of compatibility in X-Plane Dynamic livery editor (like in the Kodiak, the Beaver, the Wilga, and the Pilatus PC-6) Full PBR control! Create stunning metallic liveries, or matte, sand-blasted look in mere seconds! Additional control over dirt/grime, adjustable in real-time to dial in the exact desired amount of wear and tear. Create "virtual" liveries, based on two basic common design layouts, and assign any colour to any available paint segment. Quickly create preview of livery in real-time, using intuitive controls. Previews now include visualization of metallic materials and dirt overlays. Apply selected livery in real-time, right in the sim, without the need to even touch a 3rd party image editor! Option to change the tail number in real-time, or disable it altogether. (Enter a "space" instead of a callsign number to create a blank tail number.) Easily and quickly create dozens of paint schemes in-sim! Also supports 11 traditionally painted liveries, all visible in a convenient pre-selection preview window. Uses SkunkCrafts Updater. Option to participate in Beta program, via check box in SkunkCrafts Updater. Excellent hi-res PBR realistic materials, featuring true-to-life plate deformation and to-the-rivet precision. Fully modelled Pratt ^ Whitney PT6A-114A turboprop engine Feature-rich elegant fly-out menu with the following features: Realism settings for engine (simplified vs. realistic modes) Custom ITT logic, to get the startup ITT temperature right. Innovative electric tug, with in-panel controls to move forward/backward at the desired speed, and steer proportionally Control over chocks, individual tie-downs, covers, internal lights, external lights, etc. Option to enable/disable Cargo Pod, with realistically simulated weight, momentum, rotational inertia, and drag characteristics. Individually load weights in different sections of the Cargo Pod via the pop-up menu Option to start up running (all systems ready), or cold-and-dark, for realistic startup procedures. Control landing lights, strobes, beacon, and nav lights via pop-up window Detailed weight and balance manager with visual chart, individual passenger seat weight control, Lbs/KG unit toggle, CG control, external tank control, and the option to save and load configuration. Control individual seat positions, or hide them altogether, to create a hybrid passenger/cargo version. Multiple camera snap points, above and beyond what's available by default in X-Plane, so you can perform your walk around checks. Adjust your camera's Field of View without having to go to an X-plane menu, allowing for real-time adjustments. Audio mixer: individually control audio channels in real-time, so you can adjust volumes while hearing them play. Slew control: move your plane around the world, temporarily bypassing flight physics. Includes ground mode and air mode. Dynamic panel control page, with a separate view for the entire panel layout preview, or a per-instrument view, allowing for fine-tuning of instrument position, as well as copy-paste function to quickly replace instruments. Flight dynamics and systems: Detailed and accurate flight dynamics and weight and balance with the help of multiple real-world active Caravan pilots. This not only gives this aircraft the proper "feel", but also accurate takeoff, climb, cruise, and landing performance. The Caravan is a well-behaved airplane and a very stable IFR platform. Easy to fly, but extremely capable! The Caravan is equally comfortable at the world's busiest airports as well as back country dirt strips. Detailed fuel system, including the small reservoir tank and the fuel selector warning alarms. Extensively simulated electrical system, including the battery, avionics busses, generator, starter, external power, and standby alternator system. Tie-downs and chocks actually keep the plane from moving, even in high winds. Advanced FMOD-based sound system: High fidelity, multi-track sounds with smooth transitions and amazing atmospheric effects. Individual volume control over different aspects of the sound experience, adjustable in real-time (while listening to the sounds) Different sounds for front of plane than for back of plane Panning around the plane in exterior view yields awesome 3D audio effects, including "blade slapping" sound when view is perpendicular to prop Individual buttons and switches in the cockpit each have their own unique sound. Sounds actually give you clues as to what's happening under the hood Outside wind intensity is affected by slip and AoA. (The more the surface area of the fuselage is hit by oncoming wind, the louder the sounds Requirements X-Plane 11 Support for X-Plane 12 when available Windows, Mac or Linux 4 GB VRAM Minimum. 8 GB+ VRAM Recommended Download Size: 5 GB (yes, very large file) Current version 1.0.3 (April 13th 2022) ___________________________________ Installation and documents: download for the Thranda_C208_Caravan is 4.67Gb and the aircraft is deposited in the "General Aviation" X-Plane folder. Full Installation is 5.24Gb Documents supplied are: 208BG1000POH.pdf Caravan 675 Performance Charts.pdf Caravan Manual.pdf Changelog.txt G1000_CessnaCaravan_CockpitReferenceGuide.pdf Grand Caravan Performance Charts.pdf Thranda Graphics Settings XP11.pdf Thranda Joystick Settings.pdf X-Plane G430 Manual.pdf X-Plane G530 Manual.pdf There are a huge amount of Documentation provided here, not only for the Thranda C208B including performance charts, reference guides, but also X-Plane/hardware settings and custom and default avionics. All updates are via built-in Skunkcrafts Updater Support forum for the C208 Grand caravan by Thranda _____________________ Aircraft Review by Stephen Dutton 28th April 2022 Copyright©2022: X-Plane Reviews Review System Specifications:  Computer System: Windows - S1700 Core i7 12700K 12 Core 3.60 GHz CPU / 64bit -32 Gb single 1067 Mhz DDR4 2133 - ASUS GeForce GTX 1080 8Gb - Samsung Evo M2 2TB SSD - Sound : Yamaha Speakers YST-M200SP Software: - Windows 10 - X-Plane 11.55 Plugins: Global SFD plugin US$30.00 : Environment Engine by xEnviro US$69.90 : RK Apps XPRealistic v2 - US$34.99 Scenery or Aircraft YMLT - Launceston, Australia 1.60 by CDG (X-Plane.Org) - Free YMHB - Hobart International Airport & YCBG Cambridge Aerodrome 1.0 by TDG (X-Plane.Org) - Free (Disclaimer. All images and text in this review are the work and property of X-PlaneReviews, no sharing or copy of the content is allowed without consent from the author as per copyright conditions) All Rights Reserved
  18. Aircraft Review : Pilatus PC-6 Turbo Porter by Thranda Design The de Havilland Canada DHC-2 Beaver was a jack of all trades sort of aircraft, but the one thing it was and built on it's success was that it was versatile. But it was also a very old design in being created in the late forties and by the sixties there was the need for a replacement aircraft with better all round capabilities. The requirements required more power, more range and more carrying capacity than the DHC-2 had to offer and oddly enough the challenge came not from Canada or even the United States, but from Pilatus Aircraft of Switzerland. The first version with a 254 kW (340 shp) pistoned-engined aircraft PC-6 first flew in 1959. But it was when an early turboprop powerplant version that became available for the PC-6 with the Garrett Air Research TPE 331 that the aircraft really came then into it's own class. But the TPE 331 didn't last long either as in May 1996 with the Pratt & Whitney Canada PT6A engine performed its own maiden flight and the PT6A really then cemented the Porter's reputation and a direct replacement for the DHC-2, the Beaver's production ended just two years later. Pilatus PC-6 Turbo Porter by Thranda Design Considering the popularity of the PC-6 Porter the aircraft has been thin on the ground for X-Plane users. There has been a few freeware versions but nothing substantial. This PC-6 version was started as a project by Daniel Klaue (now Thranda Design) that if X-Plane wanted a PC-6 it was going to be the best PC-6 he could deliver, But as Thranda grew the project was slowly put in the background around all the other commitments. It was of course never forgotten and In reality the aircraft is now totally redone as is required by the demands of modern simulation, so there is not much relation to the original version, and of course Dan Klaue has to put his own innovative spin on the aircraft. The Pilatus PC-6 looks brilliant, this is a high quality Porter to die for... let us look at the detail. Modeling and design is now at a very high level, certainly from certain developers. Daniel Klaue is one of the most prominent X-Plane developers so you are going to get nothing more that the very best, and certainly that is the case here. The detailing is simply astonishing, every panel and every rivet is accounted for, and the PC-6's unique tail design is very well replicated. Also is the overall lovely modeling curves as there are no square edge shapes in here. Wing aerofoil shape is gaze over beautiful in design... Main front wheel gear is very frame like in design, even simplistic in keeping with the rugged utility design of the aircraft, but the detail of the struts and supports is excellent, even the frame welds can be seen... note the extended suspension rubbers and nut and bolt assembly... amazing detail. And so is the complex rear stabiliser, and here you can highlight the perfect detail of the aircraft in the rear wheel assembly, control cables and even the labels on the rear wheel strut is perfection. Note the cable controlled fine trim edge tabs, and they work. A lot of the glass areas are just flat, but the main windscreen is a complex, convexed and has a large helicopter feel... here again with all the glass it is highly realistic and you can have the tint on or clear glass. Cabin The cabin has two-abreast six seats, in check blue trim, very modern. Side doors can be left open in flight if required, but would scare the bejesus out of anyone actually sitting in there, unless you were going for a parachute jump. Under seat detail is excellent, with no thin spindly legs here... Wall panels are pure metal with rivets and so good you want to wipe them down, and perfect detailing is highly realistic with lovely circular windows around the green tinted glass, note the first aid box. Currently there is no cargo version, but I expect Thranda to do that version as most Porter's are used for remote field delivery services. Cockpit The PC-6's cockpit is very basic in a utilitarian way, with just metal frames with all the controls or instruments added or bolted on... ... control sticks are too low to hide, so there is not that option, rudder pedals are as basic as the ones you use with your simulator, it is a simple moving bar and extra pedals for brakes, air and heat piping is visible and again something you would buy from your hardware store. Entry doors are quite narrow, but again helicopter deep glass, so looking down is easy, to note the whole cockpit with the high ceiling glass and long glass doors feels very open and you are sitting far up and higher than the cabin behind. I like the roof mounted slung seatbelts, they flow nicely down from the bar. Note those big red handles on each side of the cockpit eject the full door in an emergency, but sadly that doesn't work here The prominent forward metal frame bar creates a shelf, but items like the quadrant and flap switch/rudder trim, clock (right) and Interrupt and Alternate trims are bolted directly on to the frame... ... three levers control "Prop", Throttle "Power" and Mixture "Idle" which has a safety gate. The lever to the through the panel push-pull rod is expertly crafted and has excellent realistic animation, T shaped throttle lever looks like a twin throttle handle but it isn't. Flap selections are UP (0 degrees), TO (28 degrees) and LND (35 degrees). Instrument Panel The instrument panel in this Thranda PC-6 is unique as it can be configured to your own personal preferences, but first we will look at the default layout of the panel. The Porter is a strictly one pilot aircraft, rarely does it have two but the stick and rudder controls are provided in the second seat. So all the instrumentation is set to the left and around the pilot's eyes. Clear and concise, most instruments are quite large and really well done here. Standard Six covers Airspeed Indicator (knots), Artificial Horizon and the Attitude Indicator on the top row. Below is a ADF/VOR pointer, Heading Dial and Backup Attitude Indicator. Third row has a Vertical Speed Indicator, Turn Coordinator and Fuel Gauge (litres), far left lower is a Radar Altitude Dial. A note about the two Altitude Indicators in that the top row version only moves per hundred feet in a click, which I really like, unlike the backup standard clock dial version. Centre panel left has four dials with two small top and two larger lower to cover the engine performance with (small) Prop RPM speed x 100 and gas generator RPM or Ng %, and below below (large) are the Torque psi and ITT or Inter Turbine Temperature gauge. Avionics package includes both the GNS 530 and the GNS 430 GPS units, a Garmin GTX327 transponder and bottom is a Garmin GNA 340 radio set. Right side instrument panel has a few more engine readouts, these include the Indicators for the oil temperature, pressure, and fuel pressure which are combined into a single gauge top... ... below is a ammeter and an voltmeter, the PC-6 utilises a 28V electrical system. A single 24V battery is installed to provide power for engine starting and as a secondary source for DC power. A 300-amp starter generator provides normal power at 28 volts. Far right is a suction gauge (Vacuum). Centre right panel is a Hobbs counter and a lovely Whisky Compass centre screen. There are two wing tanks of 170 US gallons each (643.5 liters, 1147.5 lbs, or 520.5 kg) of total of usable Jet-A fuel. These wing tanks gravity-feed into a small 2.9 gallon collector tank located behind the cabin rear bulkhead, which feeds the engine. The twin fuel tank gauges are lower right, in compliment with the total fuel gauge at the lower SS position. Dials are really well done and look really nice. All lower circuit breakers are active and here (arrowed) fuses 5 and 10 are pulled... The electrical switchgear is set out in two rows, top external lighting and lower Master (Power), Generator and various other generic electrical power switches. There is a panel each end of the instrument panel. To the right is a De-Ice system with ampere gauge. Left is the optional external fuel tank panel... ... each under-wing external tank holds 49 additional gallons (185.5 liters, 330.7 lbs, or 150 kg) of usable fuel. The external tanks are really well done, but makes the Pilatus look very military. Notable is the ADF panel sitting down between the two seats, hard to use in a simulator way, but again well done. Each of the end of shelf airvents are fully animated, for movement and flow. Customising The Thranda PC-6 Porter can be highly customised to suit your taste. So in reality there is no default instrument setup. Menu is selected via an arrow tab left screen (it can be scrolled clear), on the menu is the "PANEL" selection. This brings up the dynamic panel options... Top row of options are 4 different panel backgrounds, Default Grey, White, Black and Blue. (Note all options can be mouse scrolled) Below is the "PANEL PRESET" that has six different Presets. Items include, Pilot glareshield switch panel, Aspen EFD 1000, RealityXP GNS 530W/430W or GTN 750/650 Touch 3D bezels (these are optional addons) and (arrowed) S-Tec 55x autopilot. But that is not all for the tinkers! You also have an "EDIT MODE" that gives you access to all of the 44 individual instruments and avionic units... .... basically you can start with a completely blank panel and then create your own unique or personal instrument layout... and have up to or can save 14 different layouts... for absolute layout choice it is crazy! For those that find instruments are not to their liking in say, "I wish I could move that altitude meter a bit more to the left", then here you can adjust that, or even swap instruments around to your liking, here above I have swapped over the DME range with the Airspeed Indicator, why because I can. This customised panel feature is a very Thranda (Dan Klaue) sort of options galore "I'll give you everything" sort of fun aspect of their aircraft. It is very clever and will make a lot of users very happy out there. Alpine Avionics Evolution Final instrument note is the EFD 1000 which is a self-contained multifunction digital display that is divided into a Primary Flight Display (PFD) in the top half, and an Electric Horizontal Situation Indicator (EHSI) in the lower half. As EDF 1000 systems go it is not highly featured with the GPSS, MAP, 360 and Menu functions all not simulated... .... all the lower NAV1/NAV2/GPS selections are however available, as is the TPS (Tapes) see/hide option with the MIN (Minimums) selectable as well. and the PFD can be reversed with the EHSI. The EFD 1000 can be used with the S-TEC 55x and all panels as seen above pop-out. Menu - General The menu "General" sections covers quite a lot of options, the layout is highly detailed and very comprehensive. Three selections cover group items but any one item via "Click Spots" can be individually selected or hidden via the aircraft graphic. "ALL COVERS" will select engine inlet/outlet covers and pitot cover, "ALL TIE-DOWNS" for propeller and wing tie-downs and "ALL DOORS" for both cockpit doors, both cabin sliding doors and the twin engine cover doors, and open the panels and it exposes inside a lovely recreated PT6A-27 turboprop, flat-rated to 550 SHP (47.3 psi at 2000 RPM) this is the Pilatus PC-6 B2/H4 version represented. The Engine can be set into two modes... SIMPLIFIED or REALISTIC In Simplified mode the engine will automatically limit the engine to remain below the maximum torque of 47.3 psi. In Realistic mode it will be up to the pilot to avoid exceeding the engine limitations. The propeller gearbox or propeller shaft can break if the torque limit is exceeded by a certain margin, resulting in engine failure and smoke in the cabin (the smoke can be cleared by pulling the firewall air shutoff control closed). There is a very nice GPU (Ground Power Unit) and an Electric Tug on the rear tailwheel, that is controlled via your joystick. There is the selection of a SIMPLIFIED or REALISTIC tailwheel actions. in Simplified mode the tailwheel is standard X-Plane rudder connected yaw in a range of +- 30 degrees, In Realistic mode it functions as in the real aircraft. There is a section in the manual relating to steering in the freewheeling mode. Other General menu selections cover Window and Instrument Panel Reflections on/off, Startup Running on/off, External Fuel Tanks show/hide, Chocks and brakes on/off. All EXT - External Lights can be switched on and off as can ALL INT - Internal lights. The lights can also be accessed on the aircraft graphic including the extending and retraction of the end of the wing landing/taxi lights, this action can be a bit fiddly and slow but clever. Menu - Liveries Second Menu option is liveries, there are two options here with the first being "PAINTED LIVERIES". There are altogether 16 liveries or one blank and fifthteen designs, and all are of extremely high quality and creative flare. To note that a couple are very similar except for a different registration. Dynamic Liveries Not happy with any of those designs, then why not create your own! With their earlier release of their Kodiak then Thranda also introduced a clever feature to design your own livery.This is done by switching from PAINTED LIVERIES to DYNAMIC LIVERIES top. You have a menu to select on the right that can colour a certain part of the aircraft, like the Roof, Wing, Tail or Wing tips. Select which one you want and then adjust the RGB colours for that area, it looks hard but you can easily design a very nice livery in about twenty minutes... ... when done you can "save" the livery and then "APPLY" it to the aircraft. It was quite easy, but I found the dash symbol - couldn't be inserted in the registration except for the lower case version? So I had to take it out. Two extras can also be added to the livery with the PC-6 logo which is very nice and the Pilatus Manufacturer logo as well, the final result is excellent. Menu - Weight/Bal The PC-6 has a great Weight and Balance menu. Lbs and Kgs which can be selected via the toggle... .... Fuel can be added and use the twin-external tanks and they are then shown and are adjustable as well in the menu (above). Pilot, passengers and cargo can all be set for individual weights and the CofG (Centre of Gravity) parameters are all shown on a graph, when done you can save the configuration and reload it. Menu - Camera There is a camera feature under the menu "Camera" selection. To the right is the internal default views to be selected via a menu, or press the keypad to select the view. The FOV or Field of View is adjustable via a slider. The left side of the panel is the "Walkaround" views, just pick the dot viewpoint you want to see to rotate around the aircraft. Menu - Audio/Slew Sound can be adjusted via the sound menu. There are seven slider selections with: Master, Aircraft External, Aircraft Internal, CoPilot, Radios, Environmental and User Interface. One other sound setting is on the Flap panel... press the left-hand screw and you get a audio simulation of an active noise canceling headset, which is seen as wearing a headset. Sound quality is excellent. Slew mode Slew mode is experimental, but allows you to manually move the aircraft around in X-Plane. It functions by temporarily overriding the various aerodynamic and physical forces on the plane, it is to allow the user to reposition the plane as desired. This feature is however highly touchy! Having a go, I suddenly found myself dangling in the air, with a ground crash coming very soon after, so use with care? Menu - MISC The Misc page is currently just a placeholder for future content. It is noted to check regularly for more information on upcoming features and configurations for the PC-6, noted coming is a "Expansion Pack" like Thranda did with the Kodiak. Flying the PC-6 Porter First you have to understand the unique attraction to the PC-6 Porter. It is as they say a "Seat of the Pants" aircraft, true pilot's love the Porter because of the feel and reaction the aircraft has under their control. So if you need to get into an impossible remote landing strip then in most cases it will be with a Porter... short, rough even steep gradients are all challenges that the PC-6 can take on with it's incredible STOL - Short Takeoff and Landing capabilities. But also remember that in front of you is a PT6A-27 turboprop flat- rated to 550 shp, turning a large Hartzell 4-bladed constant speed propeller. It is like having a powerful V8 engine attached to a Go-Kart, and your case a monster of an engine attached to a frame that you are sitting in... so the PC-6 is unique in the way you handle it, or fly it... overall you can see the immense attraction to pilots it has. Also it is a taildragger, or in this case a dragging tail with a load of power at the other end, so you really have to put the throttle up sensitive slow unless you don't want to cartwheel into scenery, really all you need is slight bit's of power until the tail lifts and you get some aerodynamic control, easy? no. That unusual tail design feels a bit small against the power and huge asymmetrical side thrust, so you really need to work hard early to keep the Porter straight, and you will use a fair bit of left rudder to counter the powerful thrust effects in the lower takeoff speeds. Once that tail is in the air you can now feel more control of the aircraft and also put the throttle up to takeoff power, but still build up the speed slowly... .... certainly the weight of the aircraft (say fully loaded) and then using flaps can make a huge difference in the takeoff run distance, but around just under 90 knts in the white zone you can finally leave the runway... If you have the runway then I say use it, as you have more control that way. The PC-6 has a rate of climb of 1,010 ft/min, or a 1,000fpm. But it can easily climb that rate at the limit and still gain speed. Service ceiling is 8,197 m (26,893 ft). Thranda do note the engine limits and to certainly the need not to exceed the parameters, as that would be easy with the power you have available, but now in the air and at your altitude it is time to trim the Porter. The electric trim is on the joystick and very easy to use (I have a keyboard trim setup), the trim display is left top on the instrument panel (arrowed). The PC-6 is super easy to trim via the vertical and a couple of flicks left of the rudder trim should have you easily flying hands off stick neutral, in fact you don't need an autopilot as the Porter will fly trimmed straight into the horizon very easily... Maximum speed is 232 km/h (144 mph, 125 kn) Vno, Vne: 151 knots or cruise at 213 km/h (132 mph, 115 kn). Range is 730 km (450 mi, 390 nmi) with maximum payload and Ferry range is around 1,612 km (1,002 mi, 870 nmi) with maximum internal and those twin-underwing fuel tanks. Banking requires a bit of back-stick pressure to keep the nose up... ... trimmed correctly the PC-6 is more like playing a musical instrument than flying as you are so tuned into the feel and controls, with then only the slight stick movements to guide or move the aircraft... you are flying like an artist. You can even adjust your altitude just by reducing the power, pull the throttle back and down you go, too steep then you can climb by pushing the throttle back up to counter the fall, and all without moving the stick... If you are quite good at this flying thingy... you can set the approach into a nice glide down just by using only the throttle, and with only slight direction movements that can point you directly onto the runway... ... at the right height flare off the nose down attitude to rub off the speed... when the speed is around 80 knts and a good 15 knts into the white zone you can drop the flaps to 28º, this effect will then drag the speed down to the approach speed of 60 knts, lovely is fact there is no flap lift, or unbalance as the aircraft slows down, you feel the lift but not that secondary sinking feeling with less power... and it is all smooth as. Drop the flap to the full 36º and your speed will rub off to 55 knts, you are still flying at this speed but any less power and then you will lose height. Stall speed is only slightly below your approach speed at 96 km/h (60 mph, 52 kn). Approaching the runway you become extremely aware of that huge four poster prop sticking right out there in front of you... ... so I do an almost three point landing to keep the nose up, this also gives me a very short landing distance, but I don't have to touch the brakes either to run off the last of the speed., two wheels landing are fine, but you habitually still keep the tail down, braking too quickly of course could tip you up nose first, broken propeller second. Yes the flying was easy, but let us not get too cocky here as this aircraft is not for total amateurs, skills were needed to do the right procedure, right speed at the right place to get that extremely exciting landing, but if you are good at flying like this, then the Porter will reward you back a thousand times over... the PC-6 is brilliant to fly. Note that you can update the PC-6 Porter by the SkunkCraft's updater, also you can opt in to the "beta" program on the updater if you want to be brave, but to be aware in having some interesting things happen to the Pilatus, as Dan Klaue is always coming up with something different. Lighting Overall the PC-6 lighting is quite basic, but still good. The main instruments can be adjusted via a knob left panel. Overhead cockpit lighting is one simple on/off red light. In the rear are just two rear sidewall cabin lights. I wondered if the Porter should have a couple of those adjustable map spotlights that Thranda do so well and one for the pilot and one for the front seat passenger? External has two end of wing drop down LED landing/taxi lights which are quite powerful, and you can adjust the beams angles to suit your landing approach which I like to do... Nice red flashing beacons can be top or both, but you can switch to flashing strobes (whites) instead. Navigation lighting is very good for wings and tail. Only note is that the lighting panel is slightly confusing to use, and it's placement lower right panel is also hard to use (reach) so the menu is usually the better option. _______________________________ Summary One of the most versatile and even a workhorse background utility aircraft, the Swiss built Pilatus PC-6 Porter is on of the most coveted pilot dream machines for its basic but powerful design, extremely flexible for its amazing STOL capabilities this is one of the most rugged and the best get in and then out of remote areas fixed-wing aircraft available. Daniel Klaue needs no introduction if you have been in X-Plane for a period of time, certainly one of the most innovative but talented developers that is highly regarded within the simulator. This is Thranda's second official release after the Kodiak of which was another if larger utility aircraft. This is a Dan Klaue aircraft and so you expect a lot of ideas and clever features and certainly the PC-6 Porter does not disappoint in that department. Modeling and detail is absolutely first rate, this is an excellent Porter aircraft with a lovely design and high quality. Detaining is excellent, nothing to comment on as every detail and more is covered. You can though a innovative menu system create your own instrument panel layout or layouts as up to 14 different layouts of 44 instruments and avionics can be saved with 6 default layouts including a Aspen EFD 1000 with S-Tec 55x autopilot, and the panel is also RealityXP GNS 530W/430W or GTN 750/650 Touch with 3D bezels ready. A huge selection of 20 liveries is still complimented with a feature to create your own colour scheme and livery, then you can save them as well. Advanced FMOD-based sound system is of course recorded from a real PC-6 and PT6 engine, a full audio-mixing desk gives you total control with detailed cockpit sounds... in other words it is pretty damn good. Negatives are very few, internal lighting is basic and some lighting controls are hard to use (reach) but compensated for in the extensive menu. Really wanted a cargo version, but that is noted as still coming? Simply a pilot's aircraft to fly and love, the Pilatus PC-6 Porter is extremely responsive to your inputs, but that is why you love this aircraft, skills are required to get the very best out of the machine as it is a powerful taildragger, but even the most early cadet pilots will love it. Huge feature list and a great value price, this is the perfect PC-6 Porter you always dreamed of, what more can you ask for! _______________________________ Yes! the Pilatus PC-6 Turbo Porter by Thranda Design is NOW available from the X-Plane.Org Store here : Pilatus PC-6 Turbo Porter Price is US$34.95 Features First plane to include FULLY configurable 3D instrument panel Move any instrument to any location on the panel, or even between pilot and copilot's seat! Supports 3rd party RealityXP GTN750 instrument. Save your own presets, and even share them with the community! Instruments can be moved in 3D directly, on a 2D pop-up preview window, or by numerical entry for precise placement. GNS430 and 530 can be swapped out, but a restart of the plane is required, as 430s and 530s are mutually exclusive in terms of compatibility. Dynamic livery editor (like in the Kodiak) Create "virtual" liveries, based on one common design layout, and assign any color to any available paint segment. Quickly create preview of livery in real-time, using intuitive controls Apply selected livery in real-time Option to include/hide manufacturer logo and "PC-6" sign Option to change the tail number in real-time, or disable it altogether Easily and quickly create dozens of paint schemes in-sim! Also supports 12 traditionally painted liveries, all visible in a convenient pre-selection preview window SkunkCrafts Updater Option to participate in Beta program, via check box in SkunkCrafts Updater Excellent hi-res PBR realistic materials, featuring true-to-life plate deformation and to-the-rivet precision Feature-rich elegant fly-out menu with the following features: Realism settings for engine and tail wheel (simplified vs. realistic modes) Innovative electric tug, with in-panel controls to move forward/backward at the desired speed, and steer proportionally Control over chocks, individual tie-downs, covers, internal lights, external lights, engine compartment enclosure Option to enable/disable wing tanks, with realistically simulated weight, momentum, rotational inertia, and drag characteristics Option to start up running (all systems ready), or cold-and-dark, for realistic startup procedures Control retractable landing lights via scroll wheel (independent left/right, Infinitely variable tilt, to use lights for both taxi and landing purposes.) Ground power unit, with modeled cart Detailed weight and balance manager with visual chart, individual passenger seat weight control, Lbs/KG unit toggle, CG control, external tank control, and the option to save and load configuration Multiple camera snap points, above and beyond what's available by default in X-Plane, so you can perform your walk around checks Adjust your camera's Field of View without having to go to an X-plane menu, allowing for real-time adjustments Audio mixer: individually control audio channels in real-time, so you can adjust volumes while hearing them play Slew control: move your plane around the world, temporarily bypassing flight physics. Includes ground mode and air mode Dynamic panel control page, with a separate view for the entire panel layout preview, or a per-instrument view, allowing for fine-tuning of instrument position, as well as copy-paste function to quickly replace instruments The "Misc" page will be updated as progress on the expansion pack continues. Now it's a placeholder page that provides links to support forums, SkunkCrafts Updater, and the Kodiak Flight dynamics and systems: The PC6 has quite a few very unique flight characteristics, including the ability to enter Beta mode in flight, and these are faithfully reproduced. (This allows for very steep descents.) The real PC6 is considered to be a real STOL workhorse, whose flight characteristics and excellent STOL capabilities are calibrated to maximum precision in the sim Details, such as the condition lever latch mechanism and a functional throttle gate add to the realism Sliding passenger doors respond to G-forces, so when returning from a parachute drop, while on a steep descent, the doors will roll shut. Over-torquing the engine will cause shaft damage, when in "realistic" mode. This can result in prop loss, cabin smoke, terrifying turbine shaft friction sounds, etc Smoke in engine can be brought under control by killing the "Firewall Air" via cabin lever Tie-downs and chocks actually keep the plane from moving, even in high winds Advanced FMOD-based sound system: High fidelity, multi-track sounds with smooth transitions Individual volume control over different aspects of the sound experience, adjustable in real-time (while listening to the sounds) Different sounds for front of plane than for back of plane Panning around the plane in exterior view yields awesome 3D audio effects, including "blade slapping" sound when view is perpendicular to prop Prop pitch produces characteristic aerodynamic aural effects, especially during Beta and Reverse mode. Individual buttons and switches in the cockpit each have their own unique sound. Realistic electrical sounds, based on bus load and other factors (Sounds actually give you clues as to what's happening under the hood) Realistic oxygen flow sound effects Combustion roar sound typical for turboprop engines -recorded from real PT6 engine Outside wind intensity is affected by slip and AoA. (The more the surface area of the fuselage is hit by oncoming wind, the louder the sounds) Requirements X-Plane 11 Windows, Mac or Linux 4Gb VRAM Minimum. 8Gb+ VRAM Recommended The plane comes with an auto-updater. Free auto updates for the life-cycle of X-Plane 11 Current and Review version 1.1 (June 6th 2020) _______________________________________________________________________ Installation and documents: Download is 1.60gb and the aircraft is deposited in the "General Aviation" X-Plane folder. Installation key is required on start up and is supplied with the purchased download file. Documents supplied are: PC-6 Manual.pdf Thranda Pilatus PC6 Joystick Settings.pdf Thranda Pilatus PC6 Graphics Settings XP11.pdf X-Plane G430 Manual.pdf X-Plane G530 Manual.pdf Thranda PC6 Documentation.pdf A Blank Livery (PNG) of four files are provided for painting. Checklists and loads of Performance graphs are provided in the manual. ______________________________________________________________________  Aircraft Review by Stephen Dutton  6th June 2020 Copyright©2020 : X-Plane Reviews   (Disclaimer. All images and text in this preview are the work and property of X-PlaneReviews, no sharing or copy of the content is allowed without consent from the author as per copyright conditions) Review System Specifications:  Computer System: Windows - Intel Core i7 6700K CPU 4.00GHz / 64bit - 32 Gb single 1067 Mhz DDR4 2133 - ASUS GeForce GTX 1080 8Gb - Samsung Evo 1TB SSD Software: - Windows 10 - X-Plane 11.41 and X-Plane 11.50b10 (fine in the beta, but the Librain effects don't work?) Addons: Saitek x56 Rhino Pro system Joystick and Throttle : Sound - Bose Soundlink Mini Plugins: Skunkcrafts Updater Scenery or Aircraft - CZST - Stewart by Beti-x (X-Plane.OrgStore) - US$25.80
  19. Aircraft Update : PZL 104 Wilga 2000 Dynamic Generation Series v1.1 by Thranda Whoa! That was seriously quick... usually the time from the initial release to the nice little extras is around two to three months, but weeks! Thank You very much, I'll take that one! And nice little extras they are as well. The Polish PZL 104 Wilga now comes with both a Float and Amphibious version of the aircraft. X-PlaneReviews covered the huge feature list and the details in our exclusive review here: Aircraft Review : PZL-104 Wilga 2000 by Thranda Design. Download this v1.1 update and install (replace?) the release version in your aircraft folder, and you will now get two (.acf) versions of the Wilga... One selection is the original wheeled "Wilga PZL 104", and the second is the new variant of the "Wilga PZL 104 Seaplane". Amphibious version There are two options with the "Seaplane", one is the "Amphibious" version and the other is the "Floats" version. We will look at the Amphibious version first. The land based Amphibious version, is excellent... if you have already most Thranda aircraft (DHC-2 Beaver, Pilatus PC-6 Turbo Porter) you would know the sort of design and quality that you would get with this option on the aircraft... the detail of the Floats and gear is of the usual high quality from Thranda... the days of front sticks and bland rudders are now well and truly behind us. Detail is right down to components and even the nuts and bolts of the detailing, plus the springs and screw levers set out on the rudder boards, and all the required and detailed (Warning) signage... they are really very well professionally modeled to perfection, right down to even the perfect riveting of the pontoons. Raising and lowering of both the undercarriage and the twin rudders is via controls in the cockpit. The Rudders are lowered and raised by a pulley system situated on the left window screen pillar, touch the ring and the pulleys goes down to the lower hook and that action lowers the rudders.... very simple but very effective. You can also raise and lower the Rudders via the pop-out MENU/MISC that is situated on the tab on the far left centre of your screen. Notable here, is that it is the same Menu option point to switch from the "Amphibious version" to the non-wheeled "Float version" lower left box. The undercarriage is retracted and lowered via a panel set centre instrument panel... the panel's lights can also be set to be bright or DIM, if flying at night. On the water the floats... "well float nice". You are certainly (obviously) sitting far higher up than in the wheeled version, but this aspect is more noticeable in such a small aircraft... the other point to make is power... ... the Wilga 2000 Textron Lycoming IO-540-K1D5 naturally-aspirated rated engine at 290 horsepower at 2,575 RPM is a powerful powerplant for an aircraft of it's size, but you are now also weighting it down with a huge platform and the pontoons sitting below you, so it takes out a lot of your speed and drag, both in the water and in the air... the Wilga is not sluggish by any means, but you more than feel the extra load you are carrying around. So the usual is required, a bit of flap (not too much because of flap drag), keep the nose up (heaven's... you don't want that pontoons to go under nose first), and at around 50 knts you should clear the water... once up retract the flaps and rudders for more forward and climb speed. In the air the Wilga looks really good, even and if actually better proportioned than with those usual bendy wheels out front. Floats version Like noted, you switch over to the clean float version via the MENU/MISC selection... again even without the undercarriage it shows off the nice lines of the floats, the high quality textures and built in PBR (Physical Based Rendering) looks and also gives you some very natural and nice reflections. Slew Mode With the Float and Amphibious versions now available, it also allows you to use the Thranda feature "Slew Mode"... this feature over-rides the X-Plane positioning and movement dynamics. It is accessed again on the MENU/AUDIO-SLEW panel far right. Basically you can control the heading (Delta) in degrees, and move the aircraft in any 2d direction via a cross-hair control... It is a cool little tool that is mostly used to dock or manoeuvre the aircraft into jetties or docking areas. But remember however to turn the Slew feature off when going back to X-Plane or using the replay mode... if not then you can then find yourself in Space! Elon Musk would be jealous... Liveries The Floats are all matched up to the same liveries as on the aircraft, giving the aircraft a completeness... no grey standardised pontoons here. Two other updates areas with the release of v1.1 includes : -Fixed strobe lights and improved nav light visualizations -Touched up some PBR graphics ________________ Summary Very quickly after their release of the Polish PZL 104 Wilga 2000 from Thranda Design, now comes the additions of both a Float and Amphibious versions of the aircraft. Usually released months later, these great new features have come at a quick clip to expand out the versatility of this great little aircraft, this also brings in the use of the great "Slew" tool that allows you to manoeuvre the aircraft into jetties or docking areas. Detail and quality is guaranteed, with top rate modeling and clever aircraft detail which is also and as usually totally excellent, and you can (again) also dynamically change the Dirt, Grunge, scratches and nicks externally and internally on the fly, so this lovely aircraft can be as clean or as dirty as you want. This Wilga is also part of the "Dynamic Generation Series", that allows a customised 3D instrument panels with 50 options, (Including Aspen EFD 1000, and support for RealityXP GTN750) and you can also "Create" your own liveries and the package includes the advanced custom flight dynamics tool "DynaFeel" This new feature option of Floats and and Amphibious version is also free! So all you have to do is redownload the aircraft from the X-Plane.OrgStore, or use the provided Skunkworks updater tool. If you are a regular user of Thranda Design aircraft, then you know already what a great deal and that the huge list of features provided are both excellent, for everyone else the PZL 104 Wilga 2000 comes obviously... Highly Recommended. ______________________________ Yes! the PZL-104 Wilga 2000 v1.1 by Thranda Design is NOW available from the X-Plane.Org Store here : Wilga PZL 104 Dynamic Generation Series Price is US$39.95 Now priced at US$34.95 Requirements X-Plane 11 Windows, Mac or Linux 4 GB VRAM Minimum. 8 GB+ VRAM Recommended Download Size: 1.3 GB Current and Update Review version 1.1 (October 13th 2021) The plane comes with an auto-updater _____________________ Update Review by Stephen Dutton 15th October 2021 Copyright©2021: X-Plane Reviews (Disclaimer. All images and text in this review are the work and property of X-PlaneReviews, no sharing or copy of the content is allowed without consent from the author as per copyright conditions) All Rights Reserved
  20. Aircraft Review : British Aerospace 146 Professional by JustFlight Was it the accidental success story that even the aircraft manufacturers of British Aerospace were surprised by? It certainly was not expected to be a big seller, but it was, if just under 400 airframes produced was a major success story. But a great aircraft it is. The British Aerospace (BAe) 146 was created to fill in a marketing gap. Faster and bigger than a regional turboprop, but smaller than a standard airliner like the 100 seater segment Fokker 100 and even the smallest of the Boeing 737 family. Designed for the regional and short-haul markets, the 146 was manufactured from 1983 until 2002. The aircraft was offered in three variants, the 146-100, 146-200 and 146-300. The equivalent Avro variants were RJ70, RJ85 and RJ100, plus the QT "Quiet Trader" and QC "Quick Change" variant. The BAe 146 was marketed heavily as a low maintenance, low operating cost, feeder airliner. Design simplicity was the priority. Many components used were off the shelf products that could be easily sourced with a minimum of specialised tooling required. This went a long way to keeping the maintenance cost of the airliner down. Using the knowledge gained in the production of the Trident and Airbus A300, the wing was made also of as few components as possible. There are no leading edge slats and the top panel of the main wing is a single piece. The wide passenger cabin of the aircraft had a standard configuration of 5 abreast seating, although a high density 6 abreast configuration was also available... but the most significant aspect of the BAe 146 was it's 4 engine configuration. The four engine layout is unusual for an airframe of this size. Four engines create complexity, but also reliability, The Avco Lycoming ALF 502 H engines produced 6,500lbf of thrust each, and were chosen for several reasons. First the BAe 146 was designed from the start to be high cantilever wing, T-tail airliner with huge STOL (Short Takeoff and Landing) capablities, and the high set engines were set in the best positioned not to ingest dirt and matter in to the engines. Another notion was that at the time there was not a better or more powerful two or twin engine option available. ALF 502 engine was based on the Lycoming T55 turboshaft which was the power behind Chinook heavy-lift helicopters. It was a very quiet engine due to a geared front fan which meant it didn’t have to spin as fast keeping the blade tip speed below the sound barrier. Other quietness factors were the high by-pass ratio as well as sound-dampening layers and the BAe 146 was marketed as the "WhisperJet". Electric power was produced by generators on the two outboard engines which gave easier access for maintenance. Keeping down running and maintenance costs, the engines were modular in construction so that parts could more quickly and easily be replaced. The aircraft configuration was also designed to enable high performance on short runways with a superior climb out rate, perfect for clearing nearby obstacles. This also enabled it to perform well at hot and high airfields where lift conditions are poor. When flight testing began, it was found that the aircraft had better takeoff and climb performance than expected, this is certainly enforced by the spectacular BAe's 146 performance in and out of London's City (LCY) airport with it's physical dimensions of the 1,508 m (4,948 ft) long runway and the steep 7.5° glideslope which is double of most 3º approaches. This highly anticipated JustFlight version of the BAe 146 is not the first one released for the X-Plane Simulator as that notion easily goes to the "Avroliner Project". I have been a huge supporter over the years of the AvroLiner Project by Andreas Much... The "Avroliner Project" was one of those projects that you signed up for, with consistent updates coming along mostly twice a year, but with smaller "Overnight" updates in-between. I loved the aircraft immensely and it was very good for it's time, but the project, sort went a bit sparse with more attention given over later to the actual website than the aircraft, but it is not to forget how much a leader the aircraft was for X-Plane in it's heyday development. A note that the difference between the 146 and the RJ versions is that the earlier 146 has a clockwork dial cockpit, were as the RJ series has a semi-glass cockpit. Currently there are still 94 aircraft in active service in the world, that being 30 BAe 146s and 64 Avro RJs, with most a conversion cargo aircraft. That sort of sets up the high expectations for this new BAe 146 release from JustFlight with their version of this classic regional airliner, the 146 has already had a release but in the P3D platform format. JustFlight's earlier detail and quality of their aircraft proceeds them, and then add in the advantage of Thranda Design doing all the X-Plane systems and performance, as it puts this release then into the stratosphere of expectation, so can it or even possibly live up to all that high regards? British Aerospace (BAe) 146 by JustFlight A first impression and the JustFlight version of the 146-300, certainly does not disappoint on the modeling or the quality... it is certainly on par with the highly regarded Rotate McDonnell Douglas MD-80. Variants included in the JustFlight BAe 146 Package You get A LOT of different variants and aircraft configurations with this BAe 146 package, so let us go through each variant first. BAe 146 Series 100 Length 28.19 m (85’ 11”) - Wingspan 26.34 m (86’ 5”) - Height 8.61 m (28’ 3”) BAe 146 Series 200 Length 28.6 m (93’ 10”) - Wingspan 26.34 m (86’ 5”) - Height 8.61 m (28’ 3”) BAe 146 Series 300 Length 30.99 m (101’ 8”) - Wingspan 26.34 m (86’ 5”) - Height 8.61 m (28’ 3”) BAe 146 Series 200QT "Quiet Trader" Quiet Traders come with a large side cargo door and internal freight, there is no -100 series QT variant BAe 146 Series 300QT "Quiet Trader" BAe 146 Series 200QC "Quick Change" The Quick Change variants come with a large side cargo door and internal freight, but also a cabin forward. There are no -100 or -300 QC Variants only a -200QC. There is however one other QC Livery for the -200 in a RAF Military quise and military elements. CC.Mk2 - RAF Statesman (ZE701) – Queen’s Flight CC.Mk2 - RAF Statesman (ZE701-Modern Livery) – Queen’s Flight Both Queens Flight aircraft are -100 Series aircraft, and note the infrared countermeasures on the side and rear of the Queens Flight Aircraft Modeling and design The problem for JustFlight is that they set their standards very high with the detail and quality of say their BAe Hawk T1/A Trainer. The Bae 146 is of course very, very good in context, again the Rotate MD80 is a good bench mark. One thing to note first off is that BAe 146 is heavy in detail, so it feels heavish on your computer, it sorts of catches up with you (revealing the base modeling in the process) when changing from the internal to external view points, it does not do anything wrong, but you feel the computer has a lot to process or get through to get the changes done... so if you have a light or low powered computer, then you will slightly struggle. Framerate was actually quite good, and in the normal numbers for me between 30fr-36fr with all the bells and whistles running on the ground with the Aerosoft's Zurich scenery installed. But if you struggle now then this airframe won't help you out. The Texture Quality images here are not shown in the "Maximum" setting, but in "High", but the differences between the two settings is minuscule, and that setting (unless you have a power house computer) is the best compromise between quality and efficiency. Glass is of course excellent, nicely shaped with great depth, tint and reflection... and delivers in realism. Notable are the aerodynamic strakes on the nose/fuselage (and wings as we will see) that add in authenticity to the aircraft... The 146's wing is interesting. As noted it is high cantilever one piece wing with no leading edge spoilers, but highly efficient. And I love the construction detail that JustFlight have done here as you can easily see the different assembly (Ailerons, flaps, spoilers) sections of the wing frame that are neatly designed and visible. Under wing detail shows all the wing access panels The leading edge is excellent with that noted aerodynamic splitter above the inner engines. Wing lighting looks authentic as well, but the wingtip inner Nav lights are a bit clumsy, all static dischargers are excellent. There flap guidance tracks on the side of the upper fuselage are really well done and when extended to full flap, extends out to the full complexity of the 146 flap system... .... I know how hard these complex flap systems are to animate, and JustFlight have done a stirling job here. The lift spoilers here are open, and note the small inner wing aileron that is really well done... as noted the detail here is simply first rate. The Avco Lycoming ALF 502 H engines are beautifully modeled and perfectly shaped. Inlet and exhaust areas are perfect and nicely cast with a realistic metal cowling on the inlet and lovely shaped engine mounts. The internal fans are highly realistic, but there are no thrust-reverser systems on the BAe 146. APU (Auxiliary Power Unit) inlet and outlet is nicely done, as is the high T-Tail detail... The famous split-airbrake tail assembly is excellent, with the internal rear lighting frame expertly done, as is the bulkhead, airbrake door detail is also very, very good with internal ribbing for strength, and with cutouts for weight savings. Note the wing speedbrake extentions when tail airbrake is activated. The undercarriage on the T1/A Hawk was exceptional with every joint, component, hydraulic line, hydraulic piston, nut and bolt is all the same and applied here, even the strut labels and markings are also correctly applied. The same can also be said of the BAe 146... in exceptional in the gear detail and realism... The nose gear is stubby... ... but the Eagle Claw trailing link main gear is exceptional in detailing. The work here is based on G-JEAO - Serial No. 1010 LN:10, which was retired from service with British European Airways in 2000 and is now preserved at the de Havilland Aircraft Museum. And the detail reproduced here is from that aircraft in all it's glory. Tyres are again like on the Hawk are excellent as are the cast rims, and bolt detail. Menu/Features The menu is surprisingly quite small with only eight selections (The Hawk had 21) to choose from and positioned via the usual JustFlight left screen side arrow, scrolling on the arrow will make it transparent. There is another menu built into the pop-up AviTab tablet. The side menu eight selections cover; ‘Toggle power’ icon (the lightning bolt) will toggle between ‘Cold & Dark’ and ‘Ready for Take-off’ states, Checklist panel, Flight computer, Animation panel (Doors and Ladder), Autopilot (Panels), Toggle the VSI between analogue and digital TCAS, Thrust Management System and the Weather radar... and on the bottom of the tab are the arrows to change the livery. The Animation panel allows you to open all four main fuselage doors, with extendable stairs on the left front main entry door... ... two lower Cargo Doors and if you are using the Cargo variant then the menu changes to access the one large left rear cargo door. There is an GPU (Ground Power Unit) toggle, but in power supply only and no physical GPU unit? Also noted by their absence, there are no Static Elements? AviTab Menu Note the AviTab plugin is required to use this feature. There is another built in menu built into the AviTab, and this is a very good if basic Weights and Balance menu... the pop-up tablet is accessed by pressing the dark patches on both front side panels. The AviTab has all the usual AviTab features including Navigraph intergration if you have a subscription. On the head of the tablet is the speed, altitude, AGL Altitude and heading (Lat-Lon). Press the top left screen change icon and it changes to another aircraft layout menu for again opening the doors, stairs and GPU... But also here you also have a weights and balance setting page to adjust passenger, cargo and the aircraft's fuel weights (arrowed)... all changes are recorded in Empty, Zero Fuel, Total Fuel and Gross weight boxes, that can be switched from Kg to Lb units. Overload the weight (very easy to do on the -100/-200 variants) and it shows up into the red. Top right on the menu are five voice announcements, that can be reset. Cabin A look up and the BAe 146 Cabin awaits... ... all four access doors are highly detailed (as are the extended stairs), but on board there is a little bit of 3d modeling in the crew seating, but most of the forward galley is simply Lo-Res textures (images)... It is not bad, but to be honest I expected more 3d detail in the galley areas. Cabin is the same... very nice but not overwhelming. But we are actually lucky in X-Plane as the JustFlight P3D version does not have any cabin layout at all? This JustFlight Version uses the six across seater layout and not the more spacious five across seating layout. Seats are again good, rather than excellent, with again the use of images to do the 3d modeling work. Ditto the overhead panels with just flat images to represent the lighting and switch panels and the air-con vents, they are a bit low-res as well. Rear galley is the same layout with lo-rate images, nice and a lot of image detail, but again not overwhelming. The Cargo variant has a sealed off front galley area and a cargo hold rear. It is all nicely detailed, but not an uber cargo interior detailed like excellent SSG B748... Cargo container is very nice, but only the one... stingy. The QC Quick Change variant does not have the combo seating and cargo interior, but it is just the same Cargo layout as the QT Quiet Trader variant... disappointing, but there you go? Cargo door detail however is excellent, note the highly detailed door conversion frame set into the fuselage. Cockpit Overview You can close or open the connection door between the cabin and the cockpit, by selecting the door... note the folded stairs to the left. Even for an airliner cockpit, it is tight in here, there is barely enough room to sit behind the controls... If JustFlight skimped in the rear, then the cockpit in detail is totally in the other overwhelming direction... it is a brilliantly detailed cockpit. Both the Captain's and First Officer's chairs are superb, great seat molding and shape with a highly detailed frame lower, and covered by a lovely full blue/cream dot material. Armrests are also all fully animated, and fold up neatly to the side of the chairs. Note the third folded seat behind the First Officer's station, better still you can move both the Captain's and First Officers chairs forward via a slider, then slide out the jump seat via it's own slider (all arrowed) and lower the seat cushion... now that is a great feature. Centre pedestal is highly detailed and the overhead panel is simply huge and also full of detail. This is a complicated layout. That is an interesting point to make. Most pilots new to this flight deck would simply want to jump in and fly the BAe 146... but that would be simply deadly. These 146s have a very unusual switchgear layout, plus the systems created here are very deep... this JustFlight BAe 146 is noted as "Professional" in that it is a "Study Grade" simulation and the extensive and deeply detailed manual bears that aspect out, the manual alone is 247 pages in size and a study of the systems and layouts are essential to getting the very best out of this aircraft. Even I had to stop, do the manual in a professional way and then go back to setting up the aircraft before doing any other aspect of understanding this complex simulation. Instrument Panel I love the layout of this instrument panel, complex, clockwork and very well done for an aircraft of this era. Yokes are lovely, and fully active with A/P Disconnect, Electric Trim and a large button right yoke is the "Sync" selection. You can hide both Yokes or each one individually by clicking on the Yoke base, which is a nice option. Close up panel detail is simply first rate and very authentic, with nice highly realistic instrument reflections. Power on (via the GPU)... The electrical power system on the BAe 146 has both AC and DC power services. AC power is supplied by two (outer) engine-driven generators, an APU-driven generator, a ground source and a hydraulically driven standby generator. The standby generator also supplies DC power. DC power is normally provided by transformer rectifiers (TRs) which convert the AC (provided by the engine and APU generators or the external source) to DC. The aircraft battery provides an emergency DC supply and also, via a standby static inverter, an emergency AC supply. The AC and DC supplies are distributed by a network of busbars classified as normal, essential and emergency. The normal busbars are duplicated to form the basis of a two-channel system: channels 1 and 2, both having AC and DC busbars. Even when I selected GPU and all the correct bus channels the, aircraft didn't receive any power? It was the EXT AC supply that I had missed (arrowed), and here are the points to make... as a lot of the switchgear in here is a three-way switch system, and finding the correct switch and the right switch position can need a little study. Again to understand anything complex, then break it down into sections and study, and that is certainly the case here with the 146's Instruments. The central Artificial Horizon is very authentic in detail... known here as the Attitude Director Indicator (ADI), it provides a visual presentation of the pitch and roll attitude of the aircraft on a spherical display. The side scale shows glideslope, and localiser deviation is presented on the lower horizontal scale, and an inclinometer is mounted on the lower front face of the instrument. F-Fast and S-Slow indications, plus the ILS indicator... There is a secondary backup ADI right. A cross-pointer flight director bar system centre displays the AFGS-computed commands, and is switched on via switch upper right, (upper left on the right hand side), and the Flight Director bars will be disabled if using the Autopilot (AP). Left of the ADI is the Airspeed Indicator with built in Mach markings, Right is the Altitude Indicator. Above is a very good and highly detailed Annunciator warning panel which you can test and adjust the brightness and follows the white, green, blue, amber or red legends warning system. There is a Instrument Comparator Monitor (ICM), compares the Captain’s and First Officer’s primary attitude and heading displays and if a difference shows warnings (ICM panel is upper left of the ADI) Lower centre Instrument panel is the Horizontal situation indicator (HSI), with built in Vertical Speed Indicator, with Heading indicator, MILES (to go) and GND Speed displays. The 146 has an identical twin gyro-magnetically stabilised compass systems installed. A flux valve is situated in each wing. With selections 1/2 that allows transfers to the other heading display Two instruments left of the HSI is a Stopwatch/Clock and a Distance Bearing Indicator (DBI) for VOR1 (DME 1) and VOR2 (DME 2). Note the Radio altimeter above the Vertical Speed Indicator. As noted in the Menu, the standard Vertical Speed Indicator (VSI) can be switched to a combined VSI and TCAS display. In addition to indicating the vertical speed, it also displays any potential TCAS conflicts. Right of the VSI is a backup Altitude Indicator... ... lower are the brake pressure dials. Note the Radio altimeter above the VSI. On the First Officer's right side pane the layout is a little simpler, but has mostly the same Standard Six instrument layout... Centre are the same nice Attitude Director Indicator (ADI), Horizontal situation indicator (HSI), with left the Airspeed Indicator, Distance Bearing Indicator (DBI) and to the right the Altitude Indicator and Stopwatch/Clock, with the Vertical Speed Indicator (VSI) set below. To the left centre of the First Officer's main instruments is the Thrust Modulation System (TMS) panel. The TMS system operates in a variety of modes and consists of a control display unit (CDU), through which the pilot can select a required mode of operation, which is interfaced with a microprocessor-based computer (TMC) driving an actuator on each engine fuel control unit to provide limited trim authority about thrust lever settings. System disconnect push-buttons are located on No.1 and 4 engine thrust levers. There are four modes the TMS system covers; Take-off (TO), TMS disconnect (GA), Maximum continuous thrust (MCT), Turbine gas temperature (TGT) and Flight descent (DESC). Set below the TMS is the Cabin Pressure gauge and OAT (Outside Air Pressure) Gauge. Centre Instument panel is dominated by the four engine sets of readout dials... ... per engine row they cover with the top five dials; Oil Quanity, Oil Temp and Oil Pressure. N1 output, TGT (Turbine Gas Temperature) and N2 ouput. Fuel Flow (FF) with Fuel Used indicators... bottom row are the three Fuel Gauges. There are three main fuel tank compartments; The Main wing compartment, Feed(er) tanks and a Surge tank... Fuel consumption is per variant; 146-100 : 425 kn: 2,468 kg (5,441 lb)/h, 146-200 : 423 kn: 2,483 kg (5,474 lb)/h, 146-300 : 429 kn: 2,517 kg (5,549 lb)/h... with ranges of; 146-100 : 82 pax: 3,870 km (2,090 nmi), 146-200 : 100 pax: 3,650 km (1,970 nmi) and 146-300 : 100 pax: 3,340 km (1,800 nmi). The fuel system is complex, but well explained by JustFlight, and transfer of fuel is possible. Very top right of the center panel is a Engine Vibration Indicator Monitor (EVIM) comprising of four separate meter mechanisms presenting vertical indication displays for engines 1, 2, 3 and 4 from the left which can be tested (arrowed lower, lower left). Below the EVIM is the flap position indicator 0º-18º-24º-30º and 33º degrees, Spolier Indicator and Landing Gear Handle/Indicator. The Master Warning System (MWS) provides the flight crew with indication of aircraft systems malfunction, status and the system is displayed on a very large warnings panel centre left and can be tested via button on the MWS Panel upper right (arrowed) and again follows the white, green, blue, amber or red legends warning system. OverHead Panel There is a lot of switchgear and detail on the OverHead Panel (OHP). All the aircraft's various systems are grouped together in panels, that can be split into upper or lower Overhead Panel(s). Upper OHP. There is a lot on these upper sections and selections of the panel, that are usually sited in the lower sections. Top of the left are Yaw Dampers, and the "Main" switches for Autopilot and Avionics power. Anti-Skid and Lift and an Hydraulic panel fills out the left. The Hydraulic power is provided by two independent systems, Yellow and Green, each having an engine-driven pump (EDP) as its main source of power as well as a standby power facility and the switch arrangement means you can control both Yellow and Green channels. The Fire Protection system on the Just Flight 146 is quite comprehensive. Each engine is equipped with a fire detection system which consists of four detector loops in two parallel pairs. When the loops are subjected to heat, a signal is transmitted to a warning system as soon as a preset temperature is reached. The warning system comprises of red and amber flight deck presentations with associated audio warnings. Each engine is also equipped with a fire extinguishing system consisting of two extinguisher bottles for each engine. The bottles are in the nose cowling of each engine. The APU, Wings, pylons, fuselage spine, electrical equipment bay and the air-conditioning equipment bay are all active in warning systems. Right Panel top is the External and Notice lighting panel, with the Air-Conditioning Panel set below. Lower OHP. The full left side of the lower OHP covers the Fuel Panel, then the Electric Panel. Top centre of the lower OHP is the APU (Auxiliary Power Unit) panel, then below the Engine Power and Start panel. Set below is the Ice-Protection warnings and switches. Right top lower OHP, is a large Pressurization Panel that covers with the Air Supply Panel, more Ice-Protection warnings and switches bottom centre and lower bottom right is an annunciator lighting and OHP lighting adjustment panel. Very bottom centre is the lighting switchgear for FlightDeck Emergency, RWY Exit Lights, Landing Lights and the left and right windscreen wipers (Three-Way) and finally the Seat Beat light switch. As this JustFlight BAe 146 is a "Study" grade aircraft, then the systems and their operations are quite comprehensive. The manual does thankfully detail everything here, but the depth of the system knowledge required here is quite high. So "Study" means just that in going deep into these systems and understanding them to get the best out of the simulation. Autopilot The Smiths SEP 10 BAe 146 automatic flight guidance system has an integrated autopilot and flight director system which provides a three- axis stabilisation and two-axis manoeuvre computation in pitch and roll, in addition to flight director computation. Study is again required here as the layout of this AP panel is quite different, the ALT (Altitude) ARM is hard to see, but I love the winding ALT SEL knob (you will find that mouse wheel settings are more accurate), and the HDG (Heading) knob is centre lower panel (took me ages to find that?) Also centre are the Course selection knobs (both NAV1 or NAV2). VHF navigation has a panel to itself on the left, you will need to turn it on via the switch, and then press the centre knob to activate (there is a Automatic Direction Finder (ADF) panel lower pedestal). VHF NAV right is VOR 2 (NAV2) radio and besides there is a brilliant "ILS TEST" system for the instruments. Engagement of the autopilot is indicated by a green triangles on the AP button at the top of the panel. The bottom row selects lateral modes and the middle row selects vertical modes. There is a Turbulence mode (TURB) mode... This mode is one of a PITCH and ROLL attitude hold, with the initial datums being those at the time of engagement. On selecting TURB, any other pitch or roll mode (or armed state) will disengage. Centre Pedestal The pedestal is very nice and boxy, but extremely well done. FMS (Flight Management System) is currently provided by the default X-Plane FMS system... so it is basic. There is a custom built FMS system coming for this aircraft in the future, and it will be a free upgrade. The late FMC is also the reason the aircraft is a little late in it's release (as well as the Covid 19 disruptions). JustFlight in rather than waiting for even more time, is releasing the aircraft and not waiting any longer on the ongoing FMC development, no timescale on the release of the better custom FMS has currently been announced other than "Soon". Centre of the top of the pedestal is a (again X-Plane default) weather radar, with VHF COMMs set below (you have to turn them on). Airbrake (Speedbrake) and Flap lever strides the stubby four impressive throttles, they have a fuel safety switch on each lever, to disengage, but as noted there is no reverse thrust levers (you have to move the Airbrakes manually as well)... Elevator Trim wheels are each side of the pedestal, and the Rudder Trim knob is on the top, and the trim positions are noted on the same panel. The Aileron Trim Knob, Parking Brake and ELEV/AIL are all on the slope panel. There is a secondary AP Panel (also on the menu pop-out), that activates and adjusts the PITCH and ROLL selections. There is a transponder that allows an ATC code and flight identification code to be entered, with XPNDR/TA and TA/RA selections. Bottom pedestal is an active BRAKE TEMPºC panel, ADF1 & ADF2 Radio and console lighting knobs (three). Side panels There are set each side a Radio and Panel Lighting panel... note the tiller wheel on both sides. Note the cup-holder that slides outwards. Lower is an Oxygen Panel, and Air Vents that can be adjusted. Window detail and opening assembly is excellent (but solid). First Officer's side has the same tiller, Cup holder (also animated), Radio and Panel Lighting knobs. There is a Flight Recorder date setting panel (that works!) and also a working Oxygen Control panel upper right. Lighting The BAe 146 lighting is extremely impressive, but also extremely complicated to use. There are four lighting panels to adjust, one each pilot side, OHP and rear console and the odd lighting knob set around the OHP. Most overhead (Storm, both side panels) and main panel lighting lights activate fluorescent tubes and filaments, which are really well done under the glareshield. Left side Instruments and Centre dials are adjusted via the left lighting panel and the right side instruments are lit via the right hand panel, Glareshield lighting is via knob lower left OHP. The best lighting feature is the centre adjustment knob on the lighting panel and two buttons for "SILL" and "LAP"... press SILL and you have a magnificent adjustable flexible stalks with a light on them... they can be positioned anywhere for the illumination of the instrument panel or side panels. There are also two "LAP" lights that are also adjustable for local illumination for reading purposes, or again to light the panel. Under LIGHTS & NOTICES panel there are also two rear ENTRY lights. OHP is simply gorgeous in lighting detail, both all the switchgear and the dial lighting can be adjusted separately. There are knee high side lights on each side of the cockpit, and again adjustable... which is a very nice touch in detail. Three knobs rear adjust the console front and rear sections, and an overhead illumination. In reality there are so many combinations you can find to get that perfect lighting scenario, for on the ground, in the air working or for minimum approach instrument lighting... it is all quite perfect. Other lighting includes EMERG CALL, CABIN CALL and GRND CALL and a reset button annotated PUSH CNCL CALL, but they don't work? Cabin, vestibule, toilet and galley lighting is provided by fluorescent tubes, with additional filament lighting in the front vestibule when ground power is connected. Illuminating signs indicate ‘fasten seatbelts’, ‘no smoking’ and ‘toilet engaged’, with a ‘return to seat’ sign in each toilet, as well as EXIT and galley lighting... of all I found only the EXIT and Galley lighting worked, but the cabin lights worked well in the daytime... but there is no cabin lighting at night. External Lighting As with the cockpit, the external lighting is extremely good as well.... Navigation lights are three-way selectable; Off-Lo and Hi. Nice tail lighting, ENTRY lighting switch can be mistaken for external use, but it is as noted for overhead cockpit use. Wing root shoulders has two sets of lights for the excellent runway turnoff lighting, and for wing (ice) lighting which is also excellent... both taxi and landing lighting is in the wing leading edge. ____________________ Flying the BAe 146 There are as noted a lot of depth in the systems in this JustFlight 146. So the awareness of all the systems and their layout positions is essential before tackling any flight. The built-in (Menu) Checklists are also invaluable to getting everything ready for flight, again I stress, that this 146 is not a hop in and fly aircraft, there is simply too much going on to do that quick fly aspect. Starting up the APU, is quite easy... then switch on the aircraft batteries and provide power to the busses. When you switch, either power, air-conditioning, hydraulics in that every action has an effect and all seen in the gauges... the depth of the systems here are really phenomenal... ... particle effects are really good as well... this the APU, but the engine thrust effects are very good as well. I am loaded just under the Gross Weight Limit 42178kg, with 106 Pass (-300), servicing the ZUR (Zurich) to BRS (Bristol) Route of 601 nm, which is about normal for the BAe 146. The full range in this configuration is 1,800 nmi. I am not going to cover the default FMS System here in this review... as almost everyone is very familiar with the system, and overall it is very basic, we will cover the FMS in detail when the custom version is released. Although the aircraft IS complex, the engine start is quite easy. Make sure all the fuel pumps are on, set the APU Air on (Bleed)... Shutting any doors or hatches and pulling in the stairs give off great action sounds, open the cockpit door and passengers are a noisy talkative group, so you close the cockpit door again for a bit of flightdeck quiet. I switched all the throttle fuel locks off before starting the engines, it is easier than fiddling around with them later... ... select the engine you want to start, but always first an outer engine for a generator power supply, via the main switch... Start Power on, CONT IGN (Ignition) on (There is a separate in Flight Start option if required), and hit the START switch... The Avco Lycoming ALF 502 H engines will then spool up very, very quickly to the 20% n2 starting point, were at this point you up the throttle from the detent to the idle position to start the fuel flow, the engine then completes the start procedure to settle around the 52% n2 running in idle. If you want the full whine and intricate startup sounds then you will be disappointed here, because there is isn't any, well a little, but these tiny Avro engines are super quiet, even when all four are running it is hard to hear anything from the cockpit, except for a nice humm... the 146 isn't called the "Whisper Jet" for nothing. Final checks of the GRND (Ground) test panel... the test of the Stall Warning will jump you out of your seat, but all the different sounds are very authentic, and a double check of the MWS Panel is also a good thing to do... .... last thing to do before pulling away is to set the Thrust Modulation System (TMS) for takeoff and sync all the engine thrusts together to the current airfield temperature, it takes time to set it's self up, but again very authentic and well worth learning to use correctly. After spending an eternity on the ground, it will good to just fly the 146. Unless you have one of those Thrustmaster TCA Quadrants with the four lever option, then you will have to do what I did, lock the four throttles together as one, not ideal, but no option. Flaps are set at 18º for takeoff, but this 146 is a STOL aircraft so a higher flap selection will give you more lift on a shorter runway... On Joysticks/Throttles, JustFlight recommend to set the "TakeOff-GoAround" selection on your Joystick/Throttle to activate the TO-GO system if required. There are significant differences between the different three variants, even by load capacity and weight as well, so this -300 at a gross full weight feels very heavy, even ponderous in the taxi, I don't mind as I love heavy aircraft to fly for the feel, but you have to be aware of the wide band of feel of flying the 146 in size and weight. In the taxi it is nice to tool around the taxiways, but as noted you need a little thrust to move the set weight. Two notes... you can physically move the tiller to steer the aircraft as well as using the standard (joystick) yaw which is a brilliant option, it was usually one or the other. Another point is to check the "Config" button, which is similar to the Airbus "Config" test. It tells you if the aircraft is fully set up for takeoff, if not the red "Config" alert will show in the MWS... aircraft ‘doors not closed’ warning system is also part of the config system, but I missed a setup as we shall see. I have a departure from Rwy28 at ZRH, but at 8202 ft, it is the very shortest at Zurich... .... throttles up and I am away... very slowly, and the speed builds slowly with the weight as well, soon I am seeing the wrong end of the runway 28, but just nudging the 150 knt takeoff speed, a slight pull of the yoke to the rear, and thankfully the 146 bites the air. But I do now have that "Config" alert now screaming in my face... I missed something, which shows there is a lot of detail to cover to get this 146 ready for flight. I have "Positive climb", but you need to get the gear and flaps retracted soon to help with the drag. This is as noted in this configuration it is not representative of the general feel of the 146 series, in the -100 the aircraft it just leapt off the runway in a rush, so as noted the weight and variant really count on the way you depart the runway. Very quickly I am in very much in love with the 146, as it is brilliant to fly, but don't ignore the fact it is a very demanding and complex aircraft to fly from JustFlight, there is a lot going on, and you have to address the details, but that also makes for a rewarding and very fulfilling simulation. Turns (banks) are smooth and clean, you very quickly tune into the aircraft. Moving knobs by pure mouse movement is hard, as noted using the wheel to get exact numbers is far better and easier, also the AP pop-up is hard to use. Getting it up on screen the menu gives you all three windows, of which two have to be removed (every time is wearing)... Then the AP can only be switched on from here and not from the glareshield panel... finally the V/S (Vertical Speed) is hard to use in one click increments, up or down, to just hold the switch down does nothing, but there is a trick!... If your climb (pitch) is correct and so is the speed, you can "Sync" them or lock them in to continue the climb by pressing the large right yoke button... The IAS selection also is another option that would then hold your selected speed (Airspeed Indicator, not a panel speed setting, because there isn't one), so IAS is more useful in the cruise than the climb. All PITCH, ROLL, ALT, MACH, IAS and VS modes can be synchronised without having to disengage and then re-engage the actual AP mode. The "Config" alert is still screaming in my ears and flashing on the MWS... what did I miss I still don't know, I again ran through the checklist, but something is amiss... I cancel the alert and it finally quietens down, but the missing setting bothers me, of what it actually was. But notable is that even the usual Course pointers have to set (NAV1/NAV2) and be split for it to set off the alert... its all in the detail, detail. So you soon realise there are a lot of hidden automation systems, the 146 is certainly no Airbus, but there are helper systems that can take the load off in crucial moments of flight, the trick is to learn them and then use them effectively. so the 146 is a pre-fully automation cockpit with early automation systems. Locking in the L NAV with the FMS flightplan is tricky, as you are a little in the dark of where you are. I well... cheat a little by using the Navigraph application to overlay my route (from Simbrief) over the map and use the aircraft position arrow to guide me to the right place to lock in to the flightplan, but this is a Laminar FMS basic limitation, it will be interesting on how the coming custom FMS will make these flightplan areas more realistic. The BAe 146 is an extraordinary simulation, but the workload is quite high to fly the aircraft Professionally, so it certainly lives up to the "Study" and Professional moniker. Note the amazing engine particle effects. Sounds are brilliantly good, but also seriously complex. There are 450 flight deck sound effects alone and recorded from RAF CC.Mk2 ZE701, with authentic flap retraction/extension airflow 'howling' sound... plus+ there are another 520 sounds samples in high-definition with accurate 3D placement. The volume is pushing the limits of FMOD 1.08 sound system with more than 150 sound tracks being played at the same time. So finding (annoying) alert sounds and even minor sounds will mean moving around the instrument panel and cockpit 3d space to find the source... super authentic, but another high workload area, another point to work out is of which sound is what, and then address it. By definition the BAe 146 is not a fast aircraft Mach 0.739 (426 kn; 789 km/h) Max, Mach 0.7 (404 kn; 747 km/h) is the usual cruise speed and the Ceiling is a low 35,000 ft (11,000 m)... but this is a regional airliner in the turbo-prop category and not a B737 or A320 classification machine. Considering, I am very quickly coming up on to the south coast of England... time to get ready to land. Like most regional aircraft the trick of flying them really professionally, is controlling the speed, and the descent speed control is highly critical, as is the final approach speeds, so you use the Airbrakes here efficiently to keep the descent rate speed down to just over the flap limitations in the 170 knt range. Set the rate of descent via the trim and press the "Sync" to hold it... this way is far better than using the awkward menu panel option, but you can do it that way if you want a more specific vertical speed control. One thing I learnt very (very) quickly was the throttle control, as the 146 is very sensitive to any throttle changes... ... nose down (too fast) or pitch up (too slow) is very (extremely) easy to do, if you don't get the speed and throttle power set "Perfectly" correct, then it will need practise to get it absolutely perfect to the size and weight of each variant, but flap set to 30º and your approach speed should be around 130 knts. Note the flap extention sounds are loud and brilliant at the same time, ditto lowering the gear... you hear everything, every movement to the final latch locks. If using the ILS, then the actions change the NAV mode from HS 1-R NAV to NAV for the X-Plane NAV1 selection, then select both the GSL (Glideslope Coupling Mode) and then V/L - VOR/LOC mode to lock on to the glideslope. Full 33º flap and your final approach speed is reduced to 120 knts then when acquiring the ILS it is reduced to 115 knts, but again to note that in a different configuration (lighter), I was able to do the same approach numbers with a flap selection one step higher at 30º, so the approach speed is relative. Keeping the speed perfectly aligned to your horizon ball, sounds easy, but you need to nudge the throttles consistently to keep the thrust correct in the right place to hold the speed... y ou really work in here with the smaller details of flying the aircraft skillfully. You are tempted to slight pitch up for the flare, but that is not a good thing to do, as when you reduce the thrust the nose goes up anyway, so you have to control the forward speed and so the pitch to have only a 3º touch up altitude rather than the 5º, three times I have done this and always missed the 3º bar, so I still need to practise a better lower nose down pitch flare to get it perfectly right. On reviewing, it's not too bad an approach, but I think I can do better... on the flare thumb disconnect the AP on the yoke, and let the 146 settle nicely... ... once down you pull the AirBrake lever full rearwards to get maximum braking from that split tail and huge lift spoliers on the wings... .... they are very effective as well, but there is no roar from the reverse-thust, just you silently losing the speed, with a progression of the brakes to slow yourself down, you can check the brake temperatures as well on the rear of the pedestal and switch on the brake fans if they are all getting too hot! Cleanup the aircraft and head for the gate, then do the shutdown list.... done. Liveries There are 10 -100 liveries including, Air France Express (G-JEAT), AirUK (G-UKPC), British Aerospace demonstrator (G-SSSH), Dan-Air London (G-BKMN), Formula One Flight Operations (G-OFOM), Jersey European (G-JEAO), Pacific Southwest Airlines (N246SS), United Express (N463AP)... The two Queens Flight; RAF Statesman 1980s (ZE701 – Queen’s Flight), RAF Statesman modern (ZE701 – Queen’s Flight) are also counted because they are -100 airframes. CLICK to ENLARGE! There are 7 -200 liveries including, AirCal (N146AC), Air Canada Jazz (C-GRNZ), American Airlines (N699AA), Continental Express (N406XV), QantasLink (VH-NJJ), SN Brussels Airlines (OO-DJJ) and USAir (N165US) There are 3 -200 QT (Quiet Trader) liveries, TNT Airways 1990s (G-TNTA), Ansett Australia Airlines Cargo (VH-JJZ) and Titan Airways (G-ZAPR) There are 3 -200 QC (Quick Change) liveries, TNT Airways (OO-TAZ), Titan Airways (G-ZAPK) and RAF C.Mk 3 (ZE708) There are 7 -300 liveries including, Aer Lingus (EI-CTO), Air New Zealand (ZK-NZN), Ansett Australia (VH-EWM), Astra Airlines (SX-DIZ), British Airways (G-OINV), Flybe (G-JEBC), KLM UK (G-UKAC) There are 3 -300 QT (Quiet Trader) liveries, ASL Airlines (EC-MID), Australian Air Express (VH-NJM) and TNT Airways (OO-TAD) ________________________ Summary The British Aerospace (BAe) 146 is a short to medium range airliner. Faster and bigger than a regional turboprop, but smaller than a standard airliner, and the 146 was manufactured from 1983 until 2002 with just under 400 airframes. The aircraft was offered in three variants, the 146-100, 146-200 and 146-300. The equivalent Avro variants were RJ70, RJ85 and RJ100, plus the QT "Quiet Trader" and QC "Quick Change" variant. Powered by four small Avco Lycoming ALF 502 H engines that produced 6,500lbf of thrust each. There was a standard configuration of 5 abreast seating, although a high density 6 abreast configuration was also available. This is the highly anticipated JustFlight version of the BAe 146, but not the is not the first RJ or 146 released for the X-Plane Simulator as that notion easily goes to the "Avroliner Project". Released by JustFlight originally for the P3D platform, the aircraft has been redesigned for X-Plane by the renowned X-Plane developers Thranda Design with extensive systems and performance enhancements and with more features than the P3D version. Priced just under US$75.00. The JustFlight BAe 146 is in reality great value for the category the aircraft is placed in. There are not only the three series variants of -100, -200 and the larger -300, but variants of the -200 QT and QC, plus -300 QT, -200 in a RAF Military QC airframe and two Queens Flight -100 with infrared countermeasures, count them, there is eight different variants of three different airframe sizes, and that is a lot of aircraft for just one package alone. The extensive manual is a deep 247 pages of systems and features, not just a system, but reproductions of authentic systems that requires study and operation... so the package is a "Study" grade and Professional aircraft to learn and operate. All major systems are covered from Fuel, Fire, Hydrolics, Air-Conditioning, Electrical, APU, Pressurisation, Iceing, Oxygen, Master MWS - Warning systems, Engine Air supply, Communication systems, Authentic Smiths SEP 10 Auto Flight systems and extensive features of Thrust Modulation System (TMS) and AviTab menu and intergration. All external and internal modeling is excellent, high quality liveries and lots of perfect detail externally, internally the cockpit is of perfect detail and immersion including for excellent VR (Virtual Reality), with moving armrests, chairs and even a pop-out third jumpseat. The cabin is although is a little lo-res and basic, but still better than the no cabin on the P3D version, QT Cargo has huge detailed door, and two menus service all opening doors, AP pop-ups, Quick start, checklists, TMS pop-up, basic weights and fuel loading. Both Internal and external (complex) Lighting and fully developed 3D extensive sounds are exceptional. Comments include no physical GPU (strange on an aircraft in this category), the mentioned internal Lo-Res and detailed cabin with no night lighting, and to note the aircraft is very complex and a little heavy on framerate, also the X-Plane replay is average. Finally is the built in basic Laminar Research FMS system is in reality out of place in this extensive cockpit. But a custom FMS system is coming (very soon) and as a free upgrade... and that installation will certainly make this aircraft an even more authentic experience. Certainly extensive in pretty well any area you would want to delve into, just pick one and be absolutely blown away by the depth of this Bae 146 Series from JustFlight. We expected it to be good, but it delivers extensively as a very deep but authentic simulation. But be aware, that depth of systems and operation, does require time to learn and be put into practise, there is a lot of areas to cover and a lot to learn to get the best out of these 146s, certainly it is no, drop in and fly (unless you want a lot of alarms in your ears), but again that is the aim of this very high level of study simulation aircraft, the skill level is high as well and you will need to commit to the aircraft to get the very best out of it... do that, and you will get an exceptional simulation in return.... Absolutely Highly Recommended. ___________________________________ Yes! the British Aerospace 146 Professional by JustFlight is now available from the X-Plane.Org Store here : BAe146 Professional - JustFlight Price is US$74.99 Features Include: Highlights Eight variants of the 146 are included: - 146-100 - 146-200 - 146-300 - 146-200 QC & QT (cargo) - 146-300 QT (cargo) - CC.Mk2 (RAF VIP configuration with countermeasure pods) - C.Mk3 (RAF cargo configuration with countermeasure pods) Accurately modelled using real-world aircraft plans and comprehensive photography of the real aircraft (G-JEAO, ZE701 and ZE708) Numerous animations including: - Trailing edge flap surfaces - Wing-mounted spoilers and tail-mounted airbrake - Ailerons and elevators feature servo tabs, and balanced, free-floating control surfaces which are affected not only by oncoming air, but also by turbulence, side winds, up and down drafts etc. during taxi or low-speed ground operations - All passenger, service and cargo doors use custom animations and featurr extra logic such as the auto-closure of doors above a certain speed - Windscreen wipers with individual left/right animations and independent speed controls - Distinctive retractable tricycle landing gear featuring complex trailing link shock-absorbing mechanism on the main gear - Countermeasure pods, HF aerial and more Cockpit A truly 3D cockpit environment right down to accurately modelled seat belts and screw heads Cockpit textures feature wear and tear based on reference photos taken in the real aircraft to produce an authentic environment Captain, Co-pilot and jump-seat positions are modelled with hundreds of functional controls, including over 200 buttons, 100 switches and knobs, with smooth animations, easy-to-use clickspots and precision sounds Fully VR compatible Aircraft configuration system that will allow you to choose between 'cold & dark' or 'engines running’. These configurations can be customised via the Manifest.json file. Custom throttle lever logic – fuel latch logic which is compatible with hardware (avoiding jitters due to conflicting throttle positions), cutomisable variation in throttle positions for added realism, clickspot for controlling all four levers simultaneously etc. Functional crank handles on knobs such as the altitude select and rudder trim, which allow for more intuitive, realistic and quicker operation Full support for command assignments, hardware and cockpit builders: - All controls can be assigned to commands, with tooltips on every clickspot to indicate which command to use - Parameters such as smoothing animation, number of positions, attached dataref, push-button depth, knob rotation multiplier, frame-skip (for optimisation), default position etc. can all be customised via the Manifest.json file, providing great support for hardware and cockpit builders. - Default commands for landing and taxi lights, windsscreen wipers, panel lights etc. are still respected, despite being implemented with custom functionality Custom features such as ‘hide yokes’ are controllable using default commands (e.g. 'Hide Yoke') as well as via clickspots EFB tablet with door and call-out controls and with AviTab support Sounds Studio quality Lycoming ALF-502 engine sounds, recorded from RAF C.Mk3 ZE708 Over 450 flight deck sound effects recorded from RAF CC.Mk2 ZE701 Detailed audio equipment such as the APU, brake fans, electrical circuits, hydraulic equipment and much more Distinctive flap retraction/extension airflow 'howling' sound More than 520 sounds samples in high definition with accurate 3D placement. Pushing the limits of FMOD 1.08 sound system with more than 150 sound tracks being played at the same time with no virtualisation. Full 7.1 surround sound support via FMOD, with 3D positional sound for VR users Extremely detailed external sound system: - Takes into account distance, speed, altitude, temperature and air pressure, just like in real life - Accurate touchdown sound based on impact speed - Multi-directional sound during fly-by and camera location on external view - Realistic runway roll sounds, complete with periodic bumps that depend on lateral runway position - Realistic wind sound that reacts not only to the speed of the aircraft but also how the wind is interacting with the fuselage (AoA, side slip etc.) - Realistic ambient sounds which replaces the default X-Plane sounds with a high fidelity FMOD sound system recreating the atmospheric effect, such as rain, birds, thunder etc. Interior and cabin sounds: - Passenger sounds, based on aircraft weight, which react according to your flying style. Passenger cabin sound changes as you move around, as if you were inside the real plane. Lighting Full HDR lighting with gimballed lights that can be aimed and dynamically illuminate whichever part of the cockpit is aimed at Independent lighting controls for Captain and First Officer Dimmable integral lighting for each panel, accurately dependent on corresponding electrical bus Dimmable dynamic flood and storm lighting for a highly immersive and customisable night environment (more than 12 individual light sources including entry, lap, sill and flight kit) White and red flashlight for night operations Accurately simulated exterior lighting including dynamic wing, logo and runway exit lights, and taxi/landing and navigation lights with different intensities Strobe lights with customisable strobe flashing pattern All exterior lights, including navigation, strobe, ice, exit, logo, landing, taxi and beacon lights are fully HDR with dynamic spill light, illuminating ground and scenery objects, as well as the aircraft itself. Other Features Comprehensive manual with tutorial, FMC guide, procedures, limitations and handling notes Payload manager for realistic fuel and passenger loads AviTab (third party tablet plugin) compatibleGoodway compatible Multiple interior and exterior viewpoint presets PSD paint kits included (free separate download) so you can create your own paint schemes You can take a look at the full detailed PDF manual here! Requirements X-Plane 11 CPU: Intel Core i5 6600K at 3.5GHz or faster 8GB RAM or more DirectX 12-capable graphics card from nVidia, AMD or Intel with at least 4GB VRAM (GeForce GTX 1070 or better or similar from AMD) Windows 10 / 7 / Vista / XP, MAC OS 10.10 (or higher) or Linux 2GB hard drive space Release and Review Version 1..0 (April 28th 2021) Installation and documents: Windows download is via an .exe installer does the full install and expansion of files in the X-Plane/Aircraft folder at a full installation of 3.63gb. Mac and Linux is a download File (no download size is provided). All updates or even downloads can be done via the Skunkcrafts updater. AviTab Tablet Plugin IS REQUIRED to use with this aircraft. Documents Extensive 247 page Manual is provided. Incuded are extensive system details, Procedures and Flying & Handling notes. Flight deck Audio guide and Laminar Research FMS Manual. JF_BAE146_Flightdeck_Equipment_Audio_Guide.txt EULAstandardcommercialandacademic2019.pdf FMS_Manual.pdf 146 Professional X-Plane manual.pdf Livery images were courtesy of JustFlight ________________________________________ Aircraft Review by Stephen Dutton 30th April 2021 Copyright©2021: X-Plane Reviews Disclaimer. All images and text in this review are the work and property of X-PlaneReviews, no sharing or copy of the content is allowed without consent from the author as per copyright conditions) All Right Reserved  Review System Specifications:  Computer System: Windows - Intel Core i7 6700K CPU 4.00GHz / 64bit -32 Gb single 1067 Mhz DDR4 2133 - ASUS GeForce GTX 1080 8Gb - Samsung Evo 1TB SSD Software: - Windows 10 - X-Plane 11.53 Plugins: Traffic Global - JustFlight-Traffic (X-Plane.OrgStore) US$52.99 : Global SFD plugin US$30.00 : Environment Engine by xEnviro US$69.90 Scenery or Aircraft - LSZH - Airport Zürich v2 by Aerosoft (X-Plane.OrgStore) - US$27.99 - EGGD - Bristol International Airport by Pilot-Plus + (X-Plane.OrgStore) US$22.95
  21. Updated Aircraft Review : DHC-2 Beaver - DGS Series v1.1 by Thranda Design Mention the word "Beaver" and "de-Havilland" and any pilot will go misty eyed, and gaze at you blindly lost in cloud of personal memories, it is an emotive aircraft. The DHC-2 Beaver is a single-engined, high-wing, propeller-driven, STOL aircraft that was developed by de Havilland Canada in 1946, and is known as a bush plane, in fact one of the most highly regarded bush aircraft ever created. There was 1,657 Beavers built between 1947–1967 and half are actually still flying and working hard. In fact you can currently buy a zero-time frame and just rebuild your current aircraft and keep the machine flying as long as you can afford the new airframes... so why replace perfection. History de Havilland Canada hired Punch Dickins, a famous bush pilot, as Director of Sales who began an extensive program of collecting requests from other pilots and to understand what they needed in a new type of aircraft. Almost without variation, the pilots asked for tremendous extra power and STOL performance, in a design that could be easily fitted with wheels, skis or floats. When de Havilland engineers noted that this would result in poor cruise performance, one pilot replied "You only have to be faster than a dog sled". Other suggestions that seemingly sound mundane but important in the bush plane world; full-sized doors were installed on both sides of the aircraft so it could be easily loaded no matter which side of a dock it tied up on. The large doors (known as Alaska doors) were also made wide enough to allow for a 45 Imperial gallon drum to be rolled directly up and into the aircraft. On September 17, 1946, de Havilland officially put together a design team consisting of Fred Buller, Dick Hiscocks, Jim Houston and W. Jakimiuk, led by Phil Garratt. The new aircraft was designed to be all-metal in using "steel from the engine to the firewall, heavy aluminum truss frames with panels and doors throughout the front seat area, lighter trusses toward the rear and all monocoque construction aft". At the time de Havilland Canada was still a British-owned company and there were plans to fit the evolving design with a British engine. This limited power, so the wing area was greatly increased in order to maintain STOL performance. When Pratt & Whitney Canada offered to supply war-surplus 450 hp (340 kW) Wasp Jr engines at a low price, the aircraft ended up with extra power as well as the original long wing. The result was unbeatable STOL performance for an aircraft of its size. it was decided that the new bush plane was much like the hard-working beaver and so as many aircraft at the time were named after animals, the aircraft was designated after this industrious animal. The first flight of the DHC-2 Beaver was in Downsview, Ontario by Second World War flying ace Russell Bannock on August 16, 1947. The first production aircraft was delivered to the Ontario Department of Lands and Forests, a design partner, in April 1948. The Beaver was designed for flight in rugged and remote areas of the world. Its short takeoff and landing capability made it ideal for areas normally only accessible only by canoe or foot. Because it often flies to remote locations, often in cold climates, its oil reservoir filler is located in the cockpit and the oil can be filled in flight. A series of upgrades to the basic design were incorporated. One major customer introduced the use of flat steps replacing the earlier tubes, a feature that is now almost universal. In 1987, the Canadian Engineering Centennial Board named the DHC-2 one of the top ten Canadian engineering achievements of the 20th century. The current ownership of the certificates and tooling gives Viking Air of Victoria, Canada the exclusive right to manufacture new Beavers. Viking now sells a remanufactured and rebuilt DHC-2T Turbo Beaver upgraded with a Pratt & Whitney Canada PT6A-34 680 hp (507 kW) turboprop engine. With a maximum gross takeoff weight increased to 6,000 lb (2,700 kg) it can carry 2,450 lb (1,110 kg) of freight. However, Viking Turbo Beavers are only rebuilt from existing air frames, and are not new-builds, unlike Viking's own DHC-6 Series 400 Twin Otter, which is manufactured from a completely new airframe. (wikipeida) Performance - Maximum speed: 158 mph (255 km/h) - Cruise speed: 143 mph (230 km/h) - Range: 455 miles (732 km) - Service ceiling: 18,000 ft (5,486 m) - Rate of climb: 1,020 ft/min (5.2 m/s) DHC-2 Beaver - DGS Series v1.1 by Thranda Thranda Design seem to want to develop, strong rugged utility aircraft, first was the Caravan like Quest Kodiak, then the excellent Pilatus PC-6 Turbo Porter and now the greatest of them all in the DHC-2 Beaver. This version is the Beaver that incorporates the "Holmes Extended Engine Mount", which moves the 917lbs engine forward by almost 10 inches. This modification then moves the center of gravity of the plane forward, and in then allowing additional loads to be carried in the back without exceeding the aft CG limit. Comparisons are going to be made with the original X-Plane Beaver from SoulMade Simulations DHC-2 version a few years back, that aircraft is a pure DHC-2, were as this version is a more slightly modernised version, the SMS version is also now slightly older with only a few updates, were as this version is all completely wizz-bang and up to the current state of X-Plane dynamic standards. This is an updated version of the release review, and the update v1.1 comes with the promised Seaplane version, both with amphibious (landing gear) and standard floats... see Seaplane section below. A first look at the aircraft reveals a very nice and very authentic feeling aircraft, you know that this DHC-2 is going to be really good... even when covered over to protect the aircraft from the elements, that rugged engine/window cover is a brilliant start. Those first impressions are highly important, you know that certainly the Thranda Design ethics are always going to be some of the very best in X-Plane, that is always a religious known, but that extremely high standard we always expect from Thranda does not come easy either... but there is always value and quality abound, and again here you feel every aspect of that as well as see it. Time to pull the cover off, and see the aircraft below... That is better, "Magnificent" isn't it! The detailing is exceptional, the mapping of the precision of the rivets are simply excellent, and I love the gap in the cowling, actually done twice with the extended engine mount if you look closely. The Pratt & Whitney R-985 Wasp Junior engine, is rated at 450 BHP at sea level. This is an air-cooled, carburetted, 9-Cylinder radial engine, incorporating dual magnetos and an engine-driven single-stage supercharger. And the engine detail really jumps out at you with the coloured inner components, that aspect should not work on such an old aircraft, but it looks simply brilliant here... ... note the chrome valve guides and oil circulation, insanely good, and detail to die for. The Wasp Jr is connected to a single 3-bladed constant speed propeller mounted at the front. The aircraft will easily support the most discerning eye, the detail is so, so good, note the upper engine vents, exhaust, and the excellent landing gear support detailing as it is mounted on the fuselage. You can look at the landing gear assemblies is absolute detail, because the quality will support your critical eye, note the lovely disk brake assembly and it's attachments. Your paying for minute detail and you are certainly getting your money's worth here. Cast your eyes over the rear, the elevator detail is excellent with great mapping detail and note the fine elements of only a few simple metal rods (arrowed) that control the vertical aerodynamic surfaces... these rods are all there is between you and certain death. The rear tailwheel is also highly detailed with excellent control cable animations for realism. Tailwheel can be either free castoring or locked to the rudder. There is a complete lovely raw roughness and wear to all the surfaces with again that excellent rivet mapping that gives you such a heightened realism... lovely stuff. One of the requirements was that the DHC-2 had great STOL (Short Takeoff and Landing) performance, the depth of drop of the flaps at a 58º degree show this performance, again the detail is very good. Thranda pioneered great glass and reflections in X-Plane, and that same skill is on show here. Main windshield is a work of art, but so are the amazing bubble windows in shape, and wear (note the excellent glass streaks). You also have the option of either bubble or flat side windows. DHC-2 Internal Looking up into the cockpit and you know this is going to be good, and the detail even from seen down here is excellent. On the left side there are four opening doors, cockpit, underwing side door and a twin set of "Alaska" doors that are made wide enough to allow for a 44 Imperial gallon drum to be rolled up and inserted into the aircraft. On the right side is the Co-Pilot front door, and another underwing door. All doors can be opened via the internal latches, or from the menu. Cabin is in a dark grey, and highlighted by some nice chrome support rings. Seats are basic but beautifully modeled in detail, all seats have metal plate cushion supports. There are four forward seats and a twin-bench seat rear, the cabin fit-out is a bit drab, but very authentic to the period... .... note the very large rear and curved side (bath) metal construction of the Pilot and Co-Pilot seats, the metal construction and floor supports is simply extremely well done, with even with wear and tear on the metal surfaces. Note the nice individual door trim screws. Up onto the foot support and a look into that iconic cockpit... and wow! The Thranda Beaver cockpit is not like the antique cream version like on the SoulMade Solutions DHC-2, that is very much beloved by me as to it's reference to an early Beaver. But this version is very much a more relative version to most of the working Beavers out there and it is extremely well done. The SMS version had a single left side Yoke, but here you get the TwinBar Y double version that disappears if you press the base, so well done. Roof trim and blinds and under seat (metal seat bucket frame is also insanely great) detail is excellent. The famous name plate says it all. There is a leather surround with the internal metal facias. The polished metal reproduction is simply extraordinary, just outstanding... and in the right lighting conditions it just glows and shines like it has just been lovingly and newly polished. There is real craftmanship here, You wonder if ever you would get aircraft detail like this to fly in Microsoft FlightSim, if aircraft detail is what you want, you could never get this extreme quality over there, but you can access it in X-Plane. There are two choices of the famous throttle quadrant, the older original classic version with the Throttle Lever left, with in order Propeller lever and Mixture right... or the more modern squared off version with the Throttle centre, Prop left and Mixture right. Cenrte top are the magnificent large DHC-2 iconic Manifold Pressure and RPM gauges and the mid-screen mounted whiskey compass. The pilot gets all the flying instruments in the form of the six standard flight instruments in the Airspeed, Artificial Horizon, Altitude, Turn/Slip Indicator, Heading Indicator and the Vertical Speed, left is the main fuel tank selector It has positions of OFF, FRONT, CENTRE, REAR. Cosmetic detail is astounding, metal flaps indicator is a work of art, and you can't believe in intimate authentic detail here, like the ACK ELT and the logos MaxDim panel lighting knobs lower left panel, the metal plate storage box opens as well. Right side panel has the avionics and electrical panel... There is an altitude selector top, then an S-Tec Fifty-Five x Autopilot, KX 155 NAV/COMM Radio (NAV 1/COM 1), Garmin GMA 340 Comm radio, and a Garmin GTX 325 Transponder lower... it is to be noted that these items are the default set of avionics, but as we shall see, you can use more different units if you want to. To the far right is an OBS Course Deviation Indicator (CDI) - VOR NAV 2. Lower right panel is an active (Fuse) Circuit Breaker panel, with the relevant electrical switches set below for power and lighting (Avionics power switch is high up on the left side panel facia). Next to the Fuses is the AMPs gauge, and Suction Gauge, and below is a lovely PS radio volume panel. Centre panel is a default X-Plane GNS 530, but it can be replaced with a Reality XP GTN 750 if you own the extra feature. Mid-Panel are the engine gauges, with the Oil temperature shown on the top of the gauge, oil pressure on the left, and fuel pressure on the right. Next right is the sublime gauges to indicate the quantity of fuel remaining in the three primary internal fuel tanks. From left to right these gauges indicate the Front tank, Rear tank, and Middle tank, and below is a CYL. (Cylinder) Temperature gauge, with a Hobbs hour meter. Three lower levers cover (LtoR) the carburetor heat control lever, the famous Fuel Wobble Pump Lever and the Fuel and Oil Emergency Shutoff Lever. To the right is the internal Oil filler (yellow cap). Detail again comes to the fore with the Manufacture's and Aircraft registration plates. The authenticity is simply mind-blowing and it keeps on coming with the ratcheting carb heat lever, the manually pumped flap system (with direction valve), and the primer system that are all faithfully modelled for maximum immersion. The fuel system is complicated, with three internal tanks Front (35 GAL/132 Lts), Centre (35 GAL/132 lts) and Rear (25 GAL/95 lts), two wing tanks (21.6 GAL/85 Lts each) and an optional Belly Fuel Tank (43.1 GAL/163 Lts)... for a total of 181 GAL/685 Lts of fuel. The main internal tanks are controlled via the red switch left panel, the wing tip tanks via a red switch upper door left, and the belly tank via a handle under the instrument panel (Vacuum air pressure is required). Another notable feature in the cockpit is that you can open or lower both front door windows, and into any position you like... ... and the forward window air vent can also be rotated. There are loads of pumps and levers on the Beaver, one is the pump handle for the flaps, down right of the pilot's seat and another is the engine primer pump on the left of the pilot's seat, the actions of both are really well done and authentic. Internal Lighting Turn on the power and adjust the instrument lighting and it is.... "oh WOW, WOW!" "Totally stunning" is the one set of words you can find, "blown away" is another, the panel lighting is simply gorgeous, as there is a real depth to the lighting and in the detail. Overhead lighting is provided by two fixed side spot lights... and two highly adjustable LED roof mounted lights... ... oddly there is no lighting in the cabin? But you can turn the roof LEDs right backwards to give some illumination, but a few rear lights in the cabin would be nice, it is just a little too dark back there. Customising If you have the Thranda PC-6 Porter, then you will be aware of the instrument panel customising feature to suit your own tastes. So in reality there is no default instrument setup... and that same system is available also here in the Beaver and it is called DGS or "Dynamic Generation Series". Menu is selected via an arrow tab left screen (it can be scrolled clear), on the menu is the "PANEL" selection. This brings up the dynamic panel options... There are two basic panel selections, the iconic version we know so well, but also a flat metal grey facia version. Panel choices become endless, angled avionics, better fuel switch positions, and both either the GNS 430 or GNS 530 can be used... .... and the grey flat panel is far better with the more modern squared off throttle quadrant to which gives you even more layout variations... Optional Items include; Aspen EFD 1000, S-Tec 55x autopilot, RealityXP GTN 750/650 Touch 3D bezels (these are optional addons) and a lovely Collins 614-12 ADF... There are over 50 instruments to select from or to rearrange around on the panel facias... .... basically you can even start with a completely blank panel and then create your own unique or personal instrument layout... and have up to or you can save 14 different layouts and there are five defaults to get you started... for absolute layout choice it is simply crazy! Menus The menu is selected via the arrow (the arrow can be scrolled translucent) on the left side of your screen... ... and there are seven tab selections; General, Livery, Camera, Audio/Slew, Panel and Misc. The menu PANEL selection has already been covered above, the rest of the selections are covered below. Menu - General The menu "General" sections covers quite a lot of options, the layout is highly detailed and very comprehensive. Three selections cover group items but any one separate item via "Click Spots" can be individually selected or hidden via the aircraft graphic. "ALL COVERS" will select the huge engine canvas cover and pitot cover, "ALL TIE-DOWNS" for propeller and wing tie-downs and "ALL DOORS" for both cockpit doors, both cabin underwing and twin "Alaska" doors. The Engine can be set into two modes... SIMPLIFIED or REALISTIC In Simplified mode the engine will be automatically limited the engine and engine start up is instant start. In Realistic mode it will be up to the pilot to avoid exceeding the engine limitations, and go through the full procedure of starting the Pratt & Whitney R-985 Wasp Junior radial engine, which means a lot of lever and knob setting and a lot of hand pumping. Other General menu selections cover Window and Instrument Panel Reflections on/off, Startup Running on/off, Use the External Fuel Tank, Chocks and brakes on/off. All EXT - External Lights can be switched on and off as can ALL INT - Internal lights. The lights activation can also be accessed on the aircraft graphic and finally the "Radial Engine Animation" of which we will look at soon. The Electric Tug is attached to the rear tailwheel, that is controlled via your joystick (for motion forward or backwards), with the yaw turning the rear tailwheel and the attached tug. There are an fully animated pilot (actually Dan Klaue) and his lady friend (actually his wife) as a Co-Pilot, both will disappear if the power is off and the wheel chocks are set, if you don't select a Co-Pilot, then Dan flies alone. Menu - Liveries Second Menu option is liveries, there are two options here with the first being "PAINTED LIVERIES". There are altogether 14 liveries or one blank and thirteen designs, and all are of extremely high quality and creative flare. One is a ZZTEMP that is just totally clear (not shown). Note the Dirt and Scratches (arrowed) numbers, as they are important later. Dynamic Liveries Not happy with any of those designs, then why not create your own! With their earlier release of their Kodiak then Thranda also introduced a clever feature to design your own livery.This is done by switching from PAINTED LIVERIES to DYNAMIC LIVERIES top. You have a menu to select on the right that can colour a certain part of the aircraft, like the Roof, Wing, Tail or Wing tips. Select which one you want and then adjust the RGB colours for that area, it looks hard but you can easily design a very nice livery in about twenty minutes... ... when done you can "save" the livery and then "APPLY" it to the aircraft. It was quite easy, but I found the dash symbol - couldn't be inserted in the registration except for the lower case version? So I had to take it out. This is why there is an transparent aircraft in the liveries? There are also four effects you can apply. The said "Dirt" and "Scratches", and also "Metal" and "Rough(ness)" this gives the aircraft a dirty rough appearance. So applying these Dirt and scratches on the airplane will make the surfaces rougher, this is giving you the full PBR control in creating stunning metallic liveries, or matte, sand-blasted look, and these aspects will also slightly affect the Beaver's drag, and therefore it's cruise speeds. With full dirt and scratches you can expect a loss of 2 to 3 mph of cruise speed. Cleaning the plane by setting both values back to 0 will give you a smoother and slightly faster plane. Two extras can also be added with DH logo which is very nice and the said registration number, the final result is excellent. Menu - Weight/Bal The DHC-2 has a great Weight and Balance menu. Both Lbs and Kgs weights are shown... Fill one wingtip tank full and the Beaver will seriously lean, and so will the other tank... this shows how sensitive you are going to have to be to balance out the aircraft. .... Fuel can be added to all the tanks in the three internal, twin-wingtips and the Aux external tank and they are all shown and are adjustable as well in the menu (above). Pilot, passengers and cargo can all be set for individual weights and the CofG (Centre of Gravity) parameters are also all shown on a graph, when done you can save the configuration and reload it. Working out that right CofG balance is critical, setting just inside the parameters is just not really good enough, you need for the aircraft to be balanced in it's fuel and load weights, or you will have difficulty flying the aircraft, put too much (cargo) weight aft and you are tail heavy. Note in that taking out the Co-Pilot here will make her disappear in the cockpit, but pilot Dan stays. Menu - Camera There is a camera feature under the menu "Camera" selection. To the right is the internal default views to be selected via a menu, or press the keypad to select the view. The FOV or Field of View is adjustable via a slider. The left side of the panel is the "Walkaround" views, just pick the dot viewpoint you want to see to rotate around the aircraft. Menu - Audio/Slew Sound can be adjusted via the sound menu. There are seven slider selections with: Master, Aircraft External, Aircraft Internal, CoPilot, Radios, Environmental and User Interface... press the Audio slot and you get a audio simulation of an active noise canceling headset, which is seen as wearing a headset. Sound quality is excellent. Slew mode Slew mode is experimental, but allows you to manually move the aircraft around in X-Plane. It functions by temporarily overriding the various aerodynamic and physical forces on the plane, it is to allow the user to reposition the plane as desired. This feature is however highly touchy! In reality you don't use "Slew Mode" on the ground, it is mostly for manoeuvrability on water and for docking... If you want to see this in action then check out the PC-6 Adventure pack review and the Seaplane flying section below. Menu - MISC The Misc page covers options on the Beaver, and there are four options; Skis, Tyres, Windows, and Throttle Quadrant. We have seen the Bubble Windows and Throttle Quadrant options above in either "Flat" or "Bubble Windows", and the "Old" or "New" quadrants. Skis Ski quality and design is again exceptional, with no ordinary straight planks here, they are all highly realistic and the same as on the PC-6. Bush (Tundra) Tyres and Mud Flaps Another option is for the larger Bush tyres or "Tundra" tyres, the over-sized wheels also come with another option of having "Mud Flaps" attached (The mud flaps can be used on both the Normal and Tundra tyre options). Seaplane The Seaplane feature is now also available in v1.1 and also part of the aircraft package, and not as an extra addon cost. The float pack comes with both the amphibious (with landing gear) and standard floats options. The full v1.1 changelog is attached below. You have to do a full download and reload of the updated v1.1 aircraft, there is no merge function or addon pack. Once loaded and authorised you now get two aircraft to choose from on the Flight Configuration page with a wheeled version and a float version. If you are familiar with the PC-6 "Adventrure Pack" version of the floats, then there are the same similarities in design here with the Beaver, but adjusted to fit the bulkier DHC-2 aircraft fuselage. Float shape is again highly authentic, lower and upper sections, and the retractable wheels are also again beautifully designed and modeled as is the strut assembly, front support struts and wheels will bear out any inspection, and you get the ladder and paddle attached as well, but there are no wing ladders, unlike on the PC-6. On the Seaplane variant the MISC section of the Menu is different to reflect the aircraft. Top upper left is the same choice of straight or bubble side windows, upper right is the the switch to raise or lower the rudders... ... lower left will select the amphibious (with landing gear) or floats option, and the option of showing the rear Ventral Fin... we will look at the lower right panel "SLEW" later on the water. The solution to raising or lowering the rudders on the floats is quite bare-bones, in a cable and hoop on the lower left side of the pilot! You have to make sure you get the right selection zone as otherwise you will open the left front door, as the two active zones are situated quite close together. The Seaplane liveries are really well done to match the upper fuselage, and are all the same as the wheeled version designs, not just a set of floats thrown on here, as they are all designed to match in together. __________________________ Flying the DHC-2 Beaver There are two options to starting the DHC-2, the (very) easy way via the option in the Menu/General panel... and the long winded way. The full engine start up procedure is in the manual. Did you always want to look inside your engine? Well now you can and the idea is to see how the engine is primed to start... Dan Klaue genius strikes again! There is the option via a menu selection "Radial Engine Animation" that brings up an animated Wasp Radial engine, you can PreHeat and Prime your Wasp ready for start, but you have to be careful not to "OverPrime" the Cylinders. The starter switch can be hard to find because it is not labeled, but it is under the left red switch cover, if primed correctly then switch on the starter (no more than 15secs a try) until the Wasp finally coughs and powers up, the animation can give you exciting feedback on what is going on in the ignition phase of the engine, and then when it runs it is another "Wow" moment... yes. Pistons are exploding, and the animation is amazing beyond belief, adjust the throttle for a some serious movement, but the animation will also react to the adjustment of not only the throttle inputs, but the fuel mixture from "Rich" to 'Lean" adjustments as well. These movements and the running of the DHC-2 also compliment the amazing sound range as well, there is a consistent adjustment of the excellent engine sounds to the condition of the running of the engine, that is the "Ugh, Ugh" of low lean to the high power "roar" of the full throttle. The sounds actually give you clues as to what's happening under the hood as is for the shear band of extensive sound patterns available here that show no gaps or same patterns that just gets you all tinkly down your back... it is highly, highly aurally realistic... well like a full throated real 450 hp Wasp Jr engine sounds like, and the hope that your neighbour and you are on (very) good terms. So yes the sounds are good, or totally excellent. A note that with v1.1 that the exhaust will now puff, puff smoke on the startup procedure! External lighting is very good, but on an aircraft like the Beaver quite limited to the basics, there is a nice red beacon top fuselage, and the navigation lights are nice and pert as is the tiny wing strobe lights. Main landing lights are both LED, and very good in the distance, but can't be seen close up on the wing? As noted you can have a freewheeling rear or locked to the rudder yaw, You really need a set of rudder pedals with built in toe brakes to use the freewheeling option, which I don't have, so I have to use the yaw option. Your have to find a nice balance with the mixture and throttle levers so there is a need to experiment to find that right balance... but it is there to be found and highly realistic, and the feel is excellent. So a bit of throttle and you are moving, the Beaver is excellent on the ground as taildraggers can be twitchy, but you can actually feel the weight and the aircraft is quite smooth in it's movements. You sit high, and the view out is quite good for a taildragger, but a slight glance to the left will align you up with the runway... flaps set (to Takeoff) and your ready to go. Speed builds gradually then suddenly the tail unstick's and you need a kick-full of right rudder to maintain the straight ahead line... ... but don't get me wrong, the aircraft is not twiddly in this phase but beautifully controlled as it is all very easy tail up to steer directly on the centreline, most taildraggers are nasty and nervy at this point, but not the DHC-2... Takeoff is around 90 knts, but you don't need to pull back the stick as the Beaver just glides into the air on lift alone, to climb only requires a little pitch to meet the 600 fpm climb you need. You can climbout at a 1,000 fpm, but the 600 fpm is perfect, the one thing that should be highly noted is the aircraft's weight feel, this is a huge bonus in me holding that centreline, but also when you lift you really feeeel that WEIGHT of the aircraft, and that is rare in X-Plane, it is so very, very good is this DHC-2. Unlike other aircraft you can use the flaps and even in level flight, most aircraft need the flaps in and clean as soon as possible, but not the Beaver, as if you have a slightly uneven balance (front to rear) in the aircraft you can use the flaps to even out the balance without touching the trim, it is a tool every Beaver pilot's use. Obviously you don't go very fast... 158 mph (255 km/h) or 140 knts is max and your cruise speed is only 143 mph (230 km/h) or 125 knts, but you don't really care about that factor, this aircraft is an absolute dream to fly. Trimming the DHC-2 out is easy, the trims are set up up on the roof (But I use keyboard commands), and the Beaver trims out the pitch beautifully, now just small stick and rudder inputs keeps DHC straight, but better still yet is if you trim out the rudder as well, and now you can take both hands and feet off the controls and the Beaver will still fly like a dream straight and level.... this is one amazing simulation of a real aircraft. So for any novice pilot, this is a brilliant aircraft to learn to fly on, even if it is a taildragger (all the better), as it's balance is second to none, but you also feel the aircraft weight in every manoeuvre that you do, but this is not an aerobatic machine, it is a workhorse only, like a large Clydesdale horse it is heavy, slow and incredibly docile... that is the word to note here in docile, but I simply love it as the aircraft is very comforting and I have had enough nervy aircraft lately to last me a lifetime.... this is a true pilot's aircraft in every form... and I simply love it. The DHC-2 is so docile and neutral I am am not quickly reaching for the autopilot (S-Tec in this case), as the Beaver is just nicely (but noisily) cruising through the air and I certainly don't need any artificial help in flying the aircraft at all... open the side window to get the full throaty roar of the Wasp Jr, it is certainly noisy but exciting as well, I note the aircraft as docile, but that is in it's character, it is still however an immensely exciting aircraft to fly because it is "that good". Do a hard turn and the DHC-2 needs a little more power and a slight pitch back to slightly compensate for a loss of speed and altitude, but these reflexes come naturally each time you manoeuvre the aircraft in large variations. Thranda have already noted that an Amphibious version of this DHC-2 is coming and soon, maybe in the new year (2021), that will be another worthy add-on, and give the aircraft an even greater capability and versatility (if it is anything like the recent PC-6 version). Cockpit is stunning in the air. We are soon back over Bella Coola and heading back to the strip at CYBD... Interesting are the flaps... lower the flaps and you don't need to change your throttle position either, the Beaver just slows down to the lower speed of the flap position, with any or no sudden expected lift (Interesting though would be the aircraft at a very light loading weight, I didn't try that aspect out).... the Beaver is known as a "flap-happy" aircraft and you can see and feel that aspect of why here... That is the "Landing" setting, but you can go even slower if you go deeper with more flap and into the red zone to the full 58º degrees... Approach speed is around 70 knts, here your altitude is controlled only via your throttle, more power to go up and less power to go down, but even the mixture adjustments can even have an effect, so be aware if you are leaning out the engine more while reducing power. Final approach and you are under complete control of the aircraft, you and the machine are as one, even slight reductions of power and you lose height, but you also have uttermost confidence in the aircraft, in other words it is easy, but skillful in the same aspect. One note I will say is that the touchdown speed is still around 70 knts, dropping to 60 knts on the runway, and that feels a tad fast at full flap? but the speed does still give you full aerodynamic control on the landing and you can finely follow the centreline as good as when you took off, the question begs is that could a headwind change the aspects of a landing such as this... ... so the big trick is rubbing off the speed without touching the brakes, tricky, and that aspect may need a bit of practise is needed before getting it right, I would be more happy with a landing speed of around 50 knts or less in these circumstances. But let us be thankful, this is an amazing experience of an aircraft... the best aircraft of the year 2020? Seaplane The first thing you notice is the speed with the floats attached.... the attachment is far heavier and the amphibious floats are approximately 470 lbs heavier even more than the plain floats. Drag, tons of drag, so you feel the weight and the drag as you fly along, and it does make the Beaver a bit cumbersome low down, but authentic, but far better for landing slow on the water. 70 knts, full landing flap and the aircraft is set up perfectly for a water landing... reduce the throttle a little and the DHC-2 will sink (in the air not in the water!), nice and slowly... ... lowering the power to around 65 knts on approach is perfect, if you feel it going down too quickly, then only a slight more power will arrest the descent, it feels very, very comfortable, and you are very much in control.... I think the X-Plane water effects are very, very good, and the Beaver thrives here... ... open the side window to hear the rush of water and feel the spray, Thranda have adjusted in v1.1 the sounds to create great water effects and water landing sounds, the sound effect and difference when close to ground and airbone are noted as well. The little air vent in the side window also makes noisy sounds, DHC-2 fliers complained a lot about this (some people are just simply too hard to please)... .... a touch of flare and less throttle and the DHC-2 will settle slowly at around 60 knts.... there is a nice water roll sound as well. Control on the water is very good with the aerodynamics still working, depending on your wave height, but over a meter, the aircraft will bob then up and down a bit too heavily. So you reach and quickly grab the rope to lower the rudders for control as the speed drops, v1.1 does also give you the ability to skim the water on tundra tires as well, as you do Power up to the wharf, but then switch on the SLEW MODE. It is on the MISC tab, but the control panel is actually on the AUDO/SLEW tab of the Menu... .... here you can position the aircraft by overriding the X-Plane controls and forces, move the large dots forwards, backwards and sideways (slowly), you can also change the heading (delta) via the dot on the slider... .... SLEW MODE is a huge amount of fun and very easy to use, externally or from the cockpit. _______________ Summary This is the third aircraft in a series of rugged utility aircraft from Thranda Design, the first being the Kodiak, then the excellent Pilatus PC-6 Turbo Porter and now here comes the most iconic and the most famous bush aircraft of them all in the DHC-2 Beaver. This version has the "Holmes Extended Engine Mount", which moves the 917lbs Wasp Jr engine forward by almost 10 inches for a better rear load balance (Centre of Gravity). Any aircraft coming from Thranda Design is usually full of amazing features and outstanding quality design, and certainly you are not disappointed here. In the design aspect the aircraft is extremely the best yet from Thranda, the quality is overwhelming to the point of ridiculous... the DHC has full hi-res PBR realistic effects, featuring true-to-life plate deformation and to-the-rivet precision, not to mention the high quality materials internally and externally. Detailing and the modeling is absolutely first rate, this is an outstanding Beaver. Not only is the instrument Panel one of the best yet in X-Plane, it is also fully customised via the "Dynamic Generation Series" in not only giving you your own control over the way the instruments are laid out, but to swap and change other instruments as well including; Aspen EFD 1000, S-Tec 55x autopilot, RealityXP GTN 750 (these are optional addons) and a Collins 614-12 ADF. Fourteen liveries are provided, but also again you can create and design your own liveries with the DGS system. Options include, Skis, mud flaps, Old and New quadrants and bubble windows, and an amphibious version is noted as coming soon. Notable is the instrument lighting, it is simply awe-inspiring. Updated version v1.1 has both the amphibious (with landing gear) and standard floats options now included, not an extra but part of this already outstanding package, Float design and quality is also first rate and comes with the same liveries as the wheel version, but enhanced for the matching floats Sounds are outstanding, with High fidelity, multi-track sounds with smooth transitions and amazing atmospheric effects, 3D audio effects, including "blade slapping" sound when view is perpendicular to propeller, start up and engine mixture variance is also highly realistic. Menus are also extensive, with sound adjustments, weight and balance manager with visual chart, lighting, doors, views, reflections and an amazing radial engine visualisation in a pop-up window, which showcases the inner workings of the engine. Again like the PC-6, you would want, or like a cargo option? and there is no lighting in the rear of the cabin? Yes I have been gushing in this review, extraordinary and brilliant are full of the praise of what is delivered here from Thranda Design, not only in the options, effects and in the sheer experience available, but also in the way this Beaver flies as well... it is the full package and in my guess for the aircraft of the year in 2020. So the note here is to the converts of Microsoft's "ground breaking" new simulator, because aircraft like this coming out of X-Plane changes the dynamics of simulation. Yes MSFS may have pretty scenery, but it will never have aircraft such as this iconic Beaver as in depth, with as much quality and come with the sheer force of ideas available here, and in reality isn't that is what simulation is really all about, brilliant aircraft with exceptional quality and flying dynamics and a huge feature list, and only top level developers like Thranda Design will be in the X-Plane simulator and not the other one, so if you really want the very best then here it is.... Highly, Hugely Recommended. _______________________________ Yes! the DHC-2 Beaver-DGS Series by Thranda Design is NOW available from the X-Plane.Org Store here : DHC-2 Beaver-DGS Series Price is US$39.95 (Currently only US$34.95) Features Special features: FULLY configurable 3D instrument panel. Over 50 instruments to choose from! (Including Aspen EFD 1000, and support for RealityXP GTN750) Move any instrument to any location on the panel, or even between pilot and copilot's panel! Comes with 6 panel presets, but can easily be expanded by moving instruments around, using simple and intuitive interface. Save your own presets, and even share them with the community! Instruments can be moved in 3D directly, on a 2D pop-up preview window, or by numerical entry for precise placement. Intricate, realistic fuel tank system, featuring tip tanks and removable belly tank. Overflow logic when transferring too much fuel from other tanks to primary tanks. GNS430 and 530 can be swapped out, but a restart of the plane is required, as 430s and 530s are mutually exclusive in terms of compatibility in X-Plane Dynamic livery editor (like in the Kodiak and the Pilatus PC-6) Full PBR control! Create stunning metallic liveries, or matte, sand-blasted look in mere seconds! Additional control over dirt/grime, scratches/nicks, adjustable in real-time to dial in the exact desired amount of wear and tear. Affects airspeed. Clean plane will fly 2-3 MPH faster. Create "virtual" liveries, based on one common design layout, and assign any colour to any available paint segment. Quickly create preview of livery in real-time, using intuitive controls. Previews now include visualization of metallic materials and dirt overlays. Apply selected livery in real-time, right in the sim, without the need to even touch a 3rd party image editor! Option to include/hide manufacturer logo on tail, and control its colour. Option to change the tail number in real-time, or disable it altogether. (Enter a "space" instead of a callsign number to create a blank tail number.) Easily and quickly create dozens of paint schemes in-sim! Also supports 12 traditionally painted liveries, all visible in a convenient pre-selection preview window. Uses SkunkCrafts Updater. Option to participate in Beta program, via check box in SkunkCrafts Updater. Excellent hi-res PBR realistic materials, featuring true-to-life plate deformation and to-the-rivet precision. Floats and amphibious floats <-- New Feature-rich elegant fly-out menu with the following features: Realism settings for engine and tail wheel (simplified vs. realistic modes) Radial engine visualization in pop-up window, which showcases the inner workings of the engine. Real-time primer and pre-heat logic, with visualization indicating correct priming range Innovative electric tug, with in-panel controls to move forward/backward at the desired speed, and steer proportionally Control over chocks, individual tie-downs, covers, internal lights, external lights, etc. Option to enable/disable Belly Tank, with realistically simulated weight, momentum, rotational inertia, and drag characteristics. Option to start up running (all systems ready), or cold-and-dark, for realistic startup procedures. Option to run engine in a simplified manner (no pre-heat, no priming, easier starts) Control landing lights, strobes, beacon, and nav lights via pop-up window Detailed weight and balance manager with visual chart, individual passenger seat weight control, Lbs/KG unit toggle, CG control, external tank control, and the option to save and load configuration. Multiple camera snap points, above and beyond what's available by default in X-Plane, so you can perform your walk around checks. Adjust your camera's Field of View without having to go to an X-plane menu, allowing for real-time adjustments. Audio mixer: individually control audio channels in real-time, so you can adjust volumes while hearing them play. Slew control: move your plane around the world, temporarily bypassing flight physics. Includes ground mode and air mode. Dynamic panel control page, with a separate view for the entire panel layout preview, or a per-instrument view, allowing for fine-tuning of instrument position, as well as copy-paste function to quickly replace instruments. The "Misc" page in the fly-out window contains options to customize the plane, such as: skis tundra tires mud flaps bubble windows throttle quadrant model (choose between classic and new design) Flight dynamics and systems: The Beaver has unique flight dynamics, characterized by being a "flap-happy" plane. This is faithfully reproduced in the sim version. (Can require slight flap extension during cruise, depending on conditions). The Beaver is the quintessential Canadian classic STOL workhorse, whose flight characteristics and excellent STOL capabilities are calibrated to maximum precision in the sim. Details, such as the wobble pump, the ratcheting carb heat lever, the manually pumped flap system (with direction valve), and the primer system are faithfully modelled for maximum immersion. Tie-downs and chocks actually keep the plane from moving, even in high winds. Advanced FMOD-based sound system: Pioneer in procedural engine sounds. (No two starts sound alike: coughing, sputtering, and clanking valves all contribute to a nuanced, rich, immersive sound experience.) High fidelity, multi-track sounds with smooth transitions and amazing atmospheric effects. Individual volume control over different aspects of the sound experience, adjustable in real-time (while listening to the sounds) Different sounds for front of plane than for back of plane Panning around the plane in exterior view yields awesome 3D audio effects, including "blade slapping" sound when view is perpendicular to prop Individual buttons and switches in the cockpit each have their own unique sound. Sounds actually give you clues as to what's happening under the hood Outside wind intensity is affected by slip and AoA. (The more the surface area of the fuselage is hit by oncoming wind, the louder the sounds Requirements X-Plane 11 Windows, Mac or Linux 4 GB VRAM Minimum. 8 GB+ VRAM Recommended Download Size: 1.10 GB Current and Review version 1.1. (16th December 2020) The aircraft comes with an auto-updater. Free auto updates for the life-cycle of X-Plane 11 (note you can't use the updater to update to the v1.1 float version, it requires a full new download of the aircraft. _______________________________________________________________________ Installation and documents: Download is 1.10Gb and the aircraft is deposited in the "General Aviation" X-Plane folder. Installation key is required on start up and is supplied with the purchased download file. Documents supplied are: v1.1 Changelog.txt Thranda DHC-2 Beaver Joystick Settings.pdf Thranda DHC-2 Beaver Graphics Settings XP11.pdf X-Plane G430 Manual.pdf Thranda DHC-2 Beaver Documentation.pdf X-Plane G530 Manual.pdf A Blank Livery (PNG) of four files are provided for painting. Checklists and loads of Performance graphs are provided in the manual. v1.1 Changelog v1.1 Changelog.txt ______________________________________________________________________  Updated Aircraft Review by Stephen Dutton  16th December 2020 Copyright©2020 : X-Plane Reviews   (Disclaimer. All images and text in this preview are the work and property of X-PlaneReviews, no sharing or copy of the content is allowed without consent from the author as per copyright conditions) Review System Specifications:  Computer System: Windows - Intel Core i7 6700K CPU 4.00GHz / 64bit -32 Gb single 1067 Mhz DDR4 2133 - ASUS GeForce GTX 1080 8Gb - Samsung Evo 1TB SSD Software: - Windows 10 - X-Plane 11.51 Plugins: Skunkcrafts Updater Scenery or Aircraft - CYBD - Bella Coola by XPORG (formally Beti-x) (X-Plane.OrgStore) - US$17.50
  22. Aircraft Review : DHC-2 Beaver - DGS Series by Thranda Design Mention the word "Beaver" and "de-Havilland" and any pilot will go misty eyed, and gaze at you blindly lost in cloud of personal memories, it is an emotive aircraft. The DHC-2 Beaver is a single-engined, high-wing, propeller-driven, STOL aircraft that was developed by de Havilland Canada in 1946, and is known as a bush plane, in fact one of the most highly regarded bush aircraft ever created. There was 1,657 Beavers built between 1947–1967 and half are actually still flying and working hard. In fact you can currently buy a zero-time frame and just rebuild your current aircraft and keep the machine flying as long as you can afford the new airframes... so why replace perfection. History de Havilland Canada hired Punch Dickins, a famous bush pilot, as Director of Sales who began an extensive program of collecting requests from other pilots and to understand what they needed in a new type of aircraft. Almost without variation, the pilots asked for tremendous extra power and STOL performance, in a design that could be easily fitted with wheels, skis or floats. When de Havilland engineers noted that this would result in poor cruise performance, one pilot replied "You only have to be faster than a dog sled". Other suggestions that seemingly sound mundane but important in the bush plane world; full-sized doors were installed on both sides of the aircraft so it could be easily loaded no matter which side of a dock it tied up on. The large doors (known as Alaska doors) were also made wide enough to allow for a 45 Imperial gallon drum to be rolled directly up and into the aircraft. On September 17, 1946, de Havilland officially put together a design team consisting of Fred Buller, Dick Hiscocks, Jim Houston and W. Jakimiuk, led by Phil Garratt. The new aircraft was designed to be all-metal in using "steel from the engine to the firewall, heavy aluminum truss frames with panels and doors throughout the front seat area, lighter trusses toward the rear and all monocoque construction aft". At the time de Havilland Canada was still a British-owned company and there were plans to fit the evolving design with a British engine. This limited power, so the wing area was greatly increased in order to maintain STOL performance. When Pratt & Whitney Canada offered to supply war-surplus 450 hp (340 kW) Wasp Jr engines at a low price, the aircraft ended up with extra power as well as the original long wing. The result was unbeatable STOL performance for an aircraft of its size. it was decided that the new bush plane was much like the hard-working beaver and so as many aircraft at the time were named after animals, the aircraft was designated after this industrious animal. The first flight of the DHC-2 Beaver was in Downsview, Ontario by Second World War flying ace Russell Bannock on August 16, 1947. The first production aircraft was delivered to the Ontario Department of Lands and Forests, a design partner, in April 1948. The Beaver was designed for flight in rugged and remote areas of the world. Its short takeoff and landing capability made it ideal for areas normally only accessible only by canoe or foot. Because it often flies to remote locations, often in cold climates, its oil reservoir filler is located in the cockpit and the oil can be filled in flight. A series of upgrades to the basic design were incorporated. One major customer introduced the use of flat steps replacing the earlier tubes, a feature that is now almost universal. In 1987, the Canadian Engineering Centennial Board named the DHC-2 one of the top ten Canadian engineering achievements of the 20th century. The current ownership of the certificates and tooling gives Viking Air of Victoria, Canada the exclusive right to manufacture new Beavers. Viking now sells a remanufactured and rebuilt DHC-2T Turbo Beaver upgraded with a Pratt & Whitney Canada PT6A-34 680 hp (507 kW) turboprop engine. With a maximum gross takeoff weight increased to 6,000 lb (2,700 kg) it can carry 2,450 lb (1,110 kg) of freight. However, Viking Turbo Beavers are only rebuilt from existing air frames, and are not new-builds, unlike Viking's own DHC-6 Series 400 Twin Otter, which is manufactured from a completely new airframe. (wikipeida) Performance - Maximum speed: 158 mph (255 km/h) - Cruise speed: 143 mph (230 km/h) - Range: 455 miles (732 km) - Service ceiling: 18,000 ft (5,486 m) - Rate of climb: 1,020 ft/min (5.2 m/s) DHC-2 Beaver - DGS Series by Thranda Thranda Design seem to want to develop, strong rugged utility aircraft, first was the Caravan like Quest Kodiak, then the excellent Pilatus PC-6 Turbo Porter and now the greatest of them all in the DHC-2 Beaver. This version is the Beaver that incorporates the "Holmes Extended Engine Mount", which moves the 917lbs engine forward by almost 10 inches. This modification then moves the center of gravity of the plane forward, and in then allowing additional loads to be carried in the back without exceeding the aft CG limit. Comparisons are going to be made with the original X-Plane Beaver from SoulMade Simulations DHC-2 version a few years back, that aircraft is a pure DHC-2, were as this version is a more slightly modernised version, the SMS version is also now slightly older with only a few updates, were as this version is all completely wizz-bang and up to the current state of X-Plane dynamic standards. A first look at the aircraft reveals a very nice and very authentic feeling aircraft, you know that this DHC-2 is going to be really good... even when covered over to protect the aircraft from the elements, that rugged engine/window cover is a brilliant start. Those first impressions are highly important, you know that certainly the Thranda Design ethics are always going to be some of the very best in X-Plane, that is always a religious known, but that extremely high standard we always expect from Thranda does not come easy either... but there is always value and quality abound, and again here you feel every aspect of that as well as see it. Time to pull the cover off, and see the aircraft below... That is better, "Magnificent" isn't it! The detailing is exceptional, the mapping of the precision of the rivets are simply excellent, and I love the gap in the cowling, actually done twice with the extended engine mount if you look closely. The Pratt & Whitney R-985 Wasp Junior engine, is rated at 450 BHP at sea level. This is an air-cooled, carburetted, 9-Cylinder radial engine, incorporating dual magnetos and an engine-driven single-stage supercharger. And the engine detail really jumps out at you with the coloured inner components, that aspect should not work on such an old aircraft, but it looks simply brilliant here... ... note the chrome valve guides and oil circulation, insanely good, and detail to die for. The Wasp Jr is connected to a single 3-bladed constant speed propeller mounted at the front. The aircraft will easily support the most discerning eye, the detail is so, so good, note the upper engine vents, exhaust, and the excellent landing gear support detailing as it is mounted on the fuselage. You can look at the landing gear assemblies is absolute detail, because the quality will support your critical eye, note the lovely disk brake assembly and it's attachments. Your paying for minute detail and you are certainly getting your money's worth here. Cast your eyes over the rear, the elevator detail is excellent with great mapping detail and note the fine elements of only a few simple metal rods (arrowed) that control the vertical aerodynamic surfaces... these rods are all there is between you and certain death. The rear tailwheel is also highly detailed with excellent control cable animations for realism. Tailwheel can be either free castoring or locked to the rudder. There is a complete lovely raw roughness and wear to all the surfaces with again that excellent rivet mapping that gives you such a heightened realism... lovely stuff. One of the requirements was that the DHC-2 had great STOL (Short Takeoff and Landing) performance, the depth of drop of the flaps at a 58º degree show this performance, again the detail is very good. Thranda pioneered great glass and reflections in X-Plane, and that same skill is on show here. Main windshield is a work of art, but so are the amazing bubble windows in shape, and wear (note the excellent glass streaks). You also have the option of either bubble or flat side windows. DHC-2 Internal Looking up into the cockpit and you know this is going to be good, and the detail even from seen down here is excellent. On the left side there are four opening doors, cockpit, underwing side door and a twin set of "Alaska" doors that are made wide enough to allow for a 44 Imperial gallon drum to be rolled up and inserted into the aircraft. On the right side is the Co-Pilot front door, and another underwing door. All doors can be opened via the internal latches, or from the menu. Cabin is in a dark grey, and highlighted by some nice chrome support rings. Seats are basic but beautifully modeled in detail, all seats have metal plate cushion supports. There are four forward seats and a twin-bench seat rear, the cabin fit-out is a bit drab, but very authentic to the period... .... note the very large rear and curved side (bath) metal construction of the Pilot and Co-Pilot seats, the metal construction and floor supports is simply extremely well done, with even with wear and tear on the metal surfaces. Note the nice individual door trim screws. Up onto the foot support and a look into that iconic cockpit... and wow! The Thranda Beaver cockpit is not like the antique cream version like on the SoulMade Solutions DHC-2, that is very much beloved by me as to it's reference to an early Beaver. But this version is very much a more relative version to most of the working Beavers out there and it is extremely well done. The SMS version had a single left side Yoke, but here you get the TwinBar Y double version that disappears if you press the base, so well done. Roof trim and blinds and under seat (metal seat bucket frame is also insanely great) detail is excellent. The famous name plate says it all. There is a leather surround with the internal metal facias. The polished metal reproduction is simply extraordinary, just outstanding... and in the right lighting conditions it just glows and shines like it has just been lovingly and newly polished. There is real craftmanship here, You wonder if ever you would get aircraft detail like this to fly in Microsoft FlightSim, if aircraft detail is what you want, you could never get this extreme quality over there, but you can access it in X-Plane. There are two choices of the famous throttle quadrant, the older original classic version with the Throttle Lever left, with in order Propeller lever and Mixture right... or the more modern squared off version with the Throttle centre, Prop left and Mixture right. Cenrte top are the magnificent large DHC-2 iconic Manifold Pressure and RPM gauges and the mid-screen mounted whiskey compass. The pilot gets all the flying instruments in the form of the six standard flight instruments in the Airspeed, Artificial Horizon, Altitude, Turn/Slip Indicator, Heading Indicator and the Vertical Speed, left is the main fuel tank selector It has positions of OFF, FRONT, CENTRE, REAR. Cosmetic detail is astounding, metal flaps indicator is a work of art, and you can't believe in intimate authentic detail here, like the ACK ELT and the logos MaxDim panel lighting knobs lower left panel, the metal plate storage box opens as well. Right side panel has the avionics and electrical panel... There is an altitude selector top, then an S-Tec Fifty-Five x Autopilot, KX 155 NAV/COMM Radio (NAV 1/COM 1), Garmin GMA 340 Comm radio, and a Garmin GTX 325 Transponder lower... it is to be noted that these items are the default set of avionics, but as we shall see, you can use more different units if you want to. To the far right is an OBS Course Deviation Indicator (CDI) - VOR NAV 2. Lower right panel is an active (Fuse) Circuit Breaker panel, with the relevant electrical switches set below for power and lighting (Avionics power switch is high up on the left side panel facia). Next to the Fuses is the AMPs gauge, and Suction Gauge, and below is a lovely PS radio volume panel. Centre panel is a default X-Plane GNS 530, but it can be replaced with a Reality XP GTN 750 if you own the extra feature. Mid-Panel are the engine gauges, with the Oil temperature shown on the top of the gauge, oil pressure on the left, and fuel pressure on the right. Next right is the sublime gauges to indicate the quantity of fuel remaining in the three primary internal fuel tanks. From left to right these gauges indicate the Front tank, Rear tank, and Middle tank, and below is a CYL. (Cylinder) Temperature gauge, with a Hobbs hour meter. Three lower levers cover (LtoR) the carburetor heat control lever, the famous Fuel Wobble Pump Lever and the Fuel and Oil Emergency Shutoff Lever. To the right is the internal Oil filler (yellow cap). Detail again comes to the fore with the Manufacture's and Aircraft registration plates. The authenticity is simply mind-blowing and it keeps on coming with the ratcheting carb heat lever, the manually pumped flap system (with direction valve), and the primer system that are all faithfully modelled for maximum immersion. The fuel system is complicated, with three internal tanks Front (35 GAL/132 Lts), Centre (35 GAL/132 lts) and Rear (25 GAL/95 lts), two wing tanks (21.6 GAL/85 Lts each) and an optional Belly Fuel Tank (43.1 GAL/163 Lts)... for a total of 181 GAL/685 Lts of fuel. The main internal tanks are controlled via the red switch left panel, the wing tip tanks via a red switch upper door left, and the belly tank via a handle under the instrument panel (Vacuum air pressure is required). Another notable feature in the cockpit is that you can open or lower both front door windows, and into any position you like... ... and the forward window air vent can also be rotated. There are loads of pumps and levers on the Beaver, one is the pump handle for the flaps, down right of the pilot's seat and another is the engine primer pump on the left of the pilot's seat, the actions of both are really well done and authentic. Internal Lighting Turn on the power and adjust the instrument lighting and it is.... "oh WOW, WOW!" "Totally stunning" is the one set of words you can find, "blown away" is another, the panel lighting is simply gorgeous, as there is a real depth to the lighting and in the detail. Overhead lighting is provided by two fixed side spot lights... and two highly adjustable LED roof mounted lights... ... oddly there is no lighting in the cabin? But you can turn the roof LEDs right backwards to give some illumination, but a few rear lights in the cabin would be nice, it is just a little too dark back there. Customising If you have the Thranda PC-6 Porter, then you will be aware of the instrument panel customising feature to suit your own tastes. So in reality there is no default instrument setup... and that same system is available also here in the Beaver and it is called DGS or "Dynamic Generation Series". Menu is selected via an arrow tab left screen (it can be scrolled clear), on the menu is the "PANEL" selection. This brings up the dynamic panel options... There are two basic panel selections, the iconic version we know so well, but also a flat metal grey facia version. Panel choices become endless, angled avionics, better fuel switch positions, and both either the GNS 430 or GNS 530 can be used... .... and the grey flat panel is far better with the more modern squared off throttle quadrant to which gives you even more layout variations... Optional Items include; Aspen EFD 1000, S-Tec 55x autopilot, RealityXP GTN 750/650 Touch 3D bezels (these are optional addons) and a lovely Collins 614-12 ADF... There are over 50 instruments to select from or to rearrange around on the panel facias... .... basically you can even start with a completely blank panel and then create your own unique or personal instrument layout... and have up to or you can save 14 different layouts and there are five defaults to get you started... for absolute layout choice it is simply crazy! Menus The menu is selected via the arrow (the arrow can be scrolled translucent) on the left side of your screen... ... and there are seven tab selections; General, Livery, Camera, Audio/Slew, Panel and Misc. The menu PANEL selection has already been covered above, the rest of the selections are covered below. Menu - General The menu "General" sections covers quite a lot of options, the layout is highly detailed and very comprehensive. Three selections cover group items but any one separate item via "Click Spots" can be individually selected or hidden via the aircraft graphic. "ALL COVERS" will select the huge engine canvas cover and pitot cover, "ALL TIE-DOWNS" for propeller and wing tie-downs and "ALL DOORS" for both cockpit doors, both cabin underwing and twin "Alaska" doors. The Engine can be set into two modes... SIMPLIFIED or REALISTIC In Simplified mode the engine will be automatically limited the engine and engine start up is instant start. In Realistic mode it will be up to the pilot to avoid exceeding the engine limitations, and go through the full procedure of starting the Pratt & Whitney R-985 Wasp Junior radial engine, which means a lot of lever and knob setting and a lot of hand pumping. Other General menu selections cover Window and Instrument Panel Reflections on/off, Startup Running on/off, Use the External Fuel Tank, Chocks and brakes on/off. All EXT - External Lights can be switched on and off as can ALL INT - Internal lights. The lights activation can also be accessed on the aircraft graphic and finally the "Radial Engine Animation" of which we will look at soon. The Electric Tug is attached to the rear tailwheel, that is controlled via your joystick (for motion forward or backwards), with the yaw turning the rear tailwheel and the attached tug. There are an fully animated pilot (actually Dan Klaue) and his lady friend (actually his wife) as a Co-Pilot, both will disappear if the power is off and the wheel chocks are set, if you don't select a Co-Pilot, then Dan flies alone. Menu - Liveries Second Menu option is liveries, there are two options here with the first being "PAINTED LIVERIES". There are altogether 14 liveries or one blank and thirteen designs, and all are of extremely high quality and creative flare. One is a ZZTEMP that is just totally clear (not shown). Note the Dirt and Scratches (arrowed) numbers, as they are important later. Dynamic Liveries Not happy with any of those designs, then why not create your own! With their earlier release of their Kodiak then Thranda also introduced a clever feature to design your own livery.This is done by switching from PAINTED LIVERIES to DYNAMIC LIVERIES top. You have a menu to select on the right that can colour a certain part of the aircraft, like the Roof, Wing, Tail or Wing tips. Select which one you want and then adjust the RGB colours for that area, it looks hard but you can easily design a very nice livery in about twenty minutes... ... when done you can "save" the livery and then "APPLY" it to the aircraft. It was quite easy, but I found the dash symbol - couldn't be inserted in the registration except for the lower case version? So I had to take it out. This is why there is an transparent aircraft in the liveries? There are also four effects you can apply. The said "Dirt" and "Scratches", and also "Metal" and "Rough(ness)" this gives the aircraft a dirty rough appearance. So applying these Dirt and scratches on the airplane will make the surfaces rougher, this is giving you the full PBR control in creating stunning metallic liveries, or matte, sand-blasted look, and these aspects will also slightly affect the Beaver's drag, and therefore it's cruise speeds. With full dirt and scratches you can expect a loss of 2 to 3 mph of cruise speed. Cleaning the plane by setting both values back to 0 will give you a smoother and slightly faster plane. Two extras can also be added with DH logo which is very nice and the said registration number, the final result is excellent. Menu - Weight/Bal The DHC-2 has a great Weight and Balance menu. Both Lbs and Kgs weights are shown... Fill one wingtip tank full and the Beaver will seriously lean, and so will the other tank... this shows how sensitive you are going to have to be to balance out the aircraft. .... Fuel can be added to all the tanks in the three internal, twin-wingtips and the Aux external tank and they are all shown and are adjustable as well in the menu (above). Pilot, passengers and cargo can all be set for individual weights and the CofG (Centre of Gravity) parameters are also all shown on a graph, when done you can save the configuration and reload it. Working out that right CofG balance is critical, setting just inside the parameters is just not really good enough, you need for the aircraft to be balanced in it's fuel and load weights, or you will have difficulty flying the aircraft, put too much (cargo) weight aft and you are tail heavy. Note in that taking out the Co-Pilot here will make her disappear in the cockpit, but pilot Dan stays. Menu - Camera There is a camera feature under the menu "Camera" selection. To the right is the internal default views to be selected via a menu, or press the keypad to select the view. The FOV or Field of View is adjustable via a slider. The left side of the panel is the "Walkaround" views, just pick the dot viewpoint you want to see to rotate around the aircraft. Menu - Audio/Slew Sound can be adjusted via the sound menu. There are seven slider selections with: Master, Aircraft External, Aircraft Internal, CoPilot, Radios, Environmental and User Interface... press the Audio slot and you get a audio simulation of an active noise canceling headset, which is seen as wearing a headset. Sound quality is excellent. Slew mode Slew mode is experimental, but allows you to manually move the aircraft around in X-Plane. It functions by temporarily overriding the various aerodynamic and physical forces on the plane, it is to allow the user to reposition the plane as desired. This feature is however highly touchy! In reality you don't use "Slew Mode" on the ground, it is mostly for manoeuvrability on water and for docking... If you want to see this in action then check out the PC-6 Adventure pack review. Menu - MISC The Misc page covers options on the Beaver, and there are four options; Skis, Tyres, Windows, and Throttle Quadrant. We have seen the Bubble Windows and Throttle Quadrant options above in either "Flat" or "Bubble Windows", and the "Old" or "New" quadrants. Skis Ski quality and design is again exceptional, with no ordinary straight planks here, they are all highly realistic and the same as on the PC-6. Bush (Tundra) Tyres and Mud Flaps Another option is for the larger Bush tyres or "Tundra" tyres, the over-sized wheels also come with another option of having "Mud Flaps" attached (The mud flaps can be used on both the Normal and Tundra tyre options). Flying the DHC-2 Beaver There are two options to starting the DHC-2, the (very) easy way via the option in the Menu/General panel... and the long winded way. The full engine start up procedure is in the manual. Did you always want to look inside your engine? Well now you can and the idea is to see how the engine is primed to start... Dan Klaue genius strikes again! There is the option via a menu selection "Radial Engine Animation" that brings up an animated Wasp Radial engine, you can PreHeat and Prime your Wasp ready for start, but you have to be careful not to "OverPrime" the Cylinders. The starter switch can be hard to find because it is not labeled, but it is under the left red switch cover, if primed correctly then switch on the starter (no more than 15secs a try) until the Wasp finally coughs and powers up, the animation can give you exciting feedback on what is going on in the ignition phase of the engine, and then when it runs it is another "Wow" moment... yes. Pistons are exploding, and the animation is amazing beyond belief, adjust the throttle for a some serious movement, but the animation will also react to the adjustment of not only the throttle inputs, but the fuel mixture from "Rich" to 'Lean" adjustments as well. These movements and the running of the DHC-2 also compliment the amazing sound range as well, there is a consistent adjustment of the excellent engine sounds to the condition of the running of the engine, that is the "Ugh, Ugh" of low lean to the high power "roar" of the full throttle. The sounds actually give you clues as to what's happening under the hood as is for the shear band of extensive sound patterns available here that show no gaps or same patterns that just gets you all tinkly down your back... it is highly, highly aurally realistic... well like a full throated real 450 hp Wasp Jr engine sounds like, and the hope that your neighbour and you are on (very) good terms. So yes the sounds are good, or totally excellent. External lighting is very good, but on an aircraft like the Beaver quite limited to the basics, there is a nice red beacon top fuselage, and the navigation lights are nice and pert as is the tiny wing strobe lights. Main landing lights are both LED, and very good in the distance, but can't be seen close up on the wing? As noted you can have a freewheeling rear or locked to the rudder yaw, You really need a set of rudder pedals with built in toe brakes to use the freewheeling option, which I don't have, so I have to use the yaw option. Your have to find a nice balance with the mixture and throttle levers so there is a need to experiment to find that right balance... but it is there to be found and highly realistic, and the feel is excellent. So a bit of throttle and you are moving, the Beaver is excellent on the ground as taildraggers can be twitchy, but you can actually feel the weight and the aircraft is quite smooth in it's movements. You sit high, and the view out is quite good for a taildragger, but a slight glance to the left will align you up with the runway... flaps set (to Takeoff) and your ready to go. Speed builds gradually then suddenly the tail unstick's and you need a kick-full of right rudder to maintain the straight ahead line... ... but don't get me wrong, the aircraft is not twiddly in this phase but beautifully controlled as it is all very easy tail up to steer directly on the centreline, most taildraggers are nasty and nervy at this point, but not the DHC-2... Takeoff is around 90 knts, but you don't need to pull back the stick as the Beaver just glides into the air on lift alone, to climb only requires a little pitch to meet the 600 fpm climb you need. You can climbout at a 1,000 fpm, but the 600 fpm is perfect, the one thing that should be highly noted is the aircraft's weight feel, this is a huge bonus in me holding that centreline, but also when you lift you really feeeel that WEIGHT of the aircraft, and that is rare in X-Plane, it is so very, very good is this DHC-2. Unlike other aircraft you can use the flaps and even in level flight, most aircraft need the flaps in and clean as soon as possible, but not the Beaver, as if you have a slightly uneven balance (front to rear) in the aircraft you can use the flaps to even out the balance without touching the trim, it is a tool every Beaver pilot's use. Obviously you don't go very fast... 158 mph (255 km/h) or 140 knts is max and your cruise speed is only 143 mph (230 km/h) or 125 knts, but you don't really care about that factor, this aircraft is an absolute dream to fly. Trimming the DHC-2 out is easy, the trims are set up up on the roof (But I use keyboard commands), and the Beaver trims out the pitch beautifully, now just small stick and rudder inputs keeps DHC straight, but better still yet is if you trim out the rudder as well, and now you can take both hands and feet off the controls and the Beaver will still fly like a dream straight and level.... this is one amazing simulation of a real aircraft. So for any novice pilot, this is a brilliant aircraft to learn to fly on, even if it is a taildragger (all the better), as it's balance is second to none, but you also feel the aircraft weight in every manoeuvre that you do, but this is not an aerobatic machine, it is a workhorse only, like a large Clydesdale horse it is heavy, slow and incredibly docile... that is the word to note here in docile, but I simply love it as the aircraft is very comforting and I have had enough nervy aircraft lately to last me a lifetime.... this is a true pilot's aircraft in every form... and I simply love it. The DHC-2 is so docile and neutral I am am not quickly reaching for the autopilot (S-Tec in this case), as the Beaver is just nicely (but noisily) cruising through the air and I certainly don't need any artificial help in flying the aircraft at all... open the side window to get the full throaty roar of the Wasp Jr, it is certainly noisy but exciting as well, I note the aircraft as docile, but that is in it's character, it is still however an immensely exciting aircraft to fly because it is "that good". Do a hard turn and the DHC-2 needs a little more power and a slight pitch back to slightly compensate for a loss of speed and altitude, but these reflexes come naturally each time you manoeuvre the aircraft in large variations. Thranda have already noted that an Amphibious version of this DHC-2 is coming and soon, maybe in the new year (2021), that will be another worthy add-on, and give the aircraft an even greater capability and versatility (if it is anything like the recent PC-6 version). Cockpit is stunning in the air. We are soon back over Bella Coola and heading back to the strip at CYBD... Interesting are the flaps... lower the flaps and you don't need to change your throttle position either, the Beaver just slows down to the lower speed of the flap position, with any or no sudden expected lift (Interesting though would be the aircraft at a very light loading weight, I didn't try that aspect out).... the Beaver is known as a "flap-happy" aircraft and you can see and feel that aspect of why here... That is the "Landing" setting, but you can go even slower if you go deeper with more flap and into the red zone to the full 58º degrees... Approach speed is around 70 knts, here your altitude is controlled only via your throttle, more power to go up and less power to go down, but even the mixture adjustments can even have an effect, so be aware if you are leaning out the engine more while reducing power. Final approach and you are under complete control of the aircraft, you and the machine are as one, even slight reductions of power and you lose height, but you also have uttermost confidence in the aircraft, in other words it is easy, but skillful in the same aspect. One note I will say is that the touchdown speed is still around 70 knts, dropping to 60 knts on the runway, and that feels a tad fast at full flap? but the speed does still give you full aerodynamic control on the landing and you can finely follow the centreline as good as when you took off, the question begs is that could a headwind change the aspects of a landing such as this... ... so the big trick is rubbing off the speed without touching the brakes, tricky, and that aspect may need a bit of practise is needed before getting it right, I would be more happy with a landing speed of around 50 knts or less in these circumstances. But let us be thankful, this is an amazing experience of an aircraft... the best aircraft of the year 2020? _______________ Summary This is the third aircraft in a series of rugged utility aircraft from Thranda Design, the first being the Kodiak, then the excellent Pilatus PC-6 Turbo Porter and now here comes the most iconic and the most famous bush aircraft of them all in the DHC-2 Beaver. This version has the "Holmes Extended Engine Mount", which moves the 917lbs Wasp Jr engine forward by almost 10 inches for a better rear load balance (Centre of Gravity). Any aircraft coming from Thranda Design is usually full of amazing features and outstanding quality design, and certainly you are not disappointed here. In the design aspect the aircraft is extremely the best yet from Thranda, the quality is overwhelming to the point of ridiculous... the DHC has full hi-res PBR realistic effects, featuring true-to-life plate deformation and to-the-rivet precision, not to mention the high quality materials internally and externally. Detailing and the modeling is absolutely first rate, this is an outstanding Beaver. Not only is the instrument Panel one of the best yet in X-Plane, it is also fully customised via the "Dynamic Generation Series" in not only giving you your own control over the way the instruments are laid out, but to swap and change other instruments as well including; Aspen EFD 1000, S-Tec 55x autopilot, RealityXP GTN 750 (these are optional addons) and a Collins 614-12 ADF. Fourteen liveries are provided, but also again you can create and design your own liveries with the DGS system. Options include, Skis, mud flaps, Old and New quadrants and bubble windows, and an amphibious version is noted as coming soon. Notable is the instrument lighting, it is simply awe-inspiring. Sounds are outstanding, with High fidelity, multi-track sounds with smooth transitions and amazing atmospheric effects, 3D audio effects, including "blade slapping" sound when view is perpendicular to propeller, start up and engine mixture variance is also highly realistic. Menus are also extensive, with sound adjustments, weight and balance manager with visual chart, lighting, doors, views, reflections and an amazing radial engine visualisation in a pop-up window, which showcases the inner workings of the engine. Again like the PC-6, you would want, or like a cargo option? and there is no lighting in the rear of the cabin? Yes I have been gushing in this review, extraordinary and brilliant are full of the praise of what is delivered here from Thranda Design, not only in the options, effects and in the sheer experience available, but also in the way this Beaver flies as well... it is the full package and in my guess for the aircraft of the year in 2020. So the note here is to the converts of Microsoft's "ground breaking" new simulator, because aircraft like this coming out of X-Plane changes the dynamics of simulation. Yes MSFS may have pretty scenery, but it will never have aircraft such as this iconic Beaver as in depth, with as much quality and come with the sheer force of ideas available here, and in reality isn't that is what simulation is really all about, brilliant aircraft with exceptional quality and flying dynamics and a huge feature list, and only top level developers like Thranda Design will be in the X-Plane simulator and not the other one, so if you really want the very best then here it is.... Highly, Hugely Recommended. _______________________________ Yes! the DHC-2 Beaver-DGS Series by Thranda Design is NOW available from the X-Plane.Org Store here : DHC-2 Beaver-DGS Series Price is US$39.95 (Currently only US$34.95) Features Special features: FULLY configurable 3D instrument panel. Over 50 instruments to choose from! (Including Aspen EFD 1000, and support for RealityXP GTN750) Move any instrument to any location on the panel, or even between pilot and copilot's panel! Comes with 6 panel presets, but can easily be expanded by moving instruments around, using simple and intuitive interface. Save your own presets, and even share them with the community! Instruments can be moved in 3D directly, on a 2D pop-up preview window, or by numerical entry for precise placement. Intricate, realistic fuel tank system, featuring tip tanks and removable belly tank. Overflow logic when transferring too much fuel from other tanks to primary tanks. GNS430 and 530 can be swapped out, but a restart of the plane is required, as 430s and 530s are mutually exclusive in terms of compatibility in X-Plane Dynamic livery editor (like in the Kodiak and the Pilatus PC-6) Full PBR control! Create stunning metallic liveries, or matte, sand-blasted look in mere seconds! Additional control over dirt/grime, scratches/nicks, adjustable in real-time to dial in the exact desired amount of wear and tear. Affects airspeed. Clean plane will fly 2-3 MPH faster. Create "virtual" liveries, based on one common design layout, and assign any colour to any available paint segment. Quickly create preview of livery in real-time, using intuitive controls. Previews now include visualization of metallic materials and dirt overlays. Apply selected livery in real-time, right in the sim, without the need to even touch a 3rd party image editor! Option to include/hide manufacturer logo on tail, and control its colour. Option to change the tail number in real-time, or disable it altogether. (Enter a "space" instead of a callsign number to create a blank tail number.) Easily and quickly create dozens of paint schemes in-sim! Also supports 12 traditionally painted liveries, all visible in a convenient pre-selection preview window. Uses SkunkCrafts Updater. Option to participate in Beta program, via check box in SkunkCrafts Updater. Excellent hi-res PBR realistic materials, featuring true-to-life plate deformation and to-the-rivet precision. Feature-rich elegant fly-out menu with the following features: Realism settings for engine and tail wheel (simplified vs. realistic modes) Radial engine visualization in pop-up window, which showcases the inner workings of the engine. Real-time primer and pre-heat logic, with visualization indicating correct priming range Innovative electric tug, with in-panel controls to move forward/backward at the desired speed, and steer proportionally Control over chocks, individual tie-downs, covers, internal lights, external lights, etc. Option to enable/disable Belly Tank, with realistically simulated weight, momentum, rotational inertia, and drag characteristics. Option to start up running (all systems ready), or cold-and-dark, for realistic startup procedures. Option to run engine in a simplified manner (no pre-heat, no priming, easier starts) Control landing lights, strobes, beacon, and nav lights via pop-up window Detailed weight and balance manager with visual chart, individual passenger seat weight control, Lbs/KG unit toggle, CG control, external tank control, and the option to save and load configuration. Multiple camera snap points, above and beyond what's available by default in X-Plane, so you can perform your walk around checks. Adjust your camera's Field of View without having to go to an X-plane menu, allowing for real-time adjustments. Audio mixer: individually control audio channels in real-time, so you can adjust volumes while hearing them play. Slew control: move your plane around the world, temporarily bypassing flight physics. Includes ground mode and air mode. Dynamic panel control page, with a separate view for the entire panel layout preview, or a per-instrument view, allowing for fine-tuning of instrument position, as well as copy-paste function to quickly replace instruments. The "Misc" page in the fly-out window contains options to customize the plane, such as: skis tundra tires mud flaps bubble windows throttle quadrant model (choose between classic and new design) Flight dynamics and systems: The Beaver has unique flight dynamics, characterized by being a "flap-happy" plane. This is faithfully reproduced in the sim version. (Can require slight flap extension during cruise, depending on conditions). The Beaver is the quintessential Canadian classic STOL workhorse, whose flight characteristics and excellent STOL capabilities are calibrated to maximum precision in the sim. Details, such as the wobble pump, the ratcheting carb heat lever, the manually pumped flap system (with direction valve), and the primer system are faithfully modelled for maximum immersion. Tie-downs and chocks actually keep the plane from moving, even in high winds. Advanced FMOD-based sound system: Pioneer in procedural engine sounds. (No two starts sound alike: coughing, sputtering, and clanking valves all contribute to a nuanced, rich, immersive sound experience.) High fidelity, multi-track sounds with smooth transitions and amazing atmospheric effects. Individual volume control over different aspects of the sound experience, adjustable in real-time (while listening to the sounds) Different sounds for front of plane than for back of plane Panning around the plane in exterior view yields awesome 3D audio effects, including "blade slapping" sound when view is perpendicular to prop Individual buttons and switches in the cockpit each have their own unique sound. Sounds actually give you clues as to what's happening under the hood Outside wind intensity is affected by slip and AoA. (The more the surface area of the fuselage is hit by oncoming wind, the louder the sounds Requirements X-Plane 11 Windows, Mac or Linux 4 GB VRAM Minimum. 8 GB+ VRAM Recommended Download Size: 988 MB Current and Review version 1.0.2 (November 23rd 2020) The aircraft comes with an auto-updater. Free auto updates for the life-cycle of X-Plane 11 _______________________________________________________________________ Installation and documents: Download is 998.10Mb and the aircraft is deposited in the "General Aviation" X-Plane folder. Installation key is required on start up and is supplied with the purchased download file. Documents supplied are: Changelog.txt Thranda DHC-2 Beaver Joystick Settings.pdf Thranda DHC-2 Beaver Graphics Settings XP11.pdf X-Plane G430 Manual.pdf Thranda DHC-2 Beaver Documentation.pdf X-Plane G530 Manual.pdf A Blank Livery (PNG) of four files are provided for painting. Checklists and loads of Performance graphs are provided in the manual. ______________________________________________________________________  Aircraft Review by Stephen Dutton  25th November 2020 Copyright©2020 : X-Plane Reviews   (Disclaimer. All images and text in this preview are the work and property of X-PlaneReviews, no sharing or copy of the content is allowed without consent from the author as per copyright conditions) Review System Specifications:  Computer System: Windows - Intel Core i7 6700K CPU 4.00GHz / 64bit -32 Gb single 1067 Mhz DDR4 2133 - ASUS GeForce GTX 1080 8Gb - Samsung Evo 1TB SSD Software: - Windows 10 - X-Plane 11.51 Plugins: Skunkcrafts Updater Scenery or Aircraft - CYBD - Bella Coola by XPORG (formally Beti-x) (X-Plane.OrgStore) - US$17.50
  23. Aircraft Addon : Pilatus PC-6 Turbo Porter Adventure Pack by Thranda Design This year 2020 in early June, Thranda Design released their amazing Pilatus PC-6 Turbo Porter, a modern (if you can call the 1960's modern) bush aircraft with a utility bias. Excellent it is, but being a versatile utility aircraft then there is the need for options to cater for the aircraft's multi-role capabilities, and here it is in the "Adventure Pack". This Adventure Pack is an addon, so yes you will currently need the Thranda PC-6 Turbo Porter aircraft to use it. Installation notes are important here, so we will cover them first. First an important note!, to install you have to have the latest v1.2 version of the aircraft, if not you will get a startup conflict, followed by a nasty crash to desktop (CTD). Download and unzip the Adventure Package, then select and merge the elements into the original PC-6 folder... .... note if you use a Mac then make sure you do a clean Merge or Copy and Paste as some files overlap... when starting up you will need to authorise both aircraft (Original and Adventure Pack) with two separate keys, if correct you should have both aircraft (Wheels and Amphibian) present for selection on the Flight Configuration panel. Options There are various options to configure the aircraft for it's role, these include; Amphibian Floats, Ski's, Bush Tyres (Tunda) and Mud Flaps. Amphibian Floats Floats are always a big attraction for flying bush aircraft, and you will not be disappointed with the quality ones presented here... Not only is the shaping really, really good, then so is the hull riveting. It is this extraordinary detail of the fittings that stands out here, front support wheels and struts are excellent, pontoons to aircraft supports are also realistic with tension wires... ... the pontoon undercarriage (retractable) is high quality as well, with every nut and and bolt well rendered, The undercarriage (and front struts) are raised or lowered via a panel on the instrument panel. (Note, there is feature on this aircraft in that you can custom design your own instrument panel, so the location shown here of the location of the Gear Panel may be placed or located anywhere on the instrument panel). But the highlight are the twin rear rudders that can be raised or lowered into the water, note the springs and wires that move with the tilting action. The rudder action is controlled by a selection on the new "Misc" tab on the pull-out menu, centre left of your screen. (you can also use the beautifully crafted lever on the side of the pilot's seat). Other menu options include wing ladders, again expertly crafted, and the choice of short or long passenger windows. There is a nifty "Slew" tool to over-ride the X-Plane physics, that allows you to control the docking of the aircraft, just move (slowly) the crosshair to manoeuvre the aircraft to your wishes, and a very good tool it is as well. Overall the Amphibian Floats are an excellent addition, and look very, very nice in operation. Skis With the merged Adventure Pack, the wheeled version menu is changed as well. You now have the selection of Skis on the same "Misc" menu. Ski quality and design is again exceptional, with no ordinary straight planks here, they are all highly realistic. Bush (Tundra) Tyres and Mud Flaps Another option is for the larger Bush tyres or "Tundra" tyres, the over-sized wheels also come with another option of having "Mud Flaps" attached (The mud flaps can be used on both the Normal and Tundra tyre options). Bush tyre and flap detail is again very, very good and highly realistic, even the connection of the Mud-Flaps to the wheel assembly is done with perfection with bolts... you can't ask for more. Note; on the wheels version there are the same options for the long passenger window, and a "Coming Soon" to note "Synthetic Vision". Garmin G1000 Glass Cockpit The Turbo Porter now also comes with a G1000 two-display Glass Cockpit. It is the standard Laminar default G1000 setup, but it is still another nice feature to have. Note there is no Autopilot panel set on either of these displays, but I suppose you could adding the S-TEC 55x which is available under the panel options, and a secondary note in that there is also the EFD 1000 which is a self-contained multi-function digital display which is also available as an option instead of the G1000 layout... the G1000 option is found and selectable in the Dynamic Panel feature. PBR Metal and Rough(ness) Thranda has a unique feature on their aircraft, and that is the ability to design your own livery, or "Dynamic Liveries. Dynamic Liveries are covered in depth in the release review: Aircraft Review : Pilatus PC-6 Turbo Porter by Thranda Design In the Adventure Pack, there has been two additions to the Dynamic Liveries tool in the options to adjust the PBR (Physically Based Rendering) effects, this is the Metal (Metalness) and the Rough(ness) of the panels. The PBR effects require a bit of experimentation to get the right look and feel that you require, but you also learn of how Metalness is used in X-Plane to get the right lighting realism effect, the process is a little slow in experimenting (reloading) but your patience is rewarded.... clever though. One surprise that is missing on the Adventure Package is there is still no "Cargo"? option, in removing the seats and adding in freight, hopefully the option is still on the "to do" list. Skydivers! It wouldn't be a Dan Klaue project without something totally mindblowingly original, and here he does not disappoint again.... Skydivers! Selection of the skydiver feature is on the Menu under "Misc", when you turn the selection on you will get ten skydivers sitting in the aircraft, it is a quite a tight squeeze. It is very important your Baro pressure is set, so the pop-up panel is set at the same altitude. Then it is the takeoff and the long, long climb up to altitude and I recommend 800fpm... "oh Hi!" Note the "Open Right Rear Door" alert... the difference of the weight of a full load of skydivers on the aircraft is very evident, and I like door closed as I climb up... when you open the right rear door you get this huge load of wind noise and a far higher volume, "I love it". On the pop-up panel it shows you your ten skydivers, their smoke colours left and the choice to either "Stay With Plane" or "Join (the) Skydivers"... There is a minimum Skydiver altitude recommended, but I would double that height if you want more fun, here I aimed for 6000ft.... Press the Spacebar and out of the door they go... Their descent altitude is shown for each Skydiver, and the smoke colour shows you which skydiver they are... Now it's your turn! Select "Join Skydivers" and press the Spacebar... once "Jumped" you get additional key commands (shortcuts)... you can move the camera to the Previous or Next (C - Shift C), open the Chute (E), control your speed W (fast) or S (slow), Toggle Smoke (X) and (Q) to Release Bindings.... Two inputs are however the best fun in Right (A) or Left (D), which allow you to turn or twist in the air. You can change to any falling Skydiver you want to by selecting the Skydiver on the menu and his altitude is noted on the large altimeter. And yes it is a lot of fun.... and visually very clever if you have all ten Skydivers in the air at once.... I did find the feature a bit buggy currently (no freefalling), but the idea is very clever. Original PC-6 release review is here; Aircraft Review : Pilatus PC-6 Turbo Porter by Thranda Design _________________________ Summary After the release of the exceptional Pilatus PC-6 Turbo Porter from Thranda Design in June 2020, it was announced of an addon package, and here it is in the "Adventure Pack" for the aircraft. The package include; Amphibian Floats, Ice Skis, Bush (Tundra) Tyres, Mud Flaps, Ladders and Short or Long Windows. The G1000 avionics ( Laminar default) is also now available in the excellent "Dynamic Panel" tool and PBR Metal and Rough(ness) options have also been added to the "Dynamic Livery" tool. Highlight is the clever "Skydiver" feature, with ten Skydivers that you can jump out of your aircraft or join and control their descent to the ground. Highly original with smoke effects and keyboard commands. Oddly the much wanted Cargo (freight) option was not included? (It is available on the Thranda Kodiak). Messy authorisation with two keys required. Quality and detail on the new options (features) is second to none, all items are highly realistic and masterful in detail, as you would expect from Thranda. You asked for it, and now it is here in options for the PC-6 Turbo Porter, yes the aircraft was versatile before, but now you can expand your flying into far more rugged territory, say water, Ice and unpaved runways, that is what you wanted, that is what you got.... overall brilliant! _______________________________ Yes! the Pilatus PC-6 Turbo Porter Adventure Pack by Thranda Design is NOW available from the X-Plane.Org Store here : Pilatus PC-6 Turbo Porter Adventure Pack Price is US$16.50 The Adventure Pack is an expansion of the Thranda PC-6, which is required first. Features of the Adventure Pack: Amphibian floats With separate gear control panel Bush tires with their own aerodynamic and ground handling physics Skis for Glacier Operations Articulating Skis that follow the ground Mud flaps select them on /off on all versions G1000 panel Part of the Panel Presets PBR Painting via real-time livery editor Larger door windows to allow skydivers A new livery Requirements The Thranda PC-6 is required for the Adventure Pack. This is NOT a standalone aircraft Download Size: 480 MB Current and Review version 1.2 (October 24th 2020) _______________________________________________________________________ Installation and documents: Download is 479mb. A merge of both Aircraft and Adventure Pack files is required (see above), note the updated v1.2 is required for installation. Two Installation keys are also required on start up and is supplied with the purchased download file (and the original Aircraft key). Documents supplied are: ChangeLog.txt Thranda Pilatus PC6 Joystick Settings.pdf Thranda PC6 Expansion Pack Manual.pdf Thranda Pilatus PC6 Graphics Settings XP11.pdf X-Plane G430 Manual.pdf X-Plane G530 Manual.pdf Thranda PC6 Documentation v1_2.pdf Thranda PC6 Documentation.pdf A Blank Livery (PNG) of four files are provided for painting. Checklists and loads of Performance graphs are provided in the manual. ______________________________________________________________________  Aircraft Review by Stephen Dutton  4th November 2020 Copyright©2020 : X-Plane Reviews   (Disclaimer. All images and text in this preview are the work and property of X-PlaneReviews, no sharing or copy of the content is allowed without consent from the author as per copyright conditions) Review System Specifications:  Computer System: Windows - Intel Core i7 6700K CPU 4.00GHz / 64bit - 32 Gb single 1067 Mhz DDR4 2133 - ASUS GeForce GTX 1080 8Gb - Samsung Evo 1TB SSD Software: - Windows 10 - X-Plane 11.50r3  Addons: Saitek x56 Rhino Pro system Joystick and Throttle : Sound - Bose Soundlink Mini Plugins: Skunkcrafts Updater (required) Scenery or Aircraft - CZST - Stewart by Beti-x (X-Plane.OrgStore) - US$25.80
  24. Aircraft Review : Avro Vulcan B Mk.2, K.2 and MRR by JustFlight The Avro Vulcan (officially Hawker Siddeley Vulcan from July 1963), is a four-engined jet-powered delta wing strategic bomber, which was operated by the Royal Air Force (RAF) from 1956 until 1984. The Vulcan B.1 was first delivered to the RAF in 1956; deliveries of the improved Vulcan B.2 started in 1960. The B.2 featured more powerful engines, a larger wing, an improved electrical system and electronic countermeasures (ECM); many were modified to accept the Blue Steel missile. As a part of the V-force, the Vulcan was the backbone of the United Kingdom’s airborne nuclear deterrent during much of the Cold War. Although the Vulcan was typically armed with nuclear weapons, it was capable of conventional bombing missions, a capability which was used in Operation Black Buck during the Falklands War between the United Kingdom and Argentina in 1982. Aircraft manufacturer A.V. Roe and Company (Avro) designed the Vulcan in response to Specification B.35/46. Of the three V bombers produced, the Vulcan was considered the most technically advanced and hence the riskiest option. Several reduced-scale aircraft, designated the Avro 707, were produced to test and refine the delta wing design principles. The other V Bombers were the Vickers Valiant and the Handley Page Victor. The aircraft produced here also includes Avro Vulcan B Mk2 modeled on XH558 "The Spirit of Great Britain". Which is the last flying Vulcan that is flown by the Vulcan to the Sky Trust and the aircraft XH558 and is currently based at EGCN - Doncaster/Sheffield of which X-PlaneReviews covered in a review just earlier this year. The project here is a collaboration between JustFlight and Thranda Design, JustFlight with the initial modeling and design, and Thranda with the excellent X-Plane conversion, sounds, flight dynamics and systems. This is not the First Avro Vulcan however for X-Plane, there is an old FlightSim version that was converted to X-Plane and released as freeware back in 2014; Freeware Release : Avro Vulcan BMk2 by Daniel G and for the time period this Vulcan version was pretty good, but In reality you can't compare that aircraft to this ground up built X-Plane version, certainly not in the high detail. There are three variants of the Vulkan covered here, in the Mk.2, K.2 and the MRR Mk.2 Standard Vulcan in Mk.2 guise. K.2: Six B.2s were converted for air-to-air refuelling with the Mark 17 Hose Drum Unit (HDU) mounted semi-recessed in tail cone. The TFR was deleted. The Three tanks are positioned in the bomb bay giving the K.2 a fuel capacity of almost 100,000 lb (45,000 kg). The six aircraft were converted to used as an aerial bridge to the Falkland Islands after the War, as the Victors had by that date had more limited capacity and airframe (old) limitations. MRR: Nine B.2s were converted to the Maritime Radar Reconnaissance role, these aircraft came with the underwing MRR - (sniffer) Pods for taking samples of the upper air for scientific analysis and nose blade aerials. There are also seven individual optional equipment choices (done from the livery/‘config.json’ file) that includes: Inflight Refueling probe, Both 201 and 301 Rolls Royce Olympus engines (201 - 17,000 lbf (76 kN) thrust) - (301 - 20,000 lbf (89 kN) thrust), TFR Dome (Terrain-Following Radar ), Modern Aerials, ECM (Electronic Counter-Measure) tail cone, K.2 Drum Kit and the MRR air sampling pods and nose blade aerials. Detail In this price range you do expect great modeling detail. In fact JustFlight set themselves a very high level with their excellent BAe Systems Hawk T1/A, and a supreme high-quality machine that was... But they have done just as well here also with the Vulcan Mk2. This is respectfully a far a harder aircraft to get detail into, because basically the Vulcan is all wing, and not much aircraft per se... ... that full wing shape also created inadvertently a large advantage in that it also had a very small radar signature, In being a cold-war bomber that is certainly a bonus in warfare and the start of the race to create very low radar signatures on most current designs, with the F-17 Nighthawk being the most extreme example. The JustFlight modeling team had full access to Vulcan M655 based at Wellesbourne Mountford and is the default livery of the series, and that intimate detail is certainly shown here, but the aircraft noted is in it's current restoration state, and that is good in creating the right feel we would want from these old cold-war birds. So note the worn window surrounds and tired glass, this is not a new aircraft but a very authentic reproduction of XH588. It is all very well done. Gear detail is the same in aged, slightly corroded, but highly realistic. Internal wheel wells are filled out with great detail, so nothing is hidden here or missed. Complex, but original... the gear construction is first rate (so are the animations) with all struts and supports well modeled, and note the huge wheel well box sizes. That wing leading edge is complex with a big C from a modellers perspective. So it is very easy to take the easy way out and just do the straight wing, but here it is all the complex curves interacting with each other and the work is extremely well done. Wingtips are really art in the way they are created with such smoothness... impressive. Lovely bulbous tailcone is really again well modeled, note the engine exhausts that are neatly set into the wing, small details abound to again create that authentic feel, the Olympus engines are buried within the wings, sadly, but their internal shapes are well seen... .... again the tired worn glass of XH588 is seen on the tail, but this is a beautifully rendered tail, lots of shape and highly realistic. So the modelling overall is excellent and a great representation of this great old (cold) warbird. Note if the power is selected off and the parking brake is on then the Vulcan displays the static elements. They include engine inlet and exhaust covers, chocks, flags and the two pilots disappear in the cockpit (hard to see). Menu The JustFlight menu is to the left of the screen, the arrow tab can be hidden via a scrolling your mouse over the tab. There are 18 selections including the 2D pop-up panels: Checklist, Flight computer, Payload menu, Alternator control panel Secondary supplies panel/AAPP control panel and Autopilot control panel. And button selections for: Toggle cold and dark, or engines running (WARNING - Also totally resets the flight), Air refuelling hose (K.2 variant only), Pilot’s helmet sun visor, RAT deployment, (show/hide) ground equipment, (show/hide) control sticks, Deploy drag parachute, Instrument reflections, Window reflections, Show/hide the co-pilot, (open/close) Bomb bay doors and (open/close) Crew access door Checklist, Flight computer: Here you have a 16 page checklist that covers most aspects of starting up and shutting down the Vulcan. Second is a Flight Computer display that covers: Outside air temperature (OAT) – Celsius and Fahrenheit, Groundspeed (GS) – nautical miles per hour, statute miles per hour and kilometres per hour, Endurance – hours and minutes, Range – nautical miles, statute miles, kilometres, Nautical miles per gallon and statute miles per gallon, Density altitude and pressure altitude (feet), True airspeed (knots), track (degrees) and drift (degrees), Fuel flow – gallons and litres, Fuel used – total fuel burn (gallons), Crosswind component (knots), Headwind/tailwind component (knots) and the total fuel burn can be reset by clicking on the lower RESET FUEL BURN button. Payload menu: Next is an excellent Payload menu for easily setting up the aircraft of what type or combination of weapons and equipment you require for the mission. It is extremely easy to use (the menu looks nice as well) you can set your loads to match your mission. Choices are: Blue Steel... The Avro Blue Steel was a British air-launched, rocket-propelled nuclear armed standoff missile, it was built to arm the V bomber force. It allowed the bomber to launch the missile against its target while still outside the range of surface-to-air missiles (SAMs). The missile proceeded to the target at speeds up to Mach 3, and would trigger within 100 m of the pre-defined target point, it was a forerunner of the current Cruise Missiles. MK13 bombs: Three racks of Mk13 bombs. The Mark 13 is a nuclear bomb and its variant, the W-13 nuclear warhead. Mark 13 design used a 92-point nuclear implosion system (see Nuclear weapon design). It is a similar 92-point system was used in later variants of the Mark 6 weapon and the Mark 13 nuclear bomb design was tested at least once, in the Operation Upshot–Knothole Harry test shot conducted on May 19, 1953. The estimated yield of this test was 32 kilotons. WE.-177: The WE.177, originally styled as WE 177, and sometimes simply as WE177, was a series of tactical and strategic nuclear weapons equipping the Royal Navy (RN) and the Royal Air Force (RAF). WE.177A weighed 272 kilograms (600 lb), and had a variable yield of 10 kt (42 TJ) or 0.5 kt (2 TJ) and WE.177B weighed 457 kilograms (1,008 lb), with a fixed yield of 450 kt (1900 TJ). Both WE.177 A/B were flown on the Vulcan. With the JustFlight Vulcan you get two WE.177 nuclear bombs to play with. MRR-PODS: As seen in the MRR version above. The K.2 or MRR version is required for this option. Saddle Tanks and Cylinder Fuel Tanks: There are two 5,000 lbs of fuel Saddle Tanks available, these compare to the 8,000 lbs Cylinder Tanks used for refueling, but both sets can be carried. Other visual Menu items include: Alternator control panel Secondary supplies panel/AAPP control panel and Autopilot control panel. The alternator control panel features the following controls and indicators: Voltmeter and frequency meter for the selected incoming alternator. RAT and AAPP test push-buttons, used to obtain the readings for these supplies on the meters. Alternator selector switch, incorporating a push-button to facilitate synchronisation of alternators. Use the mouse scroll wheel to rotate it and left-click to push in on the centre push-button. EXTRA SUPPLIES TRIP push-button, used to trip any extra supply (RAT, AAPP, 200-volt ground supply) from the synchronising busbar. Mimic diagram of the 200-volt system. The diagram incorporates a voltmeter and a frequency meter to show supplies at the synchronising busbar, magnetic indicators which show continuity when an S breaker is closed and amber lights to show when an alternator is not connected to its own busbar. Magnetic indicators for the RAT and AAPP show continuity when they are connected to the synchronising busbar. Centrally positioned red alternator failure warning light (duplicated on the centre instrument panel) which illuminates steadily if one alternator fails and flashes if two or more fail. AAPP ON push-button. Beside each S breaker indicator is an alternator ISOLATE button. Beside each amber light is an alternator RESET button. NON-ESSENTIAL SUPPLIES TRIP/RESET switch, spring-loaded to the central (guarded) position. This switch can be used to trip non-essential supplies without releasing the RAT and to reset non-essential supplies once power has been restored. Left-click the switch to move it up to TRIP; right-click to move it down to RESET. Four KW/KVAR meters, one for each alternator; normally read KW with a centrally positioned button labelled PUSH FOR KVAR to read KVAR. Four ON/OFF switches, one for each alternator. The AAPP - Airborne Auxiliary Power Plant consists of a gas turbine driving a 40 KVA alternator in a bay aft of the starboard wheel bay. It can provide a 200-volt supply for use in emergency or for use on the ground when an external power unit is not available. On the ground it can provide bleed air to the cabin conditioning and air-ventilated suits. A Mk.10 autopilot is installed as part of the Military Flight System. The autopilot uses 115-volt AC and 28-volt DC. Power to the autopilot is controlled by a switch on the right console. It is a relatively basic autopilot, but missing on this panel are the direction controls in lateral direction and pitch. RAT deployment: The Vulcan is fitted with a Ram Air Turbine (RAT) under the left wing, that will drop down to give the aircraft power. Refueling Hose and Drag Parachute: Both the Refueling hose (K.2 Version required) and the drag parachute can be applied from the menu, both items are far more easier to activate than trying to find the switches in the cockpit. Ground Equipment:The Houchin ground power unit (GPU) can be used to provide electrical 28-volt ground supply power to the aircraft whilst on the ground. The GPU is parked underneath the port wing and is plugged into the aircraft just aft of the bomb bay. Also there is a Palouste compressor which is used to provide compressed air to the engine air starter motors, facilitating engine start whilst on the ground. The Palouste is parked underneath the starboard wing and the air supply hose is connected to the aircraft just aft of the starboard landing gear. Bomb bay doors and Crew access door: Both the Bomb Bay Doors and the forward Crew access (Hatch) Door can be operated from the menu. There are a few other menu items but we will look at them whist in the cockpit. _________________________ Cockpit The underbelly hatch is the access up to the cockpit... .... it is quite a climb all the way up there, or a long fall way back down if you slip! It is quite dark and foreboding in here, but eventually you see the twin huge Martin-Baker ejection seats. In the prototype they wanted an escape pod, a la the F-111, but that was seen as too costly and too heavy. Only the cockpit is modeled? The rear crew area is not in here, and so you are missing the other rear facing ejection seats and the pull-down 5th crew member seat, There are five member Vulcan crews including; Pilot, Co-Pilot, AEO - Air Electronics Officer, Navigator Radar and Navigator Plotter, and their rear area installed and their stations would have certainly added in a another dimension to the aircraft. But finally you are up here and into the cockpit... .... and how impossibly small it all is, on how everything is crammed into this small space and it is simply an ergonomic nightmare! But you have to admit is is a reproduction marvel, you can almost smell the musty tired leather of an old aircraft, lovely reflections come off the authentic gauges (did I mention the access to XH558, well that aspect is certainly on show here). One of the most interesting aspects is that once you have manoeuvred yourself into your seat, you can then pull back (pull up) the centre console with the fuel and autopilot panels attached by the rear handle. If we are in need to see anything inside this cockpit then we will need the power connected and switched on... Instrument Panels Obviously there will be a need to study the instrument layouts on the Vulcan Mk 2. JustFlight (thankfully) provide a very comprehensive manual, listing all the instruments and systems, so it is well worth your time in studying the manual and all the related details to the aircraft. Systems like Fuel, Electrical and Hydraulics are simplistic in a complicated layout, if you sort of know what I mean... so there is a need to work them out and of which button does what... this Vulcan is not your common Boeing 737, and throw in a military layout known as the MFS (Military Flight System) as well and so there is a lot to learn. Pilots main Flying instruments are quite standard, Centre line has the excellent Artificial Horizon (Director Horizon) centre, Beam Compass (heading) below and a Mach meter above. Left instruments are Speed (kts) and Altitude. Right instruments are Radio Altitude, VSI - Vertical Speed Indicator and lower a standby Artificial Horizon and slip indicator. Co-Pilot right hand side has the same MFS layout but with some additional instruments... these include (left) a ADF indicator, (right) a Fuel Flow Indicator, Total Fuel Flow (with reset switch) and Oxygen Flow Indicator. Middle panel is for the four engine instruments, which have that lovely post-war clockwork dial system. Non-Engine related instruments include: Accelerometer (G-meter - top left), Control surfaces position indicator (centre) and TACAN indicator (shows bearing to NAV 1 VOR). Note the MFS selector Panel (top right). This navigational selector has five positions: BOMB – non-functional REMOTE – the heading information is controlled by the default GPS Central (normal) – all heading indications by the heading pointer are magnetic LOC – ILS localiser beam or NAV 1 signals are fed into the system. The BEAM flag on the director horizon shows and the beam bar on the beam compasses indicates the aircraft position relative to the beam. GP – both localiser and glidepath signals are fed into the system. Both the BEAM and the GP flag show on the director horizons and the glidepath pointer moves relative to the centre dot to show the relative position of the glidepath to the aircraft. Top panel is: RAT release handle and the Engine fire warning lights and extinguisher buttons... below are the four main fuel cocks. Under are twelve warning indicator lights and doors (Canopy, Bomb and Entrance) unlocked warnings. Fuel in the Vulcan is carried in fourteen pressurised tanks, five in each wing and four in the fuselage, above and to the rear of the nose-wheel bay. The tanks are divided into four groups, each group normally feeding its own engine. A cross- feed system enables the various groups to be interconnected. Automatic fuel proportioning is normally used to control the fuel CG position. The Fuel contents gauges, one for each tank group, are situated on a panel forward of the throttle levers. The fuel switchgear is set just below on the retractable centre console, Cross-feed cocks and indicators are usable. The Bomb Bay Auxiliary tanks are controlled via a panel below the main Fuel Panel, and remember these tanks are also used in the air-to-air refueling system, so they have twin uses. Lower is the Autopilot Panel (Pop-up available via the Menu)... ... but these AP switches are used in conjunction with the actual direction controls in lateral direction and pitch that are situated directly under the throttles on the retractable console. Throttle Quadrant The four throttle levers are a work of art, as is the whole quadrant... note the built in engine relight buttons that actually work. To shutdown the Olympus engines the levers are pulled out and then pulled down to the shut-off position.... ... lower is the Airbrake selector switch, note the missing flap lever, as the delta wing does not require such flying surfaces. The really nice Control Sticks have four switches; Nose-wheel steering engage button, Elevator and aileron feel relief switch, Aileron and elevator trim switch and a Press-to-transmit switch, both Control Sticks disappear together either by selection or by the menu. Pilot's left side panels consist of (right to left): Oxygen Regulator, Radio altimeter controller, Store safety-lock and warning lights, Bomb doors control, RT2 tone switch, ILS/TACAN/ADF audio switch and TFR controller.... ... Audio warning isolation and audio warning test button, RT1 tone switch, V/UHF radio and the engine start buttons with Rapid start, Normal start selector, ignition switch, Air cross-feed indicator, Start master switch and finally the air-ventilated suits temperature controls. Lower panel are switches for; PFC and artificial feel start buttons (x3), Yaw Damper, PFC stop buttons, Mach Trimmer and Artificial feel warning and lock switches. On the Co-Pilot's right side (left to right): Oxygen Regulator, Temperature switches for Cabin, Cabin Control, Cold air unit, Ram air, Ram air Valve, AAPP air bleed, Cabin AAPP indicator, Abandon aircraft switch and Air-to-Air refueling panel... .... far right is the Anti-icing temperature gauges and Engine anti-icing switches. Lower panel are the pitot and external lighting switches - Lighting Master switch, Identification/Morse switch, Landing/Taxi Lights and Navigation Steady/Flash switch. As there is no rear compartment with an engineers station, the Electrical Panels are both pop-up: Noted both as ACP (Alternator Control Panel) and A.A.P.P. (Airborne Auxiliary Power Plant) which is an onboard Auxiliary Power Unit or APU. The lower section of the AAPP is a "Secondary Supplies Panel" or a continuation of the main electrical board. Other cockpit notes include... The Co-Pilot's station box (Radio) is right lower panel, and you have two very nice E2B compasses on each central window frame. The Wiper controls are hard to find, but they are high each side of the main instrument panel and are speed reversed, in faster first then slower in the third bottom position. Left switch is Pilot and central window, Right switch is Co-Pilot only. You have to remove the Martin Baker ejector seat pins before any flight (and yes the ejector seats actually work, so don't pull the handle?) The pins are positioned high on the side of the seats, and when selected they move to the side of each pilot on to the "Safety Pin Stowages" hooks panel. One option you don't have on a commercial airliner are "Flash Shields" or Nuclear FLASH shields. These are two sets of blinds set above the pilots and each can be separately pulled down to cover over the large circular side windows to provide protection from nuclear weapon flashes and radiation... .... the outer metallic one is still semi-visible, but the inner (heavy one) completely covers and blacks out the window, very handy to have when you need it. Flying the Vulcan Mk.2 It is known as the "Vulcan howl" which is a distinctive sound made by the engines are at approximately 90 percent power, due to the arrangement of the air intakes. It is a misconception is the fact that although the Vulcan shares the same name as the Concorde Olympus engines the versions are quite different, here we have the Olympus 301 were as the Concorde has the Olympus 593 with afterburner (or reheat), the only commonality is the two-spool axial-flow turbojet core... but it is known that the Olympus 593 did fly on a Vulcan airframe as a test bed for the engine (but not actually for Concorde but for the abandoned TR.2 Fighter). You get that lovely familiar whine as you sit ready to go, strangely there is not a lot of settings to set, no flap position, speed selection or altitude. But there is a lot of selection of switches to set like the ENGINE AIR and CABIN AIR switches, which you tend to change quite frequently... all selections are covered in the tutorial part of the provided manual. The Vulcan is quite a powerful aircraft (for the period). So depending on your mission weight it will taxi quite easily. Being in the cockpit though is bit like trying to fly from inside a post box and looking through the slot? It is dark in here and tight, it feels far more tighter than a fighter which will have that open glass canopy around you, but in here you do feel restricted as most Vulcan pilot's note... try this with a flying helmet on as well and then hope you are not the screaming claustrophobic personality type. The Beam Compass (heading) needs to be set... pull the knob (arrowed) out to turn the outer heading ring to your current heading. (note this ring will not turn as the aircraft changes direction, so you fly to the heading on the ring), push the knob in again to set the autopilot heading pointer. It takes some getting used to if you fly modern aircraft. You can move/hide the lovely armrests as they get in the way of the side panels, then check if there is oxygen flow... The VOR radio is on the left panel, you set it via the knobs and a very modern looking frequency, that disappears quickly. Time to fly, but the Vulcan is a past era dirty mongrel. The aircraft will gain speed very quickly and even with a heavy fuel and weapon load, rotate is around 155 kts at a pitch of 45º angle which can be maintained all the way up to the flight level.... .... and you really feel the huge lift from this flying wing, it will lift off anyway but you need to keep in control via holding the stick forward. Pitch is extremely pivotal, it is like the you are balancing the aircraft directly in the center with a very light nose and tail.... so you need to control the pitch movements with very small inputs and with smooth pitch changes, a few flights and you are usually ready next time, but it doesn't get any easier. Gear animations are excellent and cleaning up the underbody airflow helps with the handling and noise factors. The aircraft is surprisingly very nice under manual control, setting the trim is required, but it can upset the autopilot (AP) when switched on, so you have a choice... trim and fly manually or leave the trim alone if you are going straight to the autopilot. You can set the Autopilot ready via the switch on the Co-Pilot console and then pulling out the "power" switch on the AP panel, the white light comes on to show you the AP is active and ready. Level off and then "ENGAGE" then select TRACK to follow the set heading. You can select climb via IAS or hold the ALT (recommended). The forward panel then controls your lateral direction and pitch directions, remember this is a very basic 2-Axis system. The lower AP control are out of sight and too a point out of reach, it would have been nice to have had them on the pop-up panel with the rest of the AP controls, press the centre of the knob to lock in the trim... up or down is in 1000 fpm selections which are big movements in pitch. Specifications are impressive... Cruising speed is Mach 0.86 indicated and Max is Mach 0.93 (301 Engines), to note the early straight wing Mk 1 version was faster at Mach 0.95 indicated. Ceiling is 45,000 to 56,000 ft (14,000 to 17,000 m) which is high, but this is a nuclear bomber... Range is 1,500 nautical miles (1,700 mi; 2,800 km), but you do have the extra tankage available and that extends the range out to 4,603 mi (4,000 nmi / 7,408 km) or allow you to stay on station for hours. Getting up to 45,000ft is the easy part, then you have to come down again.... and it is a long way down without a decent Vertical Speed tool... ... helpful are the twin upper and single lower (originally double both upper and lower) airbrakes which are highly effective. Do you cheat by using a moving map to locate your position or try to do it the authentic navigation way, remember these aircraft had a dedicated Navigation Crew Member to do just that specific job. 3,000ft approach and the lights of EGCN - Doncaster are in the postbox slot... eh windows. Approach speed is around 170 kts but there is the known factor of a Pre-Stall buffet between 160 kts to 180 kts and that requires more rudder input in turns, but you still have to keep that tight, and remember the huge amount of lift this aircraft's wing can generate and with that also comes the huge ground effect reflection as you get down closer to the runway. Slowly you reduce your speed to around 150 knts over the threshold, but it is a fine line between going too fast and stalling... Vulcan's don't naturally stall in the slight nose up position, the ground effect gets too strong and they tend to seriously wobble on the large cushion of air then simply fall out of the sky as noted in a few Vulcan accidents, but touch down is around 140 kts. RAF Finningley (at EGCN-Doncaster) has a long 2,893m (9,491ft) runways as did all nuclear bomber airports, it is required as even at 140 kts as you fight the aircraft to slow it down. The manually operated airbrakes do help, but even then the parachute is still required to run off the excess speed. Overall the Vulcan is a terribly interesting aircraft to fly, and in many way quite different from your average commercial airliner... you must approach the Vulcan this way and expect time to understand and even plan each mission when you fly the aircraft, it will take time and study but in that aspect the Vulcan really delivers, it is certainly not a jump in and do a circuit sort of aircraft... it is a full mission aircraft with areas like said planned and be detailed ready from the start. Lighting UPDATED : this section of the review is updated to v1.1 that now includes large changes to the Vulcan's internal lighting. Before the Internal lighting was quite simple, one switch to light up the instrument panel and the side panels.... In v1.1 the side lighting knobs which were static before now work... The four lighting knobs are now active (orange arrows), but so also now is the functional swivel lights between the knobs, the swivel light illumination is controlled by the lower knob (yellow arrow) The same panel light knobs are on the Co-Pilot's side as well as is the same functional swivel light. Changed also is the main instrument panel lights which are now split for each side of the panel, the Co-Pilot's panel switch is on the panel far right (arrowed). The rotating knobs now give you two options, the original WHITE lighting or the very Cold War RED hue, it is very realistic... .... Main panels (separate) both side panels and the centre console are all fully adjustable individually, just like with the white hue. The functional swivel lights are very good as well, totally adjustable and not only for illumination, but also for compete axis movement... you can illuminate any part of the cockpit you desire.... .... turn the swivel light to light up the other side of the cockpit and it is highly effective, with almost daylight illumination. Externally there are options for ID Lights in STDY (Steady) and MORSE (Flashing) and Navigation lighting in ST/DY and FLASH. Three red beacons flash on the top of the aircraft or a steady in one single red beacon on the belly... navigation is wing and twin lower tail, strobes in the wings, in reality you don't want your nuclear bomber light up like a fairground do you, so it is very good... .... twin Landing/Taxi lights are build into the end of each wing and they are both retractable and have also been updated with refined functionality in v1.1 Liveries The scale of the liveries is quite impressive at seventeen, but many a registration are doubled for both Mk.2 standard and K.2 Tanker or MRR. USA and KIwi (New Zealand) and White Flash white nuclear test aircraft XL361 and XL426 are all represented as is XL426 in it's usual Camo livery... XM655 is default. Operation Black Buck had seven operations... During the 1982 Falklands War, Operations Black Buck 1 to Black Buck 7 were a series of seven extremely long-range ground attack missions by Royal Air Force (RAF) Vulcan bombers of the RAF Waddington Wing, comprising aircraft from Nos. 44, 50 and 101 Squadrons against Argentine positions in the Falkland Islands, of which five missions completed attacks. The objective of the missions was to attack Port Stanley Airport and its associated defences. The raids, at almost 6,600 nautical miles (12,200 km) and 16 hours for the return journey, were the longest-ranged bombing raids in history at that time. The Operation Black Buck raids were staged from RAF Ascension Island, close to the Equator. The Vulcan was designed for medium-range missions in Europe and lacked the range to fly to the Falklands without refuelling several times. The RAF's tanker planes were mostly converted Handley Page Victor bombers with similar range, so they too had to be refuelled in the air. A total of eleven tankers were required for two Vulcans (one primary and one reserve), a daunting logistical effort as all aircraft had to use the same runway. The Vulcans carried either twenty-one 1,000-pound (450 kg) bombs internally or two or four Shrike anti-radar missiles externally. Of the five Black Buck raids flown to completion, three were against Stanley Airfield's runway and operational facilities, while the other two were anti-radar missions using Shrike missiles against a Westinghouse AN/TPS-43 long-range 3D radar in the Port Stanley area. Shrikes hit two of the less valuable and rapidly replaced secondary fire control radars, causing some casualties among the Argentine crews. One Vulcan was nearly lost when a fuel shortage forced it to land in Brazil. Black Buck 1- Port Stanley Airport runway 30 April–1 May - XM598 (Reeve)XM607 (Withers)Performed; primary aircraft cabin failed to pressurise shortly after takeoff, replaced by reserve Black Buck 2 - Port Stanley Airport runway 3–4 May - XM607 (Reeve) XM598 (Montgomery) Performed Black Buck 3 - Port Stanley Airport runway 13 May - XM607XM612 - Cancelled before takeoff due to weather conditions Black Buck 4 - Anti-aircraft radar 28 May - XM597 (McDougall) - XM598Cancelled 5 hours into flight, due to a fault in the Victor fleet Black Buck 5 - Anti-aircraft radar 31 May - XM597 (McDougall) - XM598 (Montgomery) Performed Black Buck 6 - Anti-aircraft radar3 June - XM597 (McDougall) - XM598 (Montgomery) Performed; primary aircraft forced to divert to Brazil due to a broken refuelling probe Black Buck 7 - Port Stanley Airport stores and aircraft 12 June - XM607 (Withers)- XM598 (Montgomery) Performed My personal experience was with Avro Vulcan XL391, that sat at Blackpool Airport for years. I saw the aircraft on a visit home, but by this time the bomber was not in a great condition. Vulcans maybe prepared for nuclear attacks, but Blackpool's corrosive sea air did a lot of more serious damage to the aircraft. One aspect is that you could get very close and even look internally and the engines were still installed, but the aircraft was certainly never going to flown again... it was scrapped quite ingloriously on the June 20th, 2013. Summary This is a reproduction of the Avro Vulcan Mk.2, that was a 60's Cold War Nuclear bomber from the United Kingdom. Based on the last fully operative version of the aircraft XH558 "The Spirit of Great Britain", this same aircraft was used to create a very realistic rendition of this classic airframe. The aircraft comes in three variants with the standard Mk.2, K.2 Air to Air refueling tanker and the MRR - Maritime Radar Reconnaissance role aircraft. Detail and modeling is hugely impressive, so are the complex post-war systems. And the Vulcan comes with a lot of choices and features including the choice of the different Mk.2, K.2 and MRR setups via the liveries (can also be set manually), the range also is impressive in the liveries provided for the Vulcan's different mission roles including nuclear bomb testing flash white. Extensive menu is very good as is the choices of weapons (mostly nuclear with Blue Streak) and different belly fuel tank options. Sounds include the famous "Vulcan Howl" and are very immersive and 180º dynamic with 3D audio effects, atmospheric and distance effects and adaptive Doppler. Instrument panel, side panels, throttle quadrant and retractable centre console in detail is overwhelming, but missing is the rear crew cabin with stations for the other three crew members and importantly parts of the aircraft electrical systems panel, they are provided here only on pop-up panels from the menu? Internal lighting was also impressively updated in v1.1 In some ways the Vulcan is very easy to fly in a manual mode, and this flying wing has a huge amount of lift, but the ergonomic post-war instruments and 2-way axis Autopilot do require a lot of study and practice, so to fly the Vulcan in a serious mission role does require a lot of skill and practise on the airframe, but you don't doubt the authenticity of the Vulcan package to the high calibre and serious simulator user. Overall brilliant, but for the serious fliers only. _______________________________ The Avro Vulcan B Mk.2, K.2 and MRR by JustFlight is now AVAILABLE at the X-Plane.Org Store: Also available from JustFlight Avro Vulcan B Mk.2, K.2 and MRR Priced at US$49.99 Features MODEL Accurately modelled Avro Vulcan B Mk2, K.2 and MRR built using real-world aircraft plans and comprehensive photography of the real aircraft (XM655) K.2 air-to-air refuelling variant with Hose Drum Unit (HDU) and animated hose Maritime Radar Reconnaissance (MRR) variant with air sampling pods and nose blade aerials Many detailed animations, including: - Crew door - Bomb bay doors (with realistic deployment speed) - Multi-position airbrakes (accurately linked to landing gear position) - Drogue and main brake-chutes - Deployable ram-air-turbine (RAT) - Variable-speed wipers - Tilting main landing gear - Flying controls (including elevons) - Animated pilots - Retractable taxi/landing lights (with realistic ‘blowback’ above 180 knots) A range of payload options, selectable via a custom 2D panel: - Blue Steel nuclear stand-off missile - 1,000lb bombs - WE.177 nuclear bomb - Saddle bomb bay tanks - Cylindrical bomb bay tanks Ability to configure external model options for each livery – refuelling probe, 201/301 engines, TFR dome, modern aerials and tail fin ECM, HDU, air sampling pods and aerials Olympus 201 and 301 engine nozzle types Ground equipment, including Houchin GPU and Palouste compressor for engine start, and engine covers and chocks 4096x4096 textures are used to produce the highest possible texture clarity PBR (Physically Based Rendering) materials with real-time environment reflections for superb quality and realism Detailed normal mapping for down-to-the-rivet precision of aircraft features COCKPIT A truly 3D virtual cockpit right down to accurately modelled ejection seats and screw heads - every instrument is constructed fully in high polygon 3D with smooth animations Cockpit textures feature wear and tear, with PBR effects, based on reference photos taken in the real aircraft to produce an authentic environment Interactive engine start checklist Checklists for every stage of flight Panel state system which will automatically save the panel state whenever a flight is saved and reload the panel state whenever that flight is loaded Aircraft configuration system that will allow you to choose between 'cold & dark' or 'ready for take-off' Realistic V/UHF radio unit – save and recall commonly used frequencies Fully functioning magnetic indicators, warning lights and push-to-test buttons Numerous interactive animated blinds and visors Realistic flight instruments, including direction horizon, beam compass, control surface and CG indicators Option to activate flashlight from within pop-up window, to aid in those pitch-black cold and dark starts at night Option to remove window and instrument reflection effects All knob, switch and button animations routed through plugin logic, for optimum movement fidelity and sound synchronisation No detail is too small – even the option to switch between day and night modes on the landing gear indicator is included! AIRCRAFT SYSTEMS Numerous custom-coded systems: - Fuel system – fuel tank groups, transfer and cross-feed - Electrical system – alternators, Airbourne Auxiliary Power Plant (AAPP), Ram Air Turbine (RAT), synchroniser busbar and 2D AEO panels for controlling the AAPP, RAT and secondary supplies - Flying controls system – Powered Flying Controls (PFCs), Mach trimmer and auto-stabilisers - Engine start system – Rapid or normal engine starting, cross-bleed and Palouste external air supplies - Hydraulic system, including the electrically-operated hydraulic power pack unit (EHPP) - Oxygen system, including oxygen regulator system with realistic consumption based on altitude – watch the oxygen quantity drop with usage - Air conditioning system – cabin pressurisation and air conditioning, emergency depressurisation controls - Thermal anti-icing system, including airframe and engine anti-icing - Autopilot, including pitch and bank hold Airbrakes, bomb doors and brake-chute can be operated using standard control assignments for ease of use OTHER FEATURES Realistic and accurate flight dynamics based on real world performance and handling data Authentic sound set, generated using X-Plane's state-of-the-art FMOD sound system, including the distinctive Olympus 301 howl! Custom sounds for bomb doors, airbrakes, entrance door, switches, wipers and more, featuring accurate location placement of sounds in the stereo spectrum, 3D audio effects, atmospheric and distance effects, adaptive Doppler, exterior sounds spill in when the crew door is open, different sound characteristics depending on viewing angle etc. Dedicated pop-up window for sound mixing, allowing for individual adjustment of the volume of exterior sounds, in-cockpit sounds and various effects Comprehensive manual with panel guide and performance data PSD Paint Kit included so you can create your own paint schemes Interactive logbook panel for logging your flight details (X-Plane native) Custom external light logic with custom strobe light pattern and custom light halos for added realism Requirements X-Plane 11 CPU: Intel Core i5 6600K at 3.5GHz or faster 8GB RAM or more DirectX 12-capable graphics card from nVidia, AMD or Intel with at least 4GB VRAM (GeForce GTX 1070 or better or similar from AMD) Windows 10 / 7 / Vista / XP, MAC OS 10.10 (or higher) or Linux 2GB hard drive space Current and Review version: v1.1 (April 29th 2020) Installation and documents: Download for the Avro Vulcan B Mk.2 is 2.3Gb and the unzipped file is deposited in the aircraft "Fighters" X-Plane Aircraft folder at 2.37Gb. optional equipment choices can be done from the livery/‘config.json’ file. Librain (rain effects) plugin is required, get it here and install in your plugins folder: Click Here Documentation: Documentation consists of a 89 page overview and tutorial for the Vulcan Bomber, details available cover most areas including the complex systems. EULAstandardcommercialandacademic2019.pdf Avro Vulcan B Mk2 X-Plane manual.pdf ________________________________  Review by Stephen Dutton  29th April 2020 (updated) Copyright©2020 : X-Plane Reviews   (Disclaimer. All images and text in this preview are the work and property of X-PlaneReviews, no sharing or copy of the content is allowed without consent from the author as per copyright conditions) Review System Specifications:  Computer System: Windows - Intel Core i7 6700K CPU 4.00GHz / 64bit - 32 Gb single 1067 Mhz DDR4 2133 - ASUS GeForce GTX 1080 8Gb - Samsung Evo 1TB SSD Software: - Windows 10 - X-Plane 11.41 - tested v11.50.b4 (fine) Addons: Saitek x56 Rhino Pro system Joystick and Throttle : Sound - Bose Soundlink Mini Plugins: Traffic Global (Just Flight) US$52.99 Scenery or Aircraft - EGCN - Doncaster Sheffield by FlyX (X-Plane.OrgStore) US$17.99 
  25. Aircraft Review : PA-28-181 Archer III by JustFlight and Thranda Over the 2018/19 holiday break I flew both the earlier JustFlight/Thranda aircraft in the Arrow lll and the lV Turbo. This was to see how the aircraft still lived up to their reputation of the best of the rest. Overall they did, but a few things also came to pass. First and foremost, the aircraft are slow, the Turbo was a little better at around 165 knts, but an average ground speed in the Arrow lll of 125 knts is a twiddle or play with your fingers time... even after two hours flying I had barely moved across the map, and yes that average cruise speed is correct. As a realistic simulation with immersion then the Arrow lll was very good, but if you like faster aircraft then you will find this new release of the Archer lll by JustFlight/Thranda down in the low cruise speed zone... it is certainly not boring, but you don't cover the ground very fast either. Secondly do we really need another PA28 aircraft? many on the threads moaned that enough was getting enough... but the trick is that not all PA28 aircraft are created equally, as there is always a variation somewhere in the PA28's very long but illustrious career. We have already had the Cherokee, Arrow, Warrior and the only missing PA28 was the Archer. It was released by Piper after the Cherokee and the Arrow variants as the Archer variant had again another five inch fuselage extension, wing span increase, larger horizontal tail and a small gross weight increase over the Arrow. This release is the Archer lll from 1994, so that makes the aircraft a sort of a more modern variant, than say a 60's or 70's Cherokee, and so that gives the aircraft a more later open lighter feel. The Archer's distinctive smaller round engine inlets also help in the streamline effect of projecting a more contemporary look, that of say a more composite aircraft would than it would an early 70's aircraft design. The Archer lll does look and feel a size slightly larger than the Arrow (because it actually is), so overall it doesn't feel as connected to the PA28 family as the other family members. By now after a few releases with Just Flight you expect the high quality of the design that is reflected in the price, and you are not disappointed here either. Modeling and detail is really good to excellent, with some really nice weathering to make it all look extremely realistic as well. It is very easy now to take this sort of HD quality now for granted, but it is still important to realise how far we have come in X-Plane in a very short time with this high level of ultra realism. Although complex in the convex and concave curves and it is also surprising the modeling is so outstandingly good, note the lovely air vents and NACA air-ducts. The corrugated ribs in the tail are beautifully done and the required antennas and RF aerials are excellent, note the nice vent in the upper leading edge of the tail. Build and registration plate is a nice touch, as is the tie down hook. Glass is now again expected to be now first rate, and here it is in that high quality class in shape and reflections, and also comes with a look of a mottled feel in the glass. Two doors open with the passenger door and a locker baggage door like on all PA28's behind the rear seats. Passenger door internally opens via two locks and then a slide along the door trim... The PA28 cabins are tight, more so in the rear. The cabin colour scheme is a bit to your own taste, with a salmon lower trim and motif upper design, there is here only one interior design. Seats are nice and leather crumpled, with sheepskin covers on the two front seats which is really well done. Note the huge clipboard on the pilot's yoke... it is very large and a sort of in your face (or belly), I am not sure if I like that? Instrument panel feels more Cessna in design with the lighter plain facia than the usual with a Piper, with the either usually covered or molded 70's panel trim on the earlier aircraft that is not used here. Electrical rocker switches are overhead. The trim wheel is low and tight between the seats with the three stage flap handle, all very familiar PA28. Nice rudder pedals are well done with the fuel tank switch on the left sidewall... always check if the tank switch is on before starting as the default position is OFF. Instrument Panel Overall the instrument layout in the Archer is quite basic, but it is an interesting layout as well with some unique details. The Standard Six (SS) flying instruments are quite small by design... Airspeed Indicator, Artificial Horizon and the Attitude Indicator are on the top row and the Turn Coordinator, Heading Dial/Course and Vertical Speed Indicators set out directly below. Left of the SS is a clock, Gyro Suction and ADF pointer... note the interesting compass slaving switches far left lower... Right of the SS is the GNS-255 driven OBS VOR2/ILS dial, with a Stormscope set below. Lower panel are four engine readout dials that cover Oil Temp, Fuel Press, Oil Press - EGT (Exhaust gas temperature) - Left Fuel tank (24 Gal) and Right Fuel tank (24 Gal) - Tachometer. Top panel has a very nice set of (testable) Annunciator panel lights There are no instruments on the right panel side except for a standby Attitude Indicator. Avionics stack is the usual Bendix/King KMA 24 TSO radio which is above the S-Tec 55 Autopilot with the GNS530 below (the Reality XP's GTN 750 unit can also be fitted, but this is an addon extra and costs you another $49.95.) Note the power switch for the S-Tec 55 is below right and hard to find... until the green light comes on to show it is powered up. Top of the stack is an active intercom switch and a Monroy Traffic-Watch ATD-300, this is a useful tool that displays traffic on a Garmin 430/530, personally I don't know if it works in X-Plane or with the Reality GTN 750. Second stack has top an interesting transponder in the Trig's TT31, that most pilots retro-fit over the Bendix/King KT76A and KT78A transponders. It is really nice to use and set. The COM2/VOR2 unit is a different unit as well with the Garmin GNC 255 which is a current modern avionics set. A Bendix/King KN 64 DME unit (ground speed and distance) and a Bendix/King KR 87 is the ADF unit.Upper right is an usual digital ammeter. Lower panel has the main Throttle lever, Mixture lever and a hidden Friction control. There is a full set of circuit breakers which are noted to be active.. but I couldn't get them to work? which is real surprise as they did on the Arrow lll/lV. The outside temperature gauge is up on the lower side window frame left. Menu The menu is set on the left side tab (mouse scroll to hide!) and this brings up the now familiar JustFlight menu. There are seventeen menu tiles to use including: Top row : Open/close cabin door - Open/close baggage door - Toggle GNS 530 GPS pop-up window (or the GTN750 payware add-on by RealityXP) - Toggle window reflections and interior glass dynamic reflections - Toggle dome light if the engine is running, or flashlight when starting cold and dark. Middle Row : Toggle autopilot pop-up window - Toggle Wheel Fairings - Toggle automatic fuel selector (switches fuel tanks automatically) - Toggle fuel refill menu window - Open weight and balance window - Toggle volumes window  Bottom row : Select ‘ready for takeoff’ or ‘cold and dark’ state - Toggle checklist pop-up window - Toggle flight computer pop-up window - Toggle logbook pop-up window - Toggle ground handling pop-up window - Toggle chocks and tie-downs. The arrows at the very bottom of the menu panel allows you to select the livery you require and far more quickly than the X-Plane menu. Oddly missing is the usual altimeter barometric pressure scale between InHg and mb? The weight and balance window is very good, with weights for all four passengers, and baggage, fuel can be set here also as can the change from kg - lbs. A full list of weights, CG and a large graph of your settings are all very helpful into balancing the aircraft. Chocks, tie-downs and a ground pull handle are visible when activated. Switching the wheel fairings ON/OFF gives you a more exposed gear that I tend to favour. The animated pilot disappears as well, and yes he is realistic, but certainly not in the way of the better Carenado style human realism. Flying the Archer lll There is a fuel "Prime" button that is required, but don't over use it, a few seconds is fine, and then hit the starter (you did set the fuel tanks position?) And then the Lycoming IO-360-C1C6 engine of 200 hp (149 kW) should easily fire into life. The missing barometric pressure scale between InHg and mb are both shown directly in the Attitude Indicator, but either can be very hard to set unless you get very close... the standby attitude indicator on the far right has to set independently as well. Brake off, and they is a nice feel of weight (1054.7 Kg) that you feel under the throttle, and it needs a fair push to build some forward momentum. You also feel the difference of the mixture setting from lean to heavy, so you keep the mixture lever around the 3/4 mark. This aircraft feels that is now under the new X-Plane11.30 rules in better engine refinement, you just feel those new differences more now, and yes you do. The sounds reflect those minute throttle changes as well, but this more a gentle refined aircraft, than the earlier noisy shaking if over realistic forbears. Taxi speed is easily kept to, but pull the throttle back too far and the speed will run off and you quickly slow, so it is a bit of a trick to keep it all moving at a nice pace. Full mixture and throttle up... don't push the throttle right up quickly to the forward position but feed the fuel in nicely, then slowly the aircraft will start to move and then build up speed, again the required propeller thrust is felt before any movement, that is not sluggish in feel, but in realism. Flap is set at the first notch, and the aircraft tracks very nicely. Around 80 knts you can pitch up and fly, but once you feel the airflow over the wings lifting well, then quickly retract those flaps to gain more speed. Climb rate officially is 667 fpm but you can be liberal with that, I found even 700 ft fpm easily achieved, but you won't do that would you... stay at 550 fpm for the best results of a climbing speed and the nice gain of height at the same time. First thoughts on handling are "Predictable", "Solid"... even "Undemanding" but also engrossing. It is a nice aircraft to bank, climb and fly. Your certainly not going to throw it around, so your movements are very precise and slow to the actions you want to convey. One of the things I really didn't like on all the Just Flight Arrows was the manual trim... The Arrow lll was a monster to trim, and I tried everything to make the aircraft balance itself, even then it also had a nasty tendency to porpoise to any wind movements, and that made the vertical speed to always pitching badly between the positive and negative movements and sometimes for as much as 300 ft either way, and that took a lot of pleasure out of the flying. it also would have the odd effect of the aircraft having a hiccup every now and again. And the nasty trim wheel location with no panel indicator just sent you mental in trying to trim it out anyway in the first place. I tried knob adjustments (worse) and key adjustments (better but still too big a trim step). So to a point I was fearing the Archer lll would have the same behavior? but it is not... There are some interesting differences between the Arrow and the Archer. One is X-Plane 11.30. I think the better dynamics of 11.30 have calmed the aircraft down, and two there is now a better trim adjustment for your key input in "Pitch trim down-Mechanical, not servo". The adjustments feel smaller so you can now get more finer trim control, there is a very nice "Electric Trim" on the Yoke (left handle), but you really need that very fine trim adjustment that only the keys can give you. But the aircraft (thankfully) can now be trimmed out. The only note is that the Archer still has the tendency with the thrust to tilt to the left, so there is the requirement to just slightly keep a light force on the yoke to the right to keep it in a straight flightpath. Note to trim the aircraft with the yoke force applied, as if not it will be set wrong. It will be interesting to test fly the Arrows when they have been updated also to 11.30 to see if the trim issue has been reduced to be more realistic like this Archer. The now 11.30 default S-Tec 55 Autopilot is a nice bit of kit... (remember the hidden switch!) but like for all the avionics the autopilot pops-out for use. Here it is in the new X-Plane panel window system (for VR and home panels) that can be adjusted from very small to incredibly large. But you do have to adjust the background to fit the unit. Speeds are noted as 75% power, best power mixture, 8,000 ft 128 KTAS/3.8 hr (63 pph/10.5 gph) and 65% power, best economy mixture, 12,000 ft with both at 125 KTAS/4.5 hr (54 pph/9 gph) with a service ceiling of 13,236 ft and a range of 522 NM (Max Payload), So you don't cover the distance very fast, but the Archer does feel actually faster than the Arrow lll? Throttle adjustment is required to get the best downward vertical speed as well as setting -3 on the S-Tec, the thick white band on the airspeed is your performance band, and the upper yellow is the caution zone... the flap zone beneath 100knts is the smaller white band, but it is very hard to read. Time to head back in.... The one thing I really loved about the JustFlight Arrows was the low speed balance and manoeuvrability, it was a fun factor to fly, again and again. Dancing between 70 knts and 65 knts to control the height, more throttle to slow the descent and less to drop a little more was highlighted by an 8 knt crosswind. I was on the centreline and then I wasn't, so it was a balance between the right rudder and right or left yoke movements to correct the line. I eased the Archer into the correct position and then slowly reduced the throttle and at around 60 knts to sweet touch the runway... "ahhh... " nice that. So the low speed handling is again brilliant but also challenging to your skills, also it is highly rewarding, and I have done three landings now and each one was perfect, even in these blustery conditions. So the aircraft is great for both in the fact if you are a bit of a novice it is a great platform to learn on with excellent feedback, but also challenging enough for the pros to show off their skills. Lighting The instrument panel lighting is simply gorgeous... instruments have in-direct lighting, but the various avionic systems colours fill out the rest, again the lighting looks more Cessna than Piper. Two adjustable blue roof lights give off an off-world glow that is highlighted by the lovely rocker switch-gear lighting.... There are two overhead rear lights that brightens up the rear seats, these are activated by the switches on the side wall by each seat. All in all it a lovely place to cruise at night, but functional as well for serious night flying. The external lighting is a bit sparse... ... there is a landing light set at each wing tip, but otherwise the rest of the lighting is all set together in the wing-tip assembly. There are the navigation lights, the end strobe lights (bright) and in a different layout the white rear pointing navigation lights are also here in the same assembly.. there are no beacons or other external lights, so the aircraft can be silhouetted quite dark at night. A tip if you like your replays, then leave the strobes off while flying. Liveries There are ten liveries, all 4K HD high detailed quality. The choice is nicely varied and mostly focused on Europe, but a few are very similar in the variation of the same burgundy colour scheme. There is also the standard blank/white. Included are: C-GUXL (Canada), D-EFVC (Germany), EC-JQO (Spain), F-GNCH (France), G-CCHI (UK), G-CIFY (UK), HB-PPN (Switzerland), N6092U (USA), PH-AED (Netherlands) and VH-PPR (Australia). Summary This is the fourth variation of the PA28 aircraft from JustFlight/Thranda, the others being the Arrow lll, Turbo Arrow lll and the Turbo Arrow lV. The differences of this Archer lll besides the variant changes is that this is a more modern in 90's design and feel than the others in their late 70's disguises. The differences are down just not to the actual different panel and interior design, but also to the avionics packages that are quite different and unique to X-Plane with a Monroy Traffic-Watch ATD-300, GNC 255 and the Trig's TT31 transponder as the highlights... So this is a PA28 with a difference. In this mid-forties price range you expect a lot, and JustFlight are very good of delivering the quality and features that you expect. The aircraft is also up to date with the current specifications in X-Plane 11.30, and yes you notice the differences between the adjusted and the non-adjusted aircraft, and that is a significant bonus here as the Archer flies far much better than most PA28's and loses a lot of the irksome characteristics that is noticeable on the other JF PA28s and mostly in the trim area. Modeling is as noted very good, but the Salmon interior design is to your own taste, and it is certainly not like the very dramatic reds of the Arrow lll, but the more you fly the Archer then the more you love it as it sorts of through it's realism and flying characteristics in that you realise that this is certainly the very best PA28 yet. Features are very good and plentiful as is the lighting is excellent with the interior that is simply beautiful as are all the sounds which are all top quality FMOD and 180º dynamic. So the package is very strong. You don't purchase these aircraft to just put another aircraft into your hangar. In most cases it is for a personal reason, in that you have flown or owned one or want the very best dynamics of a certain aircraft. So it has to deliver on many levels as this is a serious investment. I personally think it does, but the real verdict will really be only out there with the owners that can relate to the aircraft on their own personal level.... Highly Recommended _______________________________ The PA-28-181 Archer III by JustFlight and Thranda is NOW available! from the X-Plane.Org Store here : PA-28-181 Archer III Priced at US$41.99 Special Features Cockpit A truly 3D virtual cockpit right down to accurately modeled seat belts and screw heads - every instrument is constructed fully in 3D with smooth animations Cockpit textures feature wear and tear based on reference photos taken in the real aircraft to produce an authentic environment Interactive engine start checklist that responds to user inputs and sim variables Interactive checklists for every stage of flight Aircraft configuration system that will allow you to choose between 'cold & dark' or 'ready for take-off' (if aircraft is stationary on the ground) Fully functional and comprehensive IFR capable avionics fit including: KMA 24 audio selector Fully featured X-Plane-native GNS530 (supports procedures out of the box, and supports Navigraph and Aerosoft custom nav databases) GNC 255 COM/NAV 2 radio KN 62 DME unit which can display information from NAV 1 or NAV 2 S-TEC autopilot with lateral hold modes (HDG, NAV, APR, REV) and vertical modes (ALT, VS) TT31 transponder KR 87 ADF Traffic-Watch ATD-300 traffic awareness unit Strikefinder stormscope HSI and ADF gauges Support for RealityXP GTN750 (sold separately, Windows only) Interactive logbook panel for logging your flight details (X-Plane native) Flight computer panel with useful information such as fuel burn, endurance, speed and wind speed/direction GoodWay compatible Ability to change barometric units from InHg to MB in altimeter adjustment Option to activate flashlight from within pop-up window, to aid in those pitch-black cold and dark starts at night Pop-up autopilot window Option to remove window and instrument reflection effects Animated toe brakes Functional throttle quadrant tensioning system Radio knob animations routed through plugin logic, for optimum movement fidelity and sound synchronisation Aircraft systems Custom-coded fuel system, including the option of automatic fuel tank switching for use on those long distance cross-country flights (this option is remembered for future flights) Custom-coded electrical system with functional circuit breakers, avionics power circuit and emergency bus controls. Circuit breaker logic is linked to X-Plane's internal failure logic, so if the plane is set to fail a certain electrical component after a certain number of hours, the circuit breaker for that element will pop out. Realistic landing gear with slow/fast tire rotation animation (blurry when rotating fast), precise shock absorber animation and wheel chocks and tie-downs Functioning carburetor and primer controls Dedicated interactive engine pop-up window displaying values such as fuel tank weights and imbalance, fuel pressure, oil pressure, oil temperature, battery charge (with quick charge option), and information about spark plug fouling and vapor lock condition Simulated vapor lock condition, with warning pop-up and suggested actions Simulated spark plug fouling condition, with indication of percentage of fouling Lighting system includes separate lighting control for gauges (via rheostat) Functional electric trim control on yoke Simulated fan and vent system with realistic blower sounds (linked to circuit breaker logic and electrical system for realism) Custom external light logic with custom strobe light pattern and custom light halos for added realism Requirements X-Plane 11+ Windows, Mac or Linux 4GB+ VRAM (GeForce GTX 1070 or better or similar from AMD) Windows 10 / 7 / Vista / XP, MAC OS 10.10 (or higher) or Linux Current and Review version and : 1.0 (January 30th 2019) PS: Owners of any the PA28 by JustFlight can purchase this new Archer lII with a $7 discount ( $34.99). Find your coupon code under your Arrow invoice at the store (doesn't apply to Arrows from other designers) Installation and documents: Download for the PA-28-181 Archer III is 730Mb and the unzipped file deposited in the aircraft "General Aviation" X-Plane folder at 818.60mb. Documentation: There are two manuals provided. The ODM is full of performance graphs and data and the X-Plane Manual is a full detailed manual of the aircraft's systems and layouts, a good if basic tutorial is also included PA-28-181 Archer III ODM manual X-Plane.pdf PA-28-181 Archer III X-Plane manual.pdf ______________________________________________________________________ Aircraft review by Stephen Dutton 9th February 2019 Copyright©2019 : X-Plane Reviews (Disclaimer. All images and text in this preview are the work and property of X-PlaneReviews, no sharing or copy of the content is allowed without consent from the author as per copyright conditions) Review System Specifications: Computer System: Windows - Intel Core i7 6700K CPU 4.00GHz / 64bit - 16 Gb single 1067 Mhz DDR4 2133 - ASUS GeForce GTX 1080 8Gb - Samsung Evo 512gb SSD Software: - Windows 10 - X-Plane 11.31 (v11.30 is required for this aircraft) Addons: Saitek x56 Rhino Pro system Joystick and Throttle : Sound - Bose Soundlink Mini Plugins: Environment Engine by xEnviro US$69.90 : WorldTraffic 3.0 Plugin - US$29.95 Scenery or Aircraft - LMML- Malta International Airport by JustSim (X-Plane.OrgStore) - US$22.30