Dominic Smith
-
Posts
142 -
Joined
-
Last visited
-
Days Won
51
1 Follower

Dominic Smith's Achievements
Advanced Member (3/3)
94
Reputation
-
 Kiwiflyer reacted to a post in a topic:
Aircraft Plugin Review: Reality Expansion Pack for DHC-2 Beaver by Simcoders
Kiwiflyer reacted to a post in a topic:
Aircraft Plugin Review: Reality Expansion Pack for DHC-2 Beaver by Simcoders
-
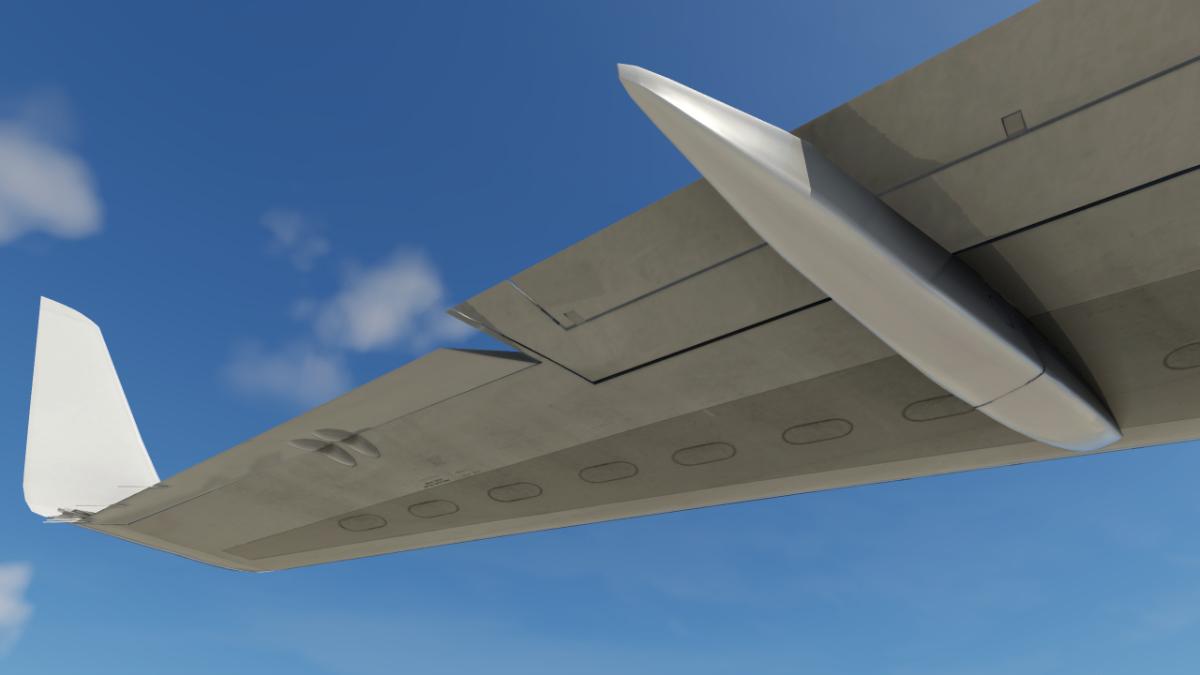
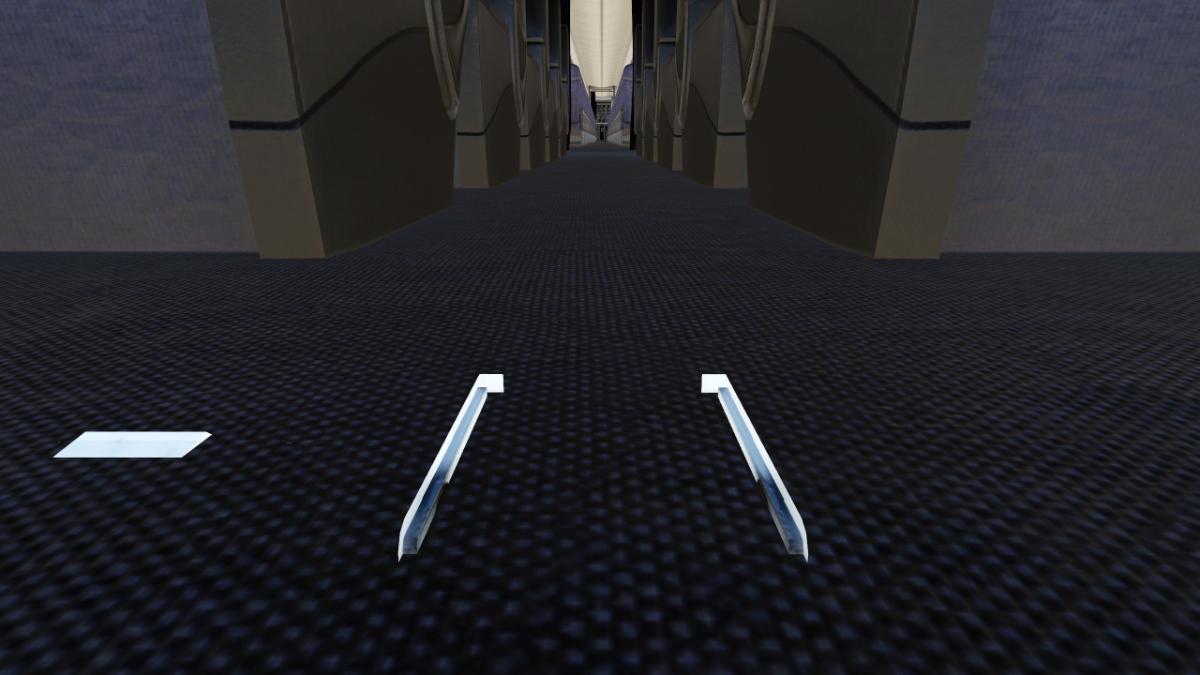
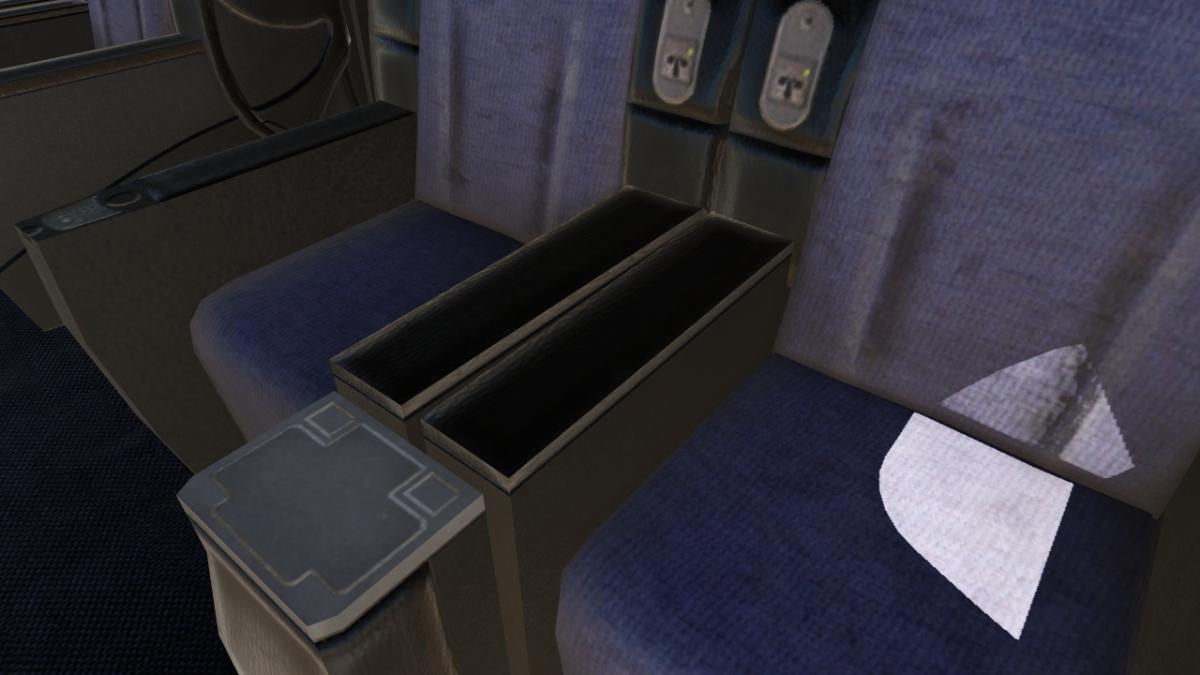
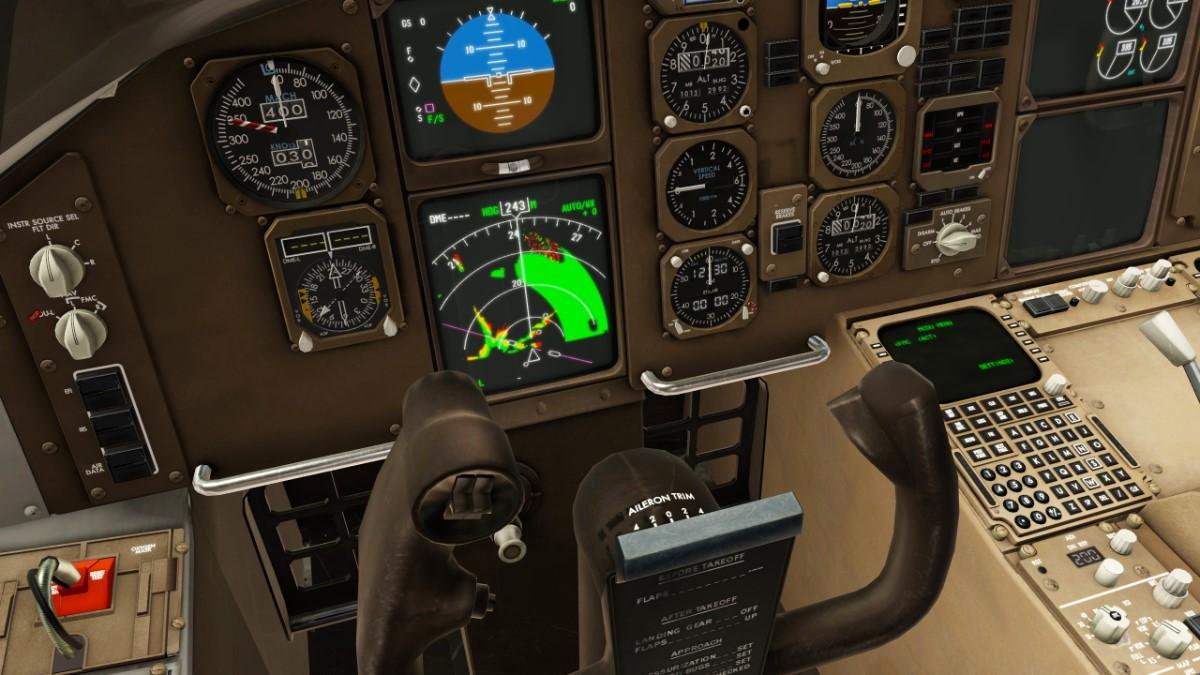
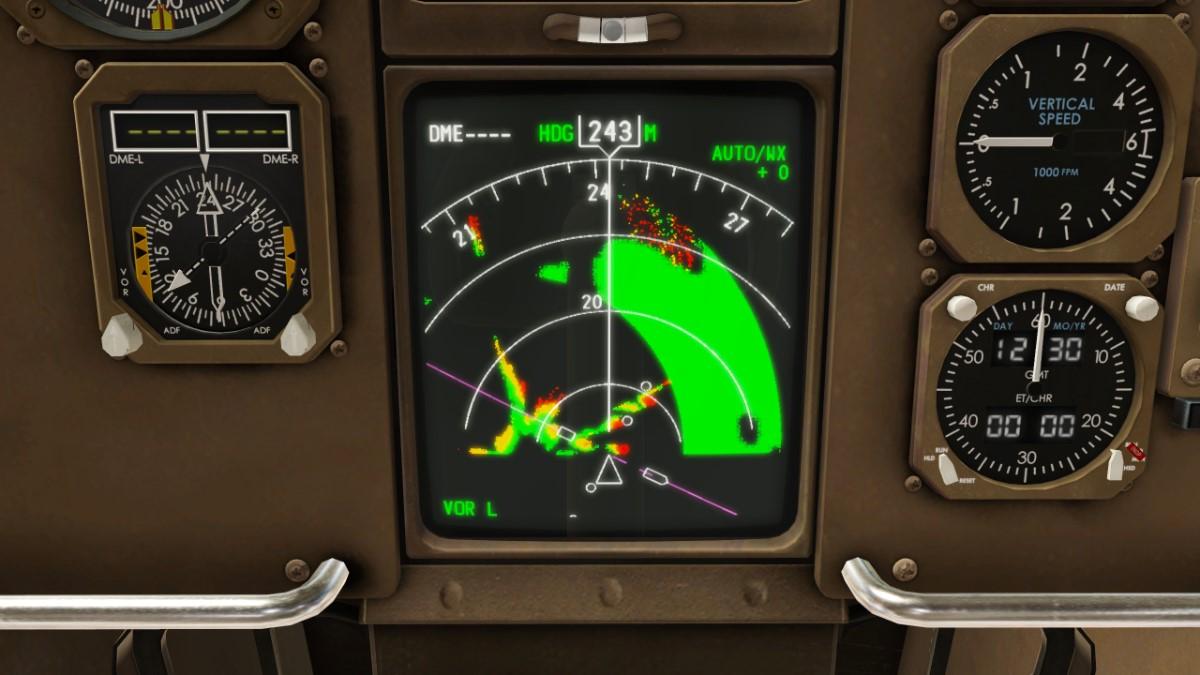
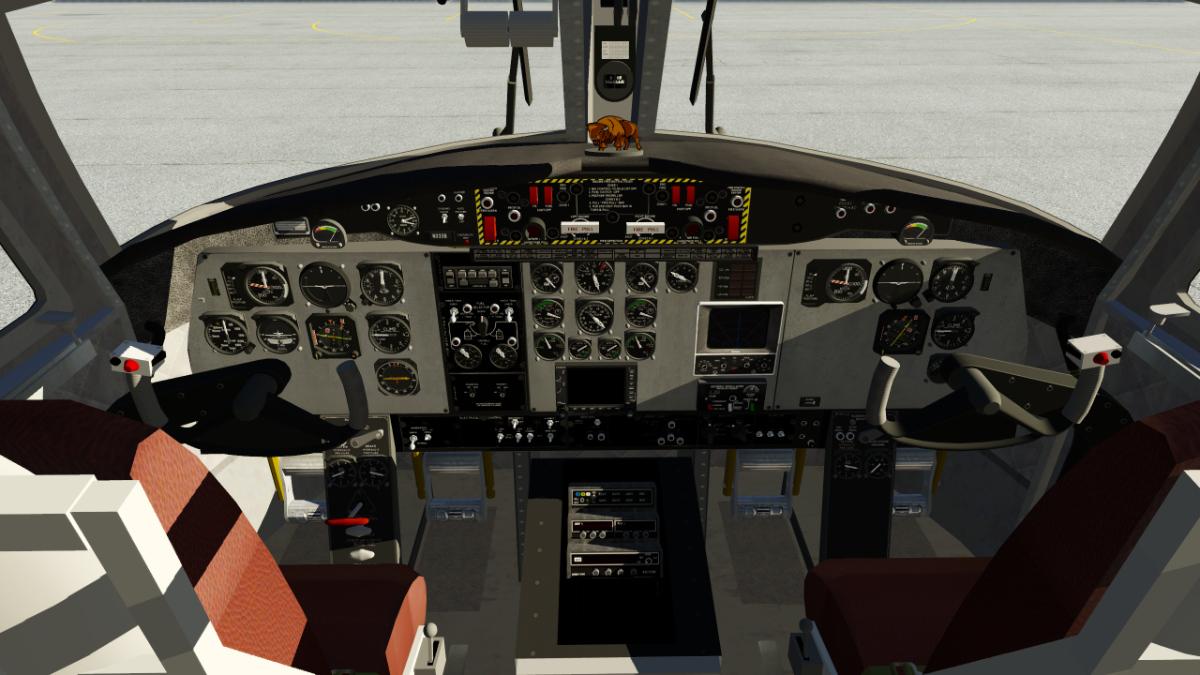
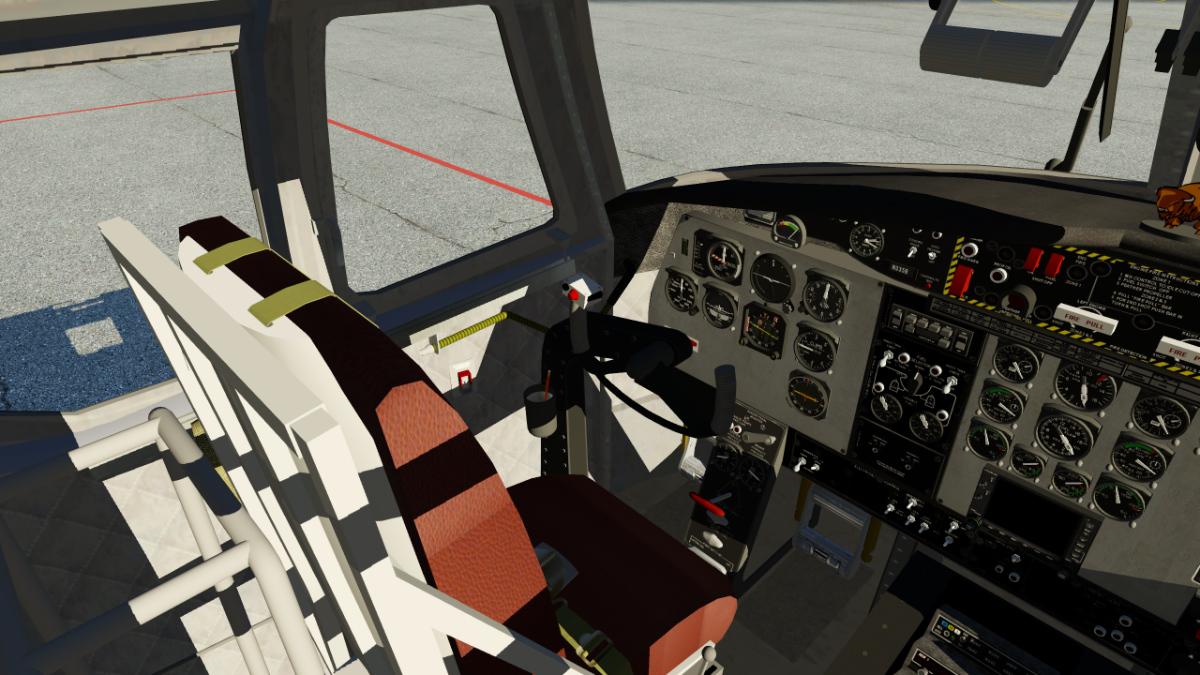
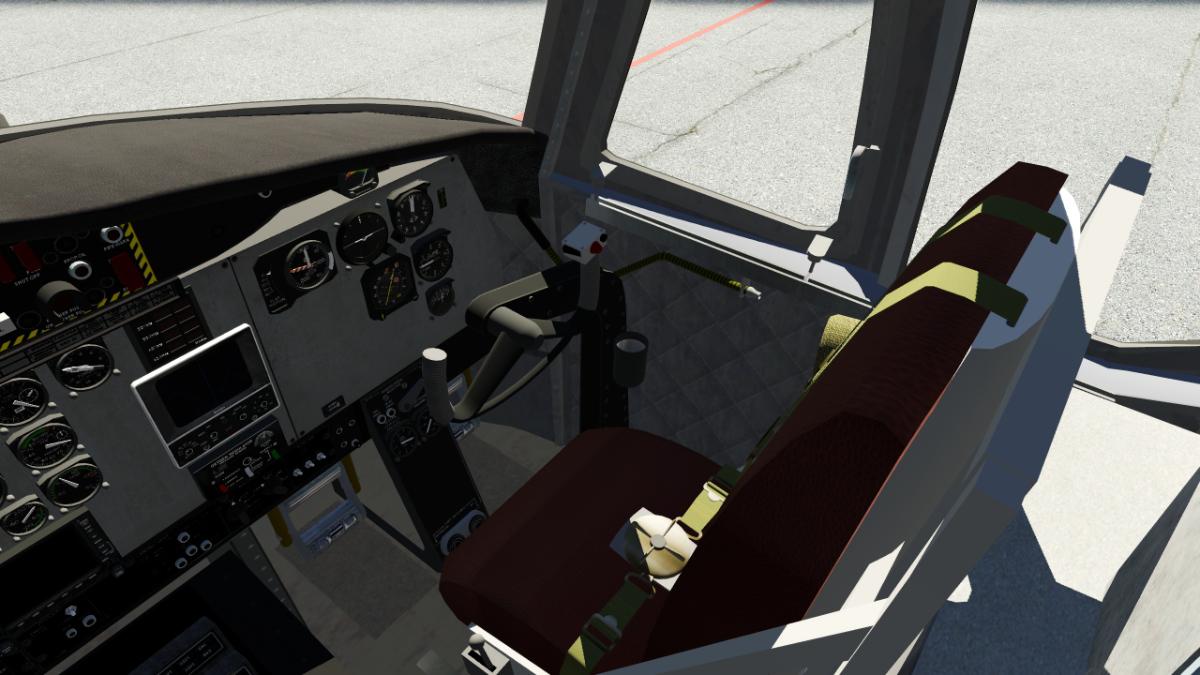
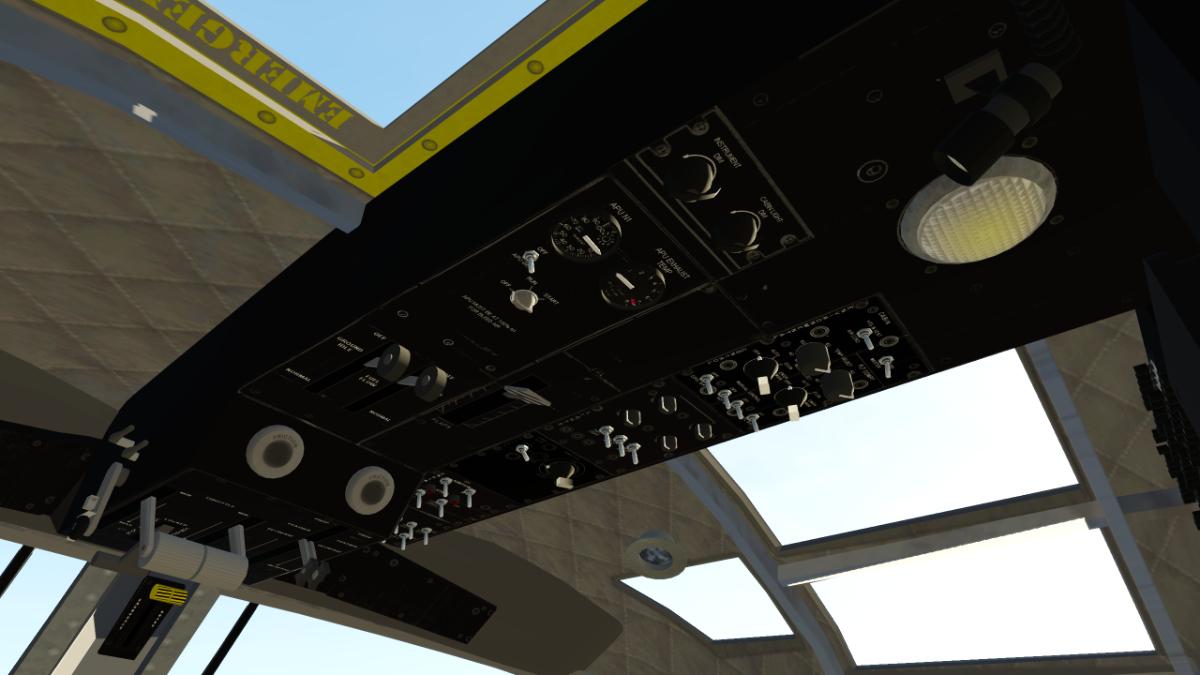
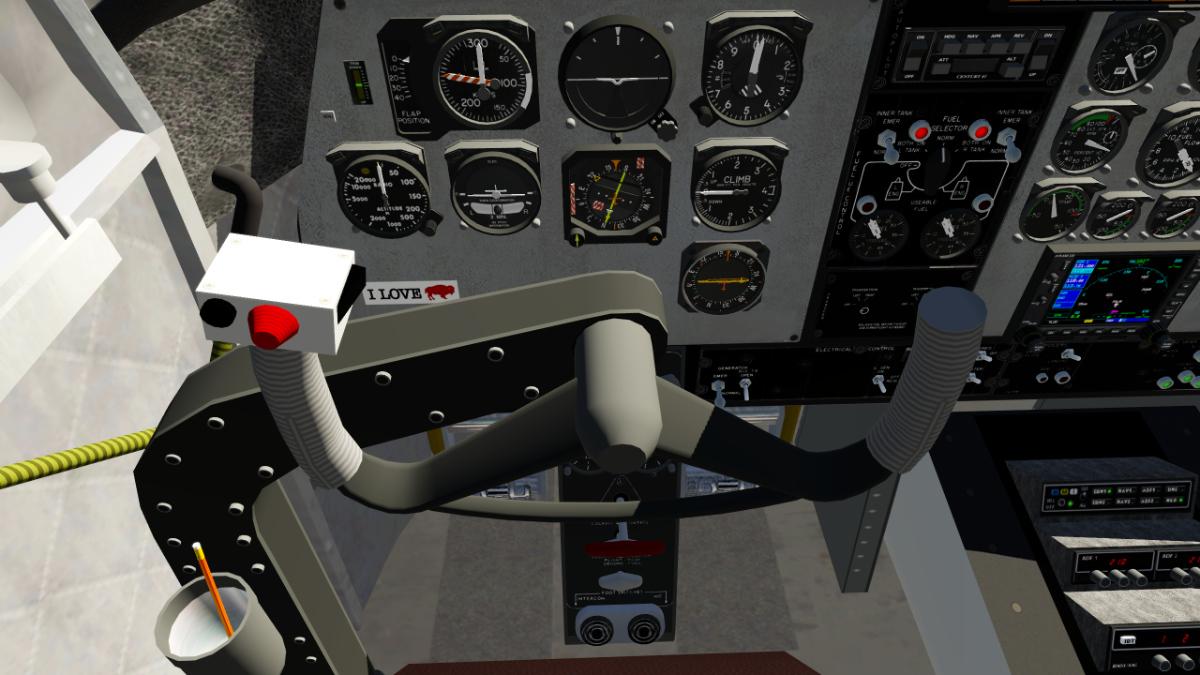
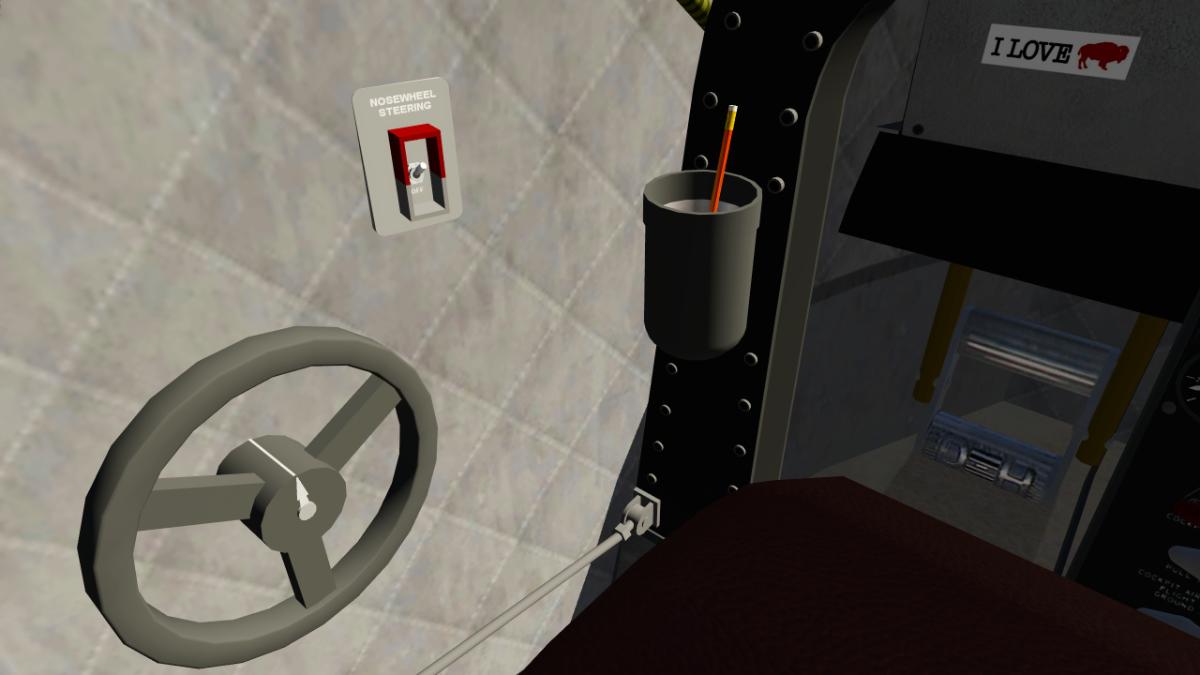
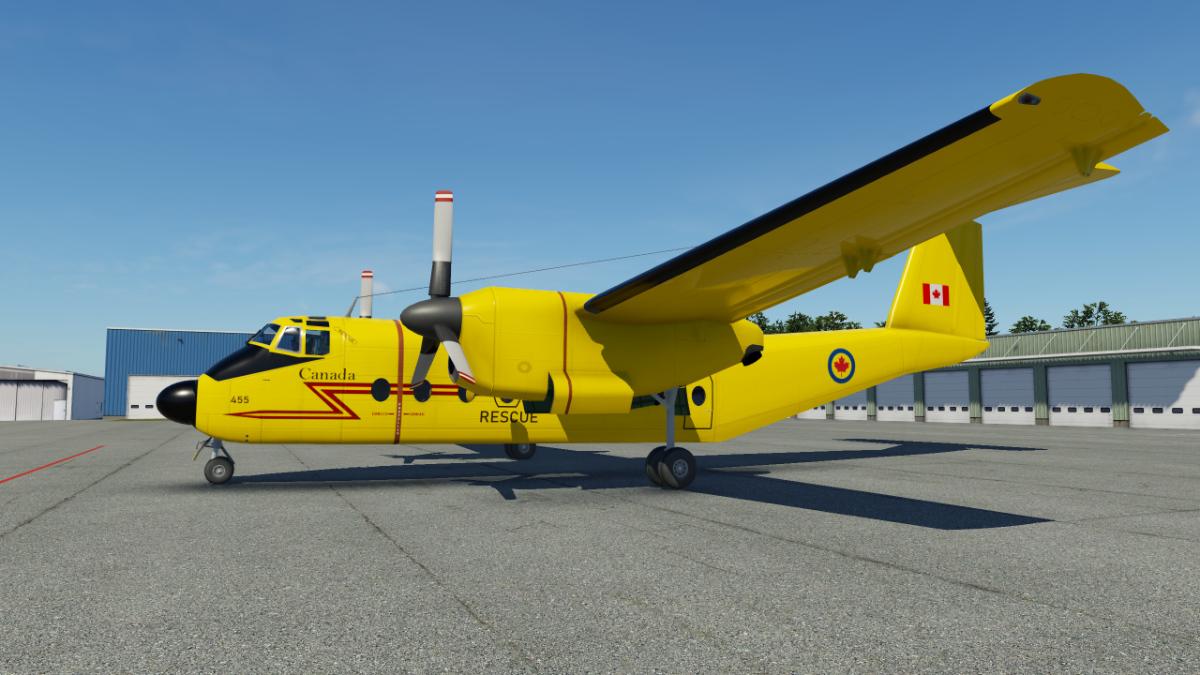
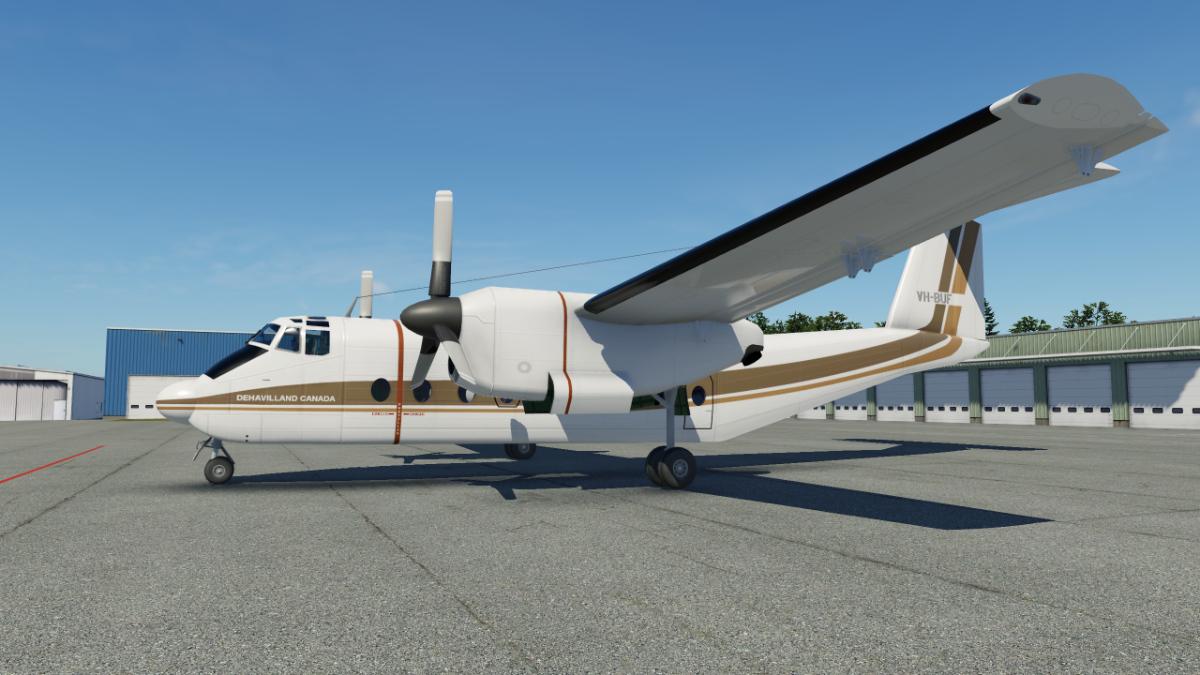
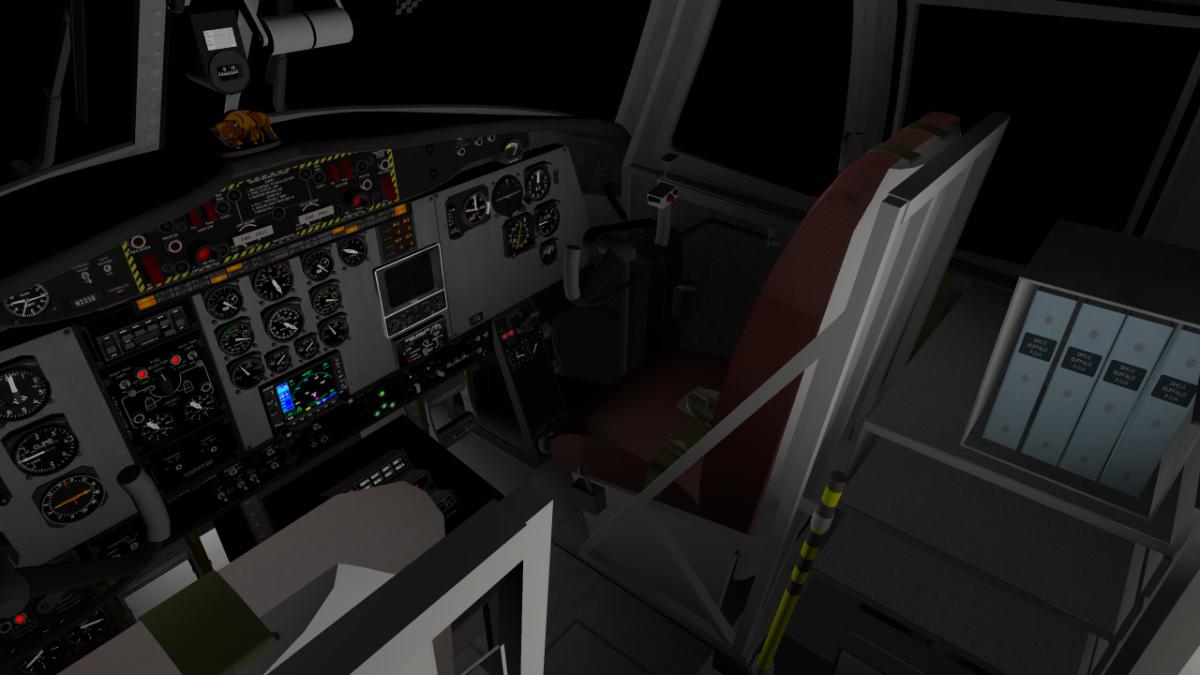
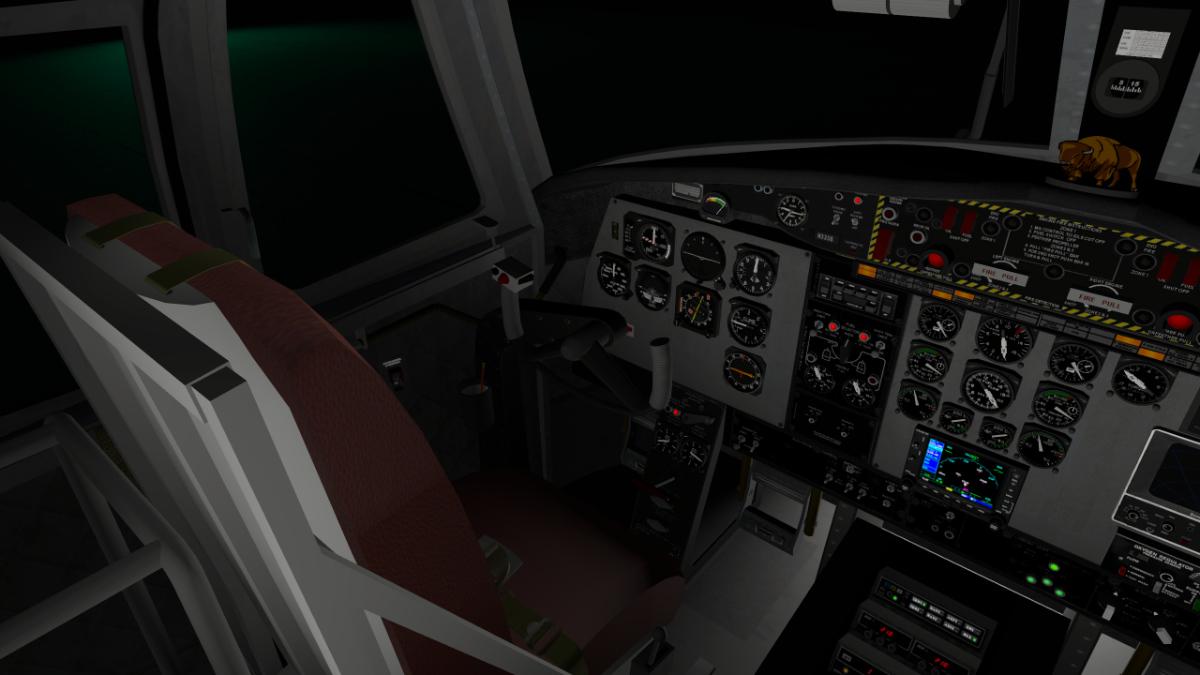
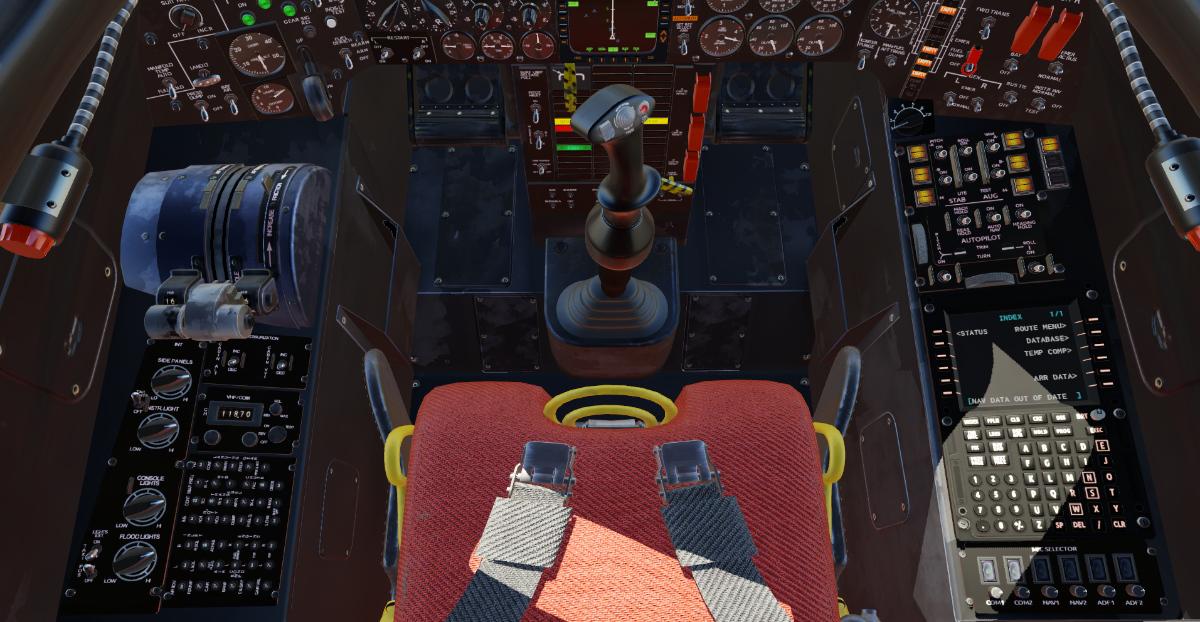
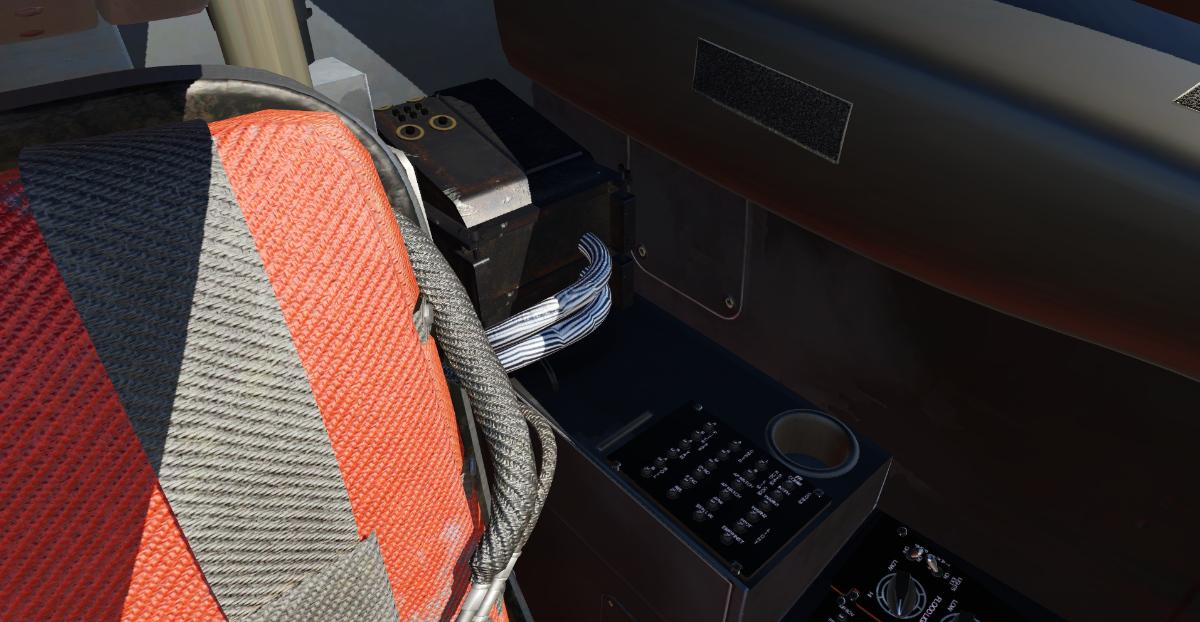
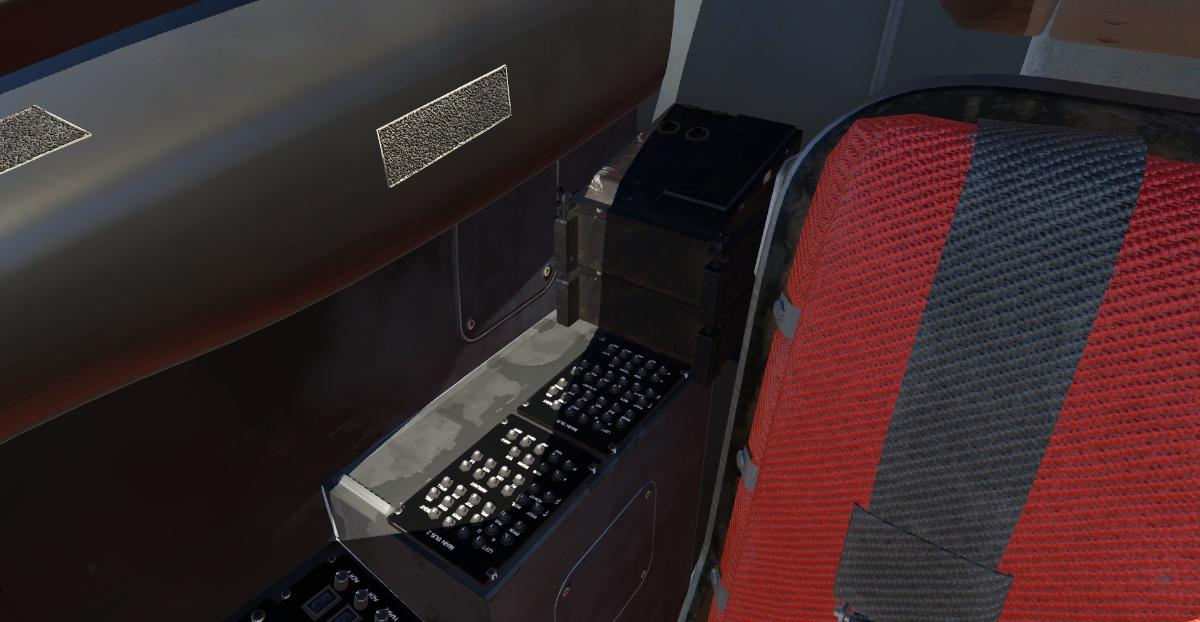
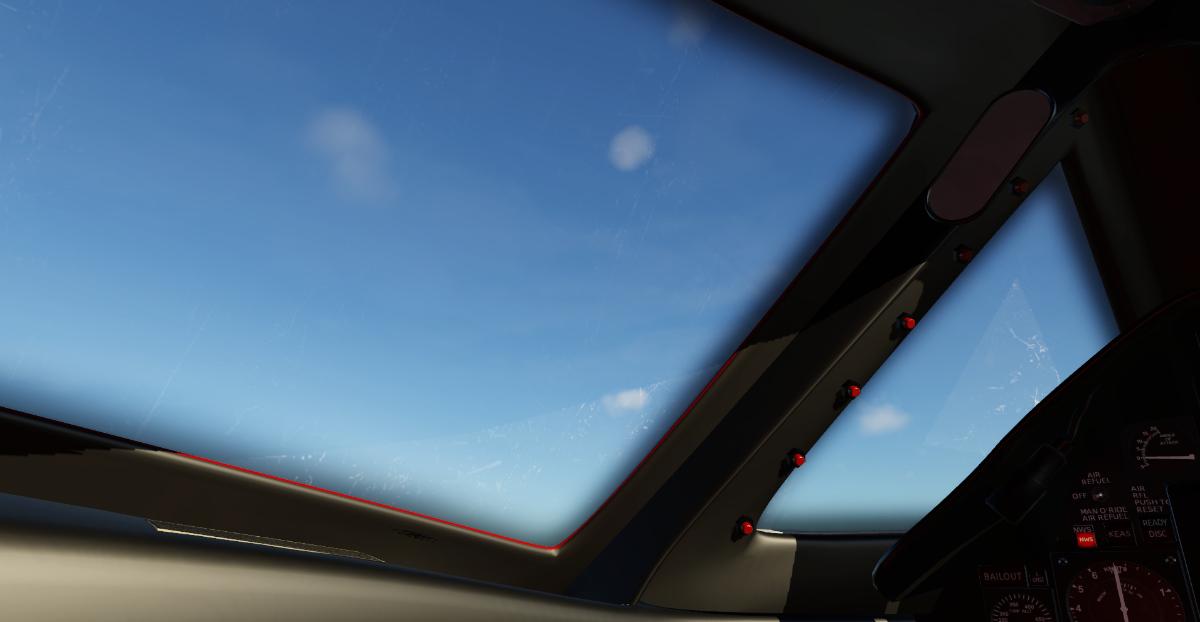
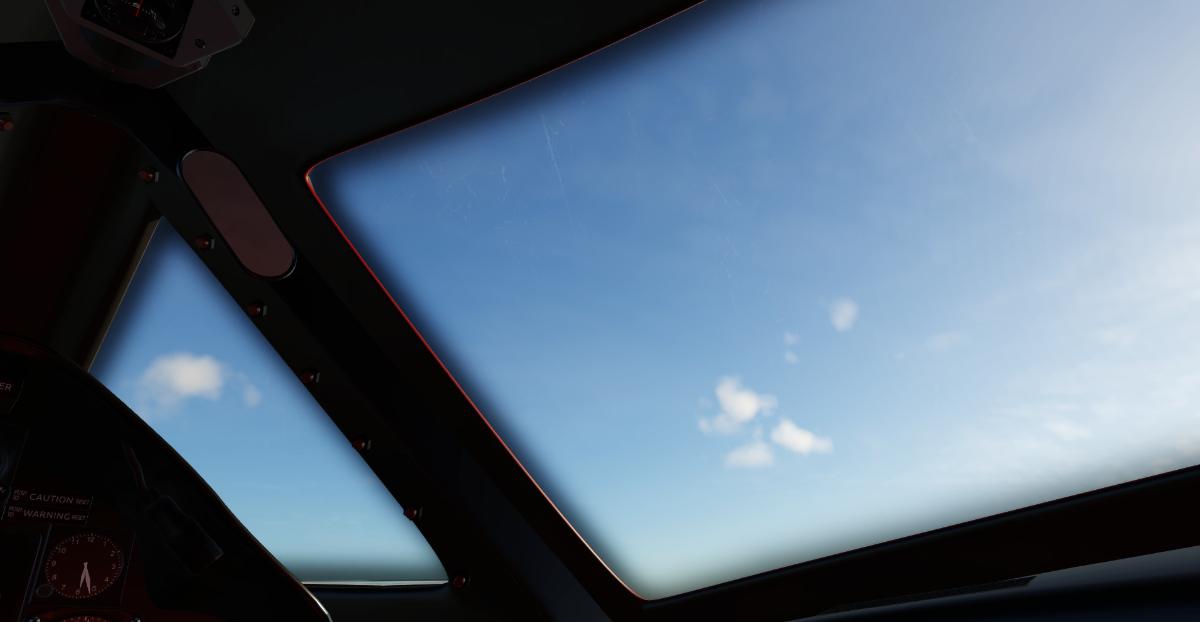
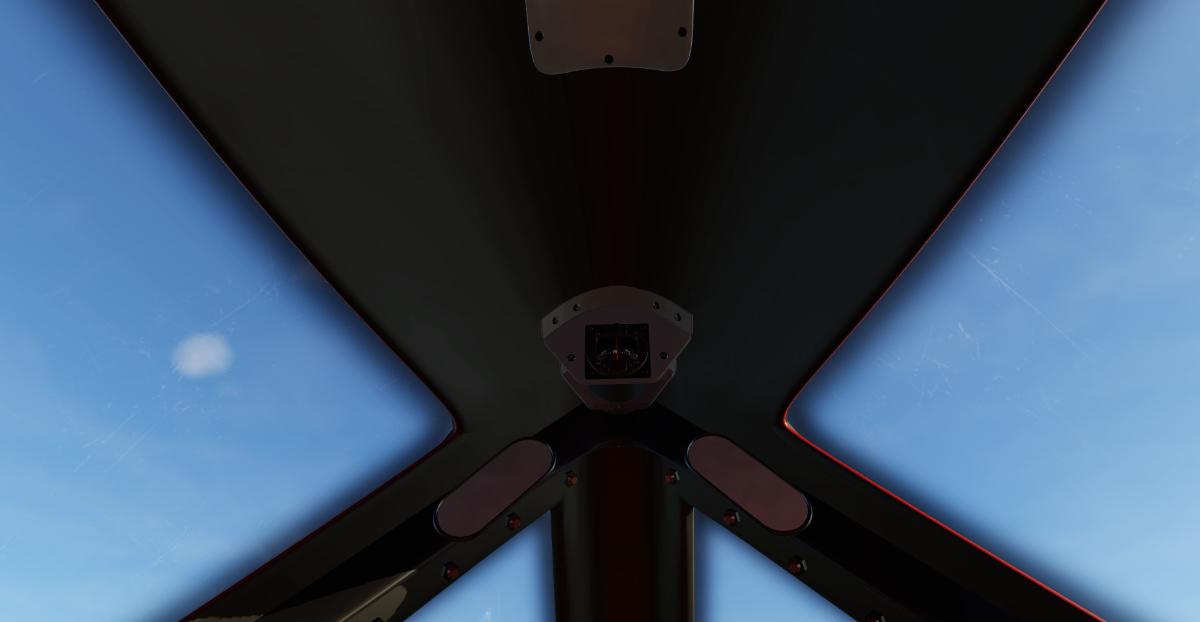
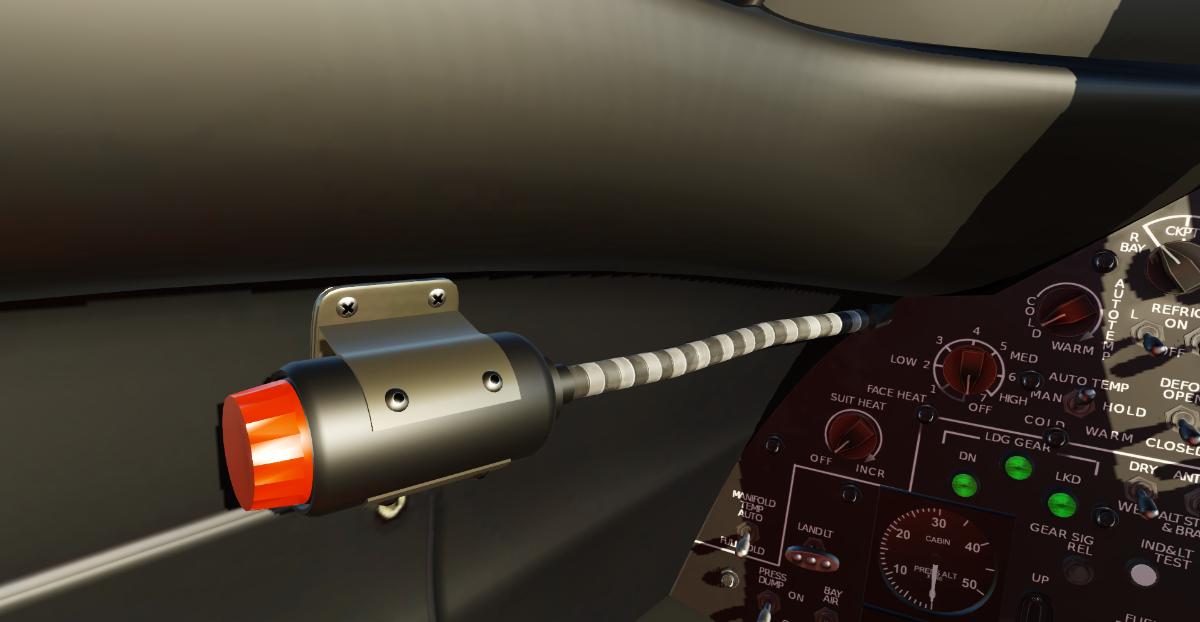
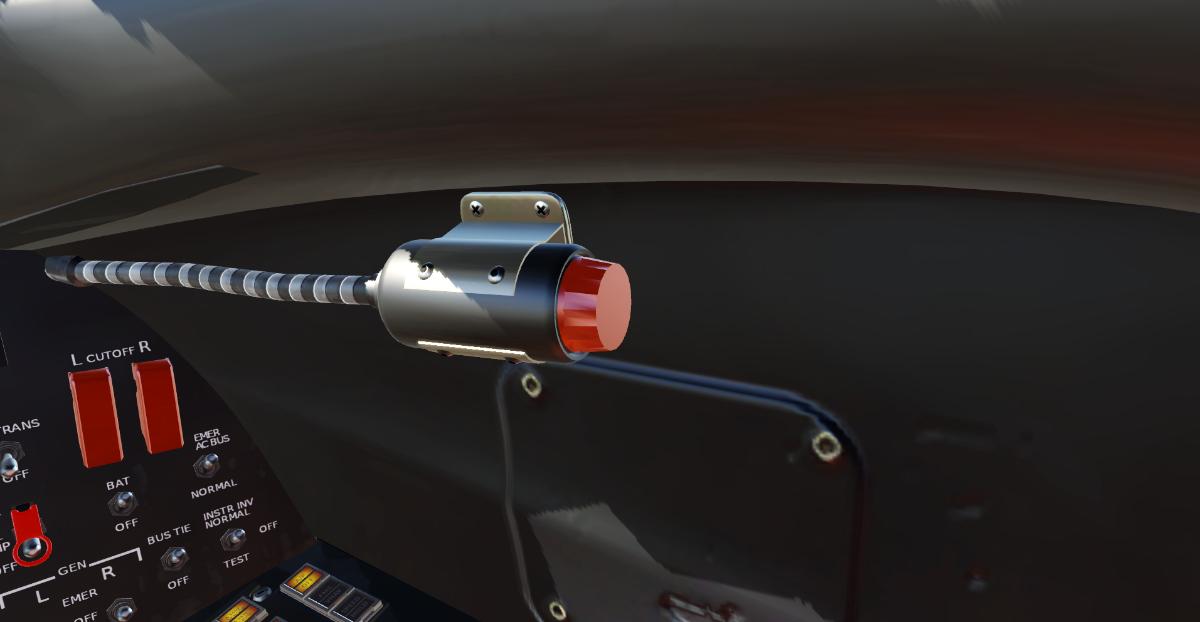
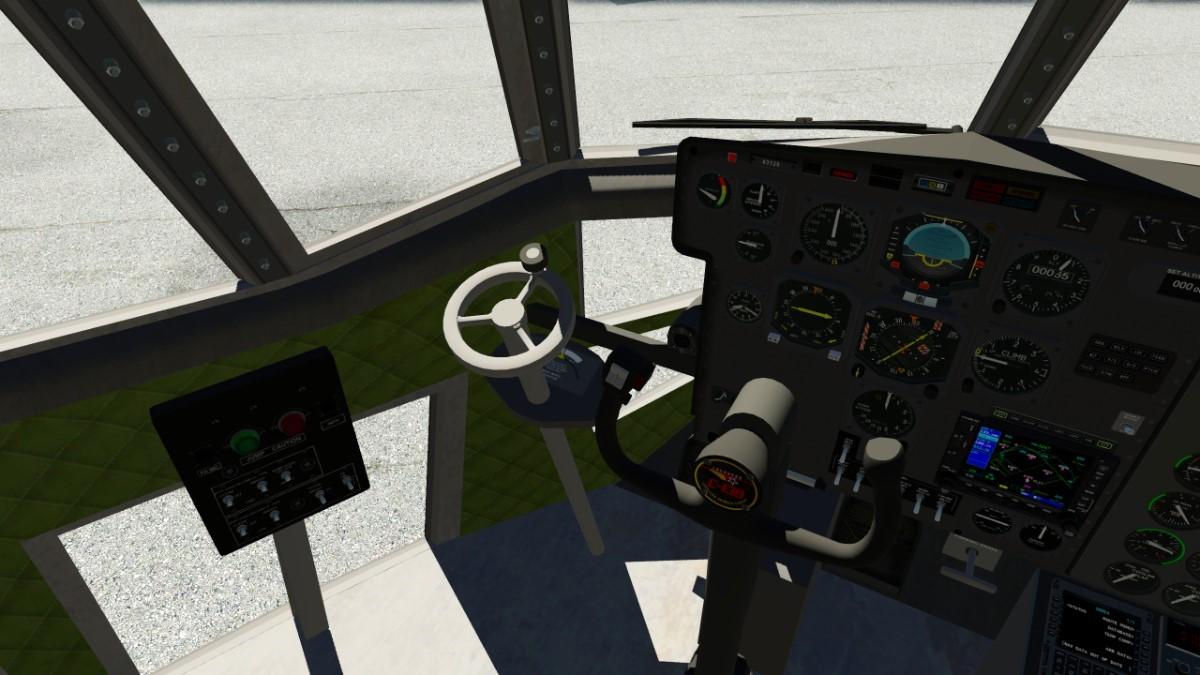
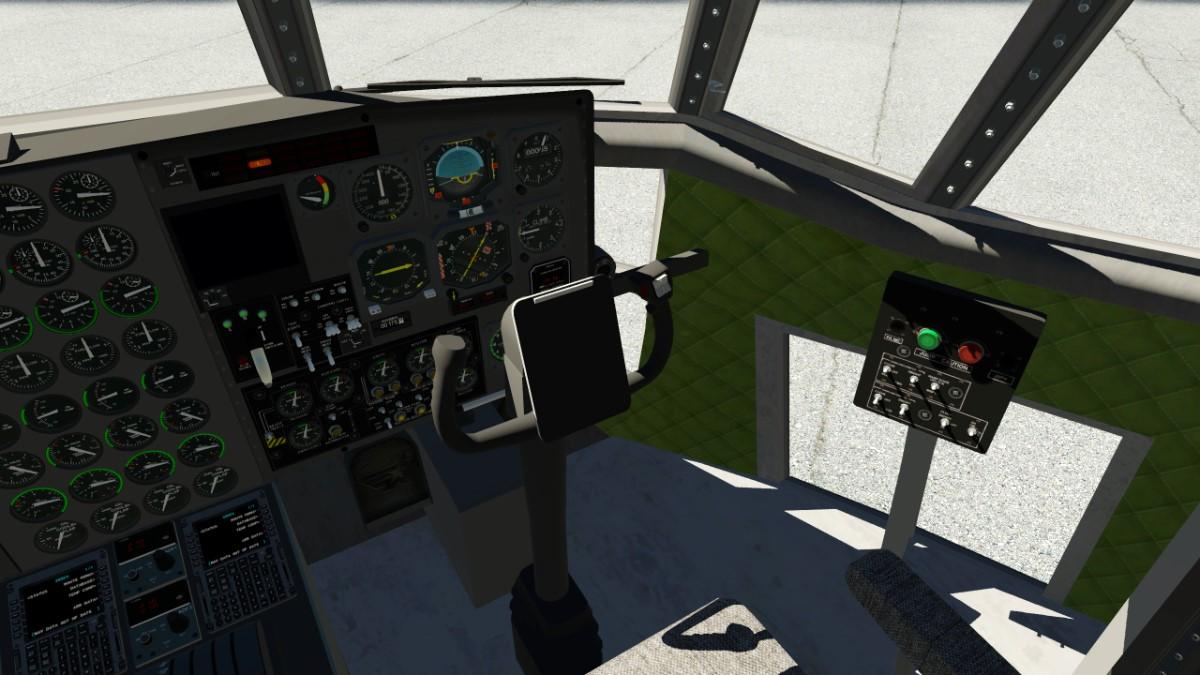
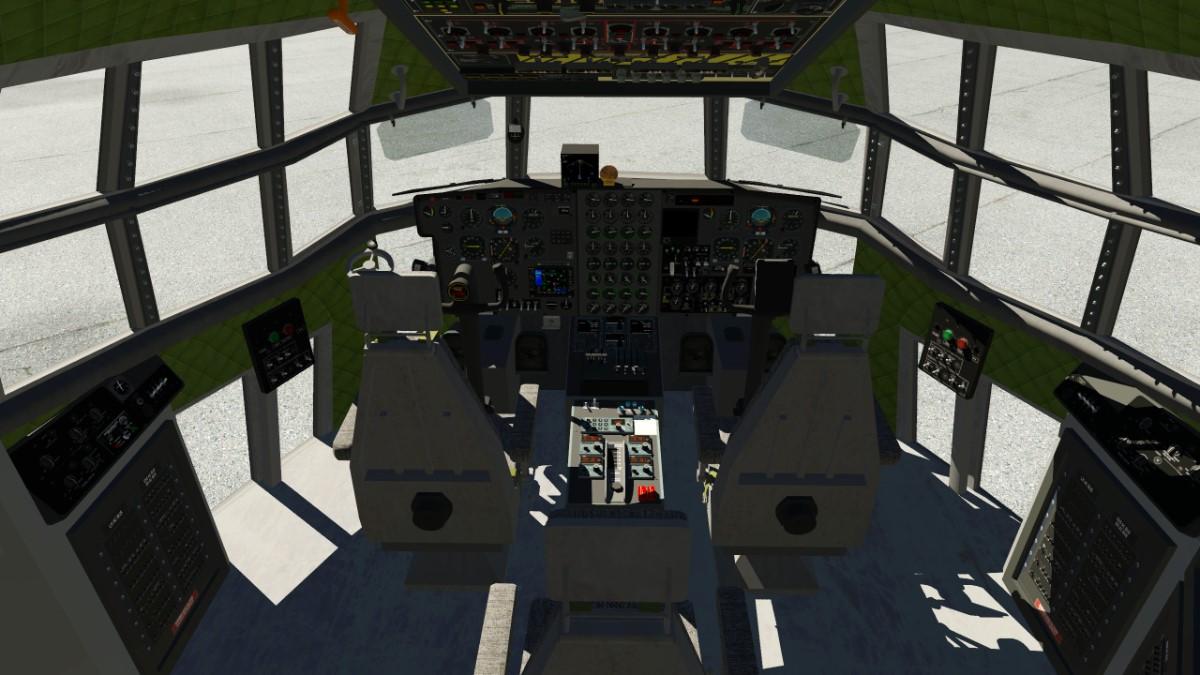
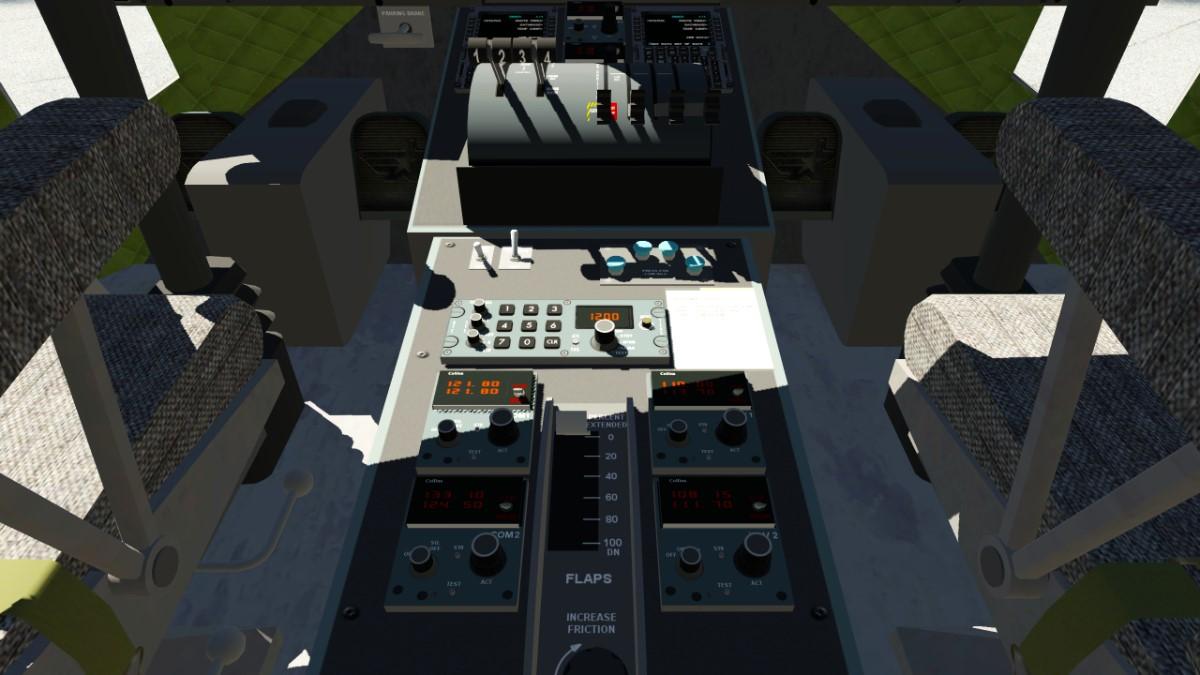
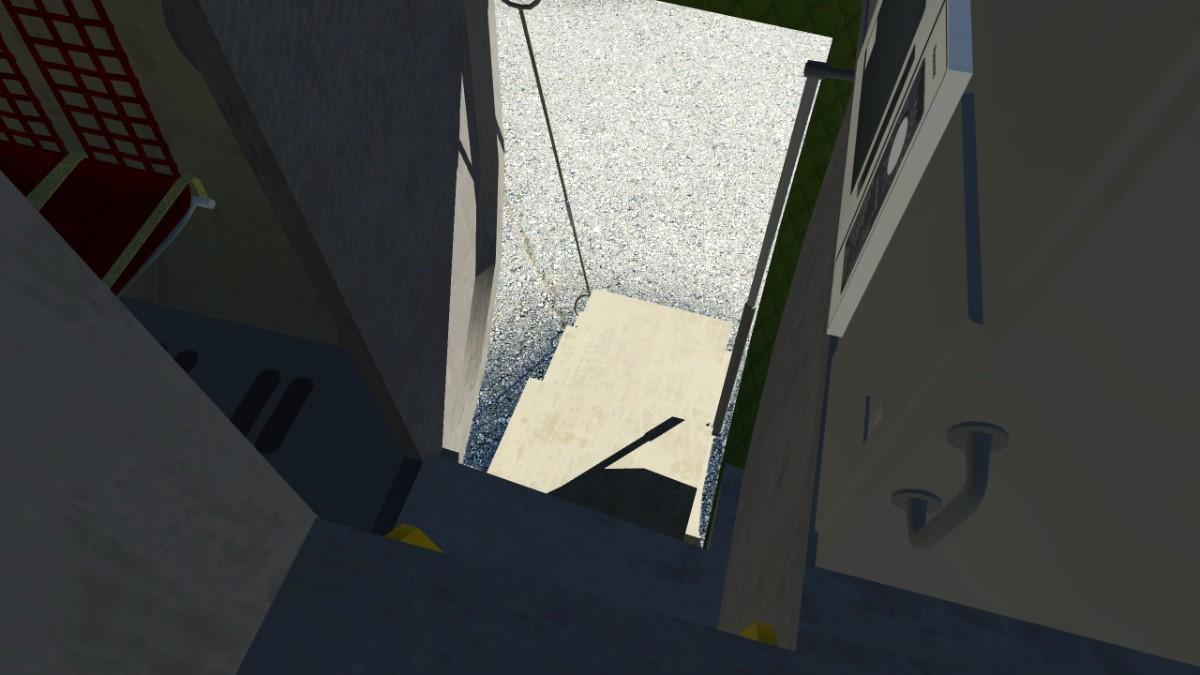
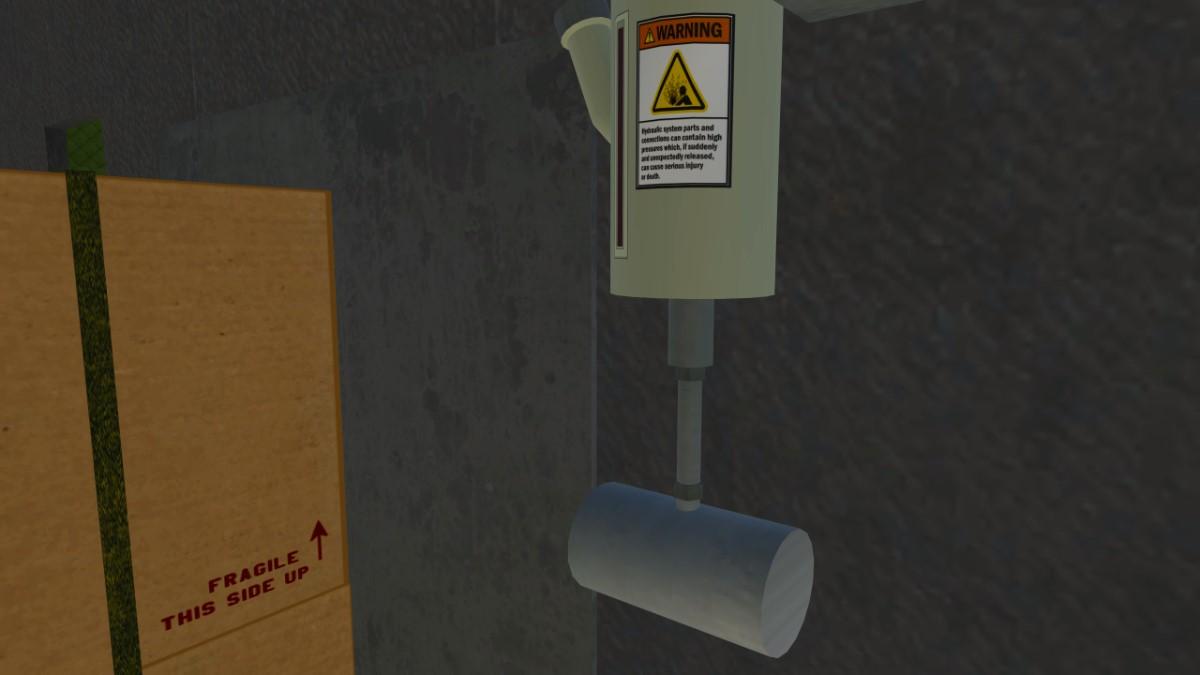
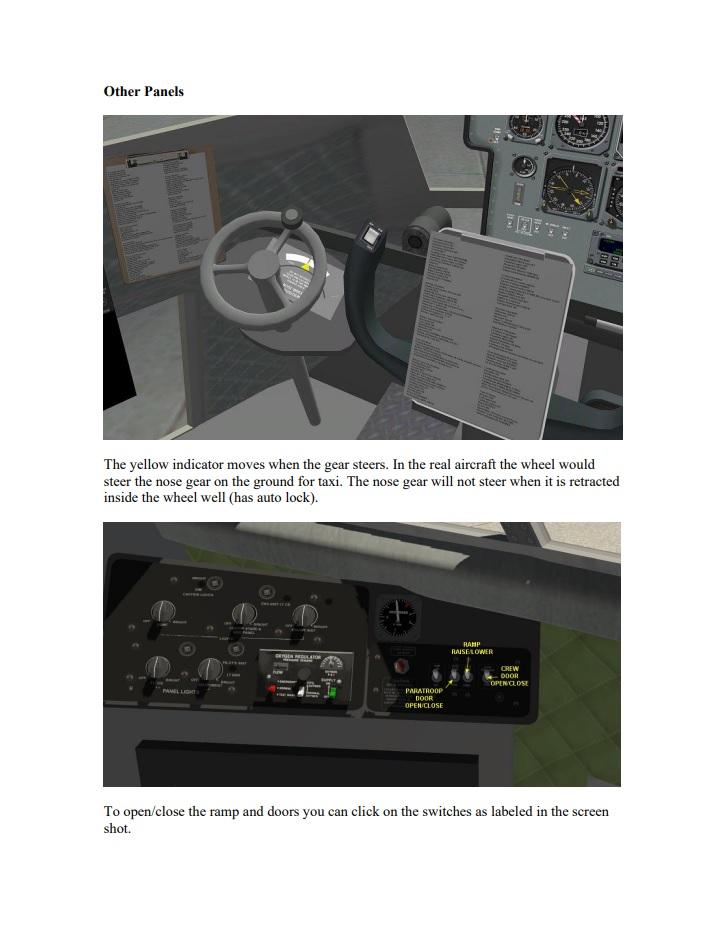
 Aircraft Plugin Review: Reality Expansion Pack for DHC-2 Beaver by Simcoders By Michael Hayward Introduction The de Havilland DHC-2 "Beaver" is a well-loved high-wing propeller aircraft that was produced in Canada from 1947–1967. With over 1,600 units produced, many continue to grace the skies today, demonstrating exceptional performance in rugged terrains and on water with the addition of floats. In 2020, Thranda released their rendition of the DHC-2 for X-Plane, later updating it for X-Plane 12 compatibility. This model has garnered praise for its attention to detail and realism, as highlighted in Stephen’s thoroughly detailed review. This review takes a closer examination of the Reality Expansion Pack (REP) by SimCoders for the Thranda DHC-2. This enhancement introduces a plethora of features and adjustments that elevate the aircraft’s realism beyond its original release. It includes a virtual economy system and improved flight checks, offering a more immersive flying experience. Having had some experience with the aircraft prior to the expansion pack, I am keen to explore the depth of enhancements SimCoders has integrated. Let's delve deeper, shall we? Installation It's a tricky installation, because you are installing a package (REP) on top of another package (Thranda DC-2). Then have to blend them together. Note that you will need the original DHC-2 Beaver - DGS Series XP12 Package to install this Add-On. First you will need to duplicate the Thranda DC2 aircraft to create a secondary aircraft file folder... When downloaded in the REP Package, there are two Folders, a read-me installation pdf and a REP user Manual. One folder "Into-aircraft-main-folder" goes into the main DC-3 Beaver root folder. It will ask you to overwrite two files... Second install folder is the "Into-aircraft-plugins-folder" which is put in the Thranda DC-2 Plugins folder. On Startup of the REP-Thranda DC-2, you will be asked to authorise (Enable) two items, both the original Thranda DC-2 Aircraft, and the separate REP Pack... this is done via the REP Pack menu in the Plugins folder.... "Enable package" Then the REP Installation process is completed. When installed the REP Menus are accessed via both the side quick "Pop-out Menu", and the more detailed menu in the "Plugins Menu". The Pop-out Menu has Six Options; Show Checklists, Show Fuel Management, Toggle Walkaround Mode, Toggle Low Mode, Toggle Maintenance report and Engine autostart... these items are reflected in the Plugin Menu. Added options in the Plugin Menu include; Settings, Wear out to (Brand New, Privately Owned - New, Privately Owned - Old, Flying Club), Check Fuel Price at airport, Toggle Static Elements, Disable Package and About. Key Features Overview SimCoders have introduced several key enhancements to the Thranda DHC-2 with their expansion pack, each designed to deepen the simulation experience. A hallmark of X-Plane is its ability to replicate realistic flight dynamics, significantly influenced by the aircraft’s airfoil shape. In this expansion, considerable effort has been invested in refining the DHC-2’s flight behaviour. This includes modifications to stall speeds, climb and cruise speeds, weight distribution, and balance, as well as enhancements to taxiing behaviour, contributing to a more authentic feeling, both on the ground and in the air. Included in the expansion is an economy system that allows pilots to accumulate virtual currency through completed flights. This currency can then be allocated towards fuel purchases and aircraft maintenance, enriching the Beaver experience with an added layer of strategy and management. Another notable feature is an enriched walkaround system, enabling pilots to conduct thorough pre-flight inspections outside the aircraft, enhancing the realism of pre-flight preparations. A significant overhaul detailed by SimCoders is the re-engineering of the engine system. By replacing the default engine with a custom-designed alternative, they introduce a range of factors for pilots to consider and manage. This, along with modifications to the electrical systems and battery configurations, will be discussed further in this review. Additional improvements include simulation state changes, maintenance protocols, and pilot behaviour adjustments, all aiming to mirror the lifelike intricacies of operating a DHC-2. These enhancements collectively serve to elevate the simulation experience, introducing a variety of real-world considerations into virtual flight that offer a comprehensive and educational exploration into the mechanics of flight. Flight and Ground Dynamics We begin by exploring the enhanced flight and ground dynamics of the DHC-2 Beaver. Flying the Beaver is relatively straightforward, offering a smooth experience when airborne and requiring minimal pilot intervention once properly trimmed. A comfortable cruise speed is approximately 125 knots, though it's capable of reaching 140 knots at full throttle, with the propellers set to high RPM and the mixture at maximum rich. These performance figures align closely with the real aircraft, which is documented to cruise at 124 knots at 5,000 feet and can achieve a maximum cruise speed of 137 knots under ideal conditions. The aircraft's climb and descent profiles have been carefully adjusted to mirror those of the actual Beaver, with an average climb rate of about 1,000 feet per minute. Its maximum cruising altitude is noted to be 18,000 feet, adhering to the US standard for altimeters. Note the "Tips" in the REP banner, they guide you through areas that are the best to fly and maintain the Beaver in flight. Maintenance of your aircraft is key, as parts wear down over time, directly impacting fuel efficiency and flight performance. For instance, a clogged fuel filter will manifest as reduced fuel flow on the gauges, limiting engine power. Consequently, pilots must manage their aircraft's condition and flight performance proactively to extend its operational lifespan. The development team at SimCoders, comprised of pilots with real-world experience possibly even with the DHC-2 itself, has dedicated substantial effort to ensure the flight dynamics are as true to life as possible. The Beaver is equipped with five ground configurations: standard tires, tundra tires, skis, floats, and amphibious floats, each altering its separate distinctive handling characteristics. With tires, it operates as a taildragger, incorporating a redesigned suspension system for smoother navigation across soft terrain. Pilots are cautioned against oversteering, as locking the wheel can lead to abrupt stops. Water operations offer a distinct and enjoyable challenge, as the Beaver handles well on calm waters, but adverse weather can necessitate skilled corrective manoeuvres to maintain control. Engine and Systems Complexity A standout feature of the SimCoders DHC-2 Beaver expansion is the overhaul of the engine function and logic. Rather than refining the existing Thranda engine, SimCoders dismantled it to construct an entirely new engine, integrating this with their unique maintenance and damage model. This reimagined engine now accurately reflects the performance of the Pratt & Whitney R-985 Wasp Junior, the powerplant used in the aircraft. Enhancements even extend to the propeller animations, offering more realistic visuals through subtle vibrations and speed fluctuations with engine and throttle adjustments. With the introduction of a new engine comes a detailed startup procedure. While it's technically possible to initiate a cold start, it's ill-advised due to potential wear on the engine and the need for precise priming to get it running. Instead, SimCoders added a preheater option to warm the engine chamber for a smoother start, negating the need for priming. This attention to detail includes the low-tension booster coil, critical for initiating fuel combustion during engine startup. If you don't want to do this, then there is the "Autostart" feature that does the tricky work for you... the startup procedure is shown in a banner top of your screen, and the startup process is extremely authentic including exhaust effects. Fuel and oil dynamics are more sophisticated, with temperature variations influencing fuel viscosity. This affects how easily fuel can be pumped through the system, highlighting the challenges of cold starts and the potential for fuel flooding if the engine is shut down shortly after starting. These issues can be identified during pre-flight inspections and addressed through maintenance. Pilots must also pay close attention to the avionics state during engine startups and shutdowns to avoid damaging the systems. I learned this lesson the hard way, failing to notice my attitude indicator was inoperative after takeoff, leading to unintended banks and, subsequently, a costly virtual repair. These intricacies significantly enrich the experience, demanding more attentive micromanagement from pilots to maintain safe and efficient aircraft operation. Economic and Custom Systems SimCoders introduces an economy panel for the DHC-2 Beaver, drawing parallels to virtual airlines where good flying earns points and promotions, but here, it's all about the financial health of your aircraft. This feature, while optional, adds an additional intriguing dimension to the experience, allowing pilots to manage the economic aspects of aircraft operation. Damaged a gauge? That’ll hit your wallet. A broken flap and its linkage might just make you consider remortgaging your virtual home! The more damage your aircraft sustains, the more you’ll find yourself investing in repairs. And it doesn’t stop at repairs; even refuelling the Beaver costs, with fuel prices fluctuating based on your global location. On the lookout for savings? Word on the street is that Venezuela offers the world's most budget-friendly fuel prices! The economic system is designed to integrate seamlessly with well-known virtual airline platforms like FSEconomy and X-CPL-Pilot, enhancing the experience for pilots already engaged in virtual aviation careers. And you have to access, or create an "Aircraft Key" to use the Economy System... Another enjoyable feature is the towing system. Although straightforward, it provides a practical method for aircraft positioning on the ground. Pilots can secure the aircraft when parked and then manoeuvre it using the joystick, offering a user-friendly and realistic ground handling experience. Additionally, the Beaver is fully compatible with VR, inviting pilots to immerse themselves in a highly realistic virtual cockpit and environment, enhancing the overall experience of flying the Beaver in X-Plane. Interactive Walkaround and Maintenance SimCoders’ pièce de résistance in their DHC-2 Beaver expansion is the comprehensive damage engine and maintenance panel. Operating an aircraft that has been flying for over sixty years, requires special care and attention, especially as a lot of the technology used is now dated. SimCoders emphasizes the necessity for correct pilot procedures to prevent wear and tear. An early lesson I learned is the importance of deactivating avionics during engine startups and shutdowns to avoid system failures. With the economy feature activated, repairs come with a price tag, proportional to the damage extent. The risk of overstressing parts to the point of affecting flight surfaces and potential failure highlights the significance of careful handling. Indeed, a malfunctioning Beaver is an unwelcome scenario for any pilot. On the ground, pilots can generate and review a maintenance report detailing the aircraft's condition, including the state of engine cylinders, oil, filters, and pumps. Over time, these components degrade, presenting the pilot with repair decisions to maintain optimal performance. A notable addition is the virtual walkaround, allowing pilots to exit the cockpit and conduct a thorough visual inspection prior to flight. This interactive feature includes a checklist for assessing potential wing damage, ensuring engine components are intact, confirming cylinder integrity, and verifying the pitot tube is clear. Successfully completing these checks ensures the aircraft is flight ready. This system not only emphasizes the necessity of maintaining operational safety but also introduces the realistic challenges and expenses associated with aircraft ownership. As systems wear and potentially fail, constant vigilance over your Beaver's condition is crucial for sustained operation. Conclusion Embarking on the journey with the Thranda Design DHC-2 Beaver, supplemented by the SimCoders Enhancement Pack REP, which introduces a captivating complexity to piloting this beloved aircraft. The addition places a significant emphasis on engine performance and maintenance management, transforming routine flights into a series of informed decisions and actions. The degradation of components serves as a constant reminder of the aircraft’s demands, underscoring the importance of thorough management and adherence to operational protocols. Piloting the Beaver not only becomes an exercise in flying skills but also in vigilance and preventive care, ensuring longevity and reliability. This enhancement pack enriches the original aircraft with a deeply immersive engine simulation, where even minor variations in engine startup procedures can influence the entire flight experience. This level of detail demands a more nuanced understanding and appreciation of the aircraft’s operational characteristics. Adding to the complexity is the virtual economy feature, which introduces financial decision-making into the mix. Pilots must carefully manage their virtual funds, prioritizing repairs and maintenance to ensure the aircraft remains airworthy, while also navigating the compromises of system management. To benefit from this comprehensive enhancement pack, pilots must have the Thranda DHC-2 Beaver for X-Plane 12 in their collection, as it is not backward compatible with X-Plane 11. For enthusiasts of the golden age of aviation who desire a hands-on, intricate flying experience, this enhancement pack is an invaluable addition, offering a richly detailed and rewarding challenge. ______________________________________ The... Reality Expansion Pack REP for DHC-2 Beaver XP12 by Simcoders is available from the Org store here: Reality Expansion Pack for DHC-2 Beaver XP12 On sale: $US19.99 US$13.99 You Save:$6.00(30%) Features: Ultra Realistic Flight & Ground Dynamics Realistic stall speeds & behavior Correct climb speeds Realistic cruise speeds Real World Weight & Balance Realistic taxi behavior with realistic spring-loaded/free-castoring tailwheel Complex Damages System Triggered by the pilot actions Based on real world data Target every system in the aircraft Meant to teach you how to correctly manage an airplane Economic System Can be enabled/disabled on the fly Earn virtual money when you fly Use virtual money to buy fuel and do maintenance/repairs Realistic fuel prices around the World Fully compatible with FSEconomy and X-CPL-Pilot More info at https://www.simcoders.com/reality-expansion-pack/economy Custom Towing System Driven by the joystick/steering wheel Realistic point of view (POV) Interacts with tie-down and brakes Interactive Walkaround Cockpit checks Lights checks Engine soft cover removal Aileron, rudder, elevator and flaps check Tire check and choks removal Tie-down removal Pitot tube check Engine cowl check Floats and water rudder check Realistic Pratt & Whitney R-985 Wasp Junior Engine Logic 100% Custom engine model Realistic power output for given manifold pressure/RPM settings Realistic propeller animations as never seen before on X-Plane Realistic booster coil Switch between conventional and Bendix-Stromberg pressure carburetor (with automatic mixture) Correct fuel consumption Oil System: 1. Realistic oil viscosity 2. Interchangeable oil type 3. Oil pump failures 4. Realistic oil filter Fuel System: 1. Realistic wobble pump 2. Realistic fuel pressure behavior 3. Realistic fuel filter 4. Realistic primer Starter Realistic startup procedure Automatic startup procedure for newbies Realistic engine temperatures Fuel Flooding simulation The engine parts wear down when not managed correctly Engine Preheater The engine may be warmed up upon start with the provided electrical heater Once activated, the electrical heater runs even when you close the simulator Realistic Landing Gear The landing gear is damaged by hard landings The brakes and tires are damaged if not managed correctly The steering wheel acts like the real one. Spring loaded under 35° of turn, then free castoring. Electrical & Avionics System Realistic Battery The avionics are damaged if on when the engine starts/shuts down Native Virtual Reality Support Complete support of new X-Plane SDK 3.0 Menu visible in VR Windows visible in VR Learn with the in-flight tips A non invasive tip with a suggestion about the conduct of the flight is shown when you are not flying the airplane properly A non invasive tip with a suggestion on how to recover the problem is shown when you damage the airplane Custom simulation of Hypoxia Tunnel vision Hard breathing Popup Kneeboard Normal operations checklist Emergency operations checklist Reference tables (speed, fuel consumption etc.) May be shown/hidden with mouse gestures Simulation state saving Every single switch and lever position restores its position when you reload the aircraft The battery may discharge if you leave it on and then close X-Plane The engine restores its cylinders and oil temperature basing on the elapsed time between restarts Maintenance Hangar Engine maintenance tab Electrical systems maintenance tab Landing gear, brakes & tires tab Instruments tab Economic System tab HeadShake Integration REP drives HeadShake to simulate the correct vibrations of the Wasp Junior engine Developed with love Coded by real pilots Very easy on FPS Written in C++ with no compromises Requirements: This is an add-on to the DHC-2 Beaver - DGS Series XP12. It will not work on the Thranda DHC-2 Beaver XP11 or any other aircraft. X-Plane 12 (not for XP11) Current version: XP 12 - 4.8.2 (February 10th, 2024) Customers who own the Reality Expansion Pack for DHC-2 Beaver XP11, can get the new XP12 version for 30% off. Coupon code can be found in the original invoice. Reviewers System: Windows 10 Professional AMD Ryzen 5 3600 Processor 32GB RAM Palit GeForce RTX™ 3080 GamingPro Scenery Review by Michael Hayward 2nd April 2024 Copyright©2024: X-Plane Reviews (Disclaimer. All images and text in this review are the work and property of X-PlaneReviews, no sharing or copying of the content is allowed without consent from the author as per copyright conditions)
-
 Busair reacted to a post in a topic:
Aircraft Update Review: Boeing 757 Professional Global package v2.6.12 by FlightFactor/VMax
Busair reacted to a post in a topic:
Aircraft Update Review: Boeing 757 Professional Global package v2.6.12 by FlightFactor/VMax
-
Kiwiflyer reacted to a post in a topic:
Aircraft Update Review: Boeing 757 Professional Global package v2.6.12 by FlightFactor/VMax
-
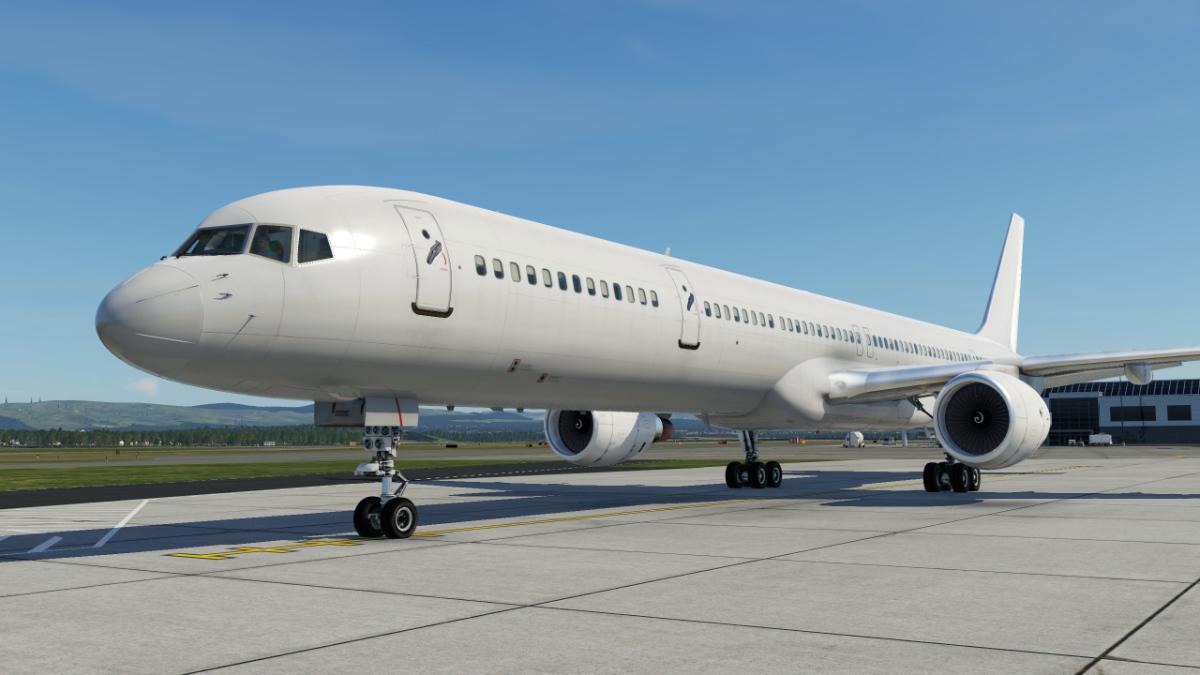
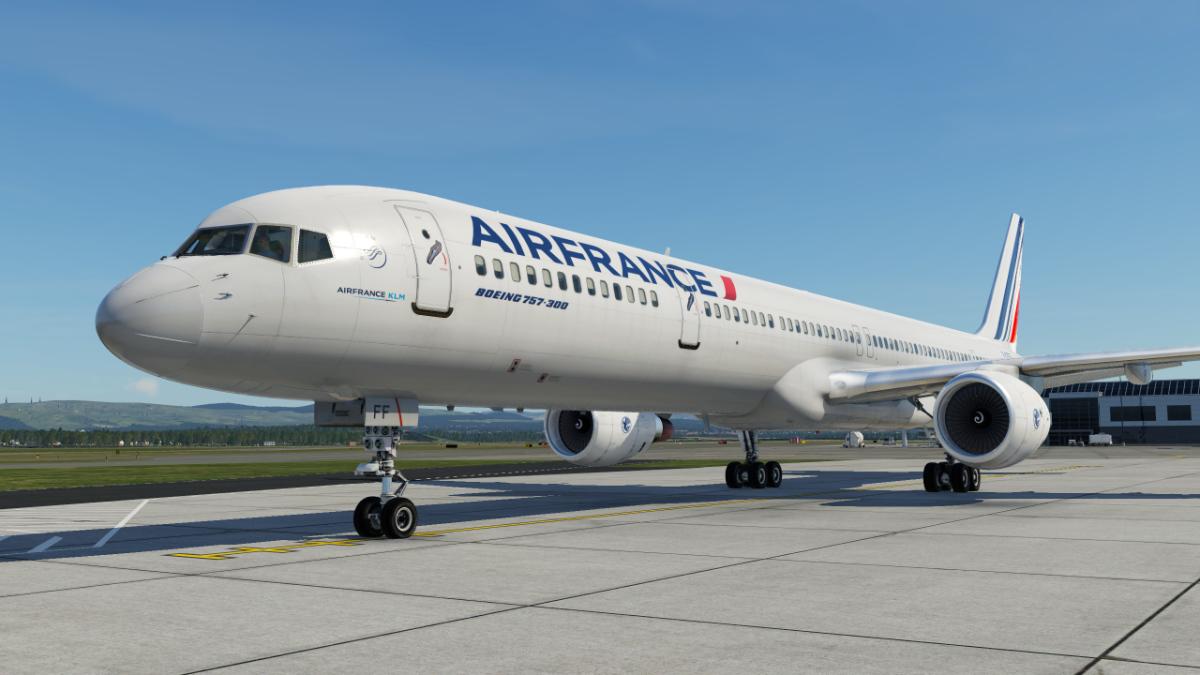
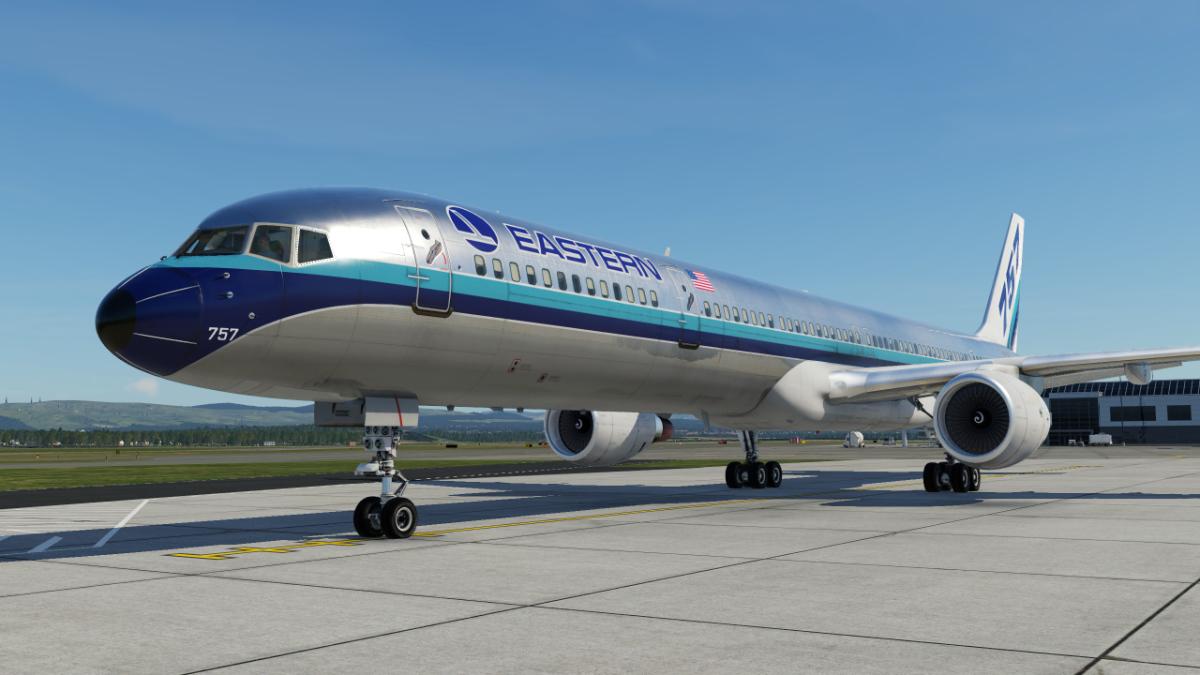
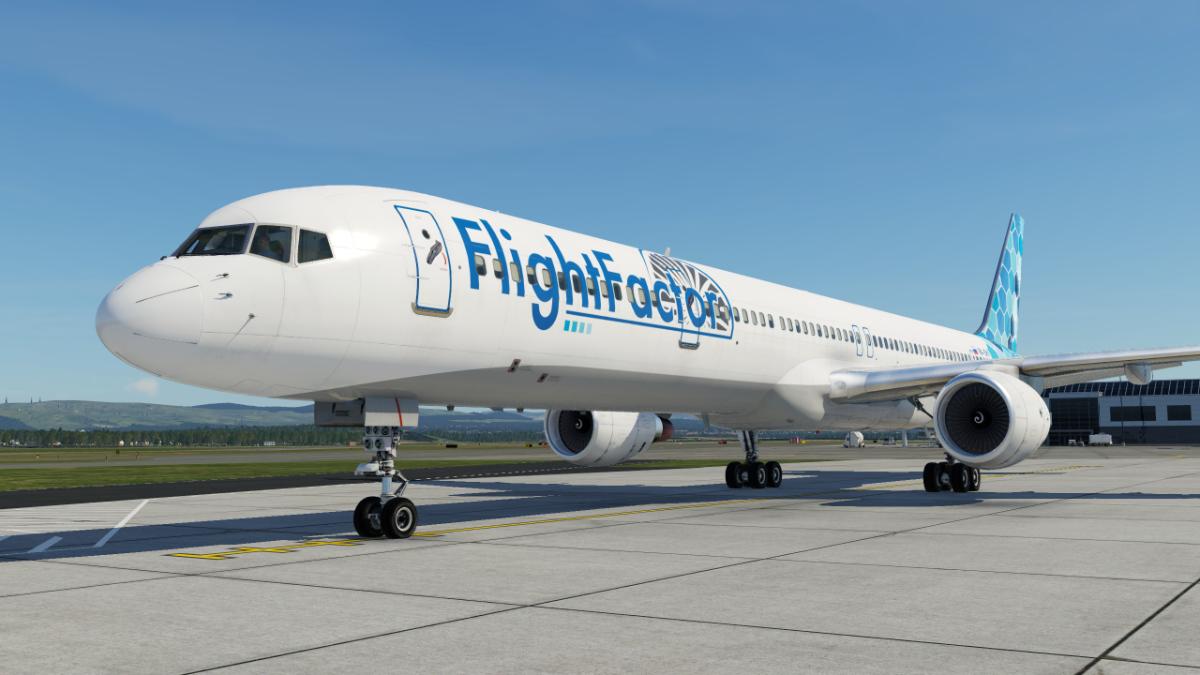
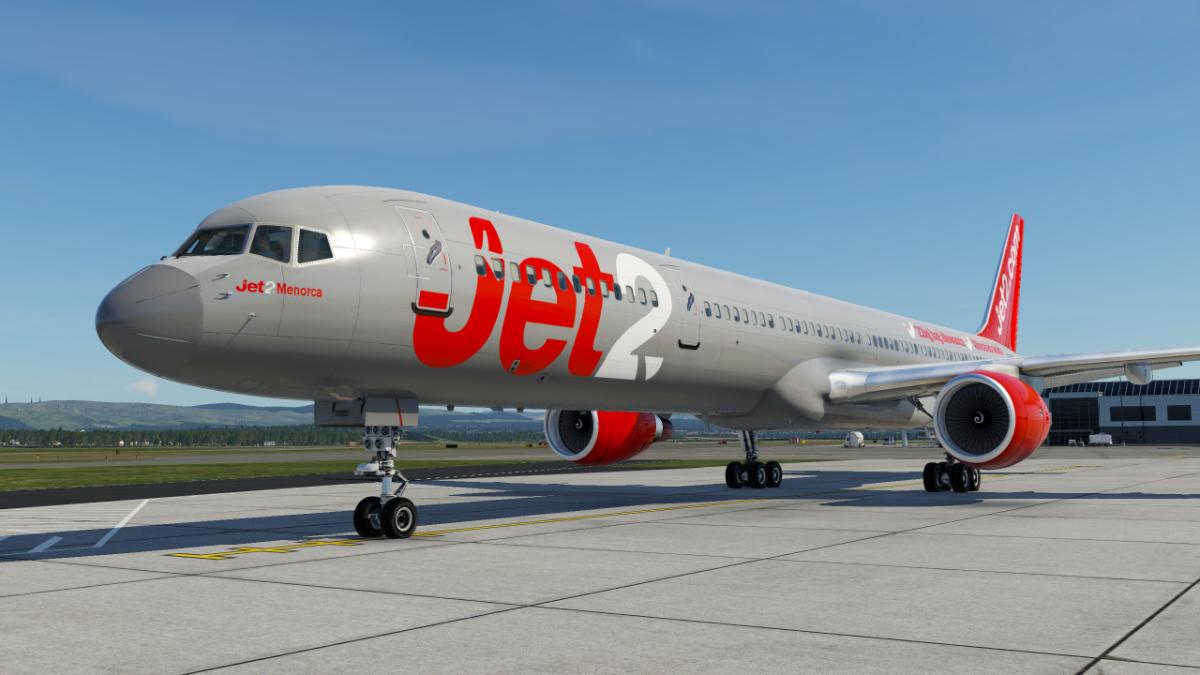
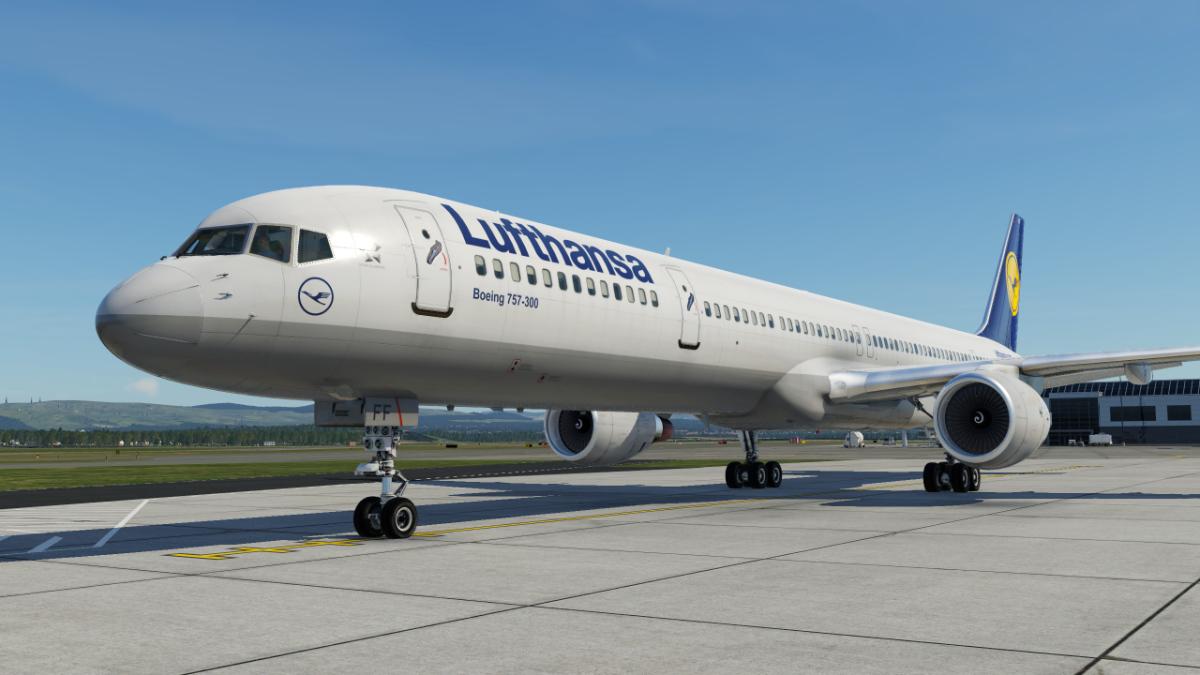
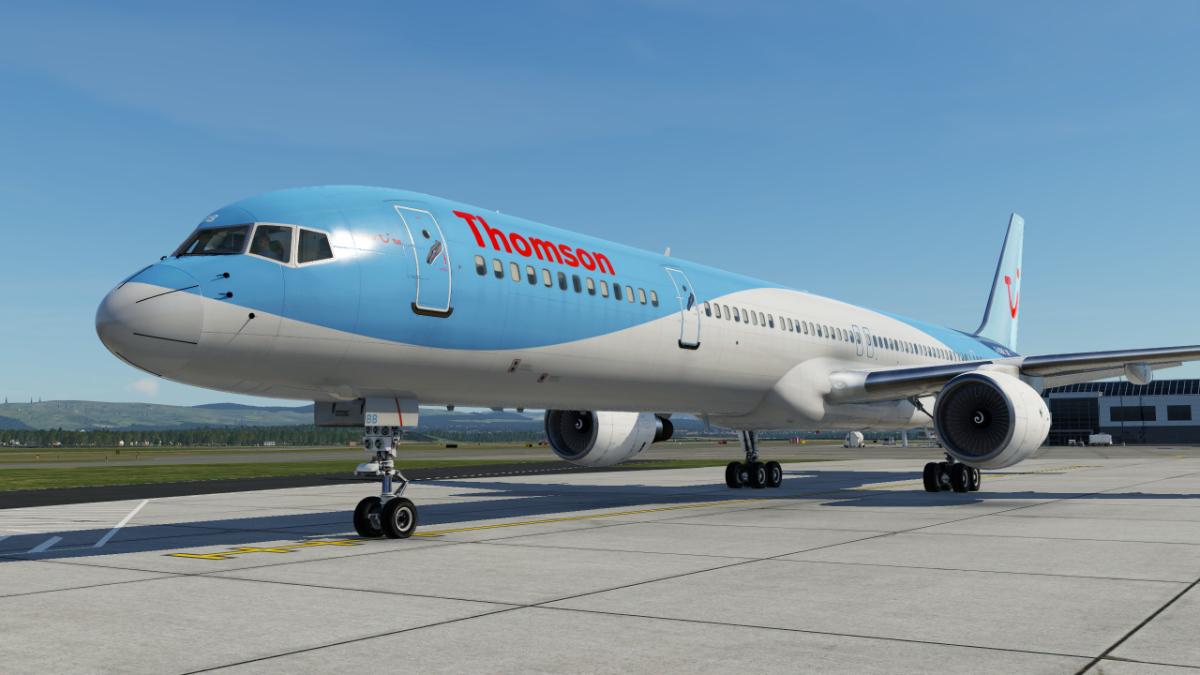
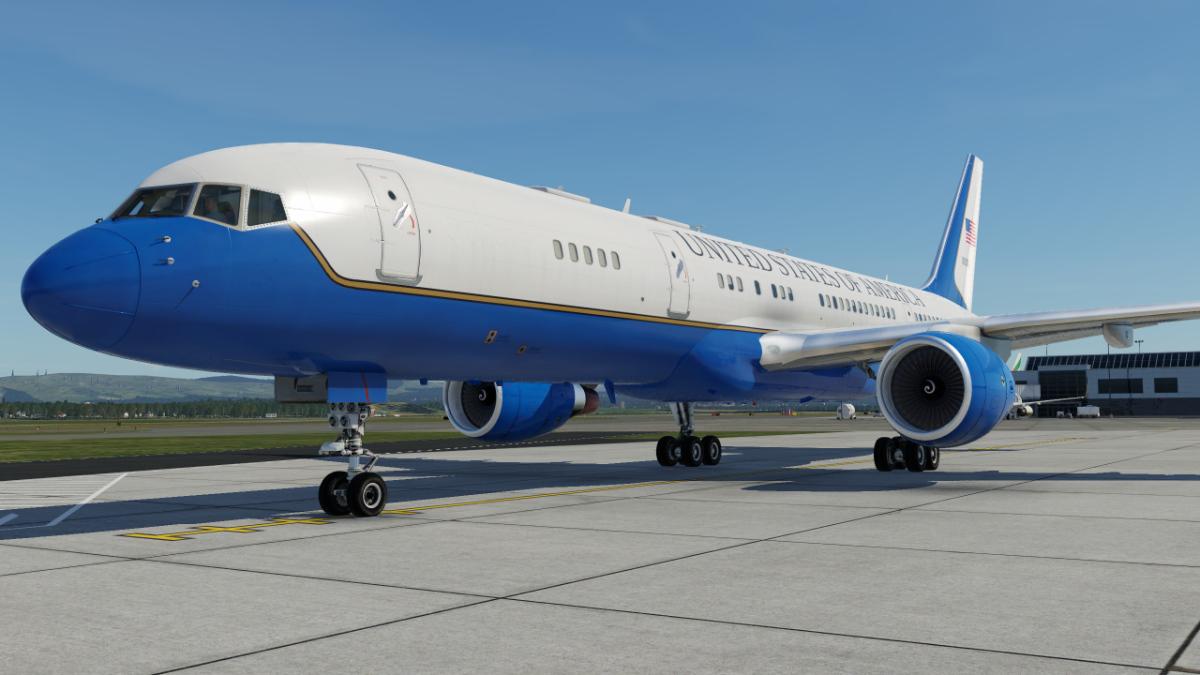
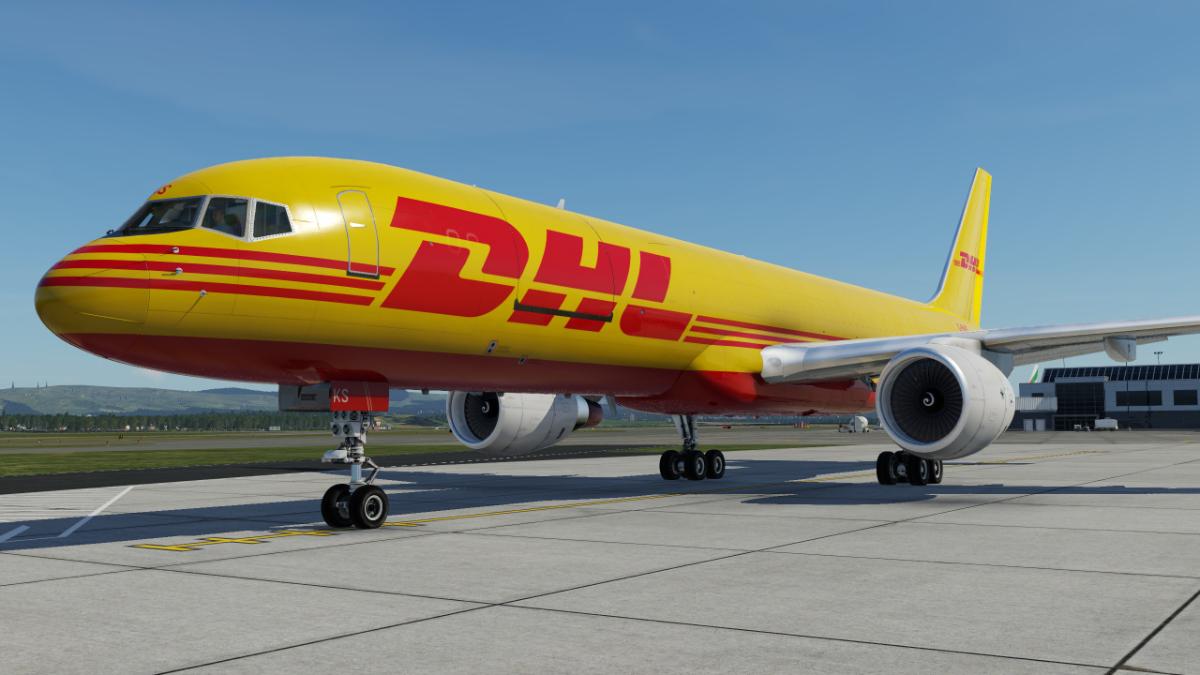
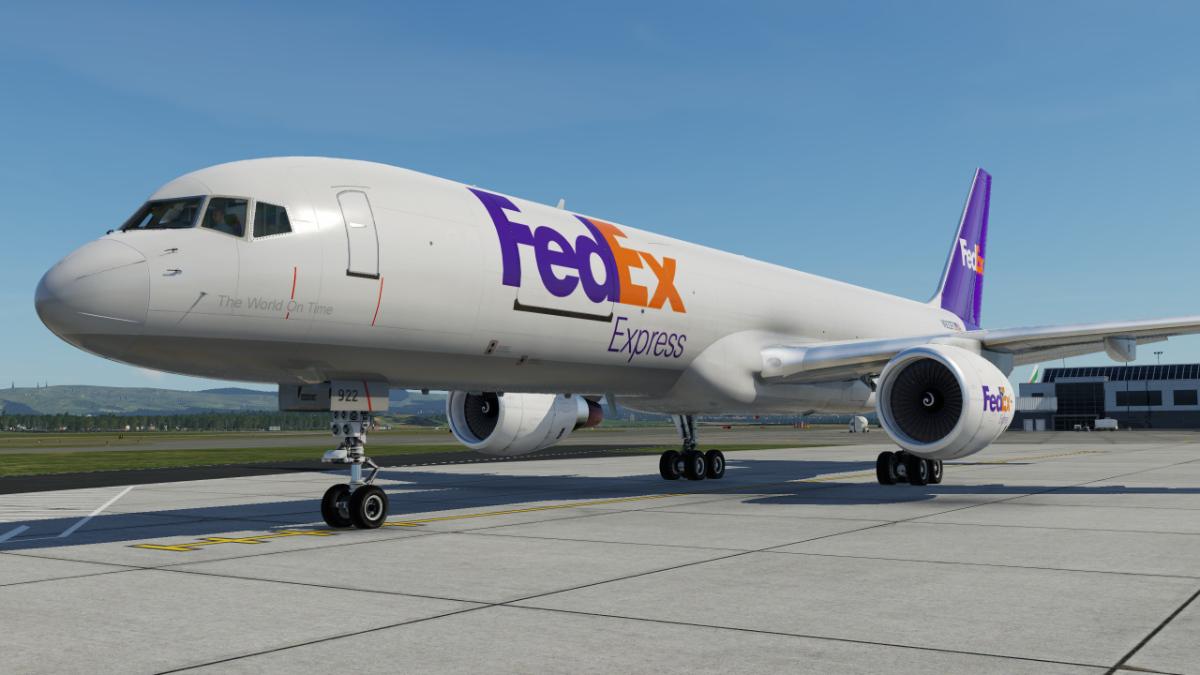
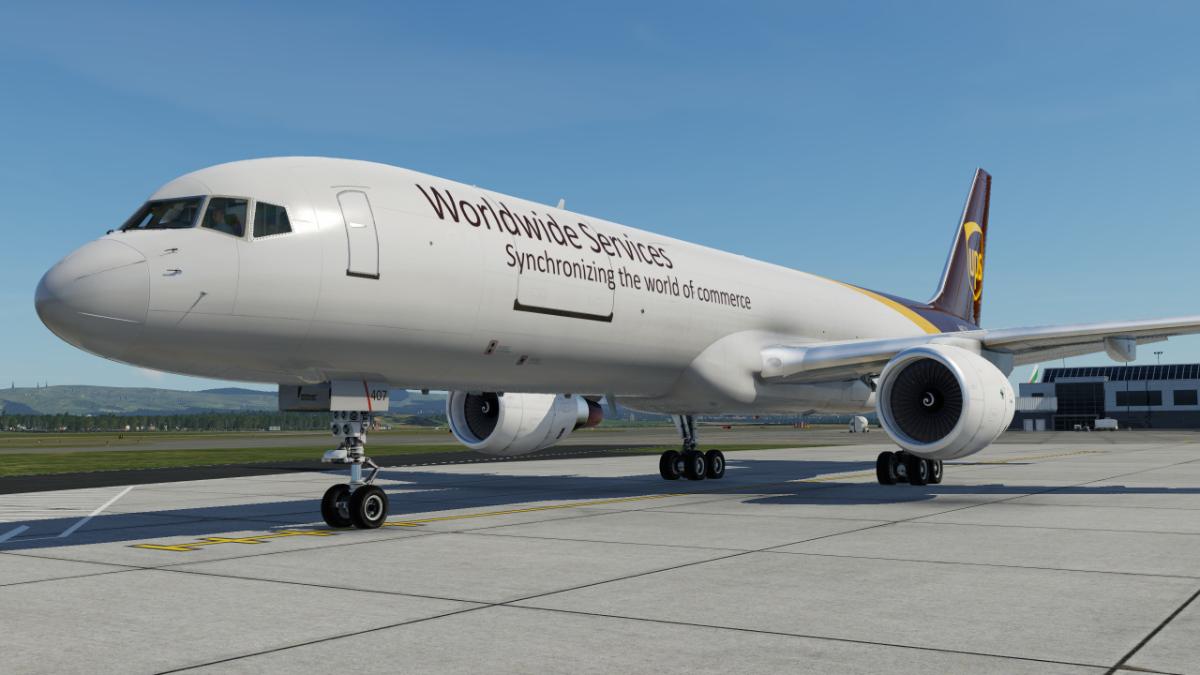
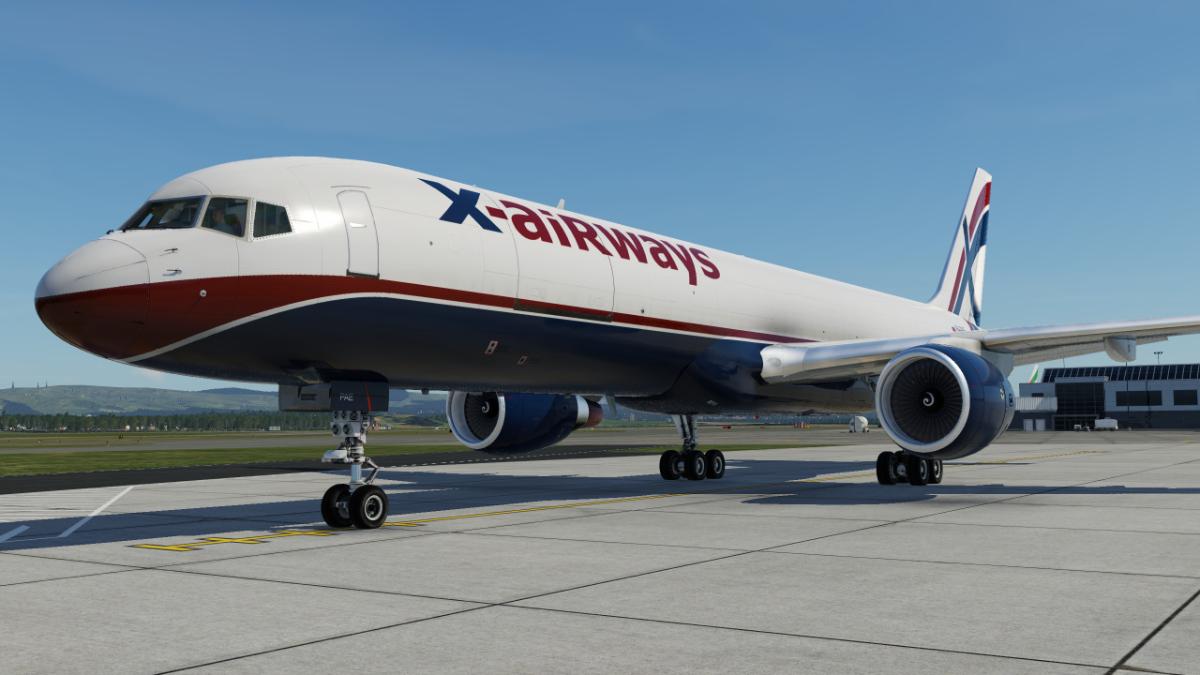
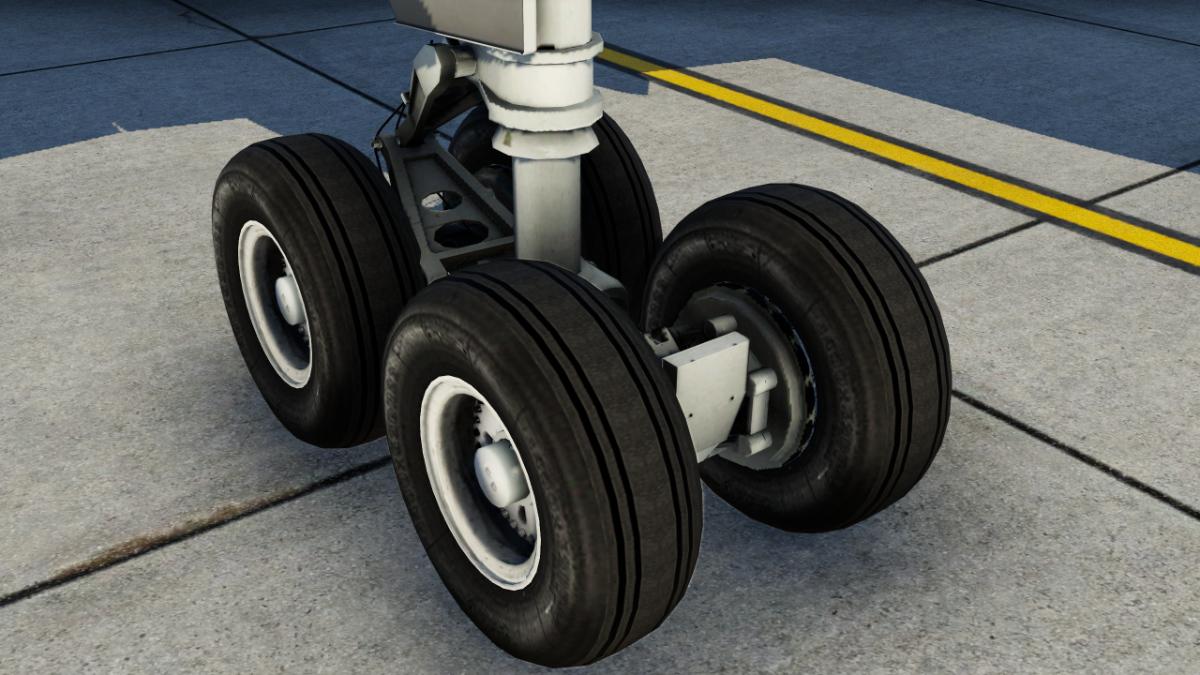
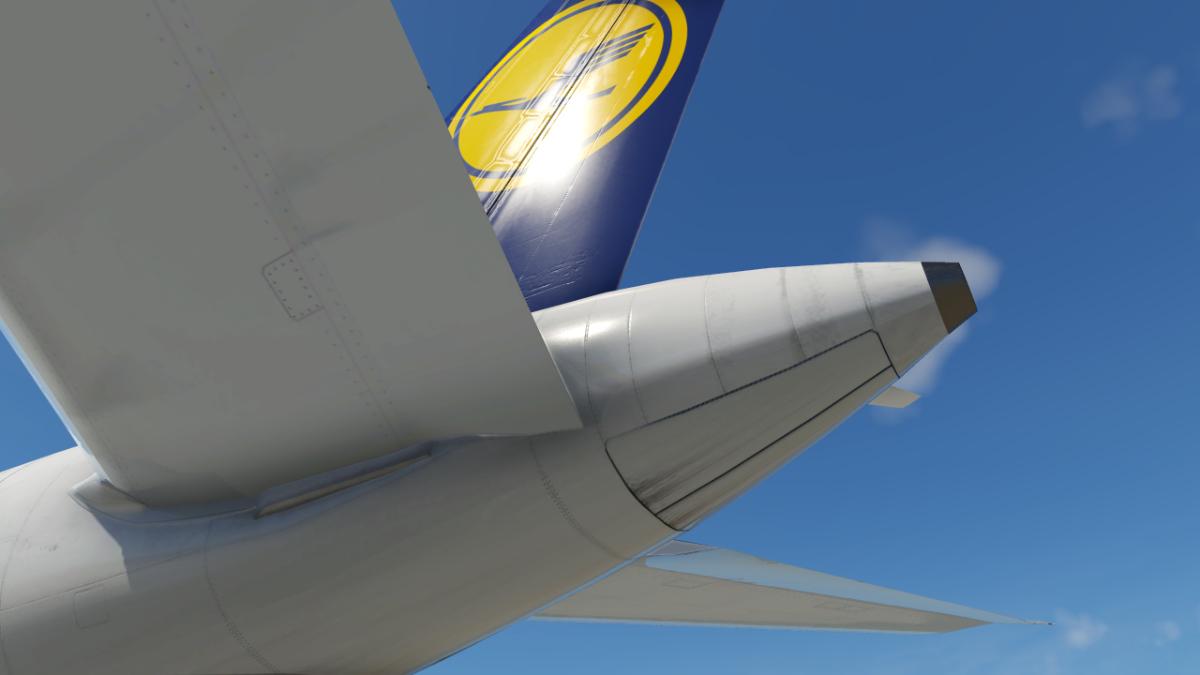
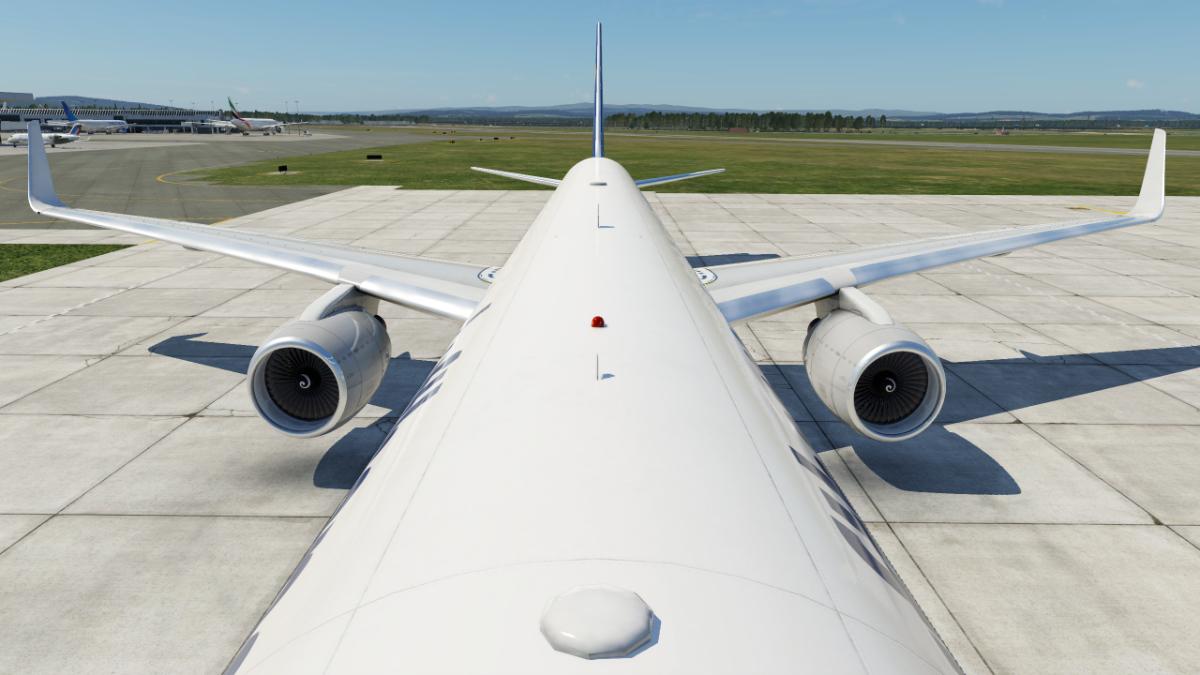
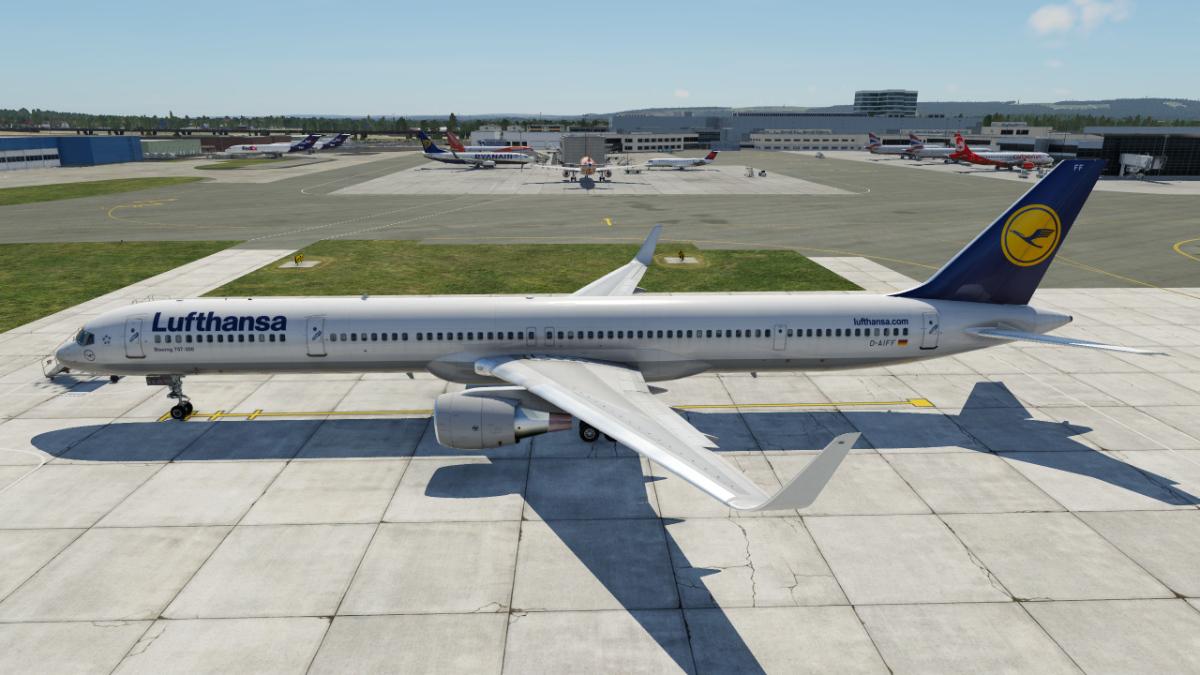
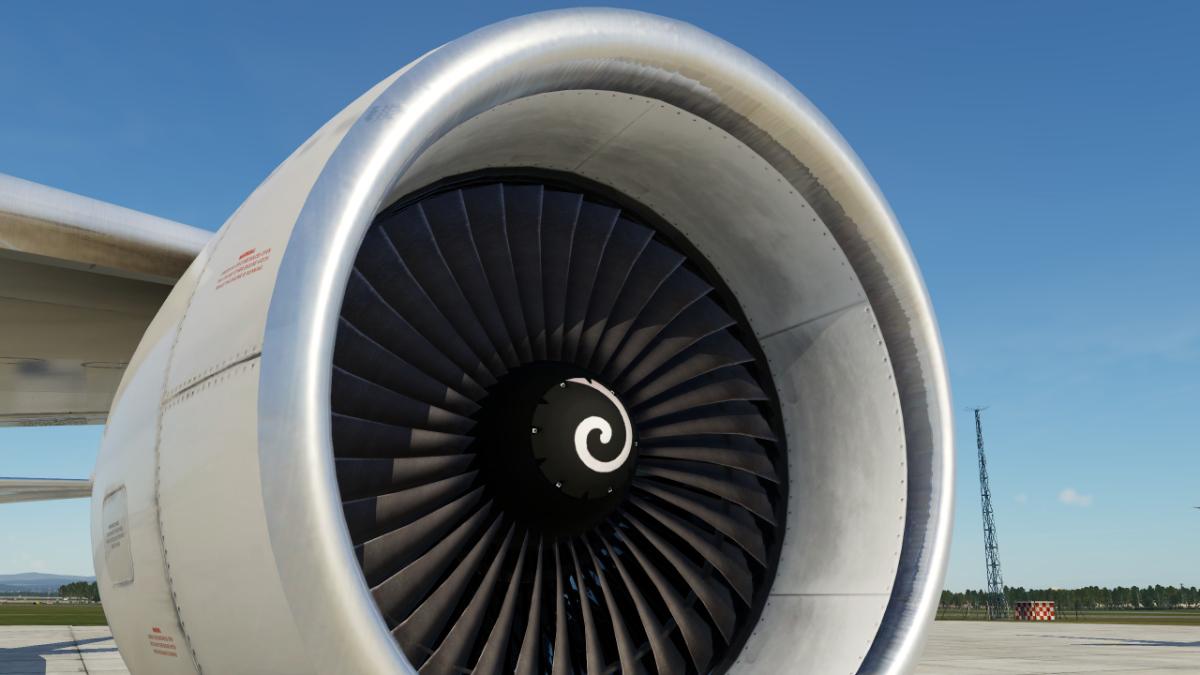
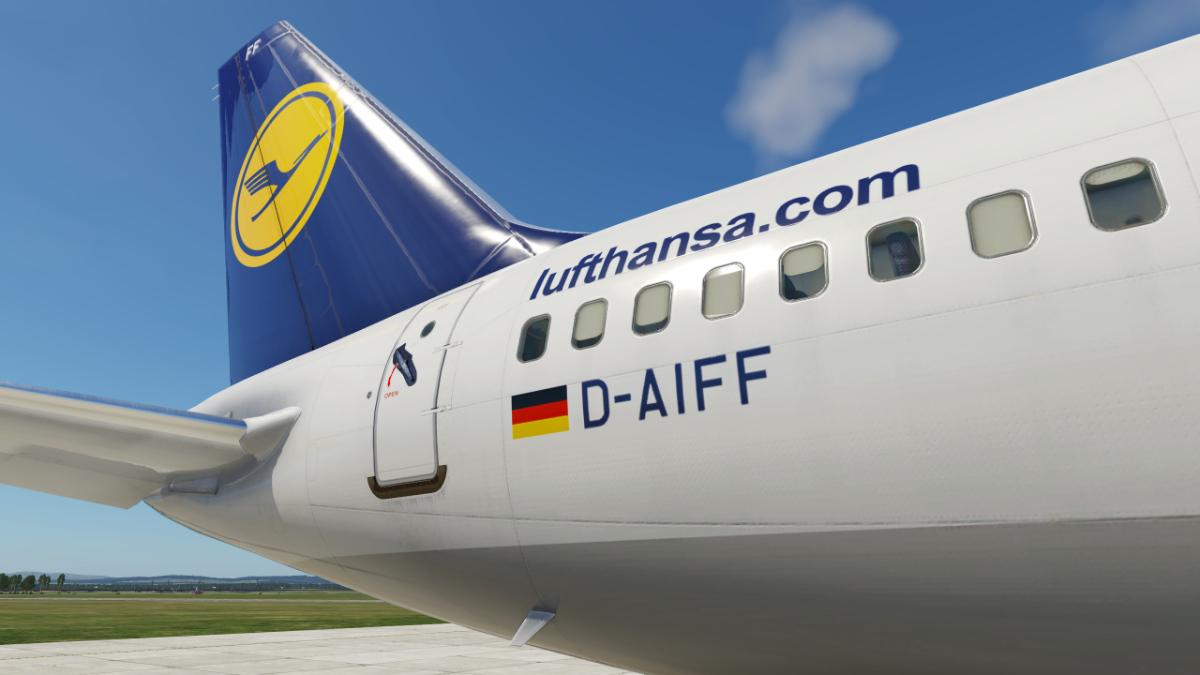
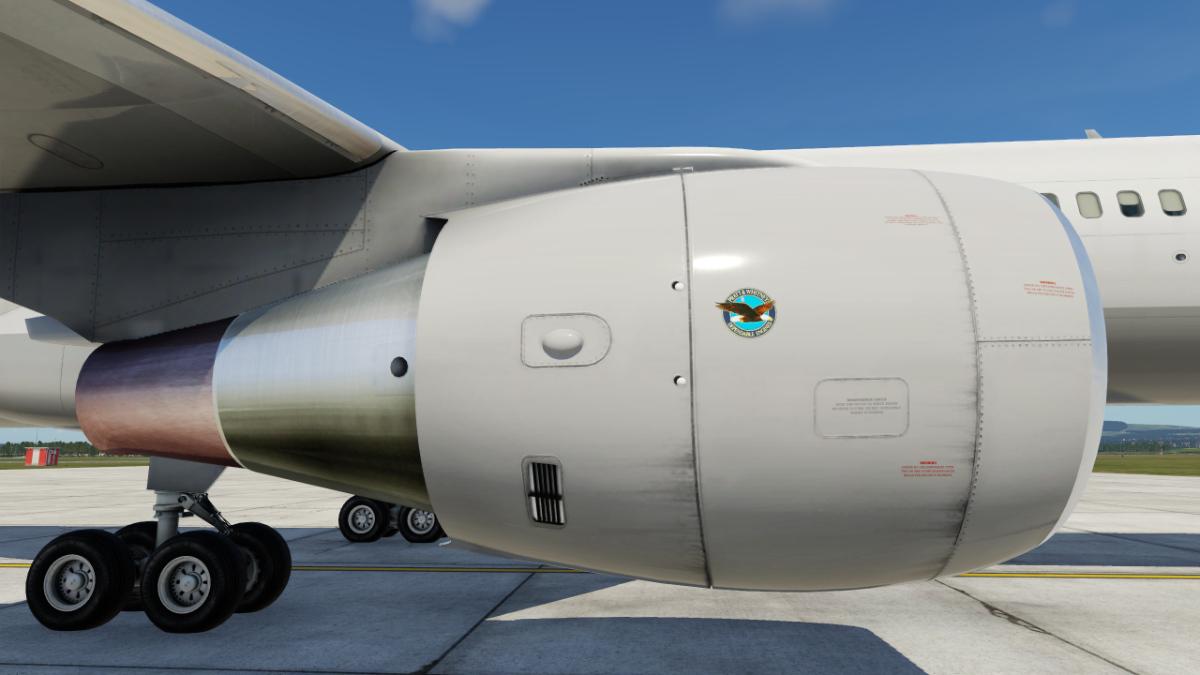
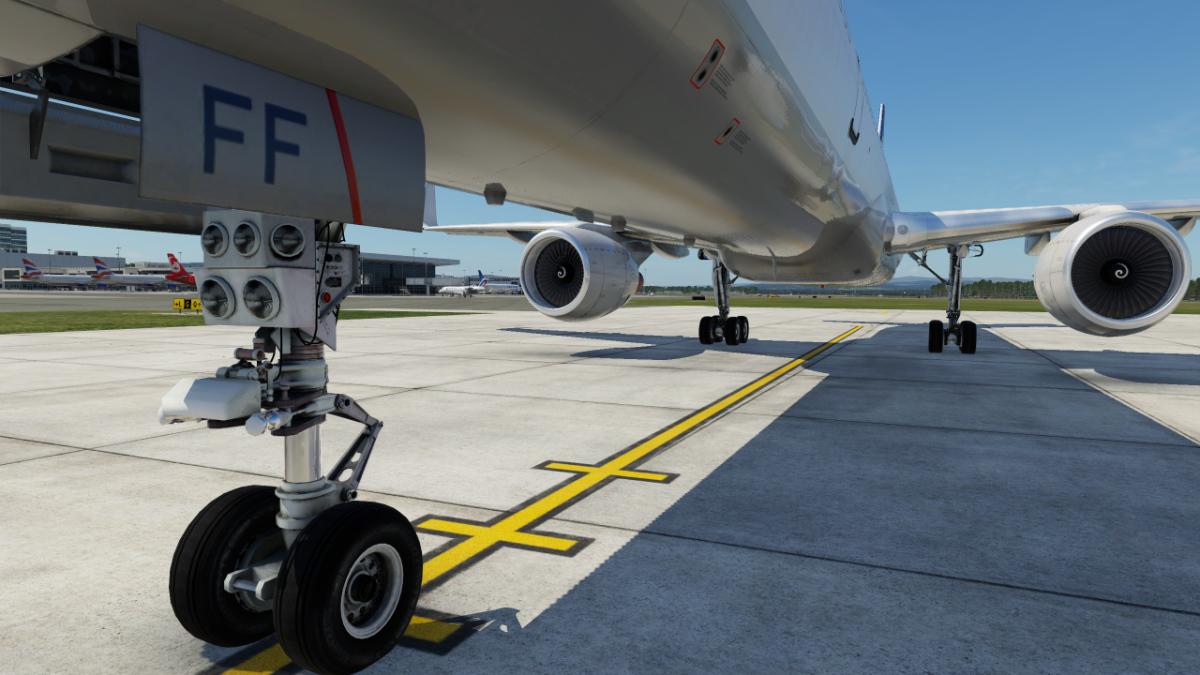
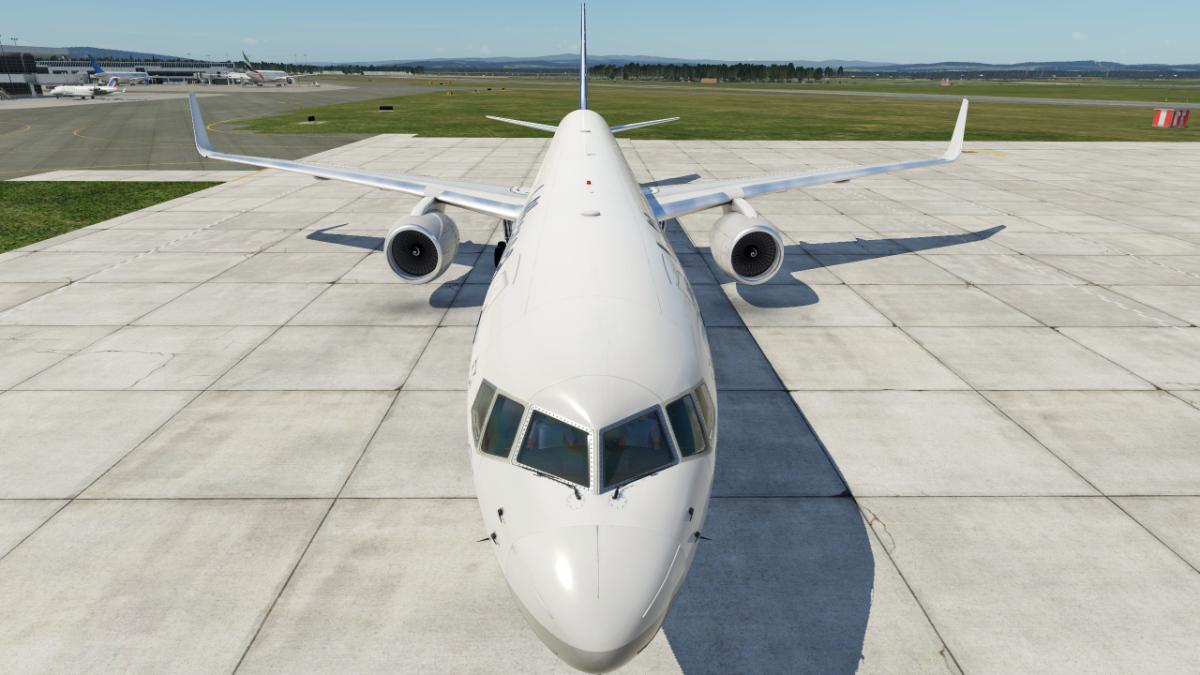
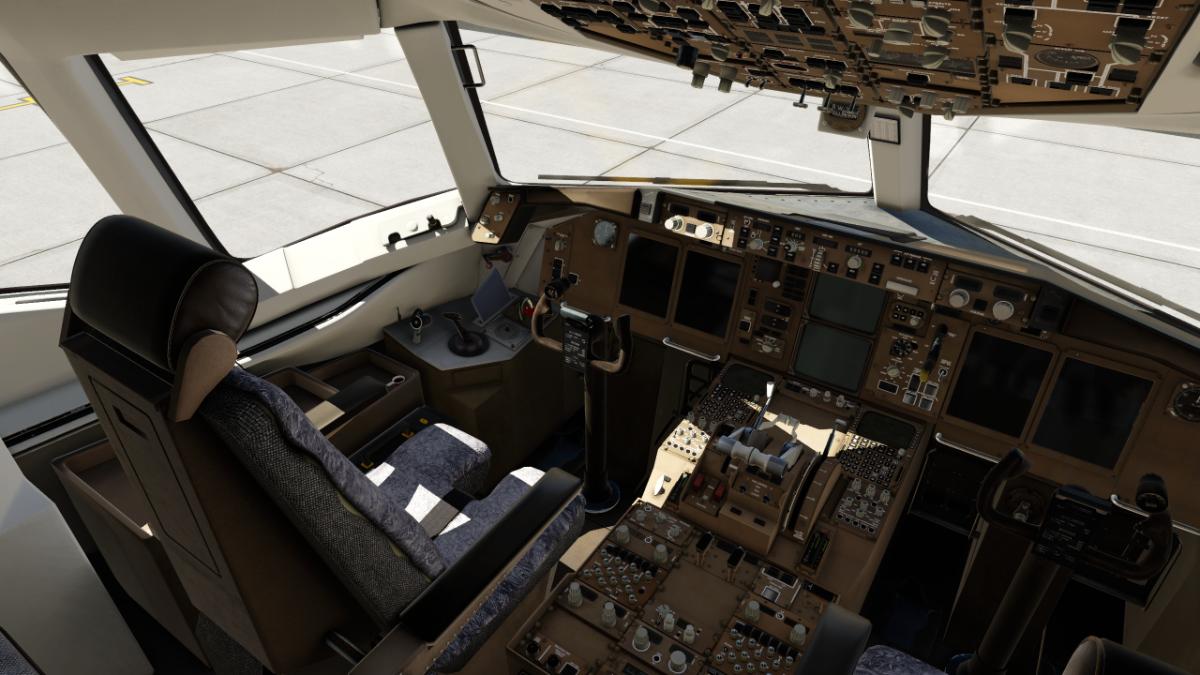
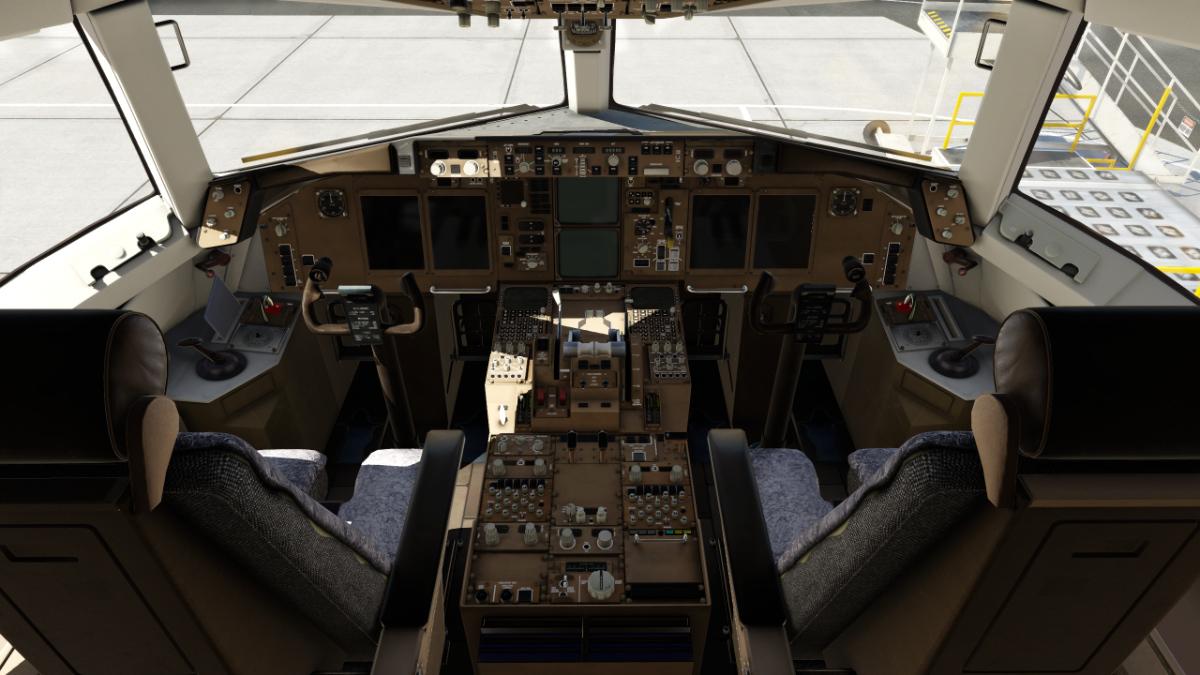
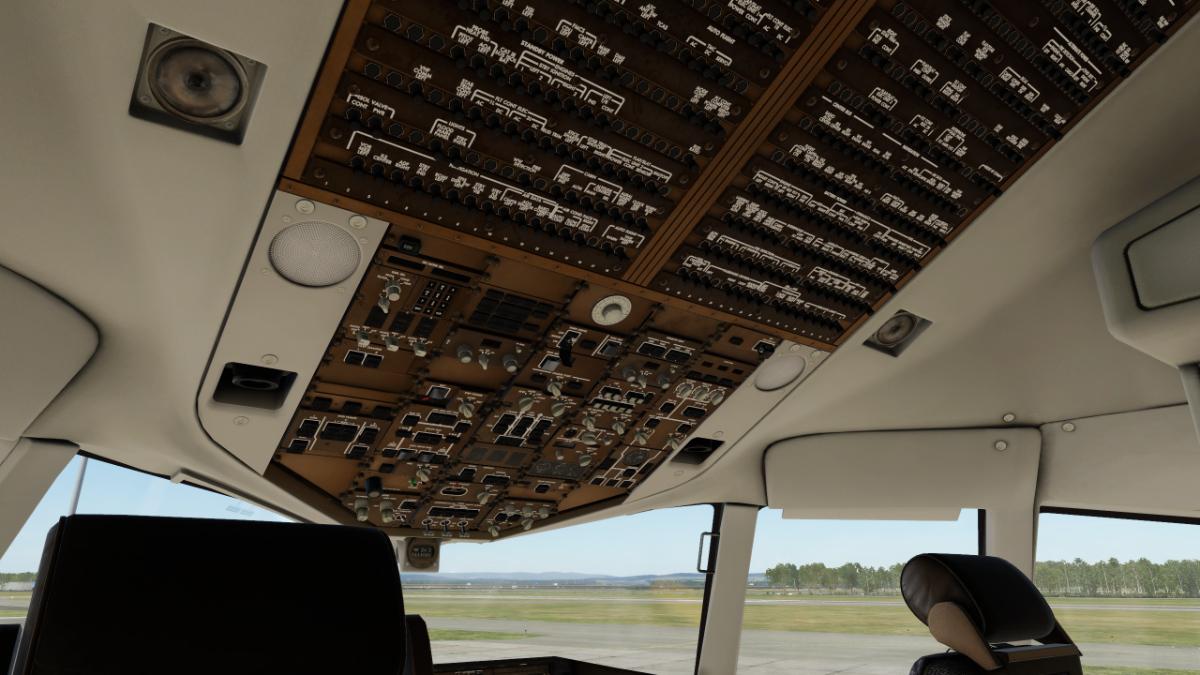
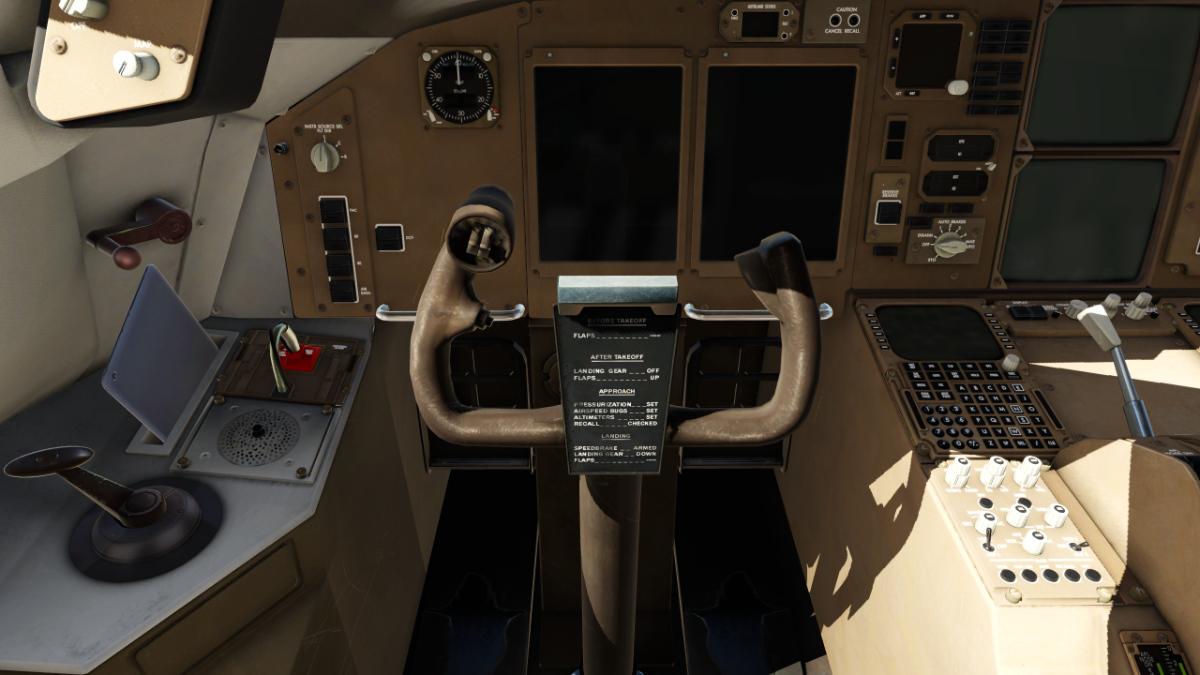
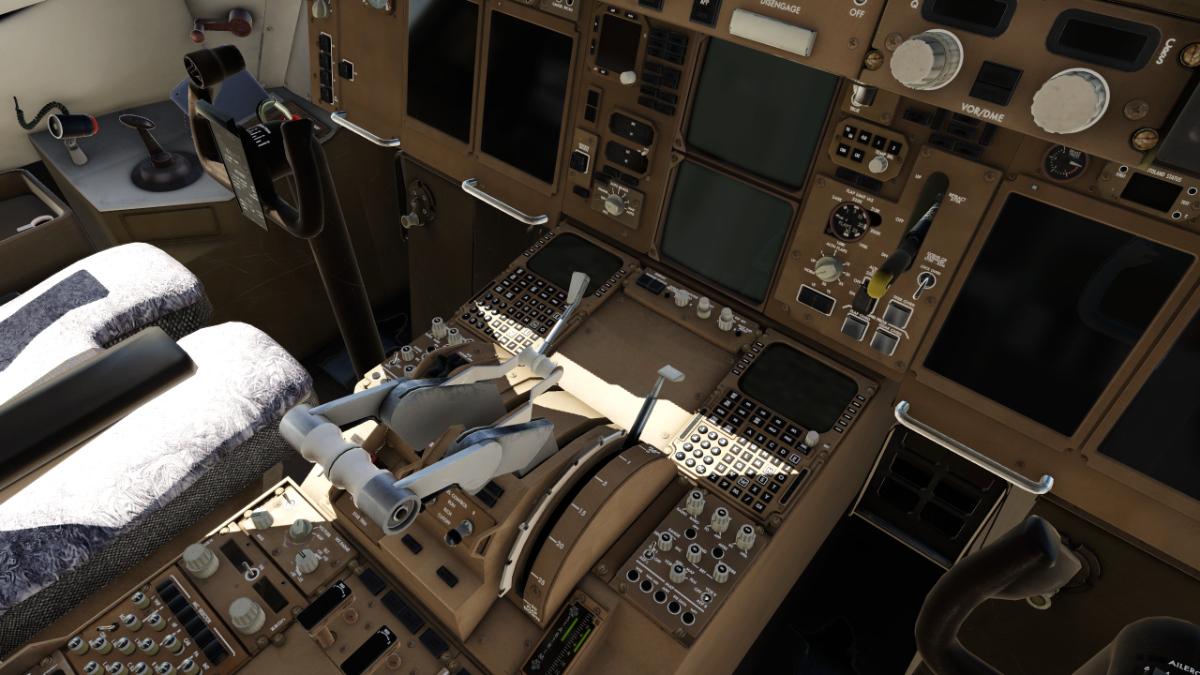
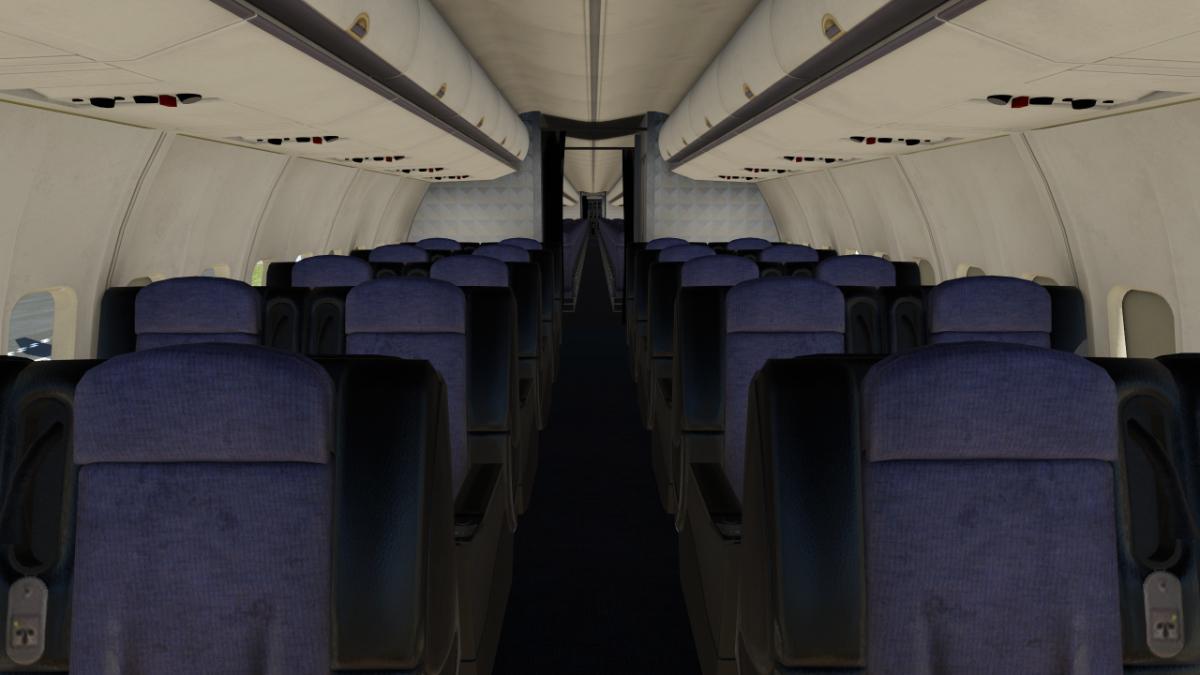
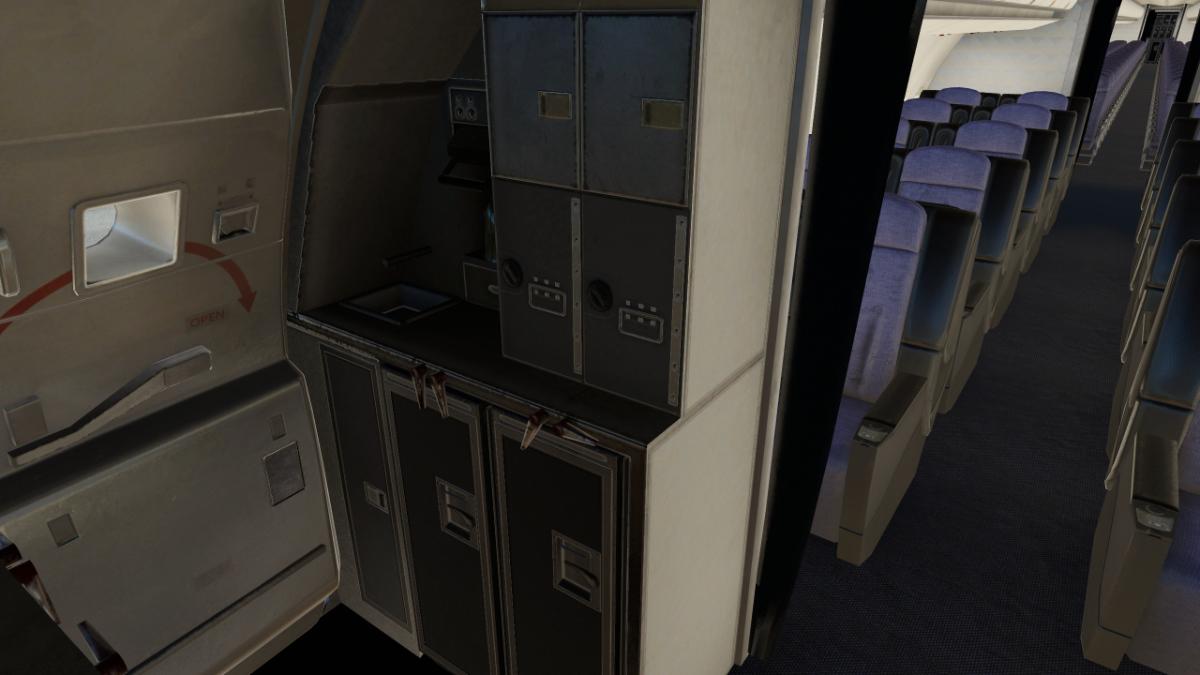
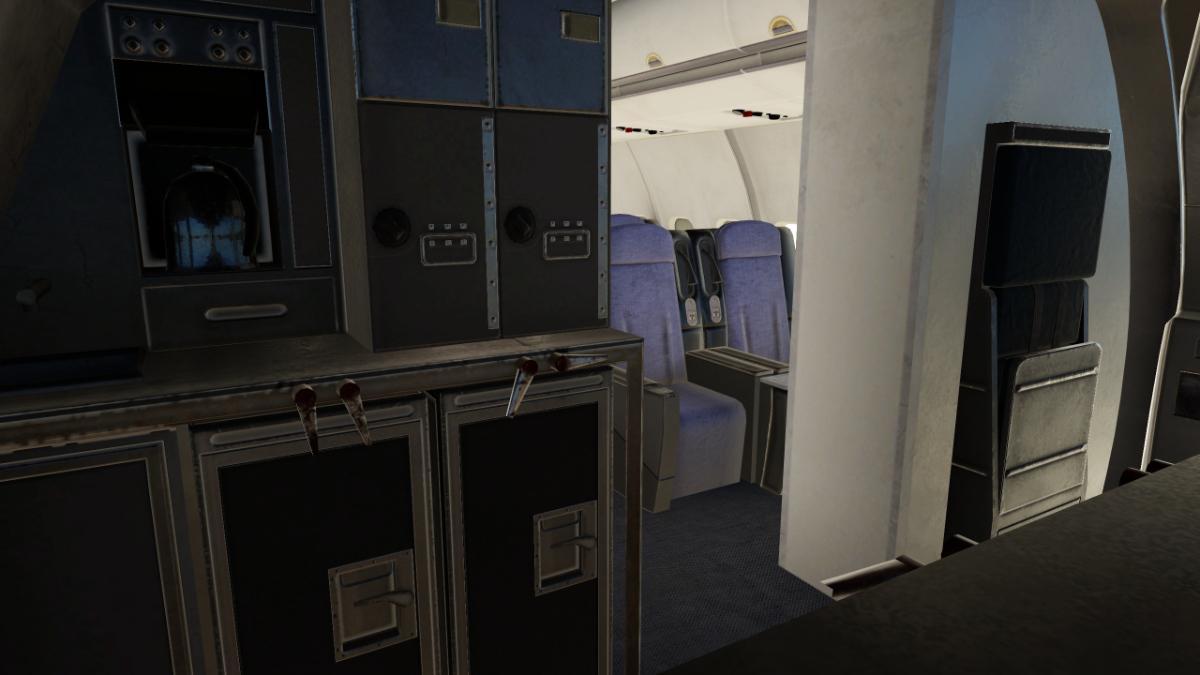
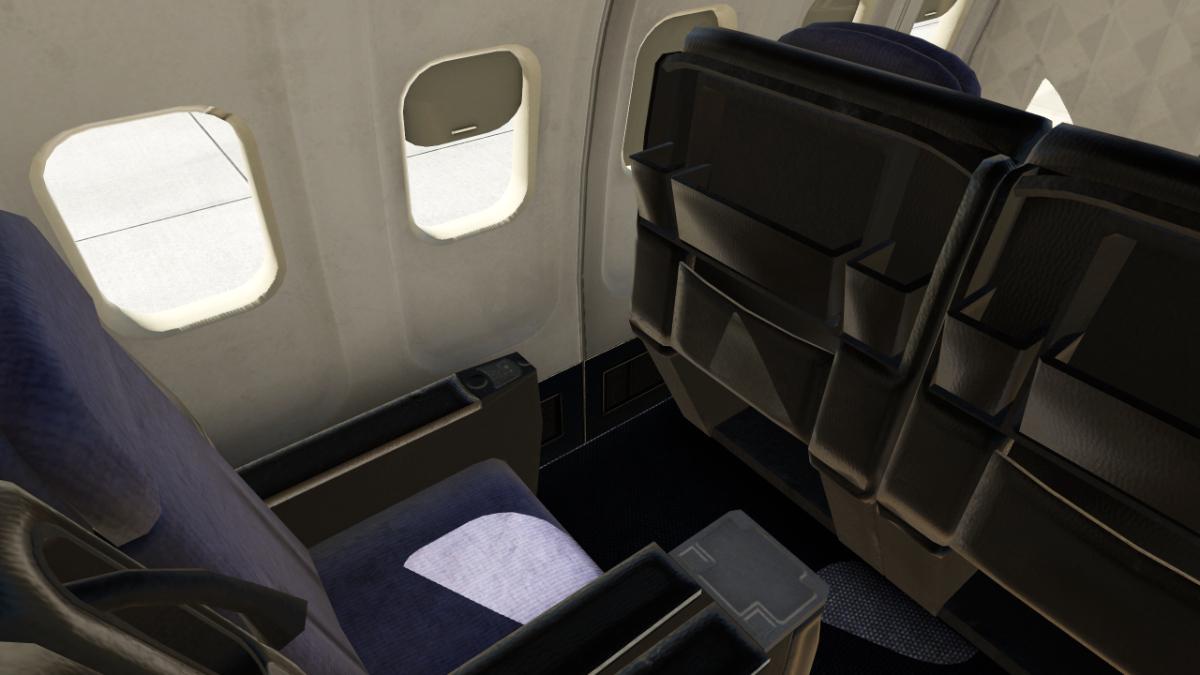
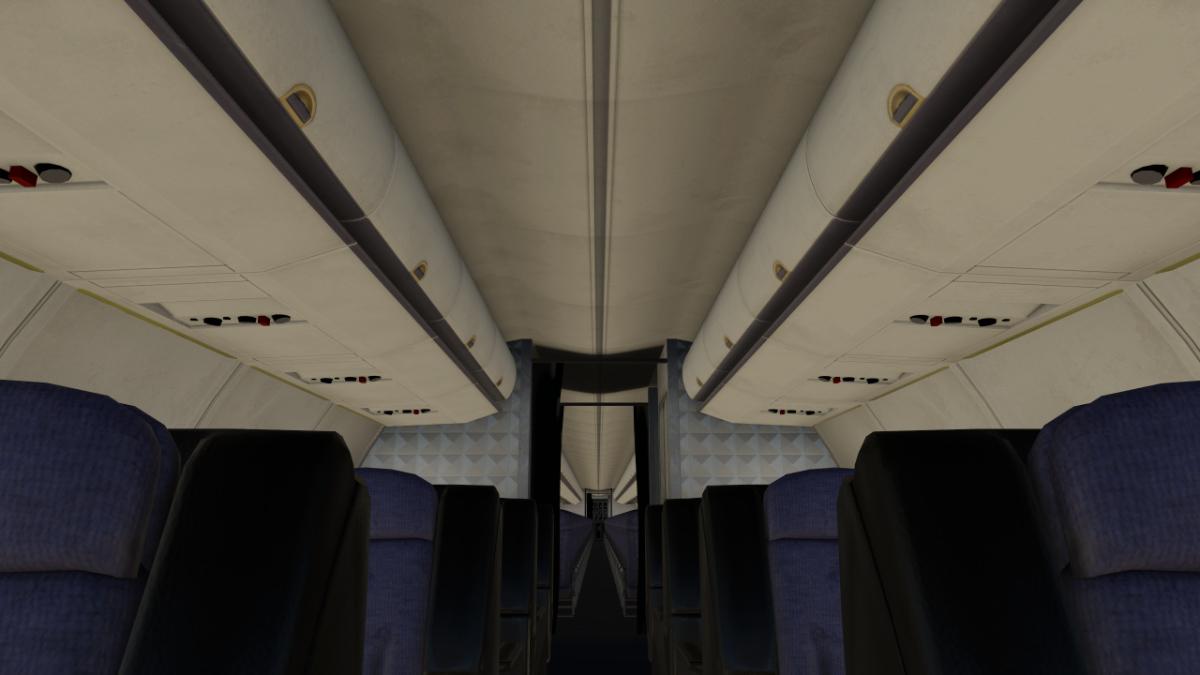
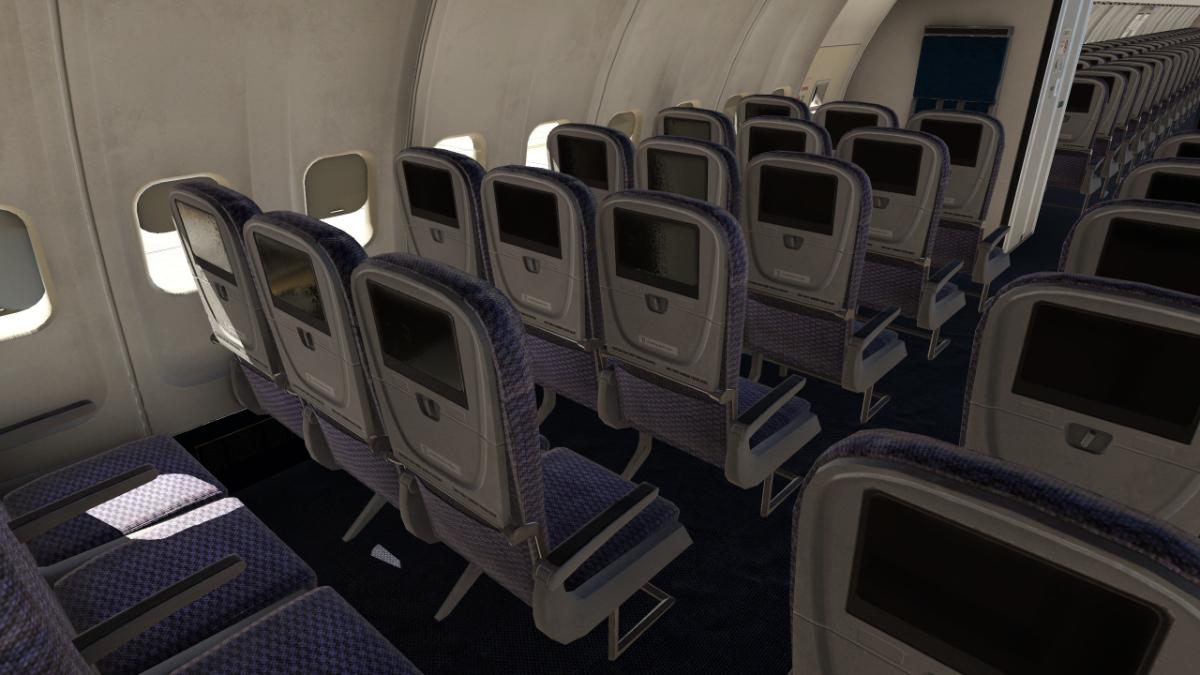
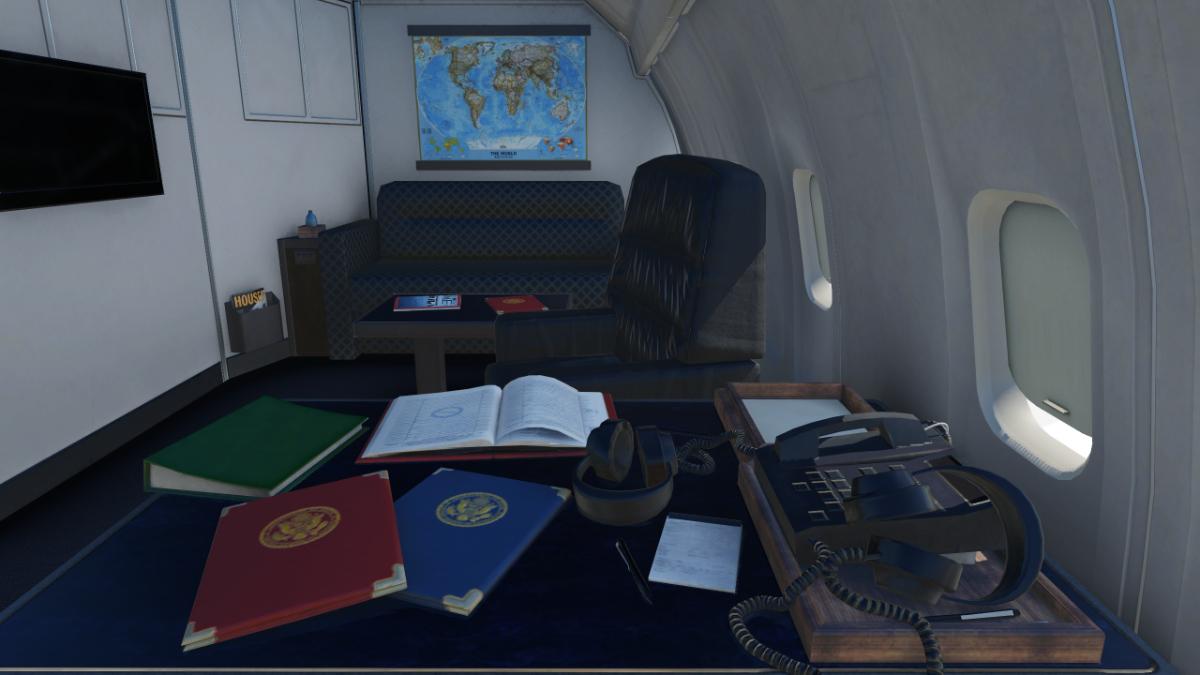
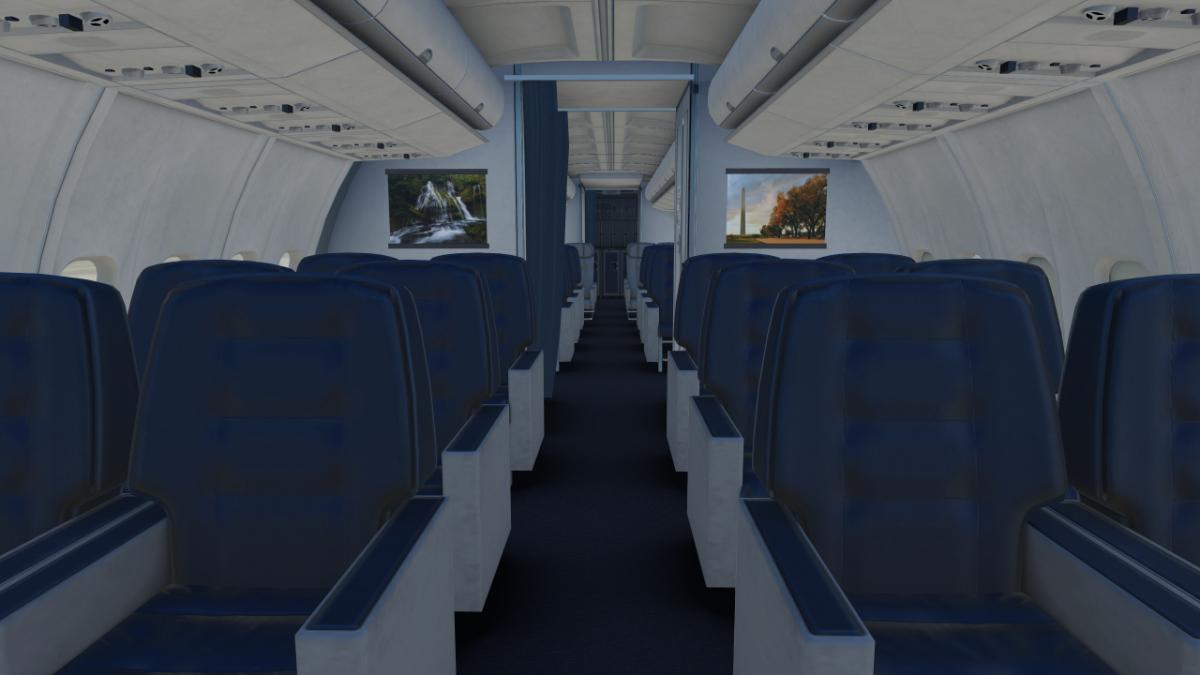
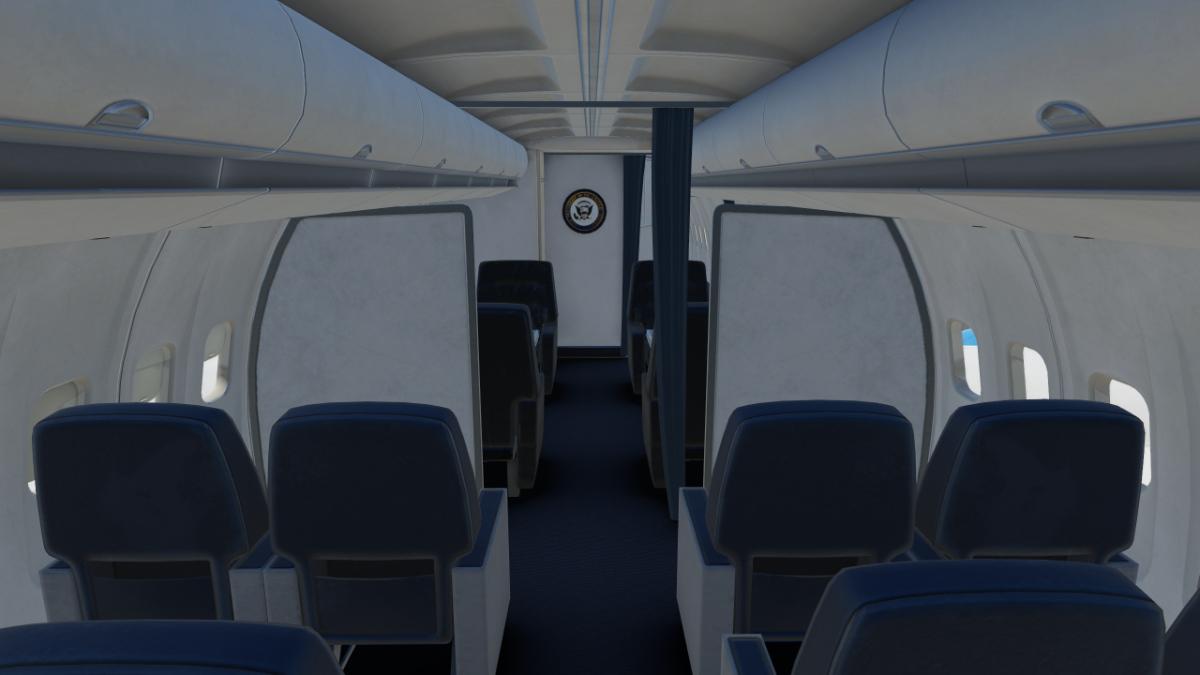
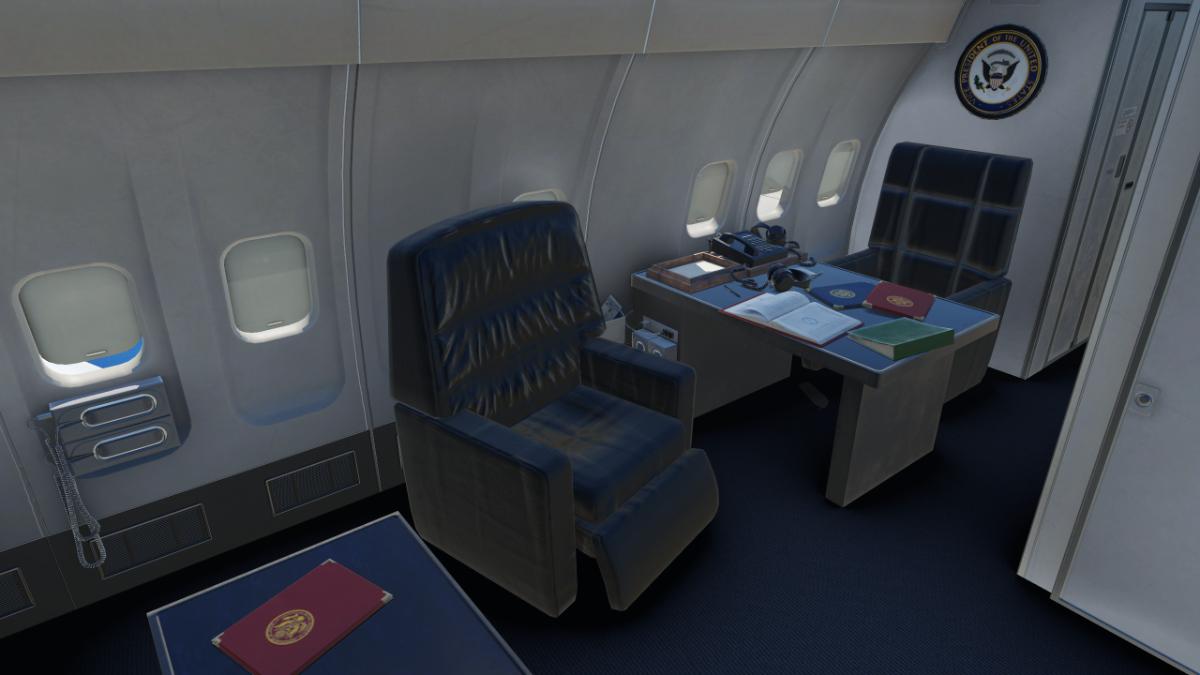
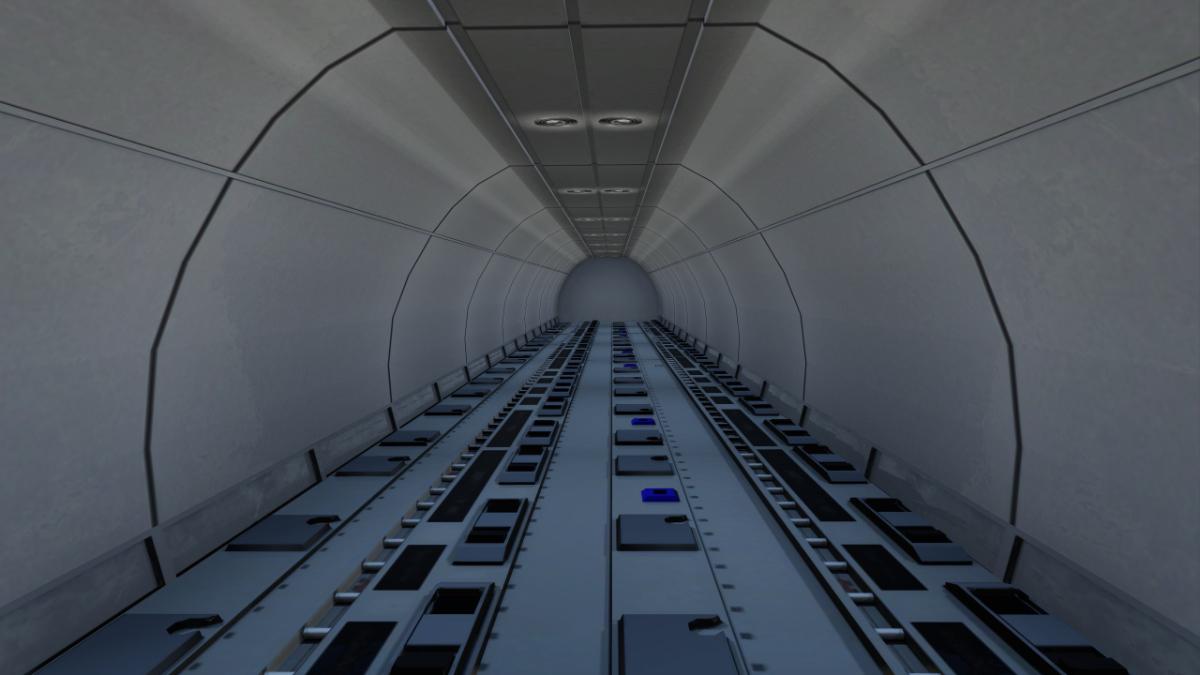
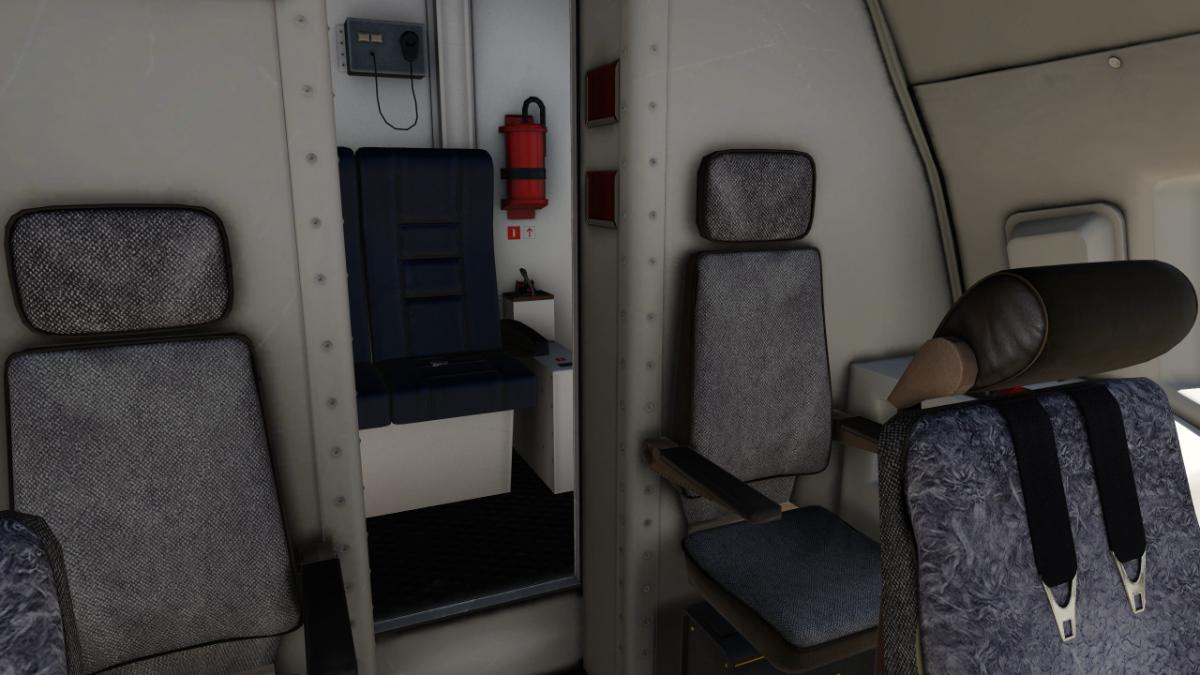
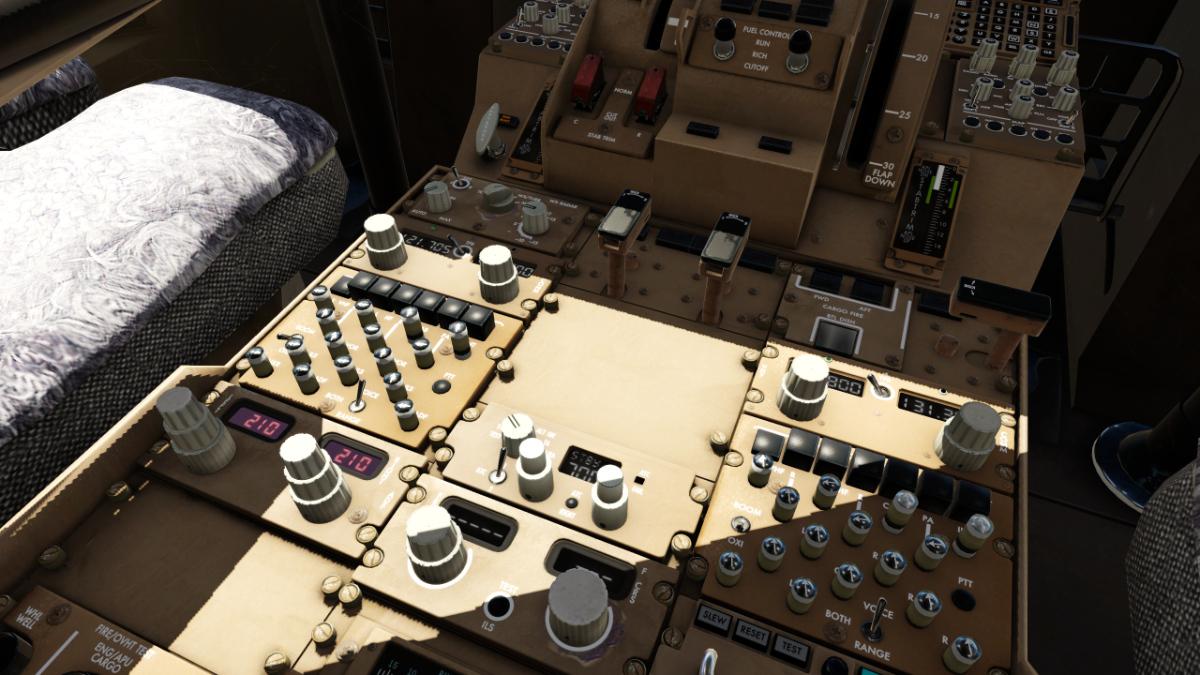
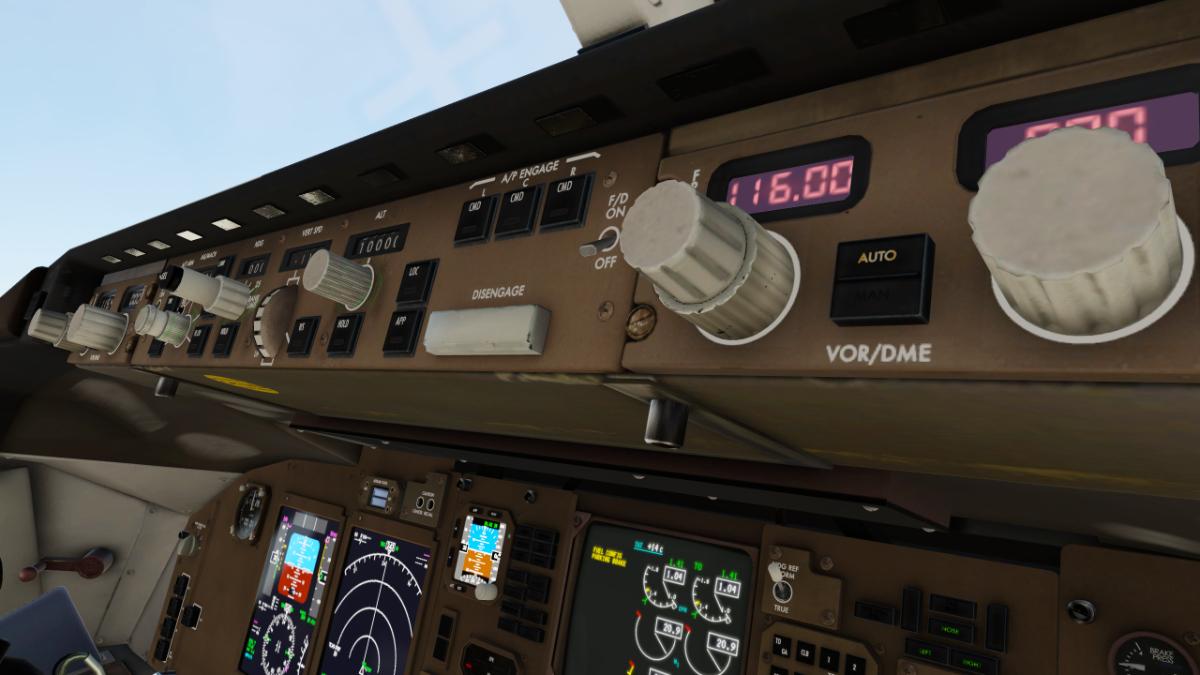
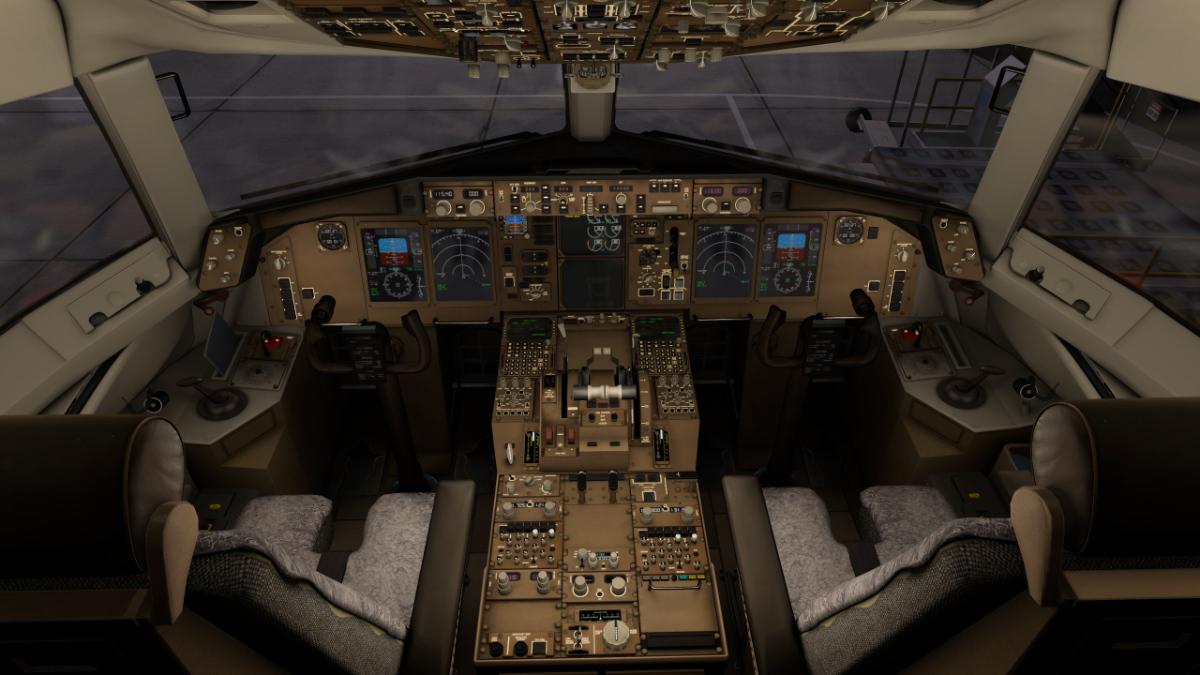
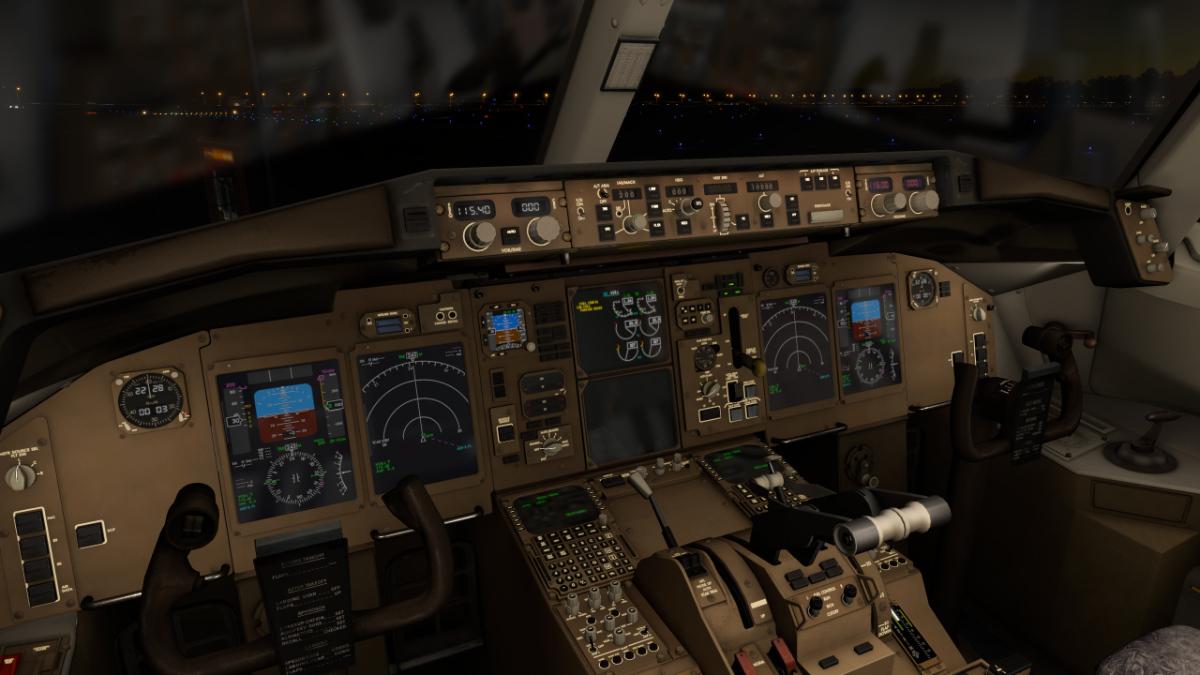
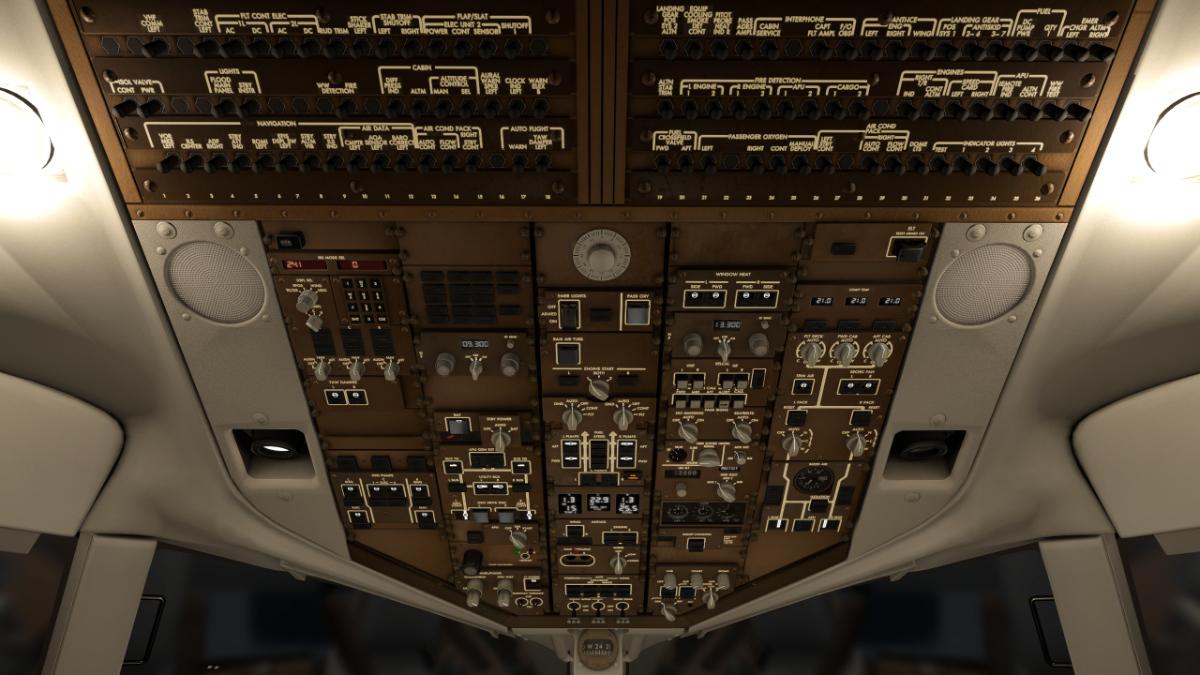
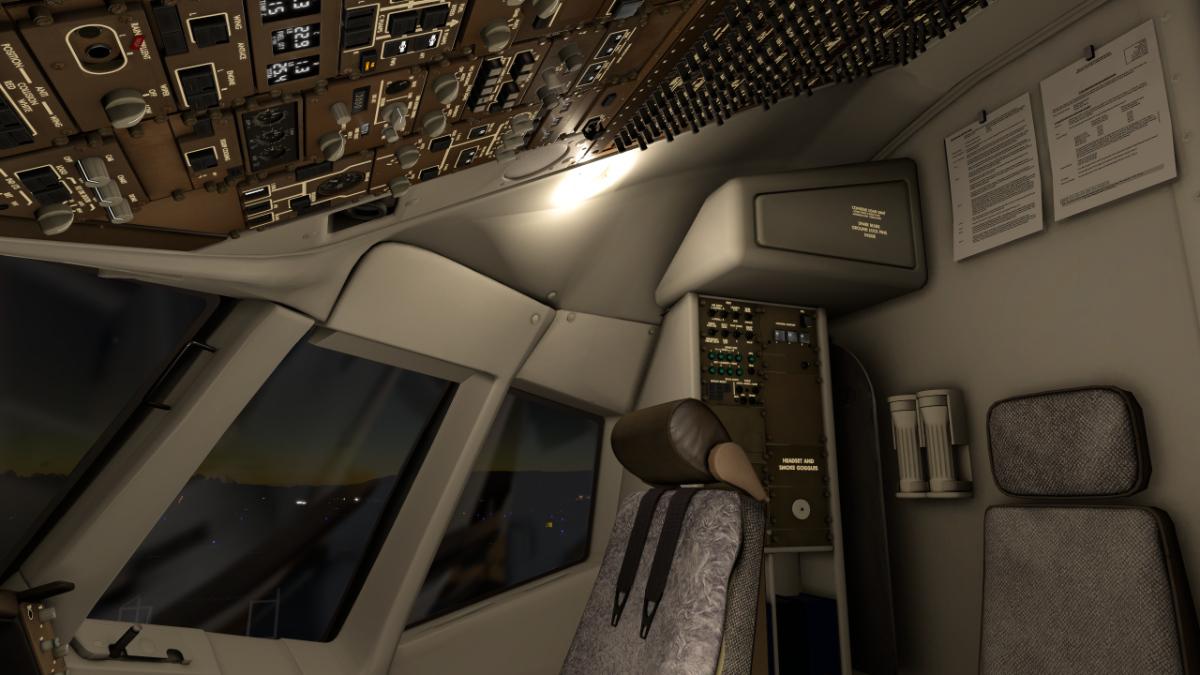
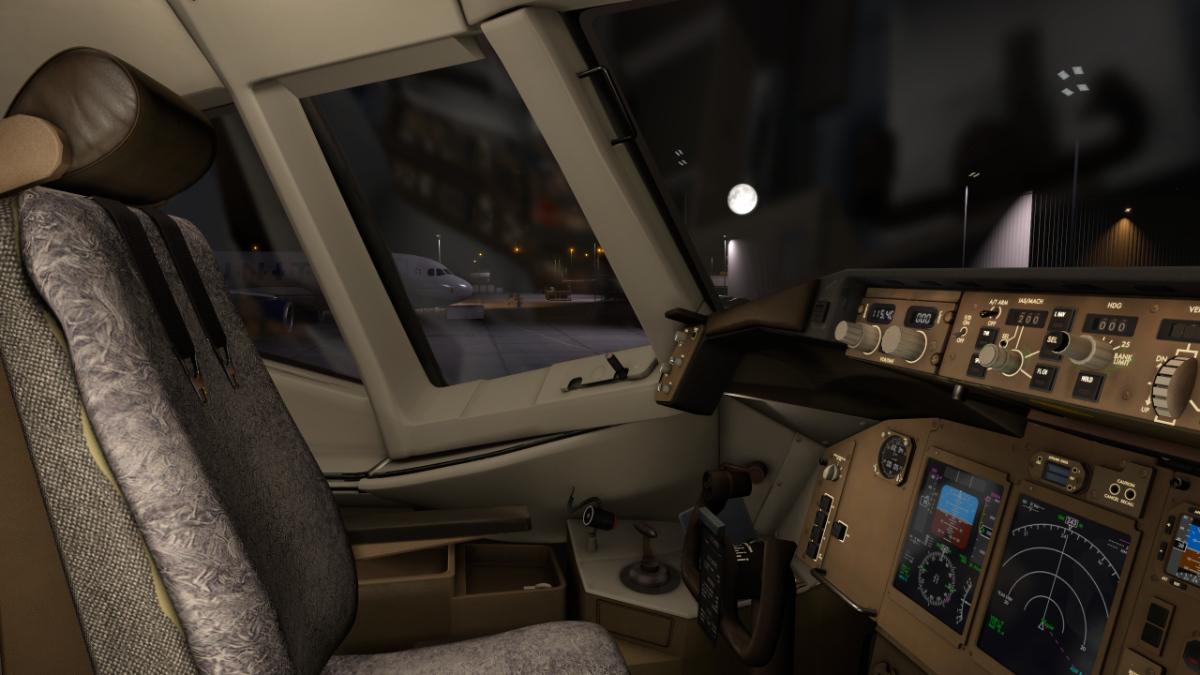
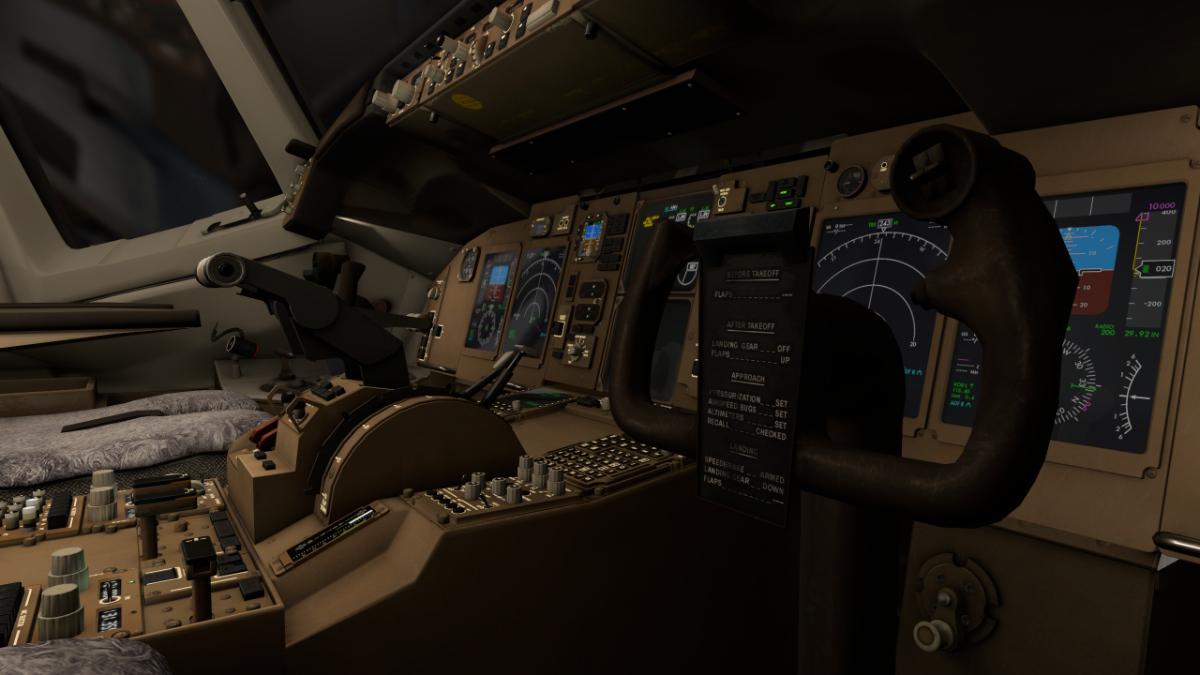
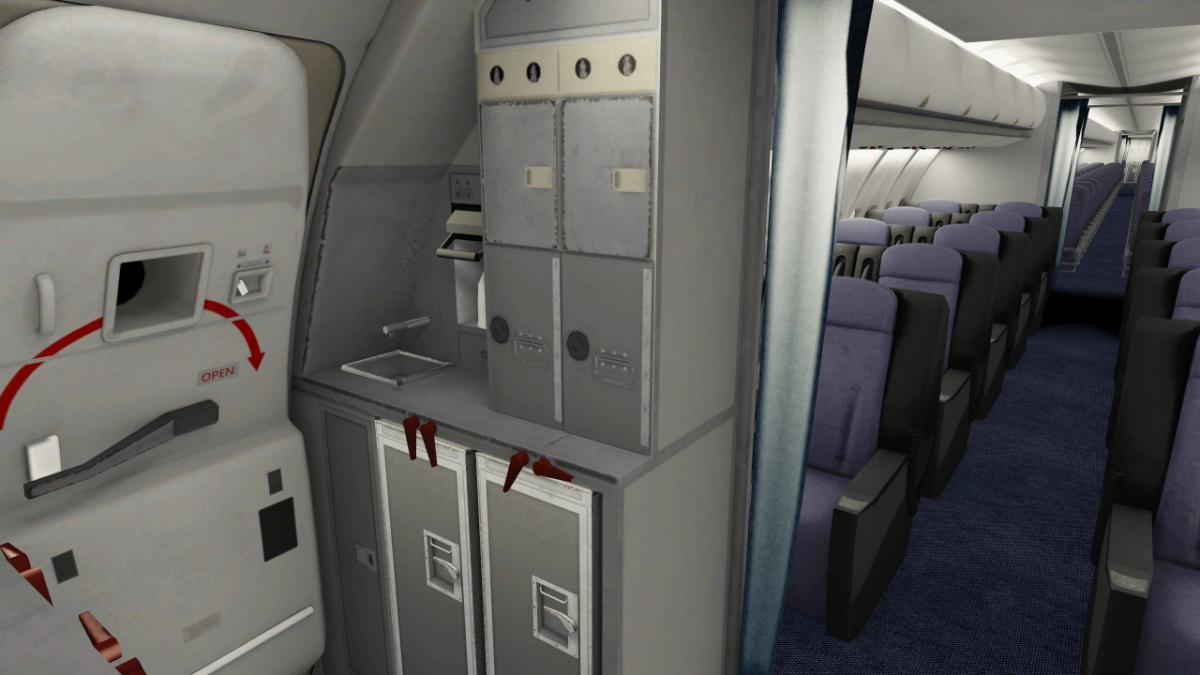
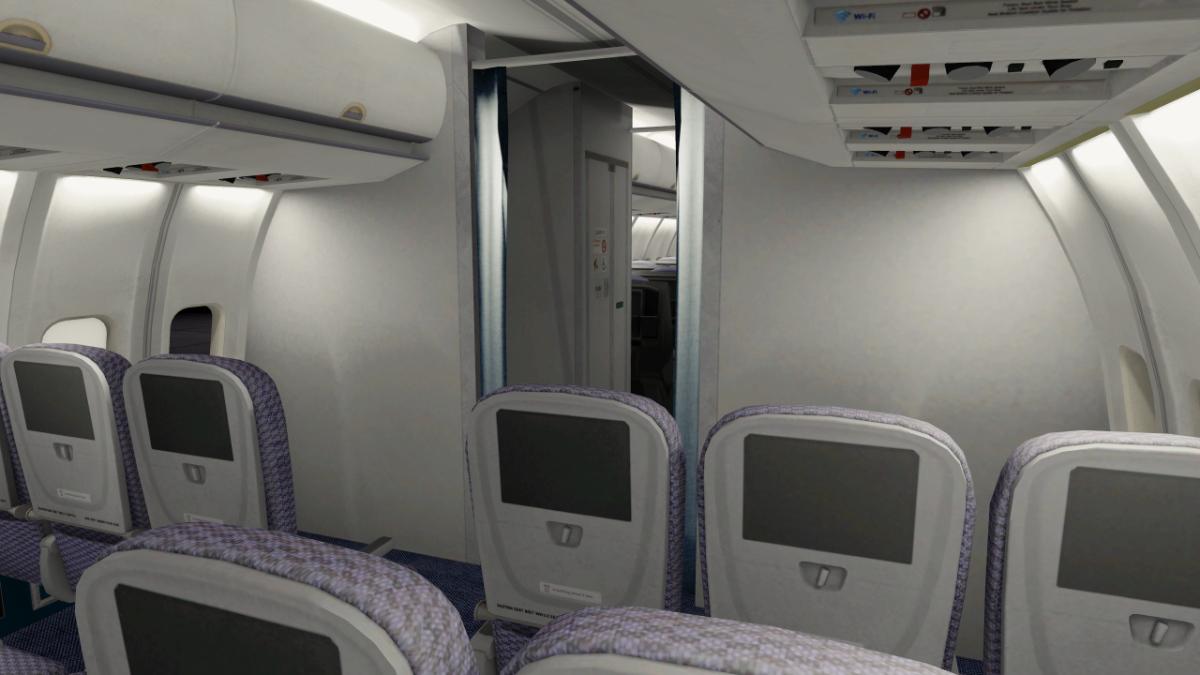
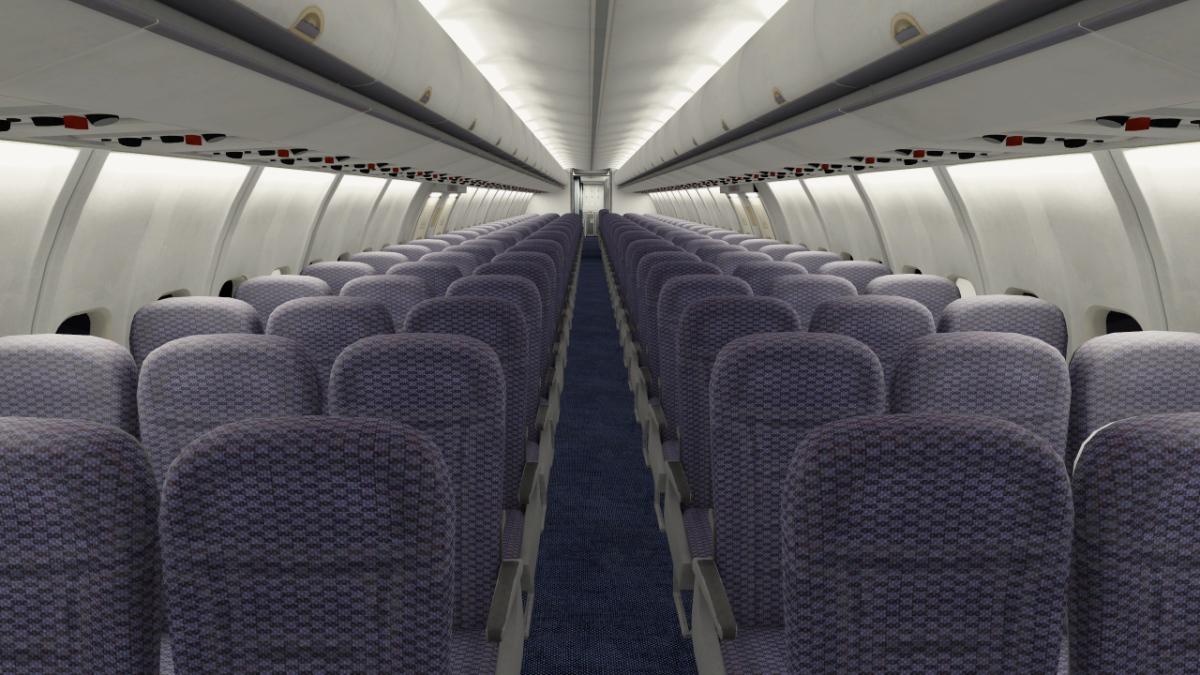
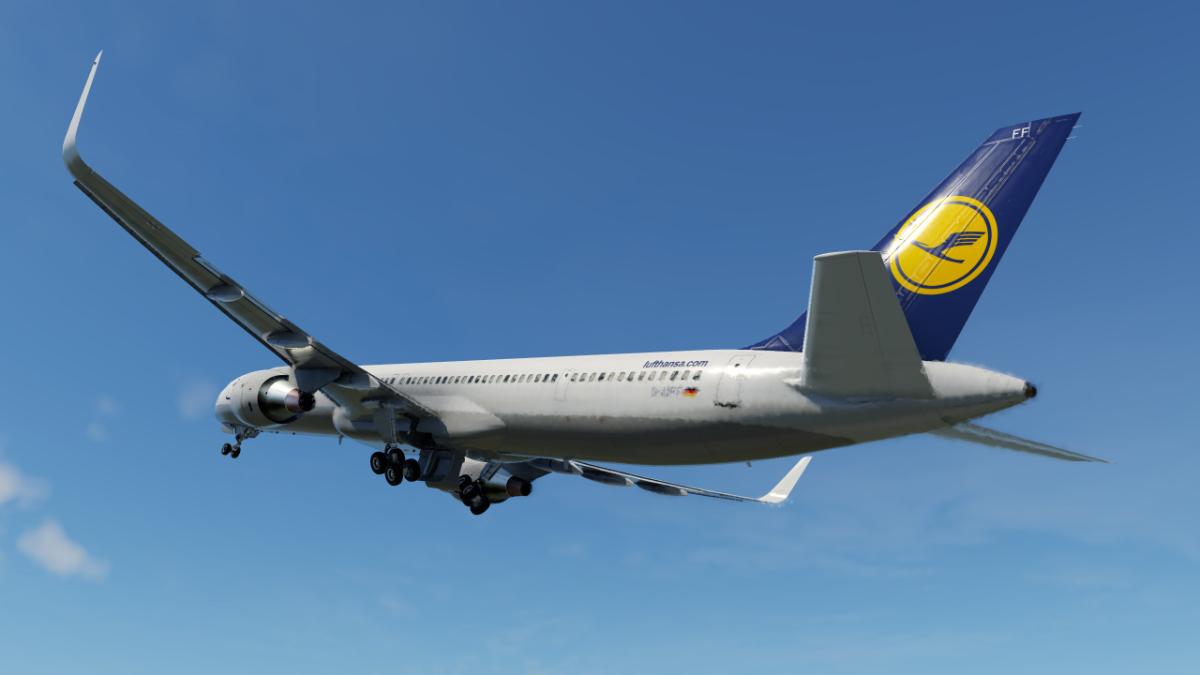
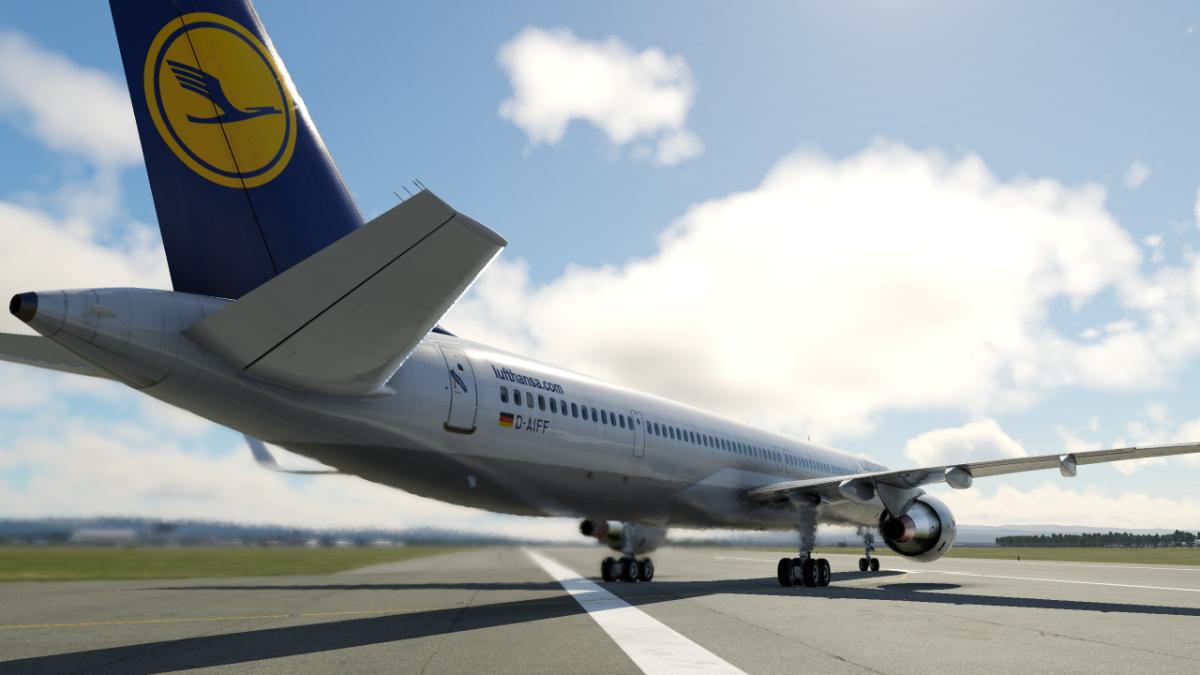
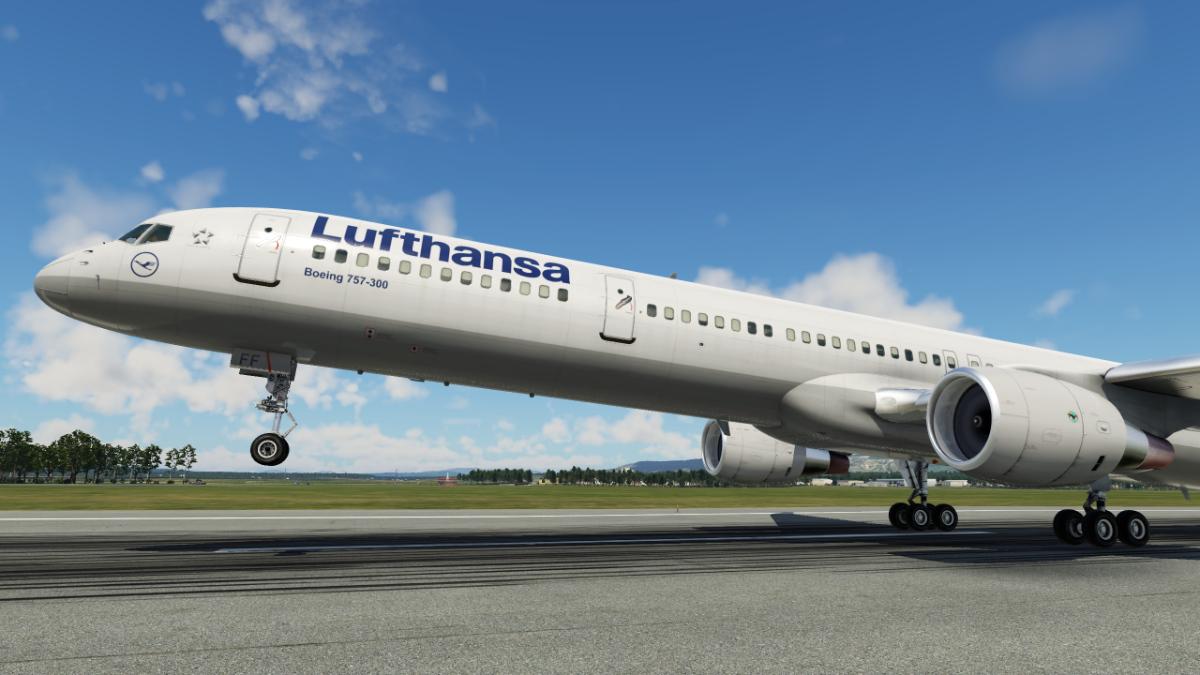
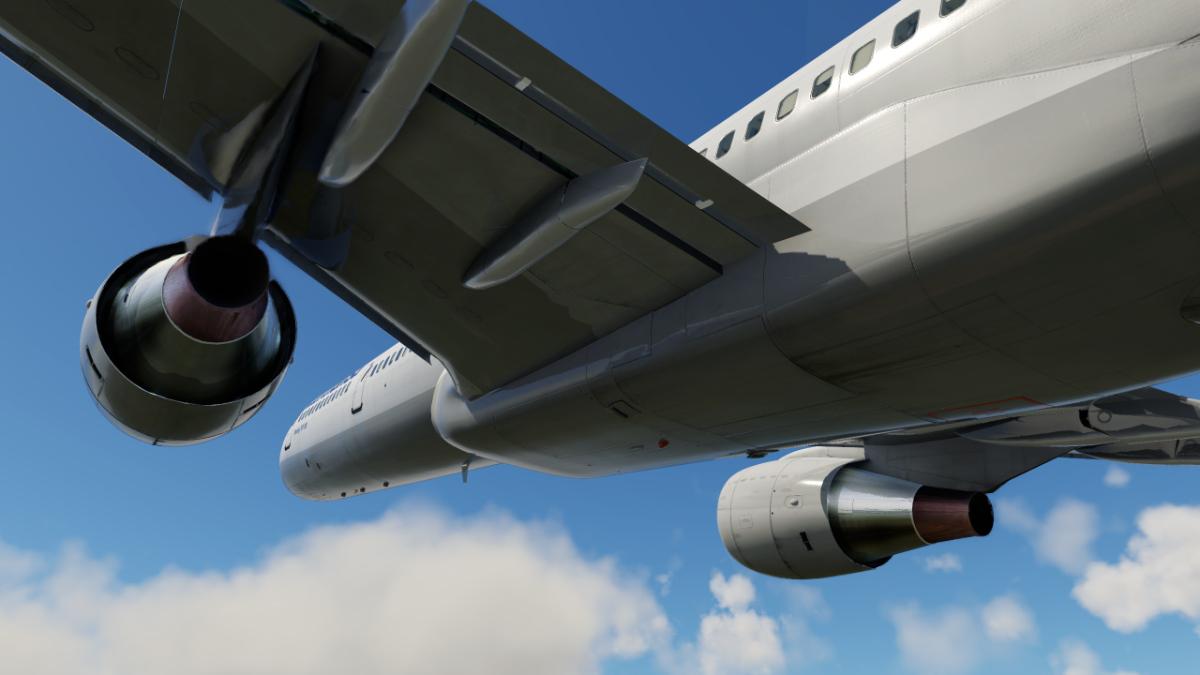
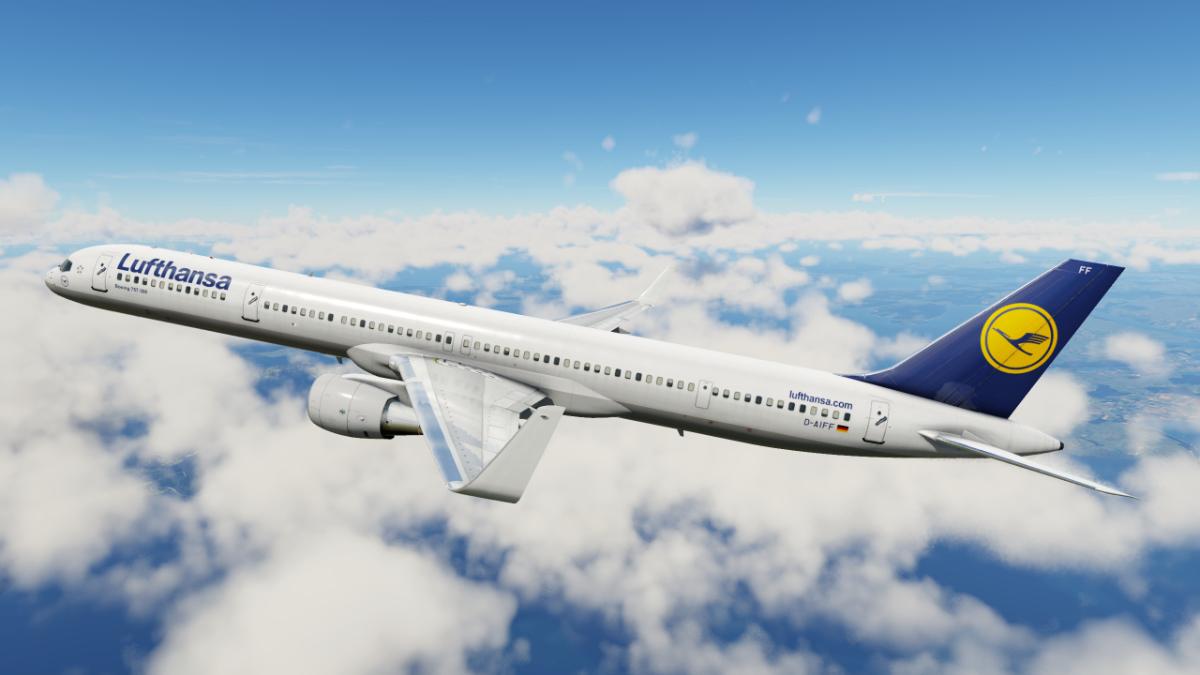
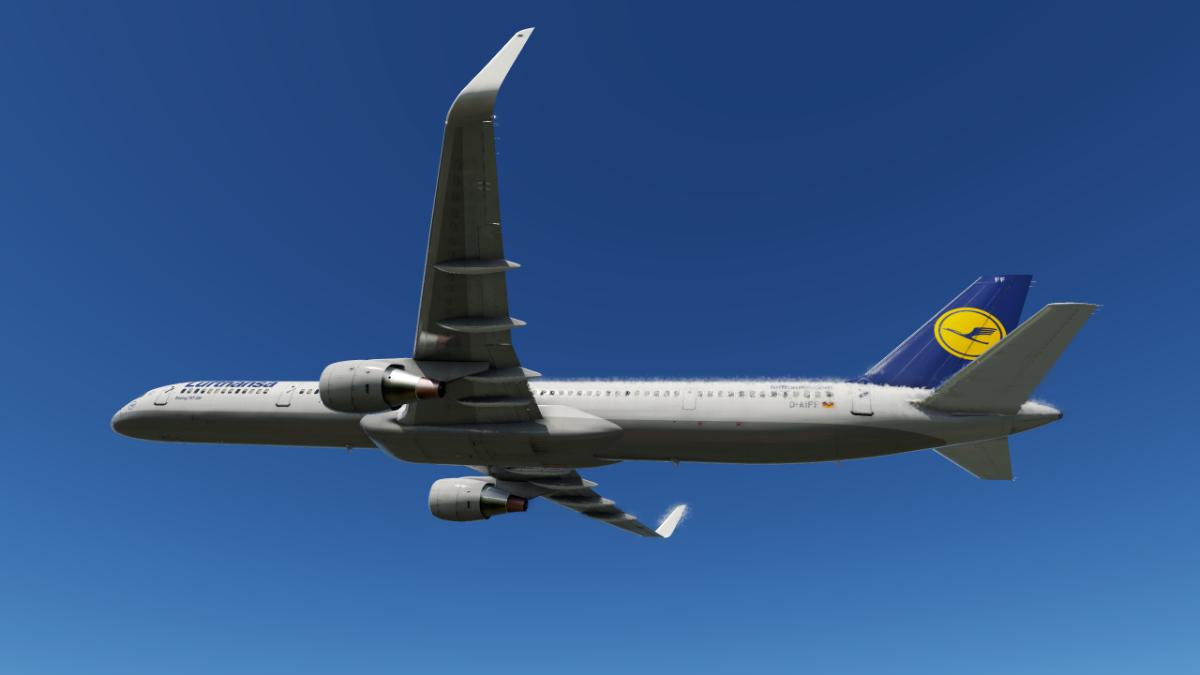
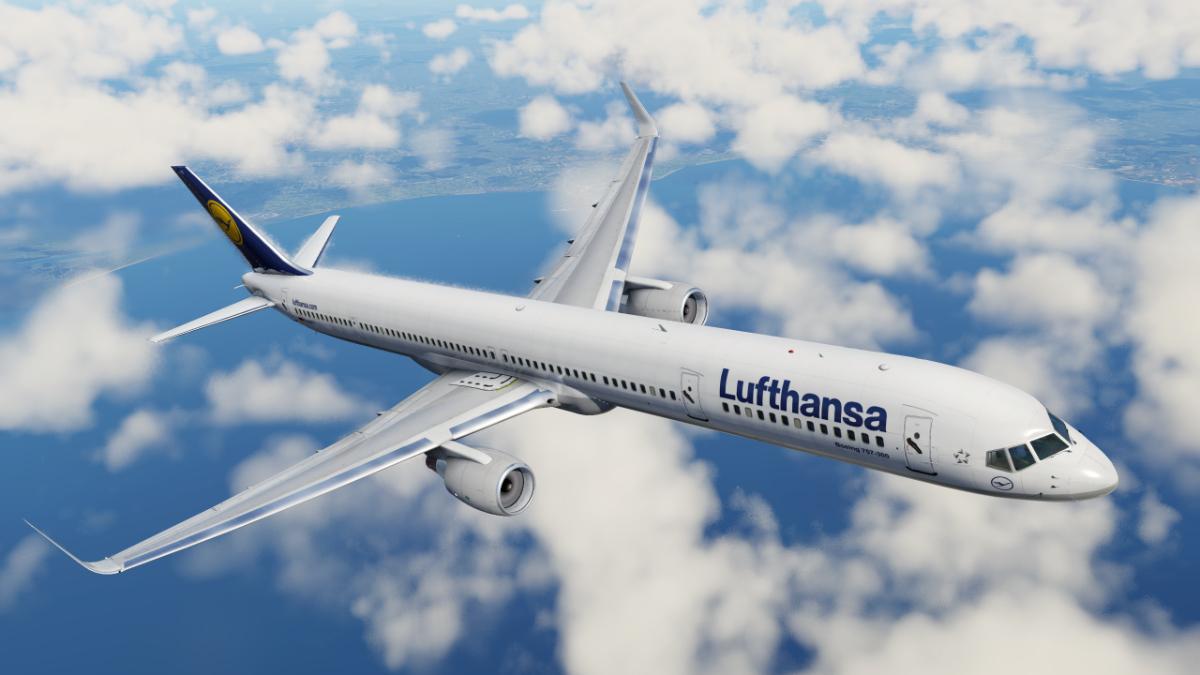
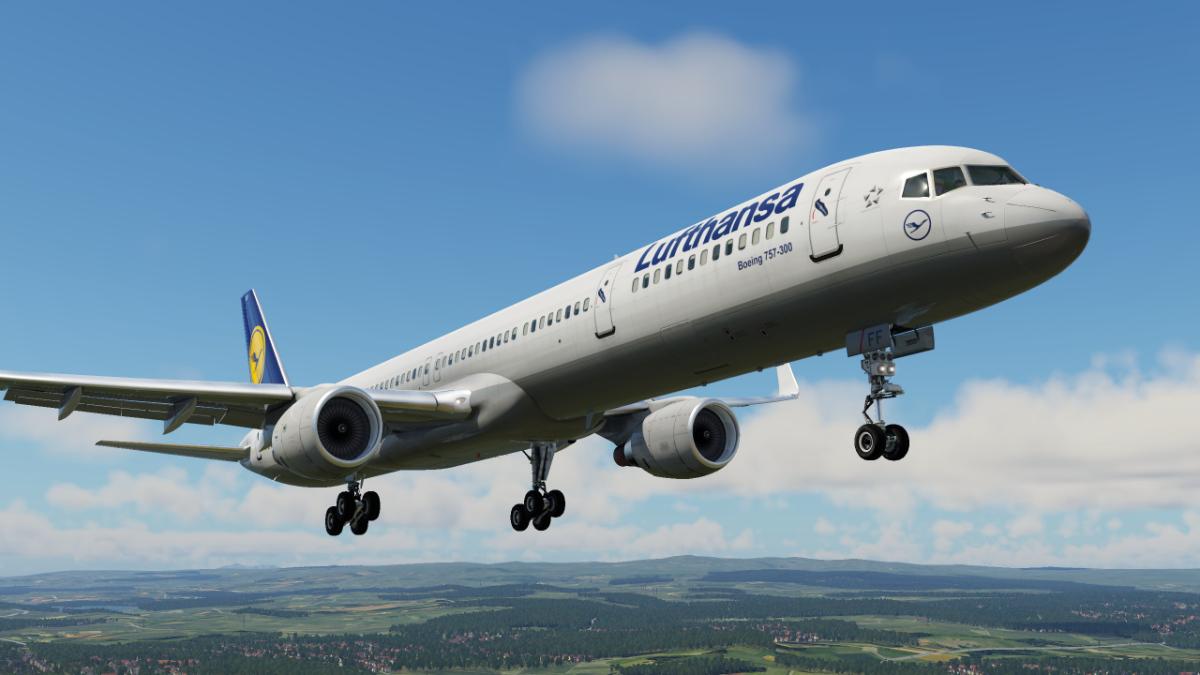
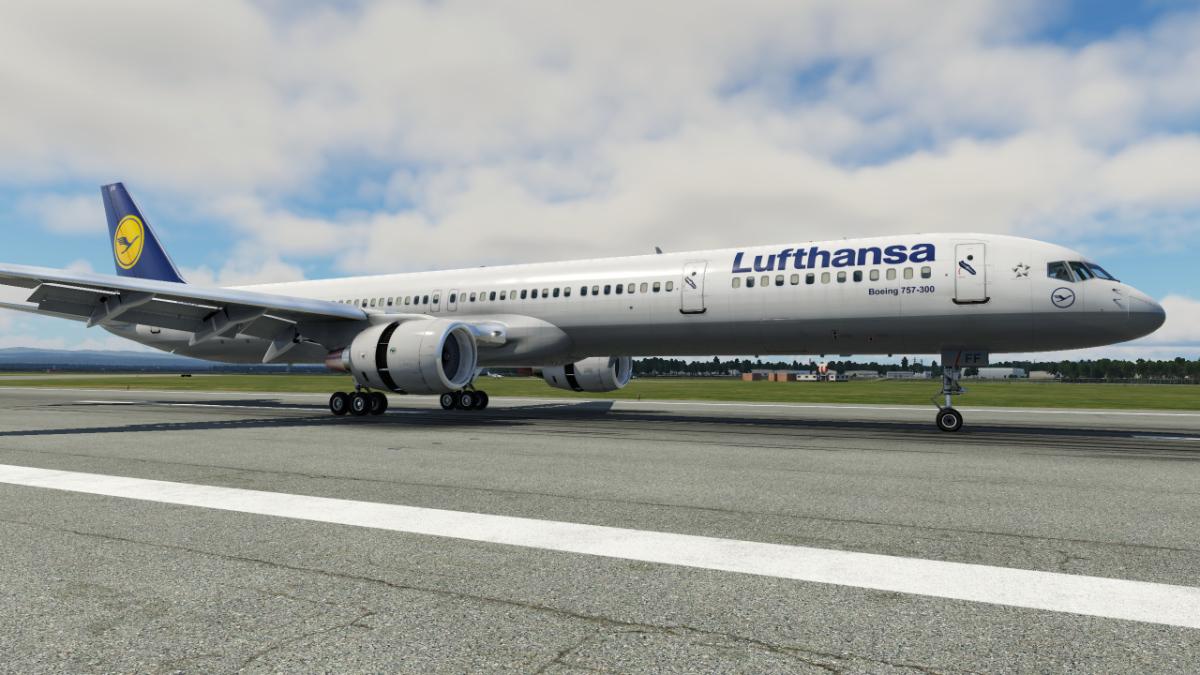
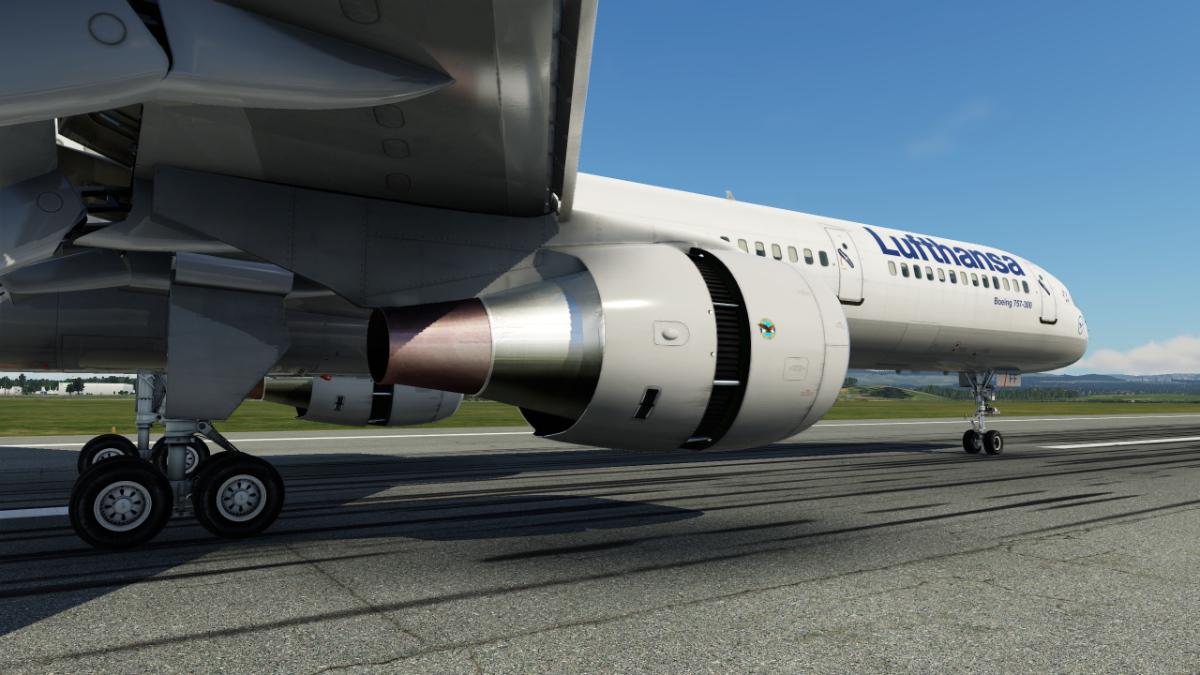
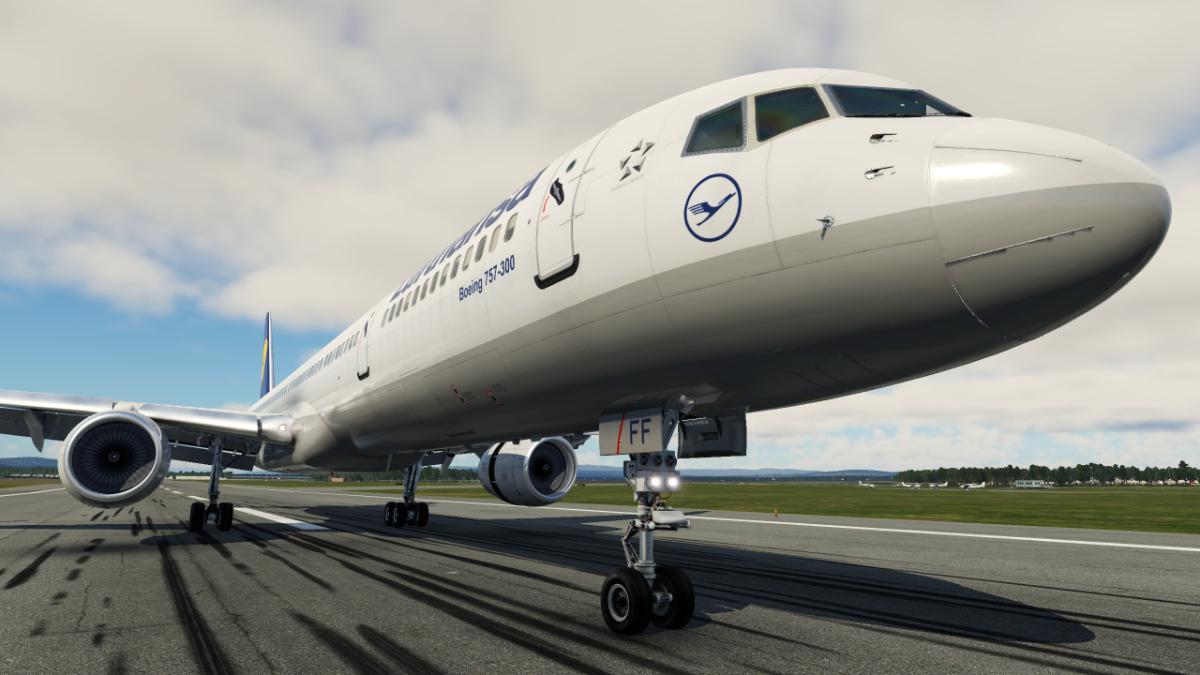
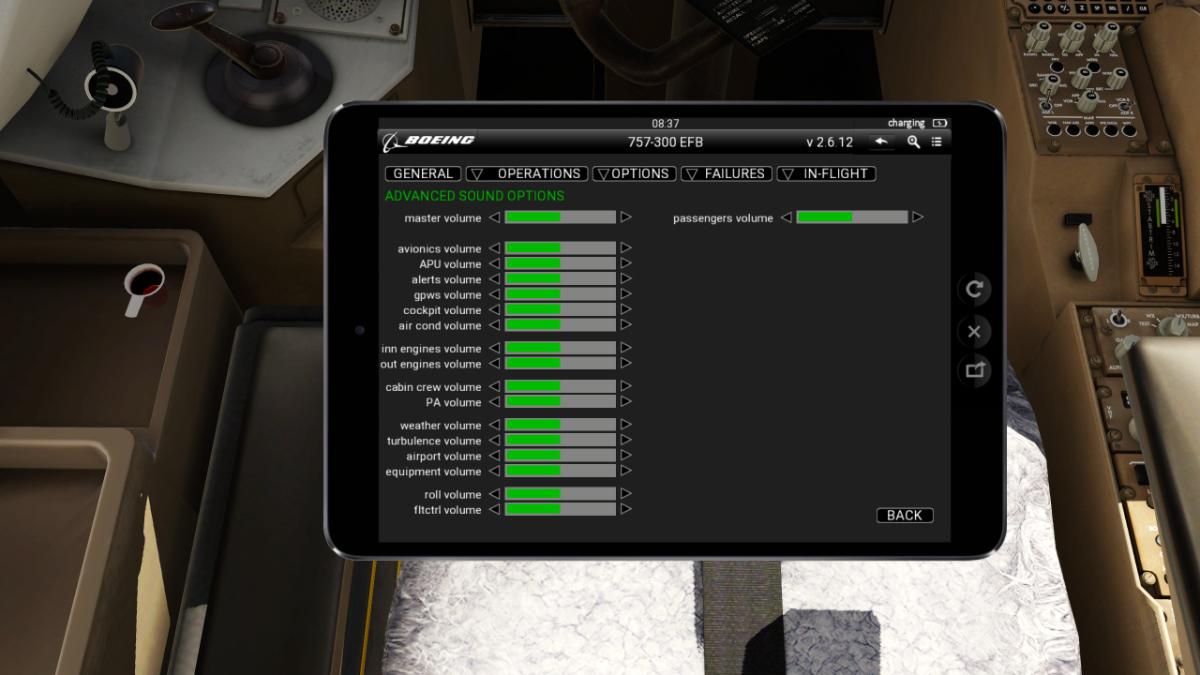
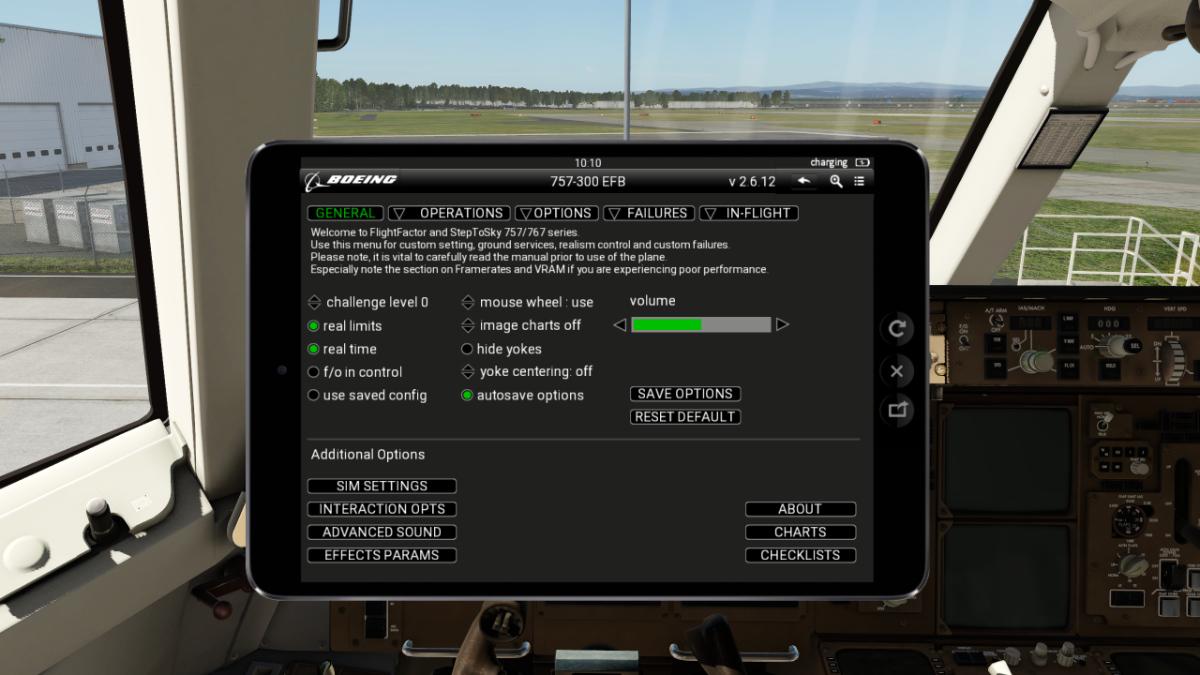
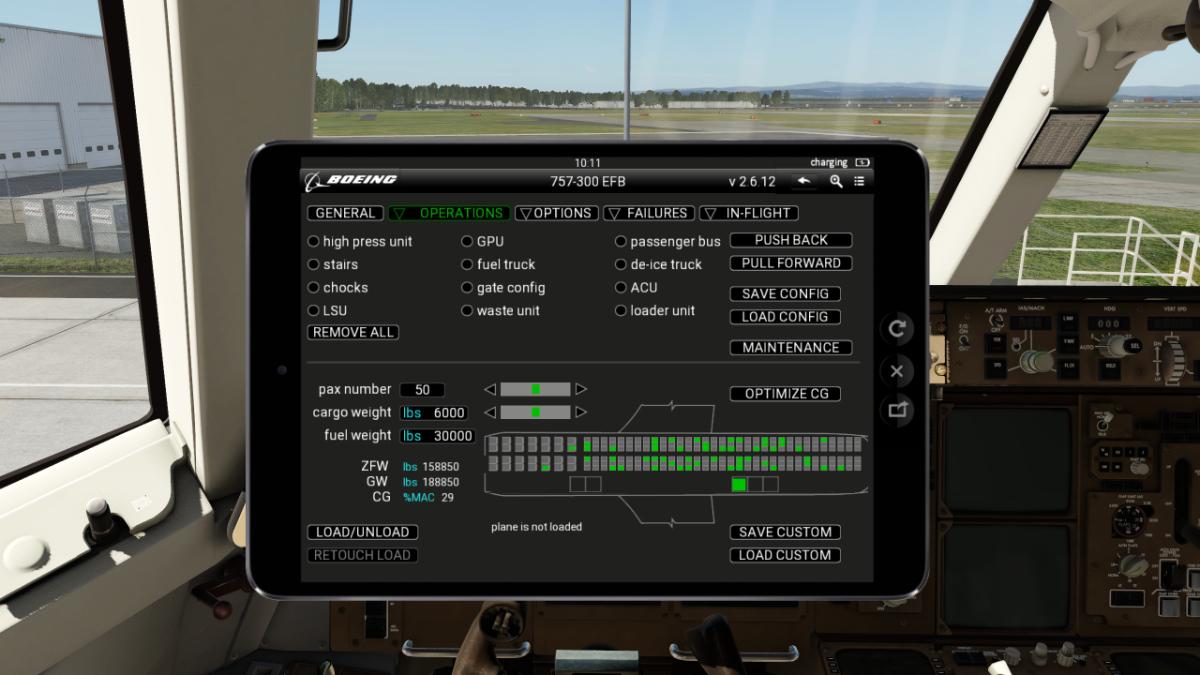
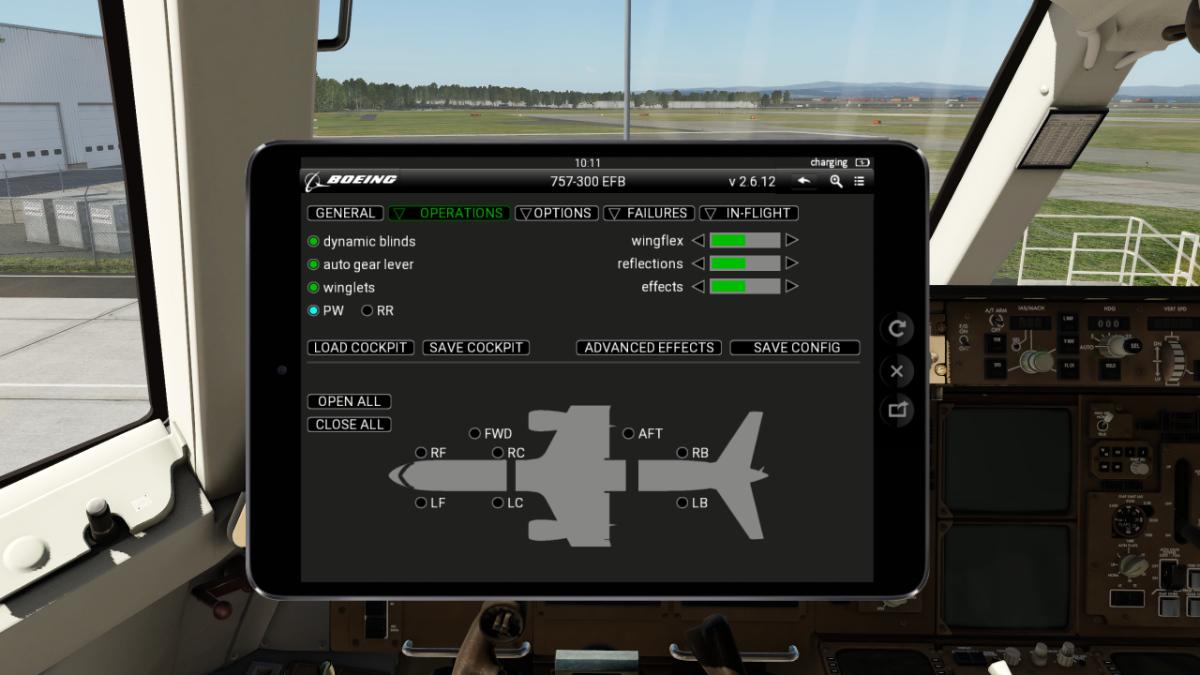
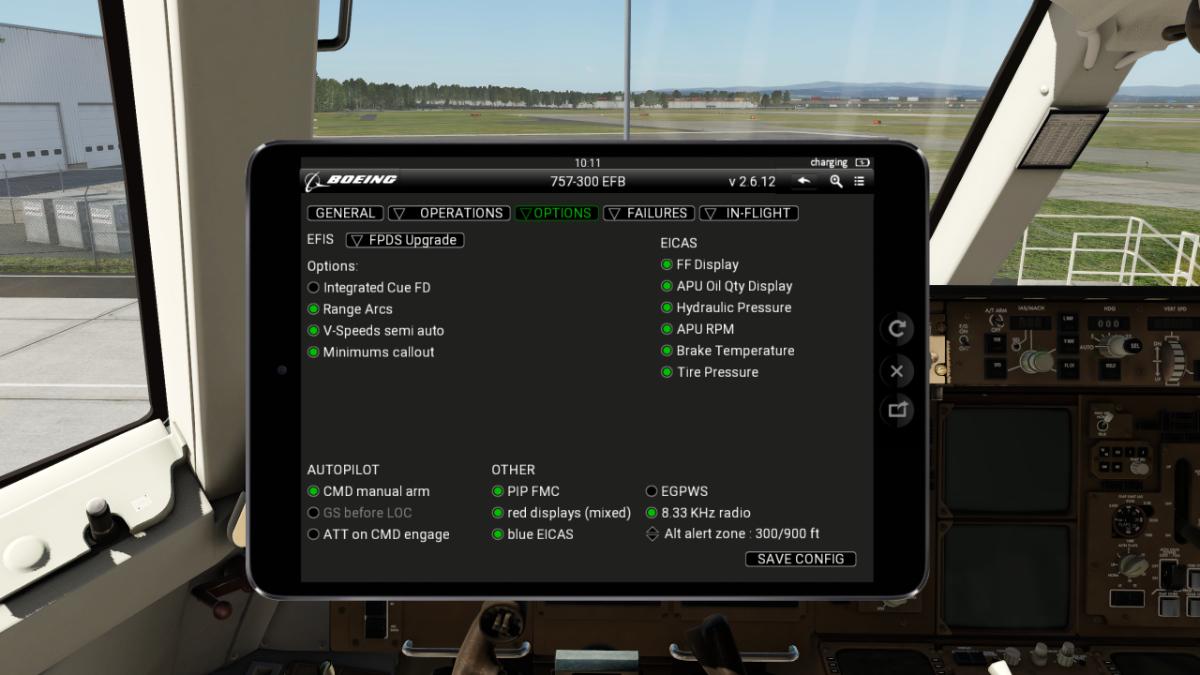
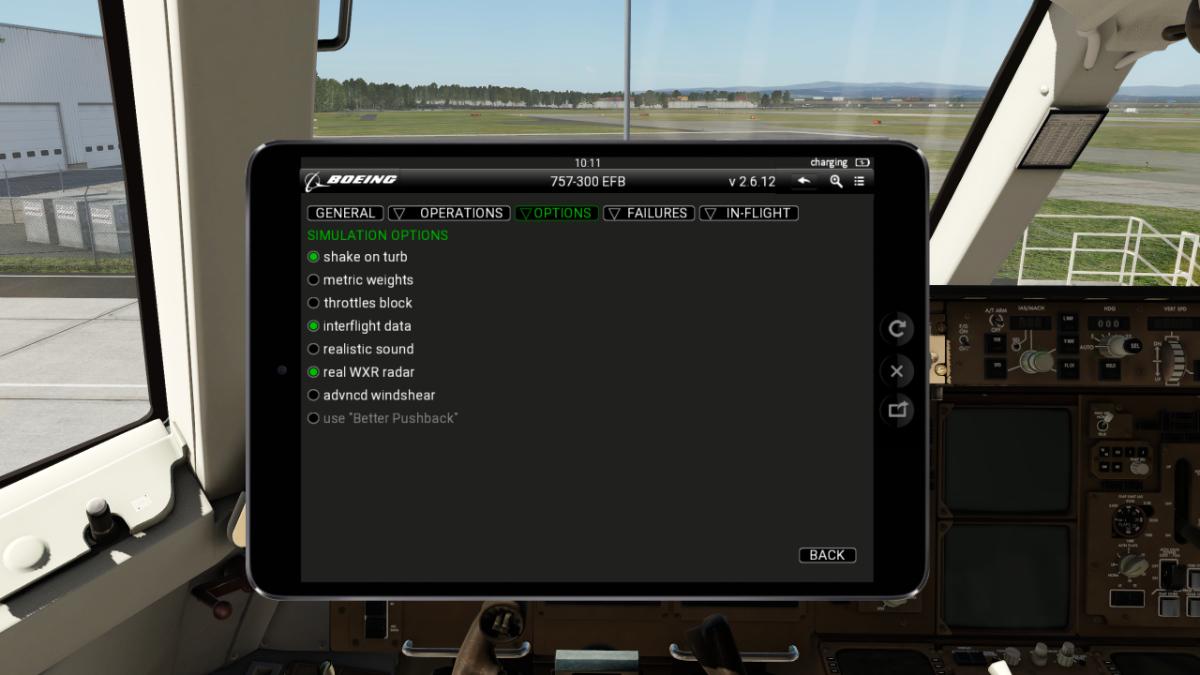
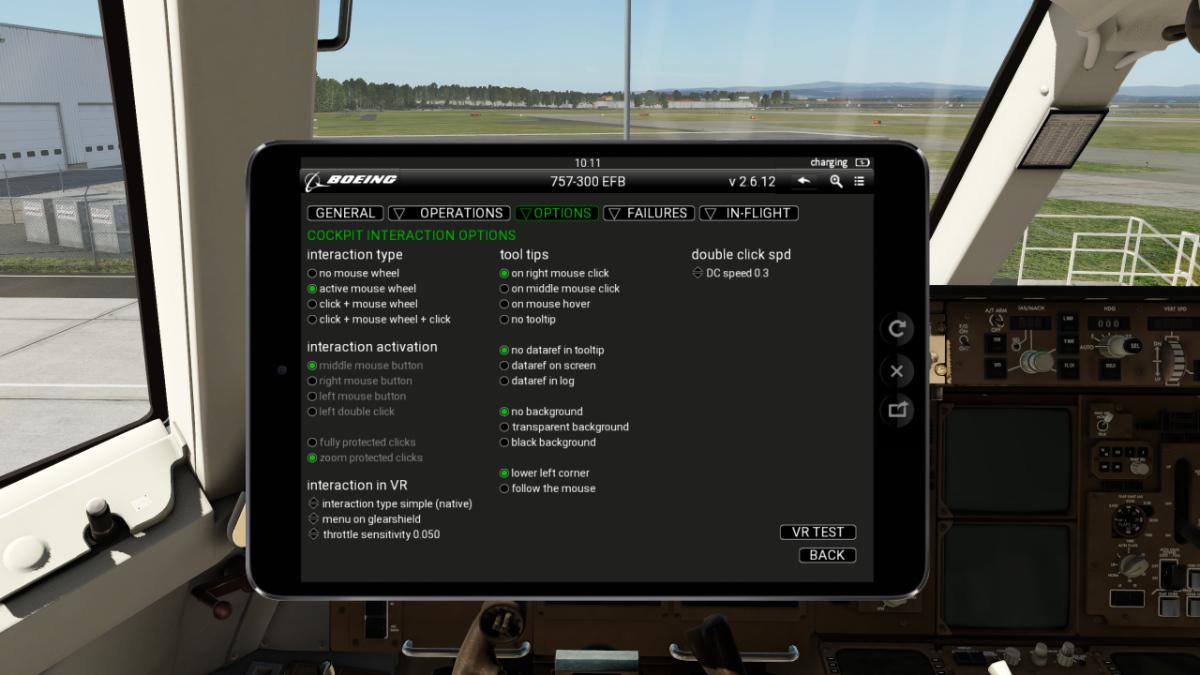
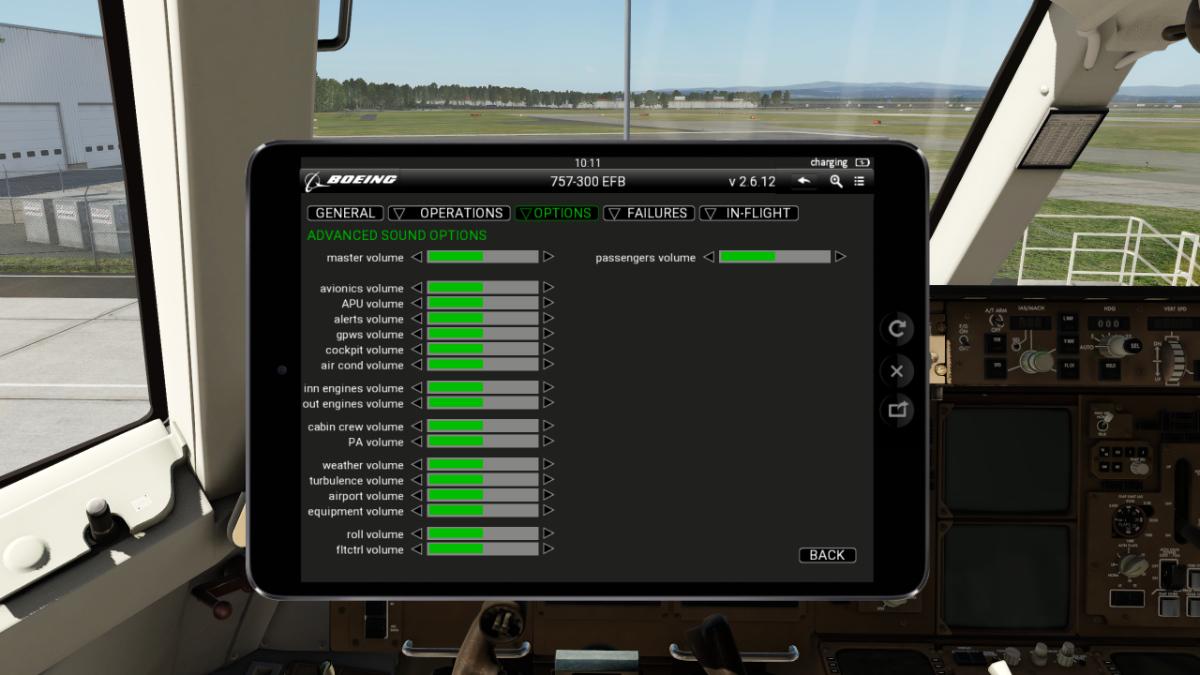
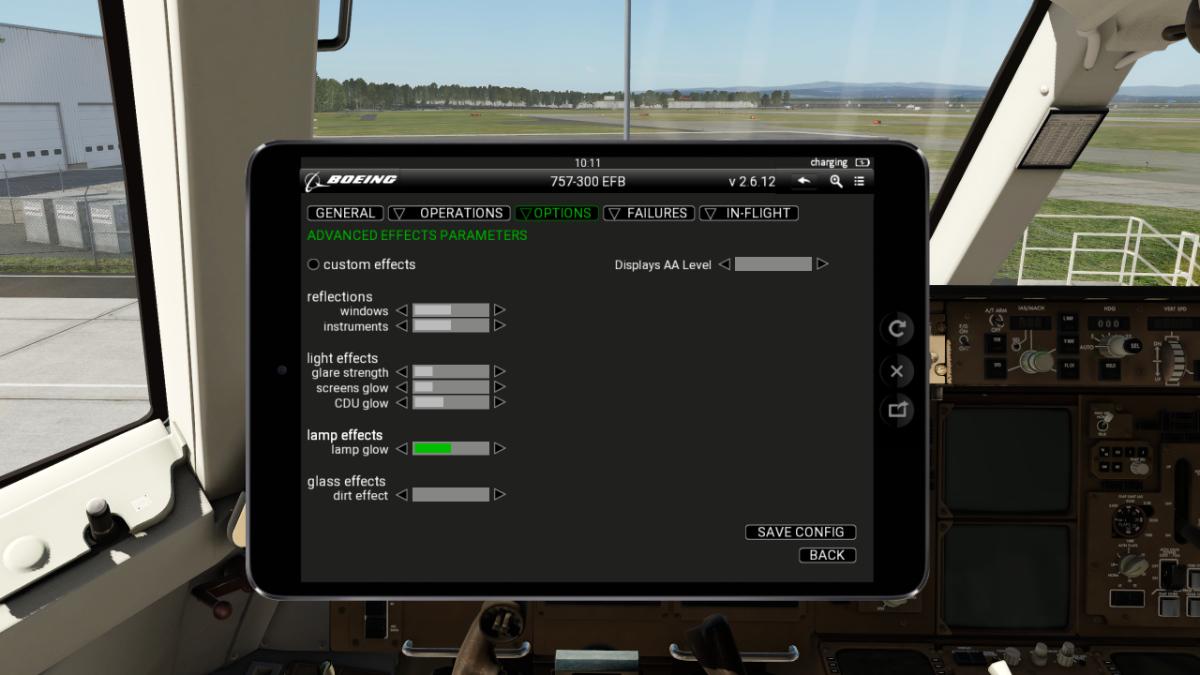
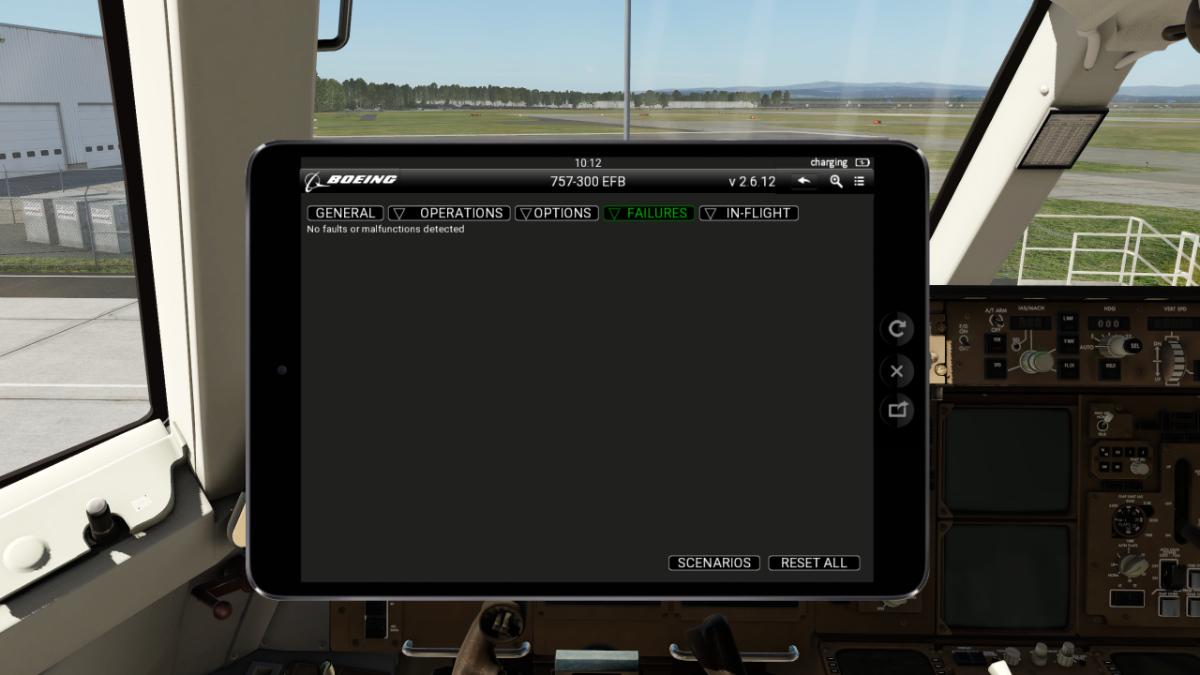
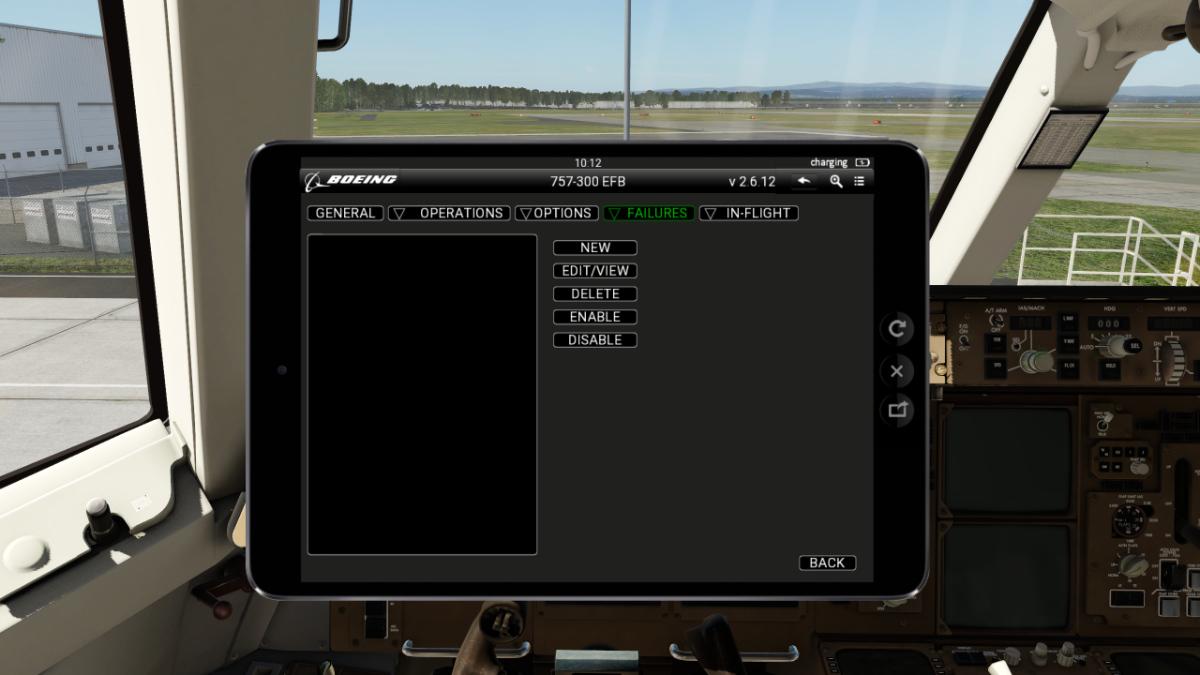
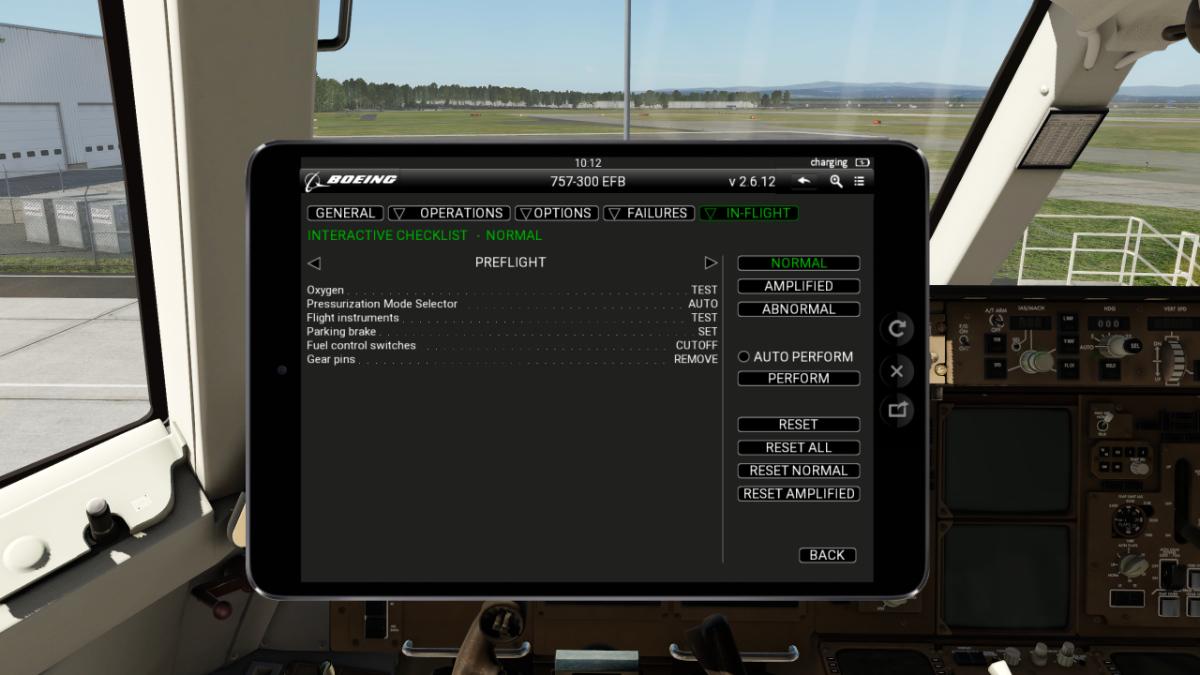
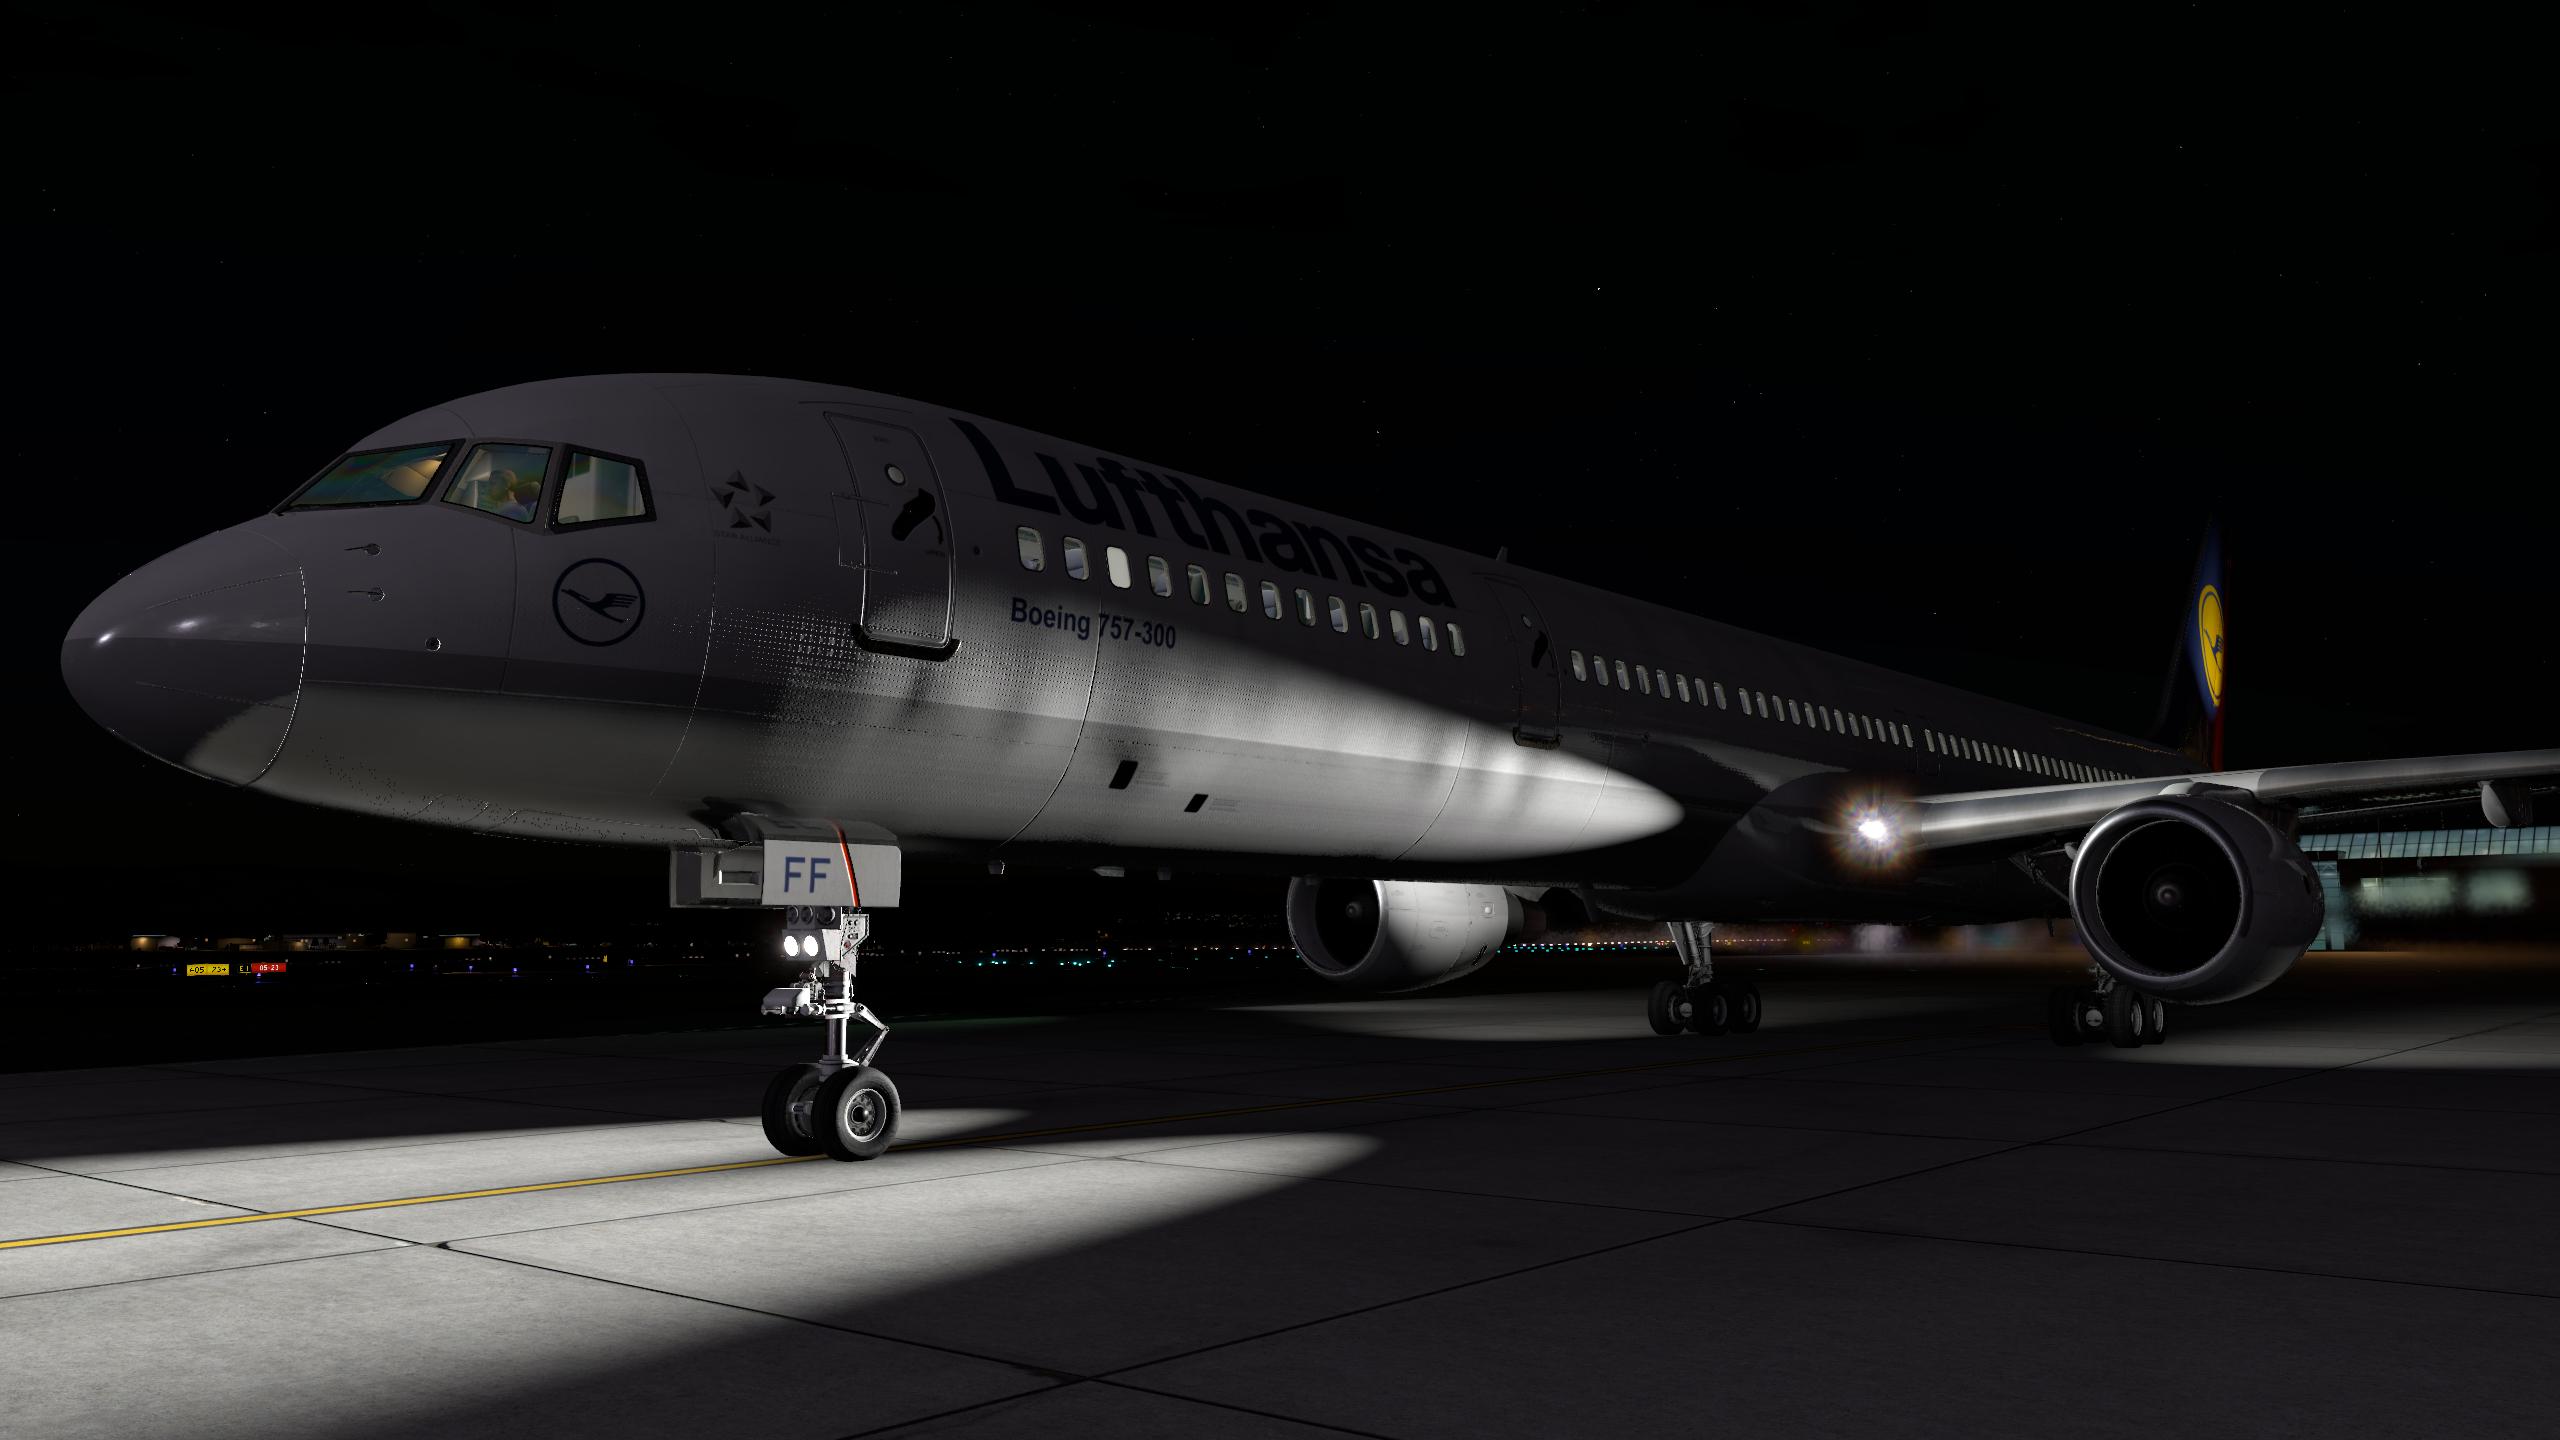
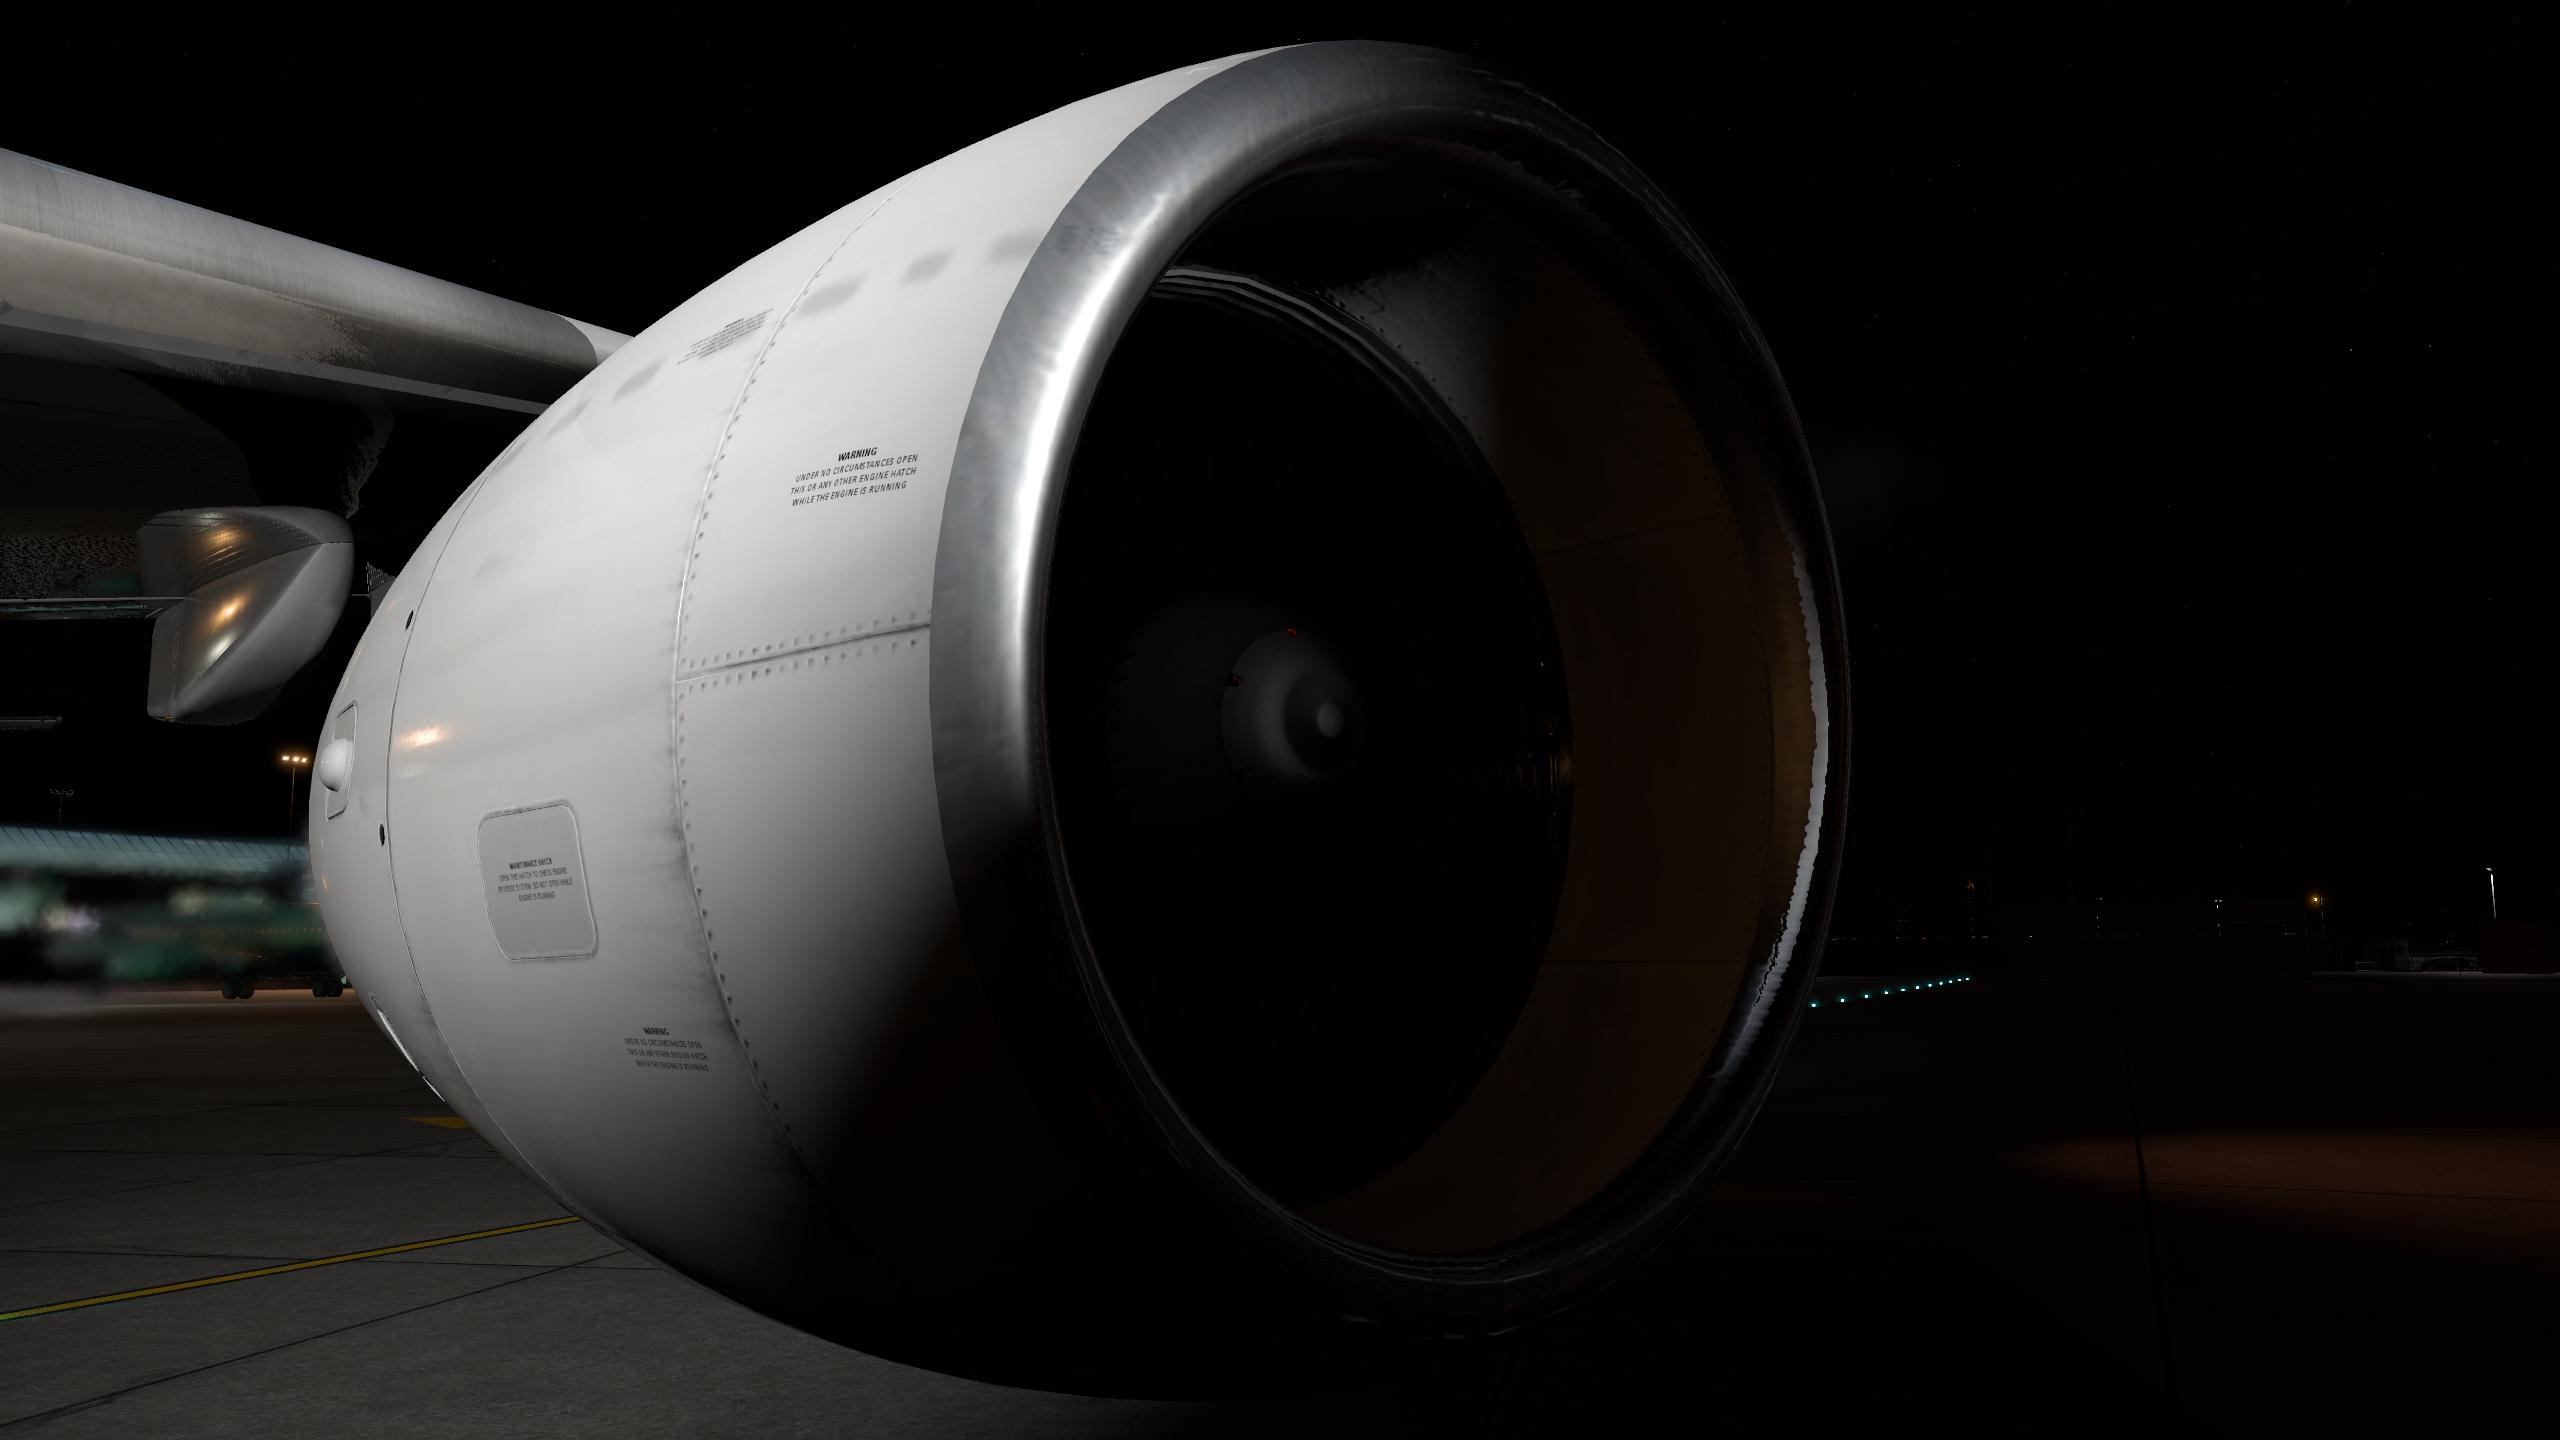
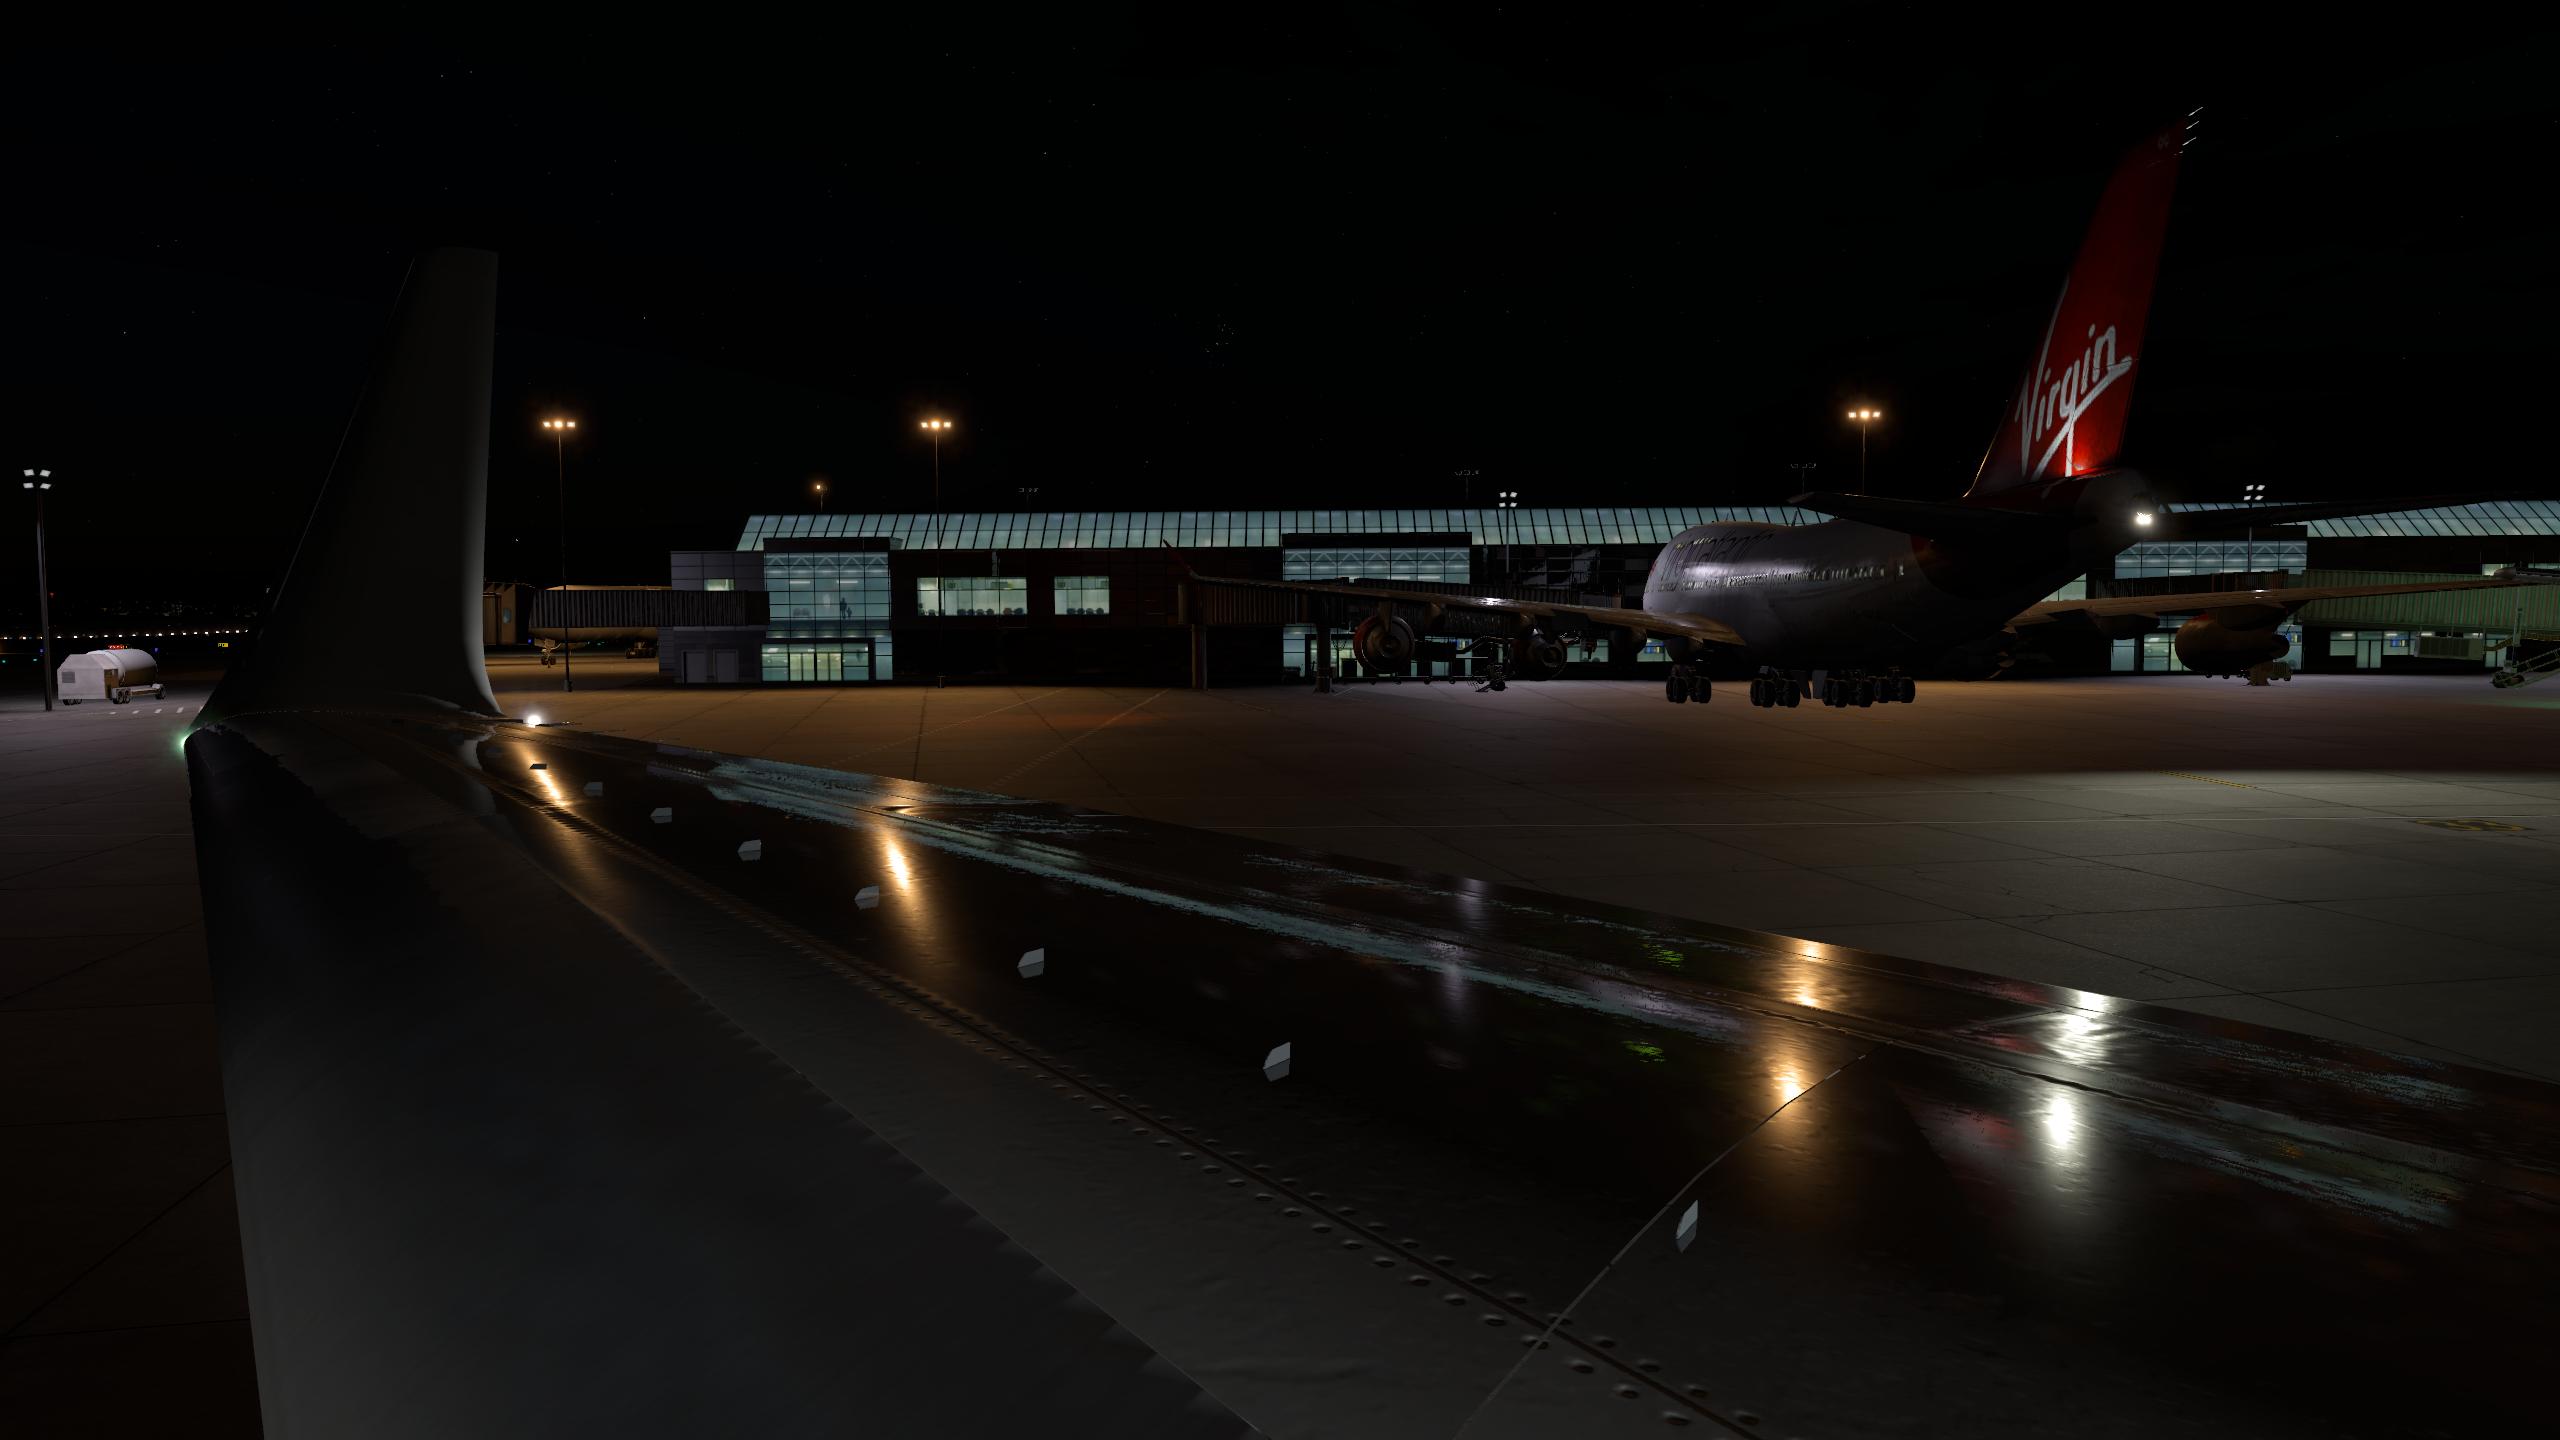
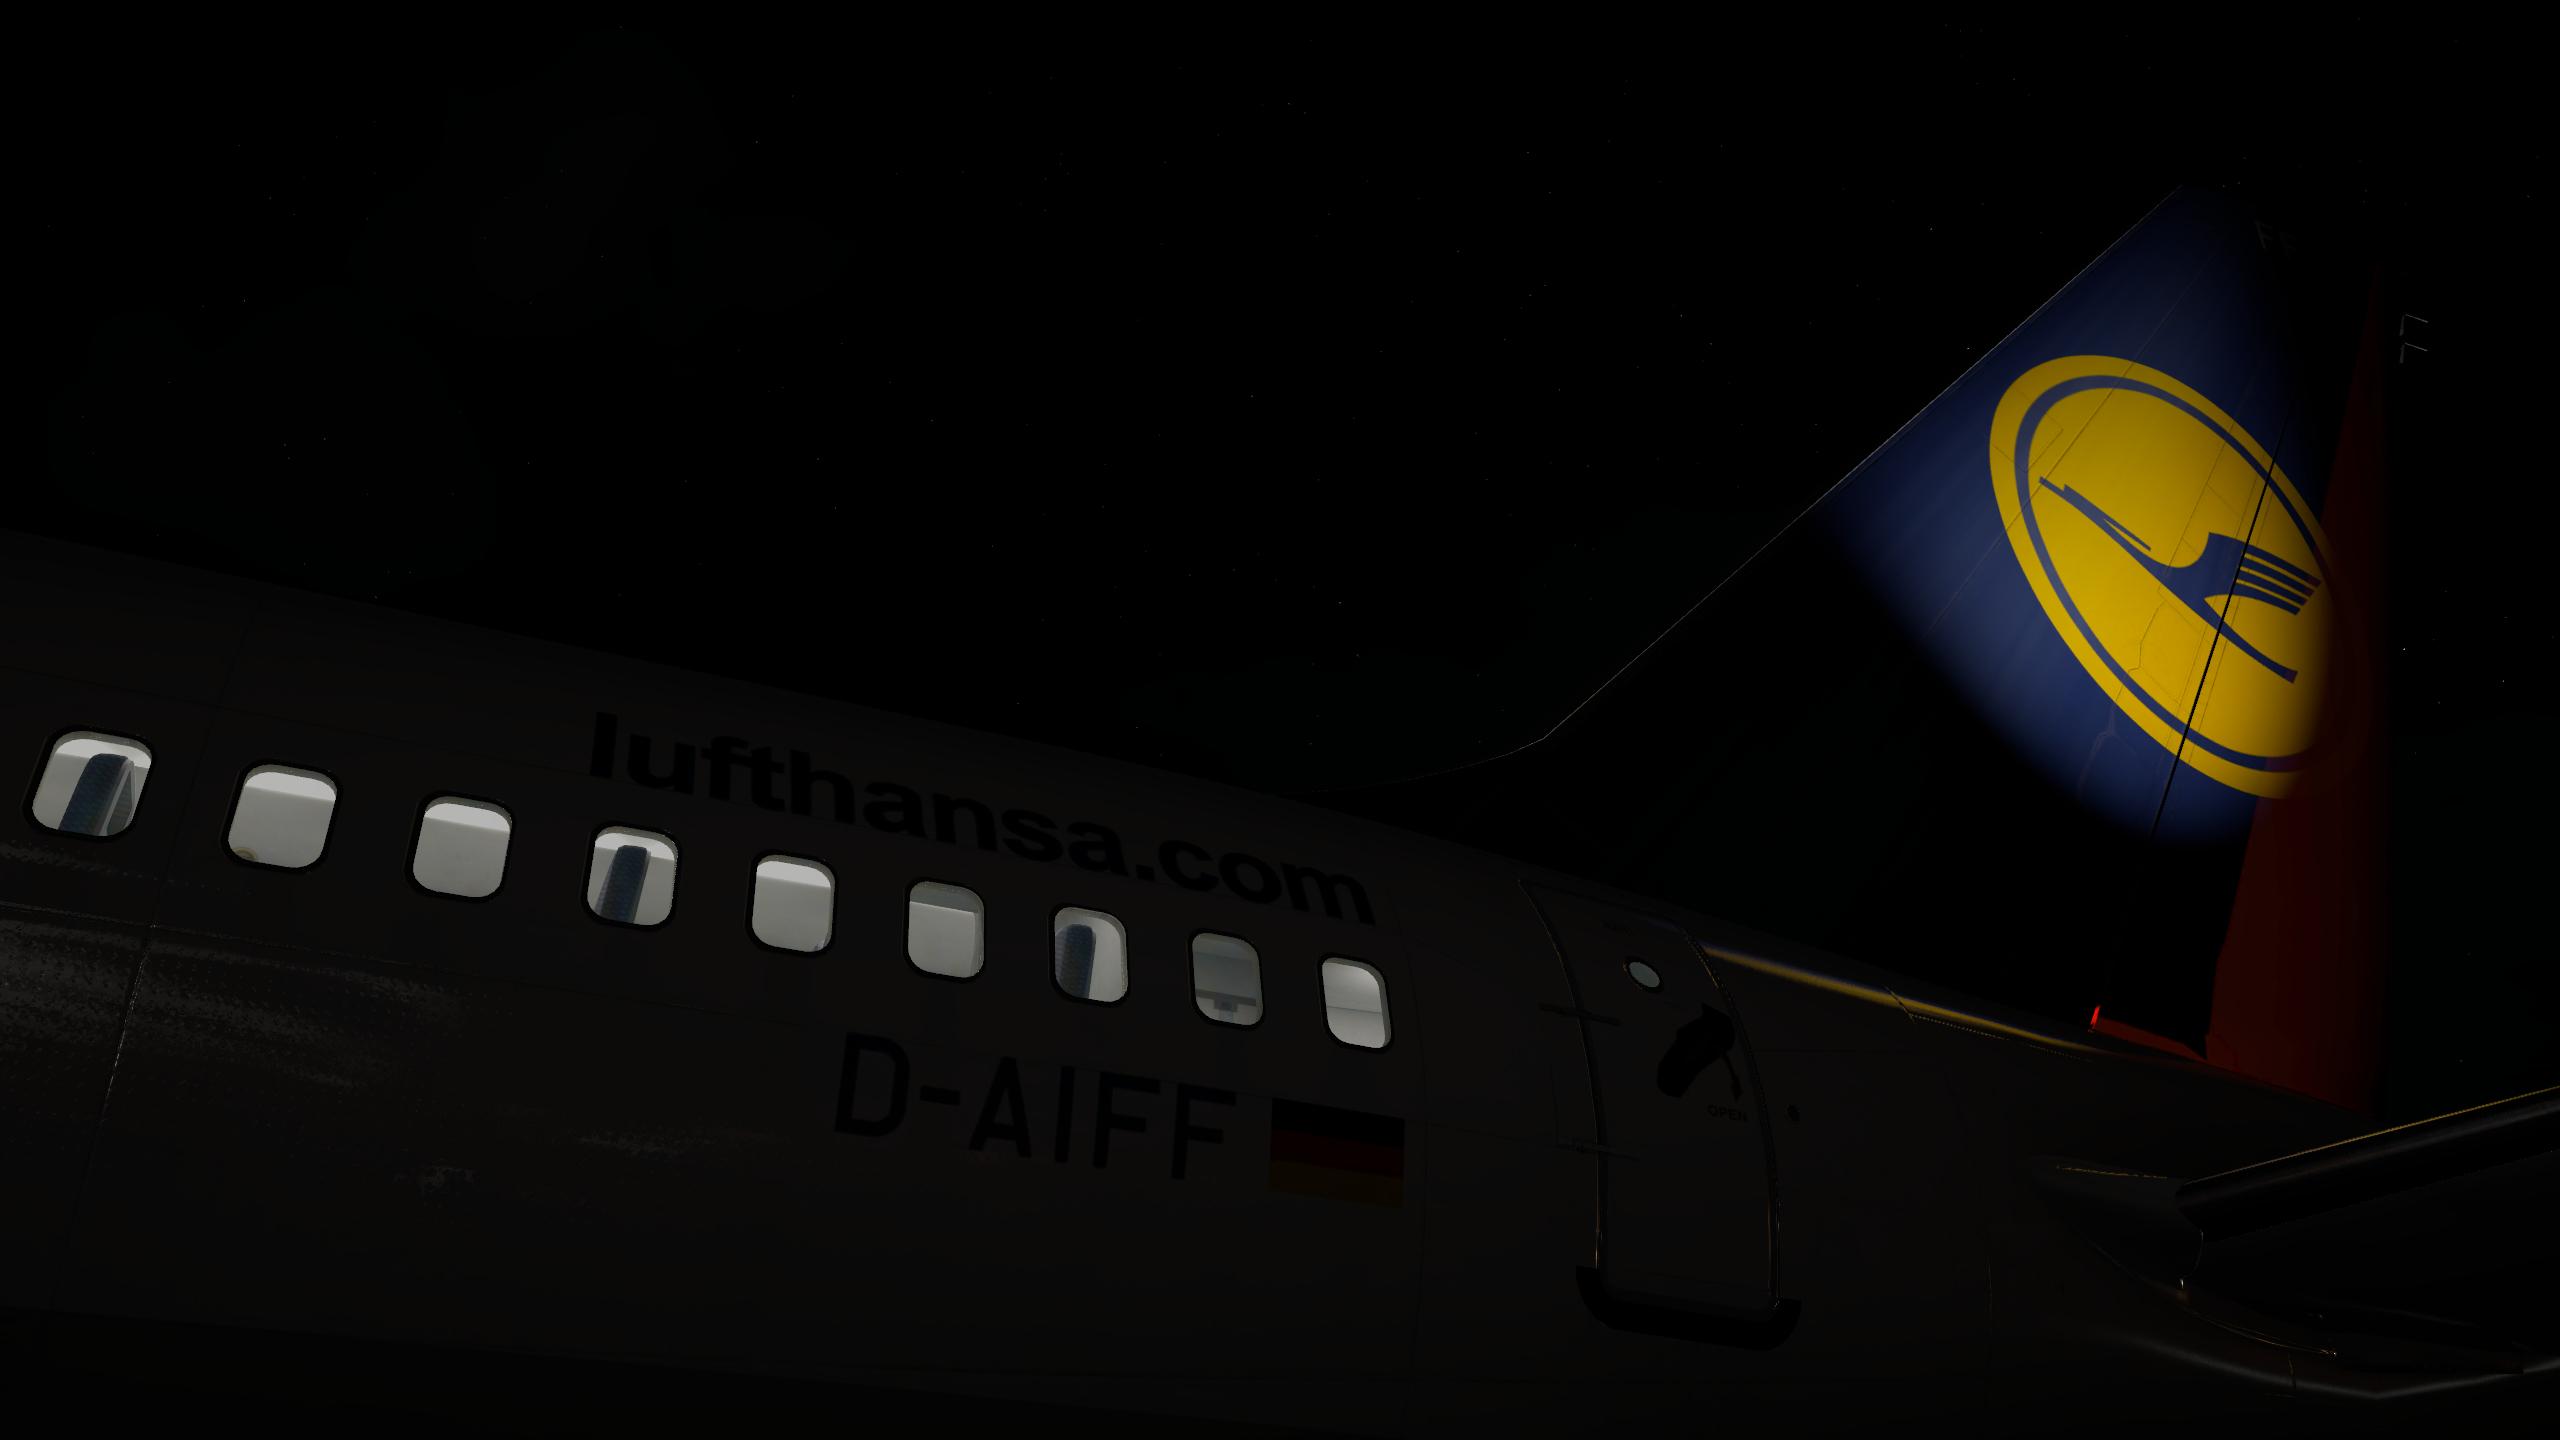
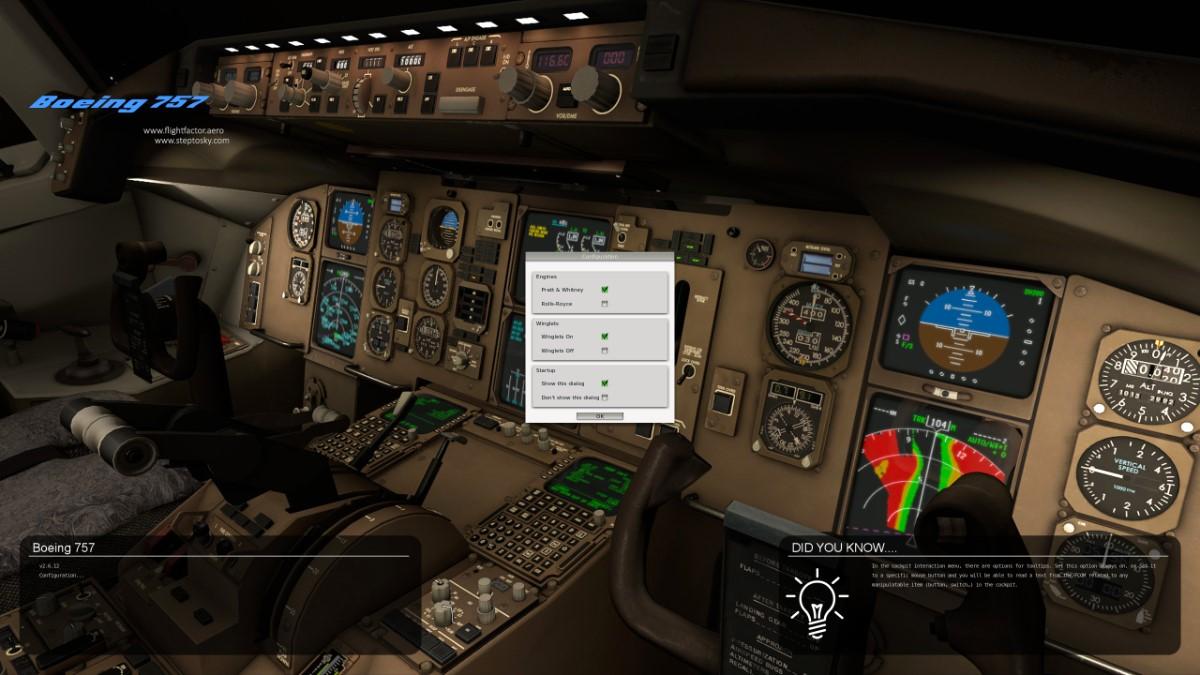
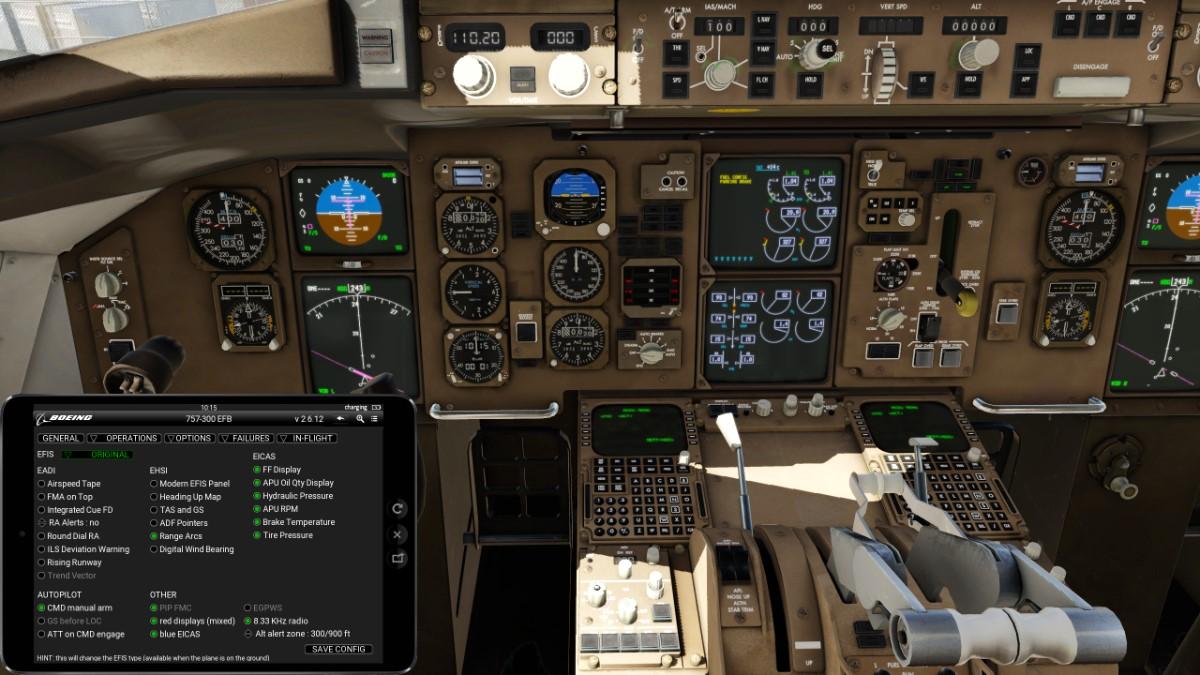
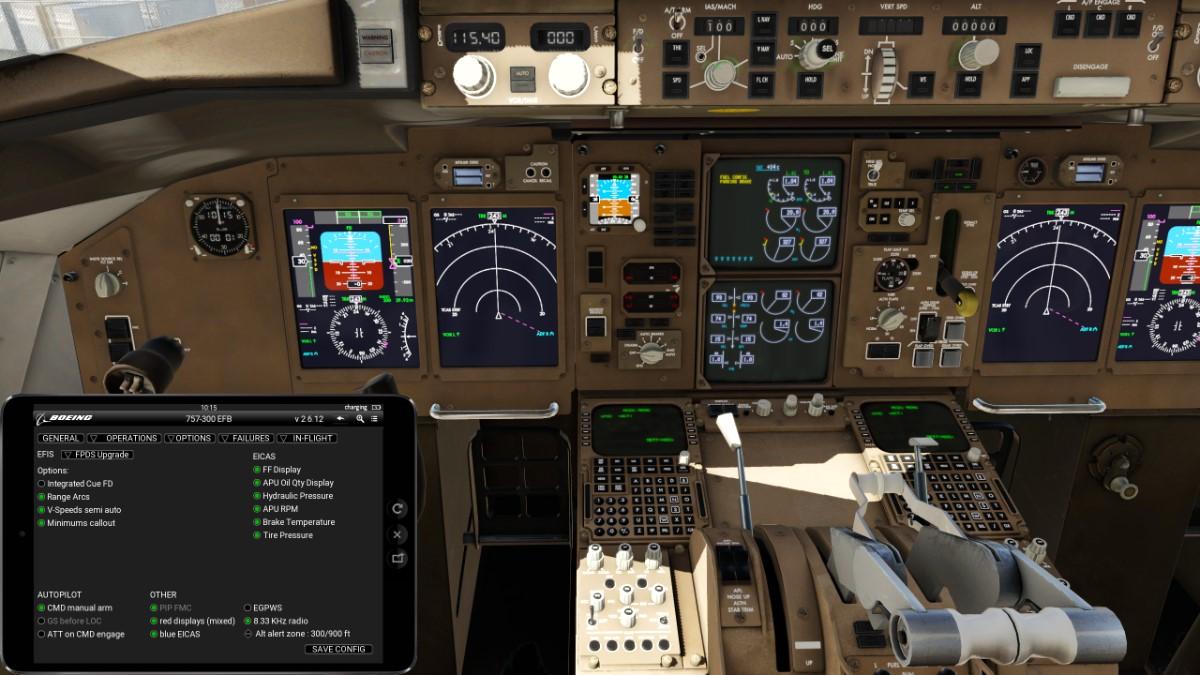
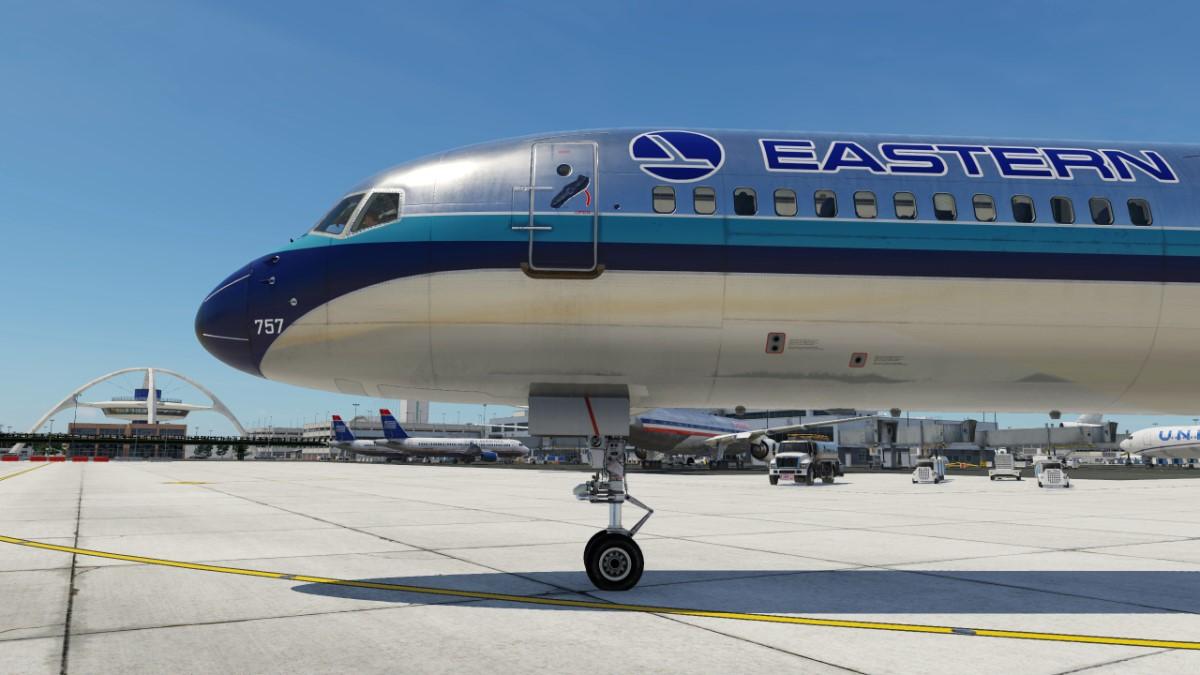
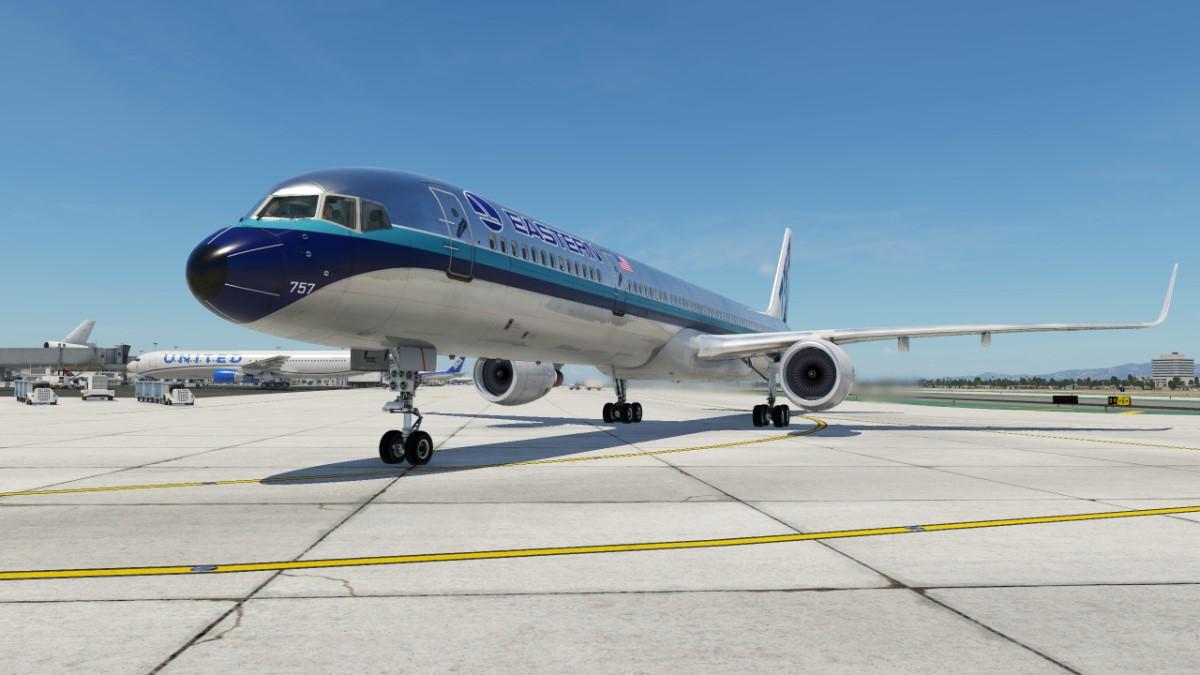
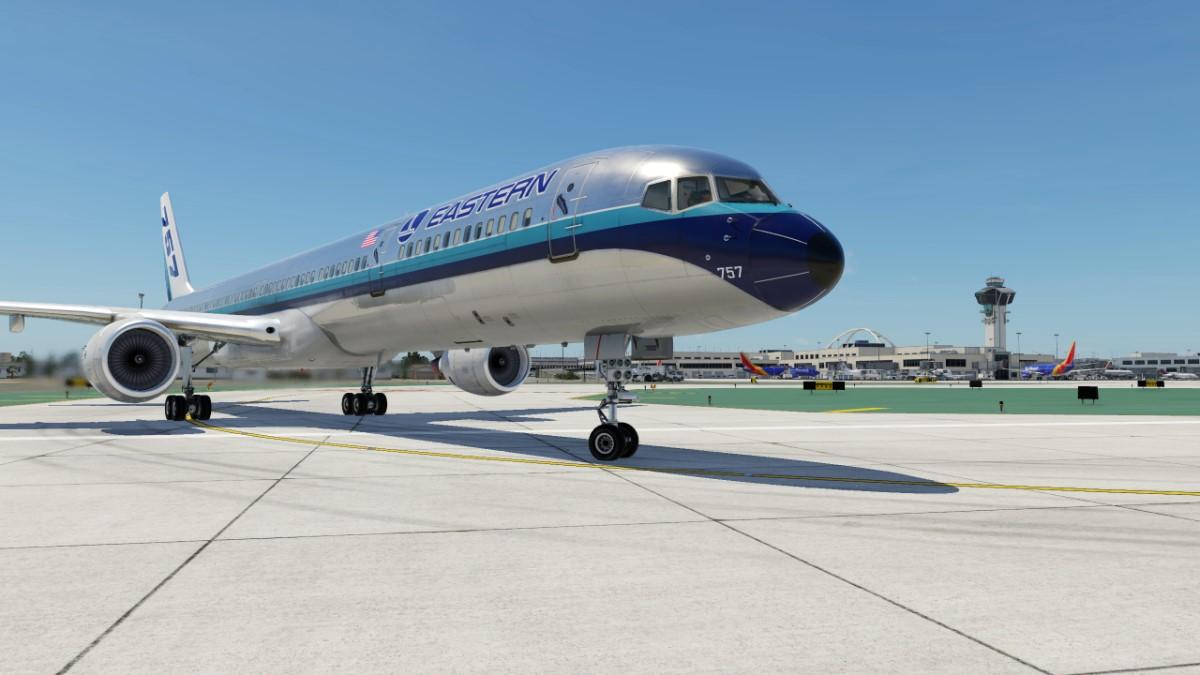
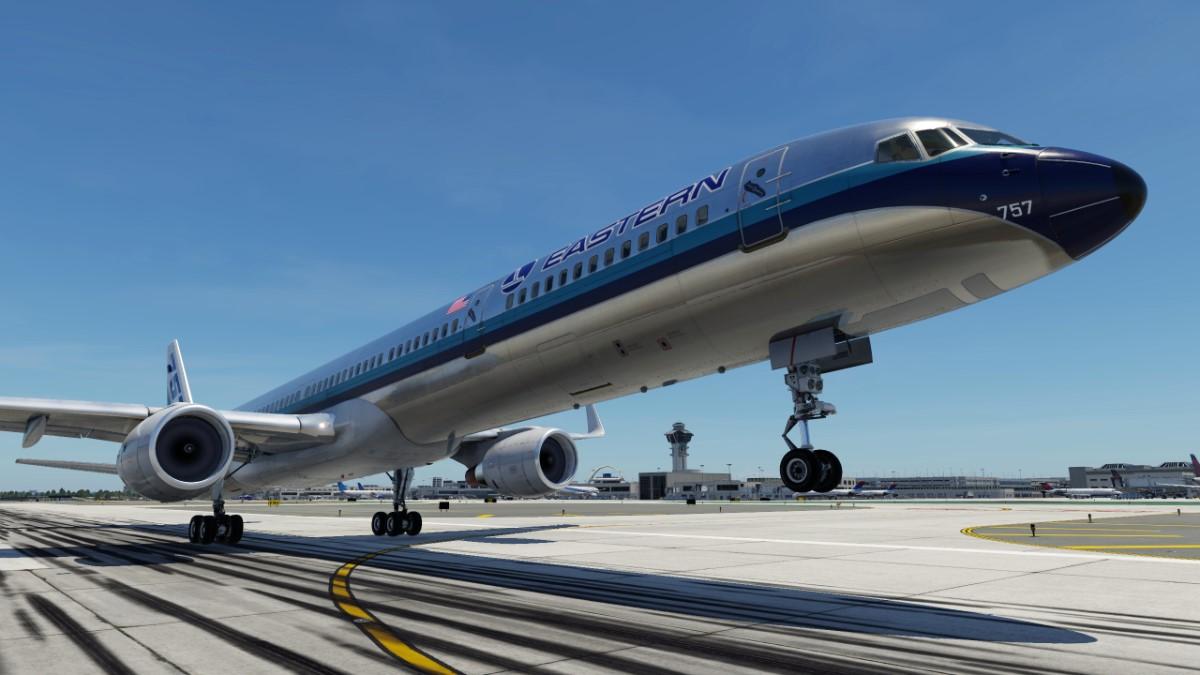
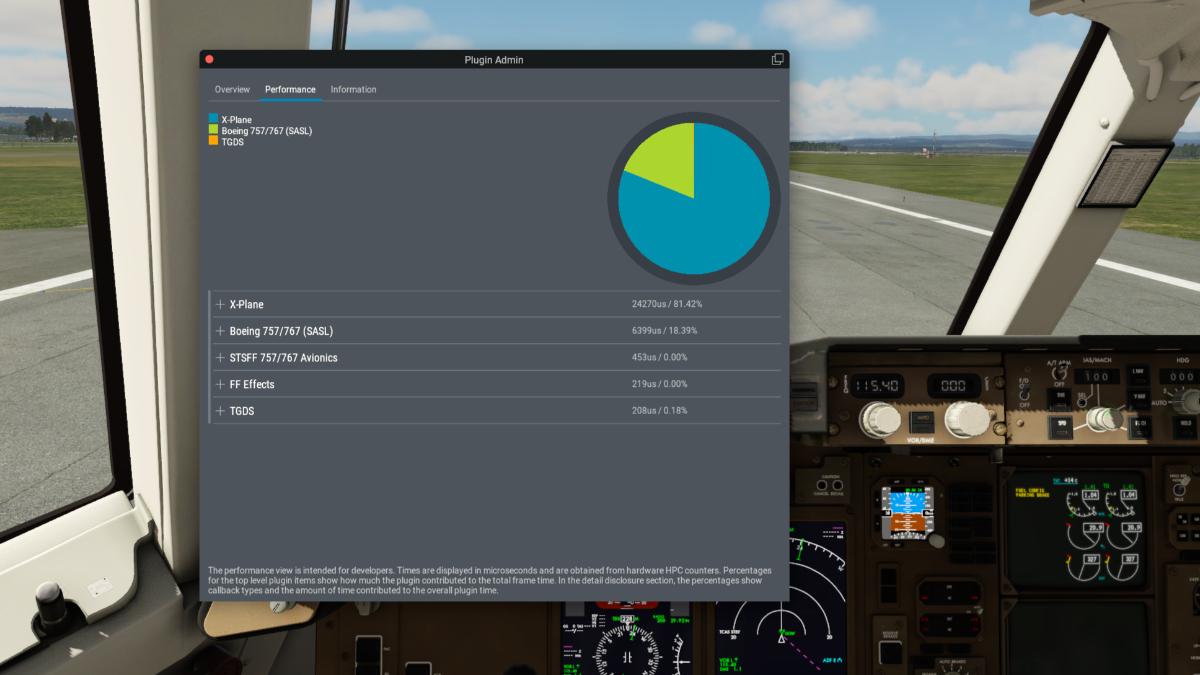
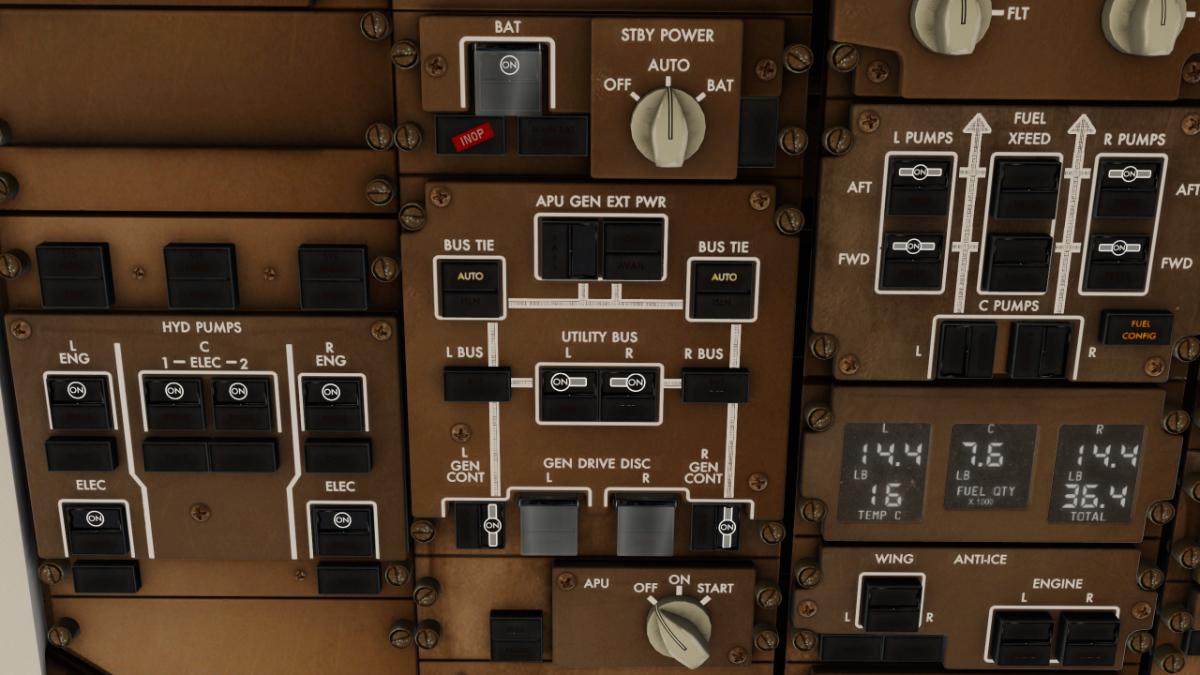
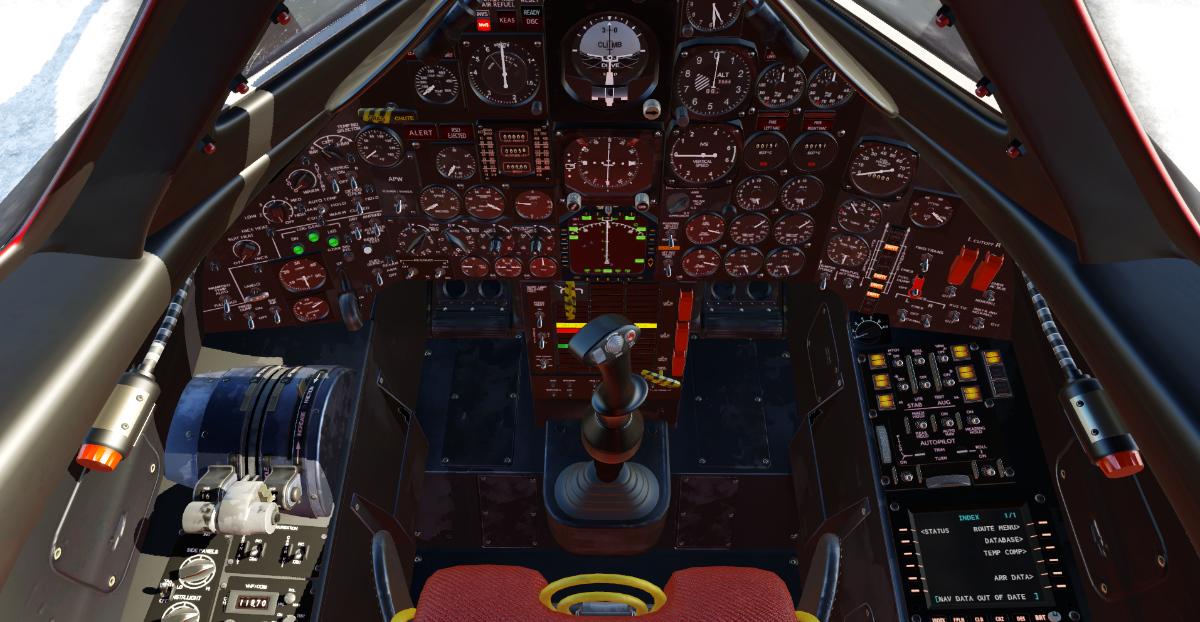
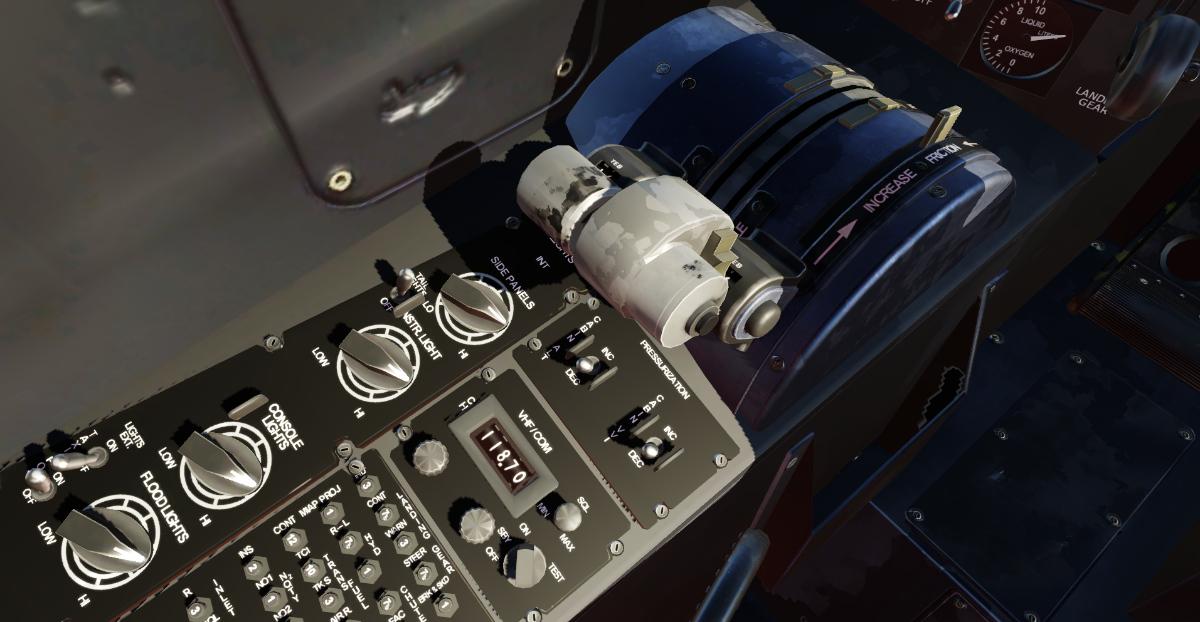
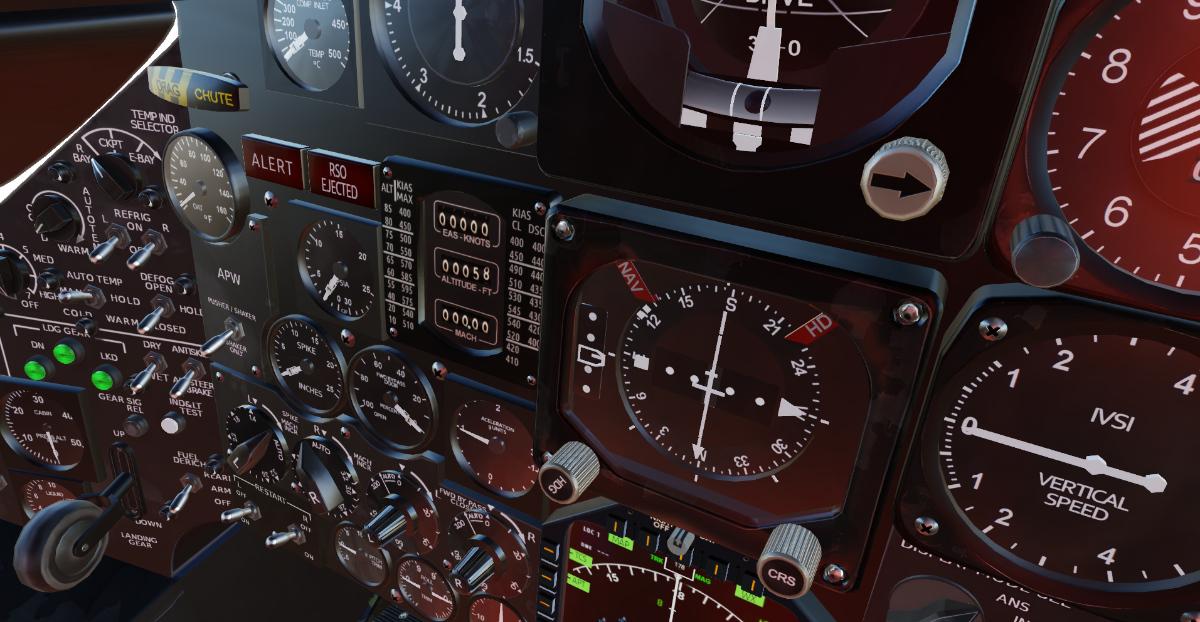
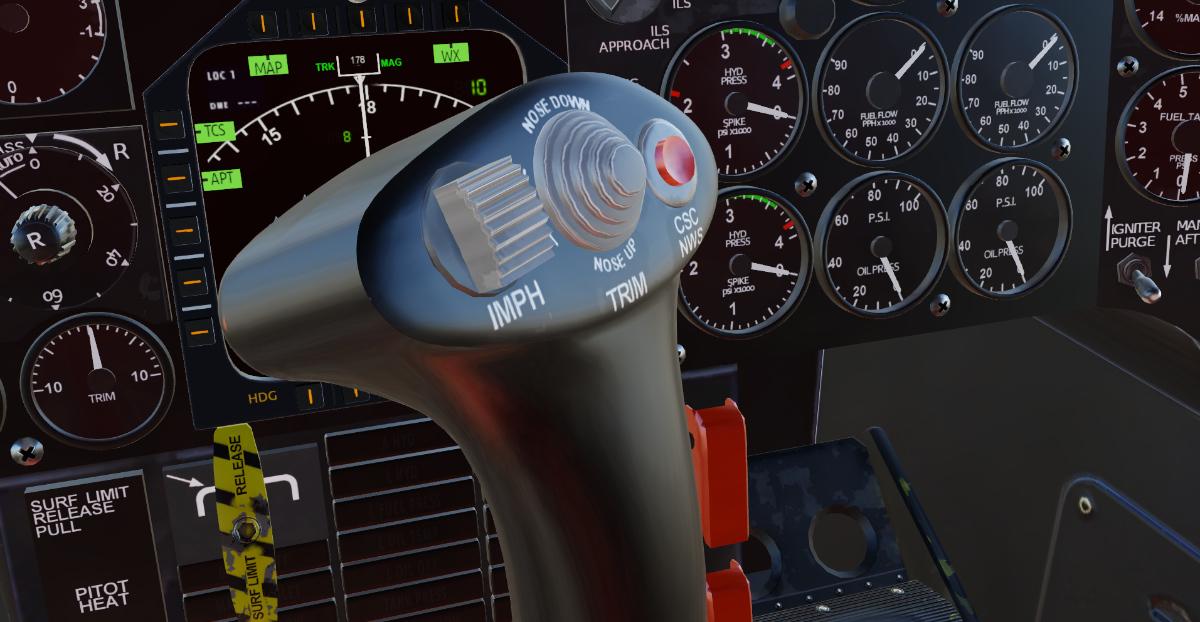
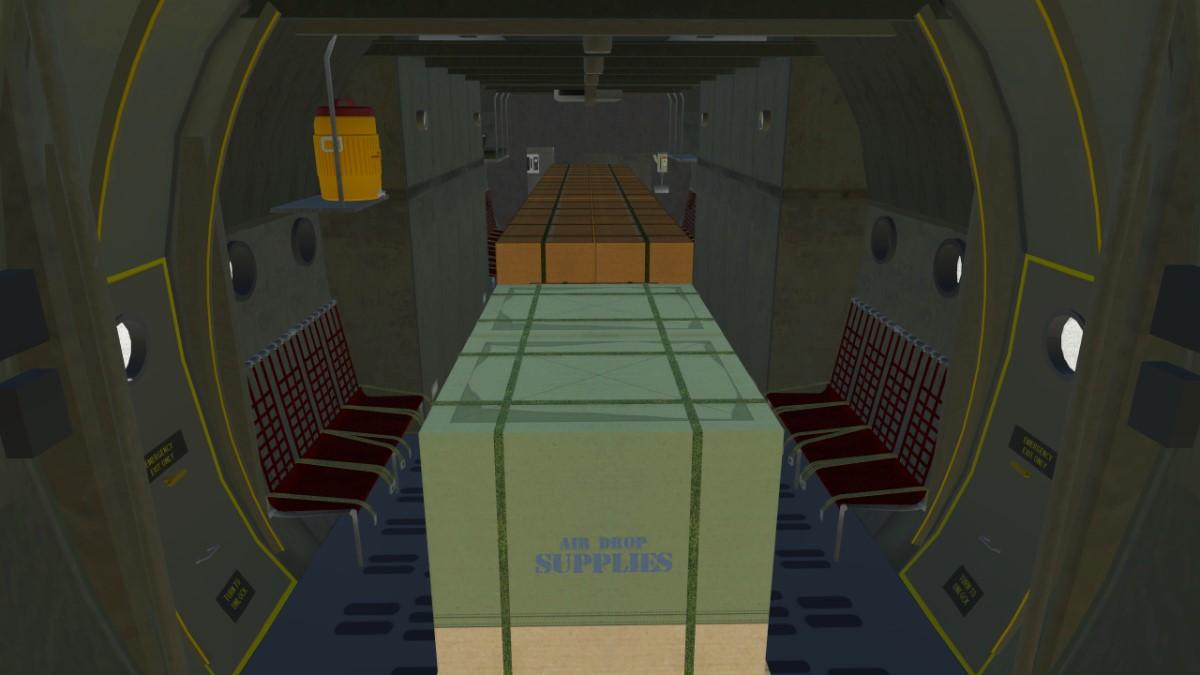
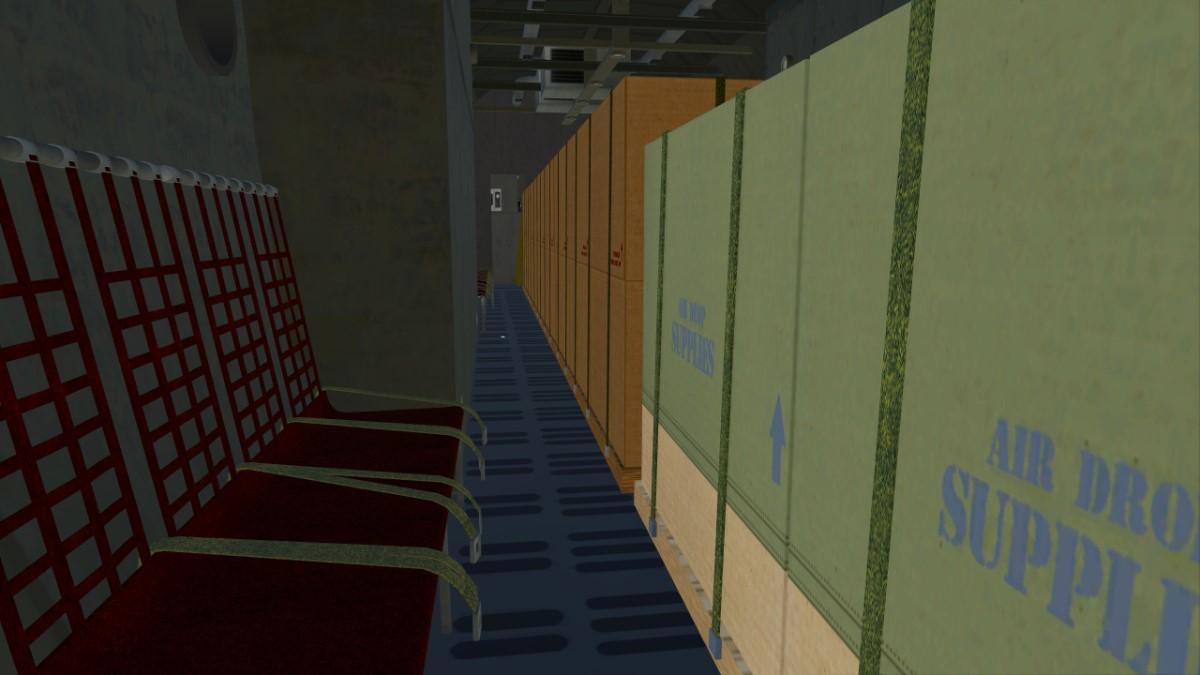
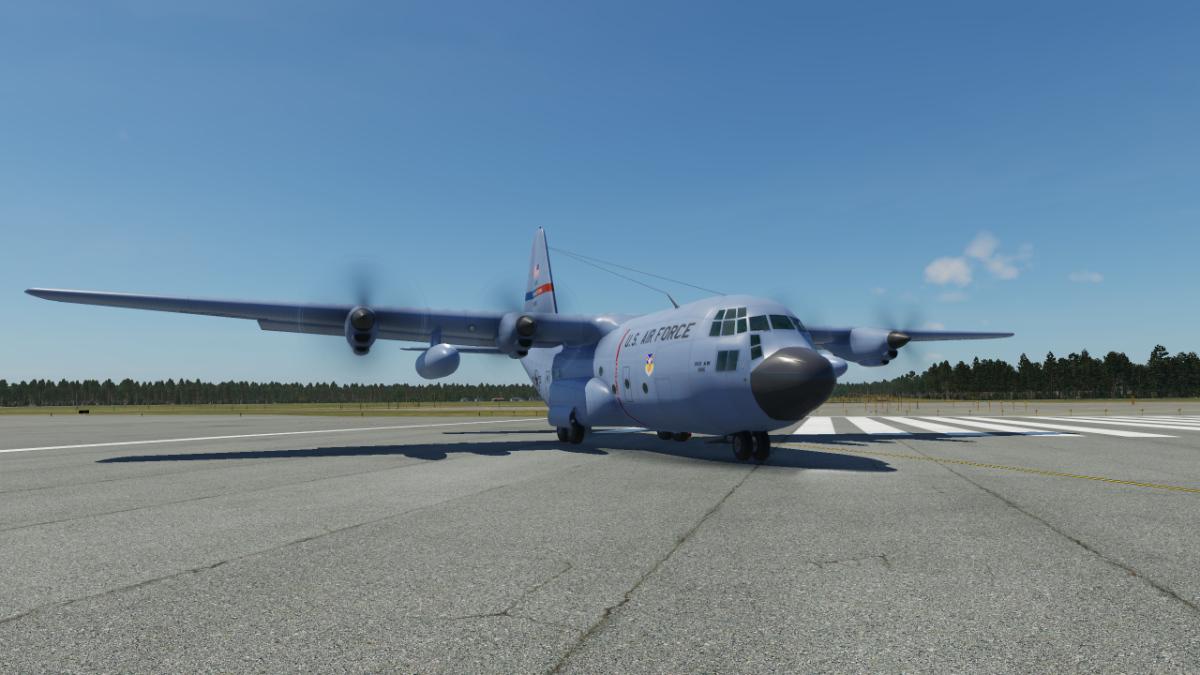
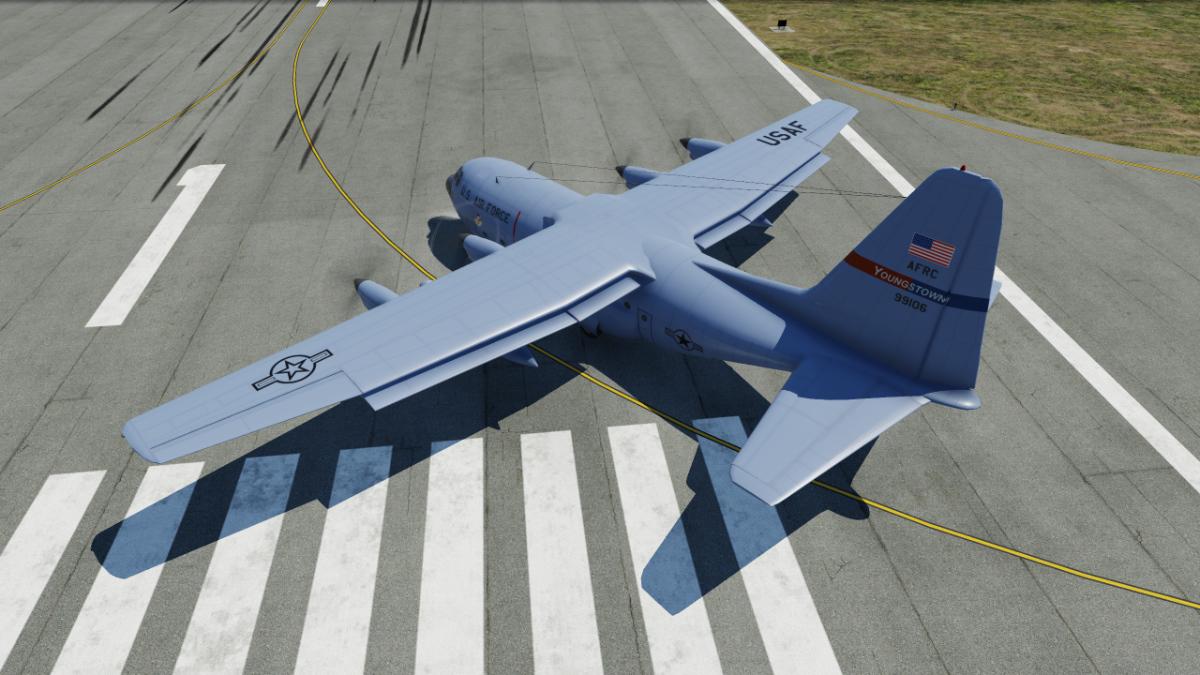
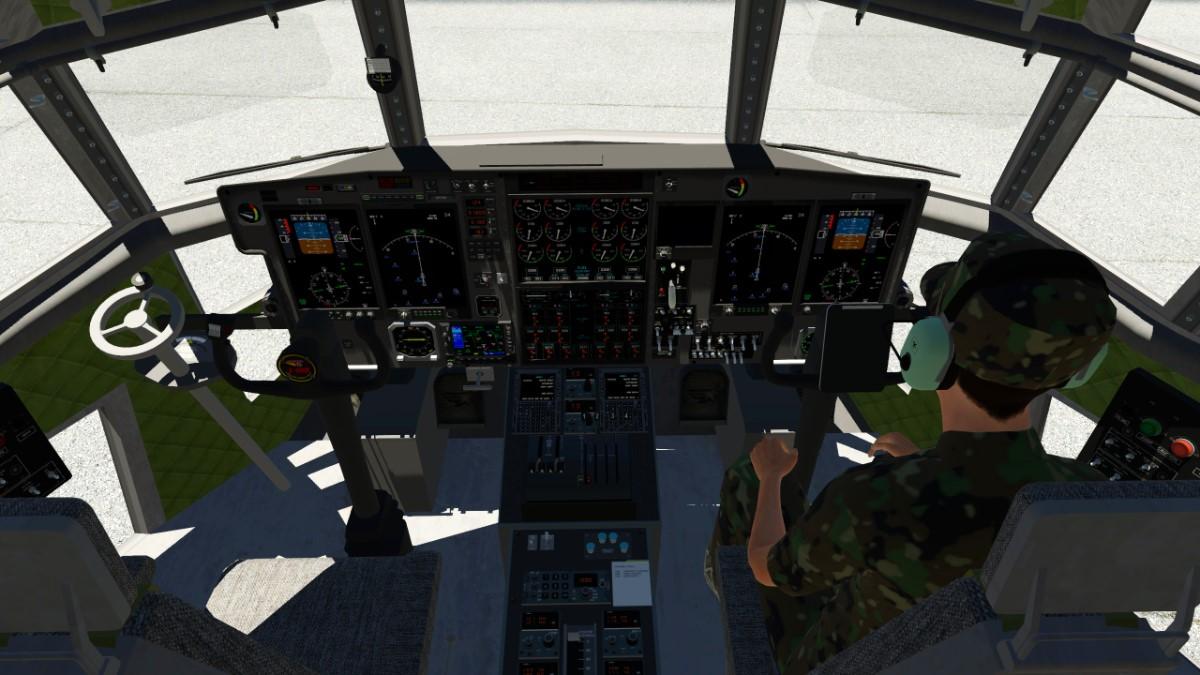
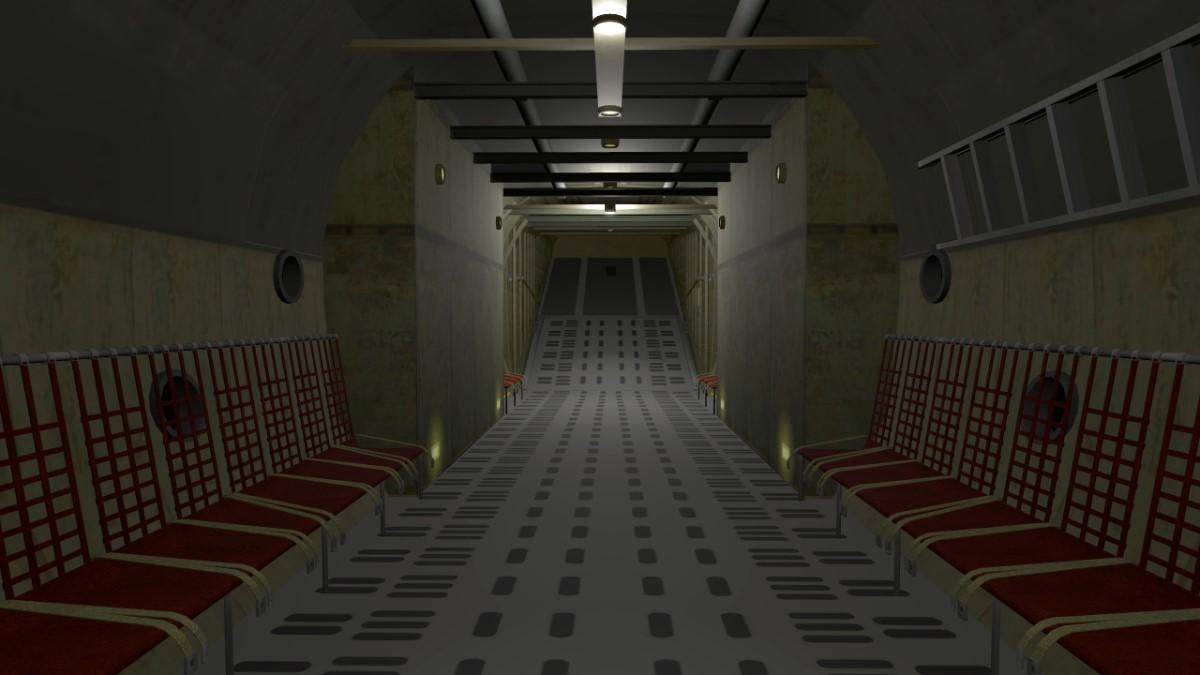
Aircraft Update Review: Boeing 757 Professional Global package v2.6.12 by FlightFactor/VMax By DrishalMAC2 Introduction The Boeing 757, a twin-engine marvel with a narrow body, represents an enduring legacy in commercial aviation. Launched in the early 1980s, this adaptable aircraft was the result of Boeing's dedication to addressing the industry's growing demands for a medium-haul mainstay. With its distinctive narrow fuselage and potent twin engines, the Boeing 757 rapidly gained a reputation for its efficiency and flexibility across a variety of routes. Engineered to span the divide between short and medium-haul flights, the Boeing 757 has become essential for airlines in search of a dependable, fuel-efficient solution for both domestic and transatlantic trips. Despite the arrival of newer models, the Boeing 757 continues to enchant aviation aficionados and professionals, representing a time when innovation met practicality in an iconic design. In this review, I revisit the FlightFactor 757, previously reviewed by Stephen way in X-Plane 10, this time within X-Plane 12. My goal is to offer a balanced examination of how this well-regarded model has adapted to the advancements and features of X-Plane 12. Join me as we explore the updated performance, features, and overall experience it delivers, assessing its fidelity to the real-world aircraft's legacy and its place in the virtual aviation world. Installation Installing the FF 757 is remarkably straightforward. Firstly, download the file from the X-Plane.org store, unzip it, and then place it in the X-Plane/Aircraft directory. When you load the aircraft for the first time, you'll be prompted to enter your licence key, which can be found in the “My Account” section of the X-Plane.org store. After you've reloaded the simulator, you can start enjoying your brand new 757! Updating the aircraft is just as easy; you have the option to download the update from the store and drag and drop the files into the aircraft folder, or alternatively, you can download and install X-Updater and use it to update the aircraft. Personally, I find X-Updater to be the preferred method as it's very quick and straightforward. Documentation The FlightFactor 757 Global package is accompanied by ten distinct PDF documents relating to the aircraft. These encompass a variety of resources such as the "752 Checklist v1.1 Double side," "752 Checklist v1.1 Full Page," the extensive "757 FCOM," "757 Remote CDU Manual," "757-300 performance," supplementary "FCOM FPDS," "FMS (All Variants)," and three versions of the manual including "Manual," "ManualFPDS," and "ManualVR." These documents are incredibly detailed and informative, with the "757 FCOM" document alone surpassing 1,000 pages in length! Indeed, you've read that correctly…a staggering 1,000 pages! About FlightFactor FlightFactor continues to offer regular updates and enhancements for their 757/767 and A320neo models. While the A350 remains supported, updates for it are issued less frequently. The 757 and 767 models are notably similar, both in terms of quality and flight experience (in real-world aviation, they share the same Type Rating). FlightFactor is also working on the eagerly awaited Boeing 777 V2, expected to be released later this year. This upcoming version is highly anticipated to establish a new benchmark for payware aircraft in X-Plane 12. Versions and Variants The X-Plane.org store offers several packages of the 757, each catering to different preferences and requirements: Boeing 757 Professional, which focuses on the 757-200 model. Boeing 757 Extended, encompassing the 757-200, 757-300, 757-SF Cargo, and 757-C32 variants. Boeing 757 Global Pack, a comprehensive collection that includes all variants alongside a modern avionics package. For the purposes of this review, we will concentrate on the Global Pack, as, in terms of quality, all variants are remarkably similar. Included with the Global Pack are a total of fifteen liveries, which includes a blank paint kit. These liveries are mostly specific to the passenger, freighter, or C32 versions of the aircraft, representing a generous selection that encompasses several of the primary 757 operators. It’s worth noting that upon loading the aircraft, a popup will emerge, offering options to configure aspects such as the aircraft’s engines and winglets. Updates Recent months have seen significant updates to the aircraft, enhancing both its performance and realism in X-Plane 12. Notable among these improvements is the refinement of spoilers and flaps drag in version 2.6.9, aimed at achieving greater accuracy and optimisation for X-Plane 12. Moreover, version 2.6.10 addressed the "slow flight controls" issue, a problem that emerged with the comprehensive X-Plane 12 overhaul introduced in update 2.6.6. FlightFactor has also been fine-tuning the engine performance and lighting, further optimising these elements for X-Plane 12. In addition, "Apple Silicon native support" was recently introduced, alongside fixes for multiple bugs, including the "default view and fuel issues in the -300 variant" and a "possible engine shutdown" bug. These updates underscore FlightFactor's commitment to the continuous improvement of this aircraft. Furthermore, with update 2.6.10, the dependency on "libGLU" was eliminated, streamlining the software's operation. This series of updates highlights the FlightFactor team's dedication and ongoing efforts to enhance and refine the aircraft. Current version at time of writing is 2.6.12, which adds/addresses the following: Added an ability to enable/disable LuaJIT from the tablet Added BUS ISOLATED eicas messages Fixed RAT door LIT texture issue Fixed cockpit windows de-ice feature (xp12) Fixed possible unexpected ILS freq/crs changing without your input Fixed CG calculation in the tablet (xp12) Fixed the RAT beacon color Fixed the stab in 200, RF and C-32 Small fixes for de-ice systems Small fixes for brake press indication Got rid of libGLU dependency in FF_Effects plugin Retuned fuel flow Exterior Modelling The exterior modelling of the 757 is nicely executed, with the aircraft being accurately depicted within X-Plane 12. While it may not boast the highest level of detail, it is certainly more than satisfactory, especially when taking into account the aircraft's size and the potential impact on performance. The landing gear and engines are exceptionally well-modelled, standing out as particularly high-quality elements. However, there are areas that could benefit from further refinement, such as the roof where the SATCOMs are situated, which appears to require a slight visual improvement. Exterior Texturing The exterior texturing of the aircraft is generally satisfactory, with most essential details captured, though some textures display a lower resolution, even when the “texture quality” setting in X-Plane is maximized. The engines, for instance, feature exceptionally sharp manufacturer logos, including those of Rolls-Royce and Pratt & Whitney. Similarly, warning labels and text maintain a high level of clarity. However, textures depicting panel edges, bolts, and signs of wear such as dirt and scratches are of markedly lower quality, detracting from the overall immersive experience. This inconsistency extends to the fuselage, where although text on the doors is crisp and clear, other elements like panel edges and bolts suffer from low resolution. While parts of the landing gear textures are well executed, others fall short of this standard. In conclusion, the exterior visuals are acceptable, especially considering that the majority of the time is spent in the cockpit, engaged in flight. In saying that, there is considerable room for improvement to enhance the visual fidelity and immersion of the model. Interior Modelling The cockpit's interior modelling is impressively executed, with every knob, switch, and lever accurately rendered to reflect the real Boeing 757 flight deck's high level of detail. The overhead panel, with its switches and buttons, looks particularly well modelled, as does the Flight Management Computer (FMC). The yoke, tiller, and throttle levers are also nicely modelled, though, when compared to actual photographs of the flight deck, the yoke appears somewhat smaller than its real-world counterpart. In the passenger variants, the seat modelling is nicely done, presenting a nice level of detail. However, the rest of the cabin does not maintain this standard; the galley is notably featureless, and the modelling of the overhead lights and seat buttons is lacking. Interestingly, the rear galley exhibits slightly more detail than the forward galley, which seems slightly strange. The C32 variant boasts a unique interior cabin that mirrors a Boeing Business Jet (BBJ), with the general modelling quality on par with the passenger variants. A feature which stands out is the command room, which is exquisitely detailed and offers a high degree of authenticity. As for the freighter variant, it features a simplified forward galley, but access to the cargo hold from the interior is not modelled. The cargo hold can only be viewed using the “free look” camera mode. Although the cargo hold's modelling is basic, it adequately represents such a space. Given the primary focus on the cockpit (which has evidently received the bulk of attention and effort) the lack of intricate detail in the cargo hold does not significantly detract from the overall experience. Interior Texturing Within the cockpit, the texturing, in my view, falls somewhat short, as the textures appear "flat" and lack the nuanced details of wear and tear one might expect. While the textures on switches and knobs are consistent and accurate, they do not convey a sense of the aircraft having been frequently used. Essentially, the cockpit looks almost brand new, apart from some slight weathering, which, for an aircraft that is getting on in years, seems like a missed opportunity in which to introduce some signs of wear, such as peeling paint. However, the colour accuracy, when compared to real-world images of the Boeing 757 flight deck, is pretty much spot on. On the positive side, the sharpness and legibility of text within the cockpit are outstanding features. The jump-seat texture is also notably sharp and detailed. Furthermore, the lighting on the overhead panel buttons is well executed, contributing to a more immersive experience. The inclusion of dirt and scratches on the displays adds a layer of realism, with the extent of wear adjustable via three settings in the Electronic Flight Bag (EFB), a feature we'll explore in greater detail later. The cabin textures in the passenger variant mirror some of the cockpit's limitations. The carpet's deep blue hue adds a touch of appeal, yet the side panels, overhead bins, and walls suffer from somewhat flat textures, occasionally appearing less detailed. The seat textures fare slightly better, offering more clarity, though this diminishes upon closer inspection. Given its price point, one might expect more refined interior textures, but considering the model's age and the pace of X-Plane’s development, some leniency may be warranted. Night Lighting The night lighting, both inside the cockpit and externally, is very nicely done. The colours and brightness levels are spot on, creating a highly immersive nocturnal flying experience. It's worth noting that I have a particular fondness for operating this aircraft at night, primarily due to the exceptional quality of the night lighting. Among the noteworthy features are the dynamic reflections on the windscreen, which vary according to the cockpit lighting's intensity. Similarly, the cabin lighting, which is entirely adjustable from the cockpit, enhances the overall ambiance. The cabin, in my opinion, appears significantly more appealing under the night lighting, contributing to the allure of nocturnal flights. Furthermore, the cabin lighting is visible from the exterior views, with its appearance altering in response to the cabin lights' brightness settings. The lighting system has received considerable refinement in recent updates, a fact that is clearly reflected in the outstanding quality of the night lighting. Flight Model The flight models across the 757 fleet are impressively realised, with variations that reflect the differences in engine types and the distinct characteristics between the 757-200 and the longer 757-300. The flight model captures a satisfyingly heavy feel, appropriate for an aircraft of its size, yet remains keenly responsive to pilot inputs. Despite the absence of a fly-by-wire (FBW) system for the primary flight controls: though FBW is employed for certain control surfaces like the spoilers, the connection between pilot and aircraft feels direct and intuitive, enhancing the flying experience. FlightFactor has excelled in simulating the ground physics of the 757, making taxiing a straightforward and responsive task, whether using the rudder or tiller for navigation. The 757's reputation for being overpowered is accurately depicted in the FlightFactor 757. Advancing the thrust levers, particularly with the Rolls Royce RB211 engines, results in remarkable acceleration, capturing the aircraft's real-world performance perfectly. A fully laden 757 demonstrates a realistically extended take-off roll, adhering to expectations. Recent updates have significantly refined the flight model, addressing previous issues related to bugs and sluggish response times. Efforts to update the simulation of flap and speedbrake drag have resulted in enhanced accuracy, bringing the virtual experience ever closer to the realities of flying the actual aircraft. Sounds The default sound package of the aircraft is generally acceptable. The simulation of switches and rotary knobs in the cockpit is notably well done, delivering satisfyingly crisp auditory feedback. However, this level of detail and depth doesn’t extend to all sound aspects, such as the air conditioning and Auxiliary Power Unit (APU) noises, which fall short in terms of depth and variation. A notable absence of bass contributes to these sounds feeling somewhat flat and lacking in interest. The engine sounds differentiate adequately between the Pratt and Whitney and Rolls Royce engines, although, like the air conditioning and APU, the interior engine sounds could benefit from a richer bass presence. Conversely, the exterior engine sounds are more robust, offering a substantial depth and a significant amount of bass, though they are quite loud in their default setting. Thankfully, sound levels can be adjusted within the Electronic Flight Bag (EFB), allowing for a more tailored auditory experience. The flyby sounds are also decent, aligning with the standard of default X-Plane aircraft sounds. Ambient noises, such as those of a bustling airport, can be heard in exterior views when the aircraft is in a cold and dark state. Personally, I find this addition slightly strange, detracting rather than enhancing the realism. Furthermore, the persistent interjections from the flight attendant regarding issues like cabin temperature, while aiming for realism, may not be universally appreciated. The option to disable this feature would be a beneficial addition for those who find it more intrusive than immersive. Moreover, the aircraft features an extensive selection of Passenger Announcement (PA) options, yet these PA sounds lack authenticity, bearing a resemblance to synthetic text-to-speech outputs rather than genuine in-flight announcements. Performance On my setup, the performance impact of operating the 757 is noticeably more pronounced than with any of the Toliss aircraft, which are renowned for their exceptional optimization. Specifically, I experience a reduction in frames per second (fps) by approximately 20% to 30% on average compared to the Toliss fleet and the default A330. Additionally, the 757 appears to demand more VRAM than the Toliss models and the default A330. An analysis using the plugin admin reveals that the 757's SASL plugin is a significant factor, accounting for nearly 20% of the performance load as depicted in the "performance pie chart." This indicates a clear need for an overhaul of the SASL's performance to enhance overall efficiency. Despite these performance challenges, I haven't experienced any stuttering issues, even when flying into more demanding airports like EGLL (London Heathrow) or KLAX (Los Angeles International). This suggests that while there is a tangible impact on performance, it may not critically affect users capable of running the default A330 at a reasonable fps. Nonetheless, improving the performance of the 757 remains an area in need of attention to ensure it aligns more closely with the high standards of efficiency seen in other aircraft within X-Plane. Systems The systems on the 757, while not as intricate as those found on Airbus aircraft, still present a level of complexity and accuracy expected from a Boeing model. The engine pages, Primary Flight Display (PFD), and Navigation Display (ND) are well-executed, displaying all the requisite information one would anticipate from such an aircraft. However, I would hesitate to categorize the systems as "Study Level," primarily due to the basic nature of the failure simulation. Some failures, for instance, either fail to activate or have no discernible impact on the aircraft's operation. A case in point is an attempted simulation of an Auxiliary Power Unit (APU) engine failure, where the APU merely switched off without triggering an auditory warning like the Master Caution. The sole indication of the failure was an "APU Fail" message on the Engine Indicating and Crew Alerting System (EICAS) display. Additionally, the Electrical Bus (BUS) system, although generally accurate, suffers from a frustrating bug. Occasionally, when the APU or Ground Power Unit (GPU) is disconnected, the BUS Ties unexpectedly switch to the "Isolate" position rather than remaining in "Auto." This deviation from expected behaviour has, on several occasions, led to the aircraft shutting down during pushback, despite the APU and its generator being operational and connected to the BUS. On a positive note, the terrain and weather radar systems perform commendably, offering accuracy and reliability that significantly aid navigation in challenging weather conditions or when flying in proximity to hazardous terrain. EFB (Electronic Flight Bag) The EFB featured in this aircraft boasts a comprehensive array of options and functionalities, accessible either through the X-Plane “Plugins” menu or by interacting with the tablet within the cockpit. Engaging the tablet brings up the EFB as a 2D window. The "General" page presents some basic settings, including a master volume slider, providing a straightforward interface for adjusting essential parameters. The “Operations – Ground” page facilitates interaction with various ground services and the management of the aircraft’s weight and balance. Although it lacks a dedicated Weight and Balance chart, the "Optimise CG" button proves invaluable for adjusting the centre of gravity according to different load configurations. Loading the aircraft requires precise coordination of ground services and the opening of specific doors, a process that, while occasionally cumbersome, enhances realism. On the “Operations – Aircraft” page, users can manage door controls, adjust certain settings, and select engines. It's important to note that engine swaps are not possible once the aircraft is operational. The "Options" page, along with its subpages, offers an extensive selection of adjustable settings, ranging from auditory cues to visual effects. This section also provides the opportunity to install the "Modern Avionics" pack, assuming ownership. Further details on this upgrade will be discussed later in the review. The “Failures page” allows for the simulation of various system failures, designed with user-friendliness in mind, reminiscent of an installation wizard. This feature enables pilots to prepare for and respond to potential issues in a controlled environment. Insert failures page Lastly, the "In-Flight" page includes functionalities for activating Passenger Announcements (PAs), accessing navigational charts, and utilising a checklist feature that simulates the presence of a first officer, enhancing the realism and immersion of the flight experience. Modern Avionics Upgrade The "Modern Avionics Upgrade" package integrates well, offering a nuanced enhancement for simmers seeking a bit of diversity. It brings new operational dynamics and functionalities, but also a learning curve and the need for adaptation. The package is particularly appealing for those looking to engage with contemporary flight scenarios or enhance their proficiency with advanced systems, acting as a bridge to more modern aviation technologies. However, its value truly lies in the simmer's readiness to explore the aircraft's systems more deeply and to increase the authenticity of their flights. The upgrade is a valuable tool for those willing to invest the effort to fully appreciate its benefits. Conclusion In summing up, FlightFactor’s model stands as a commendable and accurate portrayal of the Boeing 757 and its principal variants. The ability to operate flights ranging from commercial passenger services to cargo hauls and even transporting senior political officials adds a unique and engaging dimension to each flight, ensuring a fresh and challenging experience. Despite the need for enhancements in visual and auditory fidelity, the systems and flight model are robust, offering a high-quality simulation of the Boeing 757, that will satisfy aviation enthusiasts and serious simmers alike. FlightFactor's commitment to continuous improvement is evident in their regular updates, giving users confidence that existing bugs will be addressed in due course, following the precedent set by previous fixes. While a visual overhaul is on the wishlist, the existing framework provides a solid representation of this nimble passenger jet. Performance optimisation is another area for potential enhancement; however, the current state remains functional and does not detract significantly from the overall experience. The price point may seem steep, especially considering the aircraft's age within X-Plane’s marketplace, but it's important to remember that the “Global Pack” offers substantial value. This package includes four distinct aircraft variants along with the “Modern Avionics package,” making it a comprehensive choice for those looking to extensively explore the capabilities and variations of the Boeing 757. ________________________ Boeing 757 version 2 Professional Global Package by FlightFactor is now available from the X-Plane.Org Store here: Boeing 757 version 2 Professional Global Package Priced at $119.00 Features Supports both X-Plane 12 (fully updated) and X-Plane 11 The FPDS variant contains High resolution (768 x 1024 pixels) XGA multi-color LCD flat panel display with integrated standard six – FULL glass cockpit All digital electronics with improved accuracy, dependability and responsiveness DCP with Speed Reference Settings Minimum Selection (Radio or Baro) Units Selection Integrated Barometric Altimeter Setting Flight Path Vector Meters Altimeter The Boeing 757 Professional Extended includes 3 variants of the 757: 757-200 Passenger 757-200SF Cargo 757-300 Each plane is available with two different engine configurations (P&W and RR). Officially licensed by the Boeing © Corporation Accurate dimensions based on drawings supplied by Boeing © Support for X-Plane 11 and X-Plane 12 Suitable for beginners- Tutorial modes and auto procedures Great for advanced users - Complex systems are simulated Includes both Rolls-Royce and Pratt & Whitney engine types VR Compatible Flight model Accurate flight model, as close as it gets to real performance. Tested by real pilots. Dynamic and customizable center of gravity that depends on actual cargo, passenger placement and burning fuel in flight. Fully Functional Professional FMS and EFIS System Custom designed Flight Management Computer, integrated with other plane systems. Terminal procedures from updatable database. Two independent analogue instrument sets for captain and first officer. Two independently simulated EFIS (EADI/EHSI configuration) for captain and first officer. Dual-FMS with two independently working CDUs. Working instrument comparators. Triple IRS and triple symbol generator systems with realistic instrument source switching. Dual air-data computers with custom failure modes and source switching. Independent 2 nav and an ils receivers. Realistic inertial and radio position updating, you can see the individual inaccuracies of those systems. Triple-channel autopilot with realistic dependencies. Fail operational and fail passive autoland with mode degradations based on system failures. Load company routes generated by Professional Flight Planner X (or other compatible programs) directly into the FMC. FMC can be used on external touchscreen or tablet, optimized for the Retina iPad. Custom cockpit interaction system Adjustable modes for cockpit interaction, you chose what to use for clicks Different cockpit interaction modes, with mouse wheel and right button support In-cockpit tooltips from the manual - you click on the button and see portions of the manual on display In-cockpit life datarefs for cockpit building Options A very flexible architecture: You chose the set up Different options for many avionics instruments including two types of FMC. Options to composite your own EICAS, EADI and EHSI displays. Most of the options that the real 757 fleet has are included. Many additional options for sounds, cockpit interaction, effects etc. Interactive Checklists, Procedures, and auto-helper (Exclusive feature) Full electronic interactive checklists and procedures with automatic action detection. Automatic mode helper that performs all the actions for you. You just CHECK the items. A tutorial which shows the user what to do and when. An option to have a visual aid on what and when to do in procedures. Custom Systems and Failure model Detailed and deep simulation of almost every system in the real aircraft. Custom air and pressure system. Electrical system with all AC and DC busses modelled - see which system depends on which bus. Hydraulic system that uses a little fluid when treated correctly and a lot of fluid if used incorrectly. Multistage custom failure system - over 200 more failures than X-Plane. (Exclusive feature) Ability to fix failure by following proper procedure. Persistent failure and maintenance system - Aircraft wear and misuse will carry over to your next flight. Warning system and radars (Exclusive feature) Fully functional GPWS with all the modes the real plane has. Fully functional terrain radar, with custom database (just like the real plane), a look-ahead warning system and many other features. Weather radar that works like the real thing. Including tilt and gain functions, ground clutter, turbulence detection and windshear prediction. 3D Modeling Accurate dimensions based on exterior drawings provided by Boeing. Very detailed exterior modelling with high resolution textures. Very high resolution 3D cockpit with every switch functional. Spatial rain simulation with high detail. Very detailed passenger cabin graphics including galleys. Additional graphic features: real working oxygen masks both in cockpit and cabin, dynamic window blinds that react to sunlight etc. New and improved wingflex. Special effects (Exclusive features) Multilayer dynamic reflections on all glass objects. Glow effects on screens Reflective metal and plastic objects in the cockpit. Glossy exterior that reflects the outside. XP weather enhancements like custom windshear. Custom Sounds (Exclusive features) Two sound packs by BSS for both engines. Several hundred custom sounds. In-cockpit custom sounds. Switches with individual sounds. Many individual system sound inside and outside. Airport environment sounds. Cabin sounds. 3D stereo sound system for engines. In flight cabin announcements. Interactive communication with the cabin crew (reporting misconfigurations and passenger comfort problems). On Screen menus (Exclusive features) An iPad-like menu popping-up from the cockpit. Custom pages for loading/unloading fuel, cargo and passengers, customizing the CG, calling for pushback and performing maintenance. Ability to customize the plane with winglets, special effects level, wingflex level and set other options to be saved or default. Ground equipment and door pages. Failure monitoring menu. Extra objects and equipment Working push-back truck - Fully controllable with your joystick. Passenger bus and stairs or optional gate configuration (passengers can be loaded from gate instead of bus). Fuel truck, de-Icing truck, GPU, ground-start units both visible and fully functional with airplane systems. Other ground equipment. Liveries 7 default liveries included in the package: Air France, American, Boeing House, Jet2.com, Lufthansa, Thomson, VA X-Airways About 50 additional liveries are available separately. SmartCopilot Compatible Download the SmartCopilot files here Requirements X-Plane 12, X-Plane 11.50+ Windows 10+, Mac OS 10.15+ (Intel or Apple Silicon) or Linux 14.04 LTS or compatible, 64 bit mode Disk Space: 4 GB X-Plane 12: Minimum: CPU: Intel Core i3, i5, i7, or i9 CPU with 4 or more cores, or AMD Ryzen 3, 5, 7 or 9, or equivalent RAM: 16 GB Video Card: a Vulkan 1.3-capable video card from NVIDIA or AMD with at least 6 GB VRAM Recommended: CPU: Intel Core intel i5-12600K or Ryzen 5 3500 or better RAM: 32 GB Video Card: a DirectX 12-capable video card from NVIDIA or AMD with at least 8-12 GB VRAM (GeForce RTX 2070 or better, or similar from AMD) X-Plane 11: Minimum: CPU: Intel Core i3, i5, i7, or i9 CPU with at least 4 cores, or AMD equivalent RAM: 16 GB Video Card: a DirectX 11-capable video card from NVIDIA or AMD with at least 4 GB VRAM Recommended: CPU: Intel Core i5 8600k or Ryzen 5 3500 or better RAM: 32 GB Video Card: a DirectX 12-capable video card from NVIDIA or AMD with at least 8 GB VRAM (GeForce GTX 1070 or better, or similar from AMD) Review System Specifications Windows 10, Intel i5-12400F, 32GB RAM, RTX 3070Ti ________________________ Aircraft Update Review by DrishalMAC2 31st March 2024 Copyright©2024: X-Plane Reviews (Disclaimer. All images and text in this review are the work and property of X-PlaneReviews, no sharing or copying of the content is allowed without consent from the author as per copyright conditions).
-
Dominic Smith reacted to a post in a topic:
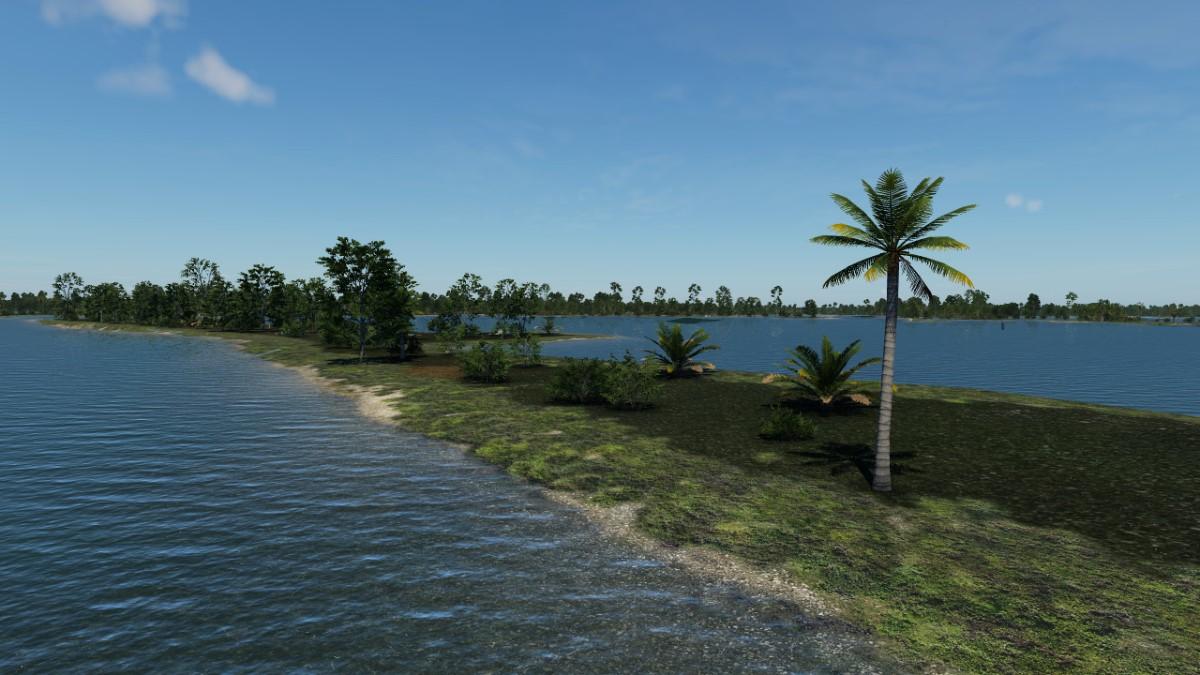
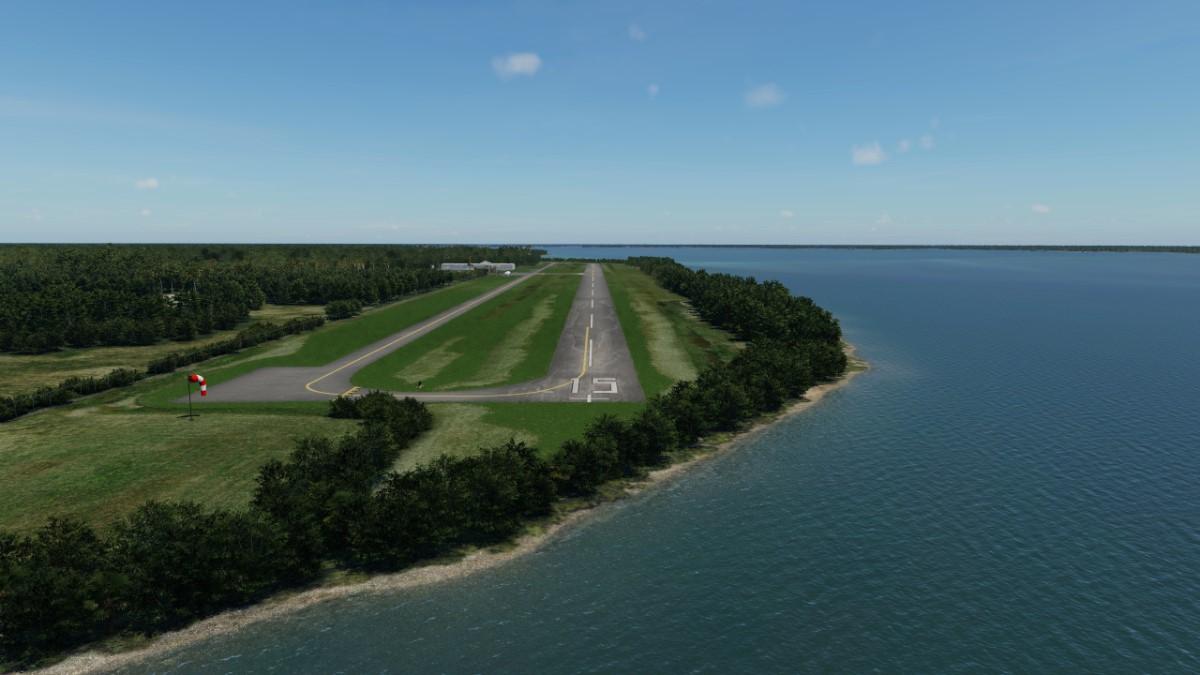
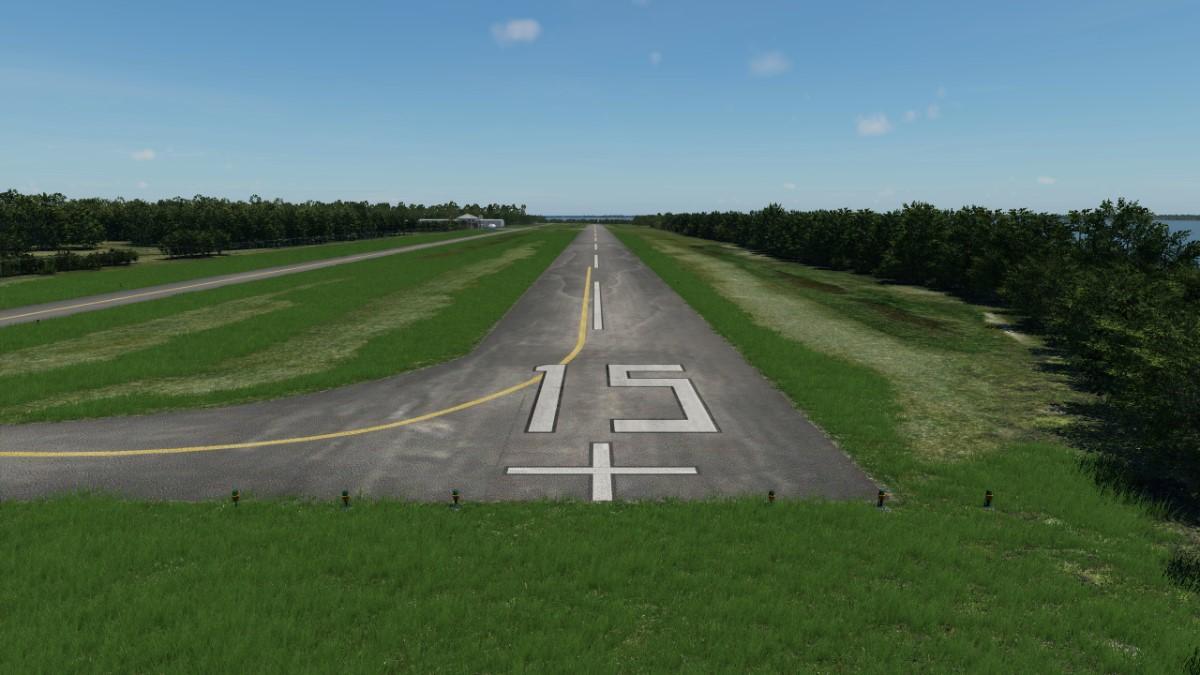
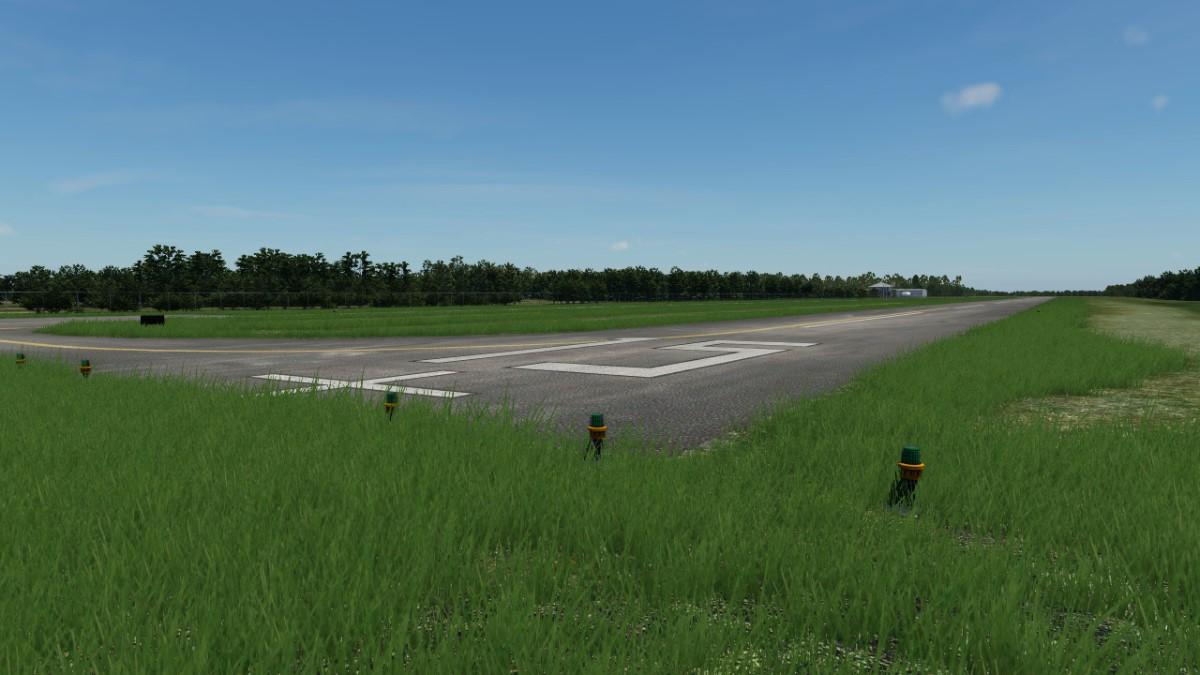
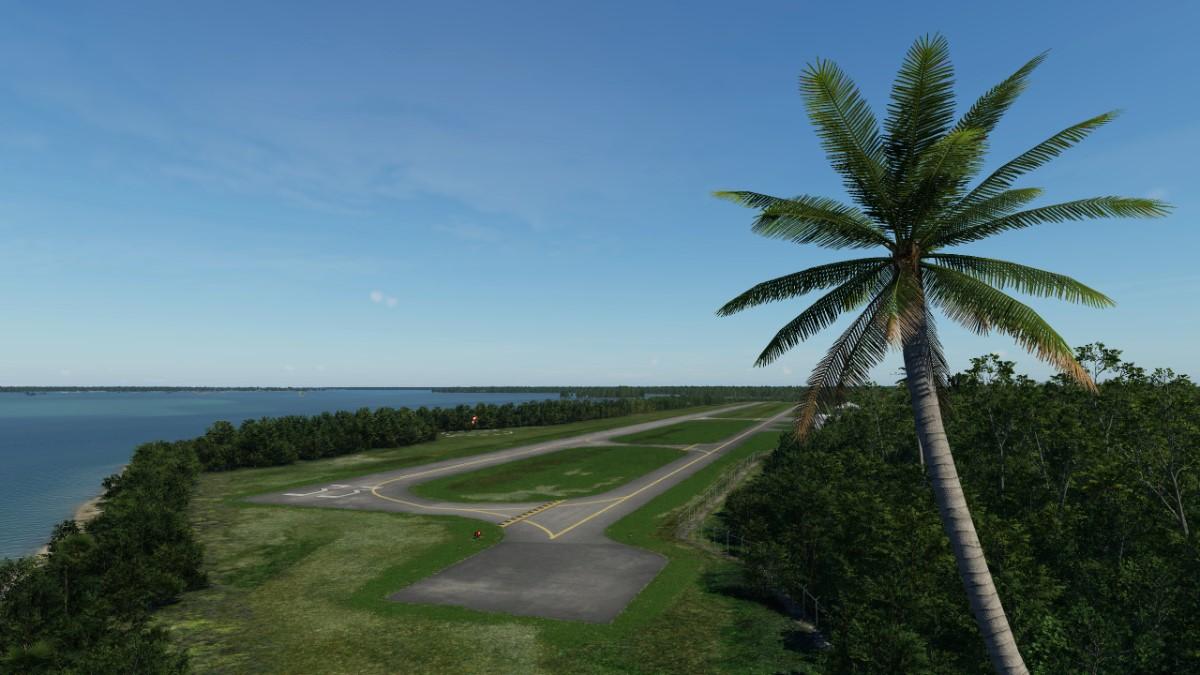
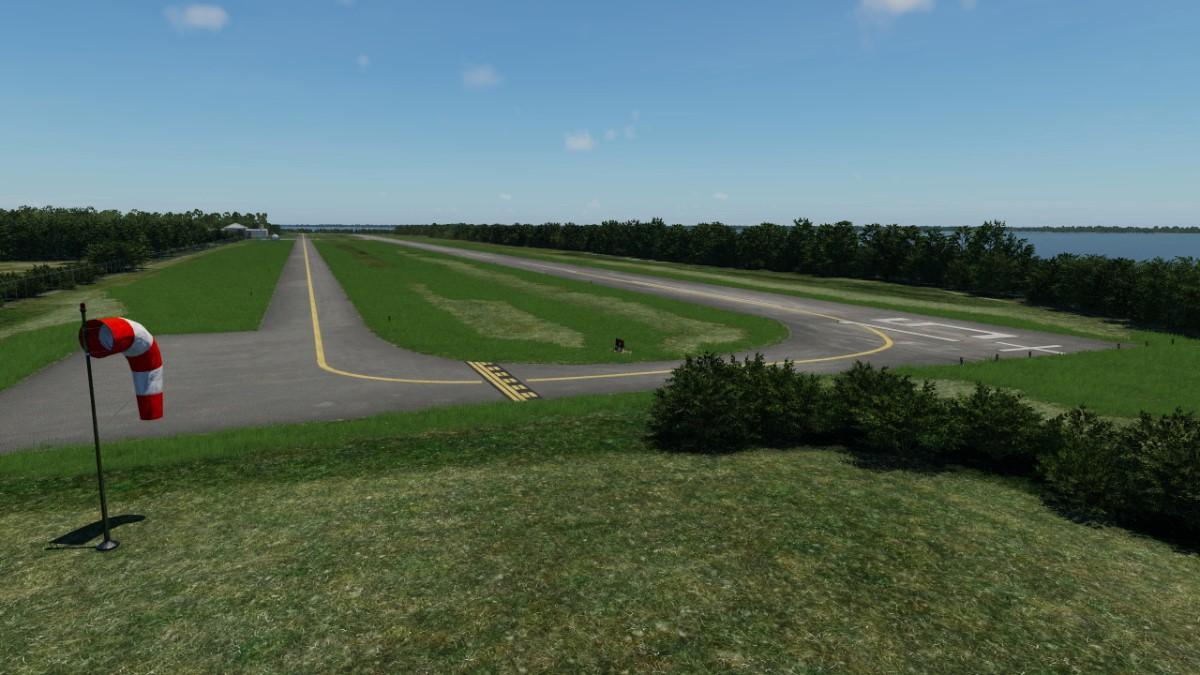
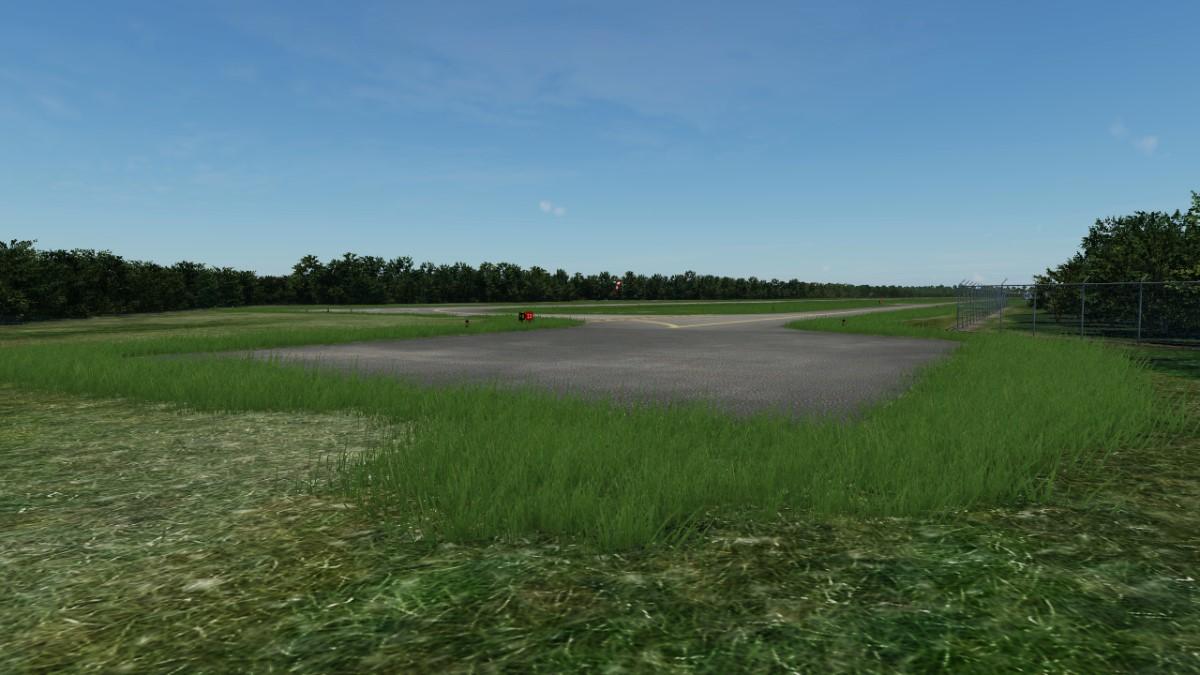
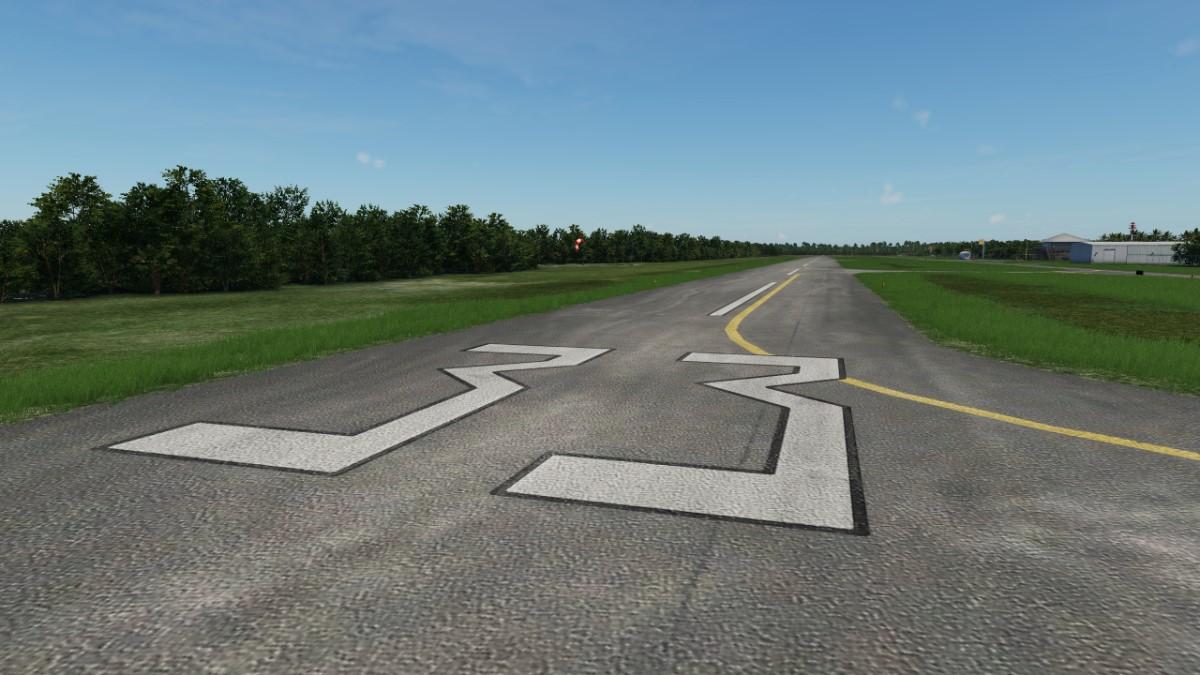
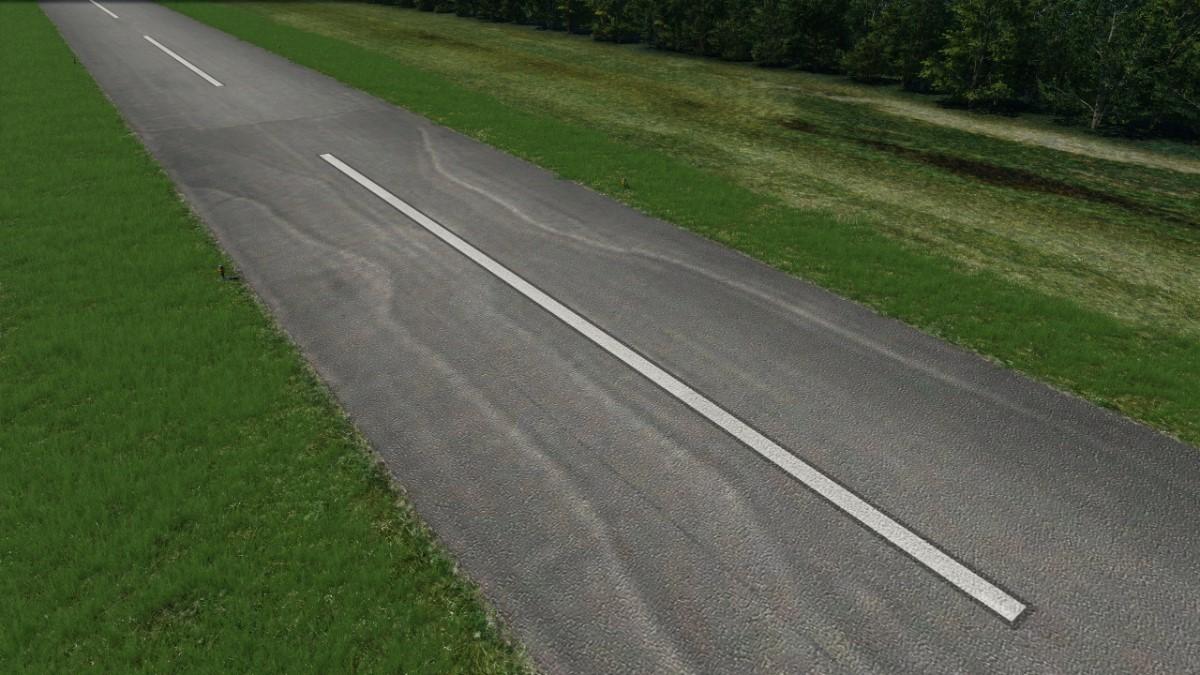
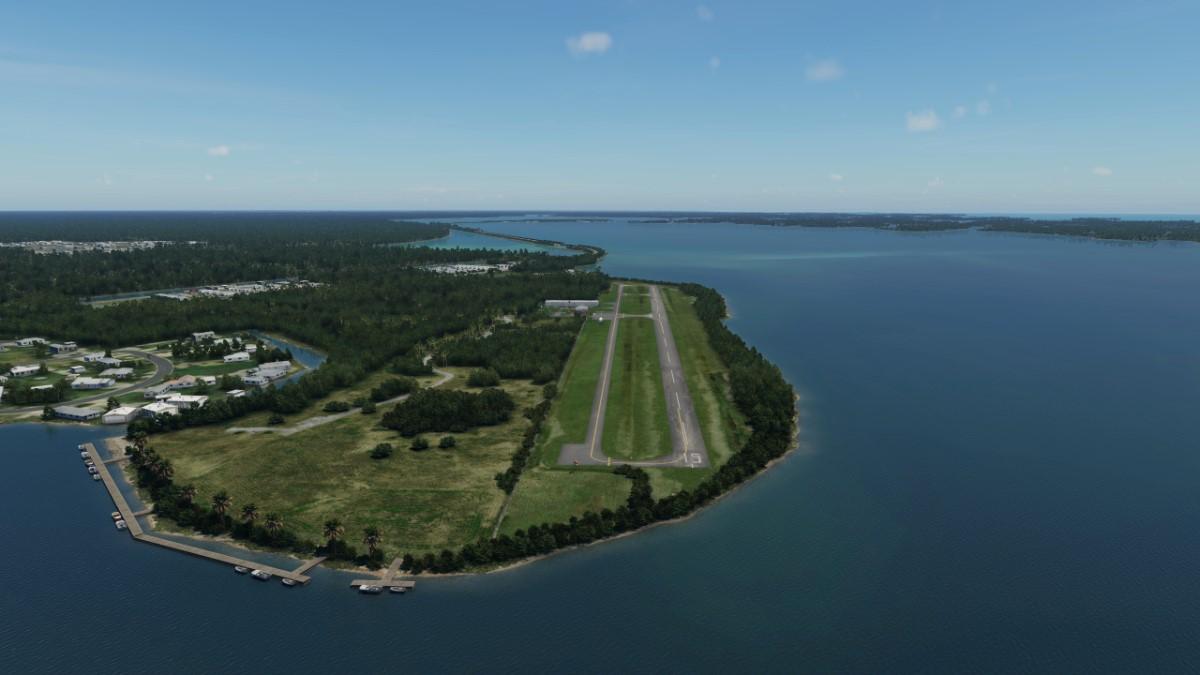
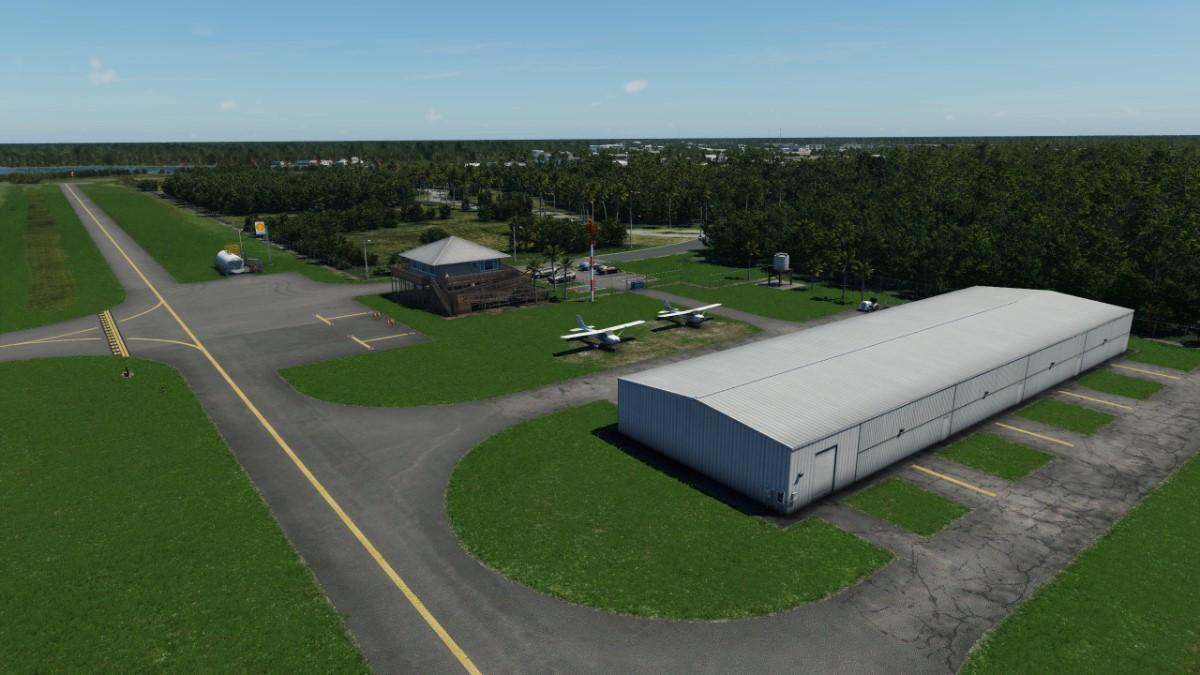
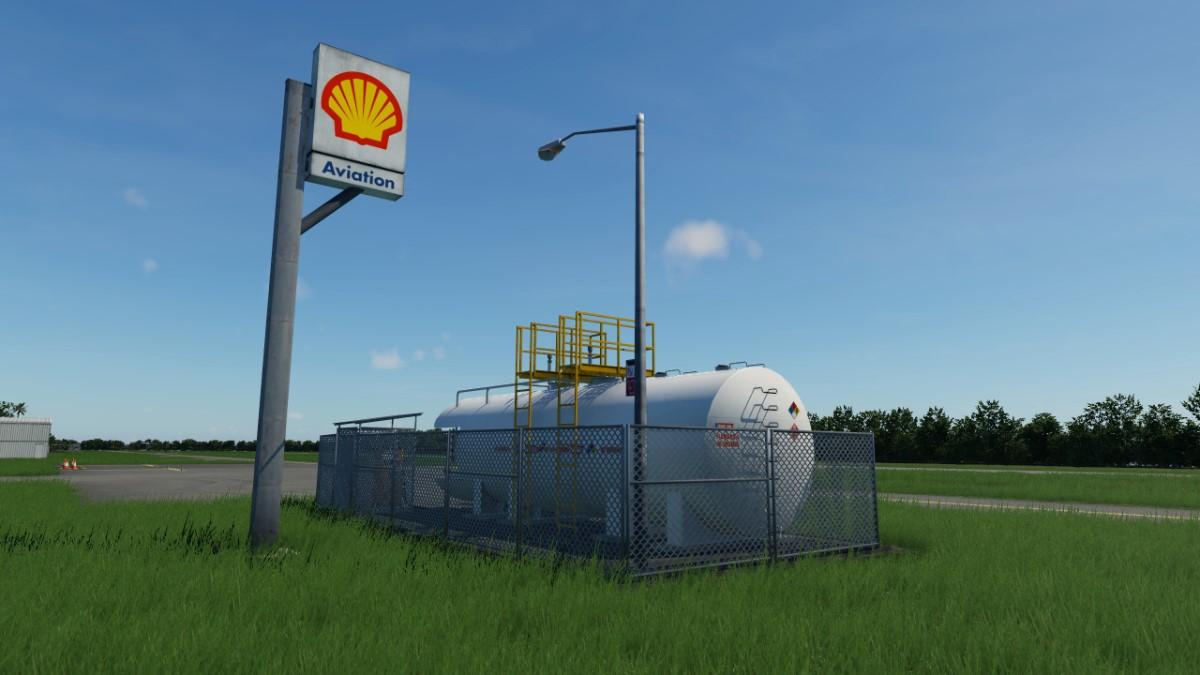
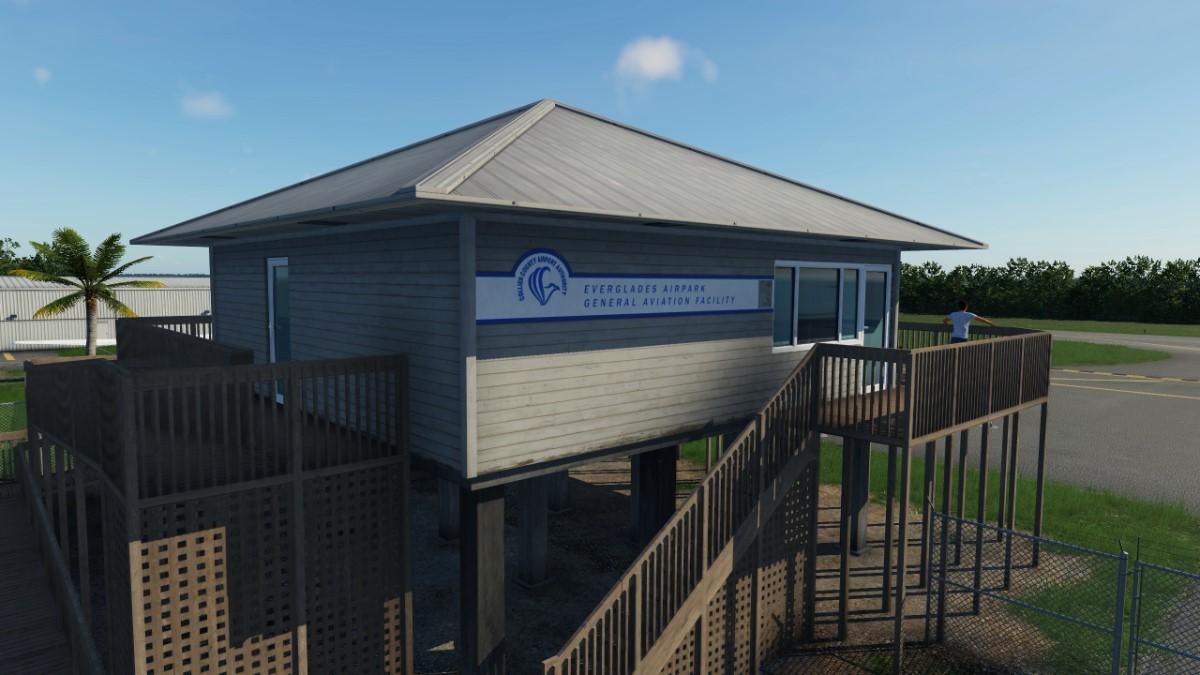
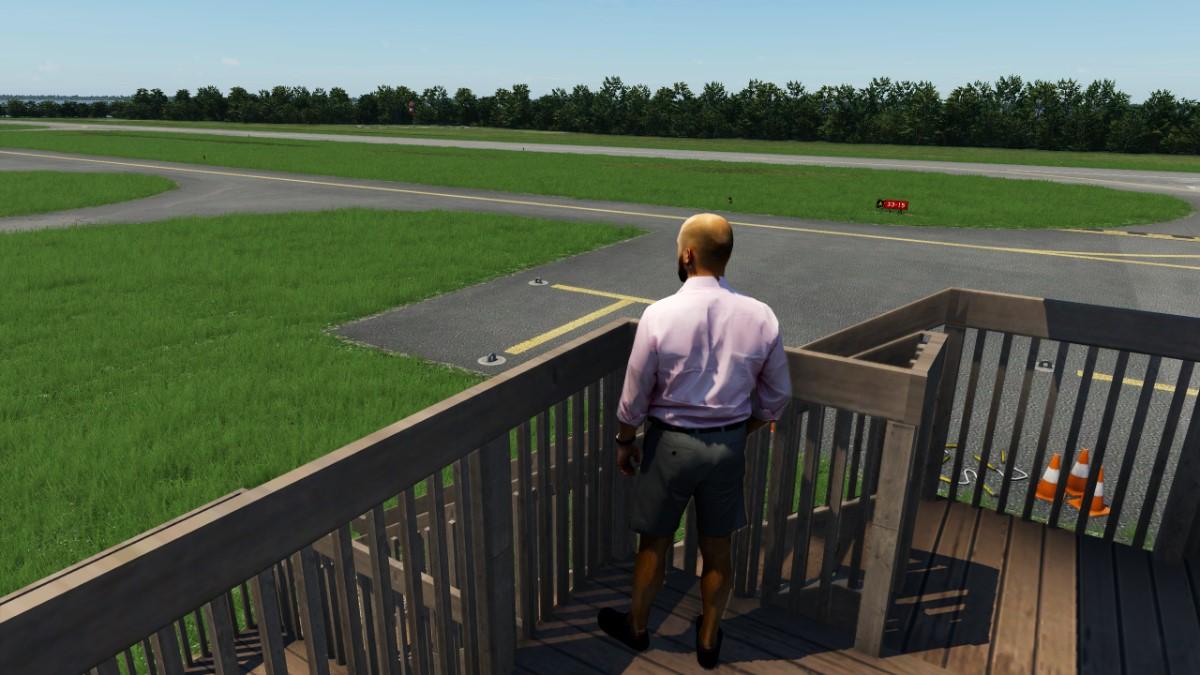
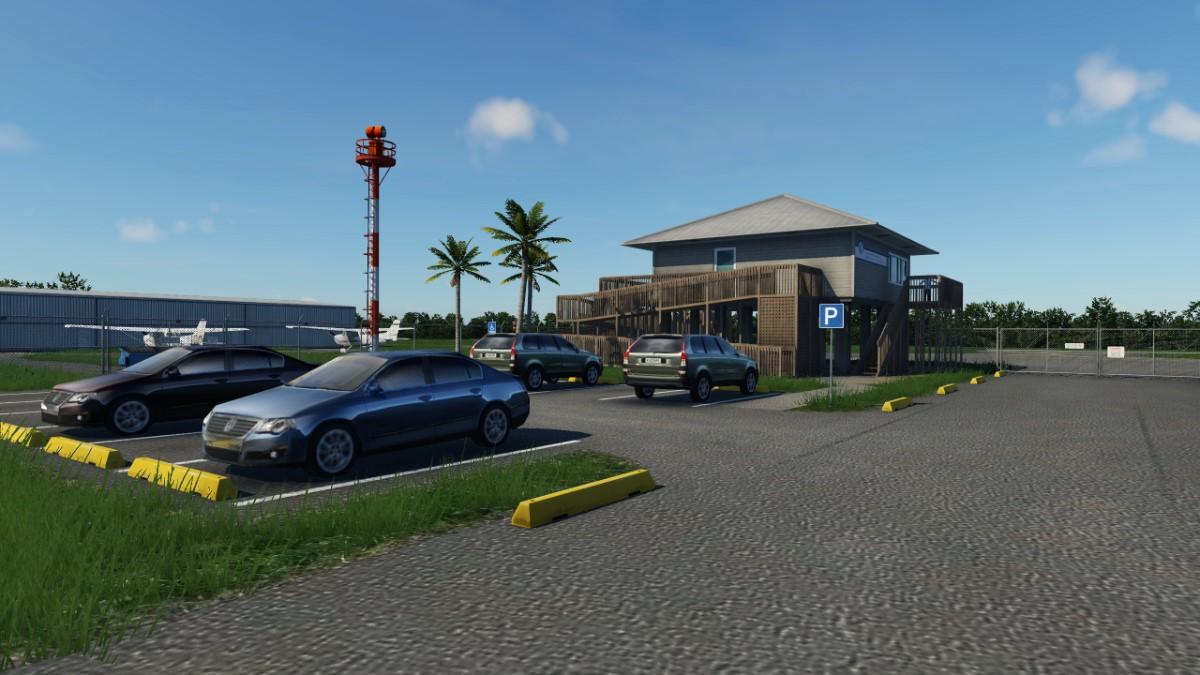
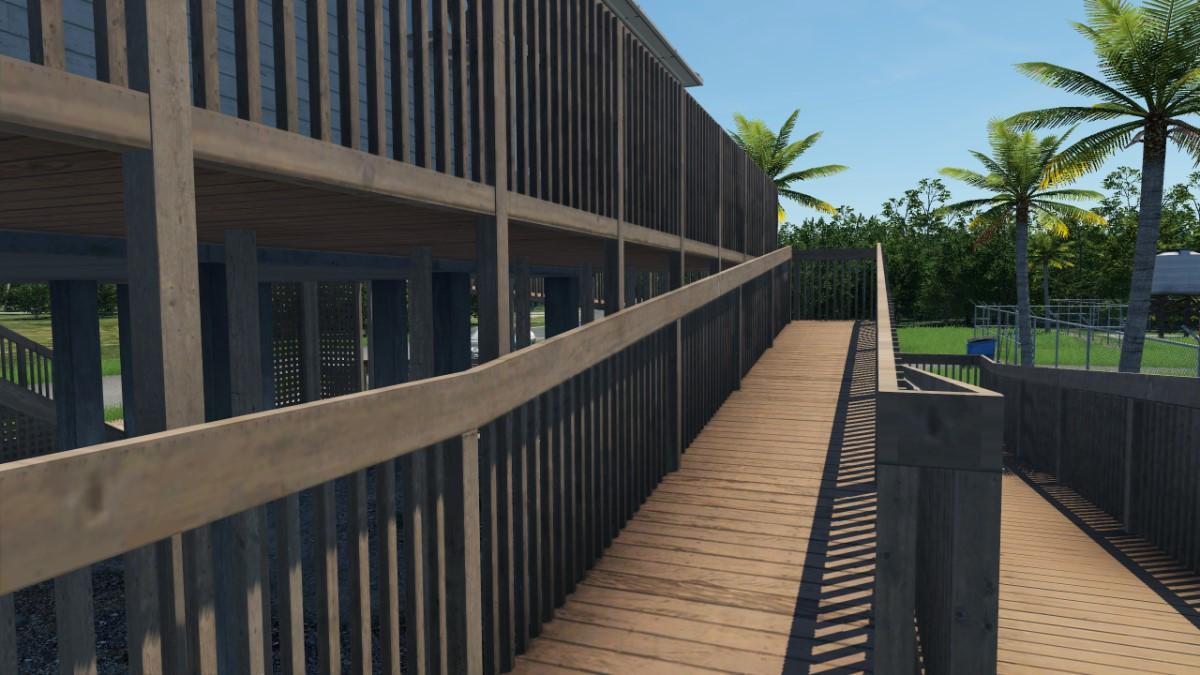
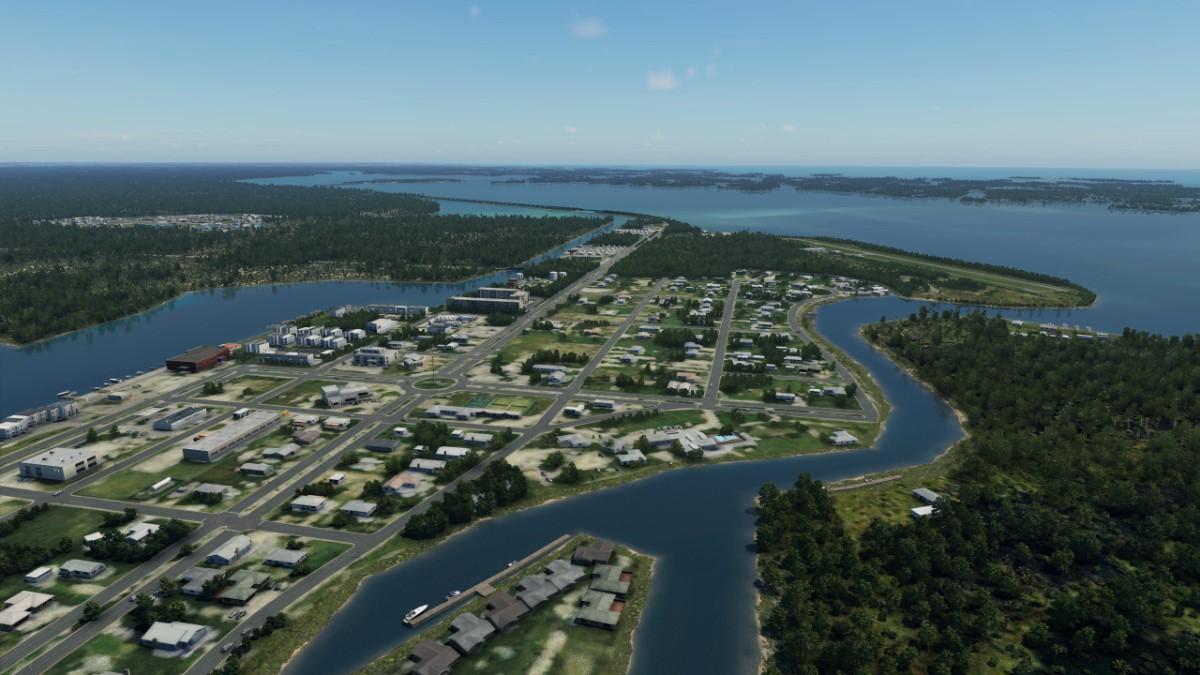
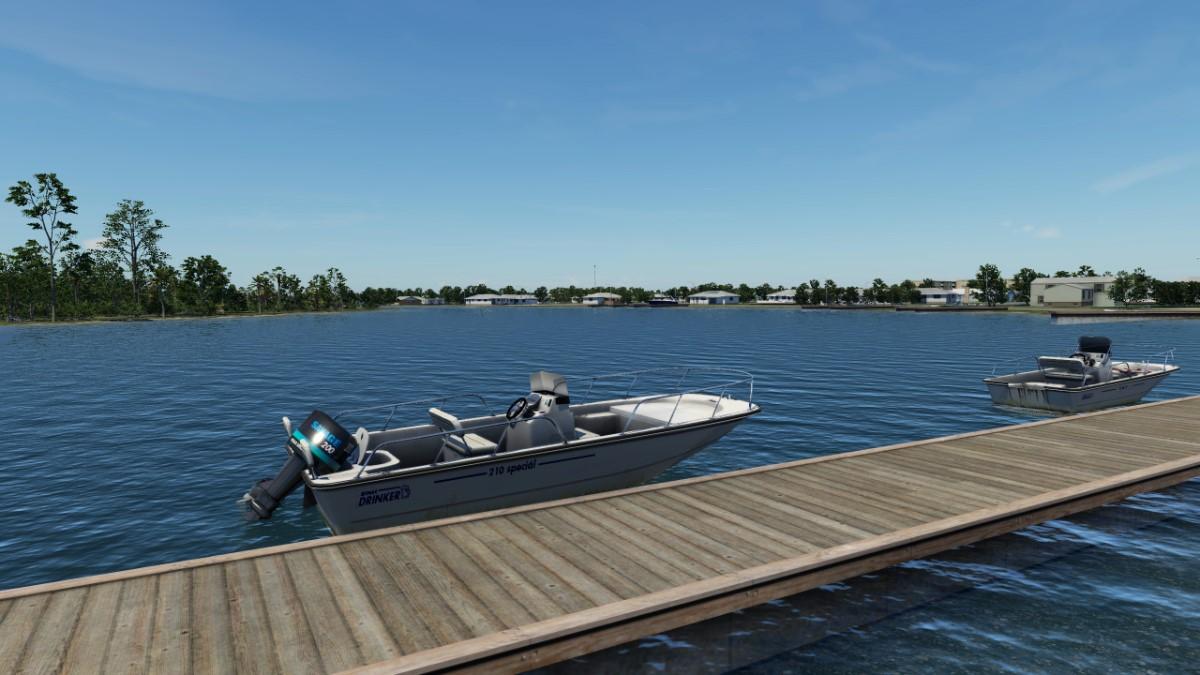
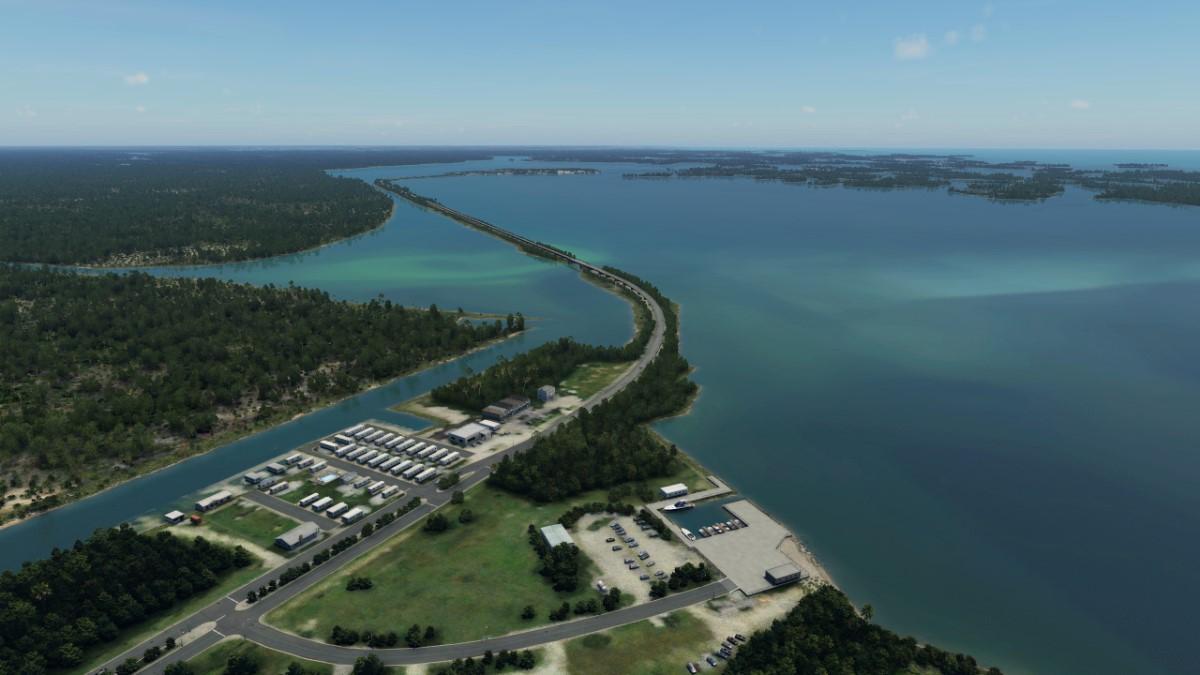
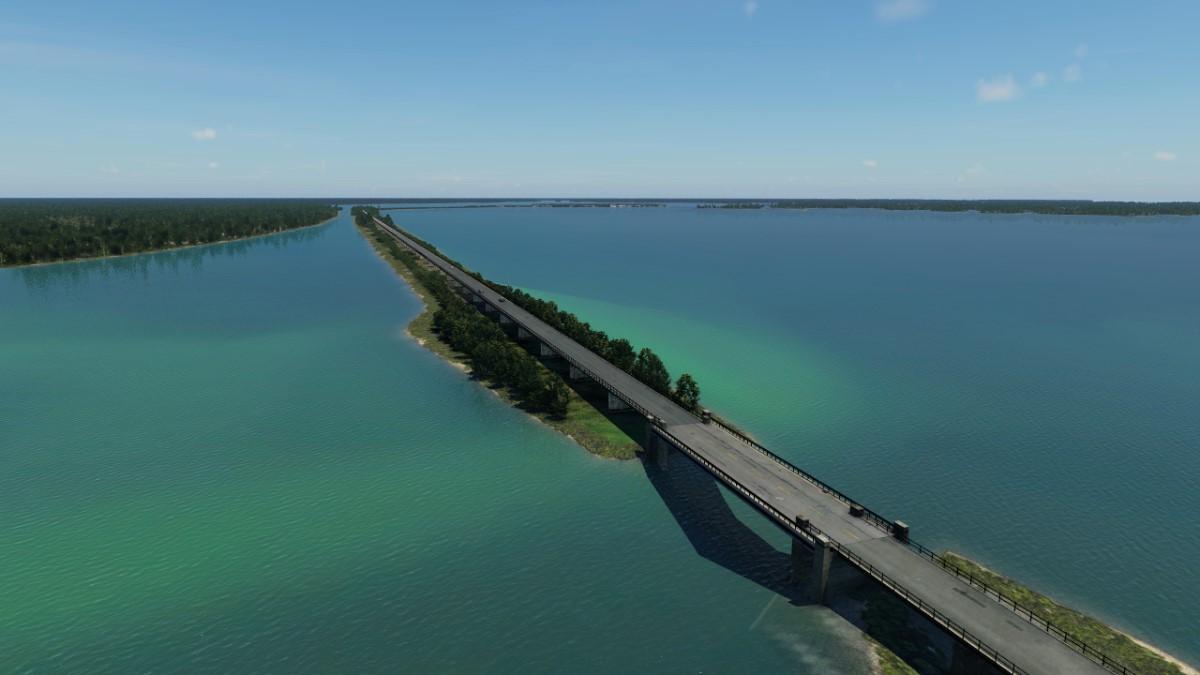
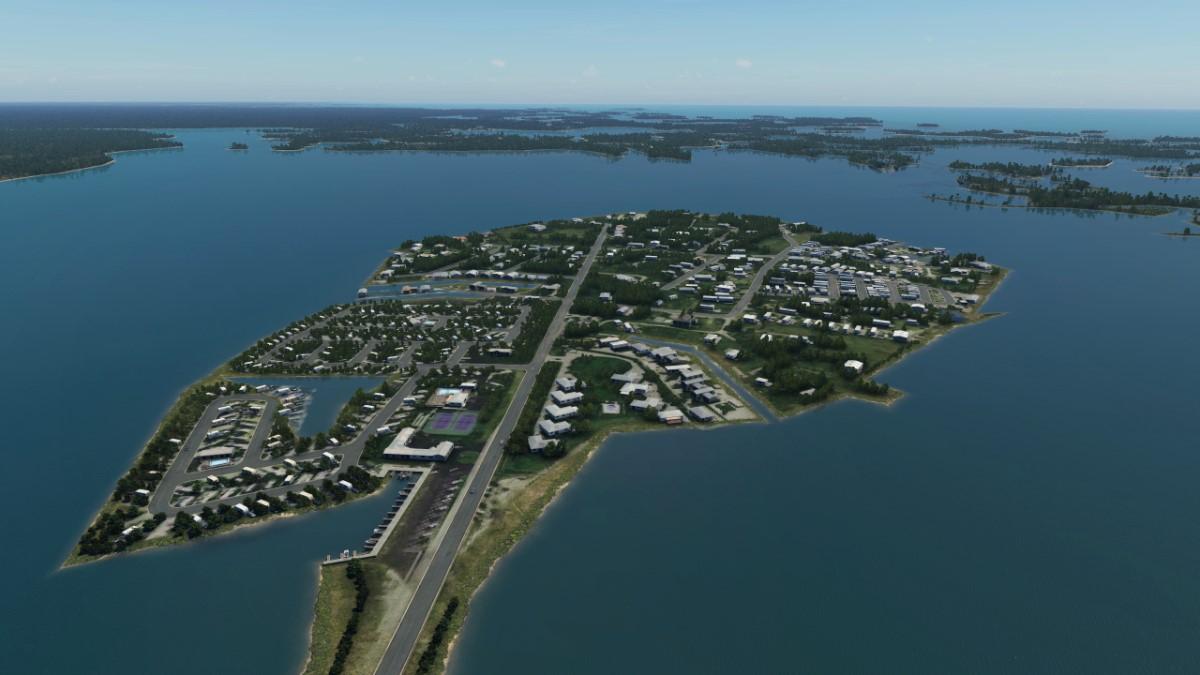
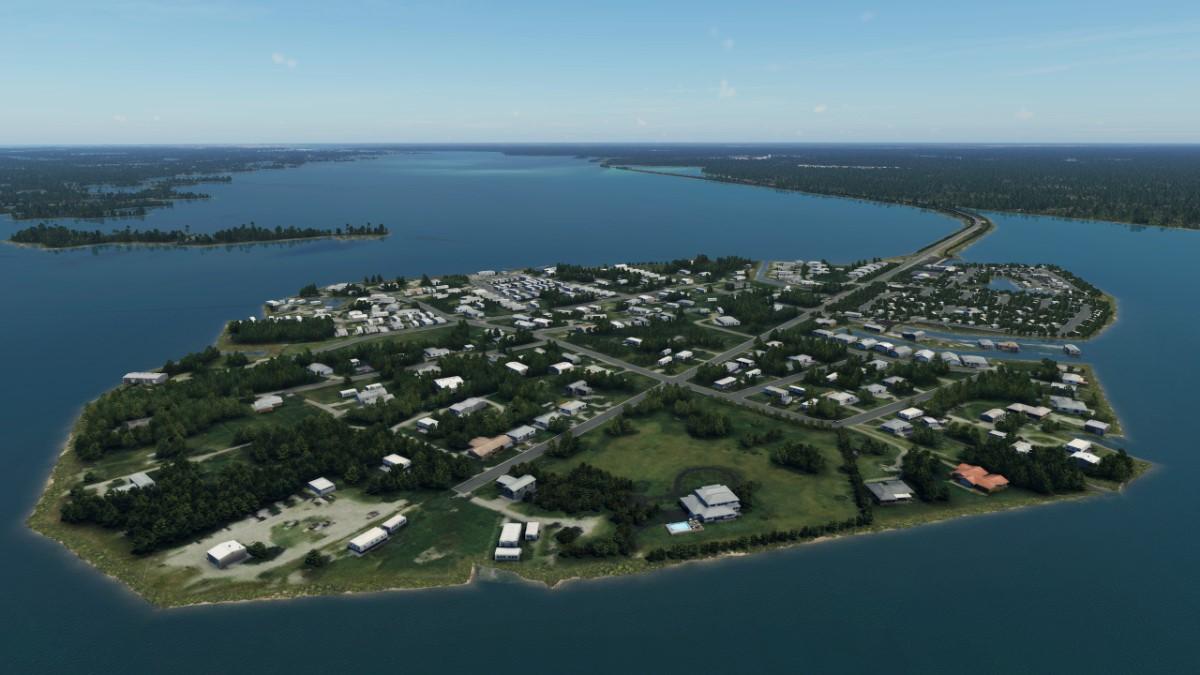
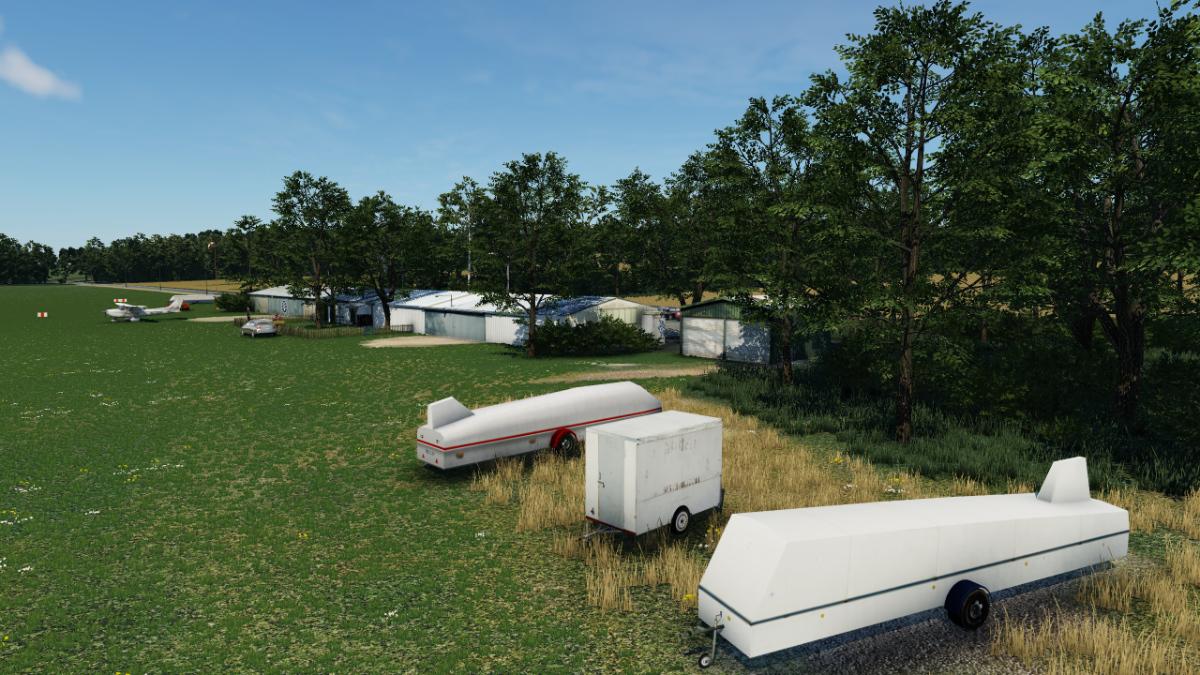
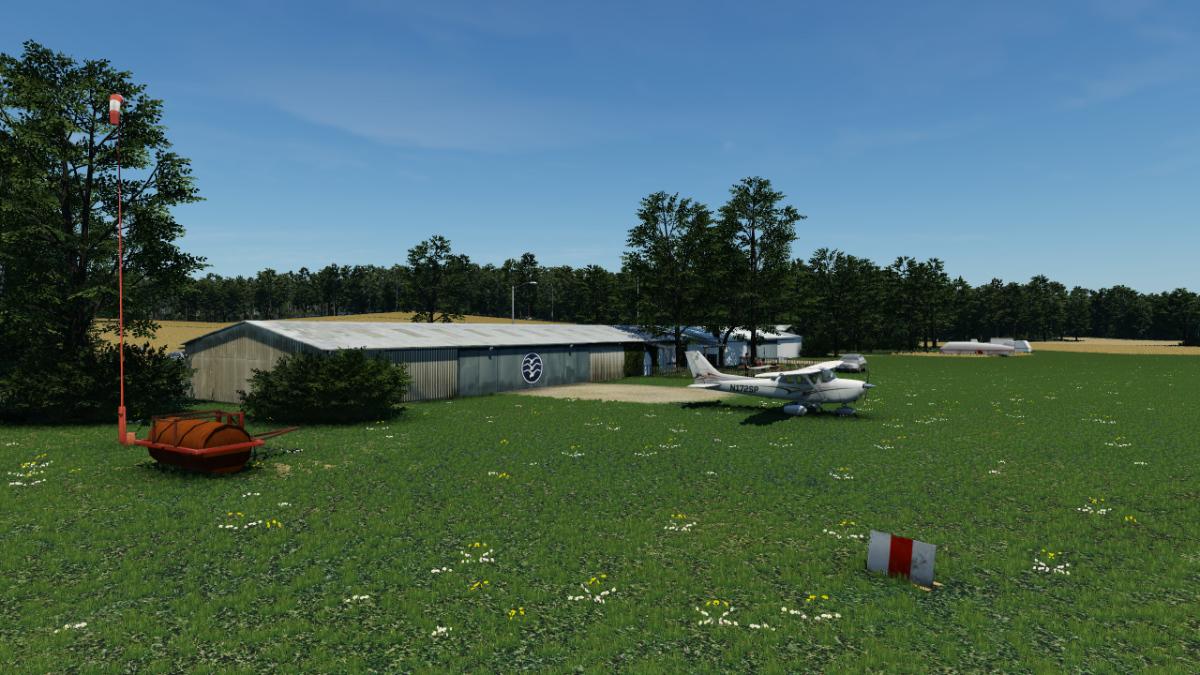
Scenery Review: X01 - Everglades Airpark, Florida by Skytitude
-
skytitude reacted to a post in a topic:
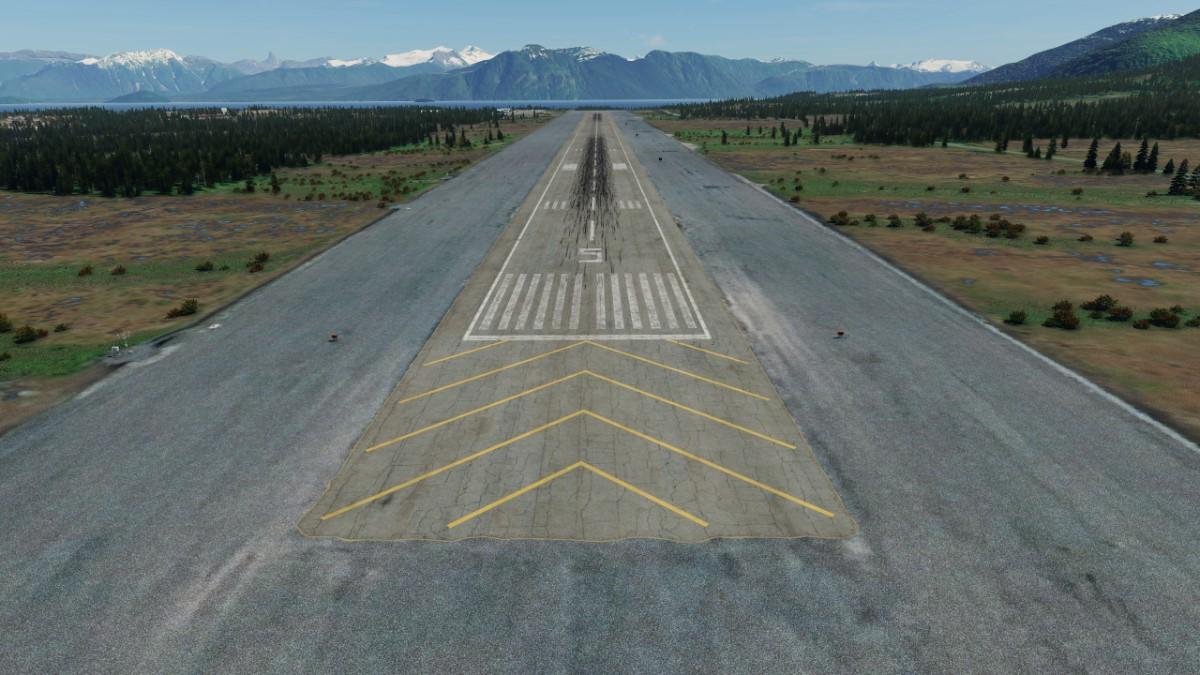
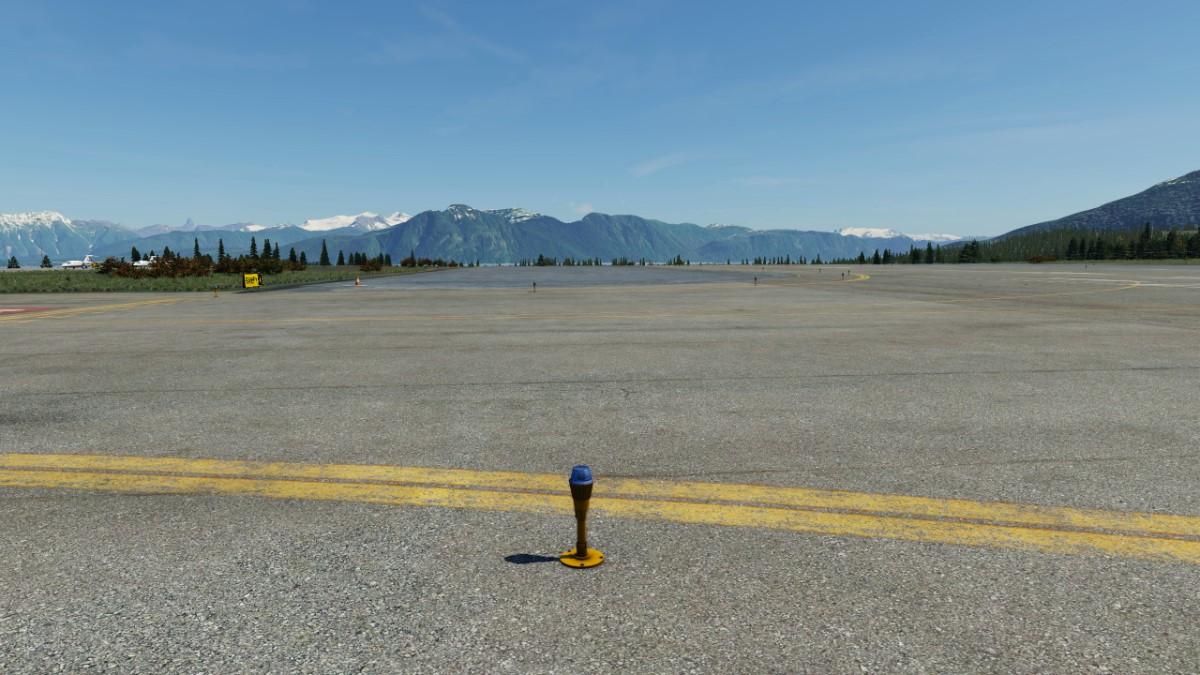
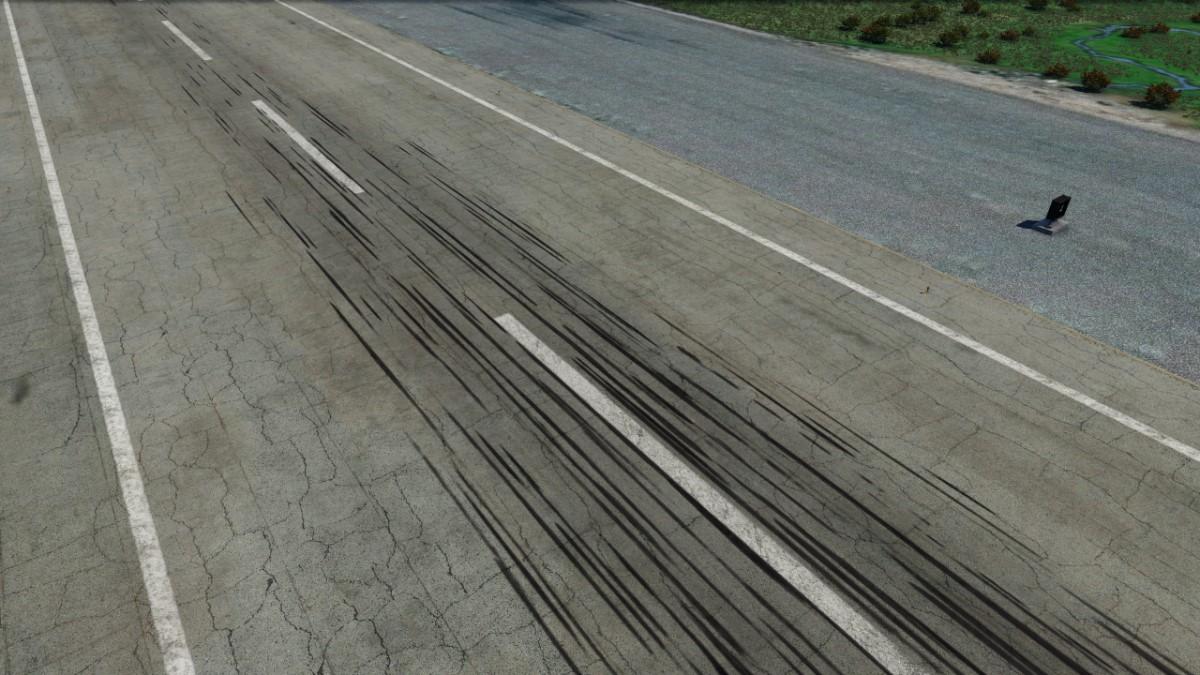
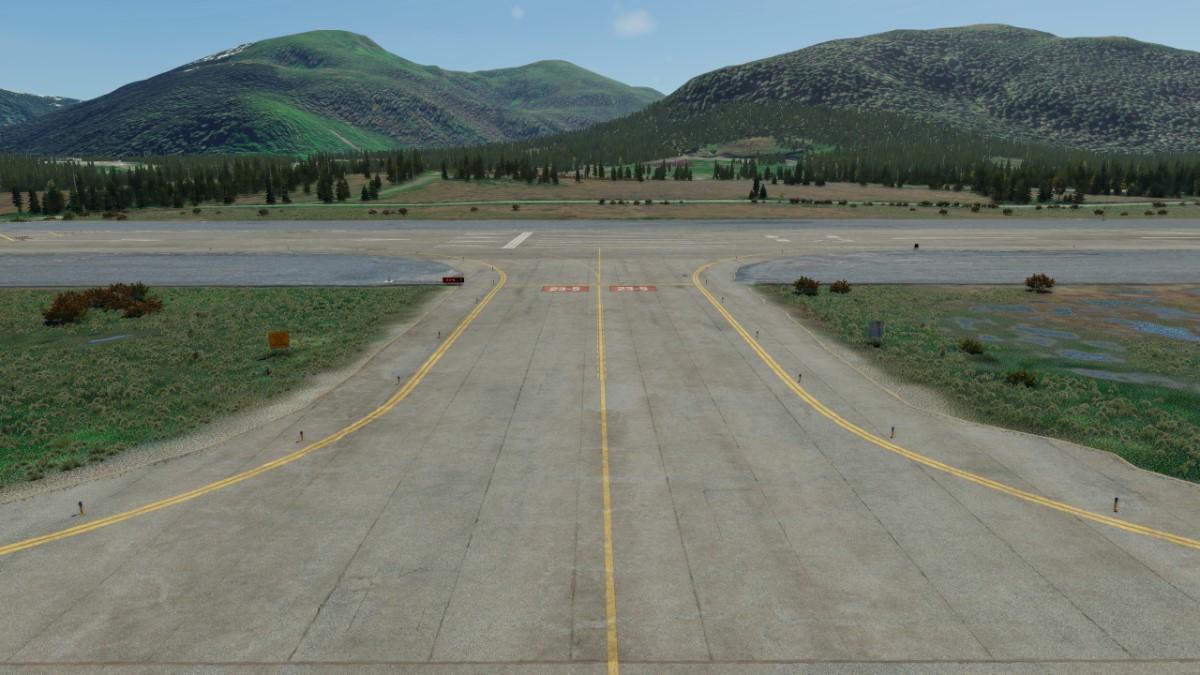
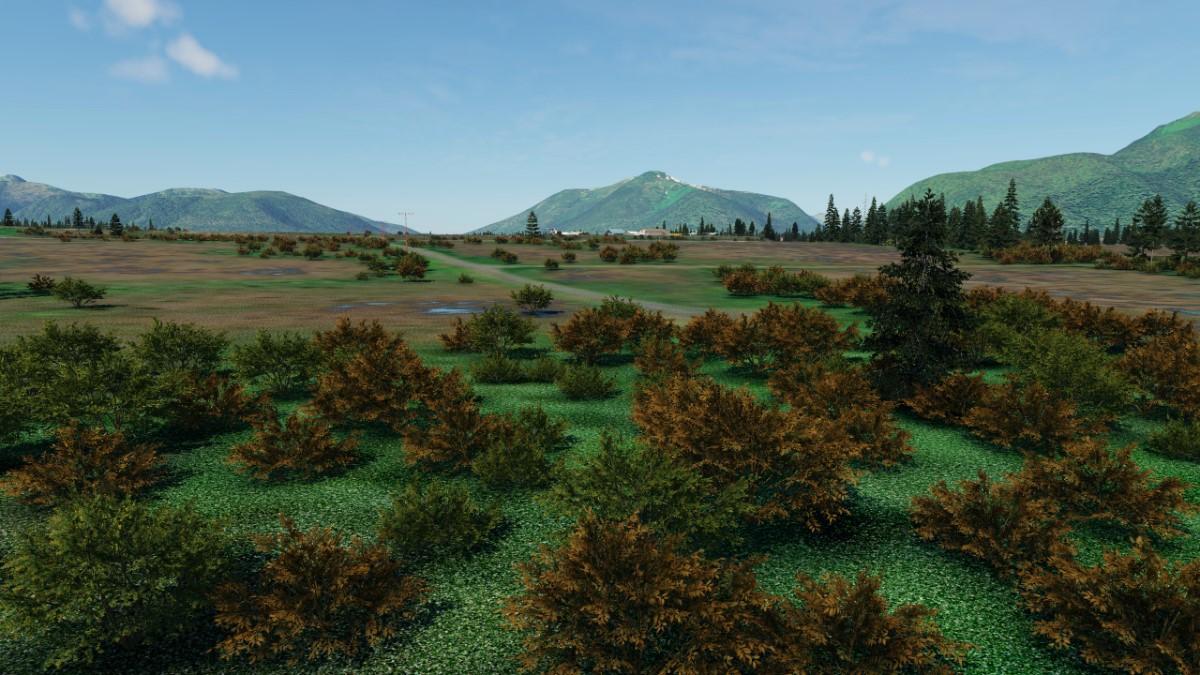
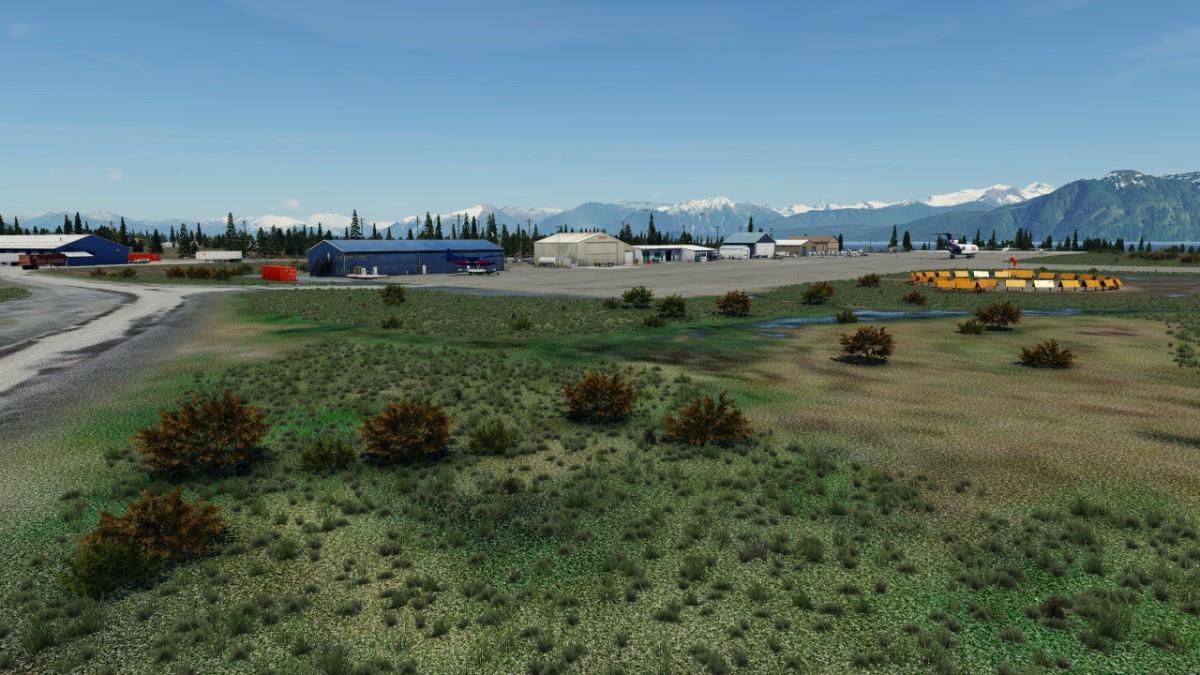
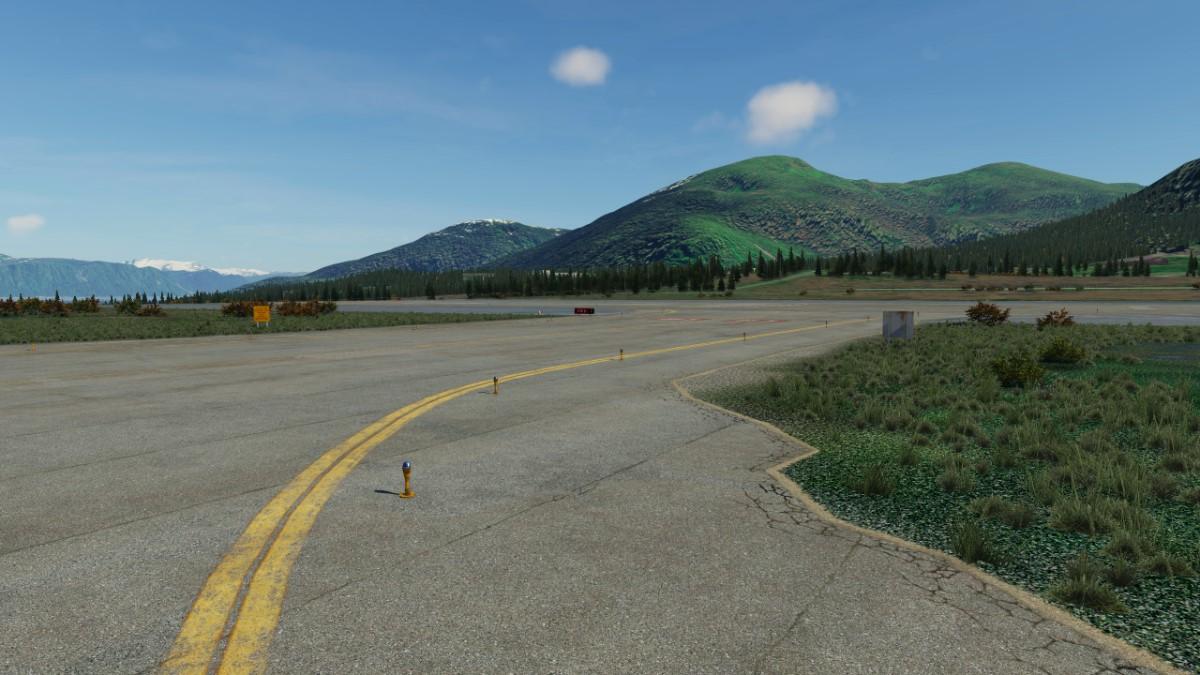
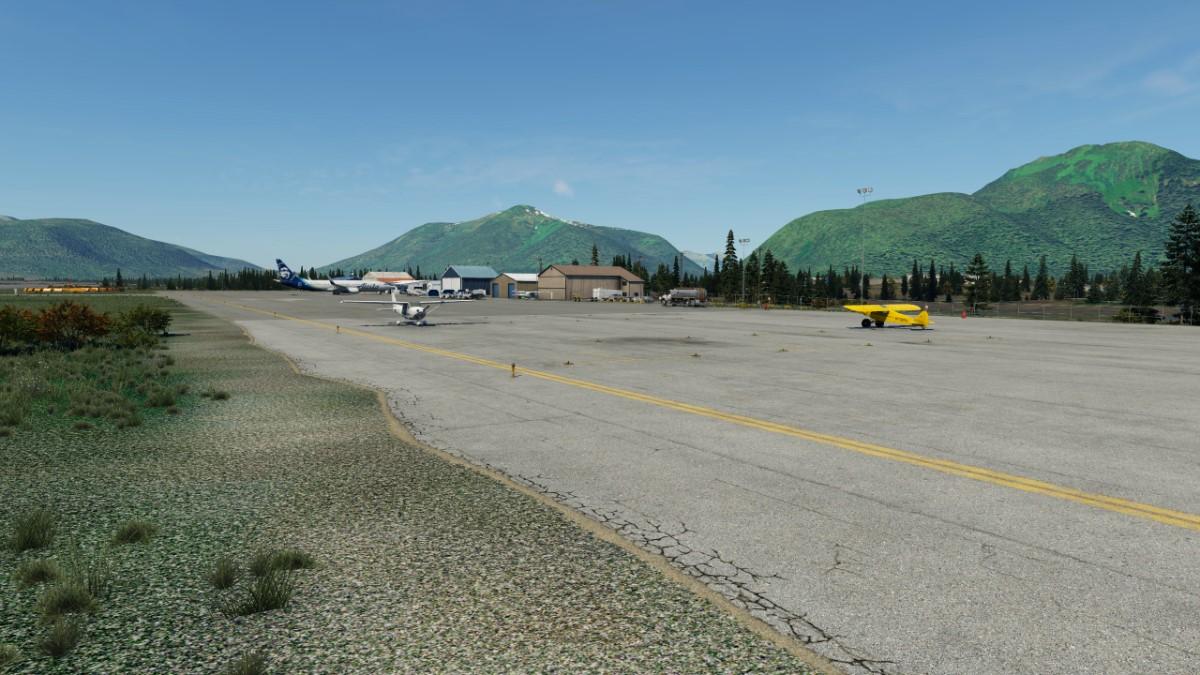
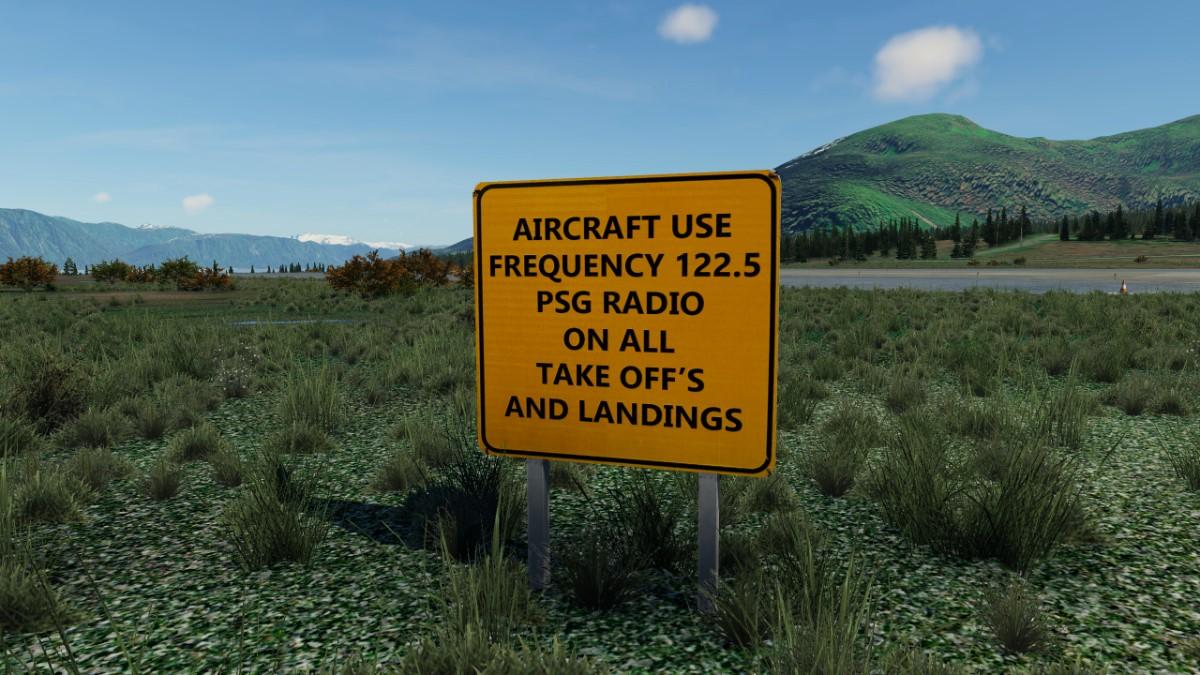
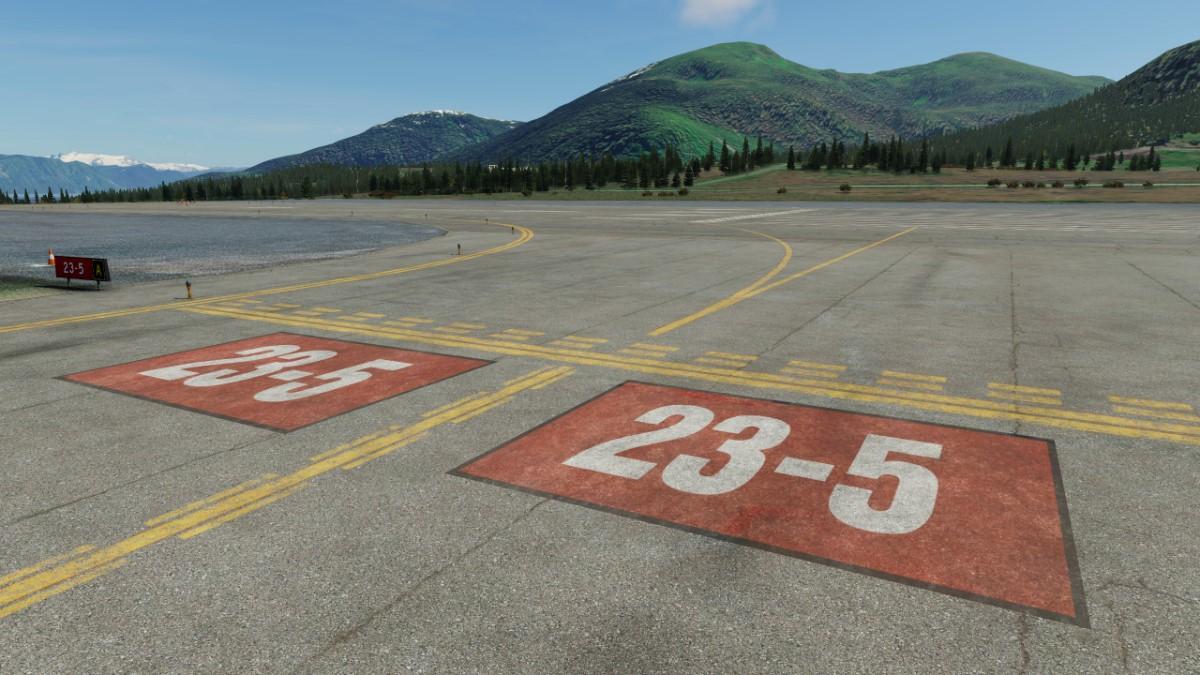
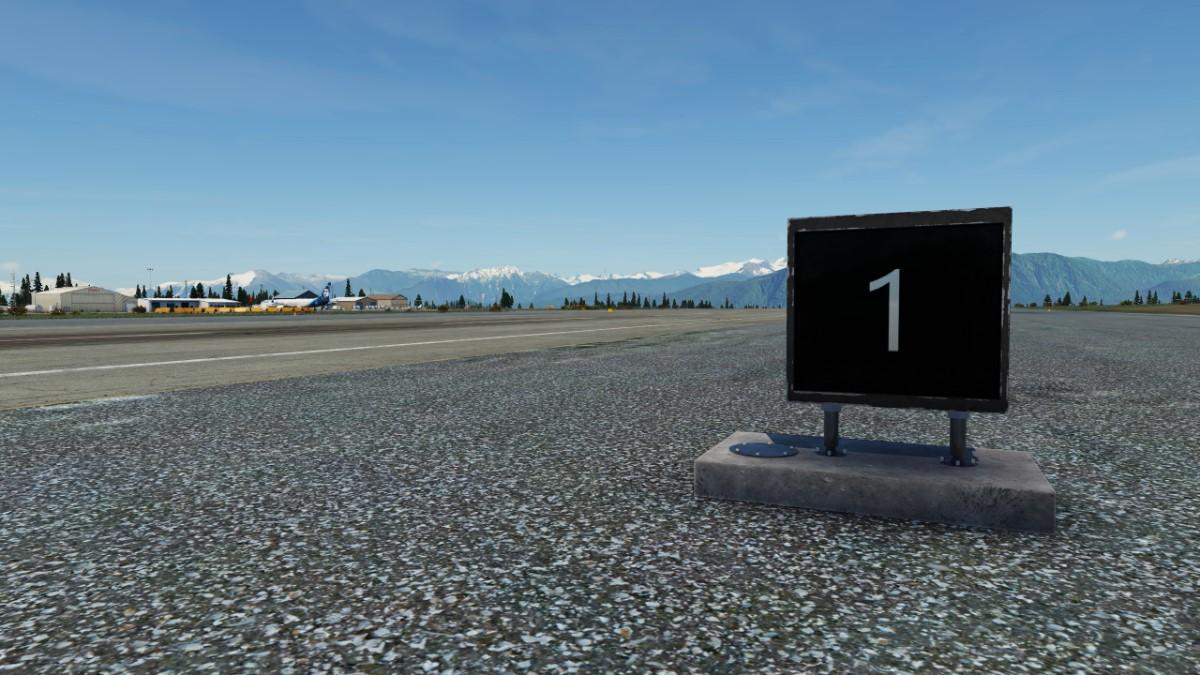
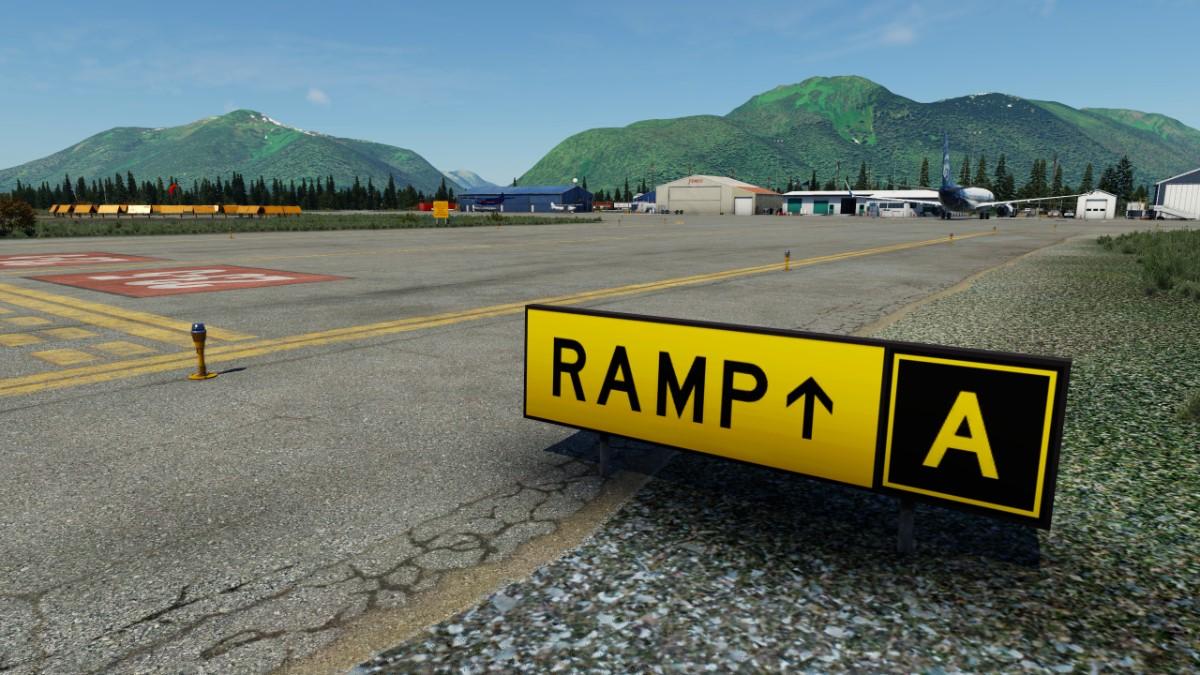
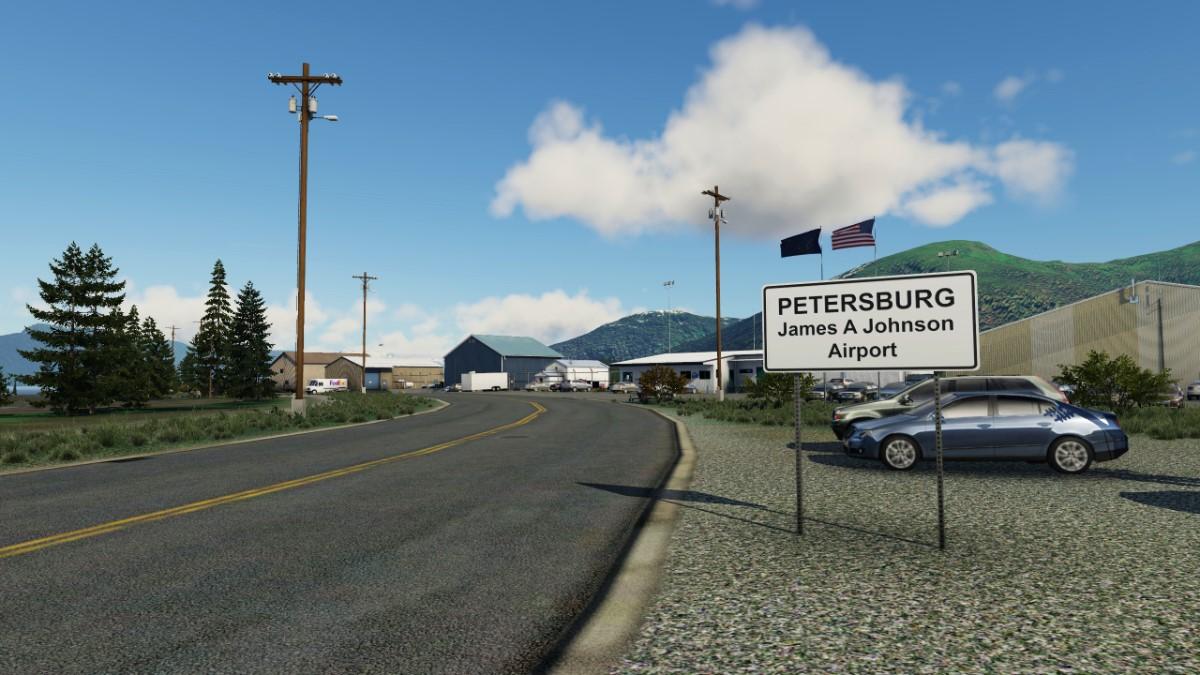
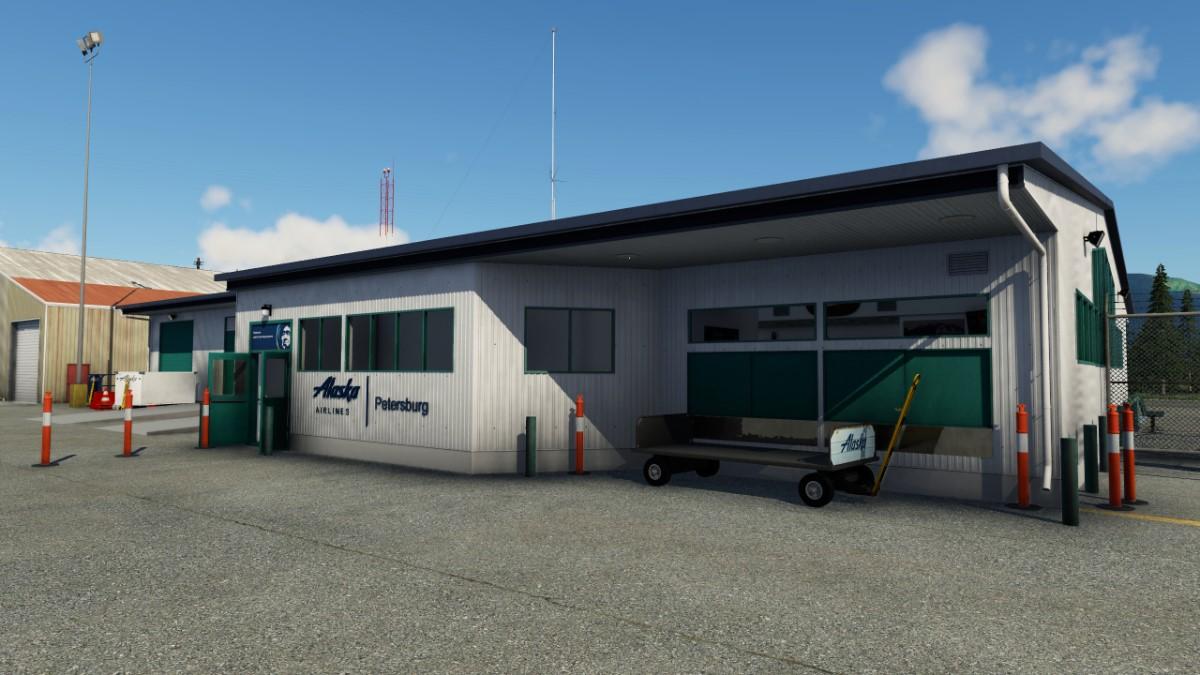
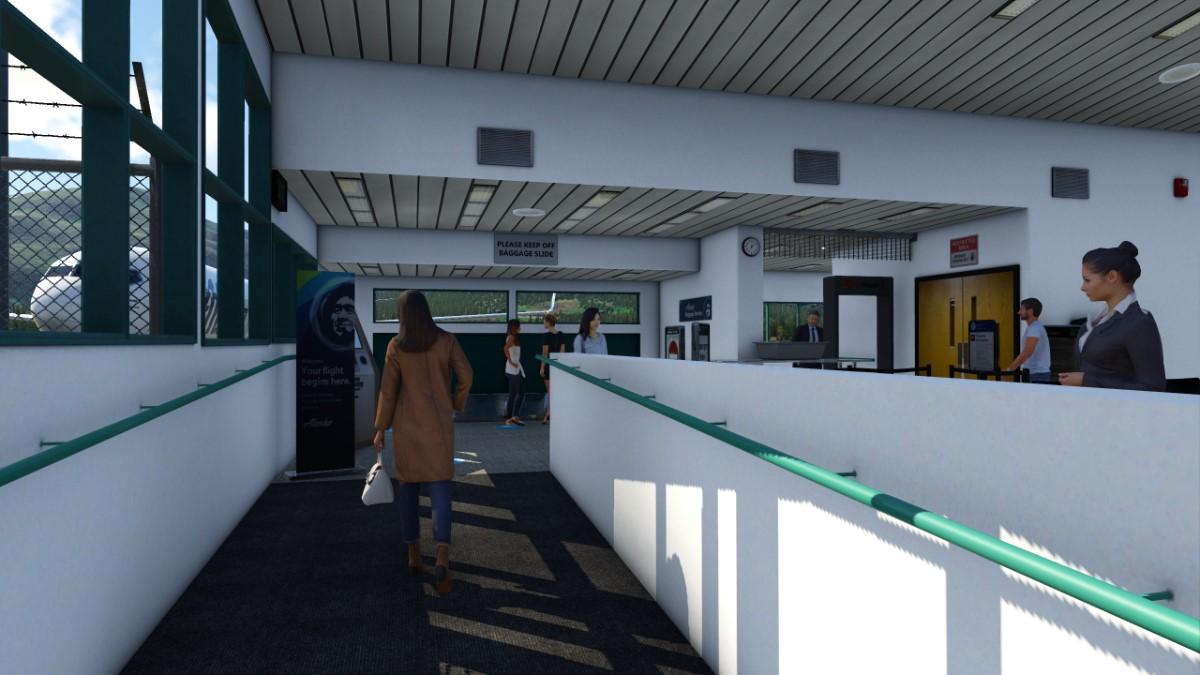
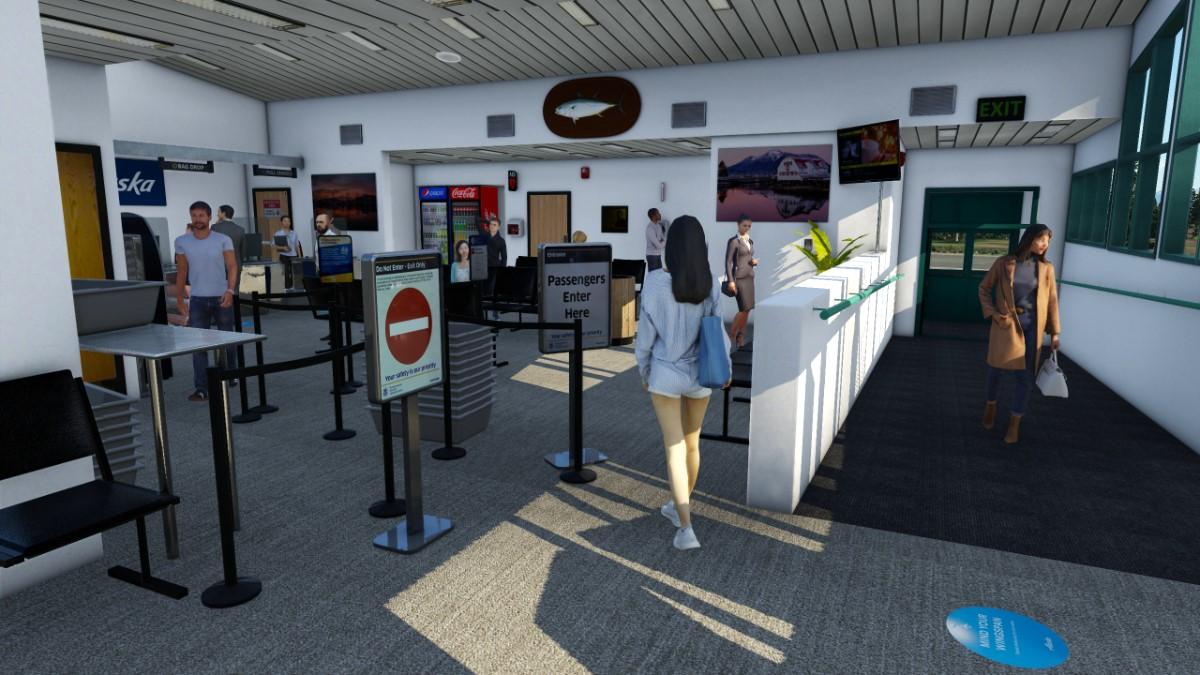
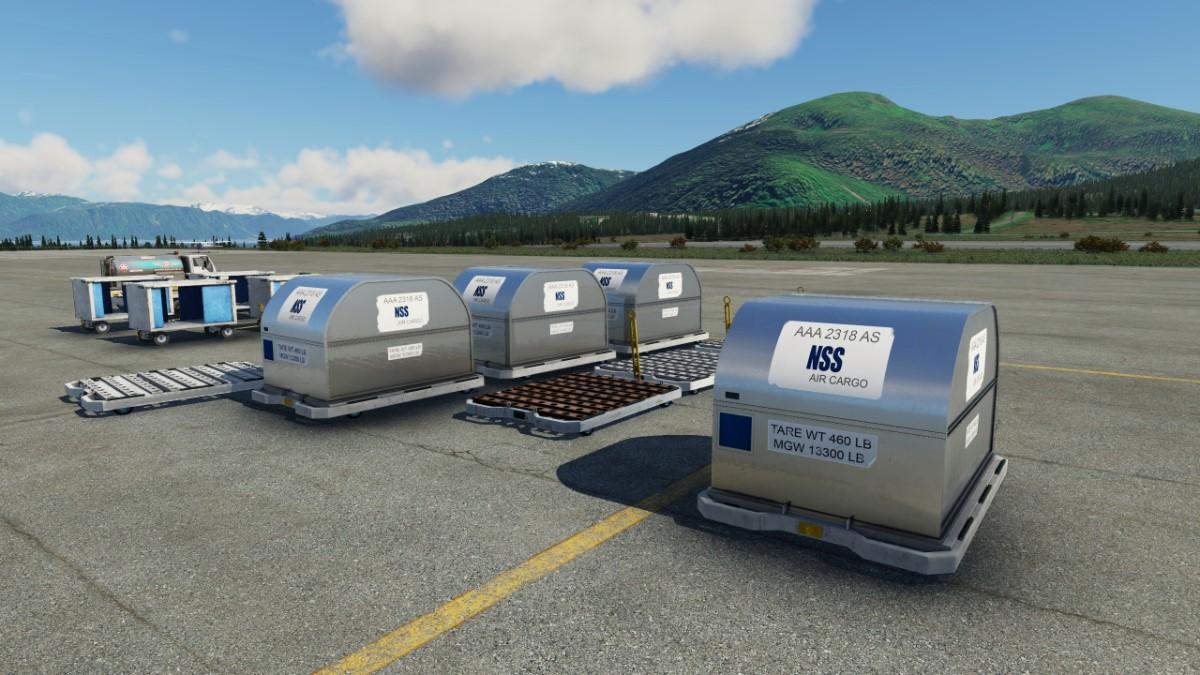
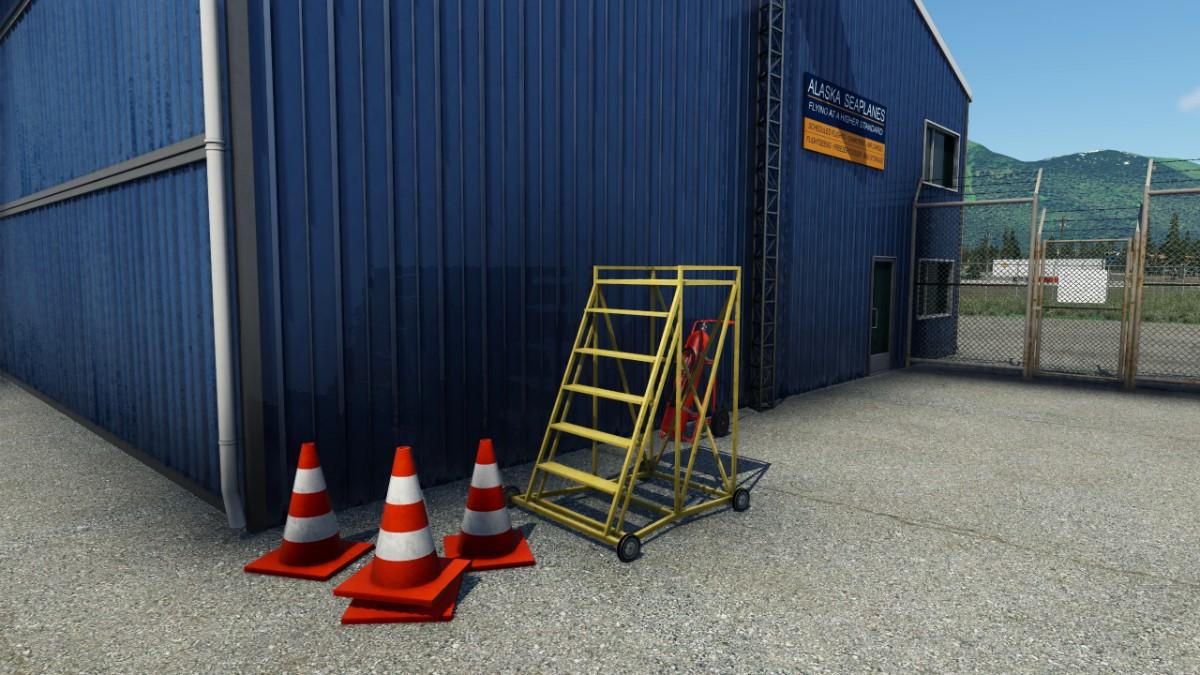
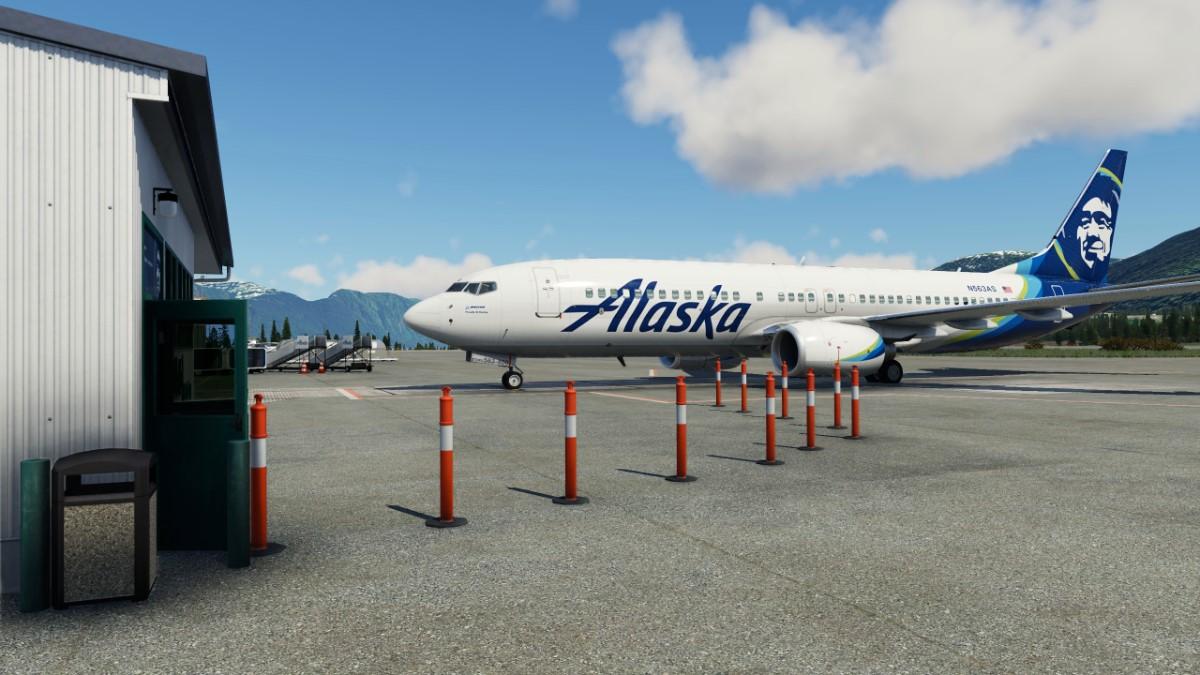
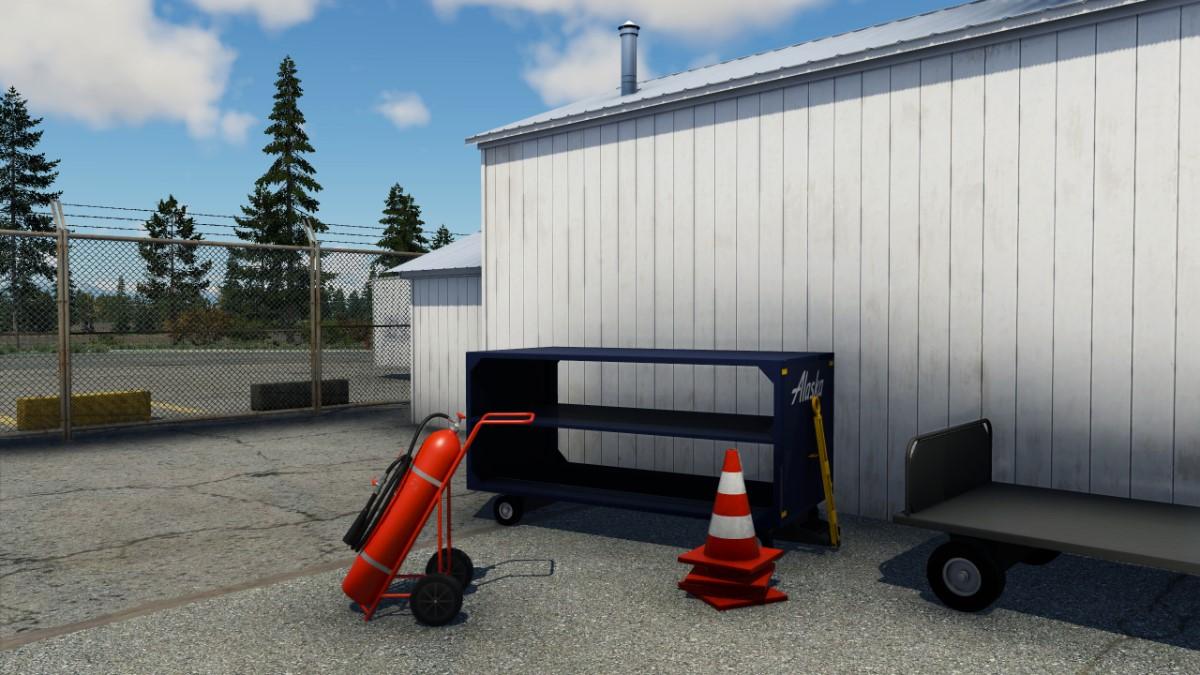
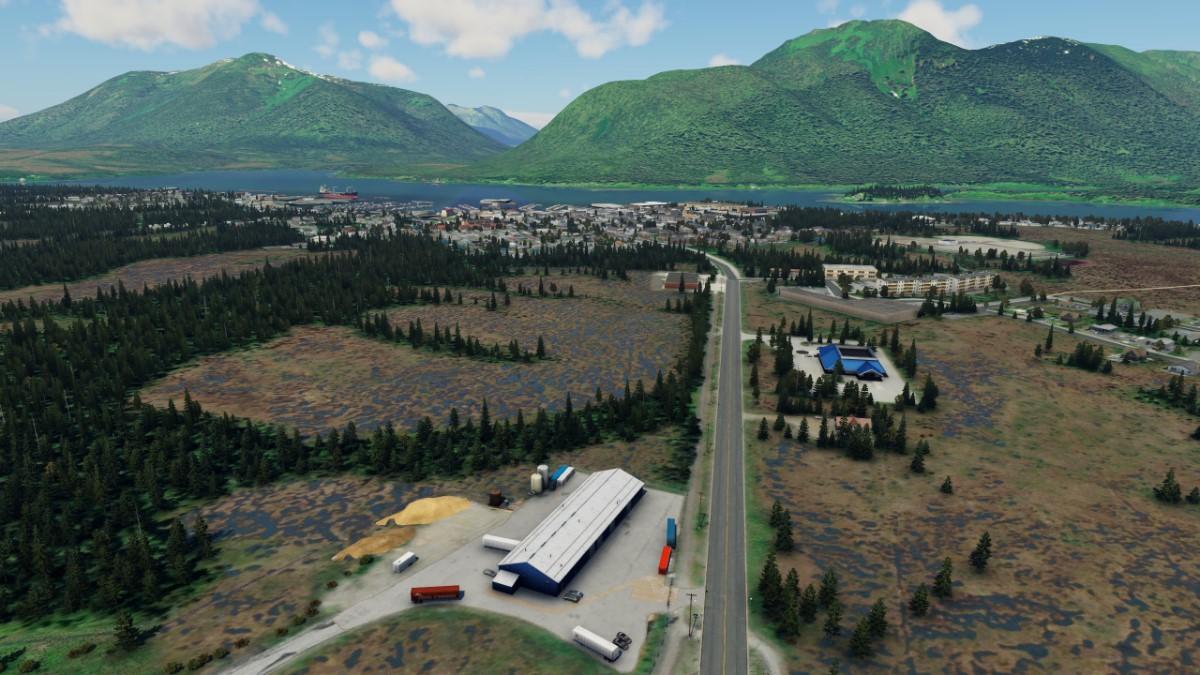
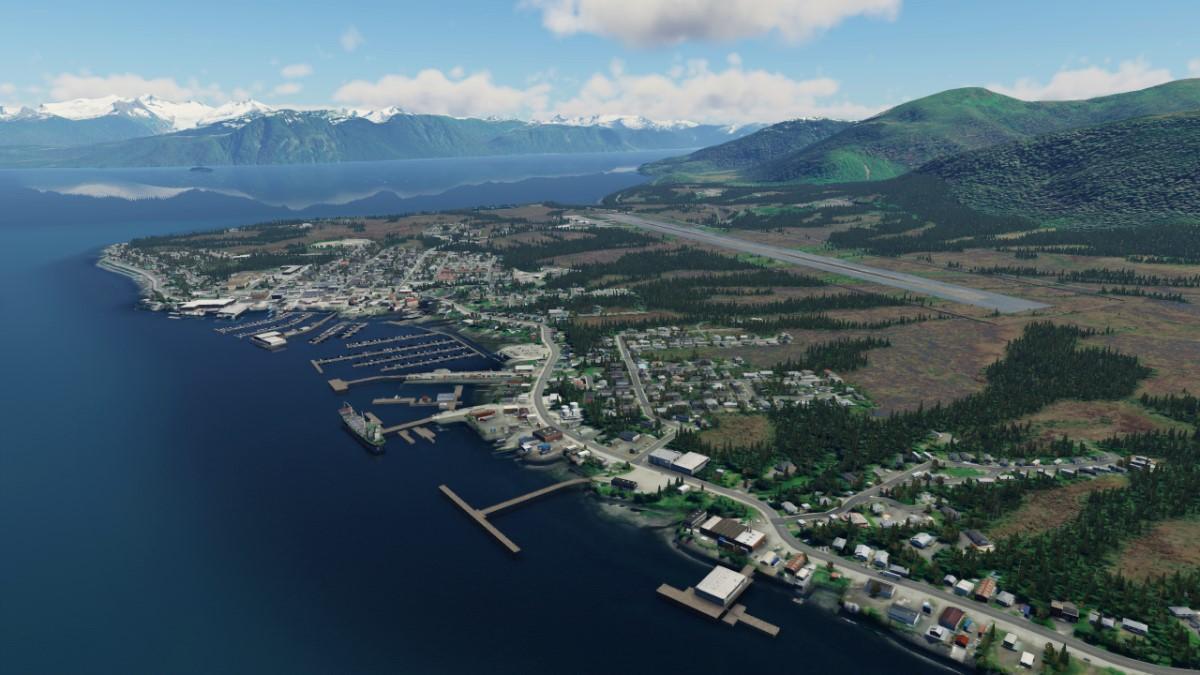
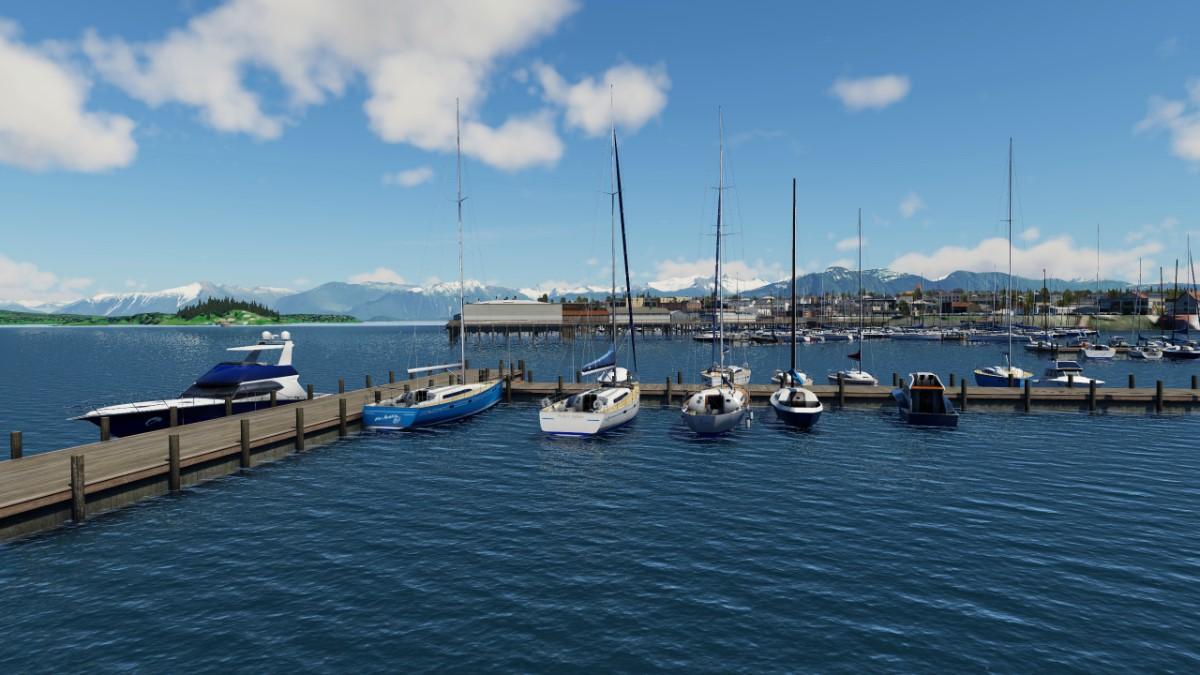
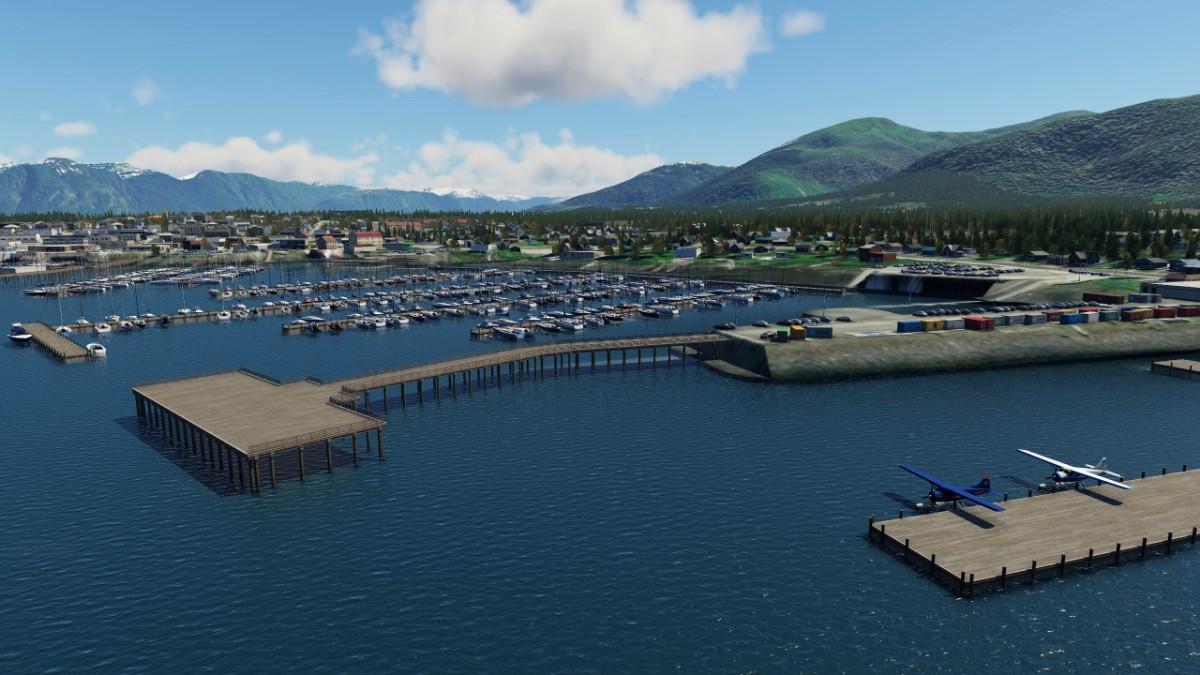
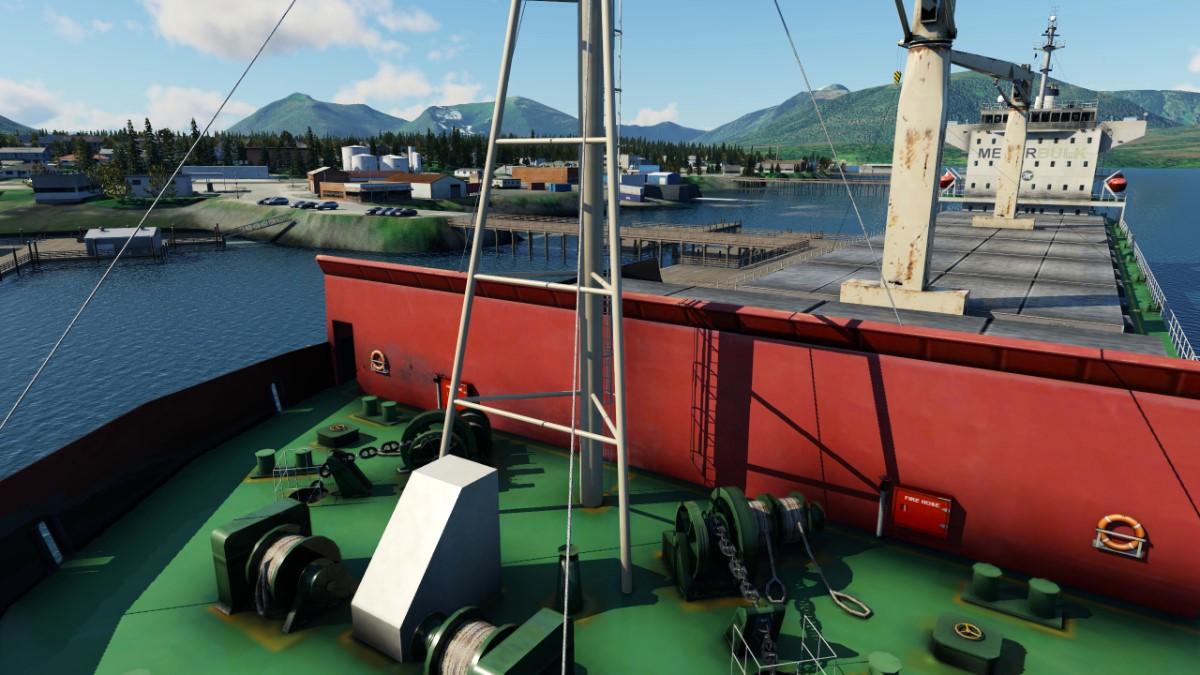
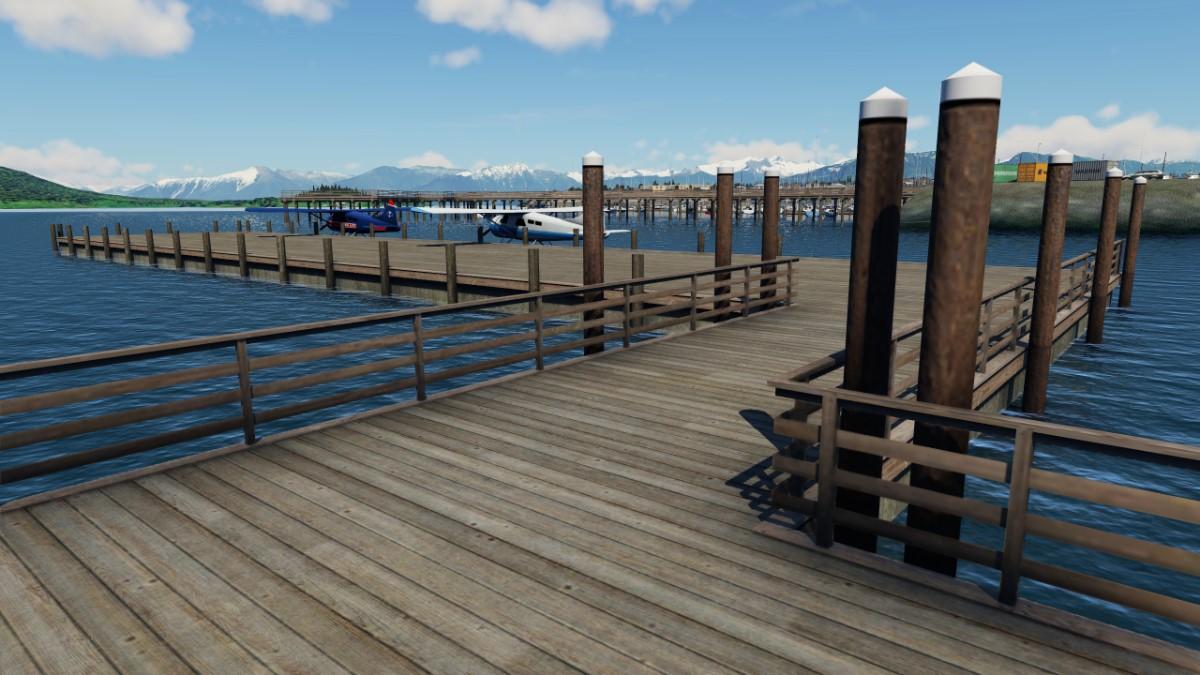
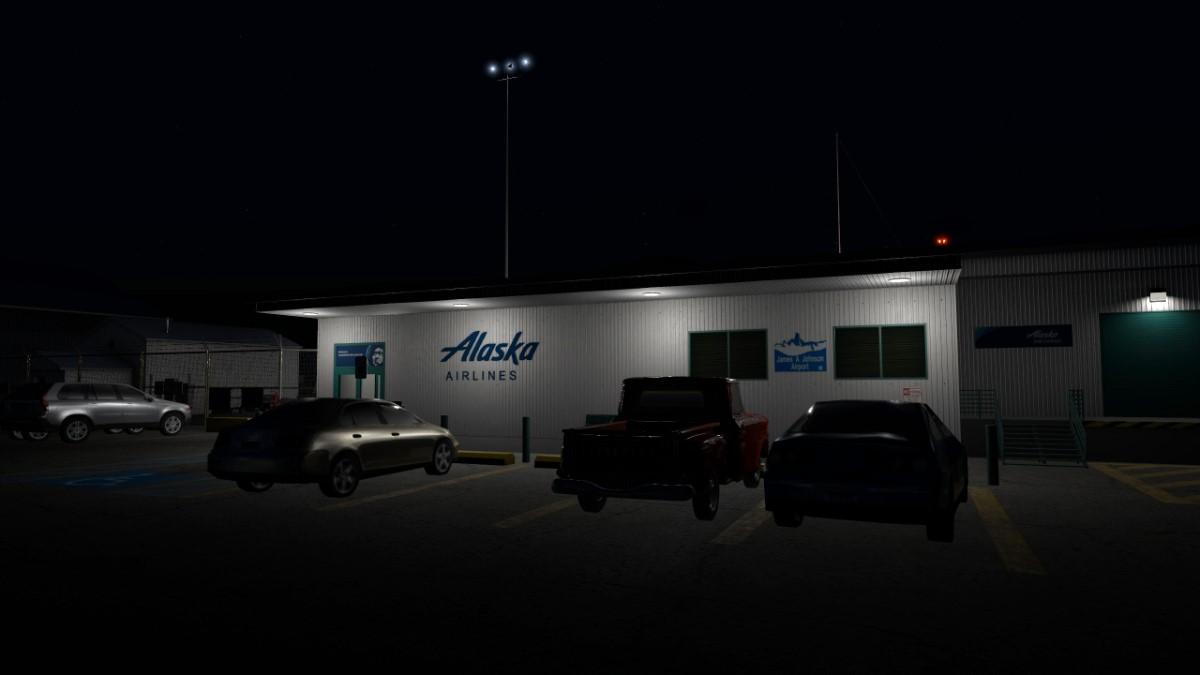
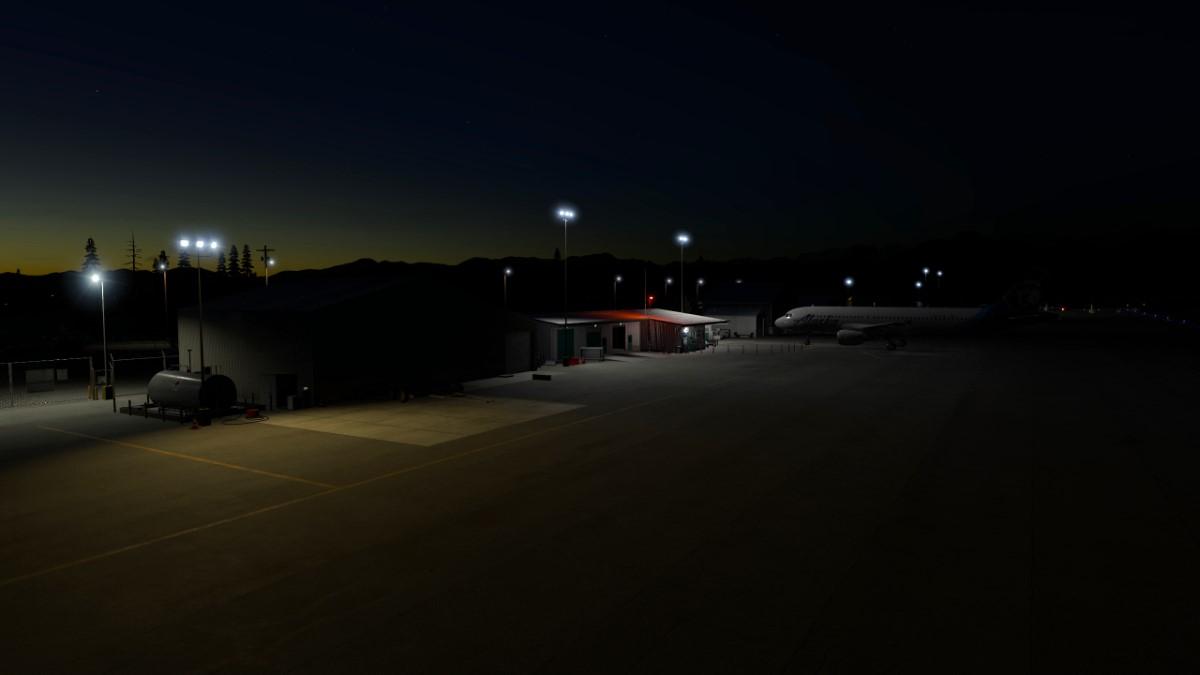
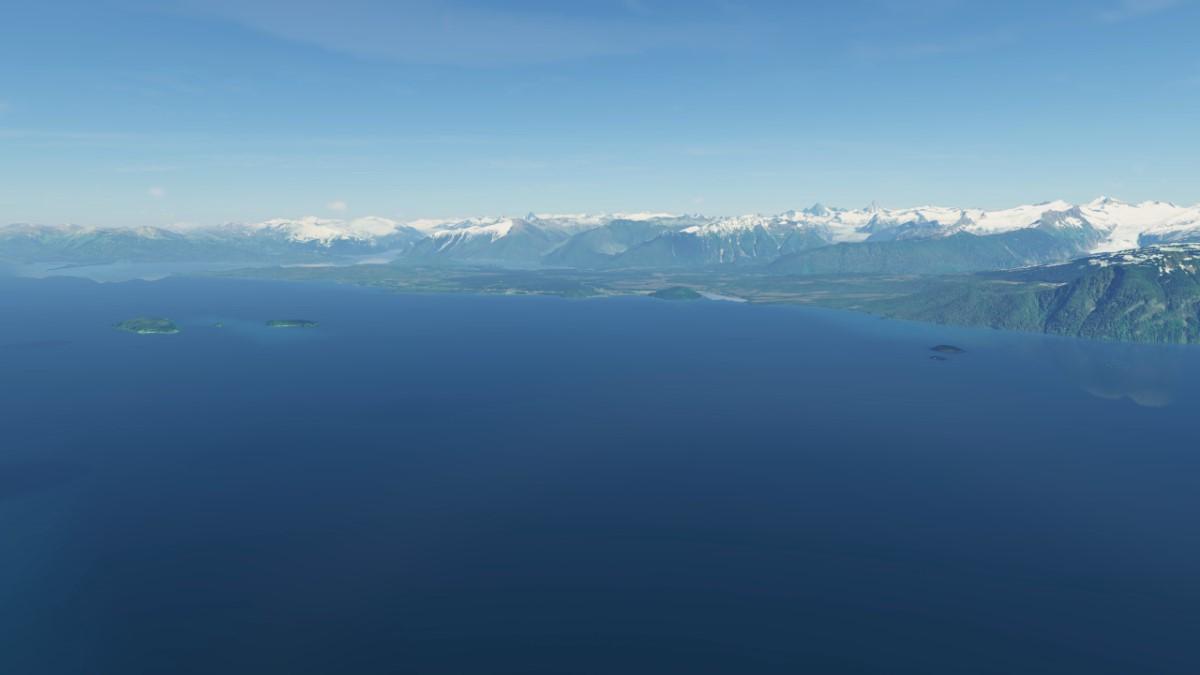
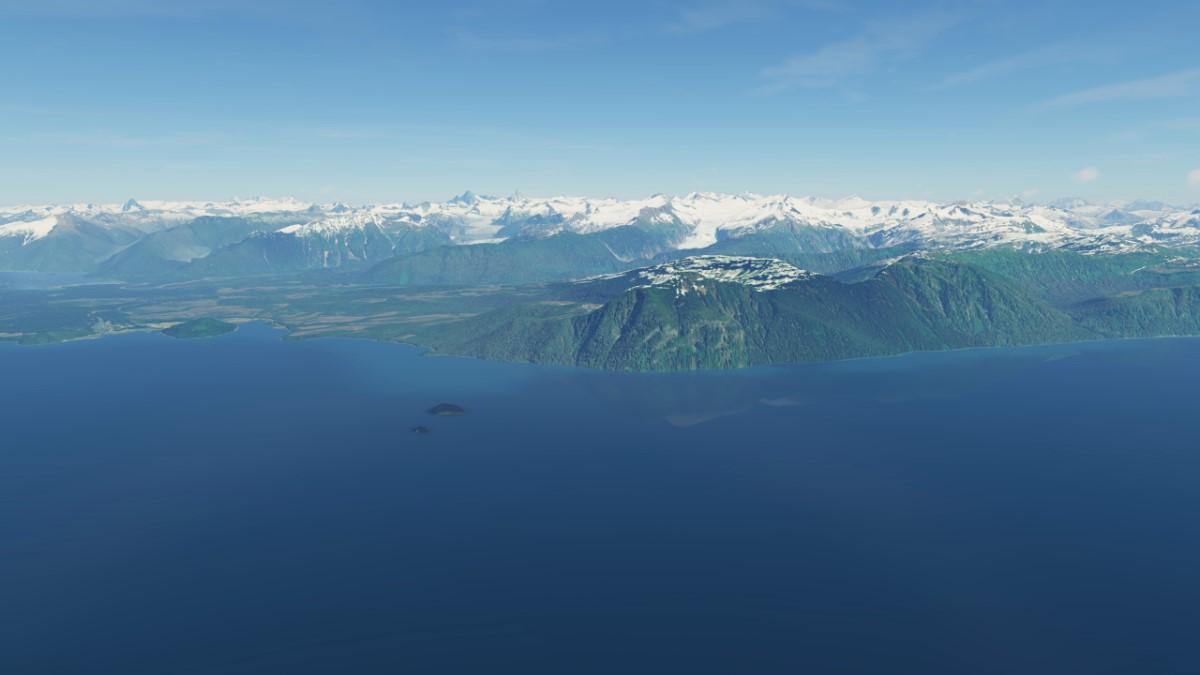
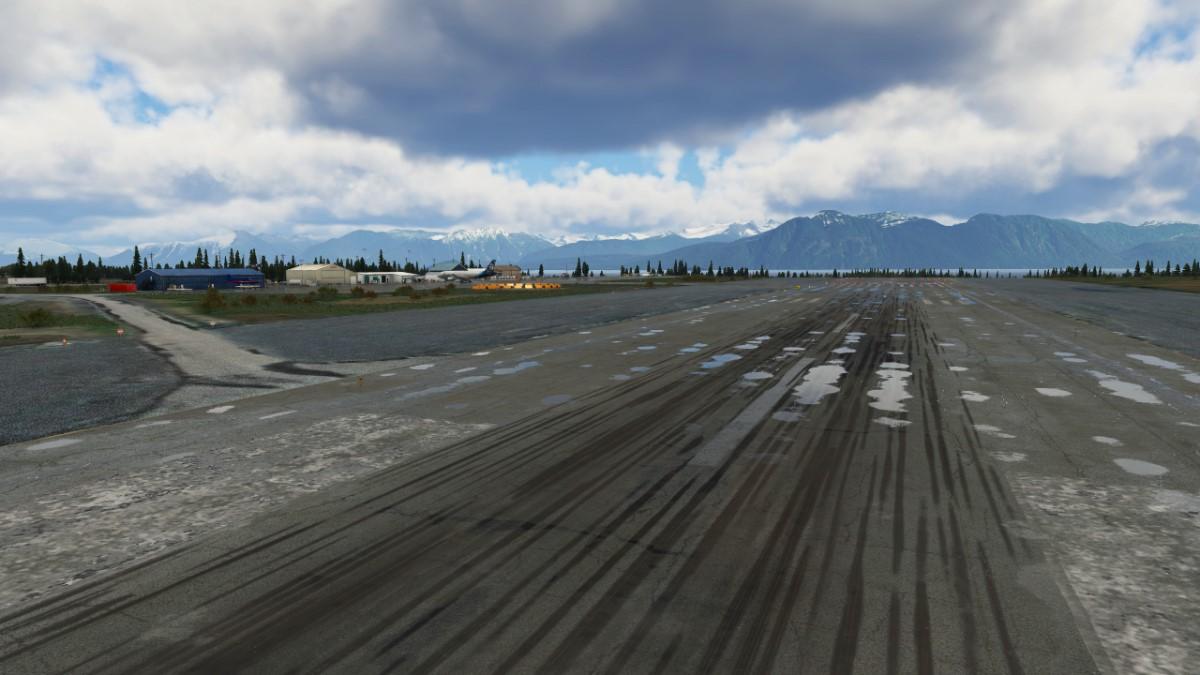
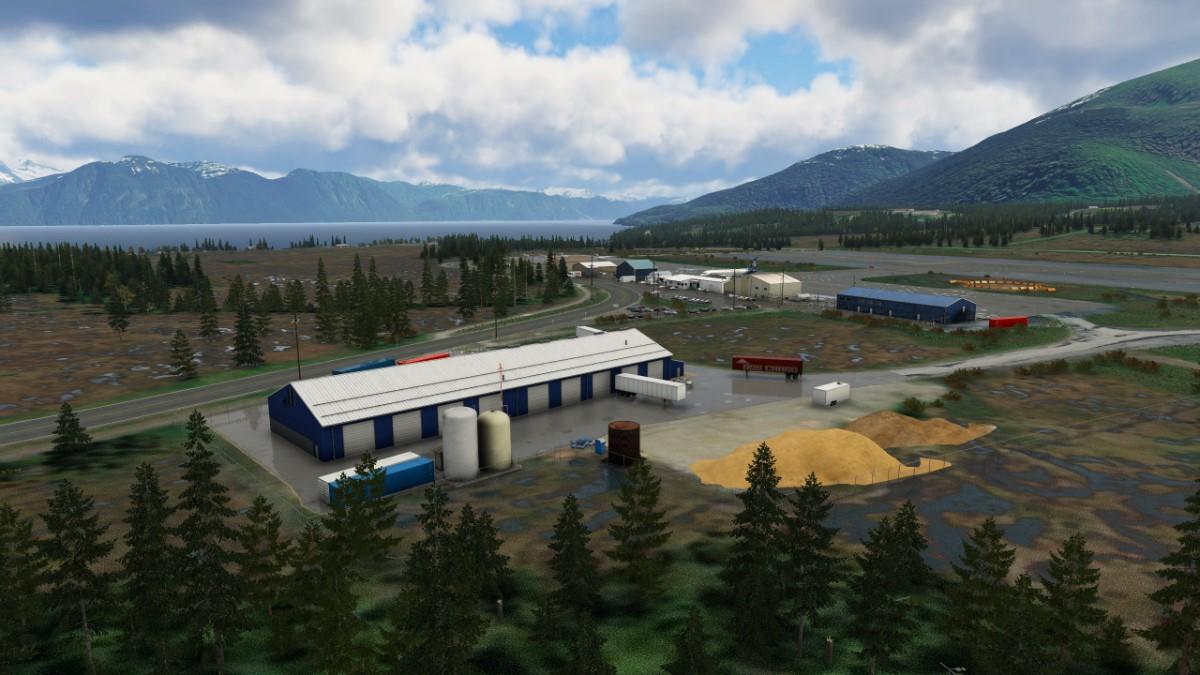
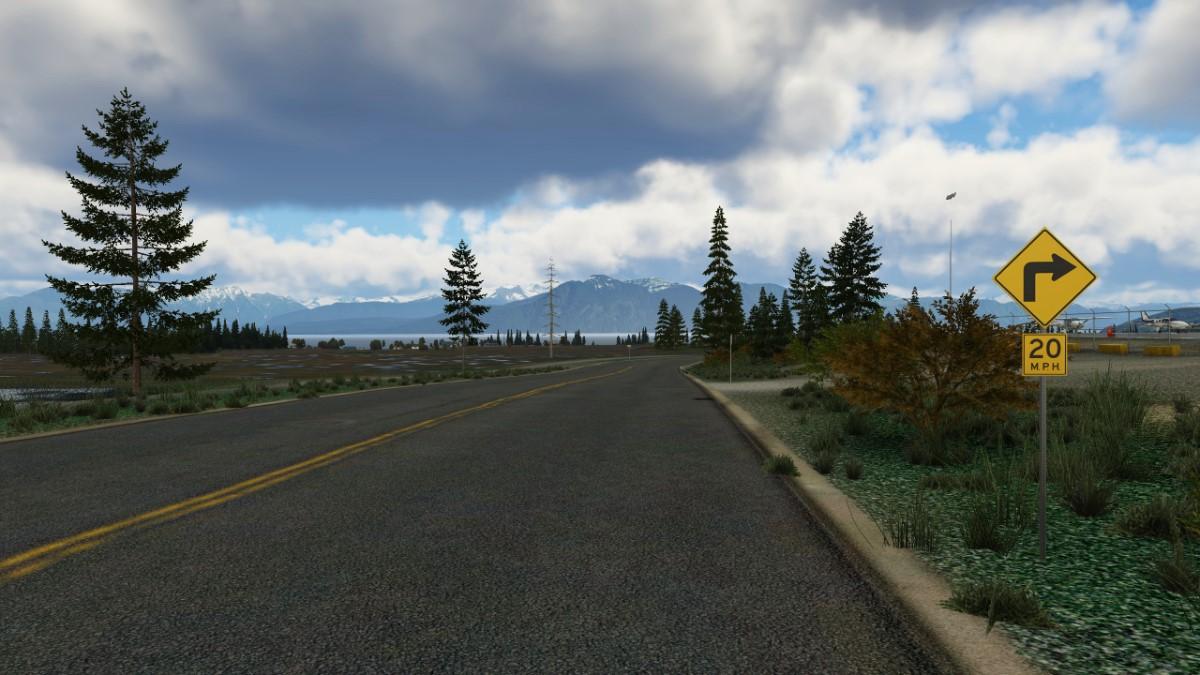
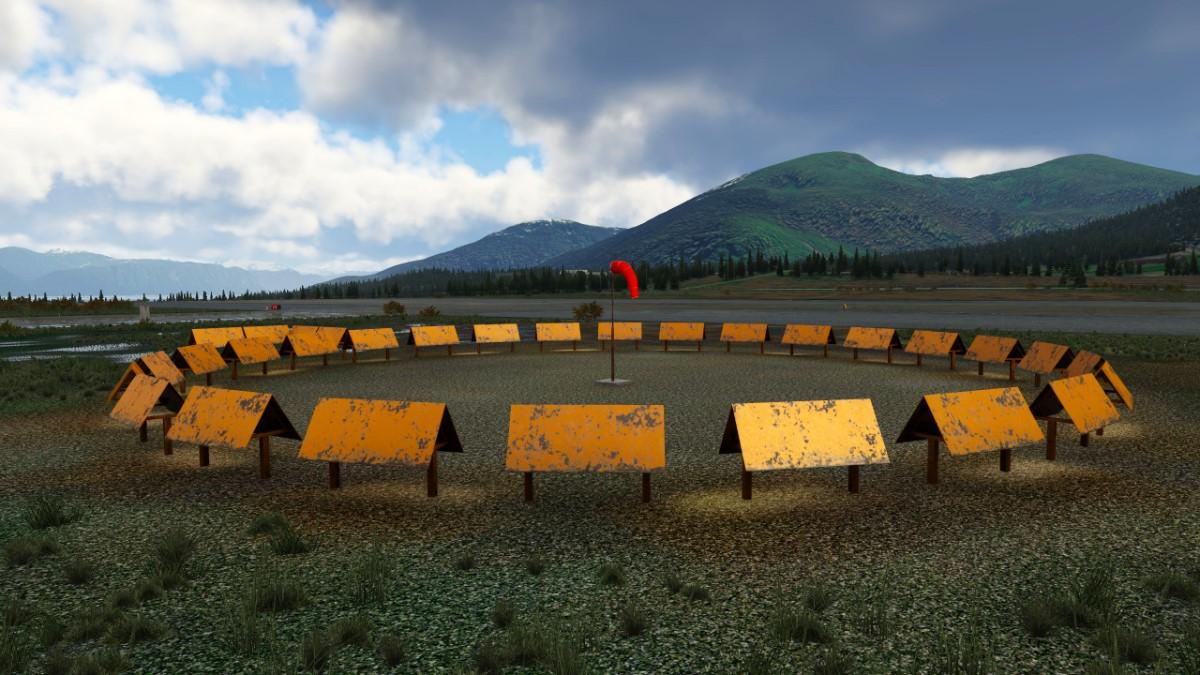
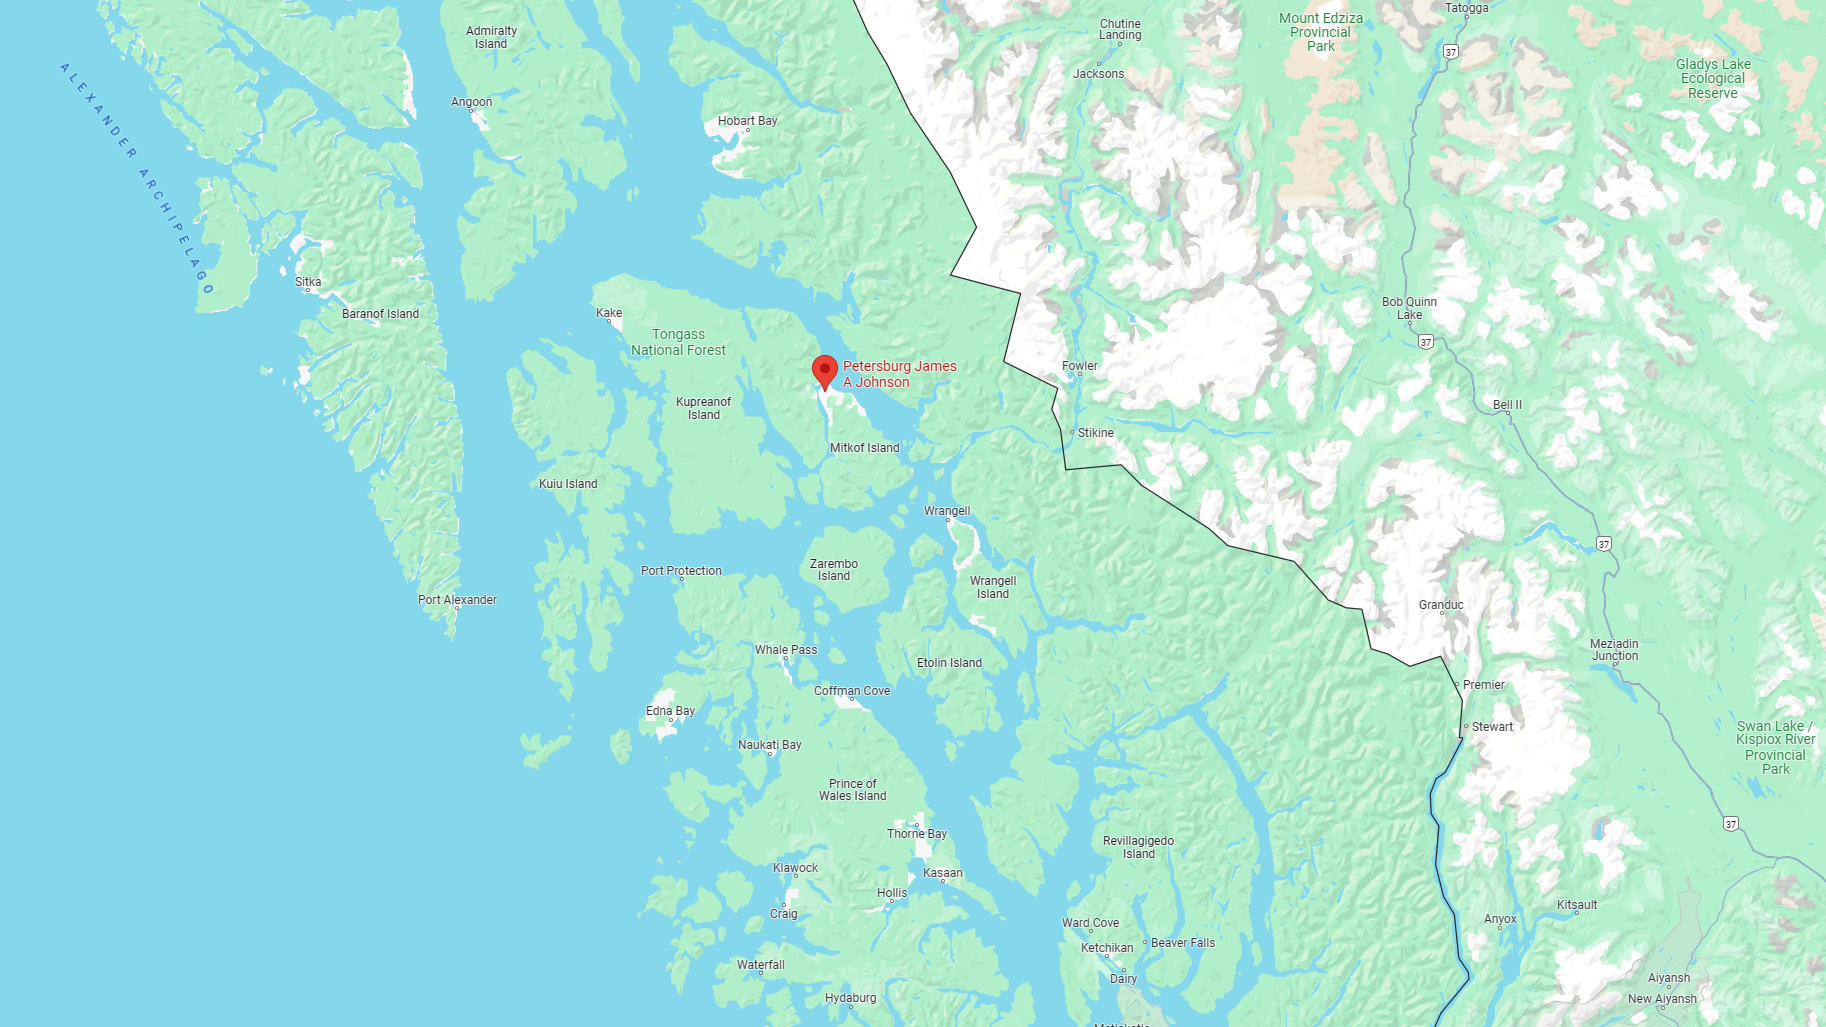
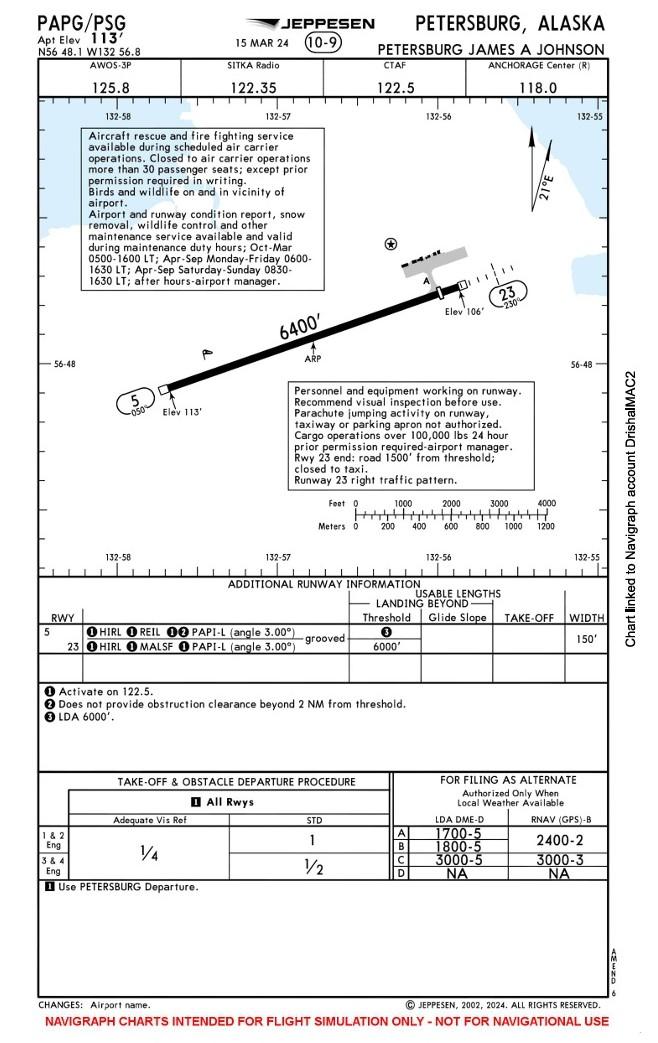
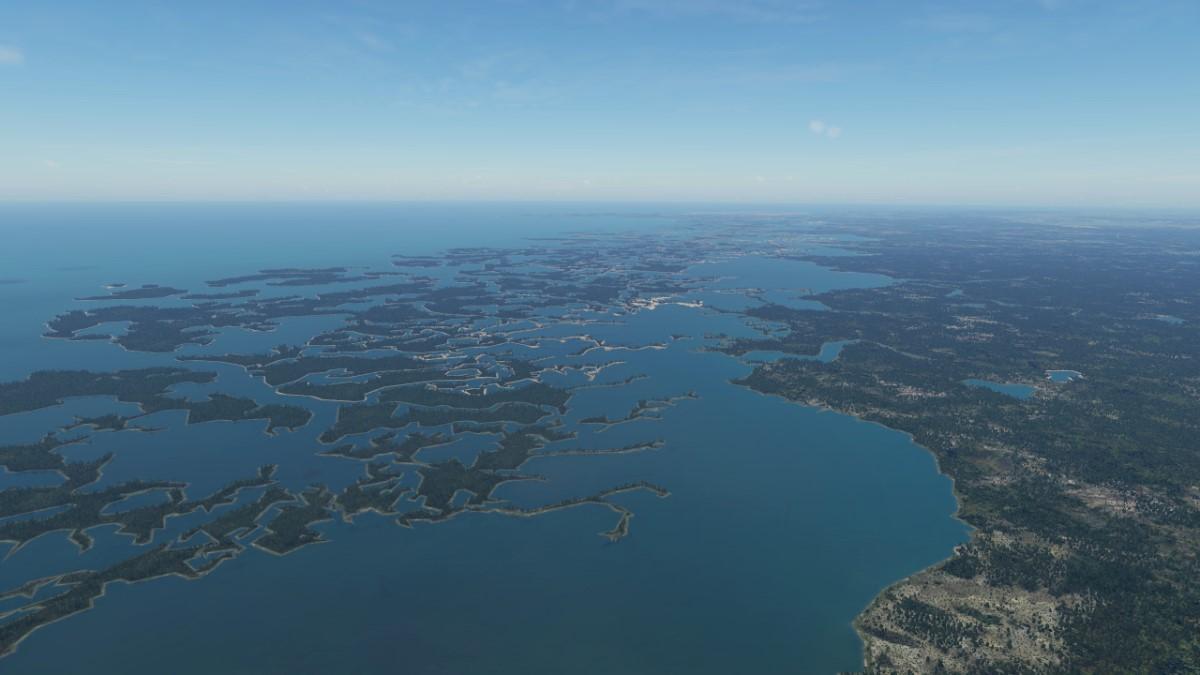
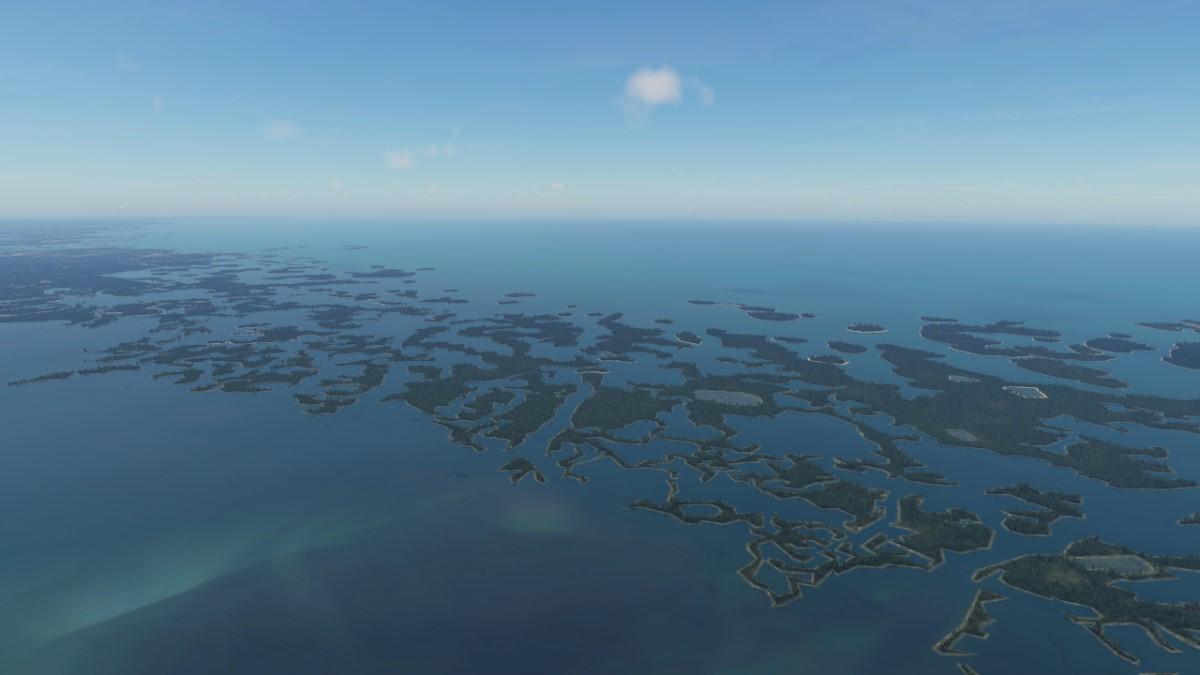
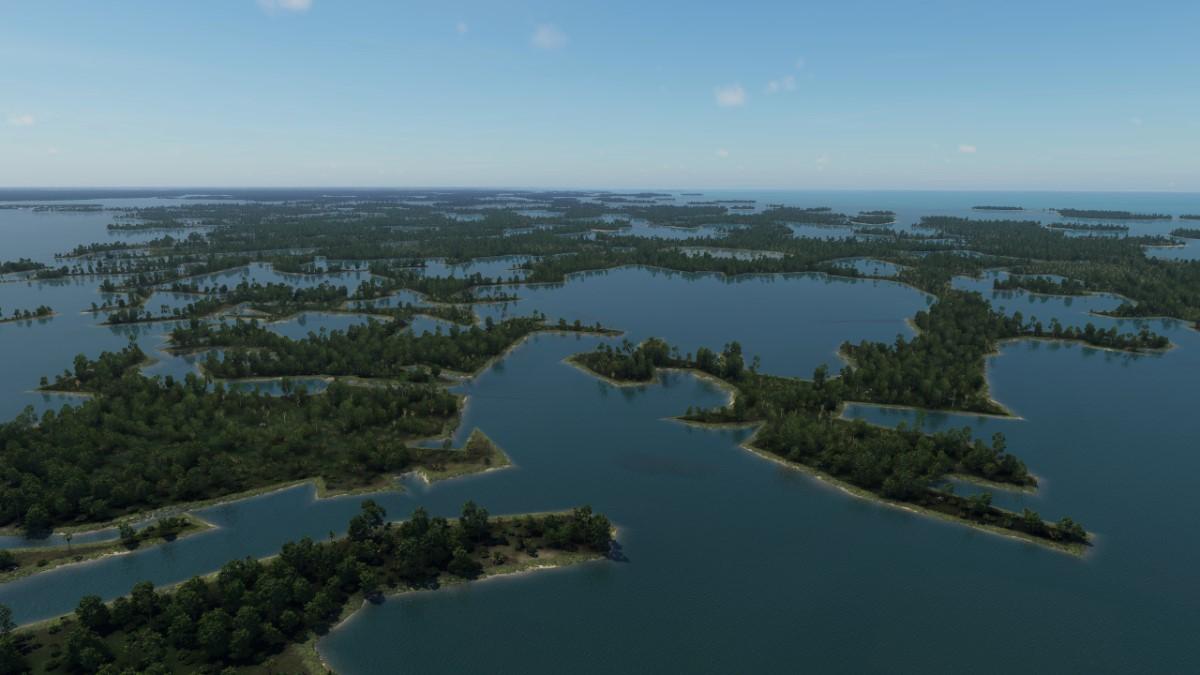
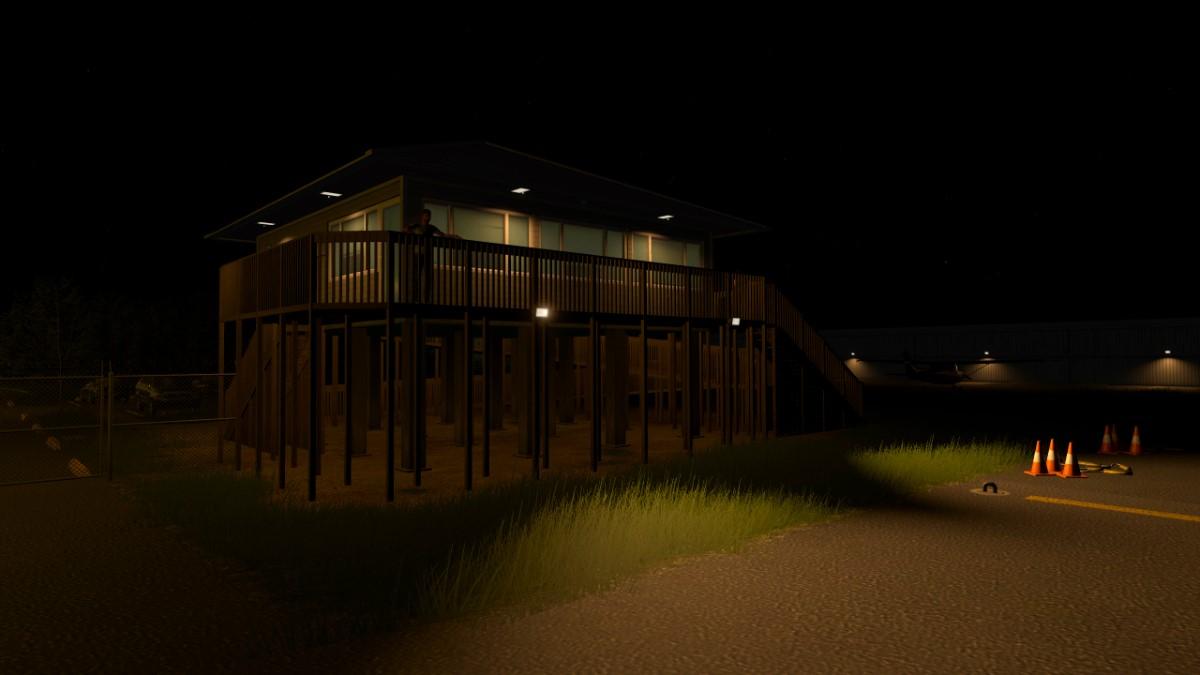
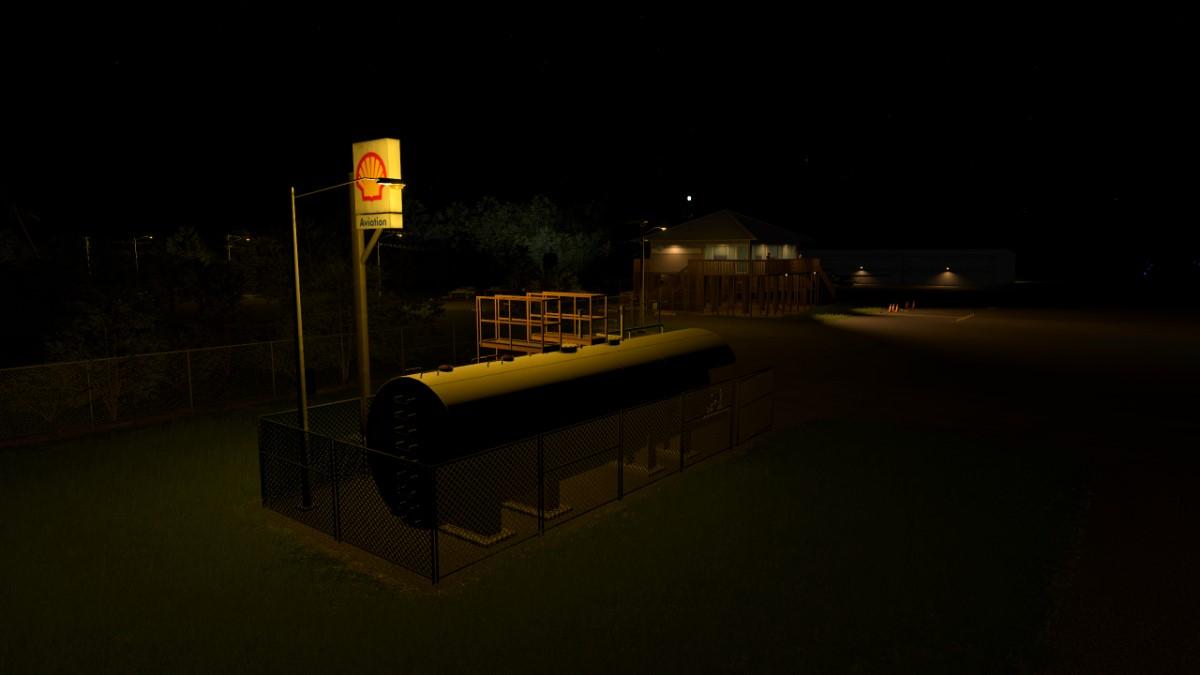
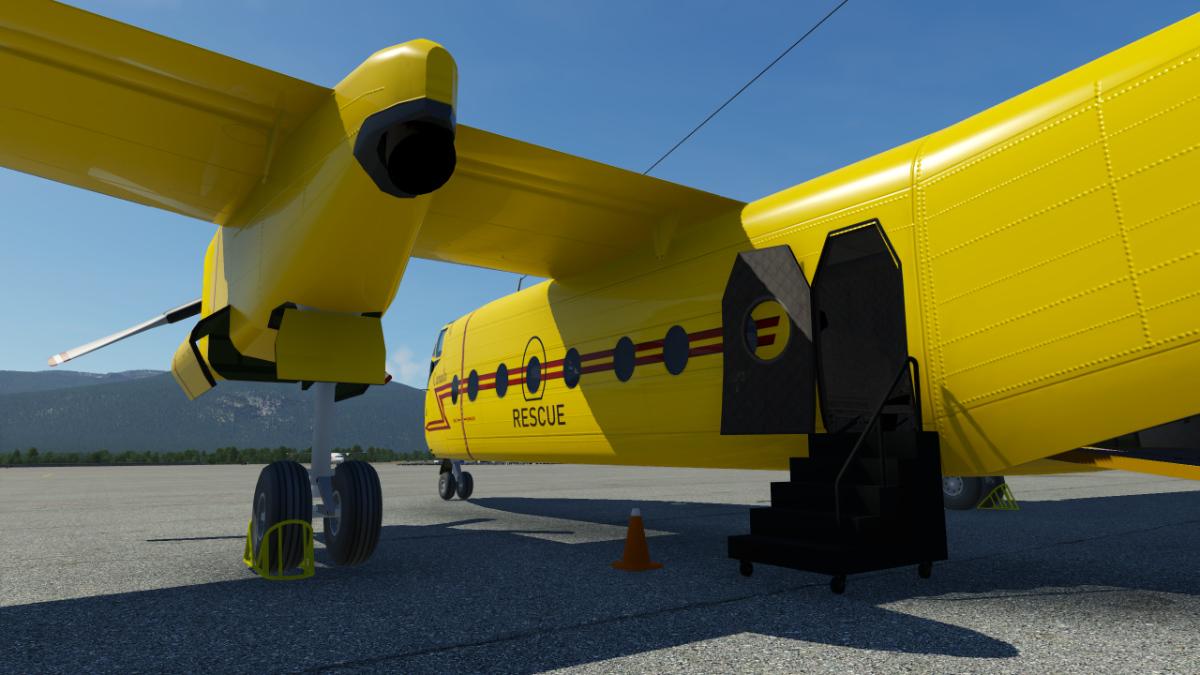
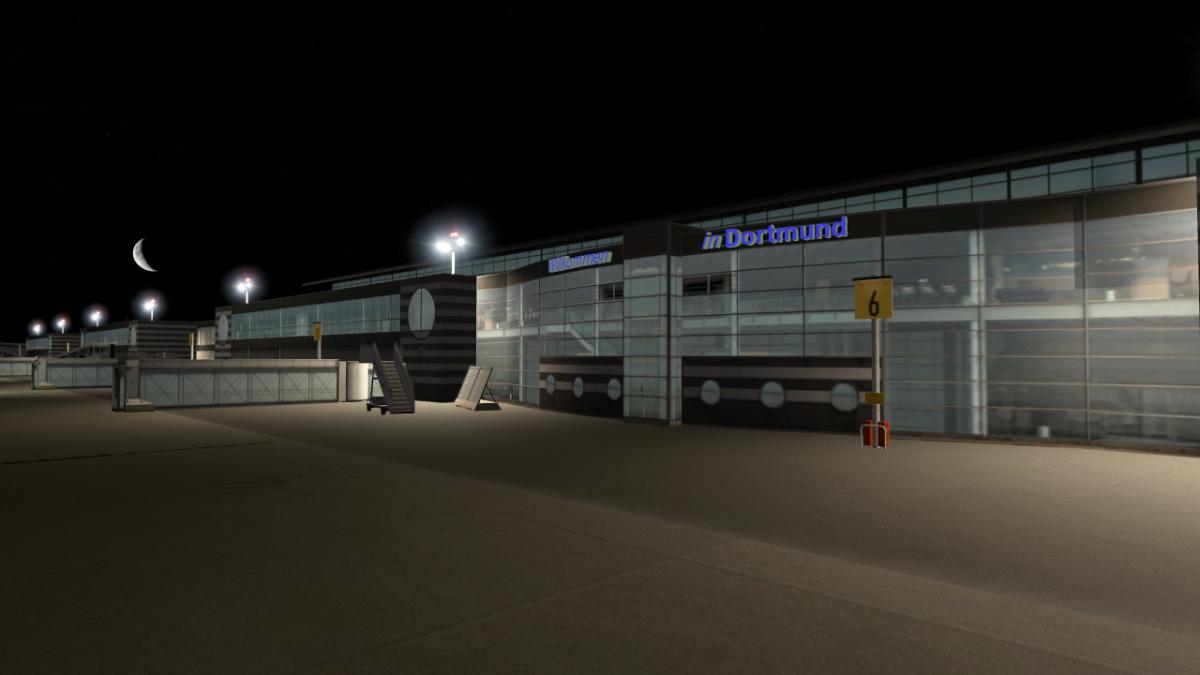
Scenery Review: PAPG - Petersburg James A Johnson Airport by Northern Sky Studio
-
skytitude reacted to a post in a topic:
Scenery Review: X01 - Everglades Airpark, Florida by Skytitude
-
Kiwiflyer reacted to a post in a topic:
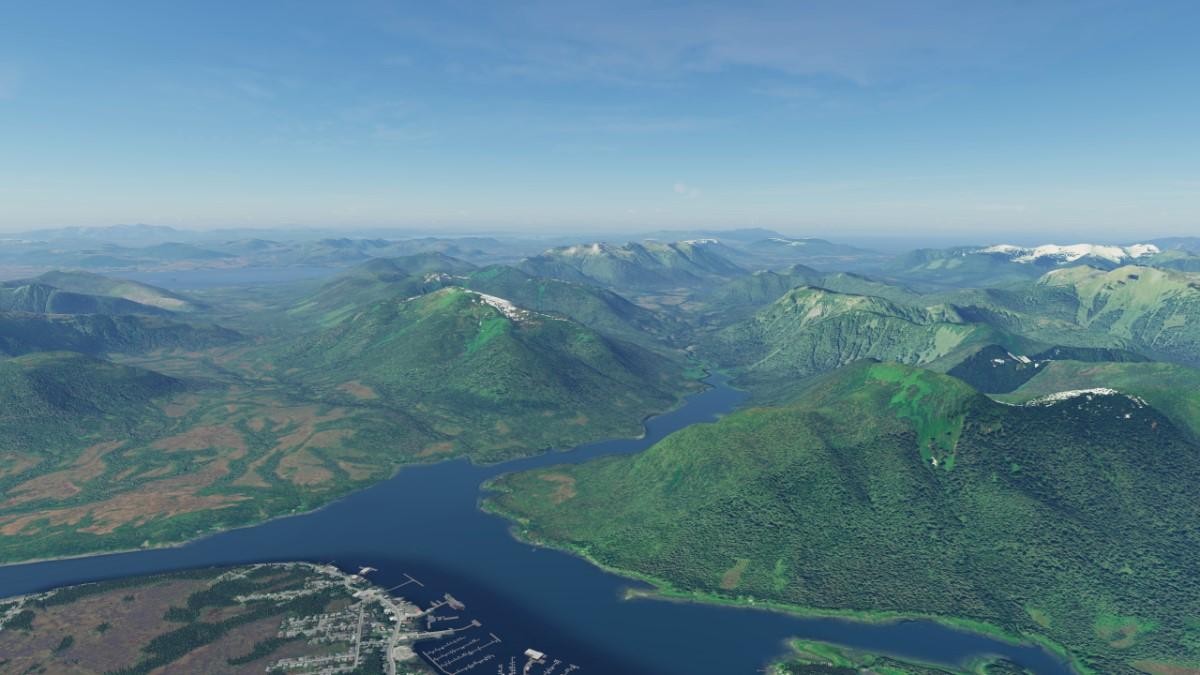
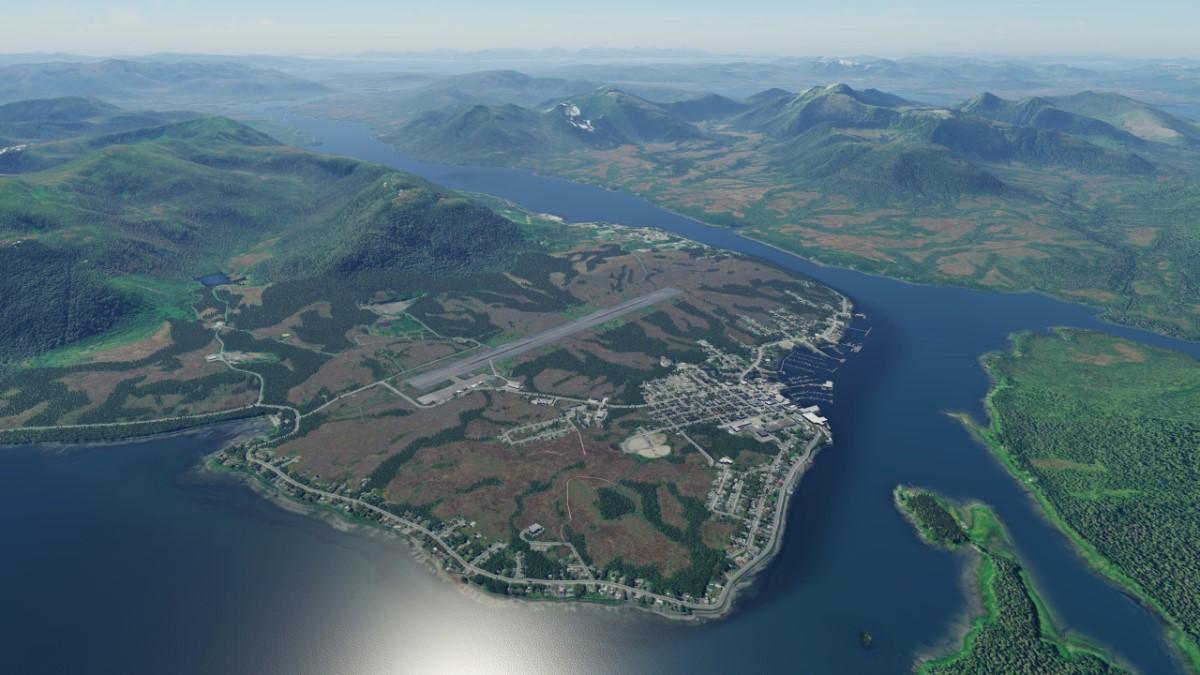
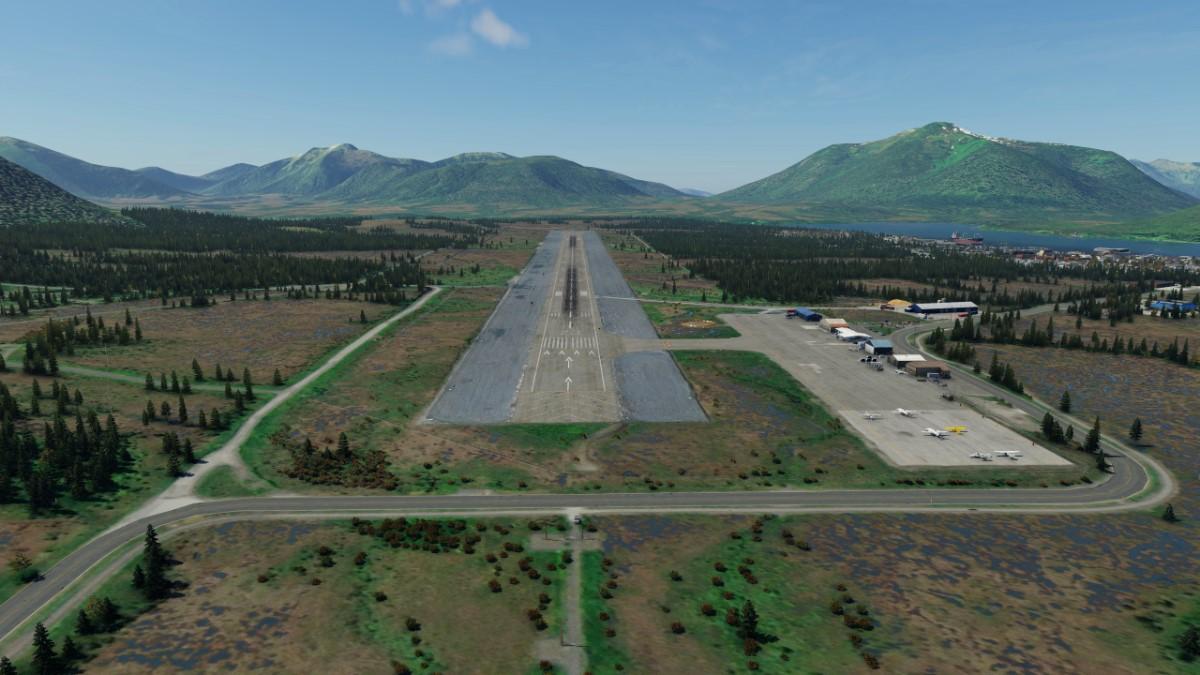
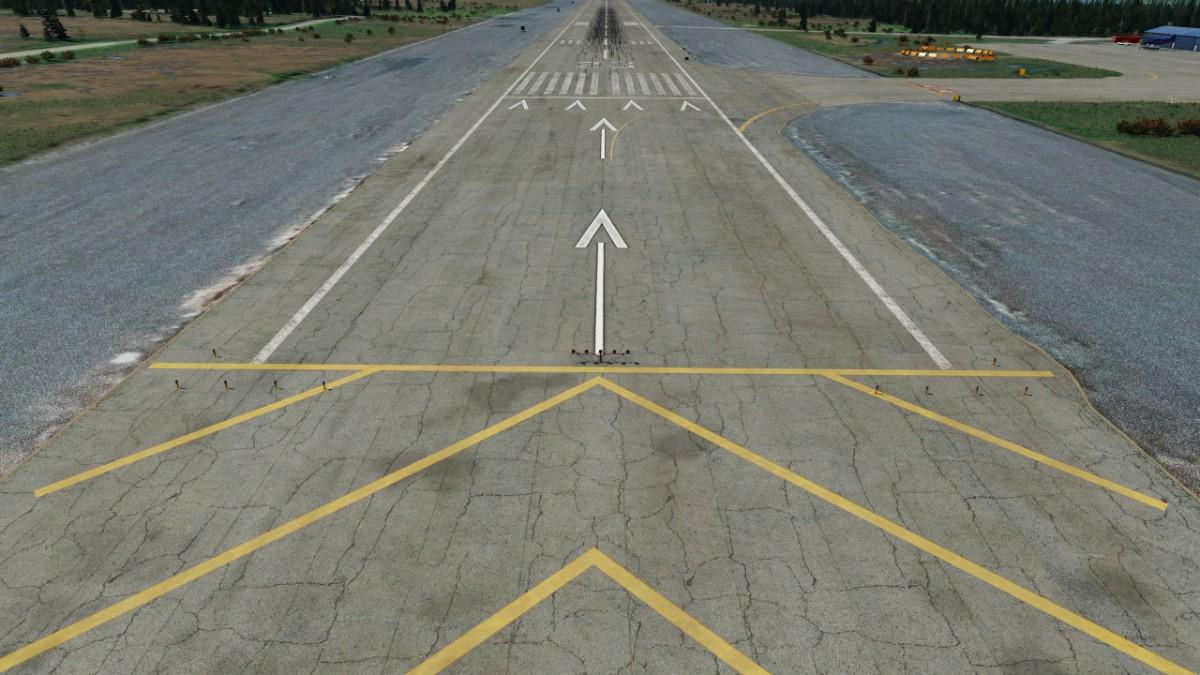
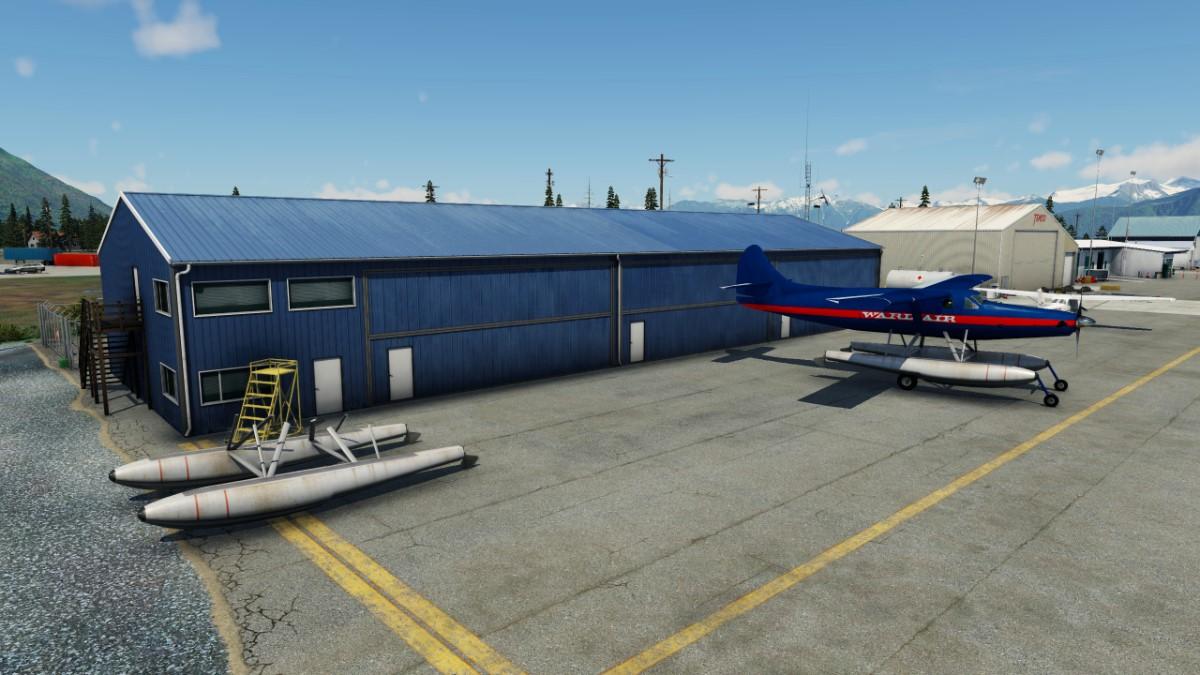
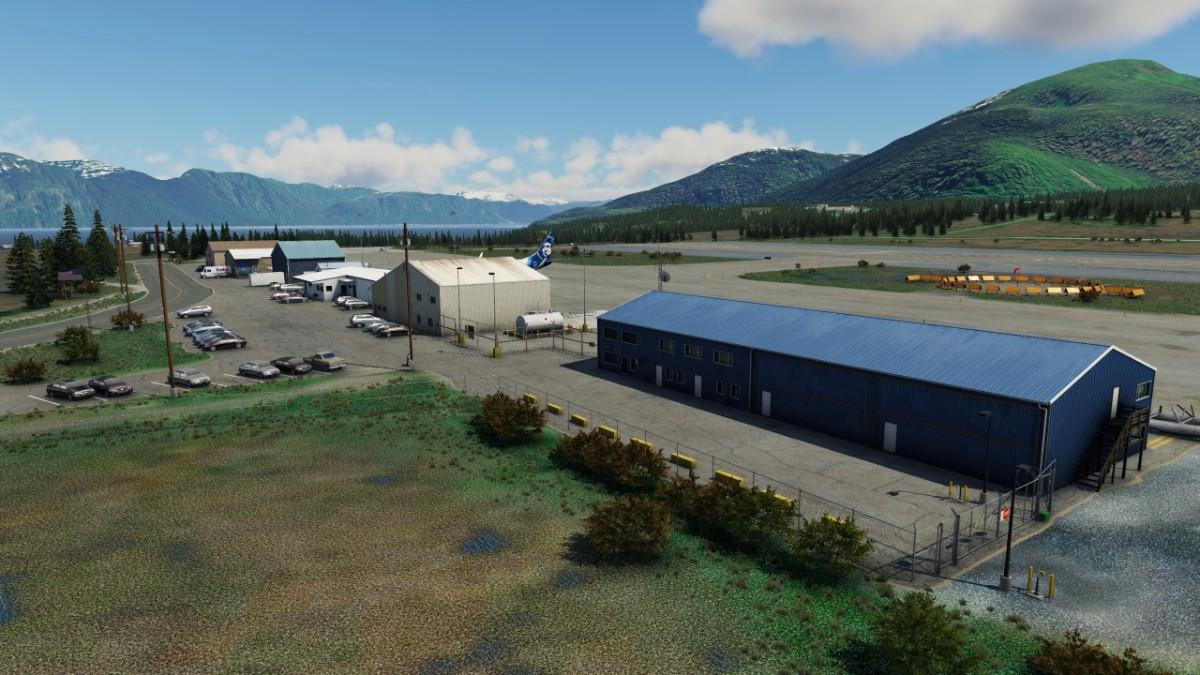
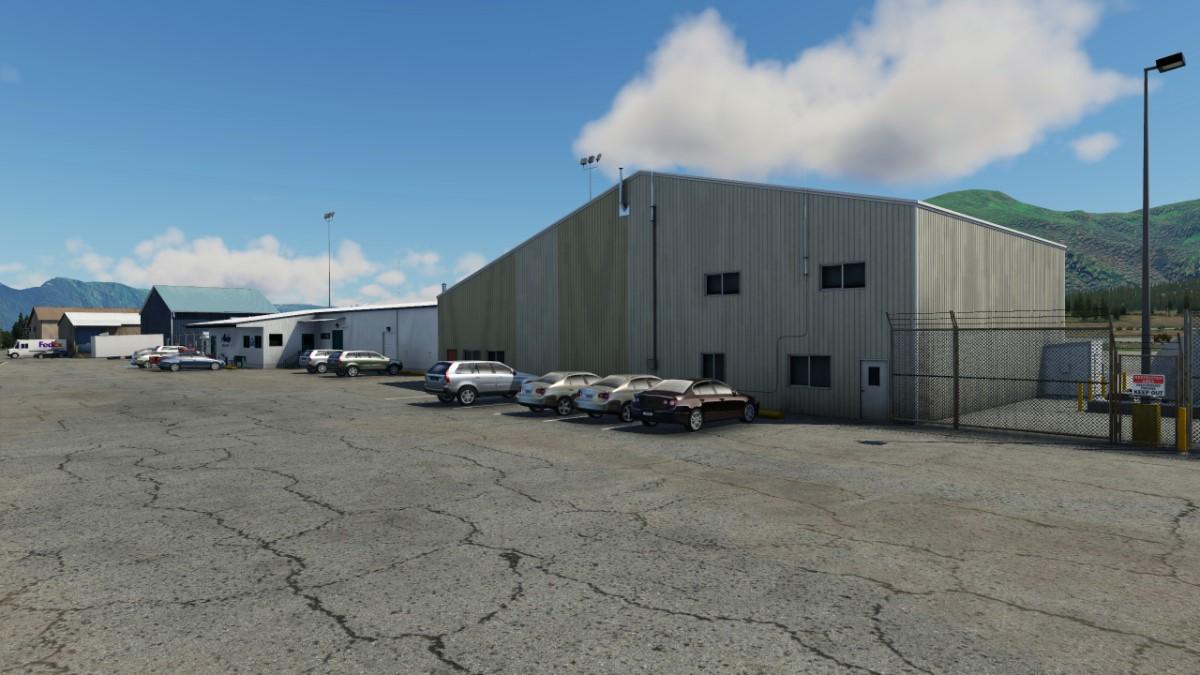
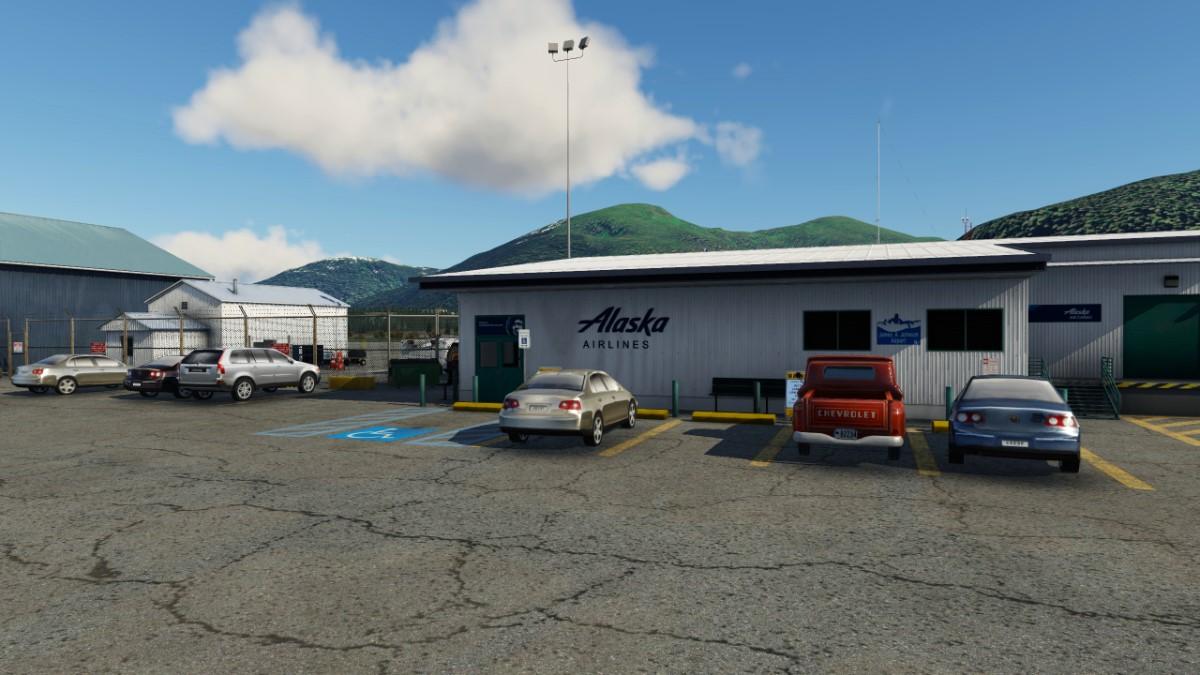
Scenery Review: PAPG - Petersburg James A Johnson Airport by Northern Sky Studio
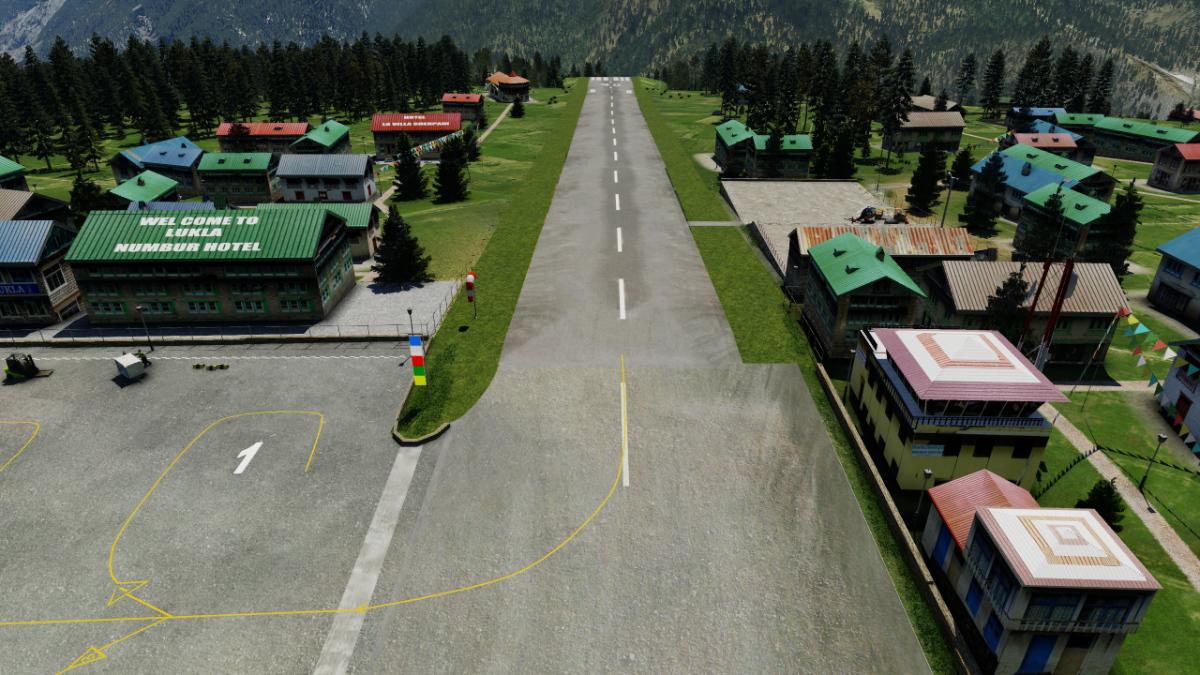
-
Scenery Review: PAPG - Petersburg James A Johnson Airport by Northern Sky Studio By DrishalMAC2 Introduction Petersburg James A. Johnson Airport (PAPG) is situated in the remote wilderness of Southeast Alaska, within the small but vibrant community of Petersburg. It serves as an essential lifeline to more populous regions, providing indispensable connections for the area's residents. Its single runway, 5/23, with an asphalt surface stretching 6,400 by 150 feet (1,951 by 46 meters), accommodates daily flights operated by Alaska Airlines with Boeing 737-700 passenger jets, reflecting the essential role of air transport in this region. Historically, the service was further supported by Boeing 737-400 passenger/cargo Combi aircraft, highlighting the airport's importance in both passenger and cargo transportation. Petersburg is a locale steeped in heritage, often referred to as "Little Norway," reflecting its Norwegian roots and the fishing industry that has long supported the local economy. Surrounded by the natural beauty of the Tongass National Forest, the area offers access to the unspoiled wilderness, including the scenic Inside Passage and the majestic Misty Fjords National Monument. These features highlight PAPG Airport's role as a gateway to Alaska's vast wilderness, welcoming adventurers and nature enthusiasts who are eager to explore the region's rugged terrain and varied weather conditions. Northern Sky Studio's latest scenery project for X-Plane aims to boost the realism of PAPG Airport and its Alaskan wilderness surroundings with detailed visuals. Targeting a broad spectrum of X-Plane users, from those passionate about general aviation to commercial jet aficionados, the package promises a significant enhancement. So, without further ado, let's explore how this scenery performs in testing. Copyright © 2023 Navigraph / Jeppesen Installation The installation process is straightforward. Download the file, which, once extracted, occupies about 2.6GB of space. Then, place the extracted file directly into your Custom Scenery folder within X-Plane. Additionally, the manual included in the download contains a link to an Ortho4XP tile for the surrounding area. This tile can be downloaded and added to the Custom Scenery folder in the same manner as any Ortho4XP file. Documentation The documentation included is concise to say the least, as it consists of just a single slide that outlines the installation process and includes links to the Ortho4XP file. Additionally, it features recommendations for third-party scenery addons, enhancing the overall experience. Among these recommendations is simHeaven's X-World, which is highly recommended for users looking to further enrich the scenery. Note: All screenshots featured in this review were captured using the optional ortho tiles and simHeaven’s X-World America First Impressions The airport is situated within Alaska's mountainous landscape, encircled by a complex network of waterways that contribute to the region's distinctive terrain. The scenery boasts an impressive array of ortho textures surrounding the airport, derived from high-quality satellite imagery. A particularly appealing decal effect has been applied to these textures, significantly enhancing their appearance and bringing the rugged beauty of Alaska's wilderness to life. Ground Textures and Foliage The runway textures are of outstanding quality, showcasing a rugged and worn appearance that aligns perfectly with expectations for an airport in such a remote setting. Physics-Based Rendering (PBR) technology enhances the textures of both the taxiways and runway, vividly bringing the airport environment to life. The ground textures are accurately marked for runways and taxiways. Notably, the careful addition of cracks and tire markings contributes significantly to the weathered appearance of the surfaces. The vegetation surrounding the airport, with its mix of small bushes and grass near the runway, appears naturally random. This deliberate randomness enhances the feeling of a remote and untamed setting. Ground textures stand out for their quality, with edge markings and tar lines that unify the different concrete textures, adding to the scenery's realistic touch. The rough and uneven edges of the taxiways contribute to the scene's authenticity, reflecting the rugged and genuine atmosphere of the area. Signage and Navigation Aids The airport’s signage is both accurately placed and of high quality. Specifically, the signage at runway hold points, which display aircraft radio frequencies, are notably sharp and clear. The accuracy extends to taxiway signs and runway distance markers, which are not only placed with precision, but are again both sharp and easy to read. This attention to detail ensures that navigating around the airport feels both realistic and intuitive. Main Airport Buildings The airport buildings have been recreated to a very high standard, featuring detailed 3D modelling and high-quality textures. Each building is unique, and after comparing them with real-life images of the airport on Google, it's clear that the models are true to life. The Alaska Airlines terminal building receives special attention, with its representation being particularly accurate and convincing. The main terminal is the only building with a modelled interior, and one which has been recreated with an excellent level of detail. From security signage to wall-mounted electrical sockets, the effort to recreate a realistic interior is evident. The inside is adorned with Alaska Airlines branding, enhancing the immersive experience. Details such as 3D people, welcome stickers, medical and security notices, and even televised images contribute to a bustling and authentic atmosphere. This careful attention to both exterior and interior details promises a convincing and immersive representation of the main airport building. Ground Clutter The ground clutter around the airport is nicely detailed, with a variety of high-quality, random objects, all strategically placed to enhance the authenticity of the airport. Items such as fire extinguishers, pallets, cones, and fuel pumps are thoughtfully added, each contributing to the realism of an active airport setting. Surrounding Area The town of Petersburg, surrounding the airport, has been recreated with careful attention to detail, depicting a highly authentic setting. Notably, the town features numerous dockyards and piers, significantly elevating the area's visual appeal. A tanker moored at the piers, numerous private small boats, and several De Havilland Canada DHC-2 Beaver seaplanes on floats bring the waterfront to life, suggesting a bustling local marine activity. Night Lighting The custom night lighting at PAPG enhances the experience for night-time flyers with a convincingly modelled nocturnal scene. An innovative feature is the control of Runway End Identifier Lights (REIL), and taxiway illumination, which activate only when 122.500 MHz is tuned into Comm 1 on the aircraft. This mimics a real-world system where pilots can manage night lighting, adding an extra layer of realism to the scenery. However, this feature introduces a significant issue. Activating the lights at this airport causes an unintended consequence where the Precision Approach Path Indicator (PAPI) lights at all other airports, whether default or addon, fail to illuminate unless 122.500 MHz is selected on Comm 1. This oversight is notable, and hopefully, it's something the developers will address in a future update. Performance Throughout my testing, I found the scenery's performance to be exceptional, characterised by a seamless experience with no noticeable drop in frames per second (FPS), or stuttering. The airport's relatively small size and its secluded location no doubt contribute to its excellent performance. Although Virtual RAM (VRAM) usage is marginally higher, this is a natural outcome of the scenery's enhanced details and higher quality textures over the default settings, and it is a small price to pay for the significant visual improvements offered. Conclusion Northern Sky Studio's rendition of PAPG Airport in Petersburg, Alaska, carefully combines authenticity with functionality, whilst targeting a diverse audience of X-Plane users. The scenery's highlights include its strategic location in the stunning Alaskan wilderness, high-quality ortho imagery, custom mesh with the optional ortho tile, carefully modelled ground textures, and bespoke buildings that resonate with the essence of the area. This detailed representation allows for an expansive exploration experience, accommodating everything from general aviation to larger aircraft like the Boeing 737, enabling pilots to embark on adventures through the nearby mountains and iconic sites such as the LeConte Glacier and Misty Fjords. Despite an issue with the custom night lighting feature, the scenery maintains an immersive and seamless experience. So, if you're seeking a launchpad to explore Alaska's expansive wilderness, Northern Sky Studio's PAPG airport stands out as an immersive base. It serves as an ideal gateway for X-Plane users keen on uncovering the rugged beauty of the Last Frontier. ________________________ Petersburg James A Johnson Airport by Northern Sky Studio is now available from the X-Plane.Org Store here: Petersburg James A Johnson Airport Priced at $12.00 Features The most detailed replica of airport buildings and vehicles EDGE, REIL and Taxiway lights can be enabled on 122.500 COM1 Custom hand-placed autogen High resolution ground textures / Custom runway textures High resolution building textures Compatible with all X-Plane 12 features Custom mesh for the airport area (Ortho4XP) All materials created for full PBR Shading and occlusion (texture baking) effects on all airport buildings High-resolution building textures Custom orthophoto for the airport and surrounding areas World Traffic 3 compatible Requirements X-Plane 12 or X-Plane 11 (both versions included) Windows, Mac, or Linux 8 GB+ VRAM Recommended Download Size: 2 GB Current version: 1.0 (Feb 15th, 2024) __________________________________ Scenery Review by DrishalMAC2 26th March 2024 Copyright©2024: X-Plane Reviews (Disclaimer. All images and text in this review are the work and property of X-PlaneReviews, no sharing or copying of the content is allowed without consent from the author as per copyright conditions).
-
Kiwiflyer reacted to a post in a topic:
Scenery Review: X01 - Everglades Airpark, Florida by Skytitude
-
Scenery Review: X01 - Everglades Airpark, Florida by Skytitude By Felicity Smith Introduction As a young girl, I remember rushing home after school to immerse myself in the adventures of Mark, his dad, and Gentle Ben, gliding effortlessly on their airboat through the Everglades in the television series 'Gentle Ben.' Those reruns transported me to a world filled with simplicity and joy, a feeling I’ve cherished into adulthood. So, when Everglades Airpark popped up on the Org store, and hubby suggested I take a look, I thought, why not! Everglades Airpark, located a mile southwest of Everglades City in Collier County, Florida, is more than just a hub for aviation activities; it's a portal to the expansive 10,000 islands that dot the region. Yes, an astounding 10,000! This strategic position offers virtual pilots a scenic base that perfectly captures the essence and beauty of the Everglades. Installation and Documentation Users are provided with two zip files, one tailored for X-Plane 12 and the other for X-Plane 11, to ensure compatibility regardless of the version they are using. The files are compact, with the download size being just over 160MB and expanding slightly to around 170MB once extracted. The installation process involves simply transferring the two folders into your Custom Scenery folder, making it as straightforward as preparing for takeoff. Documentation comes in the form of a modest text document. It's simple yet effective, providing all the essential information needed for installation. First Impressions My first flight over Everglades Airpark in X-Plane was truly eye-opening. For those who haven't had the opportunity to visit this part of the world, the expansive view of countless islands and mangroves is striking. The scenery offers depth with its myriad of islands and islets, presenting a rich tapestry for exploration. While it's uncertain if every single island has been individually modeled, the contrast to X-Plane's more generic landscapes is notable. The enhancements made to the bathymetry data through the edited mesh significantly smooth out the dips and rises in water surfaces that X-Plane sometimes exhibits. This adjustment leads to a more realistic experience, especially noticeable when flying at low altitudes, by mitigating the visual disruptions caused by these inconsistencies As you fly over the airpark, the detailing becomes even more apparent. A custom photographic overlay enhances the realism of the airport and its surroundings, making aspects such as the runway and the nearby Chokoloskee Bay appear more lifelike. Furthermore, the overlay extends over the water, effectively using different shades of blue to indicate variations in water depth. Everglades Airpark Approaching Everglades Airpark reveals that its charm lies in the subtle details rather than grandiosity. The developer has achieved a near perfect balance with the custom foliage, including shrubs, trees, and 3D grass, which are distributed in a way that creates a scene that is neither barren nor overcrowded. Combined with X-Plane's ambient nature sounds, the setting attains an immersive quality that is both pleasing and authentic. The runway itself features textures that realistically reflect wear and tear. The addition of what appears to be windblown sand across areas of the runway further enhances its visual fidelity and acknowledges the airpark's proximity to the coastline. Runway markings, as you would expect, are minimal, displaying only the essential numbers and the airport’s frequency, which underscores the airpark's practical, no-frills ethos. In terms of structures, the airpark reflects its real-world counterpart’s modesty with just a few buildings. The main hangar, serving as a shelter for small single-engine GA aircraft, and the main ticket office, which modestly functions beyond what might typically be called a terminal, are notable for their modelling. The inclusion of 3D figures around the ticket office adds a touch of life to the scenery, a detail that enhances realism. A parking area, a small water tower, and various pieces of airport clutter fill out the scene. While the airpark does not boast a wide range of structures, each element is thoughtfully placed, enriching the overall experience without overstimulating the senses. Everglades City Northward from the airpark, one encounters Everglades City, a charmingly small community that, despite its name, is home to fewer than four hundred residents. The city’s layout, with its orderly grid of streets, hosts a variety of residential and commercial structures. These are integrated into the scenery with a photographic overlay that, while not achieving razor-sharp clarity, marks a modest step up from the default textures provided by X-Plane. The waterfront, with its array of docks and jetties complemented by a selection of default boats, melds surprisingly well into the surroundings. Chokoloskee Island Chokoloskee Island, situated further south and connected to the mainland by a three-mile-long causeway, adds a serene element to the scenery. Its numerous buildings and static caravans, integrated using a photographic overlay, had the potential to be a standout feature. Unfortunately, the use of low-resolution imagery here undermines this potential. Given the relatively small size of the download package, it seems there was an opportunity for the developers to incorporate higher resolution textures without a significant increase in file size. At a time when users are generally receptive to downloading larger files for enhanced realism, the decision to keep the file size modest may limit the visual fidelity of these areas. Upgrading to higher resolution textures could have notably improved the immersive quality of Chokoloskee Island, transforming it into a more engaging part of the Everglades Airpark experience. The present resolution, particularly at lower altitudes, detracts from the scenery's potential to fully captivate virtual pilots with the natural beauty and detailed landscape that this unique region deserves. Night Lighting The night lighting at Everglades Airpark, though modest, captures the essence of what you'd expect from a small general aviation airport such as this. It's not so much about the dazzle but the fit, and in this case, the lighting strikes a pleasant balance. The gentle illumination of the main office building, coupled with the streetlights weaving through Everglades City, creates a serene and realistic nocturnal setting. It’s subtle, yet thoughtfully implemented, providing just enough light to navigate without overpowering the quiet beauty of the surrounding area. Performance Given that my computer is typically more engaged with games like “Hogwarts Legacy” and “Age of Empires” rather than the highly detailed and demanding environment of X-Plane 12, I approached this scenery with a measure of apprehension. To my pleasant surprise, the performance across Everglades Airpark was impressively smooth. The only moment I encountered a slight slowdown was when X-Plane 12’s default trees, especially animated ones in windy conditions, began to accumulate, leading to a minor drop in frame rates. However, for those who, like me, find the trees from X-Plane 11 more than satisfactory, switching back to these in the graphics menu is an option. Overall, the scenery performed excellently, free from stutter and maintaining a good performance level throughout. Conclusion In reviewing Everglades Airpark, I've found an experience that captures the simplicity and authenticity of the real Everglades, albeit on a somewhat modest scale. The scenery shines in depicting the main airport and its immediate vicinity, with its upgraded mesh, realistically modelled main airport building, and a genuine sense of place that truly embodies the spirit of this distinctive location. However, there is room for improvement, particularly the lower-resolution overlays in the urban settings near the airport. While these aspects don’t entirely detract from the overall enjoyment, they do present a clear avenue for enhancement that could elevate the scenery to more closely match the vividness and detail of its real-world inspiration. Weighing the scenery’s modest intentions against its successes, it stands out as a rewarding exploration for those captivated by the charm of the Everglades. With an accessible price point, it offers a compelling option for virtual pilots in search of new adventures, set within a context that doesn't aim for overwhelming grandeur but rather a heartfelt tribute to a beloved region. ________________________ X01 - Everglades Airpark, Florida by Skytitude is now available from the X-Plane.Org Store here: Everglades Airpark Priced at $12.95 Features Complete and accurate representation of Everglades Airpark Highly Detailed areas of Everglades City, Chokoloskee Island and ten thousand Islands for greater VFR Custom Materials and Surfaces with Physical-Based Rendering Effect (PBR) Wet Surfaces Using New X-Plane 12 Weather Technology Spectacular Buildings and Objects with Realistic Night Lighting High Density Hand-Placed Forests and Plants Custom 3D Grass Using New X-Plane 12 Vegetation Technology Accurately Built Large Surrounding Area with Thousands of Hand-Placed Objects Edited mesh for +25-082 tile, a lot of bathymetry data problems fixed Requirements X-Plane 12 or X-Plane 11 Windows, Mac, or Linux Download Size: 163 MB Current version: XP 12 1.0 (Jan 24th, 2024) Review System Specifications AMD R5 2600 – 16GB RAM - Nvidia RTX 2060 – Windows 10 Home 64 Bit __________________________________ Scenery Review by Felicity Smith 15th March 2024 Copyright©2024: X-Plane Reviews (Disclaimer. All images and text in this review are the work and property of X-PlaneReviews, no sharing or copying of the content is allowed without consent from the author as per copyright conditions). =
- 1 reply
-
- 2
-
-
Kiwiflyer reacted to a post in a topic:
Scenery Review: RJBB-Kansai International Airport by Darkblue Scenery
-
Scenery Review: RJBB-Kansai International Airport by Darkblue Scenery By Michael Hayward Introduction Kansai International Airport serves as the primary gateway to the Greater Osaka Area in Japan. This remarkable airport, inaugurated 30 years ago, is uniquely situated on an island made from reclaimed land, lying 5 km offshore from Honshu. Its near-sea-level elevation of just five meters is particularly noteworthy. In the previous year, it impressively handled close to twenty-eight million passenger movements. Darkblue Scenery, originating from China, are a modest-sized developer within the X-Plane community. Their portfolio includes a total of five airports, with Kansai being their most recent venture. As newcomers to the scene, they have ambitiously aimed to offer a diverse array of popular, yet distinct airports focused on East Asia for the platform. With an open mind about the possibilities that a new developer might bring to the bustling airports of X-Plane, let's embark on this exploration and see what Darkblue Scenery has in store! What/Where is Kansai International Airport? As noted earlier, Kansai International Airport was inaugurated in September 1994, conceived as a solution to the overcrowding at Itami Airport. Surrounded by a densely populated area, Itami had no room for expansion, necessitating a larger hub for the region. The construction of Kansai's man-made island began in 1987, completing in just two years, with terminal and other facilities ready five years thereafter. Kansai International has received several Skytrax awards, acknowledging its service excellence. These awards include best airport staff in Asia and the world, best baggage reclaim, and recognition for having the longest airport terminal globally, extending 1.1 miles from end to end. Situated in a region prone to natural disasters like earthquakes and typhoons, Japan faced a severe test in 1995. The Great Hanshin Earthquake, with its epicentre only 20km away, resulted in over 6,000 deaths and extensive infrastructure damage. Remarkably, the terminal and island airport withstood the disaster without sustaining damage, a testament to its resilient design. Installation Upon purchasing from the X-Plane.org store, you will receive a download link for the scenery. The download process is swift, resulting in a zip file that encompasses not only the scenery but also an extra file ensuring compatibility with X-Plane 11, which is always nice to see. The package comes with a concise instruction’s pamphlet available in English, Japanese, and Chinese. This guide details the installation steps and provides specific directions for XP11 users on replacing the Earth nav data to ensure the scenery runs smoothly on the older platform. Structures and Facilities Kansai International Airport is distinguished by its unique location on two artificial islands. The first airport island spans approximately 510 hectares, hosting Terminal 1, while the second airport island, slightly larger, covers approximately 545 hectares and accommodates Terminal 2. Together, these islands combine for a total area of 1,055 hectares (2,600 acres). They are interconnected by a taxiway bridge, facilitating seamless operations between the two terminals. Access from the mainland is streamlined by a 3km bridge that connects to Rinku Town, ensuring straightforward entry and departure for passengers. Terminal 1 Darkblue Scenery has invested considerable effort in accurately rendering Terminal 1 of Kansai International Airport, achieving impressive visual fidelity. This main passenger terminal, a sprawling four-story structure, highlights an innovative airfoil-shaped roof designed to enhance air circulation within. Constructed with steel and extensive glass exteriors, it provides expansive views of the airport's surroundings. The terminal's architecture brilliantly utilizes X-Plane 12's Physically Based Rendering (PBR) technology, capturing the nuanced shifts in daylight and the stunning hues of sunrise and sunset, thus enriching the simulation experience with its detailed and dynamic appearance. Terminal 2 In contrast, Terminal 2 features a more utilitarian design, embodying simplicity and cost-effectiveness with its single-story layout. This approach notably forgoes the need for elevators, aligning with the terminal's focus on streamlined operations. While the modelling of Terminal 2 may appear simpler compared to the grandeur of Terminal 1, this distinction reflects the real-life architectural choices, emphasizing functionality and efficiency. Despite its straightforward design, Terminal 2 is a vital component of the airport, serving as a hub for low-cost carriers and enhancing the airport's capacity to accommodate diverse passenger needs. The airport layout is thoughtfully designed to accommodate a variety of aircraft sizes, with jet bridges at each gate and larger stands equipped for multiple aircraft doors. This design is a nod to the era when both JAL and ANA operated Boeing 747s for domestic routes and underscores the airport's capacity for handling significant international traffic. Inside Terminal 1, the modelling is straightforward yet functional, featuring elements like walkways and benches that span the terminal's considerable length. While not the most intricate interior encountered, its design thoughtfully balances visual quality with performance. It provides sufficient detail to appreciate the airport's expansive scale from a broader perspective, without the need for an in-depth exploration. Transportation options within the airport are effectively implemented, featuring shuttle trains and buses to facilitate movement between terminals, alongside a city train that extends across the bridge to the mainland. For those who prefer, there's also the option to walk between terminals. Personally, the convenience of the bus or train seems more appealing for navigating the expansive airport grounds. The island housing Terminal 1 also accommodates cargo and maintenance facilities, administrative buildings, and offices, highlighting the airport's significant contribution to local cargo trade. These sections are accurately modelled to reflect their real-world counterparts, including an open hangar for aircraft parking. The vast scale of this operational hub within the airport is impressive, subtly reminding you of its unique location five kilometres offshore. The intricate network of roads and railways connecting the terminals and mainland is accurately depicted, enhancing the realism with dynamic road traffic. Additionally, the inclusion of a solar farm alongside the southern runway highlights the attention to detail, with each panel oriented for optimal sunlight exposure. The textures employed throughout the scenery are notably high in quality, with 4k resolution enhancing the clarity and legibility of building details and signage. Whilst there's room for improvement in the detailing of the terminal roof, the overall design is coherent and thoughtfully applied. Darkblue Scenery has put forth a commendable effort in depicting Kansai International Airport, delivering a rich and engaging experience through carefully created textures and models that span the entirety of the airport's layout. Taxiways and Runway Kansai International Airport's two runways, 06R/24L and 06L/24R, are thoughtfully integrated into the airport's layout, connected to the terminal buildings through a central pair of main taxiways and further supported by several smaller spurs. This well-designed infrastructure facilitates smooth and efficient movement throughout the airport. The runway ground textures at Kansai International Airport, like those of the terminal, are rendered in 4k resolution, significantly aiding navigation. However, it's important to point out that although the custom runway, taxiway, and general ground textures exhibit this high 4K resolution, the photographic ortho imagery for the wider airport area might not meet the same standard, often appearing somewhat muddy in comparison. Upgrading the ortho imagery to a higher resolution here would help improve the visual quality of the scenery, thereby making the scenery more immersive and engaging. The use of bump mapping introduces a subtle depth to the concrete surfaces, capturing the effects of years of exposure to water and aviation fluids. This results in a variety of marks and stains on the originally smooth, grey concrete, contributing to a realistic portrayal of wear and tear. This effect not only enhances visual depth but also adds character to the airport environment. Painted surfaces on the ground receive special treatment with a slight sheen, thanks to PBR technology. This is carefully balanced, avoiding an over polished look, and instead mimics the subtle lustre of newly painted surfaces. Night Effects Nighttime at Kansai International Airport highlights the considerable effort Darkblue Scenery has put into their work, with their commitment becoming particularly evident after dusk. The runway lights transform the approach into a vivid guide through the darkness, prominently marking the airport against the ocean's expanse. This design ensures the airport stands out as a beacon on its island, a feature further enhanced by the taxiways' green central lights. These lights provide essential guidance to pilots navigating to their gates, especially useful amidst Japan's often unpredictable weather. Each parking stand is effectively illuminated, thanks to strategically placed floodlights near each jetbridge, complemented by ambient light emanating from the terminal buildings. This implementation of X-Plane 12's dynamic lighting enhances the visual appeal significantly, creating a scene that is both visually striking and authentic. The airport's lighting envelopes the infrastructure and pathways to the mainland in a soft orange halogen glow. The careful placement of each light source enhances the visual appeal, creating a nighttime ambiance that's both vibrant and welcoming, even in the absence of bustling crowds. While the terminal's lighting is both bright and extensive, it doesn't fully shine through the transparent textured glass windows as ideally expected. This shortfall is slightly disappointing, particularly given the careful placement of spotlights within the departure lounge, an effect that regrettably does not project well to an observer from the cockpit. However, an ambient orange glow from the terminal's service vehicle underpass subtly conveys the internal dynamics. Additionally, the use of older lighting techniques, such as baked-on lit textures, is noticeable, particularly in the office windows. This approach, while historically effective, presents a stark contrast to the more dynamic lighting used elsewhere, highlighting a mix of lighting styles within the airport's design. The maintenance facilities continue to contribute to the airport's nighttime allure, with industrial areas enveloped in stark white light. The hangar, bathed in light from roof-mounted spotlights, emphasizes the operational scale and significance of these zones. Performance Performance-wise, Kansai International Airport proved to be impressively smooth, holding up well even when faced with challenging weather scenarios. The only instance of a noticeable decrease in frame rates occurred during night operations, which may have been influenced, in part, by the presence of Traffic Global. Opinion and Closing Remarks Discovering Darkblue Scenery's work on Kansai International Airport has indeed been an eye-opener. Approaching this review with an open mind, I've been thoroughly impressed by the quality and detail embedded within the scenery. The evident effort and careful planning that has gone into recreating KIX, positions it among the finest Japanese sceneries available for X-Plane 12. While there are few negatives to highlight, it's worth mentioning that the photographic ortho used, albeit a nice addition, could benefit from a higher resolution to maintain quality upon closer inspection. Additionally, the use of baked lit textures on some major buildings, while functional, does reminisce about earlier days of X-Plane design. These points, hopeful for attention in future updates, are minor when considering the overall excellence of the scenery. For flight simmers seeking a detailed and carefully modeled airport without a hefty price tag, Darkblue Scenery's Kansai International Airport, priced at an accessible $16.99, stands out as an excellent choice. This scenery not only showcases the developer's remarkable capability but also ignites anticipation for future creations. With a keen eye on areas ripe for enhancement, I remain genuinely excited to witness the ongoing evolution of their offerings. ______________________________________ RJBB-Kansai International Airport by Darkblue Scenery is available from the Org store here: RJBB-Kansai International Airport Priced at US$16.99 Features: 4K textures. Whole island owned detail modeled buildings which restored from reality. Customized ground markings and taxiway signs. Customized lights. Customized taxiway and runway texture. Interior for some buildings include Terminal 1 and train station. Accurate taxiway and runway according to the newest AIRAC data. Extremely FPS friendly. Requirements: X-Plane 12 or X-Plane 11 (XP11 has been tested and could run without error, as this scenery is fully designed for XP12, some users may experience few jetways offset in XP11.) Windows, Mac, or Linux 8 GB VRAM Minimum Download Size: 810 MB Reviewers System: Windows 10 Professional AMD Ryzen 5 3600 Processor 32GB RAM Palit GeForce RTX™ 3080 GamingPro Scenery Review by Michael Hayward 29th February 2024 Copyright©2024: X-Plane Reviews (Disclaimer. All images and text in this review are the work and property of X-PlaneReviews, no sharing or copying of the content is allowed without consent from the author as per copyright conditions)
-
Dominic Smith reacted to a post in a topic:
Scenery Review: LICD- Lampedusa Airport and Linosa Island XP 12 by Cami De Bellis
-
Cami De Bellis reacted to a post in a topic:
Scenery Review: LICD- Lampedusa Airport and Linosa Island XP 12 by Cami De Bellis
-
Kiwiflyer reacted to a post in a topic:
Scenery Review: LICD- Lampedusa Airport and Linosa Island XP 12 by Cami De Bellis
-
Scenery Review: LICD- Lampedusa Airport and Linosa Island XP 12 by Cami De Bellis By Dominic Smith Introduction Lampedusa, the largest of the Italian Pelagie Islands in the Mediterranean, stands as Italy's southernmost point, closer to Tunisia than mainland Italy. Spanning 20.2 km2, it is home to approximately 6,000 residents. Lampedusa Airport, situated merely a few hundred meters from the town centre, boasts a 5,889ft asphalt runway and experiences peak traffic during summer, catering to medium-sized aircraft like the Boeing 737 and Airbus A320. Cami De Bellis' rendition of Lampedusa Island and its airport, alongside Linosa Island, showcases her hallmark attention to detail. This scenery features highly accurate representations of Lampedusa Island, its associated airport, Linosa Island, over 160 custom objects, and custom terrain mesh by Maps2XPlane. The package offers high-resolution textures in both 2K and 4K, native 3D characters and vehicles, two heliports, and much more, providing an immersive experience for users. As some of you may be aware, I am a great admirer of Cami's work, as her sceneries are superbly detailed, embodying a unique personal touch that distinctly marks her creations as special. There's something about the way Cami infuses her projects with her own essence, though it's hard to pinpoint exactly what, that elevates them above the ordinary. Installation The scenery is purchasable from the Org store at $18.90 and is notably large, with a download size of 2.8GB and an extraction size of 4.7GB. This size is substantial in comparison to many other sceneries, due in part to the mesh and ortho coverage. Within the package, there are three folders that should be transferred to the Custom Scenery folder within X-Plane. The naming convention of these folders eliminates the need for adjustments to the scenery_packs.ini file, simplifying the setup. Furthermore, the absence of any requirement for keys or activation streamlines the installation process, making it exceptionally straightforward. Documentation The documentation is comprised of two PDF files: one dedicated to installation and the other, aptly named "Tips & Tricks," offers guidance on maximizing the scenery's potential and highlights specific features. Both documents are well-composed, with a clear layout, making them invaluable resources to review before launching X-Plane. Admittedly, like many, I was too eager to explore the scenery after being captivated by the screenshots on the store page and so bypassed the initial read-through, so it’s straight to hell for me! Aerial View The aerial view of the island evokes strong memories of a journey I once made to a remote Greek island, characterised by its semi-arid, garrigue landscape. The custom mesh expertly highlights the topographical diversity of the area. The western side features deep gorges, contrasting with the shallow valleys and sandy beaches of the eastern part. The entire northern coastline boasts cliffs, offering a mix of gently sloping cliffs on the east and stark, vertical cliffs on the west, catering to a variety of adventures. The custom orthoimagery of the island is outstanding, providing clear, crisp visuals free from common anomalies like cloud cover. This is a notable achievement, especially for anyone familiar with the challenges of creating ortho sceneries marred by 2D cloud textures. Upon descending, the imagery retains its clarity, a testament to the high resolution used. Additionally, the custom autogen, leveraging Cami’s CDB Library assets, effectively represents the island's buildings, enhancing the overall realism and immersion. Airport and Taxiways The main runway and taxiway textures for both asphalt and concrete surfaces are custom made and demonstrate a high level of detail. The exposure to the elements from the surrounding Mediterranean has been artfully captured with a significant degree of weathering visible through cracks and pits. Tire marks on these surfaces add to the realism, with the concrete showing particularly impressive evidence of aircraft manoeuvres. These details, though small, significantly enhance the authenticity of the experience. Signage and Foliage The careful placement of foliage around the runway and taxiway adds depth without being a burden on system resources, striking a balance that complements the detailed orthoimagery. While the airport's signage is limited due to its size, what is present is thoughtfully executed, with clear apron demarcations and weathering effects on the ground, enhancing the visual fidelity of the airport environment. Main Terminal and Buildings For users familiar with Cami De Bellis's previous works, the detail in the main airport terminal and its associated buildings in this scenery won't disappoint. The terminal, while lacking an interior, showcases remarkable modelling and texturing, including local artwork that adds a unique touch. A particular standout feature is the lively 3D characters, including a dog, and custom passenger vehicles that populate the airport. These are all nicely modelled and contribute to bringing the airport to life. Adjacent to the terminal, you'll find the control tower, hangar, additional passenger facilities, and fire station, all mirroring the high standard of modelling and texturing work we’ve come to expect from Cami. The area is bustling with ground clutter, such as bins, pallets, cones, and several airport vehicles, all contributing to the realism. The main car park at the airport entrance utilises a custom texture rather than a standard ortho, achieving a seamless integration with the surrounding scenery. This method avoids the common pitfalls of flat 2D cars and texture anomalies, creating a cohesive look. The car park's design, including the dividing walls and vegetation, and the non-default, atmospheric vehicles, add greatly to the atmosphere. On the airport's perimeter, a building, likely a motel or hotel for passengers, echoes the airport's architectural theme. It features numerous AC units and solar panels on its roof, again showing the attention to detail. Lampedusa Venturing beyond the airport leads to the town of Lampedusa, where Cami’s custom autogen, utilising her CDB Library assets, truly shines. While it doesn't encompass every structure, the selection present beautifully captures the essence of this charming oasis. The beach scene was a personal highlight for me, featuring palm trees, deckchairs, and animated 3D characters enjoying their surroundings; a delightful scene that reminded me that I could do with a holiday! The bay area is dotted with small boats and a few jetties, predominantly for leisure, though a larger dock facilitates commercial operations. This blend of recreational and business elements adds a realistic layer to the portrayal of the town, further demonstrating Cami's careful attention to detail and her ability to create immersive environments. Further Afield Heading westward, the landscape transitions to a sparser housing distribution amidst more pronounced terrain, featuring numerous gorges. Yet, the attention to detail remains undiminished. Midway across the island, another beach scene greets you, alive with 3D characters revelling in the sunshine. The combined effect of custom objects with the enhanced mesh and custom ortho keeps the exploration engaging. At the island's far western extremity, where the cliffs become dramatically steep and the gorges deepen, we find the first of the additional helipads, just slightly before the radar station. It's here that Lampedusa's radar station emerges, its military essence underscored by the presence of soldiers and a vigilant guard dog. This setting, evocative of a scene straight out of a high-stakes drama, brings to mind the wise words of Walter White, aka Heisenberg, from "Breaking Bad": “tread lightly.” Linosa Island Located twenty-five miles north of Lampedusa Airport, Linosa Island spans 5.45 square kilometres and boasts a volcanic heritage. Its landscape is dominated by a series of craters, with Monte Vulcano standing as the tallest at 195 metres. The island's volcanic terrain is vividly brought to life with custom mesh and texturing, offering perhaps a more dramatic scenery of the already impressive Lampedusa. The harbours are thoughtfully modeled, although one appeared to lack vessels, a detail that, if added, could further enrich the scenery's authenticity in future updates. Just up from the tranquil harbour, the landscape reveals the second additional helipad, strategically positioned yet discreet, enhancing the island's accessibility without disrupting its peaceful charm. Cami's custom autogen, brings to life the sparse settlements, lending a serene depth to the island's allure, highlighting its status as a quietly detailed haven far removed from the hustle and bustle of more commercial destinations. Night Lighting As dusk turns to night, the airport comes alive with an elaborate light display. The runway, terminal, surrounding buildings, and car park are all bathed in a brilliant glow. Beyond the airport, the autogen lighting and the lighthouse at the island's northern tip, ensures that the night is alive with light, contributing to the immersive experience. Performance During testing, I experienced no performance issues, with frame rates remaining high and stable across all areas, despite my system being midrange. This speaks volumes about the optimization of the scenery, providing an exceptional experience without compromising on detail. Conclusion Exploring Cami De Bellis' Lampedusa Airport and Linosa Island scenery was an absolute delight, evoking fond memories of my visit to Greece. The rich foundation laid by the detailed mesh and photographic textures, combined with Cami's superb 3D modeling and texturing work, brings this scenery to life in a way that is both captivating and deeply immersive. The addition of animated 3D people and custom autogen only adds to the charm of this lovely little scenery package. It's not just the visual detail that impresses; the stability of performance despite the complexity of textures and objects ensures a seamless simulation experience. The inclusion of Linosa Island, with its distinctive volcanic landscape and quaint settlements, further elevates the overall appeal of the package. This scenery package is a testament to Cami De Bellis' exceptional skill in creating immersive X-Plane environments that are rich in detail and offer an unparalleled exploration experience, all at an asking price that represents significant value. In conclusion, for those in search of a scenery that not only embodies the atmospheric and realistic charm of Italy's southern islands but also offers a compelling escape into their serene beauty, Cami’s latest work might just be the perfect addition to your X-Plane collection, serving as the perfect excuse for a wonderful getaway. ________________________ LICD- Lampedusa Airport and Linosa Island by Cami De Bellis is now available from the X-Plane.Org Store here: LICD- Lampedusa Airport and Linosa Island Priced at $18.90 Features Highly accurate scenery for LICD- Lampedusa Airport and Linosa Island with all buildings modeled. Over 160 custom objects all with Ambient Occlusion Custom Terrain Mesh for the entire island of Lampedusa and Linosa by Maps2XPlane Custom Overlay/Autogen Scenery based on CDB assets by Maps2XPlane" Photo real textures on buildings, vehicles, trees… Photorealistic ground textures based on a satellite image 50 cm. Detailed airport objects and GSE vehicles Custom textured taxiways, runways, and apron Custom surrounding buildings Custom airport lights HD Custom Overlay High-resolution building textures – all in 2K and 4K Excellent night effects World Traffic 3 compatible Native characters and vehicles created specially Ground traffic The terrain mesh is complemented with custom overlays: dense vegetation and country-typical autogen, as well as custom road networks with dynamic traffic. Two heliports, for those fans of helicopters. One at the beautiful Linosa Island, and the other on the US Loran Station Base. Requirements X-Plane 12 (not for XP 11) Windows, Mac, or Linux 8 GB+ VRAM Recommended Download Size: 2.7 GB Current version 1.0 (January 11th, 2024) Review System Specifications Intel i5 10400 – 32GB RAM - Nvidia Asus RTX 3060 – Windows 10 Home 64 Bit __________________________________ Scenery Review by Dominic Smith 23rd February 2024 Copyright©2024: X-Plane Reviews (Disclaimer. All images and text in this review are the work and property of X-PlaneReviews, no sharing or copying of the content is allowed without consent from the author as per copyright conditions).
-
Scenery Review: EGCC - Manchester International Airport by Taimodels By DrishalMAC2 Introduction Manchester Airport, located in Ringway, Manchester, England, is approximately nine miles south-west of the city centre. As of 2019, it stood as the third busiest airport in the United Kingdom by passenger numbers, and notably, the busiest outside of London. Boasting two parallel runways each measuring 3,048 meters (10,000 feet), the airport is well-equipped with an extensive array of over a hundred aircraft stands. It features three passenger terminals alongside a cargo terminal, establishing itself as a crucial hub for both domestic and international flights. Over the years, Manchester Airport has transitioned from a modest regional airfield, to one of the UK's premier aviation gateways. This latest release from TaiModels is said to incorporate state-of-the-art features that significantly enhance both the visual and functional aspects of the airport, whilst promising at the same time, unmatched performance. Let's embark on a journey to the North West of England and evaluate how this scenery stands up. Installation The download package for this scenery is quite substantial, with a zipped file size of 1.9GB and an unzipped size of 3.88GB. This is notably larger compared to TaiModels' ENGM or EGLL sceneries. The reason behind this size is the extensive detail included in the package. To install, you should first unzip the file and then transfer the airport and mesh files into your X-Plane Custom Scenery folder. It might be necessary to tweak your scenery_packs.ini file to ensure the mesh file sits below the airport entry. However, I found that the naming convention used by TaiModels meant the scenery worked seamlessly right after installation. Also, part of the download is a folder labelled “OPTION,” which offers the choice of a flattened airport version. Opting for this version removes the underground tunnel, a feature that is particularly recommended for those not using the custom mesh file. Ortho4XP Patch The scenery package includes highly detailed Zoom-Level (ZL) 21 Ortho imagery for the vicinity of the airport. However, for those who prefer to use their personalized ortho imagery across the entire tile, traditionally, the custom mesh could complicate this due to potential visual discrepancies. Thankfully, the included manual offers a solution through a link to an ortho patch file. This patch enables the creation of an Ortho4XP tile that incorporates the custom mesh with your own Ortho4XP imagery. The instructions provided are straightforward, making the integration process relatively simple. Having used this patch to generate an Ortho4XP tile myself, I can attest to its effectiveness in blending the airport seamlessly with comprehensive ortho coverage, all the while maintaining the integrity of the custom mesh. However, for the purpose of this written review, all screenshots will show the scenery in its standard form. Documentation The PDF documentation accompanying this scenery package is concise yet sufficiently clear and straightforward. It covers essential installation instructions for the scenery itself and the required SAM library, also including the previously mentioned link to the Ortho4XP patch. Despite being brief, its clarity ensures users can follow the necessary steps without confusion. However, it's worth noting the absence of airport charts or detailed information about the airport, which I feel represents a missed opportunity. Aerial Perspective TaiModels' rendition of Manchester Airport includes comprehensive coverage of ortho imagery, extending just beyond the airport's boundaries. This level of detail is a significant improvement over many other payware scenery packages I have experienced of late. The imagery is of high quality and integrates seamlessly with personal Ortho4XP tiles generated for the area. Runway & Taxiway Texture Quality Descending closer to ground level, the precision of the runway's Physically Based Rendering (PBR) textures becomes apparent. These textures, which include a variety of asphalt and concrete types, are particularly detailed with signs of wear, such as tire marks, cracks, and oil or fuel stains. The developer's careful placement of varied texture types works well and significantly enhances the realism of the airport's surfaces. Signage & Foliage The airport and its taxiways are enhanced with a generous amount of 3D grass, which not only heightens the visual appeal with its careful placement but also impresses with its performance. Quite often, the overuse of grass can detract from its performance; however, this scenery manages to maintain high frame rates at most times of the day, at least on my system. The taxiway signs are rendered with high-quality textures, maintaining their clarity even when viewed up close, a noticeable improvement over the default signs provided by Laminar Research. Additionally, the accuracy and sharpness of the taxiway ground textures are commendable, with a detailed comparison to Google Maps validating their placement. Notably, the inclusion of playful elements like the "I Love MCR" slogan on the apron adds a touch of authenticity and character. Airport Buildings Venturing beyond the runways and taxiways reveals various areas of interest, including a children’s play area, a fire practice zone equipped with a mock-up aircraft, and several other noteworthy buildings. The parking facilities, which include both ground-level lots and intricately modelled 3D multi-story car parks, are populated with numerous 3D modelled vehicles. This attention to detail, avoiding the use of 2D flat vehicle textures, significantly enhances the realism and immersion of the scenery. Adjacent to the main terminal buildings, the Ibis, Holiday Inn, Radisson Blu, and Crowne Plaza hotels are depicted with a high level of detail and accuracy. The inclusion of the airport’s railway station, aptly named "The Station," illustrates the benefits of the custom mesh. The station, like the previously mentioned hotels, is also modelled to a high standard, enriching the airport's overall authenticity without over embellishment. Terminal Buildings The terminal buildings at Manchester Airport, comprising Terminals 1, 2, and 3, are interconnected through a combination of the Skylink and a covered walkway. TaiModels has created a wonderful recreation of all three terminals, blending exceptional 3D modelling with attention to detail. The inclusion of large glass sections and intricately modelled features like AC vents and railings highlights their commitment to realism. All three terminals are further enhanced by PBR texturing, although their placement on a relatively low-resolution ortho tile might be seen as a minor drawback when viewed up close. While accurate, one could argue that custom ground textures might have offered an aesthetic upgrade, albeit potentially at the expense of geographical accuracy. Terminal 1 Catering to airlines operating both scheduled and charter flights to European and other international destinations, Terminal 1 stands as the airport's second largest. Inaugurated in 1962 by Prince Philip, Duke of Edinburgh, it serves as a base for easyJet, among others. Terminal 2 Opened in 1993, Terminal 2 is utilised by a diverse group of airlines for charter and scheduled services to numerous destinations across Europe and globally. Terminal 3 Inaugurated in 1989 by Diana, Princess of Wales, Terminal 3 initially served as a domestic hub before its expansion and rebranding in May 1998. It has undergone several name changes prior to its current designation. World Freight Terminal The World Freight Terminal, operational since 1986, caters to cargo flights and cargo transported on passenger services. This area is equipped with large warehouses, pallets, and trucks, and one can envisage its bustling activity, especially during peak times like Christmas, mirroring the vibrancy of the passenger terminals. Terminal Interiors The interior designs of all three terminals at Manchester Airport have been thoughtfully included, with Terminal 1 presenting the least detail. Despite this, the level of detail in Terminal 1 remains commendable and is appreciable even from the exterior. Terminals 2 and 3, on the other hand, boast significantly more detailed interiors across larger areas, offering visually pleasing environments. The modelling across these terminals strikes a careful balance, offering a reasonable amount of detail without venturing into excessive complexity that could potentially impair performance in terms of frame rates. One notable area for potential improvement would be the inclusion of 3D people models. Despite this omission, the overall execution of the terminal interiors is impressive, with careful attention to maintaining a balance between detail and performance, ensuring that the visual appeal does not come at the expense of usability. Hangars & Maintenance Facilities Exploring beyond the passenger terminals of Manchester Airport reveals a variety of hangars and maintenance facilities. These include hangars initially designated for Thomas Cook, which, following the airline's cessation of operations, should technically be referred to as "STS" hangars. Additionally, facilities for Air Livery, Jet2.com, and other maintenance services are present. A noteworthy highlight is the presence of vintage aircraft on static display, such as the Nimrod and VC10, which add a historical dimension to the airport's modern infrastructure. Ground Clutter & Animated Features The scenery includes animated baggage carts, pushback trucks, and a variety of other vehicles typical of a bustling international airport. The random assortment of vehicles and equipment at each gate effectively avoids a repetitive "copy and paste" appearance, contributing to a dynamic and authentic environment. When combined with third-party add-ons like Traffic Global, the airport's atmosphere is significantly enriched, mirroring the lively ambiance of a real-world airport. The integration of the SAM plugin for jetways and the implementation of a Visual Docking Guidance System (VDGS) at selected gates, further increases the realism. Night lighting The custom night lighting employed at Manchester Airport is well-executed, ensuring that the main runways, taxiway lights, and gates are adequately illuminated for operations after dark. The lighting effectively enhances visibility, contributing to a realistic night-time flying experience. The illumination of all three terminals, alongside the expansive array of maintenance buildings and hangars, contributes significantly to the scenery, introducing an additional layer of realism that enhances the visual appeal and atmospheric depth, especially during evening and nighttime scenarios. Performance Given the intricate level of detail incorporated into many parts of this scenery by TaiModels, the performance it delivers is exceptionally high. In my personal testing, I noticed only a slight reduction in frames per second (FPS) when operating larger widebody aircraft, a factor more attributable to the aircraft model and my computer's specifications than to the scenery itself. This indicates that the developers have invested significant effort in optimising the scenery for a broad range of PC capabilities, ensuring smooth and stutter-free performance across different aircraft types. The performance is even more remarkable when flying lighter General Aviation (GA) aircraft, such as the default Cessna 172. In these cases, I experienced no FPS drops at all, suggesting an optimisation level that surpasses even the default Manchester Airport scenery, resulting in improved FPS. This level of optimisation is a testament to TaiModels' commitment to delivering high-quality scenery that enhances the experience without compromising on performance, making it accessible to users with varying hardware setups. Issues / Improvements TaiModels' Manchester Airport impresses with its stunning visuals, yet like all sceneries, it's not without minor issues. Notably, without the ortho patch and elevation fixes, users might see a black texture on the airport's north side, a problem solved by applying these fixes. Additionally, the lack of people in the terminals and the outdated reference to the Thomas Cook hangar, which should now be labeled as "STS" following the airline's closure, slightly reduces the scenery's authenticity. Moreover, the documentation could be richer, including airport charts and a historical overview for direct access, enhancing the package's value. Despite these minor issues, it's clear that TaiModels has invested considerable effort into creating an immersive experience, and with their track record of updates, there's every reason to believe these areas will see enhancement in future versions. Conclusion In summing up, TaiModels' rendition of EGCC Manchester Airport is a fantastic package that offers exceptional value for both X-Plane 12 and 11 users. This scenery excels in delivering a highly immersive experience, underpinned by robust visuals and performance that together, create a compelling virtual environment. While the package does include minor issues as mentioned previously, these elements do not mar the overall excellence of the scenery. Instead, they highlight areas for enhancement in subsequent updates, suggesting a pathway towards an even more refined and lifelike representation of Manchester Airport. For those ready to embark on their next virtual journey, TaiModels' Manchester Airport offers a compelling starting point, one which is poised to enrich any X-Plane user's experience with its detailed realism and immersive environment. ________________________ ________________________ EGCC- Manchester Int'l Airport by TaiModels is now available from the X-Plane.Org Store here: EGCC- Manchester Int'l Airport Priced at $27.00 Features Hyper-Detailed models SAM amination jetways High quality PBR textures on objects and ground for superb reflections High performance Completed autogen around the airport Ground traffic plugins (car and truck) Compatible with XP11 and XP12 - Both versions included Includes weather texture in X-Plane 12 Requirements X-Plane 12 or X-Plane 11 - Both Versions Included Windows, Mac, or Linux 8 GB VRAM Minimum Download Size: 2 GB __________________________________ Scenery Review by DrishalMAC2 16th February 2024 Copyright©2024: X-Plane Reviews (Disclaimer. All images and text in this review are the work and property of X-PlaneReviews, no sharing or copying of the content is allowed without consent from the author as per copyright conditions).
-
Aircraft Review: de Havilland Canada DHC-5 Buffalo by X-Hangar By Dominic Smith Introduction Well, I’m back again with a new model from X-Hangar, this time, the venerable DHC-5 Buffalo. This robust and versatile transport aircraft, with its unique charm and capabilities, is the latest to have captured my attention, especially as it’s from a developer whose work I greatly enjoy. The DHC-5 Buffalo, a successor to the DHC-4 Caribou, was developed by De Havilland Canada and first took flight in the 1960s. Designed to meet the demanding requirements of military and civilian operations alike, the Buffalo distinguished itself with its STOL (Short Takeoff and Landing) capabilities, allowing it to operate in diverse and challenging environments. Over the years, it has served various roles, from troop transport and cargo delivery to search and rescue operations, demonstrating its versatility and reliability. X-Hangar's DHC-5 Buffalo, much like the DHC-4 Caribou reviewed previously, showcases the developer's commitment to delivering immersive and accurate flight models accessible to a broad spectrum of simmers. The model comes packed with features that not only bolster its authenticity but also user interaction. Highlights include a carefully modelled 3D cockpit, operational windows, doors, and cargo ramp, realistic rain effects and wipers, two load configurations (passenger or cargo), detailed 3D pilot and passenger figures, a PDF manual, and a huge range of international liveries. Documentation Staying true to X-Hangar's approach of creating both comprehensive and user-friendly aircraft models, the Buffalo comes with a nicely detailed 19-page PDF manual, which provides a thorough overview of the Buffalo's operational features and cockpit layout. The manual not only explains the aircraft’s functionality but also includes detailed information on how to operate the aircraft through all phases of flight. The documentation is extremely well-written and includes numerous images which clearly illustrate key aspects of the aircraft's cockpit and operation. Installation The installation process for the DHC-5 Buffalo is straightforward, mirroring the simplicity and user-friendliness characteristic of other X-Hangar offerings, such as the previously reviewed Caribou. Once purchased, users simply download the provided zip file which contains both X-Plane 12 and 11 variants. When extracted, it’s just a simple case of placing the appropriate folder directly into the 'Aircraft' folder of their X-Plane installation. The procedure is devoid of complicated steps, eliminating the need for navigating through perplexing instructions or dealing with third-party software wrappers. A key highlight is the absence of online activation requirements, emphasizing X-Hangar's user-centric approach: once you've made your purchase, the aircraft is unequivocally yours. This ensures a seamless integration into your X-Plane setup, allowing you to take to the skies with the Buffalo without any unnecessary delays or technical hurdles. Exterior X-Hangar's rendition of the DHC-5 Buffalo, akin to their DHC-4 Caribou, embodies a robust and functional design that mirrors the real-world aircraft's versatility in both military and civilian operations across the globe. Designed to tackle the challenges of demanding environments and heavy loads, often operating from short and poorly surfaced airstrips, the model captures this essence beautifully. The model's exterior features the short, stout fuselage, high wings, and twin turboprop engines, closely resembling those of the DHC-4 Caribou, albeit slightly larger and with more power engines. The texturing on the exterior is particularly commendable, with liveries that closely resemble those of actual aircraft, enhancing the model's authenticity. Notably, the textures on the Buffalo show a refinement over those seen on the Caribou, with an improvement in the metallic sheen, making the liveries appear more realistic, although still retaining a certain stylistic charm that contributes to the model's appeal. The exterior of the Buffalo is visually appealing, striking a good balance between realism and artistic interpretation. While it may not achieve the photorealistic quality of some more expensive models, X-Hangar's Buffalo stands out as a faithful representation of the aircraft's exterior. The addition of interactive features, such as the operational doors, windows, rear loading ramp, plus an X-Hangar tent and truck, further enriches the user experience, offering a comprehensive and enjoyable portrayal of the iconic Buffalo. Interior The cockpit of X-Hangar's Buffalo is a testament to the developer's ability to balance functionality with visual appeal, subtly enhancing upon the precedent set by the Caribou. It presents a layout that's not only practical but also enriched with the distinctive charm that's become synonymous with X-Hangar's designs. The main panel in front of the pilot houses the essential six flight instruments alongside the Century 41 autopilot, establishing a solid foundation for flight operations. The centre console is thoughtfully allocated to engine gauges and includes a Garmin 530 GPS unit, equipped with a pop-out feature for ease of use. Engine fire controls are strategically placed just above this area for quick access in emergency situations. The space between the two pilot seats is home to the crucial radio controls, ensuring that communication is always within reach. Above, the overhead panel integrates throttle and prop pitch controls, flaps, and ignition switches, thoughtfully arranged to break up the expansive glass area, adding to the cockpit's functional aesthetics. Despite the inherent complexity of a cockpit designed in the 1960s, X-Hangar has managed to render all instruments, gauges, and switches with clarity and precision. Although a closer inspection might reveal a slight loss in sharpness, this minor limitation does not detract from the overall quality of the texturing, which remains consistent throughout the aircraft. This commitment to detail ensures that, despite its age, the Buffalo's cockpit is both a visually appealing and highly functional space, reflective of the aircraft's storied history and X-Hangar's dedication to authenticity. Stepping into the cabin, and you're presented with a choice that adds a unique layer of versatility to the Buffalo experience: seats filled with passengers or, with a simple click on the “fold all seats for cargo layout” option in the kneepad, classic vehicles from yesteryears. The ability to switch between a passenger layout and a cargo configuration not only showcases the Buffalo's adaptability but also injects a nice does of variety to the model. Sounds The included sounds of X-Hangar's Buffalo do not use the FMOD sound system, a choice I find refreshing in a landscape where FMOD is often hastily considered a standard. Despite this, the auditory experience delivered is more than satisfactory, with the engine sounds being particularly pleasing. Whilst it's difficult to show sounds in a written review, the video below gives a good likeness to what the turboprops sound like in the X-Hangar model. Flight Characteristics After acquainting myself with the Buffalo's details, I was keen to experience its performance in the air, selecting Juneau International Airport in Alaska as my departure point, a location that's been a favourite of mine since acquiring the Inside Passage and Final Frontier packages from Tom Curtis back in the X-Plane 9 days. From the outset, the Buffalo's ground handling, in much the same way as the Caribou, impressed me with its responsiveness, making taxiing to the runway an enjoyable experience. As I initiated takeoff and advanced the throttles, the aircraft propelled forward, revealing the abundant power in the GE T64 turboprops. In what seemed like mere moments, true to its STOL design, the Buffalo effortlessly ascended, setting the stage for a captivating tour around Juneau. Once airborne, the increased thrust from the twin turboprops was immediately noticeable, offering a significant boost in performance over the DHC-4. This extra thrust was particularly apparent during the cruise phase, allowing the aircraft to maintain altitude with ease. While I refrained from executing what some might term 'enthusiastic manoeuvres', I did conduct a few stall tests. The Buffalo behaved predictably in these situations, exhibiting only a minor wing dip before recovery, aligning with expectations for an aircraft of its class and design. Approaching Juneau for the return, the Buffalo's low-speed handling merits became increasingly apparent. The final approach and touchdown called for a few delicate touches of correction due to the wind, but here again, the aircraft handled these with ease. Performance The performance of the DHC-5 Buffalo mirrors that of other X-Hangar models, showcasing an exceptional consideration for hardware requirements. Much like their previous, the Buffalo ensures that even those without the latest and greatest PC setups can still enjoy a rich, immersive experience. This approach allows simmers the flexibility to add detailed scenery or experiment with changeable weather conditions, without having to worry about overtaxing their systems. It's this level of thoughtfulness in design that makes flying the Buffalo not just a visually satisfying experience, but also a smooth and accessible one for a wide range of X-Plane users. Conclusion The DHC-5 Buffalo by X-Hangar, much like its predecessor, the Caribou, seamlessly integrates nostalgia with practicality. It shines in performance, demonstrating X-Hangar's commitment to producing highly enjoyable models that perform extremely well across a broad spectrum of PC hardware without compromising on immersion. Opting out of the race for 4K textures, it instead boasts authentic sounds and an impressive array of liveries, all contributing to its unique charm. For simmers aiming to diversify their collection with a historically rich aircraft, the Buffalo distinguishes itself as an exceptional pick, ready for adventures that few others in its class can match. ________________________ The de Havilland Canada DHC-5 Buffalo by X-Hangar is now available from the X-Plane.Org Store here: de Havilland Canada DHC-5 Buffalo Priced at US$22.95 Features For both X-Plane 12 and 11 3D cockpit VR cockpit Rain and wipers Opening windows Opening doors Opening ramp Yoke hides with keyboard key or press of a button on the panel Steerable yoke in both 3d and VR Pilot figures Passenger figures Static models Chocks and remove before flight flags Menu to hide co-pilot and other options Two different loads: Passenger or Cargo Cargo or passenger load displays according to load (more with more weight and less with less weight) Many international liveries Layers for painting your own livery Garmin 540 GPS with pop out or press buttons Autopilot Century 41 Checklist in .txt format to use in the Sim User manual in .pdf format to help fly in X-Plane FSE file included to fly Flight Sim Economy Requirements X-Plane 12 or X-Plane 11 Windows, Mac, or Linux 8 GB VRAM Minimum Download Size: 311 Mb Review System Specifications Intel i5 10400 – 32GB RAM - Nvidia Asus RTX 3060 – Windows 10 Home 64 Bit __________________________________ Aircraft Review by Dominic Smith 9th February 2024 Copyright©2024: X-Plane Reviews (Disclaimer. All images and text in this review are the work and property of X-PlaneReviews, no sharing or copying of the content is allowed without consent from the author as per copyright conditions).
-
Scenery Review: KONT - Ontario International Airport XP12 by VerticalSim By Dennis Powell Introduction Evoking memories of a 60s TV show, one might recall the phrase, “California is the place you ought to be. Swimming pools, movie stars.” Yet, a short journey east of Hollywood's dazzle takes us to Ontario, California. This area, less heralded but equally intriguing, hosts a sprawling suburban expanse and an airport that serves as a serene counterpart to the ever-busy LAX. Developed by VerticaliSm, Ontario International Airport emerges as a noteworthy addition to their portfolio. Situated as a gateway to Southern California's adventures, it offers an experience distinct from the frenetic pace of Los Angeles International Airport (LAX). The locale is steeped in suburban authenticity, replete with residential areas and the kind of small-scale industrial backdrop one might anticipate in a community adjacent to, yet distinctly apart from, Los Angeles. Encircled by mountains to the east and the undulating hills of Los Angeles to the west, KONT positions itself intriguingly, but how does it fare as an X-Plane destination? Well, that's what we're here to uncover. Installation Installing this scenery package is a breeze. The process involves a simple download of the 1.6GB package, unzipping the folder, and then transferring the uncompressed scenery folder into your Custom Scenery directory. It's straightforward: no complicated licensing, no codes to enter, no hassle at all. Just a quick click, drag, and drop, and you're all set to dive into this scenery experience. On a side note, while the store's description suggests that the gates require SAM3, I've found the package operates smoothly without it. Despite removing the SAM suite due to its impact on my system's performance, I faced no issues with the gates. However, it's worth noting that you'll miss out on the marshaller's guidance into the gate, which could be a consideration for those who fly airliners Documentation This scenery package includes a PDF that efficiently details setup, installation procedures, and any special features you might need to know about. In addition to the installation guide, the PDF offers an overview and some other handy pieces of information. For those interested, it also contains a link to the latest version of the SAM suite. The provided documentation is straightforward and includes necessary information about SAM3 compatibility. As previously mentioned, while I choose to fly without the SAM suite due to its effect on my system's performance, those with more robust systems might find it adds to their experience. And don't worry about being overwhelmed by the PDF, as it's a concise six pages. You’ll find it short, sweet, and refreshingly straightforward, sparing your hair from turning grey as you read. Exploration Walkthrough Situated in a semi-arid desert basin just east of Los Angeles, the airport is encircled by mountains to the east and rolling hills to the west, north, and south. The surrounding area is peppered with autogen, primarily suburban housing and light industry. Warehouses are a common sight as you approach, and the light industrial zone to the east of the airport forms part of the scenery. The local vegetation is quintessentially Southern Californian: scrub brush and palm trees, with a smattering of deciduous trees for shade. The airport features two parallel runways running east to west: 8L/26R, stretching 12,197 feet, and the slightly shorter 8R/26L at 10,200 feet. Both runways boast comprehensive centreline lighting. However, the ground texture, based on ortho photos, is where the scenery slightly falters. These photos retain time-specific shadows and include numerous 2D-rendered parked cars in the lots and conspicuous 2D junk piles around the airport. This aspect is the only notable shortcoming, but considering the airport's price point, it's a minor quibble. The runway and taxiway textures use transparent textures as their base, with custom polygons for the pavement. This technique, a holdover from X-Plane 11, ensures intricate taxi routes but precludes AI aircraft generation and landing at the airport. However, those familiar with World Editor can easily rectify this. The 3D modeling of the main terminal buildings is notably detailed, capturing the essence of their real-world counterparts with a high degree of accuracy. The terminals feature angular roofs with sharply angled glass elements, plus subtle curve that adds to the realistic portrayal. Smaller structures such as maintenance buildings and hangars are also accurately rendered, matching online photos, though lacking interior details. The exteriors, however, are painstakingly modelled, contributing to the airport's ambiance. The airport is abundant in clutter: 3D parked cars, ramp equipment, baggage trains, static aircraft, and notably, a Boeing 727 by a cargo hangar, a fixture in many satellite images. Also, present are power poles, dumpsters, bollards, concrete barriers, cargo containers, and custom signage. The gates, rendered using SAM, are not functional on my setup due to the absence of the SAM plugin, a decision influenced by its impact on my system's performance. Many gates are labelled with airline names like Southwest, Delta, and JetBlue. While not all gates are marked, it’s easy to discern airline allocations. A noticeable omission, however, is the presence of people, an increasingly common feature in payware airports that adds a vibrant, lively atmosphere. Night Lighting The night lighting at Ontario is particularly noteworthy. Surrounded by a brightly lit suburban area, accentuated by its proximity to several freeways, the airport itself doesn't overly stand out at night. Yet, it is sufficiently illuminated to be identifiable as an airport. The runways are equipped with the standard centreline, edge, and approach lights expected of a busy international airport. A unique feature that caught my attention were the taxi lights. Unlike the runway lights, which are strung in lines, these taxi lights appear custom-made and hand-placed, creating an impressive density and detail on the ground. Additionally, there's a significant cluster of wig wag lights at the points where various taxiways converge near the runways. The main terminal ramps are well lit, achieving a balance between visibility and subtlety. In contrast to some sceneries where you might notice a shift in lighting intensity from twilight to full darkness, Ontario’s lighting remains steady and constant. There’s no abrupt increase in brightness as the night deepens. Given the significant light pollution from the surrounding autogen, the airport's lighting is executed with just the right touch, noticeable but not overwhelming, perfectly complementing its environment. Performance Impact This airport marks my second venture with the recently acquired Nvidia RTX 2060, and during my exploration, frame rates consistently hovered in the mid to upper twenties. Pinpointing the exact cause of these low frame rates is a bit challenging. It could be attributed to the airport itself or potentially the extensive autogen in the surrounding area. However, given that my settings for autogen and vegetation are cranked to the max, I’m guessing I’m CPU, rather than GPU limited. What I can confidently report is that, despite the lower frame rates, the overall flying experience remained smooth. There were no hitches, hesitations, or scenery skips noted. During my testing of the scenery, I used the JRX Bell 407, which might have influenced the frame rates I observed. However, it's still too early to conclude if this particular model is a significant resource hog, as I haven't had enough time to thoroughly test its impact. It's a well-known fact though, that certain aircraft can be more demanding on frame rates than others. For those with a reasonably modern computer setup and a robust graphics card, this airport should not pose significant performance issues. Additionally, for those utilizing AutoOrthoXP and X-World America by simHeaven, you'll be happy to hear that VerticalSim's Ontario integrates almost seamlessly into the wider area. Conclusion Overall, Ontario by VerticaliSim presents a solid and well-executed scenery, effectively capturing the essence of its real-life counterpart. The numerous buildings are modelled with care, each one enhanced by a high level of texturing detail. The use of transparent textures for runways, taxiways, and ramps means an absence of AI aircraft, but this isn’t a major issue. For those desiring AI activity, it's an easily rectifiable point. At a price of just $15.99, this minor limitation doesn't detract significantly from the overall value. The only real niggle is with the ortho photos. The retention of shadows and 2D objects could have been addressed prior to their use, and in certain areas, the 2D vegetation isn't completely masked by 3D counterparts. These aspects, while minor, might slightly distract pilots who prefer low altitude flying. However, the photos do ensure accurate runway and parking lot markings. For heavy metal simmers, VerticalSim's Ontario is an excellent choice. It offers an escape from the congestion of LAX and serves as a gateway to explore the varied landscapes of Southern California: from the coast to the mountains, and yes, even those swimming pools and movie stars the classic 60's TV show alluded to. Dennis Powell, Sunset Arts LTD. ________________________ KONT - Ontario International Airport XP12 by VerticalSim is now available from the X-Plane.Org Store here: KONT - Ontario International Airport XP12 Priced at US$15.99 Features: Brand new XP12 weather maps Accurate cargo ramps 2023 Airport Layout HDR Lighting PBR on nearly all materials Moving vehicle traffic Traffic AI Routing SAM Jetways Usage of LOD’s for optimization Requirements X-Plane 12 - (not for XP11) Windows, Mac, or Linux 8 GB+ VRAM Recommended Version 1.0 (January 12th, 2024) Review System Specifications Windows 10 Intel i5-6600K 16GB RAM RTX 2060 with 12GB VRAM __________________________________ Scenery Review by Dennis Powell 31st January 2024 Copyright©2024: X-Plane Reviews (Disclaimer. All images and text in this review are the work and property of X-PlaneReviews, no sharing or copying of the content is allowed without consent from the author as per copyright conditions).
-
Scenery Review: Dortmund XP by Aerosoft By Michael Hayward Introduction Dortmund Airport, a regional hub in the Rhein-Ruhr region of Germany, welcomes over 1.2 million passengers yearly. Flights from Dortmund Airport are operated by a range of seven airlines, including low-cost carriers and regional operators. These airlines connect Dortmund to key destinations across Europe, offering routes to major cities like London, Paris, and Milan, as well as popular holiday destinations in the Mediterranean and beyond. Since its inception in 1925, the airport began with flights to Paris and gradually expanded its routes over the ensuing years. During the tumultuous period of 1939-1945, commonly referred to as the great European disagreement, it was repurposed as a German Air Base, later transitioning to RAF control. While Dortmund Airport may be smaller in size compared to its regional counterparts, Dusseldorf and Cologne Bonn Airports, it plays a significant role in enhancing the city's connectivity. Serving as a vital link, it efficiently bridges Dortmund to the broader European network, offering an array of flight options that cater to both business and leisure travelers. Aerosoft, a household name in the flight simming community, boasts over two decades of experience in developing high-calibre add-ons for X-Plane. Their portfolio, featuring successes like Heathrow, Manchester, and Toulouse, sets high expectations for any new release. In this review, we will explore how their latest creation, Dortmund Airport, available for both X-Plane 11 and 12, and see how it measures up to these lofty standards. Installation & Documentation Upon purchase, you'll receive an installation key for redemption via Aerosoft One. This all-encompassing package, designed for use across various flight simulator platforms, facilitates not only updates but also allows configuration adjustments within the scenery. It serves as a convenient central hub for all your Aerosoft products, representing a significant advancement over the previous Aerosoft Launcher. The installation includes a comprehensive 20-page manual, available in both German and English. It details the airport's facilities and provides a glimpse into the history of Dortmund Airport and the surrounding region. A brief look of this manual is recommended for a deeper understanding of the airport you'll be using. Airport Layout Viewing Dortmund Airport from above reveals a straightforward layout. It features a single runway, 06/24, accompanied by a terminal parking area, a helipad, and business jet facilities, all interconnected by a main taxiway. This simplicity makes it an exceptionally easy airport to navigate. The ground markings are diverse, ranging from standard yellow taxi lines to chequered service roads, and even include distinct lanes for turnback and pushback parking spots. A notable aspect appreciated by many low-cost airlines at smaller airports like Dortmund is the design that allows aircraft to turn around at the gate. This feature not only saves space but also reduces reliance on pushback tugs, enabling planes to dispatch independently without the need for a ground marshal. Subtle weathering effects in the parking areas, such as liquid stains and minor cracks in the concrete, contribute to the airport's lived-in feel, avoiding the sterility of uniformly pristine surfaces. The recently renovated parking area stands out with its lighter grey shade, contrasting with the older sections of the taxiways and runway. Signage & Foliage The taxiway markers at Dortmund Airport stand out for their clarity, both during the day and at night, ensuring easy navigation. Additionally, the airport's abundant foliage is strategically placed, contributing positively to the overall ambiance and visual appeal. Structures & Facilities The main airport terminal is modelled with a reasonable amount of accuracy, presenting an impressive view from both airside and landside. Dortmund may not boast the world's most beautiful airport, but its modern terminal, reconstructed between 1998 and 2000, certainly has a distinctive appearance. Unlike some sceneries that feature fully modelled interiors or window transparency, Aerosoft has chosen photo textures for the terminal's exterior, which achieves a realistic effect, albeit without interior visibility. Whilst it works for the most part, I felt some of the texturing could have been better. It's quite satisfactory overall, but a future update could potentially enhance these aspects. Beyond the terminal, the attention to airside details is impressive. Situated to the south of the terminal are the helipad, business jet, and maintenance facilities, located on a slightly elevated terrain. Aerosoft has skilfully adjusted the ground mesh here, adding to the overall authenticity. The blast chamber, with its 200° of soundproof blast fencing for engine testing, is a particularly noteworthy detail. Surrounding Area Aerosoft has not only focused on Dortmund Airport but has also significantly enhanced the surrounding area, including a detailed recreation of Dortmund city. This is complemented by high-quality orthophotos, rendered at an impressive 50cm per pixel resolution. As you head towards the city centre, a recreation of the railway station and numerous city landmarks and buildings comes into view. Although these may not match the airport's terminal in resolution, the use of photo textures ensures each building is recreated with high fidelity. This attention to detail is particularly striking when flying low or gazing out of an airplane window during approach. In my experience, some sceneries either neglect city details or, on rare occasions, overshadow the airport itself. Here, however, there's a commendable balance between the airport and its surroundings. While it may not totally rival the satellite imagery and photogrammetry of Microsoft Flight Simulator, the hand-modelled towers in many respects offer a more appealing visual experience. Additionally, Aerosoft has modelled the local gliding airfield, DE-0182 Engsen-Opherdicke. Whilst it’s a relatively modest setup with a few hangars, a club room, and some glider equipment, it's a charming addition to the scenery. This airfield is certainly worth exploring, especially for gliding enthusiasts or those looking for a nearby short field for leisurely flights over the city in a Cessna. Night Lighting The night lighting at Dortmund Airport is particularly noteworthy. The taxiways are lined with the standard blue edge and green centre lights, which provide a clear and vivid guidance system. This becomes even more prominent during night approaches, with the runway lights standing out impressively. Each gate area is illuminated by overhead floodlights that effectively brighten the surroundings. These lights make excellent use of X-Plane 12’s advanced lighting engine, creating a realistic and visually appealing environment. Their effectiveness is especially appreciated during preparations for flights after dusk, as they ensure the aircraft parking area is well-lit and visibly distinct. Performance The performance at both Dortmund's main airport and the surrounding city was consistently smooth, even under challenging weather conditions. I was impressed by the absence of any noticeable frame rate drops, which is particularly commendable given the density of objects and details within the scenery. Opinion & Closing Remarks In conclusion, Aerosoft's Dortmund scenery is a commendable effort, especially considering its coverage, though there's room for improvement, particularly in the detailing of the main terminal area. The buildings, while visually appealing, could benefit from additional refinement, perhaps with some enhancements to the interiors, even if not to the extent of full-scale recreations seen in other sceneries. On a positive note, Dortmund excels in its performance impact, proving to be incredibly FPS-friendly. The low-poly design of the buildings ensures minimal effect on frame rates, making it an ideal choice for those with lower-spec systems. The recreation of the city region and the included glider field are welcomed additions, adding significant depth and vibrancy to the package. Priced at $22.99, this scenery offers good value, especially when compared to more expensive, top-end airport sceneries. It represents a cost-effective option without compromising quality. Overall, while there's scope for additional enhancements, Dortmund stands out as a solid mid-tier Aerosoft airport and makes for a worthwhile addition for those looking to enrich their X-Plane 12 experience, particularly with the picturesque city views during approach and departure. ______________________________________ Dortmund XP by Aerosoft is available from the Org store here: Dortmund XP Priced at US$22.99 Features: Both XP12 and XP11 versions included Detailed rendition of the airport and its surroundings, incl. landmark objects Photo realistic ground textures based on aerial images (50cm/px) All airport buildings and facilities True-to-original navigation aids (ILS, VOR/DME, NDB, ATIS) Excellent night effects True-to-original runway and taxiway lighting Detailed 3D city model of Dortmund incl. colour-corrected 60cm/px aerial image covering the entire city area Authentic rendition of the airfield Hengsen-Opherdicke incl. colour-corrected 30cm/px aerial image The aerial images for Hengsen-Opherdicke can be turned off Autogen covering the area of the aerial image, corrected by hand Animated wind objects: wind turbines and windsocks specific to Hengsen-Opherdicke as well as the helipad the Hospital Centre North Ship traffic at the Dortmund-Ems Canal when using the Seatraffic plug-in by Marginal/Jonathan Harris Volumetric grass, toggleable PBR-based reflecting water surfaces Backup library – runs without add-ons Requirements: X-Plane 12 or X-Plane 11 (both versions supported) Windows, Mac, or Linux 8 GB+ VRAM Recommended Download Size: 4 Gb Current version: 1.0 (XP12, November 21st, 2023) Reviewers System: Windows 10 Professional AMD Ryzen 5 3600 Processor 32GB RAM Palit GeForce RTX™ 3080 GamingPro Scenery Review by Michael Hayward 26th January 2024 Copyright©2024: X-Plane Reviews (Disclaimer. All images and text in this review are the work and property of X-PlaneReviews, no sharing or copying of the content is allowed without consent from the author as per copyright conditions)
-
Aircraft Review: SR-71-TB Project by VSKYLABS for X-PLane 12 By Michael Hayward Introduction The Lockheed SR-71 Blackbird, a mainstay in the US Air Force for three decades, was renowned for its high-speed, long-distance reconnaissance capabilities. Constructed by Lockheed Martin in the 1960s, it initially took shape as the YF-12, then the A-12, serving as a successor to the older and slower U-2. The Blackbird was created under the stringent secrecy of Lockheed Martin’s Clarence “Kelly” Johnson as part of the “Skunk Works” programme. It was publicly unveiled by President Johnson during his 1964 election campaign. In this review, we delve into the intricacies of the recently released model from VSKYLABS, a developer acclaimed for their meticulously detailed recreations of both military and civilian aircraft, as well as helicopters, for X-Plane. VSKYLABS, with their reputation for intense detail and realism, offers a plethora of features in this model, which I aim to explore comprehensively. Boasting full VR compatibility and an intricate FMOD sound system, this add-on presents us with a wealth of details to examine. Let’s dive in, shall we? Installation & Manuals The installation process for the SR-71 adheres to the standard procedure for most X-Plane models. Upon purchase, you receive a zip file containing the model. Run the installer, direct it to your simulator folder, and the aircraft will be ready in your virtual hangar. Alongside the aircraft, you gain access to a comprehensive, 982-page 'declassified' document. Initially, this manual may seem daunting, but it becomes more approachable with familiarity. For those seeking additional support, VSKYLABS maintains a dedicated SR-71 support forum at the .org. This forum serves as a professional support hub and a growing knowledge base for the SR-71, continuously expanding to cater to user needs. Within this support forum, you'll find several 'EXPLAINED' topics. These are designed for on-the-go information and instructions, including various 'Cheat-Sheets' to enhance user-friendliness. Initially, navigating through the SR-71 manual might feel like a heavy task, but these resources are structured to ease users into it, gradually transforming it into an easy read. The SR-71, with its complexity, invites you to delve deeper into its intricacies, and these additional resources, including the forum and 'EXPLAINED' topics, are invaluable for learning the ropes. Exterior Modelling & Visuals Right from the outset, it's clear that VSKYLABS has invested considerable effort in accurately recreating the SR-71, ensuring it mirrors its real-world counterpart. The model boasts a sleek, black, pointed body, supported by a rear delta wing, and is powered by two Pratt & Whitney J58 engines with vertical stabilisers on top. This aerodynamic design enabled it to surpass the speeds and altitudes of nearly all contemporary fighter jets, while remaining undetected by most aircraft radar and defence systems. Its capability to penetrate deep into foreign territories, including the USSR, for reconnaissance was unparalleled. Attention to detail is evident in the flight surface animations. Close inspection reveals intricate detailing around the landing gear extension, engine movements, and lighting. Particularly noteworthy is the operation of the afterburners, complete with trailing shock diamonds, adding to the realism. As for liveries, there are three options available. The aircraft's surface features weathering effects, giving all three a “lived-in”, brushed appearance, further enhanced by X-Plane’s PBR rendering. Bump mapping is judiciously used around different panel gaps to add depth and texture. The textures are rendered in ultra-high resolution, with 8k and 4k options, allowing for fine detailing on the body, as well as subtle weathering effects. These nuances bring a sense of realism and age to the aircraft, making it a standout within the X-Plane world. The SR-71 is not just a model; it's a visually stunning representation that is as much a joy to behold from a high-altitude perspective as it is up close. Interior & Environmental Systems Mastering the cockpit of the SR-71 is a formidable task. Initially, the plethora of switches, gauges, and buttons scattered across the panels can seem overwhelming. Having reviewed and flown a significant number of jets from the mid-50s and 60s on platforms like X-Plane, Microsoft Flight Simulator, and DCS: World, the SR-71 still presents a unique challenge, comparable perhaps only to the Space Shuttle in its complexity. The aircraft is replete with a myriad of systems, ranging from aircraft functionality and engine controls to pressurisation and life support. It's difficult to know where to start. In this regard, I strongly advise consulting the manual or watching YouTube playthroughs to visually grasp the necessary steps for flight. I often emphasize in my jetliner reviews that practice is key to mastering the flows, but in the SR-71's case, I find myself repeatedly heeding my own advice to avoid getting lost in the cockpit. While it might seem that the exterior overshadows the interior, the sheer volume of activity within the cockpit argues otherwise. It's so densely packed and 'busy' that focusing on any gauge requires full attention to the plane's operation. Forward visibility is limited due to the large window framing, necessary to withstand the intense pressure and airflow. This requires some adjustment, especially in VR, where you might find yourself sitting slightly off-centre or tilting your head for a better view. Every gauge is meticulously modelled in 3D, offering depth and functionality. The central console is a labyrinth of systems and gauges, all designed to be fully functional within the simulator. Like the exterior, the cockpit benefits from full 4K textures, complete with weathering effects that add realism and a sense of history to the interior. Every detail has been included to ensure the cockpit looks authentic from every angle. While it's easy to get lost in the complexity, with practice, the intricacies of flying and managing the aircraft's systems become more manageable. Flight Controls & Instruments The fidelity with which the control system of the SR-71 has been recreated within X-Plane 12 is remarkable, and much of this is owed to the expertise of former SR-71 pilot BC Thomas. A legend in the Blackbird community, Thomas, with over 1,000 flight hours in the aircraft, has provided invaluable technical support to VSKYLABS in the development of this model. In flight, the SR-71 demands a delicate touch. Pilots will often find themselves fine-tuning control sensitivity curves. At altitudes of 80,000 feet and speeds reaching Mach 3.5, the slightest movement of the joystick can result in a course deviation of several hundred miles. Even a minor bank or roll at such speeds can dramatically alter your trajectory. Mastering the SR-71 is about understanding and adapting to these subtle control inputs. The aircraft's behaviour changes significantly during descent. From being a supremely agile, high-speed vehicle slicing through the sky, it transforms into a much heavier, more cumbersome machine at lower altitudes and speeds. This is a common trait among aircraft designed for high-speed stability – their performance characteristics vary greatly with speed. An interesting anecdote about the SR-71's recruitment process highlights the immense responsibility bestowed upon its pilots. Reportedly, the key question asked was, “are you married?”, symbolizing the need for a sense of responsibility and stability. This also hinted at a strategic consideration: married pilots were perceived as less likely to defect to the USSR with such a valuable asset. The SR-71 is at its best at high altitudes and speeds. While takeoff and landing require a period of adjustment, once airborne and with the afterburners engaged, the exhilaration of flying the SR-71 comes to the fore. It's a thrilling experience that combines technical mastery with the sheer joy of high-speed, high-altitude flight. Systems VSKYLABS’ SR-71 is equipped with an array of systems and switches, offering a comprehensive virtual experience. We've already discussed some cockpit functions, such as the afterburners and fuel systems, but there's much more to explore. A key feature is the functioning autopilot system, located on the right-hand side of the cockpit. It includes standard controls like heading, altitude, and pitch, but also a unique KEAS bleed and hold function. This system is crucial for managing aircraft pitch during high-altitude climbs as you accelerate from Mach 2.6 to 3.0. The autopilot is complemented by a default X-Plane FMS, facilitating easier navigation compared to the ANS, which requires manual coordinate inputs for flight plan formation. VSKYLABS has also integrated an air-to-air refuelling feature. For this operation, you need to stabilize your aircraft in the cruise corridor of the tanker plane (26,000-30,000ft) and reduce speed to around three hundred knots. The autopilot is invaluable here for maintaining stability. When you request refuelling, a green indicator light and an audio cue are activated, featuring real radio recordings of air refuelling processes provided by BC Thomas. A KC-135 tanker then spawns above, connecting to your fuel probe for refuelling. It’s crucial to fill your tanks completely to prevent air from entering the system, as this could ignite when afterburners are activated. VSKYLABS is committed to the long-term development of this model, with plans for numerous future updates. These include a manual control for the pressurisation schedule and overhauls of the electrical and hydraulics systems. Additionally, they plan to introduce interactive pressure suit support systems, a unique feature that allows direct interaction with the pilot's wellbeing during flight. With the current level of detail in the SR-71 model, these upcoming features promise to add even more depth and realism, and as such, this is a project I’m excited to follow closely, as it continues to evolve. Night Lighting The night lighting is executed with exceptional attention to detail, both inside and out. The cockpit comes to life after dark with an array of adjustable dials, allowing precise control over the intensity of side panel illumination as well as gauge and switch lighting. This functionality not only adds to the realism but also enhances the pilot's experience during night flights. Externally, the aircraft is equipped with tail, taxi, and positional lights, all performing flawlessly. Under the right conditions, the SR-71 takes on a rather imposing and menacing appearance in the dark, embodying the intrigue and awe that this legendary aircraft inspires. Conclusion In summary, the experience of flying the SR-71 has been nothing short of extraordinary! Soaring at 85,000 feet and cruising at speeds surpassing Mach 3, one truly appreciates the thrill of speed and the finesse required to pilot this engineering wonder. The SR-71 is a top-tier add-on that astounds in its visual, tactile, and auditory fidelity. It’s a must-try for anyone with an affinity for high-speed flight or a keen interest in detailed military systems. While there is a learning curve, the sense of achievement and enjoyment you gain after mastering the aircraft's nuances is immense. The authenticity of this recreation owes much to the technical guidance from a real SR-71 pilot, coupled with VSKYLABS’s expertise, evidenced by their background with the USAF F4 Phantom. This collaboration has resulted in a remarkably accurate representations of one of the most iconic military spy jets in history. The commitment to long-term support further enhances the appeal of this add-on, which at $37, is exceptional value. With advanced systems and updates in the pipeline, users can look forward to an evolving and deepening simulation experience. VSKYLABS has thoughtfully included a log within the aircraft's file structure to keep users informed of new developments. With more enhancements on the horizon, I highly recommend keeping a close eye on future updates from VSKYLABS for the SR-71 Blackbird. The journey with this aircraft is set to become even more captivating! ______________________________________ SR-71-TB Project by VSKYLABS is available from the Org store here: SR-71-TB Project by VSKYLABS Priced at US$37.00 Features: Early Access phase - The project is being updated rapidly VSKYLABS 'Test-Pilot' Project - Utilizing X-Plane 12 cutting edge systems and flight dynamics models Highly engineered SR-71A flight dynamics and propulsion systems (including spikes and bypasses simulation) Authentic SR-71A SAS/Autopilot (including all authentic modes of operation, KEAS bleed and with extended usability using on-board FMS as replacement of the SR-71 ANS). Authentic SR-71A performance and handling characteristics Highly accurate climb and cruise profiles Air-refueling (including tanker visualization and authentic radio recording of SR-71 during air-refueling session - courtesy of B.C. Thomas!). Deep systems simulation (including TAB injection and counters, automatic fuel scheduling, nitrogen pressurization of the fuel tanks, surf-limiter, stick shaker/pusher and much more!) D-21 Mach 3 Drone (currently as a piggy-bag payload, takes part in the physics. In later versions it will have launch capabilities) AG-330 Starters simulation for authentic start-up procedure Comprehensive FMOD sounds Designed for VR (optimized for 2-d) The project is under constant development - future updates are free to all existing customers Full Simulation scope and update log are available here: https://forums.x-plane.org/index.php?/forums/topic/297854-vsl-sr71-tb-simulation-scope-and-update-log/ Highly responsive, professional support in the VSKYLABS Special contribution: BC Thomas is the famous, high Time SR-71 Pilot During the air-refueling sequence in the simulation, an authentic SR-71 air-refueling radio recording is being initiated, adding immersion and excitement! The audio recording was implemented into the VSKYLABS 'Test-Pilot': SR-71-TB following Mr. BC Thomas approval. BC Thomas is the famous, high Time SR-71 Pilot who spent 1,217 hrs and 18 min in the cockpit of the legendary SR-71! Requirements: X-Plane 12 (not for XP11) Windows, Mac, or Linux 8GB VRAM Minimum Current Version: 1.05 (January 2nd, 2024) Download Size: 424 MB Reviewers System: Windows 10 Professional AMD Ryzen 5 3600 Processor 32GB RAM Palit GeForce RTX™ 3080 GamingPro Aircraft Review by Michael Hayward 17th January 2024 Copyright©2024: X-Plane Reviews (Disclaimer. All images and text in this review are the work and property of X-PlaneReviews, no sharing or copying of the content is allowed without consent from the author as per copyright conditions)
-
Aircraft Review: X-Hangar Lockheed C-130 Hercules By David York Introduction The Lockheed C-130 Hercules, an iconic American four-engine turboprop military transport aircraft, was designed and built by Lockheed, and is renowned for being the longest continuously produced military aircraft for over 60 years. I recall initially mistaking the Air America movie's aircraft for the Hercules, with Mel Gibson seemingly playing a supporting role to the airplane. The confusion was understandable, given the quick shots and my incorrect engine count. The C-130, with its four engines, shares a resemblance to the Fairchild C-123 Provider, which is a derivative of the Chase XCG-20 Avitruc. My familiarity with this magnificent airplane grew when my in-laws lived near the runway at CFB Trenton. On 2 February 1951, the United States Air Force issued a General Operating Requirement (GOR) for a new transport aircraft. This was to replace the aging WW2 era piston-engined transports. The Request for Proposal (RFP) was quite specific, listing the need to accommodate ninety-two passengers, seventy-two combat troops, or sixty-four paratroopers. The cargo compartment had precise dimensions, 41 ft long, 9 ft high, and 10 ft wide, and a turboprop powerplant was specified, as jet engines at the time did not meet the necessary tactical requirements. The C-130 was designed for versatility, capable of operating on short and rudimentary runways. Its range of 1,100 nautical miles made it suitable for a variety of missions. Kelly Johnson, initially not a fan of the design due to his preference for more combative aircraft, eventually came to appreciate the C-130. Willis Hawkins, the lead designer, suggested that Johnson's eventual acceptance might have been influenced by the C-130’s adaptability for various roles, including as a cruise missile launcher. The Hercules has been adapted for numerous roles such as a gunship, search and rescue, scientific research support, weather reconnaissance, aerial refuelling, maritime patrol, and aerial firefighting. It remains the primary tactical airlifter for many military forces globally, with over forty variants and civilian versions like the Lockheed L-100, operated by more than sixty nations. X-Plane Model The package for the C-130 model is thoughtfully designed for compatibility with both X-Plane versions 11 and 12. It's bundled in a way that facilitates an upgrade path for those using version 11, which is less demanding on VRAM. My setup includes an AMD 8-core FX processor, 16GB RAM, and an AMD Radeon RX570 series display card. With 4 GB of VRAM, it manages decently, though there are occasional slowdowns. Installation Procedure The installation of the C-130 Hercules package requires a few straightforward steps: Begin by unzipping the main package to obtain two separate zips: c130_12.zip and c130_11.zip, for X-Plane versions 12 and 11 respectively. Choose the version you need and unzip it into your preferred subdirectory within the <Aircraft> directory of the respective X-Plane version. Once you start X-Plane, the program automatically detects the new aircraft and adds it to your <New Flight> menu. You’re now ready to fly! The C-130 manual is located in the C-130H Hercules\Docs\manual x-plane\ sub-directory. It's recommended to review this manual early on, as it details extra features and helps familiarize you with the aircraft's cockpit, which can initially appear quite complex. You should also take a moment to look over the checklists available in the pop-up. For those interested in using the XFSE plugin: Install XFSE if it’s not already set up. A basic xfse-alias.txt file is included. Refer to the FSEconomy add-on manual for setup instructions. Documentation The manual for X-Hangar's C-130 is quite comprehensive, providing a solid overview of the model's features and a helpful guide to the flight deck and panel layouts. The manual is well-illustrated, including performance charts from the original aircraft's Pilot's Operating Manual (POM), giving a practical insight into optimal aircraft operation. From personal experience, I usually dive right into flying before consulting the manual (typical of many, I suppose!). However, I've found that an early perusal of the manual significantly flattens the learning curve and reveals many nuances that might otherwise be missed. Exterior The Hercules' shoulder-wing design might initially surprise those accustomed to more sleeker looking aircraft, but it highlights the craft's functionality over showmanship, and X-Hangar's model captures this robust spirit well. The level of detail is commendable, from the textures to the overall structure, though it lacks specific liveries like RAAF, RCAF, or UK allies. However, the provided blank livery templates offer a chance for personal customization. The minute details like antennae, propellers, and doors are well modelled, adding to the realism. This realism is further accentuated when you open the crew and cargo doors, revealing the intricacies of ground handling equipment, a vital aspect of the Hercules' operations. The airdrop animation is a notable feature, though I personally miss the inclusion of the Low Altitude Parachute Extraction System (LAPES), a system I've often seen in Canada. Despite this, X-Hangar's selection of features for the model is astute. The model uses Blender-based particles for exhaust and other systems, enhancing realism, especially with the airdropped cargo descending by parachute. The inclusion of the L-100-30 build, a stretched version of the C-130 with six-bladed propellers, is executed with the same attention to detail, showcasing the model's versatility and commitment to realism. Interior Recalling a special occasion when I once sat in a C-130 pilot seat, I can't help but compare that memory to X-Hangar's rendition of the cockpit. While it doesn't match my memory exactly, they've done a solid job without resorting to full photorealism. For those of you looking for a bit of modernity, the L-100 stretch model features an option for a digital panel, which is a nice addition. In the C-130H, the clipboard pops up when the square red button is pressed, offering functionalities like showing or hiding the crew, JATO selection, and airdrop details. The control yokes are toggled as usual with the ‘Y’ key. The absence of high-degree photorealism might be a downside for some, as well as the lack of interactivity with every button or switch, but personally, I'm not at all disappointed. The panel and cockpit are well-designed, filled with controls, albeit with some non-functional elements like the microwave in the kitchen behind the flight engineer's station. It’s these small details that add charm, even if you can't leave the water running. Opening the crew door, descending the ladder, and then opening the passage door, reveals the cargo hold. Initially, I found myself walking through the fuselage wall until I figured out how these doors functioned. Remember to close all doors and ramps, or you might find yourself with unexpected airborne companions like a cargo crate and lift truck. It’s unclear if the weight of the lift truck is factored into the plane's gross weight, though the regular cargo weight is included when selected from the weapons menu. Flight Dynamics While I've never flown a C-130 and am not a licensed pilot, I've explored its unique characteristics based on available information. Willis Hawkins, in an interview with Lockheed's Code One Magazine, mentioned the C-130's resistance to stalling. He recounted an attempt to stall it, which led to a flip rather than a stall of the main wing, possibly due to the six-bladed props' effects on the wing's boundary layer. Curiously, I tested this on X-Hangar’s model. At 10,000 feet, as I slowed down, the stall alarm activated, but the wings seemed to keep flying, even with the four-bladed props. With the L-100-30's six-bladed props, I didn’t experience the reported “unstallability” but rather a gradual descent. This simulation is remarkably forgiving, making it the first plane I've successfully landed on my first attempt. Its handling is stable, smooth, and relaxed. I even took a virtual flight from CFB Trenton to Niagara Falls International, enjoying the XP-12 view and exploring the plane in flight. Sounds The alarms and alerts have custom sounds, but the engine, prop, and wind noises are the default turboprop sounds from X-Plane. While they work adequately, the unique sound of the Allison T56-A-15 turboprop engines would have been a treat. However, obtaining specific engine sounds, especially in FMOD format, is challenging, so I respect X-Hangar's decision to keep the model affordable. Night Lighting The night lighting of the model is functional, following a tried-and-tested method. It effectively illuminates the interior, creating an appropriate ambiance for night operations. While it doesn't employ the latest lighting effects, it ensures a dependable and solid experience in line with the Hercules' reliable nature. Performance In my experience with X-Plane 12 on my somewhat dated hardware, frame rates were around 22-30 fps, so generally smooth but with occasional flutter during high-speed, low-altitude passes. However, it's important to note that these performance metrics are largely influenced by my hardware capabilities, and users with more up-to-date systems can expect improved performance. In X-Plane 11, the model performed slightly better on my setup, achieving 28-37 fps with fewer instances of freezing, particularly when accessing the map window. Given the model's detailed custom objects, which surpass those in X-Hangar's Caribou model, longer load times and avoidance of multitasking in XP-12 were necessary on my system to maintain stability. Conclusion I've always loved the Hercules, and this X-Hangar model is the best rendition I've flown, making it a worthwhile purchase even by my Scottish, thrifty standards. The cargo handling effects might not be my favourite, but the JATO option and overall art and animation are top-notch. When you look out and see a lift-truck flying alongside because you forgot to close the crew door, it's both amusing and a testament to the model's detail. The cockpit, while not overloaded with interactive features, perfectly suits my flying style. This model is enjoyable and realistic, a great fit for both X-Plane 11 and 12 users. Whether you're on a budget or equipped with a high-end system, this model will not disappoint. The more demanding simmers might long for additional features, but there's plenty to enjoy here. Overall, the C-130 is a superb addition to X-Hangar’s fleet ________________________ C-130H Hercules by X-Hangar is now available from the X-Plane.Org Store here: C-130H Hercules Priced at $27.95 Features Two separate versions to fly for both v11 and v12 Two separate .zip files Both a digital Instrument panel and analog Working wipers in v12 Rain on the glass for v11 (limited to win Vulkan) and v12 Much improved landing and taxi lights in v12 3D modeled crew Working cargo door Working crew door X-Plane FMS for v11 and v12 with pop up panel or press 3d buttons X-Plane Garmin 530 with pop up panel or press 3d buttons Many interchangeable international liveries Both civil and military liveries Easy to paint liveries with the blank included Checklist in .txt format for use in the sim PDF manual to help familiarize yourself with the aircraft Static elements Cargo automatically loads with added weight to the aircraft Animated parts Option to use and display JATO rockets (fun for shorter take off). FSE file included Requirements X-Plane 12 or X-Plane 11 Windows, Mac, or Linux 4 GB VRAM Minimum - 8 GB+ VRAM Recommended Download Size: 595 MB Current Version: 12.07 (November 14th, 2023) Review System Specifications AMD FX-8350 - 16GB - AMD Radeon RTX 570 8GB - Windows 10 Pro 64 Bit __________________________________ Aircraft Review by David York 11th January 2024 Copyright©2024: X-Plane Reviews (Disclaimer. All images and text in this review are the work and property of X-PlaneReviews, no sharing or copying of the content is allowed without consent from the author as per copyright conditions).
-
Plugin Review: VisualXP Ultimate X-Plane 12 by SimAdditions By DrishalMAC2 Introduction As the skies beckon aviation enthusiasts into a world of unparalleled realism, X-Plane 12 emerges as a state-of-the-art flight simulation platform. This experience is further enhanced by the revolutionary VisualXP add-on. Seamlessly integrating with X-Plane's already impressive environment, VisualXP elevates virtual aviation to new heights. It transforms the visual landscape with meticulous attention to detail. From the complex patterns of cloud formations to the subtle interplay of light on aircraft surfaces, VisualXP orchestrates a visual symphony. This symphony captivates and sets a new benchmark for immersive flight experiences. Delving into the details of this transformative add-on, it's clear that VisualXP is not just an enhancement, but a groundbreaking revelation in visual enhancement plugins. VisualXP is available in three distinct plugin levels, as illustrated in the image below. Further details on each category will be discussed later in the review. Installation Installing this product is straightforward. Firstly, download the product from the store. Once downloaded, extract the files into the X-Plane/resources/plugins folder. Additionally, you'll need to replace a lights file located in X-Plane/resources/bitmaps/world/lites. After loading the files into X-Plane, enter your personal serial key into the plugin, and upon activation, you're good to go! Clear instructions are provided to the user in a text document accompanying the download of the addon, ensuring a hassle-free setup. Atmosphere The "Atmosphere" tab in VisualXP offers an extensive array of settings to tailor the atmospheric lighting in X-Plane to your liking. It includes seven ozone colour presets, each distinctly different, ensuring there's a match for everyone's preference. My personal favourite is preset five. Additionally, there are eleven "Sky Scattering" control sliders, giving you the power to fine-tune the haze and lighting. For convenience, these can be set to "Auto Control Scattering," allowing VisualXP to automatically adjust these settings for you. The tab also features two visibility control sliders and a cockpit ambience control slider, both of which have an automatic adjustment option. Lastly, there's an "Aerosol" strength control slider, which can be manually set or left to automatic control. I've discovered that the Atmosphere tab, with its comprehensive range of settings, significantly alters the appearance of your simulator. The abundance of adjustable options means you're likely to find a setup that suits your taste. I generally recommend using the automatic control settings unless you're quite experienced with these parameters. VisualXP efficiently adjusts these values to realistically represent live weather conditions. Even the default settings for the atmosphere component of this plugin make a substantial difference to the simulator's visuals and enhance the lighting remarkably. Below I have provided screenshots showcasing the atmospheric settings activated, with all other VisualXP features disabled. These images illustrate examples of all the ozone colour presets available, alongside the default atmospheric lighting in X-Plane 12. I have captured these for a variety of scenarios, covering three distinct locations, at different times of day, and under various weather conditions. The first set of images was taken in Gran Canaria, showcasing clear weather conditions at sunrise. The second set of images was captured in Birmingham, United Kingdom, featuring clear weather conditions around midday. The third set of images was again taken in Birmingham, U.K., this time with the weather set to "VFR Broken". These images were captured around midday, below the conditions of the specified weather. The fourth set of images was also taken in Birmingham, U.K., but with the weather set to "VFR Broken". These were captured around midday, this time above the weather conditions. Clouds The highlight of VisualXP is undoubtedly its transformation of X-Plane's clouds. It includes four cloud form presets. While I haven't noticed a significant difference between these presets, as they tend to be situational, simply activating the cloud enhancements immediately reveals a dramatic improvement. The enhanced clouds are a marked upgrade over the default ones, and like the "Atmosphere" tab, there are numerous options to fine-tune cloud details. Initially, there are two checkboxes to enable/disable "Standard Cloud" enhancements and Extreme "Cloud Enhancements". Note that the "Extreme Cloud Enhancements" are still in Beta. I strongly recommend activating the "Standard Clouds Enhancements" but keeping the "Extreme Clouds Enhancements" off due to their Beta status and performance demands. "The Standard Cloud Enhancement" alone makes a substantial difference, as evidenced in most VisualXP screenshots shared online. Following these, a "Cloud Density" slider allows for adjusting cloud thickness. Then, four "Formation Control" sliders modify cloud shapes. Two "Clouds Shadows" control sliders change the appearance of shadows on the clouds and the shadows cast by the clouds on the ground. Finally, three "Clouds Brightness" control sliders manage various brightness aspects. The clouds section is a major selling point of this plugin, included in all versions. The manipulation of clouds is executed remarkably well, offering users considerable manual control if desired. However, for most users, I recommend leaving the settings to be automatically controlled by VisualXP. Below, I have included screenshots that specifically highlight the clouds feature of VisualXP, with all other features of the addon turned off. These images display the effects of the four cloud form presets provided by VisualXP, alongside comparisons with the default cloud forms in X-Plane. To showcase the versatility and impact of these presets, the screenshots were taken under a range of weather conditions and at different times of the day. The first set of images was taken at midday using the "VFR Scattered" weather preset. The second set of images was taken around midday, using the "IFR Non-Precision" preset. The third set of images was taken during sunrise using the "VFR Scattered" weather preset. The fourth set of images was taken around midday, using the "Cumulonimbus" weather preset, selectable in VisualXP from the "Weather" tab. Water The water enhancement section in VisualXP significantly enhances the visual appeal within X-Plane, particularly in its rendering of water. This feature modifies wave appearance, size, and the way sunlight reflects off water surfaces. It includes three distinct "Water Mods" presets, each offering a unique look. My personal choice is mod two. The first set of adjustments includes two "Waves Foam" control sliders. These can be manually adjusted or set to automatic via the "Auto Control Waves Foam" checkbox, allowing VisualXP to manage them. Next, there's a "Water Depth" control slider, which also offers both manual and automatic control options. Following this, two "Water Waves" control sliders alter the strength and scale of the waves, with options for manual or automatic adjustments. Lastly, the "Sun on Water" control slider affects how sunlight is reflected from the water, and like the others, it can be manually or automatically controlled. The water modifications by VisualXP are impressively executed, greatly enhancing the visuals of coastal destinations. They bring a dynamic and realistic feel to the otherwise flat default water in X-Plane 12, contributing to a more 'living world' experience within the simulator. These water effects, while situational, are a personal highlight for me, especially given my fondness for island hopping. It's important to note that this feature is exclusive to the "Premium" and "Ultimate" editions of VisualXP. I recommend setting these controls to be automatically managed by VisualXP for an optimal experience. Below, I have provided screenshots showcasing the water enhancement feature of VisualXP, with all other features of the addon deactivated. These images compare the three distinct water presets offered by VisualXP against the default water visuals in X-Plane. To comprehensively demonstrate the enhancements, these screenshots were captured at various times of the day and in a range of different locations. The first set of images was taken in Gran Canaria around midday. The second set of images was also taken in Gran Canaria, this time during sunset. The third set of images was taken in Boston, U.S., around midday. The fourth set of images was taken in Boston, U.S., this time around sunset. Scenery The Scenery section in VisualXP offers a variety of slightly more miscellaneous yet notably detailed enhancements to the simulator's visuals. A key highlight is the "Lights" mods, which significantly enhance night lighting in X-Plane. These mods tend to expand the lighting range, increase brightness, and add a touch of bloom. Although three preset light mod options are included, I've noticed they appear quite similar. Next, three "Lights Fog" control sliders allow adjustment of respective settings, with an option for automatic control. A particularly noteworthy feature is the "Enable Fog Spotlights" tick box, introducing light pollution effects into the simulator. This feature notably elevates airport night lighting and introduces volumetric lighting for aircraft lights, becoming especially prominent when using landing lights. For night flying enthusiasts, this feature alone can substantially enhance the experience. Another setting includes a control slider to adjust the light spots strength, primarily influencing how lights reflect off the ground. This can be set to either manual or automatic control. Lastly, there's the "Scenery shadows" feature, which, in my experience, doesn't seem to make a noticeable difference, leaving its exact impact somewhat unclear. The night lighting changes implemented by VisualXP are nothing short of amazing. I recommend setting all controls to be automatically managed by VisualXP, and don't forget to enable the fog spotlights for that extra visual appeal, although it can impact performance depending on your system. It's important to note that these scenery features are exclusive to the ultimate edition of VisualXP. Below, I have included a selection of screenshots that focus on the night lighting enhancement provided by VisualXP. These images feature the three different lighting presets, along with a comparison to the default night lighting in X-Plane. Additionally, to highlight the impact of the fog spotlights feature, I have added screenshots demonstrating the visual differences when this option is turned on and off. All images for the following three sets were taken in Los Angeles at different angles, with the time set to midnight. These images showcase before and after comparisons of when the "Fog Spotlight" option is turned on and off. Weather In the "Premium" and "Ultimate" editions of VisualXP, users gain access to a proprietary live weather system and weather search feature. My experience with the live weather system has been somewhat mixed. I've found it to be occasionally inaccurate and prone to bugs. Consequently, for much of my testing, I've relied on the default X-Plane live weather, which integrates seamlessly with VisualXP. However, there's good news on the horizon: an overhaul of the live weather feature is planned, aiming to resolve these issues. I've been in touch with Sim Additions, and they're fully committed to addressing and improving these concerns. The "Weather Search" function, on the other hand, performs reliably for airports with available METAR information. This feature seems to be dependable and adds a nice touch to the overall experience. Additionally, the "Weather Briefing" feature, exclusive to the "Ultimate" edition of VisualXP, offers a comprehensive overview of weather conditions. While this feature does have its share of issues and bugs, Sim Additions is aware of these and is actively working on fixes. Performance This addon has impressively had no impact on the performance of my machine. The sole exception is the previously mentioned "Extreme Cloud Enhancement" setting, which is currently in beta and did result in a lower FPS. Apart from this, the rest of the plugin's effects have had no adverse effect on my frame rate and introduced no stuttering at all. The extent to which the visuals are enhanced by this plugin, coupled with the absence of any significant performance drawbacks, is truly remarkable. It speaks volumes about the optimization of this addon and reflects the hard work and diligence of the team at Sim Additions. UI The user interface of this addon is exceptionally clean and user-friendly. The tabs are well-organized, and the inclusion of control sliders greatly enhances the versatility of VisualXP. A notable feature is the option to reset each control slider to its default value, indicated by a green or yellow box next to it. The box appears green when set to default and turns yellow once manually altered. In the top right corner of the interface, there's a convenient feature to save and load presets based on different settings. This function has been flawless in my experience, with no issues encountered. Additionally, the colour scheme of the UI can be customized from a selection at the bottom, and the opacity of the background is adjustable to suit user preferences. Furthermore, the settings window can be popped out of the X-Plane application, a functionality accessible via the middle button in the absolute top right corner. This aspect of the UI design adds an extra layer of convenience and flexibility to the user experience. Roadmap *Information provided to me directly from the team at Sim Additions* Improving Live Weather as much as we can (This will be continuously in each update till we find the best result that most users will be satisfied with) Improving Interface as much as we can (This will be continuously in each update till we find the best result that most users will be satisfied with) Improving all enhancements functions as much as we can (This will be continuously in each update till we find the best result that most users will be satisfied with) Adding any new stuff that can serve the user in any way whenever we find something new, especially for weather stuff. Supporting Linux and Mac once we finished the reported issues for some users of Windows. Improving Performance as much as we can (This will be continuously in each update till we find the best result that most users will be satisfied with) We try to add any requested feature from our Users whenever available/accessible. Are there plans to fix the current live weather option, and could you provide more details regarding this fix? Sure, we've added a new system, the weather will be downloaded whenever a new flight is acquired, a new area has loaded, or by user request. The downloads will be automatic and will keep trying to get data automatically in case the user is offline till the user stops the operation or the connecting returns online, instead of stopping at the first attempt. Will add all nearest airports'|cities|stations| weather briefings to the interface, and the weather will be transitioned smoothly between these giving areas whenever we close to them. If the users have built a flight plane, live weather will download weather data for every flight plane point and will take this point data whenever there are no areas available (above oceans for example). Does Sim Additions plan to release any more products in the near future? If so, could you provide further details regarding this? We are planning to add multiple plugins, the first one will be something related to Weather only, let's say advanced weather briefing similar to what we have on VisualXP but with more options, without visual enhancements, this plugin will be on our road map after we released VisualXP for Mac and Linux Will keep then focus on users' requirements for X-Plane 12 and will try to do anything that can serve them. Customer Service Following the series of questions I posed to them about the product, their response was not only rapid but also exhibited a high degree of professionalism. This experience gives me a strong sense of confidence in their customer support. I believe that if any users encounter issues or have queries about the product, Sim Additions will address them in a similarly efficient and professional manner. YouTube video by the author Conclusion VisualXP is an exceptional addon that significantly enhances the visual experience in X-Plane, bringing the simulator's world to life with remarkable realism. The abundance of controls available makes it highly versatile, catering both to users who enjoy fine-tuning every detail and those who prefer a more 'set and forget' approach. The addon's ease of use and impressive performance straight out of the box are standout features. It's astonishing how VisualXP manages to deliver such substantial visual enhancements without compromising on performance. Additionally, the ongoing development of this product by the team at Sim Additions, coupled with their clear roadmap for future improvements, is a testament to their commitment to excellence. My personal experience with their customer service has been very positive, instilling further confidence in the product's future. For anyone seeking to elevate their X-Plane experience with lifelike visuals, VisualXP is the perfect choice. Its flexible pricing structure is an added advantage, allowing users to choose features that best suit their needs and budget. ________________________ VisualXP Ultimate X-Plane 12 by SimAdditions is now available from the X-Plane.Org Store here: VisualXP Ultimate Priced at US$25.97 Features VisualXP has its own live weather resource, you don't need any extra plugins. With this plugin you can search weather for three airports. We call them Departure, Arrival, and Alternative Airport. You can also check the weather briefings for the current position of the aircraft. VisualXP has its own UI (user interface), which will show you the live weather information, search results, and the current weather briefings for the aircraft position. The interface has multiple tabs. These tabs are named Atmosphere, Clouds, Water, Scenery, and Weather. Each tab has its own functions, buttons, and sliders. With these buttons, and sliders, you can easily control VisualXP. Requirements X-Plane 12 Windows Only - Not Compatible with Mac or Linux at this time. Things To Be Considered Before Buying If you are using DataRefTool or DataRefEditor, you need to disable them before using ViualXP, VisualXP will stop working instantly once one of these plugins is detected as Enabled. and it will inform you with a message in the user interface to disable these plugins. Do not use any other plugin, scripts, or mods that controls one of VisualXP features as that will make conflict and will make bad visuals. The performance will be different from one plugin level to another because of the features that each one has, the higher level will have more performance effects, but no worries with the plugin sliders you can lower the settings to fit your device capacity. The plugin can't work in offline mode, a connection to the internet must be available for the license system and downloading weather. We cannot offer any demos at present. The plugin has been developed using the Windows 10 platform and will be for windows only at this time, sorry for Mac and Linux users, we will support these platforms in the future. The functions of the plugin can be increased or decreased depending on the X-Plane 12 version and the ability that Laminar Research offers. Review System Specifications Windows 10, Intel i5-12400F, 32GB RAM, RTX 3070Ti __________________________________ Plugin Review by DrishalMAC2 22nd Dec 2023 Copyright©2023: X-Plane Reviews (Disclaimer. All images and text in this review are the work and property of X-PlaneReviews, no sharing or copying of the content is allowed without consent from the author as per copyright conditions).
-
Scenery Review: Everest Park - Nepal 3D XP12 by Frank Dainese and Fabio Bellini By Peter Allnutt Introduction Mount Everest, known as the world's highest peak, holds a special place in the hearts of adventurers and enthusiasts. Its towering presence, steeped in history and numerous climbing stories, captures one's imagination uniquely. With such a famous landmark, it's natural to expect a lot from its virtual representations. The challenge of accurately and artistically recreating Everest’s grandeur is certainly not an easy task. In this review, we’re looking at Everest Park – Nepal 3D by Frank Dainese for X-Plane 12. This package aims to meet these high expectations with its detailed landscapes and engaging virtual experience. However, as with any simulation, it's important to be objective. We'll discuss the strengths of this scenery in realistically portraying the Everest region, while also highlighting areas where improvements could be made. This balanced perspective will provide a clear view of what the scenery offers and its potential areas for improvement. Purchase and Installation The scenery package is available for purchase at the Org Store for $30.95. Covering an expansive area of around 8,000 square kilometres in the Himalayas, the package includes not just Mount Everest but also other notable peaks in the region. After purchasing the package, you'll receive a confirmation email with a link to download the product from the store, which you can also access through your account. The download includes two items: a concise 2MB PDF manual and the main scenery file, slightly over 600MB. Once extracted, the file size increases to about 1.5GB and consists of four folders. These need to be copied into the Custom Scenery folder of your X-Plane installation. Documentation The PDF manual, separate from the main scenery ZIP file, is downloaded via the link provided. It guides you through the installation process and gives vital details about the package. The manual includes information about the various airfields and helipads, as well as the enhanced villages included in the scenery. Additionally, it features a map showing the area covered, with marked airfield locations. However, it notably does not mark the helipads, which might be an area for improvement. Overview The package features a vast area of 8,000 square kilometres, including seven detailed airfields, eight helipads, and several carefully enhanced villages. The terrain represents a significant upgrade from the default X-Plane scenery. It showcases not only Mount Everest but also other famous peaks such as Lhotse (8,516m), Makalu (8,463m), Cho Oyu (8,206m), Nuptse (7,861m), Pumori (7,161m), Ama Dablam (6,812m), Taboche (6,543m), and Baruntse (7,129m) It's important to mention that the ground textures vary in quality. Some areas have lower resolution areas, which we will highlight in the subsequent images. Also, a few of the buildings have minor visual issues, such as gaps in walls near the roof or partially transparent textures. However, these imperfections are not prevalent and are mostly undetectable during flight. The scenery provides some breathtaking views, whether you’re looking at the towering peaks or down through the valleys. Airfields We will embark on our journey from the southern reaches of the scenery, gradually making our way through the diverse landscapes, and steadily progressing northward, culminating in the awe-inspiring presence of the iconic Mount Everest. VNKD – Khanidanda Elevation: 4,432 ft Khanidanda, also known as Man Maya Airport, holds a unique position as the southernmost and easterly airfield in this package. Situated at an elevation of 4,432 feet, it features an asphalt runway, which was shortened from 590 meters to 520 meters in 2015 to boost its operational capacity throughout the year. The airfield, nestled among high ground and surrounded by dwellings, features a well modelled control tower. Its apron, accommodating two aircraft, is a hive of activity with workers and tourists. The textures are generally good, though they become less sharp on closer inspection. Animated trees and a windsock add to its charm, and the village surrounding the airfield, especially vibrant at night, contrasts with the unlit runway. VNLD – Lamidanda Elevation: 4,046 ft Heading northwest, Lamidanda airfield is positioned on a picturesque ridge and exudes a distinct charm. The control tower, resembling Khanidanda’s, is a well-modelled highlight of the airfield. The apron, amidst local houses with colourful roofs typical of the region, contains a moderate amount of detail. However, the runway's plain textures, lacking signs of wear, feel somewhat out of place in the otherwise immersive environment. VNRT – Rumjatar Elevation: 4,500 ft Rumjatar has a recently upgraded asphalt runway, now 548 meters long in which to support jet traffic. This airport features a distinctive control tower, different from Lamidanda's. The apron, though sparsely detailed, is managed by a few staff members. The adjacent village, marked again by the area's characteristic colourful roofs, is effectively illuminated at night. The absence of airfield lighting, however, limits night-time flying operations. VNKL – Kangel Danda Elevation: 6,764 ft Kangel Danda, at 6,764 feet, boasts a short dirt runway encircled by a well-detailed village. The airfield stands out with its unique control tower and several buildings along the airstrip. The presence of trees swaying in strong winds showcases the advanced environmental effects in X-Plane 12. VNPL – Phaplu Elevation: 8,054 ft Phaplu's paved runway, measuring 671 meters, was completed in 2013 and often serves as an alternative landing site for flights originally destined for Lukla. The control tower, set in a lively compound with staff and various equipment, provides a commanding view of the runway, which is lined with buildings and trees bent by the wind. The nearby village, thoughtfully enhanced to blend with the scenery, along with the runway lights, enhances the overall ambiance. However, navigating here at night remains a challenge due to limited lighting. VNLK – Lukla Elevation: 9,100 ft Lukla, the main access point for Everest expeditions, is the busiest airfield in the area. Famous for its sloped runway and demanding approach conditions, landings are confined to runway 06, and takeoffs occur downhill. The airfield's bustling nature is well captured, with plenty of apron staff, luggage, and general clutter. A minor discrepancy is seen in the welcome message on the runway, which reads "Well Come" instead of "Welcome," a mistake not repeated on the Numbur Hotel's rooftop near the apron. The helipad area, while not overly busy, features a helicopter and a few maintenance workers, creating a scene that is both functional and visually appealing. This setup, though quieter, complements the main apron's more dynamic atmosphere, adding a touch of authenticity to the airfield. The surrounding village, significantly enhanced, features distinct buildings and hotels, with names visible on their roofs. This area is particularly captivating in daylight and is beautifully lit at night. VNSB – Syanboche Elevation: 12,500 ft Positioned even higher and closer to Everest than Lukla, Syanboche's airfield sits at 12,500 feet and has a dirt runway. Although lacking clear markings, the runway is encircled by signs of ongoing development, such as building materials, suggesting active efforts to enhance the airfield's capabilities and potentially reduce trekking distances to Everest. These expansion plans, however, seem to have been put on hold, possibly due to resistance from the Lukla business community. The airfield's surroundings, much like the others, have been enhanced with clusters of houses, contributing to the charm of the local village. Helipads In addition to the airfields, each location in this package includes a helipad, adding another layer of detail and functionality to the scenery. These helipads, typically marked with the standard circled 'H', offer a range of unique features and settings. Lukla's helipad, near the control tower and adjacent to the runway, is notable for its vibrant design. It stands out as the only helipad in the package with its own ICAO code, HELK, reflecting its distinct appearance and functionality. HENB – Namche-Bazar Helipad Elevation: 11,528 ft Set on a hill, Namche-Bazar helipad provides a sweeping view of the local village, which is meticulously modelled. The village's night lighting subtly enhances its charm, and the presence of a replicated monument at various points in the scenery adds continuity. The panoramic view from the helipad, especially at night, is particularly picturesque. HYET – Yeti Mountain Elevation: 13,553 ft Yeti Mountain features a cluster of comfort lodges known for their excellent cuisine and Sherpa hospitality. These lodges, surrounding the helipad, differ from other structures in their size and quality of materials. The view from the main lodge offers a stunning vista across valleys with Mount Everest prominently in the background. HETB – Tengboche Helipad Elevation: 12,634 ft Tengboche, centred around the significant Tengboche Monastery, brings a unique character to the village. This area's model is bespoke, lending authenticity to the setting. The trail leading north from the village towards Everest is dotted with houses, enhancing the scenery's realism. HPRH Pheriche Helipad Elevation: 13,900 ft Located further along the trek towards Everest, Pheriche is a simpler Sherpa village. Serving as a resting point for trekkers, it includes several buildings catering to basic needs. A small, significant monument within the village adds a sense of importance to its otherwise modest landscape. HCNR Pyramid CNR Helipad Elevation: 16,929 ft Pyramid CNR Helipad is characterized by its sparse landscape and a unique pyramid-shaped building near the helipad. This distinctive structure serves as a research facility, operated jointly by the Ev-K2-CNR Committee and the Nepal Academy of Science and Technology (NAST). The model of the research building is accurately rendered, true to its real-life counterpart. However, a closer examination of the building reveals that the textures become less distinct, indicating a limitation in the texture resolution. HEBC - Everest Base Camp Elevation: 17,185 ft Everest Base Camp, marked by a sprawling array of tents, serves as a crucial staging ground for Everest climbers. The presence of a simple yet evocative monument provides a sobering reminder of the camp's purpose and its remarkable altitude. In the evening, the lit tents highlight the camp's vast scale and its pivotal role as a gathering point for expeditions ascending Everest. HBNF – North Base Camp Everest Elevation: 20,359 ft The North Base Camp, situated on Everest's northern face at 20,359 feet, is smaller than the South Base Camp and primarily consists of a compact group of tents. Notably, this camp has been closed to tourists since 2019, reflecting a significant shift in its function. Like the main base camp, it includes a monument, although there's a noticeable error in the displayed elevation. Performance My experience with this scenery was impressively smooth, even when running it at maximum settings on a 4K monitor. Notably, the vast number of animated X-Plane trees did not adversely affect frame rates, which stayed consistently high. This smooth performance was a pleasant surprise, given the scenery's complexity and detail. However, I did notice some inconsistency in the resolutions of the ground textures. Adjusting the settings didn't seem to improve this aspect. For reference, my testing setup includes an Intel i9 10900K processor, 32GB of RAM, an NVIDIA MSI RTX 3090 Suprim X graphics card, running on Windows 11 Home 64-bit. Conclusion Exploring the Himalayas in this scenery pack was an engaging and challenging adventure. The added realism of carefully choosing aircraft and managing oxygen levels due to the high altitudes is well captured by X-Plane. The scenery excels in its overall presentation. The animated wind-swept trees effectively suggest the harsh mountainous conditions, while the upgraded villages add depth and charm to the landscape. Bespoke models for certain landmarks, though simple, successfully capture the spirit of these locations. This simplicity is understandable and acceptable, considering the vast area covered by the scenery and the need to keep the product reasonably priced. Therefore, I highly recommend this package to those interested in a virtual exploration of this iconic region. The journey towards the summit of Mount Everest is especially rewarding, culminating in a delightful surprise: climbers positioned as if welcoming you at the peak. ________________________ Everest Park - Nepal 3D XP12 by Frank Dainese and Fabio Bellini is now available from the X-Plane.Org Store here: Everest Park - Nepal 3D XP12 by Frank Dainese and Fabio Bellini Priced at US$30.95 Features: Airports included VNLK (LUKLA) Sloped Asphalt Runway VNSB (SYANBOCHE) Runway in beaten earth VNPL (PHAPLU) Short asphalt runway VNRT (RUMJATAR) Asphalt Runway VNLD (LAMIDANDA) Asphalt Runway VNKL (KANGEL DANDA) Short Runway in beaten earth Helipads Included HELK Lukla Helipad - HENB Namche-Bazar Helipad - HETB TengBoche Helipad HPRH Pheriche Helipad - HCNR Pyramid CNR Helipad - HEBC BaseCamp Everest HBNF BaseCamp Everest North Face - HYET Yeti Mountain Helipad - All airports have a helipad Ultra-High Definition Scenery Pack The main mountains of the area have been rebuilt with 3D models. DEM data was used and further corrected with 3D graphics programs. Summer and Winter Textures (XP12) Manual included Requirements: X-Plane 12 (separate package available for X-Plane 11) Windows, Mac, or Linux 4 GB VRAM Minimum. 8 GB+ VRAM Recommended Review System Specifications Intel i9 10900K – 32GB RAM - NVidia MSI RTX 3090 Suprim X – Windows 10 Home 64 Bit __________________________________ Scenery Review by Peter Allnutt 22nd December 2023 Copyright©2023: X-Plane Reviews (Disclaimer. All images and text in this review are the work and property of X-PlaneReviews, no sharing or copy of the content is allowed without consent from the author as per copyright conditions.
-
Dominic Smith reacted to a post in a topic:
Scenery Review: PAWG - Wrangell Airport by Northern Sky Studio
-
Dominic Smith reacted to a post in a topic:
Scenery Review: Grand Arctic Scenery XP12 by HSimulators
-
Strange, as I never experienced the issue you mentioned. However, I'm glad you managed to get it all sorted. Enjoy your journey into the Artic Cheers Dominic