Leaderboard
Popular Content
Showing content with the highest reputation since 03/18/24 in Posts
-
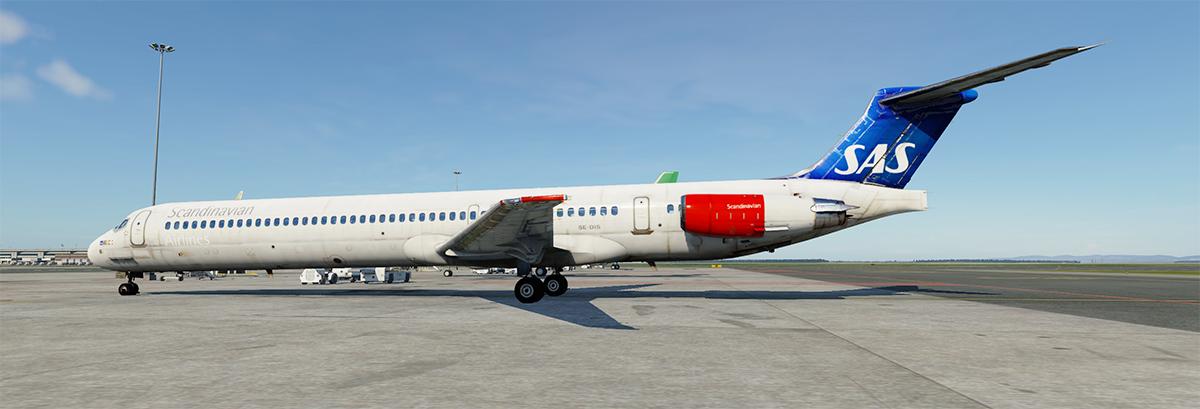
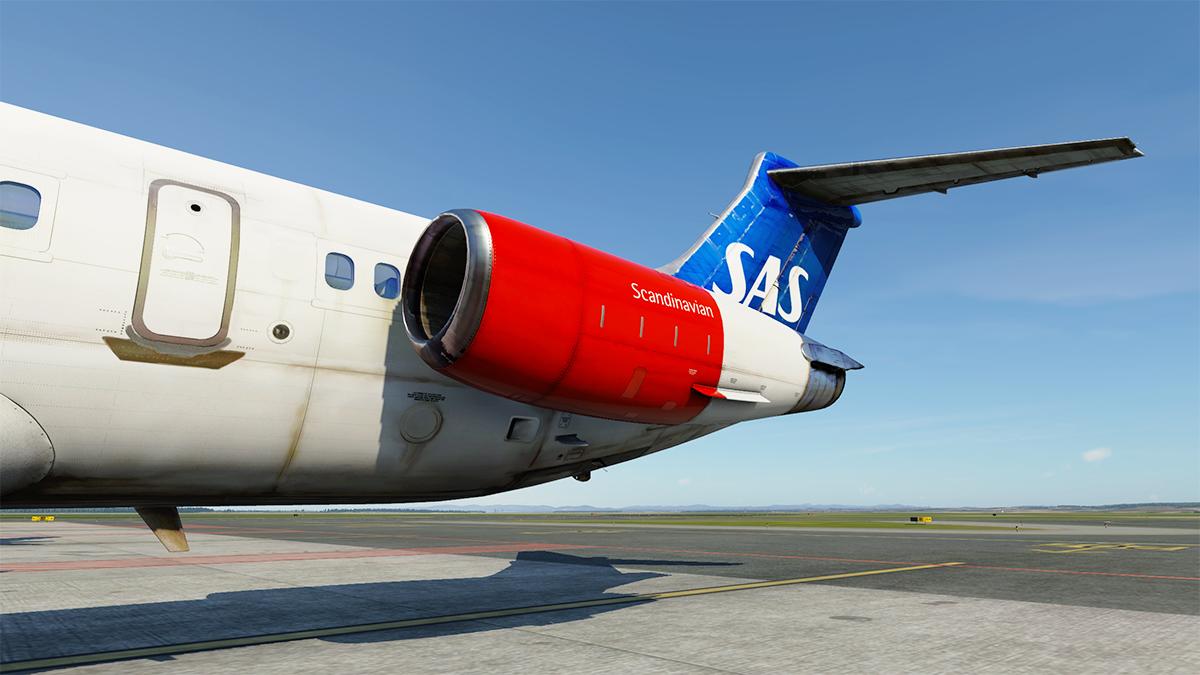
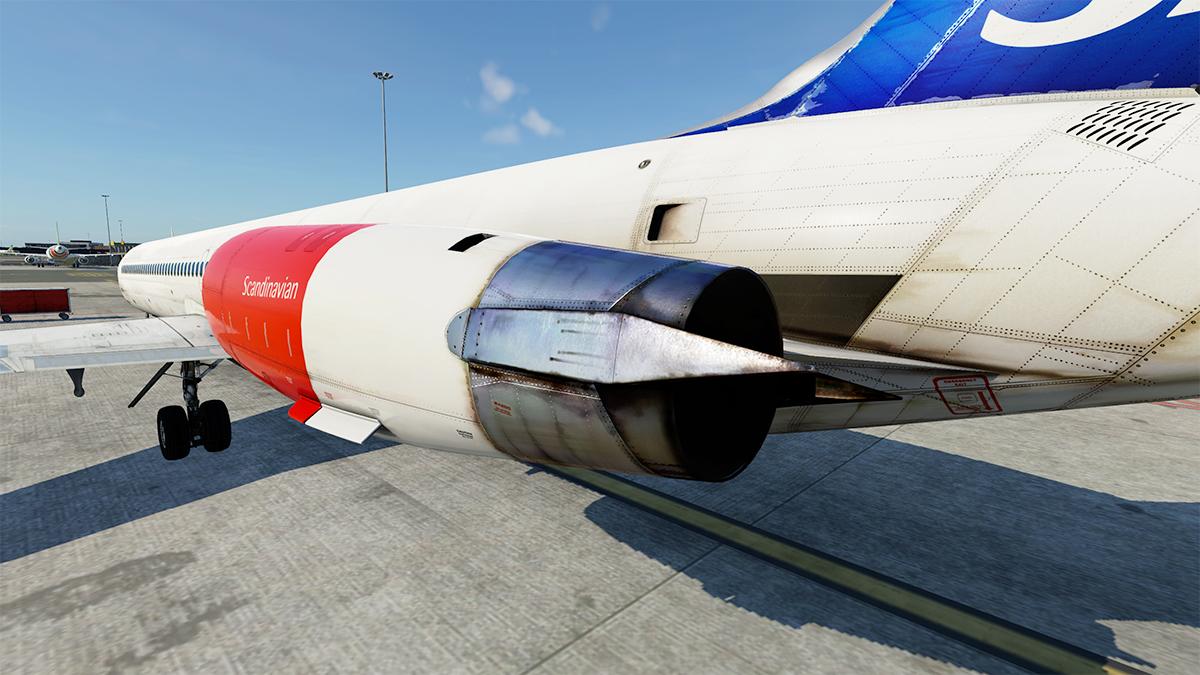
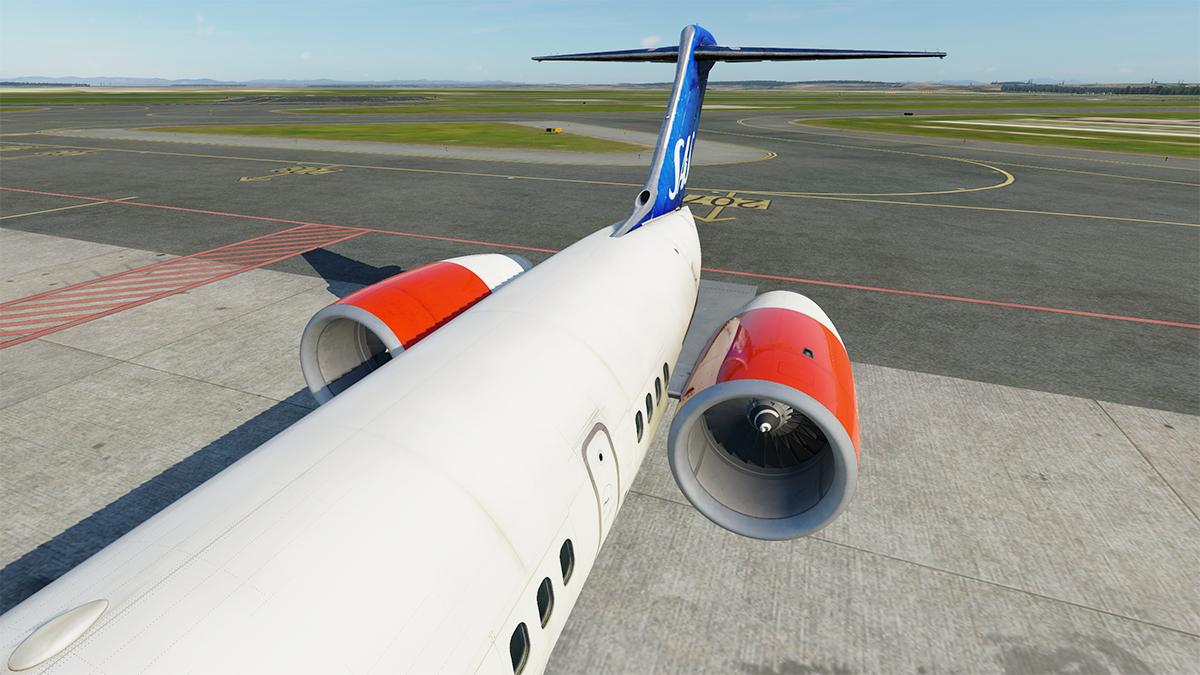
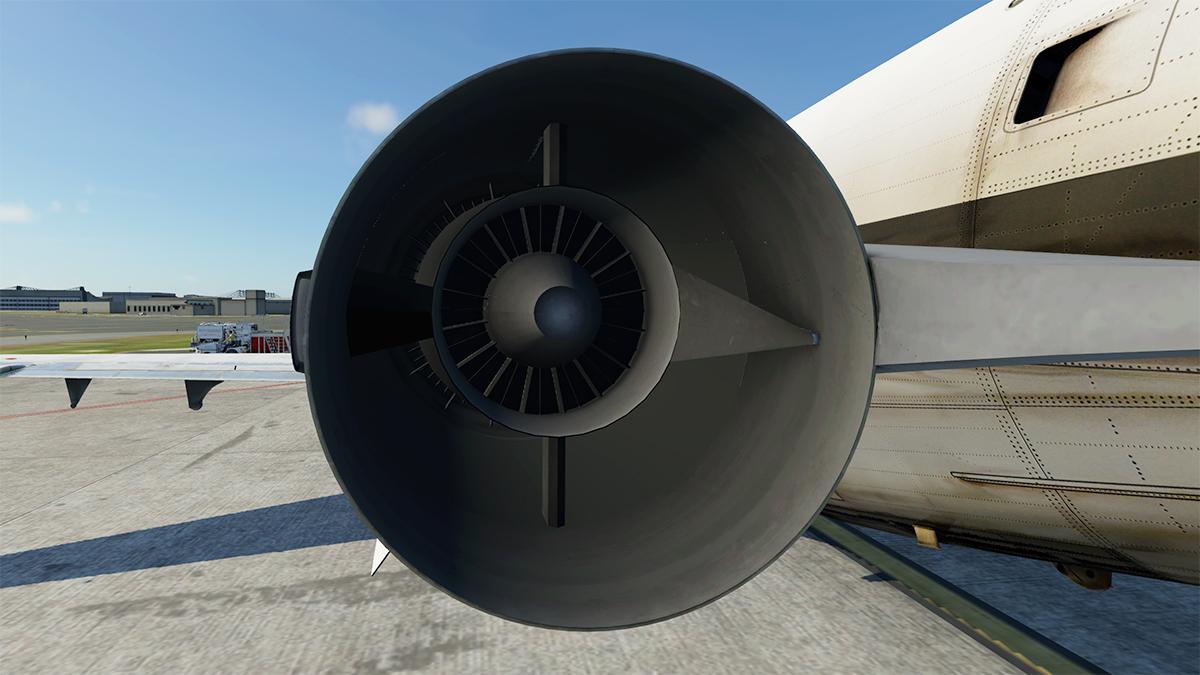
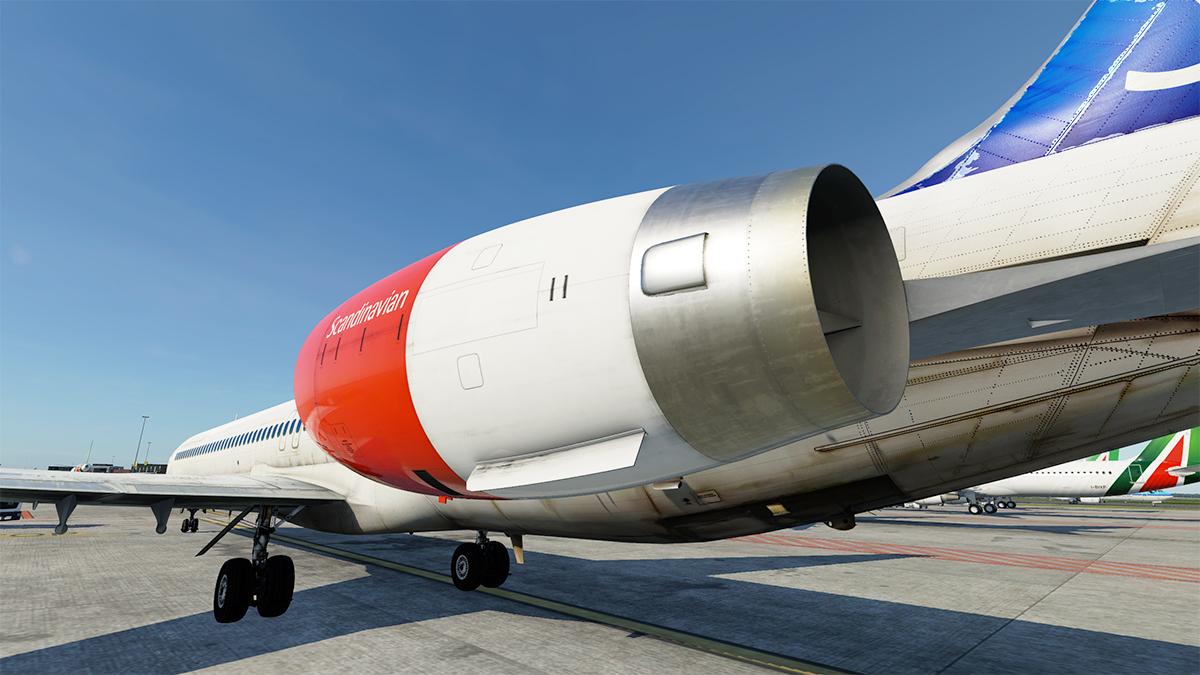
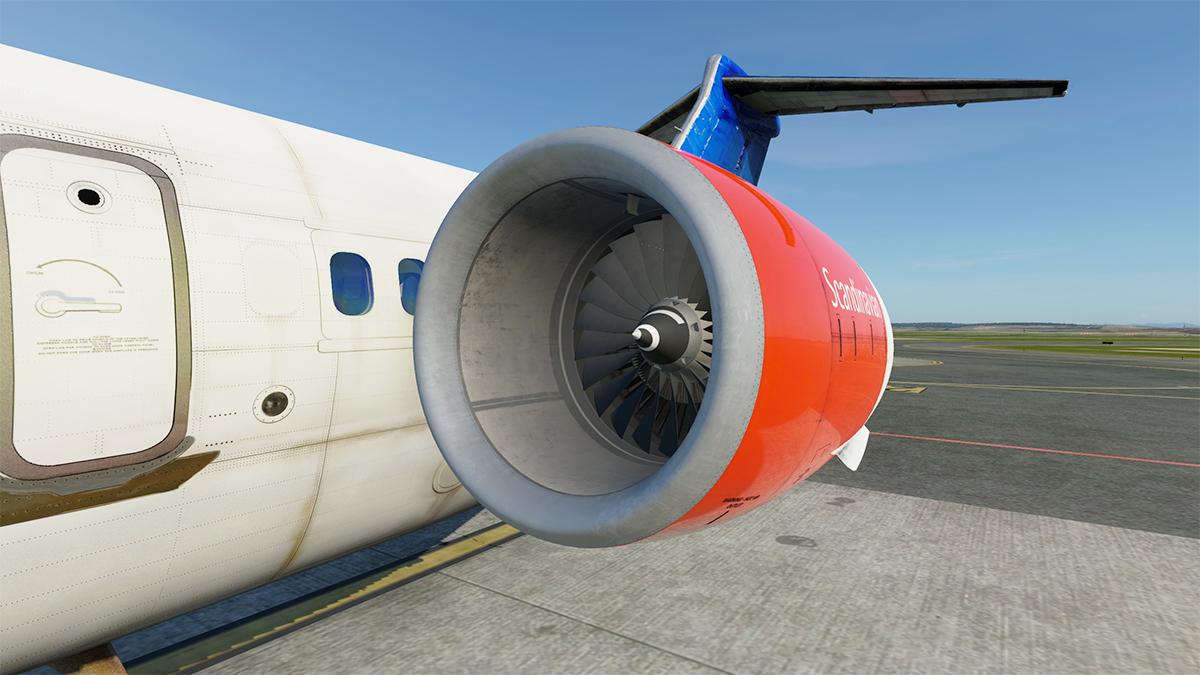
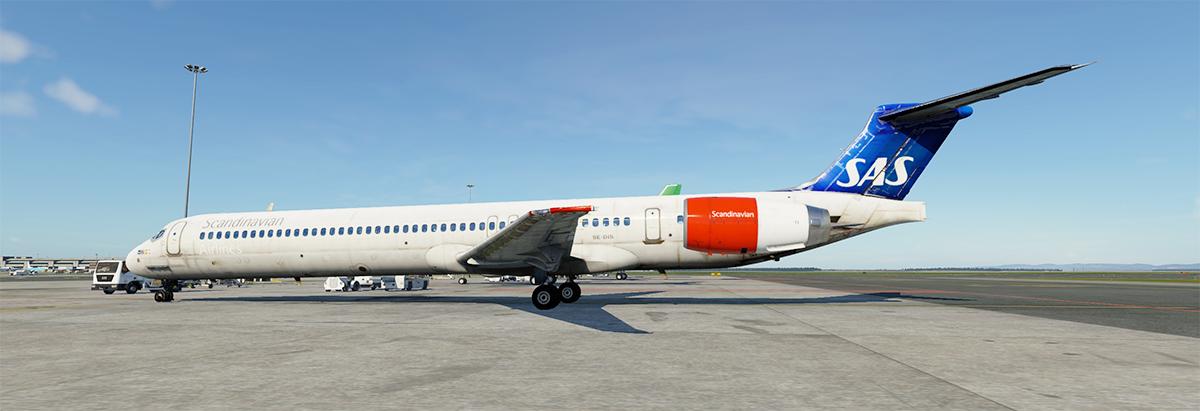
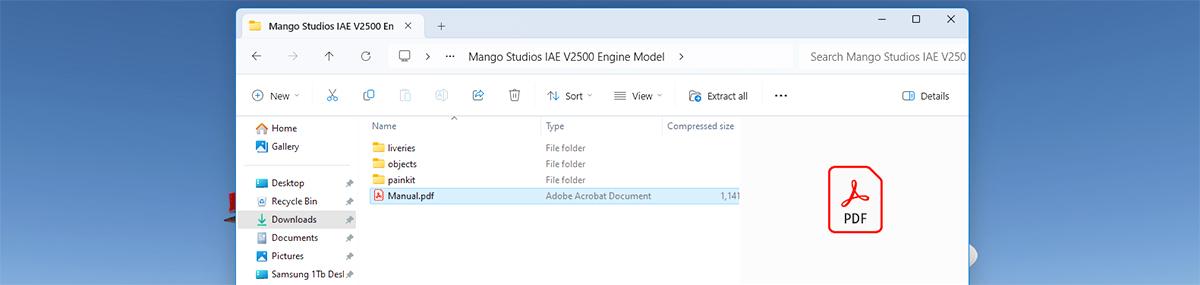
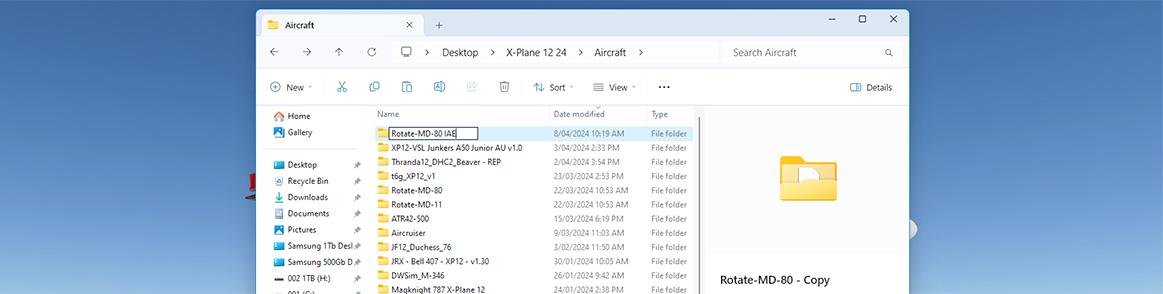
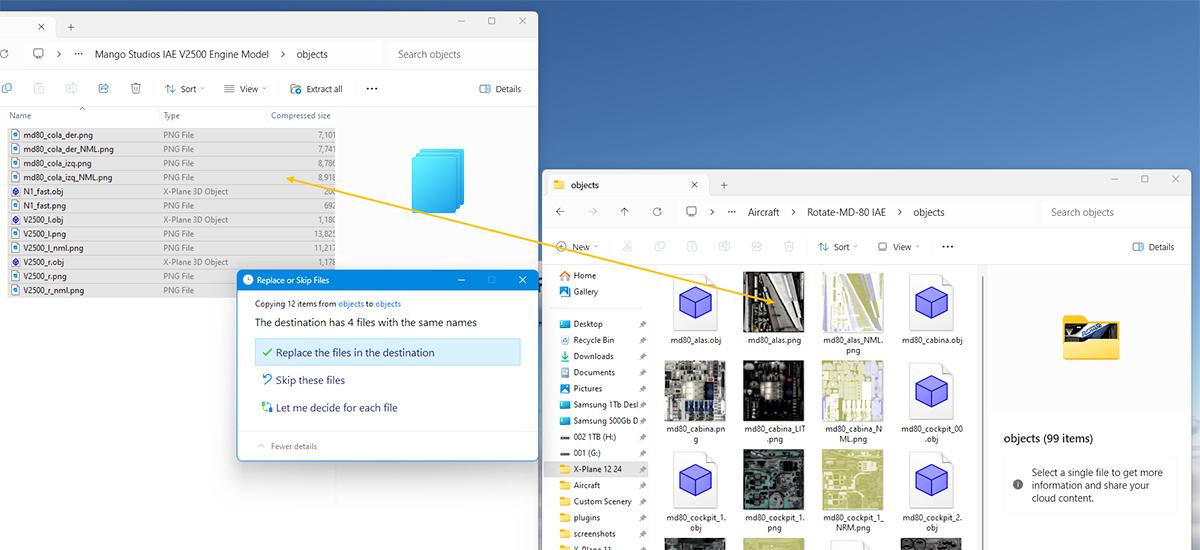
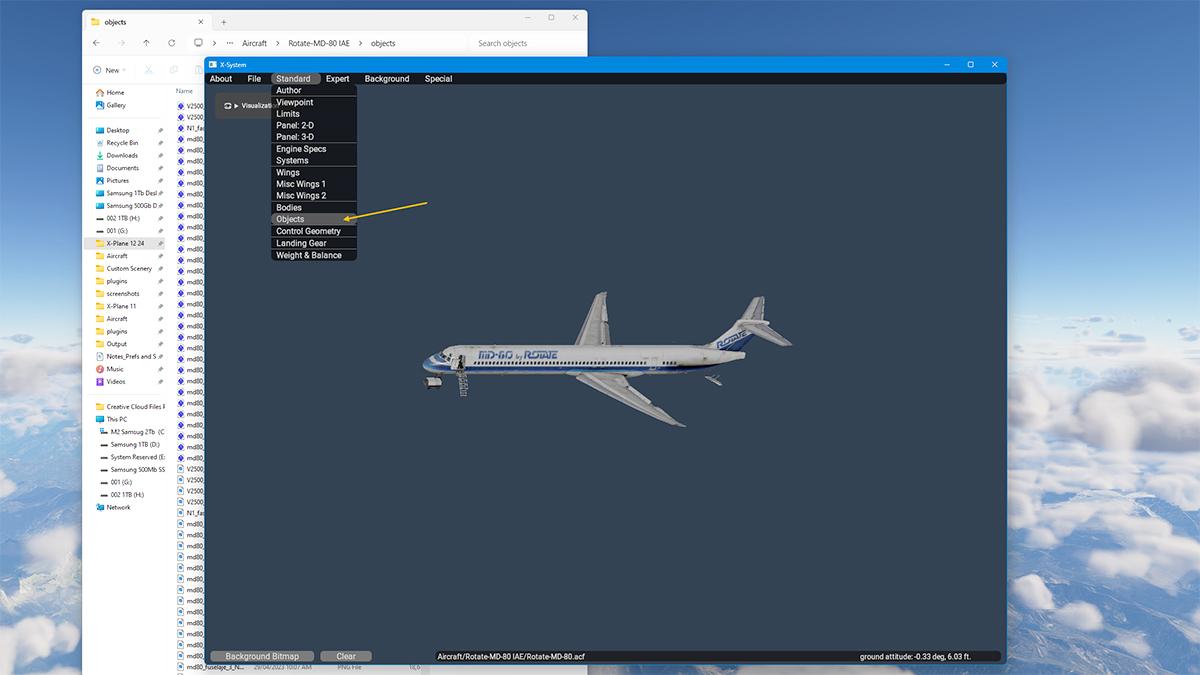
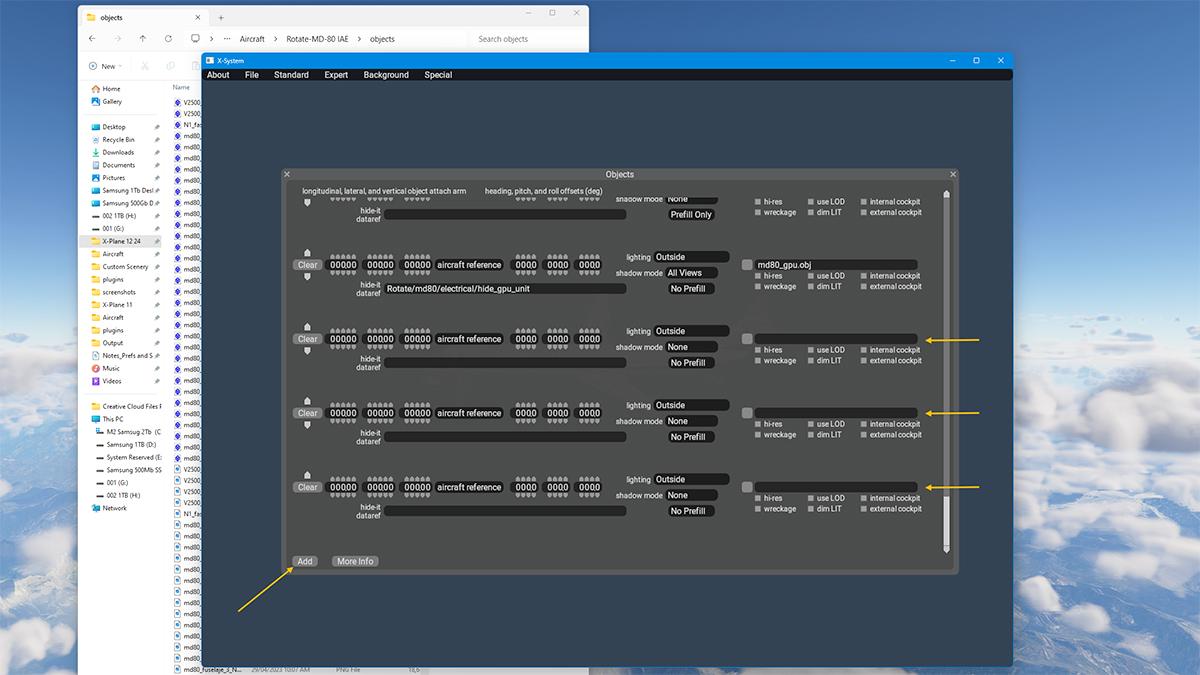
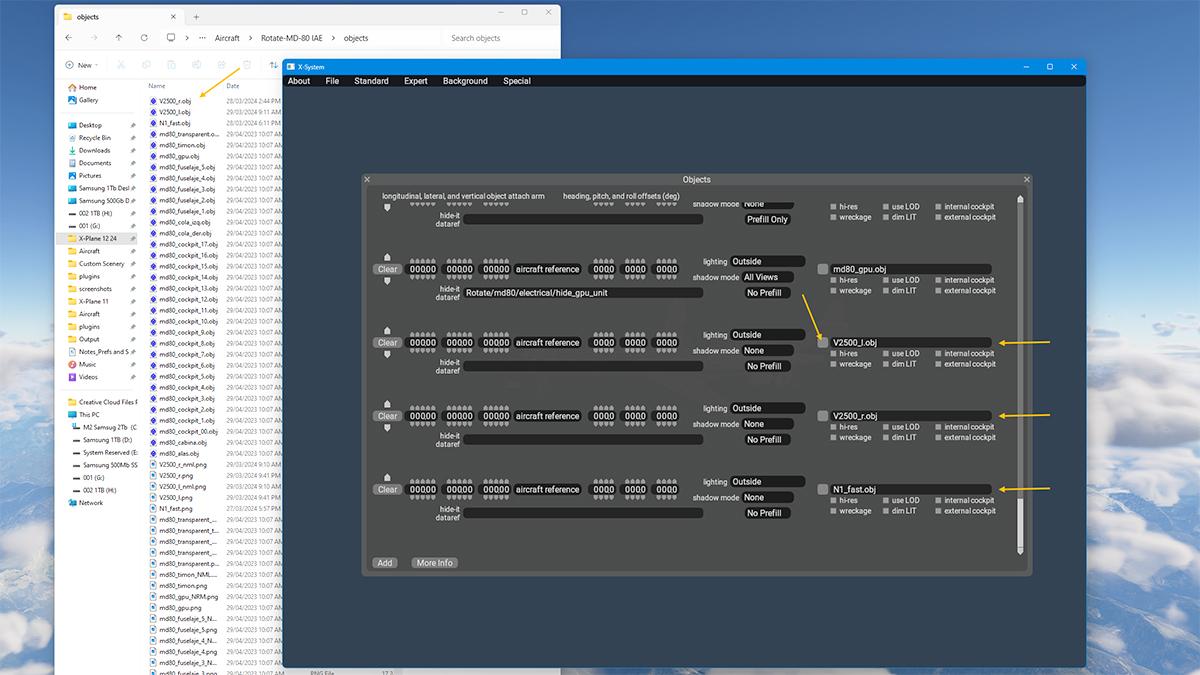
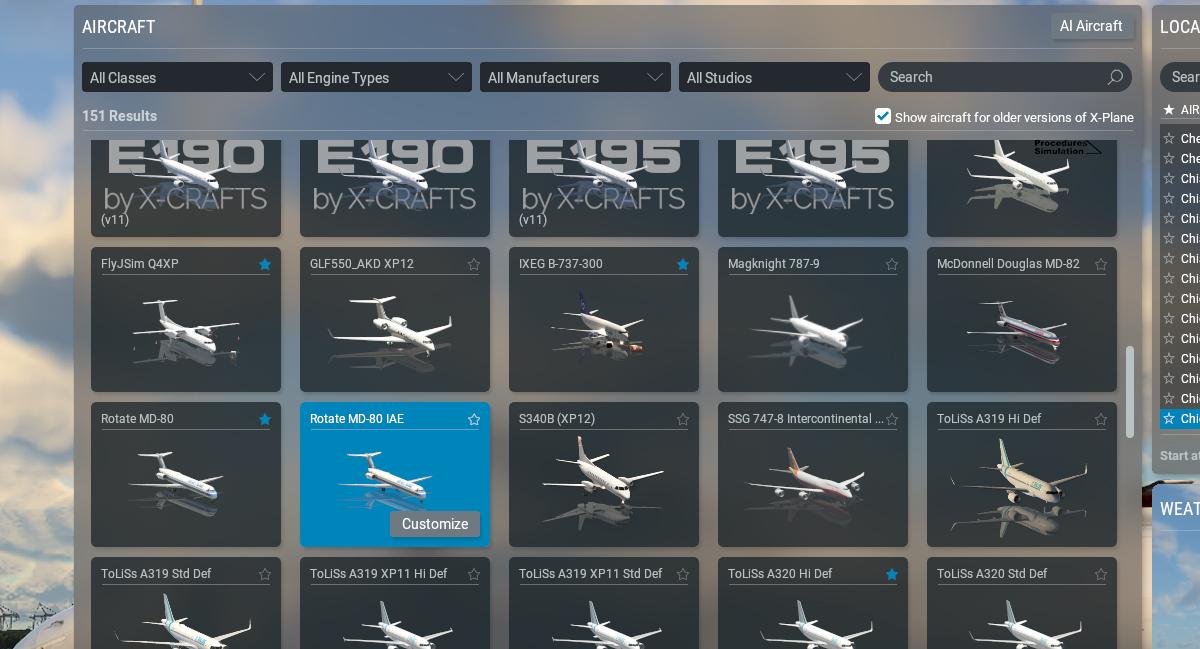
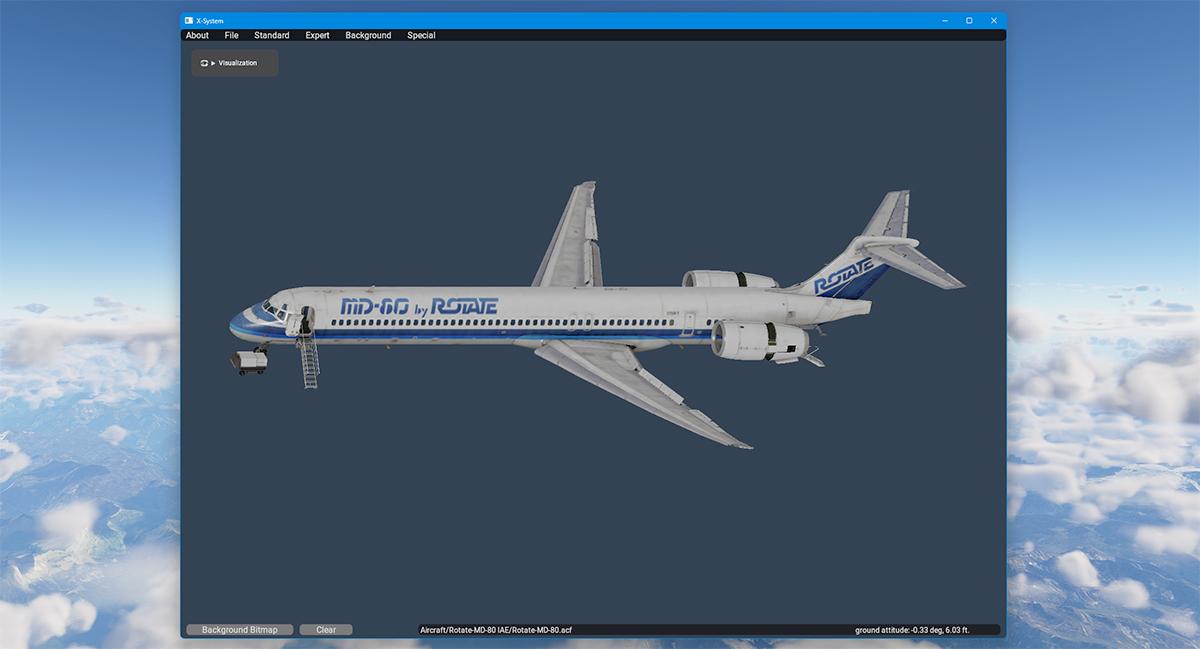
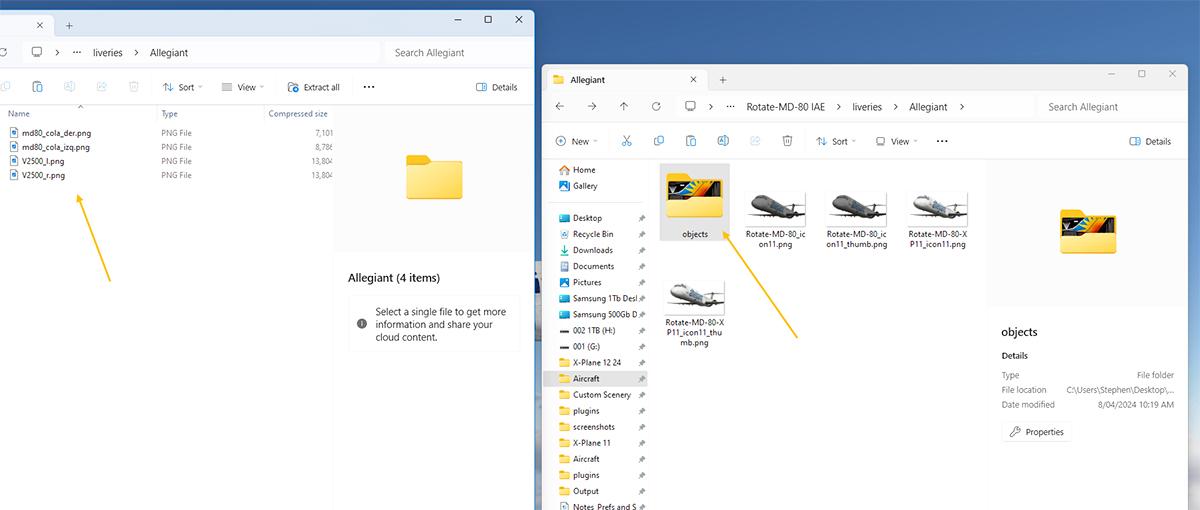
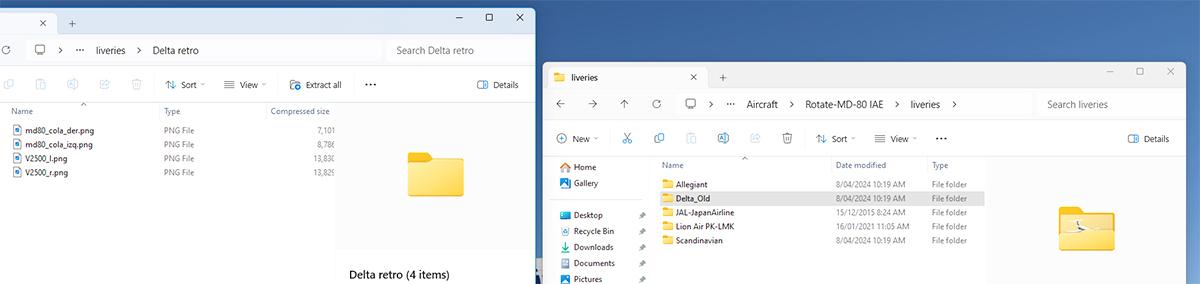
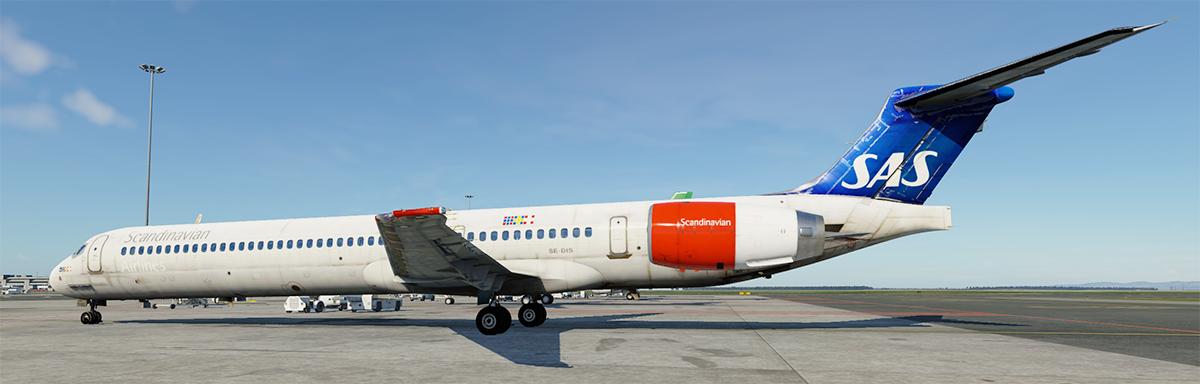
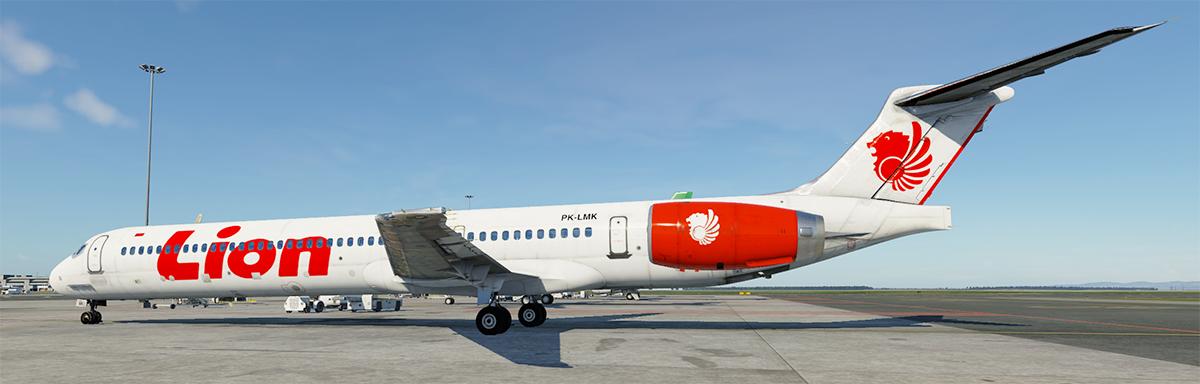
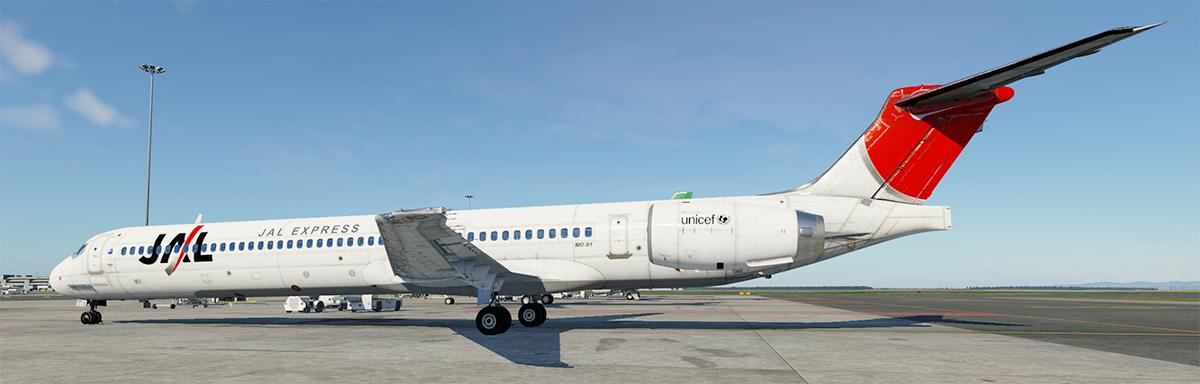
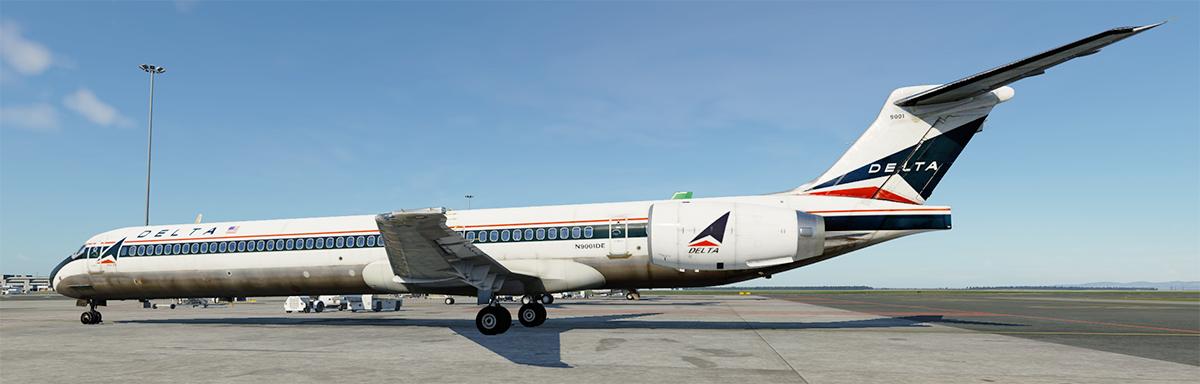
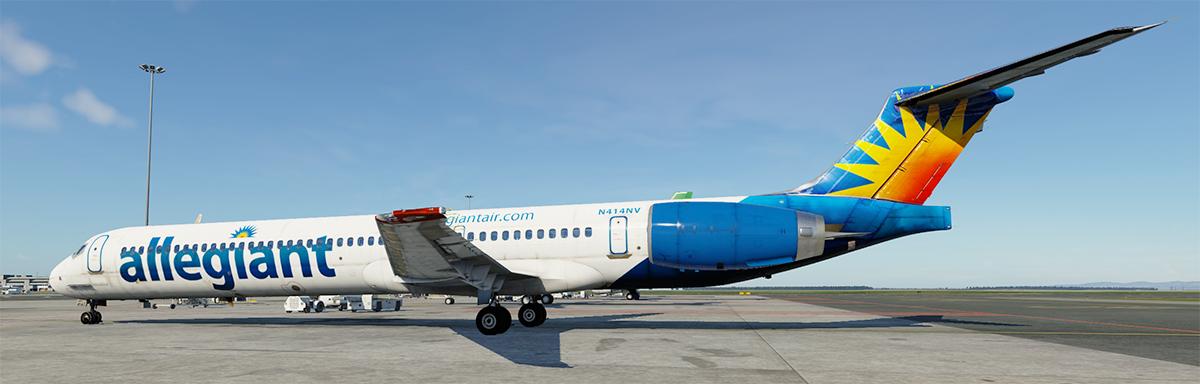
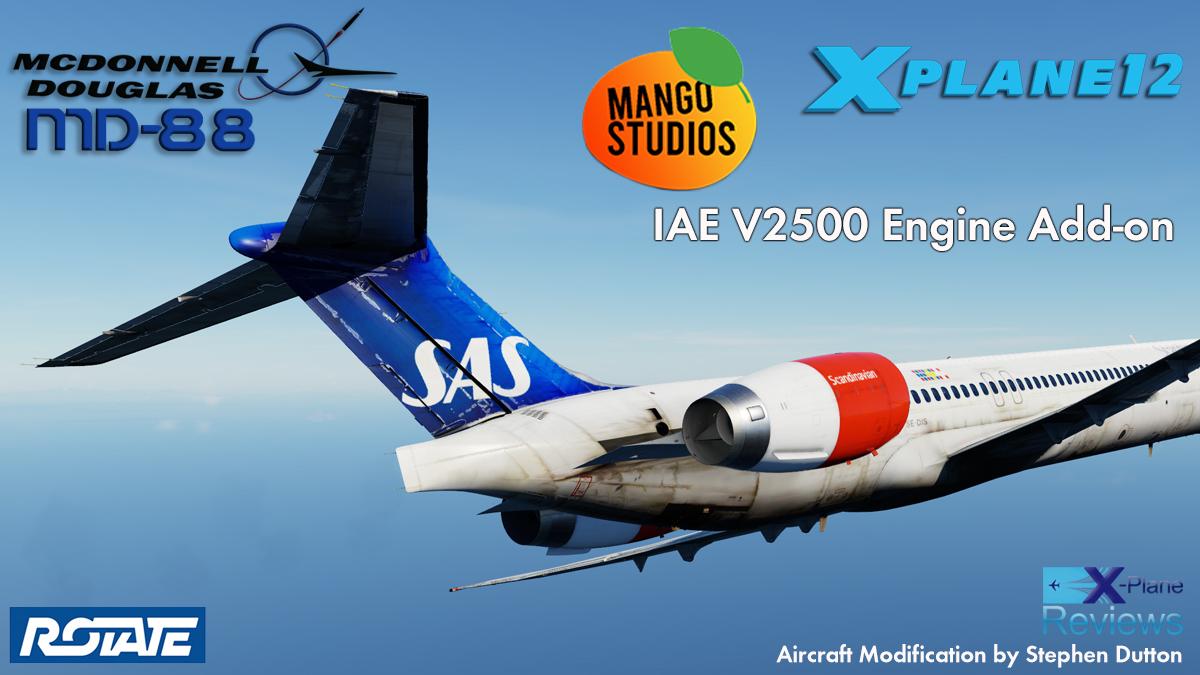
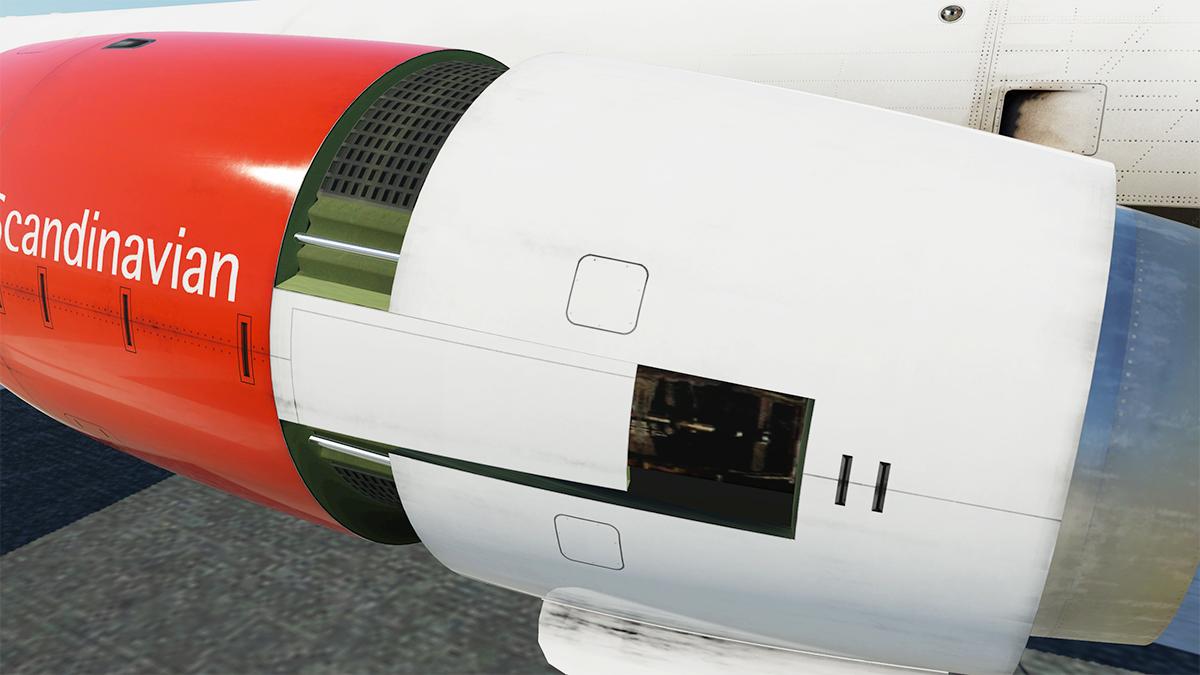
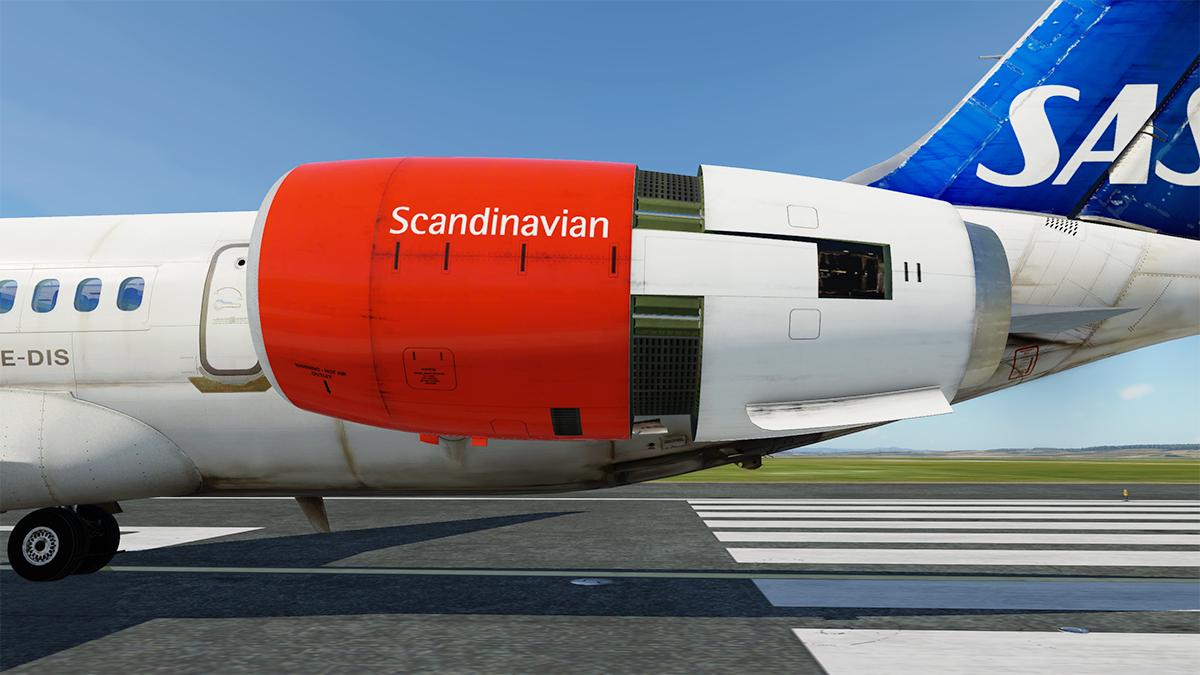
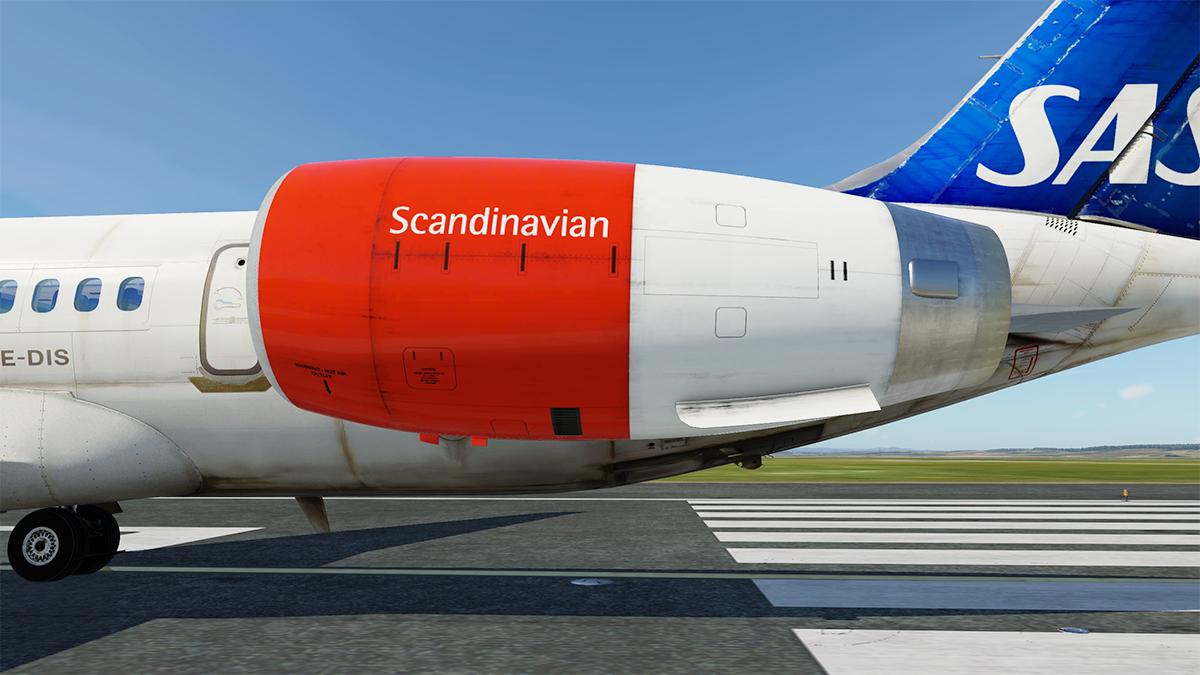
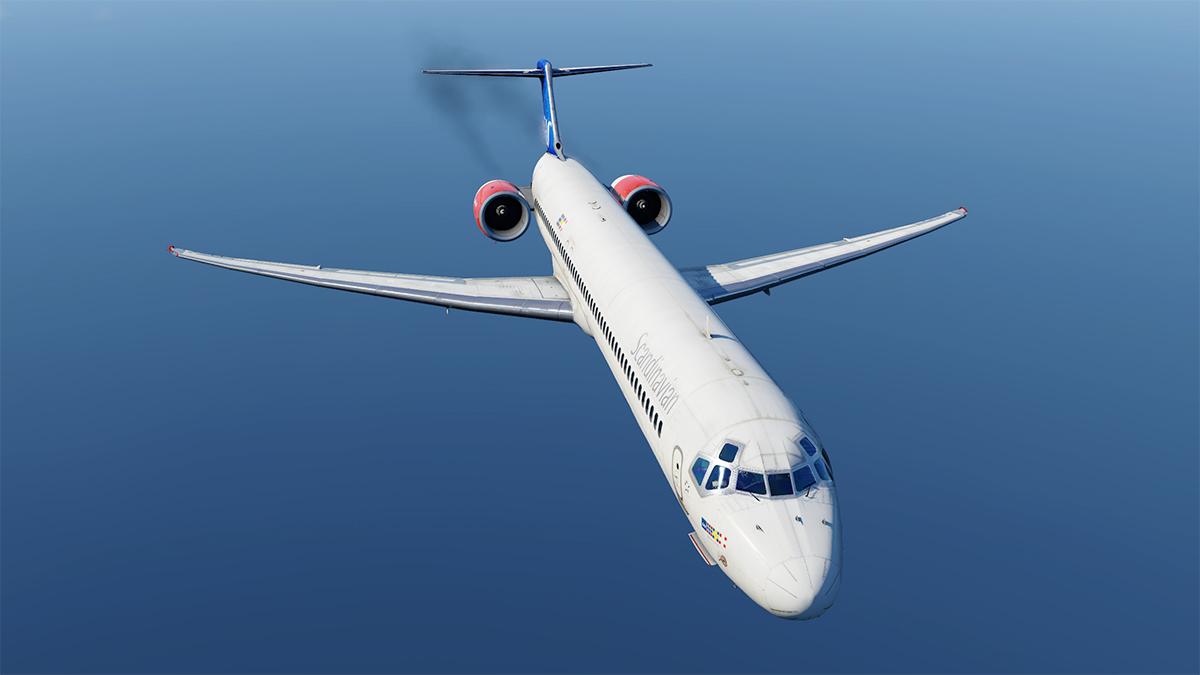
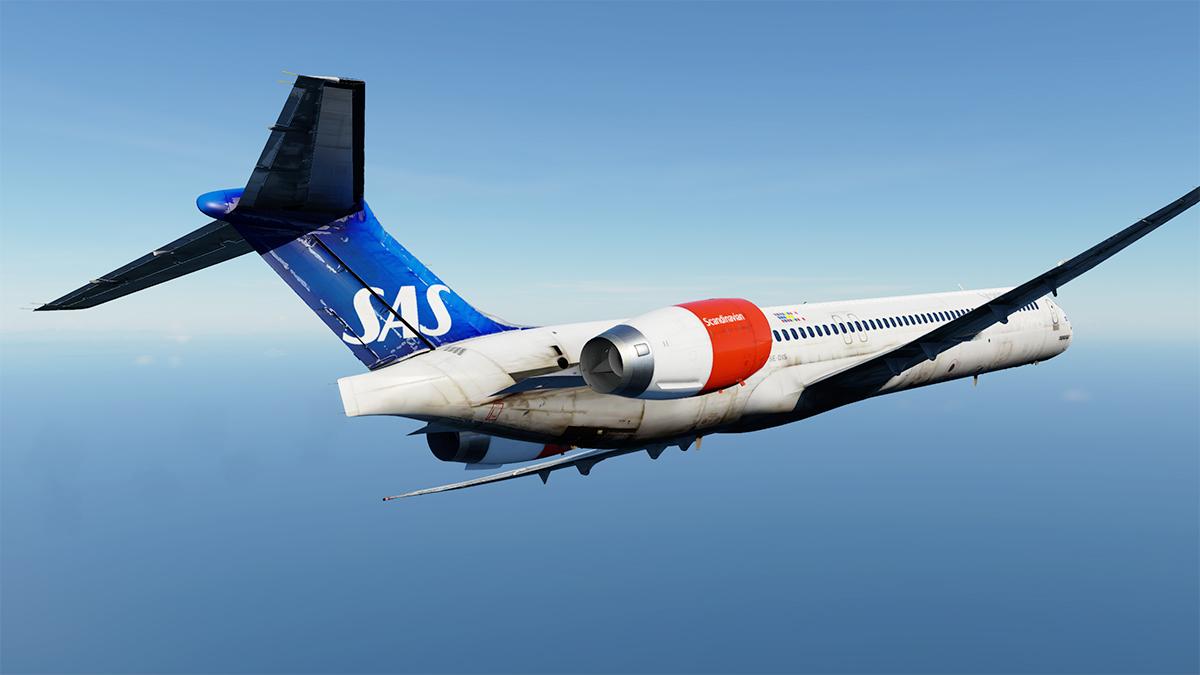
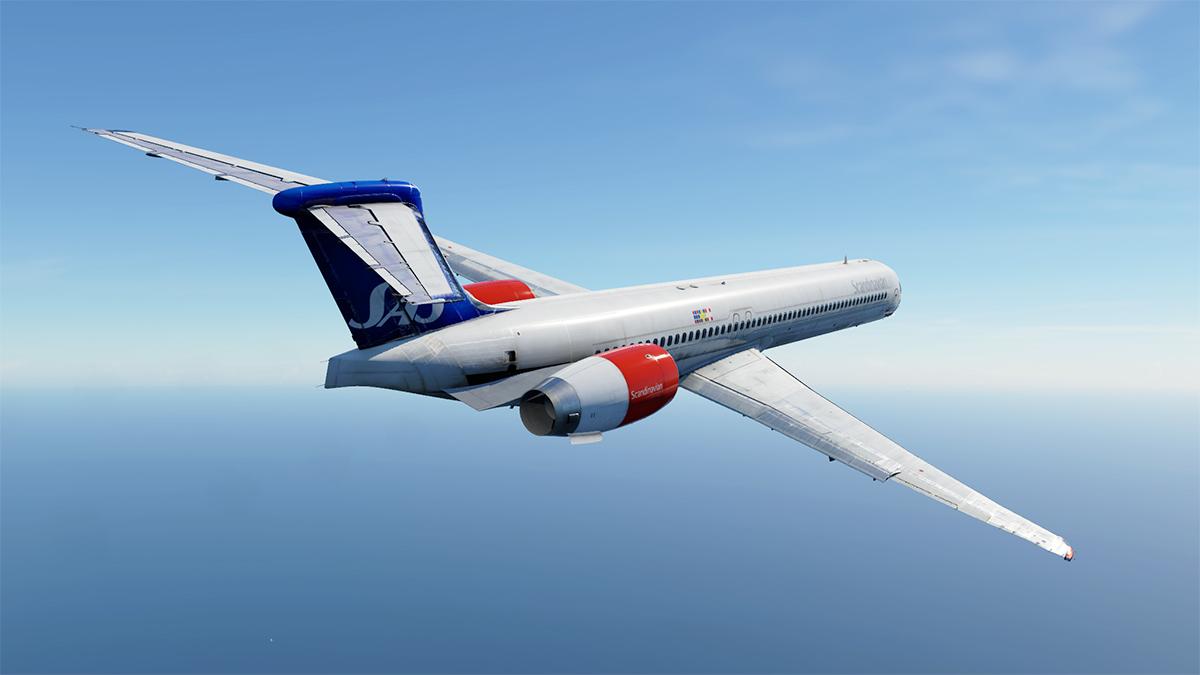
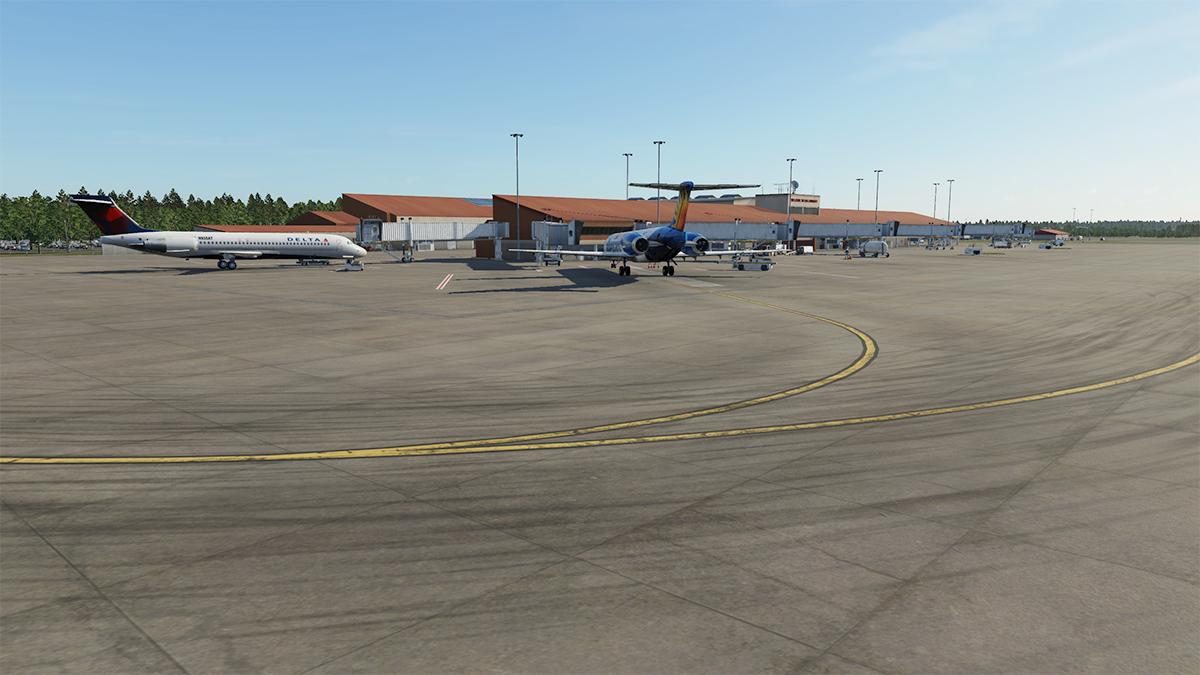
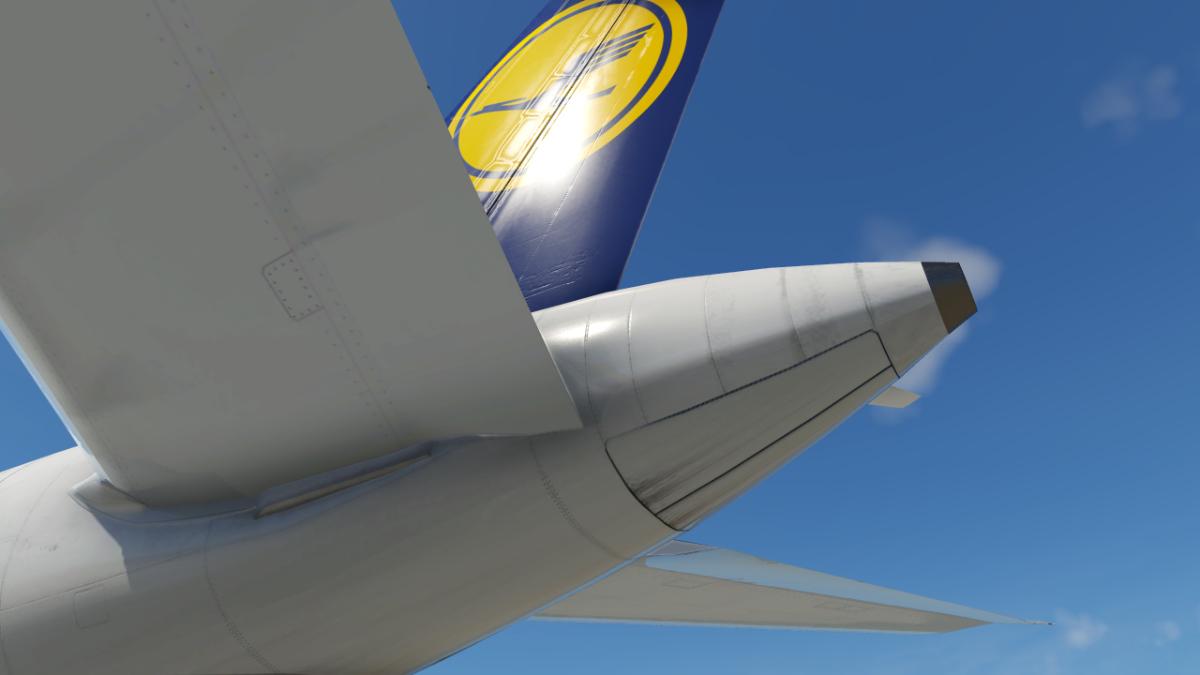
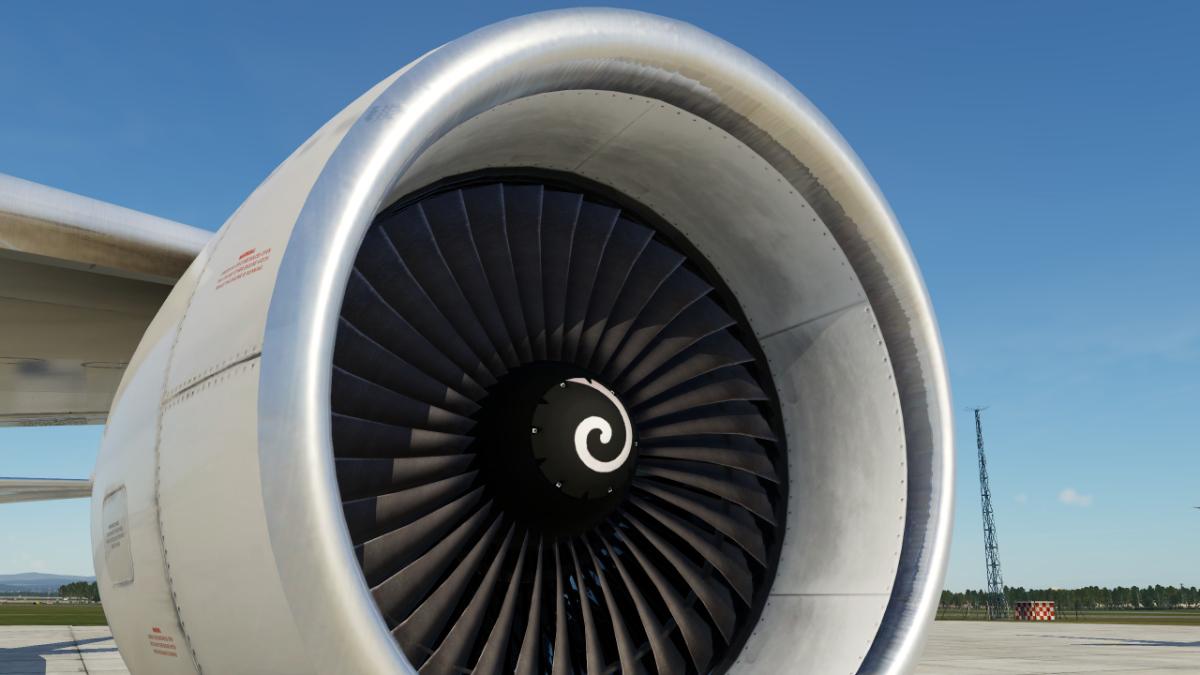
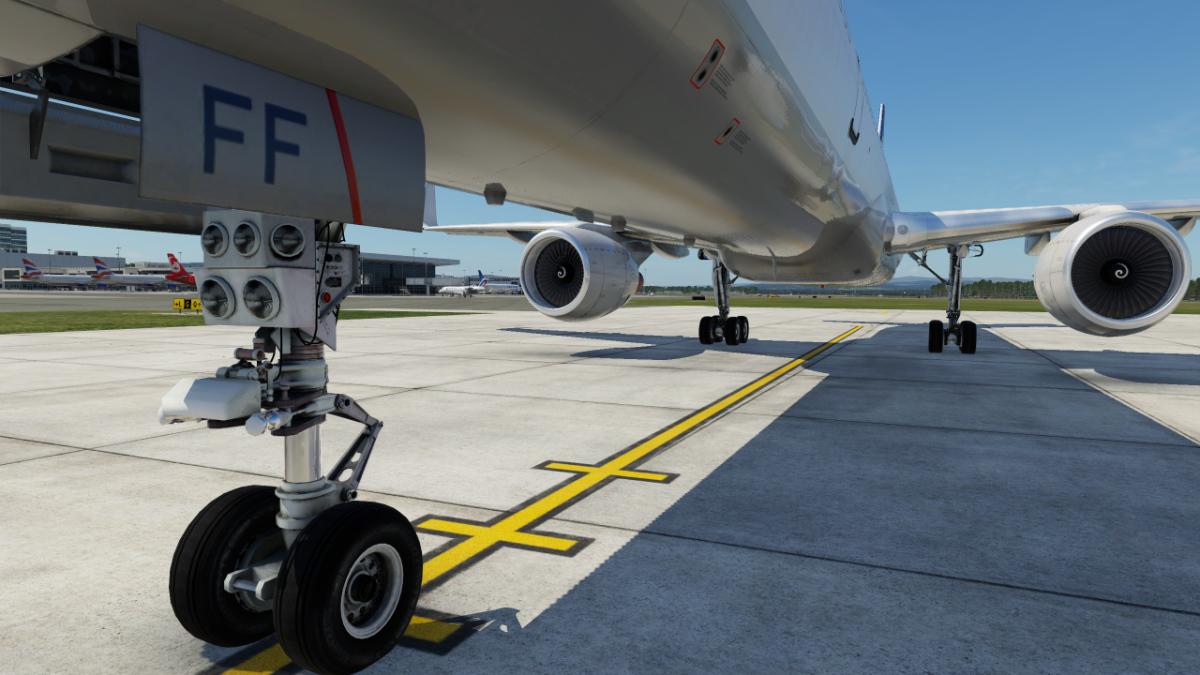
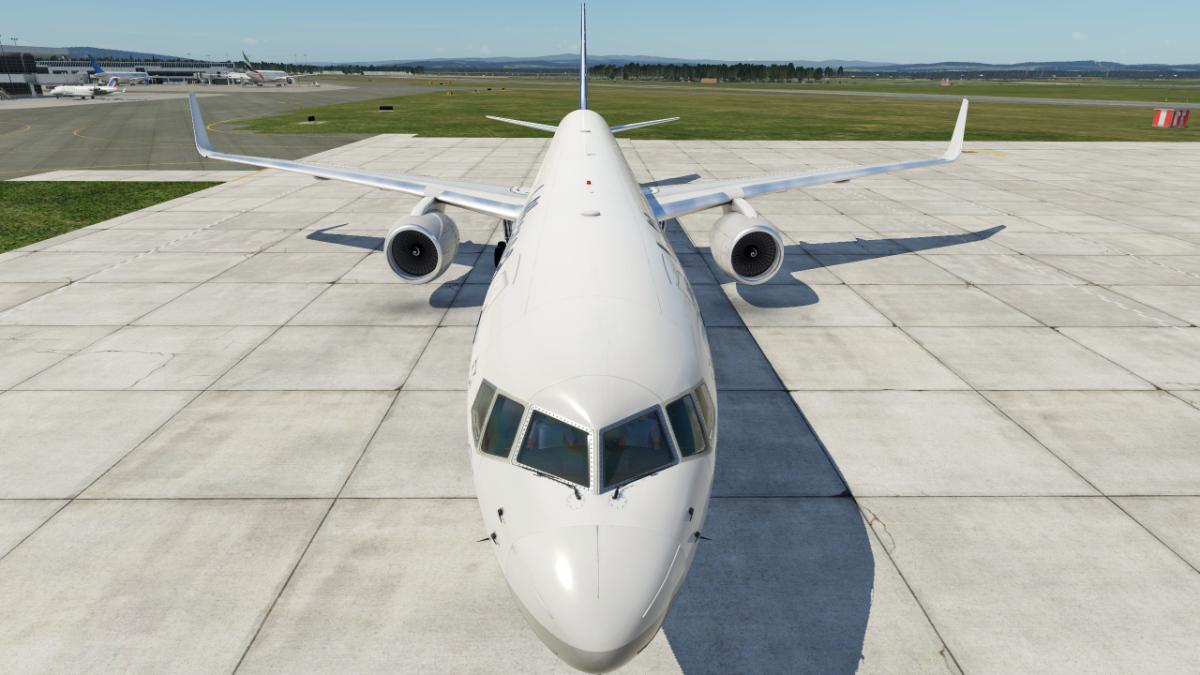
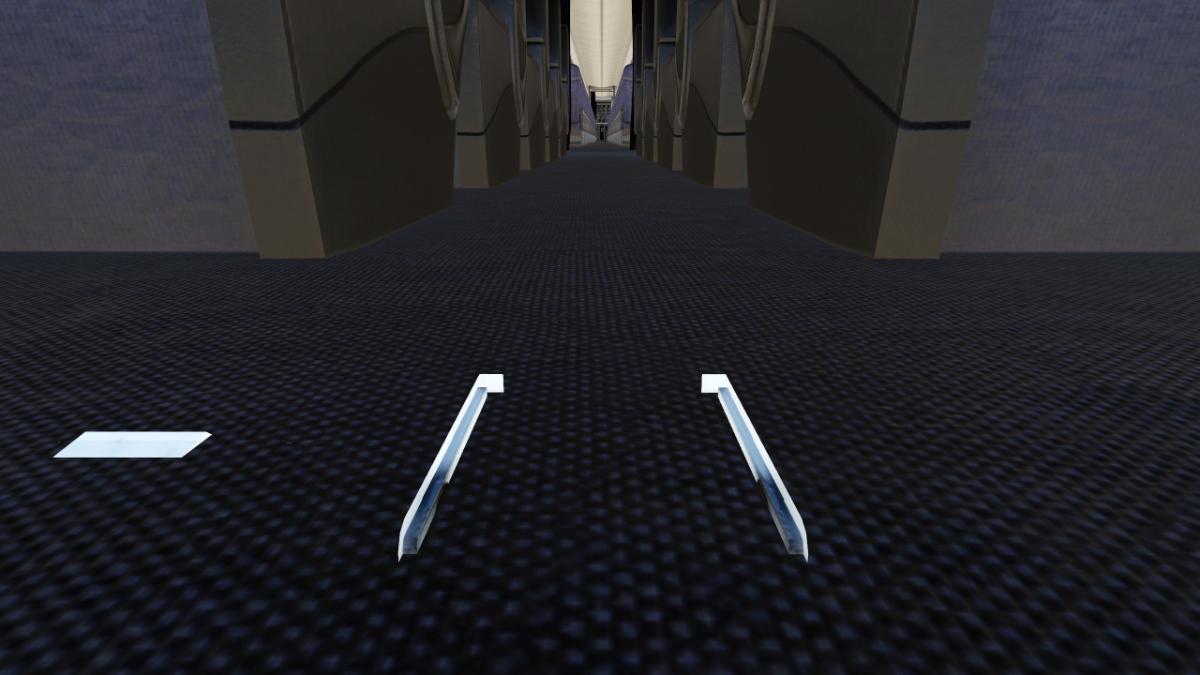
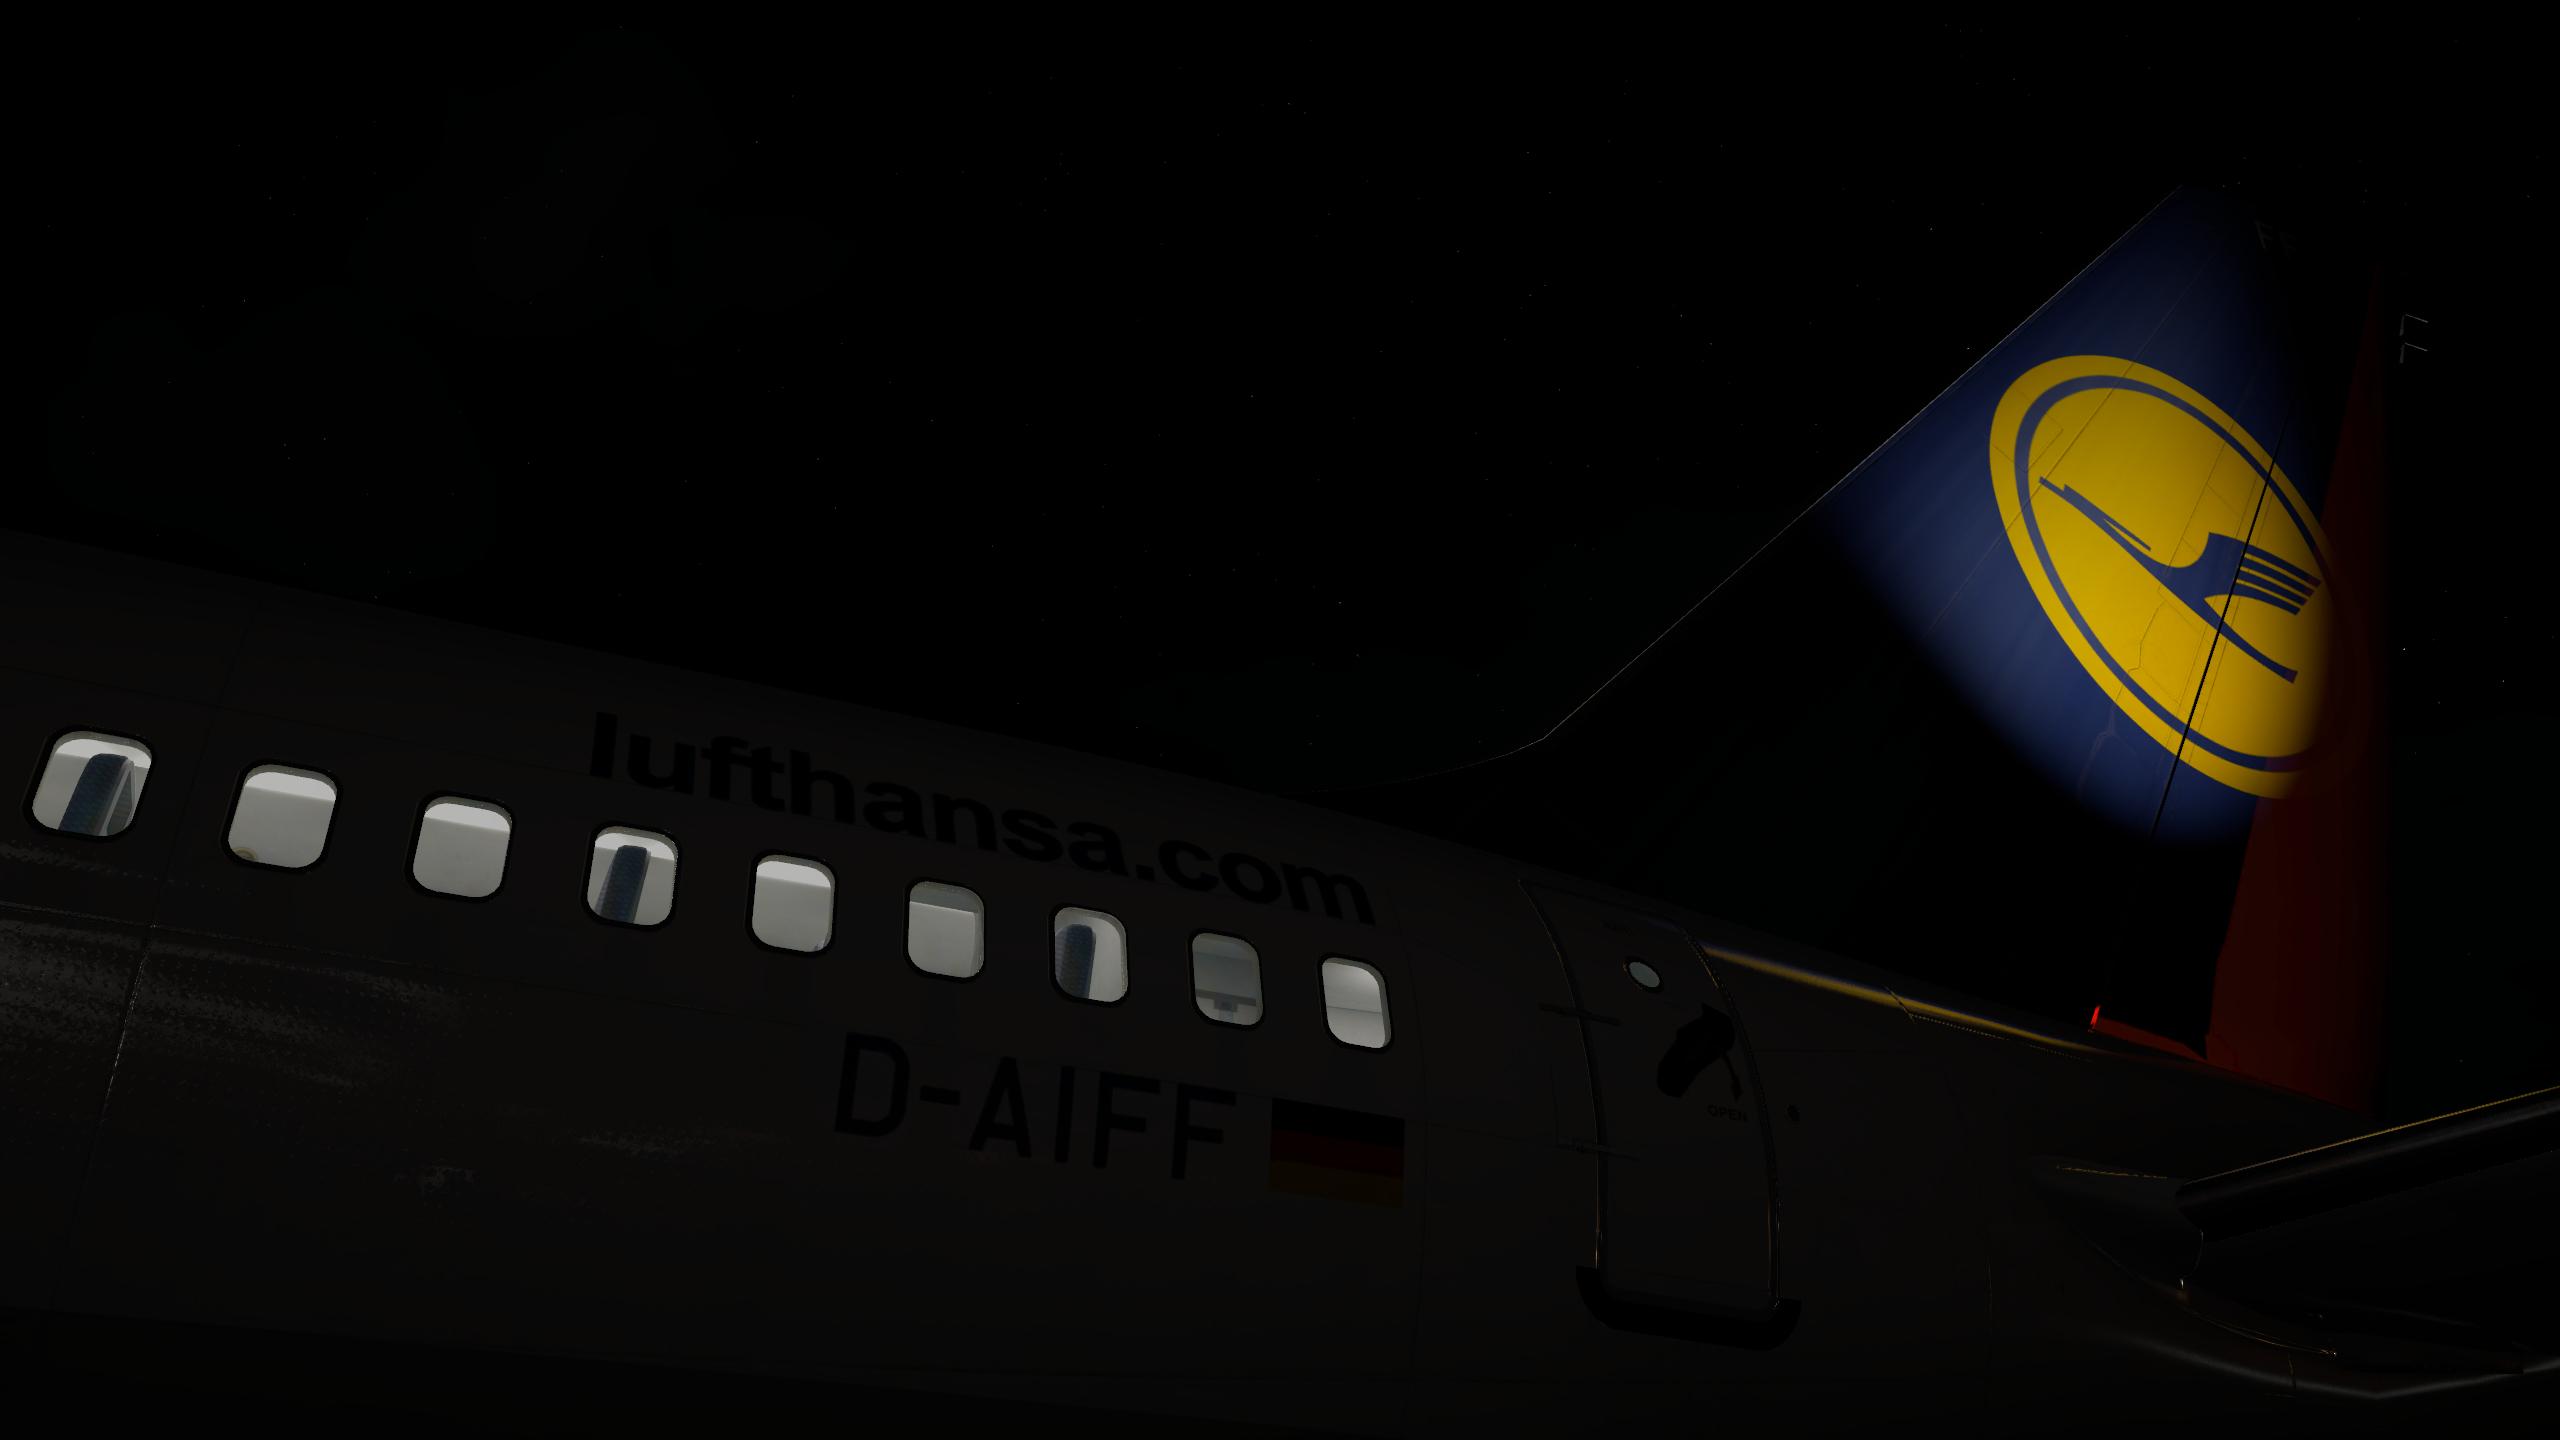
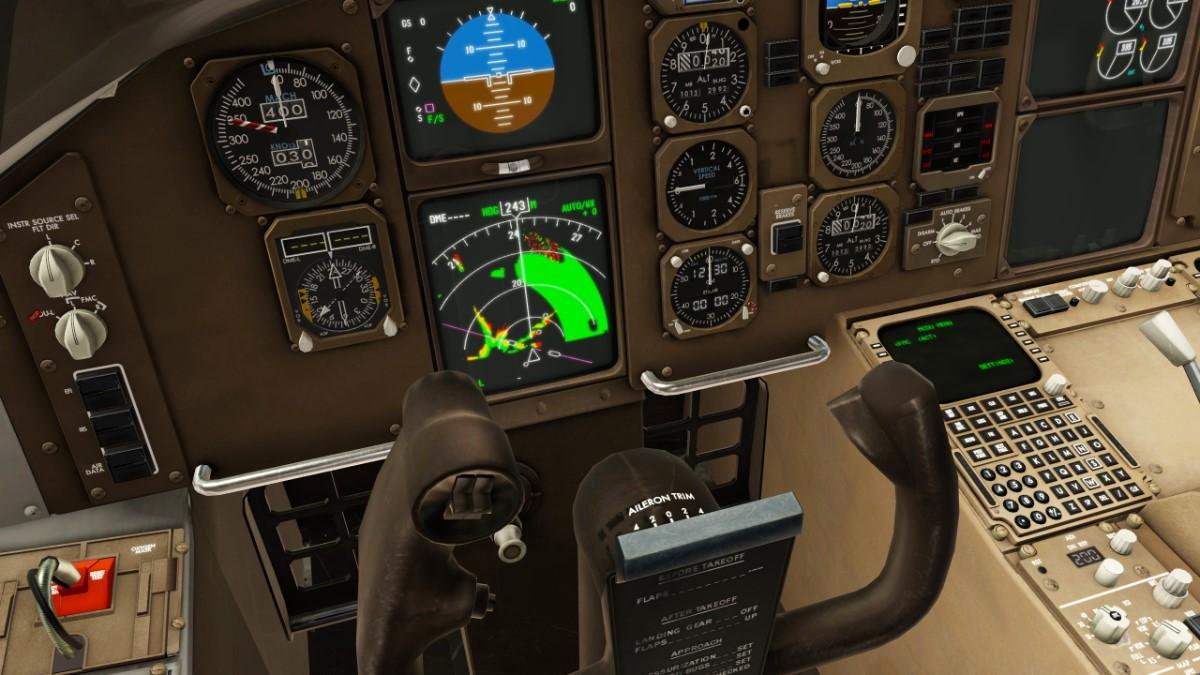
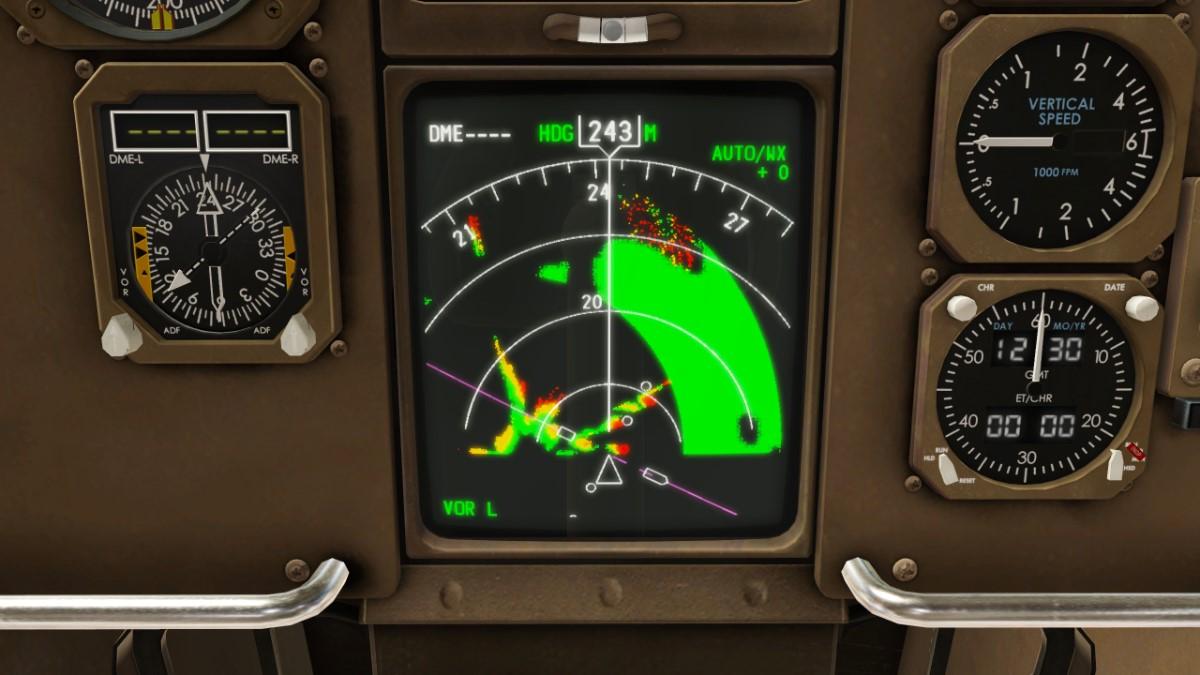
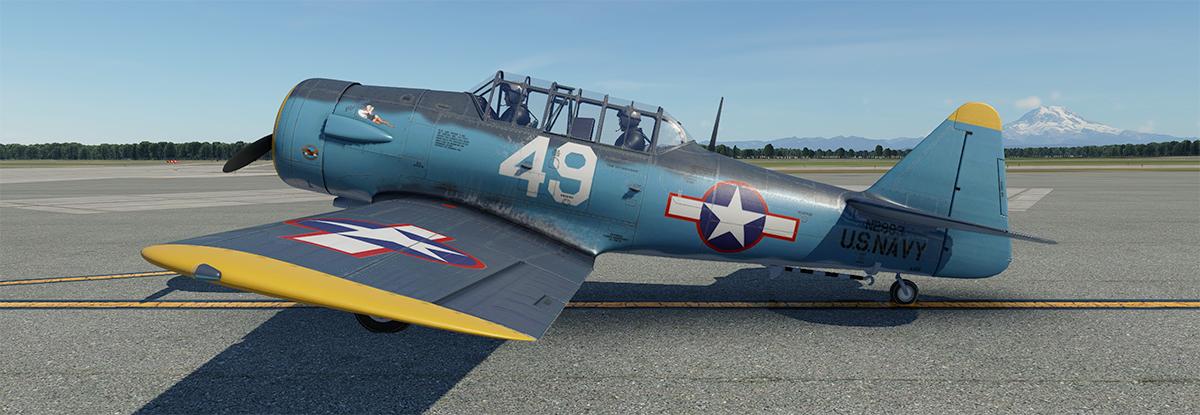
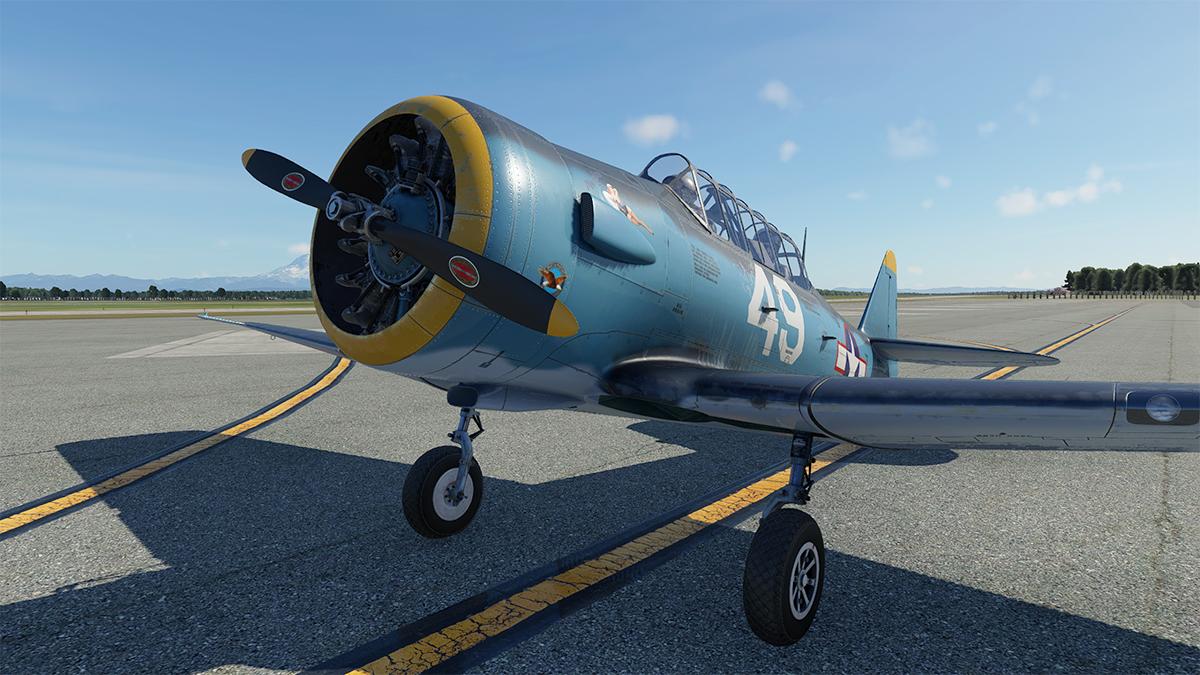
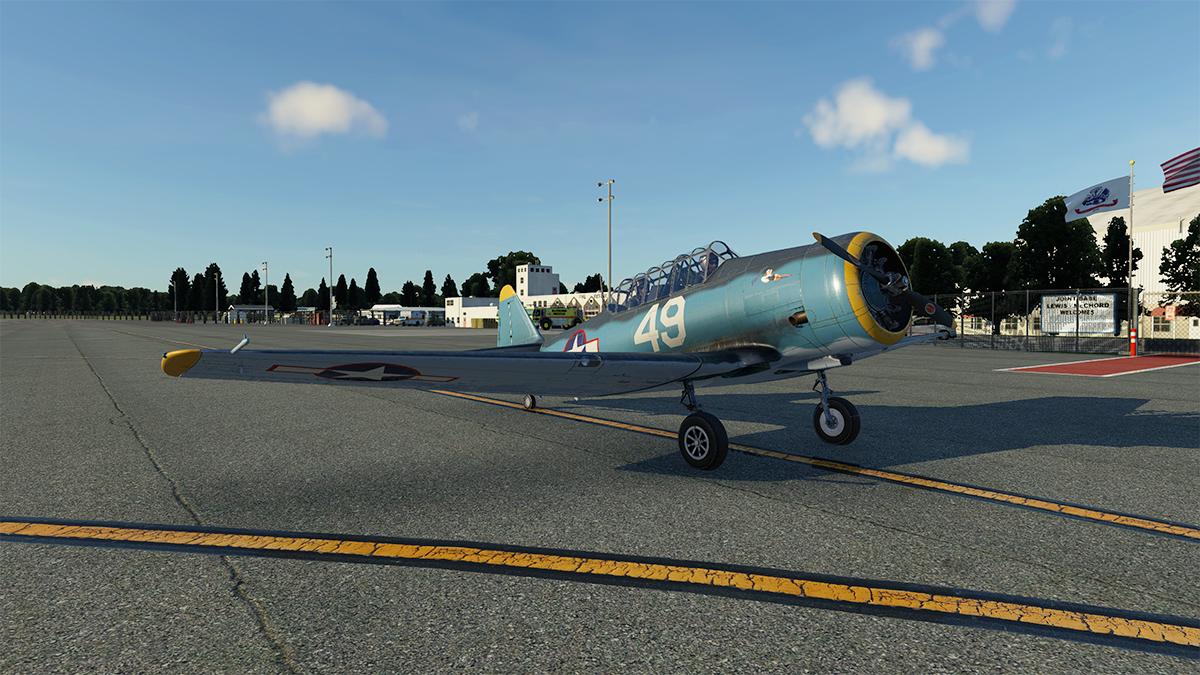
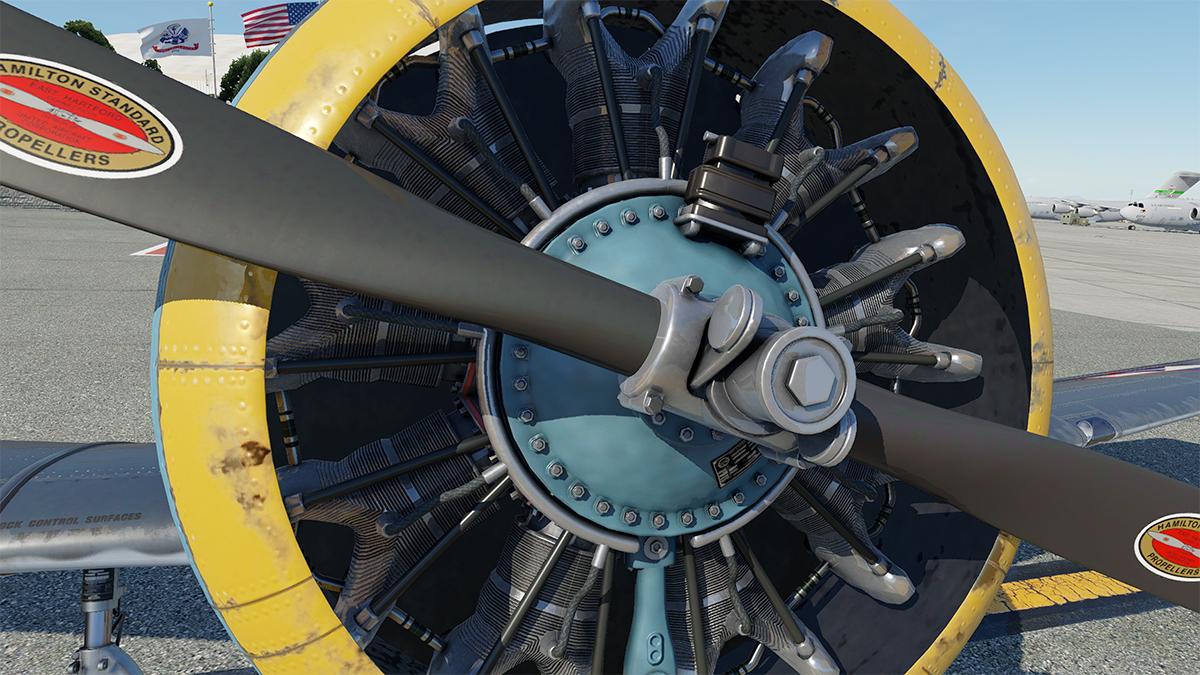
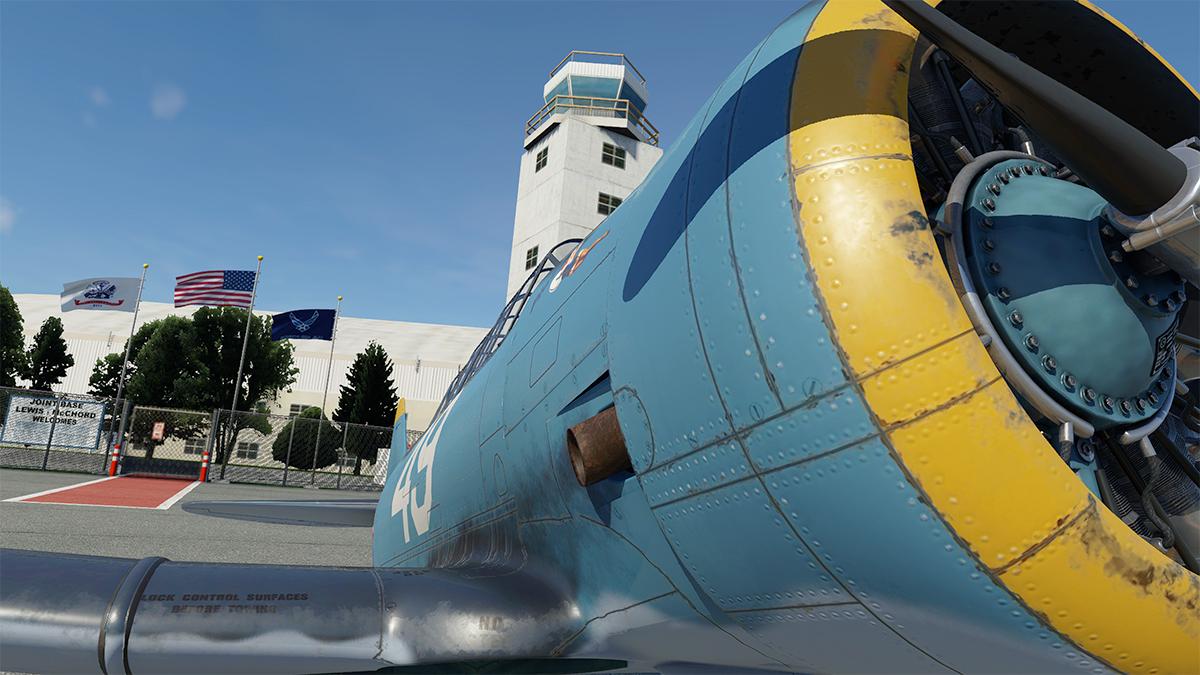
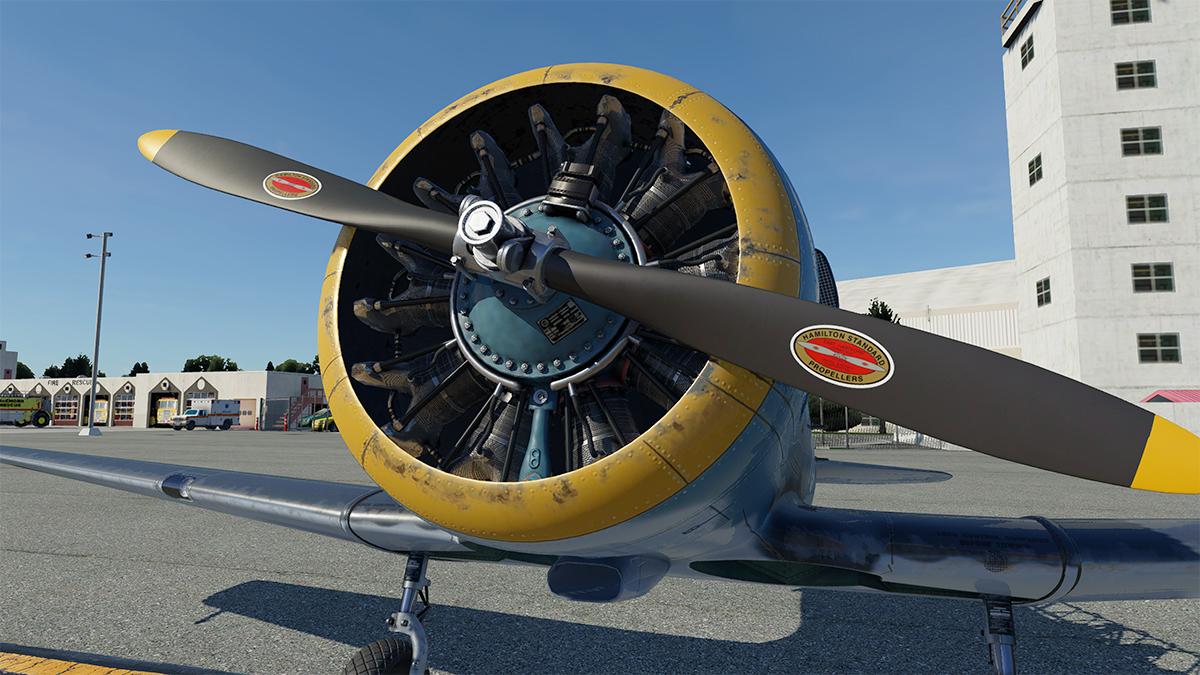
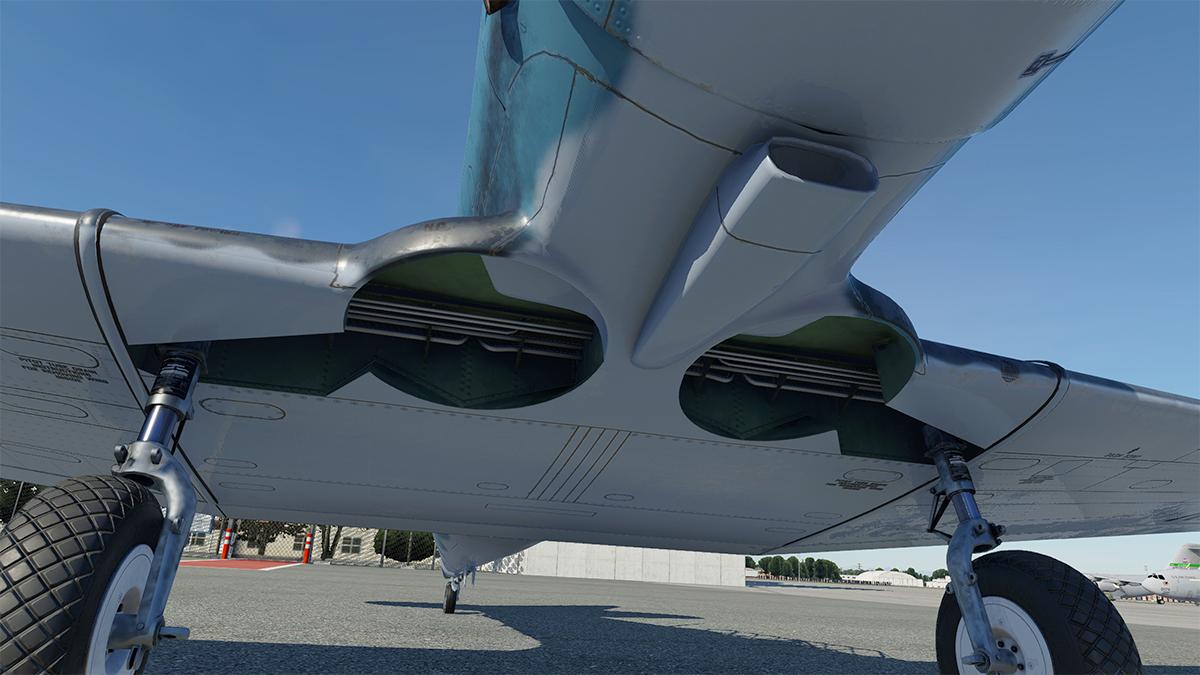
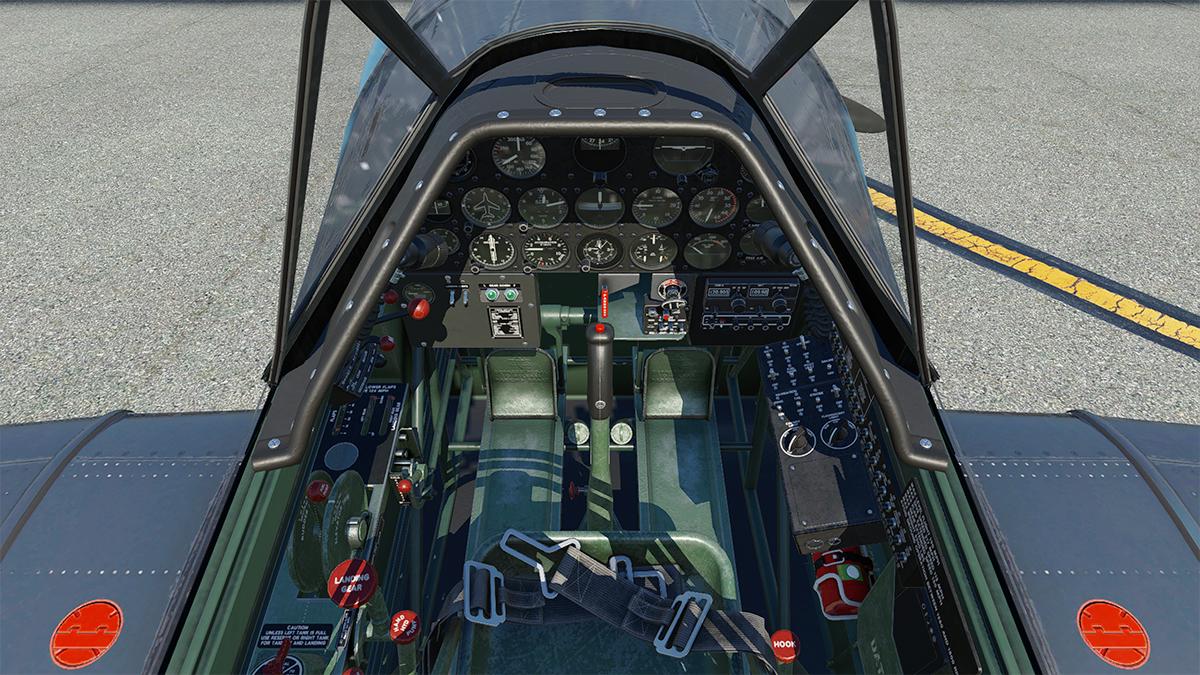
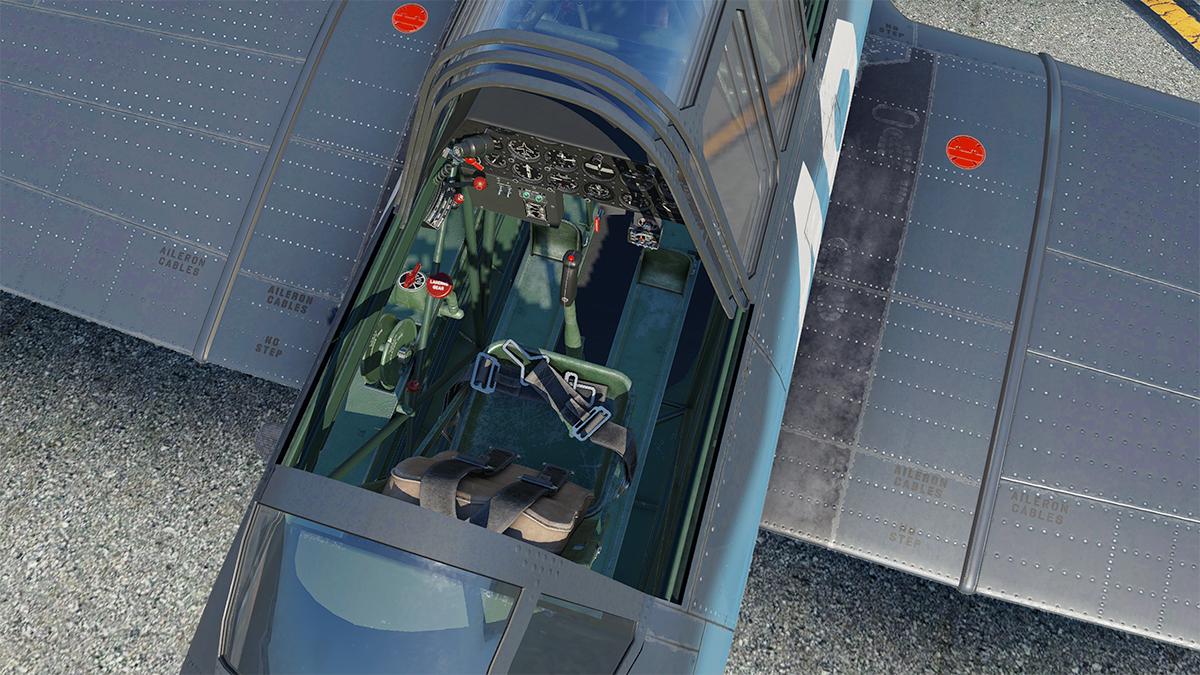
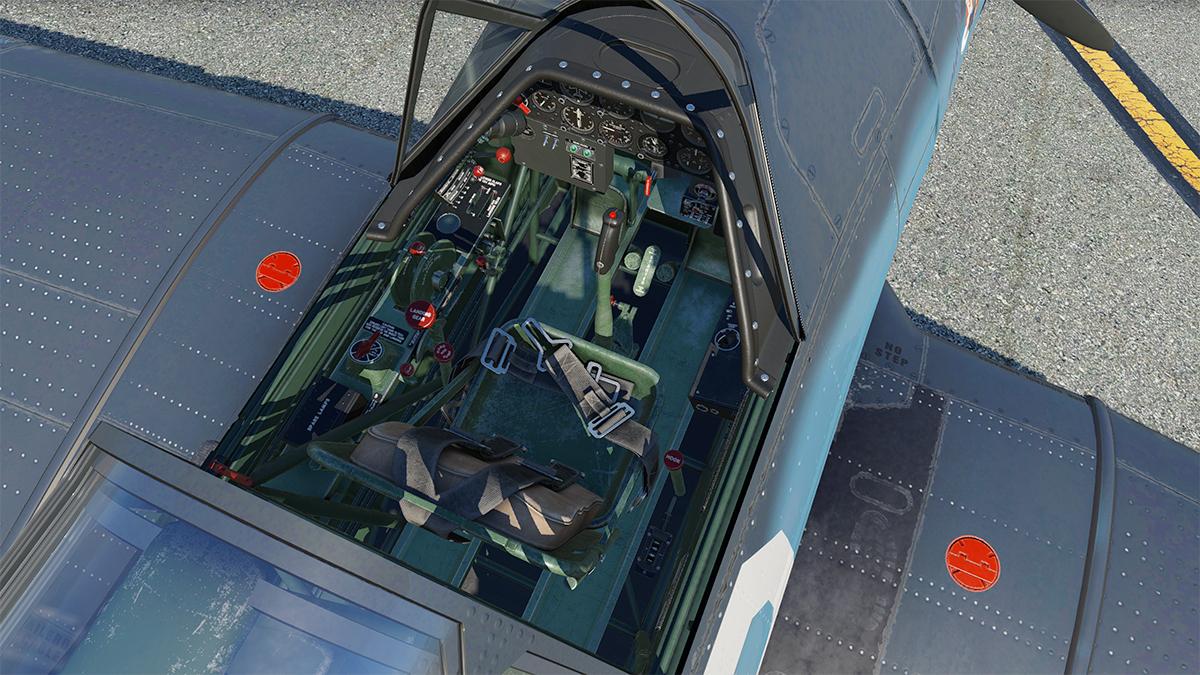
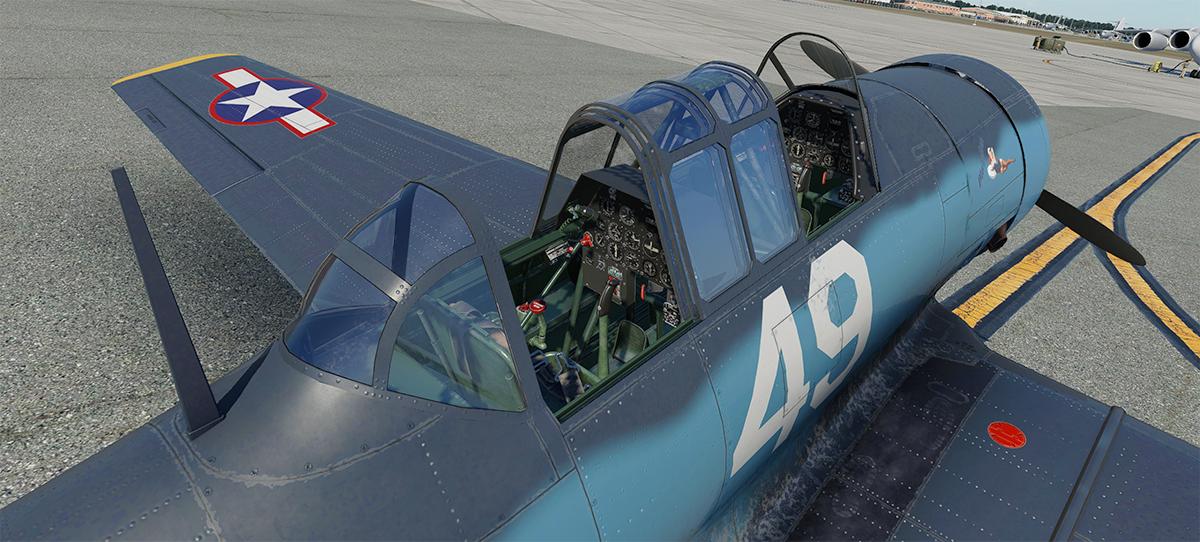
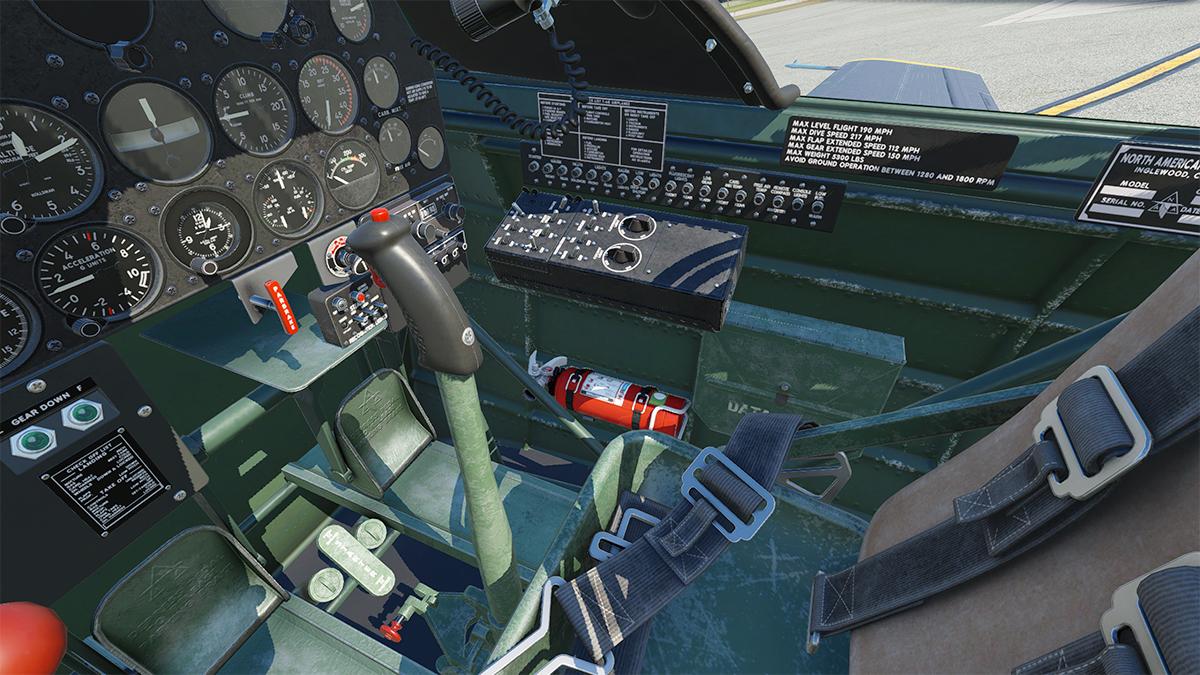
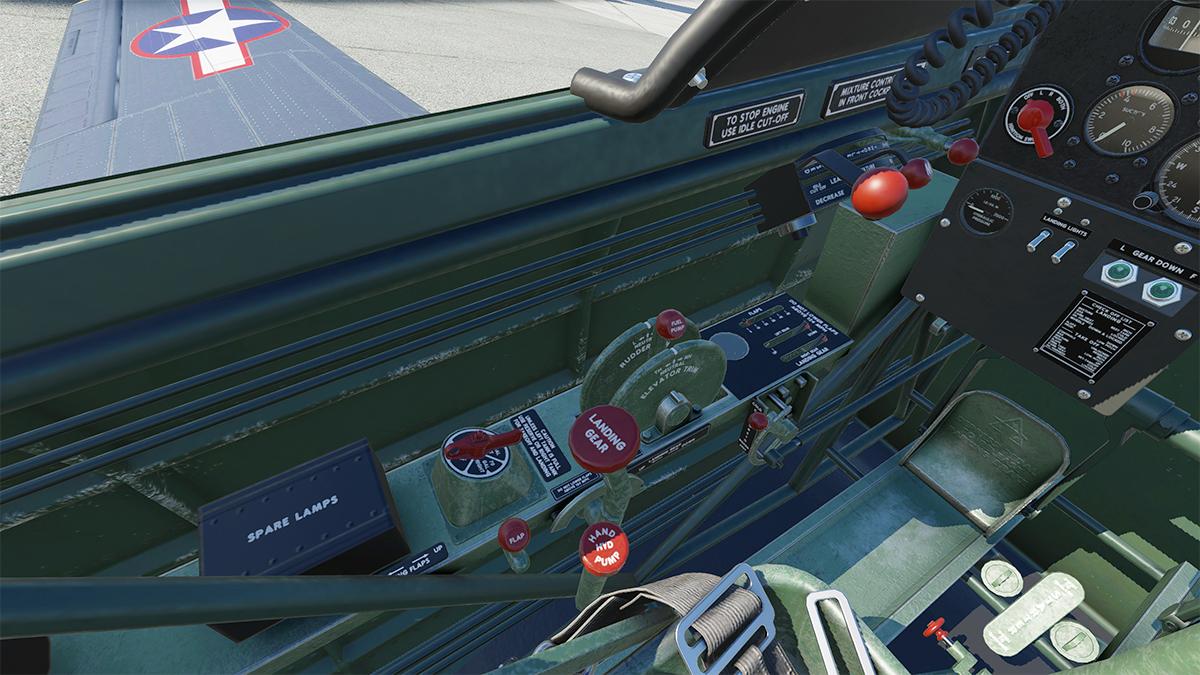
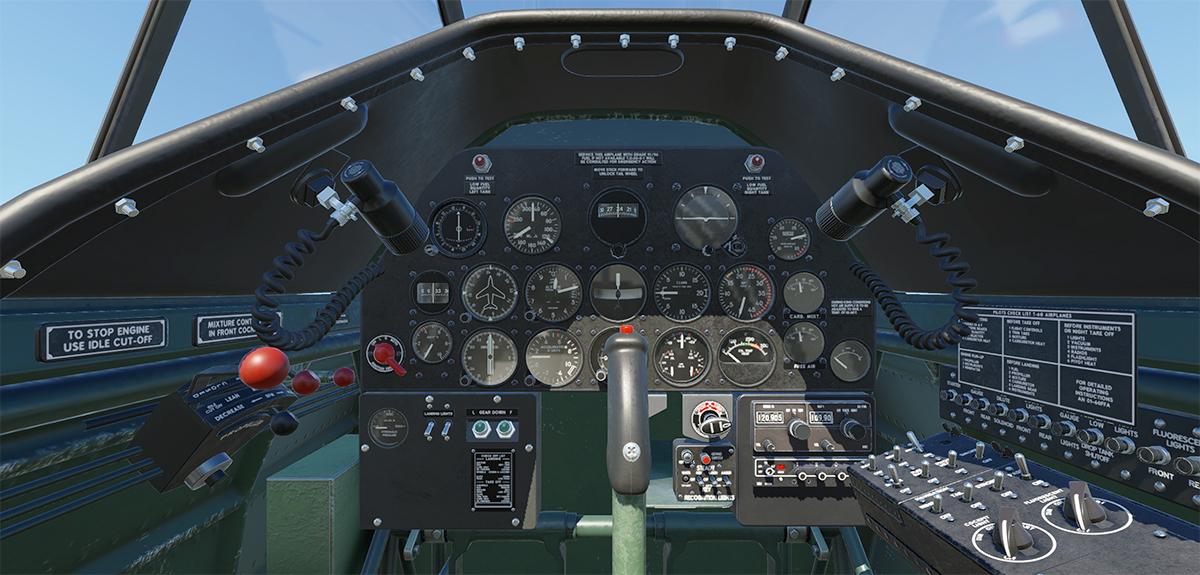
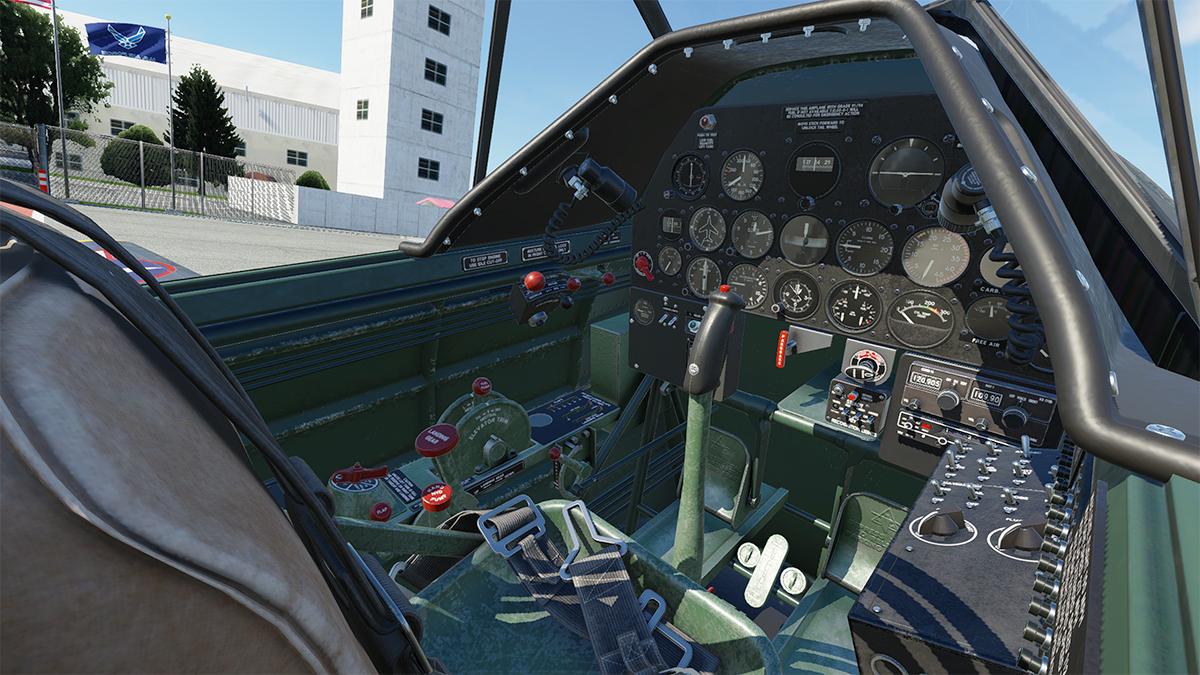
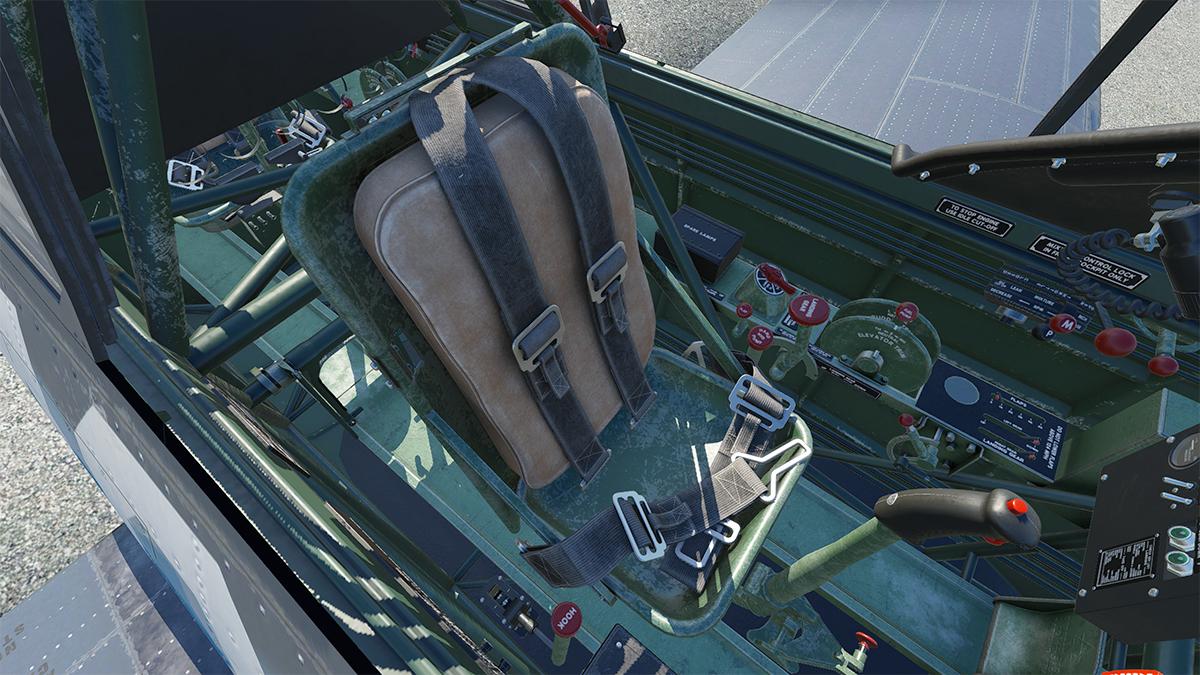
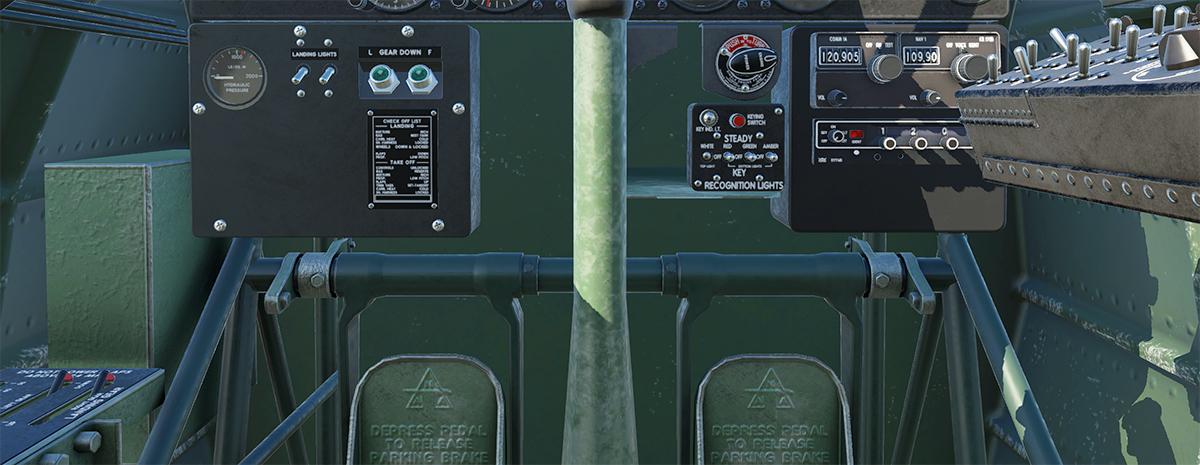
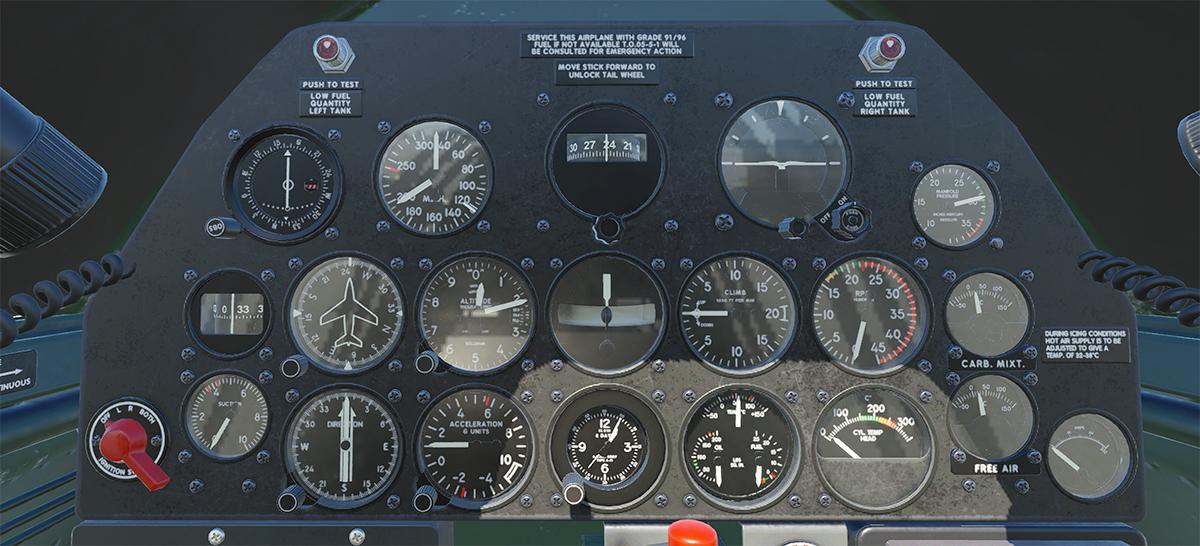
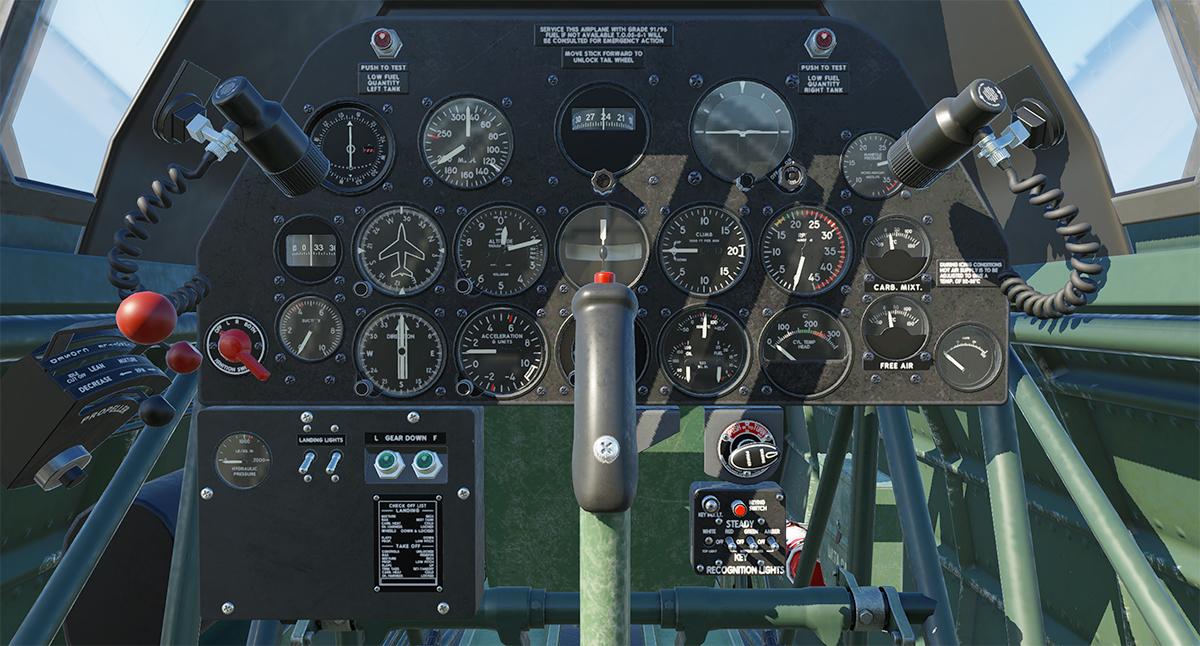
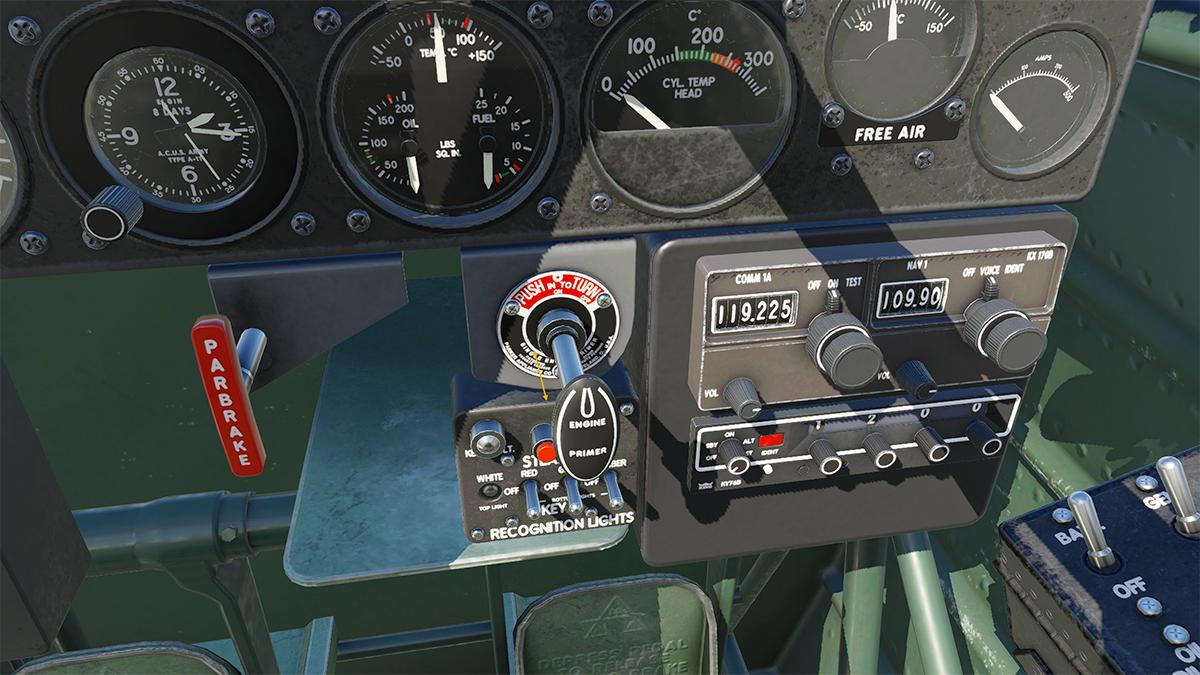
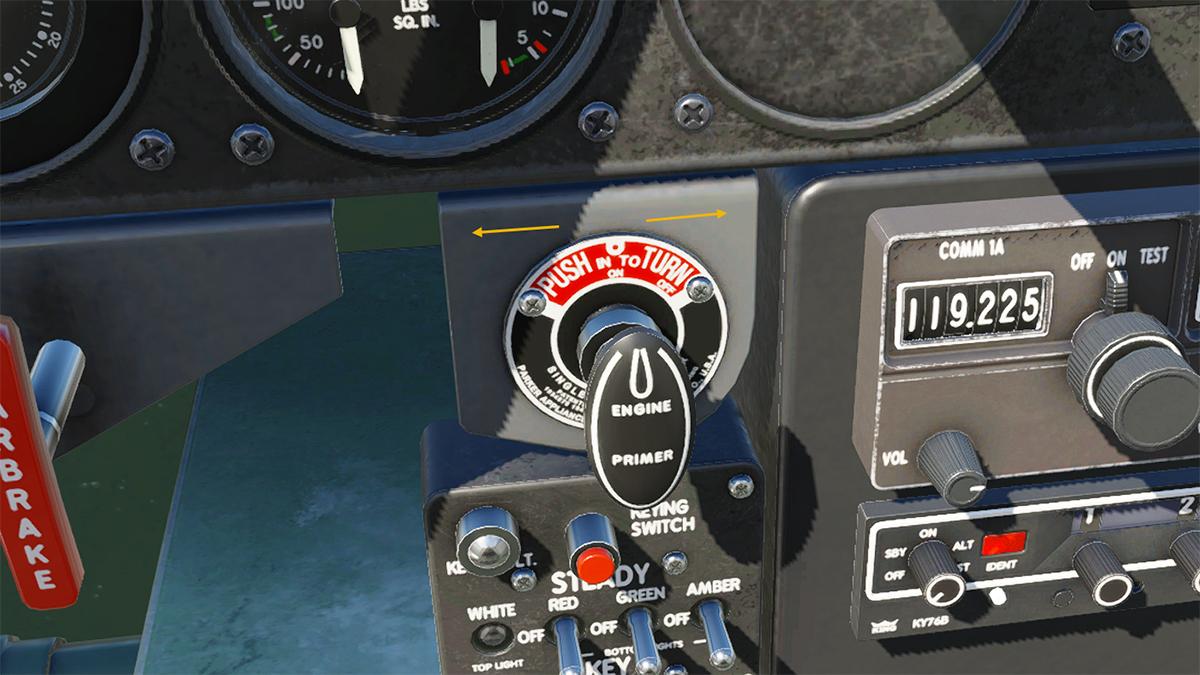
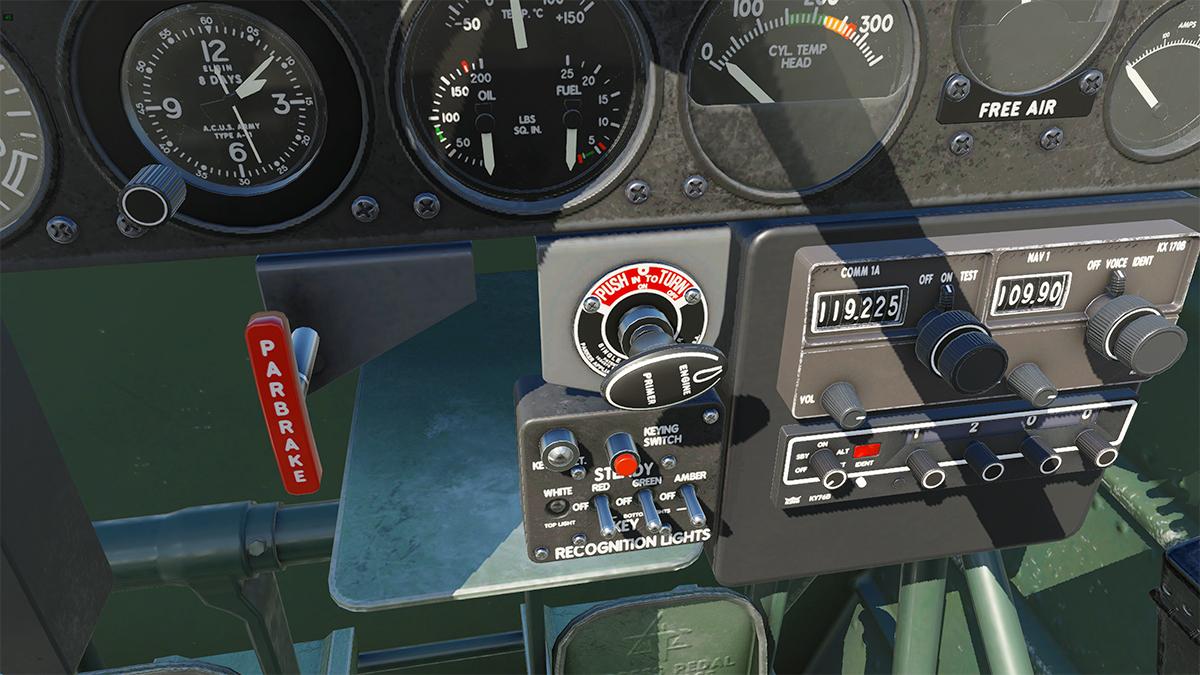
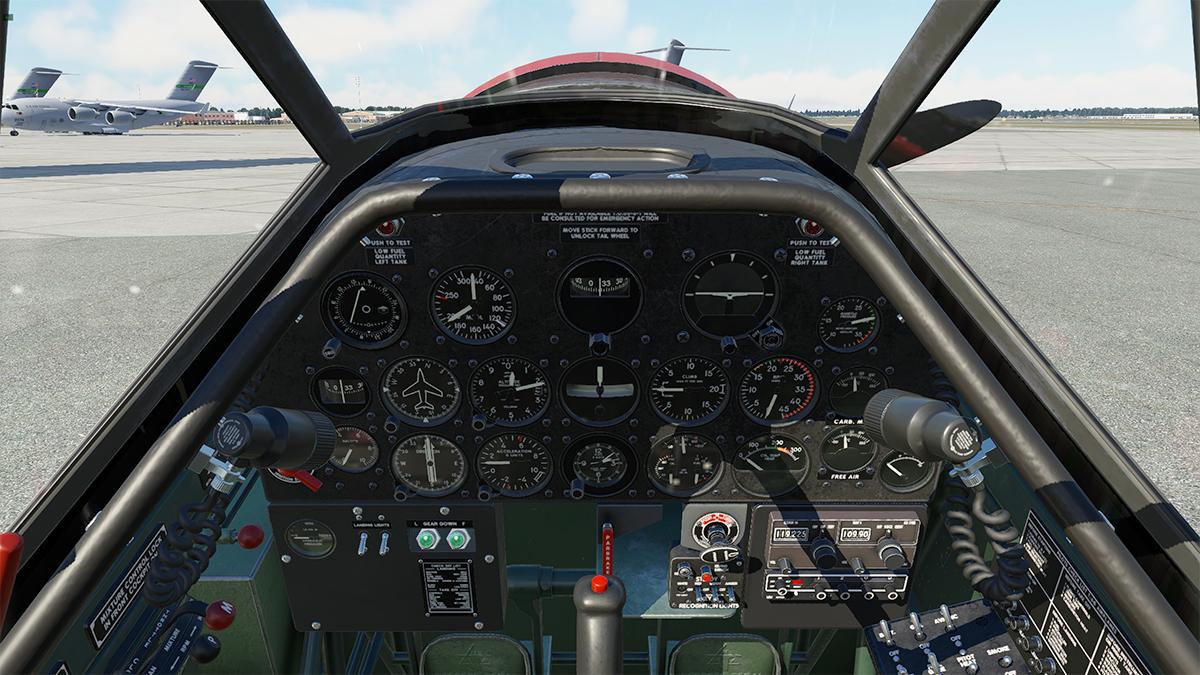
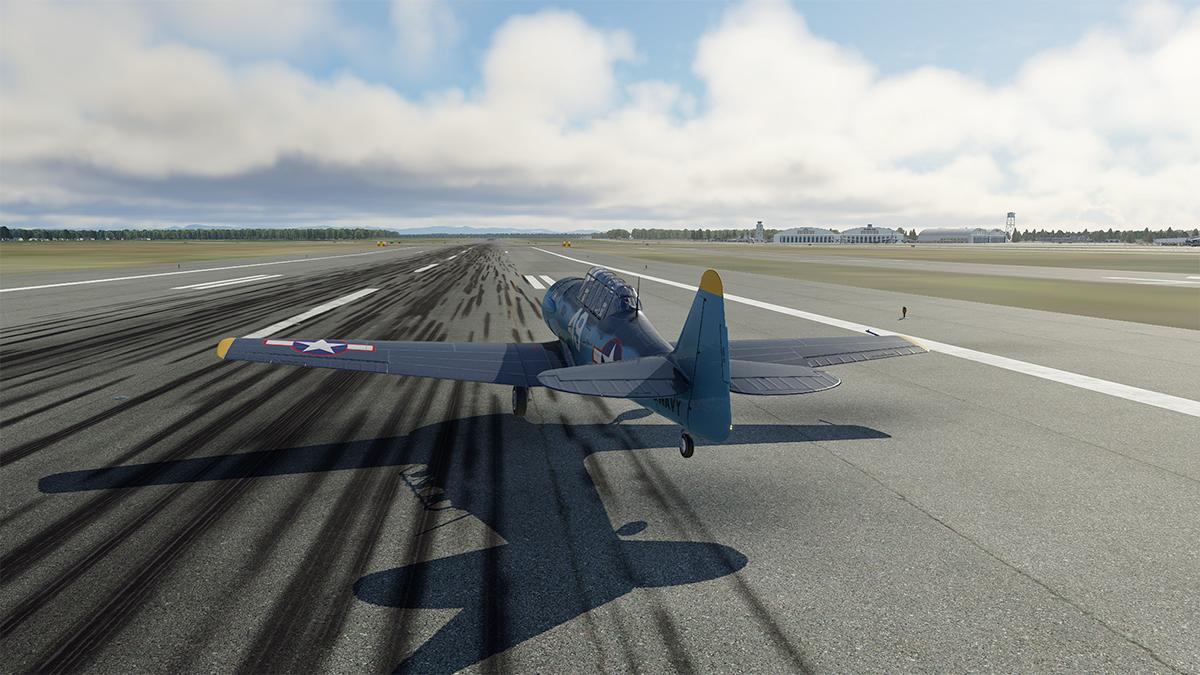
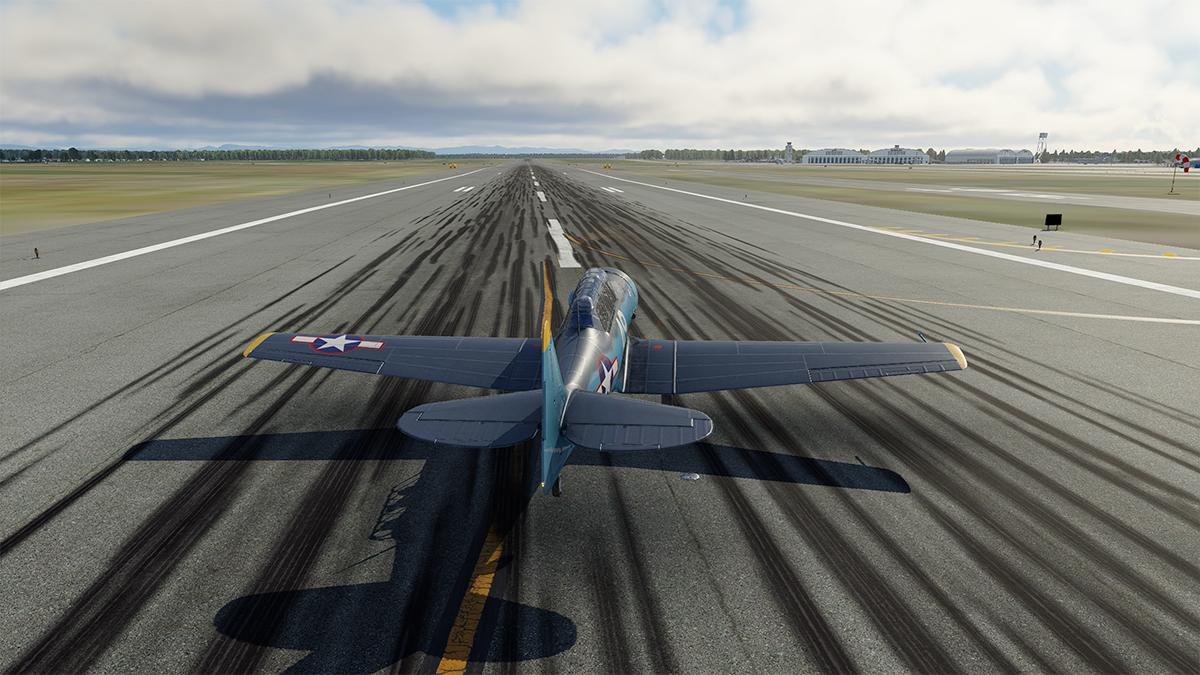
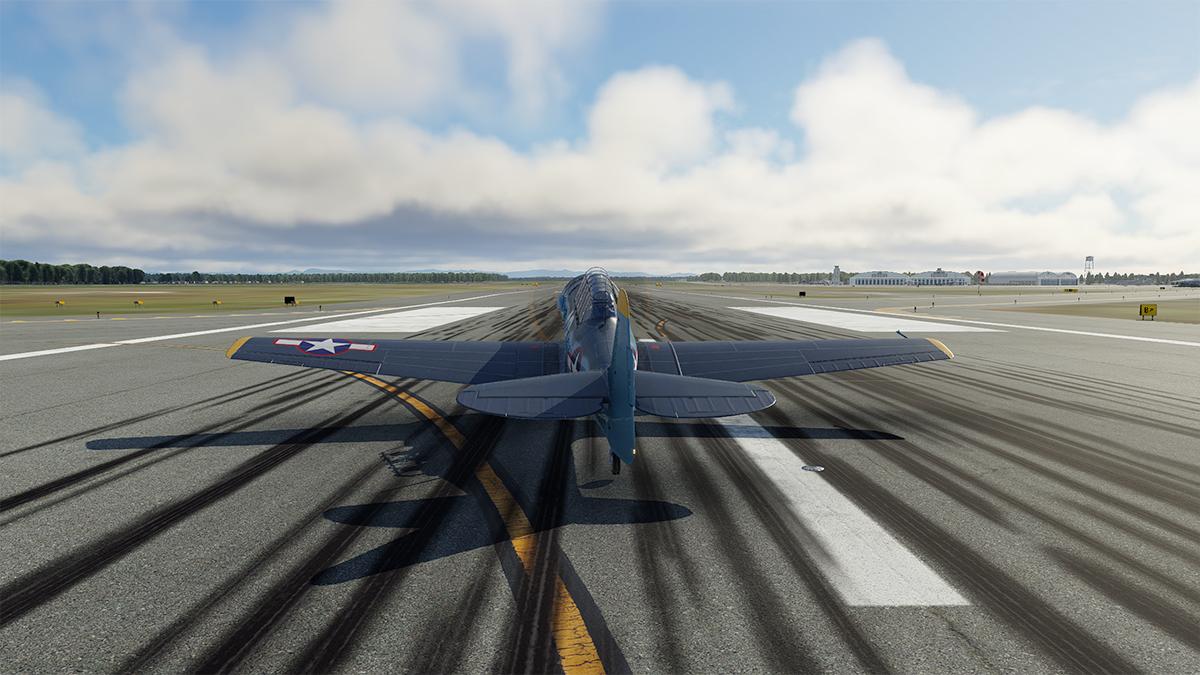
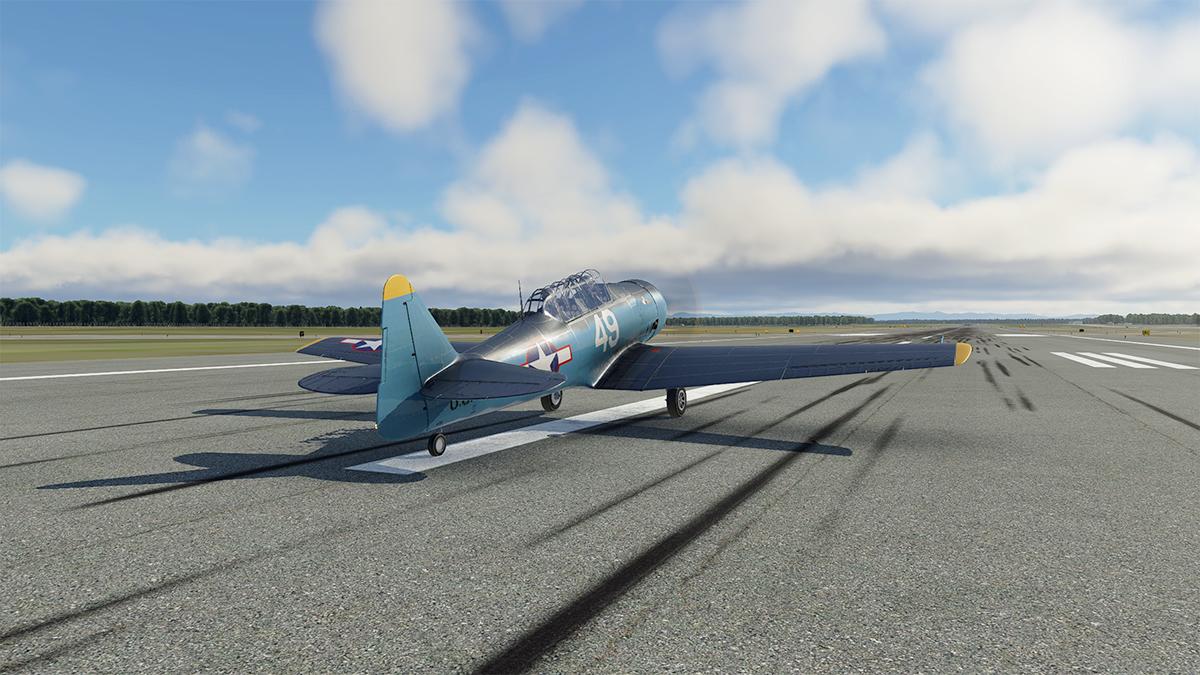
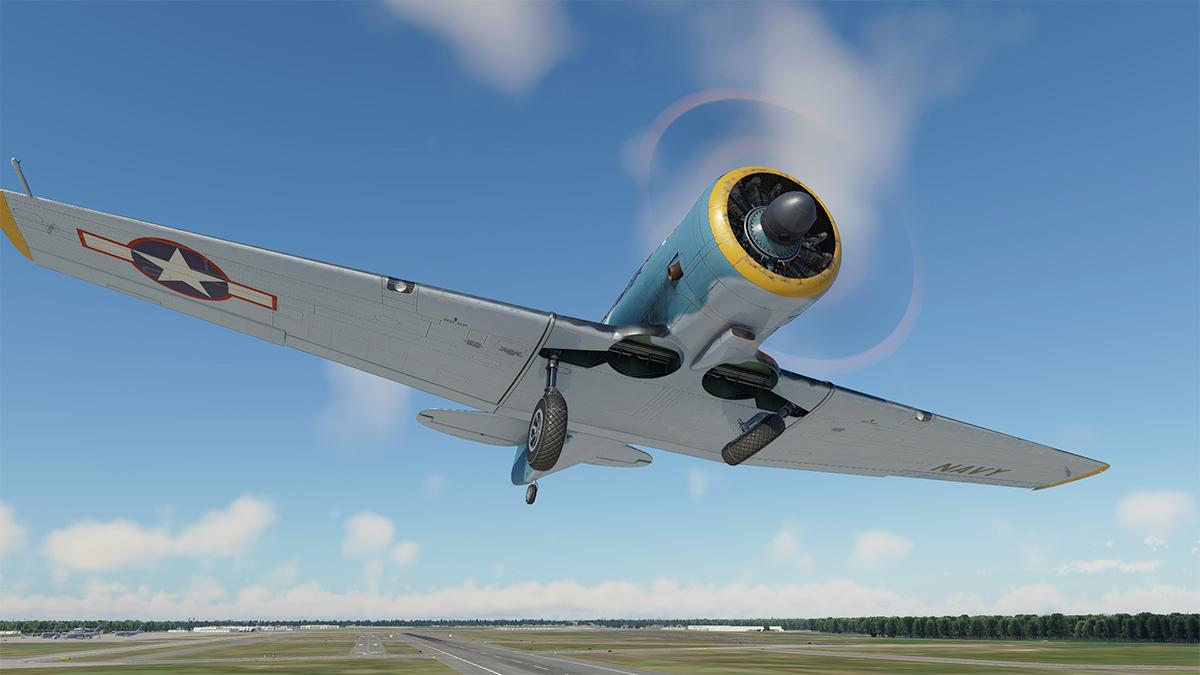
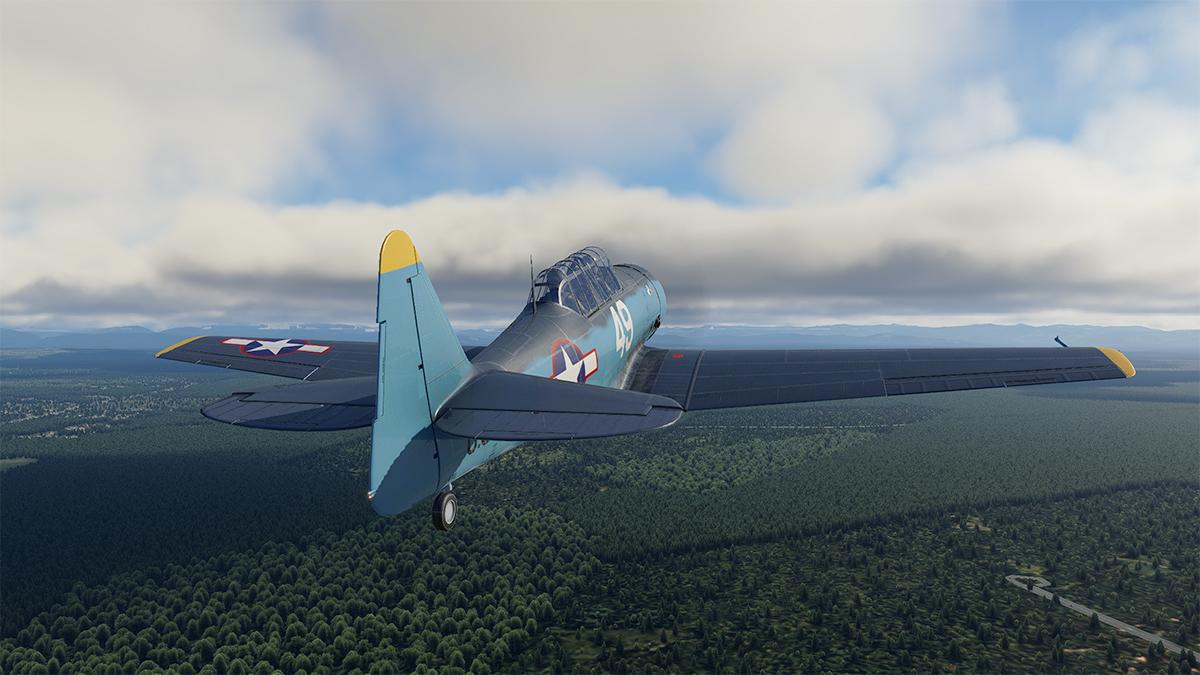
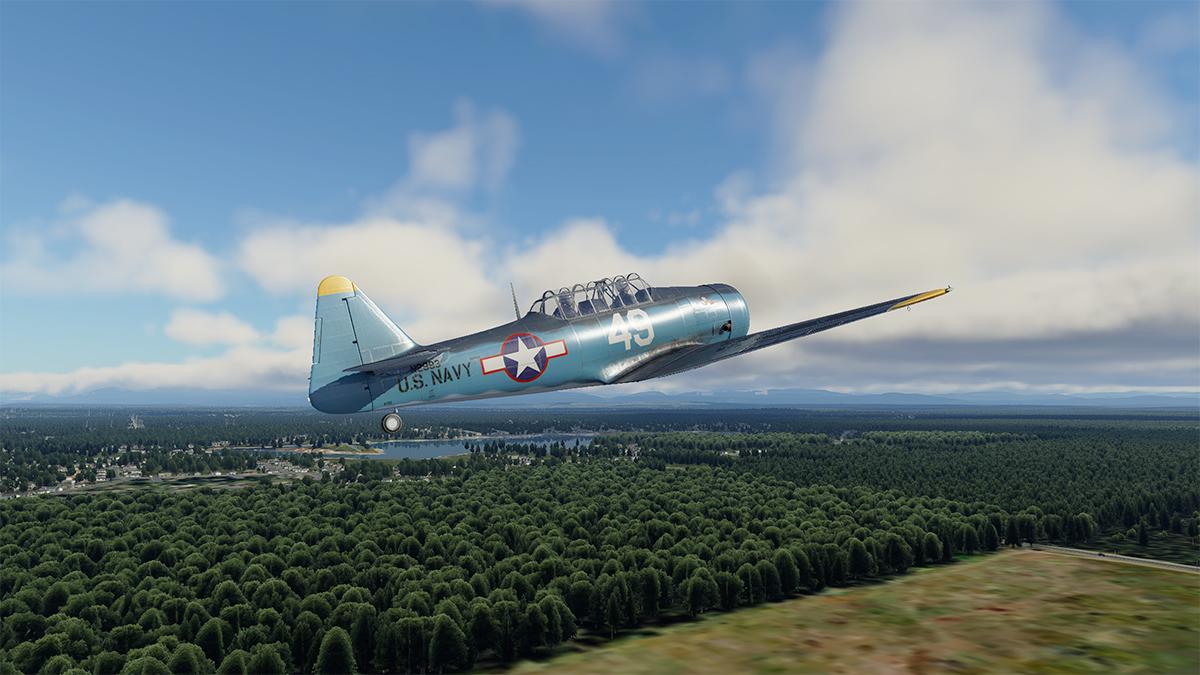
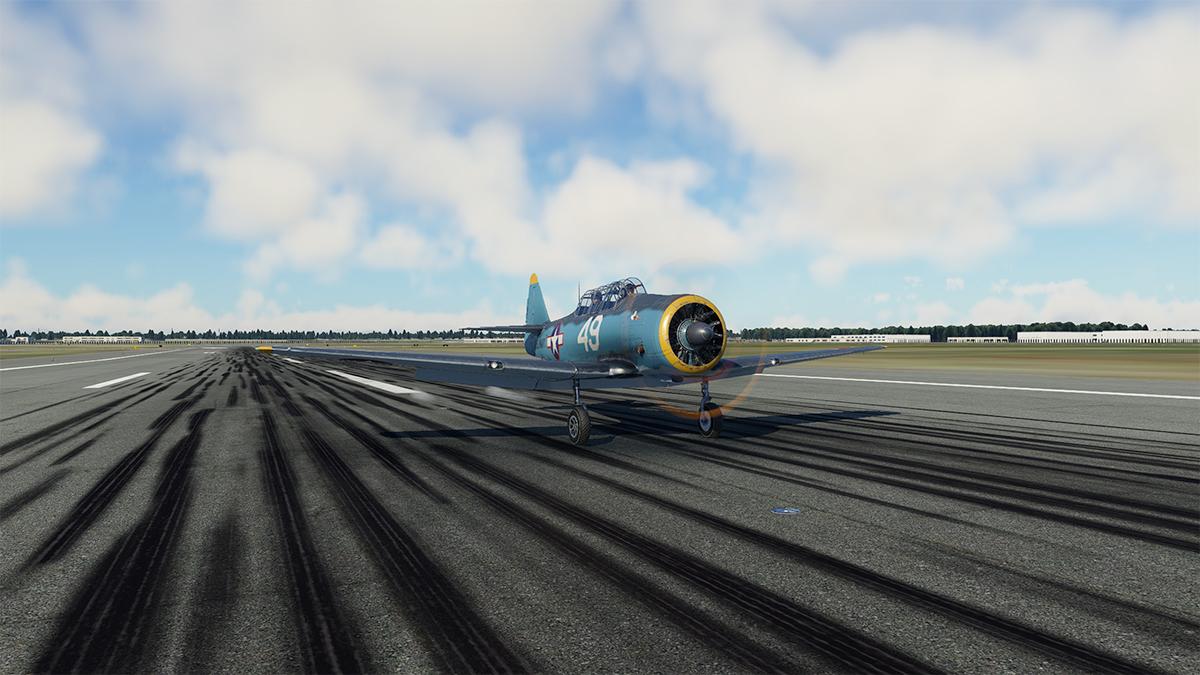
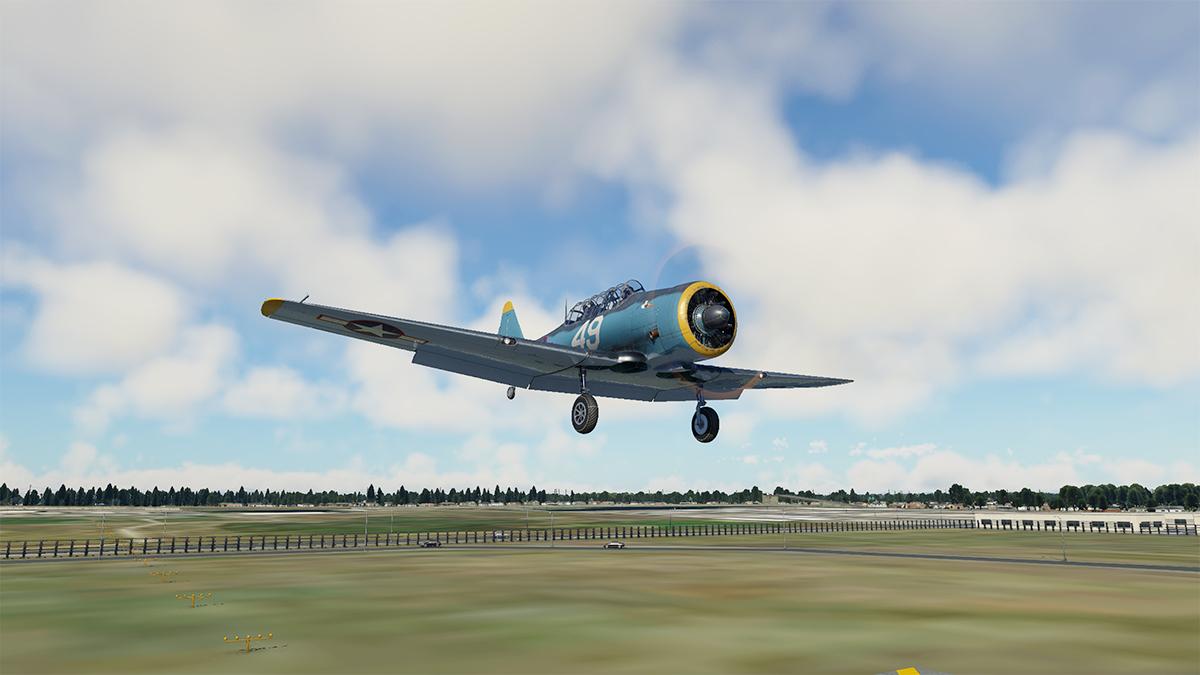
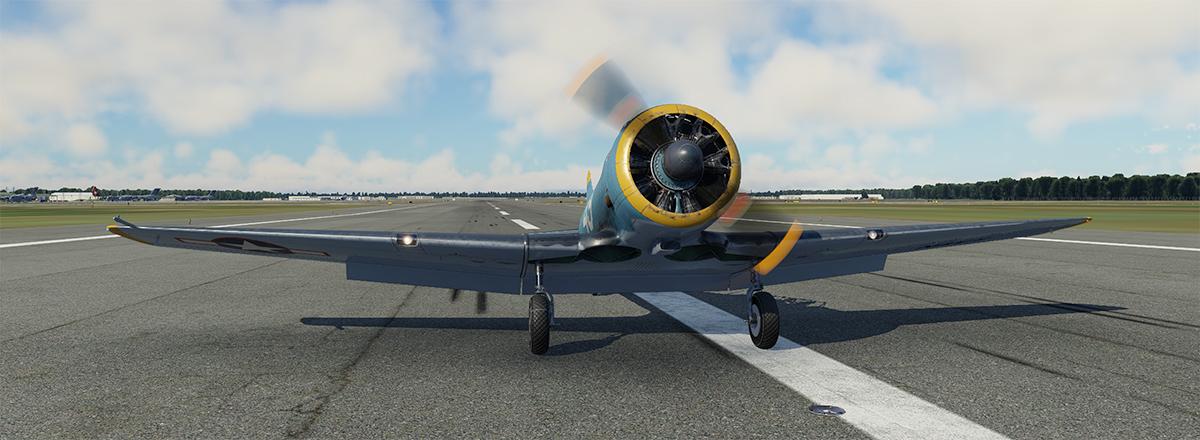
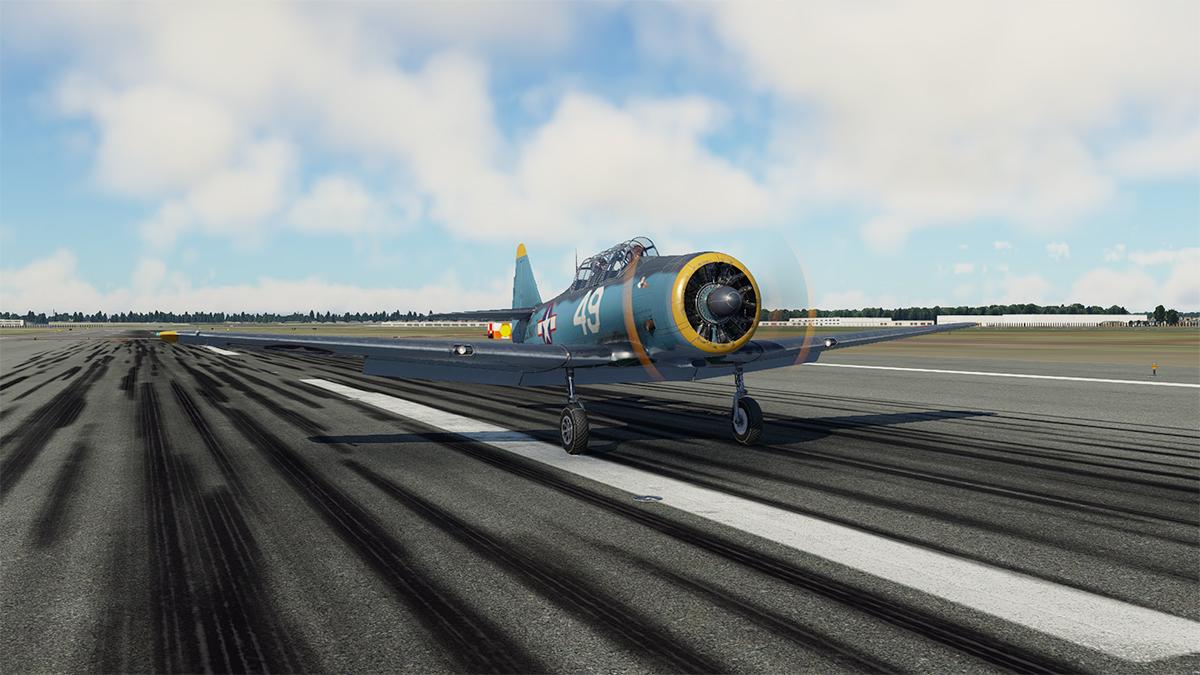
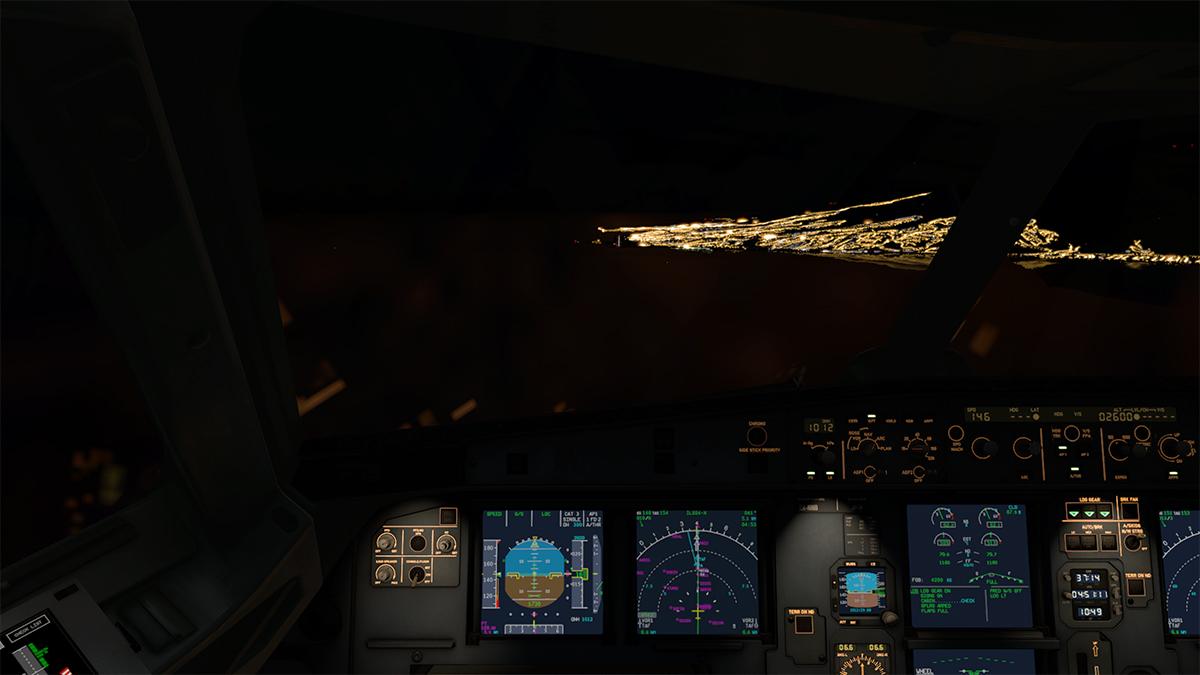
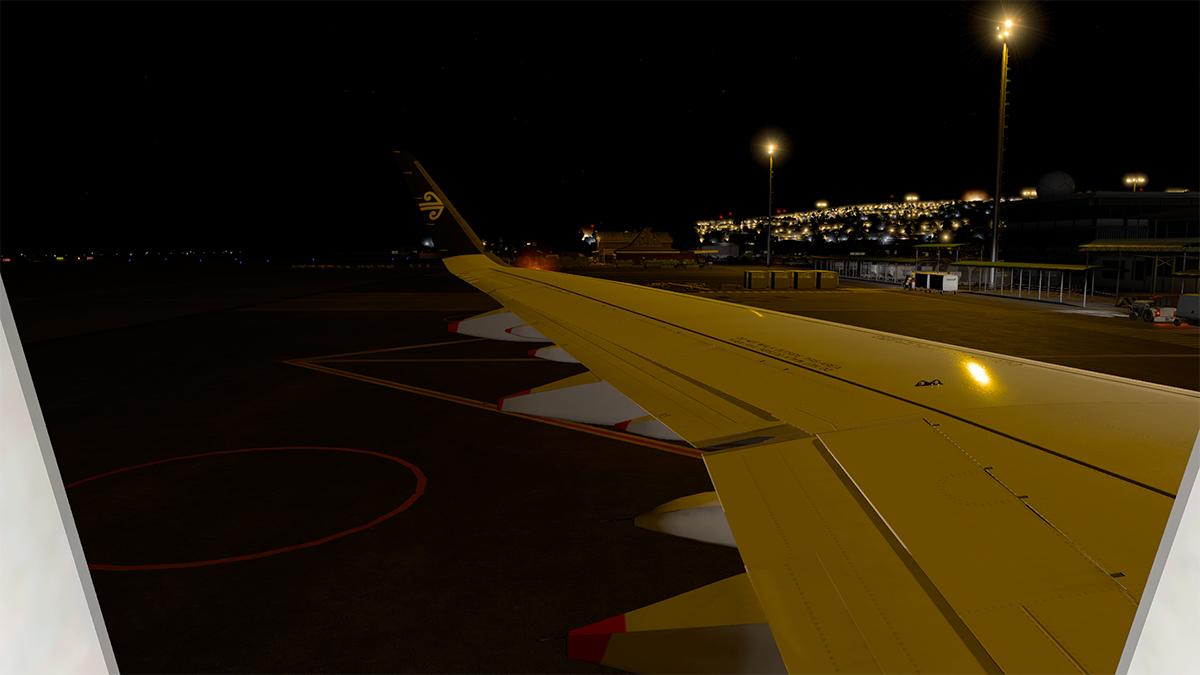
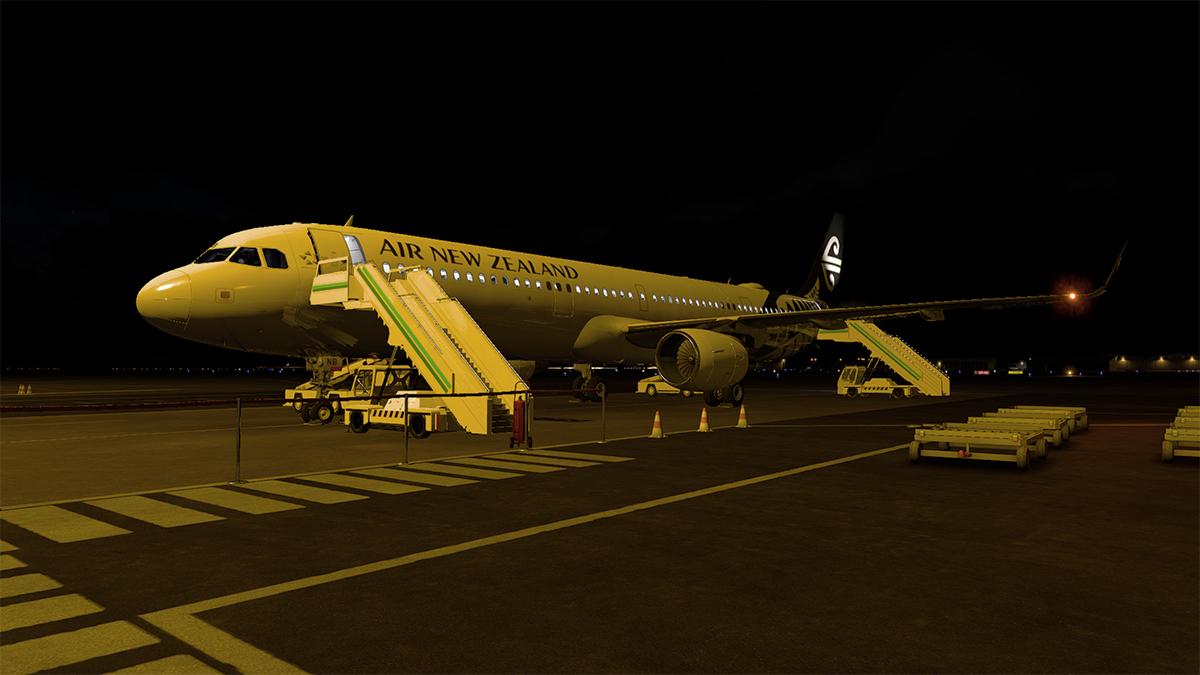
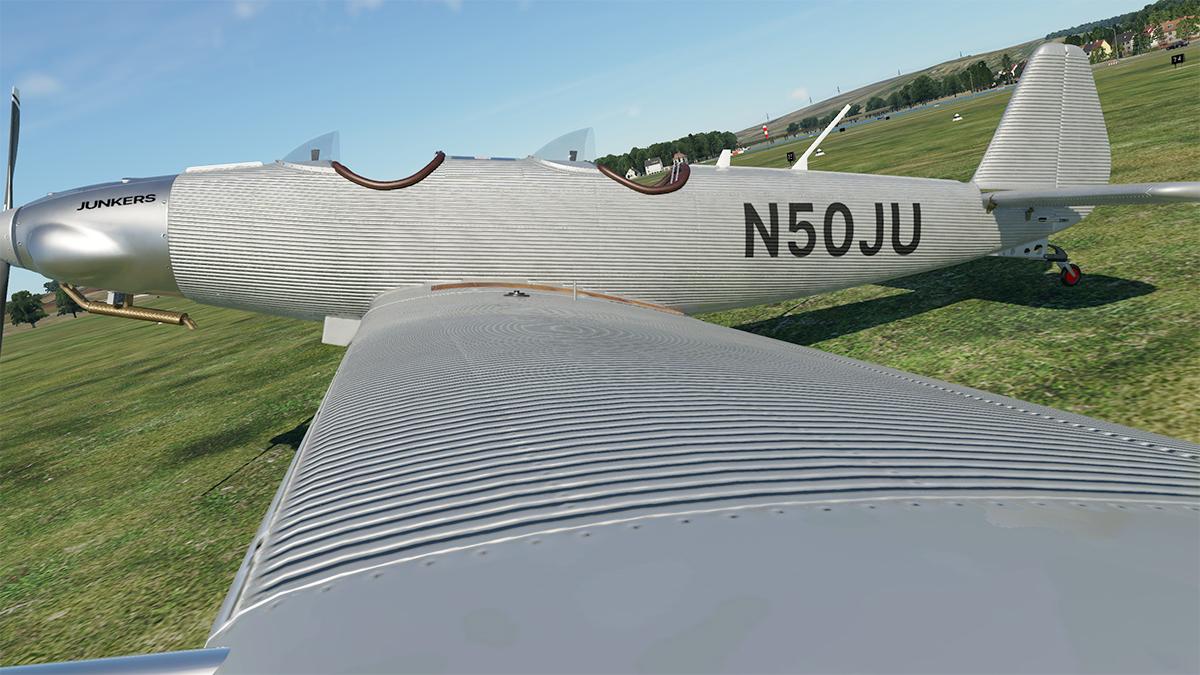
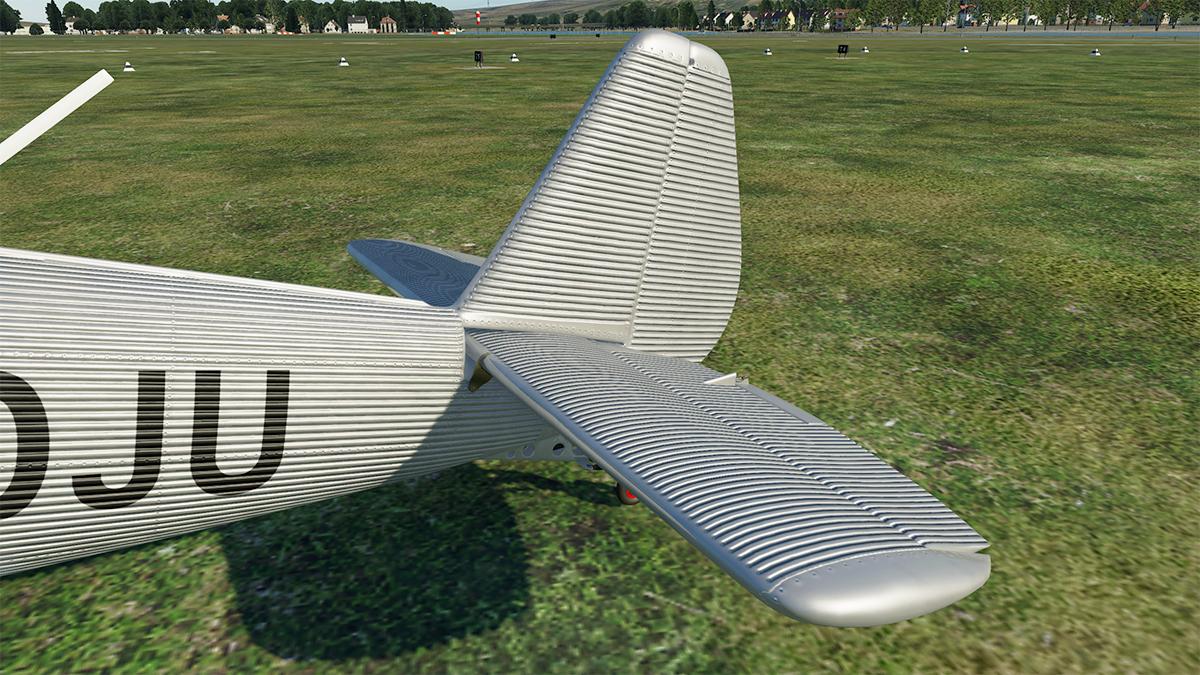
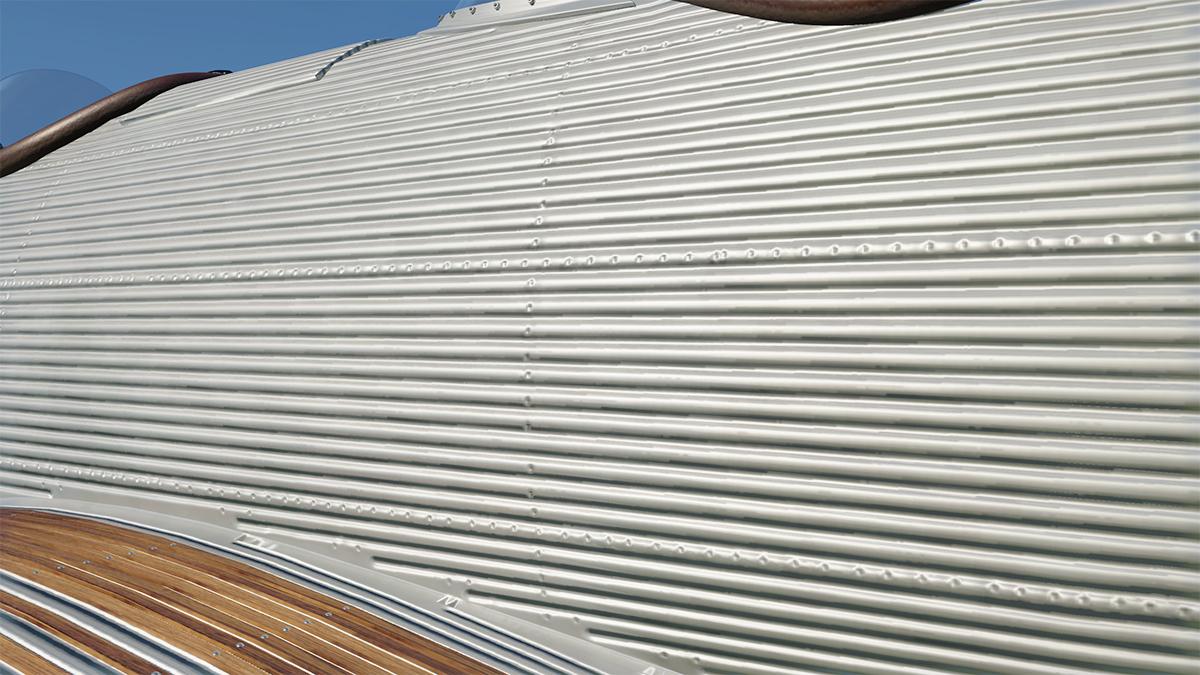
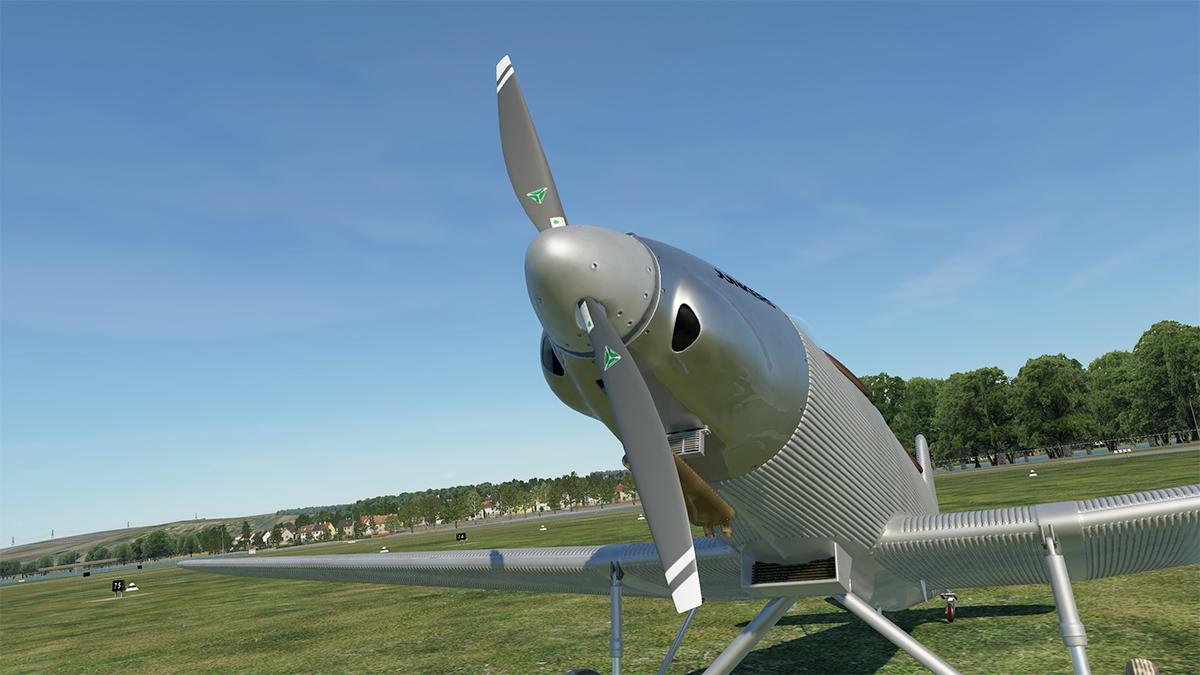
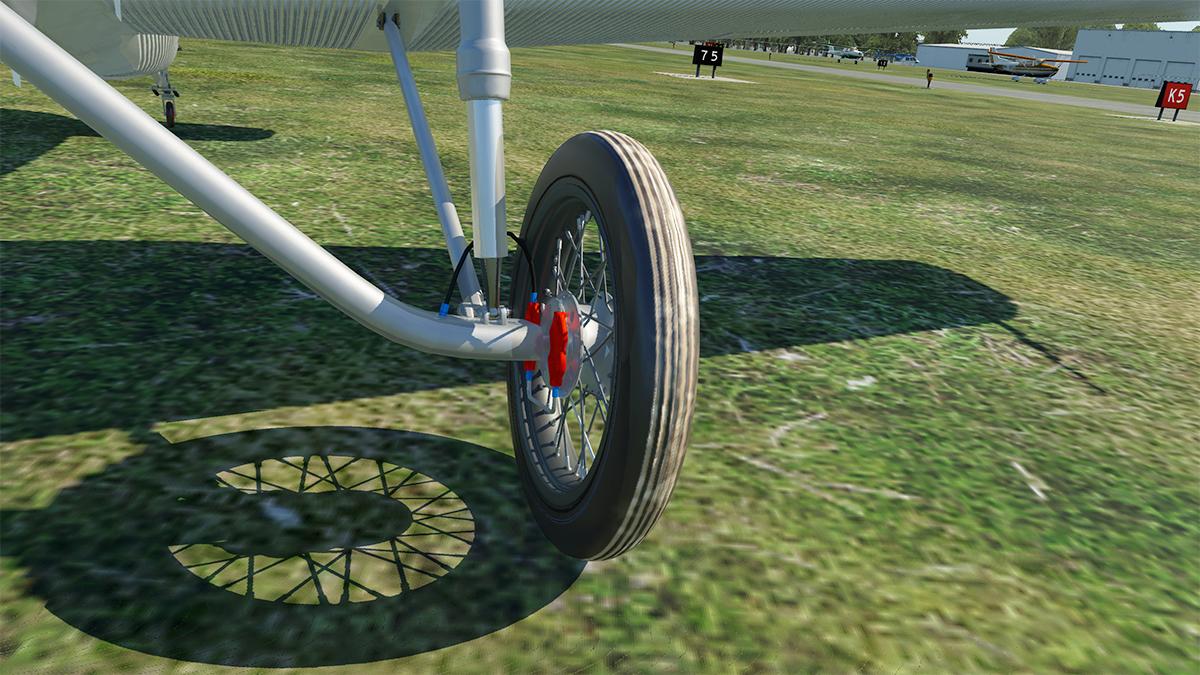
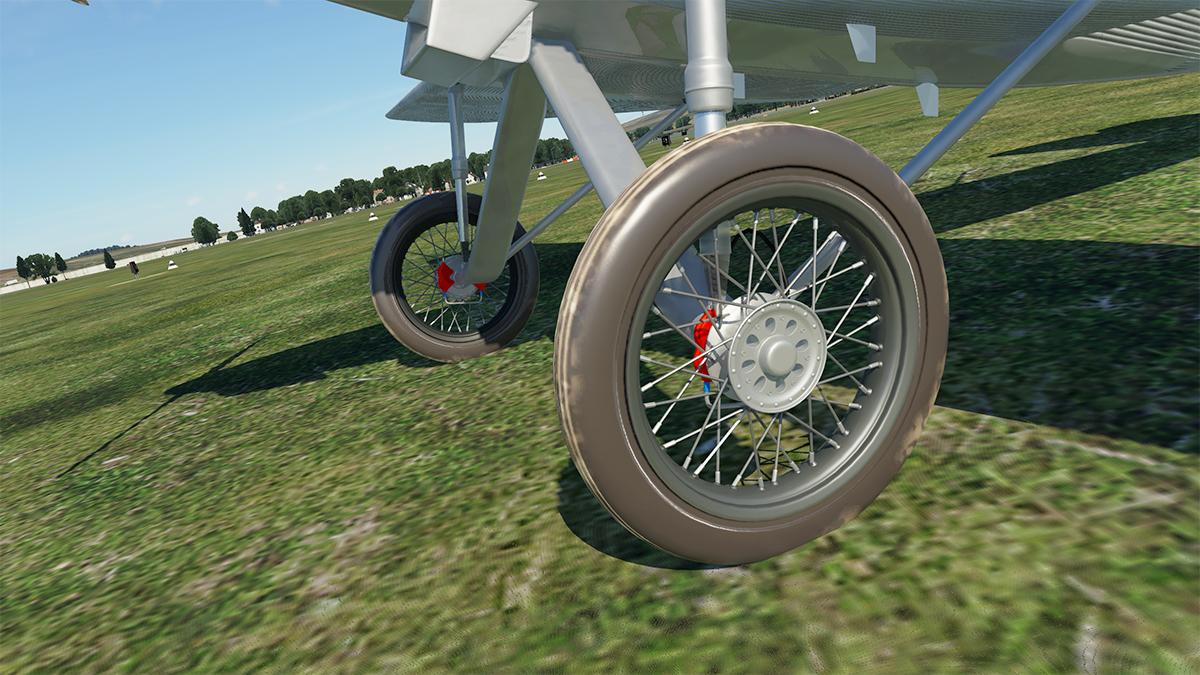
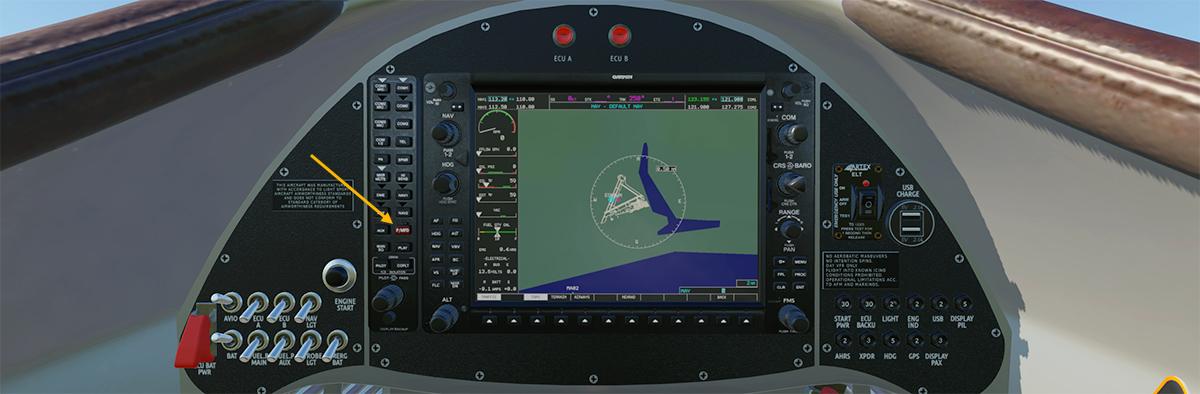
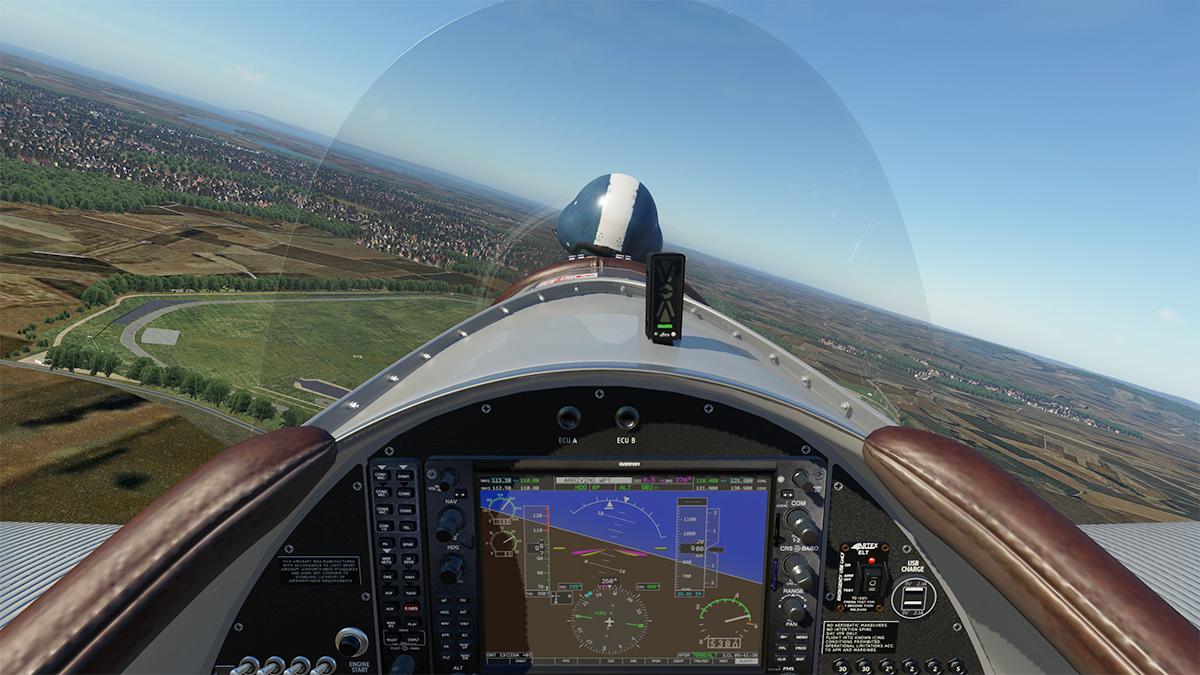
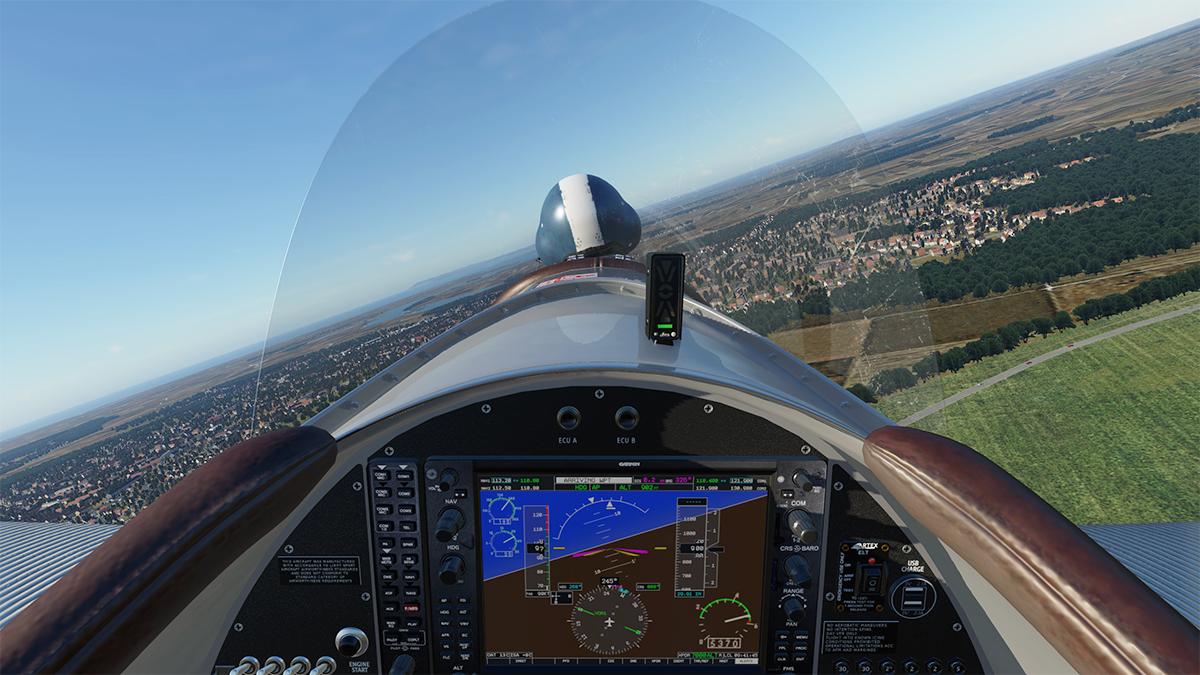
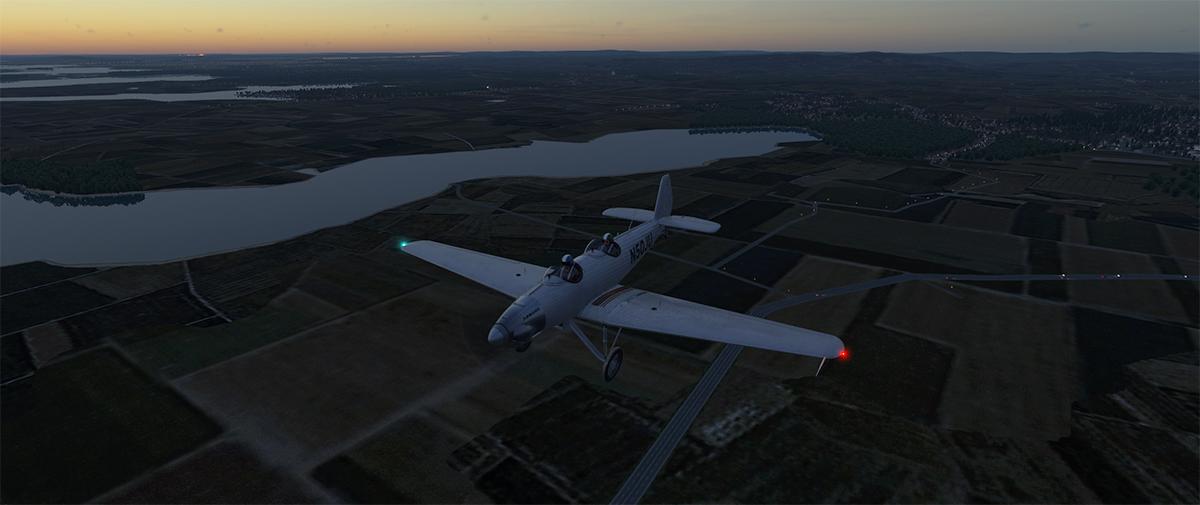
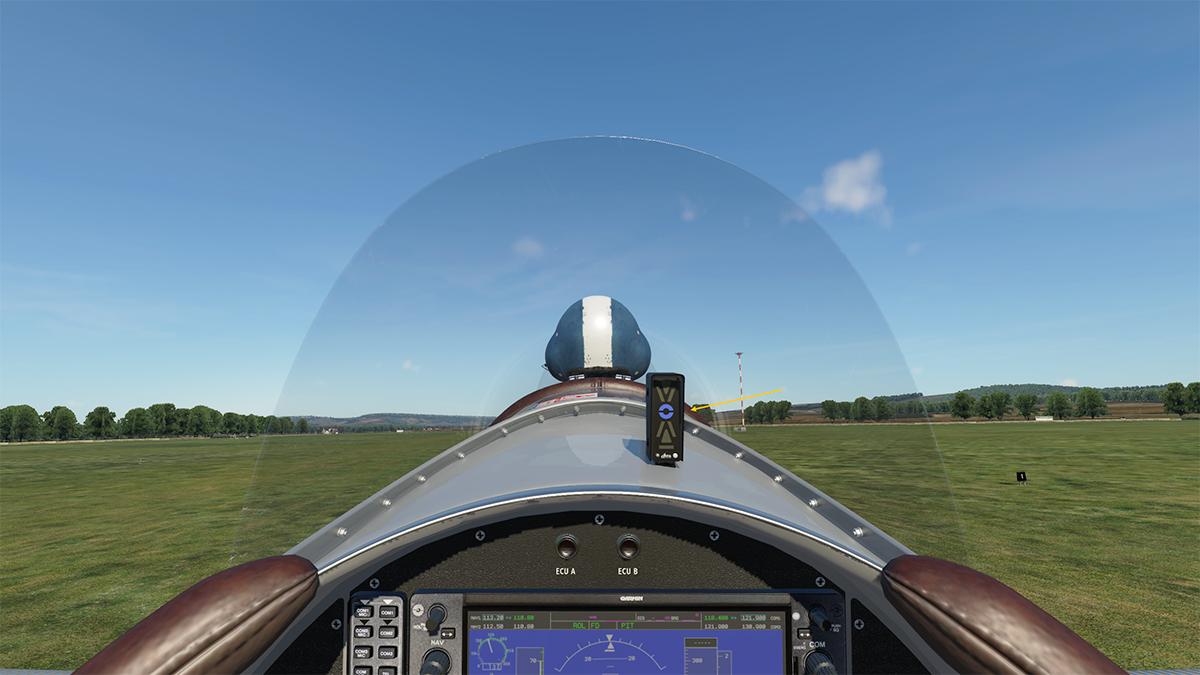
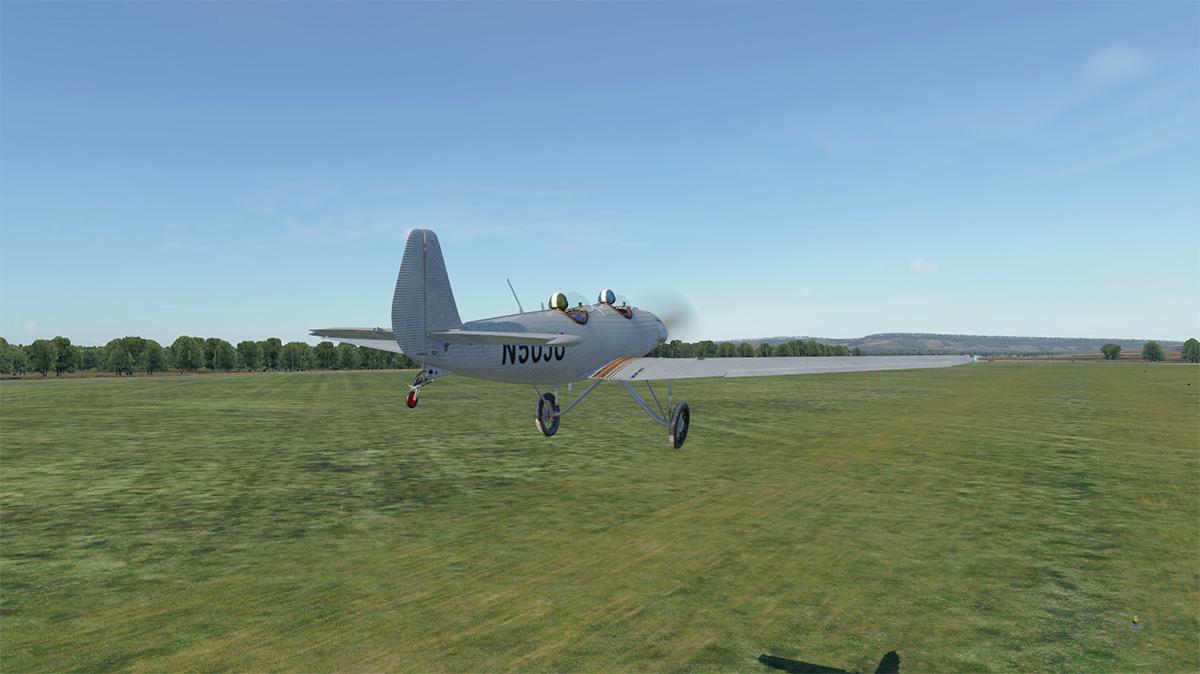
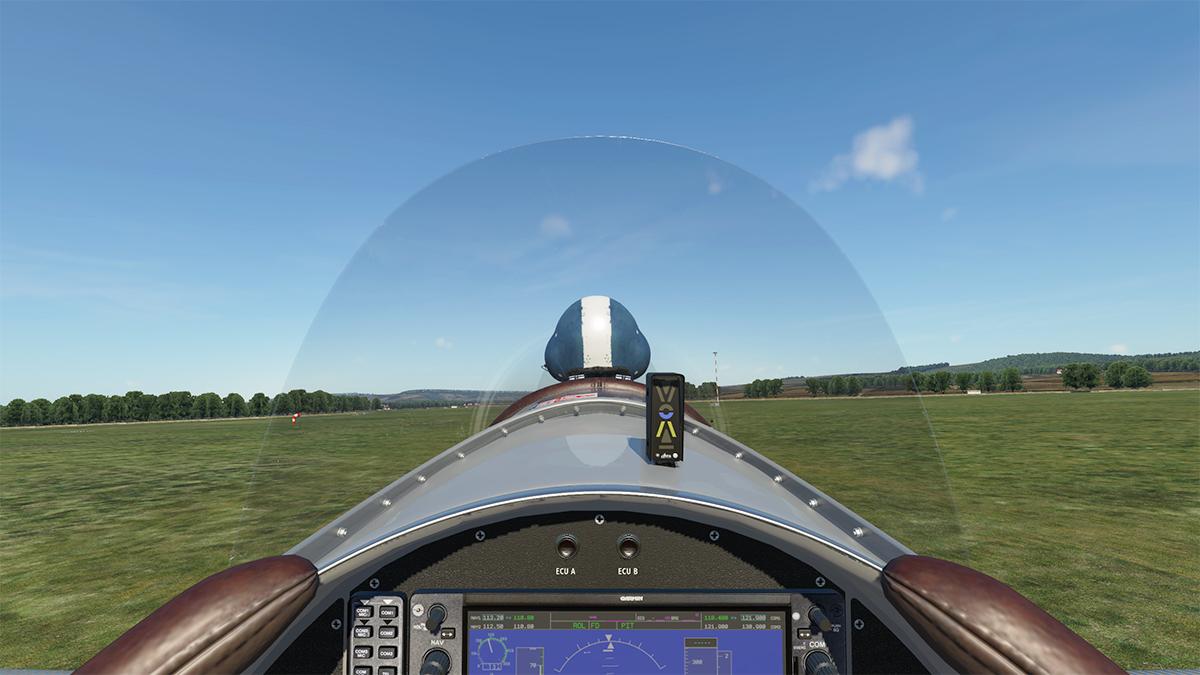
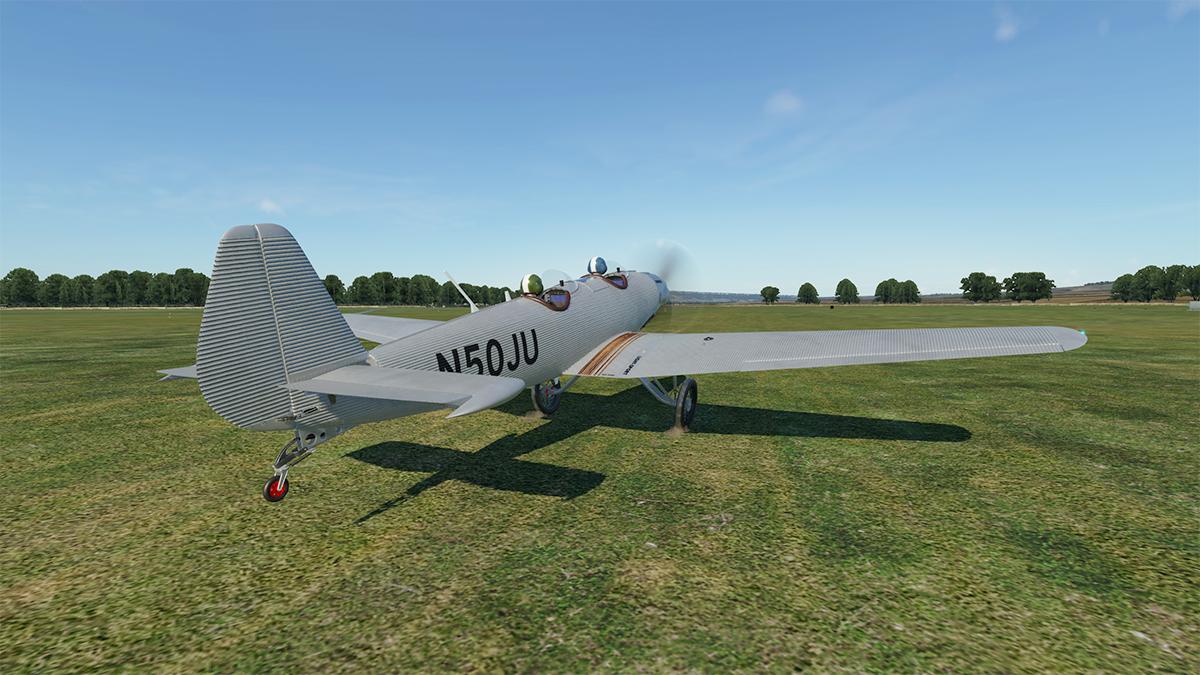
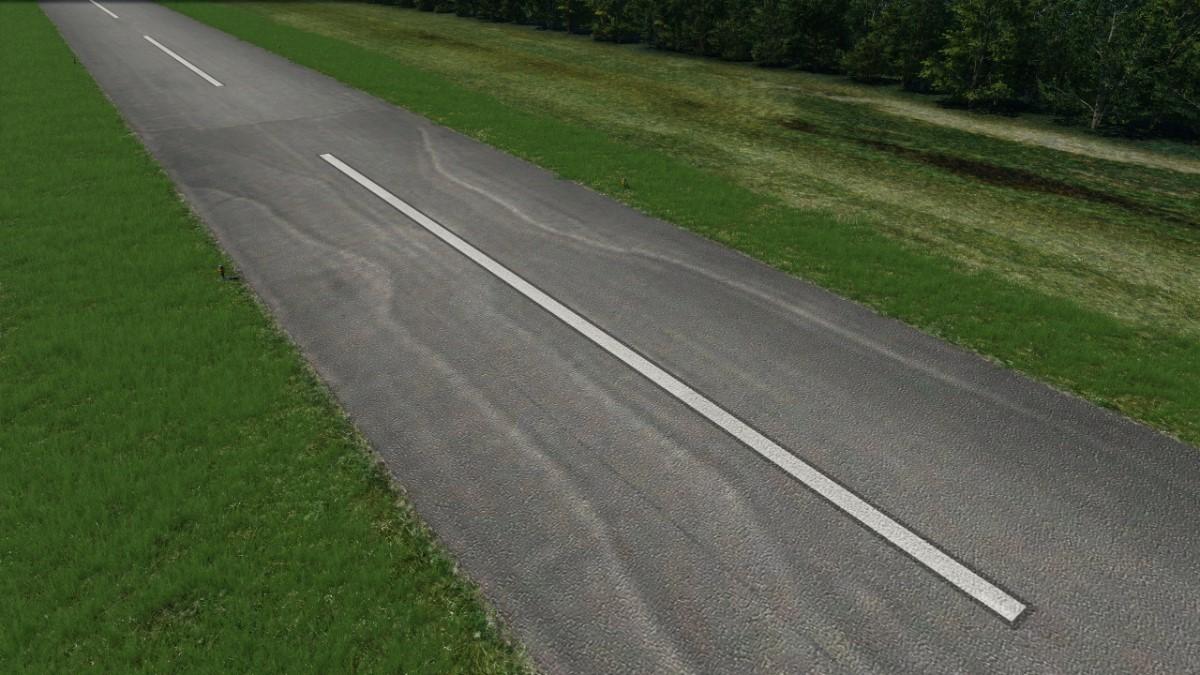
Aircraft Modification : Rotate Mcdonnell Douglas MD80 Series IAE V2500 Engine The Mcdonnell Douglas MD80 Series MD-80 was the second generation of the DC-9 family, originally designated as the DC-9-80 (DC-9 Series 80) and later stylized as the DC-9 Super 80 (short Super 80). It was a stretched fuselage, enlarged wing, and was powered by higher bypass Pratt & Whitney JT8D-200 engines. The MD80 Series made its first flight on October 18, 1979, and was certified on August 25, 1980. In response to the environmental concerns that began in the 1970s, Pratt & Whitney began developing a new version of the JT8D engine, designated the JT8D-200 series. Designed to be quieter, cleaner, more efficient, yet more powerful than the earlier -15, -17, -11 and-9 series on the DC-9. The -200 Series power-plant was re-engineered with a significantly higher bypass ratio (1.74 to 1) covering the 18,500 to 21,700 pound-force (82 to 97 kN) thrust range and became the standard engine in powering the McDonnell Douglas MD-80 series. This is the engine on the Rotate Mcdonnell Douglas MD88. It's a long thin (still low) higher-bypass engine with clam-shell reversers. Mango Studios have done a modification (MOD) to change this JT8D-200 engine to the later bulkier IAE V2500 Series engine. The look and feel of the V2500 modification is really well done, with high quality 4K Textures and new PBR (Physical Based Render) effects, the quality and installation is simply excellent. Internal exhaust detail is totally authentic, with the correctly fitted outer fins for the correct airflow around the engine pod. The V2500 does not have the clam-shell thrust reversers, but the same arrangement like on the A320, were as the full cowling door opens for the thrust reversal. This aspect is very nicely done here as well, nice operation, with great internal detail of the air vent grid and internal mechanism. This IAE engine was installed on the next stretch of the MD80 Series, third generation of the DC-9 family in the MD90. The engines were notably mostly installed on the MD-90-30 Series with the IAE V2525-D5 engine, with the option of upgrading to the IAE V2528 engine. The V2500 Series is a two-shaft high-bypass turbofan engine built by International Aero Engines (IAE) which also powers the Airbus A320 family. This engine also has an option to add 3,000 lbf for use in Hot & High conditions if needed by activating a switch in the flight deck. The V2525-D5 is fitted with different mounting hardware and accessory gearboxes to facilitate the rear MD-90 T-Tail installation, than say the under wing pylon of the A320. First look at the larger style of the IAE engine and as the MD90 Series had later the enhanced MD-90s glass cockpit, you could say it is the Boeing 717 aircraft, but it's not, as the 717 (MD95) had Rolls-Royce BR700 family engines installed, not IAE Engines. Important to note that with this modification, there are no IAE Engine sounds, strangely odd as Mango Studios are well known for their Sound Packages, and the quite different IAE engine note would have been a nice feature, but it has been noted by the developer IAE sounds are coming real soon. The performance of the Rotate MD88 is not changed either, so any power (V2525-D5 111.20 kN (25,000 lbf)) and fuel-efficiency benefits of the IAE are not available with this installation. Installation Tutorial It is a slightly tricky installation, to switch the original JT9D-200 to the IAE V2525-D5. In the downloaded "IAE V2500 Engine Model" pack there are four three folder items; liveries, objects and a paintkit (psd)... there is also a manual supplied. First you have to "duplicate" the original Rotate-MD-80 aircraft, and add into the title "IAE" From the package objects folder you transfer the 12 files to the MD-88 IAE "objects" folder, and replace (overwrite) the noted 4 files with the new files. Now for the tricky bit... You have to go and open up the X-Plane-planemaker application (in your X-Plane root folder), and open up the MD-80-IAE aircraft (acf) file. Under the banner menu "Standard" is the "Objects" selection. You have to scroll to the bottom of the objects tool, and then using the "ADD" button, insert THREE new layers... Far right on each layer is a slot to insert the file, with the selection button to the left of the slot... then insert the three new objects (V2500_I.obj, V2500_r.obj, N1_fast.object) in the MD-80 IAE "Objects" folder... into the correct slot, then "Save" (File) the changes. If correctly done, then the new IAE powerplant should be seen on the main planemaker page... and the MD-80 IAE aircraft is now ready in the X-Plane Configuration menu. Although there is a folder called "liveries", they are actually only the MOD files FOR the liveries, not the completed new livery. So you will still need the original "livery" to add in the MOD livery files... Each livery folder includes four files; md80_cola_der.png, md80_cola_izq.png, V2500_l.png, V2500_r.png and all four are transferred to the said livery "Objects" folder... Again you will be asked to overwrite two of the object files. You have to do this same process for ALL the liveries provided. Note the livery "Delta retro" is in fact Delta Old, or the default livery? Five livery conversions are provided; Allegiant, Delta (Old), JAL, Lion and Scandinavian. All look excellent, and note how the larger engine can highlight the decals. If you want to update another favorite livery, there is a paintkit (photoshop) provided, the paint kit covers the L & R engines, so you also have to still add in two files "md80_cola_der.png" and "md80_cola_izq.png" to each new set of the new livery conversion into the same objects folder. In the air the IAE V2500 conversion looks amazing! X-PlaneReviews - Rotate MD80 X-Plane 12 update review is here... Aircraft Upgrade Review : McDonnell Douglas MD-88 Pro X-Plane 12 by Rotate Summary This is a modification to change the Rotate MD80 (MD88) from the original install JT8D-200 engine to the later bulkier IAE V2500 Series engine as found on the Airbus A320 Series. The IAE engines were notably mostly installed on the MD-90-30 Series with the IAE V2525-D5 engine, with the option of upgrading to the IAE V2528 engine. Mango Studios have provided a modification kit to change the over the engines by duplicating a Rotate MD80 aircraft and installing the V2500 engine via X-Plane planemaker application, it's not too hard to do, and the tutorial is above. Also provided are MOD files to change five liveries to match the new engine installation and paintkit to do your own changes on other liveries. This modification really gives you a more modern looking MD Series aircraft, sounds for the IAE are coming soon as well to highlight the package from Mango Studios, that will also be noted here when available. Simply... a big yes, I love the Rotate MD80 in X-Plane 12, this conversion gives you another engine version to widen the aircraft's appeal and only for less than US$6, so a big yes, yes and it comes more flying options with the Rotate MD80 Series... winner, winner. _____________________ Yes! the Mango Studios MD-80 IAE V2500 Engine Add-on is currently available from the X-Plane.Org Store here : Mango Studios MD-80 IAE V2500 Engine Add-on Price is US$5.99 The Rotate MD-88 Pro X-Plane 12 is required for this add-on. Requirements The Rotate MD-80 is required for this add-on. Download Size: 415 MB Current version: Initial Release (May 9th 2024) Documentation Manual provided by Mango Studios is a bit basic, hence the Tutorial here in this review Manual.pdf _____________________ Aircraft Modification Review by Stephen Dutton 9th May 2024 Copyright©2024: X-Plane Reviews Review System Specifications: Windows - 12th Gen IS1700 Core i7 12700K 12 Core 3.60 GHz CPU - 64bit -32 Gb single 1067 Mhz DDR4 2133 - PNY GeForce RTX 3080 10GB XLR8 - Samsung 970 EVO+ 2TB SSD Software: - Windows 11 Pro - X-Plane Version 12.09rc5 Plugins: JustFlight-Traffic (X-Plane.OrgStore) US$52.99 : Global SFD plugin US$30.00 : RK Apps XPRealistic v2 - US$34.99 Scenery or Aircraft - LIRF - Airport Rome XP by Aerosoft (X-Plane.OrgStore) - US$25.99 (Disclaimer. All images and text in this review are the work and property of X-PlaneReviews, no sharing or copy of the content is allowed without consent from the author as per copyright conditions) All Rights Reserved
 4 points
 -

Behind the Screen : March 2024
flightwusel and 2 others reacted to Stephen for a topic
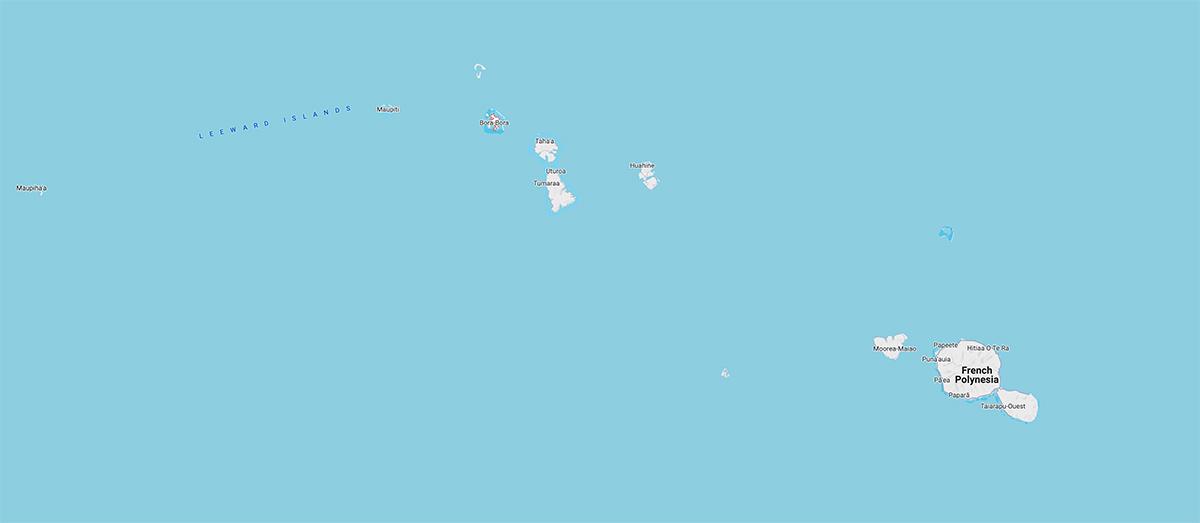
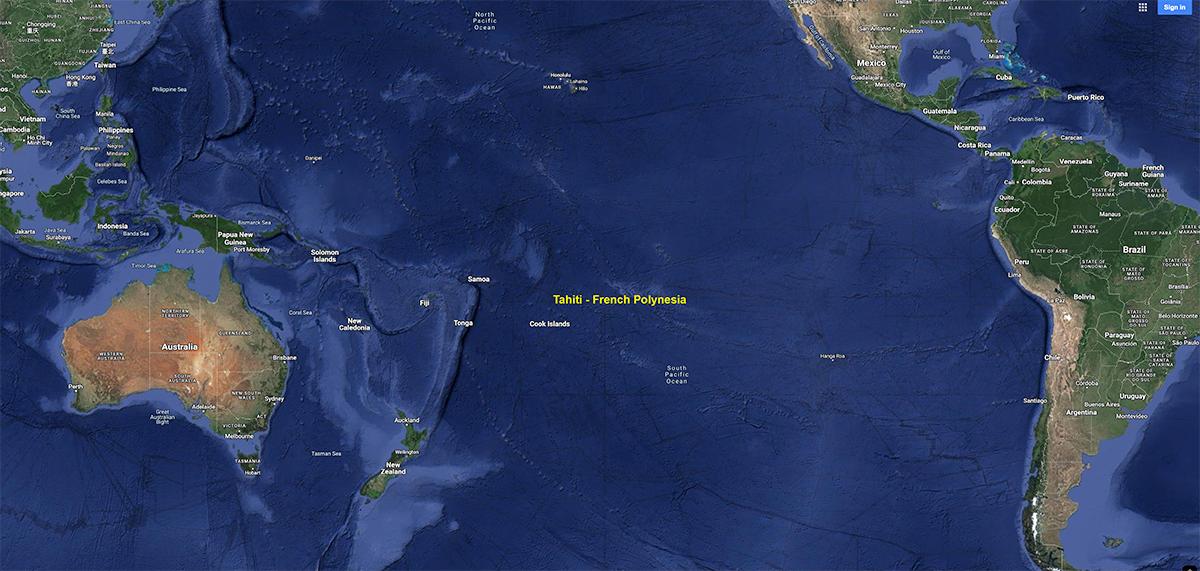
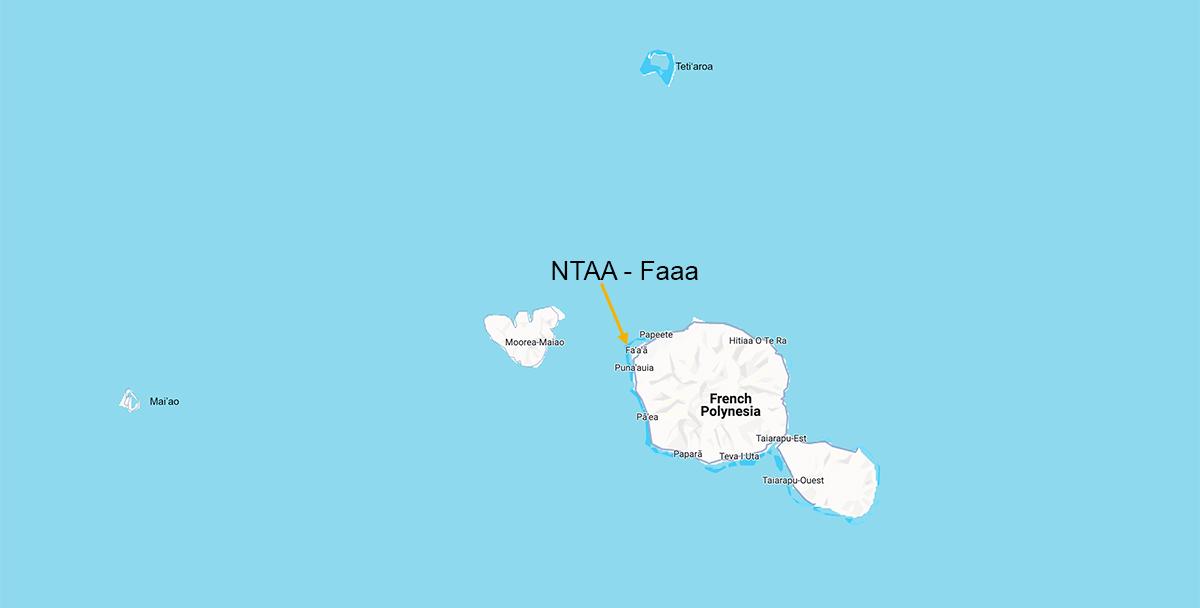
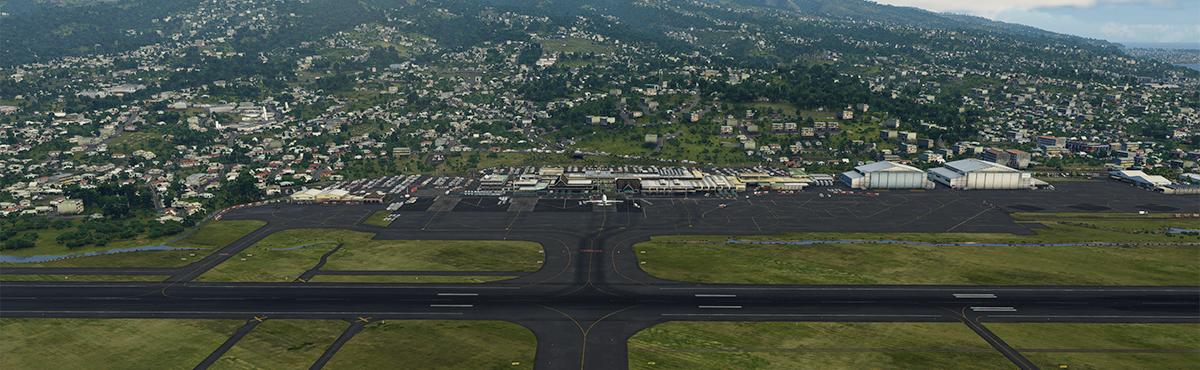
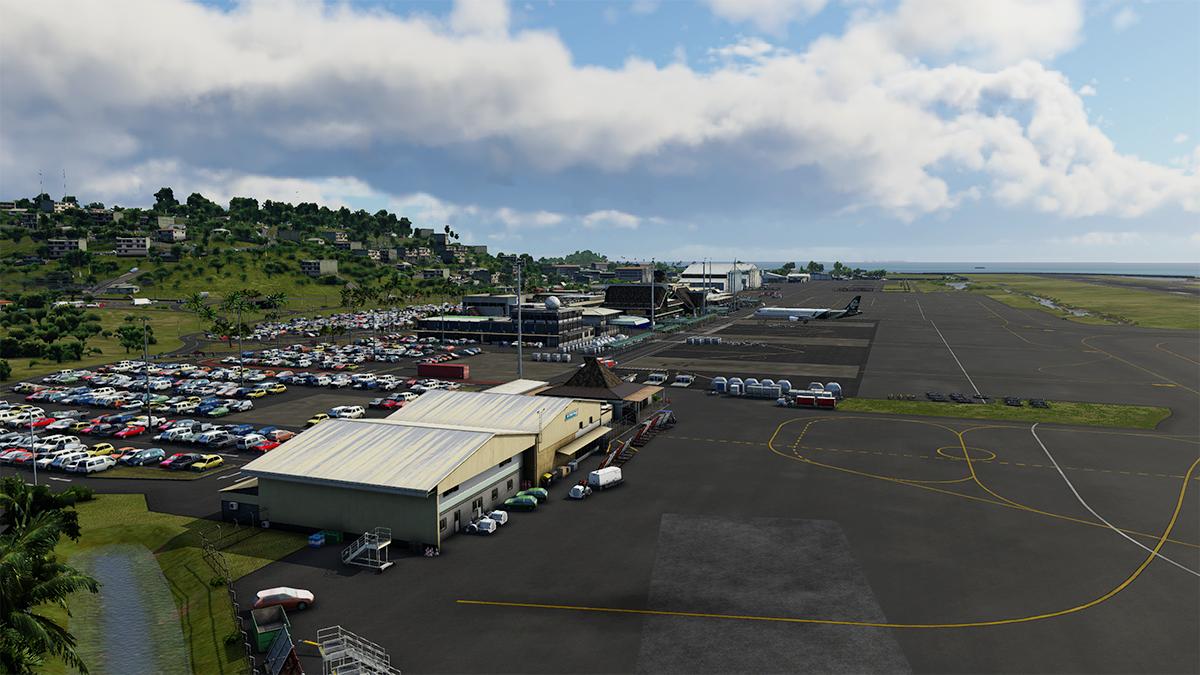
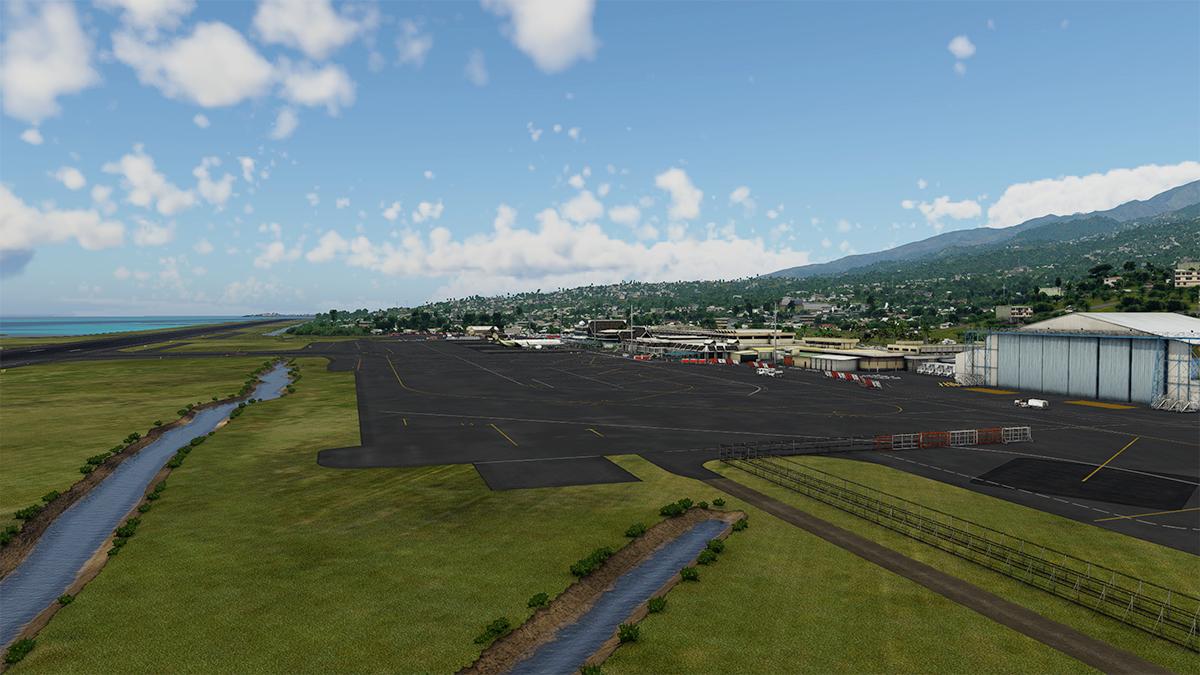
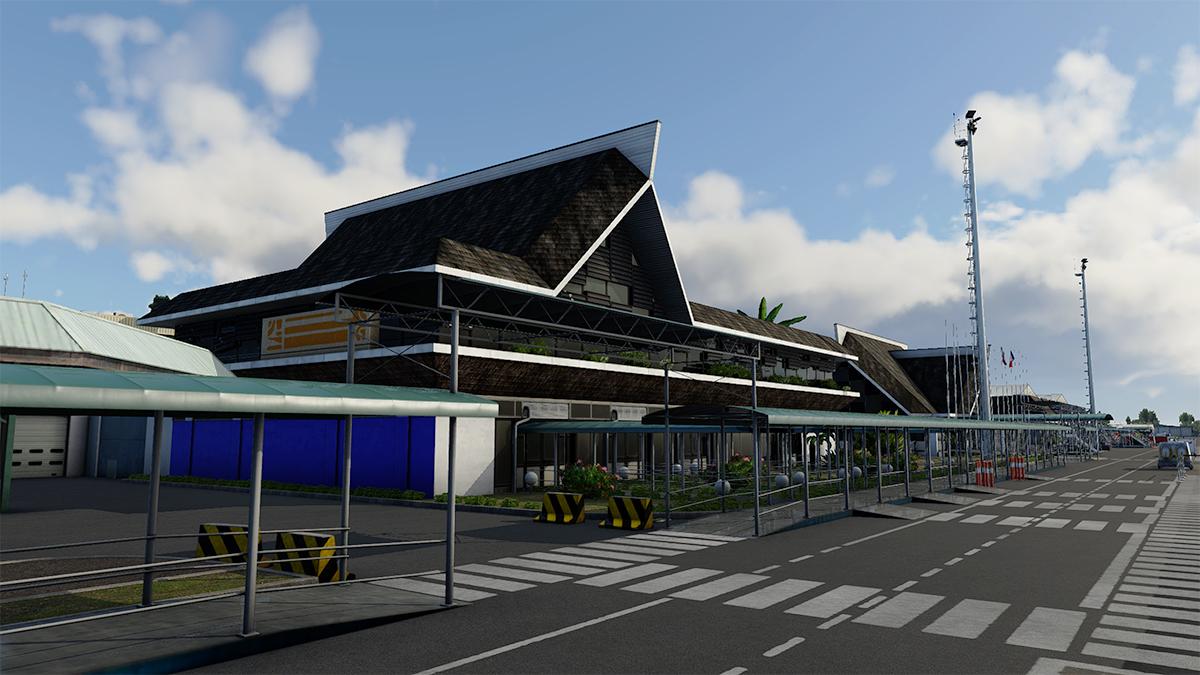
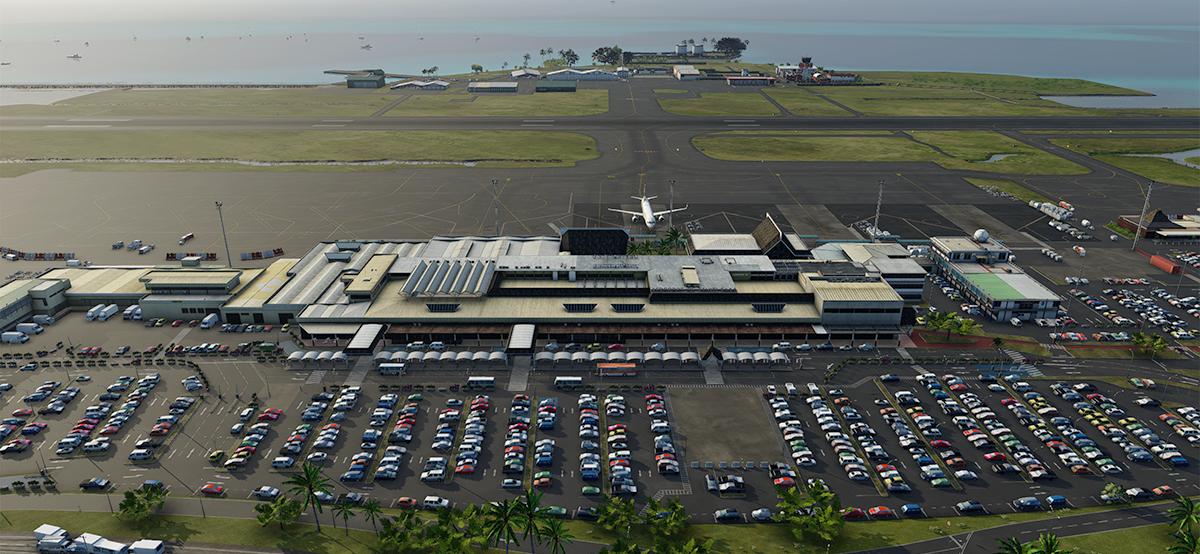
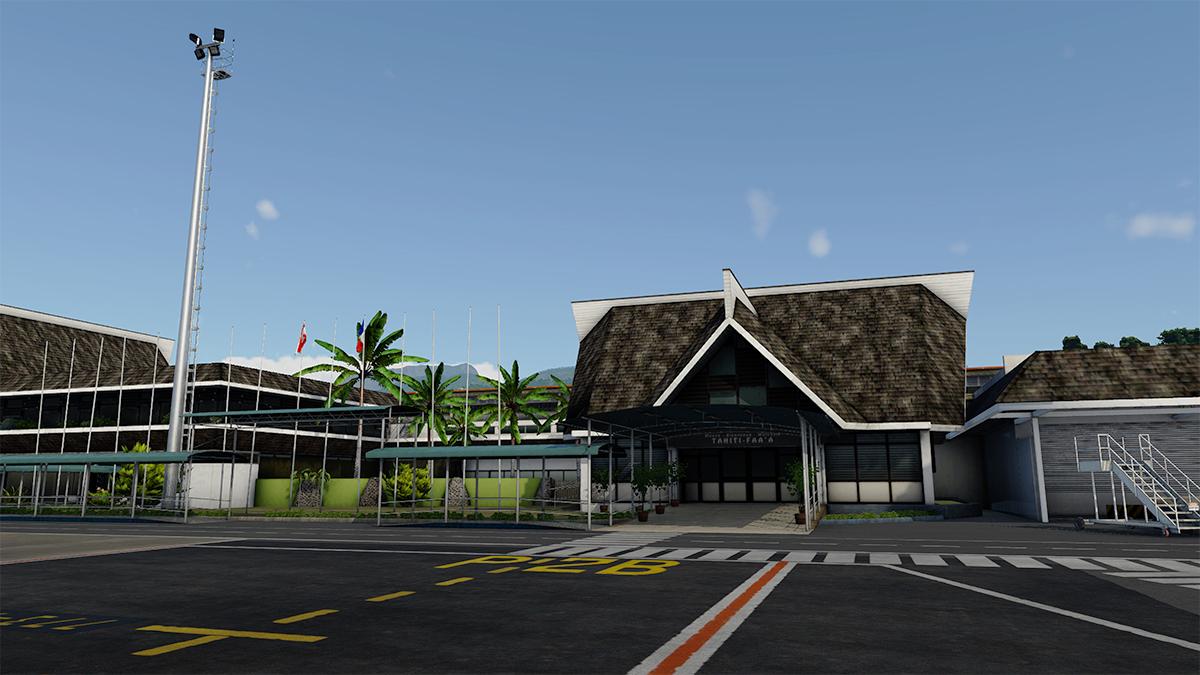
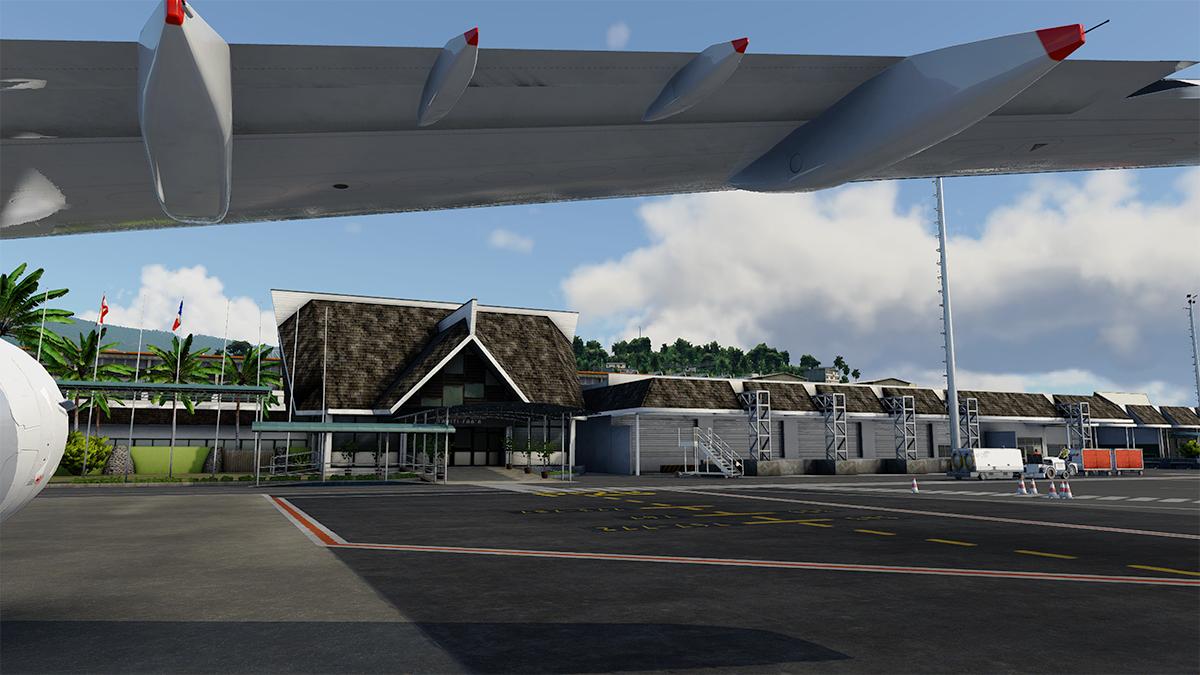
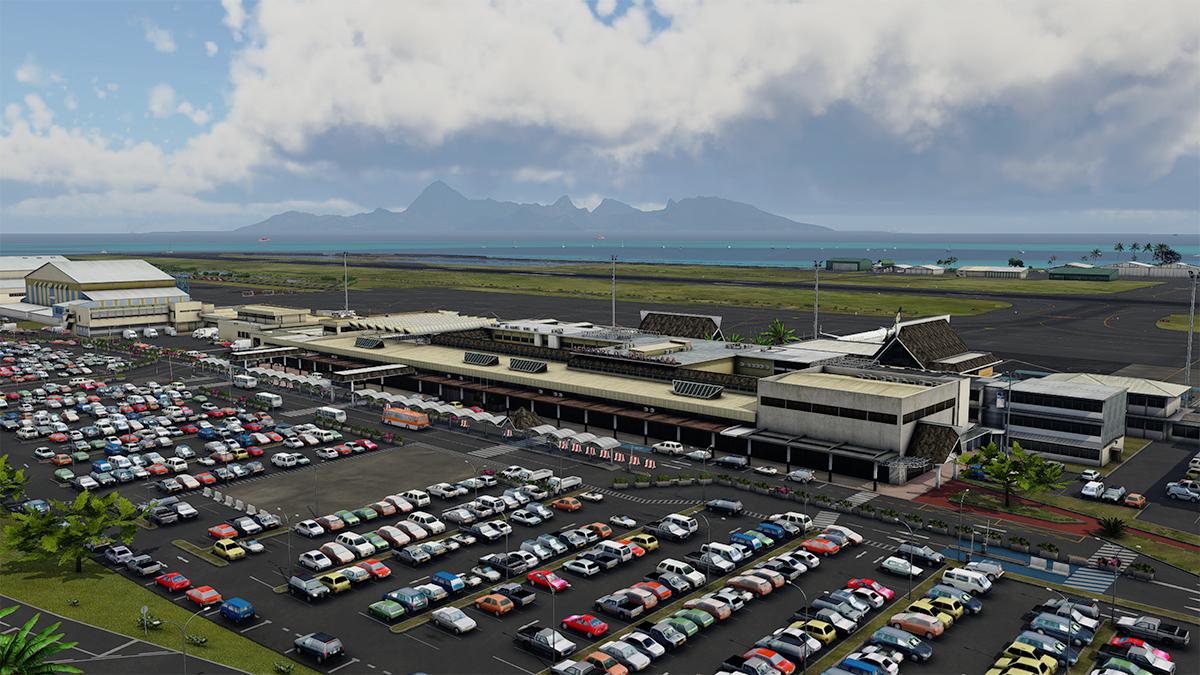
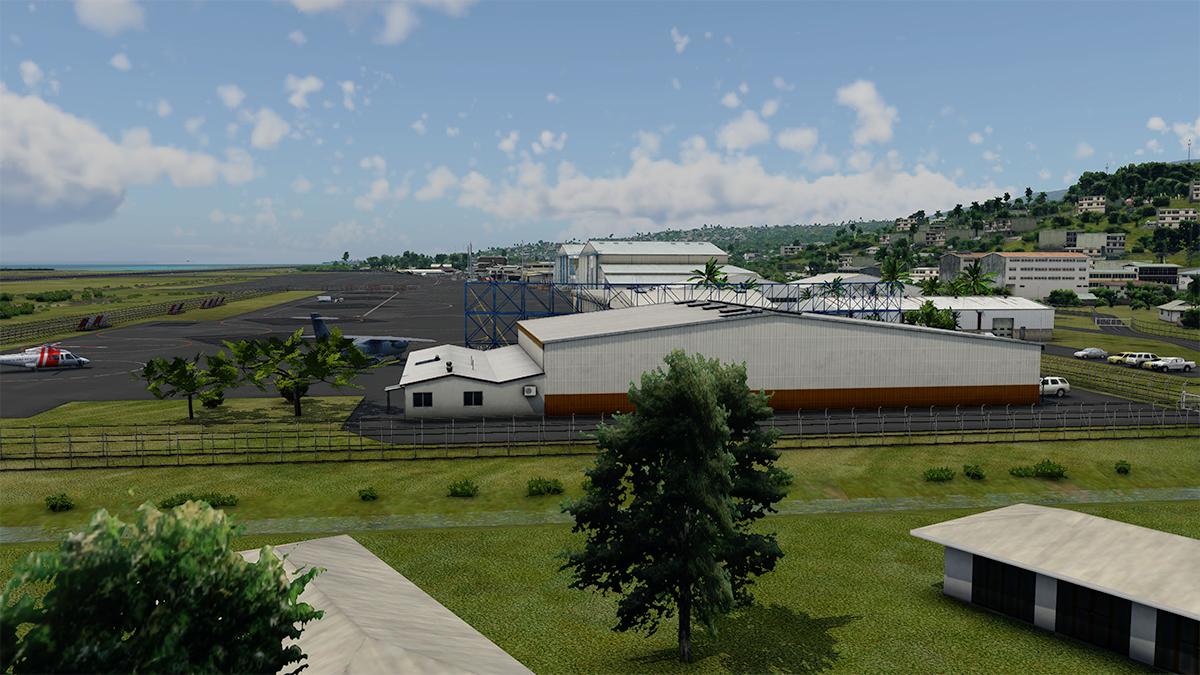
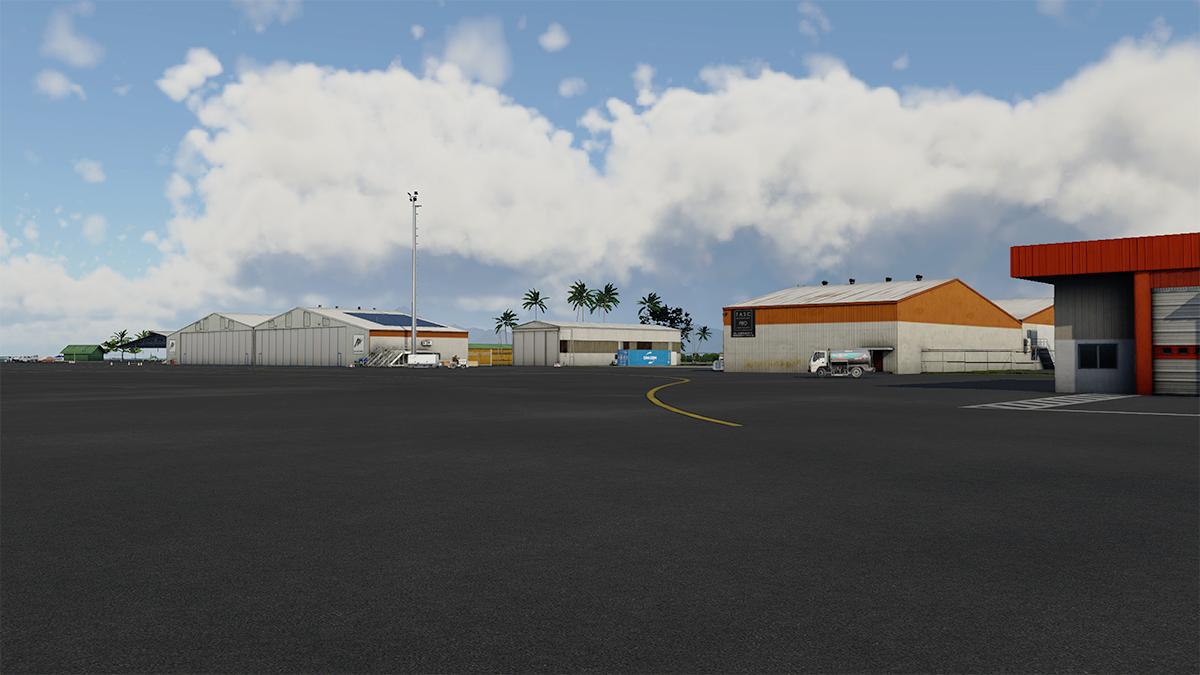
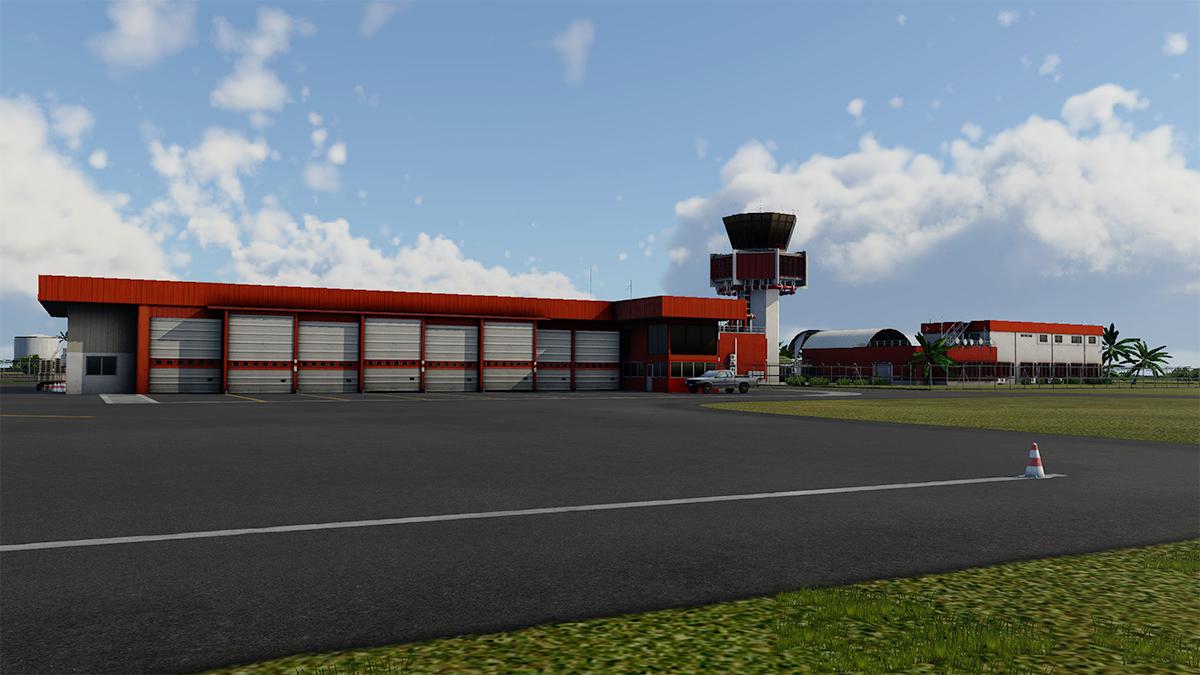
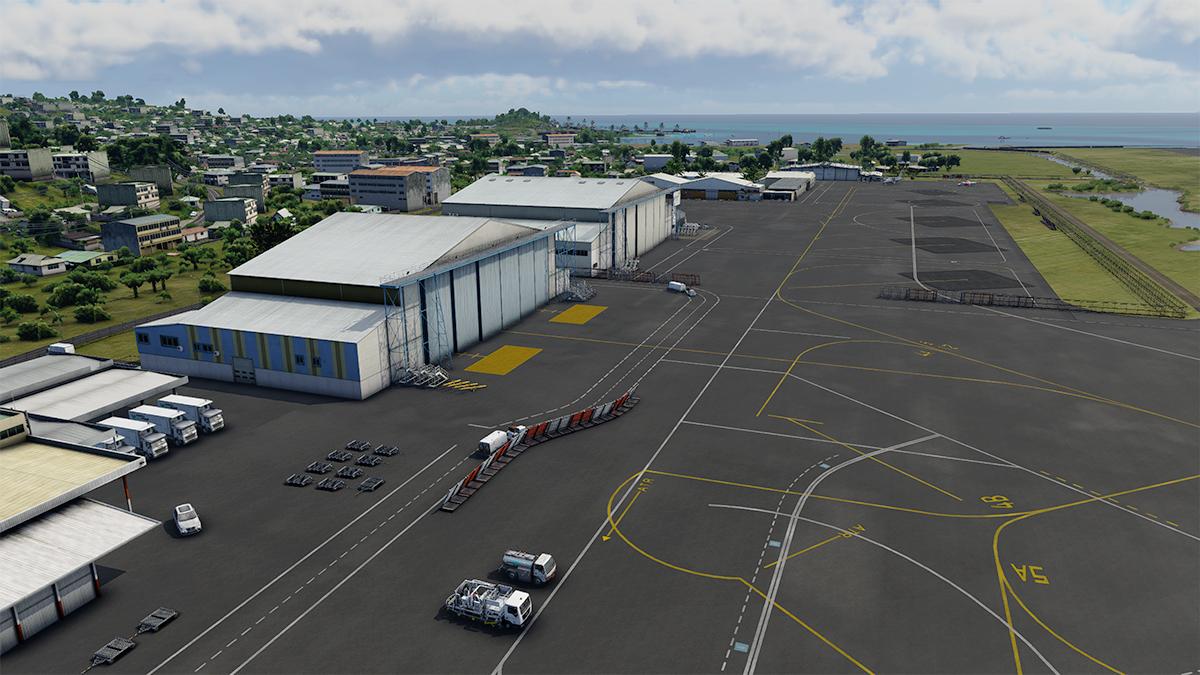
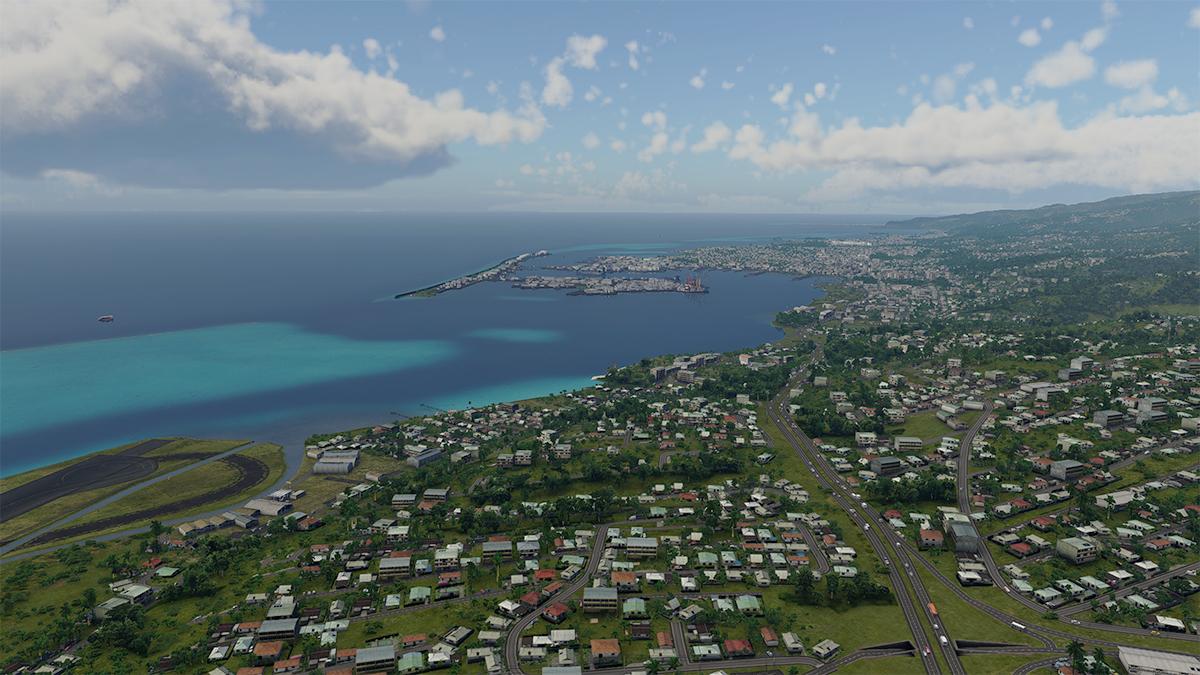
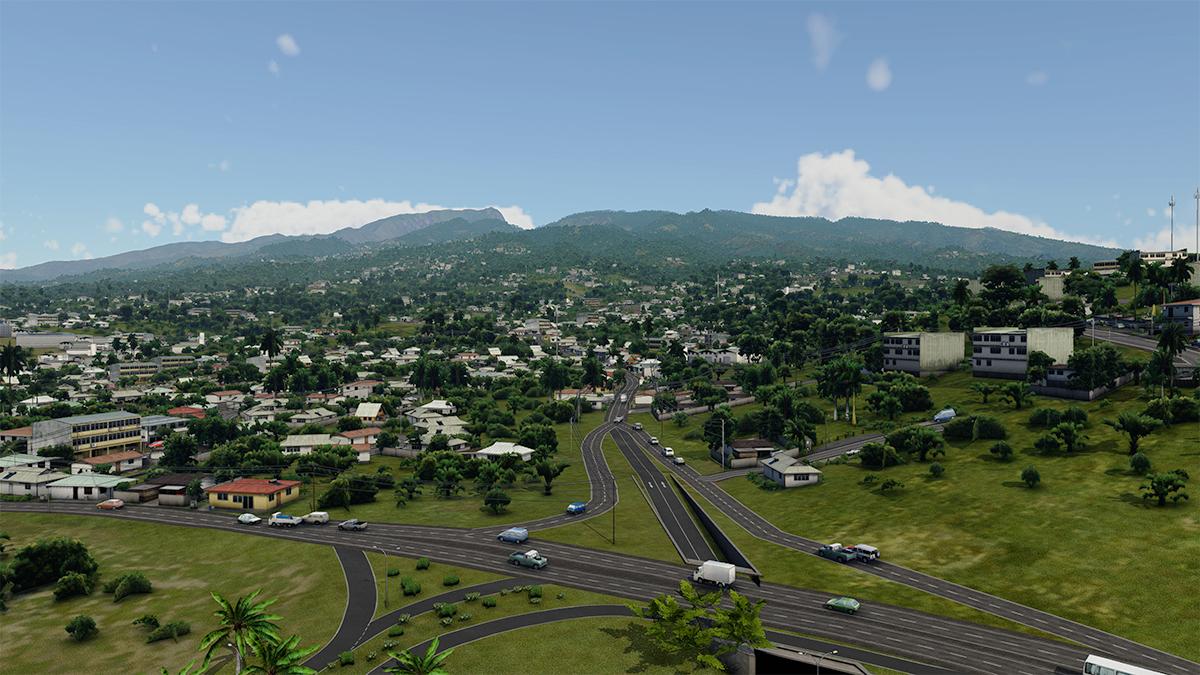
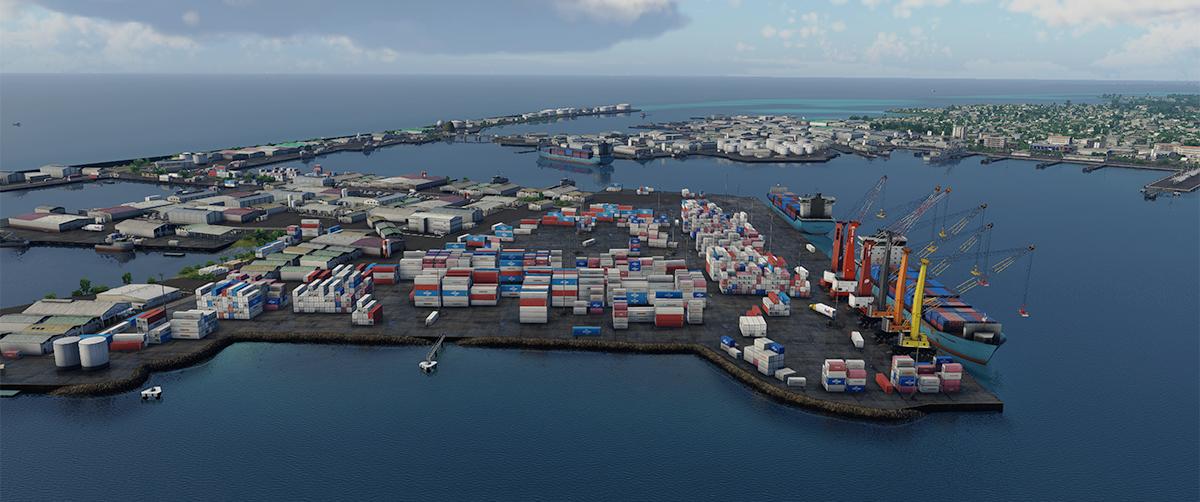
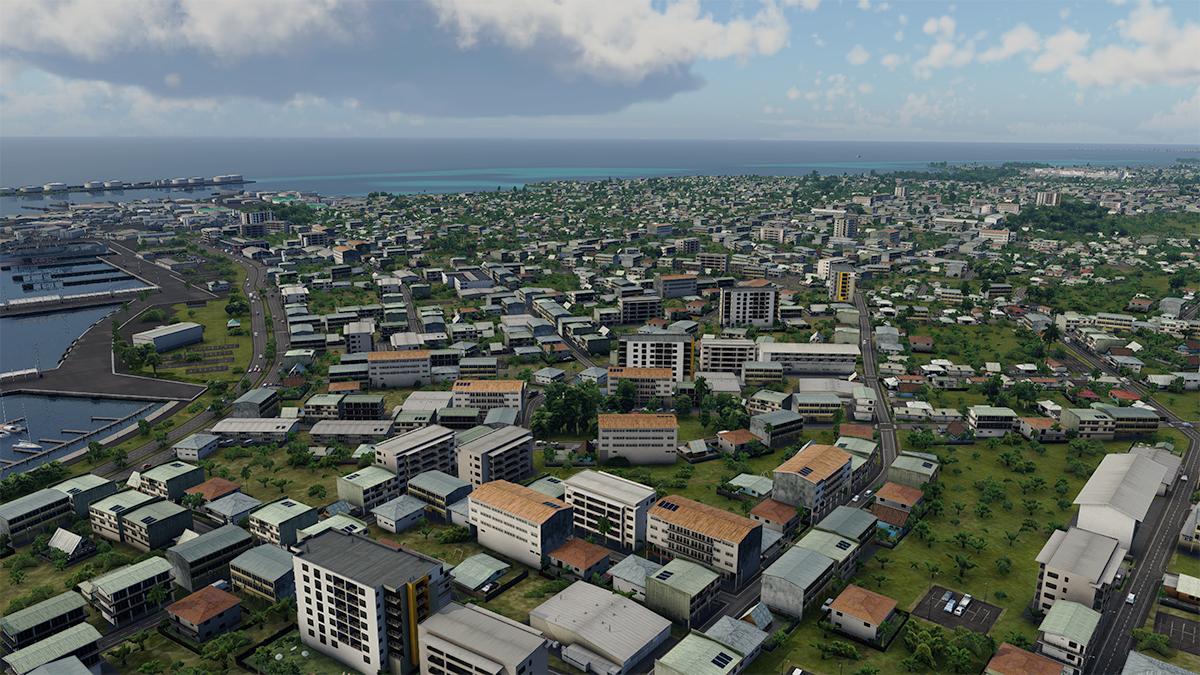
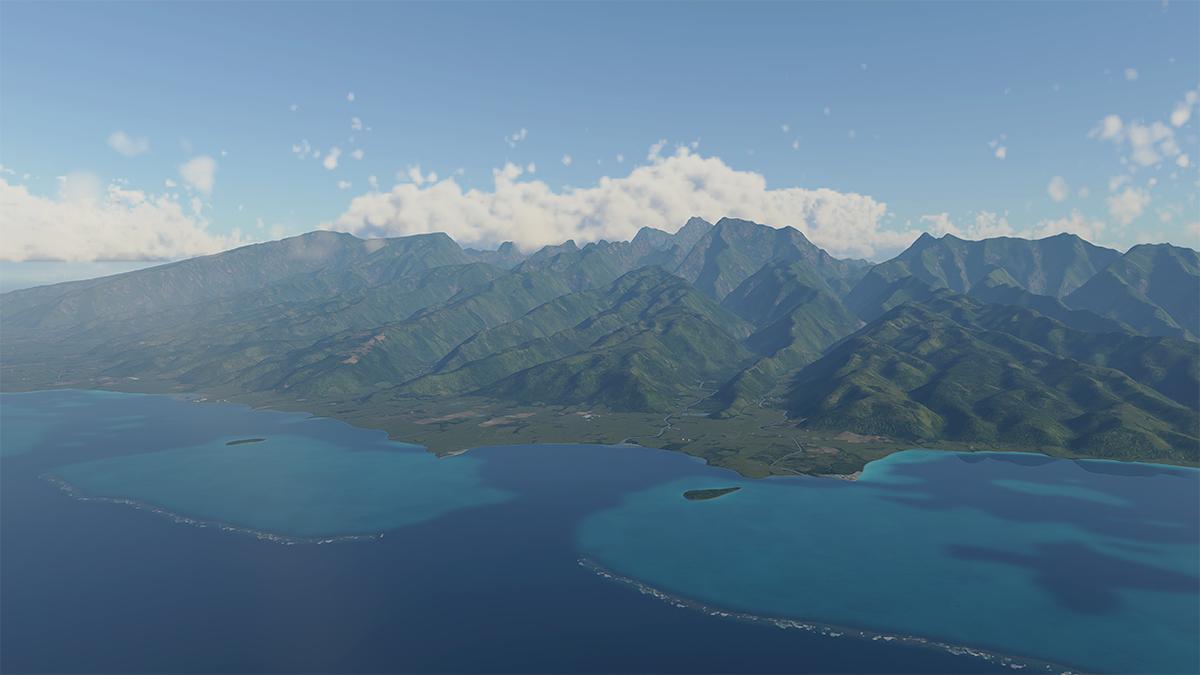
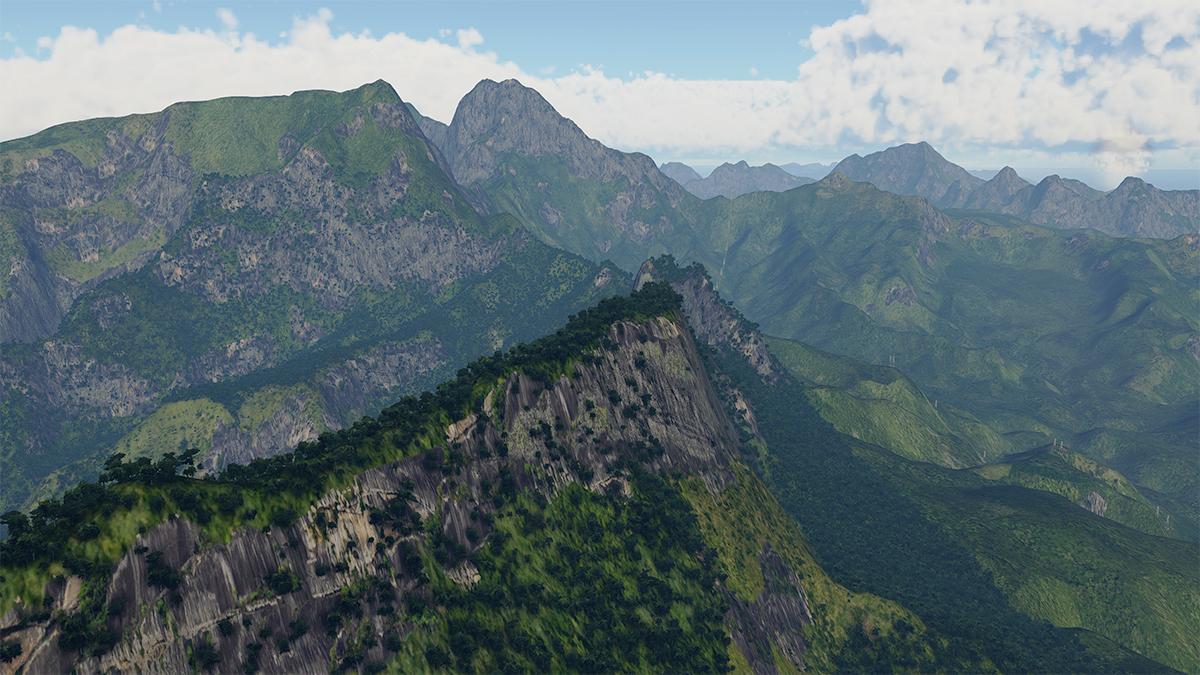
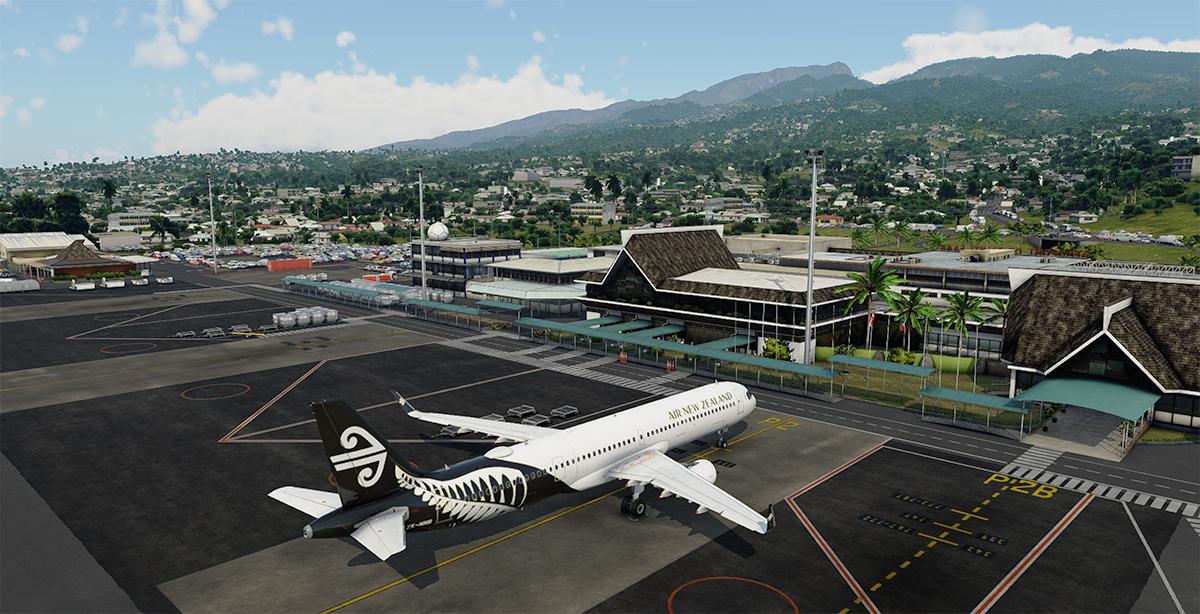
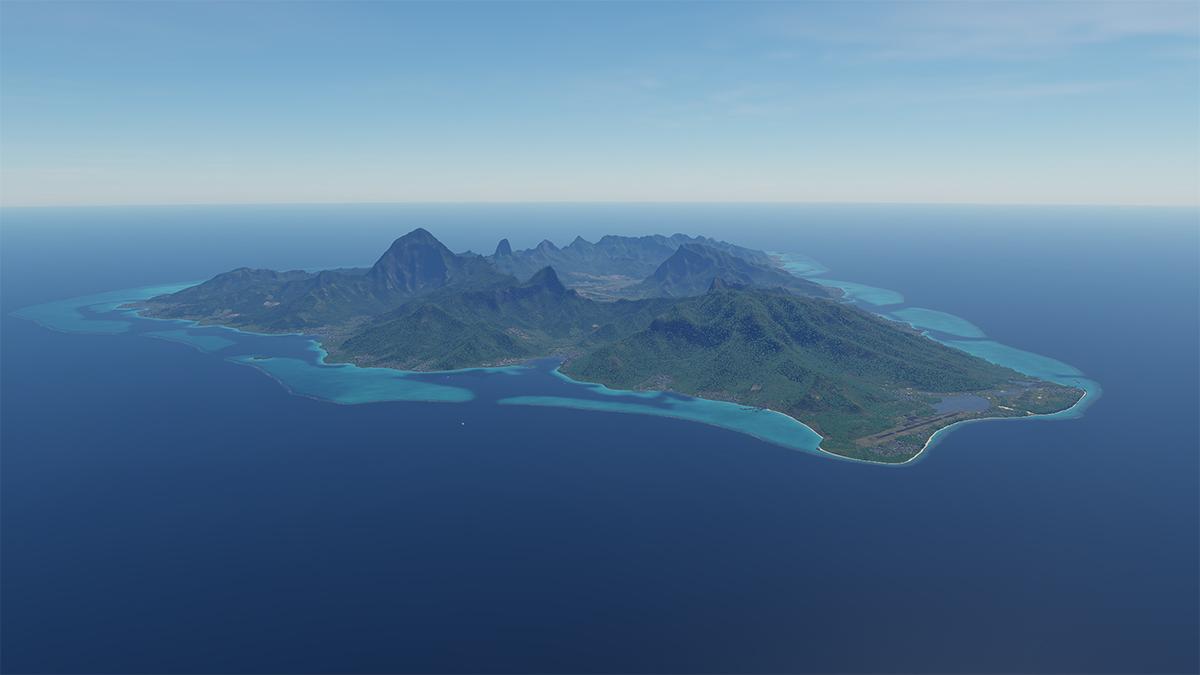
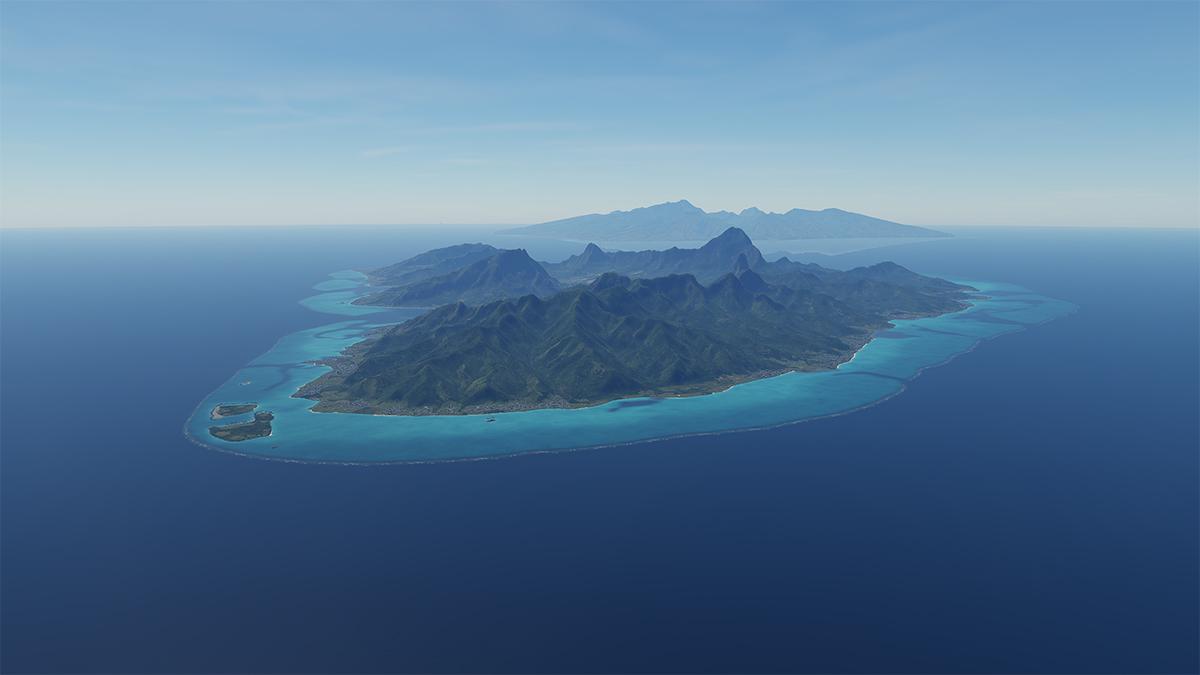
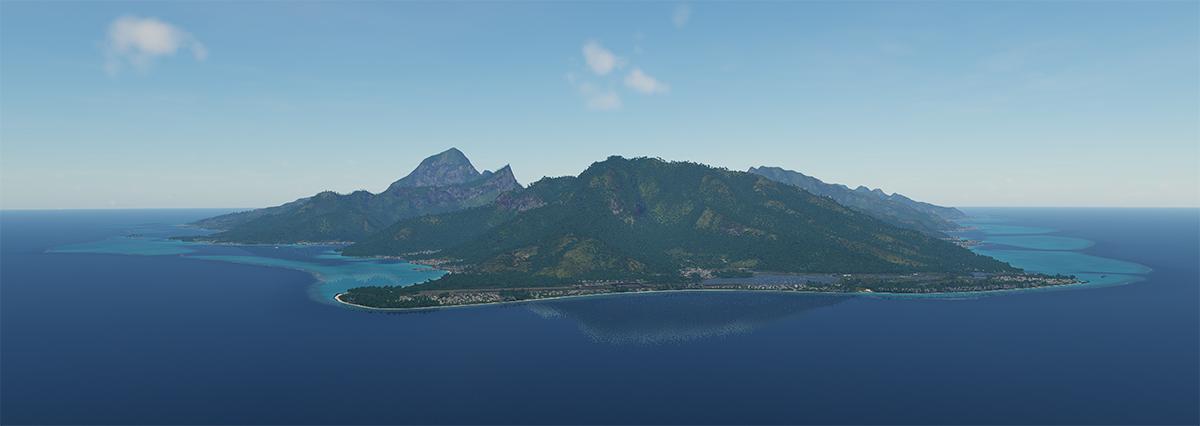
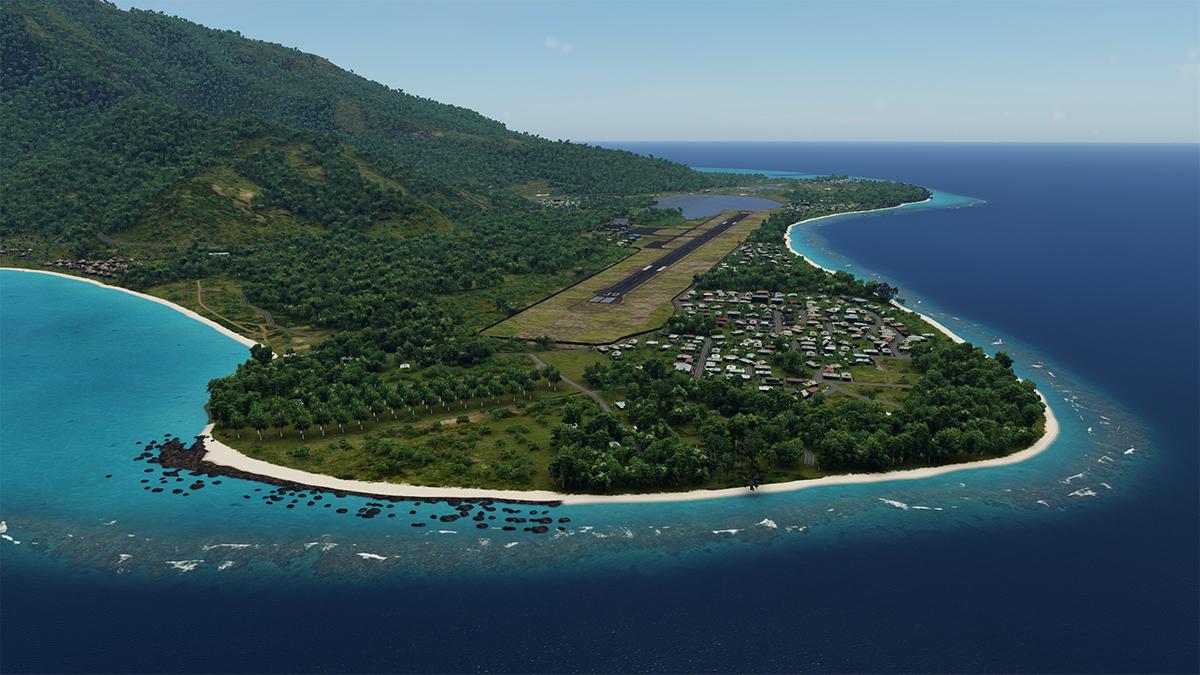
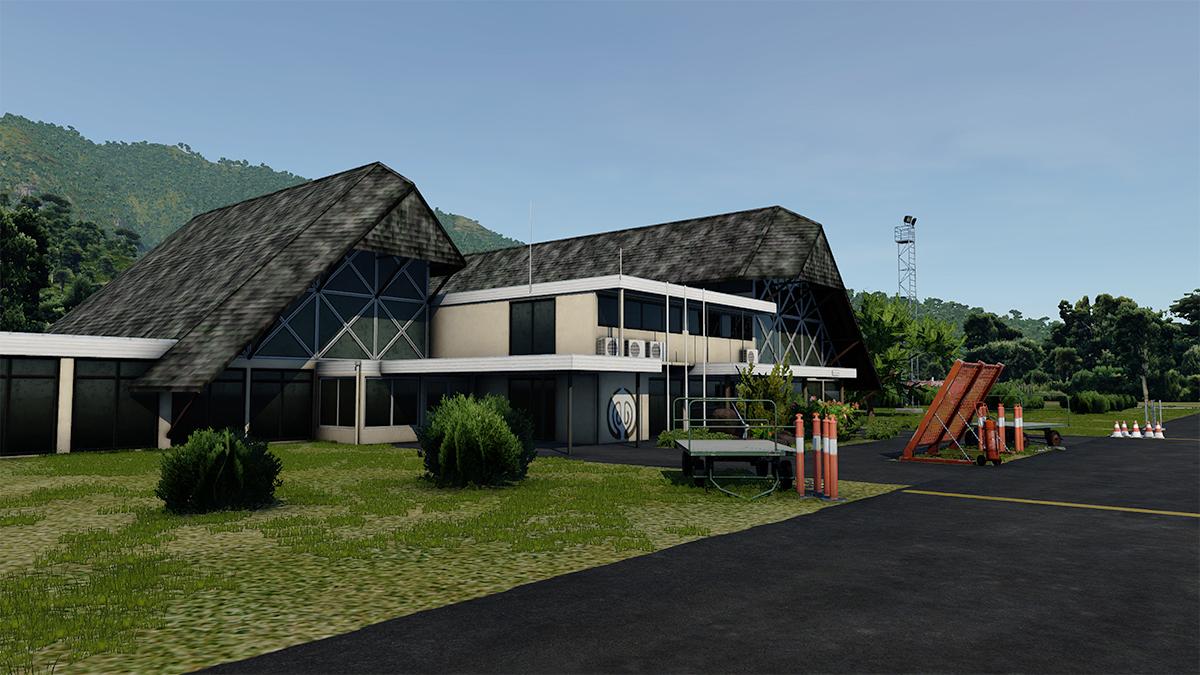
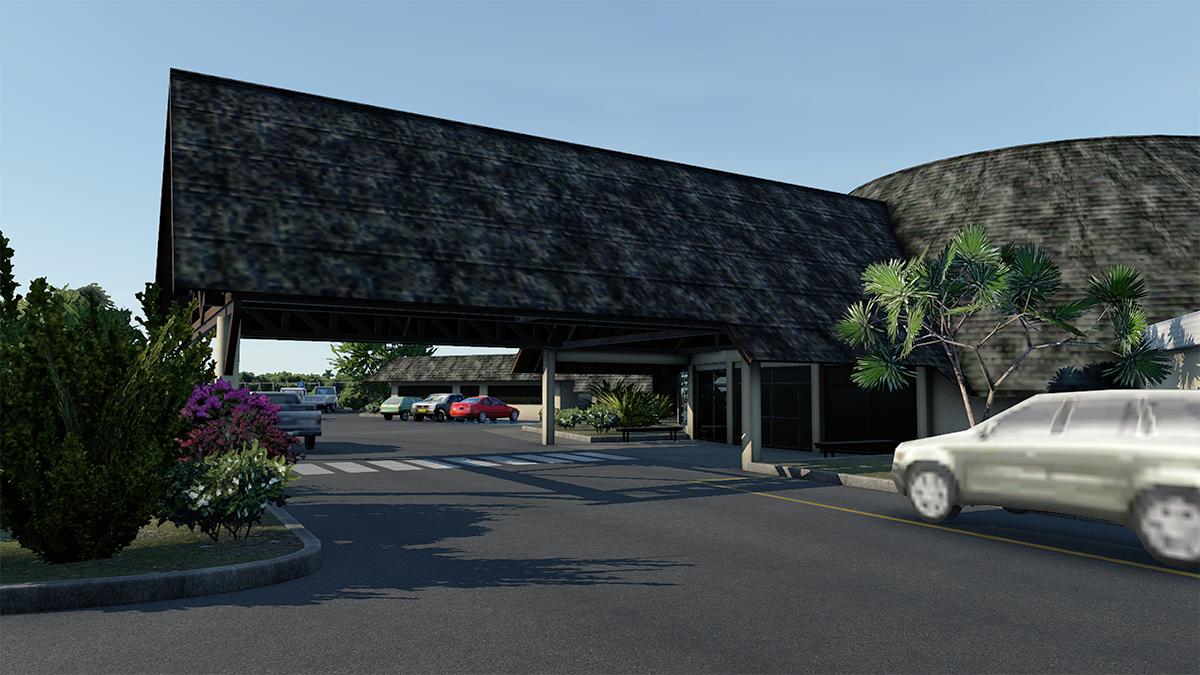
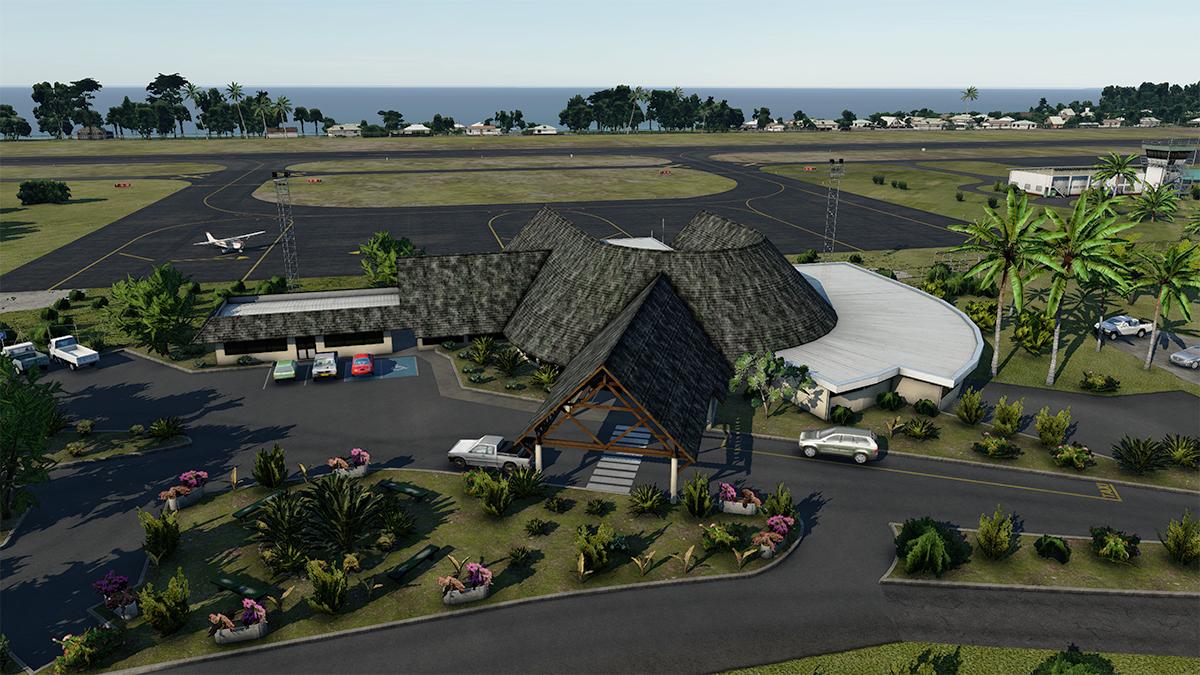
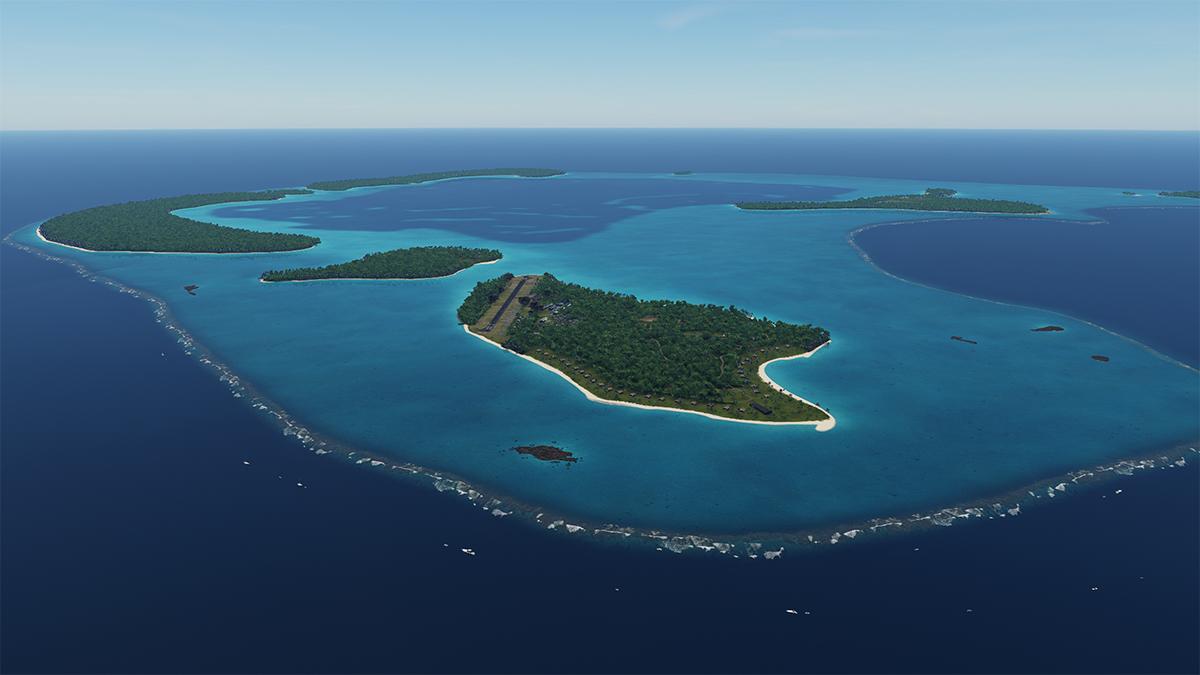
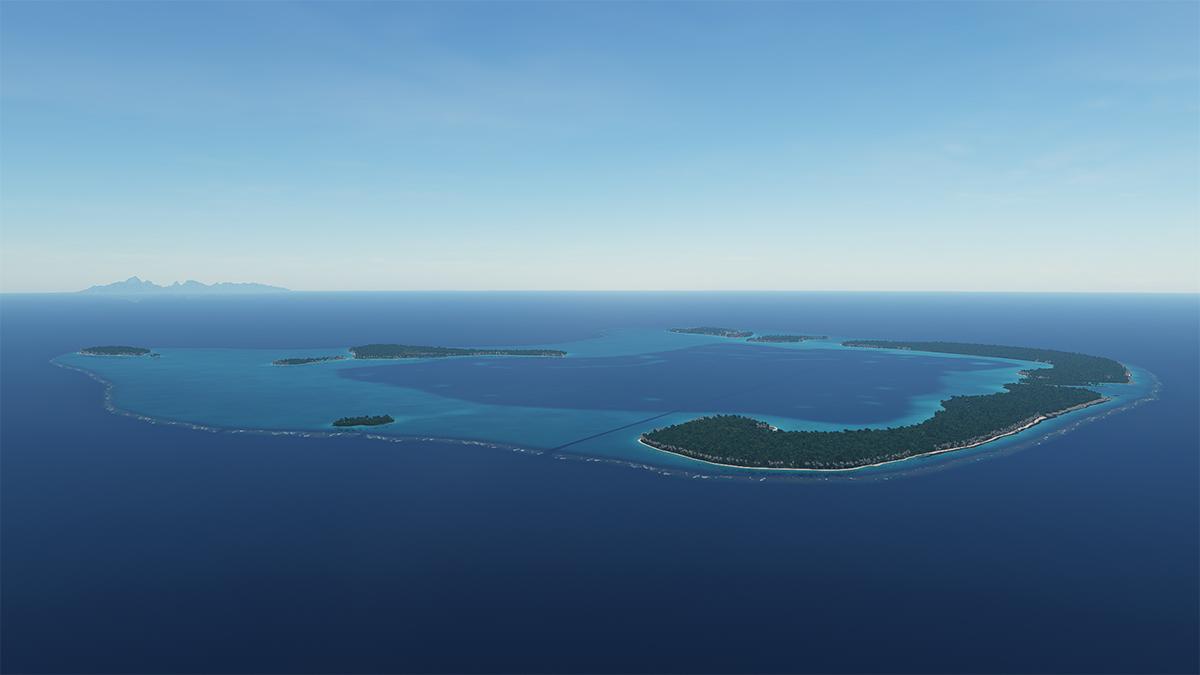
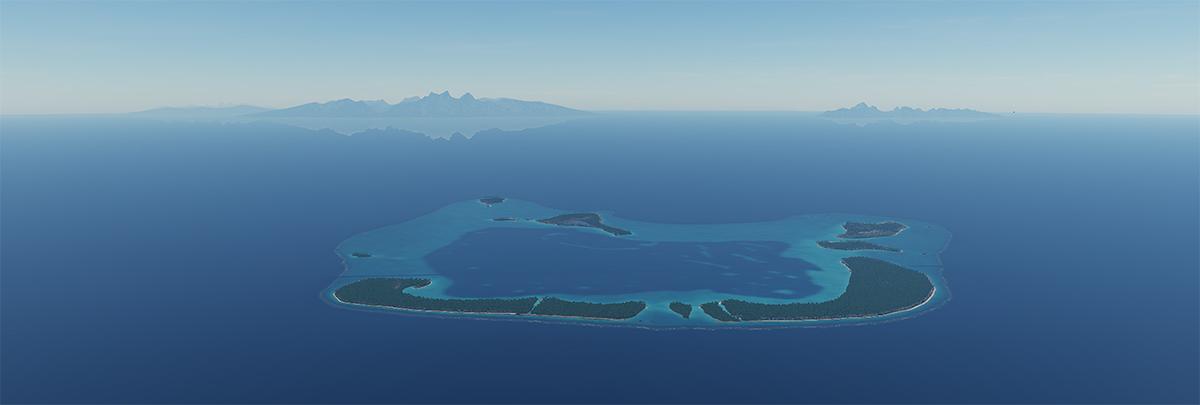
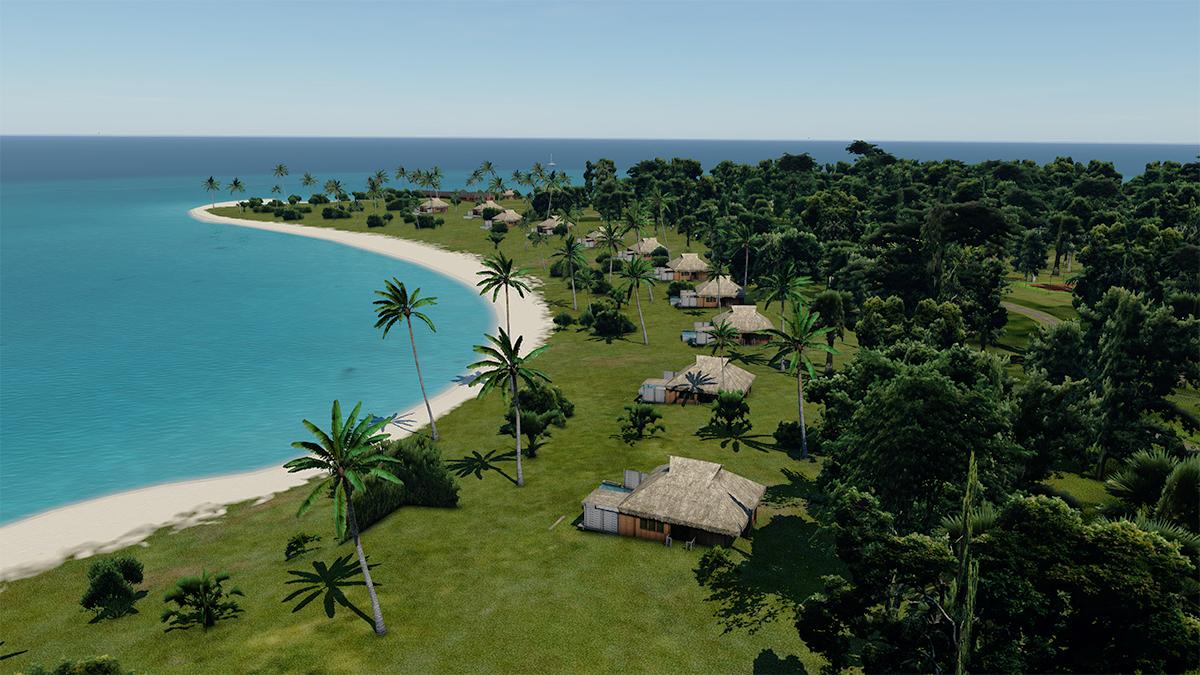
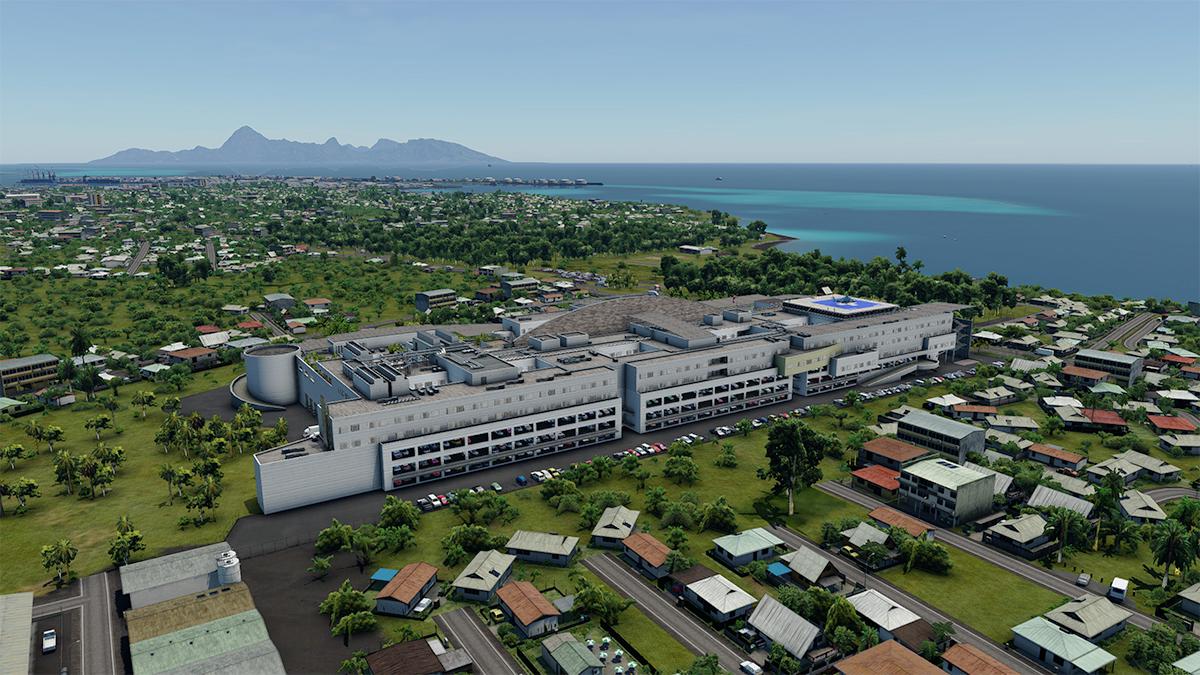
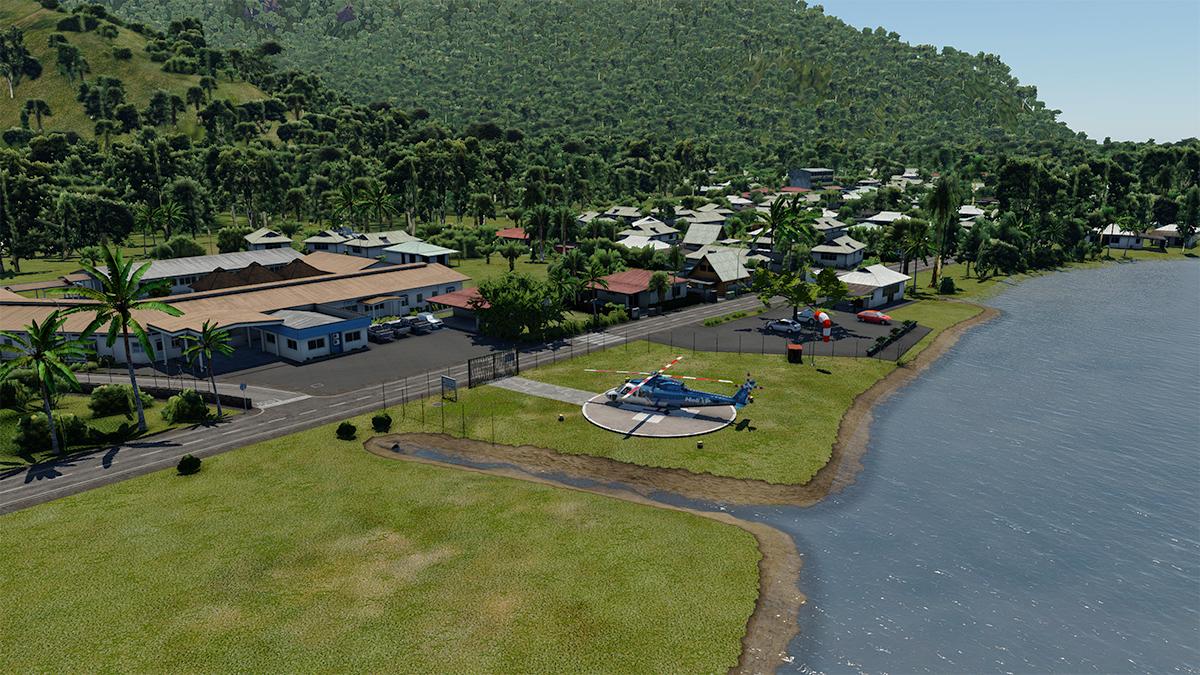
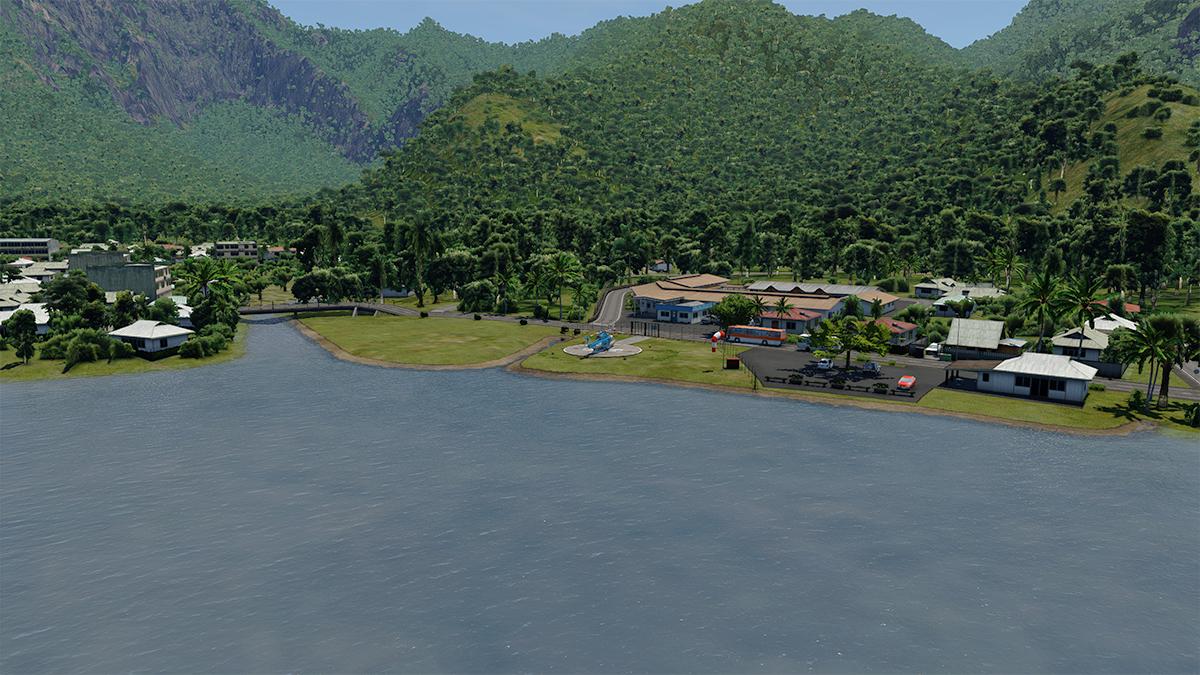
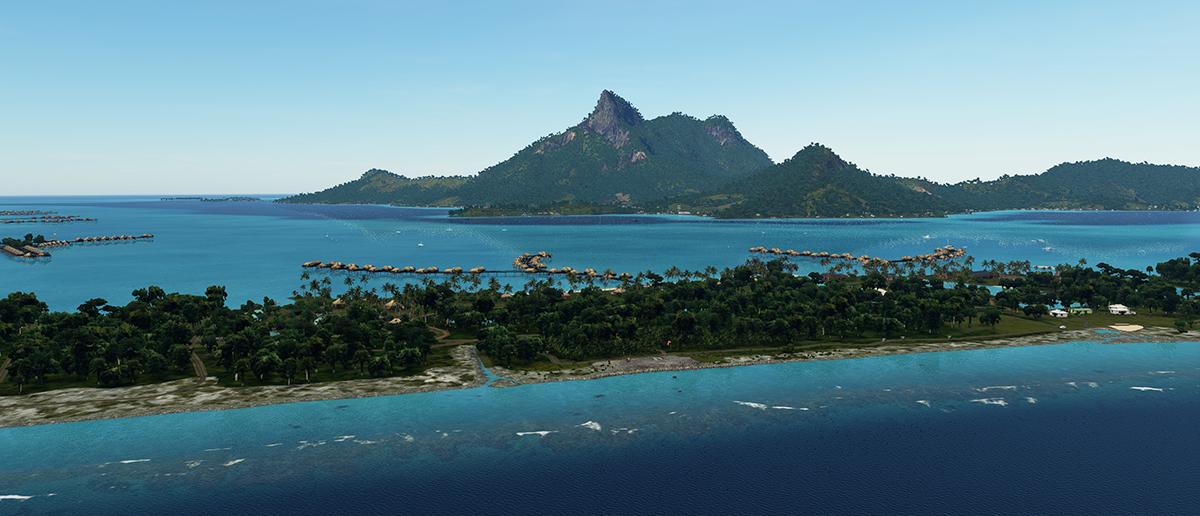
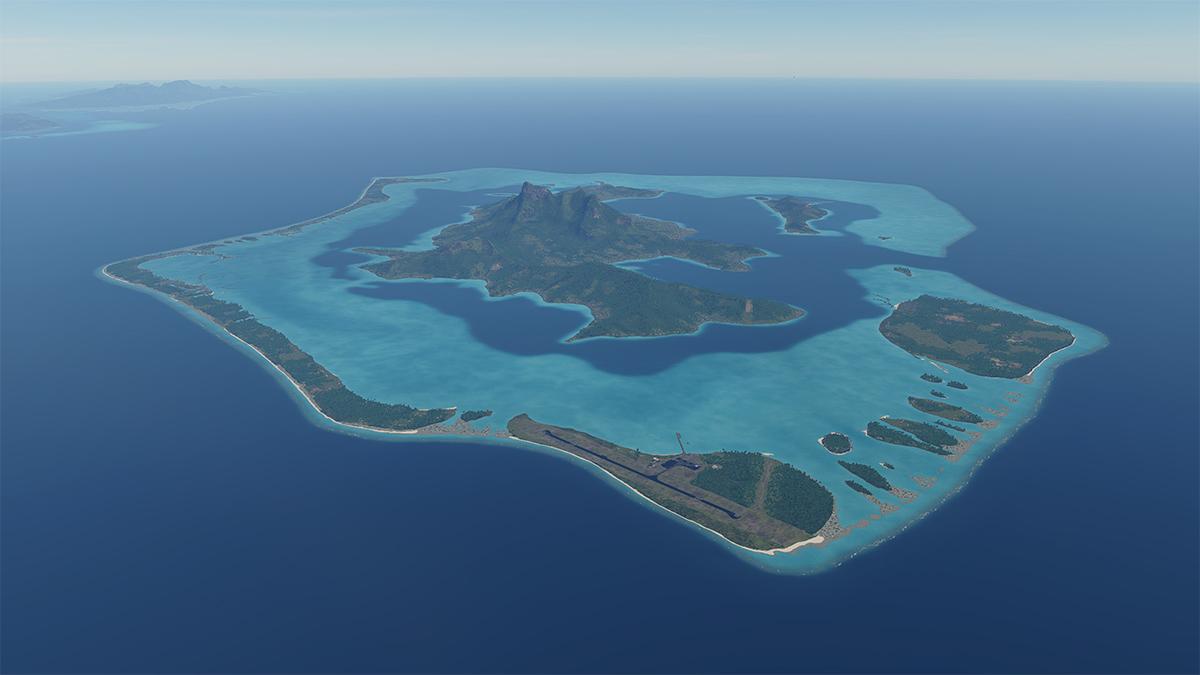
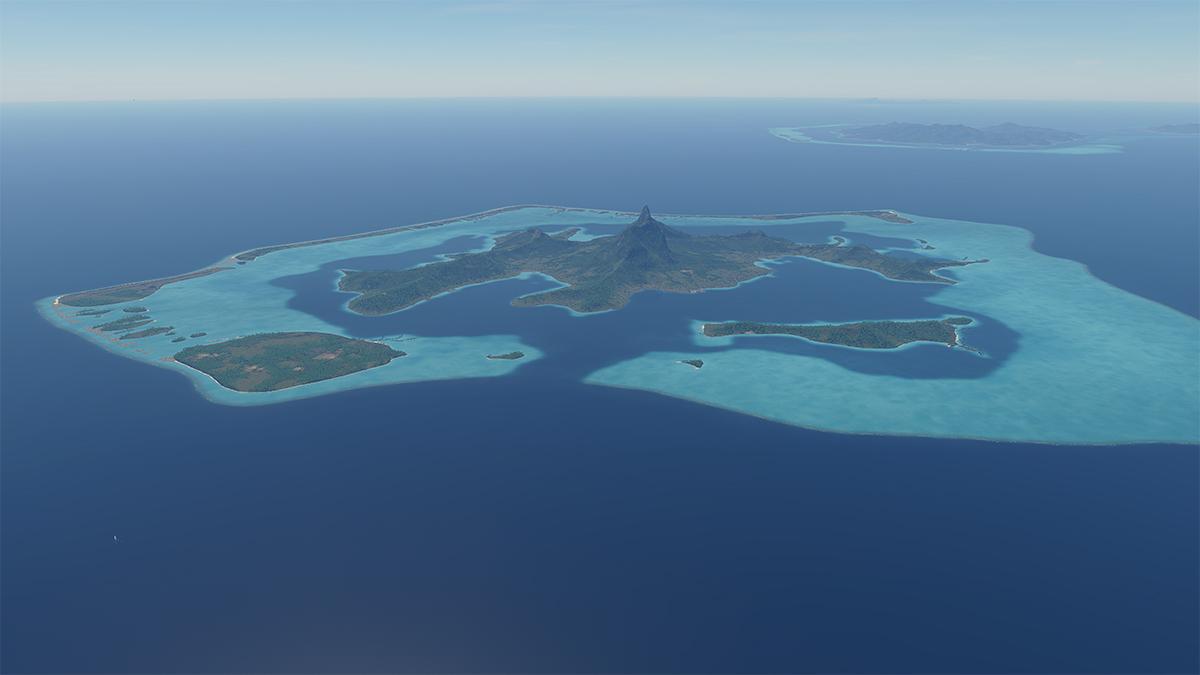
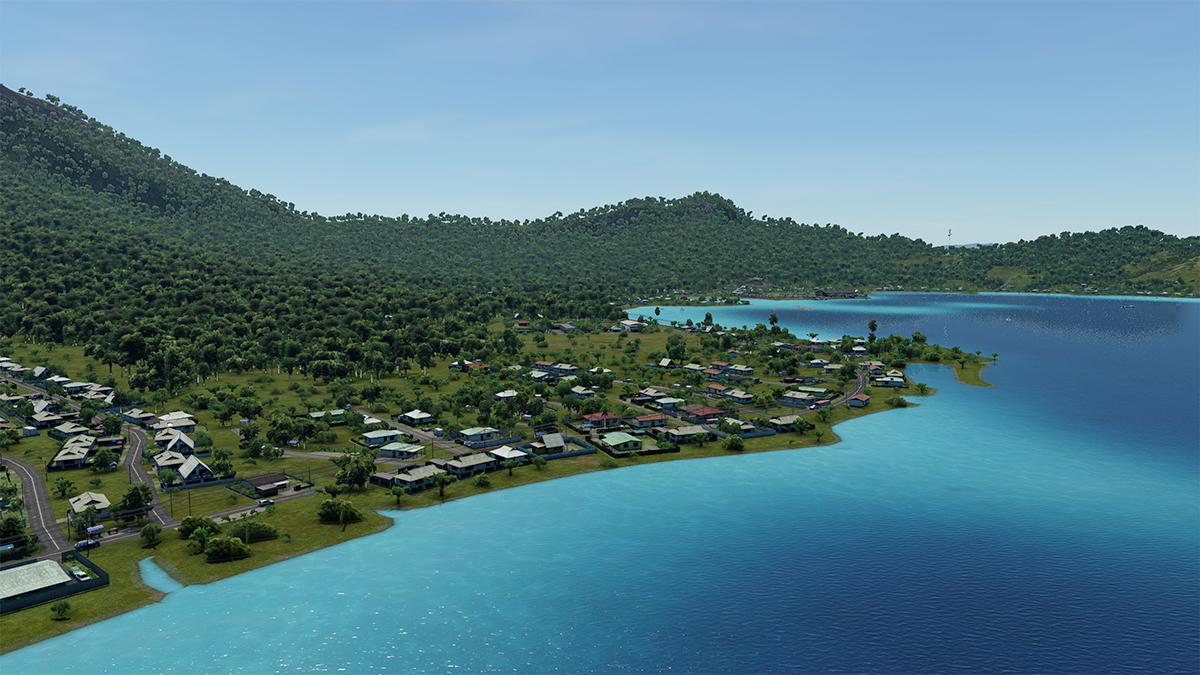
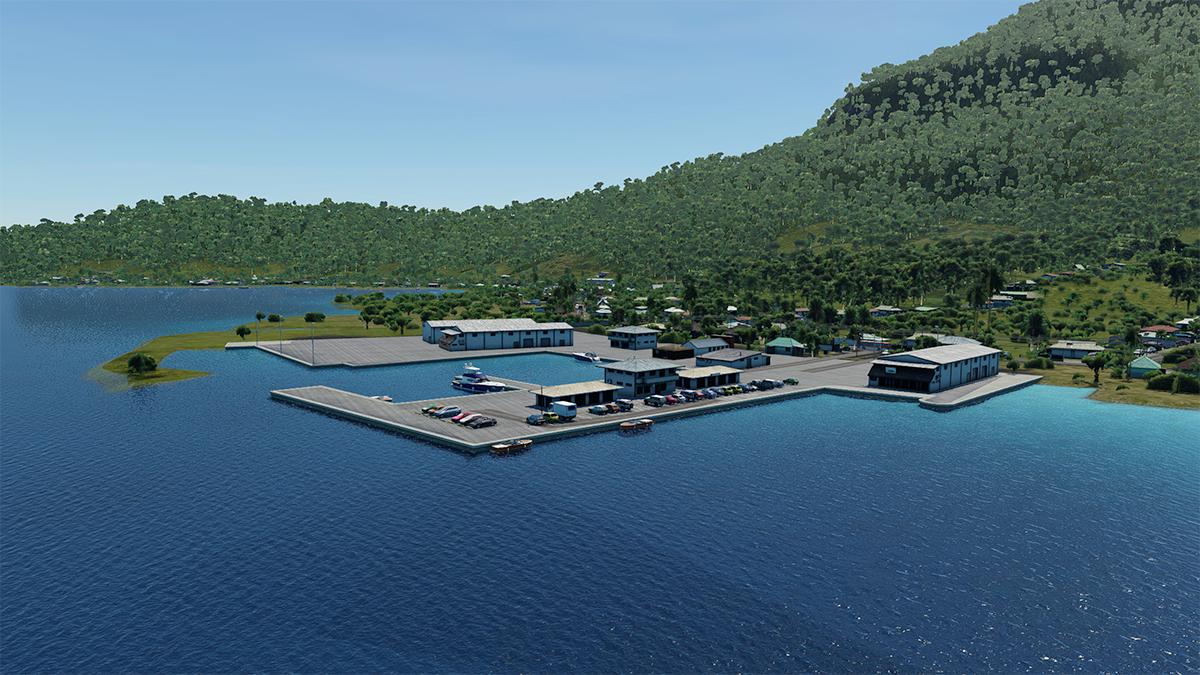
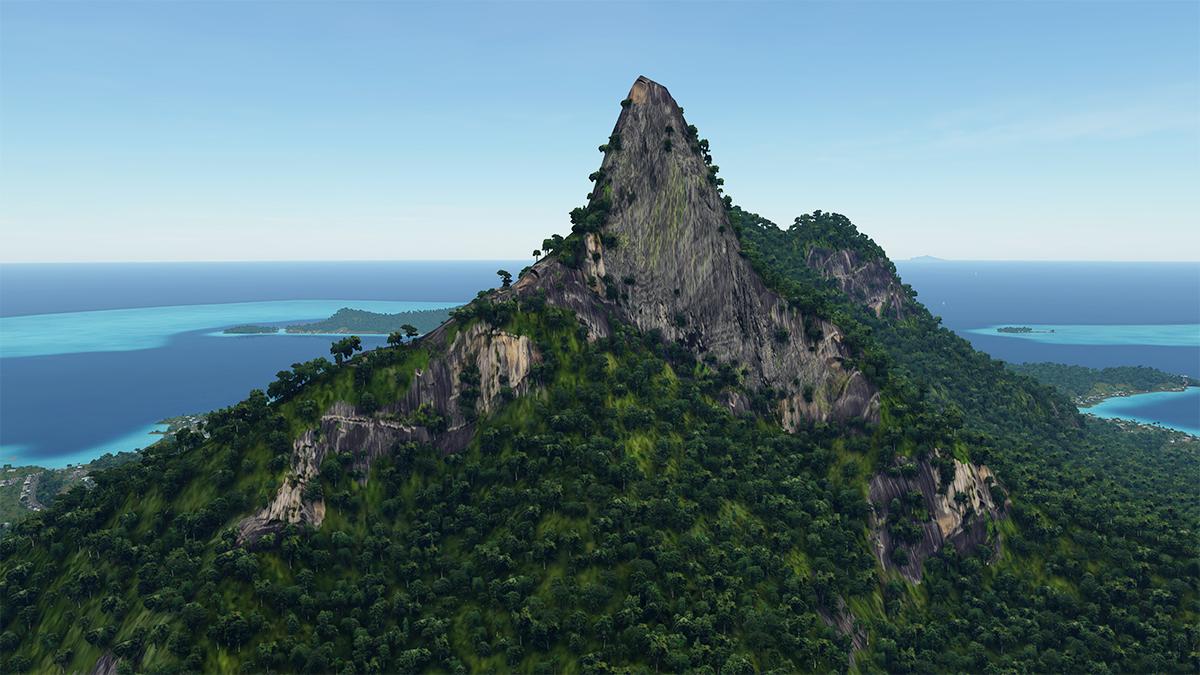
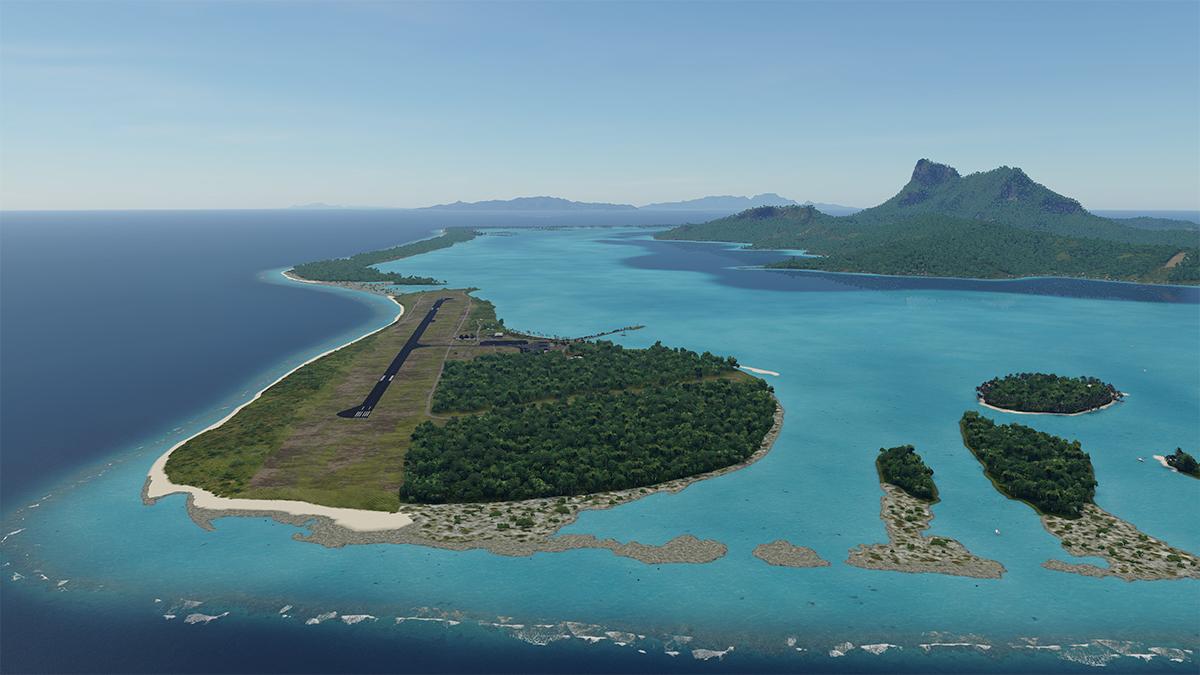
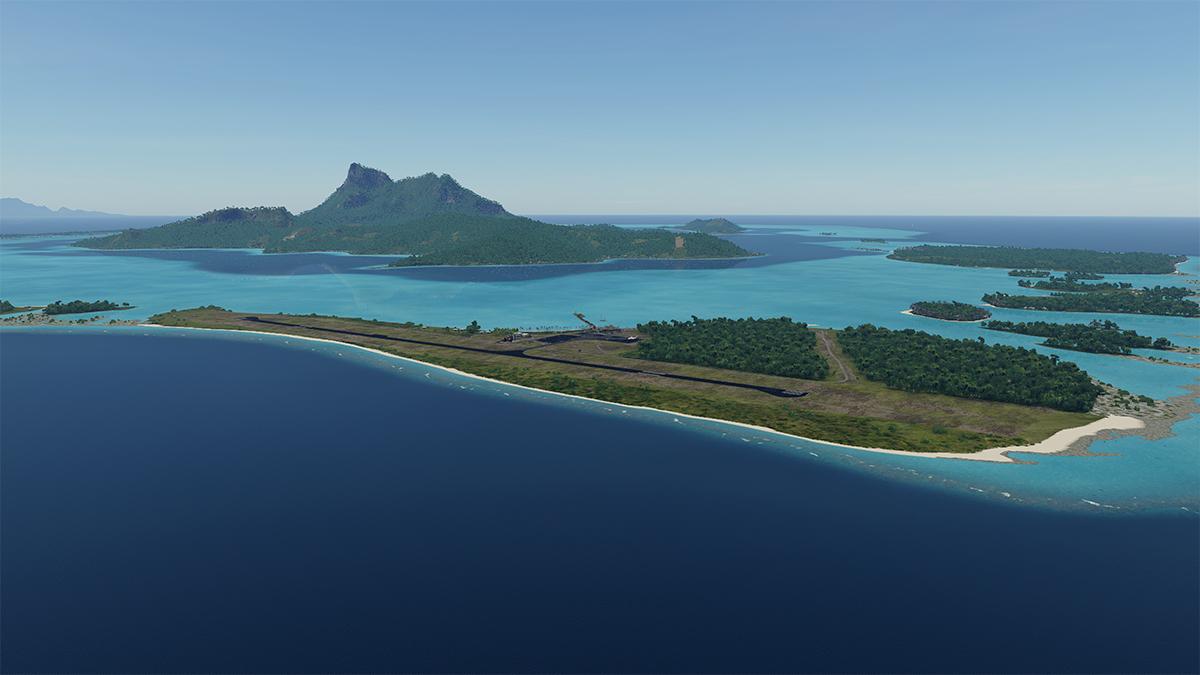
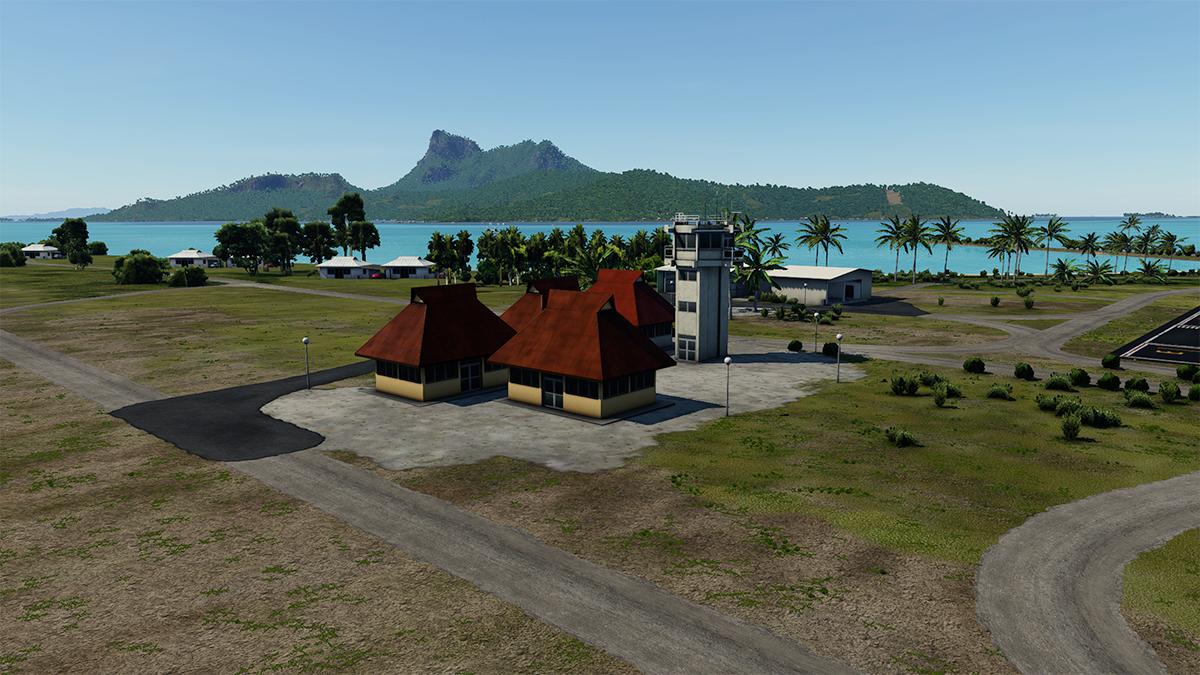
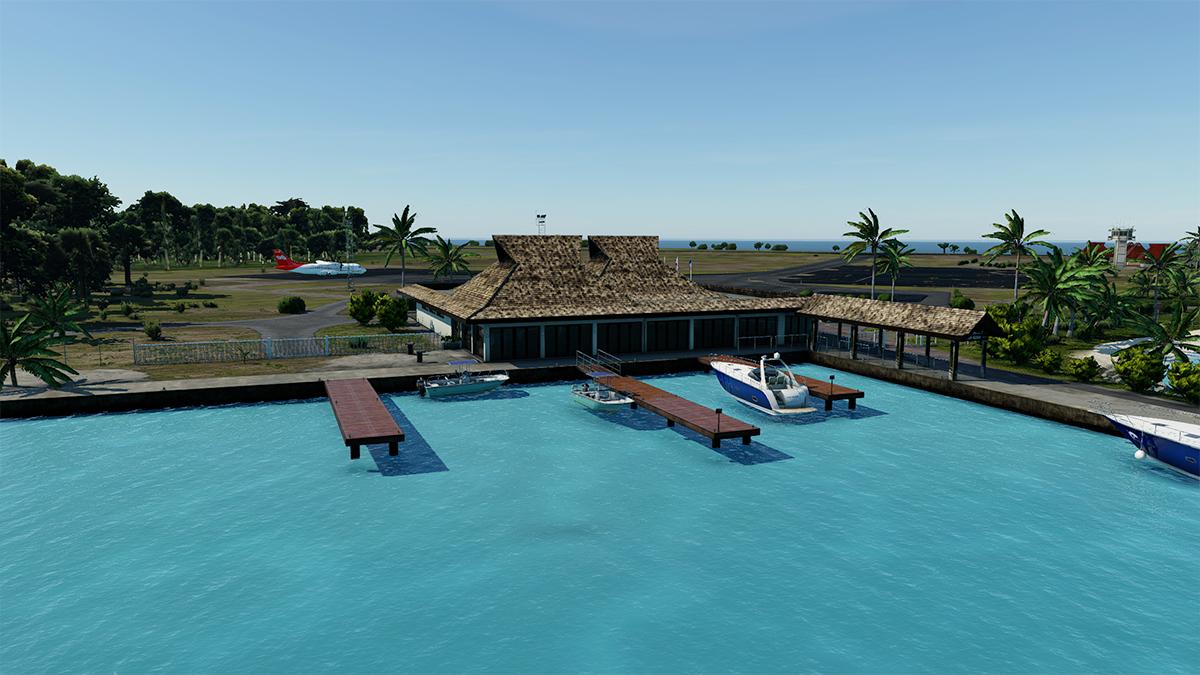
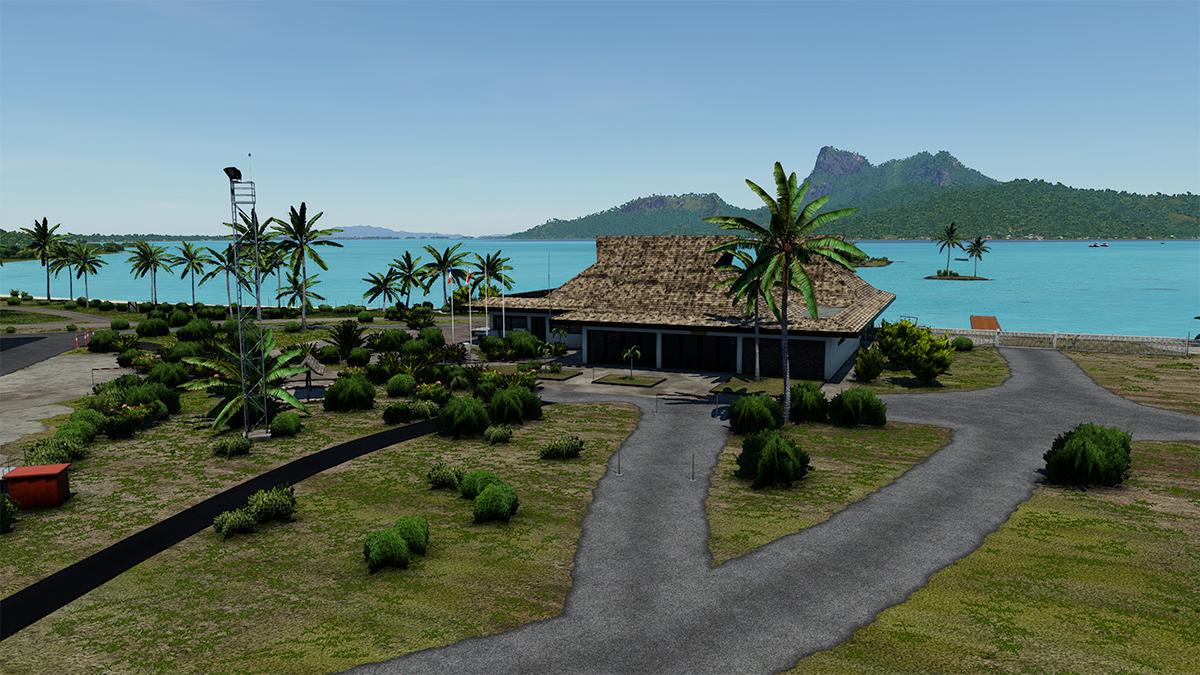
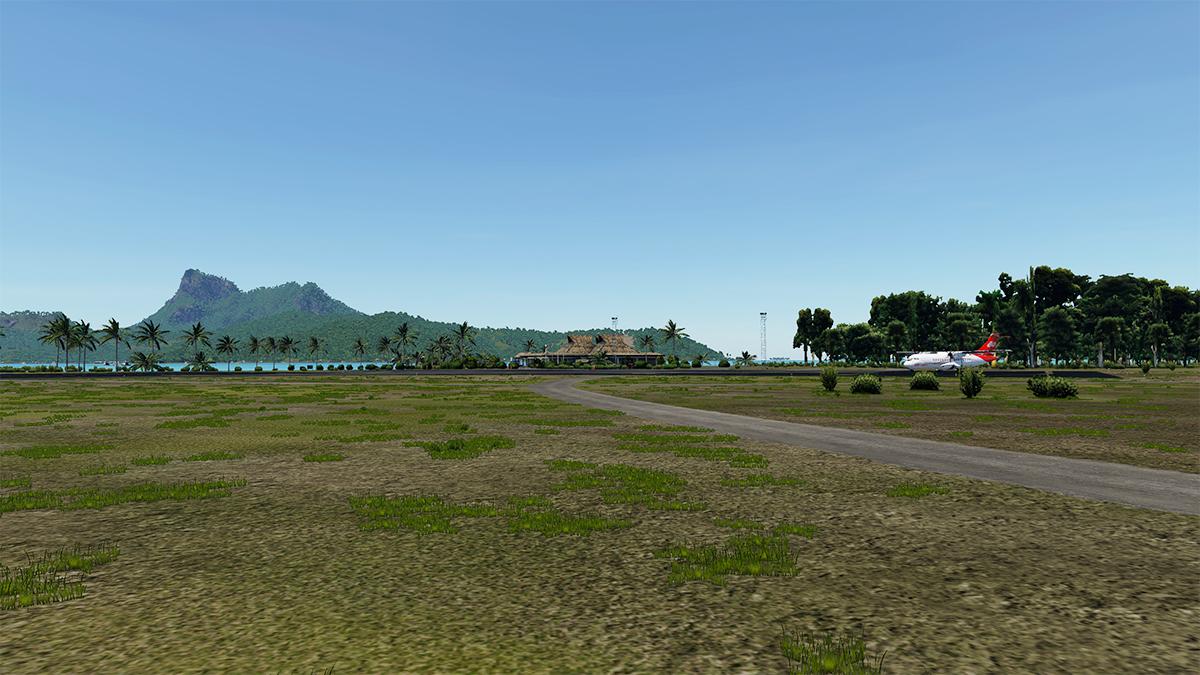
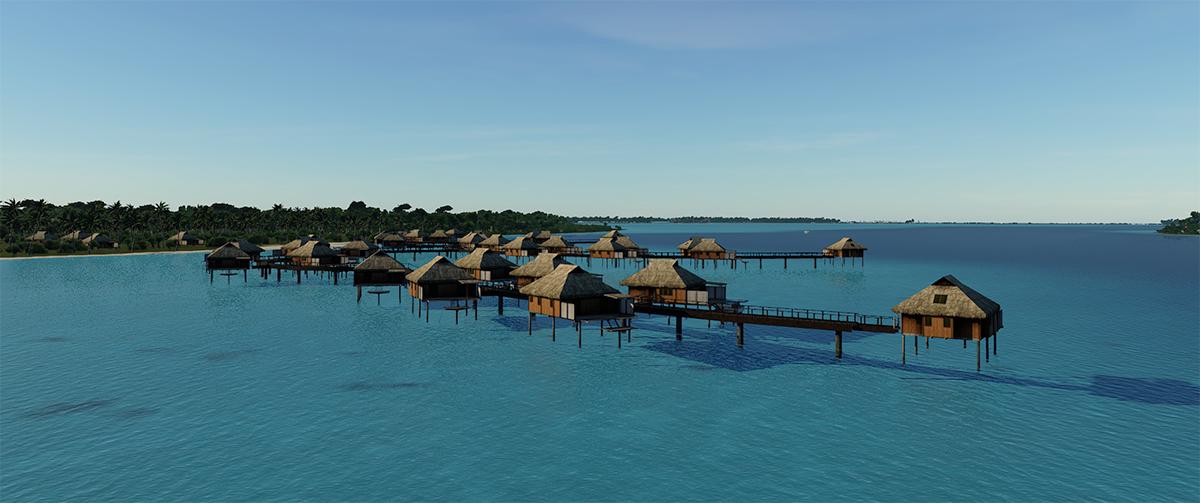
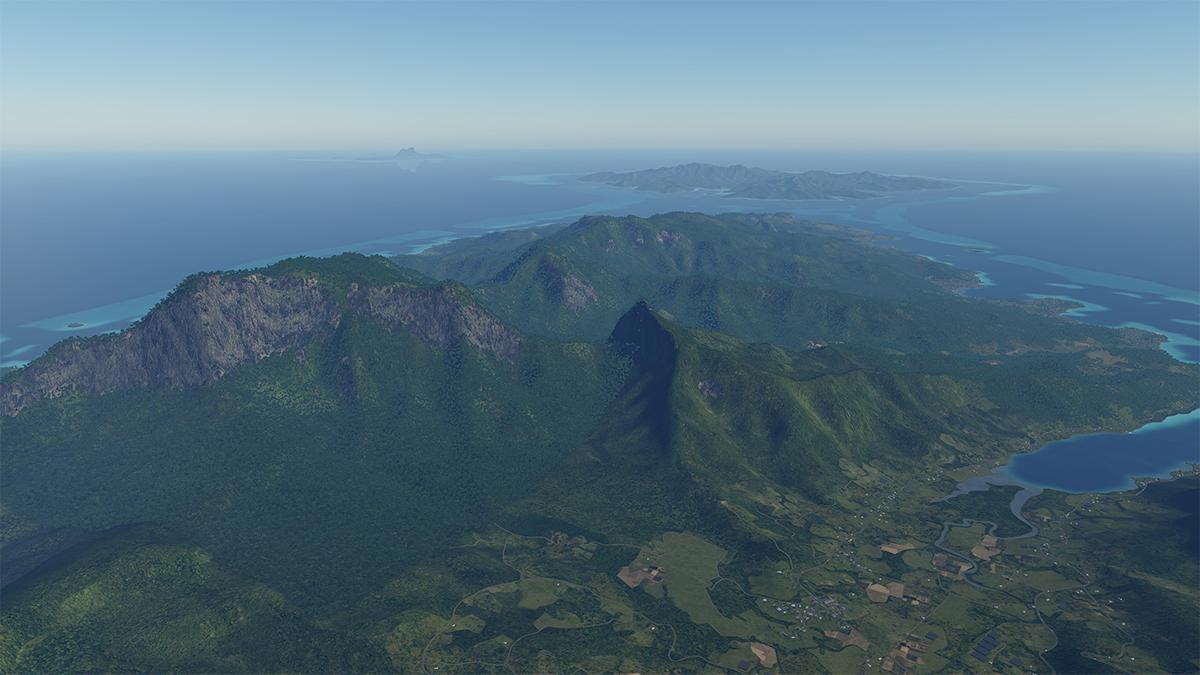
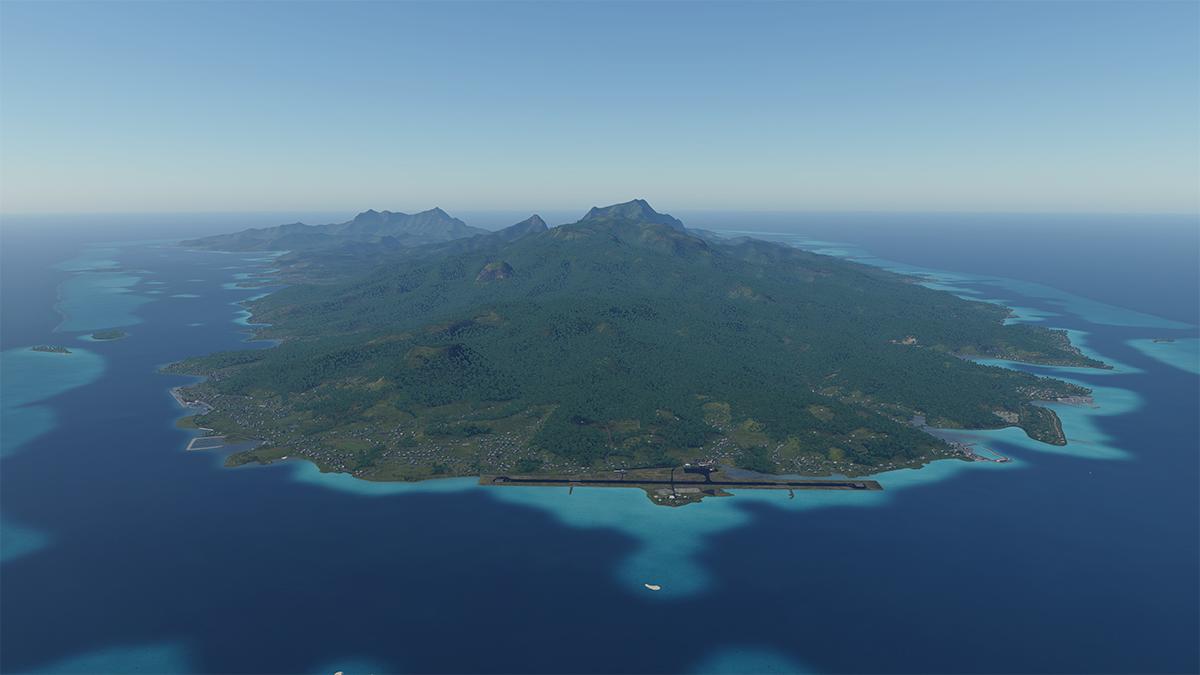
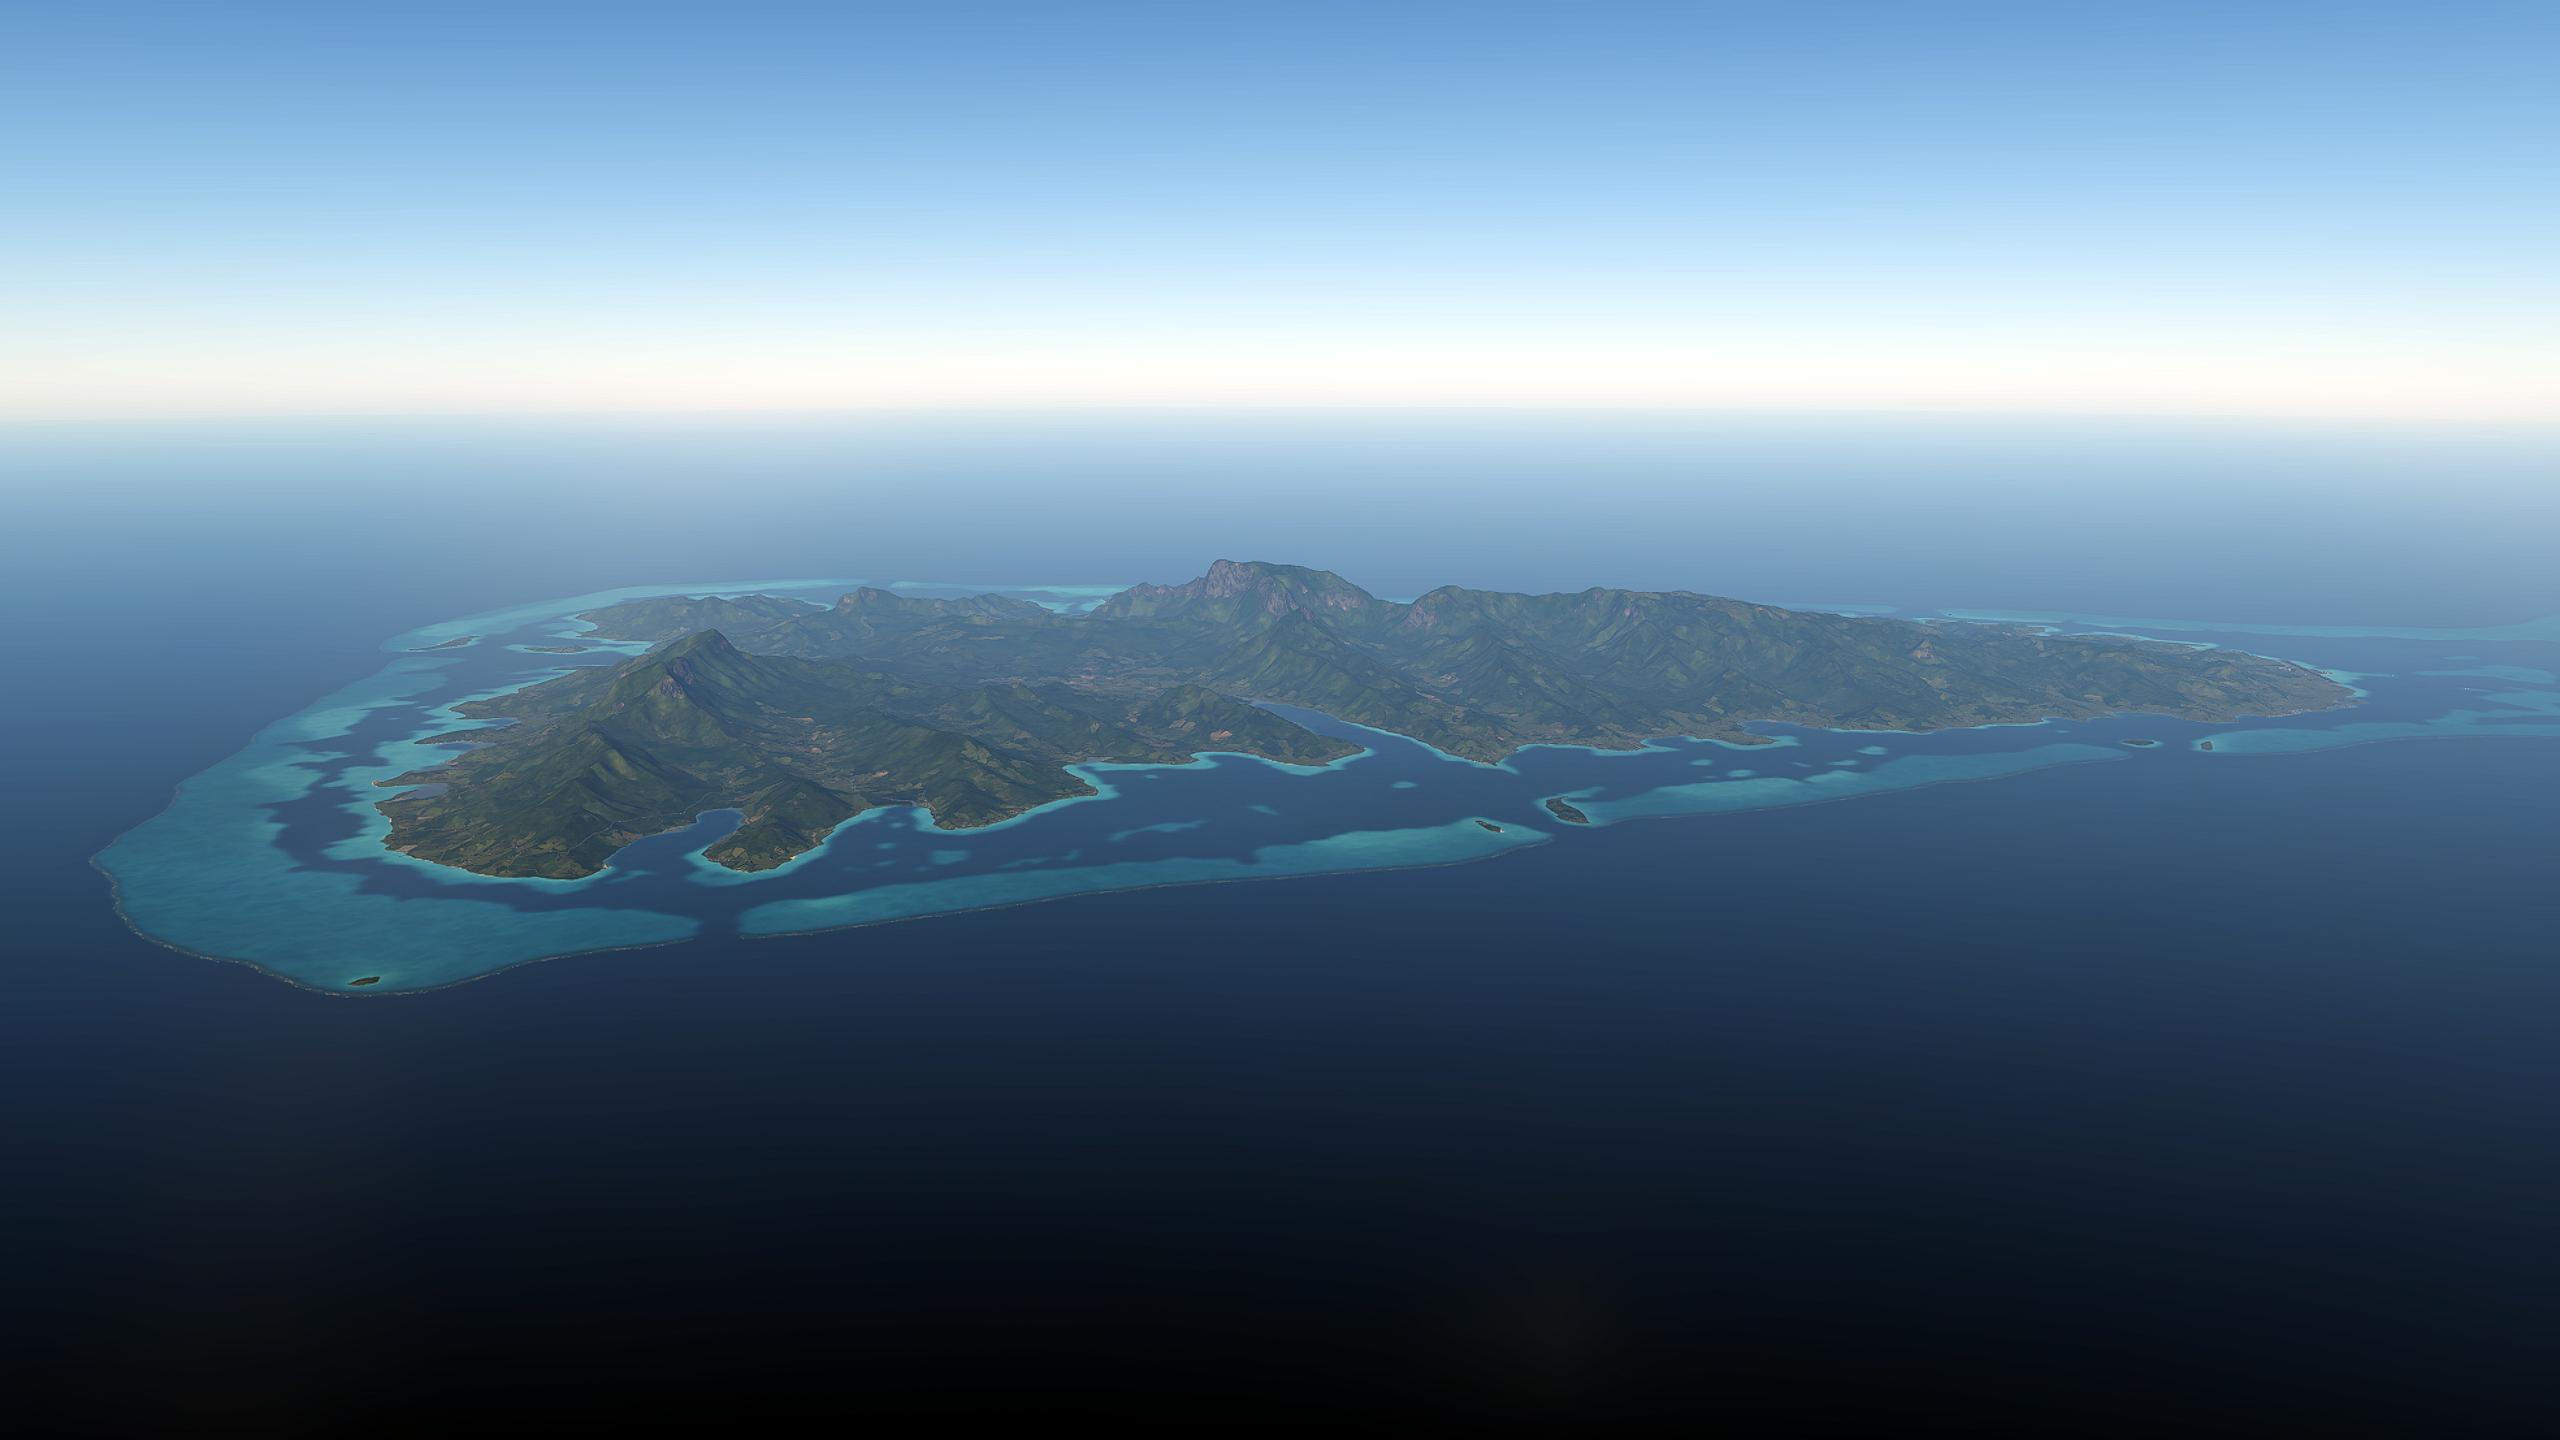
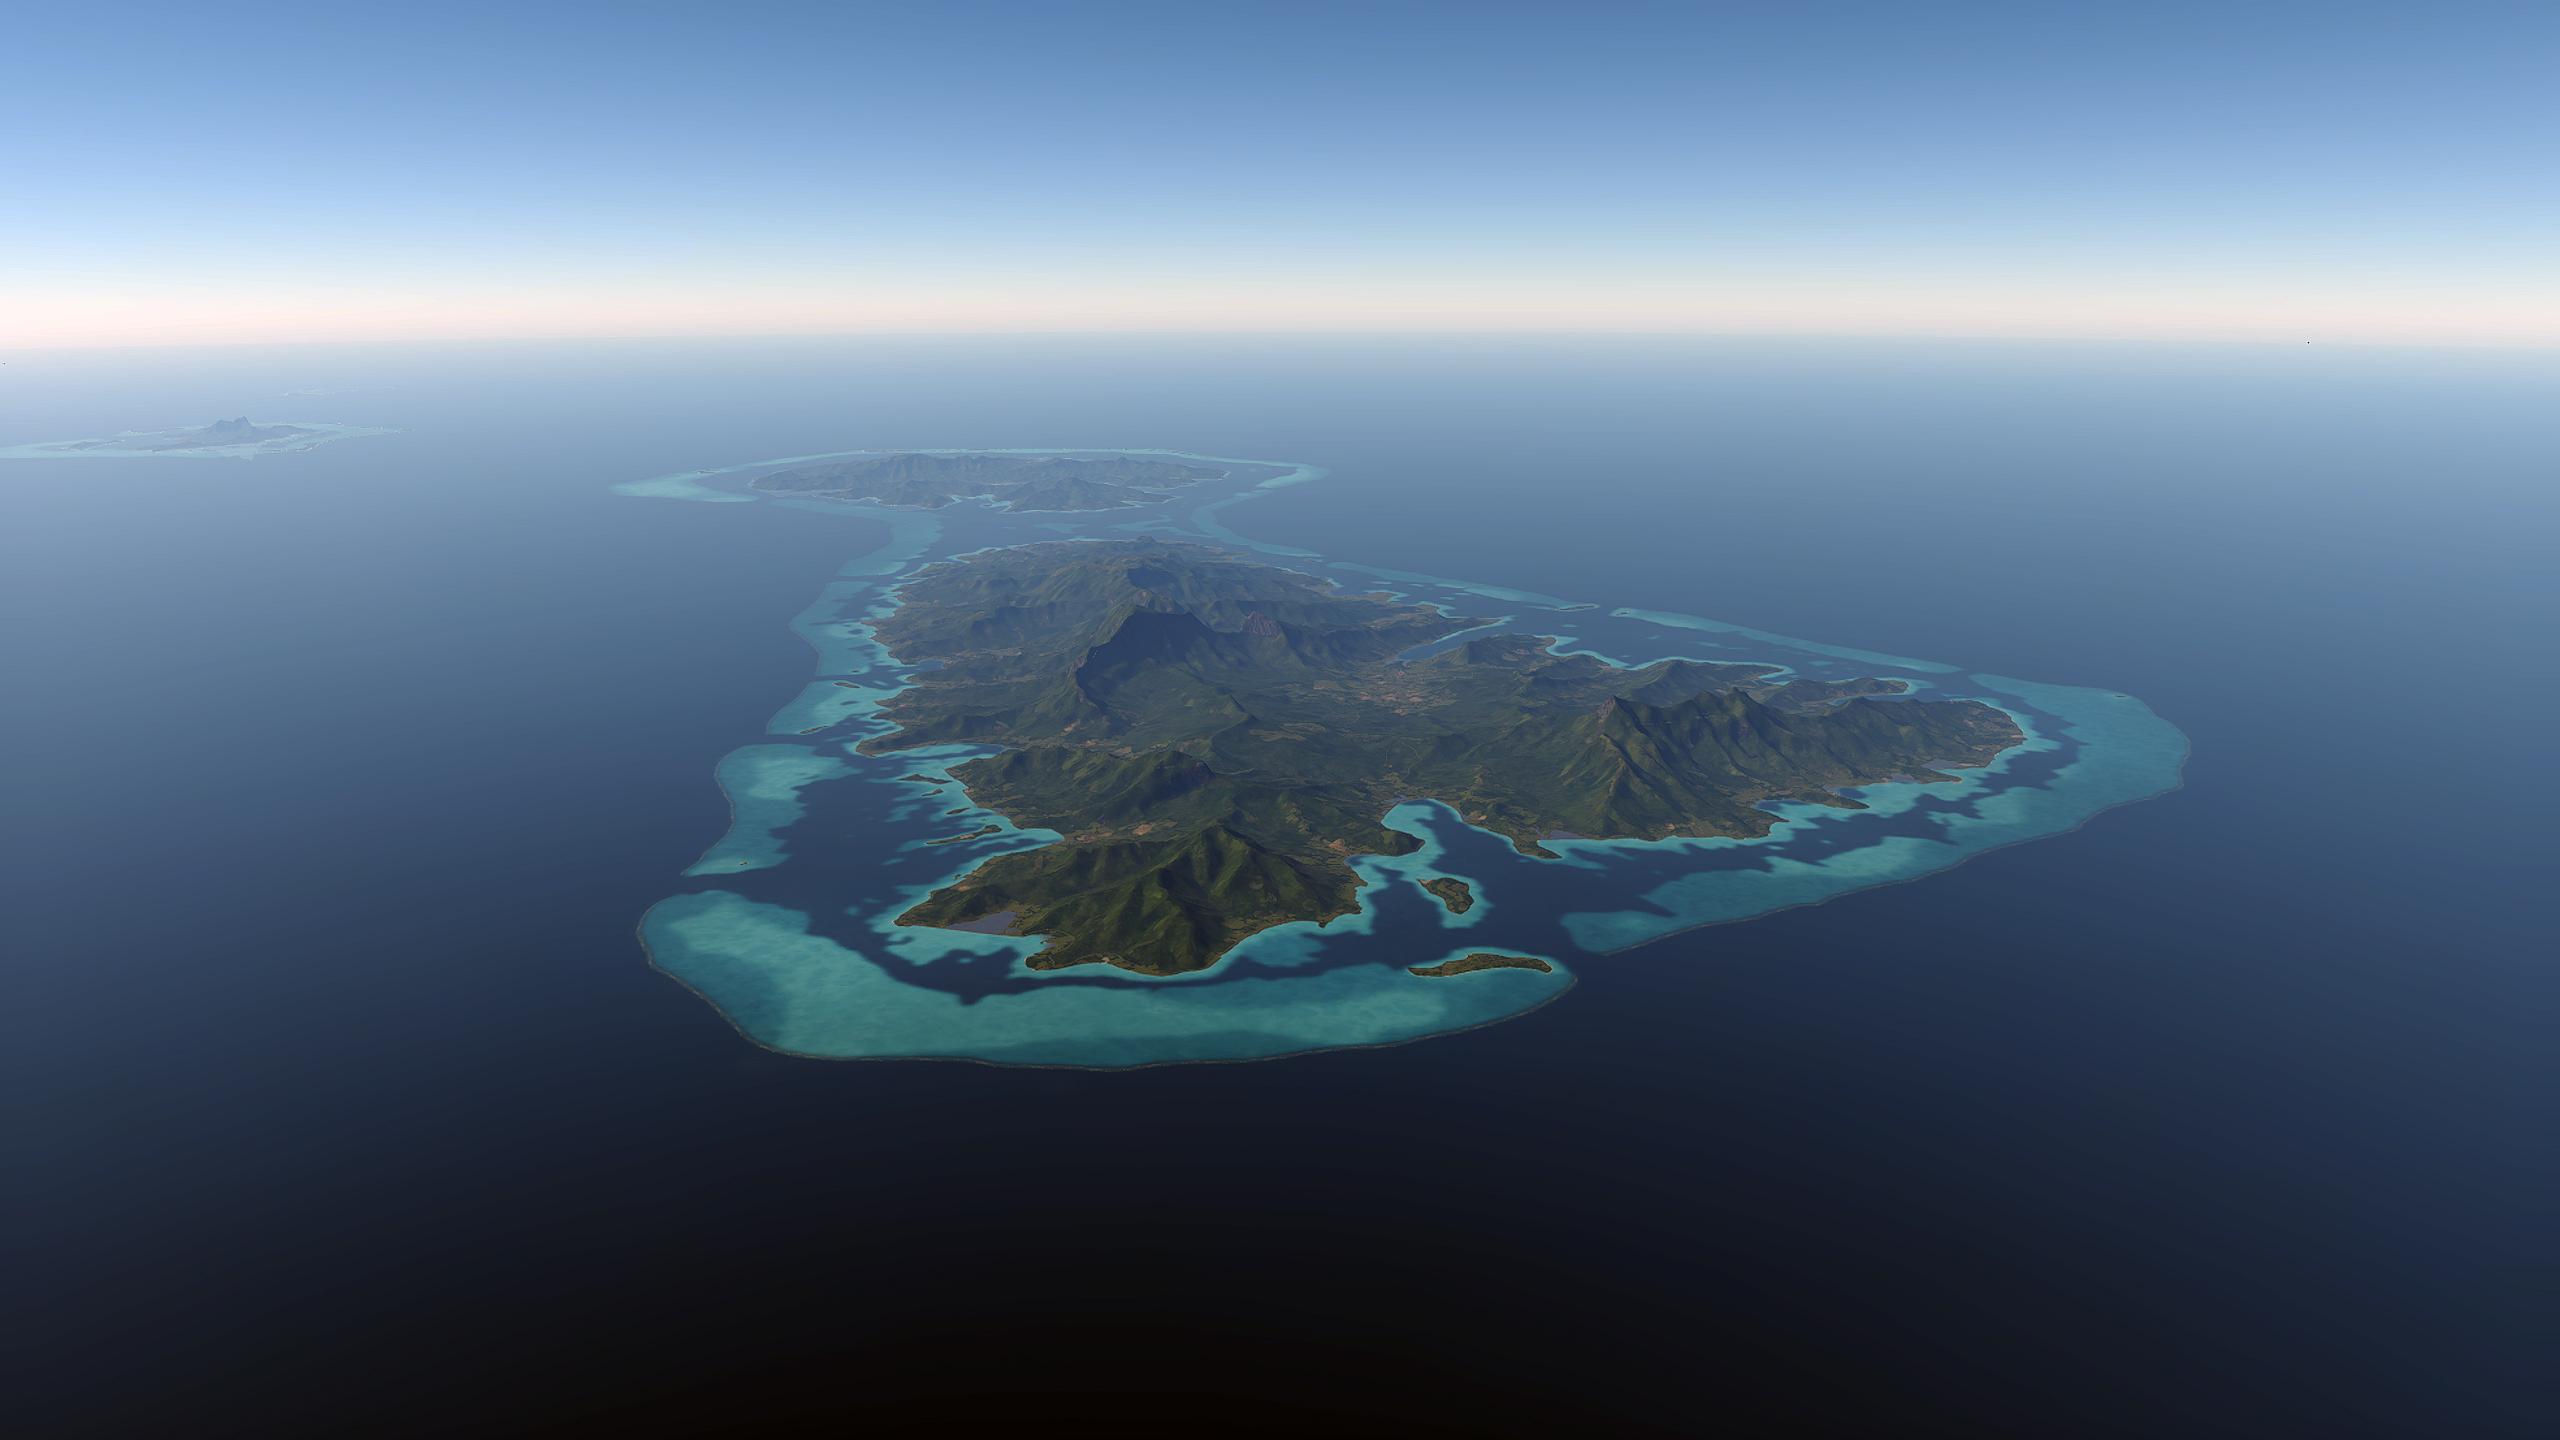
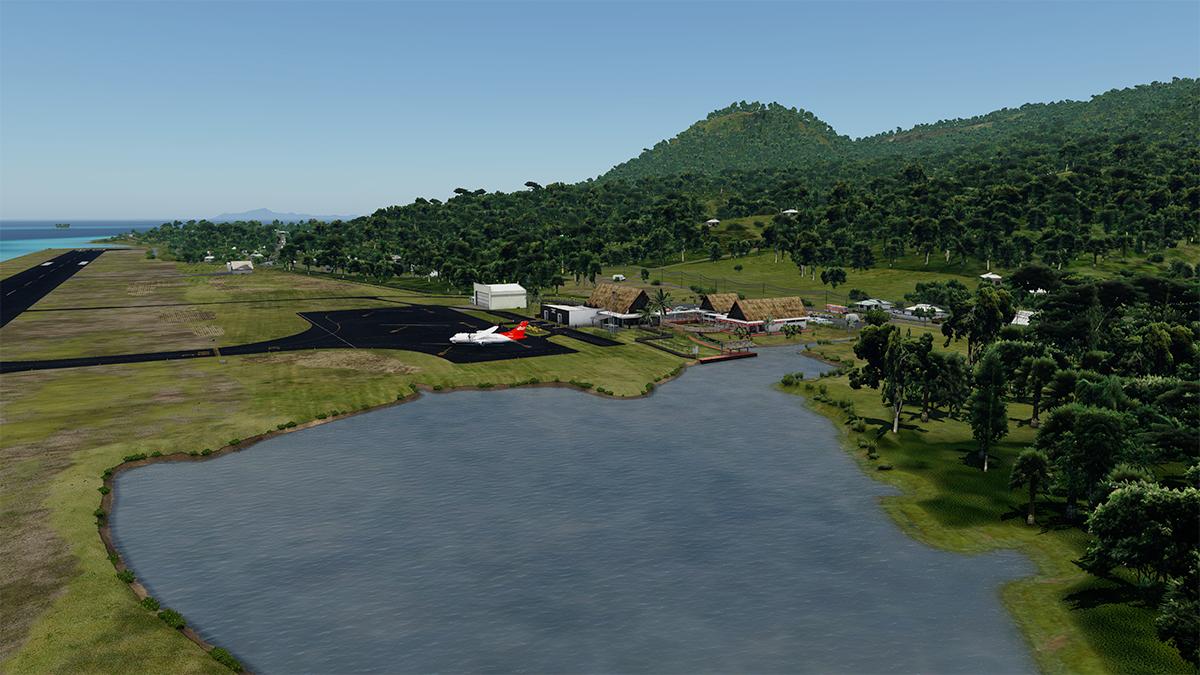
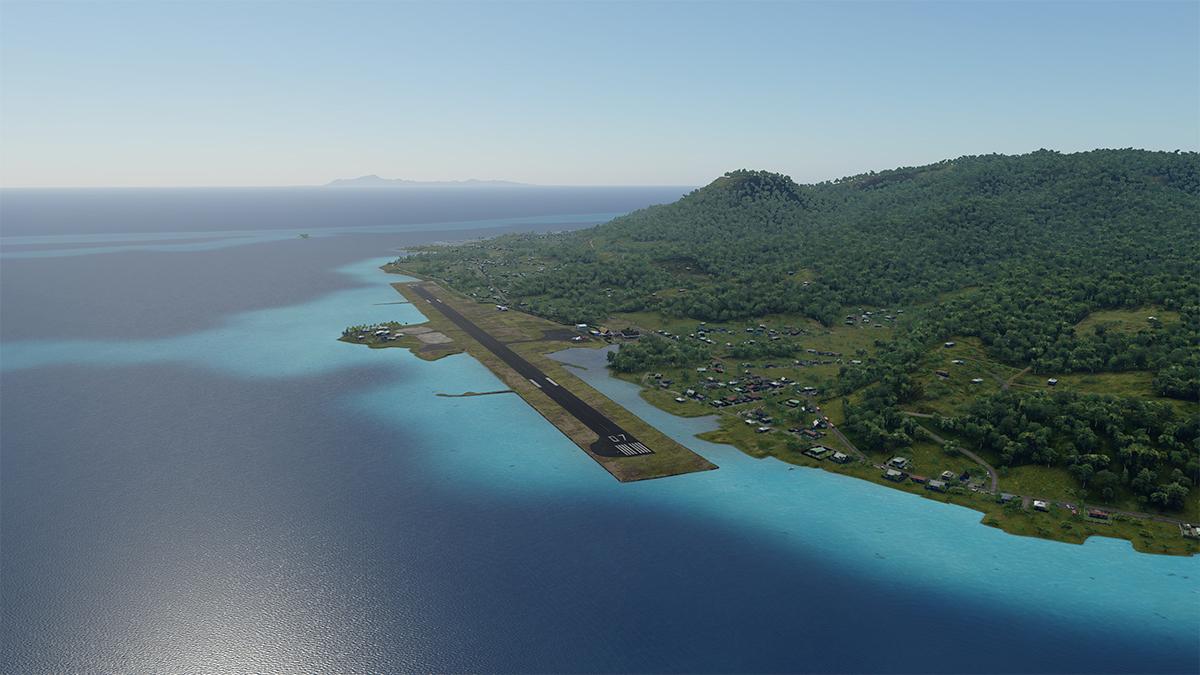
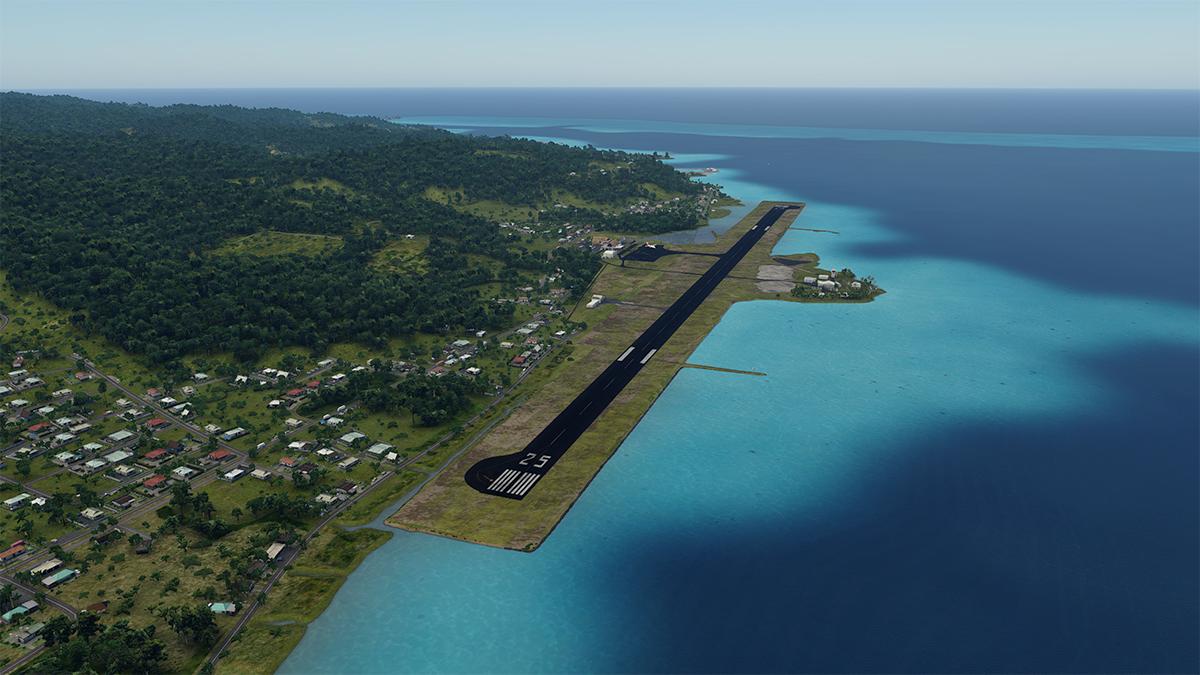
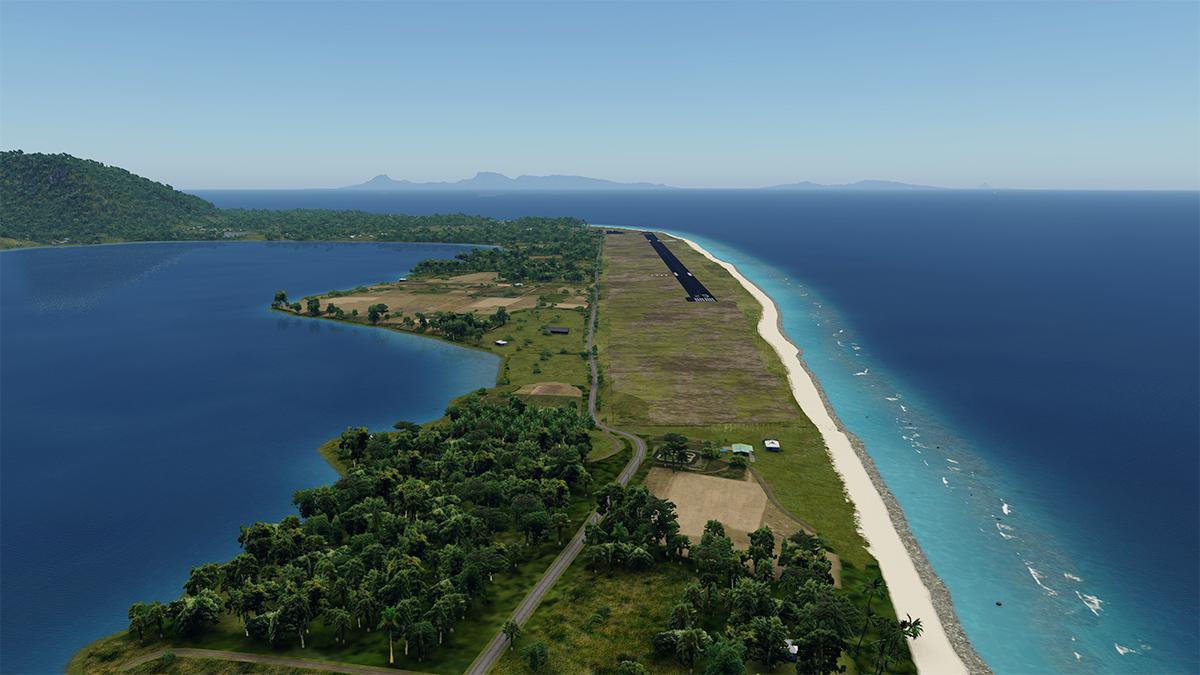
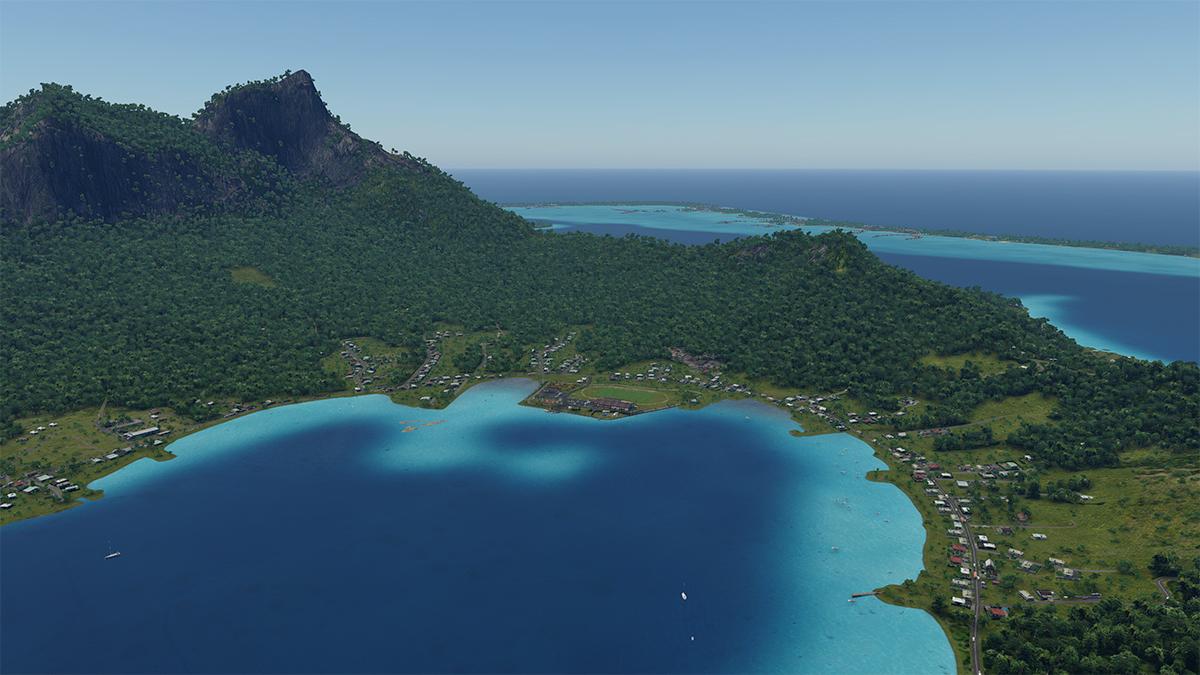
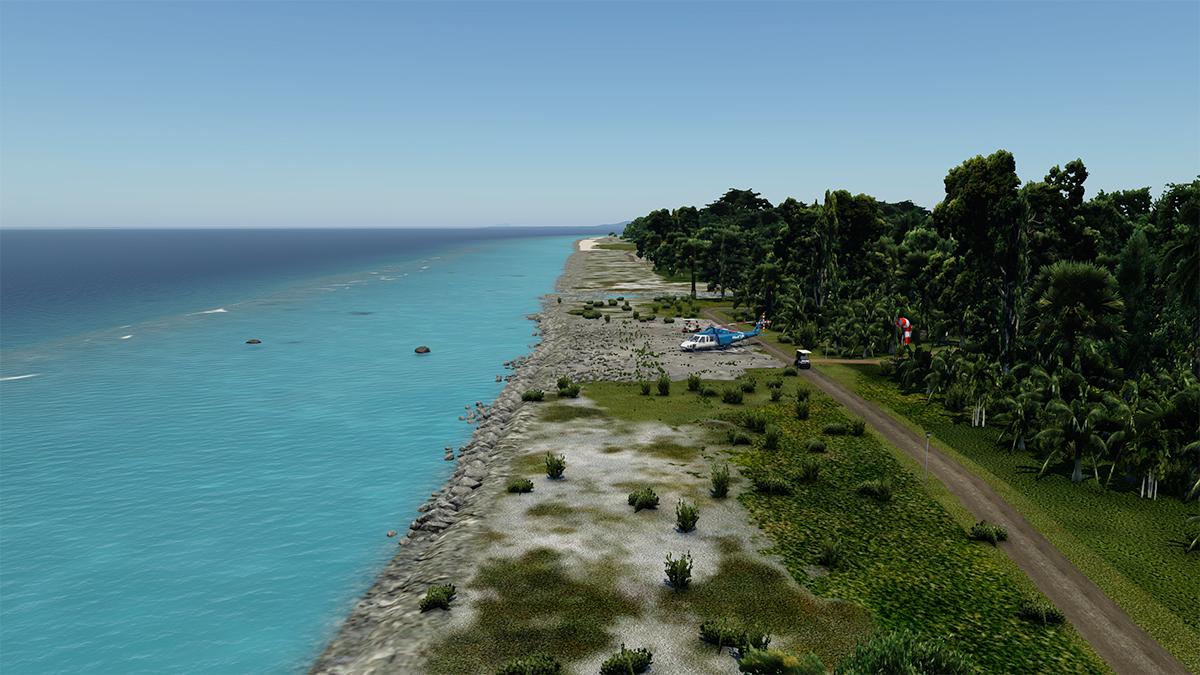
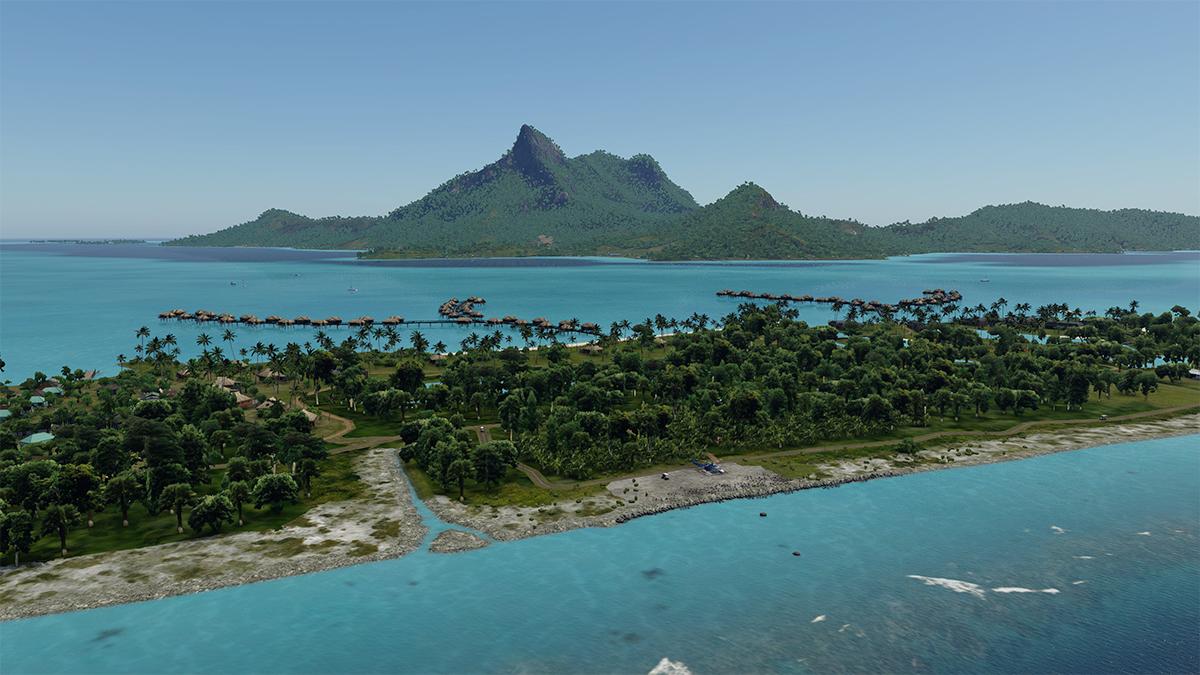
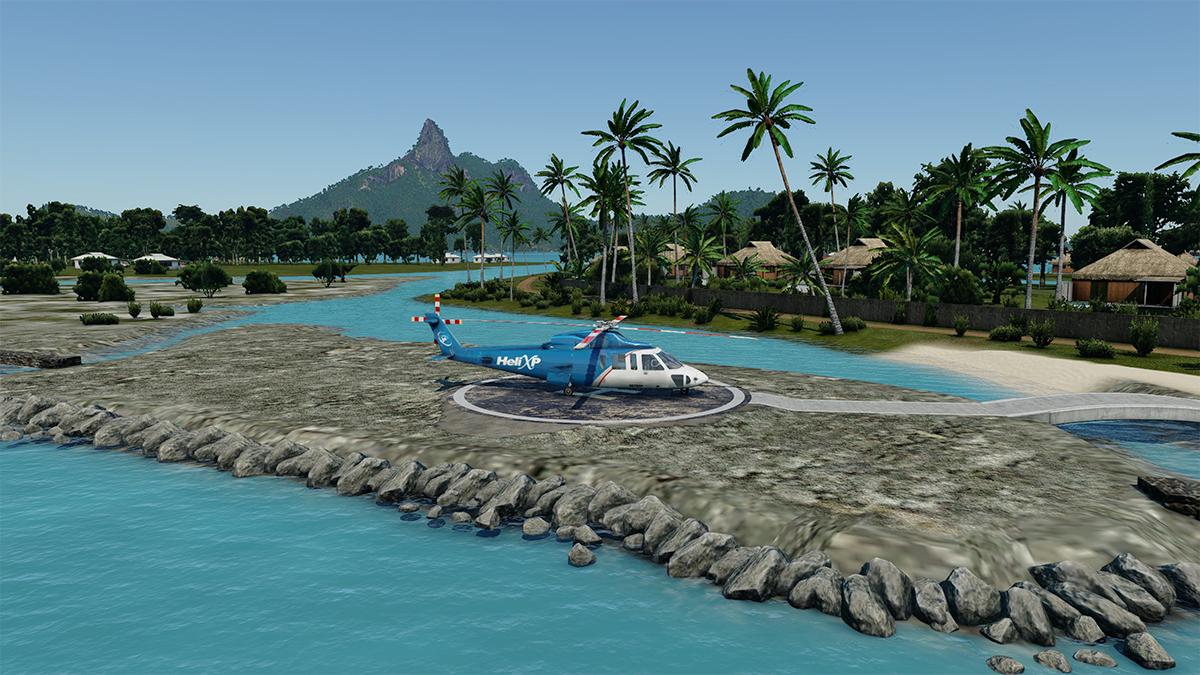
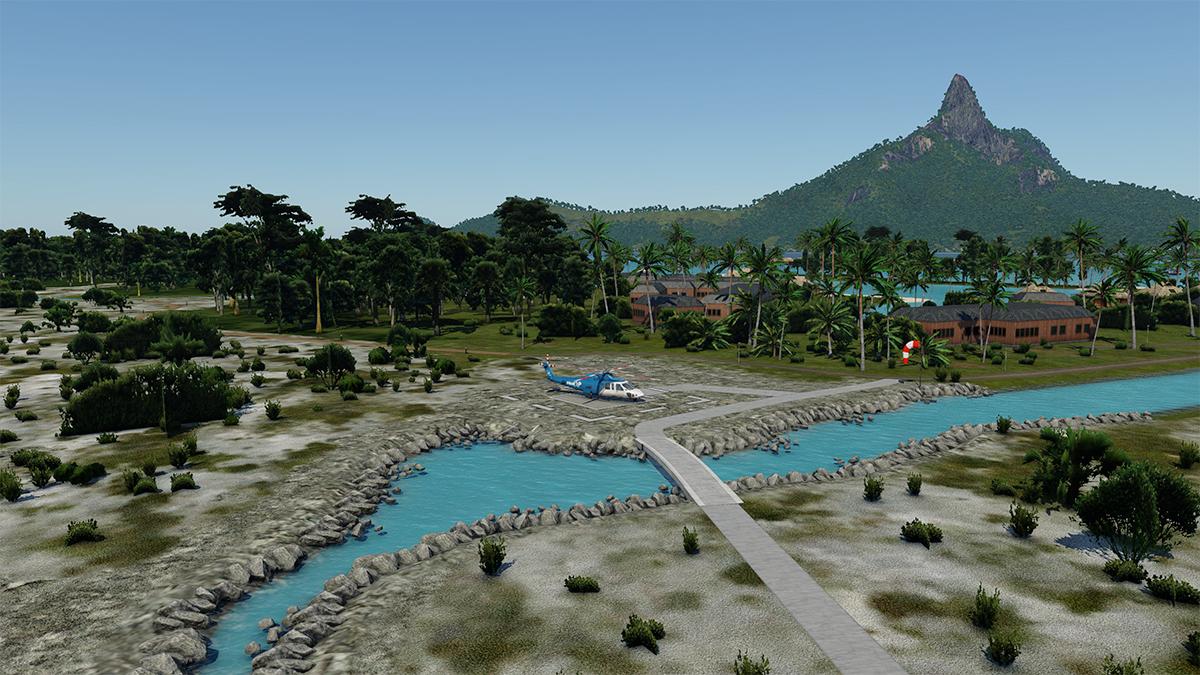
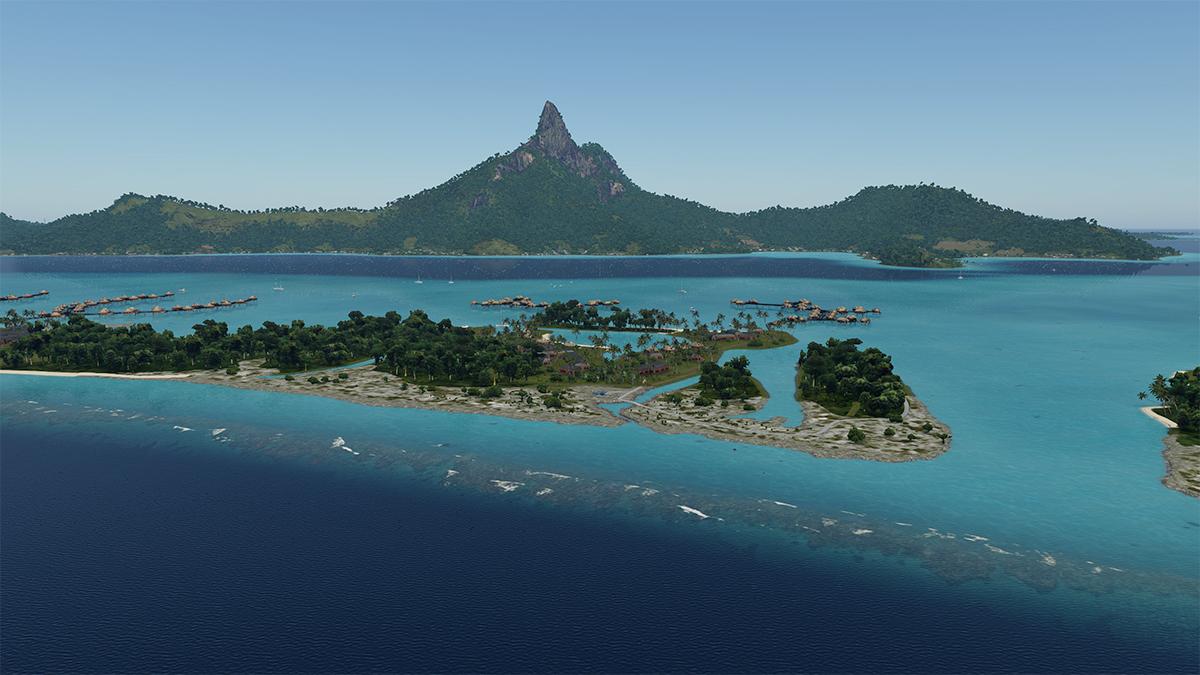
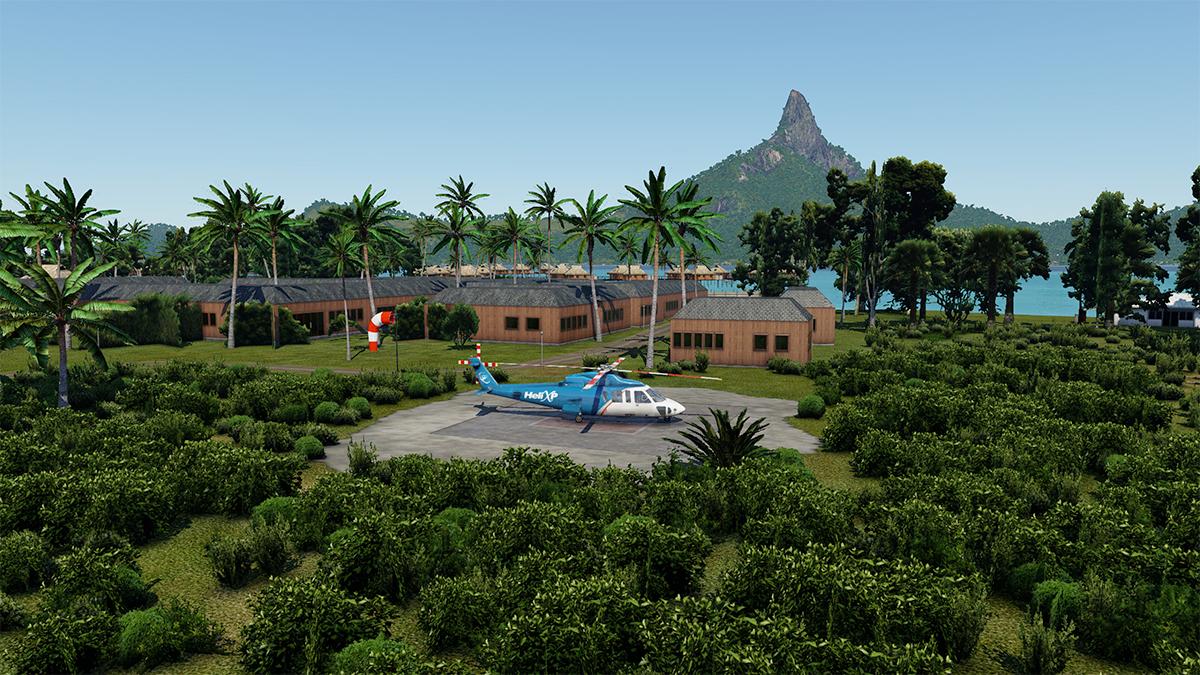
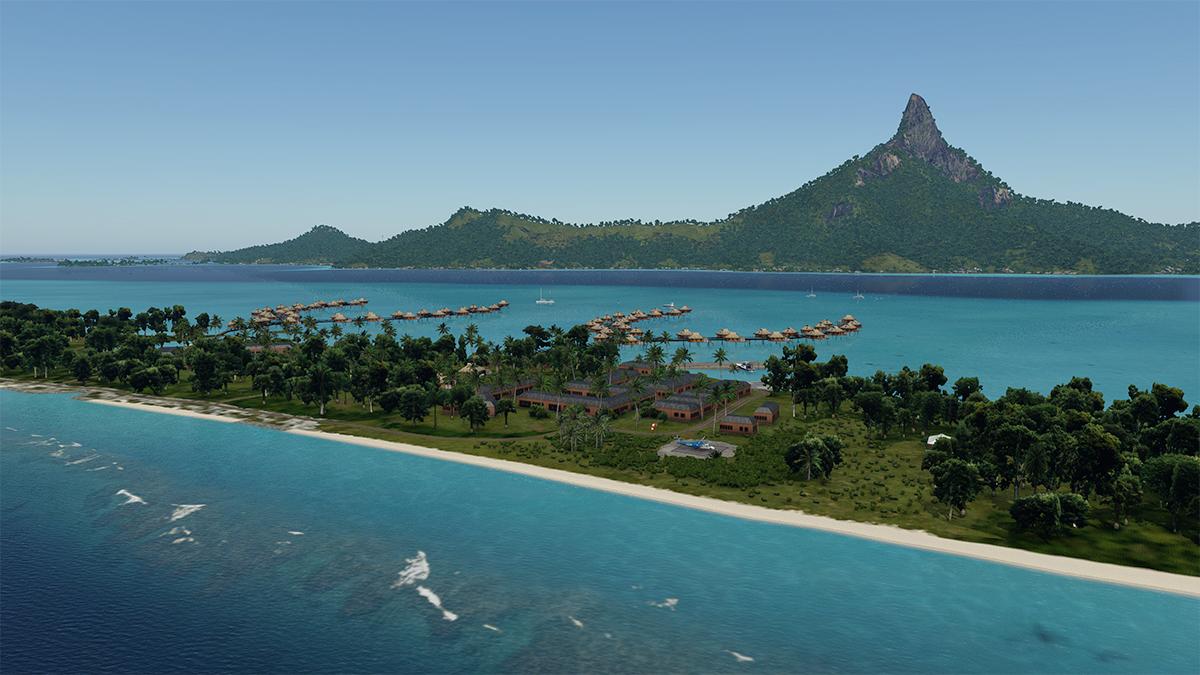
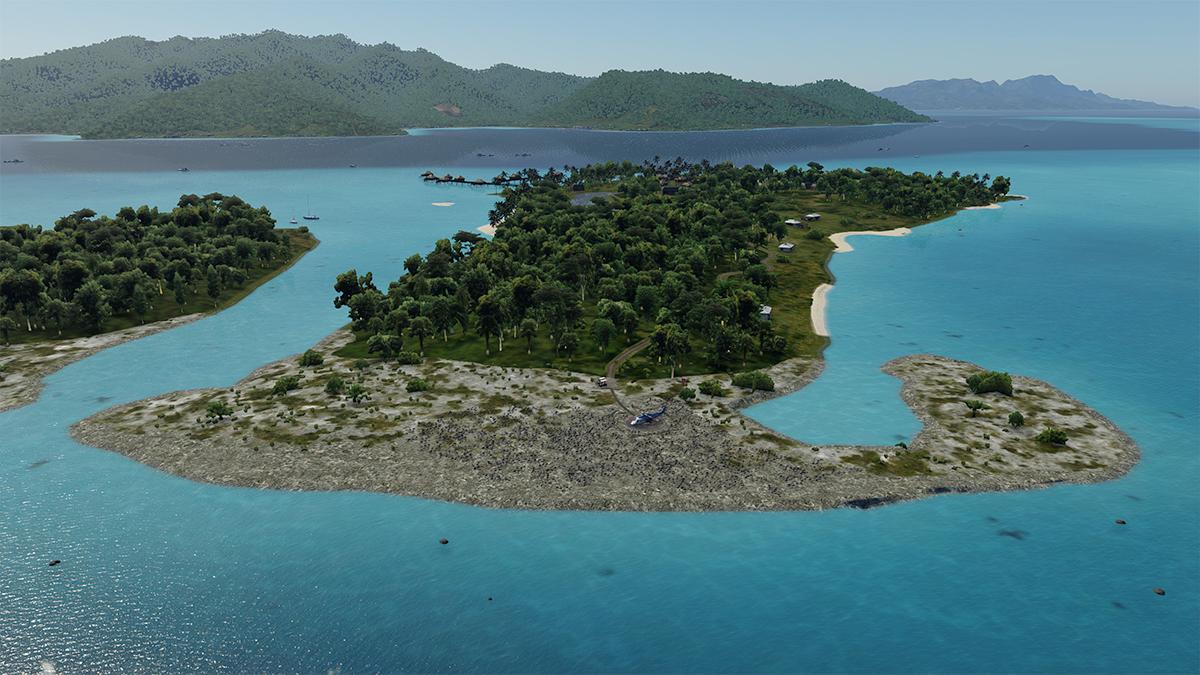
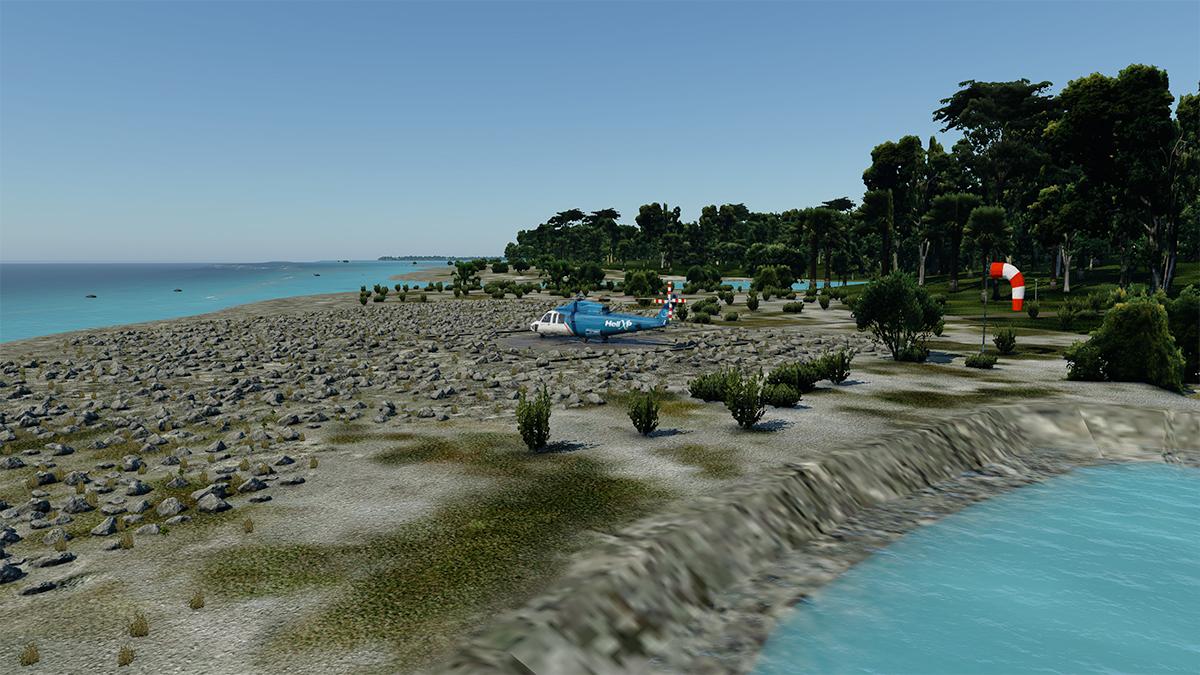
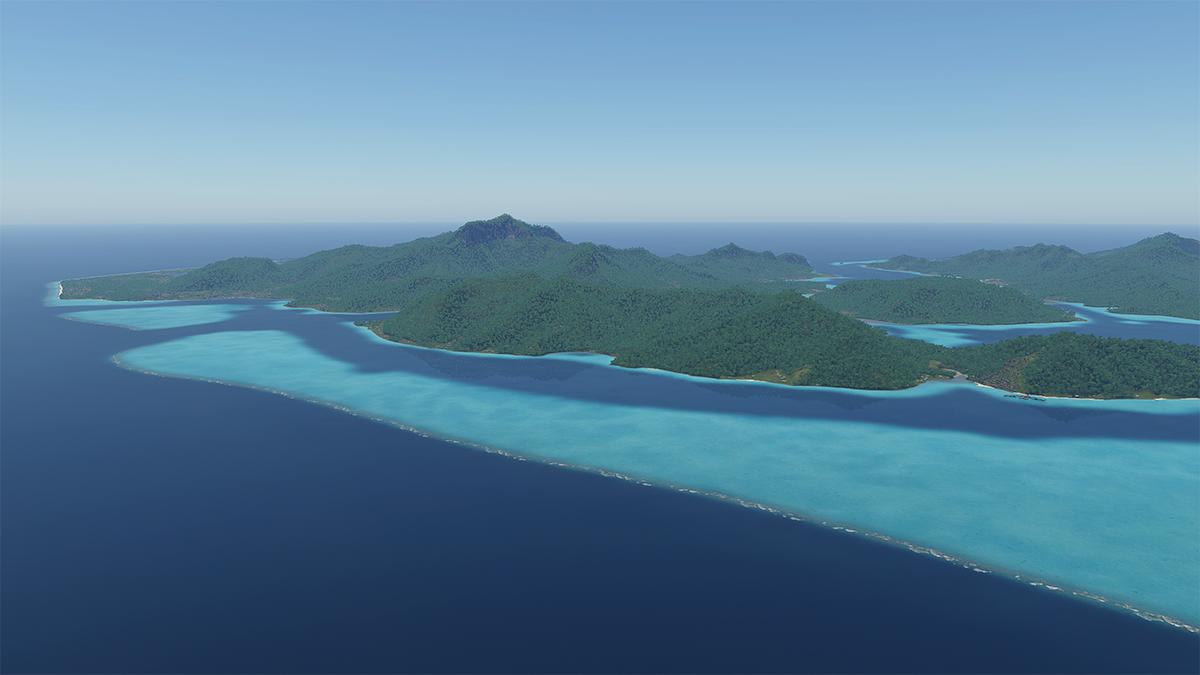
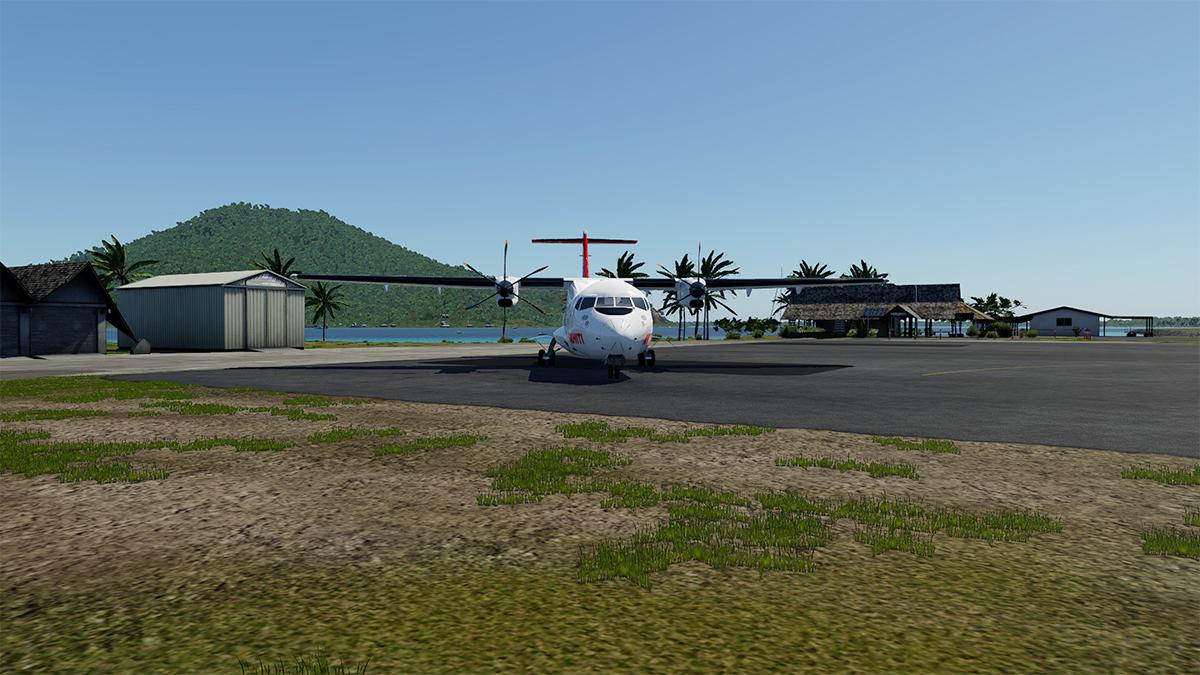
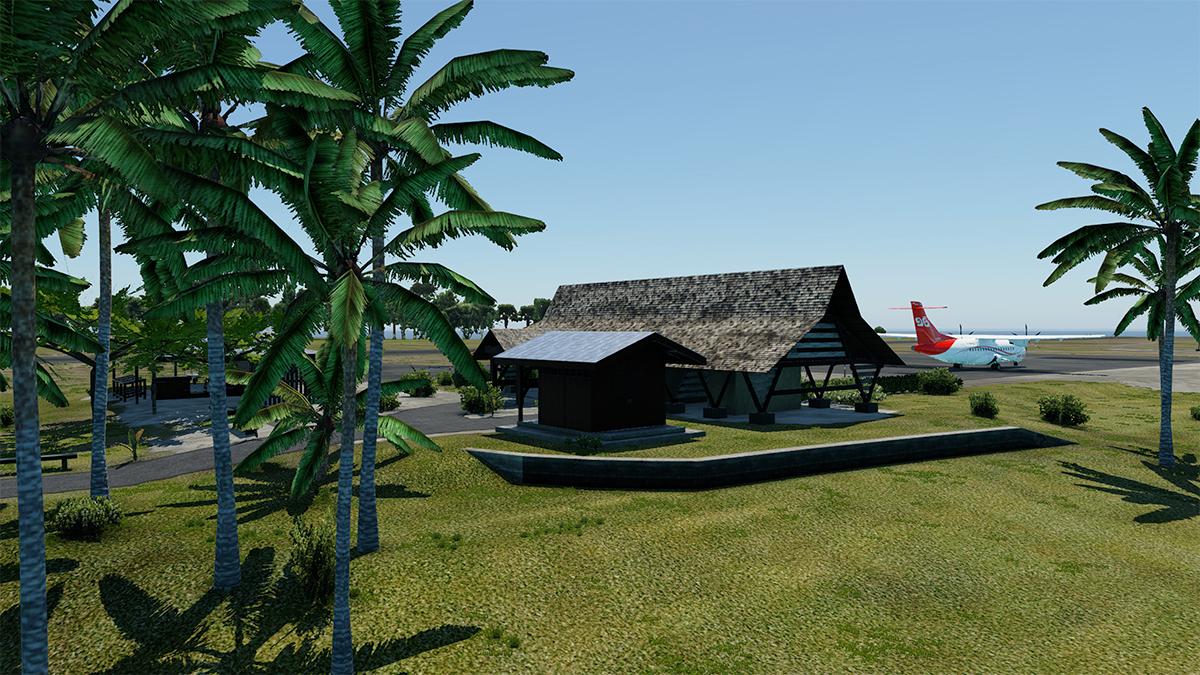
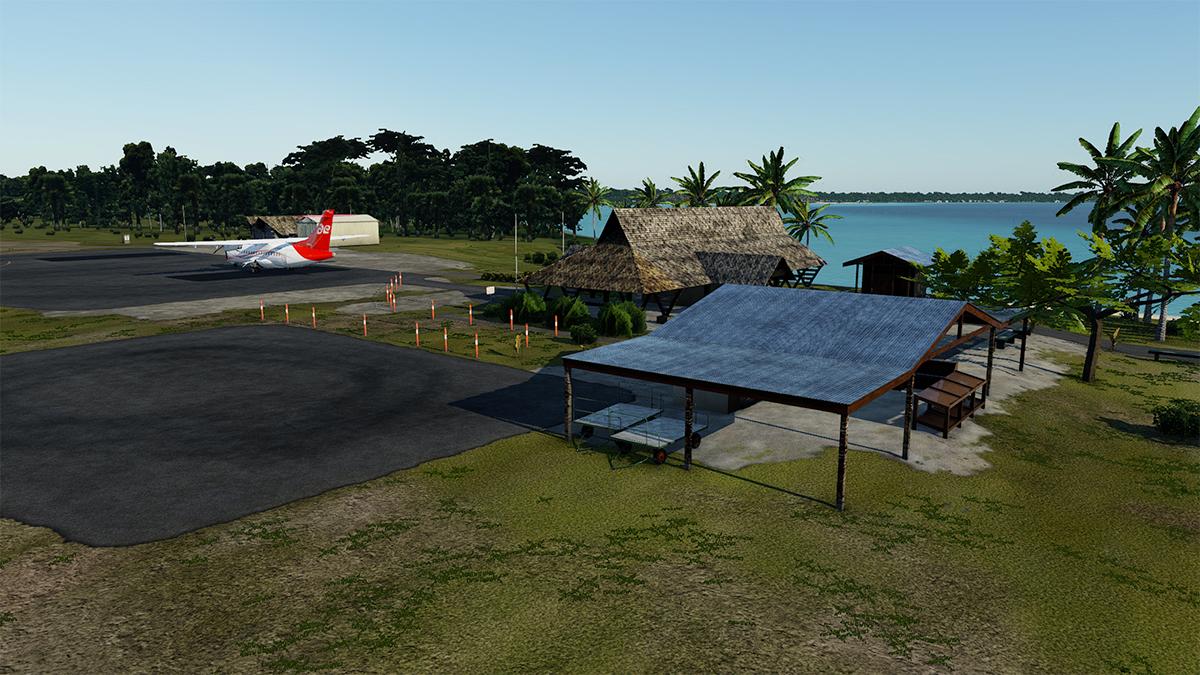
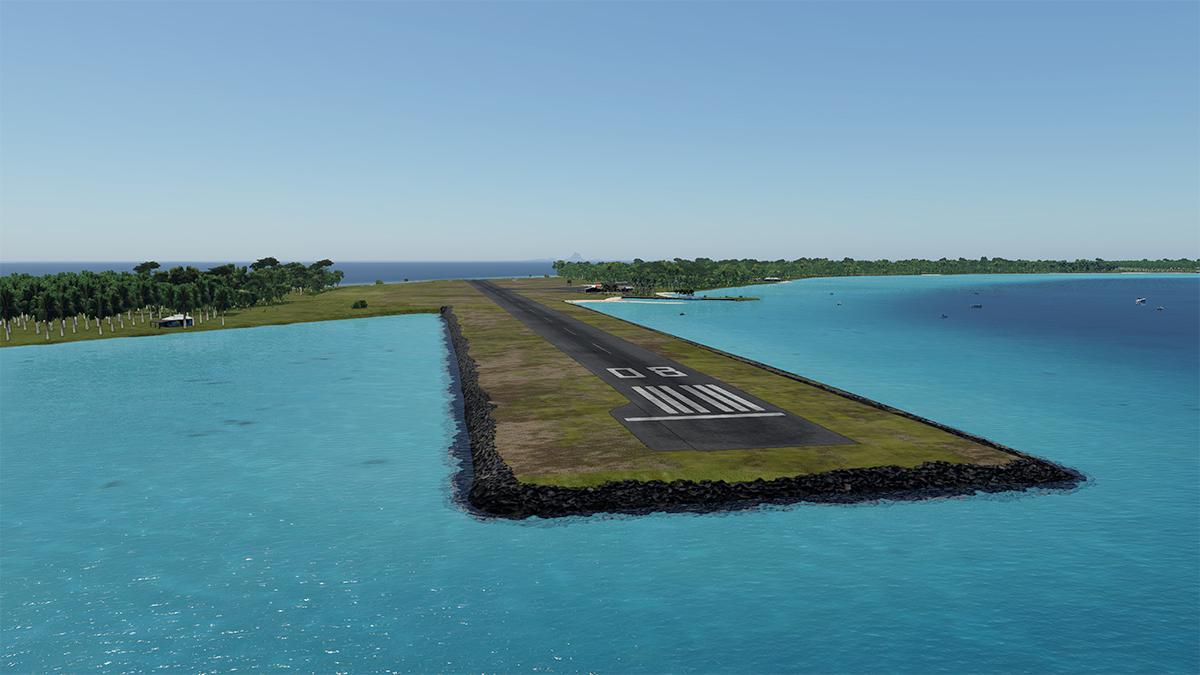
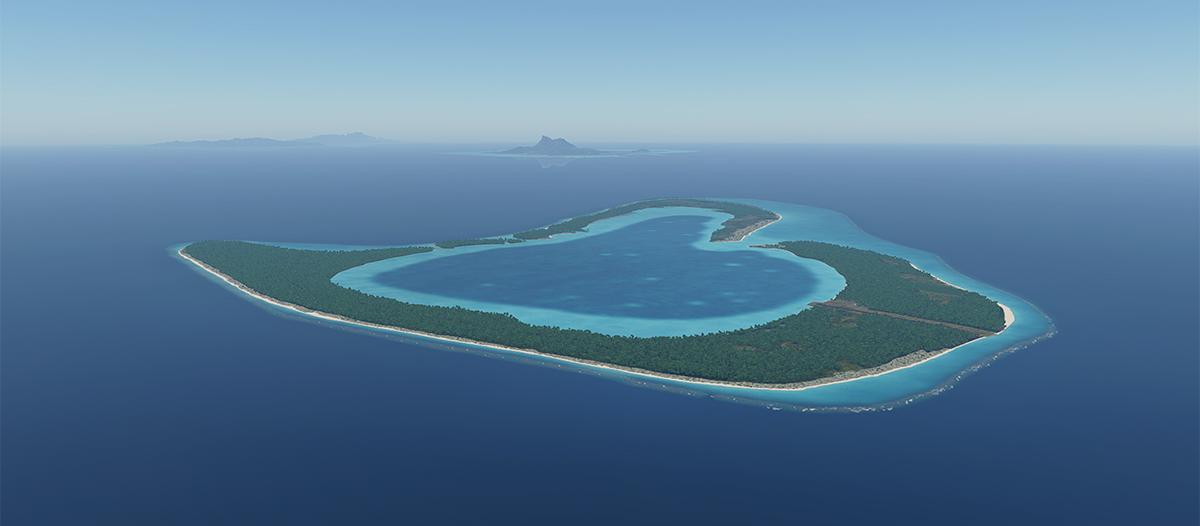
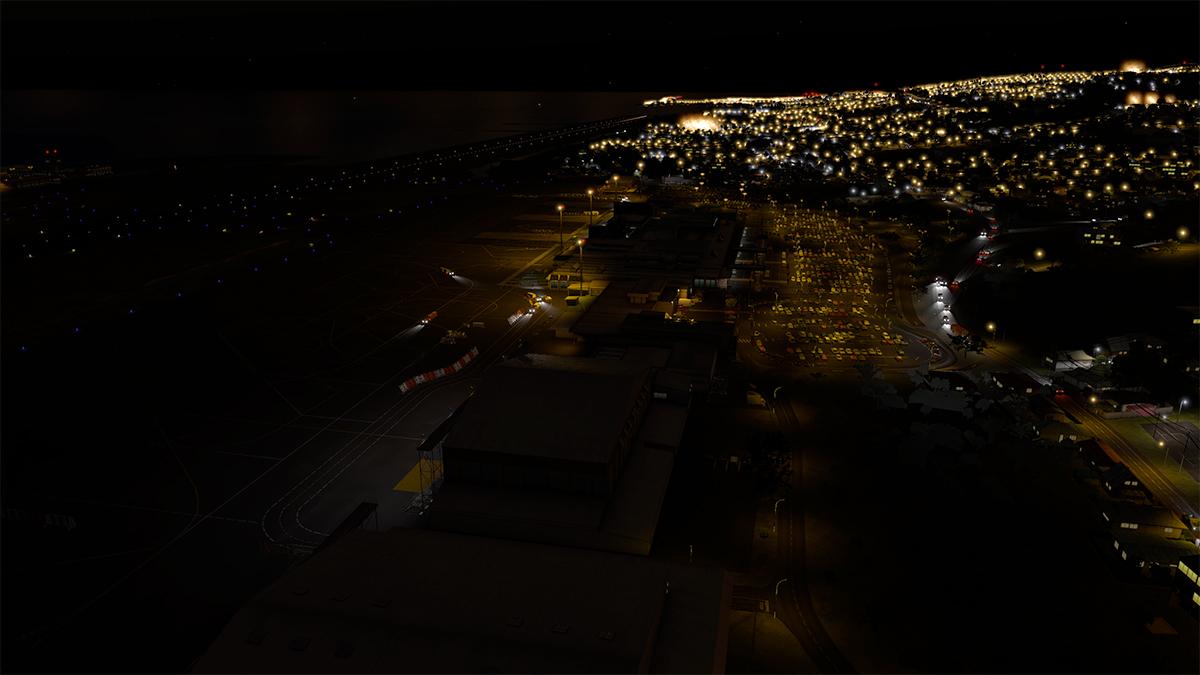
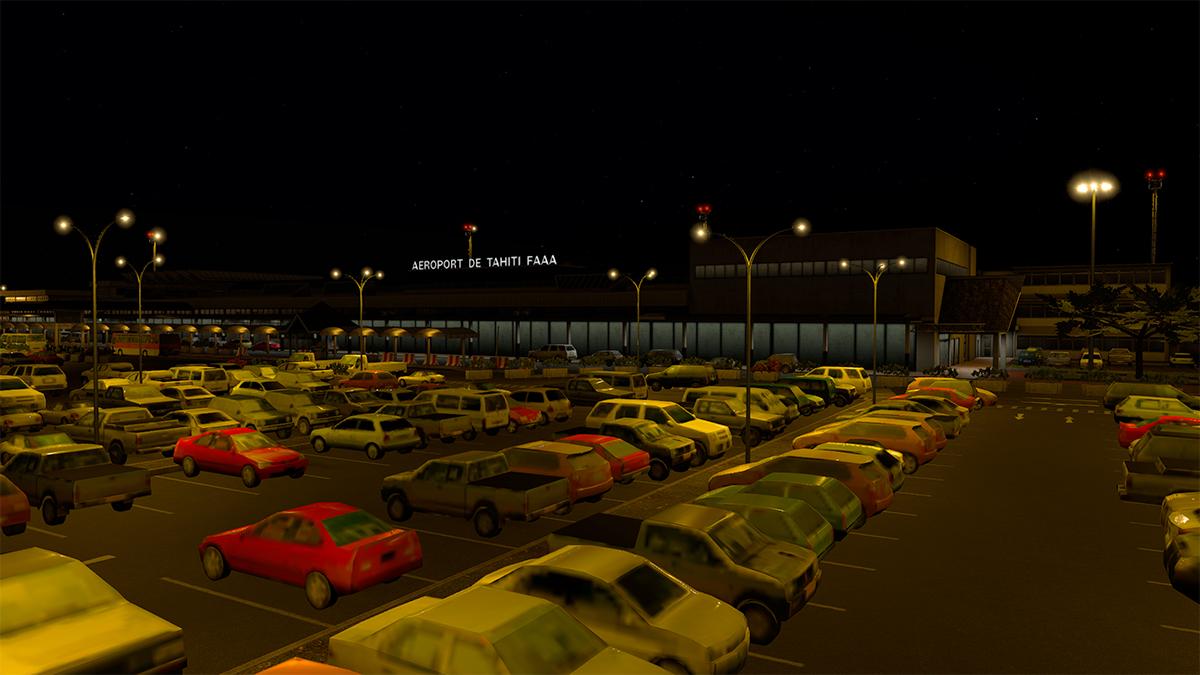
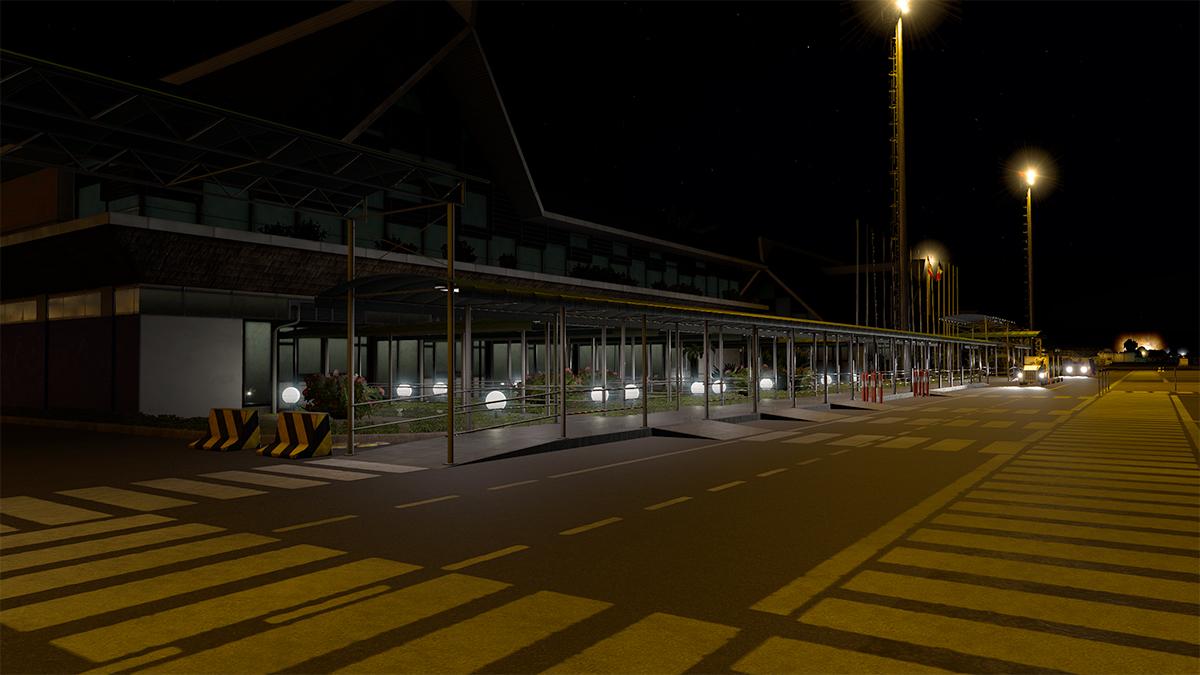
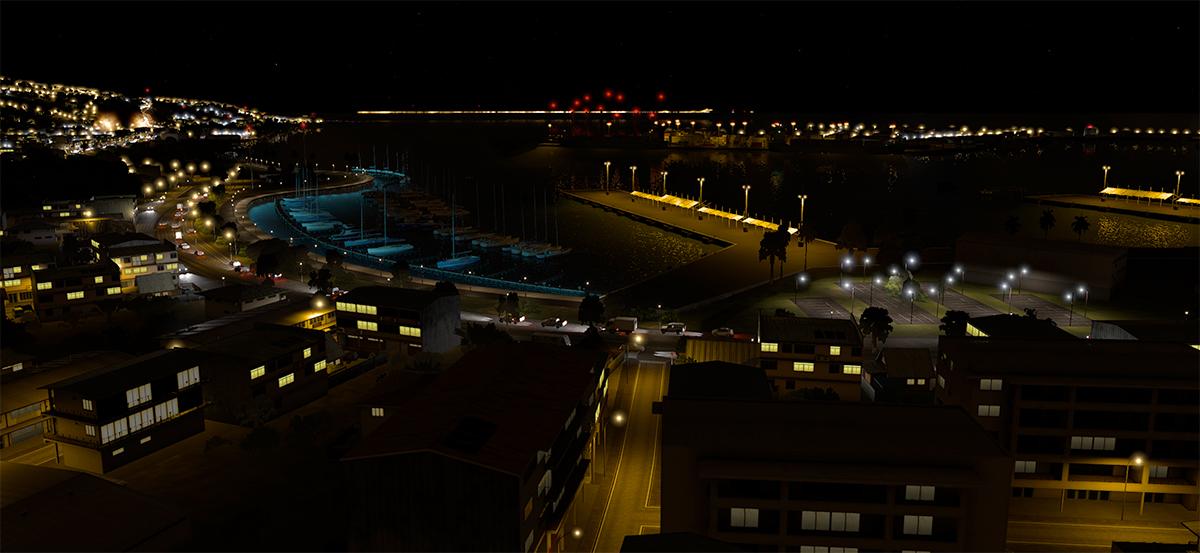
Behind the Screen : March 2024 On the 4th of February 2024, there was a Developer's conference in Montreal for X-Plane Simulator platform. Here the best and most prominent developers joined together to work out not only the future of the X-Plane Simulator, but also to share their friendship in meeting their fellow workers in arms. Laminar Research was at the same conference as well. That should have been a huge advantage in working with the very people that do the core workings of the X-Plane Simulator, the setting was ripe for setting a future roadmap and an agenda for X-Plane from both sides of the Simulator... but the conference didn't end to that satisfaction. At the height of the conference, Laminar Research announced that they were going to create a product store within the X-Plane Simulator, a reflection of the same arrangement that is part of the MSFS 2020 (Microsoft Simulator) platform. This sudden announcement did not unite the developers to the Laminar cause, in fact it divided the conference, and in itself created a rolling discontent among the the attendees, certainly when the news hit the forums, all sorts of comments came out. Initially most users were very supportive of the internal store idea, yes another store, and one built directly into the Simulator, this aspect is a major plus.... but X-Plane is not at all structured like Microsoft's Simulator, it is not a large single central entity, but a Universe with many different revolving planets, and set at it's centre are two massive Jupiter sized planets called Laminar Research and the X-Plane.Org. Initially Laminar Research never dealt with the user side of the Simulator, it was (still is) the founder and on going developer of the Simulator. The X-Plane.Org grew out of the need for users to interact, create and support the X-Plane Simulator. In the early day's it was a sort of clubby meeting place to share and communicate all things X-Plane. I'm not saying that MSFS also has this same network of user sites and forums set around it and in giving support and communication to the platform, in fact every platform has it's own network. But the central core of development and selling product at MSFS is embedded directly into the system, it is even hosted and run as an online game. But X-Plane's in it's arrangement was more focused and generalised than the others. Someone noted that the X-Plane.Org is not the centre of the X-Plane universe, as other sites contribute to the platform, and yes I agree with that aspect in file sharing and product sales, like the Fly Away Simulation sites, but most are only sales sites (Orbx, Just Flight & SimMarket). But the X-Plane.Org is different in that it supports the Developers directly or even indirectly in the support of creating the products to use in the Simulator. Early days of X-Plane were mostly based around the PlaneMaker tool provided with the Simulator, mostly aircraft were then generic, but clever in a customised way. So the clubby .Org supported these products as they were mostly freeware based. But even in these early years, the X-Plane.Org struggled for support. Sites and platforms cost money to host and maintain. Free is all very nice, but it doesn't buy you servers and software to run it all, and very quickly the site required money to support the ever expanding user base. Donations was an early trial, but failed as they were not very consistent and worse in not really giving enough financial support to the .Org site. The solution came with Nicolas Taureau, and he set up a store to sell the now more quality based "Payware" products, but the funds also supported the .Org in succession and allowed it to thrive and grow into the big utility it is today. Most of this important support is not aggrandised or visually translated, as is Taureau's personality, understated is more to the point, but important is the support of the .Org system to the X-Plane platform, of which X-PlaneReviews is also a benefactor. So now you have the X-Plane Universe, with Laminar Research and the X-Plane.Org running in parallel or in orbits around each other, Laminar in not wanting the commercial side of the Simulator, bar of selling a few cups and T-Shirts. And the X-Plane.Org system supporting the developer and user base. So what happens if you move the financial base of developers and sales of the X-Plane Simulator directly to the new store? in reality, you are blowing the X-Plane universe apart, and I really don't think that a lot of users realised that the amount of the support funding of the X-Plane.Org, developer support and loads of other auxiliary items that was generated by the X-Plane.OrgStore... and neither did Austin Meyer's, head honcho of Laminar Research. All he saw was a store in MSFS and the money he could generate if he installed inside X-Plane the same system as Microsoft, a good idea financially, but structurally unsound for his own creation. We have to understand, and oddly the original mission of X-Plane was for it to be a platform of experimentation of all things aviation. That is the core of PlaneMaker as well, although that aspect was left behind more than a decade ago. In wanting far better functionality and higher quality Simulation, it had move on pass the basic origins of PlaneMaker to plugin based custom products. This now is really the contention of the issue and where the money goes to. Obviously Laminar Research want to expand beyond being just the gatekeeper of X-Plane. So there are currently a lot of issues created by the announcement of 4th February 2024. Certainly it has the promise to unstable a very balanced current system, and the ramifications are enormous if Laminar Research get this idea wrong, and creates questions... but what of a store with very few products to sell? Would they in the future also financially support the user base... they made a very big message over the decades of not getting or even involved at all in this aspect, but they would be either the demise of it, or even damaging it beyond repair... if that scenerio was possible, could it also damage the X-Plane model as a simulator entirely? Kill the very goose that lays the golden eggs... I'm doomsaying again, but this time not without reason. So we are at a threshold, not a runway one were X-Plane gets to land safely beyond the fence and onto the hard solid runway. Since the 4th of February announcement, there has been no forth coming new announcements or details from Laminar Research, except for a few flashy images on the X-Plane website and social media. Obviously the next announcement will be the launch of the store, and it's insertion into the X-Plane Simulator. It will be very good, as Laminar are very good at these sort of things. But there is far more required than opening a store, but of the quality of the stock inside of it. Loyalty to Nicolas Taureau is also extremely strong, and why not. He has supported and cultivated the core product of the Simulator for more than over a decade, and make no mistake here in not doing it selfishly for just for the product to sell, but to give talented developers the resources and support they needed to acquire the skills we take for granted, and with the excellent products we all use. How this current store scenario plays out will be important to the future of the Simulator, hopefully we will have an answer by Q3 as announced for the opening of the LR Store in the 3rd quarter of the year... one thing is very sure, the X-Plane Simulator we used only last year, will be a very different to the one we will be using at the end of 2024. There was no edition of BtheS in February 2024, as I went of a well earned holiday, break.. or a cruise around the South Pacific. Obviously the 4th February announcement traveled with me, but I did get a well deserved change of scenery and a big sea refresh. But my demur was already more brighter before the departure, in fact since late 2023, when X-Plane through version 12.0.9, and behaved itself. A second South Pacific X-Plane related revisit to Tahiti in the same region was simply sheer coincidence, but translated the same to the X-Plane Simulator in how it mirrors the real world. Now we are looking forward to X-Plane 12 v12.1.0... the v12.1.0 update is expected to be a landmark release outside of a formal version change. Most of the focus is on graphics, including the nasty Anti-Aliasing (MSAA) Improvements, Water improvements, RCAS (Robust Contrast Adaptive Sharpening), Bloom effects and better particle effects. Systems include a better G1000 functionality, Stormscope, Traffic Map and Airport METAR flags... a new STEC ST-360 Autopilot is also included, new tools include better screenshot effects, which suits us really well... it is quite a list. With everything, then this post Easter holiday will be one of the most interesting yet, and the version v12.1.0 was highlighted with great reception at the FS Weekend in the Netherlands. Expect a beta release within weeks. Importantly those on-going v12.1.0 is more better system refinements, in shifting the heavy workload from your Graphics card over to the Processor. We expected this aspect for the release of X-Plane 12, but it will come now about mid-term in the X-Plane 12 version run. The changes will not magically fix your framerate, as heavier graphics will equalise out the benefits of less load on the Graphic Card, but it will overall make the X-Plane Simulator more efficient. I was a little annoyed about this aspect as I invested heavily in the processor side in my last system upgrade with the earlier announcement, then finding that Laminar was leaning even more heavily than ever onto the Graphic card side, so more expense was required to beef up that hardware side, now they are going back to the original focus, it is annoying and expensive as well to cater for these changing whims. Another change over the month was the upgrading of scenery for X-Plane 12. Finally the slow dribble has started to be a better flow from scenery developers, Aerosoft particularly was very active in releasing replacements and improvements to scenery that have been a long time dormant, and obviously we need more to come, a lot more. Although noted as an ever constant developing Simulator, X-Plane 12 will hopefully reach a mature point with the release of v12.1.0. Then that aspect bringing in even more resources for users to experience. So Q2 has a lot of potential to be one of the best period of 2024 for some big quality releases, even if it dribbles into the Northern Summer. But developers need a better more mature Simulator to bring quality releases to the Users, that aspect was something quite lacking over the last few years... it is time for X-Plane 12 to turn the corner... and that is said on April Fools day! See you all next month. Stephen Dutton 1st April 2024 Copyright©2024 X-Plane Reviews
3 points -
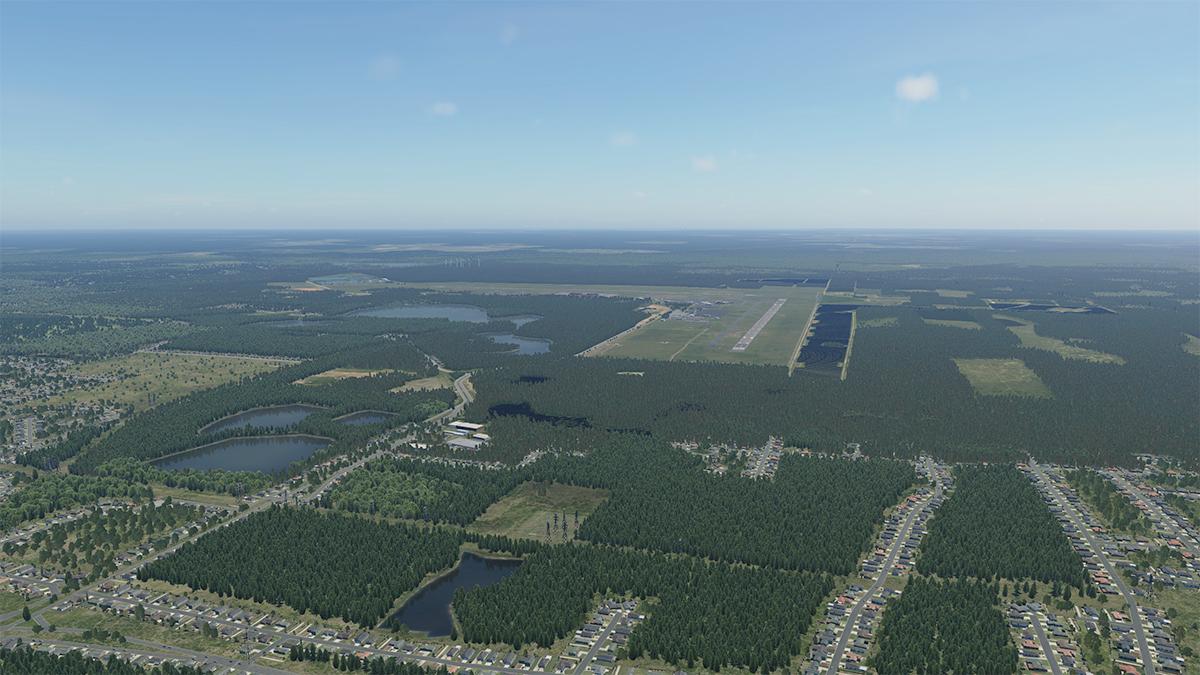
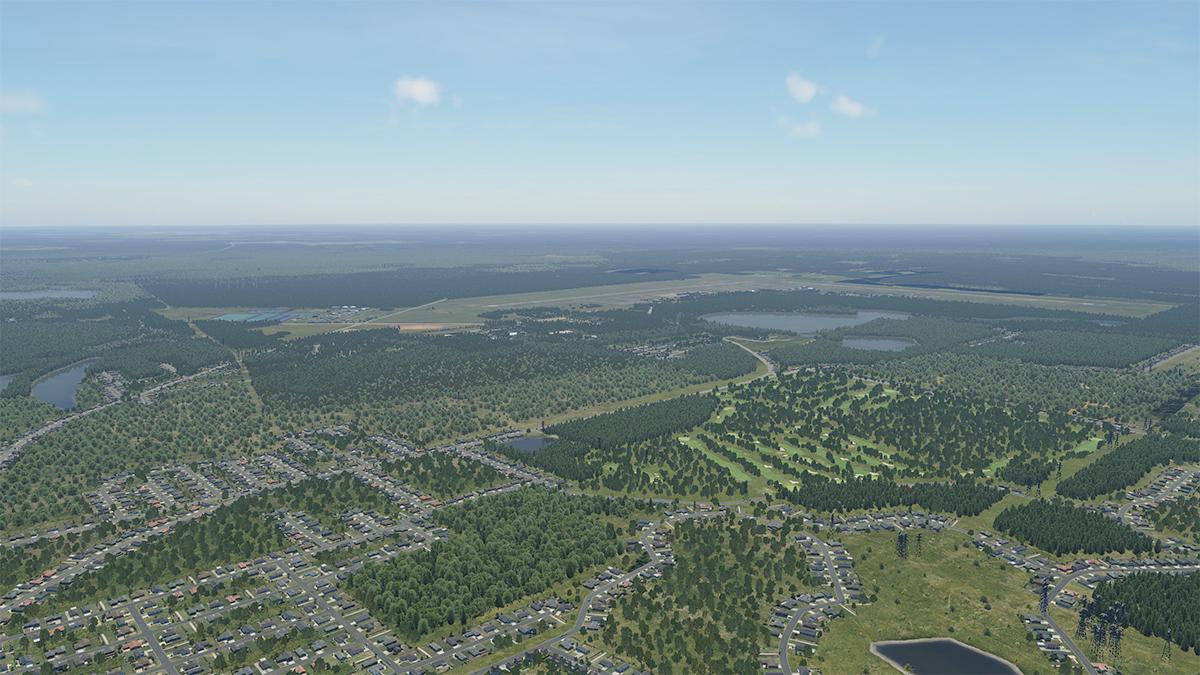
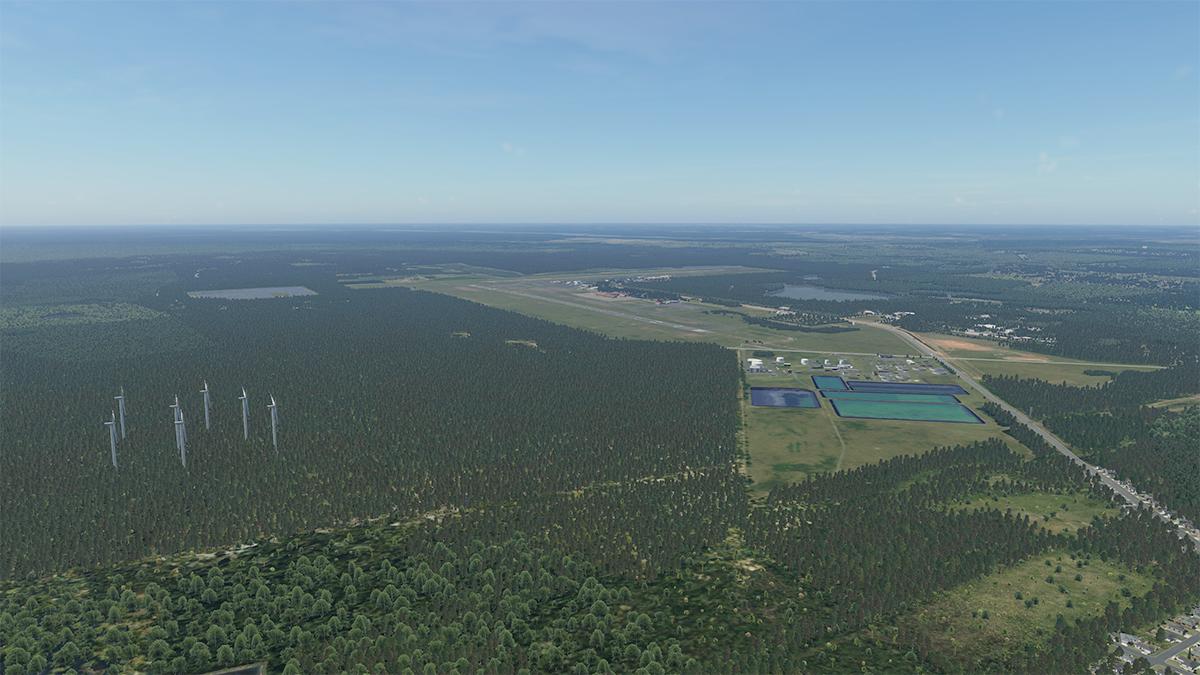
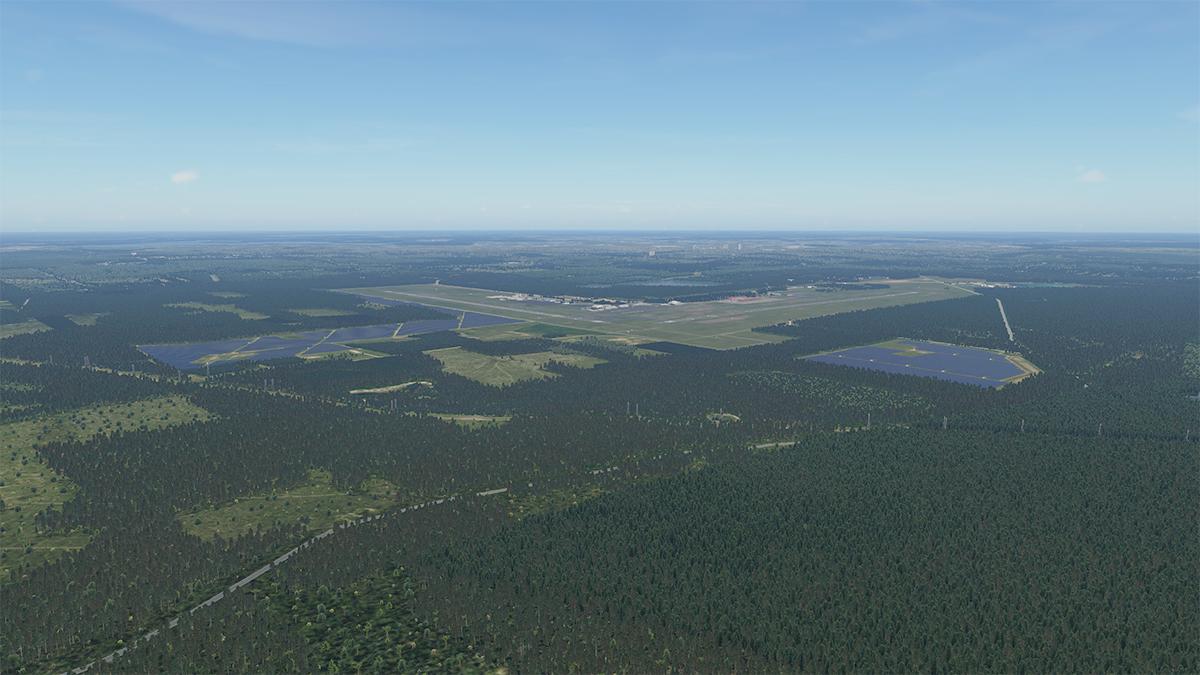
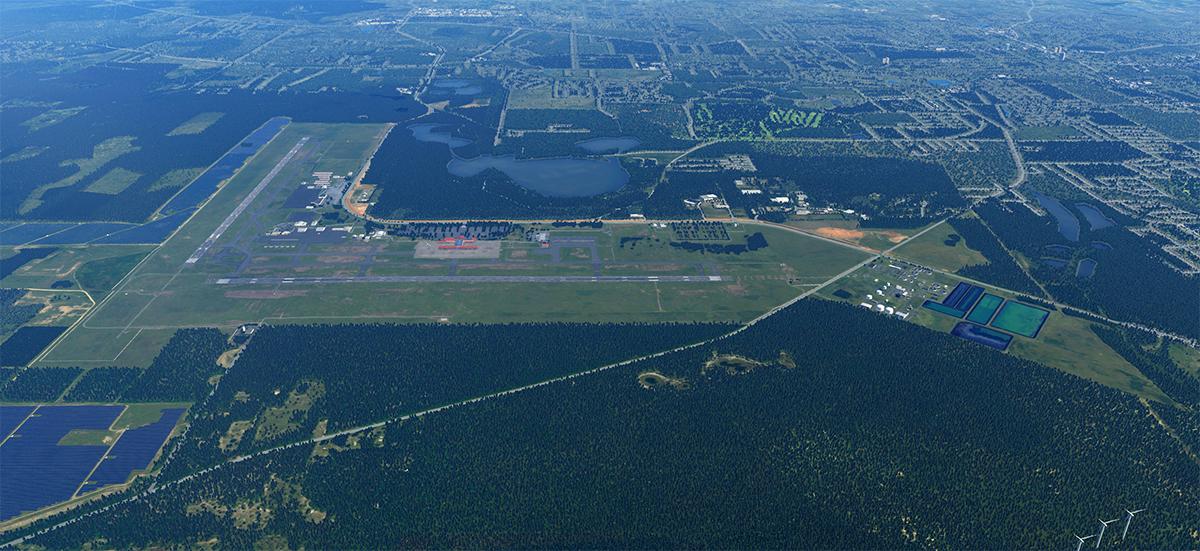
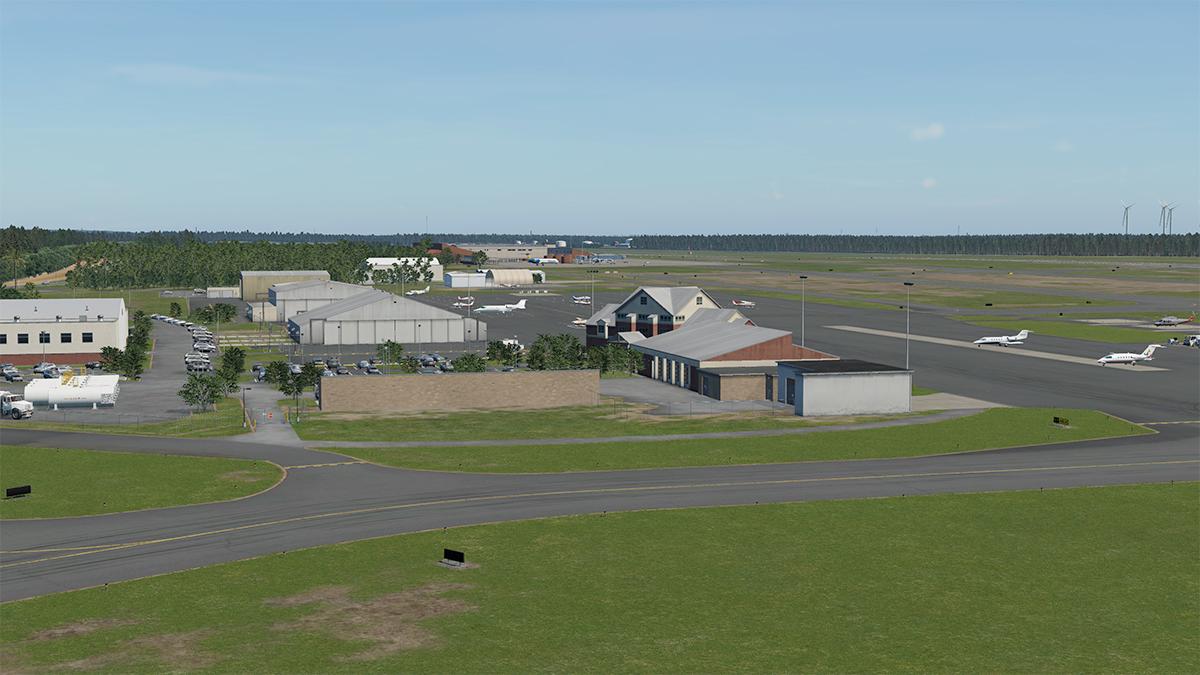
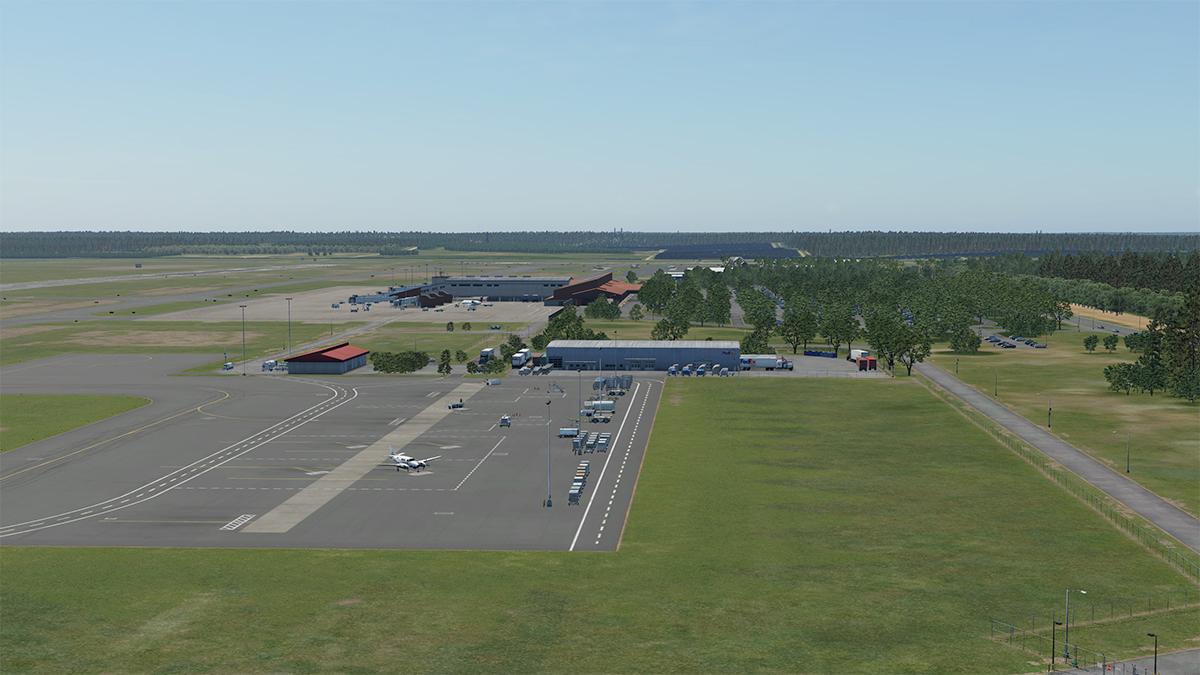
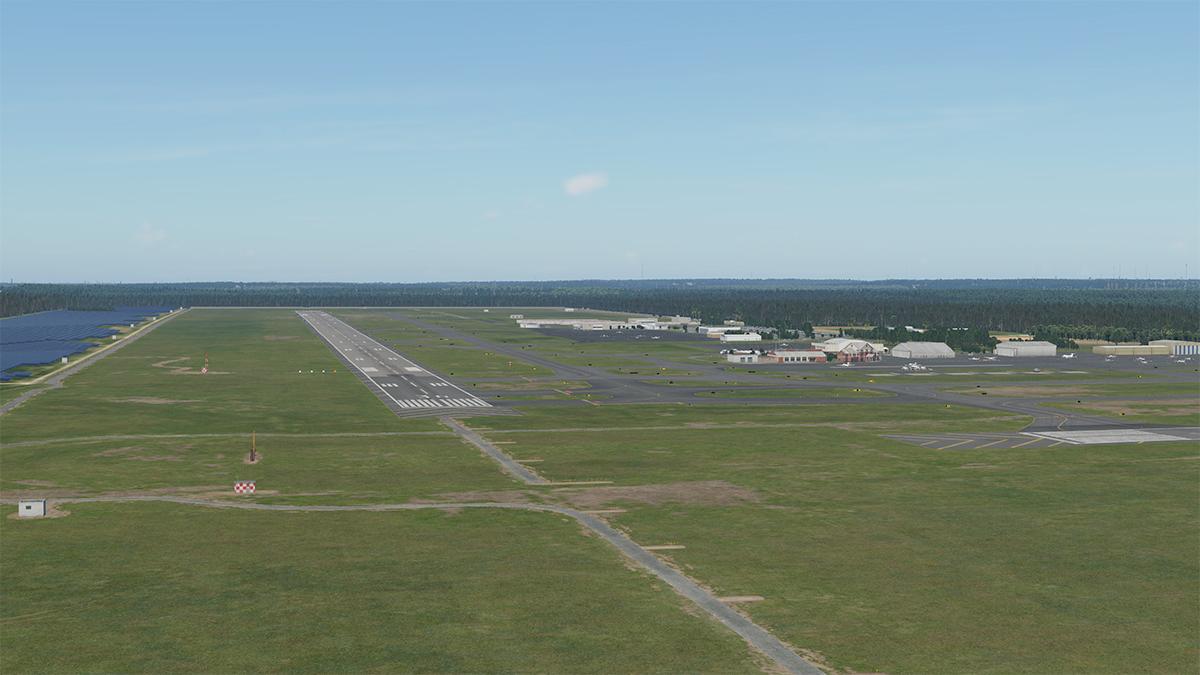
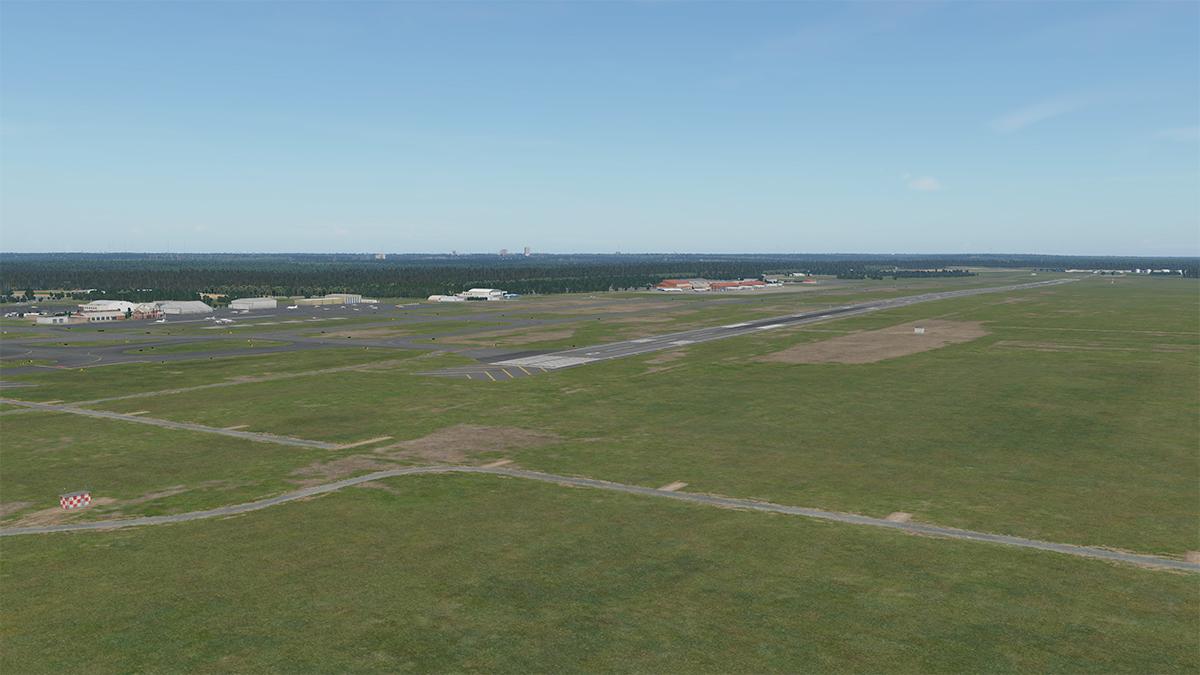
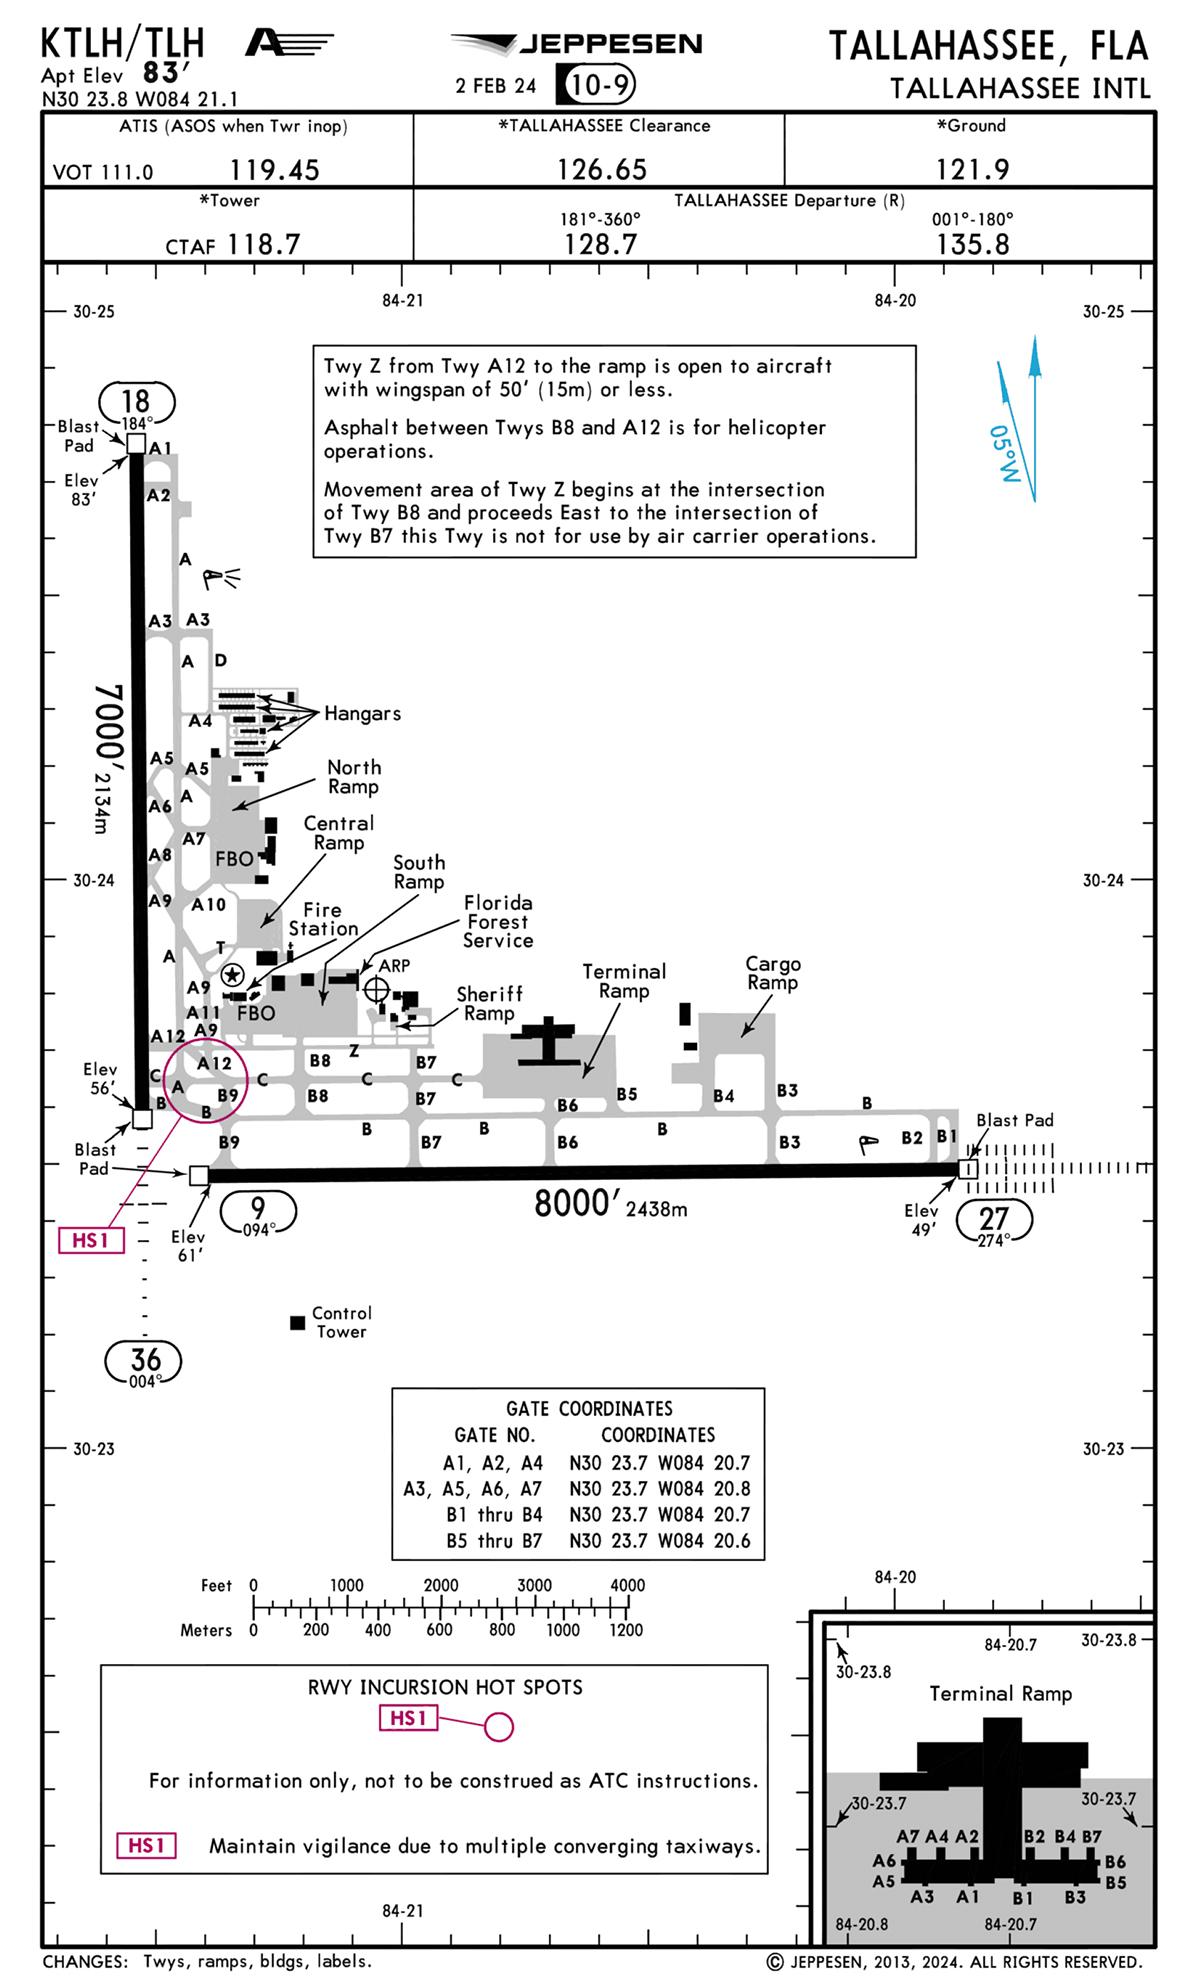
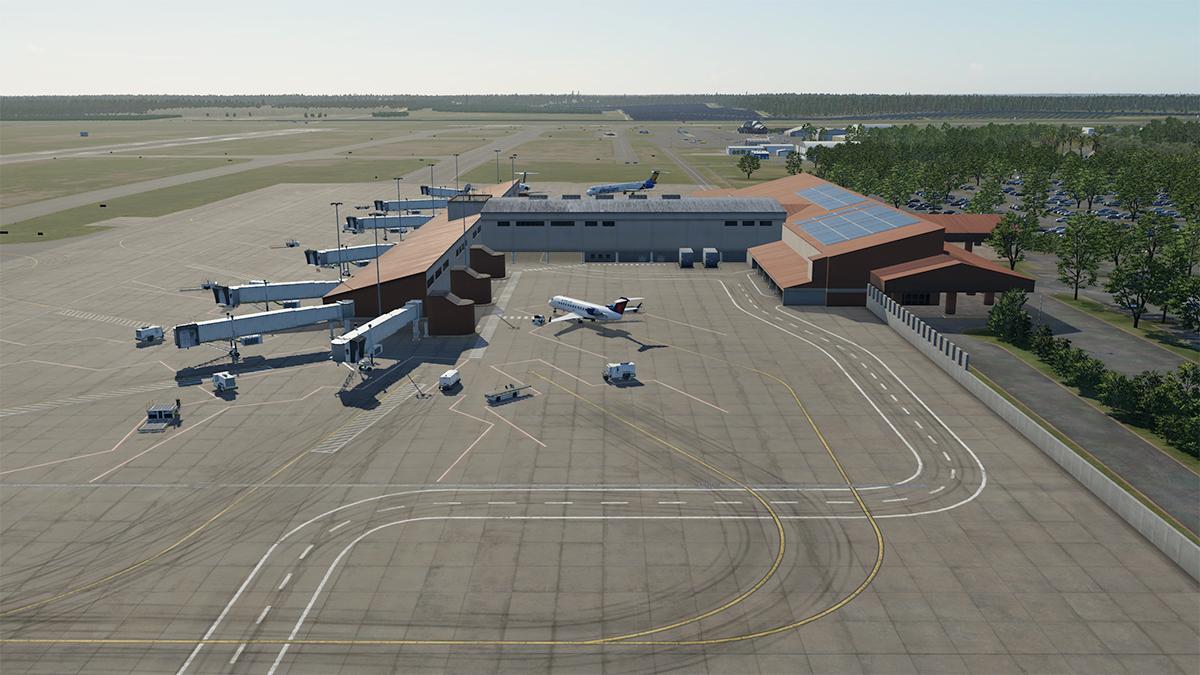
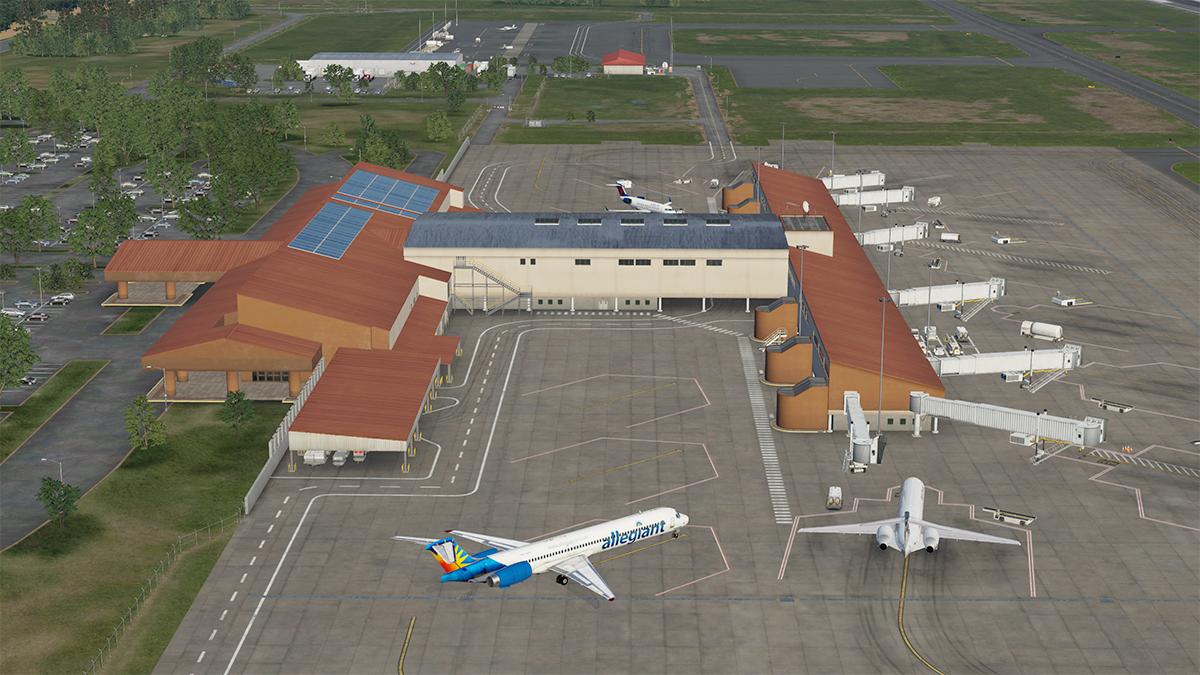
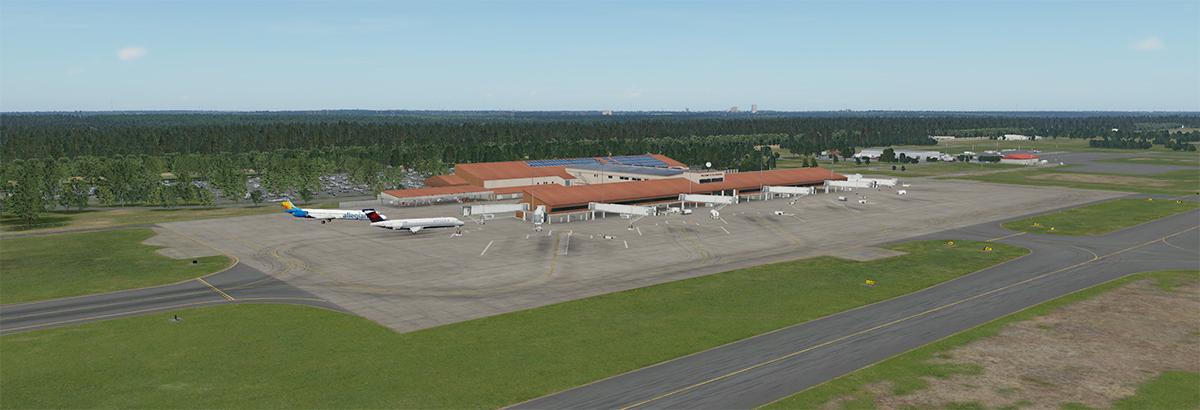
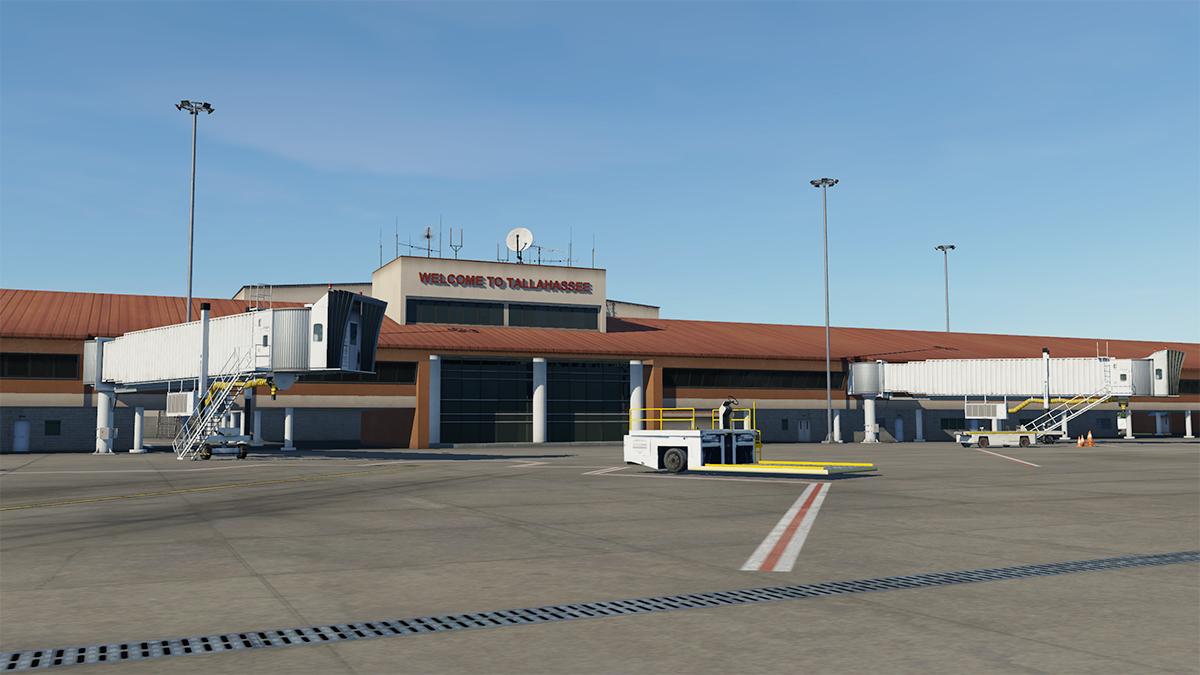
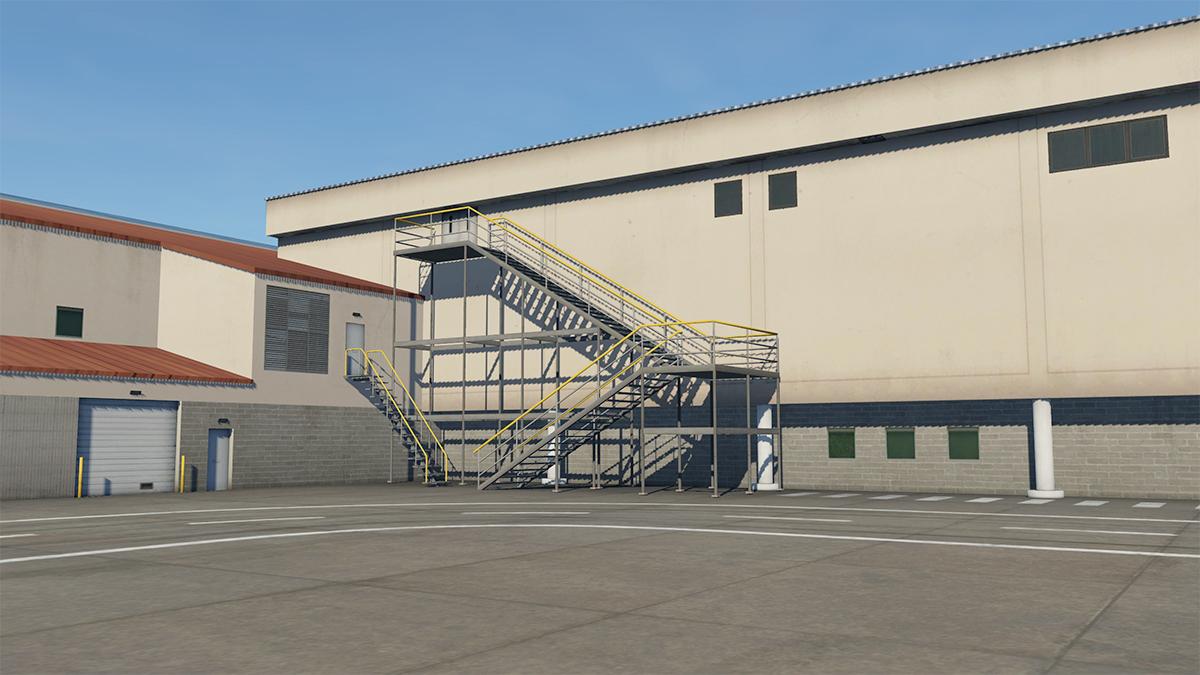
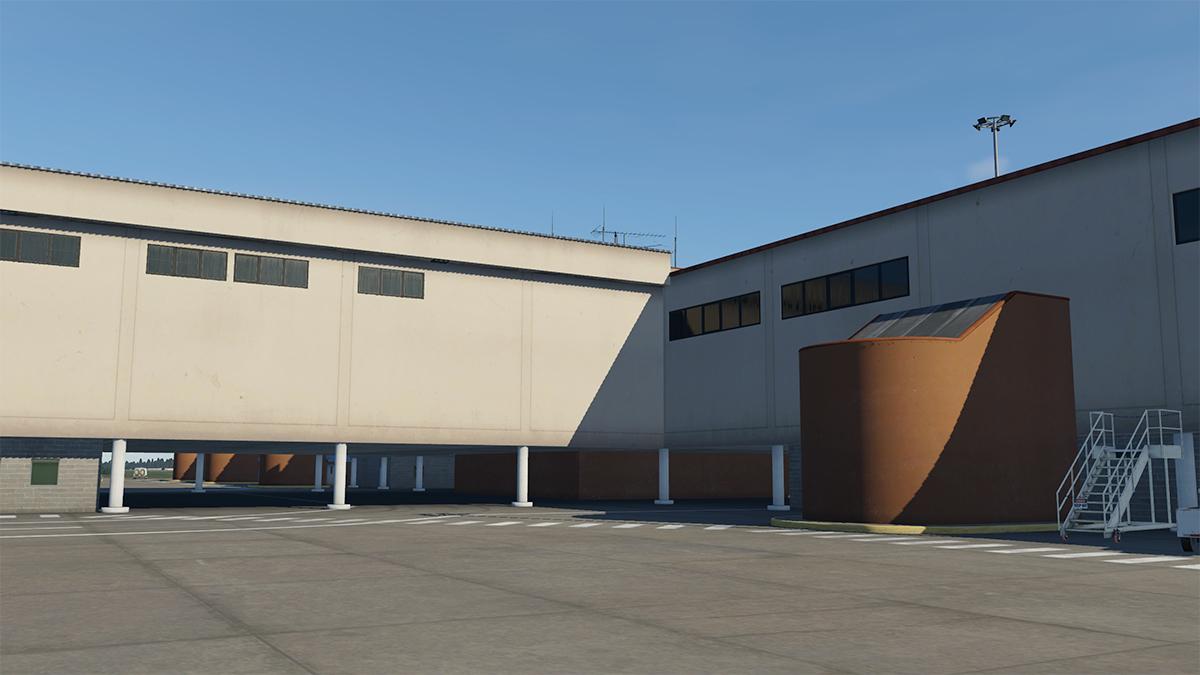
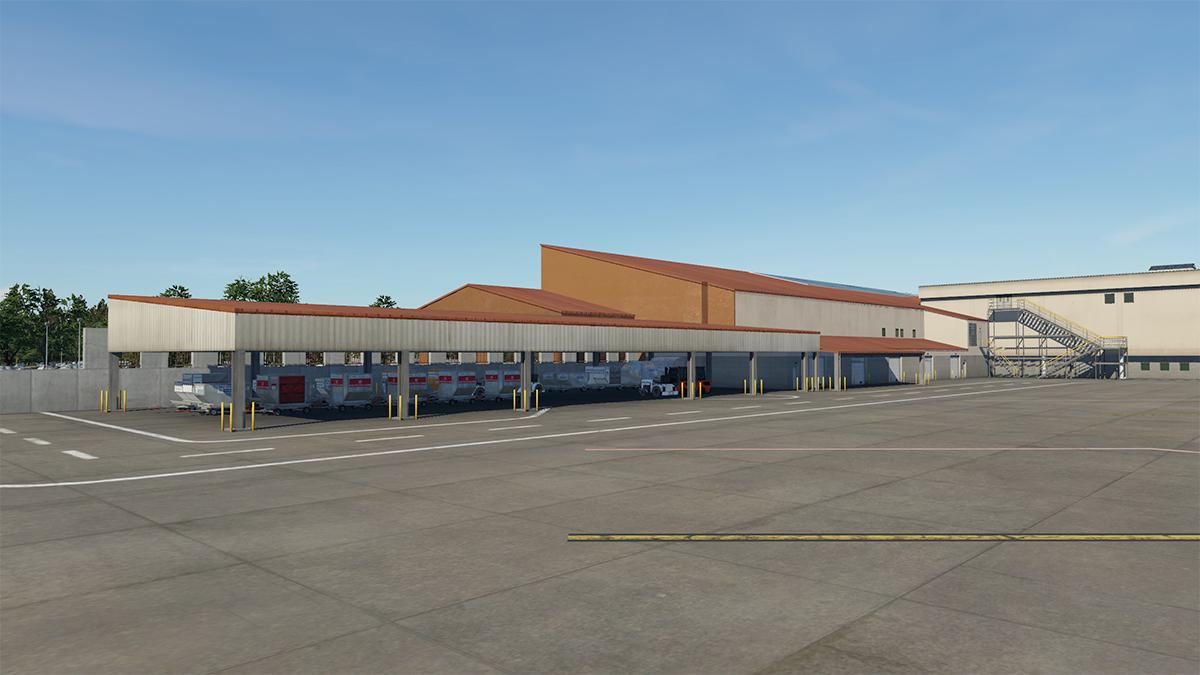
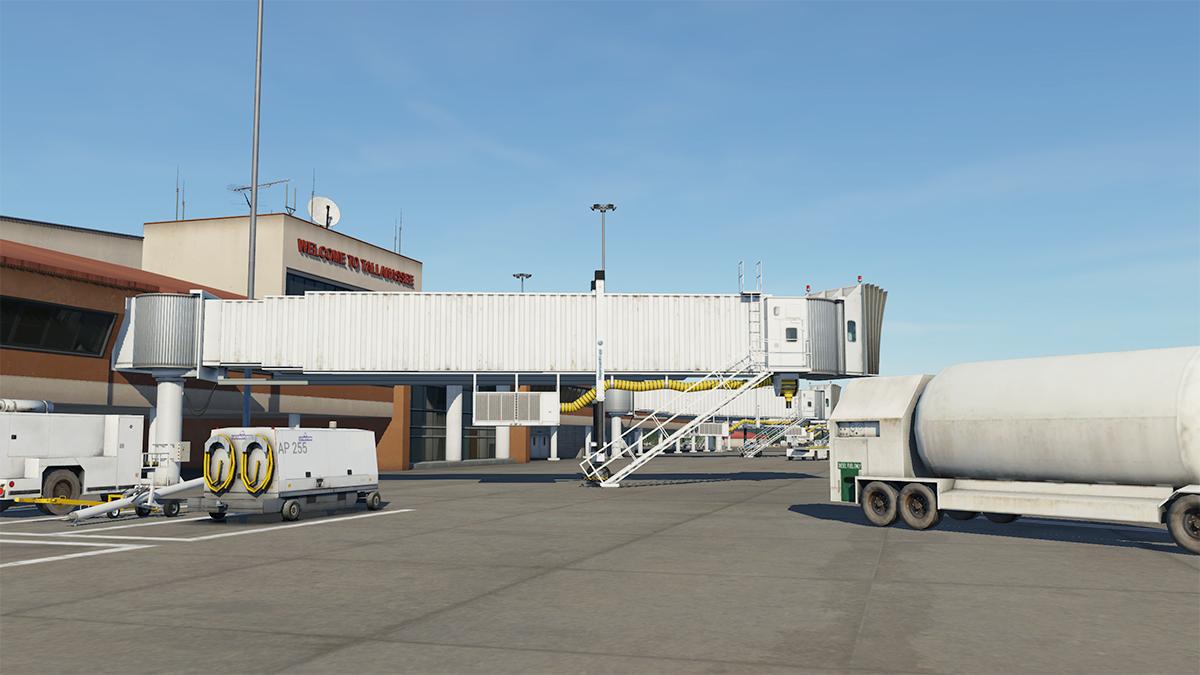
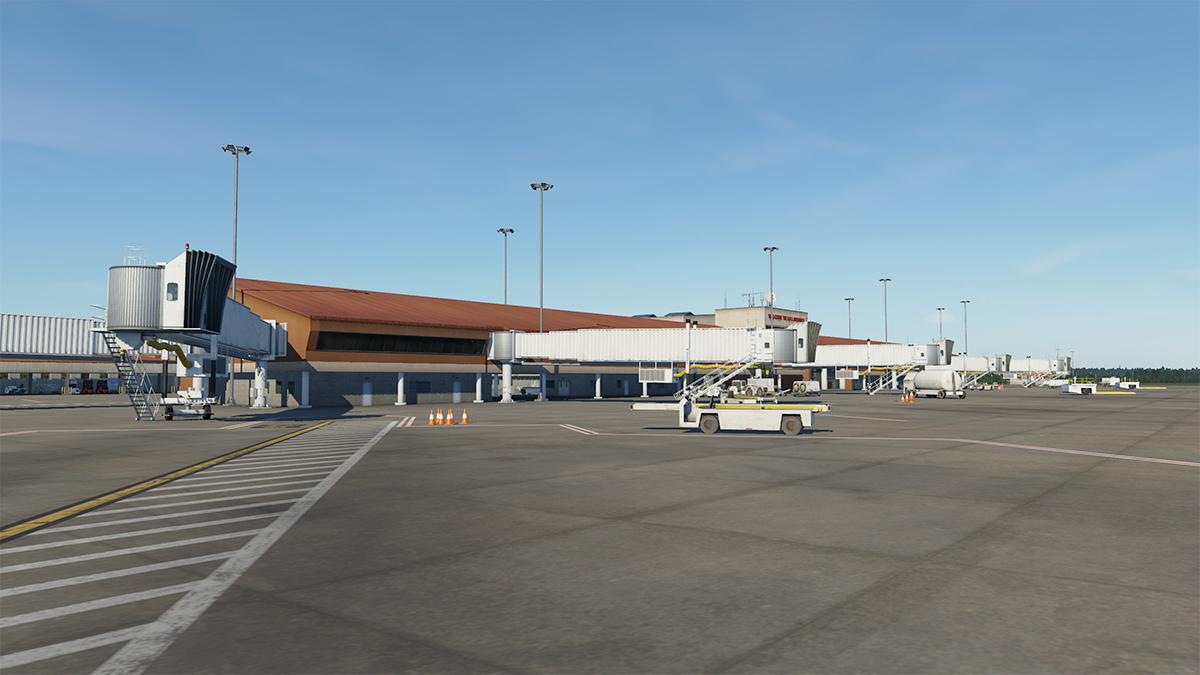
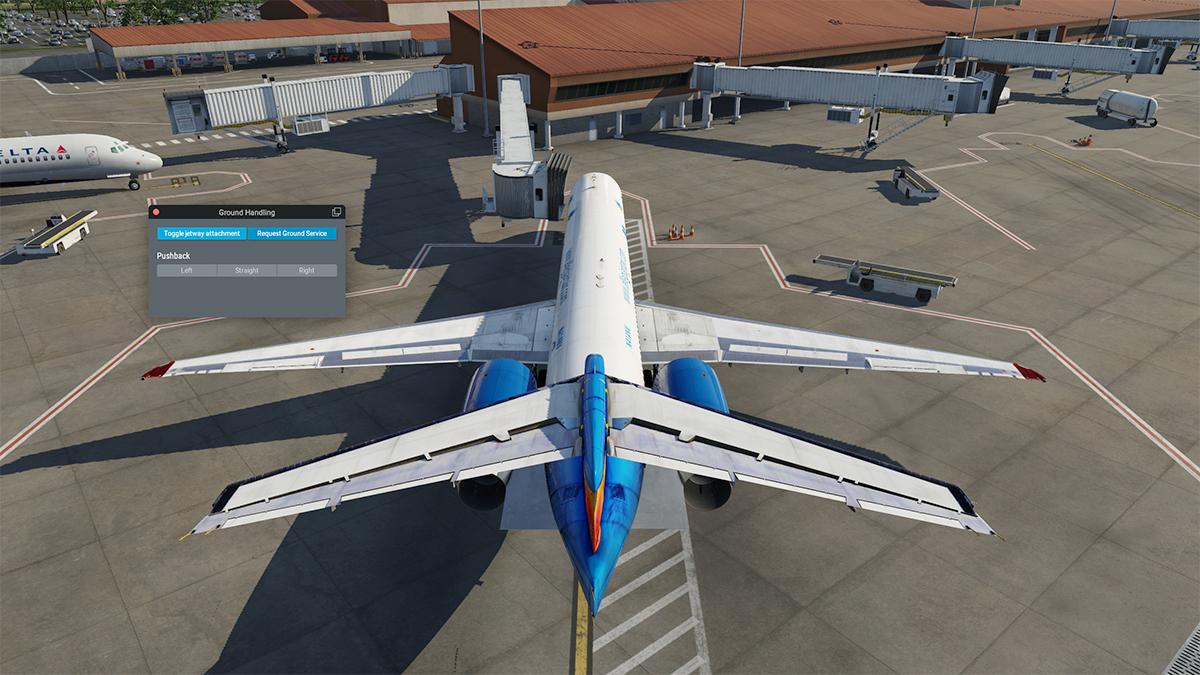
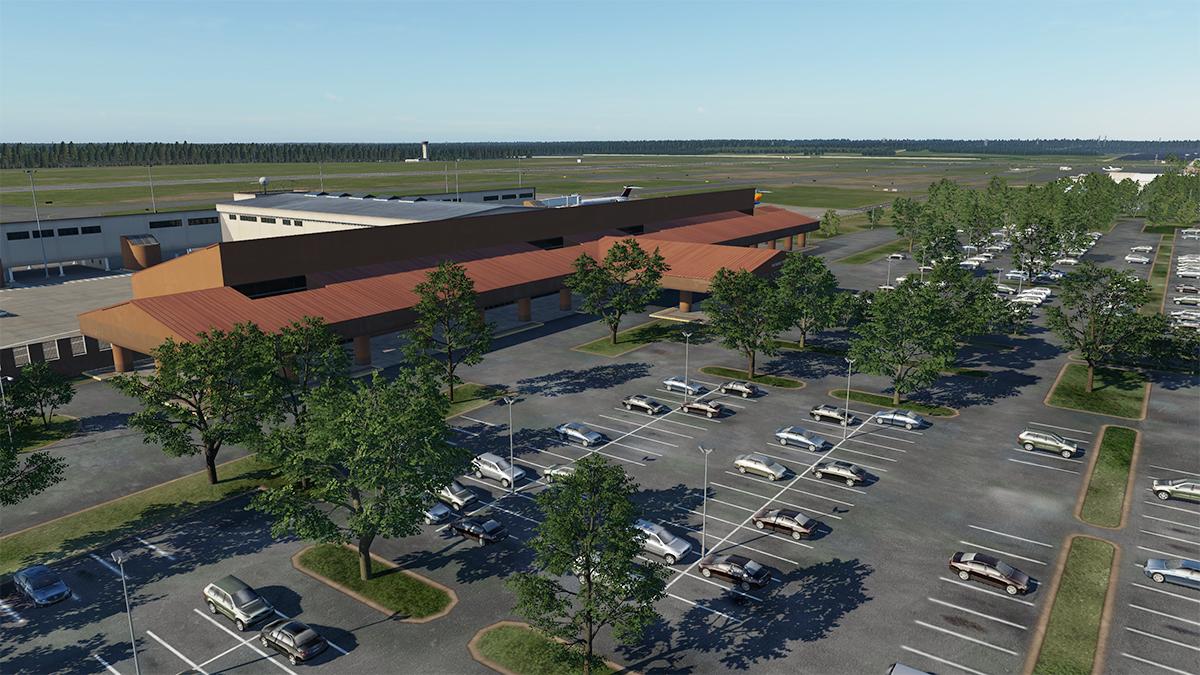
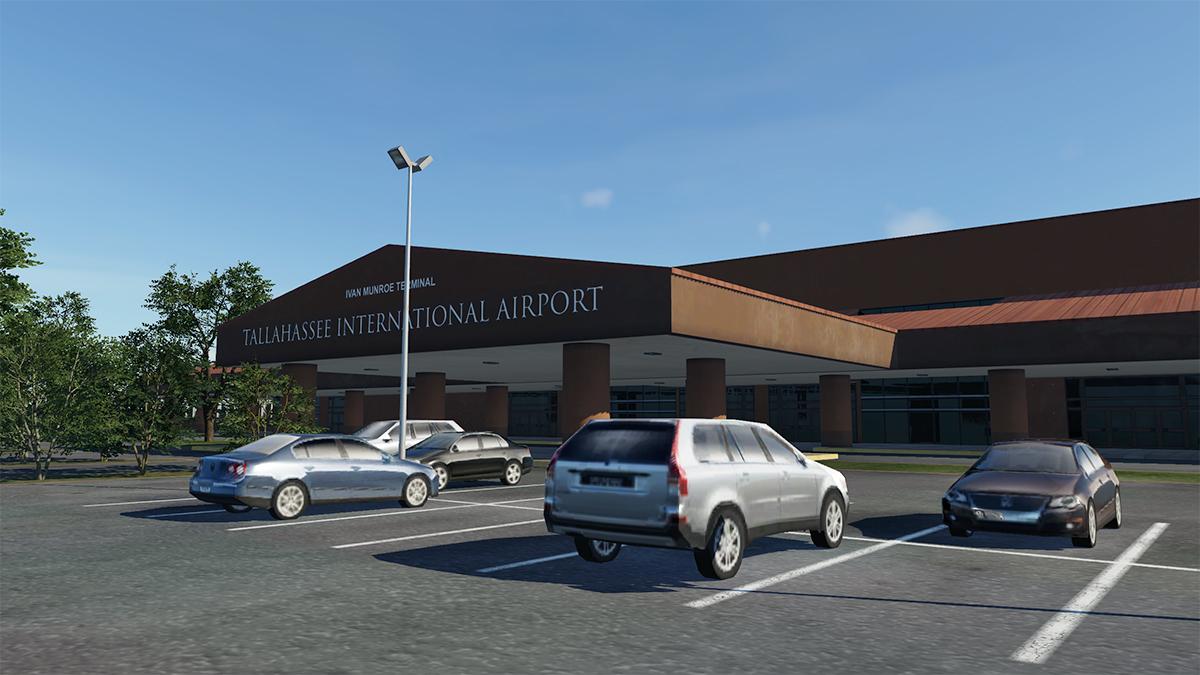
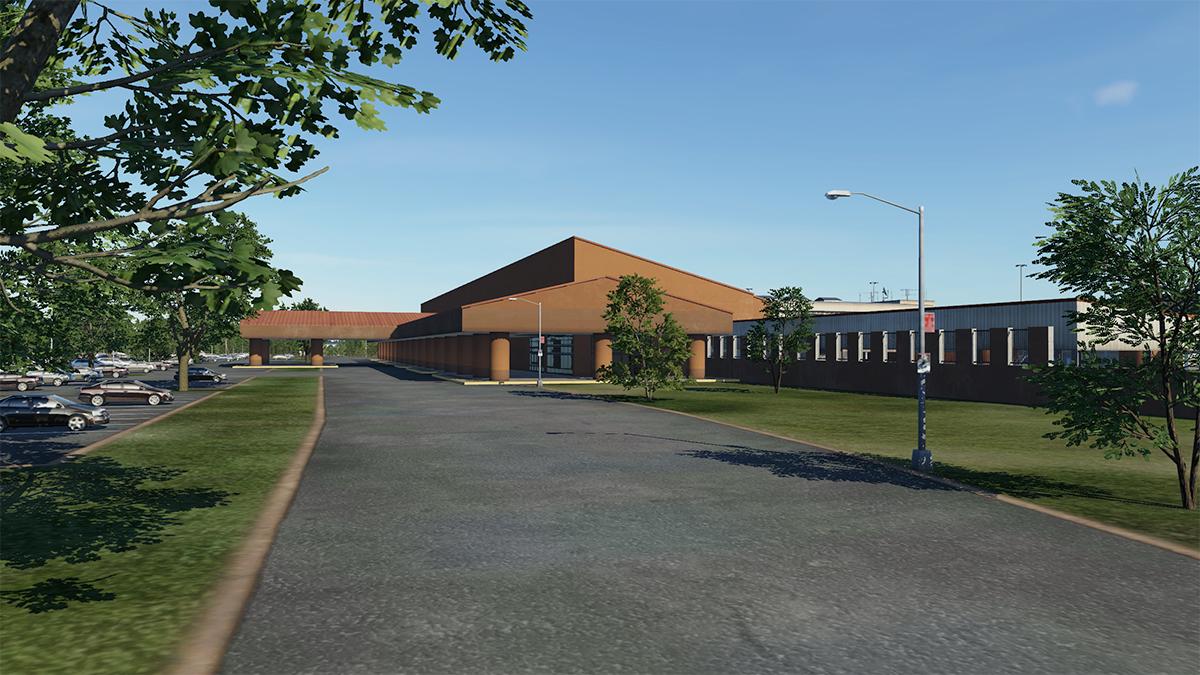
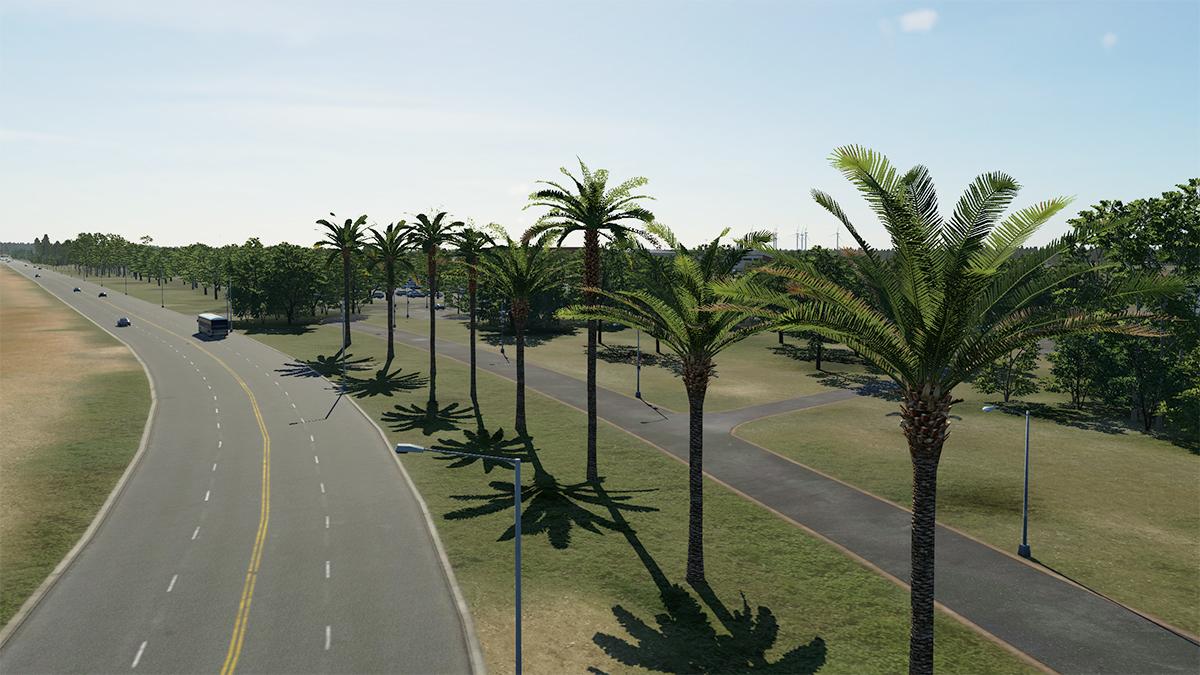
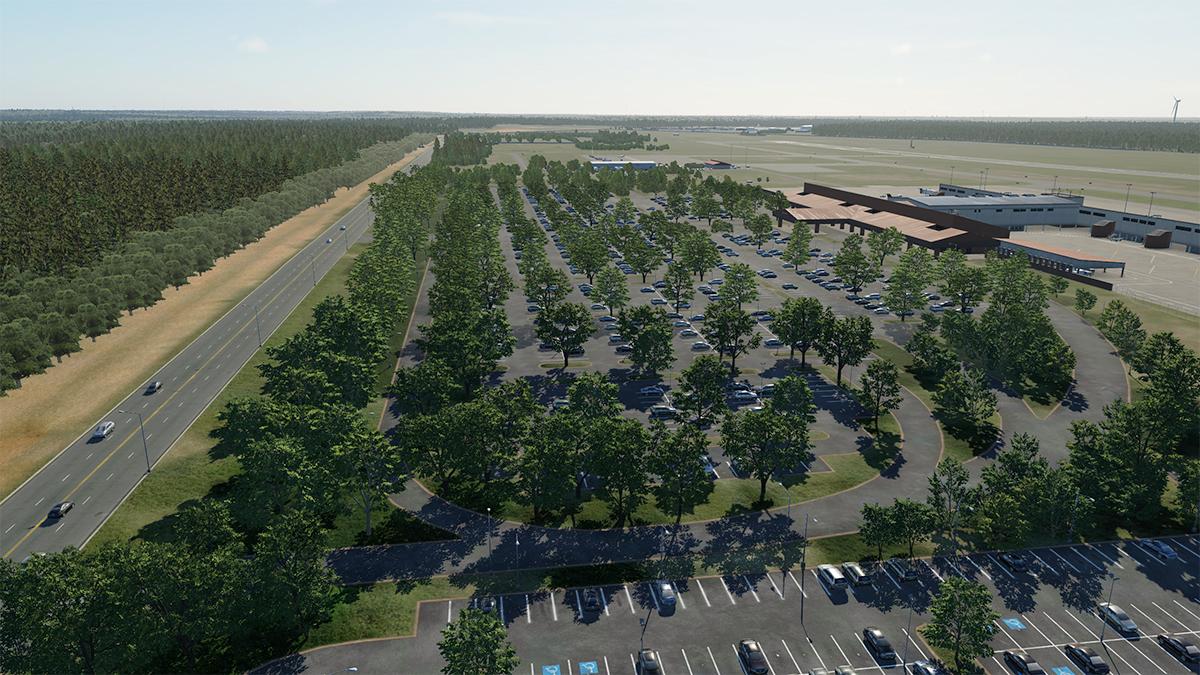
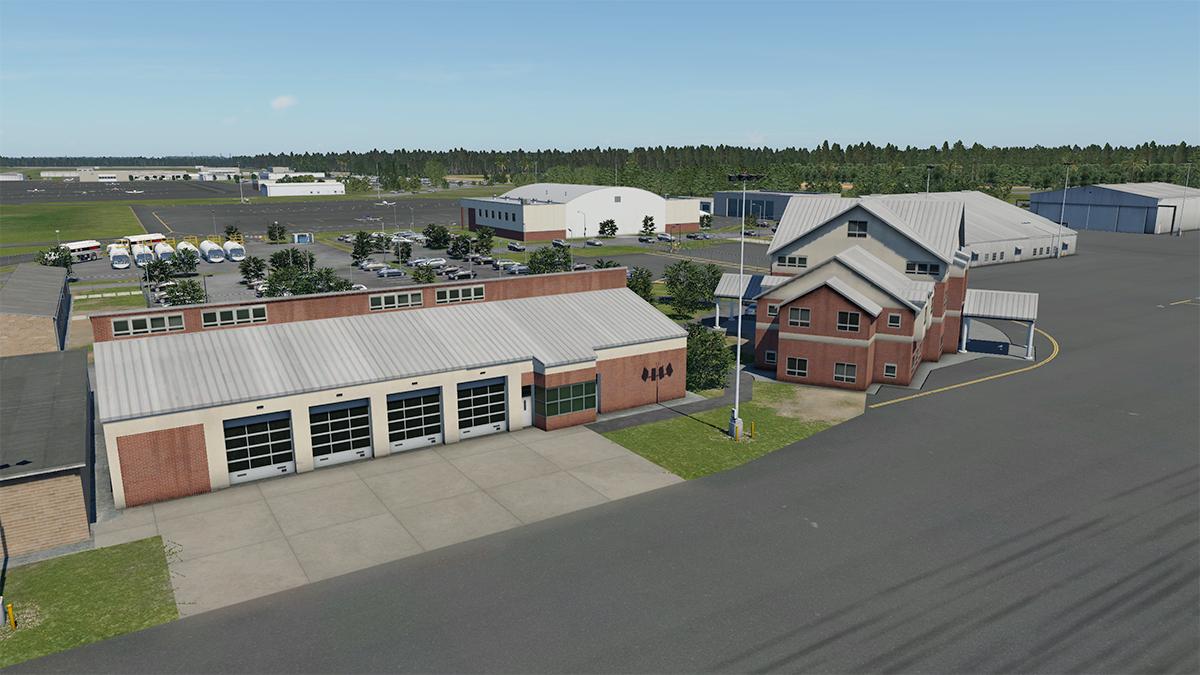
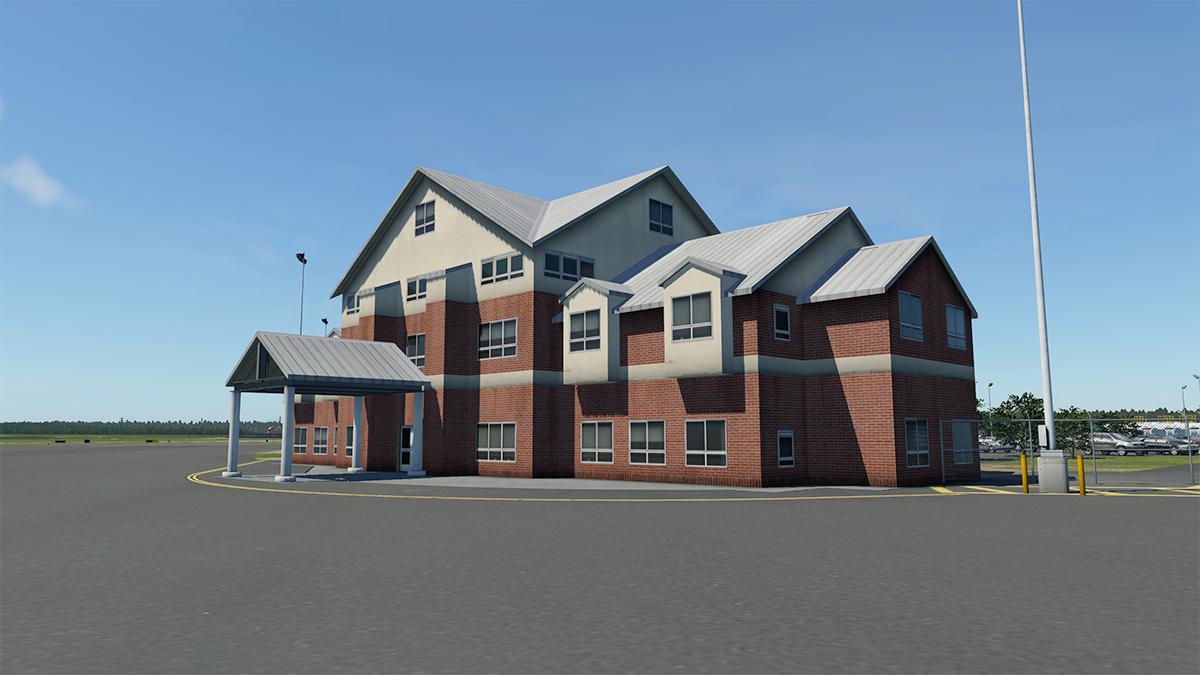
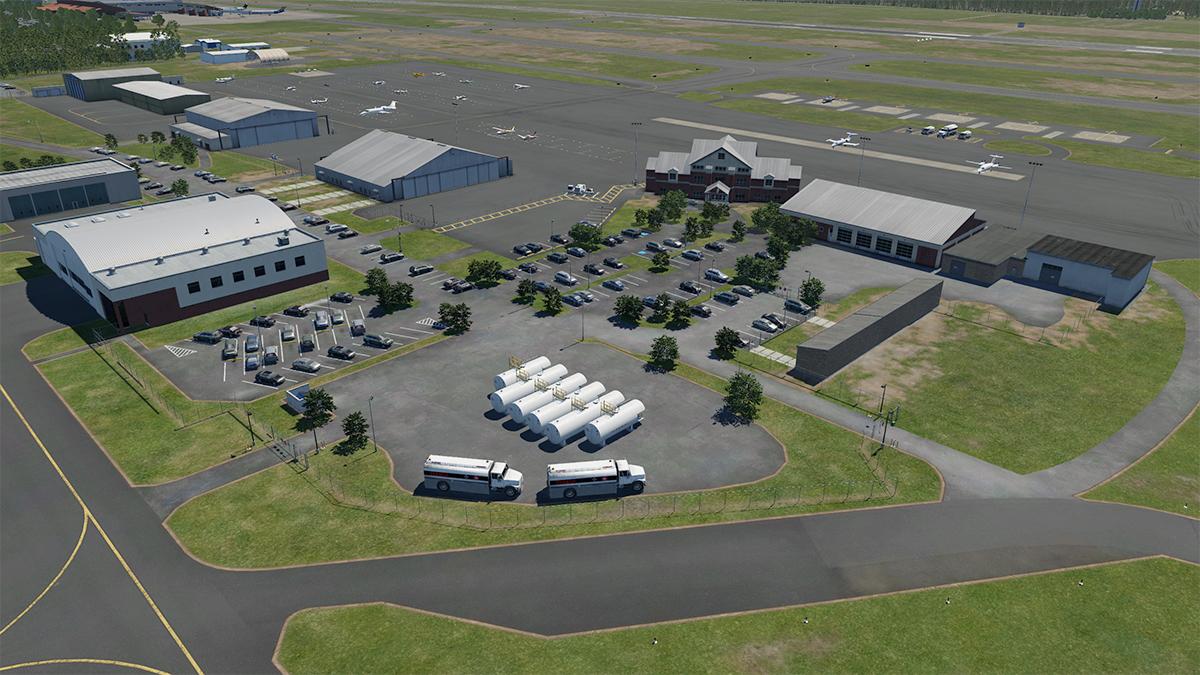
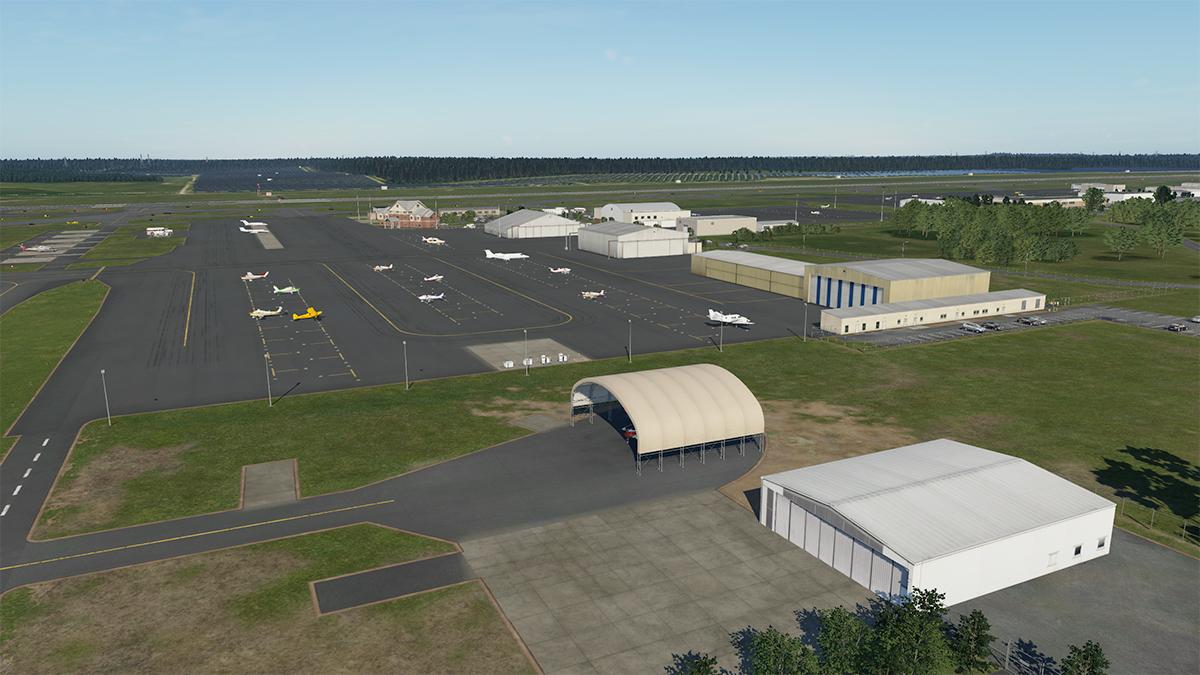
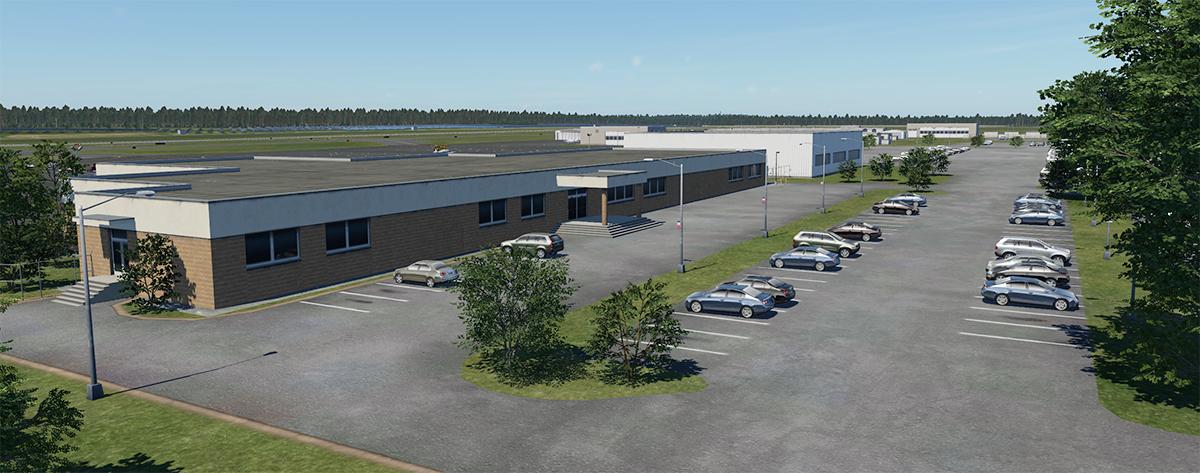
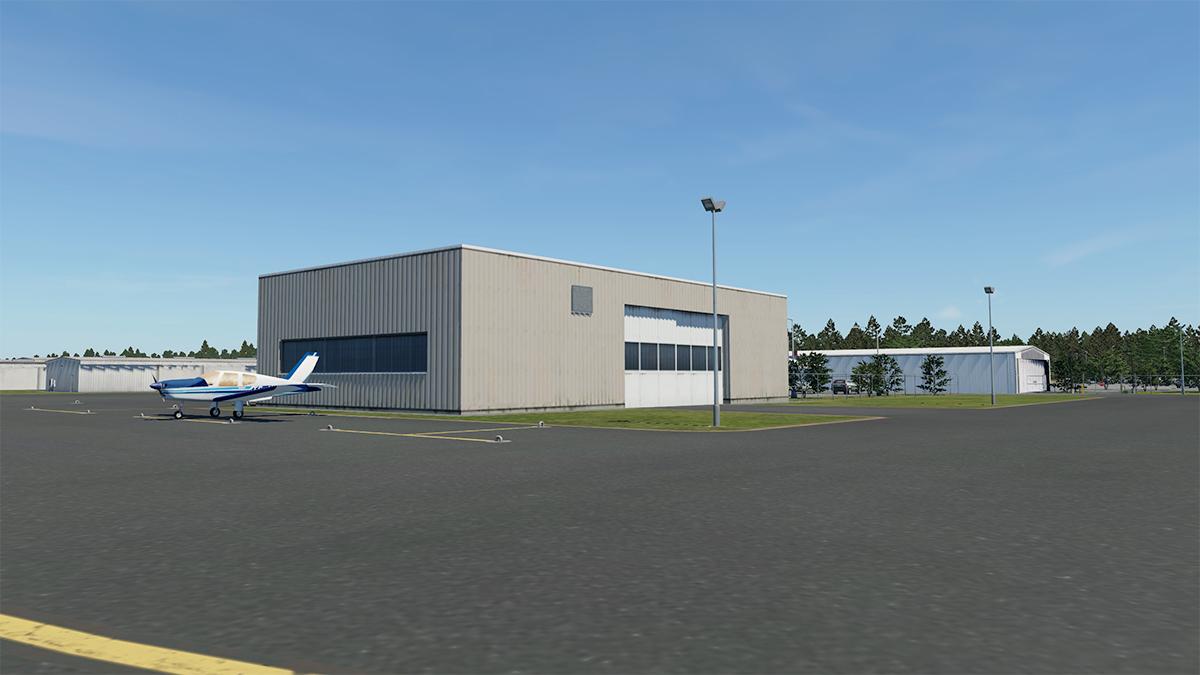
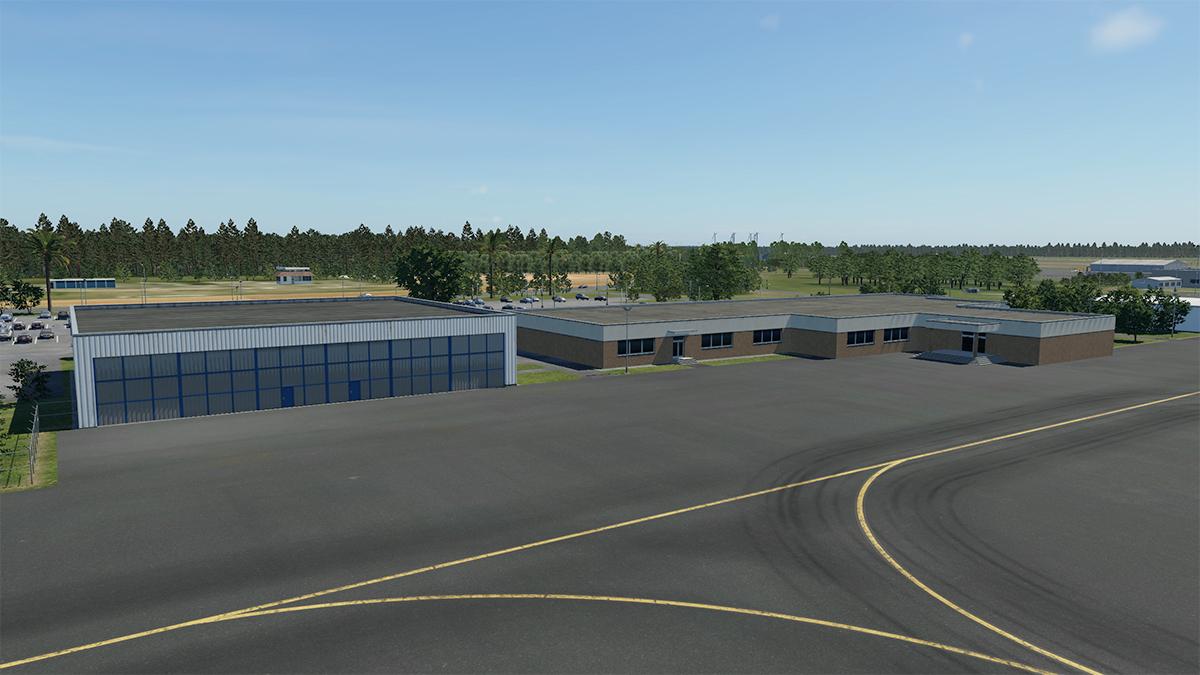
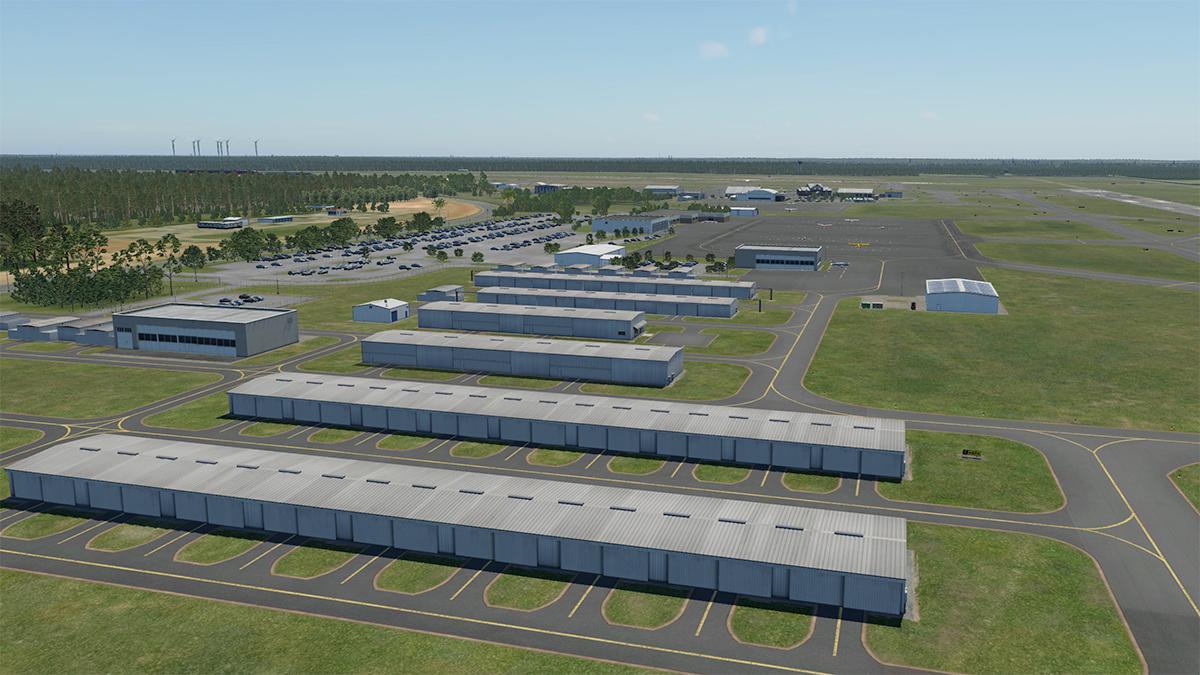
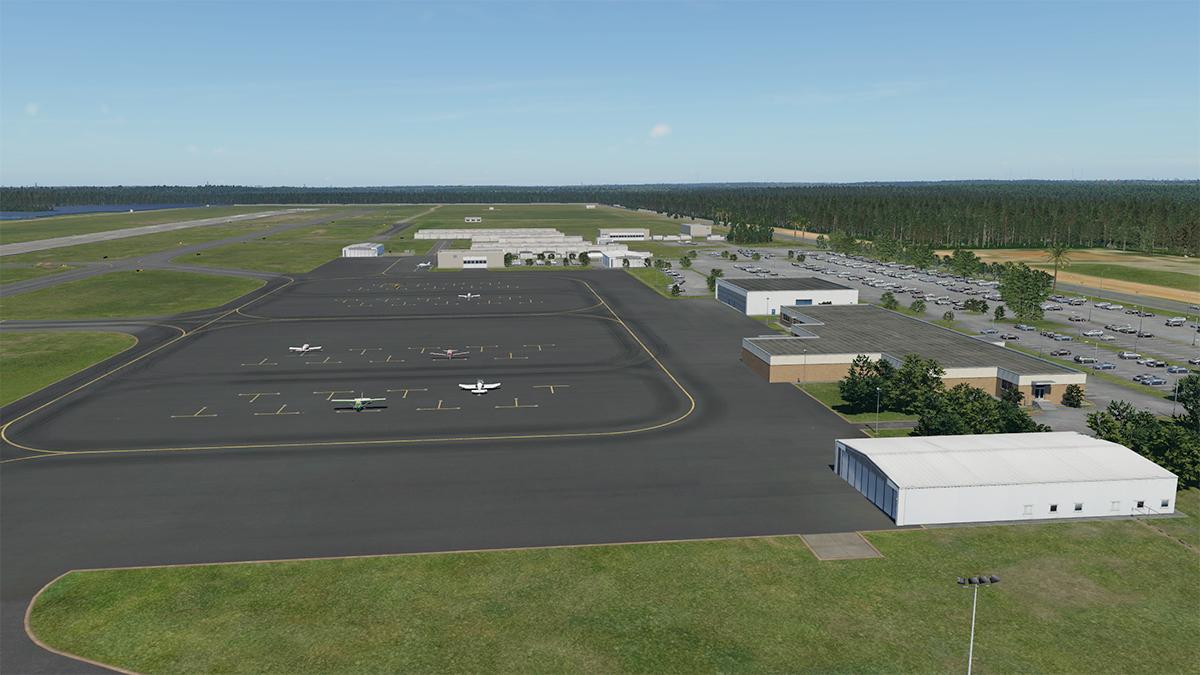
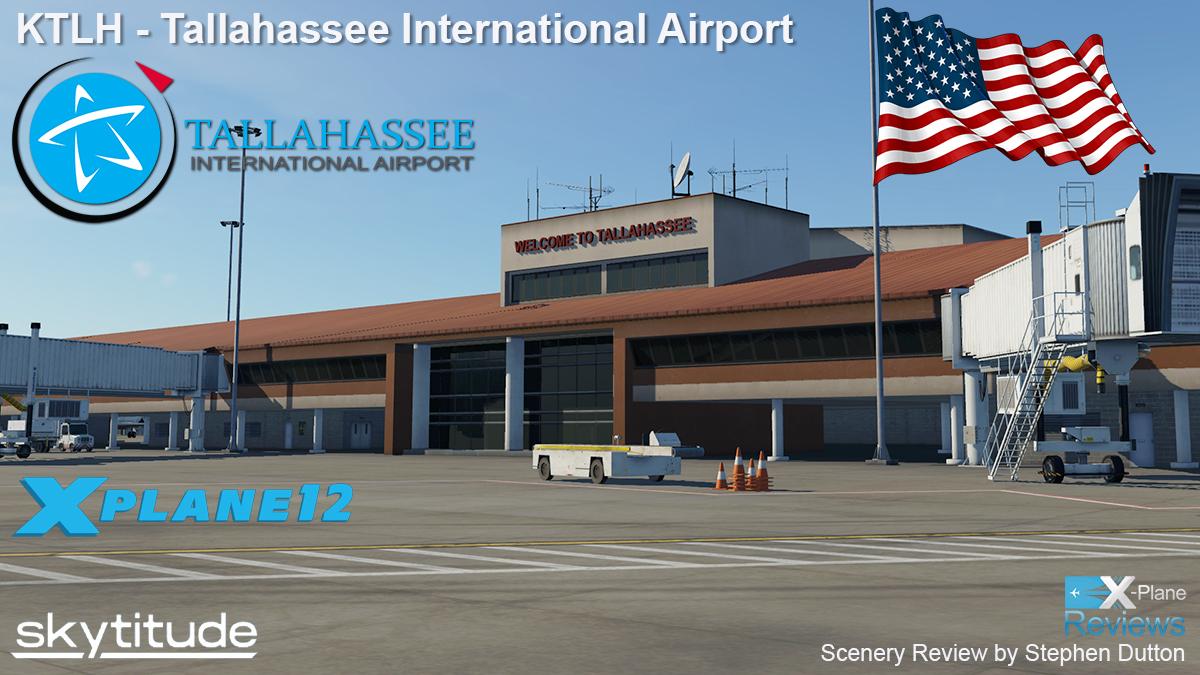
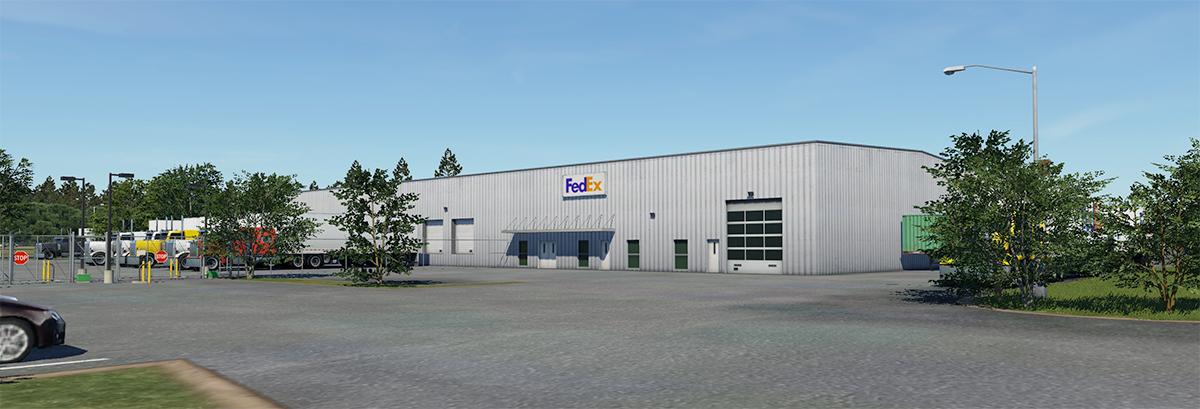
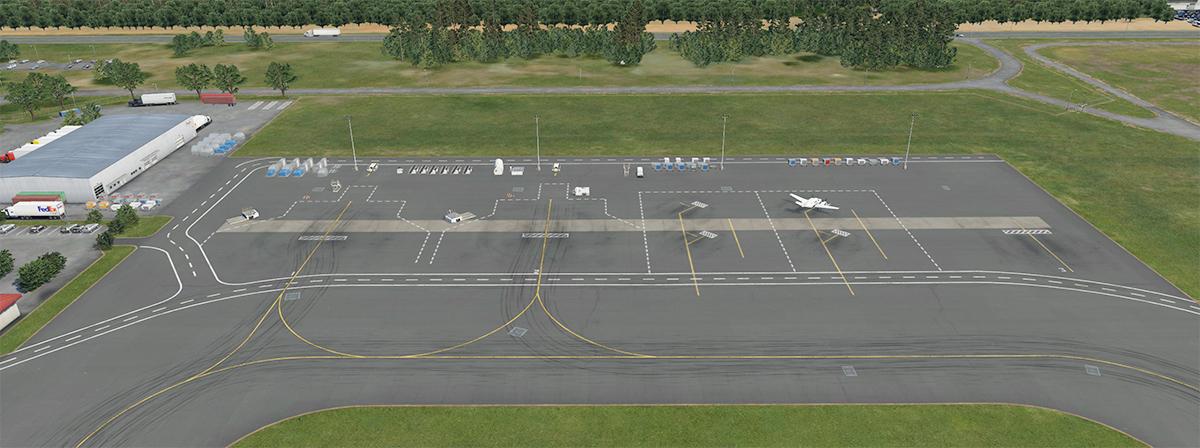
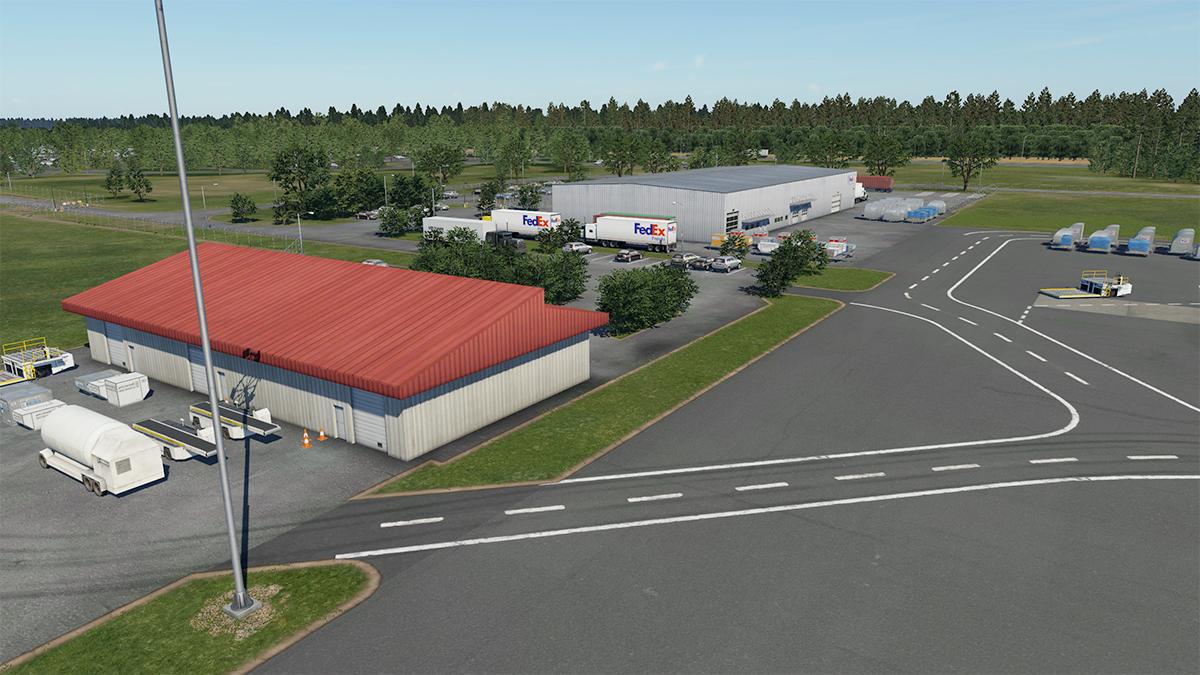
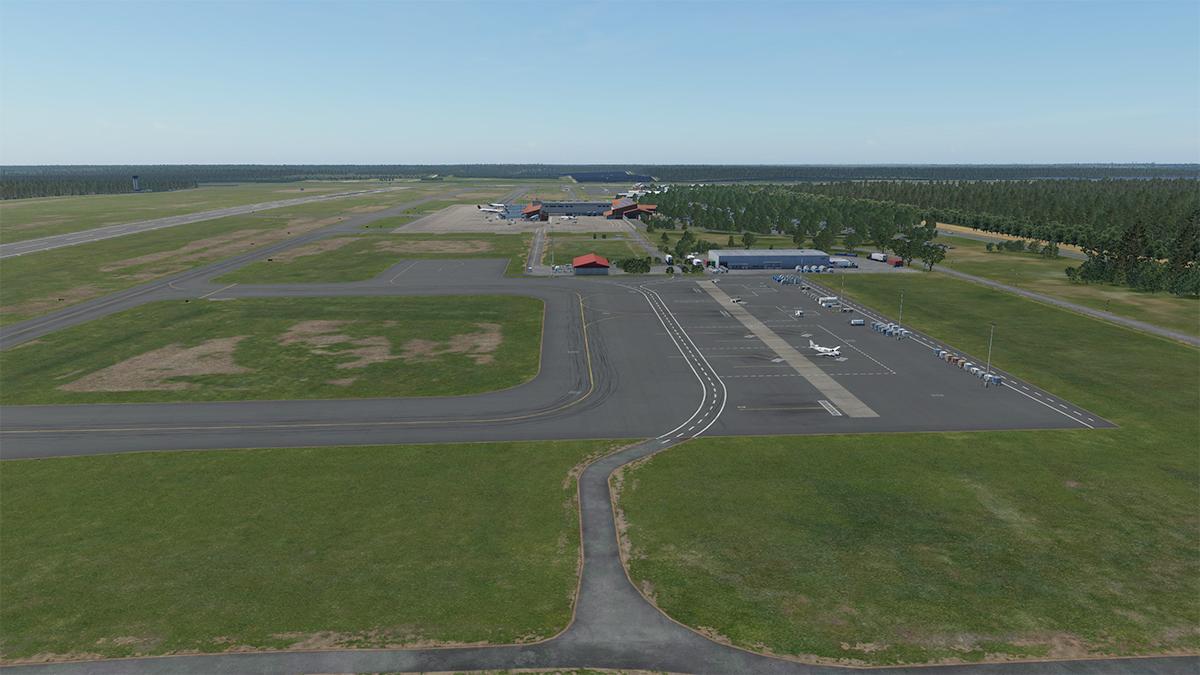
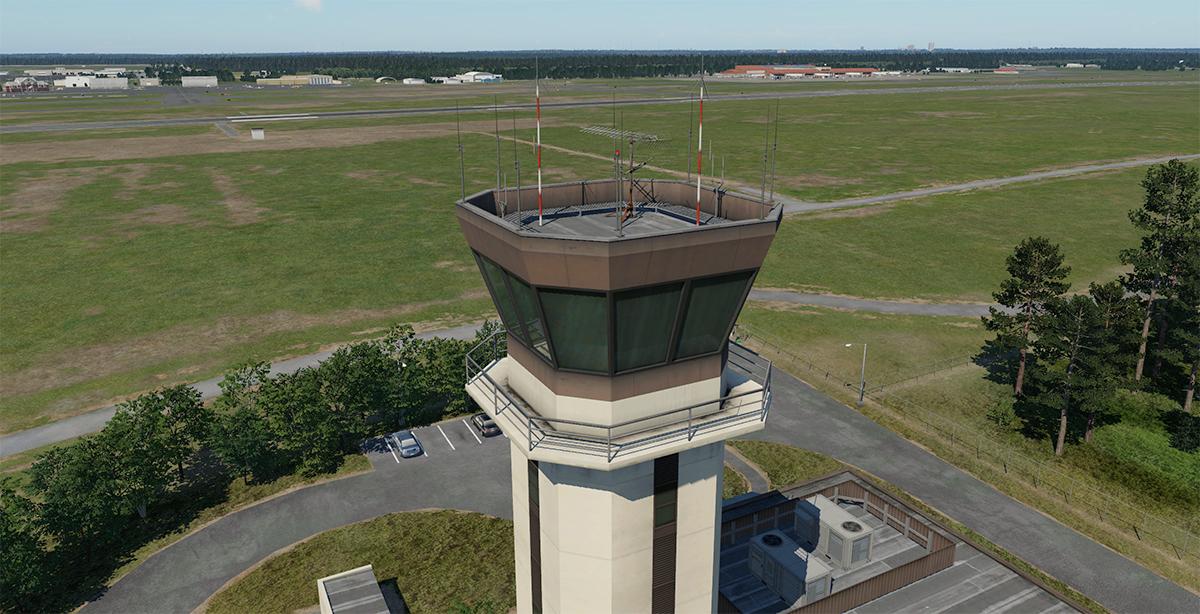
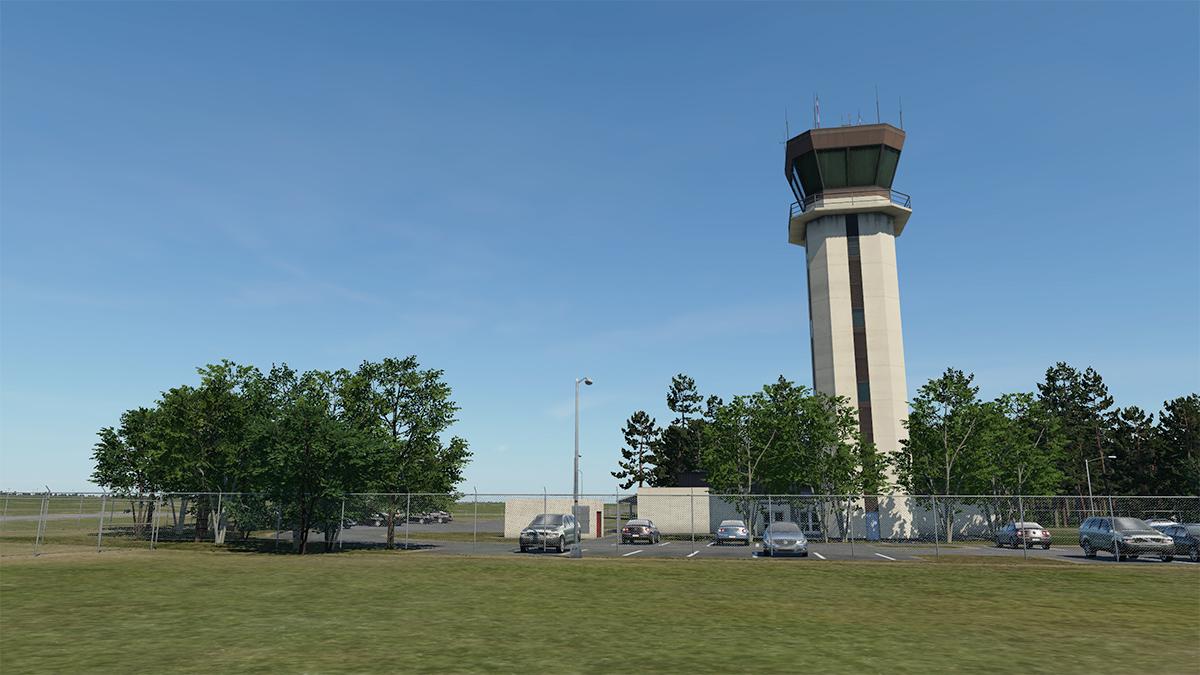
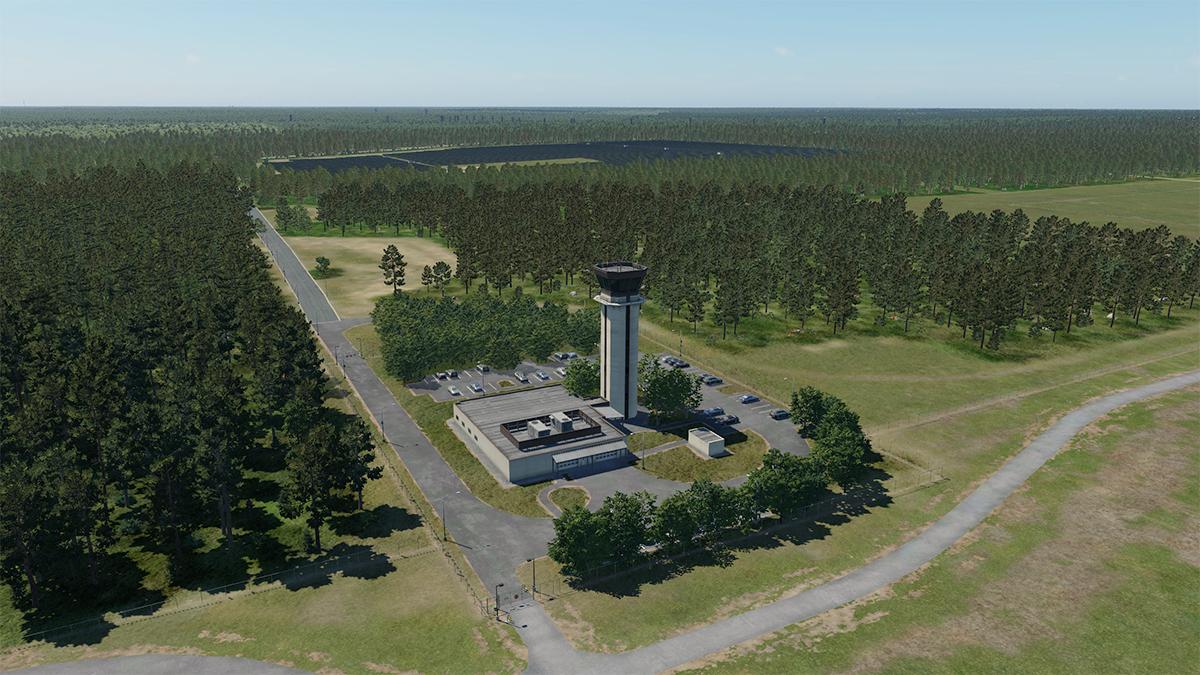
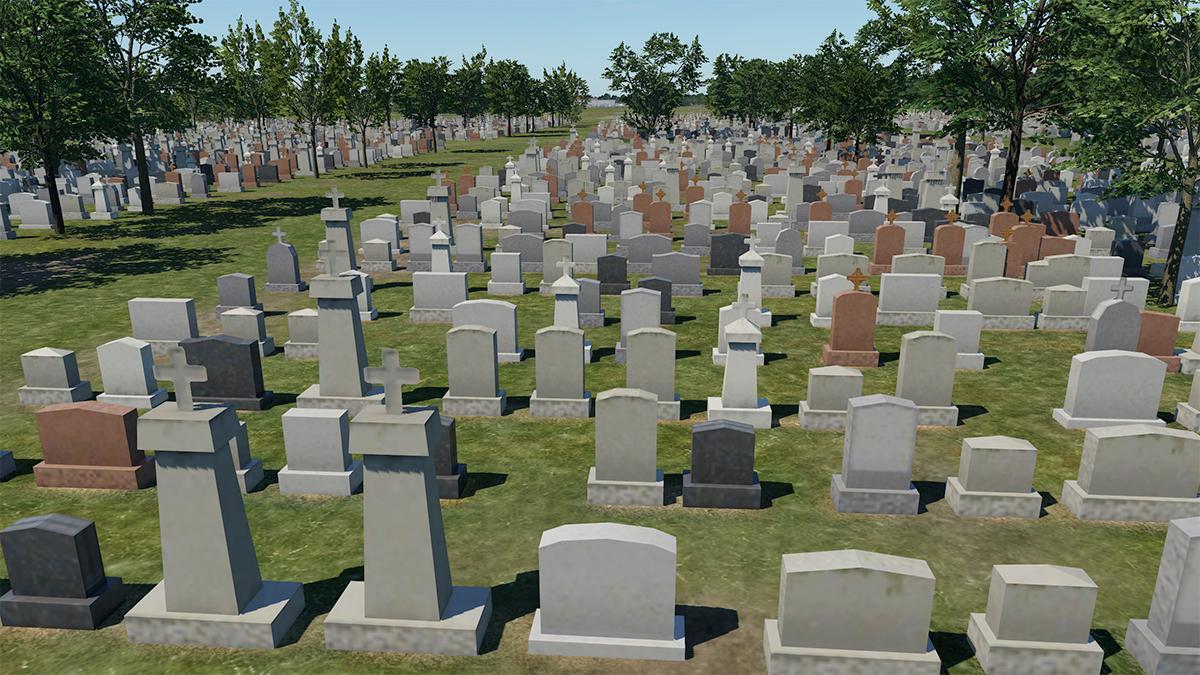
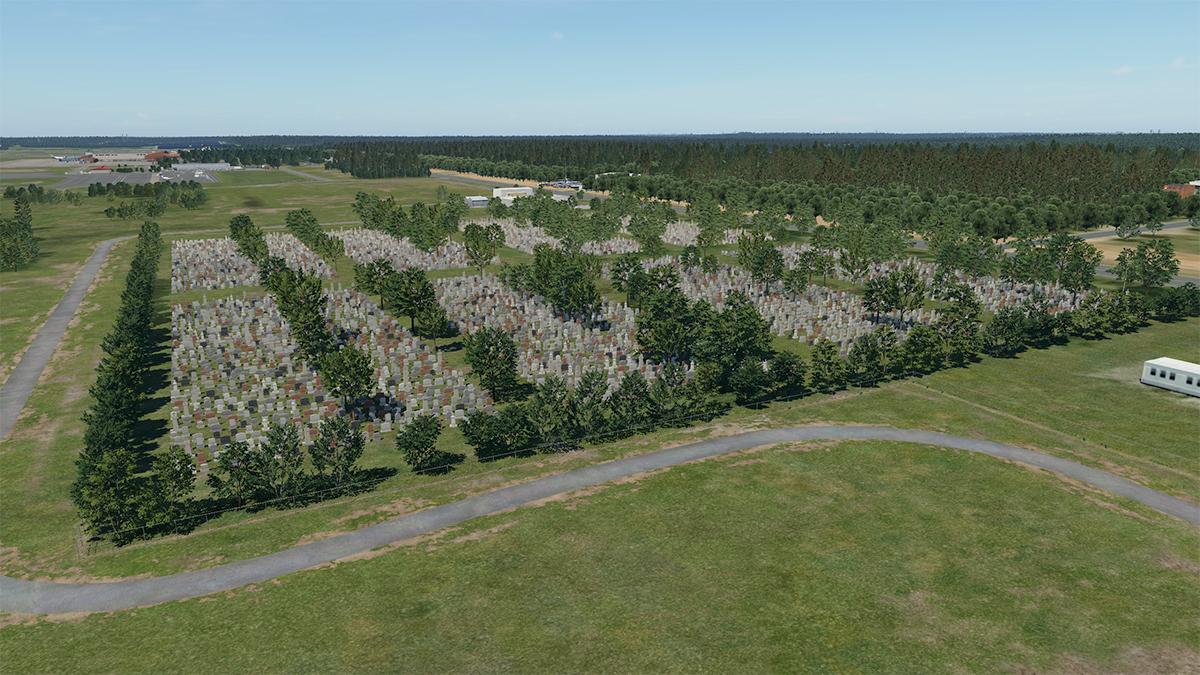
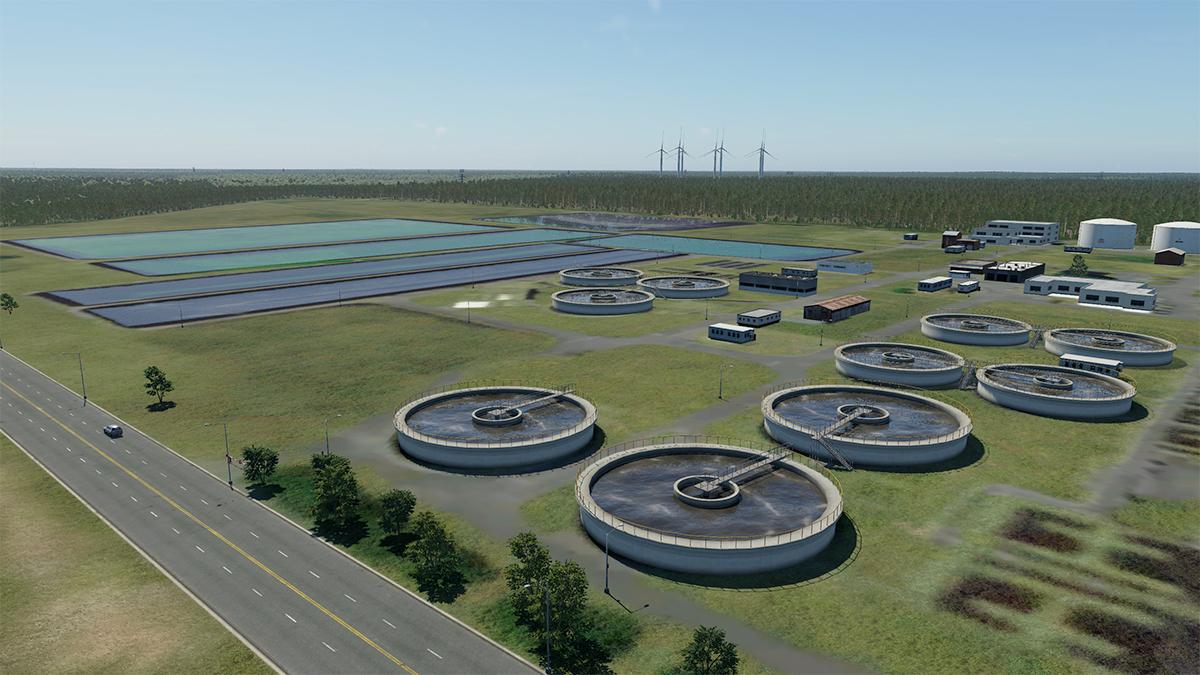
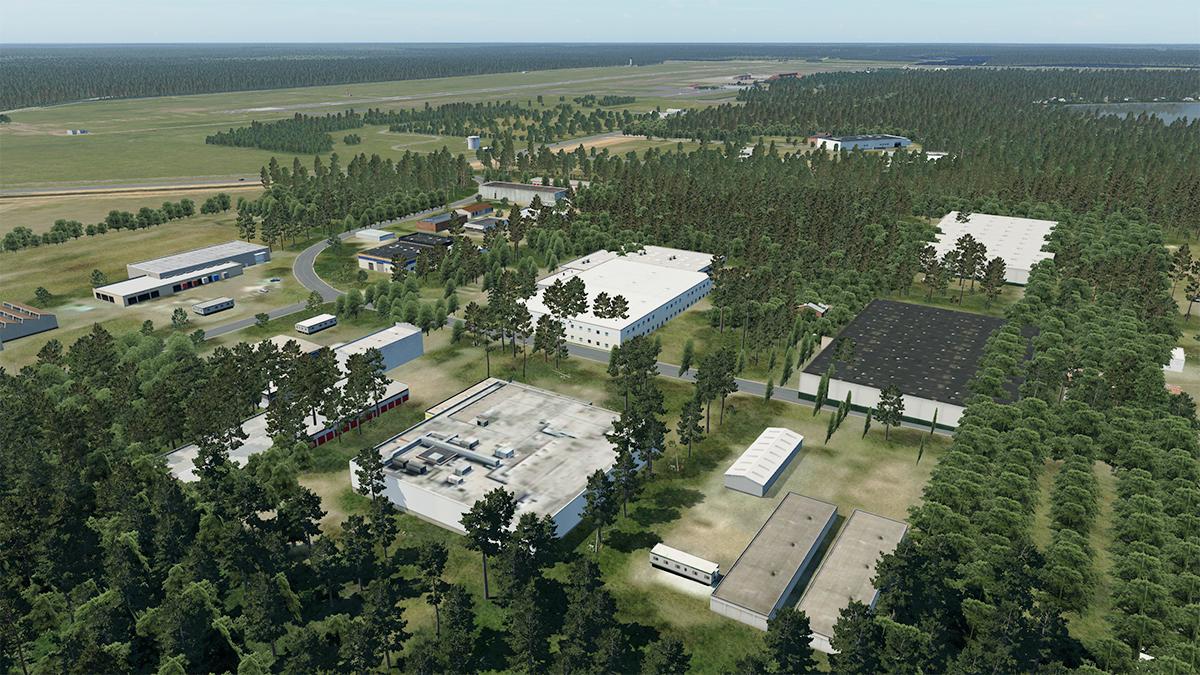
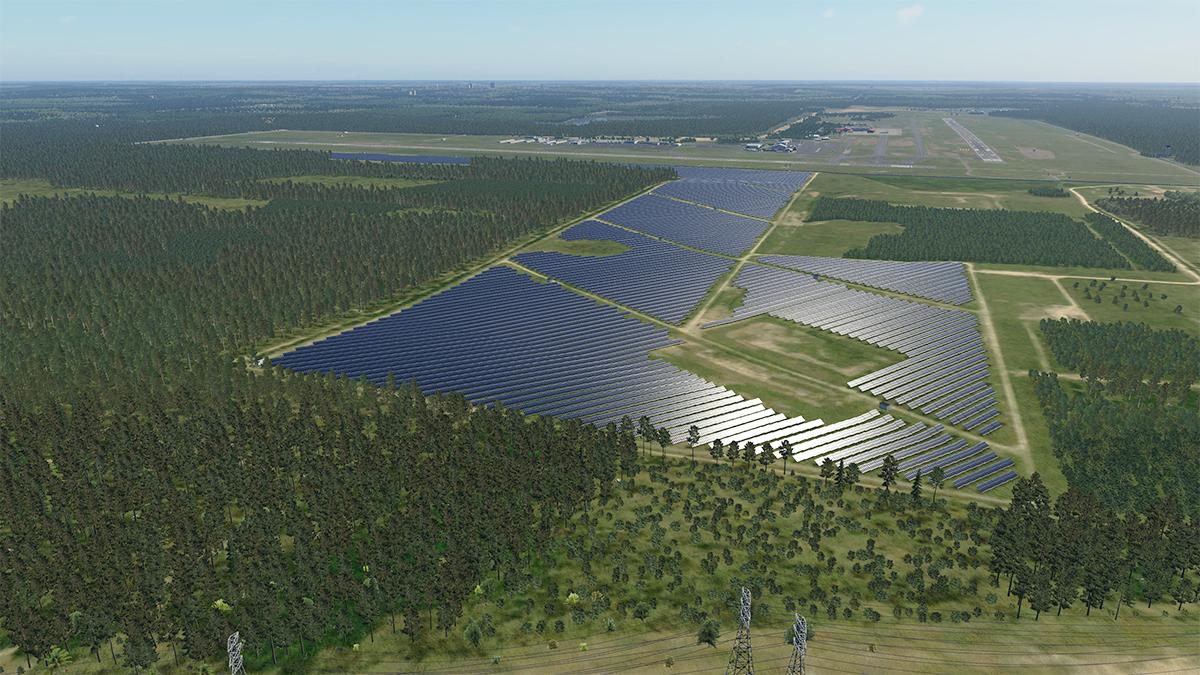
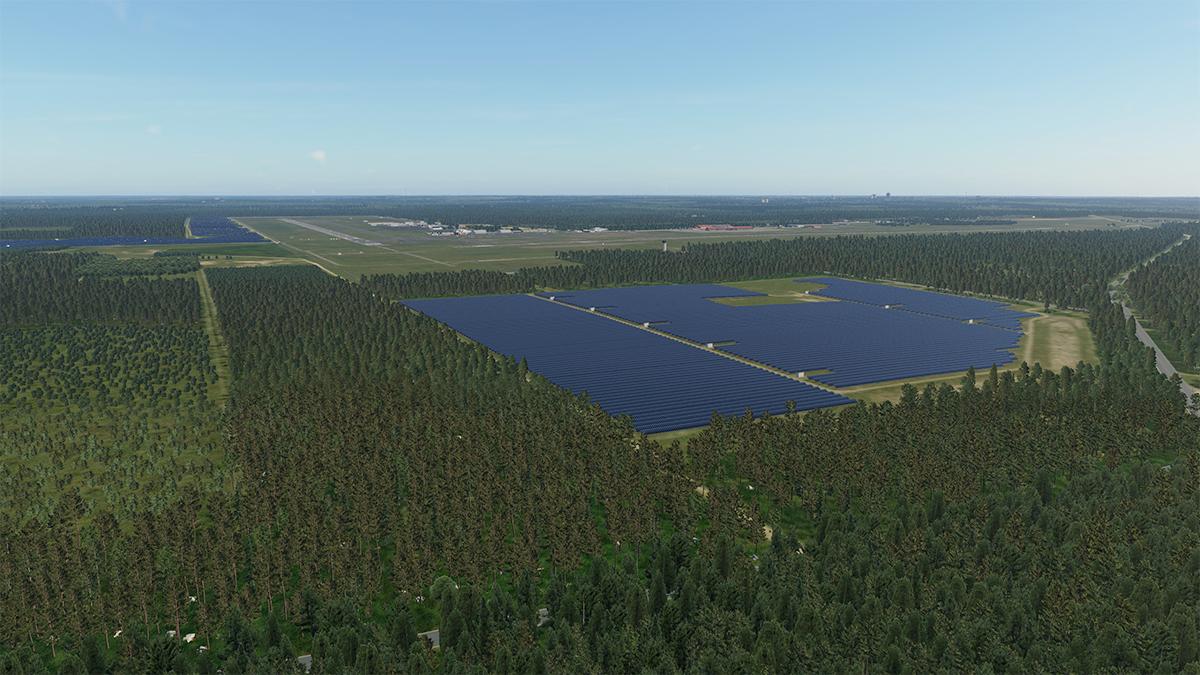
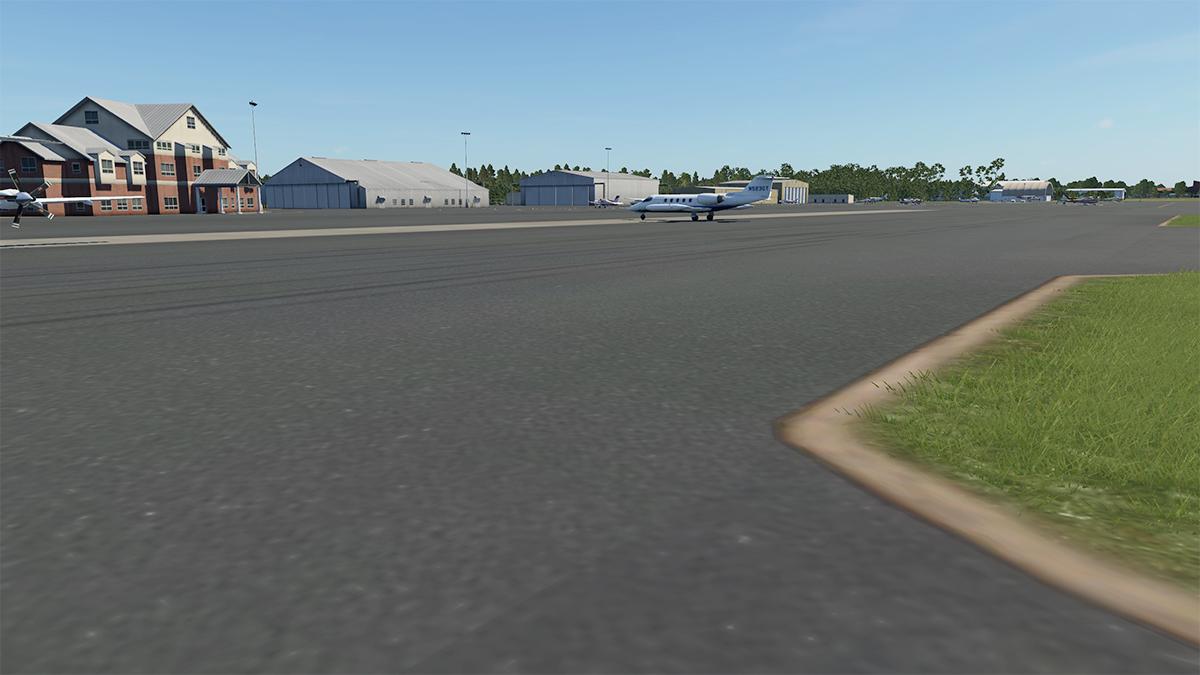
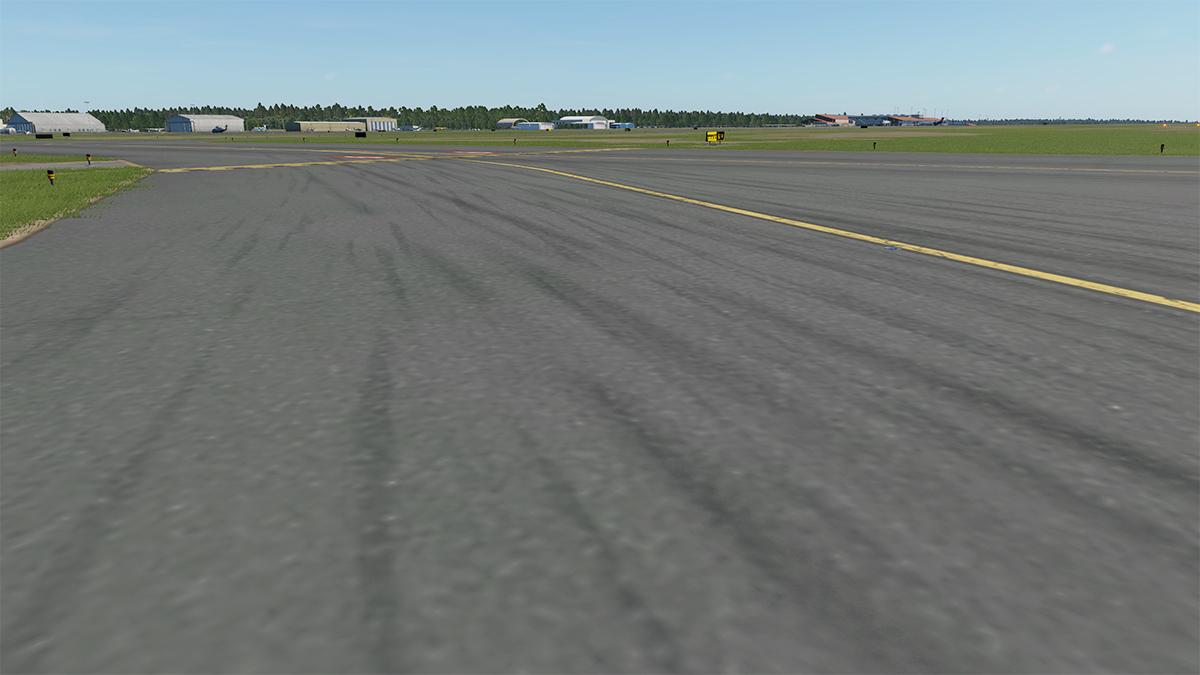
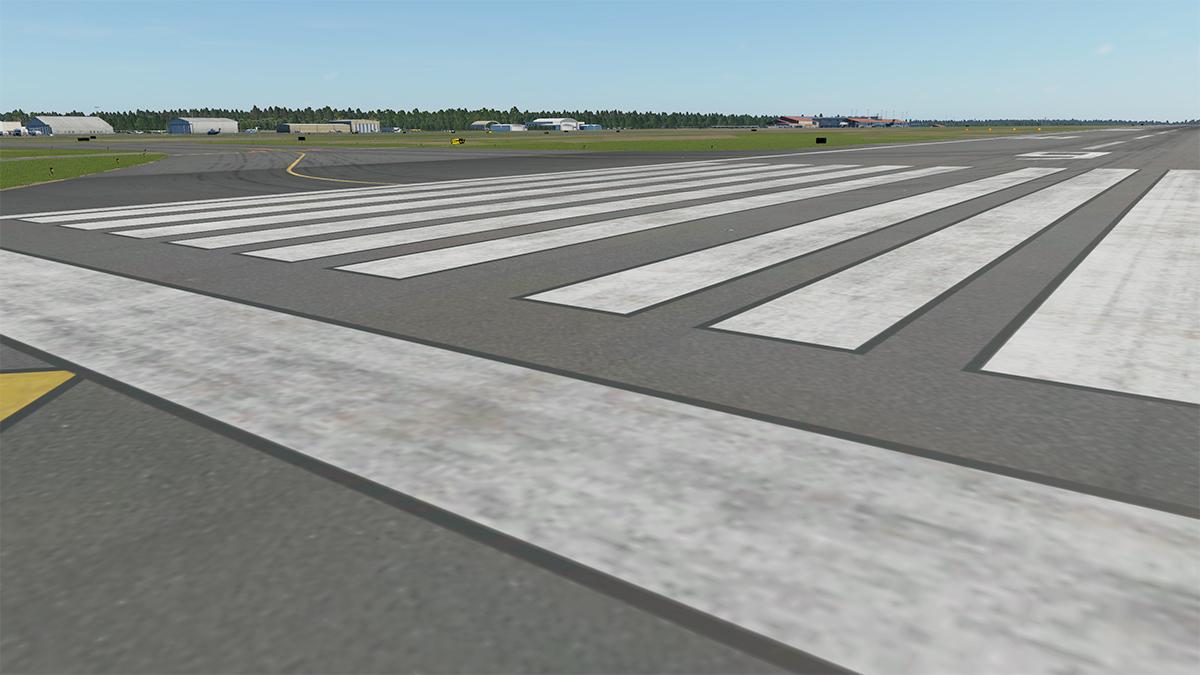
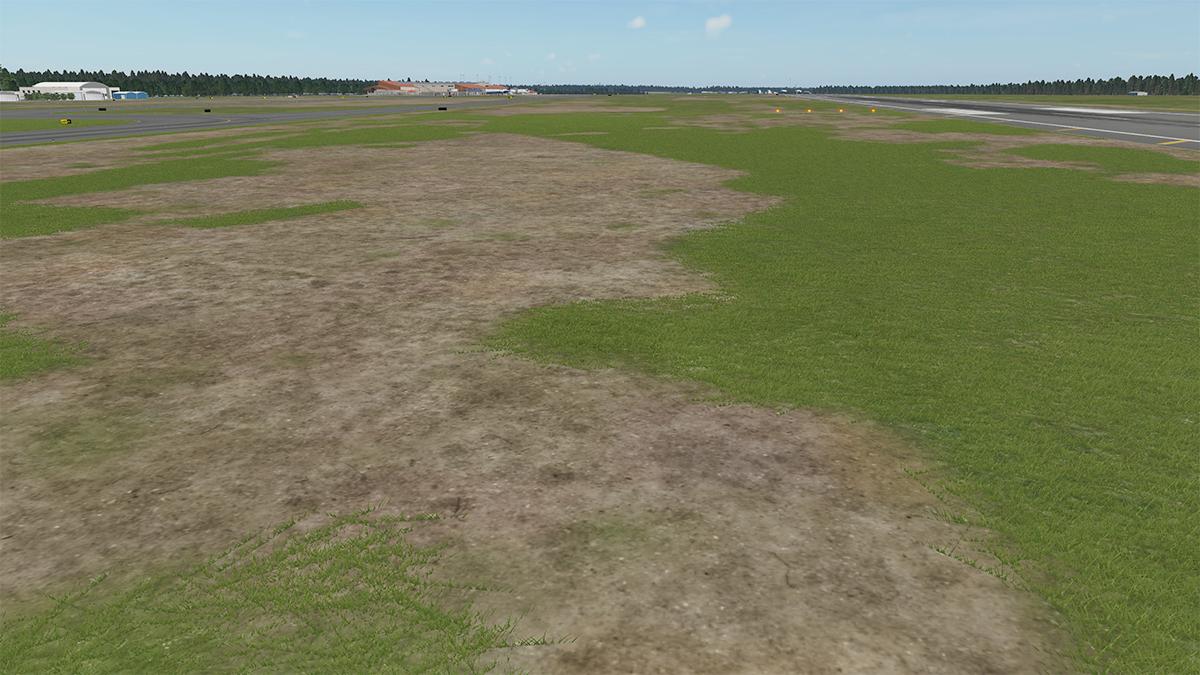
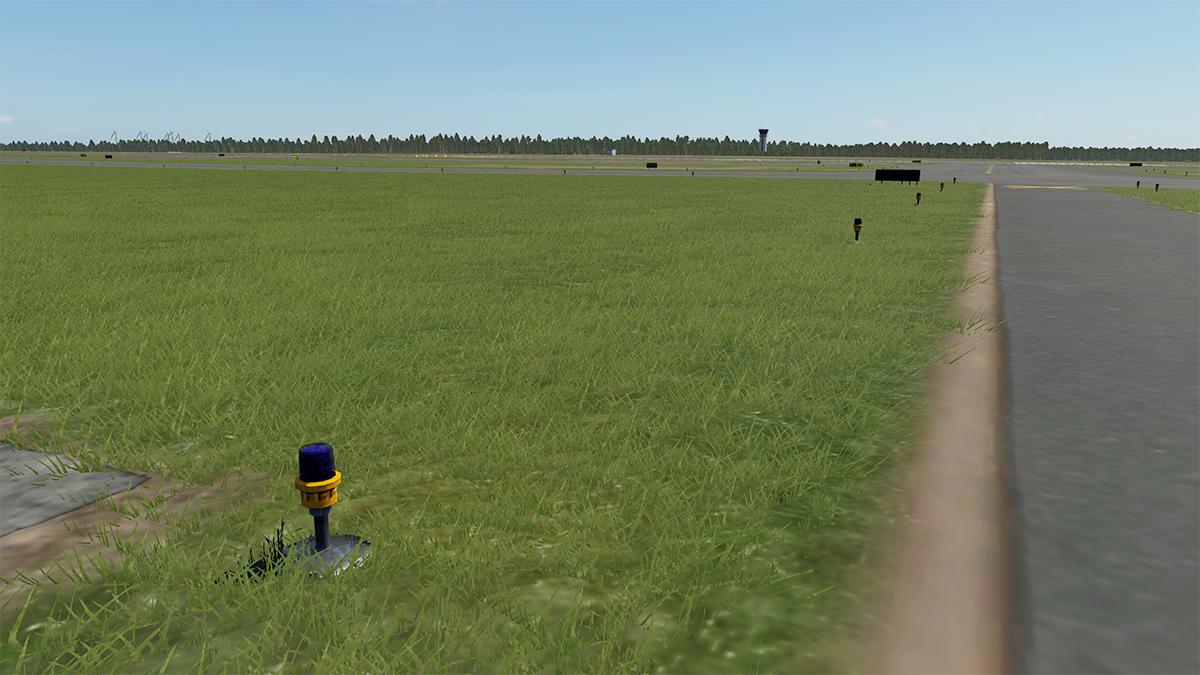
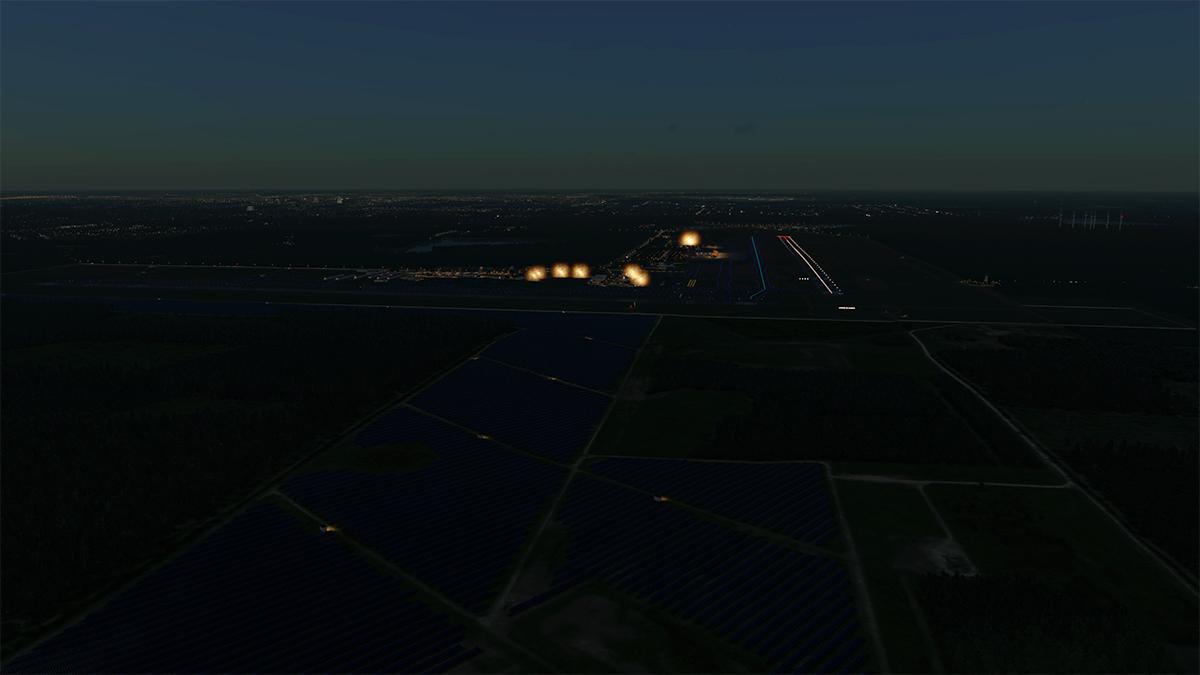
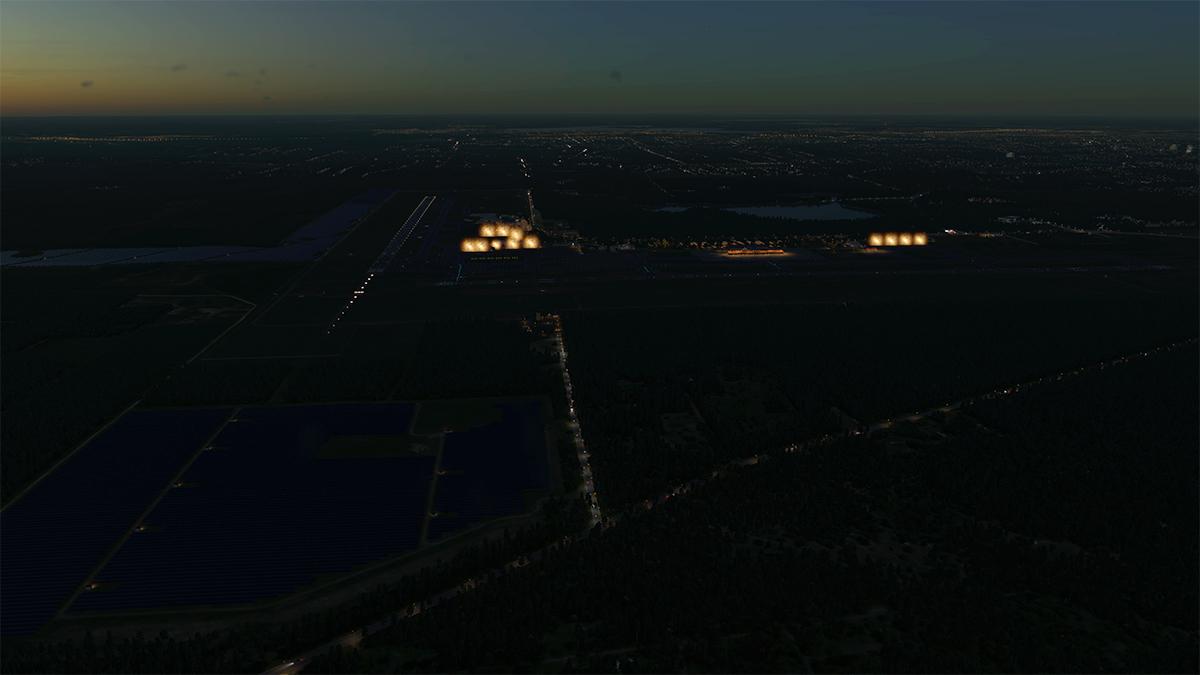
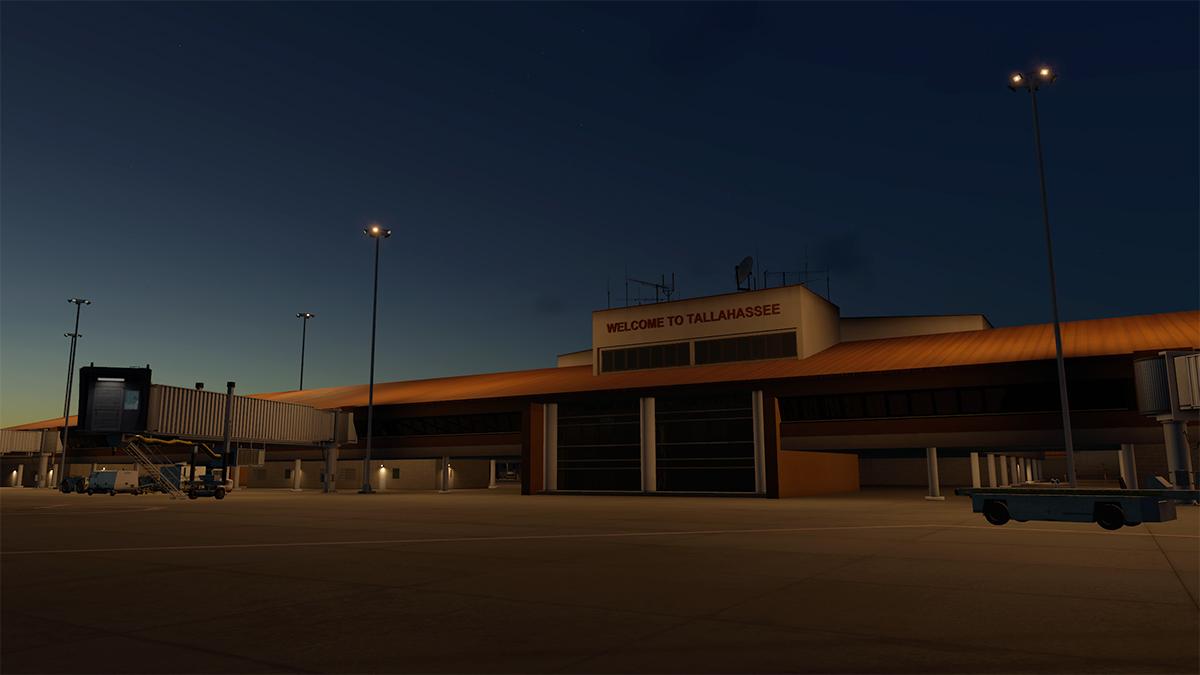
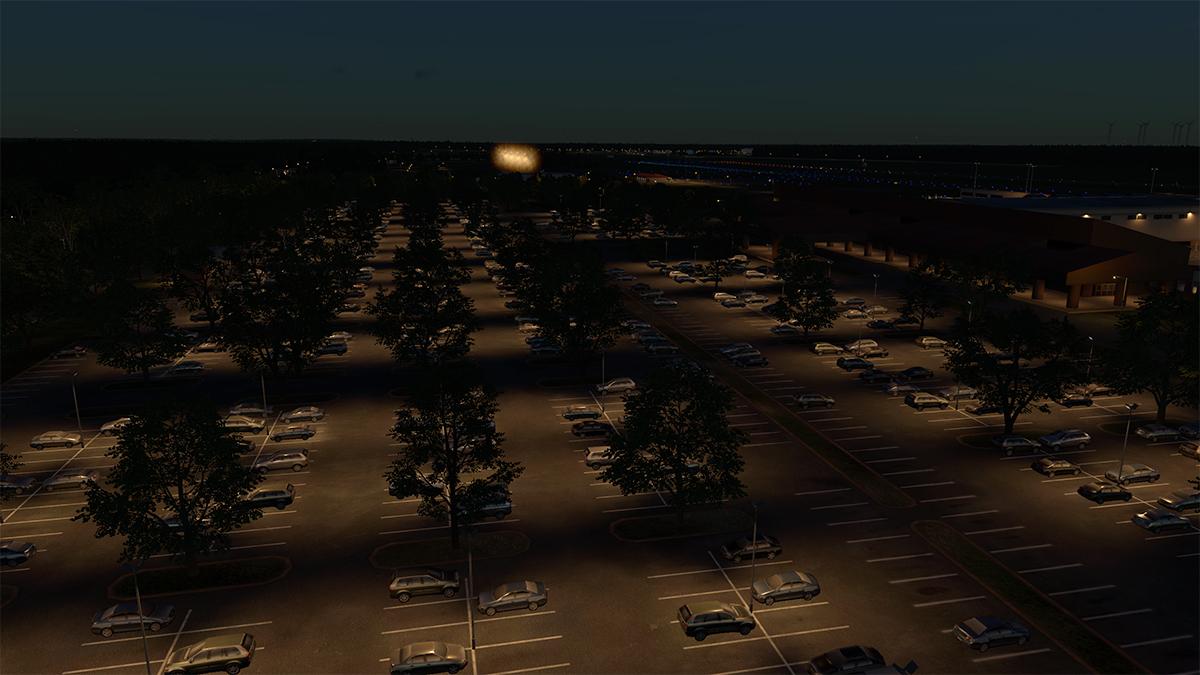
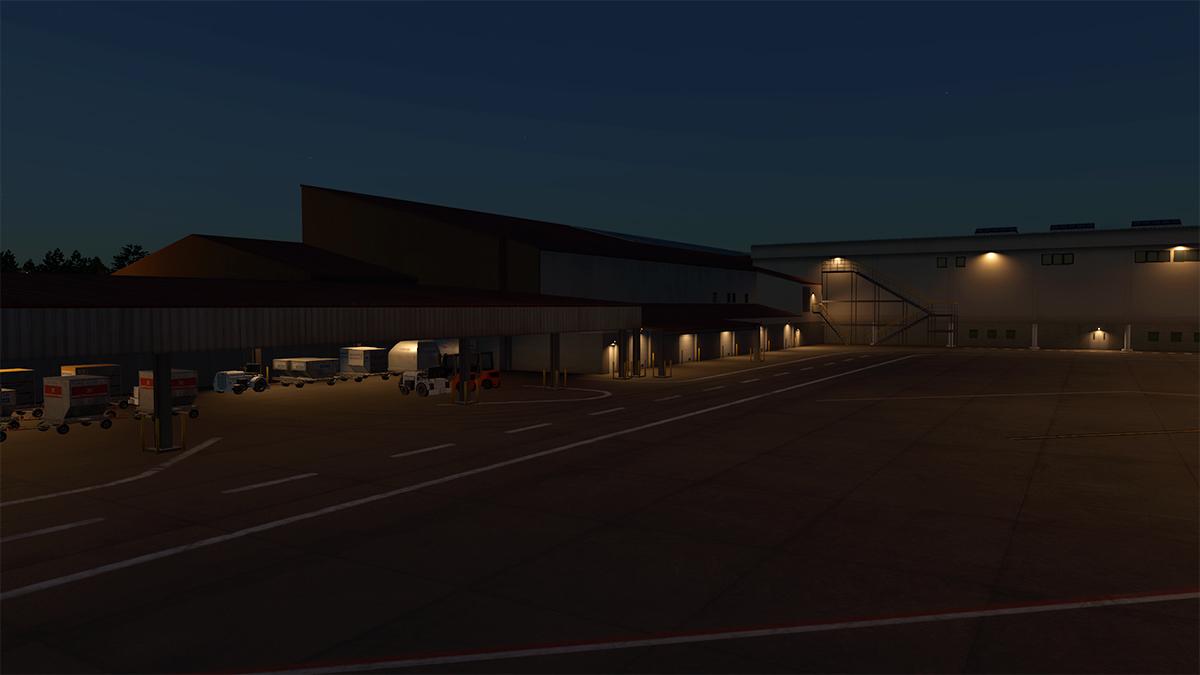
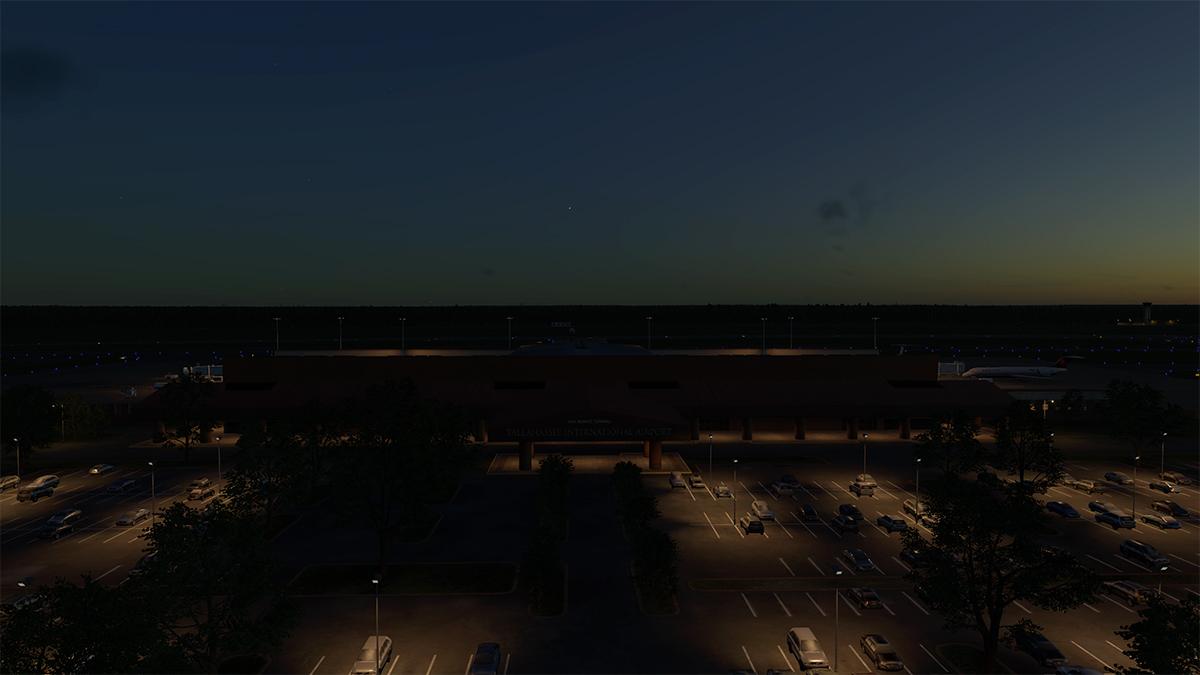
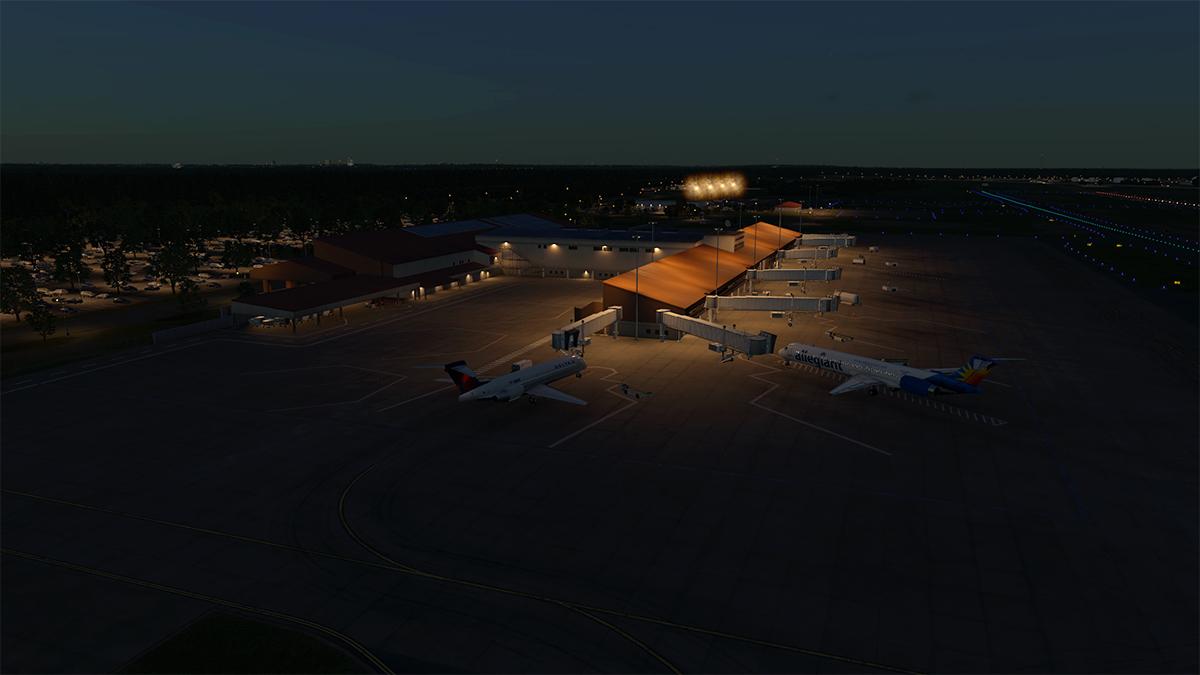
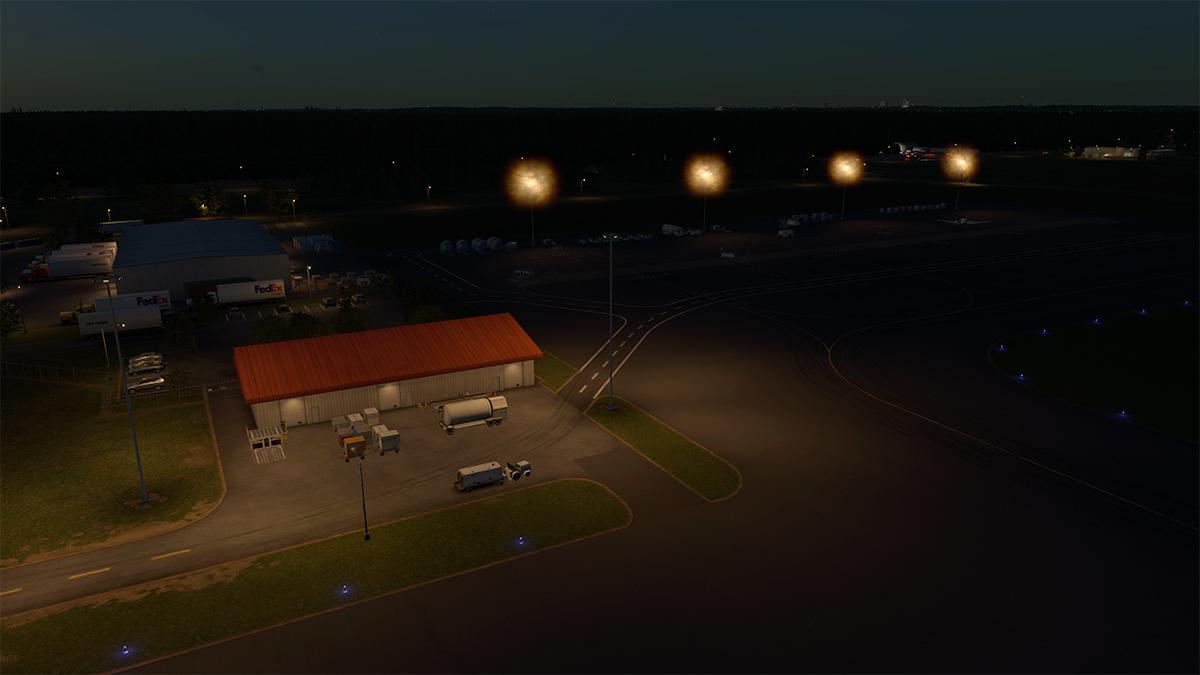
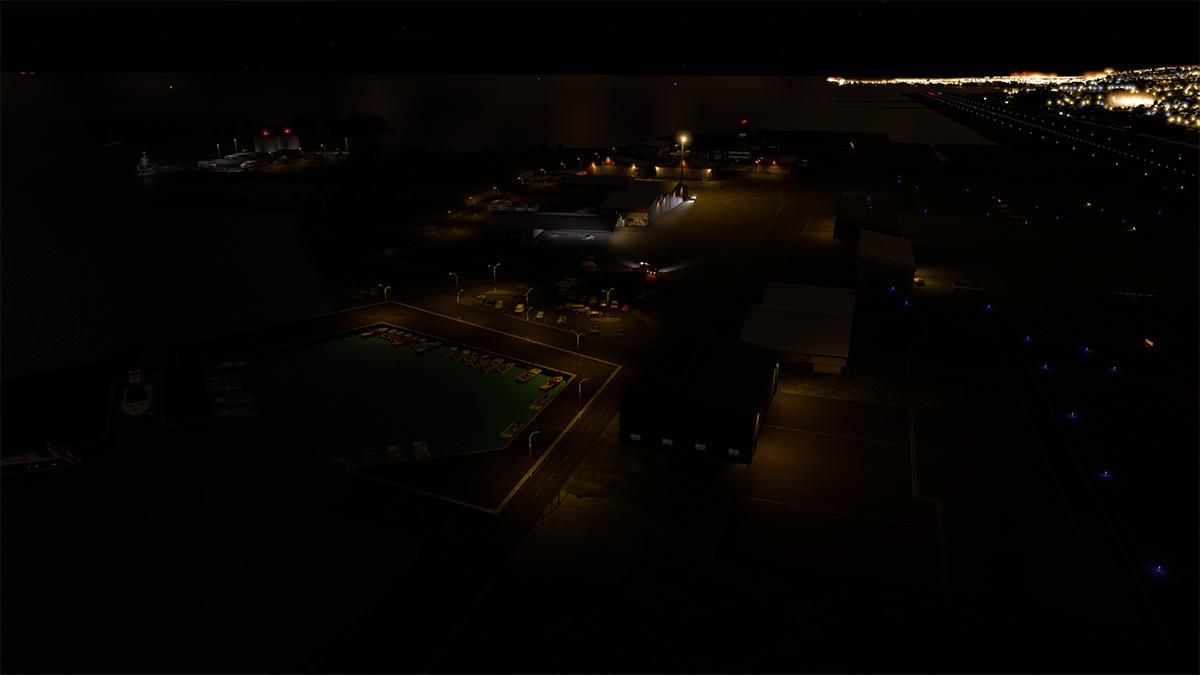
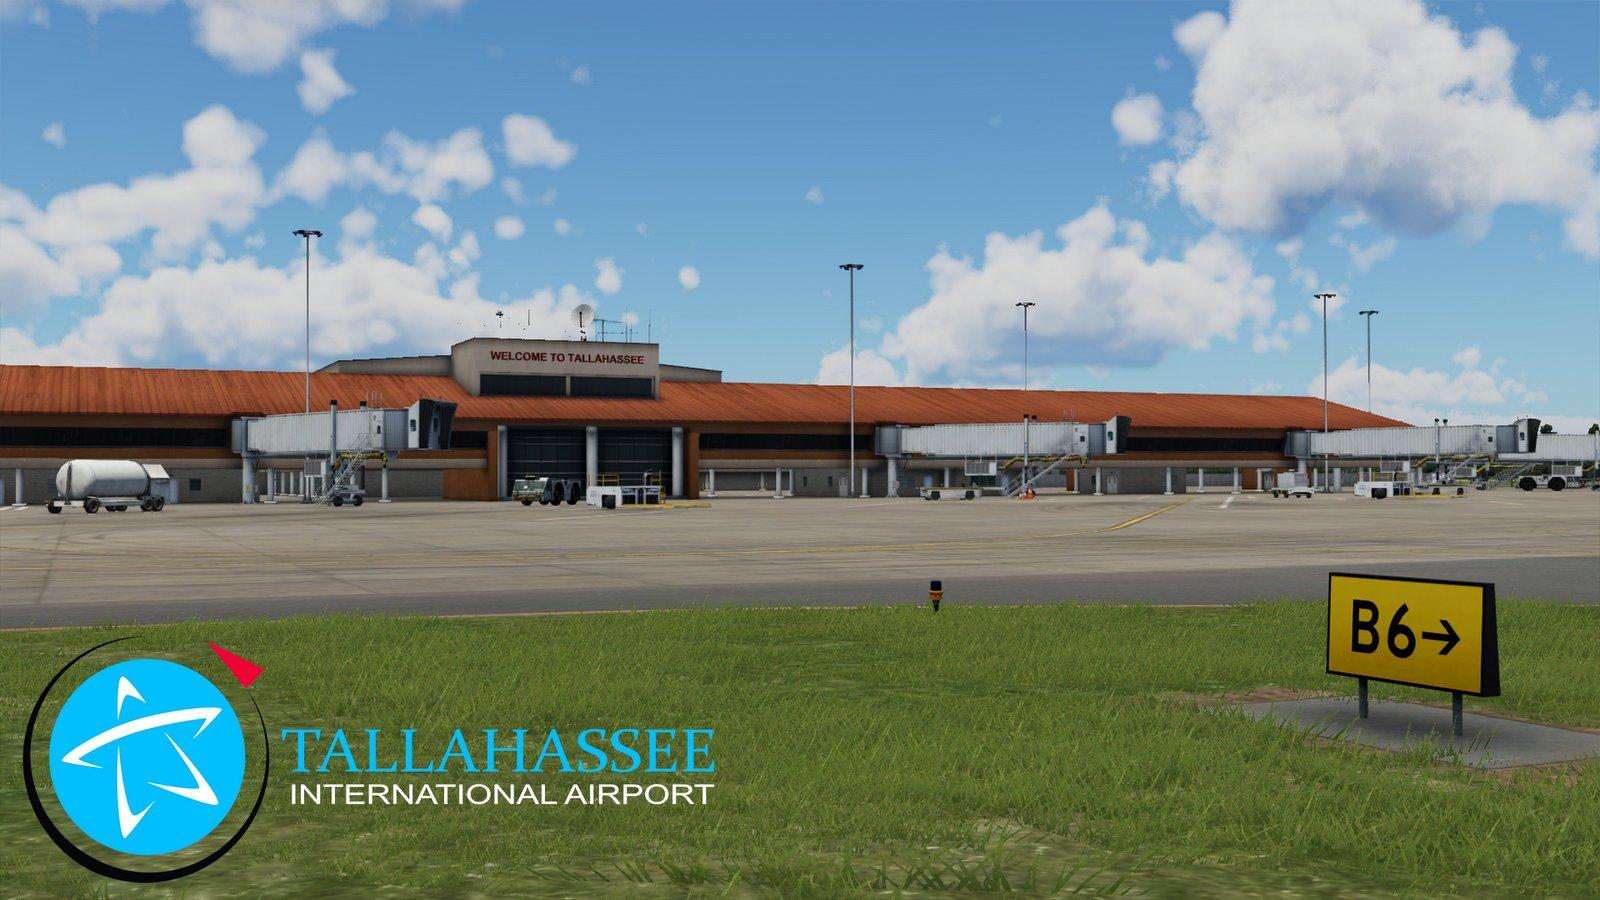
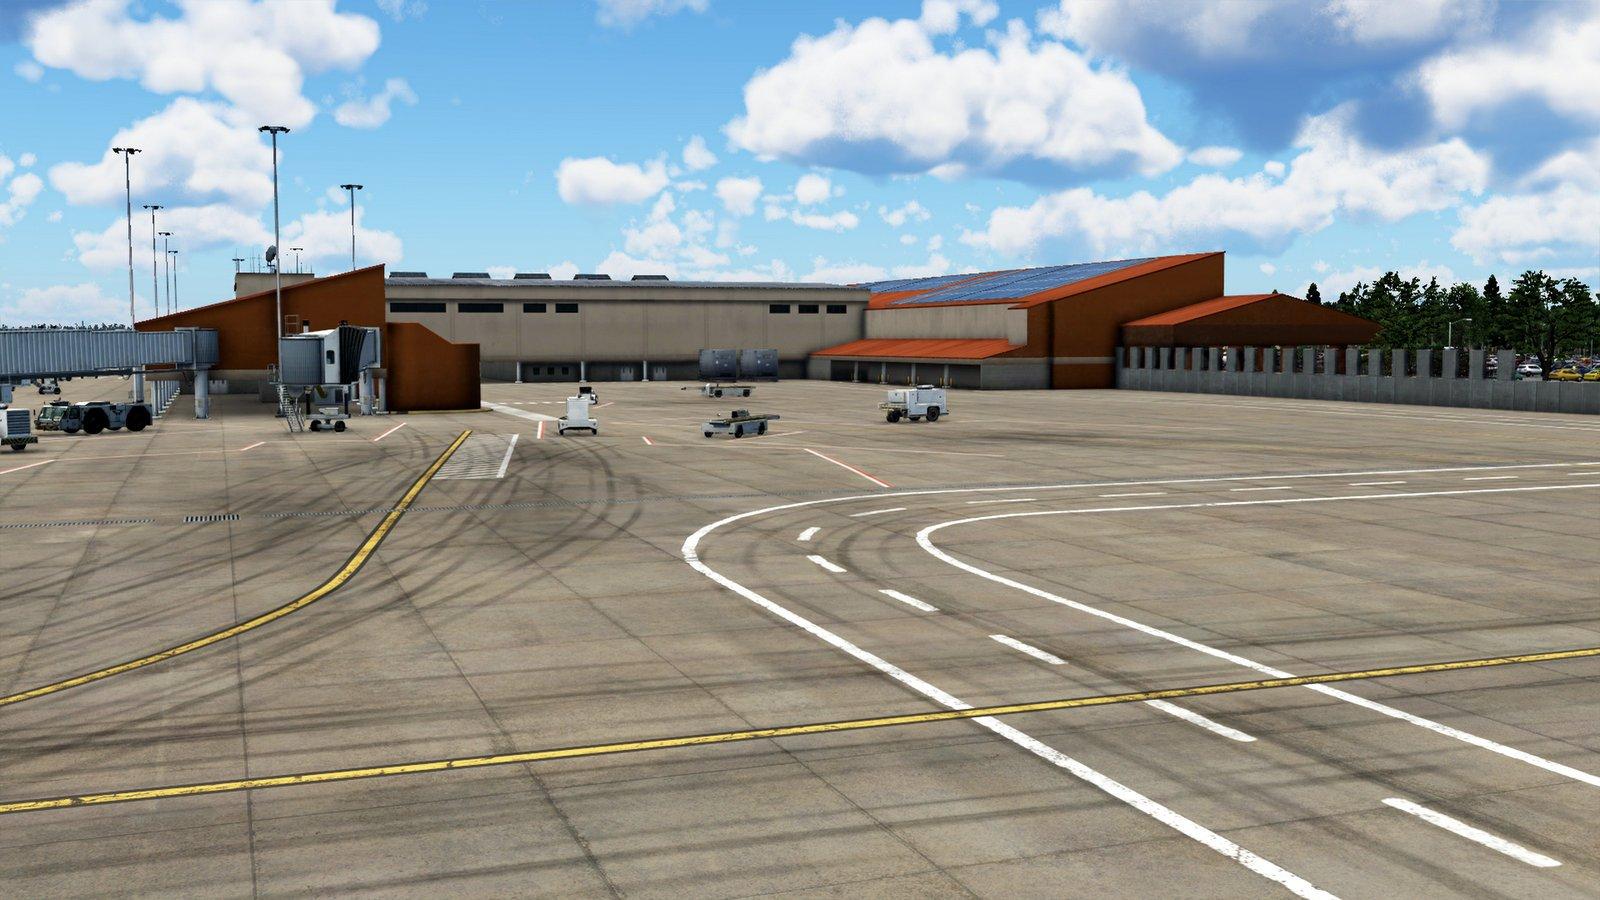
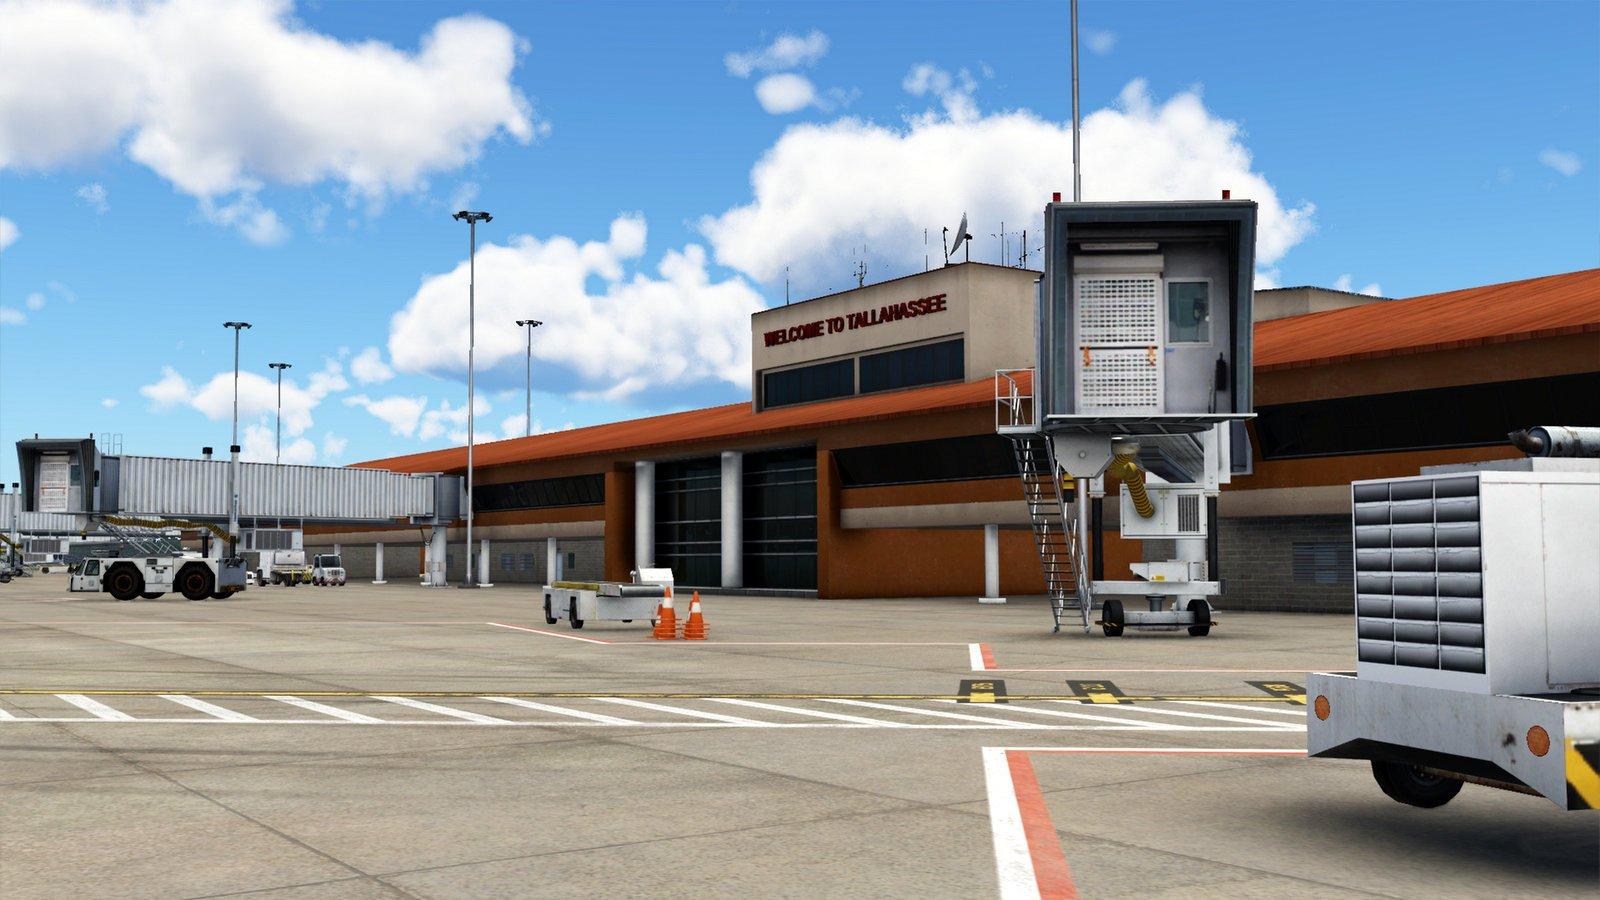
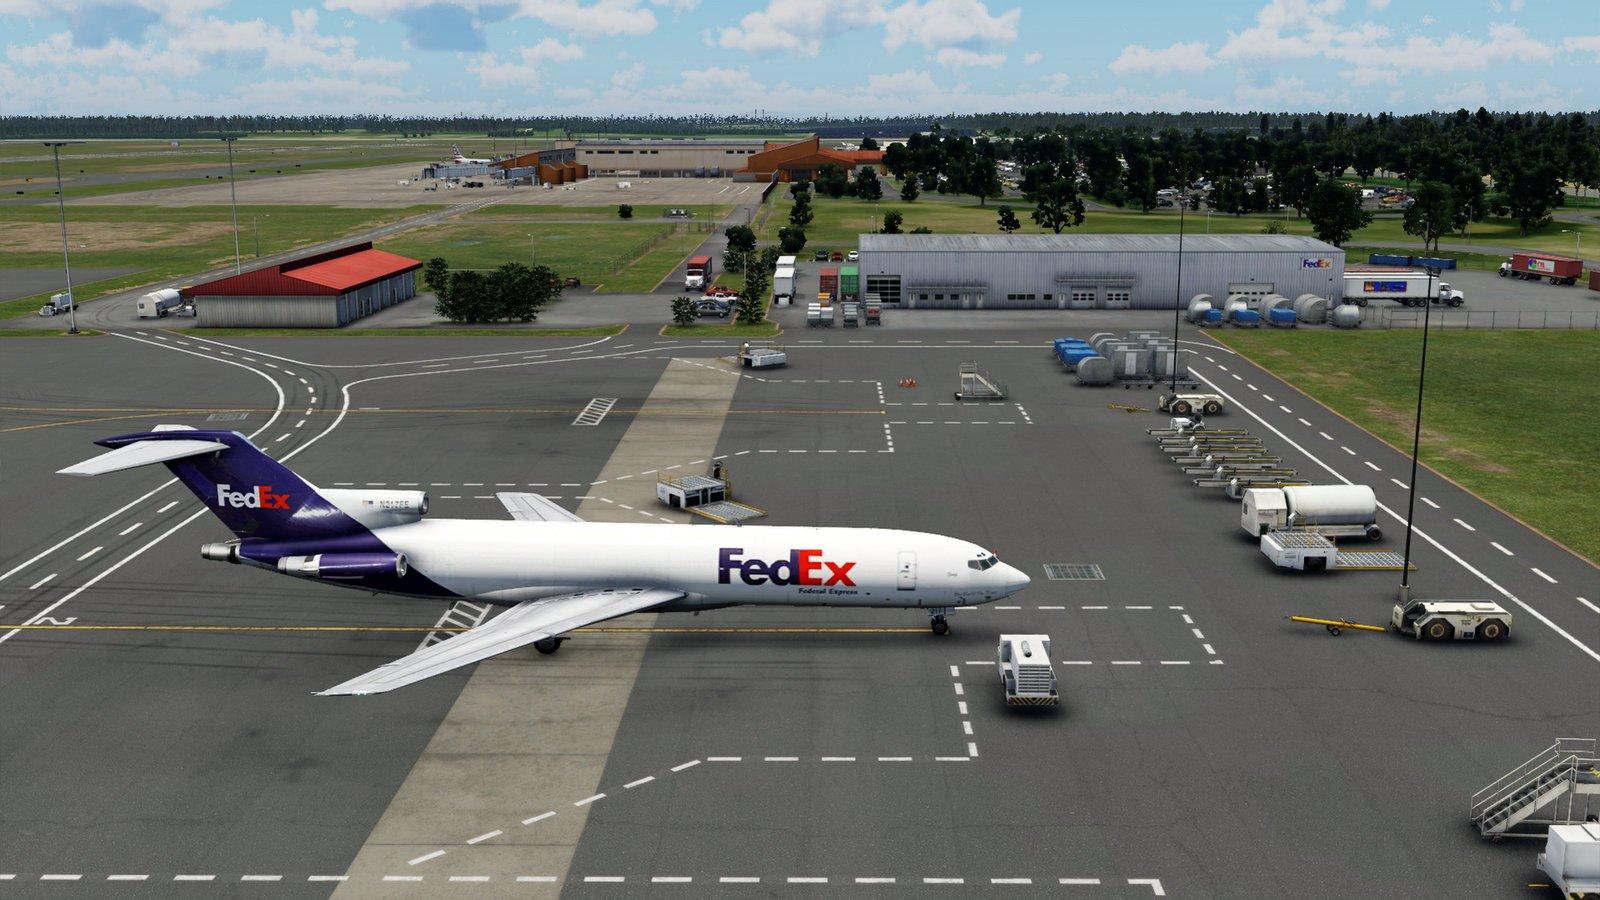
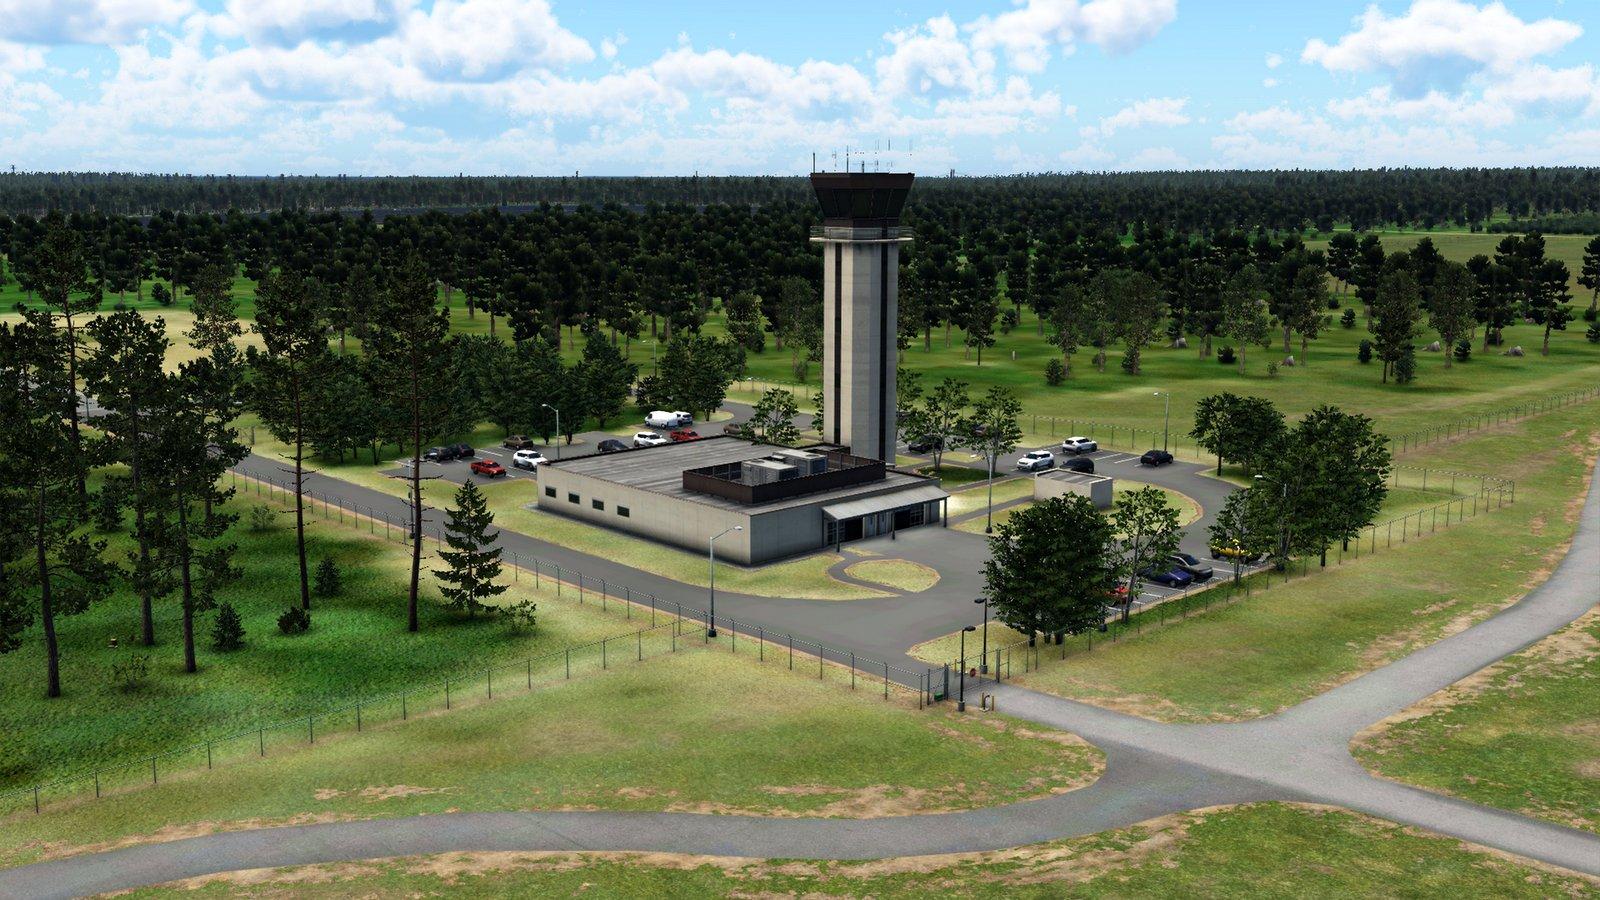
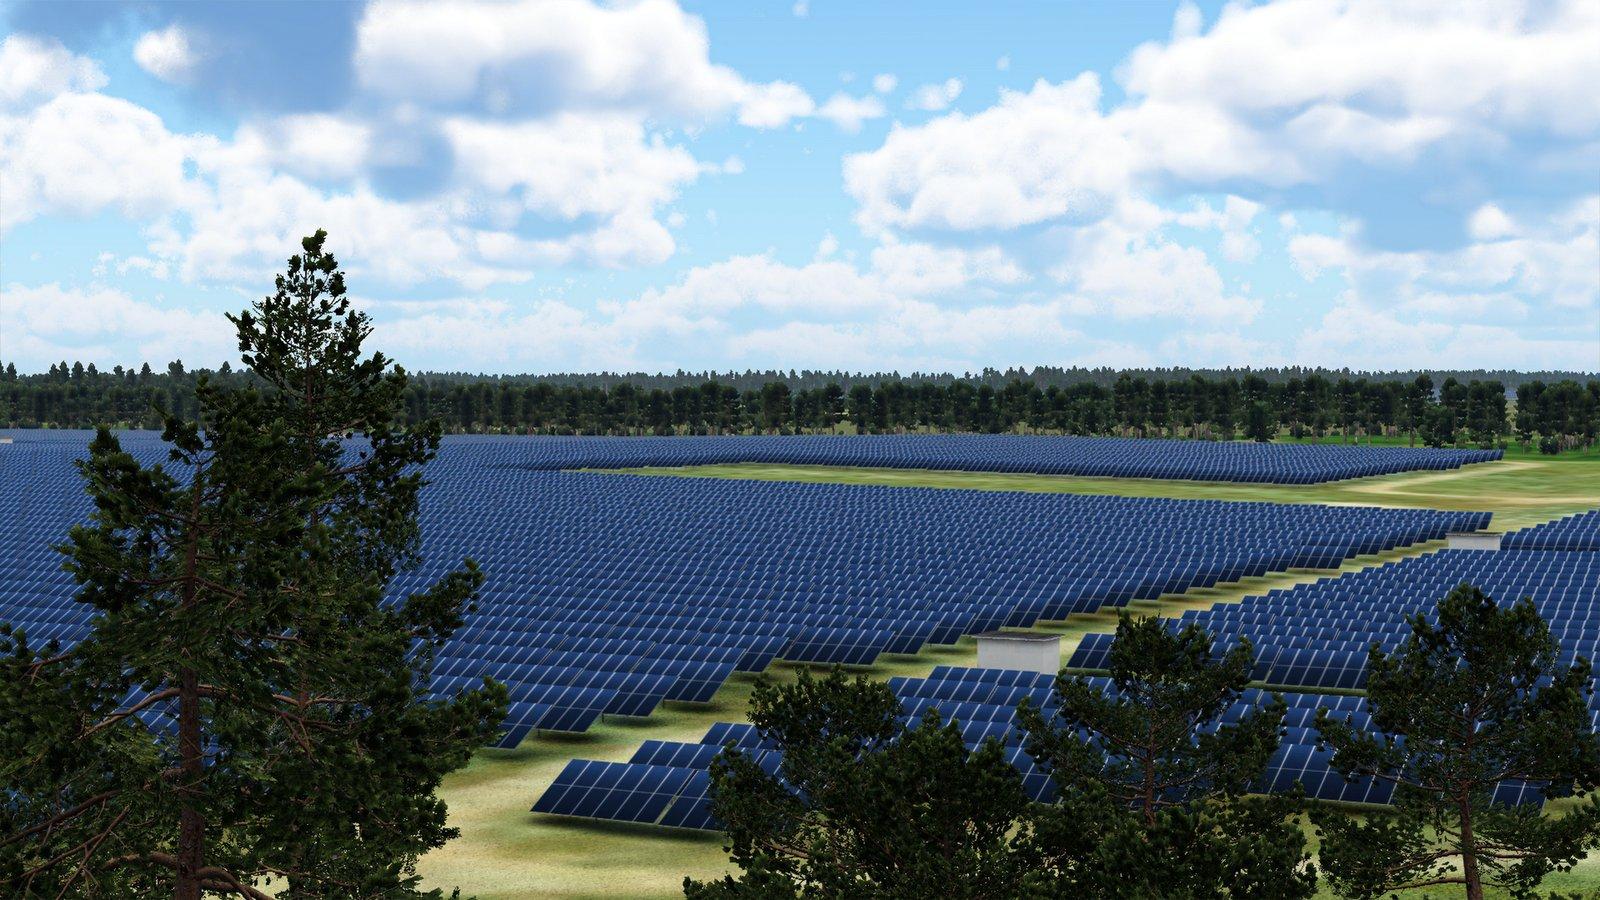
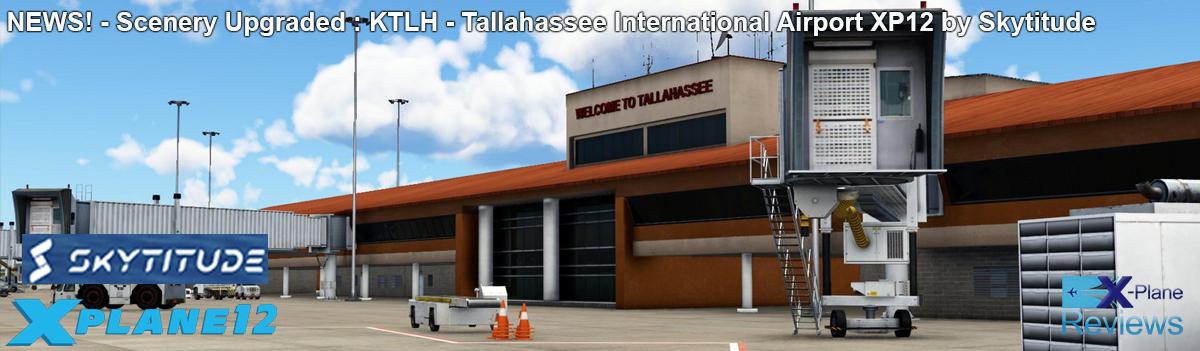
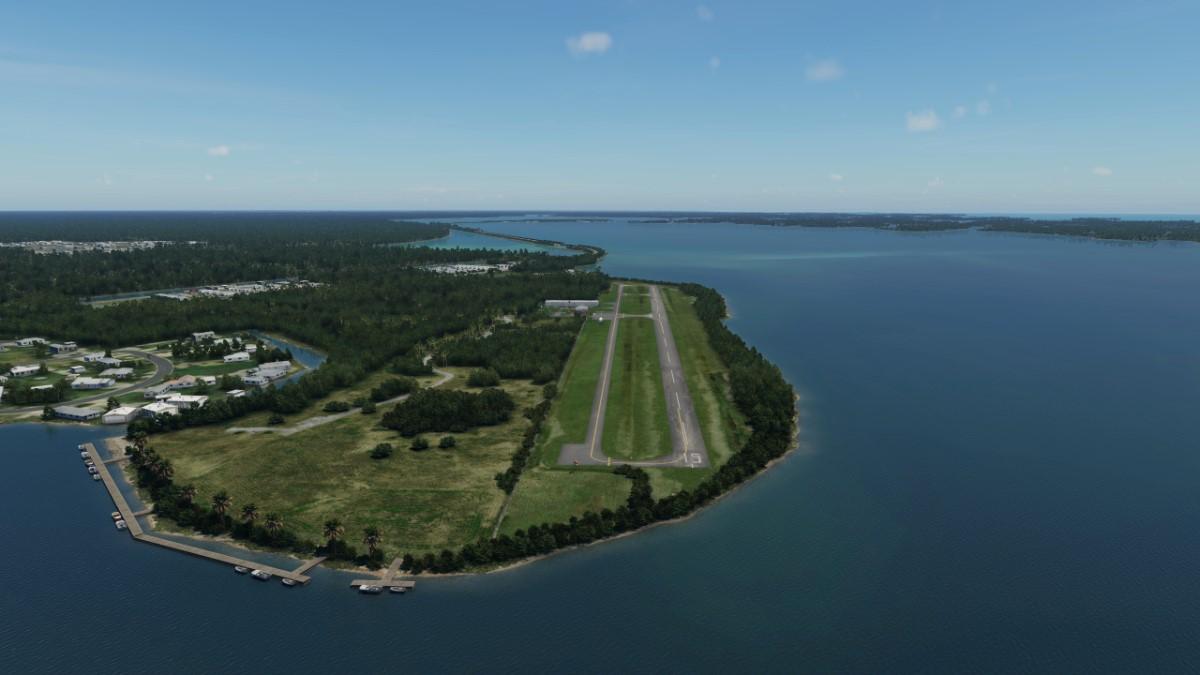
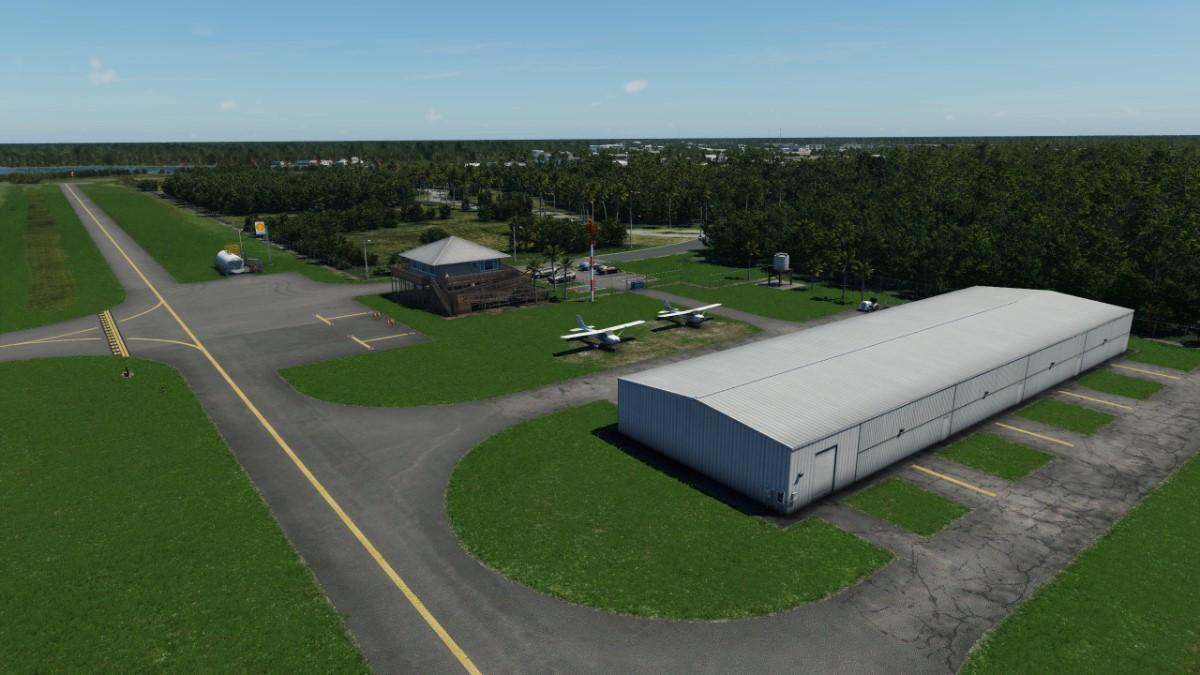
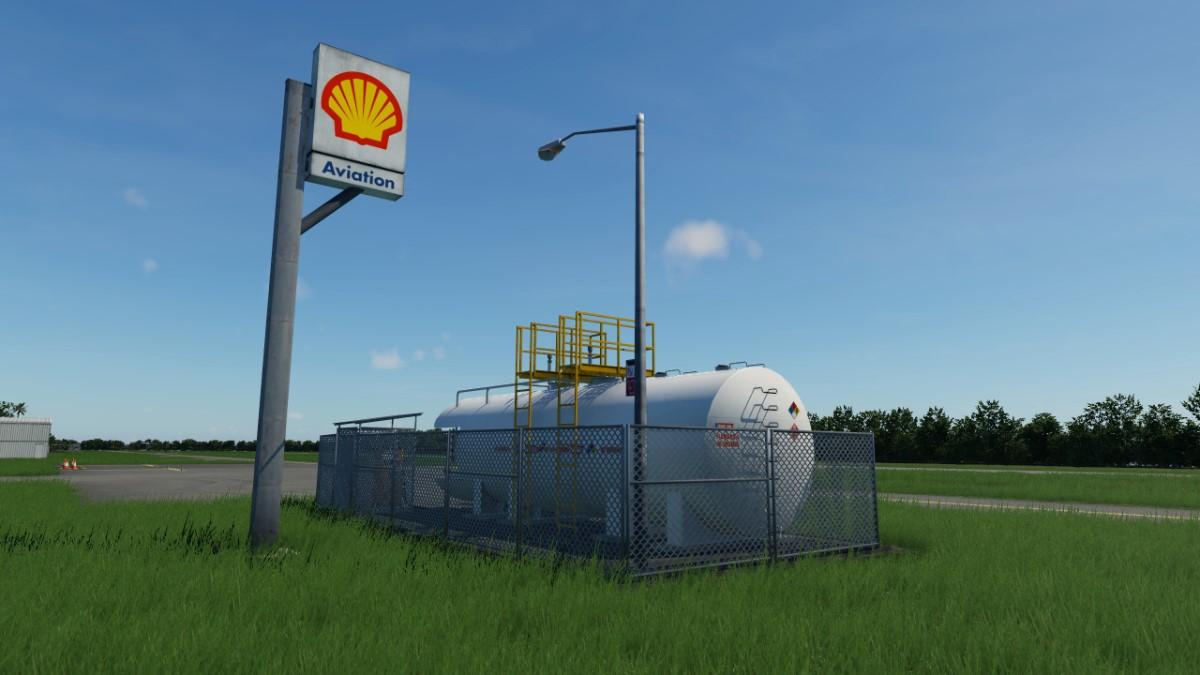
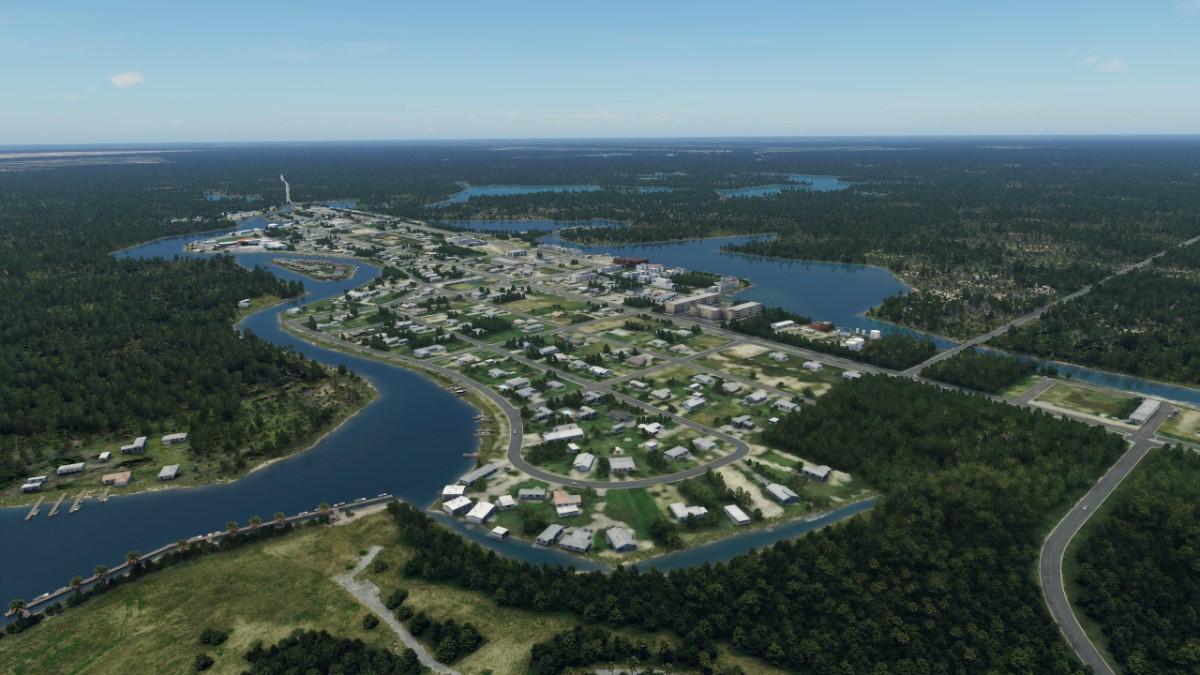
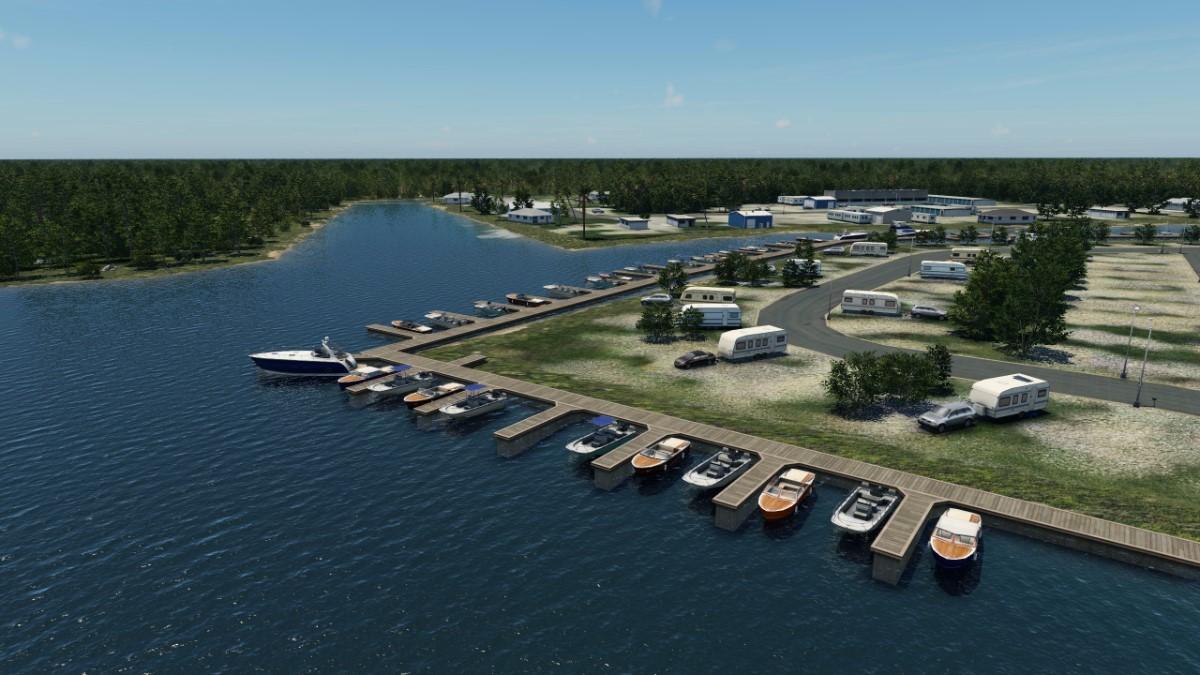
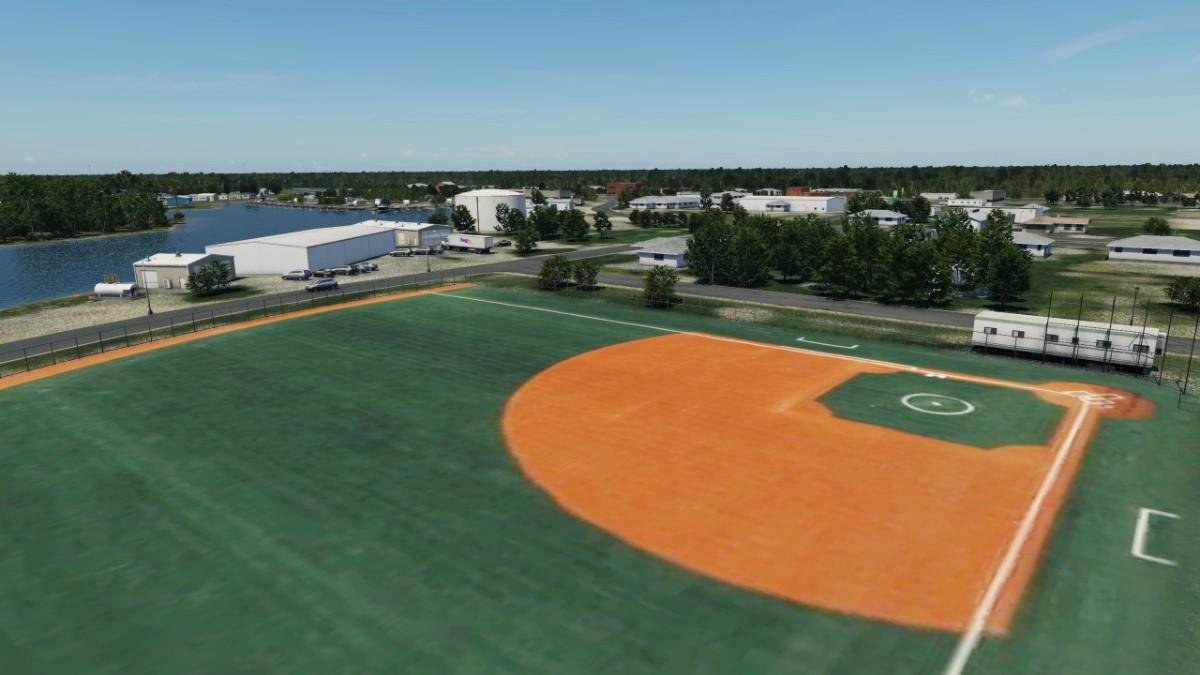
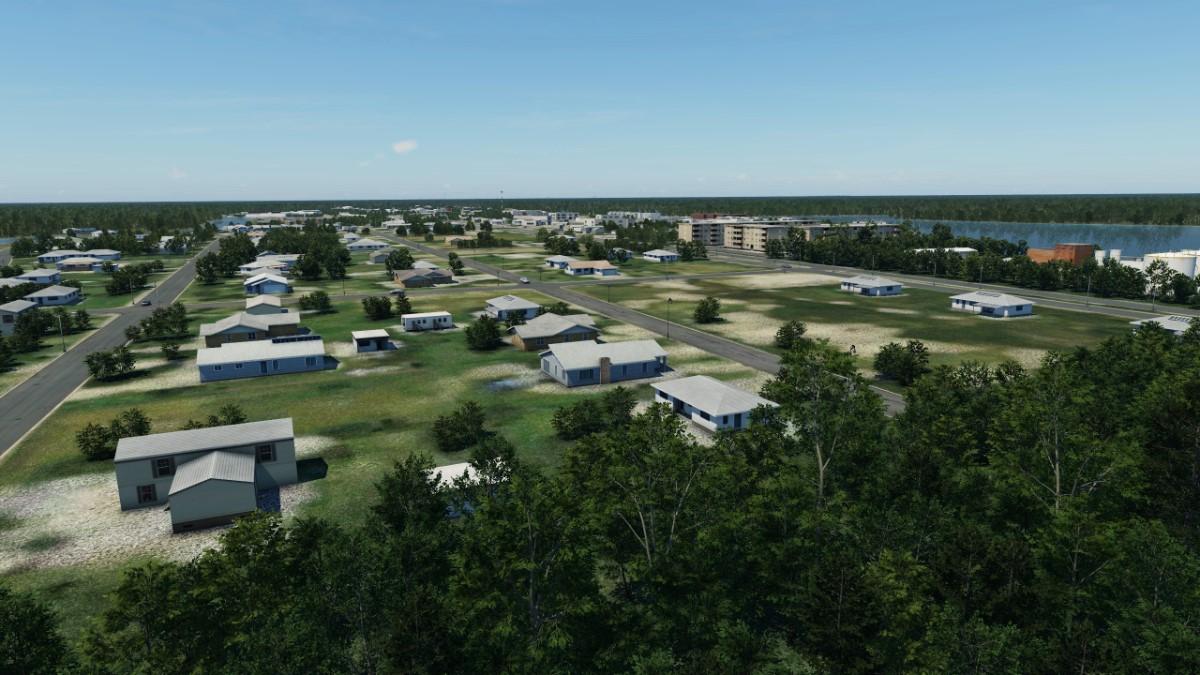
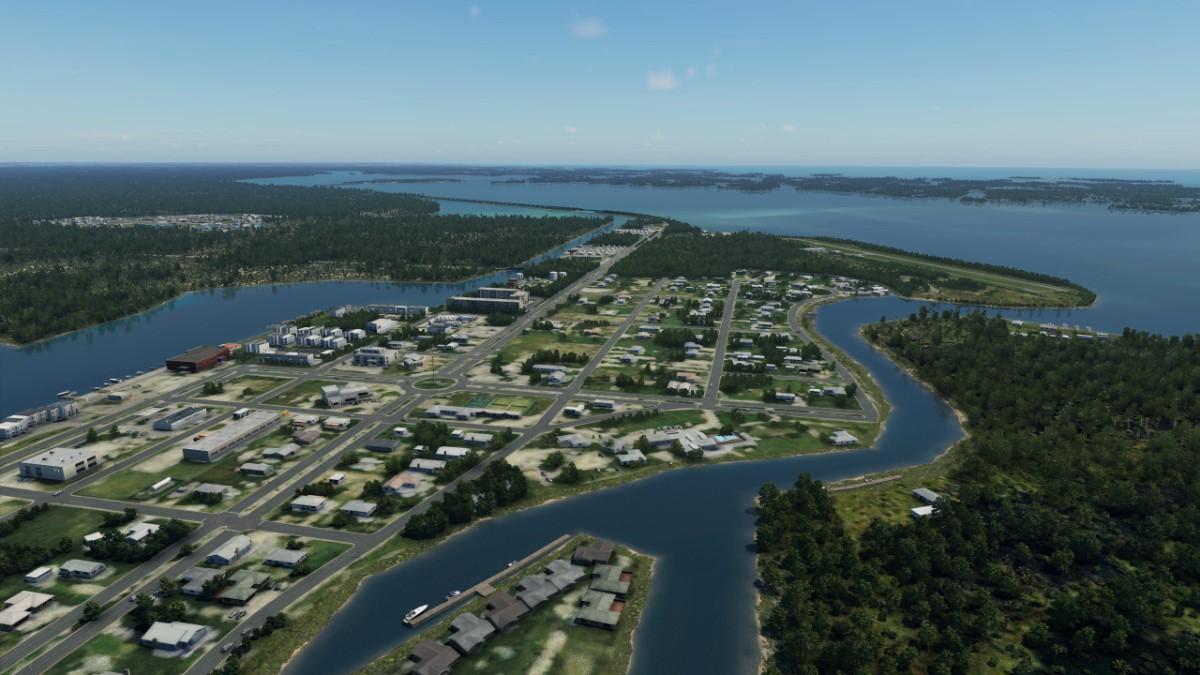
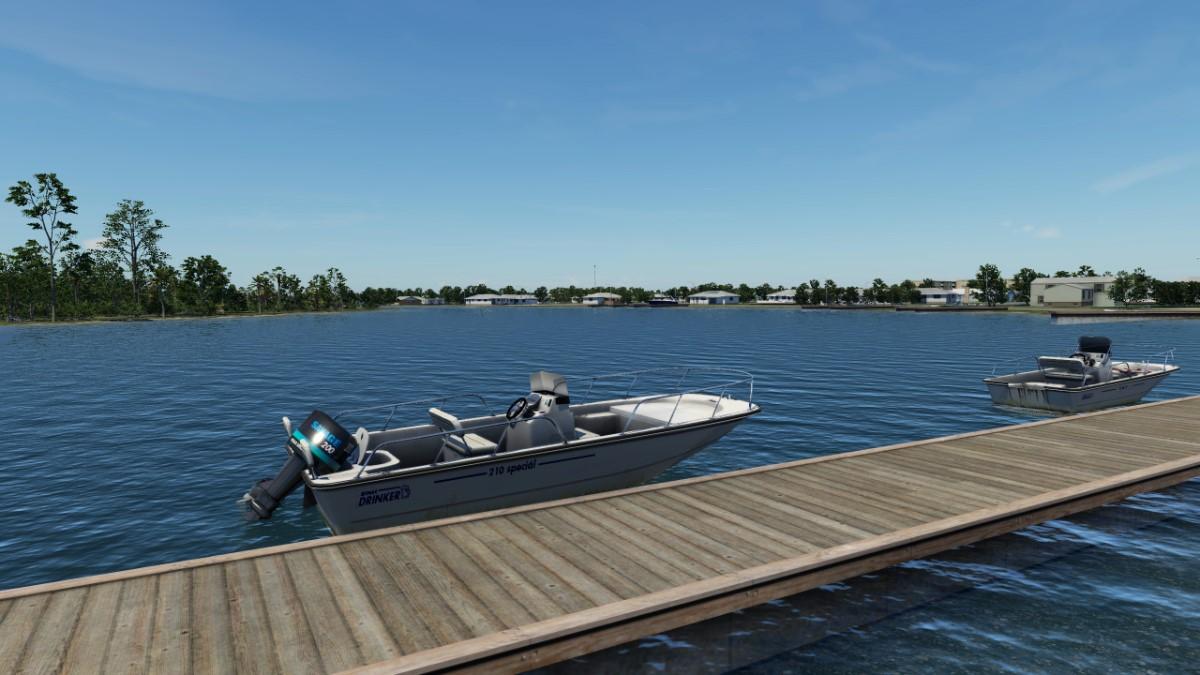
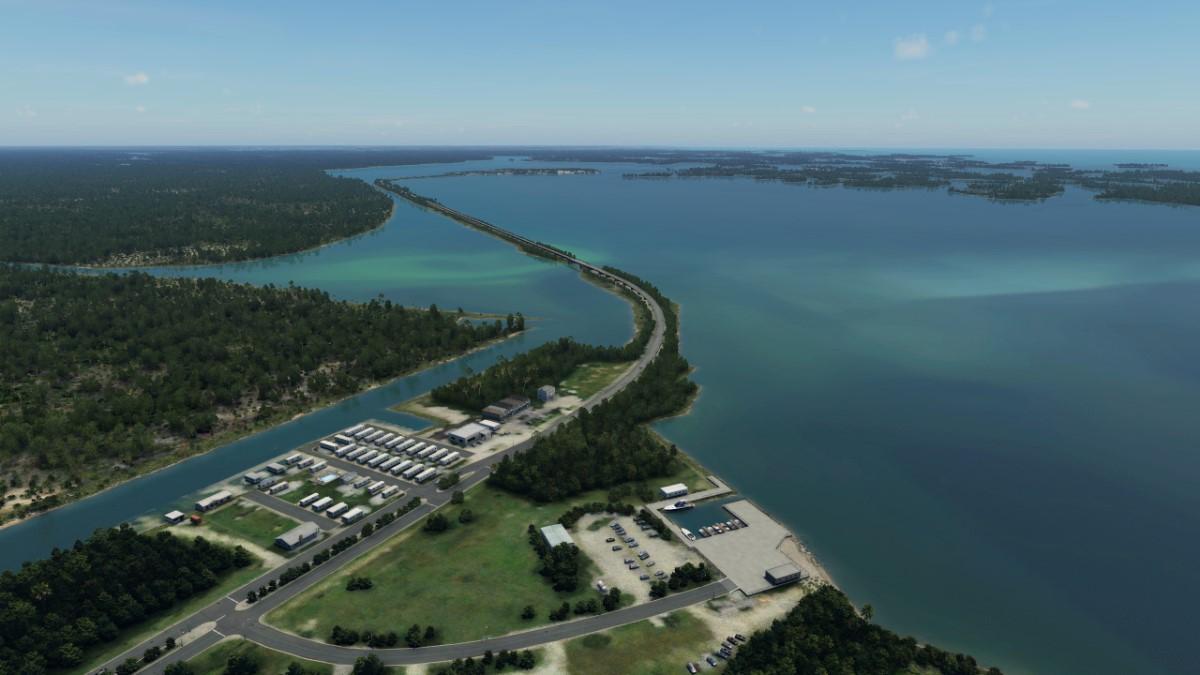
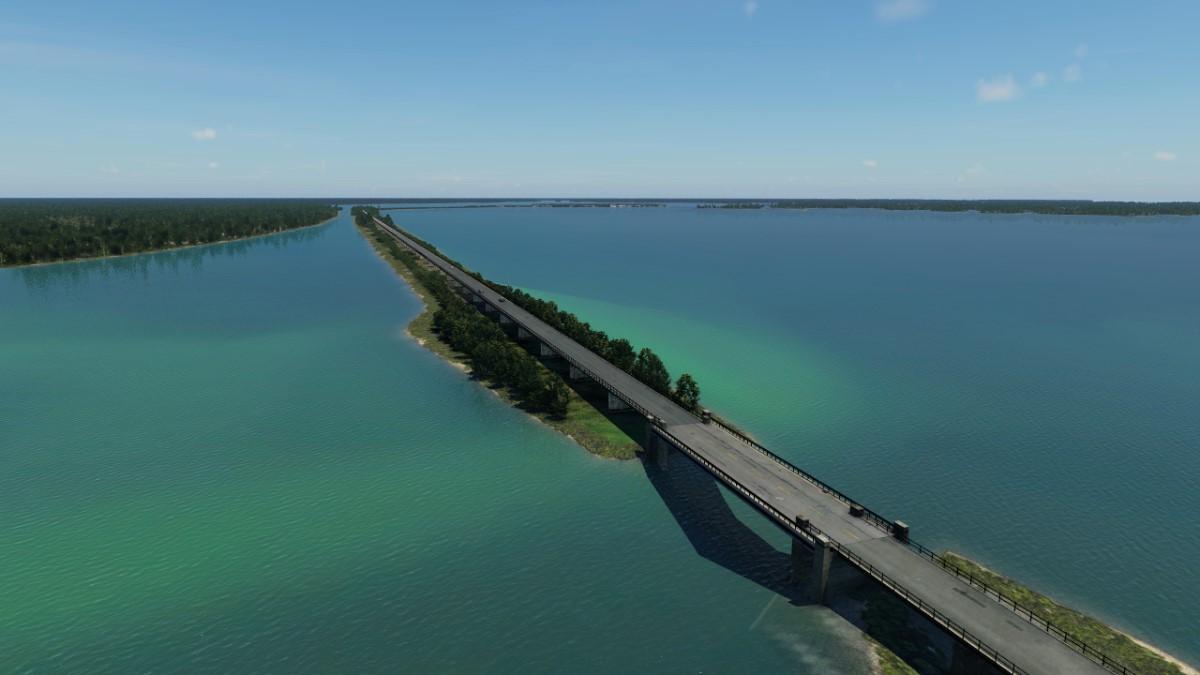
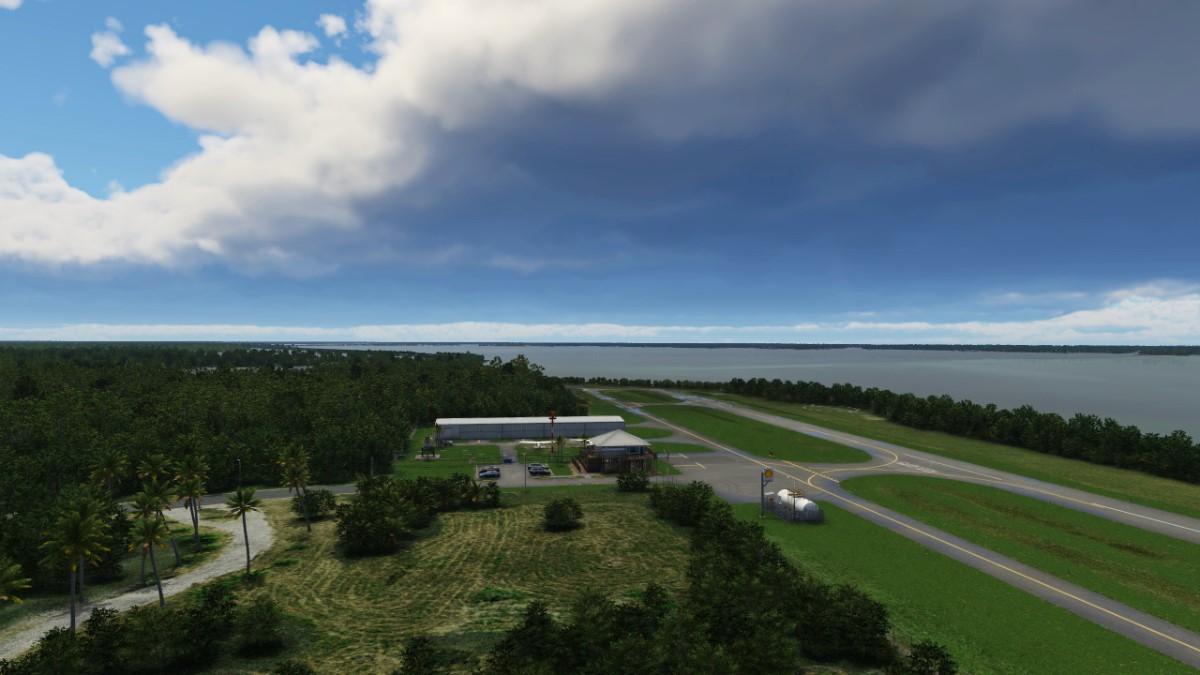
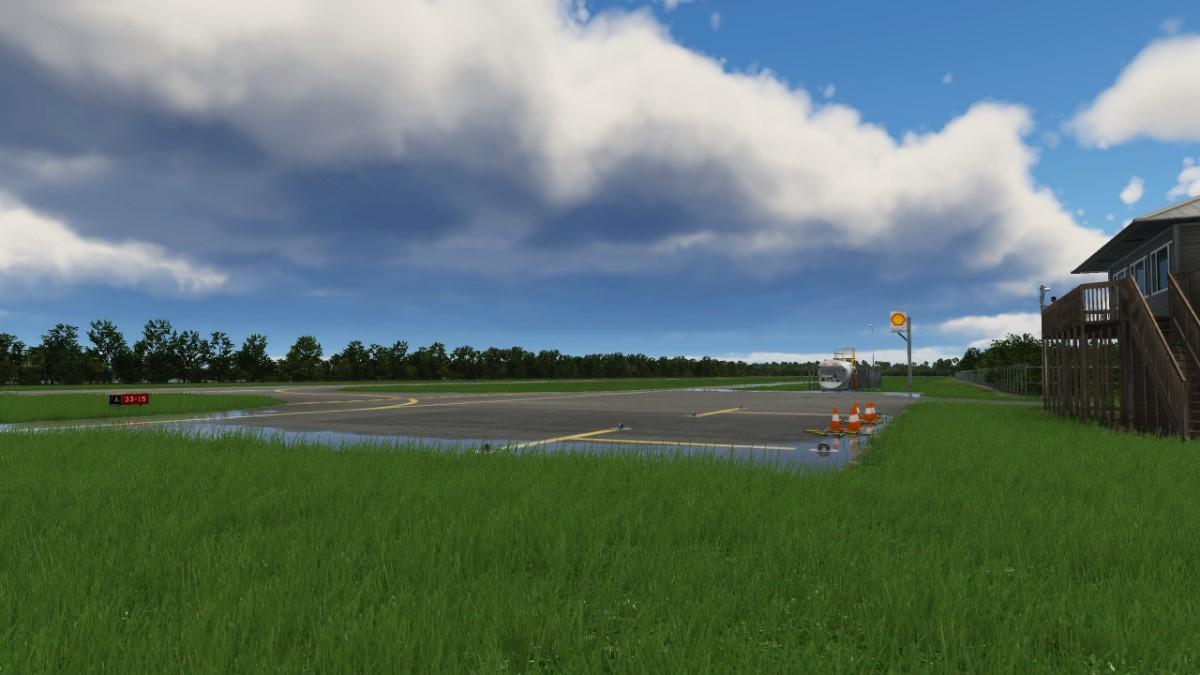
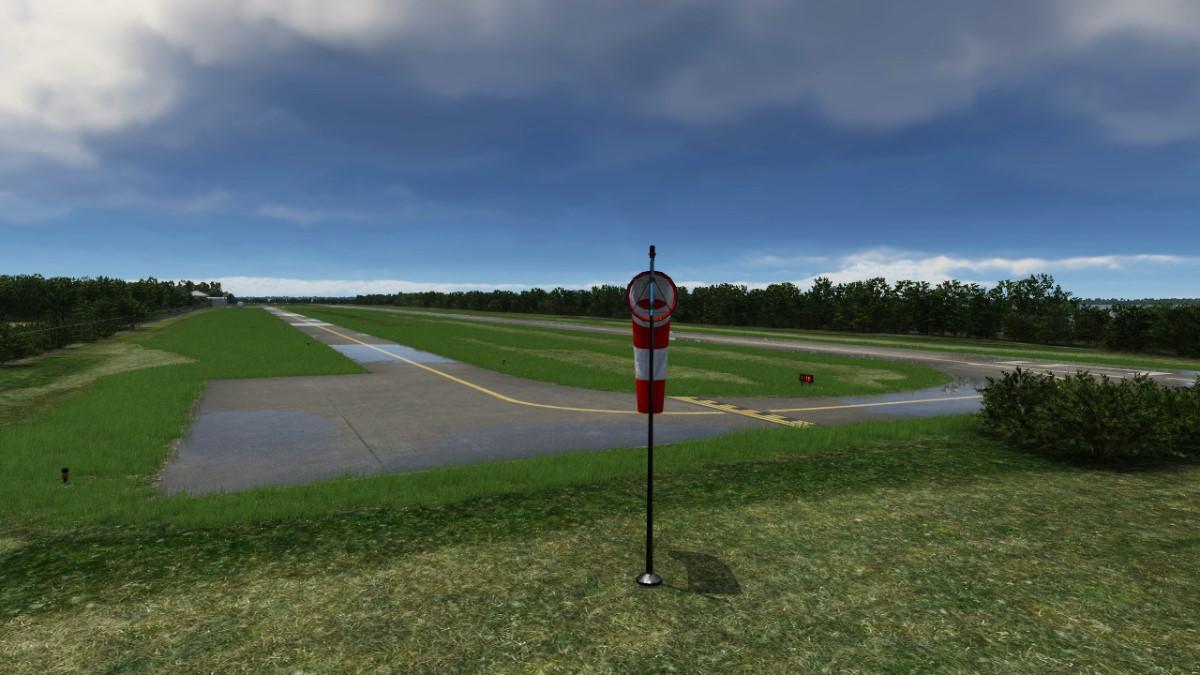
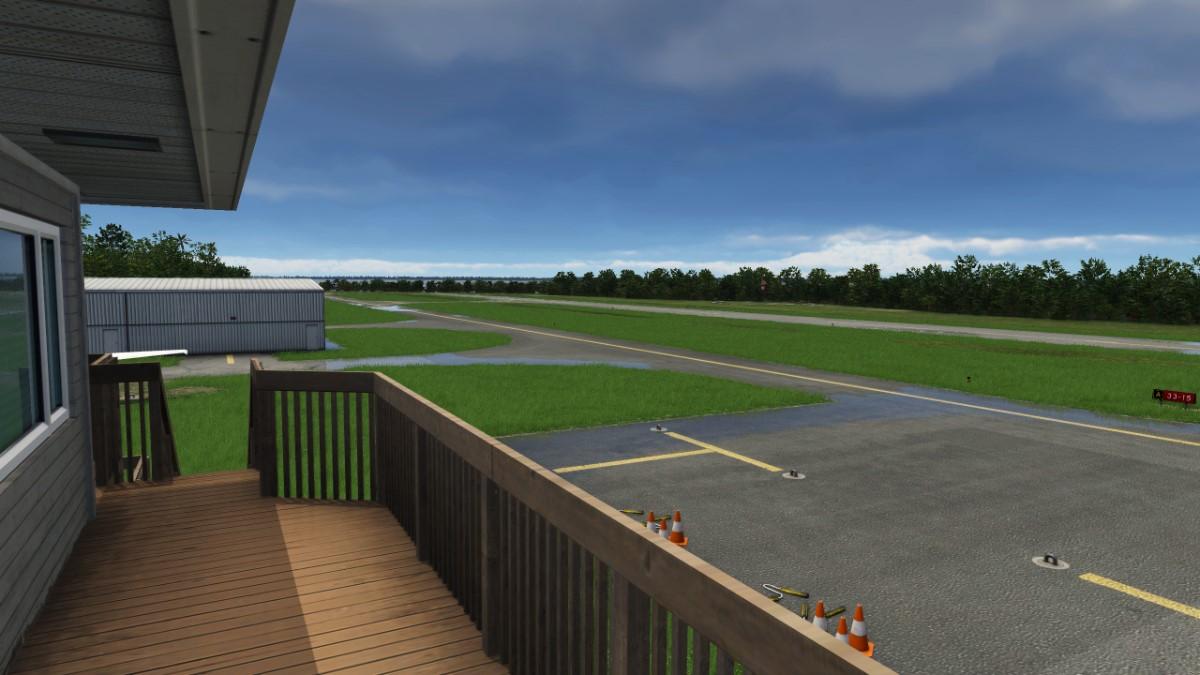
Scenery Upgrade Review : KTLH - Tallahassee International Airport XP12 by Skytitude One American State that is highly supported with X-Plane scenery than most, and that is Florida. From the lowest point of Key West, to the state boundary in the north, there are some really great quality destinations for you to chose from. My flying time in X-Plane has found me chris-crossing this one state more than any other. Some developers like FS Designs specialise in the Florida State, another in Skytitude has a few quality destinations in there as well. This is Skytitude's upgrade for their original KTLH - Tallahassee International Airport X-Plane 11 scenery, released only in November 2021, so it is not as would say an old scenery in quality, it is still available if required for US$19.95. Before that release the only scenery available for KTHL Tallahassee was an odd version from Rim&Co. A messy piece of work, that was discontinued as it had illegal, meaning stolen objects from other developers work, so best forgotten for more than one reason. So here is the X-Plane 12 upgraded version of KTLH Tallahassee International Airport, which is not actually an international port, as it doesn't have any international services to other countries. However KTLH is noted as a full-service "Service Port" for U.S. Customs. The title allows international cargo and general aviation flights to directly come to Tallahassee, which is the leading cargo handler in the Panhandle area of Florida. Tallahassee handles around 9.5 million pounds of cargo a year, Most services here are what you would call feeder (Hub & Spoke) regional routes, Atlanta, Charlotte, Miami, Fort Lauderdale, Tampa, Dallas and Washington DC. But Tallahassee is also the Florida State Capital, it is the largest city in the Florida Big Bend and Florida Panhandle region. Tallahassee is also a college town with student population exceeding 70,000, home to the Florida State University, Florida A&M University, and Tallahassee Community College, a large state college that serves mainly as a feeder school to Florida State and Florida A&M. The KTLH city-owned airport is situated five miles southwest of downtown Tallahassee, in Leon County, The airport covers 2,485 acres (1,006 ha) at an elevation of 81 feet (25 m). It has two runways: 09/27 is 8,000 by 150 feet (2,438 by 46 m) and 18/36 is 7,000 by 150 ft. (2,134 by 46 m). Helicopter operations are generally confined to the Runway 18/36 area, or direct approaches to the Million Air FBO ramp area. Tallahassee International Airport IATA: TLH - ICAO: KTLH - FAA LID: TL 09/27 - 8,000ft (2,438m) Asphalt 18/36 - 7,000ft (2,134m) Asphalt Elevation AMSL81 ft / 25 m A new passenger terminal was built just north of the new 09/27 runway on November 2, 1987, and the new terminal prompted officials to rename the airport from Tallahassee Municipal Airport to Tallahassee Regional Airport. On December 3, 1989, the city opened the $33 million terminal, and on February 20, 2000, the terminal was soon renamed the Ivan Munroe Terminal in honor of Tallahassee aviation pioneer Ivan Munroe. It is a simple layout. A terminal building with a pier that is connecting to a concourse, or a split single concourse into A and B, from the side it is in a H design. The Munroe terminal is really well replicated here by Skytitude, very realistic with very good building detail and adornments. The terracotta roof is in contrast to the brown main building and pier exposed concrete. Scenery clutter is very good, but not overwhelming... there are no animated service vehicles here, and it is noticeable in creating a static sort of environment. Note the excellent aerial installation on the forward part of the connecting pier, and the very nicely done ramp lights. There are eight detailed, white Airbridges A1-A6/B1-B6, like the real ones they come with no branding... they are powered here by the built in X-Plane 12 "Ground handling" menu. A lot of developers are moving away from the SAM system (and it's problems) and back to this updated older version, in lots of ways it is currently a better solution than the fiddly SAM experience. There also five static walkon/walkoff gates for smaller regional aircraft in A7, A4, A2 - B2, B4, B7. The landside terminal is very nicely done, even in a walkaround way, with nice well done 3d vehicle carparks and really reat fauna. But there there is no internal terminal detail. There are also no people, or traffic, again in creating a more static feel at TLH than an active one. On the roof are solar panels, in fact there is a loads of solar panels here as we shall see later. Trees are all X-Plane 12 3D quality, seasonal as well, but you won't get a lot if any snow in Florida. But the fauna quality is high here. Million Air FBO Next largest facility at TLH is the Million Air Fixed Base Operator. Besides for private operators, Million Air also provides contracted fuel services to U.S. Military and Department of Defense aircraft. TLH is regularly visited by U.S. Navy P-8 Poseidon aircraft, Lockheed Martin C-130 family aircraft, as well as Dornier C-146 and T-6 Texan II aircraft on training missions and practice approaches from nearby AFB. The ramp area is massive, and surrounded by maintenance hangers and aviation services FL Aviation and Flightline group. Main large FBO executive building is really well done in brick, next to it is the field's FireStation. Missing is the "Million Air" sign that sits outside the entrance, a small but noticeable overlook, but any signage is also missing here at TLH. But overall the detail and fill of this FBO area is very well done with a heliport with 6 landing pads located at South Apron. Aero Center Tallahassee North is another large ramp for Aero Center Tallahassee and the Epic Flight Academy. The buildings are basic here, as the entrance to the Aero Centre is quite ornamental, missing also is the roof detail of the air-conditioning systems. The brickwork however is well done. Far north are rows of aircraft storage, and this is a great parking ramp if flying into KTLH while exploring the region to refuel, as there are a few refuel stations set around these aprons for your convenience. Cargo The freight facility is FedEx. It has two major gates (1 & 2), and three regional ramps for the FedEx feeder network. But as noted it is used as a U.S. customs international feeder "Service Port" area coming into the US. Control Tower The KTLH field tower is set on the Southside. The facility and its surroundings is excellent, with great roof aerial detail. Infrastructure Is this where all digital pilots go when they leave the X-Plane mortal coil? Yes it is a cemetery, set to the east of the airport called Southside Cemetery, a big one at that, and well done. Also west is the City Of Tallahassee Utilities Water Treatment plant, really well done with real (X-Plane) water in the large pools and even in the treatment ponds... note in the background are the six animated wind turbines. Before leaving the west it is interesting to note the excellent merging of the Custom TLH airport to the default autogen, here the commercial Infrastructure blends in well with the airport boundary, making it a realistic viewpoint if arriving on Rwy 27. Obviously the Tallahassee City owners are very big into efficiency and saving the planet. Surrounding the south approach and the left side of Rwy 18/36, are hundreds of solar panel farms. And all well done here, but I wonder if these massive sun farms could blind a pilot on an approach? The noted "largest airport-based solar station in the world" here is however excellent for the visual detail on approaches 36 and 09. Ground Textures The ground textures are fine, but have no depth of detail, only a sheen, could be even noted as flat to the eye. They look okay with nice grunge, but they are not what you would call "high quality". As this is an X-Plane 12 scenery, you get the excellent weather effects. And again X-Plane 12 does it's miracle showing... water/rain and reflections are all very good, certainly in the right lighting conditions... so the PBR reflective (wet) active textures and burnt-in ambient occlusion works well. Highlight here is the 3d grass, it is excellent and not prone to LOD visuals. The main infield areas are all covered, but there are a few blank areas with no grass... the grass realism makes a big difference to the quality of the scenery. TLH Lighting In the overview of KTLH the lighting is good, with the expected (XP12) ICAO lighting standards adhered to... The ramp areas and external terminal/concourses are nicely lit, with intelligently placed drop lights. Carparks all look great as well... but the terminal/concourse has no window lighting, making the buildings dark, even blacked out at night? Other building lighting in Aviation services hangars are also well done with the well done drop lighting, but the main ramp lights for the Cargo ramp area and FBO ramps are weird, they glow, but don't give out any reflective light to the ground or their surrounding area? I'm going to throw the problem to Laminar Research and not to the developer here, as this new light (flare) bloom effects are coming in the next X-Plane update v12.1.0. We will look at this lighting again when that update is released, so ignore it for now. ____________ Summary Florida is a very well serviced American State for X-Plane pilots to explore with consistent quality destinations. Here with Tallahassee International, it is a very Northern State airport, with great regional connections to Atlanta, Dallas and the Florida State. International in the name is for U.S. Customs "Service Port" only. The KTLH Scenery from Skytitude is overall excellent, with great field landscaping and and excellent reproduced terminal and the Million Air FBO centre. Aero Center Tallahassee is also very good but missing the finer details. Grass and X-Plane 12 weather effects are also excellent. Fauna and overall layout is also first rate. The minor details are just that in minor, but they still count. Terminal Window lighting is missing, ground textures are a bit plain but have nice grunge, and not a lot of signage except for a FedEx sign, and non-lit at light? No ground or traffic animations also give a very static feel to the scenery. Yes I really like this excellent Tallahassee scenery from Skytitude, it has a very nice quality about the package, better as well with the X-Plane 12 effects, and has excellent performance or a very light impact on your computer. This KTLH is an upgrade to X-Plane 12 from the still available X-Plane 11 version, but it is a heavily revised and more modernised scenery than the one released in late 2021. There is also an upgrade offer of 25% off for previous users of the XP11 scenery. How much do I like it? well certainly expect to see KTLH Tallahassee appear in many future reviews from X-PlaneReviews, if any scenery passes that substantial test then it must cover a lot of credentials, most of all in a realistic visual quality... for that aspect alone, it is great investment! ________________________ Yes! KTLH - Tallahassee International Airport XP12 by Skytitude is now available from the X-Plane.Org Store here : KTLH - Tallahassee International Airport XP12 Price is US$19.95 Requirements X-Plane 12 (not for XP11) Windows, Mac or Linux Download Size: 703 MB Current version : 1.0 Owners of KTLH XP11 can purchase this new XP12 version for 25% off, please find the coupon code in the original KTLH Invoice. Installation and documents: TLH is download of 520Mb download. There are two folders as part of the installation; skytitude-ktlh-tallahassee-xp skytitude-ktlh-tallahassee-xp-b The second "skytitude-ktlh-tallahassee-xp-b" has to physically moved (cut&paste) lower in the scenery_packs. INI, below the main "skytitude-ktlh-tallahassee-xp" folder. All details are noted in the provided; "INSTALLATION GUIDE. 648Mb is installed into your Custom Scenery folder. Review System Specifications Windows - 12th Gen IS1700 Core i7 12700K 12 Core 3.60 GHz CPU - 64bit -32 Gb single 1067 Mhz DDR4 2133 - PNY GeForce RTX 3080 10GB XLR8 - Samsung 970 EVO+ 2TB SSD Software: - Windows 11 Pro - X-Plane 12.07r1 (This is a Release Candidate review). Plugins: Traffic Global - JustFlight-Traffic (X-Plane.OrgStore) US$52.99 : Global SFD plugin US$30.00 Scenery or Aircraft -Rotate MD-80 Pro XP12 - (X-Plane.OrgStore) - US$59.95 ____________________________ Scenery Review by Stephen Dutton 11th April 2024 Copyright©2024: X-Plane Reviews (Disclaimer. All images and text in this review are the work and property of X-PlaneReviews, no sharing or copy of the content is allowed without consent from the author as per copyright conditions) All Rights Reserved
2 points
-

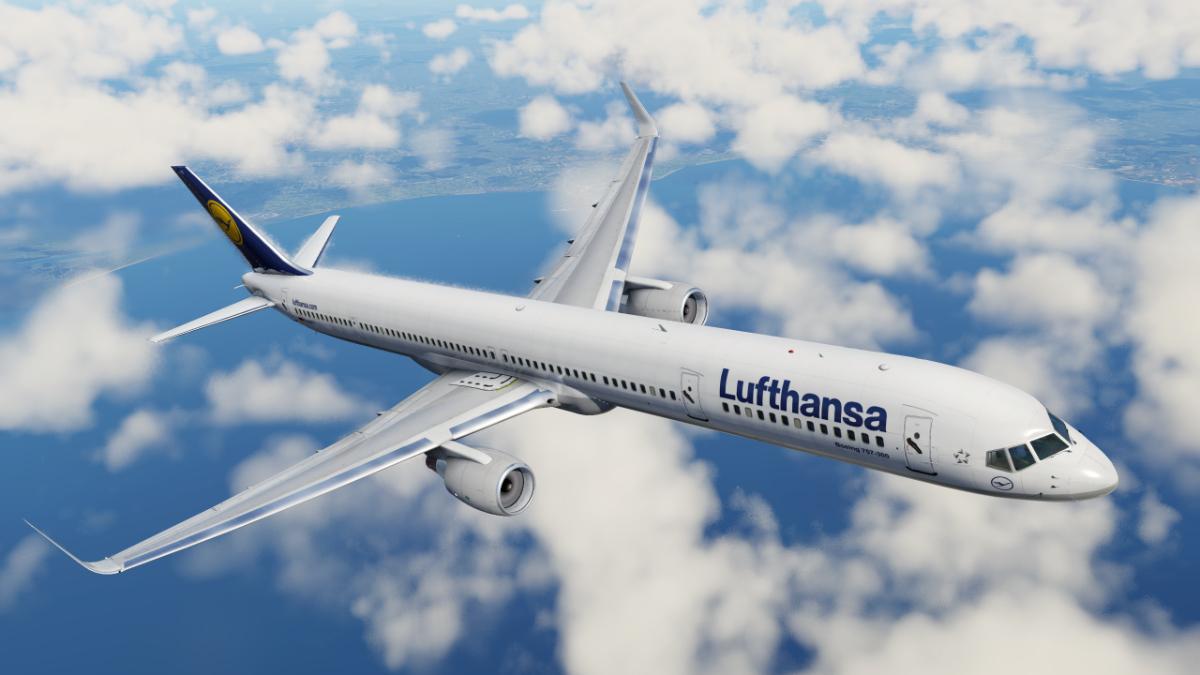
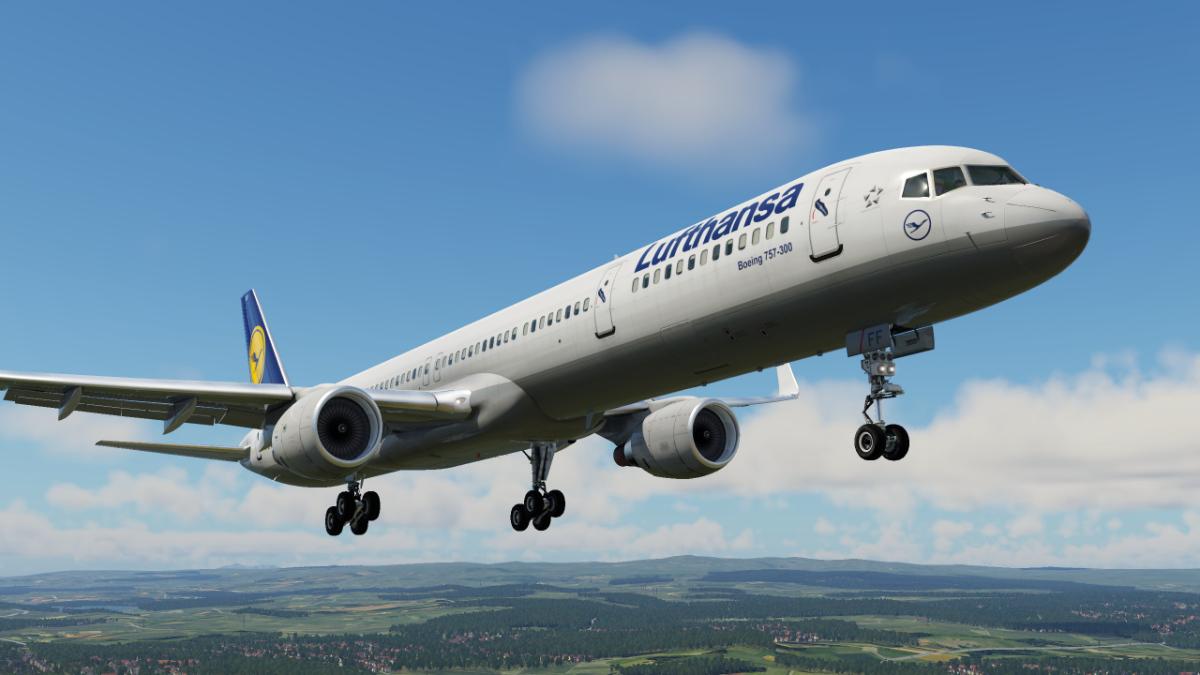
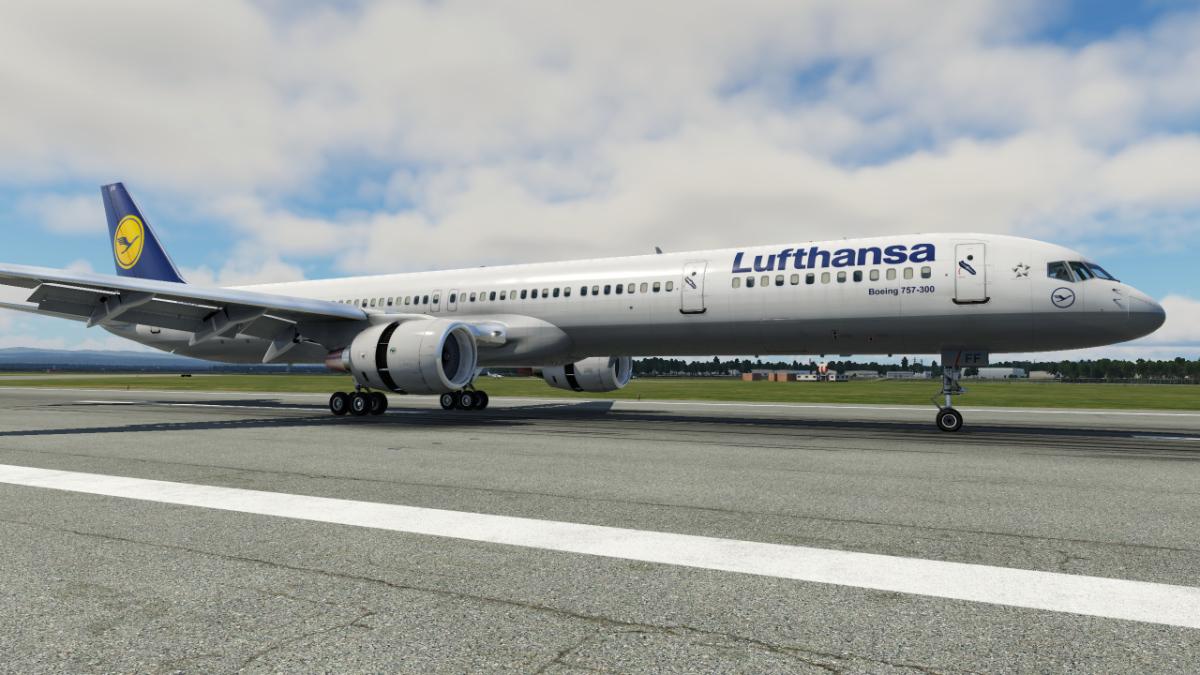
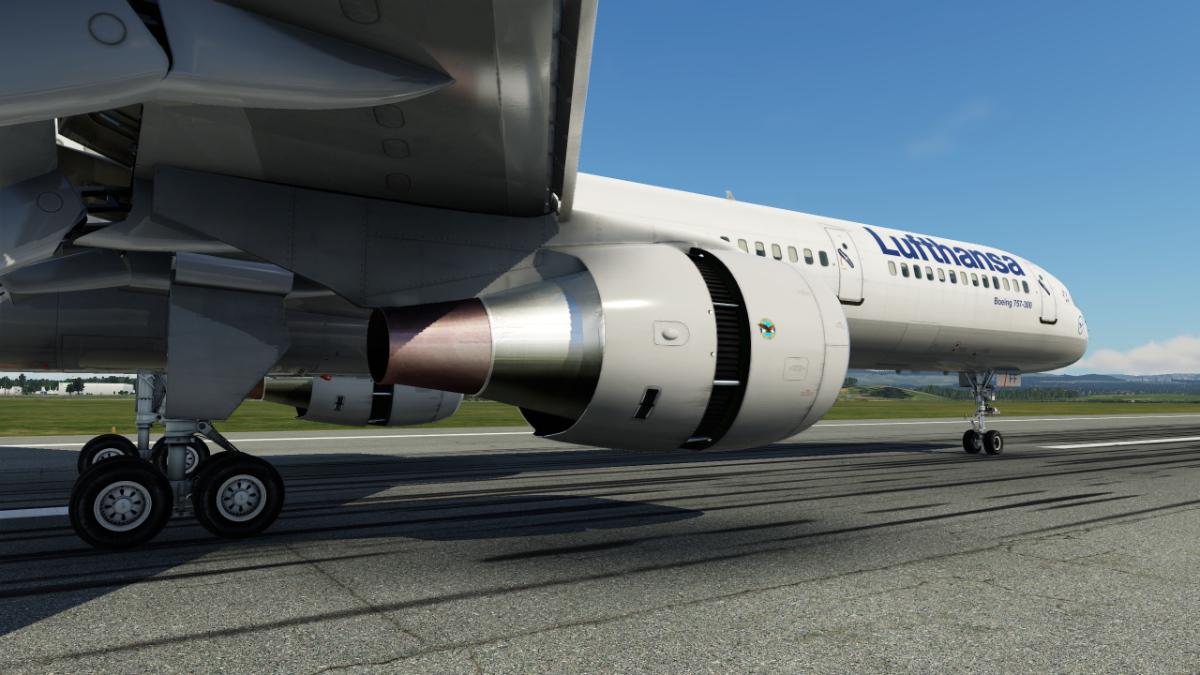
Aircraft Update Review: Boeing 757 Professional Global package v2.6.12 by FlightFactor/VMax
Busair and one other reacted to Dominic Smith for a topic
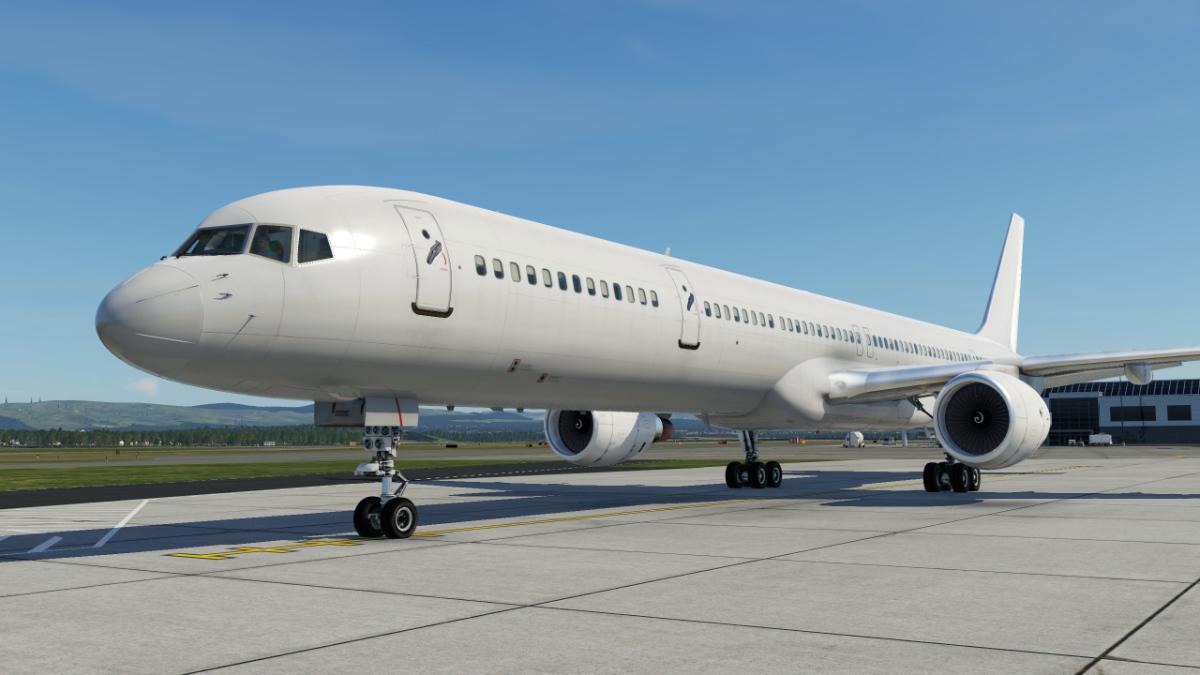
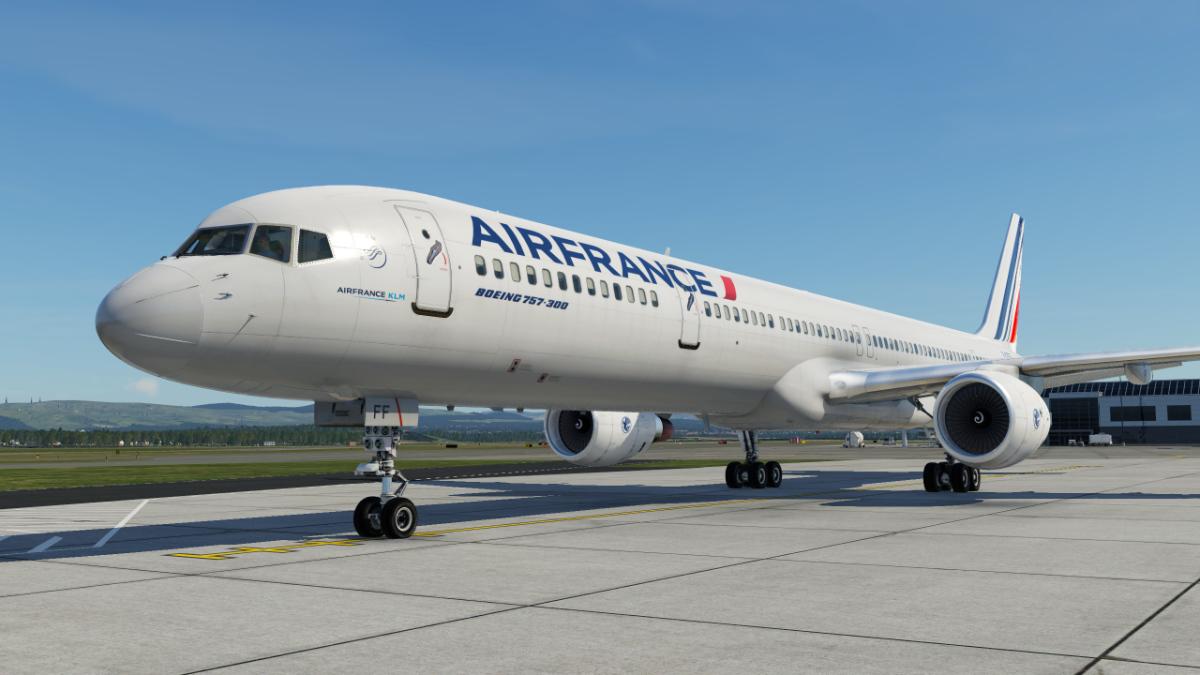
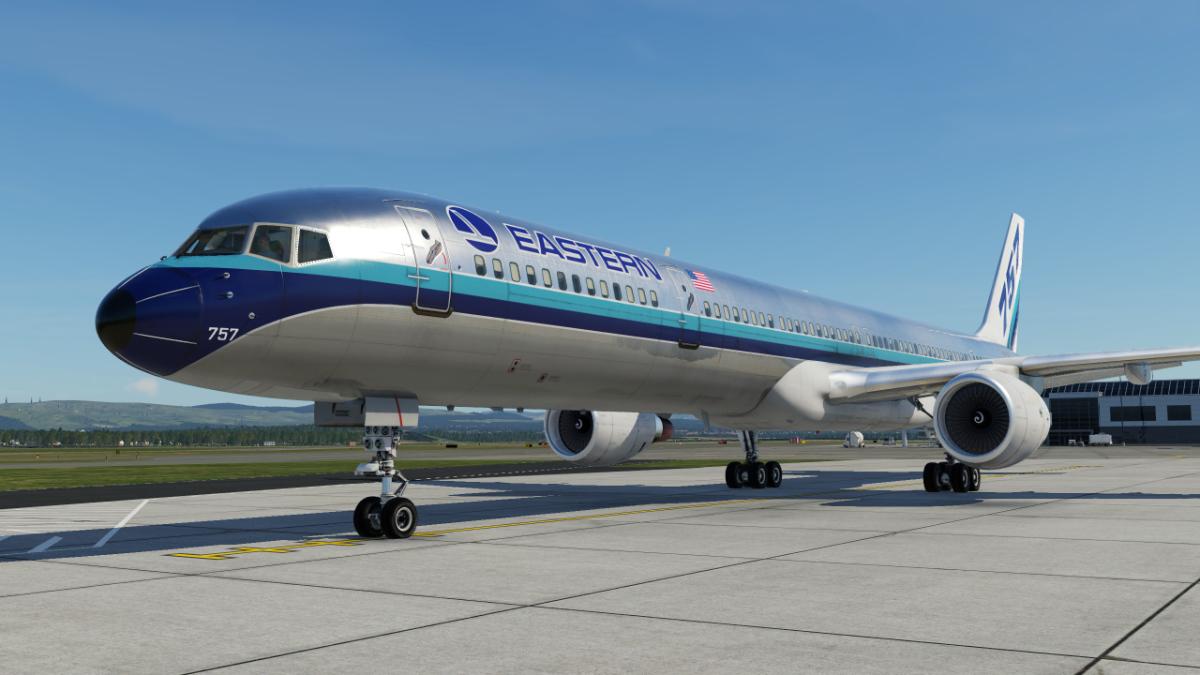
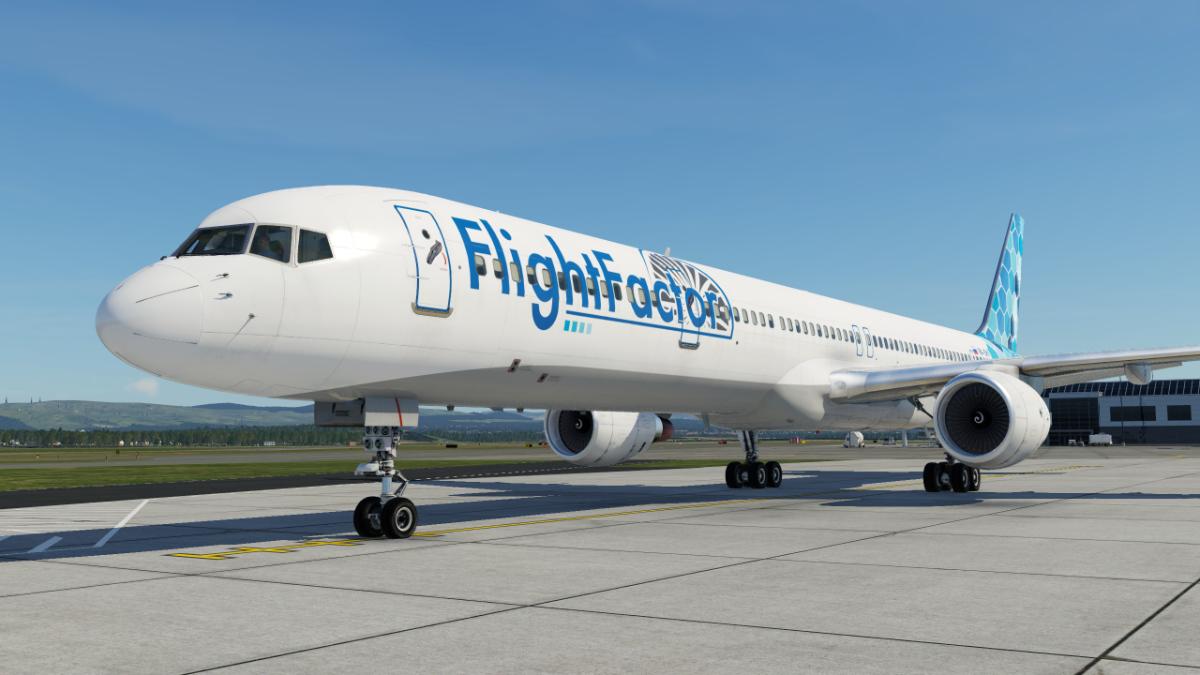
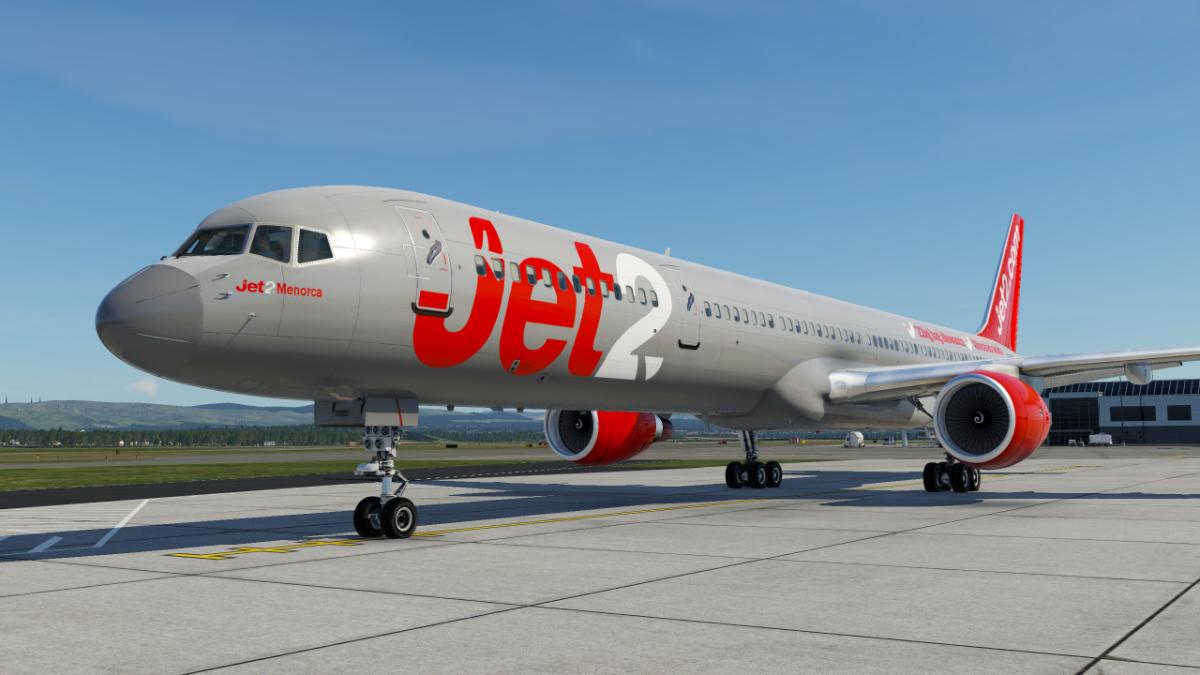
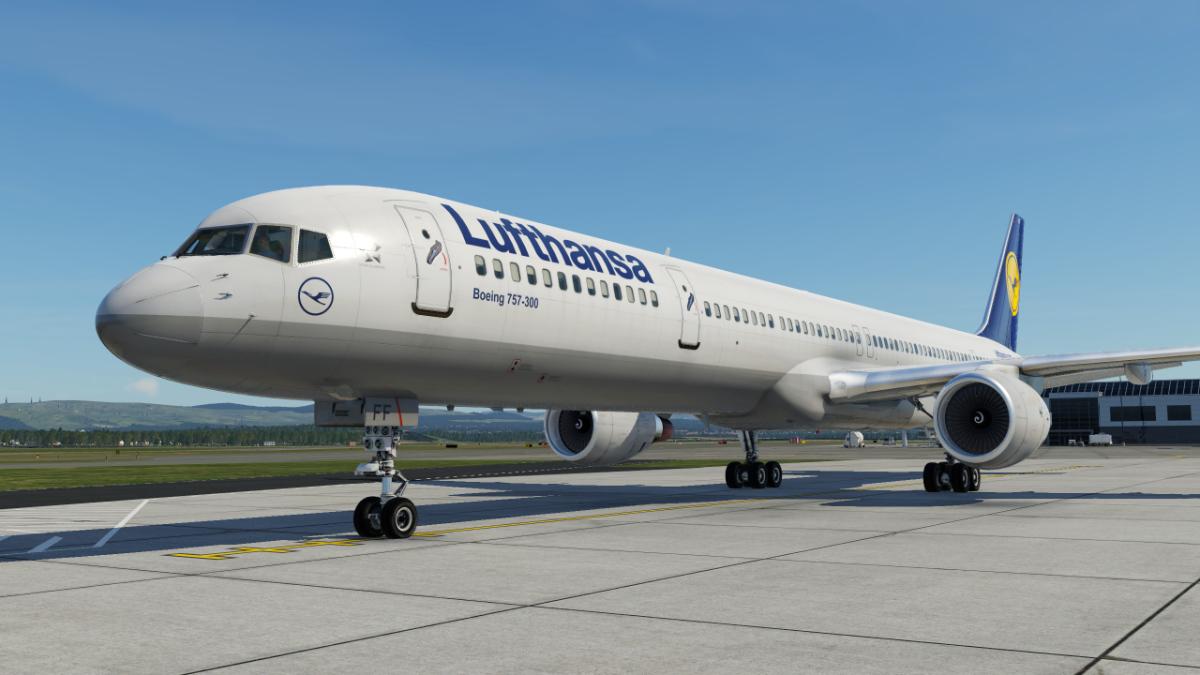
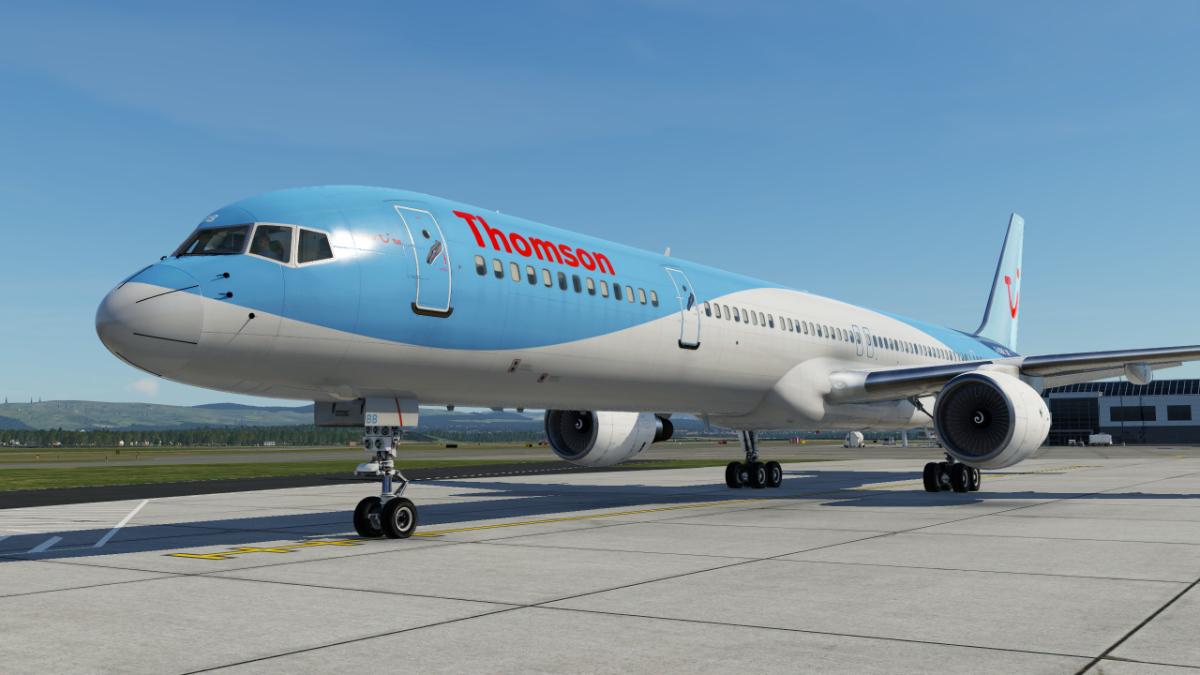
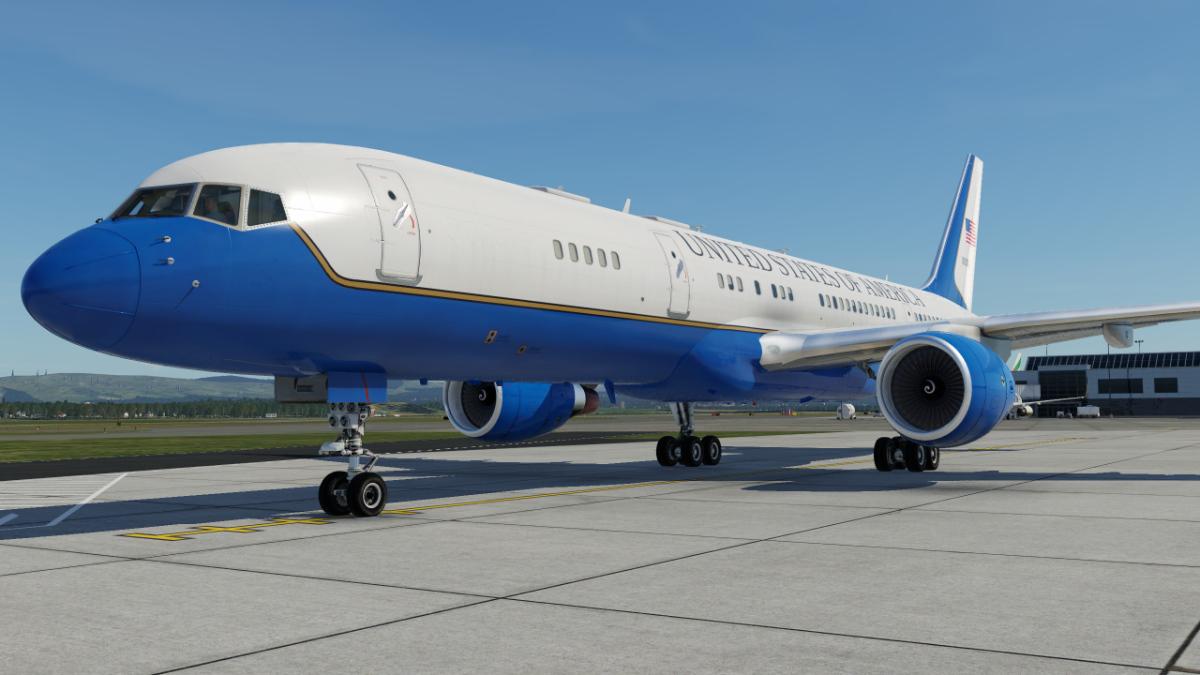
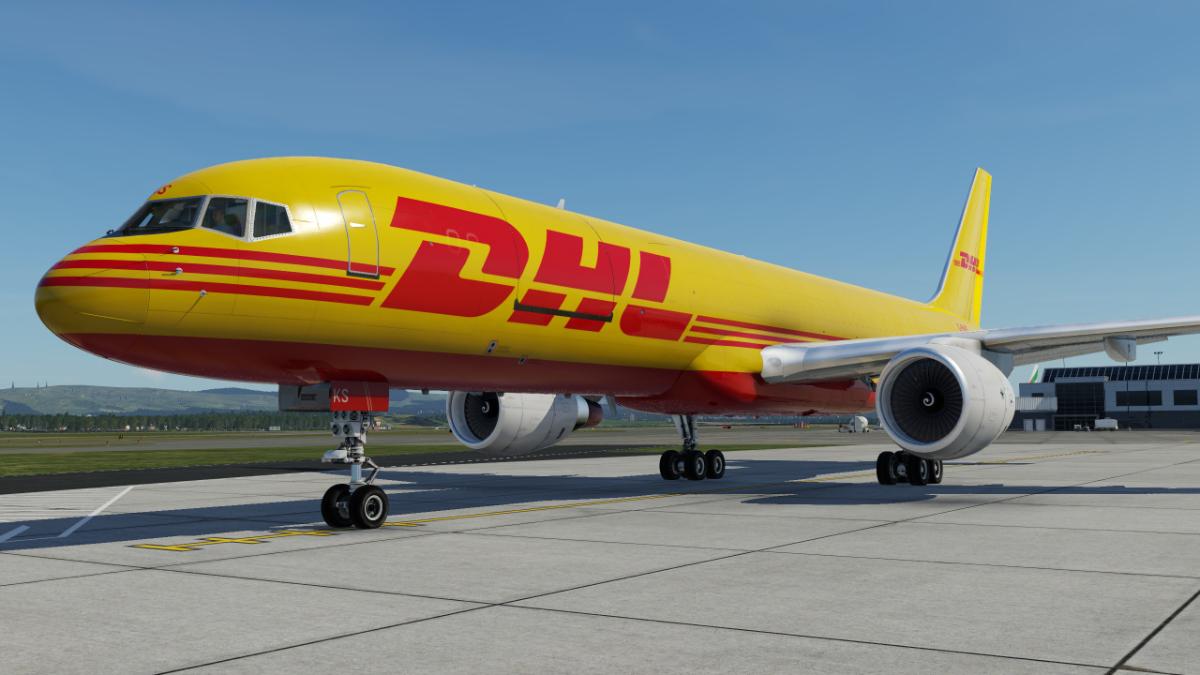
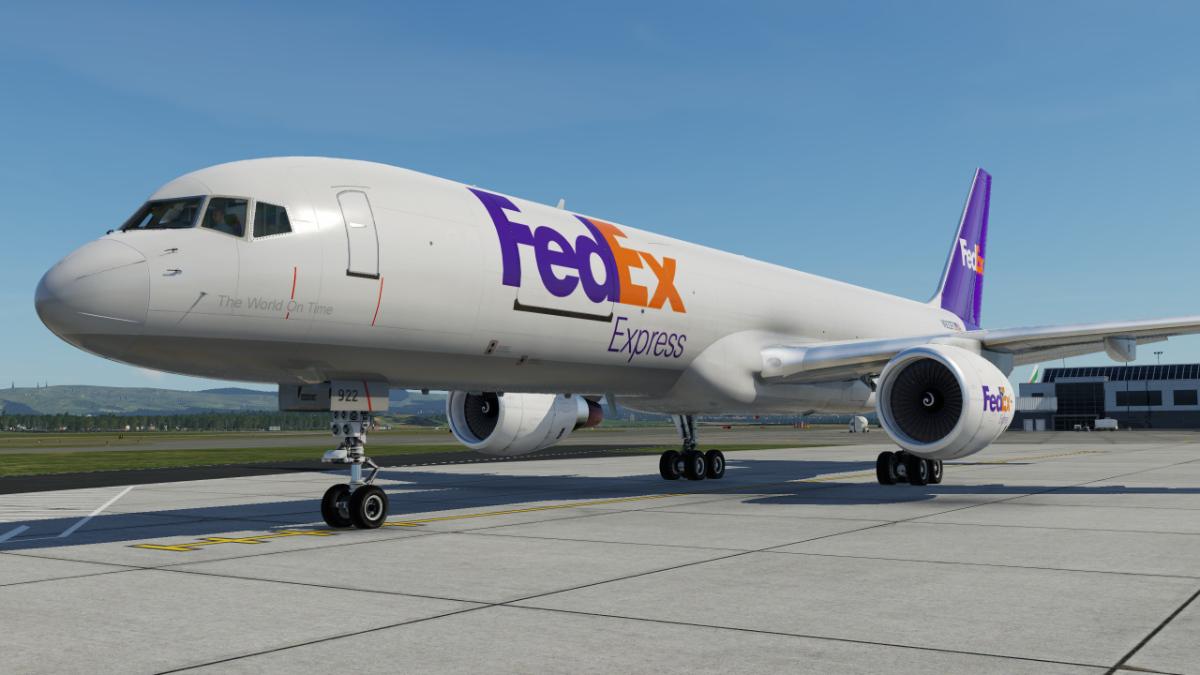
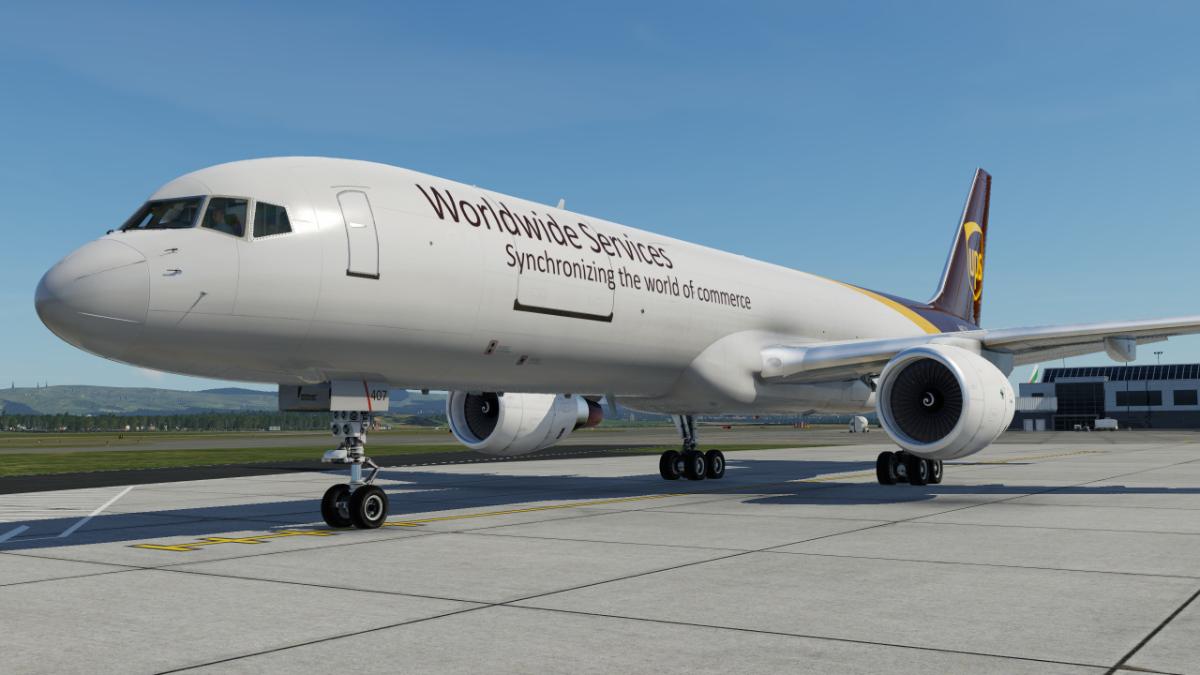
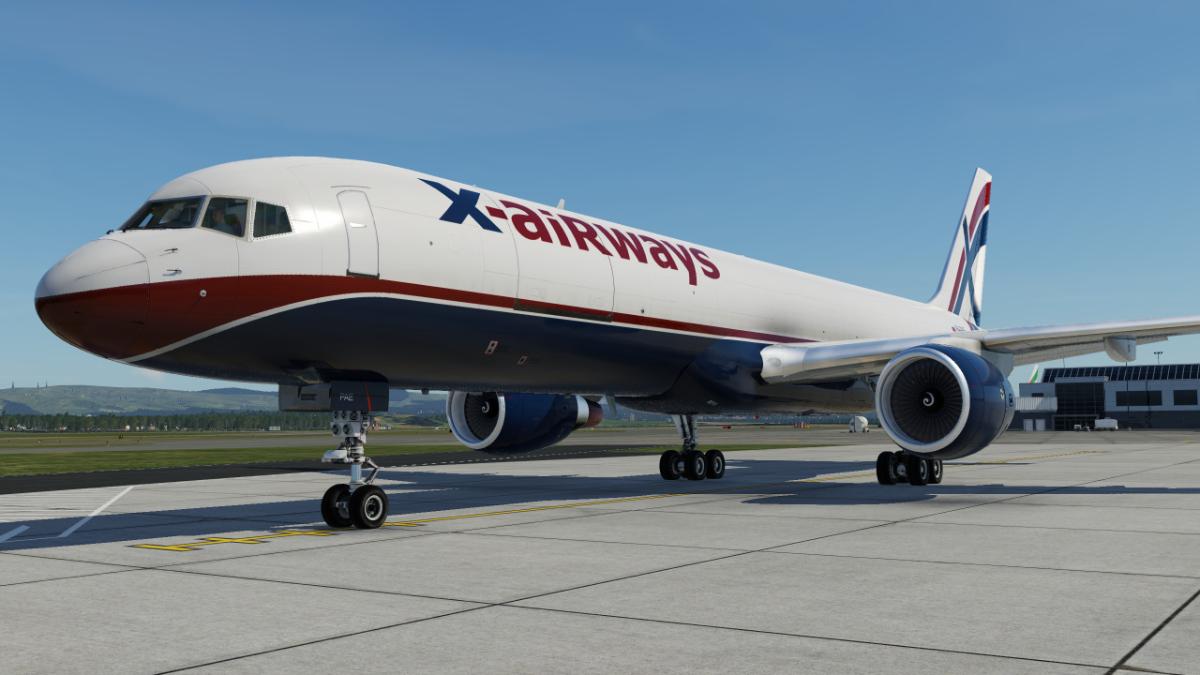
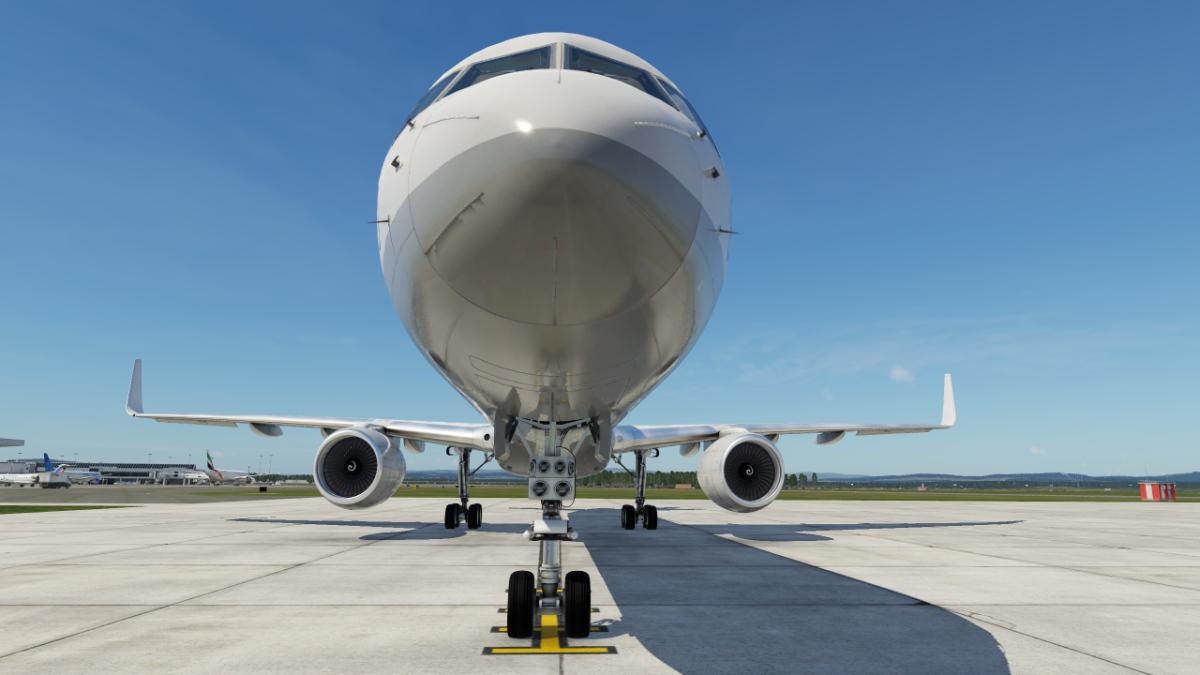
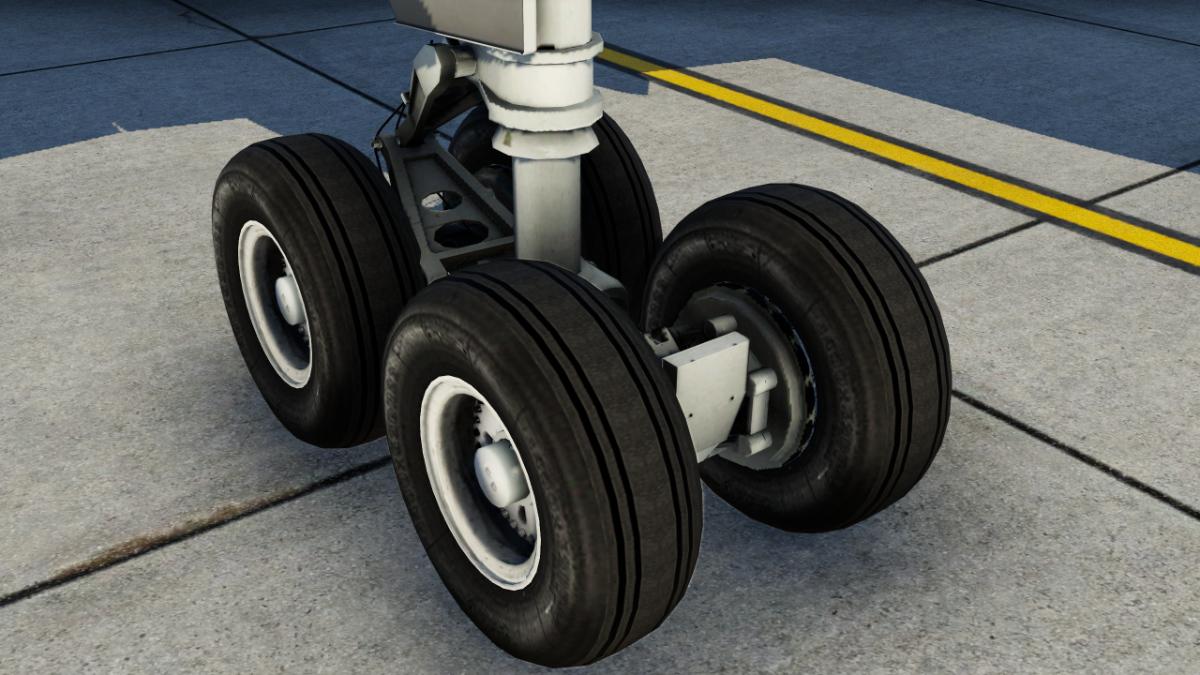
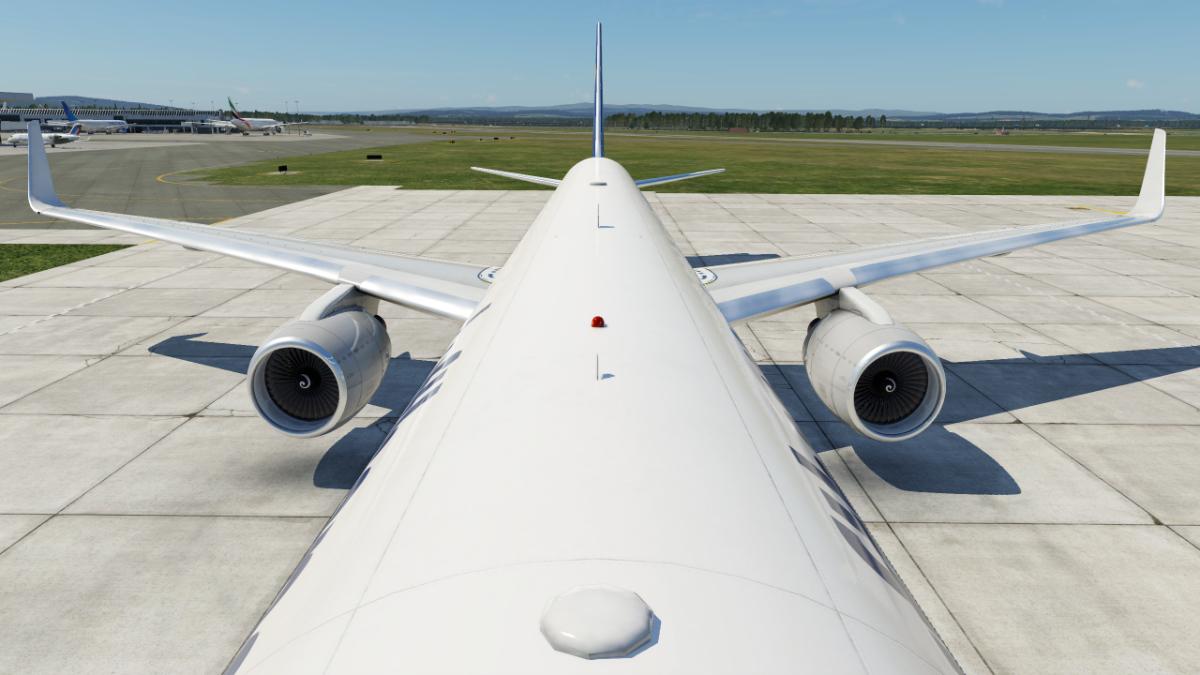
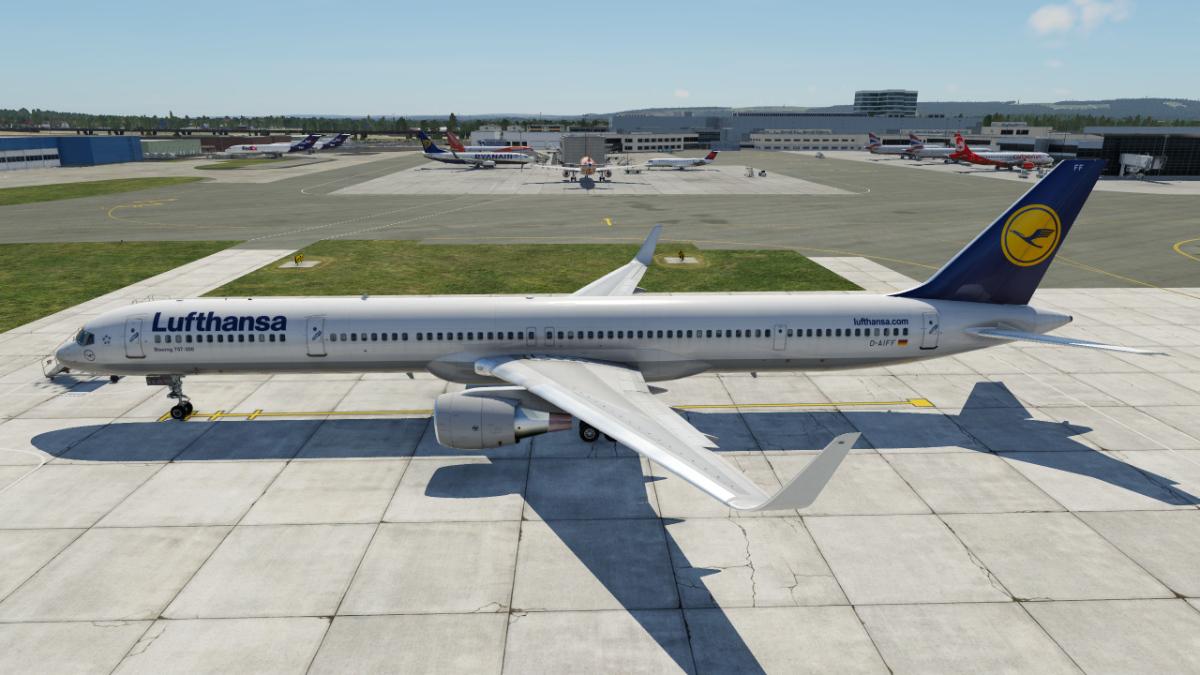
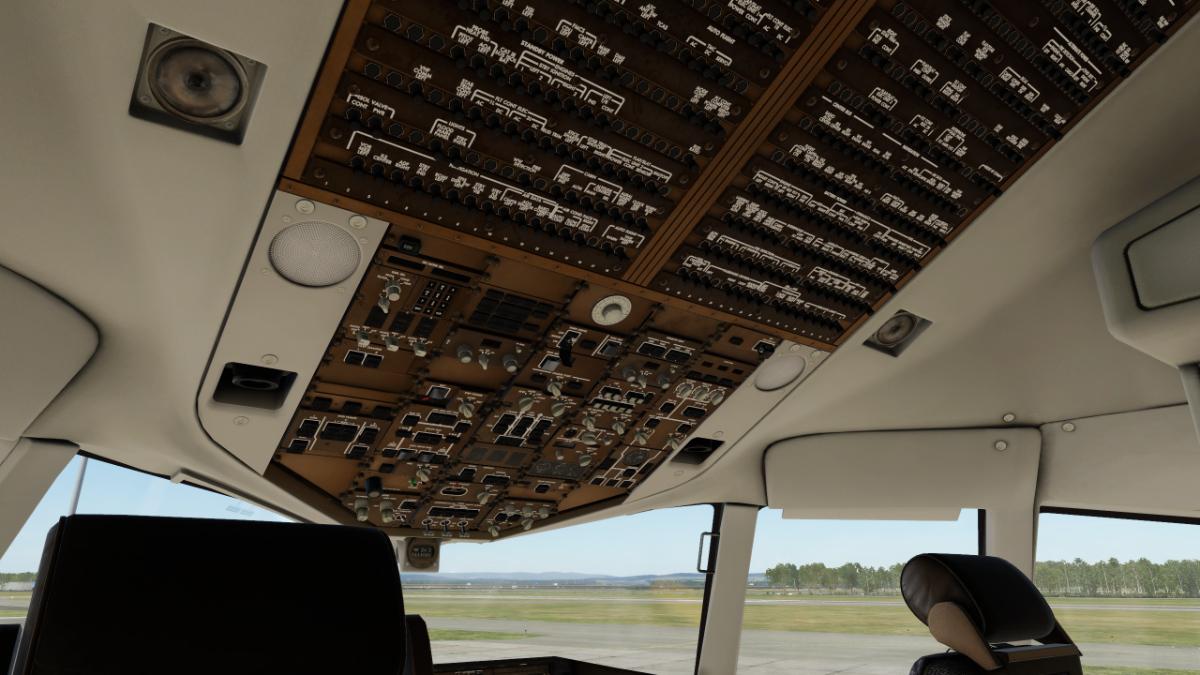
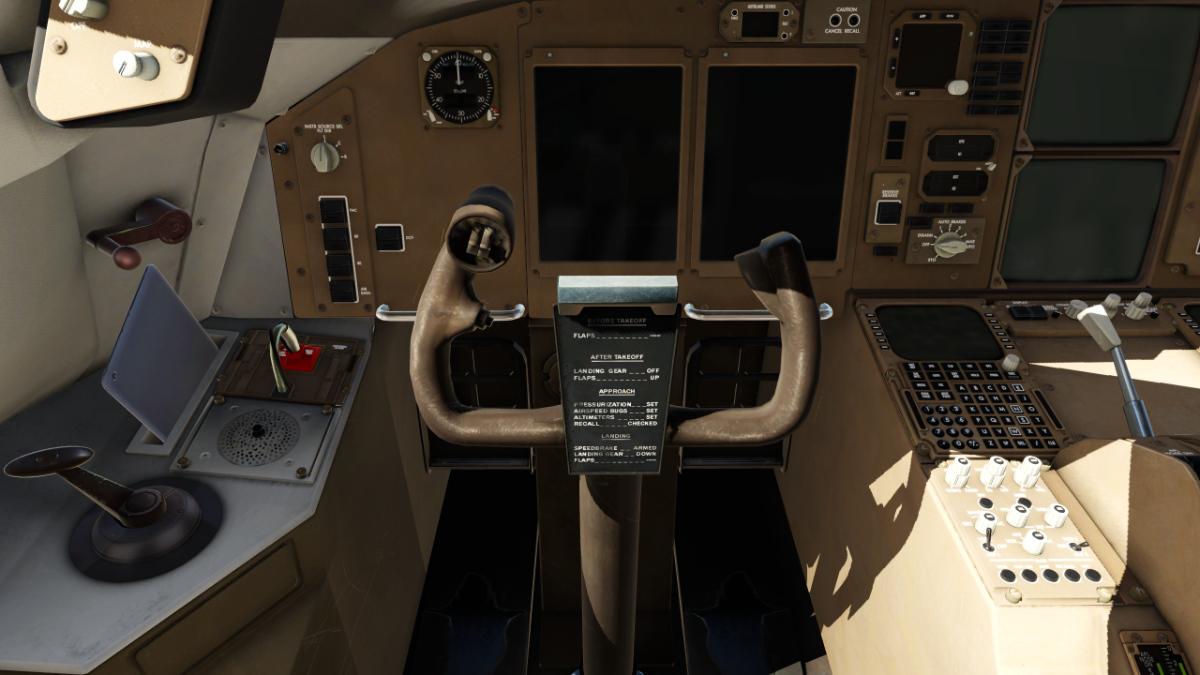
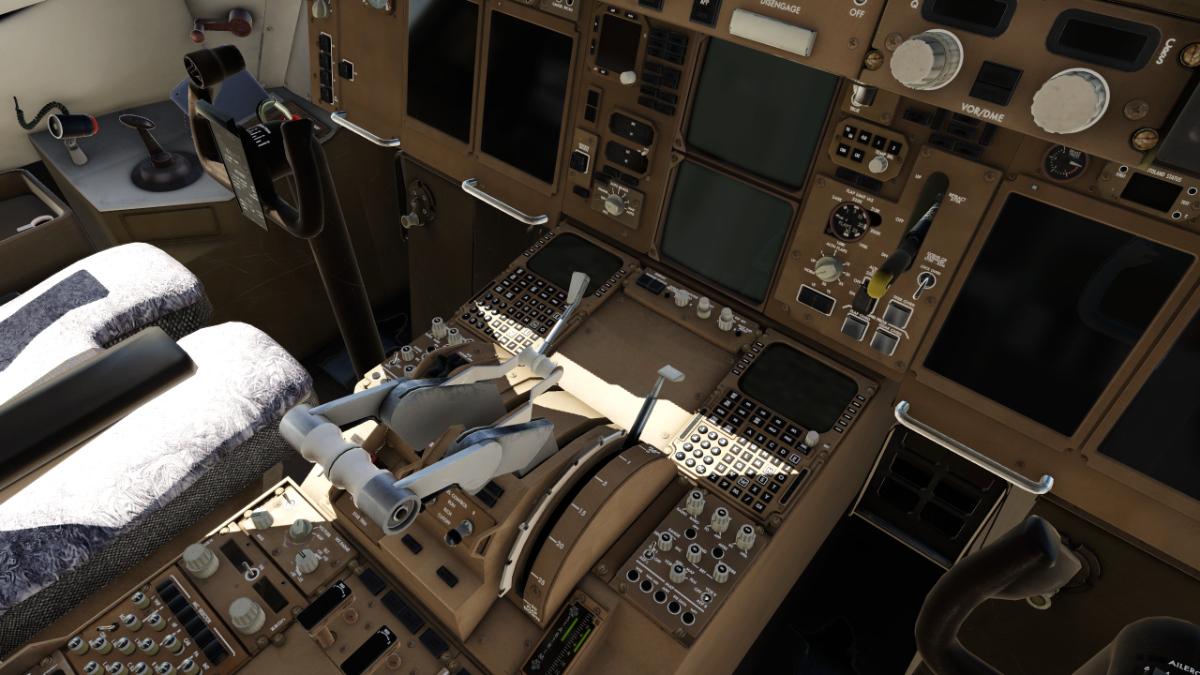
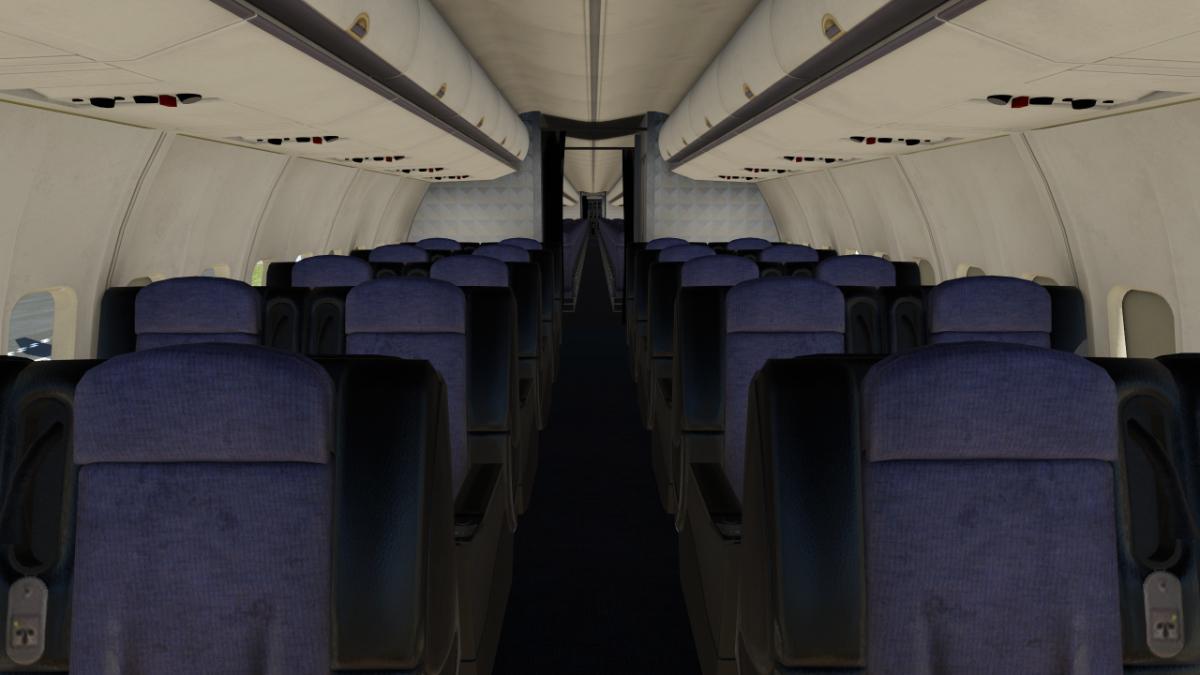
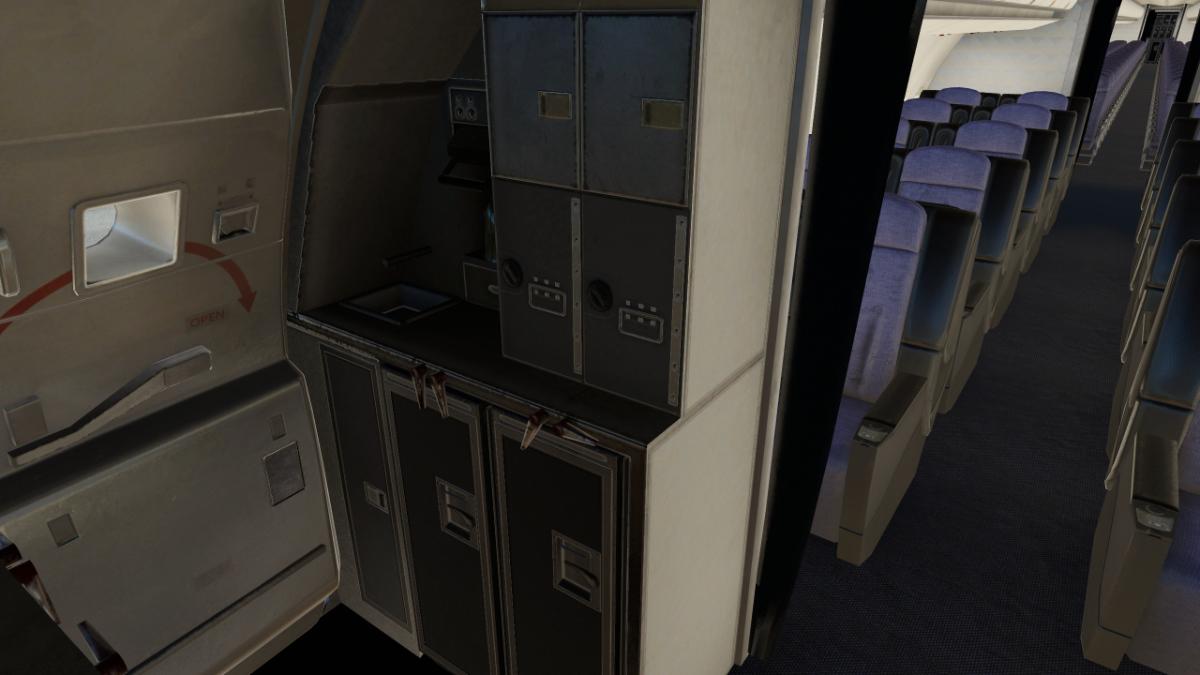
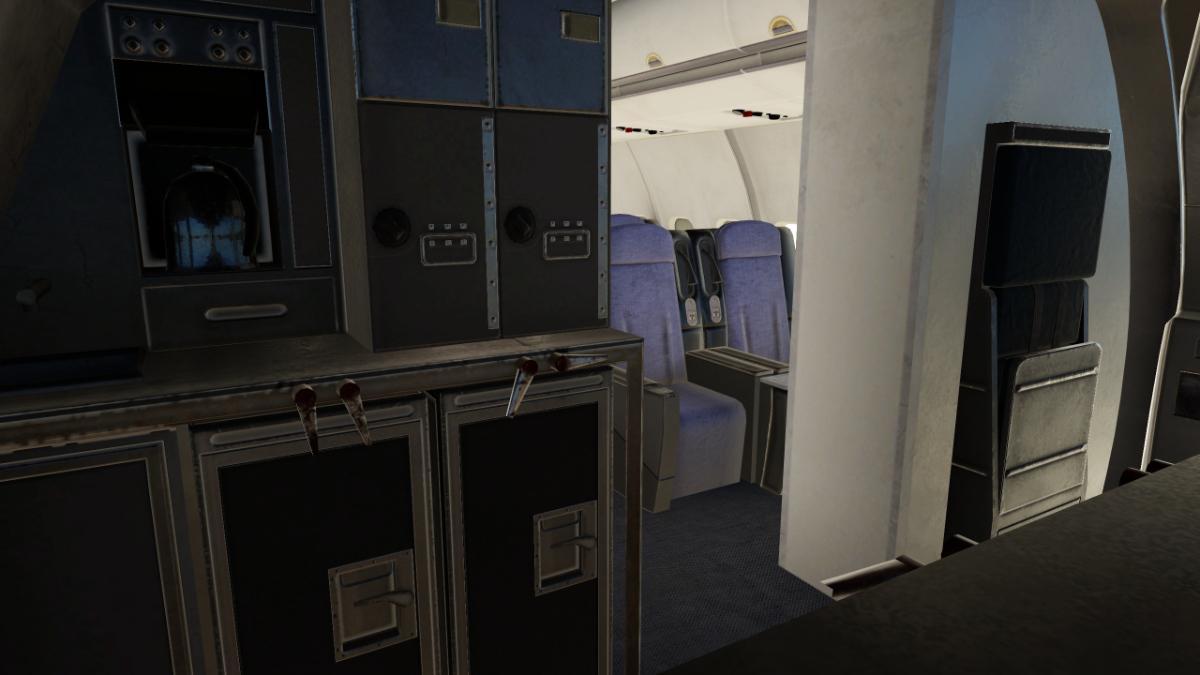
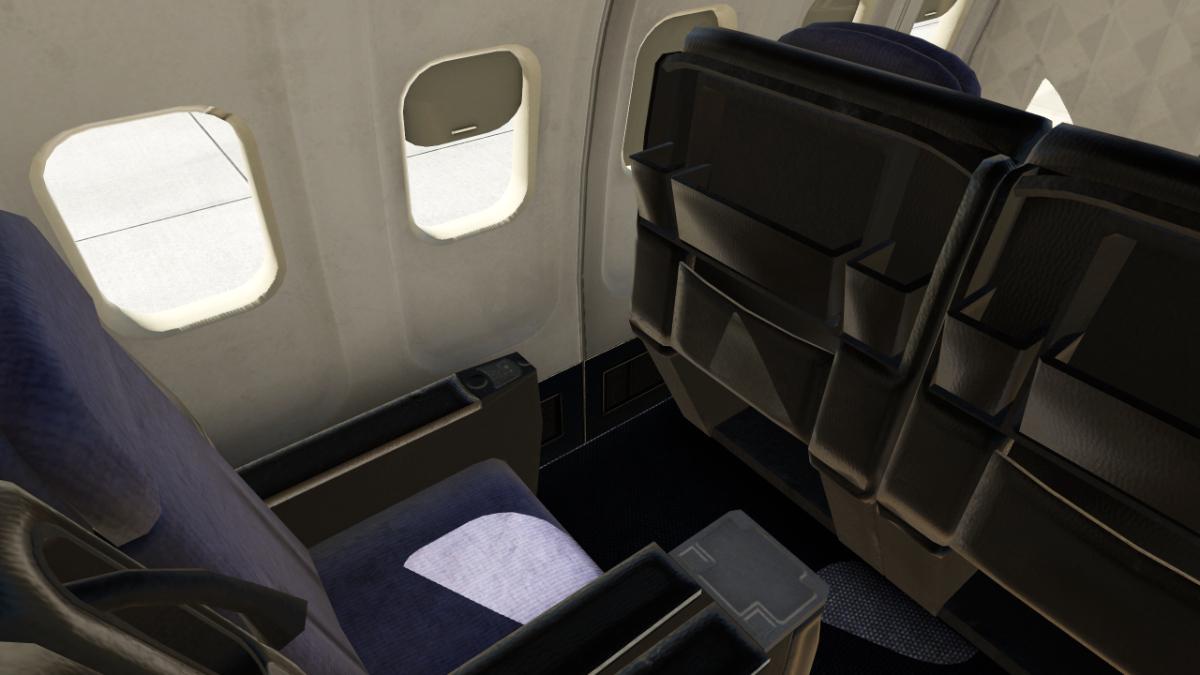
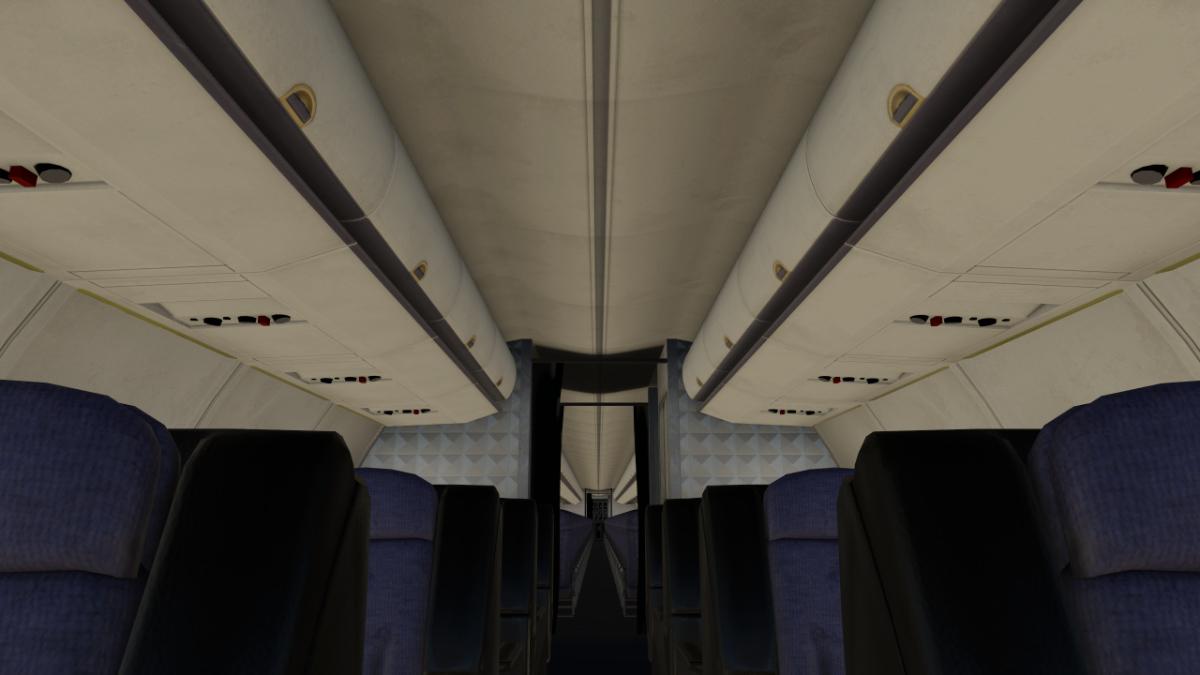
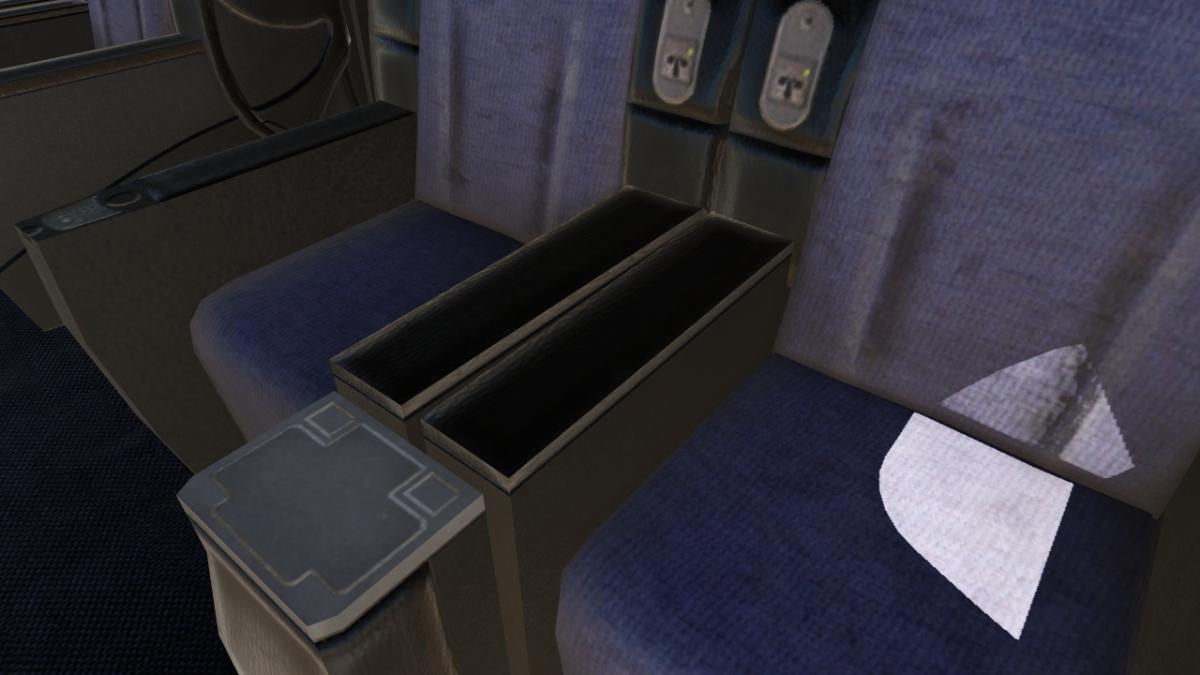
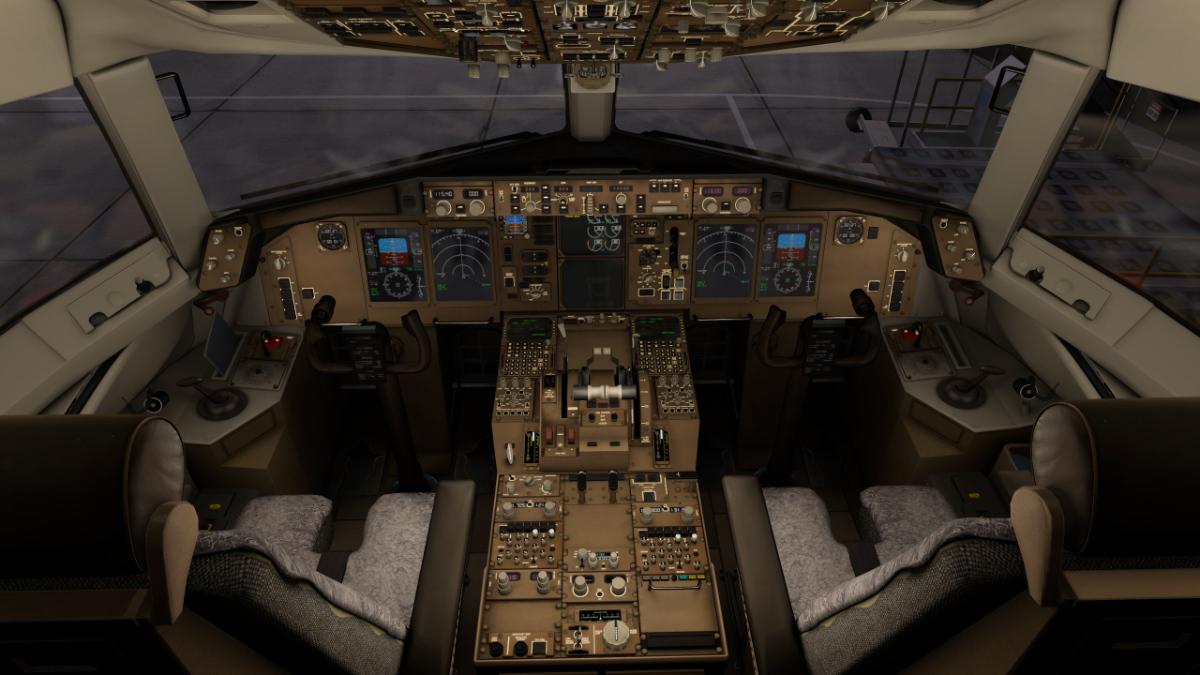
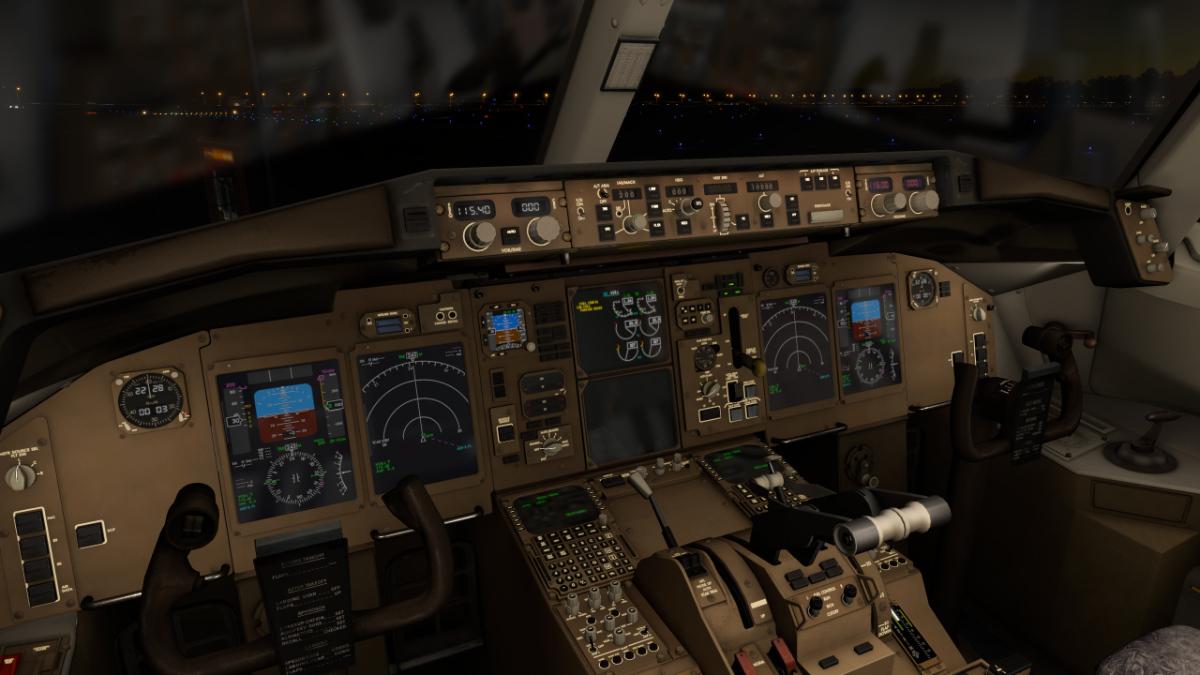
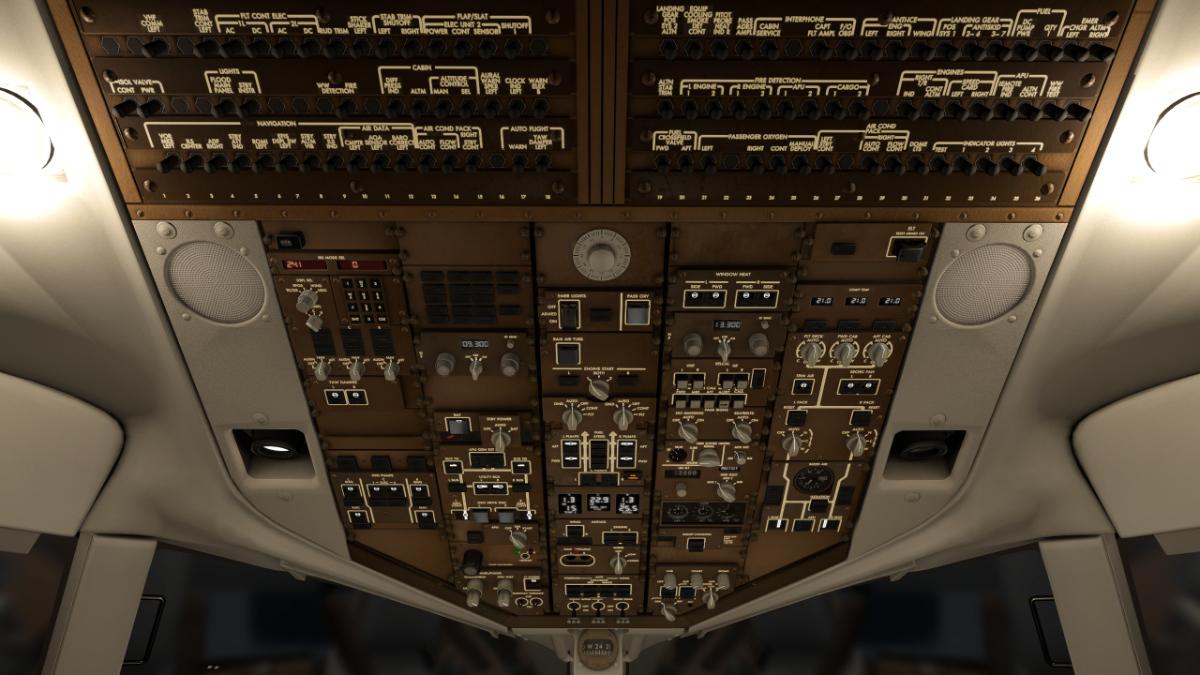
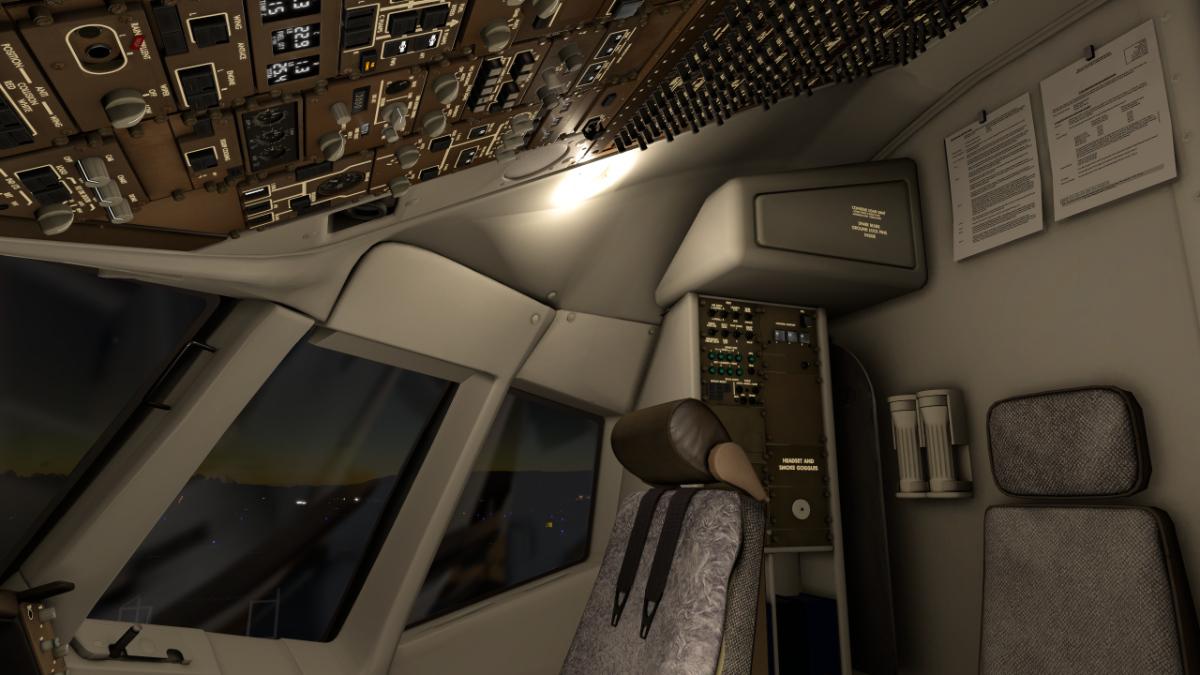
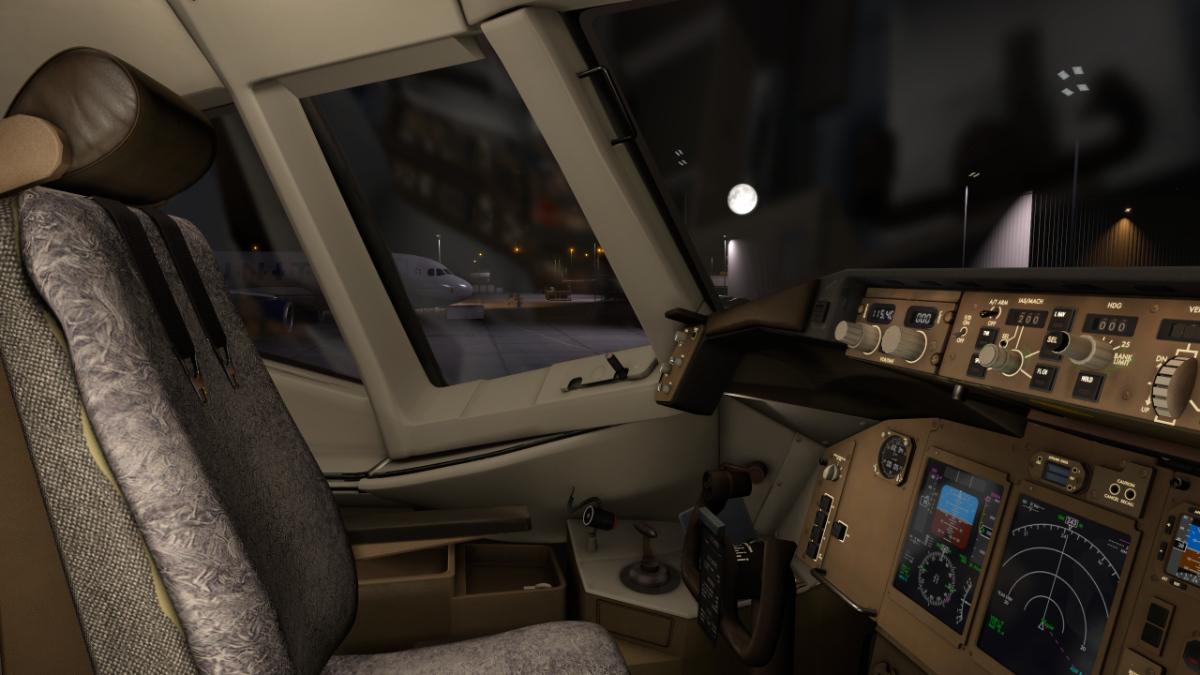
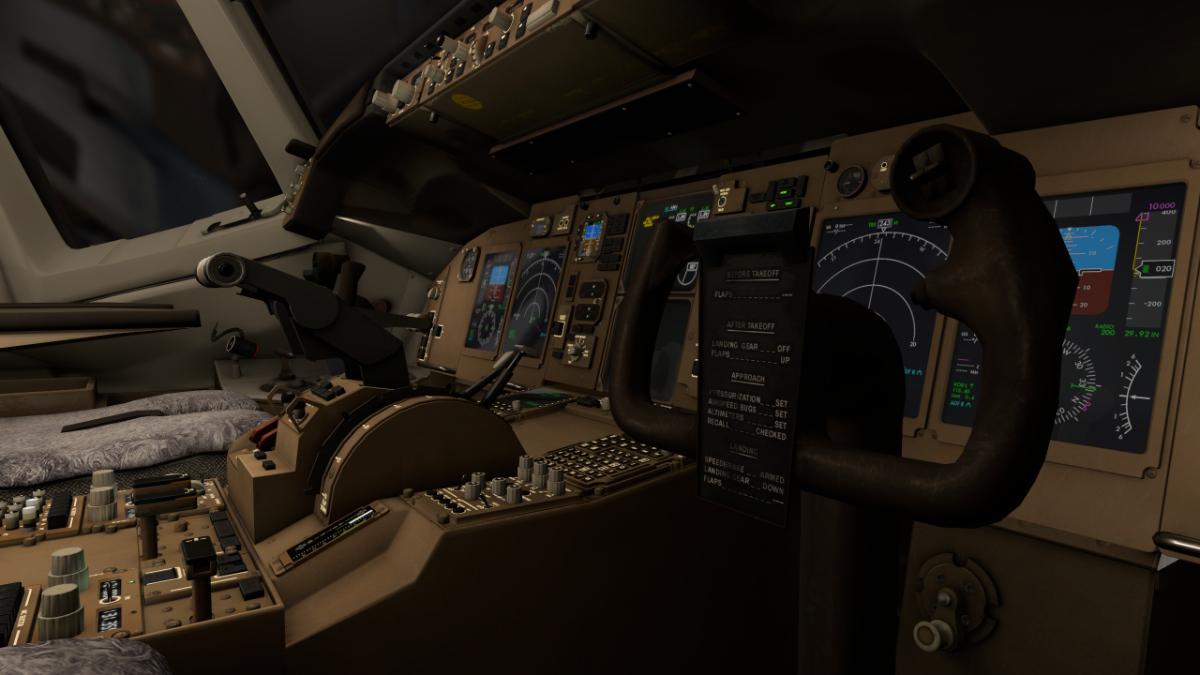
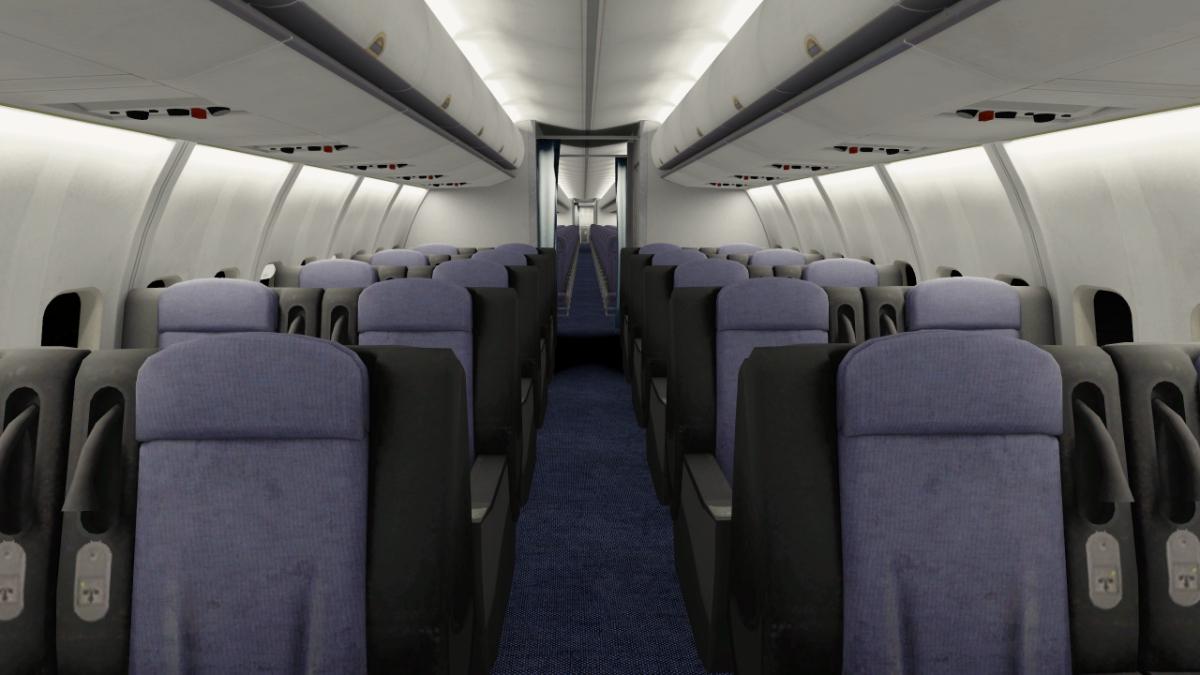
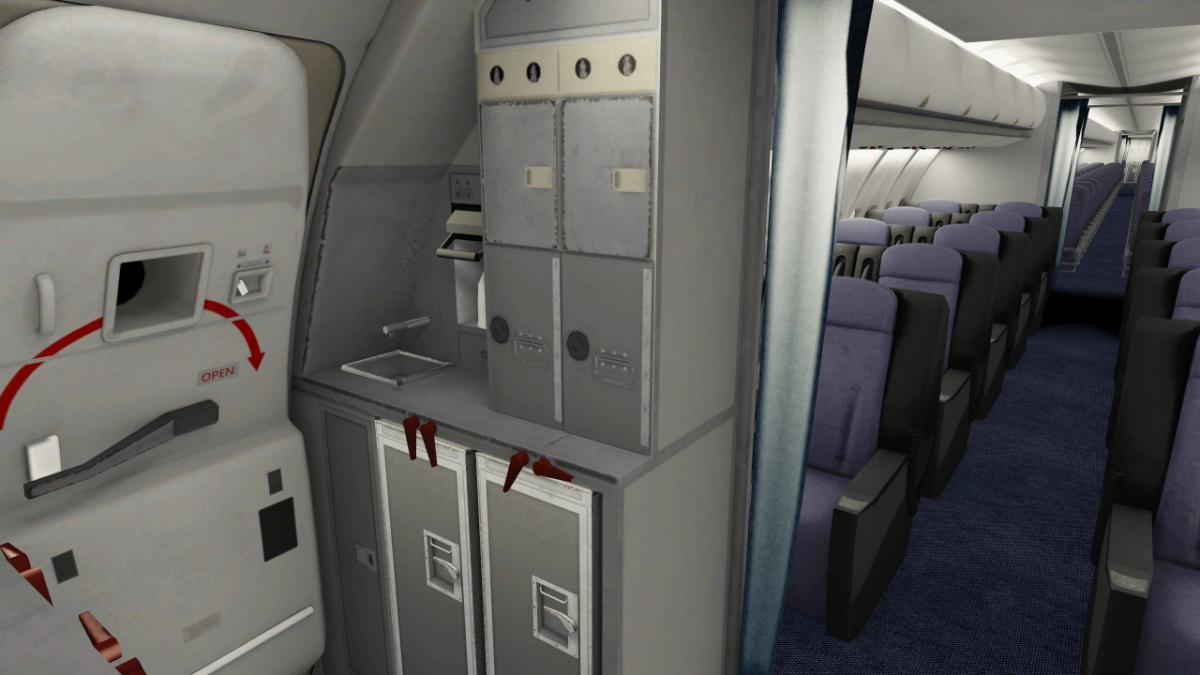
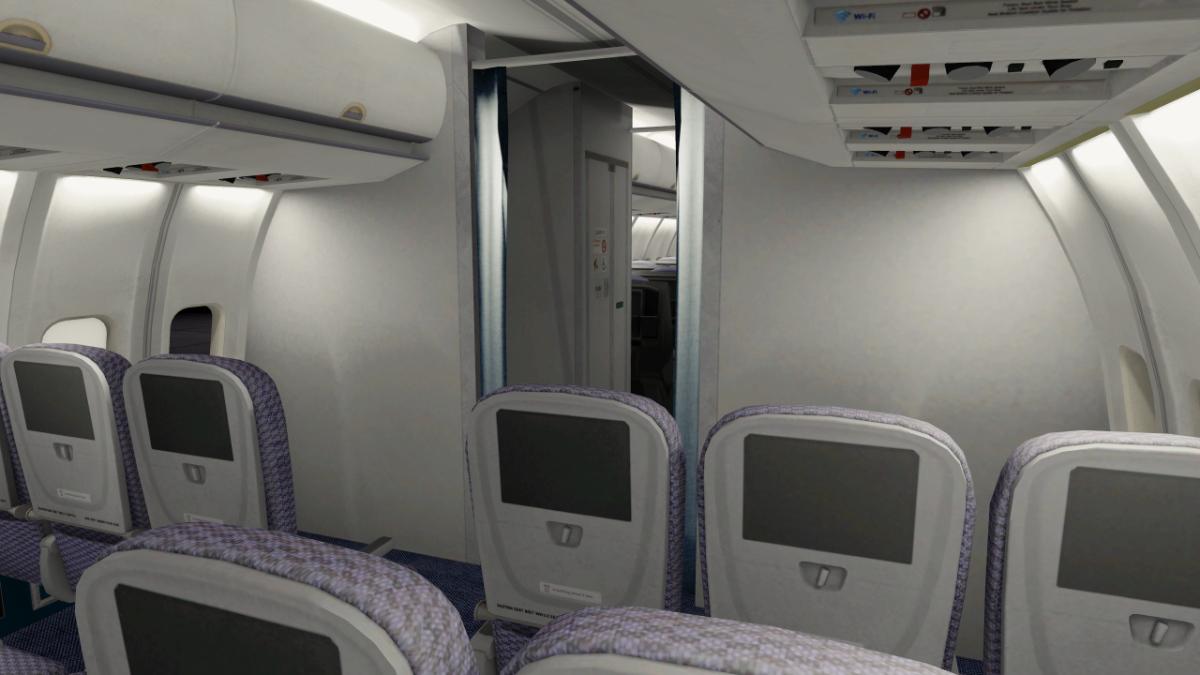
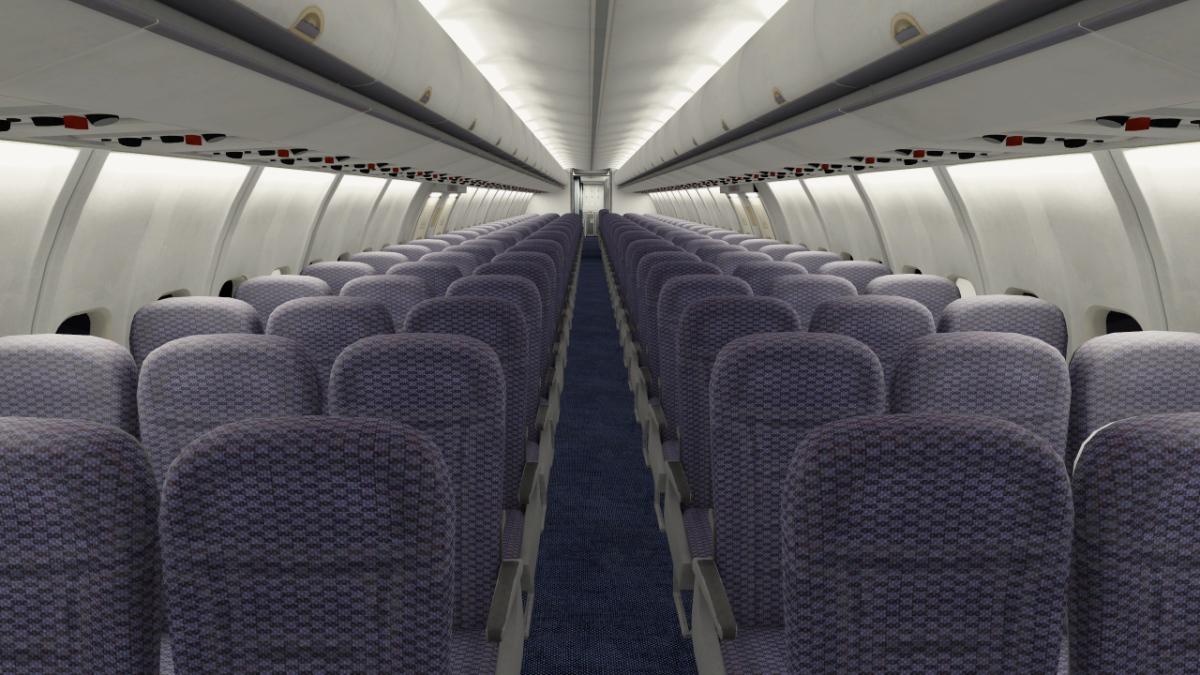
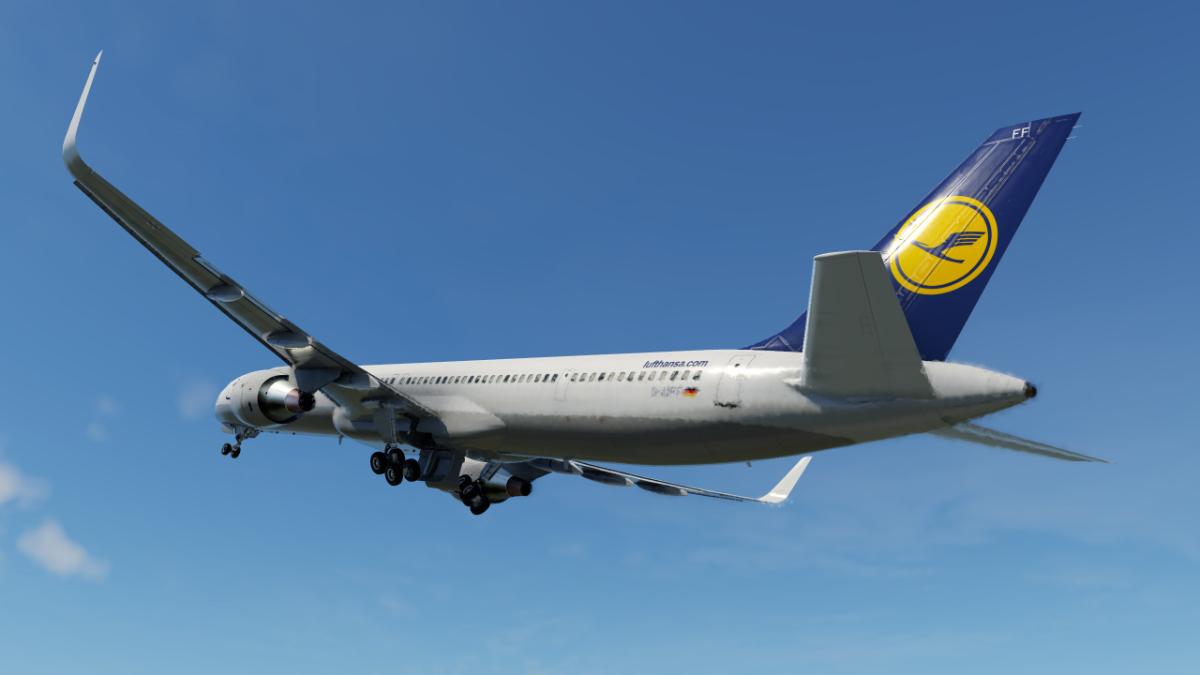
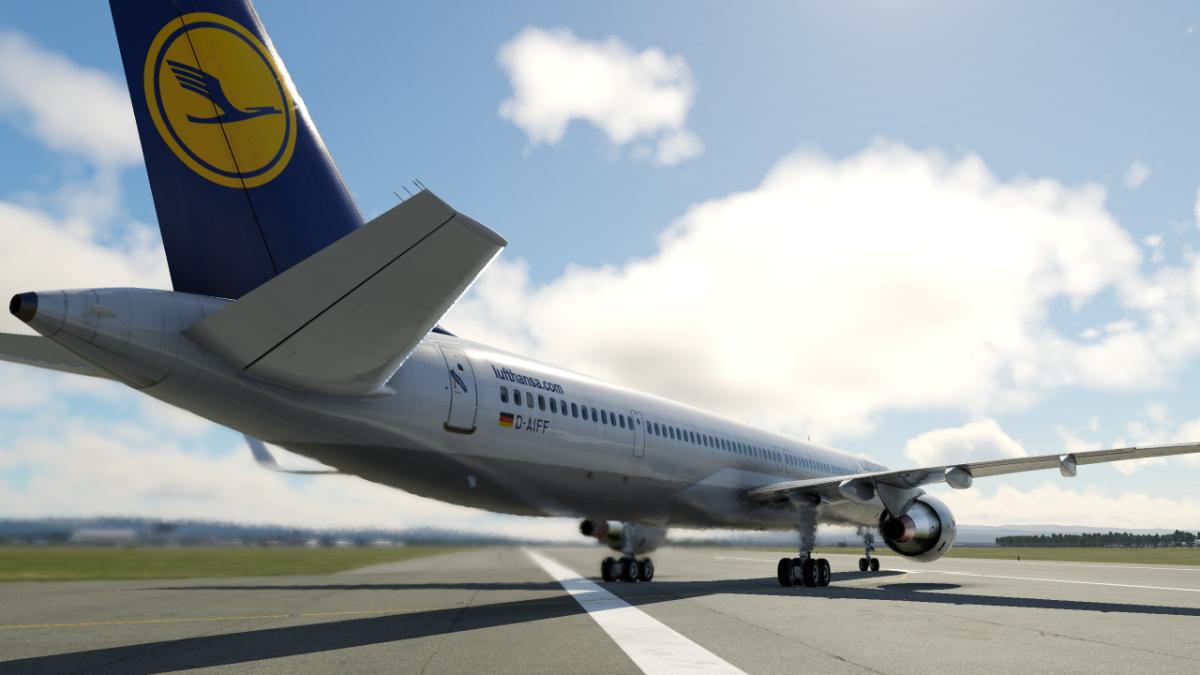
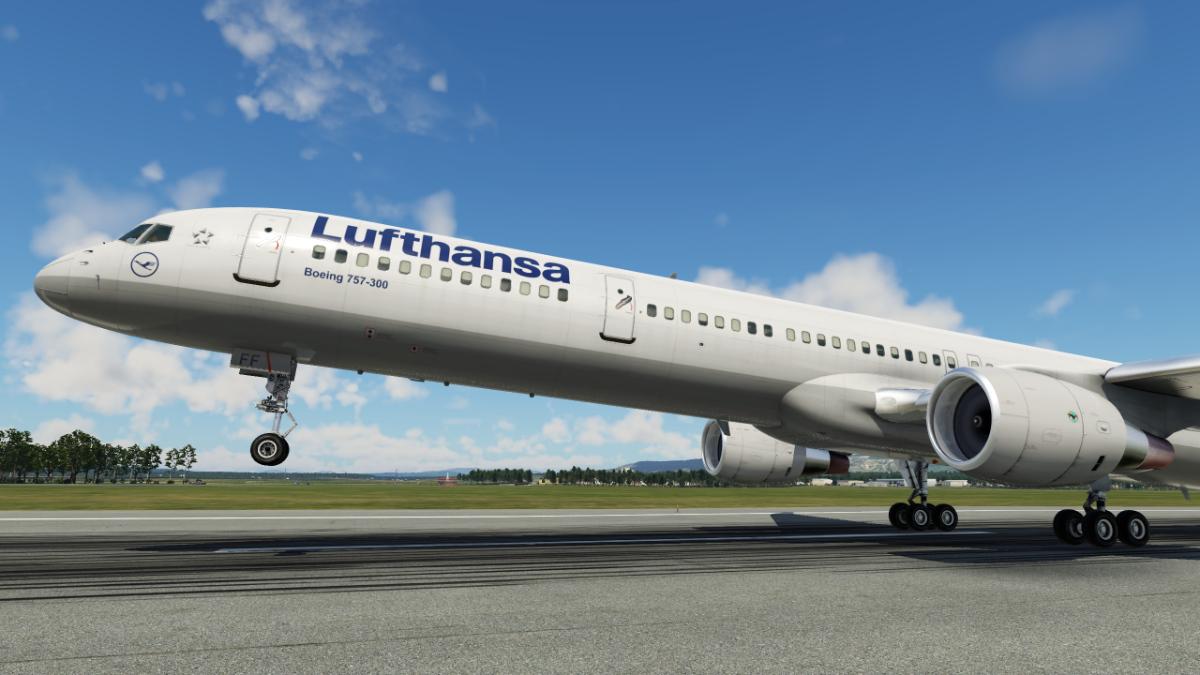
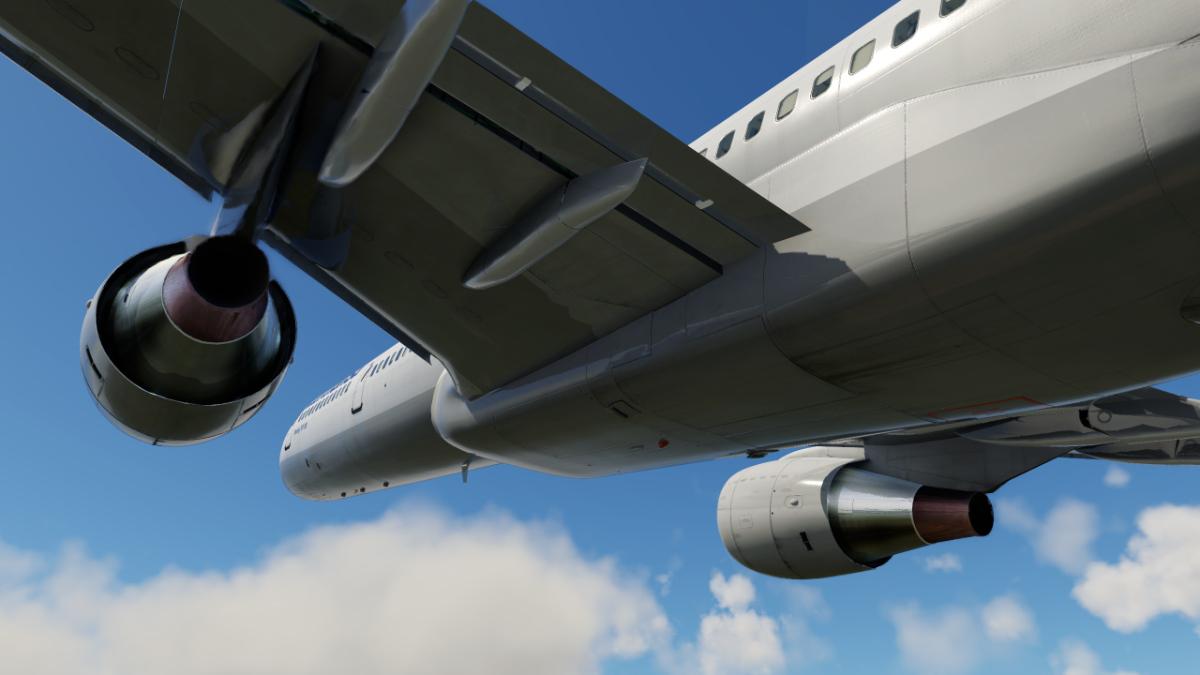
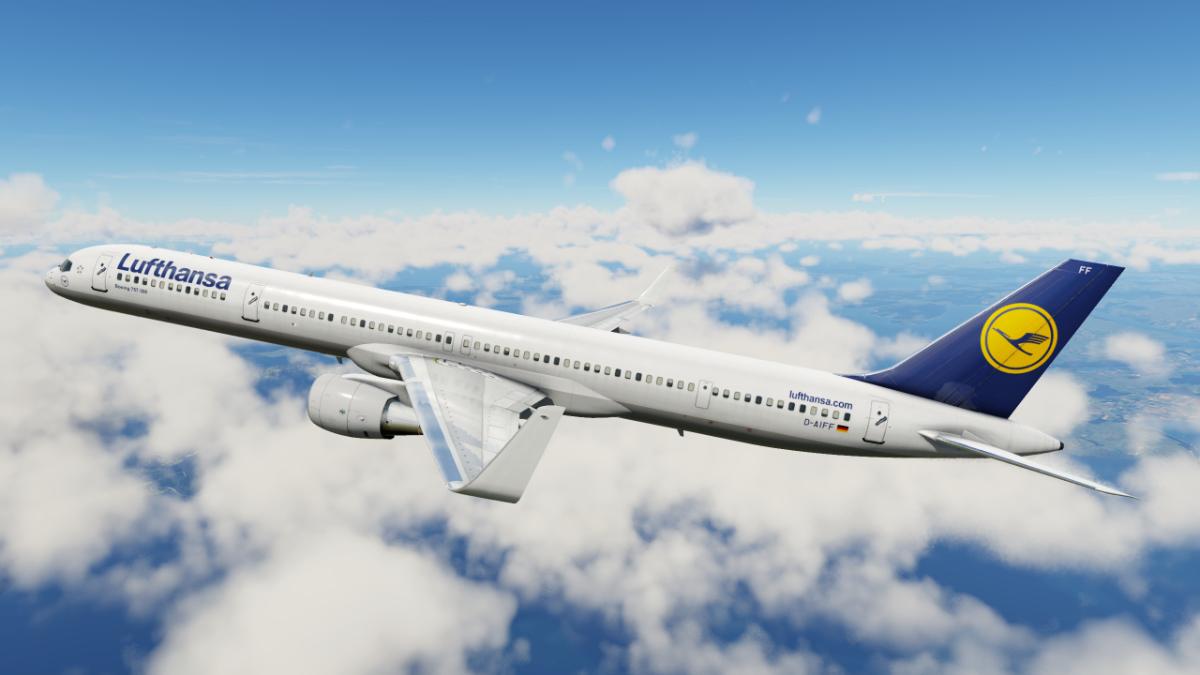
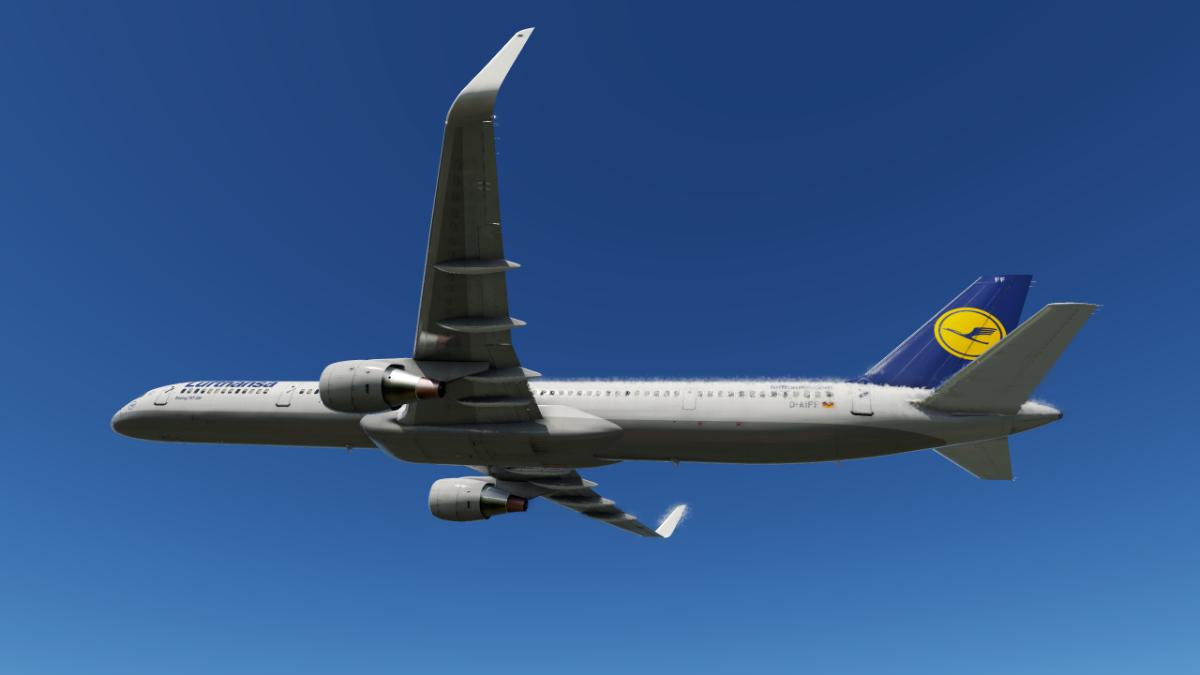
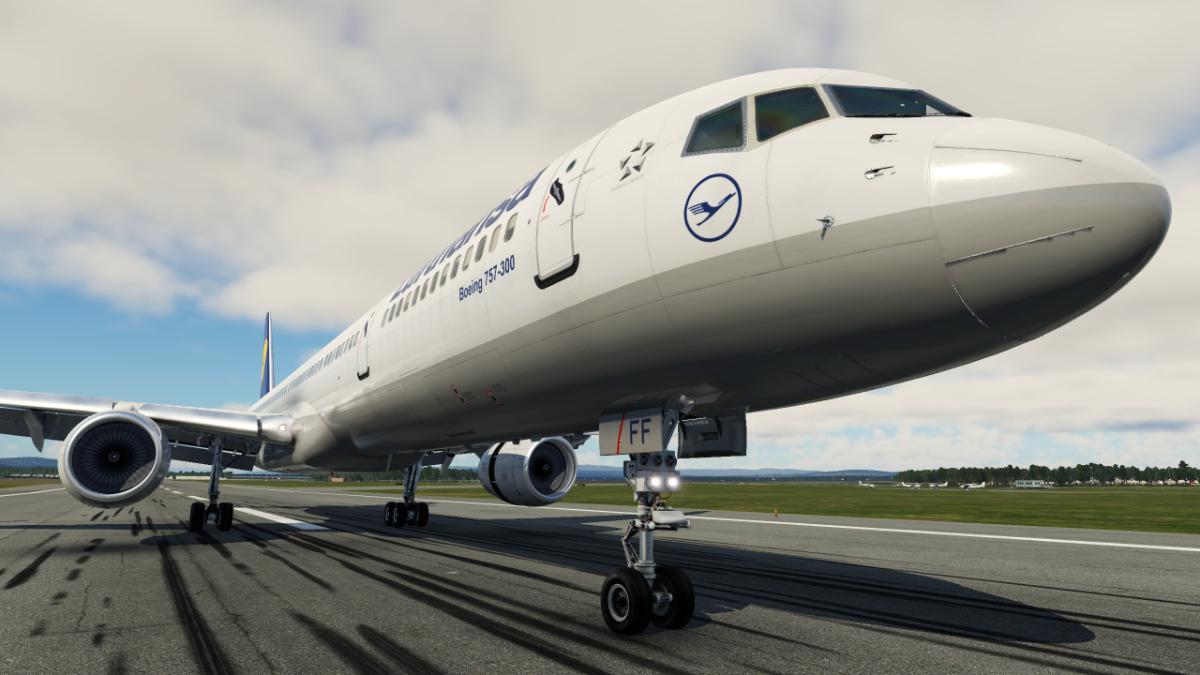
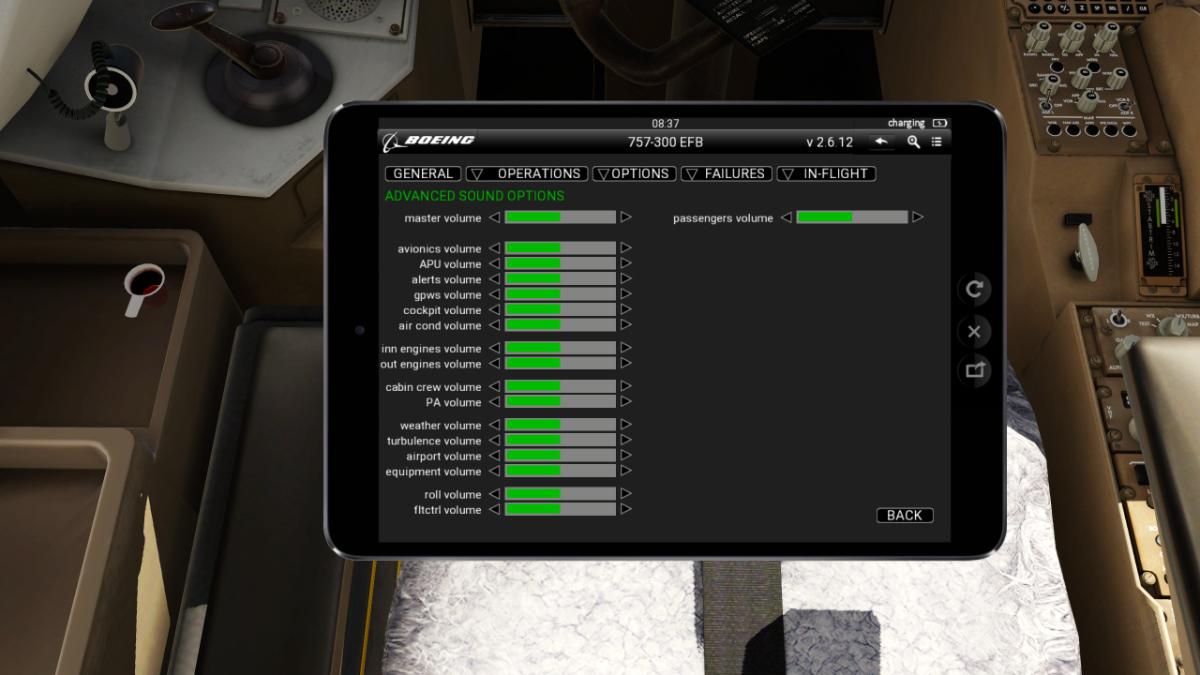
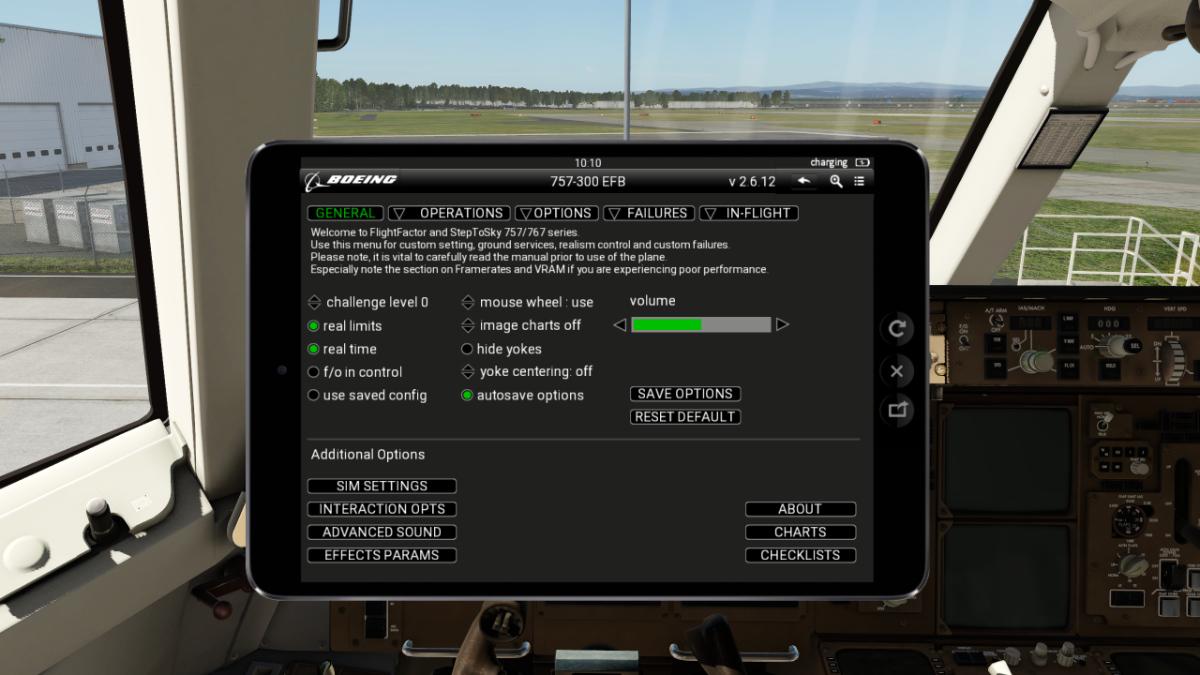
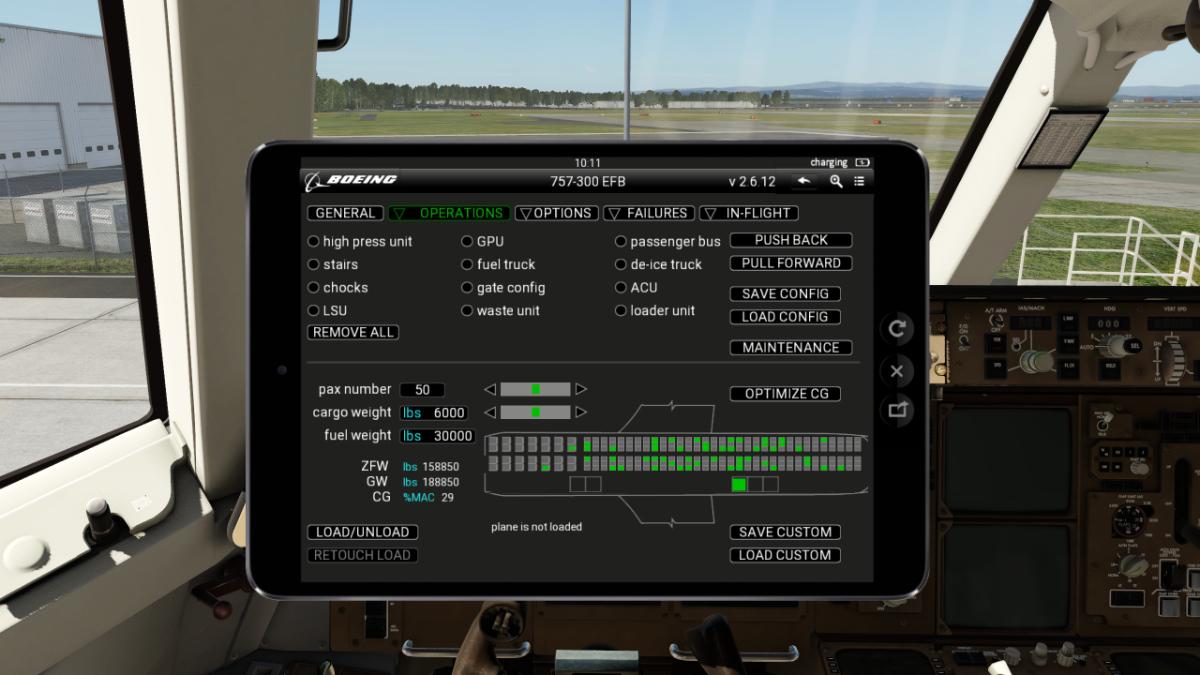
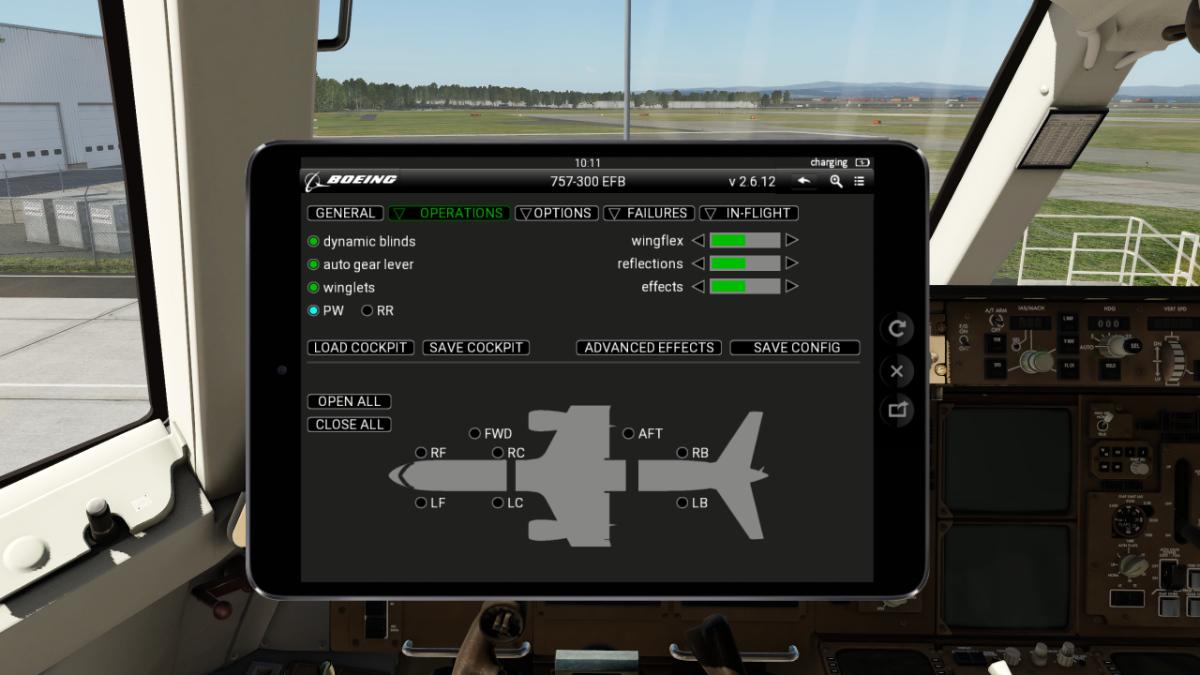
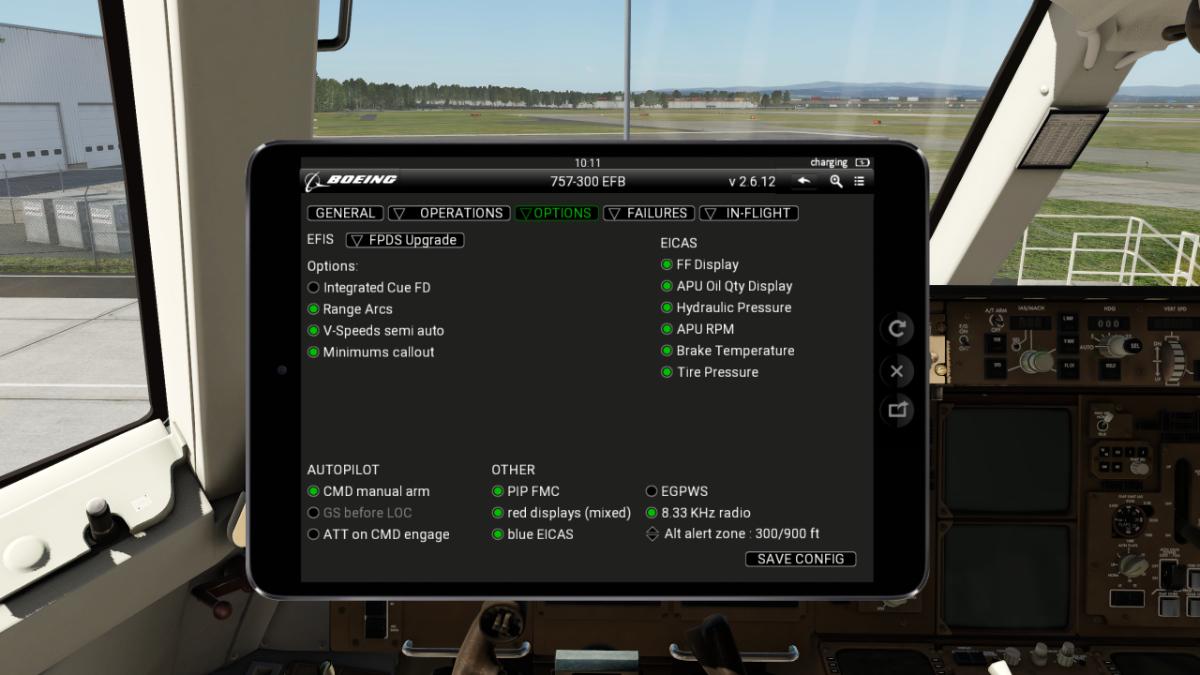
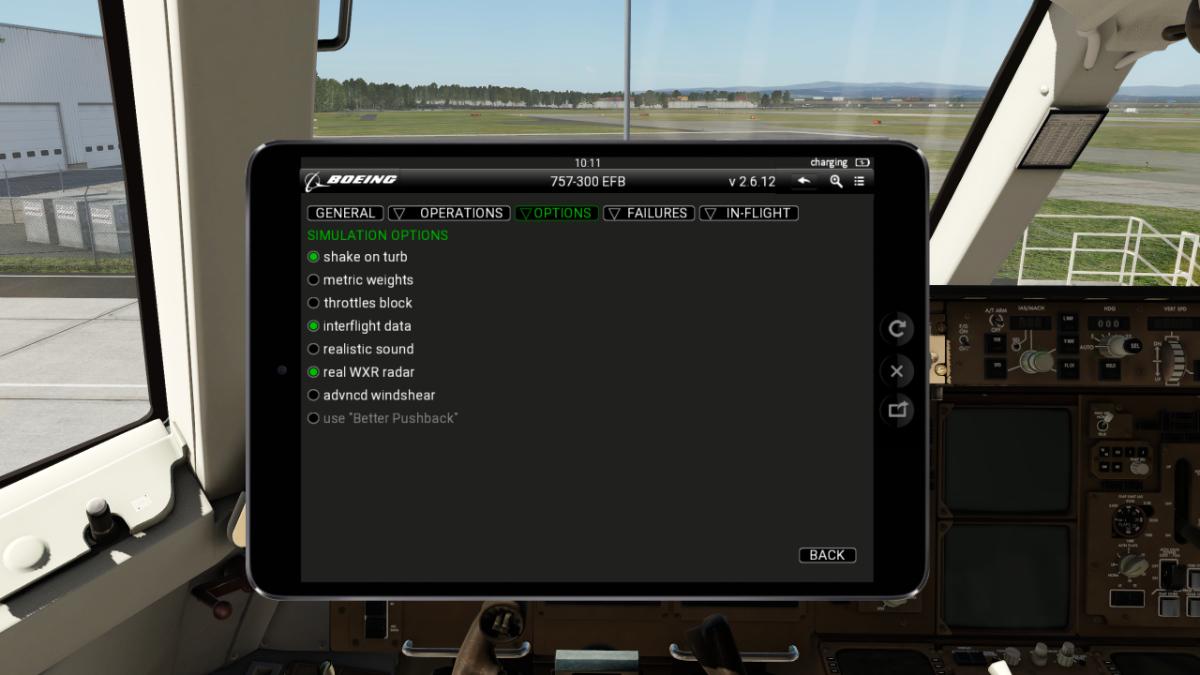
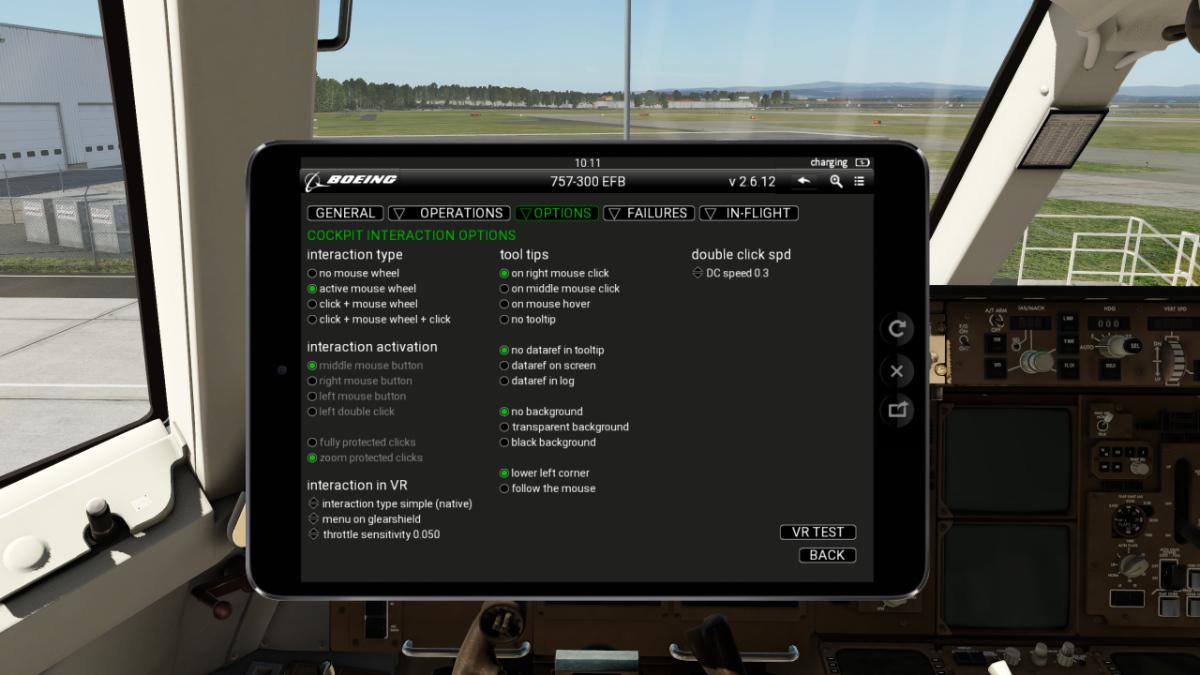
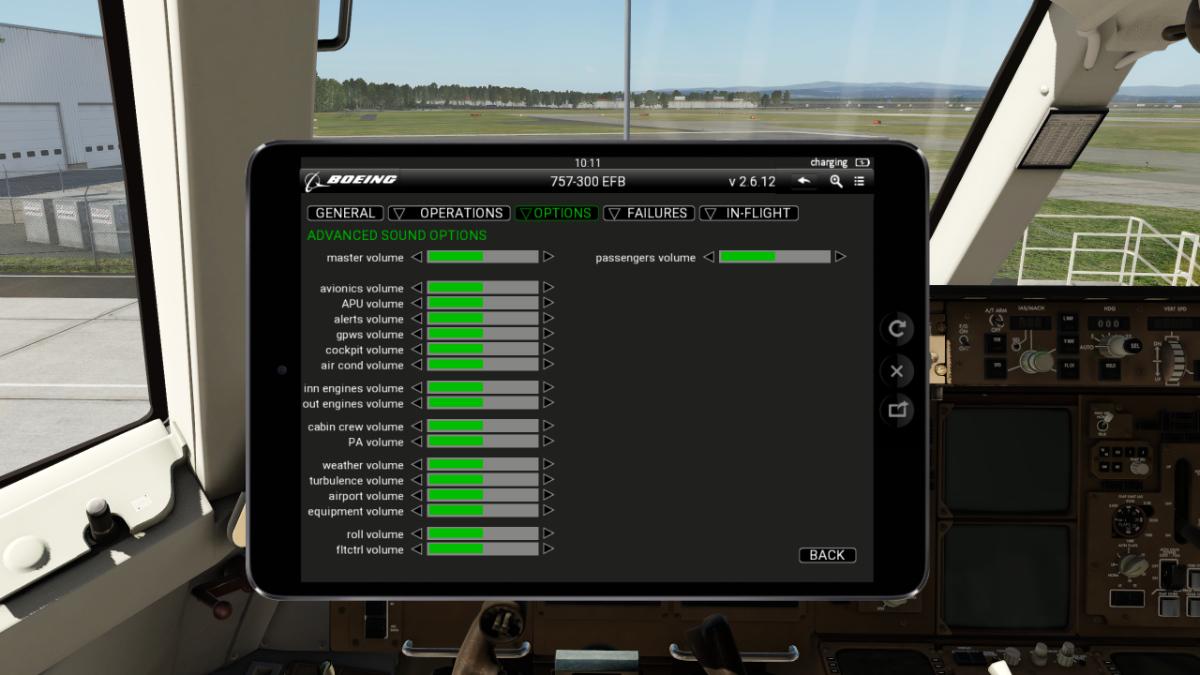
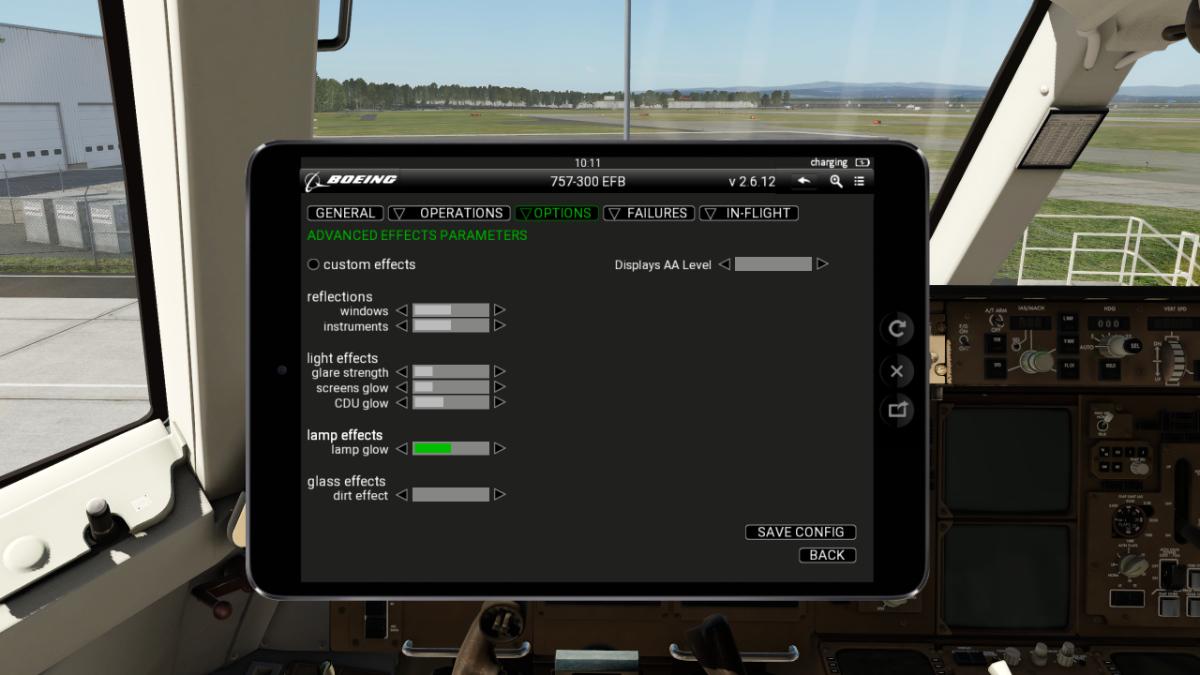
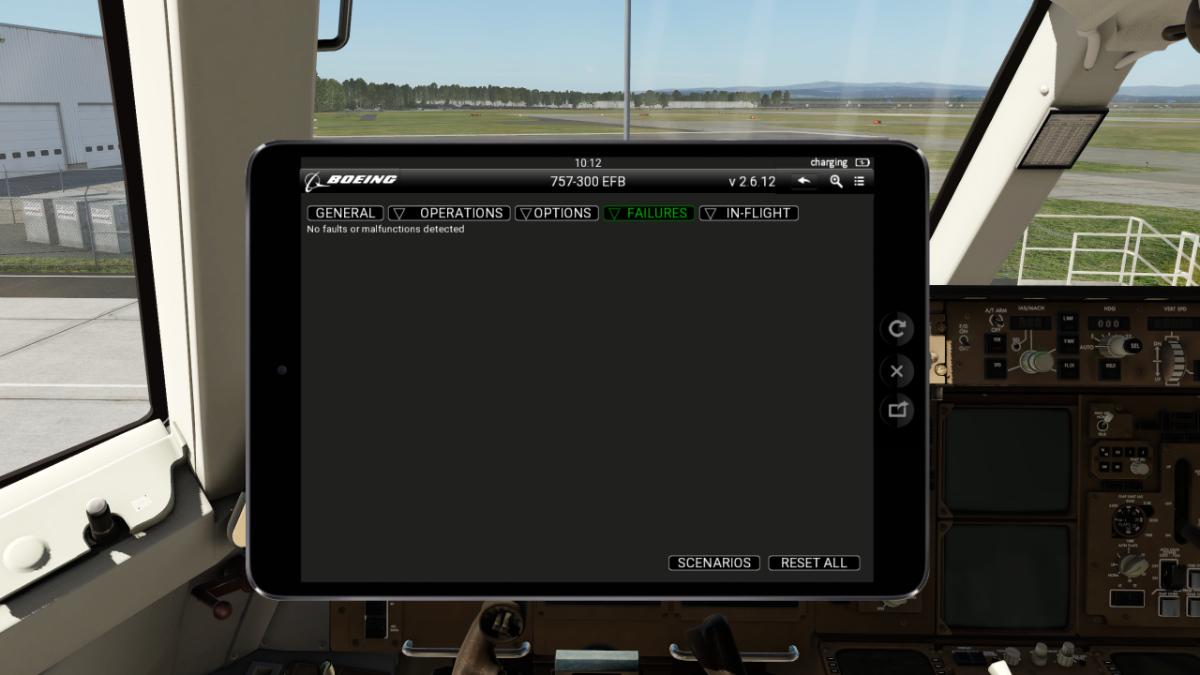
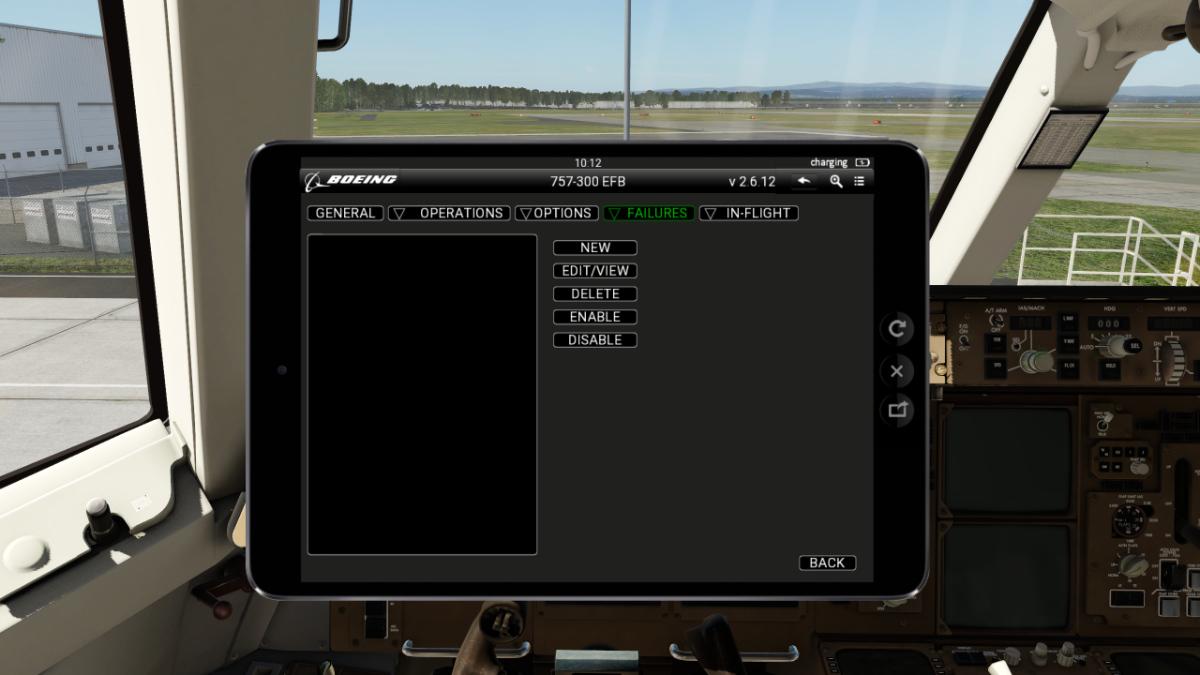
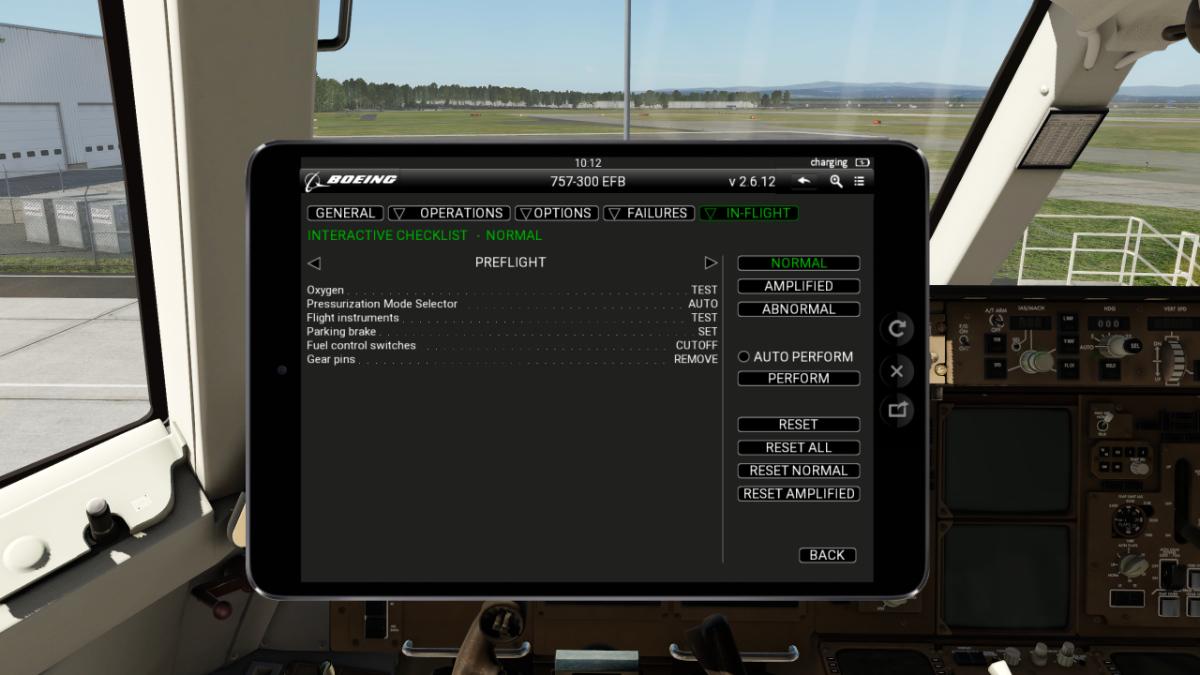
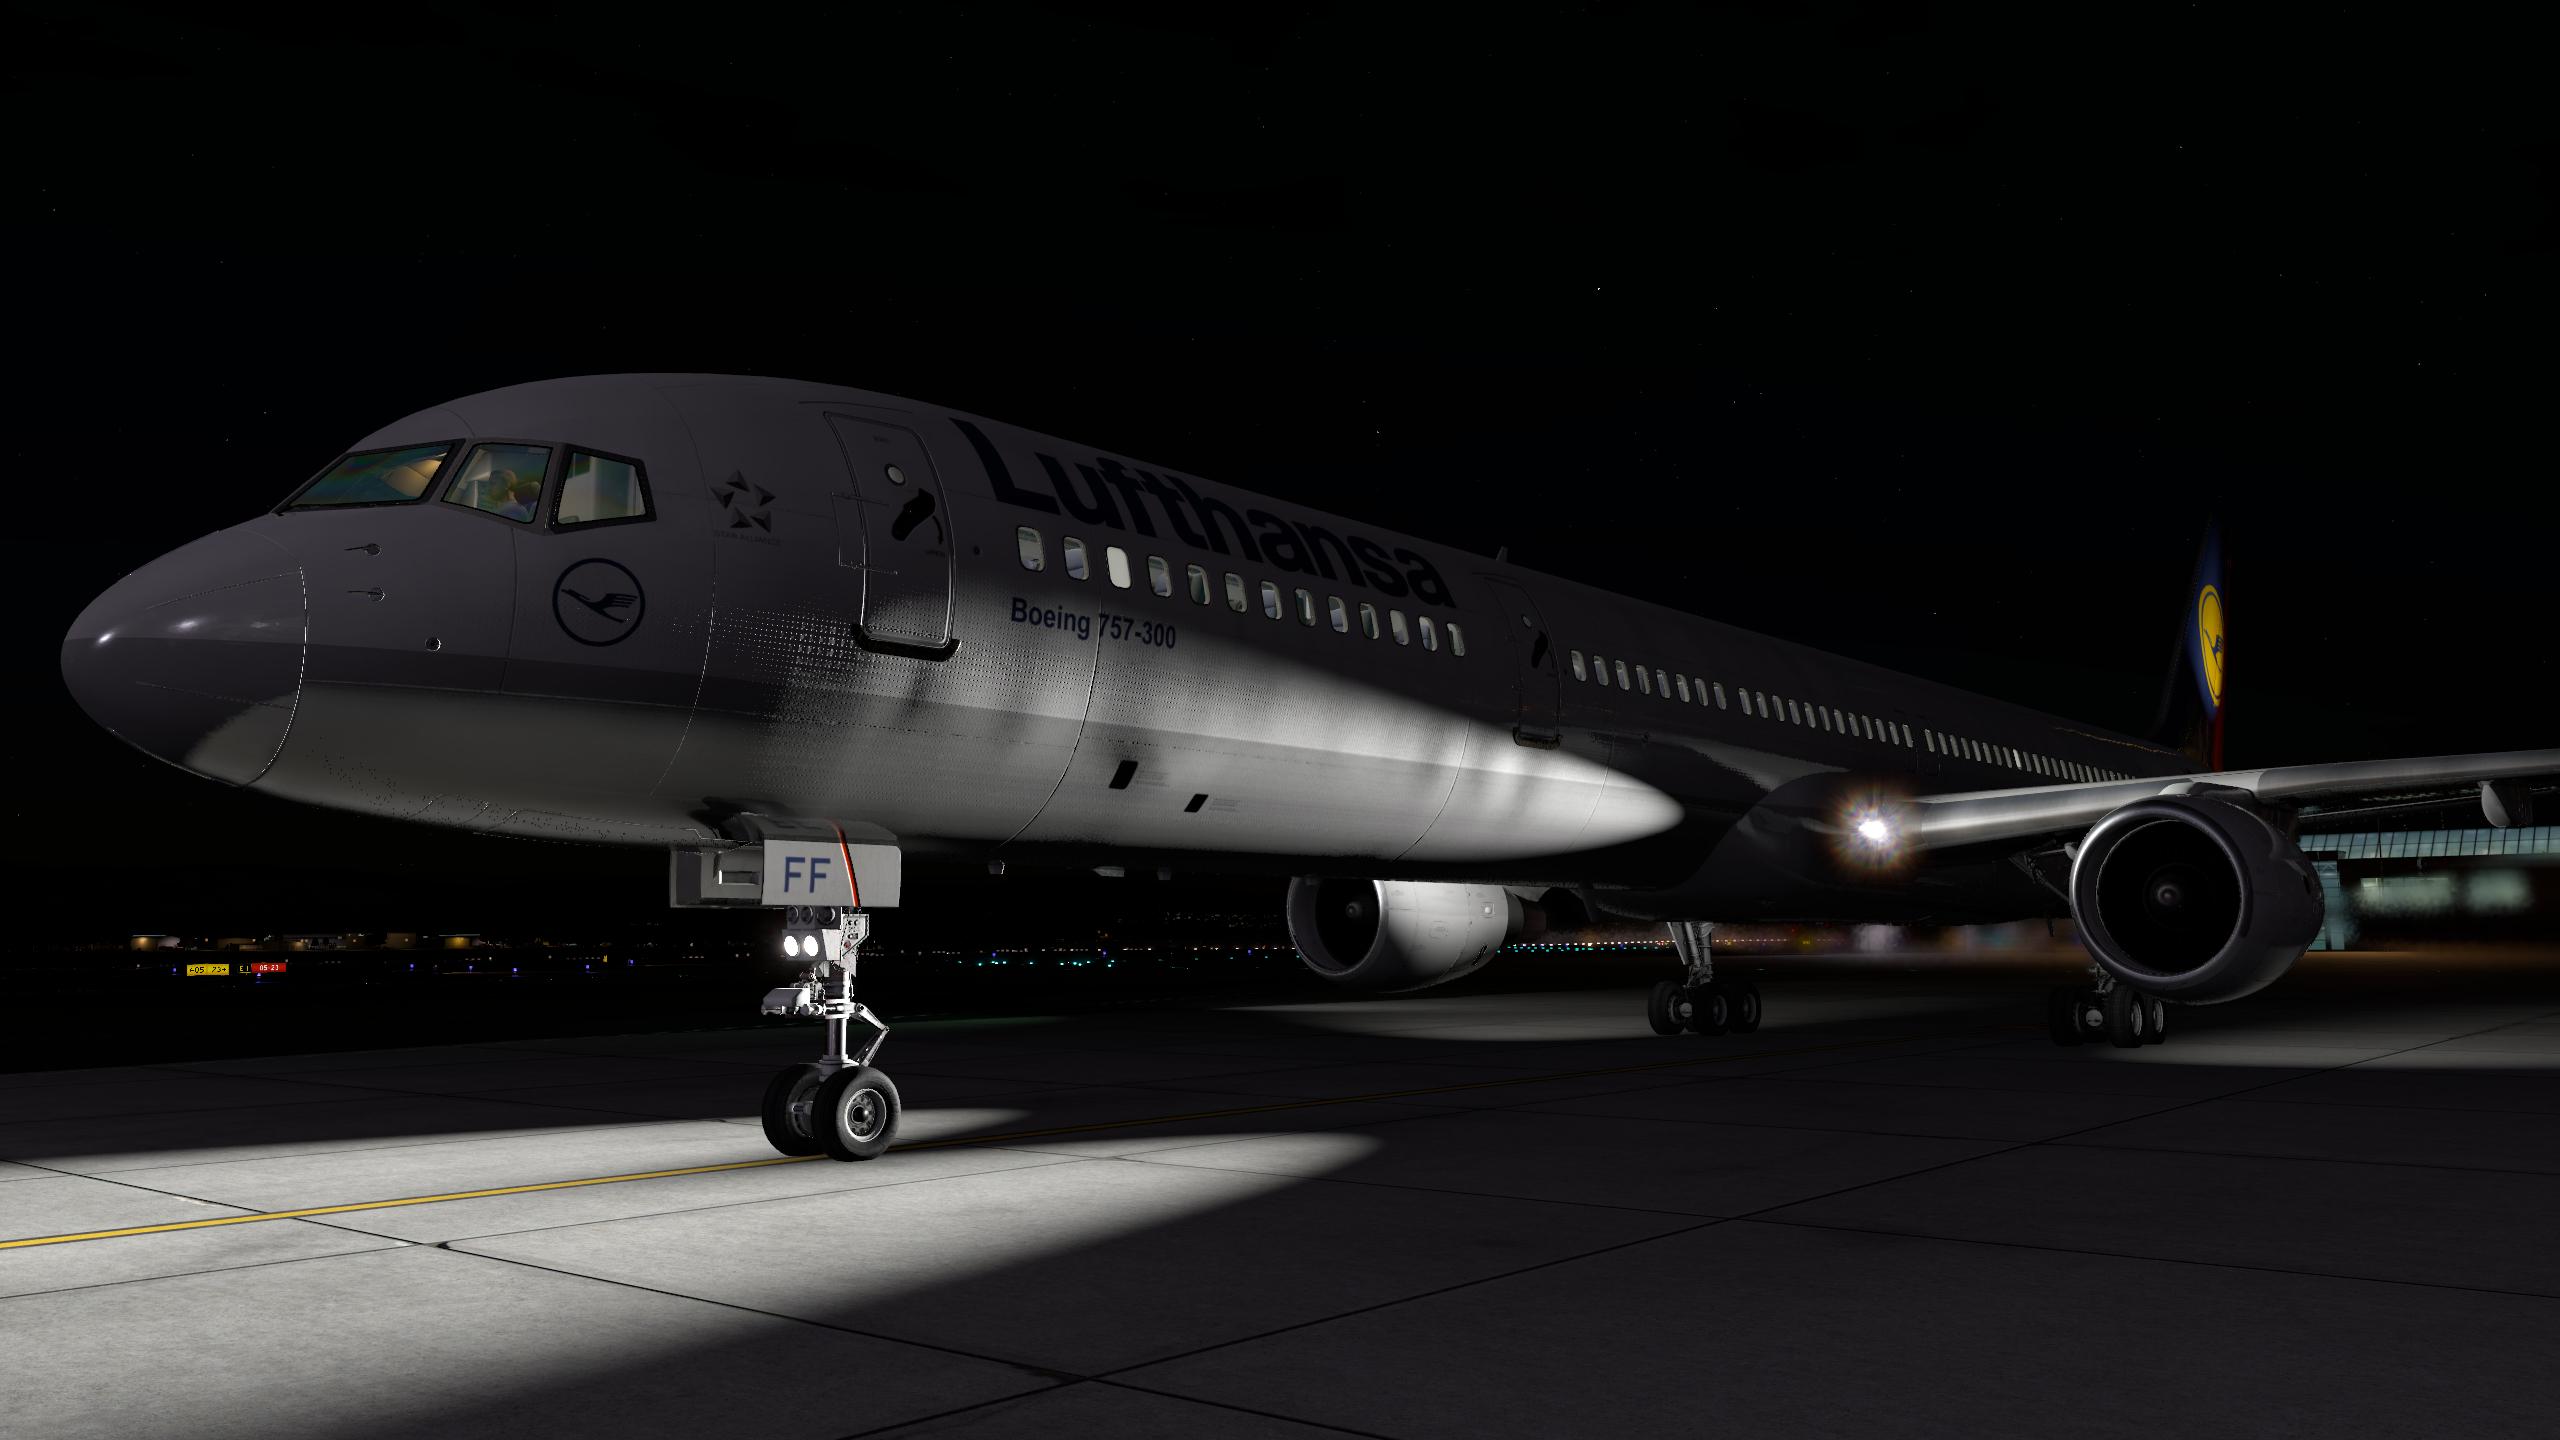
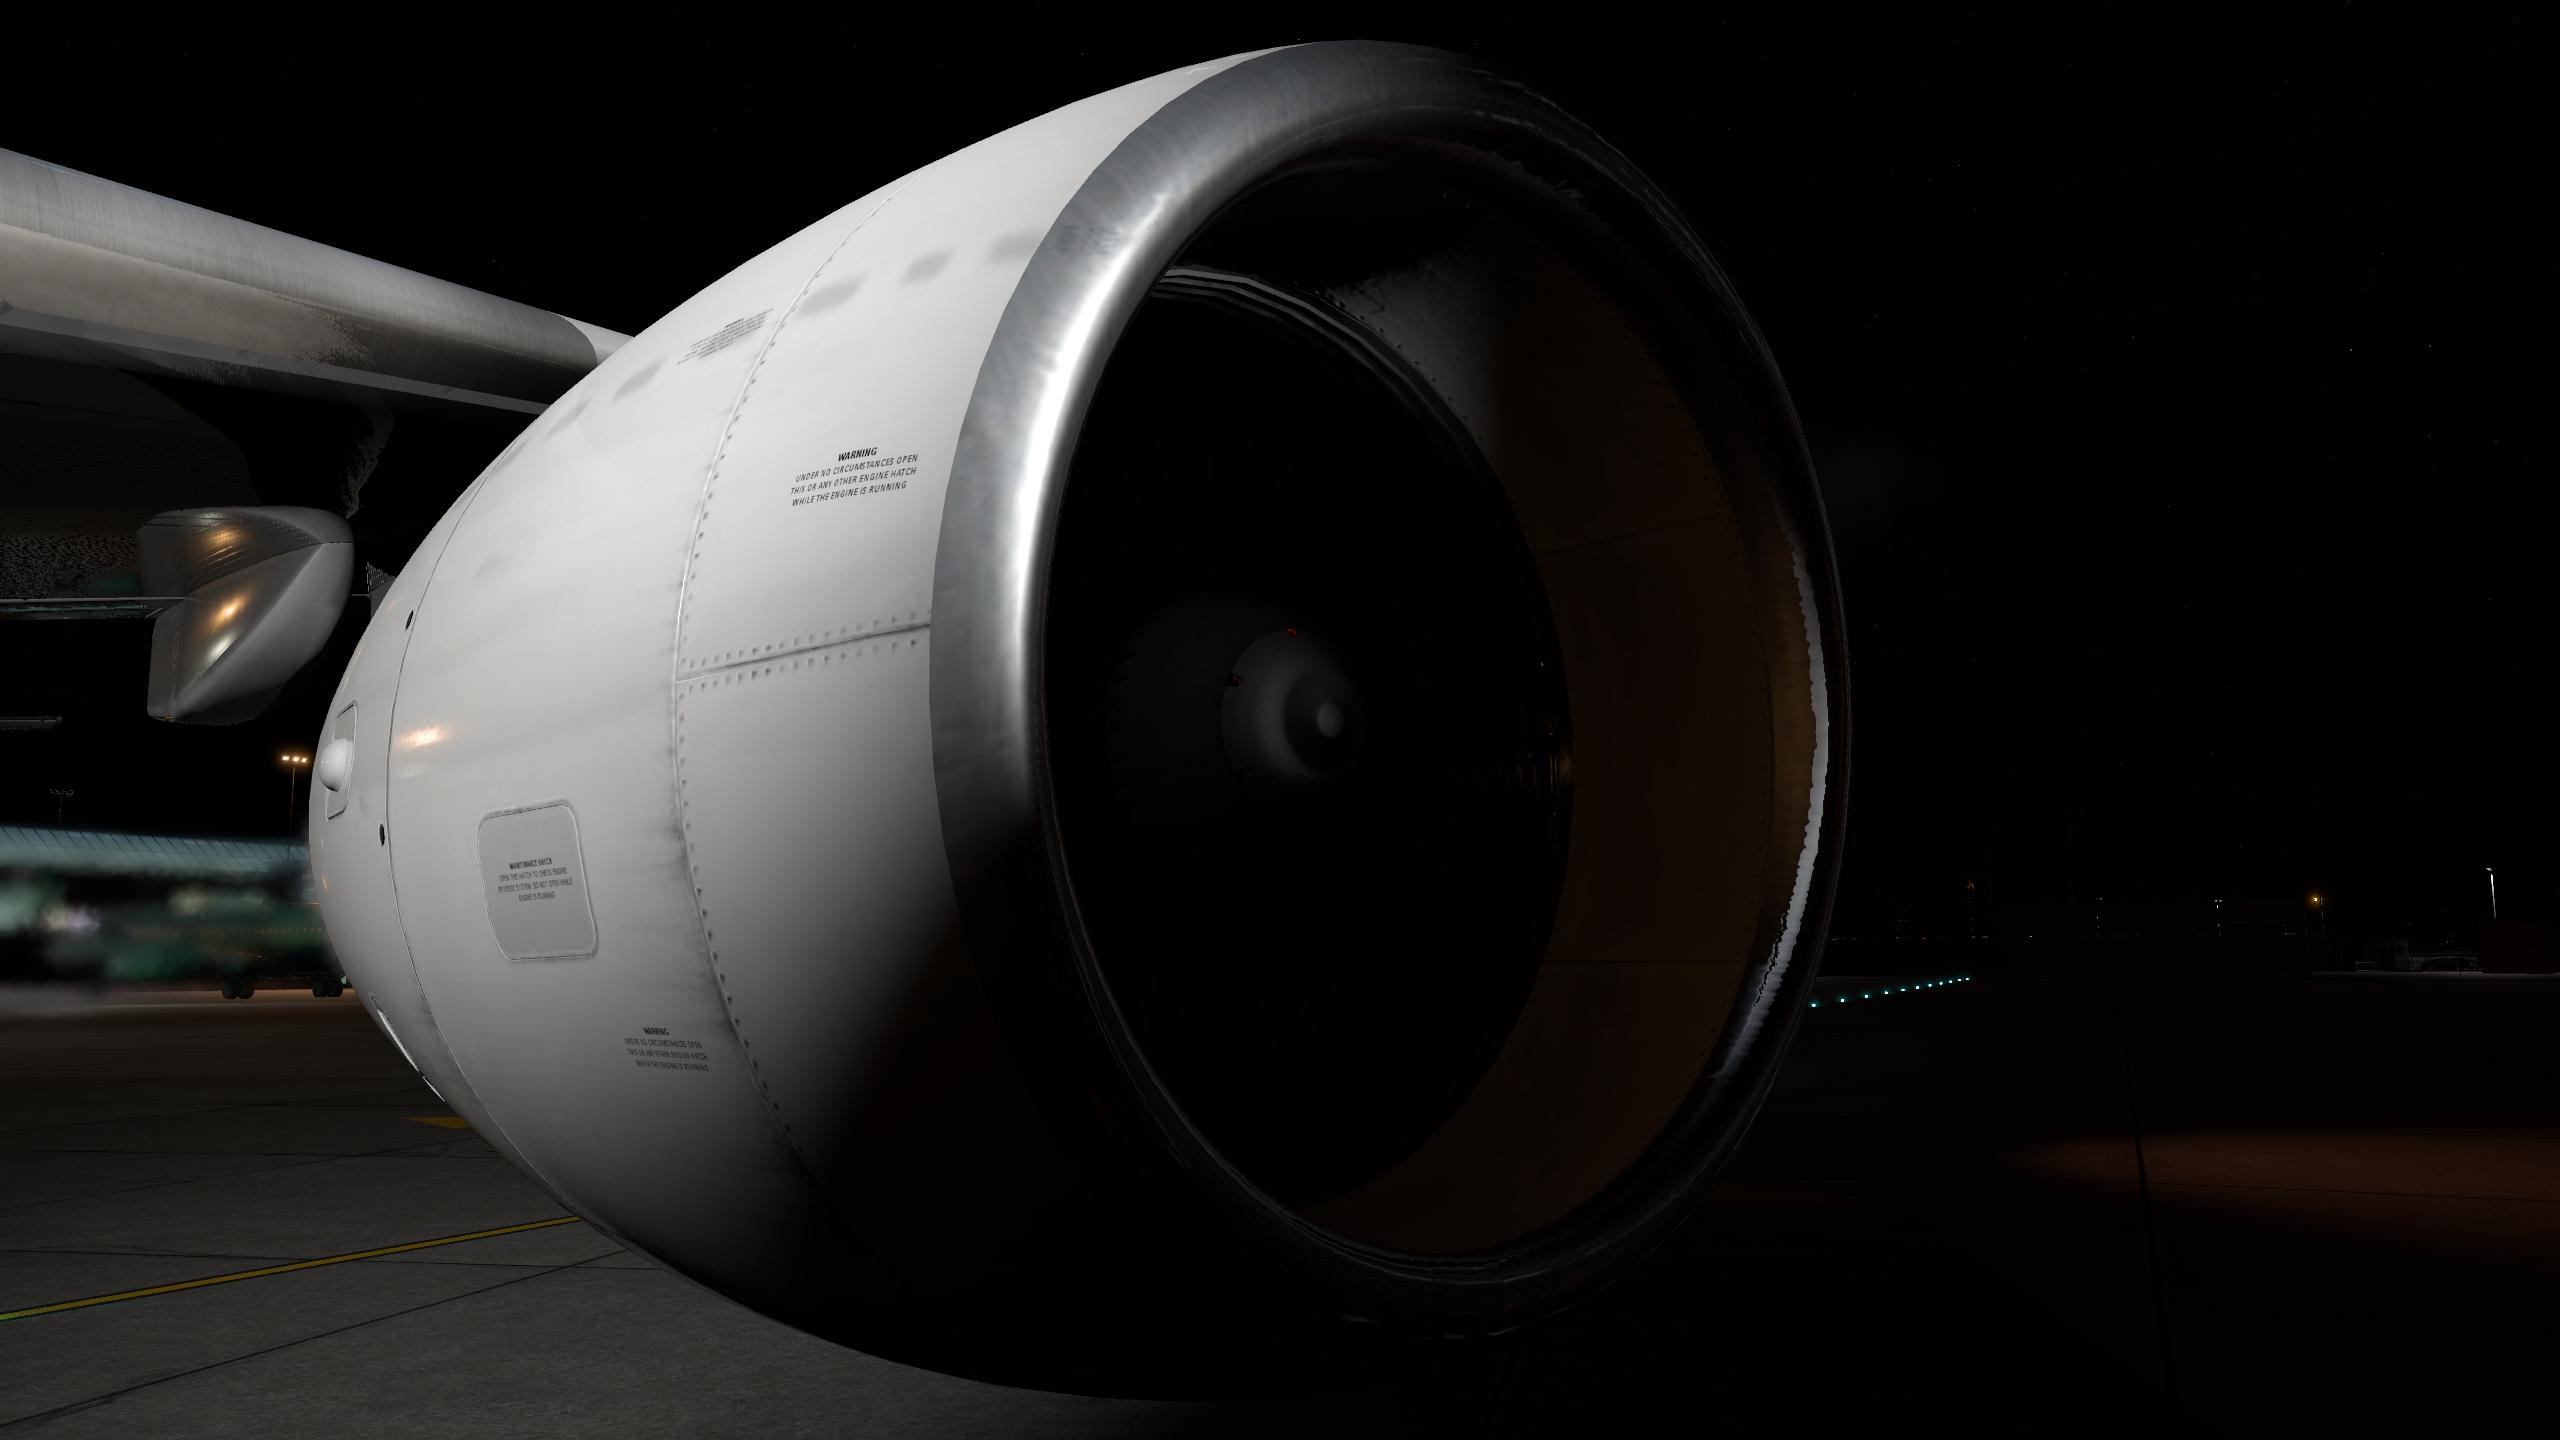
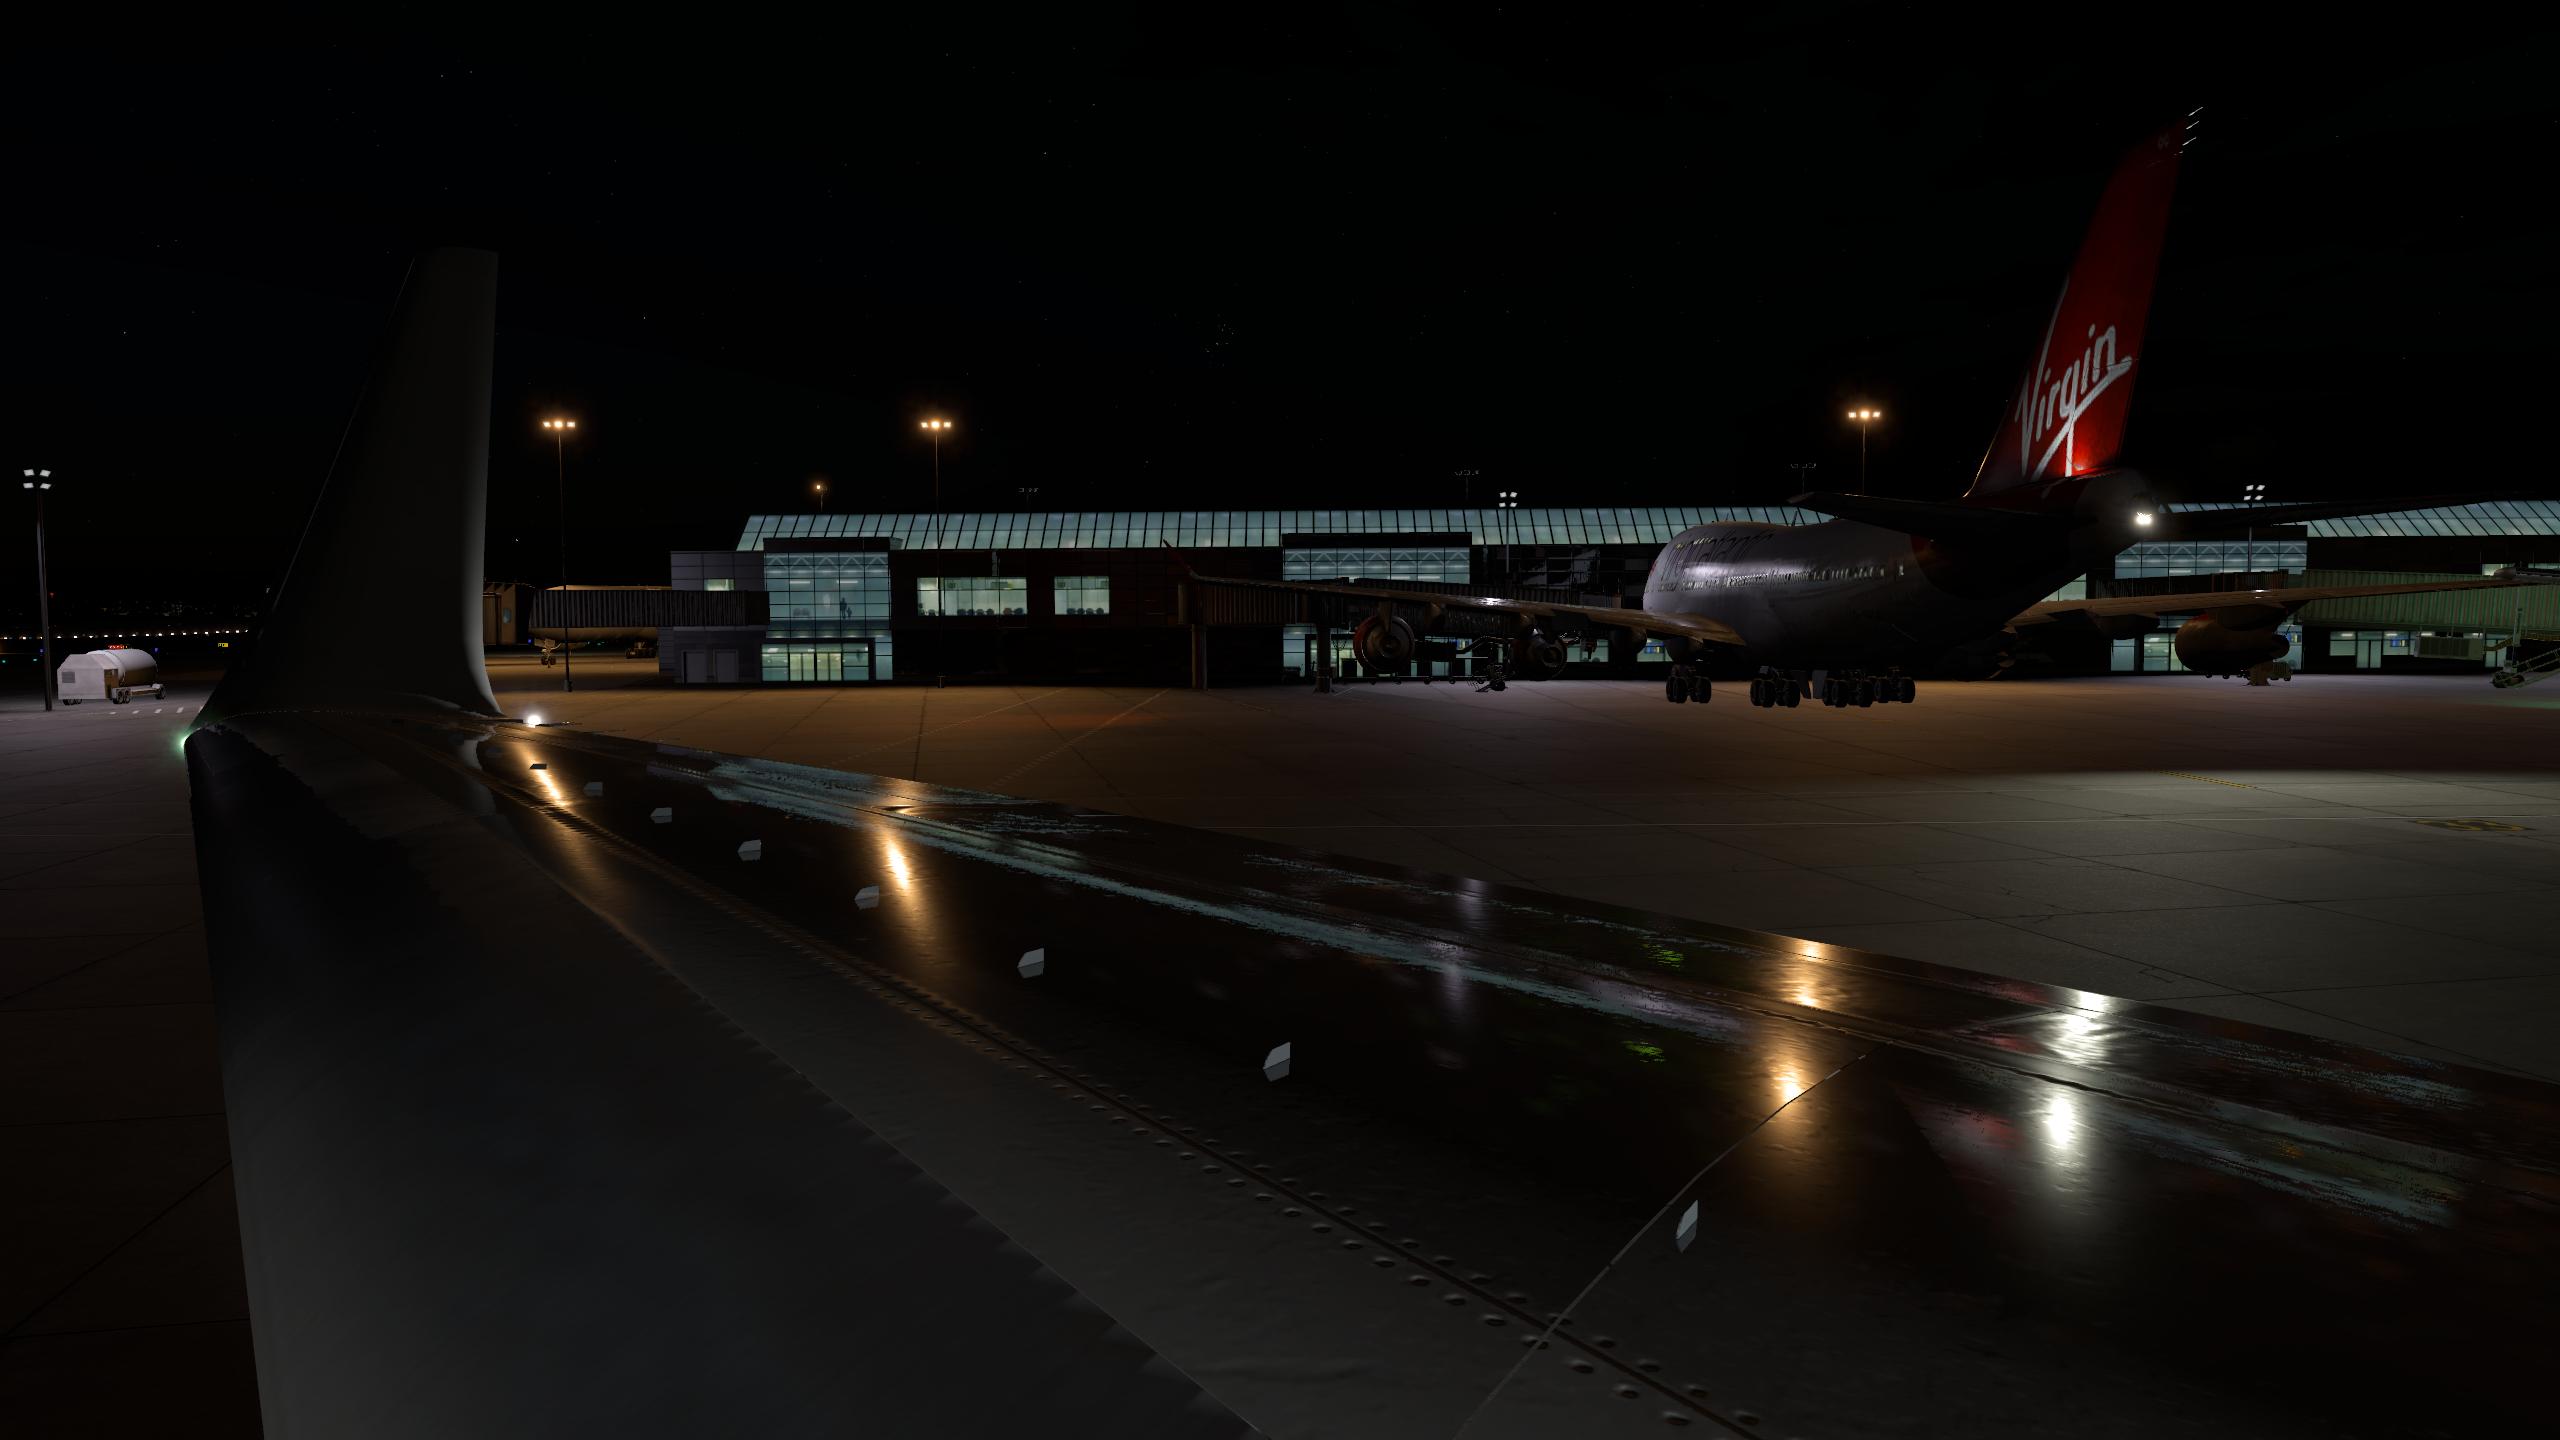
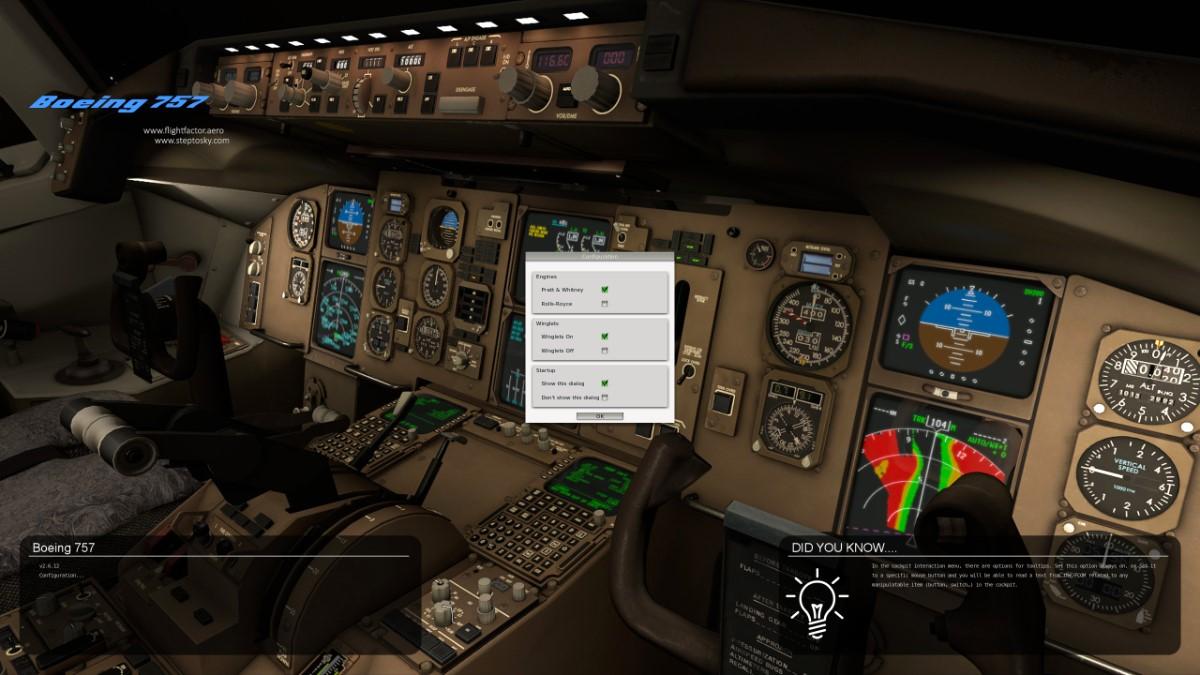
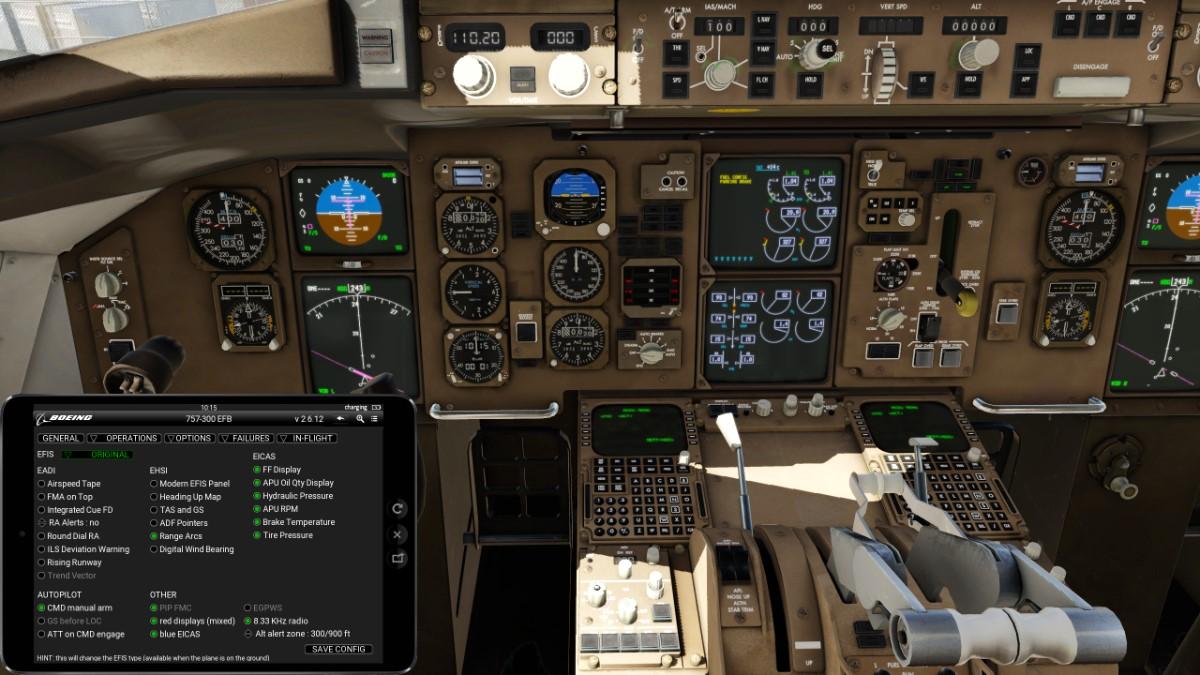
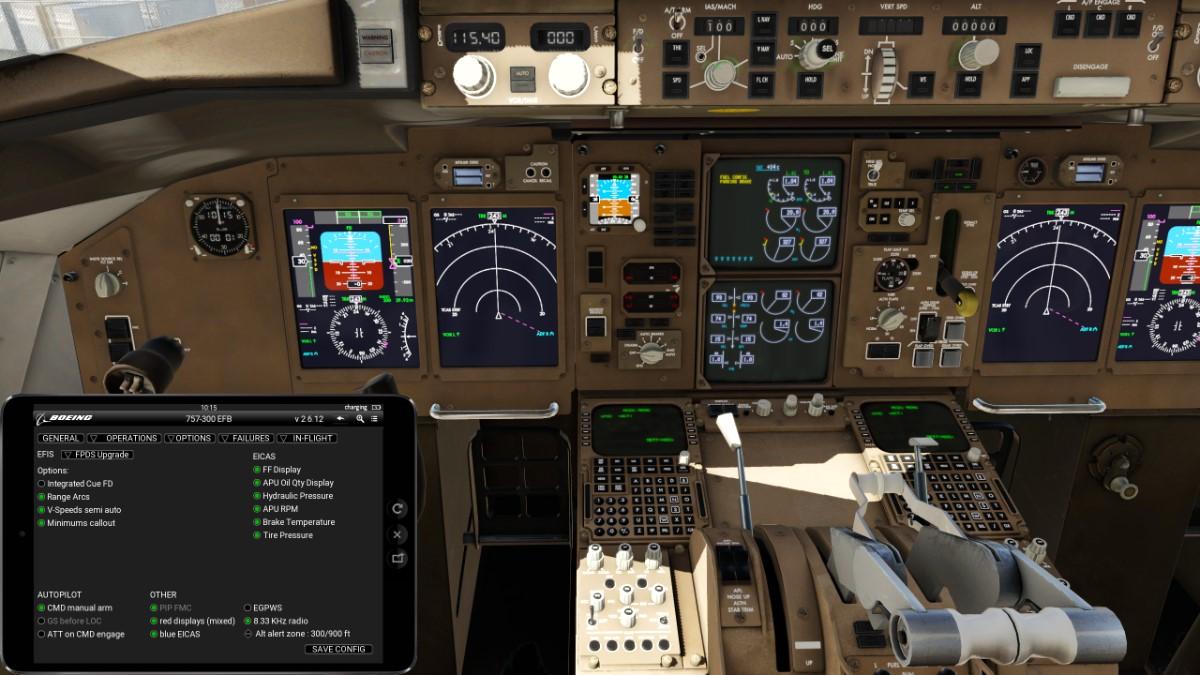
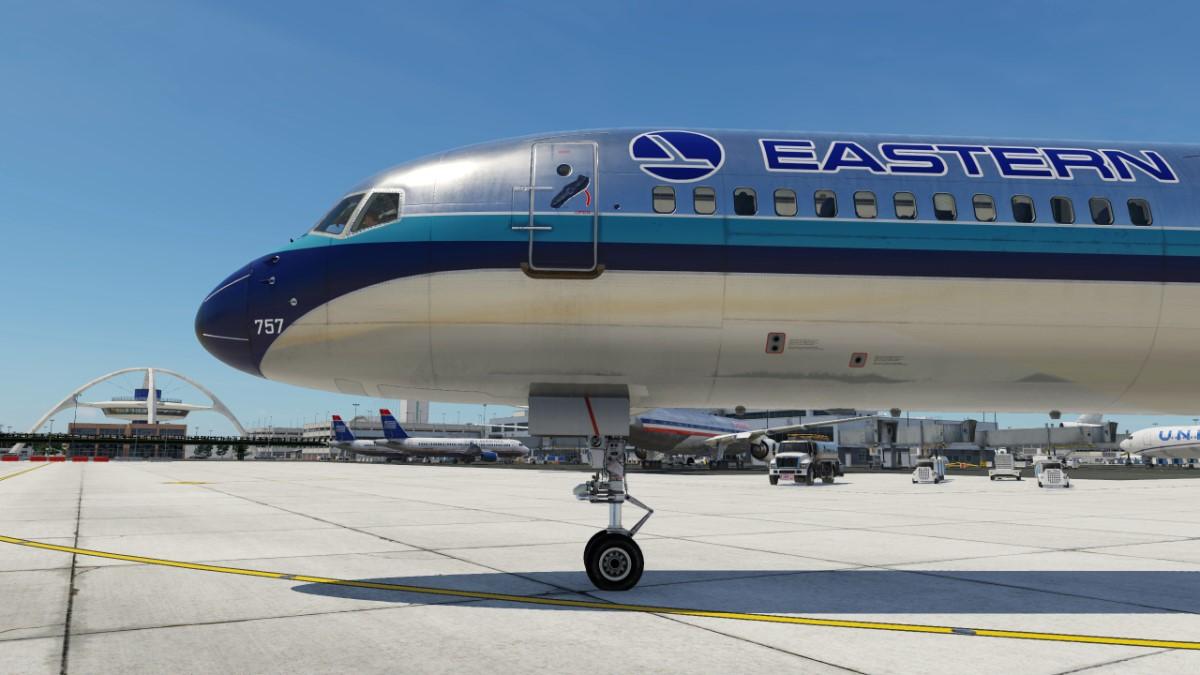
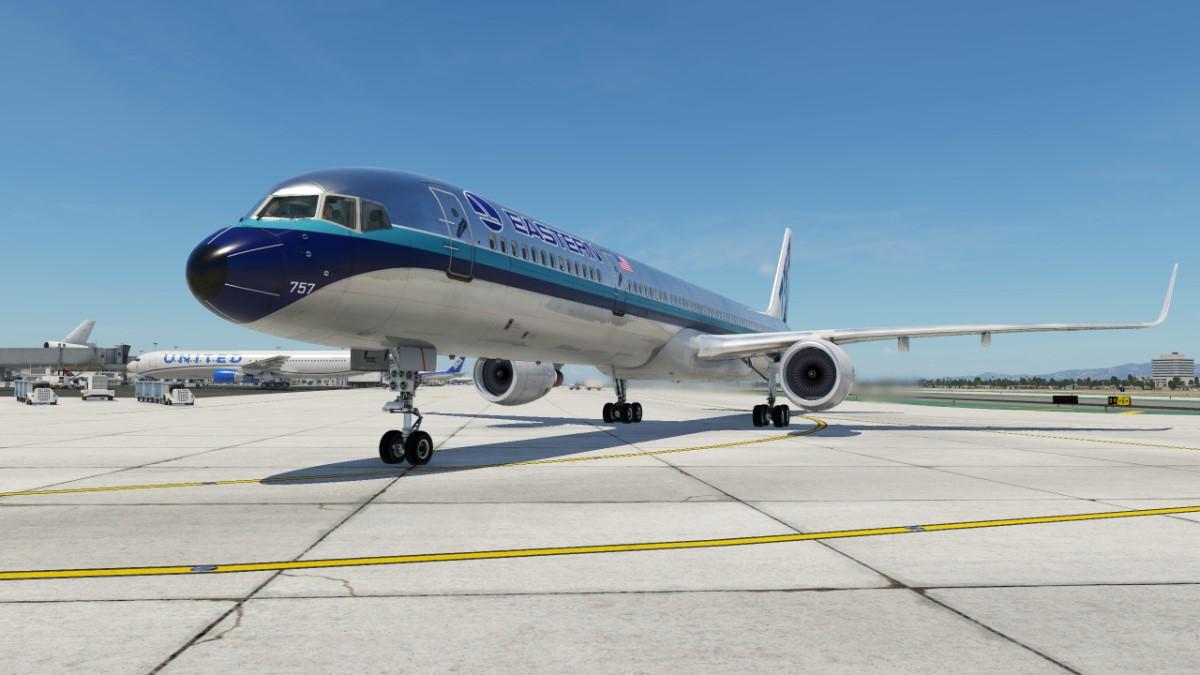
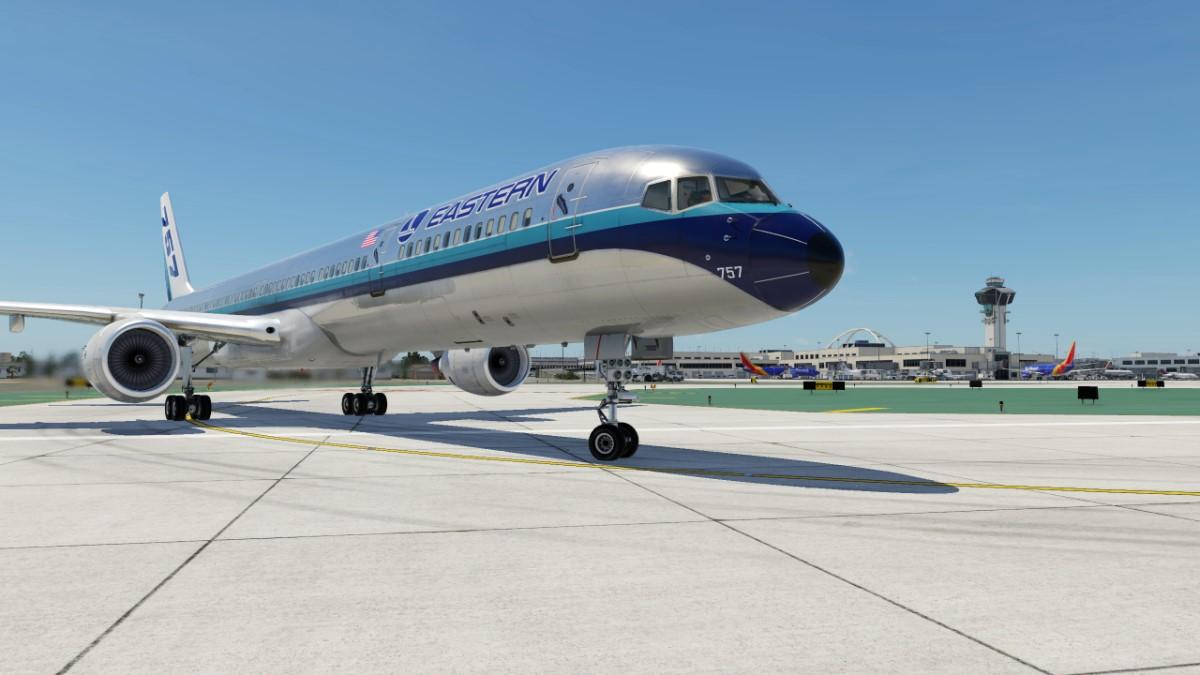
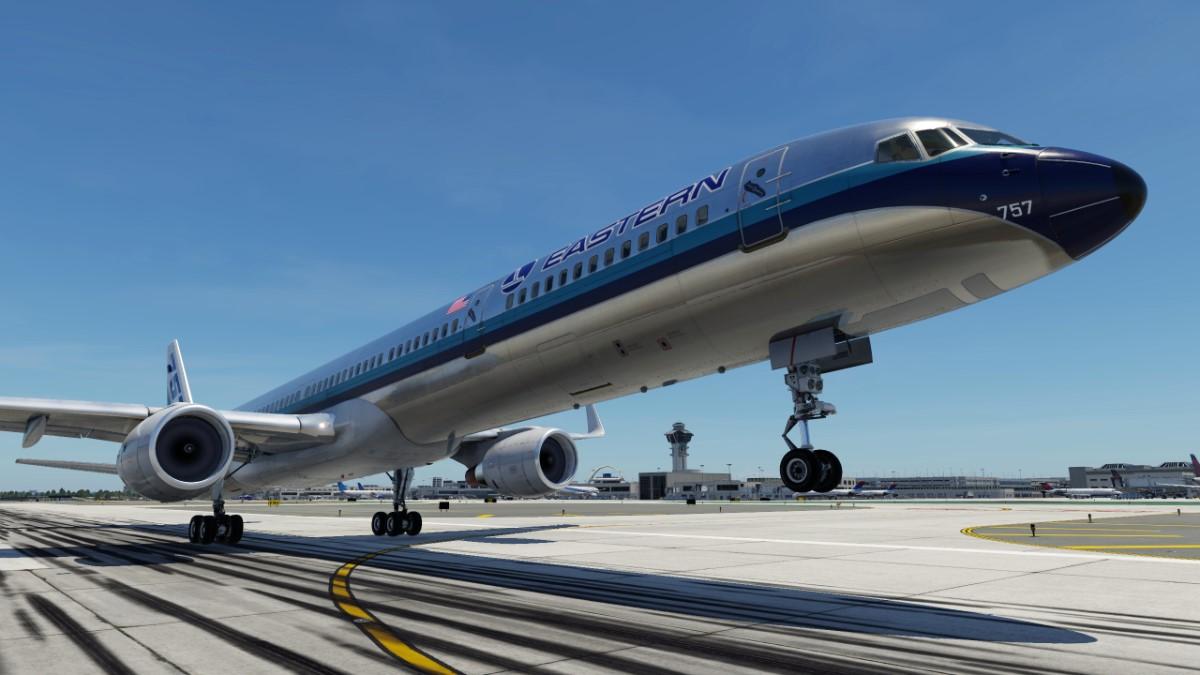
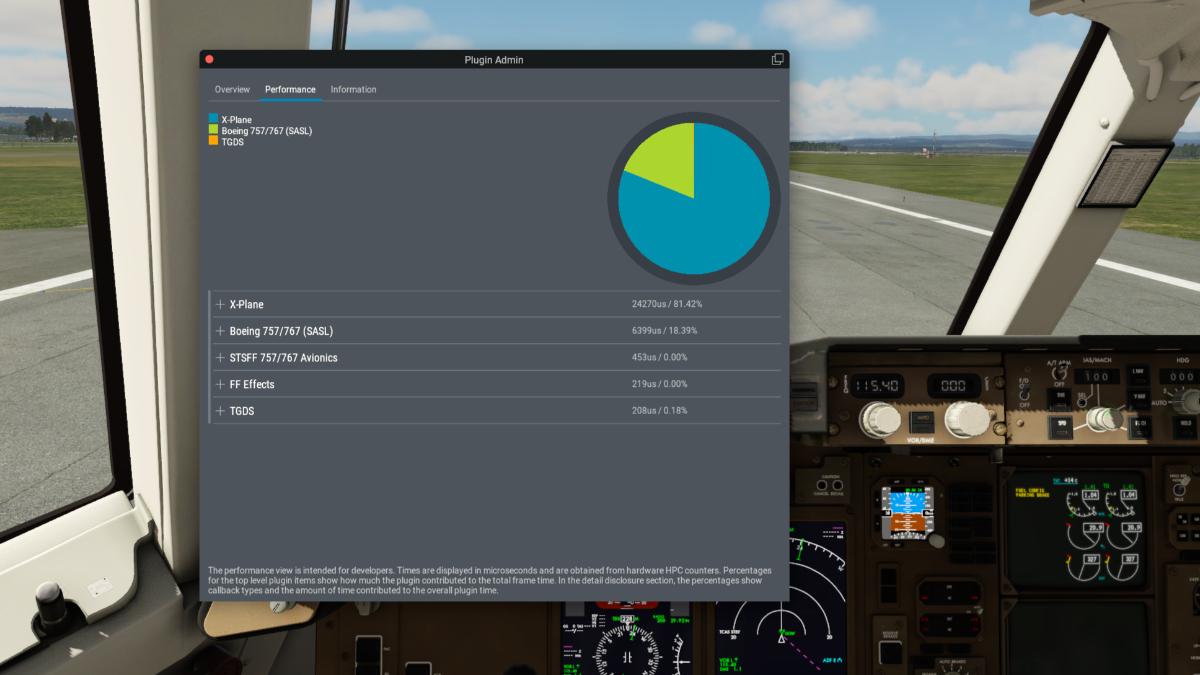
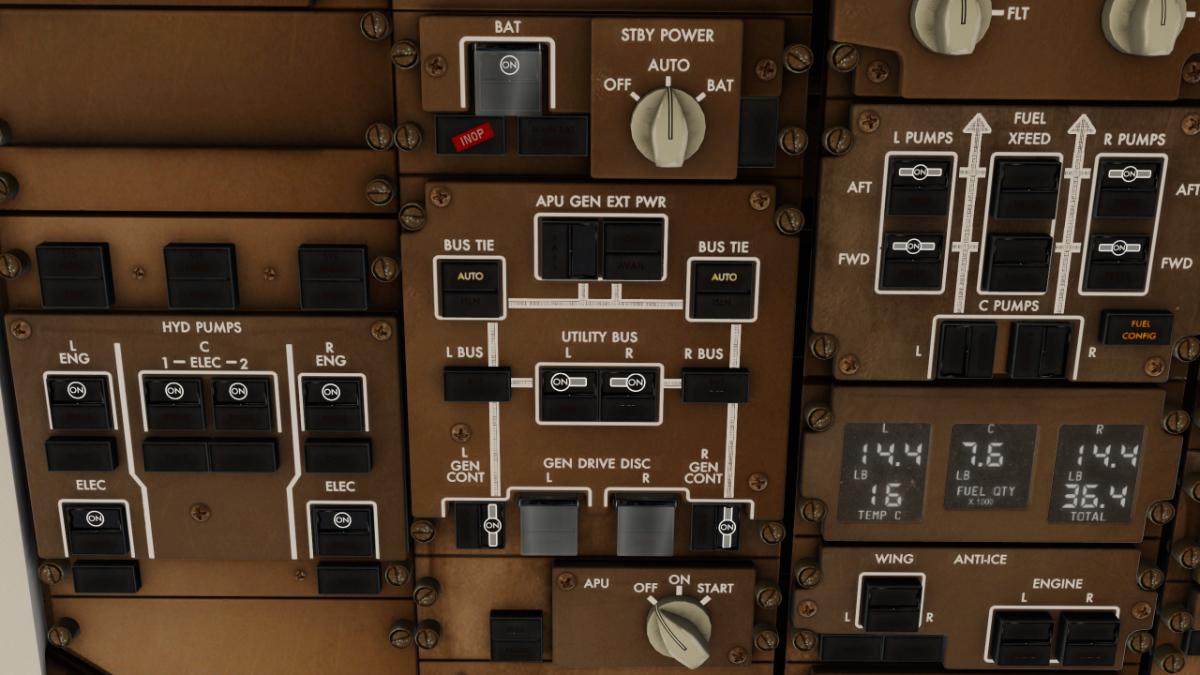
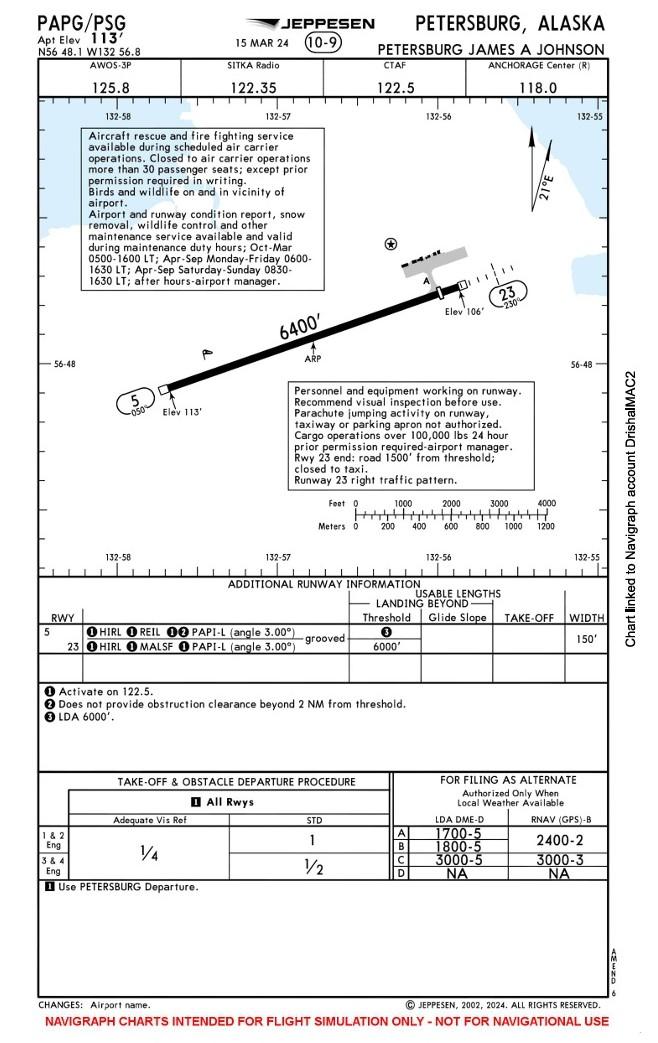
Aircraft Update Review: Boeing 757 Professional Global package v2.6.12 by FlightFactor/VMax By DrishalMAC2 Introduction The Boeing 757, a twin-engine marvel with a narrow body, represents an enduring legacy in commercial aviation. Launched in the early 1980s, this adaptable aircraft was the result of Boeing's dedication to addressing the industry's growing demands for a medium-haul mainstay. With its distinctive narrow fuselage and potent twin engines, the Boeing 757 rapidly gained a reputation for its efficiency and flexibility across a variety of routes. Engineered to span the divide between short and medium-haul flights, the Boeing 757 has become essential for airlines in search of a dependable, fuel-efficient solution for both domestic and transatlantic trips. Despite the arrival of newer models, the Boeing 757 continues to enchant aviation aficionados and professionals, representing a time when innovation met practicality in an iconic design. In this review, I revisit the FlightFactor 757, previously reviewed by Stephen way in X-Plane 10, this time within X-Plane 12. My goal is to offer a balanced examination of how this well-regarded model has adapted to the advancements and features of X-Plane 12. Join me as we explore the updated performance, features, and overall experience it delivers, assessing its fidelity to the real-world aircraft's legacy and its place in the virtual aviation world. Installation Installing the FF 757 is remarkably straightforward. Firstly, download the file from the X-Plane.org store, unzip it, and then place it in the X-Plane/Aircraft directory. When you load the aircraft for the first time, you'll be prompted to enter your licence key, which can be found in the “My Account” section of the X-Plane.org store. After you've reloaded the simulator, you can start enjoying your brand new 757! Updating the aircraft is just as easy; you have the option to download the update from the store and drag and drop the files into the aircraft folder, or alternatively, you can download and install X-Updater and use it to update the aircraft. Personally, I find X-Updater to be the preferred method as it's very quick and straightforward. Documentation The FlightFactor 757 Global package is accompanied by ten distinct PDF documents relating to the aircraft. These encompass a variety of resources such as the "752 Checklist v1.1 Double side," "752 Checklist v1.1 Full Page," the extensive "757 FCOM," "757 Remote CDU Manual," "757-300 performance," supplementary "FCOM FPDS," "FMS (All Variants)," and three versions of the manual including "Manual," "ManualFPDS," and "ManualVR." These documents are incredibly detailed and informative, with the "757 FCOM" document alone surpassing 1,000 pages in length! Indeed, you've read that correctly…a staggering 1,000 pages! About FlightFactor FlightFactor continues to offer regular updates and enhancements for their 757/767 and A320neo models. While the A350 remains supported, updates for it are issued less frequently. The 757 and 767 models are notably similar, both in terms of quality and flight experience (in real-world aviation, they share the same Type Rating). FlightFactor is also working on the eagerly awaited Boeing 777 V2, expected to be released later this year. This upcoming version is highly anticipated to establish a new benchmark for payware aircraft in X-Plane 12. Versions and Variants The X-Plane.org store offers several packages of the 757, each catering to different preferences and requirements: Boeing 757 Professional, which focuses on the 757-200 model. Boeing 757 Extended, encompassing the 757-200, 757-300, 757-SF Cargo, and 757-C32 variants. Boeing 757 Global Pack, a comprehensive collection that includes all variants alongside a modern avionics package. For the purposes of this review, we will concentrate on the Global Pack, as, in terms of quality, all variants are remarkably similar. Included with the Global Pack are a total of fifteen liveries, which includes a blank paint kit. These liveries are mostly specific to the passenger, freighter, or C32 versions of the aircraft, representing a generous selection that encompasses several of the primary 757 operators. It’s worth noting that upon loading the aircraft, a popup will emerge, offering options to configure aspects such as the aircraft’s engines and winglets. Updates Recent months have seen significant updates to the aircraft, enhancing both its performance and realism in X-Plane 12. Notable among these improvements is the refinement of spoilers and flaps drag in version 2.6.9, aimed at achieving greater accuracy and optimisation for X-Plane 12. Moreover, version 2.6.10 addressed the "slow flight controls" issue, a problem that emerged with the comprehensive X-Plane 12 overhaul introduced in update 2.6.6. FlightFactor has also been fine-tuning the engine performance and lighting, further optimising these elements for X-Plane 12. In addition, "Apple Silicon native support" was recently introduced, alongside fixes for multiple bugs, including the "default view and fuel issues in the -300 variant" and a "possible engine shutdown" bug. These updates underscore FlightFactor's commitment to the continuous improvement of this aircraft. Furthermore, with update 2.6.10, the dependency on "libGLU" was eliminated, streamlining the software's operation. This series of updates highlights the FlightFactor team's dedication and ongoing efforts to enhance and refine the aircraft. Current version at time of writing is 2.6.12, which adds/addresses the following: Added an ability to enable/disable LuaJIT from the tablet Added BUS ISOLATED eicas messages Fixed RAT door LIT texture issue Fixed cockpit windows de-ice feature (xp12) Fixed possible unexpected ILS freq/crs changing without your input Fixed CG calculation in the tablet (xp12) Fixed the RAT beacon color Fixed the stab in 200, RF and C-32 Small fixes for de-ice systems Small fixes for brake press indication Got rid of libGLU dependency in FF_Effects plugin Retuned fuel flow Exterior Modelling The exterior modelling of the 757 is nicely executed, with the aircraft being accurately depicted within X-Plane 12. While it may not boast the highest level of detail, it is certainly more than satisfactory, especially when taking into account the aircraft's size and the potential impact on performance. The landing gear and engines are exceptionally well-modelled, standing out as particularly high-quality elements. However, there are areas that could benefit from further refinement, such as the roof where the SATCOMs are situated, which appears to require a slight visual improvement. Exterior Texturing The exterior texturing of the aircraft is generally satisfactory, with most essential details captured, though some textures display a lower resolution, even when the “texture quality” setting in X-Plane is maximized. The engines, for instance, feature exceptionally sharp manufacturer logos, including those of Rolls-Royce and Pratt & Whitney. Similarly, warning labels and text maintain a high level of clarity. However, textures depicting panel edges, bolts, and signs of wear such as dirt and scratches are of markedly lower quality, detracting from the overall immersive experience. This inconsistency extends to the fuselage, where although text on the doors is crisp and clear, other elements like panel edges and bolts suffer from low resolution. While parts of the landing gear textures are well executed, others fall short of this standard. In conclusion, the exterior visuals are acceptable, especially considering that the majority of the time is spent in the cockpit, engaged in flight. In saying that, there is considerable room for improvement to enhance the visual fidelity and immersion of the model. Interior Modelling The cockpit's interior modelling is impressively executed, with every knob, switch, and lever accurately rendered to reflect the real Boeing 757 flight deck's high level of detail. The overhead panel, with its switches and buttons, looks particularly well modelled, as does the Flight Management Computer (FMC). The yoke, tiller, and throttle levers are also nicely modelled, though, when compared to actual photographs of the flight deck, the yoke appears somewhat smaller than its real-world counterpart. In the passenger variants, the seat modelling is nicely done, presenting a nice level of detail. However, the rest of the cabin does not maintain this standard; the galley is notably featureless, and the modelling of the overhead lights and seat buttons is lacking. Interestingly, the rear galley exhibits slightly more detail than the forward galley, which seems slightly strange. The C32 variant boasts a unique interior cabin that mirrors a Boeing Business Jet (BBJ), with the general modelling quality on par with the passenger variants. A feature which stands out is the command room, which is exquisitely detailed and offers a high degree of authenticity. As for the freighter variant, it features a simplified forward galley, but access to the cargo hold from the interior is not modelled. The cargo hold can only be viewed using the “free look” camera mode. Although the cargo hold's modelling is basic, it adequately represents such a space. Given the primary focus on the cockpit (which has evidently received the bulk of attention and effort) the lack of intricate detail in the cargo hold does not significantly detract from the overall experience. Interior Texturing Within the cockpit, the texturing, in my view, falls somewhat short, as the textures appear "flat" and lack the nuanced details of wear and tear one might expect. While the textures on switches and knobs are consistent and accurate, they do not convey a sense of the aircraft having been frequently used. Essentially, the cockpit looks almost brand new, apart from some slight weathering, which, for an aircraft that is getting on in years, seems like a missed opportunity in which to introduce some signs of wear, such as peeling paint. However, the colour accuracy, when compared to real-world images of the Boeing 757 flight deck, is pretty much spot on. On the positive side, the sharpness and legibility of text within the cockpit are outstanding features. The jump-seat texture is also notably sharp and detailed. Furthermore, the lighting on the overhead panel buttons is well executed, contributing to a more immersive experience. The inclusion of dirt and scratches on the displays adds a layer of realism, with the extent of wear adjustable via three settings in the Electronic Flight Bag (EFB), a feature we'll explore in greater detail later. The cabin textures in the passenger variant mirror some of the cockpit's limitations. The carpet's deep blue hue adds a touch of appeal, yet the side panels, overhead bins, and walls suffer from somewhat flat textures, occasionally appearing less detailed. The seat textures fare slightly better, offering more clarity, though this diminishes upon closer inspection. Given its price point, one might expect more refined interior textures, but considering the model's age and the pace of X-Plane’s development, some leniency may be warranted. Night Lighting The night lighting, both inside the cockpit and externally, is very nicely done. The colours and brightness levels are spot on, creating a highly immersive nocturnal flying experience. It's worth noting that I have a particular fondness for operating this aircraft at night, primarily due to the exceptional quality of the night lighting. Among the noteworthy features are the dynamic reflections on the windscreen, which vary according to the cockpit lighting's intensity. Similarly, the cabin lighting, which is entirely adjustable from the cockpit, enhances the overall ambiance. The cabin, in my opinion, appears significantly more appealing under the night lighting, contributing to the allure of nocturnal flights. Furthermore, the cabin lighting is visible from the exterior views, with its appearance altering in response to the cabin lights' brightness settings. The lighting system has received considerable refinement in recent updates, a fact that is clearly reflected in the outstanding quality of the night lighting. Flight Model The flight models across the 757 fleet are impressively realised, with variations that reflect the differences in engine types and the distinct characteristics between the 757-200 and the longer 757-300. The flight model captures a satisfyingly heavy feel, appropriate for an aircraft of its size, yet remains keenly responsive to pilot inputs. Despite the absence of a fly-by-wire (FBW) system for the primary flight controls: though FBW is employed for certain control surfaces like the spoilers, the connection between pilot and aircraft feels direct and intuitive, enhancing the flying experience. FlightFactor has excelled in simulating the ground physics of the 757, making taxiing a straightforward and responsive task, whether using the rudder or tiller for navigation. The 757's reputation for being overpowered is accurately depicted in the FlightFactor 757. Advancing the thrust levers, particularly with the Rolls Royce RB211 engines, results in remarkable acceleration, capturing the aircraft's real-world performance perfectly. A fully laden 757 demonstrates a realistically extended take-off roll, adhering to expectations. Recent updates have significantly refined the flight model, addressing previous issues related to bugs and sluggish response times. Efforts to update the simulation of flap and speedbrake drag have resulted in enhanced accuracy, bringing the virtual experience ever closer to the realities of flying the actual aircraft. Sounds The default sound package of the aircraft is generally acceptable. The simulation of switches and rotary knobs in the cockpit is notably well done, delivering satisfyingly crisp auditory feedback. However, this level of detail and depth doesn’t extend to all sound aspects, such as the air conditioning and Auxiliary Power Unit (APU) noises, which fall short in terms of depth and variation. A notable absence of bass contributes to these sounds feeling somewhat flat and lacking in interest. The engine sounds differentiate adequately between the Pratt and Whitney and Rolls Royce engines, although, like the air conditioning and APU, the interior engine sounds could benefit from a richer bass presence. Conversely, the exterior engine sounds are more robust, offering a substantial depth and a significant amount of bass, though they are quite loud in their default setting. Thankfully, sound levels can be adjusted within the Electronic Flight Bag (EFB), allowing for a more tailored auditory experience. The flyby sounds are also decent, aligning with the standard of default X-Plane aircraft sounds. Ambient noises, such as those of a bustling airport, can be heard in exterior views when the aircraft is in a cold and dark state. Personally, I find this addition slightly strange, detracting rather than enhancing the realism. Furthermore, the persistent interjections from the flight attendant regarding issues like cabin temperature, while aiming for realism, may not be universally appreciated. The option to disable this feature would be a beneficial addition for those who find it more intrusive than immersive. Moreover, the aircraft features an extensive selection of Passenger Announcement (PA) options, yet these PA sounds lack authenticity, bearing a resemblance to synthetic text-to-speech outputs rather than genuine in-flight announcements. Performance On my setup, the performance impact of operating the 757 is noticeably more pronounced than with any of the Toliss aircraft, which are renowned for their exceptional optimization. Specifically, I experience a reduction in frames per second (fps) by approximately 20% to 30% on average compared to the Toliss fleet and the default A330. Additionally, the 757 appears to demand more VRAM than the Toliss models and the default A330. An analysis using the plugin admin reveals that the 757's SASL plugin is a significant factor, accounting for nearly 20% of the performance load as depicted in the "performance pie chart." This indicates a clear need for an overhaul of the SASL's performance to enhance overall efficiency. Despite these performance challenges, I haven't experienced any stuttering issues, even when flying into more demanding airports like EGLL (London Heathrow) or KLAX (Los Angeles International). This suggests that while there is a tangible impact on performance, it may not critically affect users capable of running the default A330 at a reasonable fps. Nonetheless, improving the performance of the 757 remains an area in need of attention to ensure it aligns more closely with the high standards of efficiency seen in other aircraft within X-Plane. Systems The systems on the 757, while not as intricate as those found on Airbus aircraft, still present a level of complexity and accuracy expected from a Boeing model. The engine pages, Primary Flight Display (PFD), and Navigation Display (ND) are well-executed, displaying all the requisite information one would anticipate from such an aircraft. However, I would hesitate to categorize the systems as "Study Level," primarily due to the basic nature of the failure simulation. Some failures, for instance, either fail to activate or have no discernible impact on the aircraft's operation. A case in point is an attempted simulation of an Auxiliary Power Unit (APU) engine failure, where the APU merely switched off without triggering an auditory warning like the Master Caution. The sole indication of the failure was an "APU Fail" message on the Engine Indicating and Crew Alerting System (EICAS) display. Additionally, the Electrical Bus (BUS) system, although generally accurate, suffers from a frustrating bug. Occasionally, when the APU or Ground Power Unit (GPU) is disconnected, the BUS Ties unexpectedly switch to the "Isolate" position rather than remaining in "Auto." This deviation from expected behaviour has, on several occasions, led to the aircraft shutting down during pushback, despite the APU and its generator being operational and connected to the BUS. On a positive note, the terrain and weather radar systems perform commendably, offering accuracy and reliability that significantly aid navigation in challenging weather conditions or when flying in proximity to hazardous terrain. EFB (Electronic Flight Bag) The EFB featured in this aircraft boasts a comprehensive array of options and functionalities, accessible either through the X-Plane “Plugins” menu or by interacting with the tablet within the cockpit. Engaging the tablet brings up the EFB as a 2D window. The "General" page presents some basic settings, including a master volume slider, providing a straightforward interface for adjusting essential parameters. The “Operations – Ground” page facilitates interaction with various ground services and the management of the aircraft’s weight and balance. Although it lacks a dedicated Weight and Balance chart, the "Optimise CG" button proves invaluable for adjusting the centre of gravity according to different load configurations. Loading the aircraft requires precise coordination of ground services and the opening of specific doors, a process that, while occasionally cumbersome, enhances realism. On the “Operations – Aircraft” page, users can manage door controls, adjust certain settings, and select engines. It's important to note that engine swaps are not possible once the aircraft is operational. The "Options" page, along with its subpages, offers an extensive selection of adjustable settings, ranging from auditory cues to visual effects. This section also provides the opportunity to install the "Modern Avionics" pack, assuming ownership. Further details on this upgrade will be discussed later in the review. The “Failures page” allows for the simulation of various system failures, designed with user-friendliness in mind, reminiscent of an installation wizard. This feature enables pilots to prepare for and respond to potential issues in a controlled environment. Insert failures page Lastly, the "In-Flight" page includes functionalities for activating Passenger Announcements (PAs), accessing navigational charts, and utilising a checklist feature that simulates the presence of a first officer, enhancing the realism and immersion of the flight experience. Modern Avionics Upgrade The "Modern Avionics Upgrade" package integrates well, offering a nuanced enhancement for simmers seeking a bit of diversity. It brings new operational dynamics and functionalities, but also a learning curve and the need for adaptation. The package is particularly appealing for those looking to engage with contemporary flight scenarios or enhance their proficiency with advanced systems, acting as a bridge to more modern aviation technologies. However, its value truly lies in the simmer's readiness to explore the aircraft's systems more deeply and to increase the authenticity of their flights. The upgrade is a valuable tool for those willing to invest the effort to fully appreciate its benefits. Conclusion In summing up, FlightFactor’s model stands as a commendable and accurate portrayal of the Boeing 757 and its principal variants. The ability to operate flights ranging from commercial passenger services to cargo hauls and even transporting senior political officials adds a unique and engaging dimension to each flight, ensuring a fresh and challenging experience. Despite the need for enhancements in visual and auditory fidelity, the systems and flight model are robust, offering a high-quality simulation of the Boeing 757, that will satisfy aviation enthusiasts and serious simmers alike. FlightFactor's commitment to continuous improvement is evident in their regular updates, giving users confidence that existing bugs will be addressed in due course, following the precedent set by previous fixes. While a visual overhaul is on the wishlist, the existing framework provides a solid representation of this nimble passenger jet. Performance optimisation is another area for potential enhancement; however, the current state remains functional and does not detract significantly from the overall experience. The price point may seem steep, especially considering the aircraft's age within X-Plane’s marketplace, but it's important to remember that the “Global Pack” offers substantial value. This package includes four distinct aircraft variants along with the “Modern Avionics package,” making it a comprehensive choice for those looking to extensively explore the capabilities and variations of the Boeing 757. ________________________ Boeing 757 version 2 Professional Global Package by FlightFactor is now available from the X-Plane.Org Store here: Boeing 757 version 2 Professional Global Package Priced at $119.00 Features Supports both X-Plane 12 (fully updated) and X-Plane 11 The FPDS variant contains High resolution (768 x 1024 pixels) XGA multi-color LCD flat panel display with integrated standard six – FULL glass cockpit All digital electronics with improved accuracy, dependability and responsiveness DCP with Speed Reference Settings Minimum Selection (Radio or Baro) Units Selection Integrated Barometric Altimeter Setting Flight Path Vector Meters Altimeter The Boeing 757 Professional Extended includes 3 variants of the 757: 757-200 Passenger 757-200SF Cargo 757-300 Each plane is available with two different engine configurations (P&W and RR). Officially licensed by the Boeing © Corporation Accurate dimensions based on drawings supplied by Boeing © Support for X-Plane 11 and X-Plane 12 Suitable for beginners- Tutorial modes and auto procedures Great for advanced users - Complex systems are simulated Includes both Rolls-Royce and Pratt & Whitney engine types VR Compatible Flight model Accurate flight model, as close as it gets to real performance. Tested by real pilots. Dynamic and customizable center of gravity that depends on actual cargo, passenger placement and burning fuel in flight. Fully Functional Professional FMS and EFIS System Custom designed Flight Management Computer, integrated with other plane systems. Terminal procedures from updatable database. Two independent analogue instrument sets for captain and first officer. Two independently simulated EFIS (EADI/EHSI configuration) for captain and first officer. Dual-FMS with two independently working CDUs. Working instrument comparators. Triple IRS and triple symbol generator systems with realistic instrument source switching. Dual air-data computers with custom failure modes and source switching. Independent 2 nav and an ils receivers. Realistic inertial and radio position updating, you can see the individual inaccuracies of those systems. Triple-channel autopilot with realistic dependencies. Fail operational and fail passive autoland with mode degradations based on system failures. Load company routes generated by Professional Flight Planner X (or other compatible programs) directly into the FMC. FMC can be used on external touchscreen or tablet, optimized for the Retina iPad. Custom cockpit interaction system Adjustable modes for cockpit interaction, you chose what to use for clicks Different cockpit interaction modes, with mouse wheel and right button support In-cockpit tooltips from the manual - you click on the button and see portions of the manual on display In-cockpit life datarefs for cockpit building Options A very flexible architecture: You chose the set up Different options for many avionics instruments including two types of FMC. Options to composite your own EICAS, EADI and EHSI displays. Most of the options that the real 757 fleet has are included. Many additional options for sounds, cockpit interaction, effects etc. Interactive Checklists, Procedures, and auto-helper (Exclusive feature) Full electronic interactive checklists and procedures with automatic action detection. Automatic mode helper that performs all the actions for you. You just CHECK the items. A tutorial which shows the user what to do and when. An option to have a visual aid on what and when to do in procedures. Custom Systems and Failure model Detailed and deep simulation of almost every system in the real aircraft. Custom air and pressure system. Electrical system with all AC and DC busses modelled - see which system depends on which bus. Hydraulic system that uses a little fluid when treated correctly and a lot of fluid if used incorrectly. Multistage custom failure system - over 200 more failures than X-Plane. (Exclusive feature) Ability to fix failure by following proper procedure. Persistent failure and maintenance system - Aircraft wear and misuse will carry over to your next flight. Warning system and radars (Exclusive feature) Fully functional GPWS with all the modes the real plane has. Fully functional terrain radar, with custom database (just like the real plane), a look-ahead warning system and many other features. Weather radar that works like the real thing. Including tilt and gain functions, ground clutter, turbulence detection and windshear prediction. 3D Modeling Accurate dimensions based on exterior drawings provided by Boeing. Very detailed exterior modelling with high resolution textures. Very high resolution 3D cockpit with every switch functional. Spatial rain simulation with high detail. Very detailed passenger cabin graphics including galleys. Additional graphic features: real working oxygen masks both in cockpit and cabin, dynamic window blinds that react to sunlight etc. New and improved wingflex. Special effects (Exclusive features) Multilayer dynamic reflections on all glass objects. Glow effects on screens Reflective metal and plastic objects in the cockpit. Glossy exterior that reflects the outside. XP weather enhancements like custom windshear. Custom Sounds (Exclusive features) Two sound packs by BSS for both engines. Several hundred custom sounds. In-cockpit custom sounds. Switches with individual sounds. Many individual system sound inside and outside. Airport environment sounds. Cabin sounds. 3D stereo sound system for engines. In flight cabin announcements. Interactive communication with the cabin crew (reporting misconfigurations and passenger comfort problems). On Screen menus (Exclusive features) An iPad-like menu popping-up from the cockpit. Custom pages for loading/unloading fuel, cargo and passengers, customizing the CG, calling for pushback and performing maintenance. Ability to customize the plane with winglets, special effects level, wingflex level and set other options to be saved or default. Ground equipment and door pages. Failure monitoring menu. Extra objects and equipment Working push-back truck - Fully controllable with your joystick. Passenger bus and stairs or optional gate configuration (passengers can be loaded from gate instead of bus). Fuel truck, de-Icing truck, GPU, ground-start units both visible and fully functional with airplane systems. Other ground equipment. Liveries 7 default liveries included in the package: Air France, American, Boeing House, Jet2.com, Lufthansa, Thomson, VA X-Airways About 50 additional liveries are available separately. SmartCopilot Compatible Download the SmartCopilot files here Requirements X-Plane 12, X-Plane 11.50+ Windows 10+, Mac OS 10.15+ (Intel or Apple Silicon) or Linux 14.04 LTS or compatible, 64 bit mode Disk Space: 4 GB X-Plane 12: Minimum: CPU: Intel Core i3, i5, i7, or i9 CPU with 4 or more cores, or AMD Ryzen 3, 5, 7 or 9, or equivalent RAM: 16 GB Video Card: a Vulkan 1.3-capable video card from NVIDIA or AMD with at least 6 GB VRAM Recommended: CPU: Intel Core intel i5-12600K or Ryzen 5 3500 or better RAM: 32 GB Video Card: a DirectX 12-capable video card from NVIDIA or AMD with at least 8-12 GB VRAM (GeForce RTX 2070 or better, or similar from AMD) X-Plane 11: Minimum: CPU: Intel Core i3, i5, i7, or i9 CPU with at least 4 cores, or AMD equivalent RAM: 16 GB Video Card: a DirectX 11-capable video card from NVIDIA or AMD with at least 4 GB VRAM Recommended: CPU: Intel Core i5 8600k or Ryzen 5 3500 or better RAM: 32 GB Video Card: a DirectX 12-capable video card from NVIDIA or AMD with at least 8 GB VRAM (GeForce GTX 1070 or better, or similar from AMD) Review System Specifications Windows 10, Intel i5-12400F, 32GB RAM, RTX 3070Ti ________________________ Aircraft Update Review by DrishalMAC2 31st March 2024 Copyright©2024: X-Plane Reviews (Disclaimer. All images and text in this review are the work and property of X-PlaneReviews, no sharing or copying of the content is allowed without consent from the author as per copyright conditions).
2 points -
Military Aircraft Review : North American T-6G Texan by Khamsin Studios & Philip Ubben The extent of the full impression of the effects of the North American T-6G Texan are hidden behind the diversity of the models and the different variations of the original aircraft. Not only for the American Air Force and Naval services "SNJ". But the British Commonwealth versions under the "Harvard" moniker, and localised variations of the Australian CAC Wirraway and Canada's Noorduyn, and it was even developed later into the North American P-64, altogether there has been 15,495 aircraft built, and it had an operational life of 60 Years (1935 to 1995). No small feat for a trainer aircraft. Modified as the NA-26, it was submitted as an entry for a USAAC "Basic Combat Trainer " aircraft competition in March 1937. The T-6 was based on the NA-18, but with a foot longer wingspan, it was the first of the NA-16 series with retractable gear. It was similar to the BT-9, but with a larger engine, the 550 hp (410 kW) Pratt & Whitney R-1340 Wasp, and could accommodate two .30 in (7.62 mm) guns. Khamsin Studios is already known for classic WW2 aircraft, like his last release of the Mustang P-51, But lately he has mostly been working alongside of Philip Ubben, and in the releases of Helicopters like the SA 315B Lama, and now again here in unison with this X-Plane 12 release of the legendary T-6G Texan. The T-6 Texan is a two-seater, dual-controlled, single-engine trainer. Solo flight is permitted only from the front cockpit because of restricted visibility from the rear seat and inadequate controls in the rear cockpit. On training flights, the student uses the front cockpit while the instructor occupies the rear, except for instrument training when the student occupies the rear seat. The aircraft incorporates a steerable tail wheel, but not a free castoring rear wheel. Khamsin is a long time developer for the X-Plane Simulator, so design quality is actually expected, and he does deliver it in spades. Notable is that when X-Plane 12 is the only priority (there will be no X-Plane 11 version). You can use these advanced uprated effects and the lighting to deliver a better all round visual impact. All pure X-Plane 12 aircraft have this quality sheen, but still the talent of the developer is required to make it work in creating this extreme realism that X-Plane 12 can deliver. Here is it excellent, you feel the construction of the aircraft, and the rivets and paneling that goes into the creating the best overall effect. Notable is the excellent reproduction of the R-1340 Wasp, and the huge maul of the front of the aircraft to accommodate it Central hub and propeller (Two bladed, constant-speed Hamilton Standard) are intricately modeled here, as are all the air-cooled nine circular cylinders of the Wasp engine. In payware aircraft you expect this sort of high quality detail, almost is regarded as a benchmark to the current state of the Simulator. But still you marvel on how really good it all is, how far the developer has come in being able to deliver a quality of this high standard for you to enjoy and use. It is all brilliantly conceived and delivered in detail and authenticity here, you can spend ages just admiring it all. Note the excellent hydraulic lines in the gear bay, lovely deep cross-treaded tyres add to the realism, as does the simple strut arrangement of the main gear. Glass in the canopy frame is excellent, better is if you look for the mottled effect in certain lighting conditions, shows again the highlighted realism of the glass. Looking inside and the detail is certainly the pre-war period, but it is still quite comprehensive for a basic trainer aircraft. Notable is the fact that the T-6 Texan was created to replicate heavier service aircraft, to get the same feel and handling as the front line machines, not for just a trainee rookie pilot in taking their first steps in flight. The T-6 is far more up the grade than that, even in other roles as a combat aircraft itself, if only in a lightweight role. As noted the student goes up in the front, the instructor in the rear. But the differences between the two positions are not that much different, bar the aircraft's systems and radios. You feel and see more of the aircraft's frame in the rear, but otherwise they are not that much dissimilar. You sit on your parachute in the metal tub, stick and rudder pedals are all very heavy duty, but it's a very realistic cockpit to be in.... First view looks complicated, but the instruments and controls are all really very standard in their placement and use, so you will soon adjust to the layout. Fuel cock, Landing gear, Trims and Throttle/Mixture/RPM are on the left, right side are the Electrical switches, lighting and fuses (non-active, all DC circuits). Forward the instrument panel is a mixture of instruments, but you can sort of mentally place them, in flying instruments centre left, and engine readouts centre right, with a compass headup front. With the exception of the hydraulic pressure gauge, which is installed only in the front cockpit. A suction gauge is also provided in each cockpit. The gyro horizon, directional gyro, and turn-and-bank indicator are all operated by the engine-driven vacuum system. The airspeed indicator is operated by the pitot and static systems, and the altimeter, and rate-of-climb indicator are operated by the static system. Top level includes (LtoR); Nav 1 Pointer, Airspeed (MPH), Adjustable Compass, Artificial Horizon/ Bank Rate, Manifold Pressure. Second row; Back up Compass, Heading, Altitude, Rate of Turn, V/S Vertical Speed, Engine RPM, Carb Temp. Third Row; Ignition Switch, Suction, Pointer, Accelerometer G, Clock, Oil Temperature and Pressure, Fuel Quantity , Cylinder Head Temperature and (Outside) Air Temperature ... .... far right is the Ampere, and far left lower is the Hydraulic Pressure Gauge. Primer knob is centre right with external lights lower, right lower is the COMM1 and NAV1 radio, with a Transponder set below. Rear seat instrument layout is almost identical, except for radios and transponder. Menu Immediately right of the forward pilot is a "Data Case"... inside is the Tablet/Menu, that when activated (hotspot) is positioned upper left of the pilot. It has five tabs; AviTab, Ground operations, Other options, Sounds and About. Five buttons on the right side of the bezel covers; Power, (not working), AVI (Not Working), XPL (close tablet), Brightness (brighter, darker and again not working). AviTab we will look at in a minute.... Ground operations is the default screen... here you can change the T-6G aircraft options, including a Prop "Spinner". "Early or Late" Canopy VHF and ADF aerials SNJ hook... activation knob is right side pilot seat Gear doors and Wheel covers Bottom left is the adjustable Left or Right Wing "Fuel" Weight in Kgs or Lbs Other options Here there are six options.... first one is to "Show (rear) Copilot". Both pilot heads are animated, and are very realistic, and in flight the actions are different to ground... but both pilots are the same character. Second and third options are the Canopy and Instrument reflections (on/off). Fourth option is an "Autostart" to start the aircraft automatically, this also adds in the "Speech" Option, that will talk you through the engine startup procedure... last Option is to have the "Fuel Switcher" ON or in auto mode. Sounds & About Both pages are first the standard X-Plane "Sound" levels, and the the "About" information of the different areas of work by each developer in Khamsin and Ubben... the aircraft version number is shown here as well. The AviTab Tablet as we have shown is also available (plugin required), it is the standard AviTab layout and tools, but you can rotate a chart from Portrait to Landscape... quality is not very good at chart distance. Liveries Eleven Liveries provided by Khamsin, and all are quite exceptional for authenticity. TA-127 is the default, but included are Big Red, G-TSIX, Lagarto, Popeye, Marines, RCAF, Spanish Lady and the famous Harvard (RAF) "Wacky Rabbit". Plus there is a "Bare Metal" aircraft. Flying the T-6G Starting up a Warbird is never easy, the sequence here is still a procedure to be religiously followed, but tricky if not done correctly. Officially you first select a fuel tank containing some fuel with the fuel tank selector. Then use the hand fuel pump to build up some fuel pressure (the pressure gauge should read more than 1 psi for the primer to work). Push the mixture lever to fully forward. Use the primer to pump at least 1 stroke. (Because over-priming isn't simulated in this first release you could pump some more strokes before hitting the starter and the engine might not need any further priming after startup. Now continue to use the primer it always seems to die until the rpm does stabilises around 700rpm. (You can either wait until the rpm does drop significantly before each new primer stroke or just pump a few fast strokes until the rpm won't drop anymore.). Tricky is the use of the primer... First you have to "Unlock" it? this is done via a hotspot arrow, hidden in the top section of the pump handle, then you can unlock and pump or prime the engine. Don't forget to relock the pump when the engine is running. Highly notable is that the engine start switch is a pedal set between the rudder pedals! If you don't want the palaver of awakening a grumpy old engine into life, then you have the "Autostart" Option on the menu, which is very good with it's vocal patter over the start operation... Highly realistic are cylinder (firing!) startup sounds as you feel the inconsistent firing, then the cycle of igniting the fuel, which is then produced as an effect out of the exhaust... it is really all well done and realistic. The prop settles down to a very authentic clatter in idle... sounds are very, very authentic as noted... A small note in using the "Auto" startup feature, is that make sure your throttle is set upwards, beyond the idle point, if not when the "auto" sequence finishes, then the engine will just "conk" out and stop again, not too much, to give it too much power, but enough to fuel the engine until it warms up. The mixture range (lean-rich) is extremely small, have the mixture set too high and the T-6G will taxi very fast, too low and it just shuts the engine down... but there is fine mixture window between the two settings, were you can get a controllable taxi speed... it is worth finding. So the taxi is nice if can find your comfort zone, but tricky in that the turn circle is one of the widest I have found in a long time, you can help it along of course with a few pumps of the left or right toe-brake, but in reality it is a wide turning circle. You can of course push the stick forward to unlock the tail-wheel, pull the stick back again to lock it. It sorta works, but I found that tapping the toe-brakes in the direction you want to turn was a better way of pulling off the tighter turn circle. Adjust the mixture for more power, and your ready to go... The Pratt & Whitney R-1340 is the larger (louder) engine here, and it sounds glorious with the power on, tricky though is the extremely light tail, once it lifts the aircraft will shimmy badly, and it needs a lot of skill to control, it feels too light to me... so is it the X-Plane dynamics or just developer tuning... of course tail-draggers a tricky to fly (takeoff), but the T-6G seems too unrealistic at this point? Once clear and you enjoy the highly realistic gear stowage, first one strut moves, then it stops to allow the other strut to retract, then finishes the operation.... very good. Once airborne, you feel the weight of the Texan, but also the restricted power to climb? Rate of climb is noted at 1,200 ft/min (6.1 m/s), but you never get even close to that climb rate? Push the Wasp or put it on a high throttle for more power and the engine gives in spectacularly! So you have to keep the RPM well out of the red zone, around 20 (lower green band) to stop it exploding, so this highly restricts your climb rate. Performance is a Maximum speed: 208 mph (335 km/h, 181 kn) at 5000 ft (1,500 m), a Cruise speed of 145 mph (233 km/h, 126 kn) and a Range: 730 mi (1,170 km, 630 nmi). The Service ceiling is24,200 ft (7,400 m). Important is getting your Trims right. The Rudder Trim is the most important, then sorting it out to the right level with the Elevator Trim. Get both right and the T-6G will find the correct balance to fly manually. Important to get correct as there are no artificial helper's here, with no Autopilot installed, the Texan is a pure manual flying machine... would I like an autopilot? that aspect is debatable, but I like authenticity over modern features. Once sorted the T-6G is excellent in the air, a bit heavy (ponderous?) but extremely nice to fly and to manoeuvre with great sounds coming at you from the nose... The view from the Instructors station is excellent, but missing is the forward (animated) student pilot, having the choice to have the forward pilot visible (like with the Aermacchi M-346) would be a nice feature here. Lighting Cockpit internal lighting quite is basic, there are two fluorescent lights in the instrument panel and lights on each side panel. The T-6G does have a load more lighting features, including a full panel for "Recognition Lights" but none are operable or not done yet. That said, it looks very good internally and externally in the cockpit. External lighting is basic as well... there are two inset wing landing lights, navigation lights and that is about it, there is "Strobe" switch, but it doesn't work... so again in areas it feels there is still work to be done on the lighting overall. What is here however is very good Time to land... so I reduce the speed. Flaps are noted in 0 - 10 - 20 - 30 - 40 - 50 steps, but the reality is they are only three degree phases, 0 - 22 (ish) - 50 (full)... 125 MPH is the limit, but a full Flap will give you a level flying speed of around 100 MPH. I found the Texan very stable in the approach phase, quite easy to focus on the runway and keep a straight line in that same focus. Down goes the gear and the speed is reduced to 90 knts, notable is the drag effect on the gear when deployed, so you have to throttle up a little to account for that extra drag... I loved this approach phase, I was very, very deep into the aircraft and flying it as smoothly as I could. As I reached the threshold, I lifted (flared) the nose to rub off the speed, I didn't want to do a three-pointer, but still wanted the tail as low as it could be possible. A touch, then another... and I am down. Again the yaw was tricky until the speed had reduced and the tail was happily down, it takes a little practise to get it right with the rudder and toe-brakes, but its a foible to learn with these sort of low rear aircraft. Your thought go out to those naval boys, landing this aircraft on a shifting carrier deck, you can practise that of course in X-Plane, but I guarantee it was be a very tough challenge to get it right... Overall this was an excellent machine. _____________ Summary Khamsin Studio's is already known for classic WW2 aircraft, like his last release of the Mustang P-51, But he has mostly lately been working alongside of Philip Ubben, and in the releases of Helicopters like the SA 315B Lama, and now again here in unison with this X-Plane 12 release of the T-6G Texan. Modified as the NA-26, it was submitted as an entry for a USAAC "Basic Combat Trainer " aircraft competition in March 1937. The T-6 was based on the NA-18, but with a foot longer wingspan, it was the first of the NA-16 series with retractable gear. It was similar to the BT-9, but with a larger engine, the 550 hp (410 kW) Pratt & Whitney R-1340 Wasp, and could accommodate two .30 in (7.62 mm) guns. This is another exquisite design from Khamsin Studio, X-Plane 12 delivers very high quality aircraft, and this T-6G Texan is no exception, it is beautifully created and detailed, with a perfect soundscape and sound panel. Features are basic, with "Early" or "Late" canopies, Prop Spinner, VHF and ADF aerials, Gear doors and Wheel covers and SNJ tailhook (naval), excellent animated pilots are also included but only the rear can be hidden, front pilot would be nice visible if flying from the rear Instructor position. Popup menu also includes automated start procedure with vocal instructions, and the built in AviTab, but there is no autopilot or any helpers here. Everything is very, very authentic to this extensive service (60 Years) trainer aircraft and a few went into service (combat) as well, so you get that very genuine article feel and use of this very unique aircraft. It is certainly a huge credit to the skills of the developer of what they have delivered here, but totally authentic as well. Khamsin and Ubben have a very high record and a high regard in what they deliver in aircraft for the X-Plane 12 simulator, this T-6G Texan is no exception. But again you feel and use the step forward in quality and effects that dedicated X-Plane 12 designed aircraft deliver, it is quite extraordinary in what is now achieved in Simulation... This T-6G Texan is another banner aircraft to show off those highlights... Highly Recommended. ________________ The North American T-6G Texan XP12 by Khamsin Studio and Philip Ubben is now available from the X-Plane.OrgStore!... Here: North American T-6G Texan XP12 Price is US$32.95 Requirements X-Plane 12 (not for XP11) Windows , MAC or Linux 8GB + VRAM Recommended Download Size: 460 MB Current version: 1.1 (March 25th 2024) Aircraft download is 456Mb, and unpacked, then installed in your X-Plane Aircraft folder 636Mb. No authorization on startup is required. Documents manual_t6g_khamsin_XP12 quick_start_t6g_khamsin The provided manual (31 Pages) is excellent in being a notated original T-6 authentic manual, Quick Start (2 Pages) is mostly flying tips... Designed by Khamsin Studio and Philip Ubben Support forum for the T-6G Texan XP12 ________________ Windows - 12th Gen IS1700 Core i7 12700K 12 Core 3.60 GHz CPU - 64bit -32 Gb single 1067 Mhz DDR4 2133 - PNY GeForce RTX 3080 10GB XLR8 - Samsung 970 EVO+ 2TB SSD Software: - Windows 11 Pro - X-Plane 12.09rc5 (This is a Release Candidate review). Plugins: Traffic Global - JustFlight-Traffic (X-Plane.OrgStore) US$52.99 : Global SFD plugin US$30.00 Scenery or Aircraft - KTCM - McChord AFB - Seattle - Boeing Country 10.5 by Tom Curtis (Sorry not now available) ________________ Military Aircraft Review by Stephen Dutton 26th March 2024 Copyright©2024: X-Plane Reviews (Disclaimer. All images and text in this review are the work and property of X-PlaneReviews, no sharing or copy of the content is allowed without consent from the author as per copyright conditions) All Rights Reserved
2 points
-

Scenery Review: X01 - Everglades Airpark, Florida by Skytitude
Dominic Smith and one other reacted to skytitude for a topic
Thank you Felicity for an awesome review of Everglades. As i remember i did ortho's this way because the satellite has captured too much annoying shadows on higher resolution photos. I will take a look on how I can improve the integrated ortho's terrain in Everglades. My appreciated for honest review and your time, this is very useful.2 points -
Scenery Review: PAPG - Petersburg James A Johnson Airport by Northern Sky Studio
skytitude and one other reacted to Dominic Smith for a topic
Scenery Review: PAPG - Petersburg James A Johnson Airport by Northern Sky Studio By DrishalMAC2 Introduction Petersburg James A. Johnson Airport (PAPG) is situated in the remote wilderness of Southeast Alaska, within the small but vibrant community of Petersburg. It serves as an essential lifeline to more populous regions, providing indispensable connections for the area's residents. Its single runway, 5/23, with an asphalt surface stretching 6,400 by 150 feet (1,951 by 46 meters), accommodates daily flights operated by Alaska Airlines with Boeing 737-700 passenger jets, reflecting the essential role of air transport in this region. Historically, the service was further supported by Boeing 737-400 passenger/cargo Combi aircraft, highlighting the airport's importance in both passenger and cargo transportation. Petersburg is a locale steeped in heritage, often referred to as "Little Norway," reflecting its Norwegian roots and the fishing industry that has long supported the local economy. Surrounded by the natural beauty of the Tongass National Forest, the area offers access to the unspoiled wilderness, including the scenic Inside Passage and the majestic Misty Fjords National Monument. These features highlight PAPG Airport's role as a gateway to Alaska's vast wilderness, welcoming adventurers and nature enthusiasts who are eager to explore the region's rugged terrain and varied weather conditions. Northern Sky Studio's latest scenery project for X-Plane aims to boost the realism of PAPG Airport and its Alaskan wilderness surroundings with detailed visuals. Targeting a broad spectrum of X-Plane users, from those passionate about general aviation to commercial jet aficionados, the package promises a significant enhancement. So, without further ado, let's explore how this scenery performs in testing. Copyright © 2023 Navigraph / Jeppesen Installation The installation process is straightforward. Download the file, which, once extracted, occupies about 2.6GB of space. Then, place the extracted file directly into your Custom Scenery folder within X-Plane. Additionally, the manual included in the download contains a link to an Ortho4XP tile for the surrounding area. This tile can be downloaded and added to the Custom Scenery folder in the same manner as any Ortho4XP file. Documentation The documentation included is concise to say the least, as it consists of just a single slide that outlines the installation process and includes links to the Ortho4XP file. Additionally, it features recommendations for third-party scenery addons, enhancing the overall experience. Among these recommendations is simHeaven's X-World, which is highly recommended for users looking to further enrich the scenery. Note: All screenshots featured in this review were captured using the optional ortho tiles and simHeaven’s X-World America First Impressions The airport is situated within Alaska's mountainous landscape, encircled by a complex network of waterways that contribute to the region's distinctive terrain. The scenery boasts an impressive array of ortho textures surrounding the airport, derived from high-quality satellite imagery. A particularly appealing decal effect has been applied to these textures, significantly enhancing their appearance and bringing the rugged beauty of Alaska's wilderness to life. Ground Textures and Foliage The runway textures are of outstanding quality, showcasing a rugged and worn appearance that aligns perfectly with expectations for an airport in such a remote setting. Physics-Based Rendering (PBR) technology enhances the textures of both the taxiways and runway, vividly bringing the airport environment to life. The ground textures are accurately marked for runways and taxiways. Notably, the careful addition of cracks and tire markings contributes significantly to the weathered appearance of the surfaces. The vegetation surrounding the airport, with its mix of small bushes and grass near the runway, appears naturally random. This deliberate randomness enhances the feeling of a remote and untamed setting. Ground textures stand out for their quality, with edge markings and tar lines that unify the different concrete textures, adding to the scenery's realistic touch. The rough and uneven edges of the taxiways contribute to the scene's authenticity, reflecting the rugged and genuine atmosphere of the area. Signage and Navigation Aids The airport’s signage is both accurately placed and of high quality. Specifically, the signage at runway hold points, which display aircraft radio frequencies, are notably sharp and clear. The accuracy extends to taxiway signs and runway distance markers, which are not only placed with precision, but are again both sharp and easy to read. This attention to detail ensures that navigating around the airport feels both realistic and intuitive. Main Airport Buildings The airport buildings have been recreated to a very high standard, featuring detailed 3D modelling and high-quality textures. Each building is unique, and after comparing them with real-life images of the airport on Google, it's clear that the models are true to life. The Alaska Airlines terminal building receives special attention, with its representation being particularly accurate and convincing. The main terminal is the only building with a modelled interior, and one which has been recreated with an excellent level of detail. From security signage to wall-mounted electrical sockets, the effort to recreate a realistic interior is evident. The inside is adorned with Alaska Airlines branding, enhancing the immersive experience. Details such as 3D people, welcome stickers, medical and security notices, and even televised images contribute to a bustling and authentic atmosphere. This careful attention to both exterior and interior details promises a convincing and immersive representation of the main airport building. Ground Clutter The ground clutter around the airport is nicely detailed, with a variety of high-quality, random objects, all strategically placed to enhance the authenticity of the airport. Items such as fire extinguishers, pallets, cones, and fuel pumps are thoughtfully added, each contributing to the realism of an active airport setting. Surrounding Area The town of Petersburg, surrounding the airport, has been recreated with careful attention to detail, depicting a highly authentic setting. Notably, the town features numerous dockyards and piers, significantly elevating the area's visual appeal. A tanker moored at the piers, numerous private small boats, and several De Havilland Canada DHC-2 Beaver seaplanes on floats bring the waterfront to life, suggesting a bustling local marine activity. Night Lighting The custom night lighting at PAPG enhances the experience for night-time flyers with a convincingly modelled nocturnal scene. An innovative feature is the control of Runway End Identifier Lights (REIL), and taxiway illumination, which activate only when 122.500 MHz is tuned into Comm 1 on the aircraft. This mimics a real-world system where pilots can manage night lighting, adding an extra layer of realism to the scenery. However, this feature introduces a significant issue. Activating the lights at this airport causes an unintended consequence where the Precision Approach Path Indicator (PAPI) lights at all other airports, whether default or addon, fail to illuminate unless 122.500 MHz is selected on Comm 1. This oversight is notable, and hopefully, it's something the developers will address in a future update. Performance Throughout my testing, I found the scenery's performance to be exceptional, characterised by a seamless experience with no noticeable drop in frames per second (FPS), or stuttering. The airport's relatively small size and its secluded location no doubt contribute to its excellent performance. Although Virtual RAM (VRAM) usage is marginally higher, this is a natural outcome of the scenery's enhanced details and higher quality textures over the default settings, and it is a small price to pay for the significant visual improvements offered. Conclusion Northern Sky Studio's rendition of PAPG Airport in Petersburg, Alaska, carefully combines authenticity with functionality, whilst targeting a diverse audience of X-Plane users. The scenery's highlights include its strategic location in the stunning Alaskan wilderness, high-quality ortho imagery, custom mesh with the optional ortho tile, carefully modelled ground textures, and bespoke buildings that resonate with the essence of the area. This detailed representation allows for an expansive exploration experience, accommodating everything from general aviation to larger aircraft like the Boeing 737, enabling pilots to embark on adventures through the nearby mountains and iconic sites such as the LeConte Glacier and Misty Fjords. Despite an issue with the custom night lighting feature, the scenery maintains an immersive and seamless experience. So, if you're seeking a launchpad to explore Alaska's expansive wilderness, Northern Sky Studio's PAPG airport stands out as an immersive base. It serves as an ideal gateway for X-Plane users keen on uncovering the rugged beauty of the Last Frontier. ________________________ Petersburg James A Johnson Airport by Northern Sky Studio is now available from the X-Plane.Org Store here: Petersburg James A Johnson Airport Priced at $12.00 Features The most detailed replica of airport buildings and vehicles EDGE, REIL and Taxiway lights can be enabled on 122.500 COM1 Custom hand-placed autogen High resolution ground textures / Custom runway textures High resolution building textures Compatible with all X-Plane 12 features Custom mesh for the airport area (Ortho4XP) All materials created for full PBR Shading and occlusion (texture baking) effects on all airport buildings High-resolution building textures Custom orthophoto for the airport and surrounding areas World Traffic 3 compatible Requirements X-Plane 12 or X-Plane 11 (both versions included) Windows, Mac, or Linux 8 GB+ VRAM Recommended Download Size: 2 GB Current version: 1.0 (Feb 15th, 2024) __________________________________ Scenery Review by DrishalMAC2 26th March 2024 Copyright©2024: X-Plane Reviews (Disclaimer. All images and text in this review are the work and property of X-PlaneReviews, no sharing or copying of the content is allowed without consent from the author as per copyright conditions).
2 points -
Scenery Review : Society Islands - Leeward and Windward by Aerosoft
Cami De Bellis and one other reacted to Stephen for a topic
Scenery Review : Society Islands - Leeward and Windward by Aerosoft Say Tahiti, or Bora Bora and the thoughts are always... "Exotic". French South Pacific plus it's amazing scenery makes this a destination in one of the absolute top hits of any one's bucket list. It has always been on my "most" desired destination. Actually I have been to Tahiti, but a long time ago, way back in the 1970's, but also just passing through en-route to Australia. Yes I have always wanted to go back... So what of Tahiti in X-Plane. Actually it was well serviced by the XPFR developers, but as usual you wanted a more overall detailed and extremely high quality package to bring out the best of the Simulator and the astonishing South Pacific area. This "Society Islands" is a set of two packages by the renowned Maps2X-Plane, the same developer house that created both the excellent Faroe Islands, Svalbard and Seychelles XP, all the sceneries reviewed here are Maps2X-Plane releases, but released under the Aerosoft banner. In so any installations are now through the Aerosoft One application, just add in the authorisation number, and the tool will do the install for you. As noted the Maps2X-Plane Tahiti series is in two different area packages, the first was "Society Islands XP - Bora Bora & Leeward Islands", released now back in September 2021 for X-Plane 11, of which you could call the "Western" area. This package was quickly updated to X-Plane 12 (v1.1) almost immediately. The second release is the new one "Society Islands XP - Tahiti & Windward Islands", and again what you would call the "Eastern" area, both packages together then covers the whole Society Island territory. Although the Leeward scenery was excellent as we shall see, it was slightly compromised in that it was only a regional scenery, with only local inter-island flying. This latest Windward package is significant because it adds in the main gateway or Faa'a International Airport, situated on the main island of Tahiti. This added aspect then connects all the Tahitian areas together, not only the international routes, but also the local domestic routes from the main gateway. The now combined area is also quite significantly wide to explore and to service. You could say French Polynesia is in the middle of nowhere, because it is, set deep into the central South Pacific Ocean. This makes connections hard and extremely expensive, as the area is a fair flight from any landmass. But there are direct flights from the U.S. West coast, Rarotonga and New Zealand, lately Hawaii was also added. I did an example flight from AKL (Auckland) to PPT (Papeete), it is a route distance of 2,242 nm, translated to 4h34m flightime, and right on the edge of the A321's endurance in fuel. Tricky as there are no alternative options out here. In this eastward direction, then maybe the Cook Islands (625 nm before Tahiti) as an option, but once past that point, then there are no other places to land. As we are going into NTAA - Faa'a International Airport, we will cover the "Windward" package first.. Society Islands XP - Tahiti & Windward Islands The Windward Islands are the eastern group of the Society Islands in French Polynesia, an overseas collectivity of France in the southern Pacific Ocean. These islands were also previously named the Georgian Islands in honour of King George III of the United Kingdom. The capital of the administrative district is Papeete on the island of Tahiti. Tahiti, Moorea, and Mehetia are volcanic islands. Tetiaroa and Mai'ao are outer coral Atolls... all these noted areas are available in the Maps2X-Plane Windward package. Faa'a International Airport Faa'a International Airport, also known as Tahiti International Airport is the international airport of French Polynesia, located in the commune of Faaa, on the island of Tahiti. It is situated 5 km (3.1 mi) southwest of Papeete, the capital city of the overseas collectivity. It opened in 1960. Regional air carrier Air Tahiti and international air carrier Air Tahiti Nui are both based at the airport. The focus and highlight of both sceneries is the Faa'a International Airport, and one very long runway 3420m (11,220ft). Faa'a International Airport Aéroport international de Tahiti Faa'a IATA: PPT - ICAO: NTAA 04/22 3,420m (11,220ft) Bituminous Elevation AMSL 2m/5 ft First views of Faa'a International are simply excellent, the vista has Moorea Island in the background. How far X-Plane has come with X-Plane 12... as finally we have realistic tropical reef water, and it is excellent here in surrounding the airport perimeters. In visiting South Pacific Islands, you sort of have to time travel back a few decades. Everything is not bright, shiny or new down here. At PPT, it feels like a past time, with an airport that has only basic facilities, no airbridges here, but certainly a nice South Pacific welcome. The Polynesian look and feel is very evident in the terminal building. Expertly reproduced here by Maps2X-Plane... Airport detail is quite exceptional, everything is covered both airside and landside with "Huge" detail... "dense" I call it... but there is a lot to admire and take in here. There is a fair bit of animated traffic airside (nicely done), but there is not much traffic movement on the ramps. A few regional connections and the odd International service is about it. But the majority of international aircraft moving in or out are significantly big long haul jets... the old Pan Am 707's in the 60's, then DC-10's and MD11's dominated in the UTA years, Boeing 747's and even A380's can get into here. Now it is the odd A340, B787, A350, but also now the long thin route single-aisle aircraft ETOPS, which are a common sight. Airport infrastructure is again excellent, with maintenance hangars and three (available) Heli pads, there is plenty of static aircraft and vehicles, but the detail in gates, ramp equipment and general clutter items is excellent. West side, is the Fire Station/Control Tower and administration buildings, an inter island area (Moorea & Tetiꞌaroa) is set over here as well. More helipads are also available. There is no 3d grass? but the field detail is excellent, with great drainage (including even drainage pipes) and fencing. Surfaces are also first rate, with wear/tear and filled cracks. PBR reflective (wet) active textures and burnt-in ambient occlusion is also available here, great for those summer tropical rainstorms. I have just been on a South Pacific cruise (talk about a coincidence)... The South Pacific has a certain look, lush vegetation and foliage, the bright vibrant colours and open sided tired buildings. It is the "feel" of the islands, and this scenery totally translates that "feel" into X-Plane. I could easily have been back in Nouméa (New Caledonia), Port Vila (Vanuatu) or Suva (Fiji )with this scenery. This Tahiti scenery is shockingly very good in translating that Pacific look and feel into the Simulator... Again the "dense" feel and infrastructure of the Faa'a locale is excellent, it fills right up to the airport boundary and even into it, creating a perfect diorama of the area... note the vista of Mount 'Orohena in the background. The capital Papeete is too the north of the airport. Again the density of the capital is really well replicated, extremely realistic and includes the extensive Papeete Port area for approach realism. This arrival area's aspects are all shockingly good, more real world detail than a simulator... you have to be impressed. There are two heliports (pads) on Tahiti... Taaone The heliport NTAA of Hôpital du Taaone, located about 8 kilometers east of Faa'a International. Again no expense was spared by Maps2X-Plane to create the authentic hospital for the Tahiti scenery. Taravao The heliport NTHV of Hôpital de Taravao, is located about 40 kilometers southeast of NTAA Let us not forget that Map2X-Plane's main speciality is terrain mesh with photo-realistic textures, for the landscape and the sea. Highly evident in their amazing Faroe Islands package. It is the same here for Tahiti and these same quality custom textures. In that they cover all the areas in both Windward and Leeward packages, plus create those excellent tropical water effects. They are dazzling to absorb. Moorea Airport Moorea Airport (NTTM, 1230 meters), also know as Moorea Temae Airport, is a regional airport on the island of Moorea, located 15 kilometers west of Tahiti. It is served by Air Tahiti, and can accommodate aircraft up to the ATR 72 in size. Moorea is a volcanic, mountainous island with the highest point Mount Tohivea at 1207 meters, and for its enclosed reef that surrounds the entire island. Moorea Airport is also known as Temae Airport (IATA: MOZ, ICAO: NTTM) or Moorea Temae Airport for its location near the village of Temae in northeastern Moorea. The airport is located 7.5 km northeast of Afareitu, the island's main village. It is set almost directly across from Papeete. The Moorean Polynesian style terminal has had a lot of attention, brilliantly done here by Maps2X-Plane, it is a genuine walkaround the area and be part of the scenery experience... almost photographic in detail. Airport infrastructure is first rate, with a small field tower, cargo and admin area, and housing for airport staff. Close by Temae is replicated, as are all the locales on the island with custom autogen, very realistic it is... highlight is the excellent water and realistic reefs. Moorea's coastline is excellent, with great vistas to explore, either by helicopter or seaplane... The Island's Hilton Luxury Overwater bungalows are also well replicated. Afareaitu There is one helipad NTHF on Moorea... it is sited at the Hôpital de Afareaitu, located about 8 kilometers south of NTTM. Tetiꞌaroa Tetiaroa Airport (NTTE, 770 meters) is a regional airfield on Onetahi, one of 12 islets of the Tetiaroa atoll, located 53 kilometers directly north of Tahiti. The islets are under a 99-year lease contracted by the famous actor Marlon Brando, and is home to "The Brando Resort". It is served by private flights by Air Tetiaroa, departing at a private terminal at Faa‘a International Airport. The islets (or motus), in clockwise order starting from the southwest corner, include: Onetahi (with regulated airstrip and site of The Brando Resort), Honuea, Tiaruanu, Motu Tauvini (Tauini), Motu Ahurea (Auroa), Hiraanae, Horoatera (Oroatera), Motu 'Ā'ie, Tahuna Iti, Tahuna Rahi, Reiono, Motu One (emerging sandbank) and Rimatu'u (with an ornithology reserve). Tetiaroa is extraordinary well done in realism, you could be really here, seeing Brando's dream... Marlon Brando "discovered" Tetiꞌaroa while scouting filming locations for the film Mutiny on the Bounty, which was shot on Tahiti and neighboring Moorea. After filming was completed, Brando hired a local fisherman to ferry him to Tetiꞌaroa. It was "more gorgeous than anything I had anticipated," he marveled. Society Islands XP - Bora Bora & Leeward Islands The Leeward Islands literally "Islands Under-the-Wind" are the western part of the Society Islands in French Polynesia, an overseas collectivity of France, in the South Pacific Ocean. They lie south of the Line Islands (part of Kiribati), east of the Cooks and north of the Austral Islands (also part of French Polynesia). Their area is 404 km2 and their population is over 36,000. The westernmost Leeward Islands comprise a three atoll group: Manuae (also known as Scilly Atoll); Motu One atoll (also known as Bellinghausen), the most northerly of the Leeward Islands; and Maupihaa atoll (also known as Mopelia) to the southeast. Bora Bora Bora Bora is part of the central island group of the Leeward Islands in the South Pacific. The main island, located about 230 kilometres (125 nautical miles) northwest of Papeete, is surrounded by a lagoon and a barrier reef. In the center of the island are the remnants of an extinct volcano, rising up to two peaks, Mount Pahia and Mount Otemanu; the highest point is at 727 m (2,385 ft). Bora Bora is part of the Commune of Bora-Bora, which also includes the atoll of Tūpai. The main languages spoken in Bora Bora are Tahitian and French. However, due to the high tourist population, many natives of Bora Bora have learned to speak English. "Mystic" is the word used with Bora Bora, or even "Bali Ha'i" which is a show tune from the 1949 Rodgers and Hammerstein musical South Pacific. The name refers to a mystical island, visible on the horizon but not reachable... a lot has been said that Bali Ha'i is not Bora Bora, but actually based on the real island of Ambae (formerly Aoba Island). Ambae is located in Vanuatu... but the images and the feel of Bali Ha'i is totally the Tahitian island. The peaks Pahia and Otemanu are excellent with the custom textures, as is the detail of the island's infrastructure, small ports and all the island's locales are very well done. But this is a review, not a travelogue... jumping from the latest Windward to the earlier Leeward packages, there is a difference? Also a time difference of 2½ years, and more significantly a different X-Plane era, Eleven not Twelve. Although the Leeward scenery was updated to XP12 (my guess the water)... a lot of the XP11 elements remain, like the + trees, no active textures or burnt-in ambient occlusion effects, and not the more modern 3d style XP12 foliage. It makes a slight, but significant difference to the look and feel of this earlier scenery. It feels more plainer, even slightly flat compared to the "lush" vibrant Windward... don't get me wrong Leeward is very good, but looks not as condensed or luscious with realism as the X-Plane 12 effects created in the eastern part of Tahiti. Bora Bora Airport Bora Bora Airport (NTTB, 1505 meters), also known as Motu Mute Airport, is an airport serving Bora Bora (Leeward Islands, Society Islands, French Polynesia) and handles about 300.000 passengers annually. The airport is located on the islet of Motu Mute and is served by Air Tahiti with ATR 42 and ATR 72 propjets Bora Bora Airport Aéroport de Bora Bora IATA: BOB - ICAO: NTTB 11/29 1,505m (4,938ft) Asphalt Elevation AMSL11 ft / 3 m Rustic and Polynesian, the excellent terminal building is not only for the air, but also a sea pier for servicing the hotels set out around the lagoon. The quaint Control Tower has housing and service buildings around it. Like at Moorea, there are a significant number of luxury Overwater bungalows at Bora Bora, and they are all set out around the lagoon areas, very evident, and the hotels existing here in Bora Bora are all replicated in detail. There are five Helipads set around the lagoon, mostly at the hotel sites. The one at "Tahiti Nui Helicopters Pago dropzone" is the base for the operations around the area. Tahiti Nui Helicopters Pago dropzone The hub of Tahiti Nui Helicopters on Bora Bora is located about 8 kilometers south of NTTB, XHNTTZ Four Seasons Helipad A helipad next to the Four Seasons Resort Bora Bora, about 6 kilometers south-east of NTTB, XHNTTF Saint Regis Helipad A helipad next to The St. Regis Bora Bora Resort, about 8 kilometers south-east of NTTB, XHNTTS Le Meridien Helipad A helipad is set next to Le Meridien Bora Bora, about 8 kilometers south- east of NTTB, XHNTTM InterContinental Helipad A helipad next to the InterContinental Bora Bora Resort, about 9 kilometers south-east of NTTB, XHNTTI Raiatea Airport Raiatea Airport, also known as Uturoa Airport, is an airport on Raiatea and handles about 245.000 passengers annually. Raiatea is the second largest island of the Society Islands, after Tahiti, and has an elevation of 1017 meters. In the north of Raiatea lies Tahaa, and the islands are enclosed by a single coral reef. Raiatea Airport IATA: RFP - ICAO: NTTR 07/25 1,200m (3,937ft) Asphalt Elevation AMSL6 ft / 2 m Set on the north coast of Raiatea, is Raiatea (Uturoa) Airport NTTR, the runway is actually on reclaimed land on the coral sea. Like all these Tahiti sceneries the airport quality is excellent. With very detailed South Pacific rustic buildings and feel... highly authentic. There is only one Helipad on Raiatea... Le Taha‘a Helipad A helipad next to the Le Taha‘a Island Resort, about 17 kilometers north-west of NTTR, XHNTTT Huahine Huahine measures 16 km (10 mi) in length, with a maximum width of 13 km (8 mi). It is made up of two main islands surrounded by a fringing coral reef with several islets, or motu. Huahine Nui (Big Huahine) lies to the north and Huahine Iti (Little Huahine) to the south. The total land area is 75 km2. The two islands are separated by a few hundred metres of water and joined by a sandspit at low tide. A small bridge was built to connect Huahine Nui and Huahine Iti. The Island's highest point is Turi, at 669 m elevation. Huahine – Fare Airport Huahine – Fare Airport is the airport serving the island of Huahine in French Polynesia. The airport is located in the northern part of the commune of Fare, on the Island of Huahine Fare, Huahine – Fare Airport IATA: HUH, ICAO: NTTH 07/25 1,500m (4,921ft) Asphalt Elevation AMSL7 ft / 2 m Unusually here it is a tiled roof not thatched on the Fare Airport terminal building, but still in a Polynesian style. Again the airport is extremely well done with separate tower and service buildings, it is easy to find from the air as well with it's position. Maupiti Maupiti is the westernmost volcanic island in the archipelago, 315 kilometres (196 miles) northwest of Tahiti and 40 kilometres (25 miles) west of Bora Bora. It has a population of 1,286 people. The largest town is Vaiea. The island is a "near atoll", consisting of a central volcanic peak surrounded by a lagoon and barrier reef with four motu: Auira, Pa'ao, Tuanai, Tiapaa and Pitiahe. The lagoon has an area of 27 square kilometres (10 square miles) and the central island has an area of 12 square kilometres (4.6 square miles) and a maximum elevation of 372 metres (1,220 feet). Maupiti Airport Maupiti Airport is serving the island of Maupiti and the airport handles about 23.000 passengers annually. It is positioned on the Northeastern coast of the island. Maupiti is the westernmost volcanic high island in the archipelago. The 3136 ft runway 08/26, sticks right out into the surrounding waters, the locale is really well designed (and detailed) to discover. Maupiti Airport IATA: MAU - ICAO: NTTP 08/26 956m (3136ft) Asphalt Elevation AMSL15 ft / 5 m Maupiti Airport is another great gateway to paradise. Last and interesting in the Leeward Islands is... Tupai Tupai is also called Motu Iti, is a low-lying atoll in Society Islands, French Polynesia. It lies 19 km to the north of Bora Bora and belongs to the western Leeward Islands. This small atoll is only 11 km2 in size. Its broad coral reef encloses a shallow sandy lagoon. There are almost continuous long wooded motus on Tupai's reef. Tupai has no permanent residents apart from some workers in its coconut plantations. Tupai is a low-lying atoll and consists of two larger and a few smaller islands surrounding the lagoon. Tupai Airport is a private airfield on Tupai, inaugu- rated in 2001, and its use is restricted. It is noted as NTTU ICAO designator, there are no charts for the airfield. Of course all atolls and small coral islands throughout both packages are also all represented and customised with realistic water and landmass textures. There is also a a lot of vehicle traffic, and animated water traffic that gives off a buzz to the sceneries.... it is a very comprehensive set of sceneries, the best you could imagine for this "Exotic" part of the South Pacific. Lighting Lighting in these sort of packages is not the focus of the scenery... here it is of course basic island lighting. There is another element in looking at the night images to consider. X-Plane (12) and it's current state has not very refined lighting. It is all very over-exposed and quite large at their sources with large flares. So it isn't really very realistic? Here are my arrival images into Faa's NTAA Rwy 04. The lighting looks like cascading lava down the mountainsides? The airport PPT was actually quite hard to make out? The Faa's NTAA International lighting is perfectly fine, maybe a a better tone of light would have been more realistic... but overall it was good, but the external lighting sorta overwhelms it. The arrival globe lighting at the terminal's entrances are however a masterstroke. Papeete lighting is autogen(erated) but looks okay, the port area is very good. Moorea's lighting gives a more generalisation of the lighting across all the Windward Islands... typical island lighting, with no highlights. In the Leeward Package the lighting is the older XP11 system, and it actually looks far better, as the heavy XP12 flare is more contained. Bora Bora Airport is bright and very nicely lit and the whites, whiter. Highlights are the eerie blue glow of the Overwater hotel bungalows, snaking themselves out into the Lagoons... My advice is to revisit the packages if Laminar Research refines the lighting of X-Plane 12, you may be pleasantly surprised, as the current night-lighting is way overdue for attention in the Simulator. Summary "Society Islands" is a set of two packages by the renowned Maps2X-Plane, the same developer house that created both the excellent Faroe Islands, Svalbard and Seychelles XP, all the sceneries reviewed here are Maps2X-Plane releases, but released under the Aerosoft banner. The first was "Society Islands XP - Bora Bora & Leeward Islands", released now back in September 2021 for X-Plane 11, of which you could call the "Western" area. The second release is the newer one "Society Islands XP - Tahiti & Windward Islands", and again what you would call the "Eastern" area, both packages together then covers the whole Society Island territory. The Leeward scenery was slightly compromised in that it was only a regional scenery, with only local inter-island flying. This latest Windward package is significant because it adds in the main gateway or Faa'a International Airport, situated on the main island of Tahiti. This added aspect then connects all the Tahitian areas together, not only the international routes, but also the local domestic routes from the main gateway. The now combined area is also quite significantly wide to explore and to service. Tahiti & Windward Islands XP Package, includes the Tahiti Gateway of Faa‘a International Airport NTAA, and Papeete the capital of Tahiti, other islands and airports include Moorea Airport NTTM and Tetiaroa Airport NTTE (Brando Island), and three Heliports; Taaone NTHP, Taravao NTHV and Afareaitu NTHF. Bora Bora & Leeward Islands XP Package, includes Bora Bora Airport NTTB, Raiatea Airport NTTR, Huahine – Fare Airport NTTH, Maupiti Airport NTTP and Tupai Airport NTTU, a private airfield on Tupai. Heliports are five on Bora Bora; Tahiti Nui Helicopters Pago dropzone (XHNTTZ), Four Seasons Helipad (XHNTTF), Saint Regis Helipad (XHNTTS), Le Meridien Helipad (XHNTTM), InterContinental Helipad (XHNTTI), and on Raiatea is a Helipad at Le Taha‘a Resort (XHNTTT). Maps2X-Plane are masters at creating extensive custom terrain mesh with photo-realistic textures for the landscape and the sea. And all the extensive land and tropical sea elements are all covered here. All land autogen is (South Pacific) custom, and significant areas and island locale's are covered like Papeete and port areas. Airport vehicle and sea (water) traffic is also extensive. All airports including the Tahiti gateway Faa'a Airport are all extensively modeled and created, and the unique "South Sea Island" feel in the X-Plane 12 Simulator is very evident. Notable is that the older Bora Bora Leeward, does have still a lot of the older X-Plane 11 elements (older + trees and water) that doesn't have that later X-Plane 12 density and quality, Leeward is very, very good, but Windward is still better in feel and look. Lighting is actually the opposite, X-Plane 12 non-refined lighting is worse than the older but more stable X-Plane 11 lighting on the Bora Bora package. Notable is that both XP12 and XP11 versions are all included in the packages. In your face is the price, $36.99 for the older Bora Bora, and $38.99 for newer Tahiti... together $75.98 for scenery! Obviously an investment, but you get a lot of scenery including tons of detail and extensive features for your hard earned dollars. It's a brilliant set of flexible packages to use as well... now with International Long Haul available, regional island services, helicopter inter-island and hotel services, and even just cruising around exploring the islands in your floatplane, every aspect is covered, and it all comes with a huge quality impact and the immense detail of custom terrain and noted photo-quality base mesh, as a travelogue it is all an explorers delight. Overall, it is the excellent "South Pacific" feel that is the immense drawcard to the Tahitian scenery, can a simulator recreate the realism of the real world, well almost and these sets of Tahitian Sceneries show off the immense talents of X-Plane 12, its all so close, you can now almost touch it with these packages.... Highly Recommended. ______________________ Yes! the Society Islands XP - Tahiti & Windward Islands, Society Islands XP - Bora Bora & Leeward Islands by Aerosoft is now available from the X-Plane.Org Store here : Society Islands XP - Tahiti & Windward Islands Price is US$38.99 Requirements X-Plane 12 or X-Plane 11 Windows, Mac and Linux 4 GB VRAM Video Card - 8 GB+ VRAM Recommended Download Size: 5.7 GB - Installation is done through Aerosoft One Current version: 1.1 (January 26th 2024) Society Islands XP - Bora Bora & Leeward Islands Price is US$36.99 Requirements X-Plane 12 or X-Plane 11 Windows, Mac and Linux 4 GB VRAM Video Card - 8 GB+ VRAM Recommended Download Size: 5.7 GB - Installation is done through Aerosoft One Current version: 1.1 (December 12th 2022) ___________________________ Installation Installation of Tahiti/Bora Bora XP is done through Aerosoft one installer: Aerosoft One Universal After you have installed Aerosoft One, click on ENTER PRODUCT KEY (under the Library Tab) ... enter the Serial Number provided in this order. This will give you the option to download the airport. Note the different X-Plane 11 and X-Plane 12 installations. The Tahiti/Bora Bora scenery is downloaded into a dedicated folder "Aerosoft One Library" on your system, under a file (gameDirectory) via a shortcut. Full Install size (both packages) is 15.34Gb. Documents Standard Aerosoft Manuals Tahiti (9 pages), Bora Bora (22 pages) are in both English and German. Review System Specifications Windows - 12th Gen IS1700 Core i7 12700K 12 Core 3.60 GHz CPU - 64bit -32 Gb single 1067 Mhz DDR4 2133 - PNY GeForce RTX 3080 10GB XLR8 - Samsung 970 EVO+ 2TB SSD Software: - Windows 11 Pro - X-Plane 12.07r1 (This is a Release Candidate review). Plugins: Traffic Global - JustFlight-Traffic (X-Plane.OrgStore) US$52.99 : Global SFD plugin US$30.00 Scenery or Aircraft -ToLiss A321 XP12 - (X-Plane.orgStore) US$89.99 - Cessna 172-1000 - X-Plane Default fleet - Free (with X-Plane 12) -ATR72-500 v1.2 - Riviere 1.2.0 - - (X-Plane.org) - Free Tahiti Scenery Review by Stephen Dutton 18th March 2024 Copyright©2024: X-Plane Reviews (Disclaimer. All images and text in this review are the work and property of X-PlaneReviews, no sharing or copy of the content is allowed without consent from the author as per copyright conditions) All Rights Reserved
2 points -
Scenery Review : Society Islands - Leeward and Windward by Aerosoft
Cami De Bellis and one other reacted to Stephen for a topic
Thanks, it was a second voyage of discovery!2 points -
NEWS! - Aircraft Announcement : Toliss notes the Airbus A330 as next project At the developers conference in early February 24 in Toronto... ToLiSS put up a chart in the session to note the already released fleet from the developer, but of also which aircraft could come up for development next... Candidates included the A318, A330ceo, A330neo, A340-200/300 and of course the Airbus A380. The A350 (v2) has already been announced as a joint project with FlightFactor (same arrangement as the current FF A350) at the same conference. The choice is now between the A330ceo (Current Engine Option), and the A330neo (New Engine Option)... image depicted here is the default Laminar A330-300, so it is a not a signal of the coming ToLiSS A330 type. The question "But Which One?", will keep you guessing, but on past record ToLiSS has usually kept away from competing directly with already released products, also they usually always do the NEO versions of the same aircraft (hint A320neo, A321neo). So the A330neo is probably the pick of the two versions. And into also not competing directly with the same A330-300 Laminar offering. The A330neo has two variants, the -800 based on the older ceo -200 and -300 variants, that has a range of 8,150 nmi (15,090 km; 9,380 mi) with 257 passengers. The second variant is the -900, it covers a range of 7,200 nmi (13,330 km; 8,290 mi) with 287 passengers. Both variants are powered by the Rolls-Royce Trent 7000 which has double the bypass ratio of its predecessor. ToLiss Features include... Accurate Systems ToLiss Fly-by-wire and autopilot module, with support for Alternate and Direct Law Unique feature: Control Surface hinge moment modelling allows the surfaces to float to the appropriate position after loss of all actuators on a surface or to not reach full deflection if running on a single actuator. fault injection interface allowing to inject custom selected failures, or randomly selected failure based on fault probabilities with over 210 failure modes available. Custom TCAS with resolution advisory function. Terrain on ND and Weather radar available (WX radar works with default X-plane weather engine) Brake temperature model based on the detailed physics of heat transfer between the individual brake components Hydraulics model with proper hydraulic flow computation as function of surface motion, flap/slat motion, gear extension etc. You will see this by the pressure dropping when flying on RAT Custom engine model for accurate thrust and fuel flow modelling including oil pressure and temperature model as well as many engine failure modes. Thrust and fuel flow modelled for each engine type. Special engine logics, such as dual cooling on the PW1127G engine, are also modelled. Detailed model of each ADIRU including alignment, small pressure sensor differences between the units, switching of sources for PFDs and Aps Quantitative bleed system modelling affecting engine fuel flow Electrical system simulation with correct bus reconfiguration and load distribution, simulated electrical transients as well as emergency generation from the blue hydraulic system. Fire detection simulation for engines and APU Custom radio navigation computations including ability to perform backup RADNAV tuning through the RMPs Custom air conditioning model supporting high altitude operations at airports like Cusco in Peru or La Paz in Bolivia without spurious warnings Flight warning system with ECAM actions supporting numerous system failure scenarios, e.g. engine failures, generator failures, hydraulic failures. Custom indicating system including DMC and SDAC simulation. Choice between Multifunctional runway lights or the classic landing light configuration Useability features Situation loading and saving. It is possible to save the flight at any point in time and resume it another day. This can also be used, e.g., to save the position just before approach and practice just the approach many times. This feature reinstates the complete aircraft state (except communications with ATC, such as AOC and CPDLC messages or ground service states.) Autosaving allows recovering where you left off, should the X-Plane session end unexpectedly. Jumping waypoint-to-waypoint through the cruise phase: Shorten your flight to focus on the more interesting parts as you like. Integrated takeoff performance calculator supporting the use of flex temperature. 4 different start-up configurations from Cold and Dark to engines running and ready to go In-screen popup displays or use of x-plane windows for popups Interactive audio control panel to change ground services, fuel, loading, passengers etc. without breaking immersion Electronic flight bag on both sides with Avitab integration, weight and balance computation, take-off and landing performance calculator as well as a user customizable interactive checklist. Print function for AOC messages, CPDLC messages and selected FMGS functions Release would be around October, as this is also a ToLiSS release period with the other time in being March... ToLiSS notes that the new A330 is obviously compatible with X-Plane 12, but will also support X-Plane 11 backwards compatibility, but without the X-Plane 12 effects. Start saving now, price should be around US$89.99! ___________________________ News! by Stephen Dutton 16th April 2024 Copyright©2024: X-Plane Reviews (Disclaimer. All images and text in this review are the work and property of X-PlaneReviews, no sharing or copy of the content is allowed without consent from the author as per copyright conditions) All Rights Reserved
1 point
-
Thank you @Stephen for your honest review, much appreciated. As developer of KTLH I would like to add few comments and explain some decisions in this airport for X-Plane Reviews readers and you. Regarding custom buildings and objects within the airport area, I focused most of the power on the ATC Tower, Cargo Apron Facility and Ivan Munroe terminal, this objects are the most important for virtual jet airliner pilots. Also I tried to represent the Custom Hangars surrounding South Ramp with Million Air terminal very close to real airport. Unfortunately due to the development cost and profitable reasons nowadays I was forced to pay just a little less attention to a few secondary objects and hangars far away from Munroe terminal. Also meanwhile development process some details like logo's on Million Air terminal and some hangars was missed, now I'm figure it out and I will add them back in further update with some fixes as well. Ok then I would like explain the airport lighting, most of lights looks pretty accurate on your images (my custom lights with custom masts) except few weird over bloomed light apron masts taken from laminar's library. I partially used them to save time and they were looking very good when I was taking release images, I guess maybe something has changed in latest X-Plane update that I got few days ago but they wasn't looking like presented. I will investigate it soon and will replace them with custom masts as well. Briefly about ground poly's and airport surfaces quality, I figured out why they are depicting in lower quality than I had, I will fix it and also will add better fidelity decal with solid normal map underlaying all current layers to make surfaces looking more crispy and bumpy from closer look. I carefully read the review and I promise I'll take a look at how to make the airport more dynamic with ground traffic. Regarding the 3d people I would like to say low poly 3d people are quite expensive for me and I can't promise to add them in large quantity. Also they are absolute static and almost impossible to animate them due to very old x-obj x-plane object format, Ben says laminar's are looking forward to transition from old x-obj to glTf, it will make such things like animated mass of peoples much easier. Instead of conclusion I want to add that I love X-Plane and it's wonderful community. Everyday I'm studying to do better things and this days I'm engaged in X-Plane more than ever before. Thank you Stephen for your time and majestic review this is incredible helpful.1 point
-
Aircraft Review - Junkers A50 Junior S-LSA by vSkyLabs One of the most interesting things of the changing of the eras, is the transition point, or a certain revolutionary design that in itself creates the new era. These time periods are interesting, exciting as well... as you are seeing the forward advances of a particular genre. In Aviation's case, these forward advances in design and increasing engine power was in the early to late 1920's, this period was breathtaking in the changes of aircraft. From the frame and fabric (tri) biplanes of the First World War, to the first steps of commercial aviation that changed the world. Center of this explosion of sweeping change, is Junkers Flugzeug- und Motorenwerke AG, a maker of boilers and radiators. "Junkers" as they are known created the first all metal designed aircraft in the Junkers J1, nicknamed the Blechesel (Tin Donkey or Sheet Metal Donkey), that was the monumental transition point from the frame/fabric to a Monocoque construction. The J1 was only an experimental aircraft, but it did create a subsequent series of monocoque metal based airframes, and created success for Junkers. With this success, Junkers wanted to expand into other aircraft categories. Most current Junker aircraft were medium to large by the day's standards, but what of a Junior or smaller "Sports" aircraft or "Sportsplane". The Junkers A50 Junior was the first sportsplane designed by Hermann Pohlmann. It had the same modern all-metal construction, in being covered with corrugated duralumin sheet as the larger Junkers passenger planes. But the A50 was small, only a crew of two, sitting in tandem in separate open cockpits (if it flew without a passenger, one cockpit could be closed with a cover). powered by a Two-bladed propeller, and had a conventional fixed split axle mainwheel landing gear, with a rear skid. The first flight of the A50 took place on 13 February 1929. It was followed by further four prototypes, in order to test different engines, but eventually they settled on a 80-hp, 5-cylinder radial engine. Junkers expected to produce 5,000 aircraft, but stopped after manufacturing only 69, of which only 50 were sold. The high prices probably inhibited sales... but the design had created a new category in aviation. However the Junkers A50 Junior was able to set a number of FAI world records around the world and became famous, amongst other things, because Marga von Etzdorf was the first woman to fly her Junkers A50 Junior from Berlin to Tokyo in several stages in 1931. The aircraft however has not been resigned to the original's past. In 2022, (The new) Junkers Aircraft Works began production of a modernized version of the A50 for LSA approval. This new A50 features modern avionics, a 100 hp Rotax 912iS engine driving a composite MT-Propeller, and a ballistic parachute. As of May 2023, 27 of these new A50s have been sold in Europe, and plans have been made for the American WACO Aircraft Corporation to produce aircraft for American customers. Light Sport Aircraft (LSA) category is a small 2 seat aircraft with a maximum take-off weight of 600kg. The modern interpretation of the Junker A50 is the version here for the X-Plane 12 Simulator by vSkyLabs. This aircraft is part of the ‘Test-Pilot’ Series, an open ended on going project with regular updates and changes as part of the process. The vSkyLabs Junkers A50 Junior is based on the modern German version, there will also be no X-Plane 11 version. Like a flying cigar, the A50 is long and very sleek. Although this version is the modern interpretation of the 1929 classic, the lines and construction are exactly the same. It is very easy to behold this futuristic design in those early days, it looks and feels very Pre-war WW2 Junkers as well. The reproduction of the corrugated duralumin sheeting or an early type of age-hardenable aluminium–copper alloy is excellently well done here. The term is a combination of Dürener and Aluminium. It was also used extensively on Zeppelin Airships of the same period. The aircraft is all basically duralumin, except for the shiny Aluminium engine cowl and wheel struts. The propeller is actually a modern composite MT-Propeller, than the old wooden version, for weight and strength. On the real A50, you can remove the wings, or fold them backwards, but not on the vSkyLabs version. The exhaust is modern as well, and the oil cooler gives the modern engine type away. The gear design from the 1920's however has been retained, with a bicycle spoke style design, pencil thin tyres and with disc brakes. It is a basic arrangement, but works and it is very nicely replicated here in it's simplistic but metallic splendour. The twin cockpits are wildly spaced apart along the narrow fuselage, not at all combined together forward like of the Tiger Moth and such aircraft. The brown leather cockpit surround is lovely, but missing is the cover for the front cockpit when empty? expect in an update... There are two pilots (slightly animated) and lifelike (meaning realistic). They are selected via the X-Plane "Weight, Balance & Fuel" via the sliders. In the rear is the pilot, in the front is the passenger... and to note the severe Centre of Gravity position with only the rear pilot in the aircraft, so you have to find ways to balance the aircraft in better to compensate for the odd weight distribution. Both pilot and passenger are not hands or legs animated as noted, but if you press Command "G" (Toggle landing gear) then the front passenger will slip sideways for the rear pilot to see ahead, a nice feature. And an override of the fixed landing gear on the A50. Cockpit In the (rear) cockpit it is all metal inside. Incredible is the design of almost 100 years between the two generations of A50s. But in here the metal design and construction it is almost the same, it is like living in the past, now in the future. It is very well done in recreating this construction aspect of the aircraft. Simple stick and rudder pedals are well done, as is the housing for the cables. There is a "Remove Before Flight" safety pin (Emergency Parachute) that is stored in the right side satchel. On the left side are two levers, rear is the Elevator Trim, front the Throttle... left rear floor is the fuel tank selector. The real (modern) A50 Junior has installed a Garmin G3X Touch 10” with a Garmin G3X Touch 7” or GI 275 with Winter altimeter/Winter airspeed indicators as instruments. Here in the vSkyLabs version we have the customised Laminar Research Garmin G1000 fitted. And nicely intergrated it is... Power switches and start button are on the left, (active) Circuit Breakers (Fuses) with ELT and USB Charge panels on the right. Up top are the two bus (ECU) lights, and on the very top is a AOA (Angle of Attack) avionics upgrade, based on the 'Alpha Systems AOA' Eagle AOA kit. (we will look at this in flight) The G1000 is the standard default Avionics system... Speed and Altitude/Vertical Speed tapes, Artificial Horizon, Horizontal Situation Indicator (HSI) with NAV 1/GPS BRG (Backgrounds), Speeds, Baro, Altitude, Wind, HDG (Heading) and CRS (Course) are all shown. There are however two configurations (custom) of the PFD (Primary Flight Display). One (above) has three readouts, in being overlaid with top left Cylinder Head Temperature (CHT), below is the Manifold Pressure and for right lower is the Engine RPM. Turnoff the "AVIO" switch far left and the screen changes to the standard G1000 engine readout panel. Here now shown is the RPM (top), FF (Fuel Flow), Oil Pressure, Oil Temp, EGT (Exhaust Gas Temperature), VAC (Vacuum), Fuel Quantity, Electrical (Bus/Volts) and Battery (Amps). Pressing the P/MFD (red Button) with change the screen to the Multi-Function/MAP Display. Standard adjustable G1000 popouts are available in both engine display modes, but the three custom instruments don't show on that setting. Obviously a very simple instrumentation set up, but really well done here in this basic Sports style aircraft. _________________ Flying the (Modern) Junkers A50 Junior Turning on the power, even selecting the twin ECU Buses doesn't bring the A50 alive. So there is also the need to push in all the CBs (Circuit Breakers/Fuses), then while doing so you see the different systems on the different CB selections relating to the various avionics. Fuel selector is on the floor, and their is no "All" tank selection, just Left-Right (tanks) or OFF, so you have to select one of the L-R tanks for fuel flow... Fuel capacity is 95L (25 US gal; 21 imp gal), Range is an amazing 600 km (370 mi, 320 nmi). When ready just press the Starter Button to easily fire up the engine. Unlike the original A50, this is a modern powerplant, a 100 hp Rotax 912i that comes with more power as well than the older original installation of the Armstrong Siddeley Genet which is a five-cylinder, air-cooled, radial engine for aircraft use, that was then built in the UK, and first run in 1926. The Genet developed 80 hp at 2,200 rpm in its final form and was in this era a very popular light aircraft powerplant. The later Rotax 912 is a horizontally-opposed four-cylinder, naturally-aspirated, four-stroke aircraft engine with a reduction gearbox. It features liquid-cooled cylinder heads and air-cooled cylinders. Originally equipped with carburetors, the later versions are now fuel injected. It sounds brilliant, although these Rotax engine sounds are now very common in the X-Plane Simulator. There is no "Novice" setting for the tailwheel, it is either locked or free castoring under the X-Plane "Toggle tailwheel lock" setting... so taxiing is a tricky business, either power up with the tailwheel locked and use the toe-brakes heavily to drag the tail into the direction you want to go. Or use a combination of going straight, then "Toggling" the tailwheel on/off by the key Command and using a lighter touch on the toe-brake to turn, or if the aircraft is actually castoring in the right direction... then locking the tailwheel again to go straight when turned to the right direction of travel... messy and hard work, especially if you are not very competent with this taildragger style? You can't see much either when taxiing, as your just not positioned close up front behind the passenger, but sited way down in the rear, but central position in the aircraft. Overall the A50 Junior is just a simply Stick and Rudder aircraft, with a few modern tweaks. So you fly the machine in a very basic way. Tons of right rudder is needed to keep you straight and you will have to find that sweet position to counter the engine asymmetric thrust, your tail lifts just after 30 knts (33 knts) then the rudder aerodynamics now need the control, still giving right rudder, but your moving the pedals around now a bit finer. Takeoff is around 45 knts and officially noted as 250 m (820 ft), no flaps here. You don't really have a Vertical Speed, just a gradual climb out of around 400 fpm. You feel like Louis Blériot, the first person to cross the English Channel in 1909... exposed in a simple aircraft, the wind rushing past your face (a small in your face fan helps with the effect)... but it's great fun, aviation in it's very basic form in this very striking looking aircraft. Unlike the 1929 version, here you have on your A50 a few modern conveniences, like a full G1000 avionics package. So this gives you an Autopilot, and even Flightplans at your disposal (handy if you want to actually cross the English Channel). Only one slight annoyance is that to switch between the PFD and MAP/Flightplan popup displays, you first have to close the current screen, then move over to the other selection, and then reopen the other pop-up, it is slightly annoying when setting up a flight plan and having to keep going back and forth to each of the different popup displays. As noted you can move the head sideways with the front passenger, but the head still moves as well with the angle (bank) of the A50, which is very realistic, and both pilot and passenger heads move together in partnership. There are no liveries with the package. Although there is a choice of colours of the fuselage from the Modern Junkers A50 brochure, including; White Aluminium, Glacier White, Deep Black Pearl Effect, Papaya Metallic, Saffron Yellow Metallic and Frozen Blue... I think they would be a nice addition to the package here. Lighting is of course extremely basic... no landing lights, just wing navigation and strobe lights. Light comes from the G1000 displays, but there are two side lights that have no lighting source. The AOA base is pretty as well. The A50 Junior is actually very nicely balanced if you get the Elevator Trim right, like most of the era, these light aircraft are fun and fine to twirl around the sky in, with no loss of height in steep banks or with heavy manoeuvres... lovely actually. But these Light-Sports are very susceptible in winds, and the forces will shake you and buffet you around, as seen in this video. I need to have a look at my landing field, EGHR - Goodwood in the south of England. So I do an orientation pass over the field, and note the grass strips are very hard to see? But the G1000 does give you a few tools to help... the Course Pointer in the HSI is great for aligning you going downwind in the landing pattern (then for runway course alignment). The G1000 HSI also has ILS alignment, but not here with the grass landing strips, but good to know if you want a landing alignment tool. Going downwind I drop down to 300ft and 73 knts, ready for the approach... then a 180º turn back to the field, again using the course angle to set the Runway 32 approach. Now down 200 ft and dropping the speed to get the best descent angle... a lot of feel (feedback) through the throttle is very good. There are no flaps here to reduce the speed zone, but it feels like a bi-plane in lift, pulling back on the stick, the A50 easily rubs off the speed to make the approach quite perfect, the Junkers Junior handles so well. Coming into finals on the 32 Approach, I'm not familiar with the airfield, so I'm a little off angle, but I'm fine with that... Now the AOA "Eagle" feature comes alive, and I'm tracking too low at the rear... gradually I adjust the pitch nose down to move the AOA upwards. It is very good, it sets the A50 up to the almost perfect angle for landing, throttle power is now my other tool to control the final descent. consistently adjusting the speed and AOA angle until they both perfectly match... ... On the perfect AOA blue circle, and your set, and then you glide down onto the grass, and then touch! Then let the rear settle. Considering the almost One Hundred years between the first A50, and this new modern counterpart. The flight aspect in the stick and rudder, metal long tube fuselage and lovely wings. It is just the instruments that are different, but the actual A50 flight experience is remarkably the same. _____________ Summary The Junkers A50 already is a legend. As it was the first Sportsplane, and designed by Hermann Pohlmann in the Junkers works. The first flight of the A50 took place on 13 February 1929. It was followed by a further four prototypes, in order to test different engines, but settled on a 80-hp, 5-cylinder radial engine. The A50 was an all metal construction sports plane, conventional in layout, with low cantilever wings and stressed corrugated duralumin covered, the same material as used in the Zeppelin Airships.... Two-spar wings could fold rearwards or be detached. Crew of two, sit in tandem, in separate open cockpits (if it flew without a passenger, one cockpit could be closed with a cover). The A50 used a Two-blade propeller and conventional fixed split axle main-wheel landing gear, with a rear skid. Junkers expected to produce 5,000 aircraft, but stopped after manufacturing only 69, of which only 50 were sold. The aircraft however has not been resigned to the past. In 2022, Junkers Aircraft Works began production of a modernized version of the A50 called the "Junior S" for LSA approval. This new A50 features modern avionics, a 100 hp Rotax 912iS engine driving a composite MT-Propeller, and a ballistic parachute. As of May 2023, 27 of these new A50s have sold in Europe, and plans have been made for WACO Aircraft Corporation to produce aircraft for American customers. Light Sport Aircraft (LSA) category is a small 2 seat aircraft with a maximum take-off weight of 600kg. This A50 aircraft is from renowned vSkyLabs, and it is based on the modern German version, it comes with a dual display G1000 Avionics system, 'Alpha Systems' Eagle AOA (Angle of Attack) and semi-animated pilots. Beautifully designed and well recreated of the original look and feel of this unique material, it is also tailored for perfect VR (Virtual Reality) realism. Flight dynamics and (Rotex) engine sounds are also first rate. Basically the A50 is a simple stick and rudder aircraft, from originally a dynamic era of change in aviation. So the aircraft to use and fly is simply excellent for novices, but beware the taildragger steering is tricky and difficult to use on the ground with no artificial helpers. So recreate and fly in this 1920's innovative era aircraft, with a modern twist, I really loved it... once in the air, and to have the features of using modern tools (Autopilot, Flightplans, HSI, ILS alignment) should feel odd in this environment, but I still loved it. Even if I will always desire the authentic 1920's experience. The vSkyLabs A50 Junior is great value as well, as is the excellent on-going support from vSkyLabs... so in my eyes the Junkers A50 Junior is an all round winner. _____________ Yes! Junkers A50 Junior S-LSA XP12 by vSkyLabs is NOW available from the X-Plane.Org Store here : VSKYLABS Junkers A50 Junior S-LSA XP12 Price is US$29.00, on sale for US$20.30, You Save:$8.70(30%) Requirements X-Plane 12 (not for XP11) Windows, Mac and Linux 8 GB+ VRAM Recommended Current version: 1.0 (March 29th 2024) Project Main Features: VSKYLABS 'Test-Pilot' Project: designed for use with X-Plane cutting edge flight model environment, featuring superb flight dynamics with authentic performance and flight handling characteristics. Superb Flight dynamics: The VSKYLABS Junkers A50 Junior simulation is a highly engineered, robust tail-glider S-LSA simulation model which makes use of X-Plane 12 sophisticated flight dynamics and physics simulation, extracting it to its limits. Simulated systems: The VSKYLABS Junkers A50 Junior features X-Plane 12 latest native features, systems and physics. This assures a 'high airworthiness' in X-Plane, throughout its update process. Some systems may be restricted to X-Plane default systems algorithms. General cockpit configuration: Equipped with a full-scale and fully-featured X-Plane 12 G1000, in a single-screen / dual-display configuration, to allow maximum usability. Equipped with Alpha Systems AOA 'Eagle' indicator replica. Passenger leaning-aside feature for better takeoff and landing forward visibility (by demand via interaction/assignment). Built for VR: development was tailored specifically for VR, and optimized for 2D usage. Perfect fit for beginner and expert pilots: The aircraft is designed to be flown from the back-seat cockpit. This configuration requires higher piloting skills, and it *will* make you a better pilot!. The front-seat cockpit is fully functional as well, with the limitations which are derived from the real-world Junkers A50 Junior front-seat operations). Wonderful FMOD sound package that includes authentic Rotax 912iS engine recordings and an interactive set of dynamic sound layers that will "wrap" your open-cockpit flying experience, setting a whole new level of immersion! Autoupdater based on the SkunkCrafts autoupdater (XP12 only) - all updates are being pushed smoothly without the need to re-download the entire base package (base package will be updated every once in a while to minimize the gap). Note: In order to use and enjoy VR environment in X-Plane, user hardware and system specs should meet the required specifications for OS, CPU, GPU, MB and RAM which are specified both in the given VR hardware websites and at X-Plane.com. Aircraft download is 290.1 Mb, and unpacked then installed in your X-Plane Aircraft folder 408.5 Mb Documents How to INSTALL your VSKYLABS aircraft.pdf How to UPDATE your VSKYLABS aircraft.pdf VSKYLABS Junkers A50 Junior ESSENTIALS.pdf VSKYLABS Junkers A50 Junior POH.pdf Designed by VSKYLABS Support forum for the Junkers A50 Junior _____________________ Review System Specifications: Windows - 12th Gen IS1700 Core i7 12700K 12 Core 3.60 GHz CPU - 64bit -32 Gb single 1067 Mhz DDR4 2133 - PNY GeForce RTX 3080 10GB XLR8 - Samsung 970 EVO+ 2TB SSD Software: - Windows 11 Pro - X-Plane 12.09rc5 (This is a Release Candidate review). Plugins: Traffic Global - JustFlight-Traffic (X-Plane.OrgStore) US$52.99 : Global SFD plugin US$30.00 Scenery or Aircraft - EGKA - Shoreham - Brighton City Airport by NKdesign (X-Plane.orgStore) US$15.00 - EGHR - Goodwood Chichester 1.0.0 by jbnemo (X-Plane.Org) - Free ___________________________ Update Review by Stephen Dutton 5th April 2024 Copyright©2024: X-Plane Reviews (Disclaimer. All images and text in this review are the work and property of X-PlaneReviews, no sharing or copy of the content is allowed without consent from the author as per copyright conditions) All Rights Reserved
1 point
-
Aircraft Plugin Review: Reality Expansion Pack for DHC-2 Beaver by Simcoders
Kiwiflyer reacted to Dominic Smith for a topic
Aircraft Plugin Review: Reality Expansion Pack for DHC-2 Beaver by Simcoders By Michael Hayward Introduction The de Havilland DHC-2 "Beaver" is a well-loved high-wing propeller aircraft that was produced in Canada from 1947–1967. With over 1,600 units produced, many continue to grace the skies today, demonstrating exceptional performance in rugged terrains and on water with the addition of floats. In 2020, Thranda released their rendition of the DHC-2 for X-Plane, later updating it for X-Plane 12 compatibility. This model has garnered praise for its attention to detail and realism, as highlighted in Stephen’s thoroughly detailed review. This review takes a closer examination of the Reality Expansion Pack (REP) by SimCoders for the Thranda DHC-2. This enhancement introduces a plethora of features and adjustments that elevate the aircraft’s realism beyond its original release. It includes a virtual economy system and improved flight checks, offering a more immersive flying experience. Having had some experience with the aircraft prior to the expansion pack, I am keen to explore the depth of enhancements SimCoders has integrated. Let's delve deeper, shall we? Installation It's a tricky installation, because you are installing a package (REP) on top of another package (Thranda DC-2). Then have to blend them together. Note that you will need the original DHC-2 Beaver - DGS Series XP12 Package to install this Add-On. First you will need to duplicate the Thranda DC2 aircraft to create a secondary aircraft file folder... When downloaded in the REP Package, there are two Folders, a read-me installation pdf and a REP user Manual. One folder "Into-aircraft-main-folder" goes into the main DC-3 Beaver root folder. It will ask you to overwrite two files... Second install folder is the "Into-aircraft-plugins-folder" which is put in the Thranda DC-2 Plugins folder. On Startup of the REP-Thranda DC-2, you will be asked to authorise (Enable) two items, both the original Thranda DC-2 Aircraft, and the separate REP Pack... this is done via the REP Pack menu in the Plugins folder.... "Enable package" Then the REP Installation process is completed. When installed the REP Menus are accessed via both the side quick "Pop-out Menu", and the more detailed menu in the "Plugins Menu". The Pop-out Menu has Six Options; Show Checklists, Show Fuel Management, Toggle Walkaround Mode, Toggle Low Mode, Toggle Maintenance report and Engine autostart... these items are reflected in the Plugin Menu. Added options in the Plugin Menu include; Settings, Wear out to (Brand New, Privately Owned - New, Privately Owned - Old, Flying Club), Check Fuel Price at airport, Toggle Static Elements, Disable Package and About. Key Features Overview SimCoders have introduced several key enhancements to the Thranda DHC-2 with their expansion pack, each designed to deepen the simulation experience. A hallmark of X-Plane is its ability to replicate realistic flight dynamics, significantly influenced by the aircraft’s airfoil shape. In this expansion, considerable effort has been invested in refining the DHC-2’s flight behaviour. This includes modifications to stall speeds, climb and cruise speeds, weight distribution, and balance, as well as enhancements to taxiing behaviour, contributing to a more authentic feeling, both on the ground and in the air. Included in the expansion is an economy system that allows pilots to accumulate virtual currency through completed flights. This currency can then be allocated towards fuel purchases and aircraft maintenance, enriching the Beaver experience with an added layer of strategy and management. Another notable feature is an enriched walkaround system, enabling pilots to conduct thorough pre-flight inspections outside the aircraft, enhancing the realism of pre-flight preparations. A significant overhaul detailed by SimCoders is the re-engineering of the engine system. By replacing the default engine with a custom-designed alternative, they introduce a range of factors for pilots to consider and manage. This, along with modifications to the electrical systems and battery configurations, will be discussed further in this review. Additional improvements include simulation state changes, maintenance protocols, and pilot behaviour adjustments, all aiming to mirror the lifelike intricacies of operating a DHC-2. These enhancements collectively serve to elevate the simulation experience, introducing a variety of real-world considerations into virtual flight that offer a comprehensive and educational exploration into the mechanics of flight. Flight and Ground Dynamics We begin by exploring the enhanced flight and ground dynamics of the DHC-2 Beaver. Flying the Beaver is relatively straightforward, offering a smooth experience when airborne and requiring minimal pilot intervention once properly trimmed. A comfortable cruise speed is approximately 125 knots, though it's capable of reaching 140 knots at full throttle, with the propellers set to high RPM and the mixture at maximum rich. These performance figures align closely with the real aircraft, which is documented to cruise at 124 knots at 5,000 feet and can achieve a maximum cruise speed of 137 knots under ideal conditions. The aircraft's climb and descent profiles have been carefully adjusted to mirror those of the actual Beaver, with an average climb rate of about 1,000 feet per minute. Its maximum cruising altitude is noted to be 18,000 feet, adhering to the US standard for altimeters. Note the "Tips" in the REP banner, they guide you through areas that are the best to fly and maintain the Beaver in flight. Maintenance of your aircraft is key, as parts wear down over time, directly impacting fuel efficiency and flight performance. For instance, a clogged fuel filter will manifest as reduced fuel flow on the gauges, limiting engine power. Consequently, pilots must manage their aircraft's condition and flight performance proactively to extend its operational lifespan. The development team at SimCoders, comprised of pilots with real-world experience possibly even with the DHC-2 itself, has dedicated substantial effort to ensure the flight dynamics are as true to life as possible. The Beaver is equipped with five ground configurations: standard tires, tundra tires, skis, floats, and amphibious floats, each altering its separate distinctive handling characteristics. With tires, it operates as a taildragger, incorporating a redesigned suspension system for smoother navigation across soft terrain. Pilots are cautioned against oversteering, as locking the wheel can lead to abrupt stops. Water operations offer a distinct and enjoyable challenge, as the Beaver handles well on calm waters, but adverse weather can necessitate skilled corrective manoeuvres to maintain control. Engine and Systems Complexity A standout feature of the SimCoders DHC-2 Beaver expansion is the overhaul of the engine function and logic. Rather than refining the existing Thranda engine, SimCoders dismantled it to construct an entirely new engine, integrating this with their unique maintenance and damage model. This reimagined engine now accurately reflects the performance of the Pratt & Whitney R-985 Wasp Junior, the powerplant used in the aircraft. Enhancements even extend to the propeller animations, offering more realistic visuals through subtle vibrations and speed fluctuations with engine and throttle adjustments. With the introduction of a new engine comes a detailed startup procedure. While it's technically possible to initiate a cold start, it's ill-advised due to potential wear on the engine and the need for precise priming to get it running. Instead, SimCoders added a preheater option to warm the engine chamber for a smoother start, negating the need for priming. This attention to detail includes the low-tension booster coil, critical for initiating fuel combustion during engine startup. If you don't want to do this, then there is the "Autostart" feature that does the tricky work for you... the startup procedure is shown in a banner top of your screen, and the startup process is extremely authentic including exhaust effects. Fuel and oil dynamics are more sophisticated, with temperature variations influencing fuel viscosity. This affects how easily fuel can be pumped through the system, highlighting the challenges of cold starts and the potential for fuel flooding if the engine is shut down shortly after starting. These issues can be identified during pre-flight inspections and addressed through maintenance. Pilots must also pay close attention to the avionics state during engine startups and shutdowns to avoid damaging the systems. I learned this lesson the hard way, failing to notice my attitude indicator was inoperative after takeoff, leading to unintended banks and, subsequently, a costly virtual repair. These intricacies significantly enrich the experience, demanding more attentive micromanagement from pilots to maintain safe and efficient aircraft operation. Economic and Custom Systems SimCoders introduces an economy panel for the DHC-2 Beaver, drawing parallels to virtual airlines where good flying earns points and promotions, but here, it's all about the financial health of your aircraft. This feature, while optional, adds an additional intriguing dimension to the experience, allowing pilots to manage the economic aspects of aircraft operation. Damaged a gauge? That’ll hit your wallet. A broken flap and its linkage might just make you consider remortgaging your virtual home! The more damage your aircraft sustains, the more you’ll find yourself investing in repairs. And it doesn’t stop at repairs; even refuelling the Beaver costs, with fuel prices fluctuating based on your global location. On the lookout for savings? Word on the street is that Venezuela offers the world's most budget-friendly fuel prices! The economic system is designed to integrate seamlessly with well-known virtual airline platforms like FSEconomy and X-CPL-Pilot, enhancing the experience for pilots already engaged in virtual aviation careers. And you have to access, or create an "Aircraft Key" to use the Economy System... Another enjoyable feature is the towing system. Although straightforward, it provides a practical method for aircraft positioning on the ground. Pilots can secure the aircraft when parked and then manoeuvre it using the joystick, offering a user-friendly and realistic ground handling experience. Additionally, the Beaver is fully compatible with VR, inviting pilots to immerse themselves in a highly realistic virtual cockpit and environment, enhancing the overall experience of flying the Beaver in X-Plane. Interactive Walkaround and Maintenance SimCoders’ pièce de résistance in their DHC-2 Beaver expansion is the comprehensive damage engine and maintenance panel. Operating an aircraft that has been flying for over sixty years, requires special care and attention, especially as a lot of the technology used is now dated. SimCoders emphasizes the necessity for correct pilot procedures to prevent wear and tear. An early lesson I learned is the importance of deactivating avionics during engine startups and shutdowns to avoid system failures. With the economy feature activated, repairs come with a price tag, proportional to the damage extent. The risk of overstressing parts to the point of affecting flight surfaces and potential failure highlights the significance of careful handling. Indeed, a malfunctioning Beaver is an unwelcome scenario for any pilot. On the ground, pilots can generate and review a maintenance report detailing the aircraft's condition, including the state of engine cylinders, oil, filters, and pumps. Over time, these components degrade, presenting the pilot with repair decisions to maintain optimal performance. A notable addition is the virtual walkaround, allowing pilots to exit the cockpit and conduct a thorough visual inspection prior to flight. This interactive feature includes a checklist for assessing potential wing damage, ensuring engine components are intact, confirming cylinder integrity, and verifying the pitot tube is clear. Successfully completing these checks ensures the aircraft is flight ready. This system not only emphasizes the necessity of maintaining operational safety but also introduces the realistic challenges and expenses associated with aircraft ownership. As systems wear and potentially fail, constant vigilance over your Beaver's condition is crucial for sustained operation. Conclusion Embarking on the journey with the Thranda Design DHC-2 Beaver, supplemented by the SimCoders Enhancement Pack REP, which introduces a captivating complexity to piloting this beloved aircraft. The addition places a significant emphasis on engine performance and maintenance management, transforming routine flights into a series of informed decisions and actions. The degradation of components serves as a constant reminder of the aircraft’s demands, underscoring the importance of thorough management and adherence to operational protocols. Piloting the Beaver not only becomes an exercise in flying skills but also in vigilance and preventive care, ensuring longevity and reliability. This enhancement pack enriches the original aircraft with a deeply immersive engine simulation, where even minor variations in engine startup procedures can influence the entire flight experience. This level of detail demands a more nuanced understanding and appreciation of the aircraft’s operational characteristics. Adding to the complexity is the virtual economy feature, which introduces financial decision-making into the mix. Pilots must carefully manage their virtual funds, prioritizing repairs and maintenance to ensure the aircraft remains airworthy, while also navigating the compromises of system management. To benefit from this comprehensive enhancement pack, pilots must have the Thranda DHC-2 Beaver for X-Plane 12 in their collection, as it is not backward compatible with X-Plane 11. For enthusiasts of the golden age of aviation who desire a hands-on, intricate flying experience, this enhancement pack is an invaluable addition, offering a richly detailed and rewarding challenge. ______________________________________ The... Reality Expansion Pack REP for DHC-2 Beaver XP12 by Simcoders is available from the Org store here: Reality Expansion Pack for DHC-2 Beaver XP12 On sale: $US19.99 US$13.99 You Save:$6.00(30%) Features: Ultra Realistic Flight & Ground Dynamics Realistic stall speeds & behavior Correct climb speeds Realistic cruise speeds Real World Weight & Balance Realistic taxi behavior with realistic spring-loaded/free-castoring tailwheel Complex Damages System Triggered by the pilot actions Based on real world data Target every system in the aircraft Meant to teach you how to correctly manage an airplane Economic System Can be enabled/disabled on the fly Earn virtual money when you fly Use virtual money to buy fuel and do maintenance/repairs Realistic fuel prices around the World Fully compatible with FSEconomy and X-CPL-Pilot More info at https://www.simcoders.com/reality-expansion-pack/economy Custom Towing System Driven by the joystick/steering wheel Realistic point of view (POV) Interacts with tie-down and brakes Interactive Walkaround Cockpit checks Lights checks Engine soft cover removal Aileron, rudder, elevator and flaps check Tire check and choks removal Tie-down removal Pitot tube check Engine cowl check Floats and water rudder check Realistic Pratt & Whitney R-985 Wasp Junior Engine Logic 100% Custom engine model Realistic power output for given manifold pressure/RPM settings Realistic propeller animations as never seen before on X-Plane Realistic booster coil Switch between conventional and Bendix-Stromberg pressure carburetor (with automatic mixture) Correct fuel consumption Oil System: 1. Realistic oil viscosity 2. Interchangeable oil type 3. Oil pump failures 4. Realistic oil filter Fuel System: 1. Realistic wobble pump 2. Realistic fuel pressure behavior 3. Realistic fuel filter 4. Realistic primer Starter Realistic startup procedure Automatic startup procedure for newbies Realistic engine temperatures Fuel Flooding simulation The engine parts wear down when not managed correctly Engine Preheater The engine may be warmed up upon start with the provided electrical heater Once activated, the electrical heater runs even when you close the simulator Realistic Landing Gear The landing gear is damaged by hard landings The brakes and tires are damaged if not managed correctly The steering wheel acts like the real one. Spring loaded under 35° of turn, then free castoring. Electrical & Avionics System Realistic Battery The avionics are damaged if on when the engine starts/shuts down Native Virtual Reality Support Complete support of new X-Plane SDK 3.0 Menu visible in VR Windows visible in VR Learn with the in-flight tips A non invasive tip with a suggestion about the conduct of the flight is shown when you are not flying the airplane properly A non invasive tip with a suggestion on how to recover the problem is shown when you damage the airplane Custom simulation of Hypoxia Tunnel vision Hard breathing Popup Kneeboard Normal operations checklist Emergency operations checklist Reference tables (speed, fuel consumption etc.) May be shown/hidden with mouse gestures Simulation state saving Every single switch and lever position restores its position when you reload the aircraft The battery may discharge if you leave it on and then close X-Plane The engine restores its cylinders and oil temperature basing on the elapsed time between restarts Maintenance Hangar Engine maintenance tab Electrical systems maintenance tab Landing gear, brakes & tires tab Instruments tab Economic System tab HeadShake Integration REP drives HeadShake to simulate the correct vibrations of the Wasp Junior engine Developed with love Coded by real pilots Very easy on FPS Written in C++ with no compromises Requirements: This is an add-on to the DHC-2 Beaver - DGS Series XP12. It will not work on the Thranda DHC-2 Beaver XP11 or any other aircraft. X-Plane 12 (not for XP11) Current version: XP 12 - 4.8.2 (February 10th, 2024) Customers who own the Reality Expansion Pack for DHC-2 Beaver XP11, can get the new XP12 version for 30% off. Coupon code can be found in the original invoice. Reviewers System: Windows 10 Professional AMD Ryzen 5 3600 Processor 32GB RAM Palit GeForce RTX™ 3080 GamingPro Scenery Review by Michael Hayward 2nd April 2024 Copyright©2024: X-Plane Reviews (Disclaimer. All images and text in this review are the work and property of X-PlaneReviews, no sharing or copying of the content is allowed without consent from the author as per copyright conditions)
1 point -
NEWS! - Scenery Upgraded : KTLH - Tallahassee International Airport XP12 by Skytitude Tucked north in the east of the Gulf of Mexico in the American state of Florida is Tallahassee. The capital of the state, and it is the largest city in the Florida Big Bend and Florida Panhandle region. Tallahassee is also a college town with student population exceeding 70,000, home to Florida State University, Florida A&M University, and Tallahassee Community College, a large state college that serves mainly as a feeder school to Florida State and Florida A&M. Tallahassee International Airport is a city-owned airport five miles southwest of downtown Tallahassee, in Leon County, Florida, United States. It serves the state capital of Florida, and its surrounding areas; it is one of the major airports in north Florida, the others being Pensacola, Northwest Florida Beaches, and Jacksonville. Despite its name, it does not service any international destinations. Rim&Co did a weird X-Plane 11 version of KTLH Tallahassee, but they got into trouble for stealing other peoples objects. Another version of KTLH was from Skytitude for X-Plane 11, and this is the re-released X-Plane 12 version. Owners of KTLH XP11 can also purchase this new XP12 version for 25% off, and Skytitude importantly note that this NEW scenery for X-Plane 12 was completely renovated and does not contain anything from older version. Features: ❯ Complete and Accurate representation of Tallahassee Airport ❯ Custom Materials and Surfaces with Physical-Based Rendering Effect (PBR) ❯ Spectacular Buildings and Objects with Realistic Night Lighting ❯ Tons of High Density Hand-Placed Forests and Plants ❯ Wet Surfaces Using New X-Plane 12 Weather Technology ❯ Custom 3D Grass Using New X-Plane 12 Vegetation Technology ❯ Moveable Jetways Using New X-Plane 12 Technology ❯ AI Traffic Routes for Airliners are implemented ❯ Accurately Built Large Surrounding Area with Thousands of Hand-Placed Objects ❯ All Surrounding Area Lakes have Realistic Water Masks ❯ Huge Solar Power Farms are Implemented in Outstanding Quality Without Performance Impact ❯ Water Treatment Facility on Runway 27 Final Approach Area ❯ Well Optimized, Awesome Performance even on Low-End or High-Loaded Machines ❯ Highest Precision of Surface Markings, Lights, Signs and other Ground Elements ❯ Markings and Signs are strictly complains FAA rules 150/5340-1M and 150/5340-18G as real one's Images are courtesy of Skytitude ________________________ Yes! KTLH - Tallahassee International Airport XP12 by Skytitude is now available from the X-Plane.Org Store here : KTLH - Tallahassee International Airport XP12 Price is US$19.95 Requirements X-Plane 12 (not for XP11) Windows, Mac or Linux Download Size: 703 MB Current version : 1.0 Owners of KTLH XP11 can purchase this new XP12 version for 25% off, please find the coupon code in the original KTLH Invoice. ___________________________ News by Stephen Dutton 30th March 2024 Copyright©2024: X-Plane Reviews (Disclaimer. All images and text in this review are the work and property of X-PlaneReviews, no sharing or copy of the content is allowed without consent from the author as per copyright conditions) All Rights Reserved
1 point
-

Scenery Review : Society Islands - Leeward and Windward by Aerosoft
Cami De Bellis reacted to Kiwiflyer for a topic
Kia Orana & welcome back Stephen! What a tremendous and comprehensive review of this South Pacific jewel. Thanks to this masterful work by Maps2X-Plane, while you've been sailing the South Seas, I've been rekindling my real life Coral Route voyages by air. The essence and magic of these majestic Isles has been captured for sure. Thanks for showcasing this extraordinary package, which was an absolute must for this Kiwi who lost his heart to the mighty Pacific many shimmering moon-lit nights ago. Nigel1 point -
Scenery Review: X01 - Everglades Airpark, Florida by Skytitude
skytitude reacted to Dominic Smith for a topic
Scenery Review: X01 - Everglades Airpark, Florida by Skytitude By Felicity Smith Introduction As a young girl, I remember rushing home after school to immerse myself in the adventures of Mark, his dad, and Gentle Ben, gliding effortlessly on their airboat through the Everglades in the television series 'Gentle Ben.' Those reruns transported me to a world filled with simplicity and joy, a feeling I’ve cherished into adulthood. So, when Everglades Airpark popped up on the Org store, and hubby suggested I take a look, I thought, why not! Everglades Airpark, located a mile southwest of Everglades City in Collier County, Florida, is more than just a hub for aviation activities; it's a portal to the expansive 10,000 islands that dot the region. Yes, an astounding 10,000! This strategic position offers virtual pilots a scenic base that perfectly captures the essence and beauty of the Everglades. Installation and Documentation Users are provided with two zip files, one tailored for X-Plane 12 and the other for X-Plane 11, to ensure compatibility regardless of the version they are using. The files are compact, with the download size being just over 160MB and expanding slightly to around 170MB once extracted. The installation process involves simply transferring the two folders into your Custom Scenery folder, making it as straightforward as preparing for takeoff. Documentation comes in the form of a modest text document. It's simple yet effective, providing all the essential information needed for installation. First Impressions My first flight over Everglades Airpark in X-Plane was truly eye-opening. For those who haven't had the opportunity to visit this part of the world, the expansive view of countless islands and mangroves is striking. The scenery offers depth with its myriad of islands and islets, presenting a rich tapestry for exploration. While it's uncertain if every single island has been individually modeled, the contrast to X-Plane's more generic landscapes is notable. The enhancements made to the bathymetry data through the edited mesh significantly smooth out the dips and rises in water surfaces that X-Plane sometimes exhibits. This adjustment leads to a more realistic experience, especially noticeable when flying at low altitudes, by mitigating the visual disruptions caused by these inconsistencies As you fly over the airpark, the detailing becomes even more apparent. A custom photographic overlay enhances the realism of the airport and its surroundings, making aspects such as the runway and the nearby Chokoloskee Bay appear more lifelike. Furthermore, the overlay extends over the water, effectively using different shades of blue to indicate variations in water depth. Everglades Airpark Approaching Everglades Airpark reveals that its charm lies in the subtle details rather than grandiosity. The developer has achieved a near perfect balance with the custom foliage, including shrubs, trees, and 3D grass, which are distributed in a way that creates a scene that is neither barren nor overcrowded. Combined with X-Plane's ambient nature sounds, the setting attains an immersive quality that is both pleasing and authentic. The runway itself features textures that realistically reflect wear and tear. The addition of what appears to be windblown sand across areas of the runway further enhances its visual fidelity and acknowledges the airpark's proximity to the coastline. Runway markings, as you would expect, are minimal, displaying only the essential numbers and the airport’s frequency, which underscores the airpark's practical, no-frills ethos. In terms of structures, the airpark reflects its real-world counterpart’s modesty with just a few buildings. The main hangar, serving as a shelter for small single-engine GA aircraft, and the main ticket office, which modestly functions beyond what might typically be called a terminal, are notable for their modelling. The inclusion of 3D figures around the ticket office adds a touch of life to the scenery, a detail that enhances realism. A parking area, a small water tower, and various pieces of airport clutter fill out the scene. While the airpark does not boast a wide range of structures, each element is thoughtfully placed, enriching the overall experience without overstimulating the senses. Everglades City Northward from the airpark, one encounters Everglades City, a charmingly small community that, despite its name, is home to fewer than four hundred residents. The city’s layout, with its orderly grid of streets, hosts a variety of residential and commercial structures. These are integrated into the scenery with a photographic overlay that, while not achieving razor-sharp clarity, marks a modest step up from the default textures provided by X-Plane. The waterfront, with its array of docks and jetties complemented by a selection of default boats, melds surprisingly well into the surroundings. Chokoloskee Island Chokoloskee Island, situated further south and connected to the mainland by a three-mile-long causeway, adds a serene element to the scenery. Its numerous buildings and static caravans, integrated using a photographic overlay, had the potential to be a standout feature. Unfortunately, the use of low-resolution imagery here undermines this potential. Given the relatively small size of the download package, it seems there was an opportunity for the developers to incorporate higher resolution textures without a significant increase in file size. At a time when users are generally receptive to downloading larger files for enhanced realism, the decision to keep the file size modest may limit the visual fidelity of these areas. Upgrading to higher resolution textures could have notably improved the immersive quality of Chokoloskee Island, transforming it into a more engaging part of the Everglades Airpark experience. The present resolution, particularly at lower altitudes, detracts from the scenery's potential to fully captivate virtual pilots with the natural beauty and detailed landscape that this unique region deserves. Night Lighting The night lighting at Everglades Airpark, though modest, captures the essence of what you'd expect from a small general aviation airport such as this. It's not so much about the dazzle but the fit, and in this case, the lighting strikes a pleasant balance. The gentle illumination of the main office building, coupled with the streetlights weaving through Everglades City, creates a serene and realistic nocturnal setting. It’s subtle, yet thoughtfully implemented, providing just enough light to navigate without overpowering the quiet beauty of the surrounding area. Performance Given that my computer is typically more engaged with games like “Hogwarts Legacy” and “Age of Empires” rather than the highly detailed and demanding environment of X-Plane 12, I approached this scenery with a measure of apprehension. To my pleasant surprise, the performance across Everglades Airpark was impressively smooth. The only moment I encountered a slight slowdown was when X-Plane 12’s default trees, especially animated ones in windy conditions, began to accumulate, leading to a minor drop in frame rates. However, for those who, like me, find the trees from X-Plane 11 more than satisfactory, switching back to these in the graphics menu is an option. Overall, the scenery performed excellently, free from stutter and maintaining a good performance level throughout. Conclusion In reviewing Everglades Airpark, I've found an experience that captures the simplicity and authenticity of the real Everglades, albeit on a somewhat modest scale. The scenery shines in depicting the main airport and its immediate vicinity, with its upgraded mesh, realistically modelled main airport building, and a genuine sense of place that truly embodies the spirit of this distinctive location. However, there is room for improvement, particularly the lower-resolution overlays in the urban settings near the airport. While these aspects don’t entirely detract from the overall enjoyment, they do present a clear avenue for enhancement that could elevate the scenery to more closely match the vividness and detail of its real-world inspiration. Weighing the scenery’s modest intentions against its successes, it stands out as a rewarding exploration for those captivated by the charm of the Everglades. With an accessible price point, it offers a compelling option for virtual pilots in search of new adventures, set within a context that doesn't aim for overwhelming grandeur but rather a heartfelt tribute to a beloved region. ________________________ X01 - Everglades Airpark, Florida by Skytitude is now available from the X-Plane.Org Store here: Everglades Airpark Priced at $12.95 Features Complete and accurate representation of Everglades Airpark Highly Detailed areas of Everglades City, Chokoloskee Island and ten thousand Islands for greater VFR Custom Materials and Surfaces with Physical-Based Rendering Effect (PBR) Wet Surfaces Using New X-Plane 12 Weather Technology Spectacular Buildings and Objects with Realistic Night Lighting High Density Hand-Placed Forests and Plants Custom 3D Grass Using New X-Plane 12 Vegetation Technology Accurately Built Large Surrounding Area with Thousands of Hand-Placed Objects Edited mesh for +25-082 tile, a lot of bathymetry data problems fixed Requirements X-Plane 12 or X-Plane 11 Windows, Mac, or Linux Download Size: 163 MB Current version: XP 12 1.0 (Jan 24th, 2024) Review System Specifications AMD R5 2600 – 16GB RAM - Nvidia RTX 2060 – Windows 10 Home 64 Bit __________________________________ Scenery Review by Felicity Smith 15th March 2024 Copyright©2024: X-Plane Reviews (Disclaimer. All images and text in this review are the work and property of X-PlaneReviews, no sharing or copying of the content is allowed without consent from the author as per copyright conditions). =
1 point